
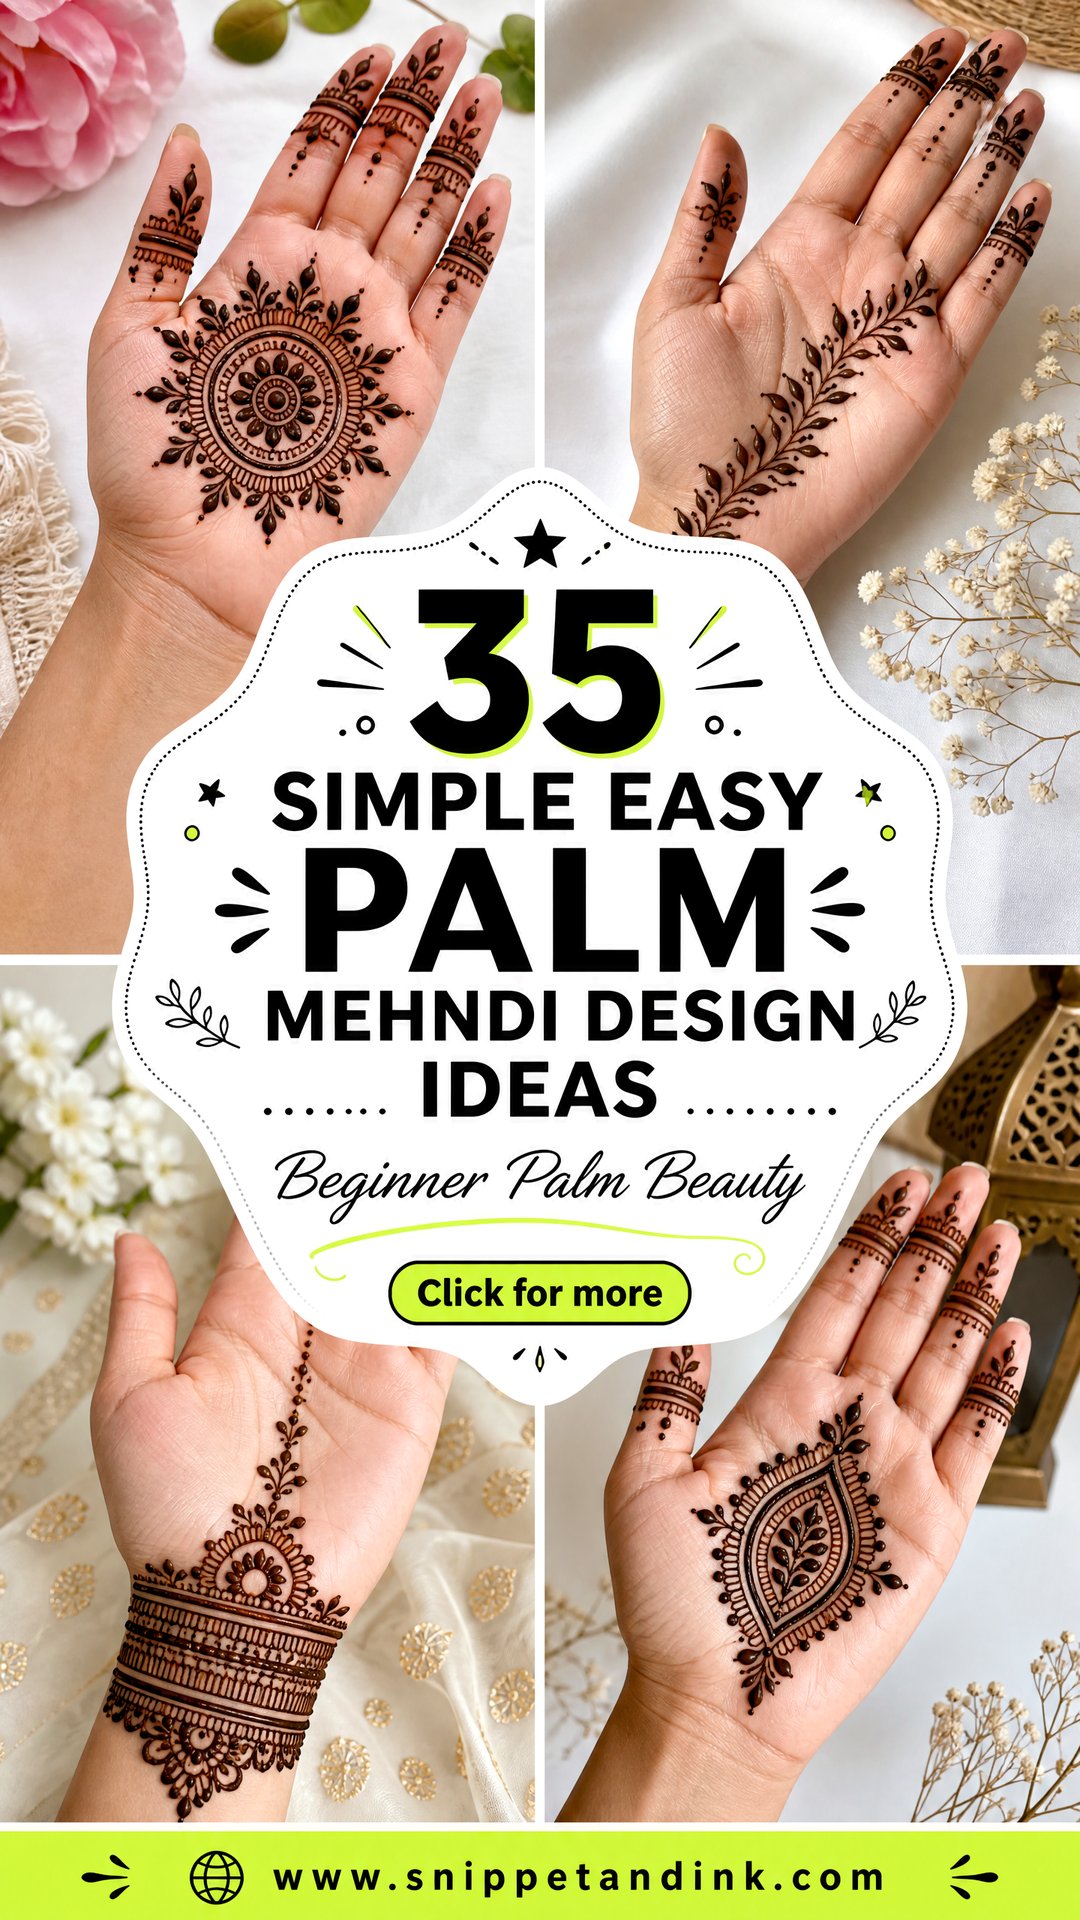
Simple palm mehndi is where I start everyone who has never held a cone. The palm is wide, fairly flat and takes stain beautifully, so the easy shapes you learn first (circles, flowers, leaves, dots, vines, paisleys and plain borders) come out looking intentional. You can keep the fingers bare, fill only the center or run the design down to the wrist when there’s a festival to dress for. The ideas below are the ones I’d hand a beginner in roughly the order I’d teach them, with notes on where each one tends to go wrong.
Practicing When You’re Both the Artist and the Canvas
Most beginners practice on their own hands, and that creates a problem nobody warns you about. You can only draw on the palm of your weaker hand, and you have to keep that hand completely still while the other one works. Here’s how I’d set it up.
- Rest the hand you’re decorating flat on a folded towel on a table, palm up. Don’t hold it in the air.
- Turn the towel, not your wrist, when you need a new angle. Twisting the wrist stretches the skin and distorts circles.
- Measure your palm against the photo. Most reference pictures show large hands, so I scale motifs down, often by a third, before starting.
- Do one practice round on paper or a plastic sheet laid over the photo, tracing the main shape until it feels automatic.
- Leave the dominant hand for a friend, or do it the following day once the first hand is dry and scraped.
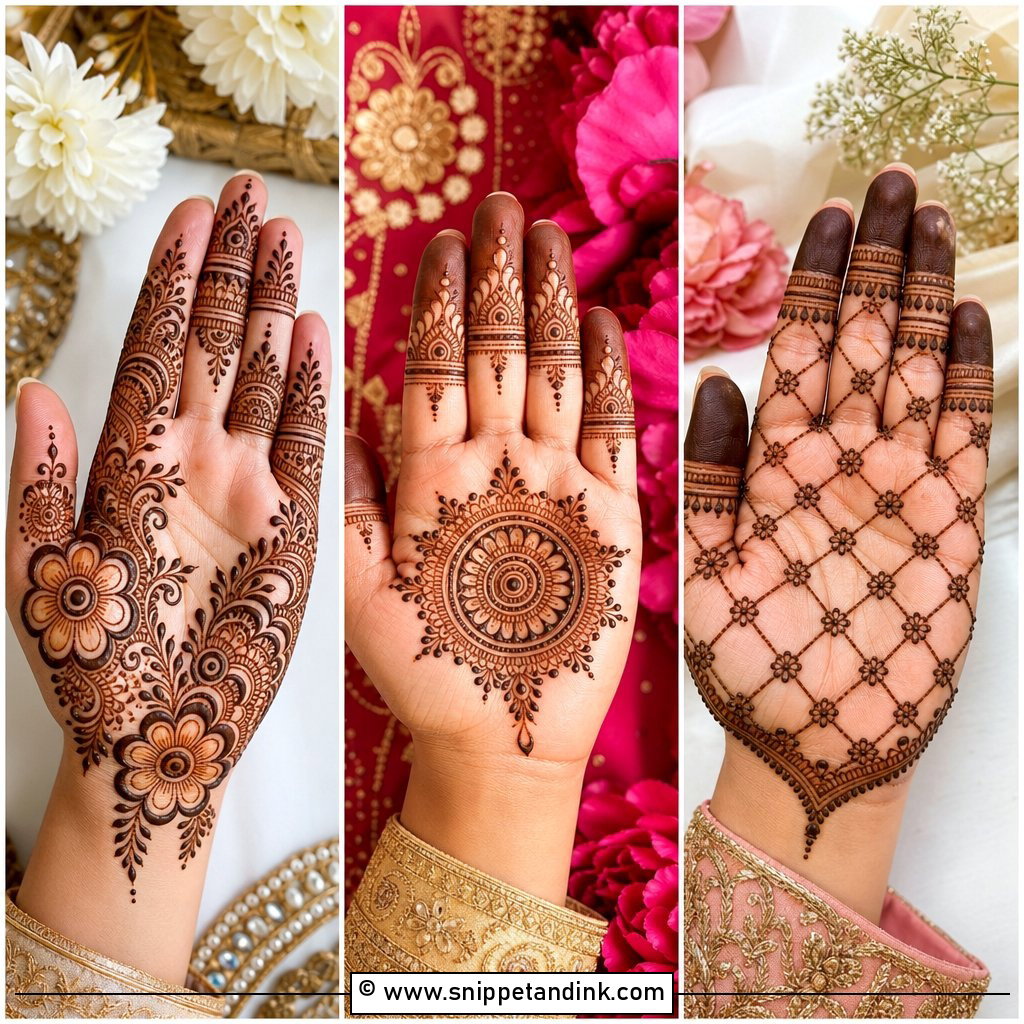
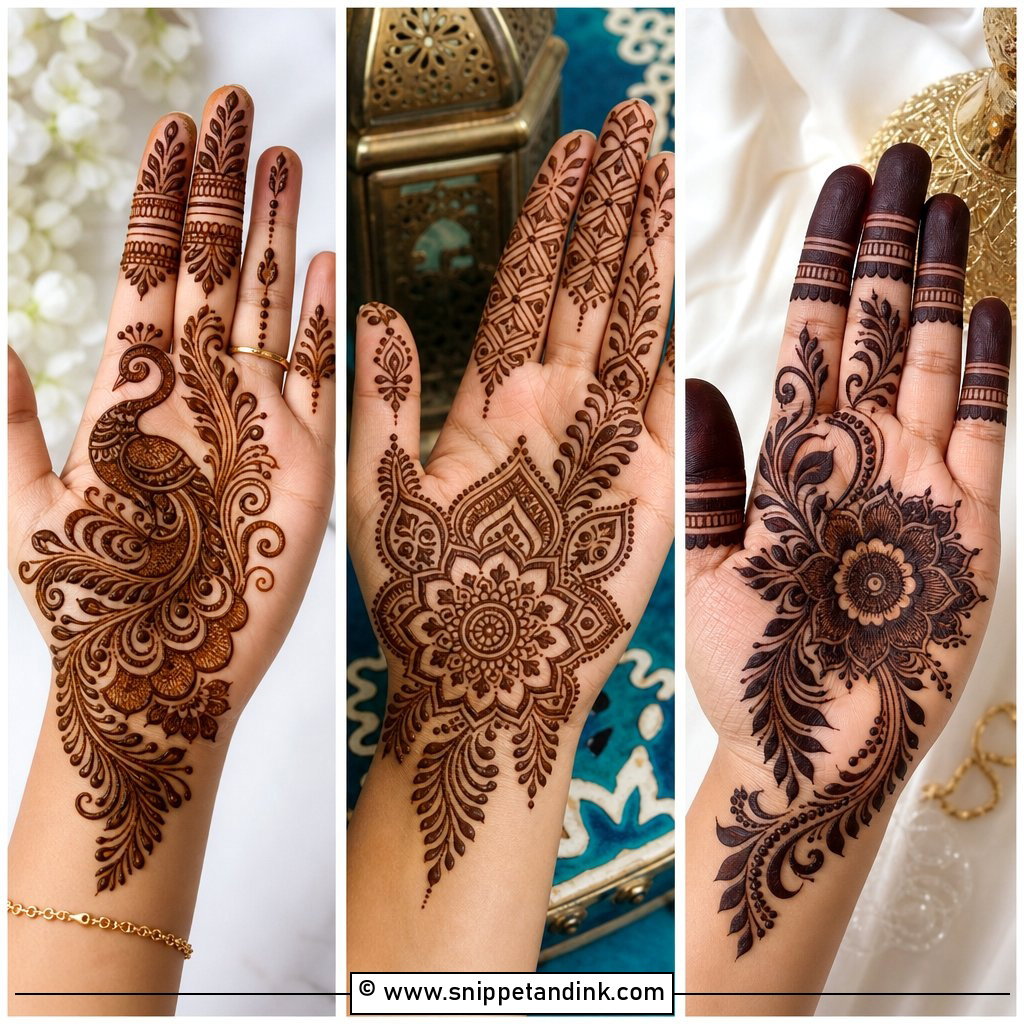
1. Simple Palm Mandala Mehndi Design
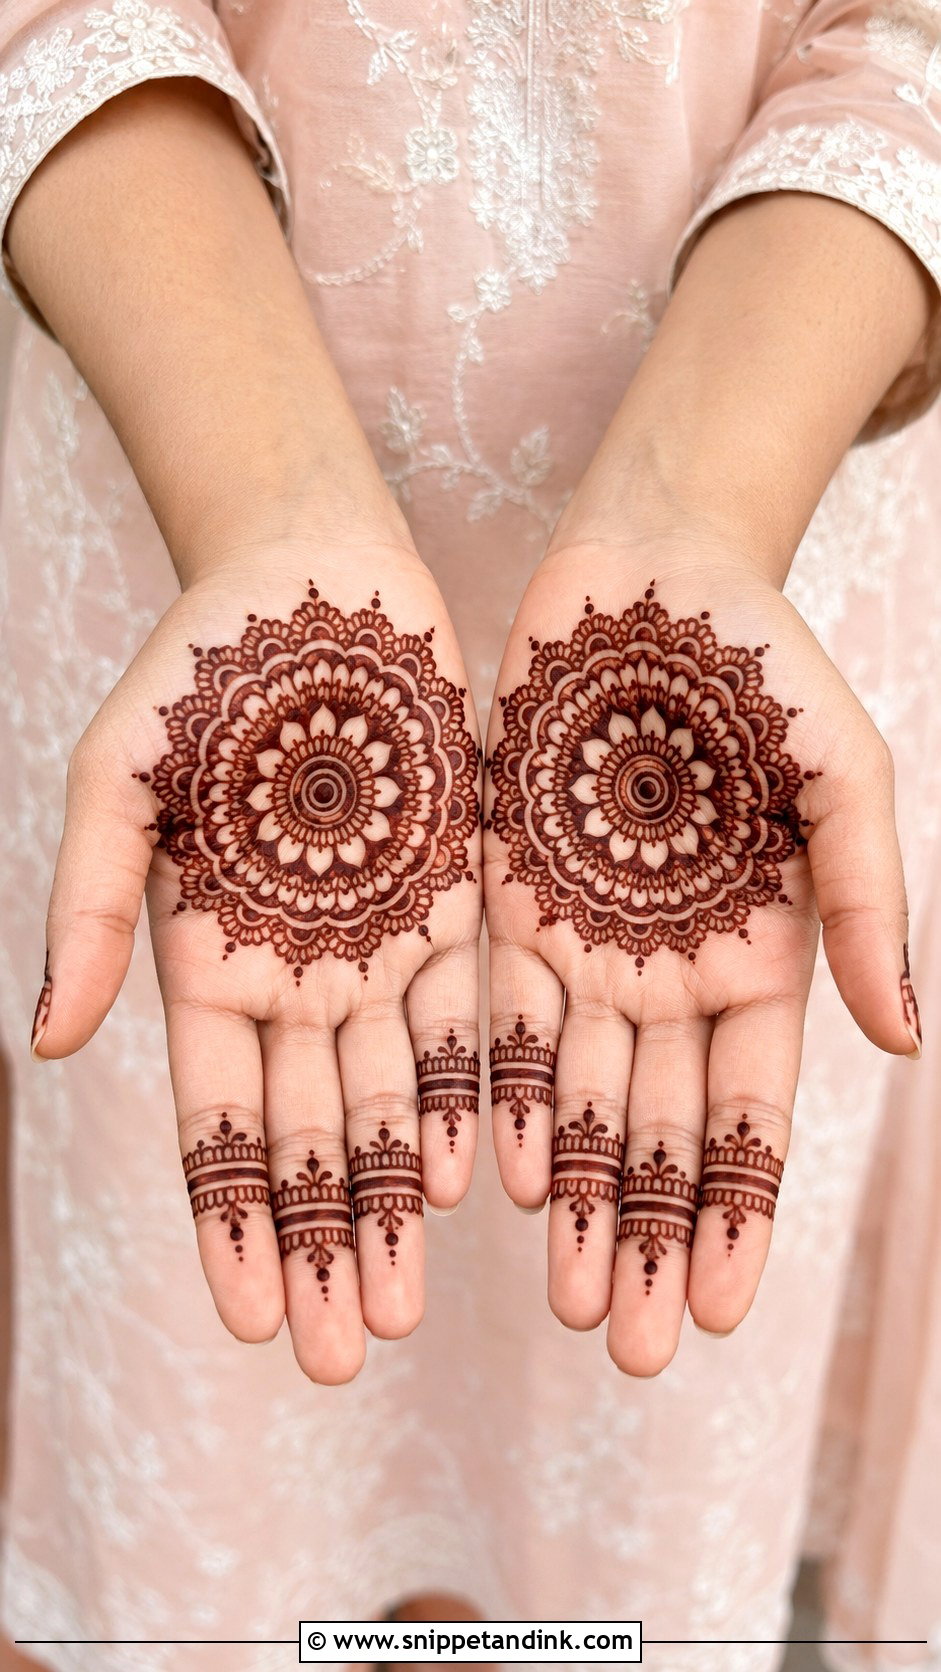
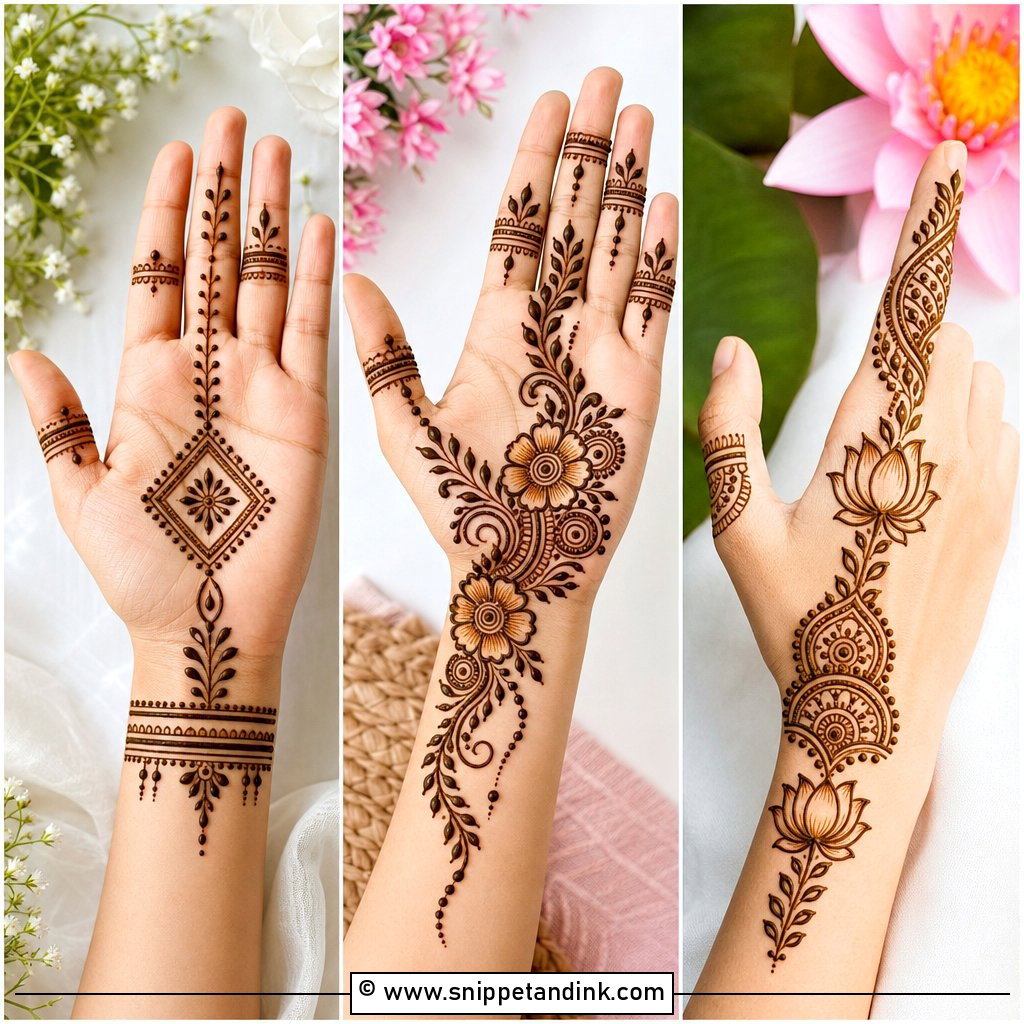
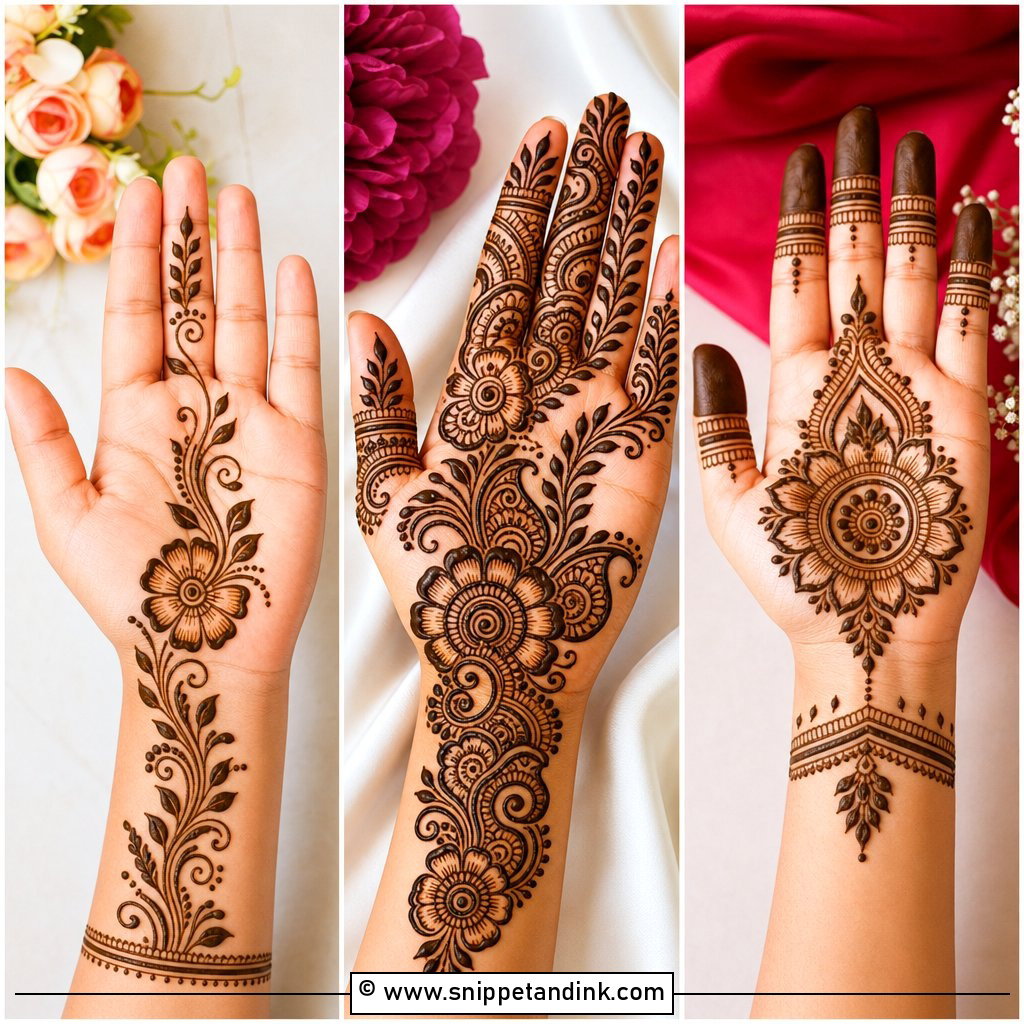
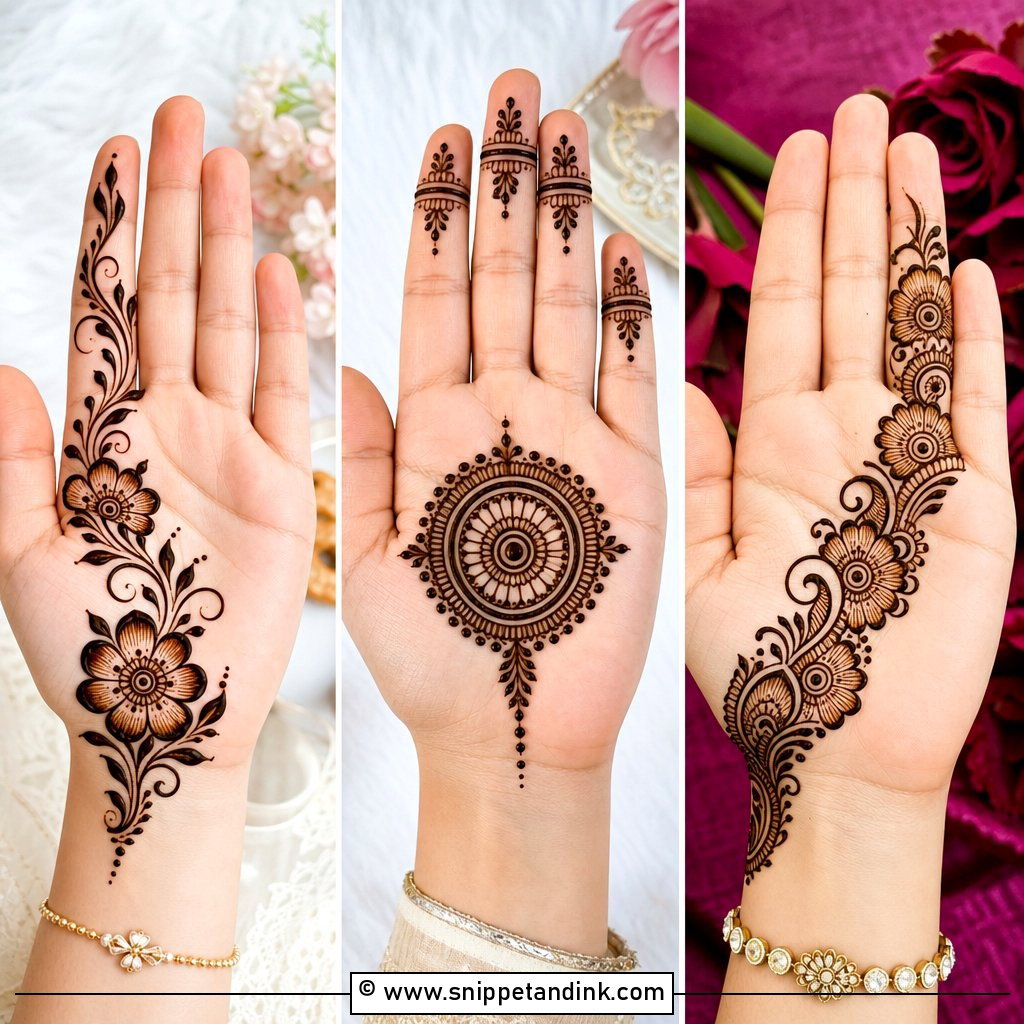
Everything in a mandala grows from the middle, which is why it’s the first full design I teach. A dot, then two or three rings, then petals, scallops and dots in layers. The fingers get caps, short lines or dotted trails. On a narrow palm I keep the outer ring smaller than feels natural; a mandala that reaches the edges of the palm looks squeezed once you close your hand slightly.
2. Easy Floral Palm Mehndi Design
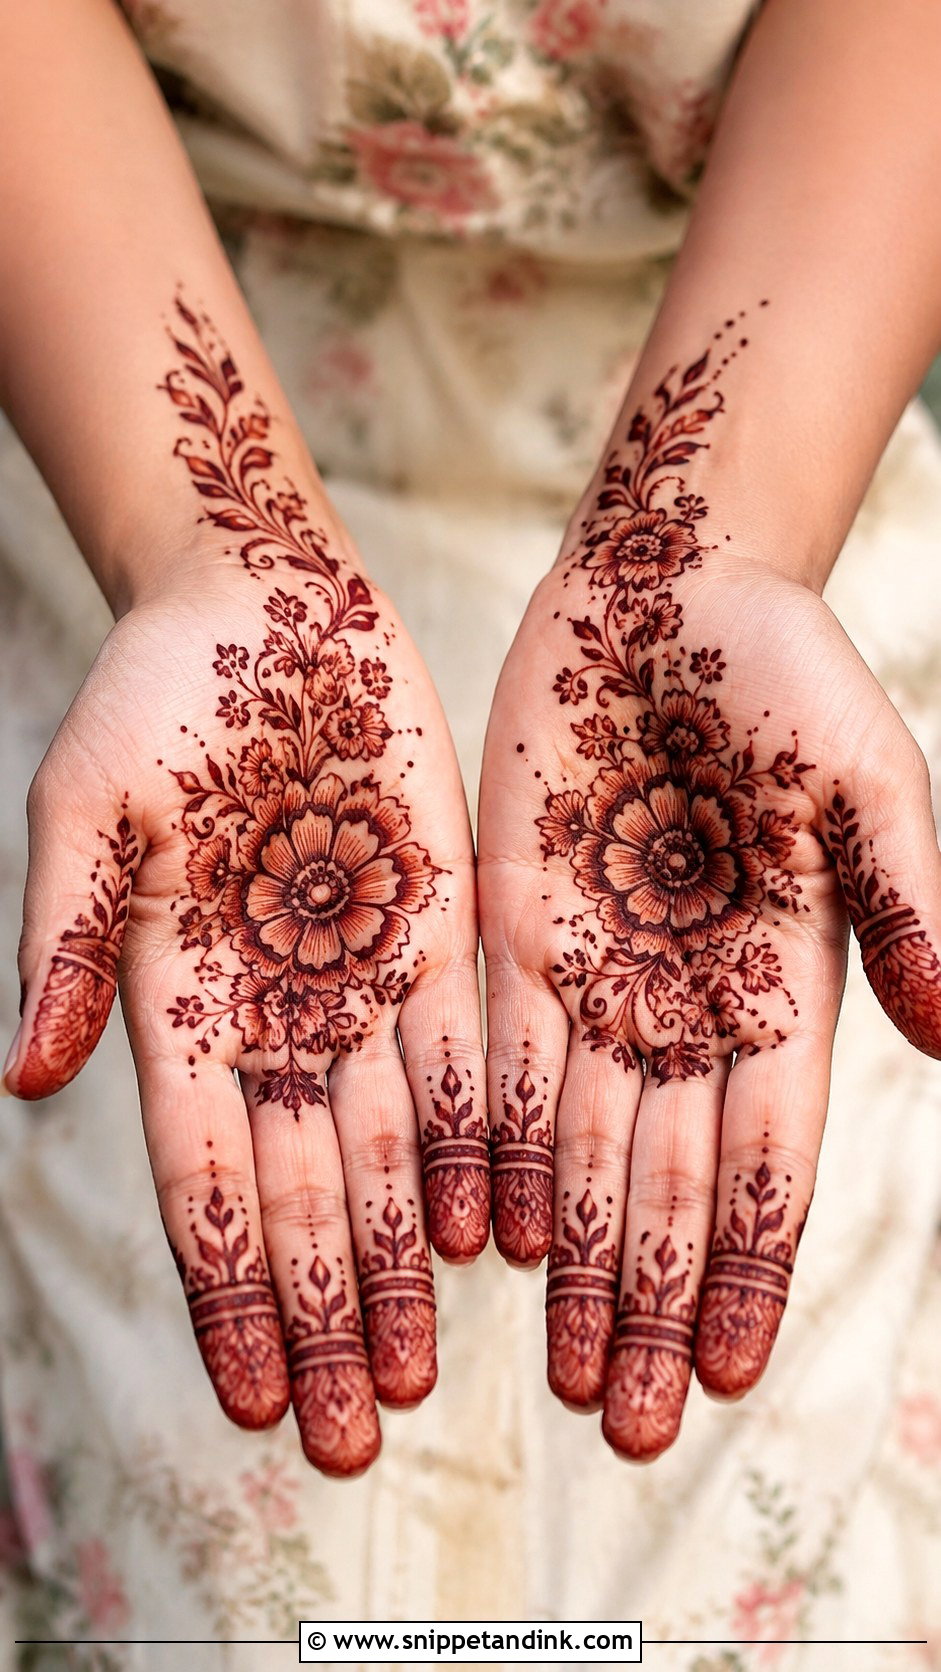
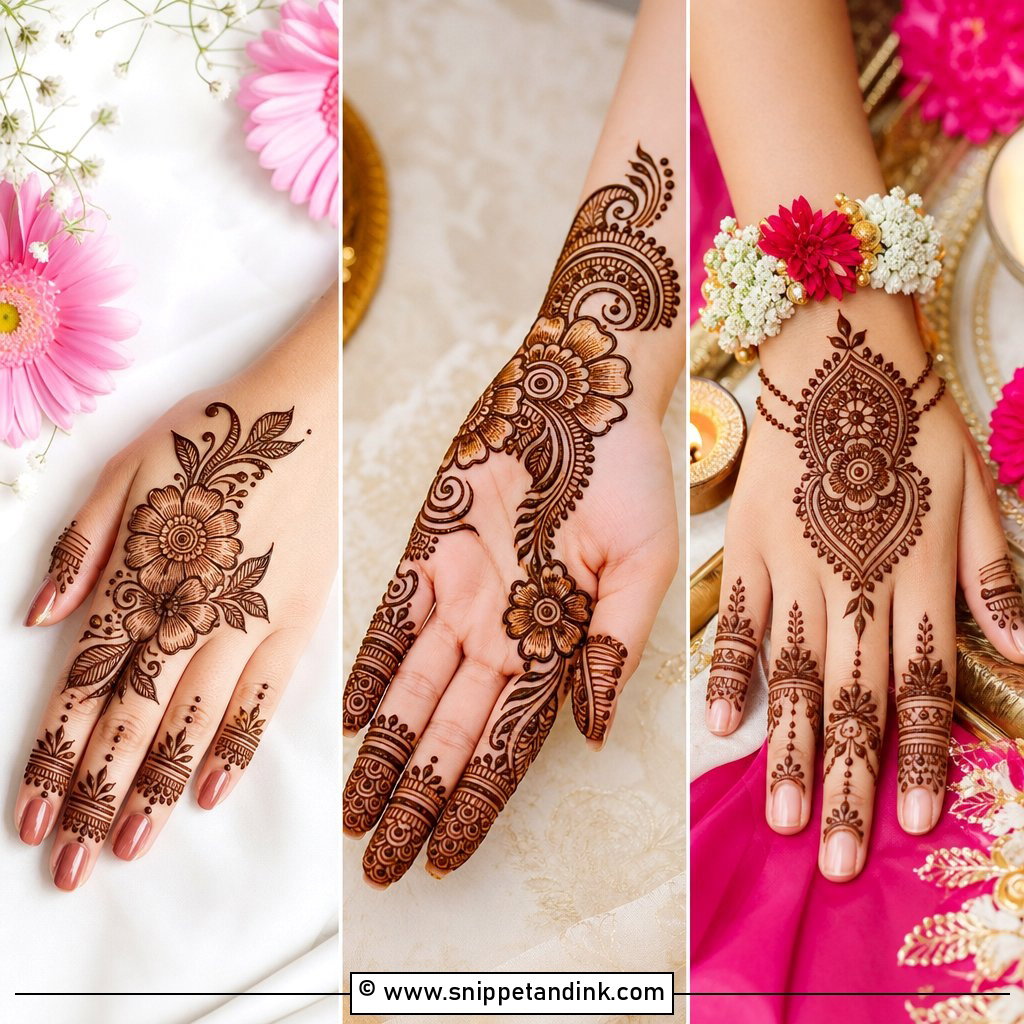
Put the large flower slightly below the center of the palm, not dead center. That one change gives room for smaller blooms to curve upward around it. Rounded petals, pairs of leaves and tiny dots fill the spaces, and matching mini flowers or leafy tips go on the fingers. No two petals need to match, which is a relief when you’re new.
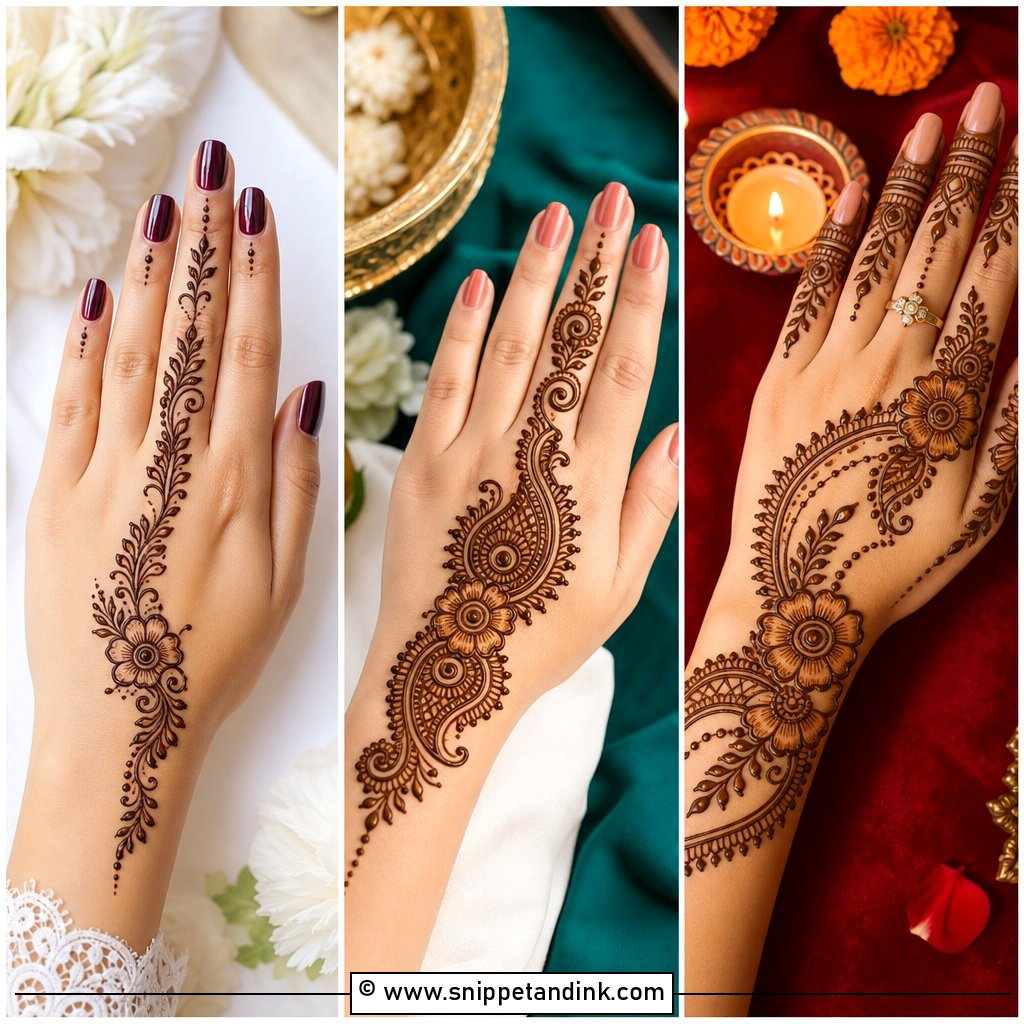
3. Simple Arabic Palm Mehndi Design
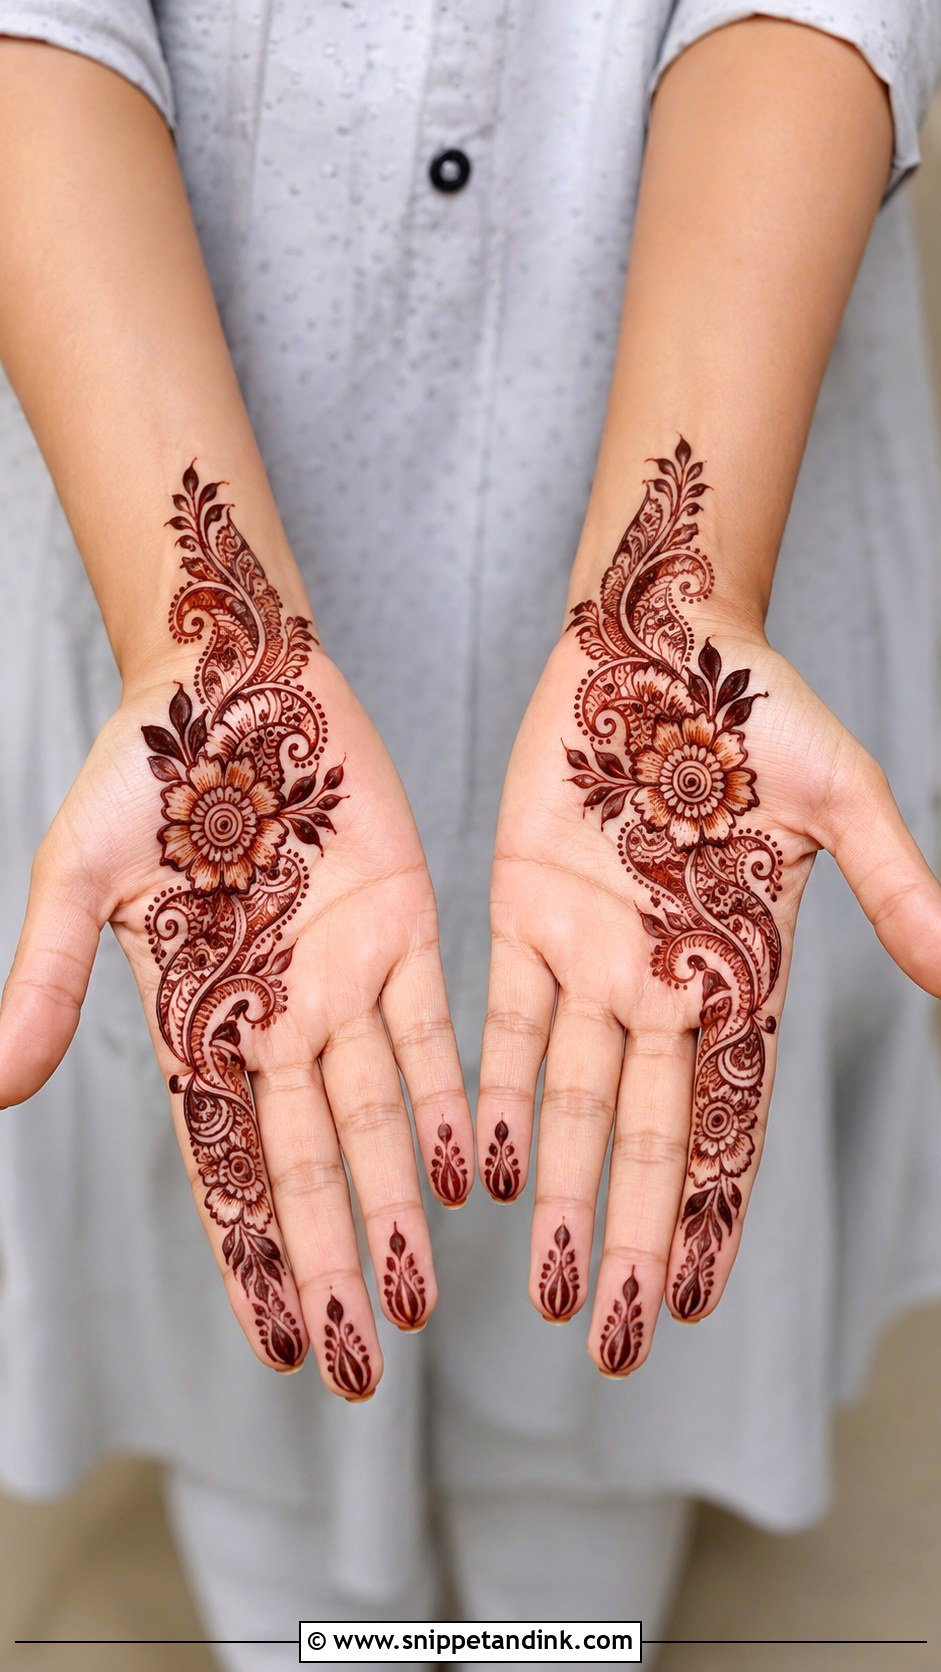
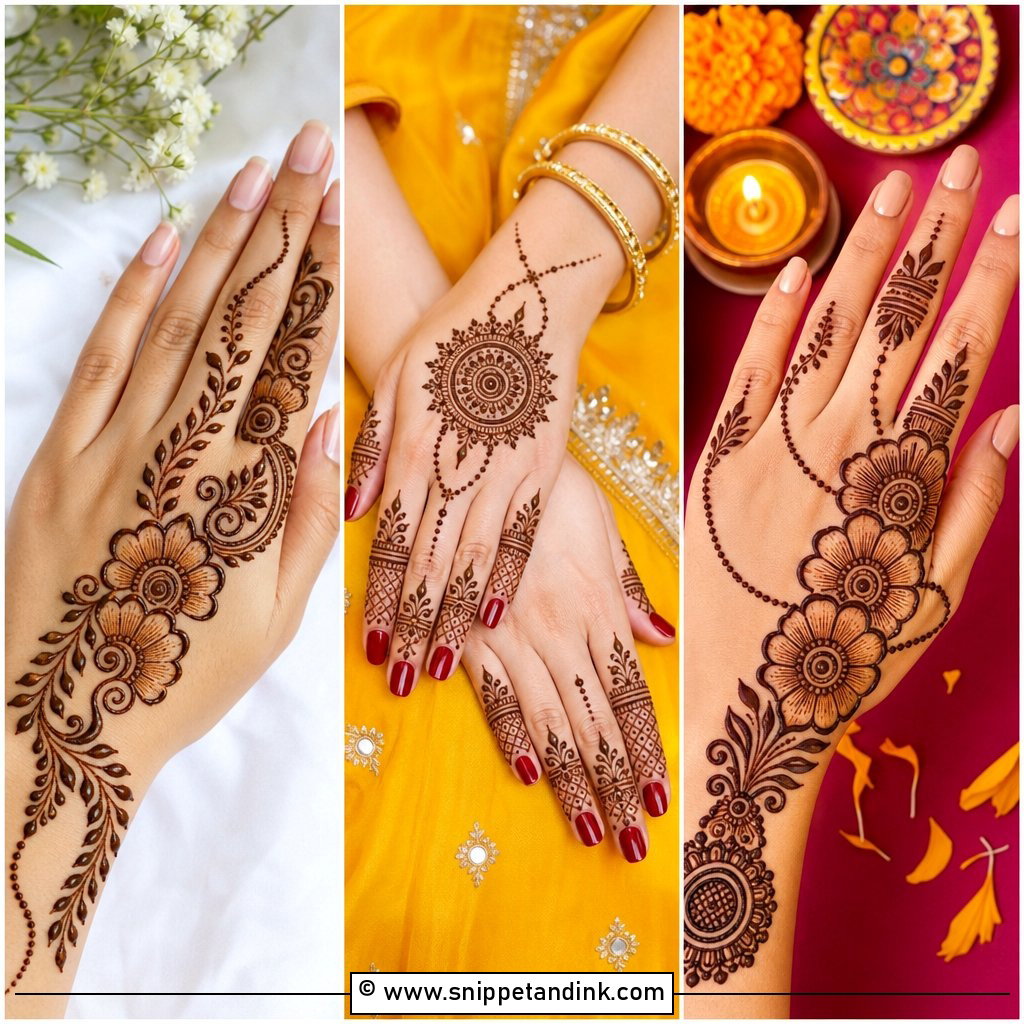
A simple Arabic palm mehndi design is a diagonal: wrist to index finger, with large flowers, leafy vines, curved paisleys and dot clusters along the way, and the rest of the palm left clean. I outline the flowers and leaves thickly, then add thin inner lines last. The thick outline is what survives as a strong stain; fine inner lines are decoration.
4. Easy Palm Mehndi Design For Beginners
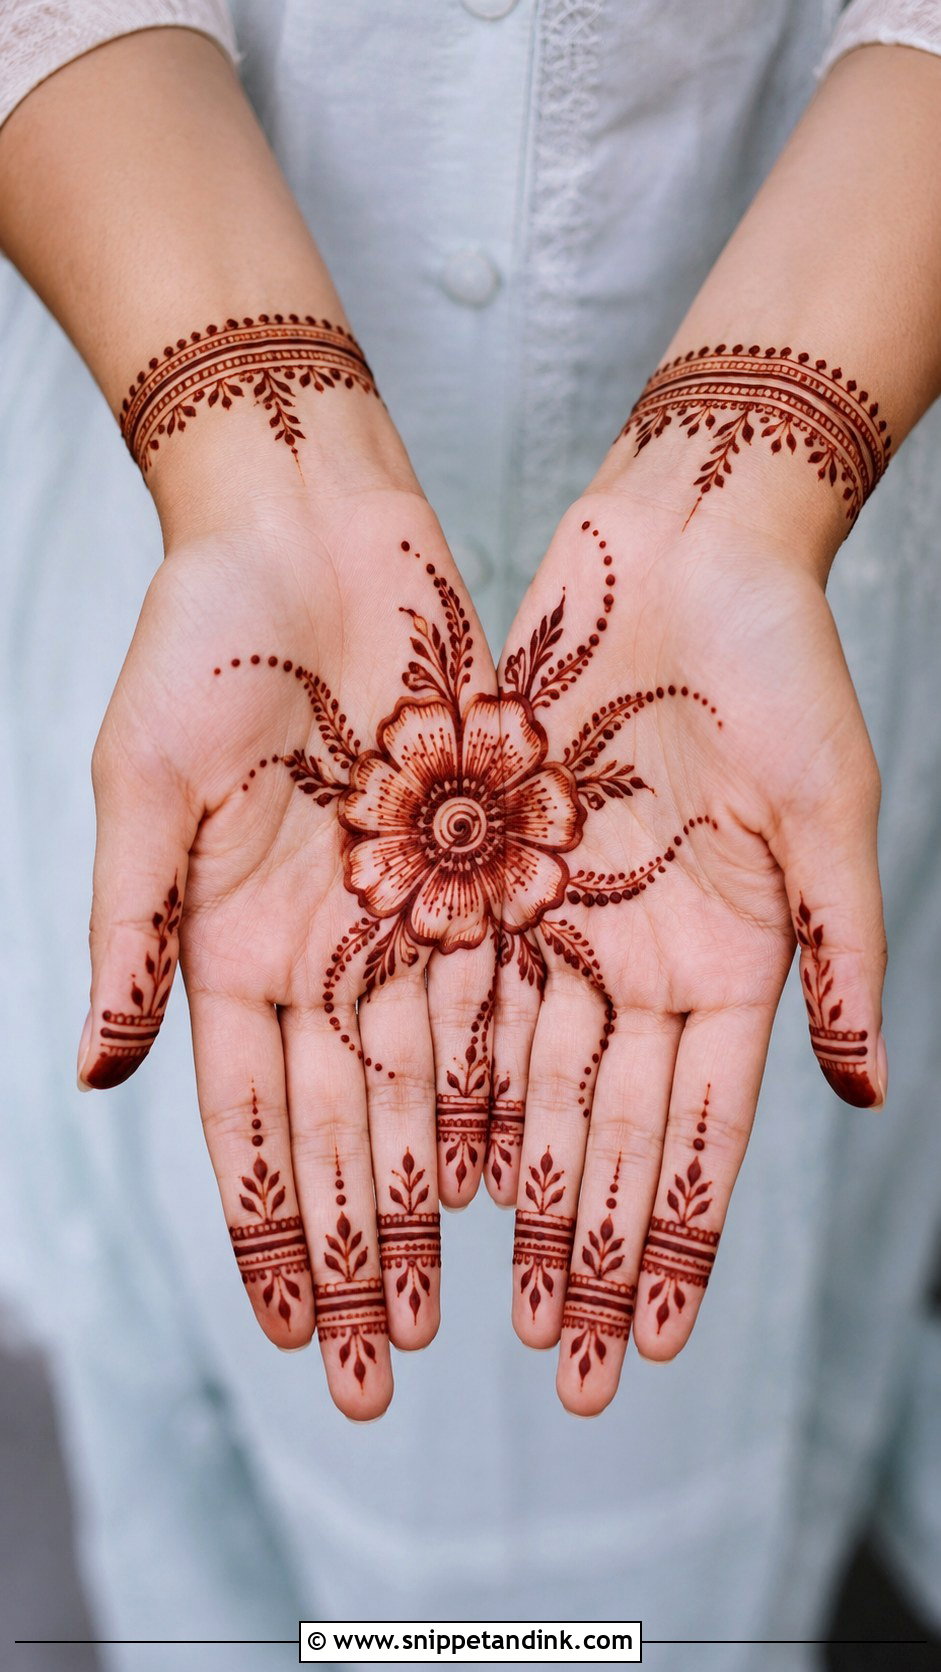
This is the sunburst exercise. One central flower or circle, curved lines radiating outward like rays, and each section filled with dots, small leaves or tiny arches. Fingers get straight lines, rows of dots and petal bands. It teaches you to repeat a shape around a center, which is the basic skill behind almost every palm design, and a wonky ray simply disappears among the others.
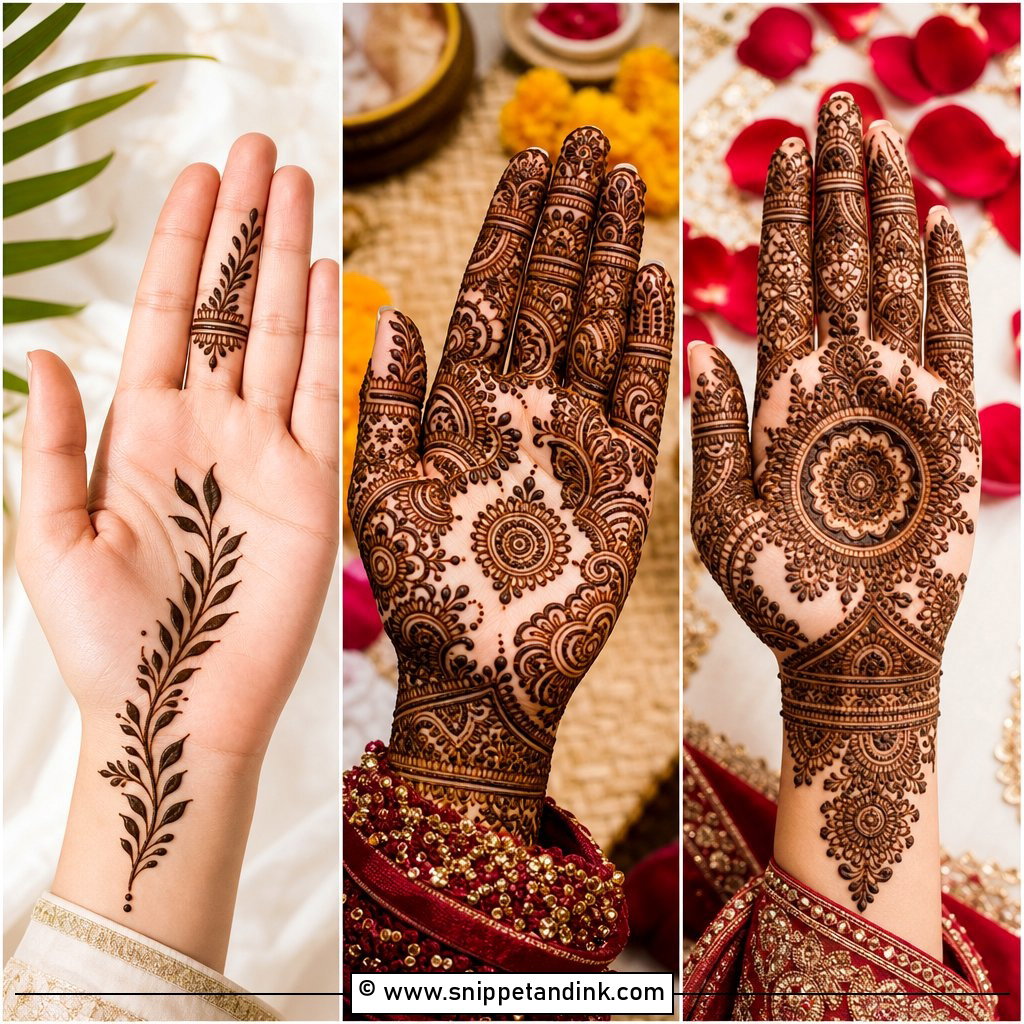
5. Simple Full Palm Mehndi Design
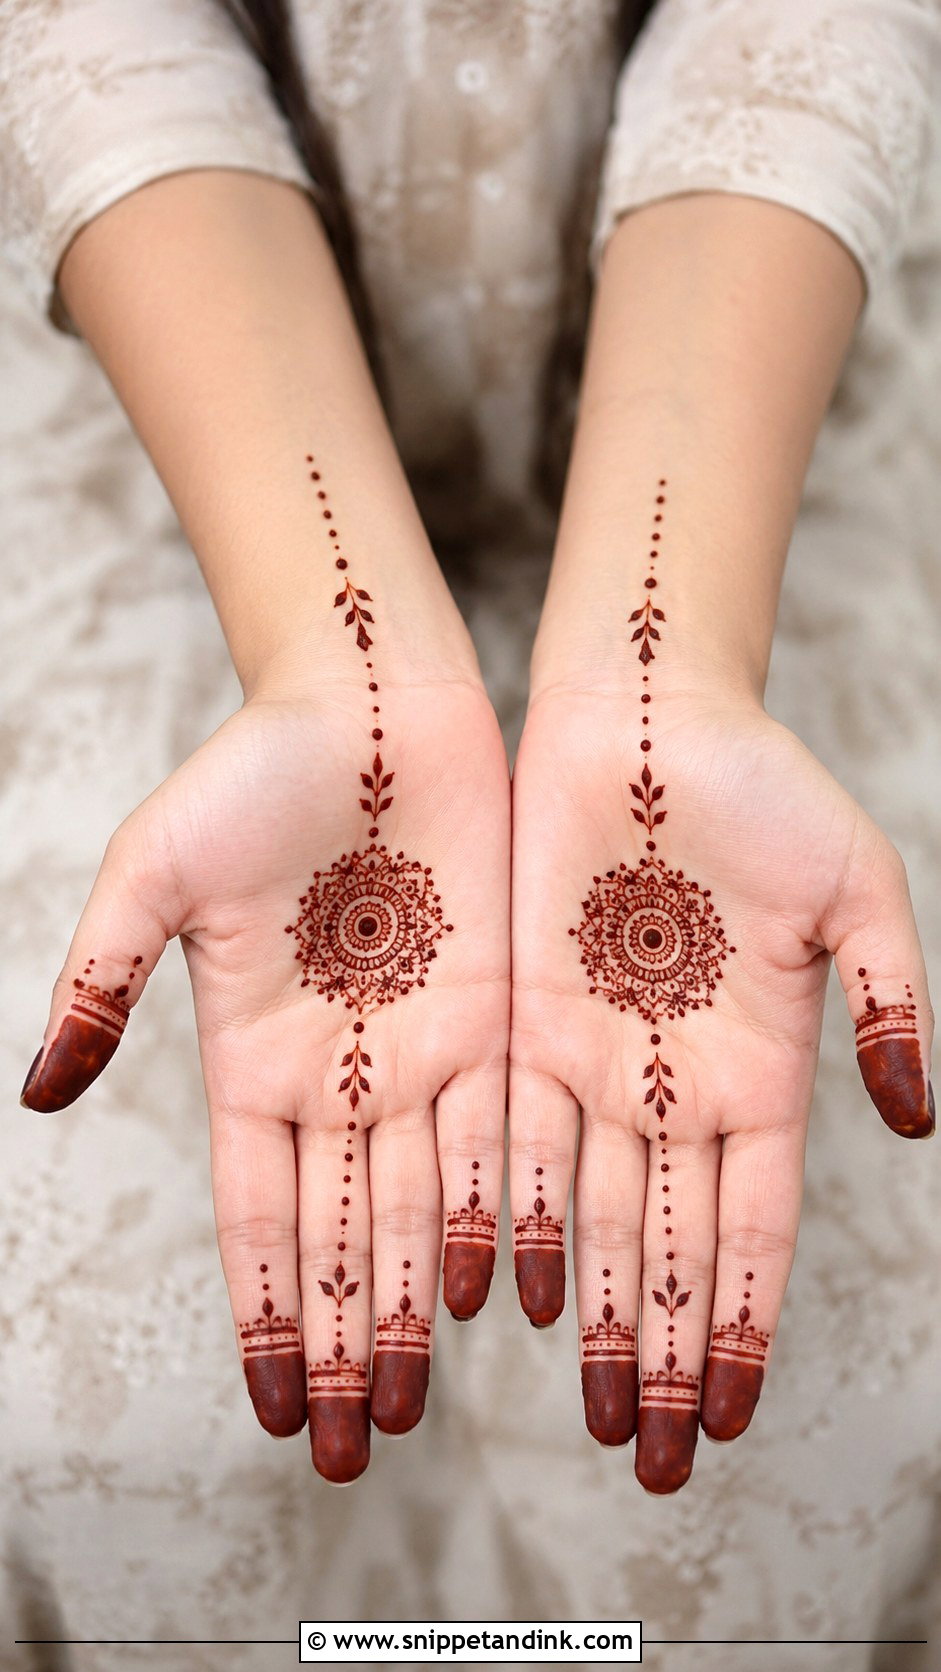
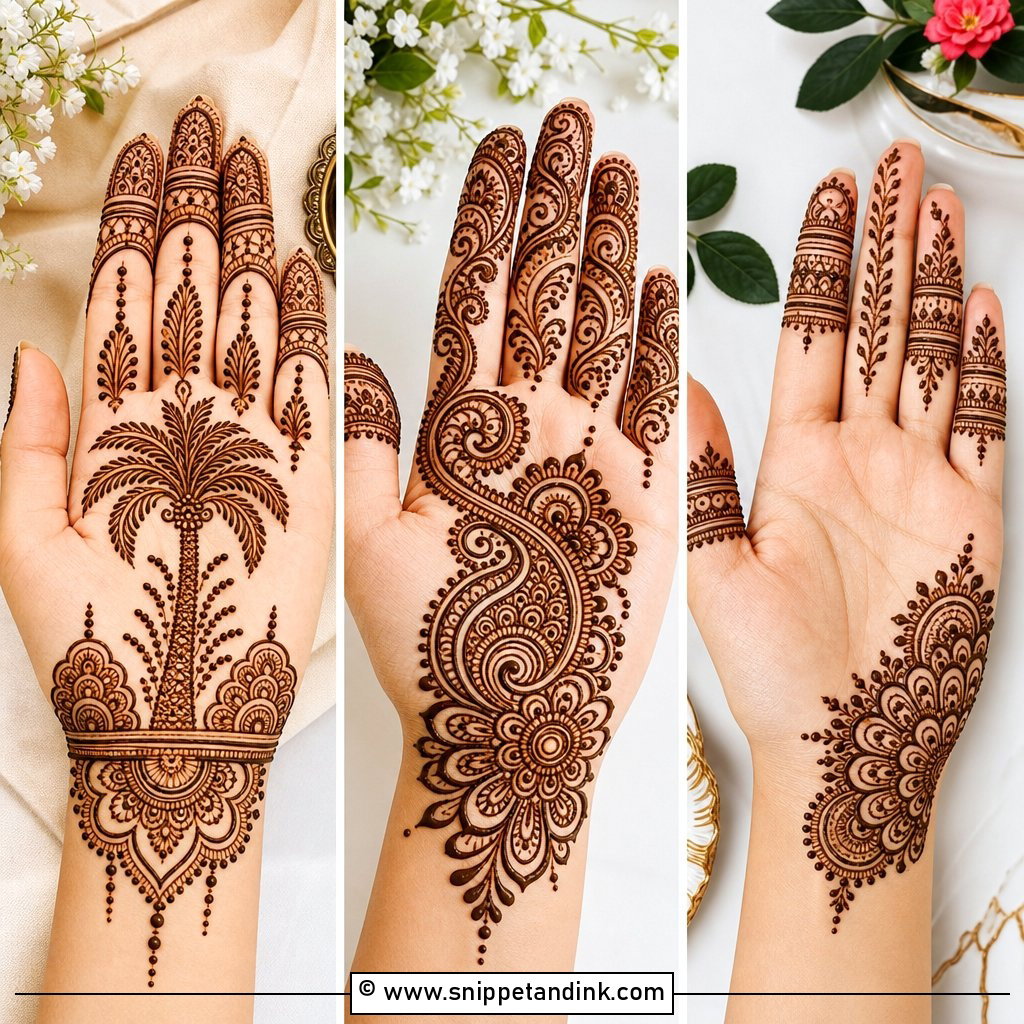
To cover the whole palm without getting lost, divide it into three zones: a mandala in the center, flowers to the sides and a border at the wrist. Draw those first, then connect them with thin lines and fill gaps with small paisleys, dots and leaf chains. Skin should still show between zones. It’s the step up I suggest once a beginner can draw a clean mandala.
6. Easy Round Palm Mehndi Design
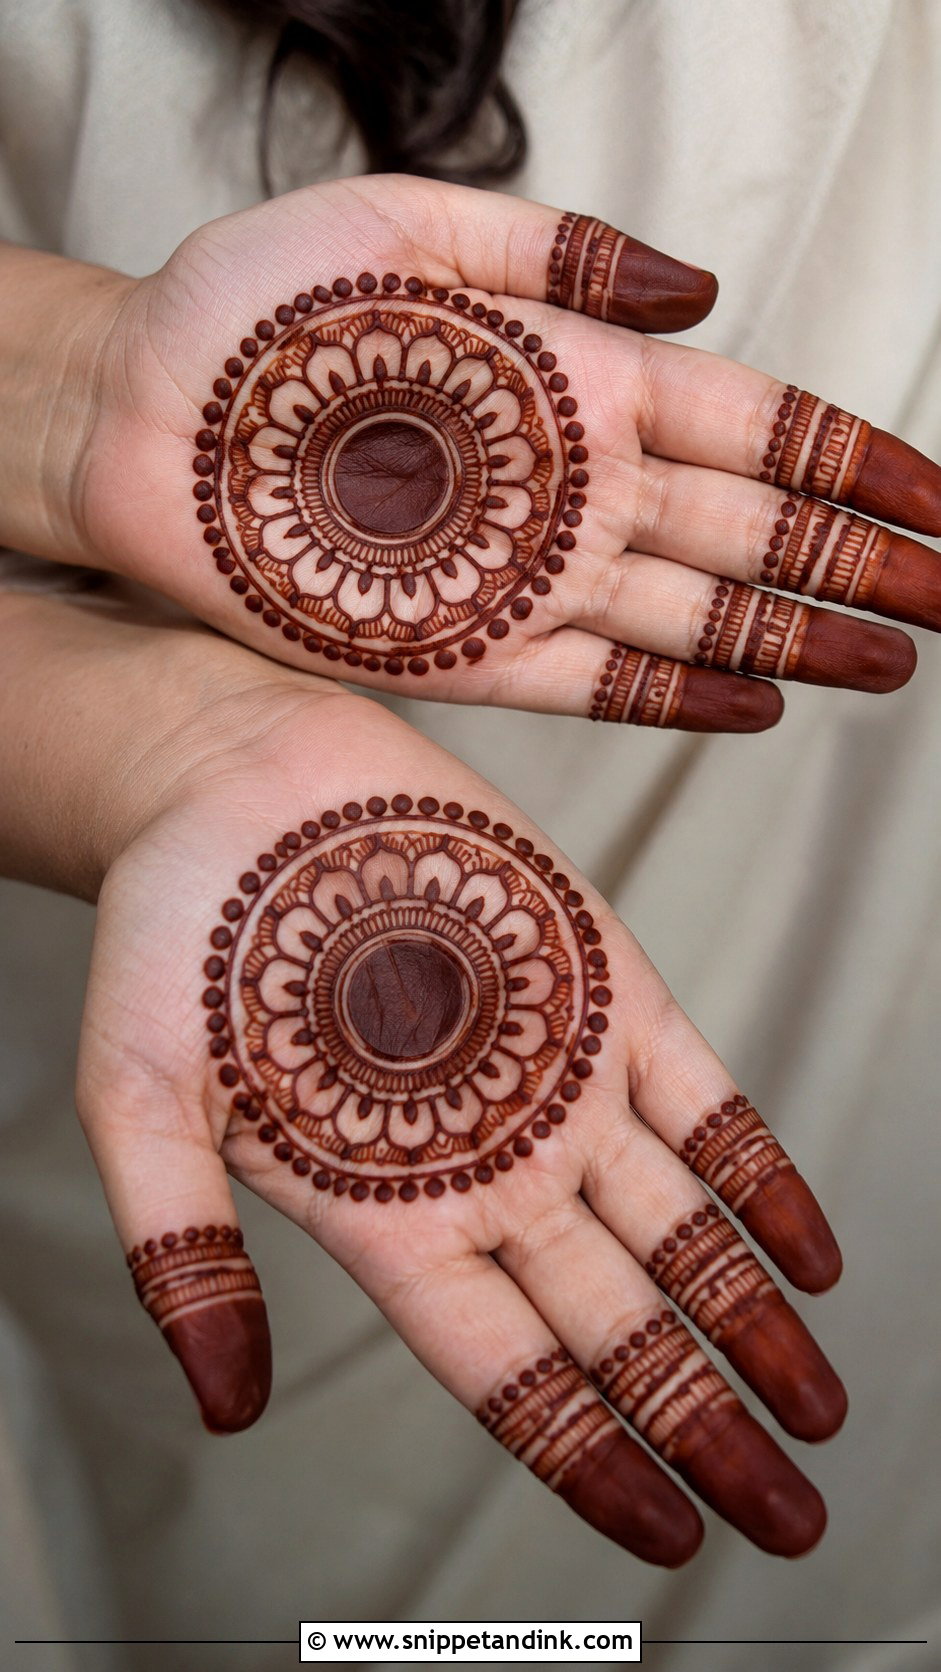
A bold round motif in the center, the classic gol tikki, built from rings of petals, dots, scallops and fine lines. Each finger gets a small matching band, with space left near the knuckles. There are no long vines to plan, so it’s very manageable. The center of the palm also stains the darkest, so the tikki comes out as the strongest part of the hand.
7. Simple Paisley Palm Mehndi Design
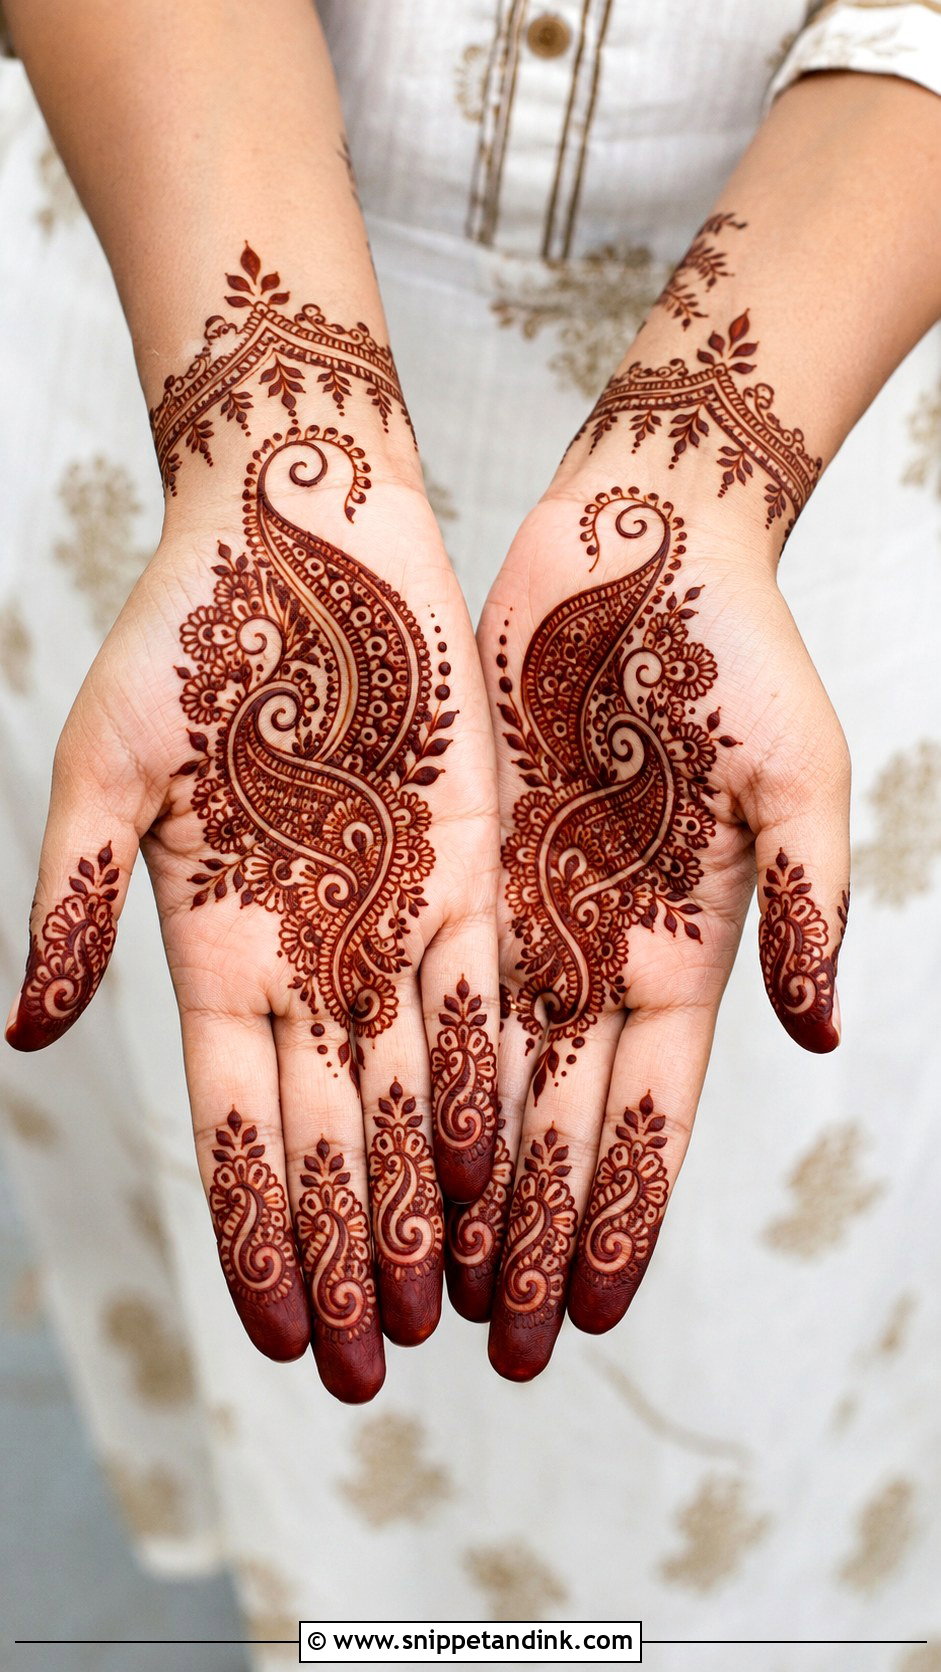
Two paisleys, one medium and one smaller, set on opposite sides of the palm so they balance each other. I fill them with curved lines, dots and small leaves and link them with a light floral border around the center. Paisley tips or curves on the fingers echo them. If a paisley comes out lopsided, widen its curve slightly and add a row of dots outside; the correction is invisible.
8. Easy Leafy Palm Mehndi Design
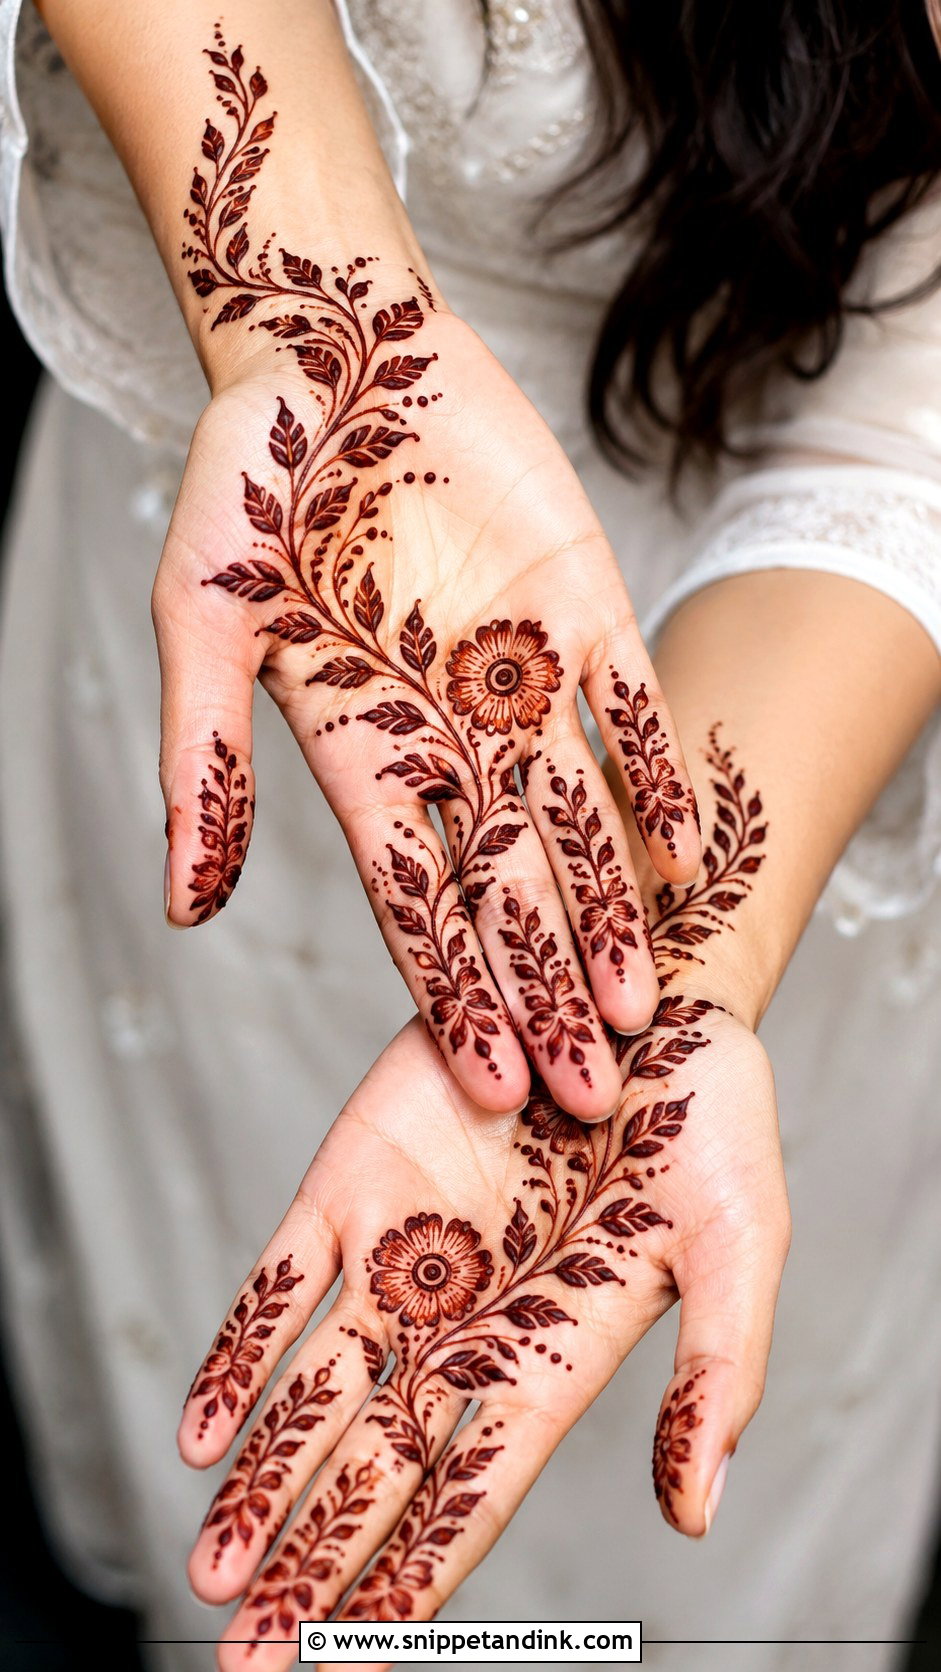
A vine from the wrist curving into the center of the palm, paired leaves along each side and a small flower or circle where it ends. For more contrast, fill every other leaf solid. Simple vines on the fingers connect the hand. Long fingers suit this one particularly well, because the trail carries the eye up the hand.
9. Simple Finger And Palm Mehndi Design
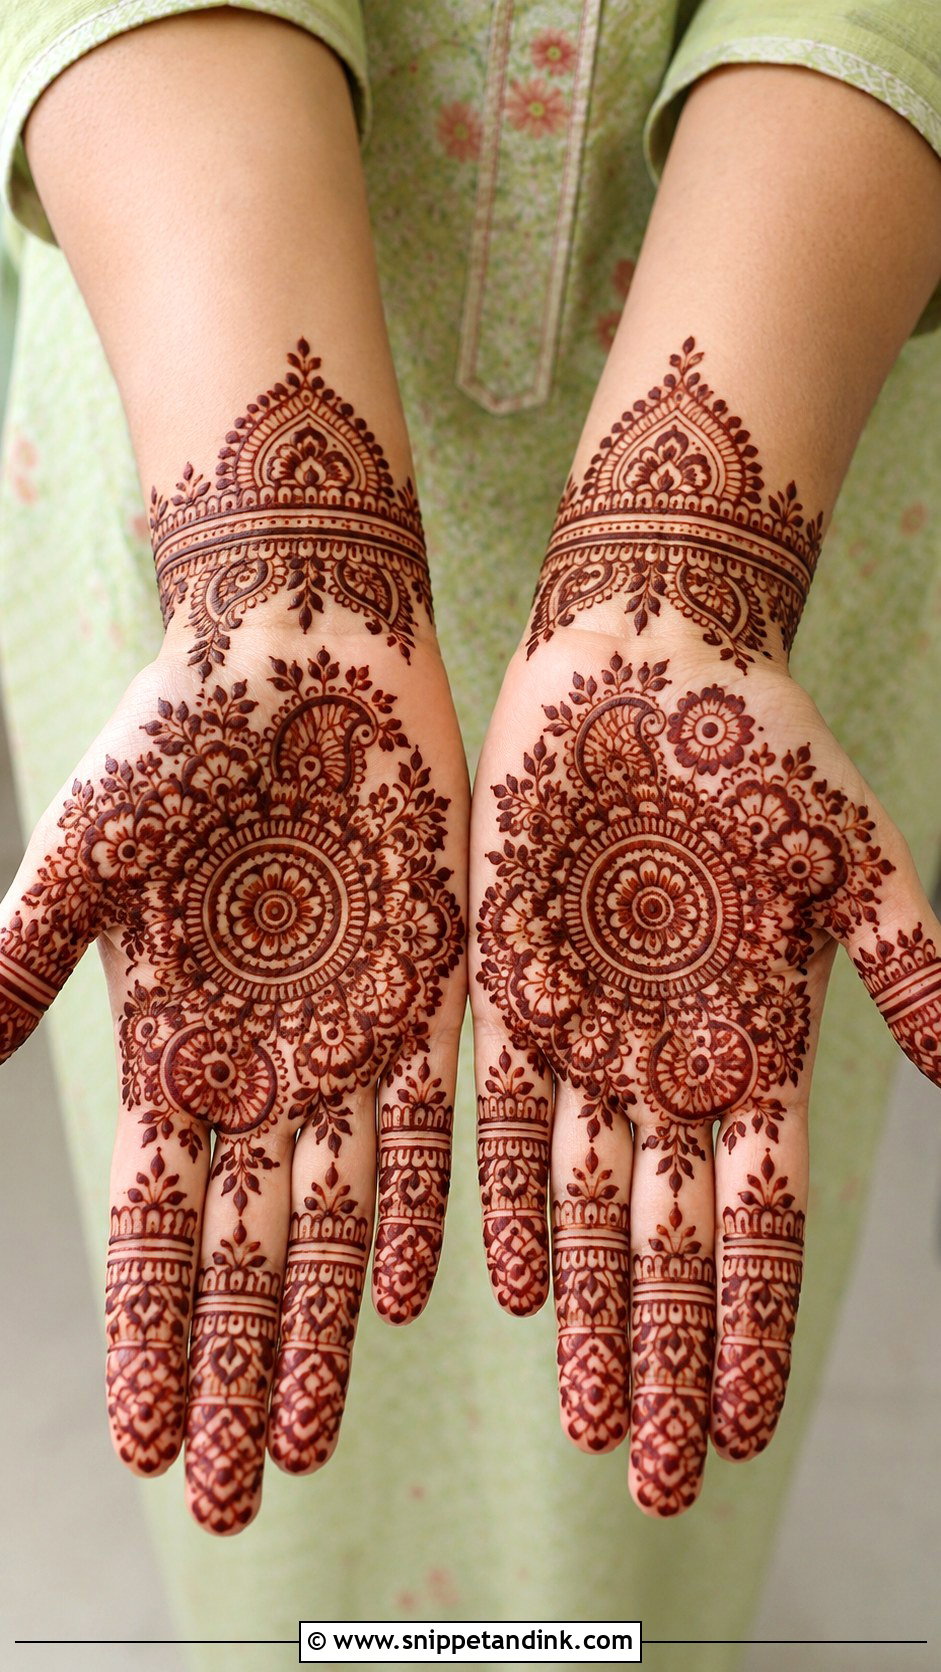
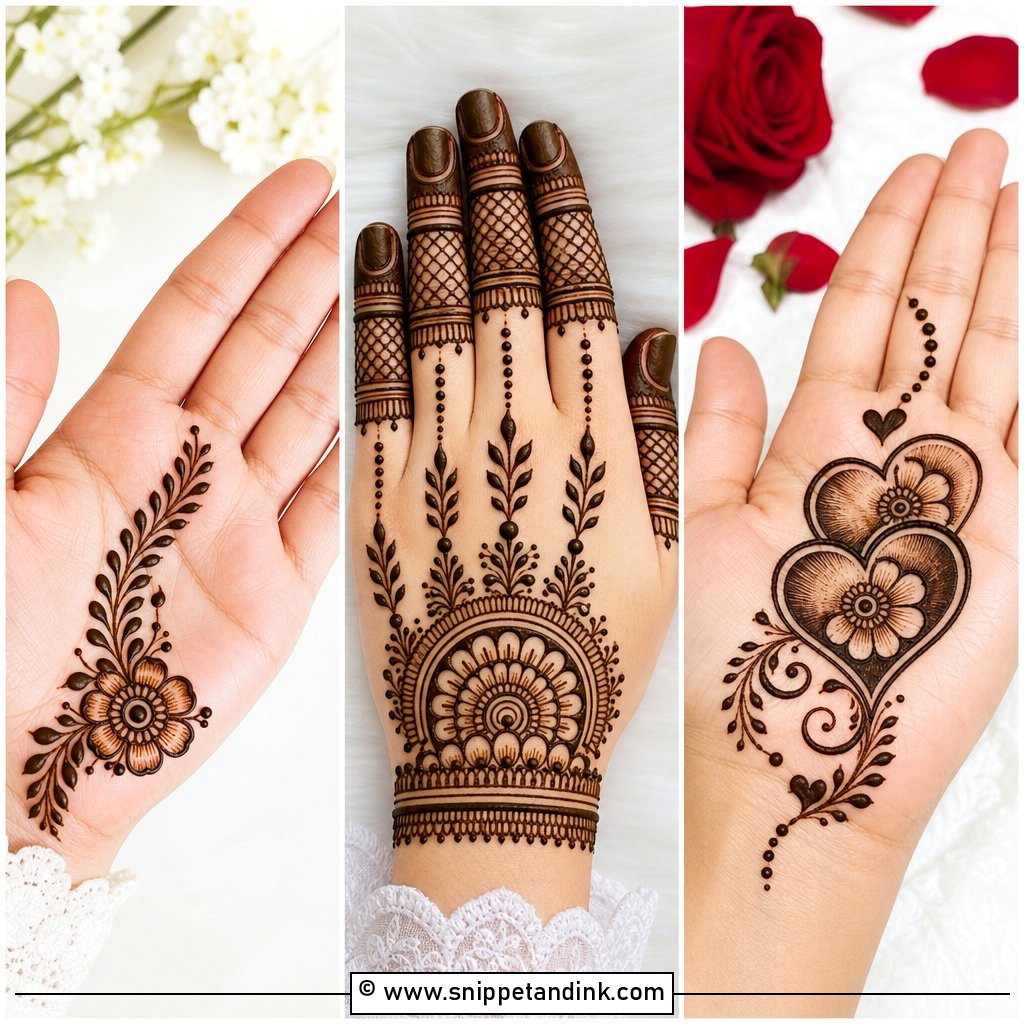
This layout gives you finger practice with a palm motif to anchor it. A small mandala or flower in the center connects to the fingers with dotted chains, and each finger gets a different simple band: lines, dots, leaves, arches. Keep the middle of the palm open. I like it for beginners because each finger is a short, separate exercise, and a weak one can be redone with a band on top.
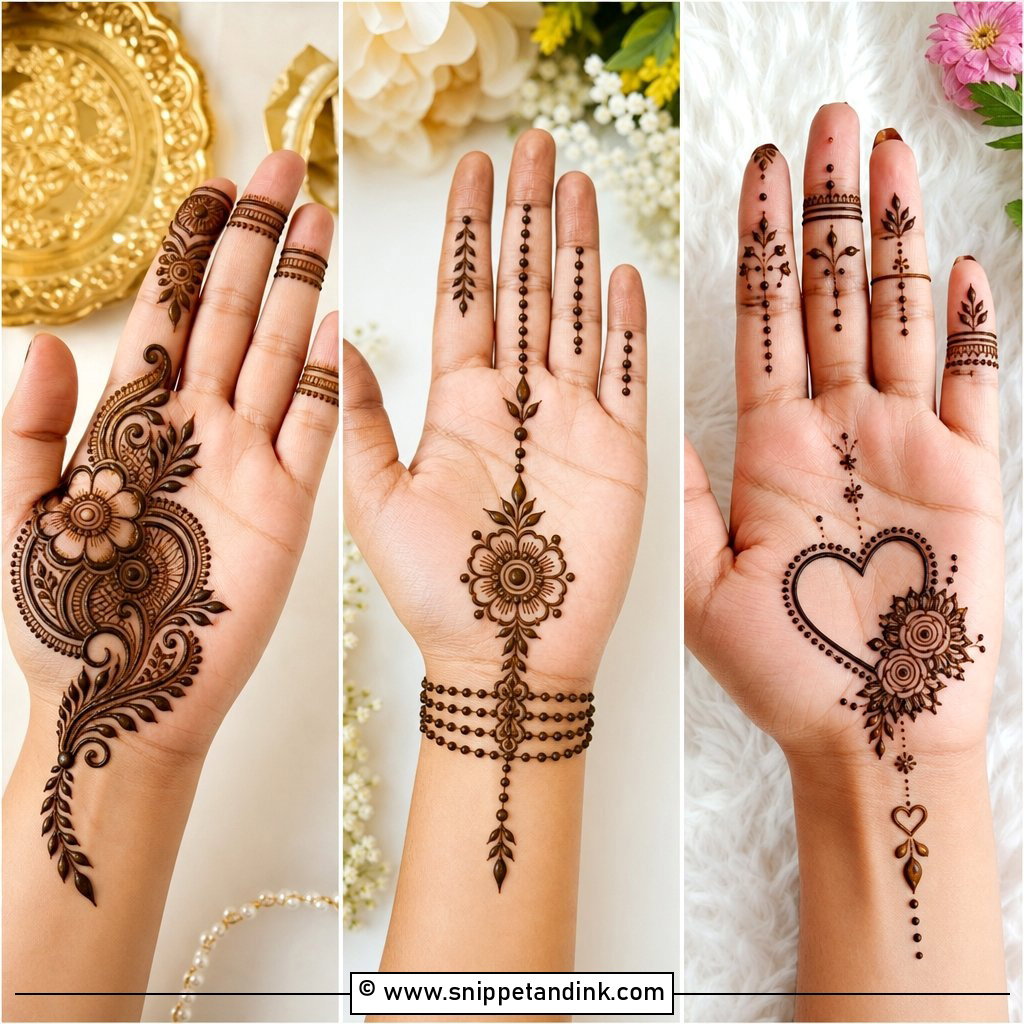
10. Easy Minimal Palm Mehndi Design
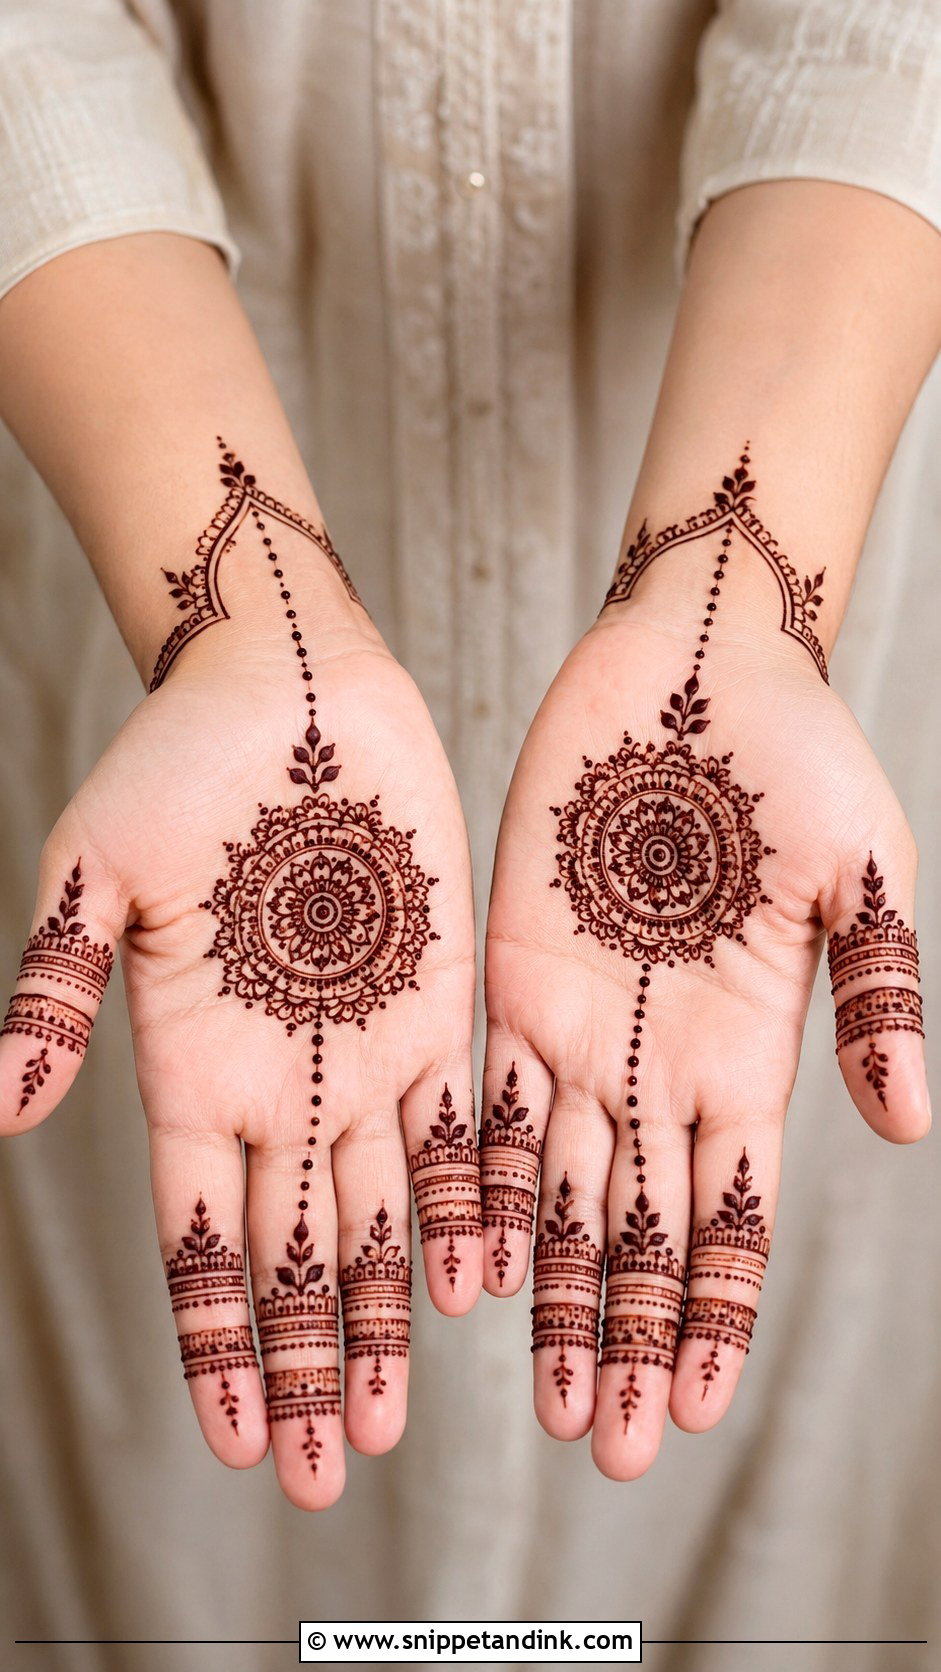
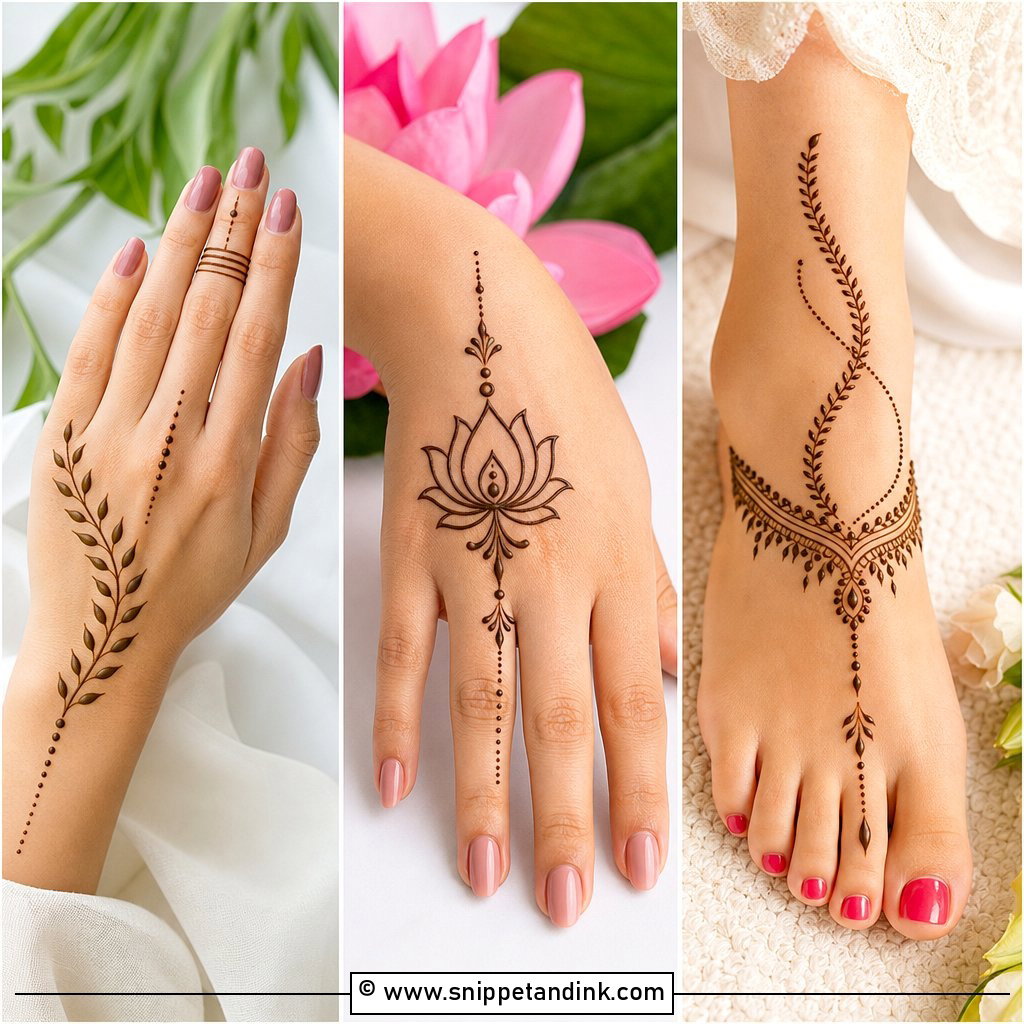
One small motif in the center, a flower, a mandala or a leafy circle, and a few dot trails toward the fingers and wrist. Fingertips bare or dotted. That’s all. The empty skin is the design. It’s quick to dry, so it suits college events or a weeknight when you still need your hands afterwards.
11. Simple Front Palm Mehndi Design
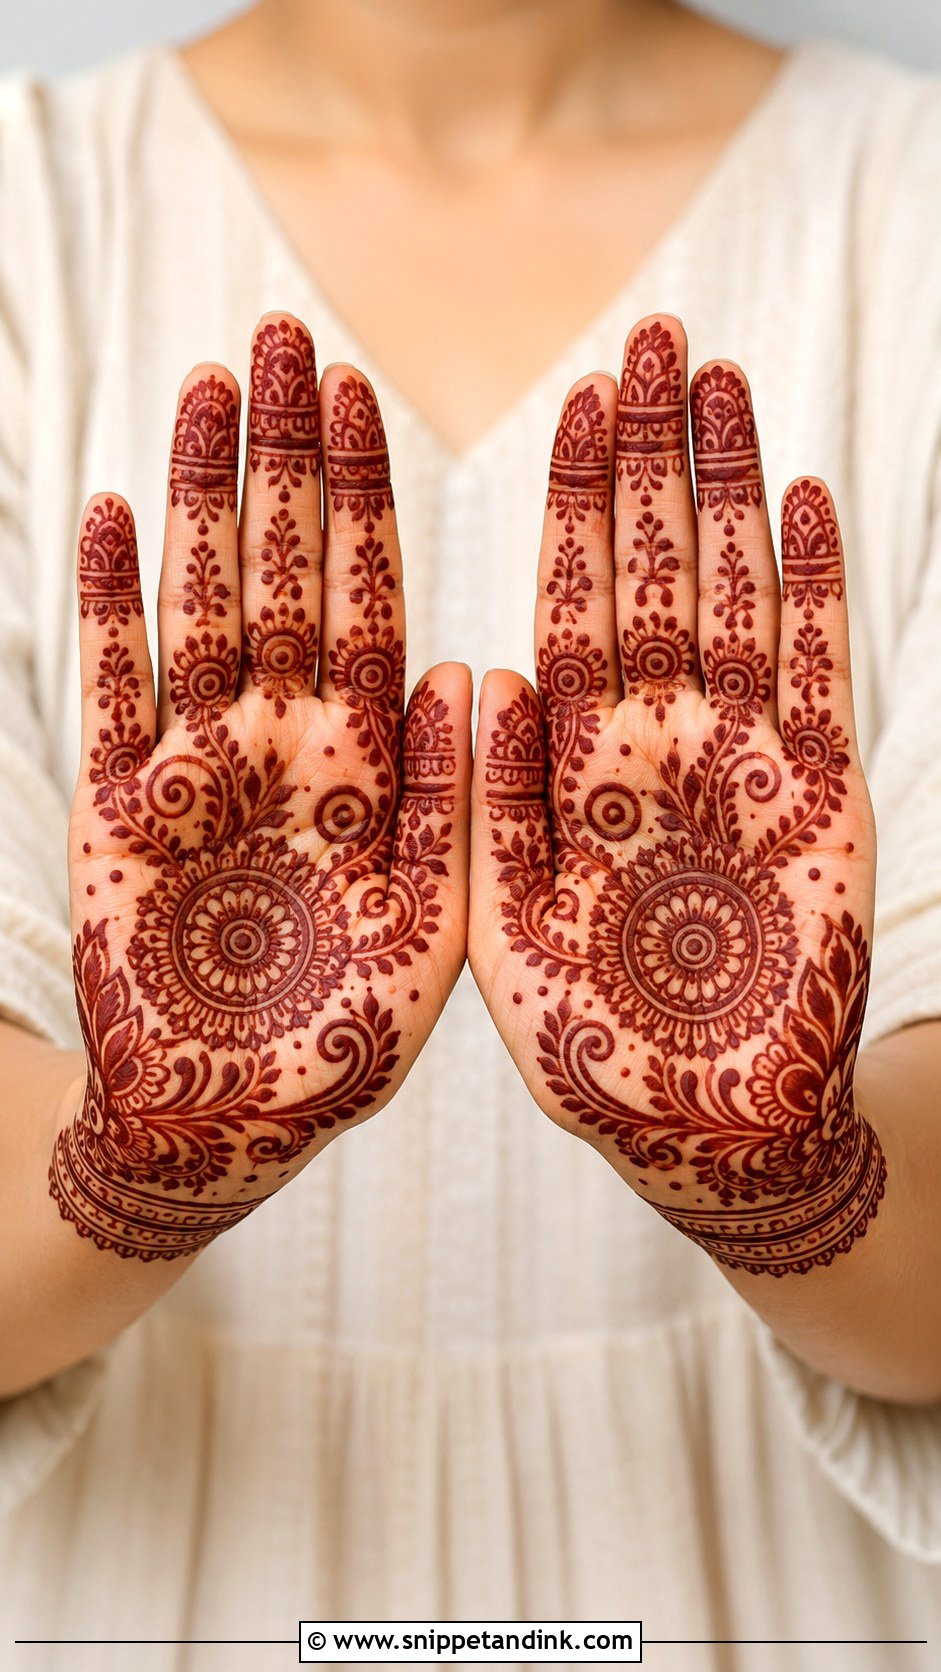
Here the design frames the open palm. A medium floral circle in the center, two curved vines on each side, small leaves, dots and half-flowers along the curves, a thin wrist border and light finger patterns. The vines follow the edges of the palm, so the layout almost draws itself. Hold your hand open and flat while applying; it’s how the design will be seen.
12. Easy Heart Palm Mehndi Design
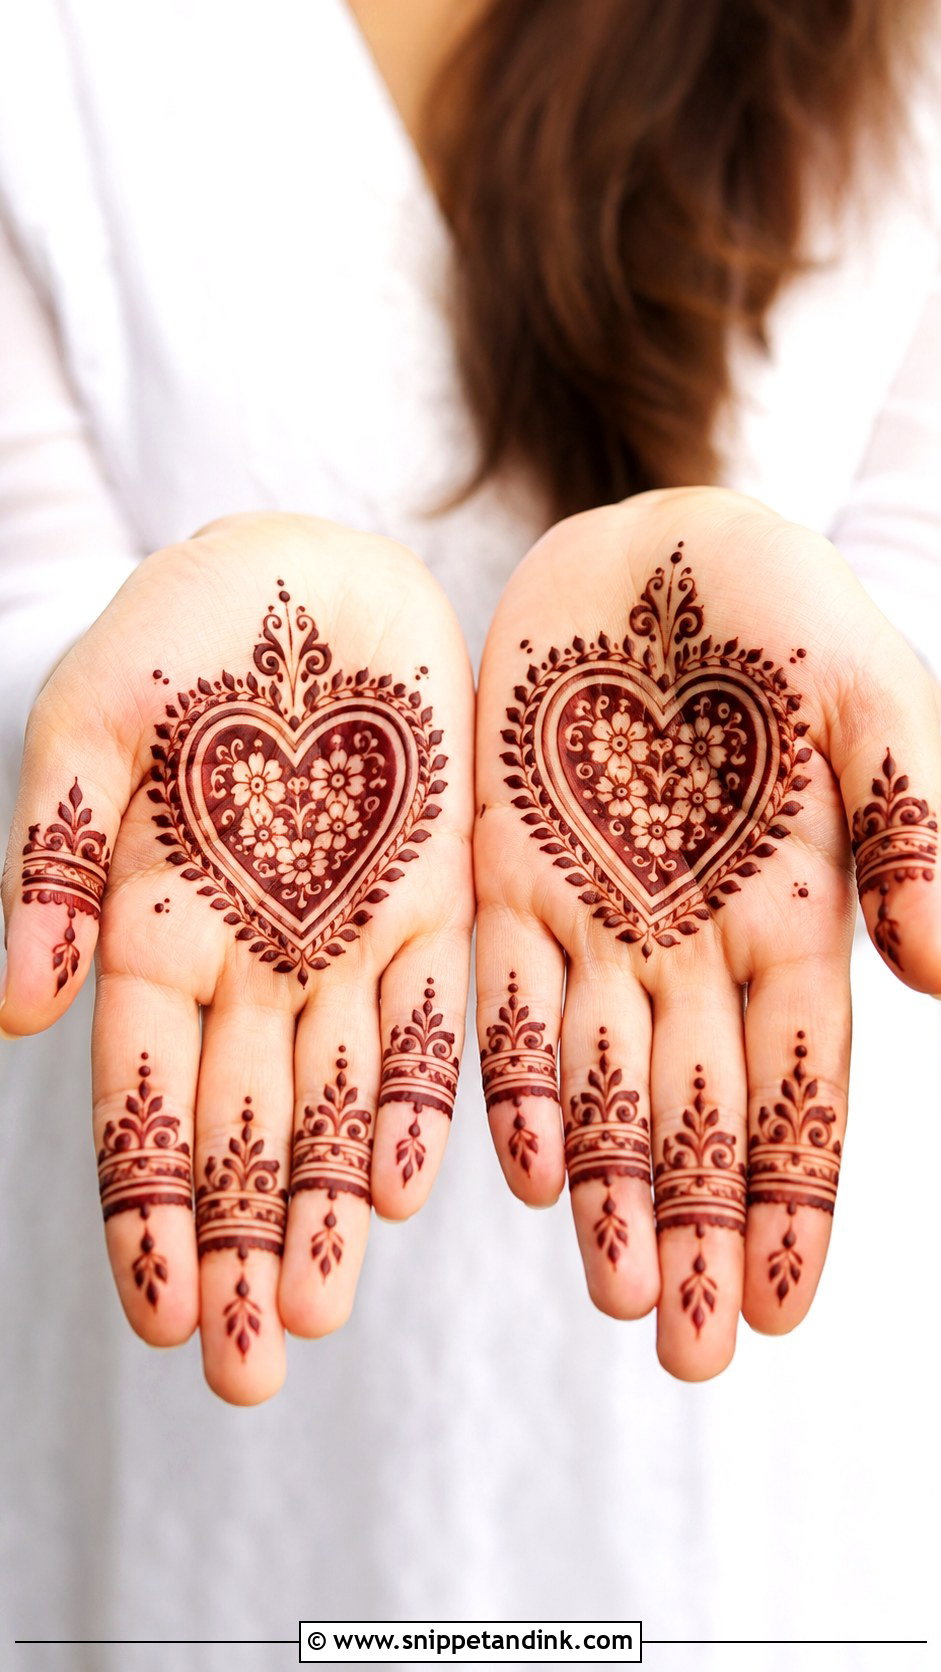
A neat heart in the center of the palm, decorated with tiny flowers, dots and curves, with leaf trails around it so it blends in. Keep it medium-sized; a large heart leaves no room for the details that stop it looking childish. Fingers stay light. Young girls love it, and it suits casual family gatherings.
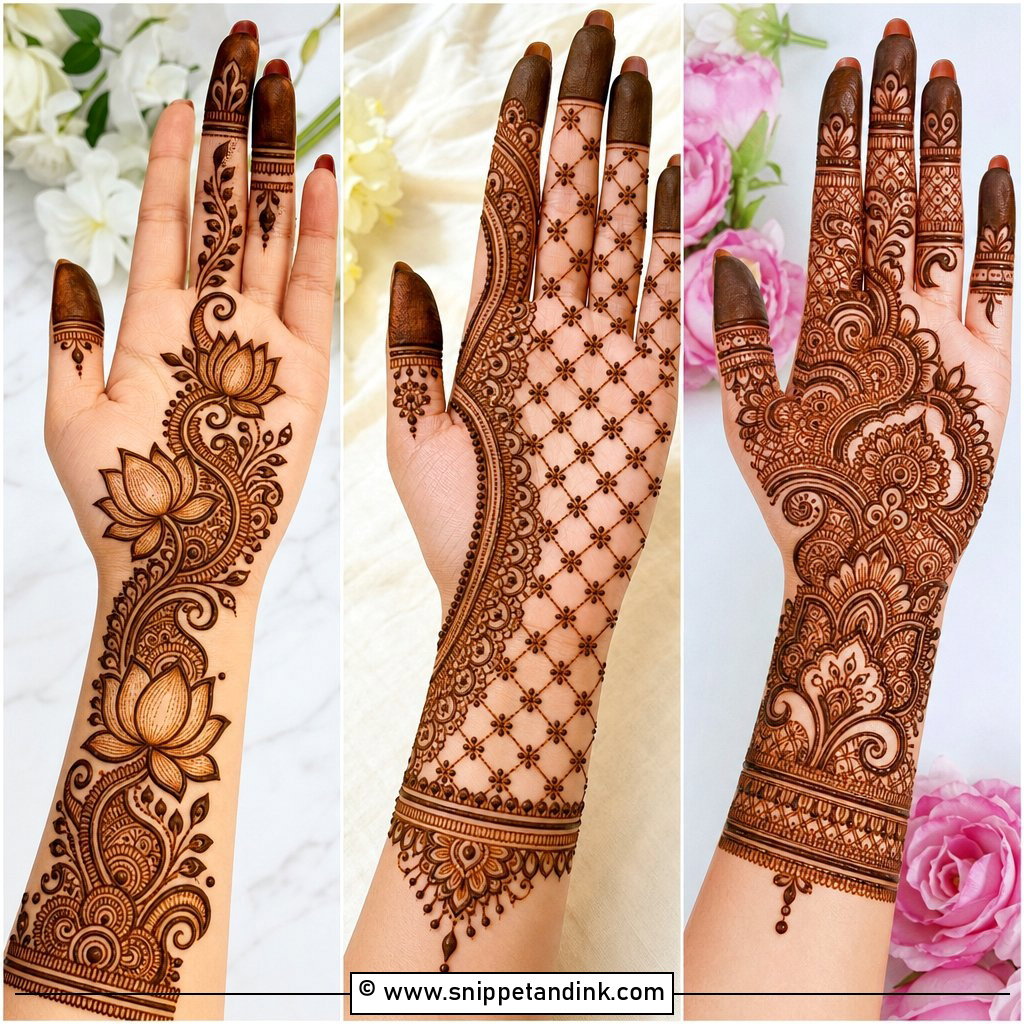
13. Simple Lotus Palm Mehndi Design
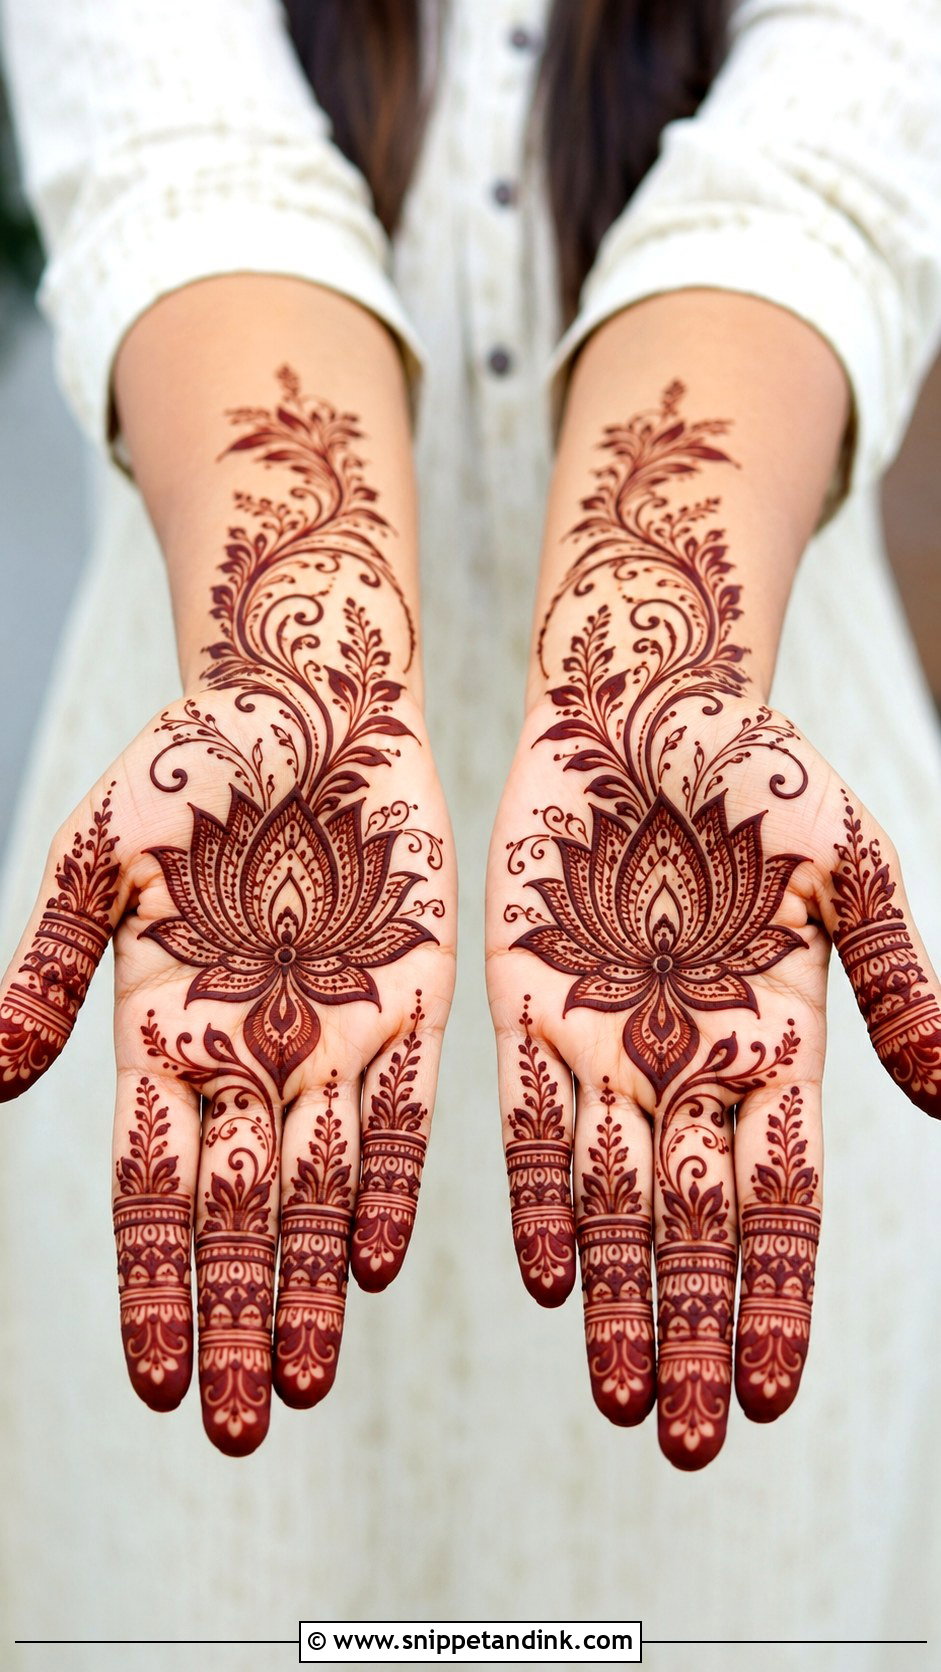
A lotus in the center or lower half of the palm with layered petals opening upward, and small leaves, dots and vines around it. Begin with five large petals and add the smaller inner ones afterwards; that order keeps the flower symmetrical. Petal bands or fine lines on the fingers finish it. No heavy detailing is needed for a lotus to read well.
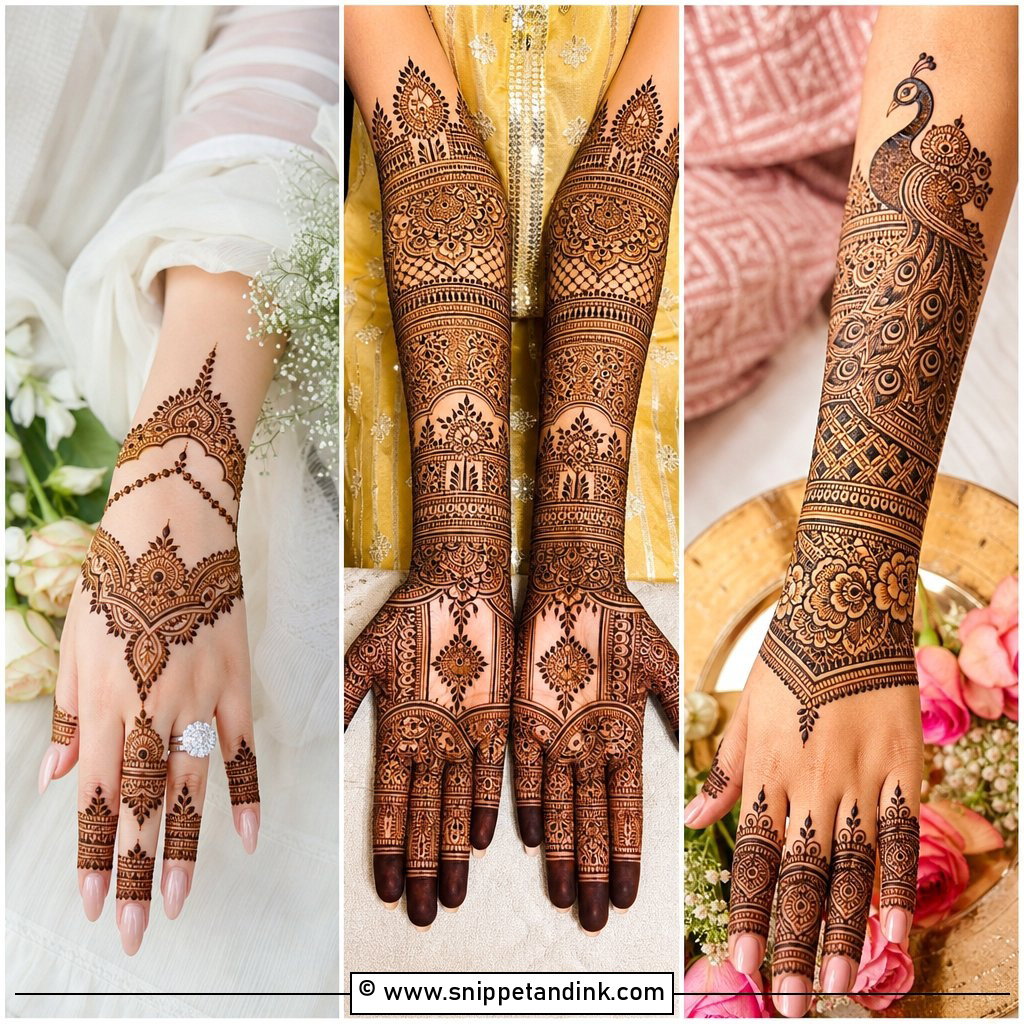
14. Easy Peacock Palm Mehndi Design
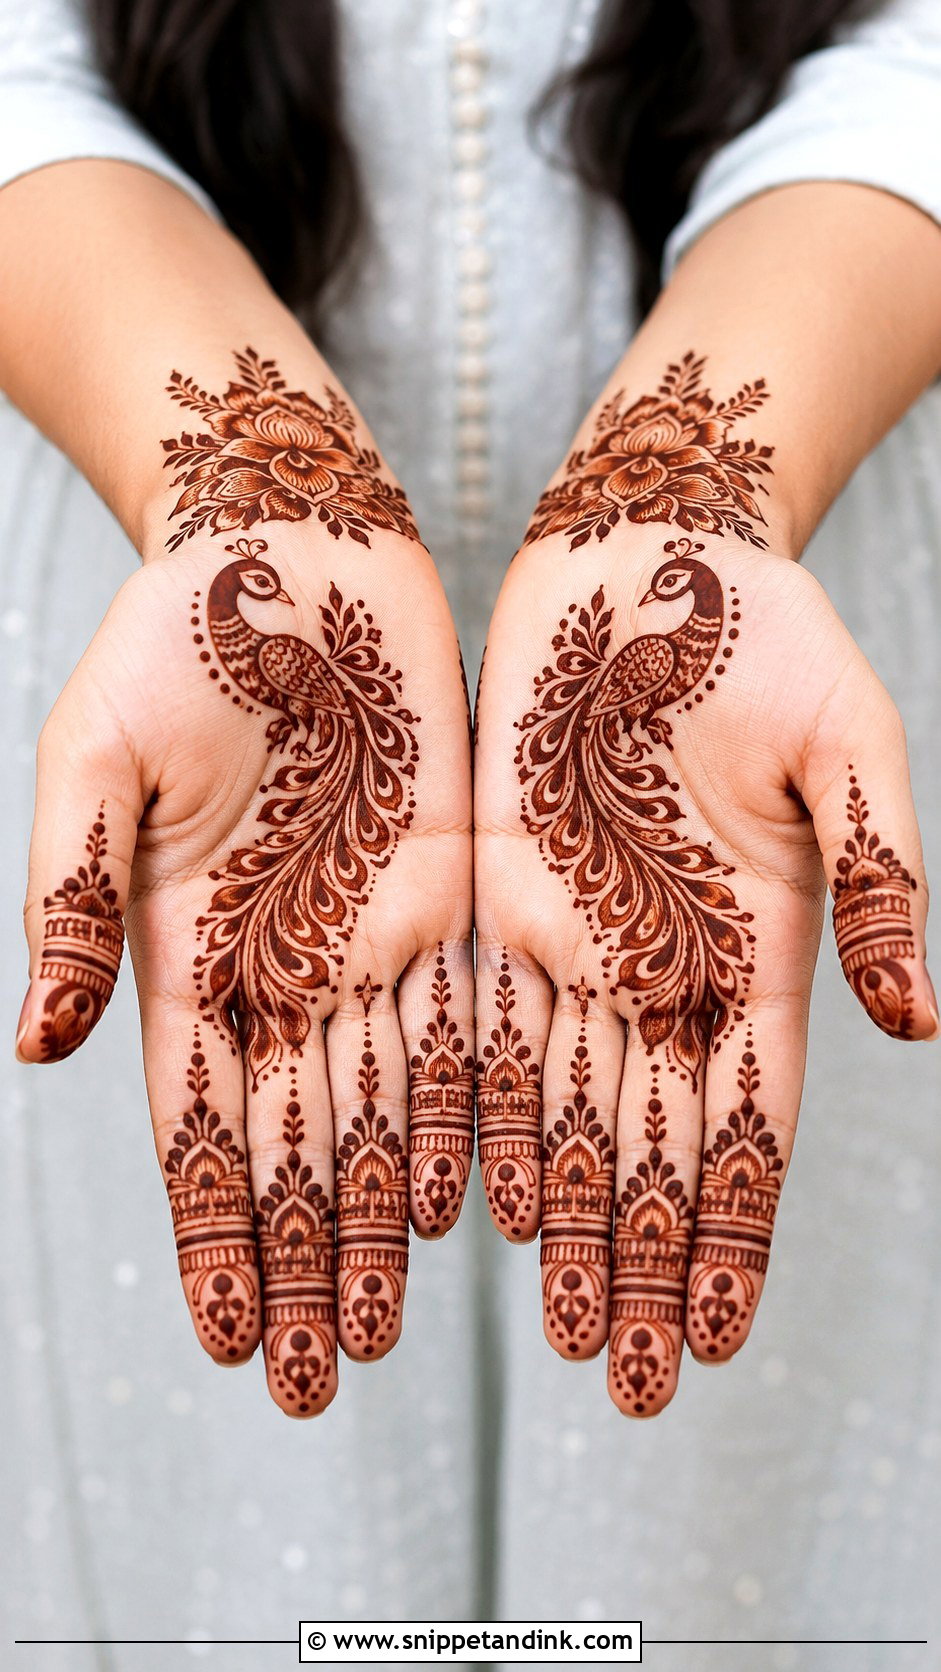
A small peacock body on one side of the palm and a curved trail of feathers across the center, suggested with teardrops, dots and short lines rather than detailed plumes. A few flowers near the wrist and simple finger bands complete it. Outline the bird boldly and keep everything inside it light. If the body gets too much fill, the shape disappears in the stain.
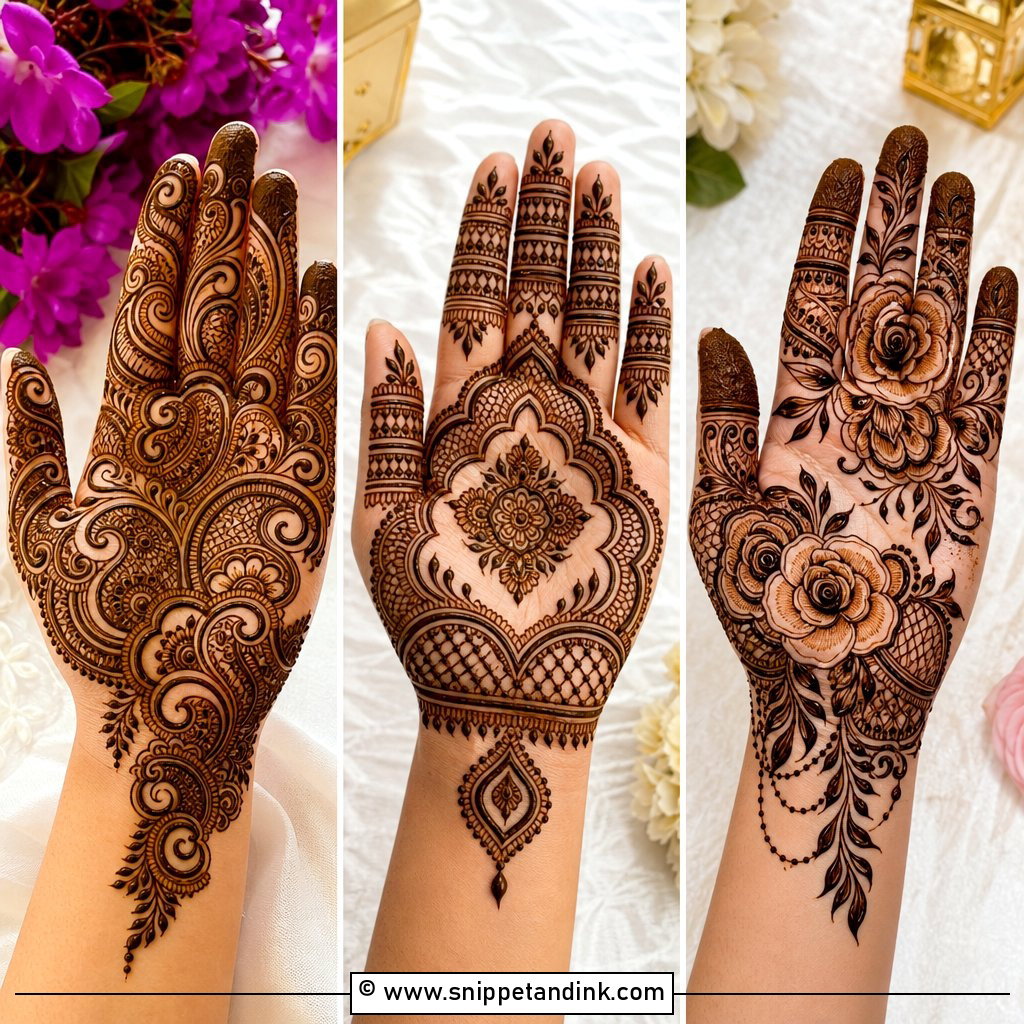
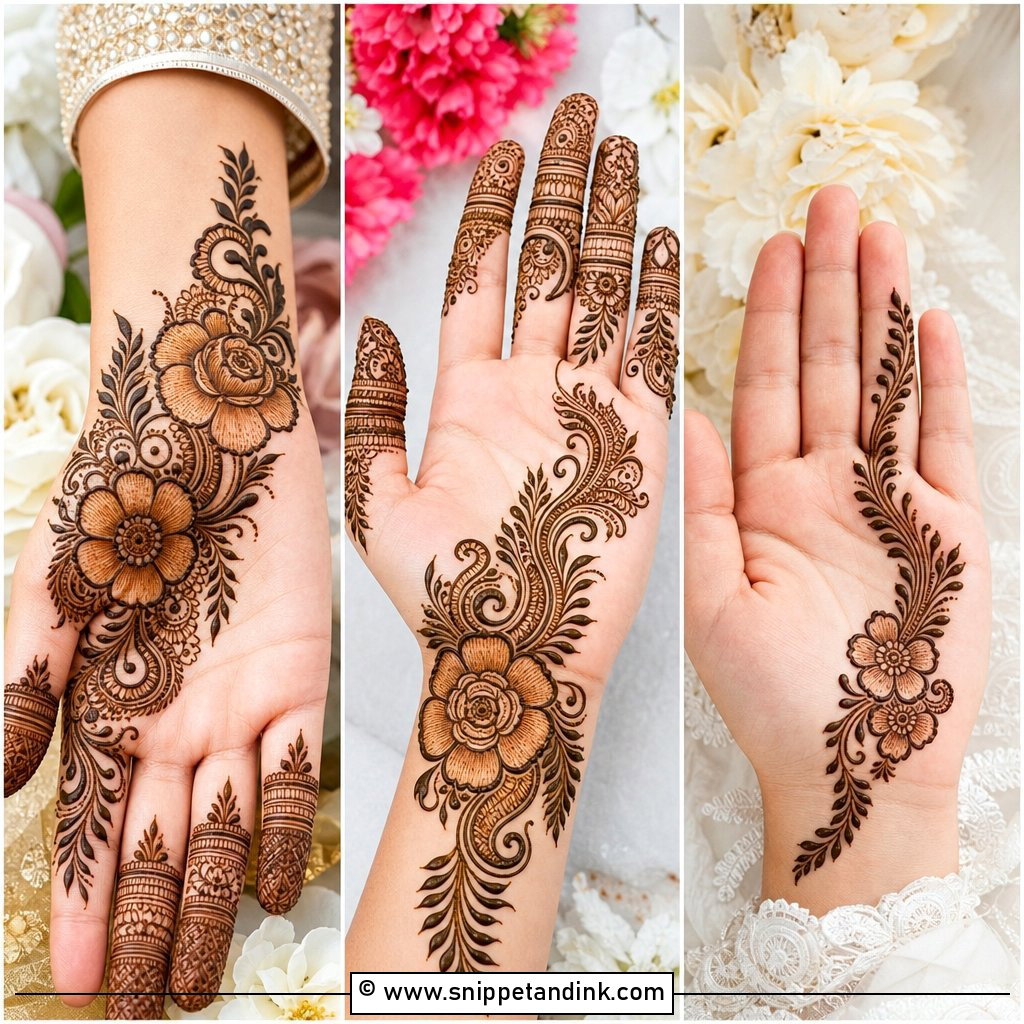
15. Simple Bracelet Palm Mehndi Design
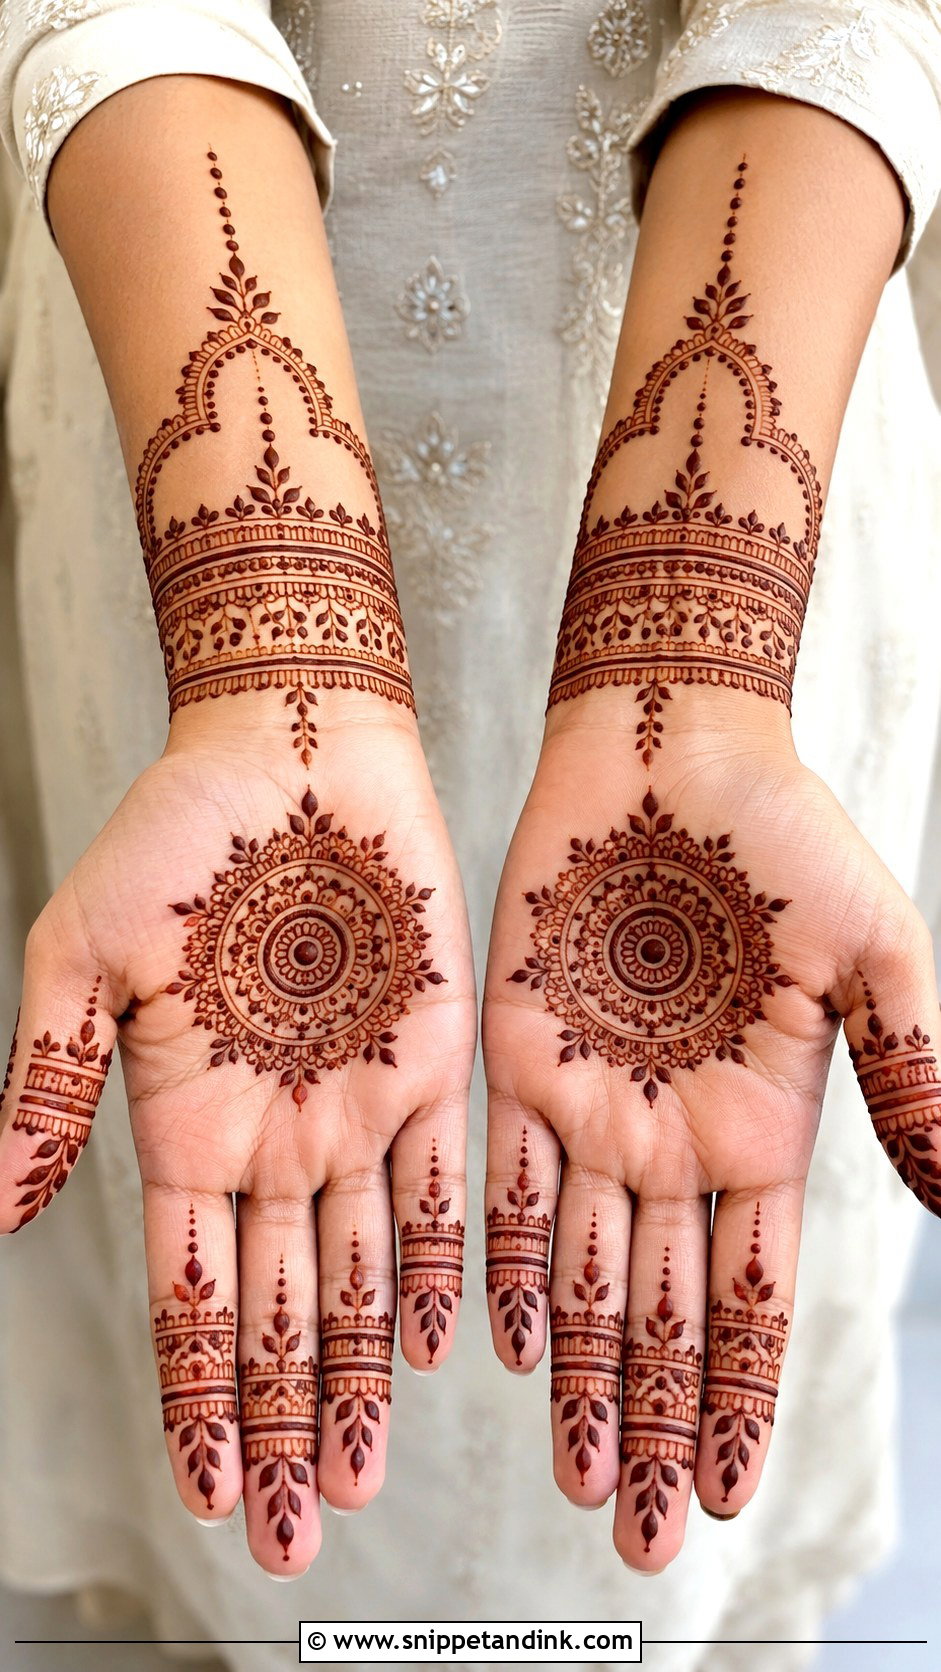
A bracelet palm mehndi design links a small flower or mandala on the palm to a band at the wrist with dotted chains or thin vines. The band can be lines, small arches, leaves and dot borders. Light finger details complete it. The bracelet gives structure on short hands without covering much, and I keep the connecting chain as thin as my cone allows.
16. Easy Jaali Palm Mehndi Design
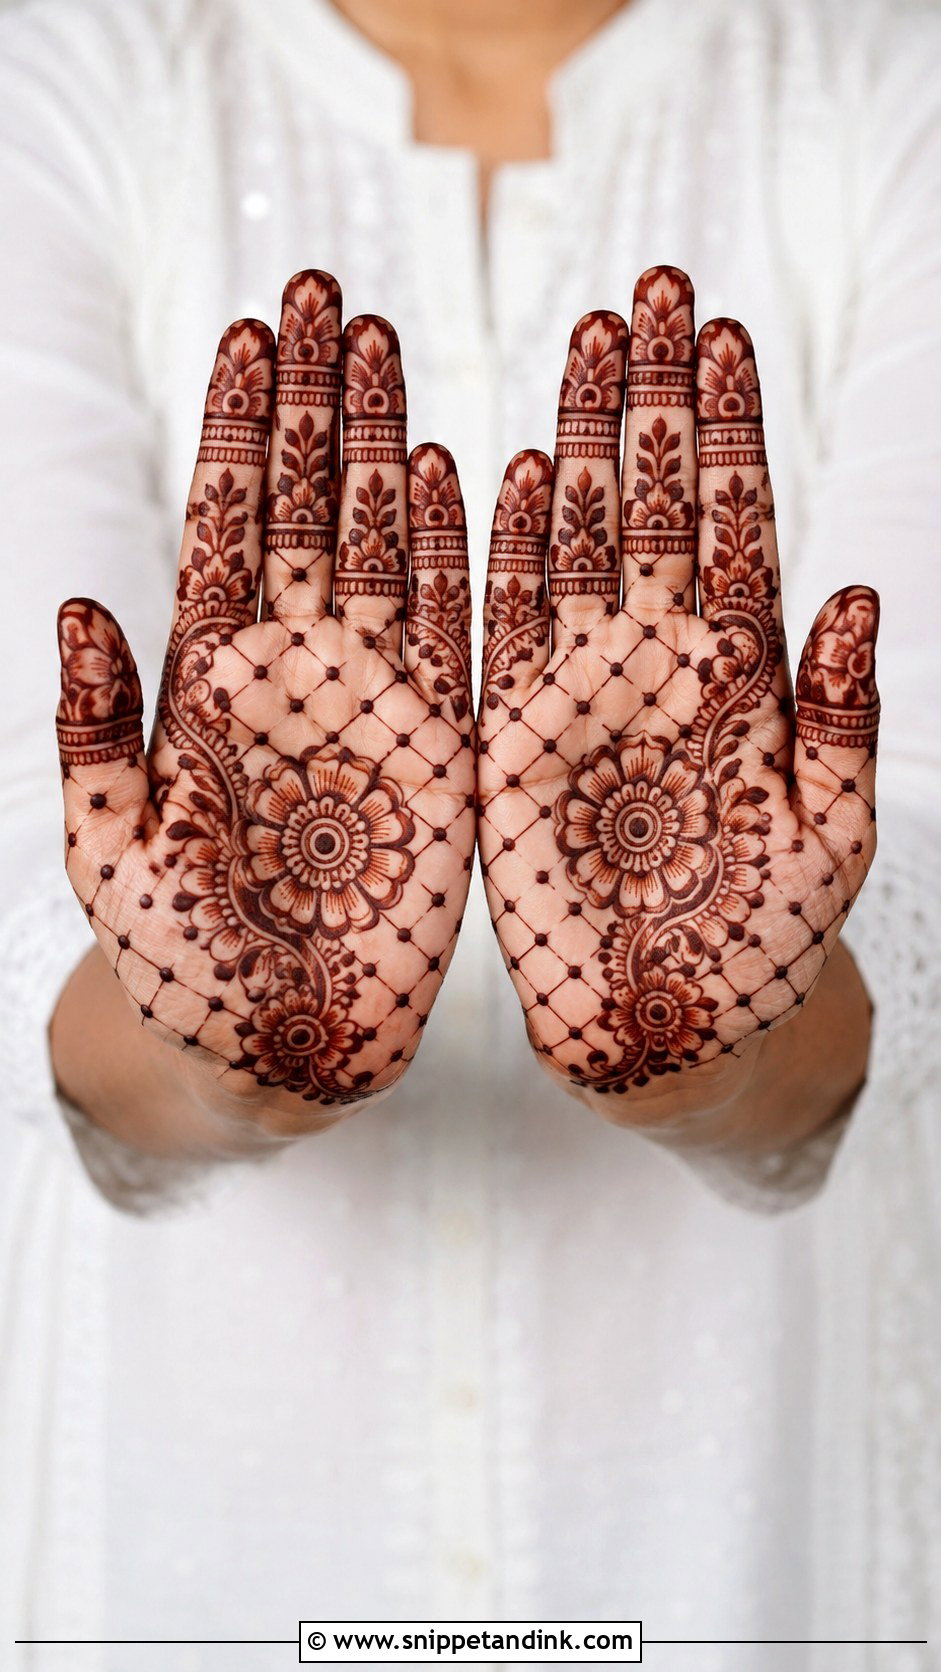
A simple jaali palm mehndi design keeps the mesh to one side of the palm, beside a central flower or paisley, with a dot at each crossing. A curved floral trail fills the rest, with plain bands on the fingers. Draw all the lines in one direction first, then all the lines crossing them. That’s the easiest way to keep the grid even.
17. Simple Half Palm Mehndi Design
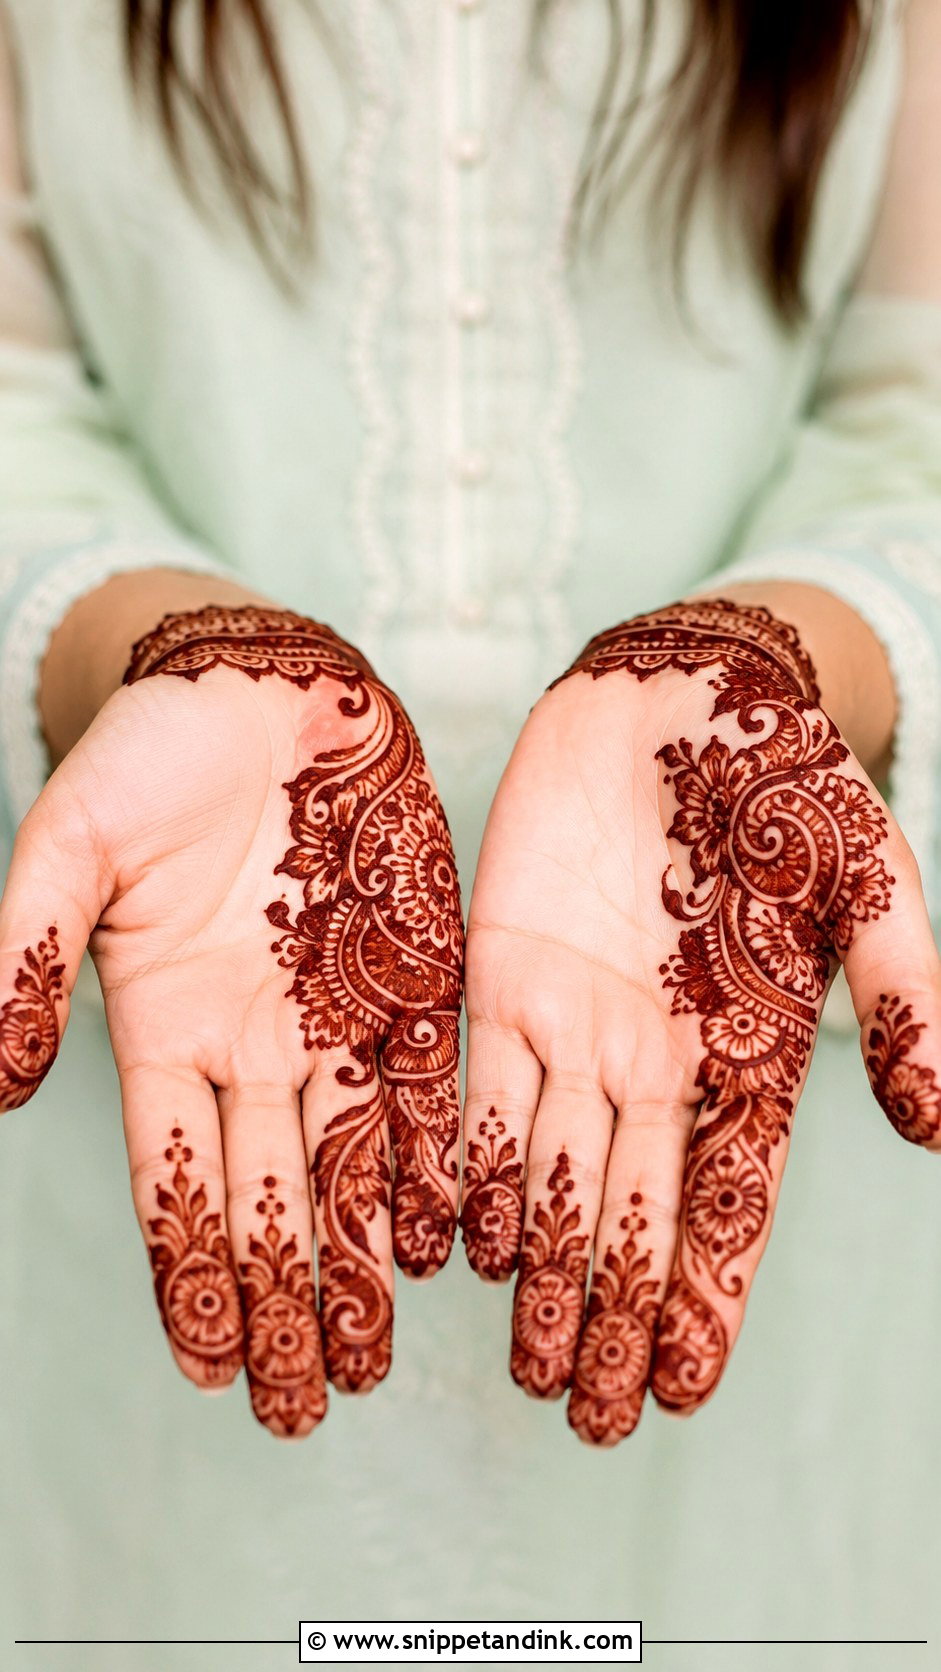
Decorate only one side: a floral vine, a paisley trail or half a mandala, with matching finger detail on that side. The other side stays open. Make the filled side bold with thick outlines and soften its edge with dots and small leaves. It’s fewer elements and less drying time, which makes it the gentlest introduction to asymmetric work.
18. Easy Diagonal Palm Mehndi Design
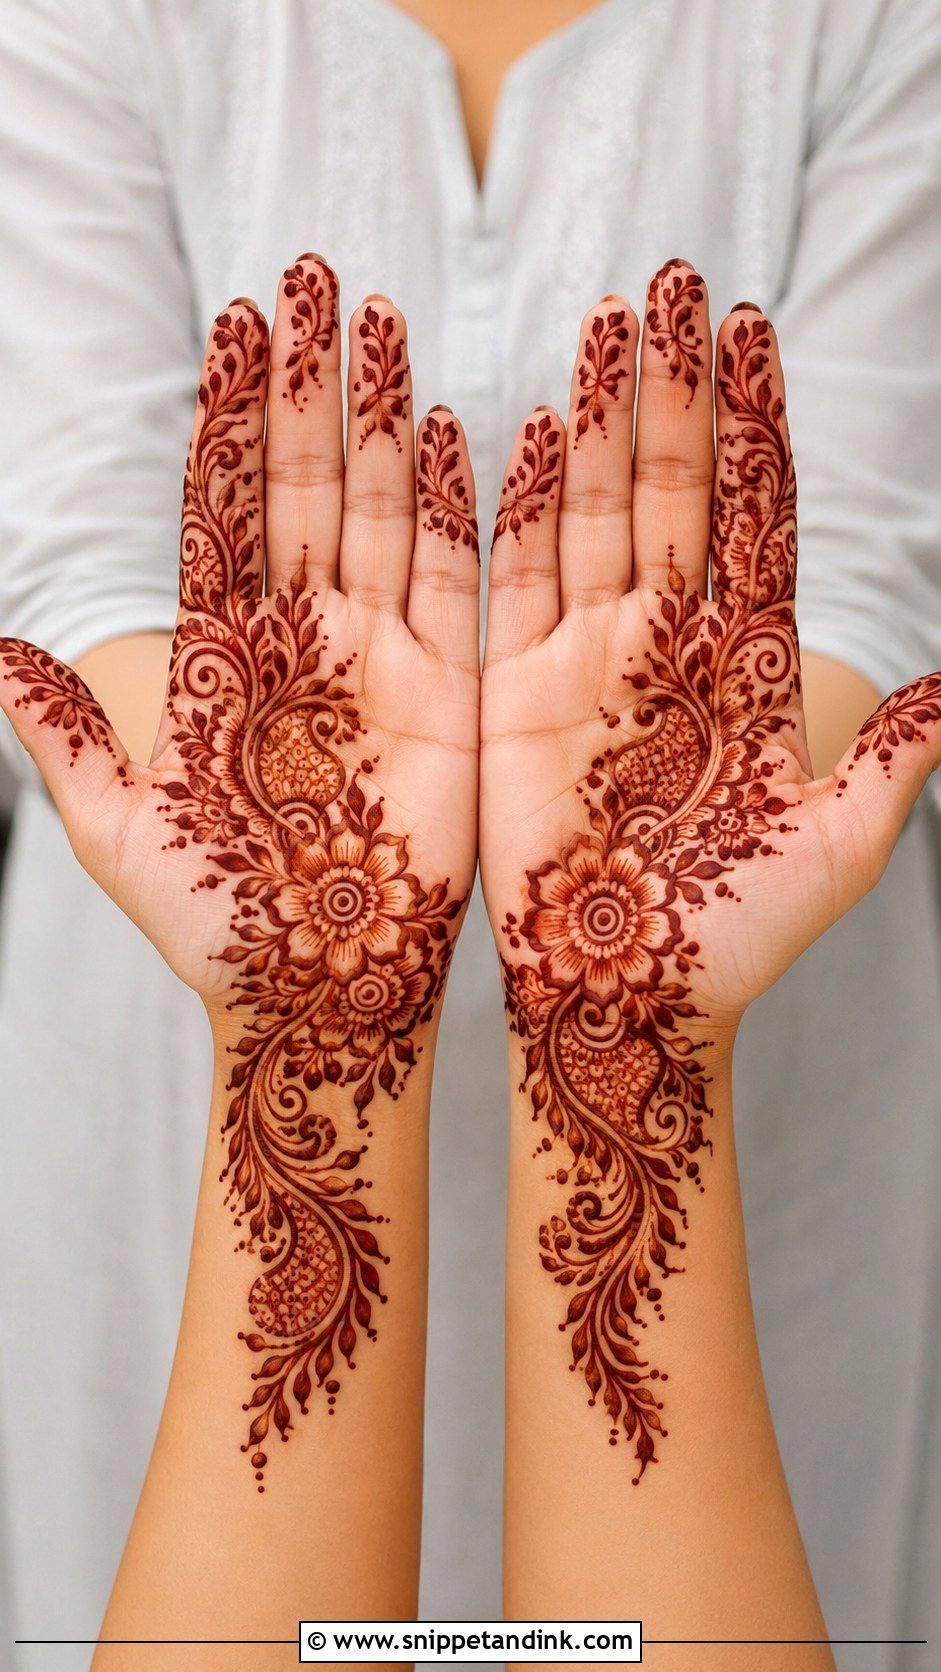
A curved trail from one side of the wrist to the opposite finger, with flowers, leaves, small paisleys and dots along it. Both corners of the palm stay lightly open, and only the finger the trail reaches gets real decoration. You’re thinking in one direction instead of filling a space. I sketch the line of the trail with tiny dots first so it ends exactly at the finger I intended.
19. Simple Dots Palm Mehndi Design
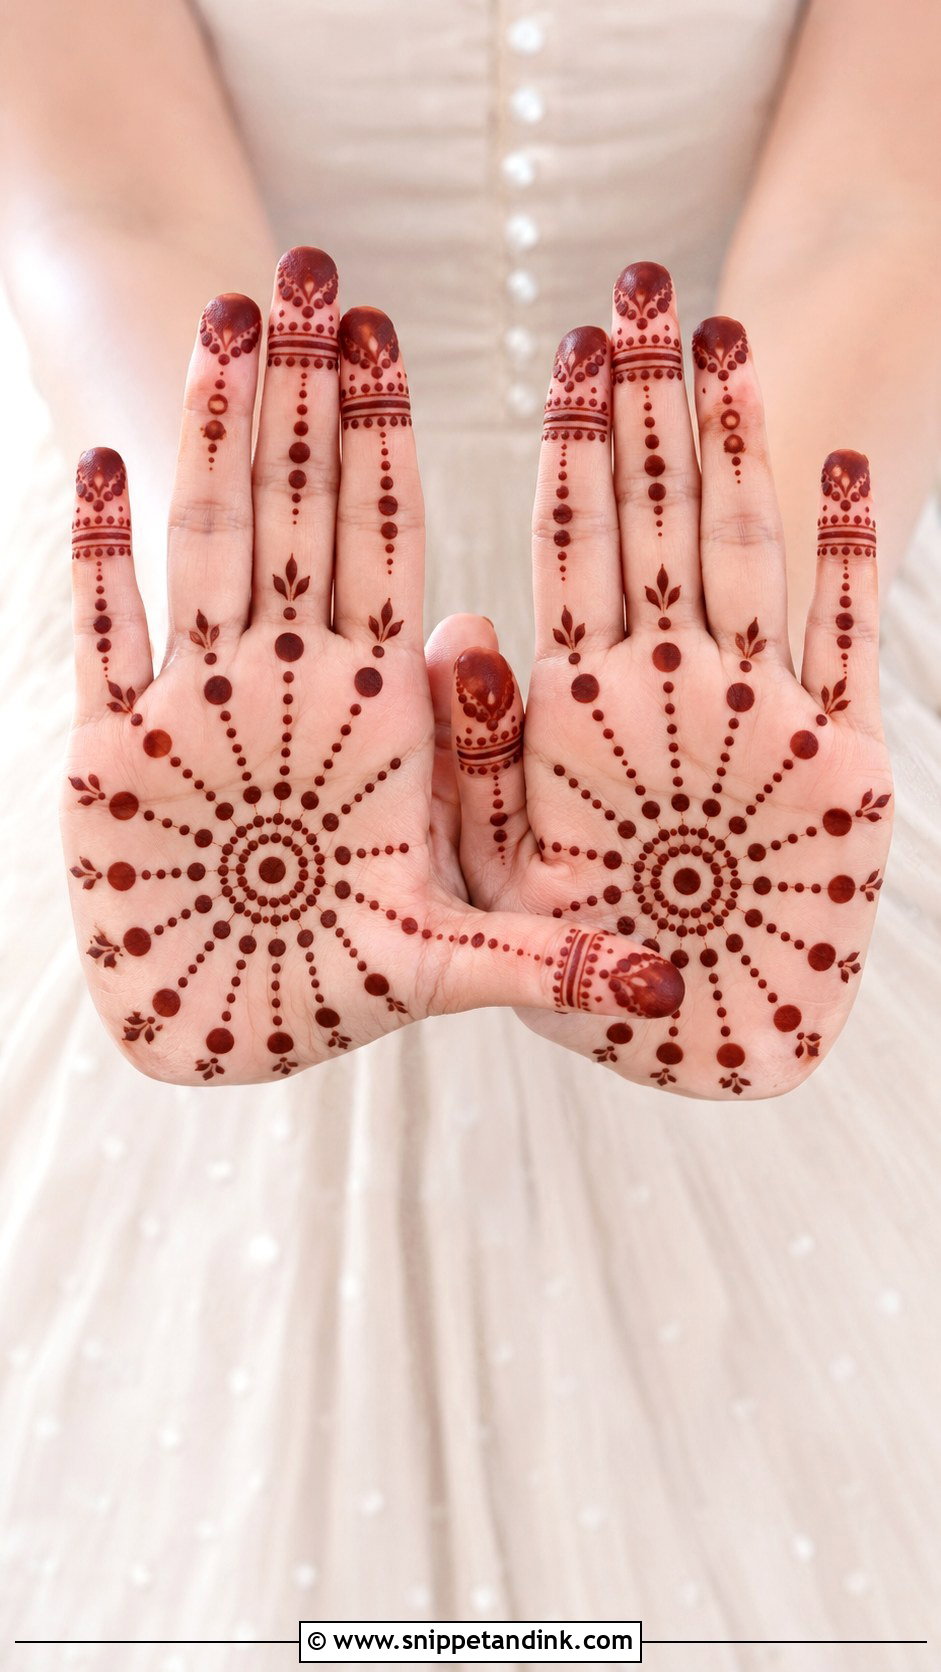
Dots alone can carry a palm design. A central dot circle or small mandala, dotted chains reaching out to the fingers and wrist, larger dots as anchors and smaller ones as fill, and a few leaves or petals to soften it. Dots are easy to control and dry fast. The habit to build is consistent pressure, so each dot in a row is the same size.
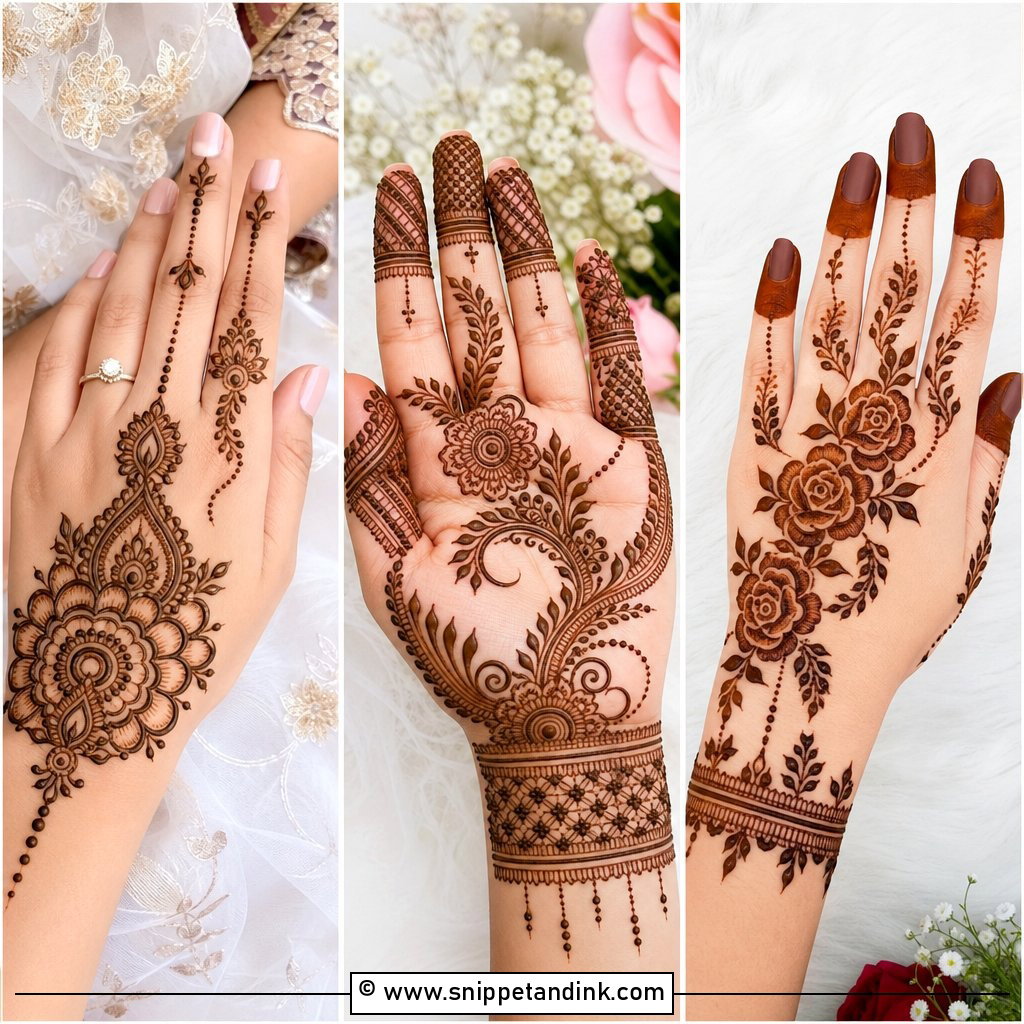
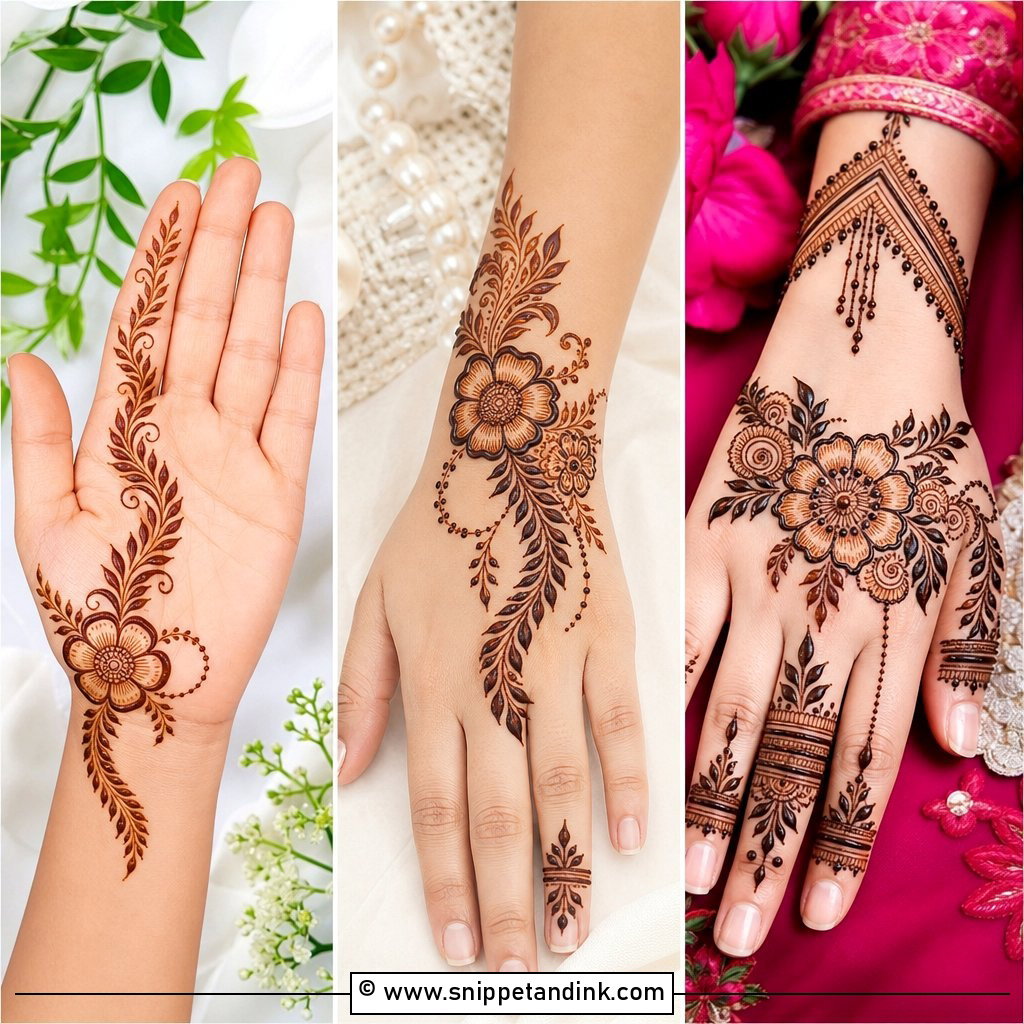
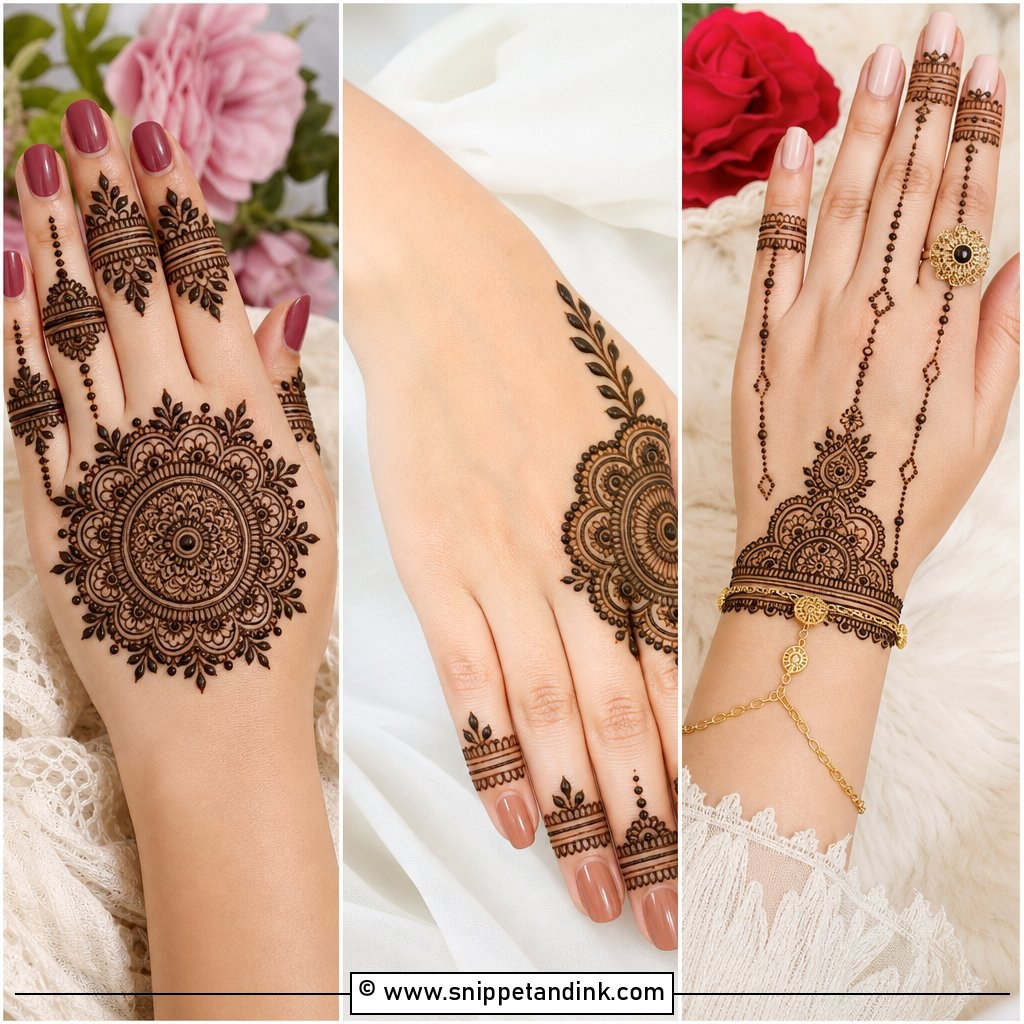
20. Easy Geometric Palm Mehndi Design
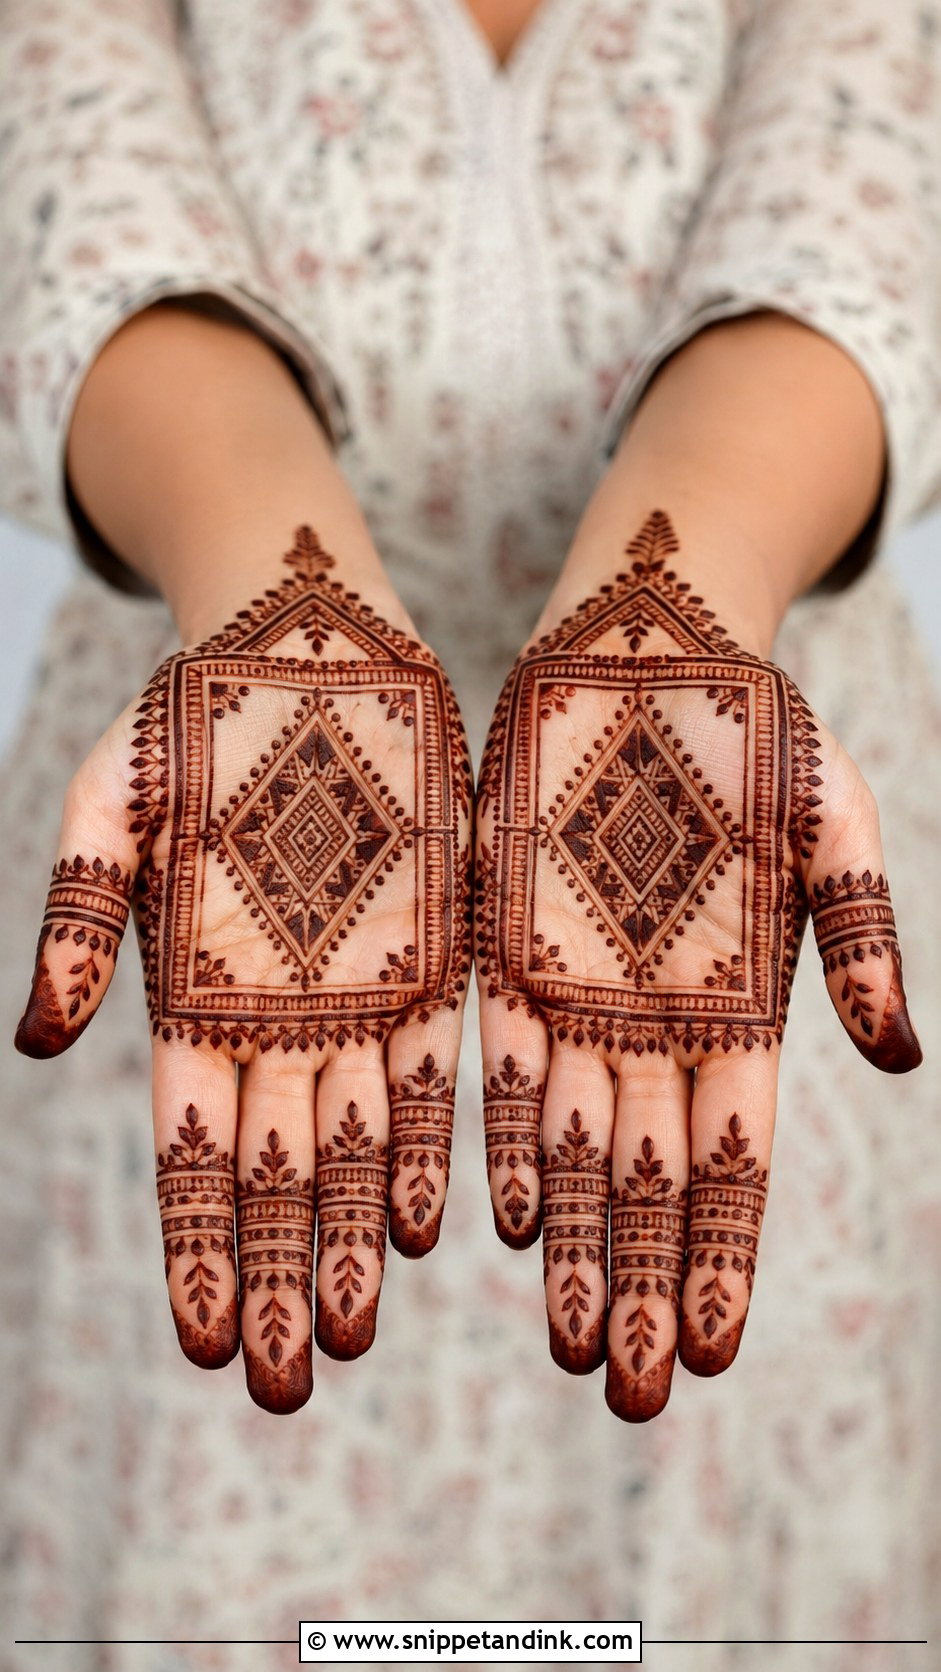
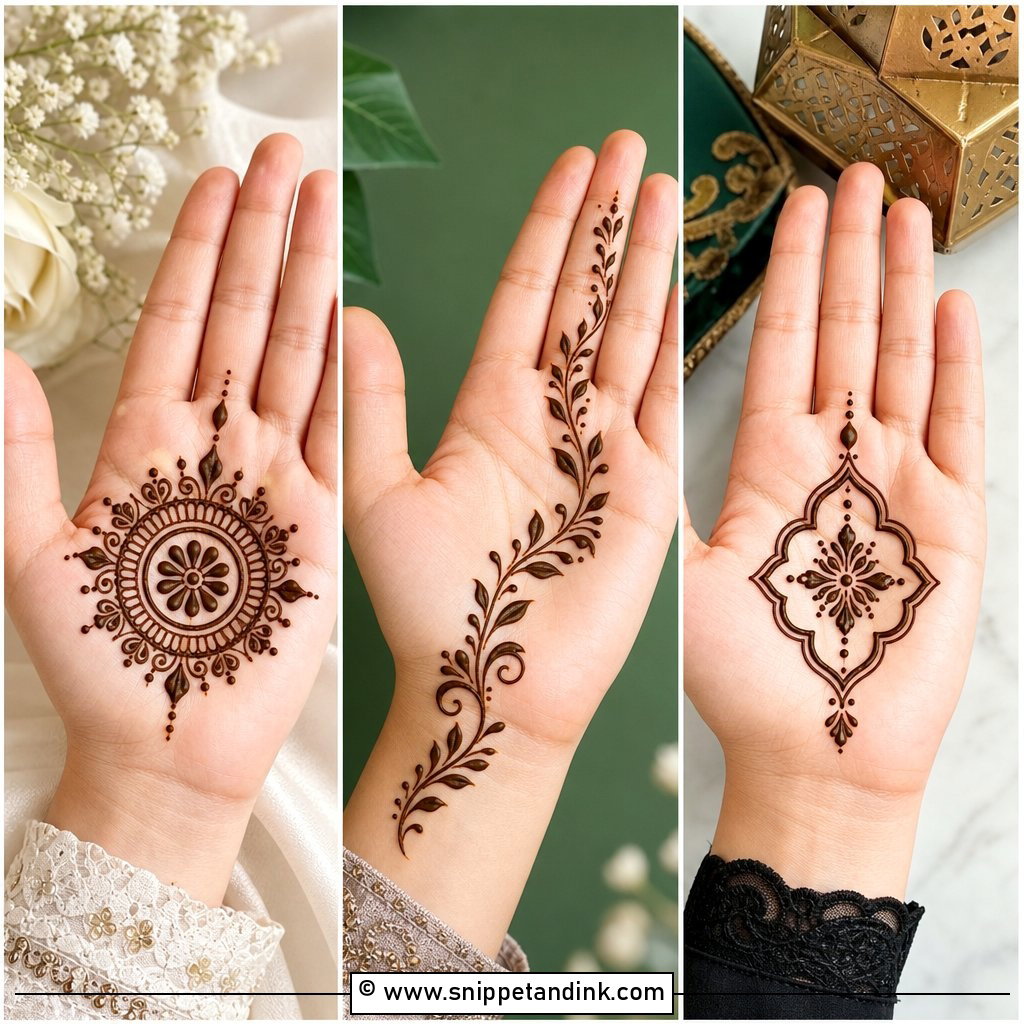
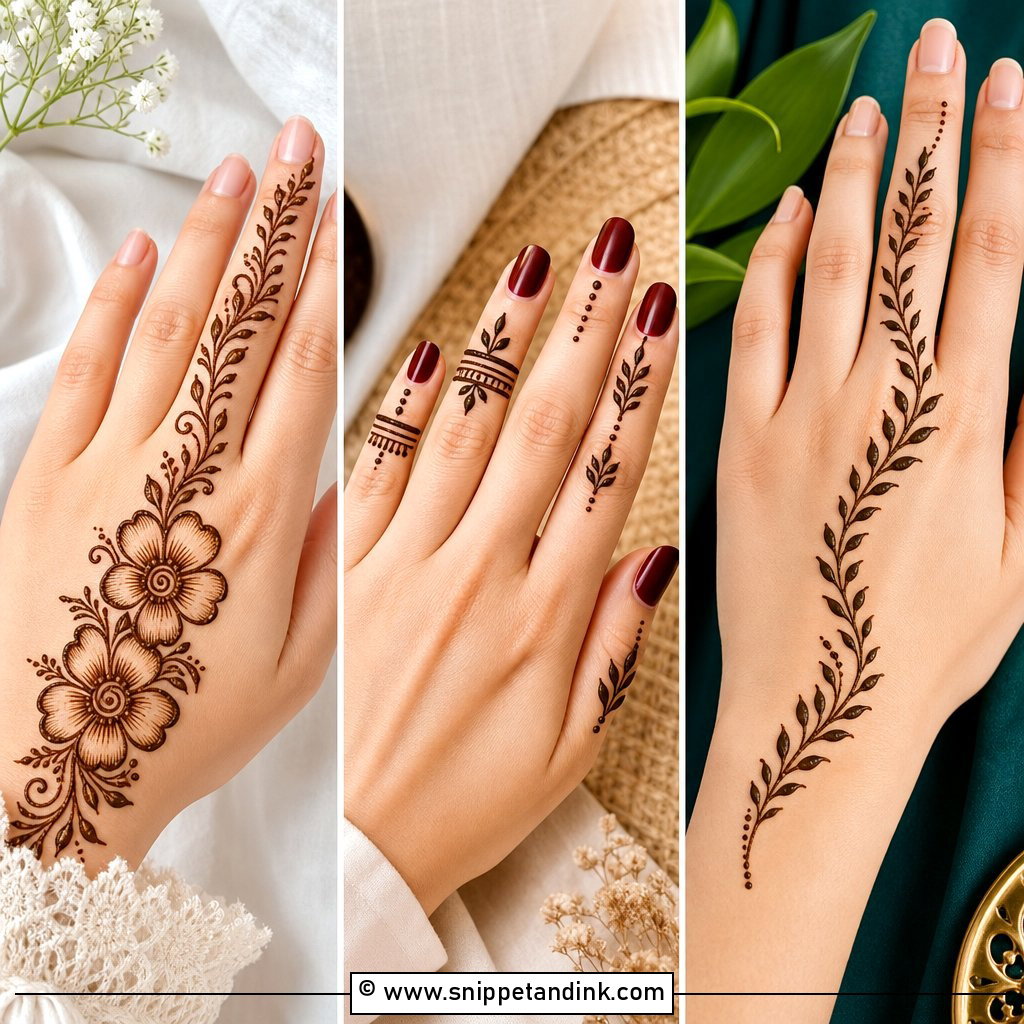
Triangles, diamonds, squares and straight bands, with a diamond in the center framed by small lines, dots and leaf edges, and matching line bands on the fingers. Draw light guide dots first, then connect them slowly. Straight lines on a palm are trickier than they look because the skin curves, so I turn the hand rather than bending my wrist to follow the line.
21. Simple Indo Arabic Palm Mehndi Design
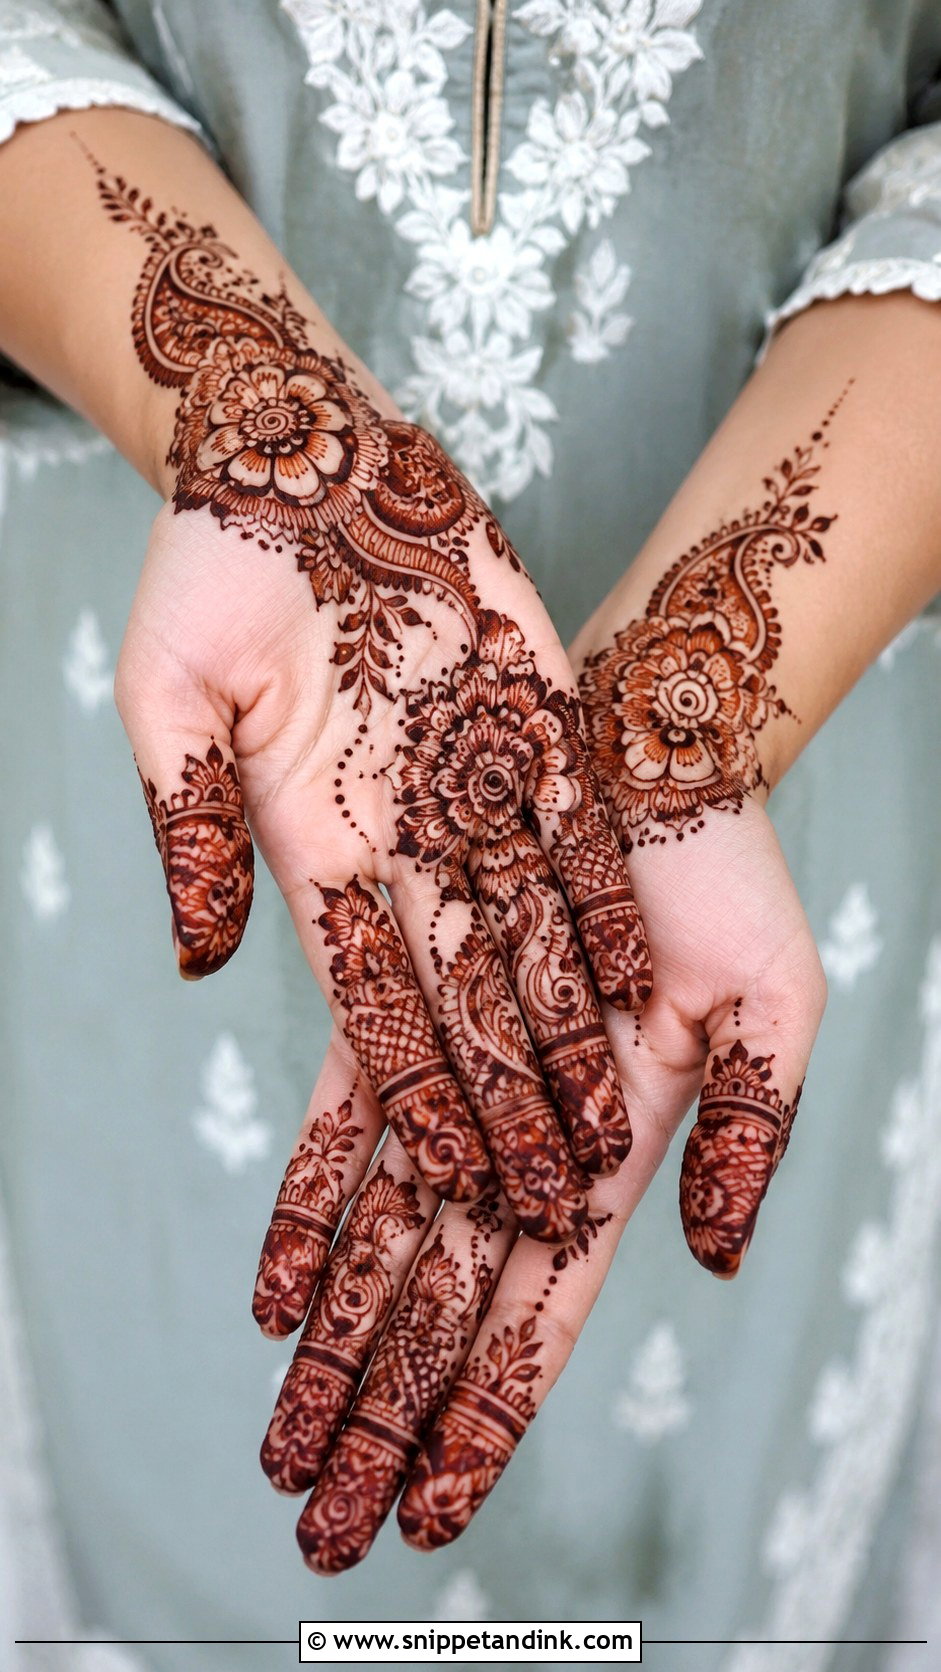
An Indo-Arabic palm mehndi design starts with a curved Arabic floral trail across the palm, then adds small Indian elements into the open spaces: paisleys, scallops, dots, a mini mandala. Main flowers bold, fillers fine. Finger patterns match the trail. Because some of the palm stays open, it’s far less work than full Indian coverage.
22. Easy Bridal Palm Mehndi Design
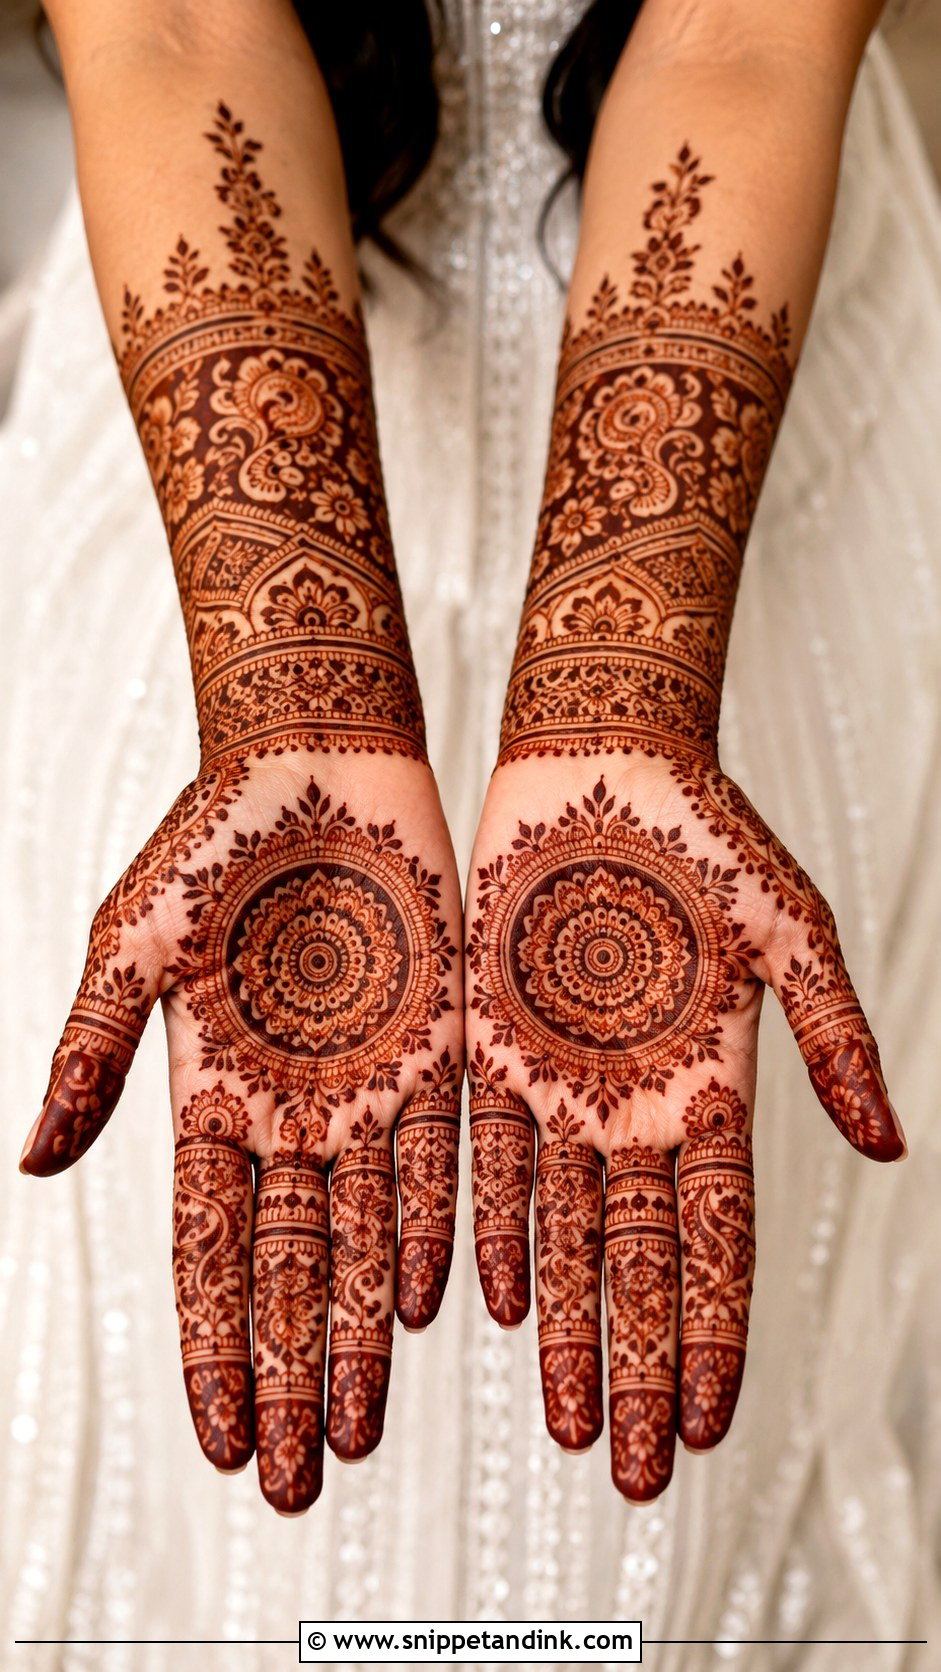
Light bridal palms still need structure. I draw a central mandala, surround it with paisleys and flowers and finish with a wrist border, then fill with dots, leaf chains and curved fillers. Fingers carry more detail than a casual design, but not tiny complicated patterns if you’re a beginner. Outlines first, details last; a bridal palm drawn in that order always looks cleaner.
23. Simple Eid Palm Mehndi Design
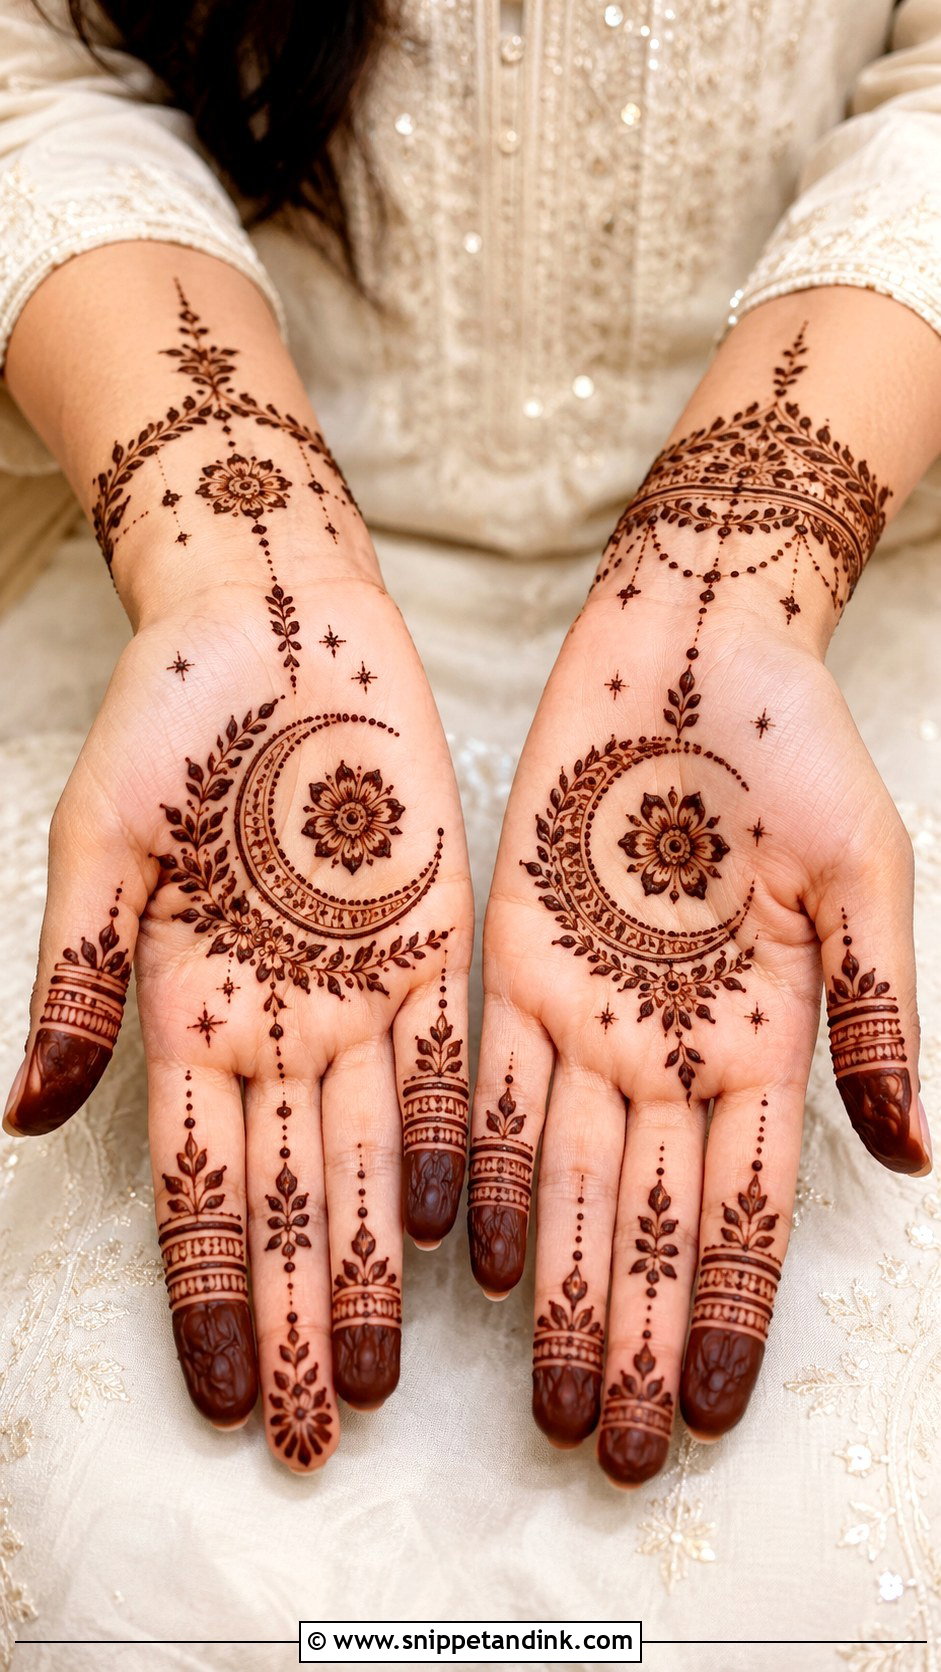
Eid mehndi is usually a last-minute job. A central flower or mandala with crescent curves, dot chains and leafy vines around it, simple rings, dots and fingertip details on the fingers. Keep the palm open enough to dry quickly. For a tidy result, take one small detail from the main motif and repeat it on each finger.
24. Easy Kids Palm Mehndi Design
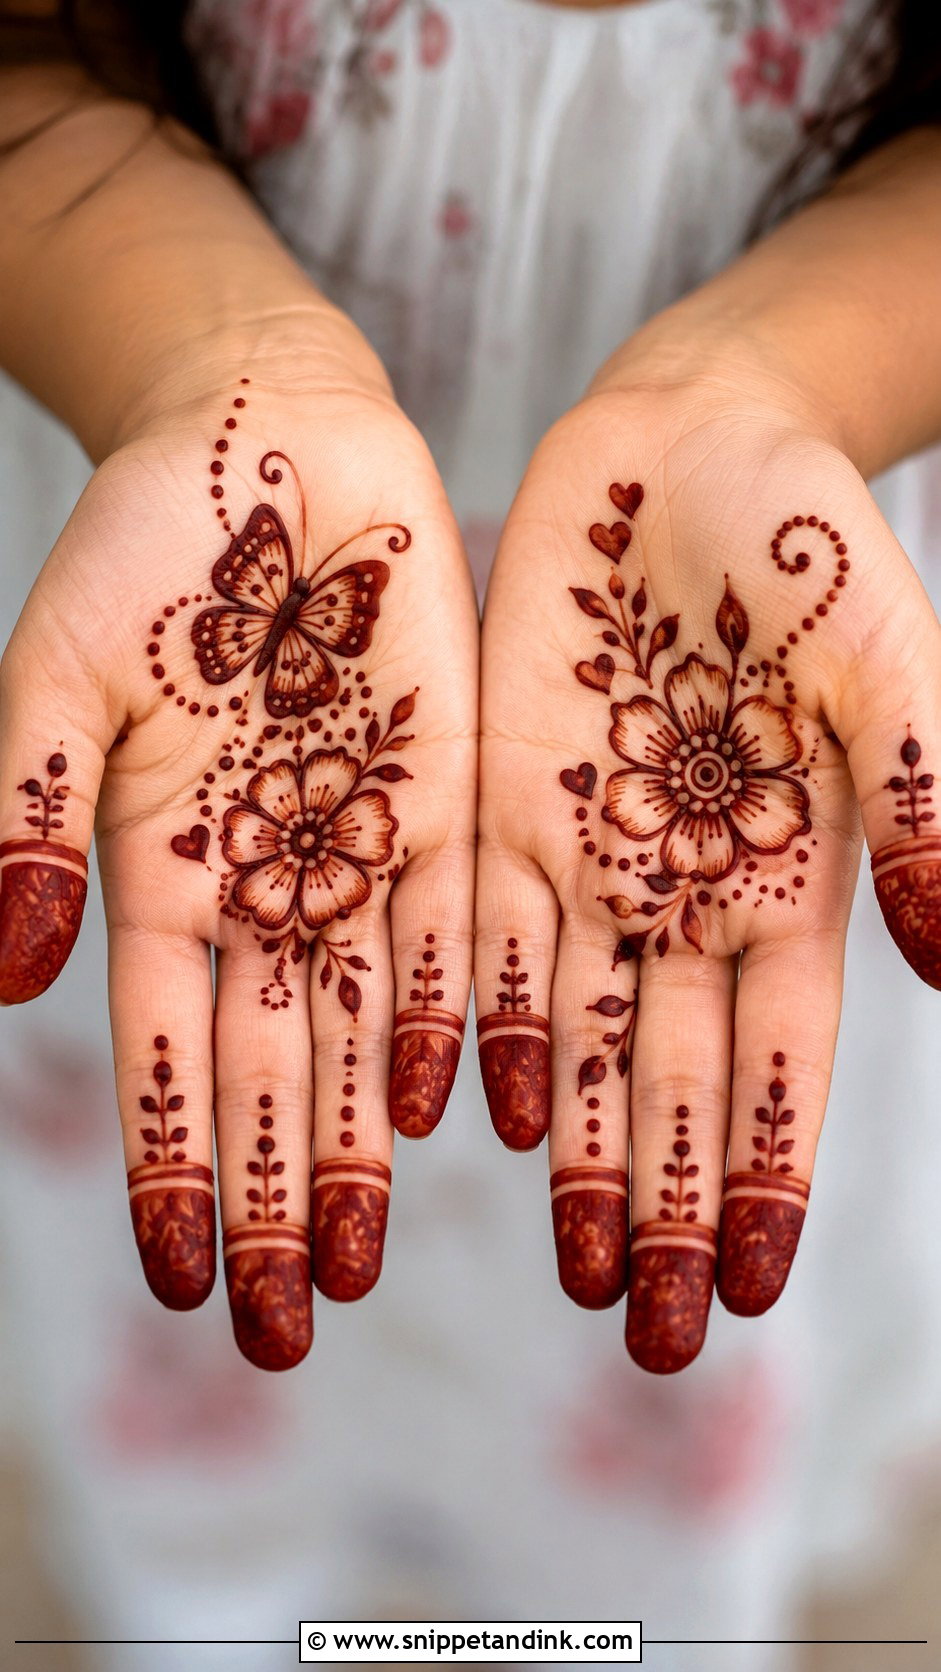
Children’s palms need something bold and fast: a small flower, butterfly, heart or round mandala in the center, dots, tiny leaves and simple fingertips. Skip fine lines, since they’ll move before it dries. Spaced-out shapes still stain clearly. I only ever use plain natural henna on children; dark “black henna” can contain a chemical dye that causes serious skin reactions.
25. Simple Festival Palm Mehndi Design
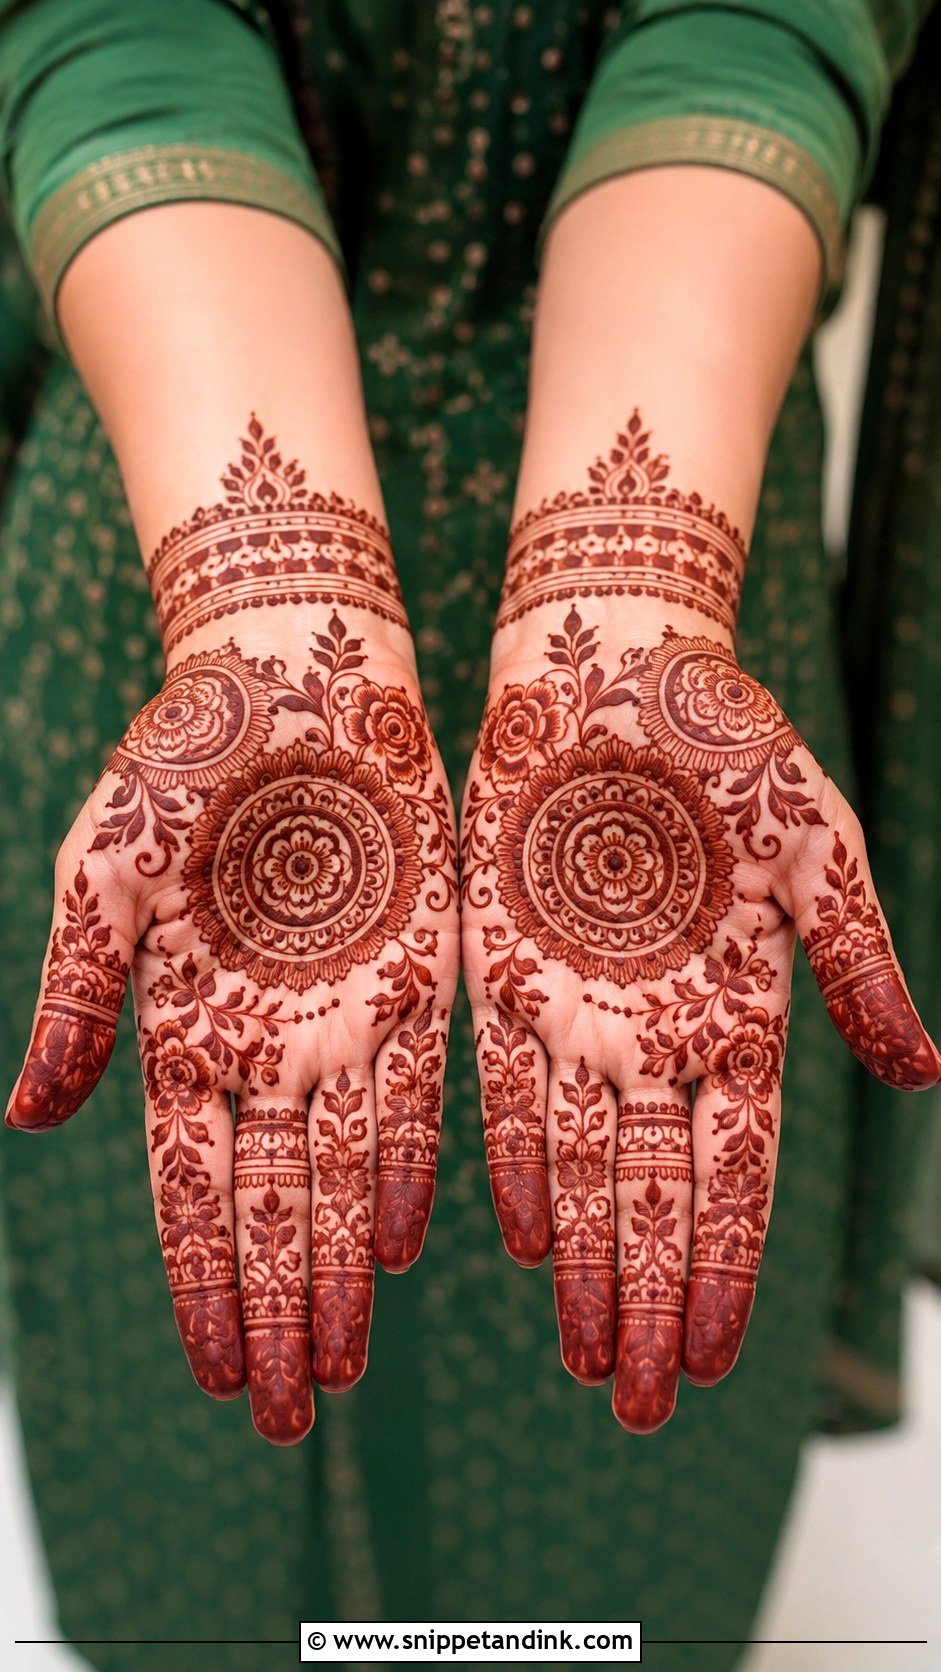
A simple festival palm mehndi design repeats familiar shapes: a center mandala, side flowers, leafy trails, dotted finger bands and an optional wrist border. It suits Diwali, Eid, Karva Chauth, Teej and Raksha Bandhan. I use medium-thick outlines here; very thin lines on a festival night tend to get smudged before they’ve set.
26. Easy Modern Palm Mehndi Design
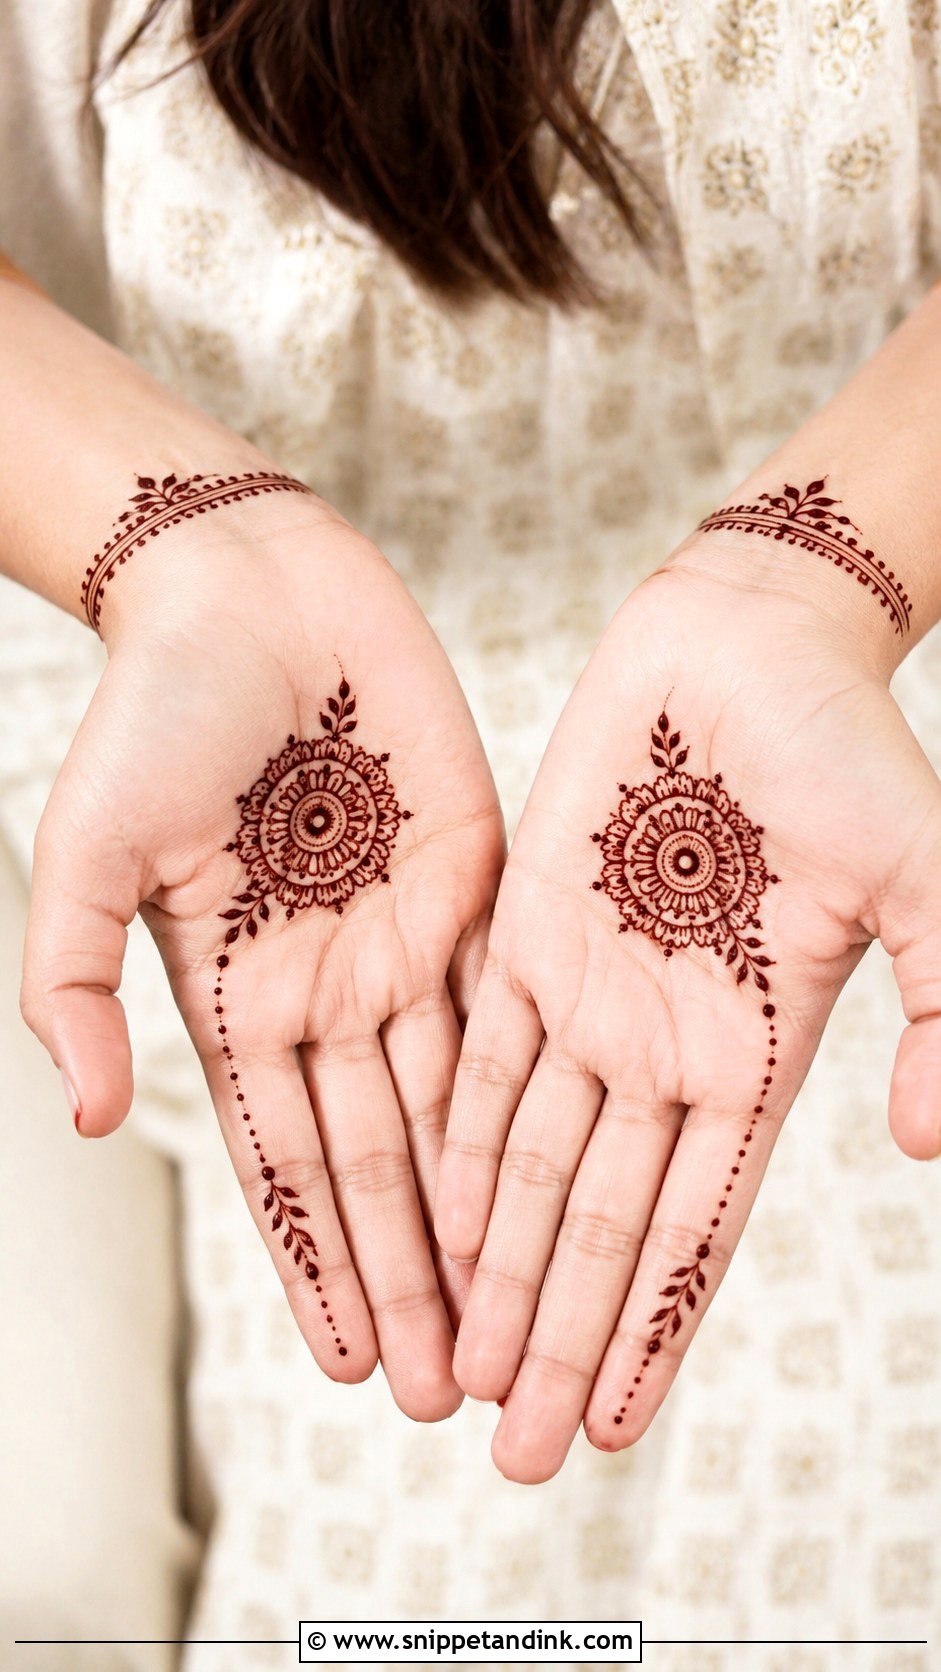
Modern palms move the motif off-center. A small mandala to one side, a thin dotted chain up to one finger, a few leaves and curves and light lines at the wrist, with large areas of palm left empty. Every line has to be neat because there’s nothing to hide behind. Resist filling the space afterwards.
27. Simple Side Palm Mehndi Design
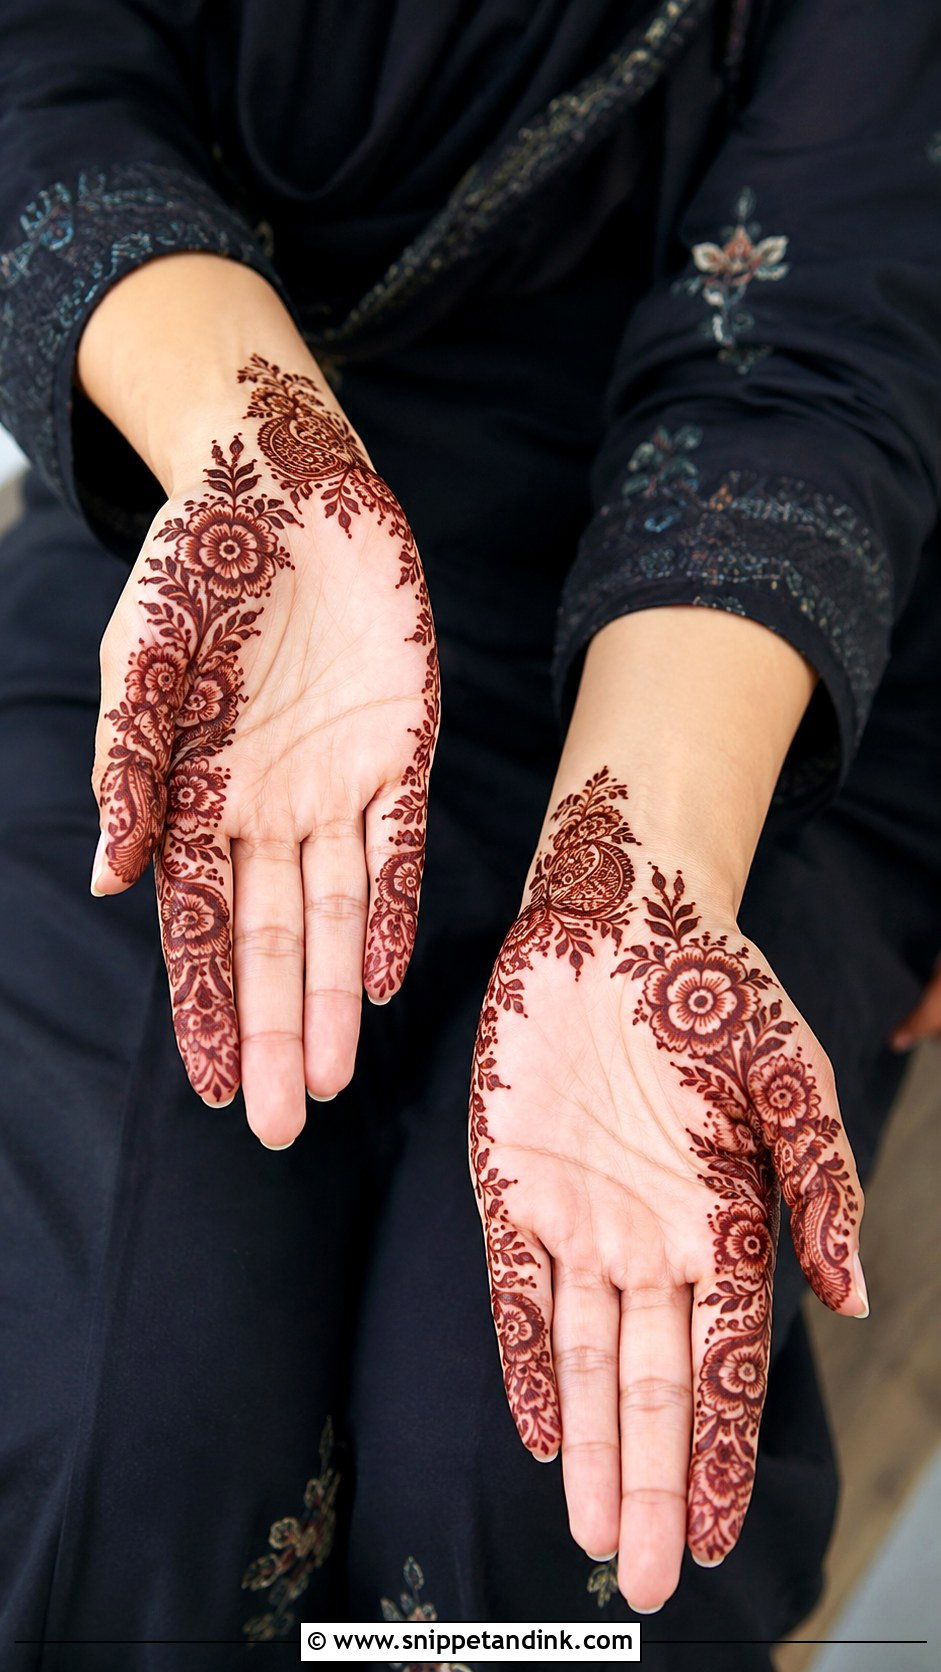
A floral or leafy trail along one edge of the palm, from the wrist toward the little finger or index finger, with small paisleys or half-flowers beside it. The center stays open, which makes the hand look longer. Fingers on the decorated side get matching bands; the others stay light. It’s a good choice when the full palm feels like too much to attempt.
28. Easy Vine Palm Mehndi Design
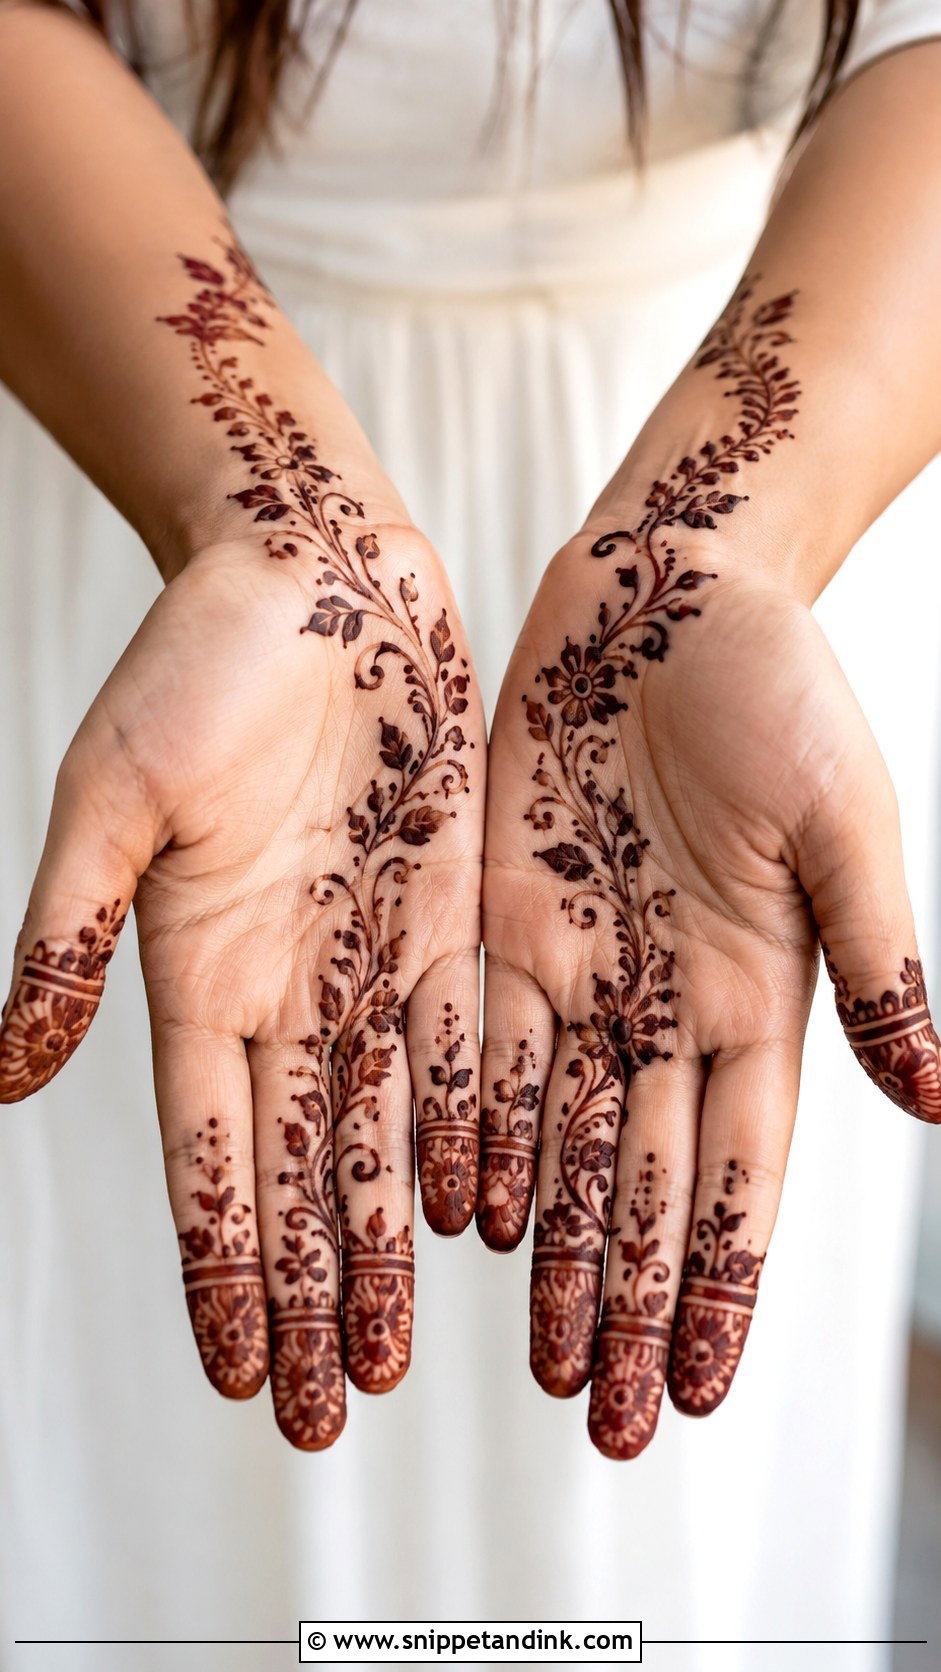
One flowing line from wrist to middle finger, with leaves, tiny flowers and dot clusters along it, and an optional smaller vine on the other side for balance. The curve doesn’t need to be perfect; leaves cover uneven stretches. Keep the background open so the vine reads clearly.
29. Simple Rose Palm Mehndi Design
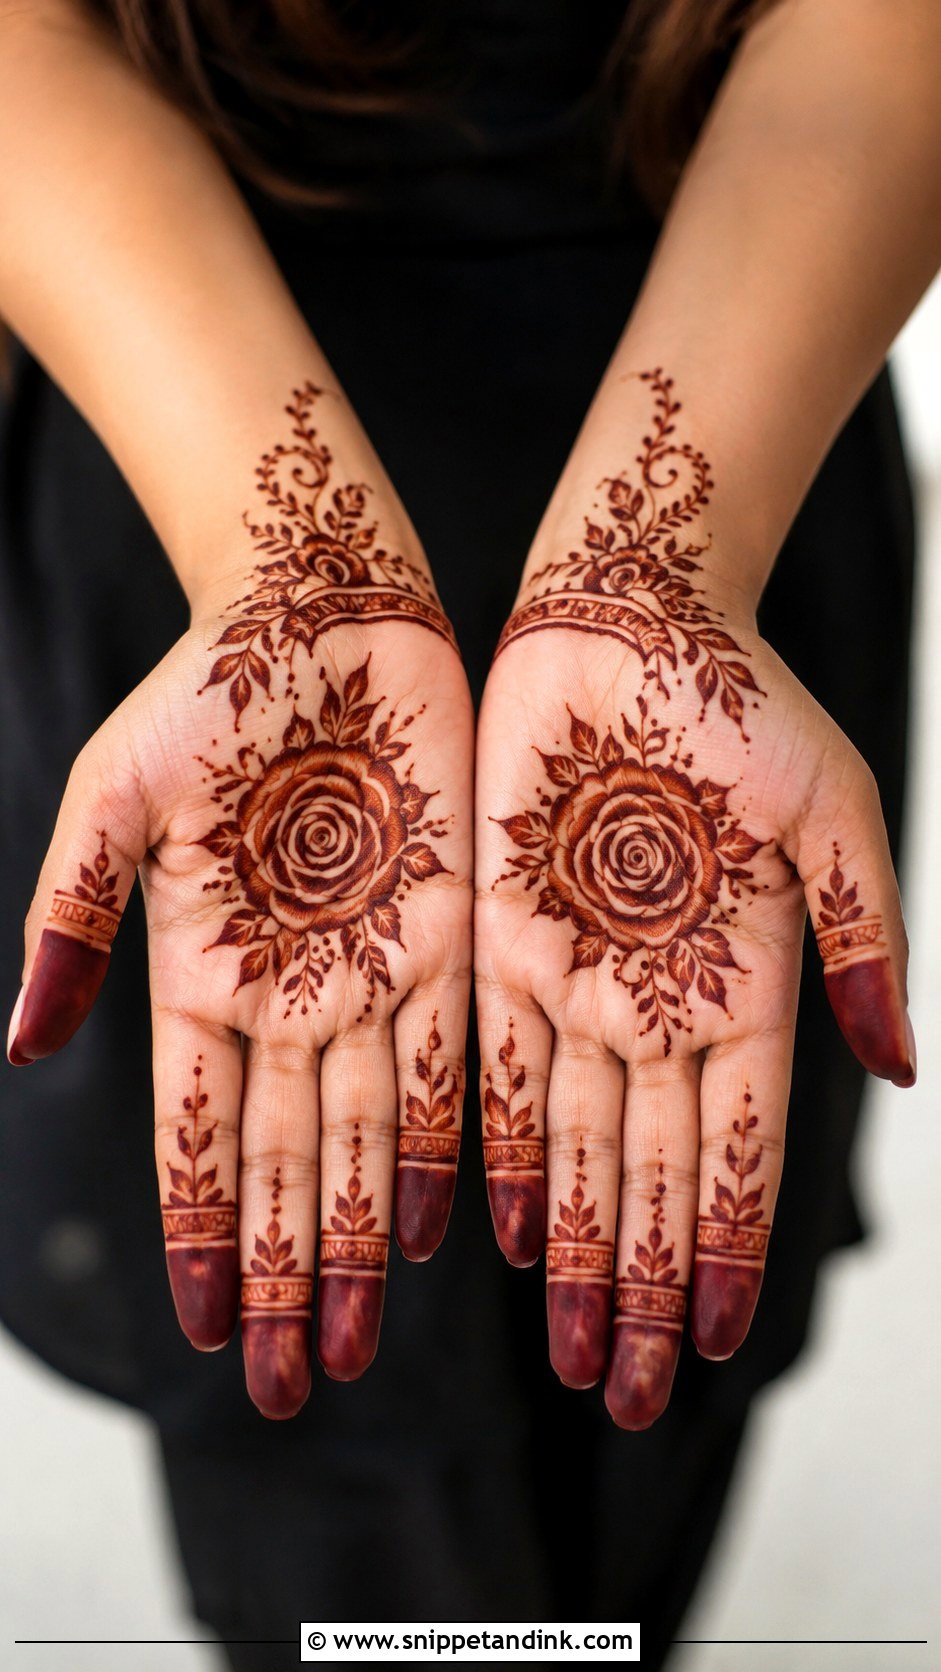
Roses are drawn as a spiral or a stack of C-shapes, then given leaves and a small vine toward the wrist and fingers, with simple lines and dots on the fingers. Keep it medium-sized and resist adding many tiny petals. A clear outline and a few inner curves are enough, and the stain itself gives the petals depth as the color varies slightly between layers.
30. Easy Square Palm Mehndi Design
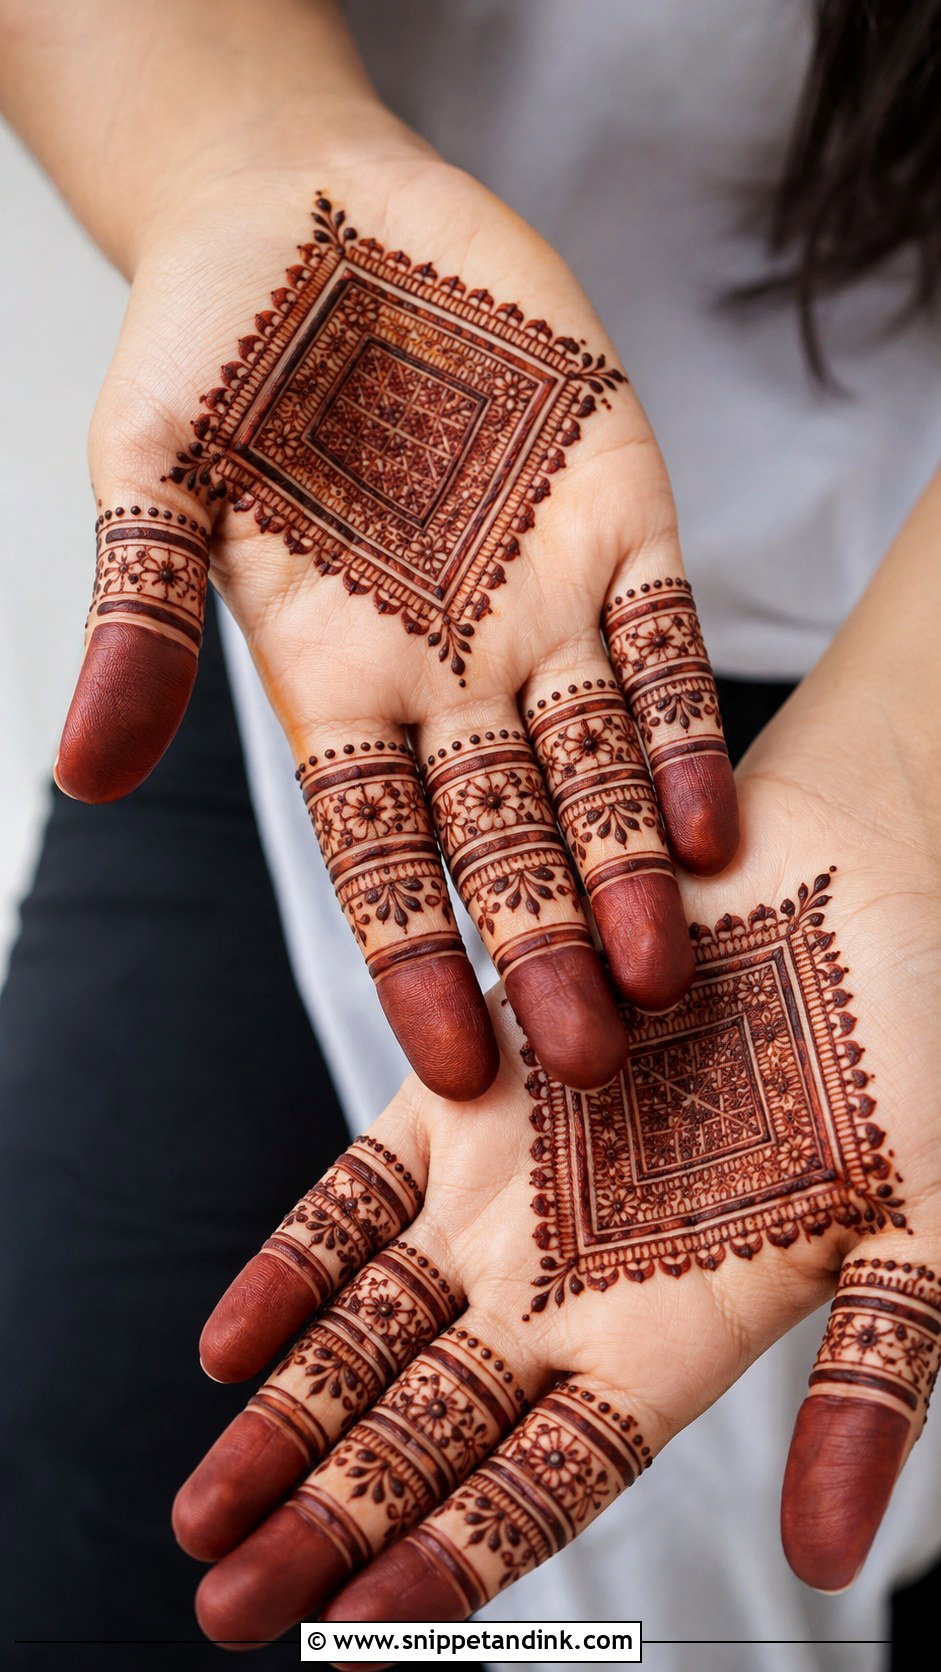
A square or diamond in the center of the palm, filled with small flowers, dots or crosshatching, framed with scallops, leaves or tiny arches, and straight bands on the fingers. It fills a broad palm evenly. Keep the center from getting dense; a filled square stains as a solid block, which looks heavier than a circle would.
31. Simple Circle And Finger Palm Mehndi Design
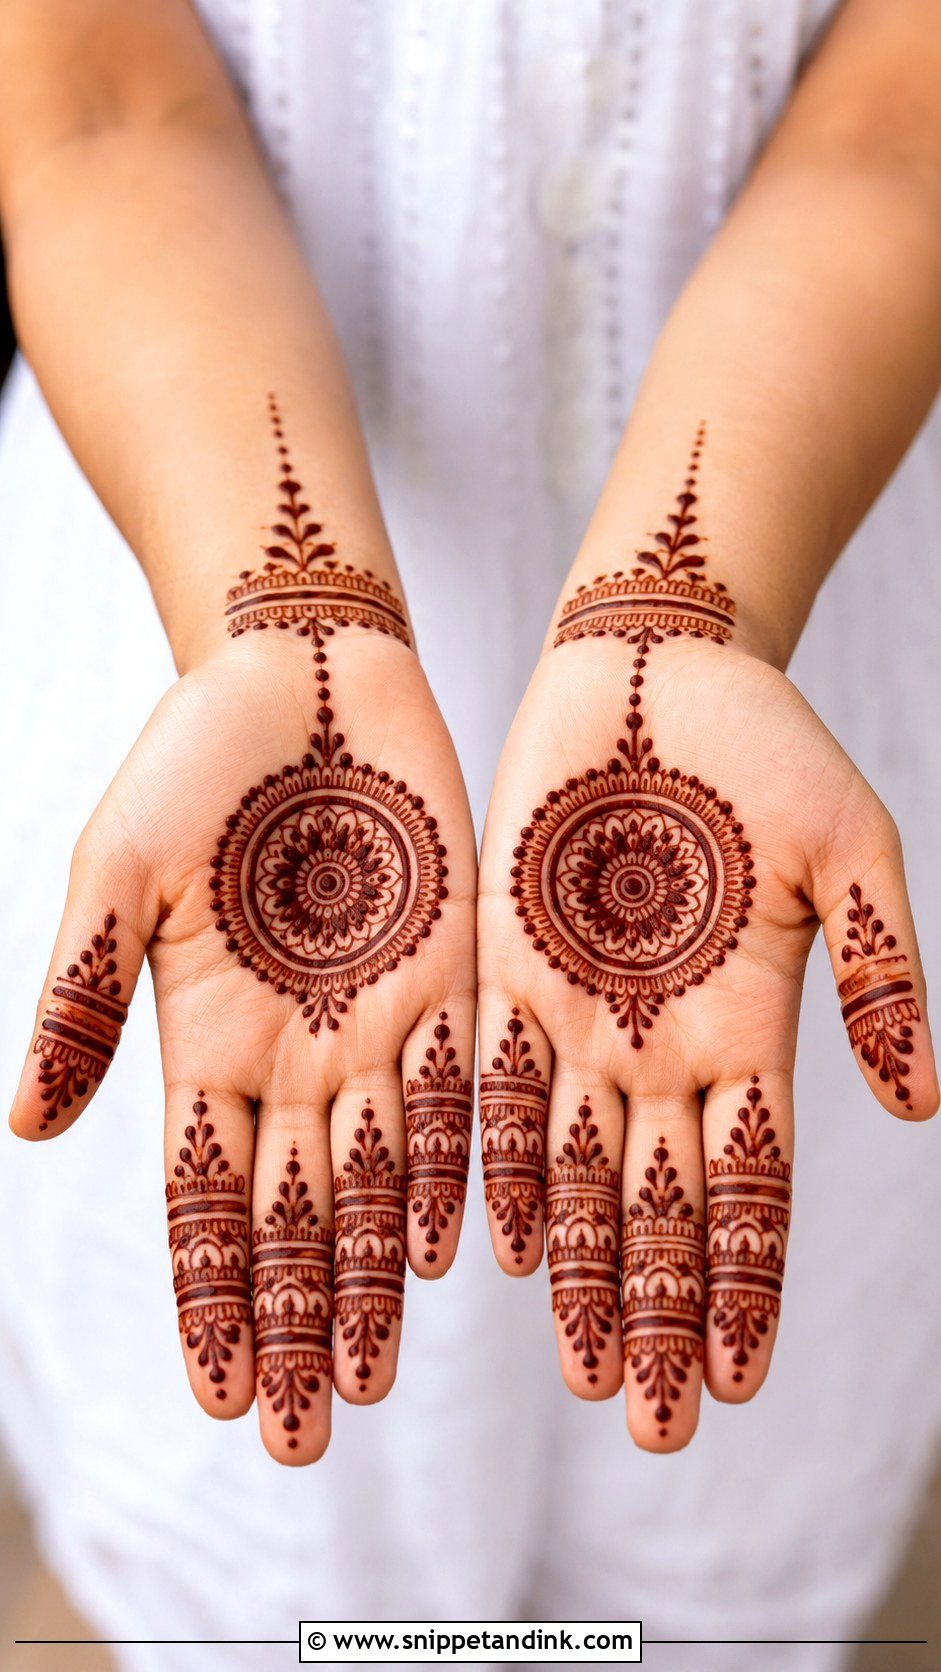
A clean circle in the middle of the palm and fingers that each get a different but related pattern: dots on one, leaves on the next, arches on the next. A dotted chain links the circle to the middle finger. I teach this as a sampler; every finger is a separate practice section, and you’ll quickly see which pattern your hand draws best.
32. Easy Palm Mehndi Design With Wrist Band
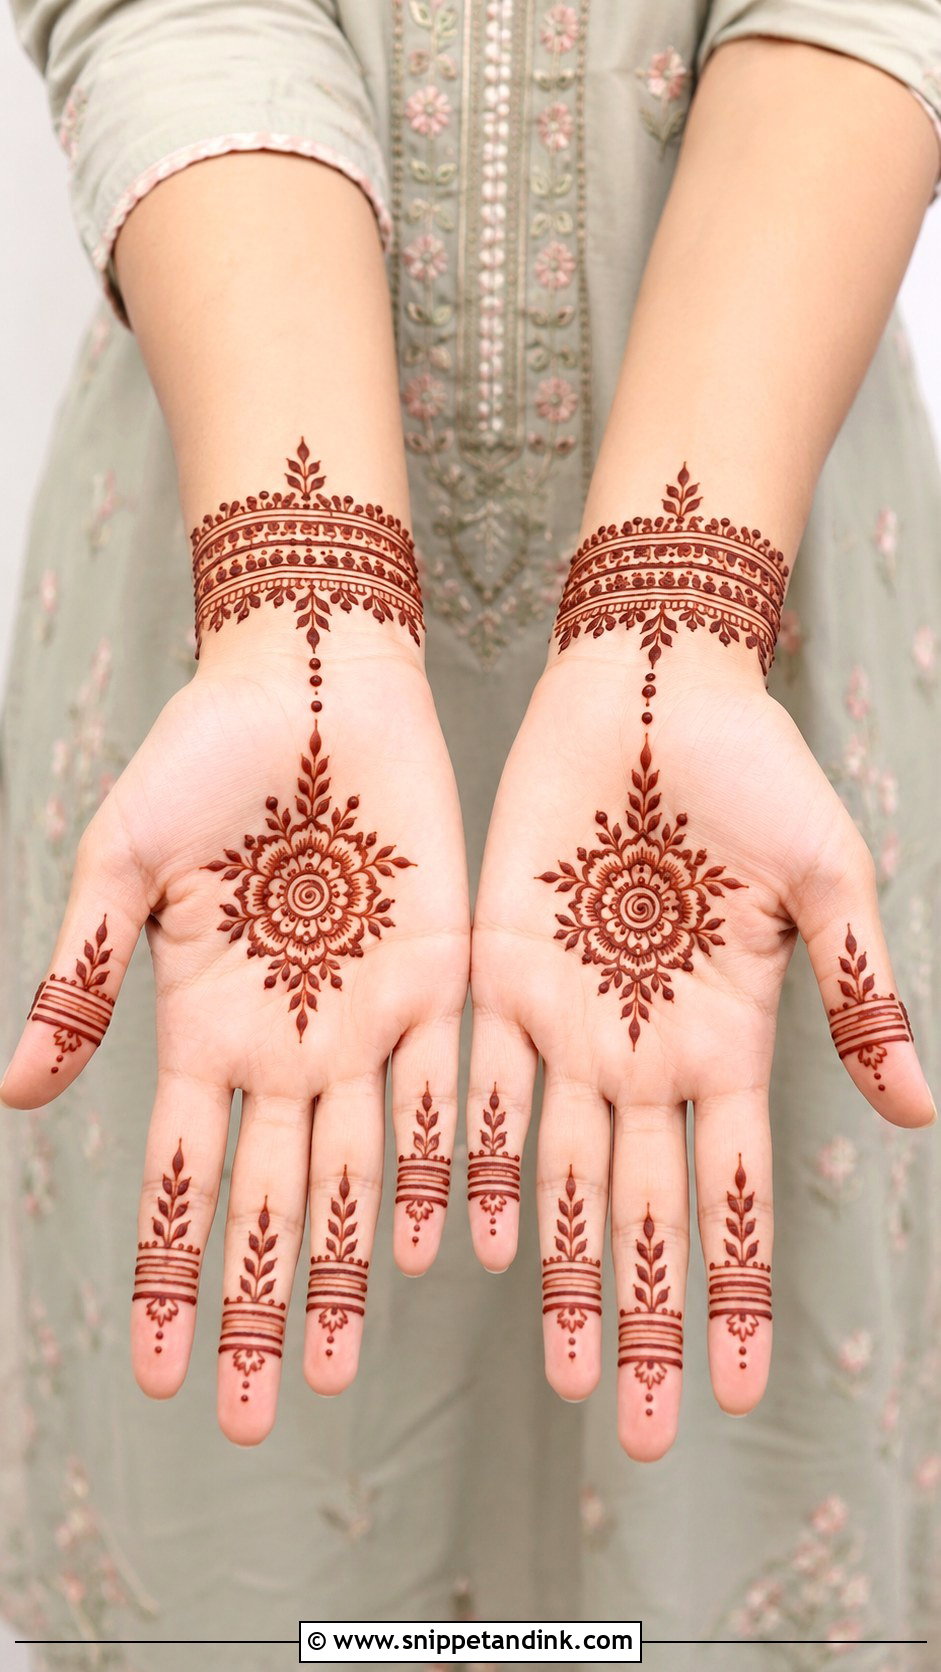
A medium floral motif on the palm, joined by a chain or vine to a bracelet band of parallel lines, dots, leaves and arches at the wrist, with light finger detail. It looks like hand jewelry. If you’ll wear bangles, place the band a little higher than where they sit, so the metal doesn’t rub it away in the first few days.
33. Simple Shaded Palm Mehndi Design
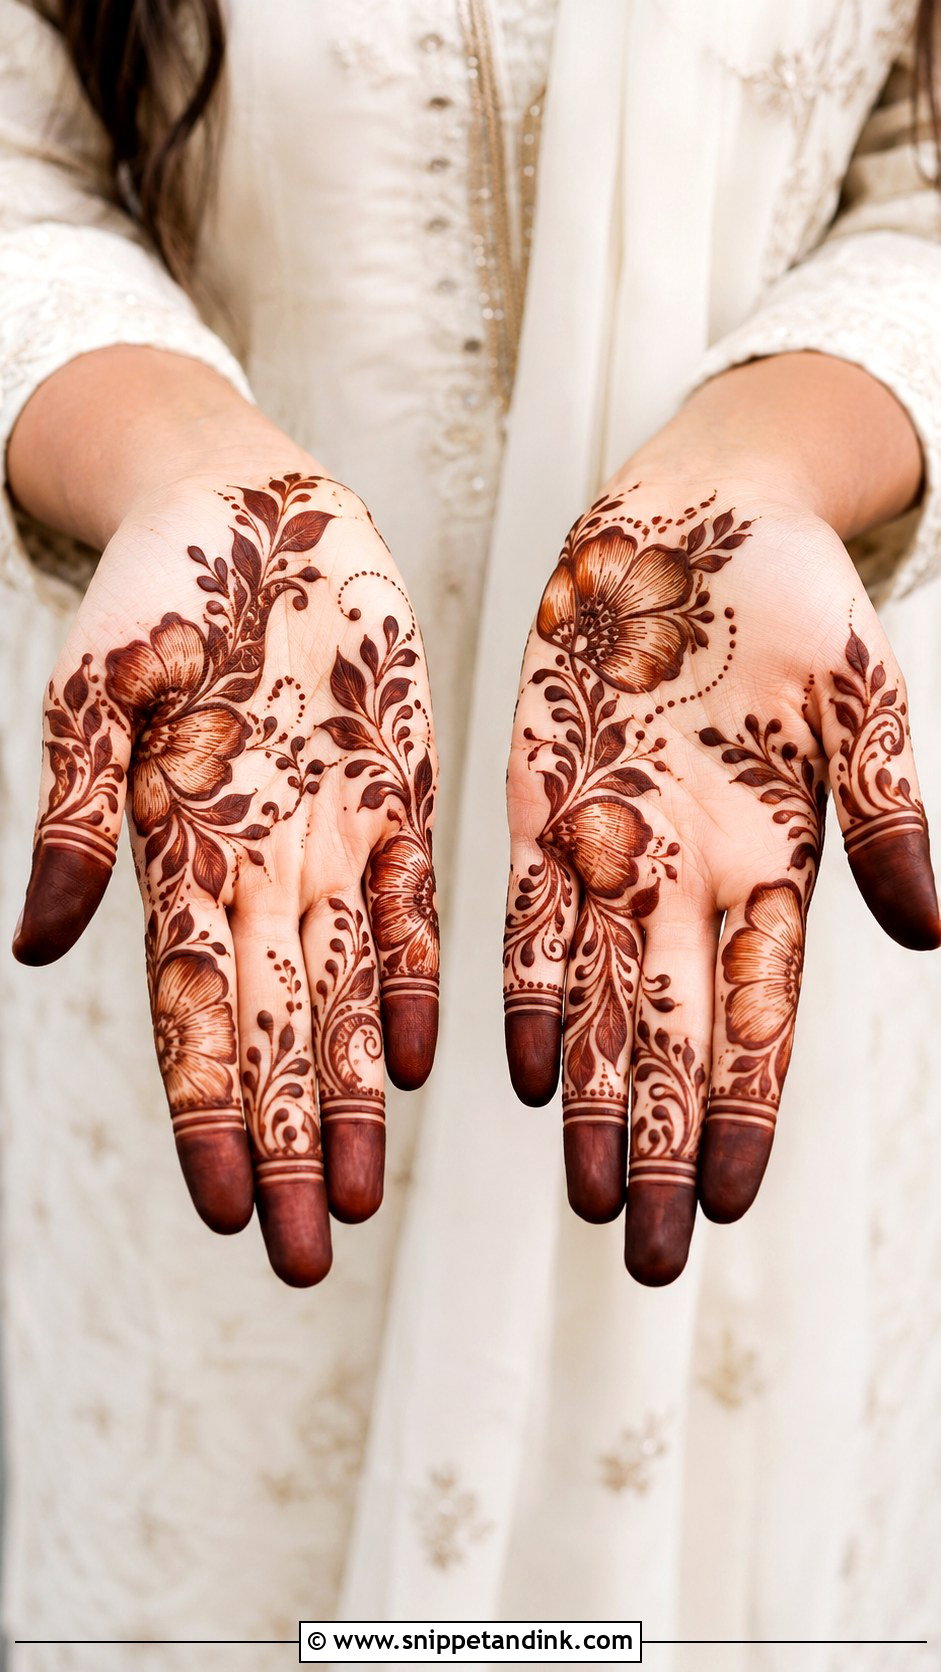
One or two large flowers with petals shaded in fine parallel lines or softly filled tips, leaves and dots around them and the rest of the palm open. Shaded bands or small leafy sections on the fingers. Pressure control is everything; practice on paper first and ease off the cone inside the petals. On the palm, shading stains strongly, so less is more.
34. Easy Moroccan Palm Mehndi Design
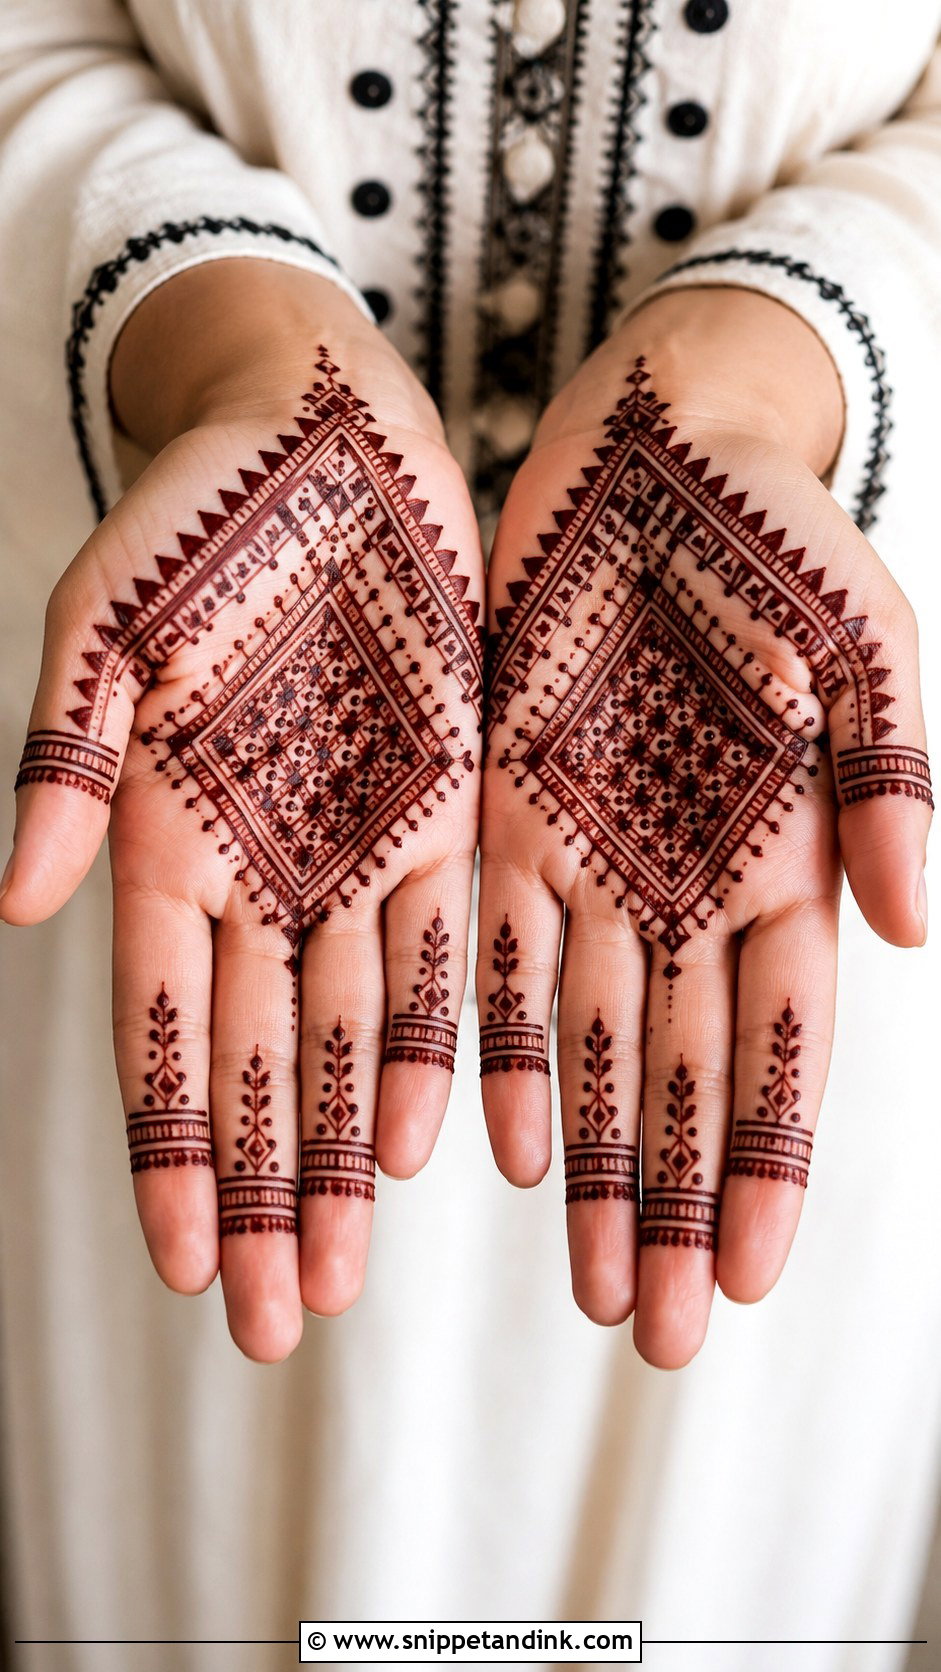
Moroccan-inspired palms rely on a central diamond with small triangles, dot rows and straight borders around it, plus geometric finger bands. Keep it symmetrical but not dense, and soften the sharp edges with dots. If you can already draw a steady straight line, this will feel easier than florals; if not, try it after the line exercise in the geometric design above.
35. Simple Khaleeji Palm Mehndi Design
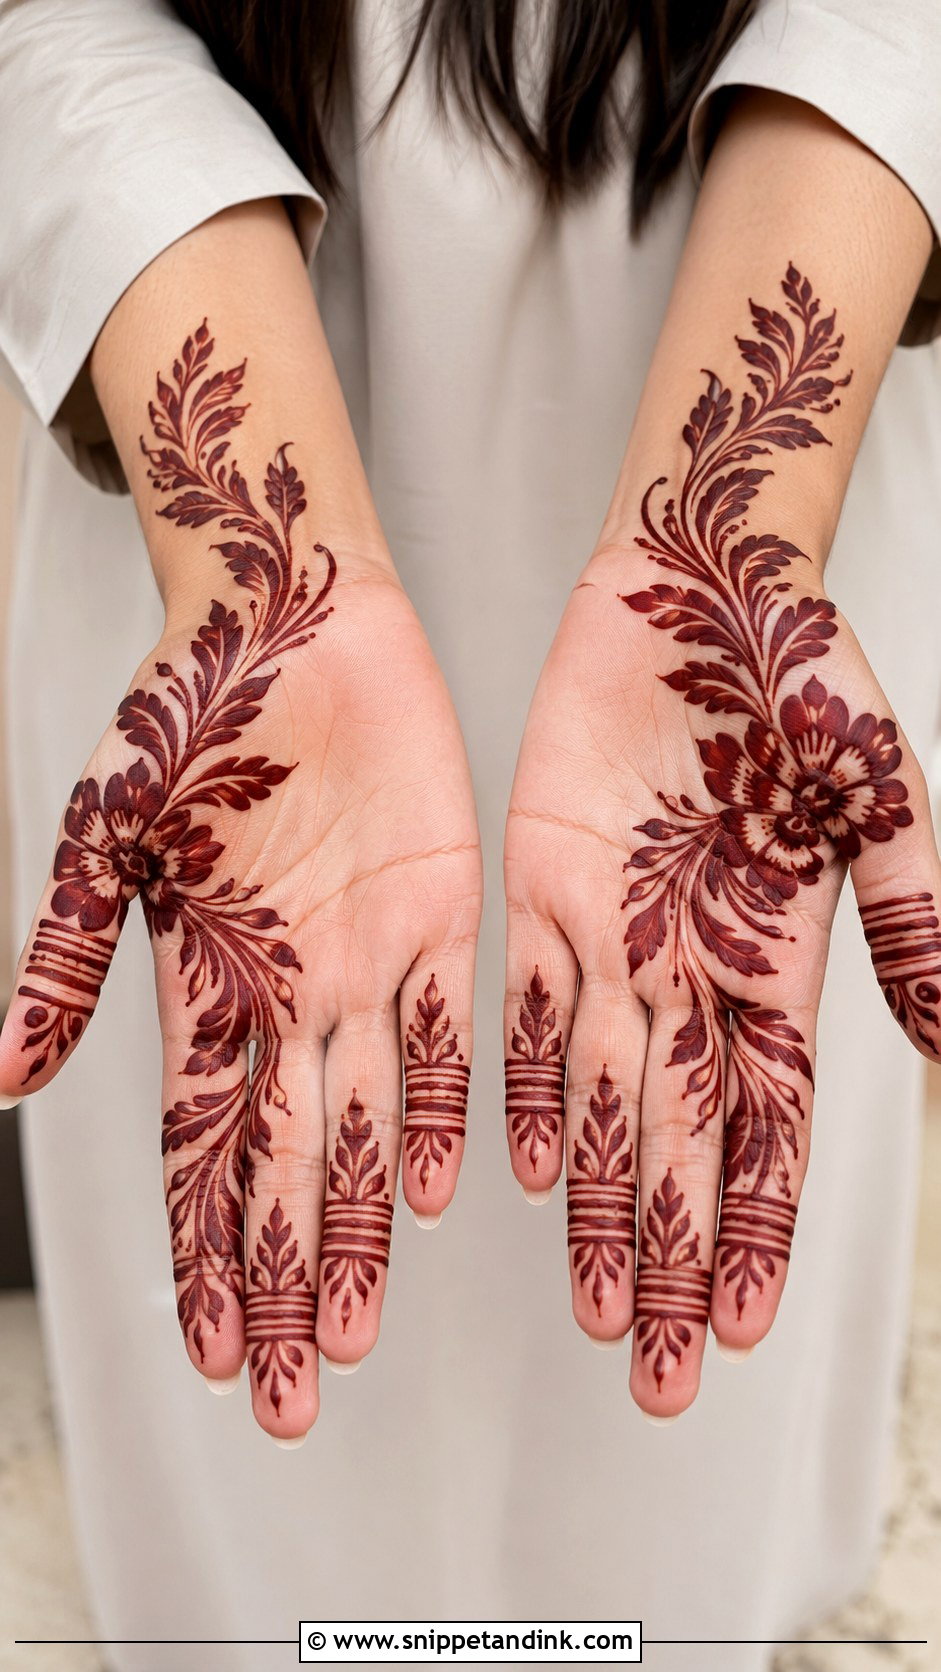
Khaleeji palms use one large flower, thick leaves and curved vines moving toward the fingers and wrist, with obvious gaps between motifs. Bold outlines and minimal inner detail make it quick. Simple leafy trails or rings on the fingers connect the hand. Large, clear shapes like these are also the most readable in photos.
A Practice Order That Builds One Skill at a Time
When I teach beginners, I don’t start with a pretty design. I start with shapes, because every palm pattern in this list is just a few of them repeated. Practice in this order, on paper first and then on skin.
- Dots in rows of equal size. This teaches steady pressure.
- Straight lines and gentle curves, lifting the cone cleanly at the end of each one.
- Leaves in pairs along a curved stem, which gives you the vine designs.
- Simple five-petal flowers, then petals in rings around a dot, which gives you the mandala.
- Paisleys, the hardest of the basics because of the curl at the tip.
- Jaali and geometric lines last, once your hand is steady.
Why a Palm Stain Fades Faster Than You Expect
Palms stain darker than anywhere else, but they also fade sooner than you might hope. Henna only colors the outermost layer of skin, and the palms shed that layer quickly because we wash and use our hands constantly. Expect the stain to peak a day or two after you remove the paste and then gradually lighten over the following one to three weeks. Dishwashing, hand sanitizer and swimming all speed that up. Rubbing a balm into your palms before washing and wearing gloves for chores keeps the color around longer. If you’re practicing for an event, that timing works in your favor: anything you try a couple of weeks ahead will be mostly gone by the day itself.
Draw the Main Motif on Paper Five Times First
The palm designs that turn out best are the ones you can draw with confidence, so start with simple shapes and clean spacing, and pick something that fits your time, skill and occasion. Mandalas, flowers, vines, dots, paisleys, wrist bands and diagonal trails all sit well on the palm. If you’re new to henna, practice the main motif on paper before it goes on skin, keep the cone pressure steady and leave the paste on long enough to dry fully. That’s how simple palm mehndi ends up looking polished.
You'll Like These Ideas:


Leave a Reply