
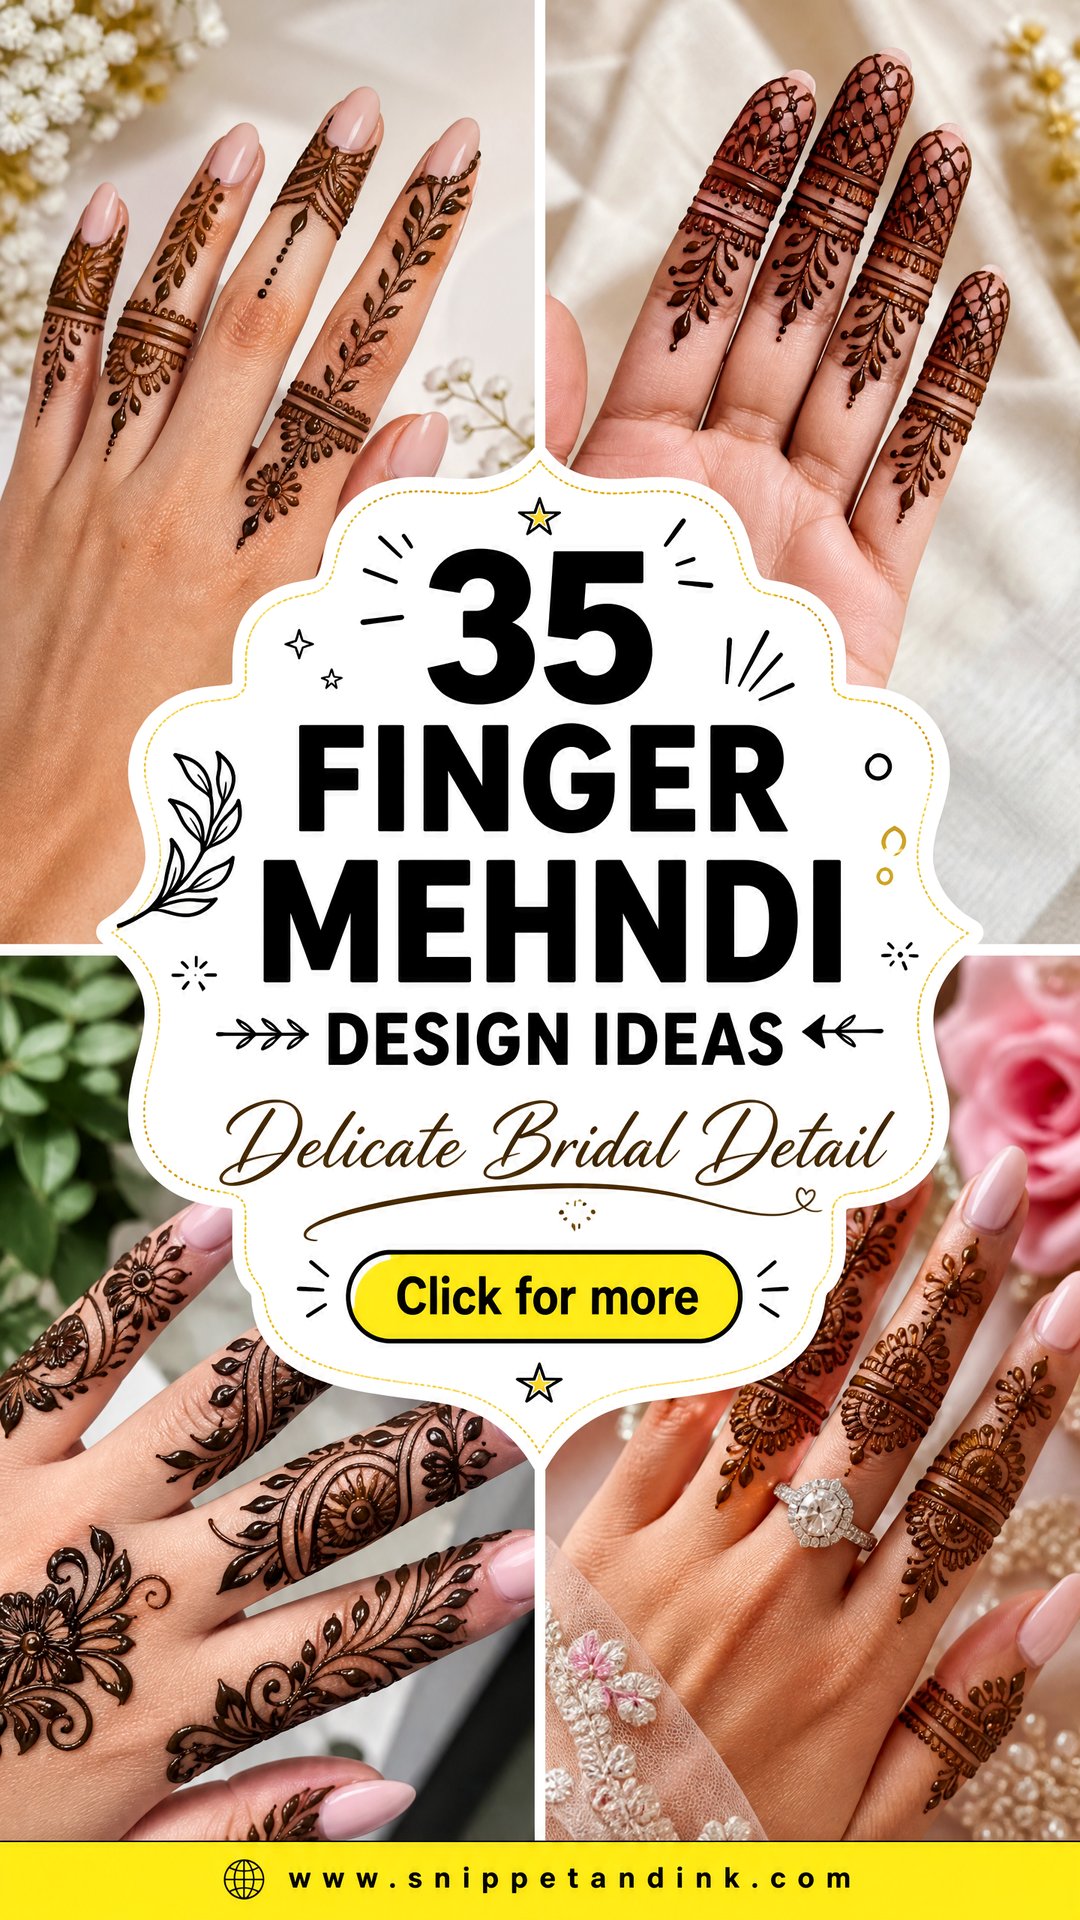
Fingers are where henna gets noticed first. They hold the bouquet, the ring and the cup of chai, and they stain darker than almost anywhere else on the body. That makes finger-only mehndi a smart middle ground for Eid, Diwali, a friend’s wedding or a quick celebration when a full palm would take too long. Finger-focused henna can also change how a hand reads: vertical lines lengthen, heavy bands shorten, and open skin makes a busy pattern calm. Below are the layouts I draw most often, with what I watch for on each.
What Your Fingers Do to a Henna Pattern
Before a client picks a design, I look at her hands flat, then curled. Fingers are the most mobile surface I henna, and two things shape every layout I draw on them.
Color lands unevenly across one hand
Fingertips and the palm side take the deepest stain, the backs of the fingers come up a little lighter, and the wrist lighter still. So I put the detail I most want people to see where the color will be strongest, and I don’t promise a bride that a back-of-finger pattern will match her fingertips shade for shade.
Every knuckle is a fold line
When you bend a finger, the skin over each joint creases, and dry paste cracks along it. I keep the lines crossing a joint thin, or I stop a motif just before the crease and start the next one after it. That’s why so many finger designs look like stacked sections; the joints are doing the dividing.
1. Simple Finger Mehndi Design
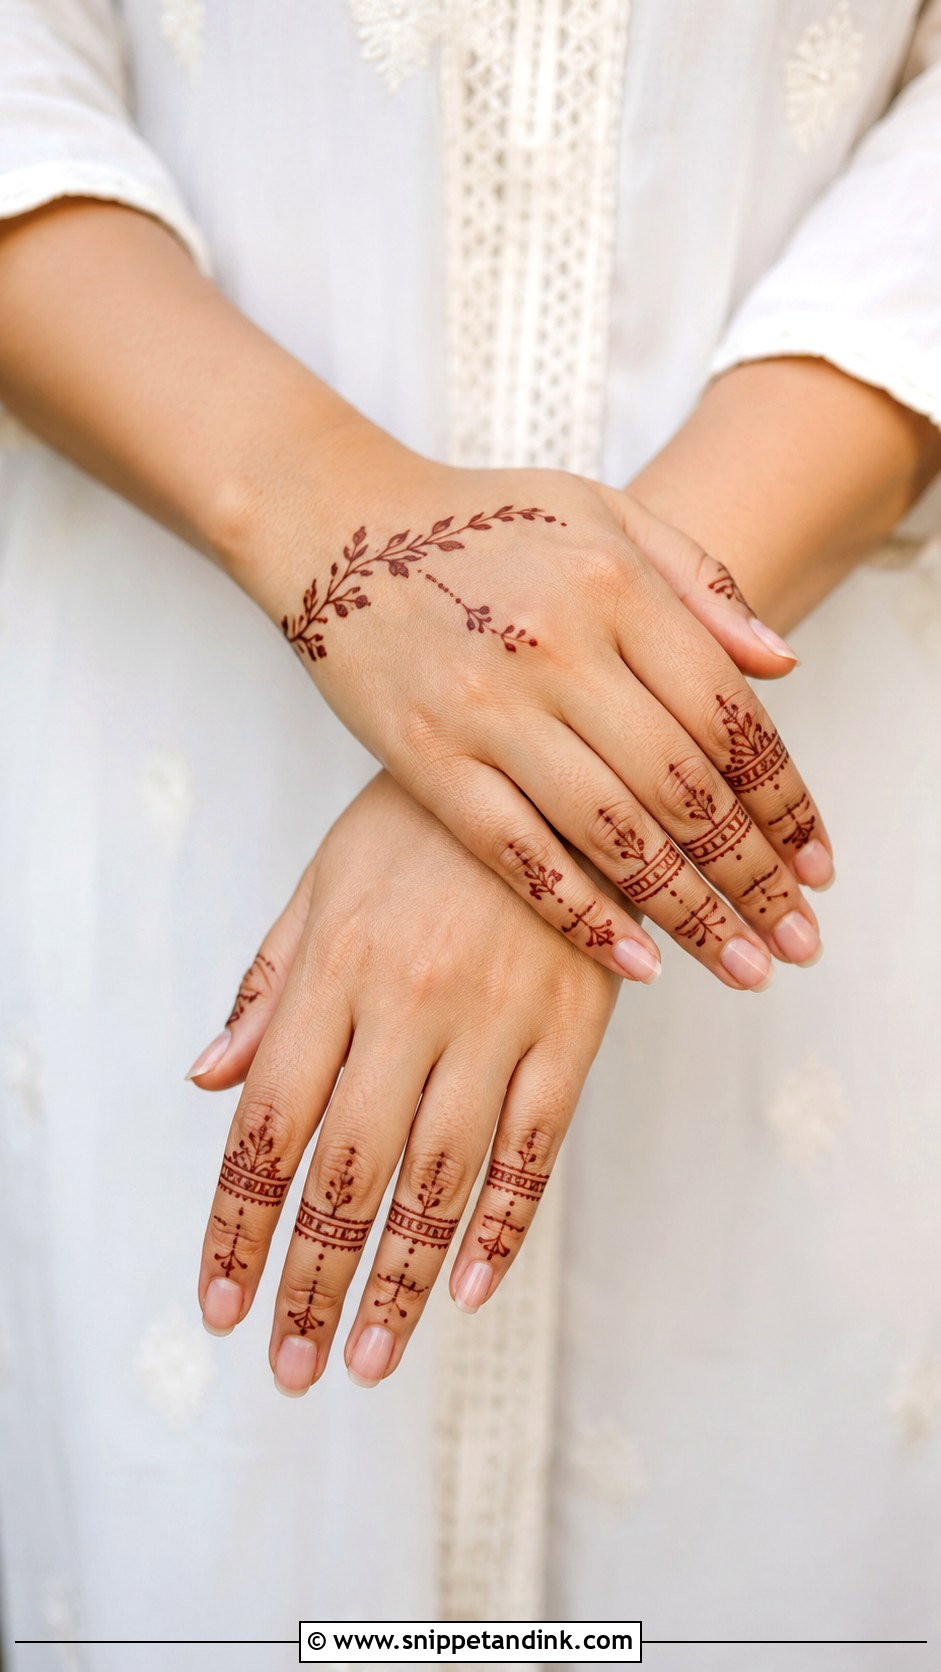
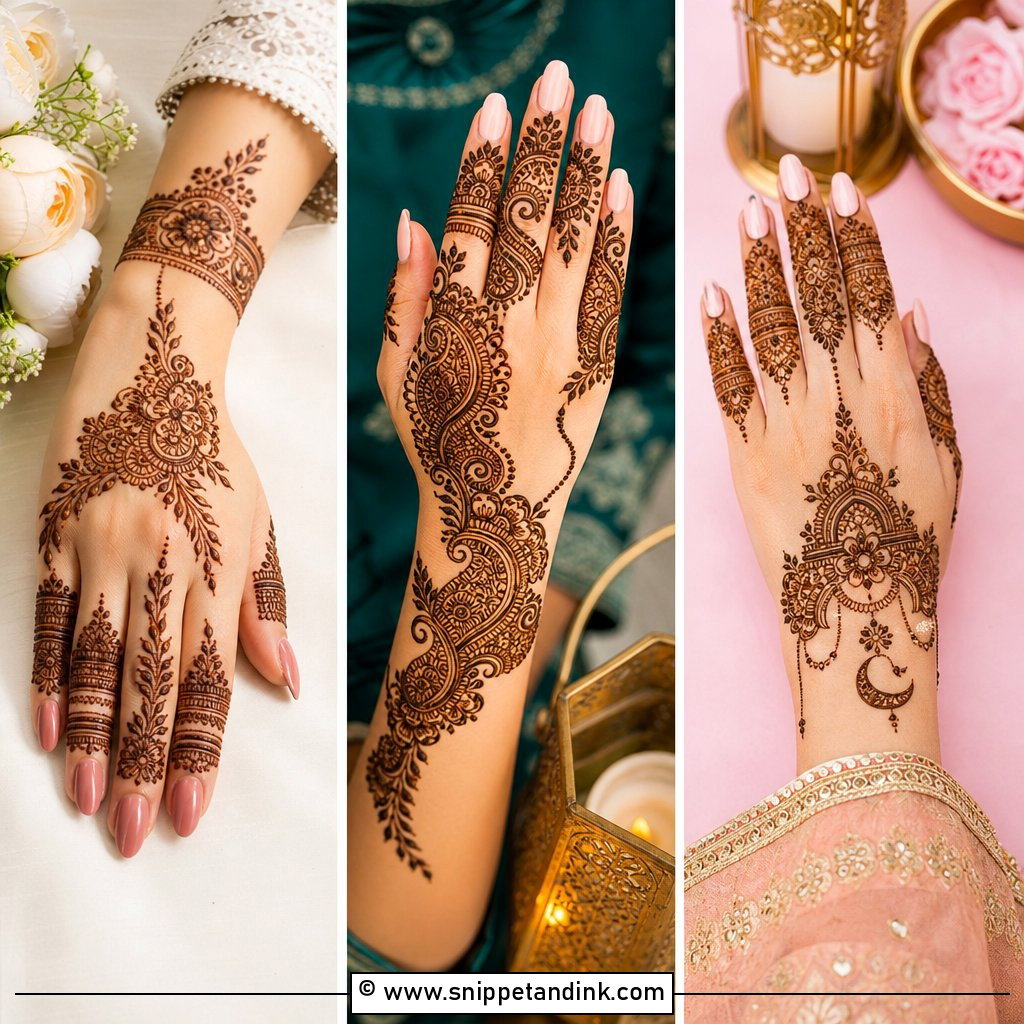
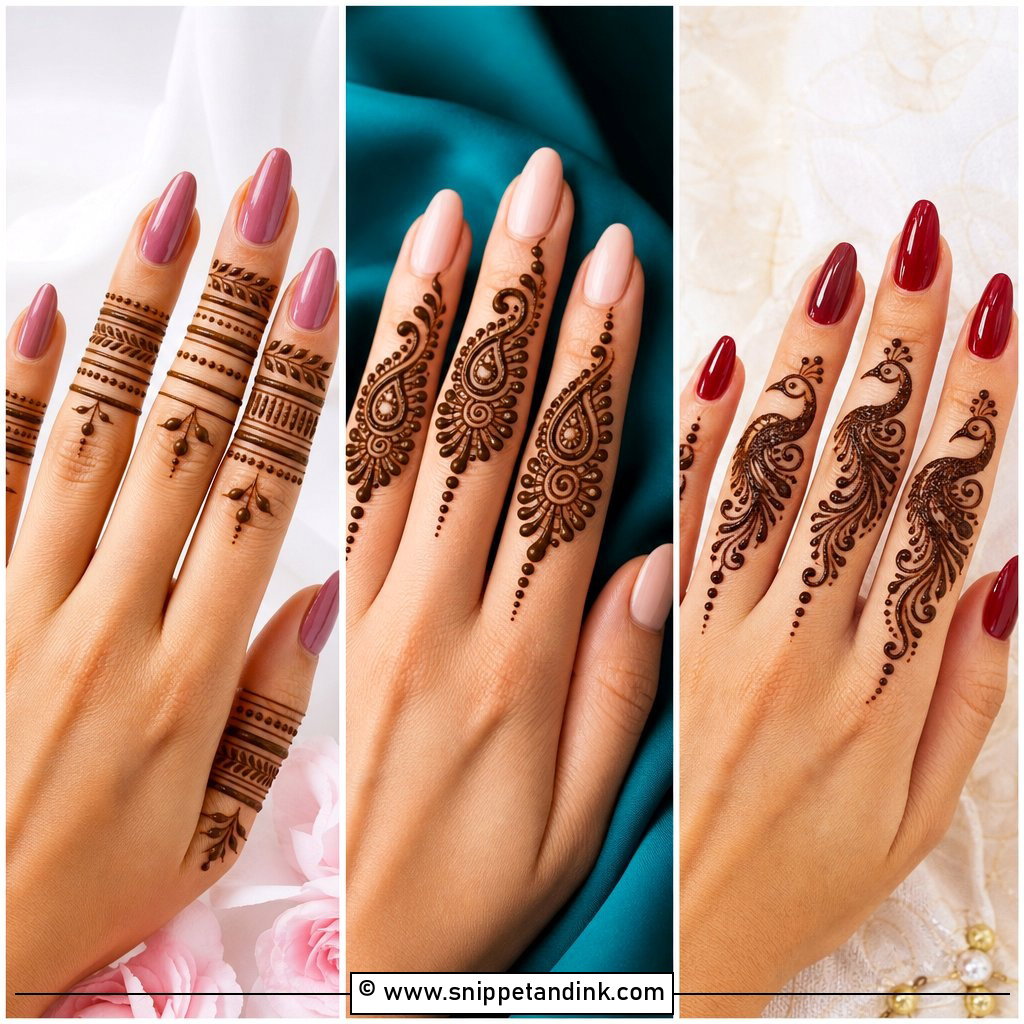
Fine lines, tiny dots, small leaves and slim bands on the fingers, with the palm left mostly bare. Each element is small and easy to control, so this is where I start anyone nervous about henna. I usually let one finger, often the index, carry slightly more detail so the hand has a focal point. A thin wrist line or a little cluster of dots on the palm ties it together if the fingers feel disconnected.
2. Back Finger Mehndi Design
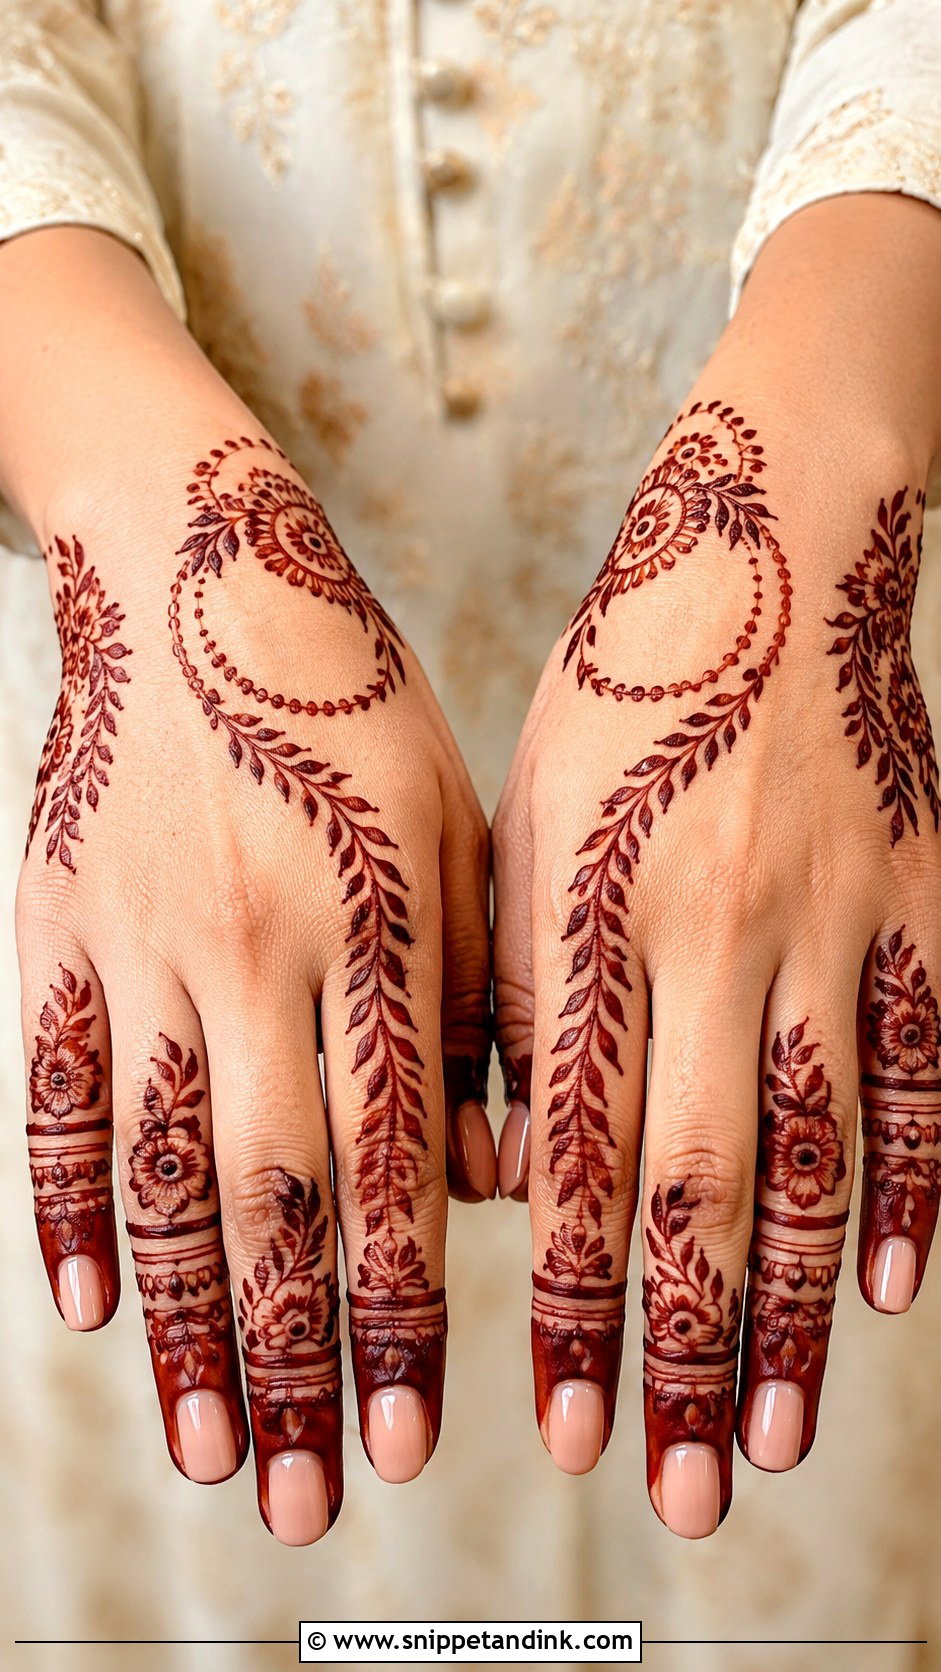
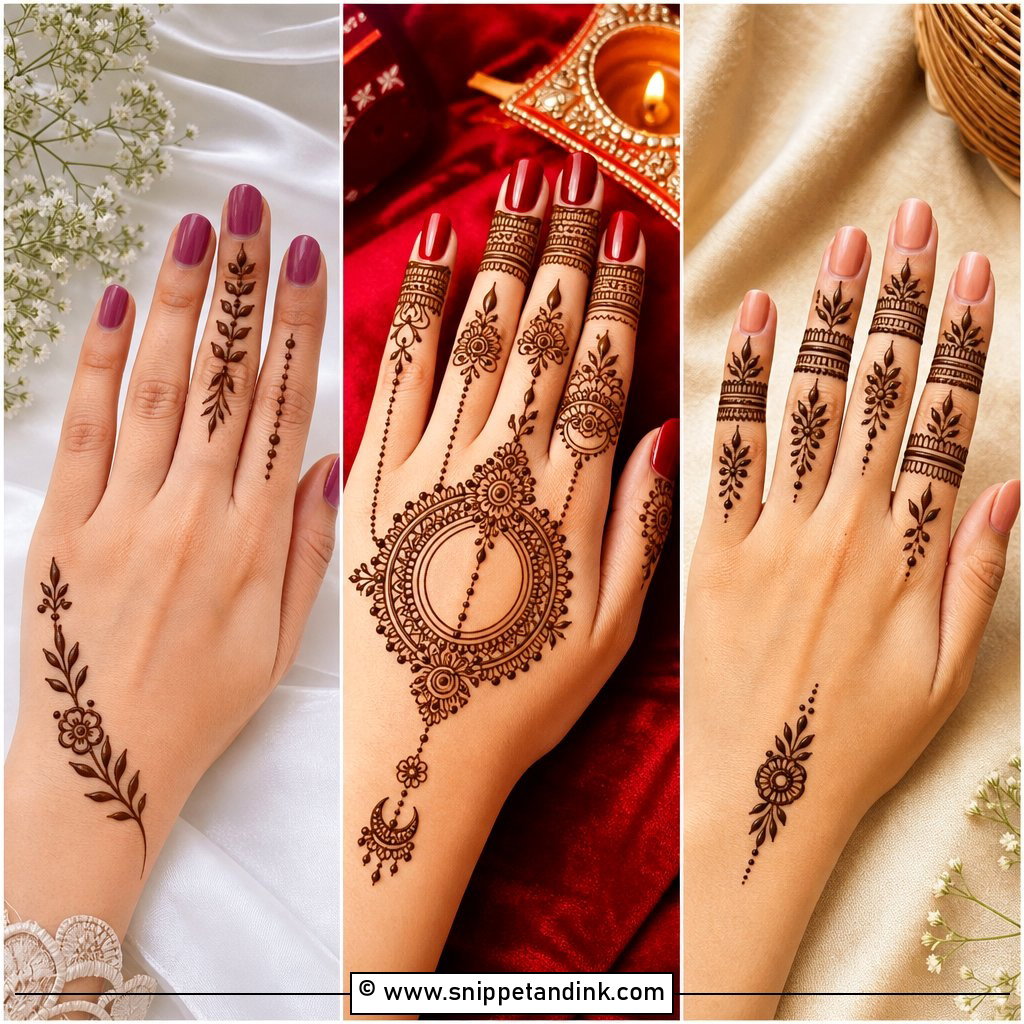
The back of the fingers is what people see when you raise a glass or hold someone’s hand, so this design pays off in photos. It usually runs from the nail down toward the knuckle with leafy lines, ring bands, small flowers and open space between them. I fill the tips darker and keep the middle of each finger airy. If you wear rings, plan the bands around where your real ones sit, and the henna starts to look like part of the jewelry.
3. Front Finger Mehndi Design
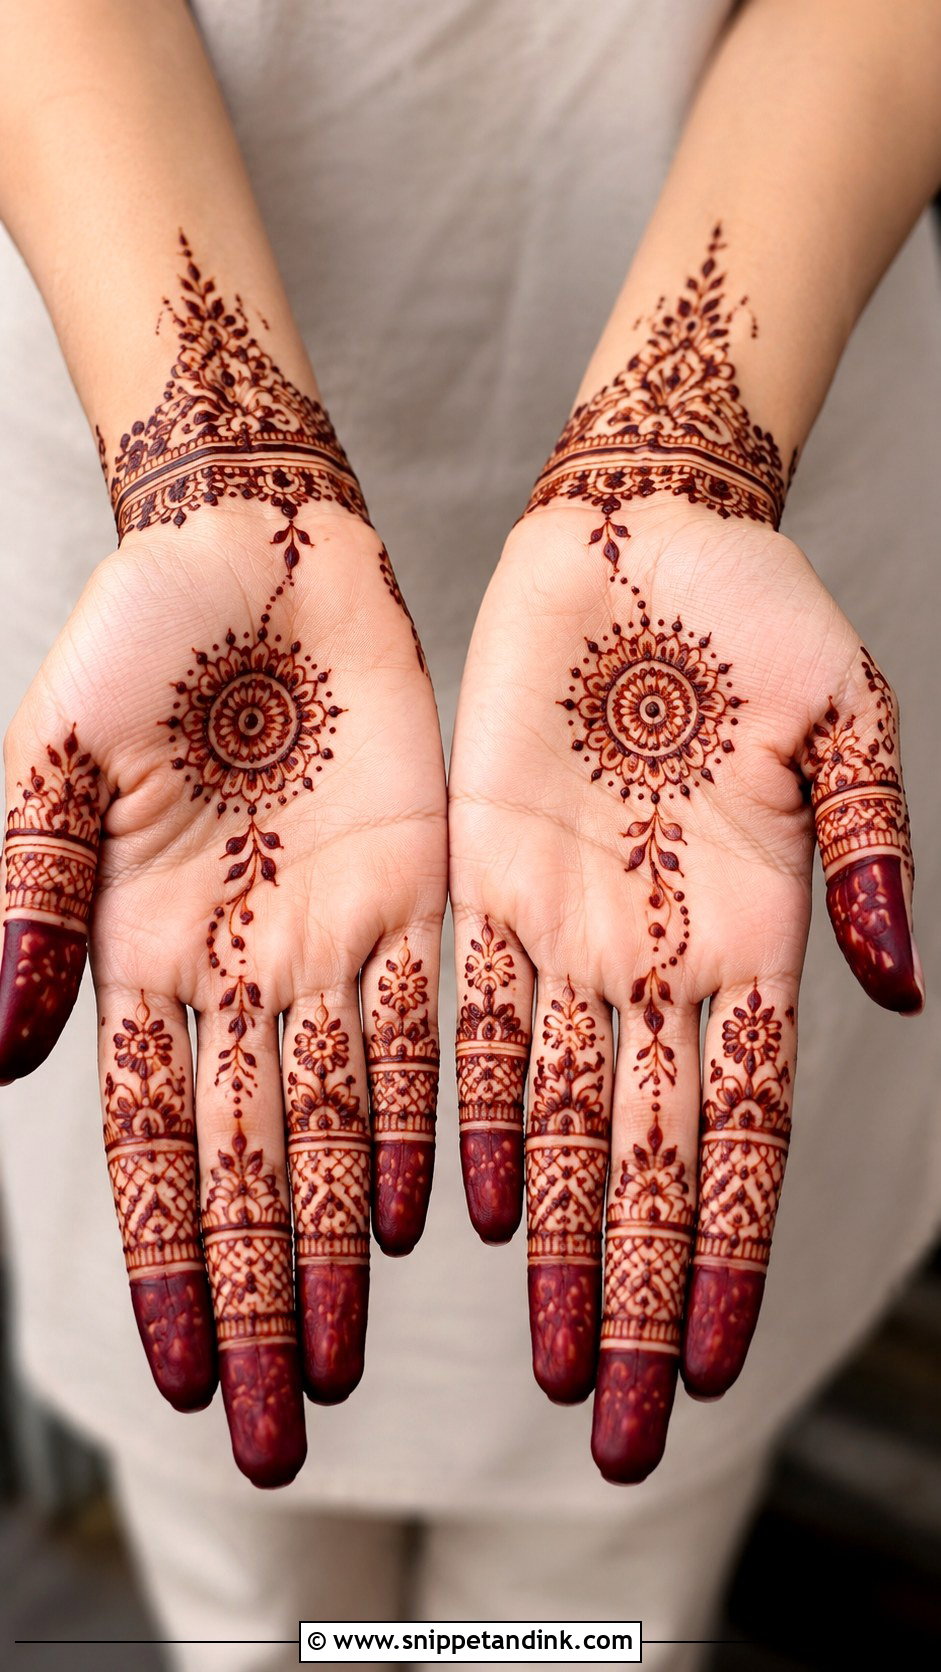
On the palm side, each finger is decorated from the tip to the first or second joint, then a small accent such as a dot trail, a tiny mandala or a short vine sits on the palm. Palm-side skin takes the deepest stain on the hand, so even light linework here comes up rich. I give the thumb a slightly different pattern from the other four; when all five match exactly, the hand looks printed.
4. Arabic Finger Mehndi Design
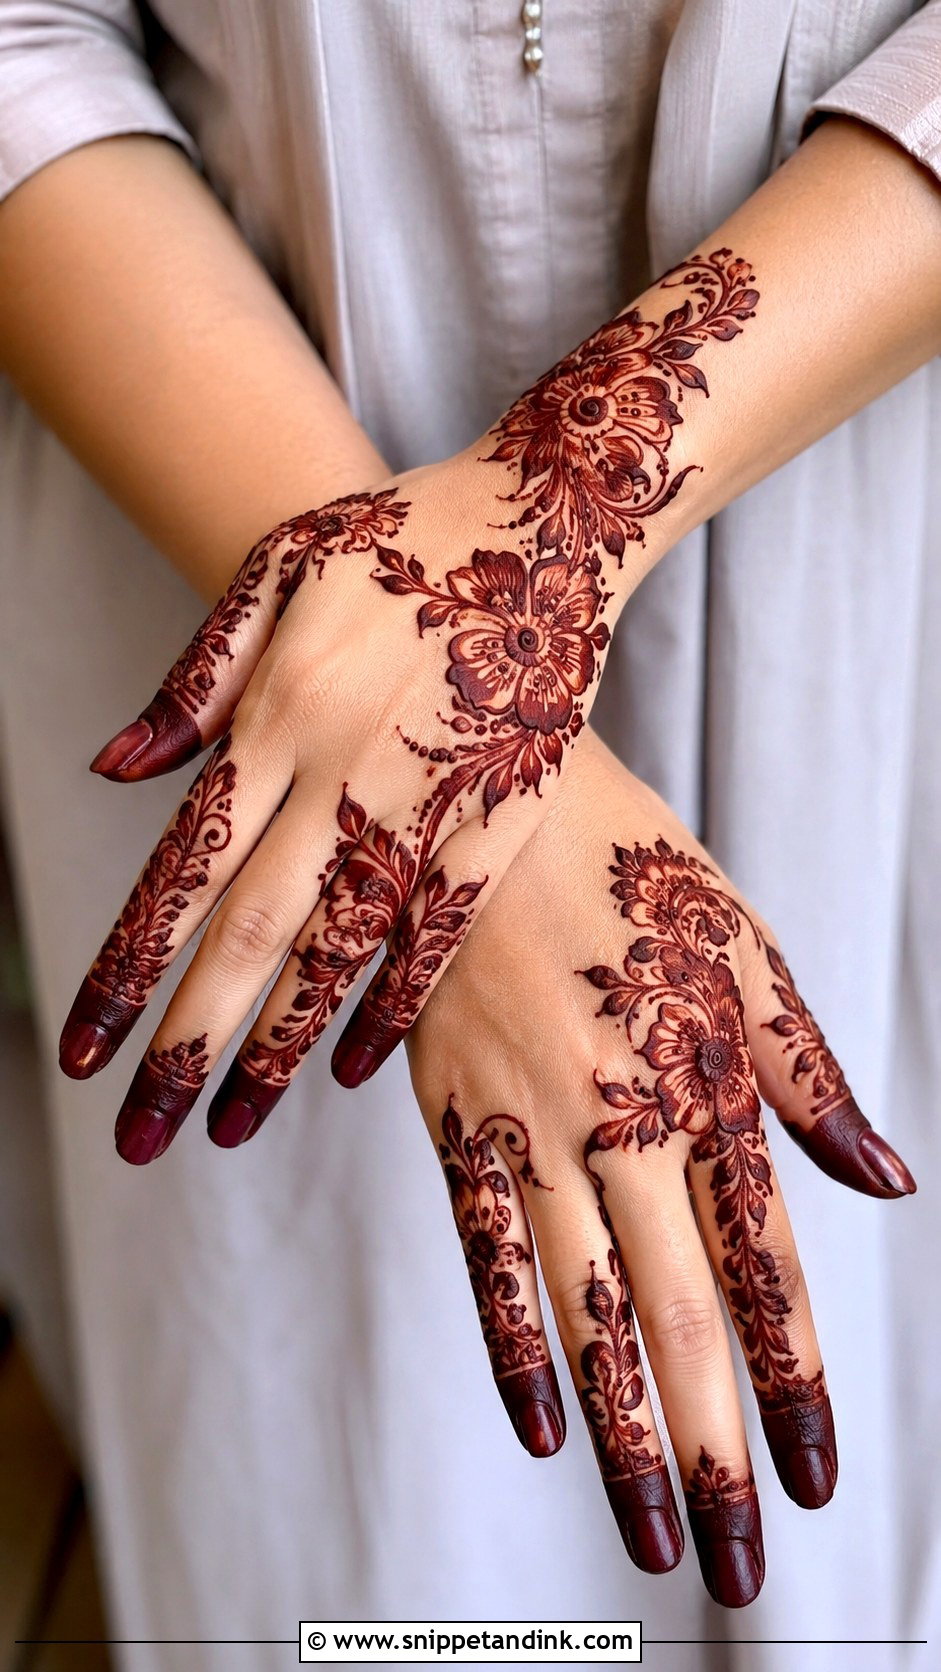
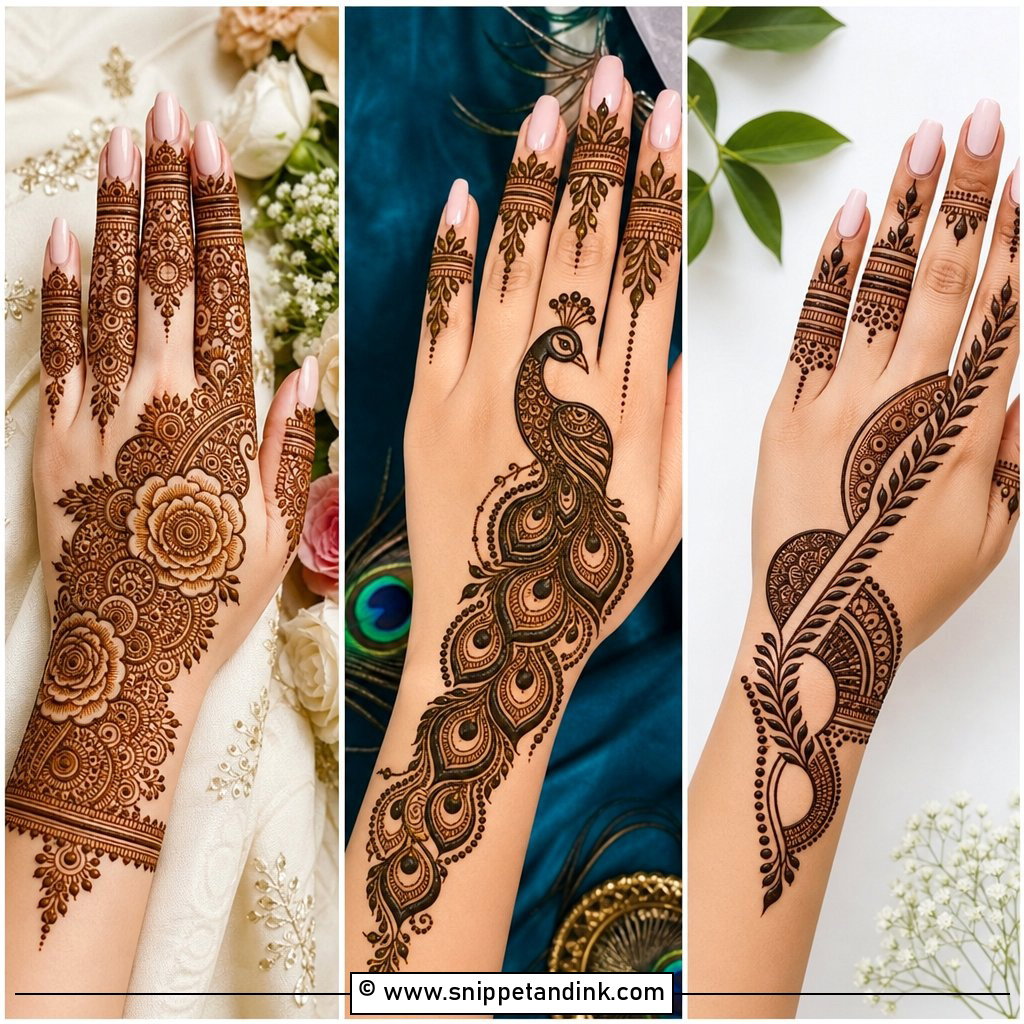
Arabic finger work is about flow: big leaves, curved vines and rose-like flowers running diagonally across two or three fingers, usually starting from the index, with plenty of bare skin around it. It goes on fast, which is why it’s a favorite for Eid and engagement parties. I decide on fingertip caps based on the hand. On long fingers a dark cap adds contrast, while on shorter fingers I often leave the tips open so the trail can do the lengthening.
5. Indian Finger Mehndi Design
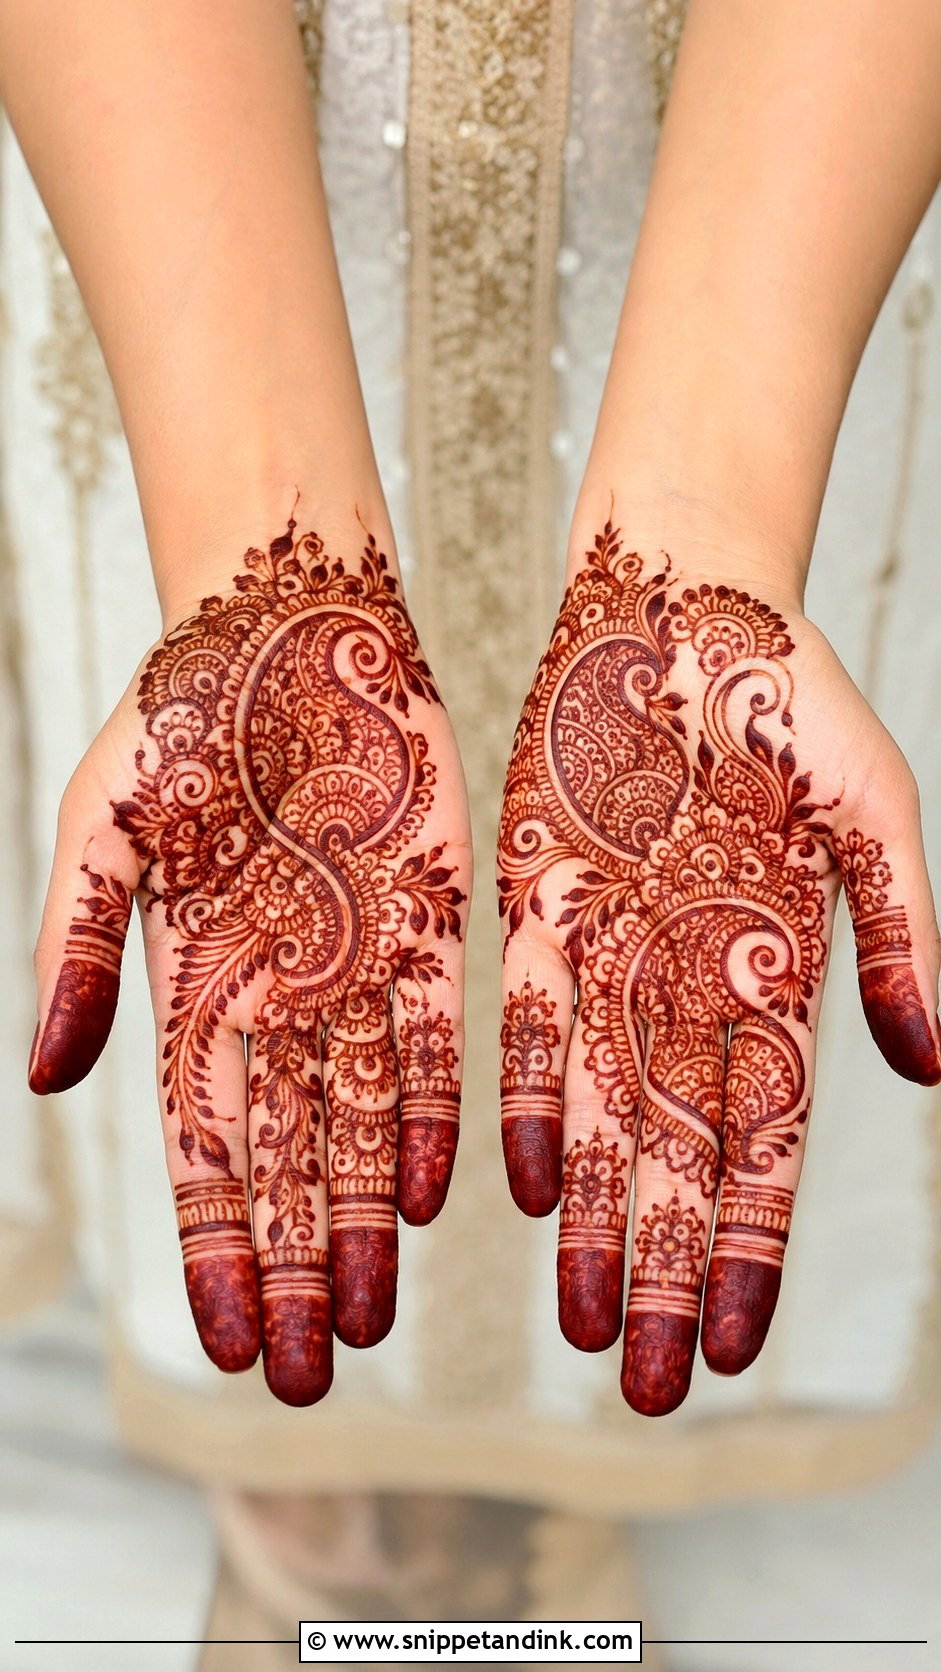
Paisleys, small florals, dots, leaf rows and filled fingertip sections make Indian finger mehndi more detailed than the minimal styles, while the palm stays light. It sits well with sarees, lehengas and salwar suits. The thing I’m strict about is line weight. Indian filler is fine, and if the paste is too thick the lines merge as they dry, so I use a fine cone tip and keep the paste smooth. A small circle at the base of the fingers or a fine wrist line makes it feel complete.
6. Indo Arabic Finger Mehndi Design
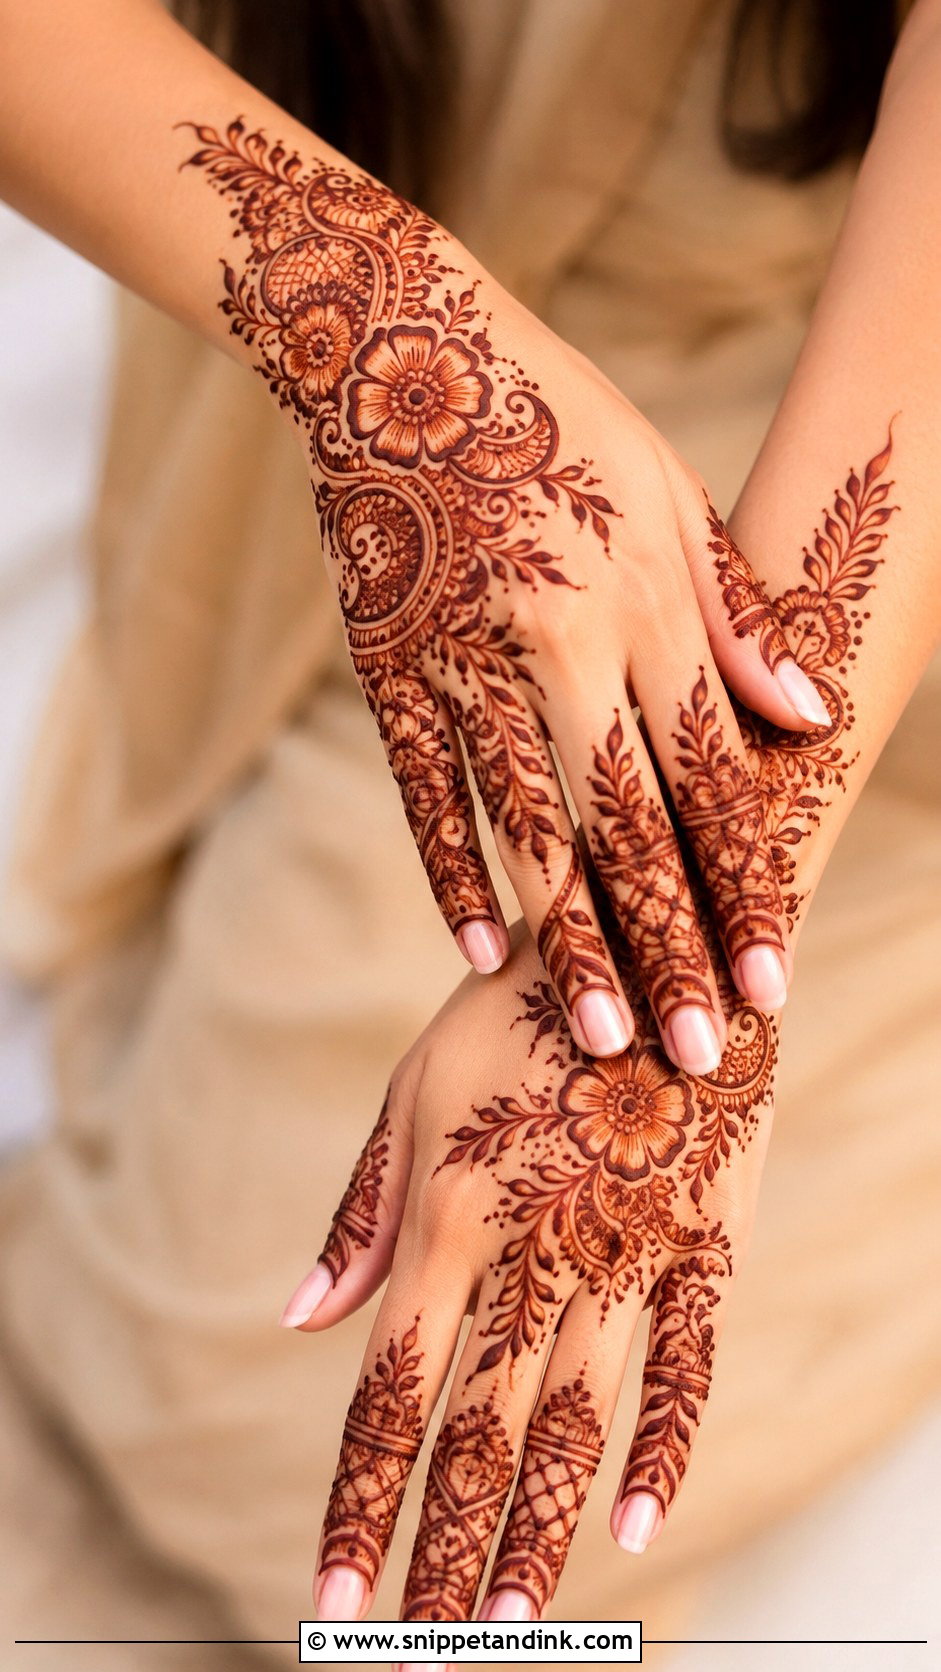
Indo-Arabic mixes the open spacing of Arabic henna with Indian filling inside the shapes. My usual layout puts real detail on two fingers and keeps the remaining three lighter with bands or dots, which gives contrast and stops the hand looking busy. Bridesmaids and wedding guests like it because it reads traditional without the sitting time of a full bridal hand.
7. Ring Finger Mehndi Design
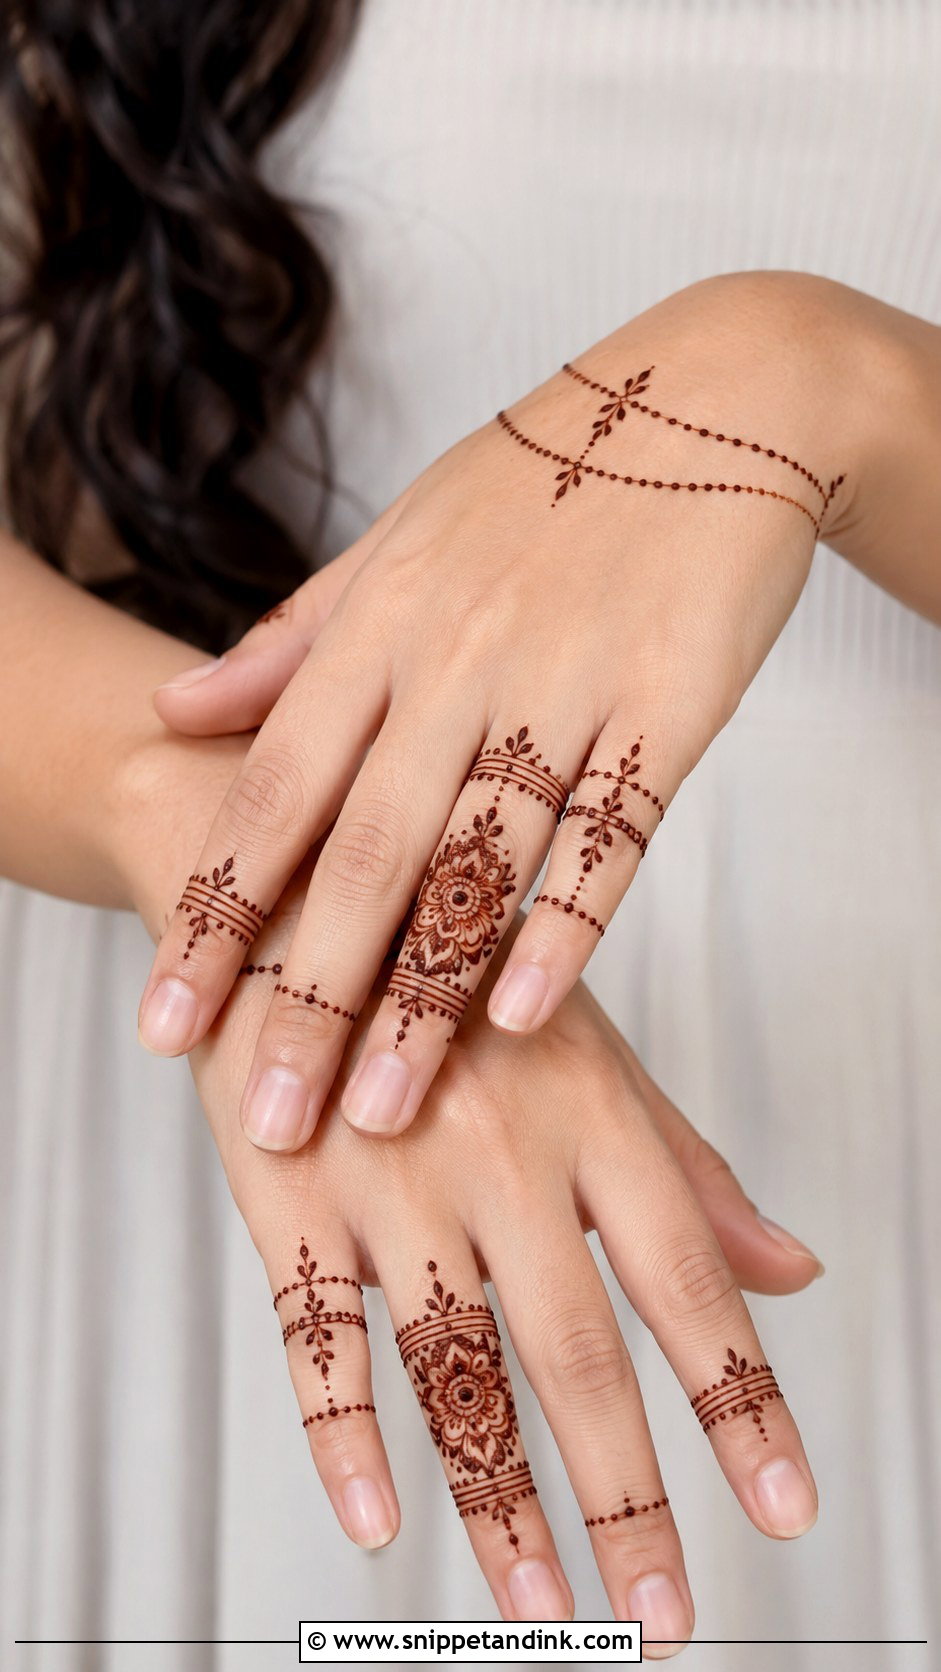
Here the henna imitates stacked rings: circular bands, dotted chains and floral rings, sometimes on one finger and sometimes on several. One bold band at the middle joint looks clean, and several thin ones look layered. On the actual ring finger, I keep the band below or above where the engagement ring sits, because henna directly under metal gets rubbed and the stain looks patchy by the wedding. A short chain toward the knuckle finishes it.
8. Full Finger Mehndi Design
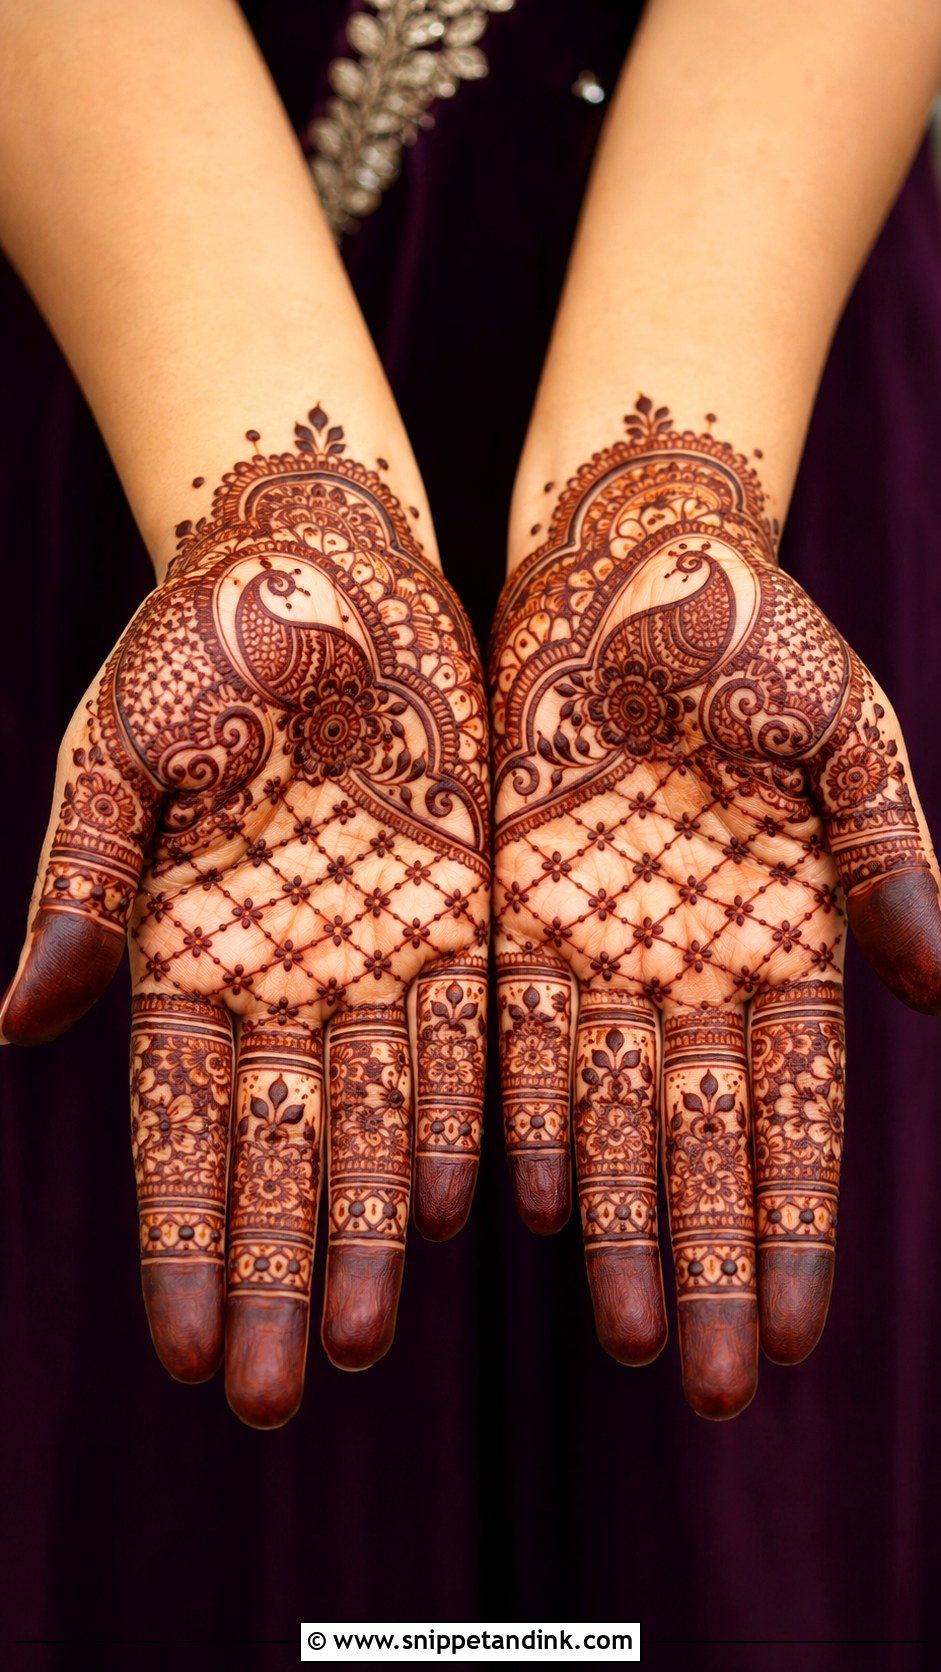
Full finger mehndi design means tip to base, with jaali, florals, paisleys, shaded blocks and fine linework, but the palm still left alone. It gives you visible, festive henna in a fraction of a full hand’s application time. I vary the layout finger to finger and repeat one element, usually a dot border, so it holds together. Watch the knuckle creases: paste cracks there when you bend, so I keep the line crossing each joint thin.
9. Minimal Finger Mehndi Design
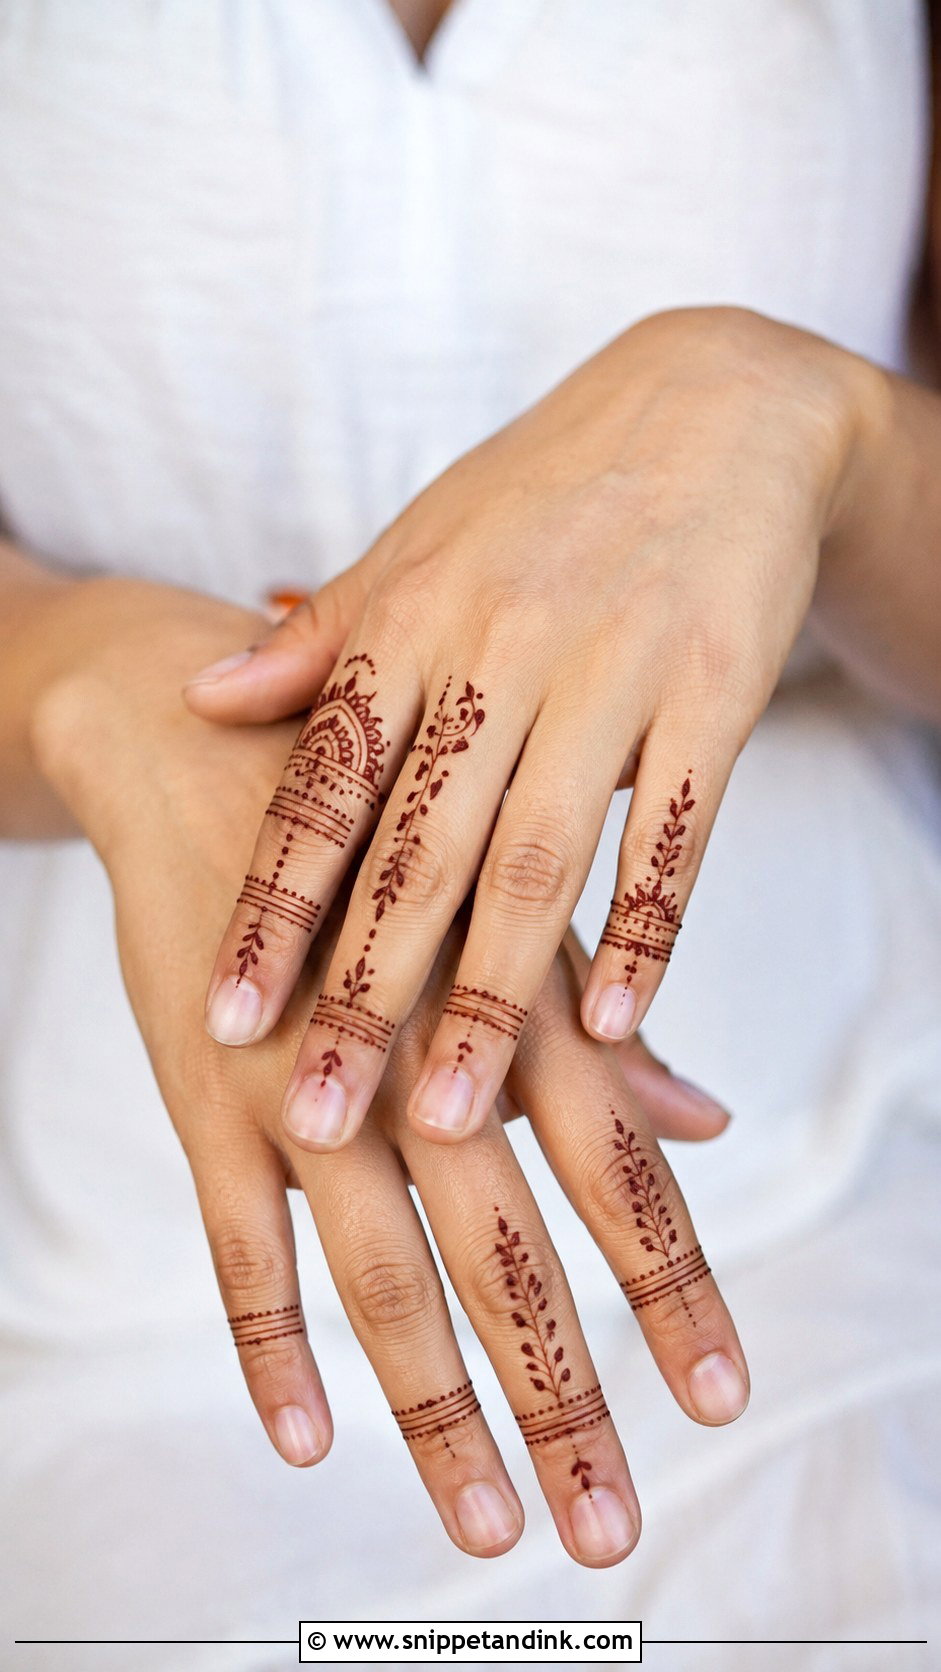
Thin lines, tiny dots, half-moons and narrow bands placed with a lot of space between them. It’s the version I suggest for an office, a college event or anyone who finds traditional henna too much. Placement is everything, since there’s no filler to soften a crooked line. Decorating just two or three fingers often looks cleaner than doing all five.
10. Modern Finger Mehndi Design
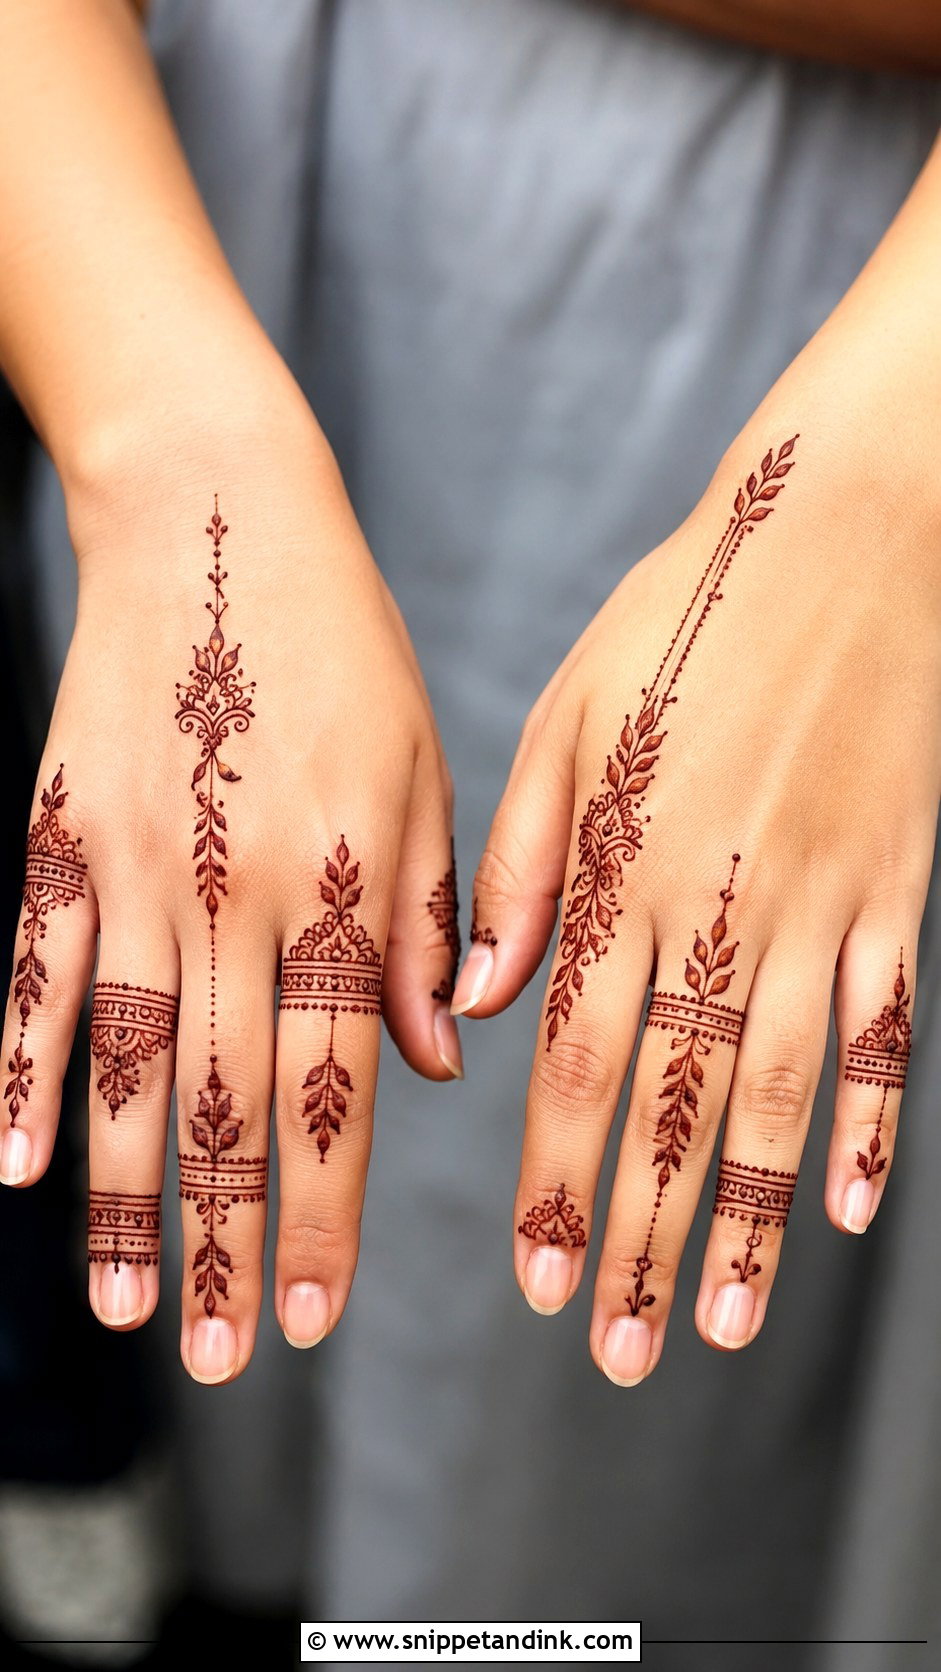
Negative space, sharp lines, asymmetric trails and a mix of fine and bold strokes, with the palm left empty so the fingers carry everything. One statement finger with a long vertical pattern, then small matching details on the others, is the composition I return to most. It photographs crisply because nothing competes. The risk with modern layouts is that they can look unfinished on a bride surrounded by heavy embroidery, so I save them for parties and contemporary outfits.
11. Easy Finger Mehndi Design
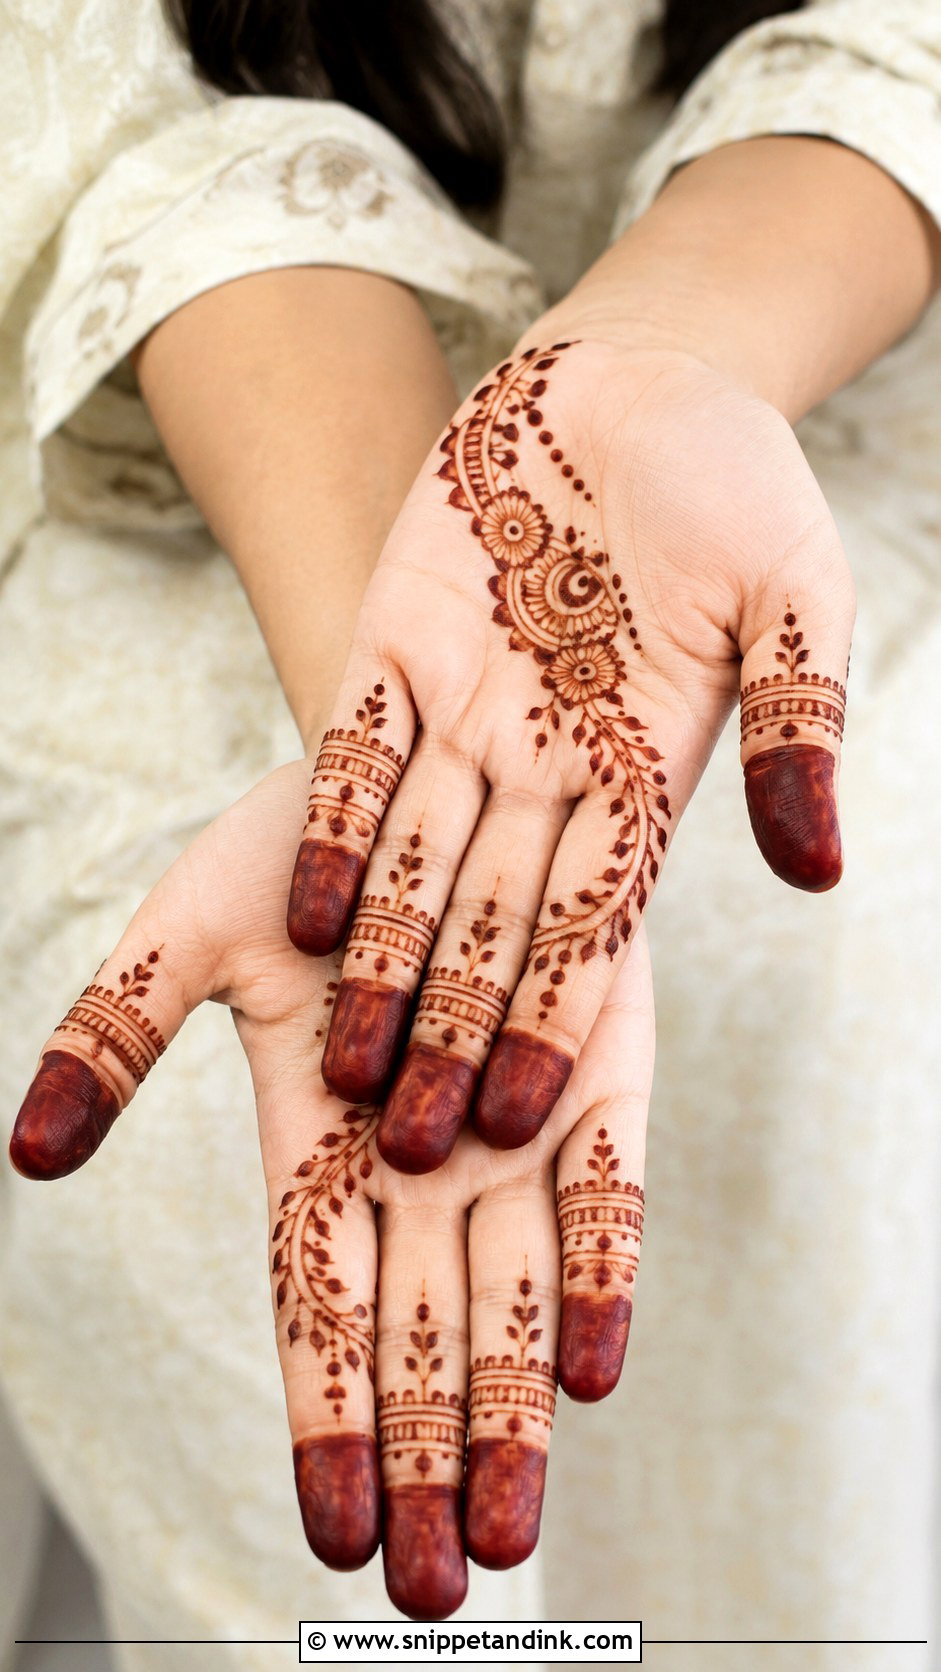
If you’re applying henna at home, start here. Dots, curved lines, small petals, leaves and short bands are all you need. My order is fingertip caps first, then a thin line below each nail, then small vines or dots down the finger, because working from the tip down keeps your wrist from dragging through wet paste. Repeat the same pattern on every finger and the result looks neat even when the shapes are basic.
12. Stylish Finger Mehndi Design
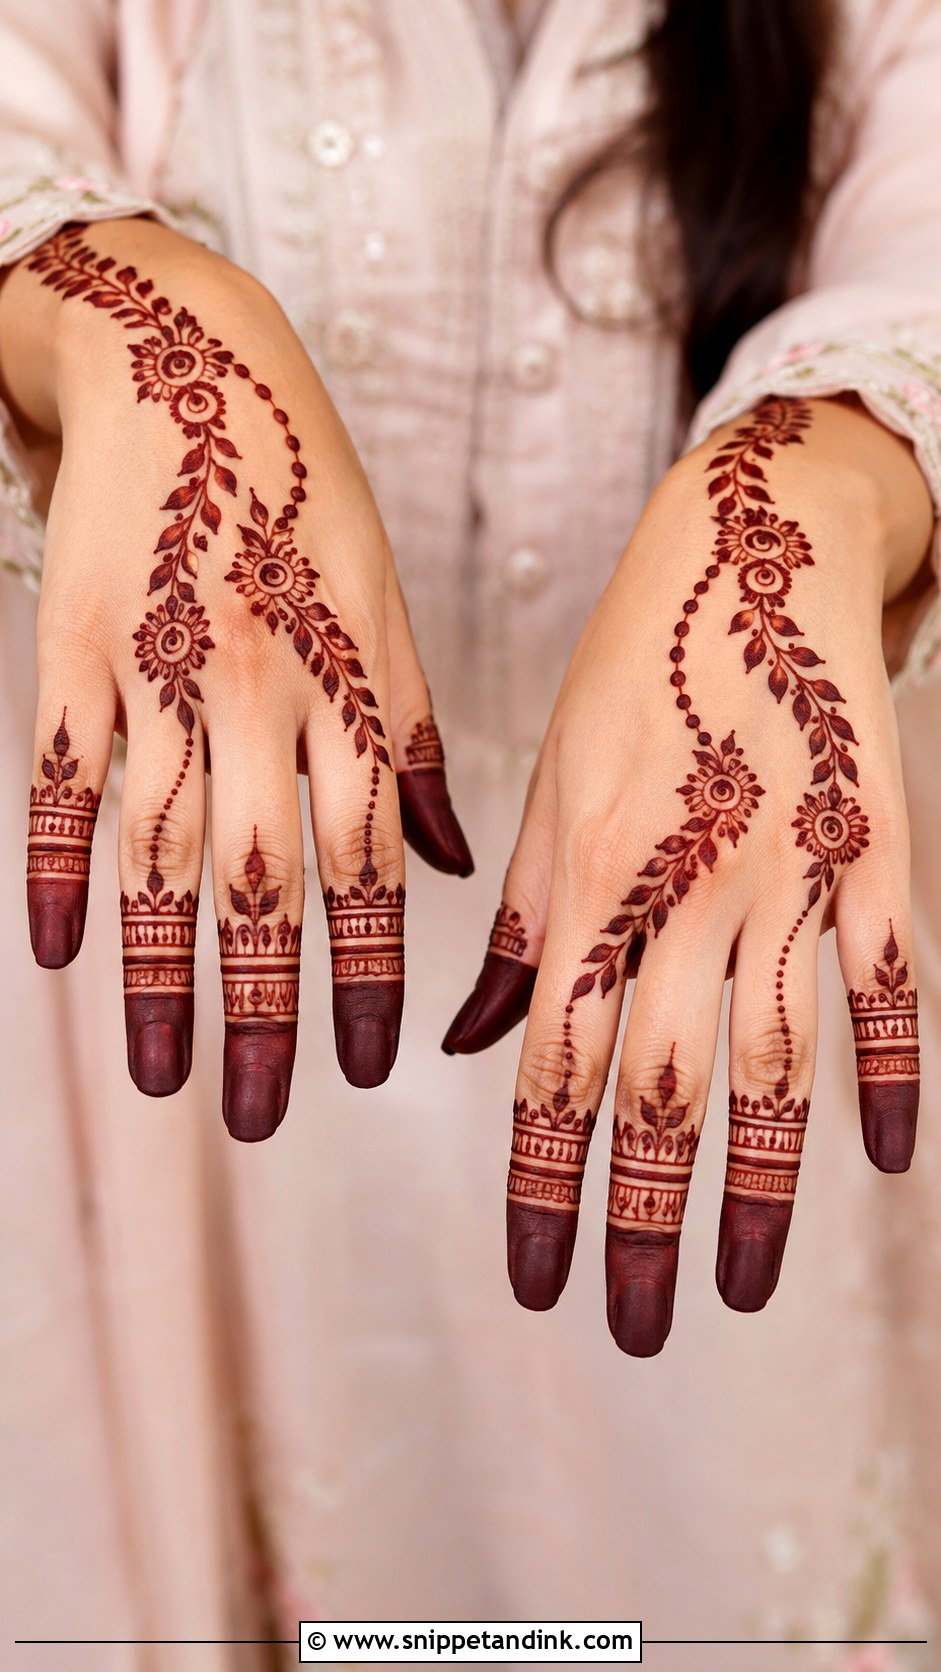
The polish here comes from placement rather than complexity: bold shaded tips, ring bands, leafy chains and clean gaps. A layout I like puts heavier detail on the index and middle fingers and lighter work on the ring and little fingers. It pairs well with nail color, as long as the polish goes on before the henna, since paste won’t stain through polish and you can’t paint over fresh henna without smudging it.
13. Bridal Finger Mehndi Design
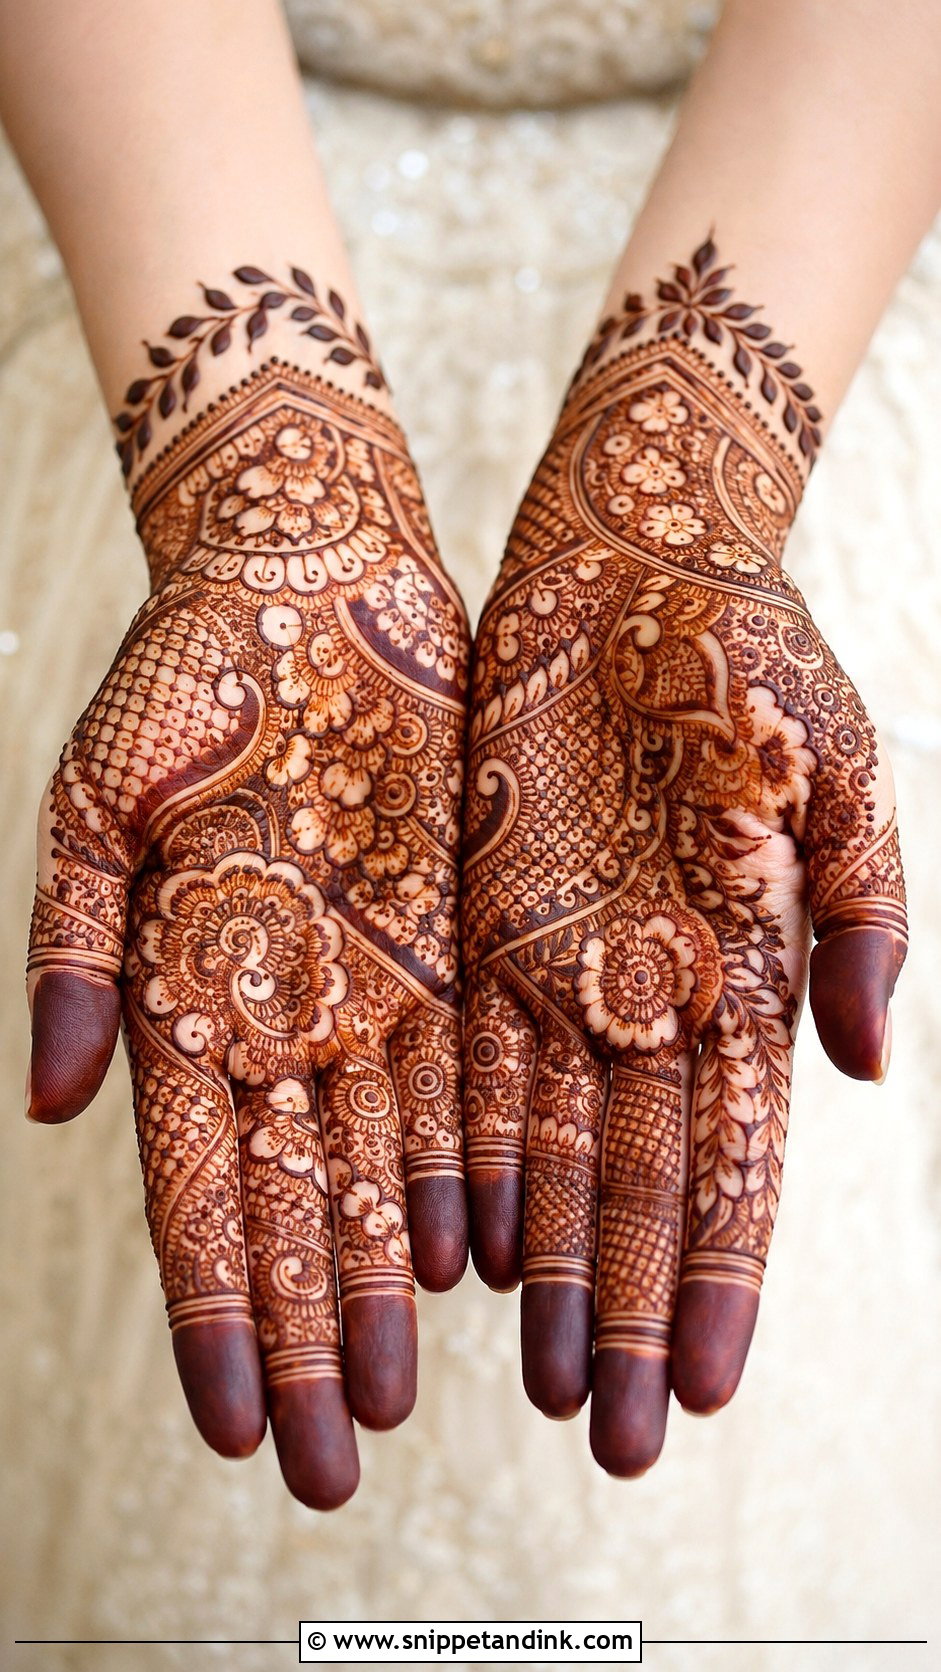
Even a finger-focused bridal design can carry a lot: fine jaali, paisleys, florals, dots and filled tips, each finger slightly different but tied together by matching borders and shading. It works as part of a full bridal hand or alone for a pre-wedding function. If a bride wants something more modern, I leave small gaps of bare skin around the joints. To make it richer, I extend it toward the palm with a mandala or chain.
14. Finger Mehndi Design For Eid
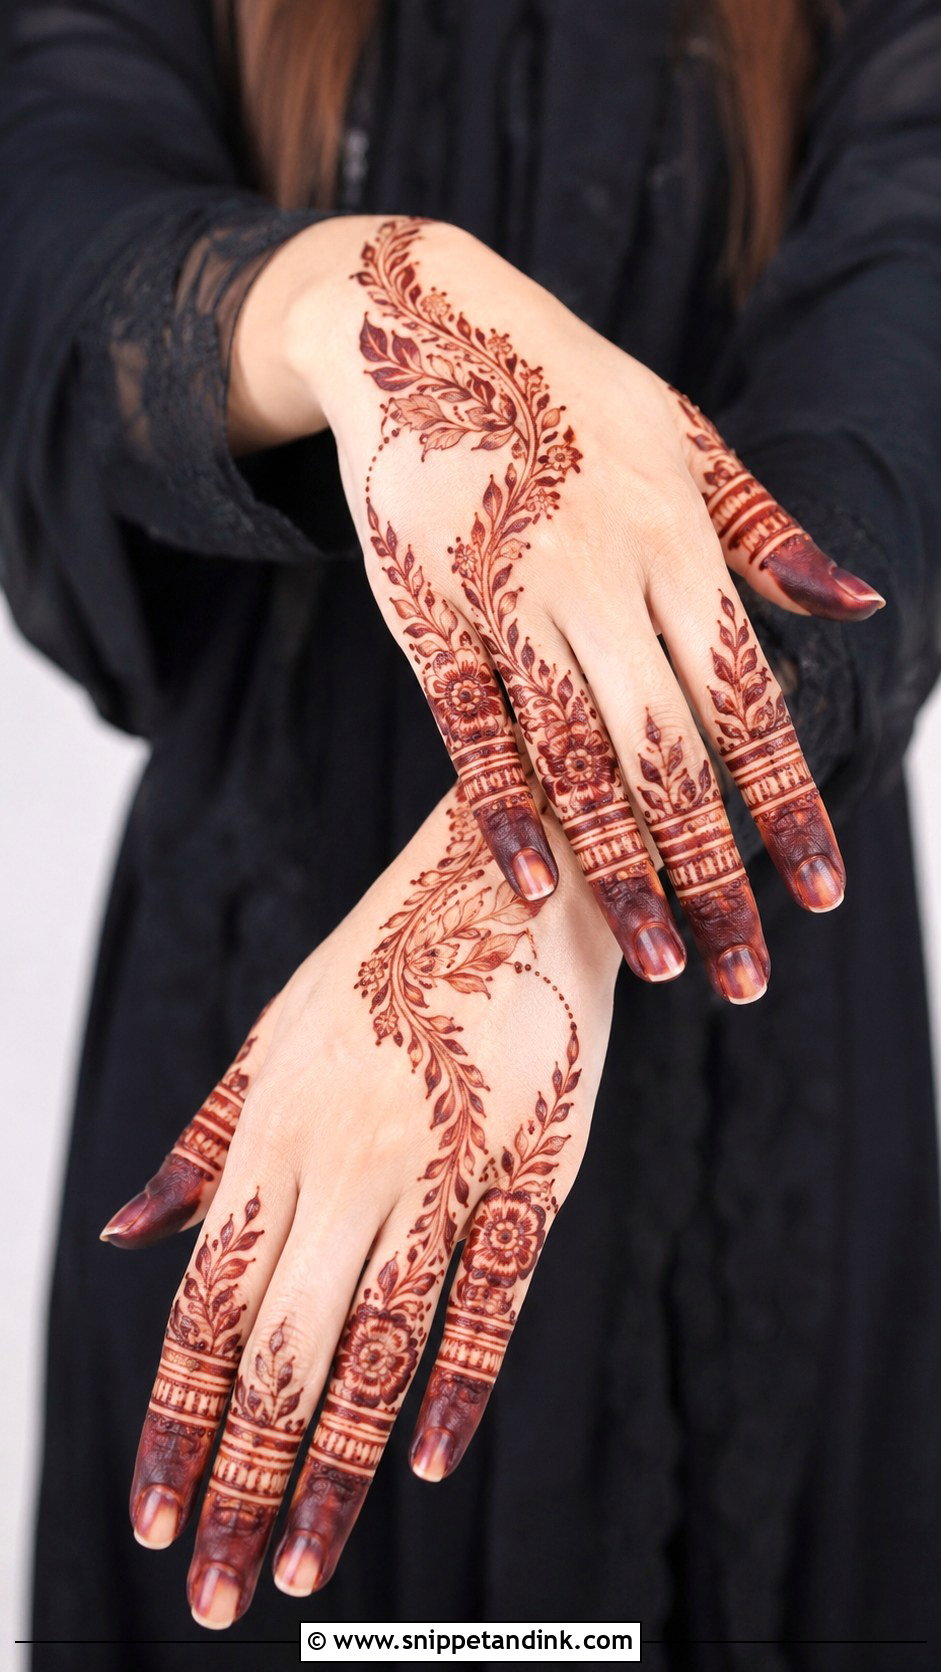
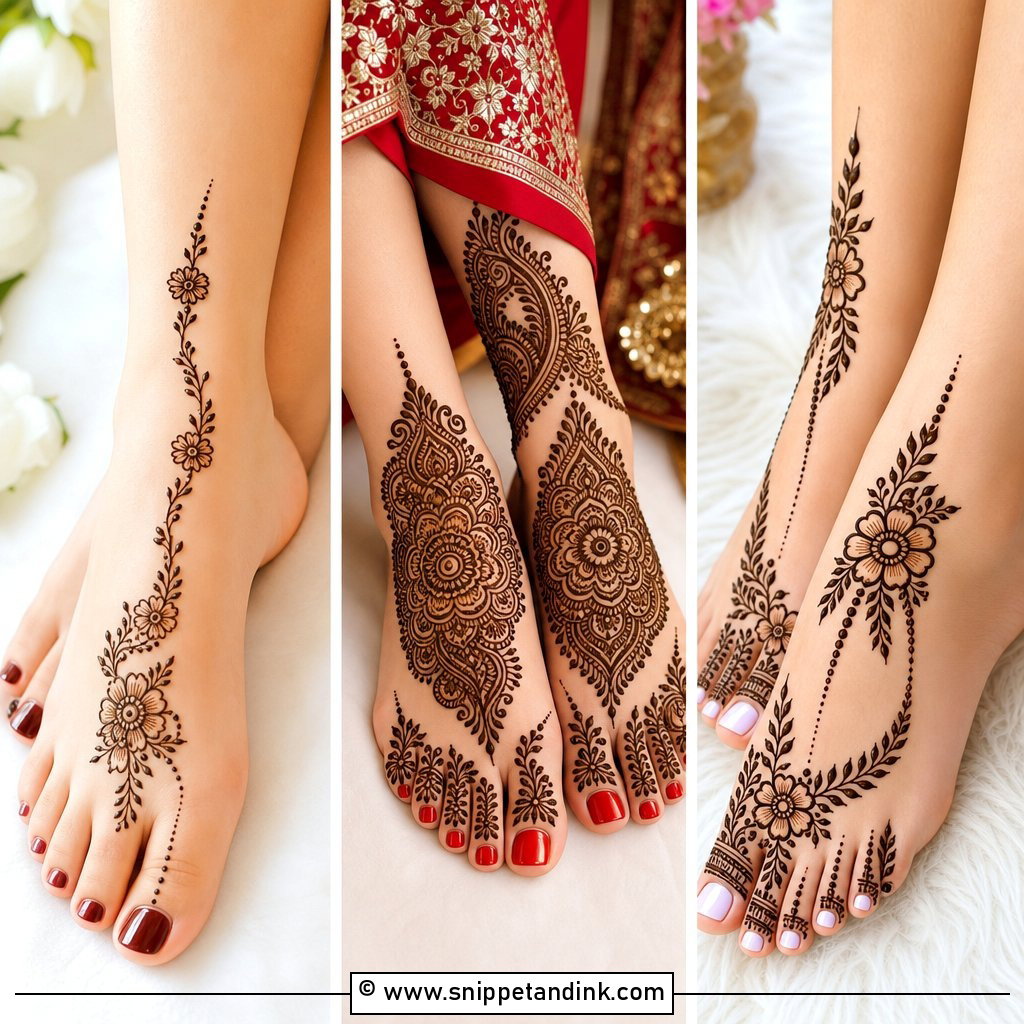
Finger mehndi design for Eid has to survive a full day of cooking, greeting and eating, so I keep it comfortable: Arabic flowers, leafy trails, ring bands and shaded tips with the palm mostly open. A diagonal trail from the index finger toward the wrist, with smaller accents on the other fingers, is the classic layout. Apply it the night before chaand raat if you can, so the color has darkened by morning.
15. Finger Mehndi Design For Diwali
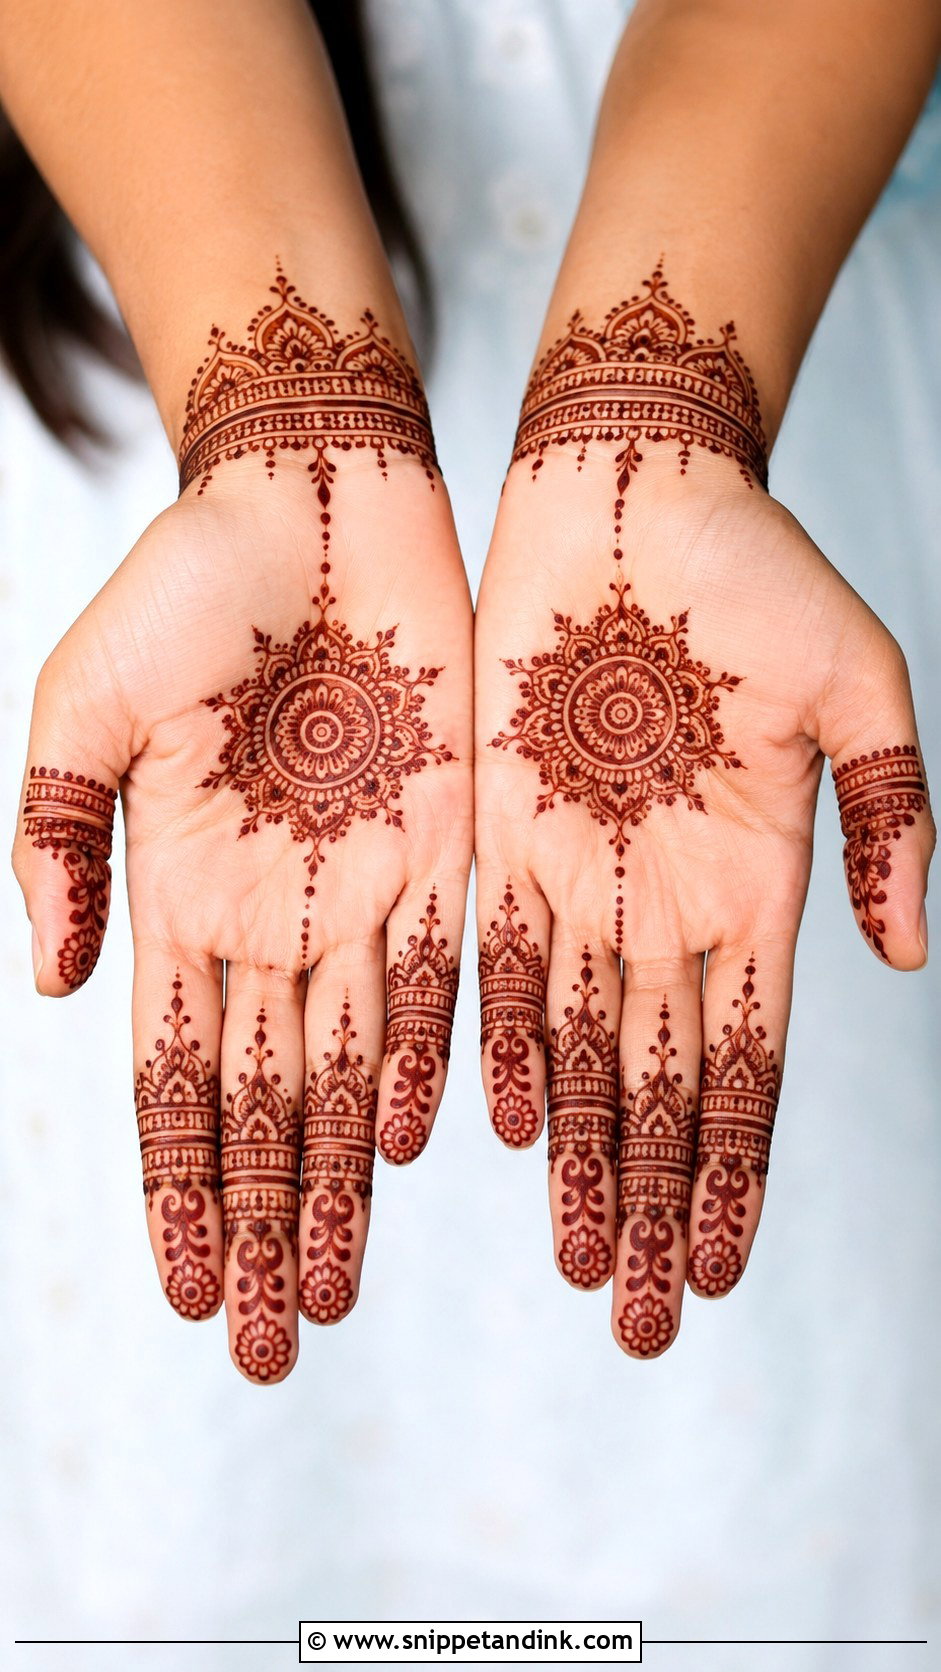
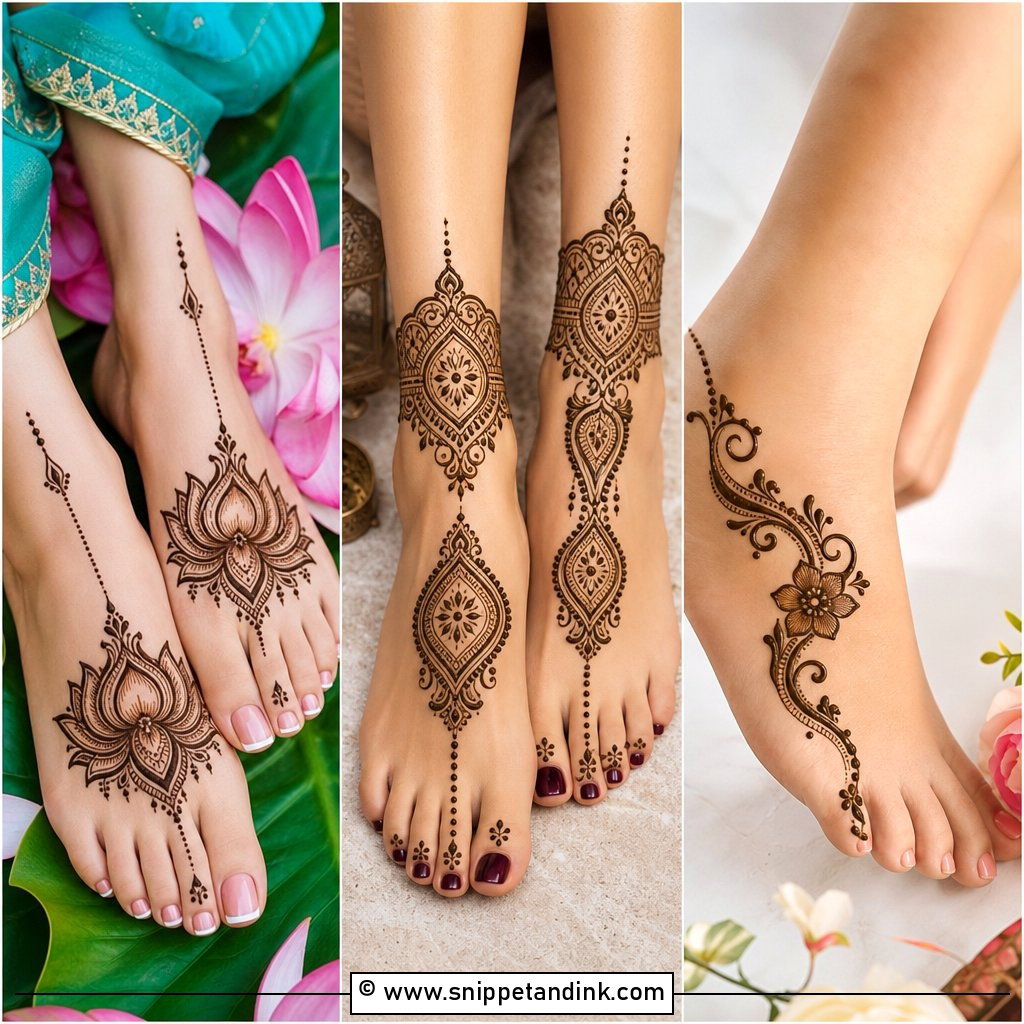
Diwali hands are lit by diyas and fairy lights, so I lean on patterns with clear shapes that still read in low light: mandala tips, leafy rings, tiny paisleys and dotted chains. You can cover every finger and leave the palm clean, or connect them to a small diya-shaped motif at the base of the palm. Dark fingertip filling with lighter linework below the joints keeps it from looking heavy next to bangles and bright outfits.
16. Finger Mehndi Design For Wedding Guest
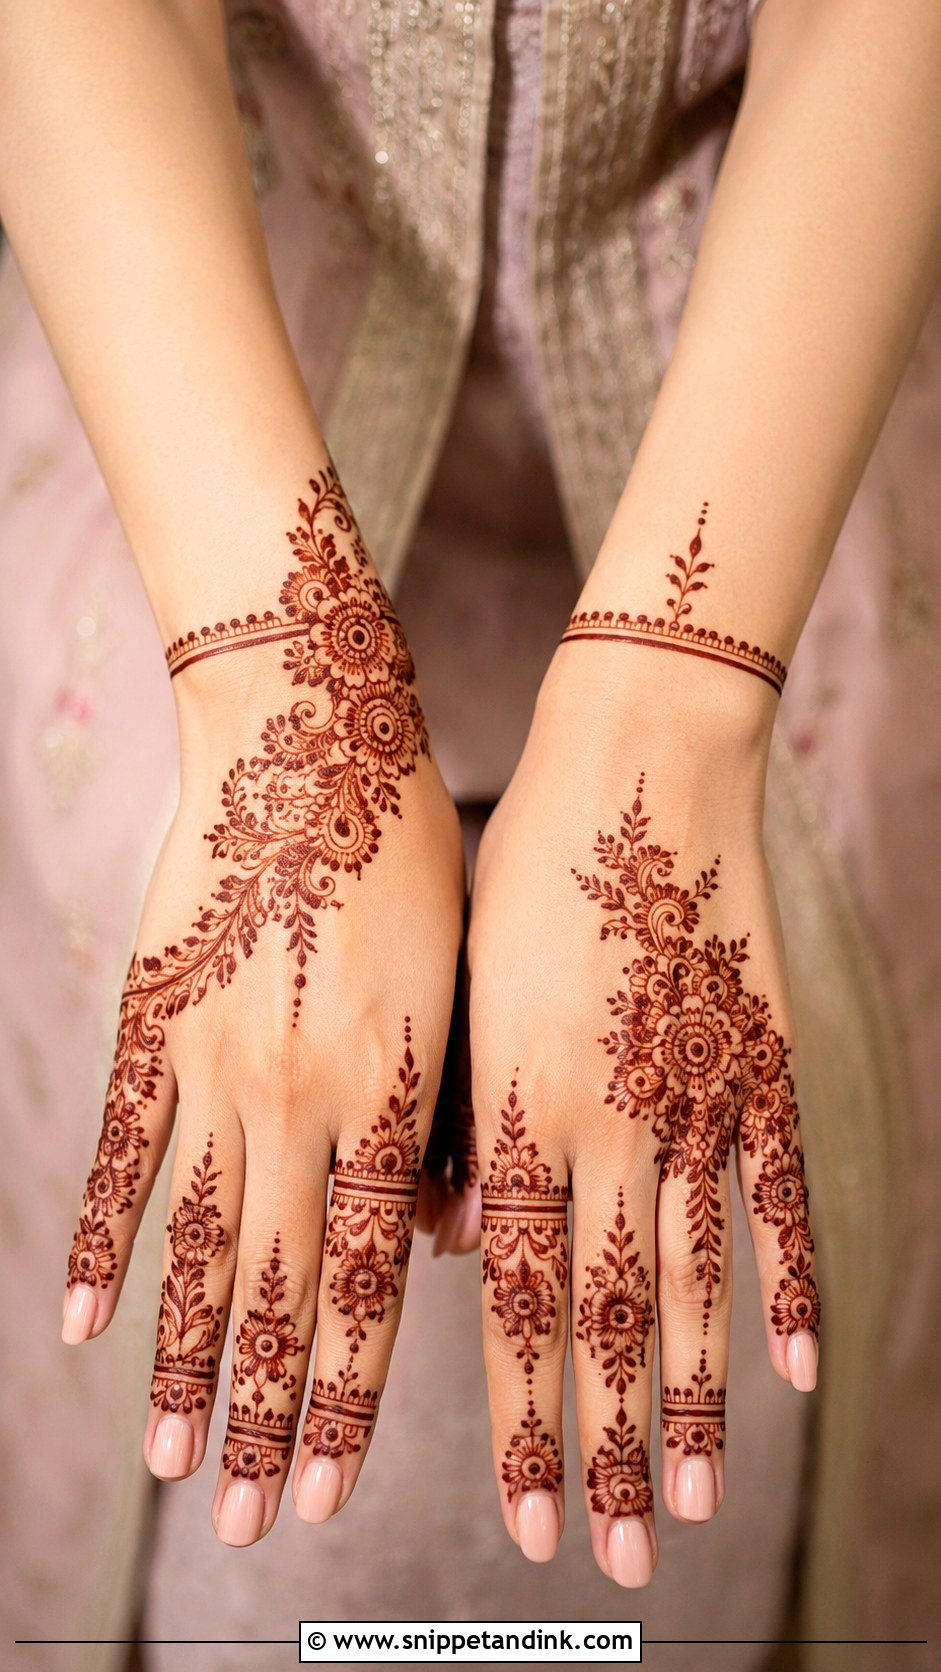
Guests should look festive without competing with the bride, so medium coverage is the sweet spot: florals, ring bands and open space, maybe leafy vines on the back of the fingers and a bracelet line at the wrist. Match the weight to your outfit. Heavy embellishment calls for lighter henna, and a plain outfit can take bolder tips or thicker Arabic strokes. You’ll be eating and shaking hands all evening, which is another reason I keep guest designs off the palm.
17. Finger Mehndi Design For Engagement
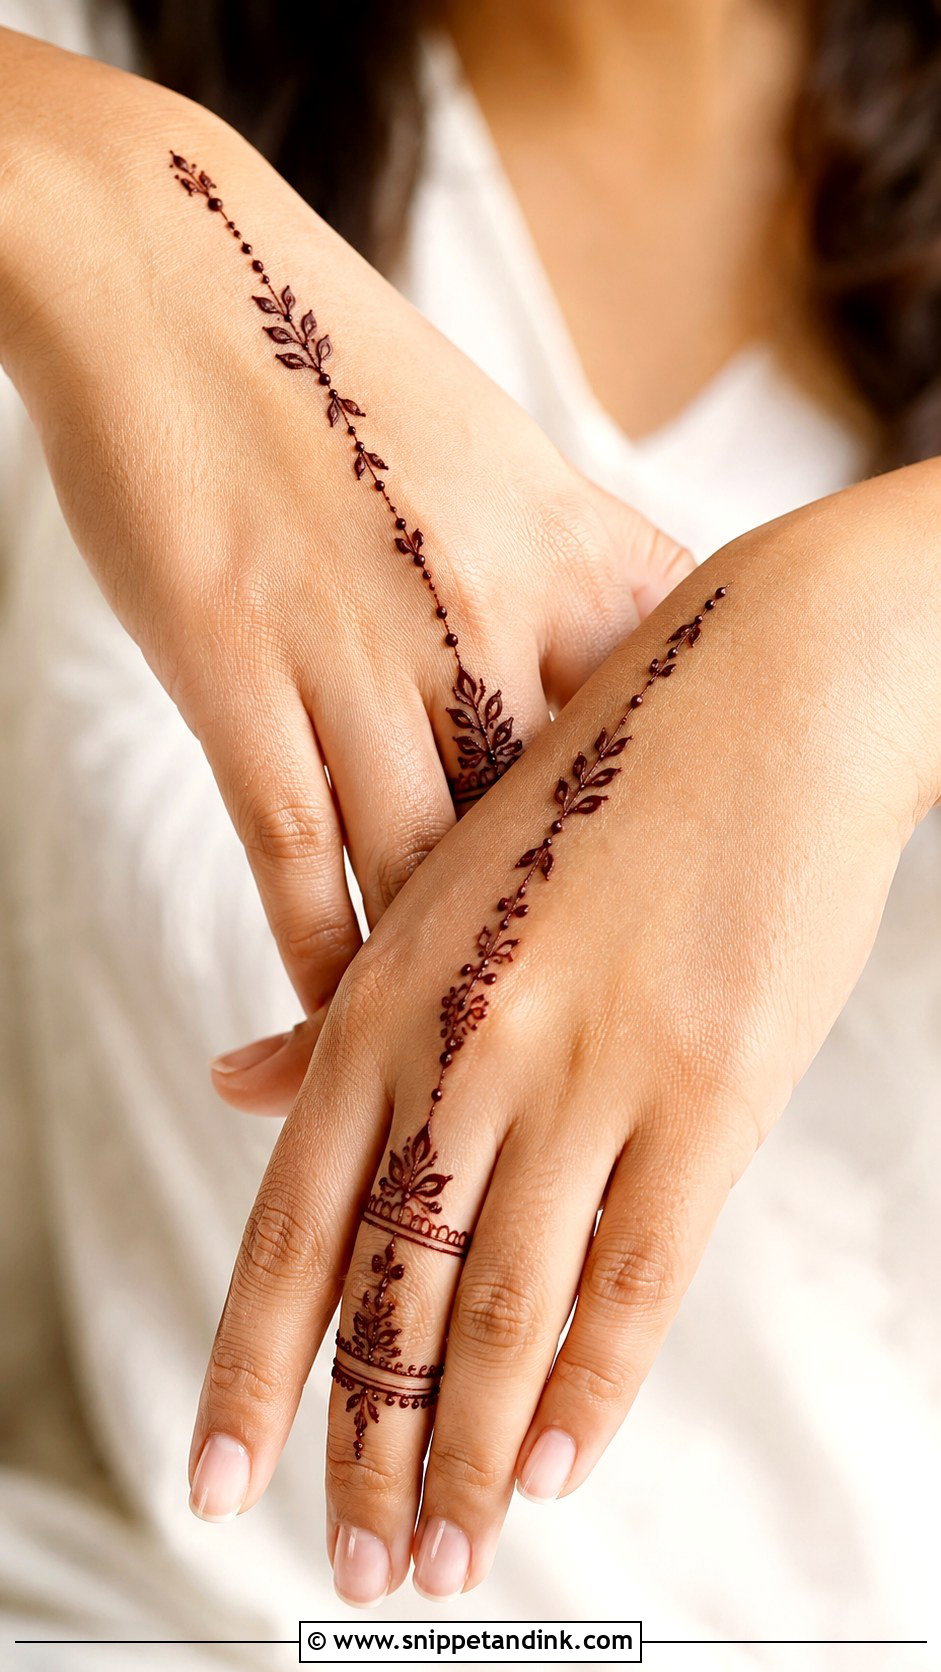
Engagement photos are mostly close-ups of one hand, so the design should frame the ring, not hide it. I put a detailed band around the ring finger, run a delicate chain or vine toward the wrist and keep the other fingers soft with dots or slim bands. Open space around the knuckles stops it from crowding the ring. The same layout works for close family at the ceremony, scaled down.
18. Finger Mehndi Design For Kids
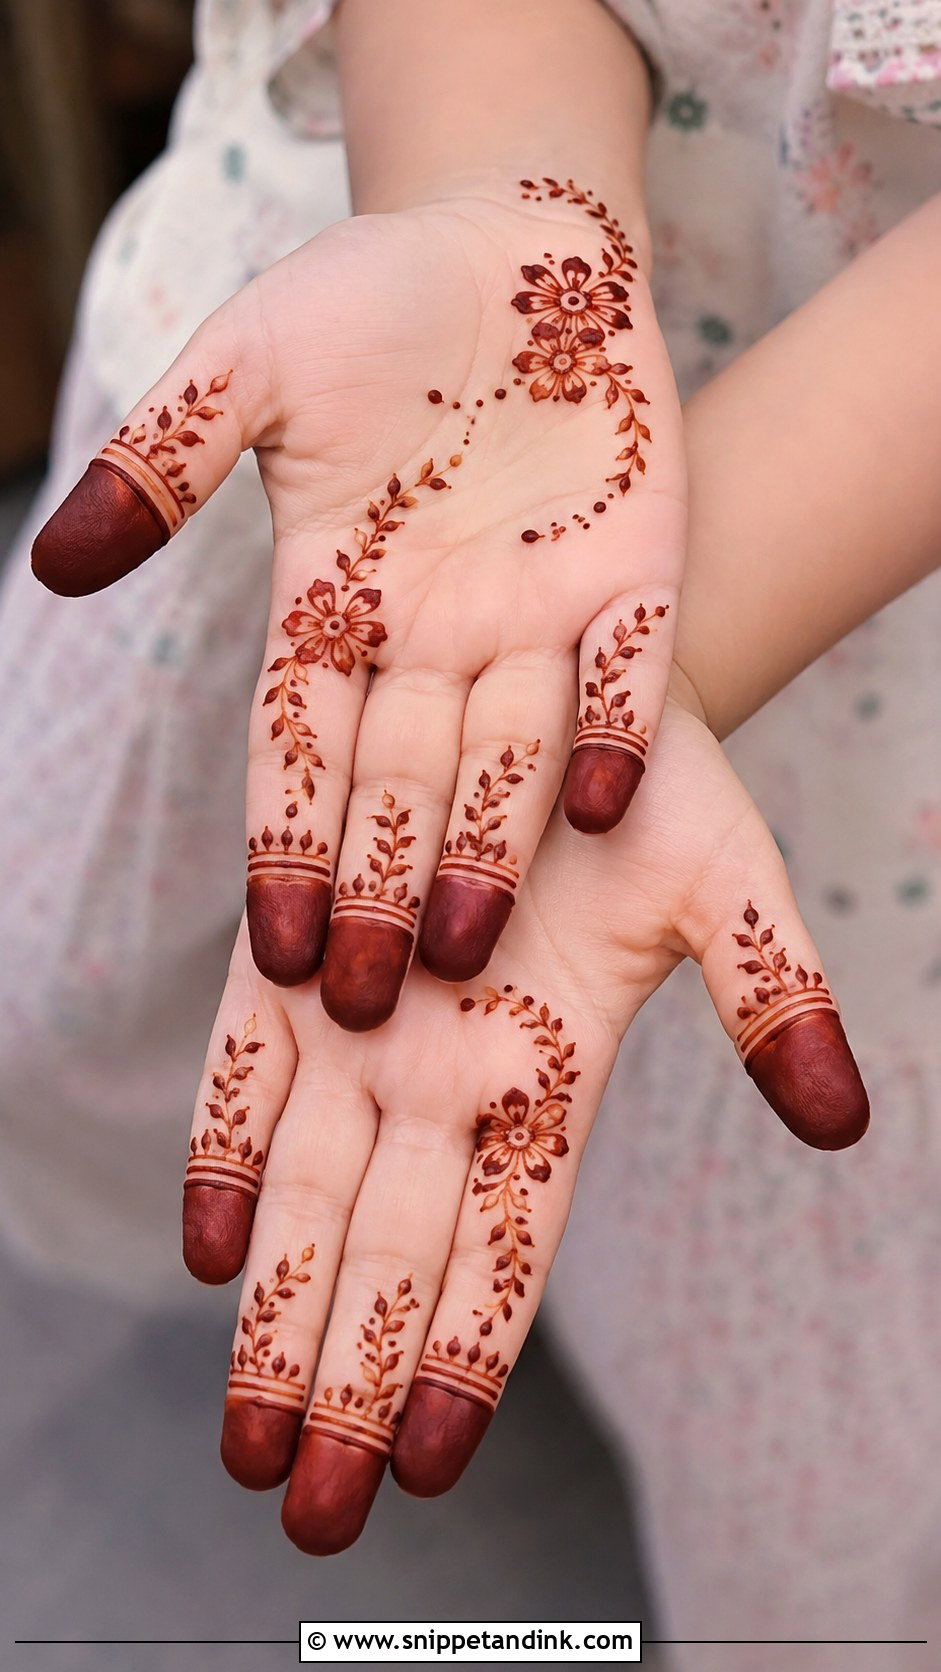
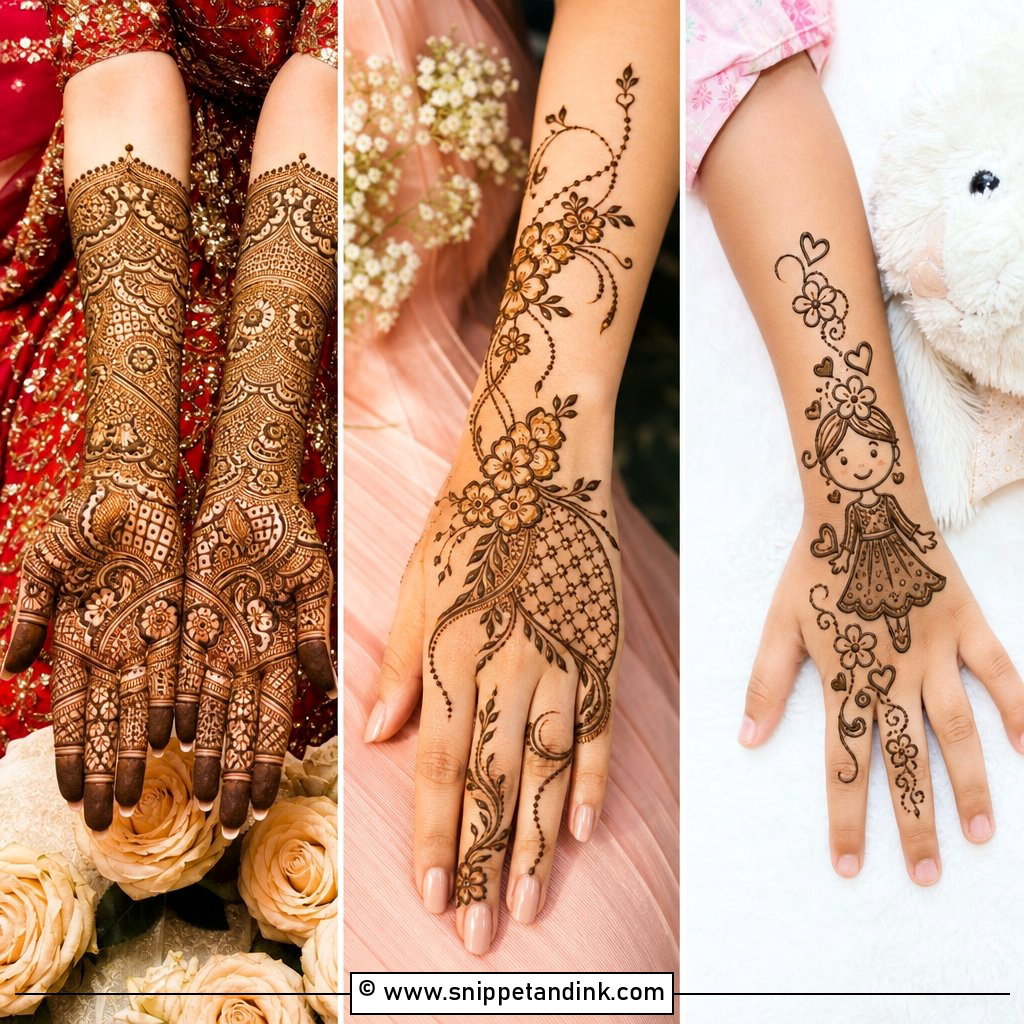
Children lose patience fast and smudge everything, so I keep it quick: small flowers, dots, stars, hearts, leaf chains and fingertip caps. One mini flower per finger joined by dots is plenty. Skip dense filling; a child will touch something before it dries. Only ever use natural henna on kids, never a paste that promises a black stain, since those can contain PPD and cause serious skin reactions.
19. Finger Mehndi Design With Flowers
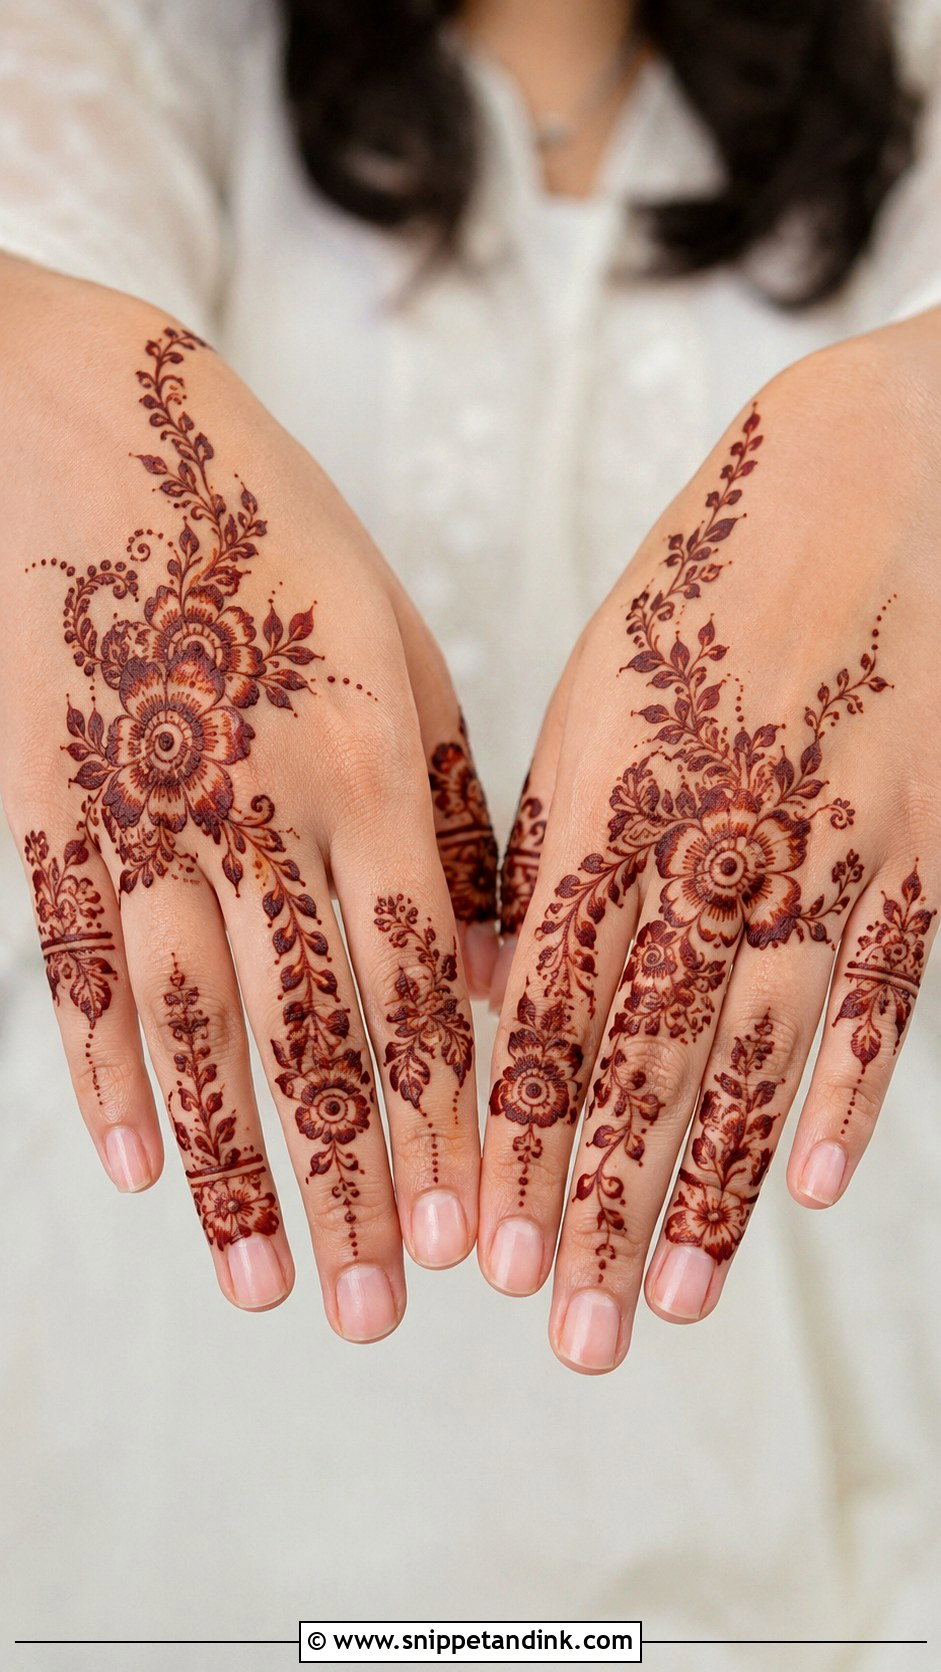
Flowers can sit at the tip, around the knuckle or along a vine traveling down the finger. Small petals keep it minimal, and larger Arabic flowers make it bold. I pair floral fingers with thin leaf trails and dotted borders so the blooms don’t float on their own. One finger as the main floral focus with tiny blossoms on the rest is a layout that suits front and back of the hand equally.
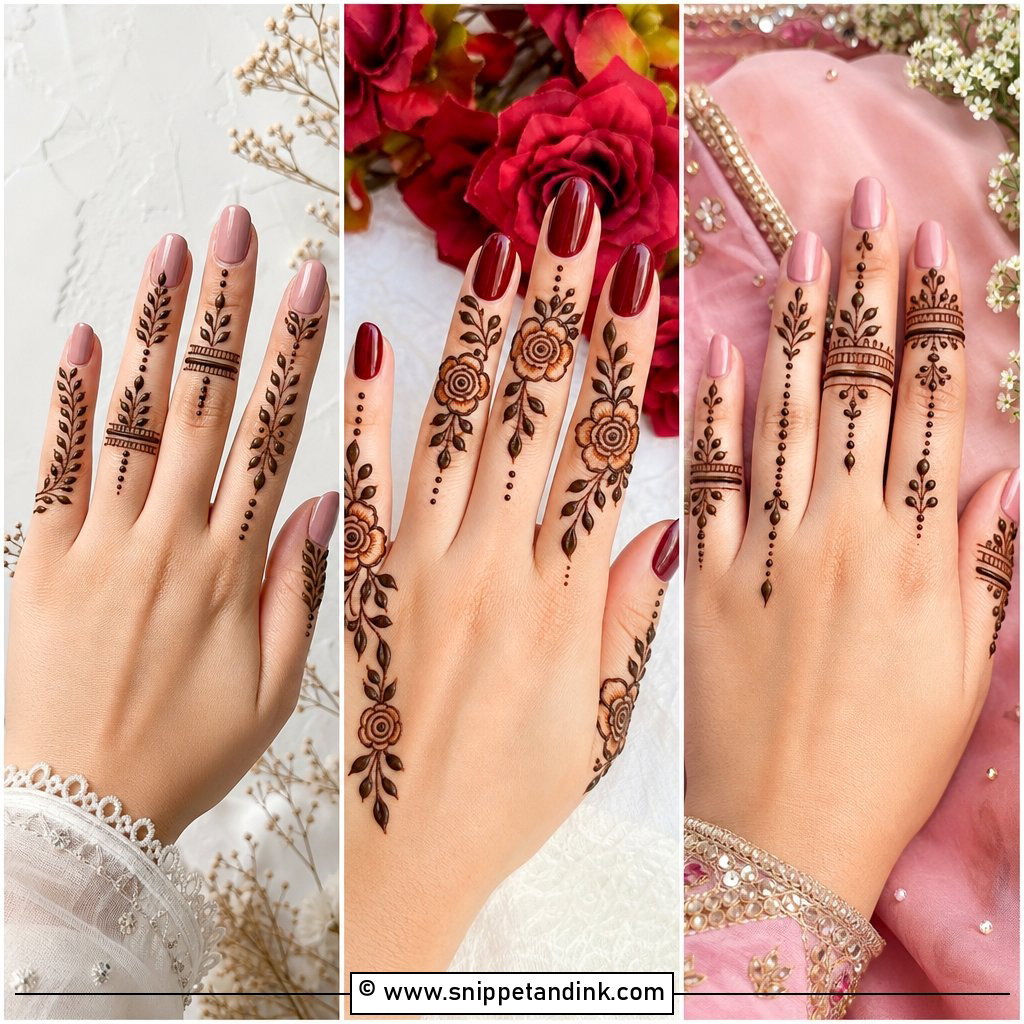
20. Finger Mehndi Design With Leaves
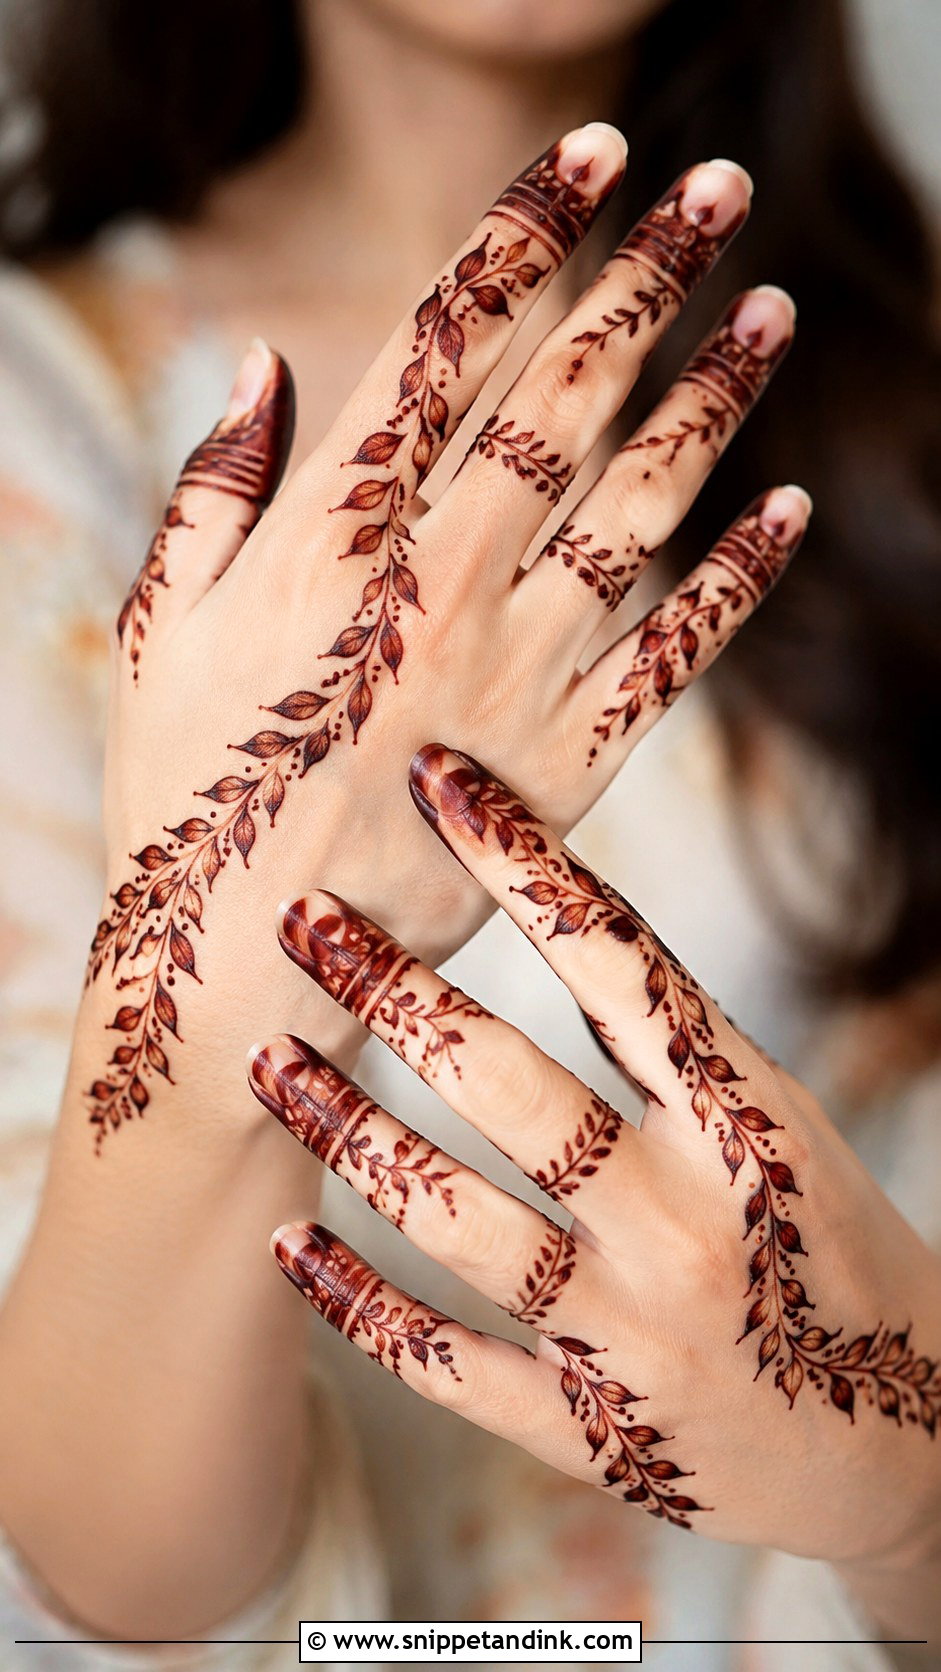
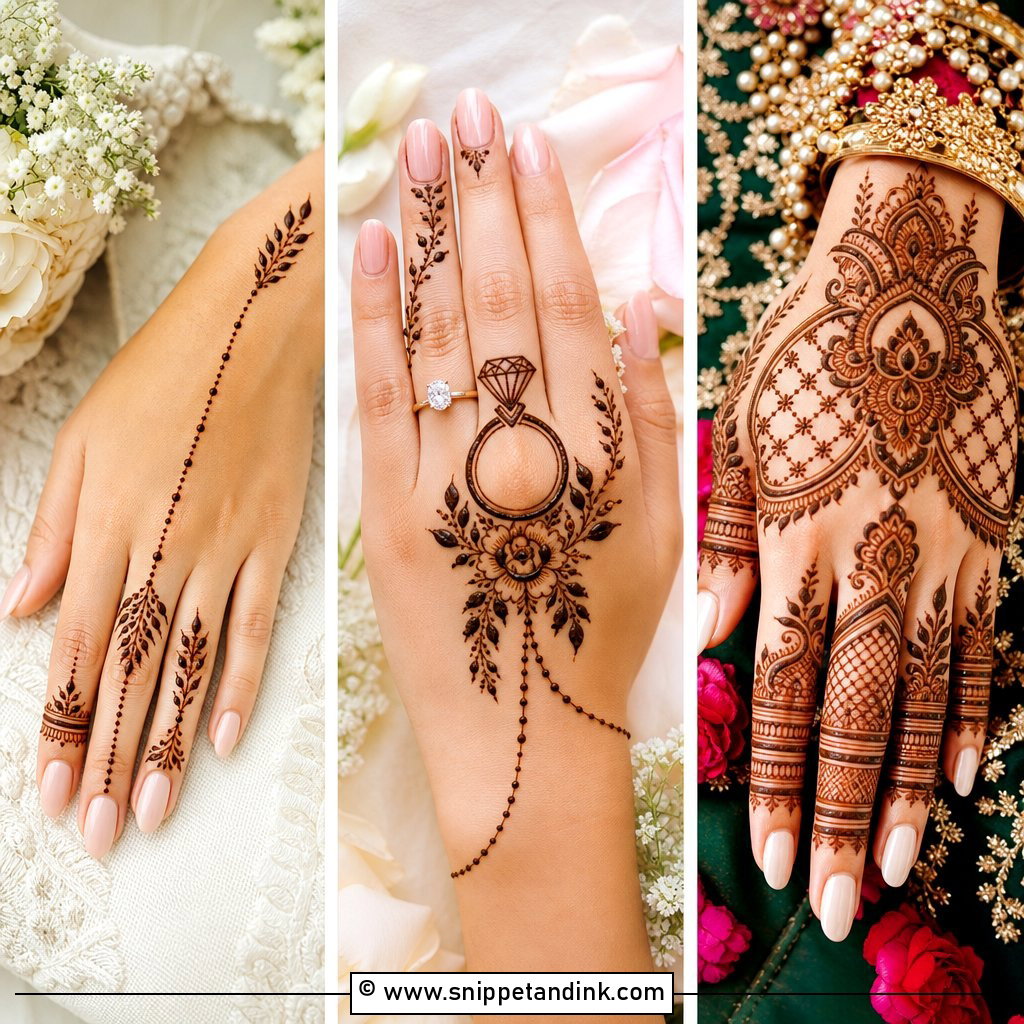
Leaves are the most forgiving motif I draw. They can be tiny or bold, and if one comes out slightly off, the next leaf disguises it. Start with dark fingertip shading, draw a fine vine from the tip toward the knuckle, then add leaves on alternating sides so the line has movement. It’s a good choice for daytime events where heavy henna would feel out of place.
21. Finger Mehndi Design With Dots
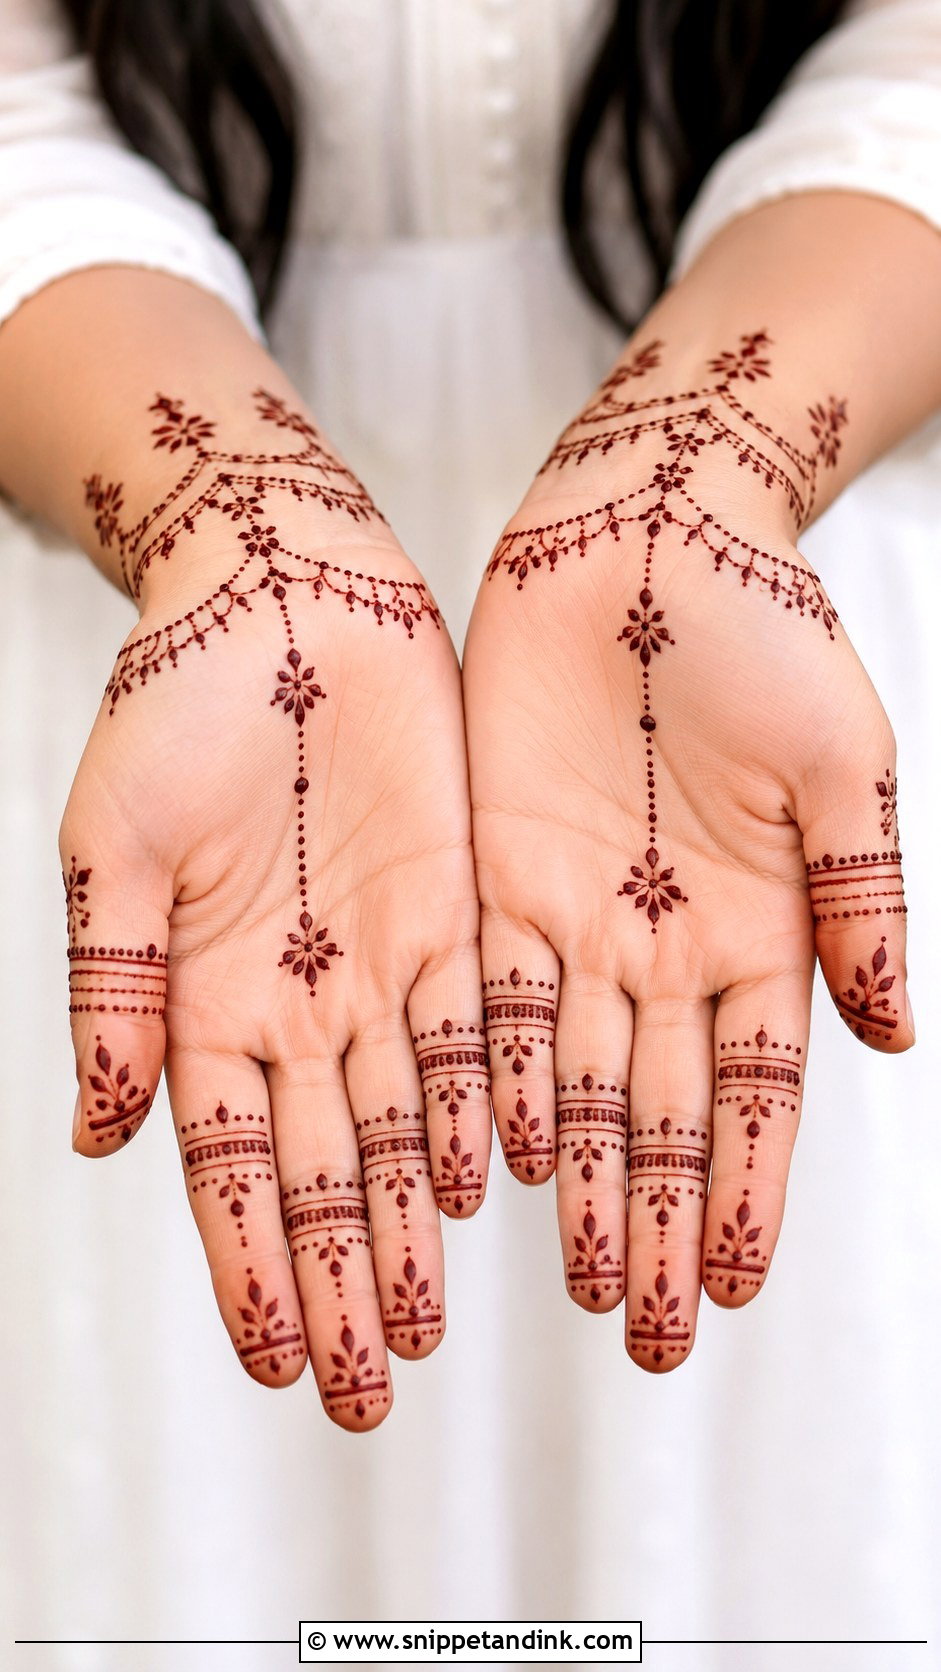
Dots are deceptively hard. They frame bands, connect joints, outline tiny flowers and make chains across the fingers, but the whole look depends on even spacing and even size. I draw slim horizontal lines around the fingers first, then place dots above and below each one with steady pressure on the cone. Uneven dots are the first thing people notice, more than any other flaw.
22. Finger Mehndi Design With Jaali
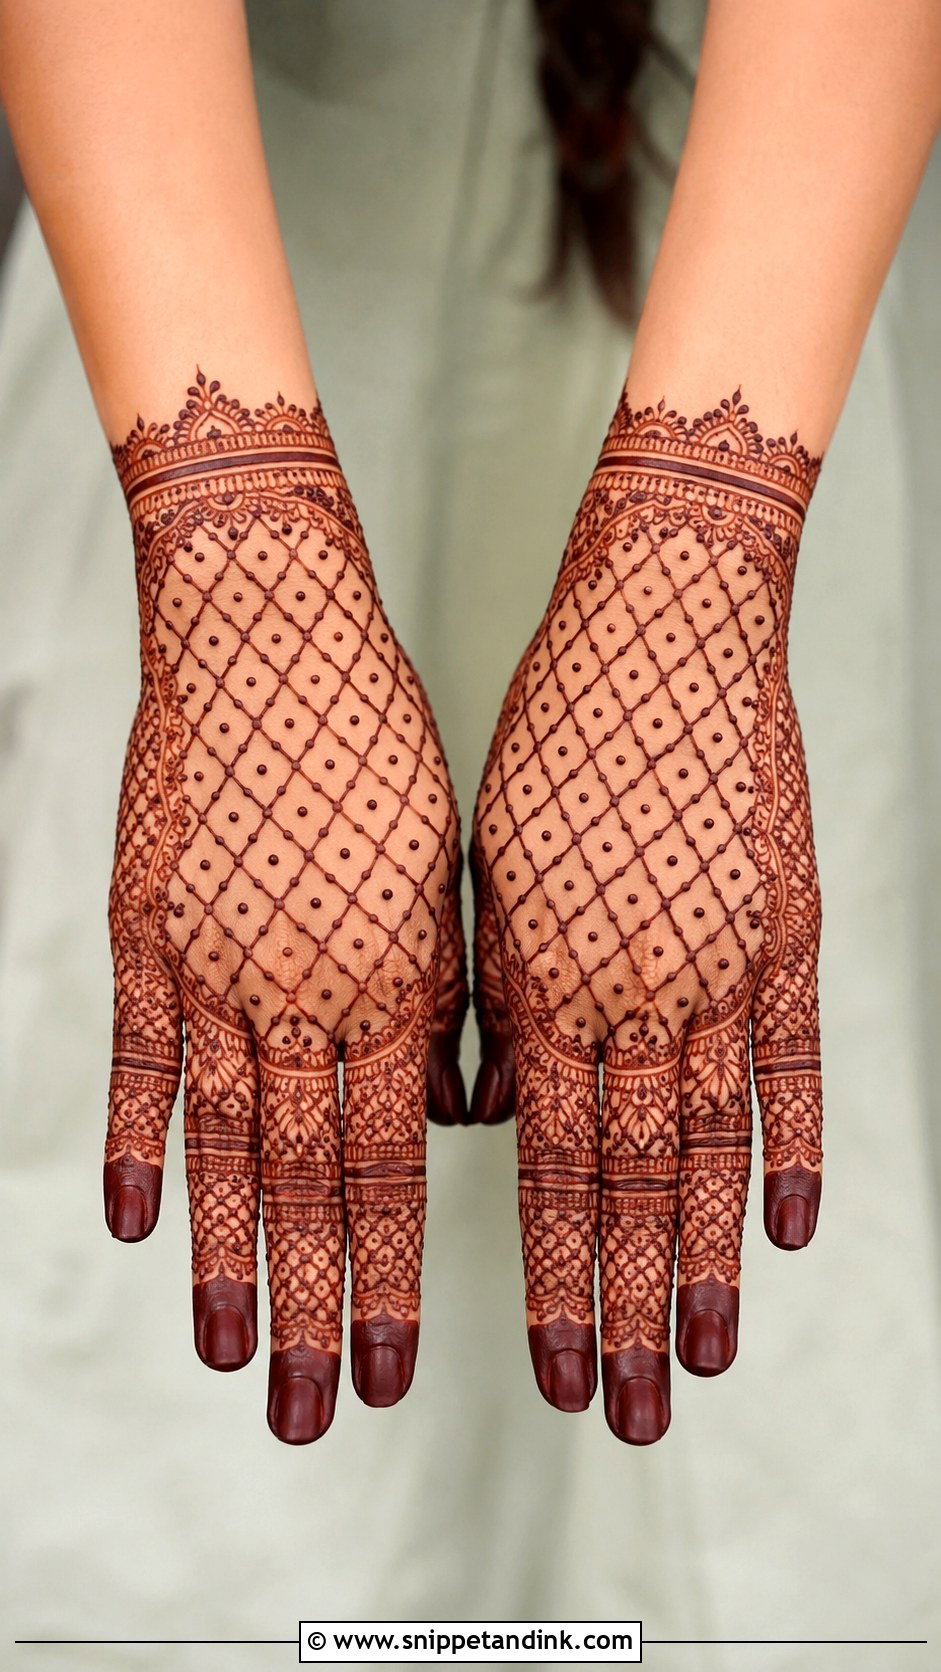
Jaali gives the fingers a lace effect with small grids, diamonds or net shapes filled with dots or tiny petals. On the back of the hand it looks like a delicate glove. For lighter coverage I use jaali on one or two fingers and simple bands on the rest; for a wedding or reception I cover every finger with different jaali sections and dark tips. The grid needs to be drawn slightly wider than you’d expect, because henna lines spread a little as they dry and a tight mesh closes up.
23. Finger Mehndi Design With Mandala
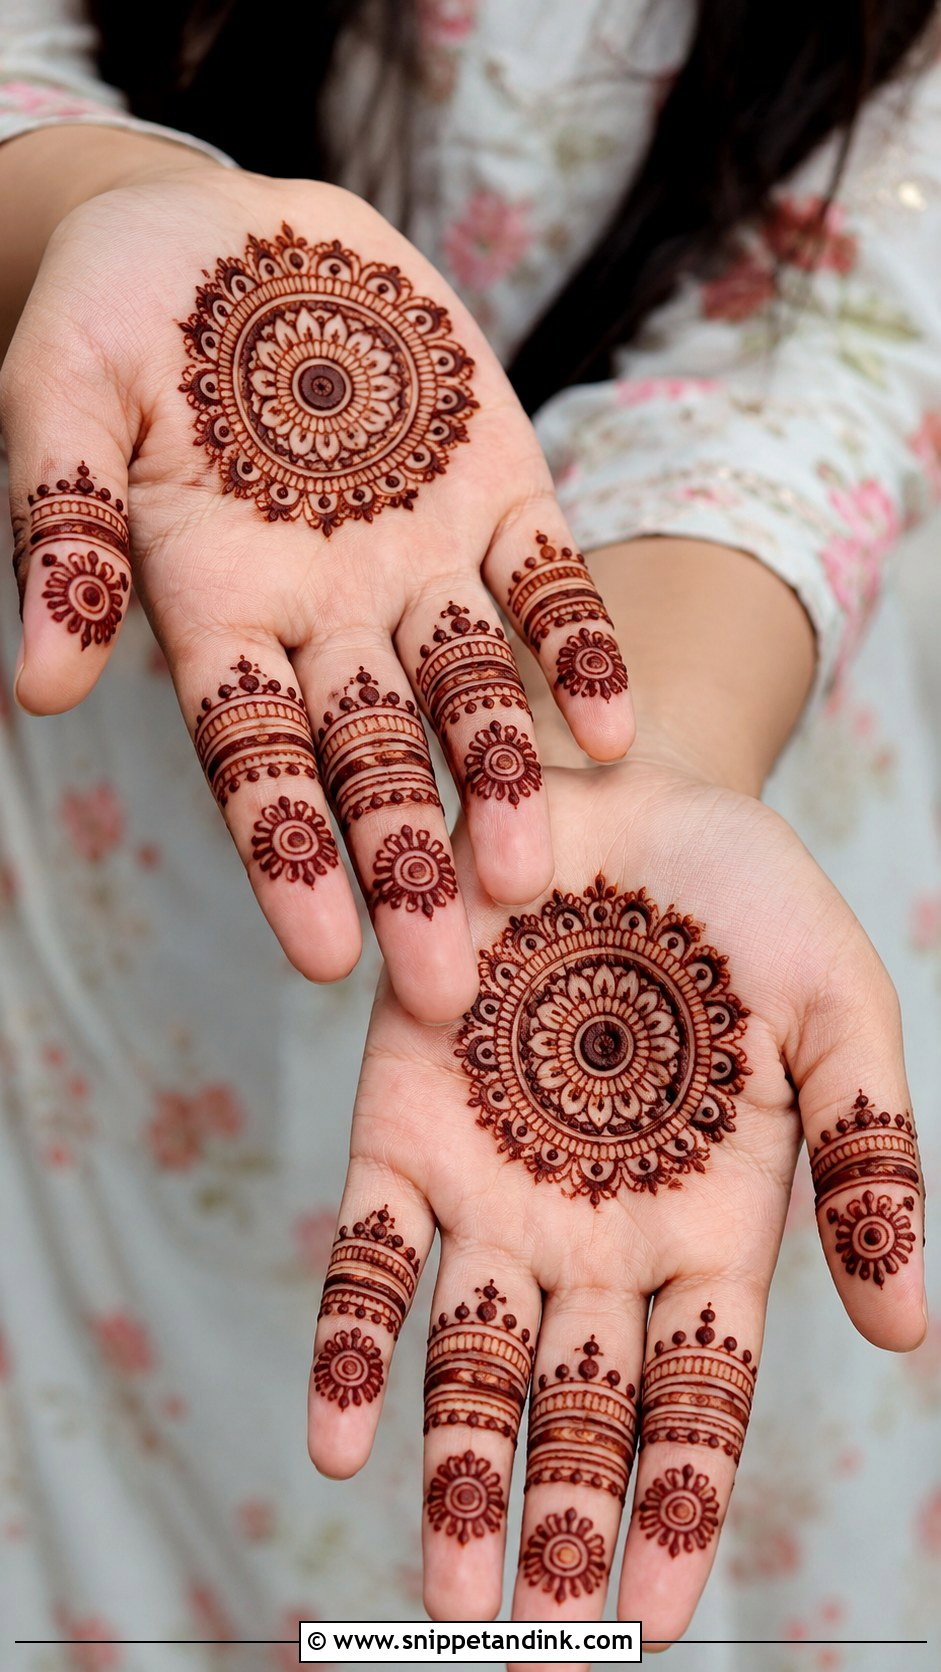
A mandala can sit at the base of the fingers, in the center of the palm, or as tiny circles on each finger. For a finger-led version, I put a mini mandala on the middle finger and repeat its bands or dots on the others, which completes the hand without heavy palm work. Circles on a narrow finger are easy to warp. I keep them small enough to sit flat between two joints.
24. Finger Mehndi Design With Paisley
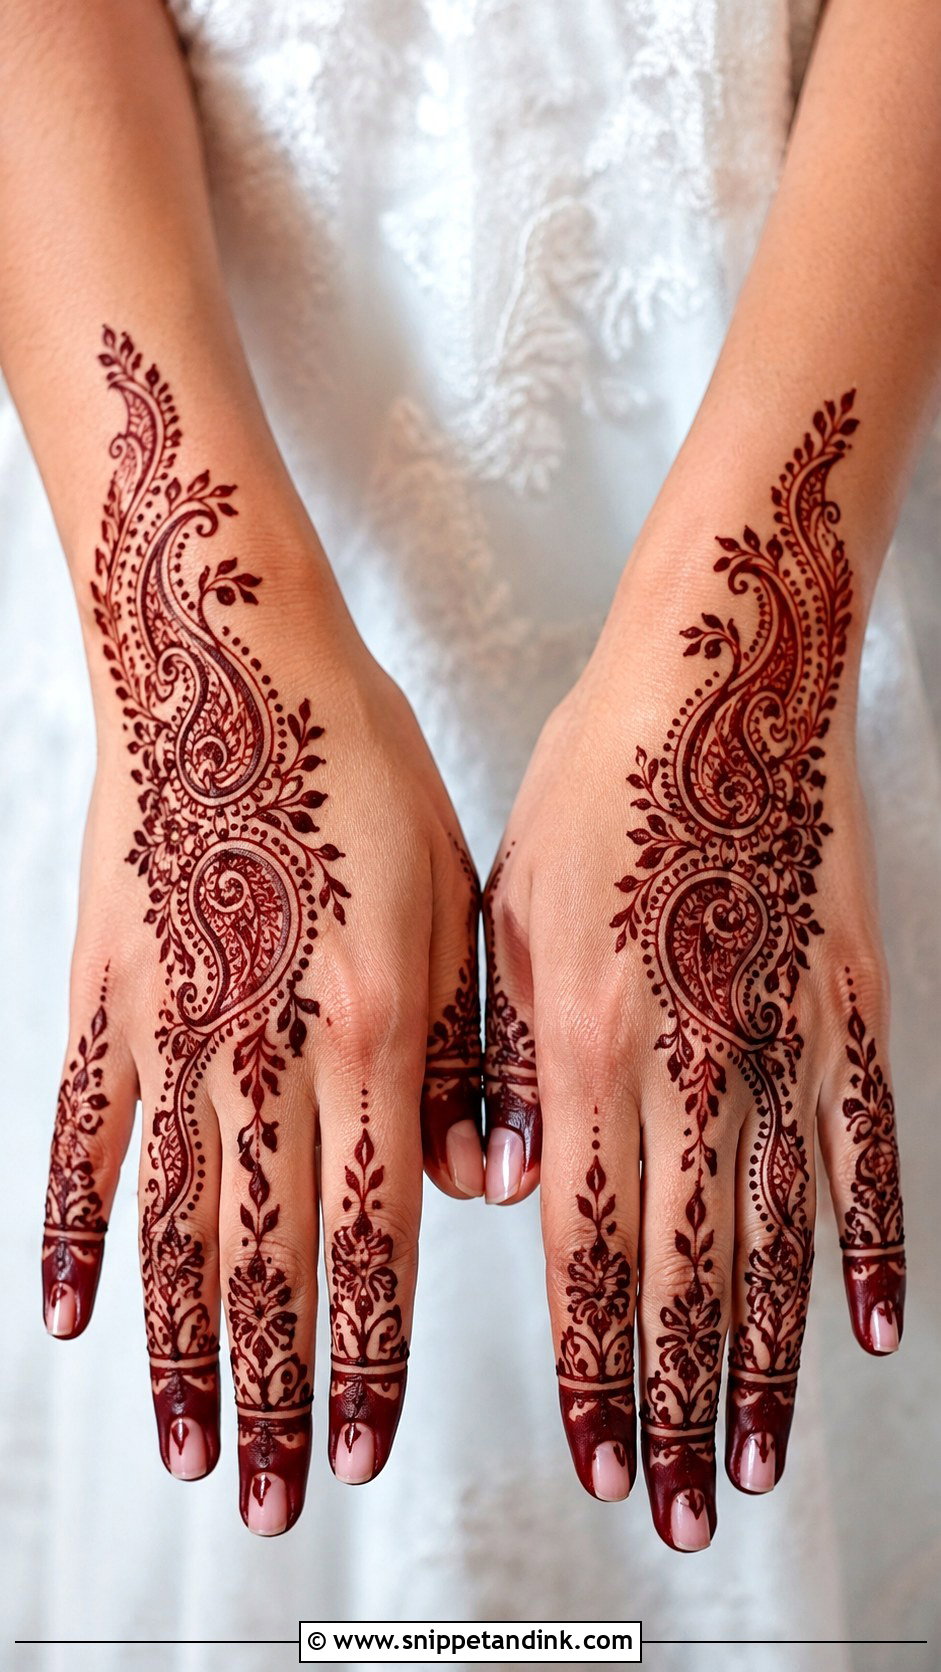
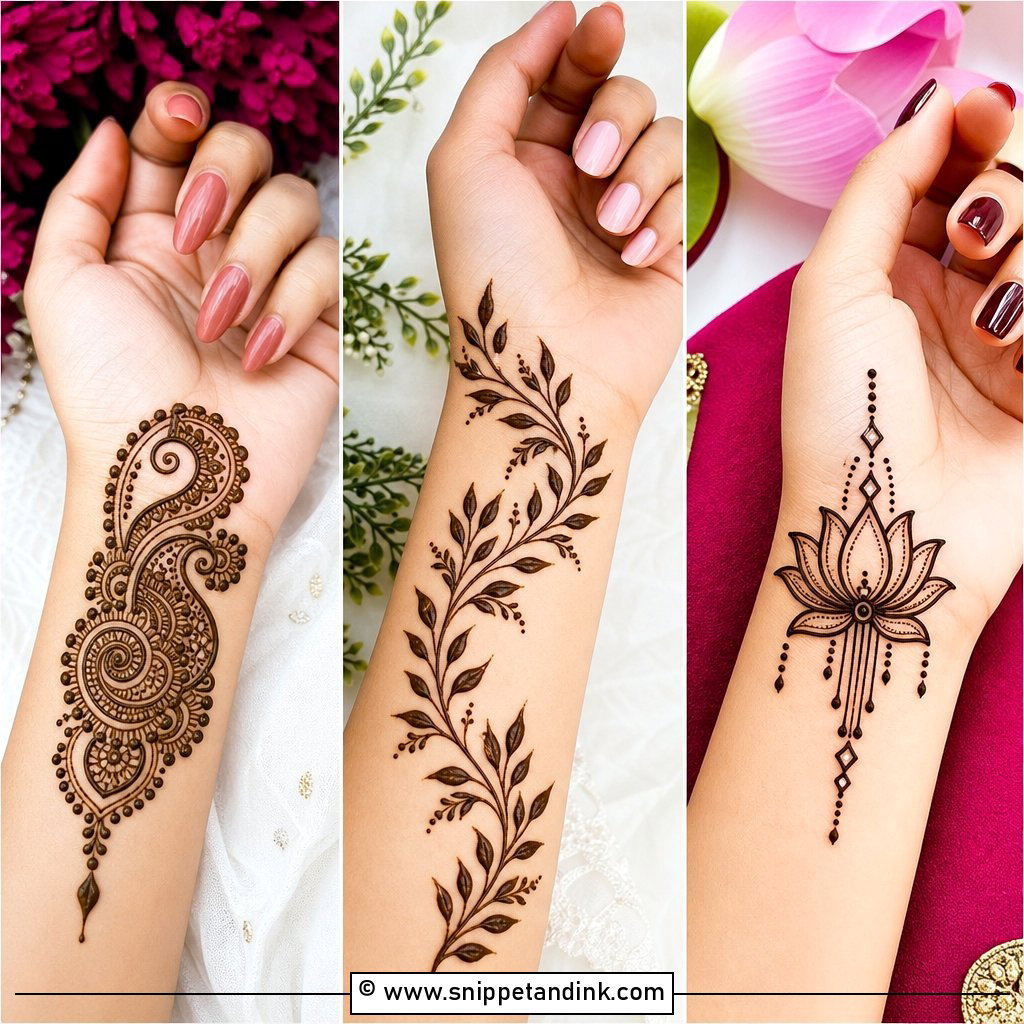
Paisleys follow the length of a finger naturally, which is why they suit this placement. I’ll put one near the base of the index or middle finger and extend it toward the tip with dots, leaves and curved lines, or use mini paisleys on every finger for more detail. Leaving space around each paisley instead of filling the finger keeps it modern next to Indian outfits.
25. Finger Mehndi Design With Peacock
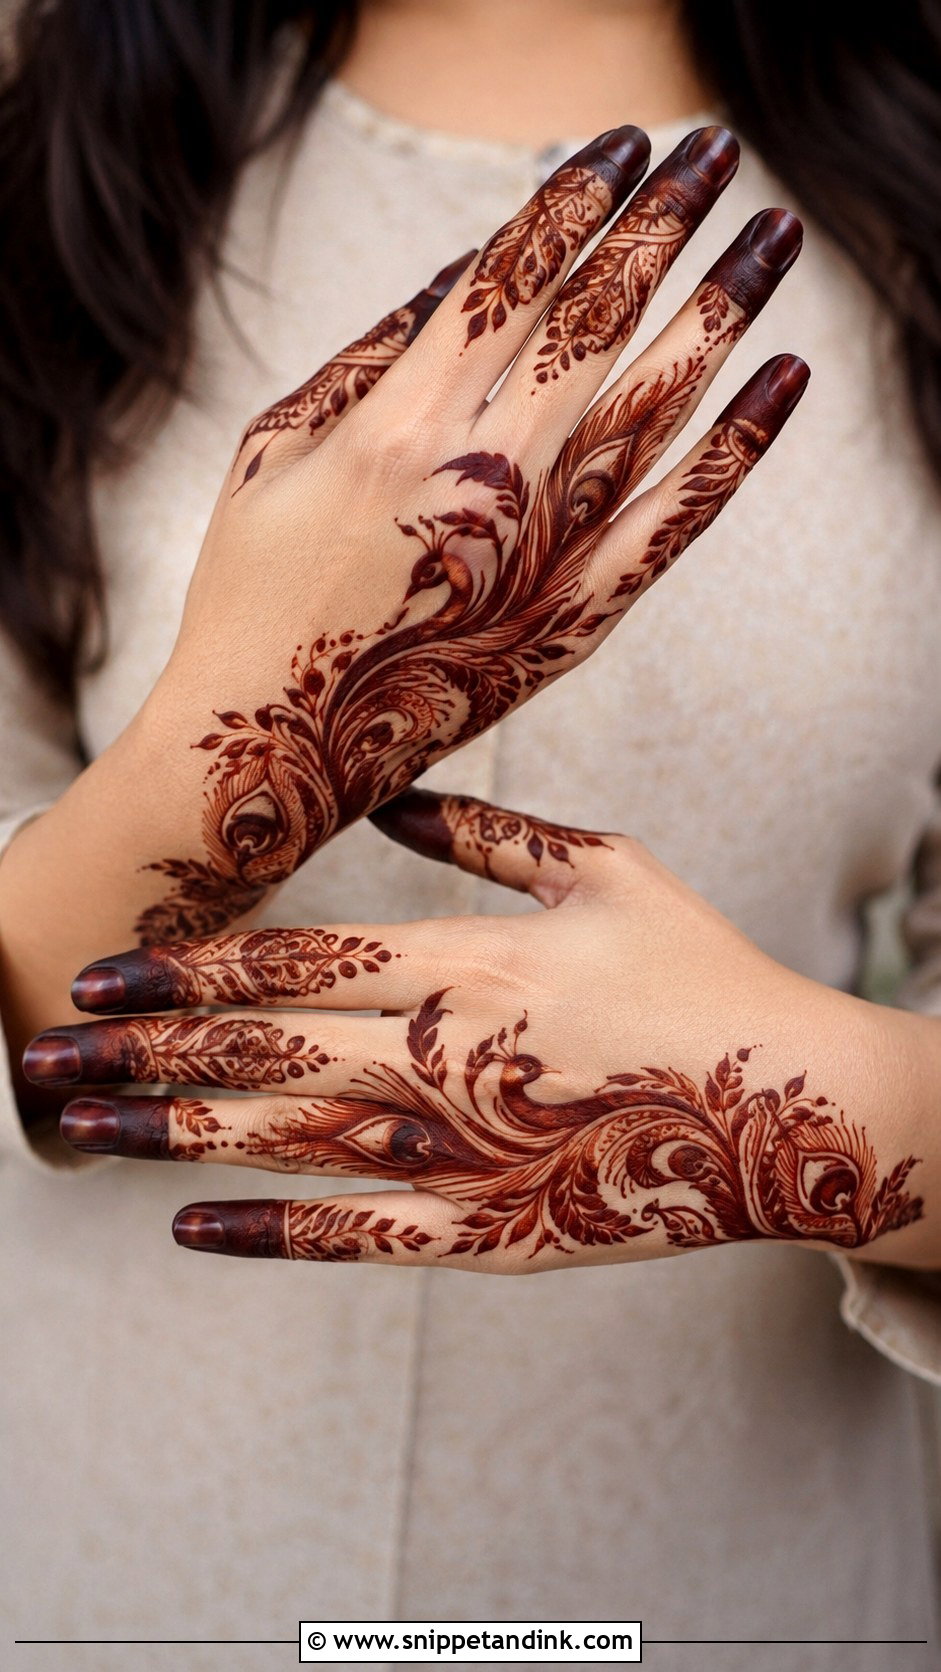
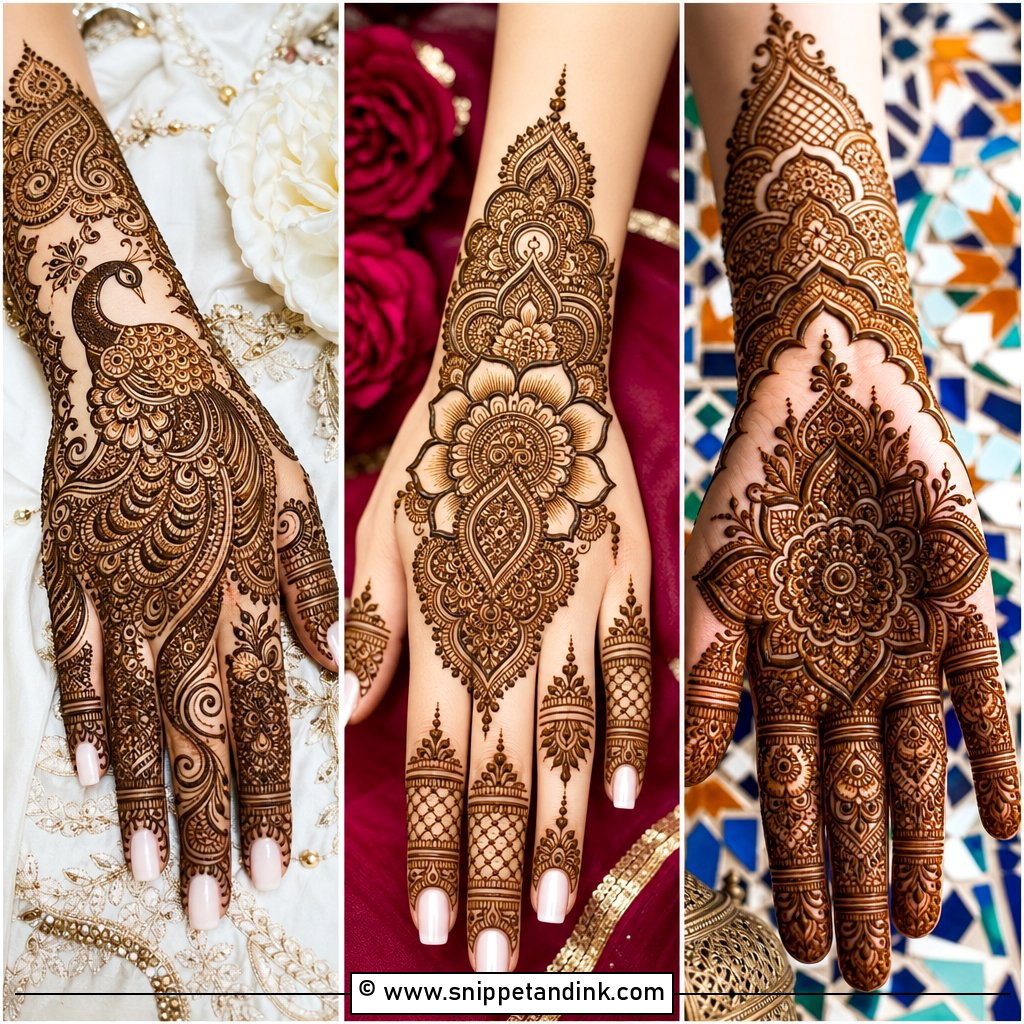
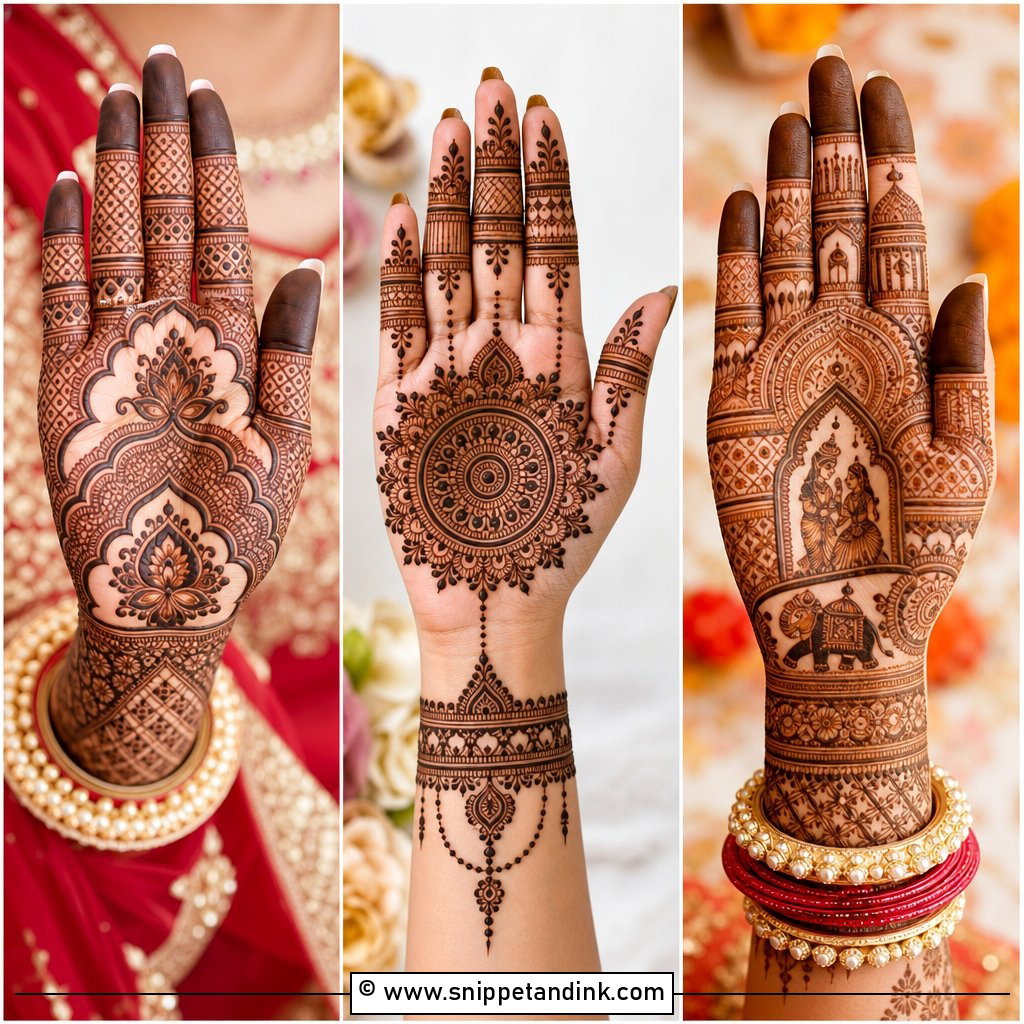
Fingers are narrow, so a peacock has to be scaled down: a single feather along the index finger or a tiny peacock head near the knuckle. Anything bigger loses its detail. Fine lines, dots and leaf accents finish it, with dark fingertip filling as contrast against the delicate feather strokes. It shows best on the back of the hand.
26. Finger Mehndi Design With Bracelet
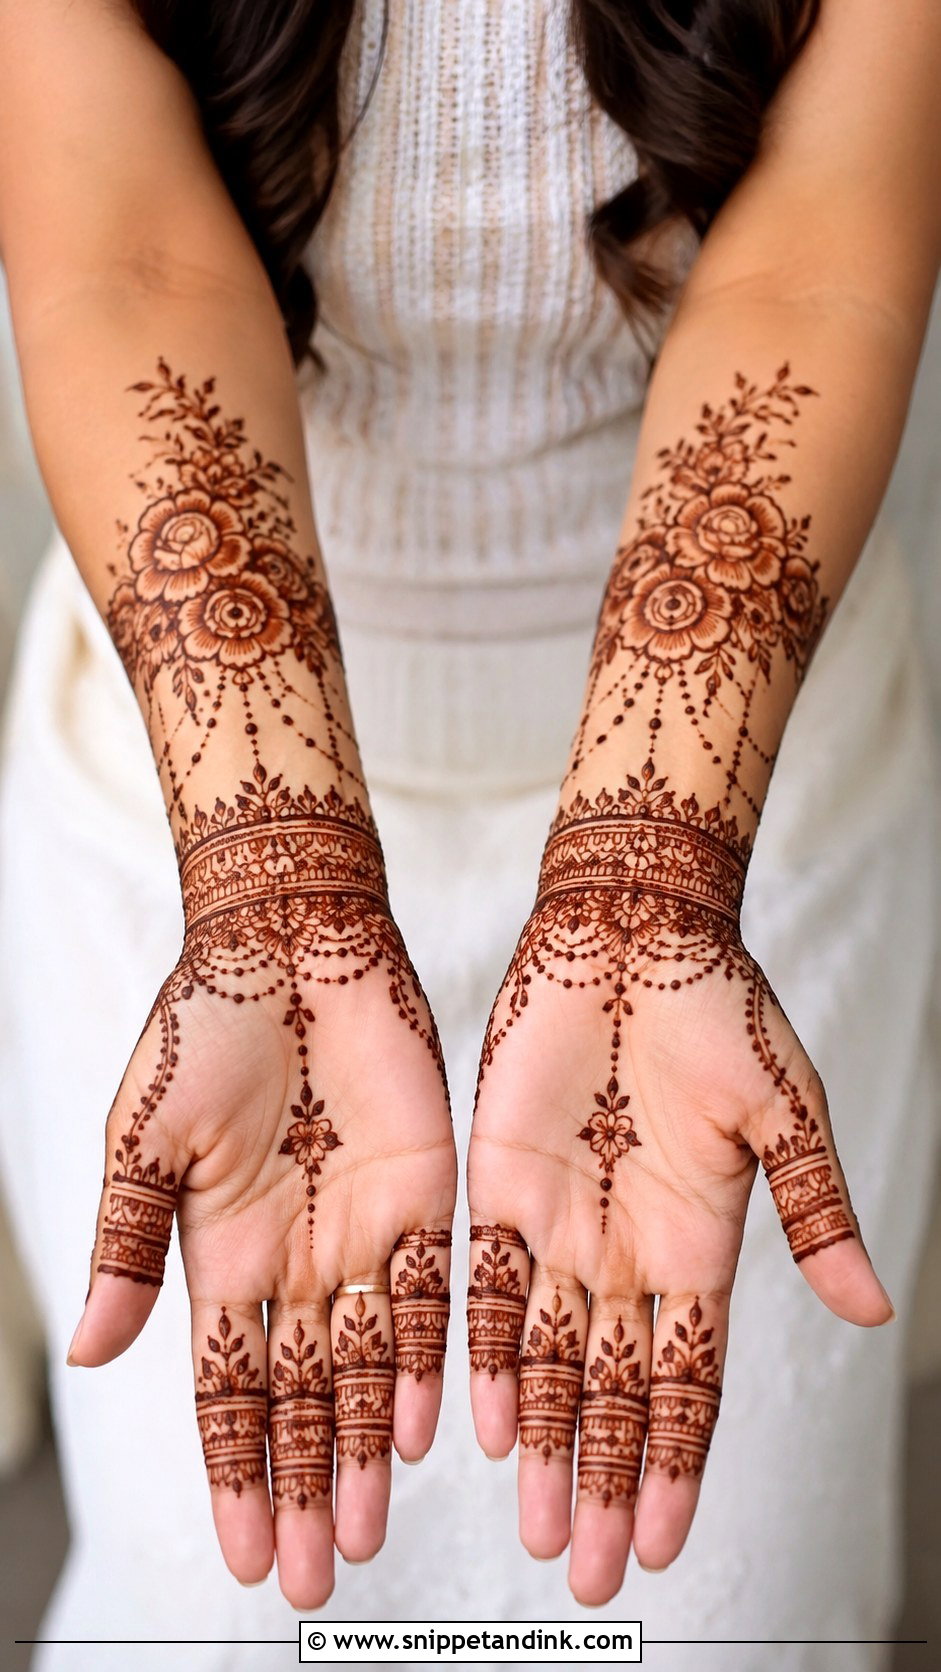
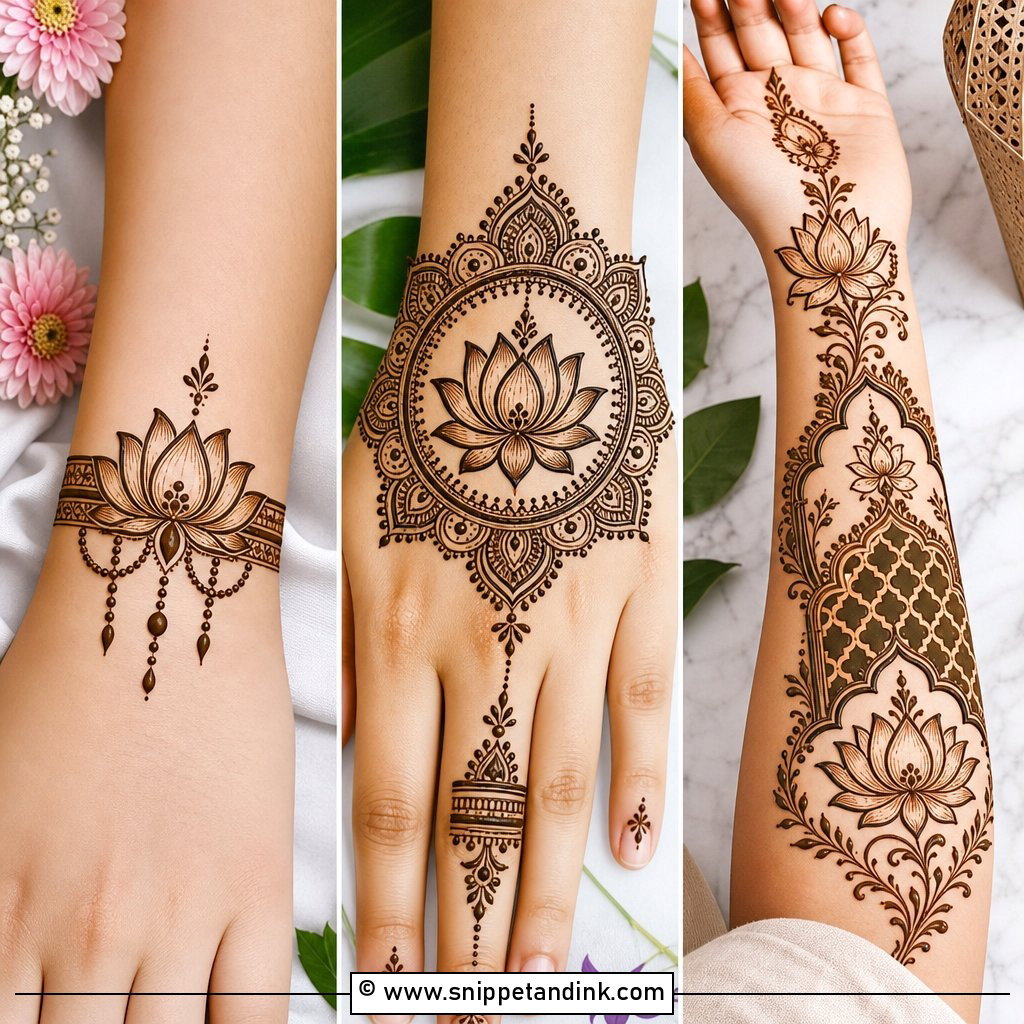
Ring bands, dotted chains and floral links run from the fingers to a strip around the wrist, creating a chain-like henna layout that looks like a haath phool. The fingers can stay simple because the chain makes the design. It sits nicely with real bangles. Keep the chain thin for a delicate effect; small flowers along the wrist add weight if you want it.
27. Finger Mehndi Design With Fingertips
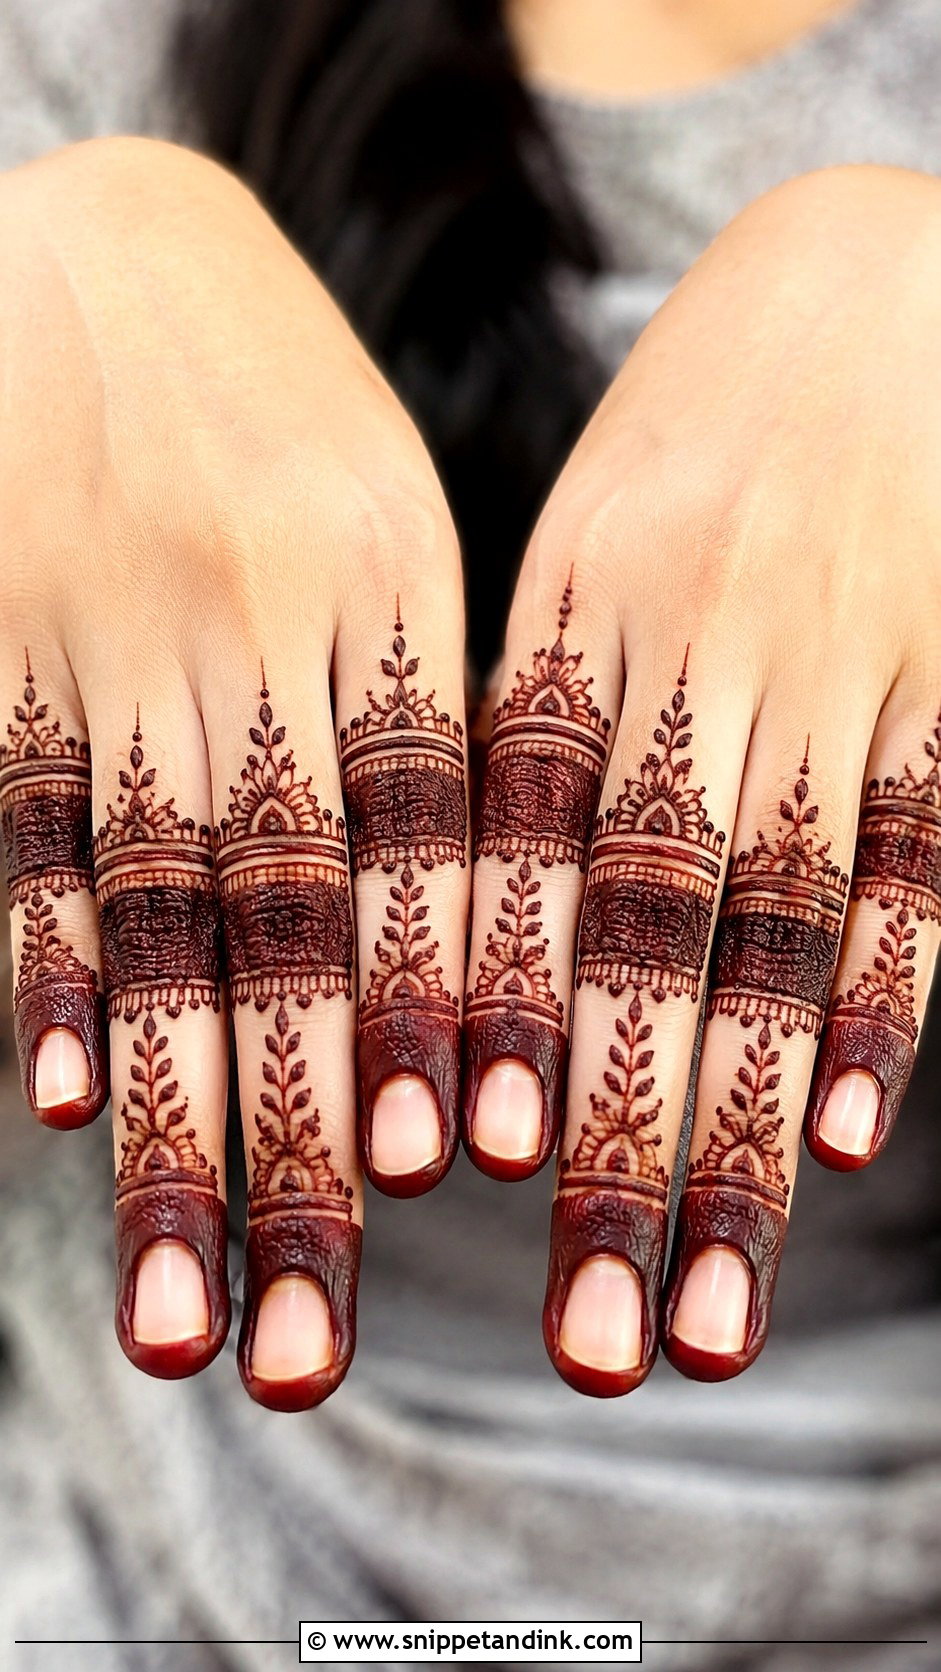
Filled, shaded or striped tips give the strongest impact for the least time, because fingertips stain darker than any other part of the hand. Add fine bands, dots or small vines below the first joint, and leave a gap between the cap and the lower pattern if you want a modern line. Expect the tips to fade first, too. They’re the part of your hand that gets washed most.
28. Finger Mehndi Design With Negative Space
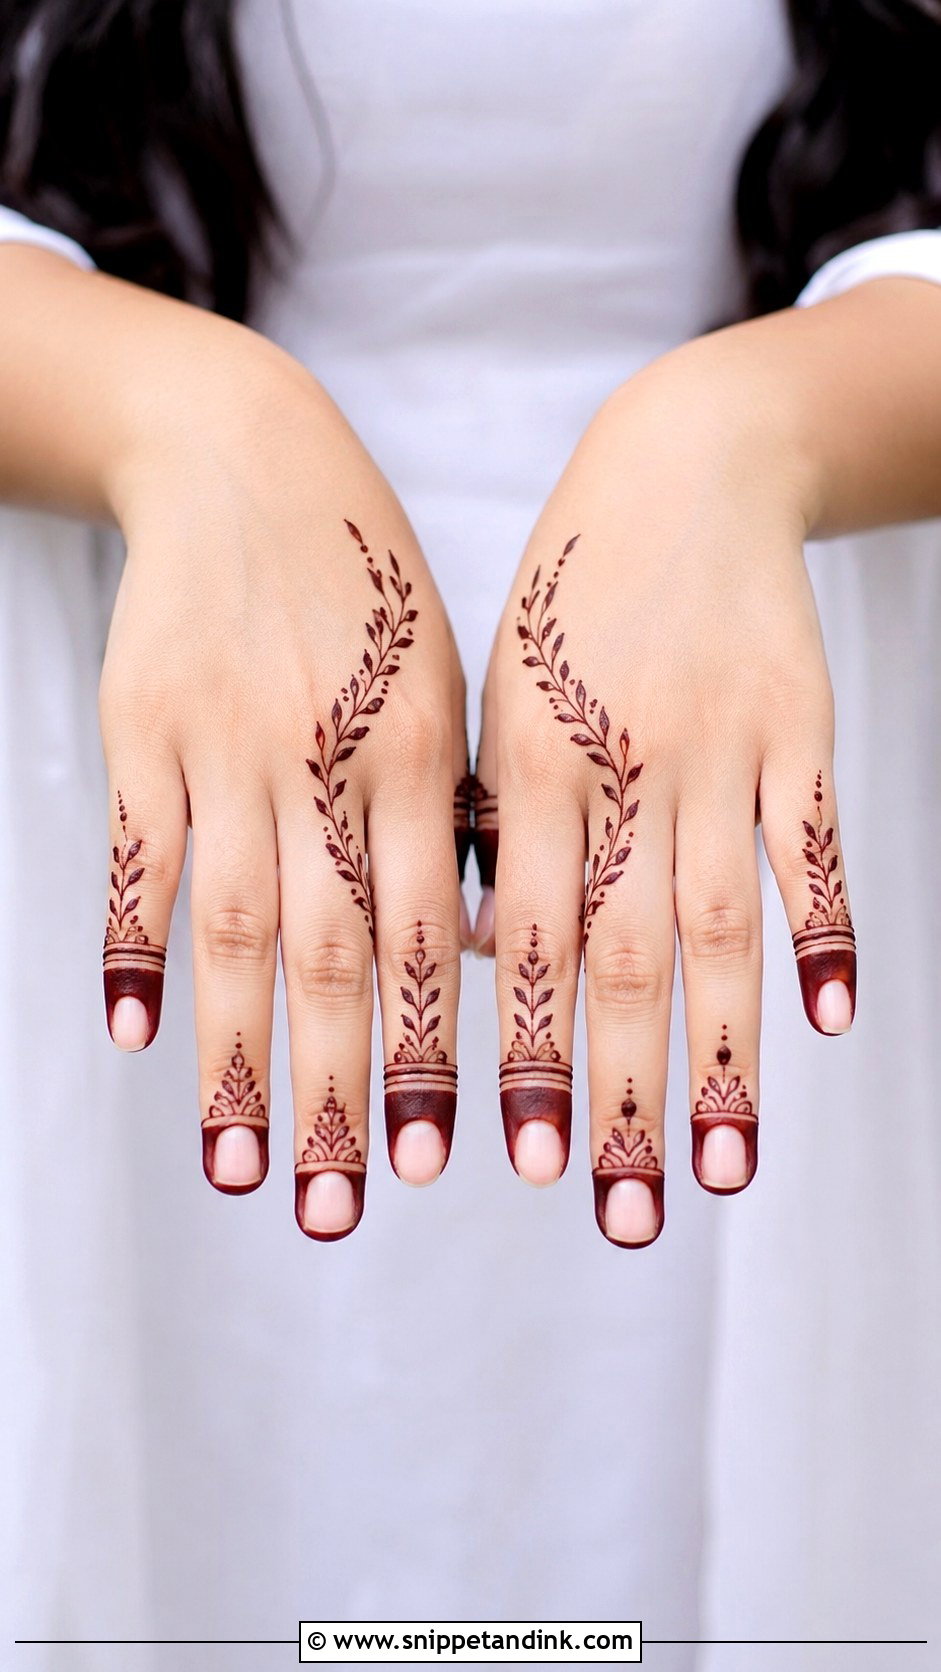
Blank skin does the work in a negative space design: split bands, half-filled tips and side vines with the center of the finger clear. I often recommend it for small hands, because dense coverage on short, slim fingers can look crowded quickly. Make one finger detailed and keep the rest very minimal. Every line is visible, so the linework has to be clean.
29. Finger Mehndi Design With Geometric Pattern
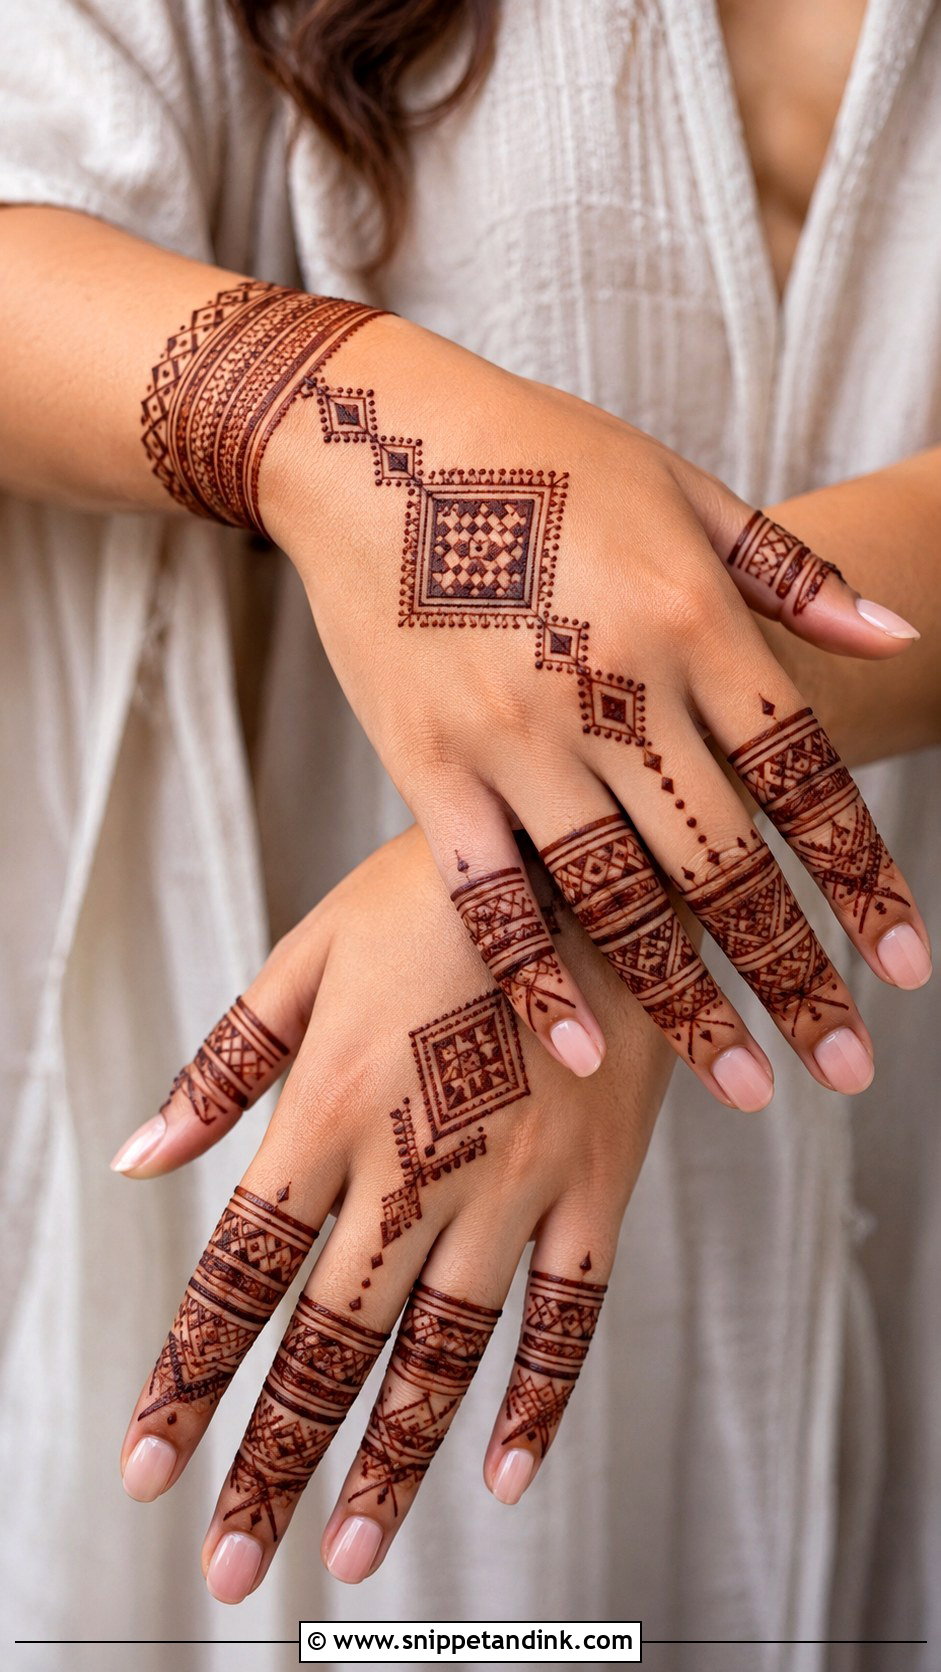
Diamonds, triangles, checks, straight lines and boxed details suit anyone who doesn’t want florals or traditional motifs. Geometric bands on every finger, with one matching shape near the base of the hand, makes a complete look for Indo-western outfits. It is less forgiving than florals. A slightly slanted line is obvious in a grid, so I mark small guide dots before drawing any straight edges.
30. Finger Mehndi Design With Heart
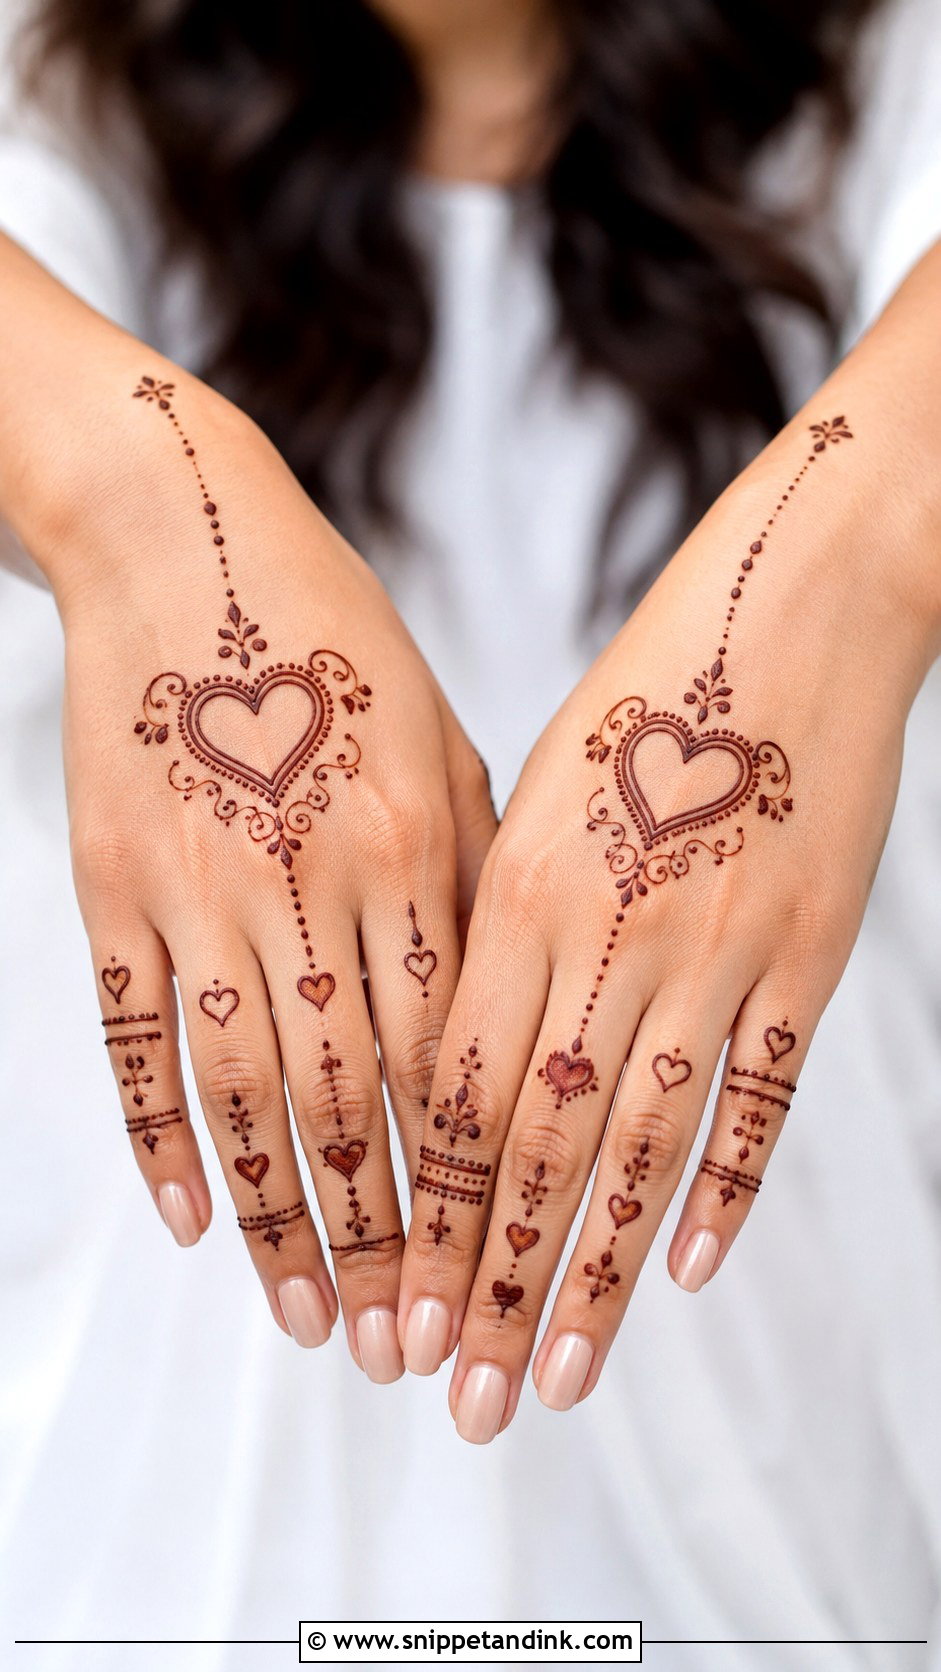
Hearts near the fingertips, inside ring bands or at the center of a dotted chain feel youthful and personal, which makes them popular for engagements and birthdays. The size matters a lot. Small hearts stay elegant, while big ones start to look like a child’s drawing. A heart on the ring finger with a slim chain toward the wrist is a sweet detail for an engagement.
31. Finger Mehndi Design With Vines
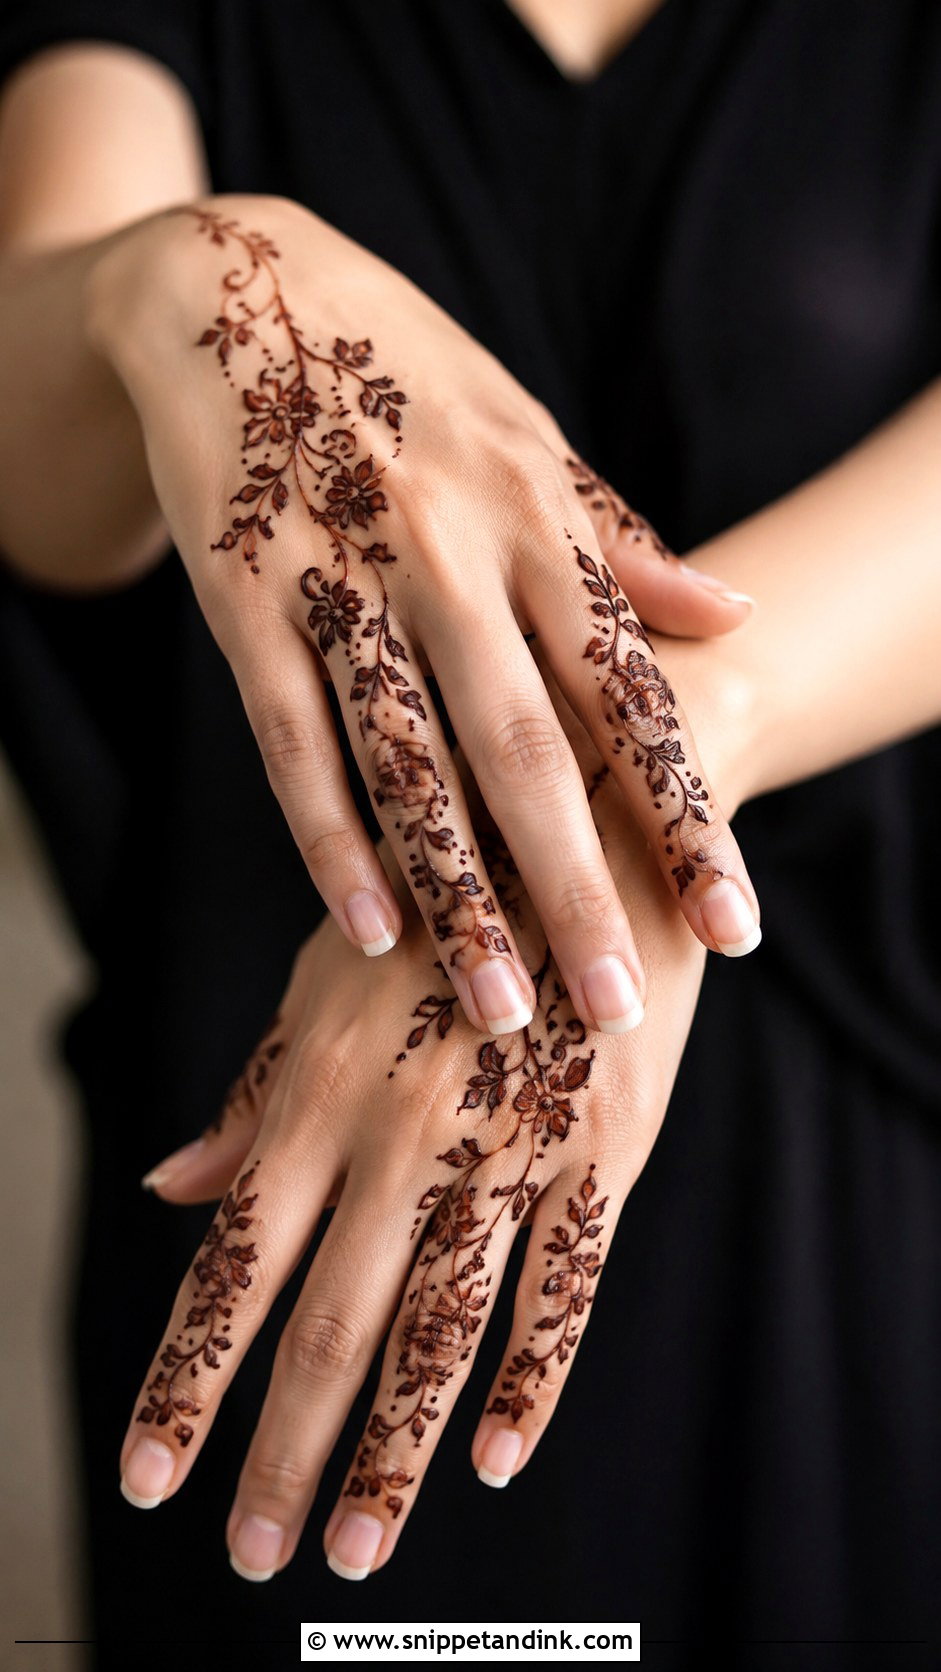
Vines can run from the fingertip to the knuckle, wrap around the finger like a ring or travel diagonally across several fingers, with tiny leaves, dots and flowers along them. The vertical movement makes fingers look longer, which is why I reach for vines on shorter hands. For a light version, decorate only the index and ring fingers; for a fuller one, give each finger a different vine.
32. Finger Mehndi Design With Shading
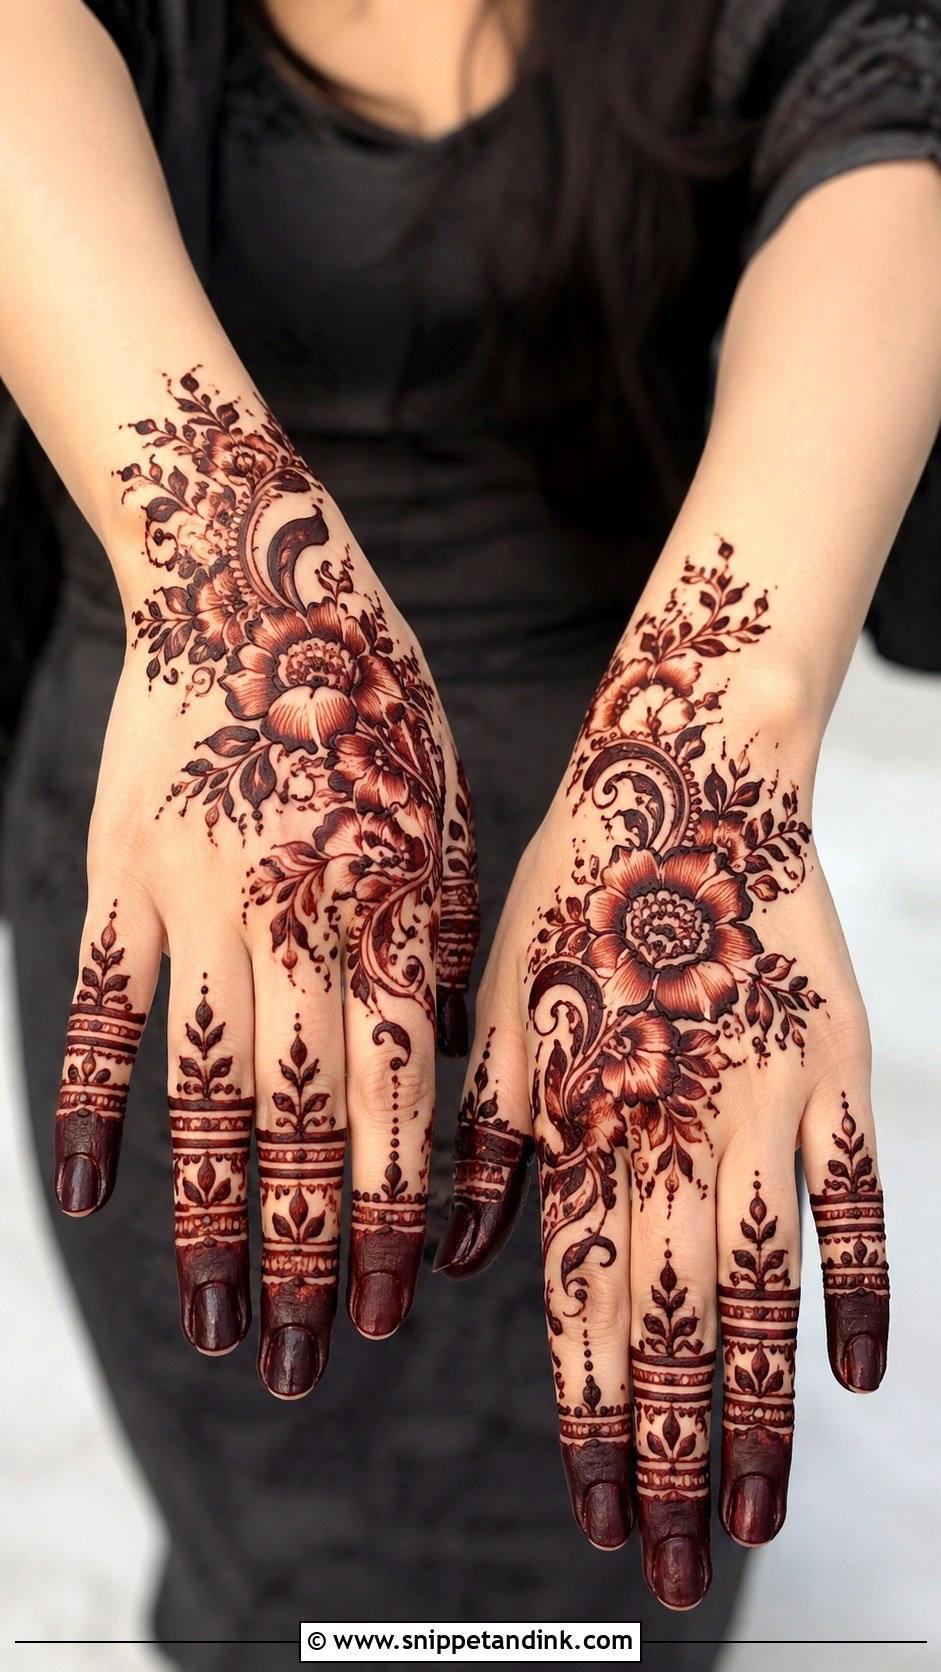
Shading fills flowers, leaves, tips, paisleys or geometric blocks with a thin wash of paste, so the design looks fuller with fewer lines. Light shading on the tips with bold outlines and fine dots around the joints is a popular layout. Shade every section and the pattern loses its clarity. I limit it to one or two statement areas so the contrast actually shows in photos.
33. Finger Mehndi Design For Short Fingers
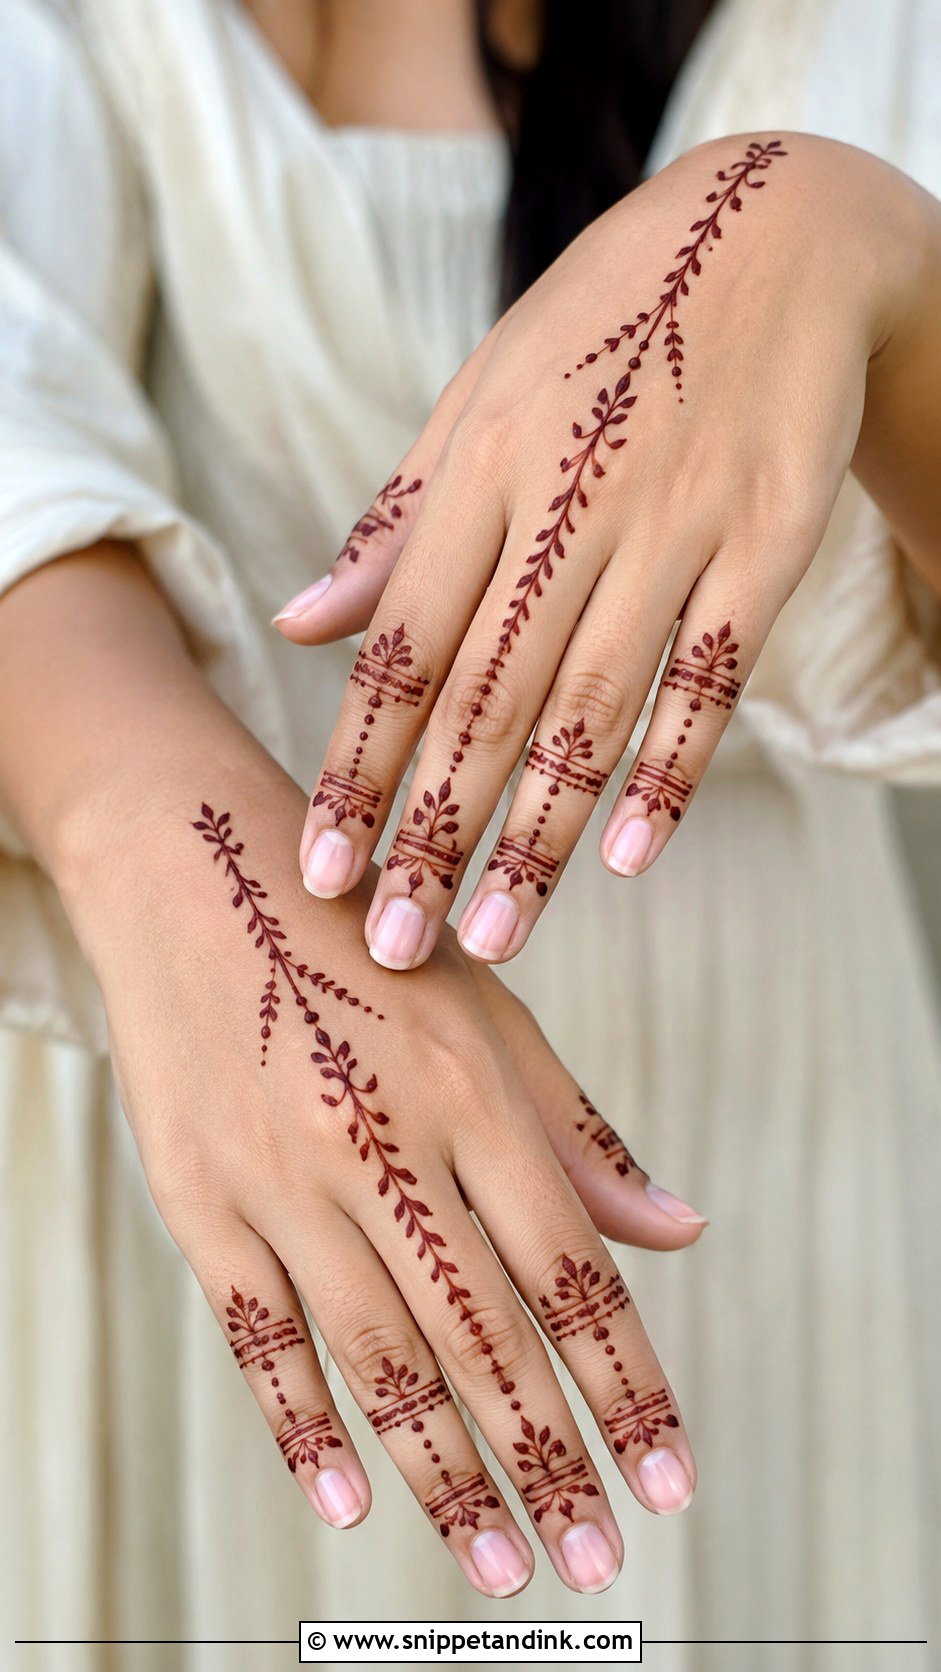
Short fingers need length, not weight. Vertical vines, slim trails, small leaf rows and narrow center lines from tip to base all help, with open space around each joint. Thick bands on every finger cut the finger into short segments, so I avoid them. Dark tips can still work if thin details run downward from them. A center vine on the middle finger with lighter accents on either side is my go-to.
34. Finger Mehndi Design For Long Fingers
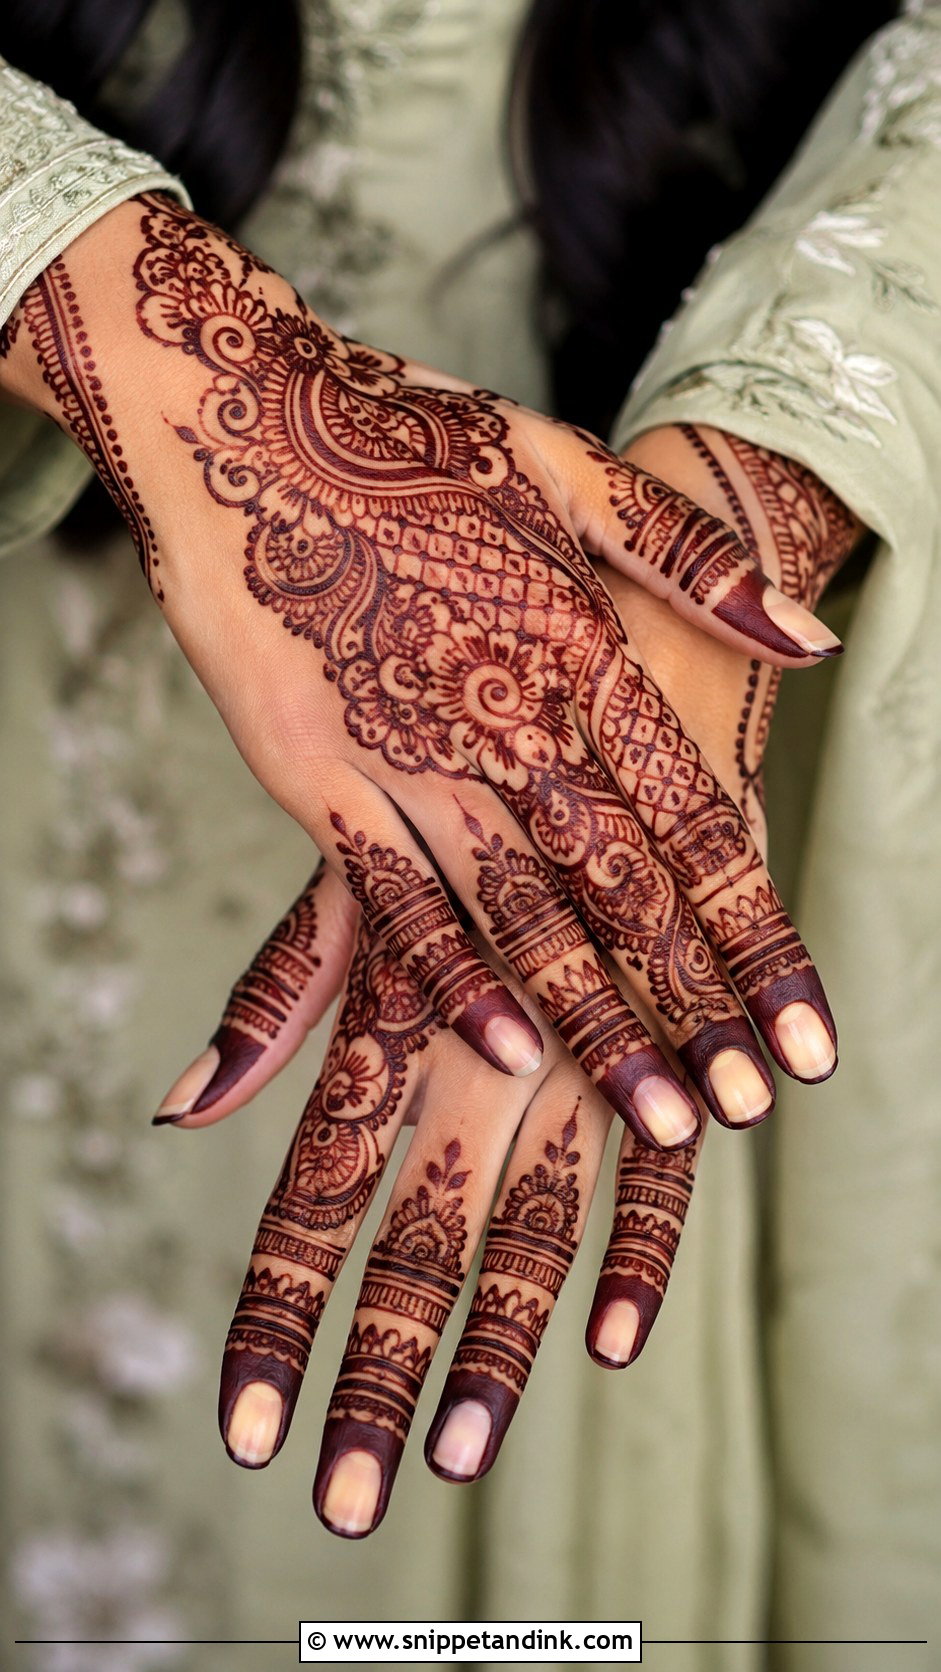
Long fingers have room for everything: ring bands, jaali sections, paisleys, floral trails and shaded tips, stacked without crowding. The one risk is making them look even longer and thinner, so I mix horizontal bands in with the vertical vines to balance the proportion. Different patterns on each finger hold together if dots or borders repeat. This is the hand shape where I can be most creative.
35. Finger Mehndi Design For Dark Skin
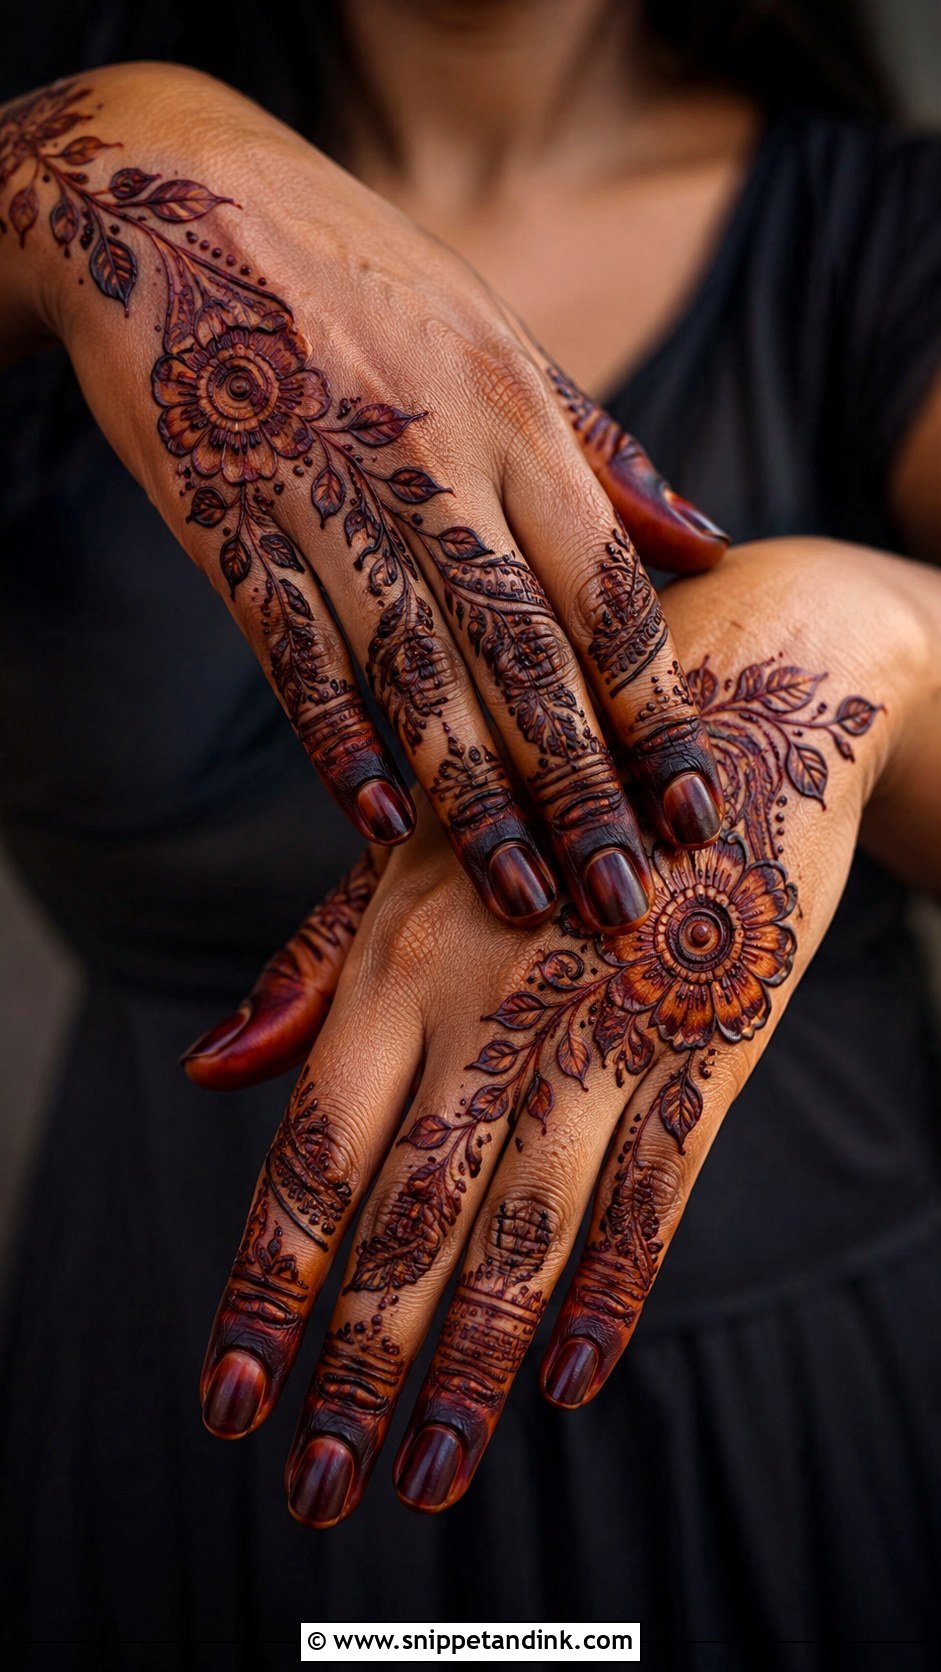
Henna stains the same way on every skin tone, but on deeper skin the contrast between stain and skin is lower, so very fine lines can disappear. I plan clearer spacing, bolder outlines, darker tips and larger motifs, with Arabic florals, ring bands, jaali and leafy vines all working well. Keep hands moisturized in the days before, but skip oil or lotion on the day of application; it blocks the dye. Dark tips with open spaces in between give the most striking result on deeper skin tones.
Nails, Rings and Manicures Around Fresh Henna
Finger designs run right up to the nail, so the order of your appointments matters more than with any other placement.
- Have your manicure or gel done first. Paste stains bare nails and cuticles orange, and you can’t buff or soak your hands for days afterward without fading the tips.
- Take every ring off before I start and leave them off until the paste is scraped away. A ring pressed into wet henna smears it, and metal over a fresh stain rubs it unevenly.
- If you’d like the traditional orange tint on your nails, tell me. I’ll cap them deliberately rather than leaving it to accidental smudges.
Why Fingertips Fade First and How to Slow It
On hands, a stain usually lasts one to two weeks, and the tips go first because they’re washed and used constantly. Wear gloves for dishes and cleaning, swap hand sanitizer for gentle soap where you can, and rub a little balm into your fingers at night. Skip scrubs and anything with bleach. Once the paste is off, your skin is renewing itself and taking the color with it, so all you can do is slow the rubbing.
Your Hand Shape Gets the Final Vote
Finger mehndi can be quick or detailed, playful for kids or heavy for a bride, and it costs you far less sitting time than a full hand. Your hand shape, your outfit and the event should decide the coverage. Clean looks come from dots, bands, vines and negative space; richer ones from jaali, paisley, peacock, shaded florals or bridal finger patterns. Bring photos of two or three you like to your artist, and ask her which will suit your fingers best.
You'll Like These Ideas:


Leave a Reply