
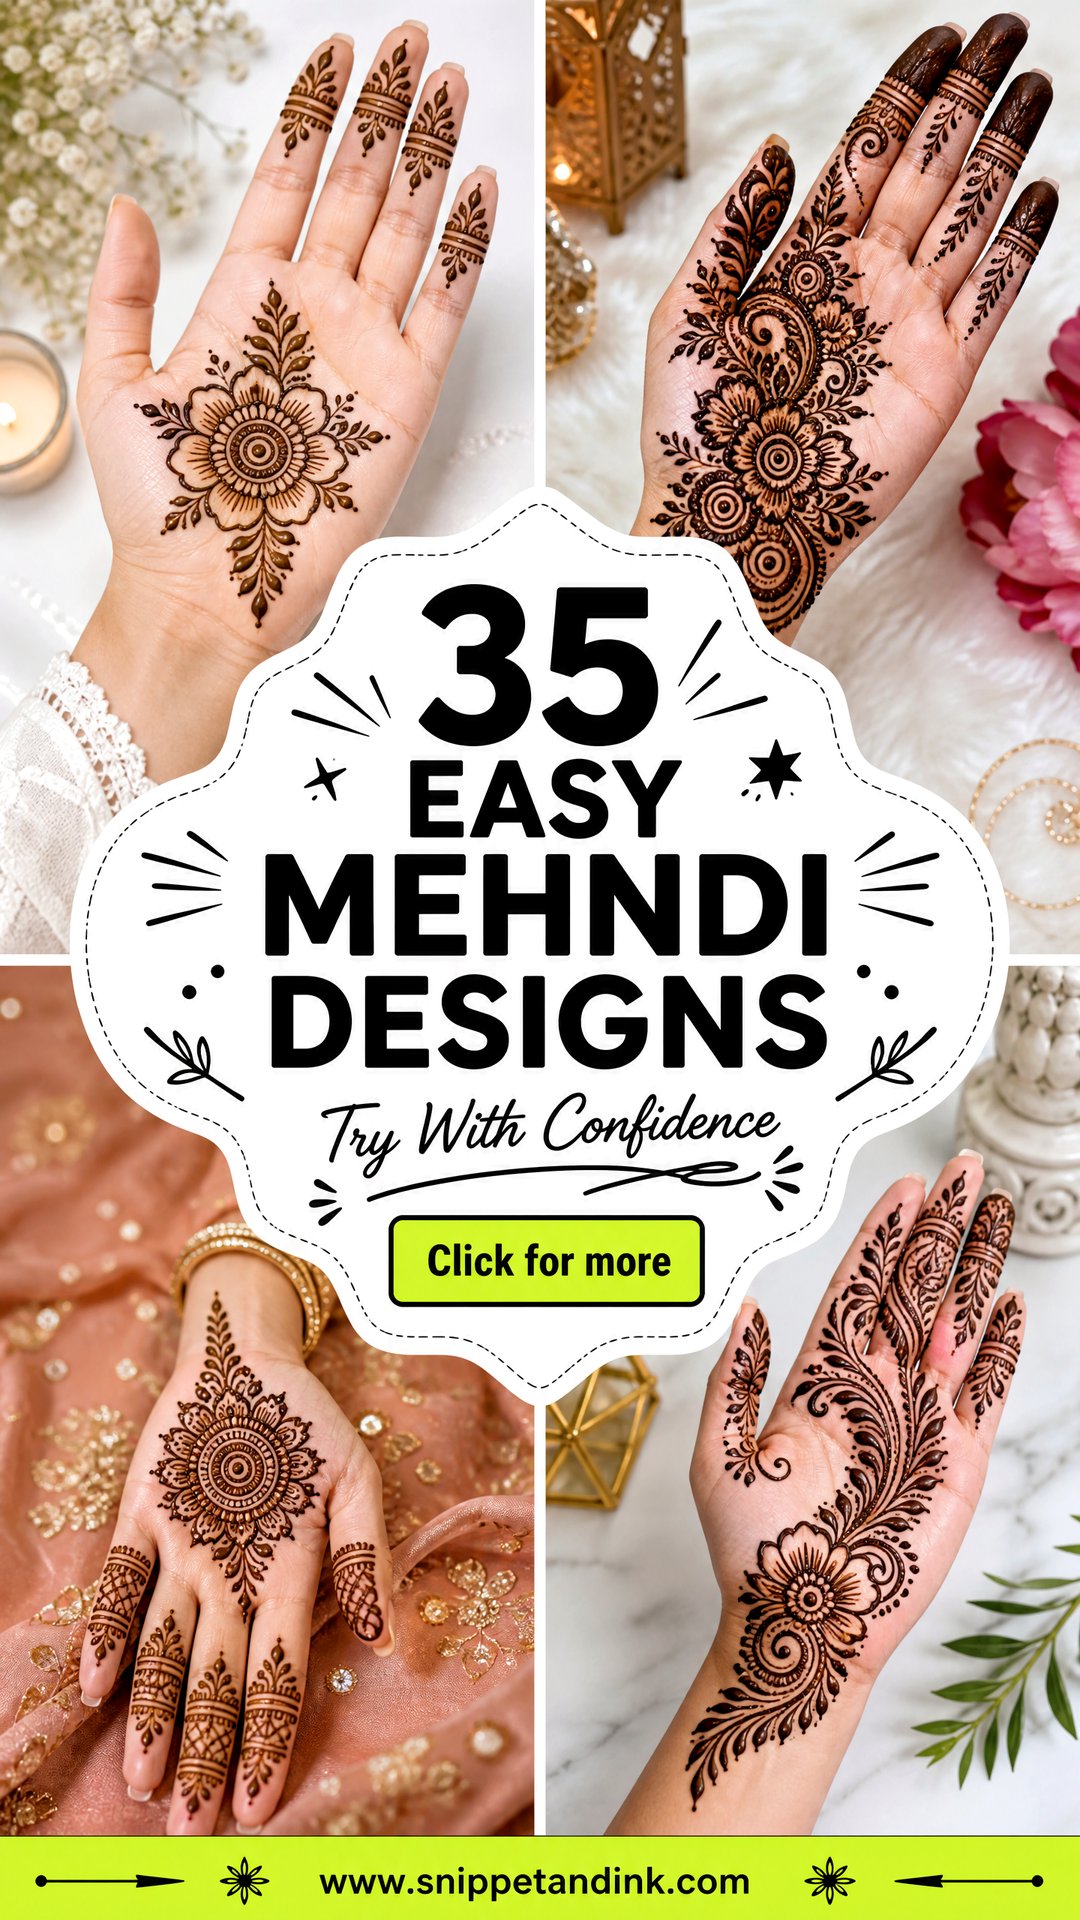
Easy mehndi art feels much less intimidating when you start with complete looks that use simple shapes, open spacing, and repeatable patterns. These 35 Easy Mehndi Designs for Beginners focus on designs you can actually practice at home, even if your cone control is still new. You will see front-hand, back-hand, finger, wrist, palm, Arabic, Indian, Indo-Arabic, Moroccan, and minimal henna looks that are neat without being overly complicated. The best beginner designs usually rely on dots, lines, leaves, flowers, mandalas, checks, and soft trails. Once you learn these layouts, you can mix them for festivals, family events, school functions, or casual days. Start with clean hands, steady pressure, and these 35 Easy Mehndi Designs for Beginners.
1. Simple Front Hand Mehndi Design

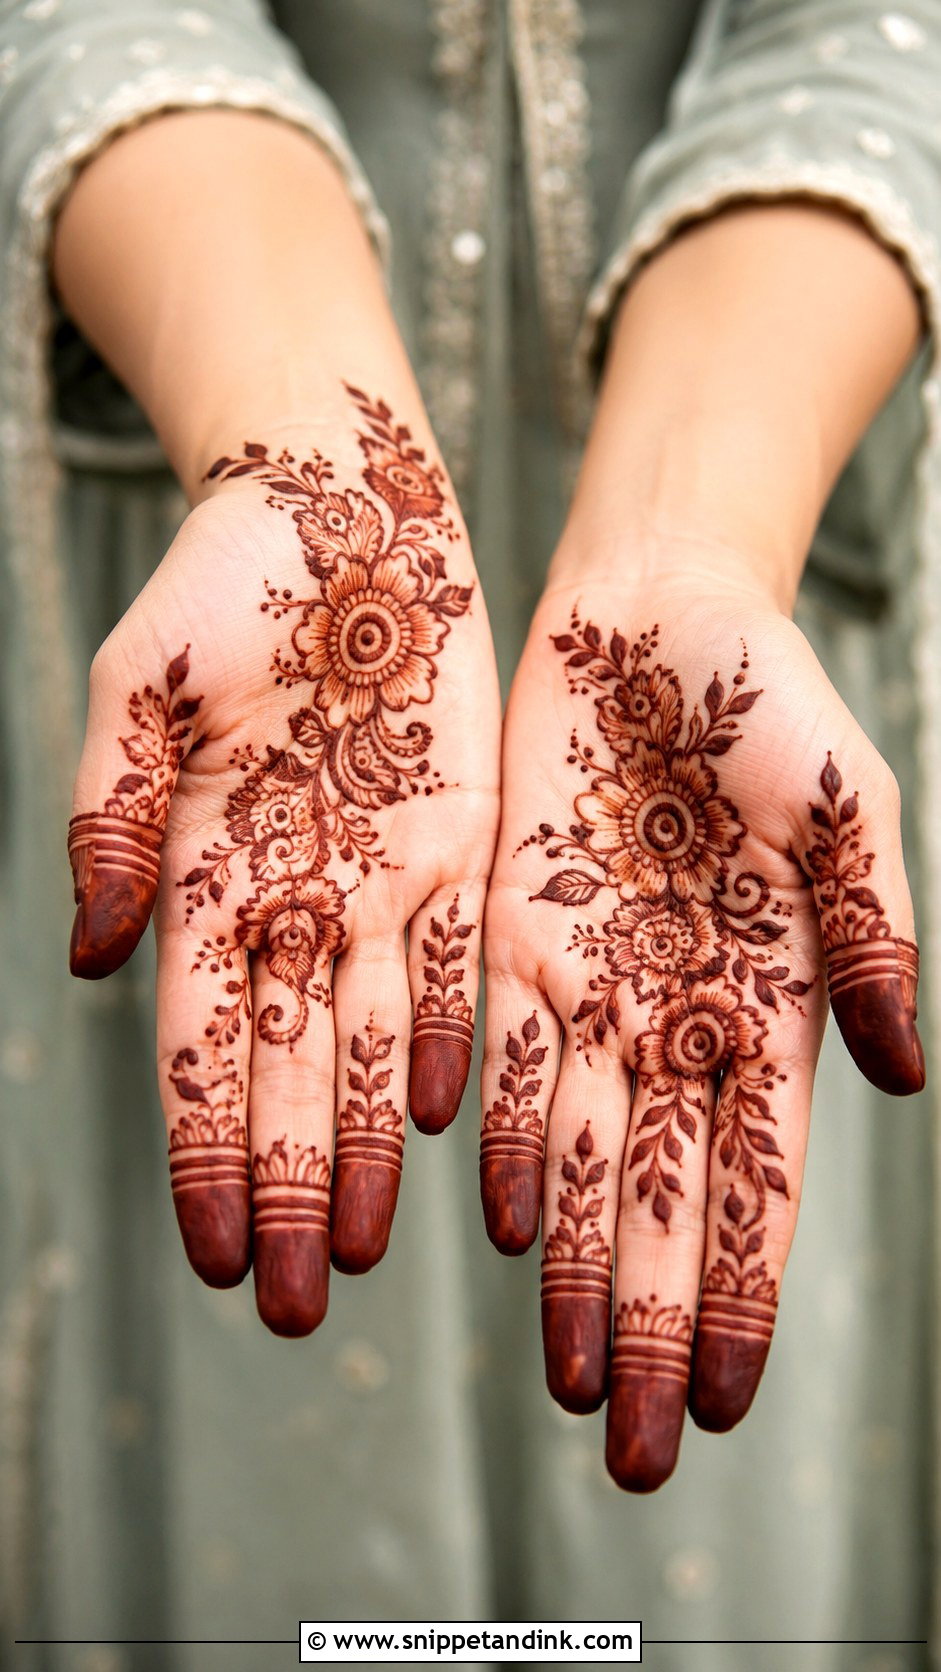
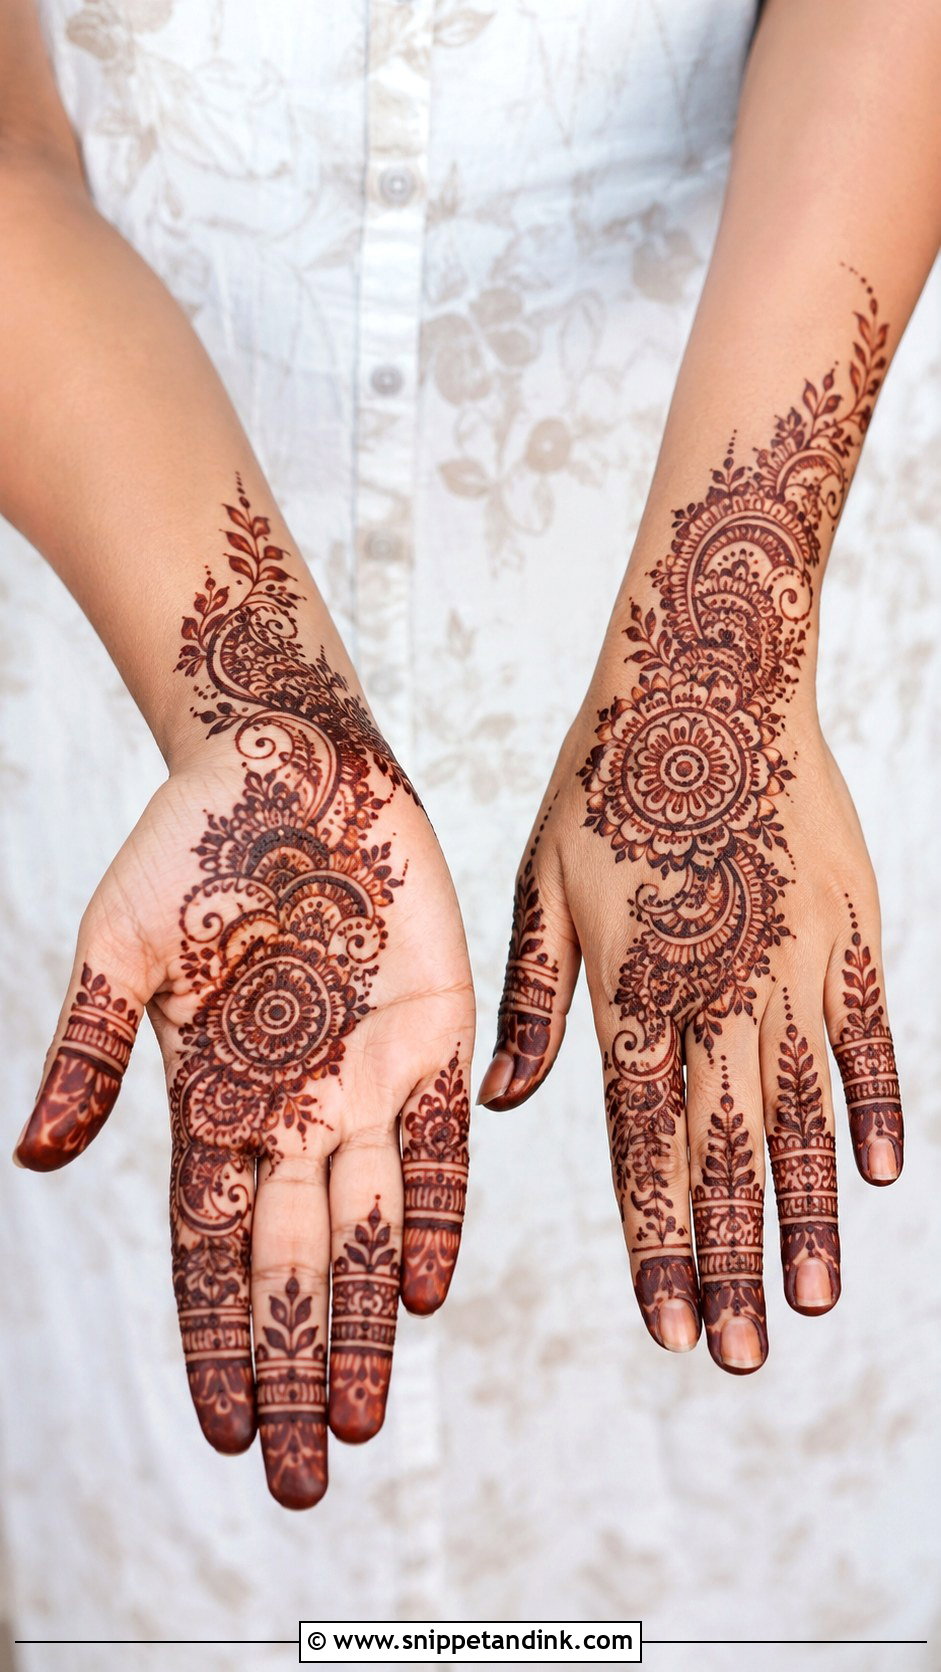
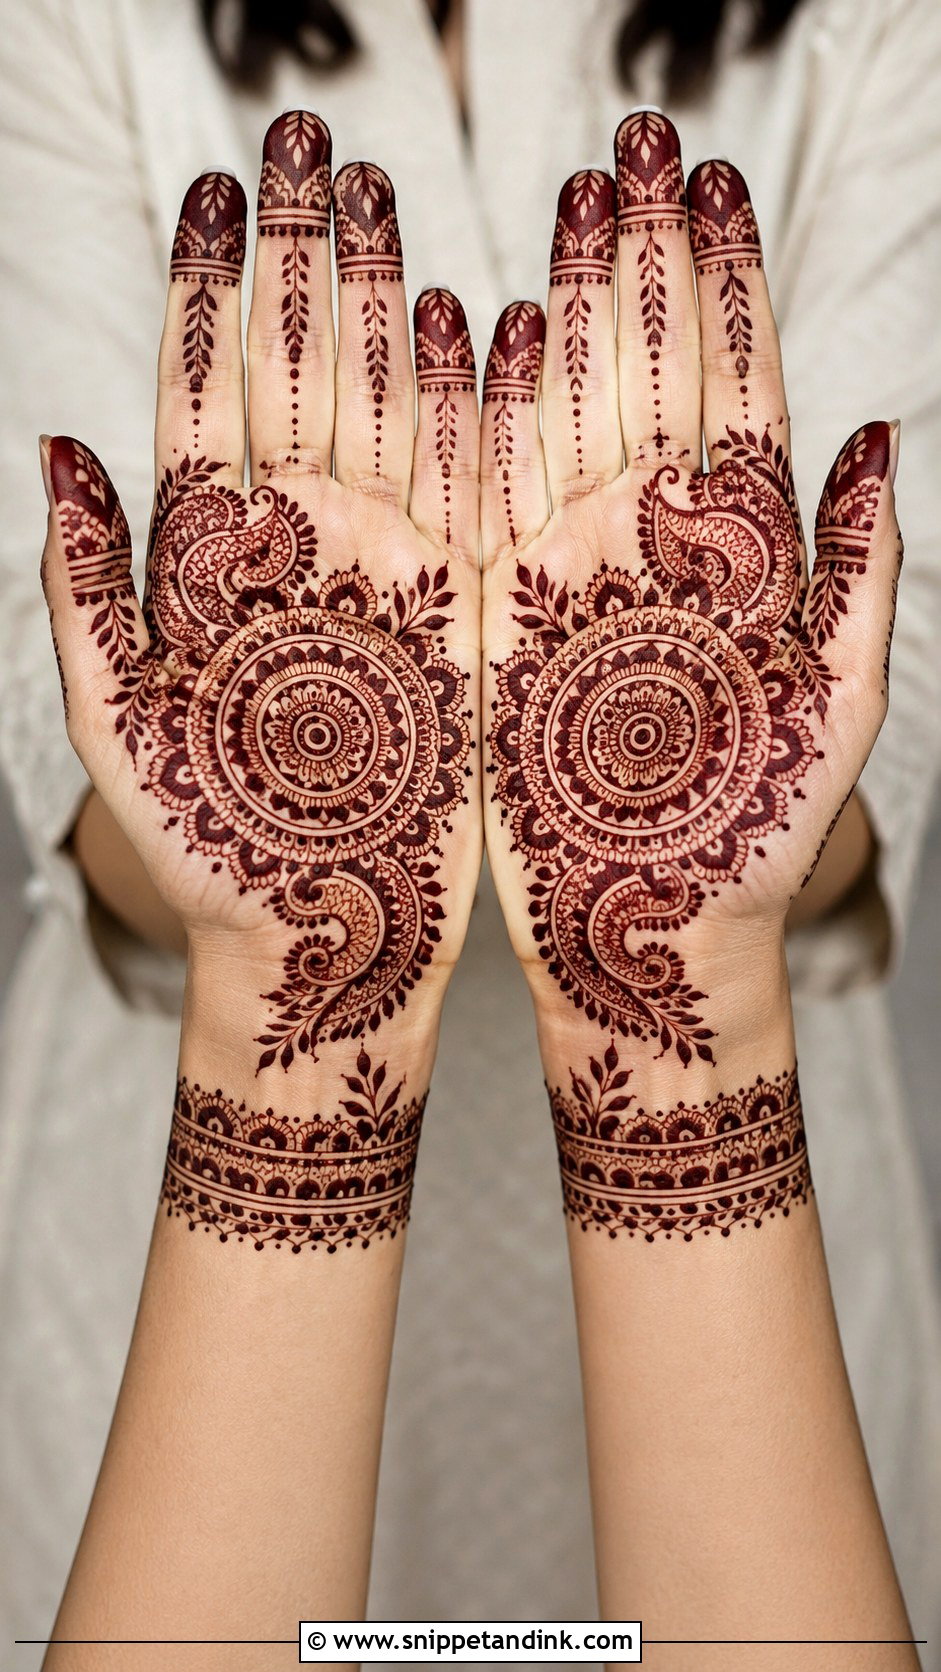
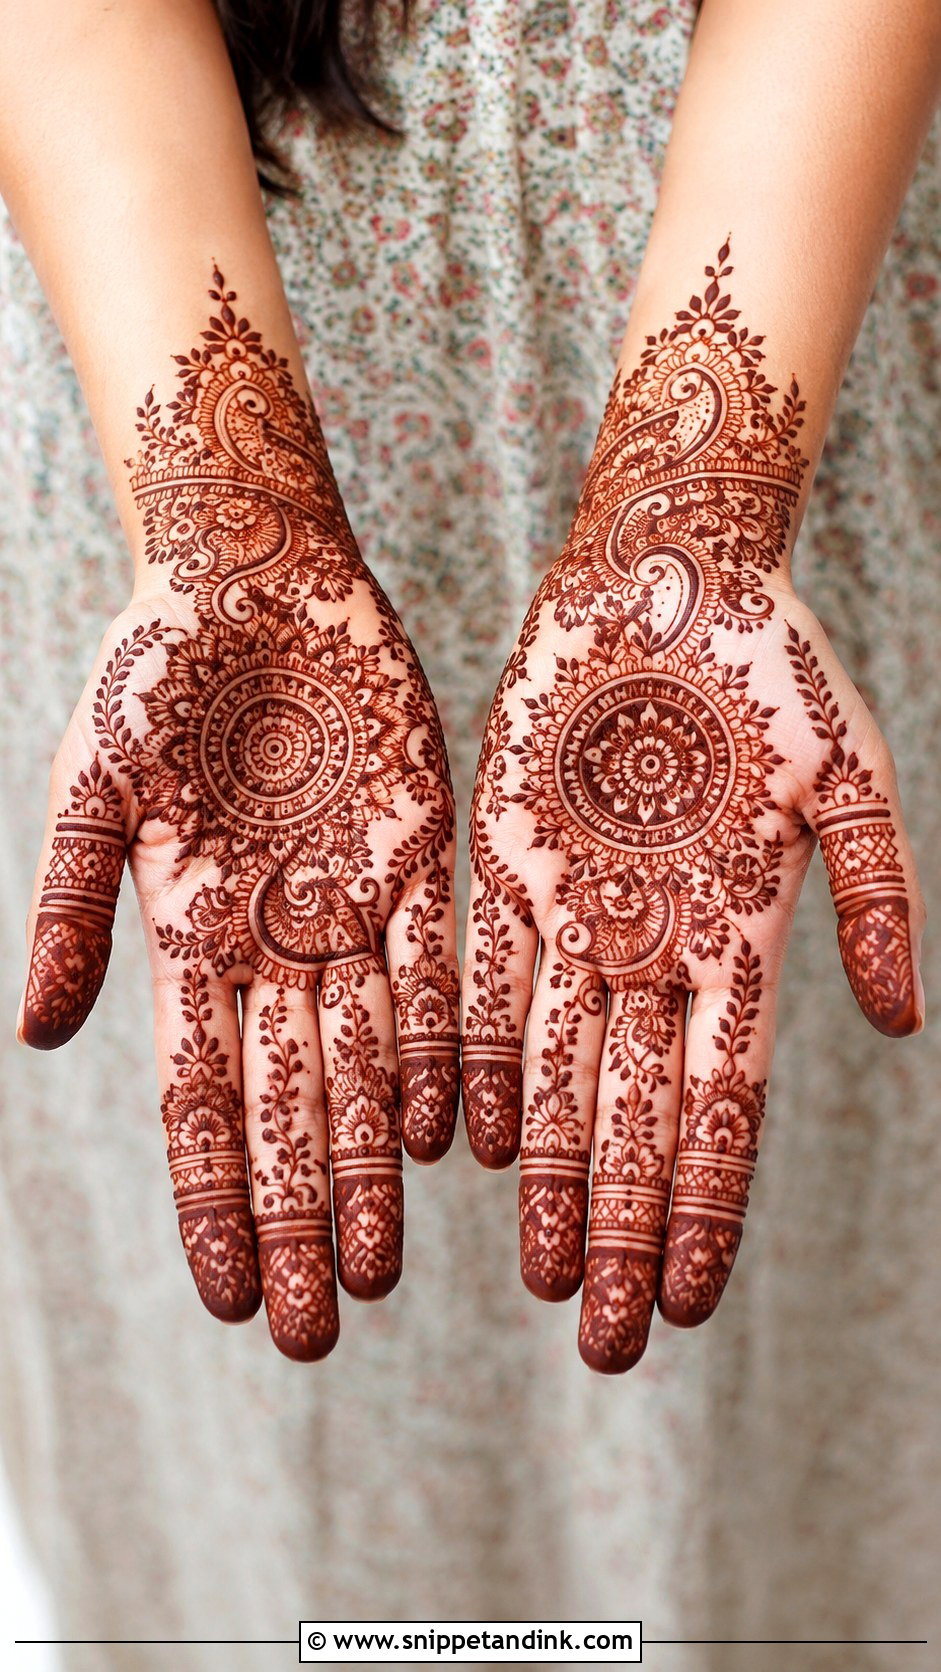
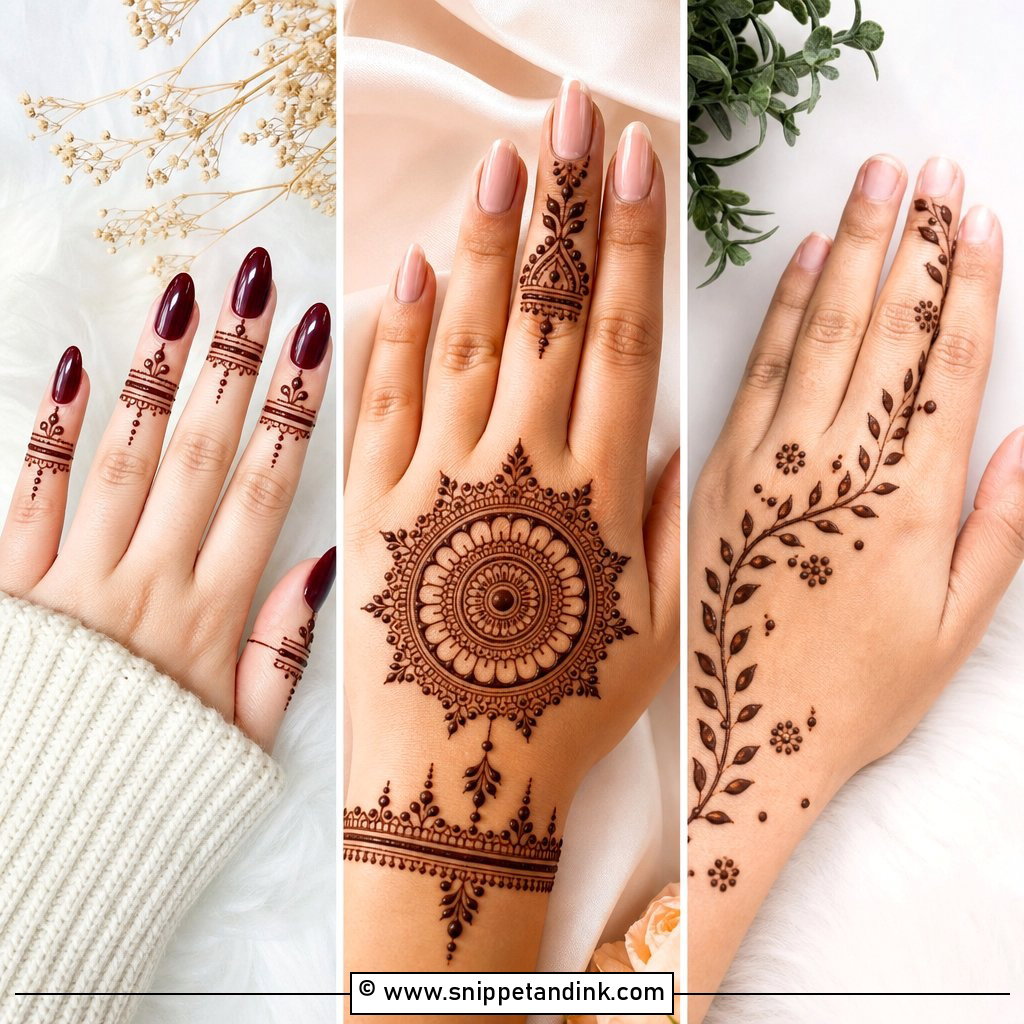
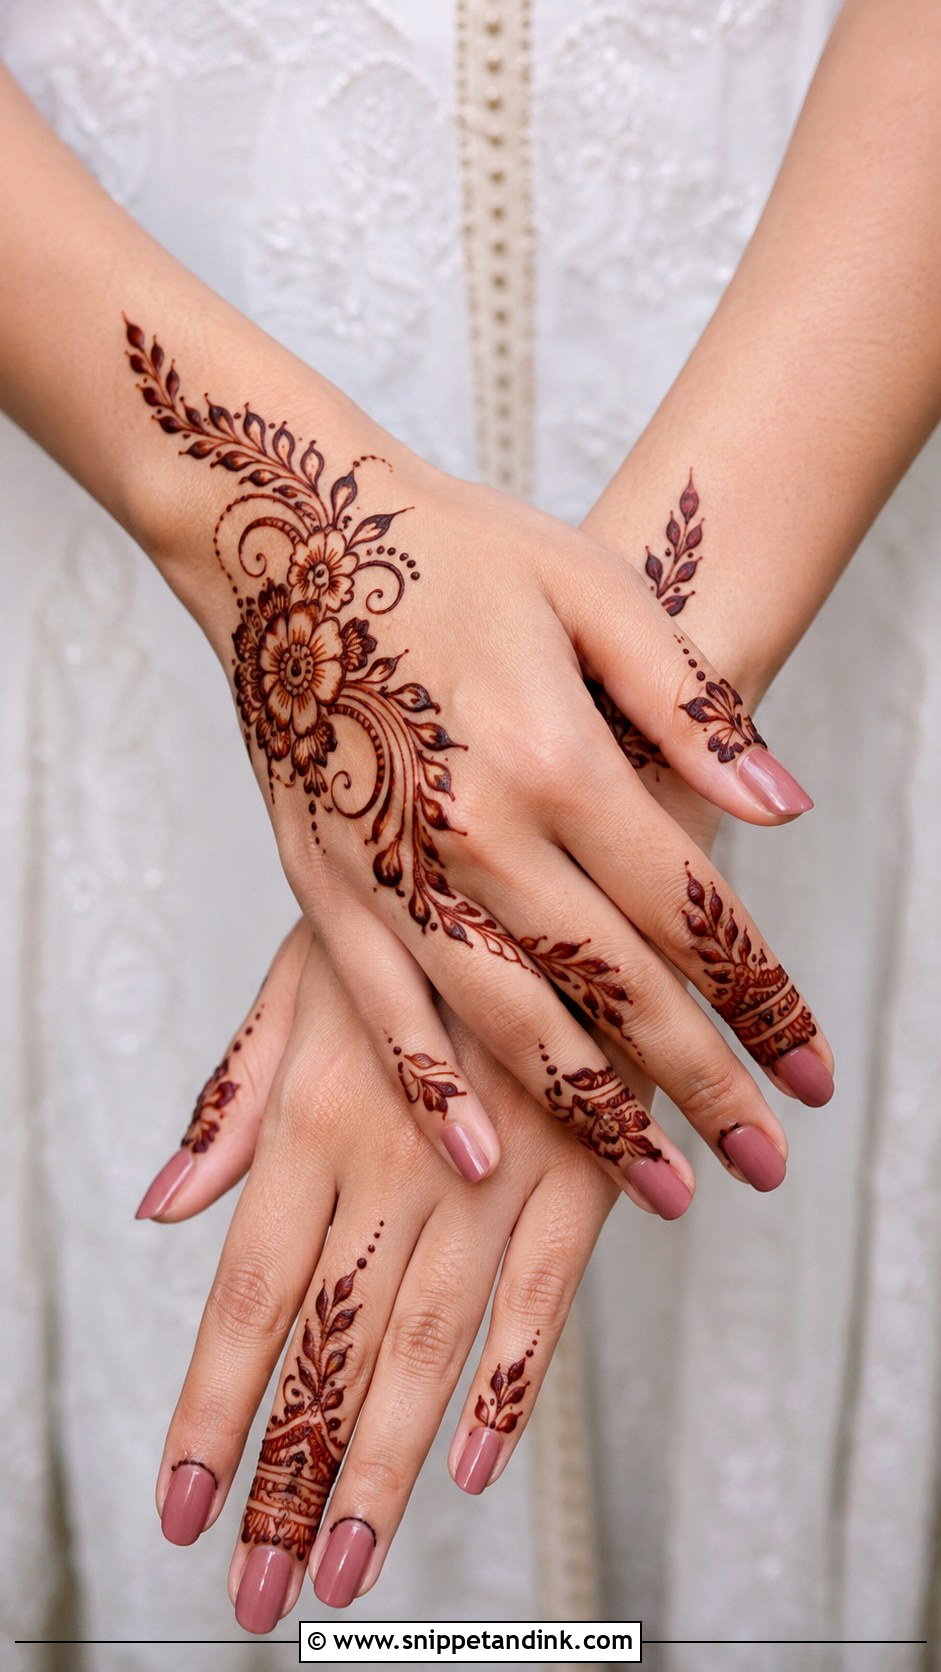
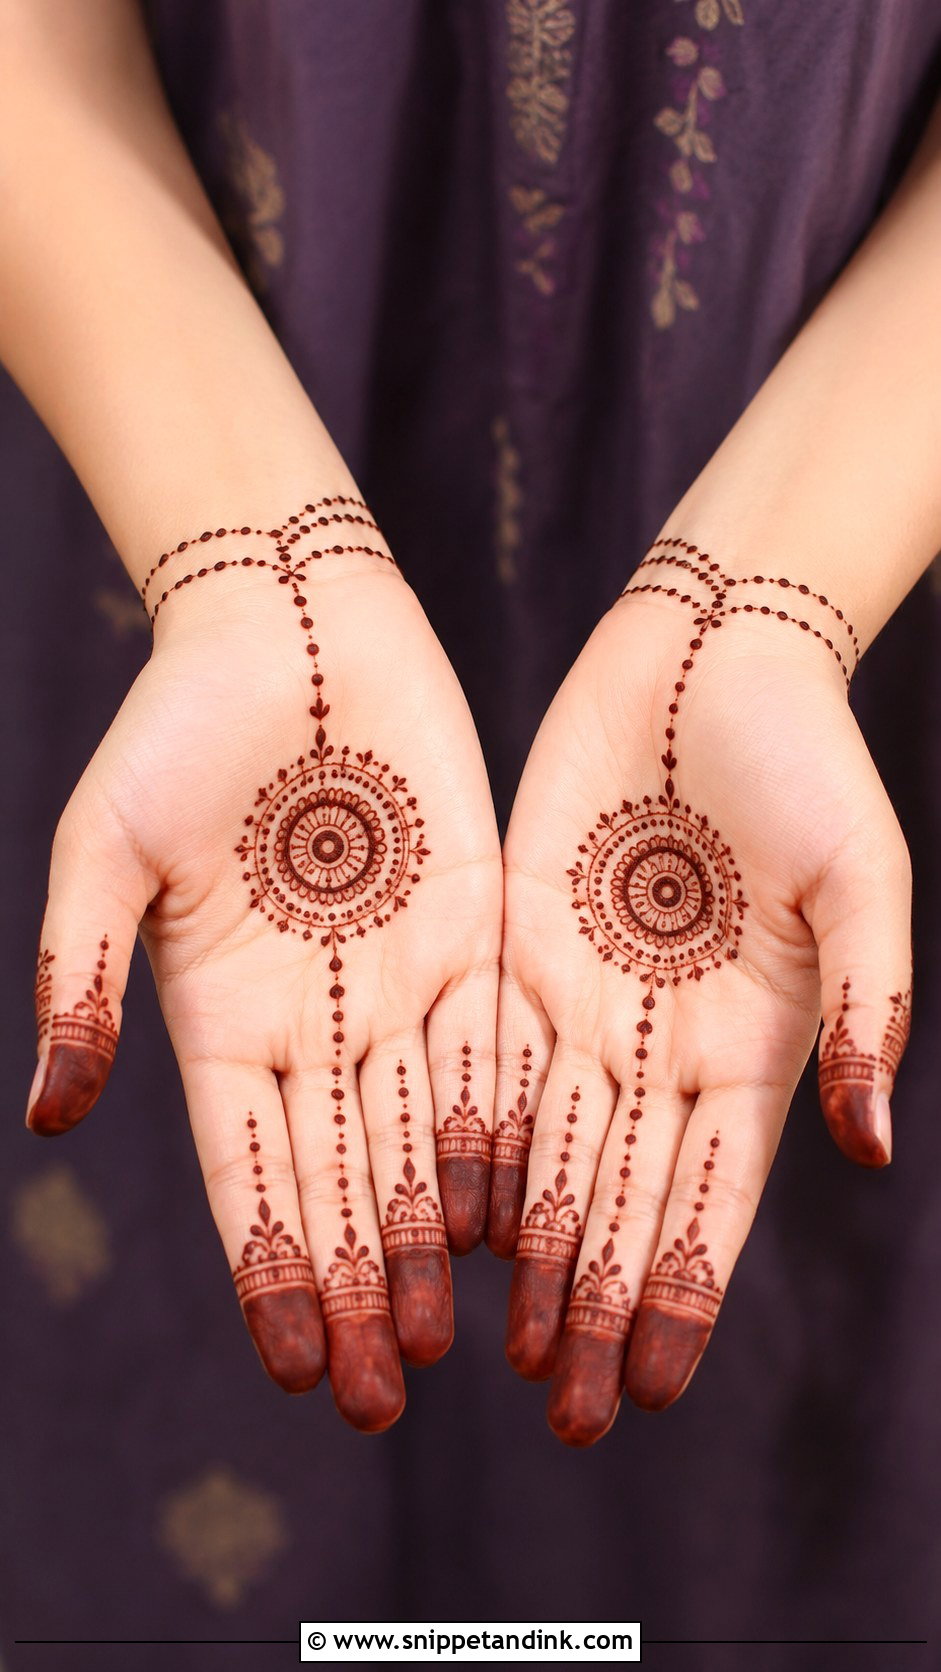
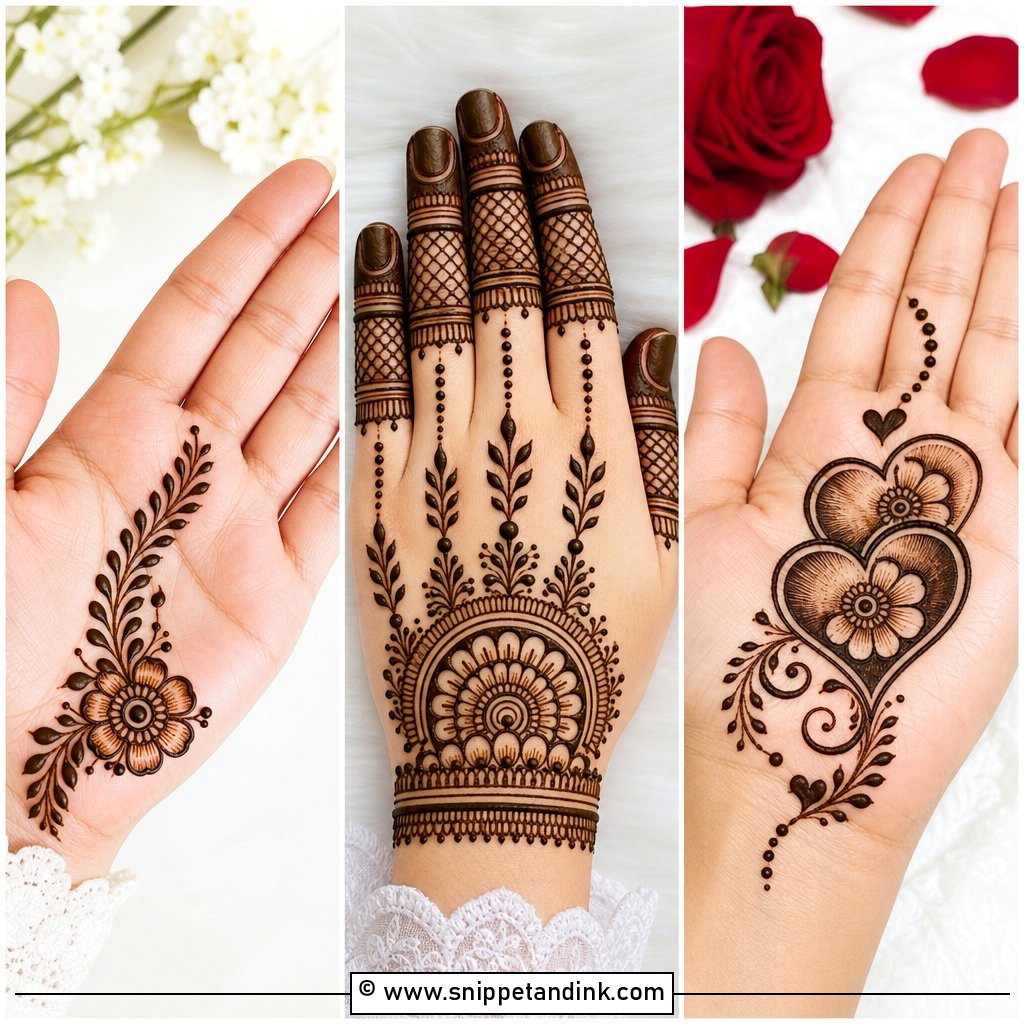
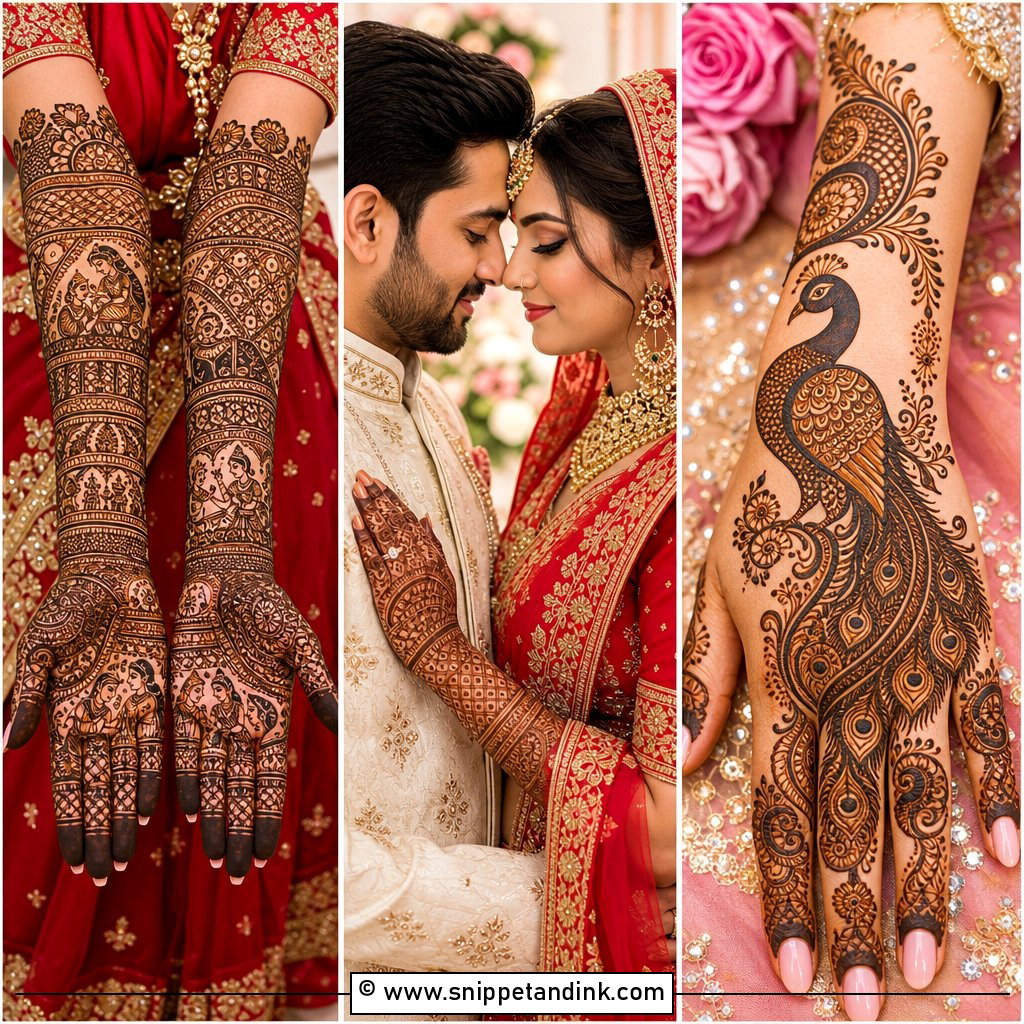
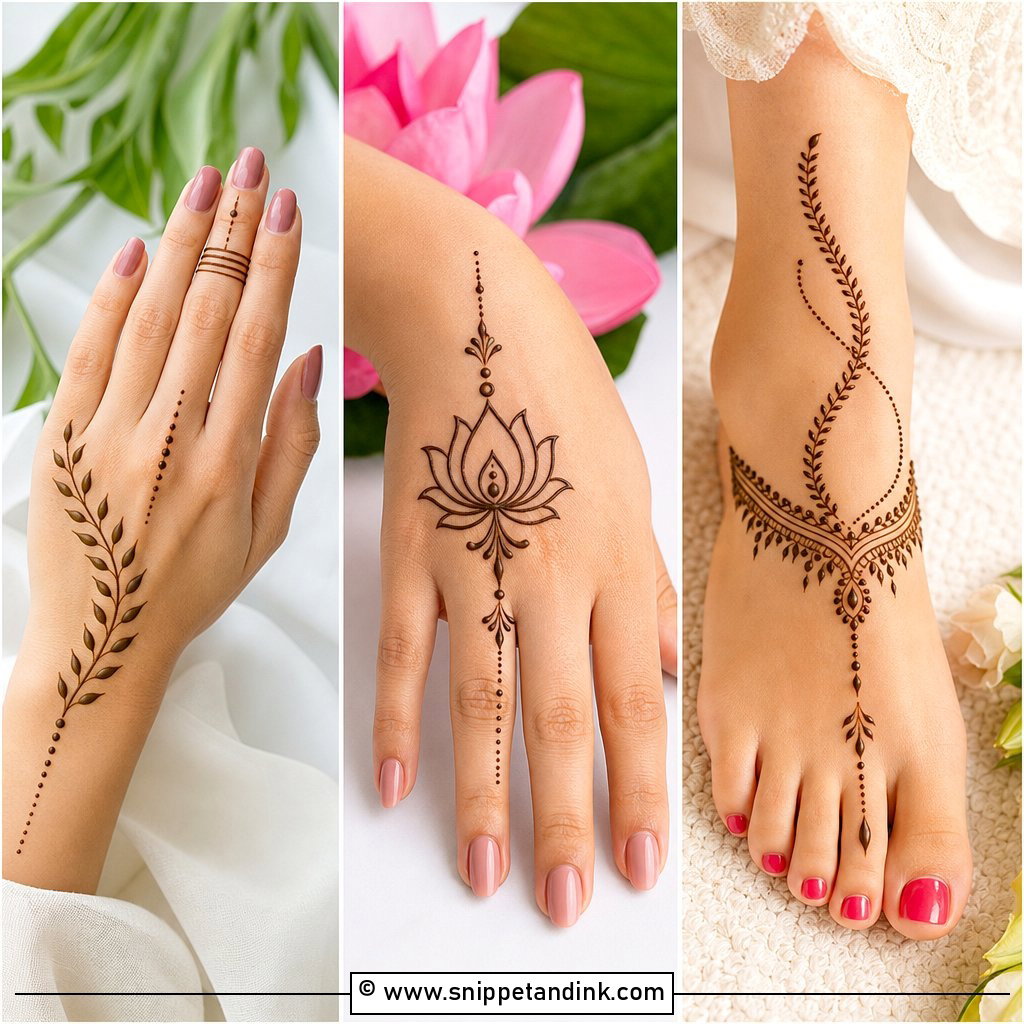
A simple front hand mehndi design is the best first step for anyone learning henna. This look usually starts with a small flower, circle, or mandala in the center of the palm. From there, you can add curved leaves, tiny dots, and short vines toward the fingers. Keep the spacing open so the design looks clean even if your lines are not perfect. For the fingers, draw simple bands, dots, and small leafy strokes instead of dense filling. This full palm layout teaches balance, symmetry, and basic cone control. It also looks graceful for daily wear, small celebrations, and beginner practice sessions.
2. Simple Back Hand Mehndi Design
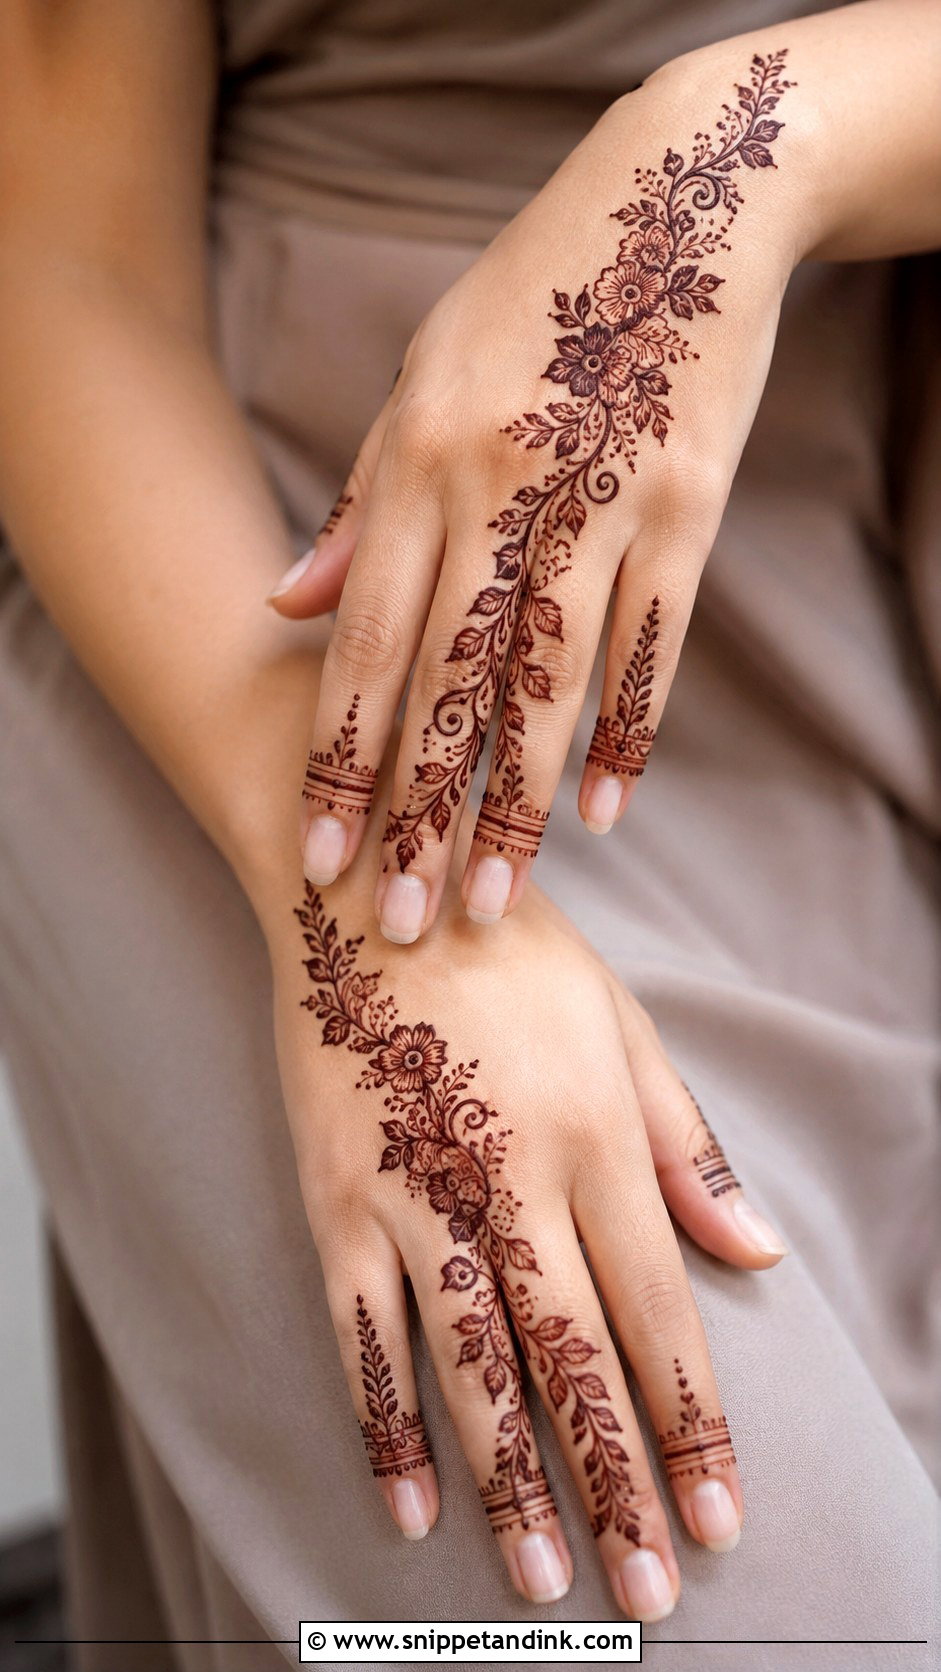
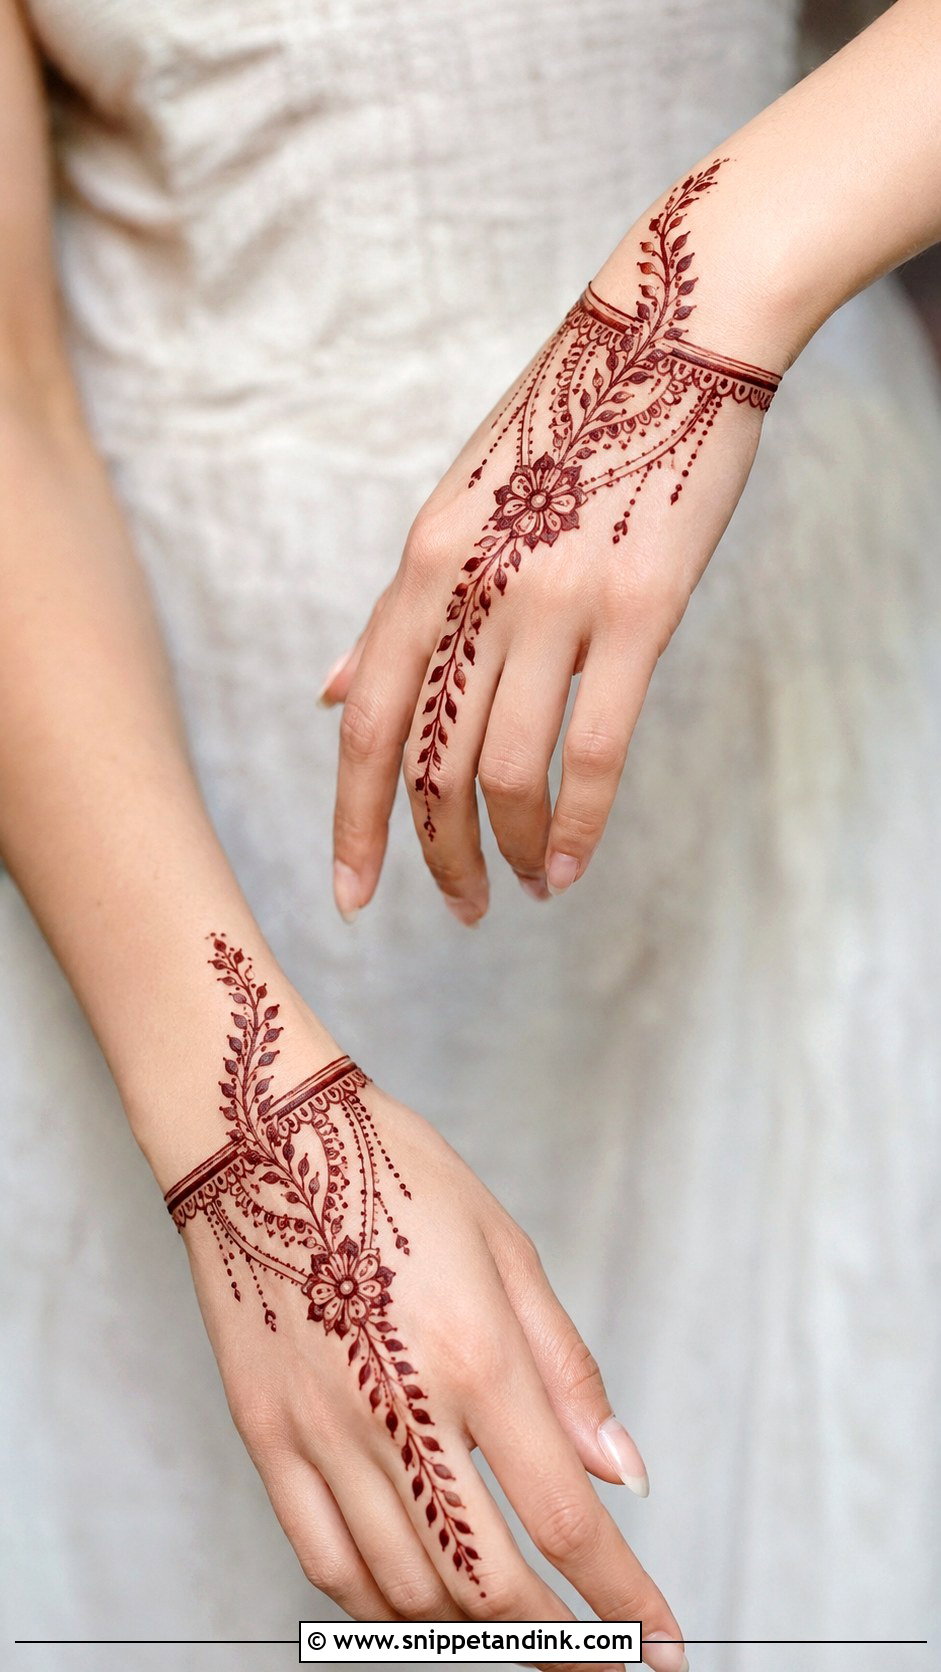
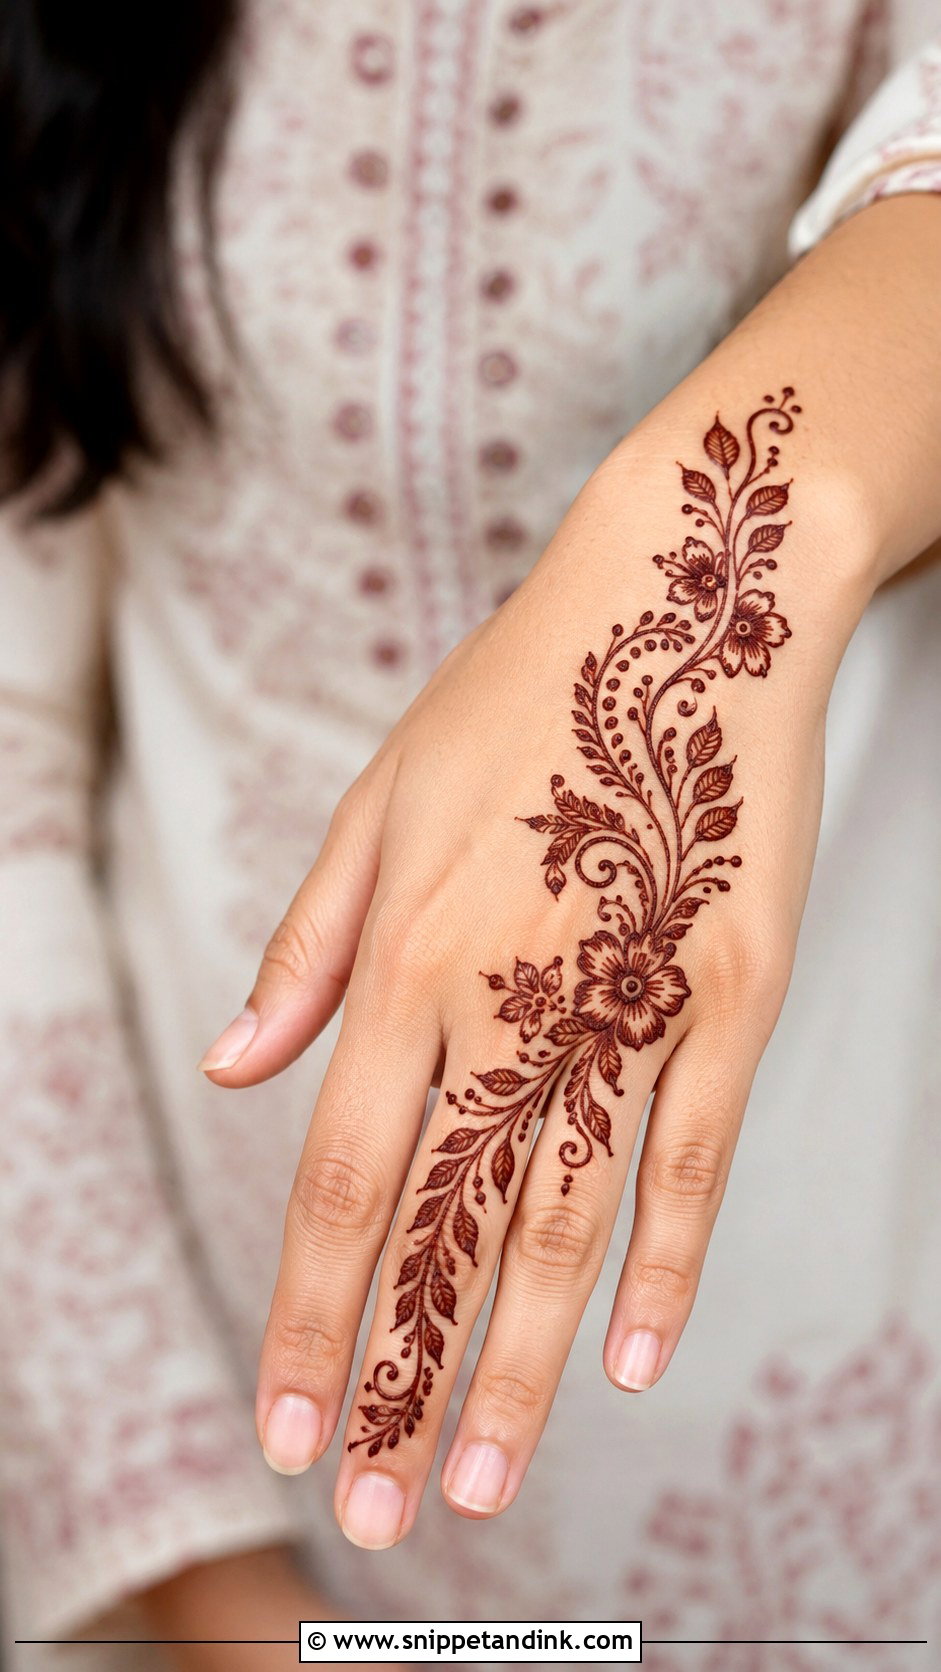
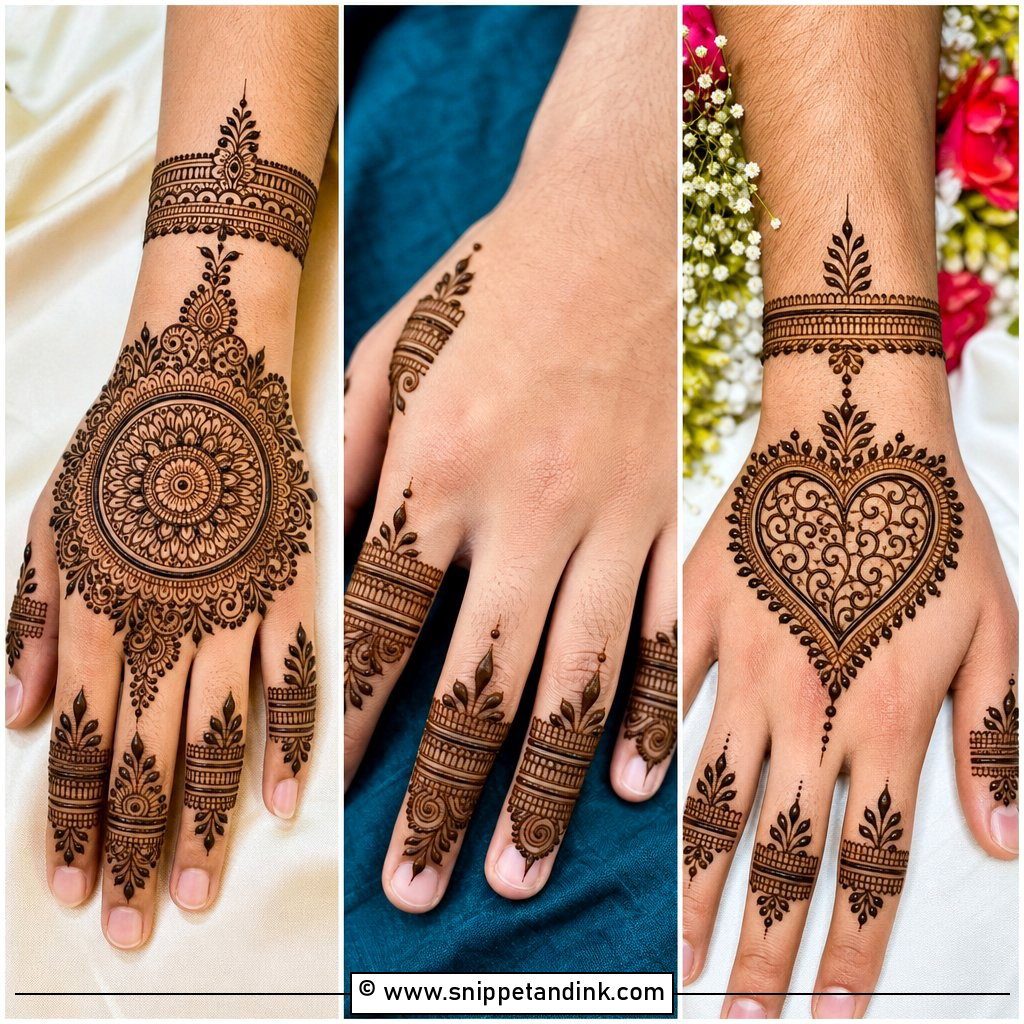
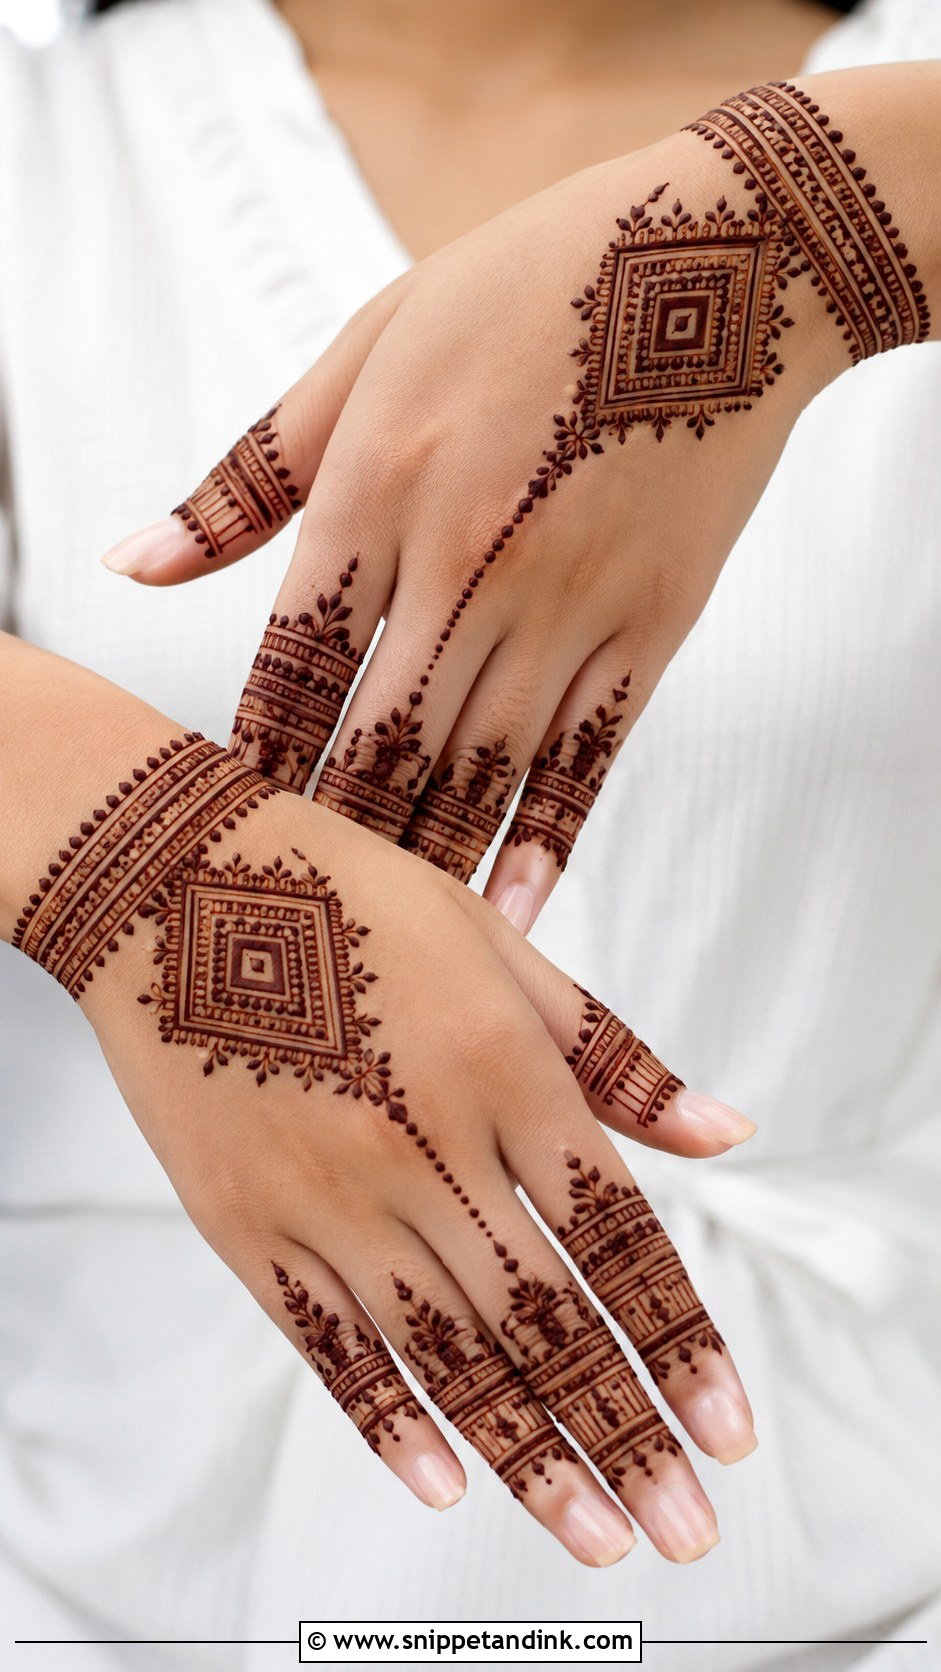
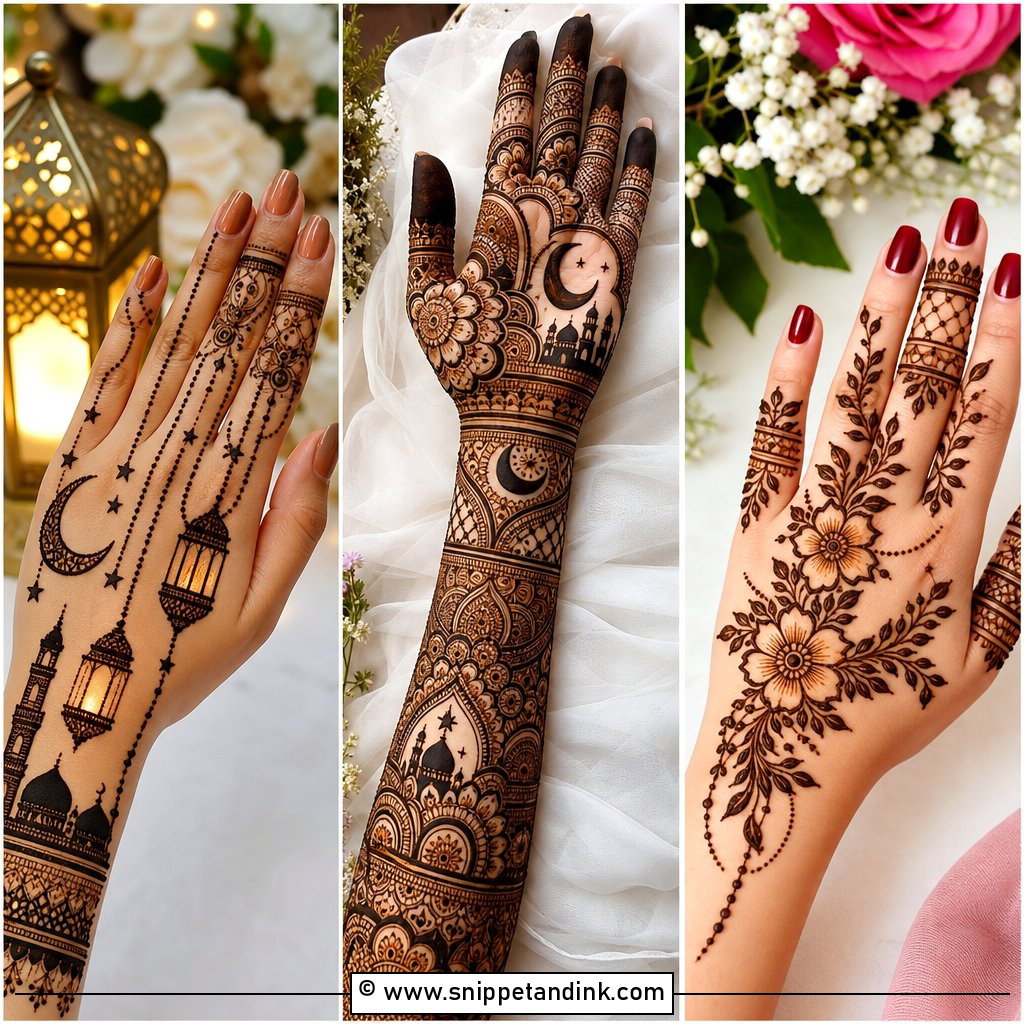
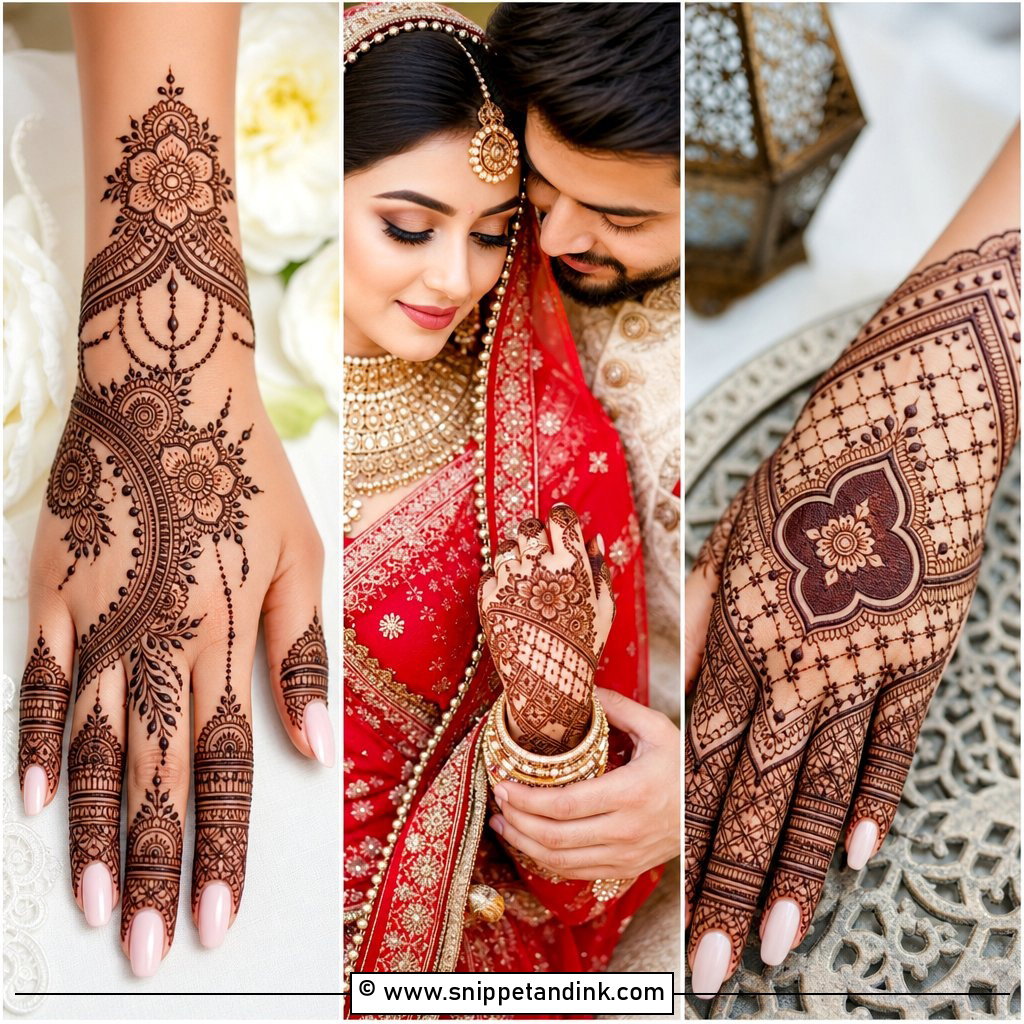
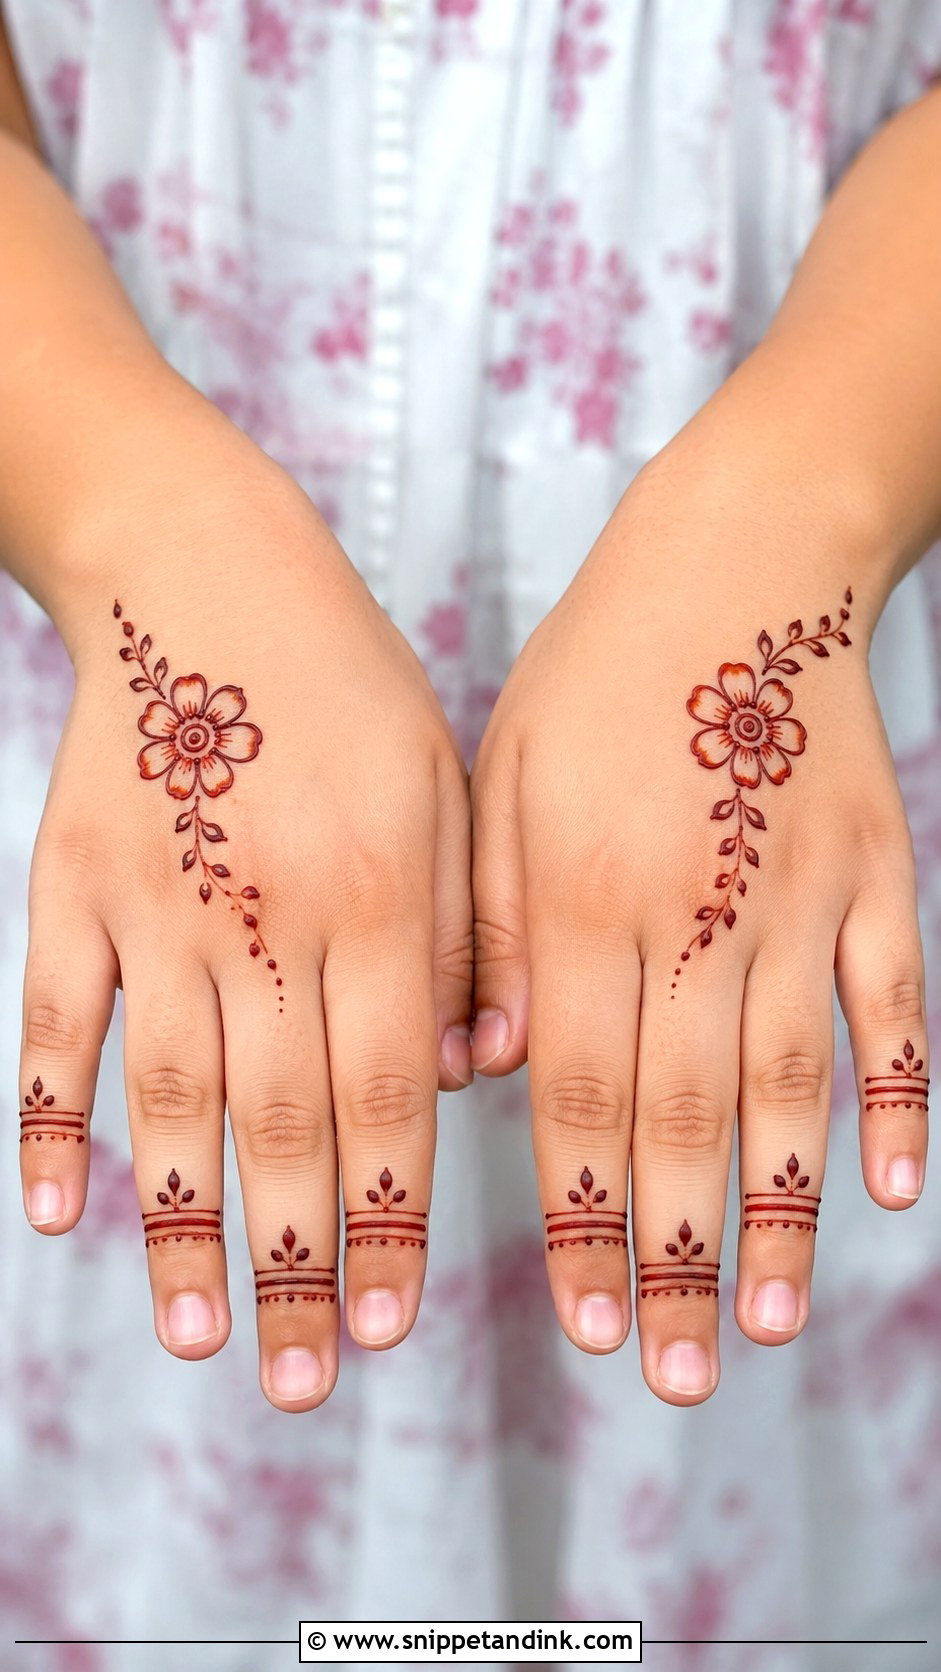
A simple back hand mehndi design gives beginners more room to work with graceful trails and open space. Start near the wrist with a small floral cluster, then let a curved vine move toward the index finger. Add leaves on both sides of the vine, and use dots to fill gaps without making the hand look crowded. The fingers can have slim bands, tiny petals, or half-flower tips. This design is easier than a full bridal pattern because it does not need heavy shading or tiny details. It creates a neat, stylish look that photographs beautifully and works well for casual events.
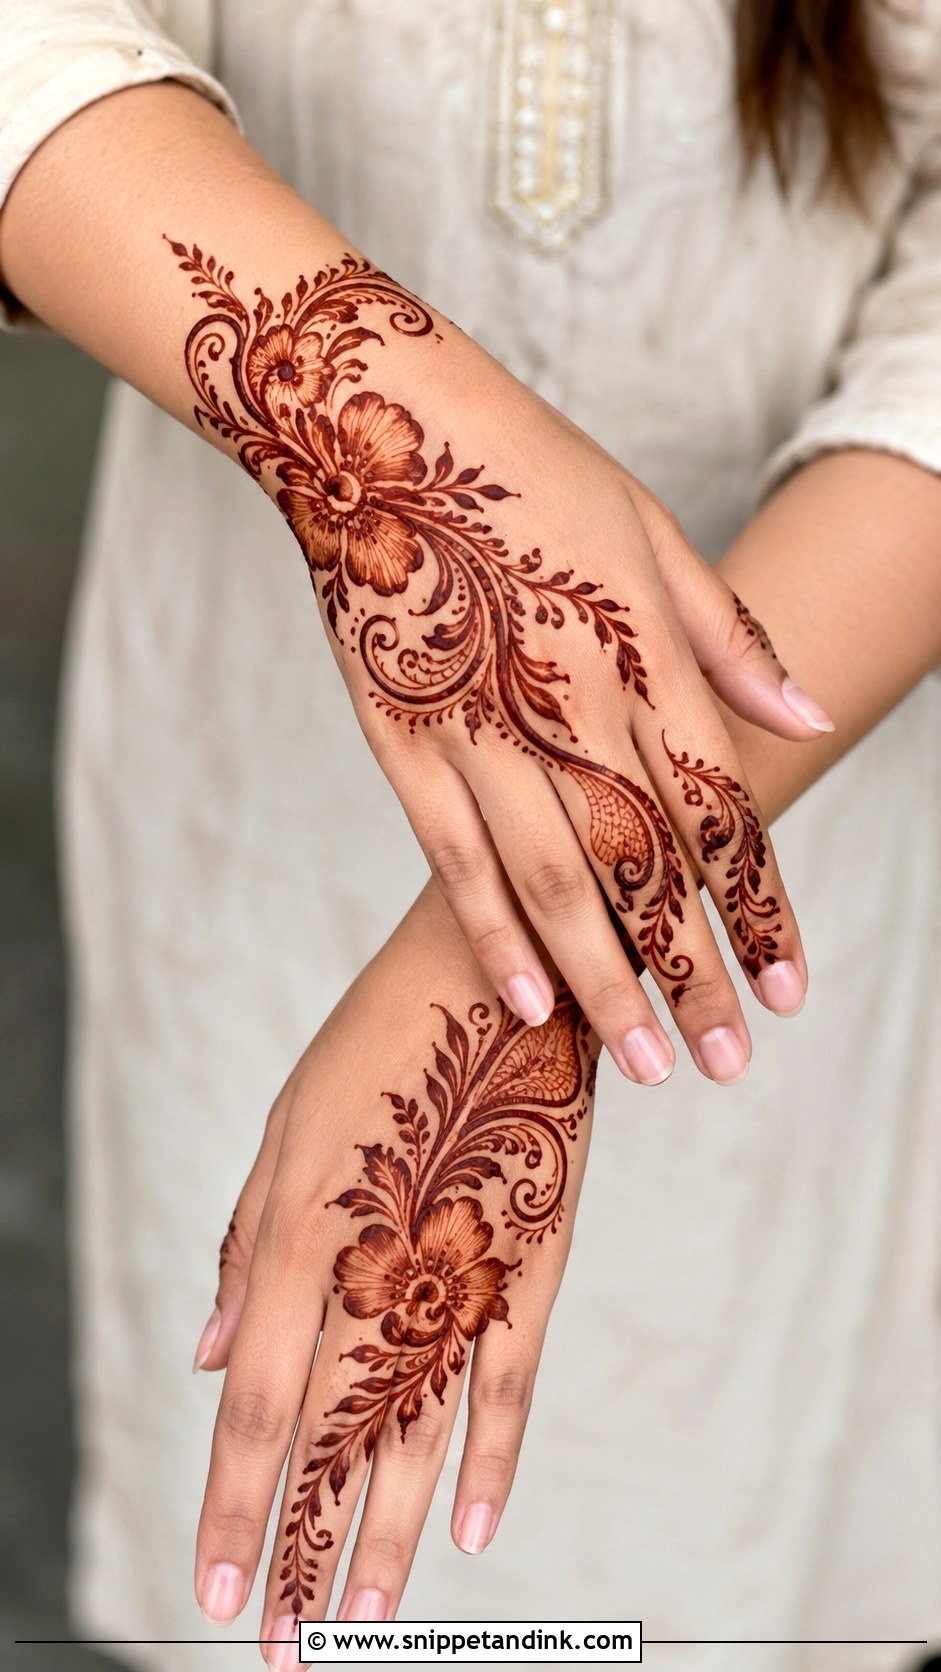
3. Easy Arabic Mehndi Design
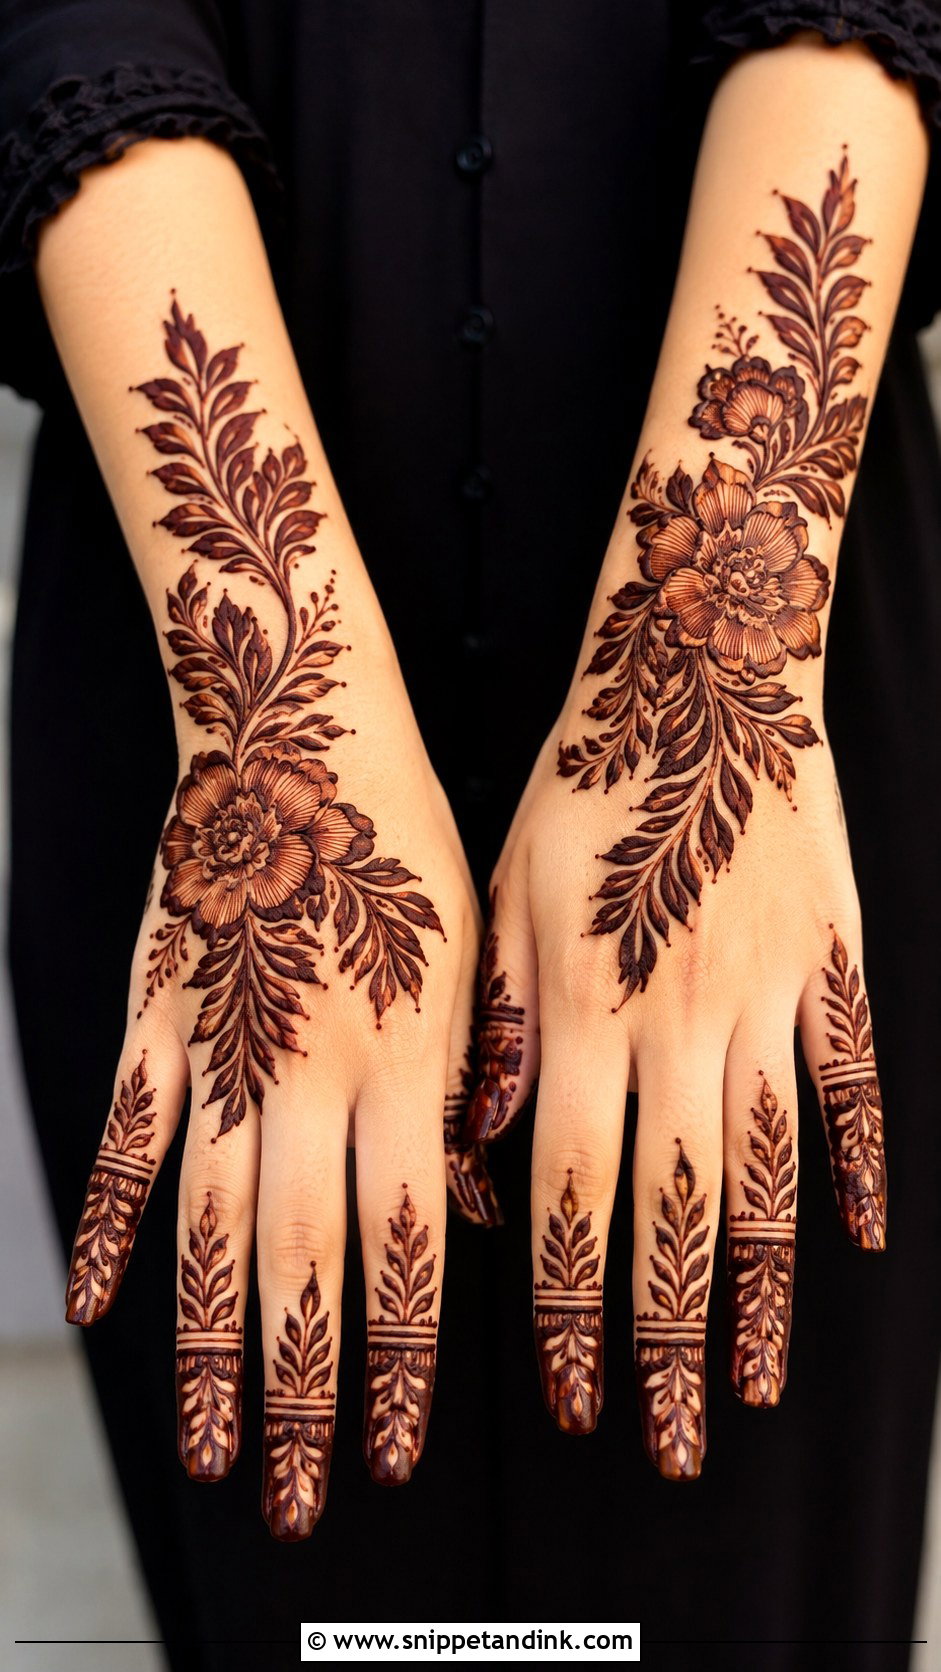
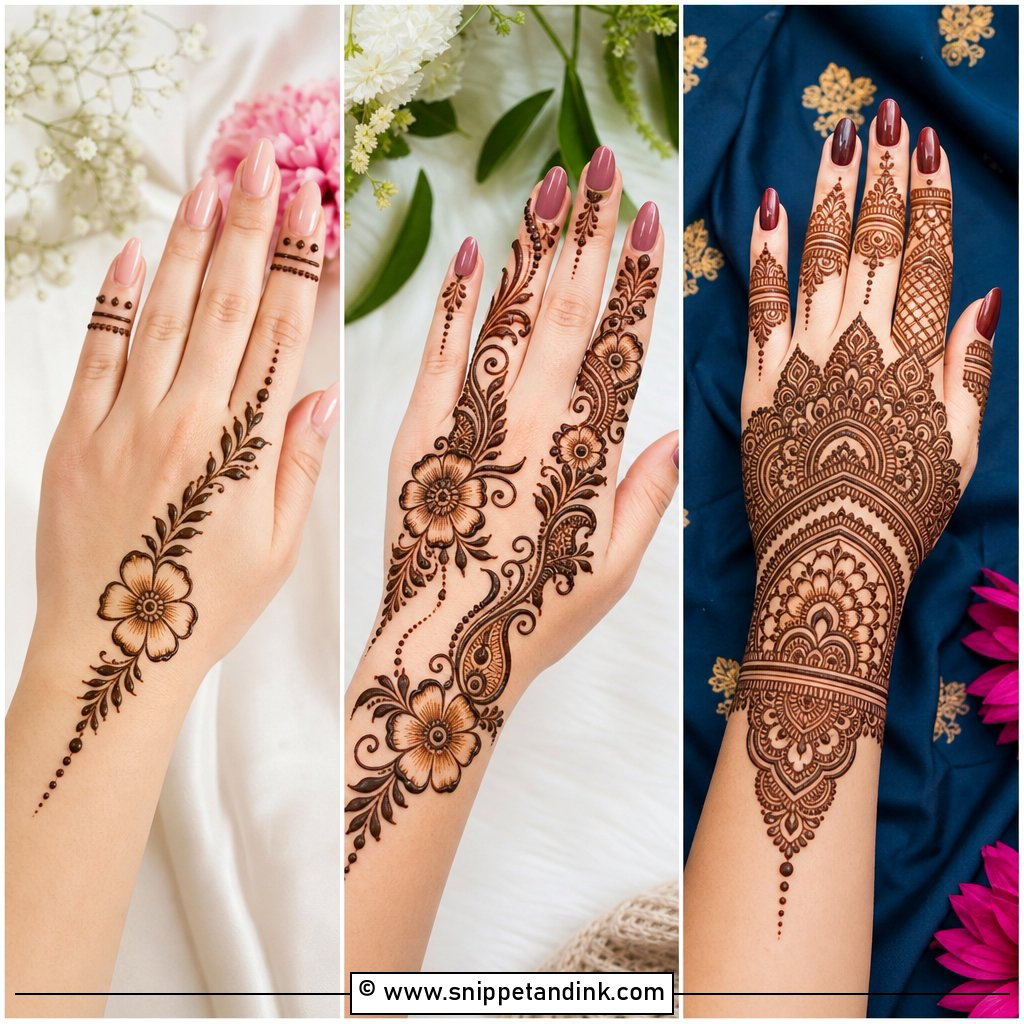
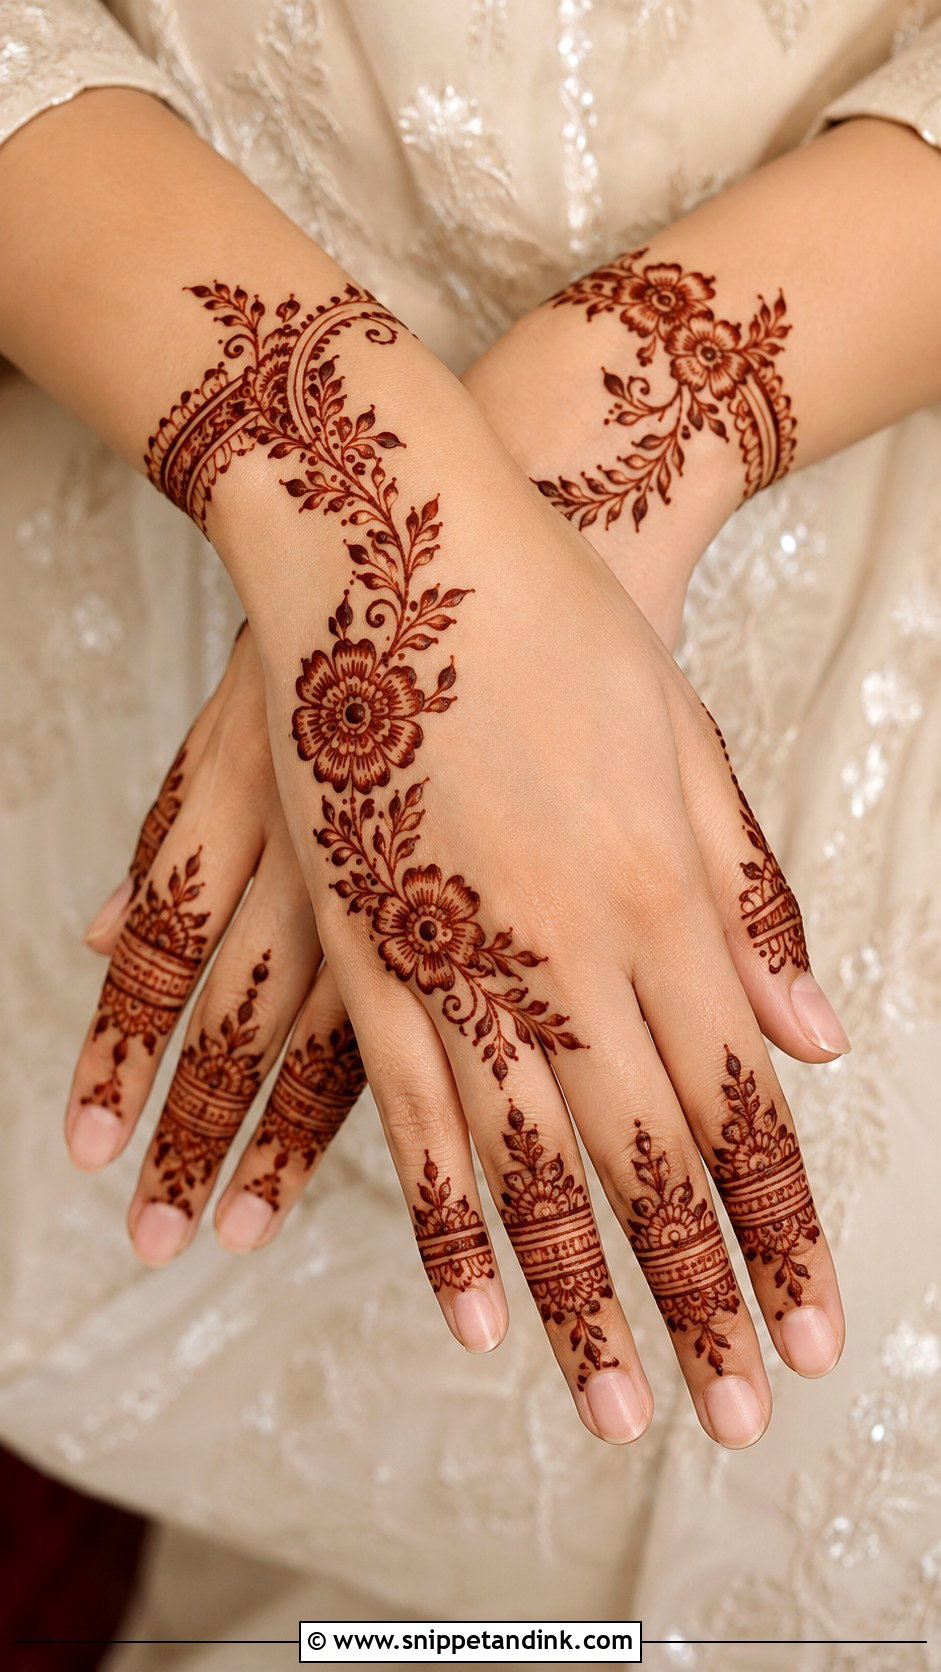
An easy Arabic mehndi design is perfect for beginners because it uses bold curves, flowers, and empty spaces. Instead of filling the whole hand, this look follows a diagonal flow from the wrist to one finger. Begin with a large flower near the wrist, then add leaves, paisleys, and small buds along a curved trail. Keep the outlines thicker and the inner details simple. Arabic designs are forgiving because the open areas make small mistakes less noticeable. This look suits front hands and back hands, especially when you want something quick, elegant, and not too dense for practice.
4. Easy Mandala Mehndi Design
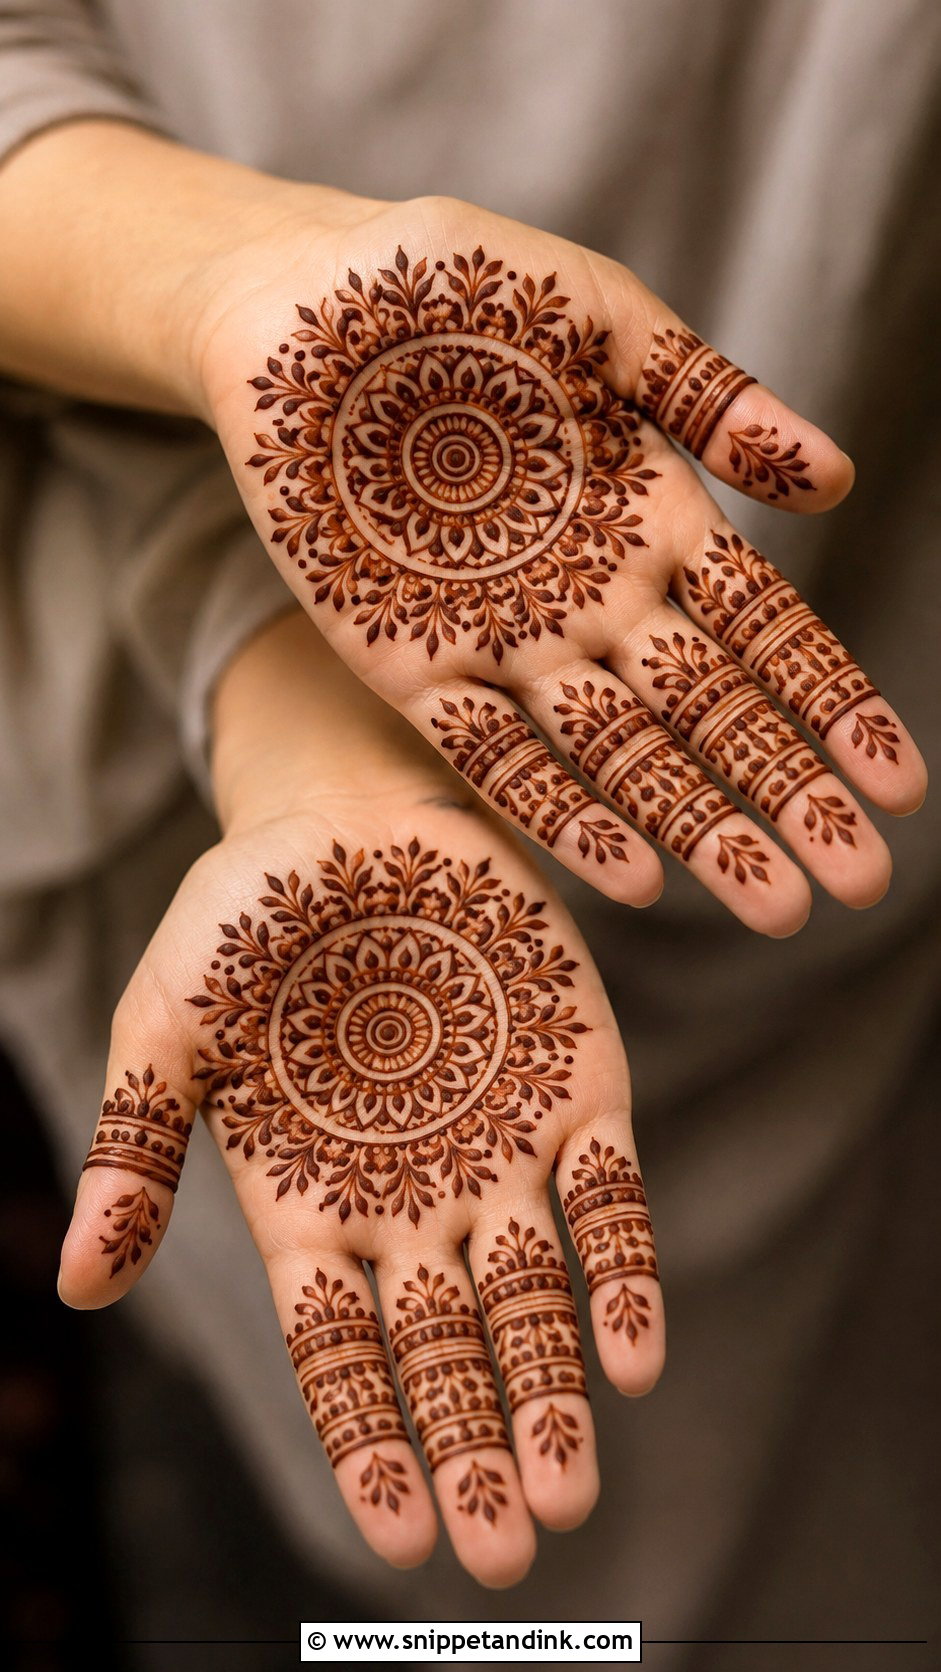
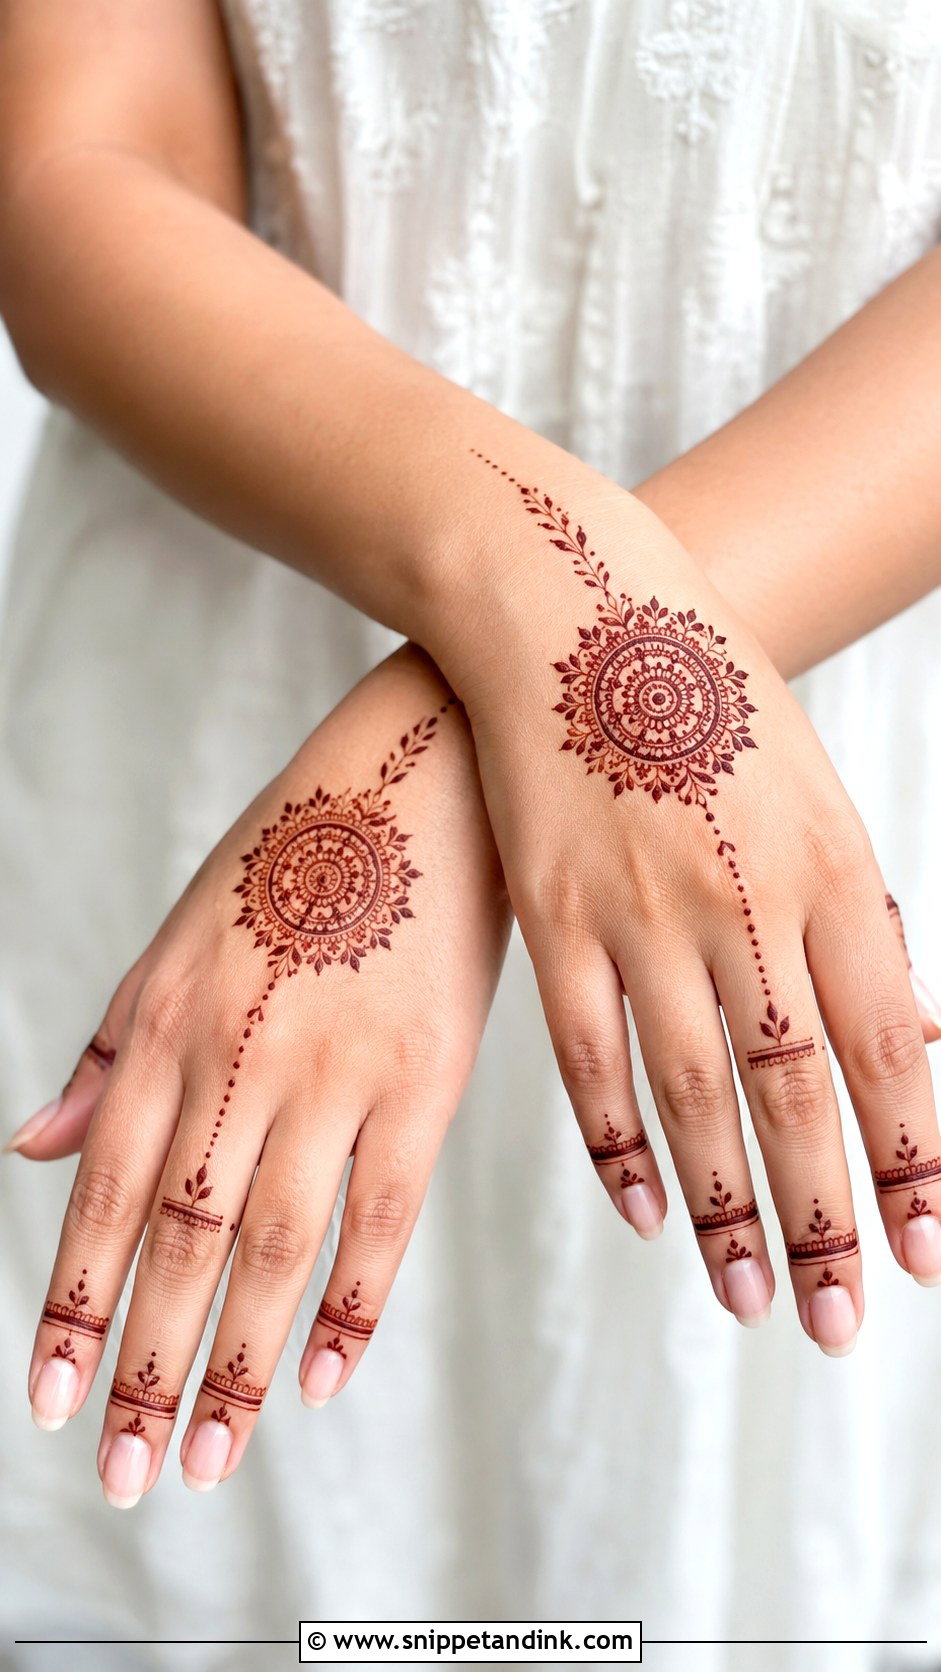
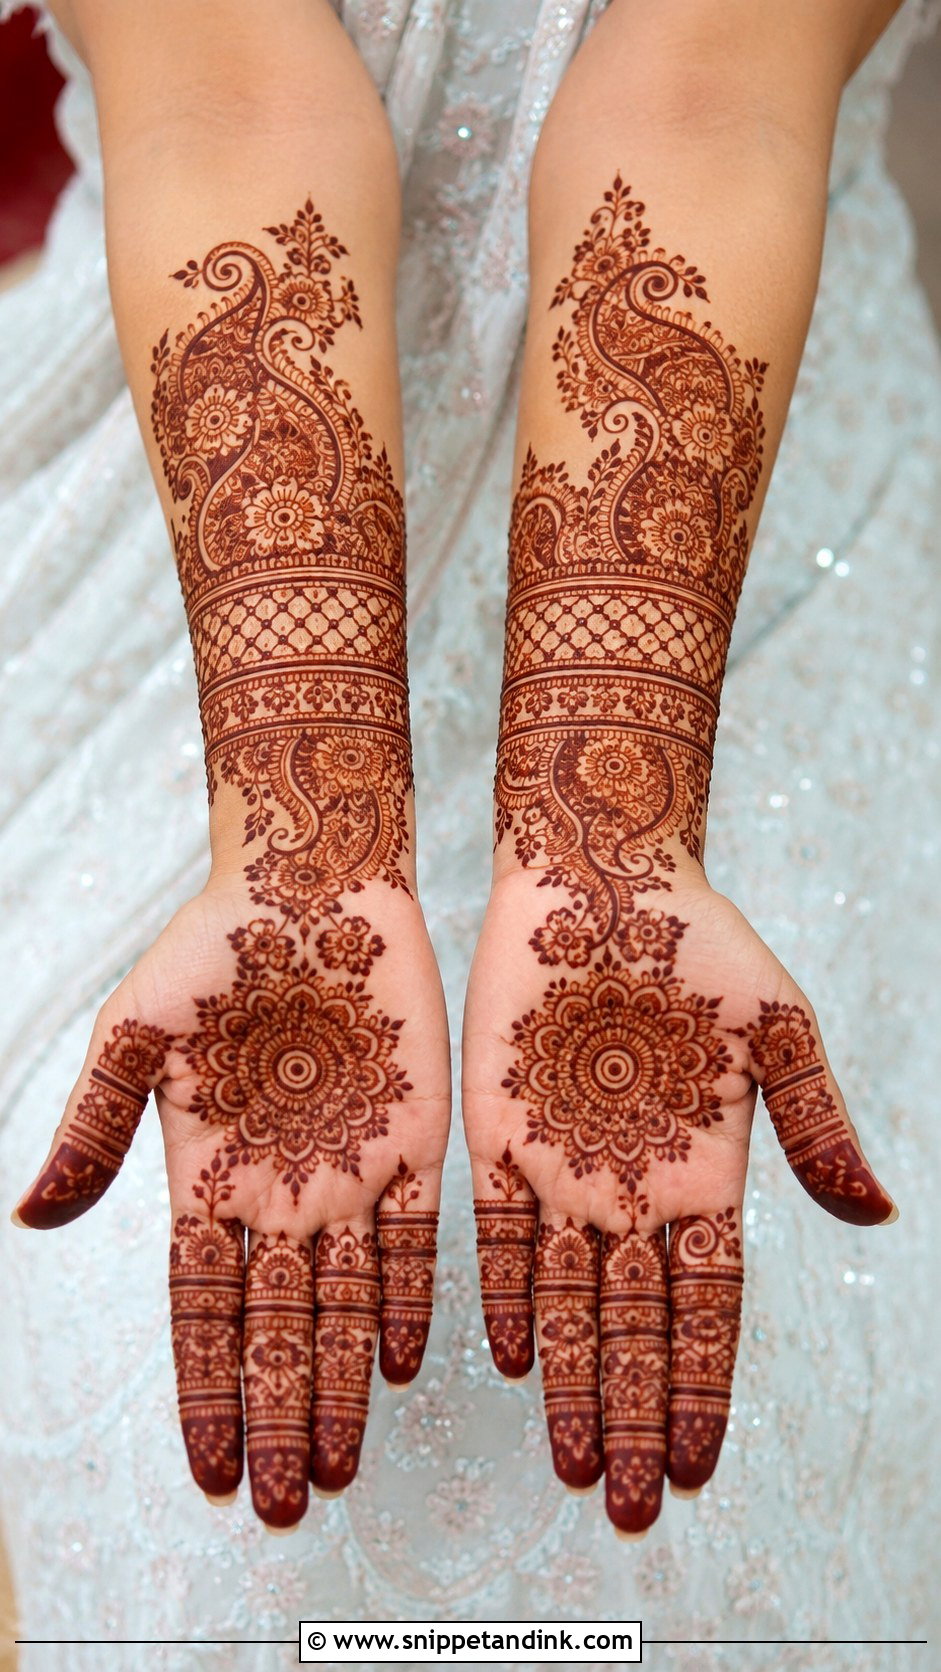
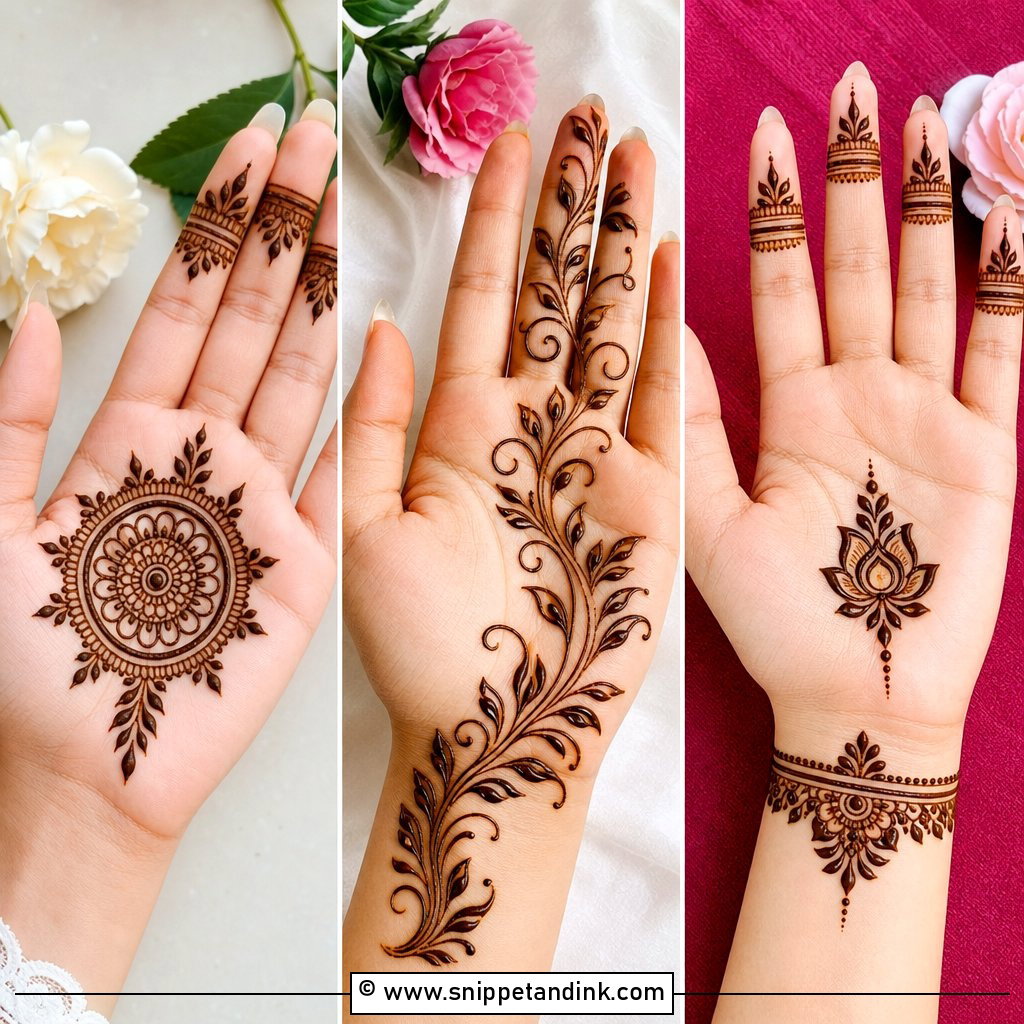
A mandala mehndi design helps beginners practice circles, dots, and repeated shapes. Place one round mandala in the center of the palm or back of the hand. Start with a small dot, circle it, then add petals, tiny arches, and a dotted border. Keep the fingers simple with matching dots, rings, and small leaf marks. The beauty of this design is its balanced center point, so you do not need to cover the whole hand. If your circle is not perfect, add an extra border to smooth it out. This look is classic, neat, and easy to finish quickly.
5. Easy Floral Mehndi Design
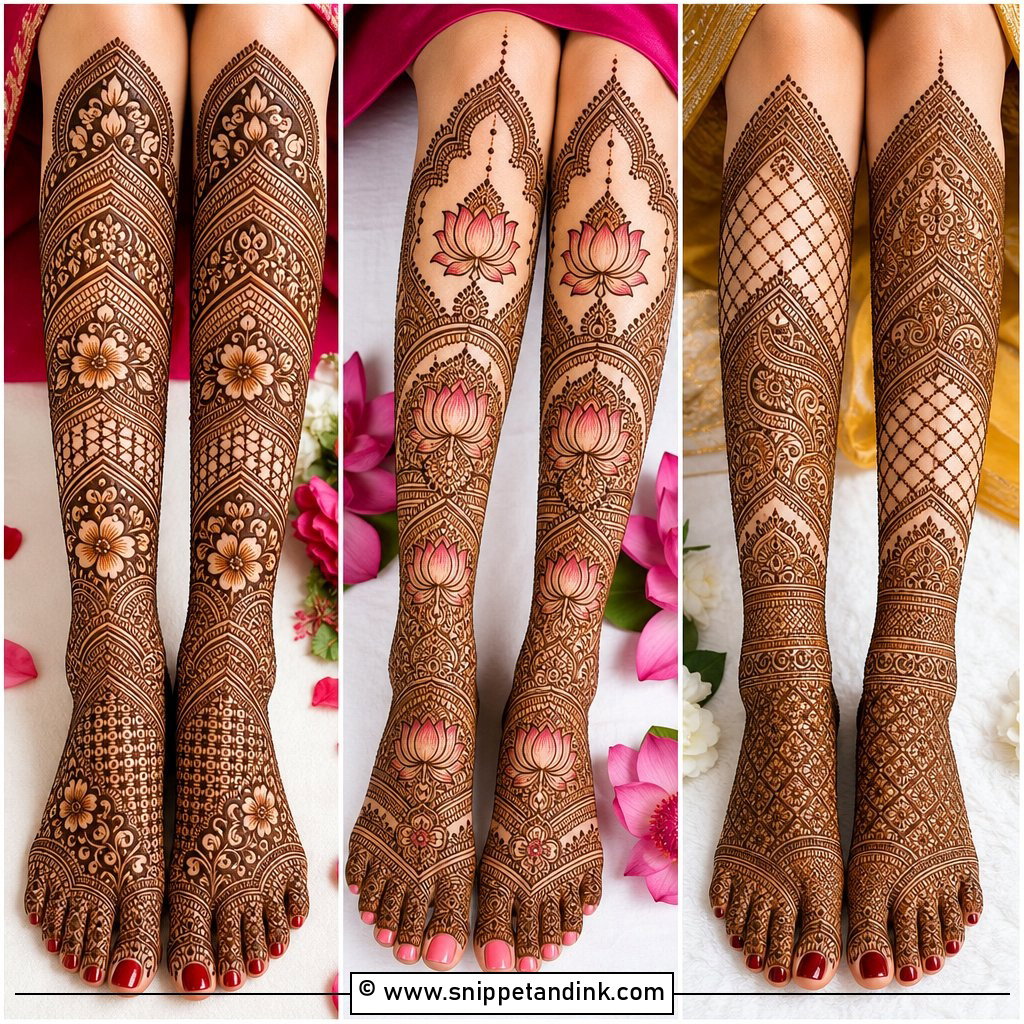
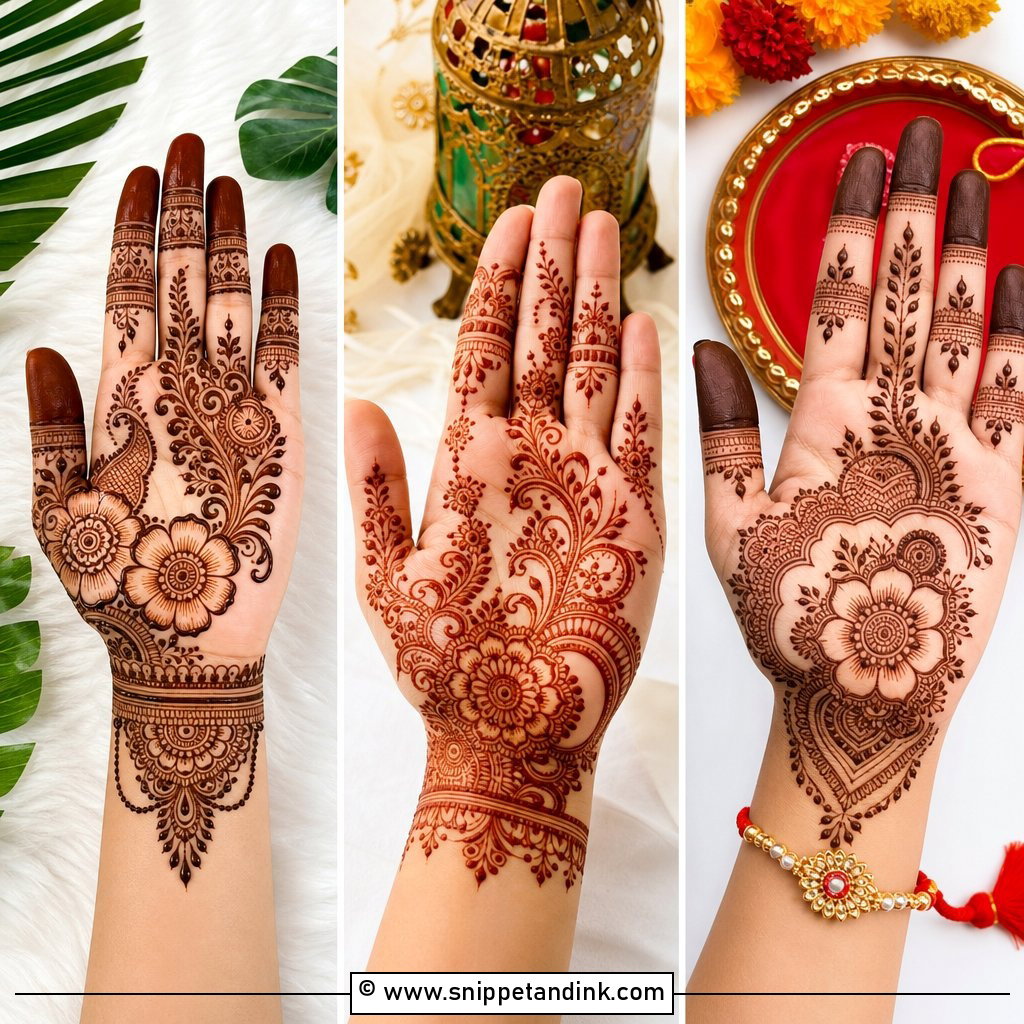
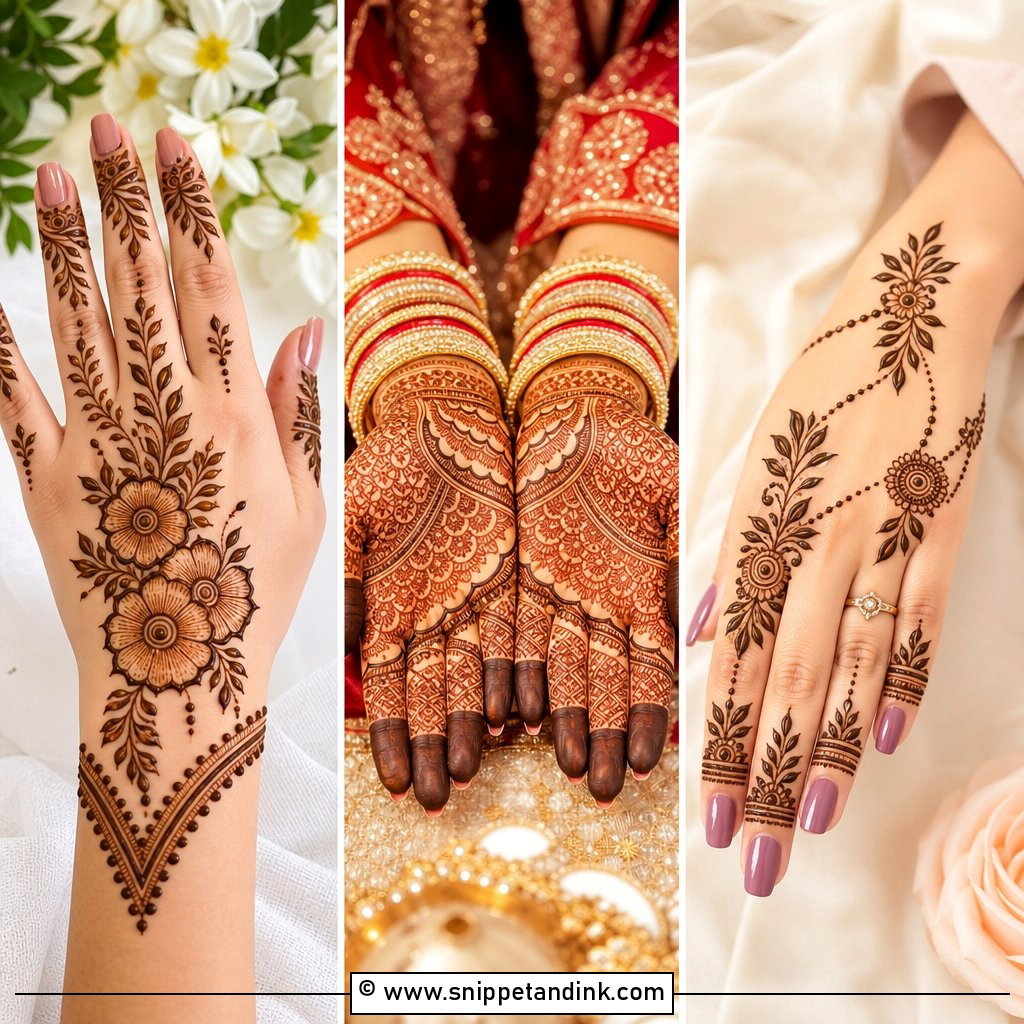
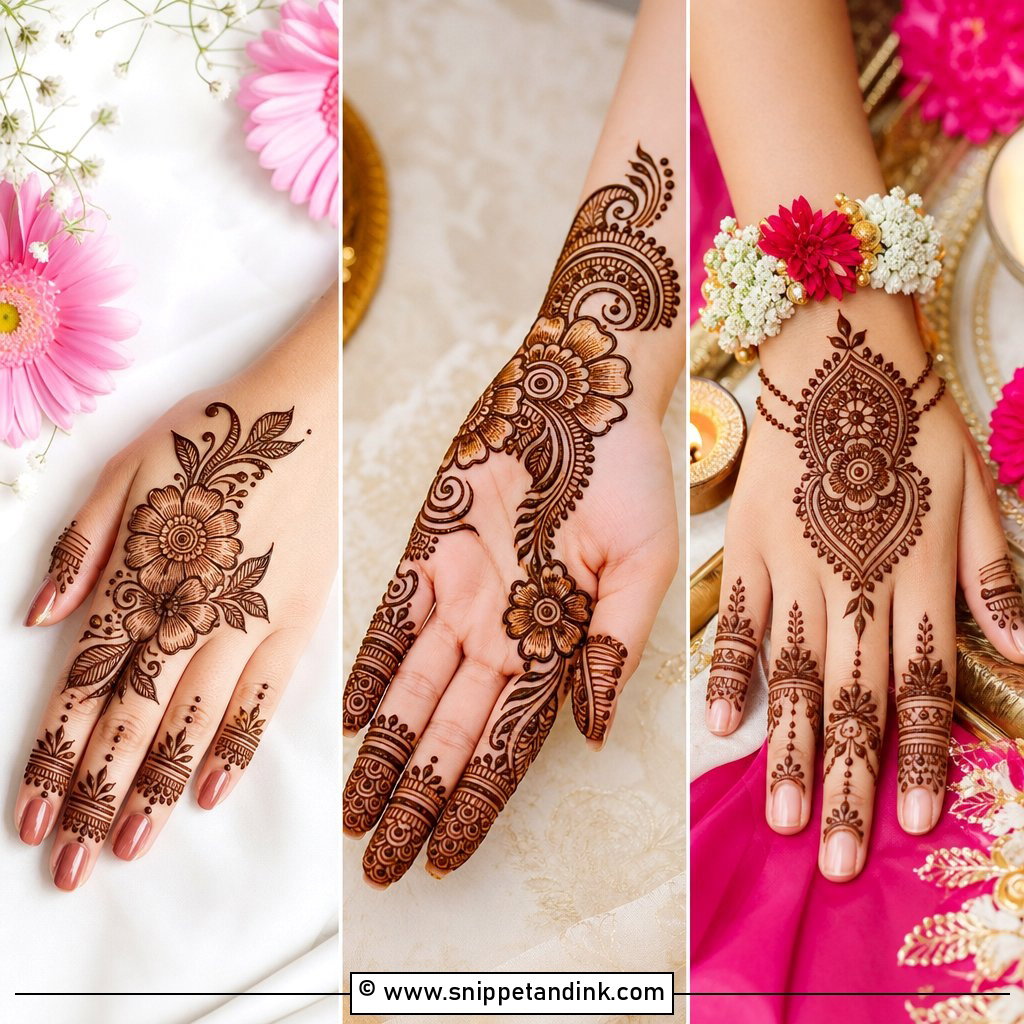
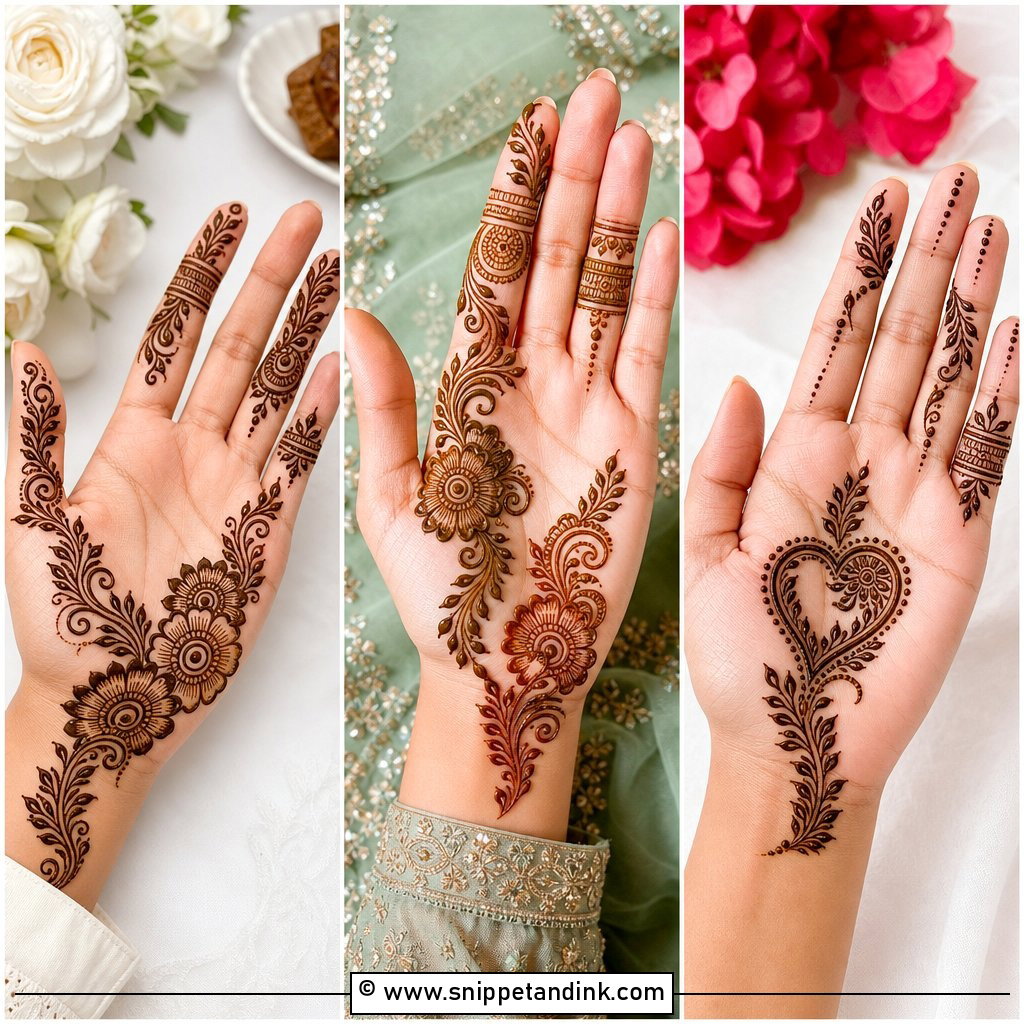
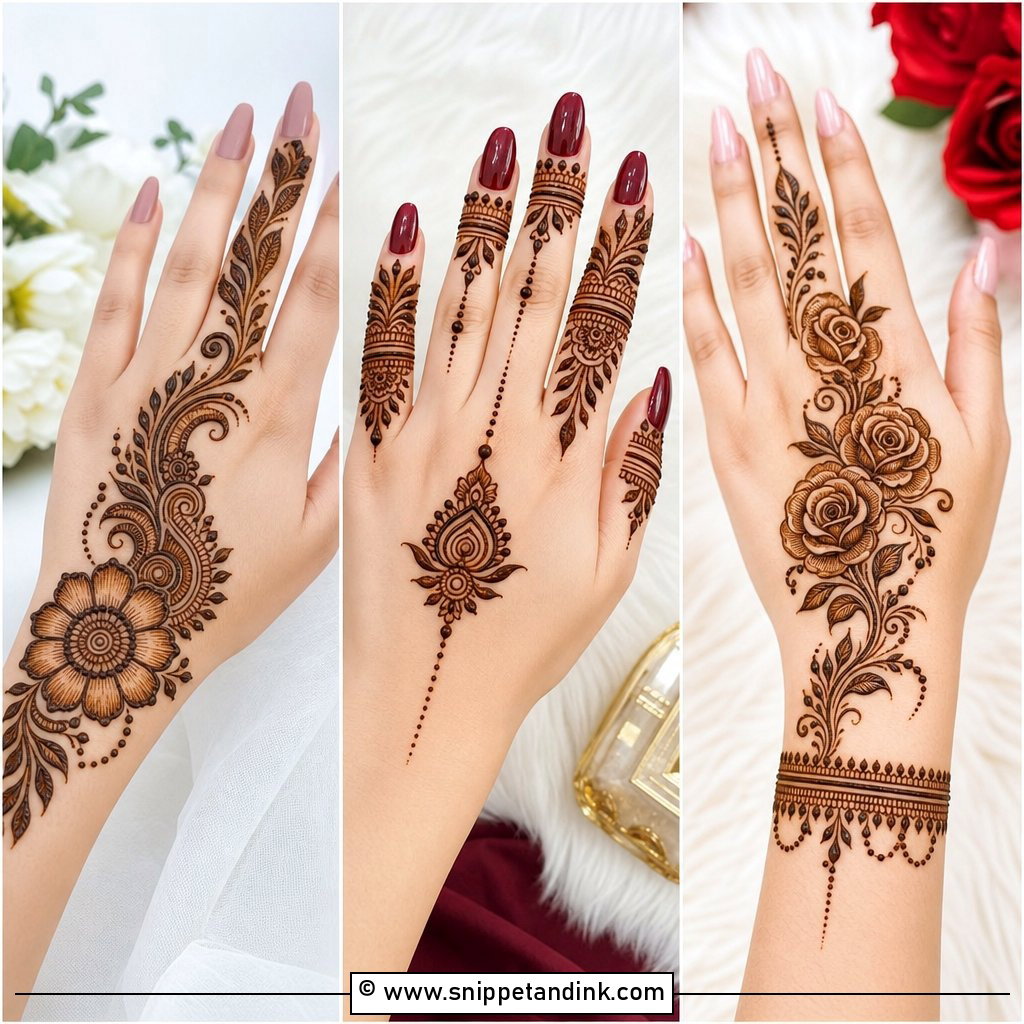
Soft flowers make beginner mehndi feel pretty without requiring advanced skills. For this complete floral hand look, draw one medium flower on the palm or back of the hand, then connect it to smaller flowers with a curved vine. Use rounded petals because they are easier than sharp, detailed shapes. Add leaves, dots, and small swirls around the flowers to complete the design. Keep the fingertips lightly decorated with simple petal caps or dotted rings. This mehndi look is beginner-friendly because flowers can be adjusted in size and shape. It works beautifully for family gatherings, Eid, Diwali, and simple festive dressing.
6. Easy Finger Mehndi Design

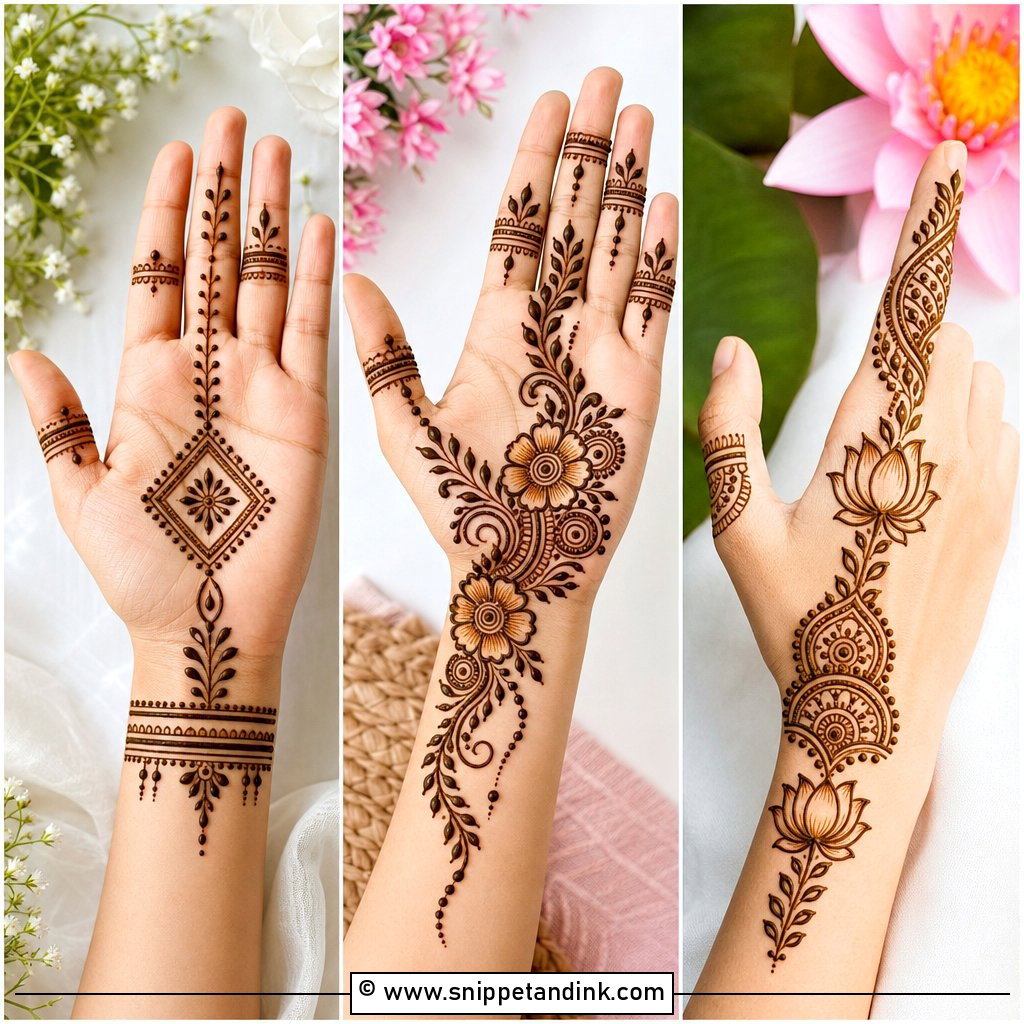
An easy finger mehndi design is ideal when you want a stylish look without covering the full hand. This design keeps the palm mostly empty and focuses on the fingers with bands, dots, leaf chains, and small ring patterns. Begin with one main finger, usually the index or middle finger, and create a vertical leafy line from the fingertip down to the knuckle. Decorate the other fingers with lighter bands so the whole hand feels balanced. Add a tiny wrist bracelet if you want more detail. This look is quick, modern, and excellent for practicing straight lines and repeated spacing.
7. Easy Palm Mehndi Design
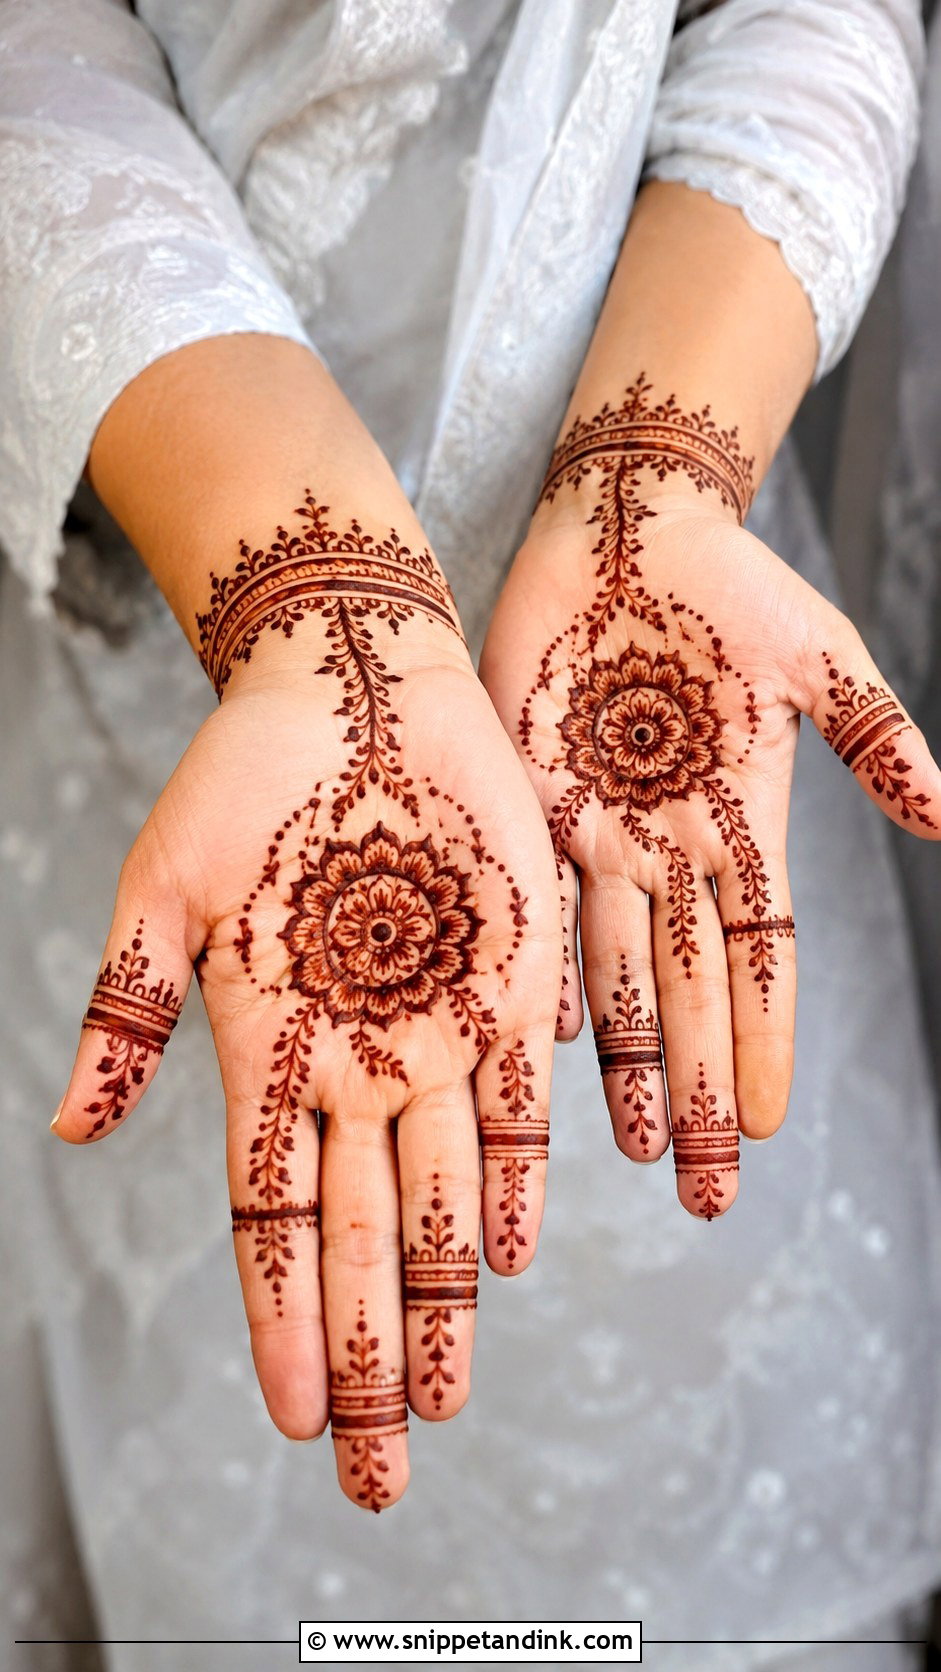
A palm mehndi design for beginners should feel centered, clear, and easy to control. Start with a round tikki or flower in the middle of the palm, then add a simple ring of petals around it. Extend small vines toward the base of each finger, but avoid filling every space. On the fingers, use short horizontal bands, dots, and tiny arches. This layout gives a traditional look without the pressure of detailed bridal work. Since the palm is flat, it is easier to draw steady lines. It is a great design for first-time practice and quick festive henna.
8. Easy Wrist Mehndi Design
A wrist mehndi design gives the hand a pretty bracelet effect while staying simple for beginners. Begin with two curved lines around the wrist, then fill the space between them with dots, leaves, small flowers, or checks. From the center of the bracelet, extend one soft vine toward the back of the hand or palm. Keep the vine thin and open so it does not look heavy. This design is easy because the wrist band works like a guide. It also pairs well with finger mehndi or a small mandala. The finished look feels clean, wearable, and elegant.
9. Easy Bracelet Mehndi Design
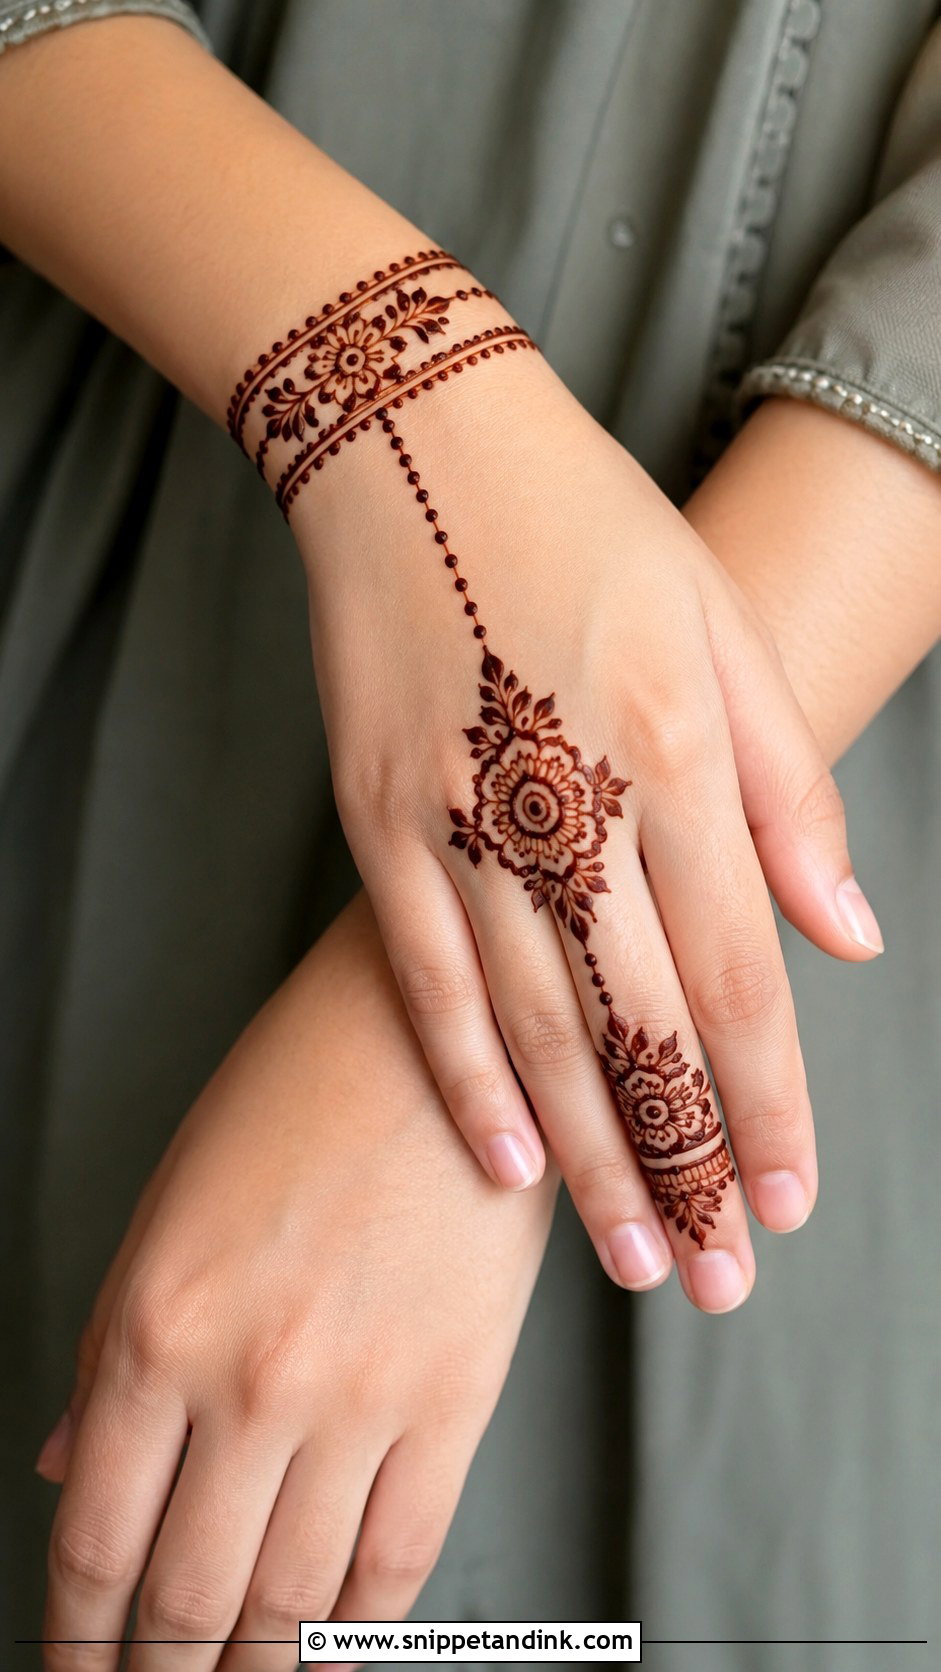
A bracelet mehndi design looks like hand jewelry, but it is much easier to draw than it appears. Create a simple cuff around the wrist using parallel lines. Add hanging dots, tiny leaf chains, and one small flower in the center. Then connect the bracelet to one finger with a thin chain pattern made of dots or small loops. Decorate that finger with simple rings and a leafy fingertip. Keep the rest of the hand open for a modern effect. This complete look is perfect for beginners who like minimal henna with a polished finish. It works especially well on the back hand.
10. Easy Bail Mehndi Design
A bail mehndi design is a flowing vine pattern that travels across the hand. Beginners can start this look from the wrist and move diagonally toward the index finger. Draw one curved stem first, then add leaves, small flowers, and dots along the line. Keep each motif spaced apart so the design stays light and easy to correct. The fingers can remain simple with thin bands or dotted tips. This look is popular because it gives full-hand movement without requiring full-hand coverage. It is also one of the easiest ways to practice smooth curves and repeated leafy shapes.
11. Easy Paisley Mehndi Design
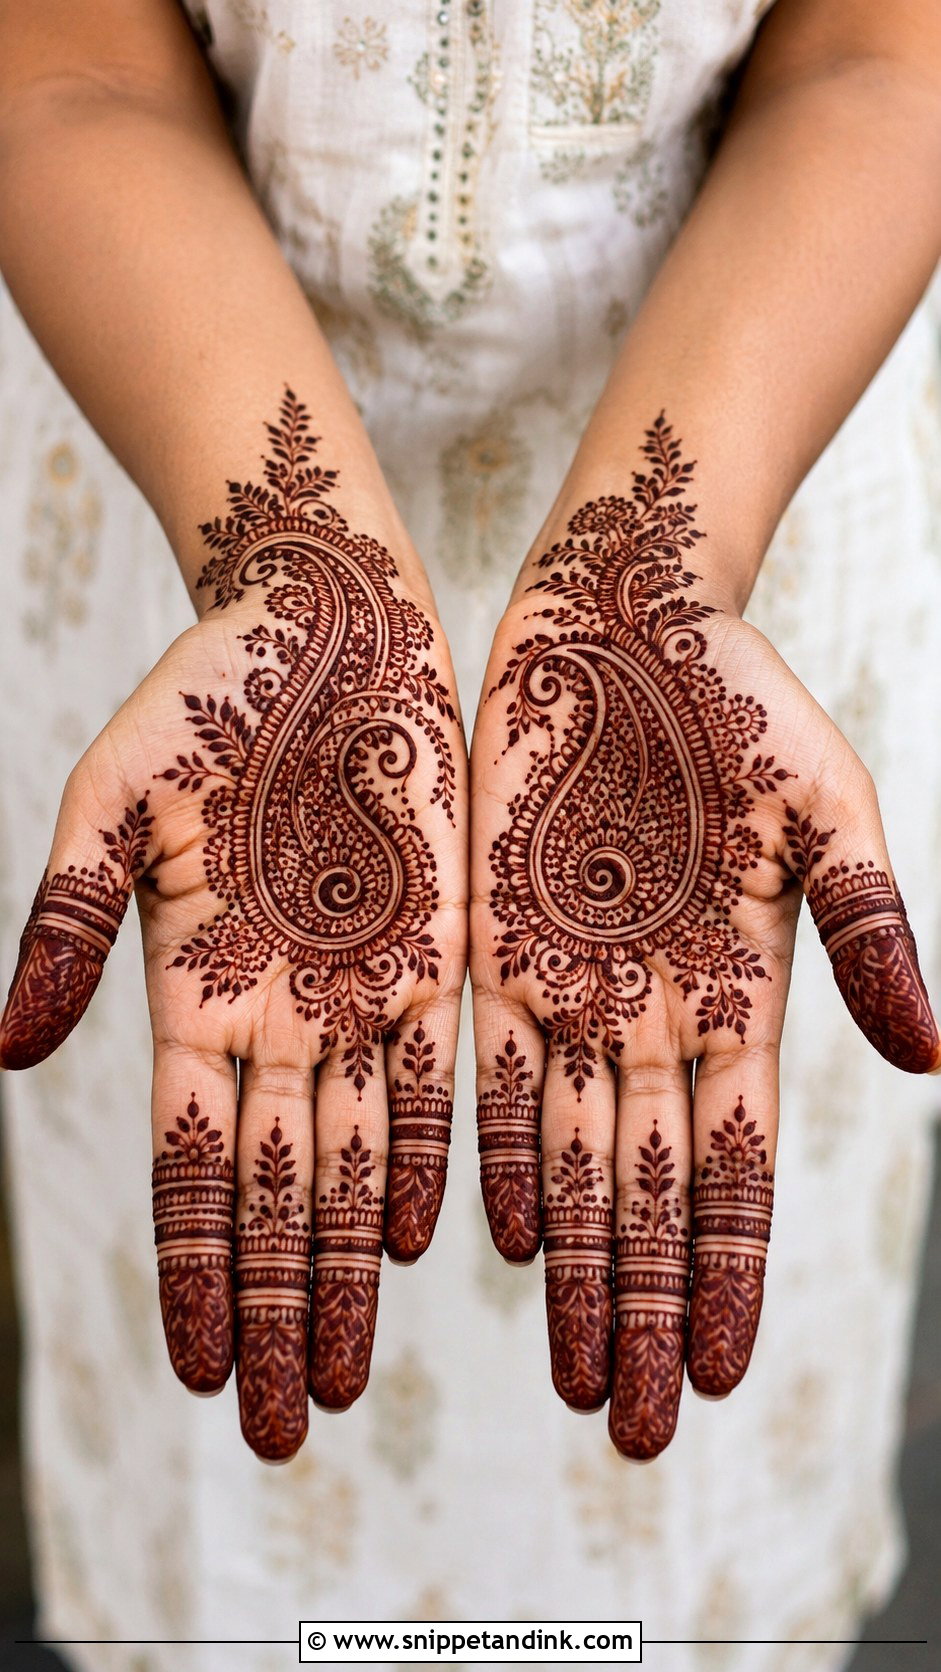
Paisley shapes are common in Indian and Arabic mehndi, and beginners can use them in a simple full-hand look. Start with one large paisley on the palm or back of the hand. Outline it slowly, then fill it with dots, small curves, and tiny leaf strokes. Add a flower at the base and a few vines around the paisley to make the design feel complete. Keep the fingers light with bands and dots. Paisleys are useful for practice because they teach curved outlines and inner filling. Even a single paisley can make the hand look festive and traditional.
12. Easy Leaf Mehndi Design
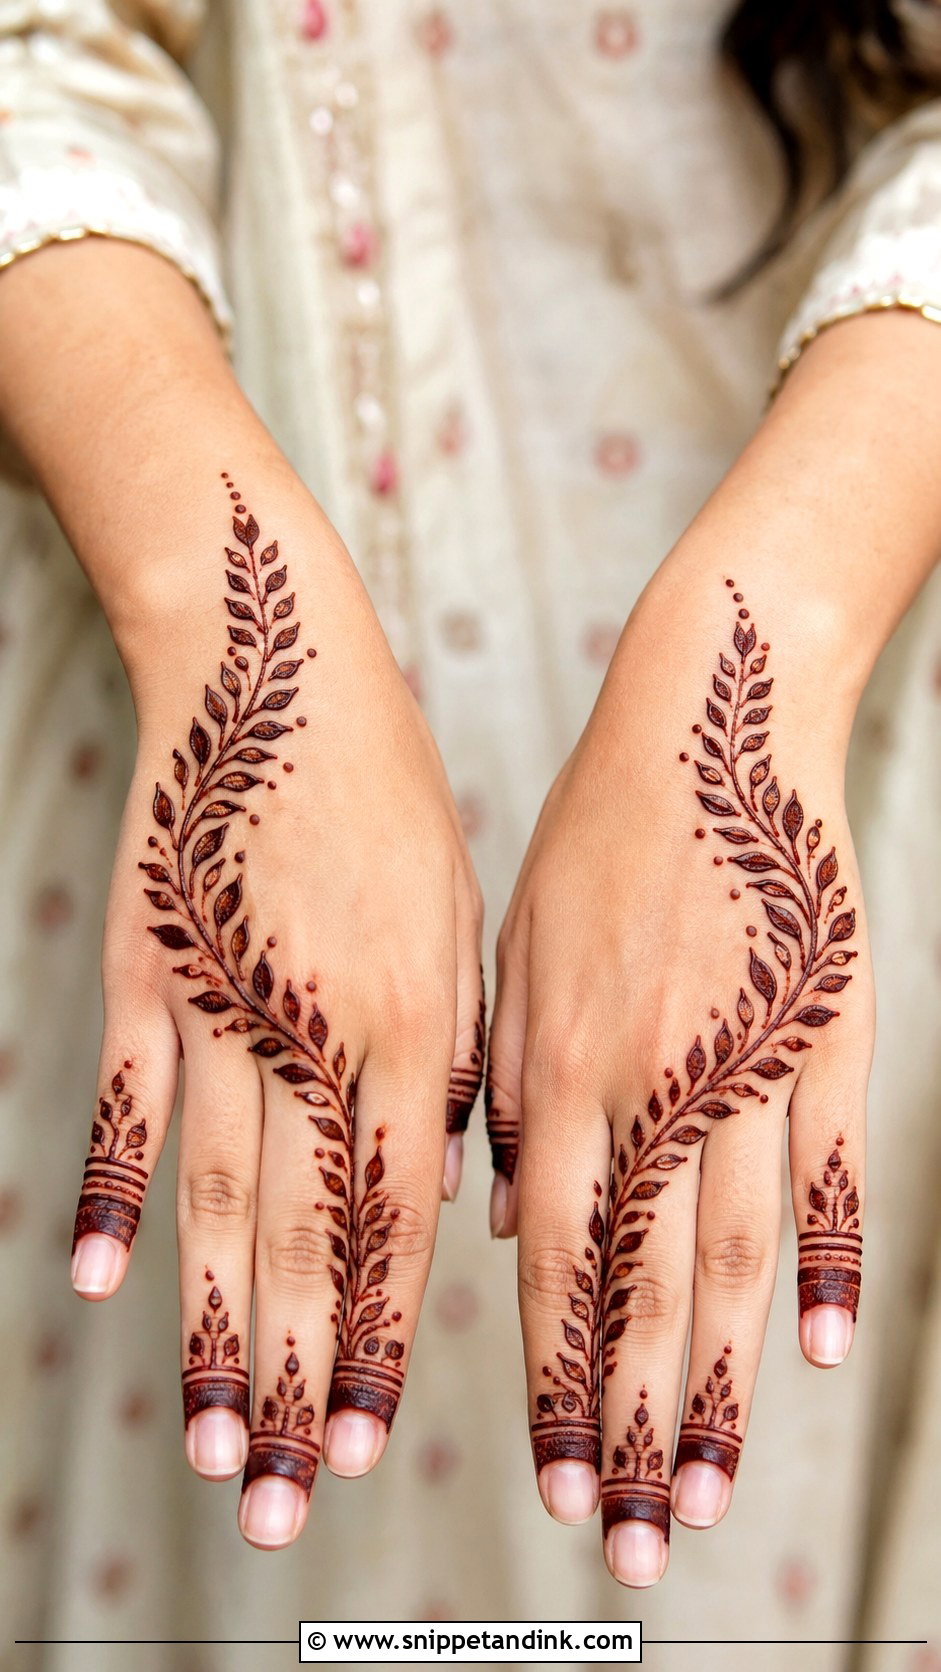
A leaf mehndi design is one of the simplest complete looks for beginners. Draw a curved line from the wrist to the middle finger, then add small leaves on both sides. Make each leaf with two short curved strokes that meet at a point. Add dots between the leaves to create rhythm and fill empty spaces. You can place a small flower at the wrist or center of the hand for a fuller finish. Keep the fingertips decorated with little leaf bands. This design is quick, graceful, and useful for learning pressure control because the same shape repeats throughout the hand.
13. Easy Flower Vine Mehndi Design
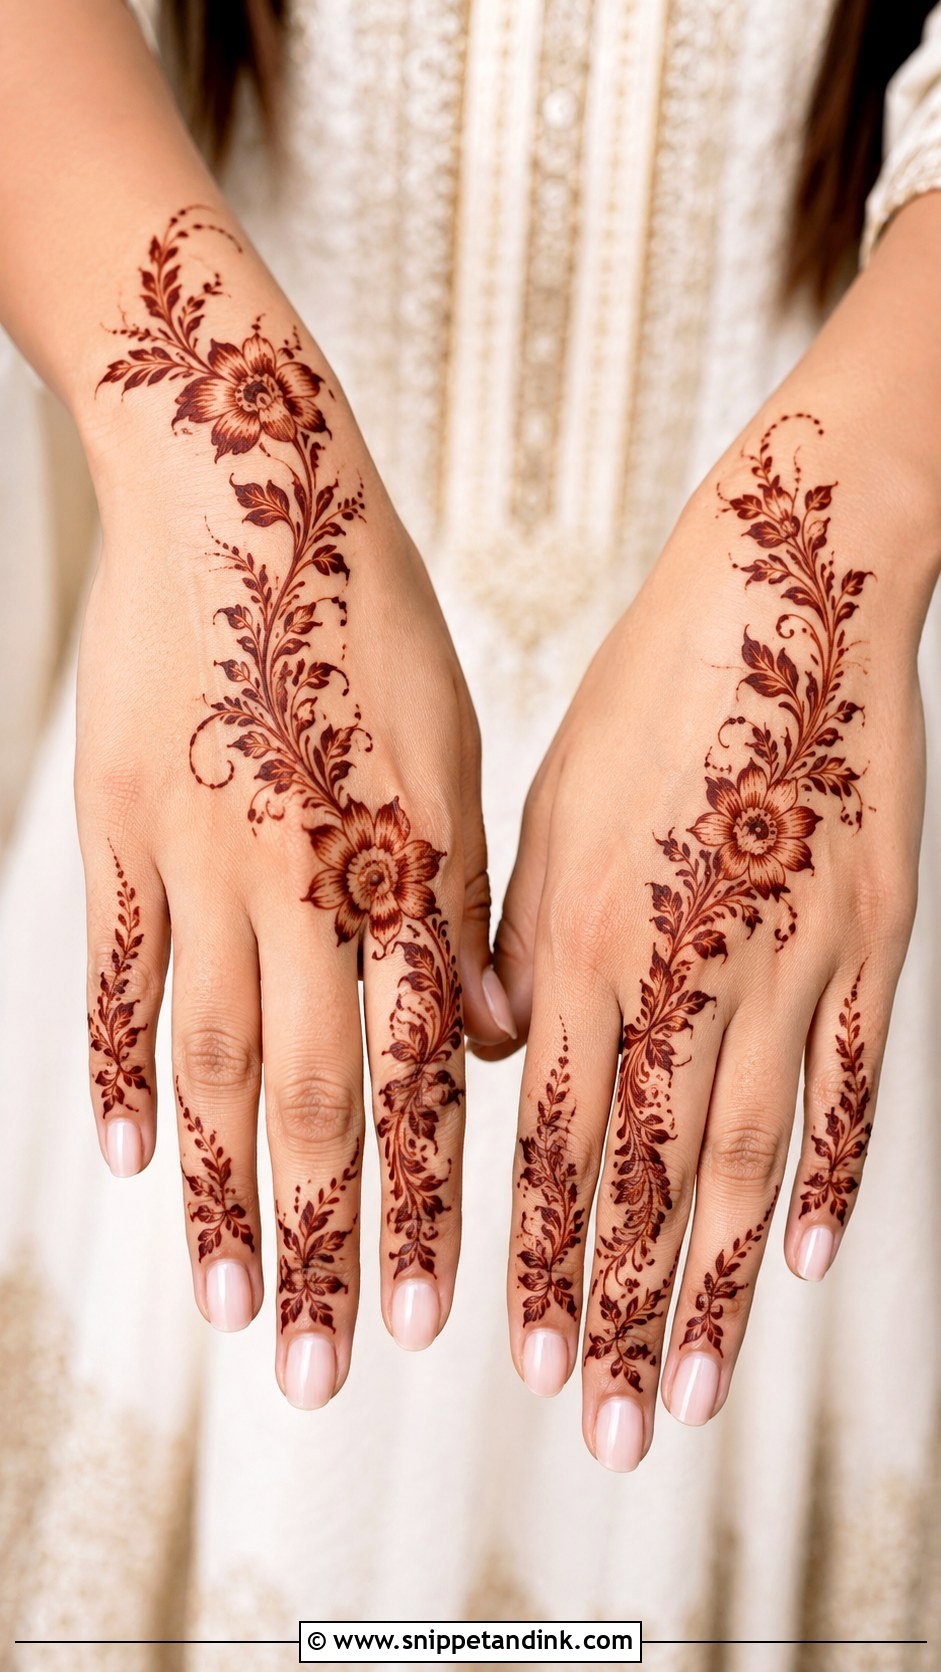
A flower vine mehndi design blends two beginner-friendly elements into one complete hand look. Start with a flower near the wrist, then draw a vine that curves gently toward the fingers. Add two or three smaller flowers along the vine, leaving enough space between them. Fill the empty areas with leaves, dots, and tiny curls. The fingers can have simple bands that match the vine’s flow. This design looks more detailed than it really is because the repeated flowers create a rich effect. It is a lovely choice for beginners who want a pretty design for festivals or family events.
14. Easy Indo Arabic Mehndi Design
An Indo-Arabic mehndi design combines Indian detail with Arabic spacing, making it great for beginners. Use a diagonal Arabic-style trail as the main structure, then add Indian touches like small mandalas, paisleys, dots, and fine borders. Keep the design open instead of covering the entire hand. A flower at the wrist, a paisley in the center, and leafy movement toward one finger are enough for a complete look. The fingers can include simple rings and small shaded tips. This design is helpful for practice because it teaches layering without becoming too dense. It looks festive, balanced, and beginner-friendly.
15. Easy Indian Mehndi Design
An easy Indian mehndi design can be traditional without being complicated. Begin with a palm mandala or flower, then add simple paisleys and leafy curves around it. Use dotted borders to connect the center design with the fingers. Keep the finger patterns basic with lines, dots, small arches, and simple petal bands. A light wrist border completes the full hand. This look gives the feel of classic Indian henna while staying manageable for new learners. It is great for Diwali, weddings, pujas, and family functions when you want a cultural design that does not take hours to apply.
16. Easy Moroccan Mehndi Design
Moroccan mehndi is known for clean geometry, so beginners can create a neat hand design using lines, diamonds, checks, and dots. Start with a central diamond on the back of the hand or palm. Add straight bands toward the fingers and wrist, then fill selected spaces with tiny dots or small triangles. Keep the pattern symmetrical but not too crowded. The fingers can have matching rings and simple angular tips. This design is different from floral mehndi because it feels bold and structured. It is perfect for beginners who find straight lines easier than curves and flowers.
17. Easy Gulf Mehndi Design
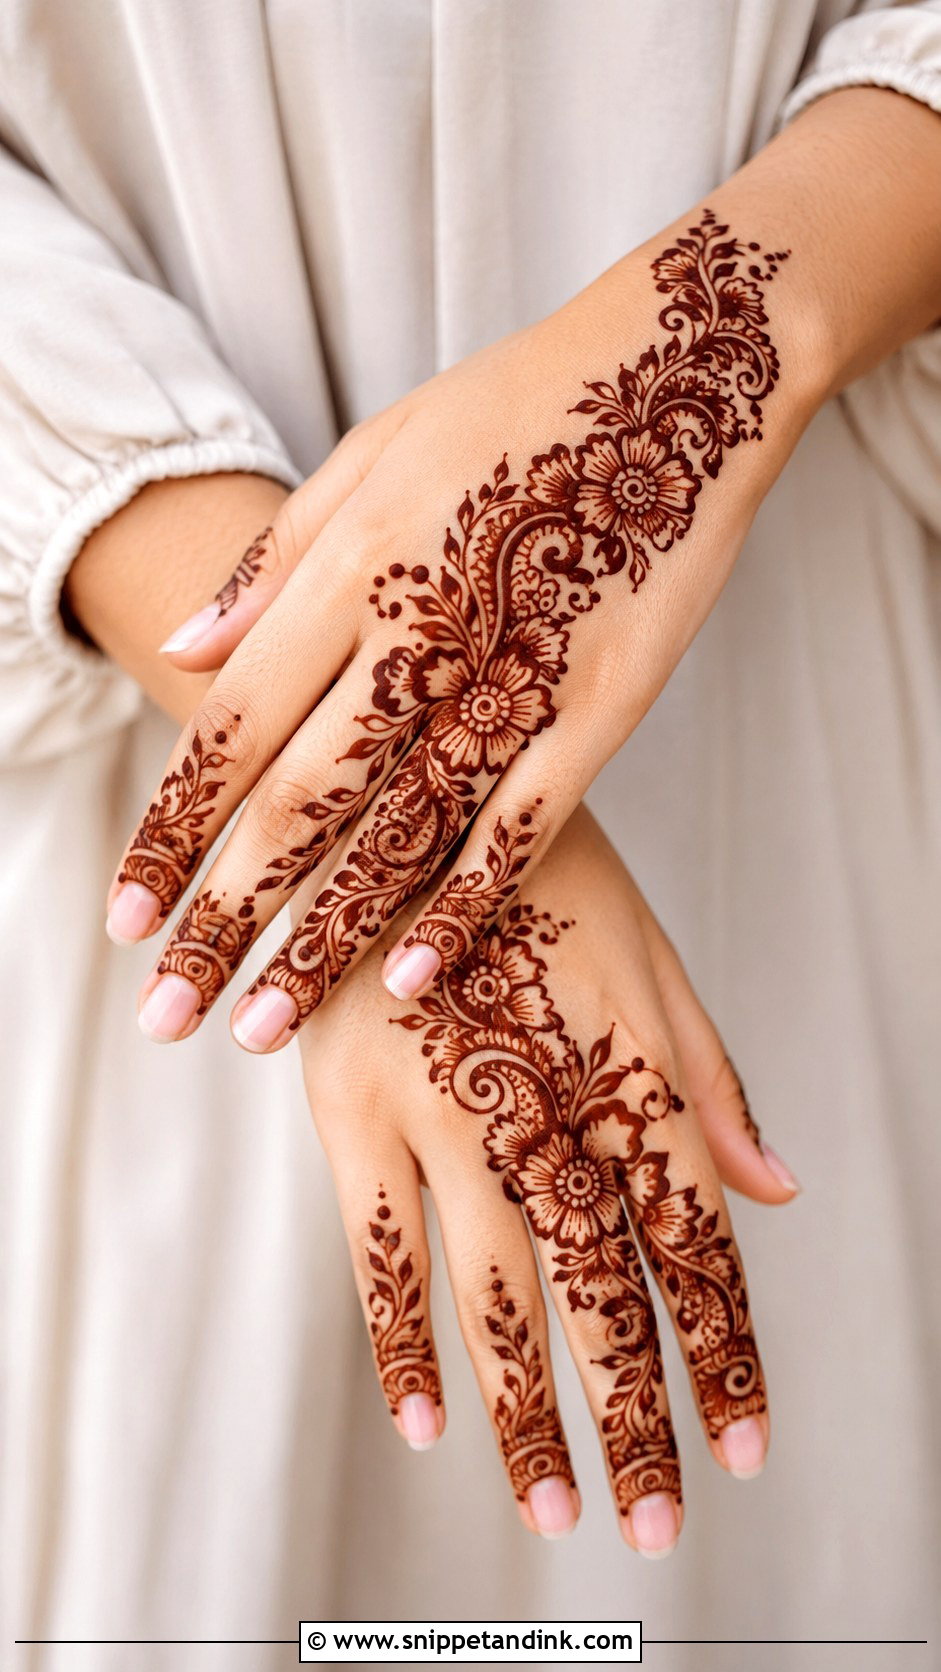
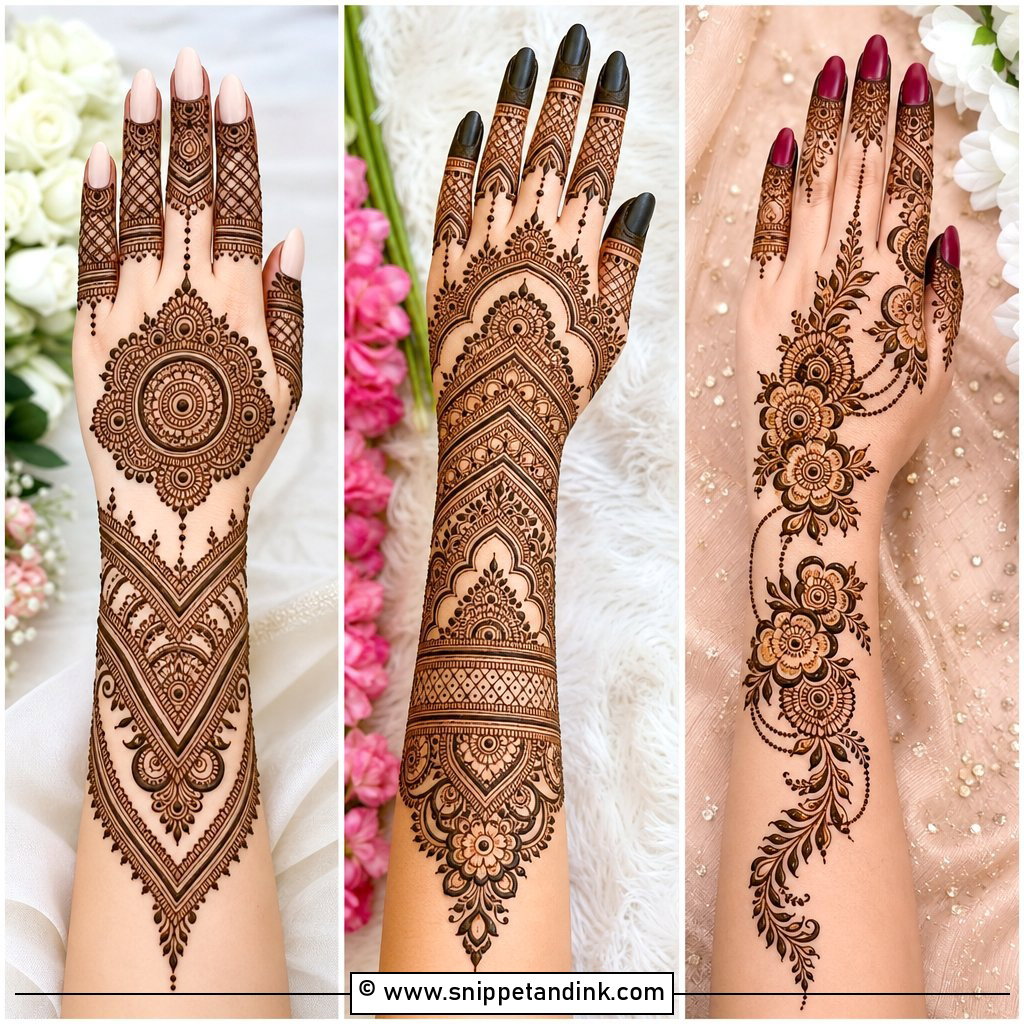
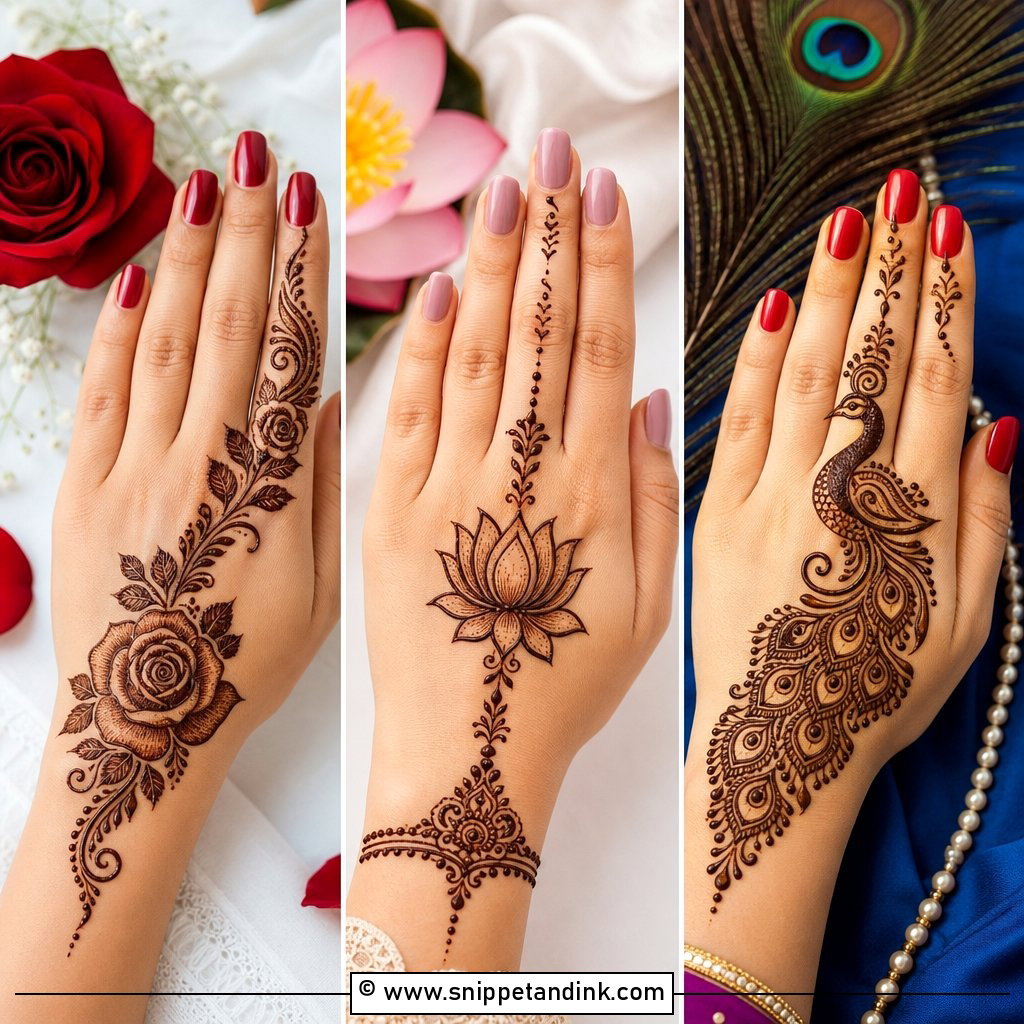
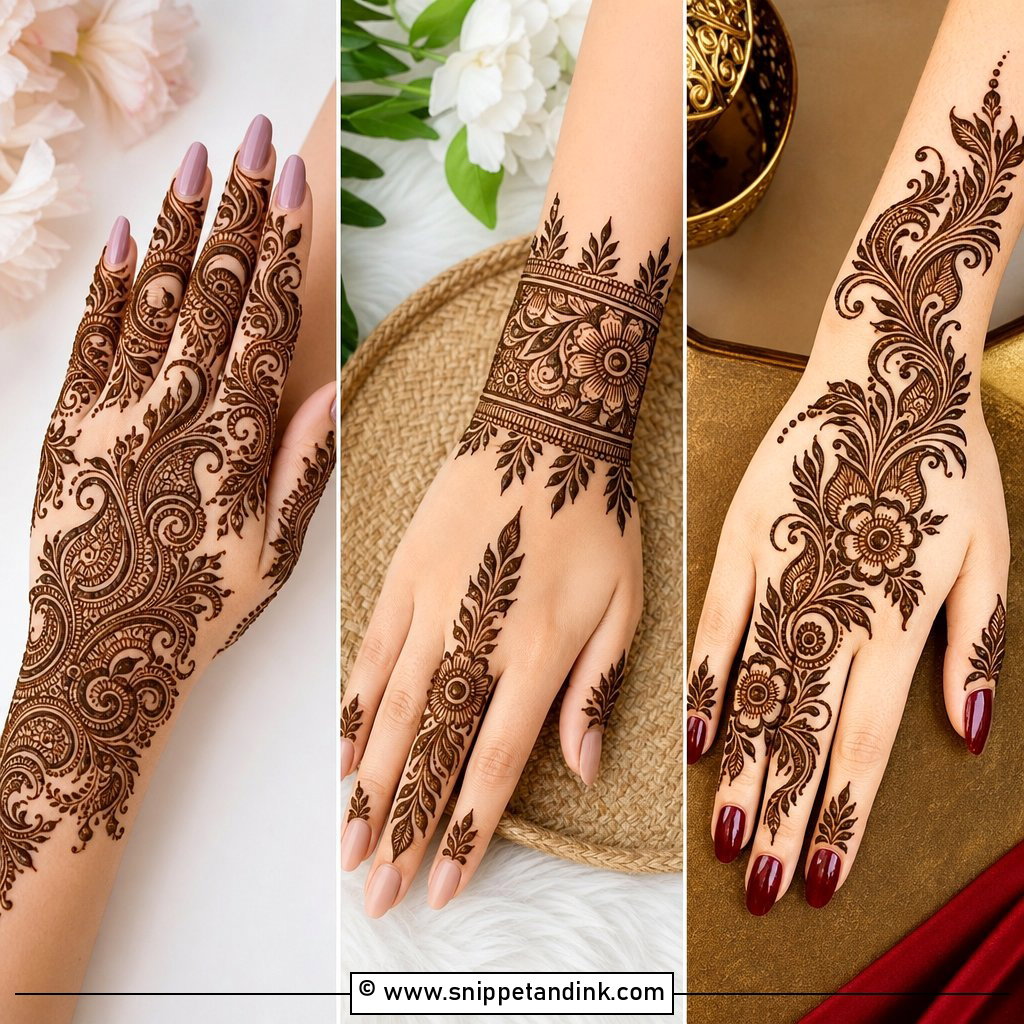
A Gulf mehndi design often feels bold, open, and elegant, which makes it friendly for beginners. Create a large floral cluster near one side of the hand, then extend thick leafy vines toward the wrist and fingers. Leave generous empty space around the pattern. Use simple shading inside petals, but do not overfill the design. The fingers can have bold tips, dots, and leafy bands. This complete look works well on the back hand because the open layout looks modern and clean. Beginners can practice confident outlines, smooth curves, and balanced spacing while still creating a striking henna design.
18. Easy Minimal Mehndi Design
A minimal mehndi design is perfect when you want something clean, quick, and beginner-safe. Focus on one small motif, such as a tiny mandala, flower, or leaf chain, and place it neatly on the back of the hand or palm. Add fine finger rings and a few dotted lines for balance. Leave most of the skin empty so the design feels modern and fresh. This look is easy to apply because there is less pressure to create dense detail. It is ideal for school events, office-friendly celebrations, or anyone who likes soft henna that does not feel too heavy.
19. Easy Full Hand Mehndi Design
A full hand mehndi design for beginners should use large motifs instead of tiny, complicated filling. Start with a wrist band, then add a flower, paisley, or mandala in the center of the hand. Connect the sections with simple vines, dots, and curved borders. For the fingers, use repeated bands and small leaf patterns. Keep open spaces between the motifs so the design looks neat and does not feel crowded. This approach gives the effect of full coverage without advanced bridal-level detail. It is a great design for practicing layout planning and learning how to connect different patterns smoothly.
20. Easy Half Hand Mehndi Design

A half hand mehndi design gives a complete look while saving time and effort. Cover only the palm area or only the back hand area from the wrist to the middle of the hand. Use one main flower or mandala, then add short vines and dotted borders around it. Keep the fingers lightly decorated, or leave a few fingers bare for a modern touch. This design is useful for beginners because it teaches composition without requiring full-hand coverage. It also dries faster and is easier to manage. The final look feels simple, pretty, and suitable for casual celebrations.
21. Easy Round Tikki Mehndi Design
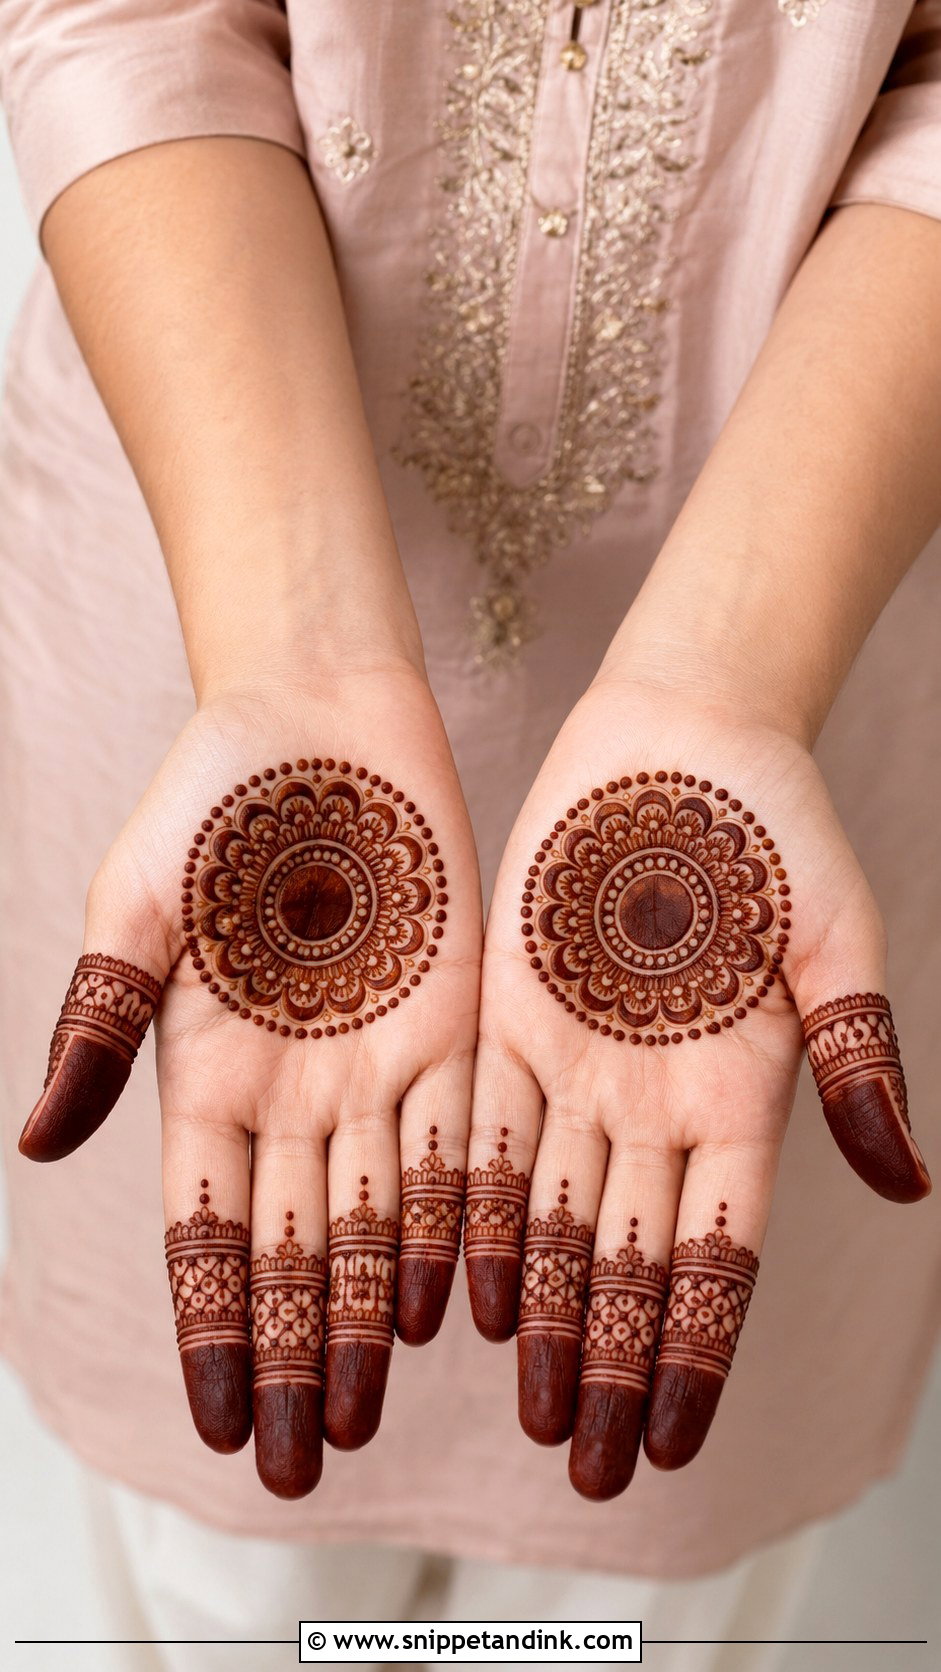
A round tikki mehndi design is one of the most loved beginner patterns. Place a clean circle in the center of the palm, then surround it with petals, dots, and small arches. Add a second or third border to make it look fuller. On the fingers, draw matching dots, rings, and small fingertip caps. You can also add a light wrist band to complete the hand. This design is easy because the main focus stays in one place. It looks traditional, balanced, and elegant. If you are practicing henna for the first time, a tikki design is a smart place to begin.
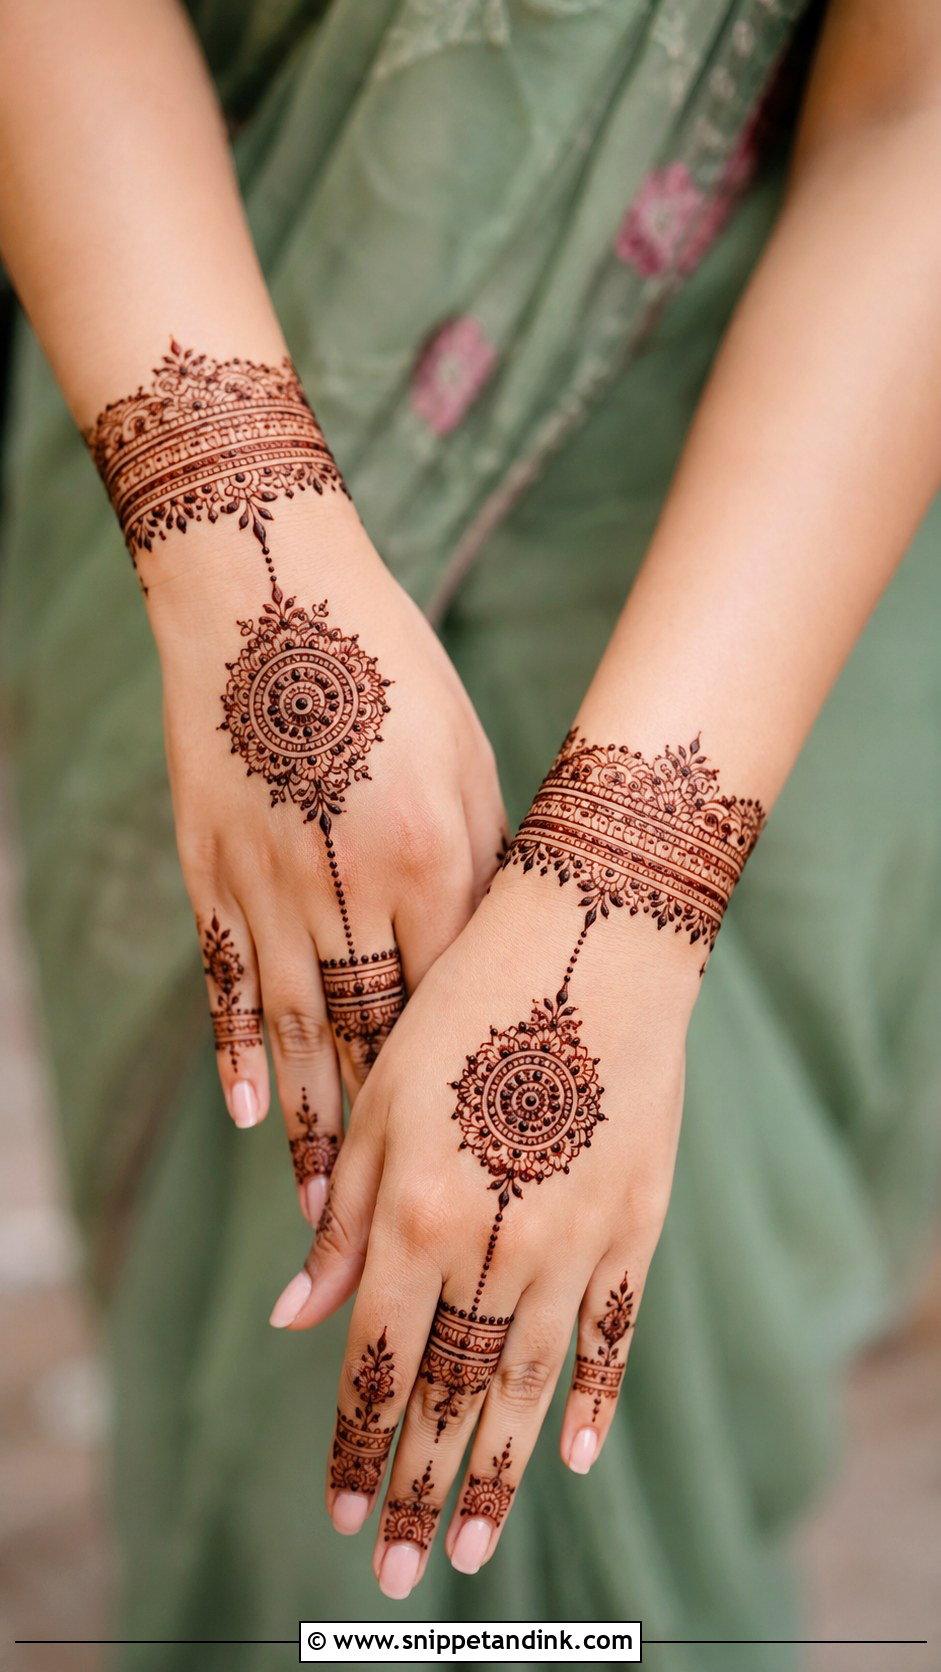
22. Easy Back Hand Mandala Mehndi Design

A back hand mandala mehndi design looks polished with very little effort. Draw a mandala in the center of the back hand, then connect it to the fingers with dotted chains or slim leaf lines. Add simple rings around each finger and keep the fingertips lightly filled. A small wrist border can make the design feel complete. The back hand naturally gives the mandala a jewelry-like effect, especially when the spacing is clean. Beginners should keep the circles medium-sized and avoid overly tiny details. This look is perfect for photos, festive outfits, and simple modern henna practice.
23. Easy Front Hand Arabic Mehndi Design
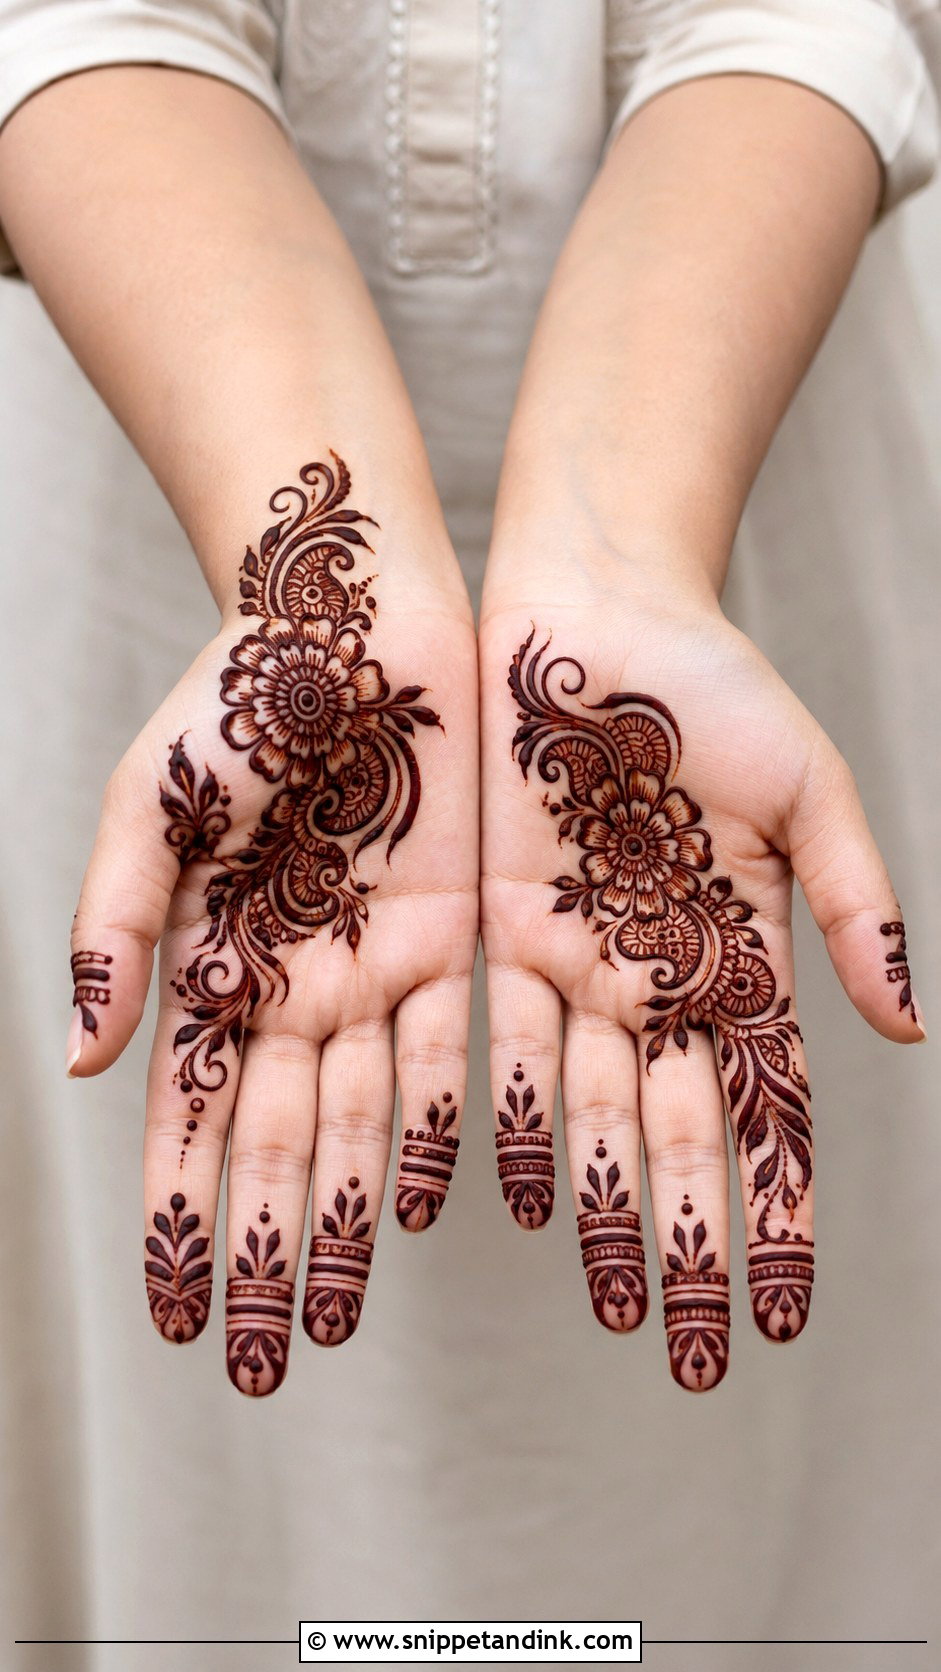
A front hand Arabic mehndi design is a beautiful option for beginners who like flowing patterns. Start from one side of the wrist and move diagonally across the palm toward the index finger. Add big flowers, soft leaves, and curved paisleys along the path. Leave open space around the design so it stays airy. The fingers can have simple bands, dots, and small leaf tips. Because Arabic mehndi does not need full coverage, it is easier to finish neatly. This look works well for Eid, parties, and festive gatherings when you want a graceful front-hand design without too much detail.
24. Easy Back Hand Arabic Mehndi Design
A back hand Arabic mehndi design gives a stylish, open look that beginners can create with confidence. Begin with a flower near the wrist or side of the hand. Draw a curved vine that moves toward the middle finger, then add leaves and small buds along the trail. Keep the spaces between motifs clear. Decorate the connected finger with a fuller pattern, while keeping the other fingers simple. This layout creates movement and elegance without covering the whole hand. It is especially helpful for practicing bold outlines and smooth curves. The finished design feels modern, neat, and easy to wear.
25. Easy Jaali Mehndi Design
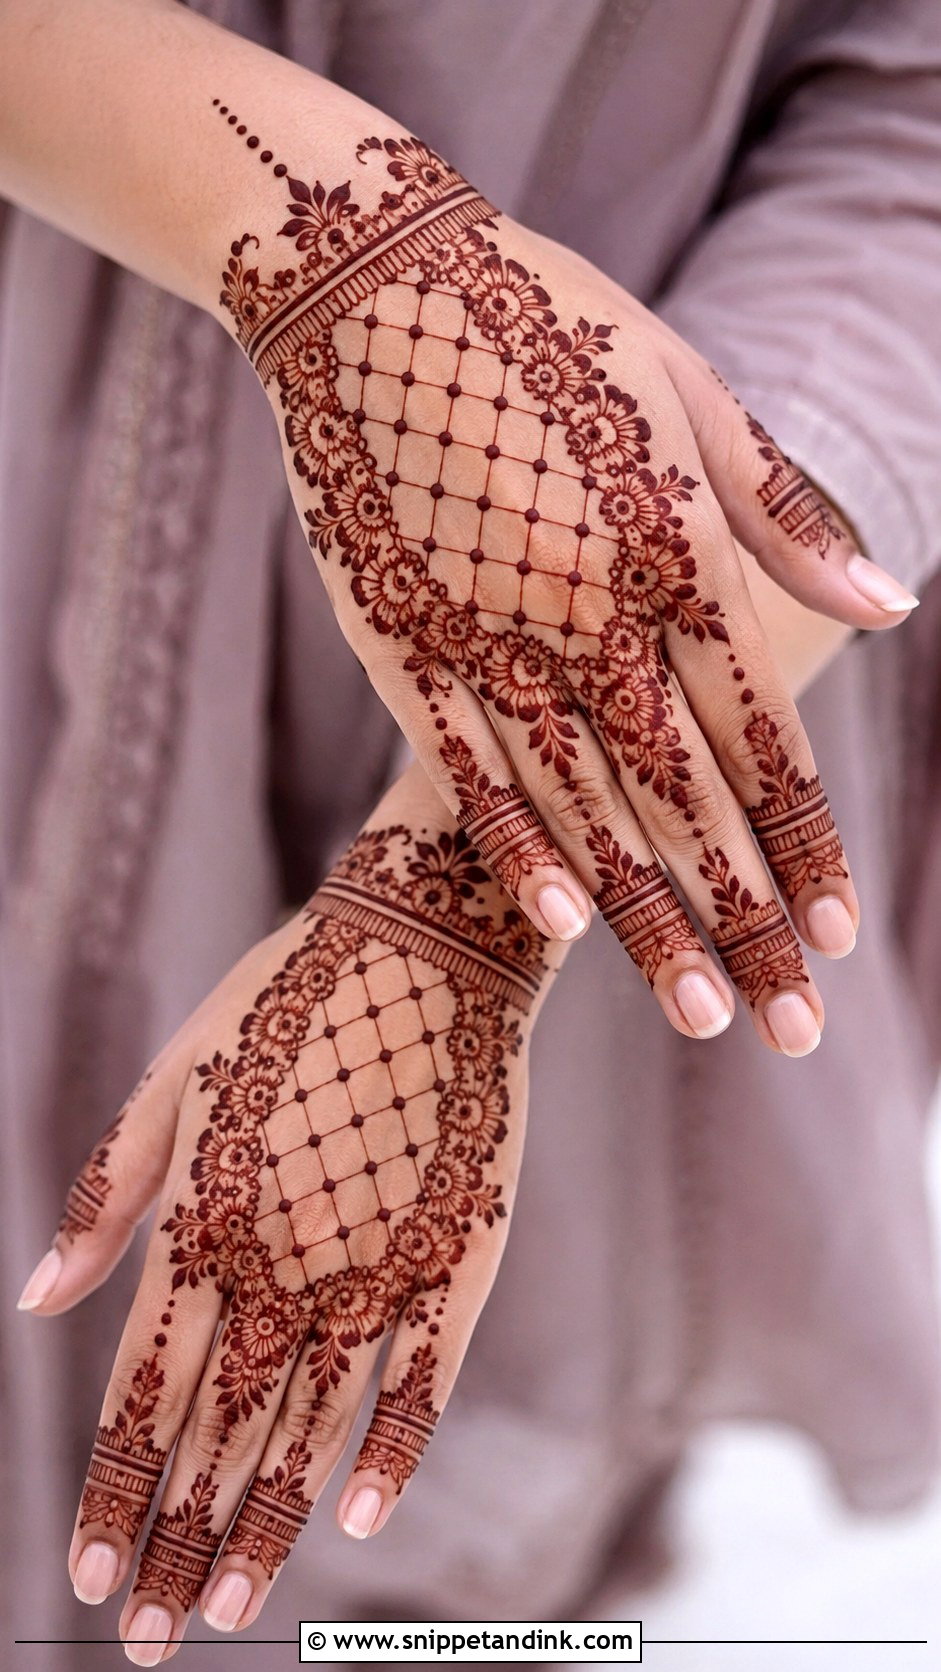
A jaali mehndi design uses a net or mesh pattern, but beginners can keep it very simple. Choose a small area, such as the back of the hand or wrist, and draw diagonal lines one way, then cross them the other way. Add tiny dots where the lines meet. Pair the jaali with a flower, mandala, or leafy border so it looks like a full design instead of just a pattern. Keep the fingers decorated with clean bands and dots. This design teaches spacing and control. It also adds texture to beginner mehndi without needing many complicated motifs.
26. Easy Lace Mehndi Design
A lace mehndi design gives the hand a soft, delicate look while staying simple enough for beginners. Start with a curved border across the back of the hand or wrist. Add small scallops, dots, and tiny flowers along the edge to create a lace effect. Extend the design lightly toward the fingers with thin chains and simple bands. Keep the details airy, not packed. This full look is great for beginners because it uses repeated shapes in a controlled area. It works well for parties, family functions, or any occasion where you want mehndi that feels feminine and neat.
27. Easy Jewelry Mehndi Design
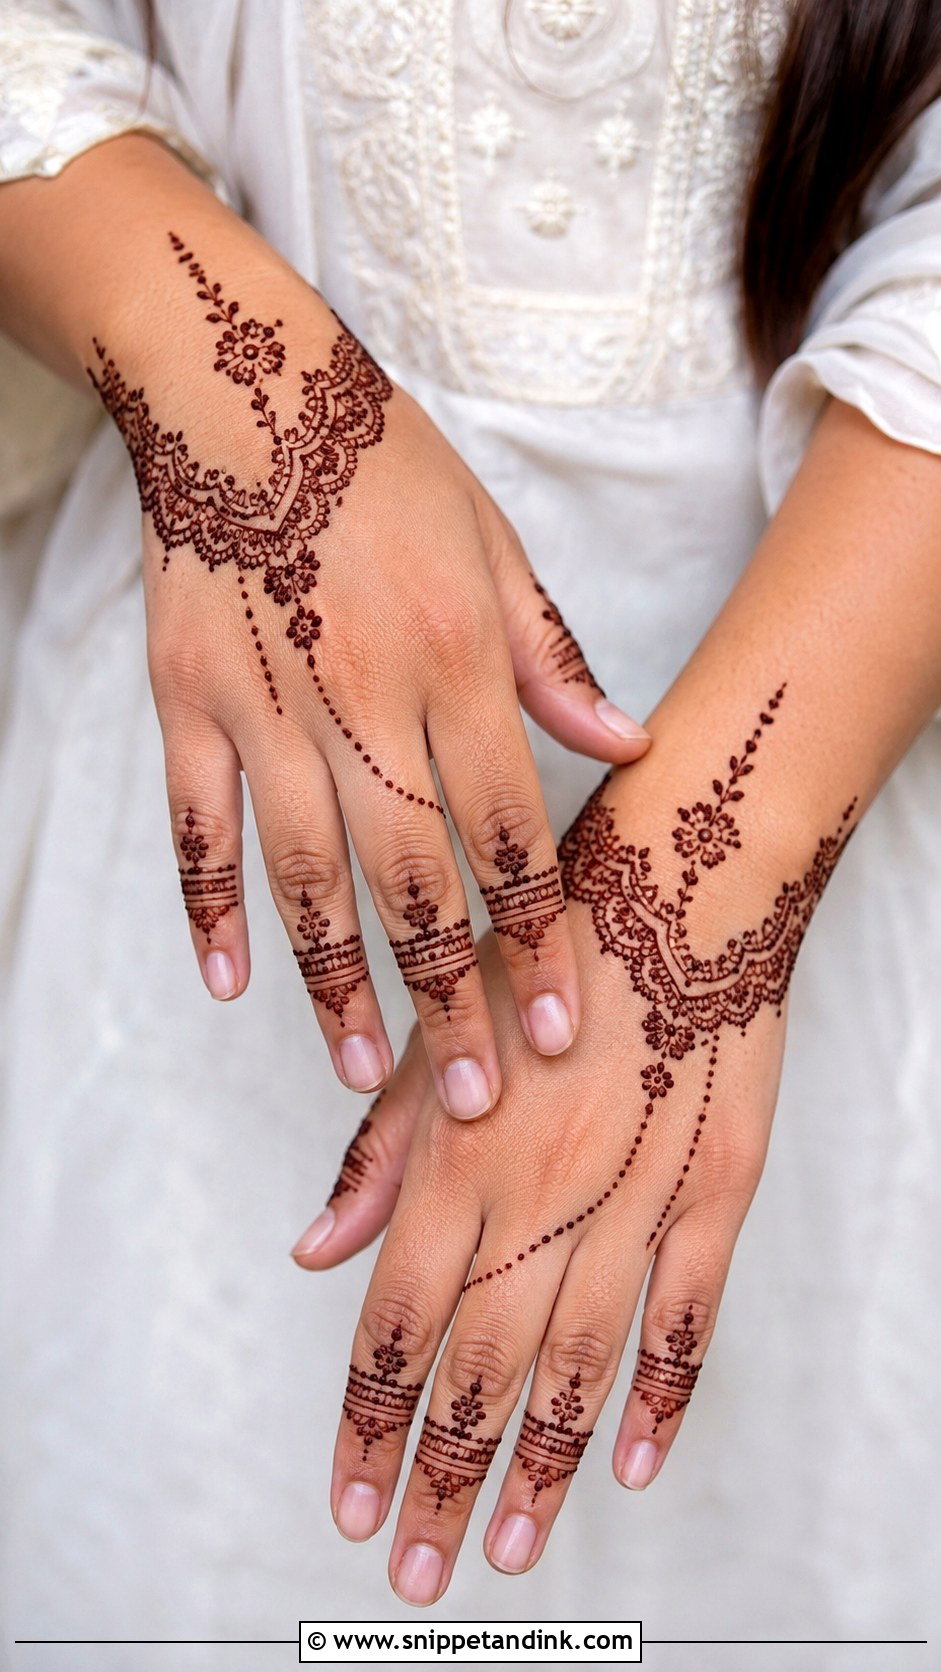
A jewelry mehndi design looks like rings, chains, and bracelets drawn with henna. Begin with a bracelet around the wrist, then create a dotted chain that connects to the middle finger. Add a small flower or mandala on the back of the hand as the main ornament. Decorate the connected finger with rings and a fingertip pattern. Keep the other fingers simple so the jewelry effect stays clear. This design is beginner-friendly because the chain is made mostly with dots and short lines. It is a beautiful choice for modern outfits and light festive looks.
28. Easy Peacock Mehndi Design
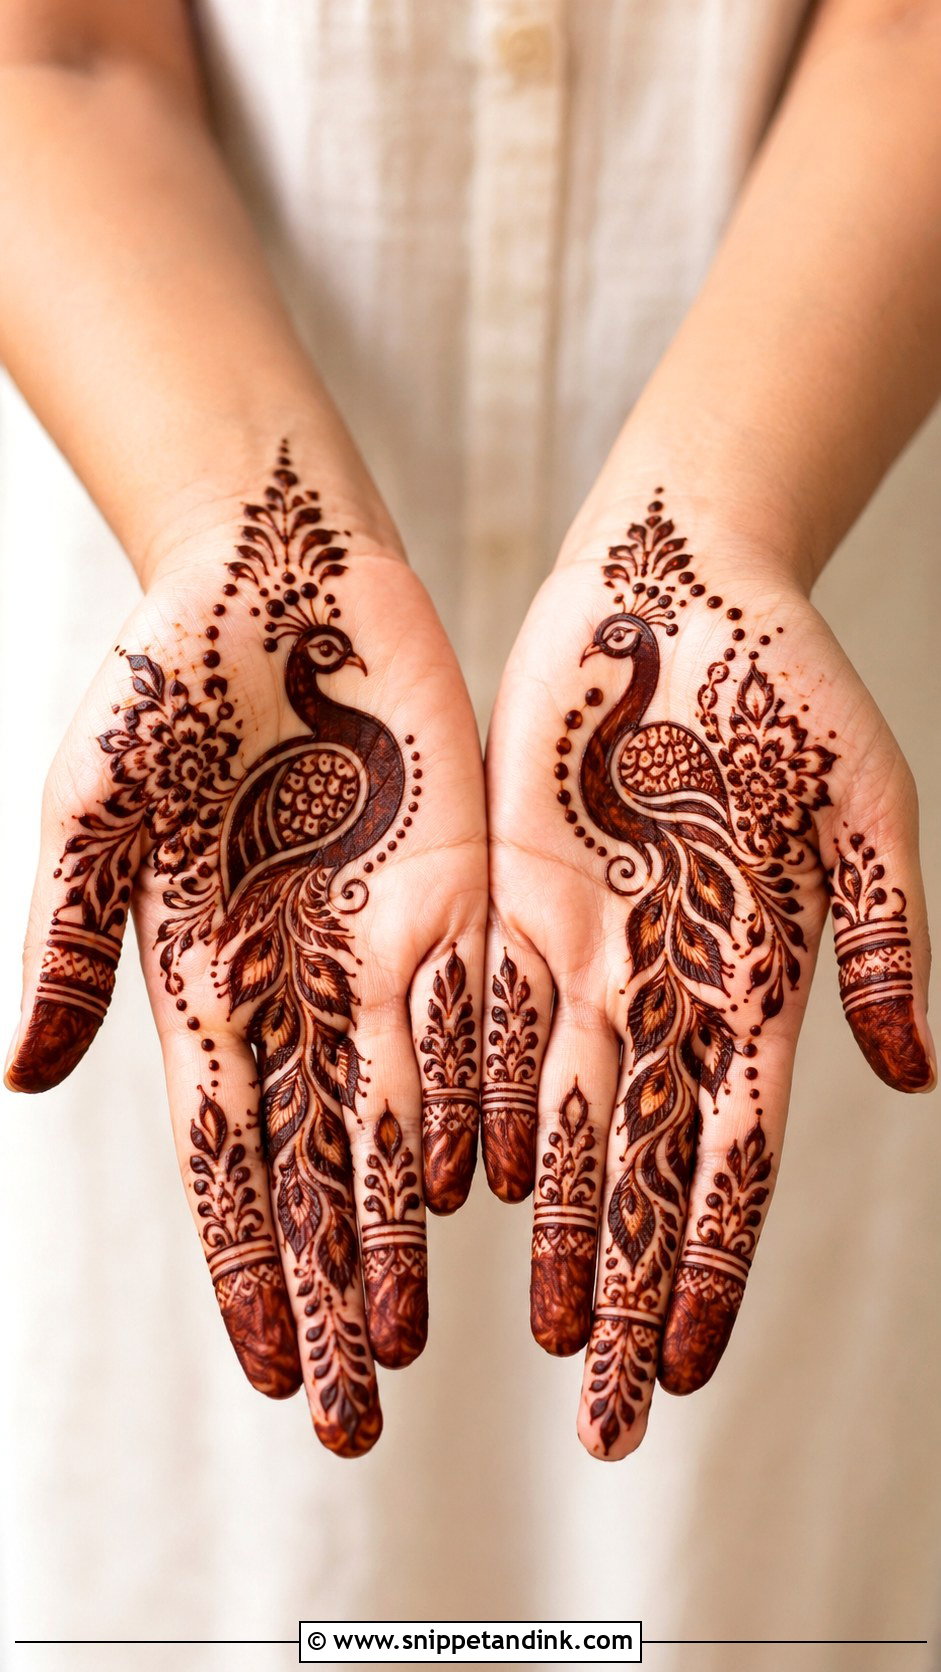
A peacock mehndi design can be beginner-friendly if you keep the shape simple. Draw a small peacock body on the palm or back of the hand, using a curved neck and teardrop body. Add a few large feather shapes behind it instead of many tiny details. Fill the feathers with dots, lines, and small curves. Add leaves or a simple border around the design to complete the hand. Keep the fingers light with bands and dots. This look gives a traditional feel without becoming too complex. It is great for practicing curves, outlines, and decorative filling.
29. Easy Lotus Mehndi Design
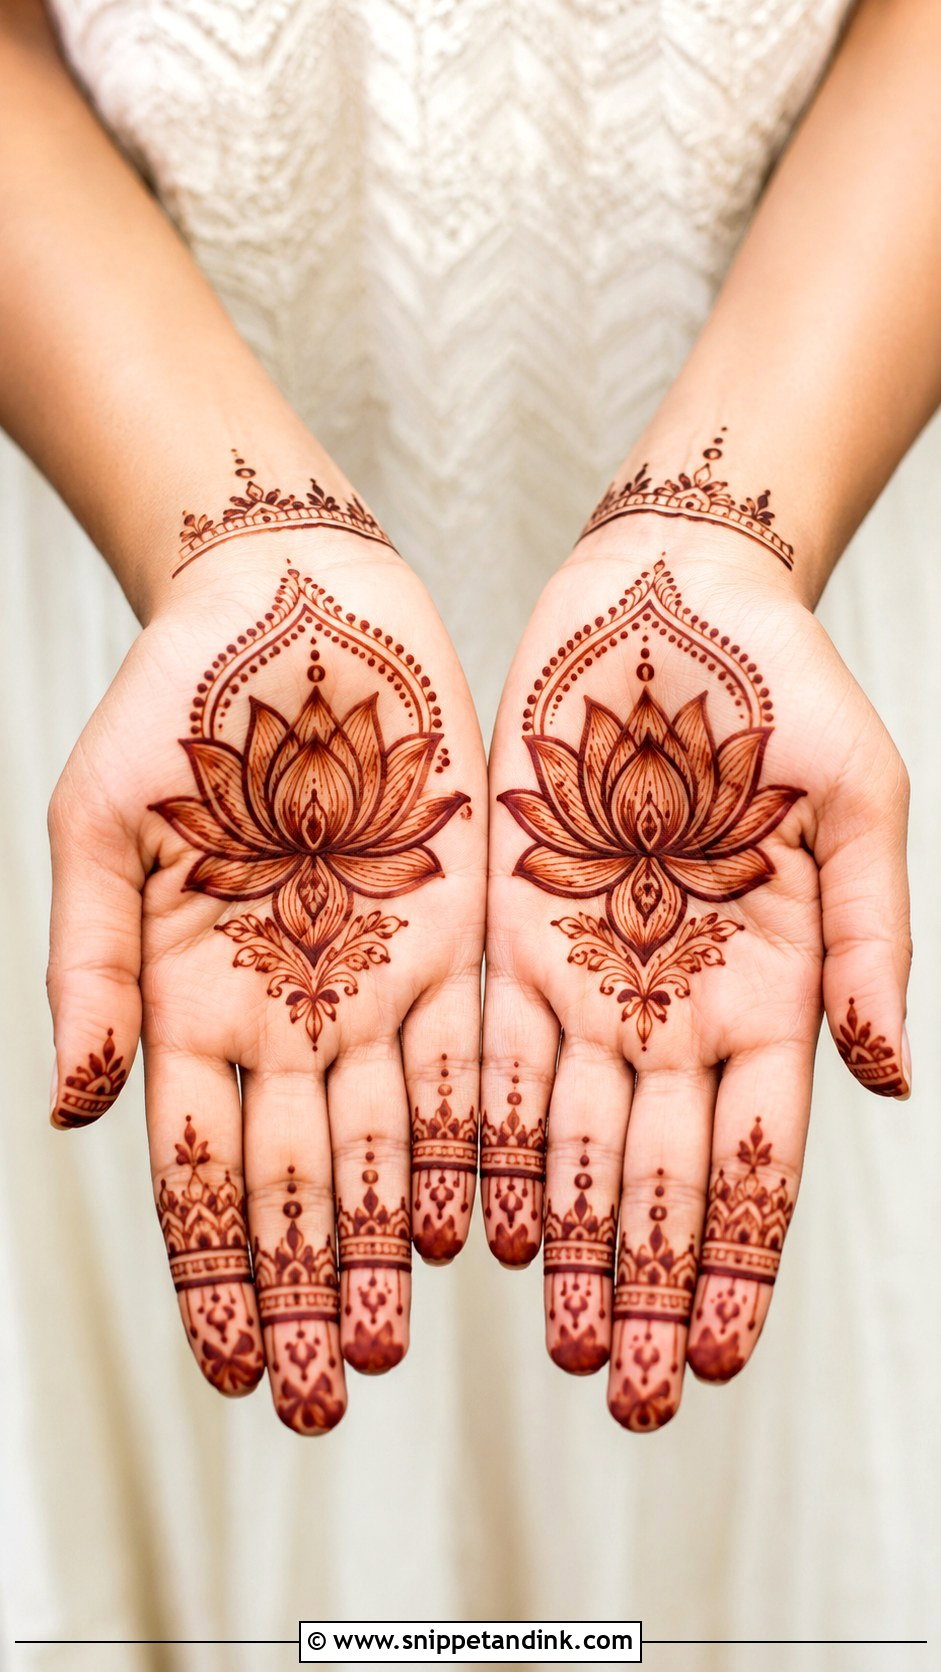
A lotus mehndi design looks elegant and is easier than many detailed floral patterns. Start with a lotus in the center of the palm or back of the hand using rounded petals stacked in layers. Add leaves below the flower and a few dotted curves around it. Extend a simple vine toward the fingers or wrist to complete the layout. The fingers can have matching petal bands and small dots. This design is graceful, balanced, and beginner-friendly because the lotus shape can be drawn slowly in sections. It works nicely for traditional events, festivals, and simple celebration looks.
30. Easy Shaded Mehndi Design
A shaded mehndi design helps beginners create depth without adding too many motifs. Choose a simple flower trail or Arabic vine as the base. After outlining the flowers and leaves, add light shading inside the petals using thin parallel lines or soft filled edges. Keep the shading gentle, not heavy. Use dots and small curls to finish the open spaces. The fingers can include shaded tips or simple ring bands. This design looks richer than a plain outline pattern while still being easy to learn. It is a helpful step once you are comfortable drawing basic flowers and leaves.
31. Easy Dotted Mehndi Design
A dotted mehndi design is simple, cute, and excellent for practicing control. Build the full look with a small mandala or flower in the center, then add dotted chains toward the fingers and wrist. Use dots to create rings, borders, and tiny curves. Keep the finger patterns light, using dot lines and small fingertip details. This design is forgiving because dots can fill gaps and hide small uneven areas. It also dries quickly and looks clean on both front and back hands. Beginners will enjoy this look because it teaches spacing, rhythm, and neat finishing without complex drawing.
32. Easy Kids Mehndi Design
A kids mehndi design should be quick, cute, and comfortable. Choose one small motif, such as a flower, heart-shaped floral pattern, butterfly-like floral shape, or tiny mandala, and place it on the palm or back of the hand. Add a short vine, dots, and simple finger rings to make it feel complete. Avoid dense coverage because children may not sit still long enough for drying. Keep the lines bold and the details minimal. This design is perfect for family events, school celebrations, and festivals. It gives a happy, playful henna look while staying safe, simple, and easy to apply.
33. Easy Eid Mehndi Design
An easy Eid mehndi design can feel festive without being difficult. A great beginner layout includes a back hand flower trail, a wrist bracelet, and simple finger bands. Start with a bold flower near the wrist, then move upward with leaves and dots. Add a small mandala or paisley in the center if you want extra detail. Keep the spacing open so the hand looks fresh and elegant. This design pairs well with festive clothing and works for both teens and adults. Beginners can complete it without stress, and the final stain looks beautiful for Eid gatherings and family photos.
34. Easy Bridal Mehndi Design For Beginners
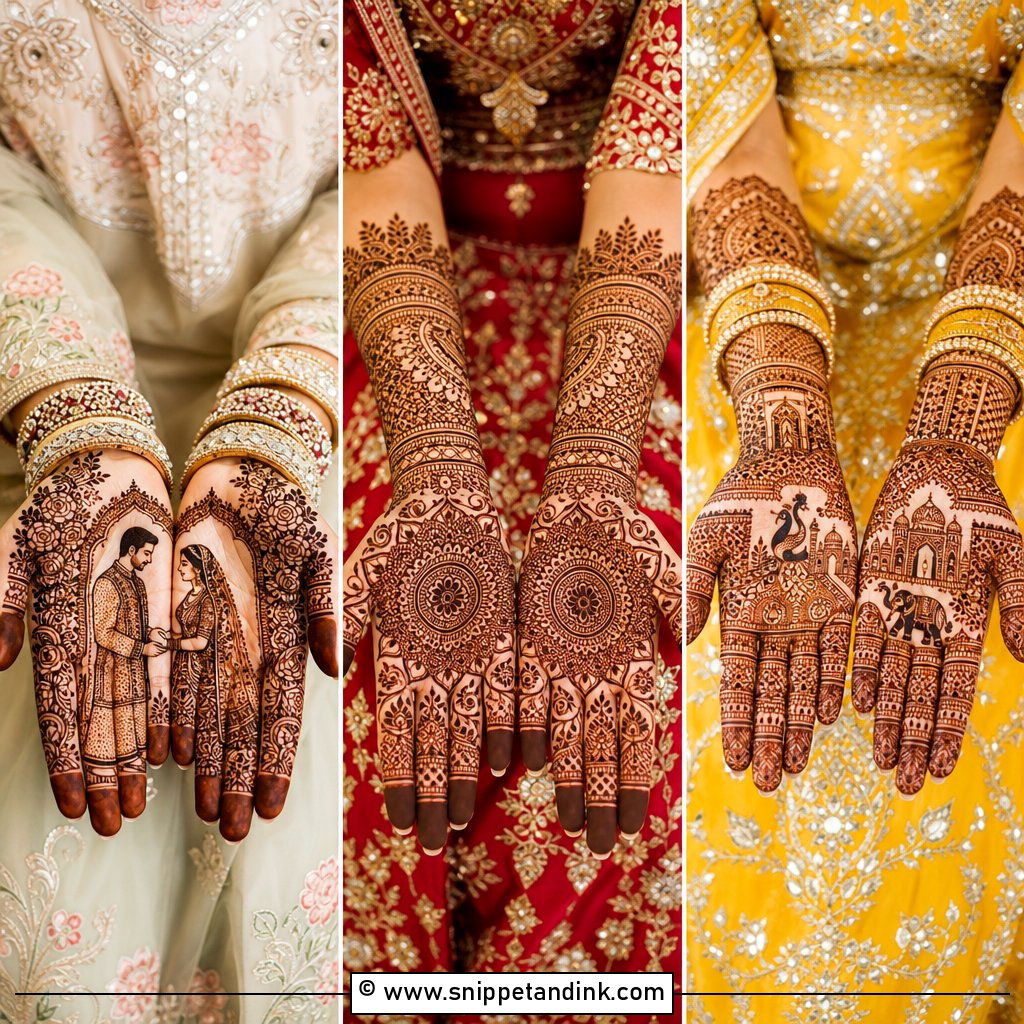
A bridal mehndi design for beginners should feel special but not overwhelming. Instead of dense full-hand work, create a light bridal-inspired layout with a wrist cuff, palm mandala, paisley trail, and decorated fingers. Add small flowers and dotted borders to connect the sections. Keep the motifs larger so they are easier to draw. You can cover from the wrist to the fingers while still leaving small open spaces. This design is ideal for bridesmaids, engagement practice, or simple wedding events. It teaches beginners how bridal mehndi is structured without requiring advanced portraits, tiny fills, or very detailed symmetry.
35. Easy Modern Mehndi Design

A modern mehndi design keeps the hand fresh, clean, and stylish. Use negative space, fine lines, finger rings, and one main motif on the back hand or palm. A small mandala connected to a dotted chain and wrist bracelet works beautifully. You can also add simple leafy accents along one side of the hand. Avoid heavy filling and keep the layout balanced. This design is perfect for beginners who like minimal fashion-inspired henna. It suits parties, casual events, and everyday looks. The best part is that it teaches neat placement and clean finishing without needing complicated traditional coverage.
Conclusion:
These 35 Easy Mehndi Designs for Beginners prove that beautiful henna does not have to be hard, crowded, or time-consuming. Start with one design that matches your comfort level, such as a mandala, flower vine, bracelet, or simple Arabic trail. Practice basic strokes first, then slowly add paisleys, jaali, shading, and fuller layouts. Keep your cone pressure steady, let the paste dry well, and avoid rushing the details. Beginner mehndi improves quickly when you repeat simple shapes with patience. Whether you love traditional Indian patterns or modern minimal looks, these designs give you an easy path to confident henna art.
You'll Like These Ideas:

Leave a Reply