
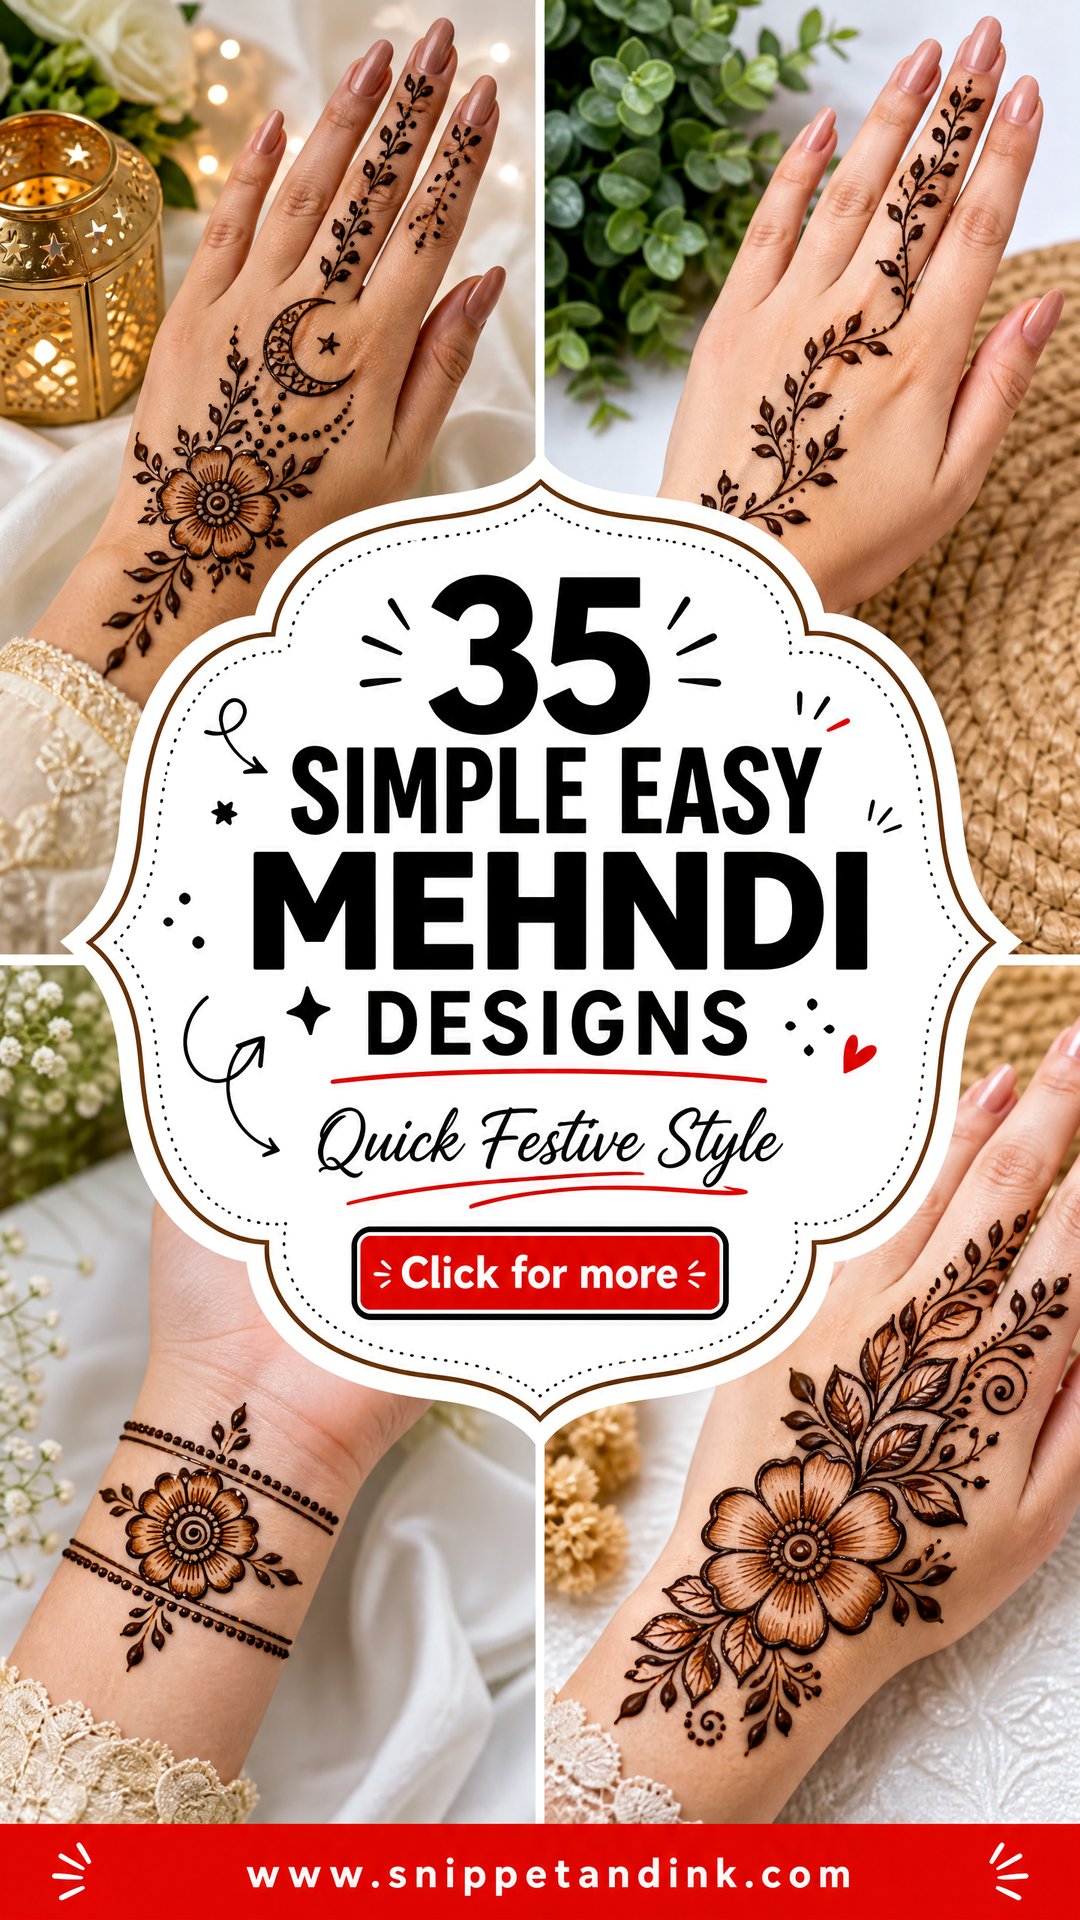
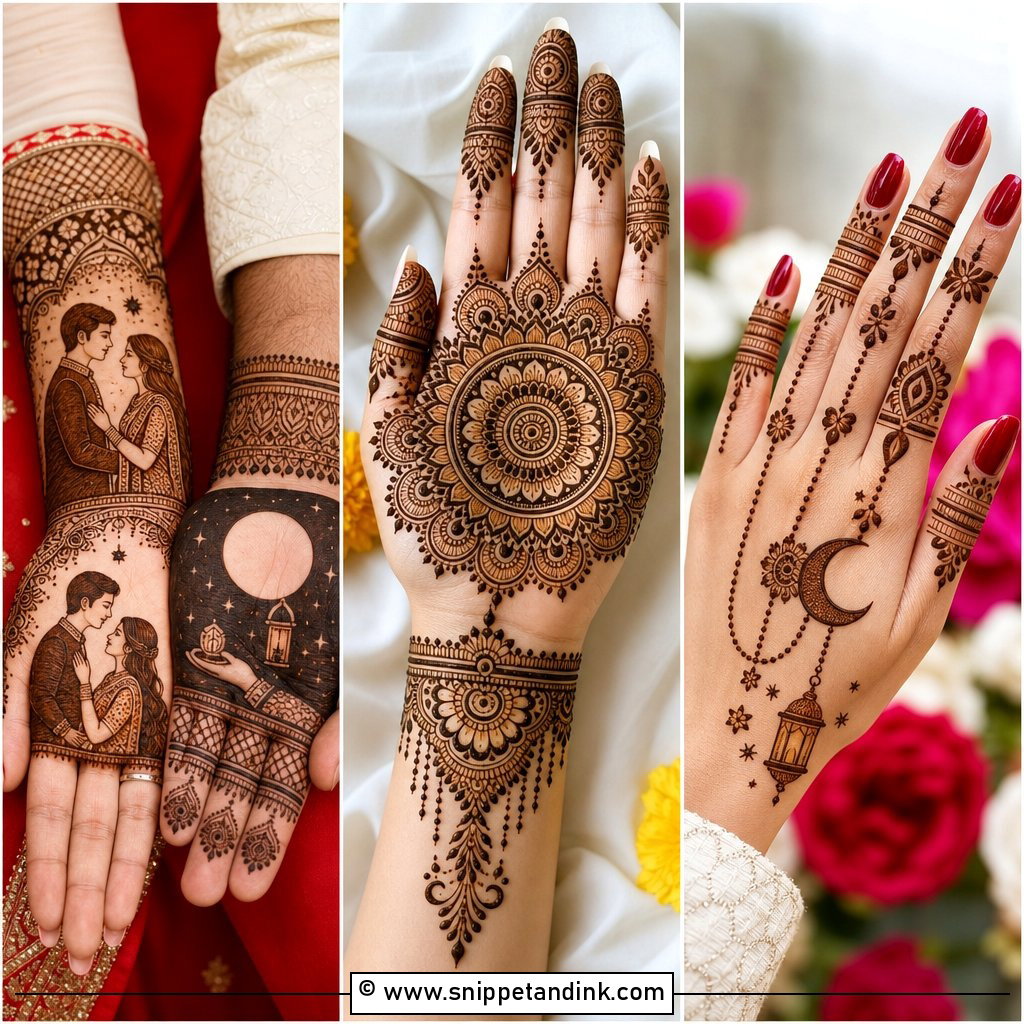
Simple mehndi earns its place on festival nights because nobody has three hours to sit still before Eid, Diwali or a cousin’s sangeet. The designs I lean on at those times are built from a handful of shapes: flowers, vines, mandalas, paisleys, dots and light finger work, placed with plenty of open skin. They work on the palm, the back of the hand, the wrist and even the forearm, and most of them can be practiced with a basic henna cone at your kitchen table. Here are 35 that I’d trust on a beginner, a bridesmaid or a student with a train to catch.
Holding a Cone for the First Time at Home
Most home designs go wrong at the cone, not in the pattern. A few habits make even a basic design look clean.
- Snip the tip very small. You can always cut more; a wide opening gives you thick, blobby lines you can’t control.
- Hold it like a pen, with the folded top end of the cone pinched shut so paste only moves forward.
- Rest the side of your hand on the surface or on the person’s hand. Floating hands shake.
- Squeeze gently and evenly, and let the paste lay down on the skin rather than dragging the tip through it.
- Wipe the tip on a tissue every few minutes. Dried paste at the opening is what causes sudden spurts and broken lines.
- Practice the motif a few times on paper or a plastic sheet before you touch skin.
Work outward from the center motif and finish each hand before starting the other, so you’re never resting your arm on wet paste.
1. Simple Front Hand Mehndi Design
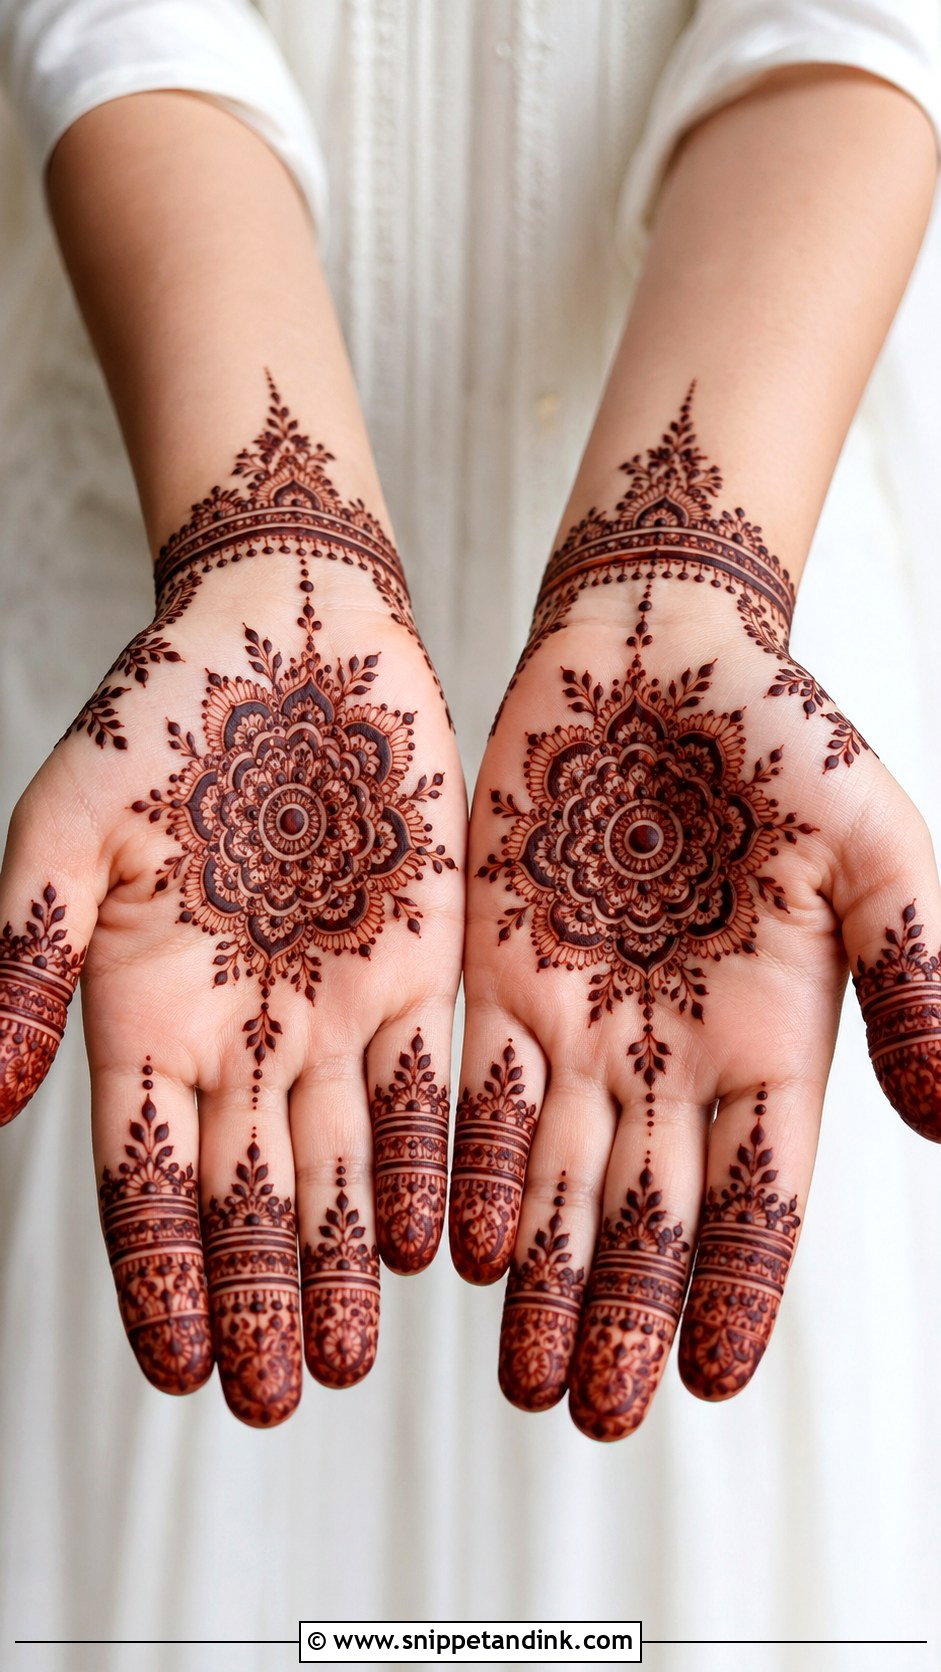
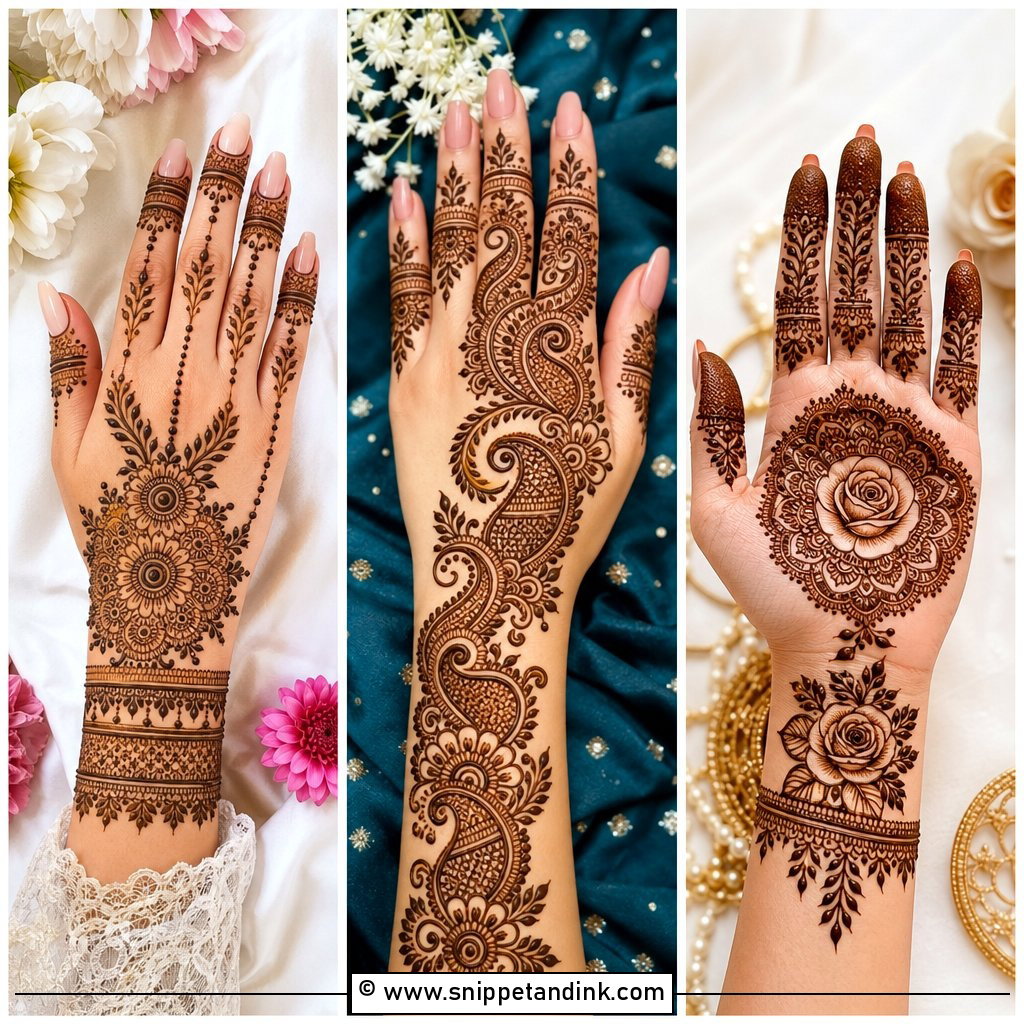
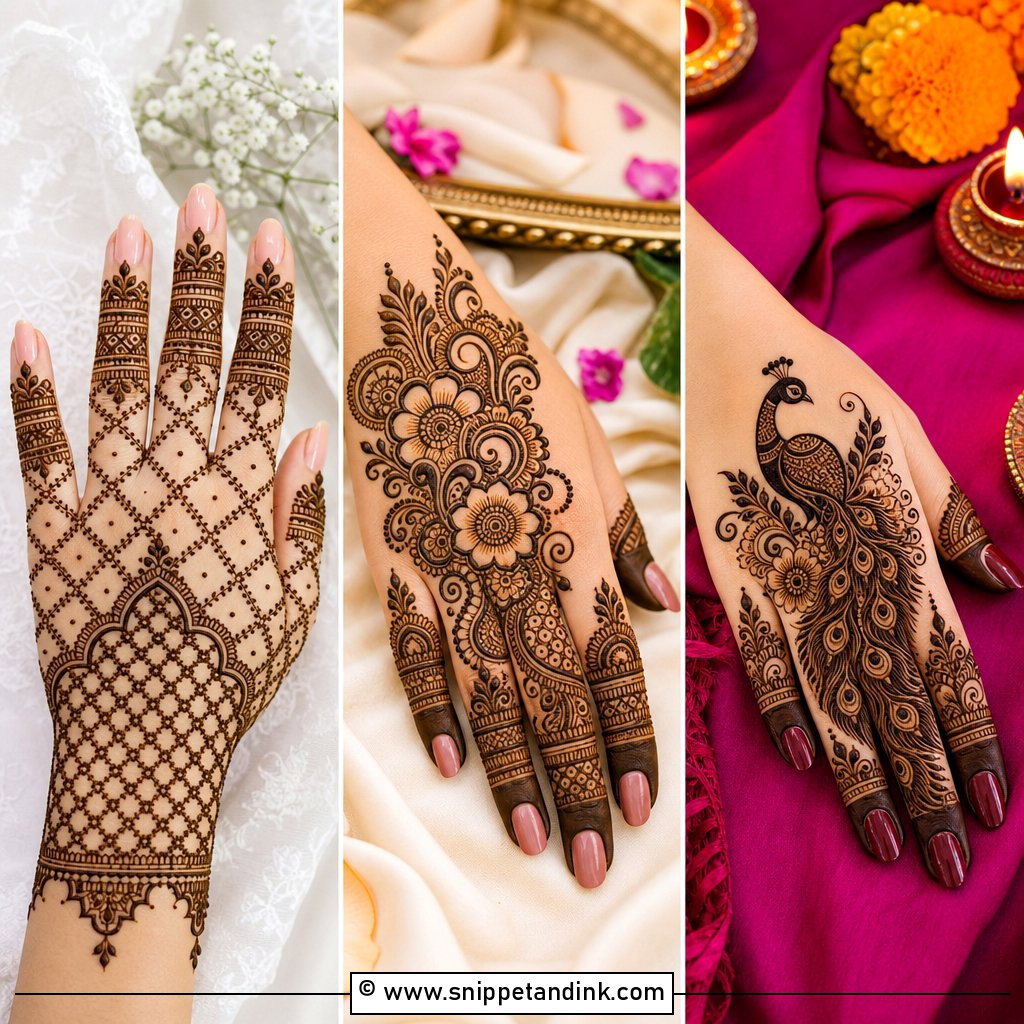
One small mandala or flower in the center of the palm, then leafy vines, dots and curved lines working outward, with light bands or partly filled tips on the fingers. The open space is what keeps a palm from looking crowded, and it makes each line easier to read once the stain darkens. Take it slowly. Every shape here repeats, so your hand learns the movement as you go.
2. Simple Back Hand Mehndi Design
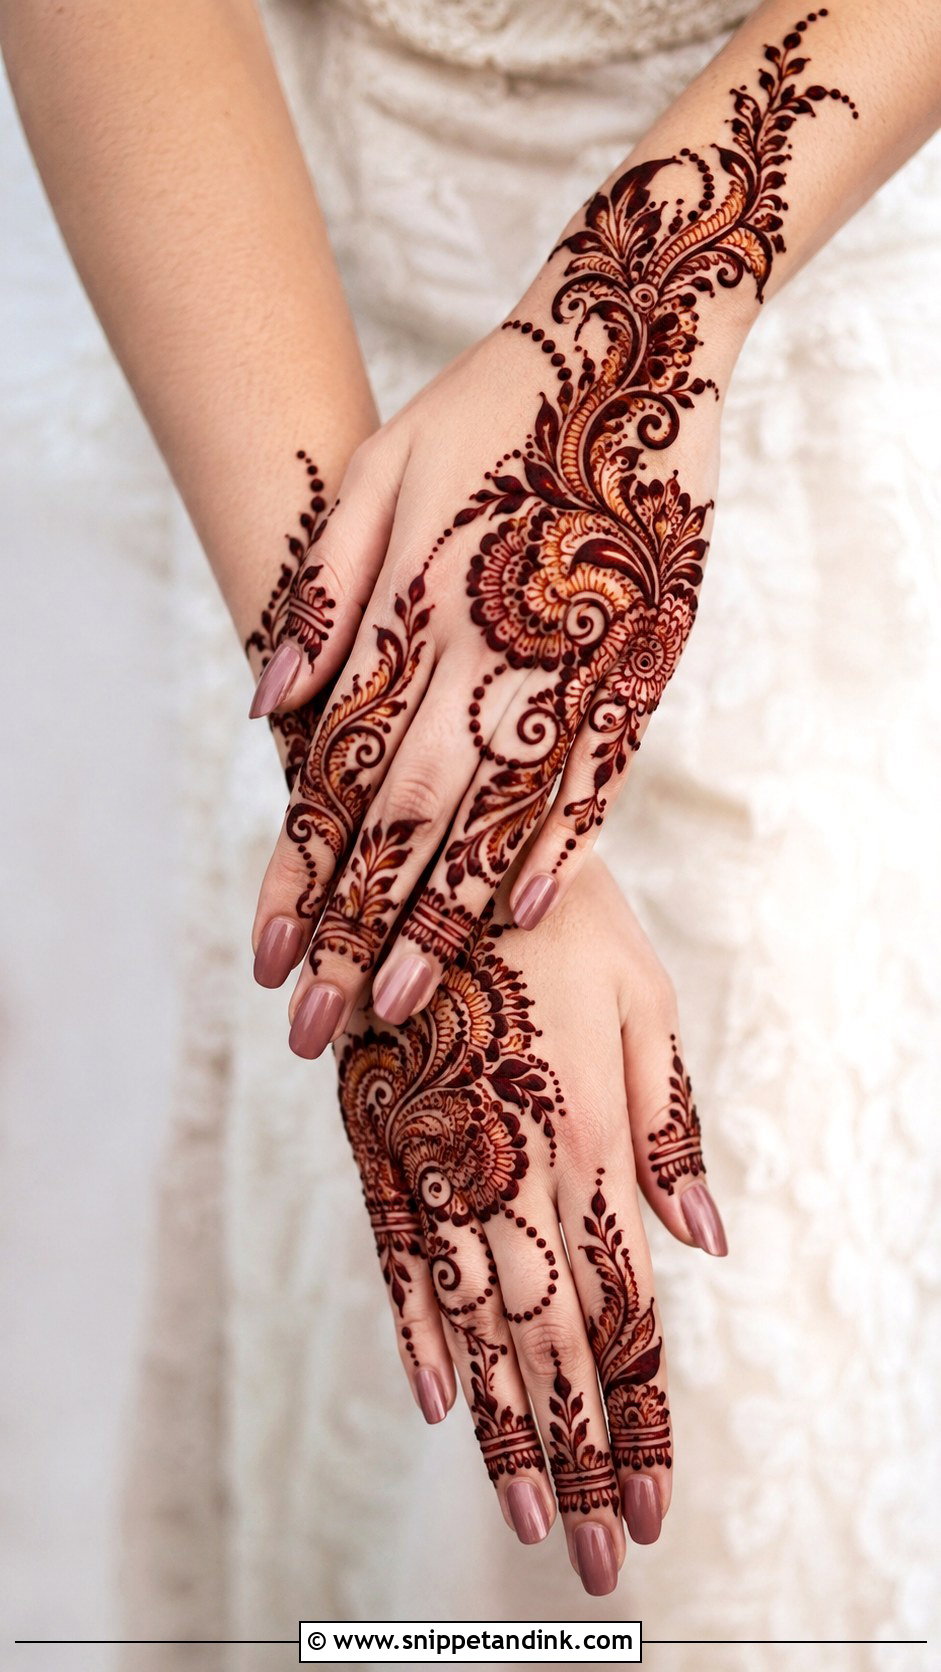
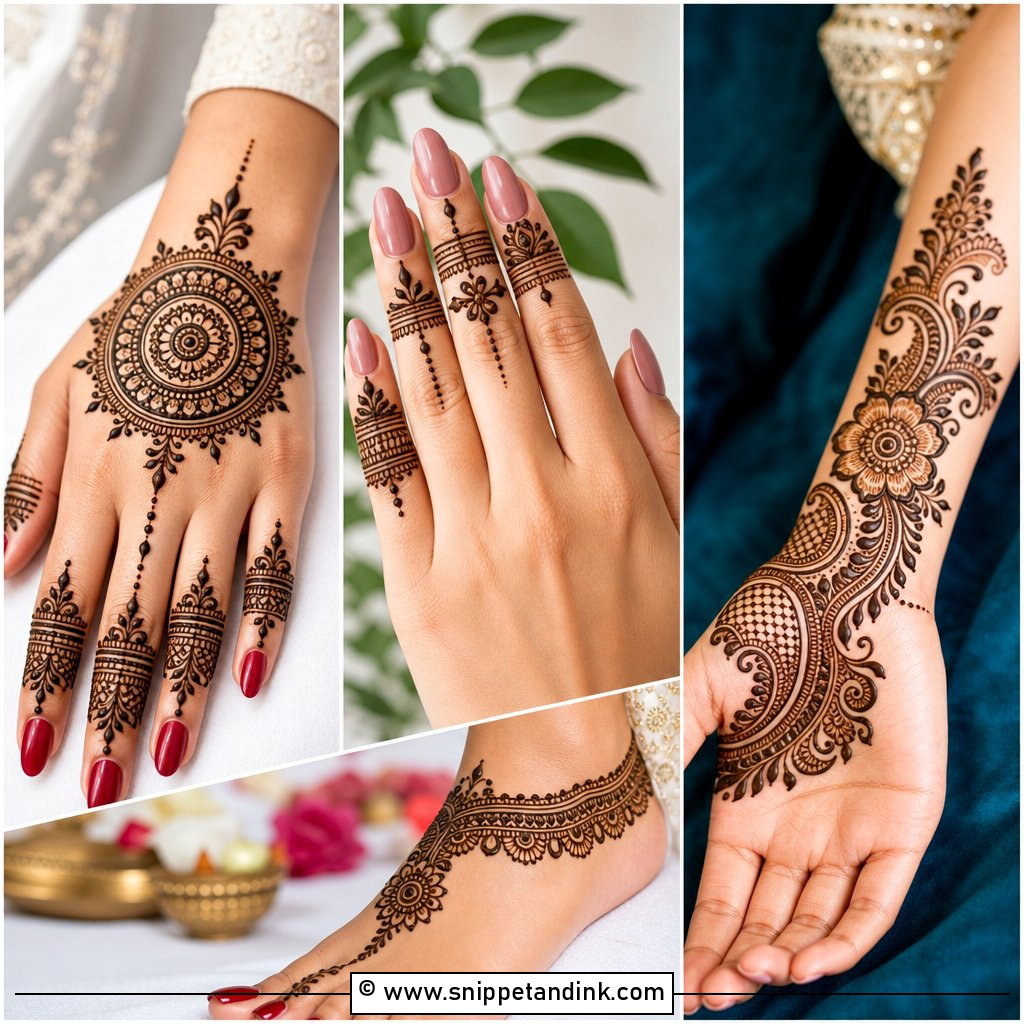
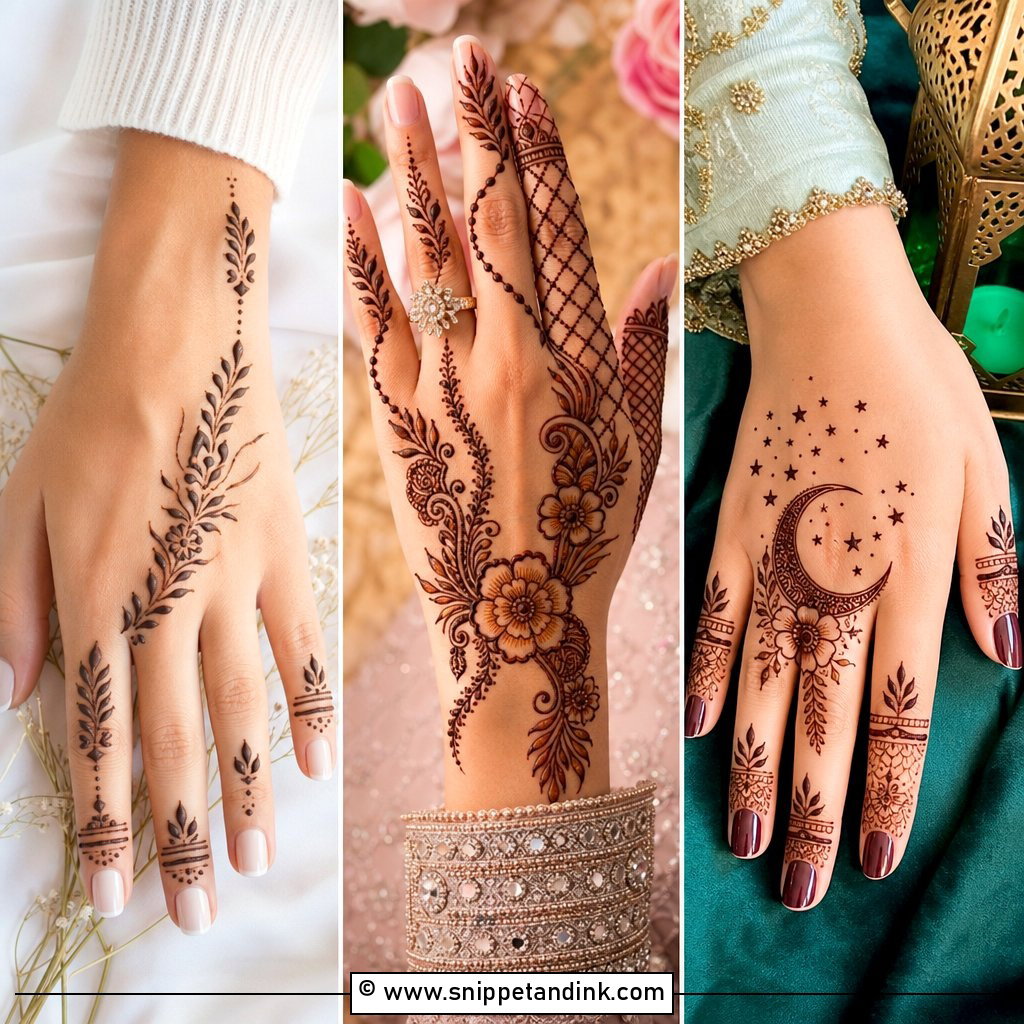
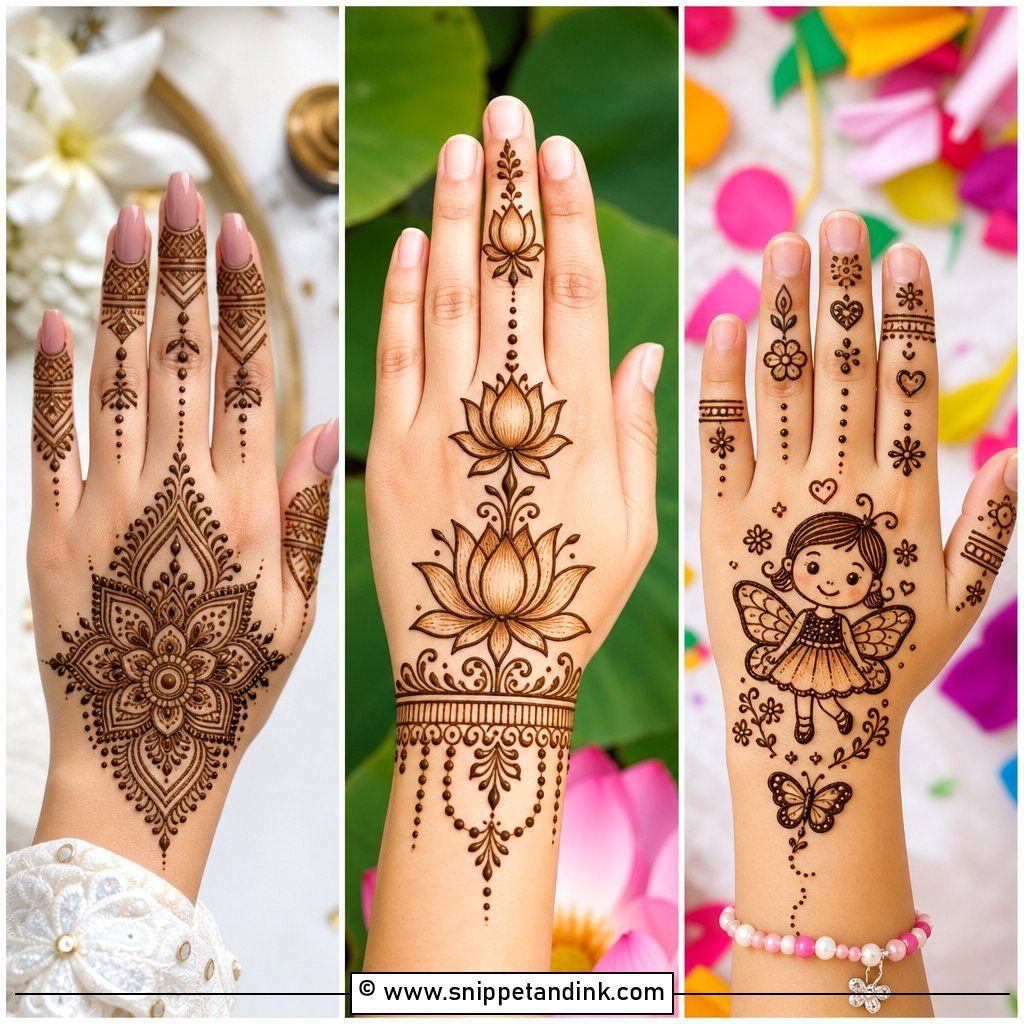
The back of the hand is a smooth, visible surface, so neat work shows up well there. I put a round mandala in the center, connect it to the fingers with small chains, dots and leaf trails, and close it off with a bracelet band at the wrist. No dense fill is needed. Leave clear gaps between motifs and it stays light enough to wear to anything.
3. Easy Arabic Mehndi Design
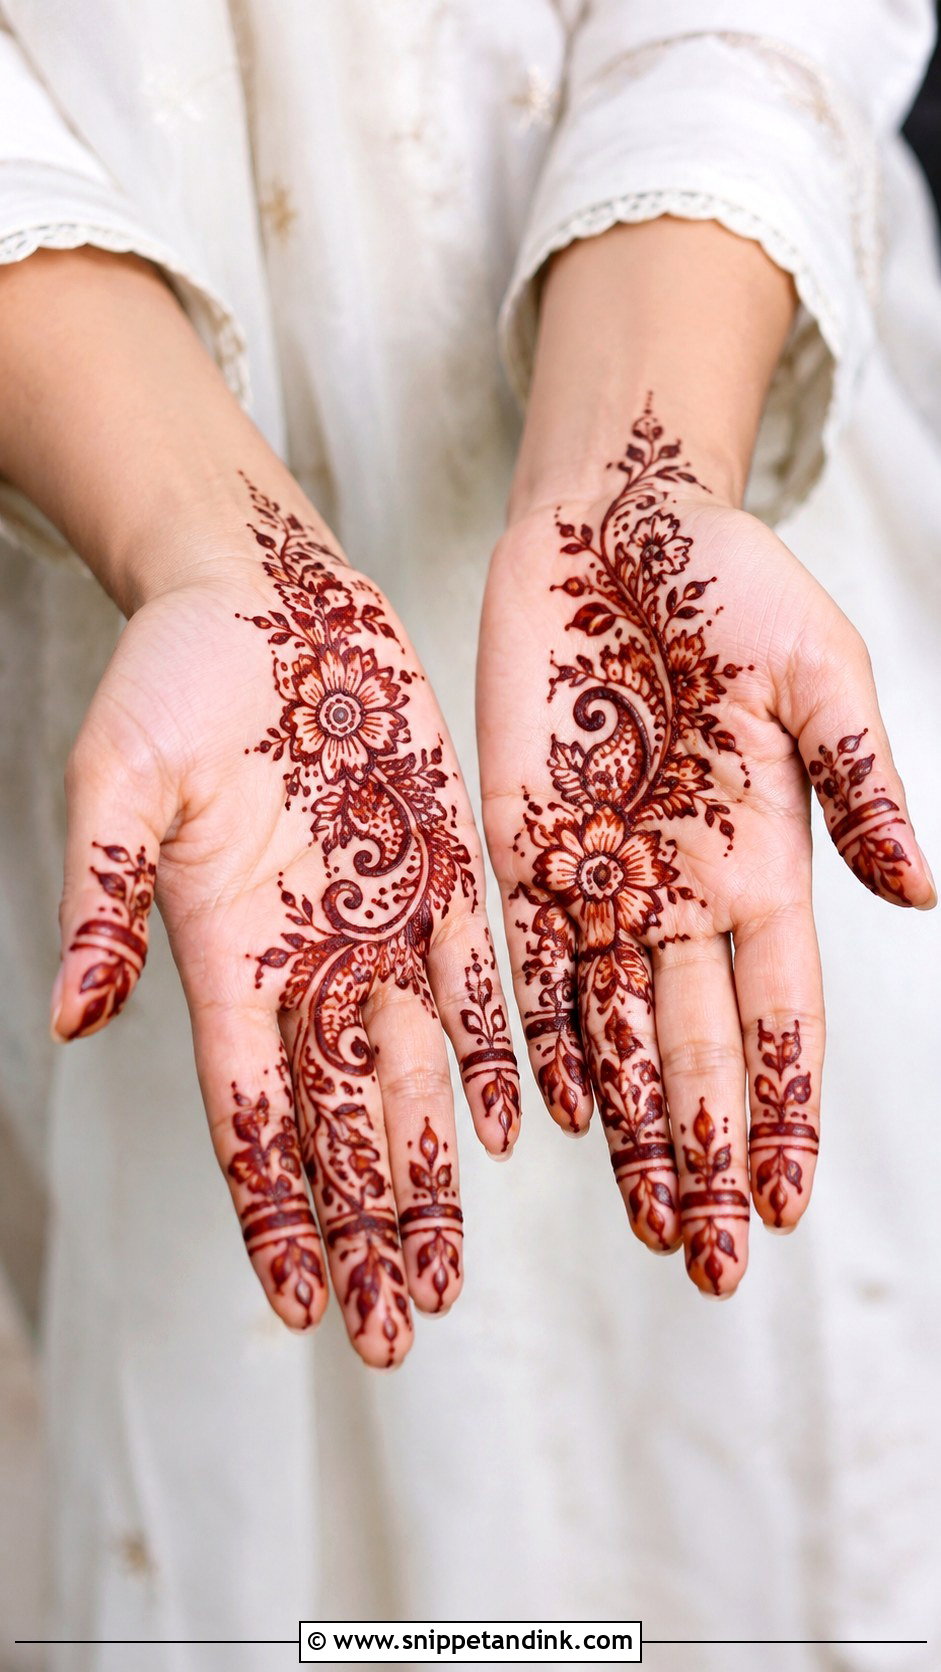
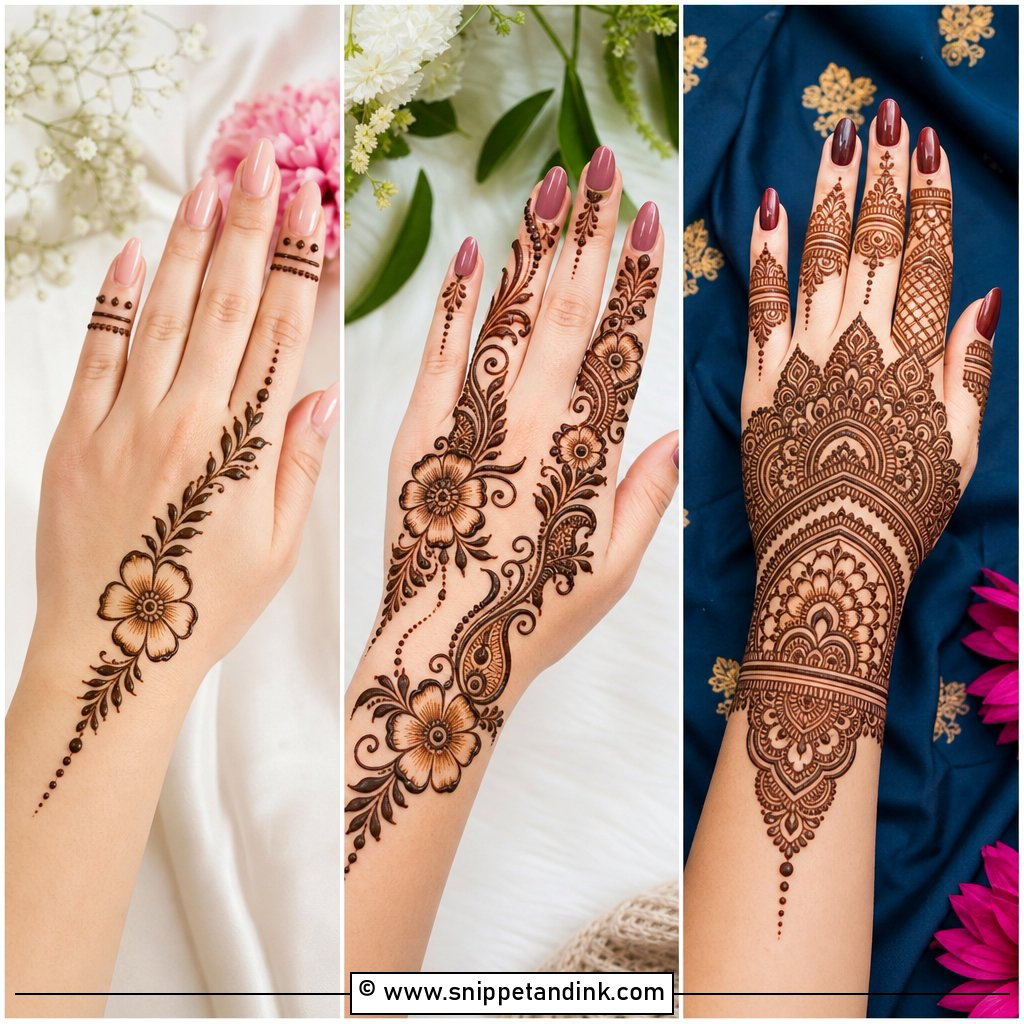
Arabic designs run diagonally from the wrist to one or two fingers and leave the rest of the hand open. I draw the large flowers first, spacing them out along the line, then connect them with stems, leaves, dots and a paisley or two. Placing the big shapes first is the habit that saves beginners; if you start with the small detail, you run out of room for the flowers. Bold outlines, light inner shading.
4. Simple Mandala Mehndi Design
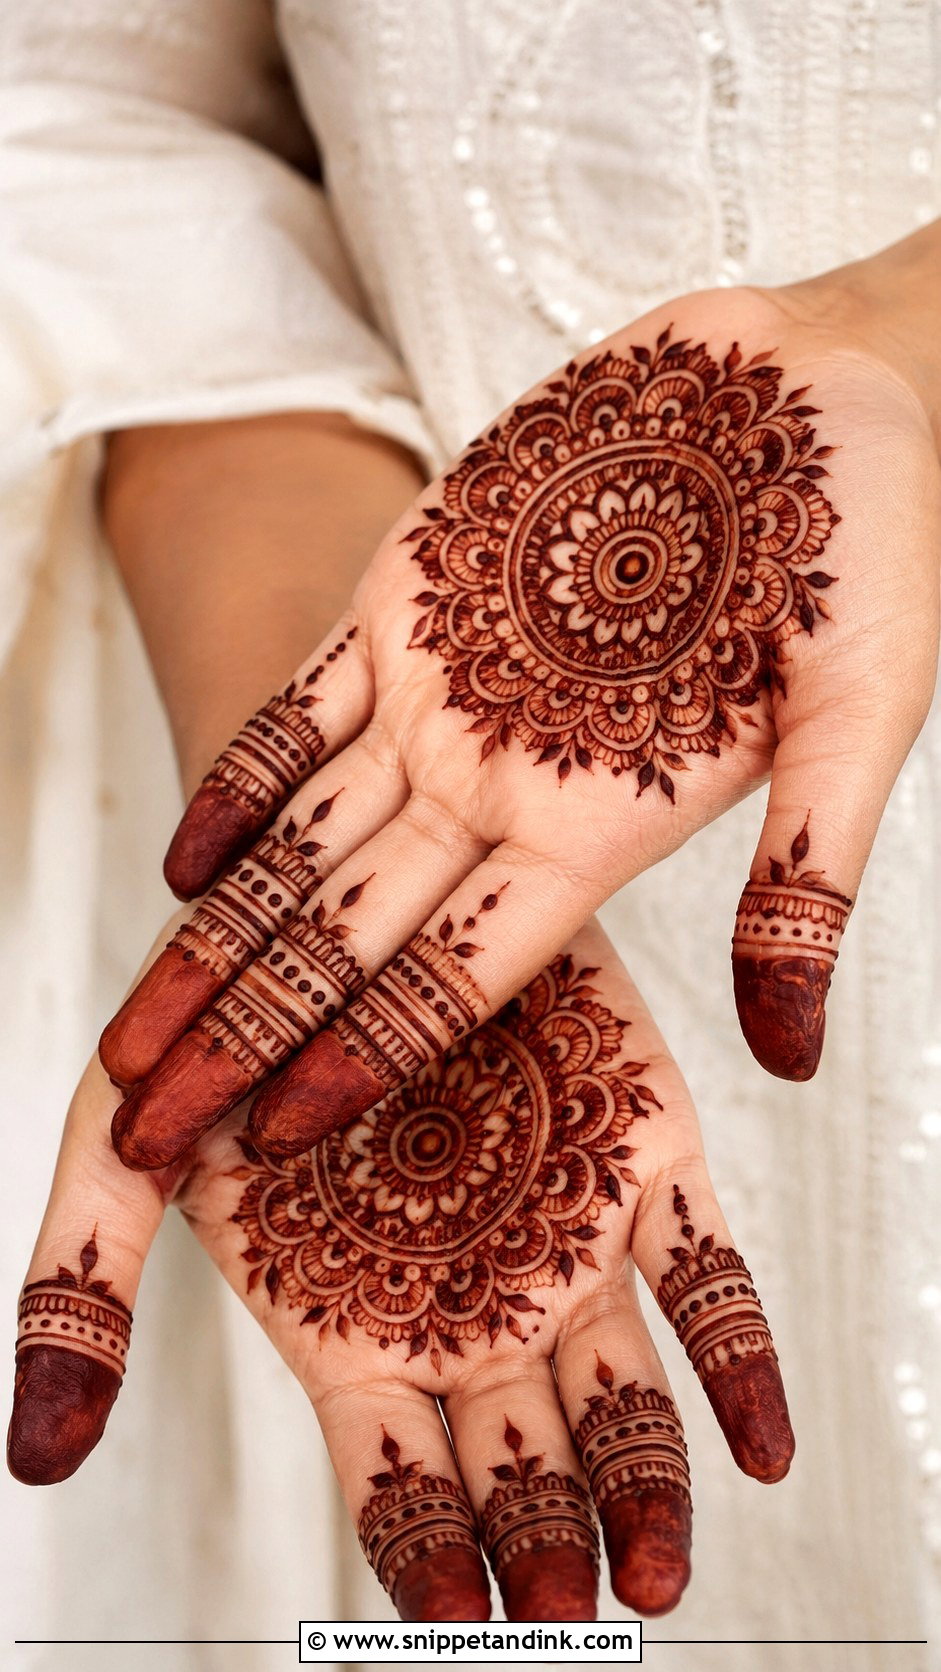
Start with a dot, add rings, then build petals around it. That’s a mandala, and it’s the easiest complete design I know. It sits in the center of the palm or back hand, with lines, dots and tiny leaves on the fingers. Even a small one makes the hand look dressed. If the first ring comes out slightly oval, make the next petal layer a touch wider on the narrow side and nobody will see it.
5. Easy Flower Mehndi Design
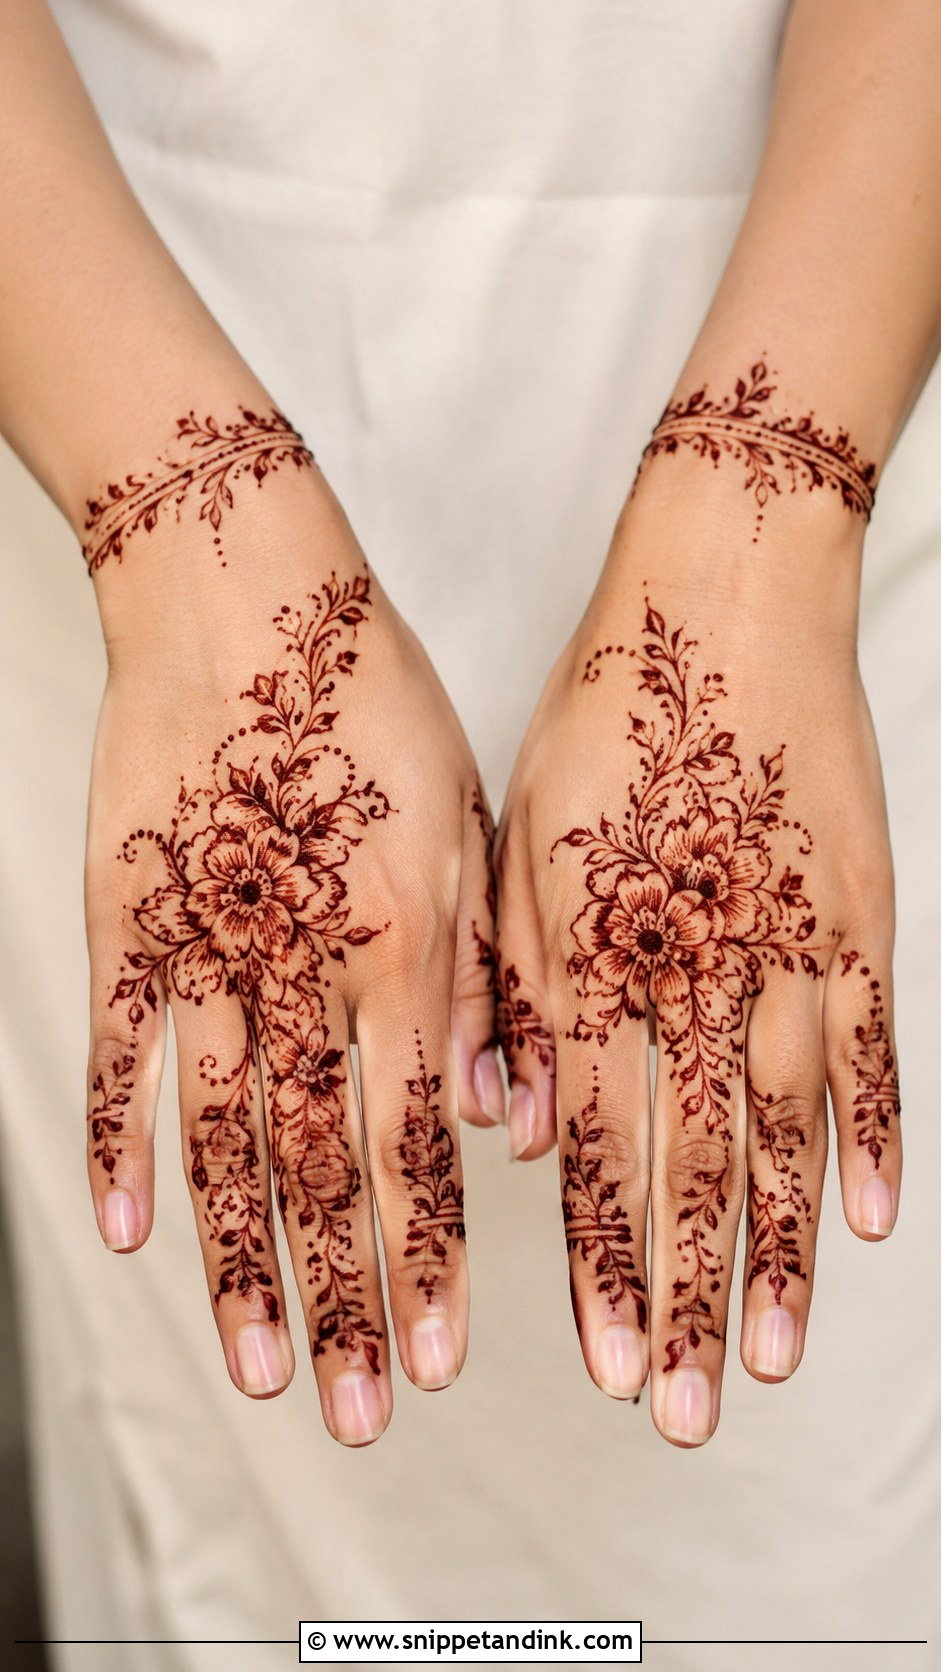
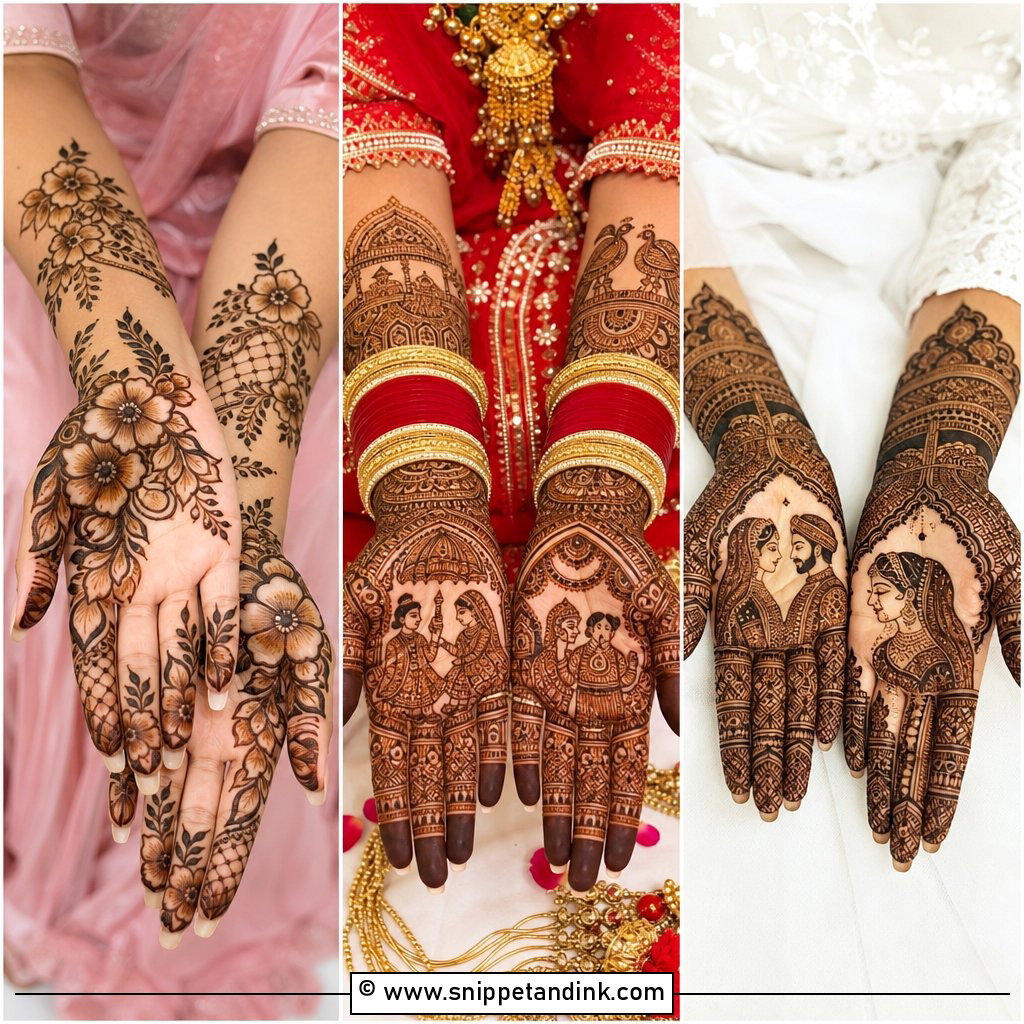
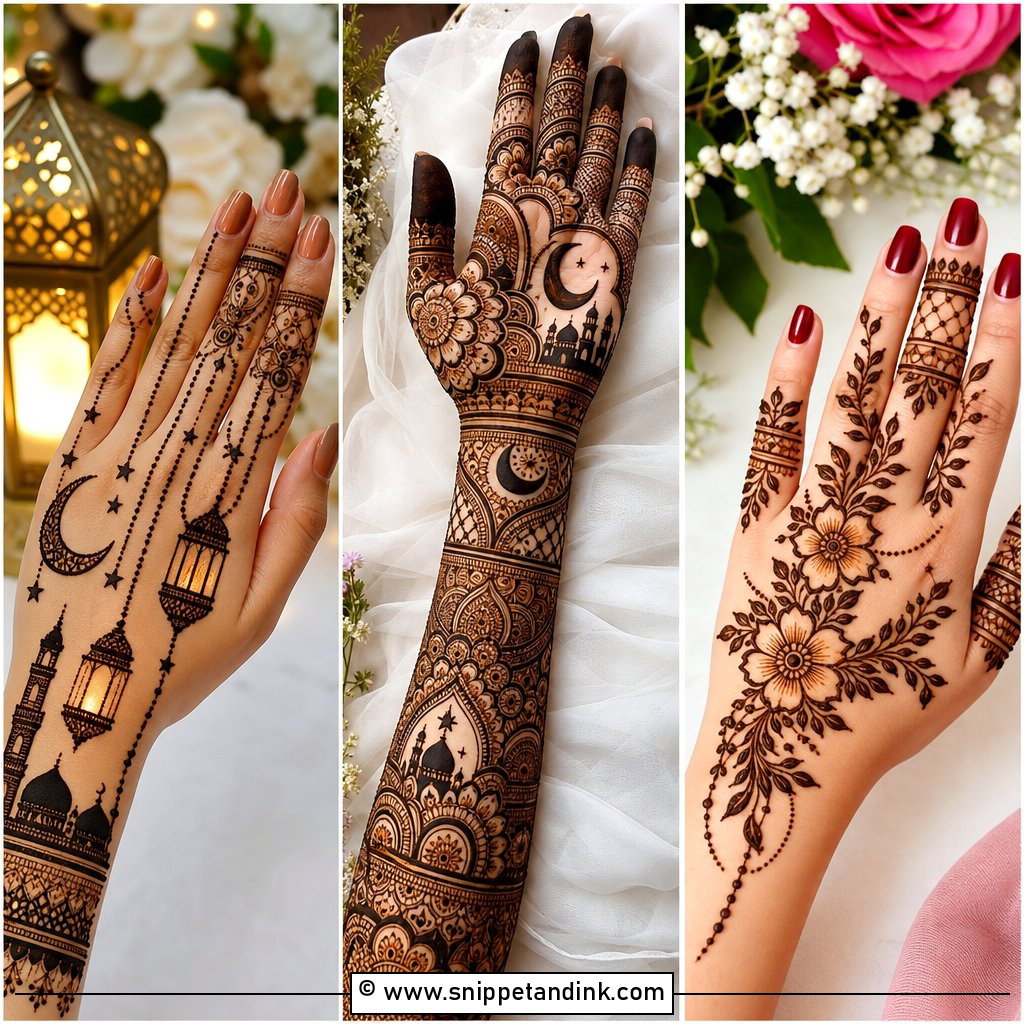
A few large blooms and leafy curves can cover the palm, the back hand or just the wrist. I place one big flower near the center and two smaller ones around it, linked with vines, dots and swirls. Petals need bold outlines so they survive the darkening stain. Flowers can be resized freely without spoiling the layout, which makes this a good pick for kids and first-timers alike.
6. Simple Bridal Mehndi Design
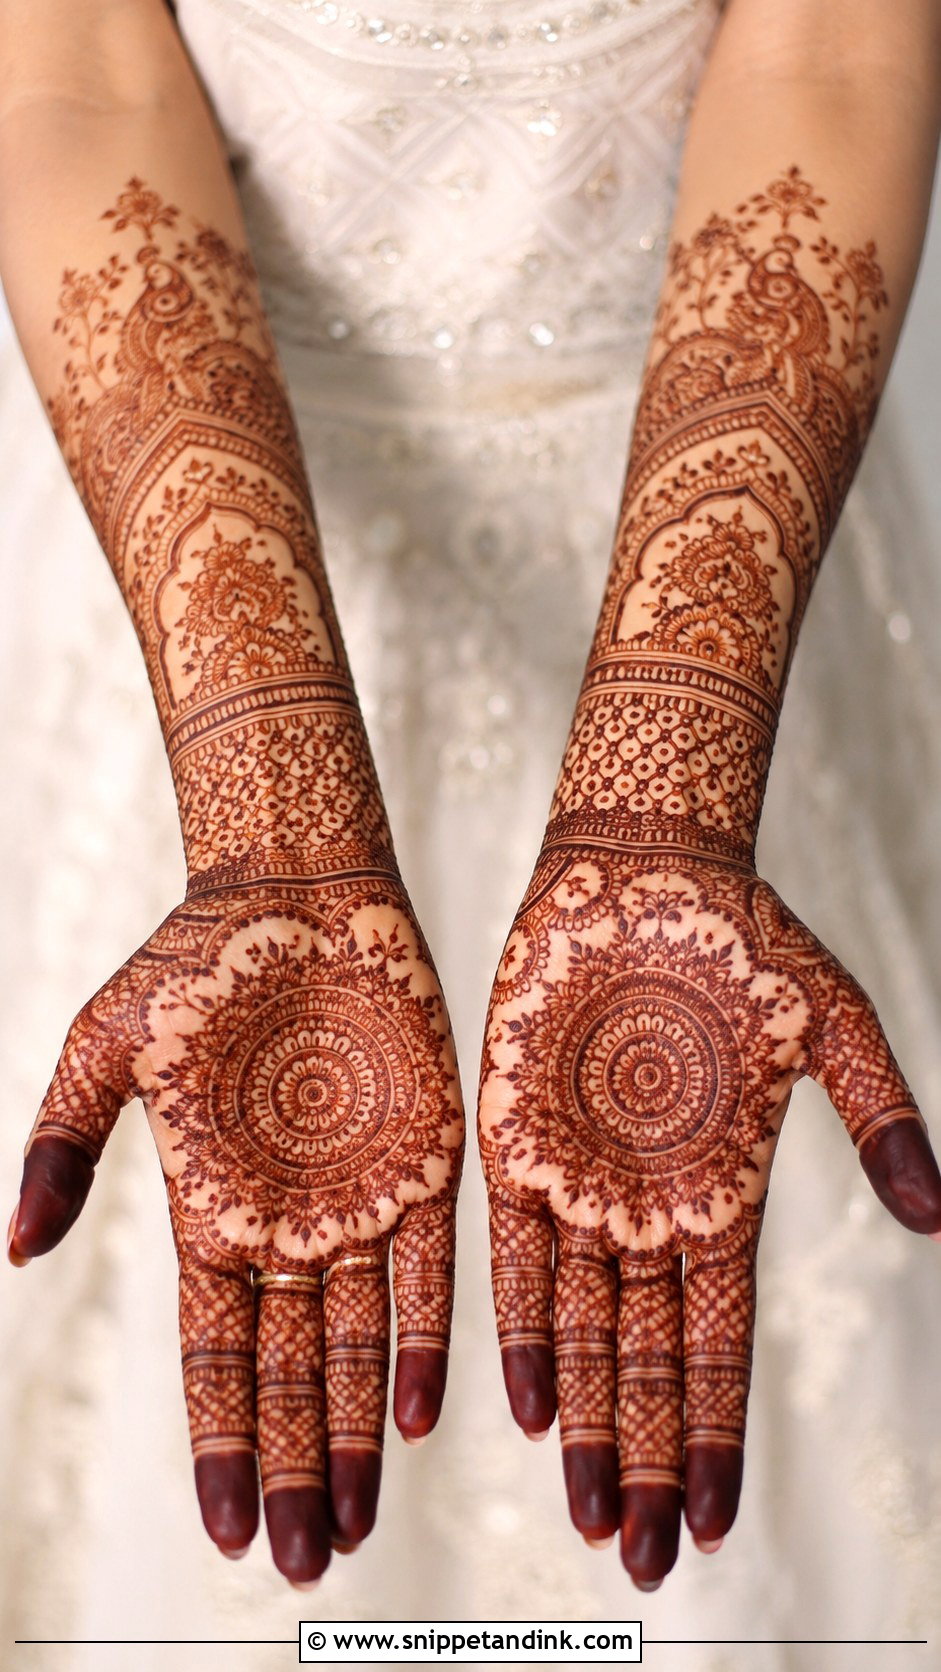
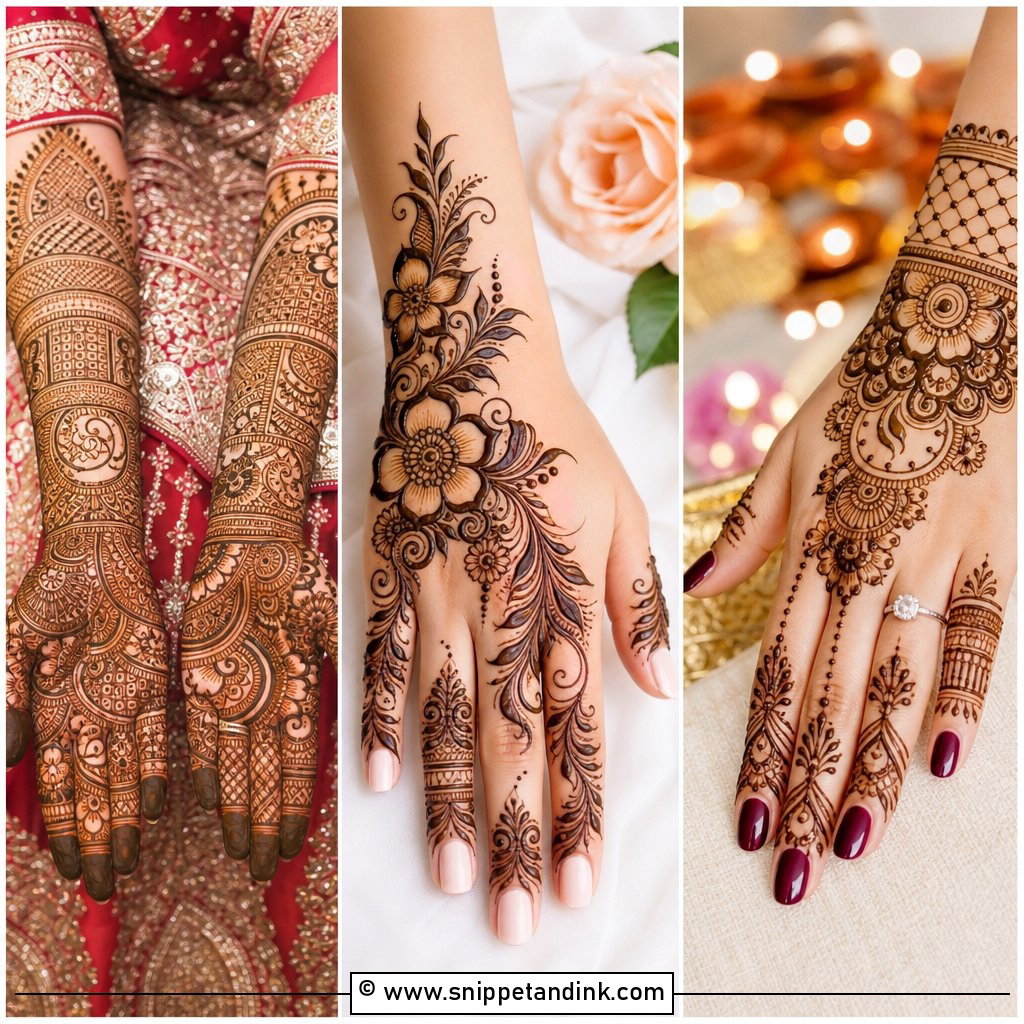
Some brides want less, not more. For them I use neat mandalas, paisleys, flowers and small jaali sections, a central motif on the palm, matching bands and dots on the fingers, and a clean extension from the wrist up the forearm. A delicate cuff, a few tiny hearts or the partner’s initials hidden in the pattern add the bridal touch. It is lighter to sit through than full coverage, which also matters on a busy wedding week.
7. Simple Finger Mehndi Design
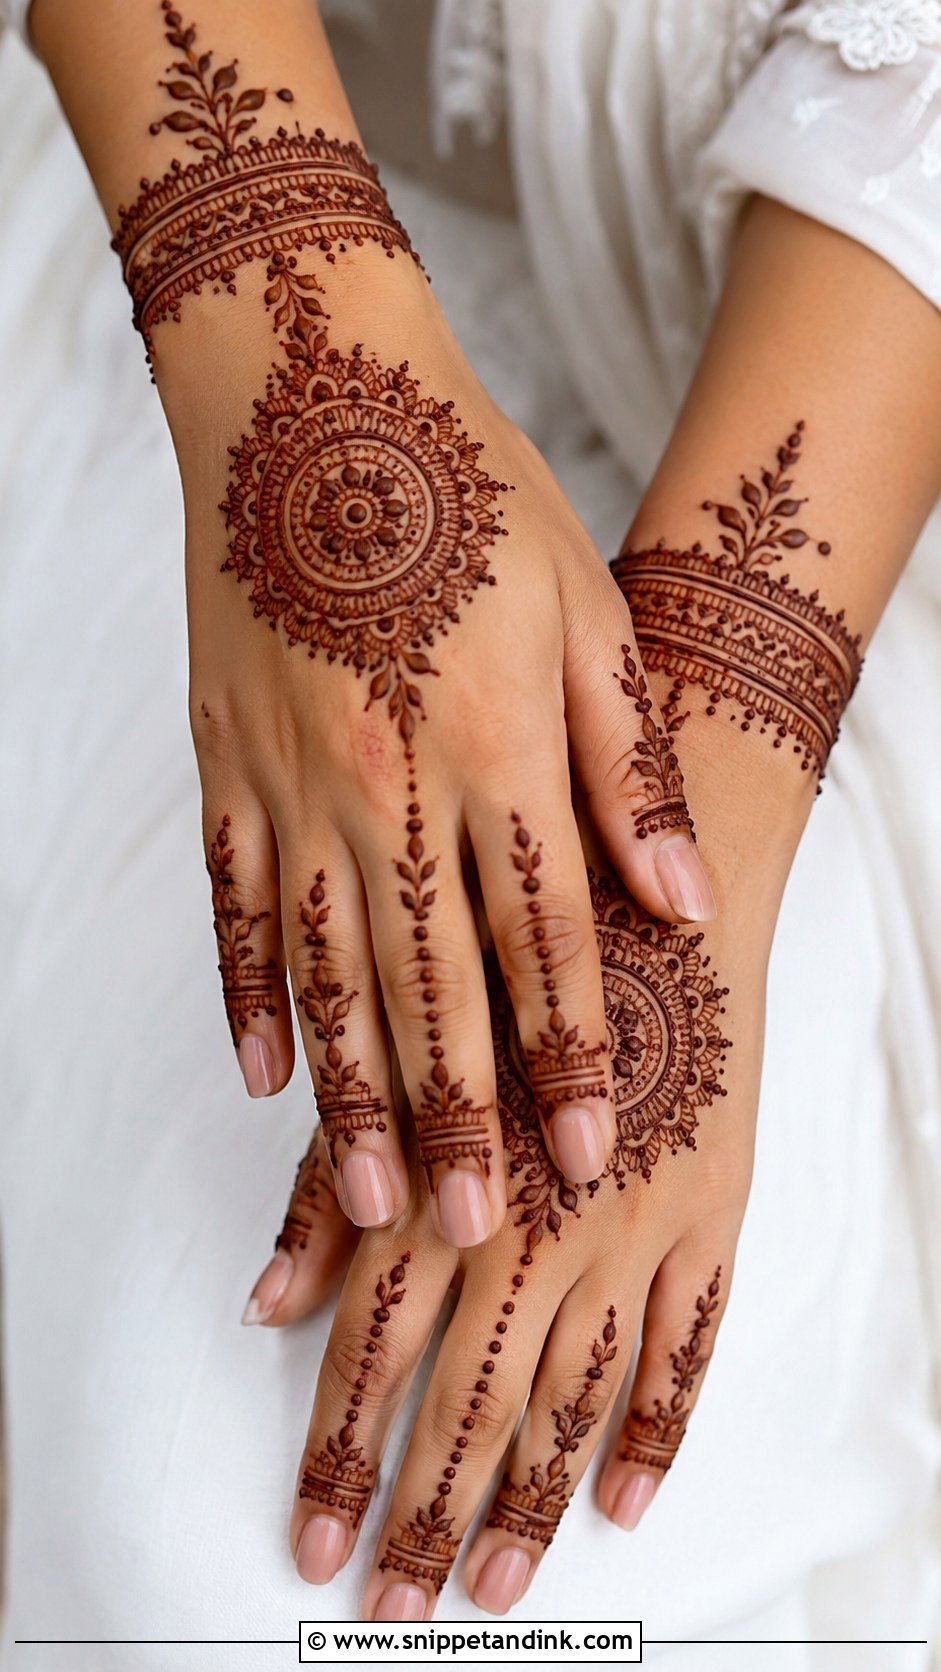
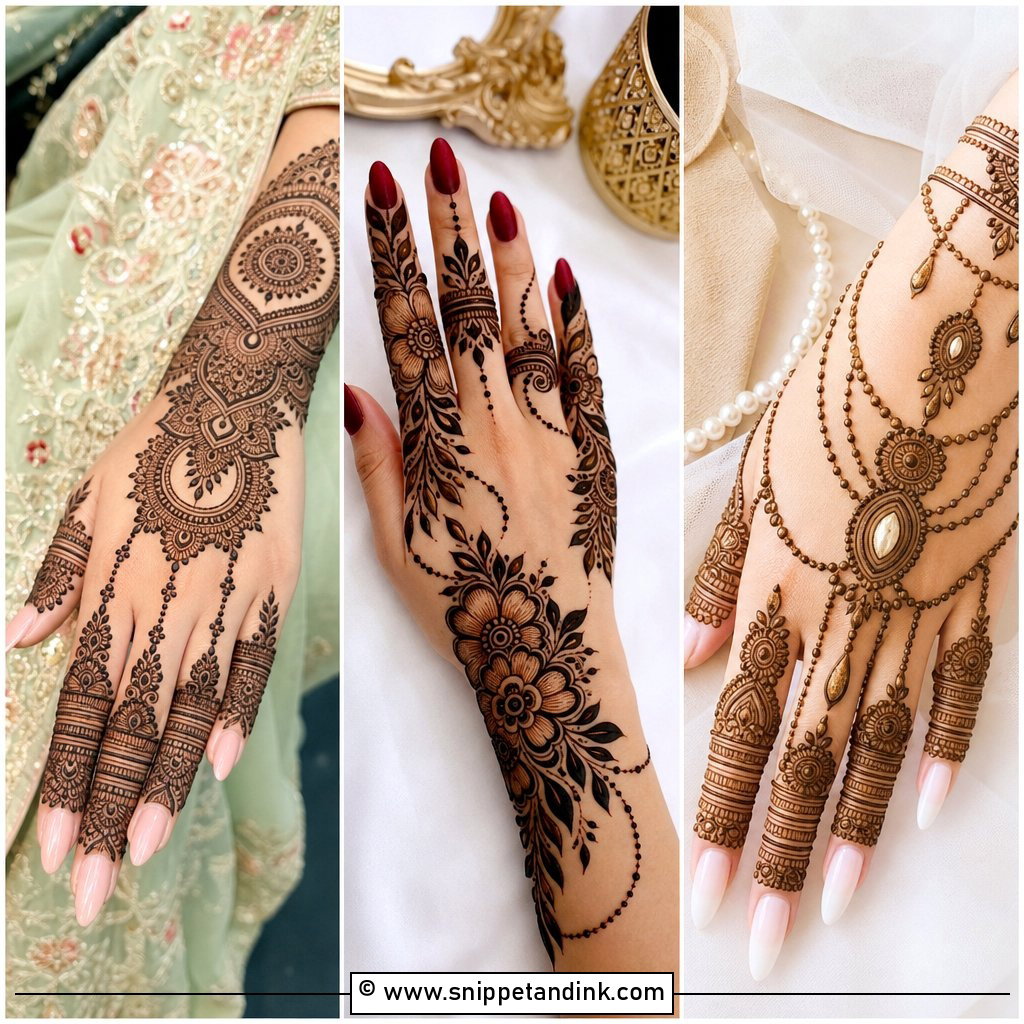
All the detail goes on the fingers: rings, leafy bands, dotted chains and small floral caps, with maybe a tiny wrist bracelet or back-hand mandala for balance. It’s quick and dries fast. I keep each finger a little different but within the same family of patterns, so it looks designed rather than copied five times. Good for office events and anyone who wants mehndi that won’t dominate.
8. Easy Half Hand Mehndi Design
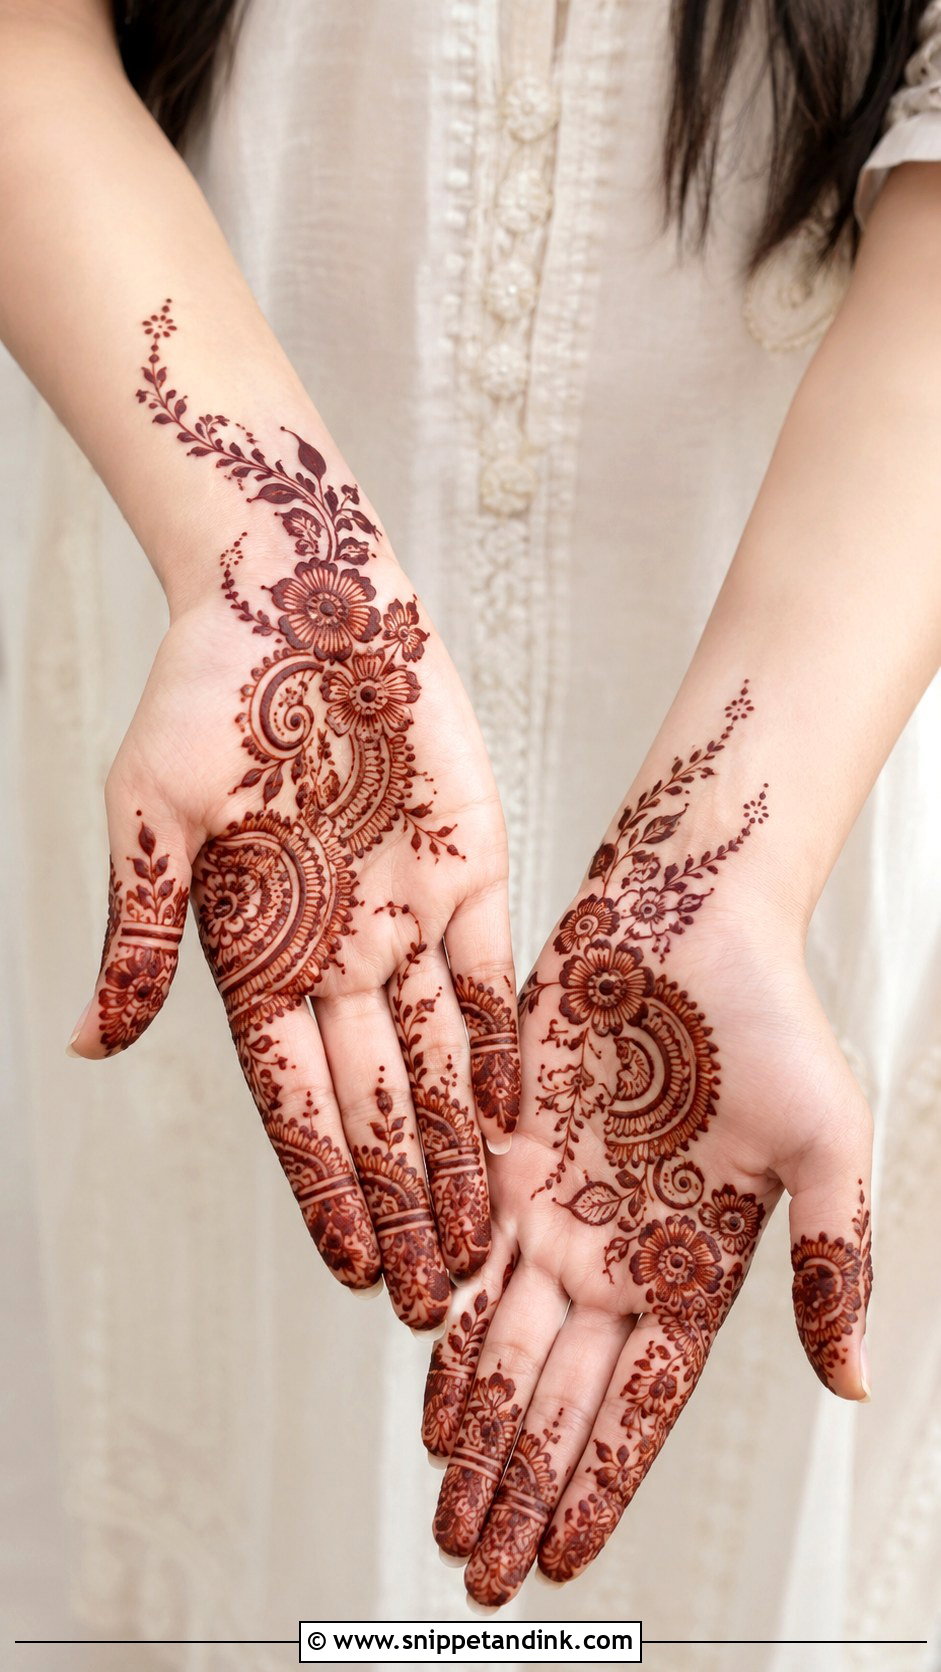
Half-hand designs cover part of the palm or back hand, from wrist to center or from fingers to the middle, and leave the other half open. A diagonal floral trail, a half mandala or a curved paisley vine all work. I plan the covered half as one complete composition, so it doesn’t look like I ran out of time. It’s what I suggest to bridesmaids on a packed schedule.
9. Simple Palm Mehndi Design
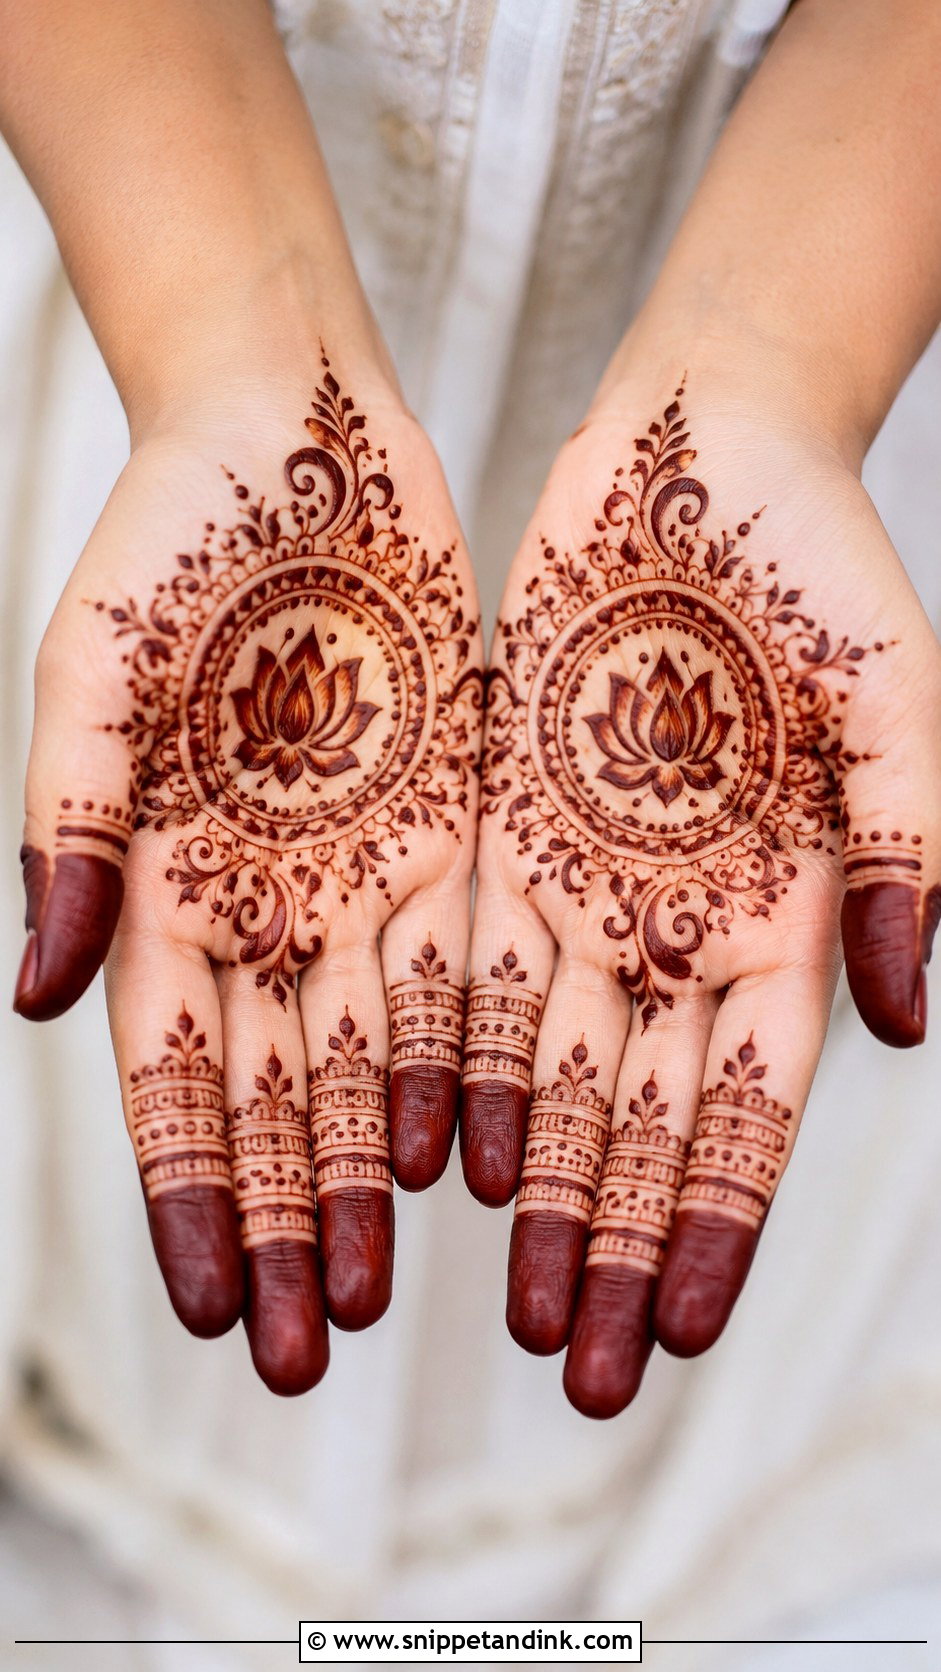
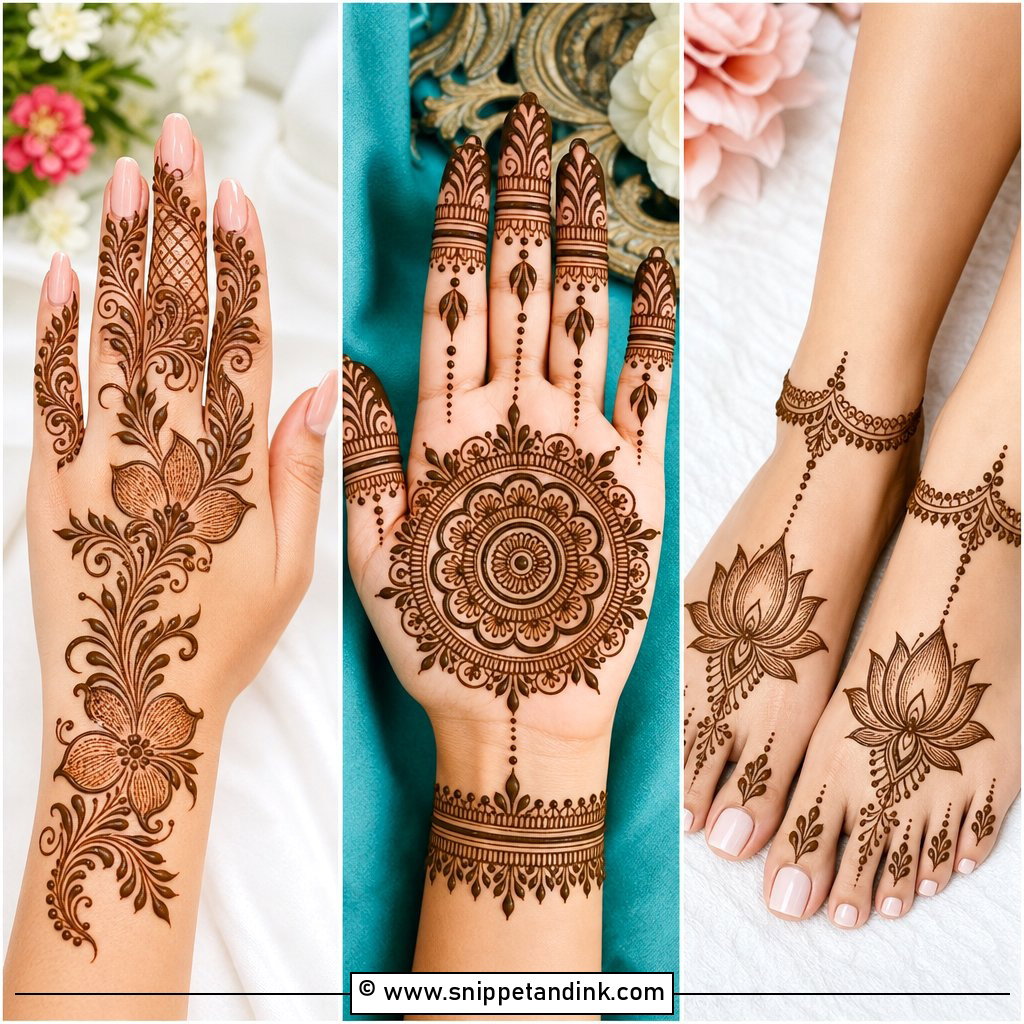
The palm wants one strong focal point: a round mandala, a lotus or one large flower in the middle, with dots, curved leaves and finger bands around it. Palms also stain darker than anywhere else on the hand, so close lines blur together. I leave a little more space than looks necessary. Fill the fingertips completely for a festive look, or keep them to thin lines for something softer.
10. Easy Back Hand Arabic Mehndi Design
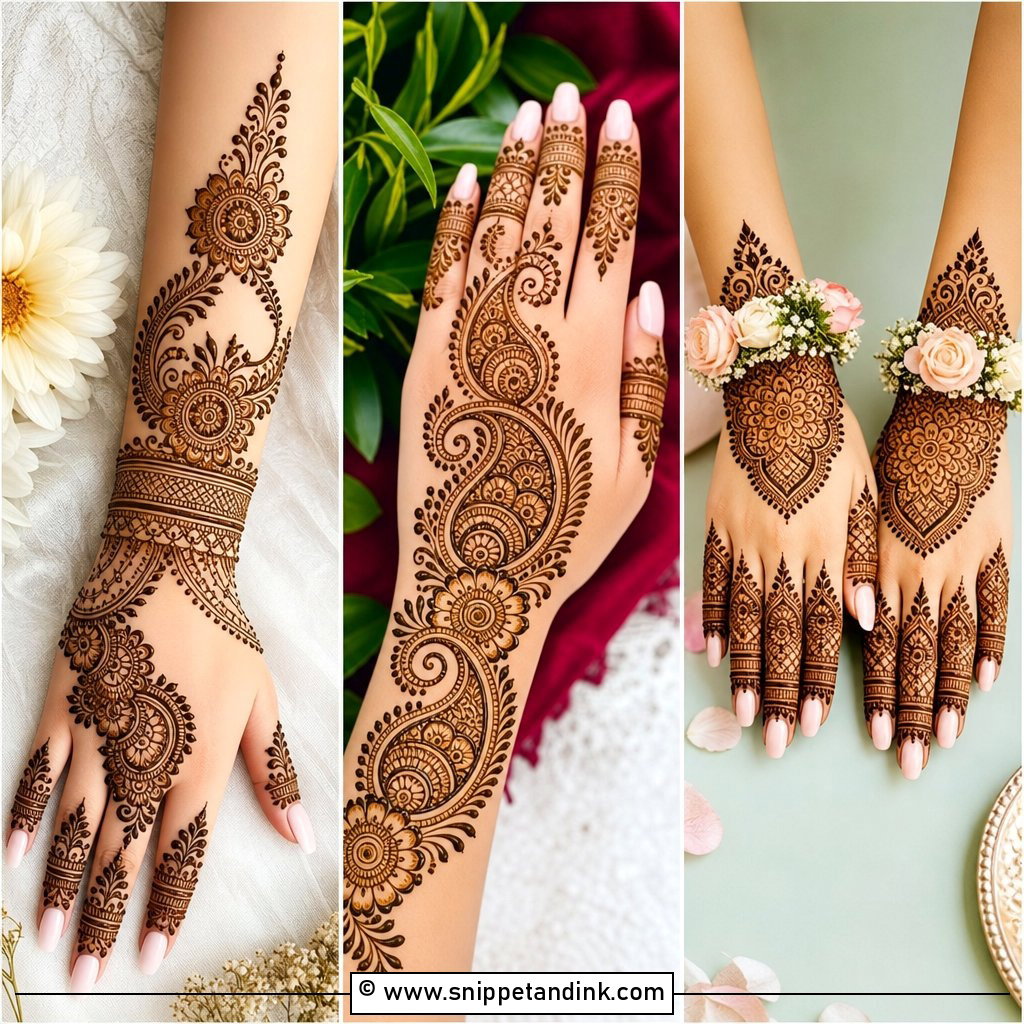
When people need mehndi in a hurry, this is usually what I draw. A flowing trail from the wrist to the index or middle finger, big flowers, curved leaves and bold paisleys, with open gaps around them and light finger detail. Bold outlines make it look professional even when the inner work is minimal. It suits Eid, Diwali and wedding guests equally.
11. Simple Round Mehndi Design
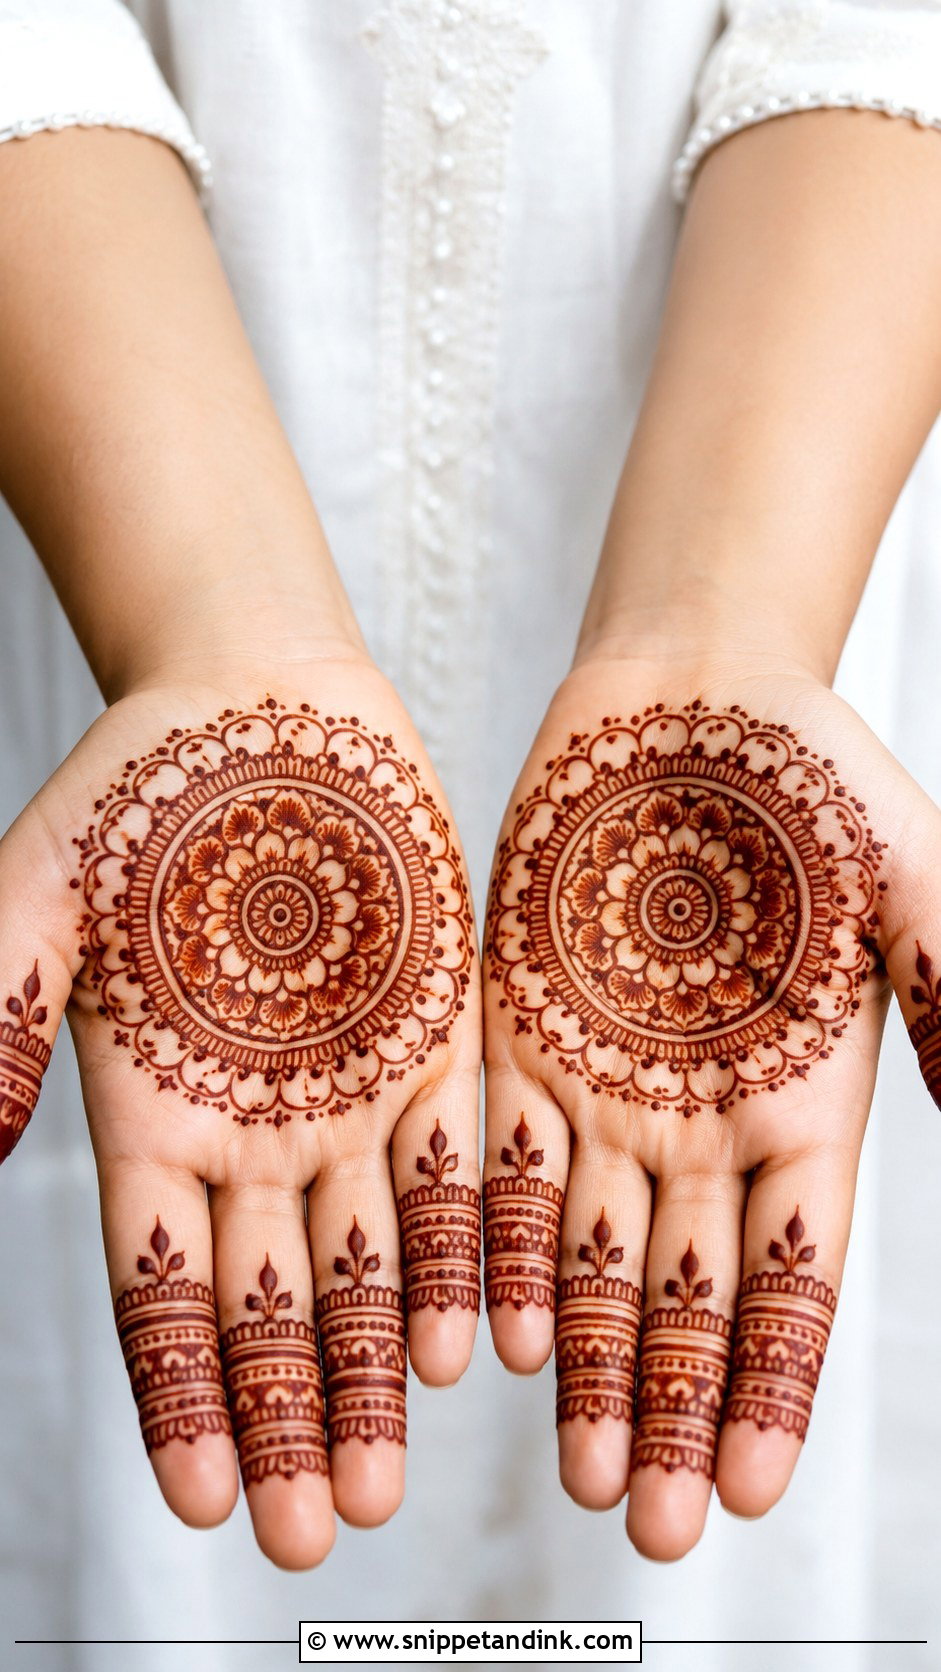
Round designs grow outward step by step from a clean circle: petal layers, dots, scallops, tiny leaf borders. Fingers get matching bands. It works on the palm or the back of the hand. A wobbly circle is easy to rescue, because each petal layer gives you a chance to even out the shape, and that’s why I keep recommending it for practice.
12. Simple Bracelet Mehndi Design
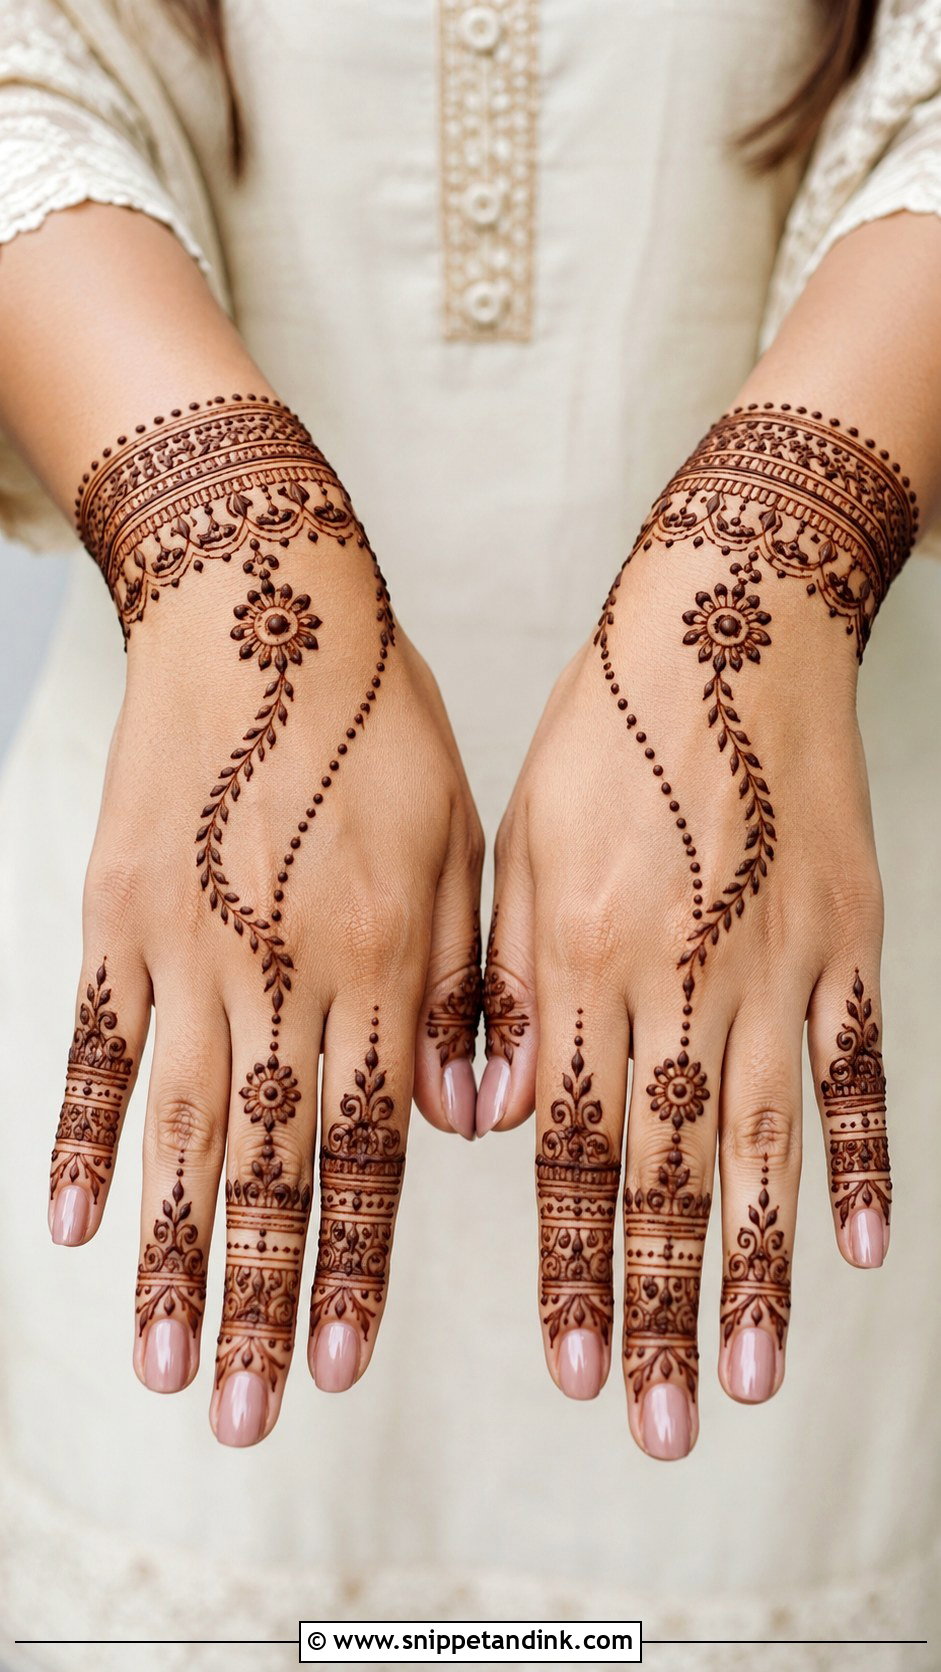
Bracelet designs live at the wrist: two or three bands like a bangle or cuff, filled with tiny lines or dots, then a chain, a few leaves or a small motif linking it to the fingers. I add a delicate trail toward the ring finger to finish it. Most of the work is repeated lines, which beginners manage well. If you wear bangles, set the band slightly above where they rest so they don’t rub it.
13. Easy Paisley Mehndi Design
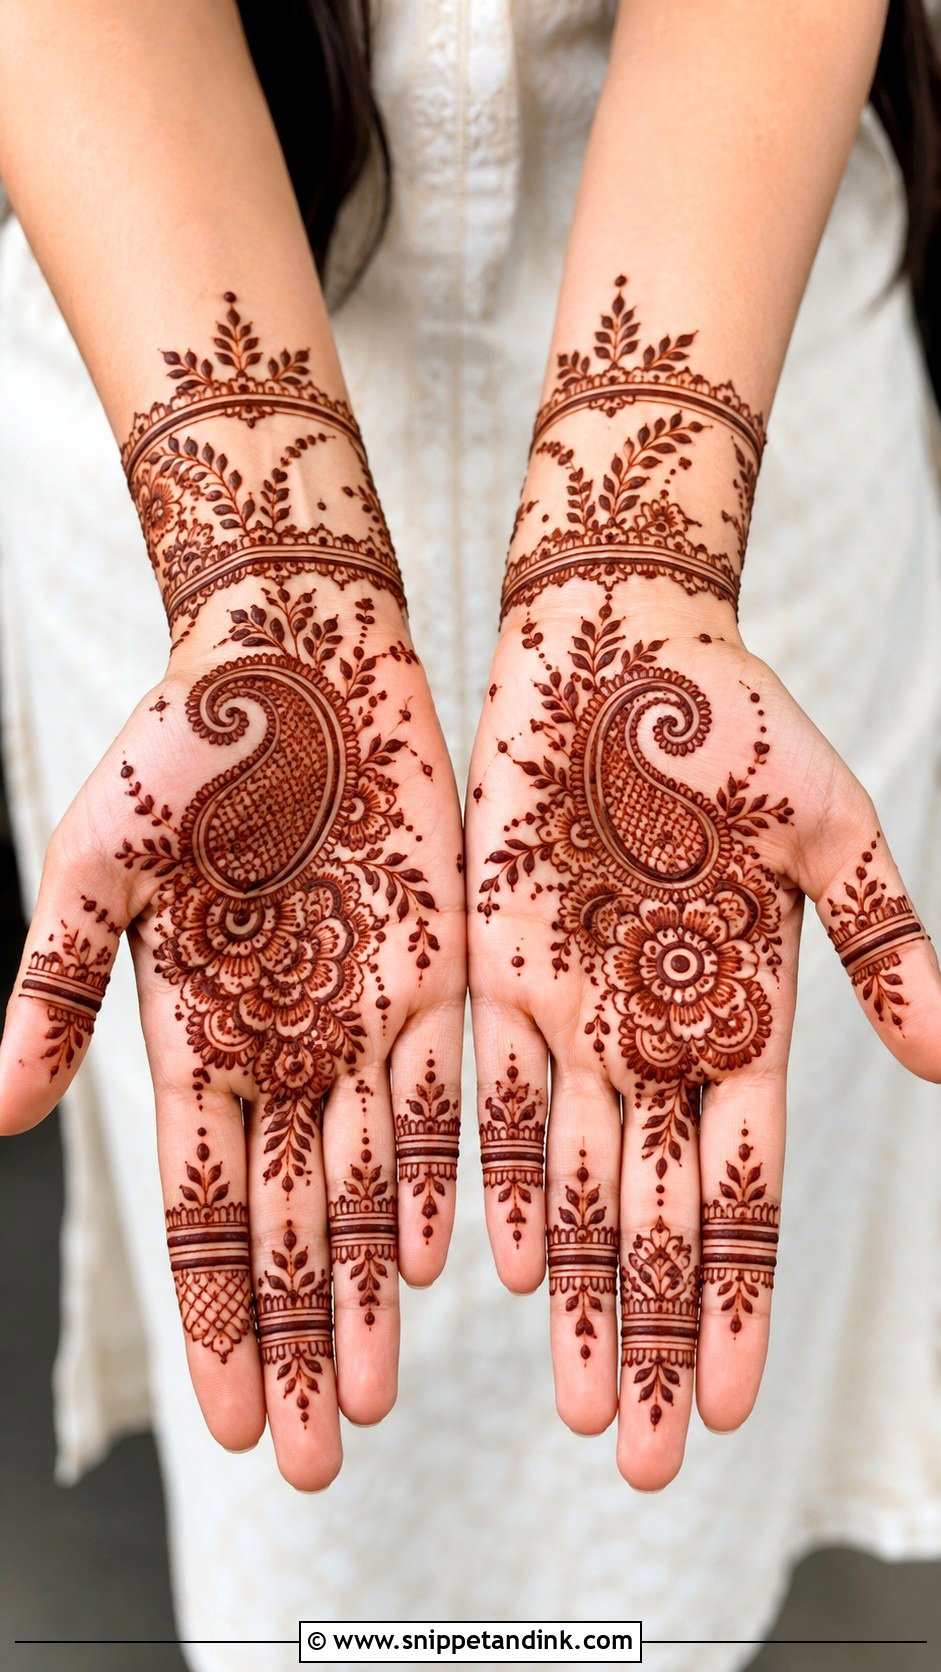
Paisley, the curved mango shape, gives a classic Indian feel without bridal density. I draw one large paisley as the main motif and surround it with flowers, dots, leaves and small curves, then run it diagonally for an Arabic feel or keep it centered for a traditional one. Paisleys don’t have to match exactly, so beginners can relax. Keep the inside fill to lines and dots.
14. Simple Leaf Mehndi Design
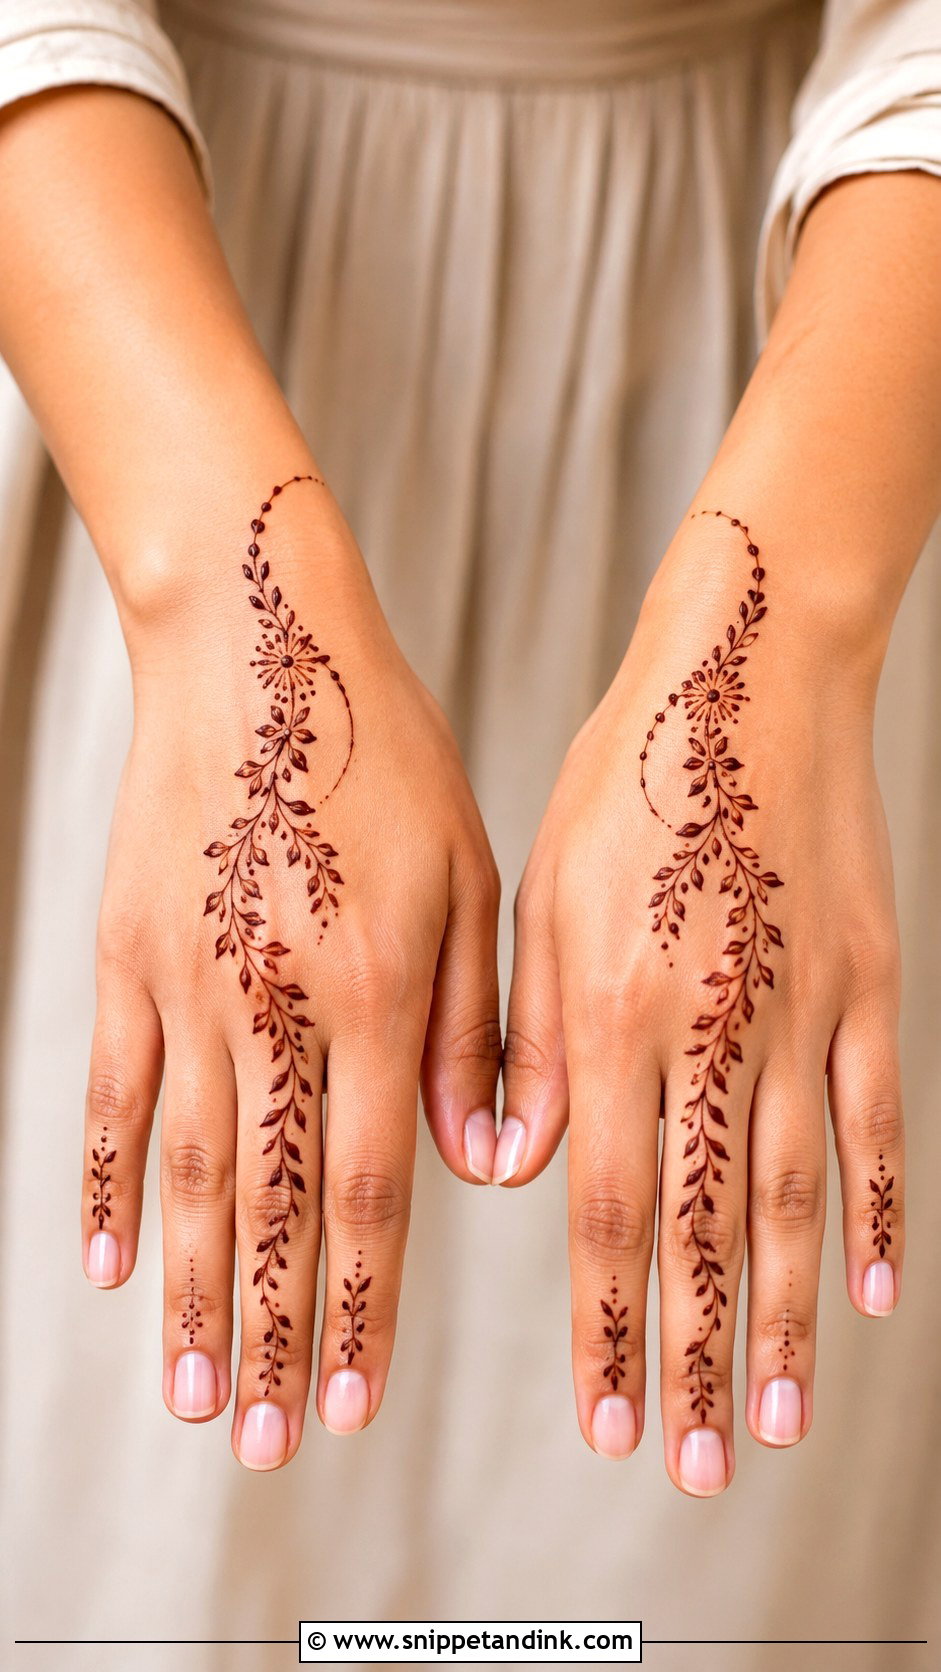
One or two leafy vines across the hand. On the back hand, start at the wrist and curve toward the middle finger; on the palm, run it diagonally with dots alongside. Add tiny flowers between leaves if you want it fuller. Leaves need only basic strokes, so this is one of the quickest designs in the list.
15. Easy Full Hand Mehndi Design
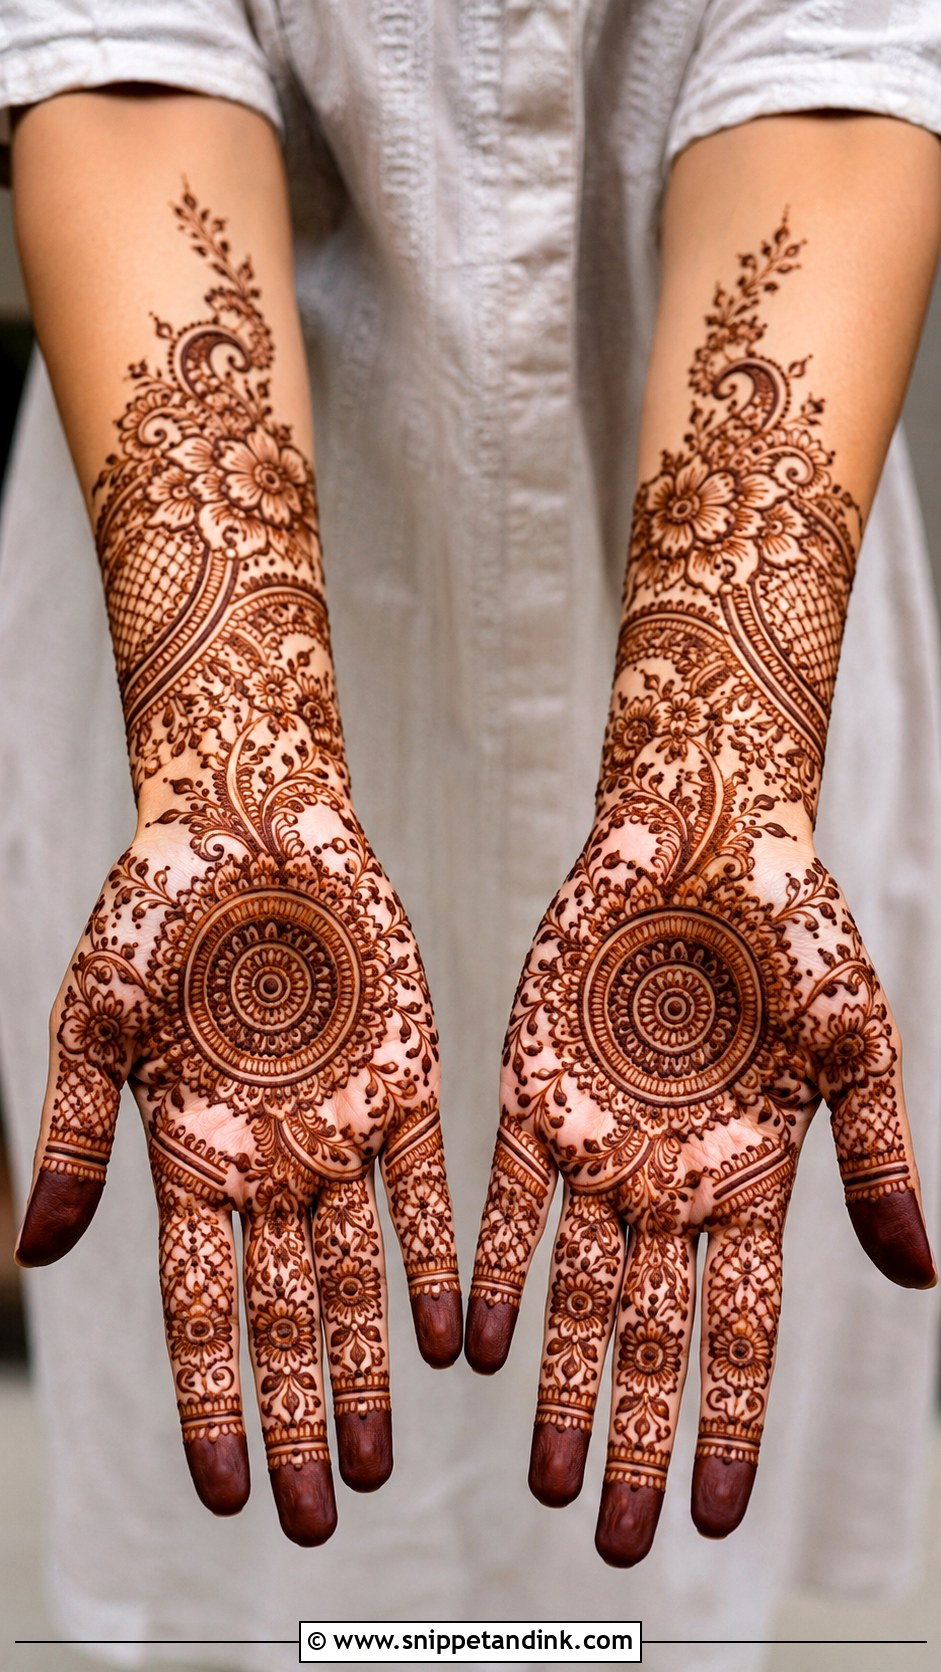
Full-hand coverage gets easier with larger motifs. A palm mandala, side paisleys, floral vines and simple wrist bands, extending a little onto the forearm, with open space between sections and repeated bands, dots and leaves on the fingers. It looks rich without fine work. Be realistic about time, though: even simple full hands take a while, and both hands will be out of use until the paste dries.
16. Simple Jaali Mehndi Design
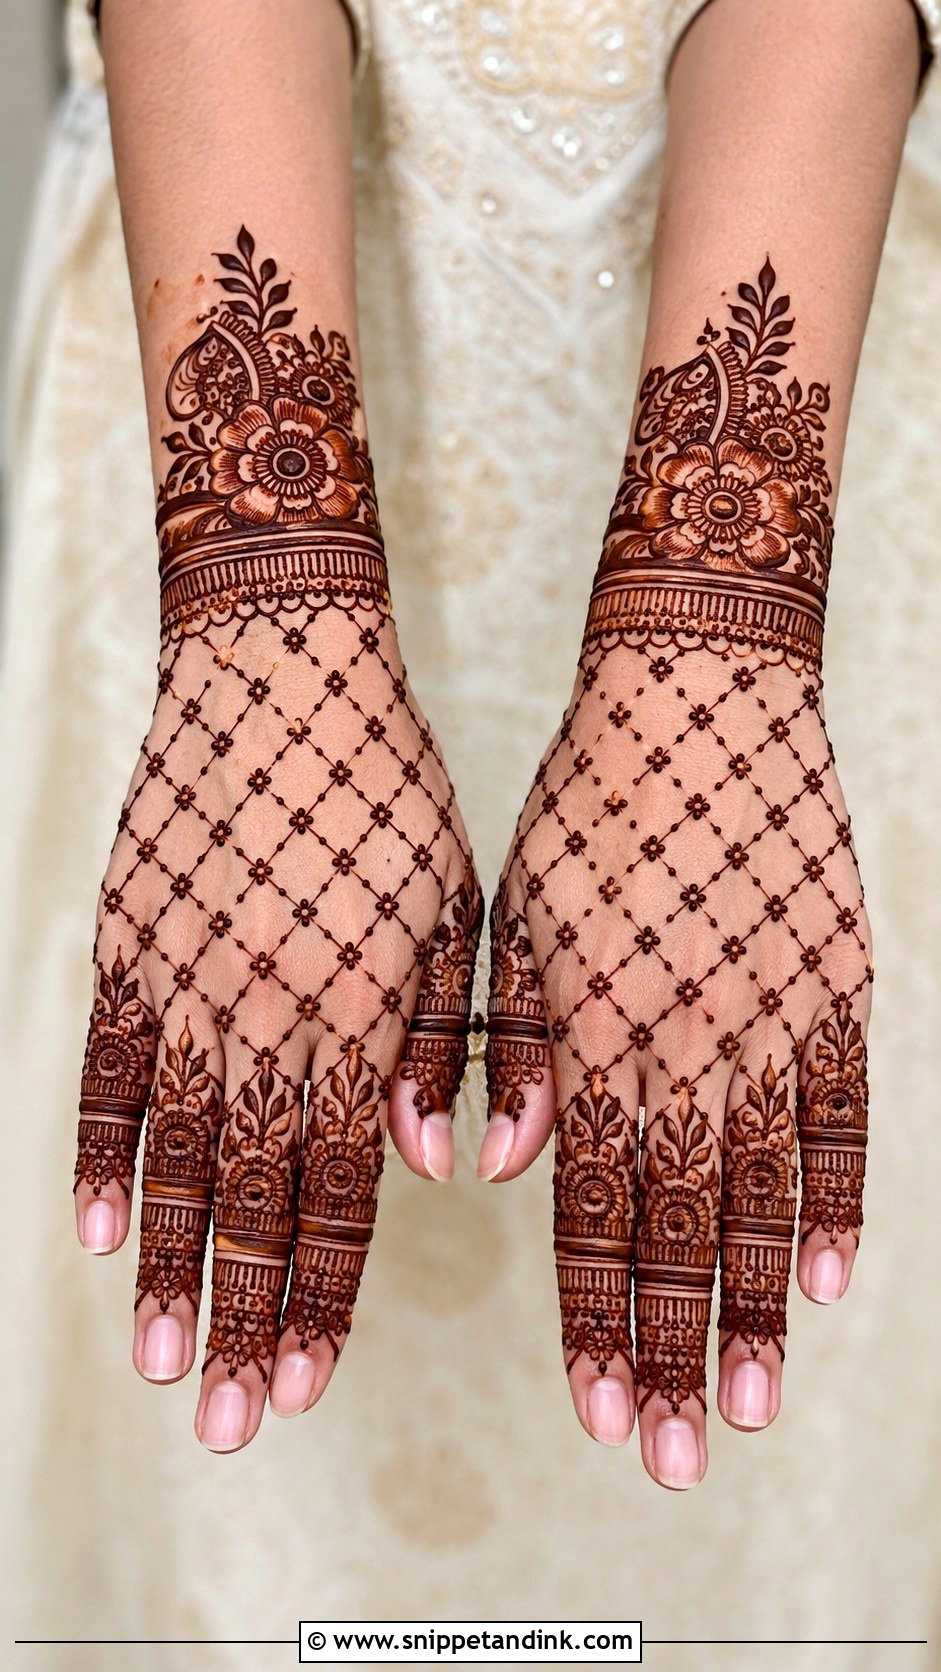
Jaali, the net pattern, makes a hand look detailed for very little effort. I put it on one side of the palm, in a bracelet cuff or beside a mandala on the back hand: crisscross lines, a dot at each crossing, framed by flowers or paisleys. Start with a small patch and medium squares. Tiny squares look delicate when wet but tend to close up as the stain darkens.
17. Easy Indo Arabic Mehndi Design
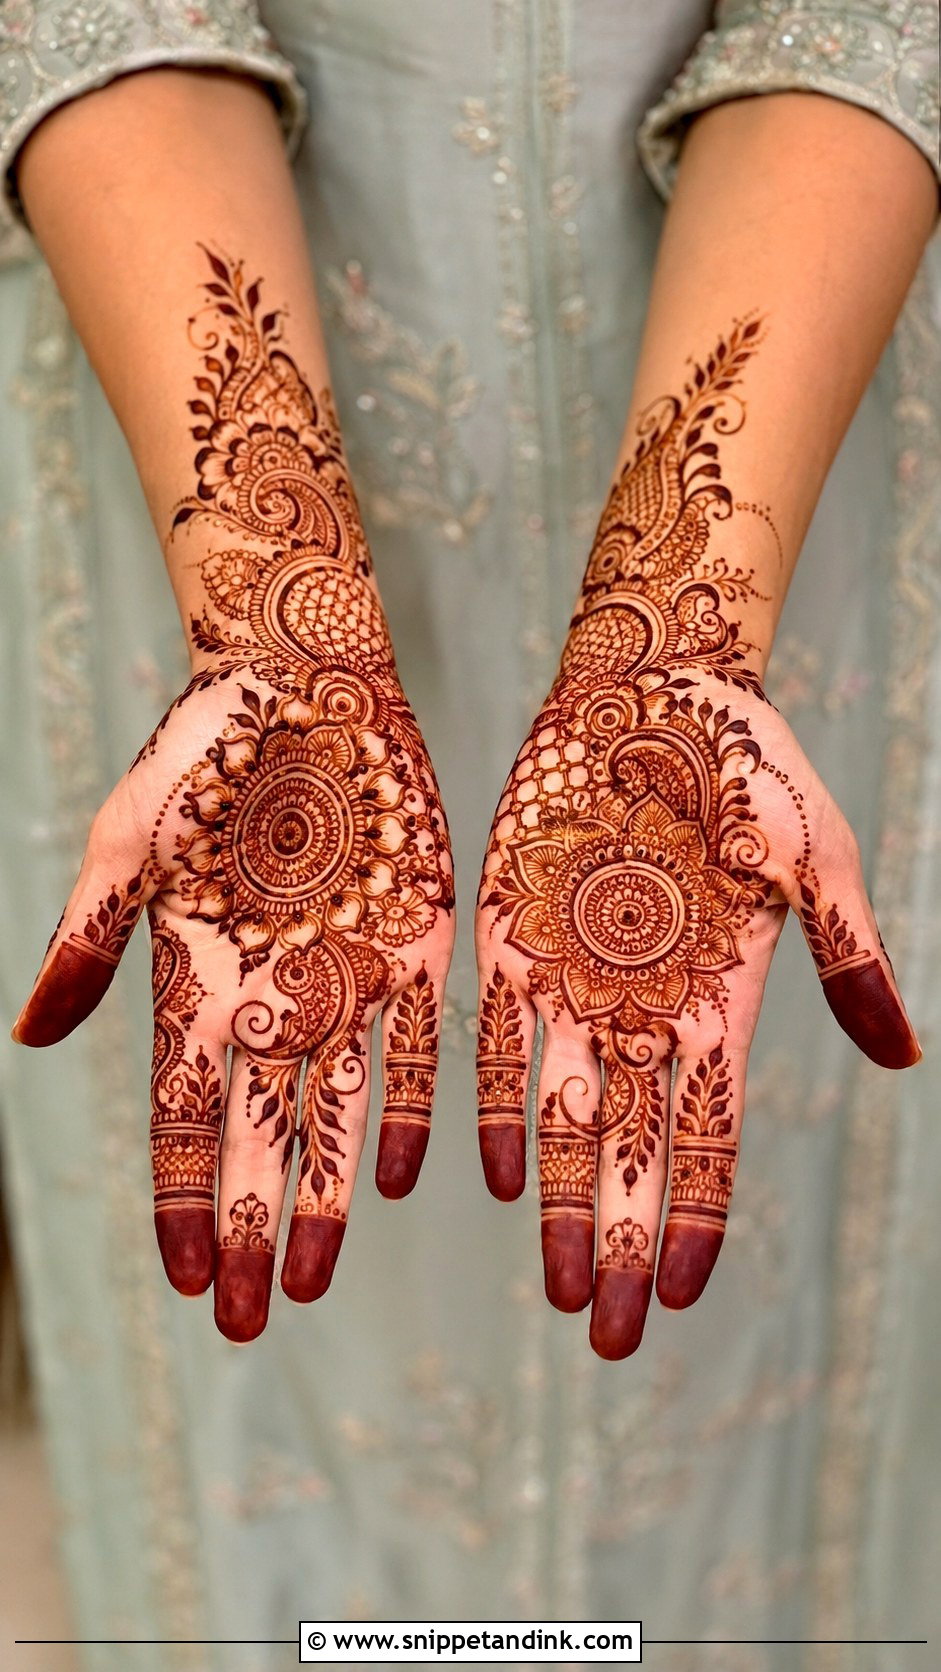
Indo-Arabic begins with a bold Arabic floral trail and adds Indian touches inside it: a mandala, paisleys, dots, a small jaali patch. It’s fuller than plain Arabic but simpler than bridal work. I keep the overall flow from wrist to finger and use bold outlines with simple inner detail to save time. It’s my default for engagement functions and family gatherings.
18. Simple Eid Mehndi Design
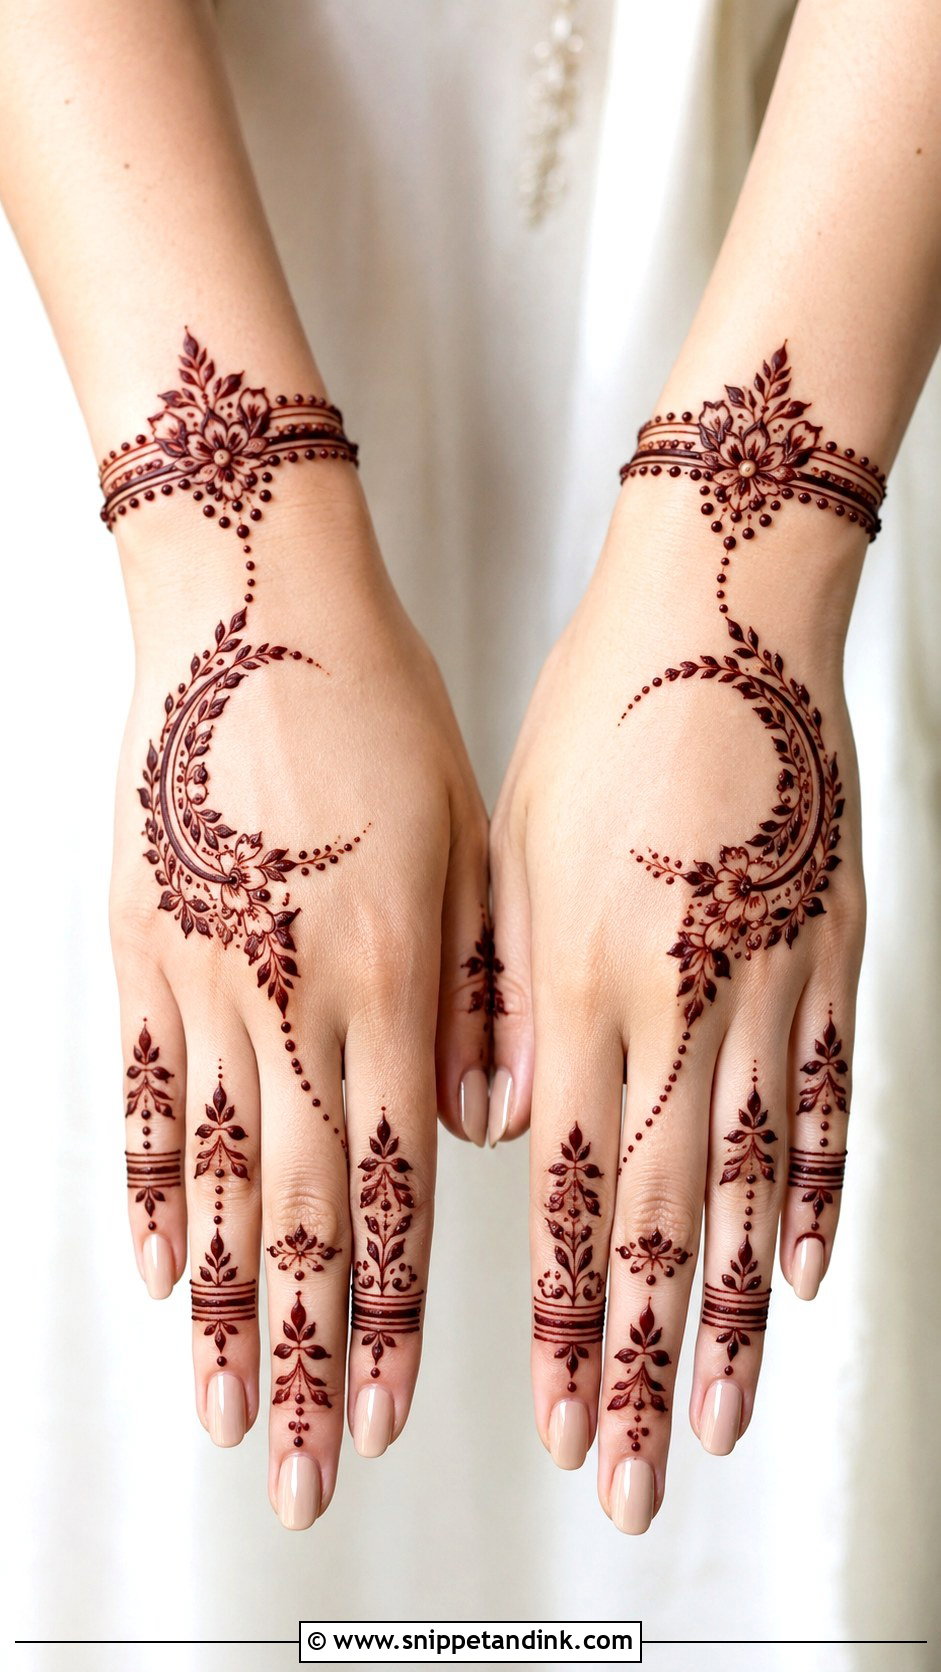
A simple Eid mehndi design is usually applied on chaand raat with the whole house waiting, so I keep it quick. A wrist bracelet, a leafy chain and small flowers leading to the fingers, perhaps a crescent curve or a back-hand mandala. Keep the palm light if you need it to dry fast; add bold fingertip fills and dots for a more traditional look. Repeated lines and clear shapes keep it achievable for a beginner.
19. Simple Diwali Mehndi Design
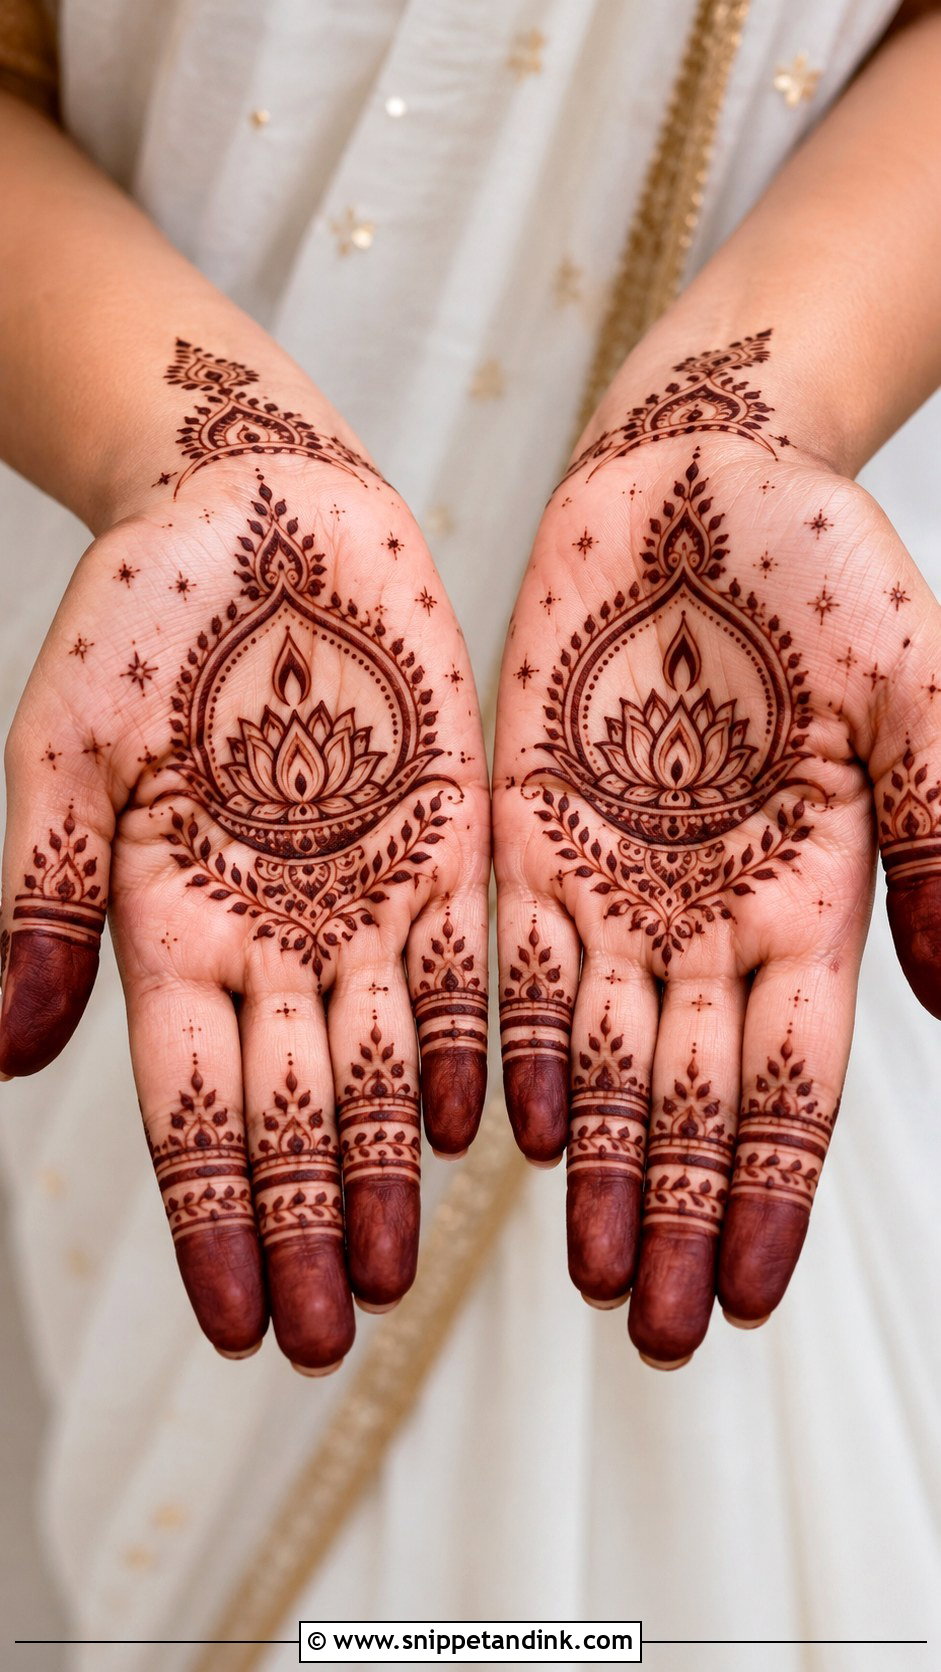
A simple Diwali mehndi design needs one main motif, a palm mandala, a lotus or a few diya shapes, with finger bands around it. On the back hand, try a bracelet cuff with a floral trail. Neat dots and curved lines give it a bit of sparkle. Since you’ll be lighting lamps and handling sweets, I’d apply it the night before so the paste is long gone by the evening.
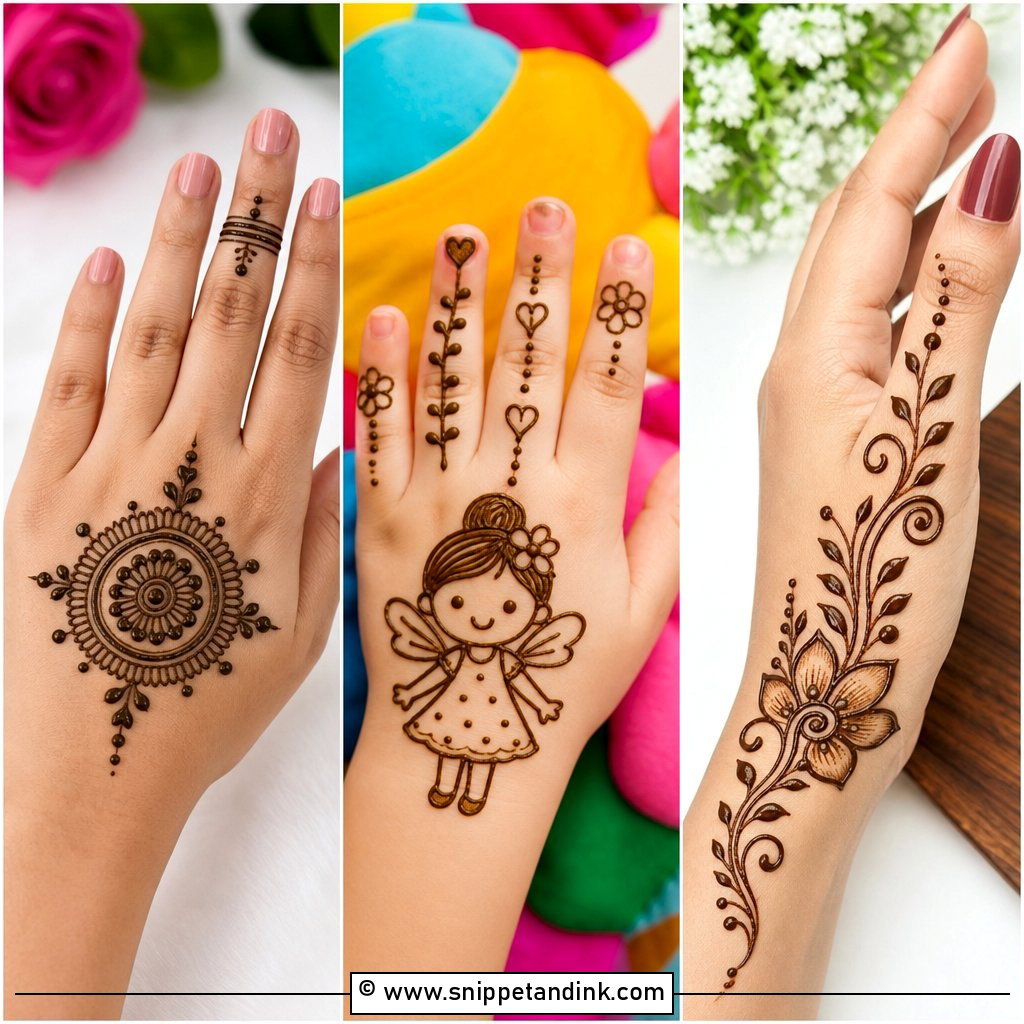
20. Easy Wedding Guest Mehndi Design
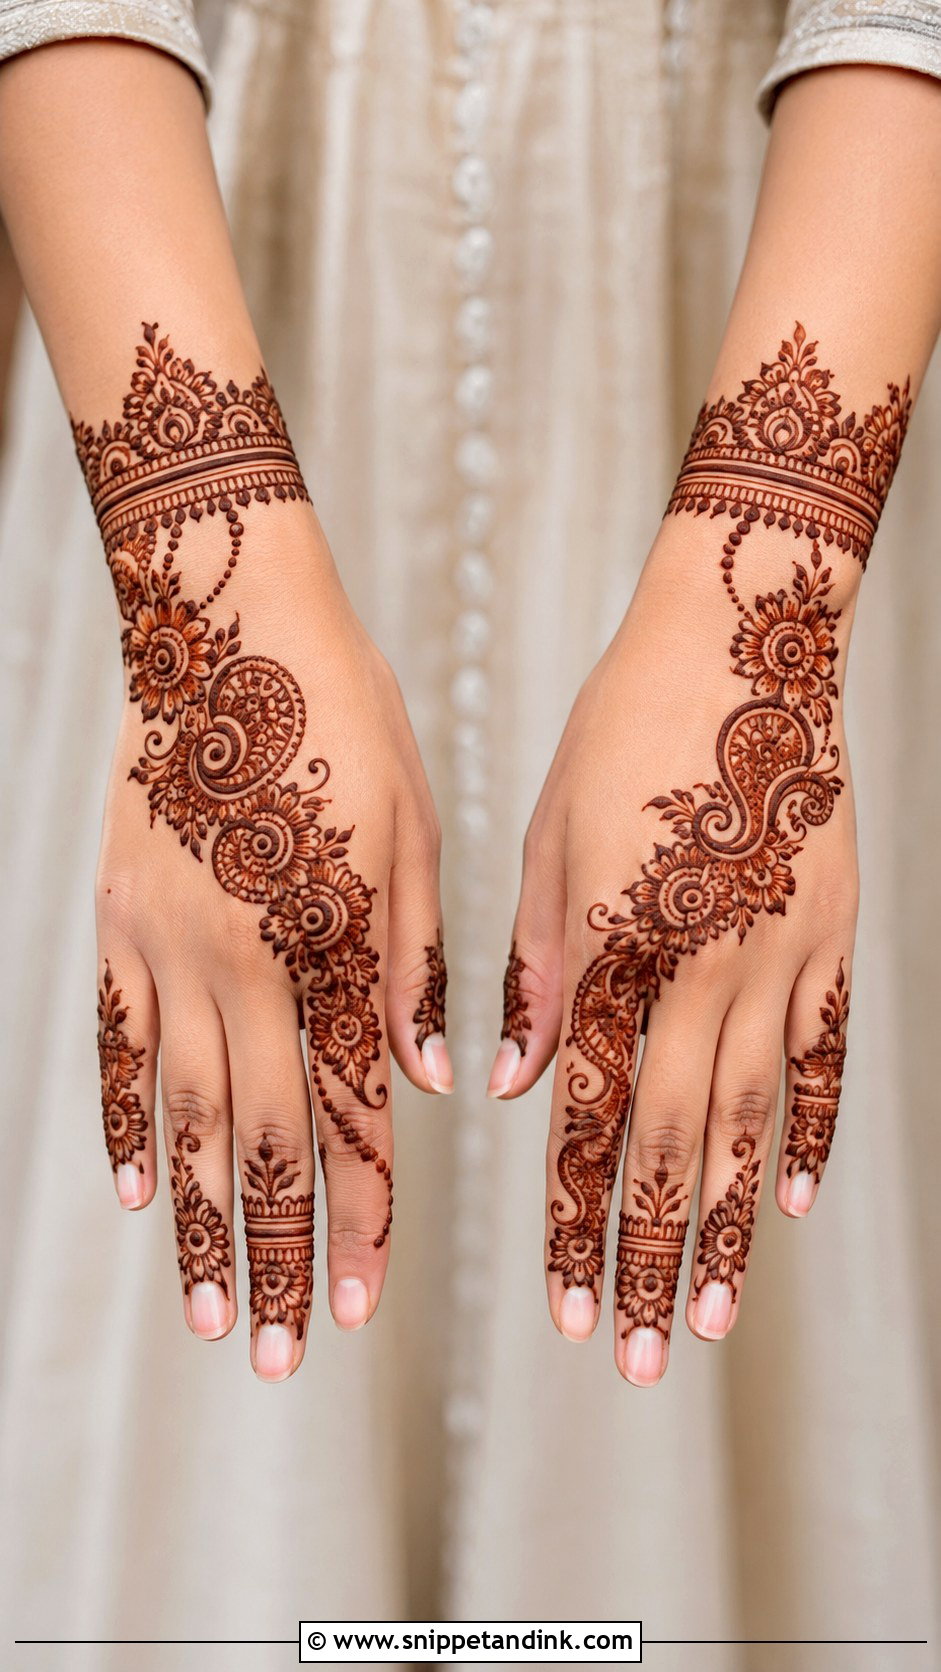
Guests should look dressed up but lighter than the bride. A diagonal Arabic trail of flowers, leaves and paisleys with a wrist cuff, simple rings and dotted chains on the fingers, and a small back-hand mandala for balance. Large, spaced motifs make it quick to apply. It sits comfortably with lehengas, sarees and shararas through a long evening.
21. Simple Kids Mehndi Design
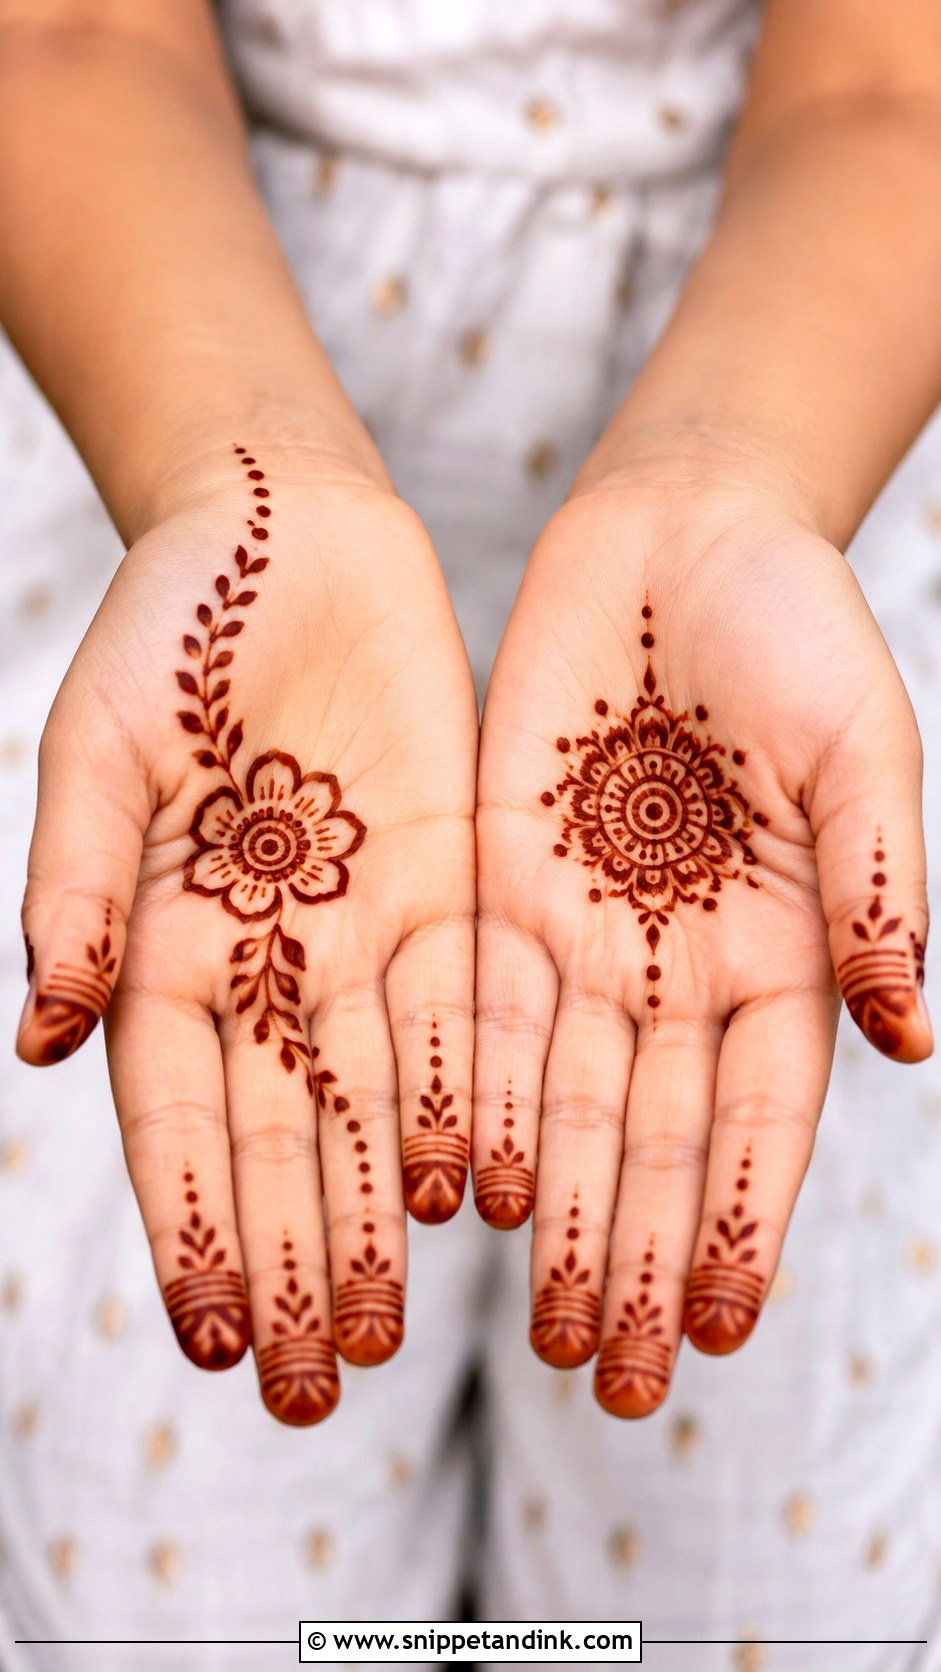
A simple kids mehndi design has to be finished before the child loses patience. A flower with leafy vines, a tiny mandala with dots or a bracelet with fingertips, on one hand area only, and perhaps just one or two fingers decorated. No dense detail; it takes longer to dry and smudges. I always check the paste is natural henna. Very dark “black henna” can contain a chemical dye that causes serious skin reactions, and it should never go on a child.
22. Simple Minimal Mehndi Design
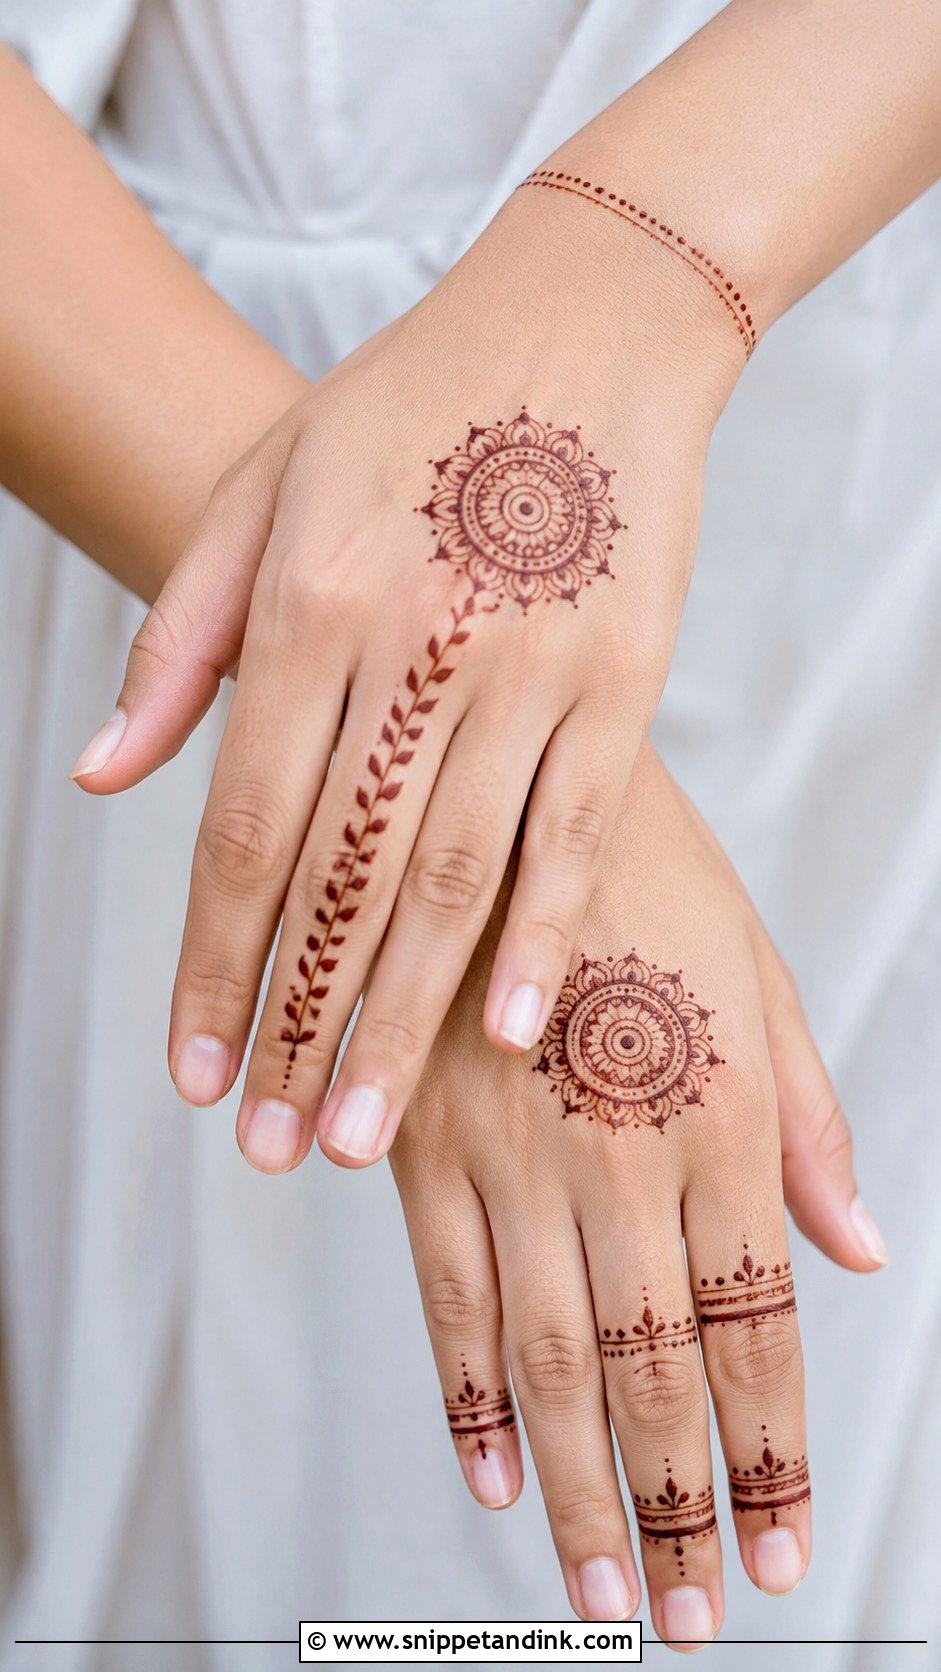
Minimal mehndi is one small mandala, a single leafy trail, thin finger rings or a delicate wrist band, and plenty of bare skin. It’s quick to apply and dries fast. I use fine lines, tiny dots and small flowers instead of shading. It’s the design I recommend for office events or for anyone trying henna for the first time.
23. Easy Side Hand Mehndi Design
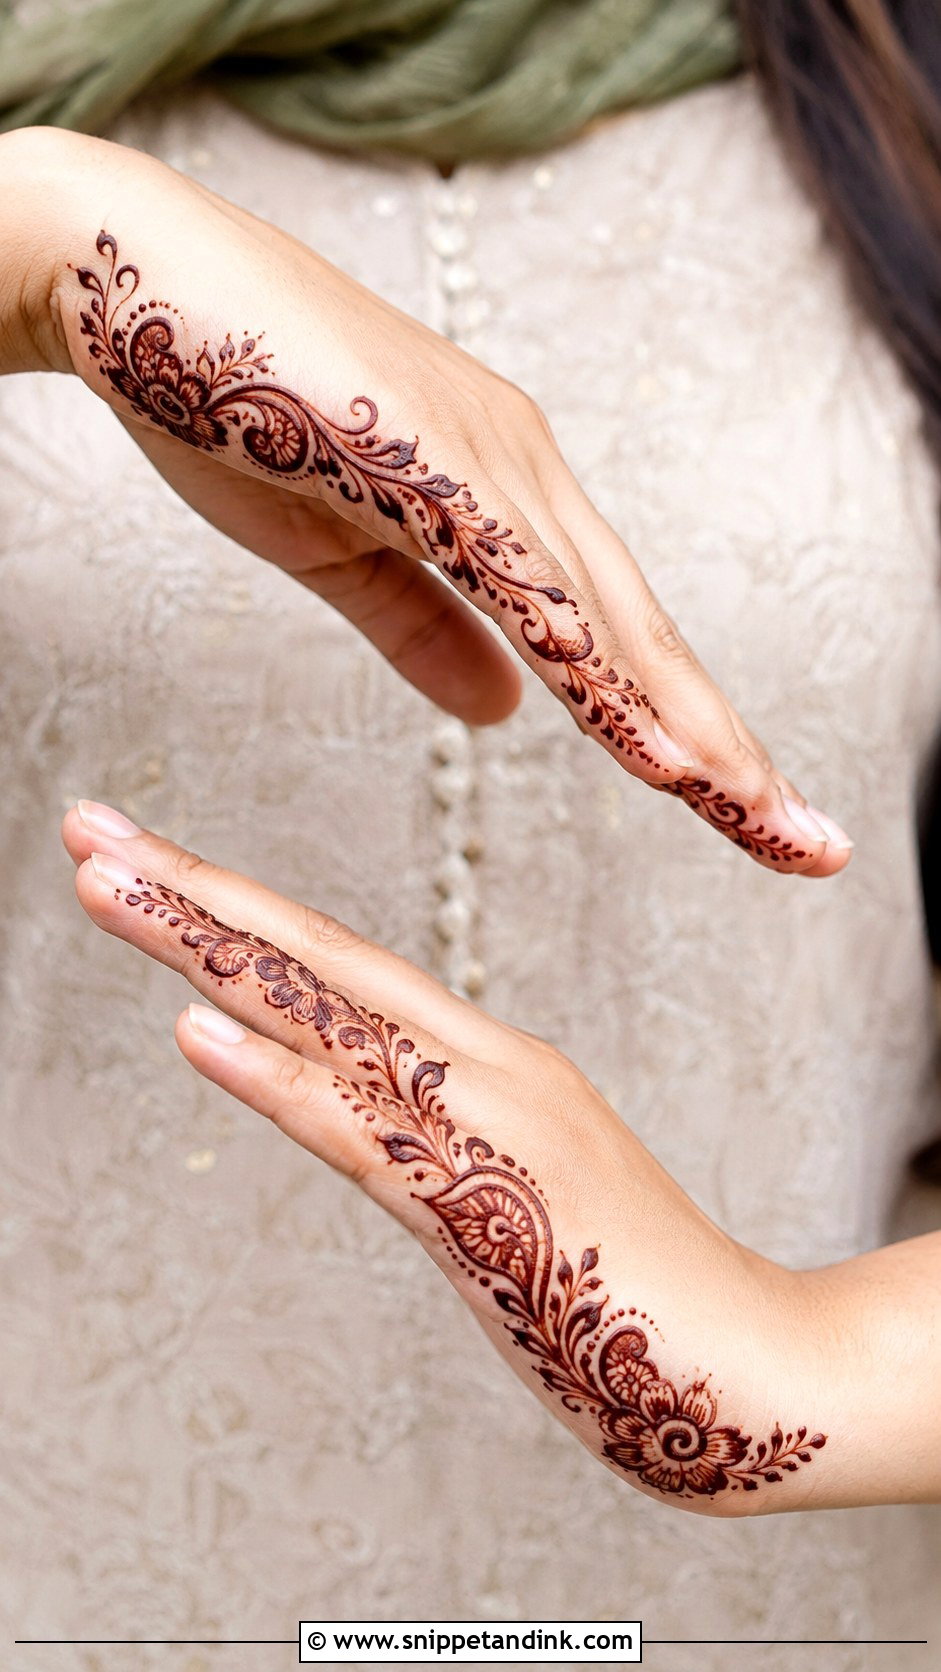
Side designs run along one edge of the palm or back hand, starting near the wrist and moving toward the little finger or index finger in flowers, leaves or paisleys, softened with dots and small curves. Most of the hand stays open. There’s no center to line up, which is why beginners find it easier than a mandala. Keep the motifs bold so they stay visible after staining.
24. Simple Tikki Mehndi Design
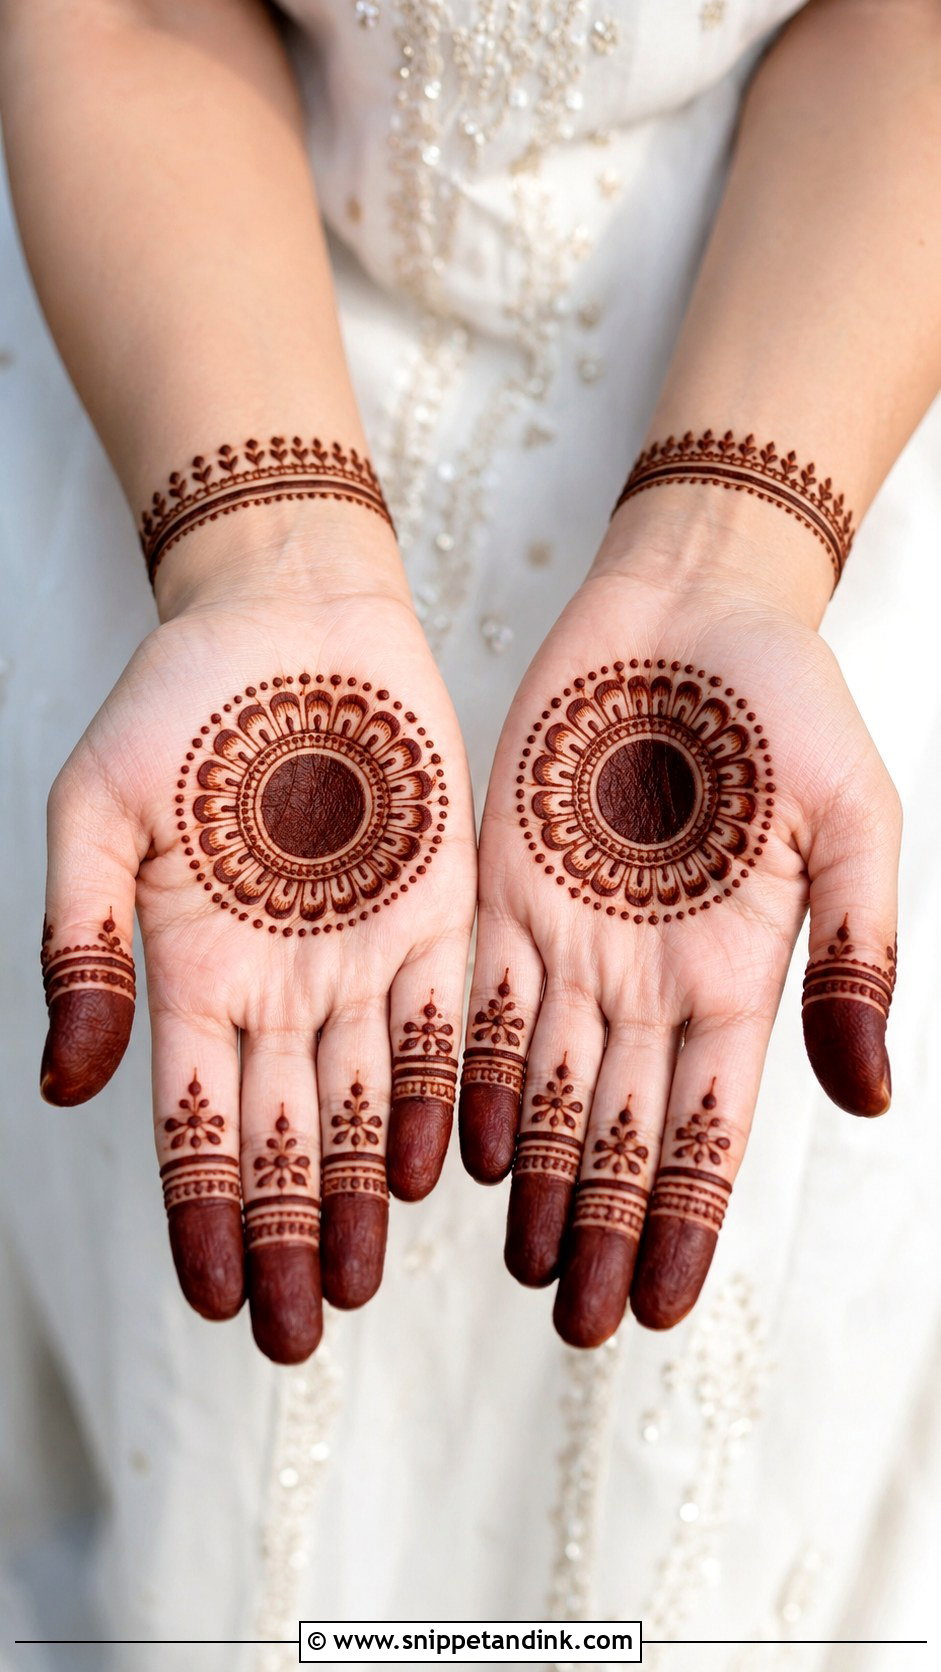
Tikki is the traditional round motif filled or detailed in the center of the palm, ringed by dots, petals and small borders, with fingertips filled or simply banded. On the back hand it pairs with a bracelet-style wrist pattern. It’s symmetrical and quick. The fill in a solid tikki stains very dark on the palm, so I make the outline crisp before filling; any blur at the edge shows.
25. Easy Modern Mehndi Design
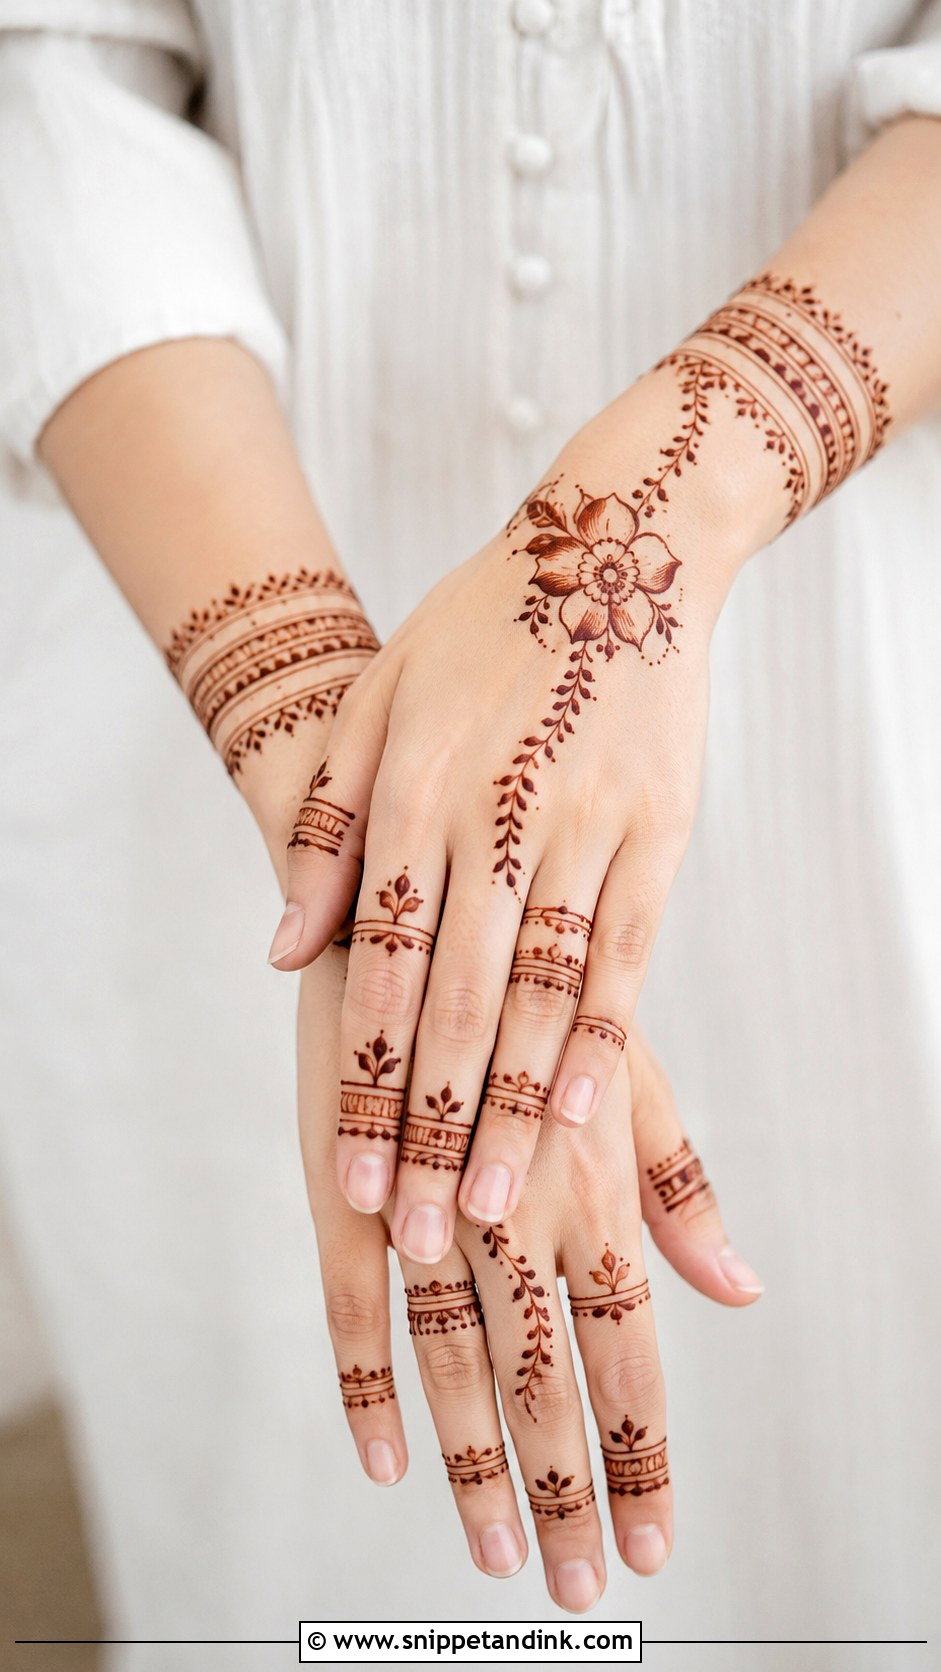
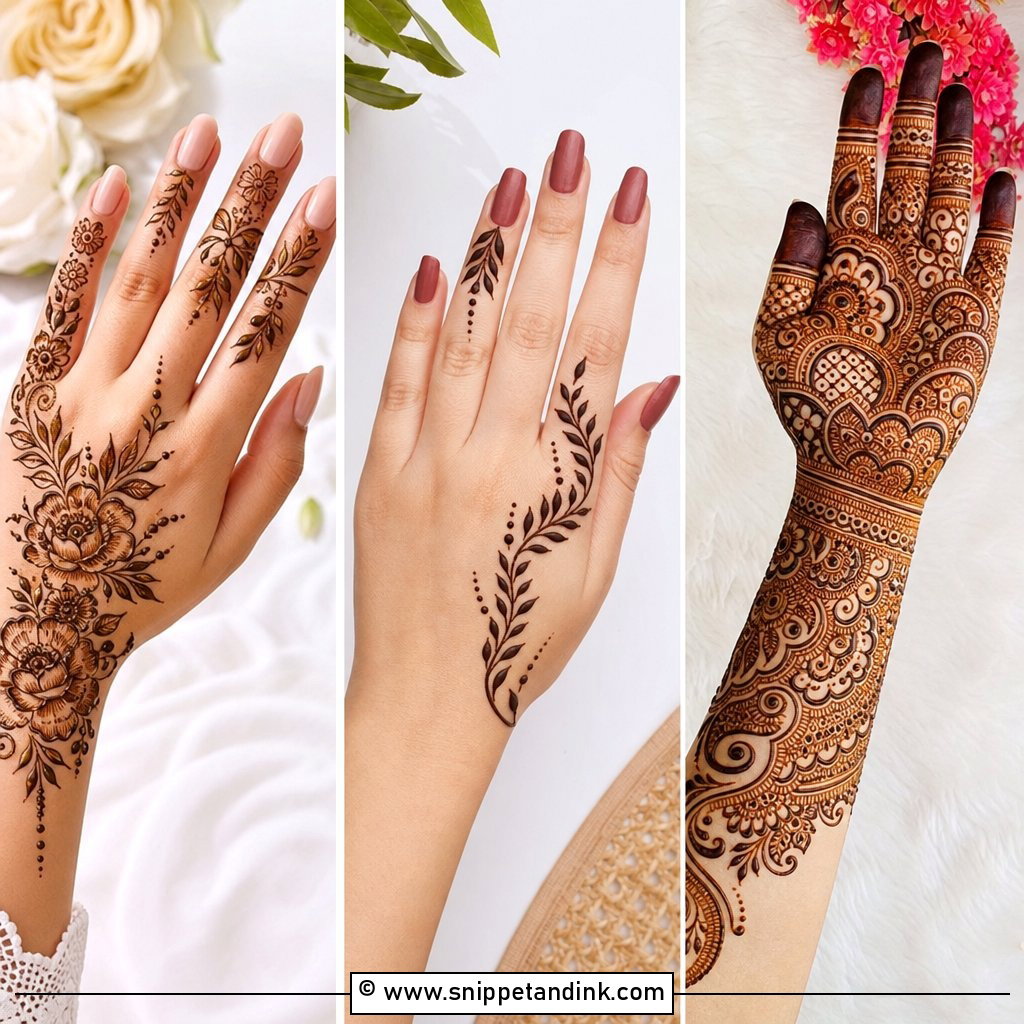
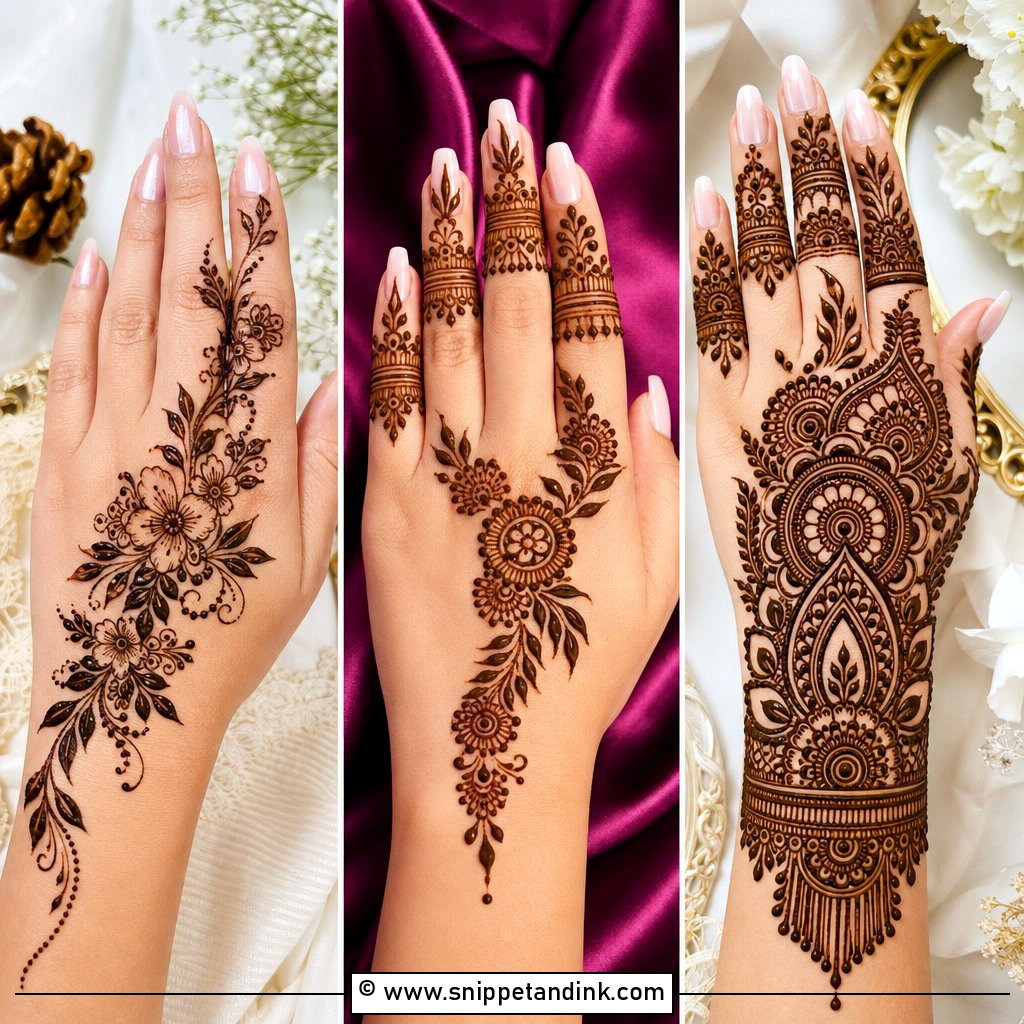
Modern mehndi relies on placement: finger rings, negative space, half-hand coverage, slim vines, geometric bands and one bold floral motif. The back hand suits it best because that’s what people see. A wrist cuff, a chain detail and decorated fingertips make it a complete look. Resist adding more; overcrowding is what makes modern designs look dated.
26. Simple Peacock Mehndi Design
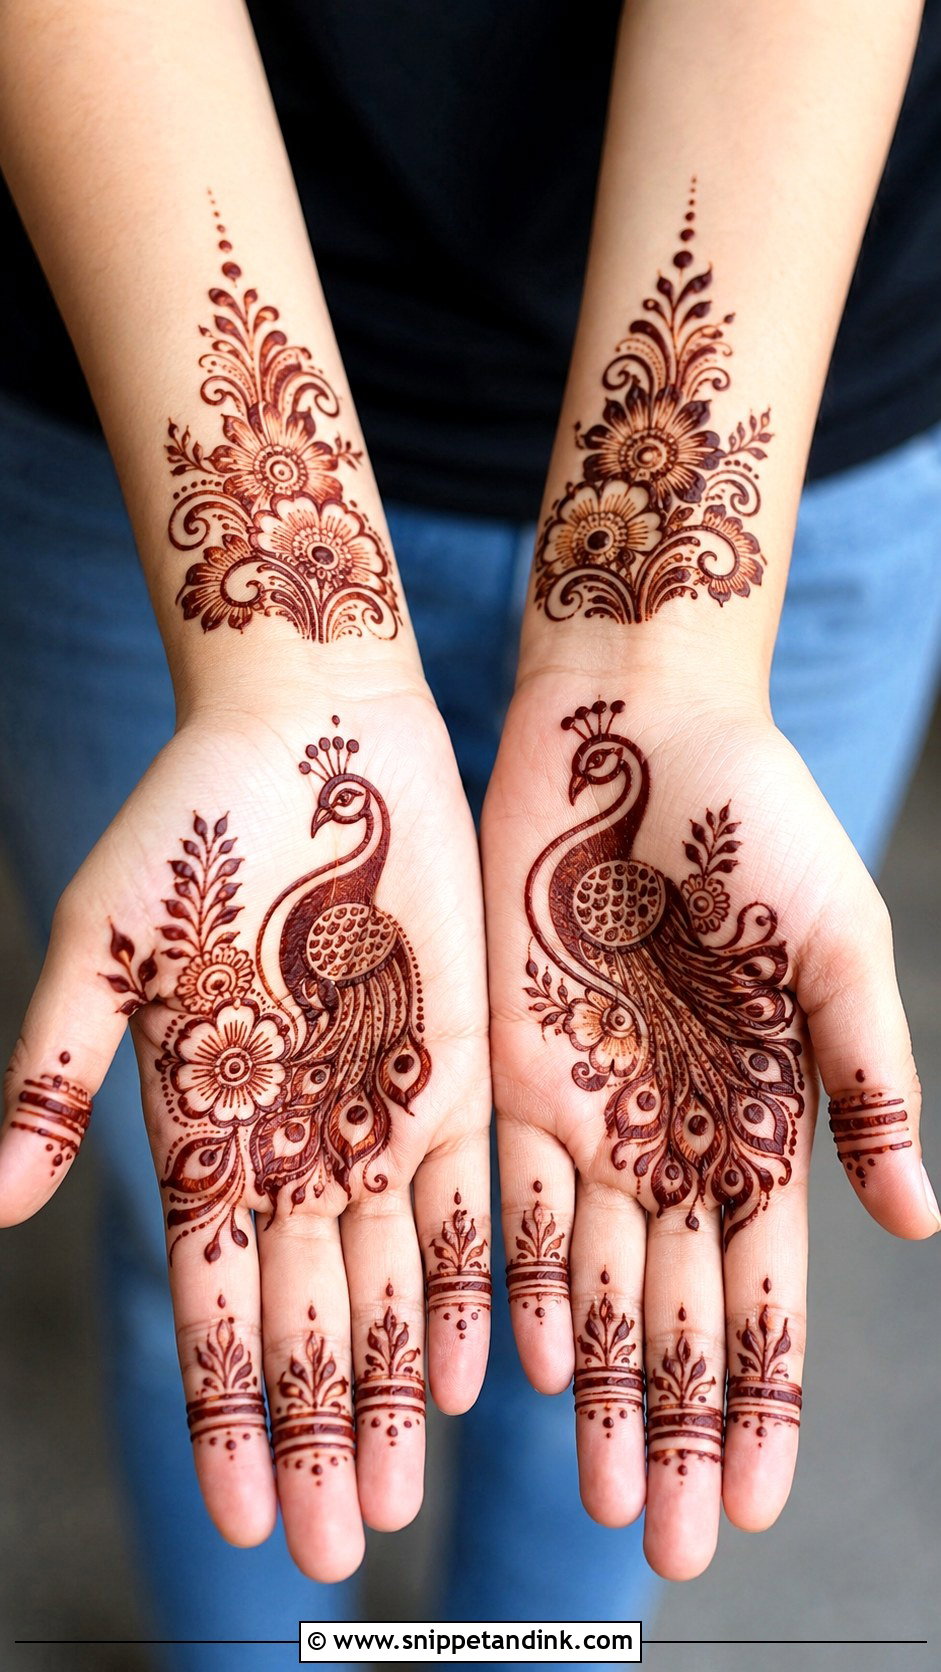
One peacock on the palm or back hand, with curved feathers, dots, flowers and leafy lines around it, and the rest kept light with finger bands and a small wrist border. Beginners should concentrate on two things: the neck curve and the fan of feathers. Get those right and the bird is recognizable even if the rest is loose. Keep the outline bold.
27. Easy Rose Mehndi Design
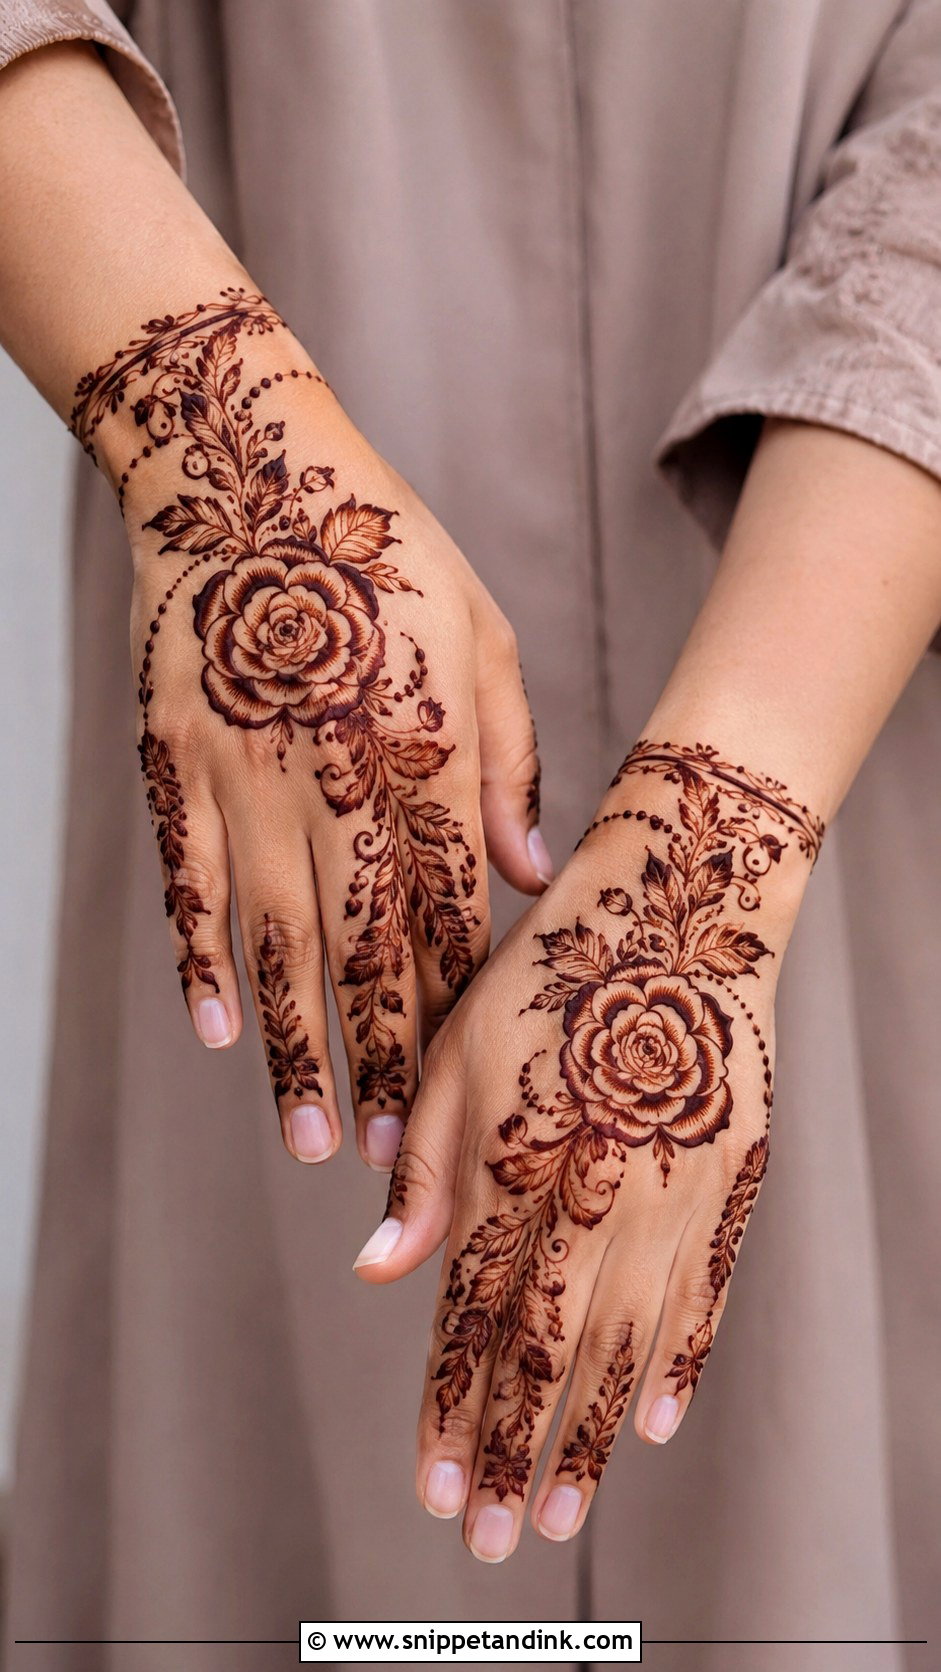
A single large rose on the back hand or palm with leaves, buds and curved vines around it, thin bands and leaf tips on the fingers. Draw the petals as loose curved layers; they don’t need symmetry. A little shading inside the petals adds depth, but go lightly, because heavy shading makes the rose stain as one dark blob.
28. Simple Vine Mehndi Design
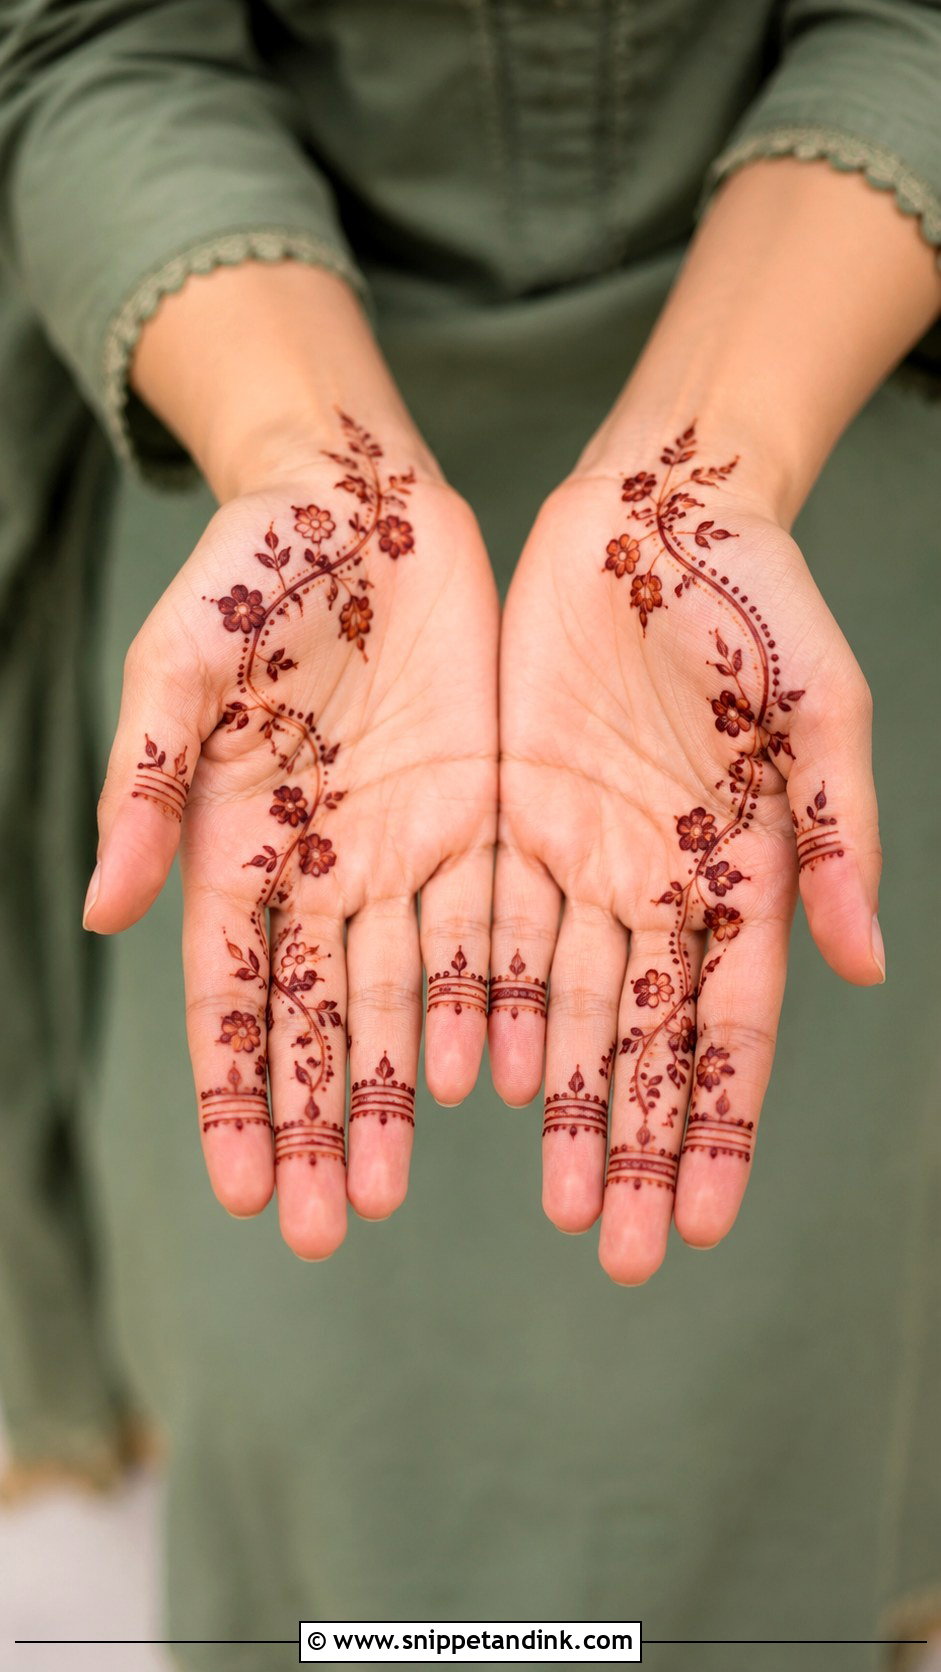
A vine is one curved line from wrist to finger, built up with leaves, tiny flowers, dots and curls along the way. Run it diagonally on the palm or back hand. If you want more coverage, add a second, smaller vine beside the first. You can stop at any point and it still looks finished, which is the reason I suggest it when time is uncertain.
29. Easy Ring Mehndi Design
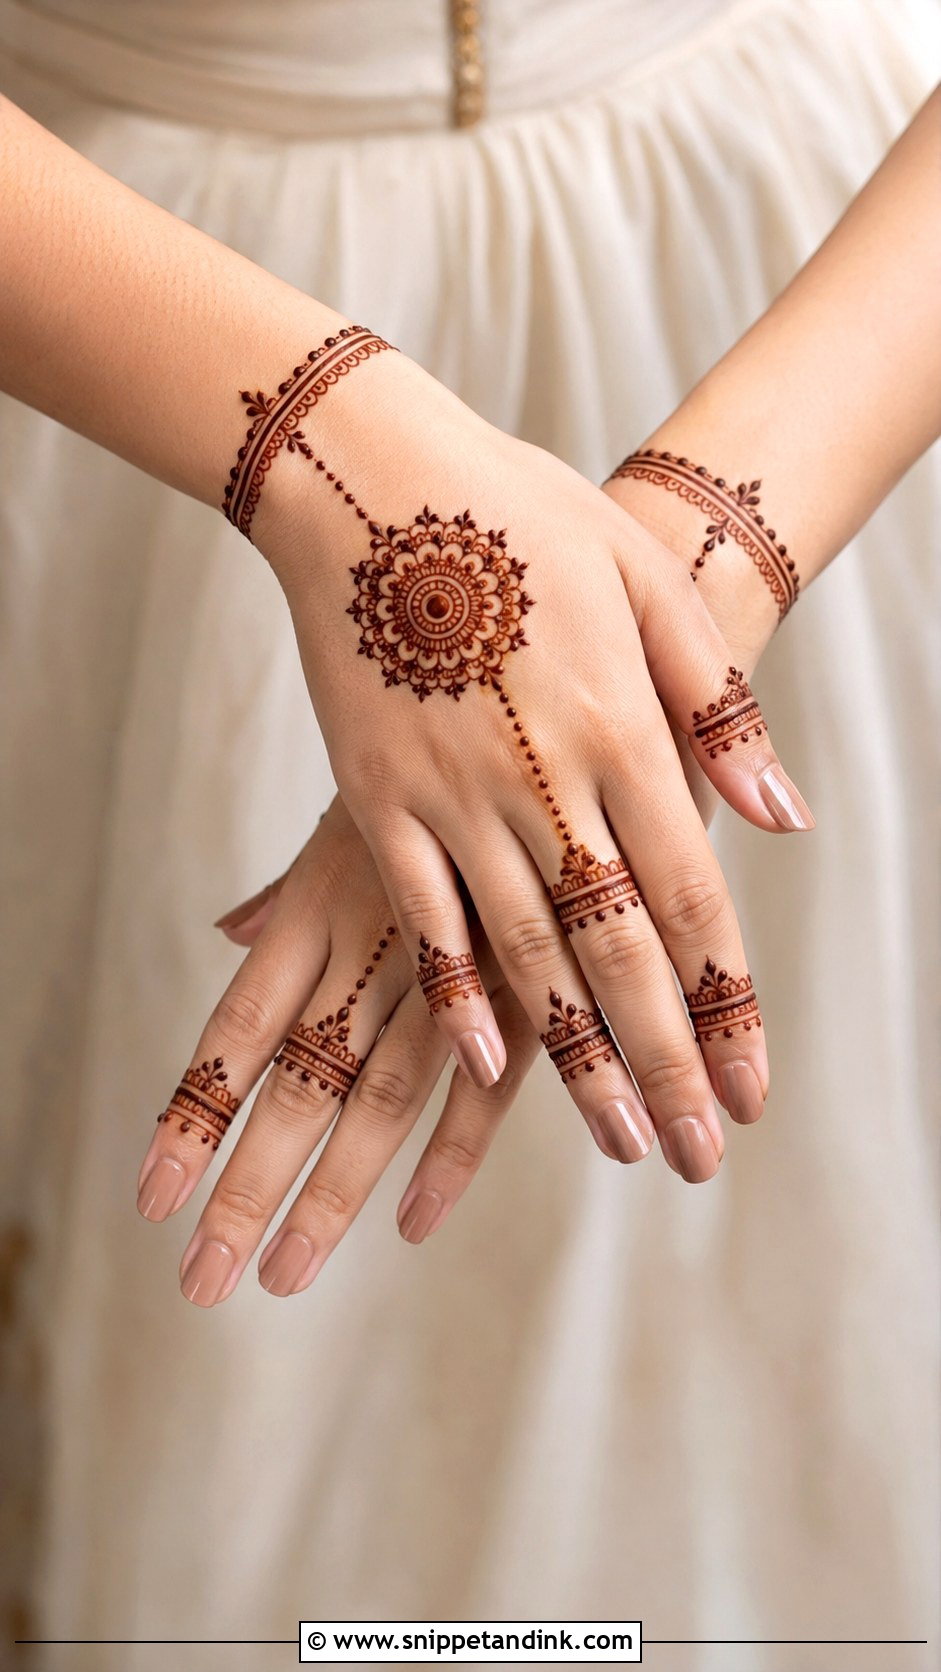
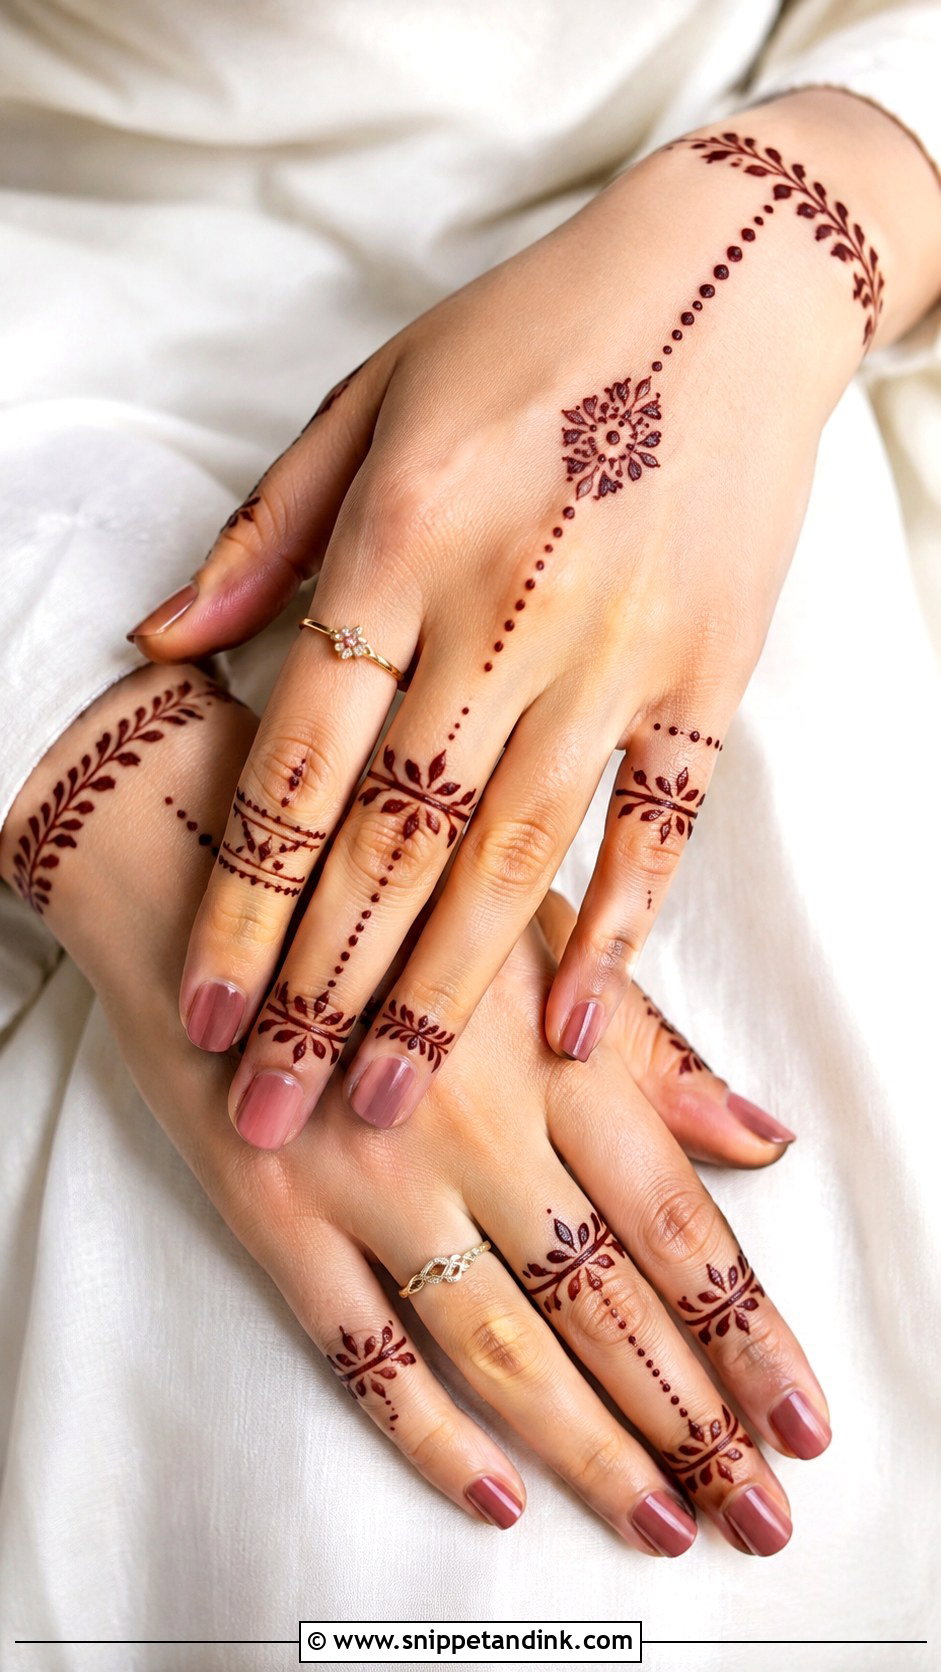
Ring designs decorate the fingers with bands and connect them to a small back-hand motif or wrist bracelet with dotted chains. Add a small flower or mandala in the center for balance. Thin lines and neat spacing keep the jewelry effect clear. I place each ring band between the finger joints, not on a knuckle, so the paste doesn’t crack as you move.
30. Simple Wrist Mehndi Design
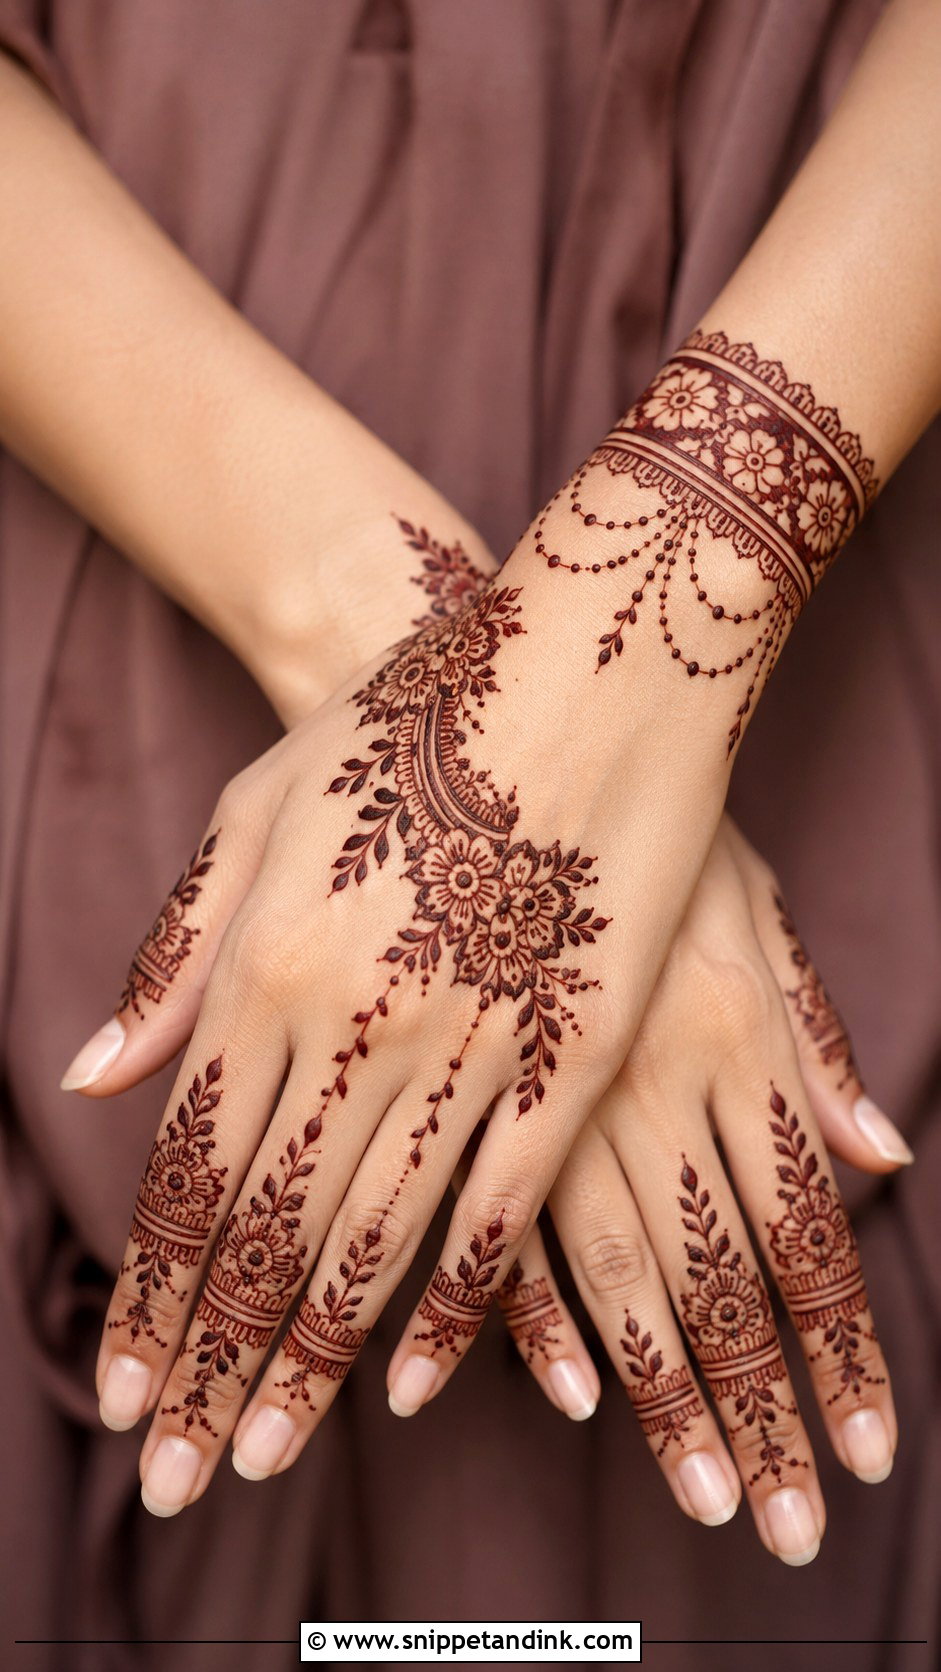
Wrist designs work like a bracelet or cuff: bands, flowers, leaves, dots and small hanging chains spilling a little onto the hand, with light finger detail or a small back-hand motif to complete it. Repeated horizontal lines are easy to keep even. A watch strap or tight bangles will rub this area, so after the stain develops I’d keep metal off it for a day or two.
31. Easy Moroccan Mehndi Design
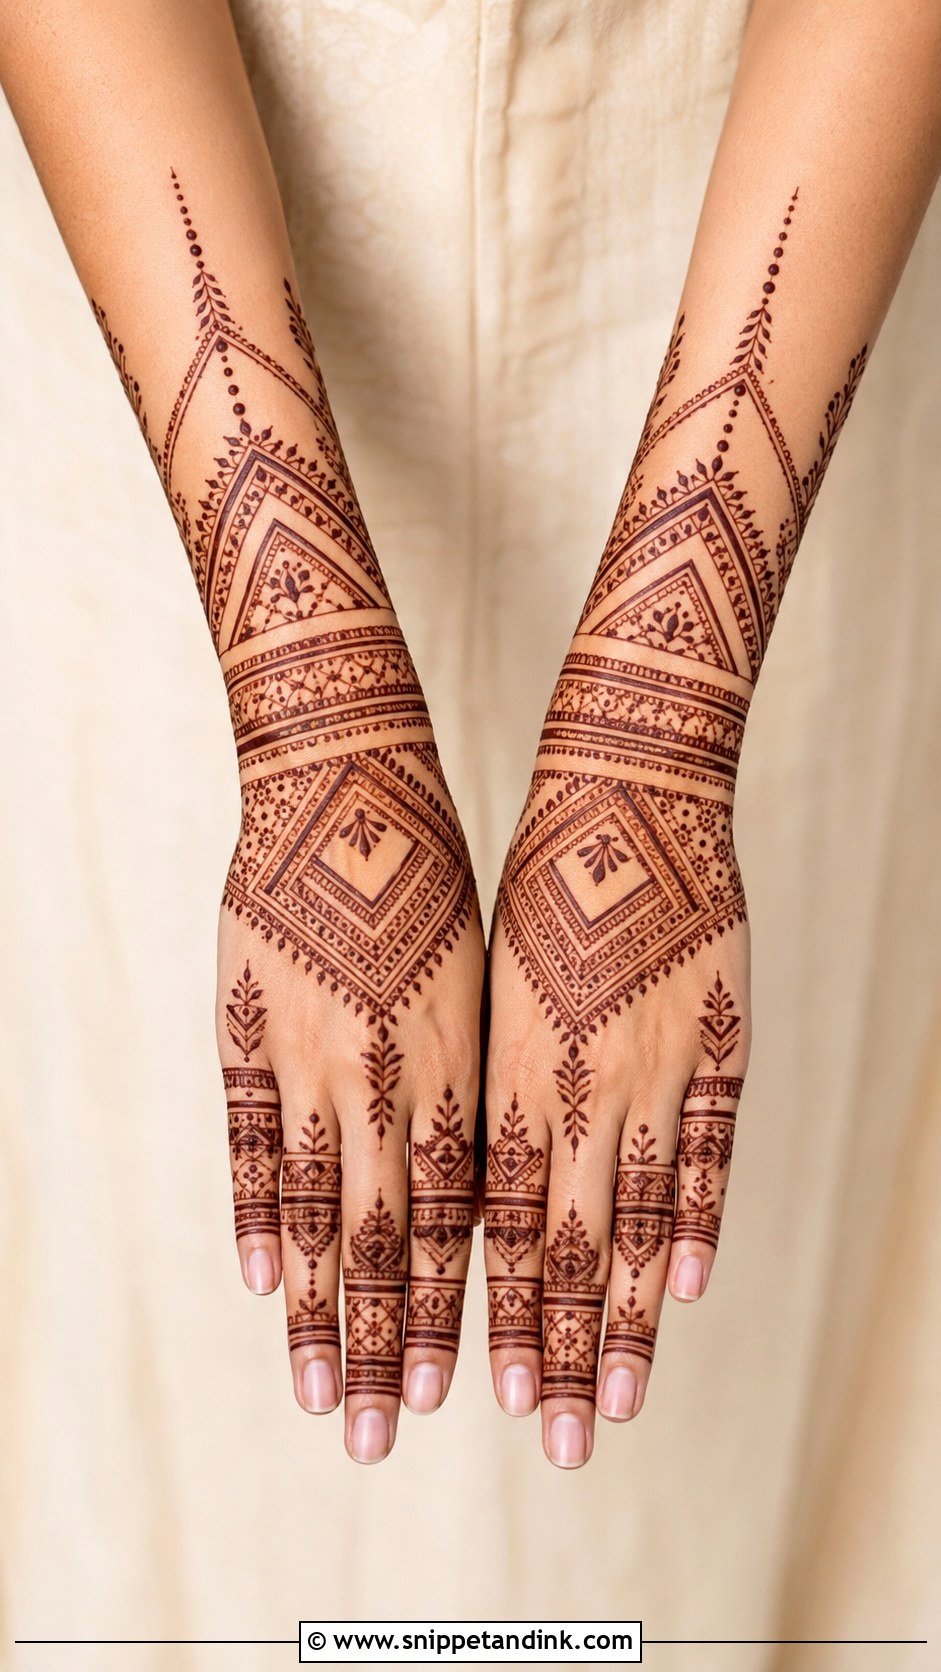
Geometric Moroccan-style work uses lines, diamonds, triangles, dots and structured bands, best on the back hand or from wrist to forearm. I start with a central diamond or grid and add smaller shapes around it, with matching line bands on the fingers. Steady strokes matter more here than anywhere else in this list, so I mark key points with dots before drawing the lines.
32. Simple Gulf Mehndi Design
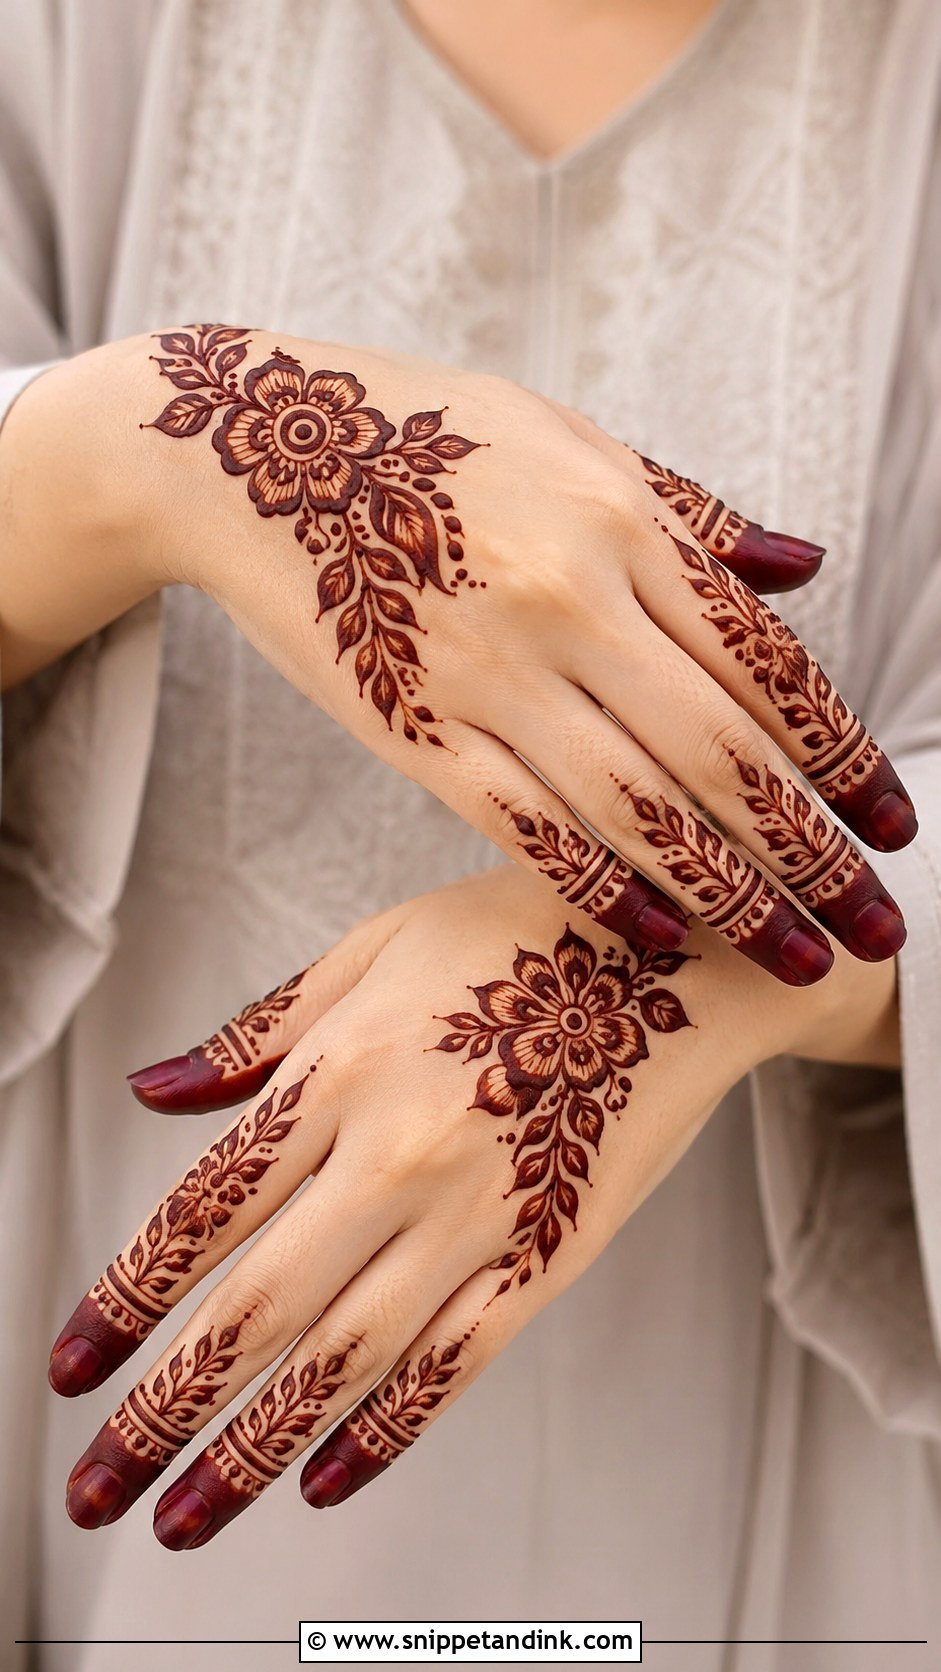
Khaleeji or Gulf-inspired mehndi is bold flowers, leafy trails and open spacing. I place large floral motifs on the back hand or palm and connect them with curved vines and dots, with fingertips lightly decorated or fully filled for contrast. Large flowers with minimal inner detail are quick and easy for beginners. The bare skin around each flower is what gives the style its drama.
33. Easy Shaded Mehndi Design
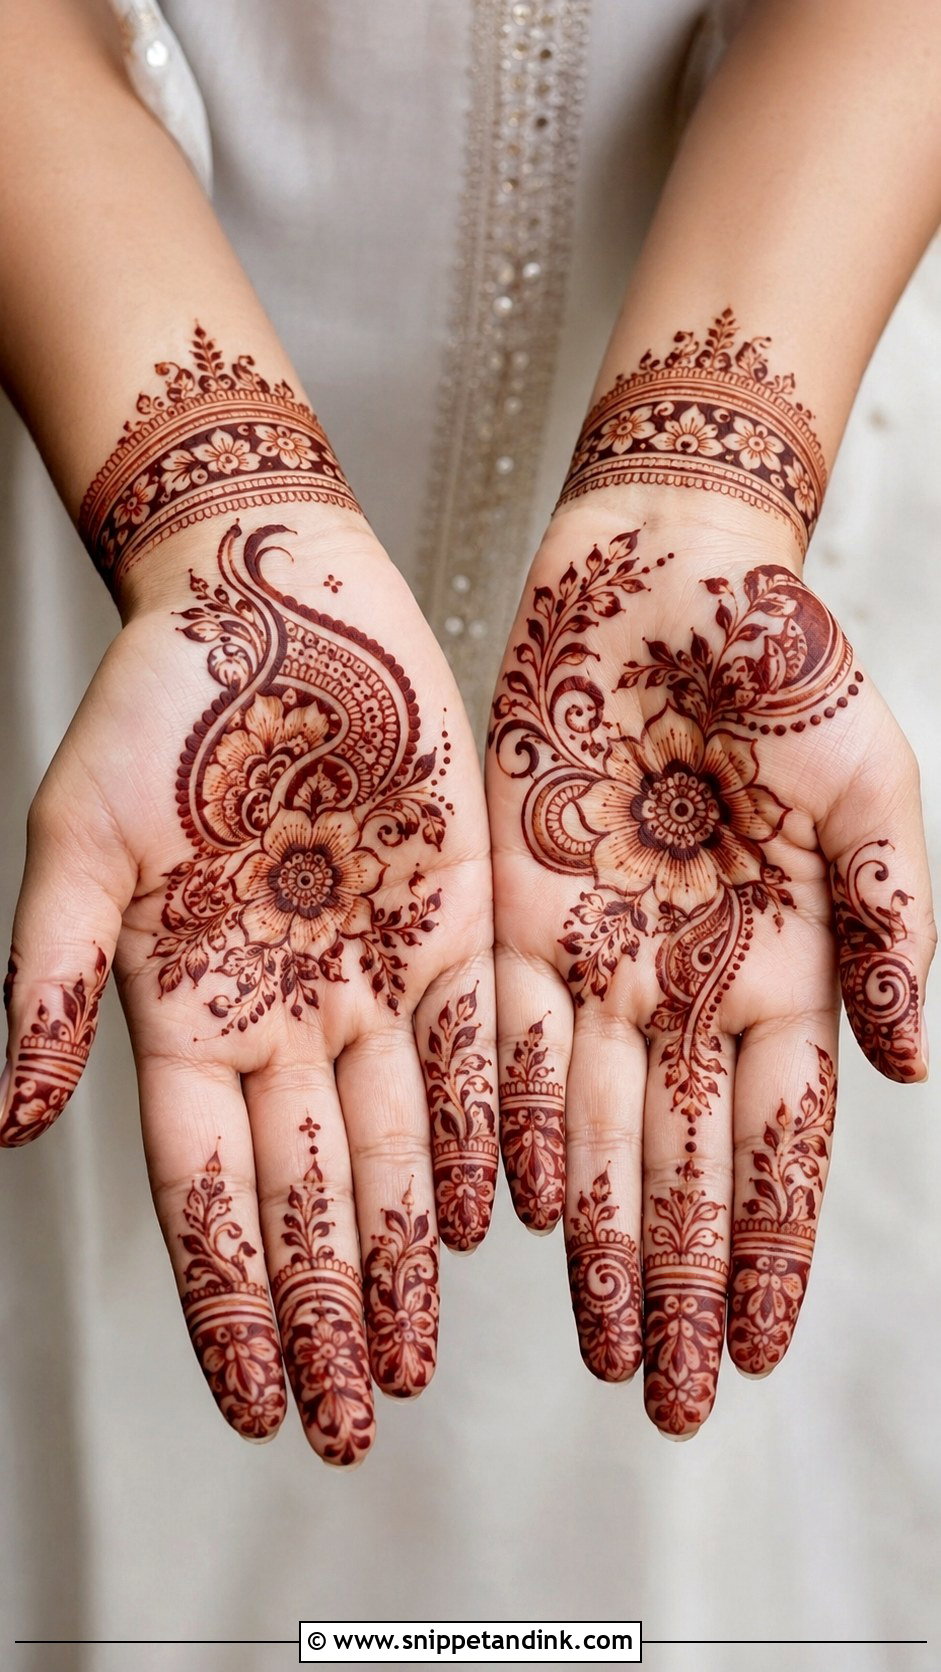
Shading makes a design look more detailed than it is. I draw bold flowers or paisleys and shade one side of each petal with fine lines, then keep everything else simple with vines, dots and finger bands. Light, controlled strokes; lift the pressure on the cone. Practice on large petals first, since shading small shapes tends to fill them solid.
34. Simple Forearm Mehndi Design
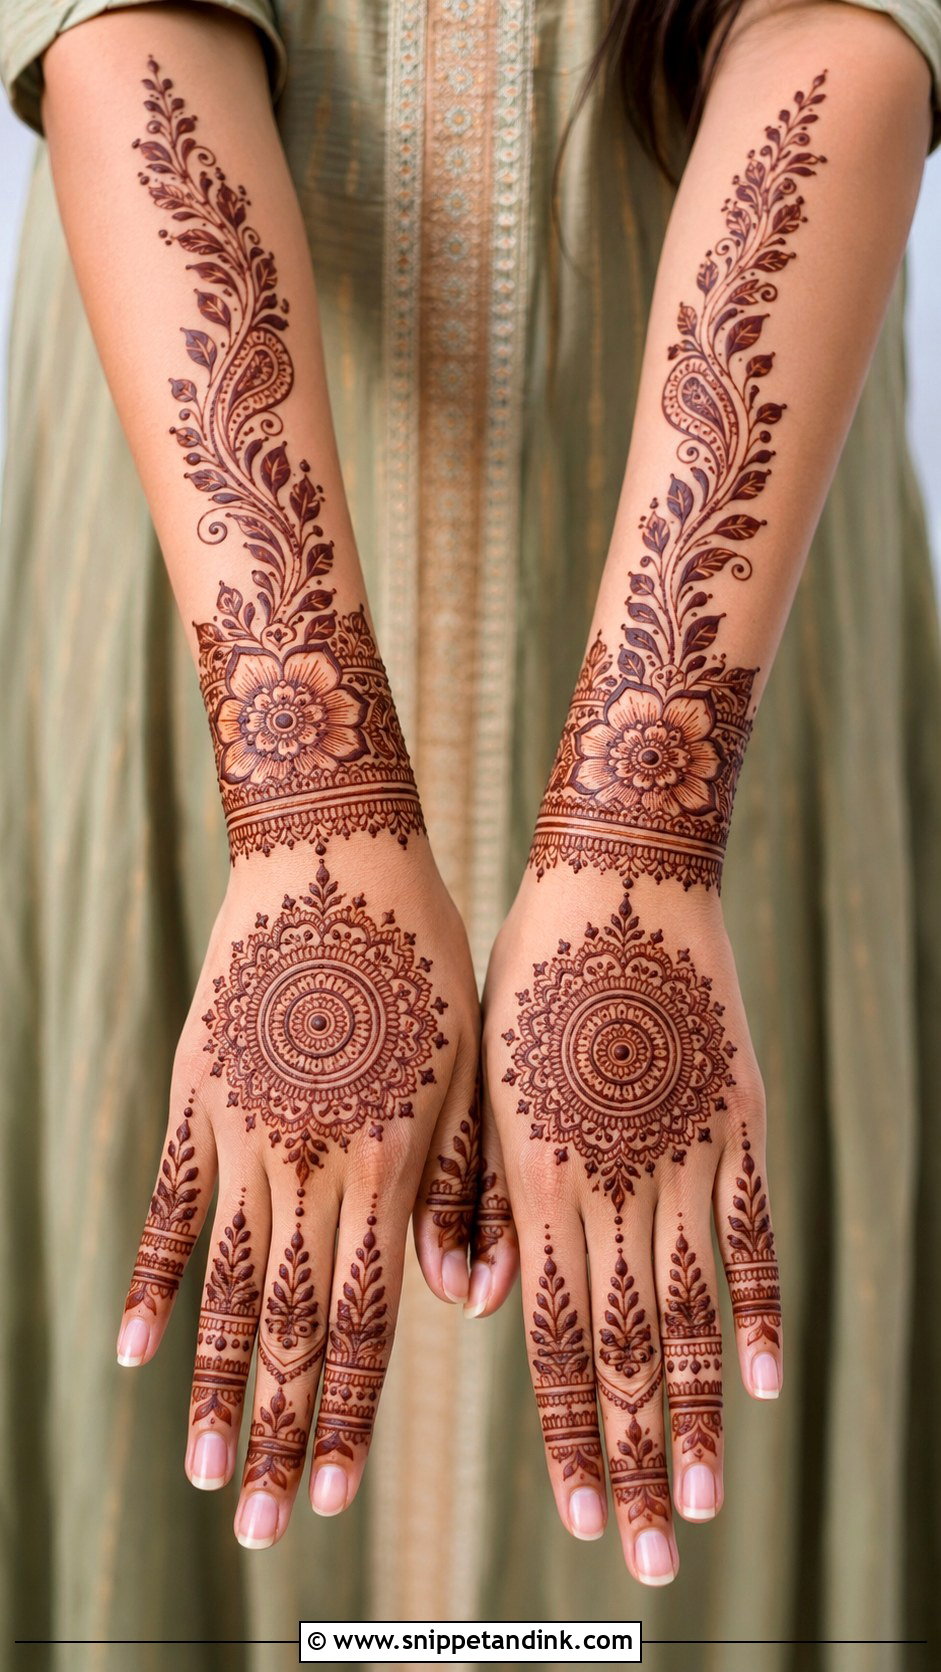
Forearm work extends the design from the wrist up the lower arm with bracelet bands, leafy vines, flowers, paisleys or mandala cuffs, while the hand stays light. The wrist becomes the bridge between the two, so I draw that band first and build both ways. Keep the forearm motifs spaced out. The forearm stains lighter than the palm, so bolder lines help there.
35. Easy Beginner Mehndi Design
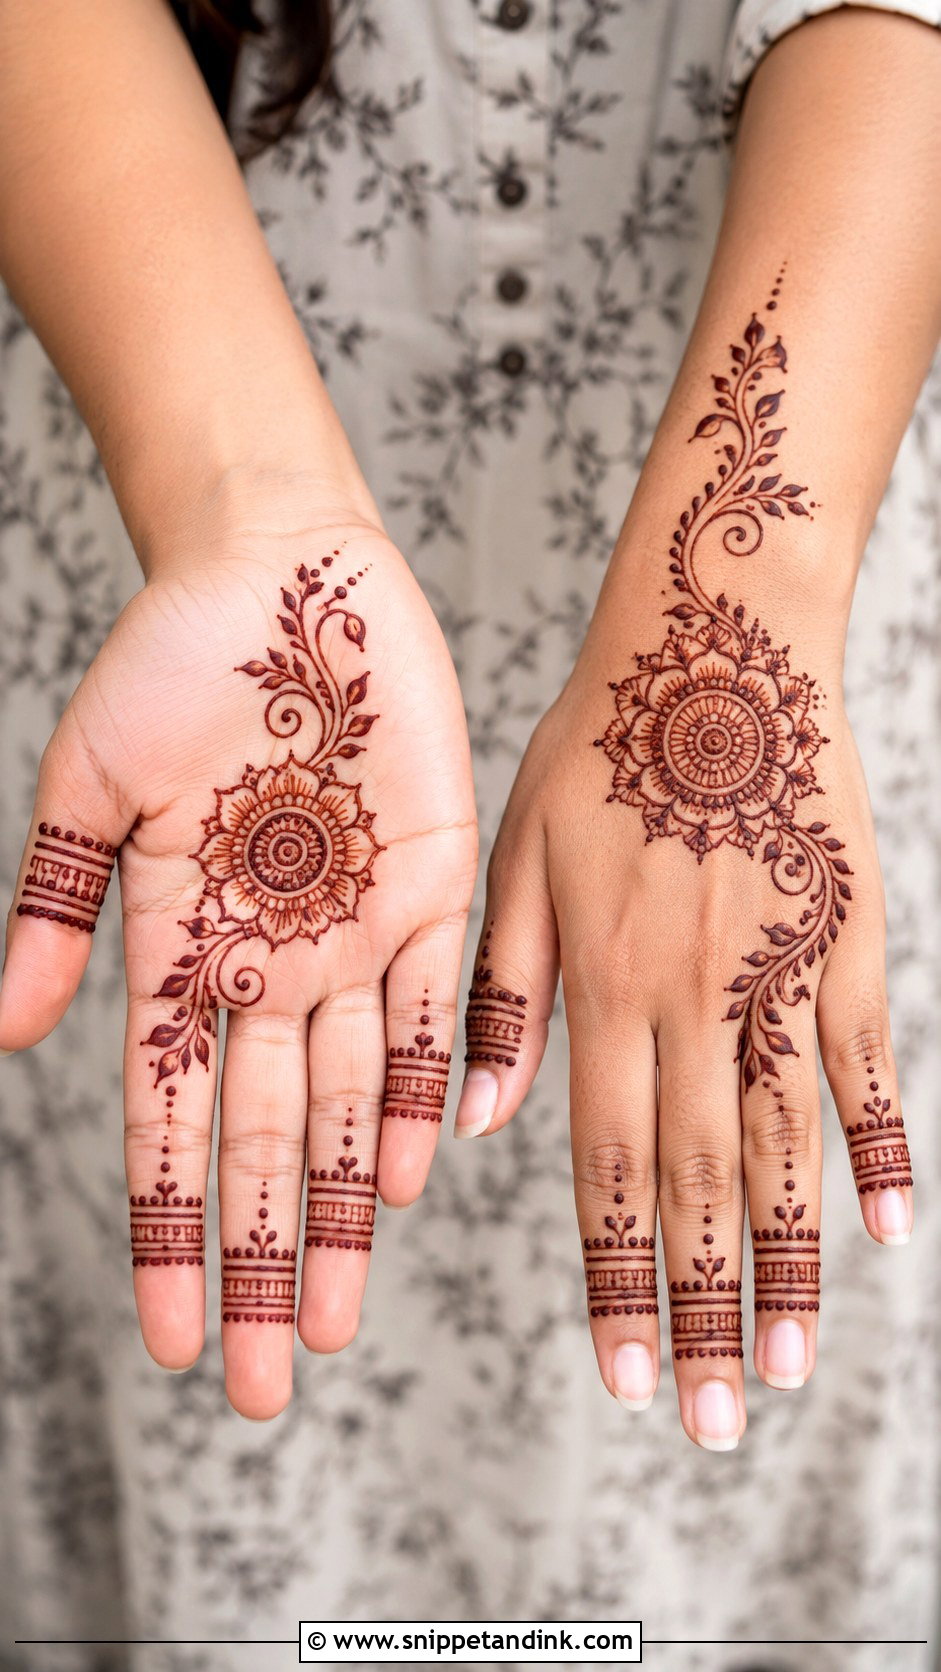
If you’ve never held a cone, start here. A small flower or mandala on the palm or back hand, one curved vine, a few leaves, dotted borders and basic finger bands. Avoid tiny detail at first and concentrate on clean outlines, even spacing and steady pressure. Once those feel natural, add flowers, paisleys or a bracelet to make it fuller.
Smudges, Blobs and Patchy Stains: Rescuing a Rushed Design
Quick mehndi means mistakes, and festival nights are full of elbows and children. Most of them can be fixed if you act at the right moment.
A wrong line while the paste is wet
Lift it straight away with a toothpick or a cotton bud dipped in a little water, wiping toward the empty side. Henna starts staining the moment it touches skin, so a faint ghost may remain. I usually hide it inside a leaf or a cluster of dots.
A blob from a sudden squeeze
Turn it into something: a dot, a petal, the center of a small flower. Trying to scrape a big blob tends to spread it.
Patchy color the next day
Lighter patches usually come from paste that flaked off early, a cold room or hand washing too soon. You can’t fix a stain after the fact, but you can stop it fading unevenly. Keep the hands warm, avoid soap and scrubbing for the first day, and rub in a little balm before washing. Remember that the stain is still developing for a day or two after removal. What looks pale orange at bedtime is often a much deeper brown by the time the celebrations start.
Plain Shapes, Placed Well, Are Festive Enough
Simple mehndi doesn’t have to look plain. Basic flowers, vines, dots, mandalas, rings and wrist bands make a complete design when the layout is right. The quickest designs share three things: open spacing, bold outlines and repeated shapes. They dry faster, suit more occasions and are easier to practice at home. Arabic trails, Indian mandalas, finger-only work or a modern bracelet can each be done in the time you have, so pick by the hours available and the outfit, then keep the lines clean.
You'll Like These Ideas:


Leave a Reply