
The back of the hand is where I start every beginner. It’s flat, you can see what the cone is doing without twisting your wrist, and the result is on show the moment you lift your hand. These designs are also beginner-friendly for a practical reason: they’re built from open spacing, repeated strokes and shapes that hide a wobble, since a dot or a small leaf covers most slips. Each idea below covers the whole back hand, wrist to fingertips, rather than one motif floating in the middle. Some suit Eid or Diwali, some a mehndi night as a guest, and a few are easy enough for a school event or a quiet weekend of practice.
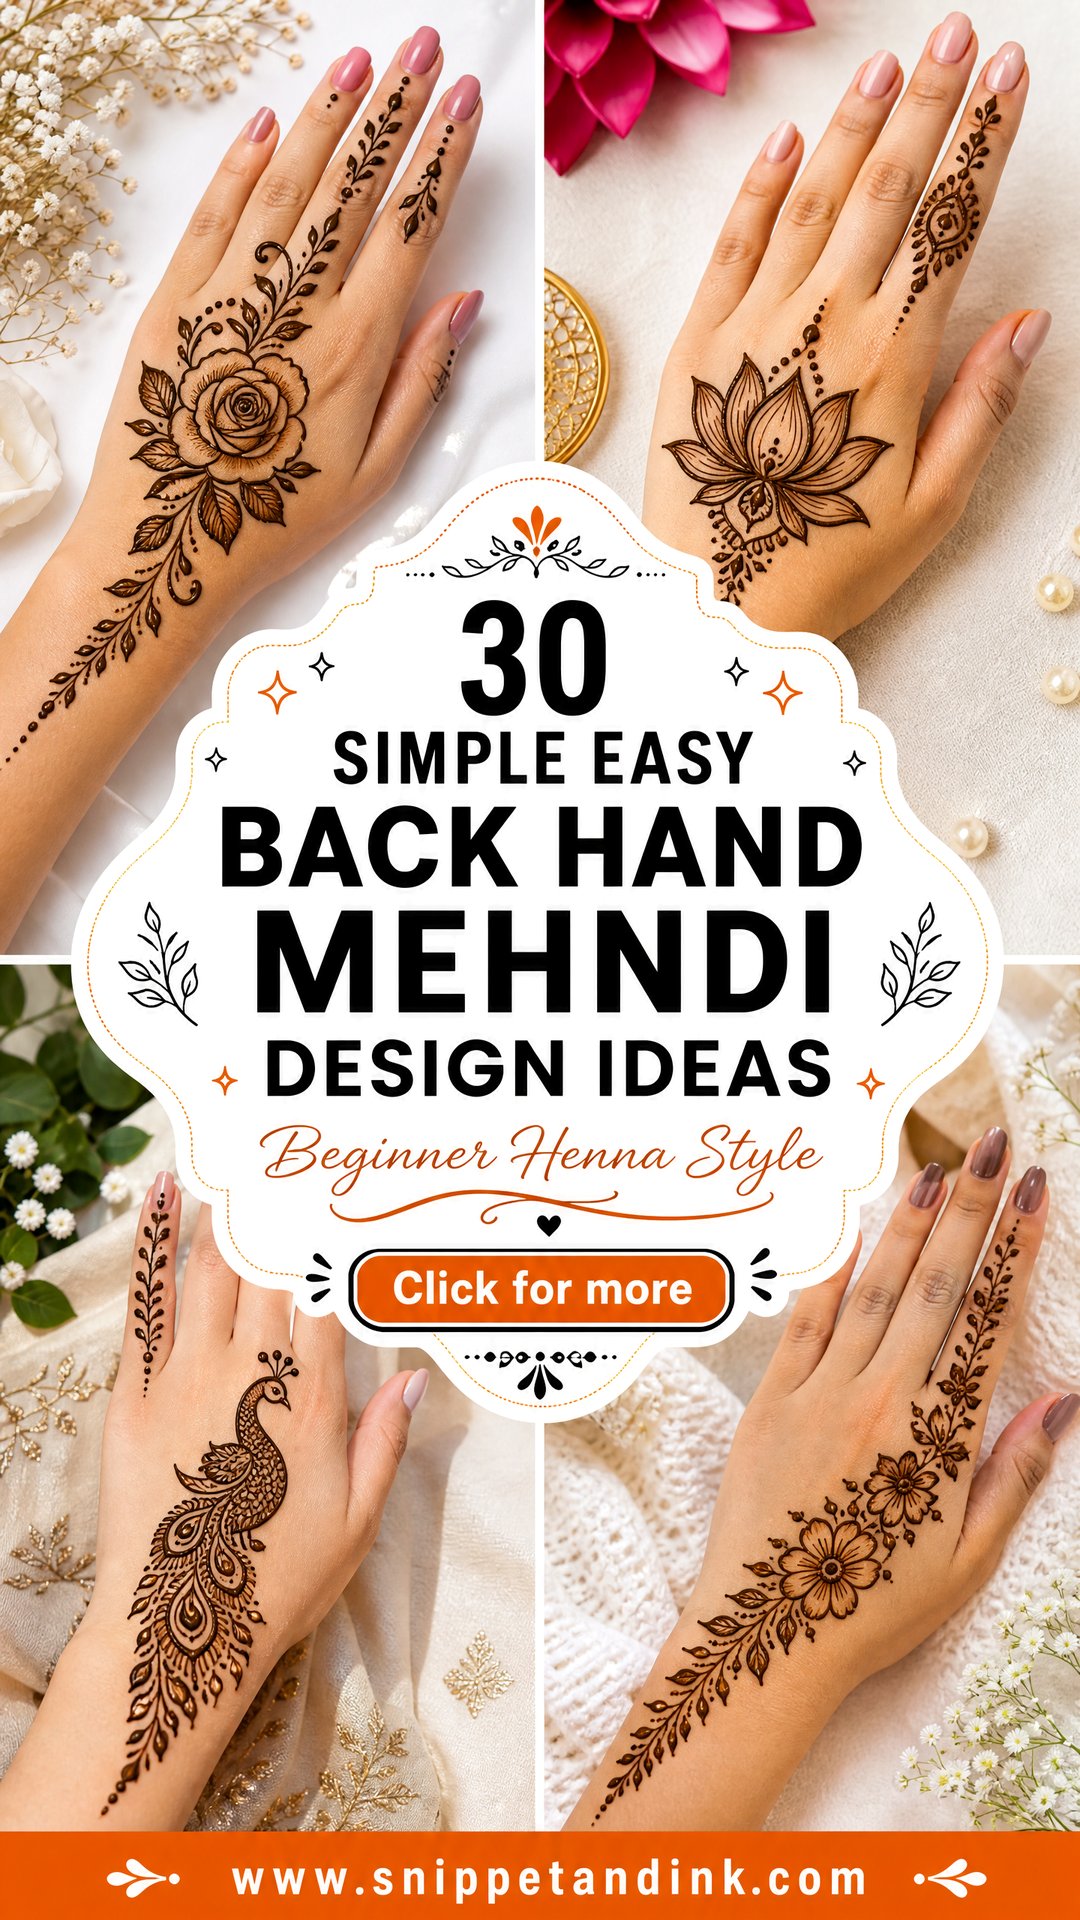
Mapping the Back of the Hand Before the Cone Touches Skin
Most beginner designs that go wrong were never planned. Before I draw anything, I look at three landmarks: the wrist crease, the line of the knuckles and the direction the hand naturally slants when it rests on a table. A design that follows that slant looks deliberate even when the lines aren’t perfect.
- Decide where the focal point sits: dead centre for mandalas and tikkis, off to one side for Arabic and half designs.
- Choose which finger the design leads to. The index and middle fingers are the usual targets because they’re longest.
- Keep fine lines off the knuckle creases and the wrist bend, since they crack when you move.
- Draw the biggest shape first and work outward. Starting with edge details usually leaves a gap you can’t balance later.
Paste consistency matters as much as layout. Good henna paste flows like thick toothpaste, smooth and free of grit. If the cone lays down a flat ribbon, it’s too wet; if the line breaks into crumbs, it’s too dry. I snip the cone tip tiny for fine work, because you can always cut a little more off but you can’t make the hole smaller again. Right-handed beginners usually find the left hand easier to decorate first, so practise there.
1. Simple Floral Back Hand Mehndi Design
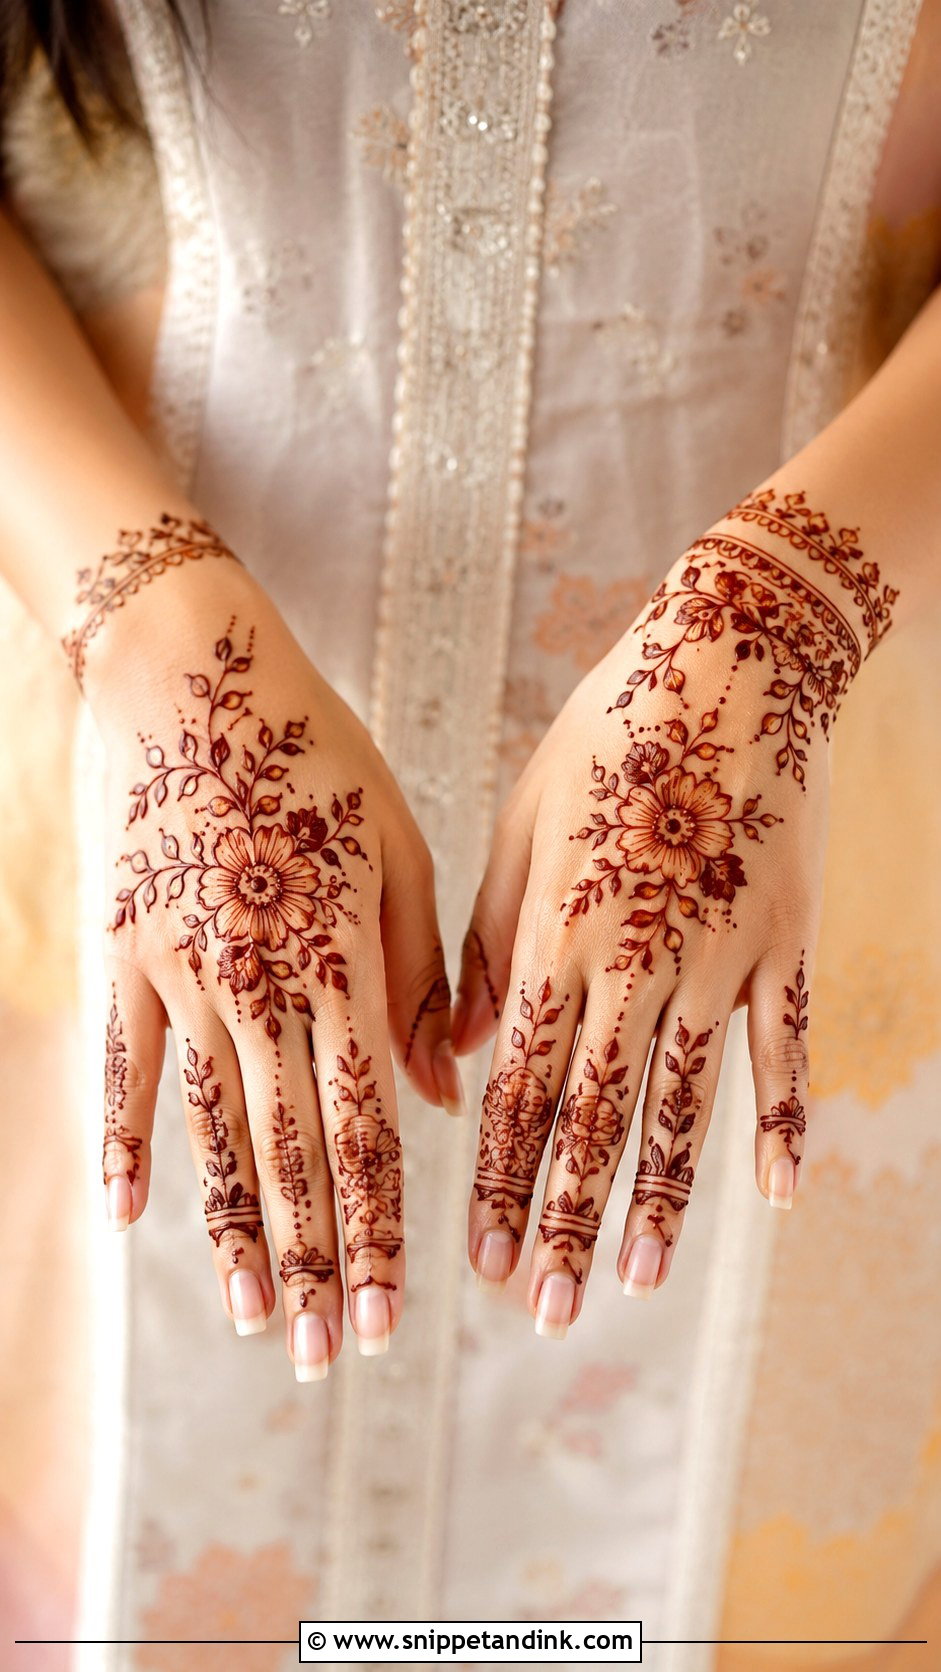
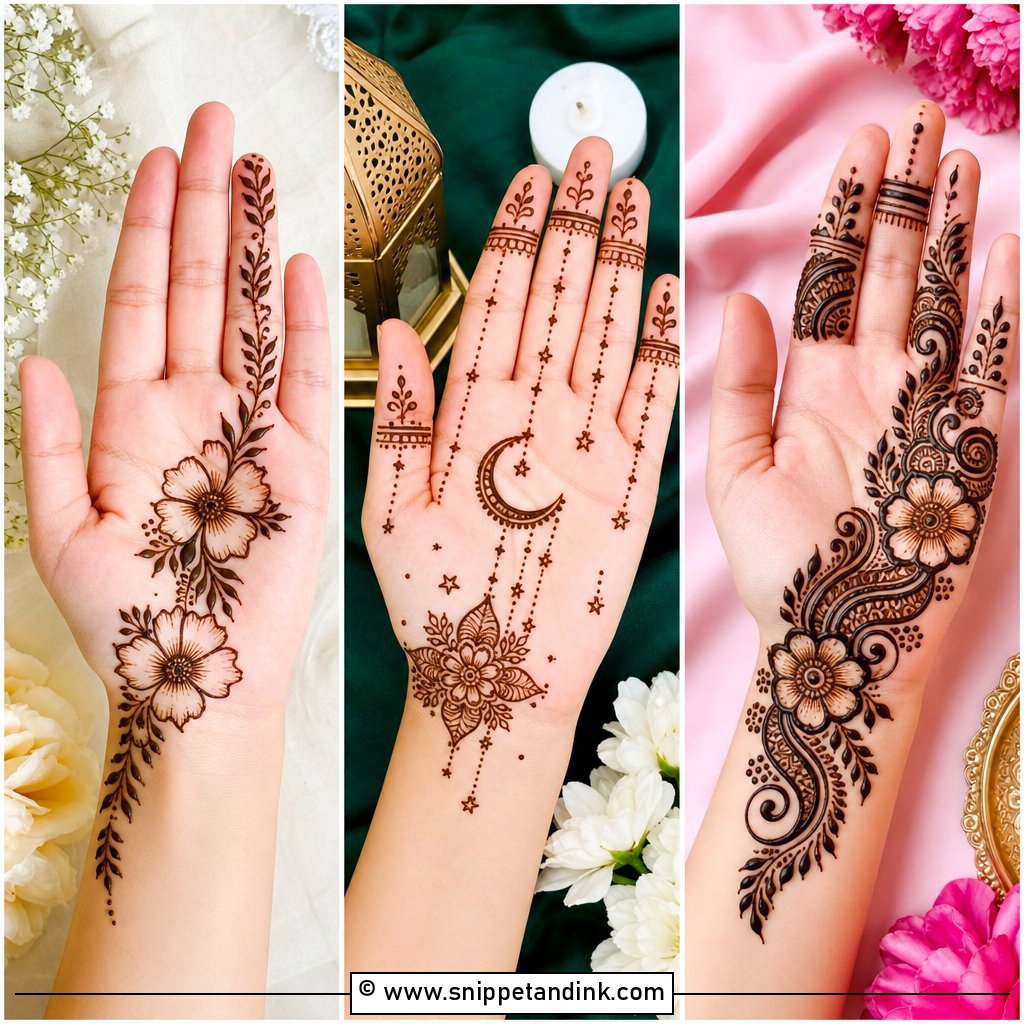
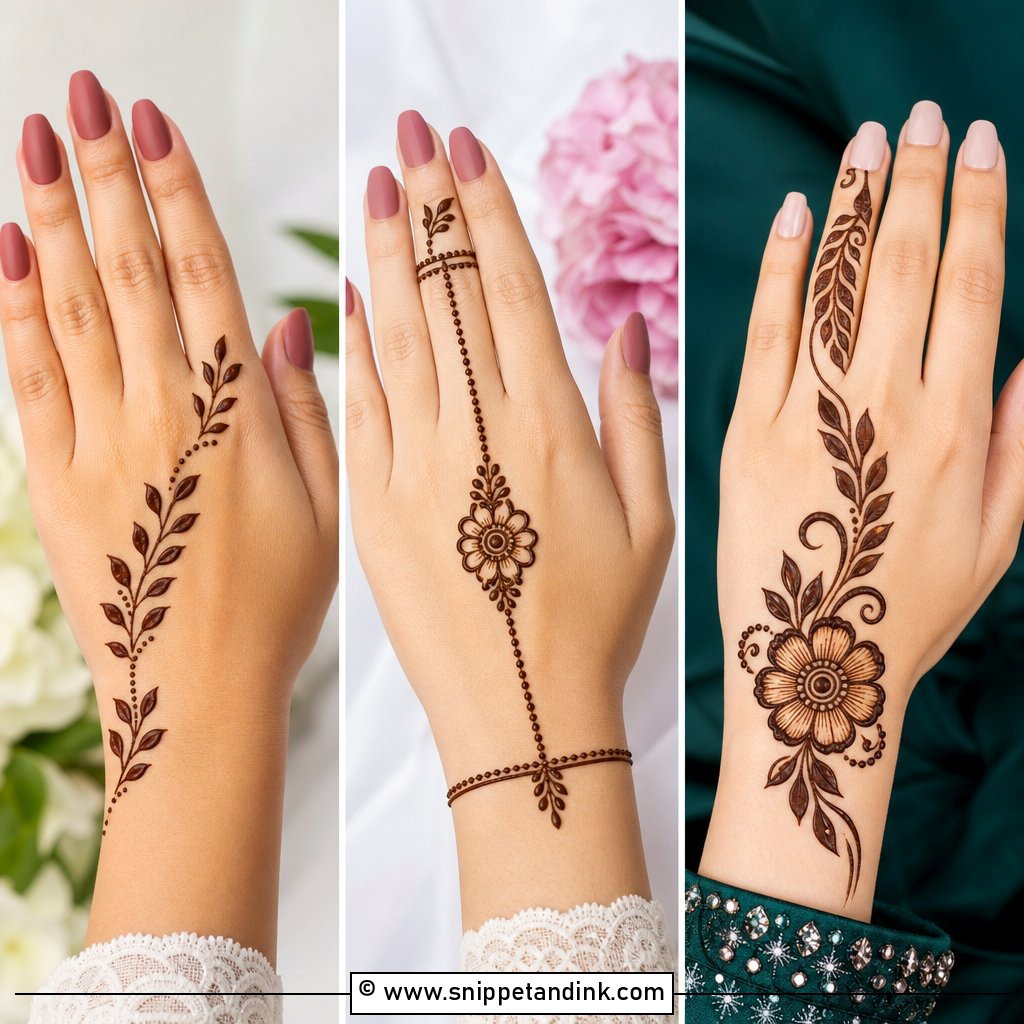
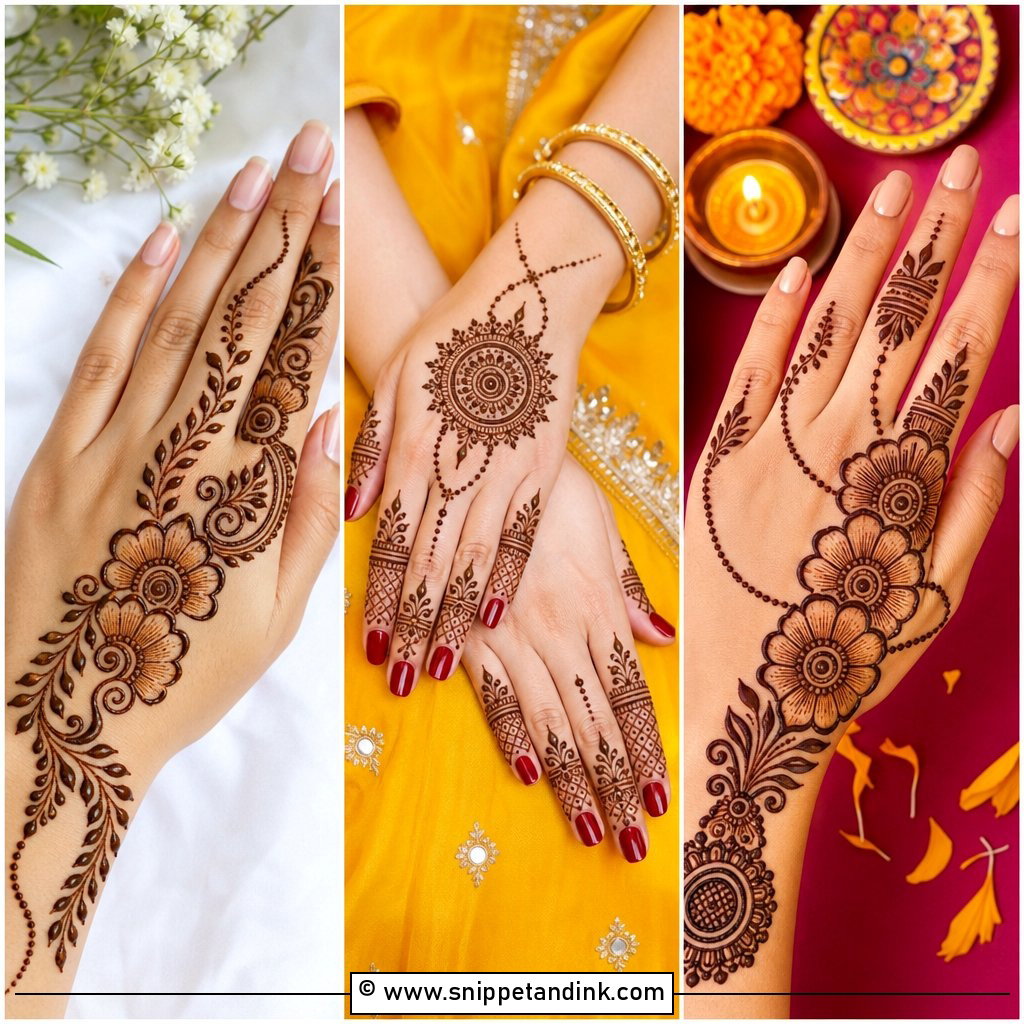
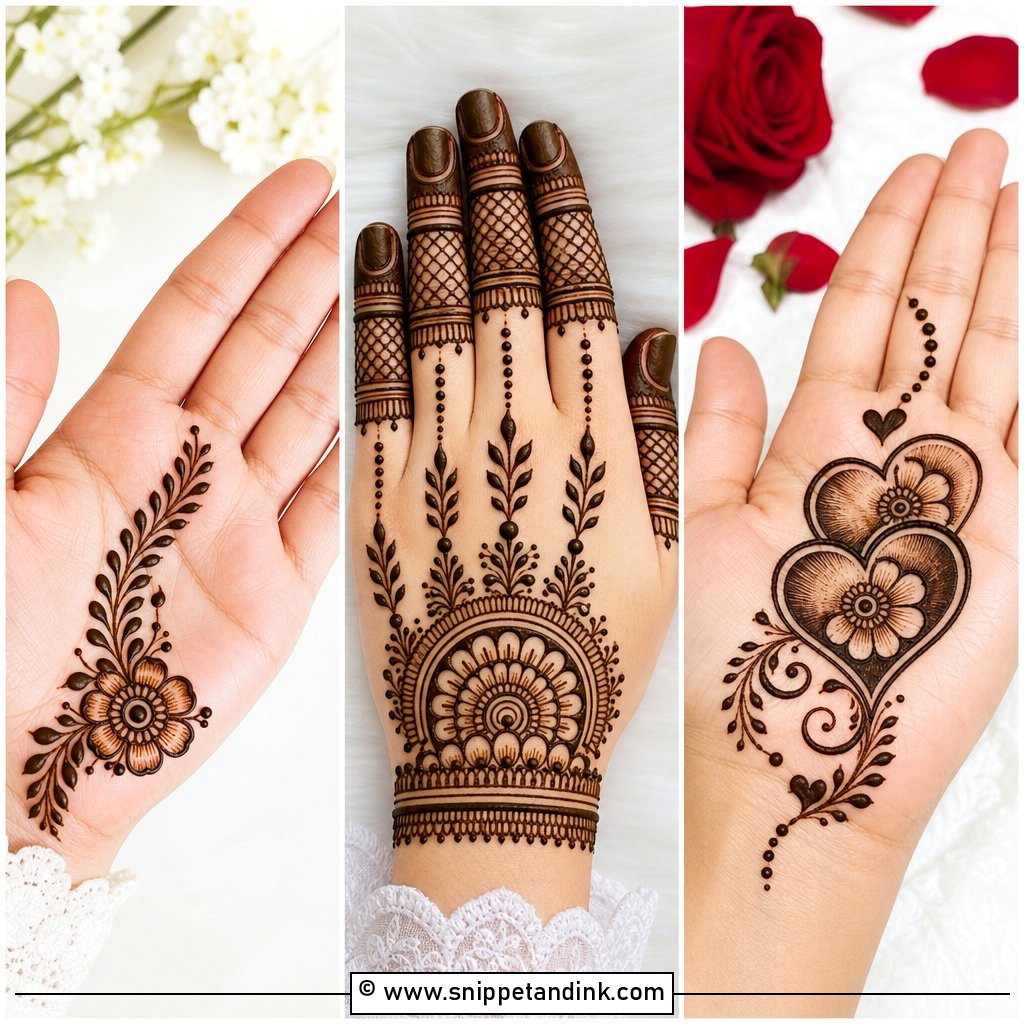
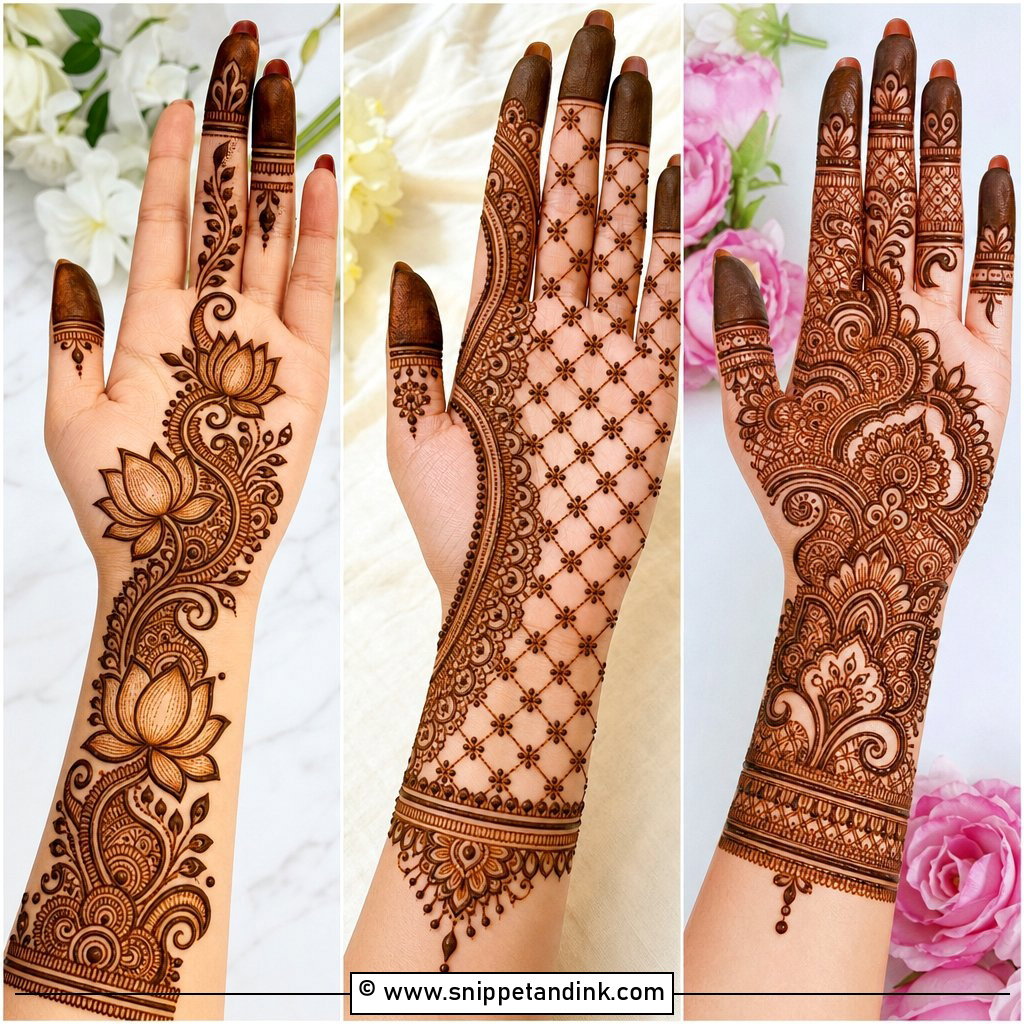
Flowers forgive more mistakes than any other motif, which is why I hand them to nervous first-timers. Put one medium bloom a little off centre, then send small leaves out toward the fingers and down toward the wrist. Keep the petals rounded and fairly bold. Very thin petals on the back of the hand often stain so pale they vanish by day two. If a space looks empty, a cluster of three dots settles it better than another flower, and a leafy band or a line ending in a dot is all each finger needs.
2. Easy Arabic Back Hand Mehndi Design
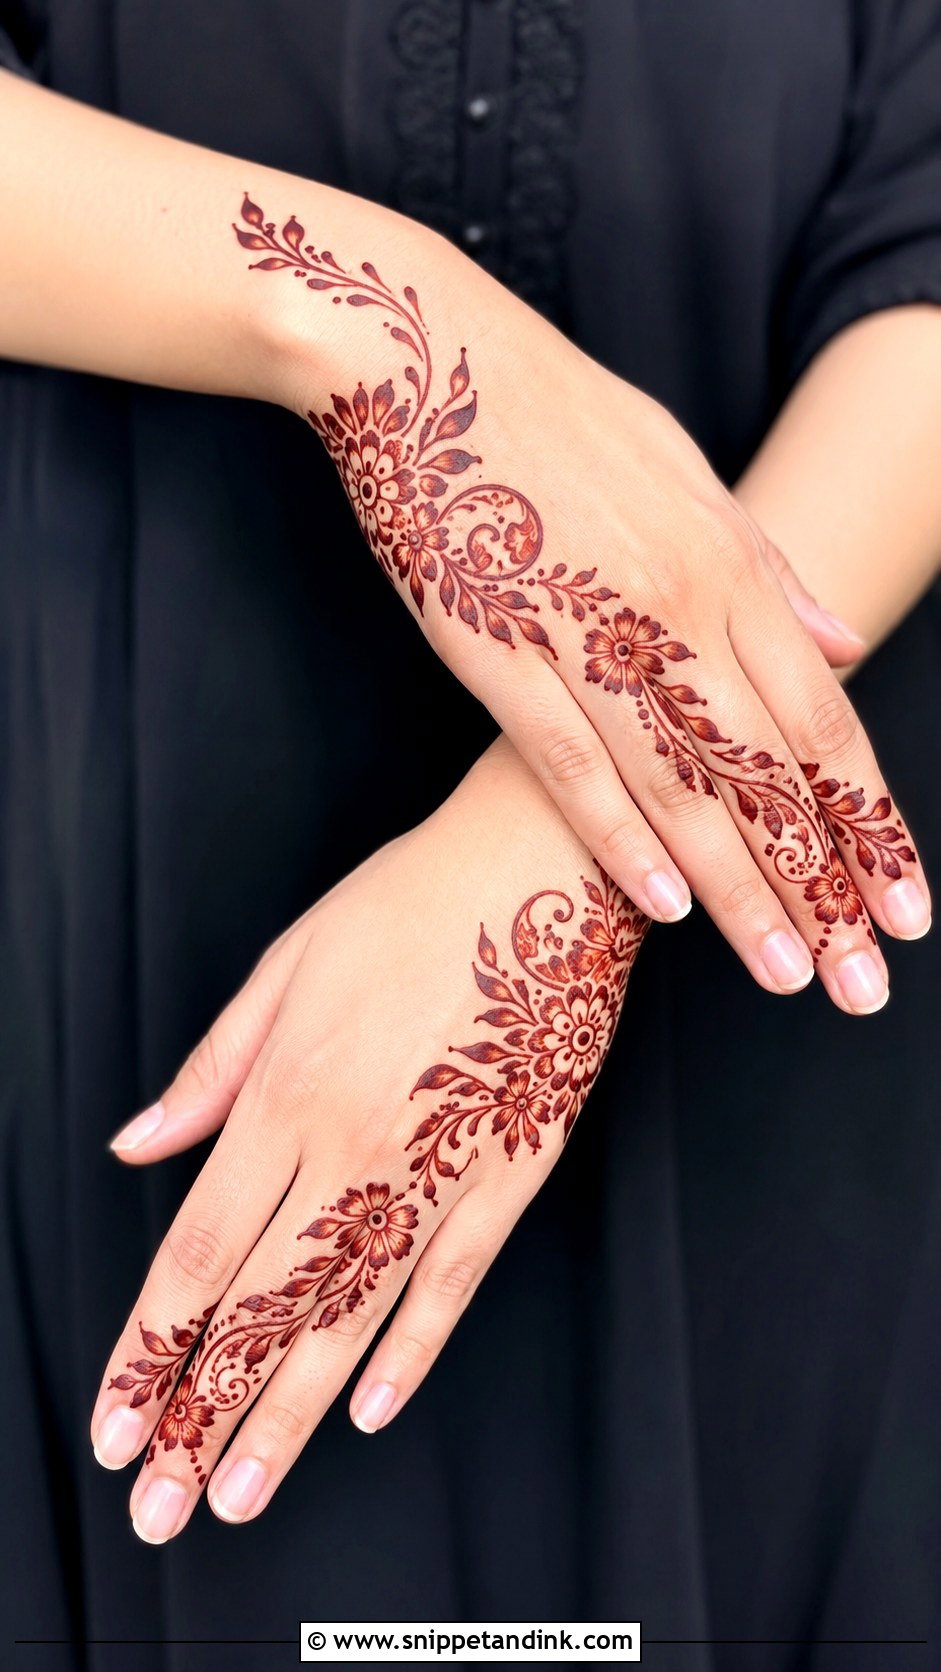
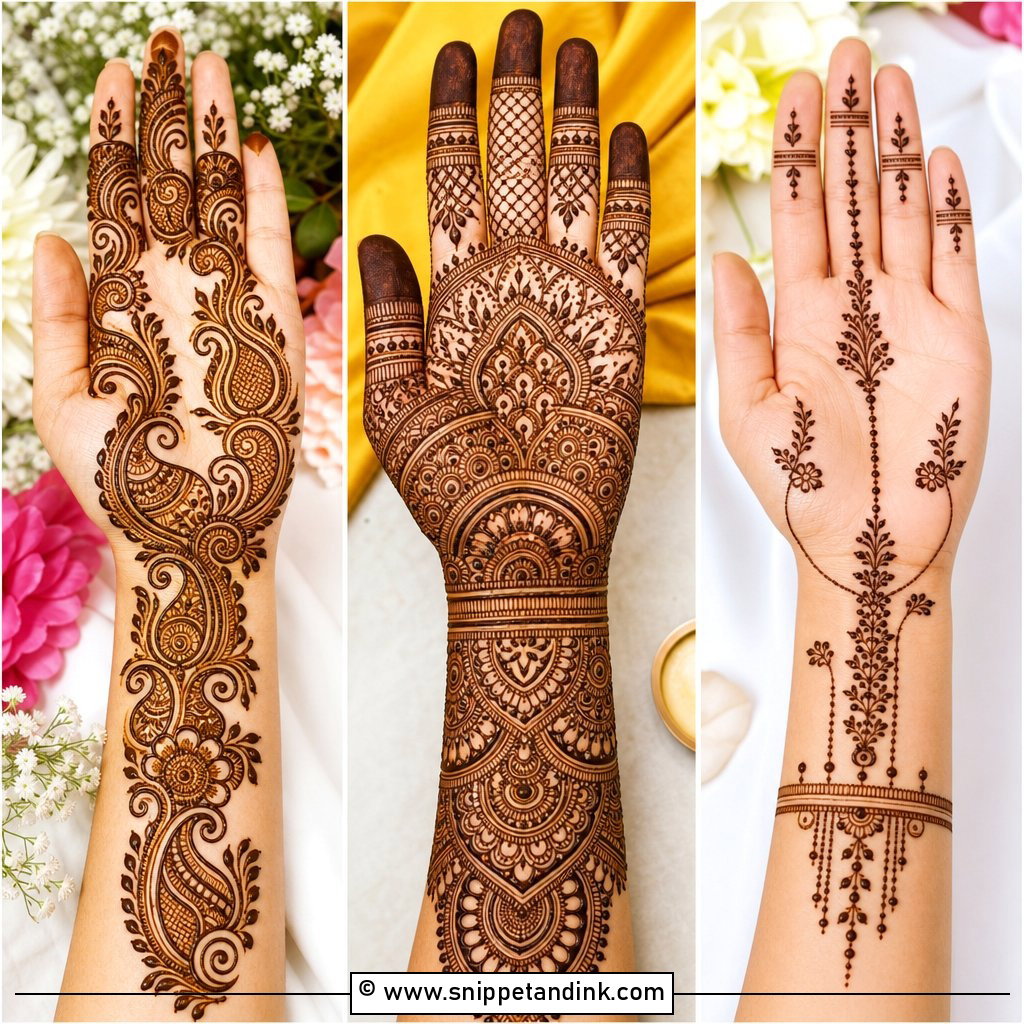
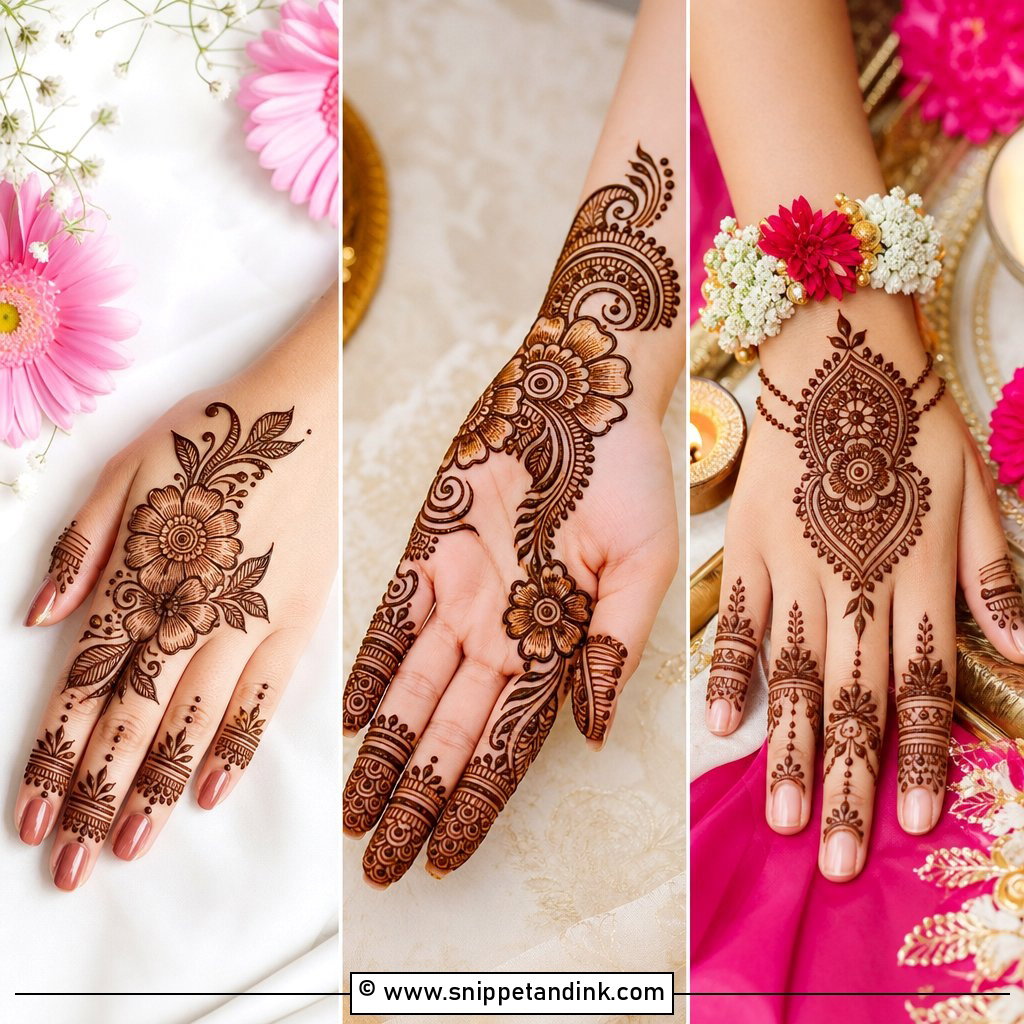
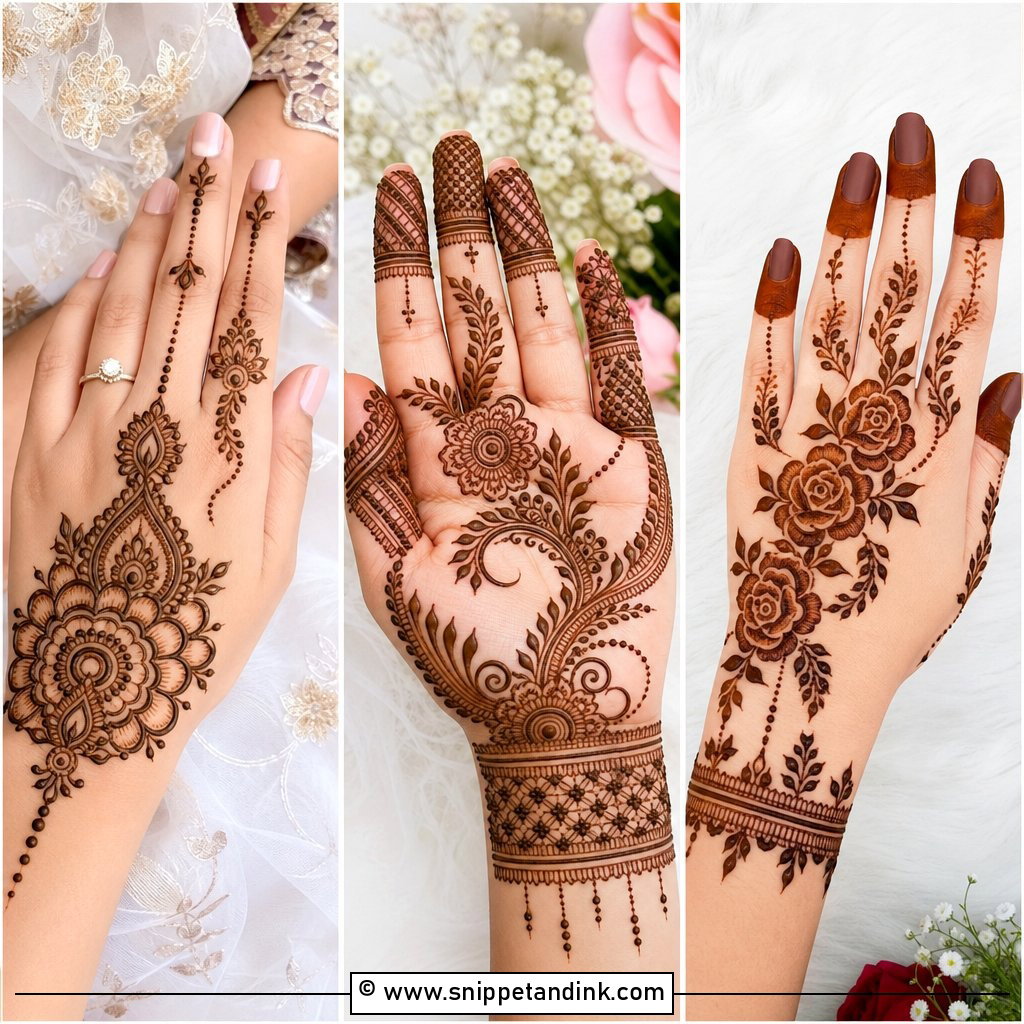
Arabic layouts run diagonally, from one side of the wrist up toward the index finger, and that slant is what makes a hand look longer. The motifs are bold flowers, curving vines and paisleys, but the real skill is in the gaps. I leave roughly a finger-width of bare skin between clusters, because Arabic work only reads as Arabic when the negative space is there. A little shading inside the petals adds depth if your lines are steady. Keep the fingers simple with a curved line and a couple of leaves on the ones the trail reaches. It’s quick enough to do on yourself the evening before a wedding you’re attending.
3. Back Hand Mandala Mehndi Design
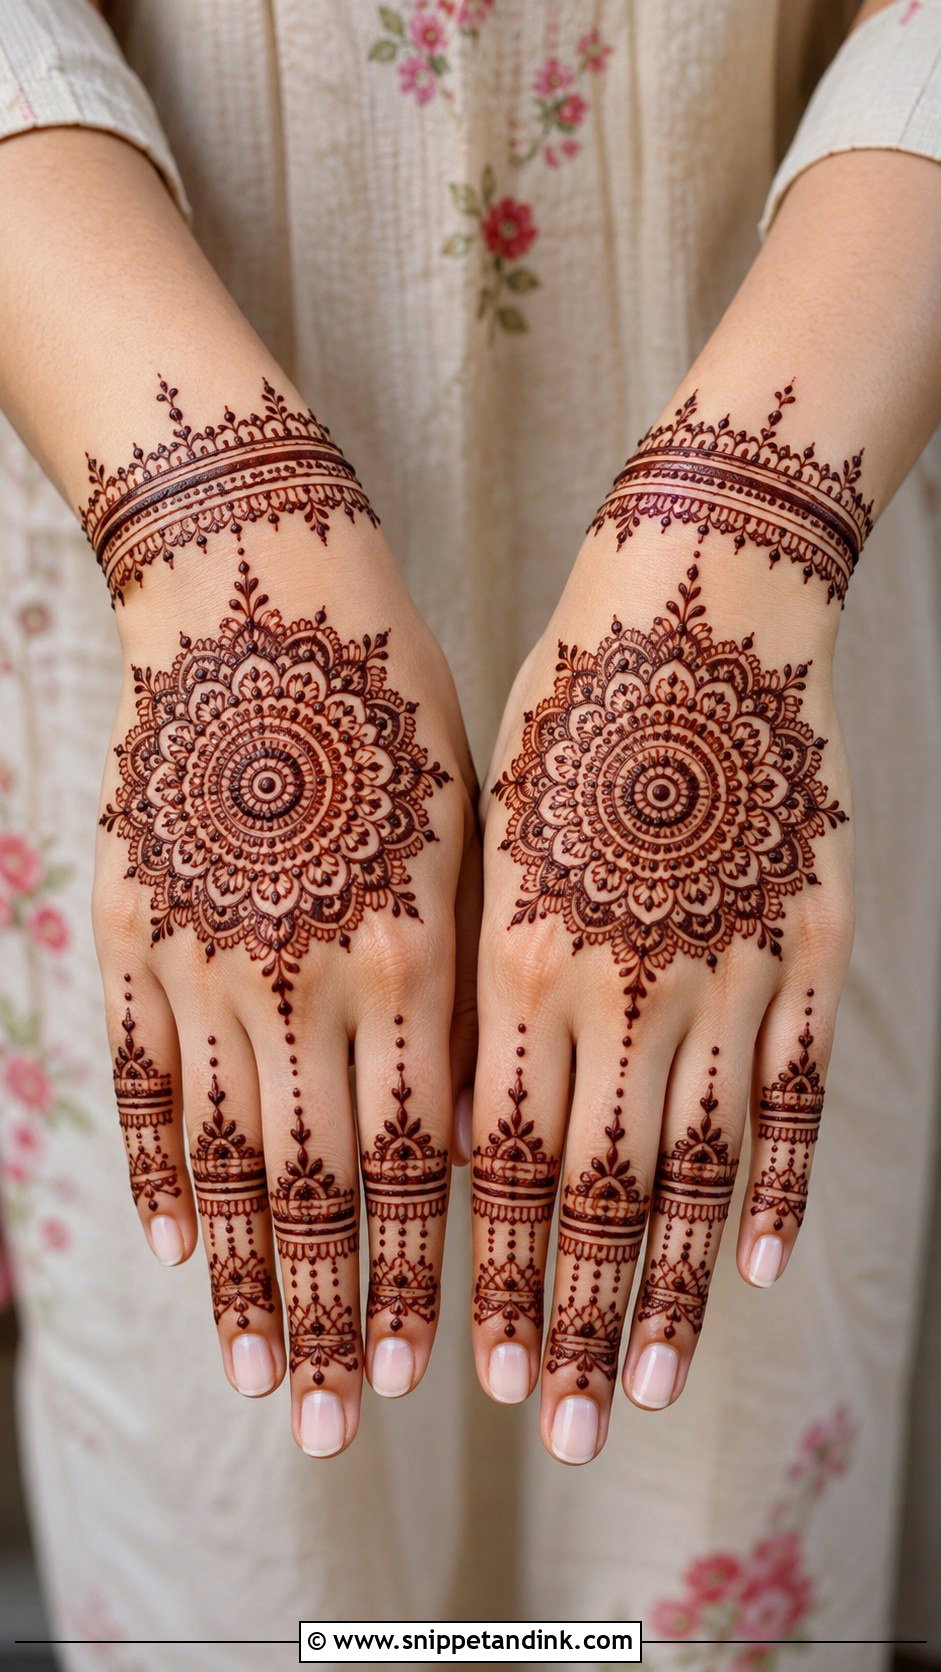
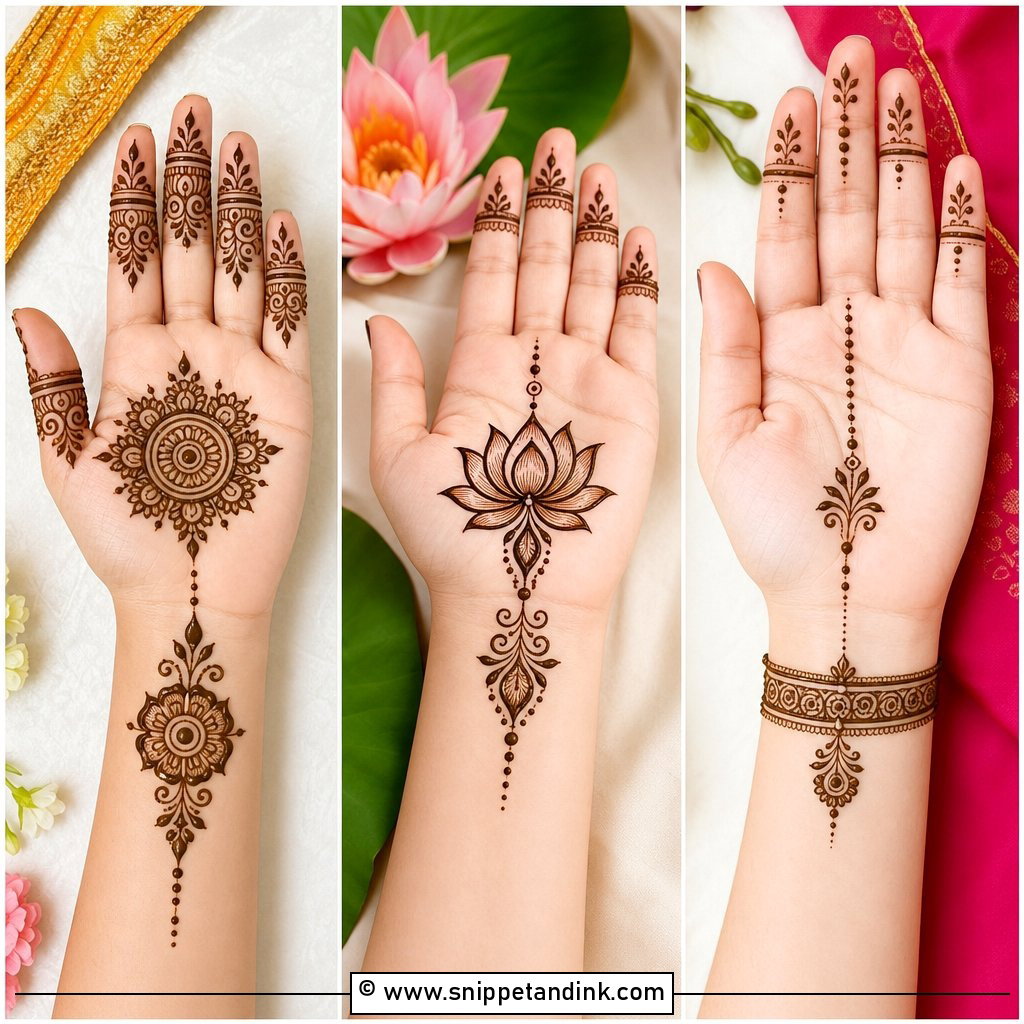
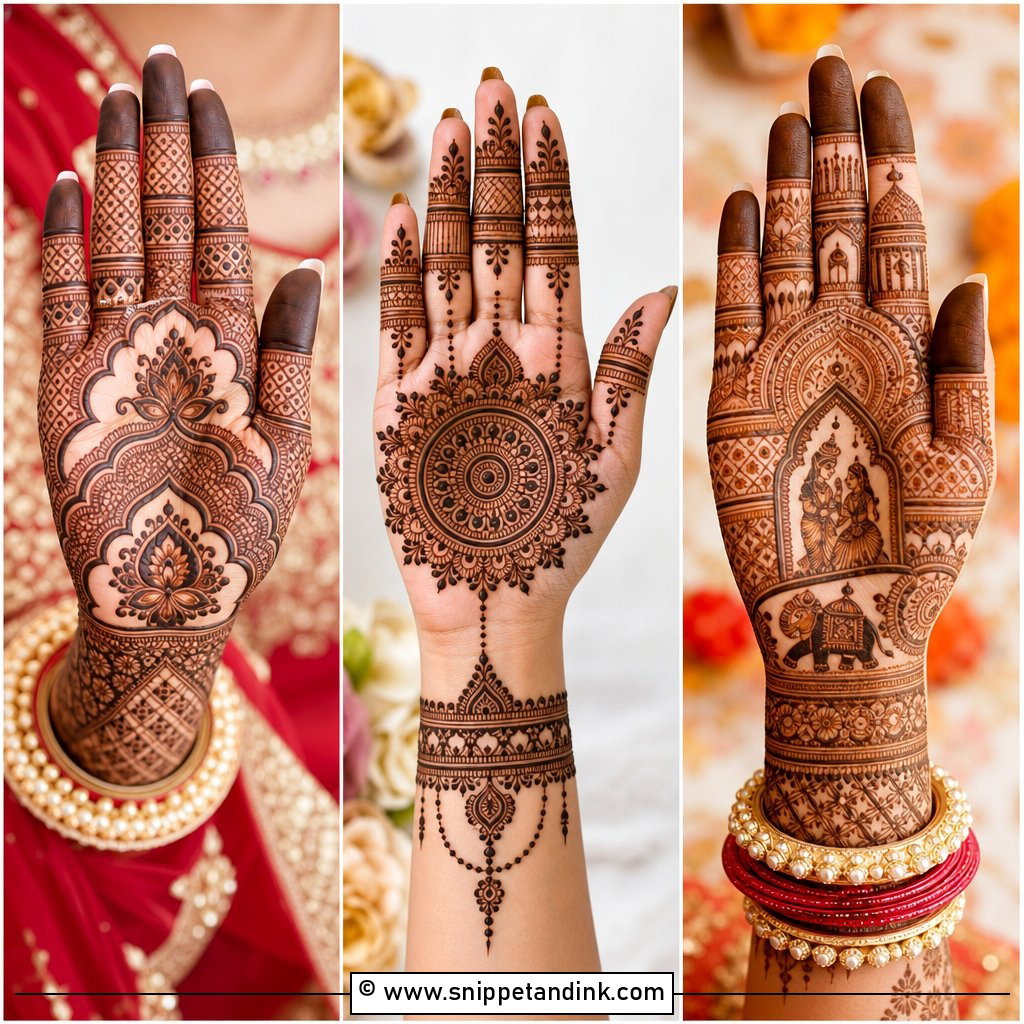
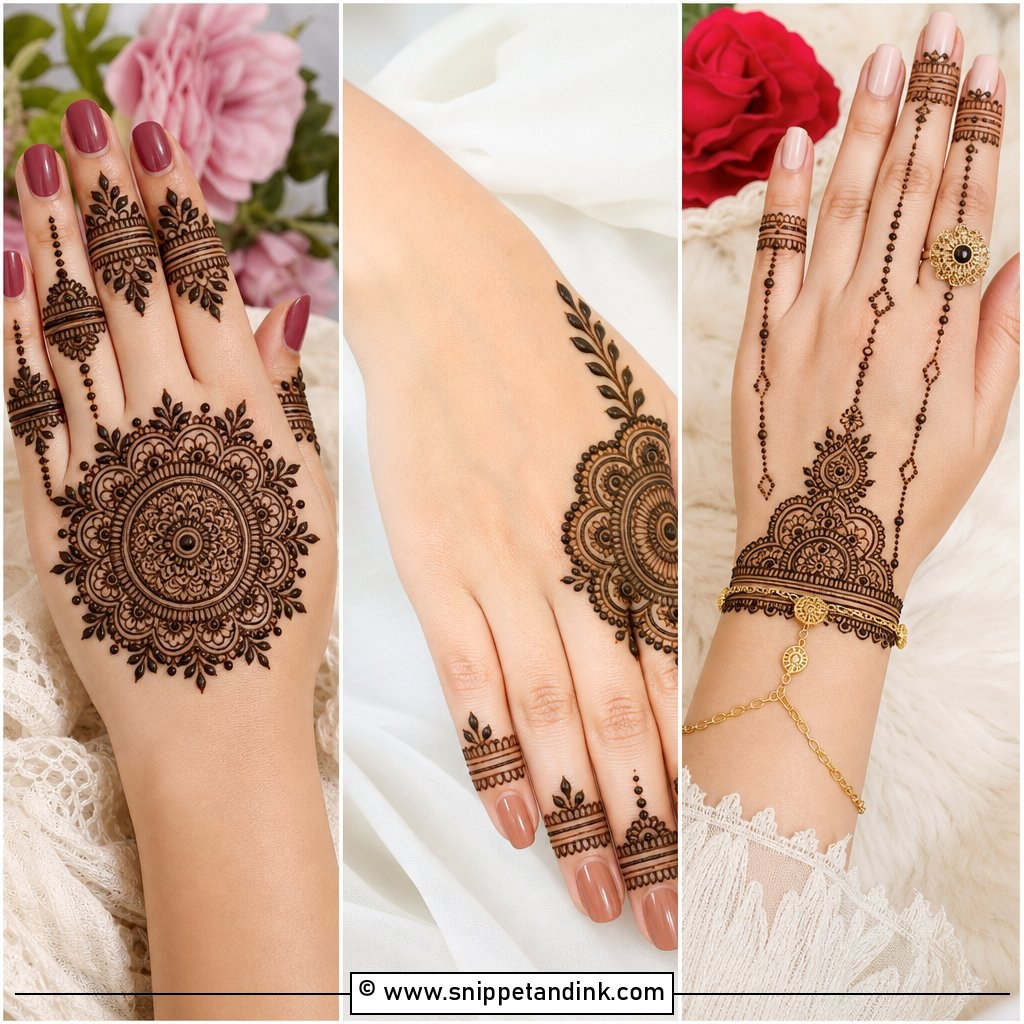
A mandala looks intimidating until you realise it is just rings. I place the centre dot first, then a small circle, then build outward one ring at a time: petals, dots, scallops. The trap is the outer edge. If the last ring goes uneven the whole circle looks lopsided, so slow down most at the end, not the start. Matching finger bands and a dotted wrist cuff tie it together, and because the work sits in one place, it’s a friendly layout for pujas and the smaller functions around a wedding.
4. Minimal Back Hand Mehndi Design
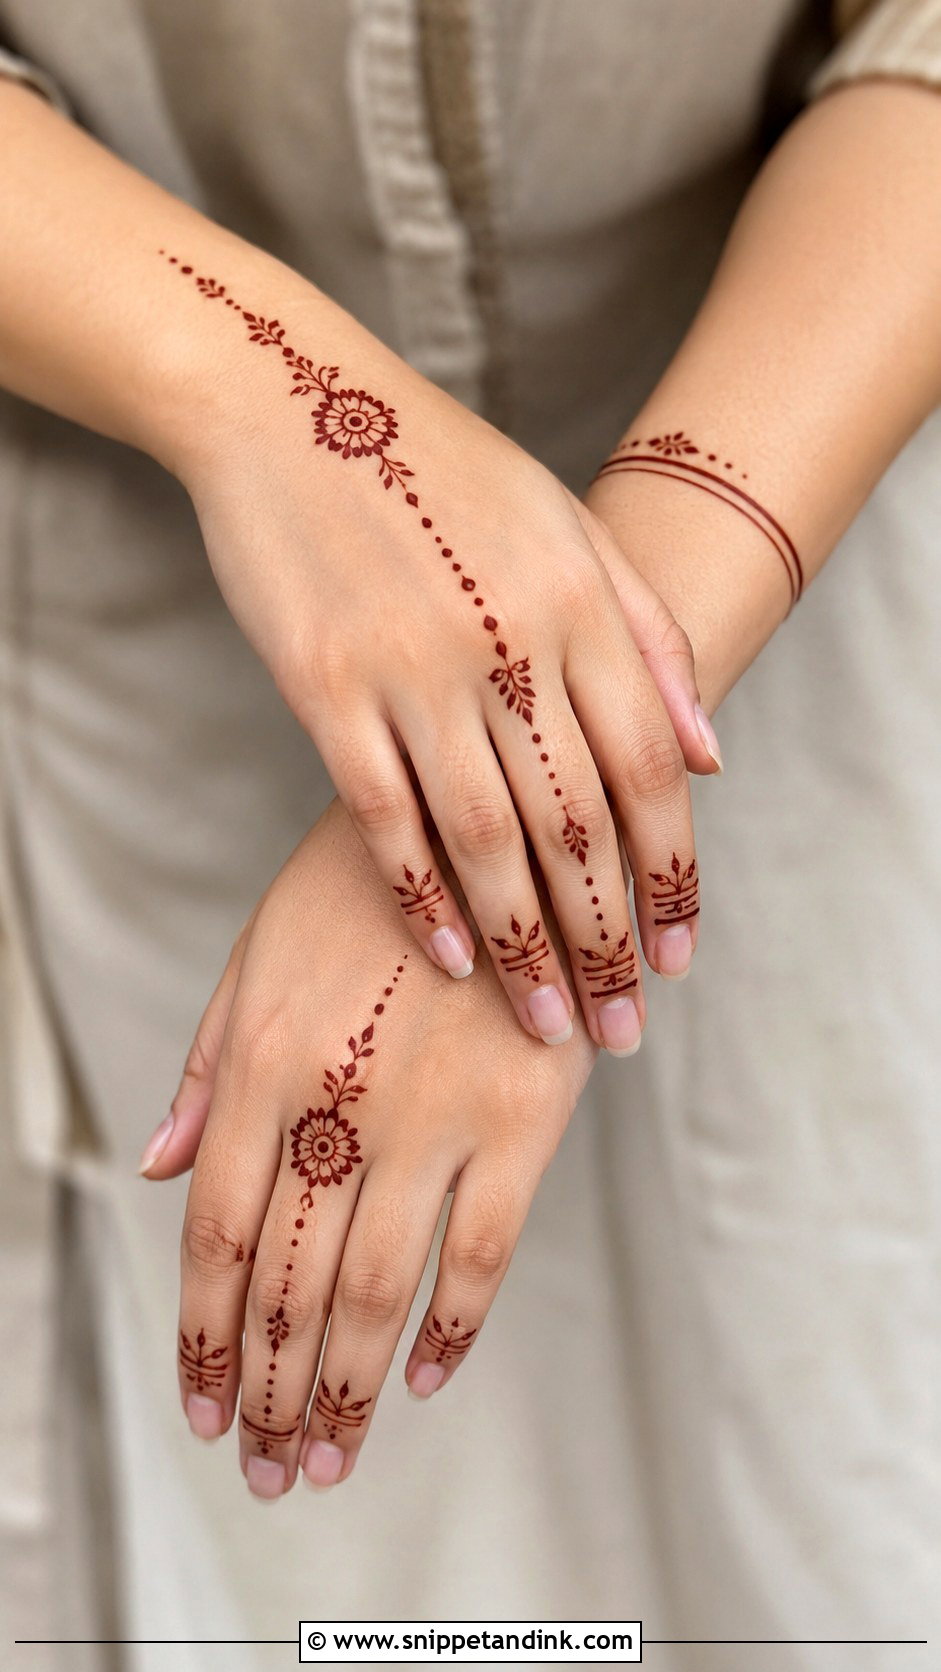
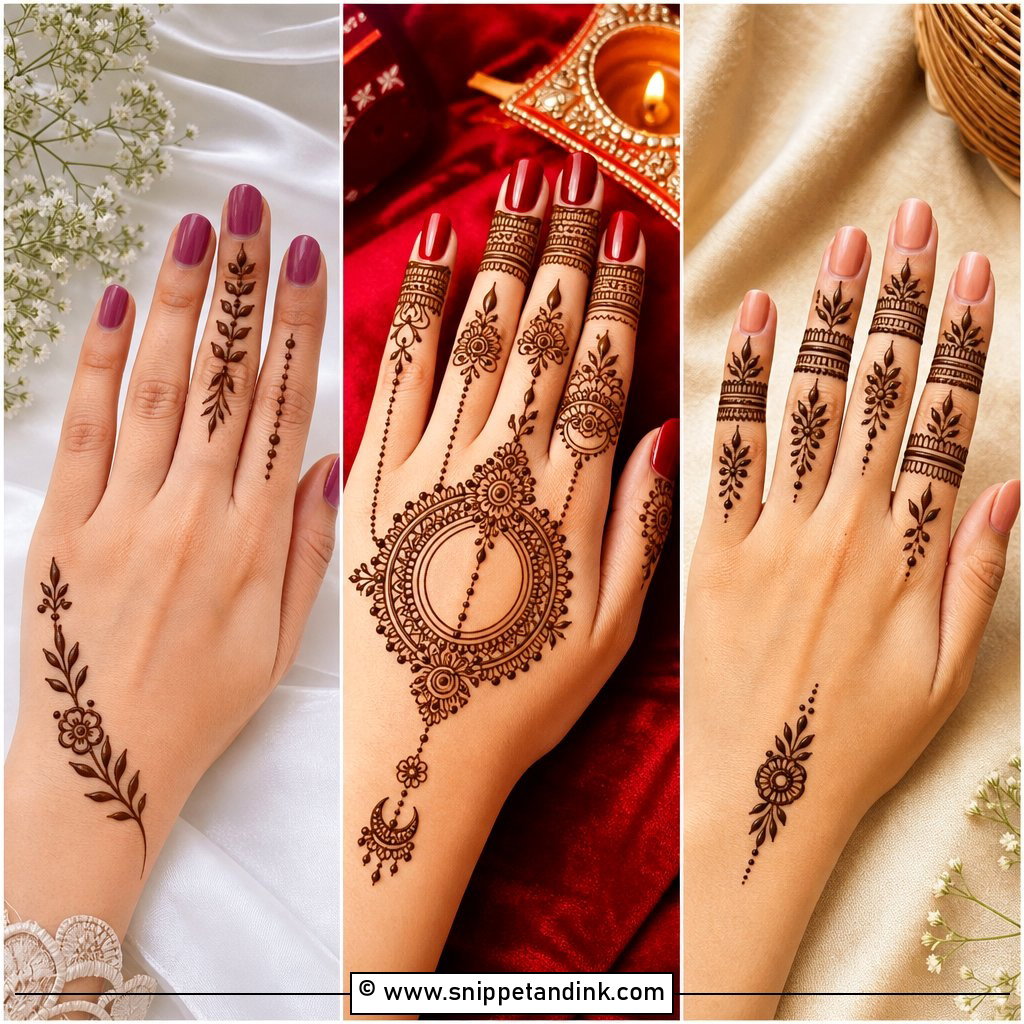
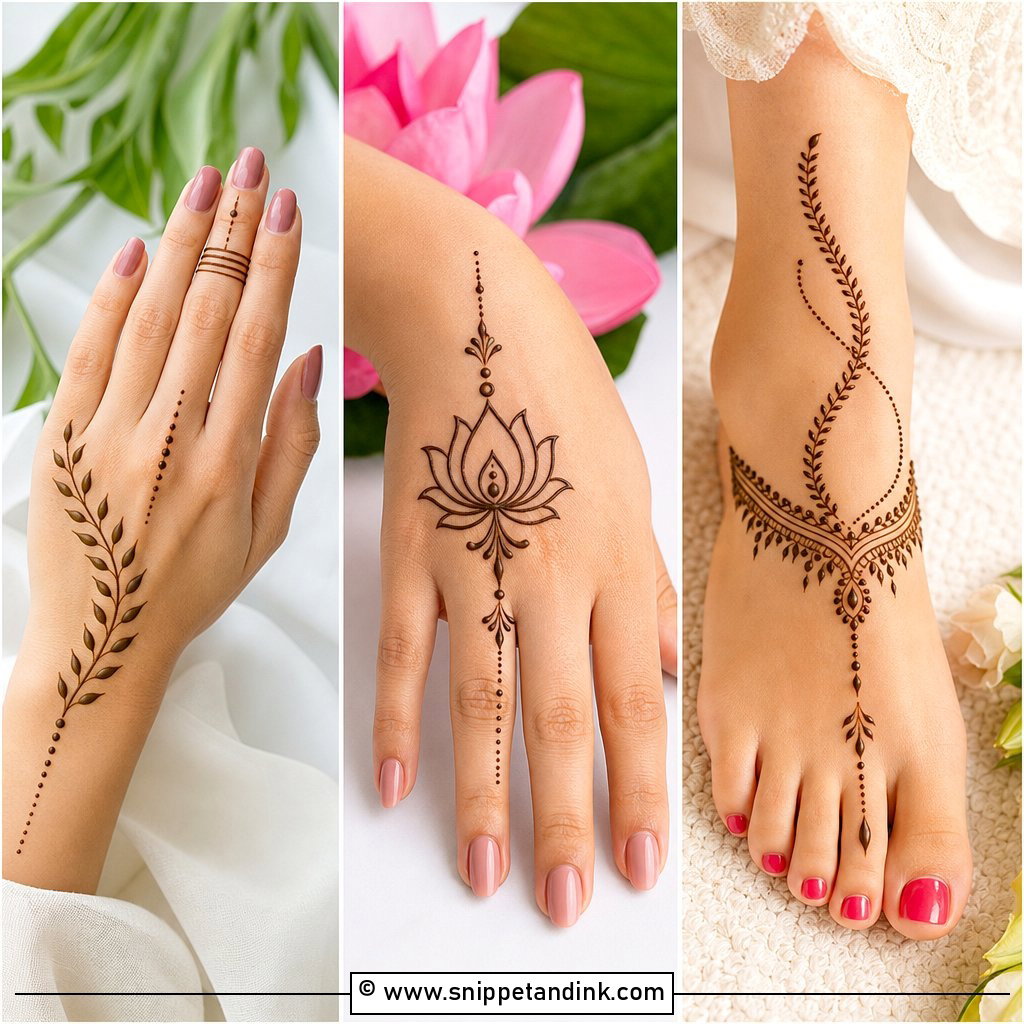
Minimal is harder than it looks, because with so few strokes every one is on show. I place a small flower or mini mandala near the centre, run two or three slim lines toward the fingers, and stop there. A thin bracelet line or a few tiny leaves at the wrist balance it. It dries fast and won’t smudge at a desk, so it’s what I’d suggest for school or office days.
5. Back Hand Finger Mehndi Design
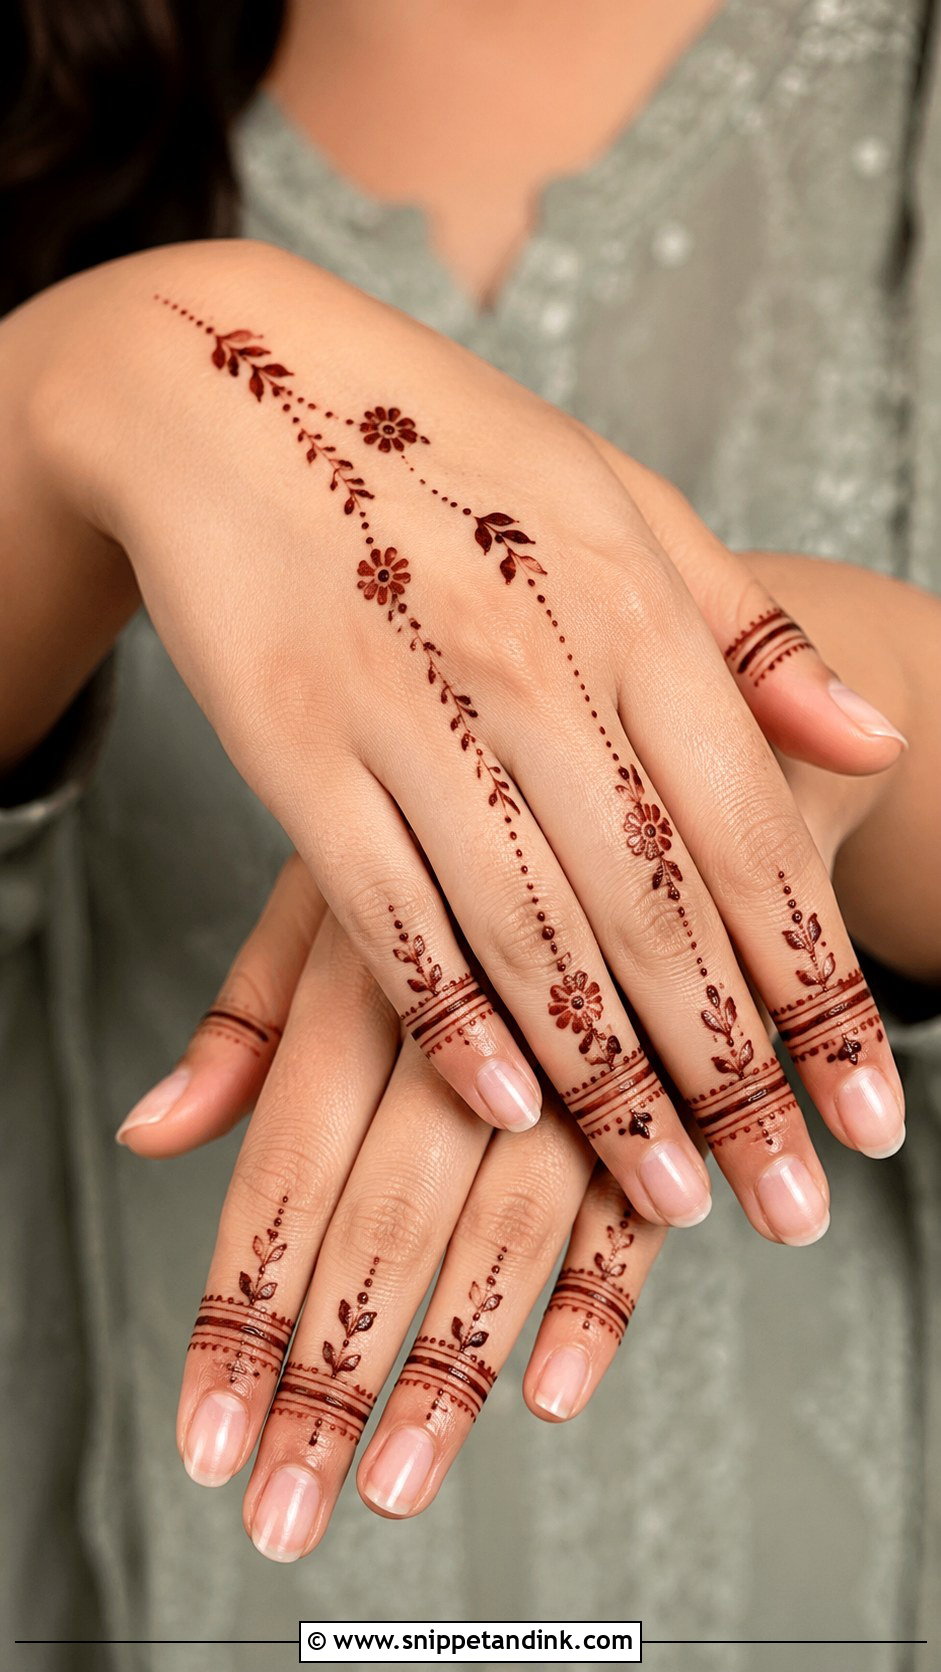
Here the fingers carry the design and the back of the hand stays almost bare. Treat each finger as its own small panel: a band on one, a dotted chain on the next, fine checks on another. The thing I watch is the knuckle crease. Lines drawn straight across it crack the moment you bend your fingers before the paste dries, so I set bands just above or below it. A tiny flower or half mandala near the knuckles, plus a thin wrist line, joins everything up.
6. Simple Bracelet Back Hand Mehndi Design
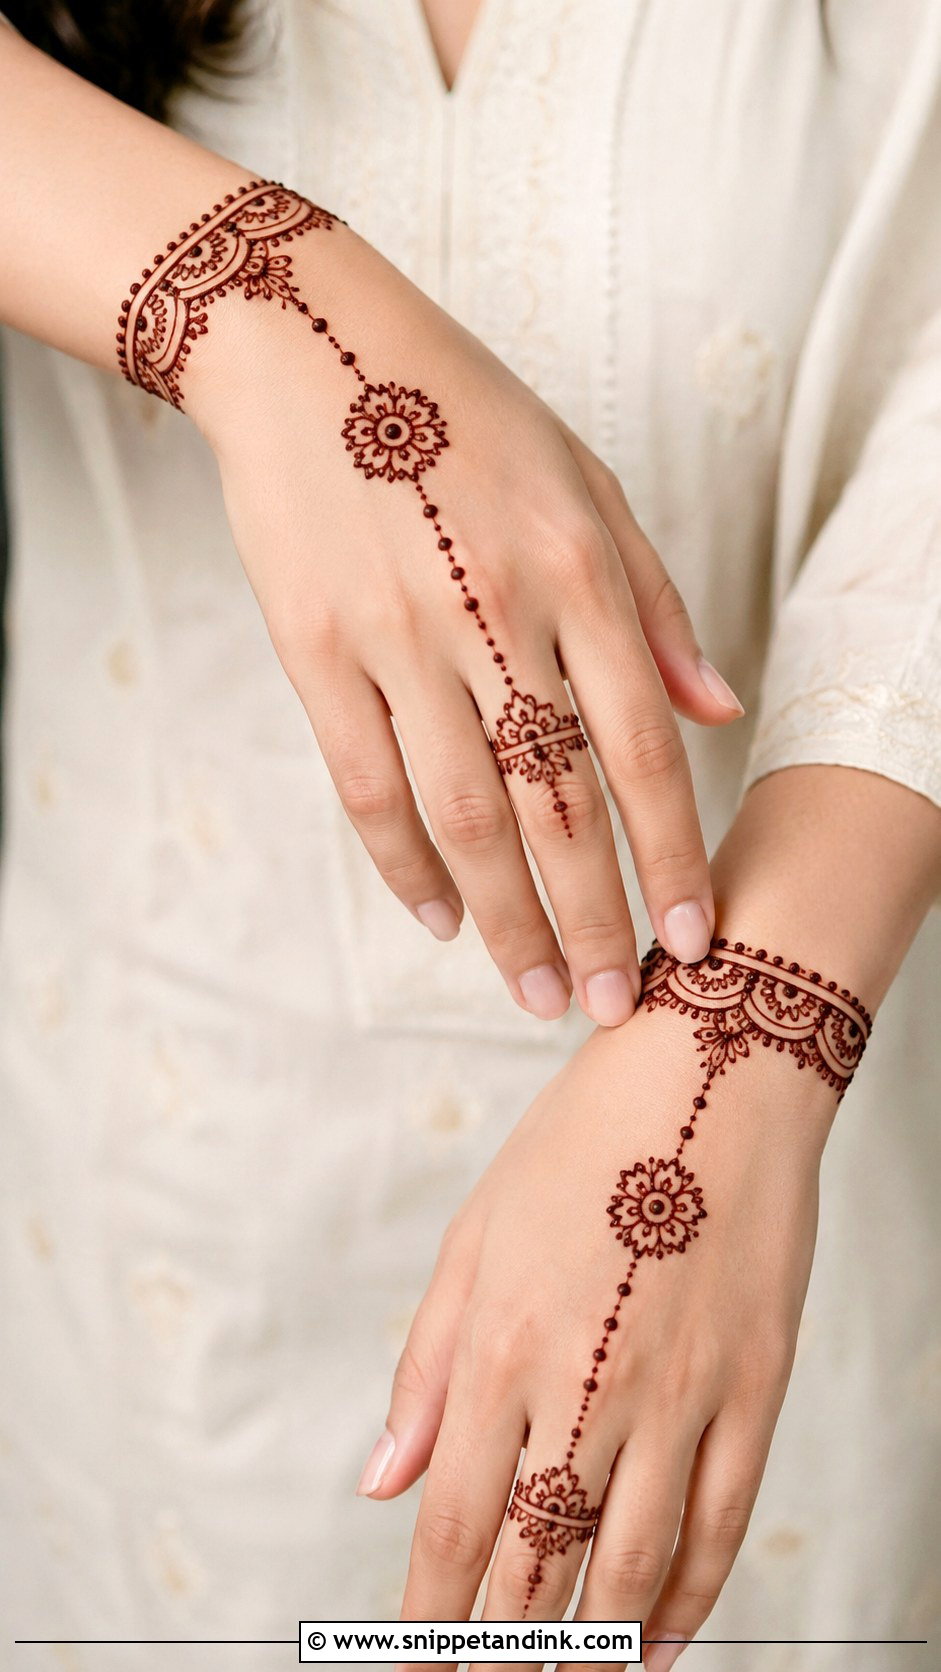
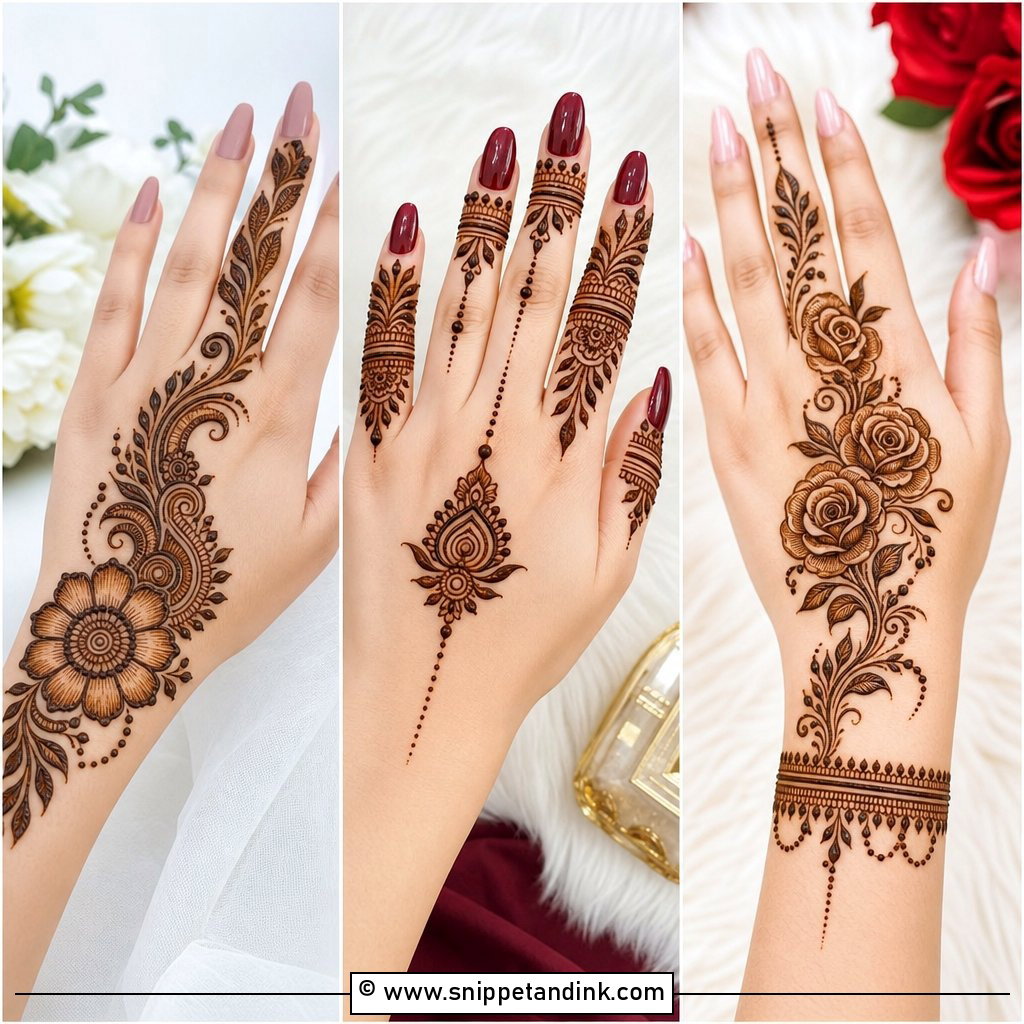
A simple bracelet back hand mehndi design borrows from jewellery: a neat cuff of parallel lines, dots and a scalloped edge at the wrist, with a fine chain running from its centre to one finger, where it ends in a ring band. I add a small flower where the chain crosses the middle of the hand, otherwise it reads as a stray line. The cuff needs the steadiest hand of the whole design because the wrist curves away from you, so rotate your arm as you go instead of reaching around it. Wear your bangles on the other wrist so the two don’t compete.
7. Back Hand Leaf Mehndi Design
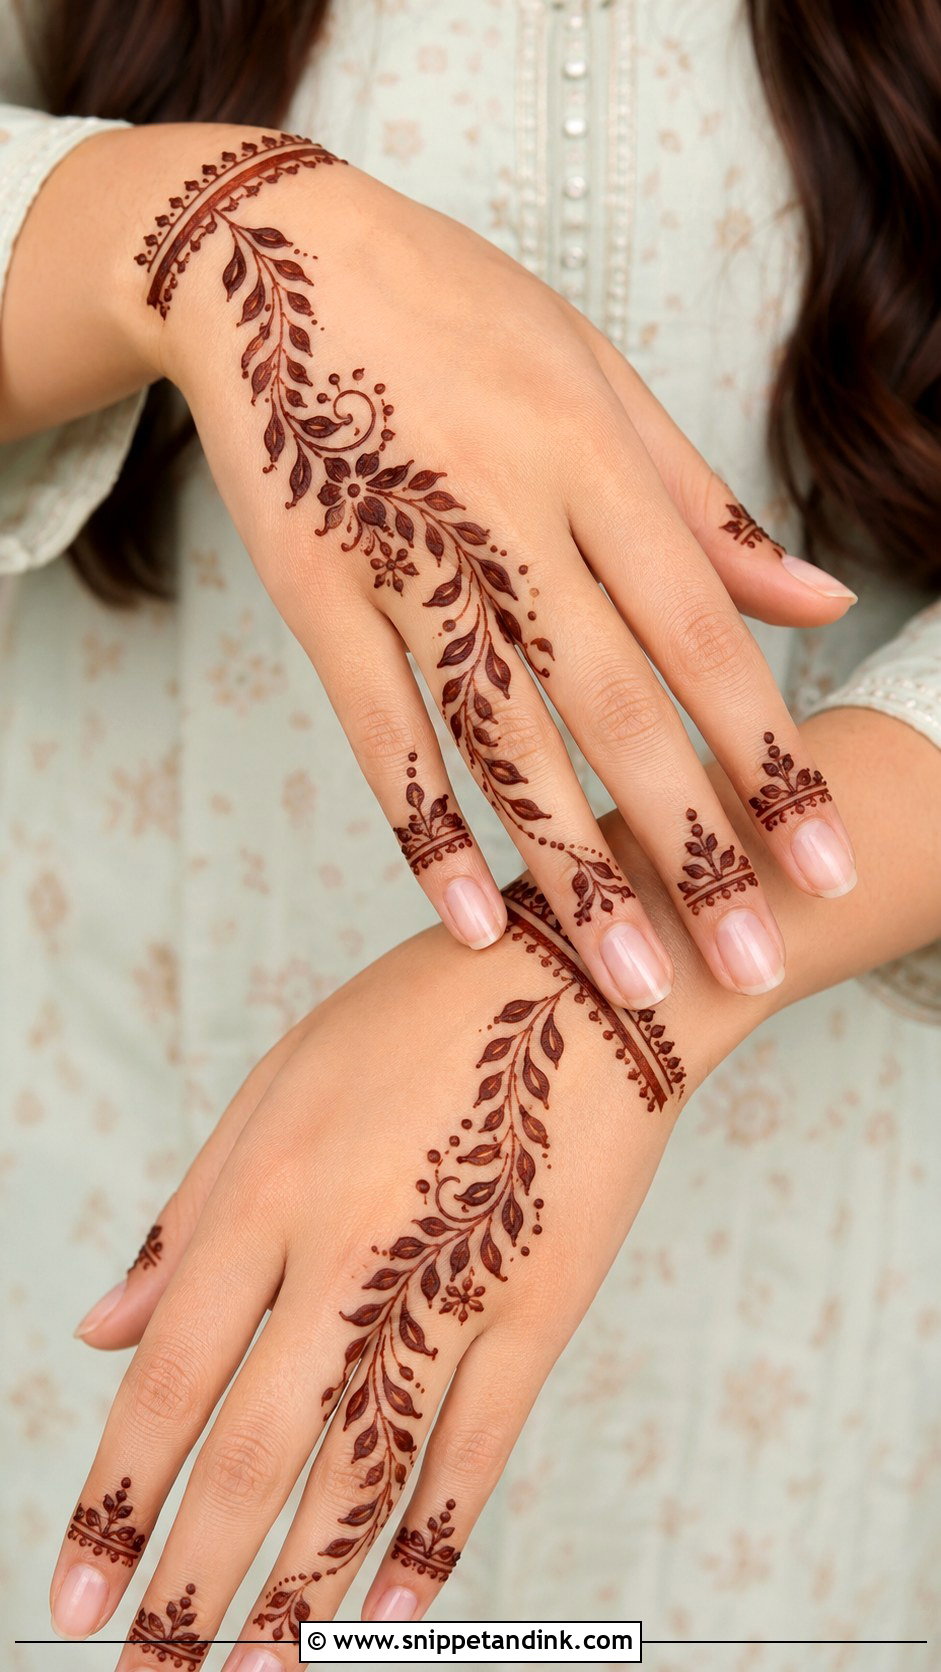
Leaves are the best repetition practice I know. Begin a curved vine at the wrist and bring it up toward the middle finger, then add leaves along both sides with a small gap between each so they don’t merge as the paste settles. One small flower near the centre gives the eye somewhere to land. Symmetry barely matters here, which takes the pressure off.
8. Back Hand Rose Mehndi Design
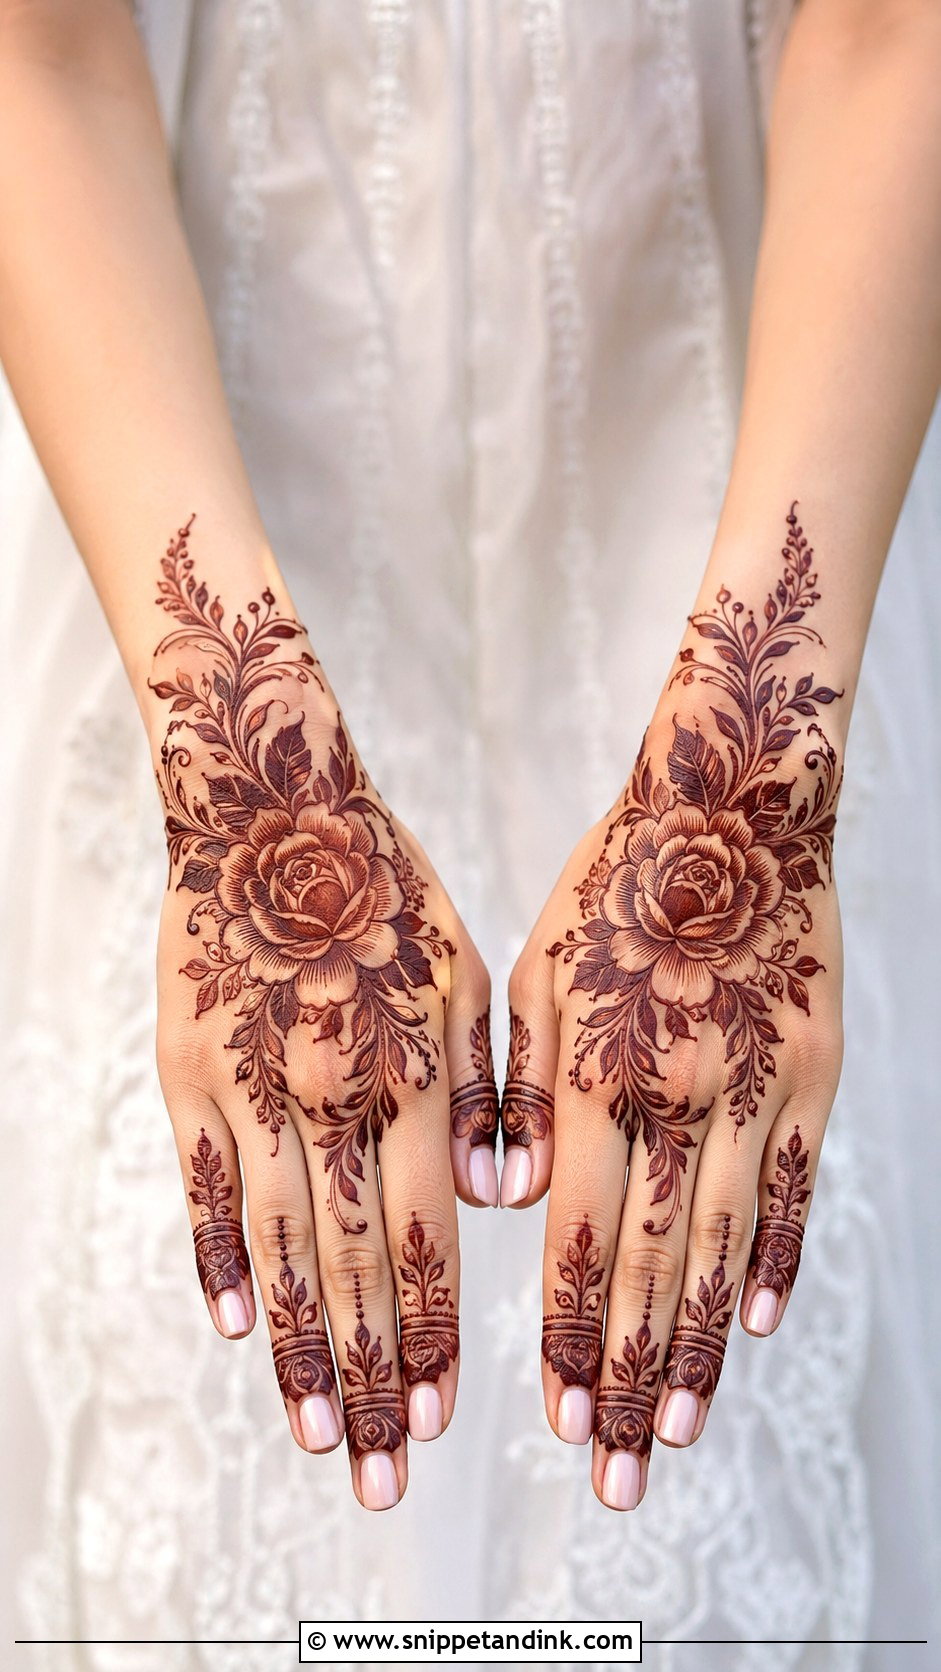
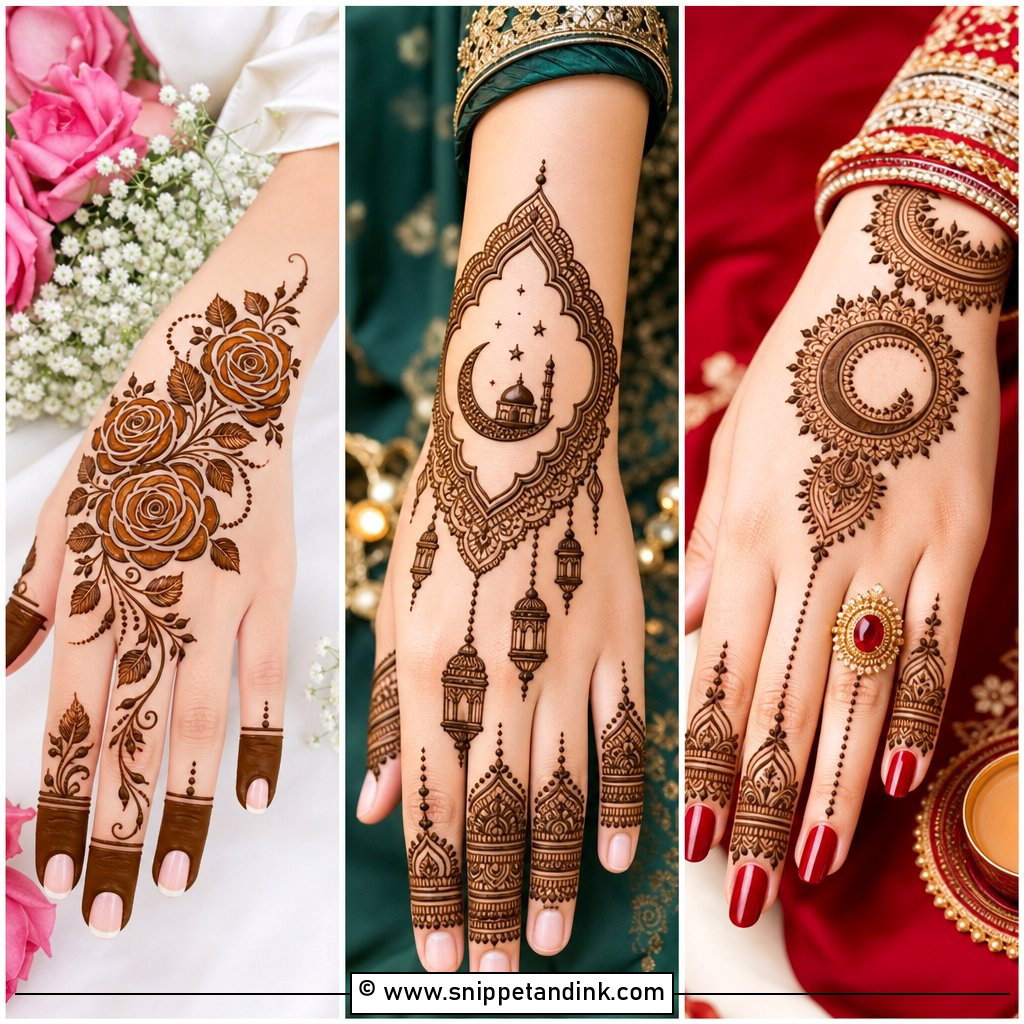
Roses are where beginners overwork things. On the back hand a rose needs three or four curved petal layers, not ten, because tiny inner petals fill in and blur as the stain develops. Draw one large rose at the centre or toward the side, add leaves, then let a soft vine run toward the wrist, with rosebuds and dots on the fingers to repeat the theme. The spiral in the middle is the part that usually goes wrong, so practise it on paper a few times first. Kept bold, it reads clearly from across a room at an engagement party.
9. Back Hand Paisley Mehndi Design
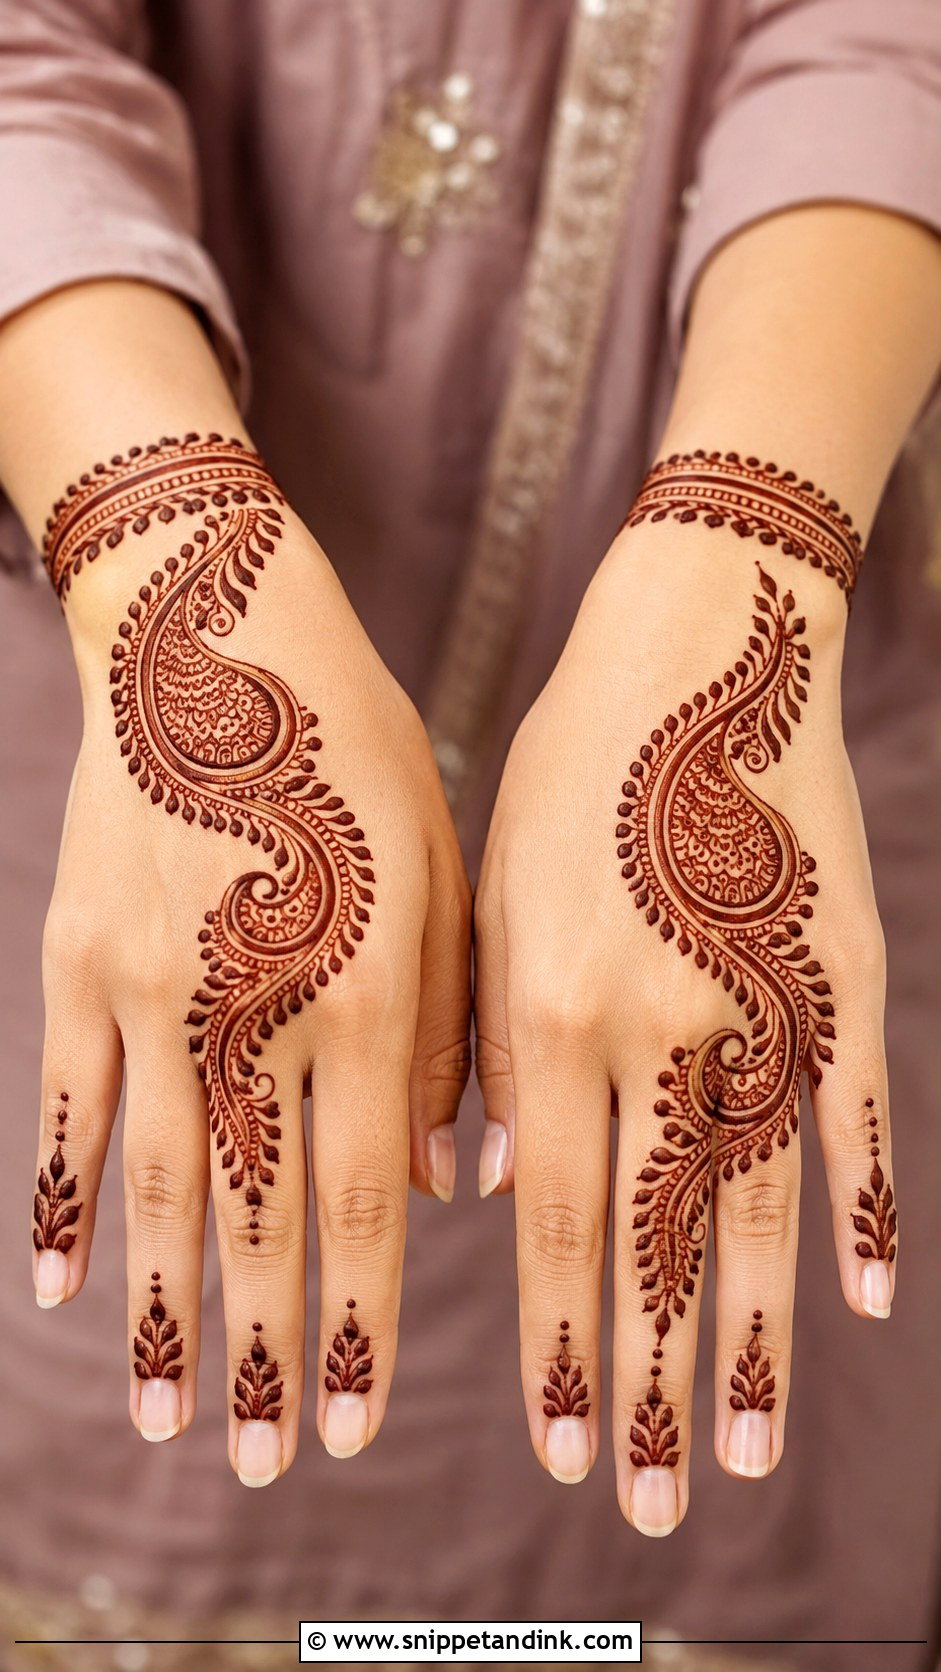
Paisley, the keri or mango shape, is the most adaptable motif in mehndi: it stretches for long fingers and shrinks for a small hand. Set one or two diagonally across the back hand and fill them simply with lines, dots and small petals. I draw each paisley outline in one confident stroke, because stopping halfway leaves a visible blob where the line restarts. Leafy vines around them add movement, and a thin wrist border keeps the bottom light. It sits naturally with classic ethnic outfits.
10. Easy Jaali Back Hand Mehndi Design
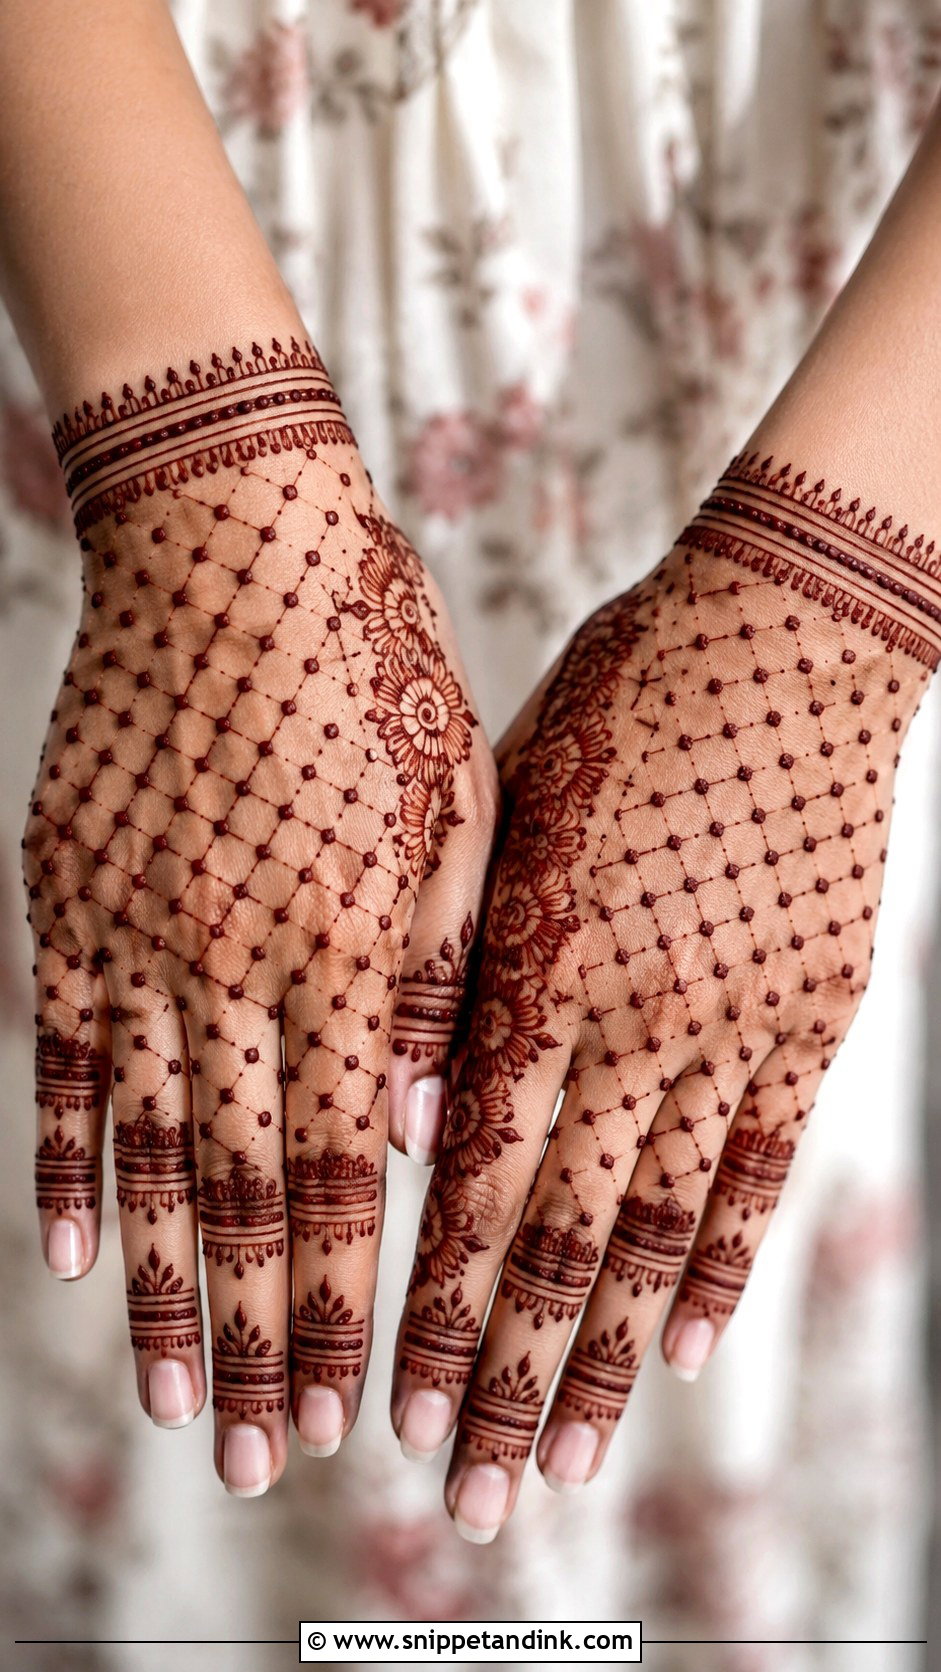
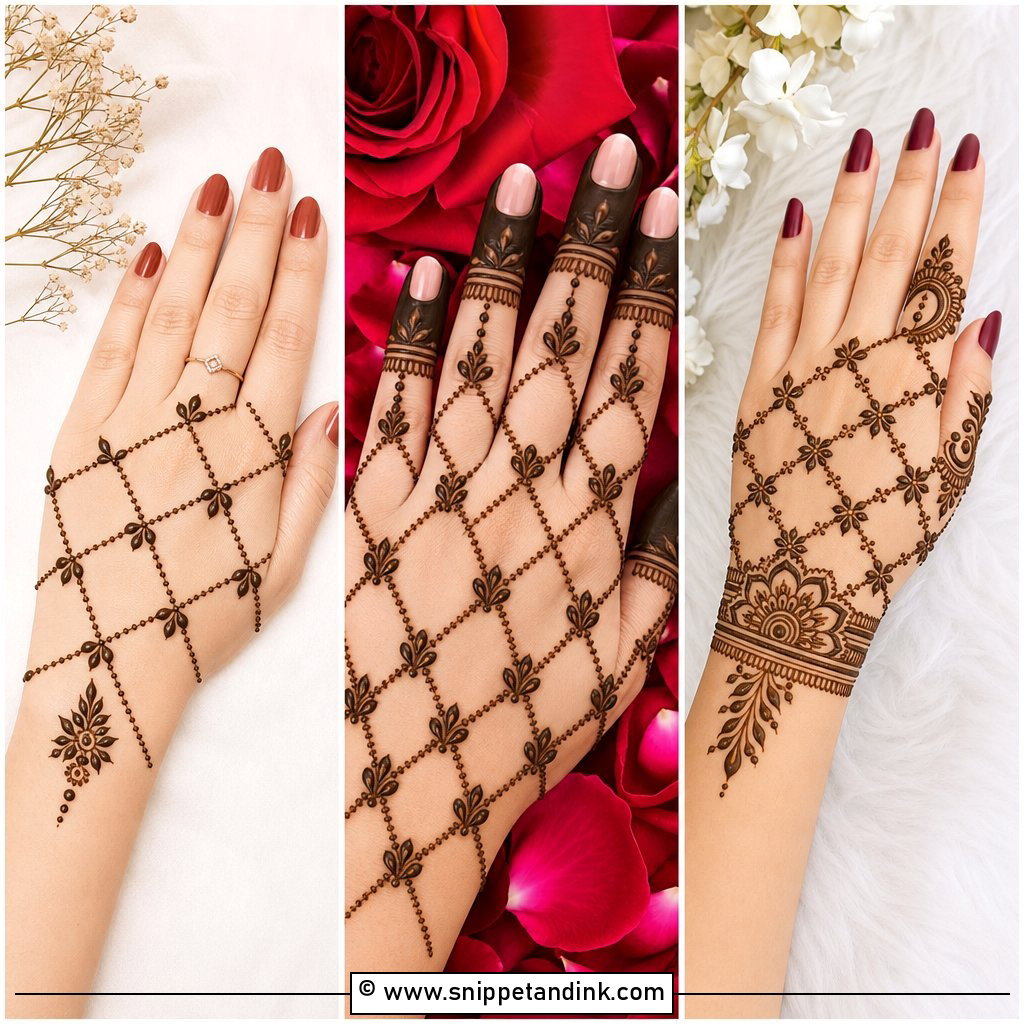
Jaali is a net, and nets are mostly patience. Draw your diamond mesh on one side of the hand, keeping one set of lines parallel before you cross them with the other, then drop a dot inside each diamond. My warning: if the paste is too runny, the crossings flood and the mesh turns into a solid patch, so test a few lines on paper first. Balance the jaali with a flower or paisley on the opposite side. Once it stains, the open mesh gives a fine, lace-like effect.
11. Back Hand Vine Mehndi Design
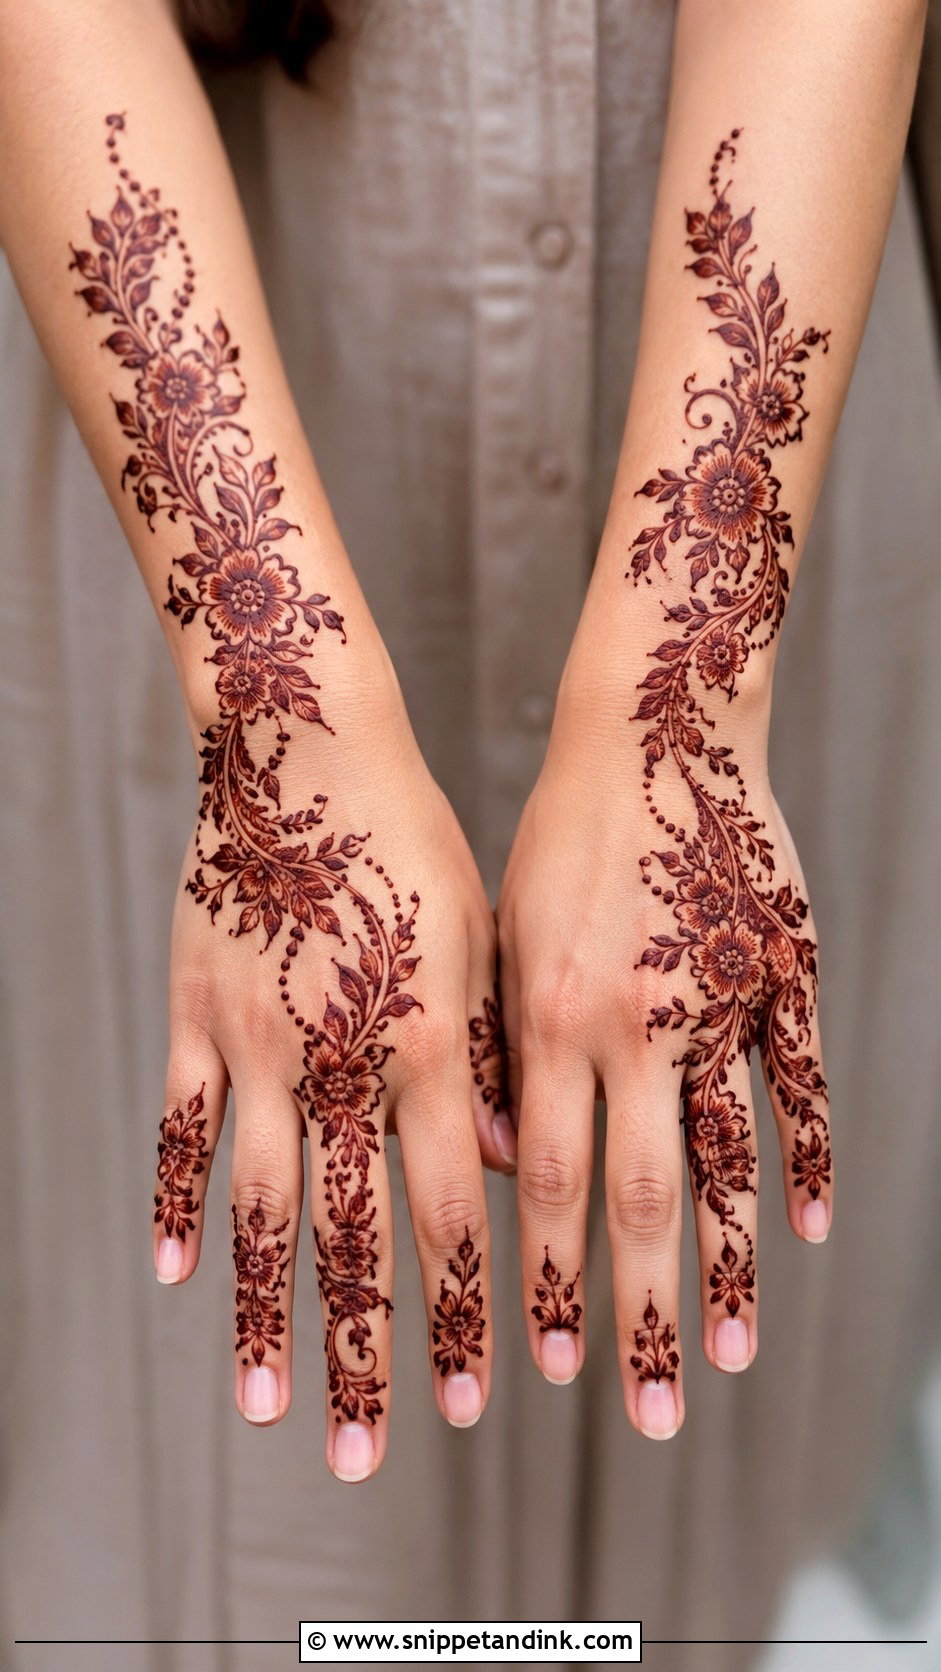
A vine flows from the wrist toward the index or middle finger, with flowers, leaves and buds along its length. I keep the stem slightly thicker near the wrist and taper it toward the fingers, which mimics how a real stem grows and stops the design looking flat. Dotted trails alongside add texture. This is one of the easiest looks for beginners because nothing has to mirror anything else, and it’s the design I reach for at Eid or Diwali when several cousins are waiting their turn.
12. Modern Back Hand Mehndi Design
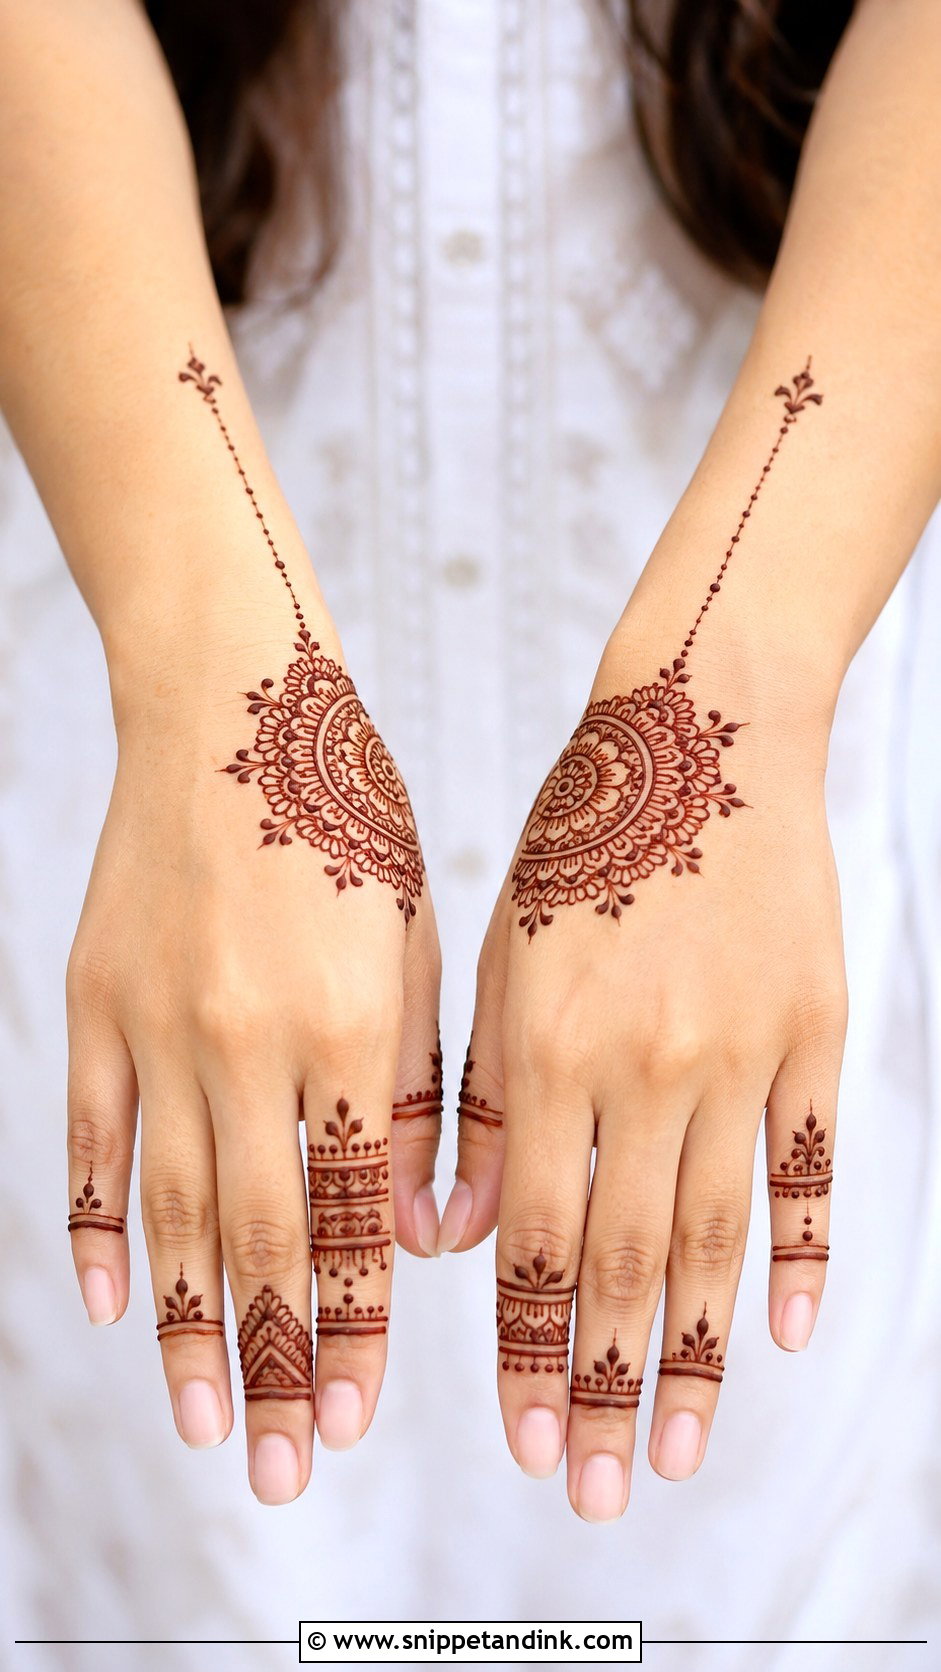
Modern back hand mehndi relies on spacing, not fill. A half mandala at the wrist, a slim chain across the hand and plain finger bands are often all it needs. The bare skin is part of the design, so resist adding a leaf to every gap. Camera flash also picks out clean lines on open skin far better than dense fill, which matters if the evening will be photographed. I’d suggest it for college functions, parties and contemporary festive outfits.
13. Back Hand Ring Mehndi Design
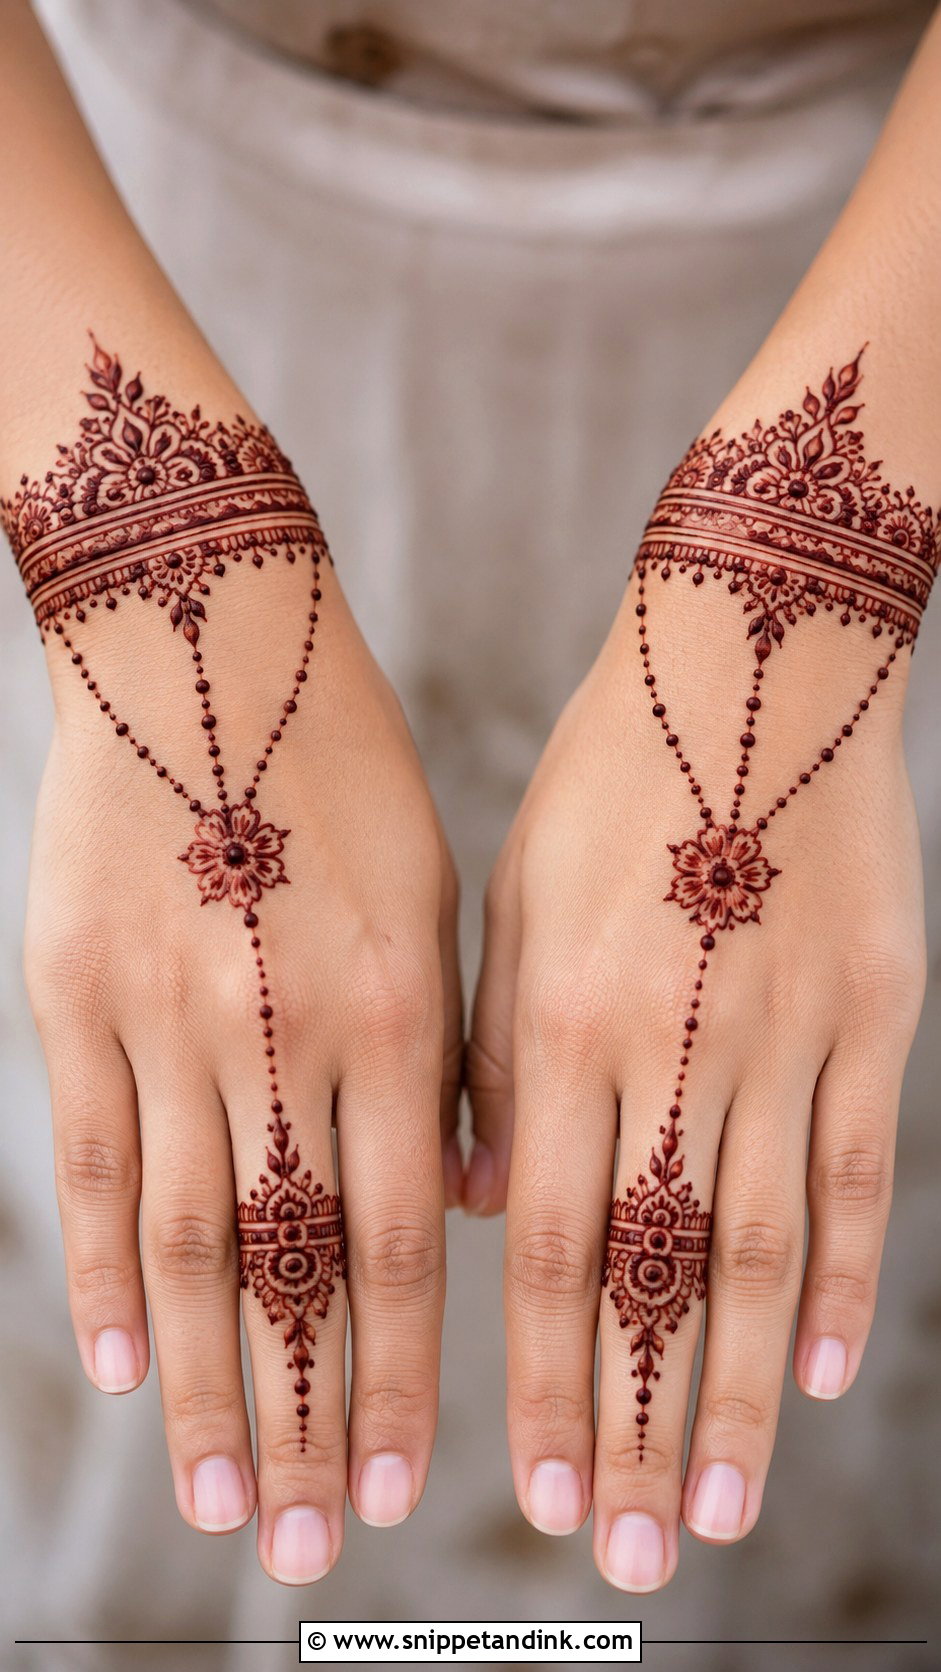
Think of this as mehndi jewellery: a ring pattern on one finger, joined by a dotted chain to a small flower or mandala on the back hand, with a bracelet band at the wrist. It’s built from small repeated details, so a beginner can manage it, but the chain dots must be evenly spaced or the illusion of jewellery breaks. I count my dots between the ring and the flower before I start. Bridesmaids ask for this one often, since it’s light and easy to repeat across a group.
14. Back Hand Lotus Mehndi Design
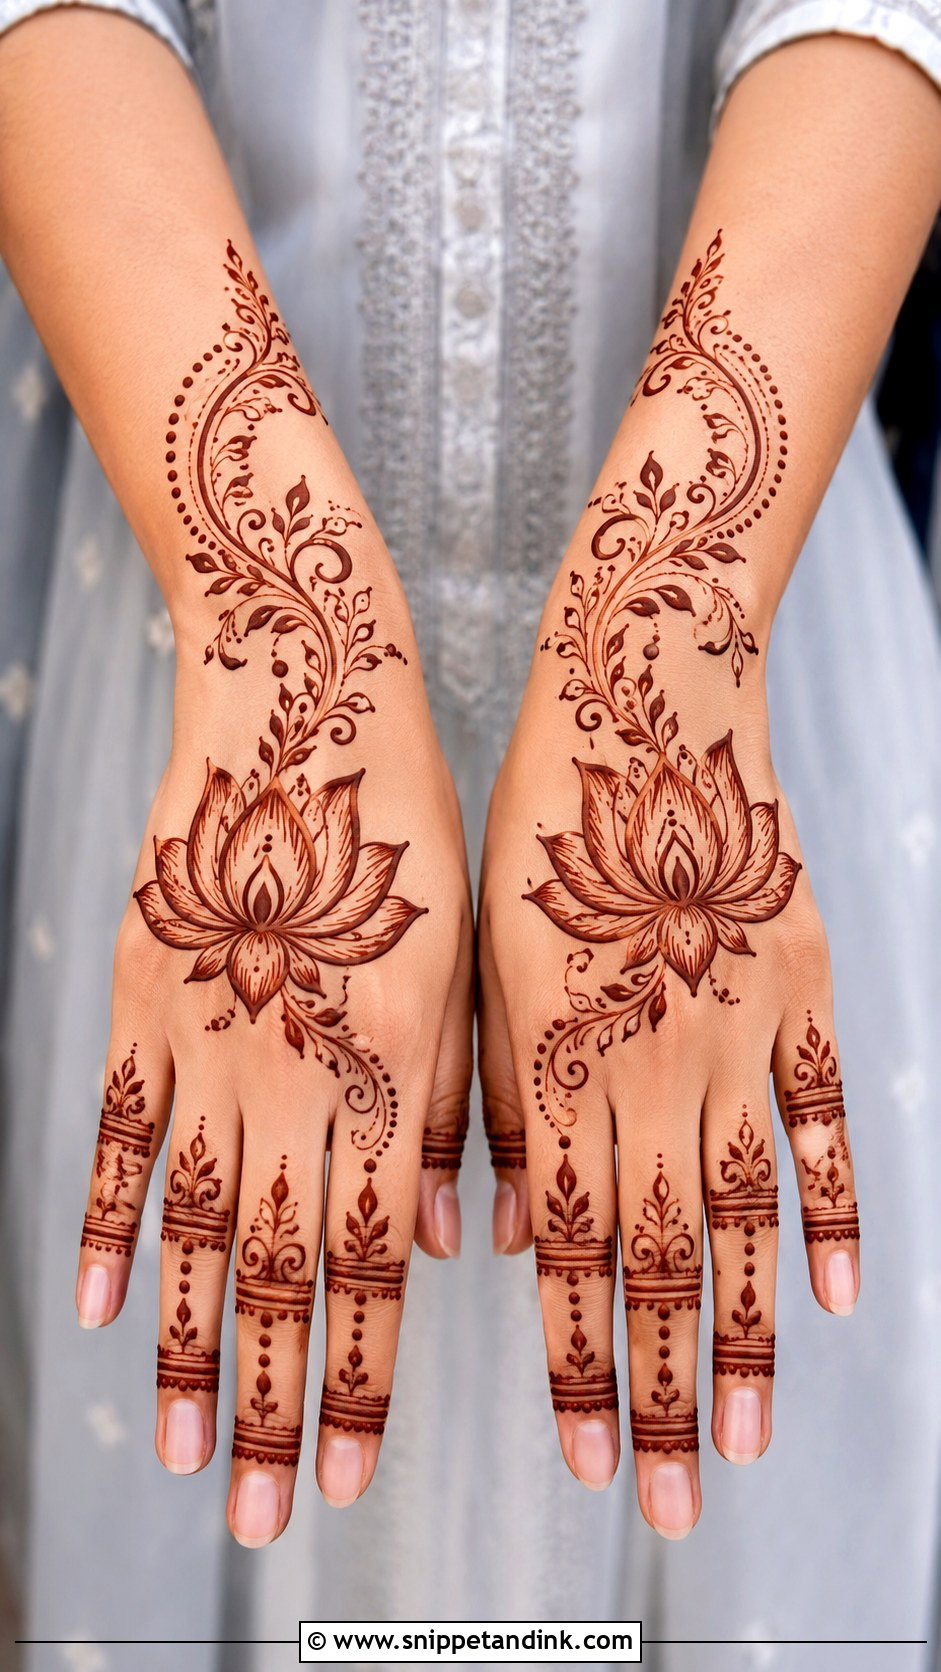
A lotus wants clean outlines and soft inner lines, nothing fussy. Place it at the centre of the back hand or at the wrist, draw the petals outward as gentle curves, and let leafy vines carry the design up to the fingers. The lotus scales well, so keep it small for a guest or let it grow for a fuller hand. Simple dots and thin lines on the fingers are enough. Because it carries meaning, I’m asked for it most at pujas and quieter bridal ceremonies.
15. Back Hand Peacock Mehndi Design
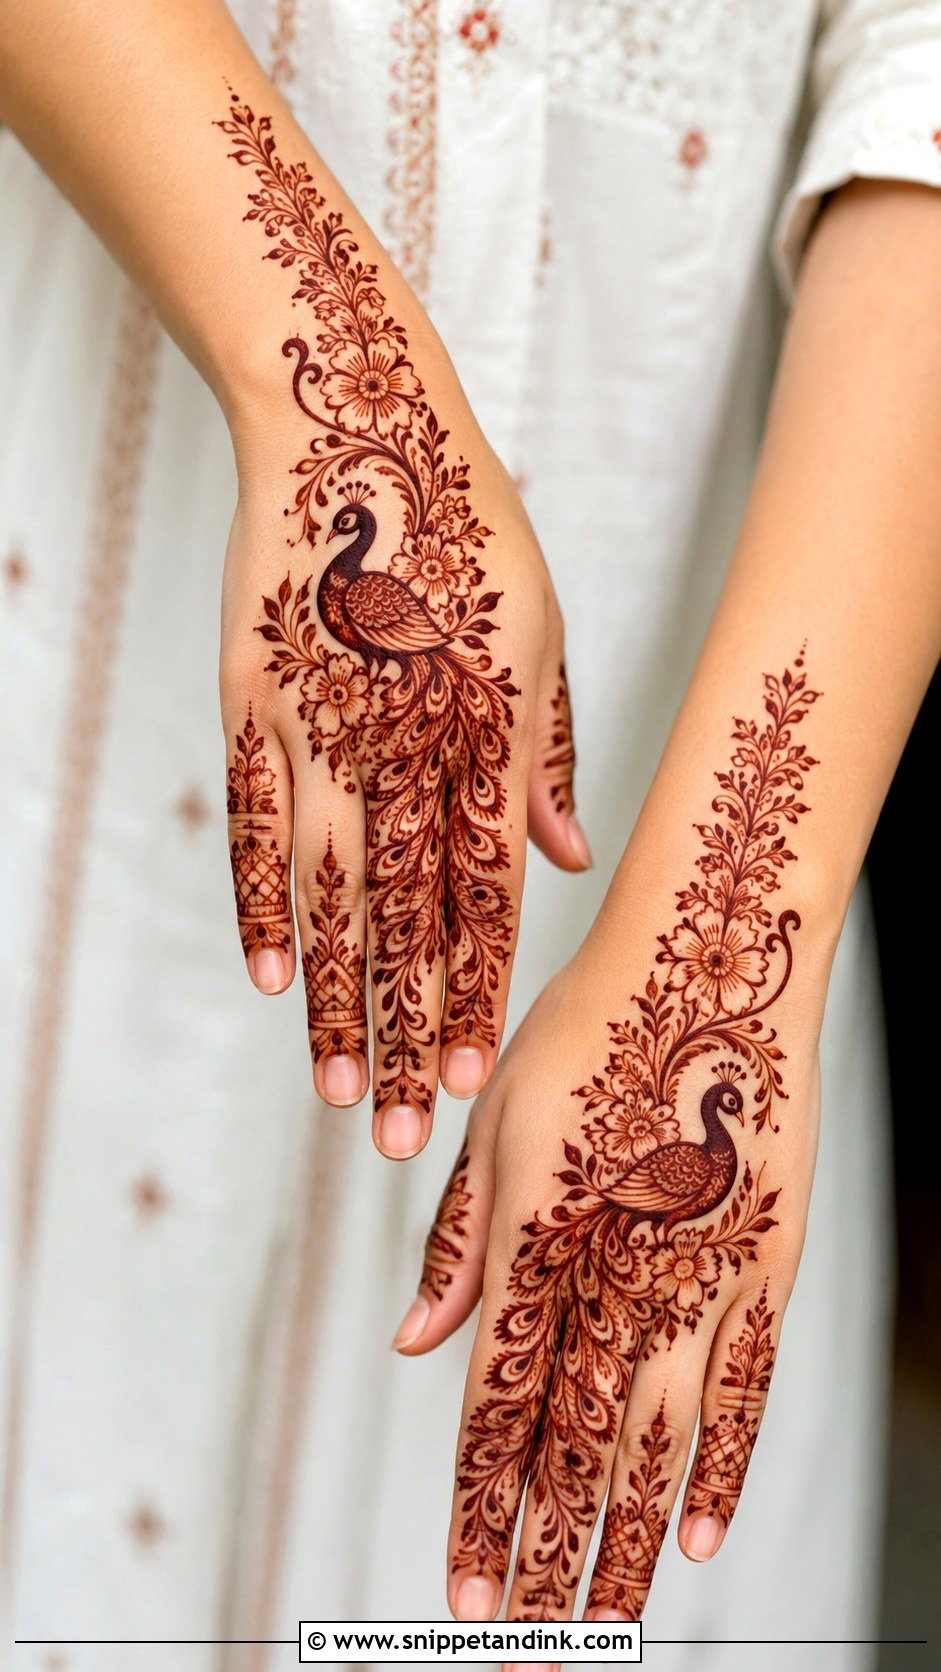
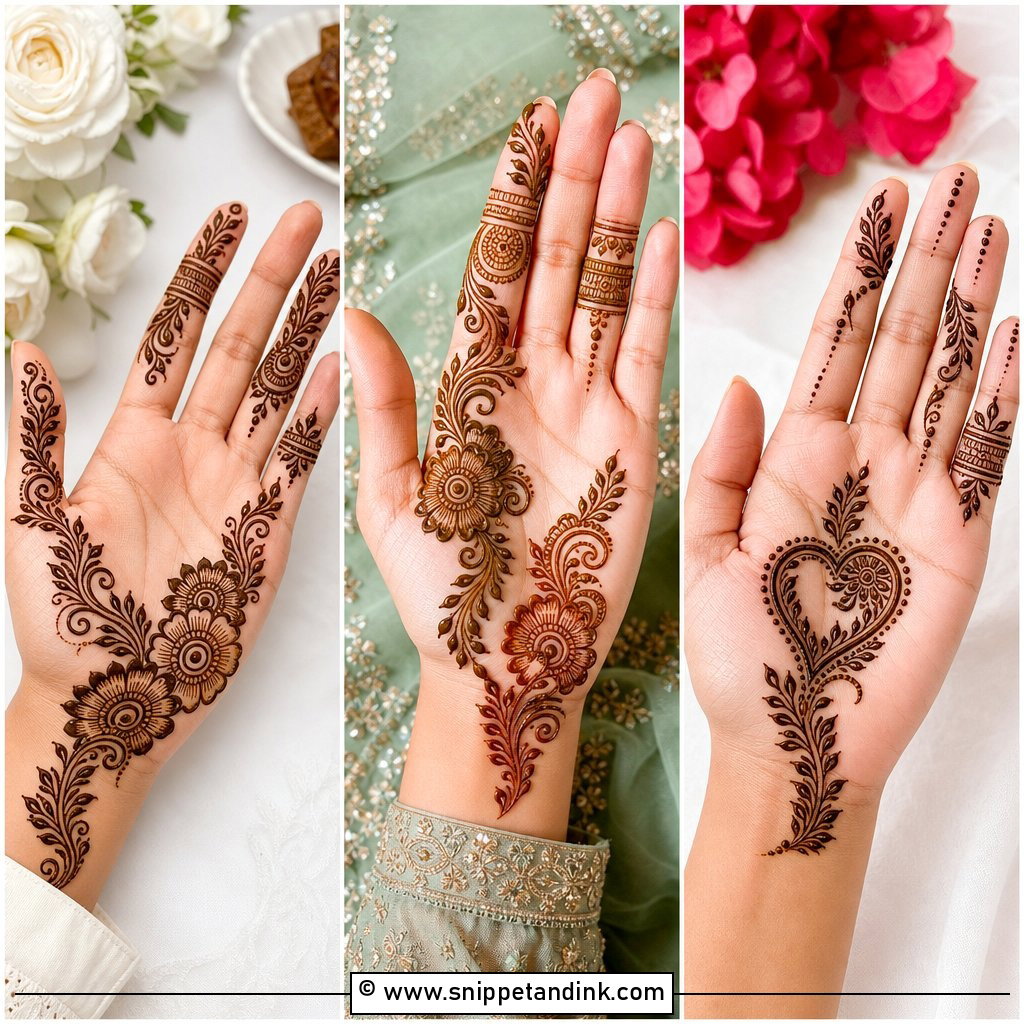
A peacock stays simple if you draw one clean bird instead of filling the hand. Put it near the wrist or the side of the hand and keep the body outline bold so it reads as a peacock from a distance. The feathers can spill out as repeated teardrop shapes with dots, and a floral trail toward the fingers balances the weight. The neck is where most people struggle; I draw it as a single S-curve before adding the head and crest. It suits traditional outfits and festive occasions.
16. Back Hand Flower Trail Mehndi Design
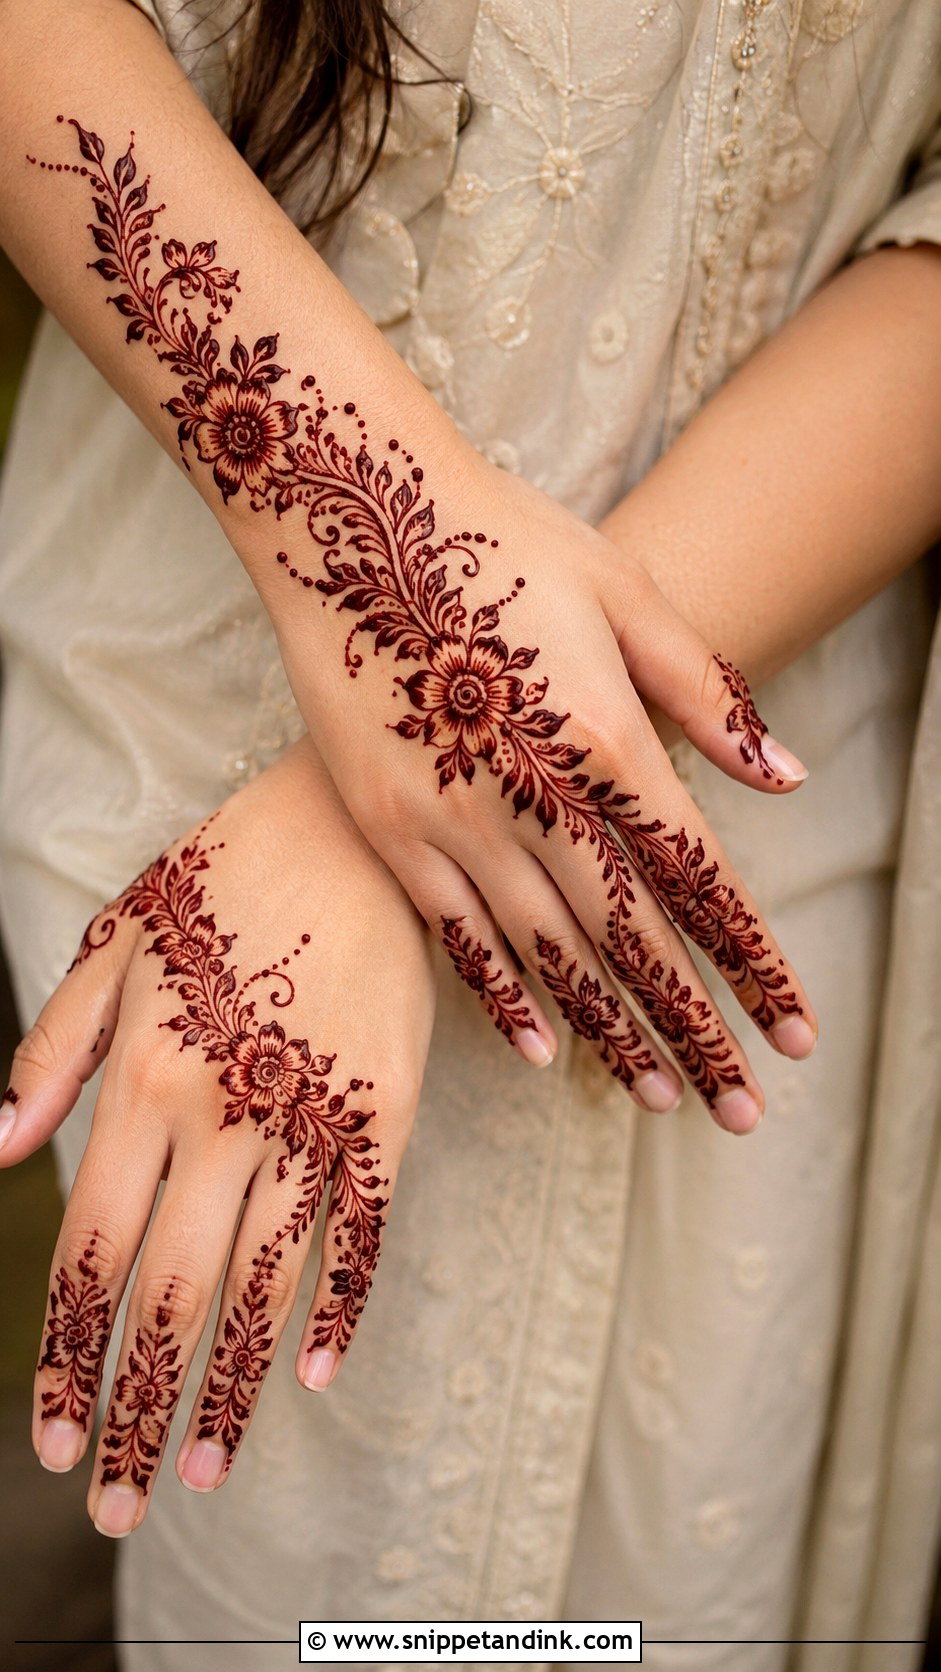
This is a diagonal line of flowers stepping down in size, from one near the wrist to small ones at the index finger, with leaves linking them. The trick is to reuse the same flower shape at three or four sizes, so it reads as one design rather than a collection of different blooms. Leave skin open on both sides of the trail and close it off with petal tips or dotted bands on the fingers. It’s quick enough that I can do several guests back to back at a mehndi night.
17. Simple Full Back Hand Mehndi Design
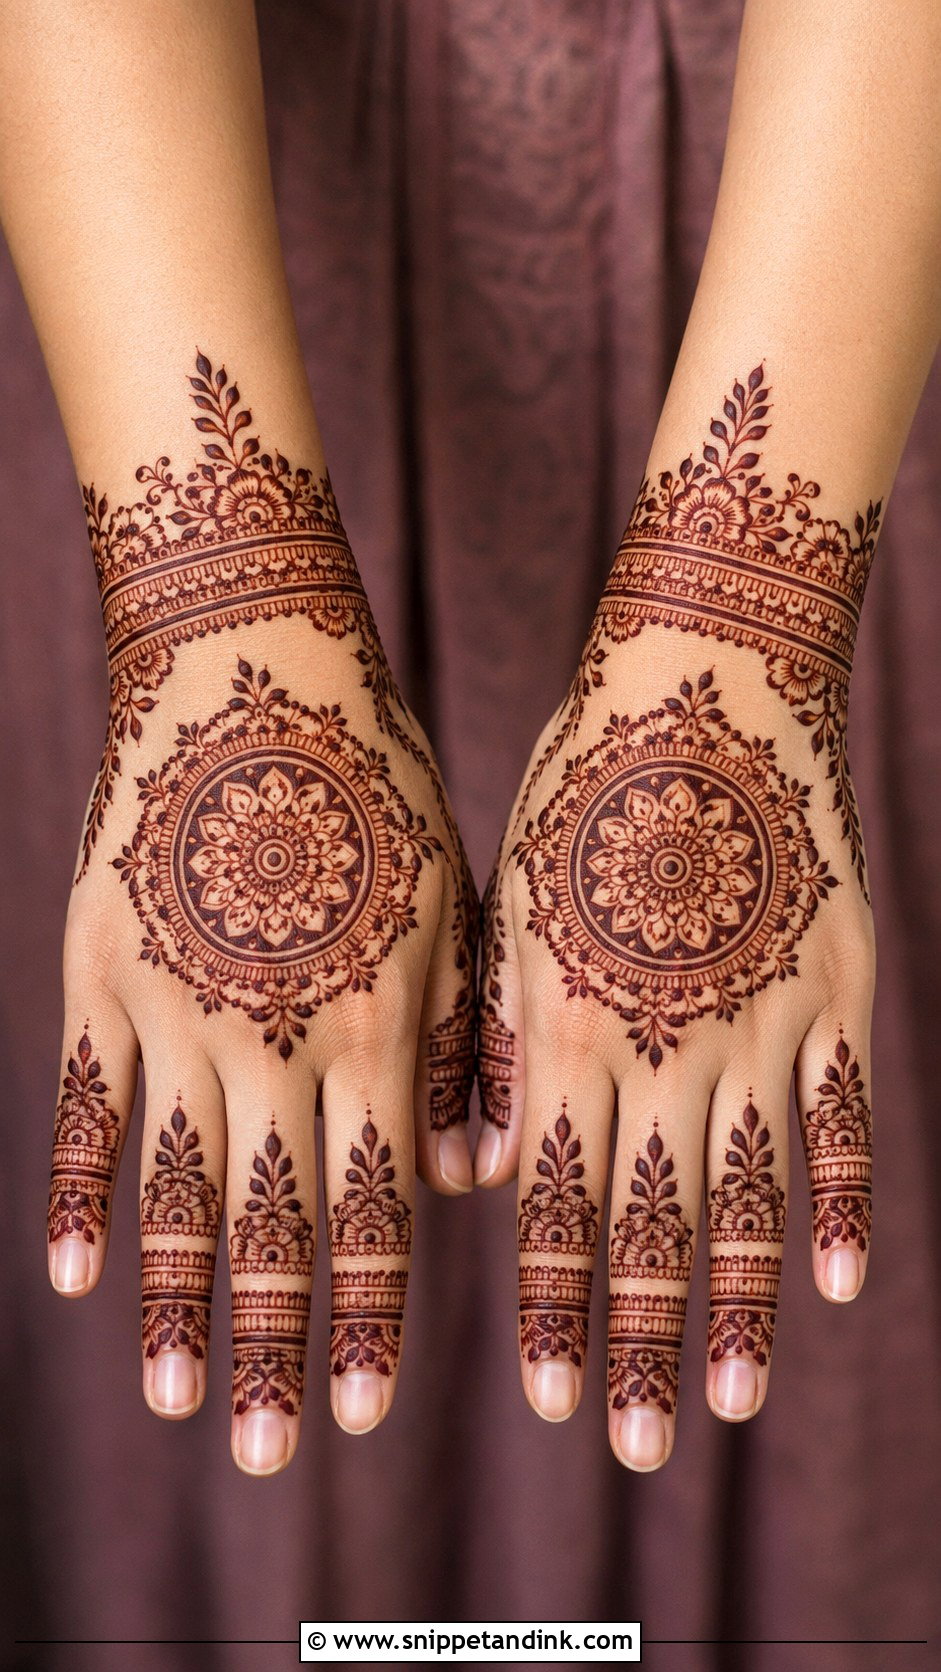
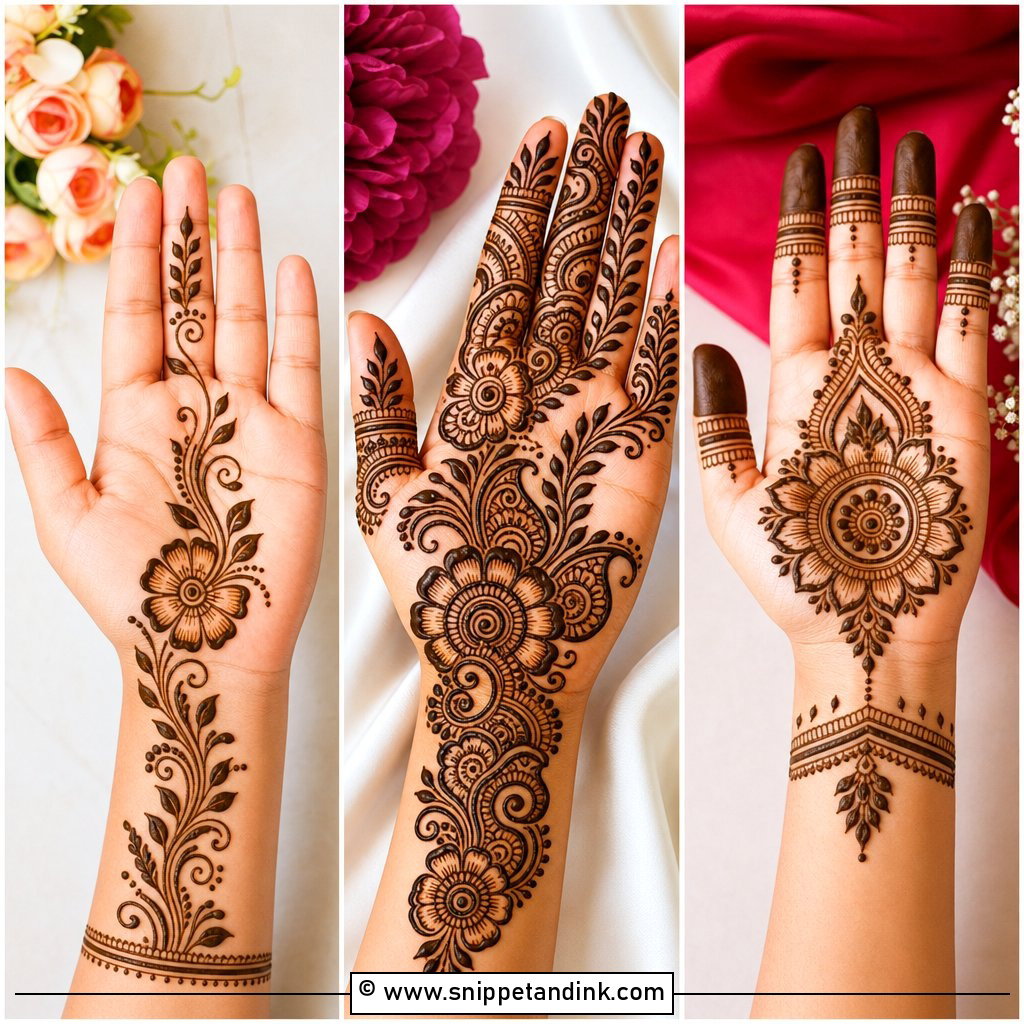
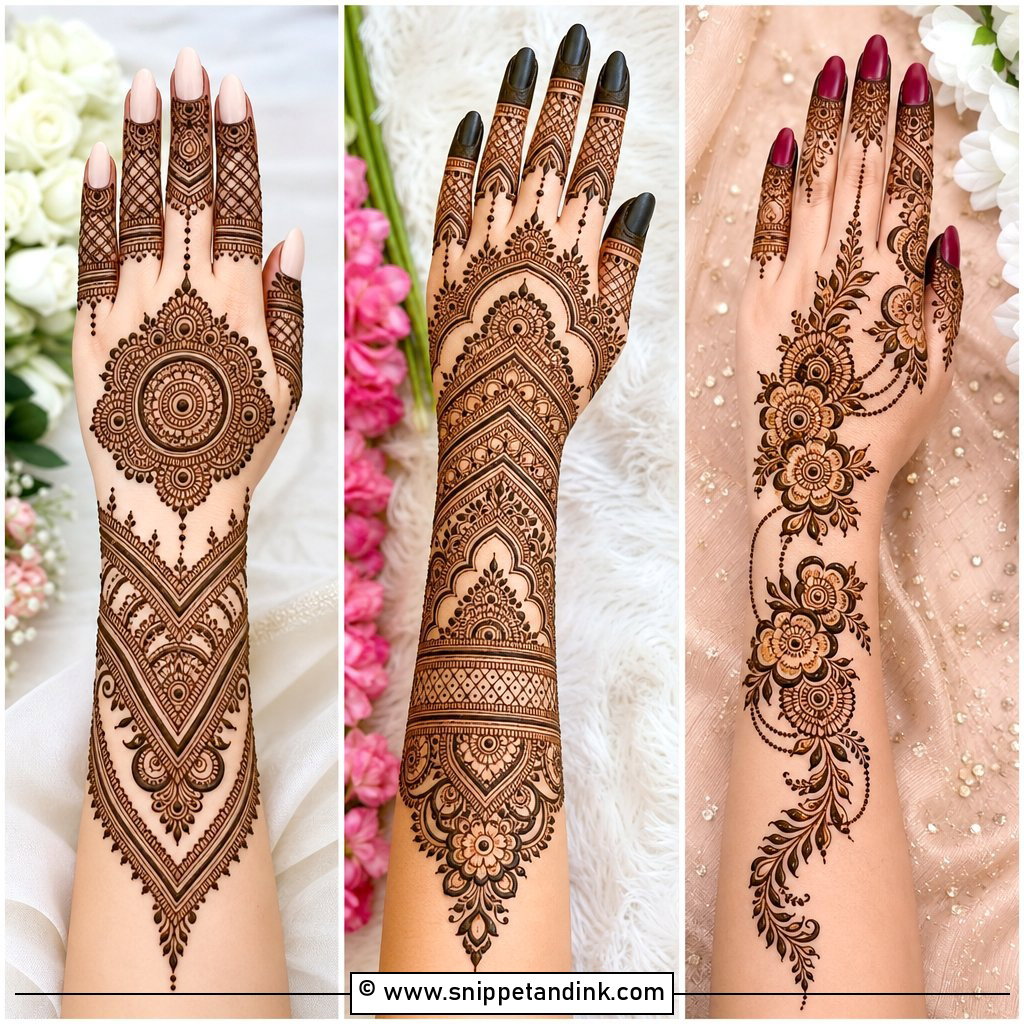
Full coverage doesn’t have to mean dense. I build a central mandala, floral borders, leafy corners and finger bands, but keep every element medium-sized so the hand doesn’t take two hours. Small breathing gaps between sections stop it reading as a solid brown glove once the stain darkens. Finish the wrist with a bracelet band or a scalloped border. Save this for bigger days like Eid or a family wedding, and plan to sit still for a while as it dries.
18. Back Hand Half Mehndi Design
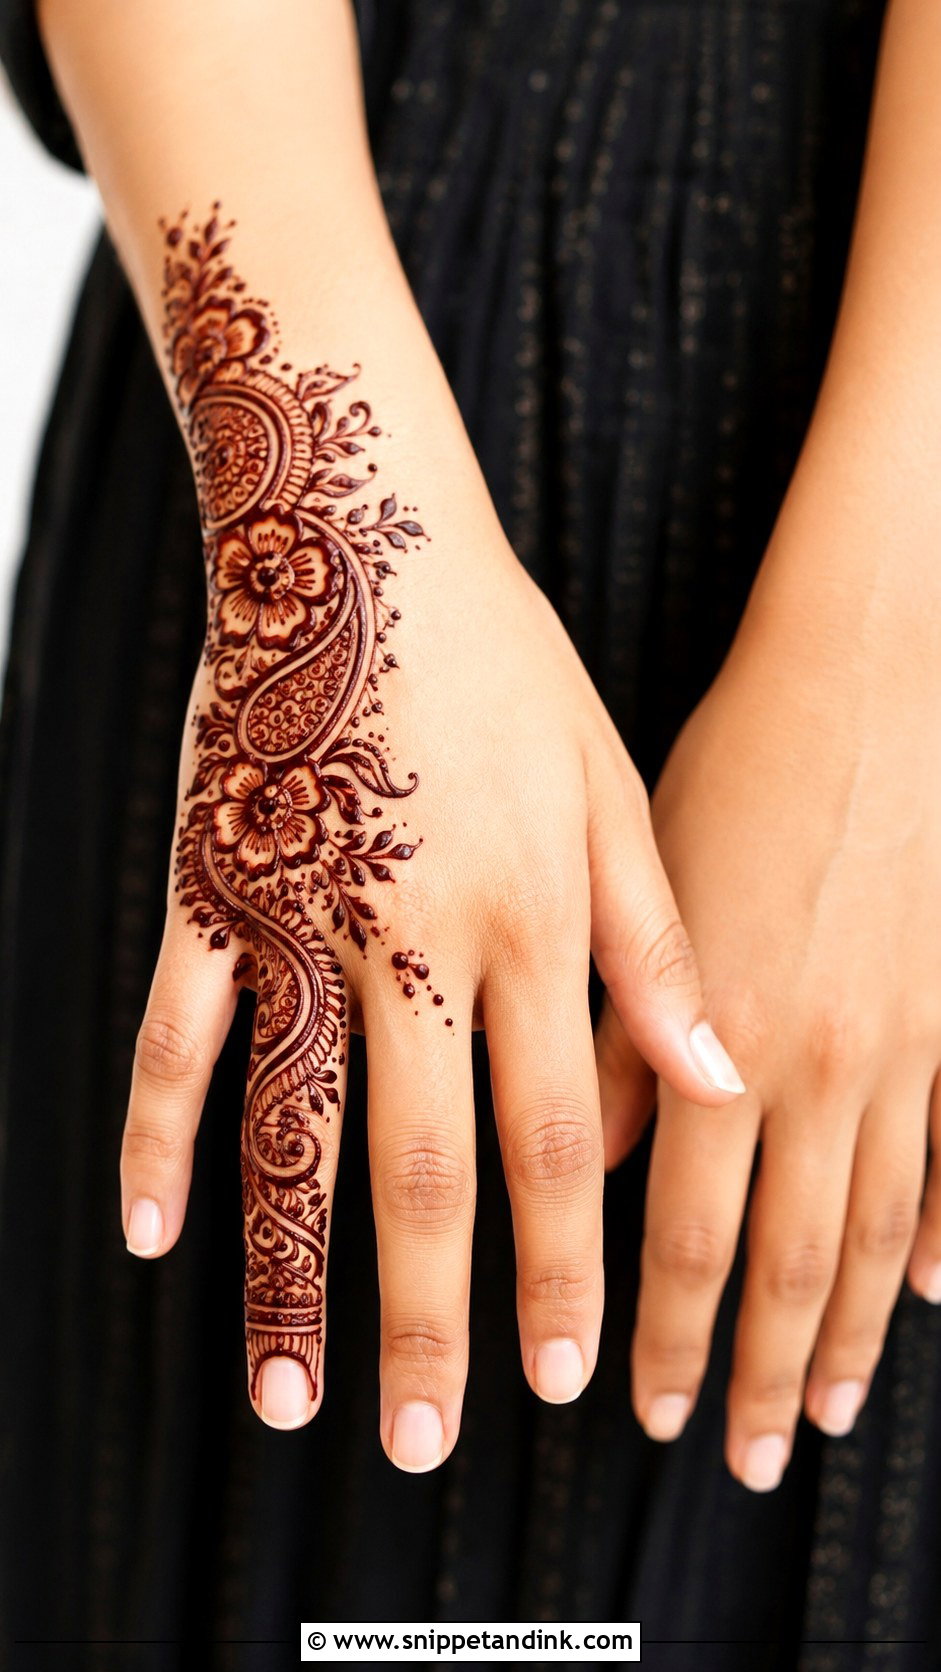
Half designs cover one side, usually from the wrist up to one or two fingers, and leave the other side bare. A floral vine, paisley trail or Arabic curve runs along the edge of the hand. Only decorate the fingers on the side the design touches; stray detail on the bare side muddles the asymmetry. It’s quick and comfortable for a whole day of cooking and greeting relatives.
19. Back Hand Round Tikki Mehndi Design
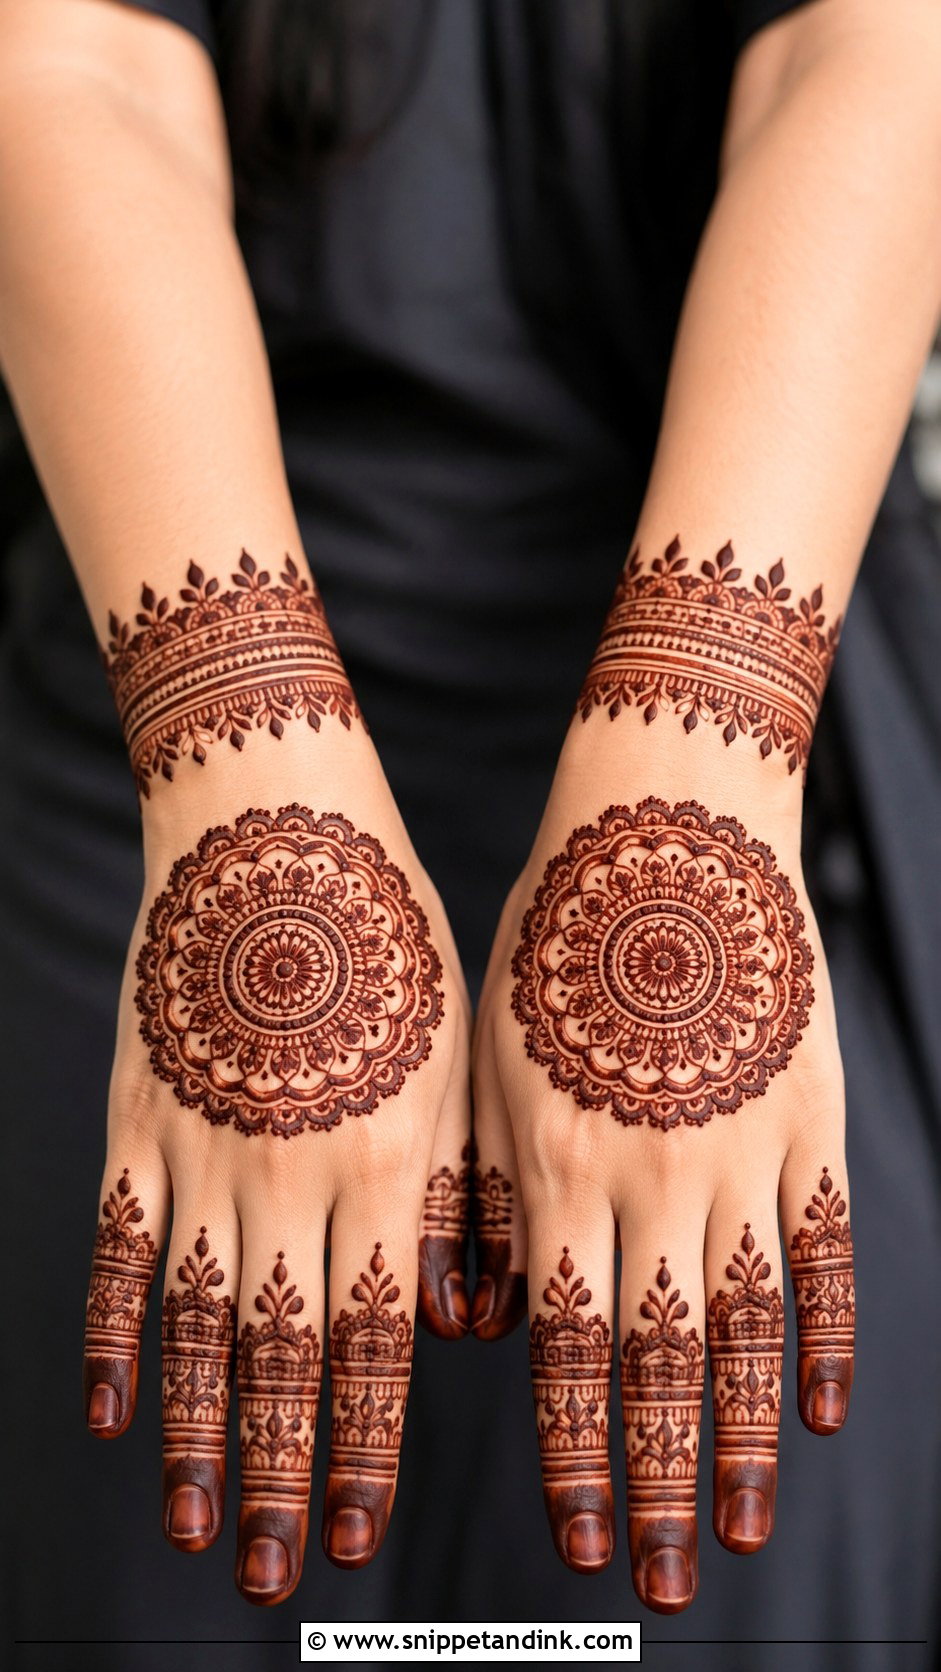
The round tikki has been worn for generations and still looks right. Draw a bold circle in the centre of the back hand and build outward in layers of petals, dots, scallops and fine lines. Because the circle is the whole point, I trace it lightly with a fine line first, check it from arm’s length, then go over it properly. Fingertip designs and a plain wrist band complete it. You get a traditional hand for festivals without the stress of a full bridal design.
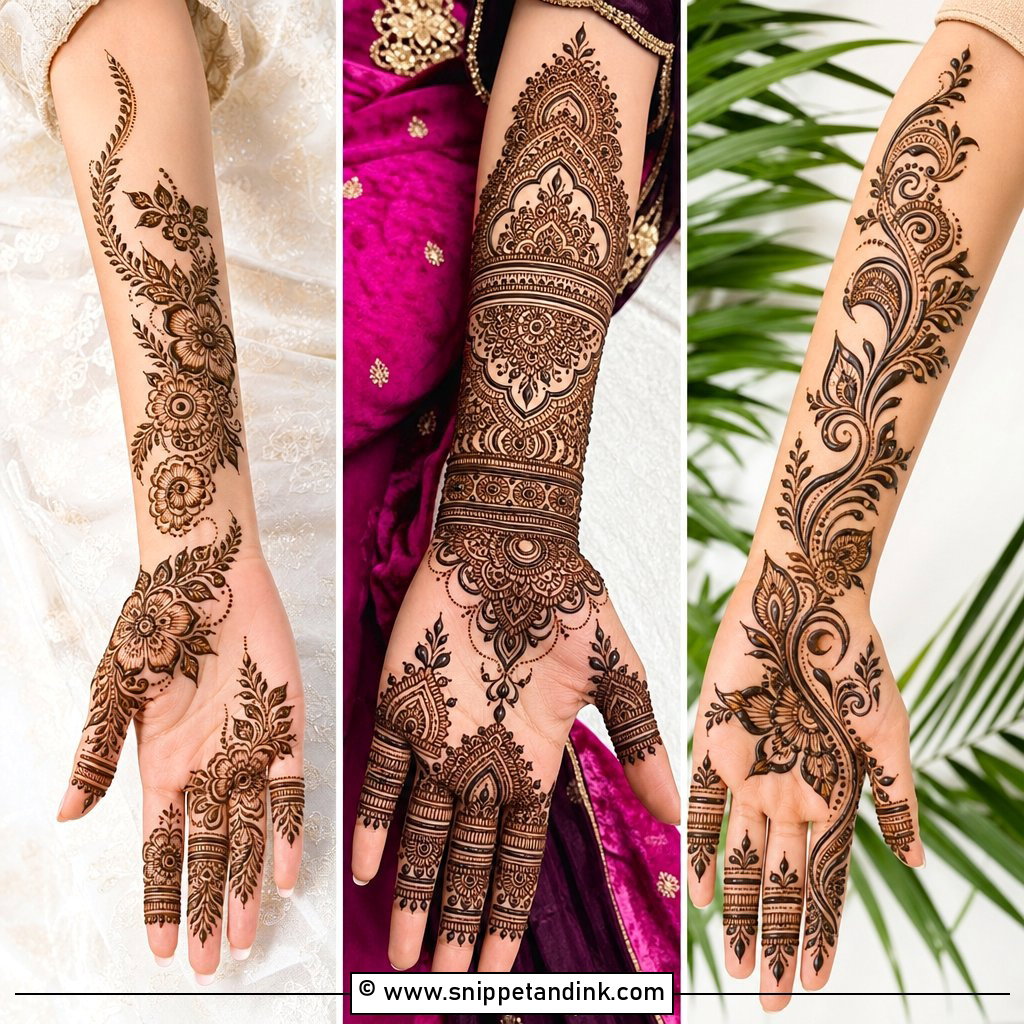
20. Back Hand Chain Mehndi Design
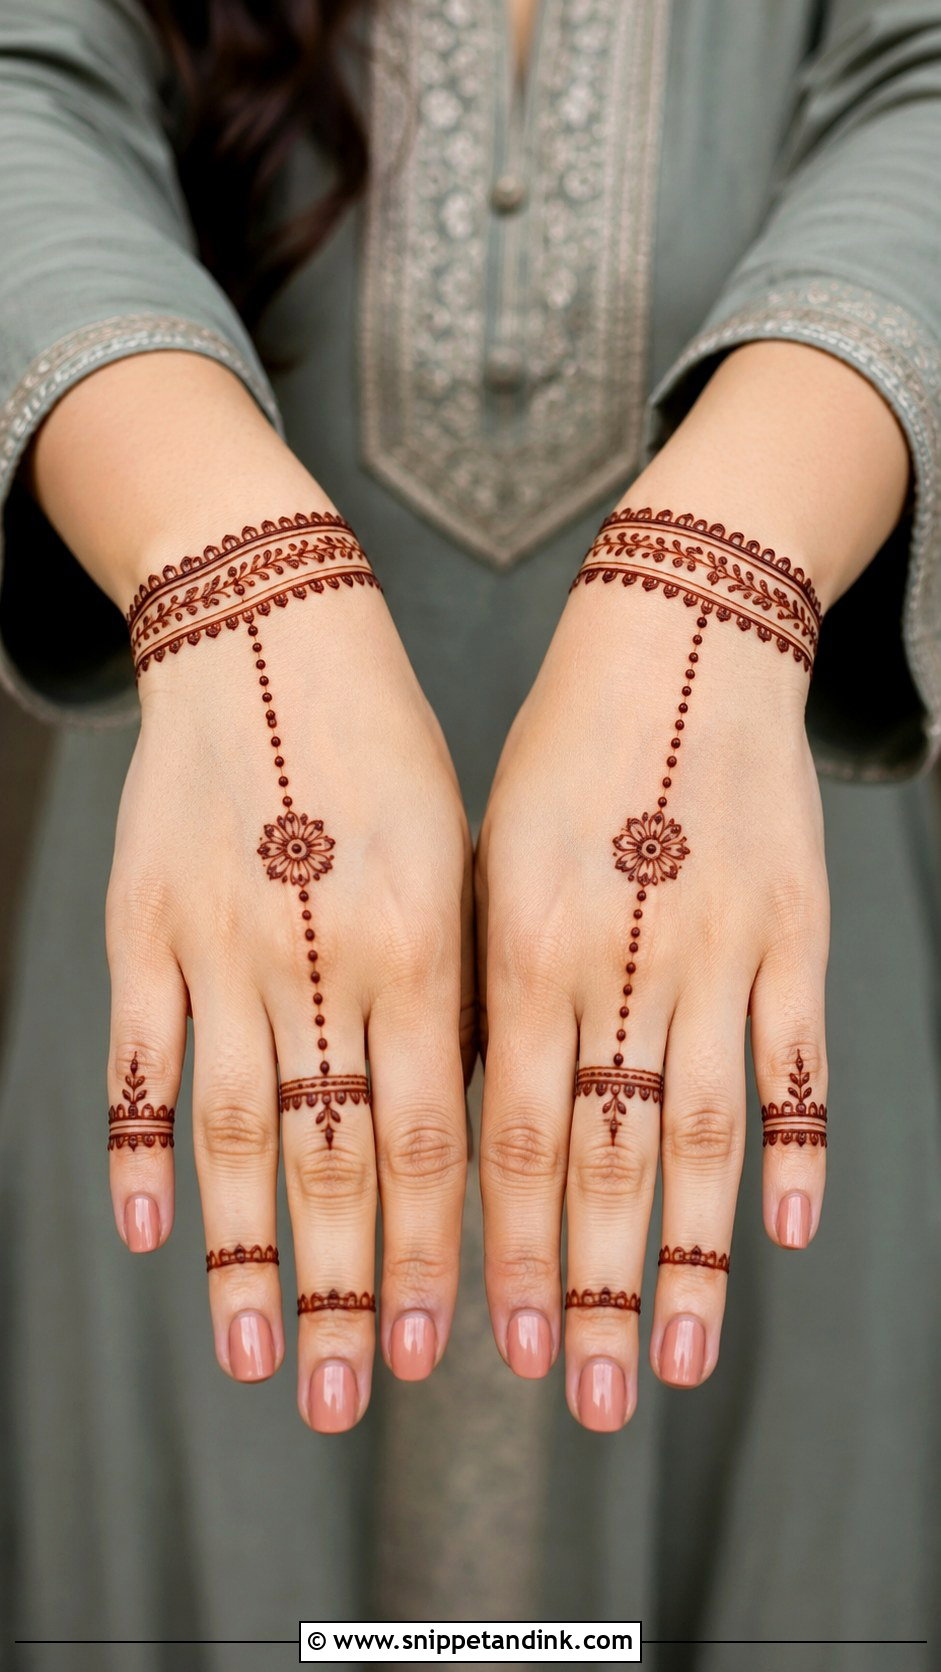
Chains imitate the hathphool, the hand ornament that links rings to a bracelet. Draw a small flower, ring or mandala on the back hand, then connect it to the fingers and the wrist with dotted chains, adding tiny leaves or beads along them. Thin, even lines are everything here; one thick blob ruins the delicacy. Ring bands on the fingers and a simple wrist bracelet finish it. It covers very little skin and goes on quickly, which is why it’s a favourite for parties.
21. Back Hand Geometric Mehndi Design
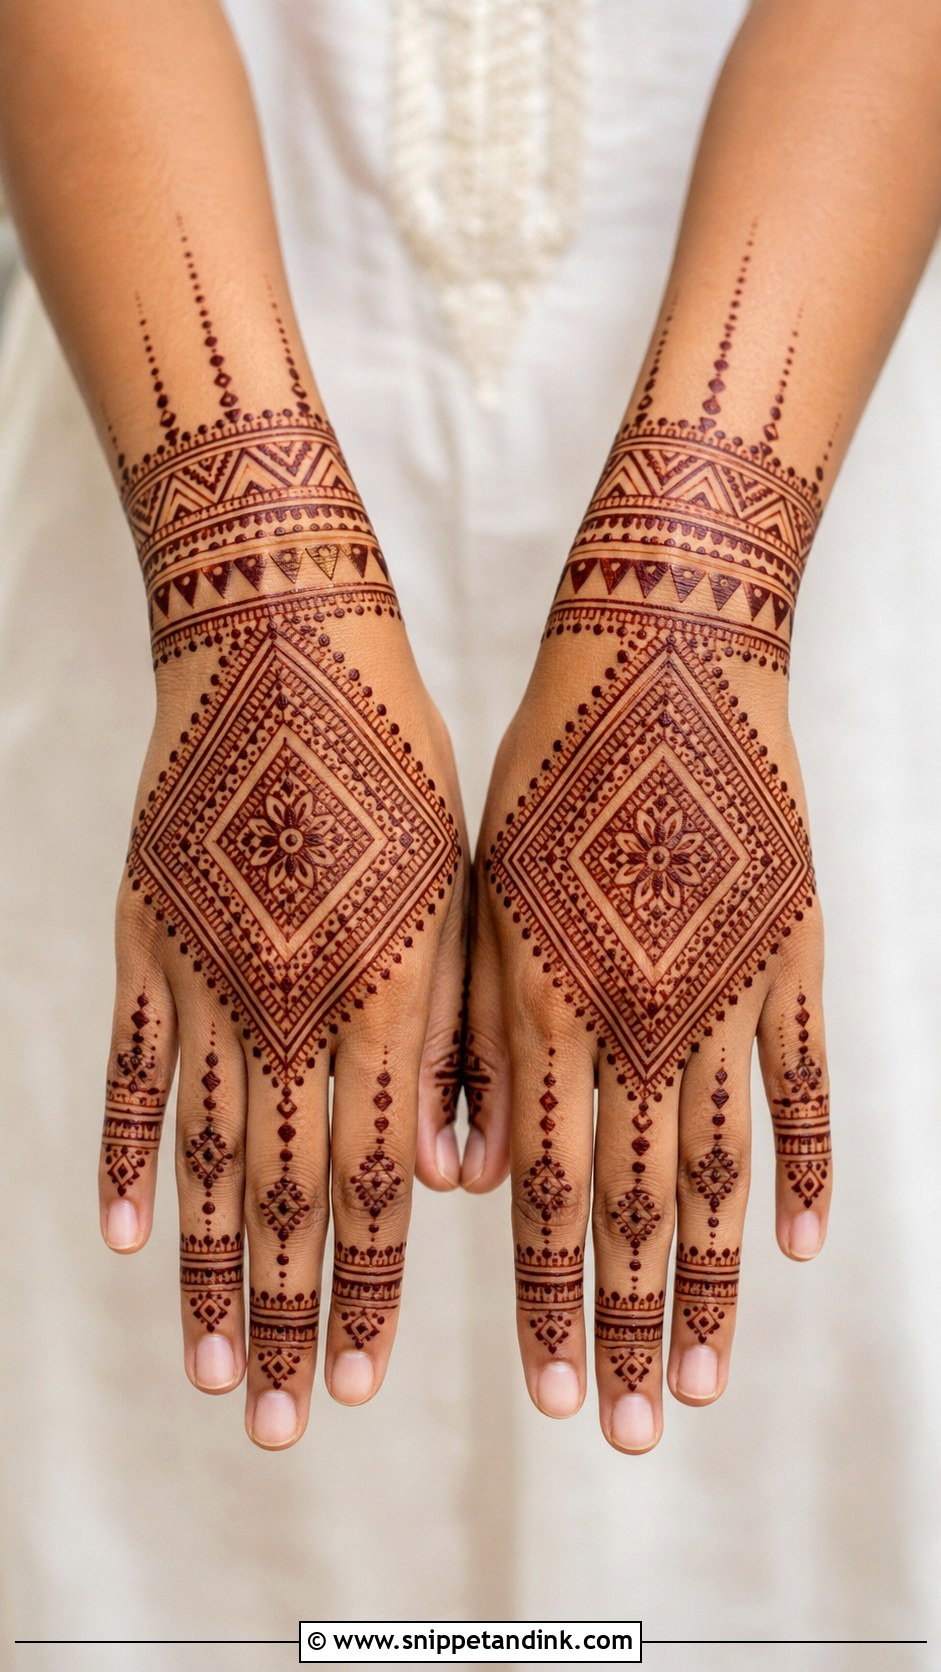
Geometric work suits people who’d rather have structure than flowers. Diamonds, triangles, squares and straight borders form a panel across the centre of the hand, softened with dotted lines and a few small leaves. Straight lines are less forgiving than curves, though. I pull them in one steady motion with the cone held just above the skin, letting the paste fall onto the hand instead of dragging the tip through it. Matching bands with checks or tiny triangles go on the fingers, and the shapes resize easily for any hand.
22. Back Hand Moroccan Mehndi Design
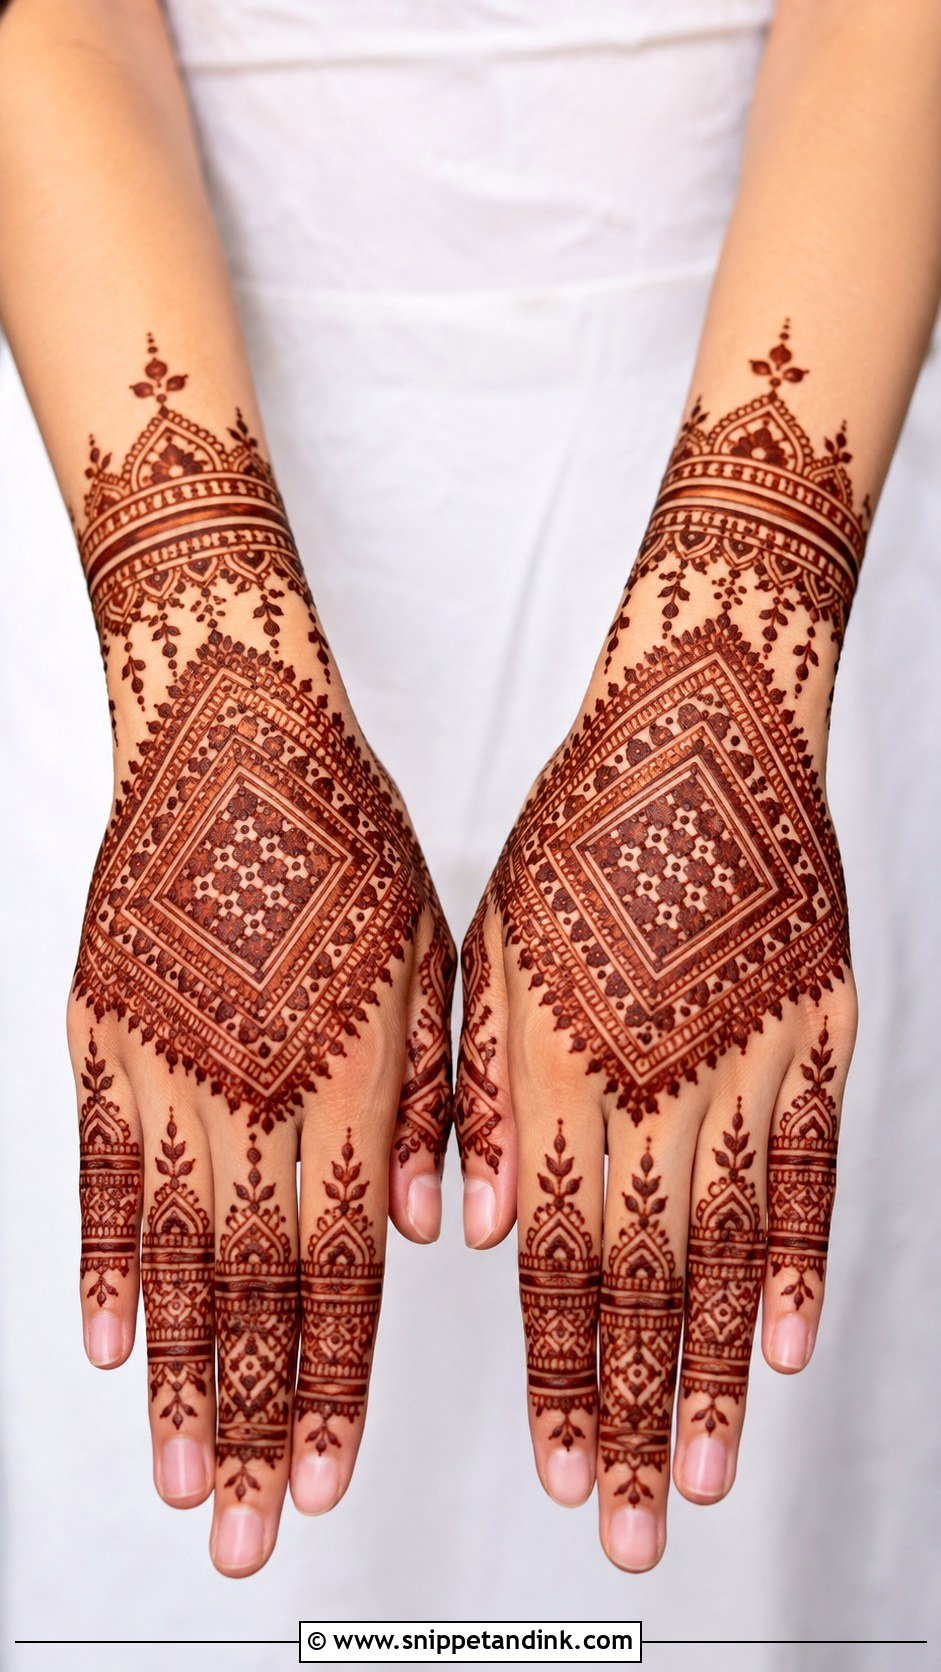
Moroccan-inspired designs swap florals for bold geometry: diamonds, grids, bands and angular shapes in balanced spacing. Start with a central diamond panel, then add wrist and finger bands that echo it. Symmetry matters more here than in almost any other style, so I mark the centre line of the hand with a tiny dot before beginning. Because the shapes repeat, it’s also excellent practice for building line control.
23. Back Hand Gulf Mehndi Design
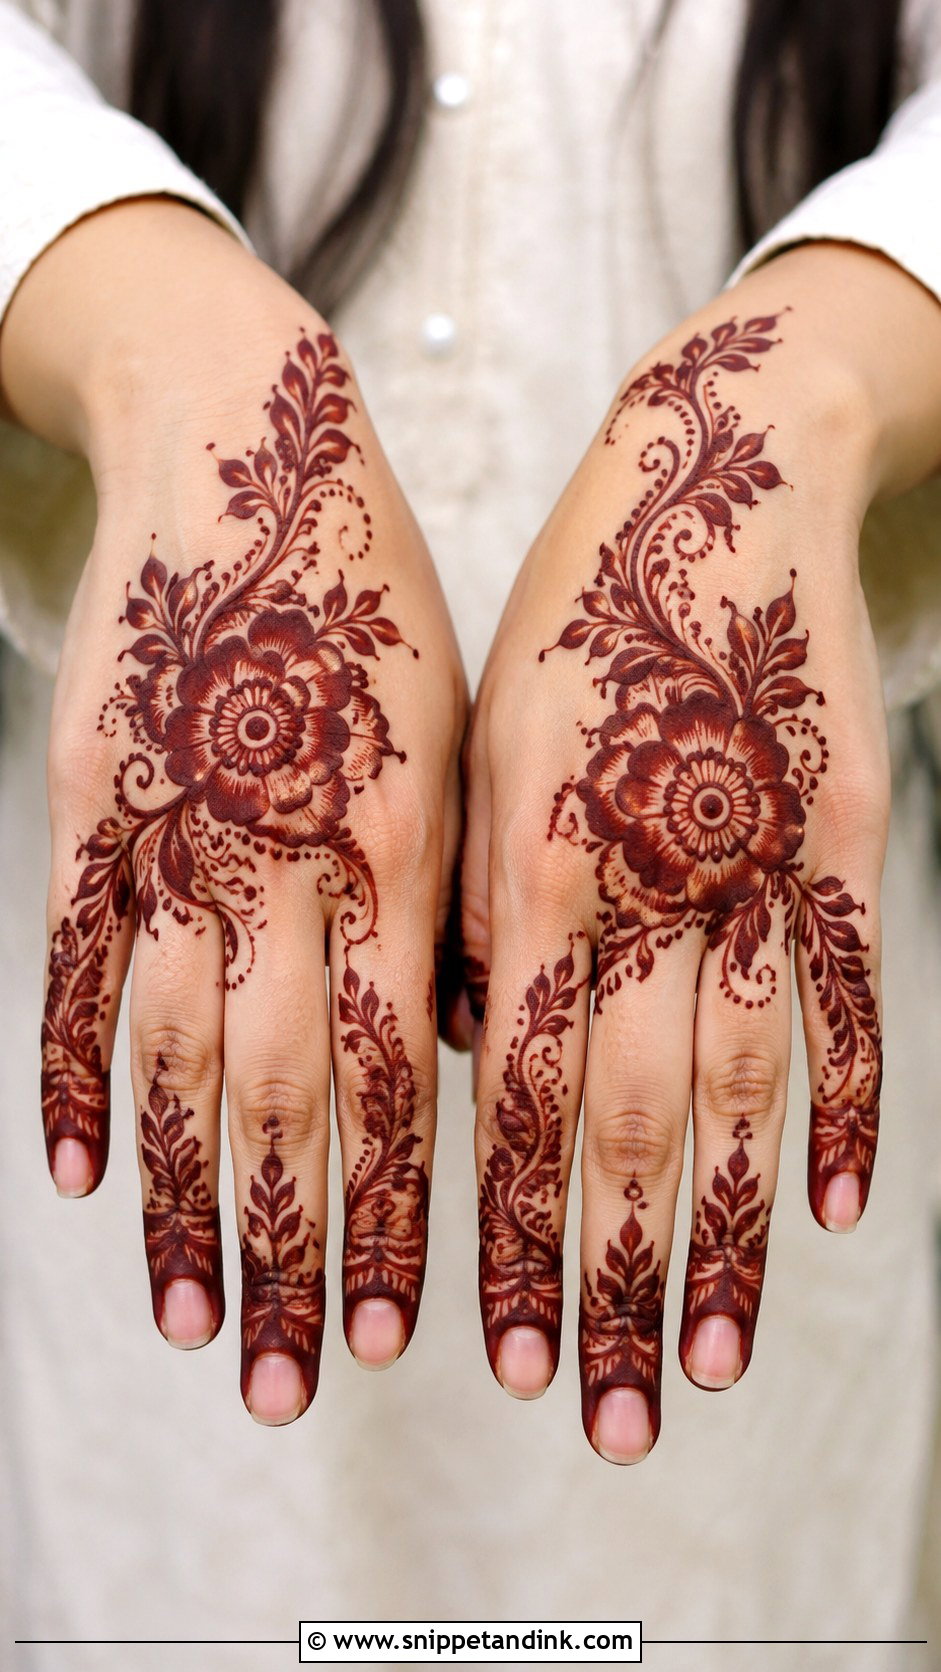
Gulf or Khaleeji mehndi uses big flowers, leafy curves and plenty of open skin. For an easy version, set one large flower on the side of the hand and let flowing leaves run toward the fingers, with a few dots and curved fillers. Bold petal tips or simple bands on the fingers are typical. Outlines in this style are thicker than in fine Indian work, so I cut the cone tip a little wider. Those confident outlines are also why it tends to stain strongly, and it’s much loved for Eid.
24. Back Hand Indo Arabic Mehndi Design
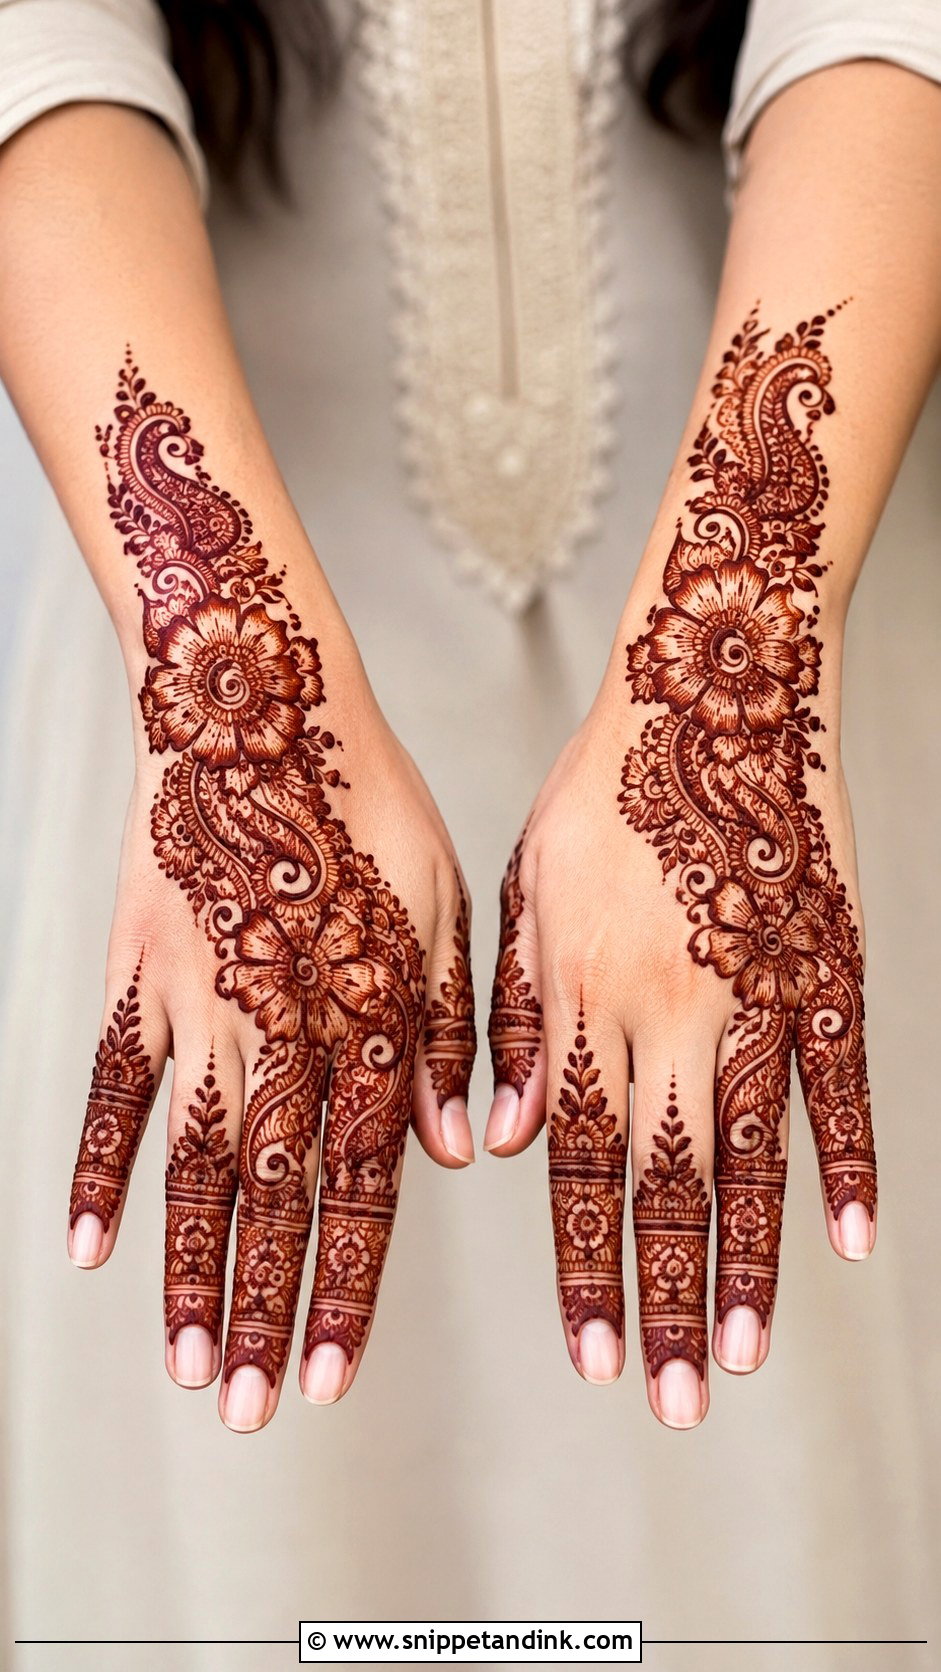
Indo-Arabic takes the diagonal flow of Arabic mehndi and fills its shapes with Indian detail: small paisleys, dots and fine lines inside the main flowers. The balance I aim for is one detailed side and one open side, so it never tips into heavy. Patterned finger bands and a plain wrist border round it off. It’s a step up from minimal mehndi yet still manageable for a confident beginner, and it sits comfortably at weddings and family functions.
25. Back Hand Bridal Simple Mehndi Design
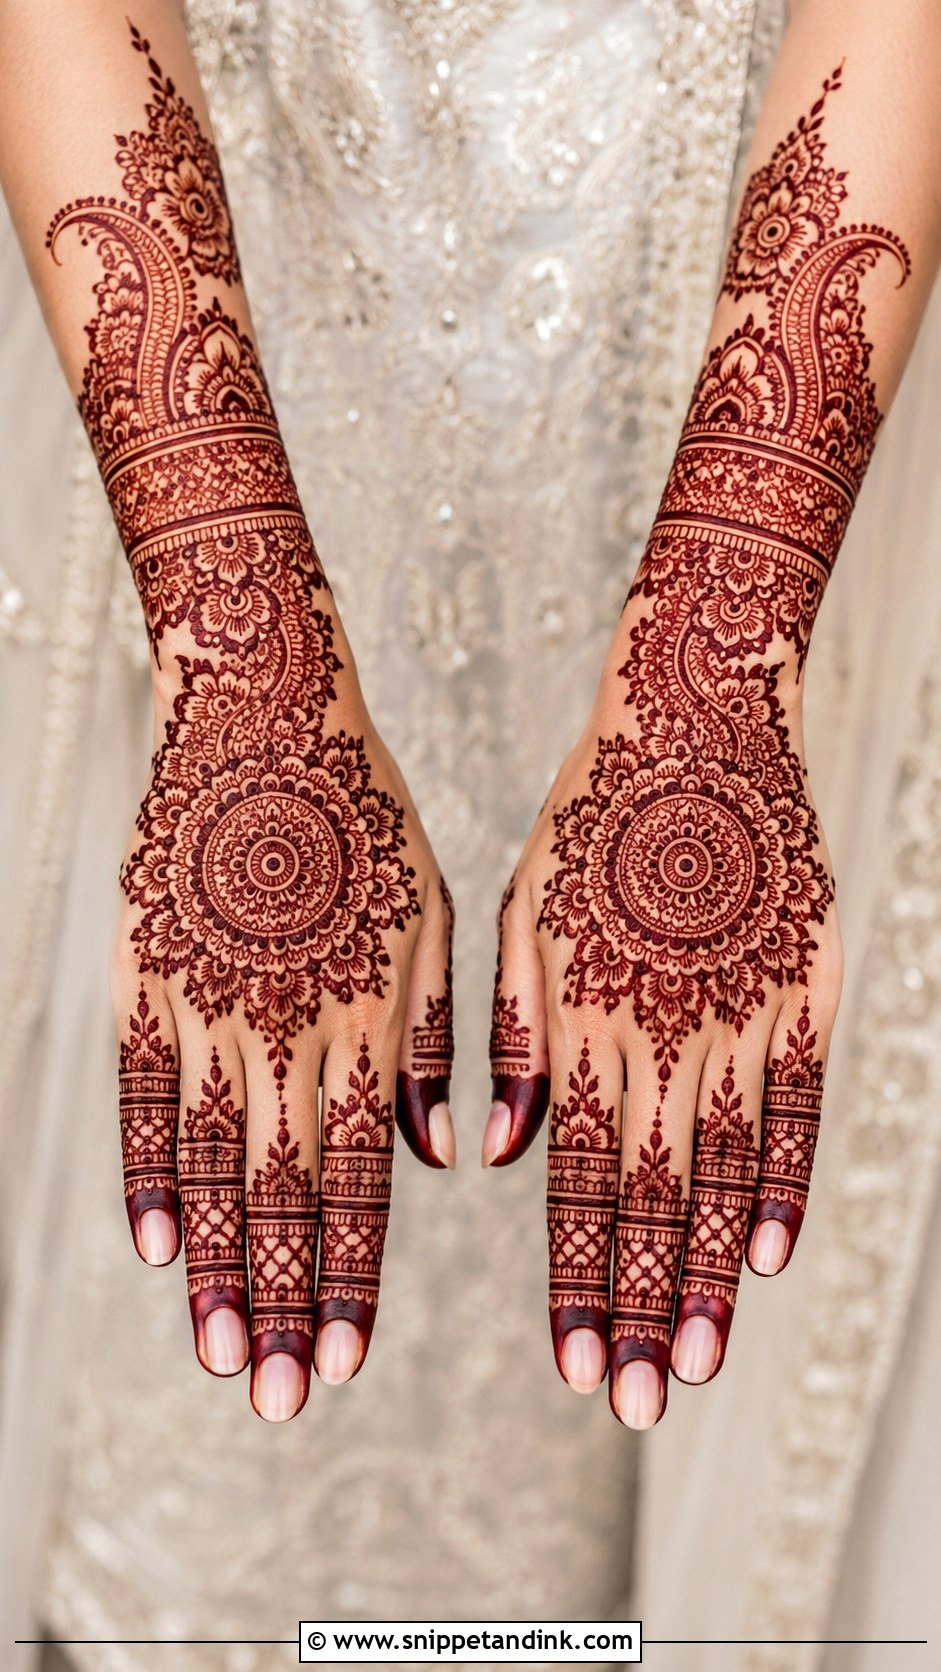
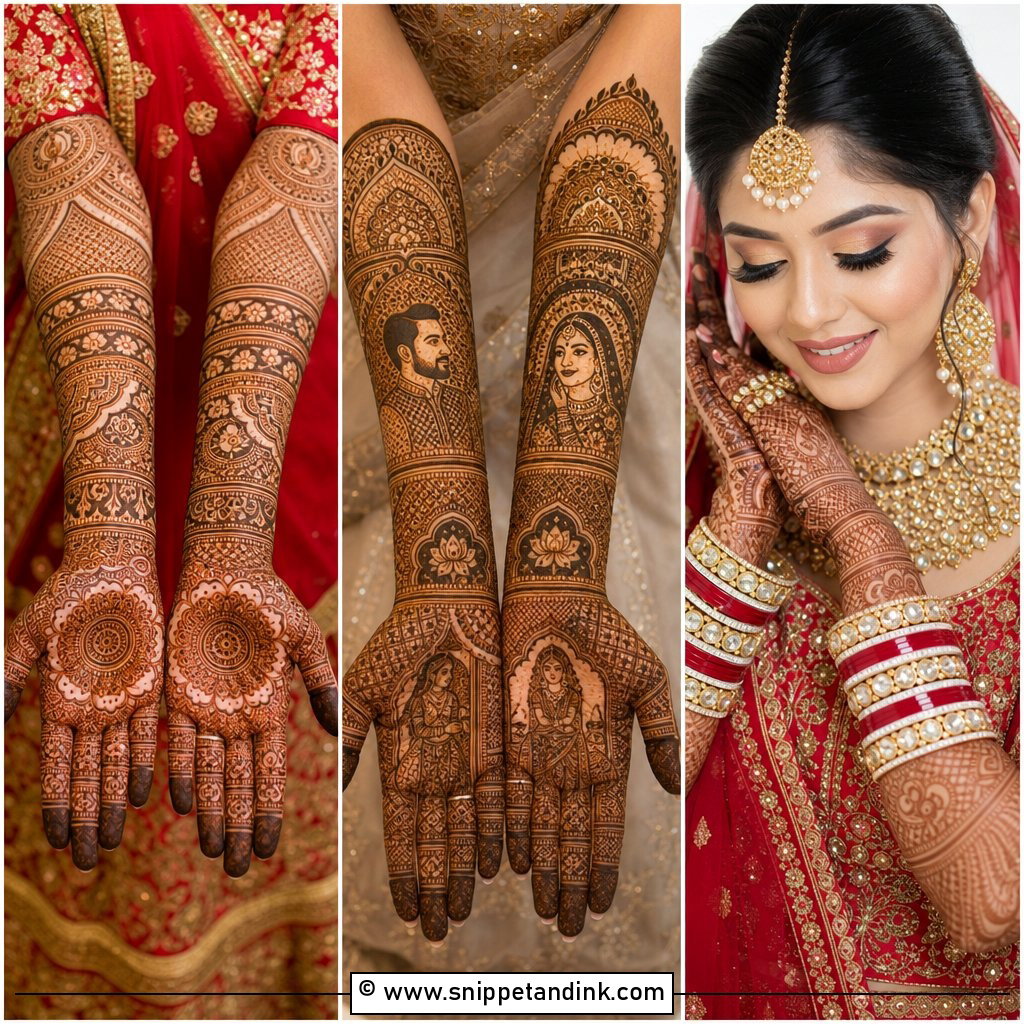
A back hand bridal simple mehndi design is for a bride who wants something neat rather than elbow-deep coverage. I combine a central mandala, floral borders, paisley accents and detailed fingers, then let the wrist cuff climb slightly onto the forearm so it reads as bridal. Initials or a tiny symbol can be tucked in, kept small. Clean symmetry and even spacing count for more than the number of motifs. Bridesmaids and engagement looks can borrow the same layout at a lighter weight.
26. Back Hand Eid Mehndi Design
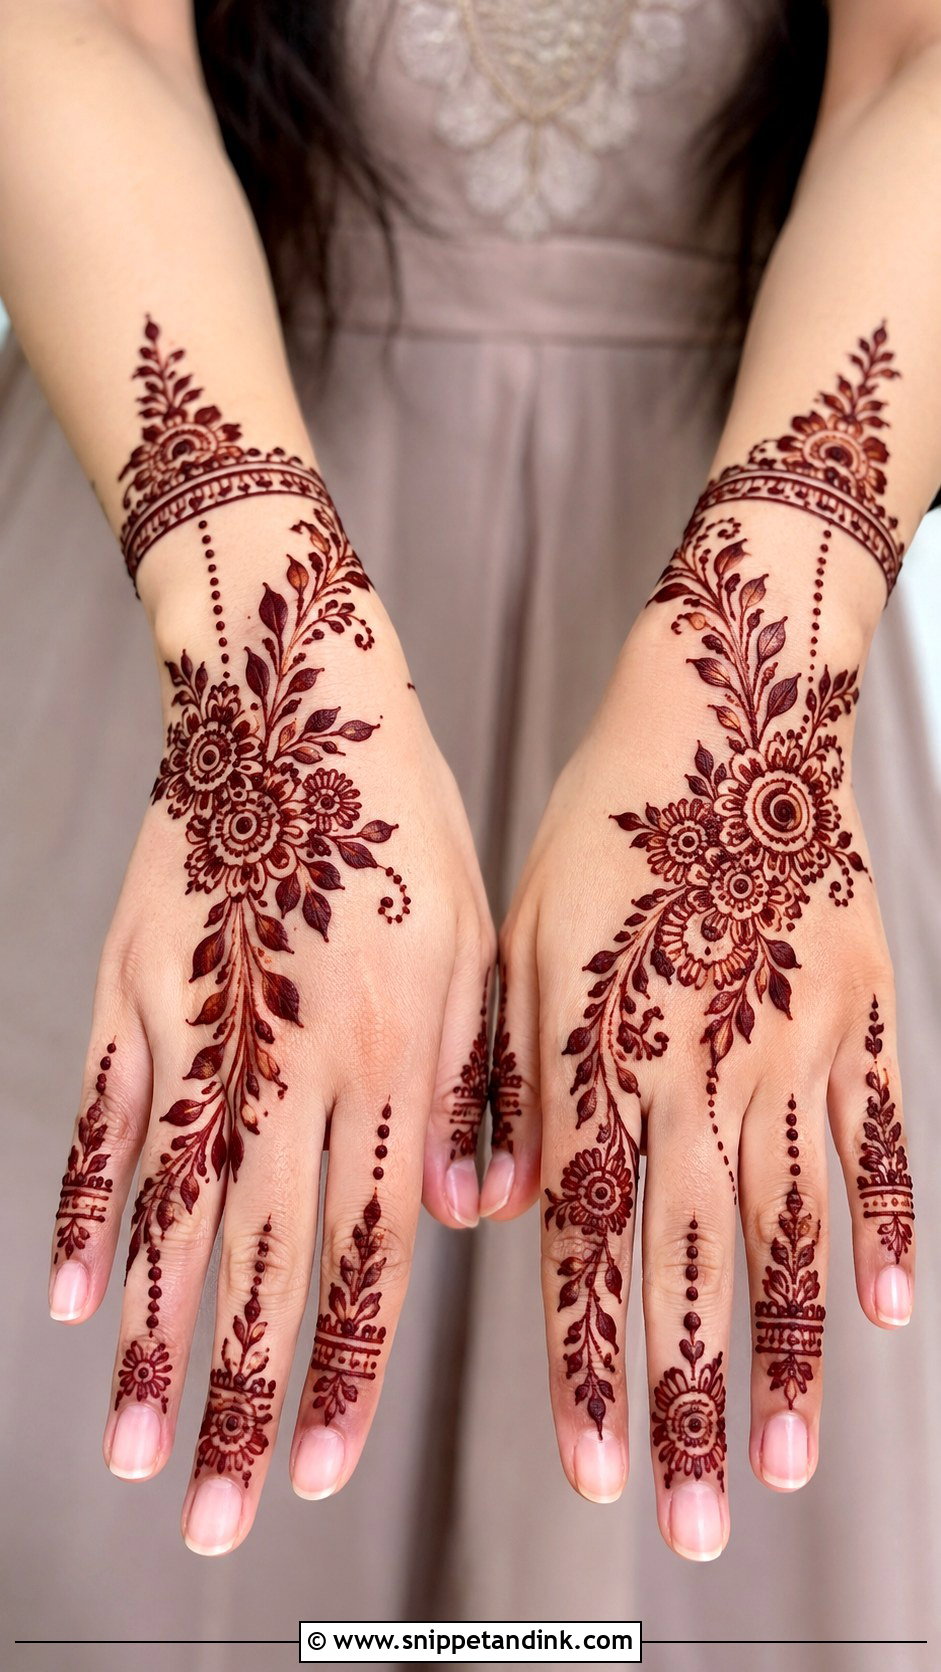
Eid mehndi often happens late on Chaand Raat, usually for a queue of family, so the design has to be fast. An Arabic floral trail with open spaces, leafy vines and dotted fingers fits that brief, and a small wrist bracelet makes the hand feel dressed. For darker fingers, I fill the fingertips solid; they take colour better than the back of the hand ever will. It sits well with both everyday and dressy festive clothes.
27. Back Hand Wedding Guest Mehndi Design
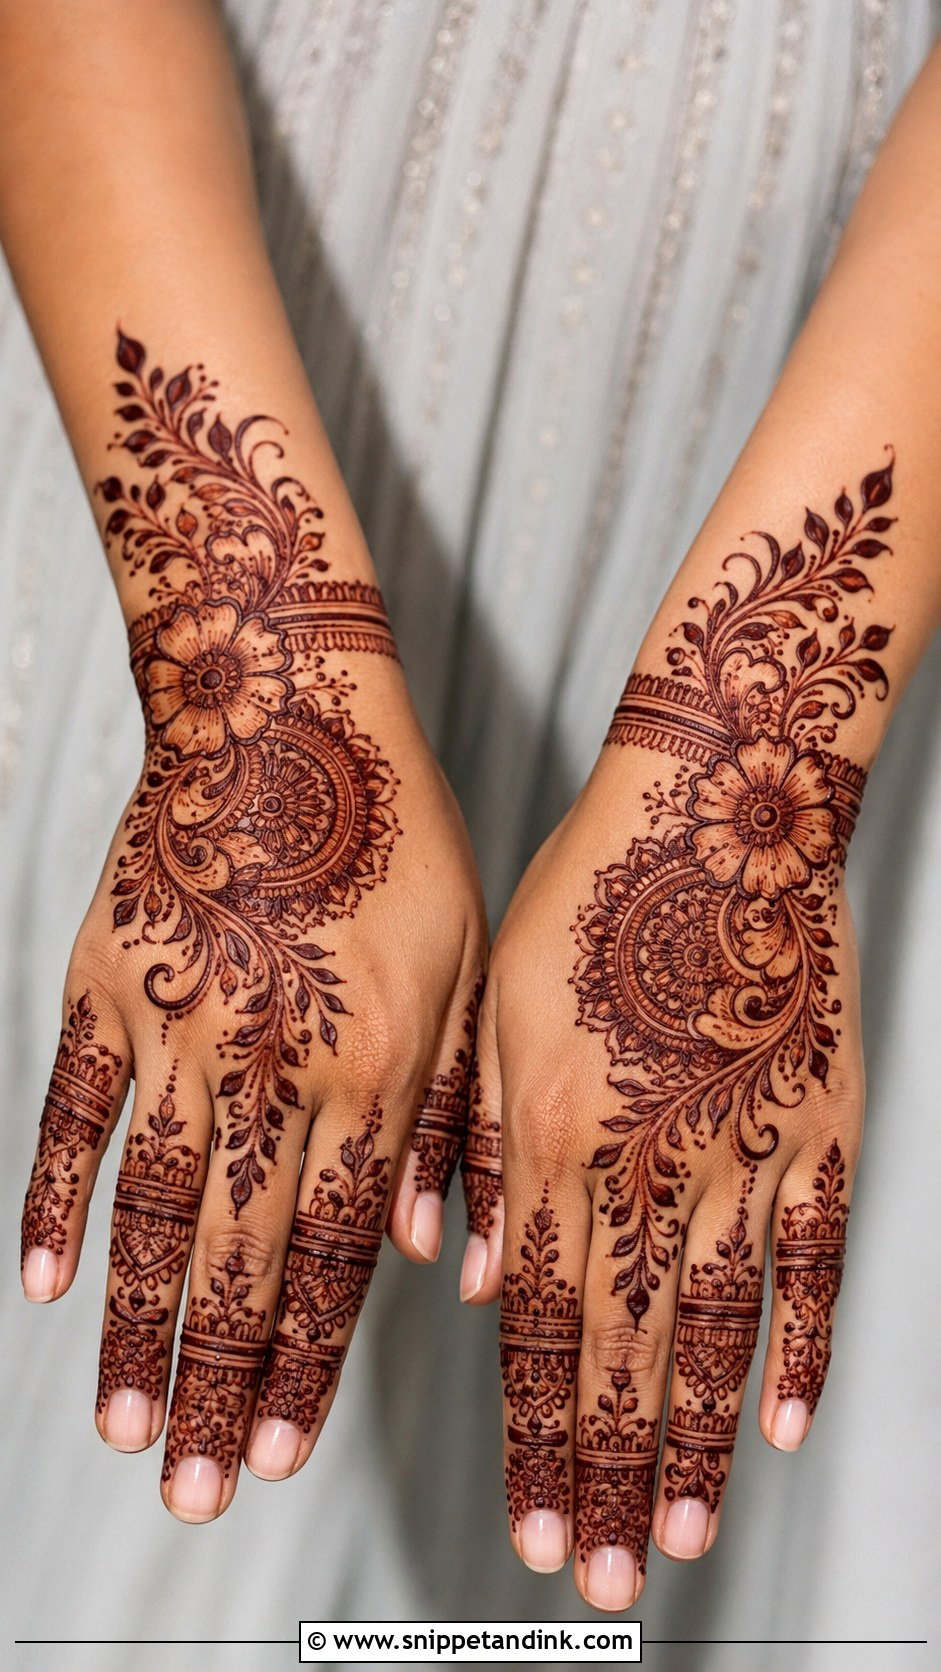
As a guest, you want polish without competing with the bride’s hands. A diagonal Arabic trail, a central mandala with finger bands or a bracelet chain all land at that level, using flowers, leaves, dots and slim borders. Think about your bangles too. A busy wrist cuff disappears under a stack of churis, so I keep the wrist light when someone plans to wear a lot of them. This weight suits mehndi nights, receptions and engagement parties.
28. Back Hand Kids Mehndi Design
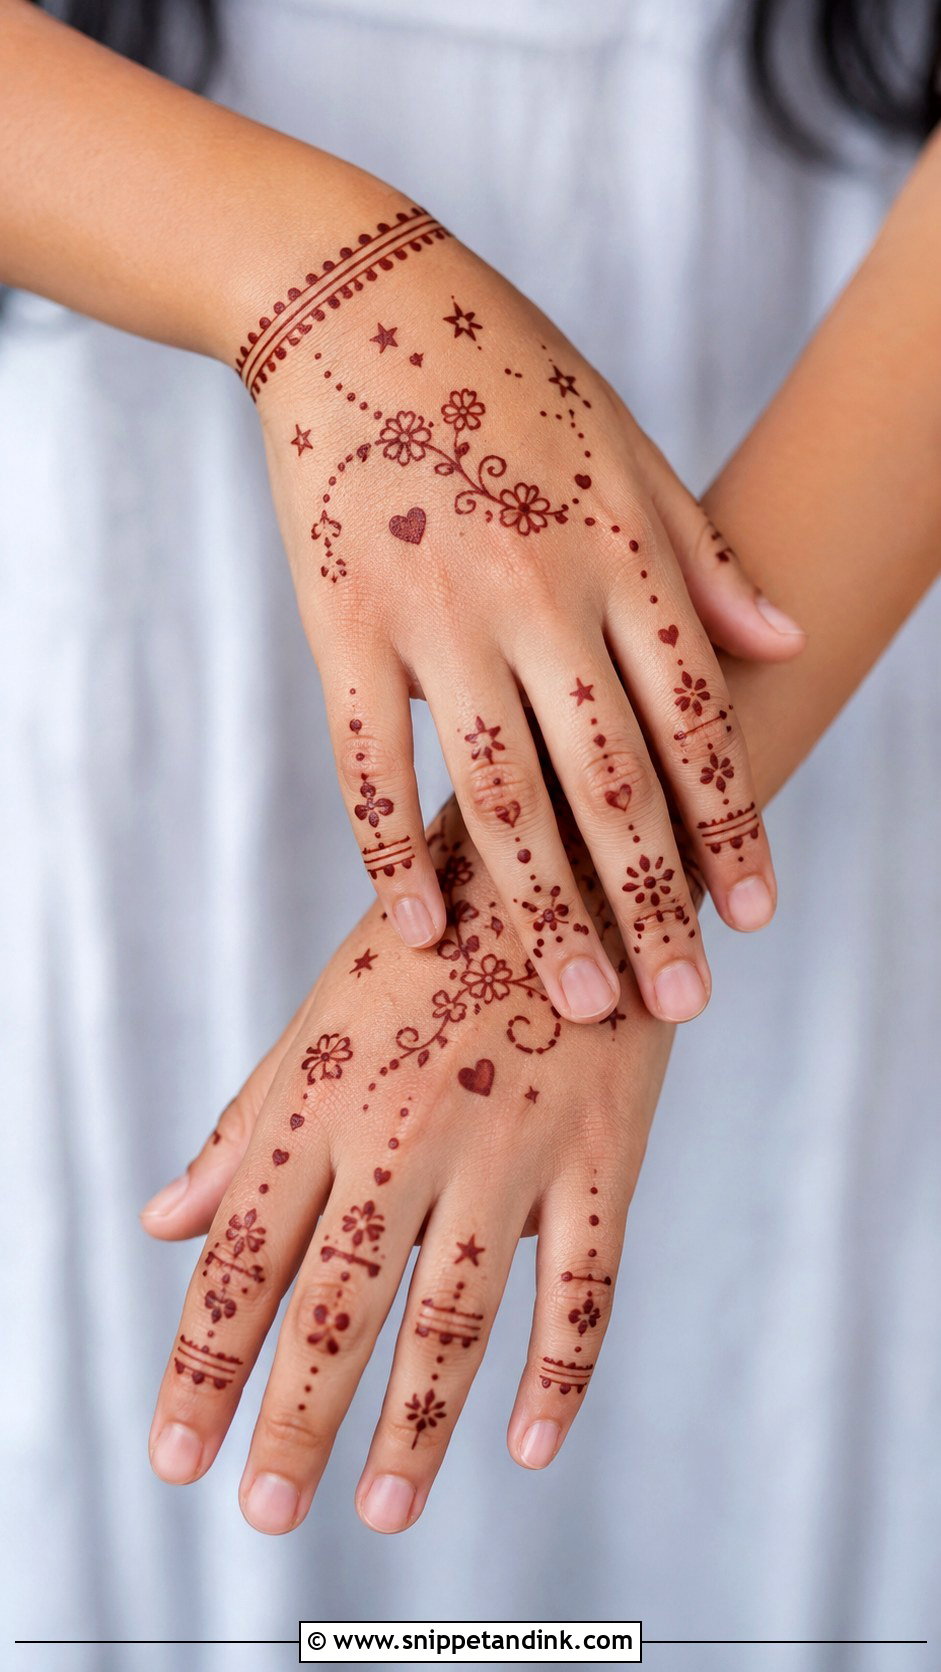
A back hand kids mehndi design should be small and fast, because children rarely sit still until the paste dries. Small flowers, a simple vine, dots, hearts, stars or a mini mandala are plenty. Skip dense fill; a smudged design upsets a child far more than a plain one. Keep it to the back hand and fingers with lots of open space. I use only natural henna on children, never anything sold as black henna, and I aim to finish in a few minutes so they can run off.
29. Back Hand Beginner Mehndi Design
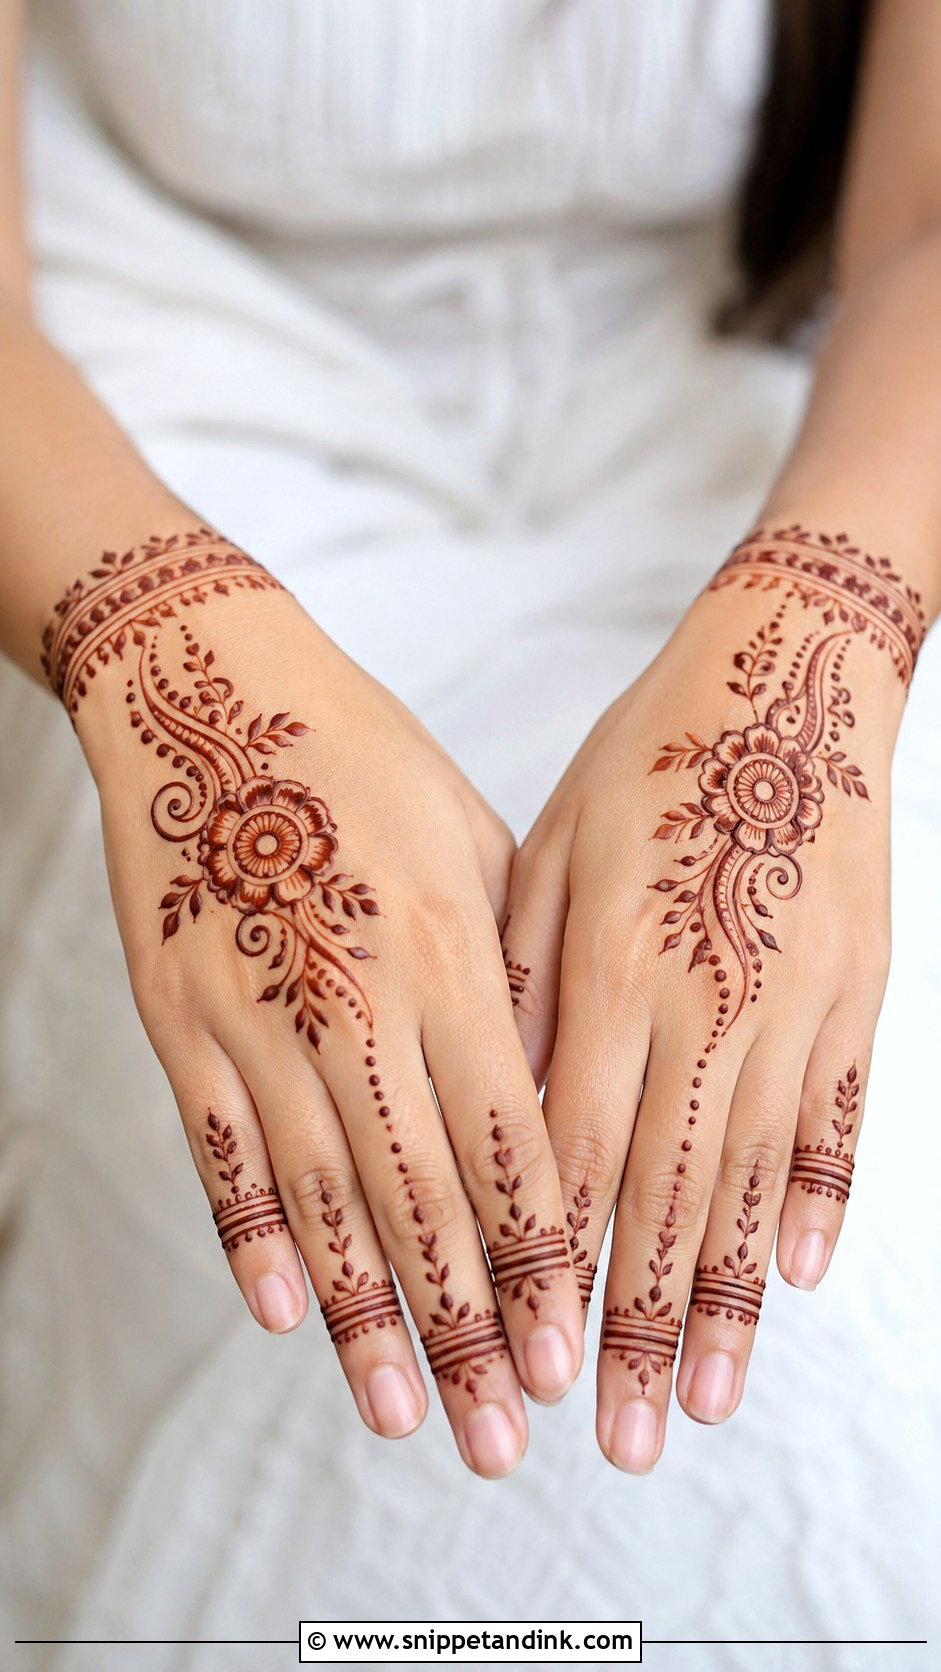
If you’re learning, start with a small flower or round tikki in the centre and add leaves, dots, curves and simple finger bands. Don’t fill every gap; clean spacing is what makes beginner work look practised. Shaky line? Cover the wobble with a dot or a small leaf, which is exactly what experienced artists do. Hold the cone like a pen, squeeze from the top with steady pressure and move slower than feels natural. That one habit improves lines more than any design choice.
30. Back Hand Simple Shaded Mehndi Design
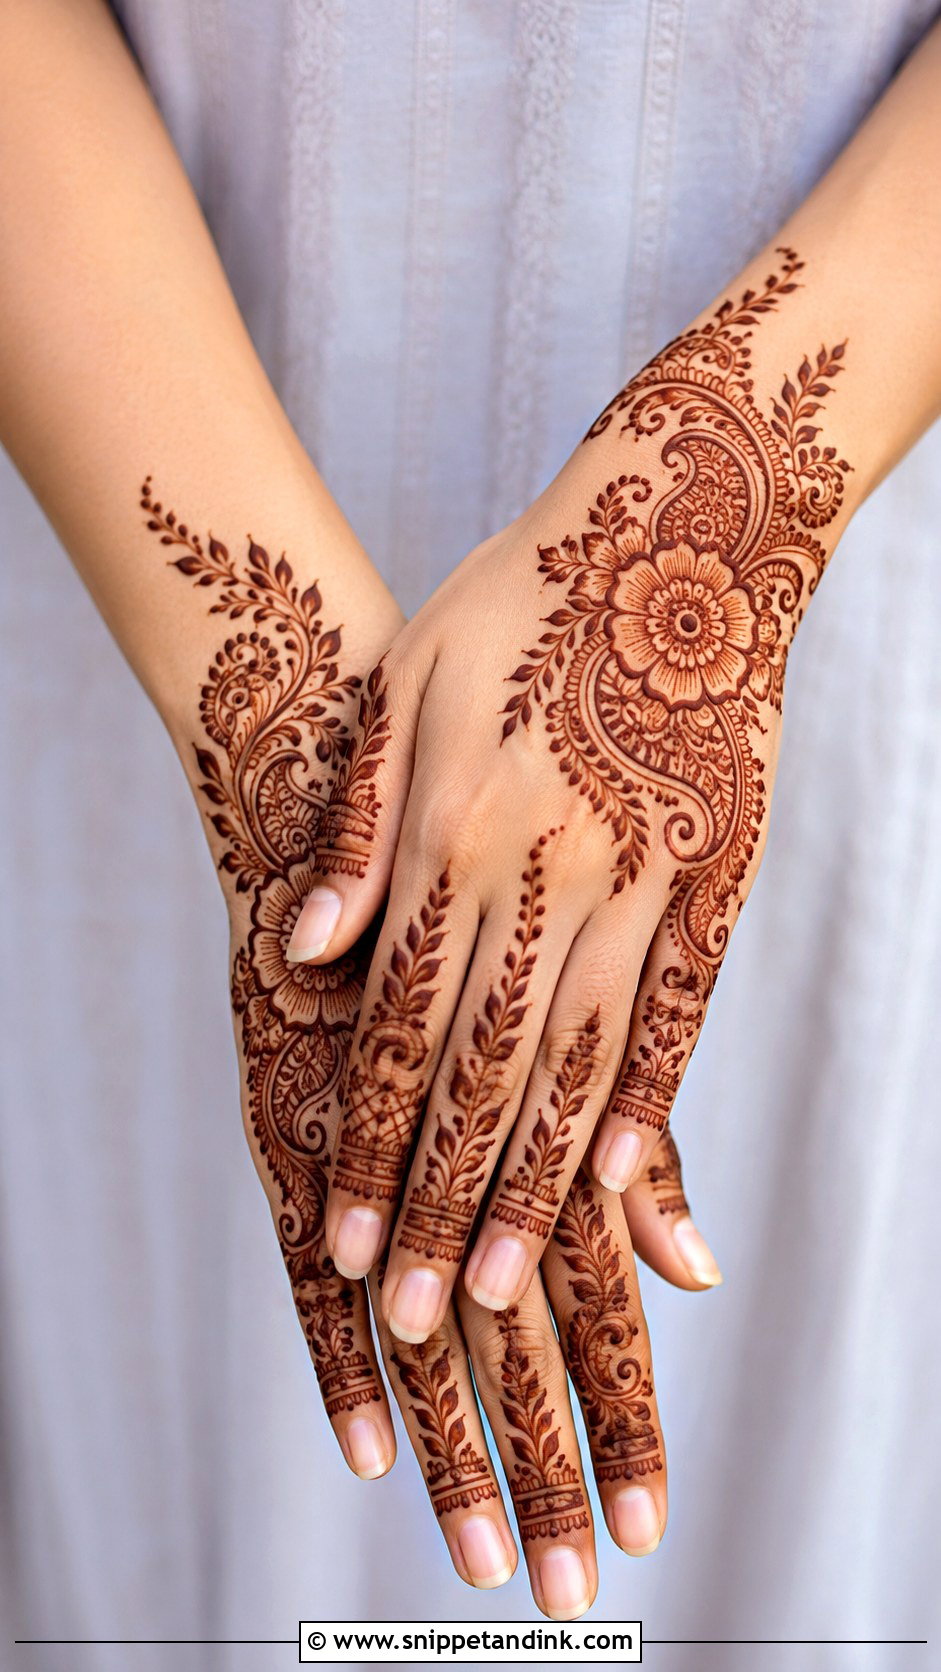
Shading makes a design look more detailed than it really is. Draw bold flowers or paisleys, then add thin parallel strokes along one side of each petal, always the same side, so the light seems to come from one direction. Keep the strokes fine and evenly spaced; heavy shading merges into a solid patch on the back of the hand. A vine or leafy trail from wrist to fingers ties it together, with open space around the main elements. The result looks rich at parties and wedding functions.
Why the Back of Your Hand Stains Lighter Than Your Palm
People are often disappointed that their back hand comes up paler than a friend’s palm. That’s normal. Henna dye binds to the outer layer of skin, and the palm has a thicker outer layer than the back of the hand, so it holds more colour. Fingertips stain dark for the same reason. Expect bright orange when the paste comes off, then a gradual deepening to reddish brown over the next 24 to 48 hours.
Coaxing the deepest colour out of thinner skin
- Apply one to two days before the event so the stain peaks on the day rather than after it.
- Leave the paste on for several hours, overnight if you can, and dab a little lemon juice and sugar over it once dry so it stays stuck to the skin.
- Scrape the dried paste off with a blunt edge instead of washing it, then keep water away for the rest of that day.
- Stay warm. A cold room slows the stain noticeably.
Soap, sanitiser, scrubs and pool water all fade the stain faster. A back hand design usually looks its best for around a week before it starts lightening from the edges inward, so plan the timing around the event that matters most.
Black Henna Is Not a Darker Kind of Henna
Natural henna never stains black, and it never develops fully in an hour. Paste sold as black henna, or promising an instant dark result, usually contains PPD, a hair-dye chemical that can cause blistering and a lifelong allergy. I won’t use it on anyone, and I’d never put it on a child.
Real paste is green to brown in the cone and smells earthy or of essential oils. If a ready-made cone has no ingredient list, smells of chemicals, or the seller can’t tell you when it was made, leave it on the shelf. Fresh natural cones are normally kept chilled or frozen because the dye weakens within days at room temperature. If your skin is sensitive, a small patch on the inner arm a day or two ahead costs you nothing.
Start With the Vine, Save the Peacock for Later
Every design here comes down to the same few skills: a steady outline, honest spacing and knowing when to stop. If you’re new, I’d begin with the vine, leaf and floral layouts, then move to mandalas and jaali once your pressure is even. Arabic trails, bracelet chains and paisleys are the quickest route to a festive hand when time is short. Keep your outlines confident, give the stain two days to deepen, and save the peacock for when the rest feels easy.
You'll Like These Ideas:


Leave a Reply