
Festive season is when I draw the most hands, and most of them want the same thing: henna that looks finished and smart without eating an afternoon. That’s where light designs earn their place. A front-hand mandala, a back-hand floral trail, a clean Arabic pattern or a finger-focused layout will carry you through Eid, Diwali, Raksha Bandhan, Karwa Chauth, a cousin’s wedding or a Saturday party. They’re also where beginners should start, because they’re made of clear shapes, open spacing, bold outlines and patterns that repeat. Below are 35 layouts, each with notes on how I’d actually draw it.
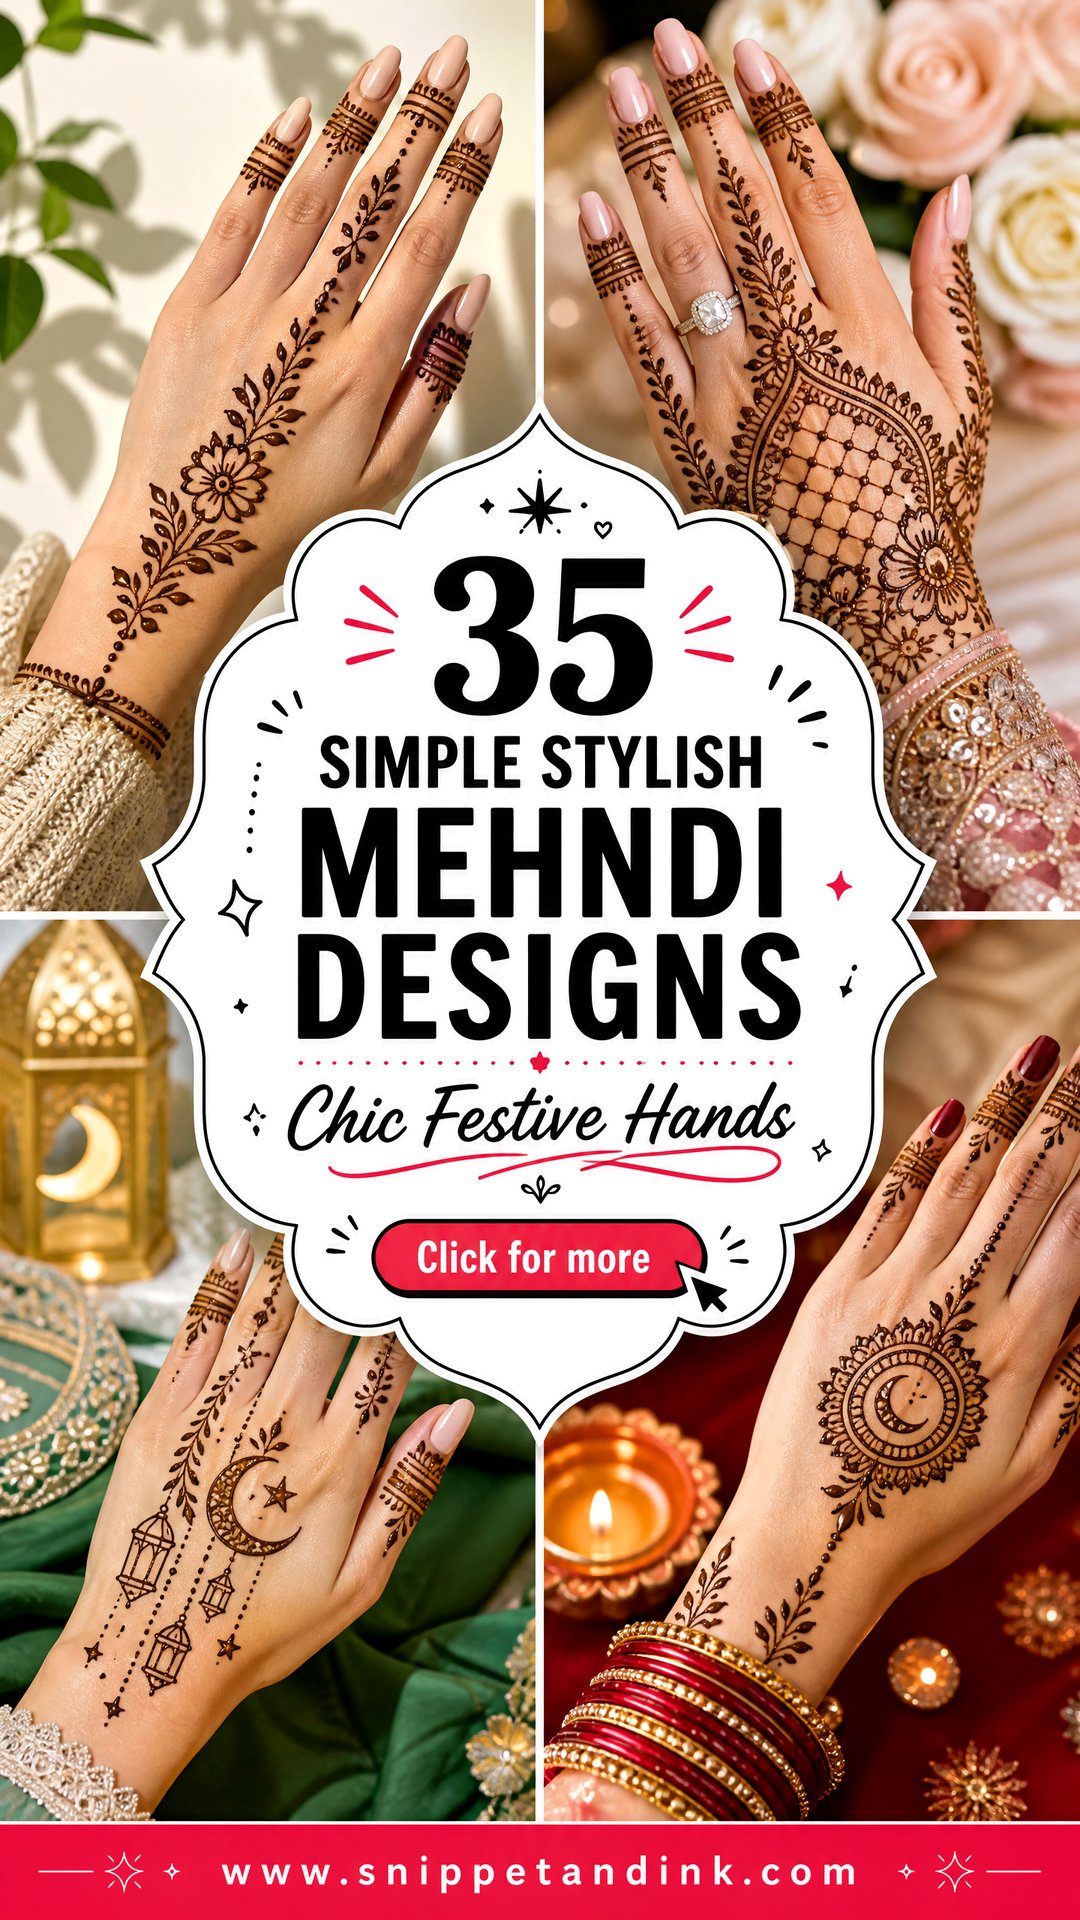
Pairing Henna With the Outfit and Jewelry You’ve Picked
The most stylish hands I see are the ones where the henna was planned with the outfit in mind. Before I draw a festive design, I ask to see what’s being worn, or at least a photo.
- Heavily embroidered sleeves or a busy print: keep the henna light and open, or the two compete.
- A plain outfit in a solid color: this is where a fuller design earns its place.
- Stacked bangles or a kada: leave the wrist bare and put the detail on the fingers and back hand.
- A statement ring: keep that finger clean at the base so the ring sits on skin.
- A printed motif you love, like paisley or florals: echo it in the henna for a pulled-together look.
Think about how you’ll hold your hands in photos too. Most festive pictures catch the back of the hand resting on a lap or holding a plate, so if you can only have one side done, the back hand often gets more camera time than the palm.
1. Simple Stylish Front Hand Mehndi Design
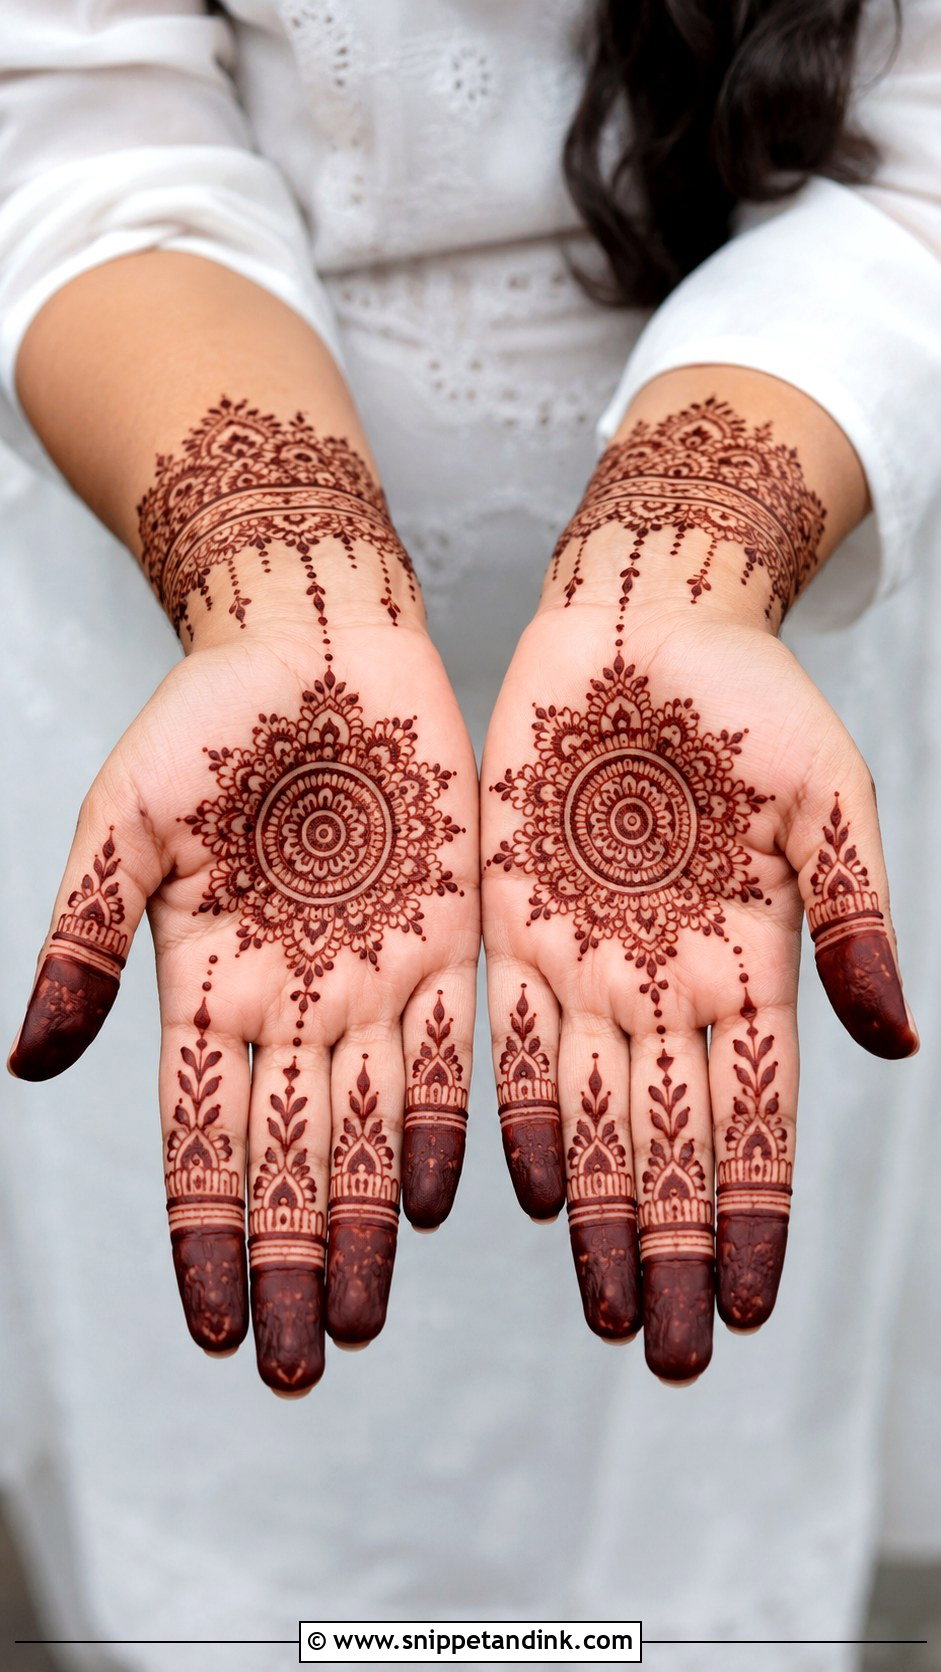
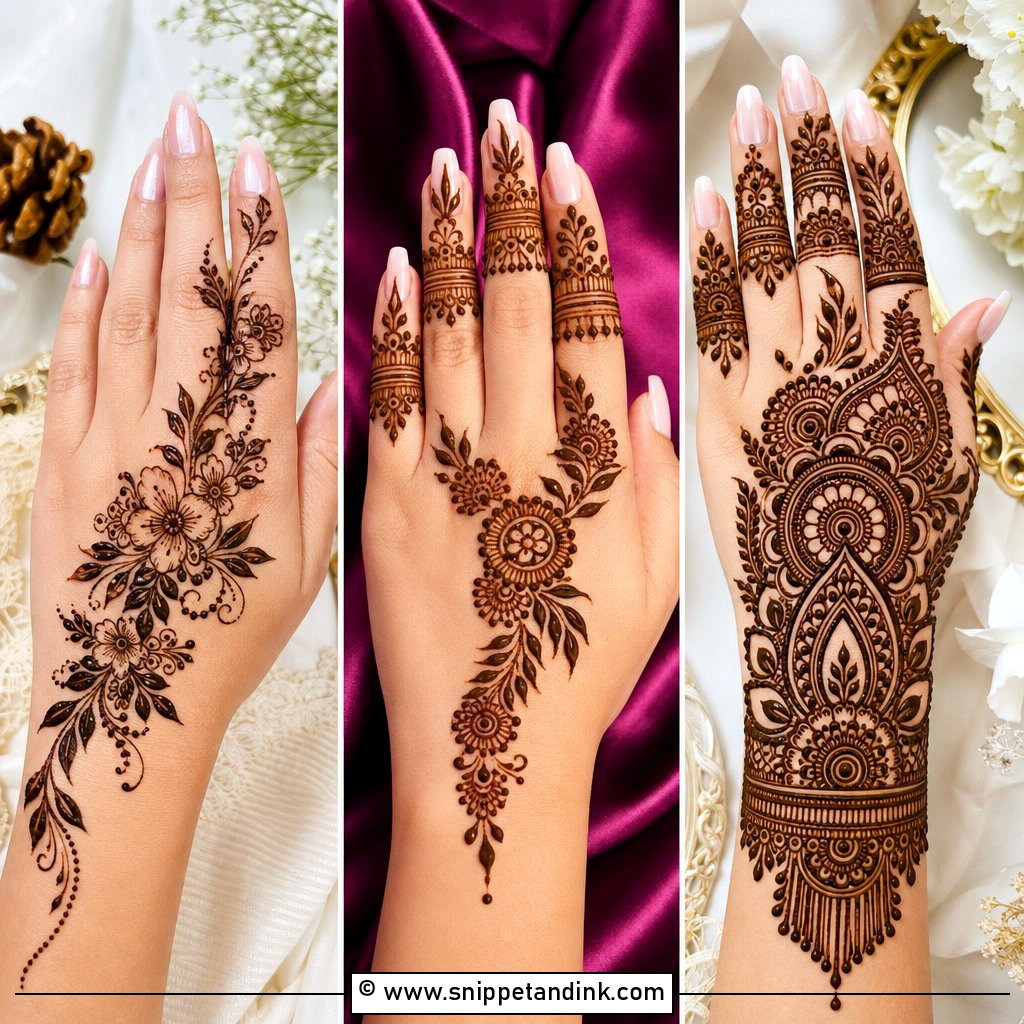
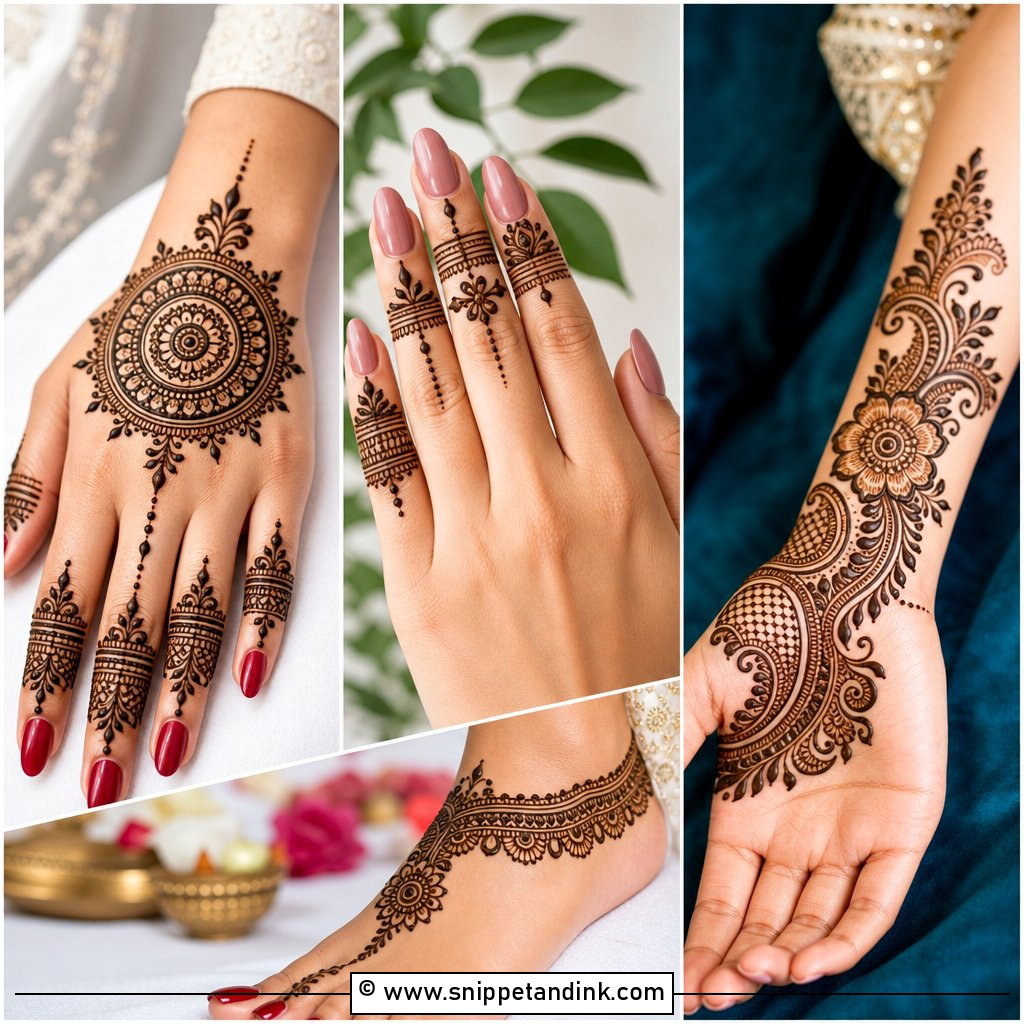
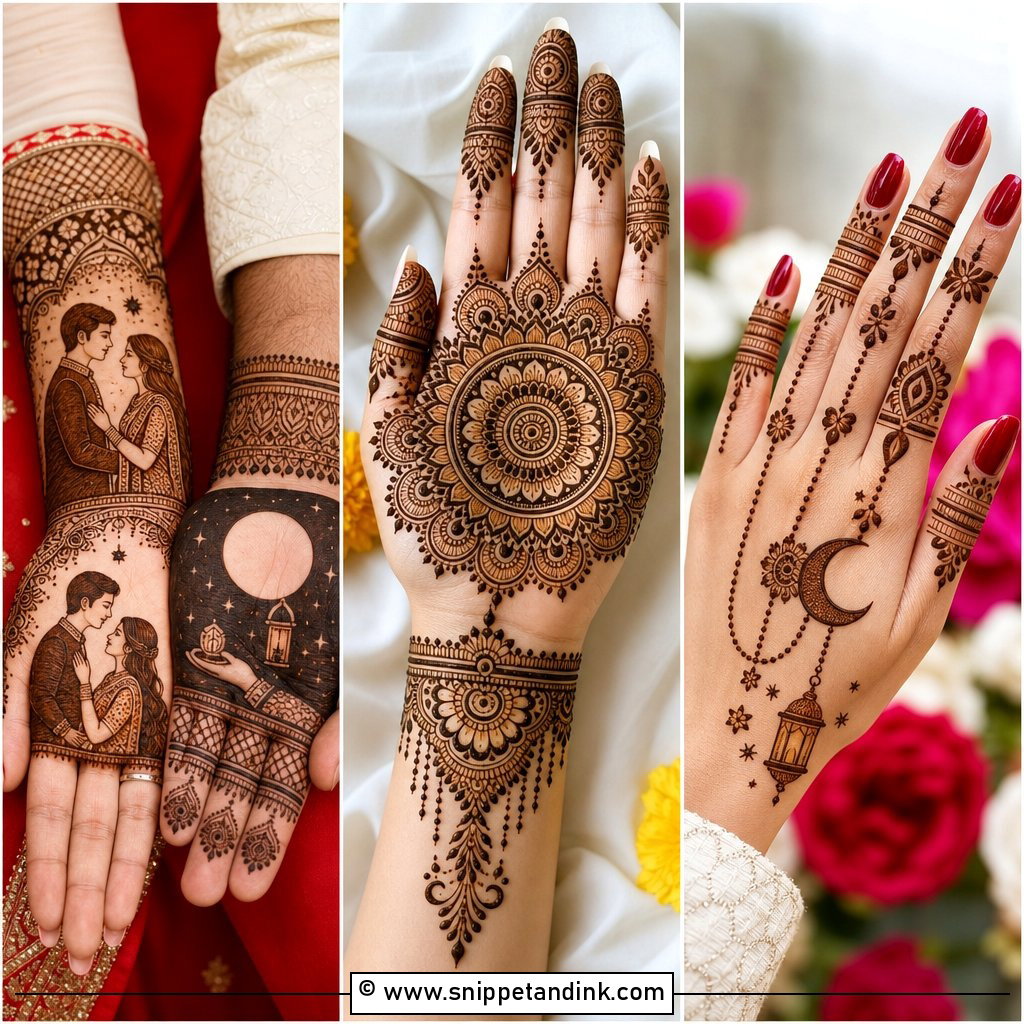
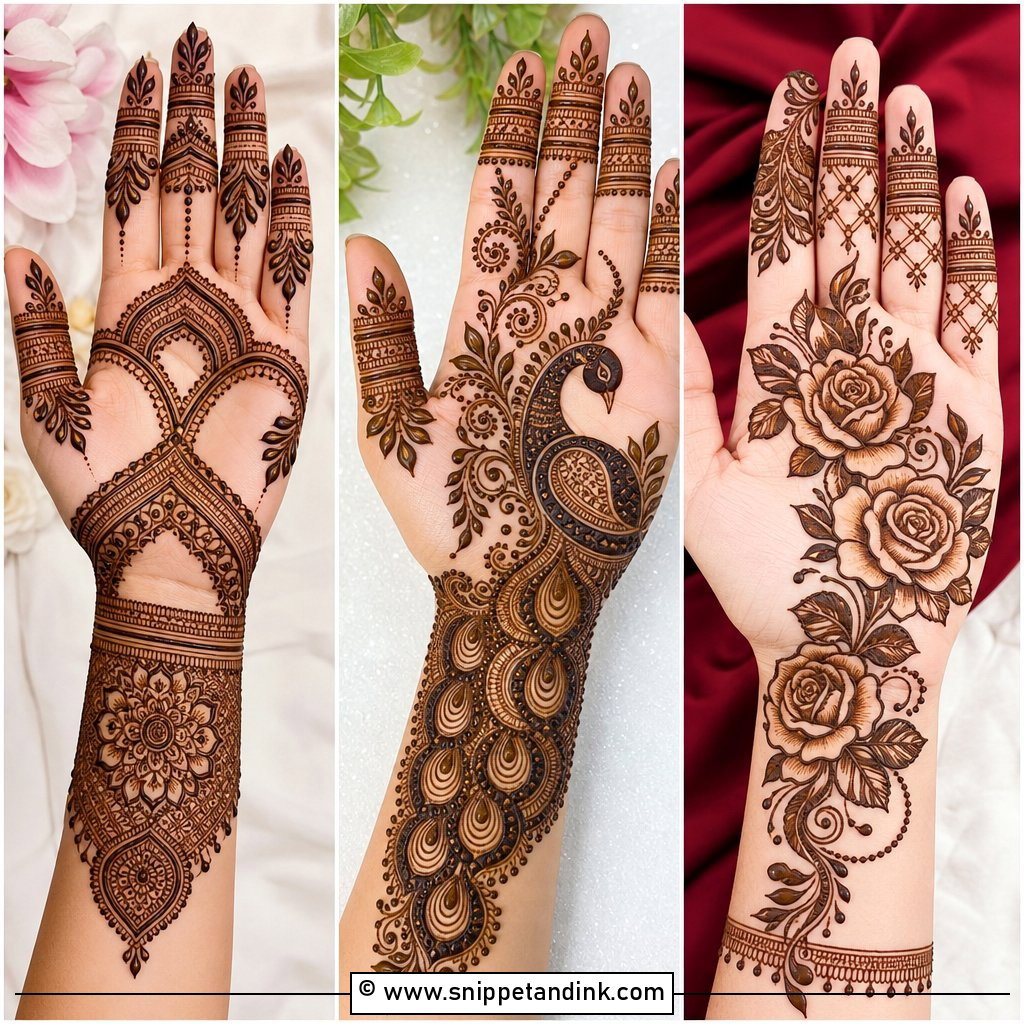
On the front of the hand I always settle the focal point first, then work outward toward the fingers. A round mandala in the center gives the strongest anchor, and leafy borders, dotted curves and light fingertip patterns grow from it. A few small flowers at the wrist close it off without covering the whole hand. The one thing I watch is spacing between lines: on the palm, paste spreads a little as it settles, so lines that look apart when wet can touch in the stain. Give each one a bit of room.
2. Simple Stylish Back Hand Mehndi Design
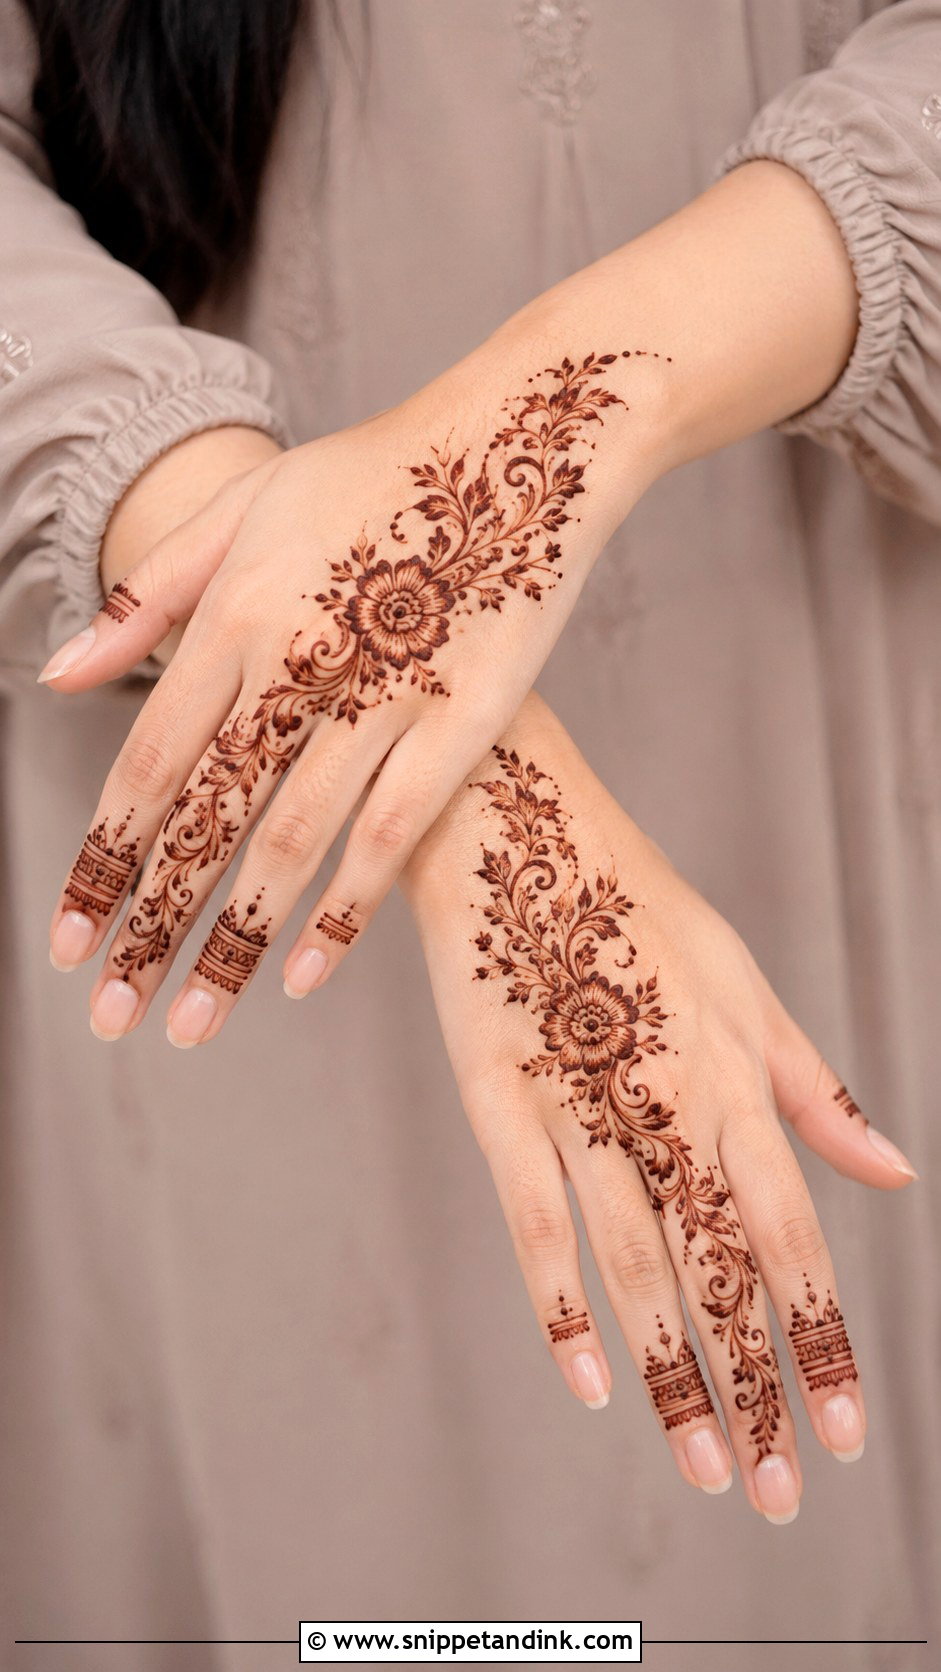
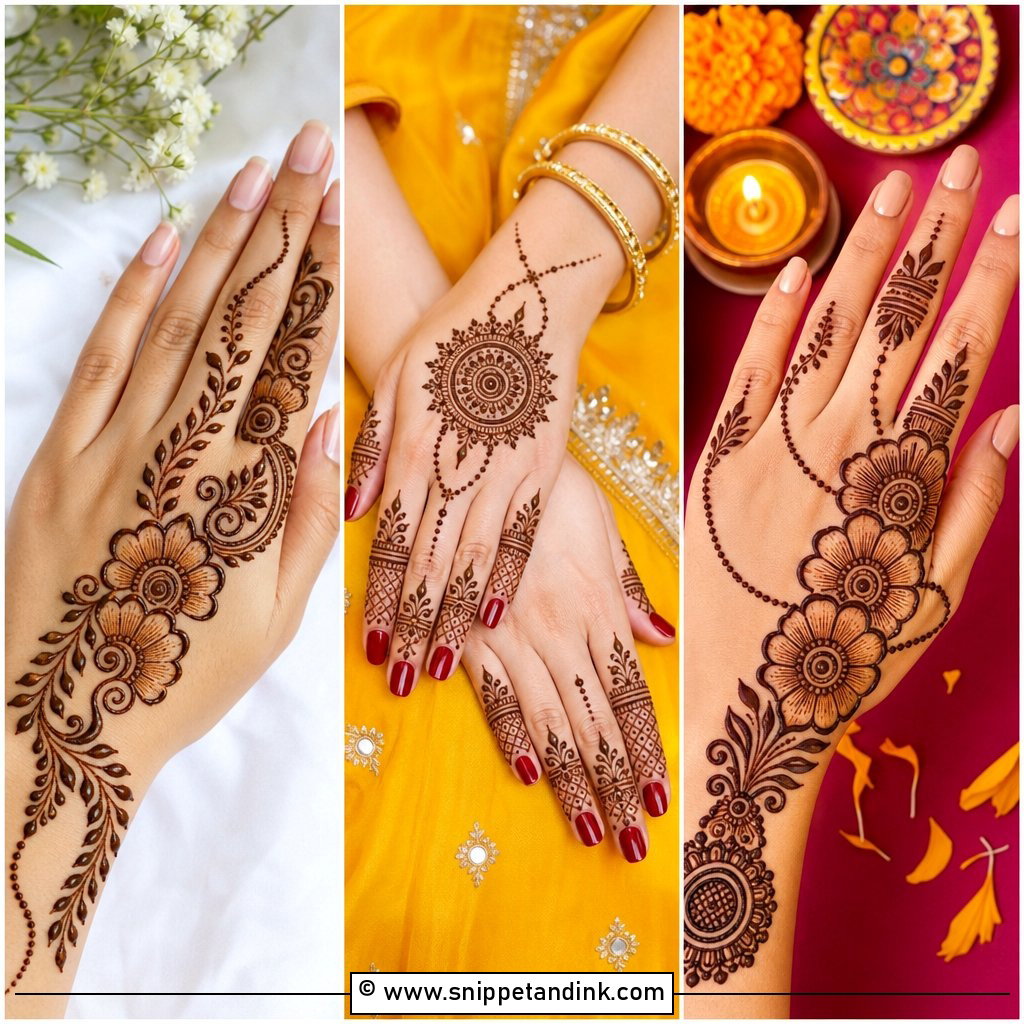
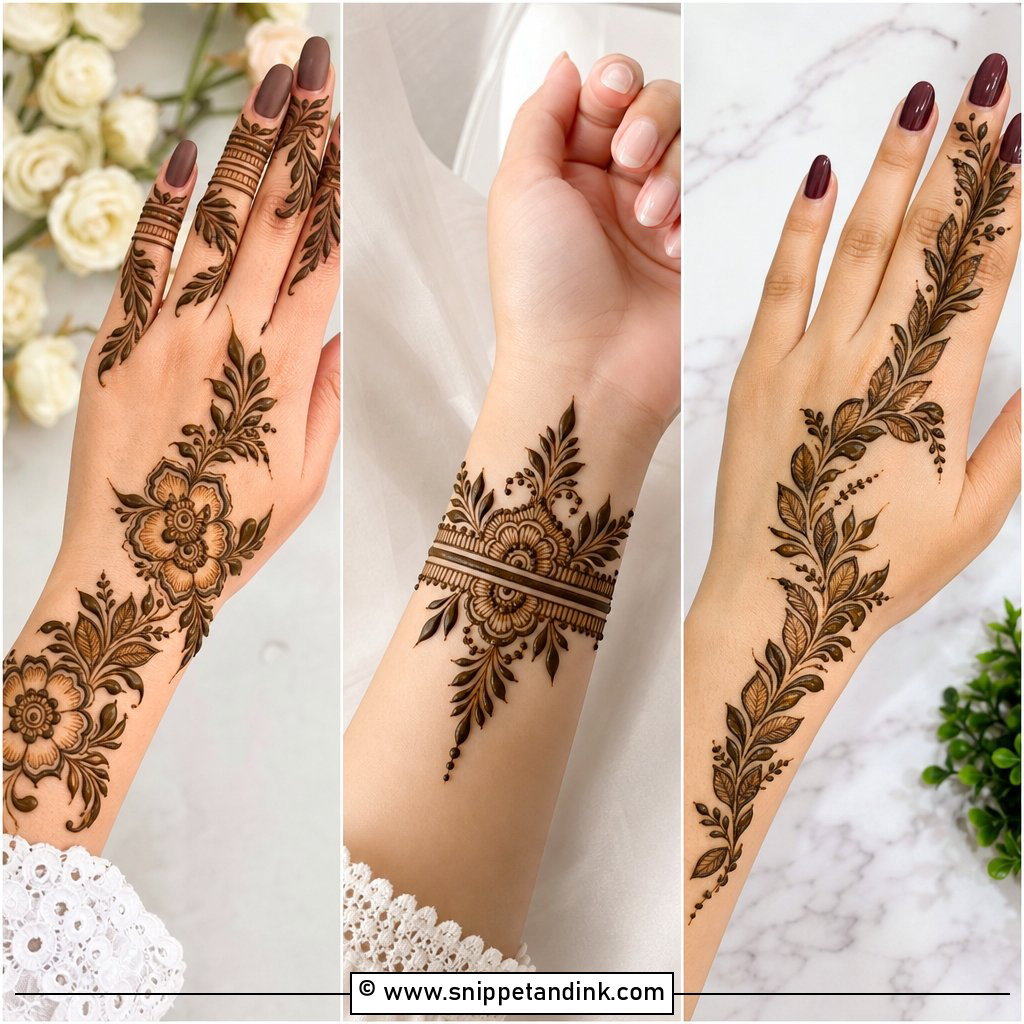
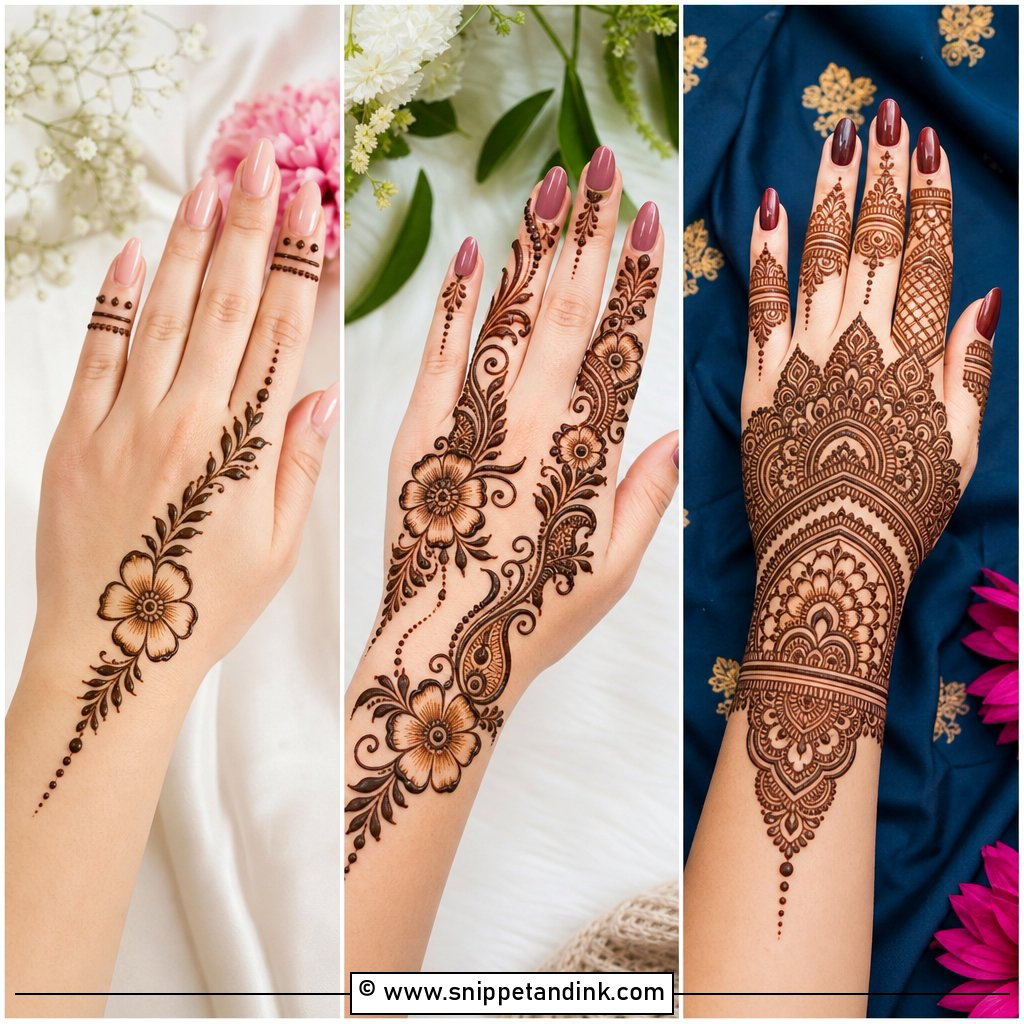
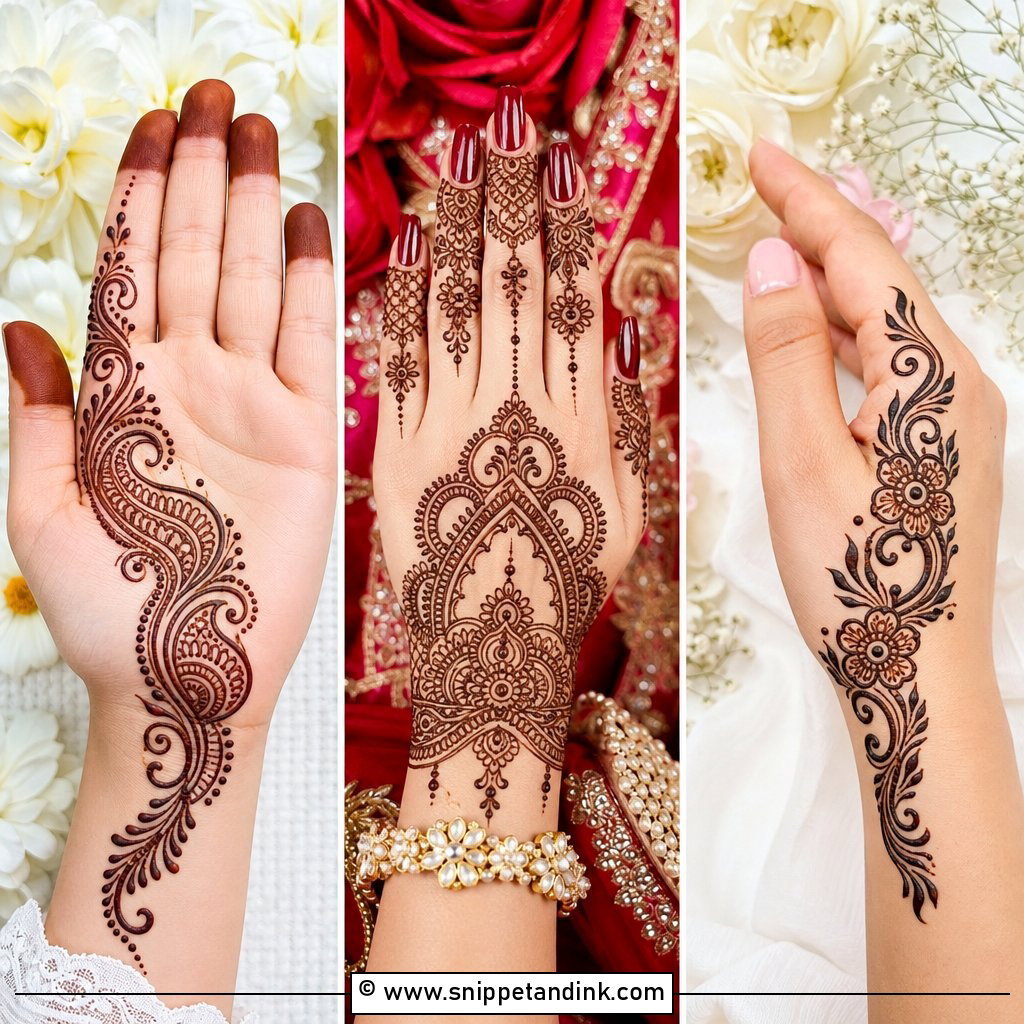
The back of the hand suits open-space henna, so I keep this layout light. A floral trail leaves the wrist and travels diagonally toward the index finger, with leaves, dots and small paisleys along it for movement. The empty skin either side of the trail is what makes the hand look long. Fingers get thin bands, tiny vines or half-flower details rather than fill. One practical point: the back of the hand stains lighter than the palm, so a trail here wants a slightly heavier line than you’d use inside the hand.
3. Simple Stylish Arabic Mehndi Design
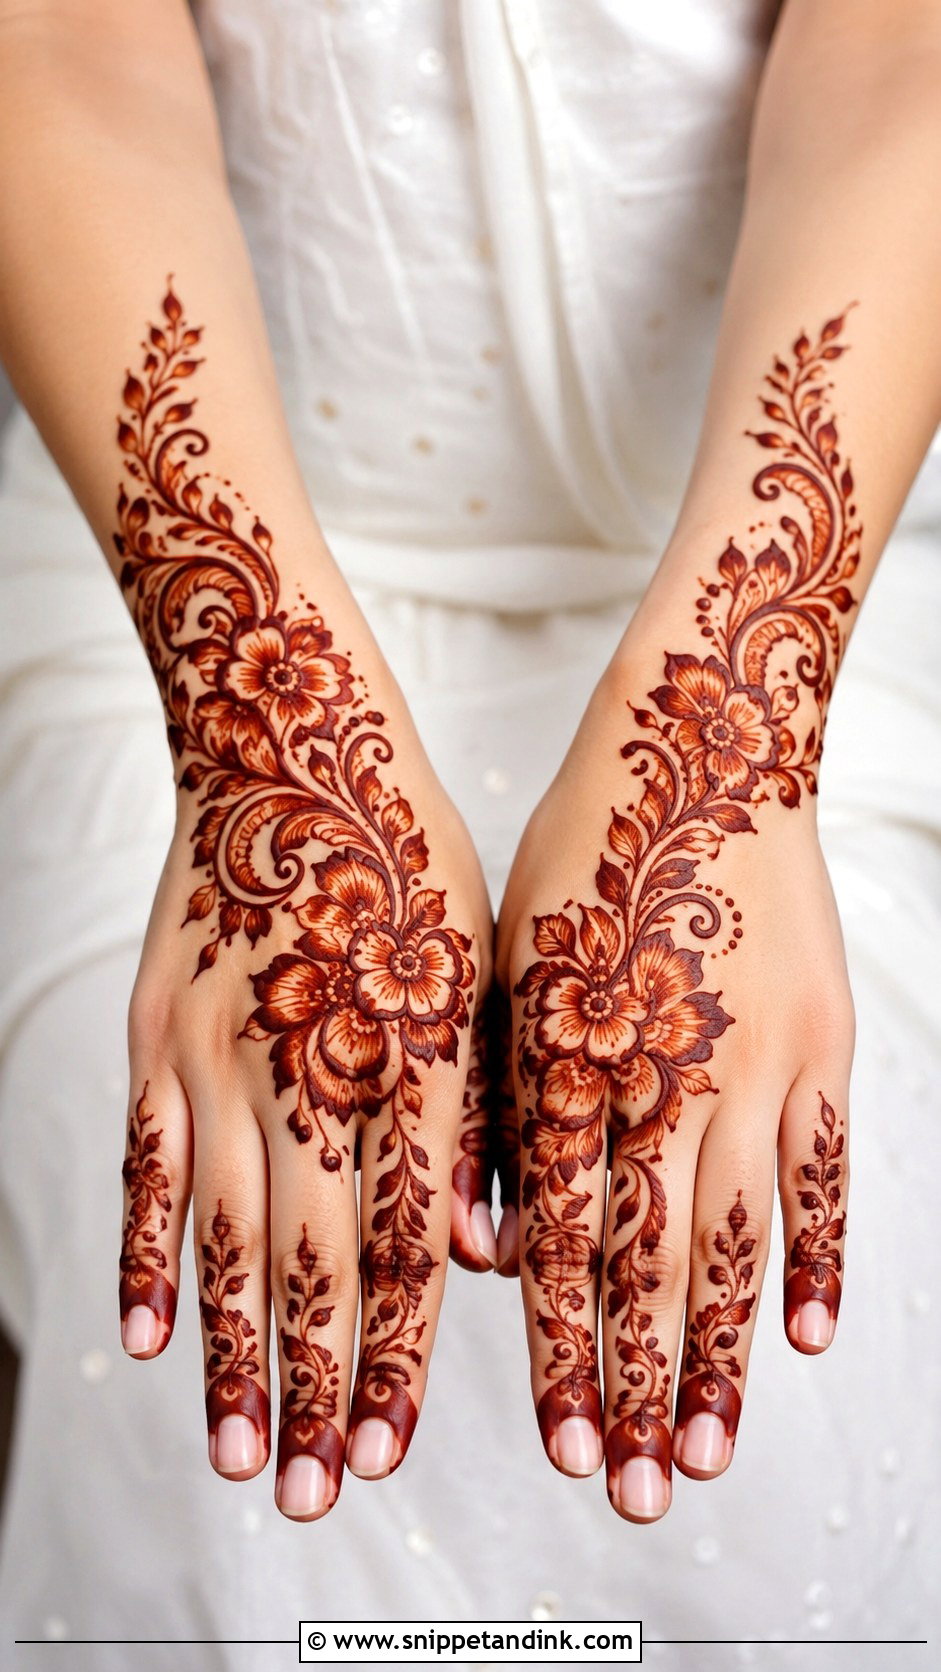
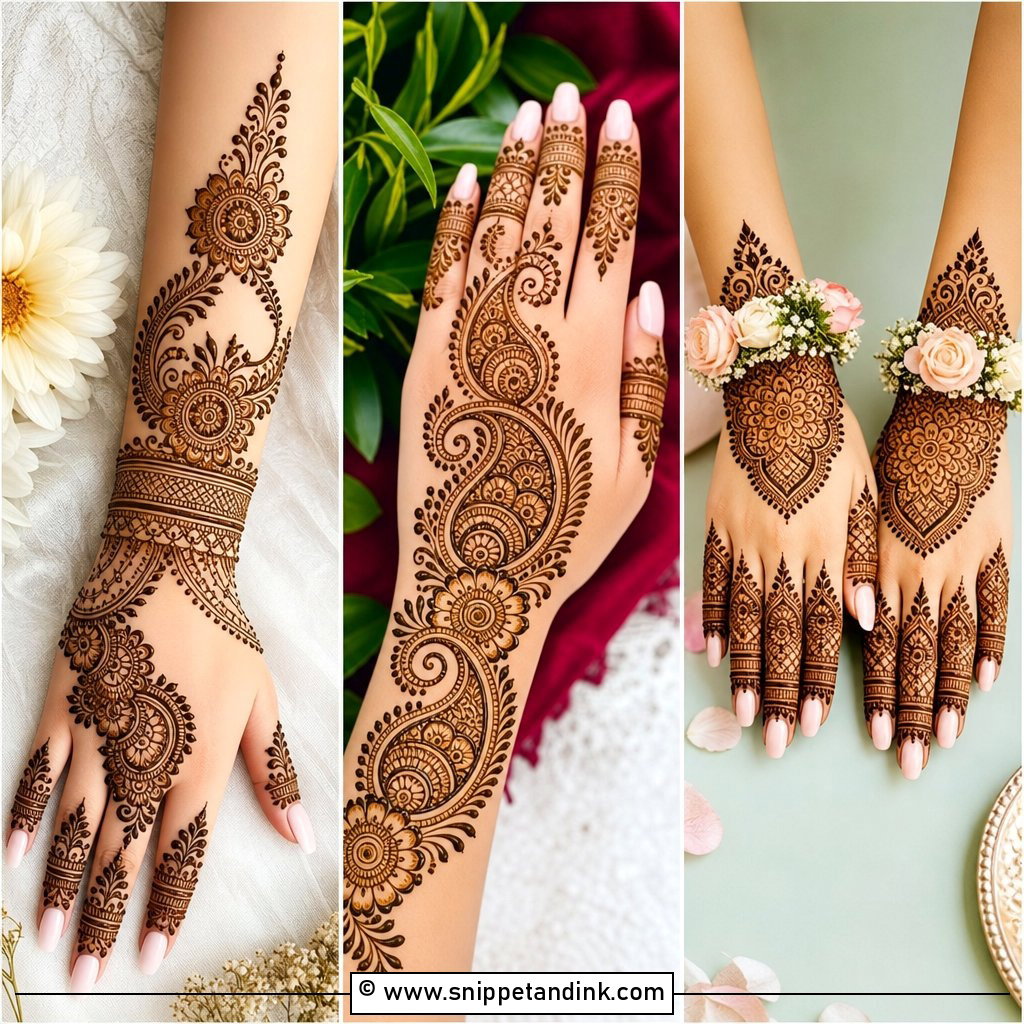
Speed is the reason Arabic henna is so popular at festival time. A classic Arabic design starts at the wrist with a large flower and curves across the palm, built up with paisleys, shaded petals and leafy vines. You don’t fill corners; you leave clean gaps between motifs, and that’s what makes it look sharp. When I’m doing a queue of guests before Eid, this is the layout I reach for, because each hand takes so little time and still reads as festive.
4. Simple Stylish Mandala Mehndi Design
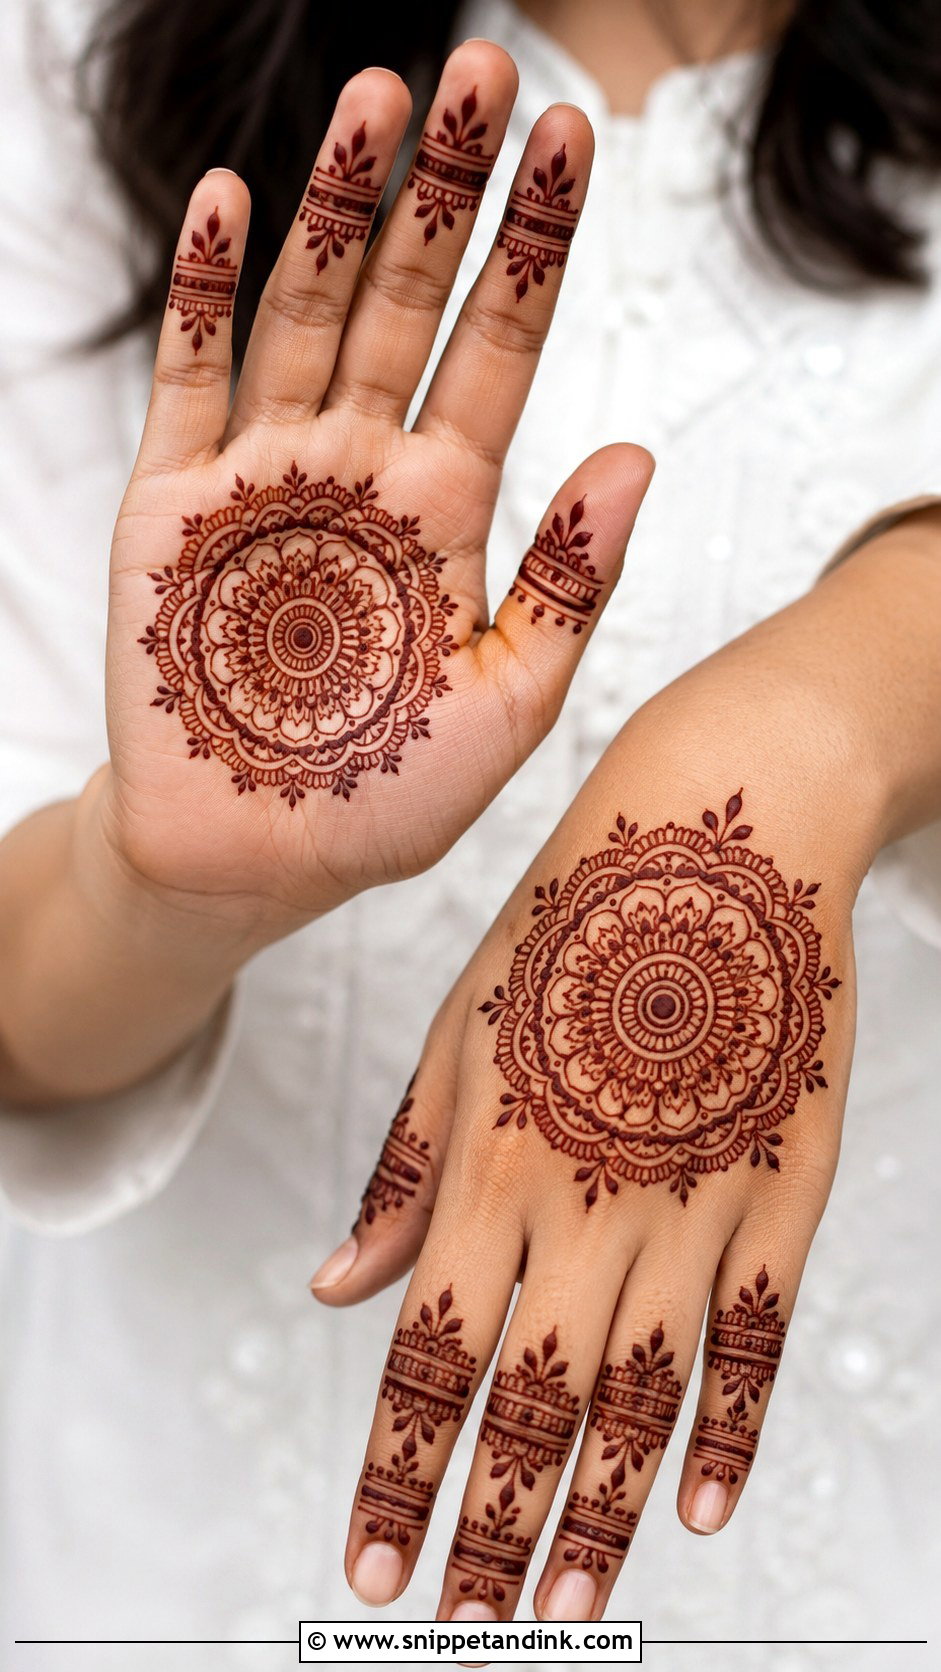
A mandala holds the eye because it’s symmetrical, and that same symmetry is what you have to protect. Center it on the palm or the back of the hand and build ring by ring with petals, dots, scallops and fine lines. I count petals as I go so each ring relates to the one inside it; random petal counts make even clean lines look wobbly. The fingers can stay minimal with small bands, leafy tips or dotted lines. The circle does the work here, so let it.
5. Simple Stylish Floral Mehndi Design
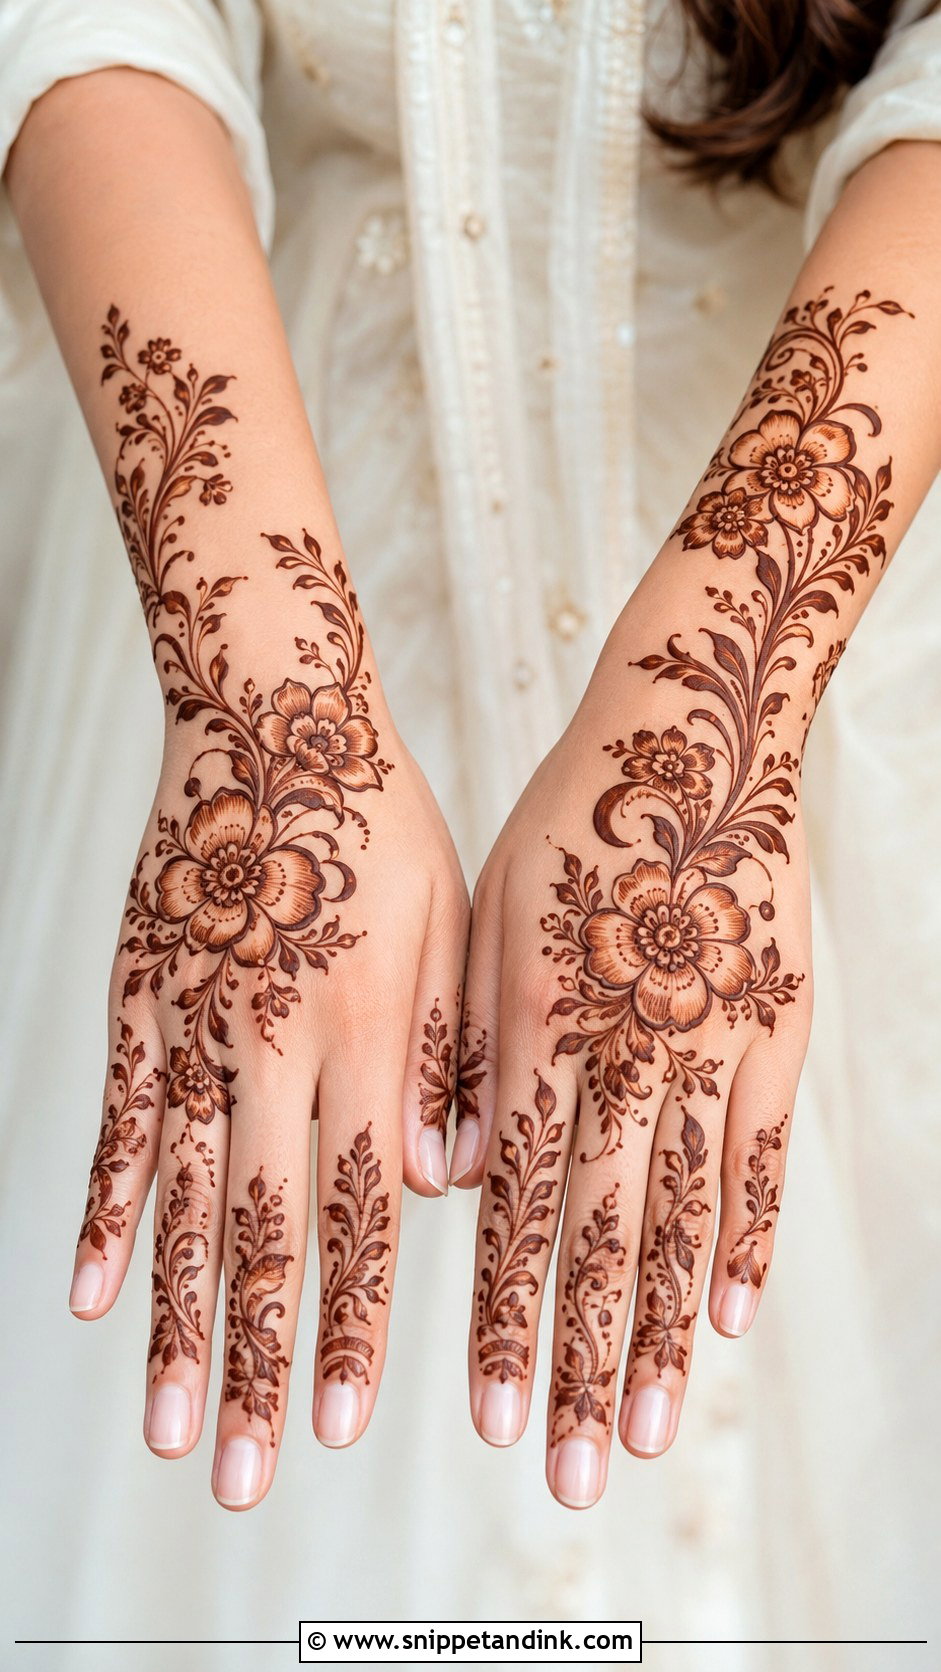
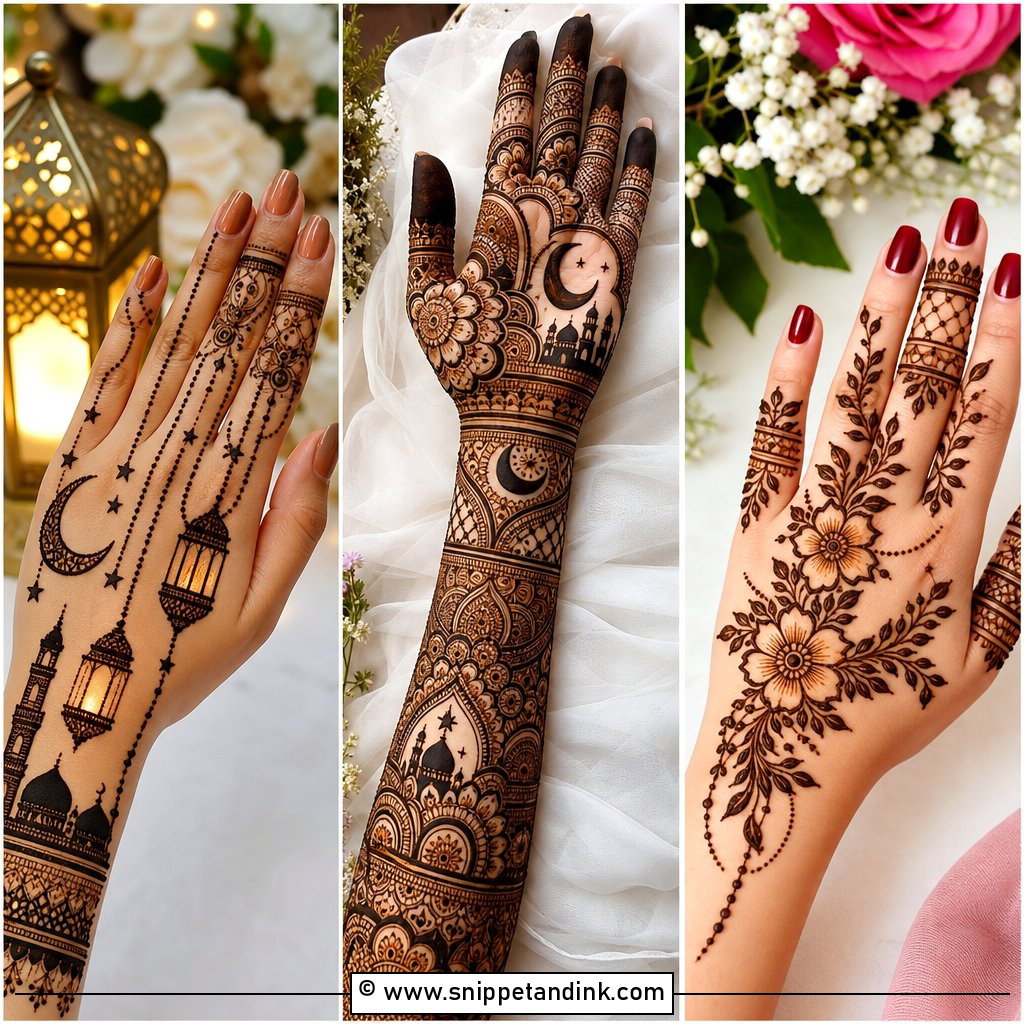
Floral henna is the friendliest choice for daytime functions. One large flower near the palm or wrist, connected to smaller blooms and leafy vines, and small leaf chains or tiny flowers on the fingertips. Decide early whether you want shaded petals or bold outlines. Shading softens the contrast, outlines sharpen it, and doing both on the same flower usually looks muddy. It works on the front, the back, or as a trail from wrist to finger.
6. Simple Stylish Finger Mehndi Design
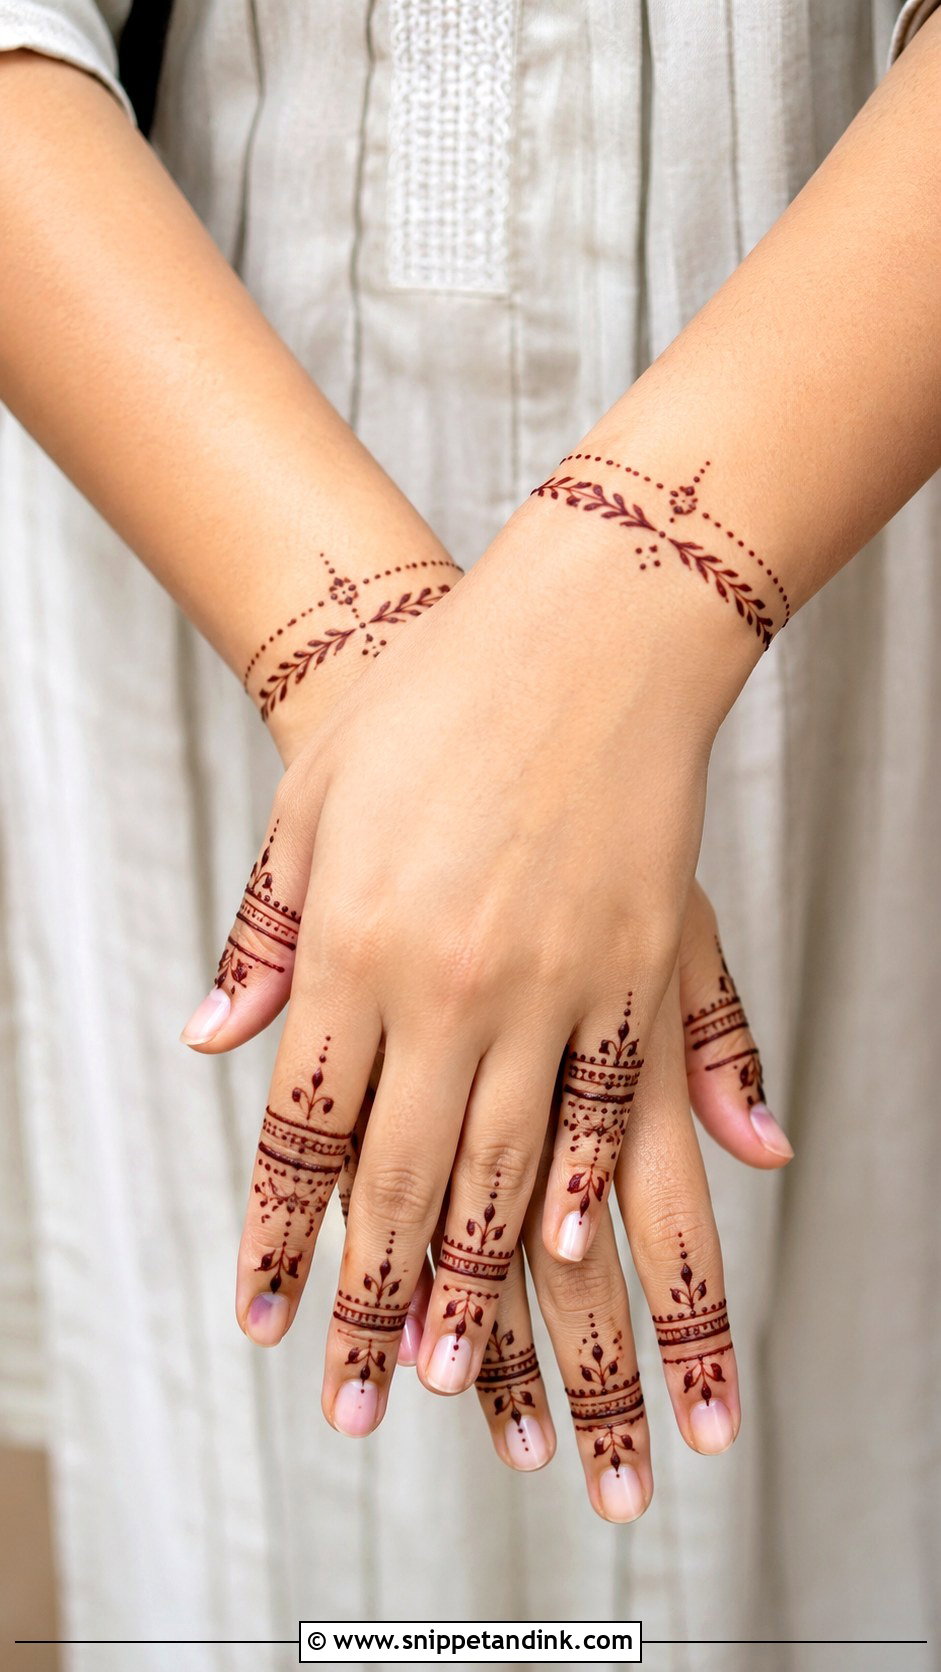
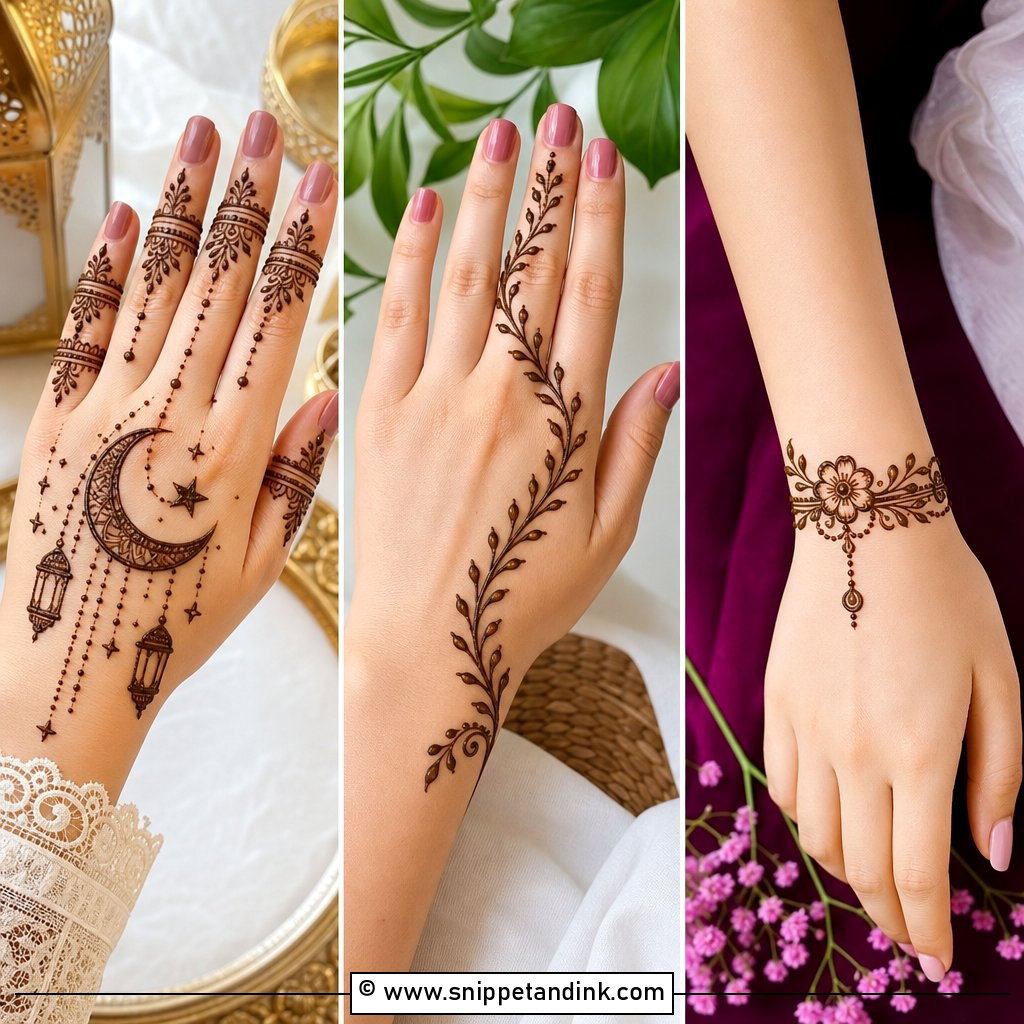
Here the fingers become the design. I draw bands, dots, leafy lines and small geometric shapes on each finger and leave the center of the hand empty, or add a tiny mandala near the wrist for balance. On the back of the hand, with rings on, it looks especially sharp. It dries fast, because there’s very little paste, but fingers also take the darkest stain on the hand, so even a light pattern ends up clearly visible. College and office functions are where it lives.
7. Simple Stylish Bracelet Mehndi Design
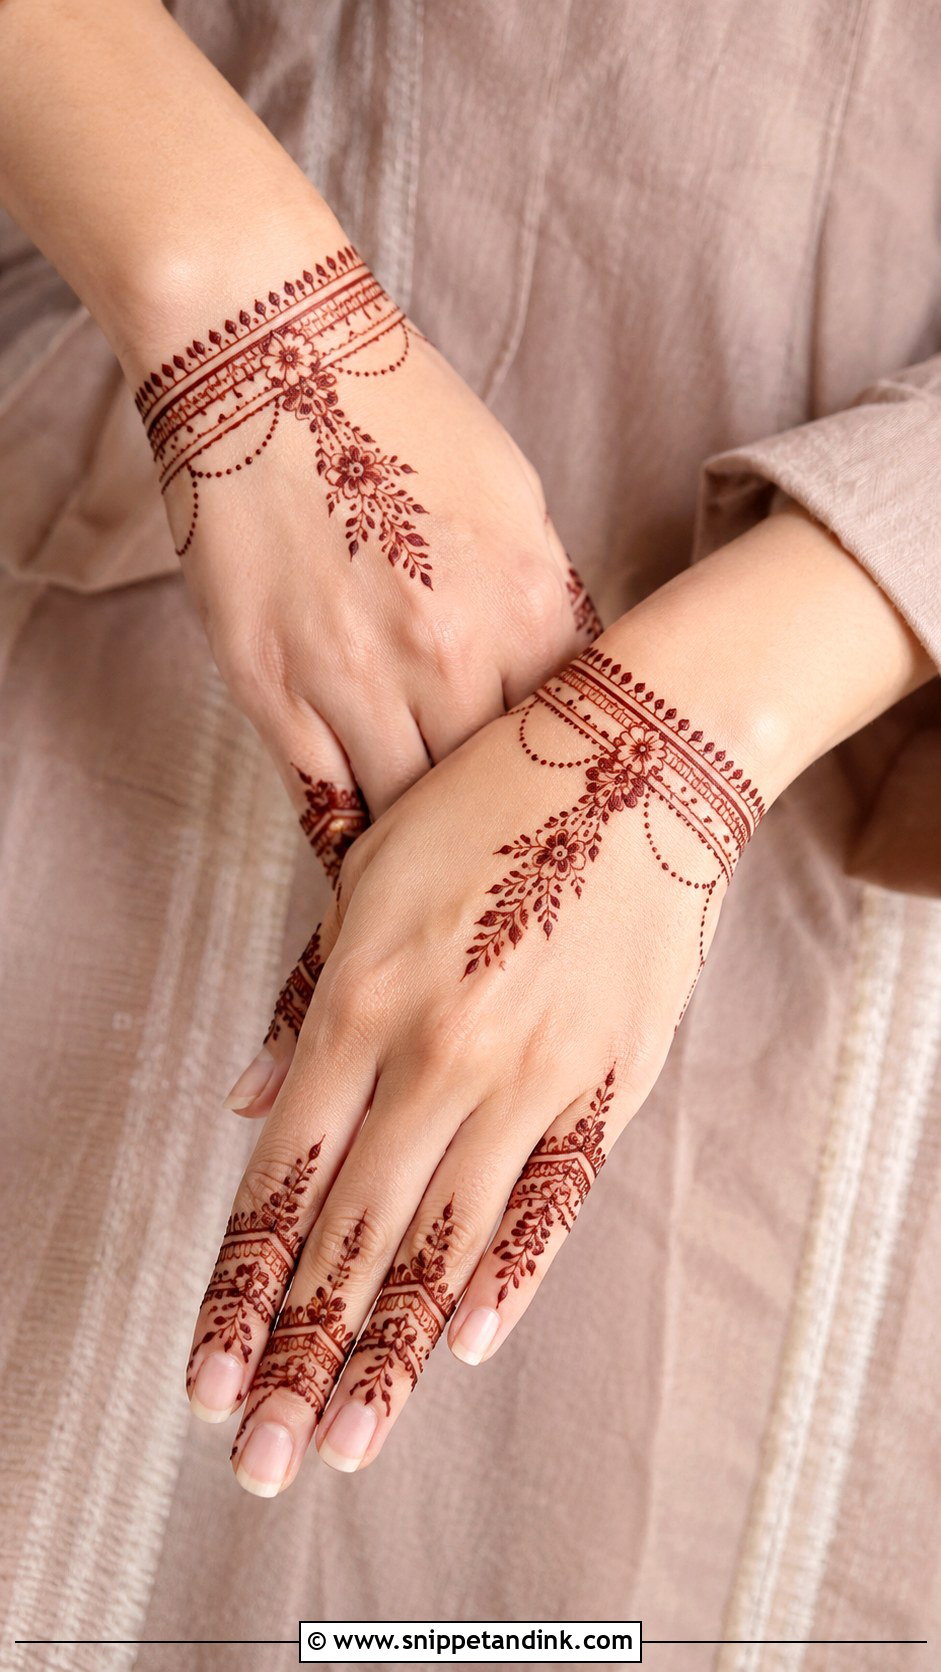
A neat band goes around the wrist first, decorated with small flowers, bead-like dots and chain lines, then one or two delicate trails reach toward the fingers. The palm or back hand stays mostly open so the bracelet is what people see. It sits well with bangles or with festive sleeves that stop at the wrist. I ask clients to rest the wrist on a cushion while it sets, because the slightest bend cracks a band along the crease before it has stained.
8. Simple Stylish Paisley Mehndi Design
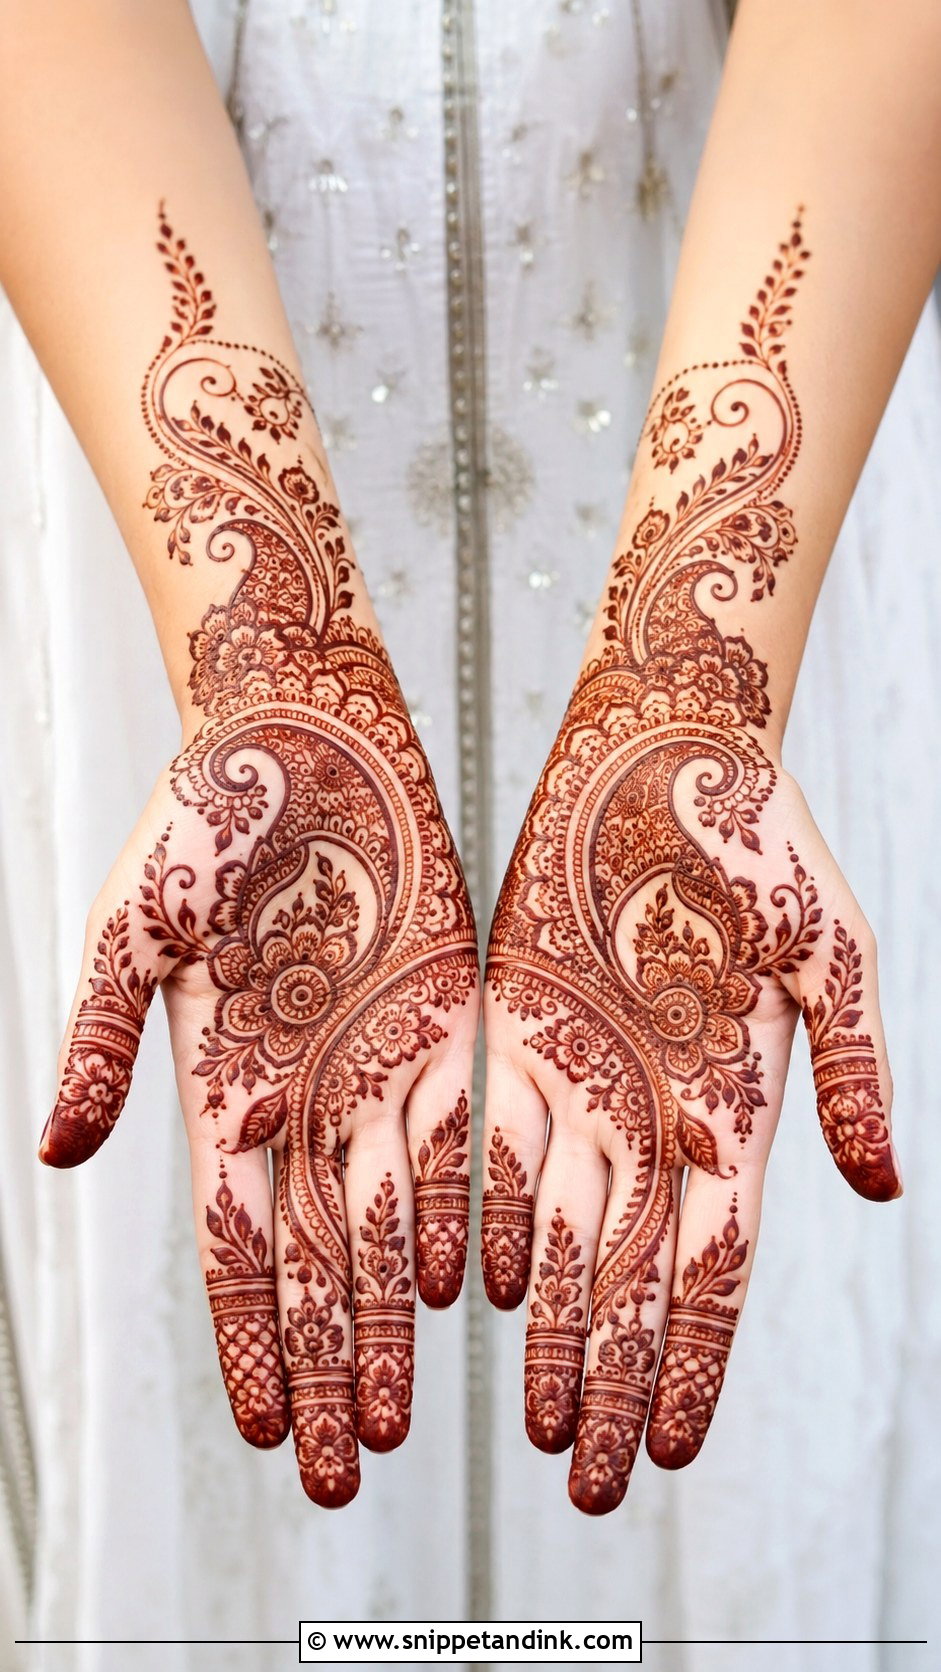
Paisley motifs look current when they have room around them. I place one medium paisley on the palm or back hand and surround it with flowers, dots and curved leaf lines, filling the inside with a few light strokes instead of dense mesh. Running a paisley trail from the wrist to one finger gives it flow. Because it belongs to both Indian and Arabic traditions, it’s a safe pick when a family has mixed preferences. Family weddings and festivals both suit it.
9. Simple Stylish Indo Arabic Mehndi Design
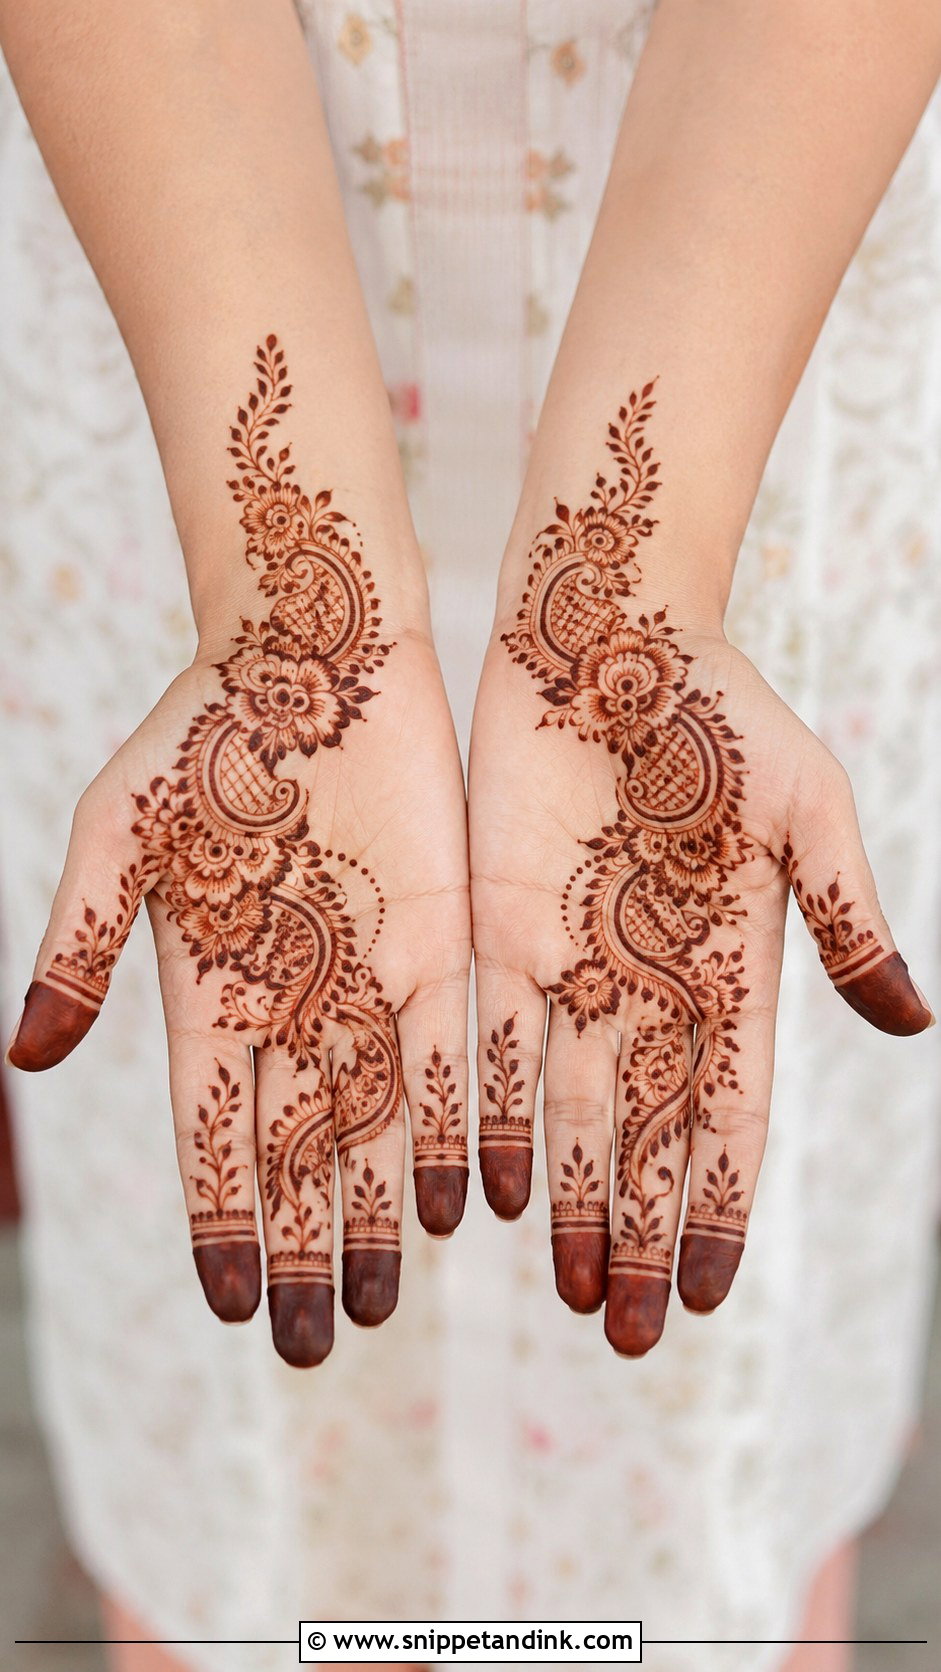
Indo-Arabic takes the bold flow of an Arabic trail and adds Indian detail. My simple version is a diagonal floral and paisley trail with small jaali sections, dots and leafy curves for texture, while most of the hand stays clear. Fingers get a mix of bands and tiny traditional details. It’s a good choice for bridesmaids, who often want something richer than a guest design but clearly lighter than the bride’s. I’d still check the bride’s design first so the two don’t clash.
10. Simple Stylish Full Hand Mehndi Design
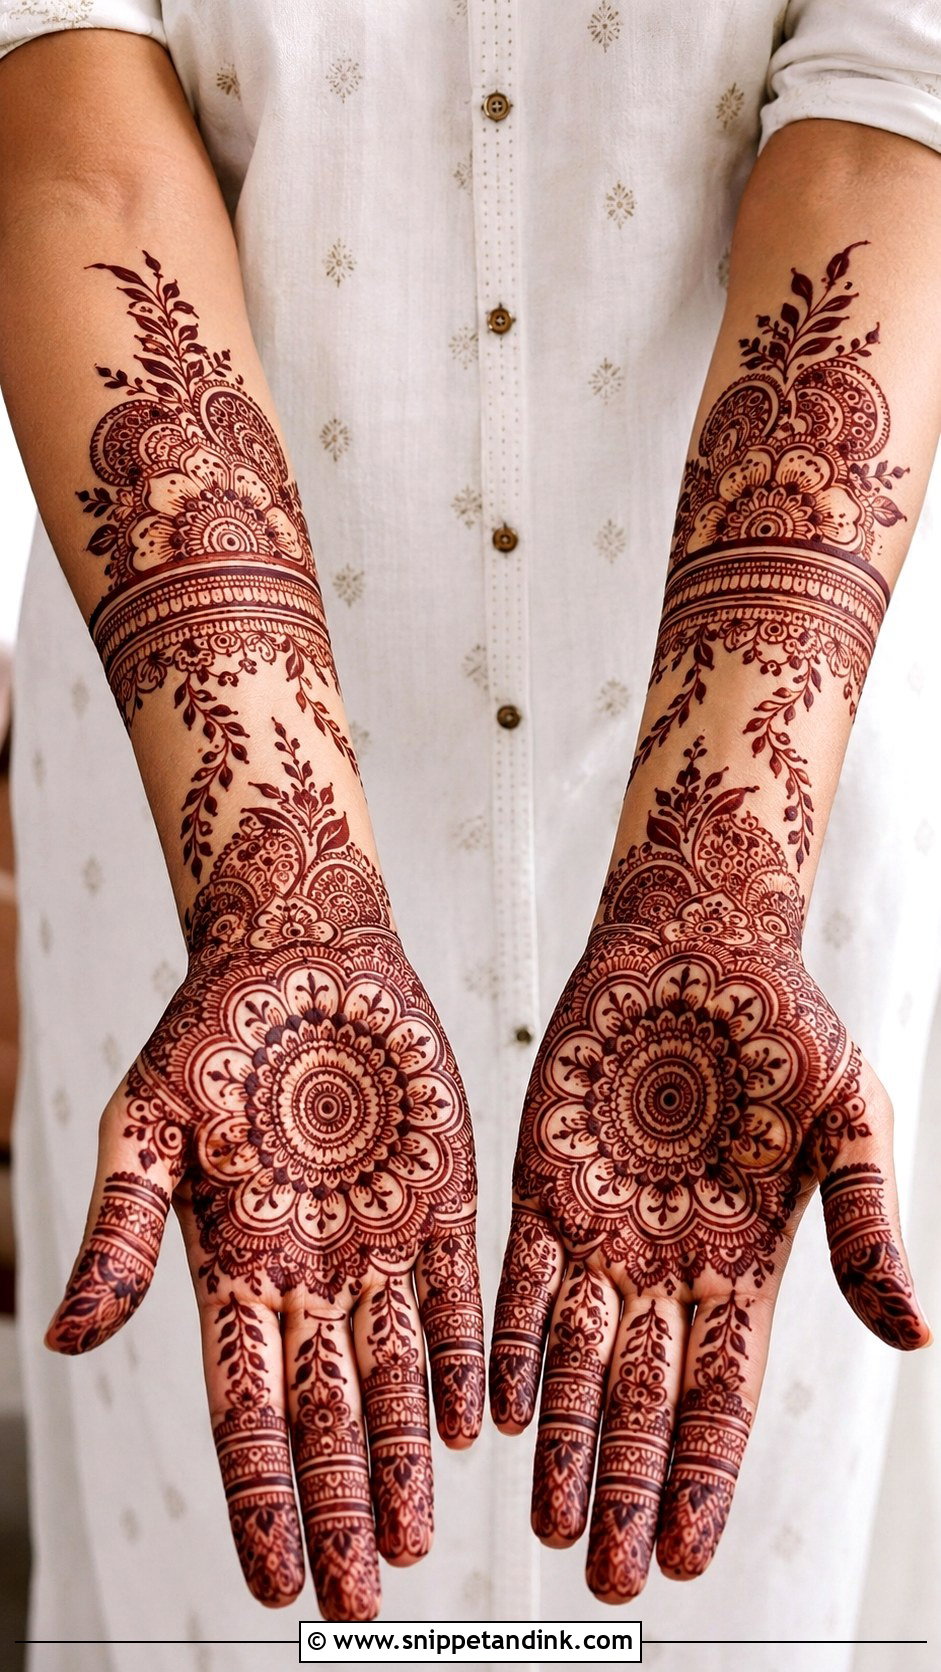
Full coverage can still be easy to read. I build it from large motifs, clean borders and repeated patterns: a wrist cuff, floral vines on the palm, a mandala or paisley as the main focus, then matching bands and leaf trails on the fingers. Small open spaces between sections stop it looking crowded. Plan on a long sit, since a full hand needs time to apply and more time with the paste on. Festive days and pre-wedding functions are where I draw it most.
11. Simple Stylish Half Hand Mehndi Design
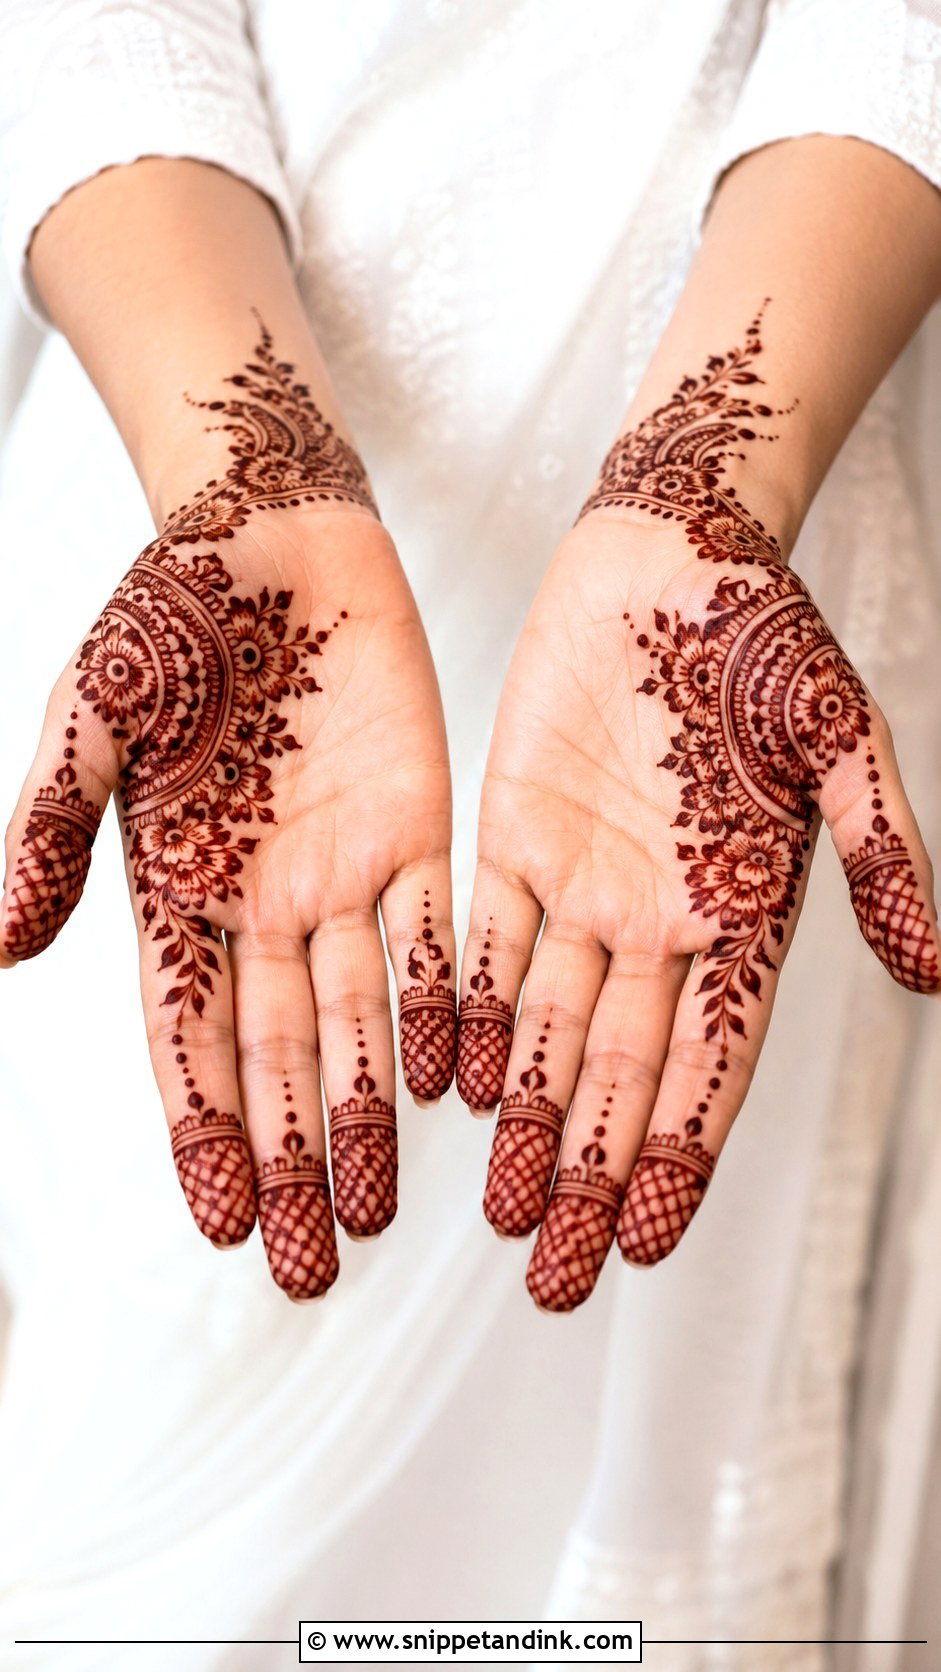
Half hand designs cover the fingers, the palm center and part of the wrist, leaving some skin open. A floral trail, half mandala or paisley border makes it look complete, and a curved border or bracelet band keeps the wrist edge tidy. It dries faster than a full hand, which matters if you’re getting it done between errands. Young girls and wedding guests ask for it most. The edge where the design stops is what people notice, so I draw that border as carefully as the center.
12. Simple Stylish Palm Mehndi Design
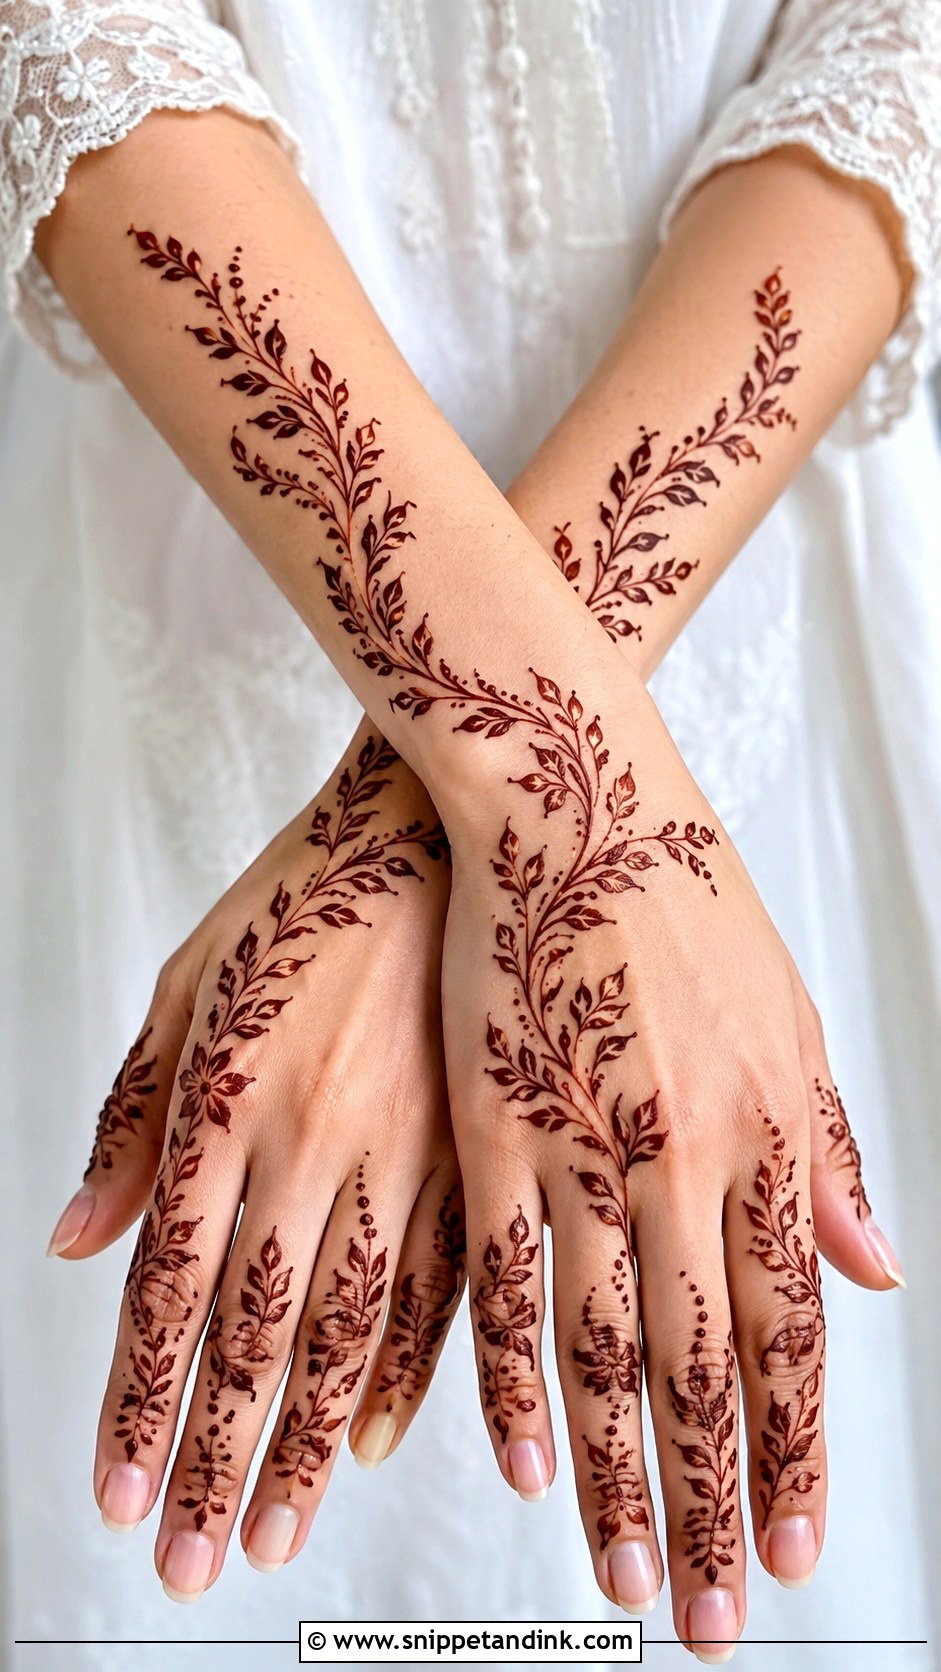
Palm designs depend on a clear, planned center: a round mandala, floral circle or bold paisley, with small details extending toward the fingers and wrist. Since the palm stains deeply, even a modest design comes out rich. Dots, petals and short curves fill the gaps without weight, and small bands or leaf chains coordinate the fingers. Before I start, I ask clients to open and cup their hand a few times so I can see where the creases fall and keep the center motif off them.
13. Simple Stylish Back Finger Mehndi Design
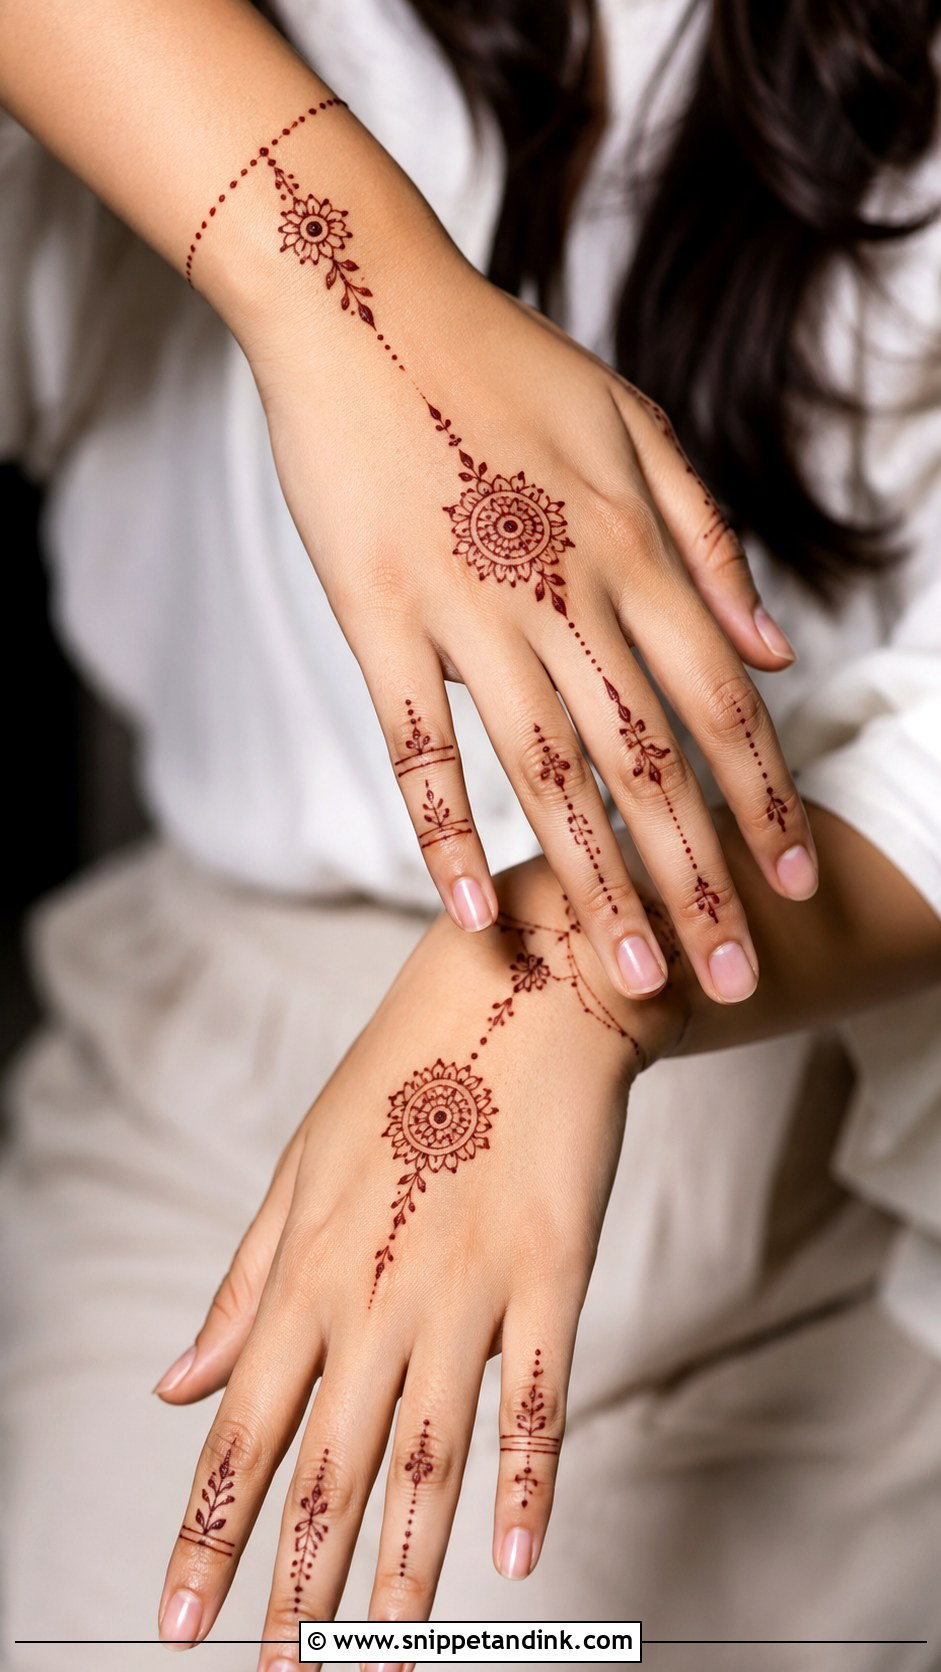
Back finger henna sits on the fingers and knuckles: slim lines, tiny leaves, dots and small floral bands, sometimes with a light wrist cuff or a small motif on the back of the hand to anchor it. Make each finger slightly different, but keep line thickness and spacing the same across all of them; that consistency is what ties it together. Avoid drawing directly across the knuckle crease, because bending breaks the line long before it stains. It’s my last-minute go-to.
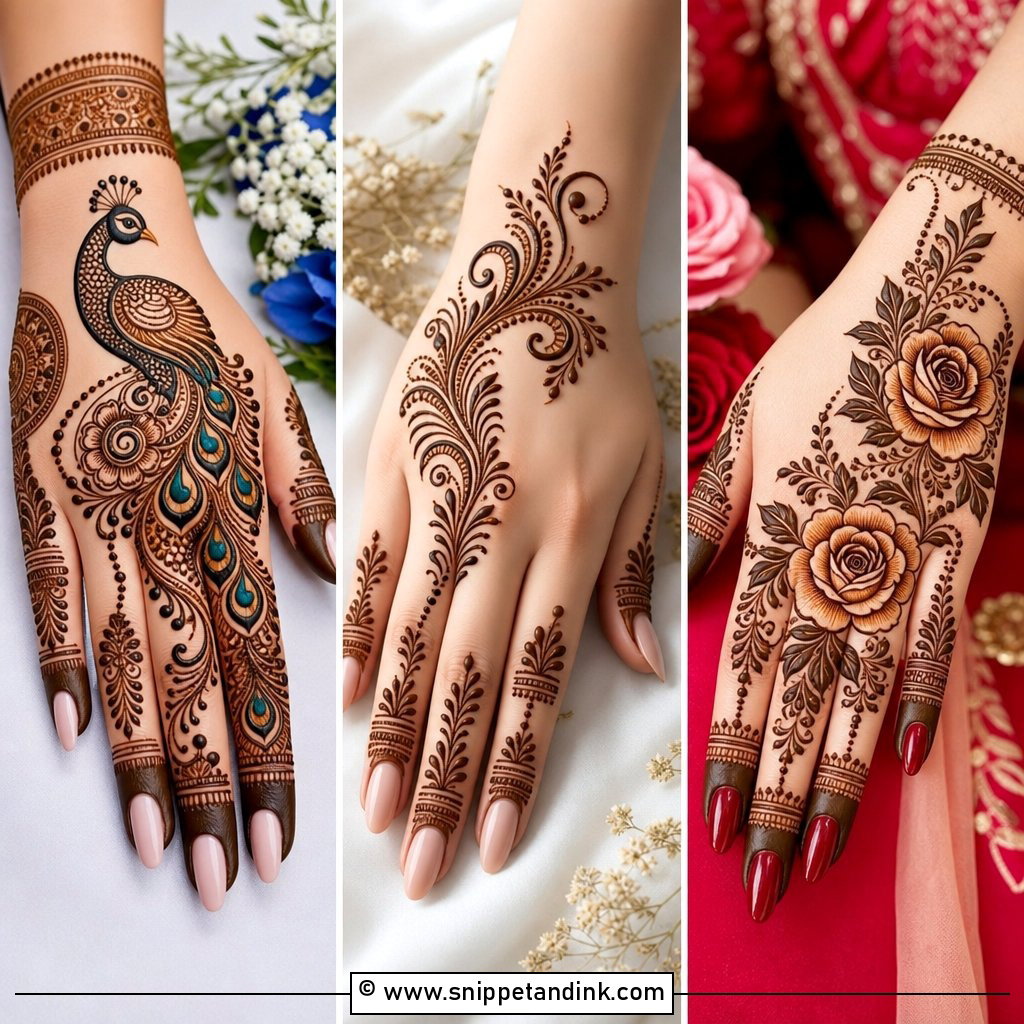
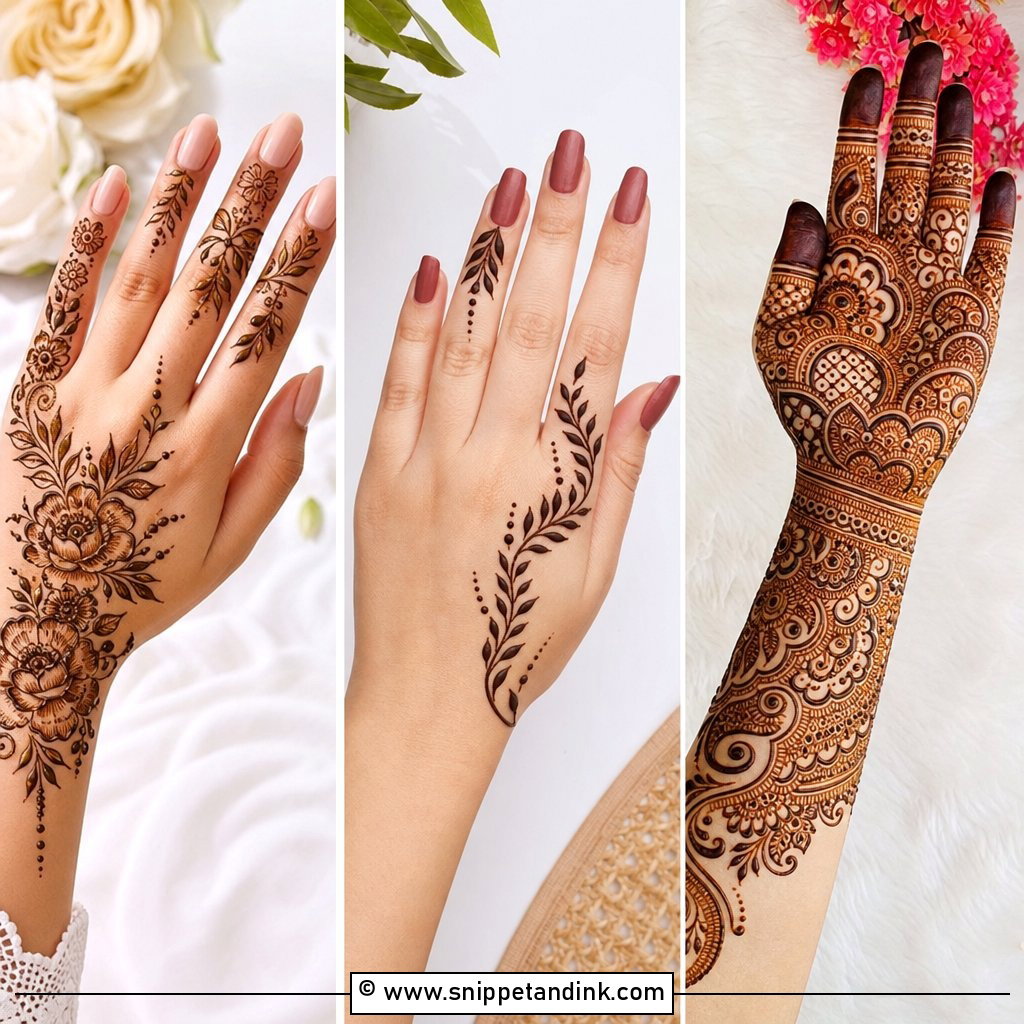
14. Simple Stylish Rose Mehndi Design
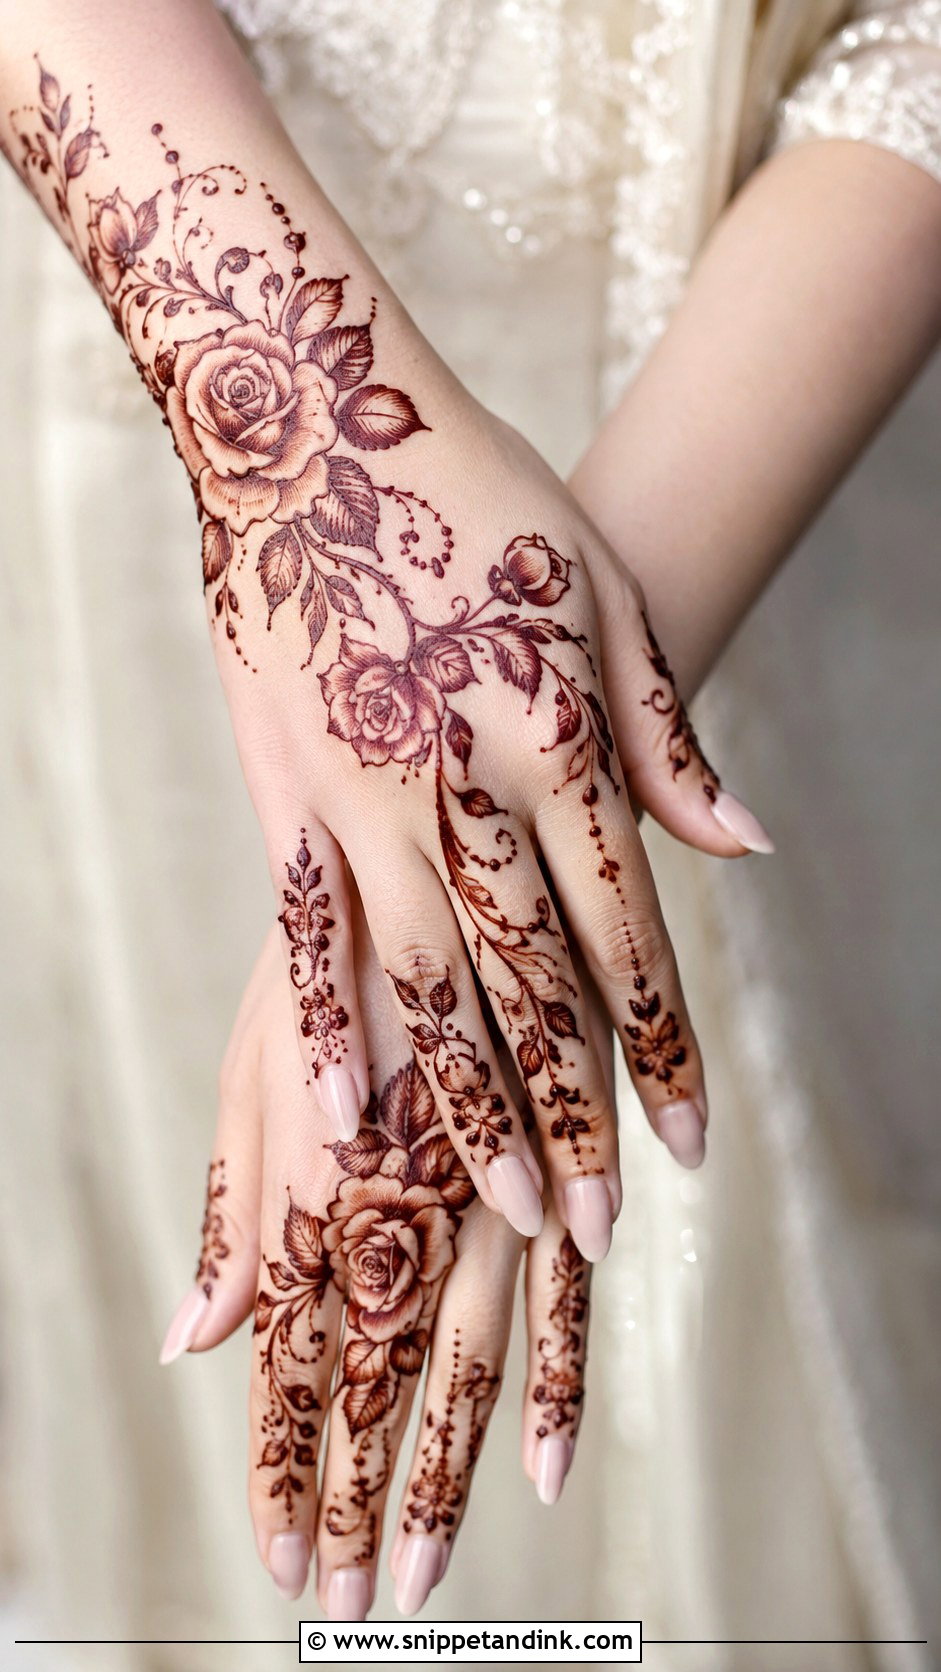
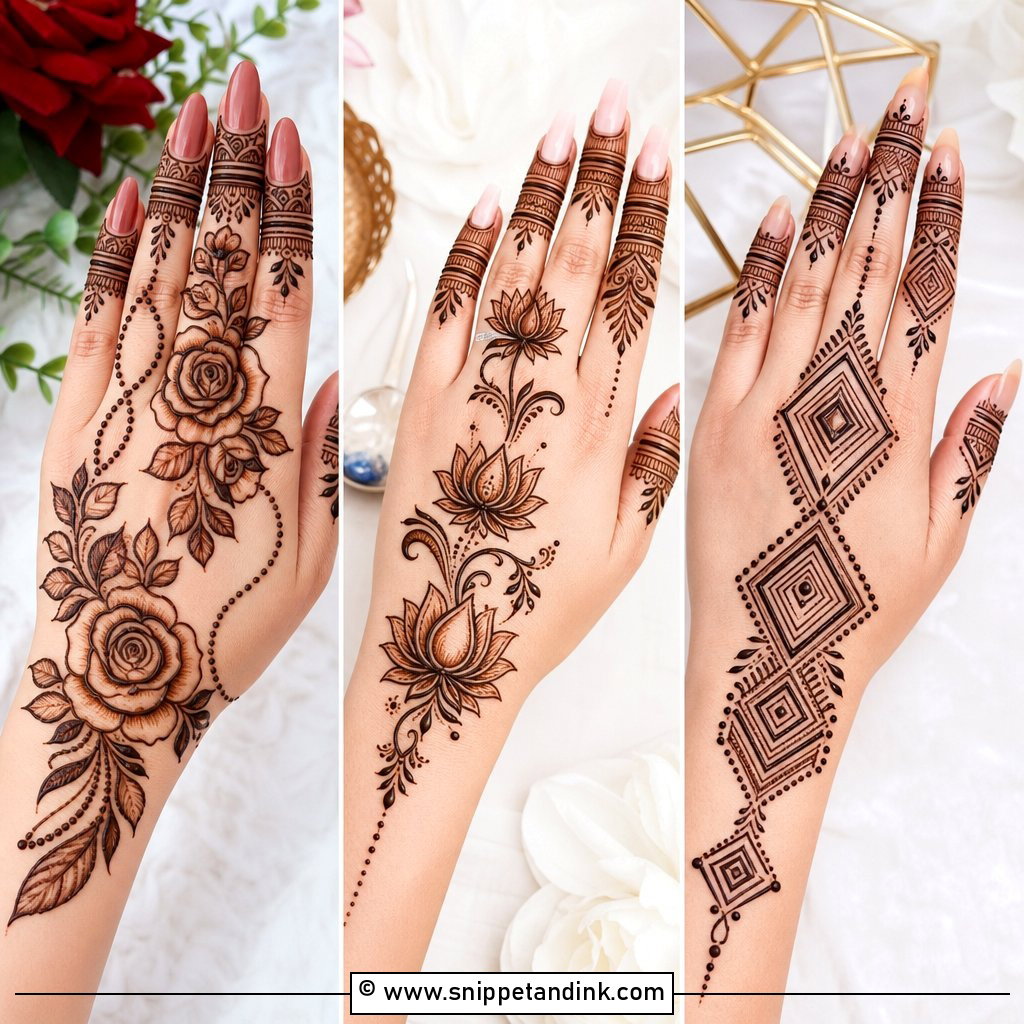
Roses stay simple if you use larger petals and clean outlines. I place one rose near the wrist or the center of the hand and add curved leaves and small buds around it. Light shading inside the petals gives depth, but only on one side of each petal, like shadow. A rose trail moving toward one finger gives an Arabic-style finish, and the rest of the hand stays open. Engagement functions and festive gatherings both suit it.
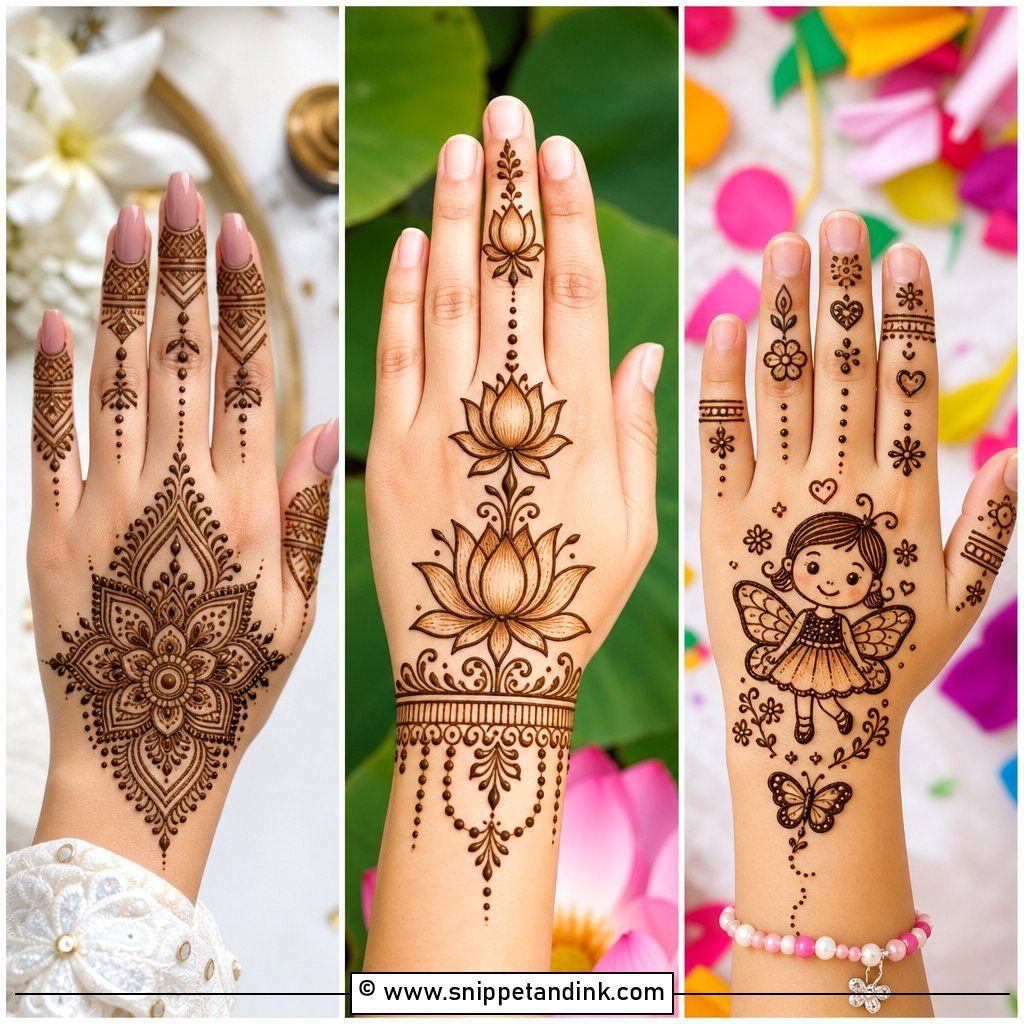
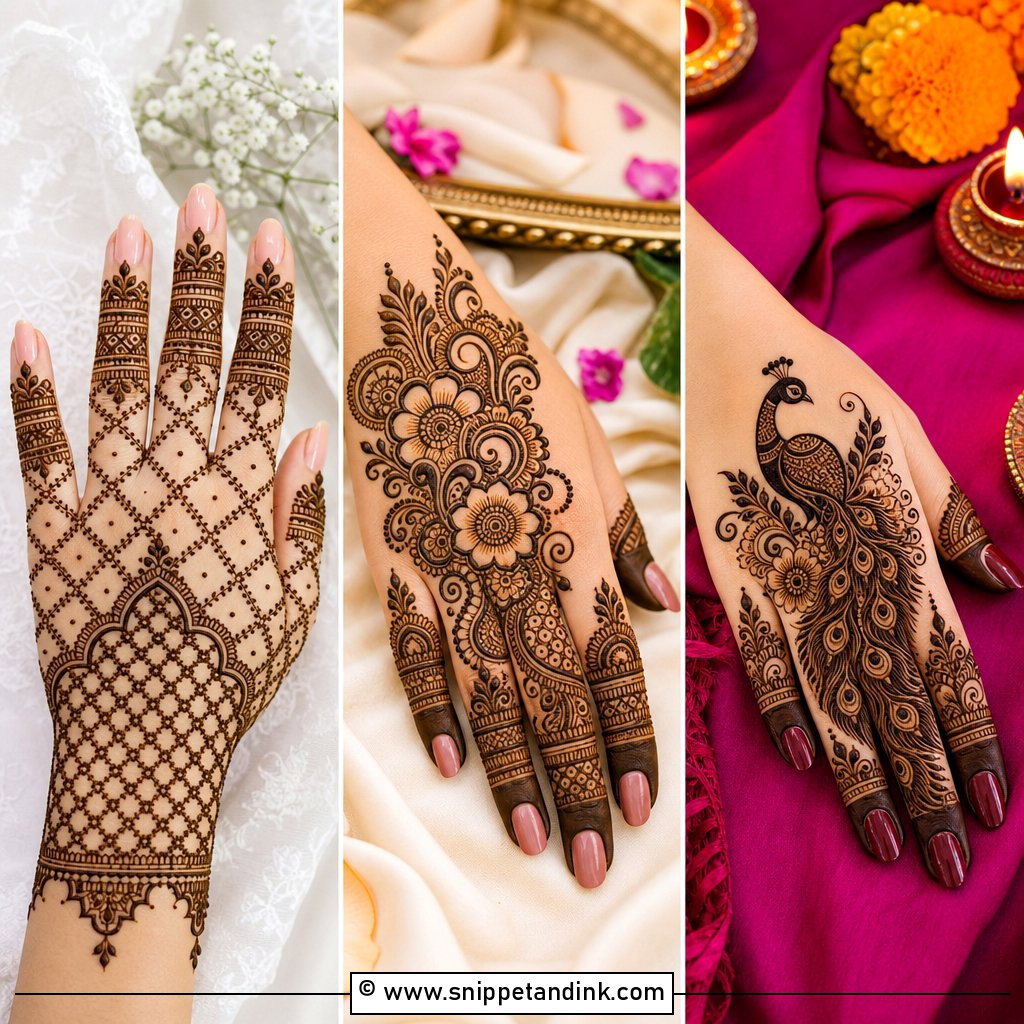
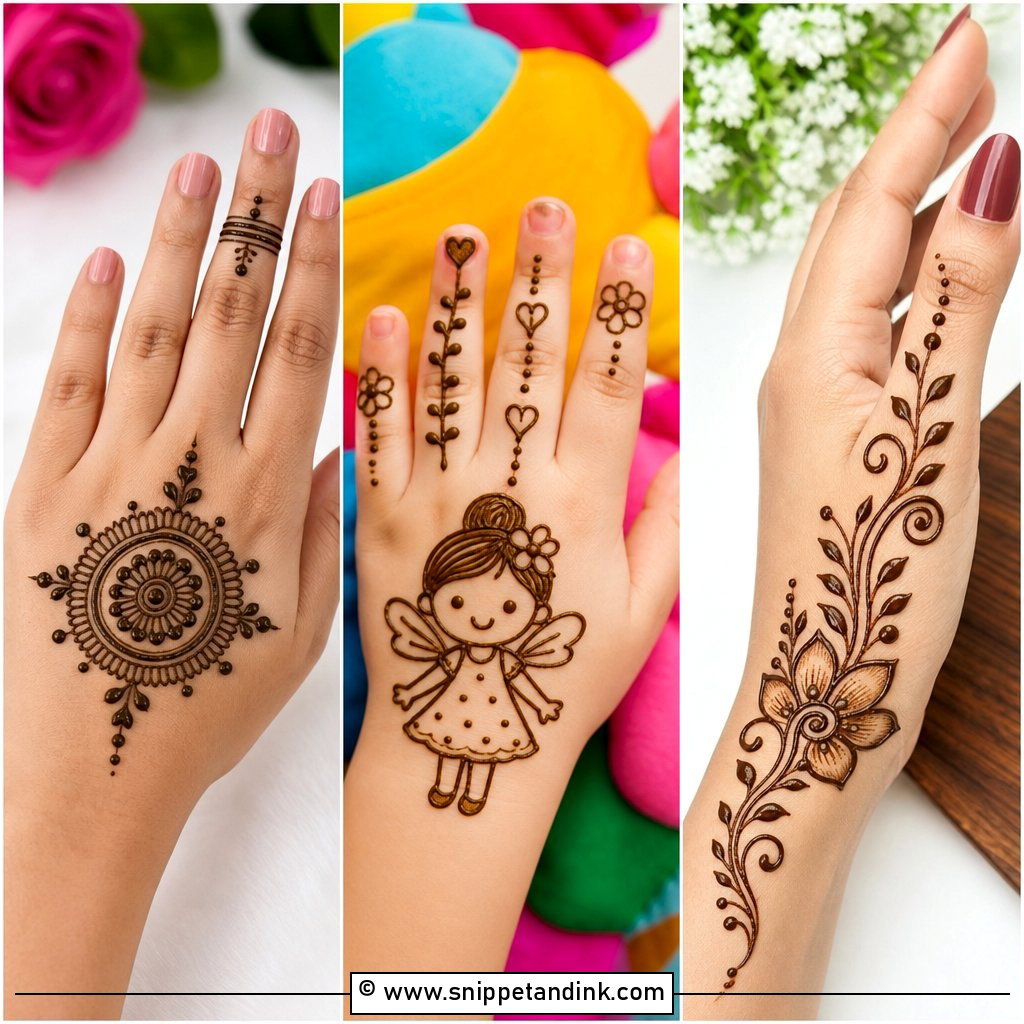
15. Simple Stylish Leaf Mehndi Design
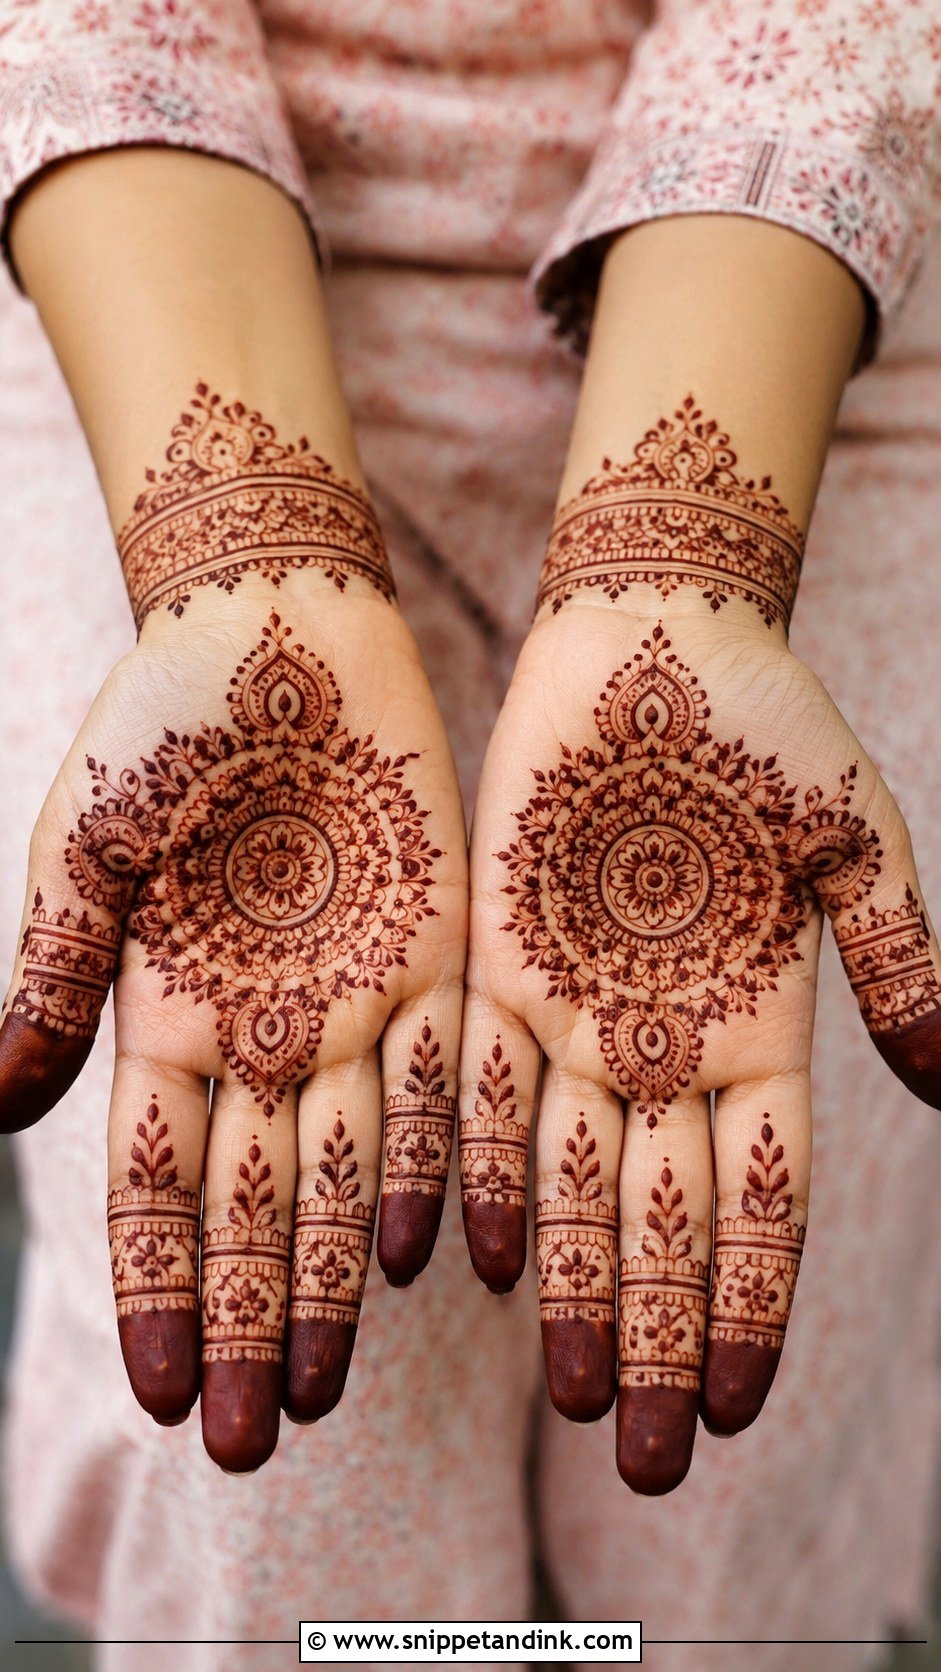
Leaf patterns suit almost every hand shape. I either run a leafy vine from the wrist to the middle finger, or draw two small branches across the palm and fingers. Thin stems, paired leaves and dotted accents keep it neat, and a few small flowers mixed in soften it. Leaves can repeat endlessly without looking dull, so beginners get a lot of practice for very little risk. Casual celebrations and school events are a natural fit.
16. Simple Stylish Jaali Mehndi Design
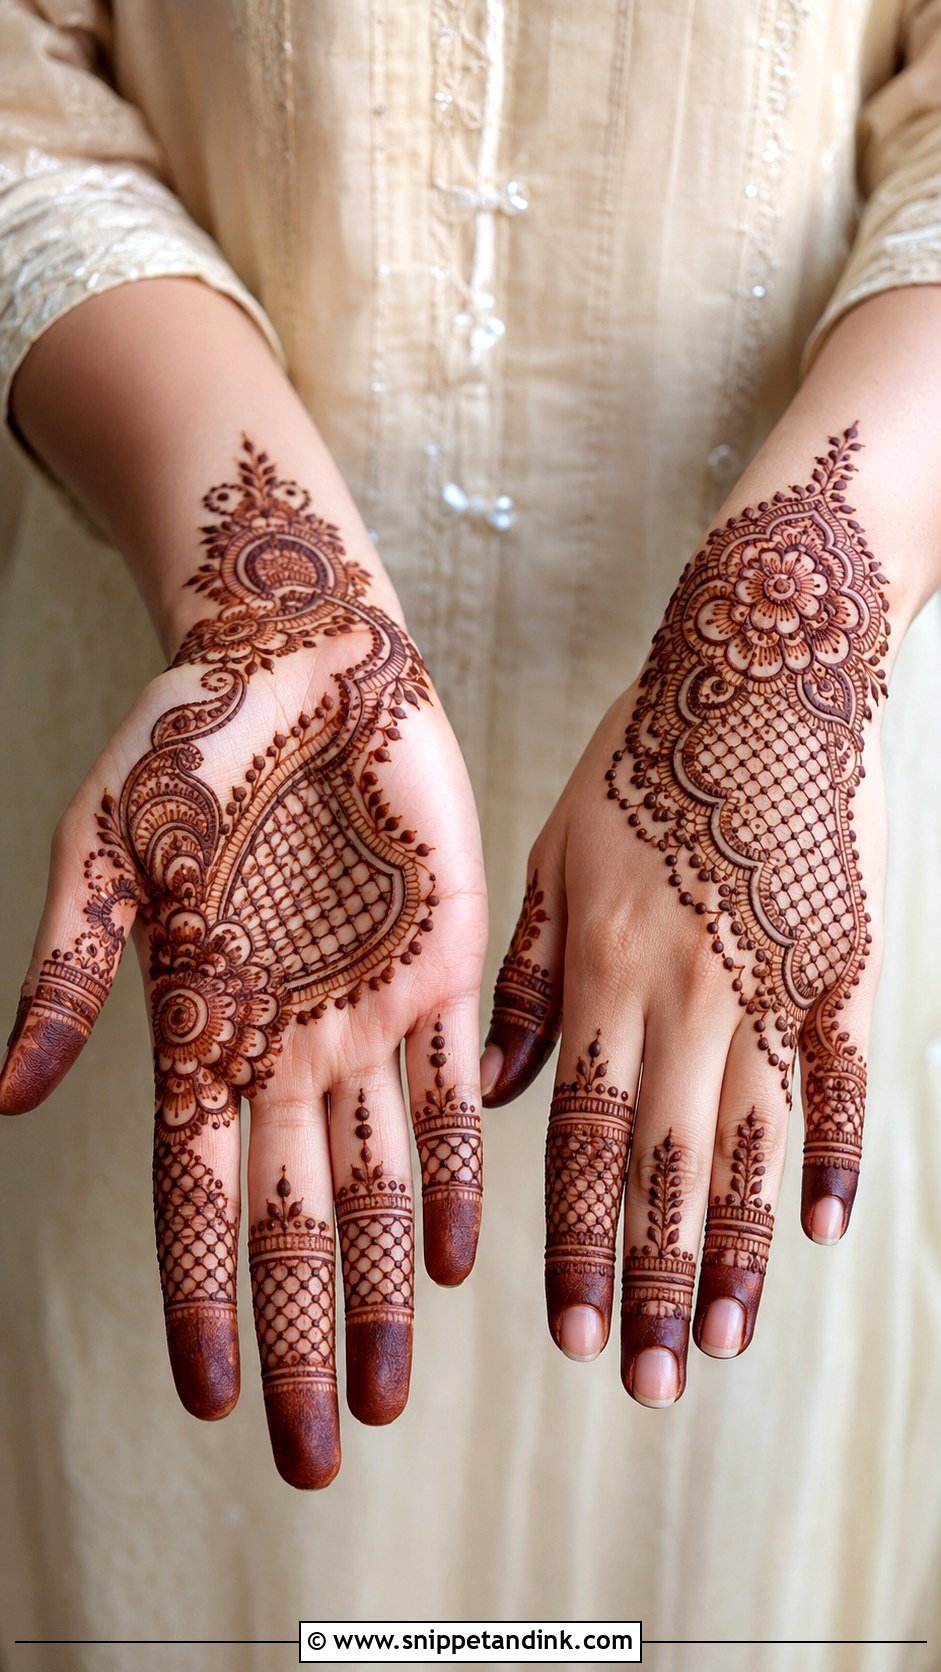
Jaali, the net pattern, gives a lot of visual detail for a small area. I draw one small panel on the palm, back hand or wrist and frame it with flowers or paisleys. Even spacing is everything, so I set the panel’s corners with dots first, draw parallel lines in one direction, let them firm for a minute, then cross them. A whole hand of mesh gets busy fast; one panel with simple finger bands and dotted edges is enough.
17. Simple Stylish Peacock Mehndi Design
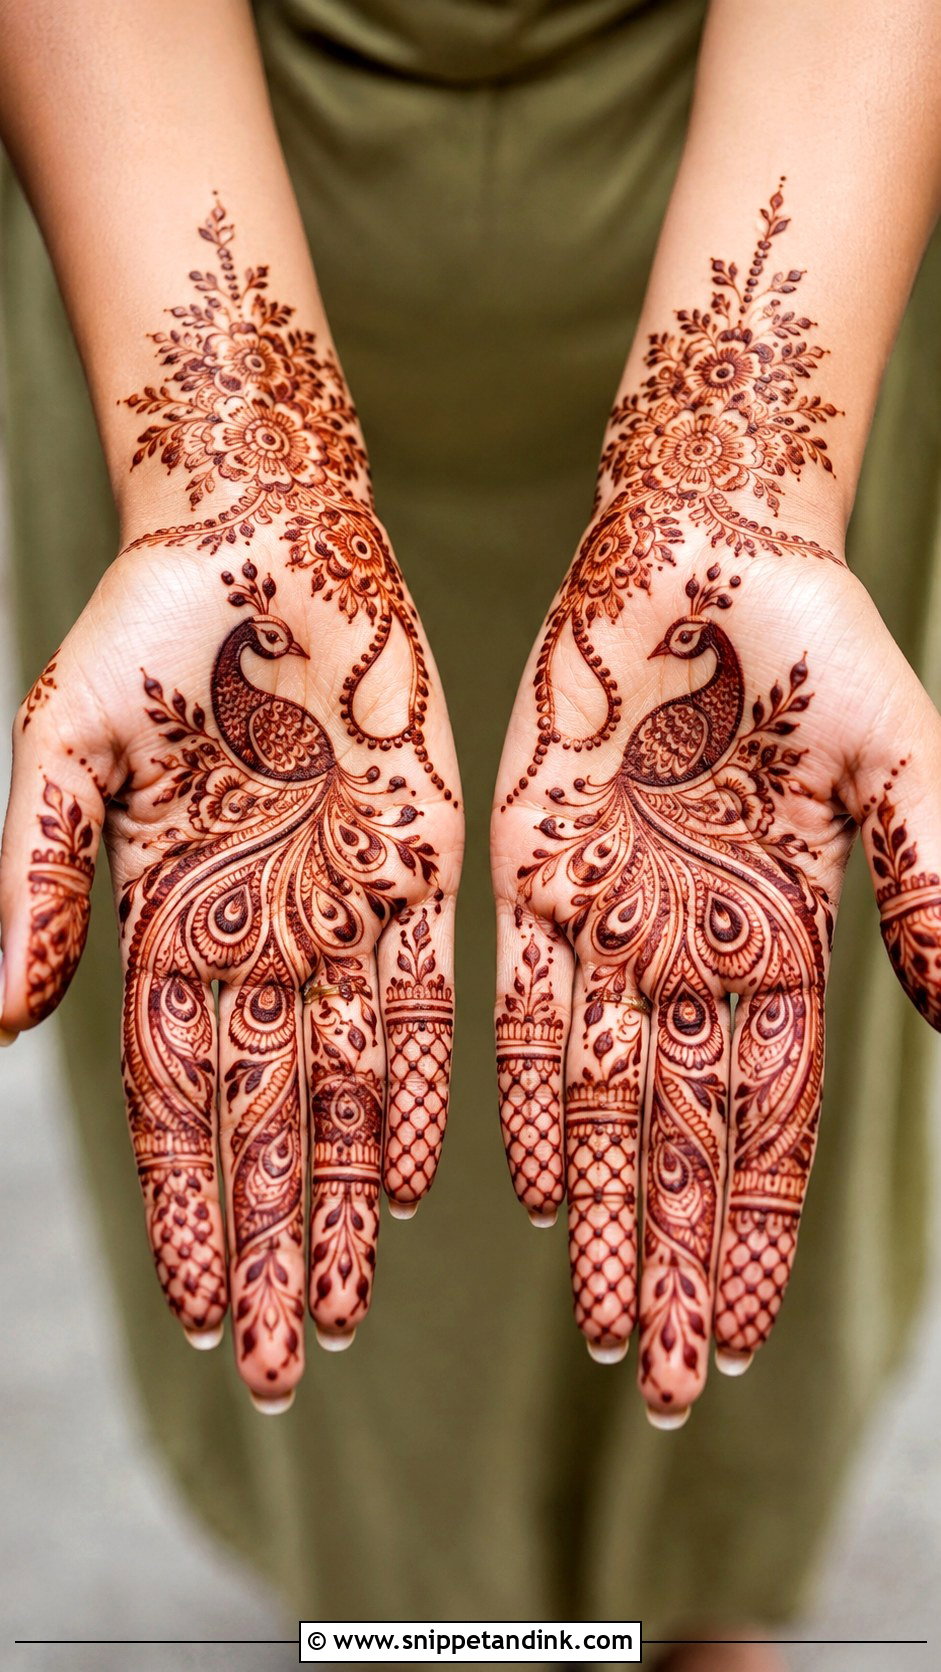
A peacock can look grand, but the simple version keeps the shape clear. I draw a small bird on the palm or back hand and let the feathers flow in curved lines, dots and tiny paisleys, leaving the feather section open instead of packed. That openness is also what makes it quicker to apply. A few leaves or a small floral trail can carry the design toward the wrist. Weddings, festivals and traditional celebrations are where people ask for it.
18. Simple Stylish Round Tikki Mehndi Design
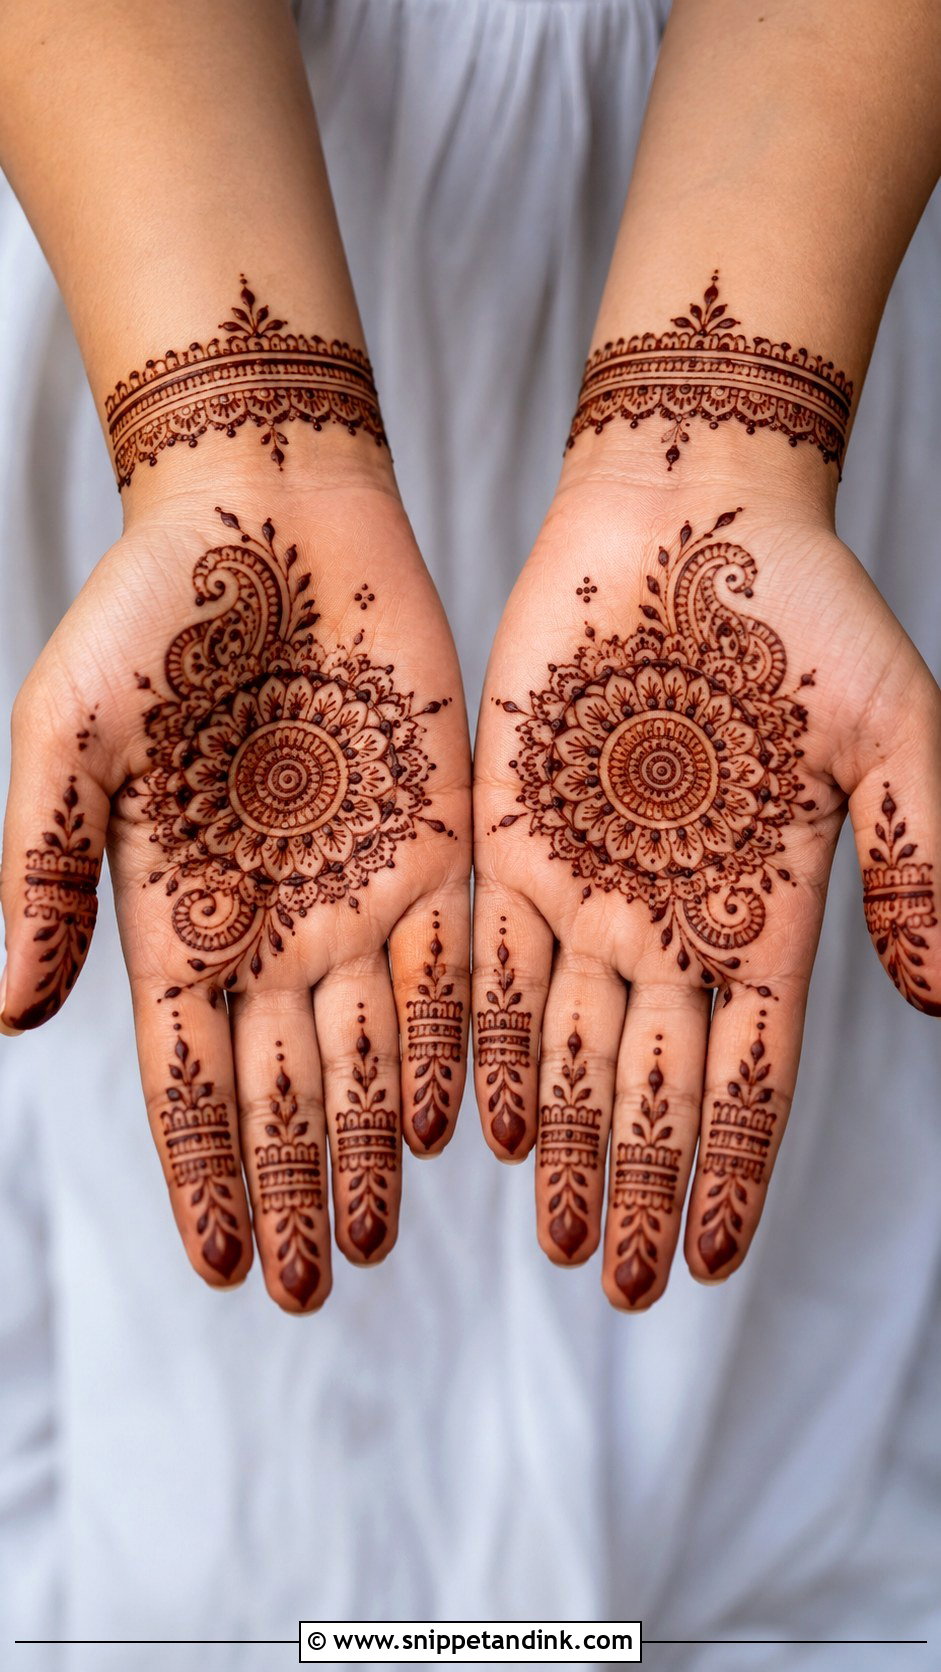
The tikki is a bold circle in the center of the palm, decorated with petals, dots, scalloped edges and small rings, with simple bands or fingertip caps on the fingers. It’s quick and balanced, and it’s the easiest design to match across both hands. If the center is filled solid, I lay the paste in an even, slightly thicker layer than the outlines, because a thin patchy fill gives a blotchy stain. Eid, Diwali and family rituals all suit it.
19. Simple Stylish Minimal Mehndi Design
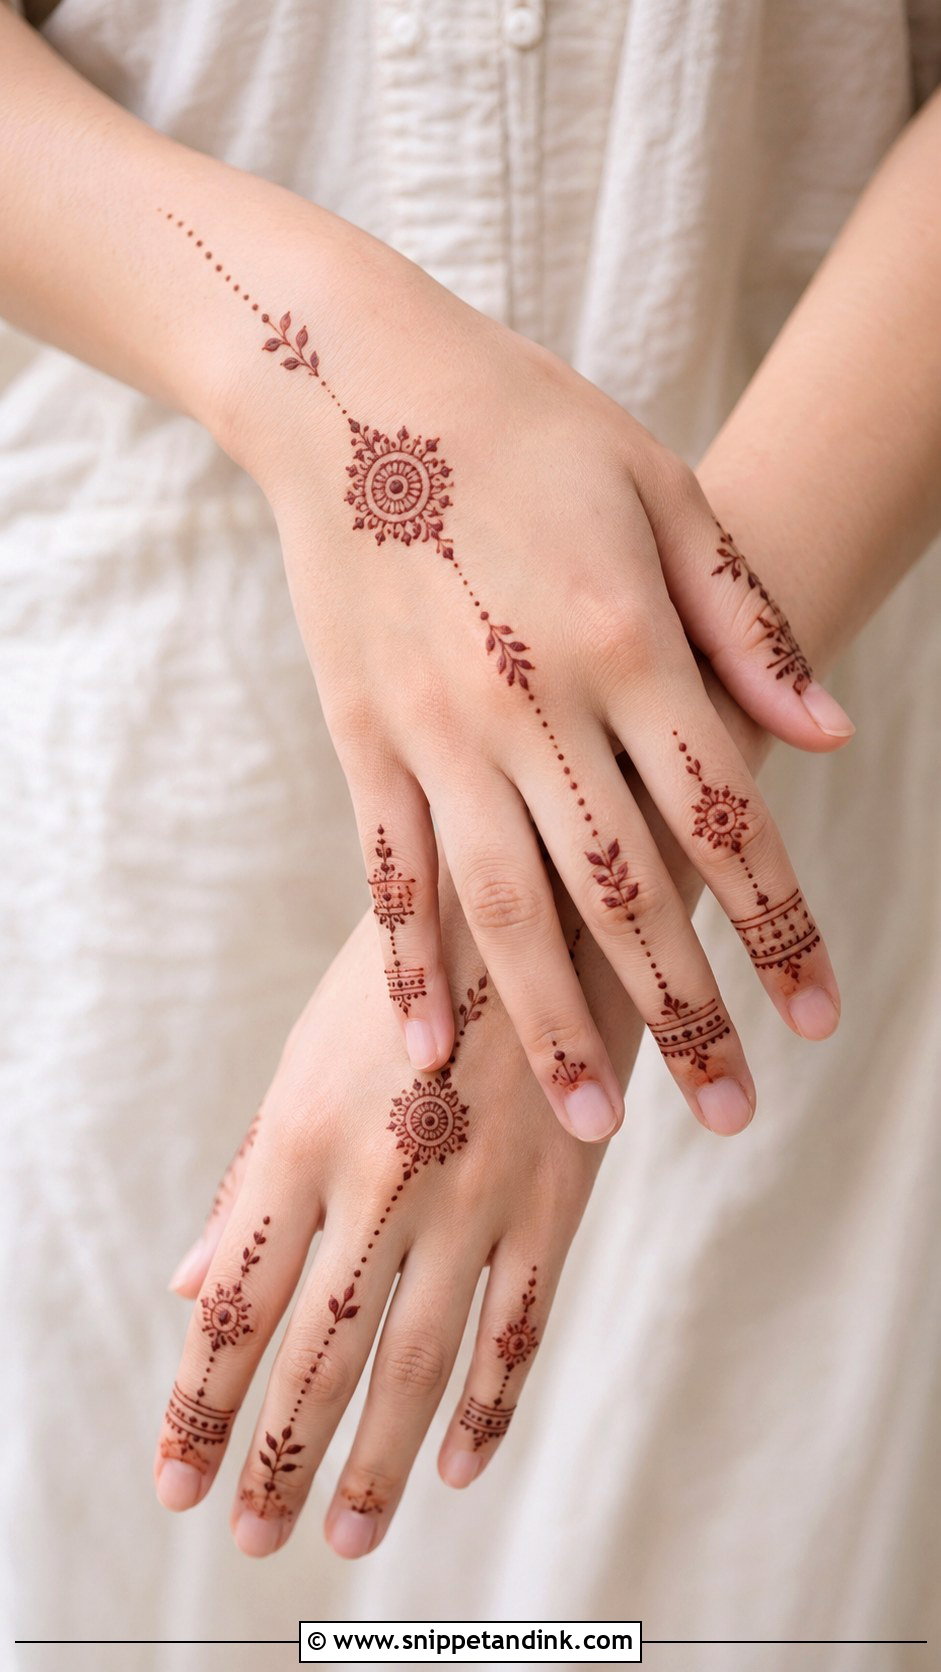
Minimal henna demands precision, since there’s so little on the hand. Fewer motifs, thinner lines and more open space: a small mandala near the wrist, a delicate finger trail or one tiny floral chain. It’s the right call for anyone who needs something subtle for work or school. Every line has to be clean, so if you’re doing it yourself, practice the exact strokes on paper first. Drawn well, it still carries the feel of traditional henna.
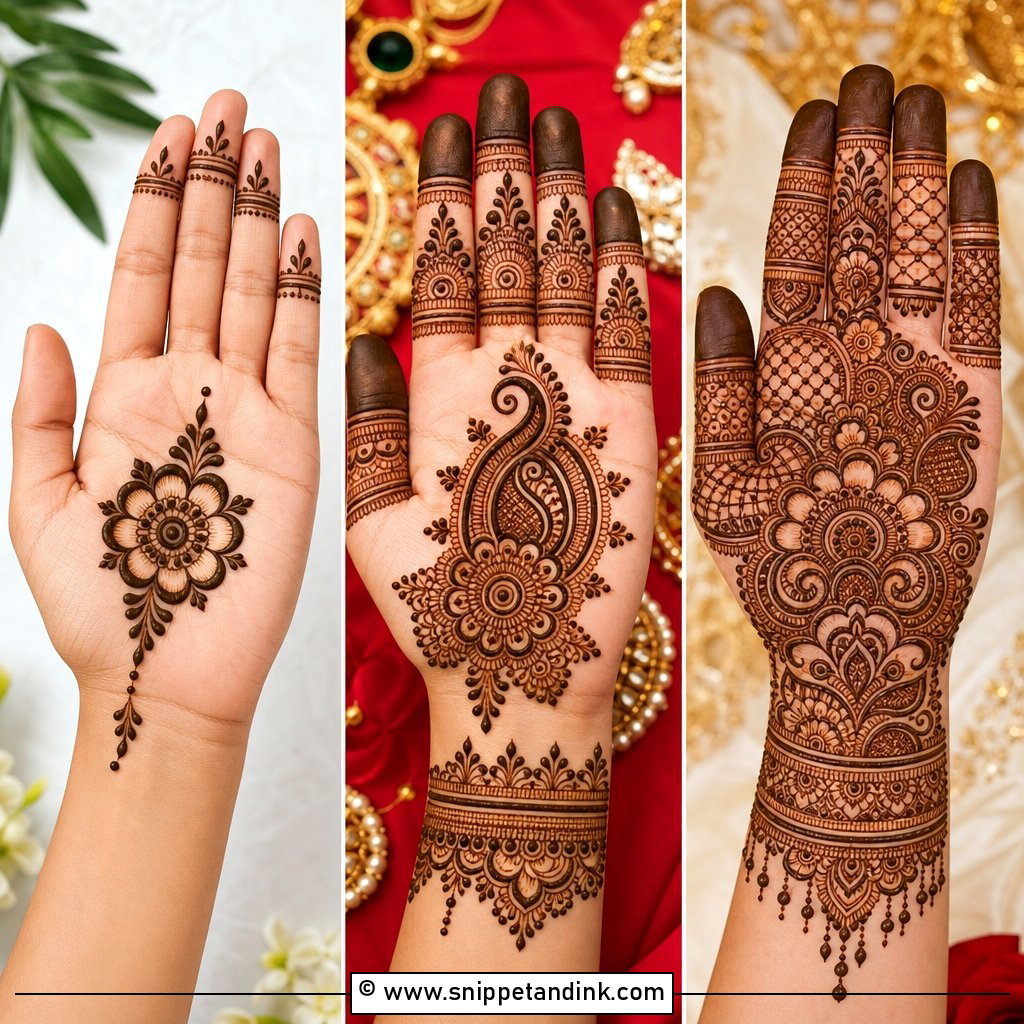
20. Simple Stylish Modern Mehndi Design
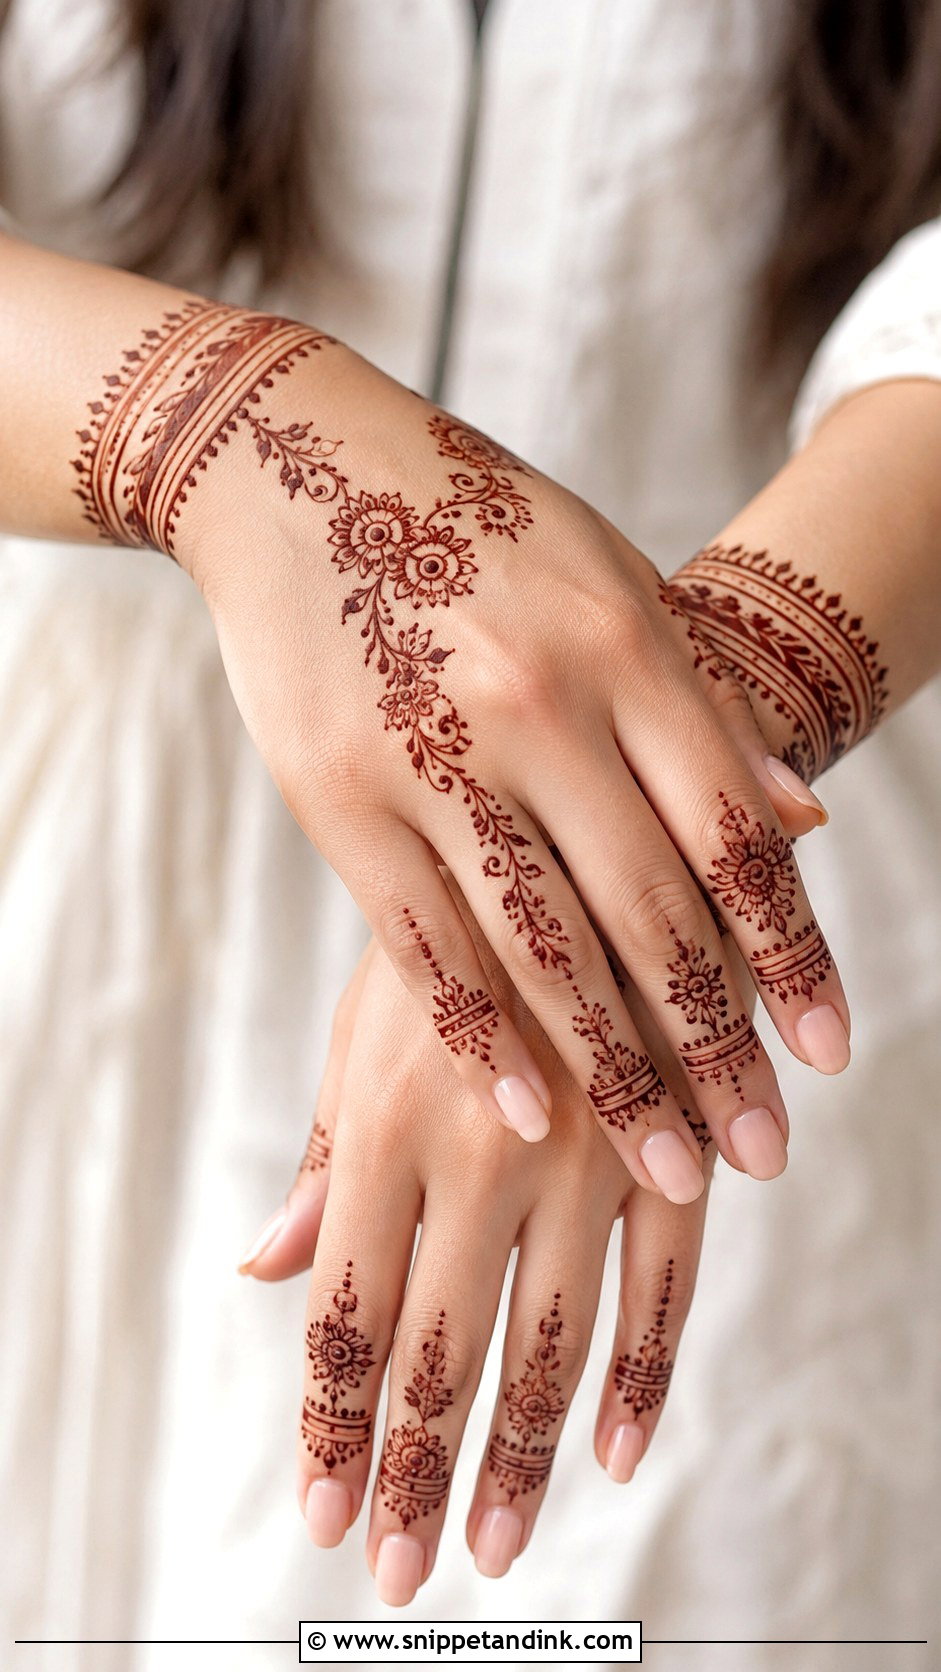
Modern henna mixes traditional motifs with clean layouts: negative space, slim wrist bands, finger rings, floral trails and a few geometric accents in one balanced design. I place motifs where they flatter the hand rather than filling the palm, for example a small mandala with bold finger details. It photographs crisply because it’s uncluttered. Young women and bridesmaids gravitate to it, and it’s easy to wear for days afterward.
21. Simple Stylish Geometric Mehndi Design
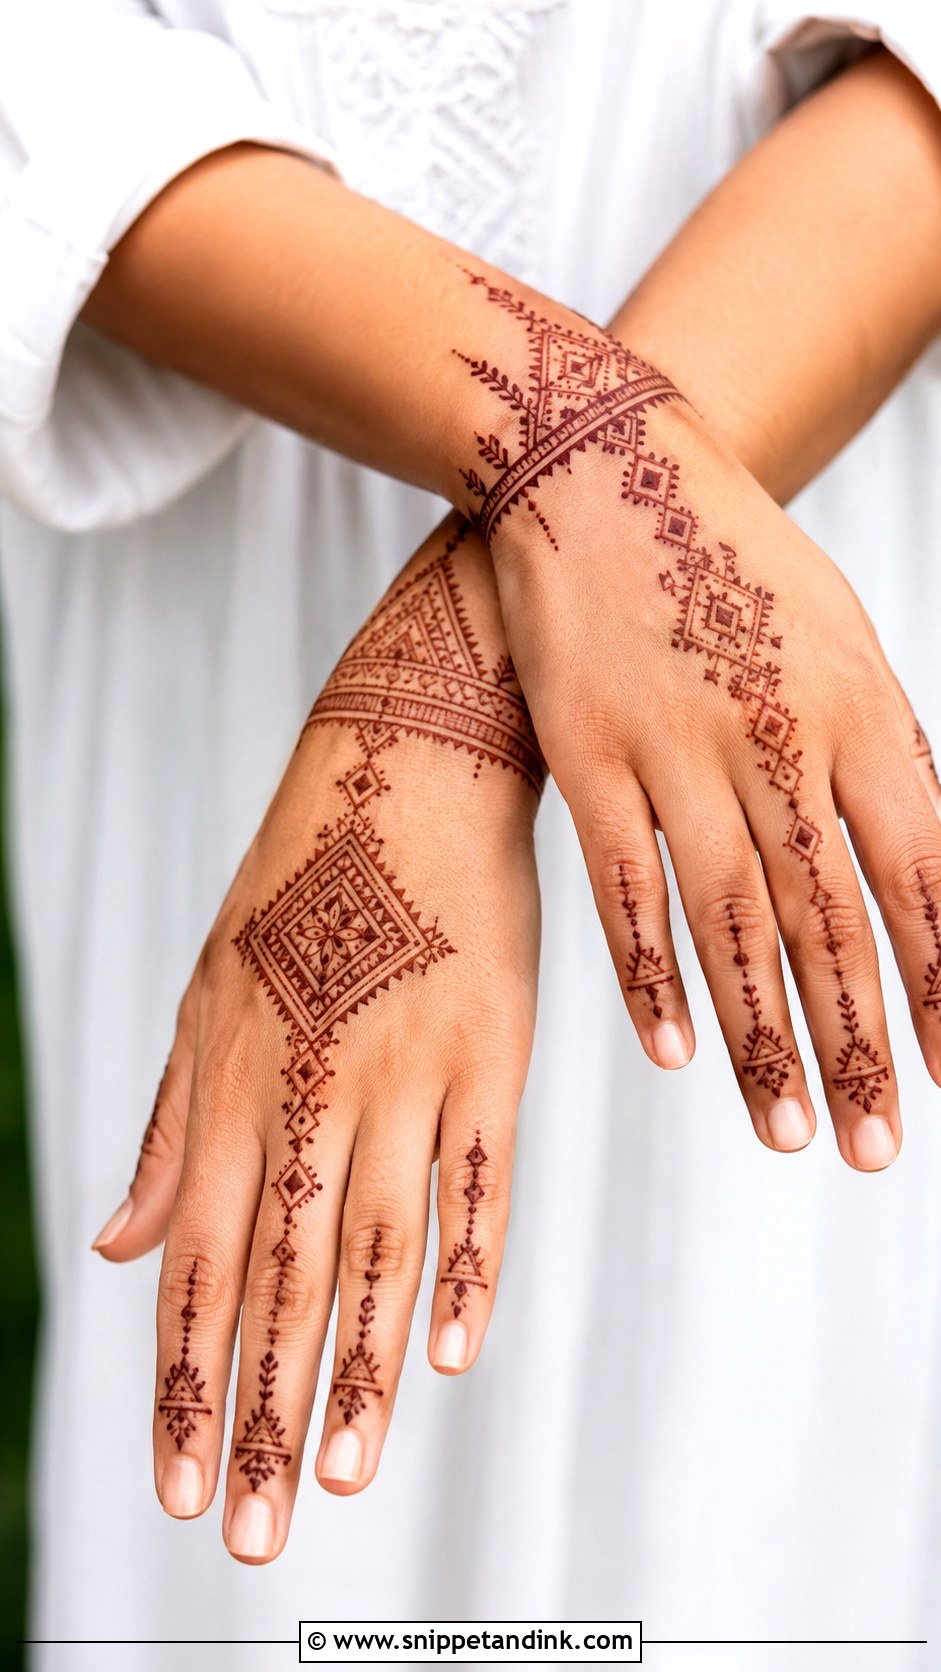
Geometric henna is built from triangles, diamonds, straight lines, dots and small grids. A diamond chain from the wrist to one finger on the back of the hand is the version I’d start with. Small leaves or tiny flowers soften it if you want. Straight lines are easy to pipe but show any unevenness, so I step back every few strokes to check spacing. It pairs best with modern outfits and people who like structure.
22. Simple Stylish Moroccan Mehndi Design
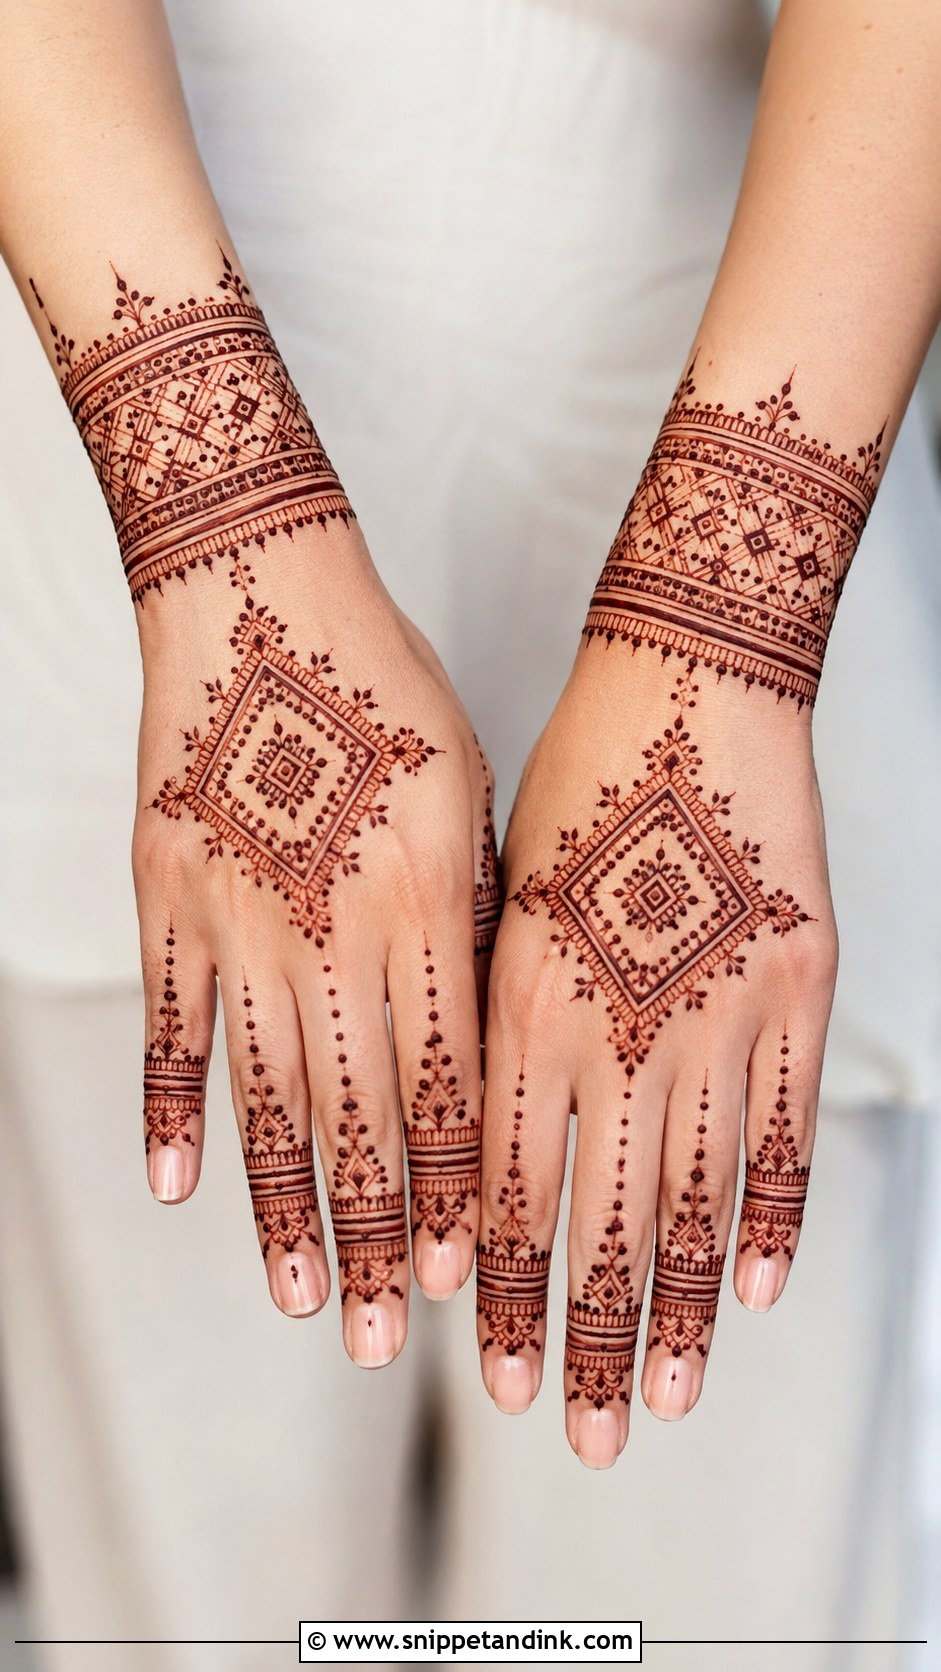
Moroccan henna is graphic: diamond grids, small dots, angular borders and wrist bands, usually on the back of the hand and the fingers. Compared with floral Indian or Arabic work, it feels structured. Keep it symmetrical and resist adding curves, which tend to fight with the geometry. It’s easy to draw once you get used to steady straight lines, and it looks strong at casual and festive events alike.
23. Simple Stylish Gulf Mehndi Design
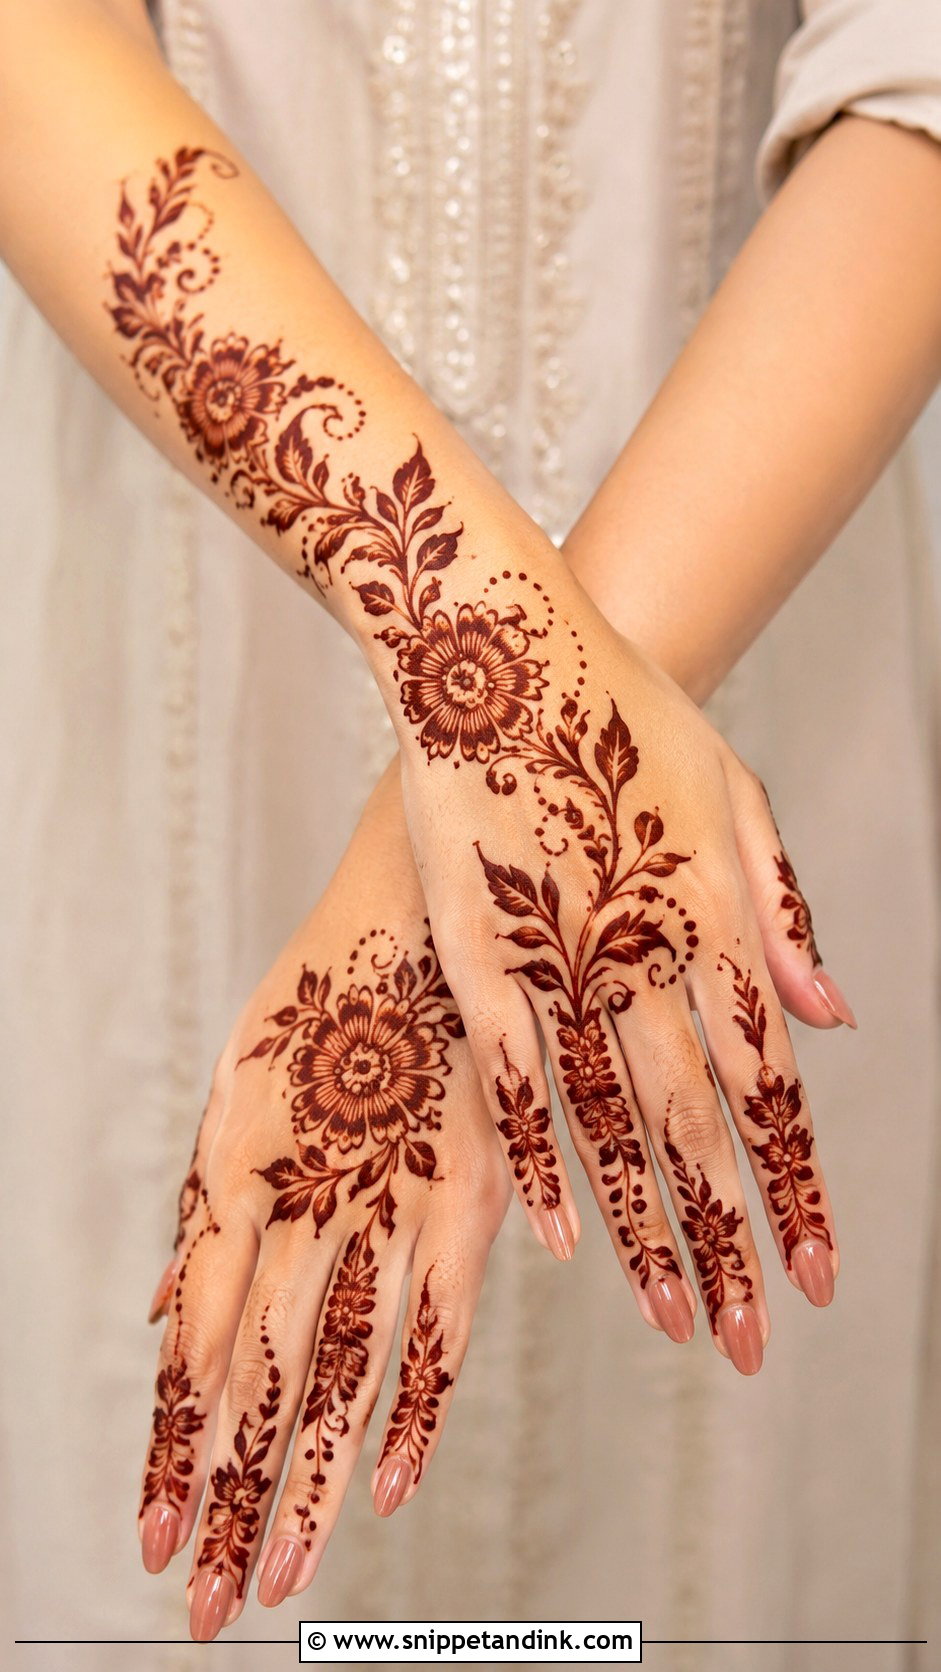
Gulf-inspired henna uses bold florals, leafy trails and open spacing. For a simple version I draw one main flower near the wrist and let the design flow toward the fingers with thick leaves and curved stems, adding dots and small swirls but leaving plenty of empty skin. The bold outlines carry more paste, so they stain strongly. I cut a slightly wider cone tip for this style. Eid, weddings and evening celebrations suit it.
24. Simple Stylish Wedding Guest Mehndi Design
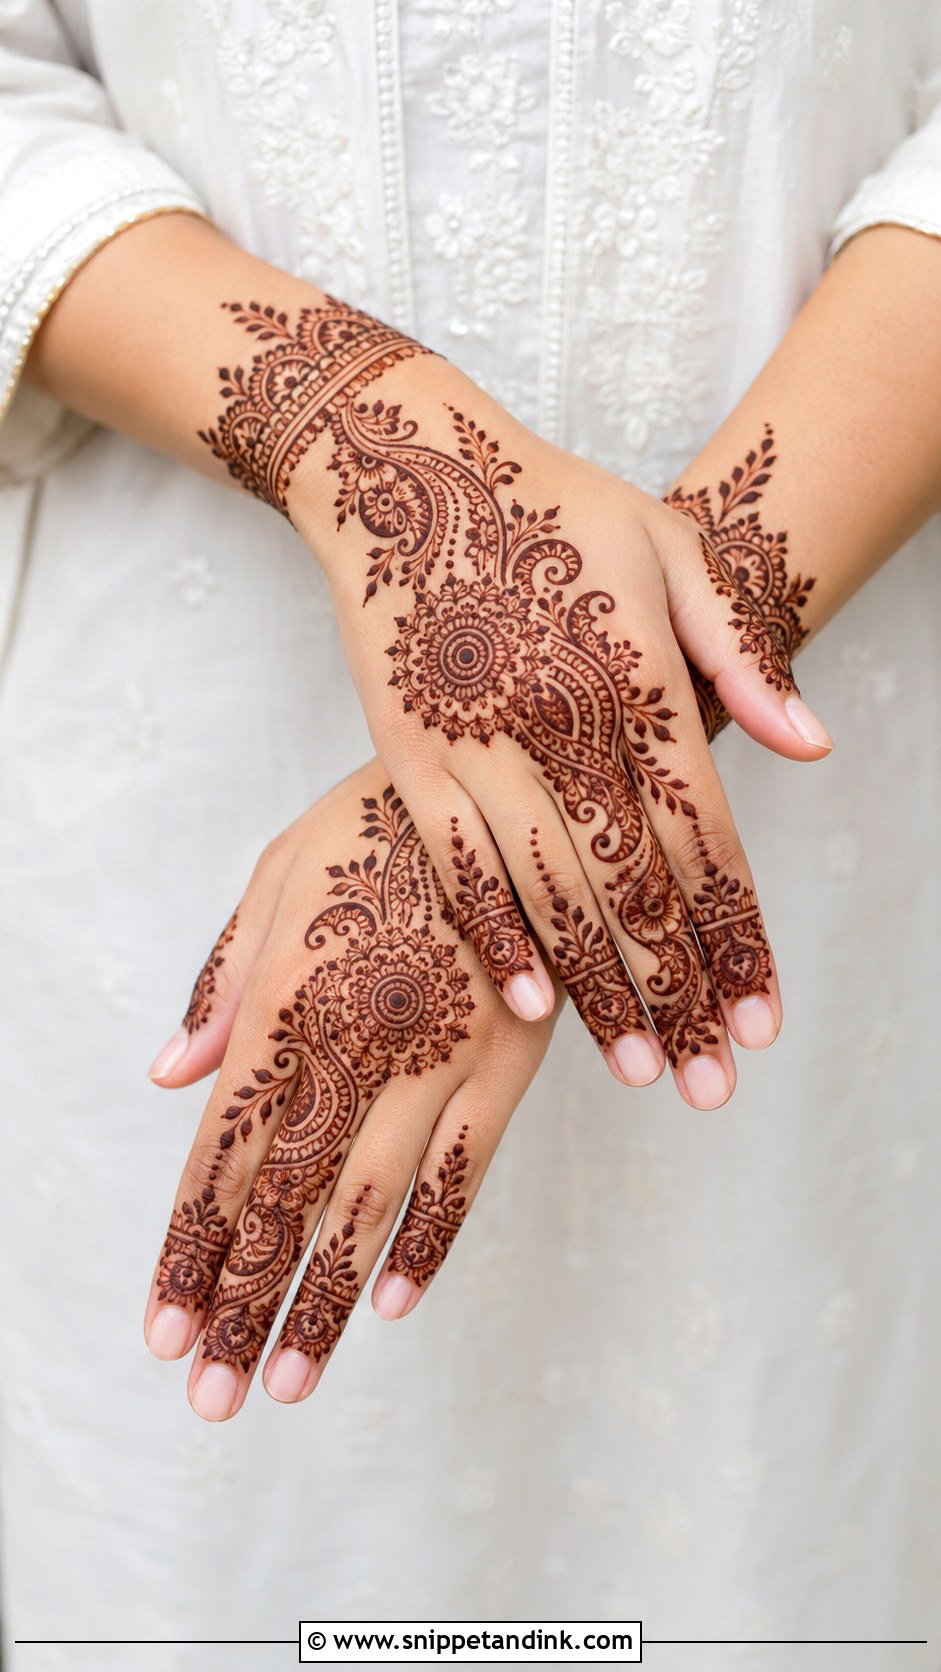
A guest’s henna should never compete with the bride’s. I usually suggest a balanced floral and paisley trail, kept to either the palm and wrist or the back hand and fingers, with a bracelet border, small mandala or leafy details to finish. It doesn’t take long and pairs well with traditional outfits. A wedding guest mehndi design like this suits sangeet, mehndi night, reception events and family ceremonies, where the bride’s heavy coverage should stay the center of attention.
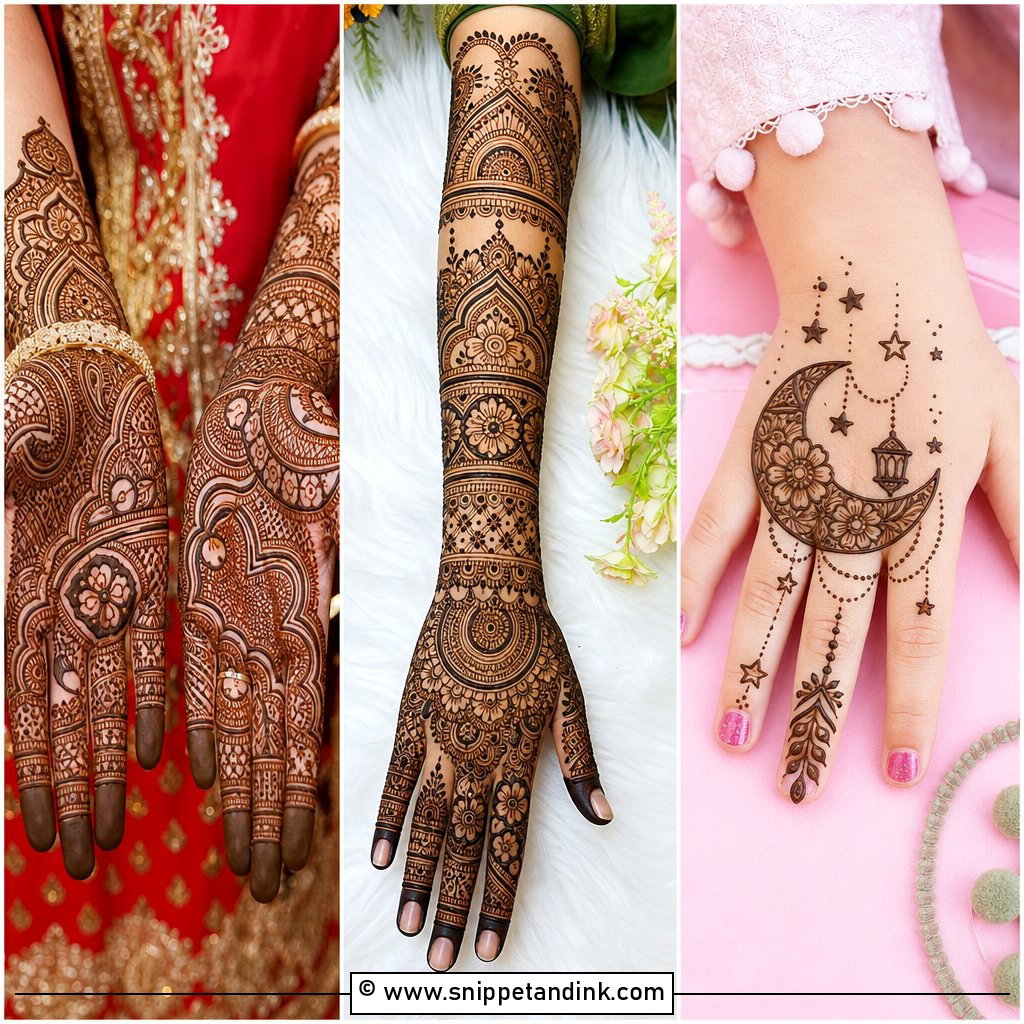
25. Simple Stylish Engagement Mehndi Design
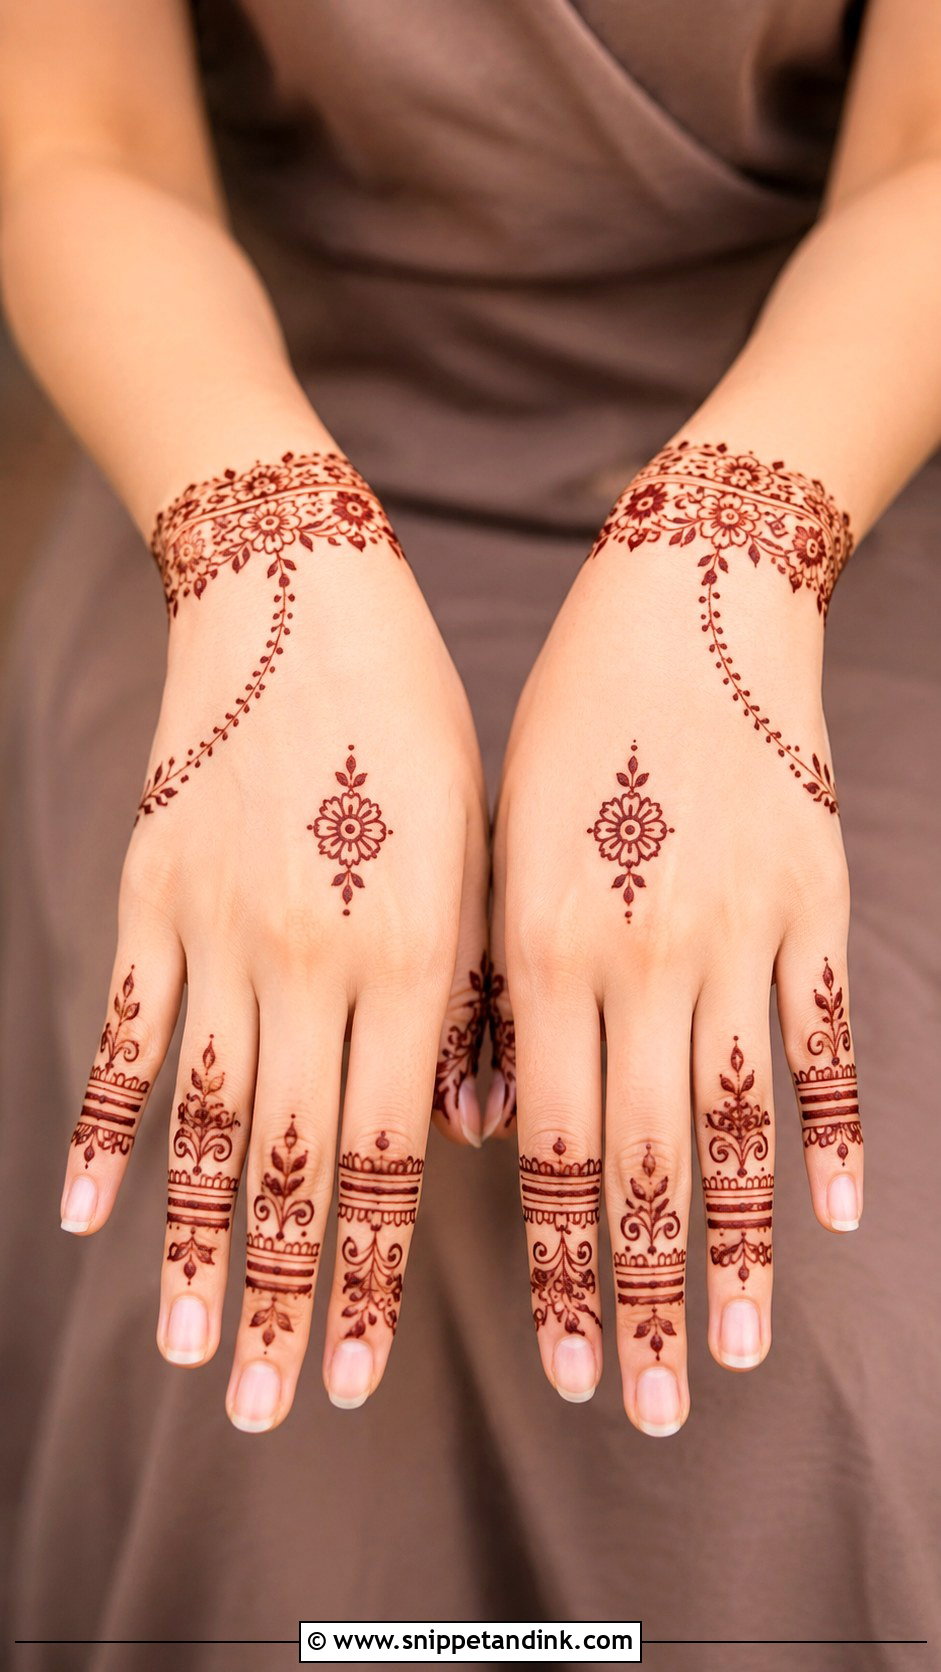
Engagement henna gets photographed with the ring, so I design around that. A modern back-hand layout with a floral bracelet, finger bands and a small central motif works well, or a front-hand mandala with delicate wrist details for a more traditional look. Small hearts are popular, but blend them into flowers or dots so they don’t look like stickers. Keep the ring finger fairly clear between the knuckle and the band. It’s lighter than full bridal work and photographs cleanly.
26. Simple Stylish Eid Mehndi Design
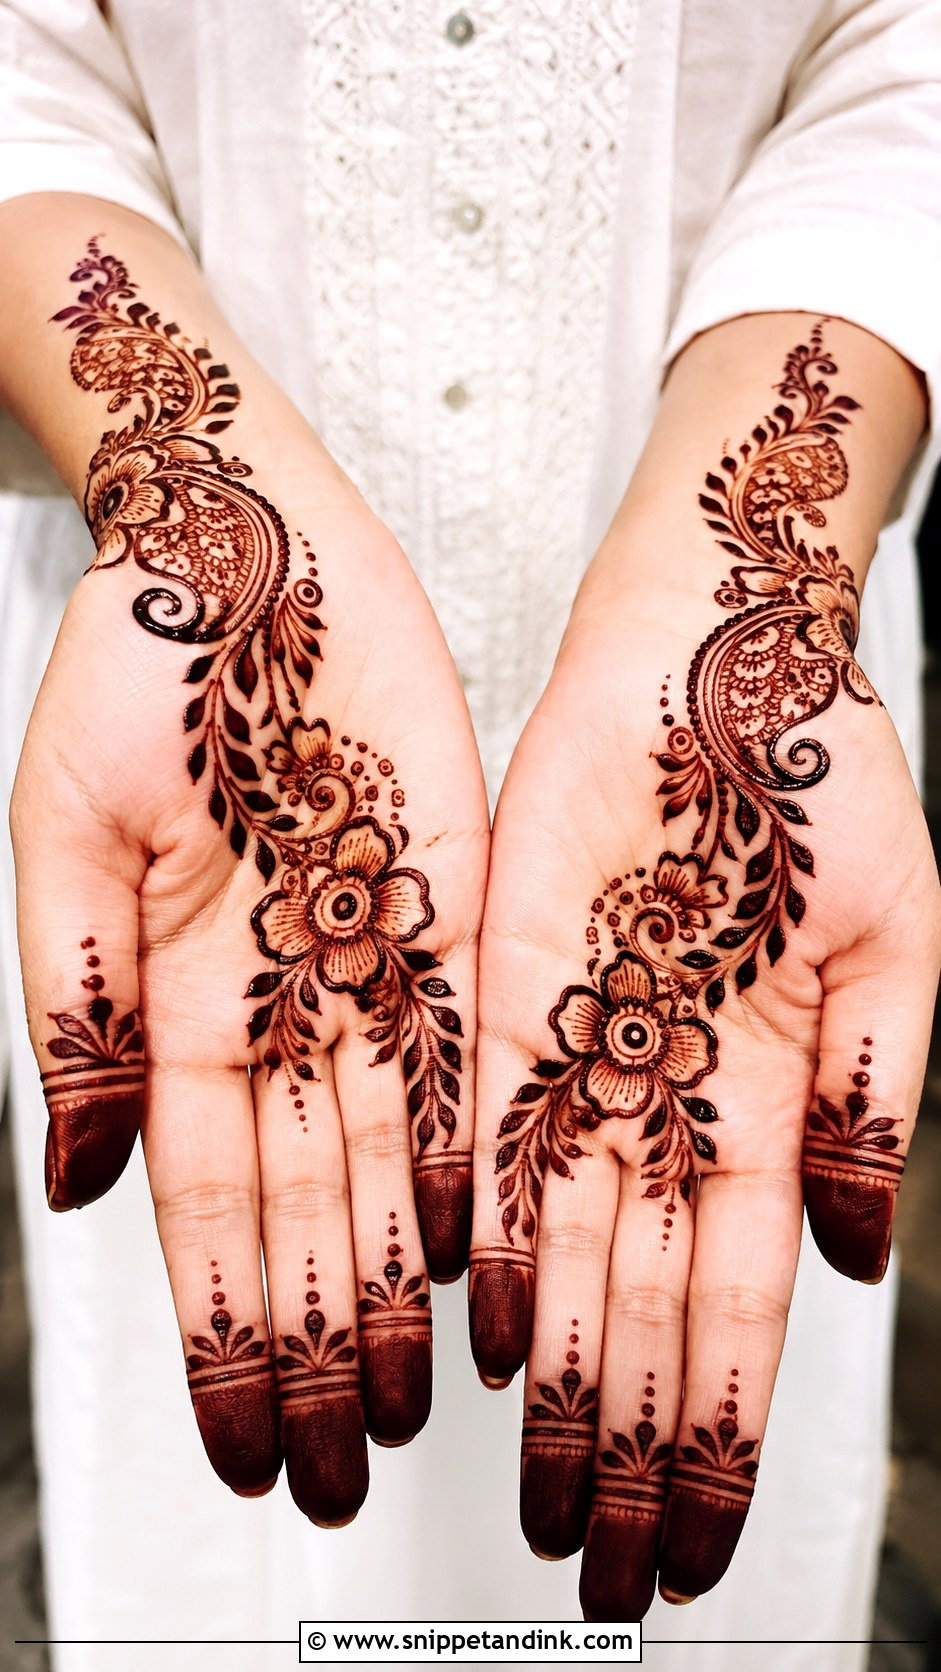
Eid henna usually means an Arabic trail from the wrist diagonally toward one finger, with bold flowers, leaves and paisleys spaced apart so it looks fresh. Fingertips can be filled or decorated with fine bands. It’s quick enough to fit into the busy night before Eid, and it suits every age in the family. Get it on at least the night before, so the stain has deepened from orange to brown by the morning. Bangles and soft makeup complete the look.
27. Simple Stylish Diwali Mehndi Design
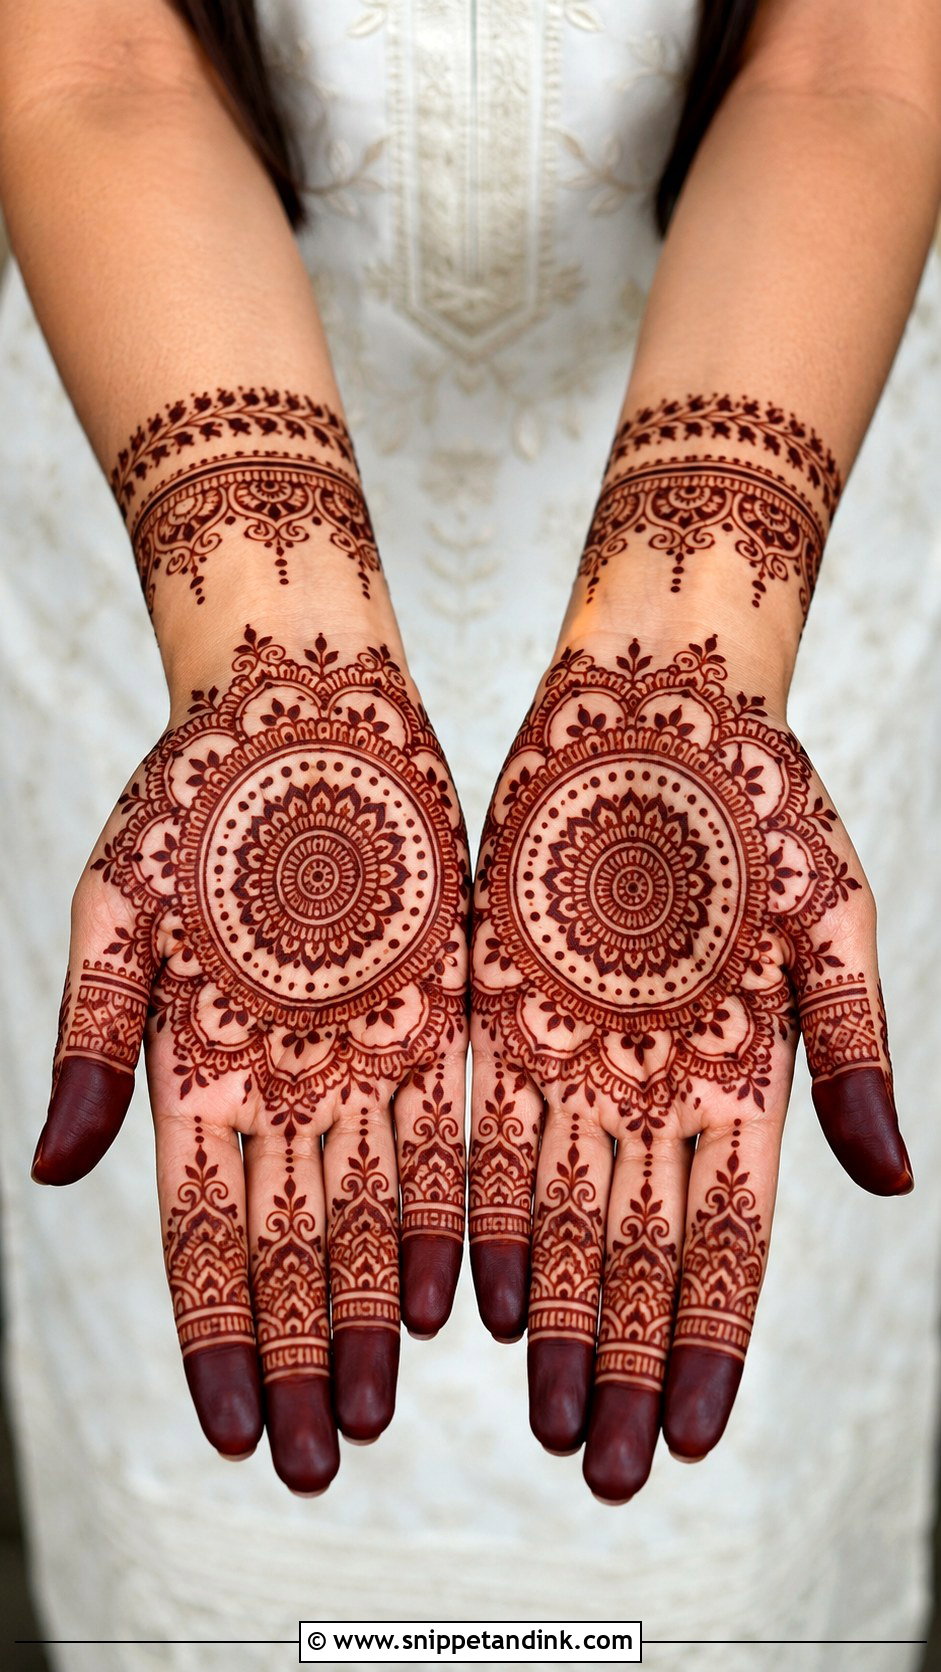
For Diwali I lean toward a palm mandala with floral borders, which looks traditional and clean while you’re doing puja. Small diya-inspired curves can go in if you like the festive touch, but keep them few. The wrist gets a bracelet band and the fingers carry dots, leaves and tiny lines. It doesn’t take hours, and it suits ethnic wear and family photos. If Karwa Chauth henna is still faintly showing, this design can be drawn over the old stain without trouble.
28. Simple Stylish Karwa Chauth Mehndi Design
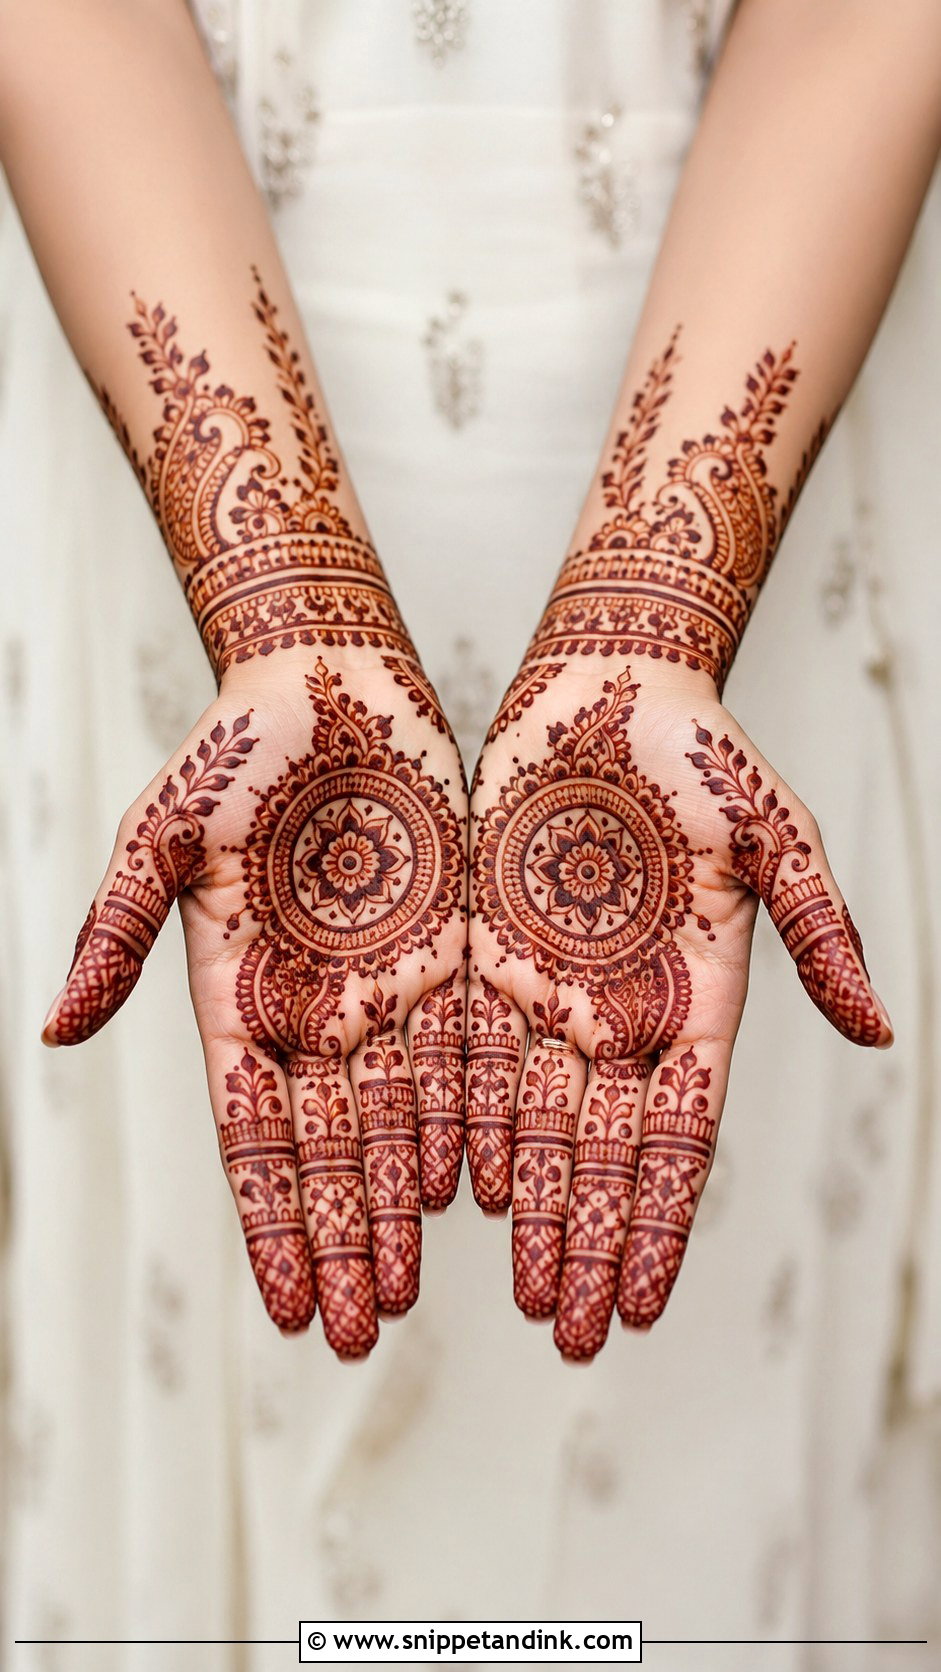
Karwa Chauth henna is usually traditional, but it can stay simple: a central mandala or paisley on the palm, leafy vines toward the wrist and fingers, and a bracelet-style wrist border. Keep the hand open and readable. Many women apply this the day before their fast, so I suggest the morning or early afternoon of that day, which leaves time for the paste to stay on for hours and the stain to deepen by evening of the festival.
29. Simple Stylish Raksha Bandhan Mehndi Design
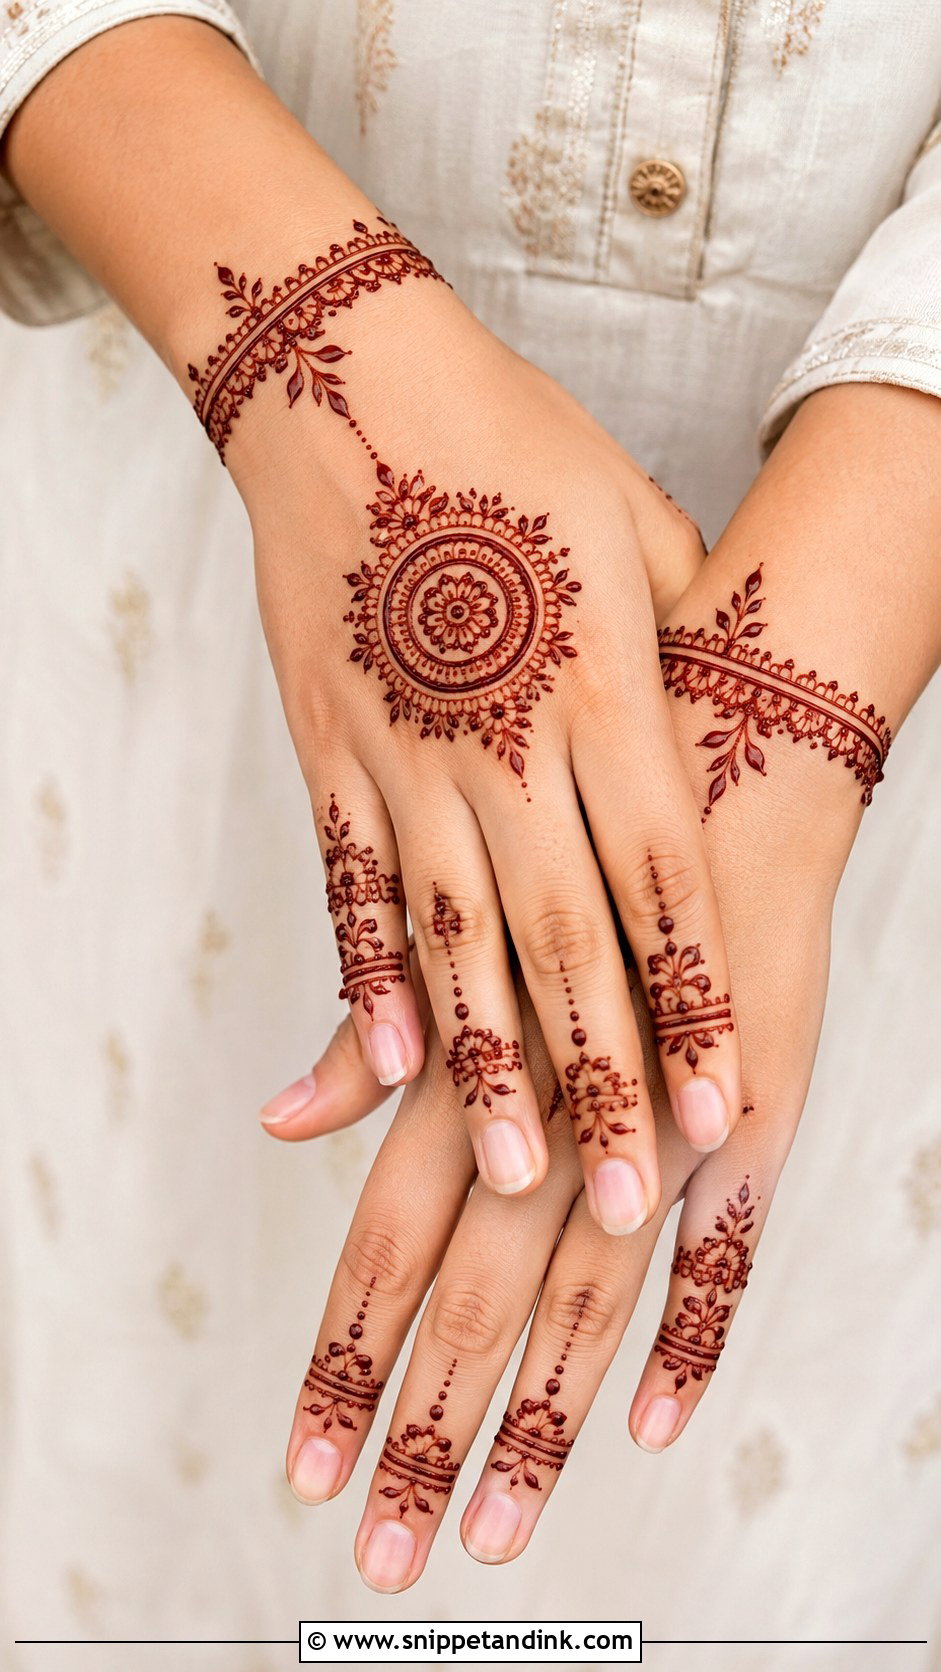
Raksha Bandhan is a busy family day, so the henna should be quick and practical. A small back-hand mandala with finger bands works well, or a bracelet design, which suits the rakhi theme. Tiny flowers, dots and leaves around the wrist give a delicate finish, and keeping the palm light lets you move around easily. A simple stylish Raksha Bandhan mehndi design like this is a good fit for sisters, cousins and young girls.
30. Simple Stylish Kids Mehndi Design
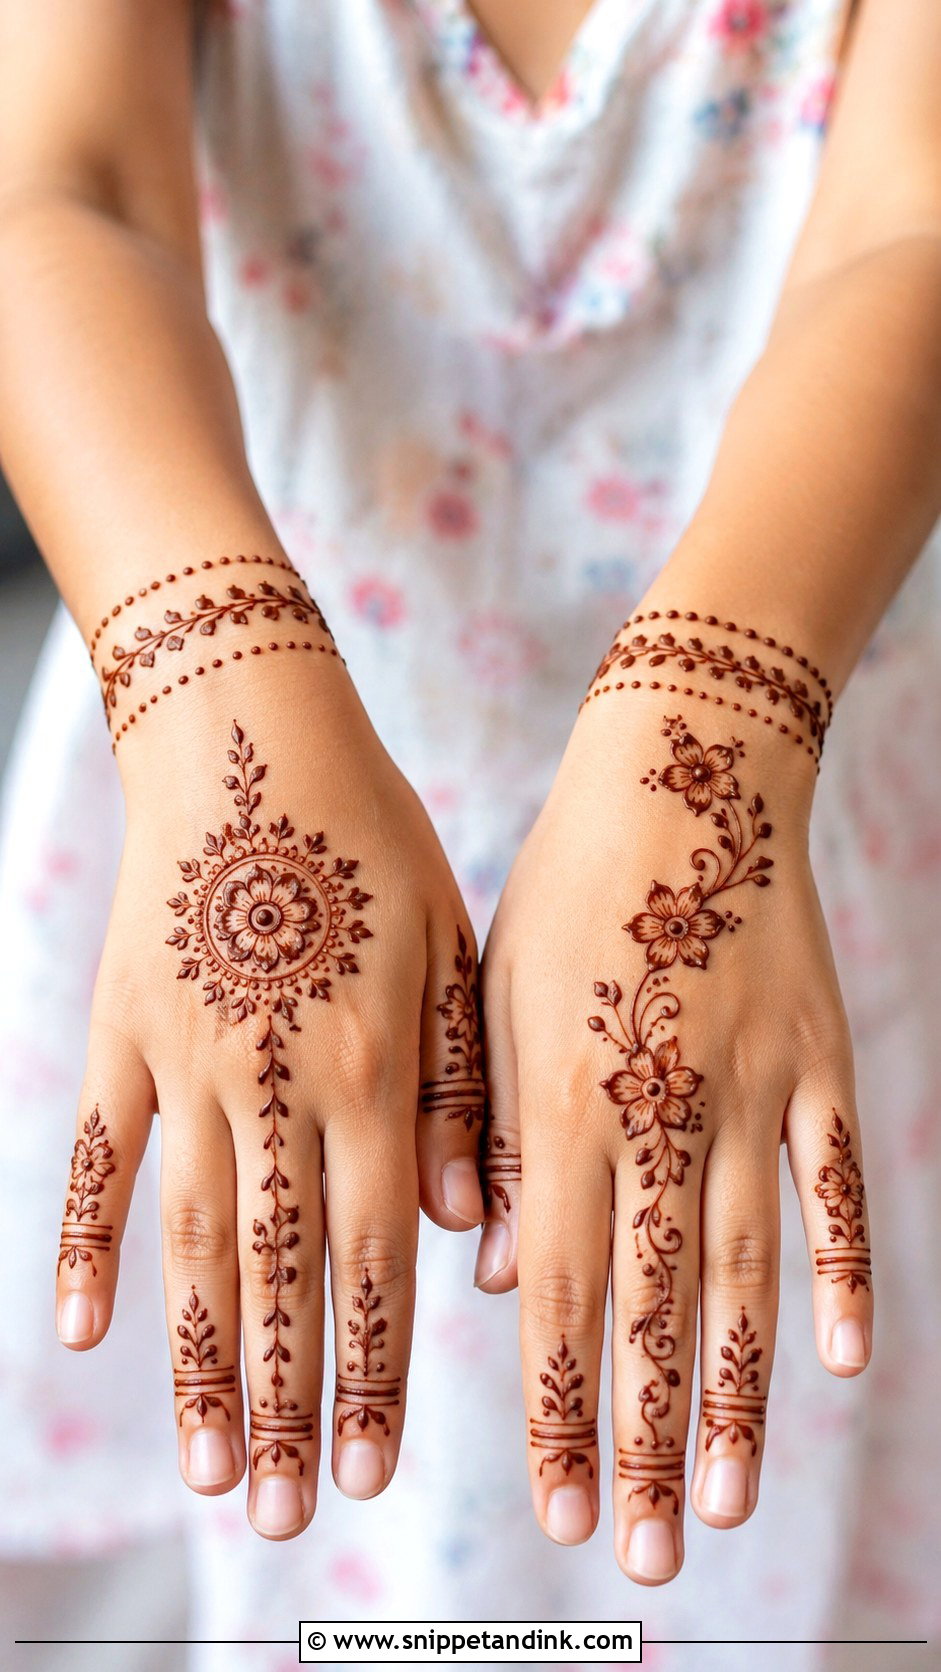
Children don’t sit still for long, and that decides the design. Small flowers, tiny mandalas, simple vines and dotted wrist bands are plenty; skip fine filling. A small palm design with decorated fingertips makes most kids happy, though a back-hand trail dries faster and smudges less. Use natural henna only and never a cone sold as black henna, which can contain PPD and cause skin reactions. Festivals, school celebrations and family weddings all suit it.
31. Simple Stylish Bridal Mehndi Design
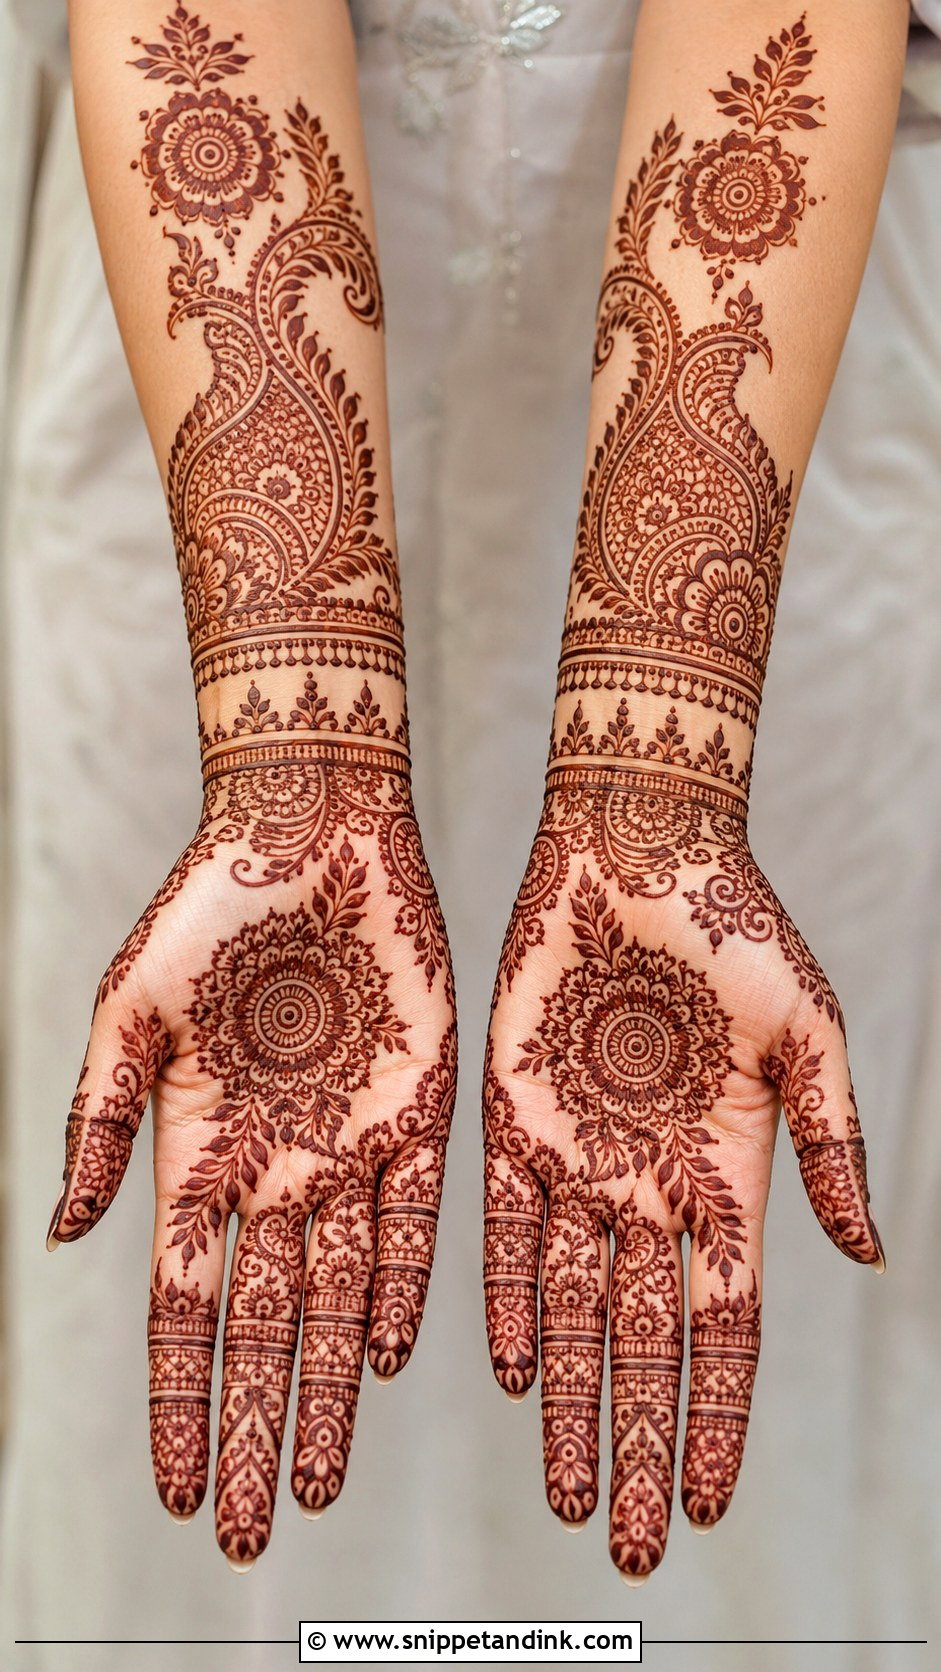
Bridal henna is usually heavy, but a lighter bridal version is very doable. I use full-hand coverage with larger motifs, open spacing and clean borders instead of tiny dense filling, combining mandalas, paisleys, florals and wrist cuffs. Keeping the pattern consistent from fingers to forearm makes it look planned. It suits brides who prefer lighter henna or smaller ceremonies. Even so, bridal paste should stay on overnight, so plan to sleep with your hands wrapped.
32. Simple Stylish Feet Mehndi Design
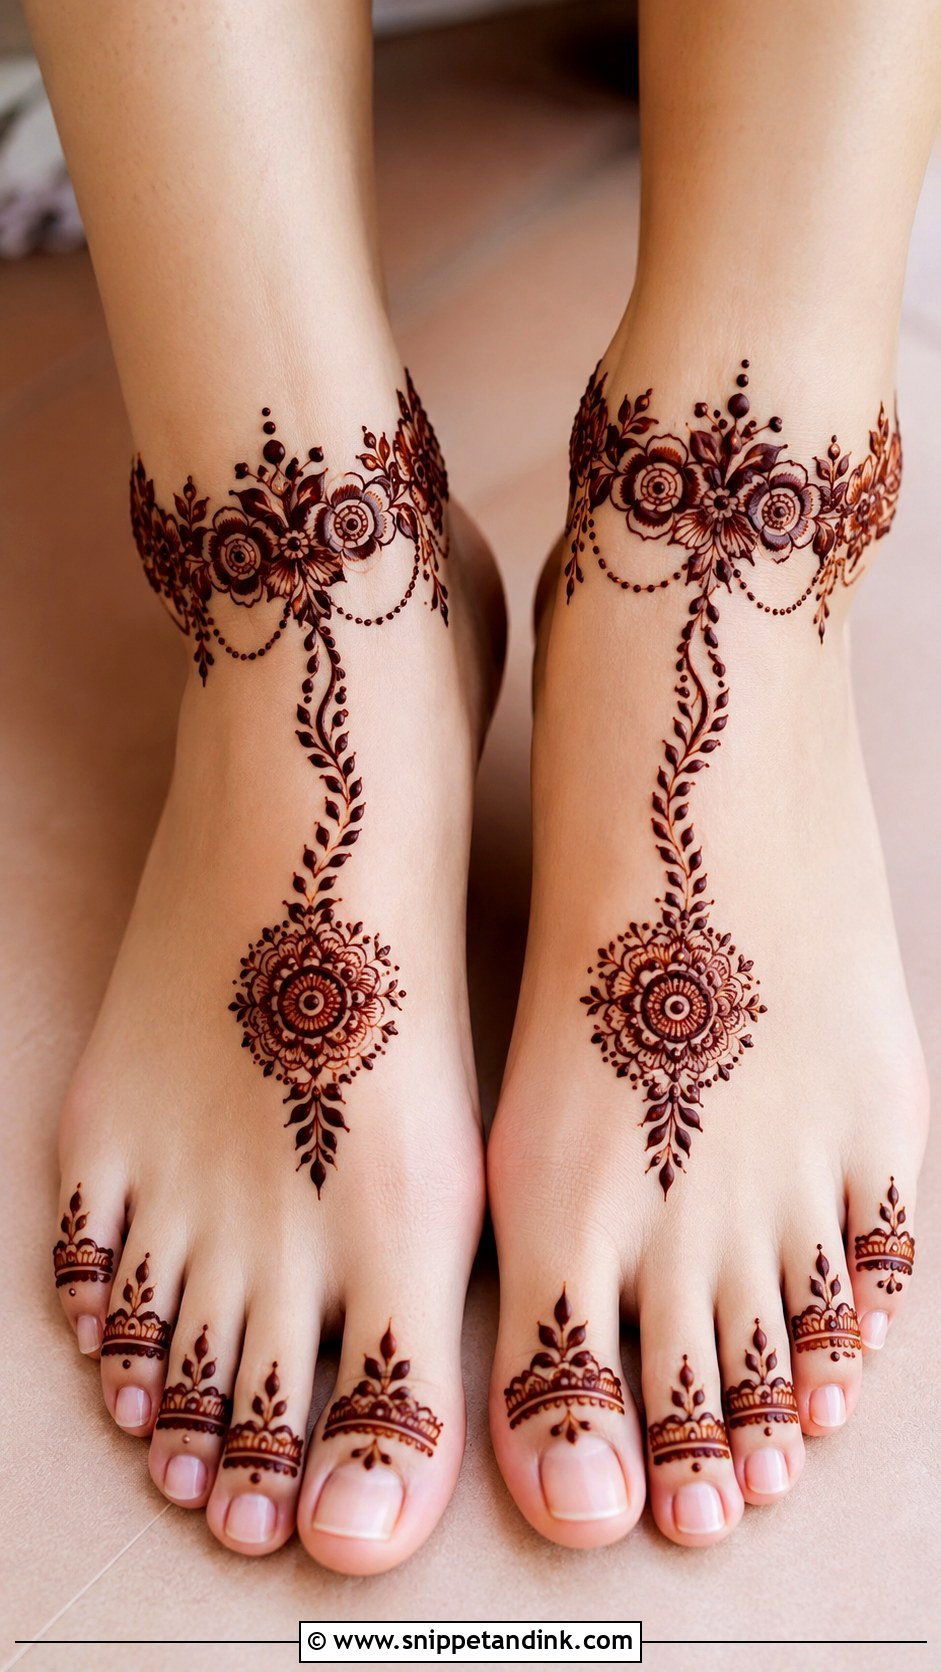
Feet mehndi should follow the natural shape of the toes, ankle and top of the foot. A simple floral anklet with a trail moving toward the toes is my default, with small toe bands, dots and leafy curves added. Keep the center open for a modern look or add a small mandala for a traditional one. Feet stain very dark and hold the color longer than hands, so a light design here stays visible for a long time. It suits bridesmaids and brides wearing sandals.
33. Simple Stylish Ankle Mehndi Design
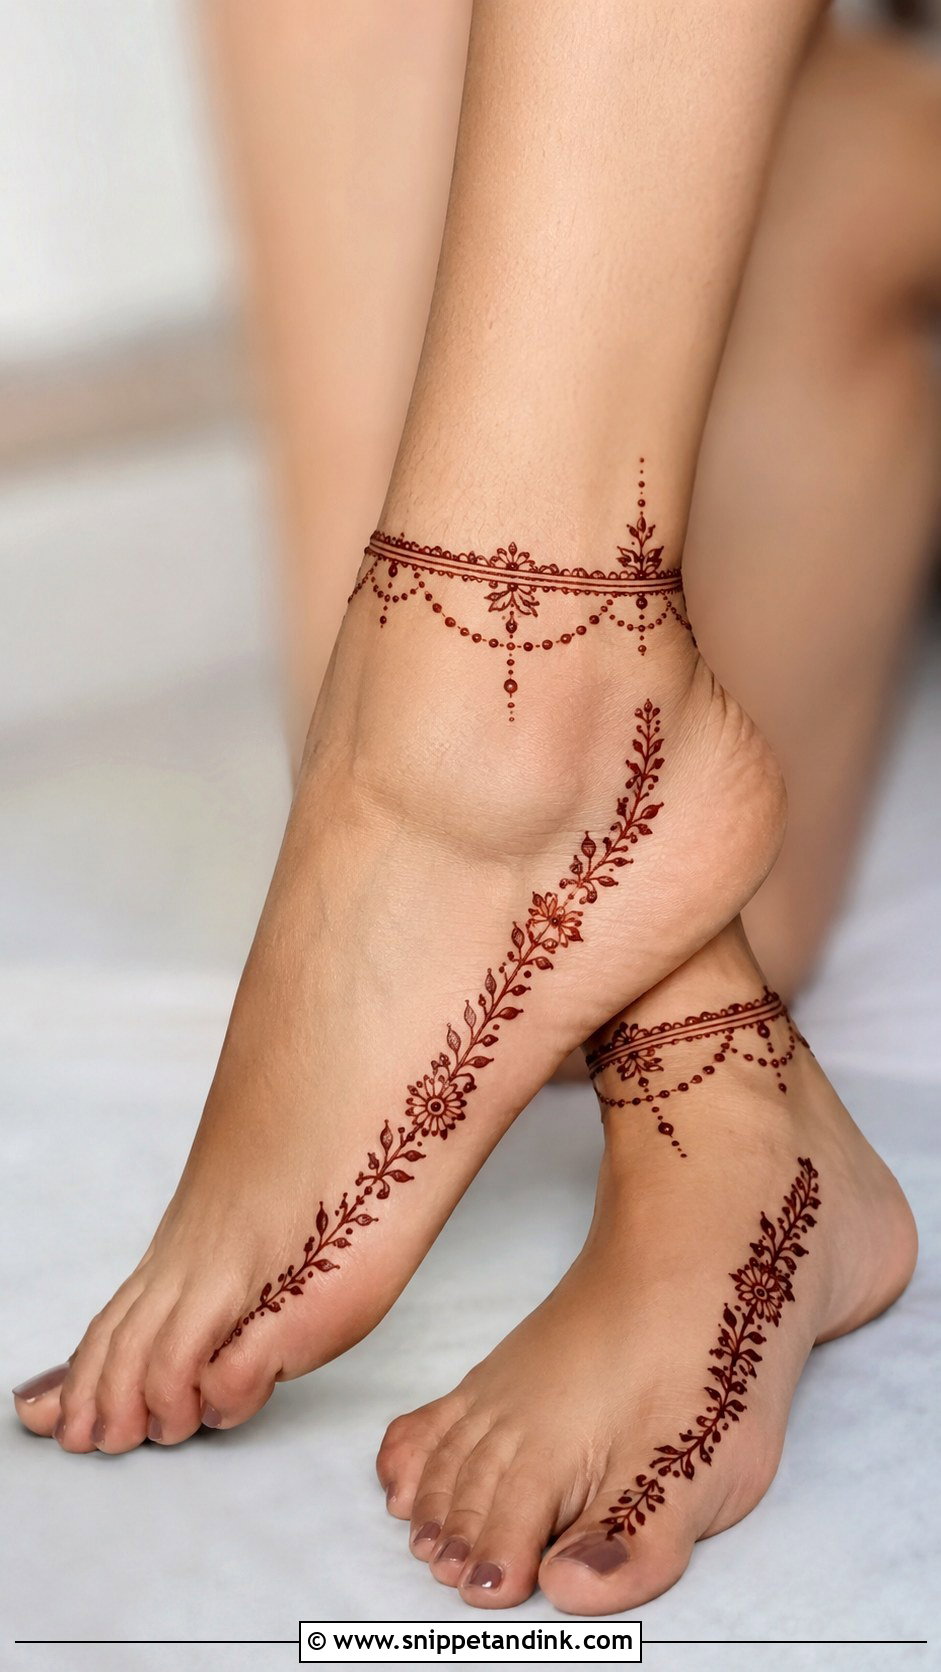
Ankle henna looks like an ornament without covering the foot. I draw a thin anklet band of dots, leaves and small flowers, then a short trail down the side of the foot. Single, double or slightly curved bands all work. Keep the lines clean and don’t crowd the ankle bone, where skin creases as you walk. Socks and closed shoes will rub off wet paste, so wear open footwear until it’s dry and scraped.
34. Simple Stylish Forearm Mehndi Design
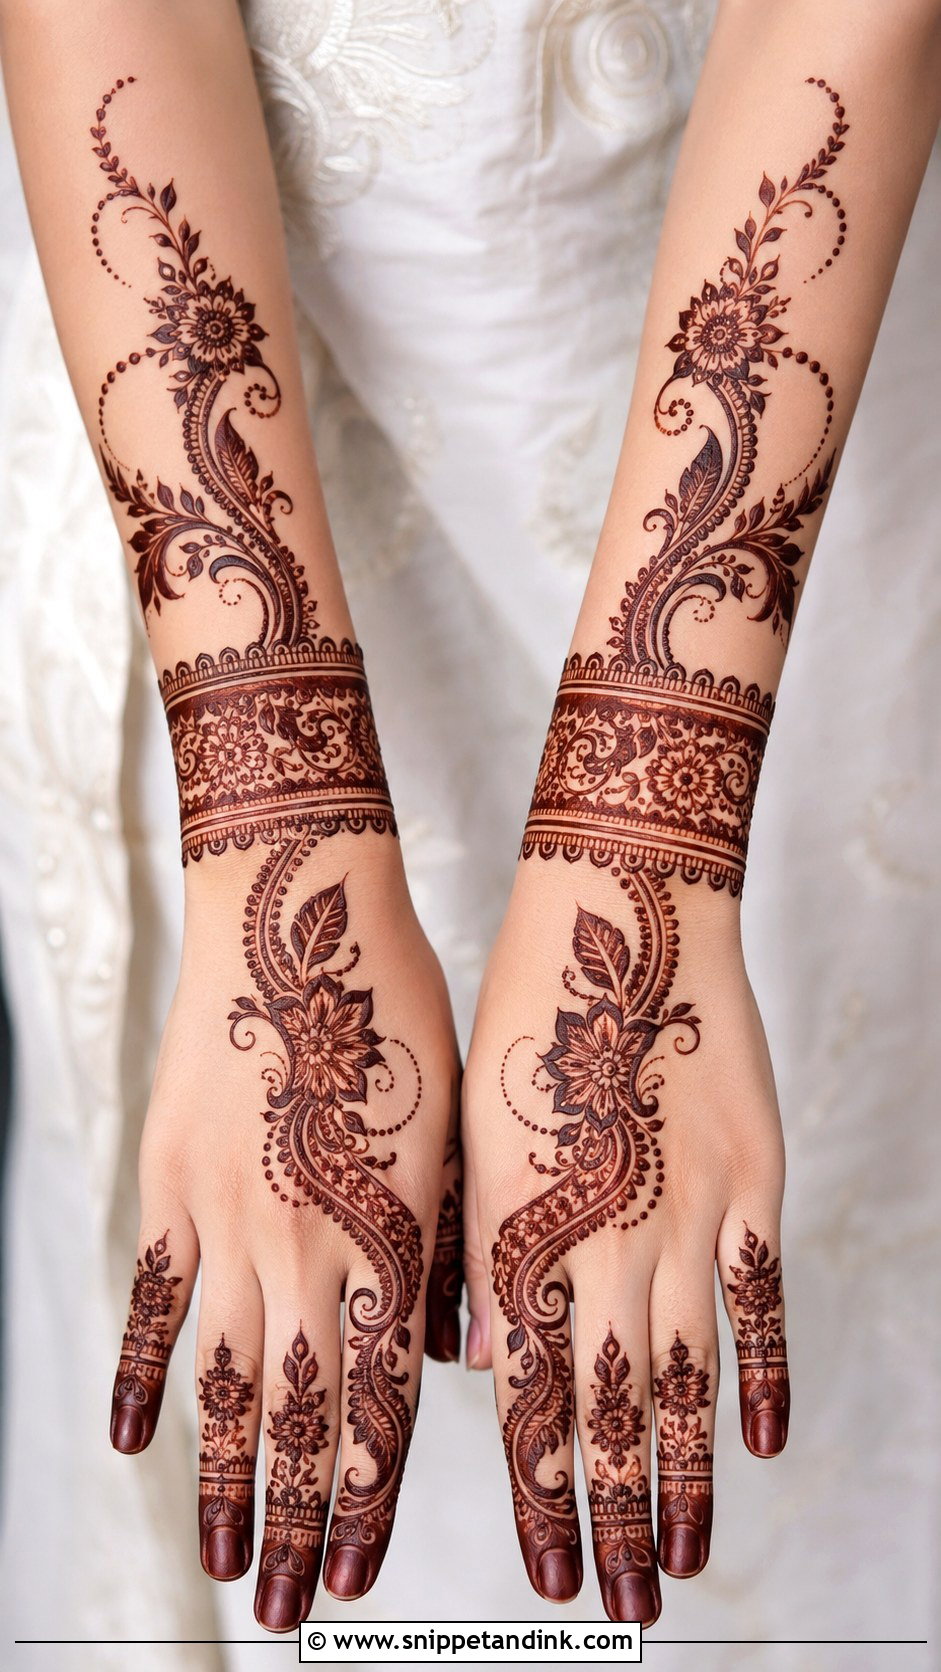
Forearm henna extends the design past the wrist without weight. I start with a wrist cuff, then send a floral vine or paisley trail upward, keeping the arm section airy with larger leaves, dots and open curves. Simple finger details balance it. The forearm stains lighter than the hand, so I lay the paste a bit thicker there and ask clients to keep it on longer. Bridesmaids and anyone wearing short sleeves like the flow from hand to arm.
35. Simple Stylish Matching Hands Mehndi Design
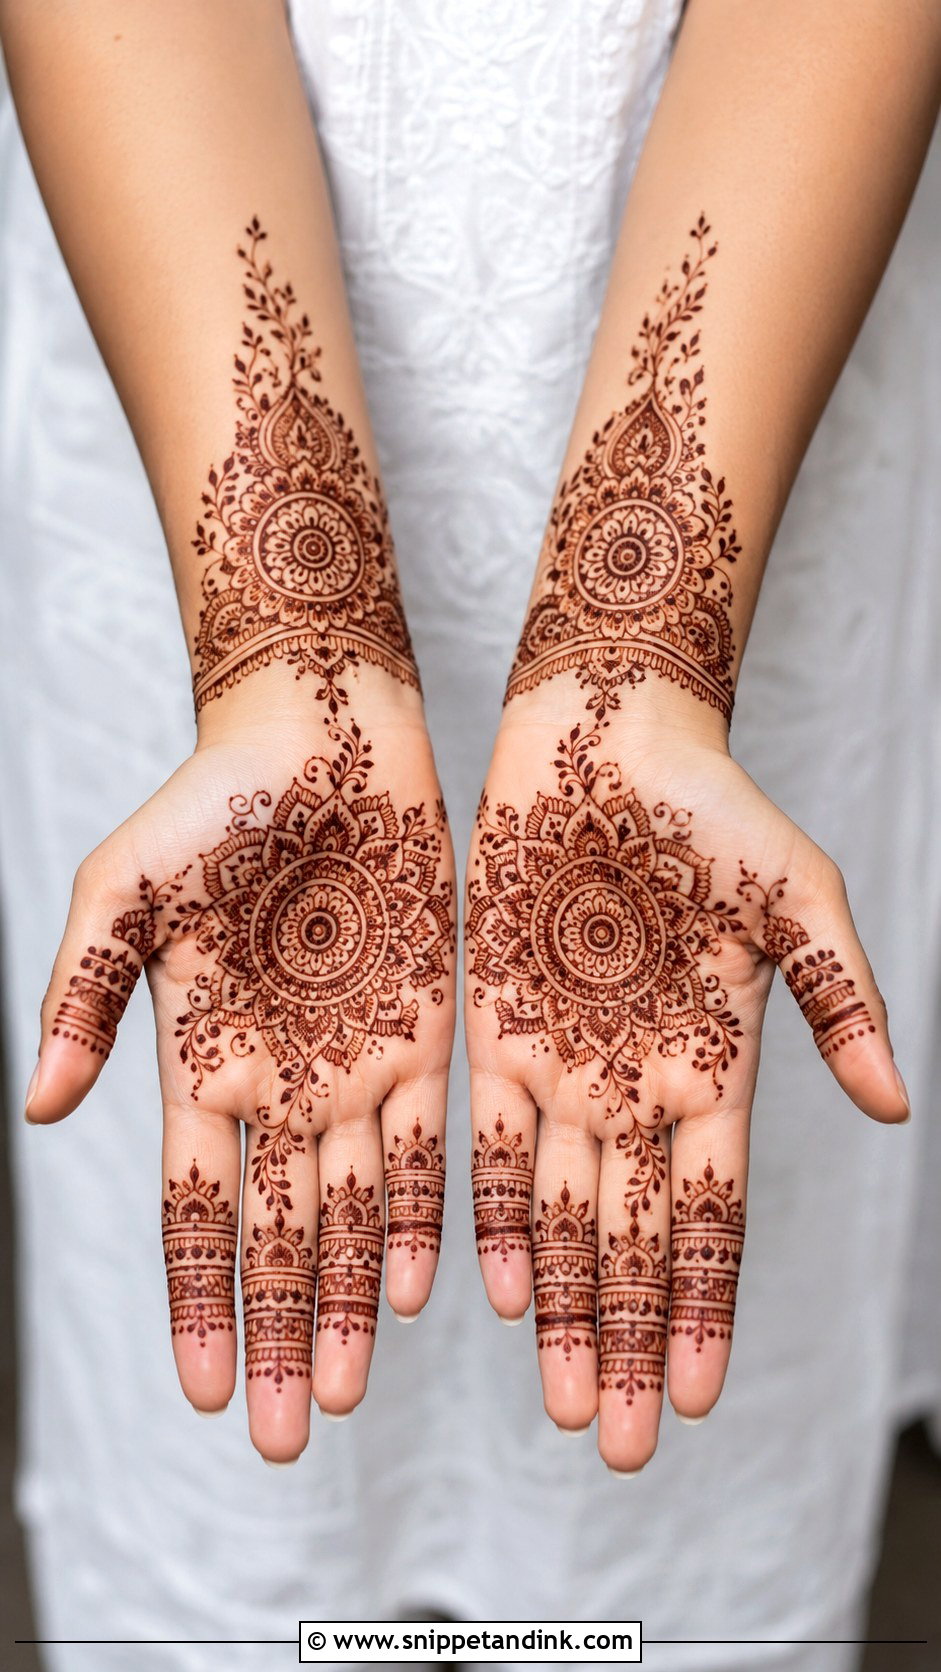
Matching hands look polished in photos, especially when you hold them side by side. Use the same main motif on both, such as a mandala, floral trail or Arabic paisley, and keep finger details similar. You can mirror the trails or repeat the same layout. When I draw a mirrored pair, I finish the first hand completely, then work the second while looking at the first, rather than alternating. For beginners, repeating one pattern twice is great practice for control.
Timing Henna Across a Busy Festive Season
A stain peaks about two days after the paste comes off, then fades over one to three weeks depending on where it is and how much you wash. That rhythm decides when to book. For a single event, apply one or two days ahead. For festivals that fall close together, such as Karwa Chauth and Diwali, which are usually around ten days apart, you can either redo the hands for the second date or choose a light design for the first so the second can be drawn over a faded stain without looking muddy.
When the stain comes out orange
A pale or orange result usually has one of a few causes: the paste came off too early, the hands were cold, the henna was stale, or water touched it in the first hours. Give it a full day before deciding, since it often darkens overnight. If it is still weak, you can reapply paste over the same lines and leave it on longer; the second layer deepens the color.
One Flower Can Be Enough
Light henna gives you comfort and quick application without looking underdone. Arabic trails and mandalas, bracelet patterns, finger work, floral designs and lighter bridal layouts all fit here, and each suits different moods and occasions. Clean motifs, balanced spacing and patterns sized to your hand matter far more than coverage. One flower, one mandala or one well-placed vine can be enough. Keep these 35 ideas handy for your next celebration, and give each one a day to develop before you judge the color.
You'll Like These Ideas:


Leave a Reply