
The back of the hand is the placement people see most: when you pass a plate, hold a phone or rest your hand on a lap in a group photo. It’s also trickier skin to work on than the palm, thinner, more mobile and quicker to fade. I’ve gathered the back-hand layouts clients ask me for, from a single vine to traditional Indian detailing right up to the wrist, and for each one I’ve noted what I watch for while drawing and who it suits. Every design here is a finished hand, fingertips to wrist, not a stray motif.
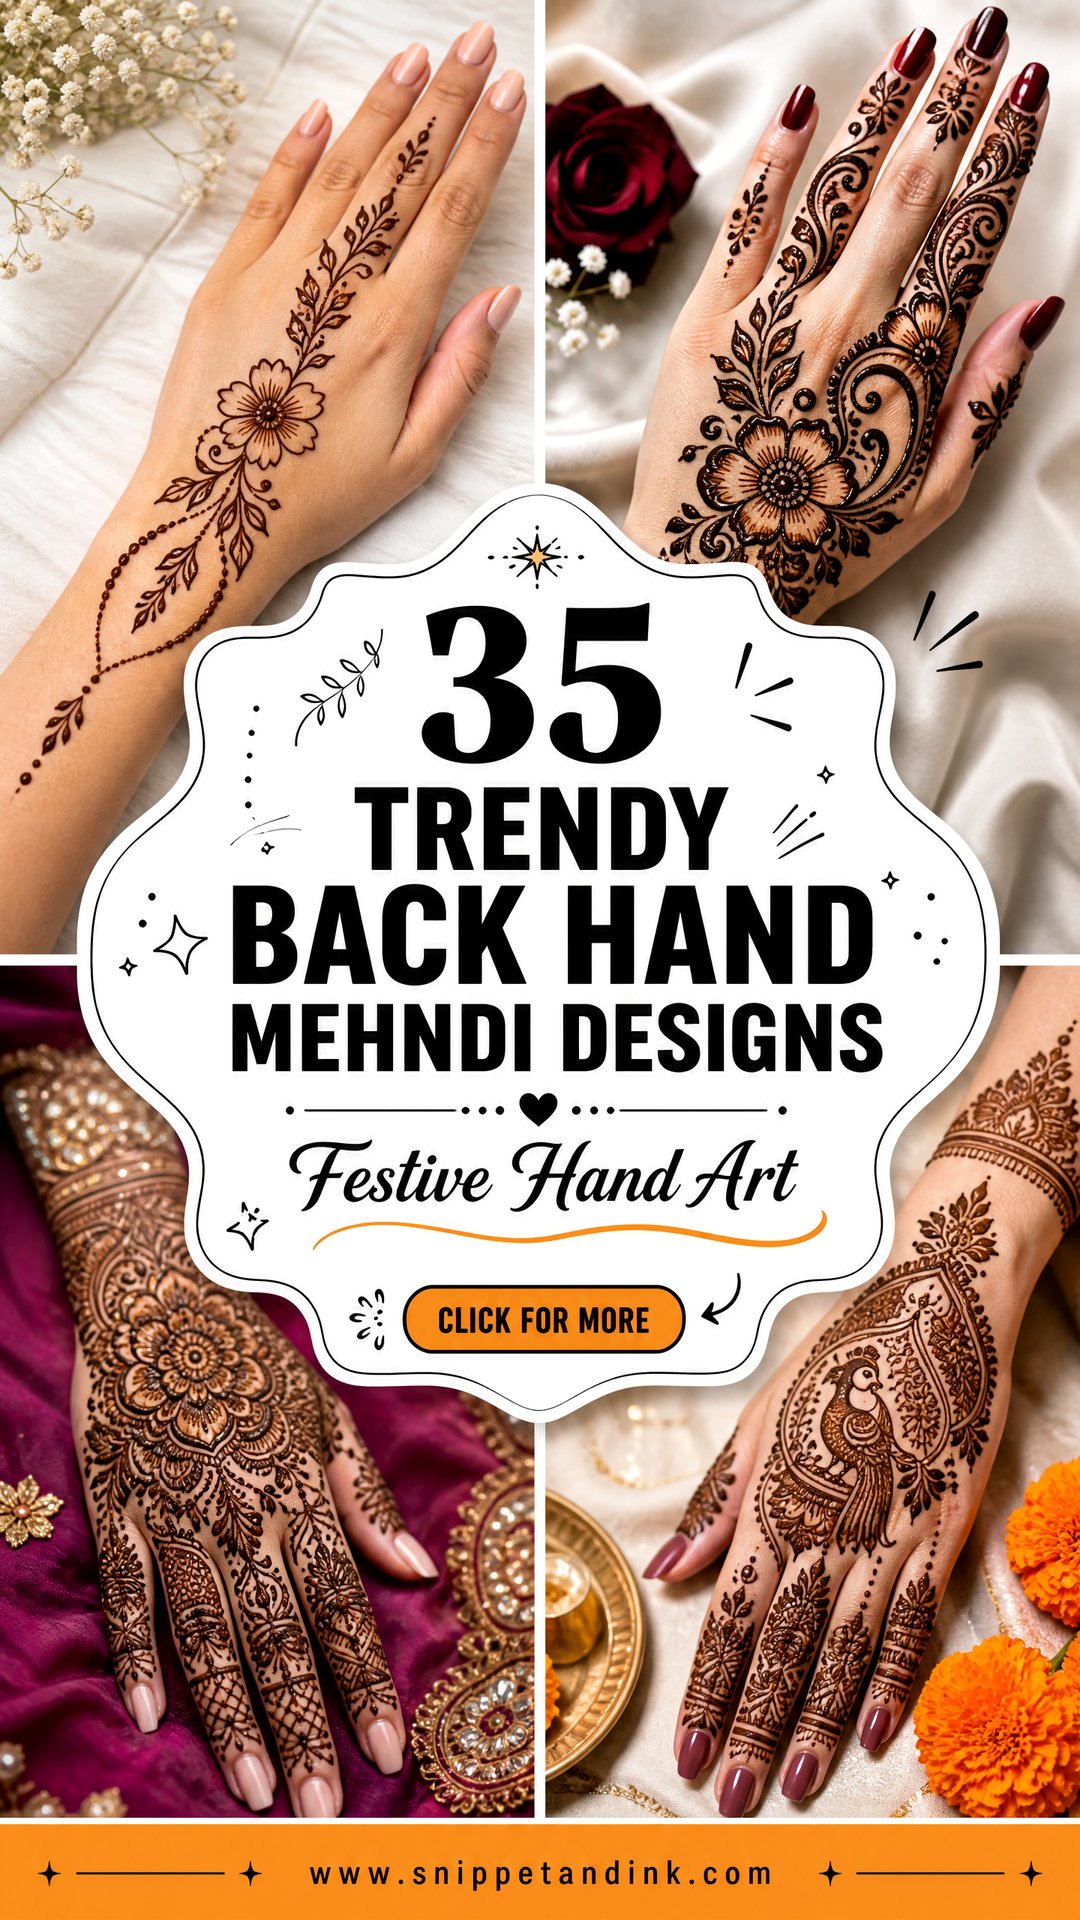
Knuckles, Veins and Hand Shape Change the Layout
A design that looks right in a photo of someone else’s hand won’t sit the same way on yours. The back of the hand has knuckles that fold, tendons that lift when you spread your fingers and skin that stretches every time you grip something. Before I draw anything, I ask the client to rest her hand naturally on the cushion, then make a loose fist, so I can see where the lines will bend.
Adjustments I make by hand type
- Short fingers and a wide hand: a diagonal trail or a vertical vine that runs toward the middle finger makes the hand look longer. Wide horizontal bands across the knuckles do the opposite.
- Long, slender hands: these can take a large central mandala or a full jaali panel without looking crowded.
- Prominent veins or tendons: I avoid laying a straight line right along a raised tendon, because it distorts when the hand moves. Florals and curves hide that movement better.
- Very small hands, such as teenagers: scale the motifs down, but don’t shrink the gaps between them, or the finished stain fills in.
Bring a reference photo, but expect your artist to resize and shift it. That isn’t her ignoring your choice. It’s how the same idea ends up fitting your fingers and wrist.
1. Simple Back Hand Mehndi Design
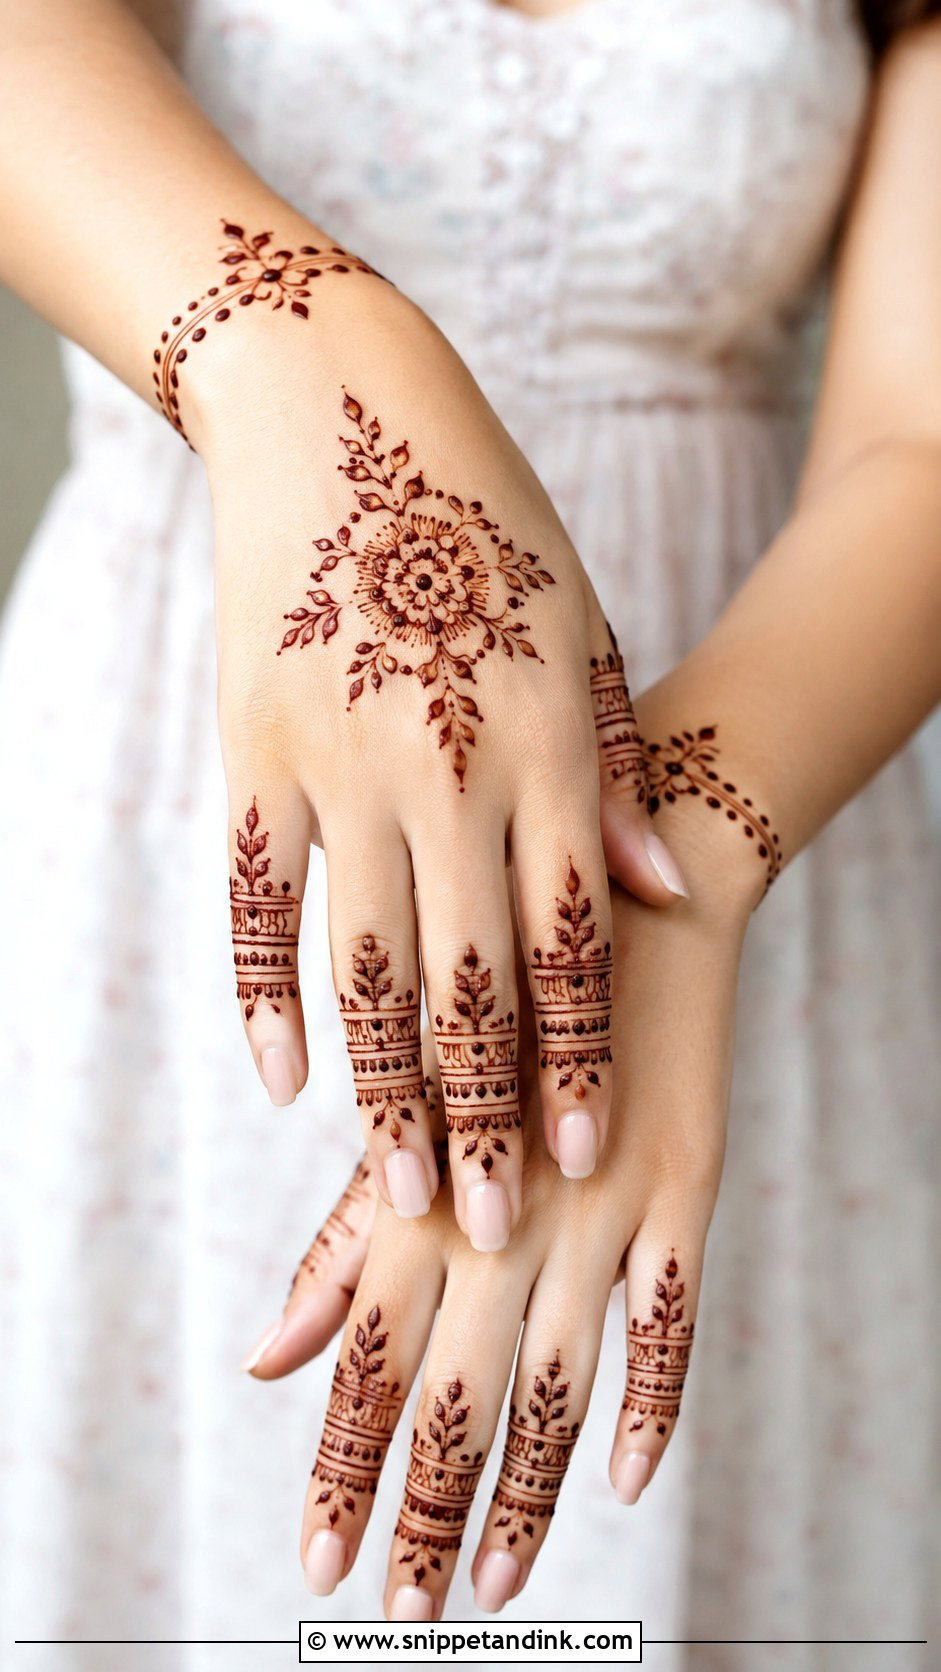
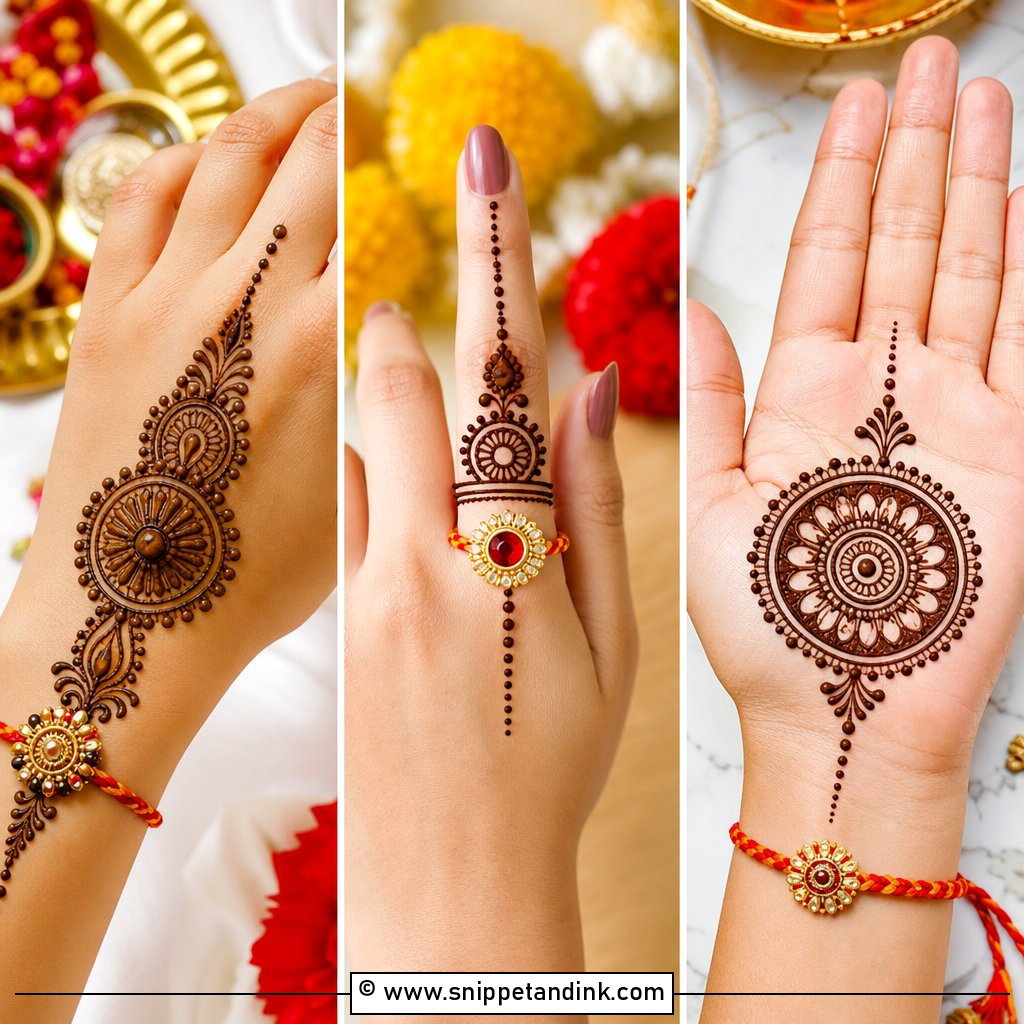
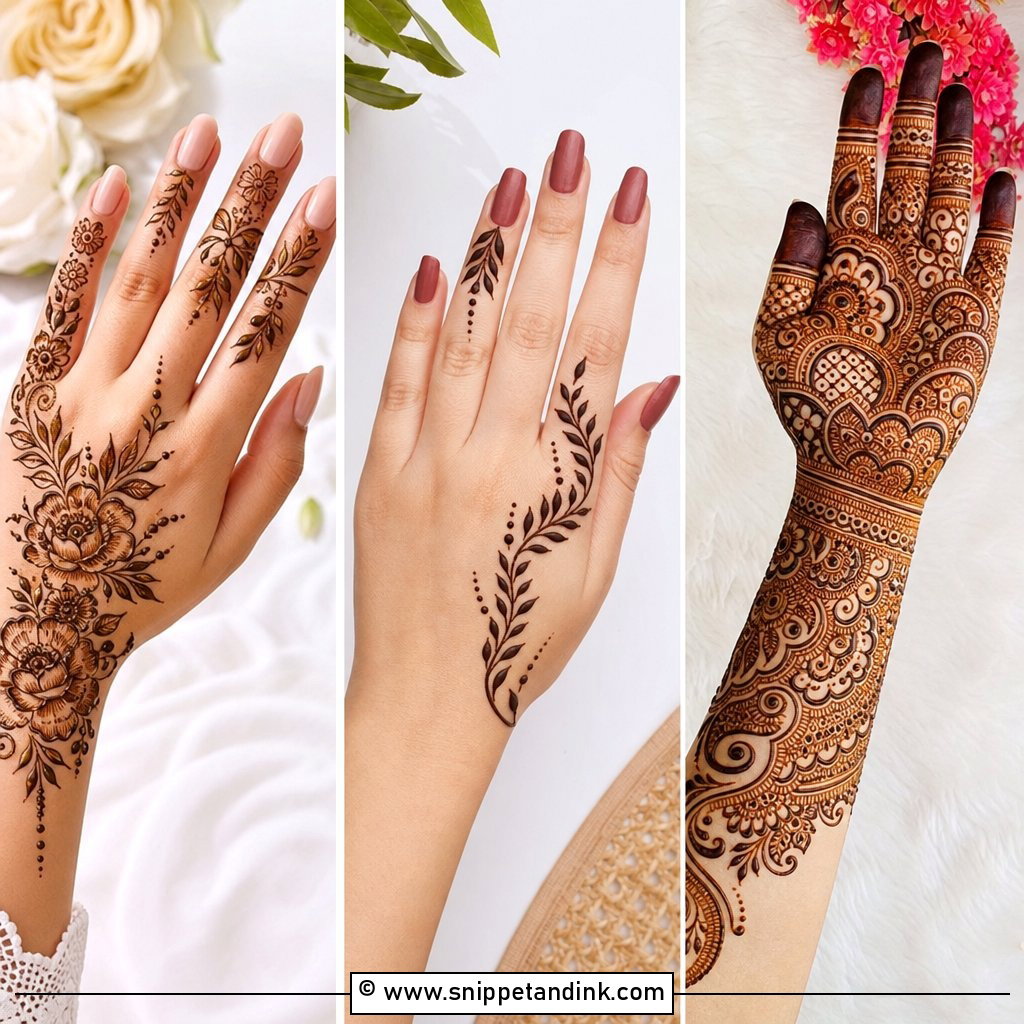
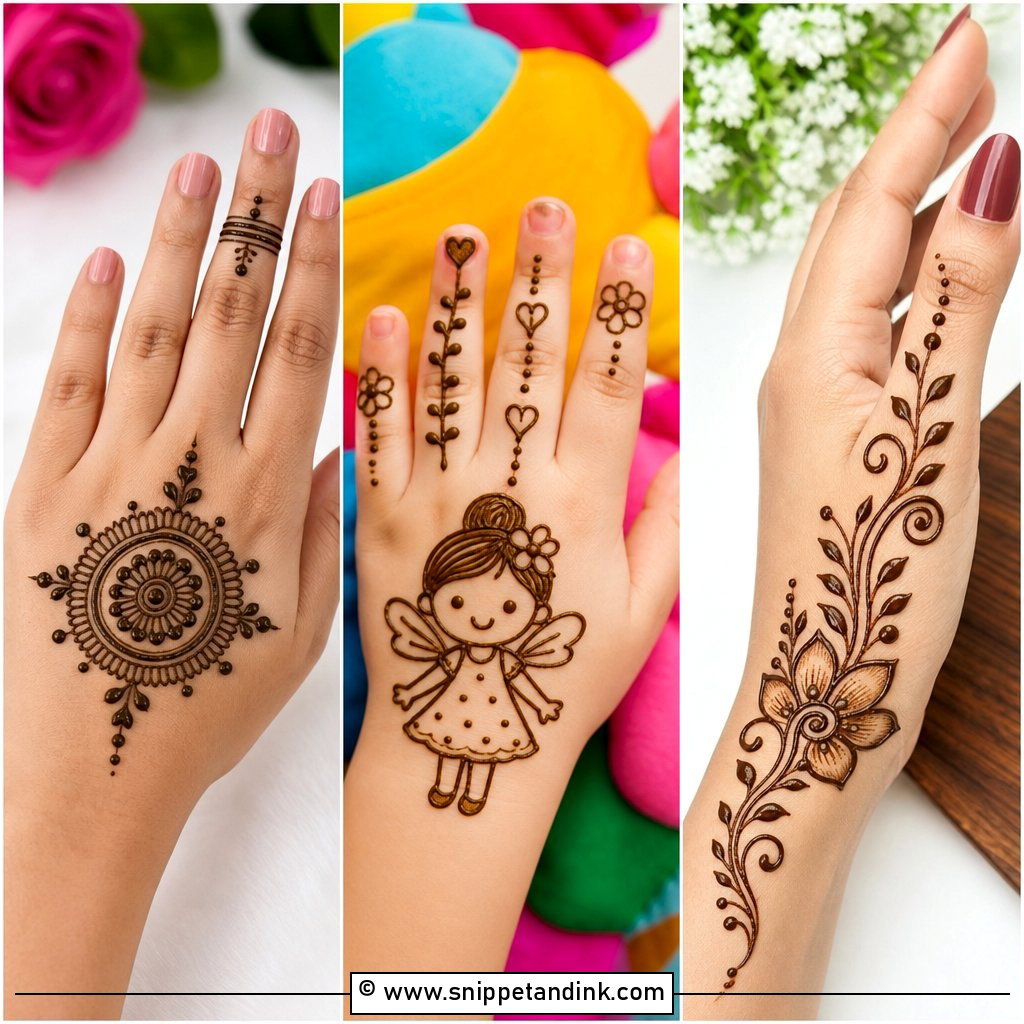
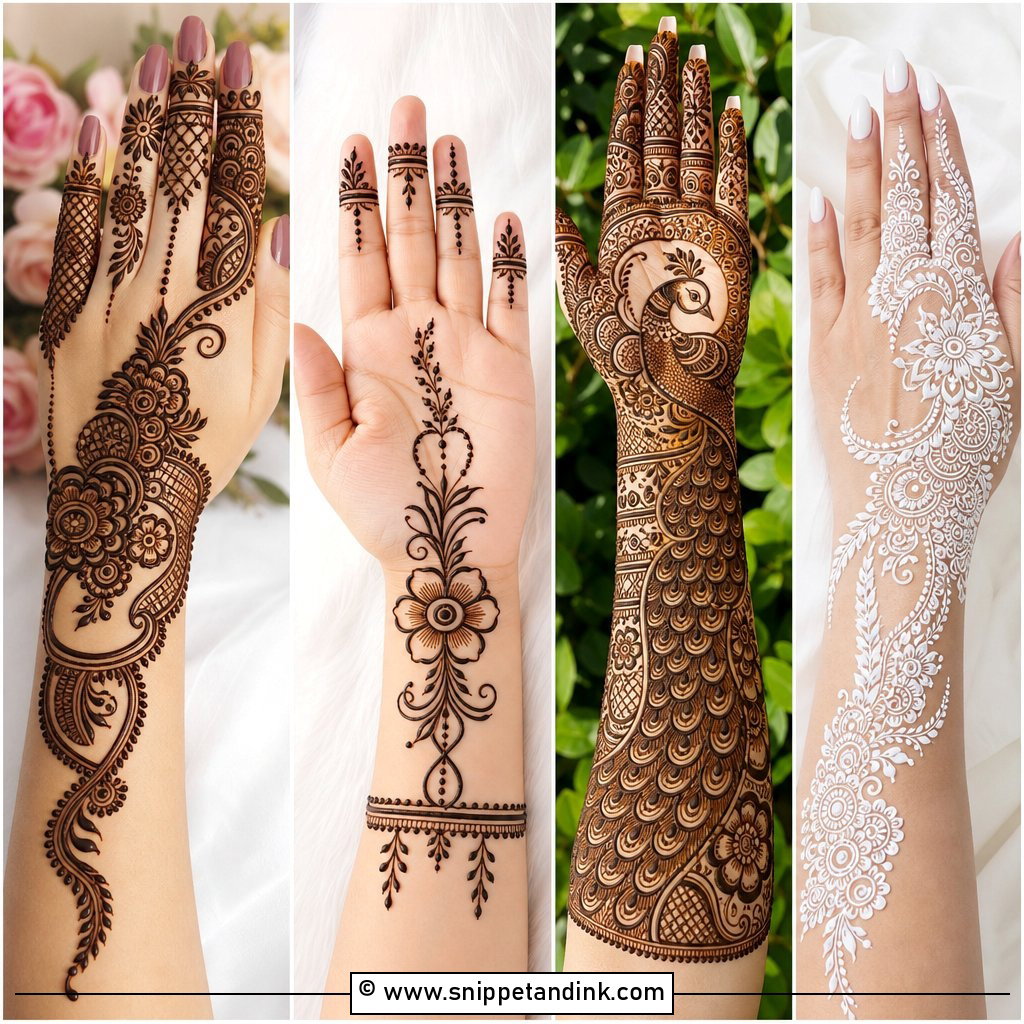
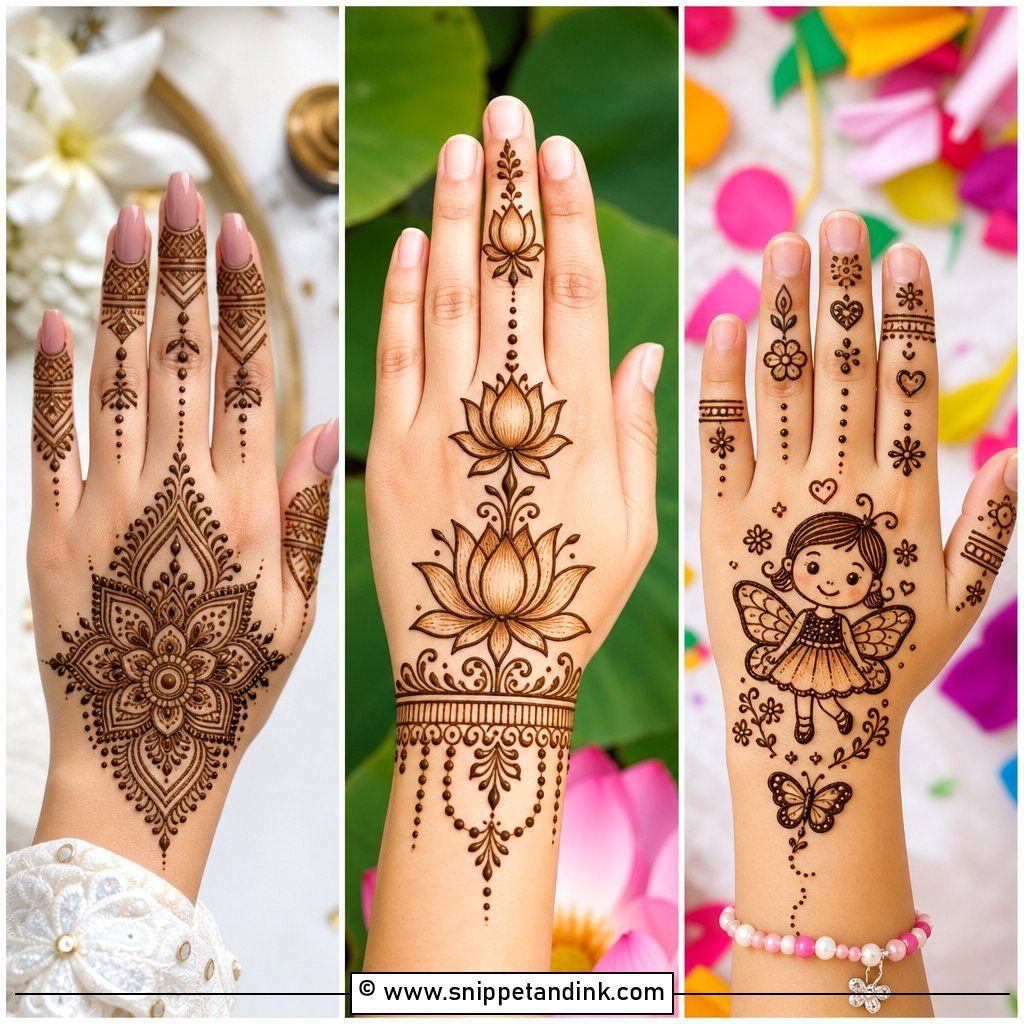
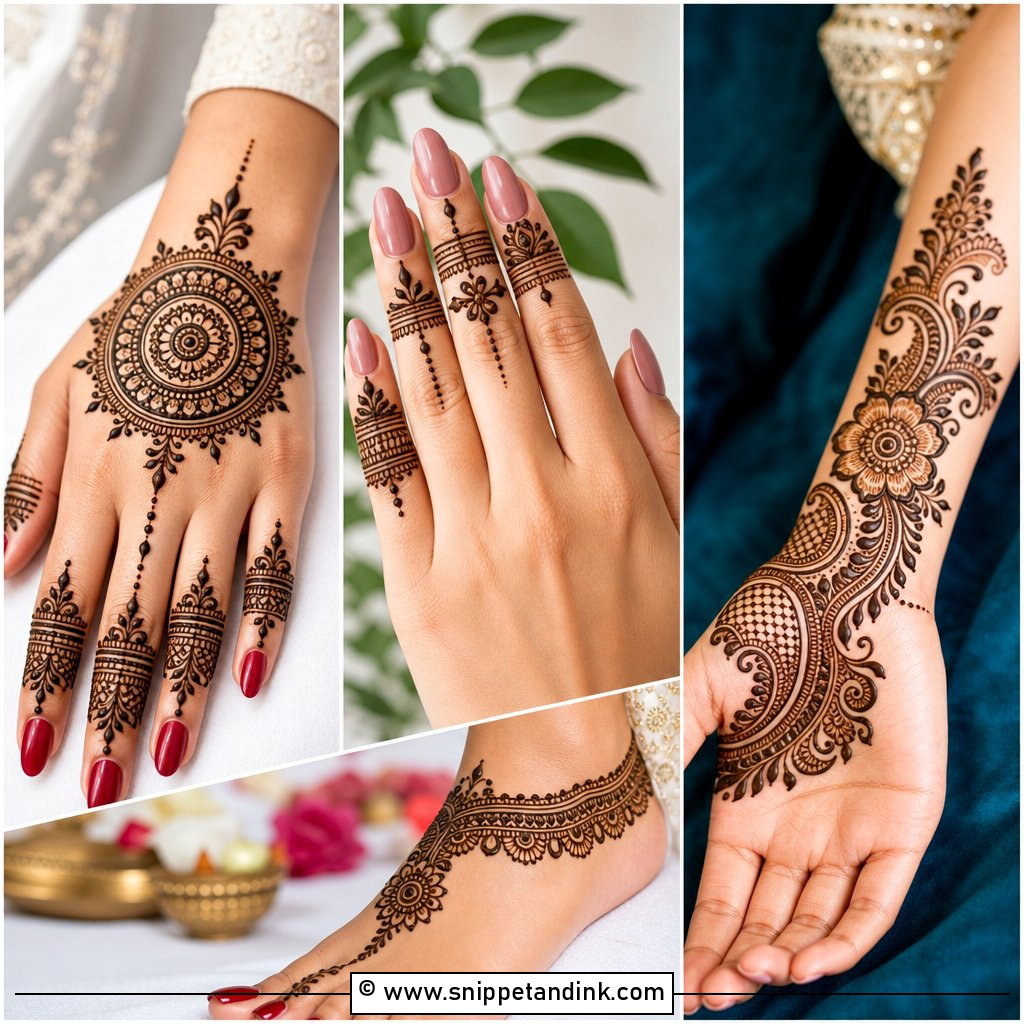
One flower, a small mandala or a leafy vine in the center, slim lines and dots on the fingers, and a light border at the wrist. That’s all. The risk with a sparse design is that it looks unfinished, so I always close the wrist edge and give every finger something, even a single band. It takes me around ten minutes a hand, which makes it the one I suggest for anyone trying henna for the first time.
2. Arabic Back Hand Mehndi Design
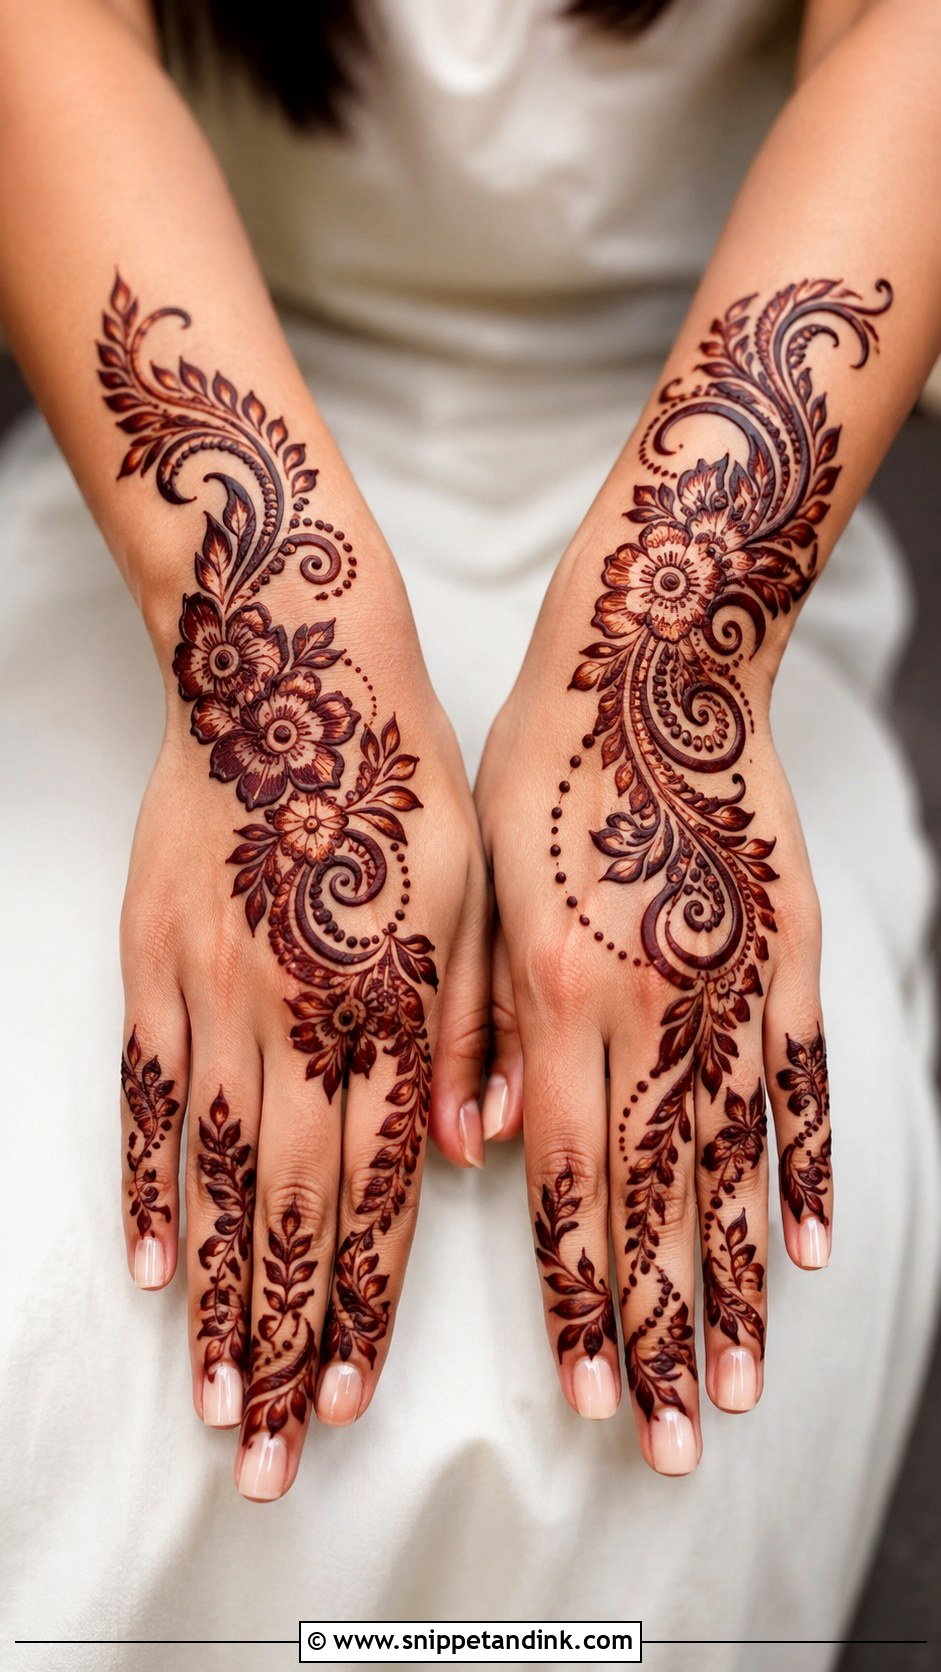
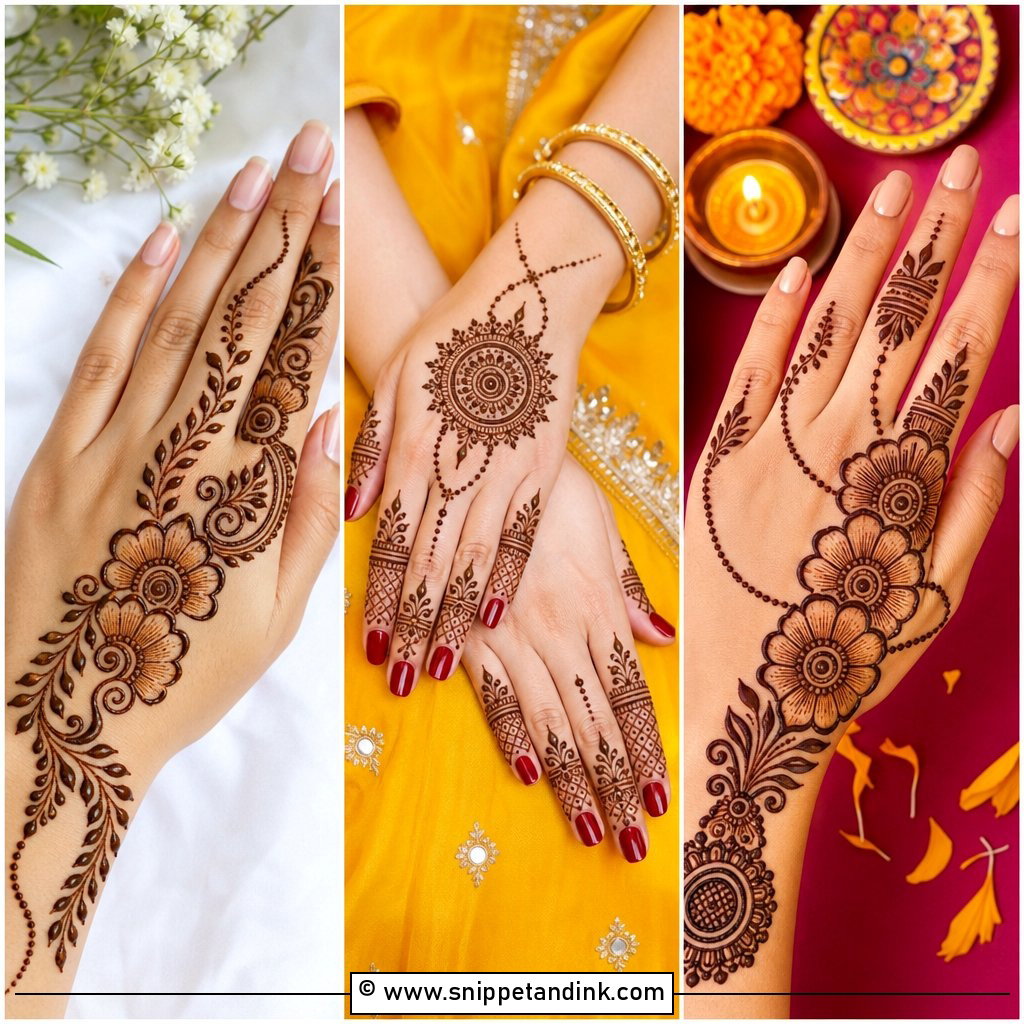
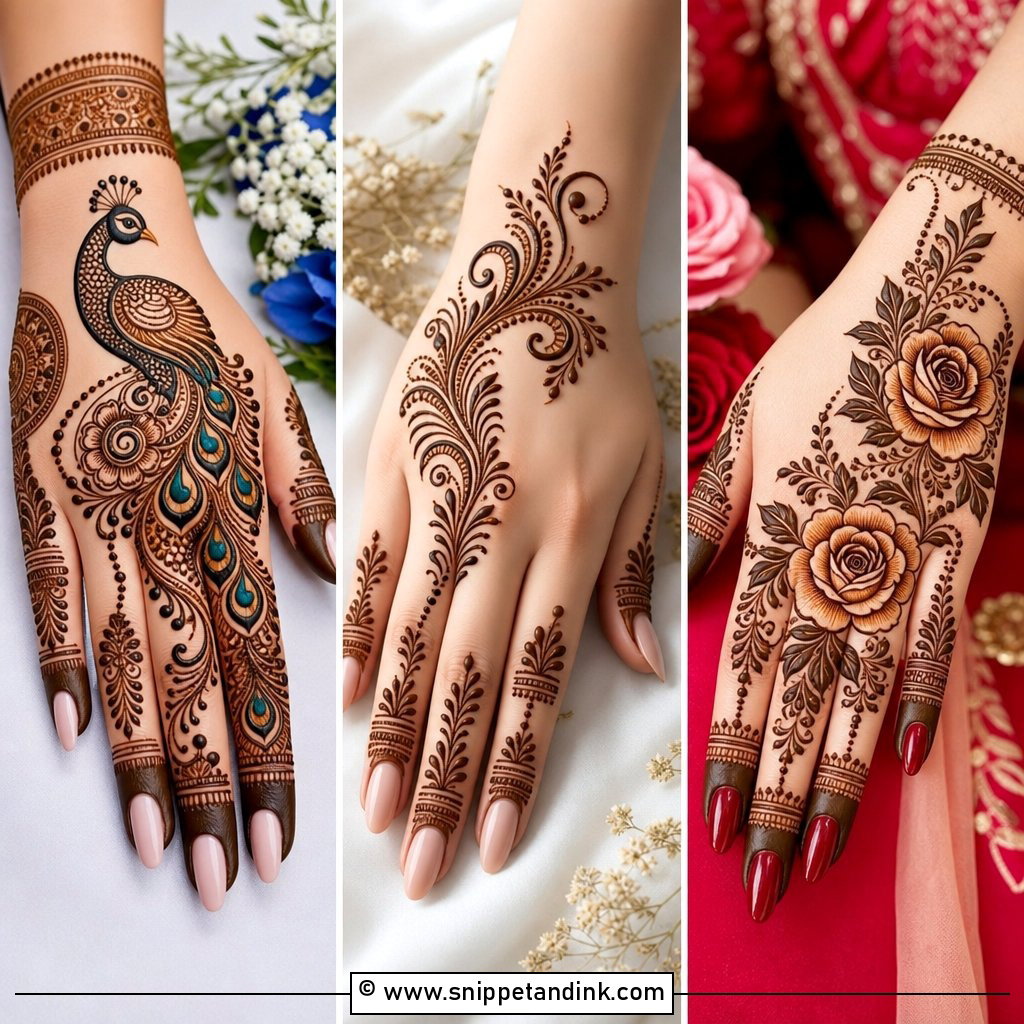
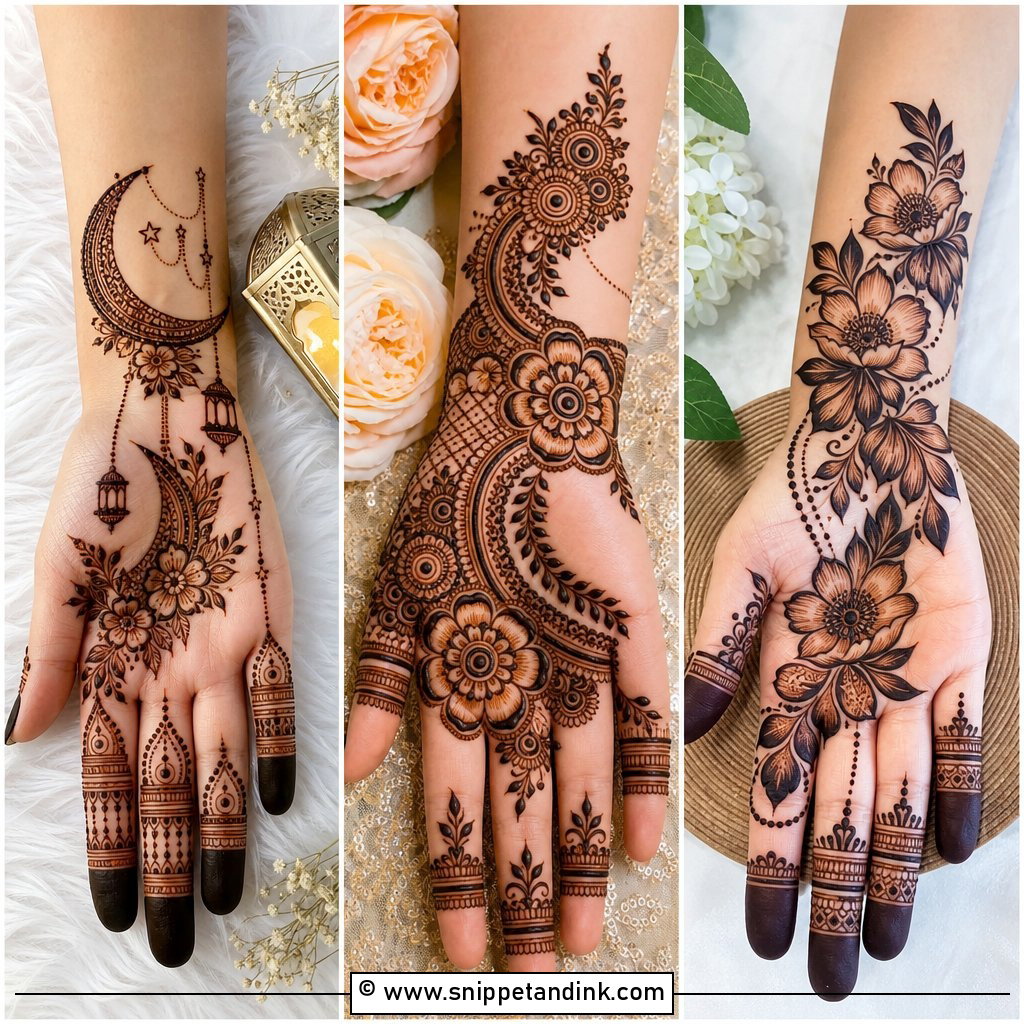
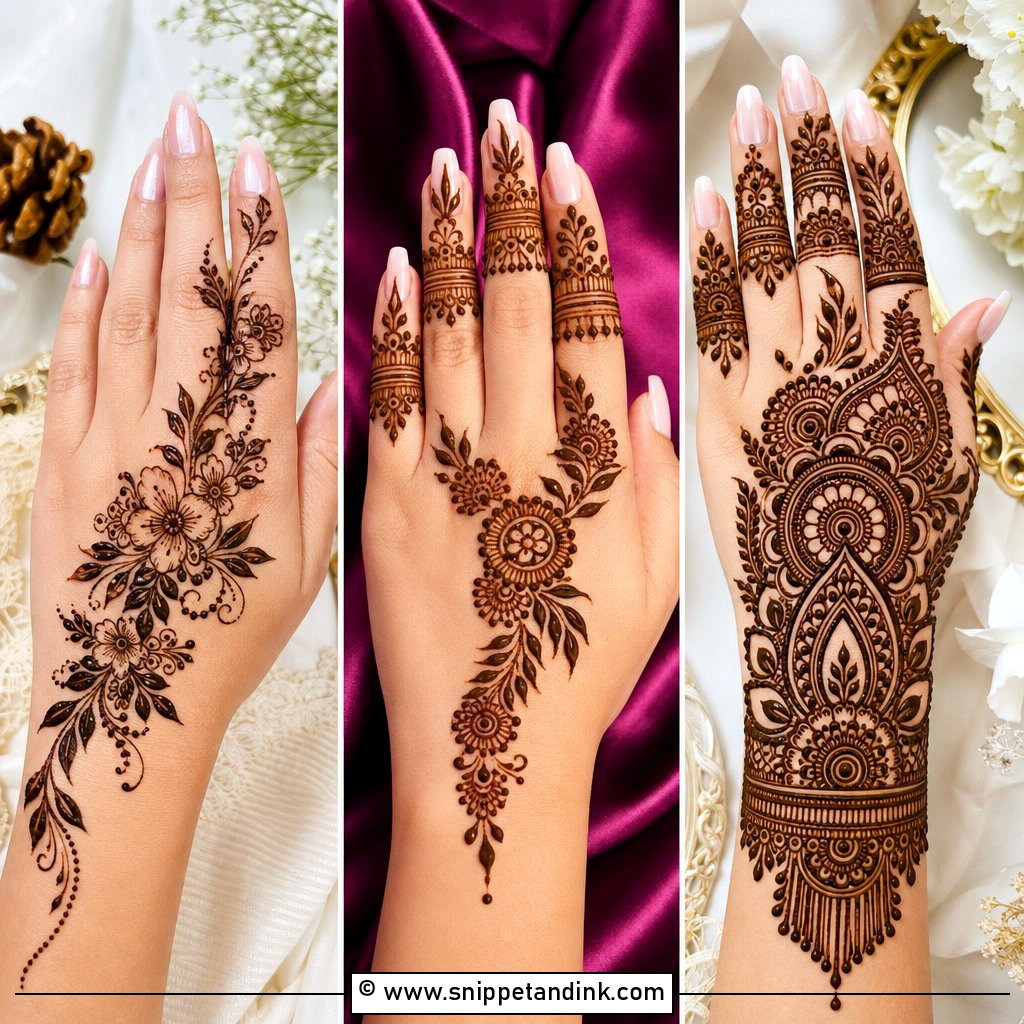
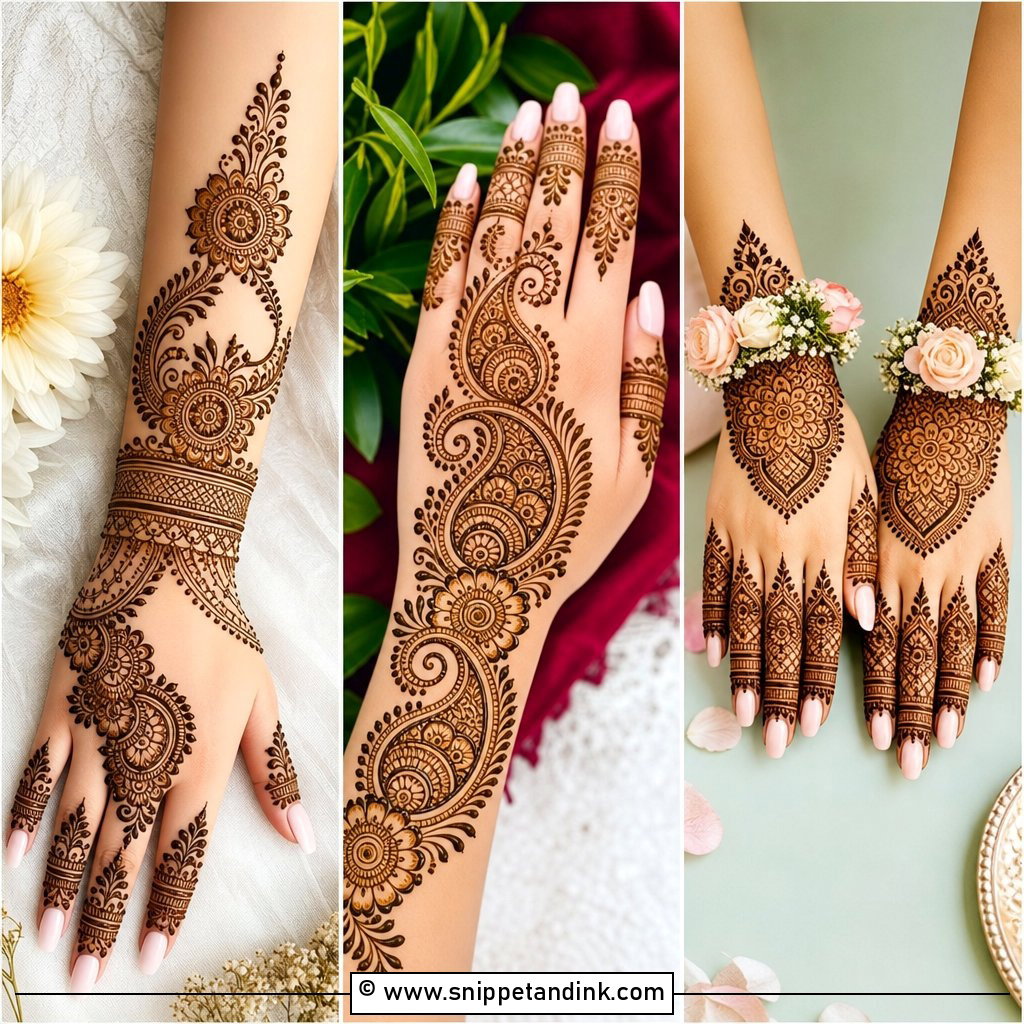
Arabic layouts run diagonally from the wrist to the index or middle finger, with big flowers, curved leaves and bold outlines and lots of bare skin around them. Those thick strokes carry plenty of paste, so they stain richly even on back-hand skin that usually comes up lighter. I decide which finger the trail ends on by looking at where the client wears her rings. It’s the quickest way to look dressed for Eid or a party.
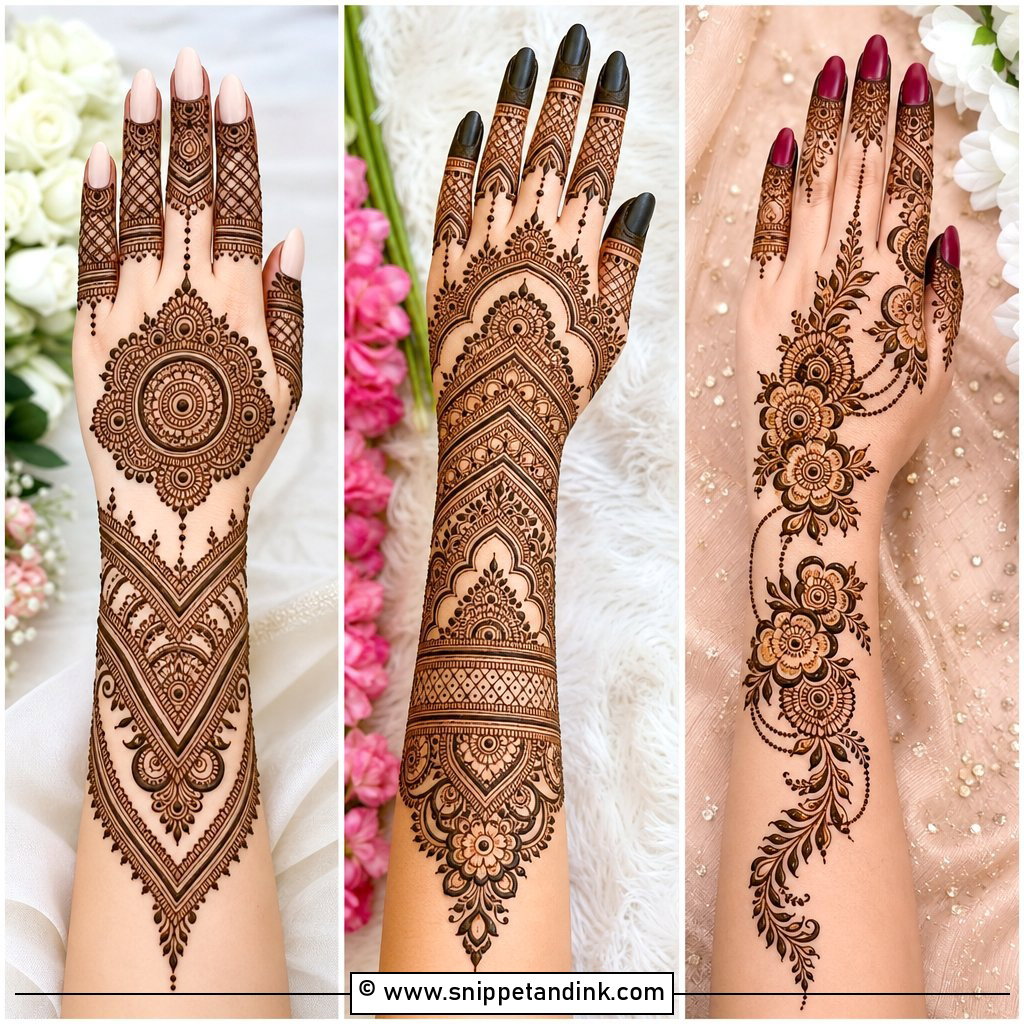
3. Full Back Hand Mehndi Design
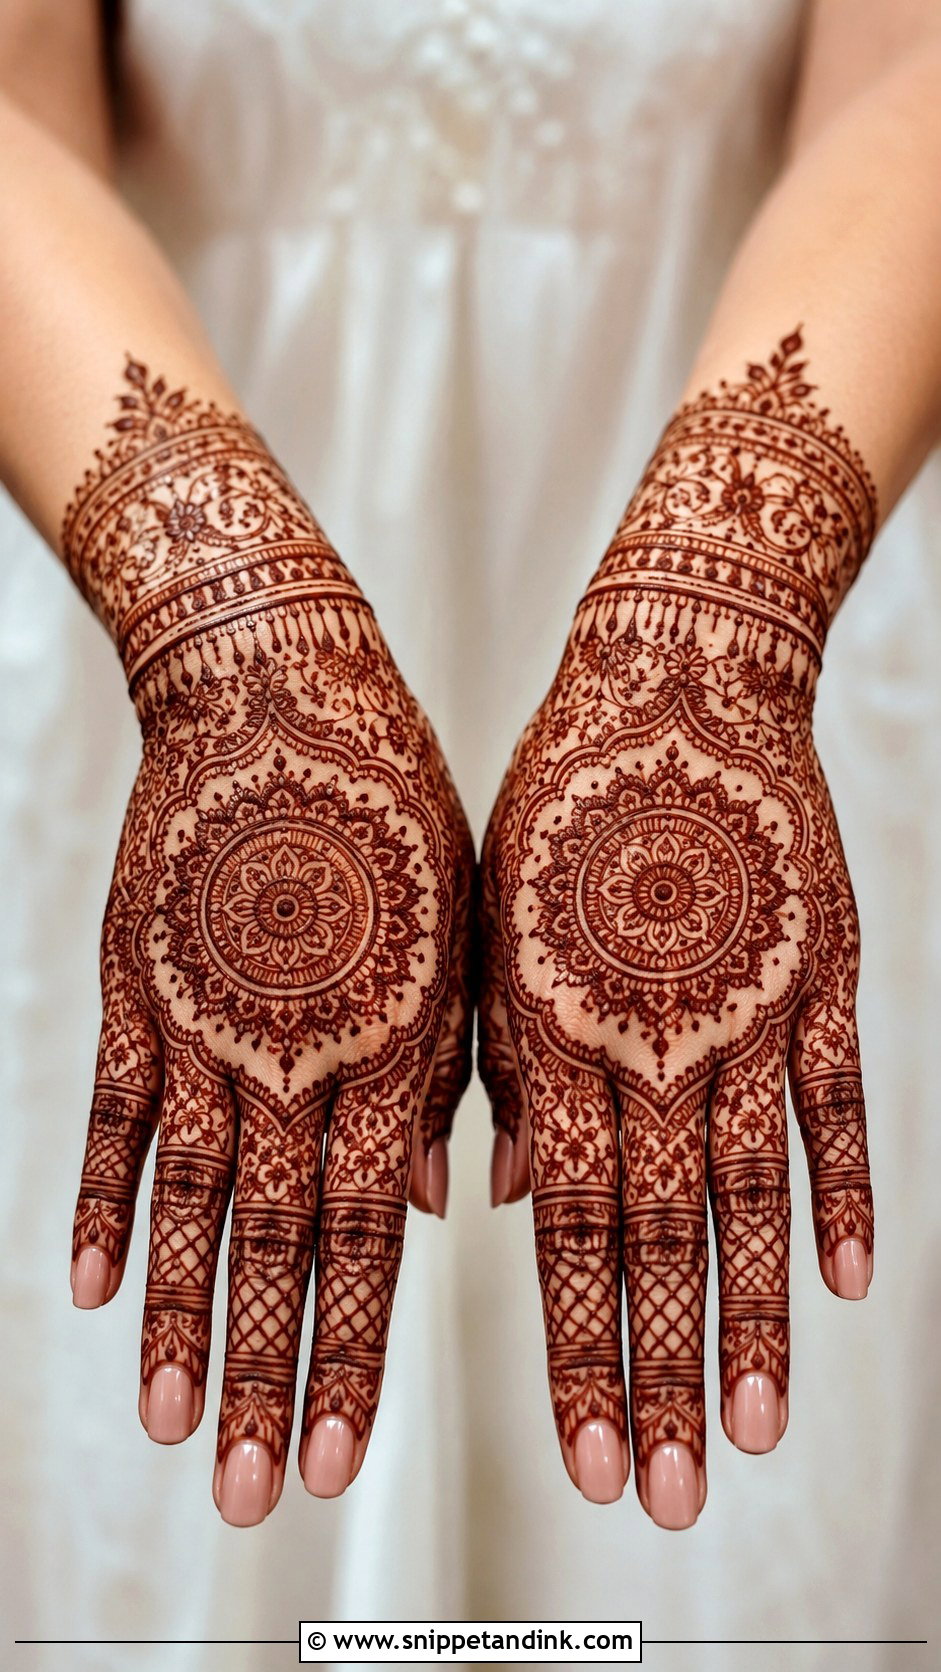
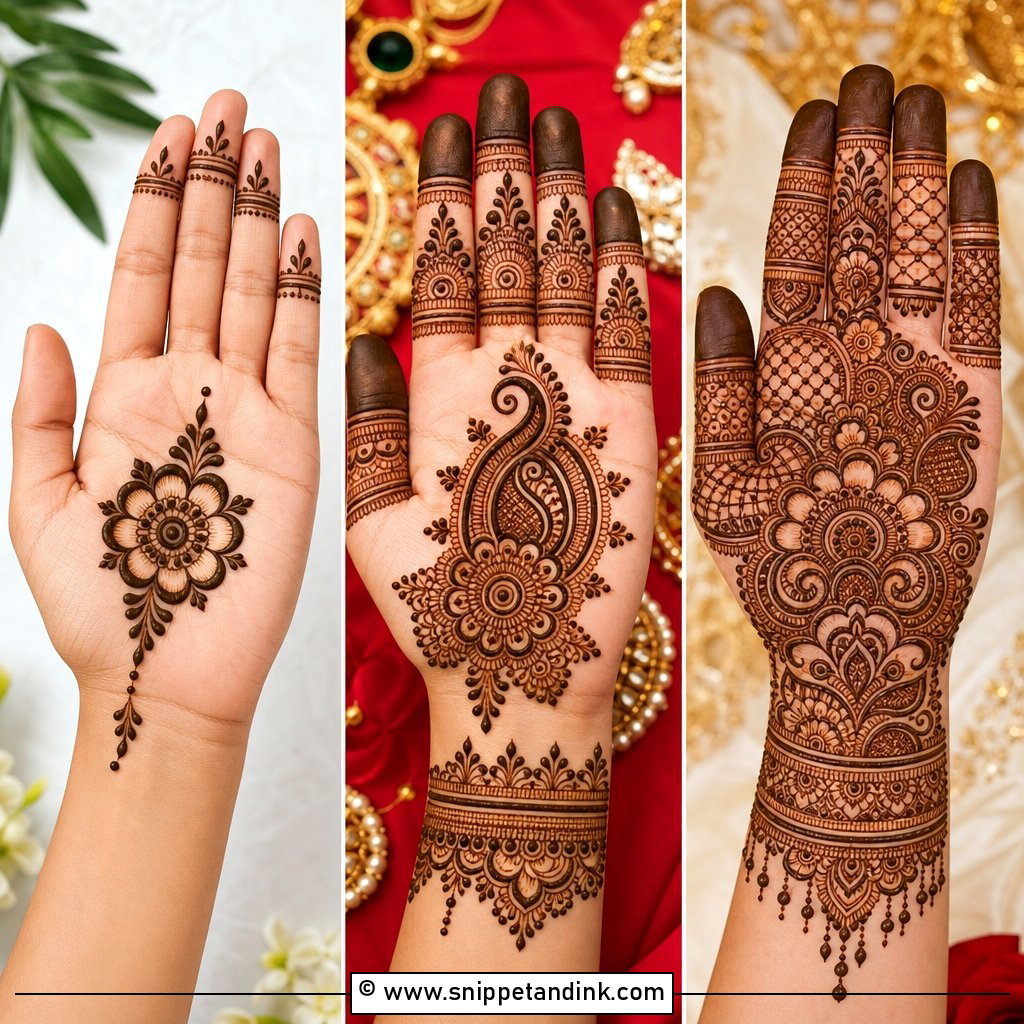
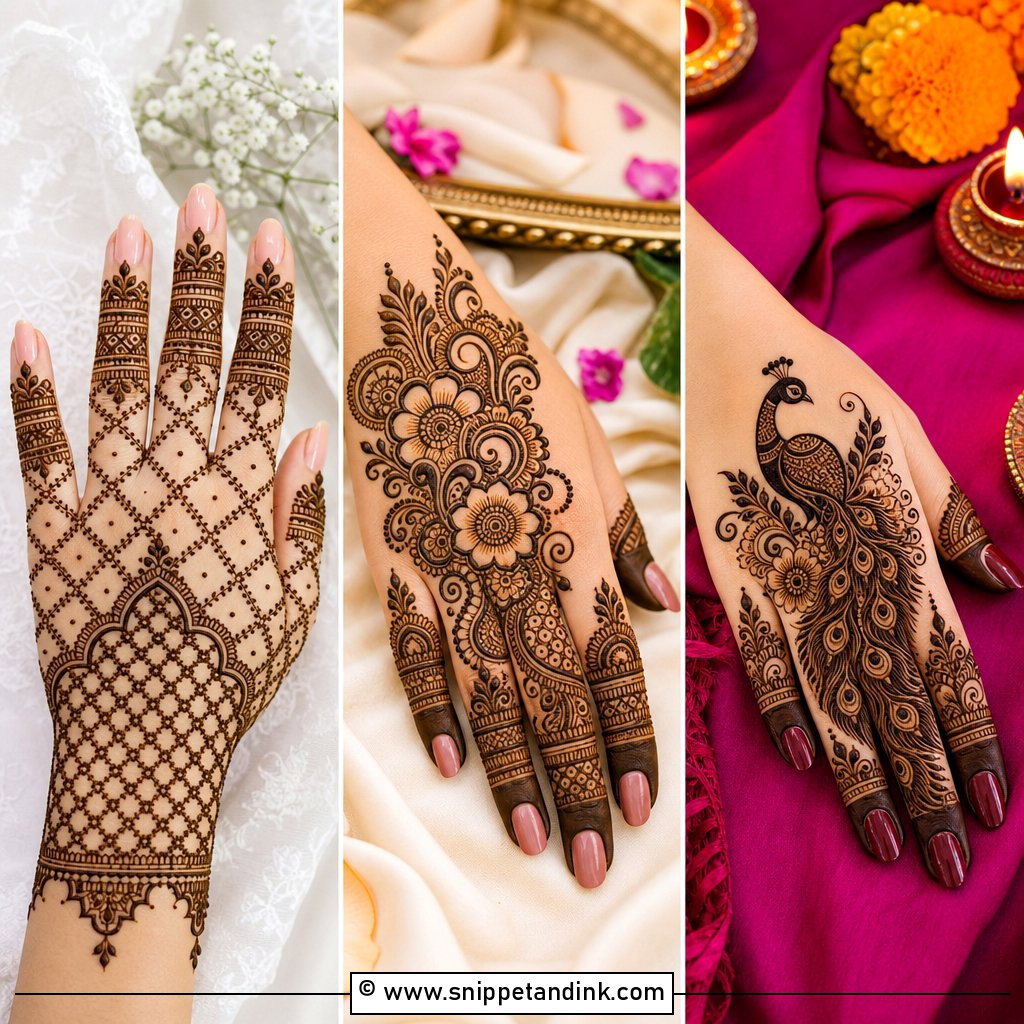
Fingertips to wrist, fully worked: mandalas, florals, paisleys, jaali and finger bands in one balanced layout. The challenge is clarity. On a full back hand I leave thin channels of skin between motifs, because the lines spread very slightly as the paste sits, and without those gaps the stain reads as one dark patch. Finish it with a cuff or scalloped border so it doesn’t stop abruptly at the wrist bone.
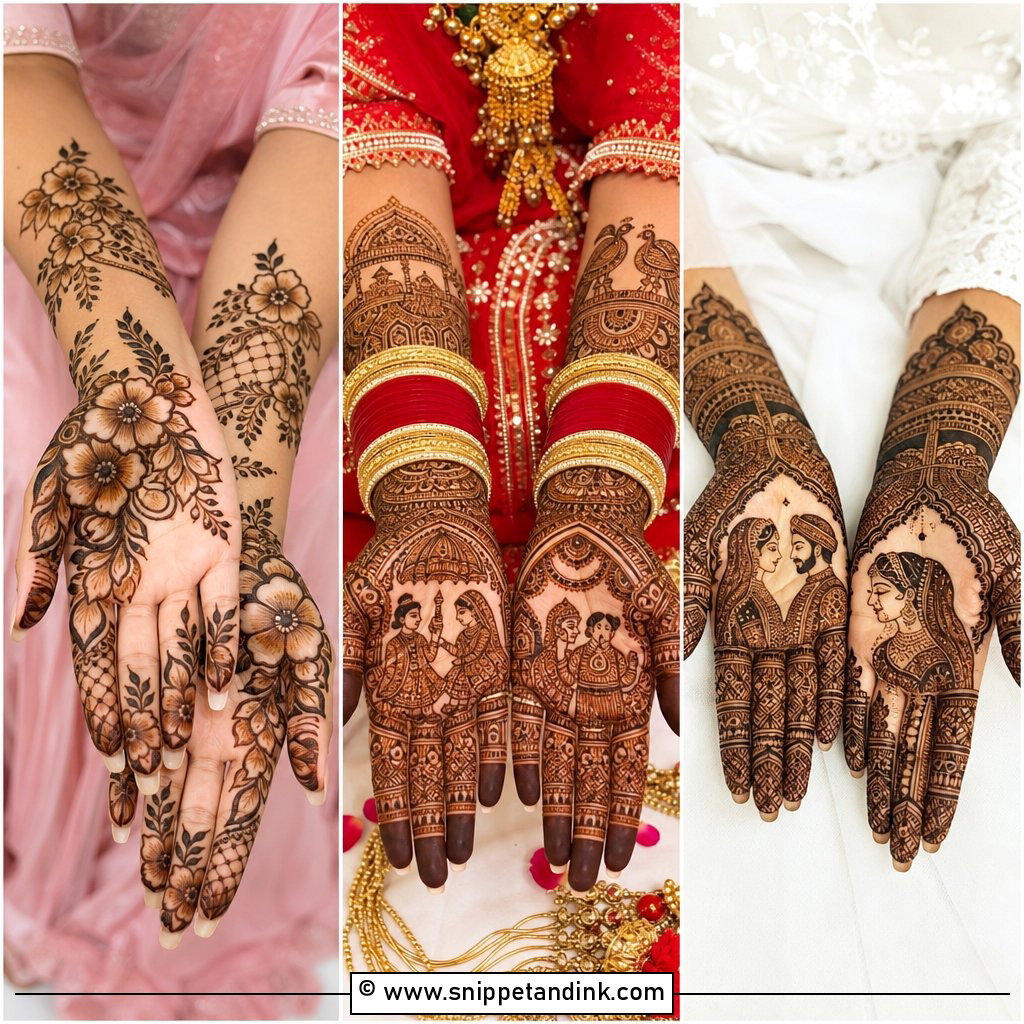
4. Bridal Back Hand Mehndi Design
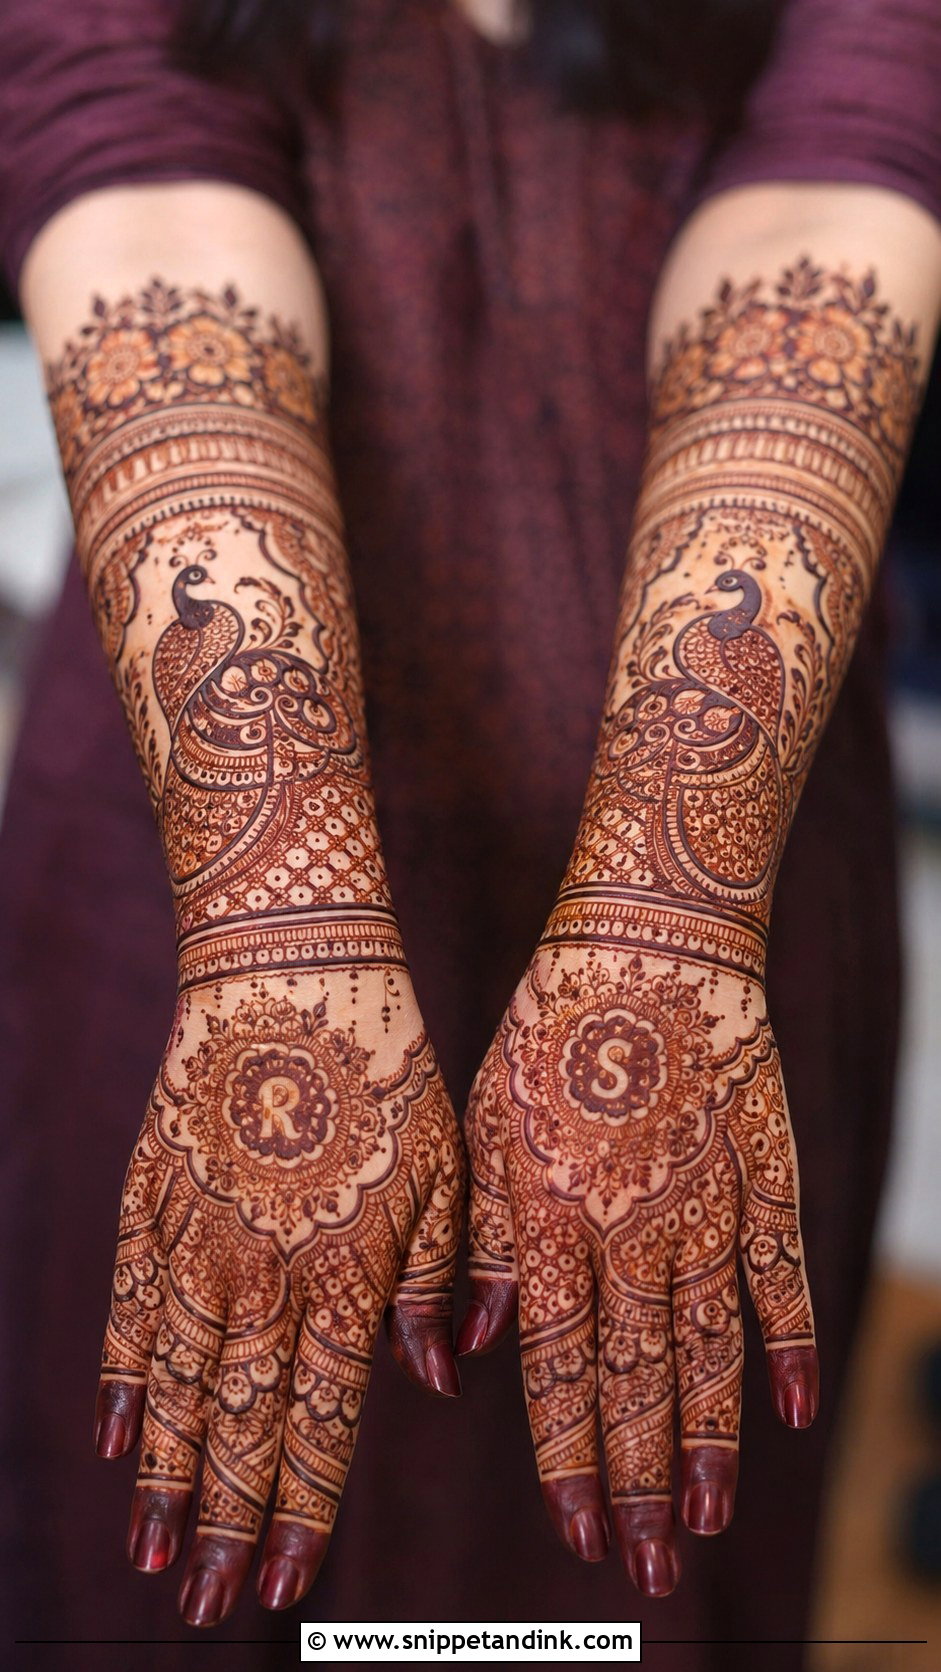
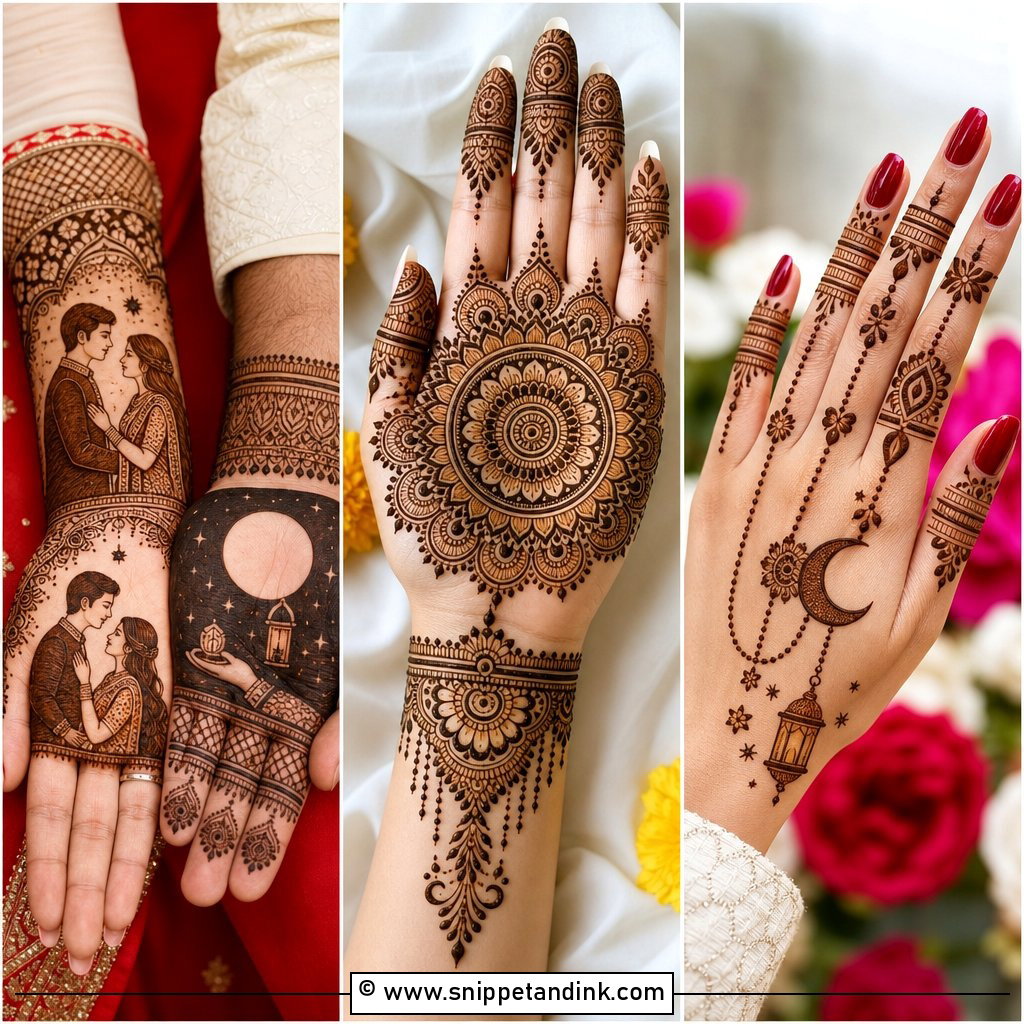
A Bridal back hand mehndi design is the most personal work I do: flowers, peacocks, paisleys, bride and groom elements, initials or jewelry chains, with dense fingers and broad cuffs leading into the forearm. I like the two hands to coordinate without matching, a mandala on one and peacock work on the other, so they look like a pair when the bride holds them together. Bangles and rings sit over the cuff area, so I ask what she’s wearing before I draw it.
5. Mandala Back Hand Mehndi Design
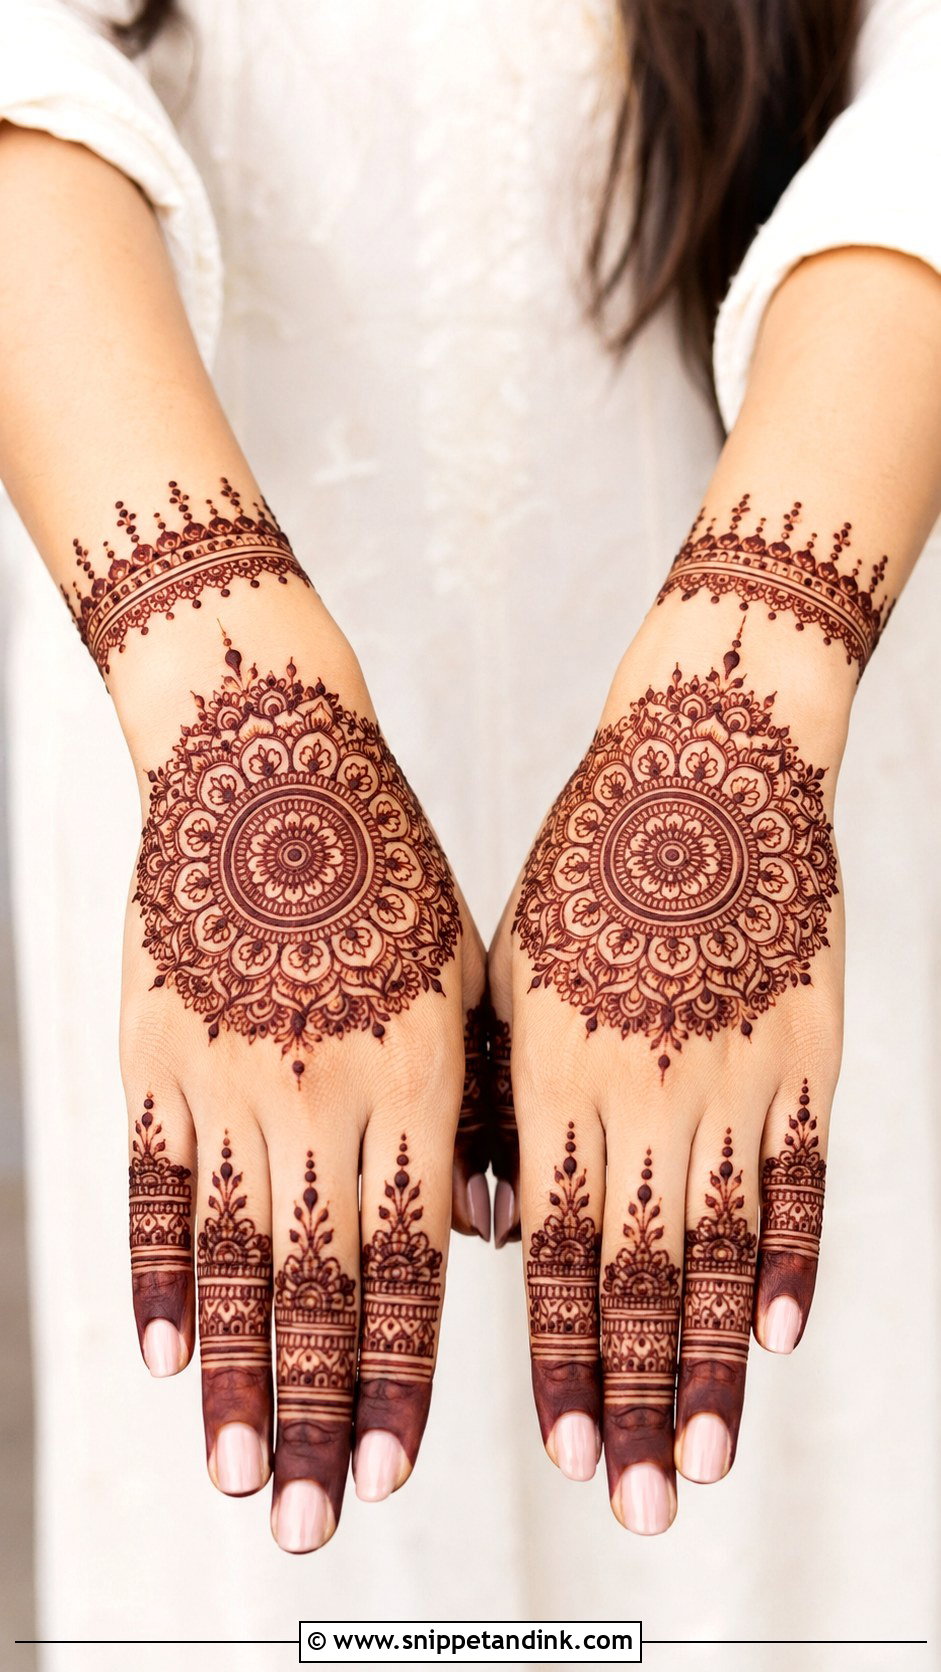
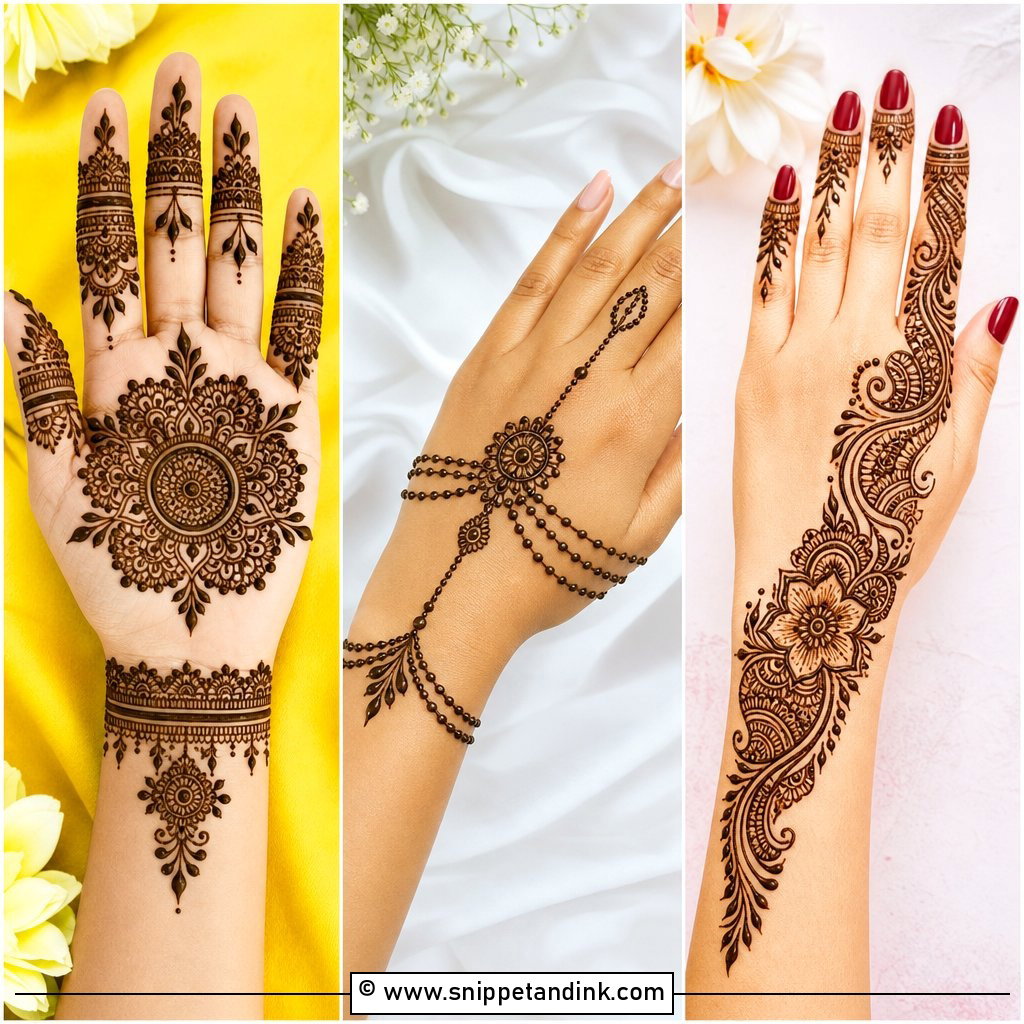
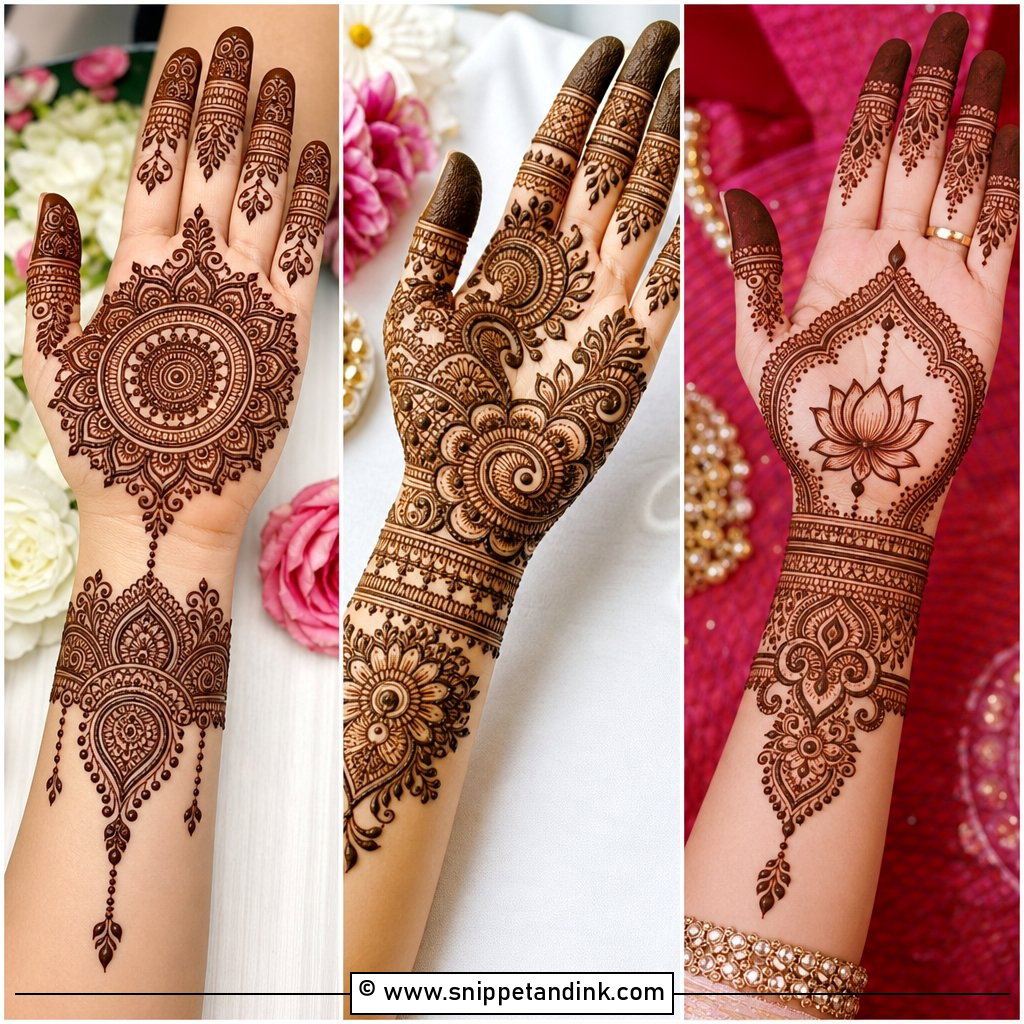
On the back of the hand, the knuckles move every time you make a fist, so I center a mandala slightly above the middle knuckle line rather than over it. Dots, petals and fine rings radiate outward, the fingers get matching bands or leafy tips, and a simple wrist border closes it. A small mandala reads modern; a large, layered one reads festive. Either way, symmetry is the whole point, so it suits hands that will be photographed flat.
6. Floral Back Hand Mehndi Design
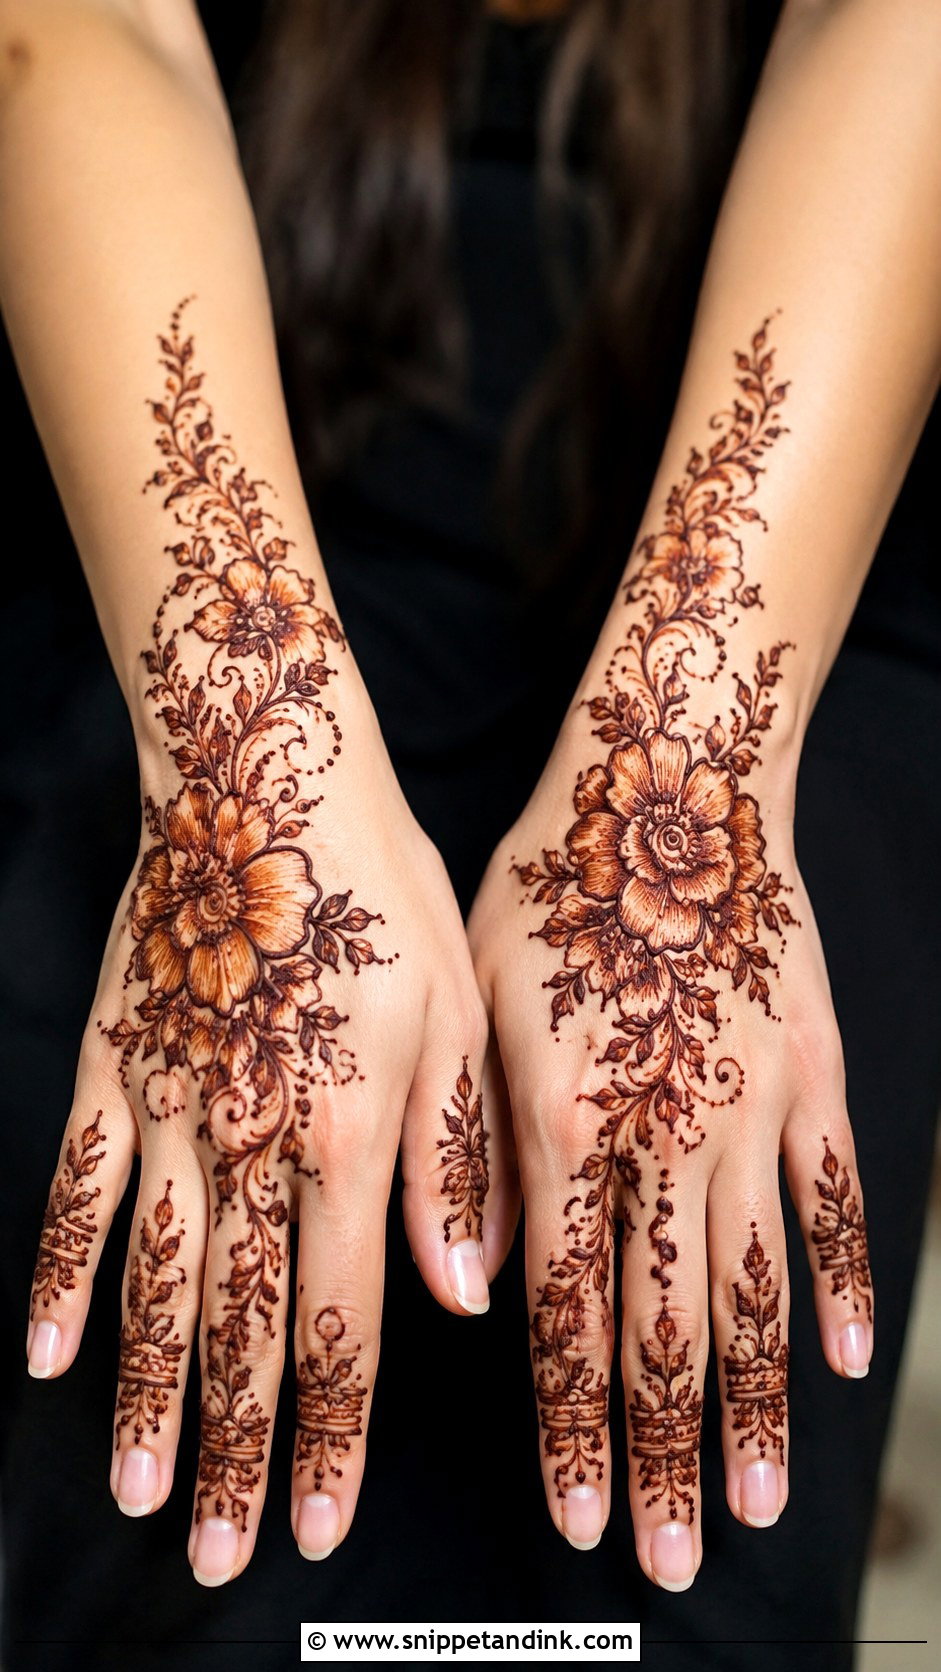
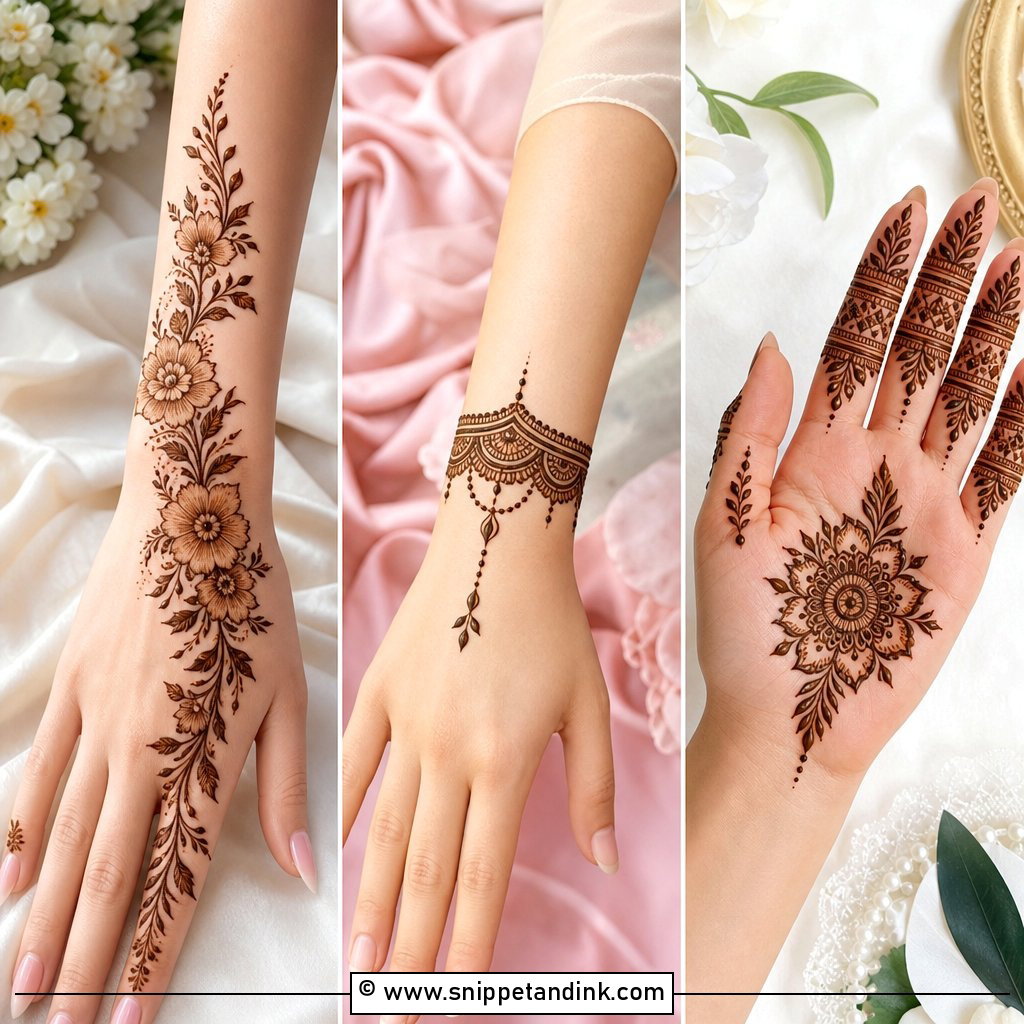
Flowers are forgiving. I can scale them up for a long hand or down for a small one, and place one large bloom near the thumb or let a cluster spread across to the wrist. Bold outlines with shaded petals give depth. Leave space around each bloom, though; crowded flowers on back-hand skin turn into a muddy blur once the stain oxidizes over the next day or two.
7. Jaali Back Hand Mehndi Design
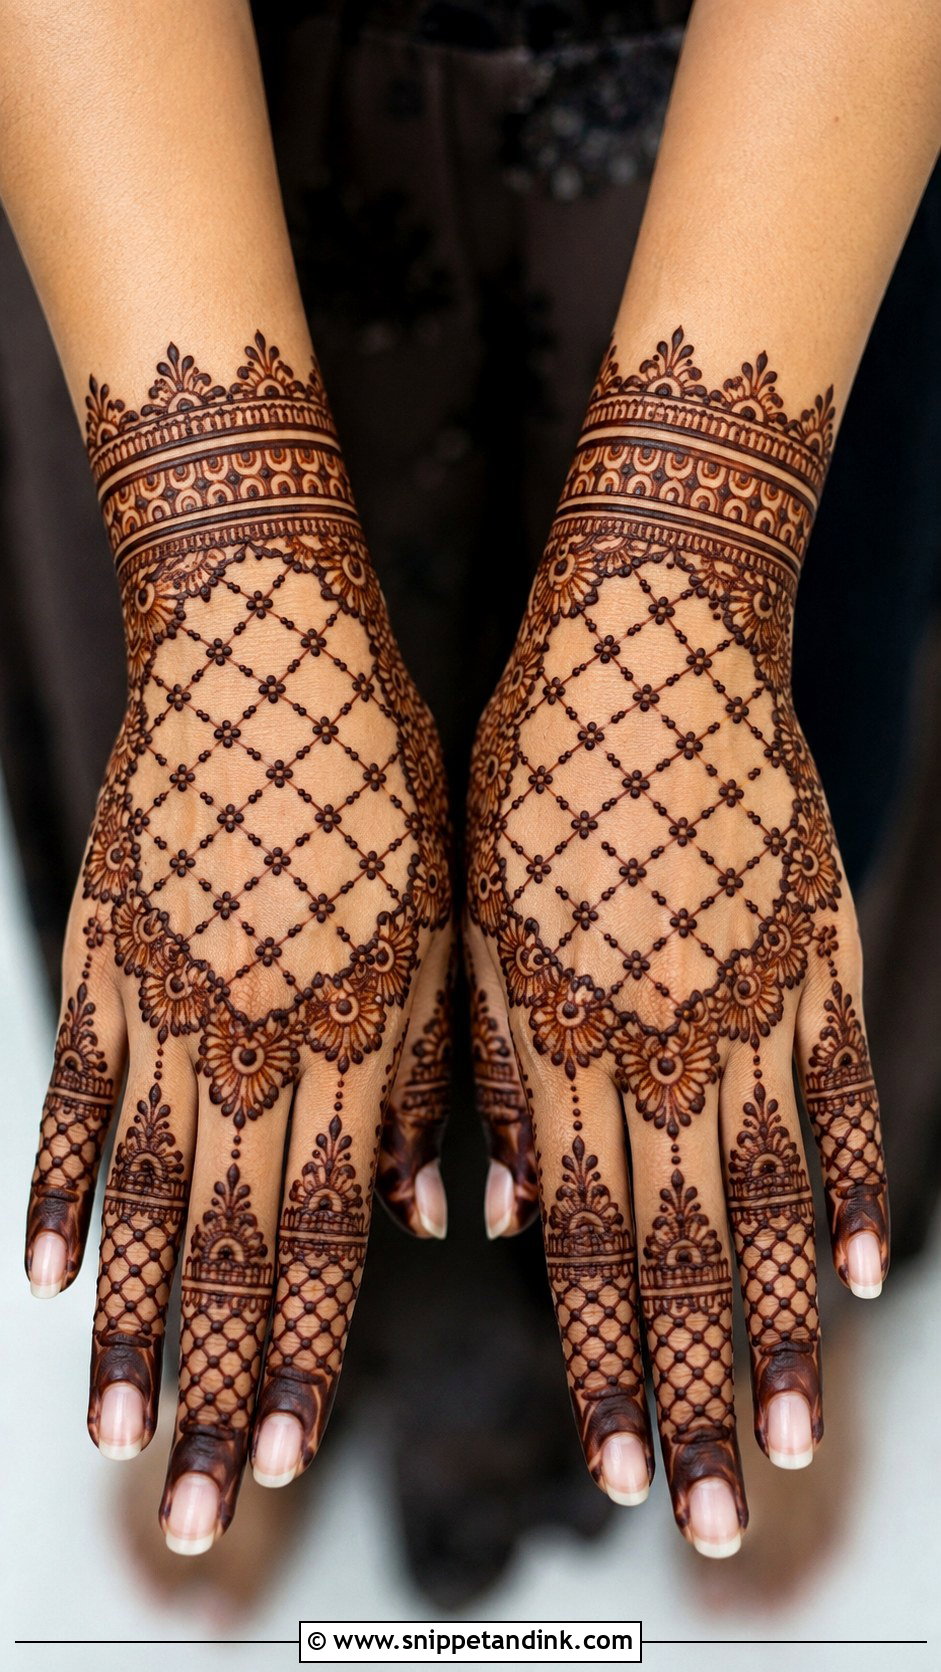
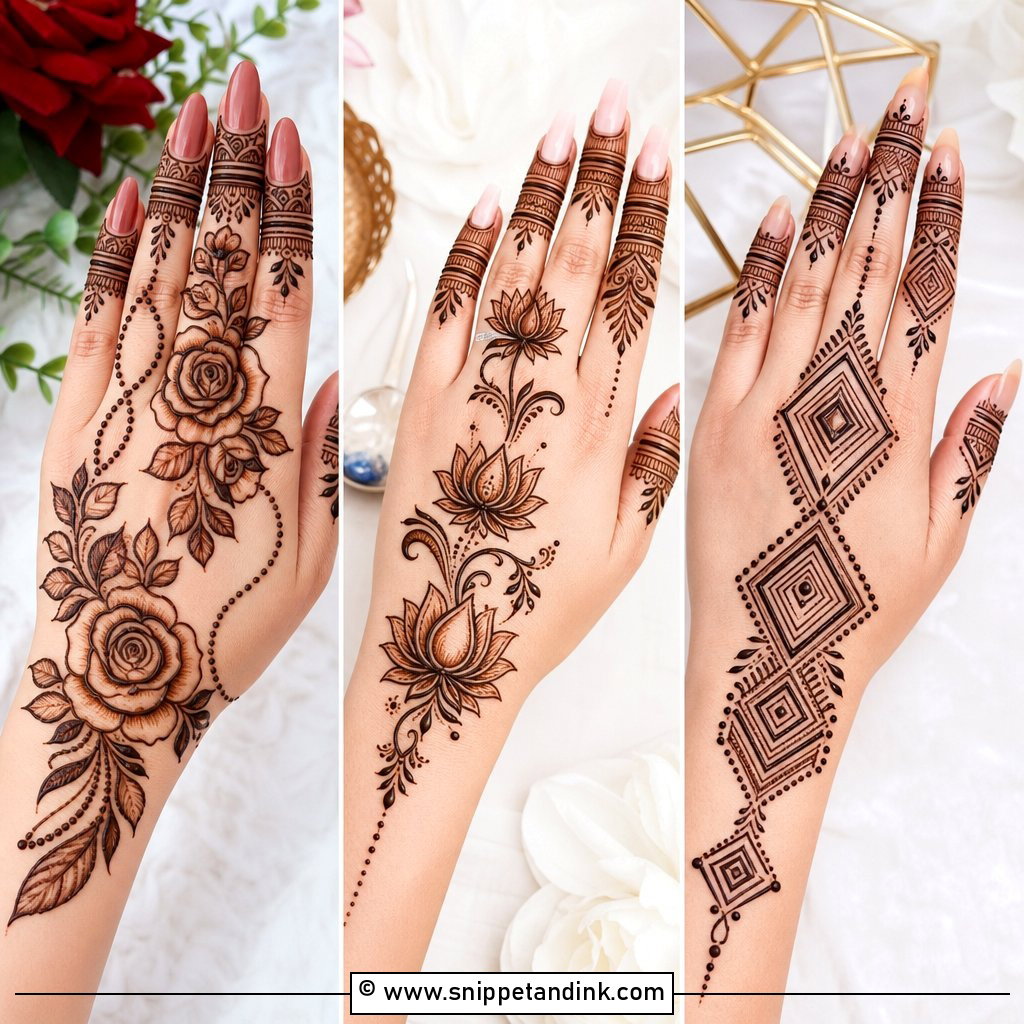
Jaali is a mesh of diamonds or squares across the center, fingers or wrist, often with a dot or tiny leaf inside each cell. Line spacing is everything here. Draw the net too tight and the gaps close as the stain darkens, which is the most common way jaali goes wrong. Full jaali reads royal; a half panel feels lighter and more modern.
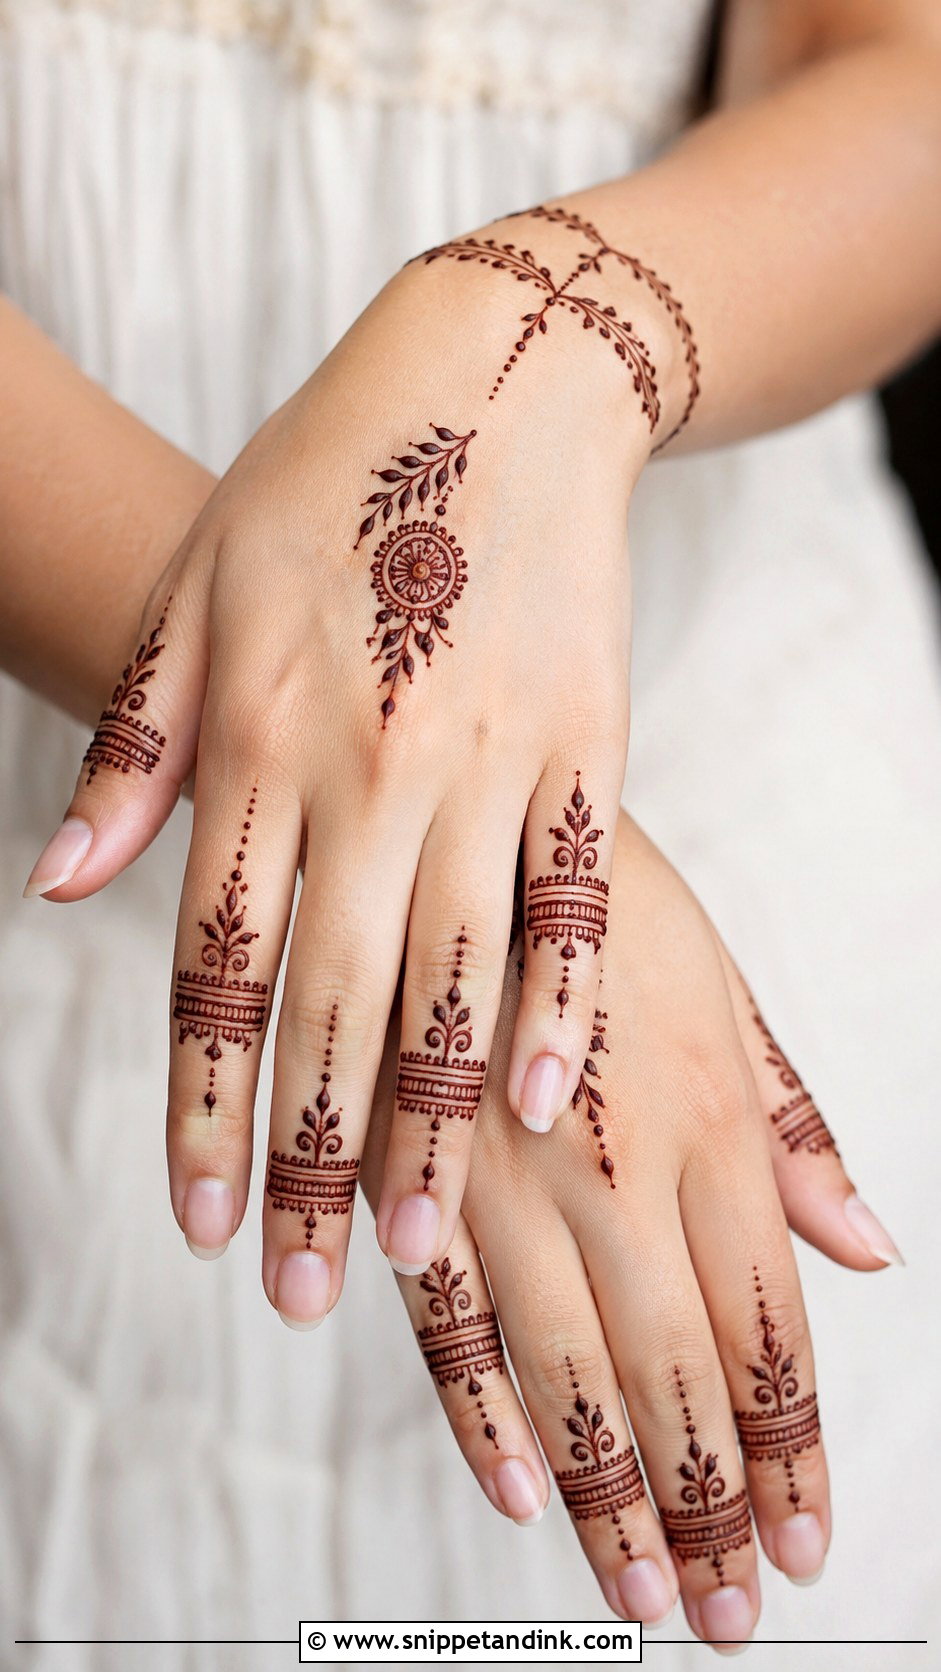
8. Jewelry Back Hand Mehndi Design
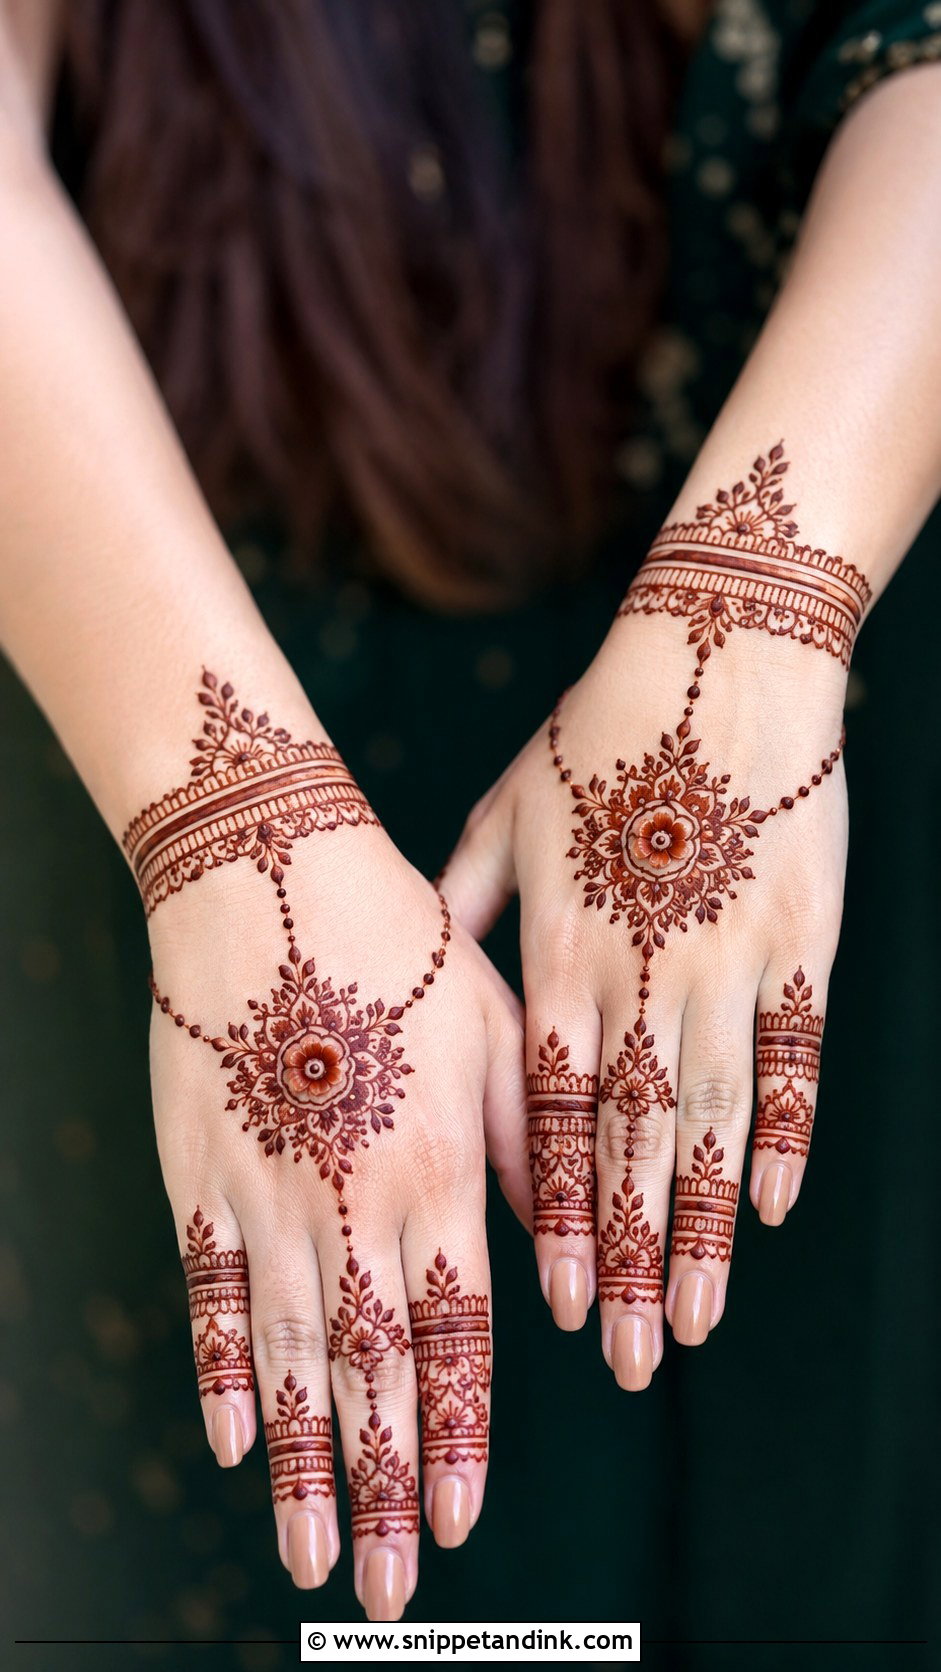
Ring chains, bracelet cuffs, finger bands and fine lines linking fingers to wrist, with a floral charm or mandala pendant at the center. I draw the chains last and check them with the client’s fingers spread and relaxed, because a chain that looks straight on a flat hand can curve oddly when the hand is at rest. It’s a good stand-in for real jewelry at a sangeet or engagement, and it sits well under traditional outfits.
9. Minimal Back Hand Mehndi Design
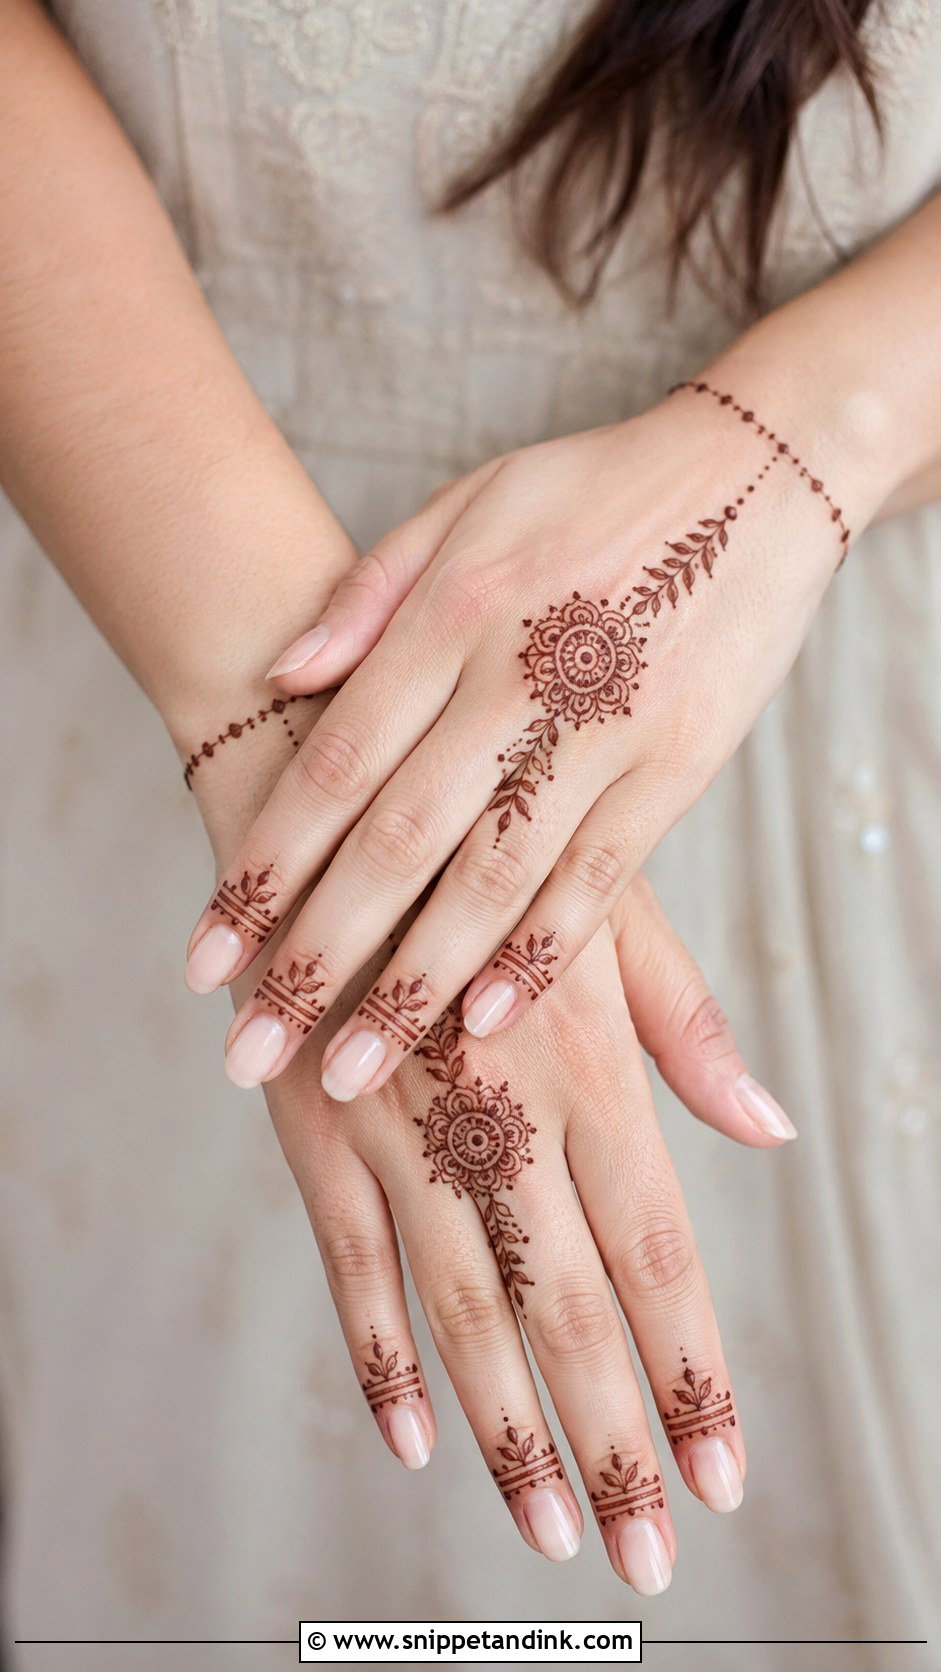
Fewer motifs, thinner lines, more open skin: a small flower, mini mandala, a diagonal vine or just the fingers. Minimal designs don’t overwhelm short fingers, which makes them a sensible pick for smaller hands. The catch is that any shaky line shows, so I use a fine tip and a steady, slower hand. For first-timers and office-friendly events, this is where I’d start.
10. Modern Back Hand Mehndi Design
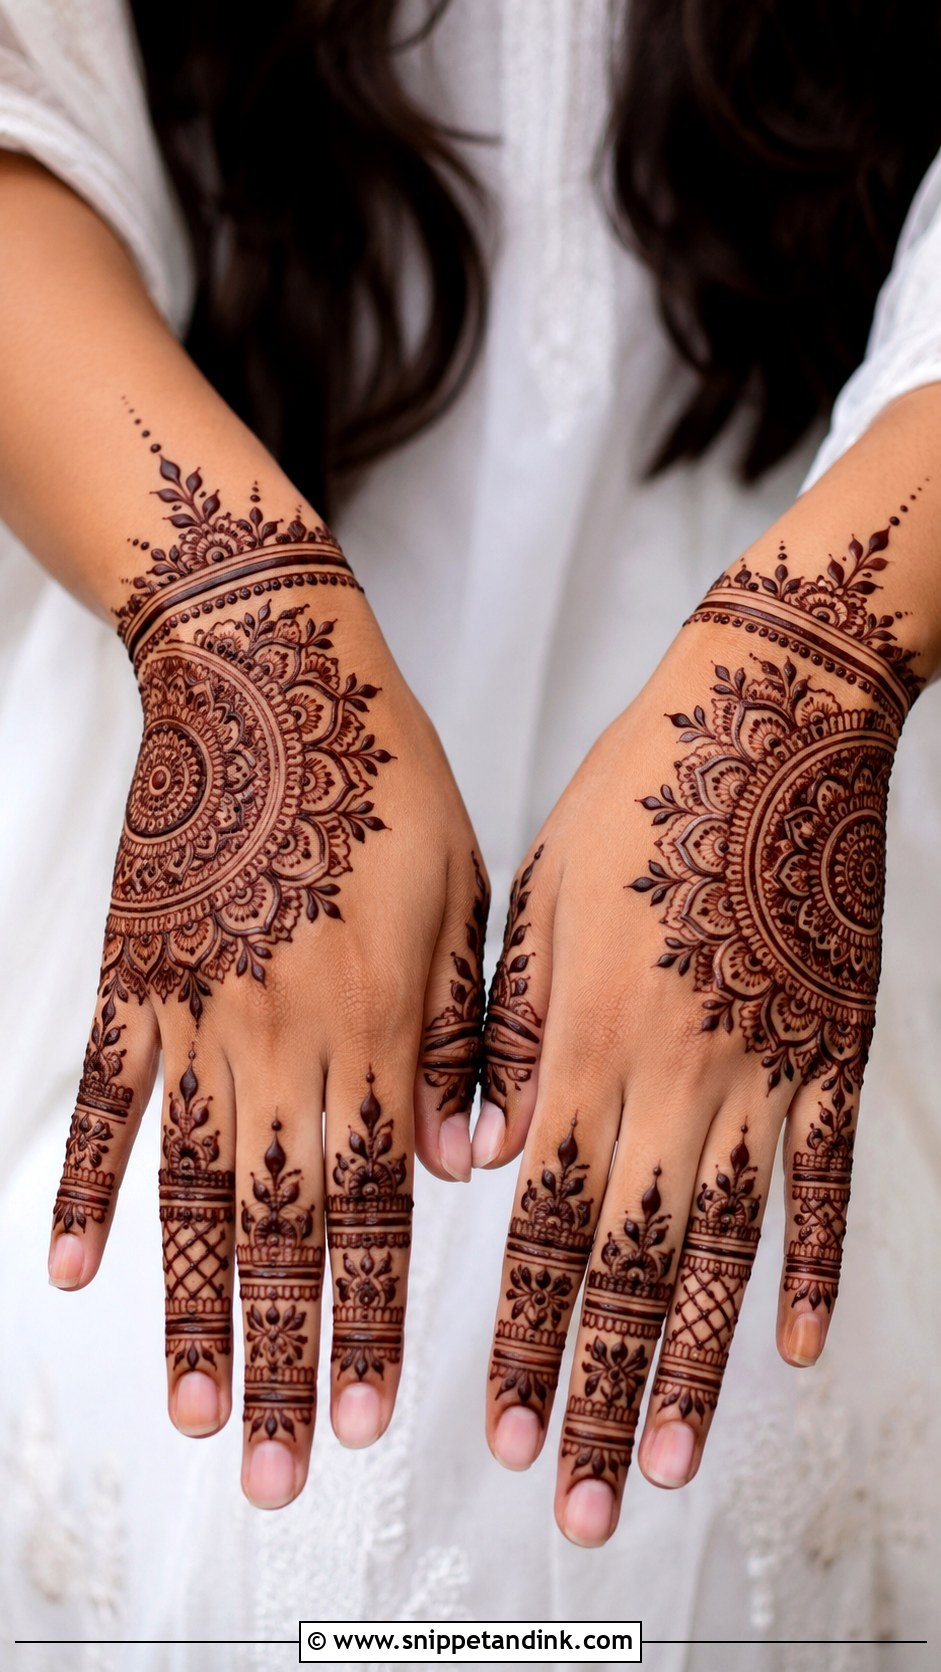
Modern layouts take traditional motifs and space them out deliberately: bold florals, half-mandalas, geometric lines, curved vines, finger bands. The design might sit on one side only, run diagonally or form a bracelet-and-ring effect. Bare skin is treated as part of the pattern rather than a gap to fill. Receptions and engagement events are where I see these most.
11. Indian Back Hand Mehndi Design
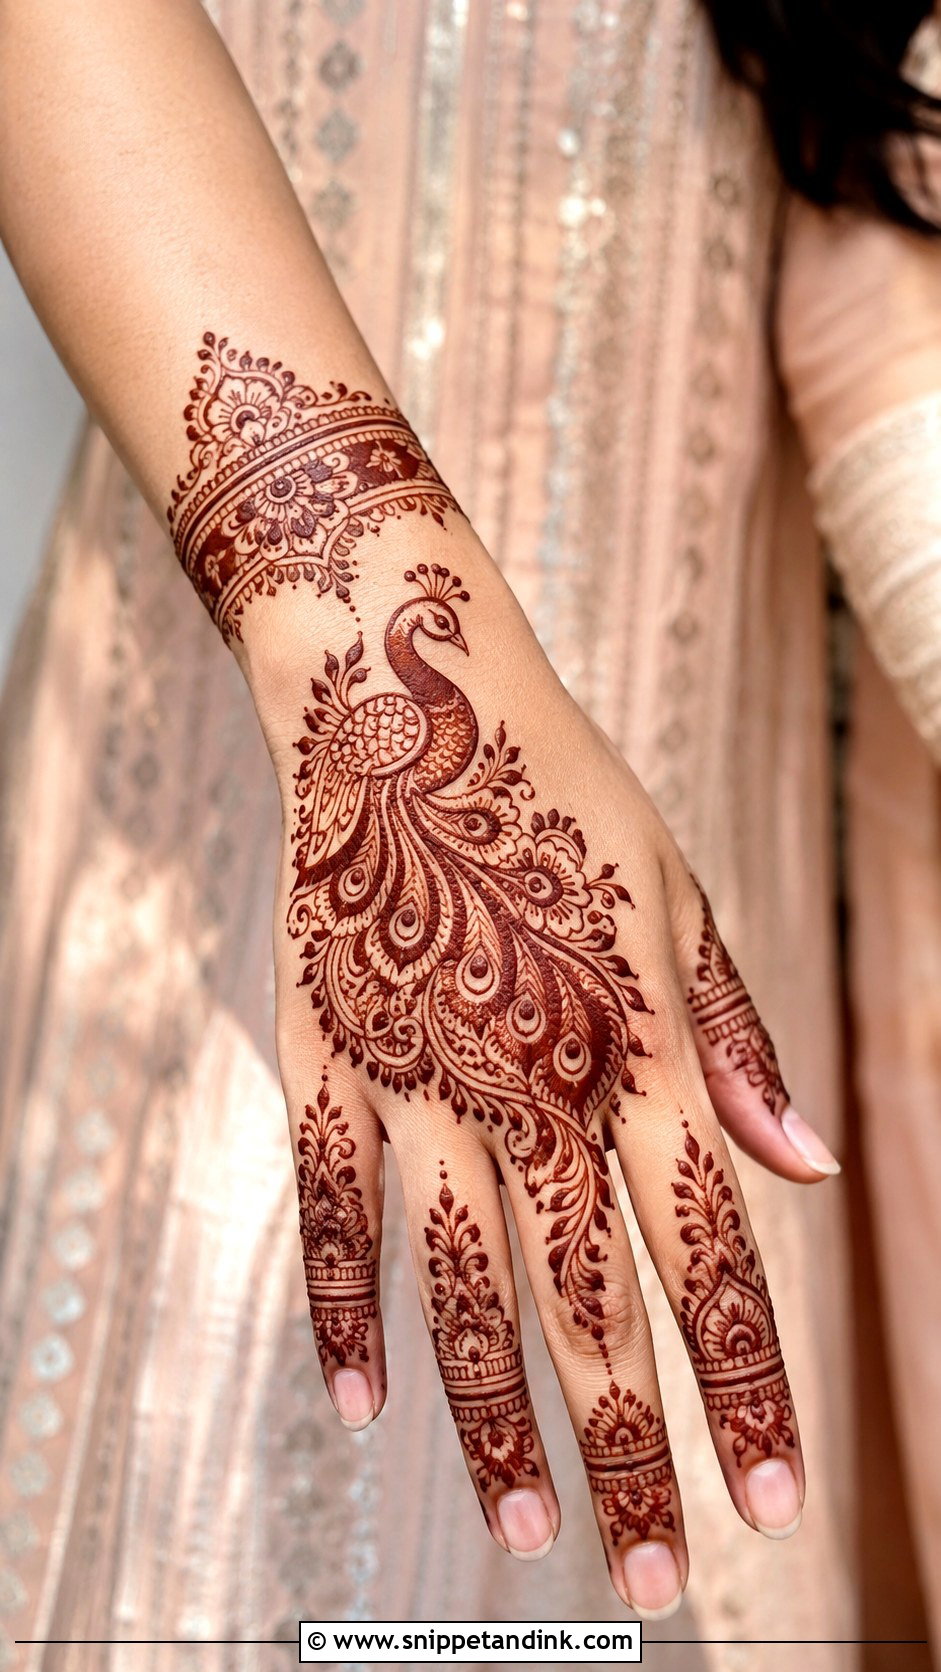
Indian back-hand work is dense: paisleys, flowers, peacocks, mandalas and fine filler, fully decorated fingers and layered wrist bands. The goal is coverage without losing legibility, and on a good stain it goes deep maroon after a couple of days. It’s the design for Karwa Chauth, Teej, Diwali and weddings. If you stain lightly, ask your artist to open up the filler a little, since dense fine work on a pale stain can look smudged.
12. Indo Arabic Back Hand Mehndi Design
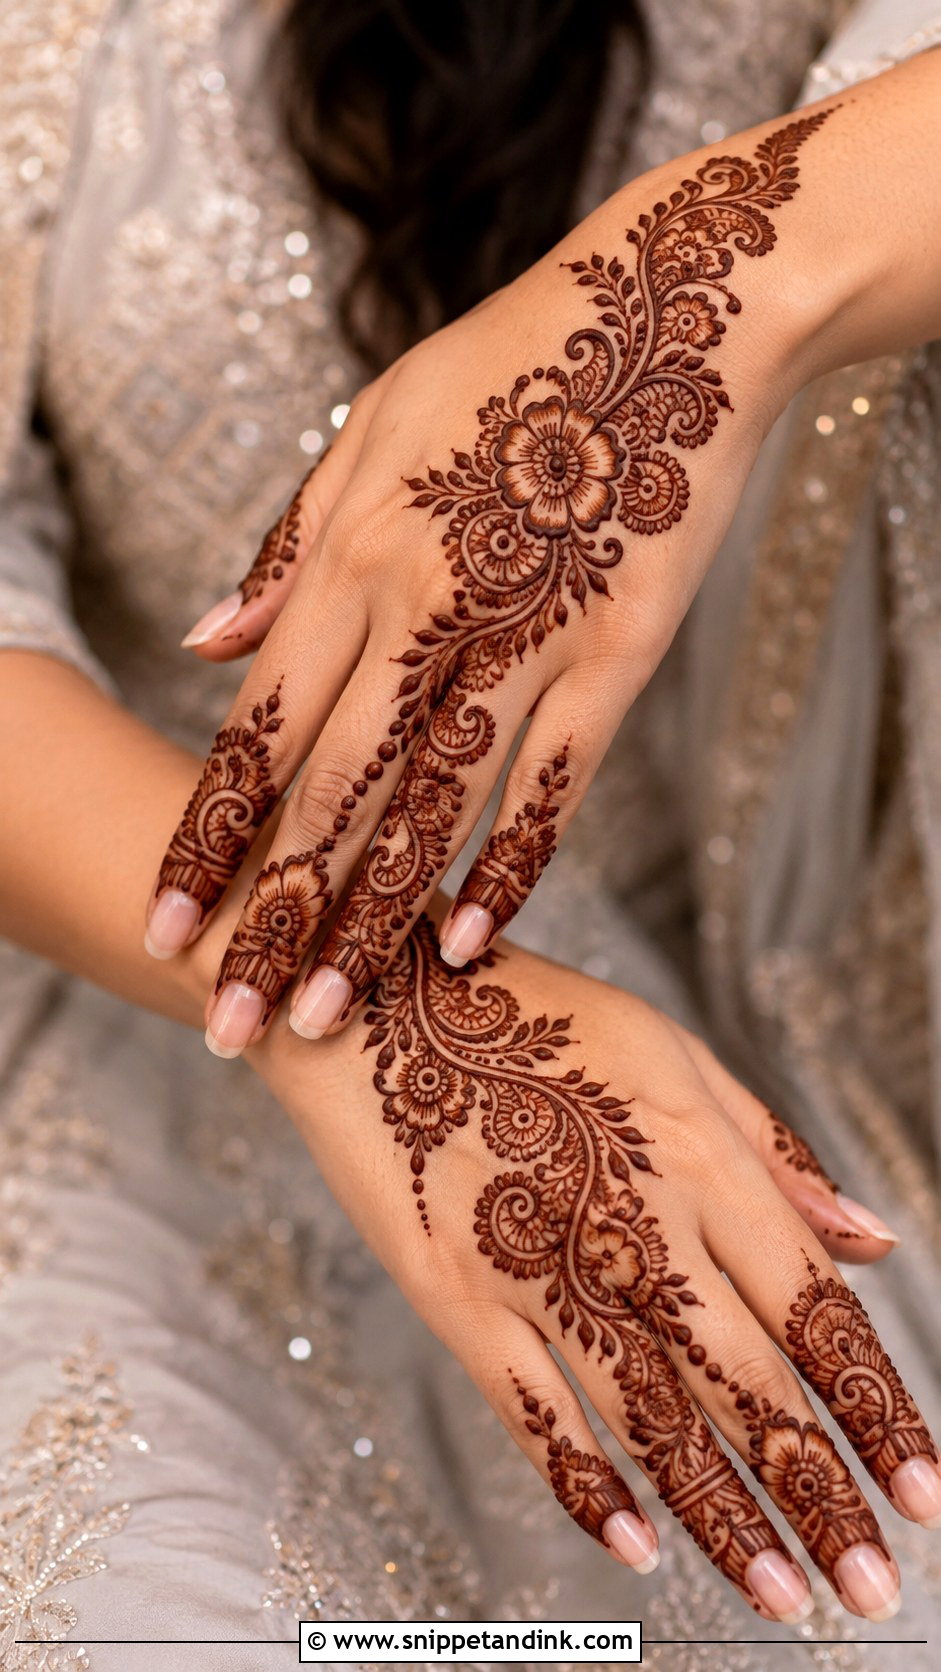
Indo-Arabic places big diagonal florals and paisleys first, then fills around them with dots, leaf fillers, shaded petals and finger detail. It takes longer than a plain Arabic trail but far less than full Indian work. That middle ground is why bridesmaids and guests ask for it: rich enough for photos, and you’re out of the chair before the music starts.
13. Moroccan Back Hand Mehndi Design
Moroccan back-hand work uses lines, triangles, grids, diamonds and dots in a symmetrical run from wrist to fingers, with stacked bands and small chevrons on the fingers. I set a few guide dots along the hand before drawing straight lines, since back-hand skin stretches as you move and a line drawn on a flexed hand bends when it relaxes. Clean, even spacing is what makes it look graphic rather than messy.
14. Gulf Back Hand Mehndi Design
Khaleeji, or Gulf, henna clusters large flowers across the back of the hand with curved vines heading to wrist and fingers, strong outlines and softer inner detail. It reads from across a room, which suits Eid gatherings and evening weddings. Fingers can stay partly bare or carry matching leaf tips. The thick outlines need a slightly wider cone opening than delicate fill work.
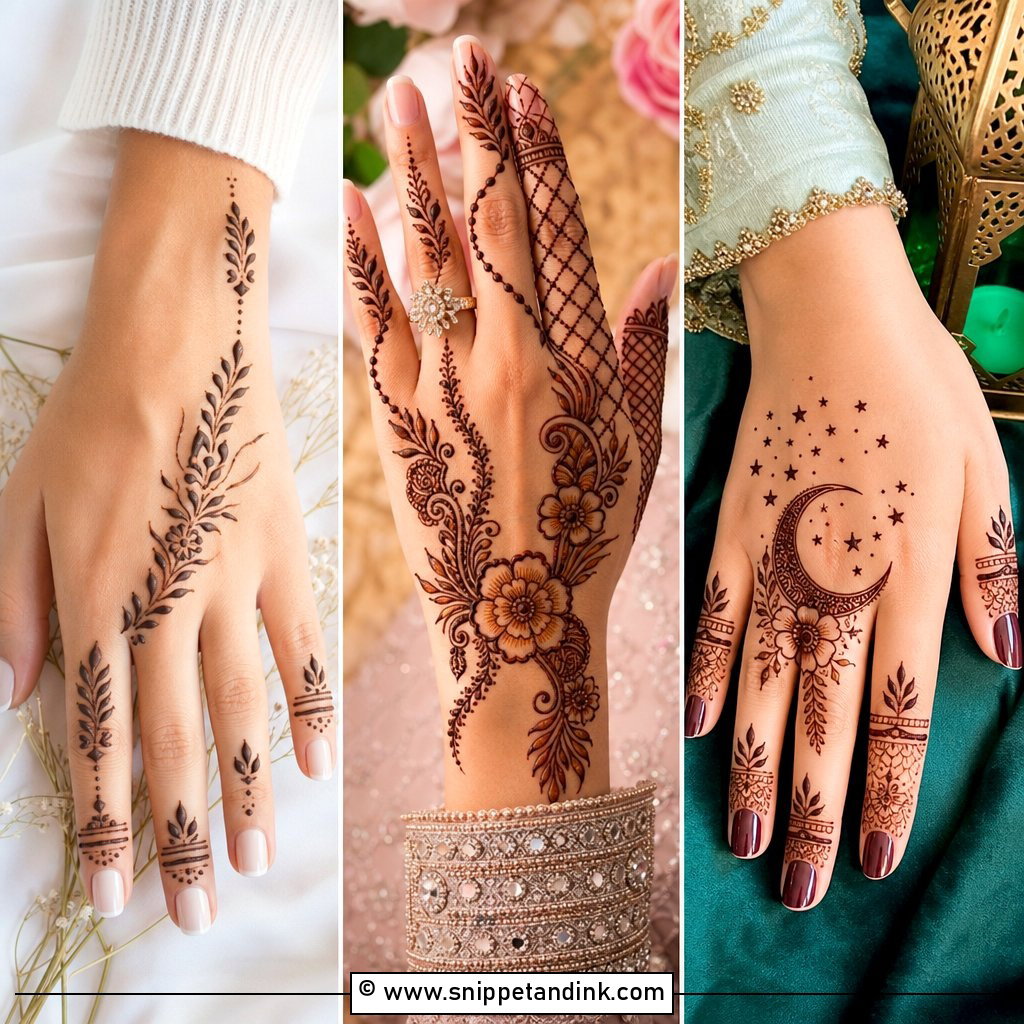
15. Finger Back Hand Mehndi Design
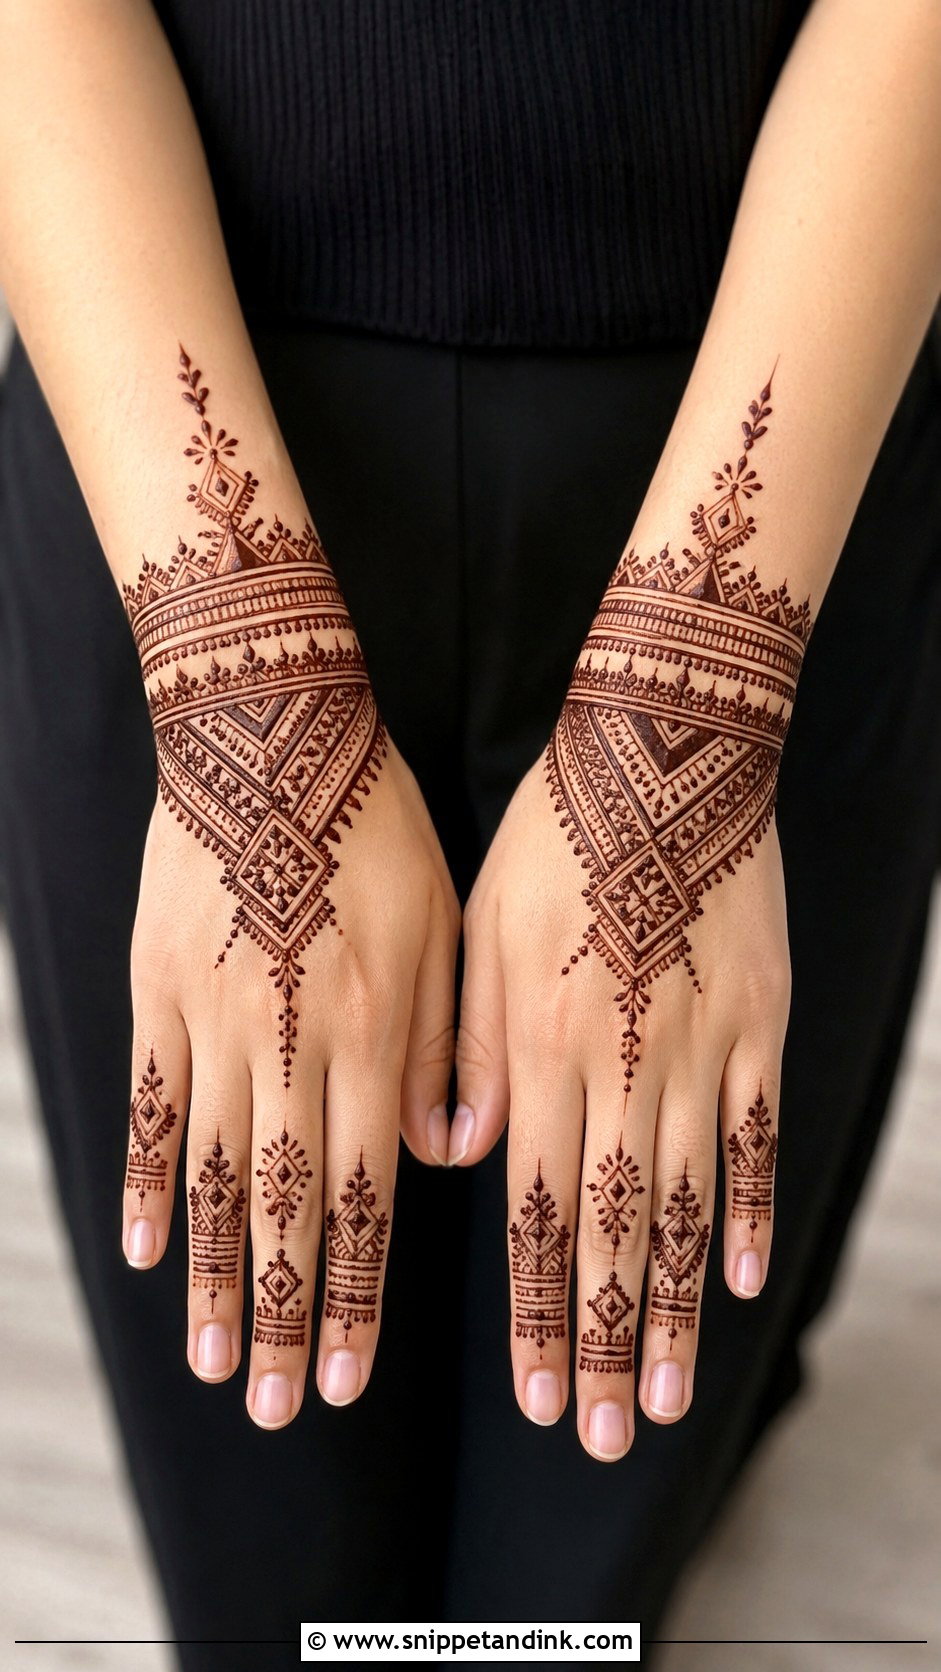
Here the fingers carry the design: bands, leaves, dots, small florals or lace detail on each one, with a little central motif or a light bracelet tying it together. It frames rings naturally. Fingertips stain darker than the rest of the back hand, which helps. I’d keep the patterns related across all ten fingers; deliberately mismatched ones can work, but only if the wrist ties them back together.
16. Bracelet Back Hand Mehndi Design
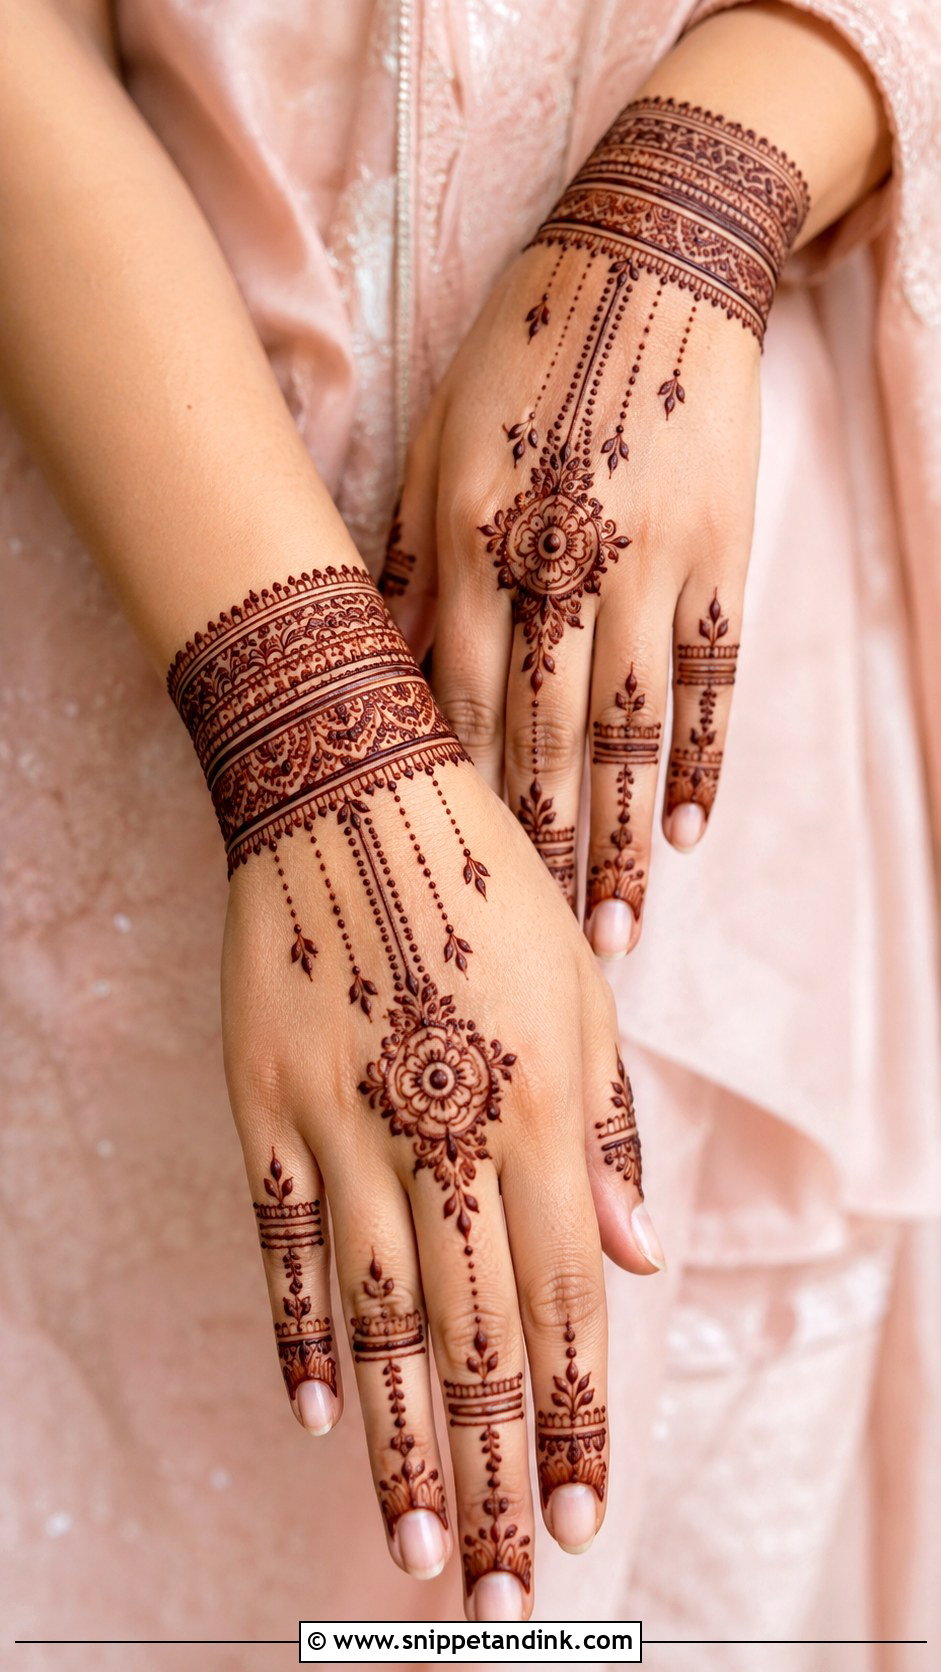
A henna cuff around the wrist, plain with dots and lines or detailed with flowers, paisleys, lace edges and hanging chains, connecting to the fingers through a central vine or charm. The wrist is the part that rubs against sleeves and bangles most, so the cuff fades first; I draw it with a bit more paste than the rest to give it a head start. Good for engagement looks and guests.
17. Peacock Back Hand Mehndi Design
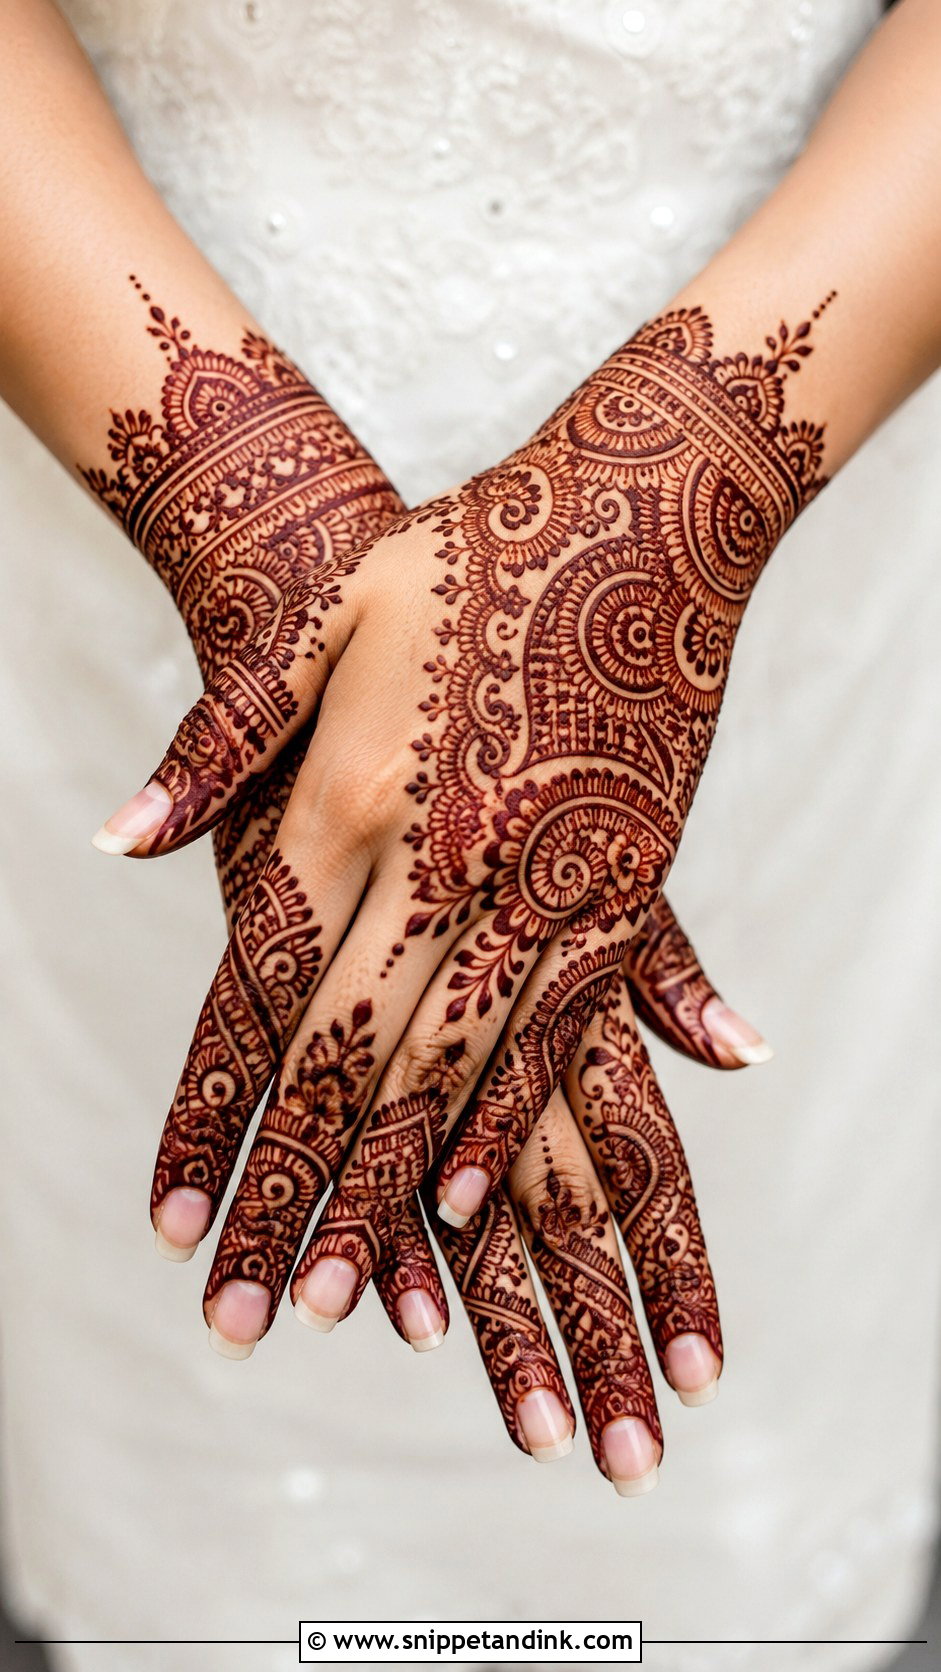
The peacock can sit near the wrist, center or side of the hand, with its feathers opening into paisleys and fine curves and feather-like lines on the fingers. Get the neck curve and body proportion right first; if those are off, no amount of feather detail saves the bird. I keep the eye motifs a decent size so they survive the slight spreading of the stain. It belongs with silk and embroidered outfits.
18. Paisley Back Hand Mehndi Design
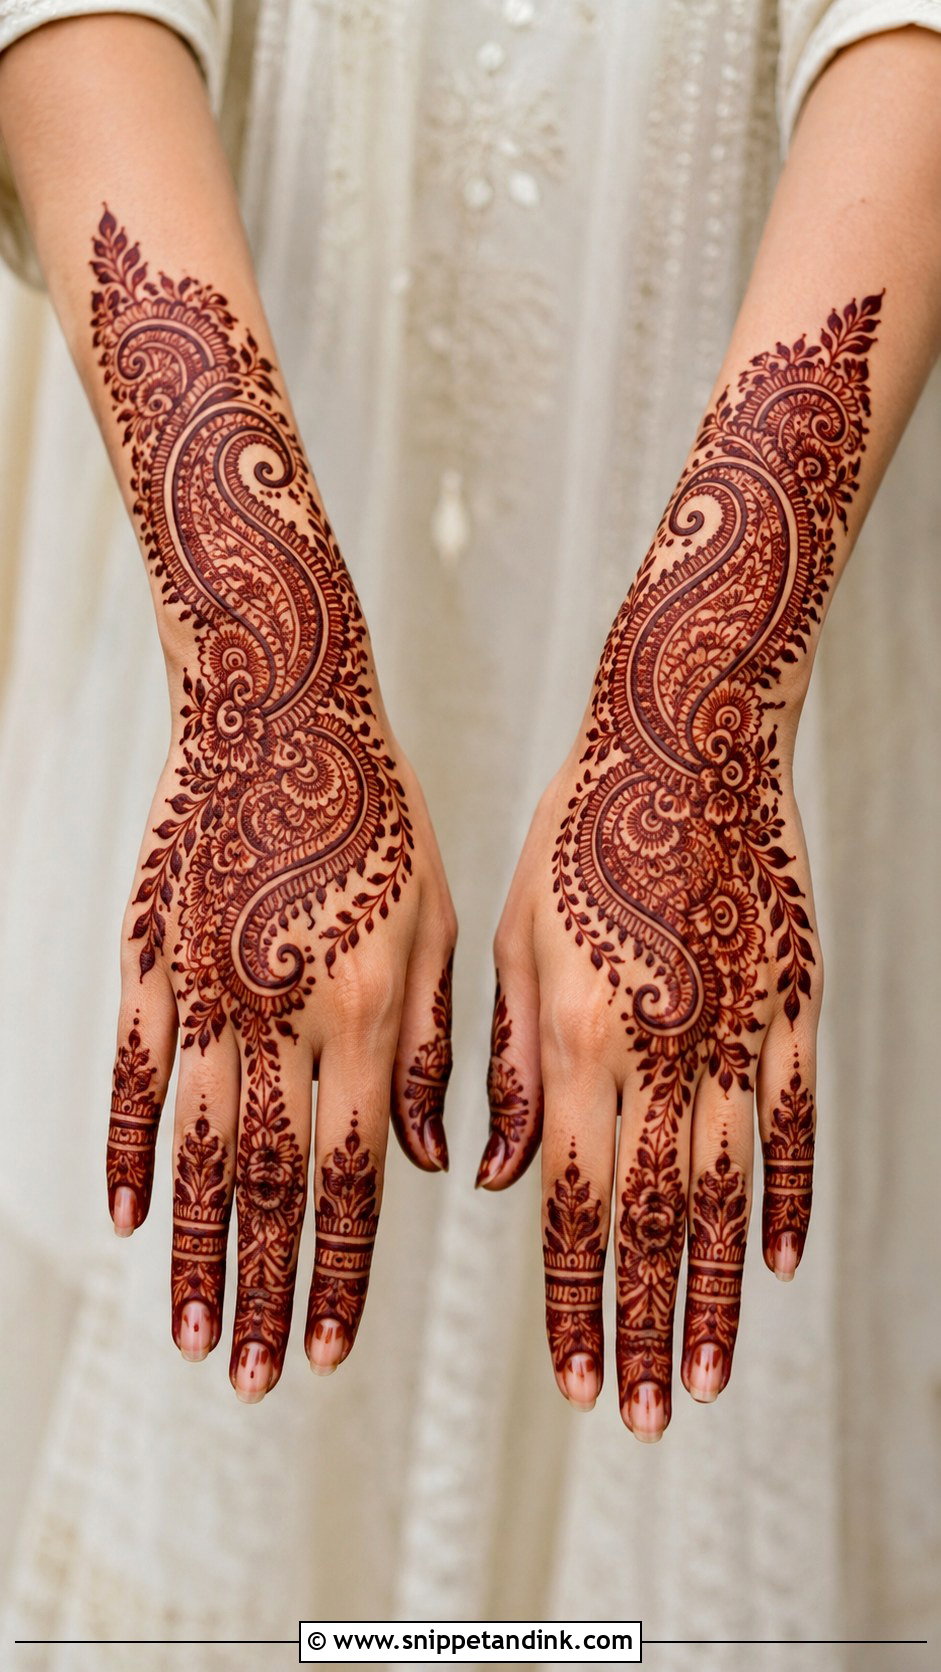
Paisleys follow the curve of the hand naturally, which is why they flatter almost every hand shape. Run them diagonally, ring them around a mandala or link them with vines, and echo small paisley tips on the fingers. The amount of filler decides whether it reads simple or heavy. I aim for bold outlines with tiny interior detail rather than packing every gap.
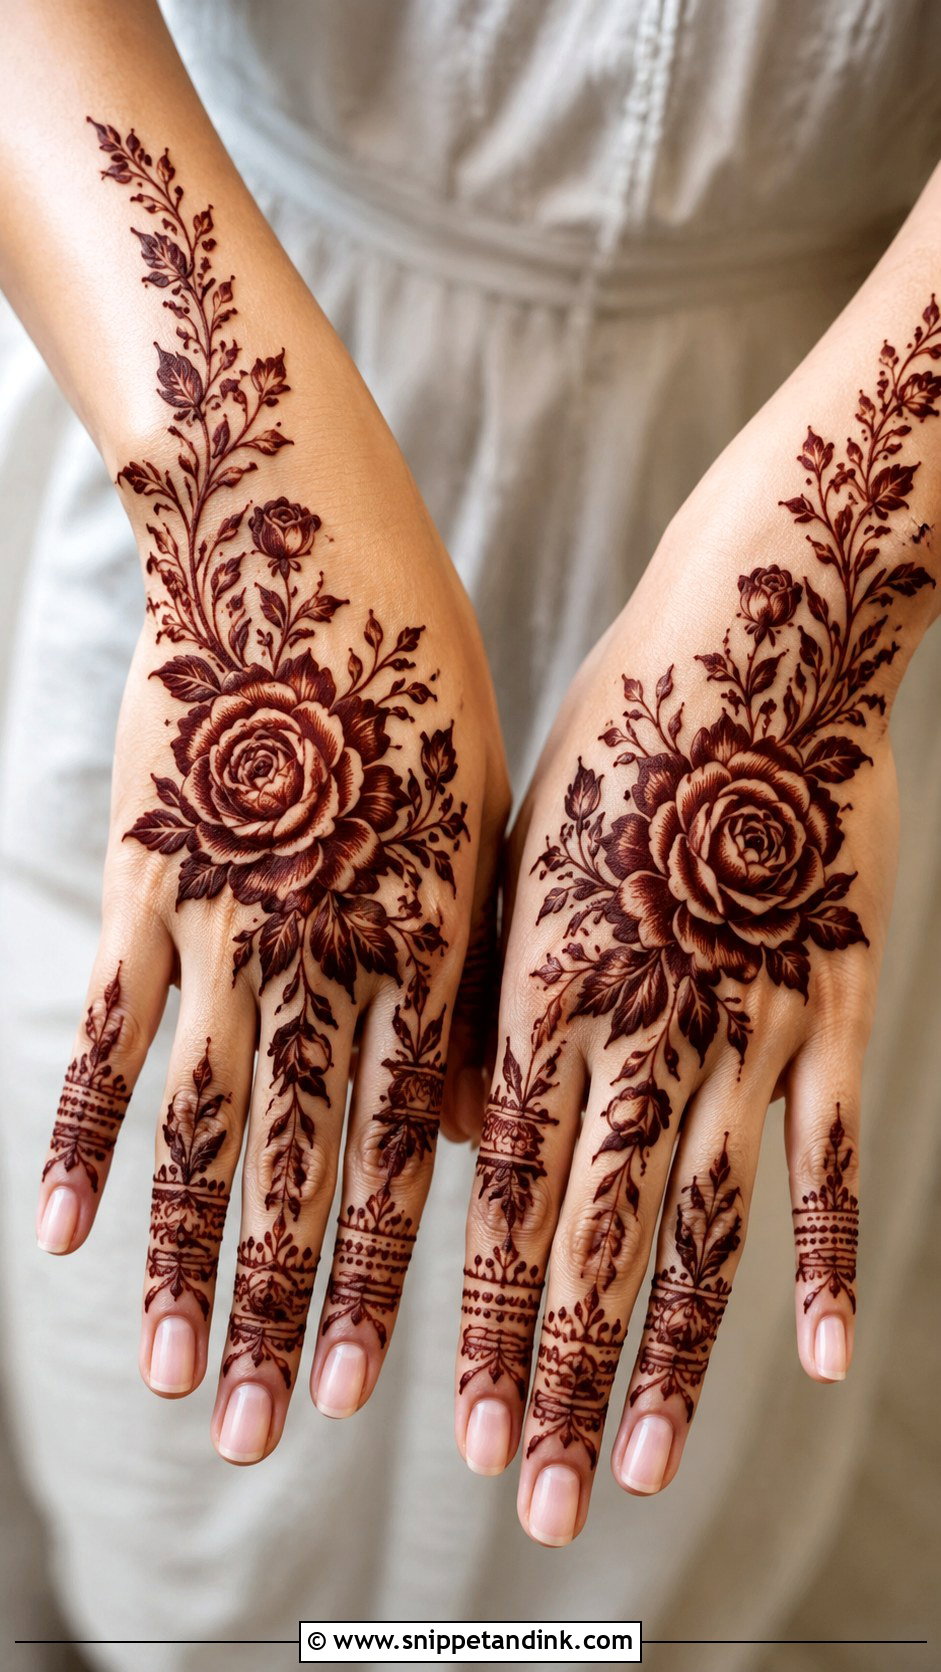
19. Rose Back Hand Mehndi Design
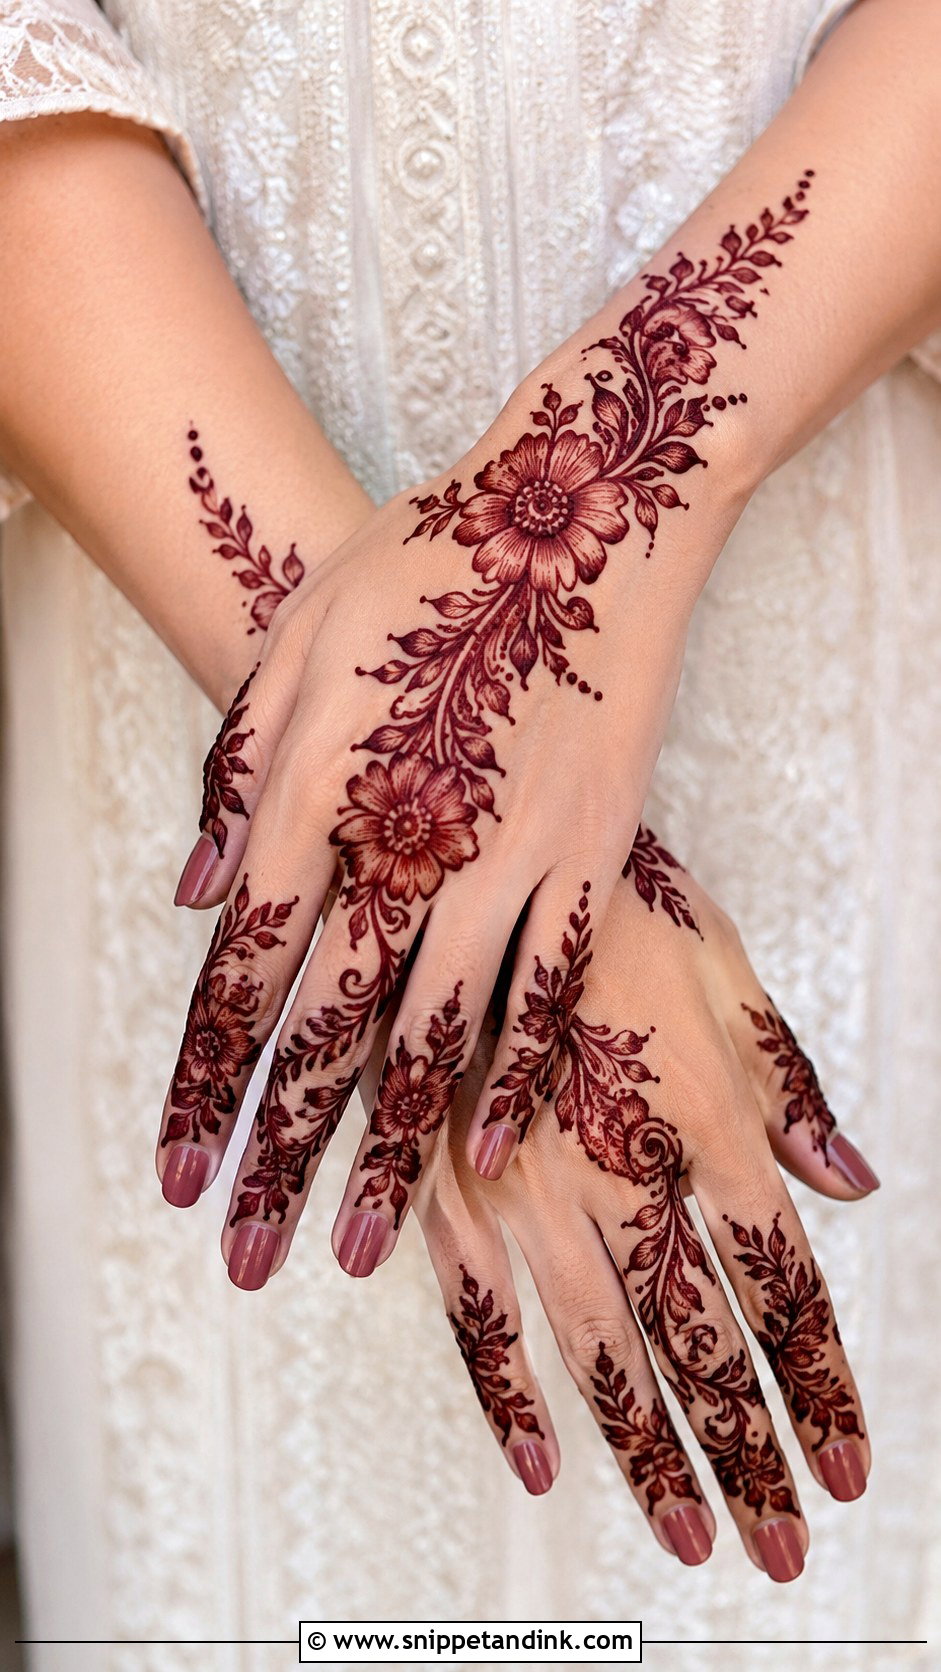
Large roses at the center or along a diagonal from wrist to fingers, shaded petals, leaves and fine vines, with rosebuds or bands on the fingers. Roses need the shading to look round; drawn as flat outlines they read like generic circles. For a bride who’d rather wear florals than dense traditional motifs, a rose layout makes a lighter bridal option. Keep the surrounding detail neat so the blooms stay the focus.
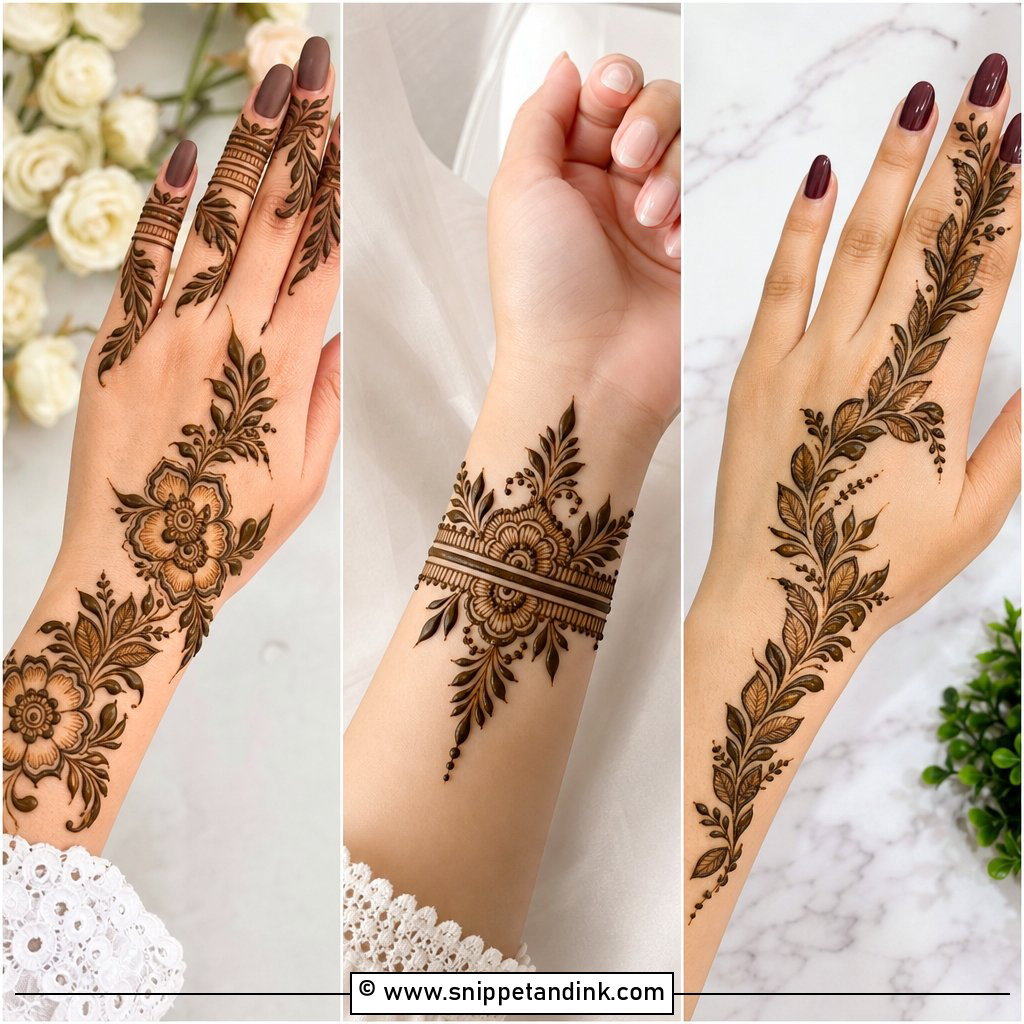
20. Lotus Back Hand Mehndi Design
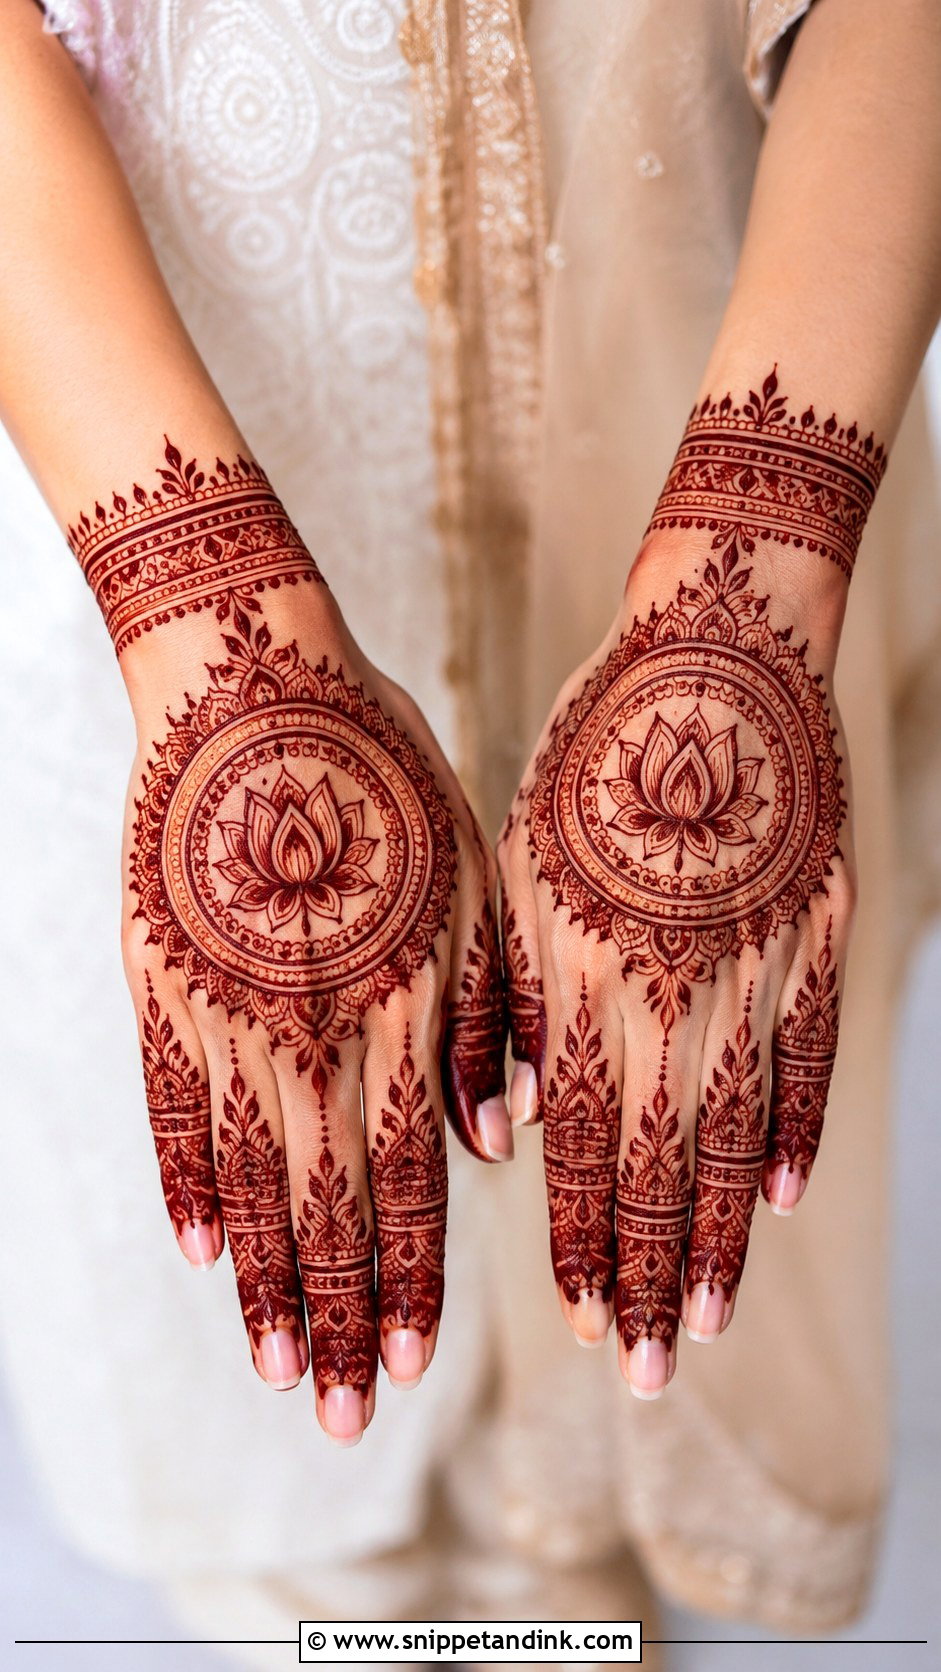
A lotus works as one large central flower, a wrist-to-finger trail or a repeated motif. I count petals and keep them even, because uneven lotus petals are the first thing people notice. Alone it feels minimal; with jaali and paisley it becomes grand enough for a bride. Puja events and family functions are where clients most often ask for it.
21. Leafy Back Hand Mehndi Design
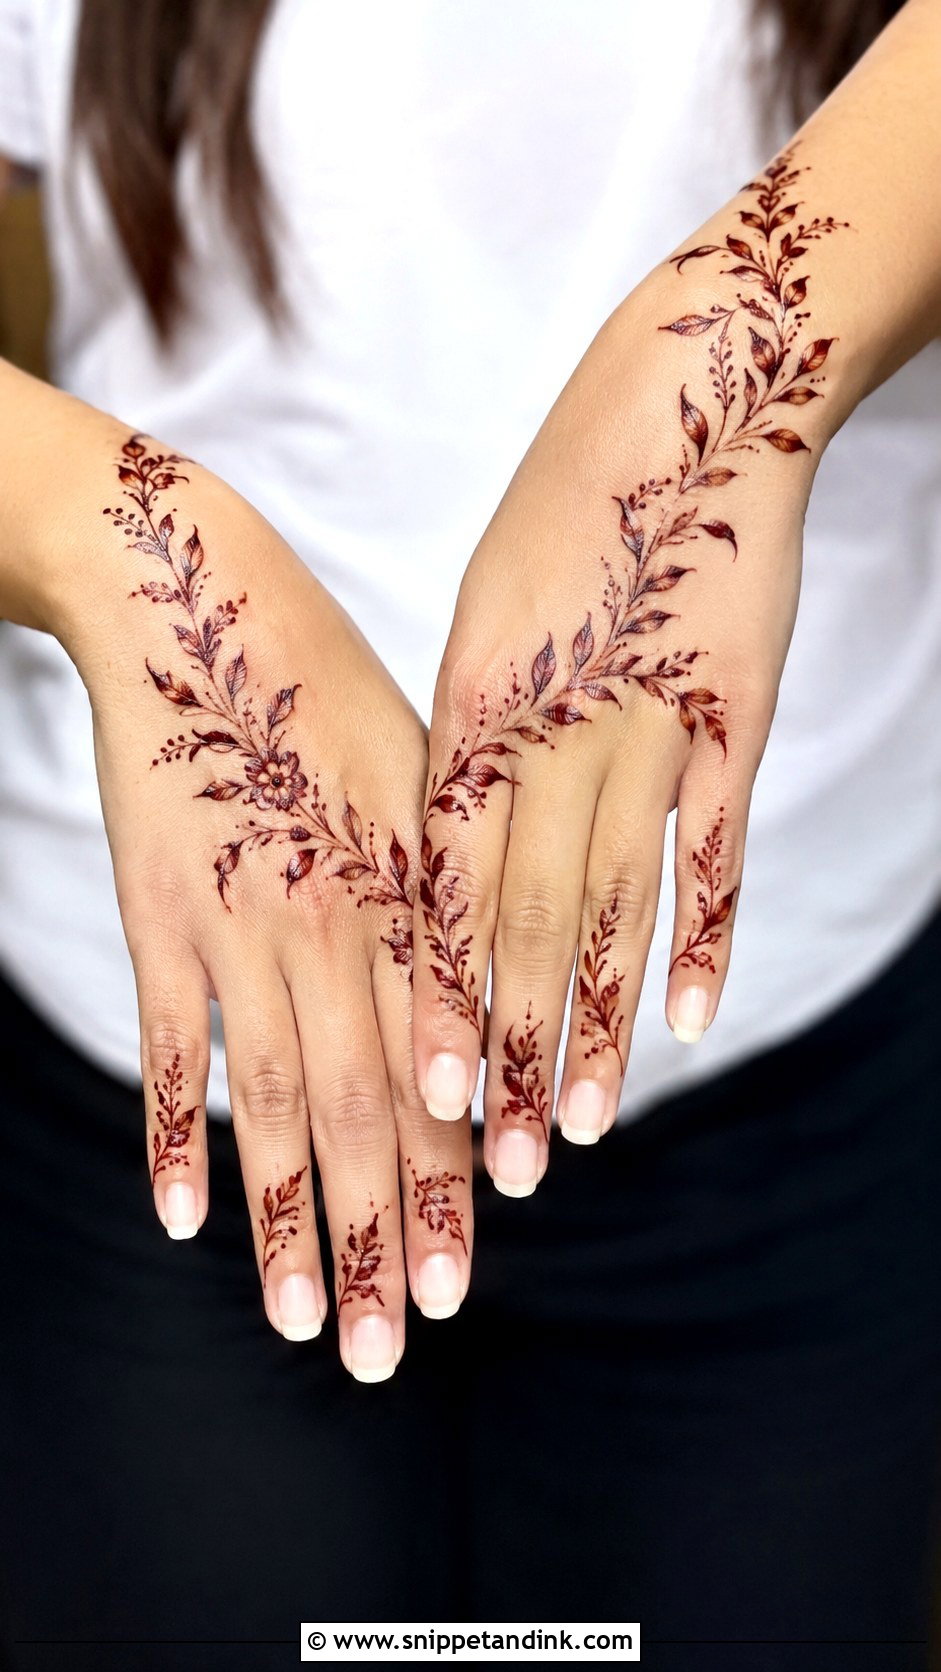
Vines, leafy trails, small branches and dots, either a diagonal to one finger or a soft spread across the center. Leaves are fast to draw, which makes this the design I reach for when there’s a queue of cousins waiting. It’s airy and suits younger wearers and bridesmaids. The fingertips can take a small leaf band so the hand still looks finished.
22. Geometric Back Hand Mehndi Design
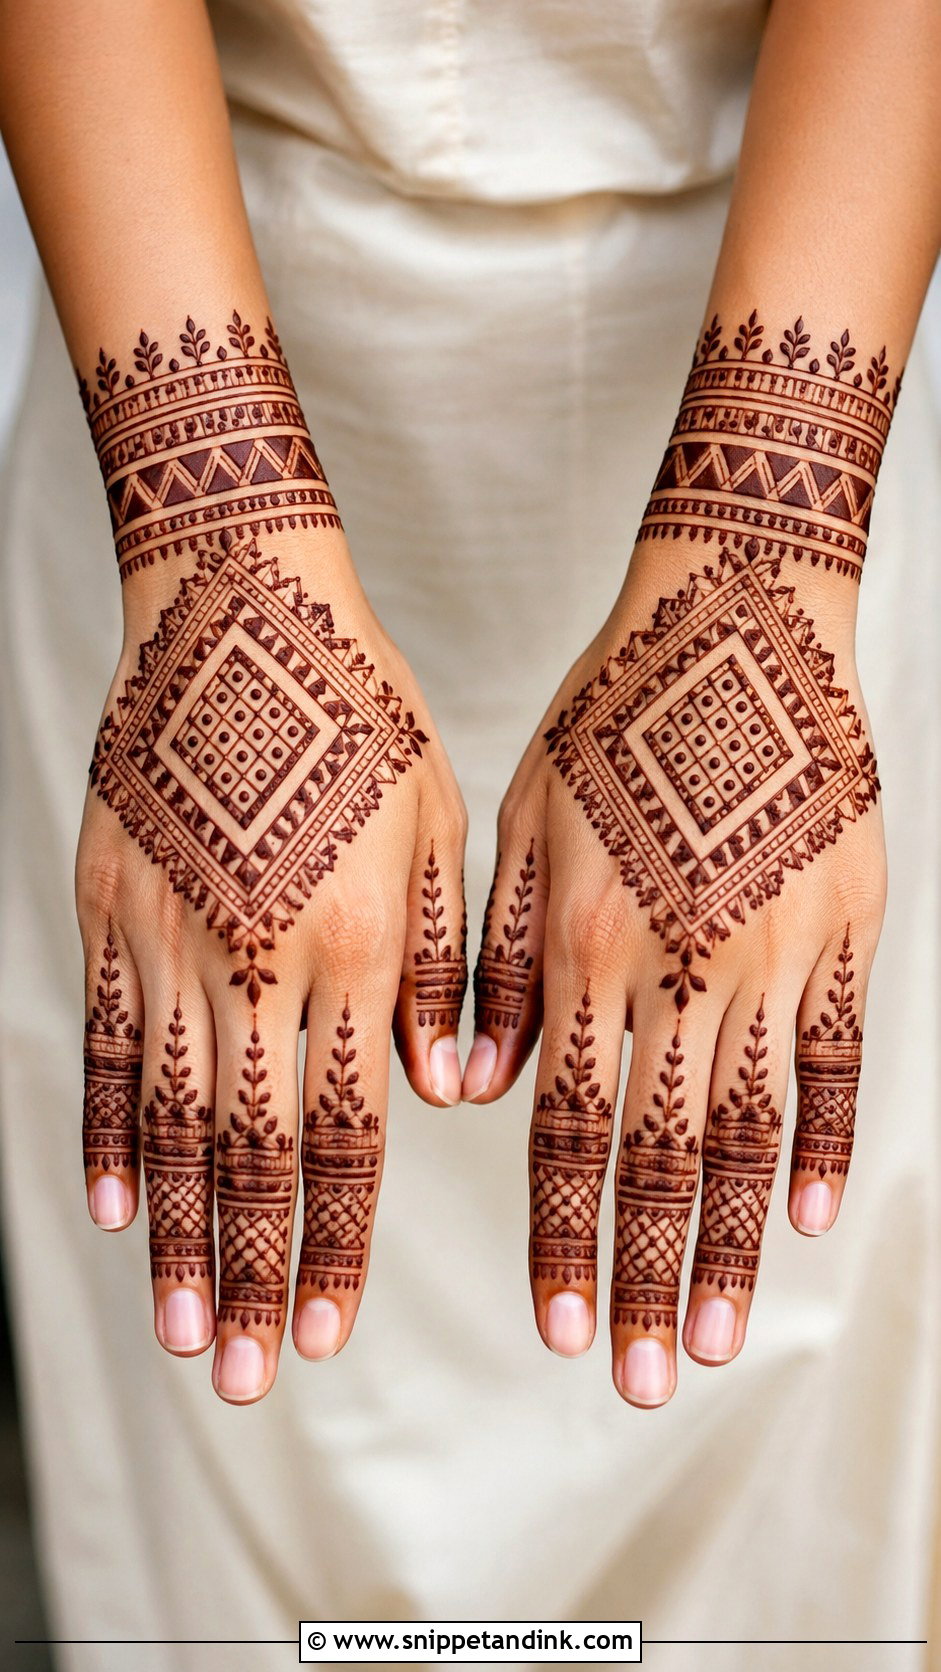
Diamonds, triangles, grids, straight lines and clean borders, either full hand or focused on the center and fingers, with a geometric cuff and matching finger bands. Straight lines on a curved surface are hard; I draw them in short connected strokes rather than one long pull. On short, wide hands I keep the grid lighter so it doesn’t make the hand look boxy. Fusion outfits suit it well.
23. Shaded Back Hand Mehndi Design
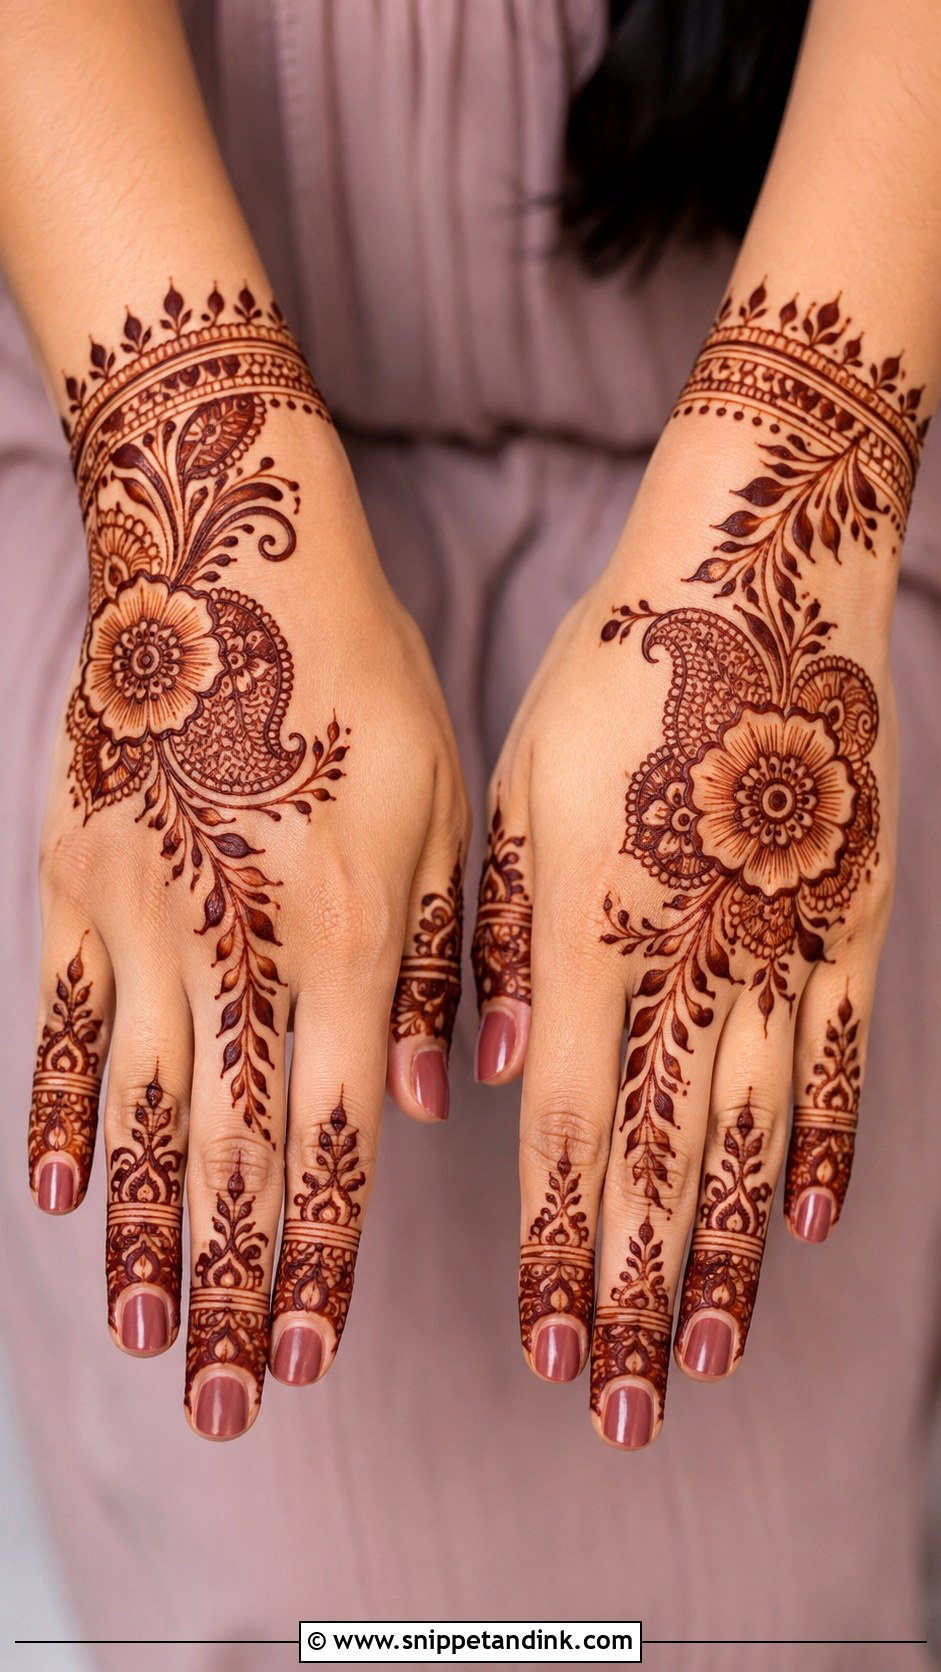
Shading fills flowers, leaves and paisleys with lighter strokes inside dark outlines, so the motif looks full without tiny filler. I build the shade with thin, close lines instead of a thick layer of paste, which tends to crack and flake off before it can stain. A shaded floral trail from wrist to fingers is the classic Arabic or Indo-Arabic version. The contrast shows up well on camera once the stain develops.
24. Half Hand Back Mehndi Design
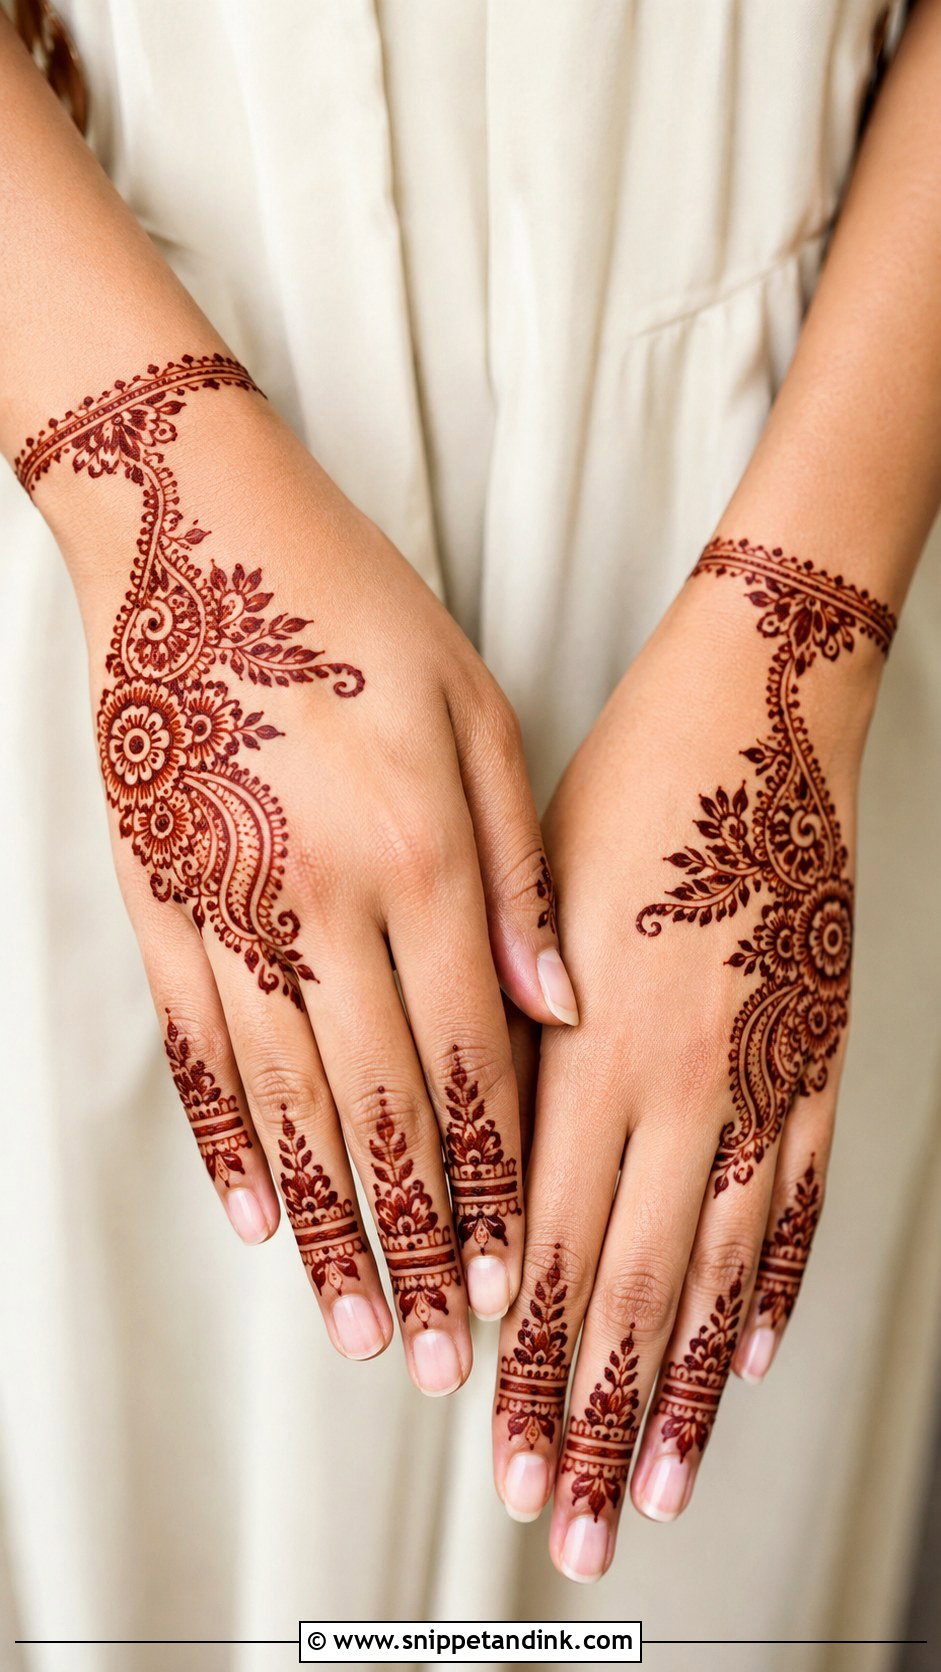
One side of the back hand, the lower half or a diagonal section, with flowers, paisleys, vines, jaali or a bracelet in a tidy layout and the rest left bare. The bare area makes the motifs crisper. Where it goes wrong is the edge: an uneven boundary looks like I ran out of time, so I finish it with a clear border. It’s the right size for a short salon slot.
25. Back Hand Mehndi Design For Eid
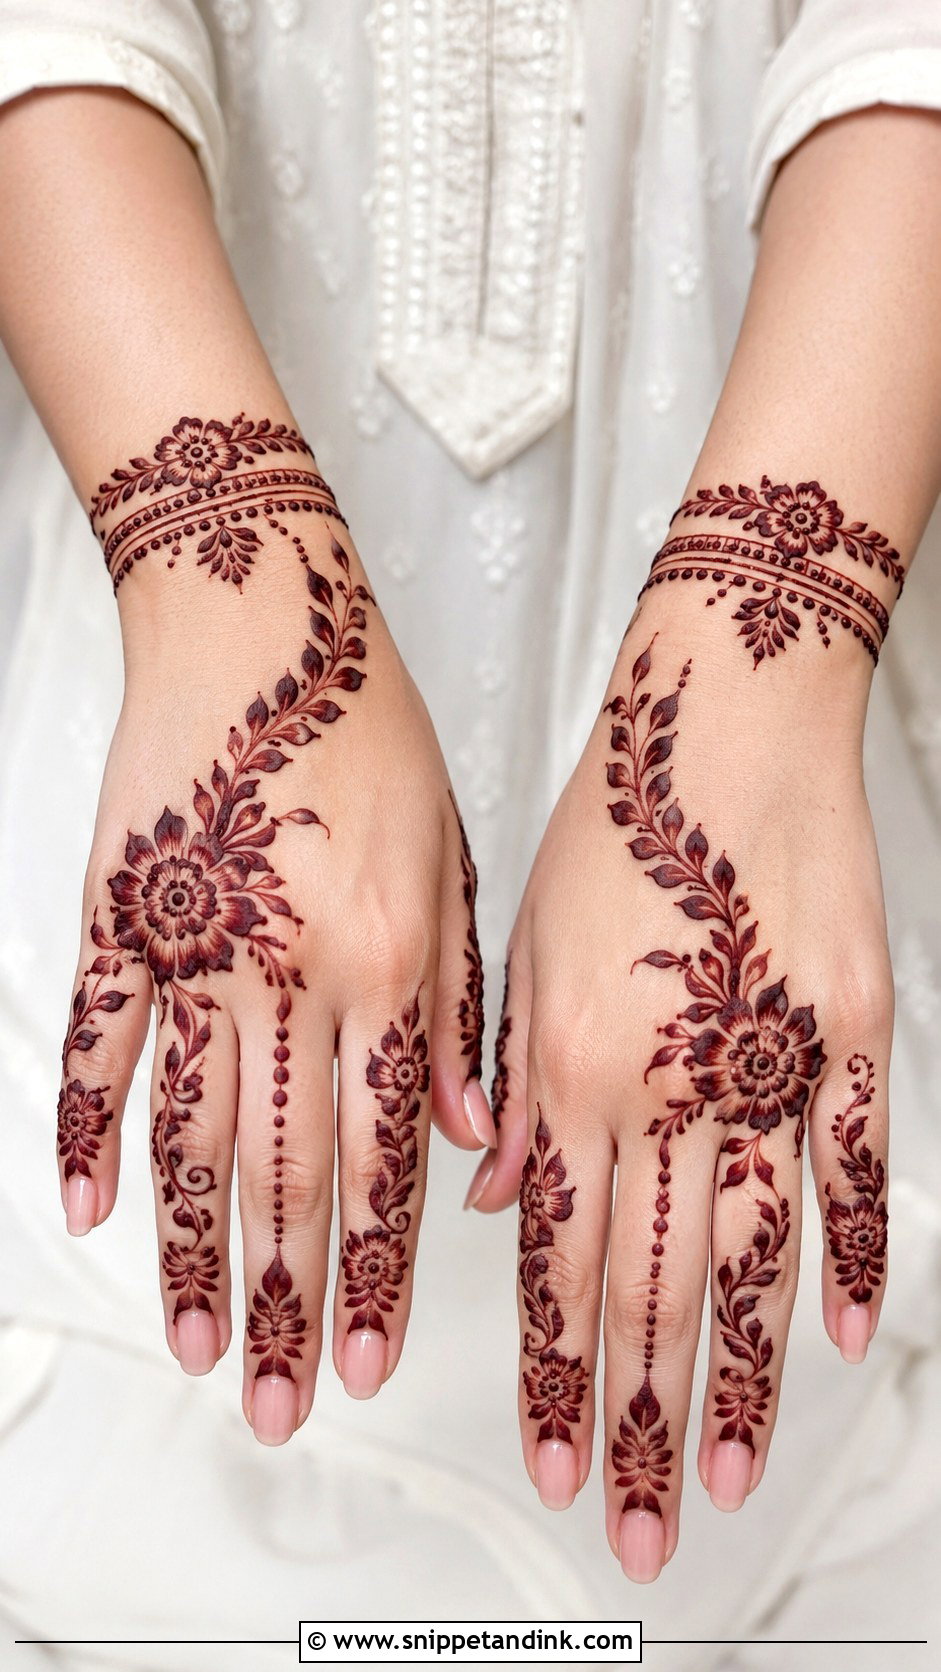
On chaand raat, everyone wants henna and nobody has much time, so I steer Eid clients toward Arabic floral trails, Gulf flowers, leafy vines, mandalas or bracelet designs that look rich in under half an hour. Applied the night before, the stain will still be orange the next morning and deepen through the day, so dark outlines matter more than fine filler. A bracelet layout looks good with festive bangles.
26. Back Hand Mehndi Design For Wedding
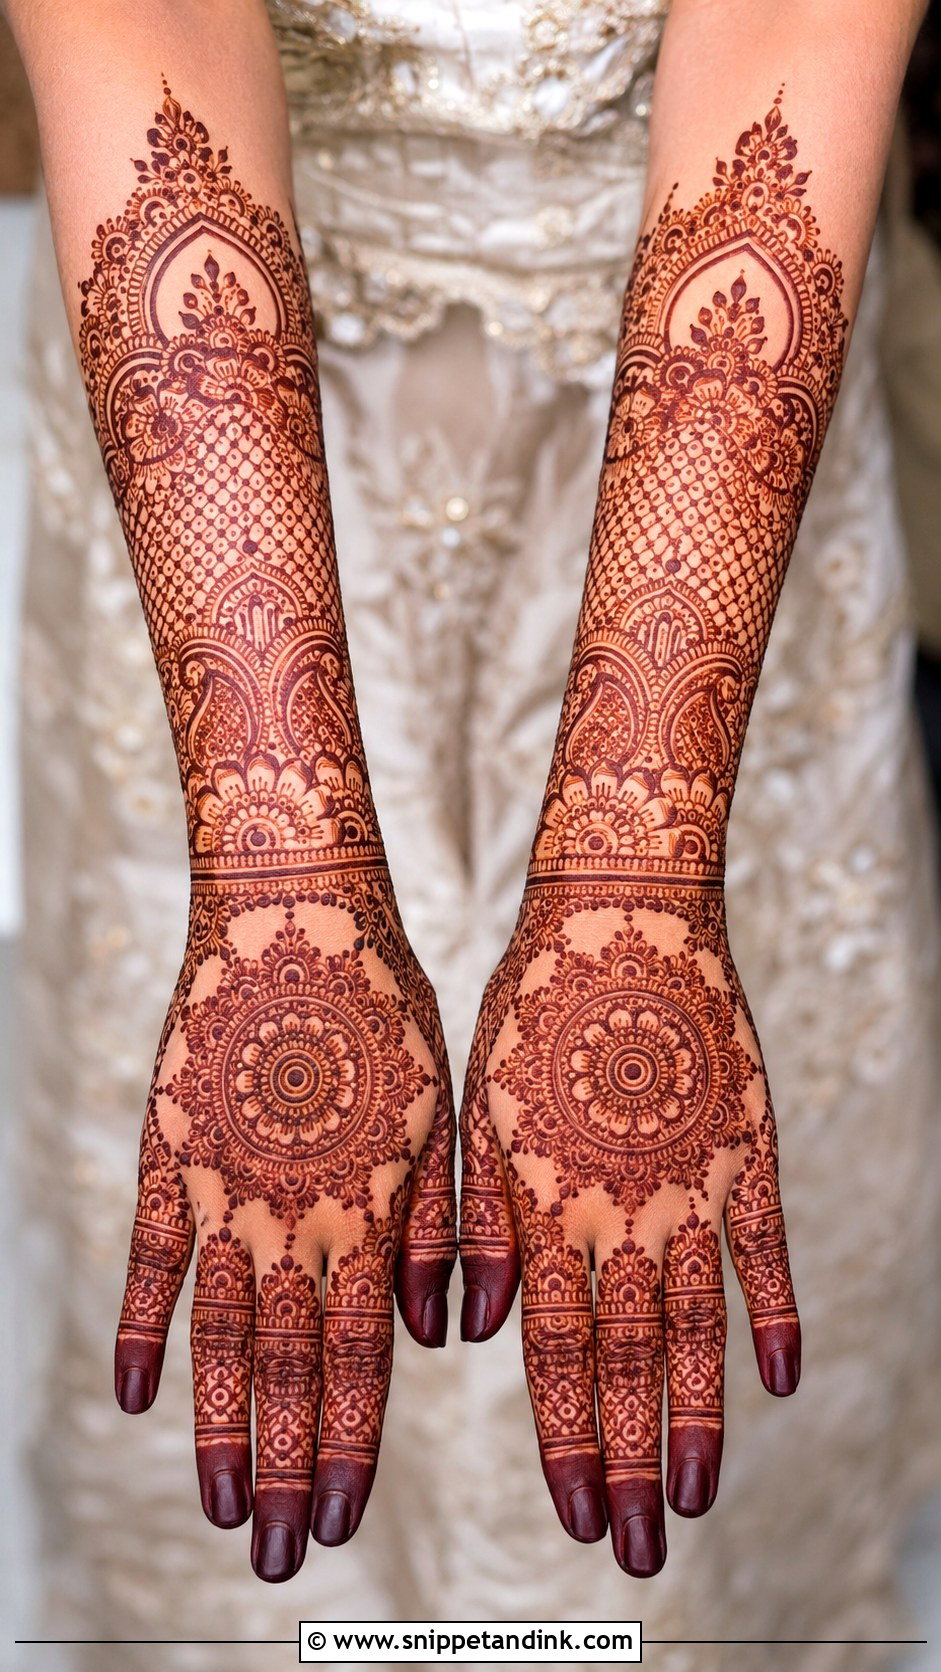
Guests often pick Arabic trails, mandalas, floral cuffs or Indo-Arabic work; brides and close family go heavier with jaali, paisleys, peacocks and full coverage. Match the design to the function. A sangeet look can be playful and modern, while the ceremony usually calls for something traditional. Finish the fingers neatly; they’re what shows when you hold the garland or pass the sweets.
27. Back Hand Mehndi Design For Engagement
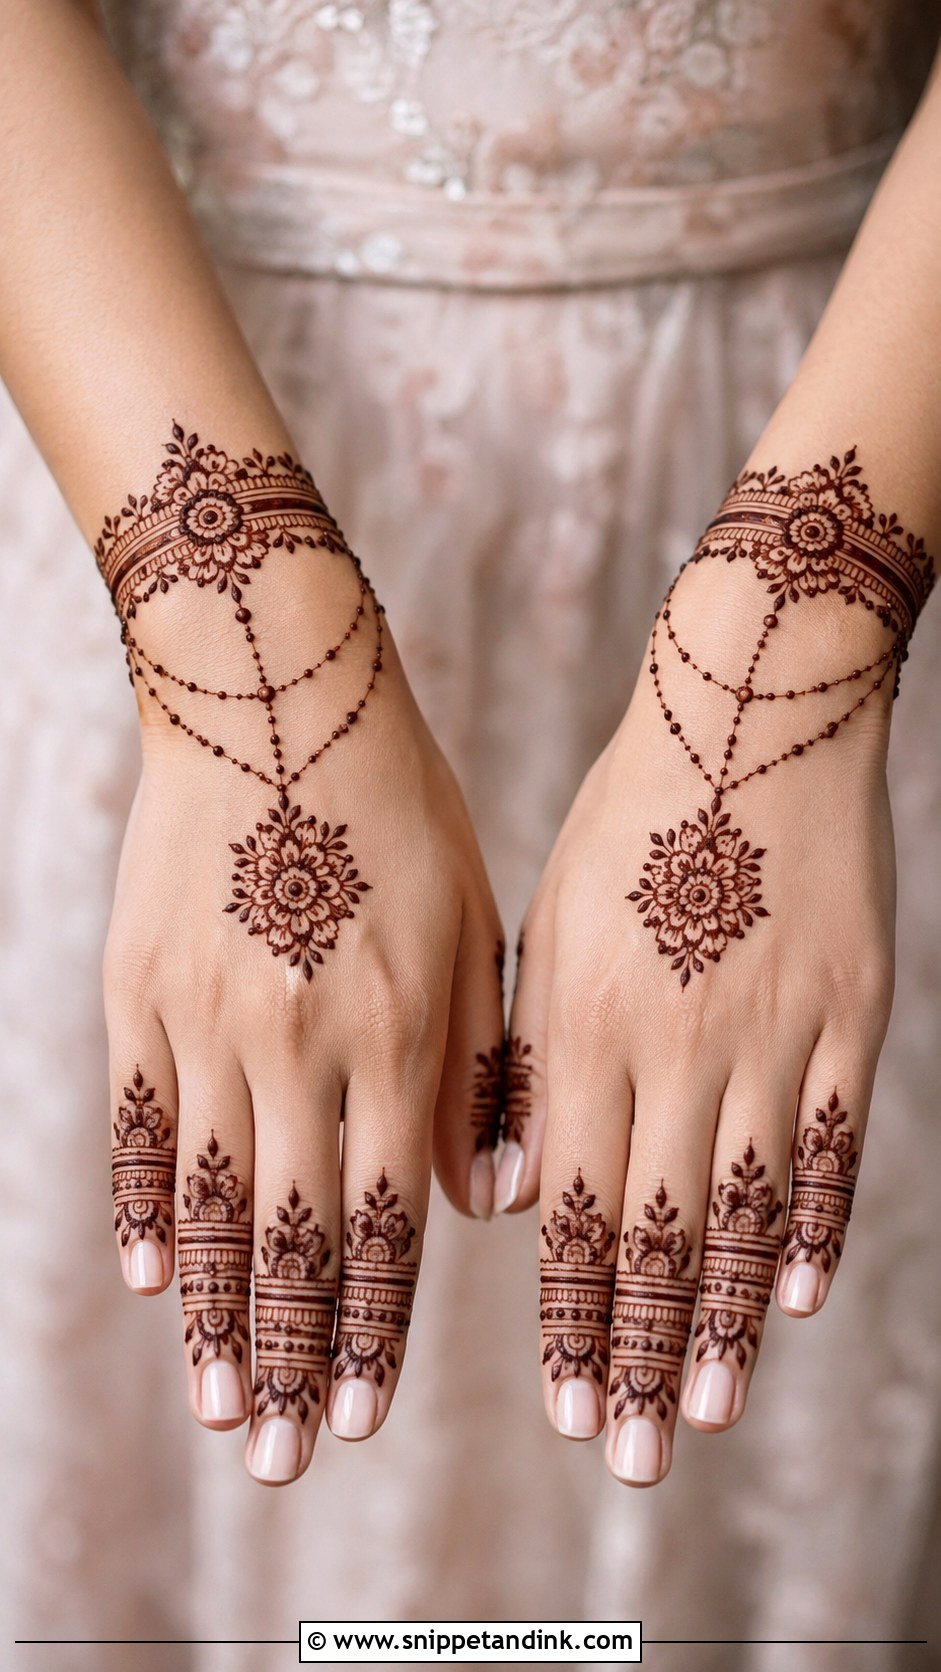
Engagement photos are mostly close-ups of the ring hand, so I keep the area around the ring finger clean and let the design build toward it rather than over it. Ring chains, a light floral vine into a wrist bracelet, or a small mandala with finger bands all work. Crowd the base of that finger and the ring disappears. A balanced engagement mehndi design leaves the jewelry visible and the hand clearly decorated.
28. Back Hand Mehndi Design For Bridesmaid
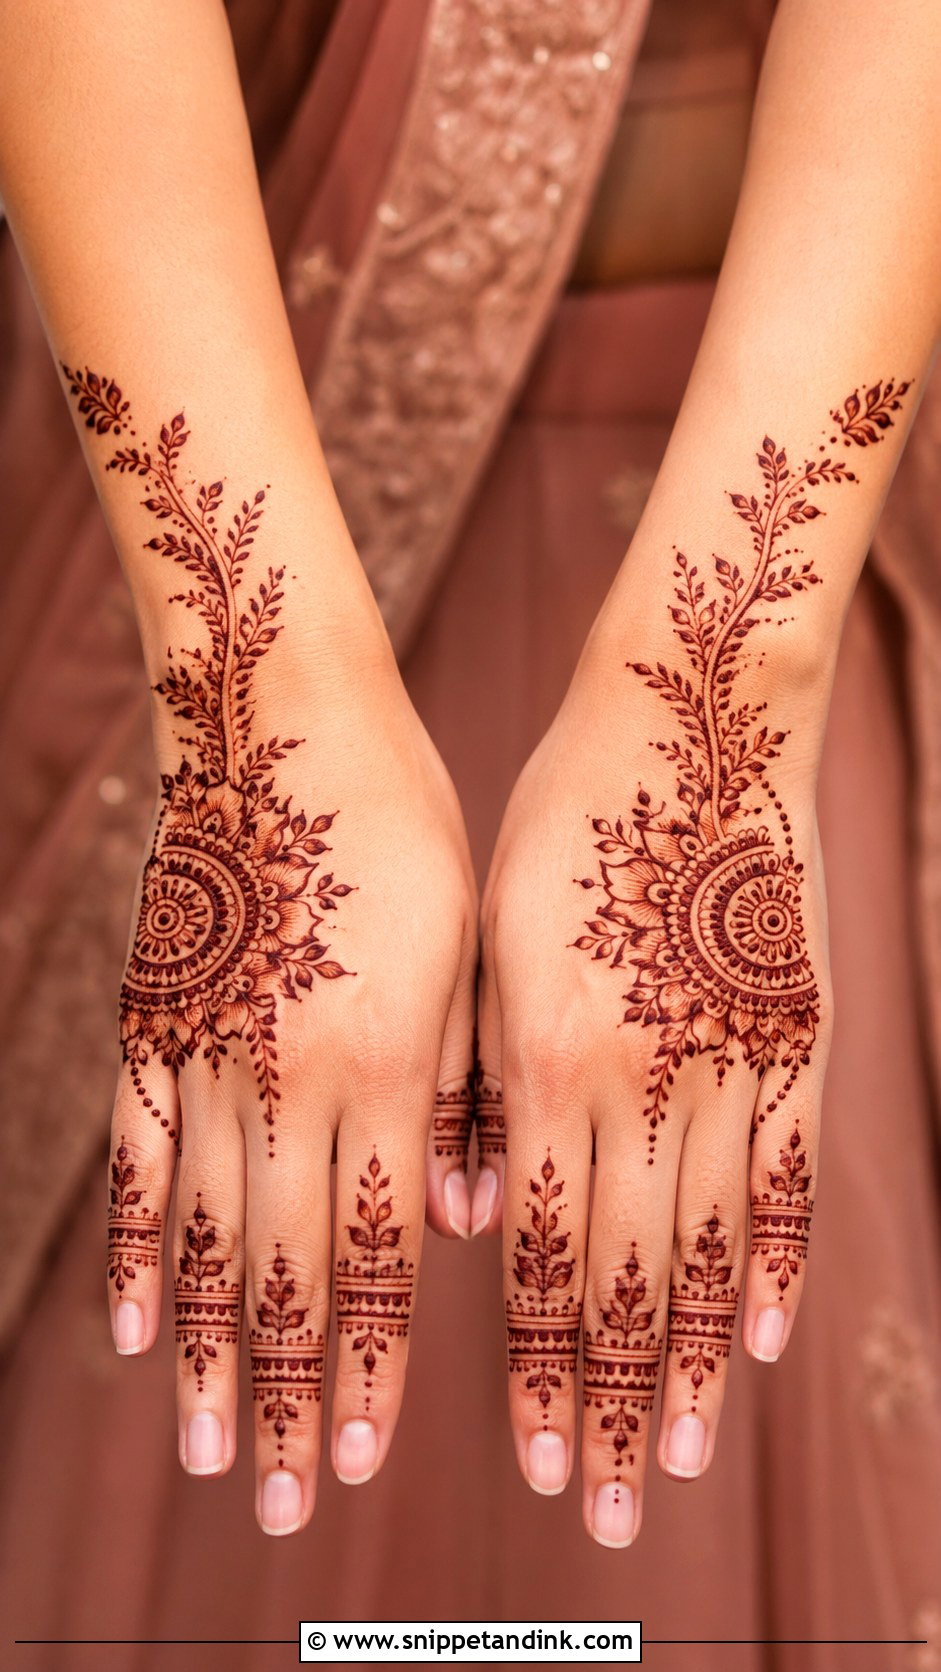
Bridesmaids need something festive that stays out of the bride’s lane. Indo-Arabic florals, bracelets, mandala centers, leafy trails and half-hand designs all do that. A trick I use for a group is to give everyone the same wrist cuff but a different center motif, so they look coordinated in photos without being identical. The design has to be dry quickly enough for dancing.
29. Back Hand Mehndi Design For Beginners
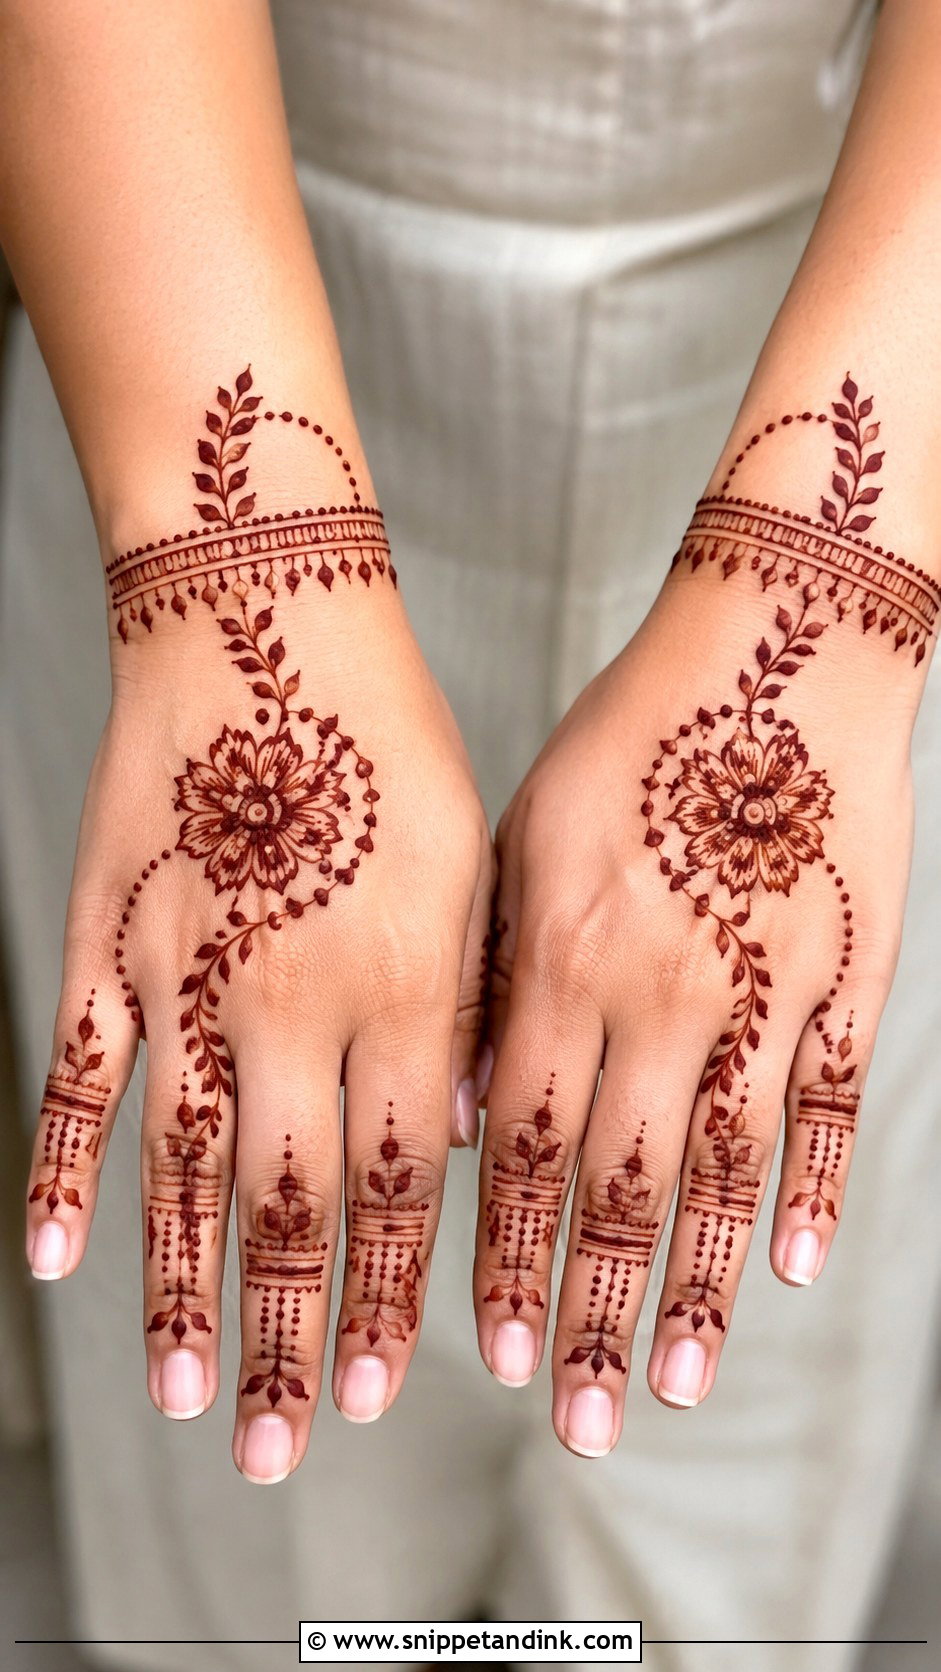
If you’re learning, start with a central flower, a simple mandala, a leafy vine or a bracelet cuff, then add dots, small leaves and finger bands. Skip tiny details at first; they blur. A diagonal Arabic trail is the easiest beginner layout because it doesn’t need perfect symmetry. Practice steady cone pressure on paper first, and keep the cone at a low angle to the skin.
30. Easy Back Hand Mehndi Design
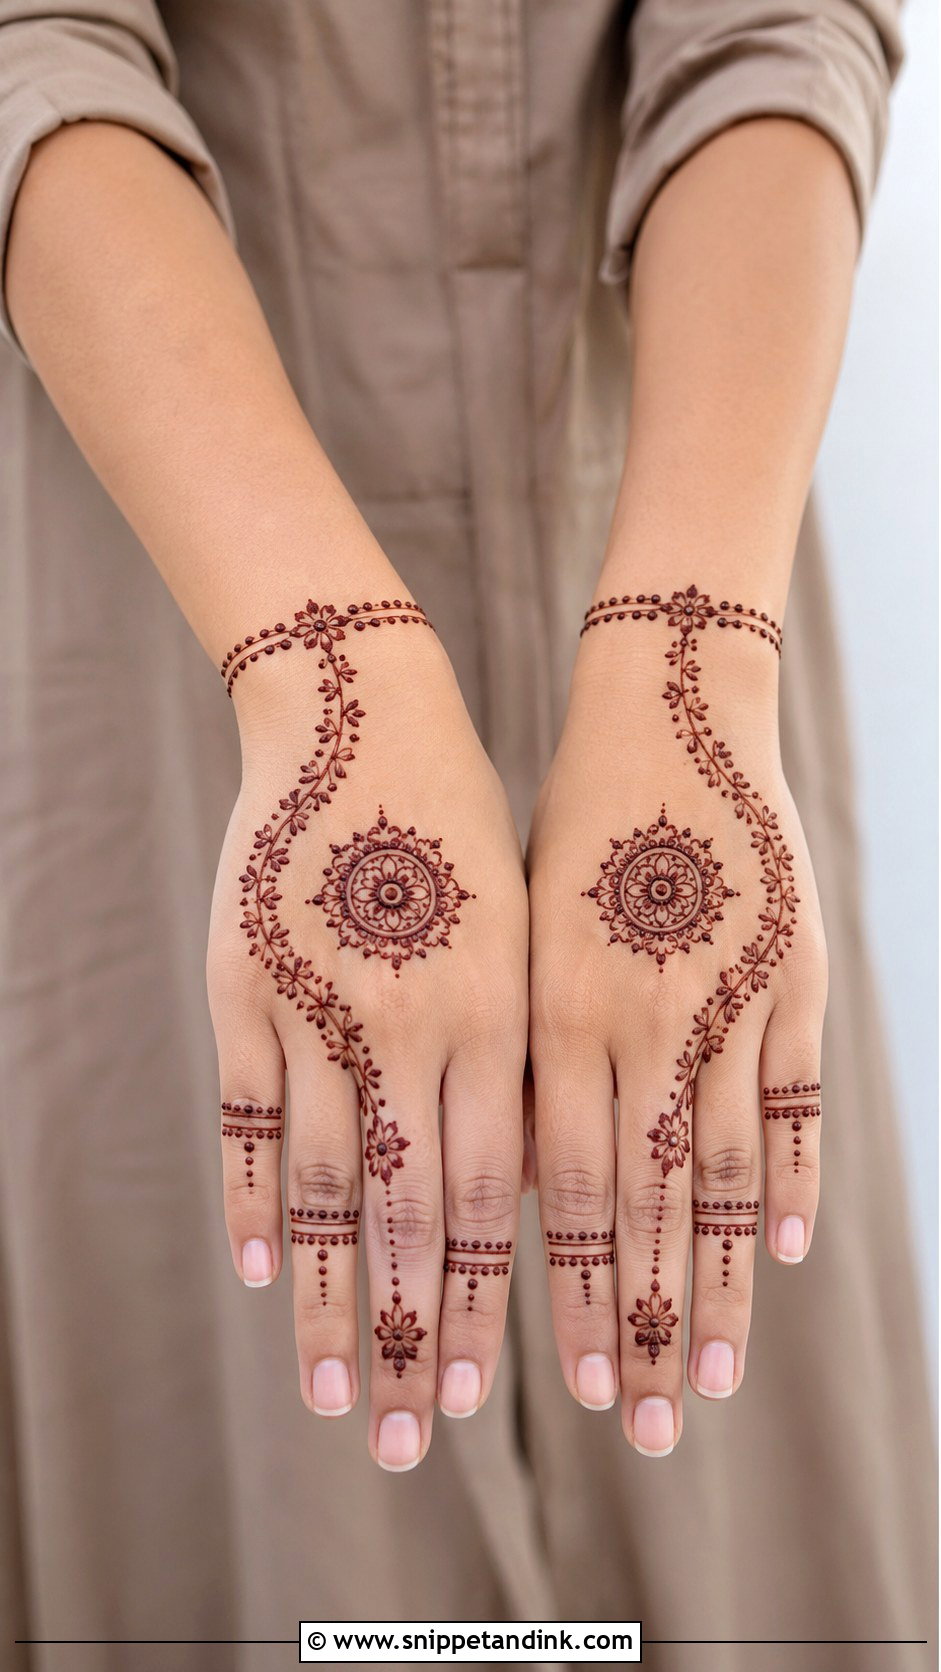
Quick application, neat result: a small center mandala, simple finger lines and a dotted wrist bracelet, or a single floral trail toward one finger. No shading and no dense filling. These work for last-minute events and for doing henna at home. Choose larger motifs and fewer fillers; it’s faster, and big shapes are more forgiving if your hand wobbles.
31. Stylish Back Hand Mehndi Design
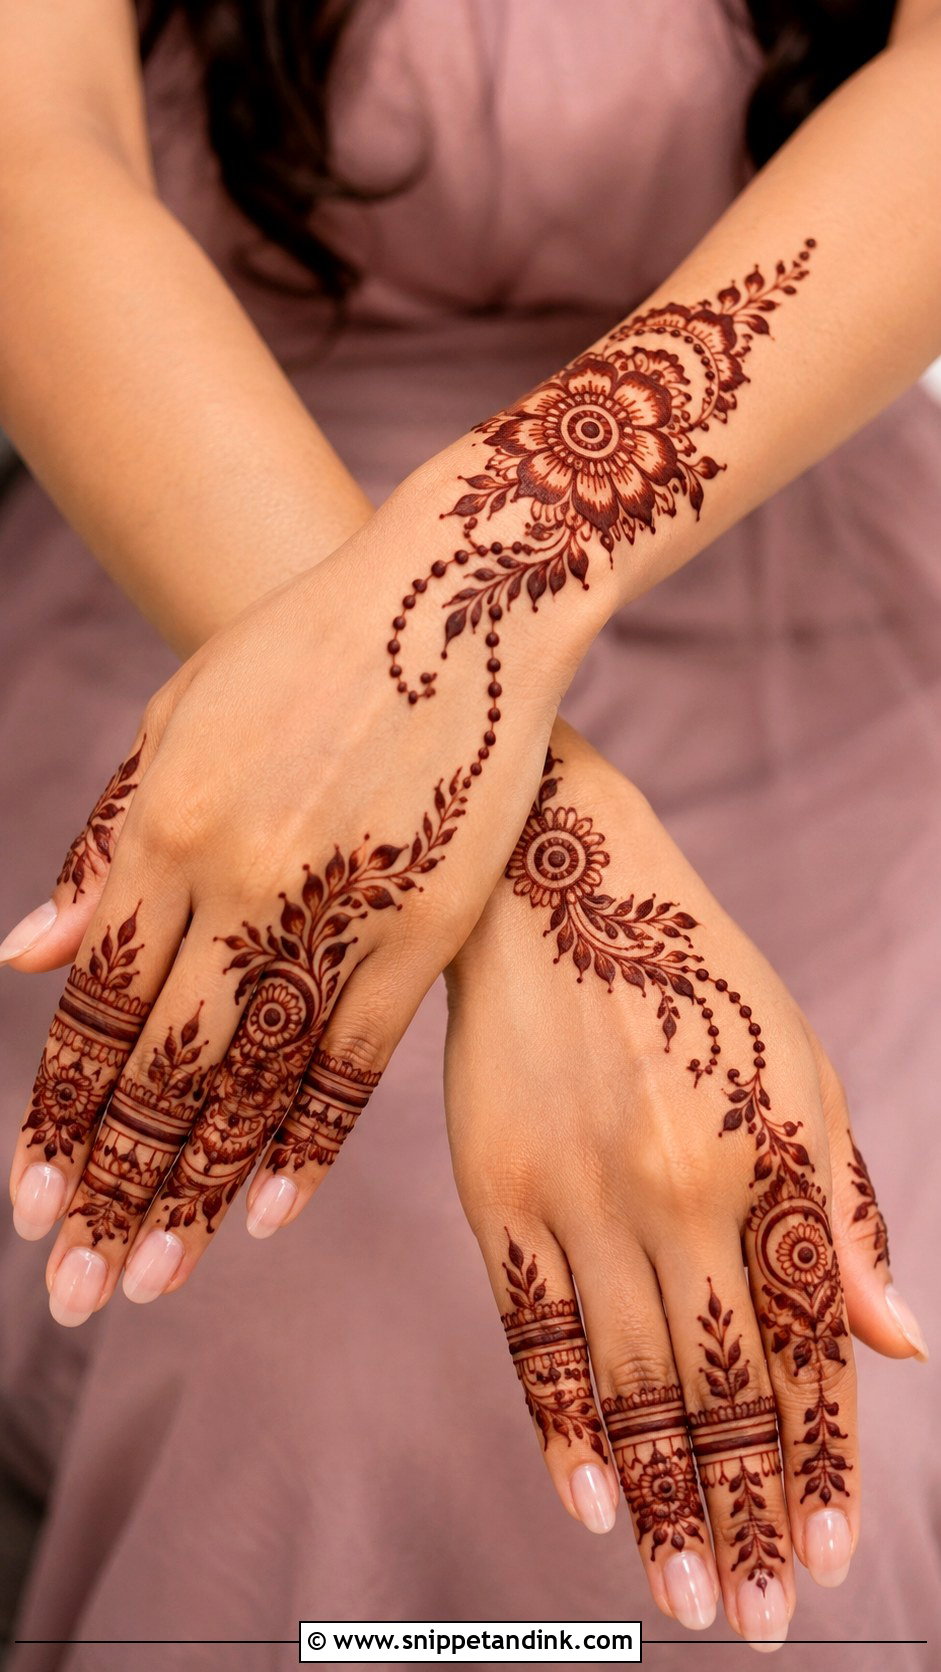
Stylish usually means a bold flower near the wrist, a chain running to the fingers and slim bands on each finger, or a half-mandala with leafy lines and open space. The design avoids clutter and leans on shape. I check it from the side as well as from above, since people see your hand at angles, not flat. Ring-like finger details and a bracelet finish make it look complete.
32. Heavy Back Hand Mehndi Design
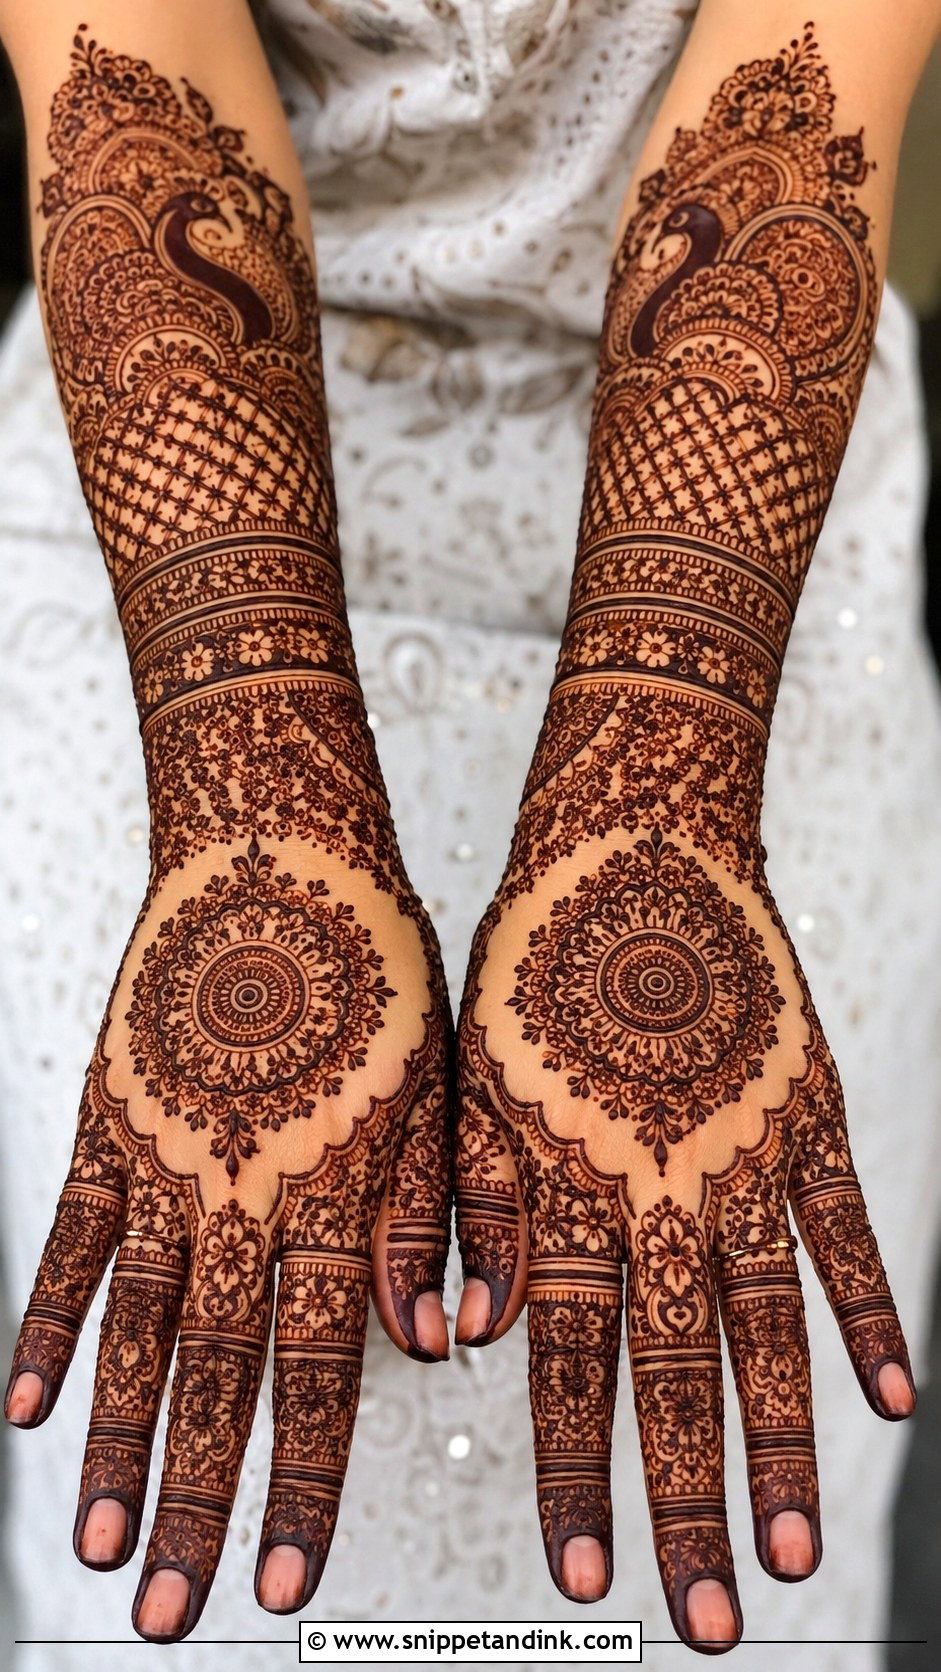
Full coverage with mandalas, paisleys, peacocks, florals, jaali and dense finger work, sometimes extending past the wrist into the forearm with layered bands. Even in heavy work I keep small gaps between patterns; without them the stain darkens into a solid patch and nobody can see the motifs. Plan for a long sitting. It’s made for brides, close family and major festivals.
33. Back Hand Mehndi Design With Name
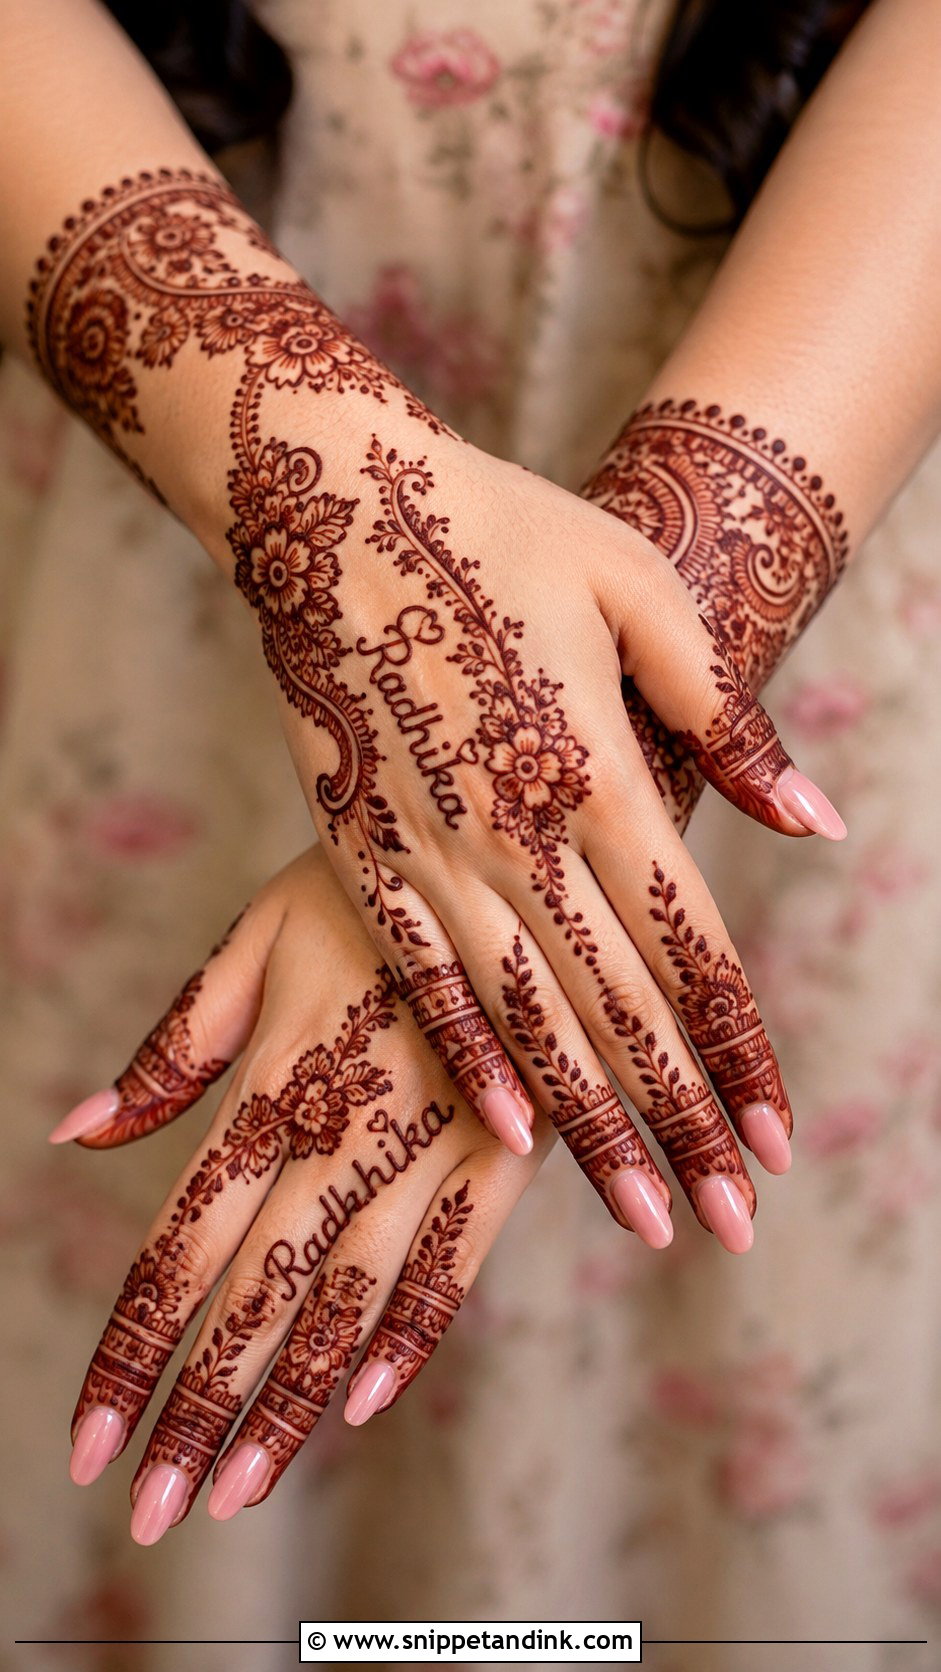
Names or initials can be hidden in a floral trail, written near the wrist, placed inside a mandala or tucked into a paisley. I write the letters at least as tall as a fingernail, because lettering smaller than that fills in once the stain develops and becomes unreadable. The surrounding florals and dots should frame the name, not compete with it. If it’s meant to be a hidden game for the groom, tell your artist so she can disguise it properly.
34. Back Hand Mehndi Design With Bangles
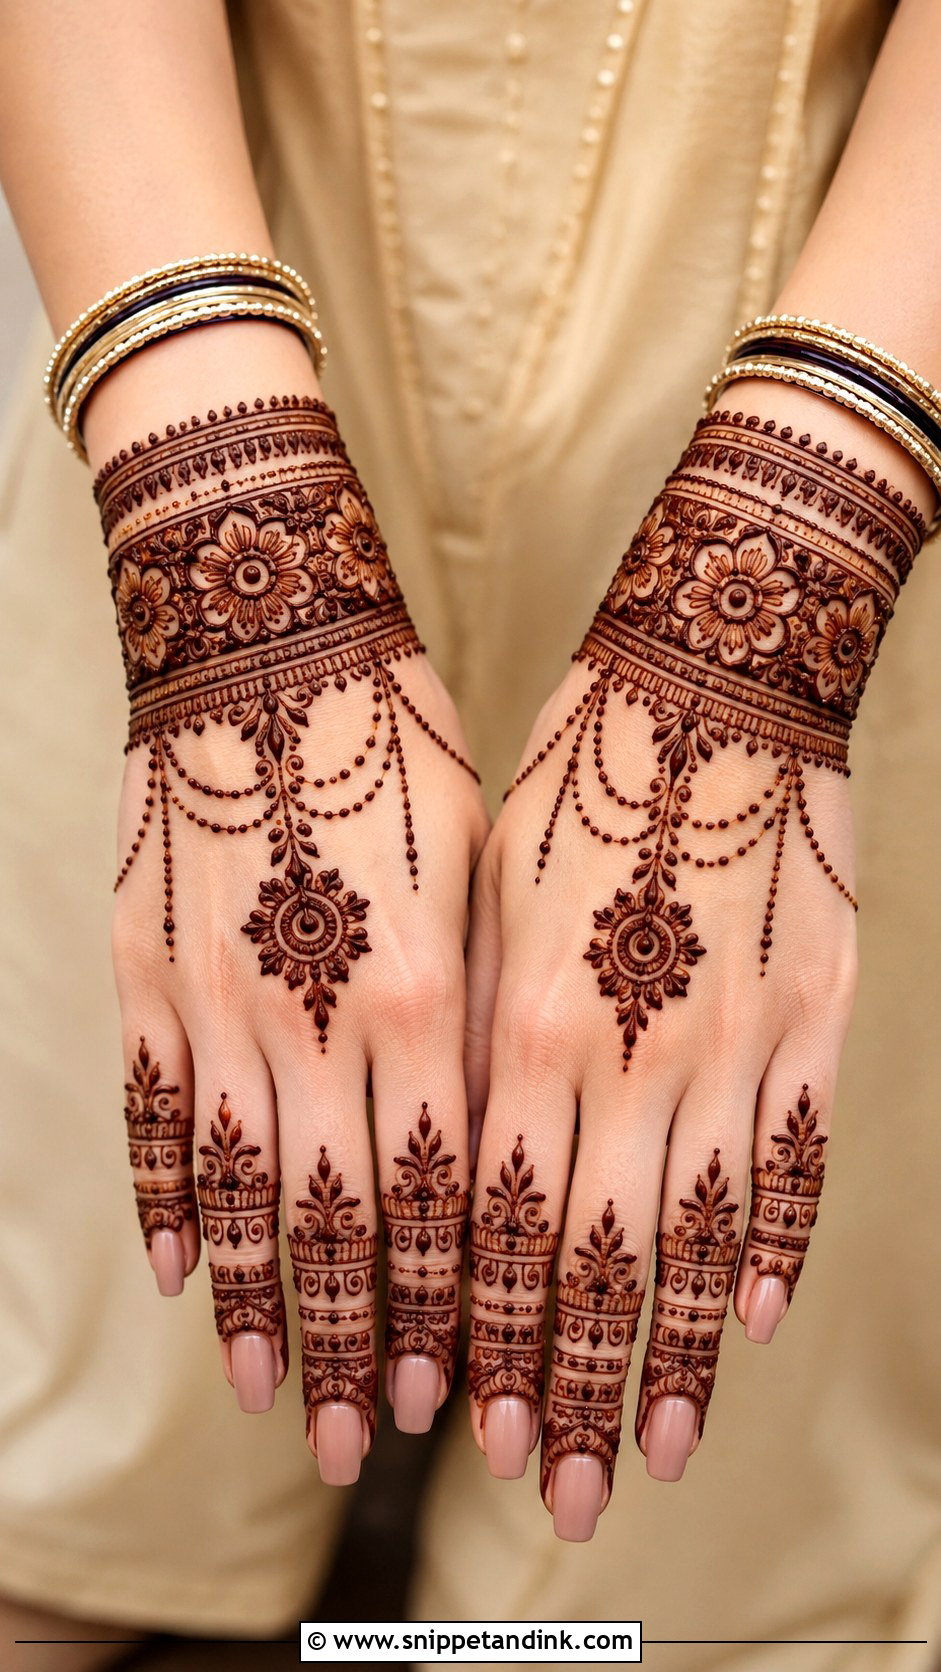
If you’re wearing chooda or a stack of glass bangles, the design has to be planned around them. I ask clients to bring their bangles or show me how high they sit, then place the bracelet cuff and hanging dots just above that line so the henna stays visible. From the wrist, a mandala, flower or paisley charm can lead into the hand, with light fingers keeping the focus at the wrist. Bangles rub, so expect the band under them to fade a little faster.
35. Back Hand Mehndi Design With Negative Space
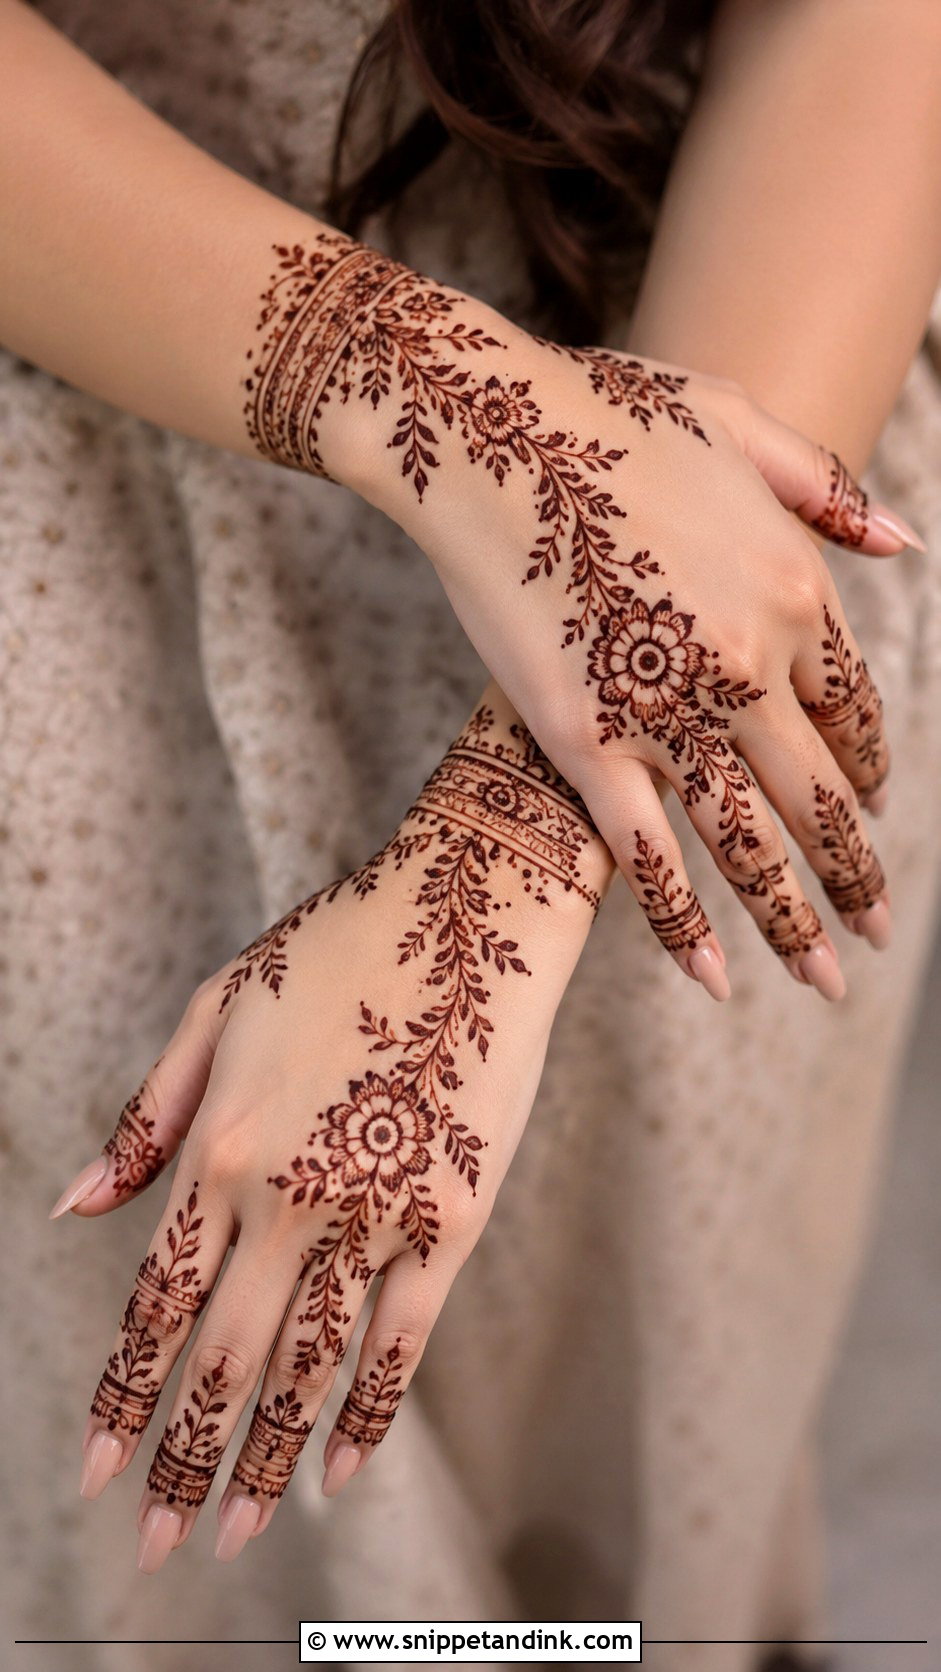
Here the empty skin is part of the pattern: flowers, mandalas, vines or geometric shapes with clear gaps around them, typical of Arabic, Gulf and minimalist work. A large floral trail with open spaces can look more modern than a filled hand. Negative space designs also dry faster and are less likely to smudge, since there’s simply less paste on the skin.
Why the Back of the Hand Fades First, and How to Slow It
Back-hand henna lives a harder life than palm henna. The skin is thinner, so the stain starts a shade lighter, and it takes the brunt of washing, hand sanitizer, sleeves and bangles. Natural henna fades as the top layer of skin naturally sheds, usually over one to three weeks, and the back of the hand tends to go first while the palm holds on.
- Leave the paste on for at least six hours, longer if you can sleep in it. Back-hand skin needs the extra time more than the palm does.
- Scrape the dry paste off. Keep water off the design for the rest of that day.
- Wear rubber gloves for washing dishes, and go easy on alcohol sanitizer, which dries the skin and speeds up flaking.
- Rub a little natural oil or balm over the design before showering and before you put bangles on, to cut down on friction.
- Skip scrubs and exfoliating washes on your hands until after the event you did it for.
One honest warning: any cone or salon offering a black design that’s dark the moment it comes off isn’t using pure henna. Natural henna always starts orange and darkens to brown or maroon. Those instant black products can contain a hair-dye chemical that causes blistering and lasting skin sensitivity, so pass on them, especially for children.
Fingertips to Wrist: Read the Whole Hand Before You Commit
Start from the occasion and the time you have. Simple, minimal and easy Arabic designs suit quick events. Bridal, Indian, peacock, jaali and heavy layouts belong to weddings and big festivals. Modern, jewelry, geometric and negative-space designs work when you want something current. Whatever you choose from these back hand designs, check three things before the cone touches skin: that every finger is finished, that the wrist edge is closed, and that there’s enough space between motifs for the stain to stay readable.
You'll Like These Ideas:


Leave a Reply