
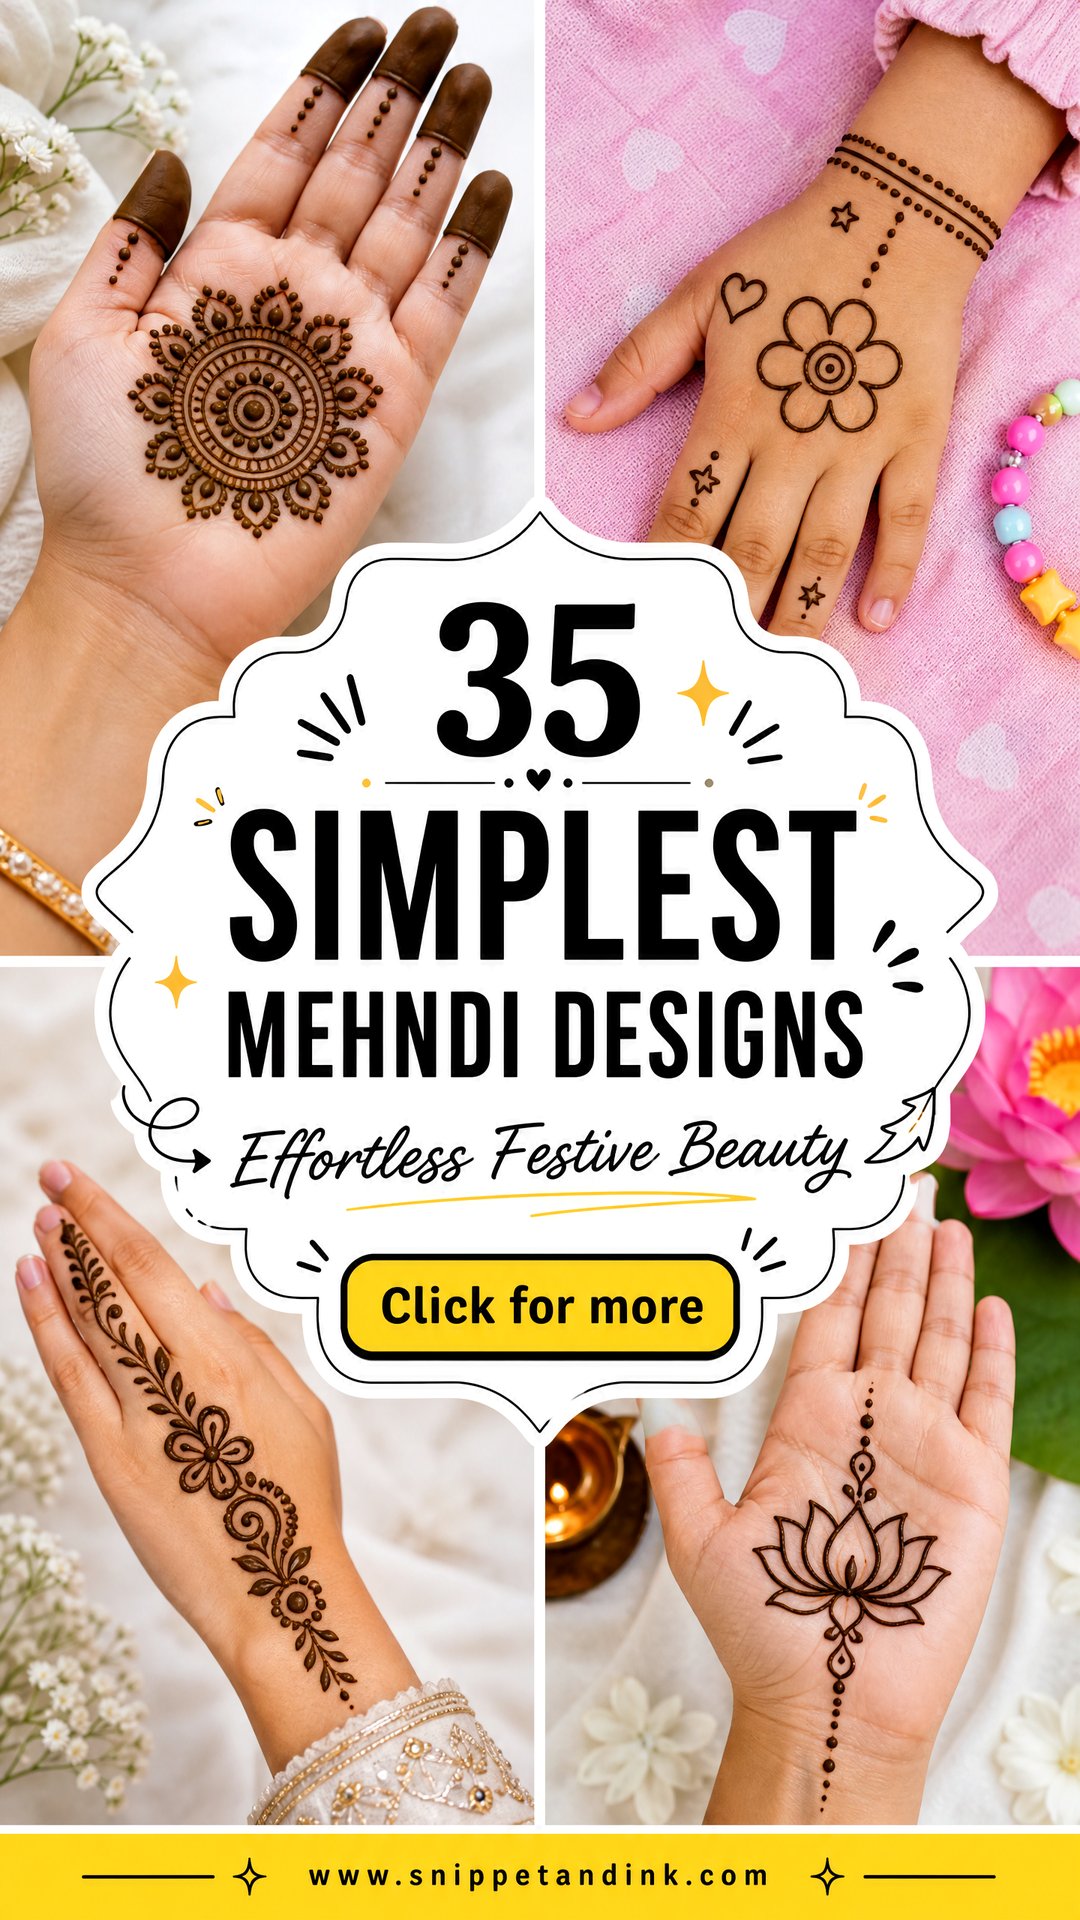
Half the people who ask me for “something simple” are worried a light design will look unfinished. It won’t, if the spacing is planned. A single bold trail with clear skin around it often reads better from across a room than a crowded hand, and it stains more evenly too. These 35 easy layouts cover palms, back hands, wrists and fingers, from Arabic trails and small mandalas to jaali, bracelets and minimal finger looks. I’ve added notes on where each one stains darkest, how long it takes and who it suits, so you can pick one for Eid, a sangeet, a family dinner or your own first attempt with a cone.
Paste Consistency Matters More Than the Pattern
Simple designs show every line, so the paste has to flow cleanly. When a beginner tells me her lines keep breaking or blobbing, the cone is usually the problem, not her hand.
- The paste should be smooth and stringy, about the thickness of toothpaste. Too thick and it breaks; too thin and it spreads into blobs.
- Strain it through fine cloth or a stocking before filling the cone, since a single grain of sand or leaf can block the tip.
- Use natural henna. It should smell earthy and leave an orange stain at first. If a paste stains black within an hour, it likely contains chemicals, and I’d never put it on skin.
- Fresh paste works best. I mix in small batches and freeze extra cones, which keep for months.
If you’re new, do a patch test on your inner arm a day ahead. Natural henna rarely causes reactions, but some people react to added essential oils.
Planning the layout before you draw
I always place the largest shape first, then the connecting lines, then the small details. Draw the biggest flower or mandala, link it with vines, and fill the fingers last. That way the design stays balanced, and if you run out of time, it still looks finished.
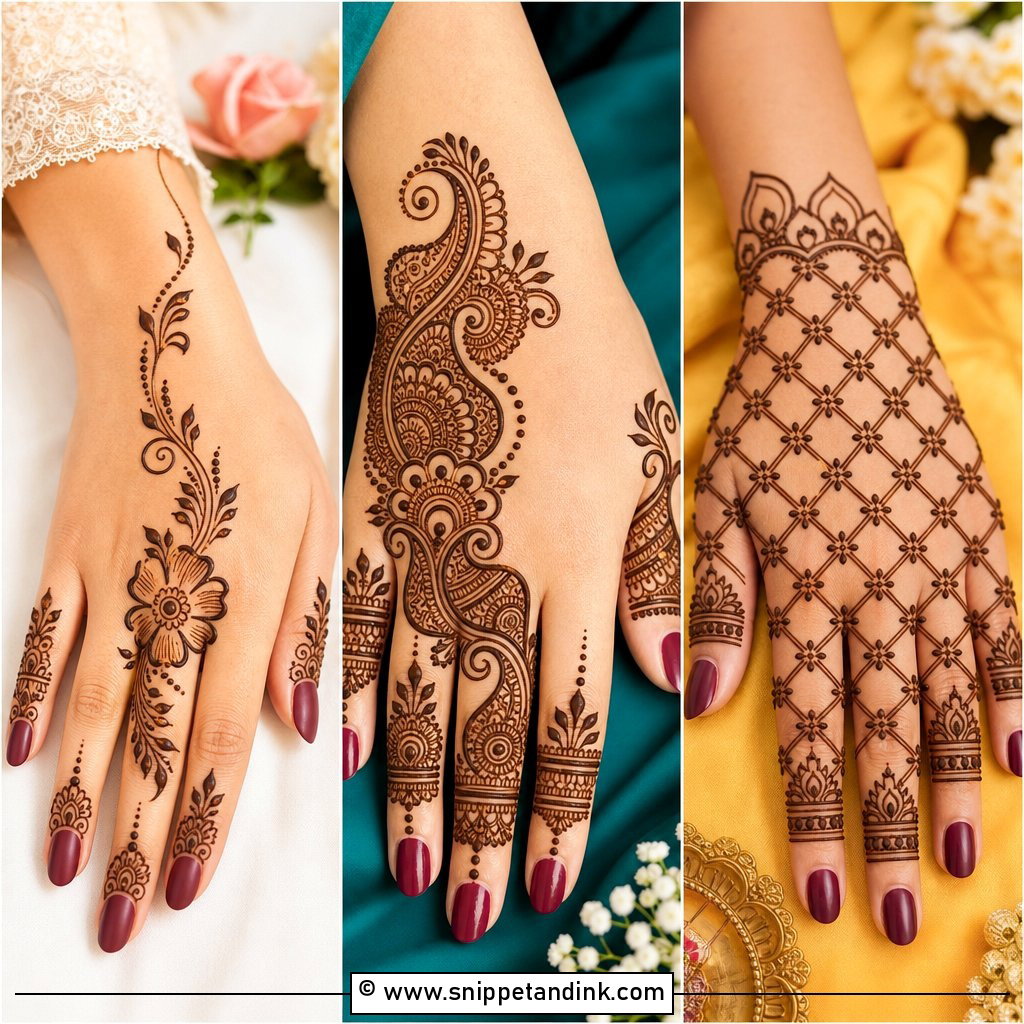
1. Simple Arabic Mehndi Design
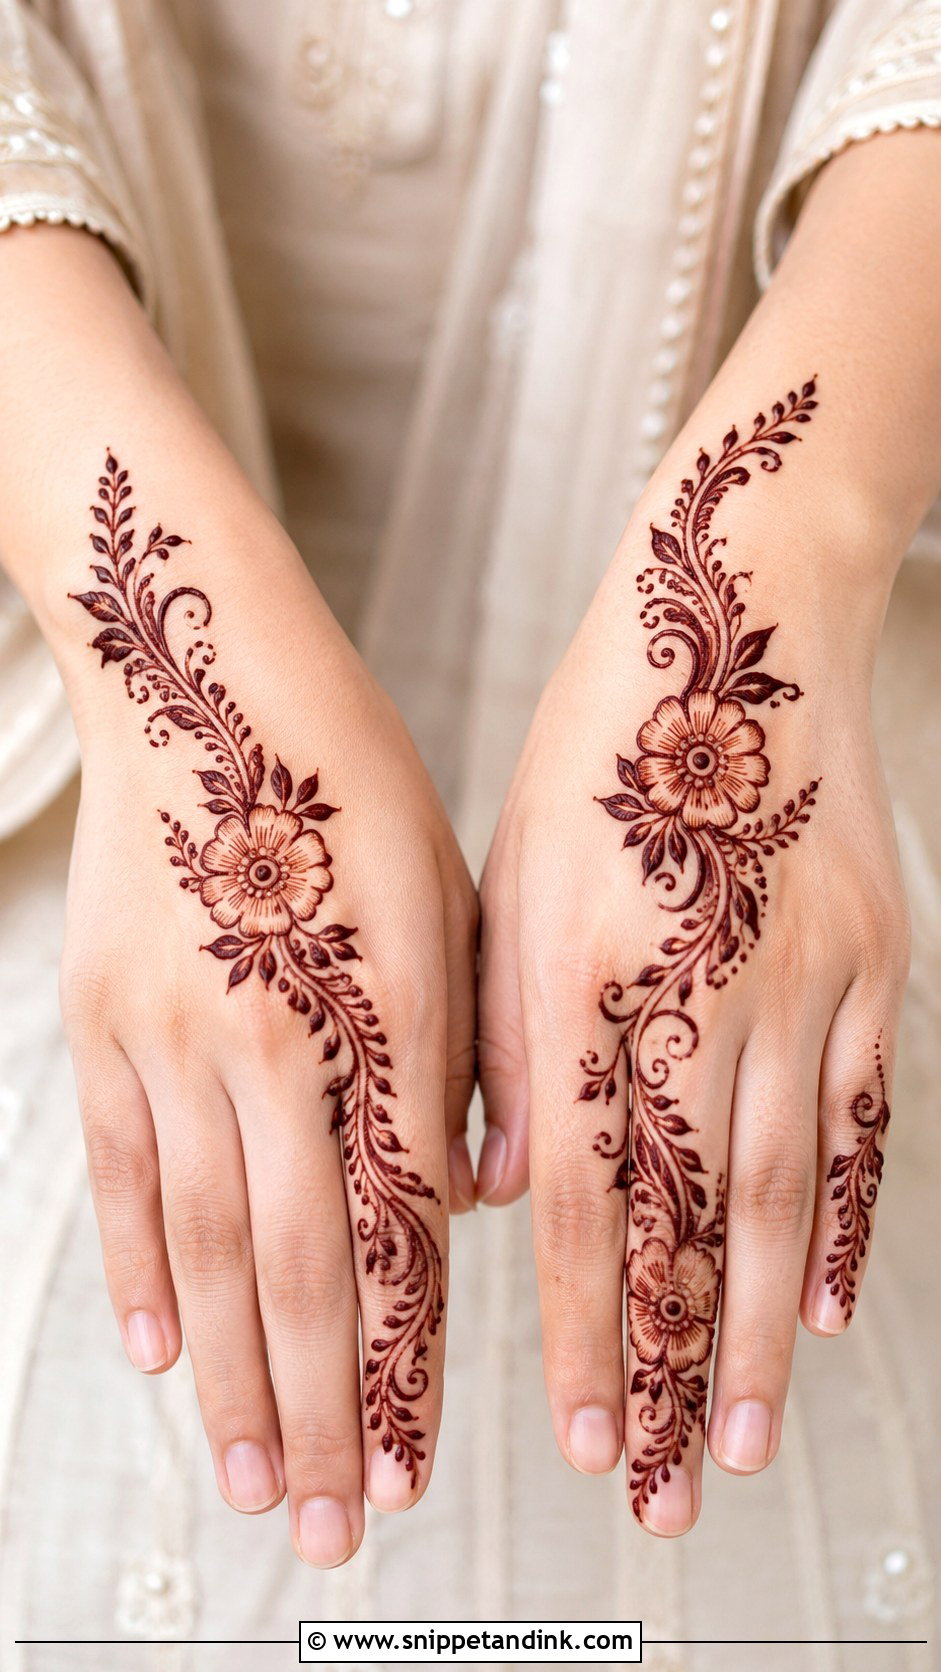
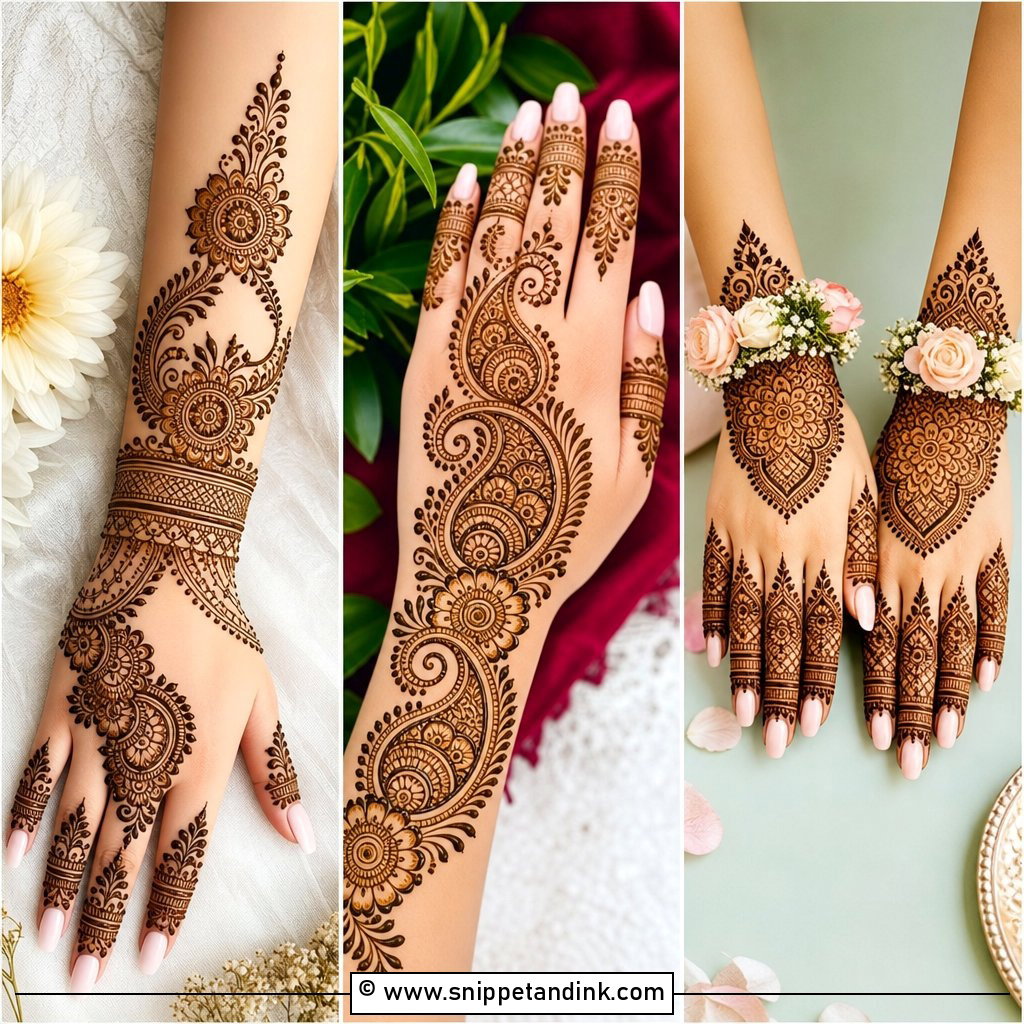
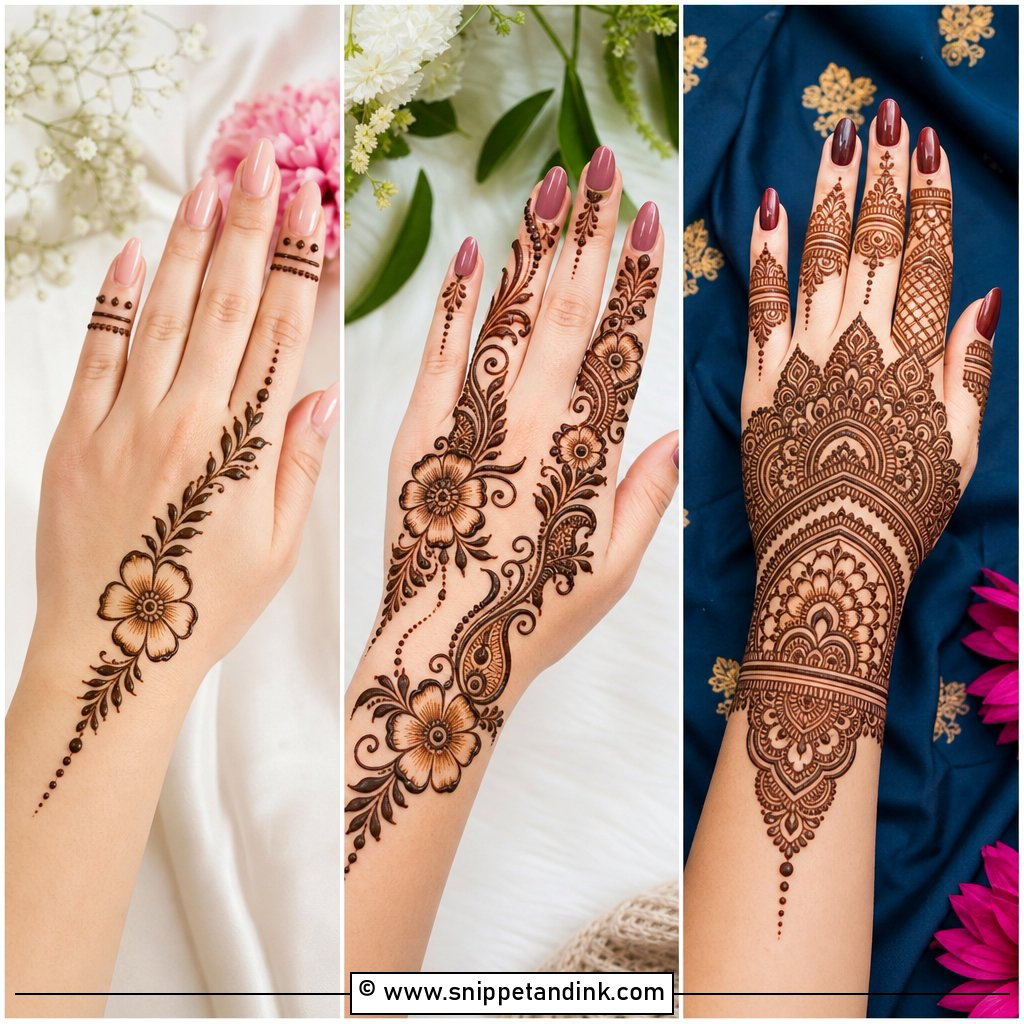
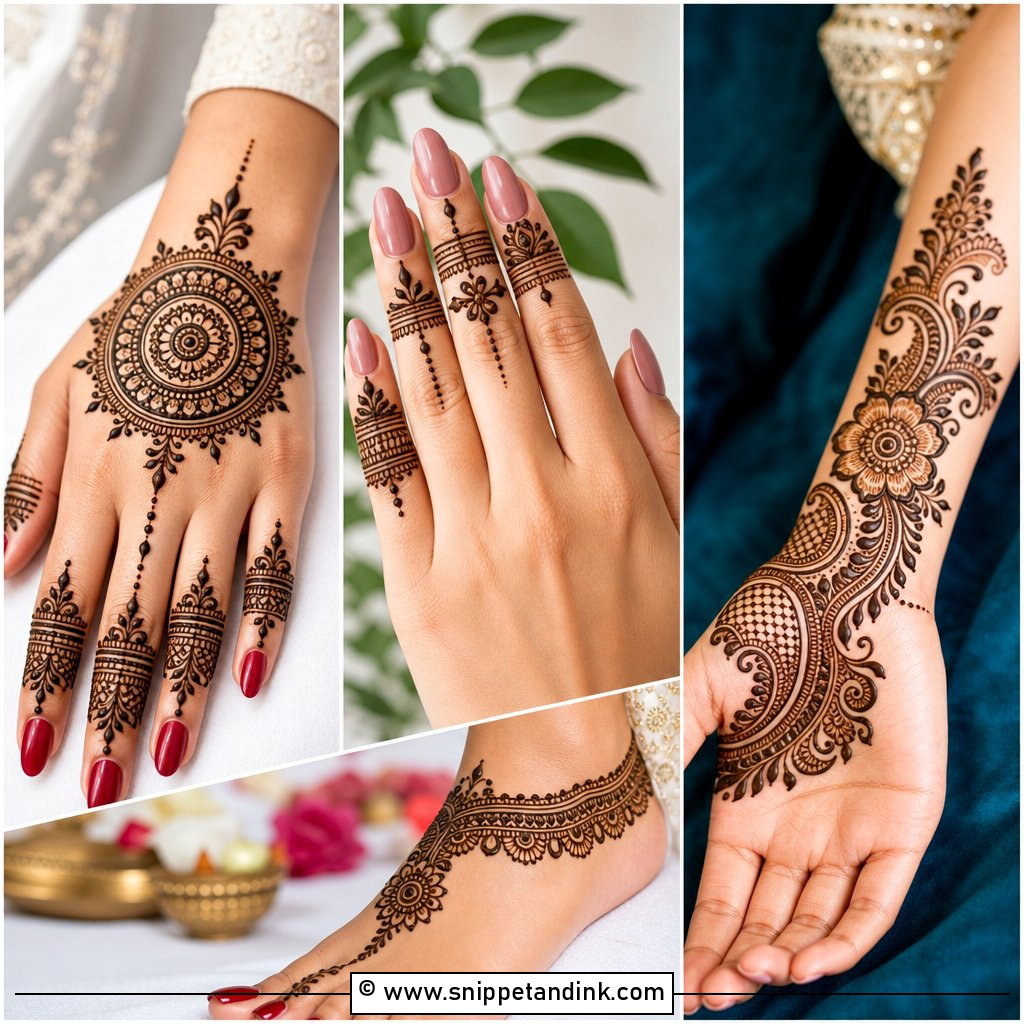
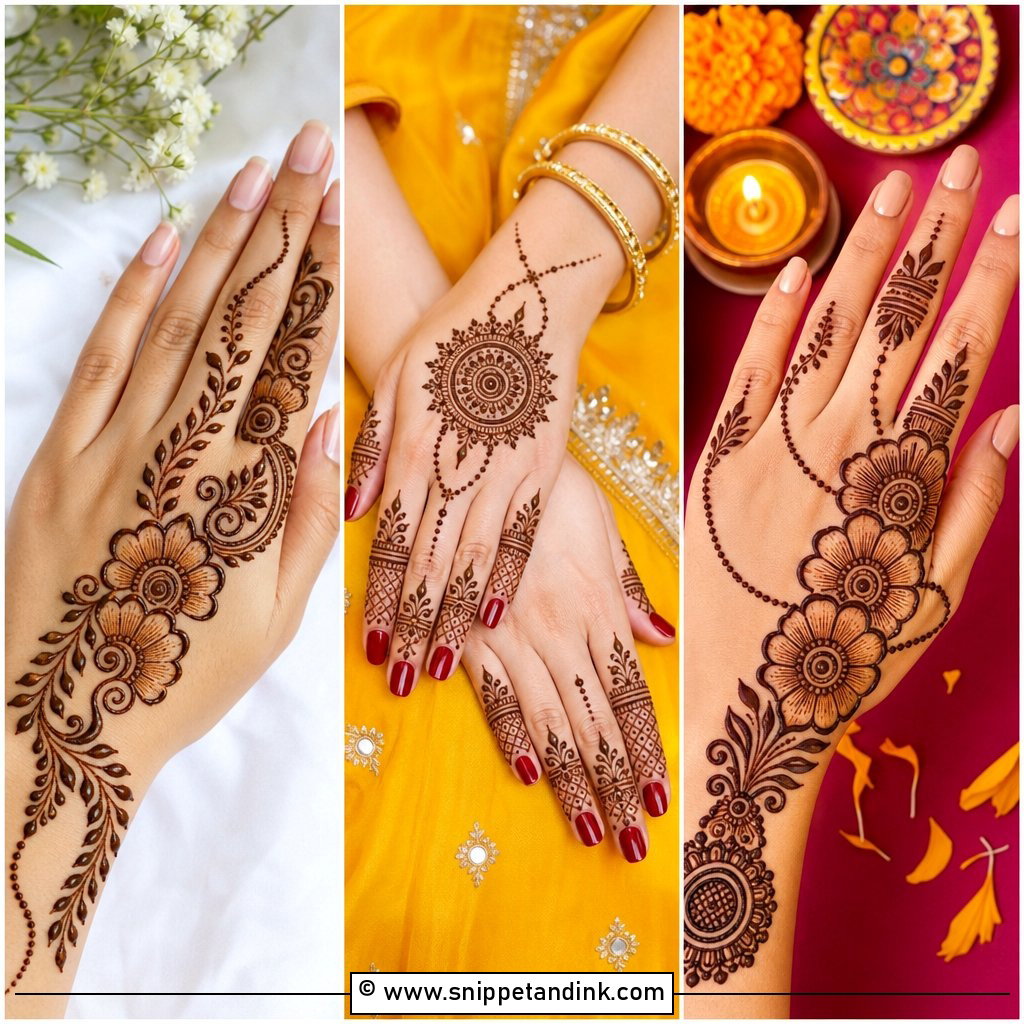
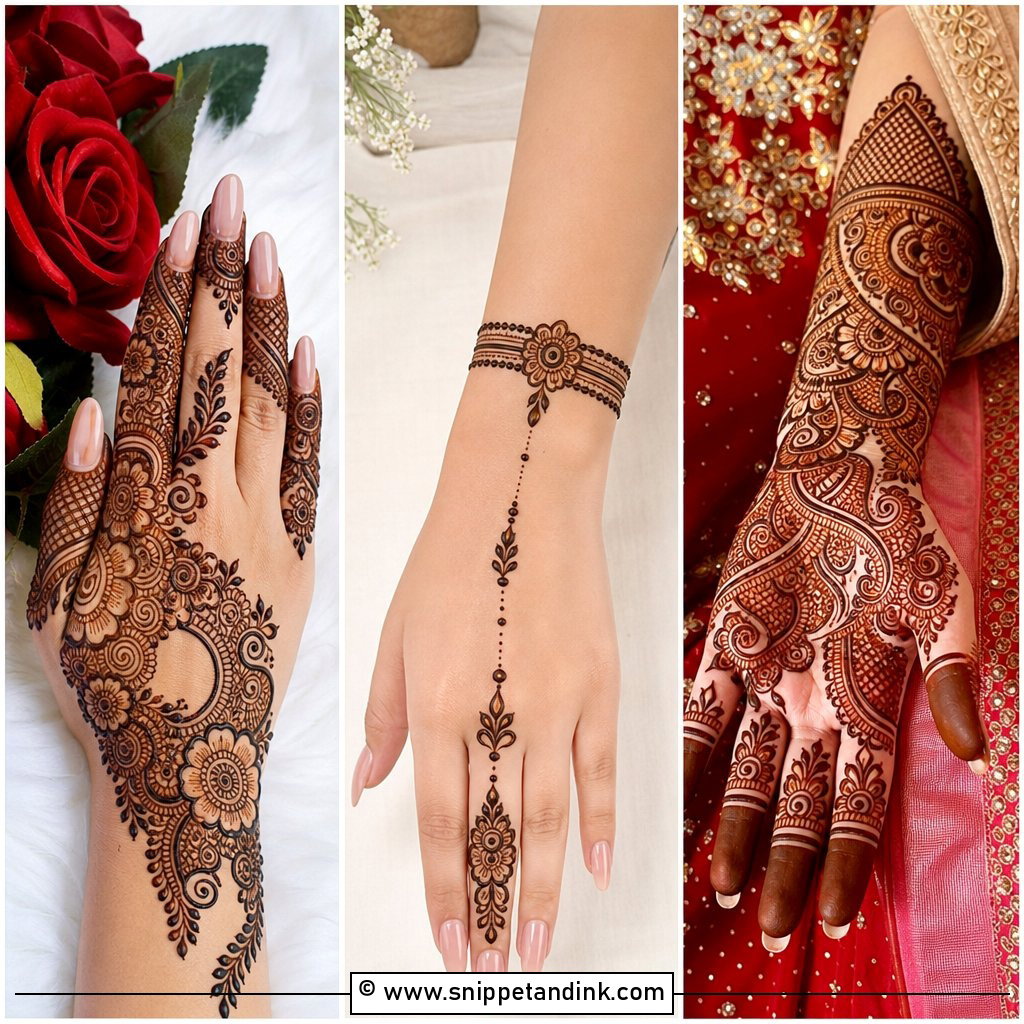
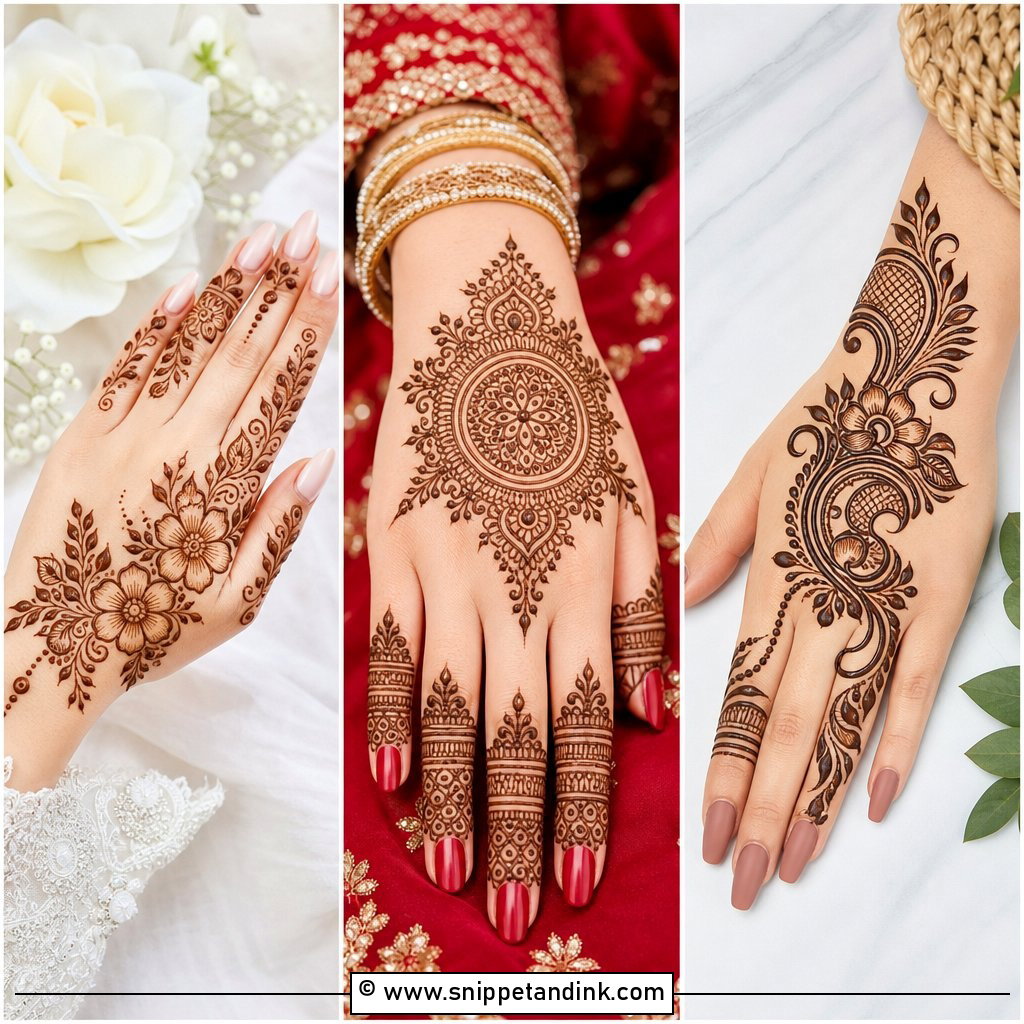
Arabic layouts are where I tell most beginners to start, because the empty skin does half the work. The trail runs diagonally from the wrist across the back hand or palm and finishes on one or two fingers. I draw the big flower near the wrist first, then the connecting leaves, then the finger, so the diagonal stays straight. Keep the outline bold. Thin Arabic lines on the back hand can stain faintly, since that skin is thinner and less absorbent than the palm. Shade one side of each petal and stop.
2. Simple Back Hand Mehndi Design
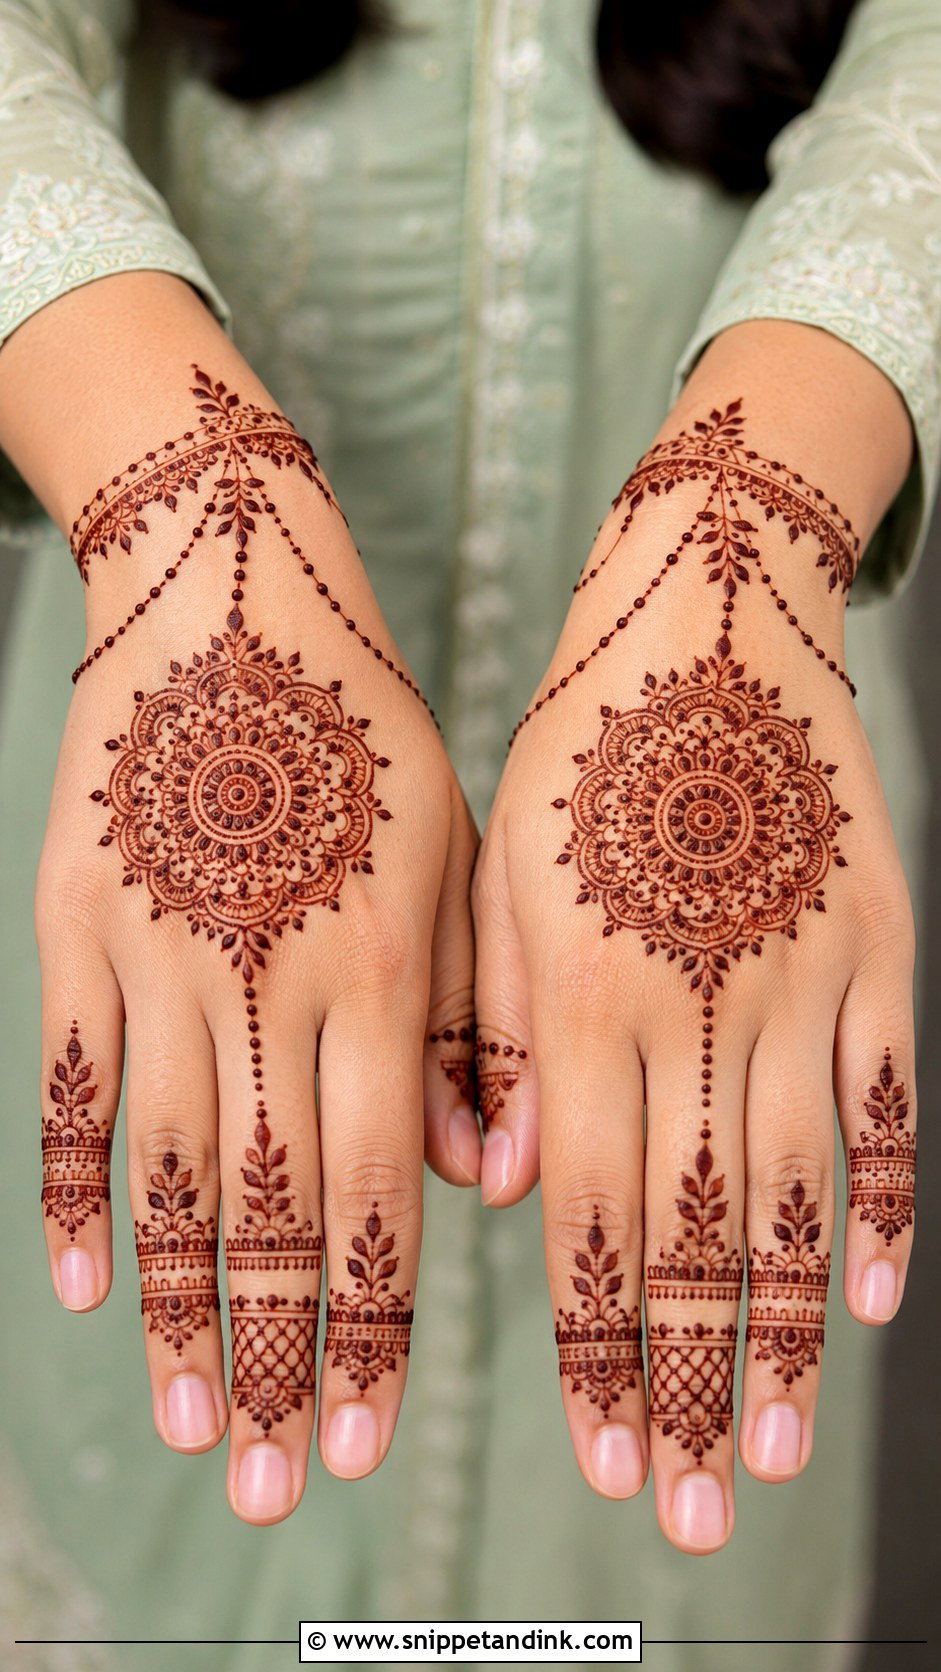
Everyone sees the back of your hand, at the table, holding a glass, in every photo, so this is where neatness counts. I place a round mandala in the center, then let small chains and leaf strings run toward the knuckles. The fingers get a few bands and a leafy tip, not heavy filling. Expect a lighter stain here than on the palm. If you want the back hand to come out darker, keep the paste on longer and seal it well, which I cover further down. A plain bracelet line at the wrist ties it all together.
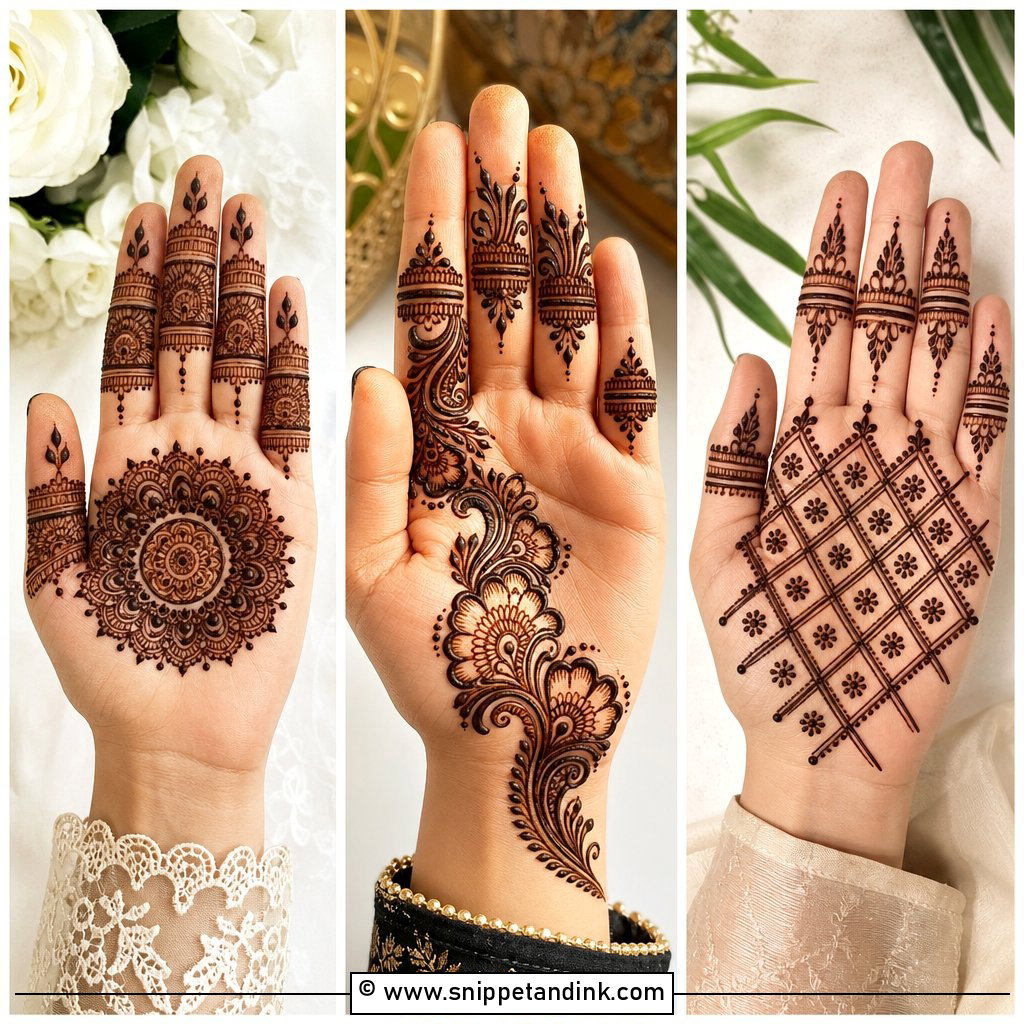
3. Simple Front Hand Mehndi Design
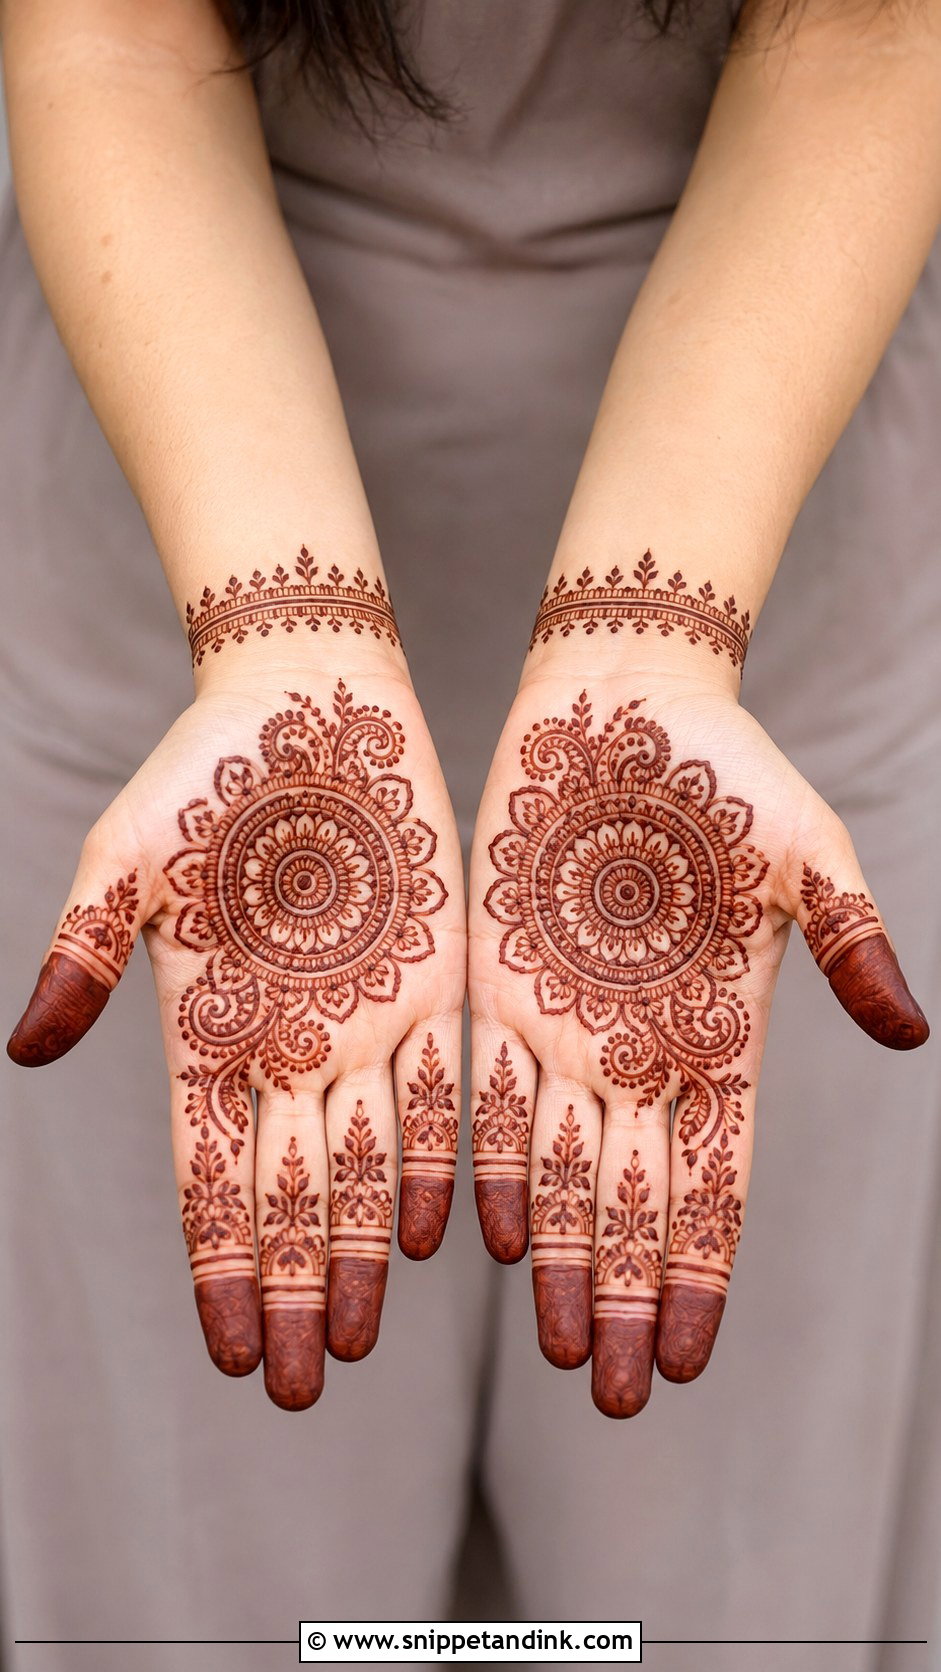
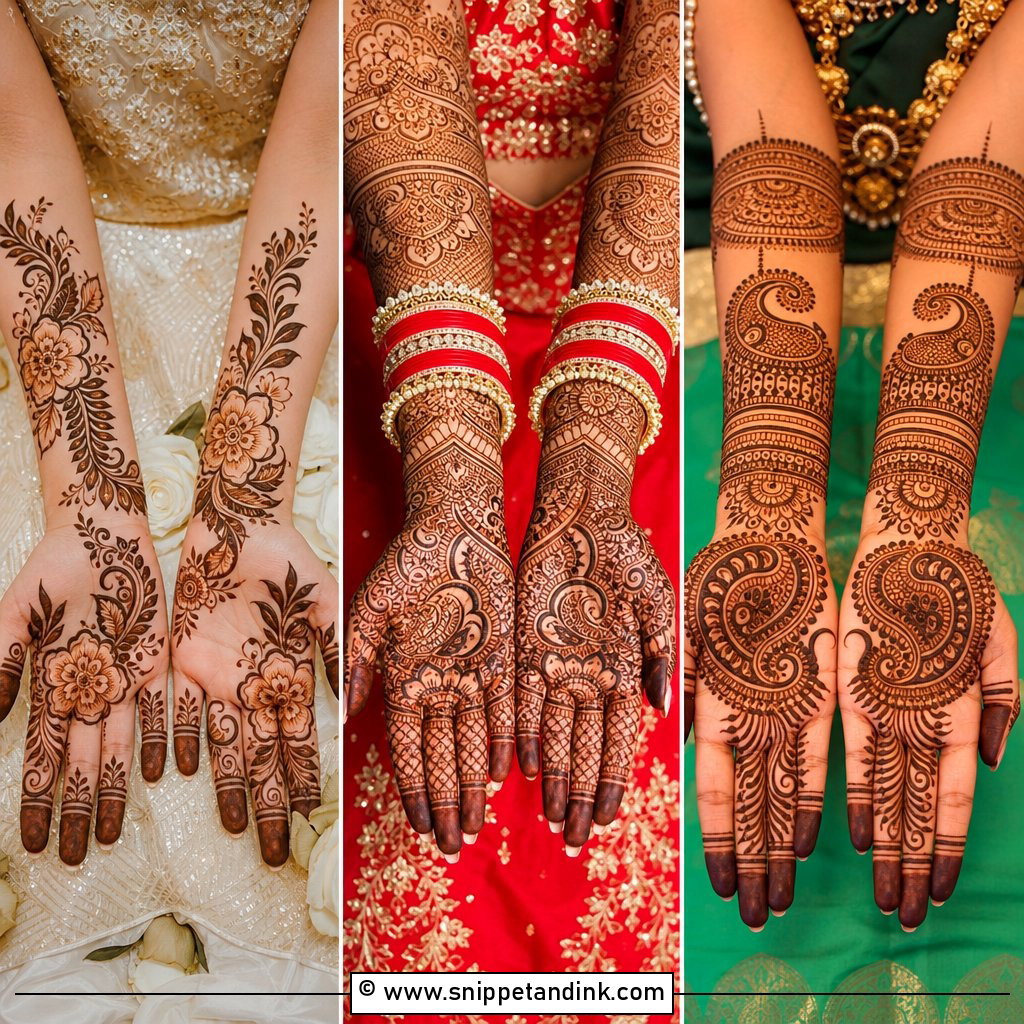
The palm is the best canvas you have: thick skin, warm, and it takes color well. I center a small mandala, then curve paisleys around it with a little skin showing between each one, because touching motifs blur into a single brown patch once the stain deepens. The fingers get repeated rings and dotted tips. A scalloped cuff at the wrist frames the hand. This works for festivals and as a wedding guest look when you want tradition without bridal density.
4. Simple Finger Mehndi Design
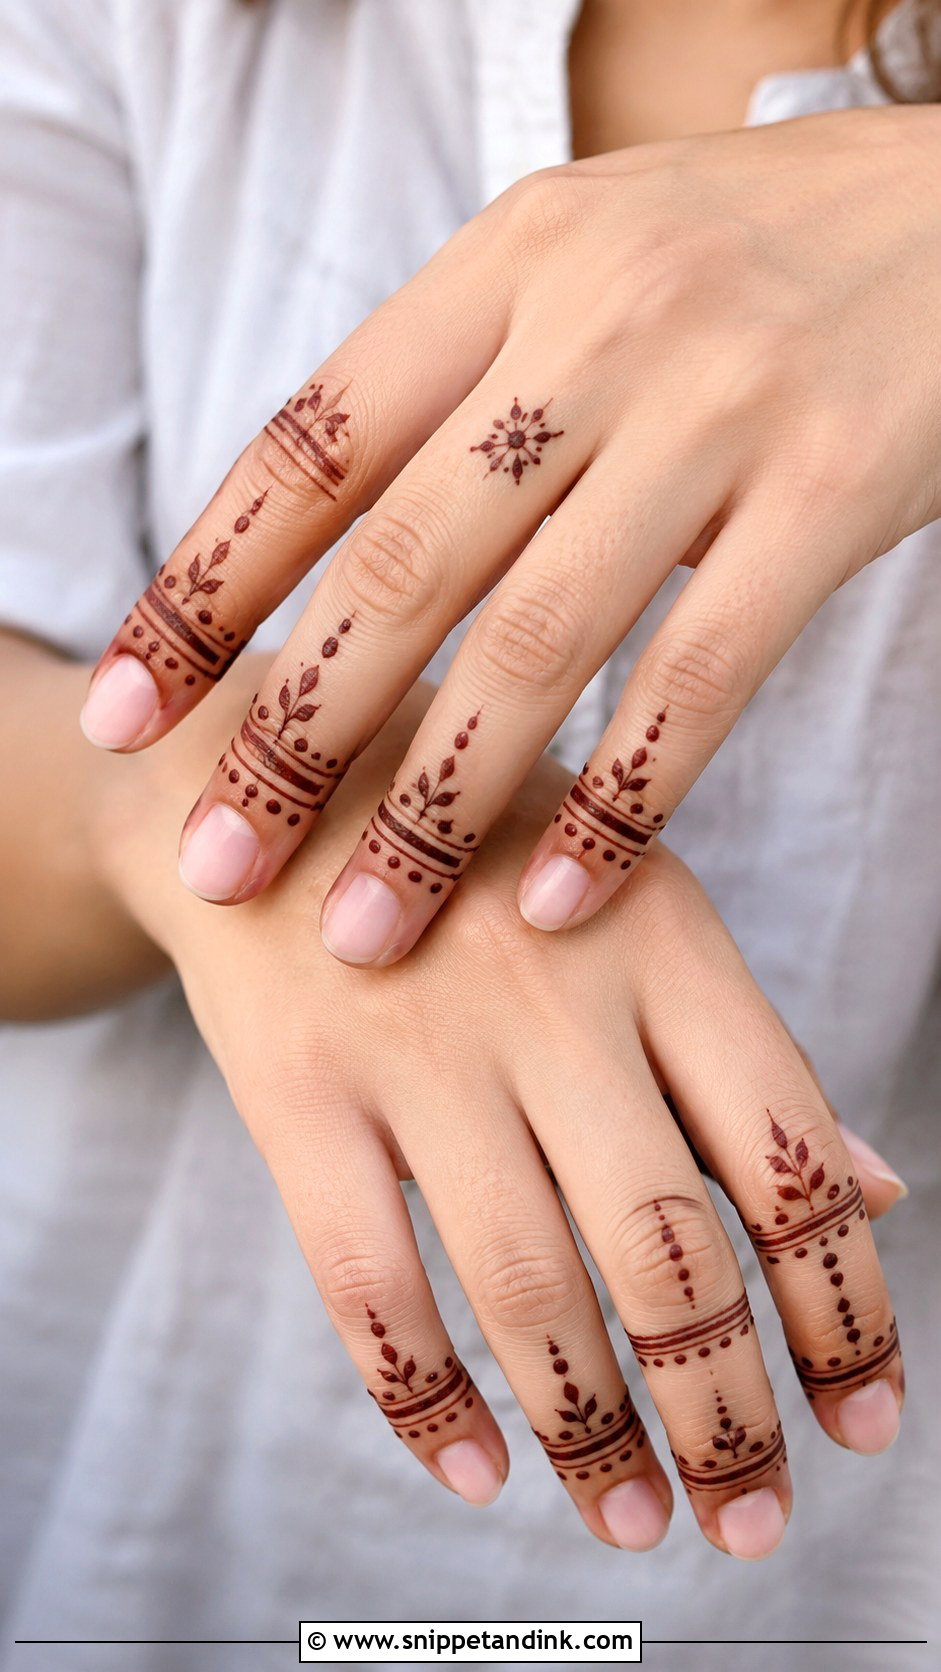
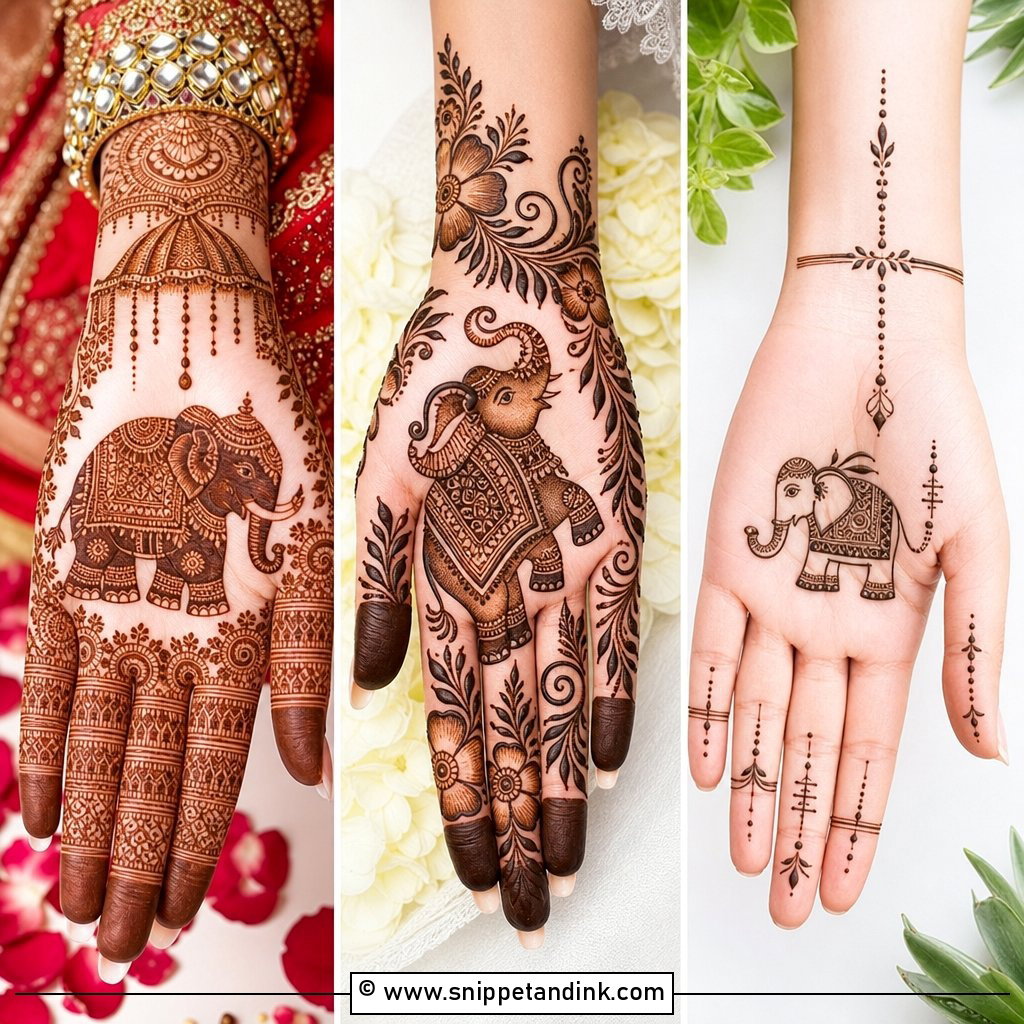
Finger-only mehndi takes me about ten minutes a hand, which is why it’s popular the night before a busy event. Each finger gets matching bands, dots and a small leaf, with maybe a dot or mini flower in the middle of the back hand. Fingertips are where henna stains darkest, so even a thin ring there will show up deep brown. This looks especially modern on the back hand, and it’s low risk if you have to start cooking or typing soon after.
5. Simple Mandala Mehndi Design
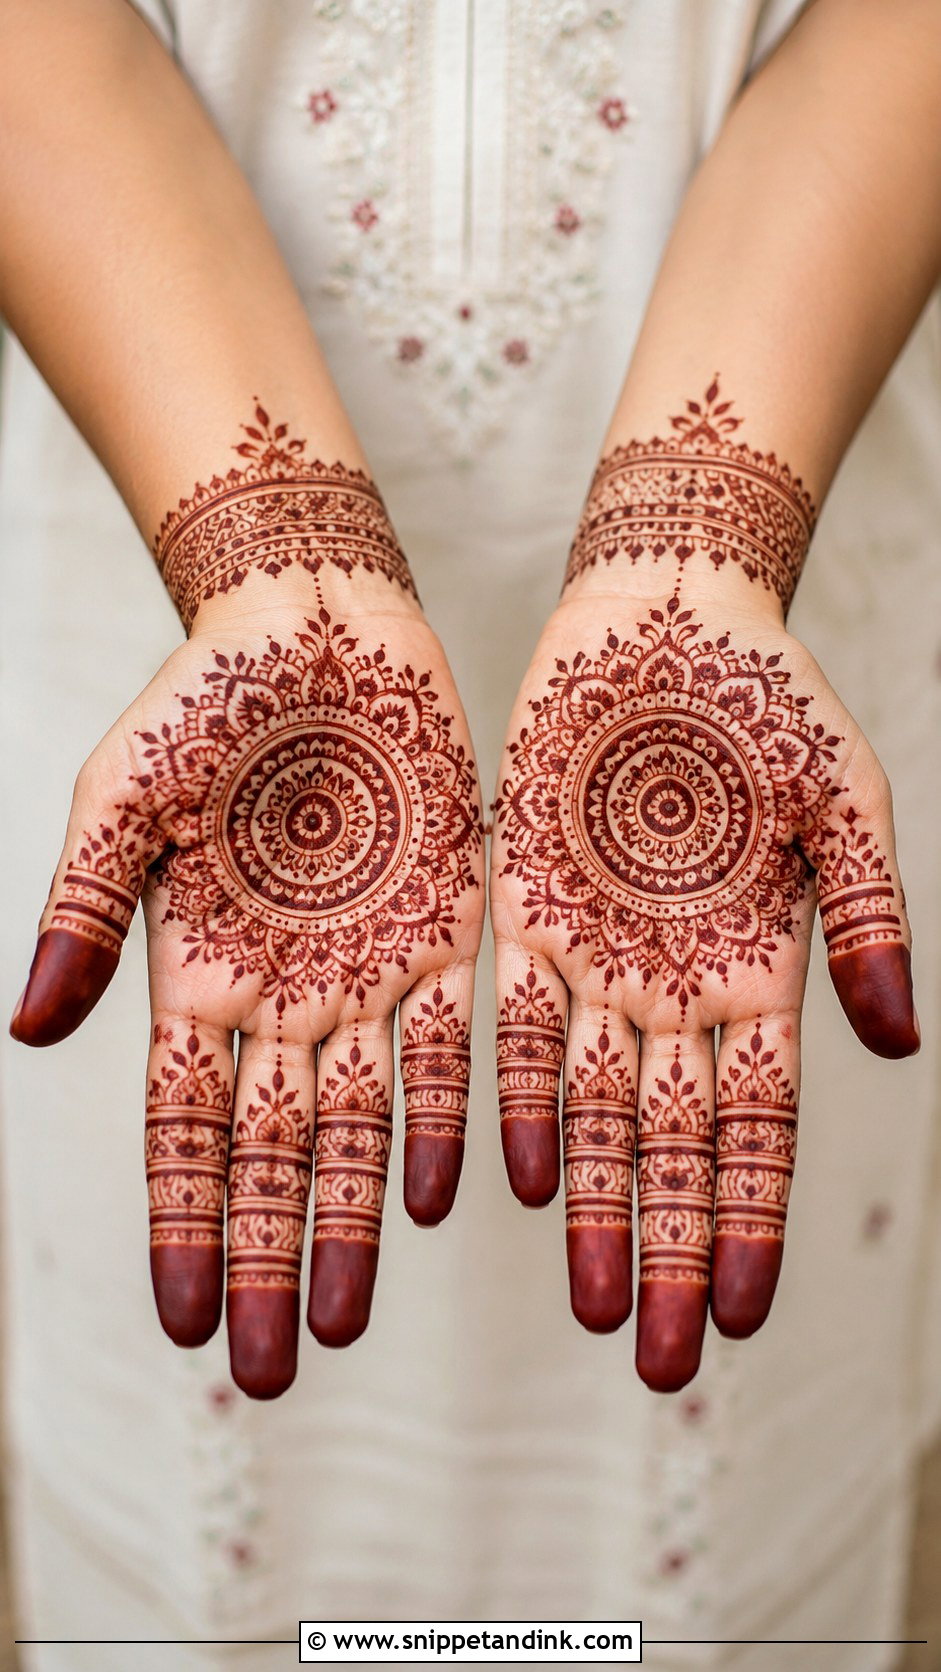
A single mandala is the design I use to test a new cone, because the circle shows every wobble. I build it from the center out: a dot, a ring, petals, then a scalloped outer edge. Turn your hand, or the client’s hand, as you go so you’re always drawing toward yourself. The rest of the hand stays clean except for matching finger bands. Even spacing matters more than detail here. It’s a favorite for puja, Eid, Diwali and Raksha Bandhan.
6. Simple Floral Mehndi Design
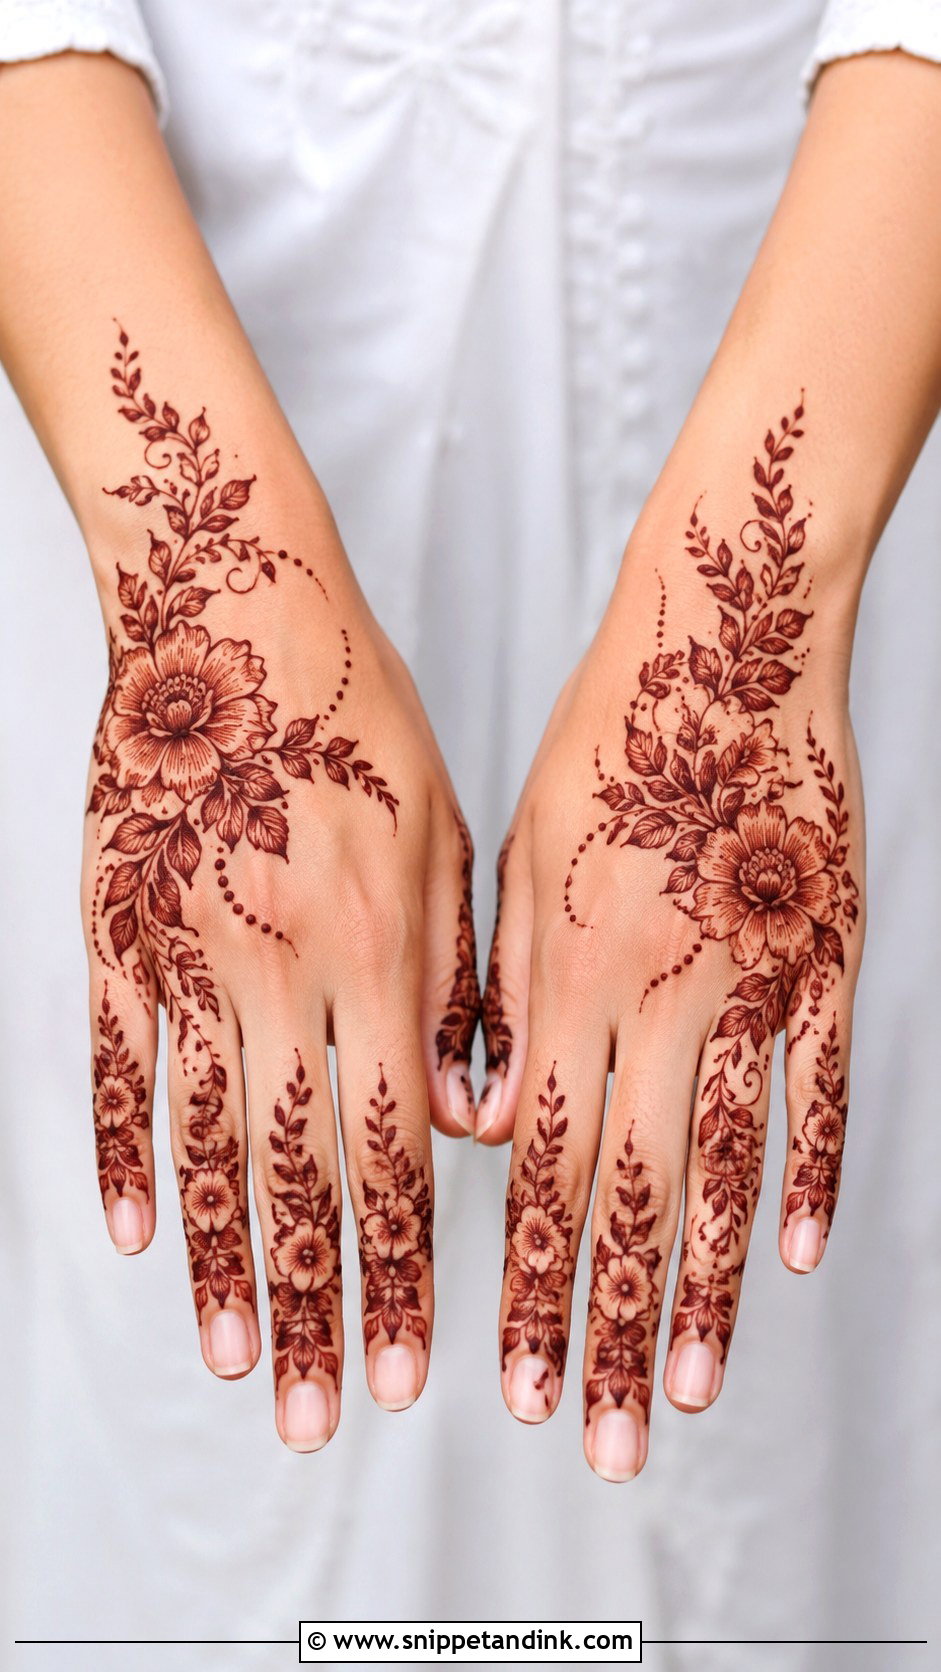
Flowers forgive a shaky hand better than any other motif, because no two petals need to match. I place one large flower near the wrist, one in the center and smaller ones toward the fingers, then connect them with vines and dots. Rounded petals with one shaded edge look fuller than petals packed with lines. On a palm, keep the flowers slightly apart; on a back hand, they can sit closer. This suits haldi, birthdays and any small festival.
7. Simple Bracelet Mehndi Design
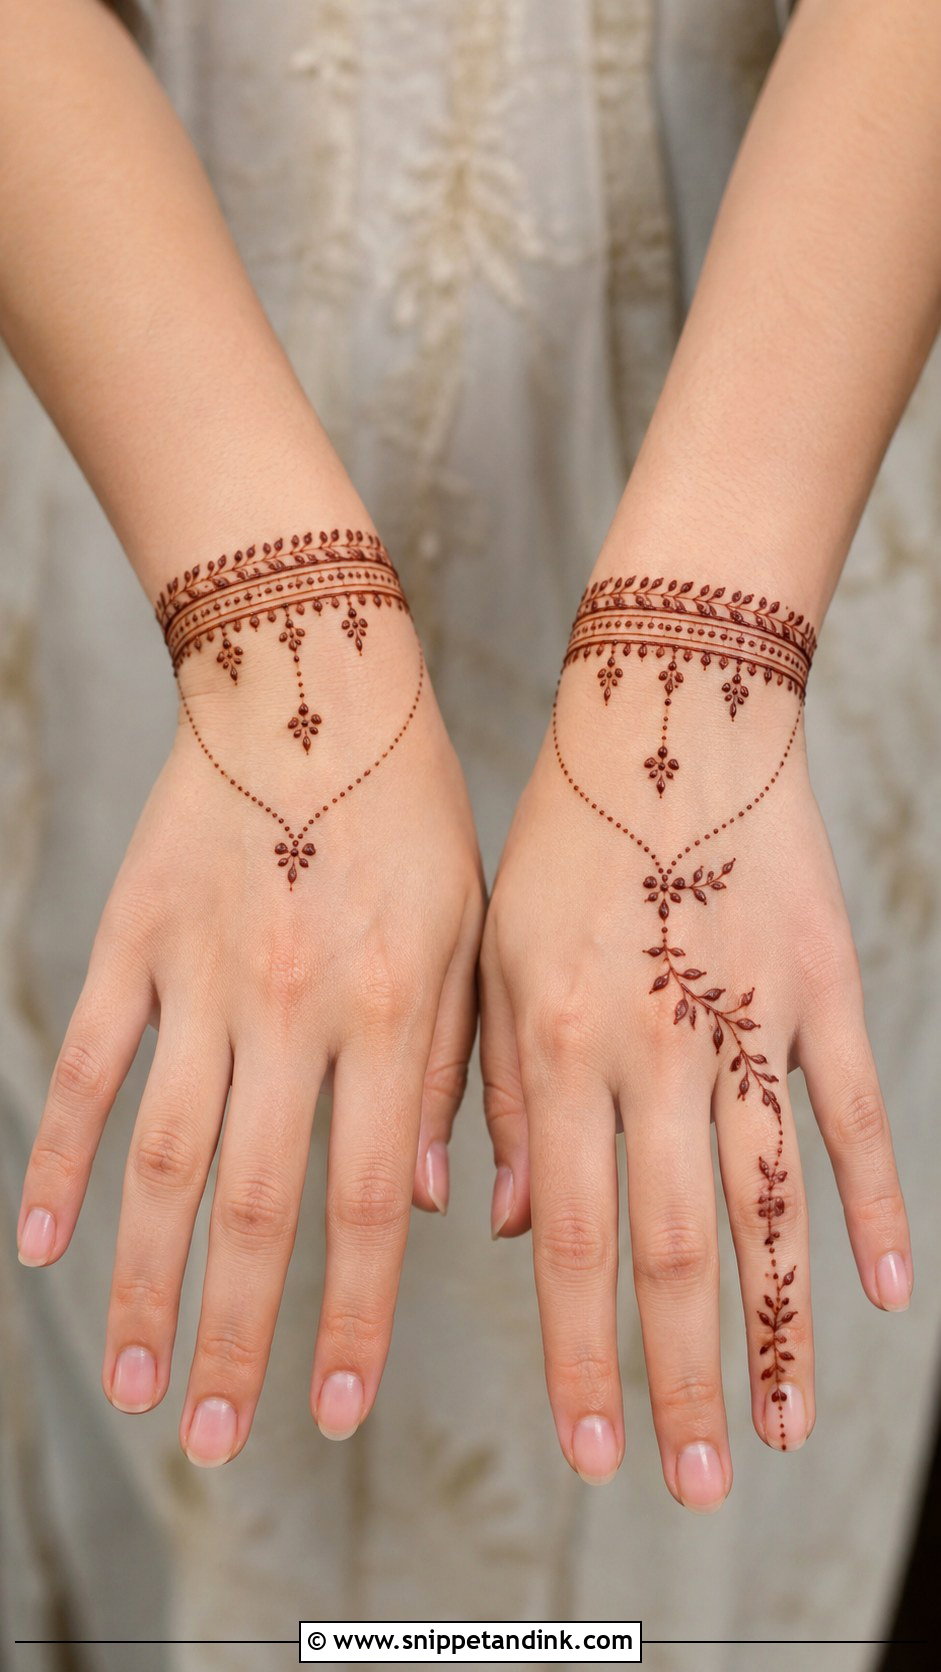
Bracelet mehndi copies jewelry, so I treat it like jewelry: bands, chains and small hanging drops around the wrist, with one delicate vine running up to the middle finger. Put it on the back of the wrist rather than right on the crease, because the skin folds there and the paste cracks off early, leaving a patchy line. Finger rings or leafy tips finish it. It sits well with bangles and plain festive outfits.
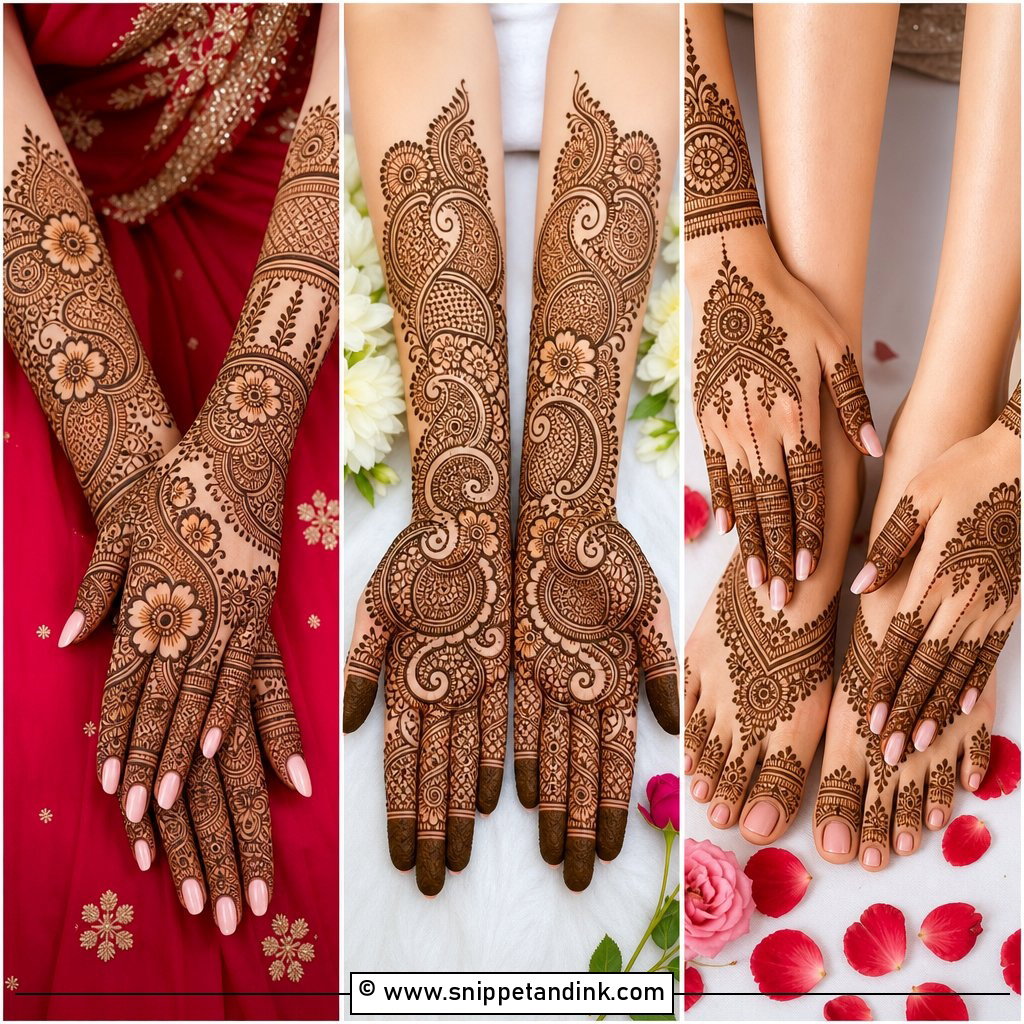
8. Simple Full Hand Mehndi Design
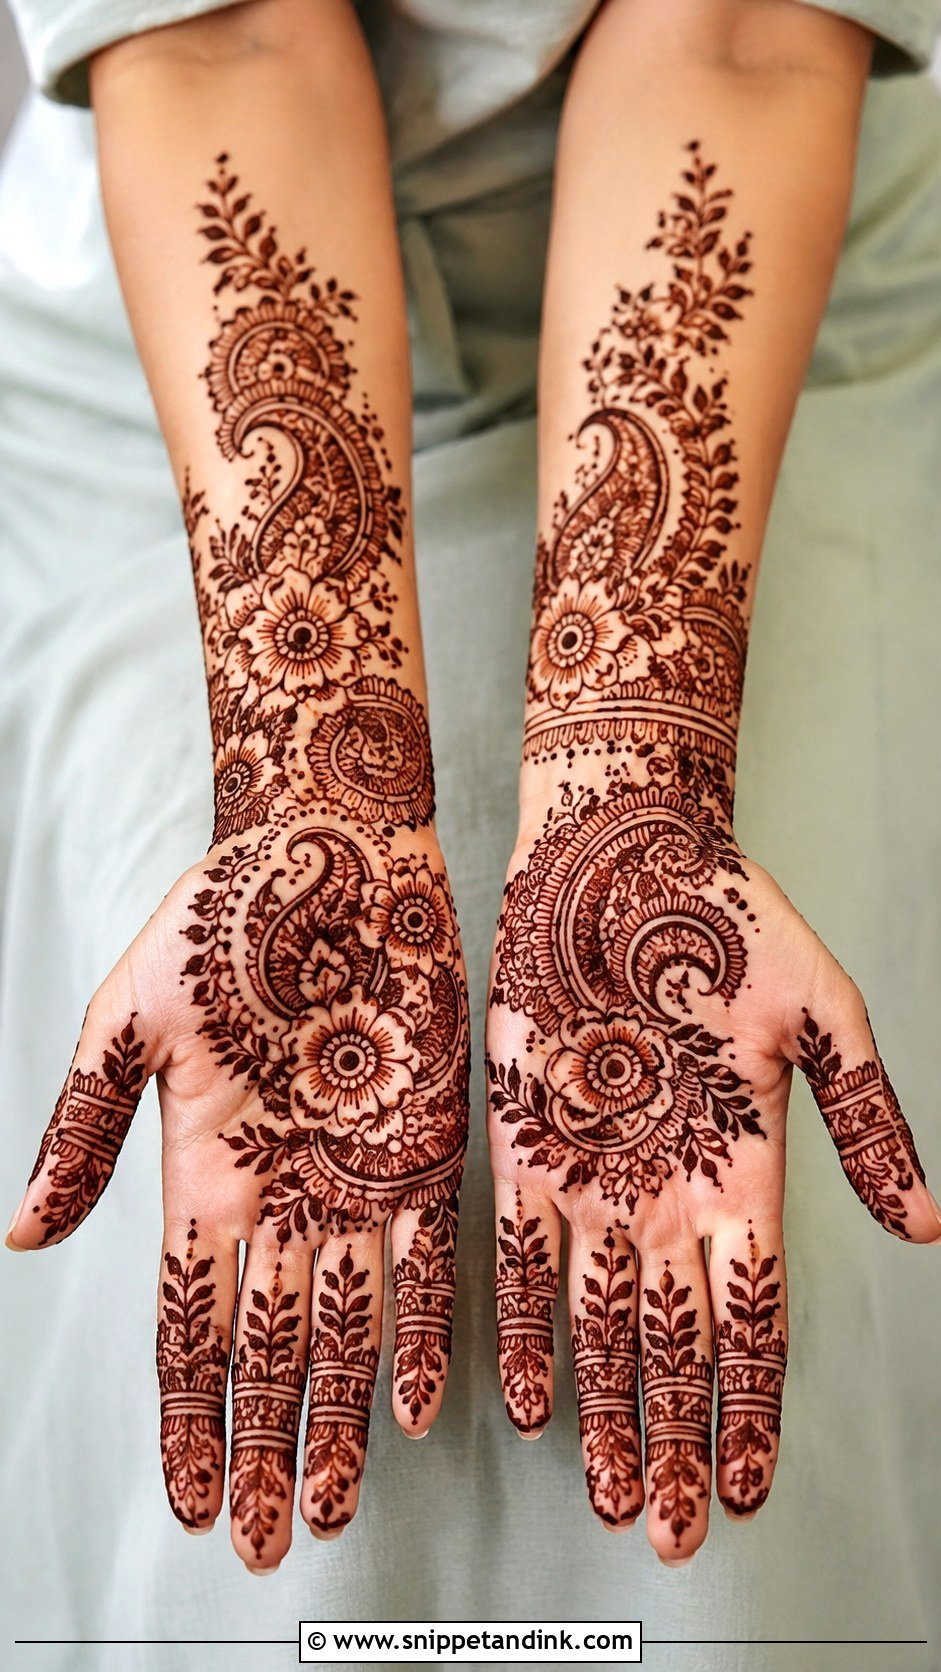
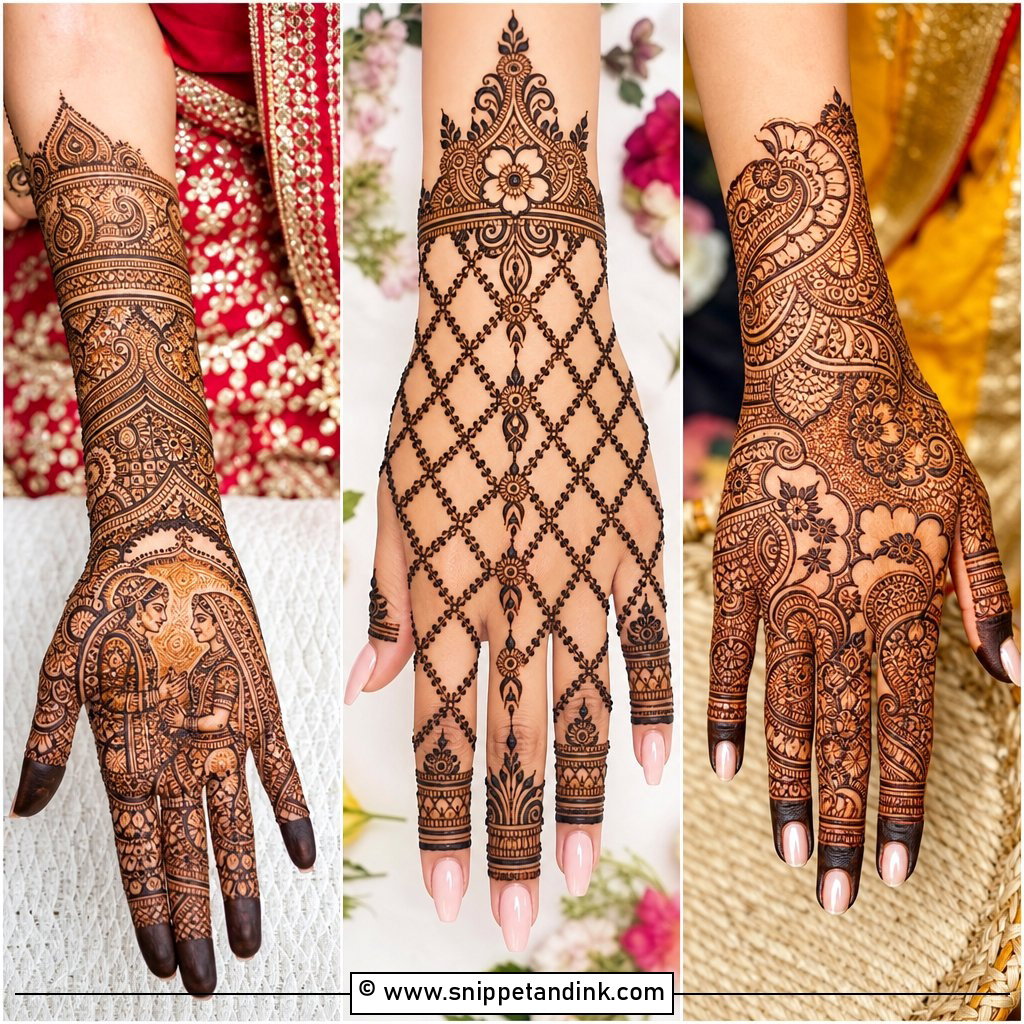
Full coverage doesn’t have to mean crowded. I use fewer, larger motifs: a wide border at the wrist, two or three paisleys on the palm and easy line patterns on the fingers. Big shapes with gaps are faster to draw and they stain more clearly than fine filling. If you’re a beginner, skip the tiny checks and grids and lean on bold outlines with light shading. It gives a rich look for a wedding function without bridal hours in the chair.
9. Simple Palm Mehndi Design
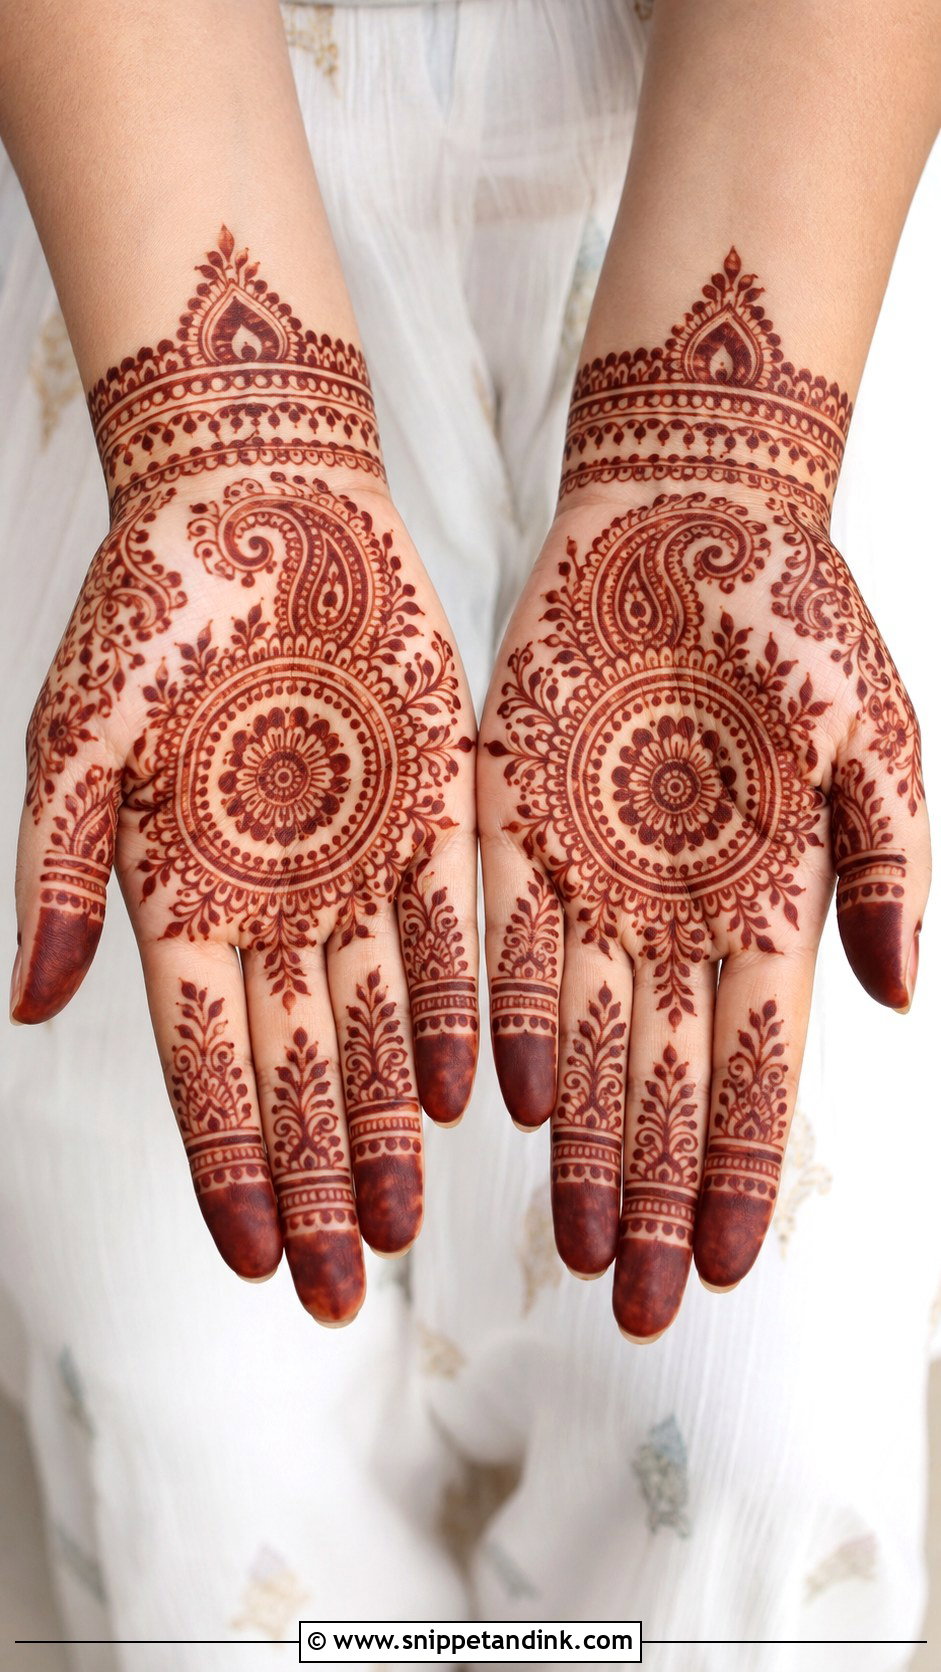
If you love front hand henna, a simple palm mehndi design is the safest bet for a dark result. The palm can hold one round mandala, a lotus, a paisley cluster or a floral circle, with dots and curved borders around it so the center doesn’t float. Fingers get repeated bands, leaf trails or full fingertip caps. Palms stain deepest because the skin there is thicker, so this is the layout I suggest when color matters more than coverage.
10. Simple Paisley Mehndi Design
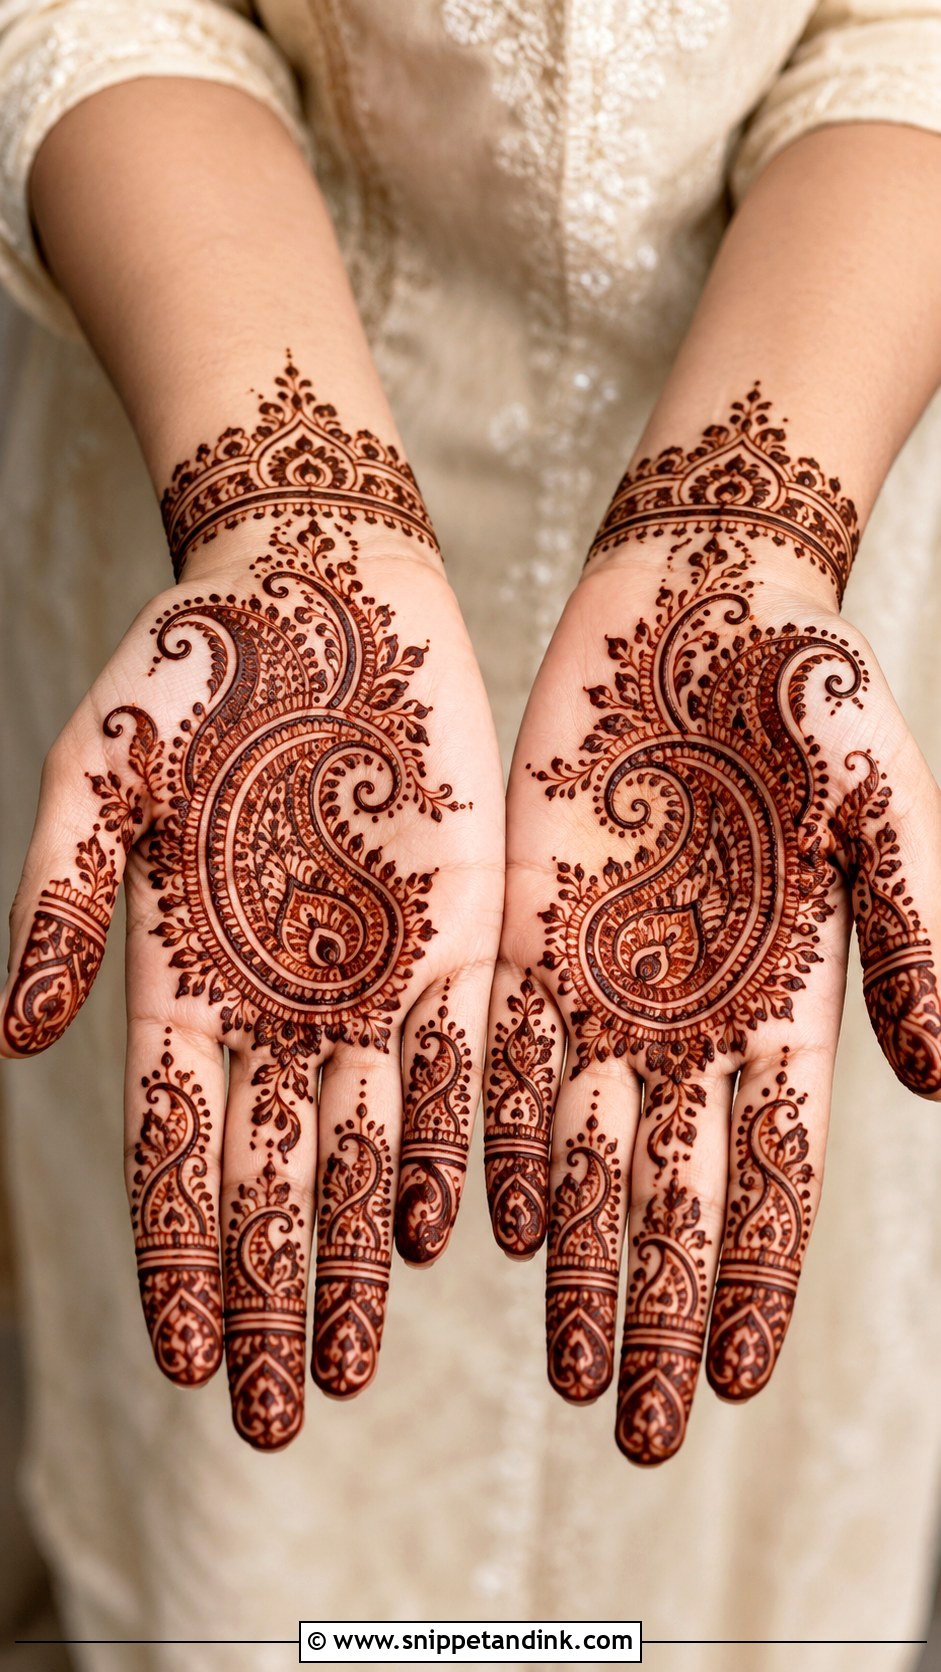
Paisley, or the mango shape, is the motif I teach right after circles. Start with one large paisley in the palm or on the back hand, add a smaller one beside it and fill both with dots, lines and tiny petals. Curved vines join them. Leave the fingers light so the paisleys lead. With enough empty skin around them, they read modern, not heavy. They suit weddings, puja days, Diwali and Eid.
11. Simple Round Mehndi Design
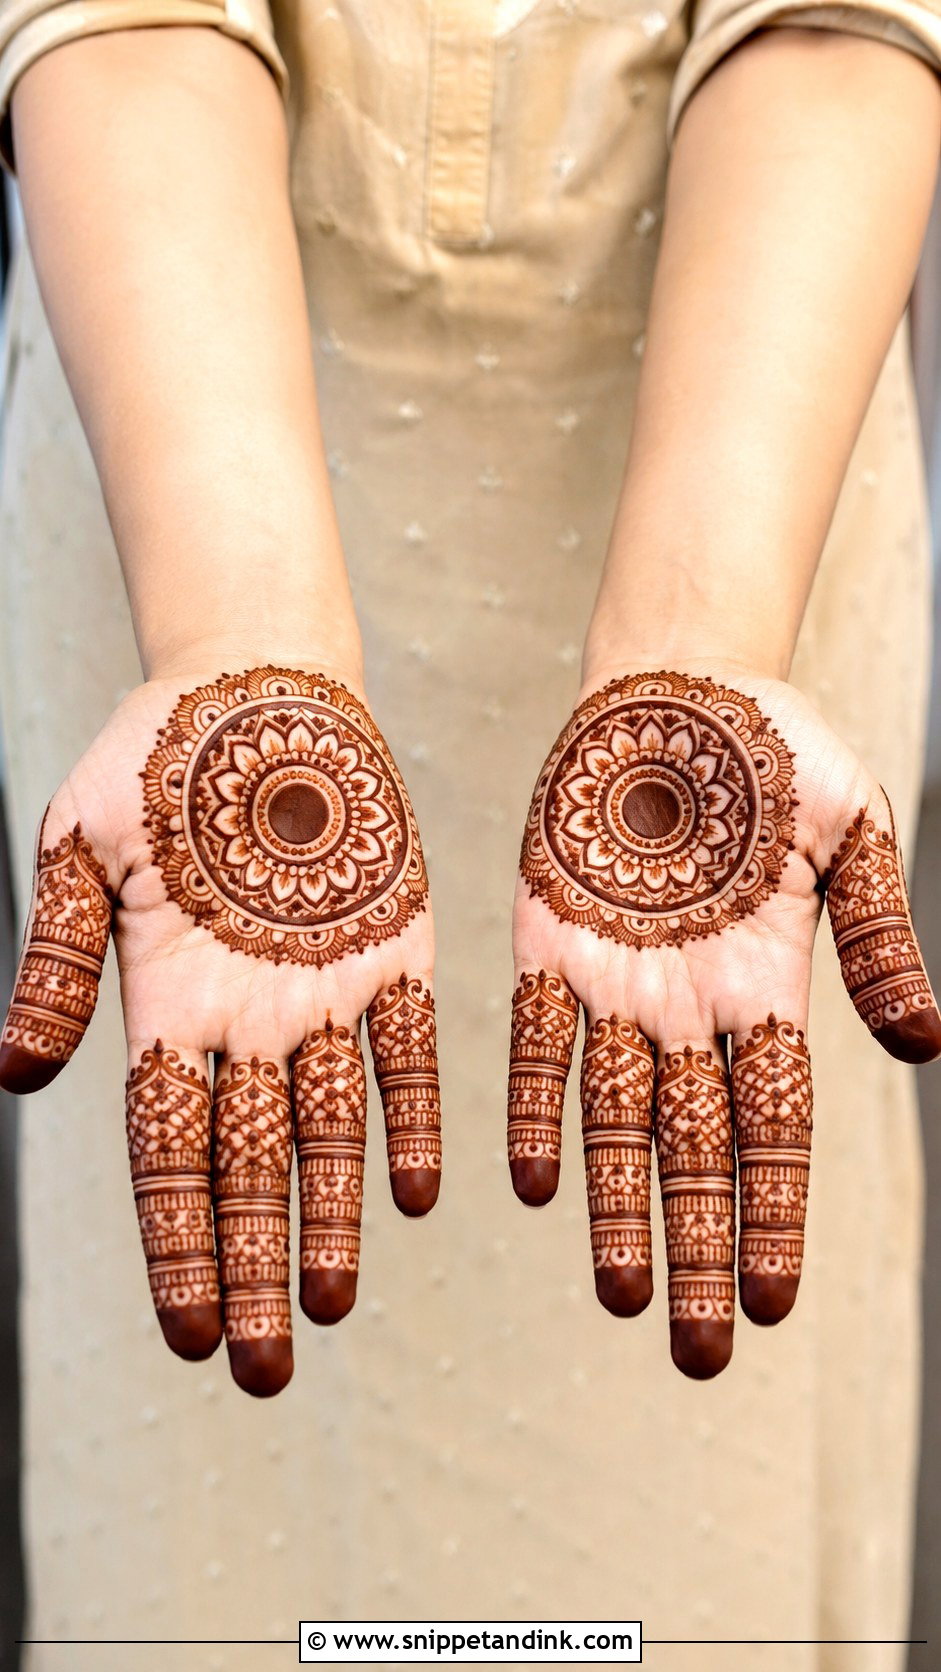
A round design is easy to plan, which is why I suggest it for children and nervous first-timers. One circle sits in the center of the palm or back hand, and you add layers outward: petals, dots, scallops, thin rings. Stop whenever it feels done. Lightly decorated fingers and a narrow wrist border finish it. The size scales with the hand, so it works on a seven-year-old and her grandmother alike.
12. Simple Jaali Mehndi Design
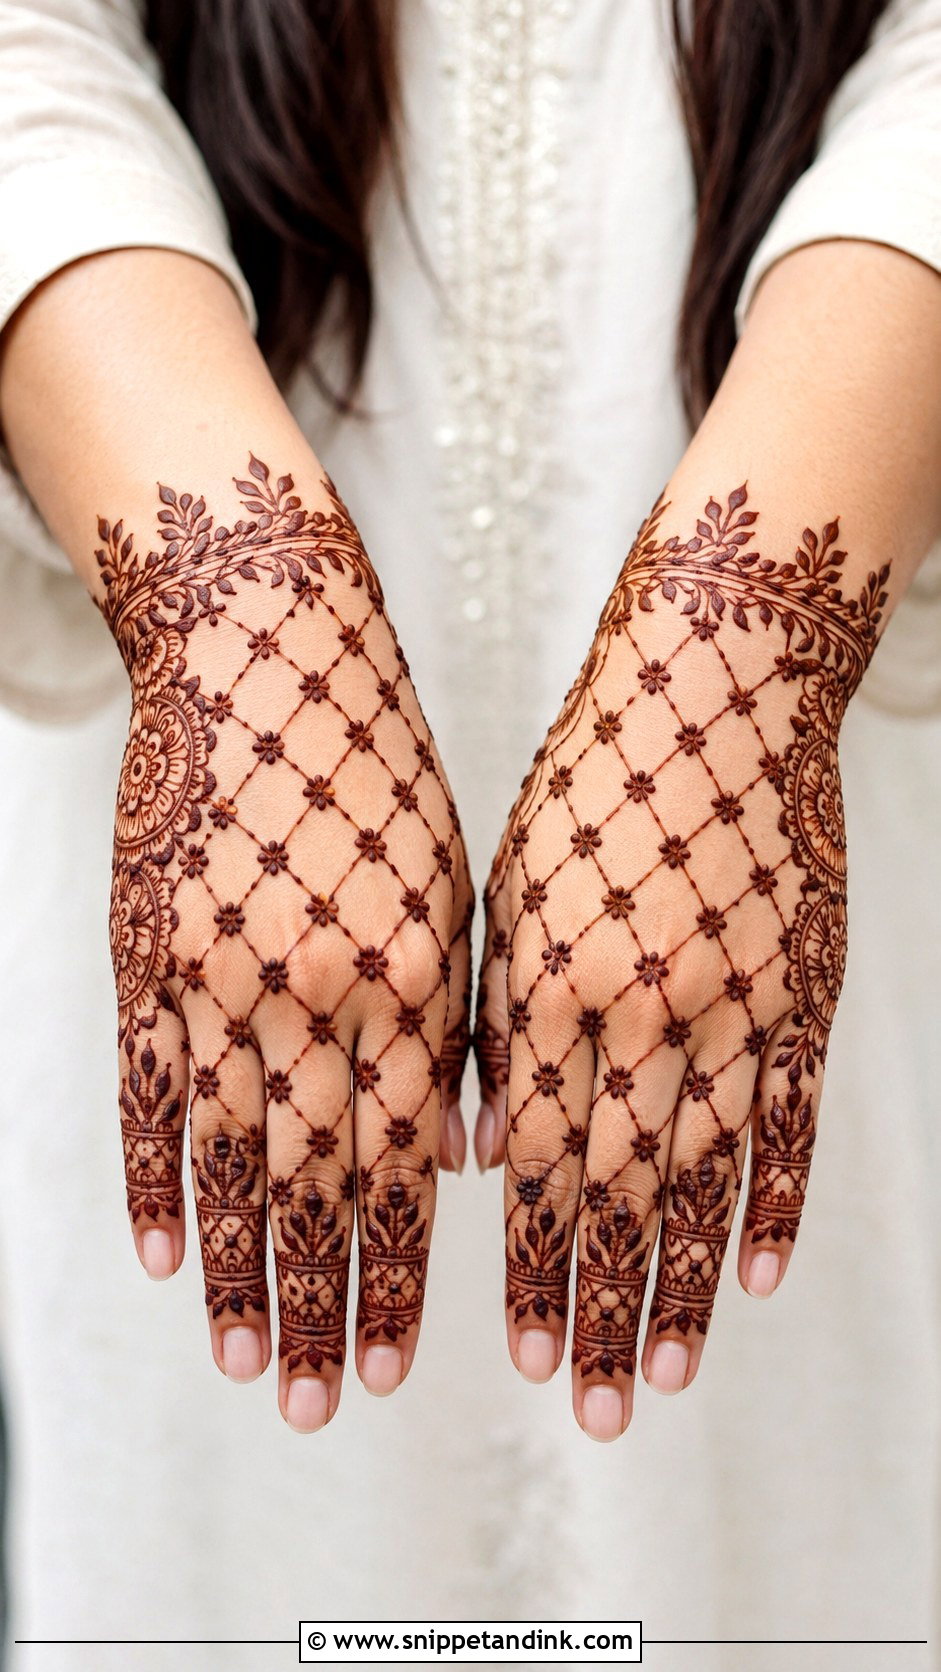
Jaali is a mesh: diagonal lines one way, then crossed the other way, with a dot where they meet. I keep jaali to one section, a side of the palm, a strip across the back hand or inside a bracelet band, then balance it with flowers or a small mandala. Lines that are too close together merge into a dark block once the stain develops, so space them wider than looks right while the paste is wet. It gives a neat, geometric finish for parties and festive outfits.
13. Simple Modern Mehndi Design
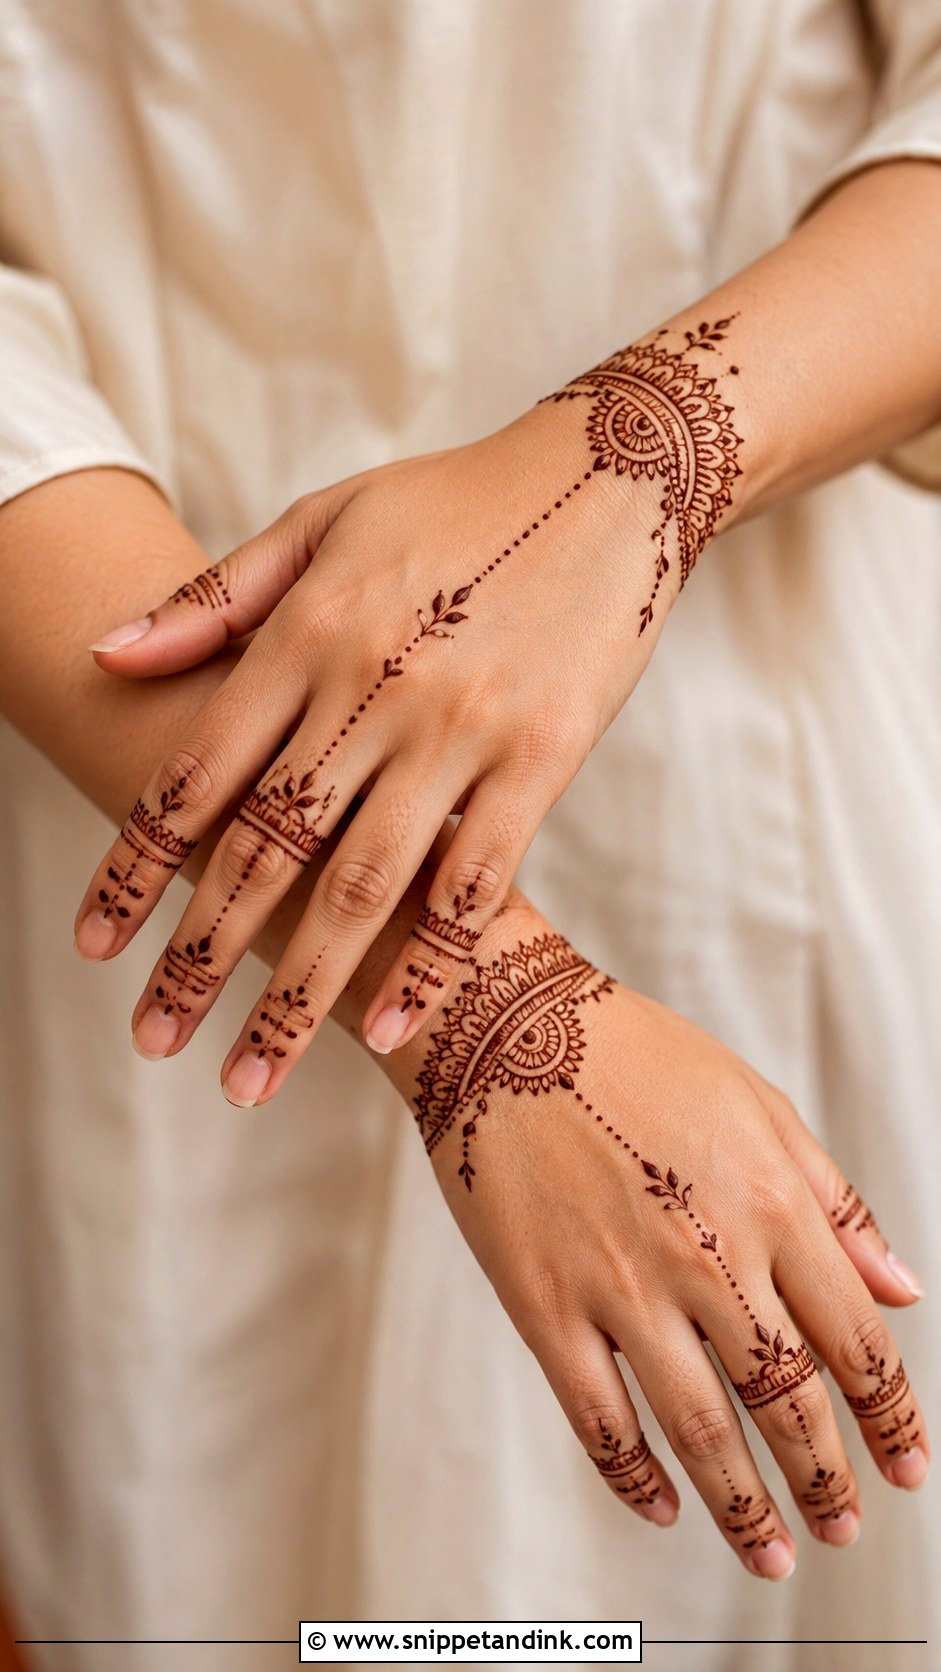
Modern layouts use negative space as part of the pattern. I pick one or two areas, say slim finger bands and a half mandala at the wrist, and join them with dotted chains. Everything else stays bare. It suits anyone who wears minimal jewelry, and it looks neat in close-up hand photos. For work events and small parties where full henna feels like too much, this is the one I’d suggest.
14. Simple Indian Mehndi Design
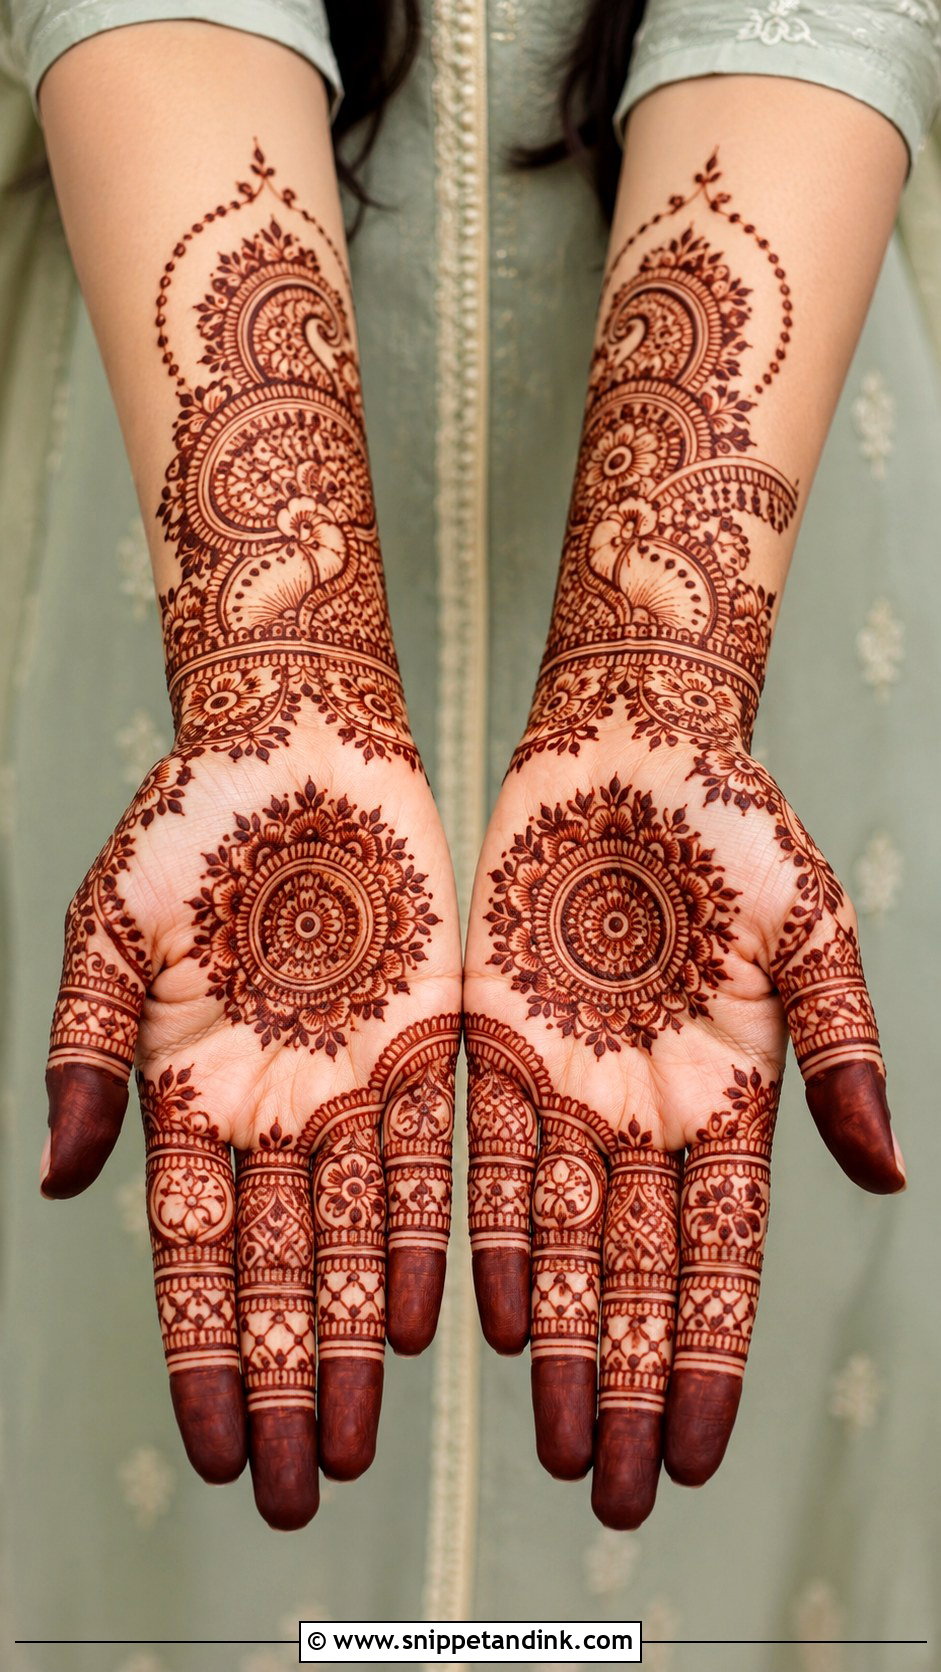
Traditional Indian work combines mandalas, paisleys, flowers and finger details. To keep it simple, I put a mandala in the palm, run paisleys along one side, and complete the fingers with repeated bands, filling gaps with dots and small leaves. Mirror the layout on the other hand, since Indian designs look best when both palms match when held together. It’s a cultural look for weddings and family ceremonies without bridal density.
15. Simple Indo Arabic Mehndi Design
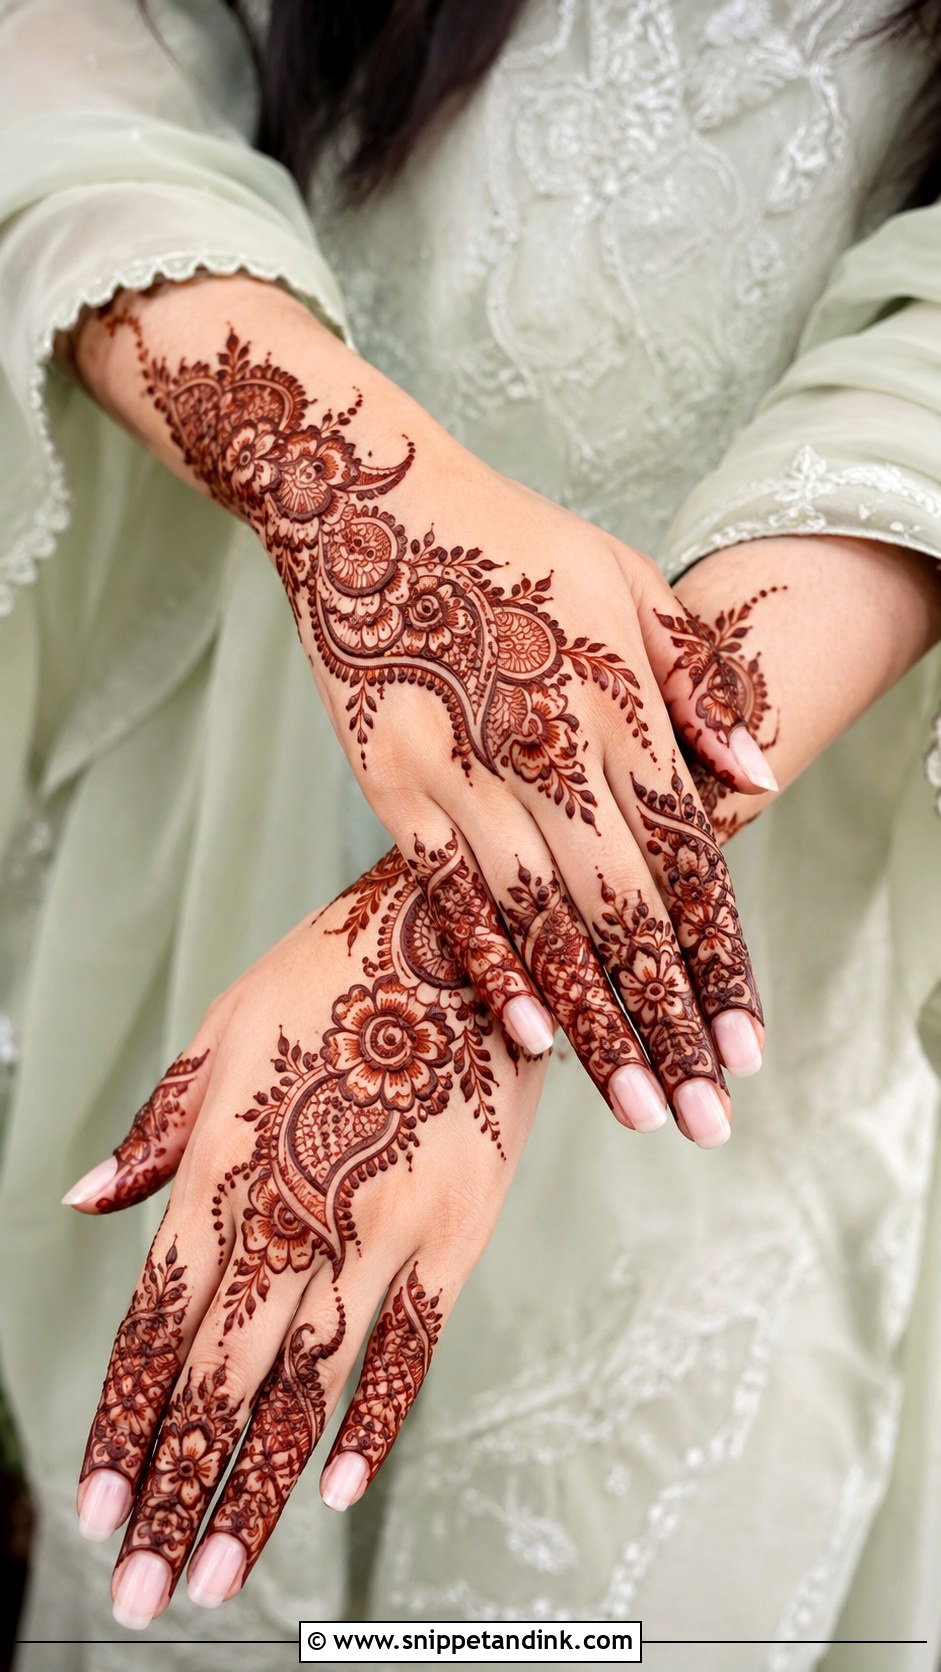
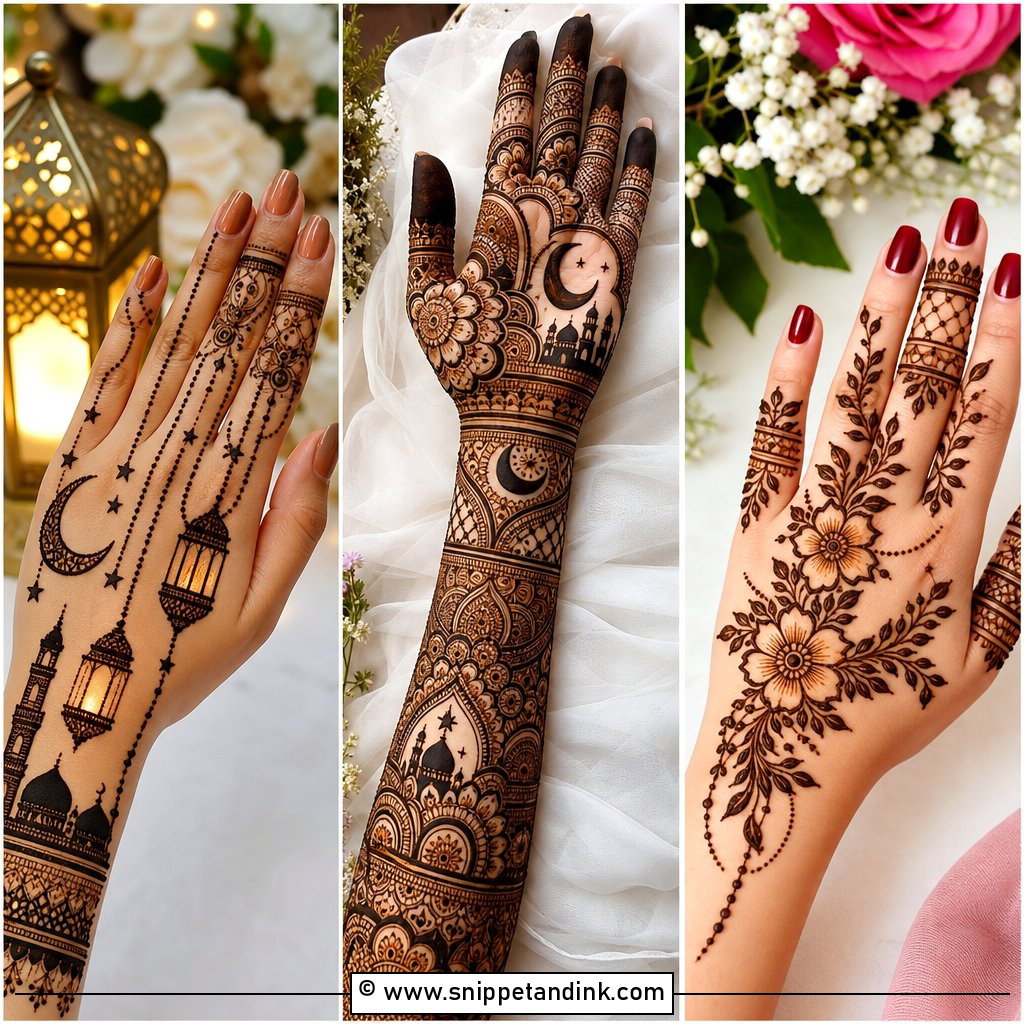
Indo-Arabic mixes the open trail of Arabic work with the filled motifs of Indian work. I draw a bold Arabic floral trail first, then add Indian filling, dots, small checks, paisley lines, inside the flowers only. One side of the hand stays open so it doesn’t turn heavy. Fingers get simple bands or leafy tips. It sits nicely between minimal and traditional, and suits festive and wedding guest looks.
16. Simple Moroccan Mehndi Design
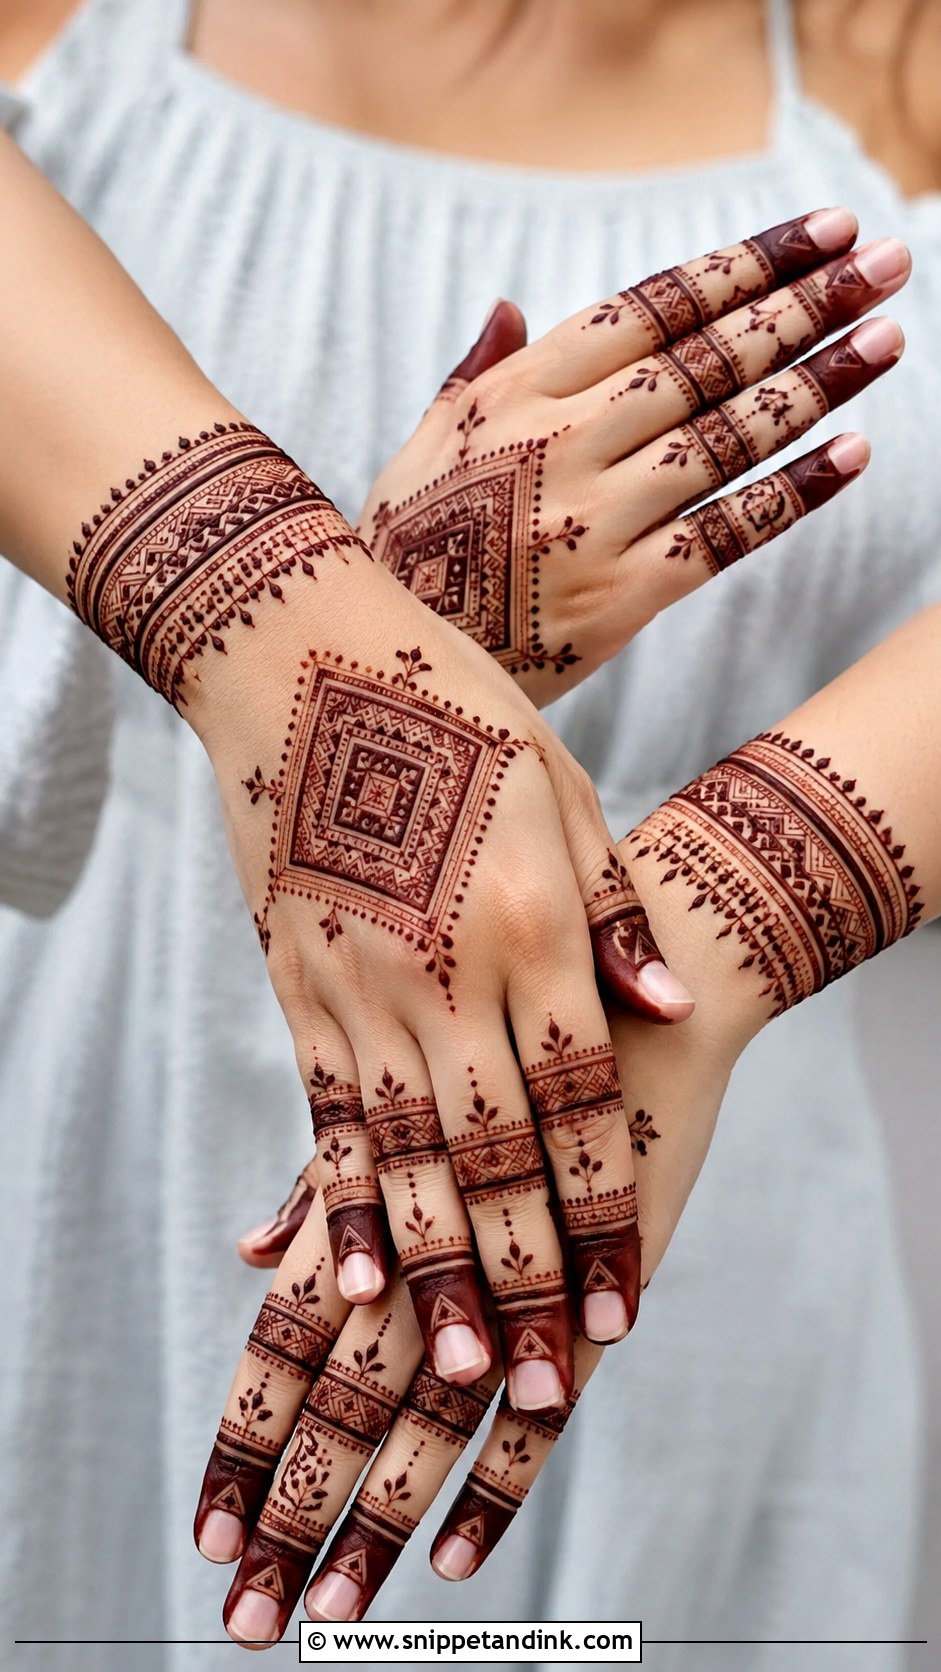
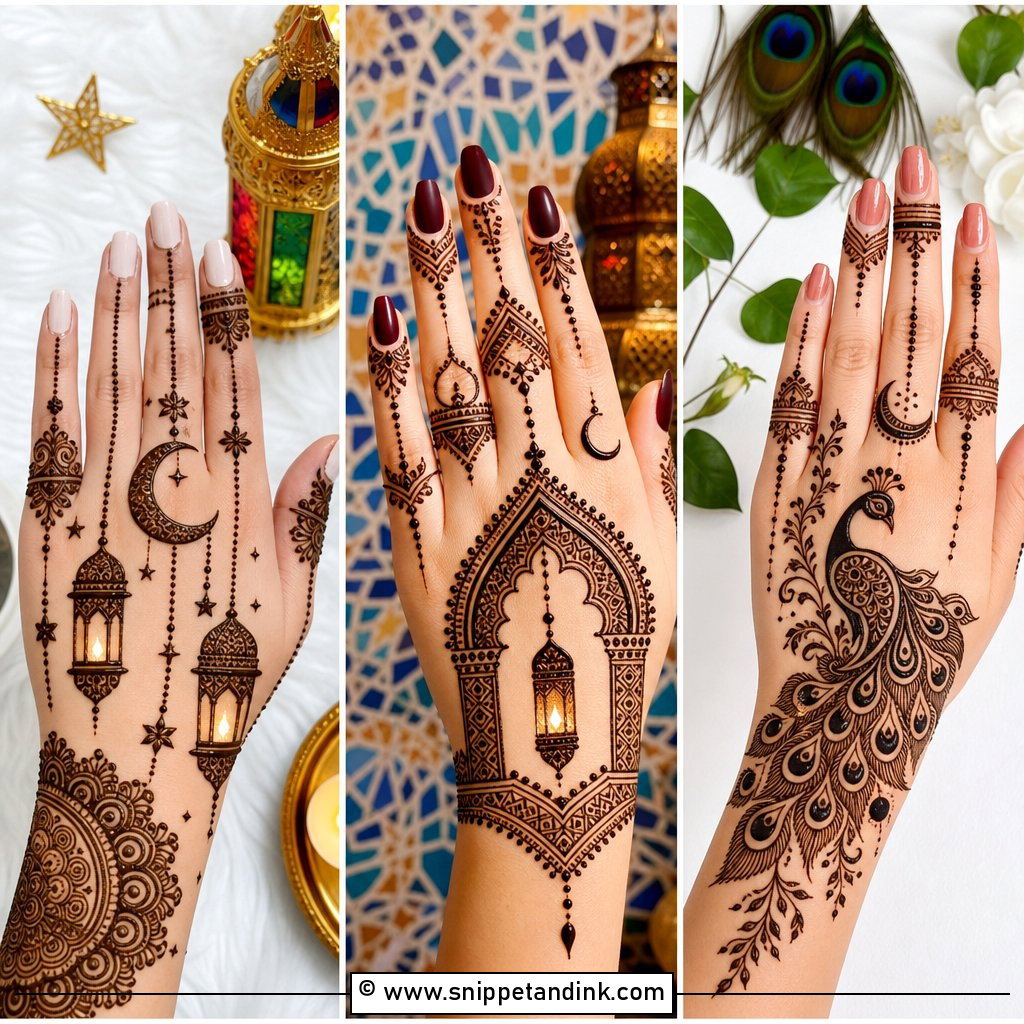
Moroccan-style henna uses geometry rather than flowers: diamonds, triangles, straight lines, dots and small blocks. I draw a bracelet at the wrist, a diamond on the back hand and clean finger bands. Straight lines are easier for a beginner to plan, but they’re harder to keep straight with a cone, so go slowly and let the paste fall onto the skin rather than dragging it. It looks sharp and different from floral work.
17. Simple Gulf Mehndi Design
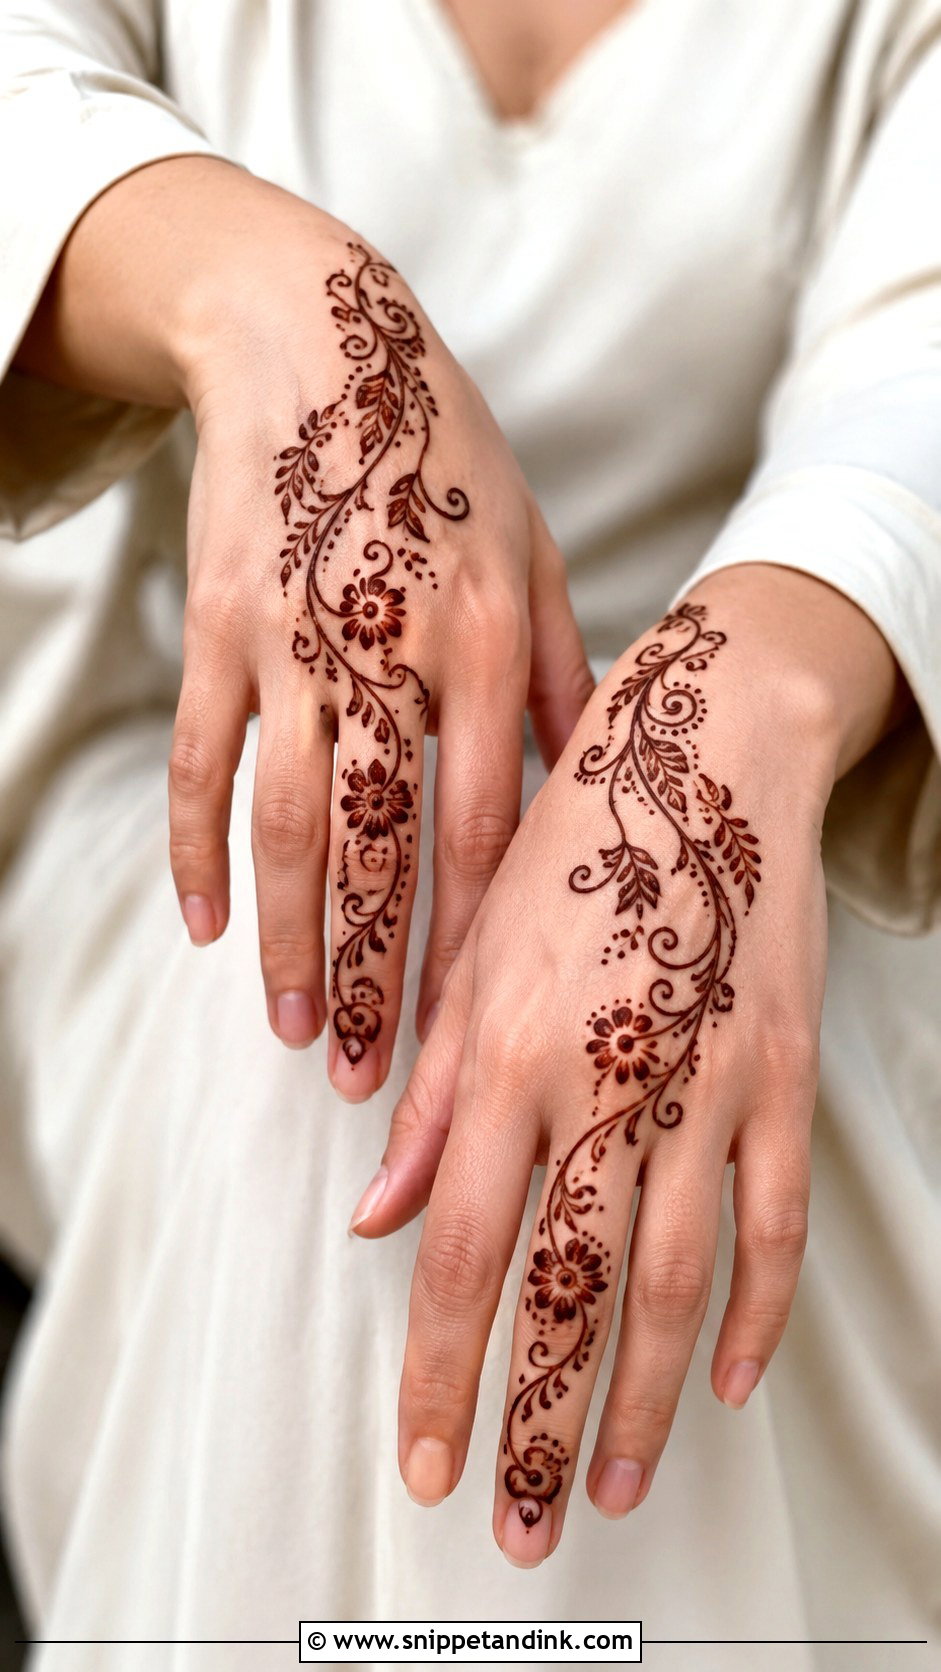
Gulf designs are bold and airy, with large flowers, leafy trails and plenty of empty space. I start at the wrist with a floral cluster, move diagonally across the back hand and finish on the middle or index finger. Thick outlines and light shading keep it visible from a distance. Don’t fill the gaps. That open layout is what gives it its look, and it photographs well for Eid, henna nights and family gatherings.
18. Simple Leaf Mehndi Design
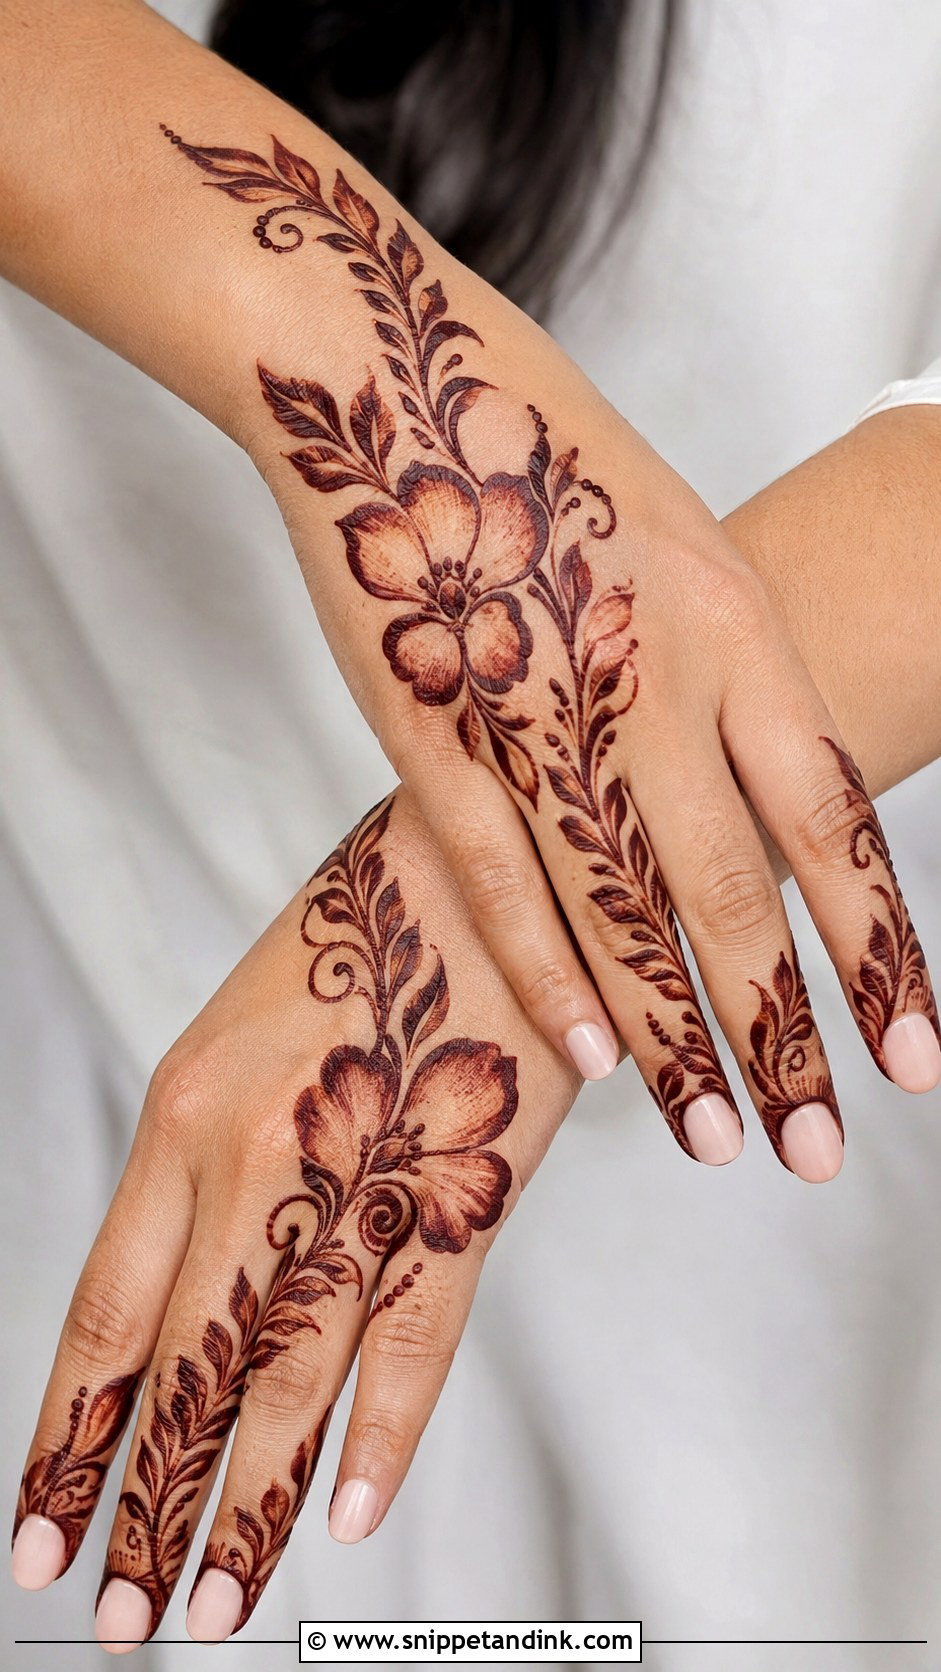
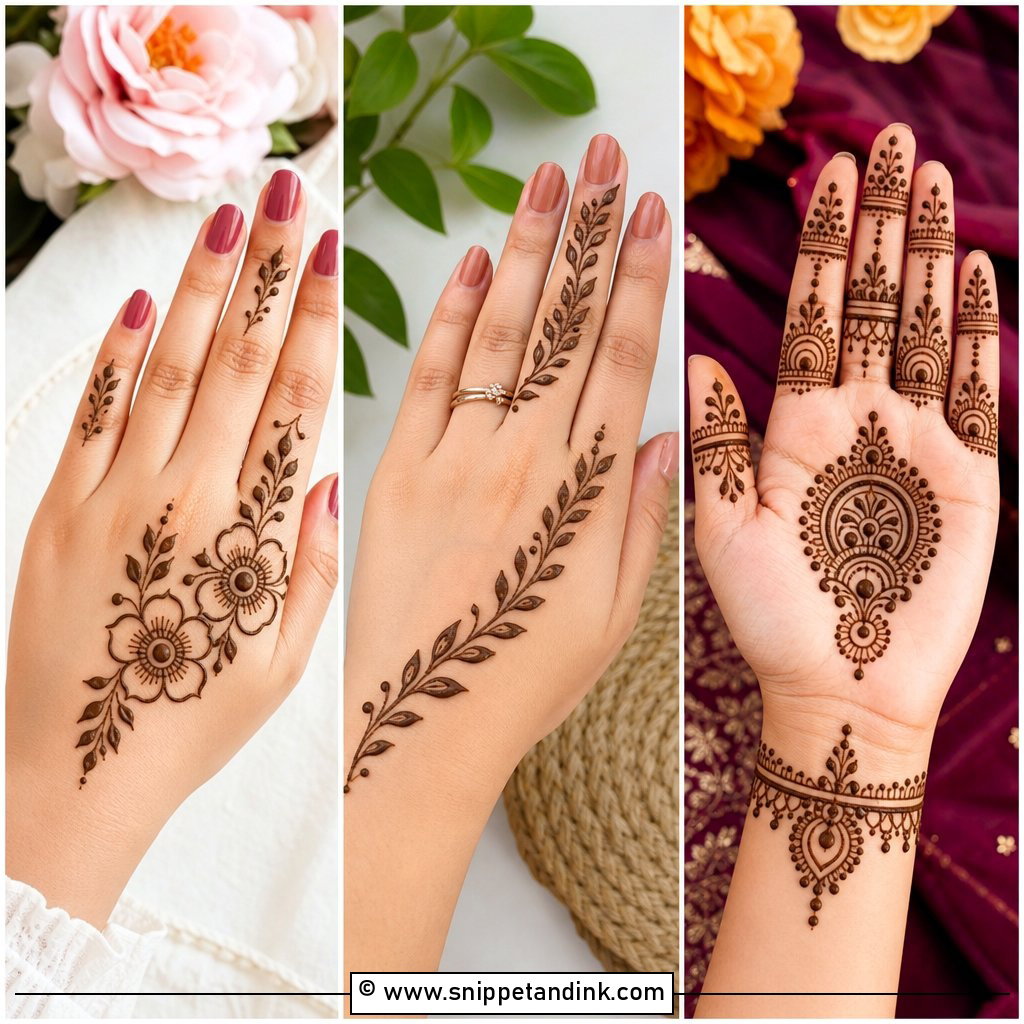
Leaves are the quickest motif I know. I run leafy vines from the wrist to the fingers, with one small flower or round motif in the center so the pattern has an anchor. Keep the leaf shape the same throughout, pairs on a curved line, teardrops or long points, or it starts to look random. It works on both sides of the hand and suits anyone who wants a natural, delicate look.
19. Simple Vine Mehndi Design
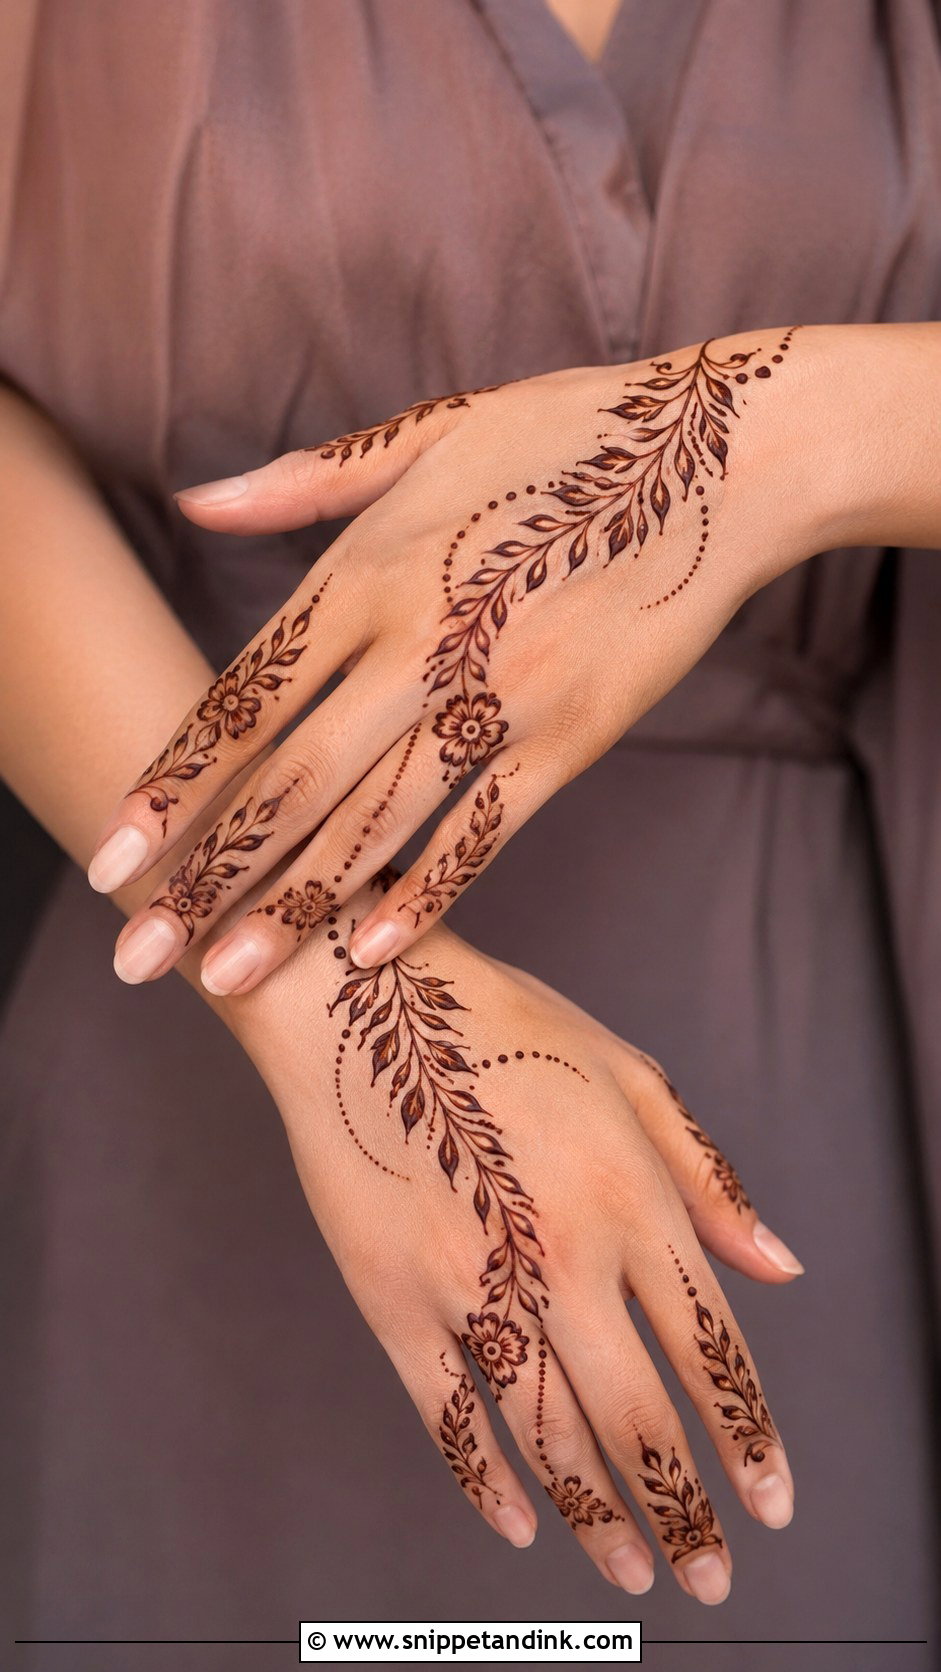
A vine is my go-to for last-minute requests. One curved line runs from the wrist to the ring or index finger, with leaves, tiny flowers, dots and small spirals along it. Keep it slim for a minimal look or add shaded petals for festivals. It doesn’t need symmetry, and it moves with the shape of the hand. I can finish one in a few minutes.
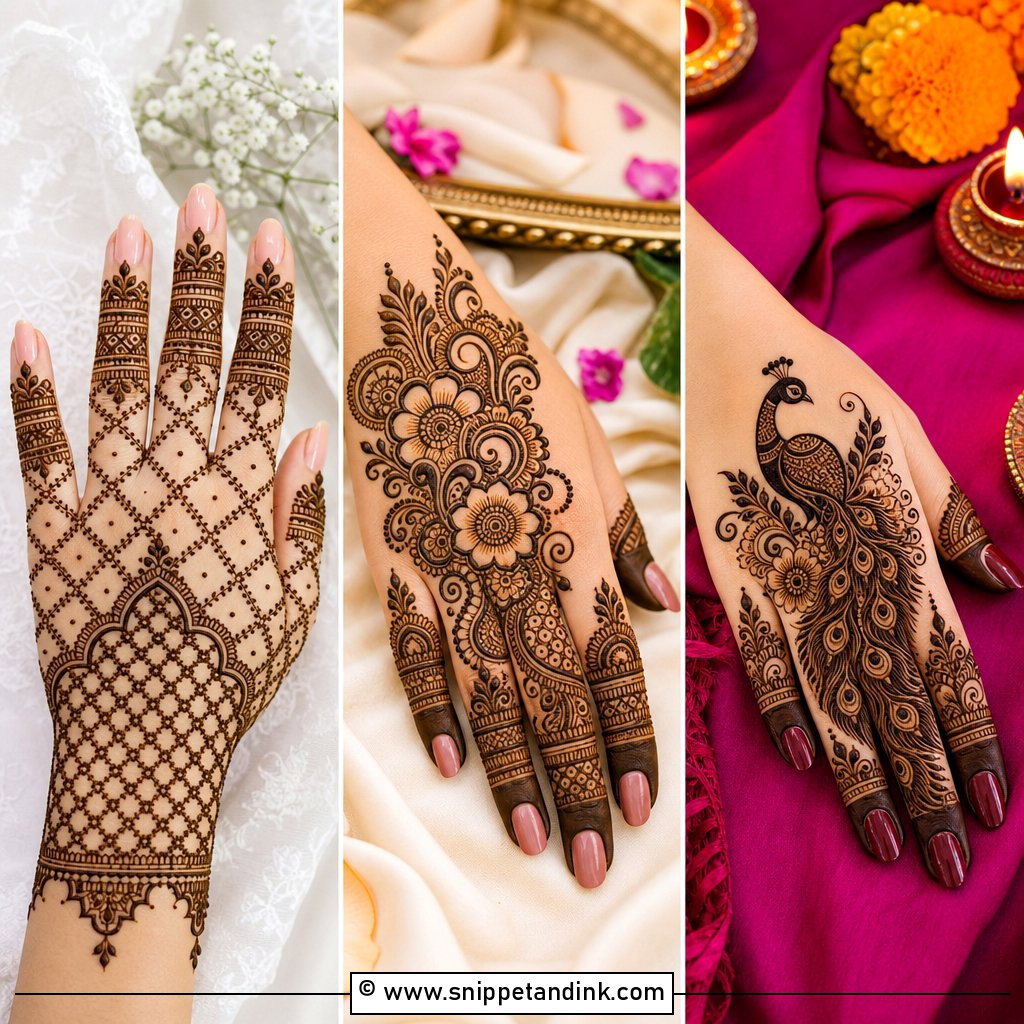
20. Simple Tikki Mehndi Design
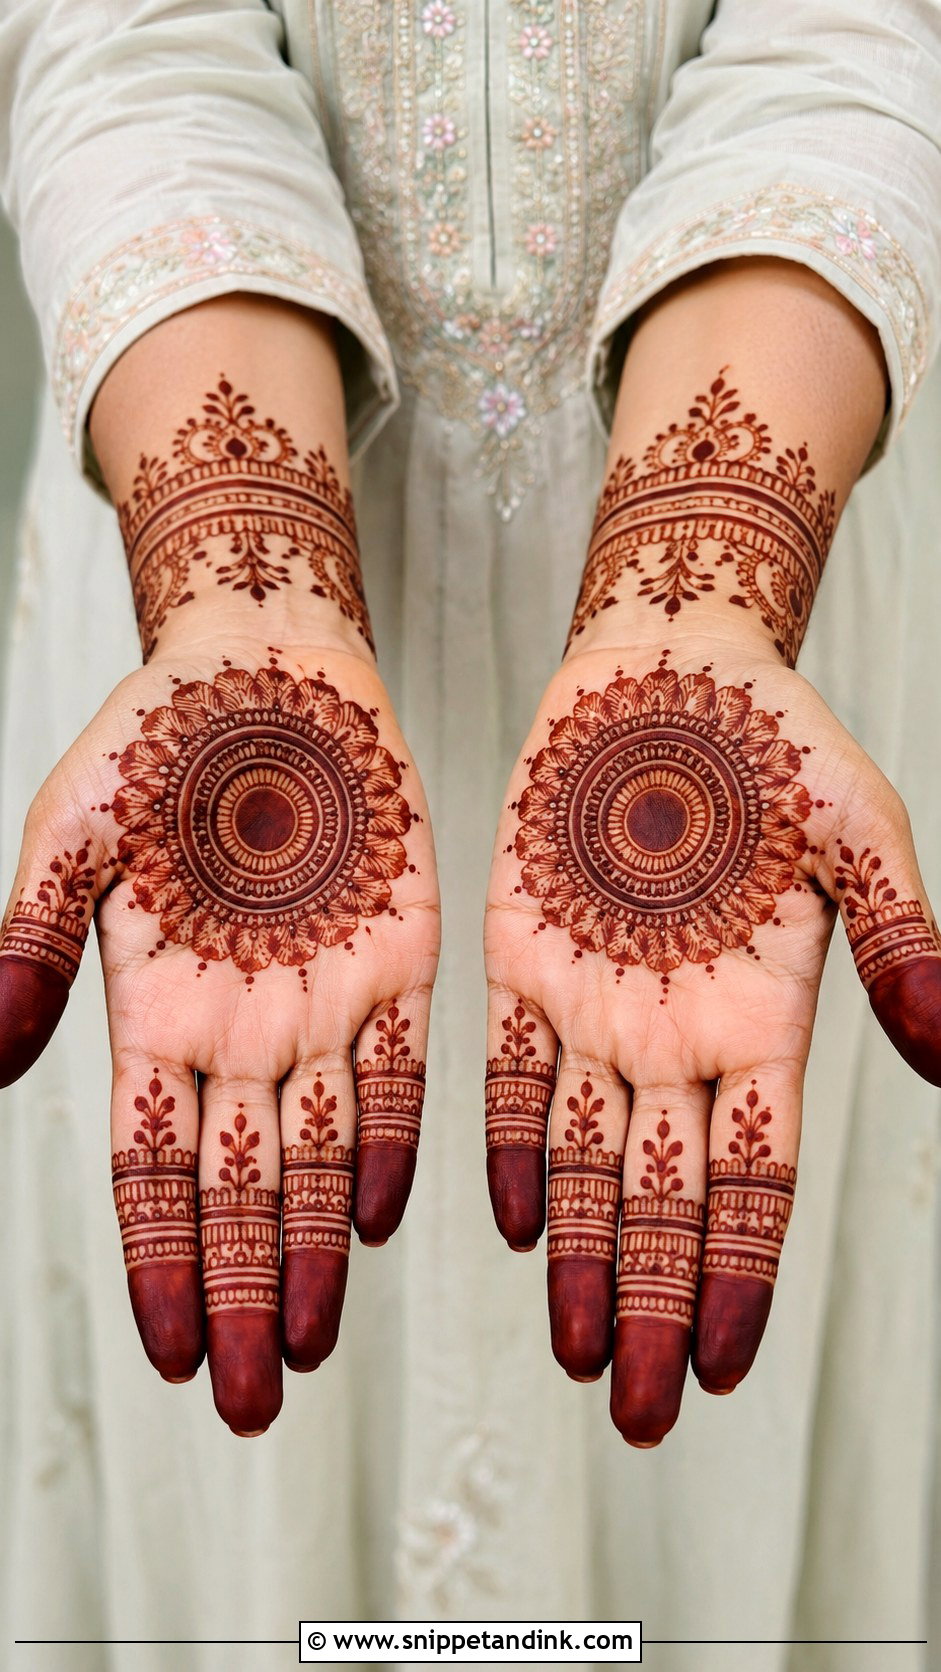
Tikki means a bold round center in the palm, and it’s among the oldest layouts I draw. I fill the circle completely, then surround it with petals, dots and thin rings. Fingers get small bands and filled tips. A small wrist border balances it. Because the center is solid, it stains as a deep, even disc on the palm, which is why so many families still ask for it at Eid and weddings.
21. Simple Bridal Mehndi Design
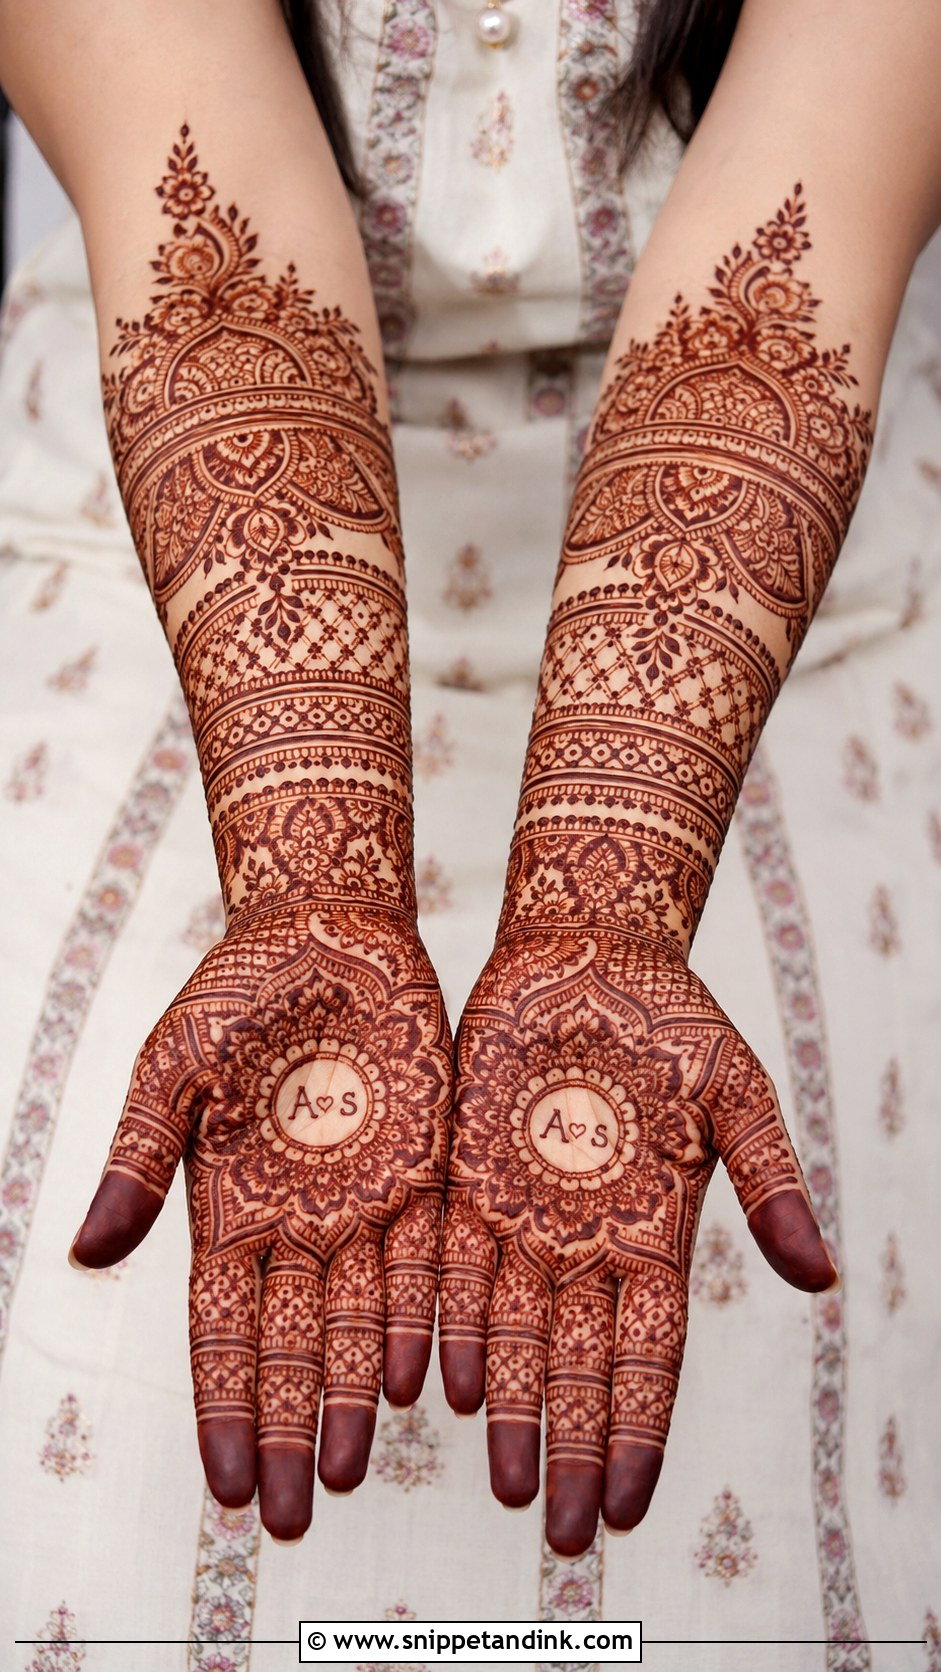
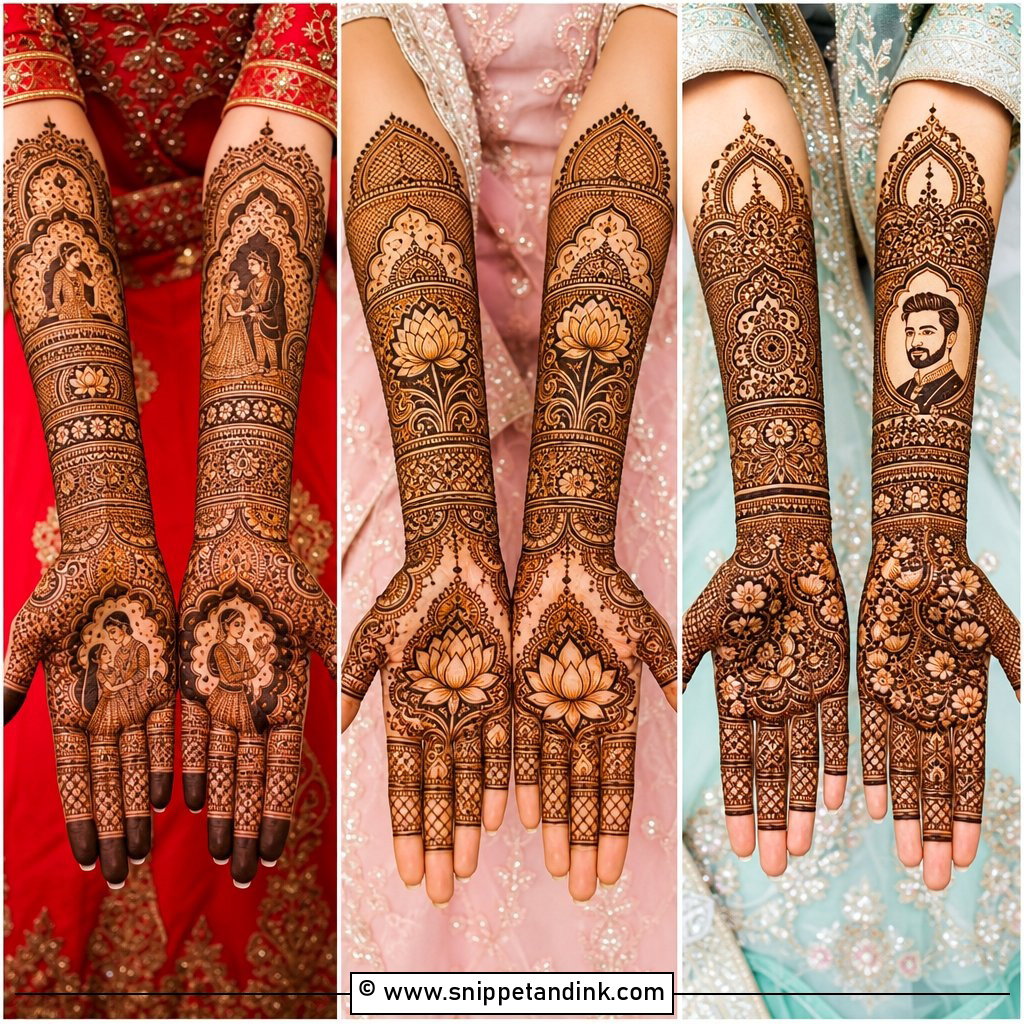
Not every bride wants six hours of mehndi. For a lighter bridal look, I fill the palm with mandalas, paisleys, flowers and leafy borders, but at a larger scale, and take the design from the fingers to the wrist or slightly up the forearm. Both hands mirror each other. A small heart, initials or a wedding motif can hide in the design. Apply bridal henna one to two days before the wedding, not the same morning, so the stain has time to darken. It also suits an engagement, nikah, court wedding or small ceremony.
22. Simple Eid Mehndi Design
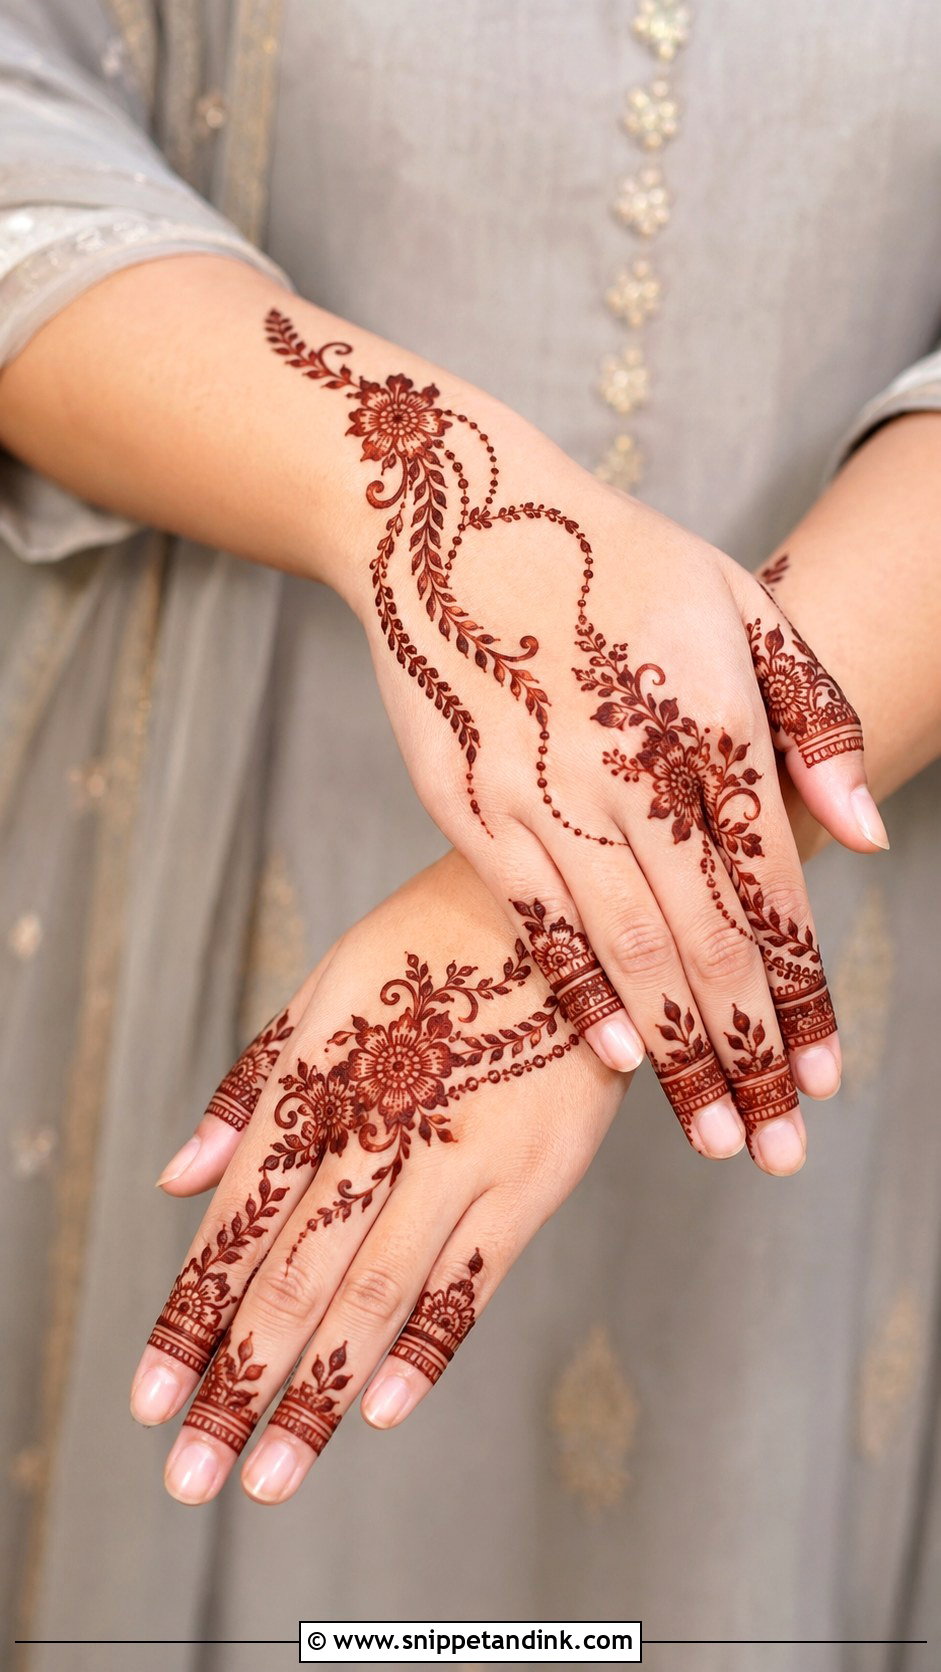
On Eid morning, I usually have a queue of family members, so a simple Eid mehndi design has to be quick. Arabic trails, floral back hand patterns, bracelets and finger layouts all work. A floral vine across the back hand with dotted chains and matching finger bands takes a few minutes. Apply it the night before Eid if you can, so the stain has darkened by morning. It pairs well with bangles and rings.
23. Simple Diwali Mehndi Design
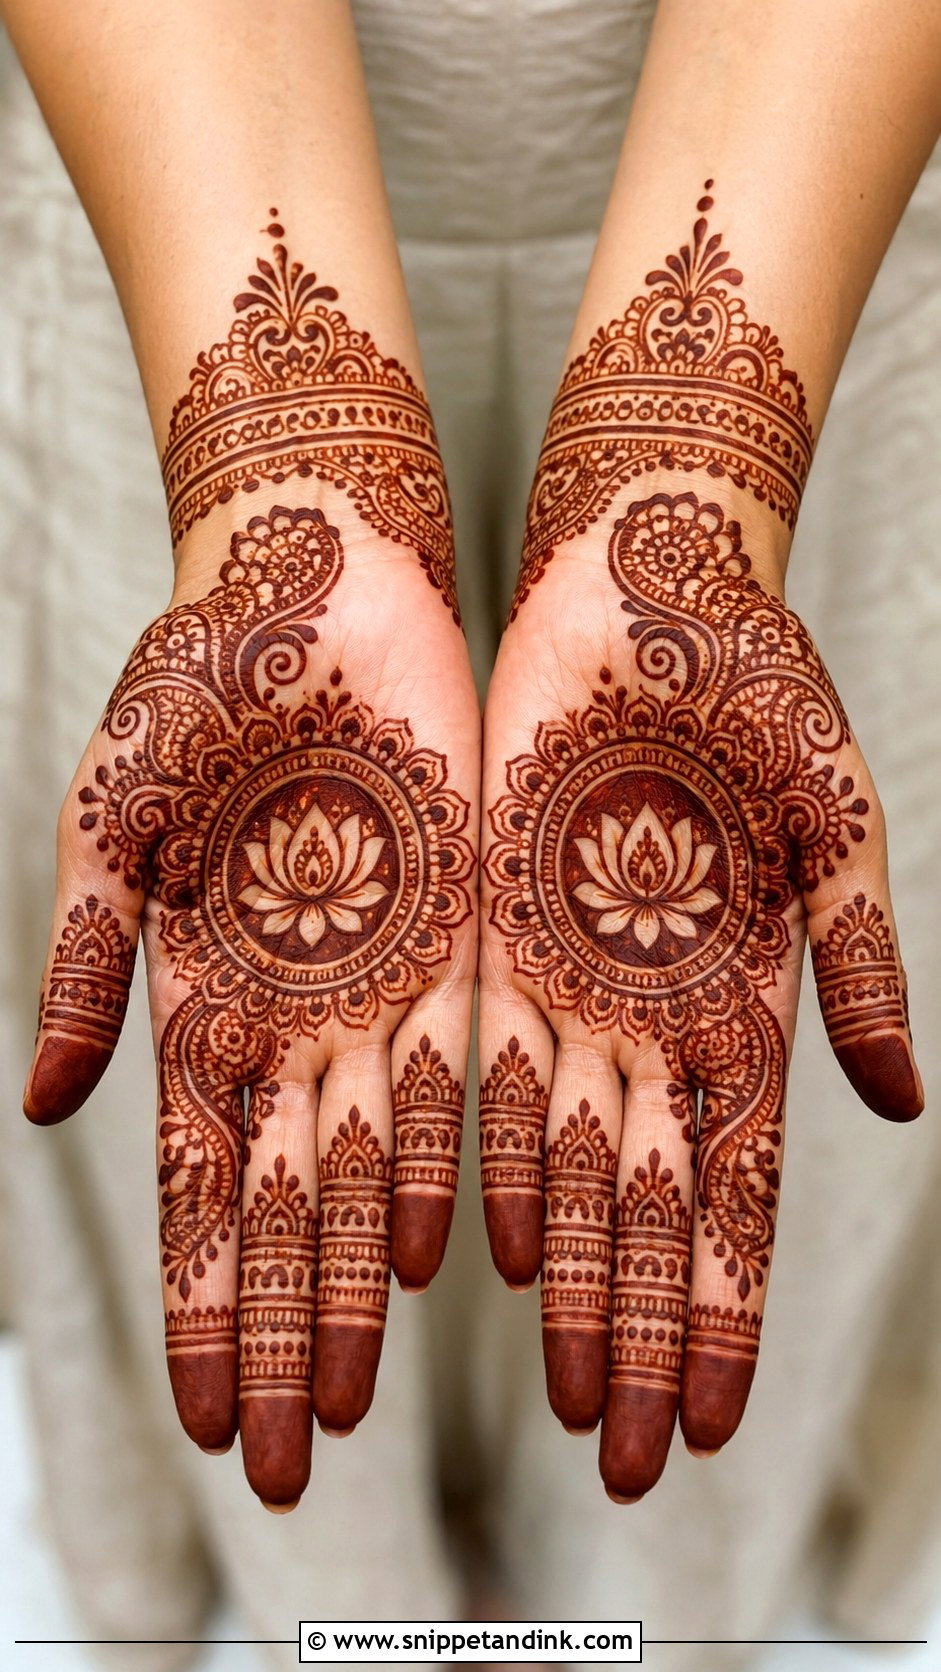
Diwali designs often feature mandalas, lotus shapes and paisleys with neat wrist borders. I start with a round palm motif, add a lotus or floral detail around it and finish the fingers with simple bands. Clean lines keep it festive but not crowded. A back hand bracelet layout is lighter and sits well with bangles. Apply it a day or two before so the color is deep for puja and family dinners.
24. Simple Wedding Guest Mehndi Design
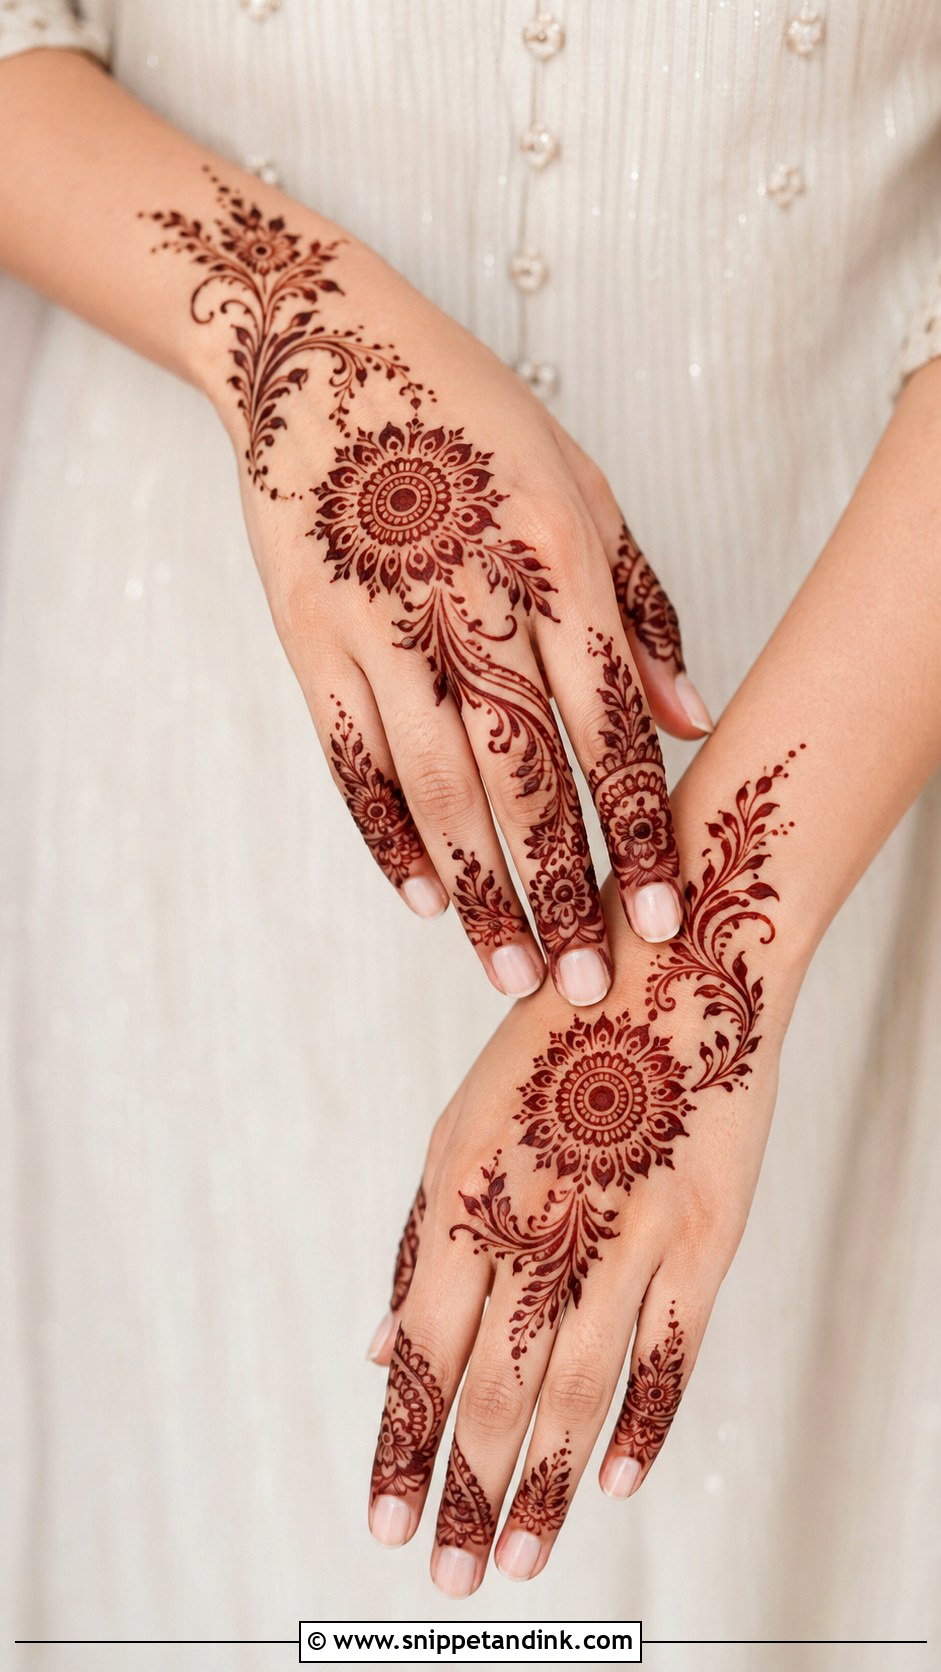
As a wedding guest, your mehndi should never compete with the bride’s. I’d go for a back hand floral trail, a palm mandala or a bracelet layout with light coverage and plenty of open skin. Finger patterns finish it. It goes with sarees, lehengas, salwar suits and fusion outfits. Light designs also dry faster, which matters when you’re applying it at the mehndi night itself and need to eat soon after.
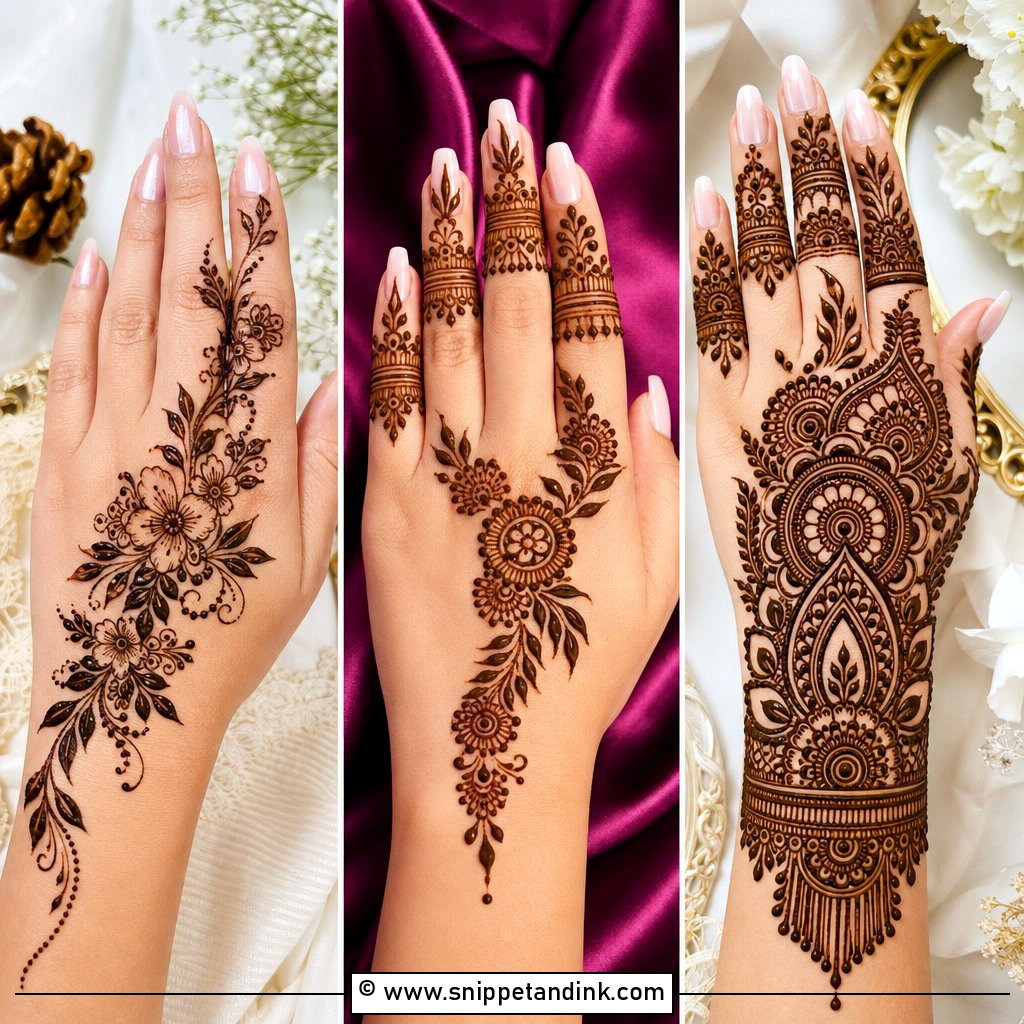
25. Simple Kids Mehndi Design
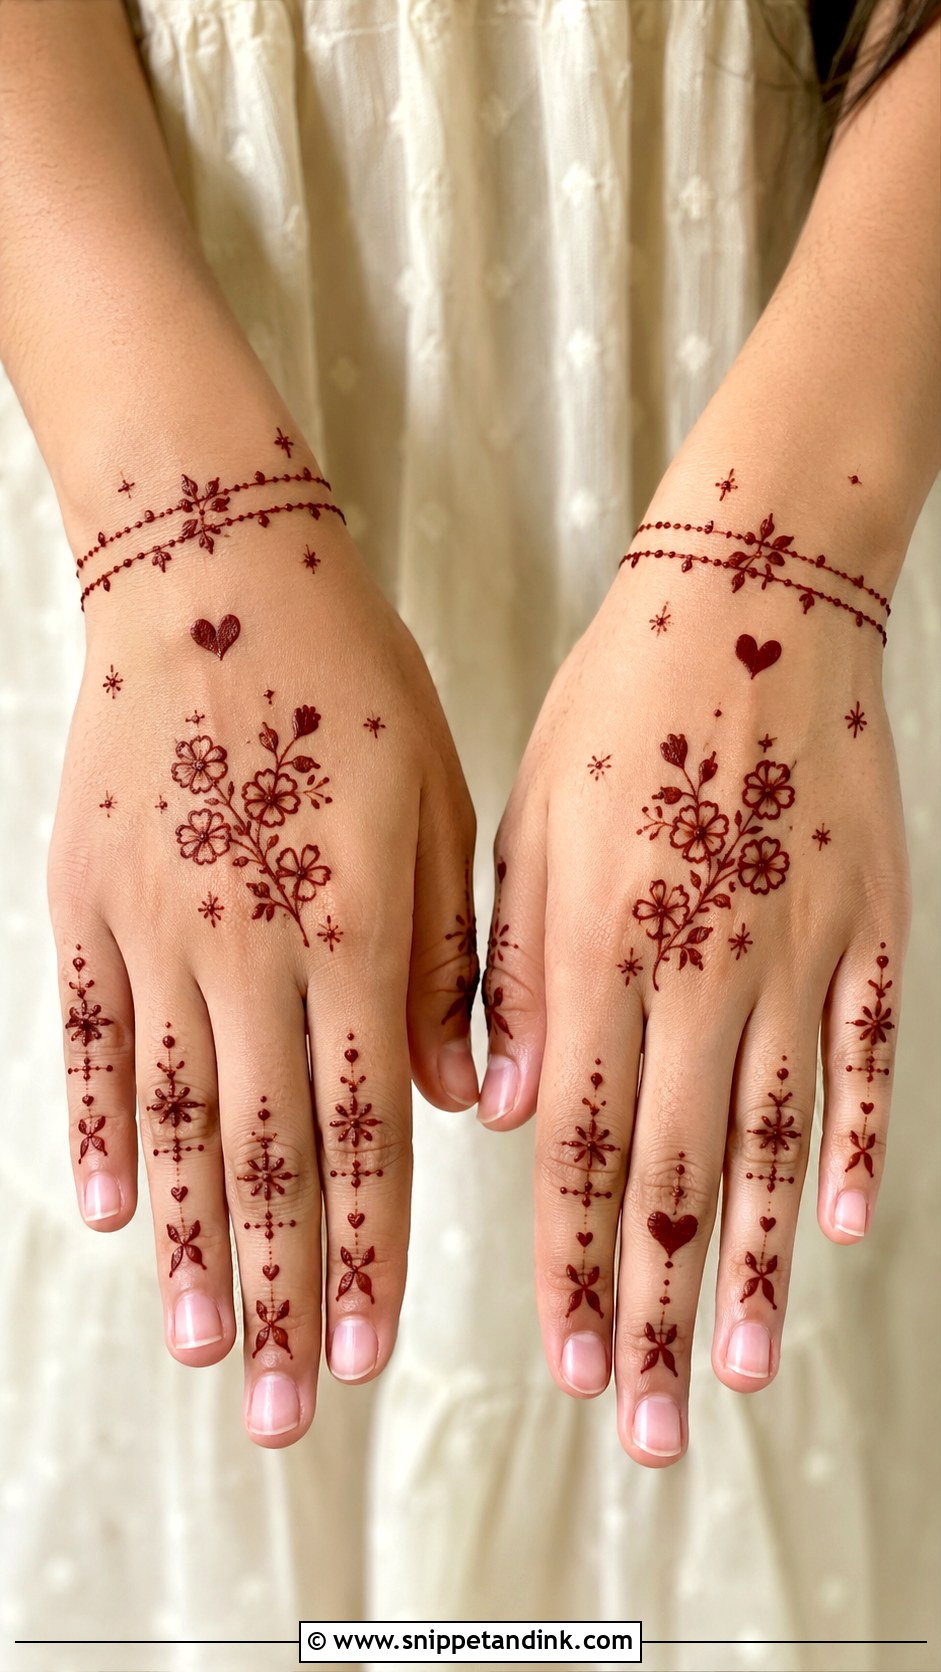
Children won’t sit still for long, so I keep their designs to five minutes: small flowers, hearts, stars, leaves or a tiny mandala on the back hand. Add light finger dots or a mini bracelet. Skip the palm for younger kids, since they’ll touch everything before it dries. Bold lines stain clearer. And only ever use natural henna on children; anything sold as black henna can contain chemicals that cause serious skin reactions.
26. Simple Mehndi Design For Beginners
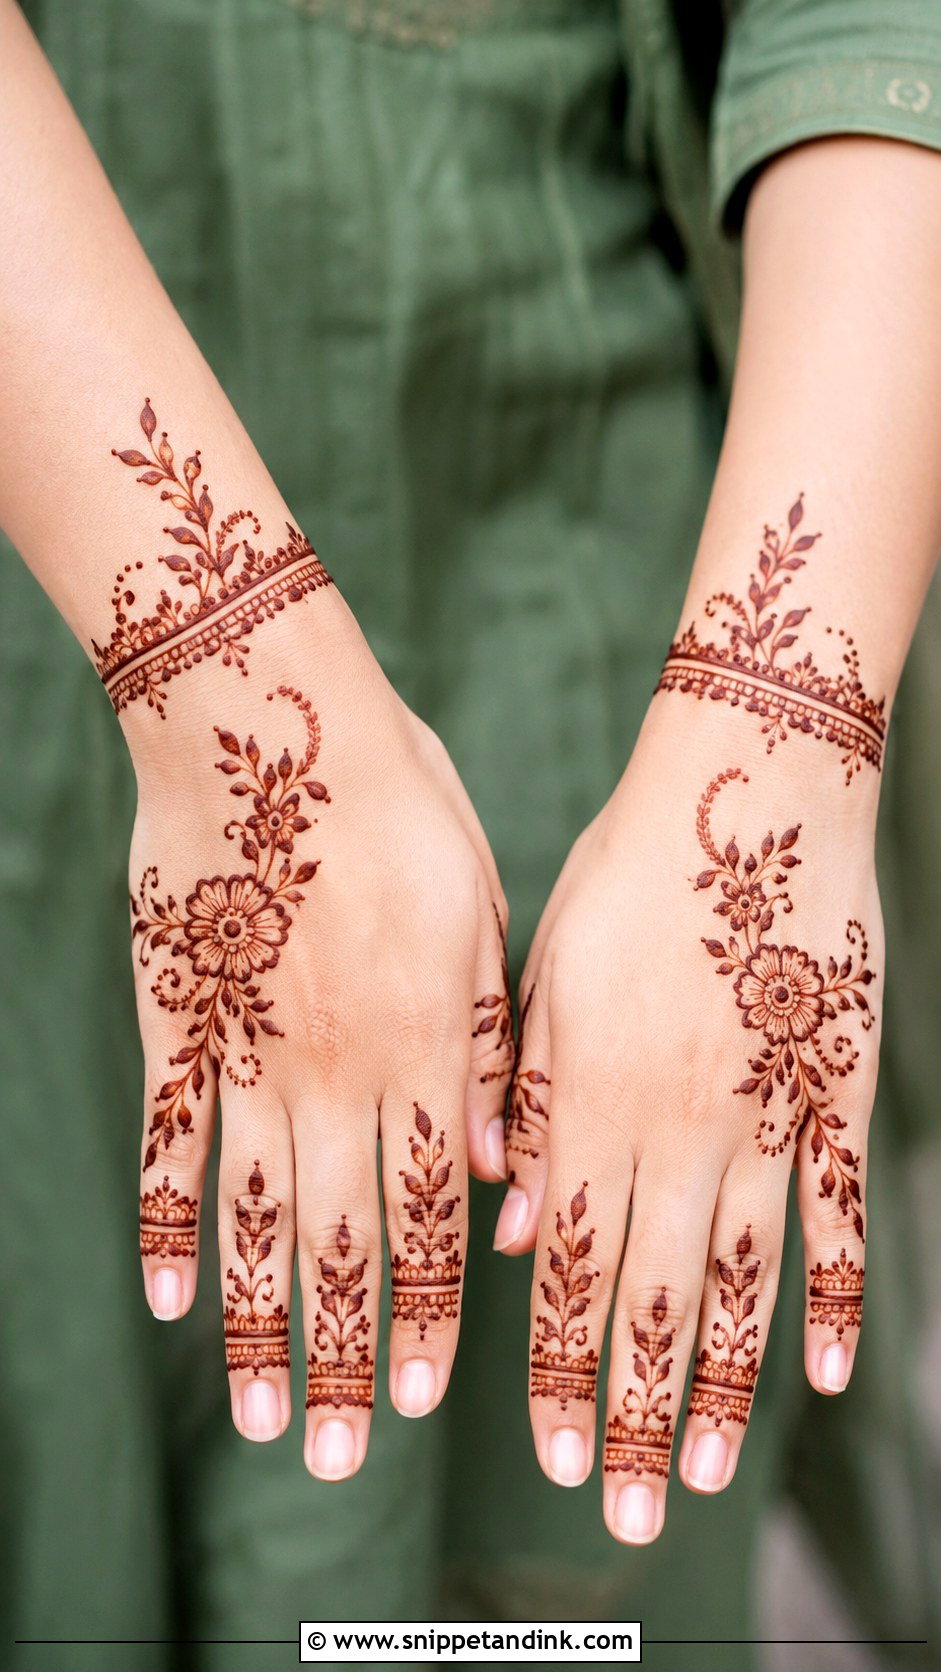
Beginners should learn control before detail. Dots, lines, leaves, circles and small flowers are enough. A good practice layout is a center flower on the back hand, a curved vine to one finger and a bracelet at the wrist. Hold the cone like a pen, press steadily and lift slightly off the skin so the line falls into place. If a line wobbles, add dots or leaves around it and nobody will notice.
27. Simple Minimal Mehndi Design
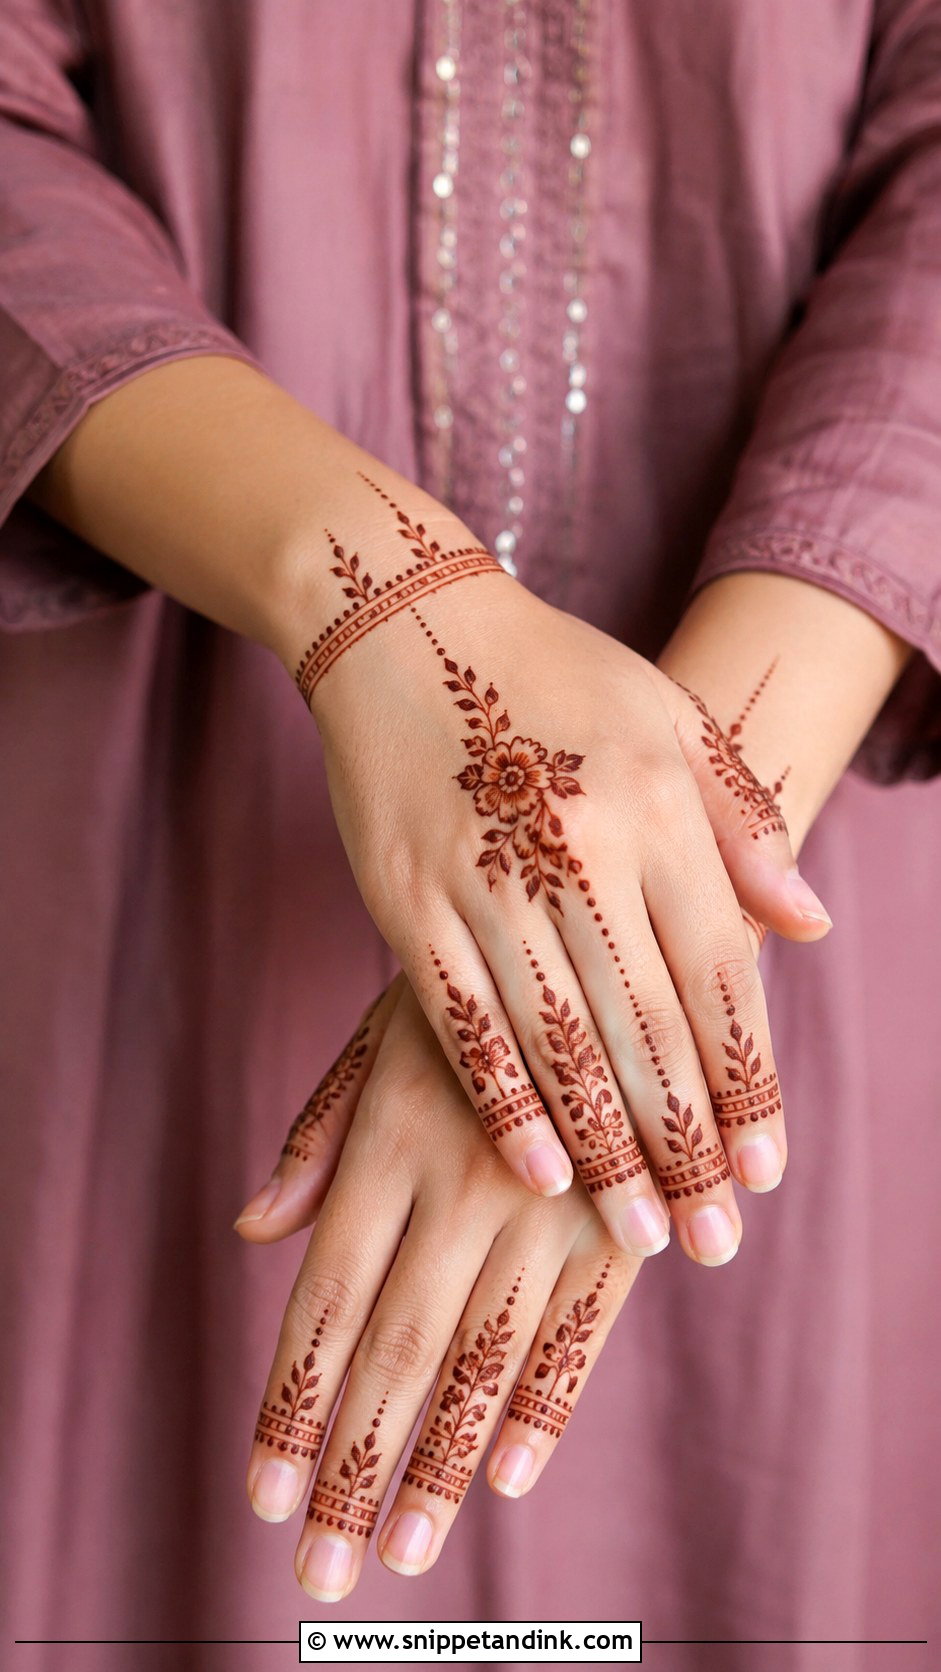
Minimal henna focuses on the fingers, wrist or one side of the back hand. I use thin rings, tiny dots, small leaves and one floral or mandala accent. The empty space makes it look intentional. It suits short nails, plain outfits and everyday wear, and it’s a gentle first try for people who’ve never worn mehndi.
28. Simple Half Hand Mehndi Design
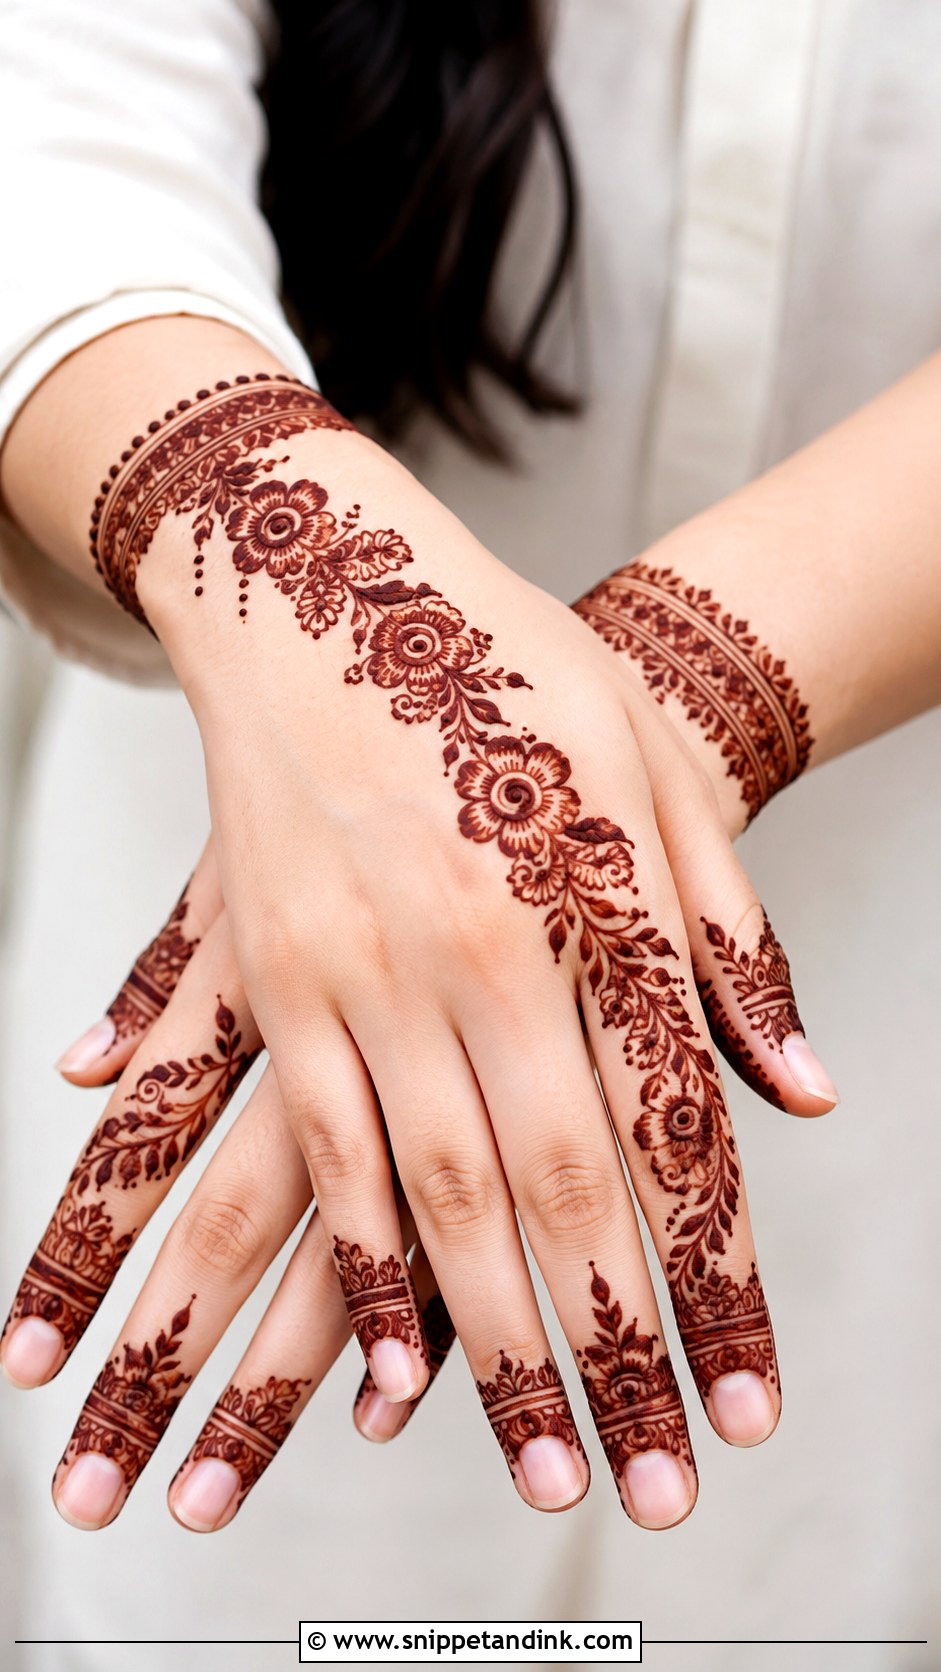
Half-hand layouts cover part of the hand but still look complete. I’ll decorate the fingers and upper palm, or run a design from the wrist to the center and leave the fingertips bare. A diagonal Arabic trail filling one side also works. When I map a half-hand design, I stop the pattern at a natural line, like the base of the fingers, so it looks deliberate rather than unfinished. It dries faster than full coverage and is comfortable for daily activities.
29. Simple Side Mehndi Design
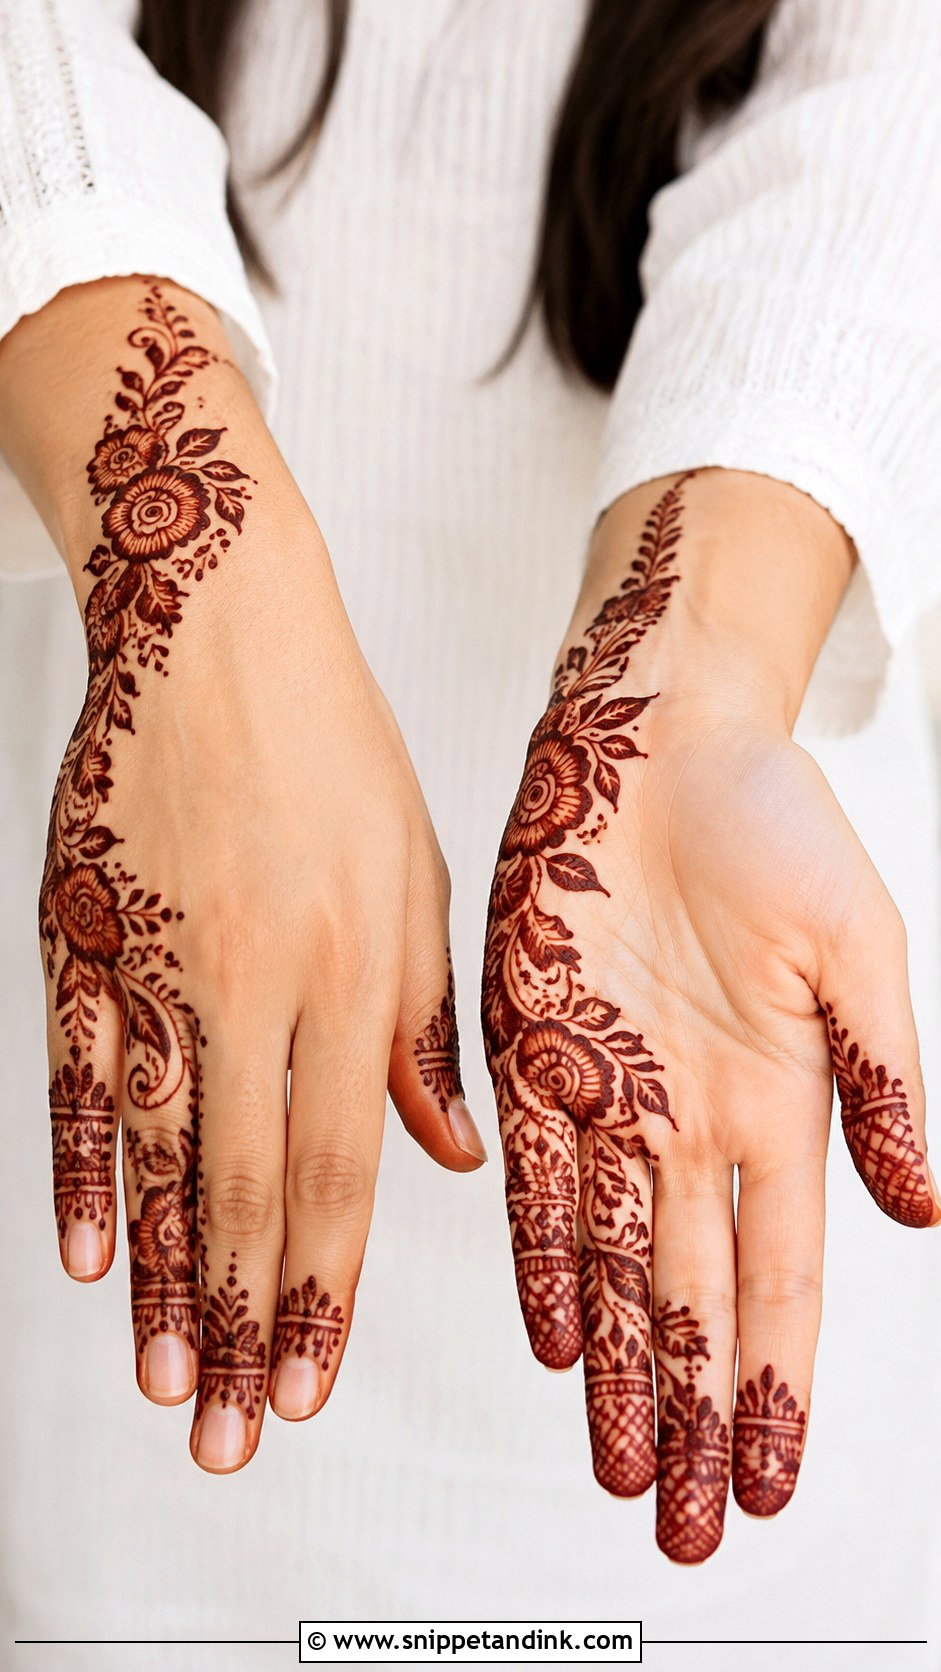
Side designs follow one edge of the hand. On the palm, I run it from the wrist along the thumb side; on the back hand, from the wrist toward the index finger. Flowers, leaves and small curves fill it, with the rest of the hand open. No center symmetry is needed, which makes it easier for beginners, and it looks graceful in photos.
30. Simple Ring Mehndi Design
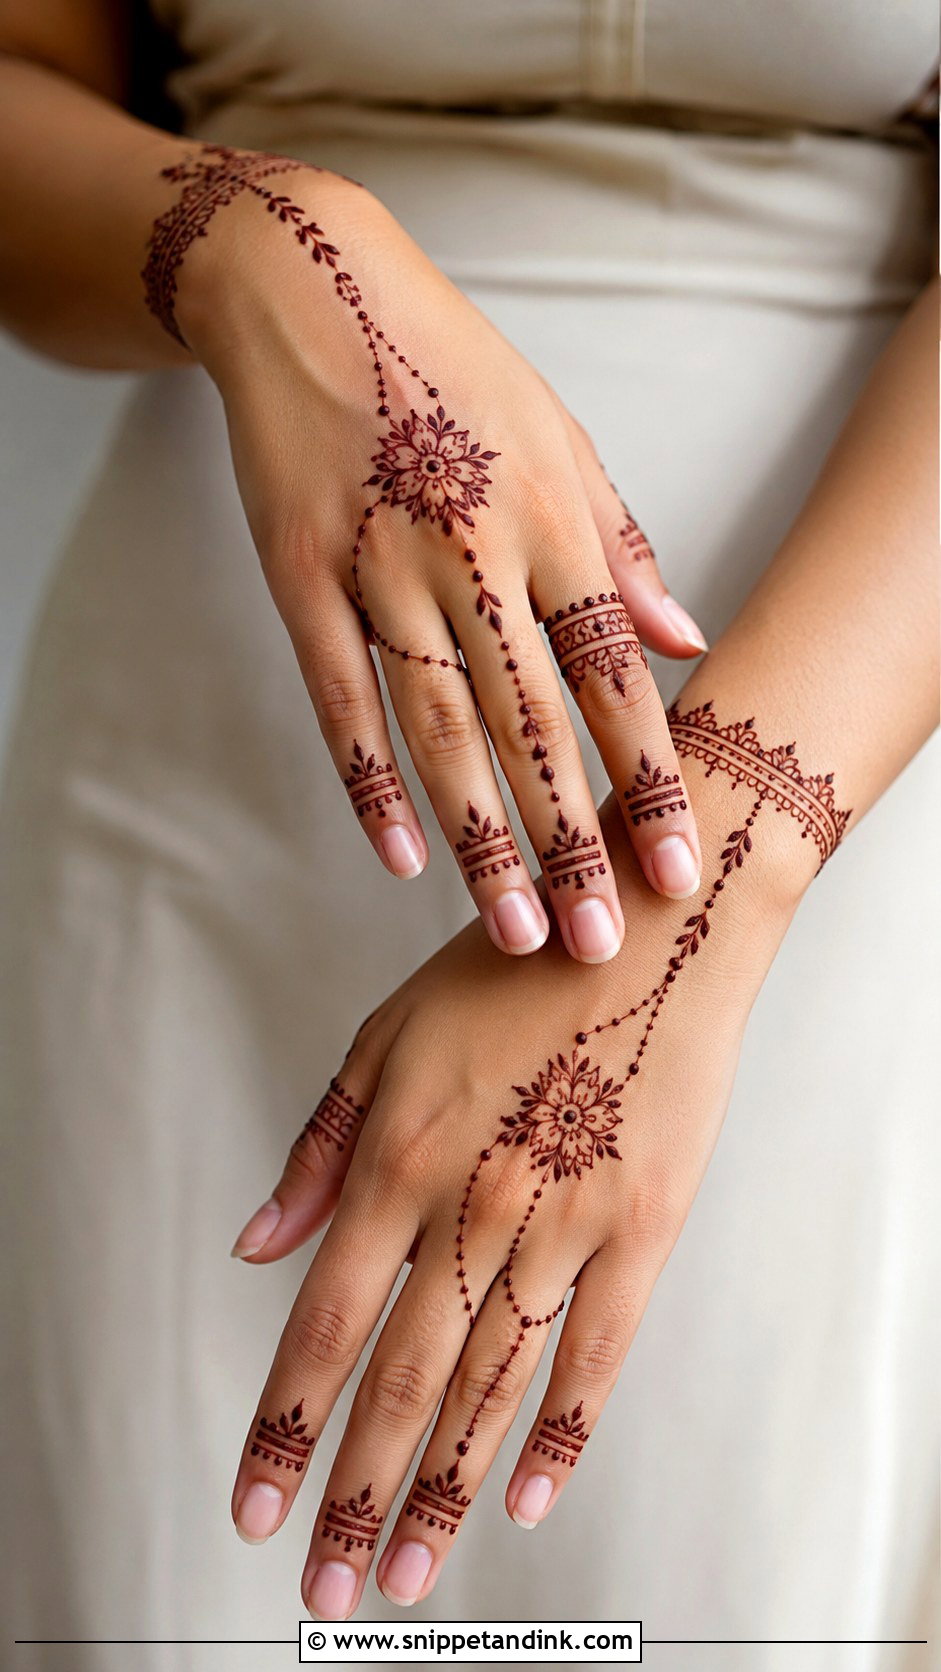
Ring designs look like hand jewelry. I draw small rings around each finger, connect one finger to the wrist with a dotted chain or leafy line, add a bracelet band and a small flower on the back hand. The palm stays bare. It’s quick, and it suits engagement parties, Eid and casual celebrations. Since the rings sit on the fingers, where henna stains deepest, they come out sharp and dark.
31. Simple Bel Mehndi Design
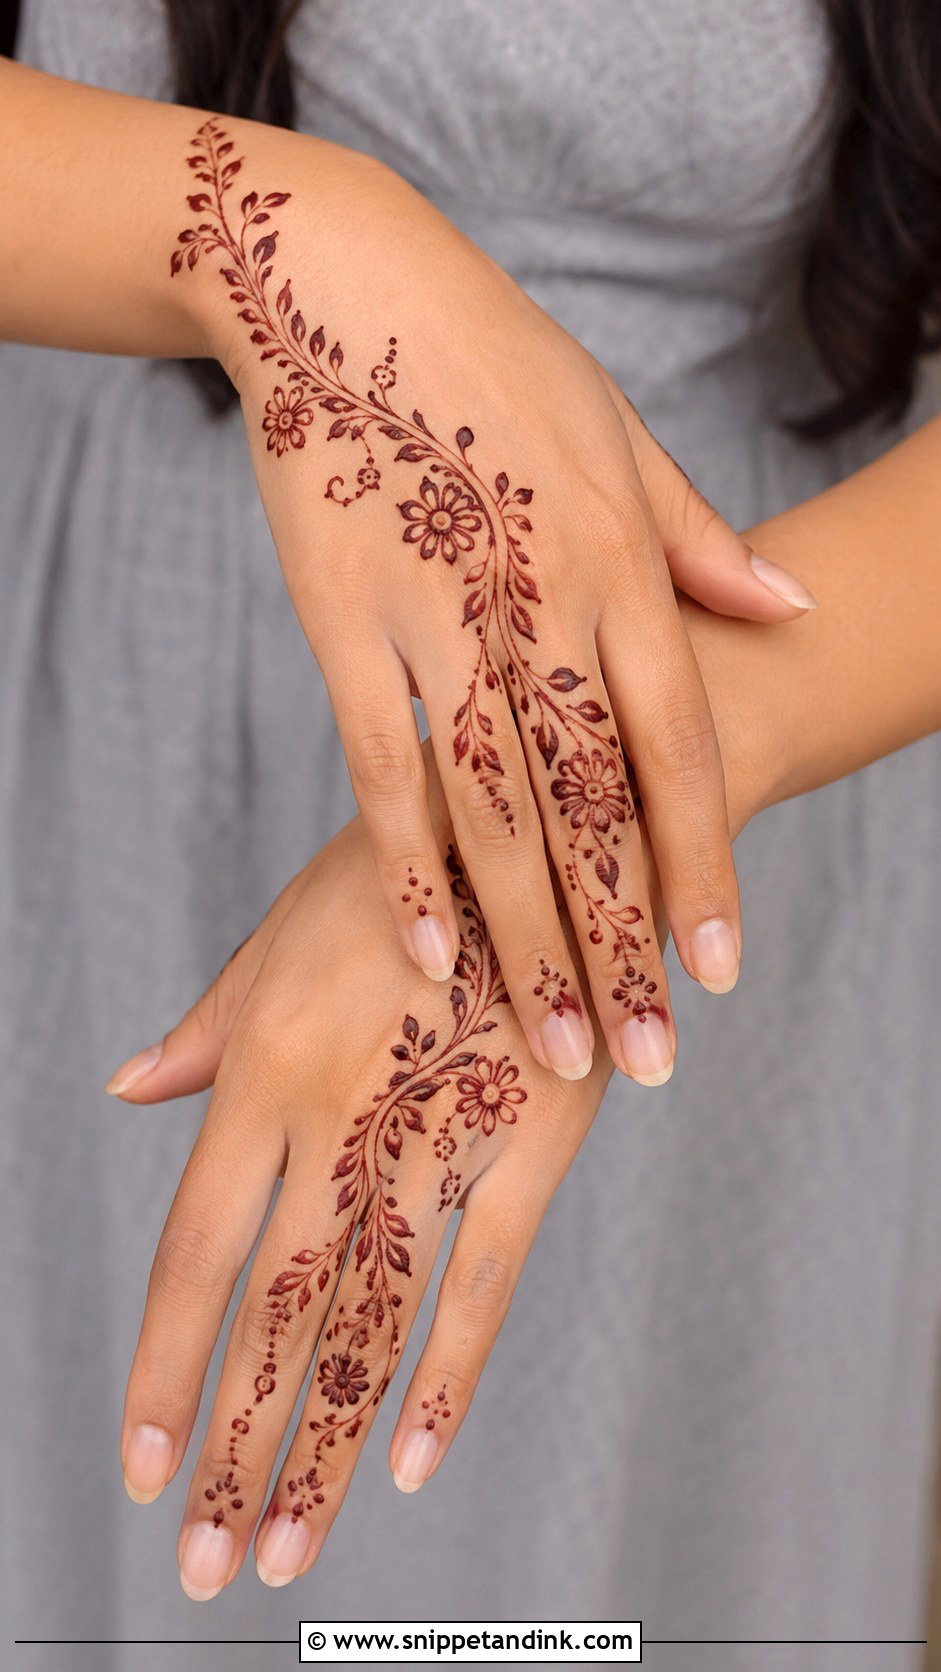
Bel means a flowing vine, usually drawn diagonally. I start at the wrist with a small floral cluster, then curve the bel toward one finger with leaves, dots and buds along it. Slim for beginners, slightly thicker for festivals. It’s common in Arabic and Indo-Arabic work because it looks graceful against open skin, and the diagonal line makes fingers look longer.
32. Simple Lotus Mehndi Design
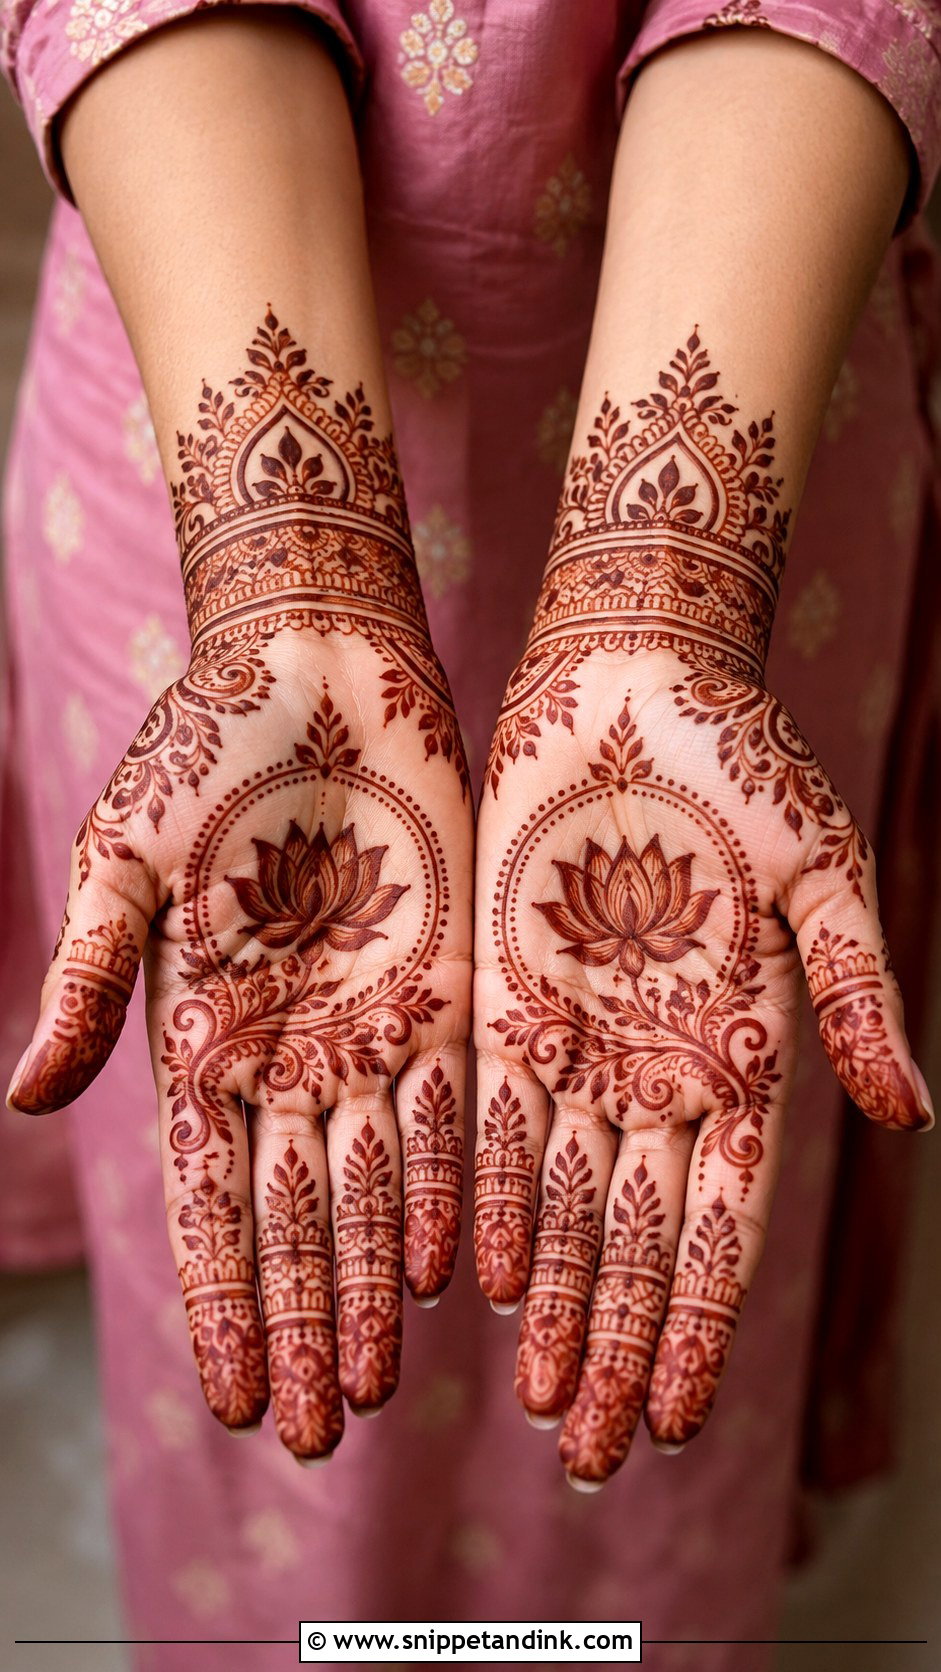
Lotus is one of the motifs clients ask for by name. I place one lotus in the center of the palm or back hand, then add curved leaves and dots around it. Clean petal shapes with one shaded side make it stand out. For more coverage, add a wrist border and finger bands. It suits Diwali, weddings and puja.
33. Simple Peacock Mehndi Design
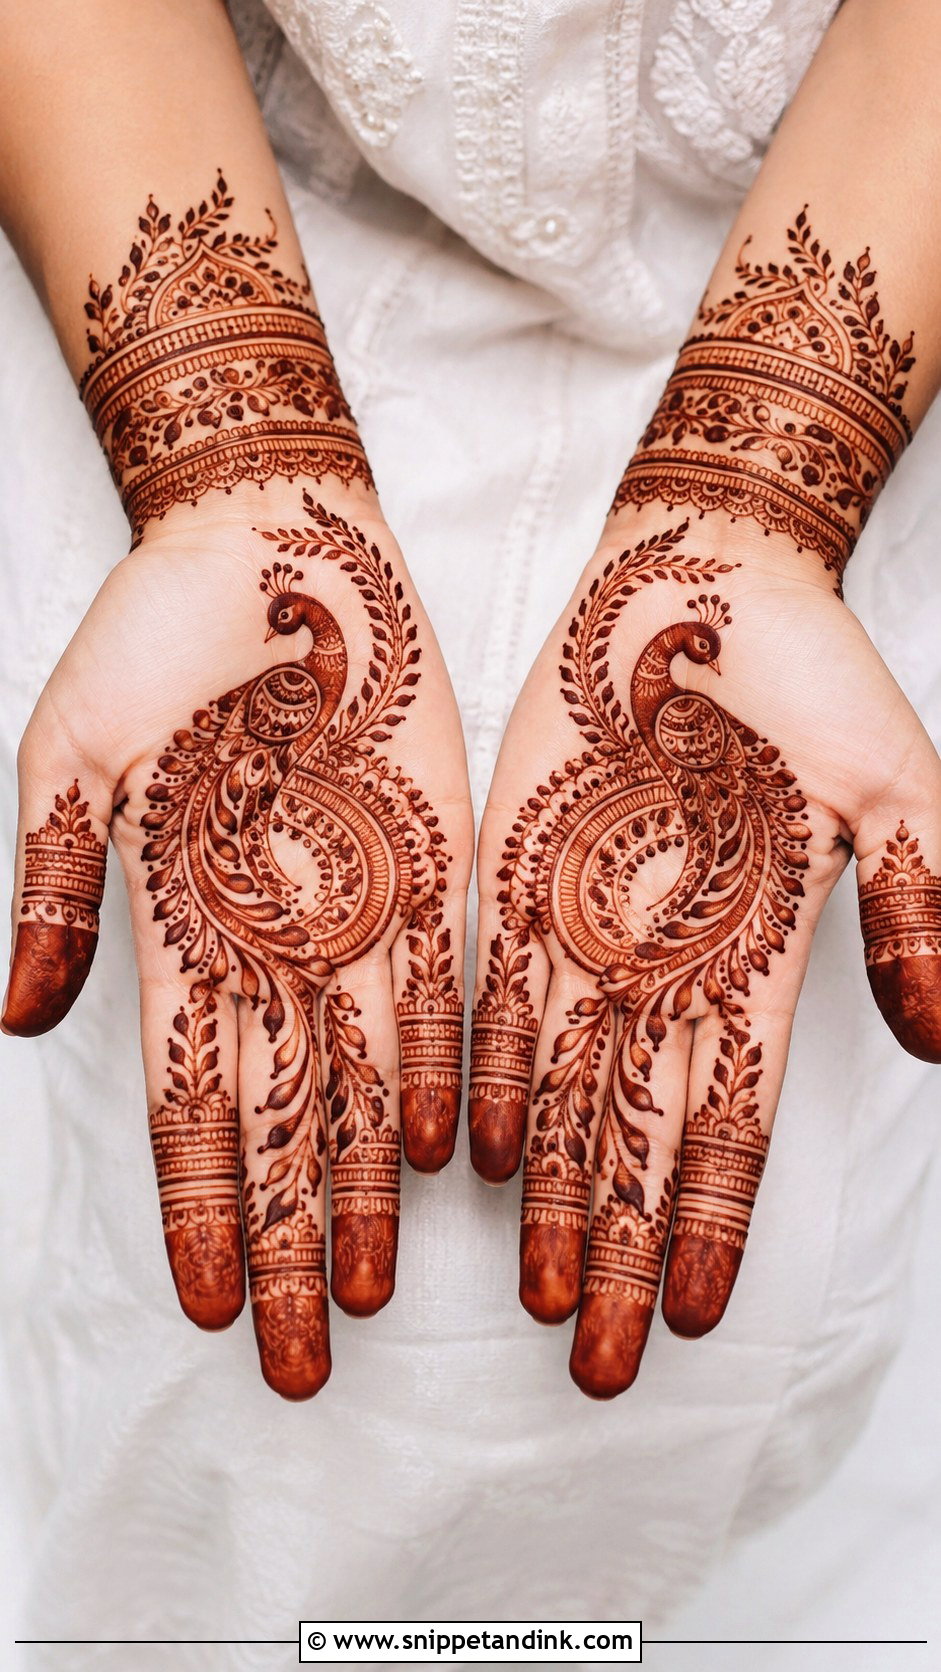
Peacocks look harder than they are. I draw a small body near the palm or wrist, then a curved feather trail with leaves, dots and scallops. Skip the tiny feather details if you’re new; bold outlines and clean spacing work better. Matching finger bands connect it all. The peacock has a classic Indian feel and gives more personality than a floral design, as long as you keep the shapes large.
34. Simple Shaded Mehndi Design
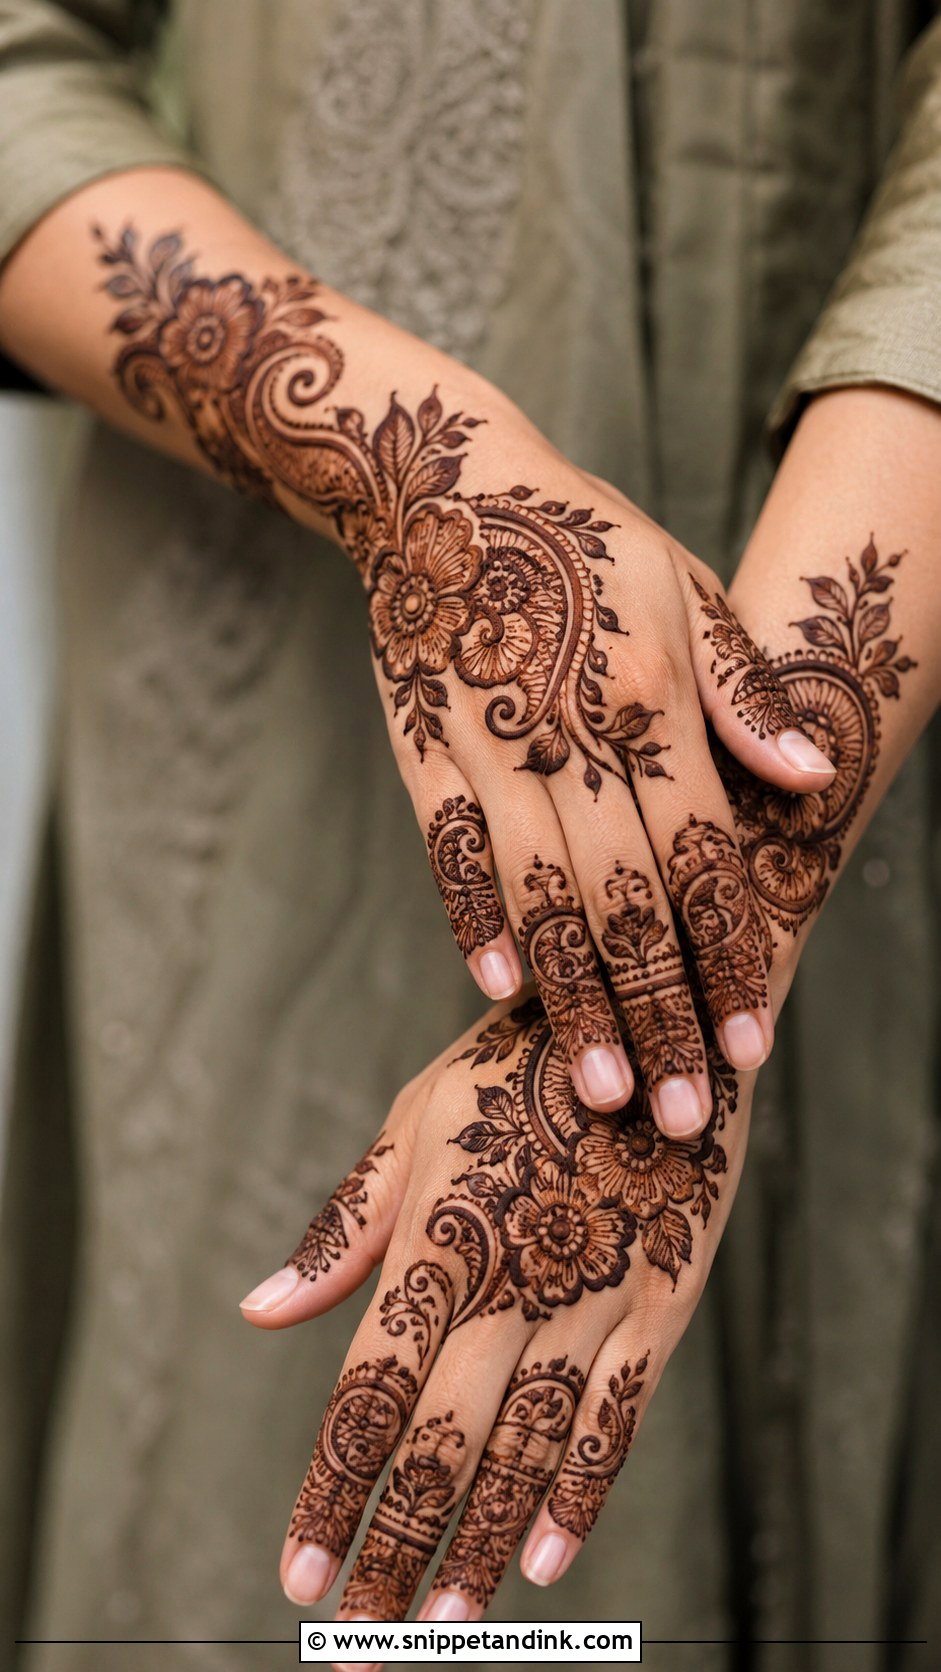
Shading adds depth without new motifs. I take large flowers, paisleys or leaves and shade one side of each with thin parallel lines or soft filled strokes. The main layout stays simple, a diagonal trail or a back hand vine. Bold outlines and clean gaps matter most. Shade slowly with steady pressure, since uneven shading stains as uneven patches.
35. Simple Wrist Mehndi Design
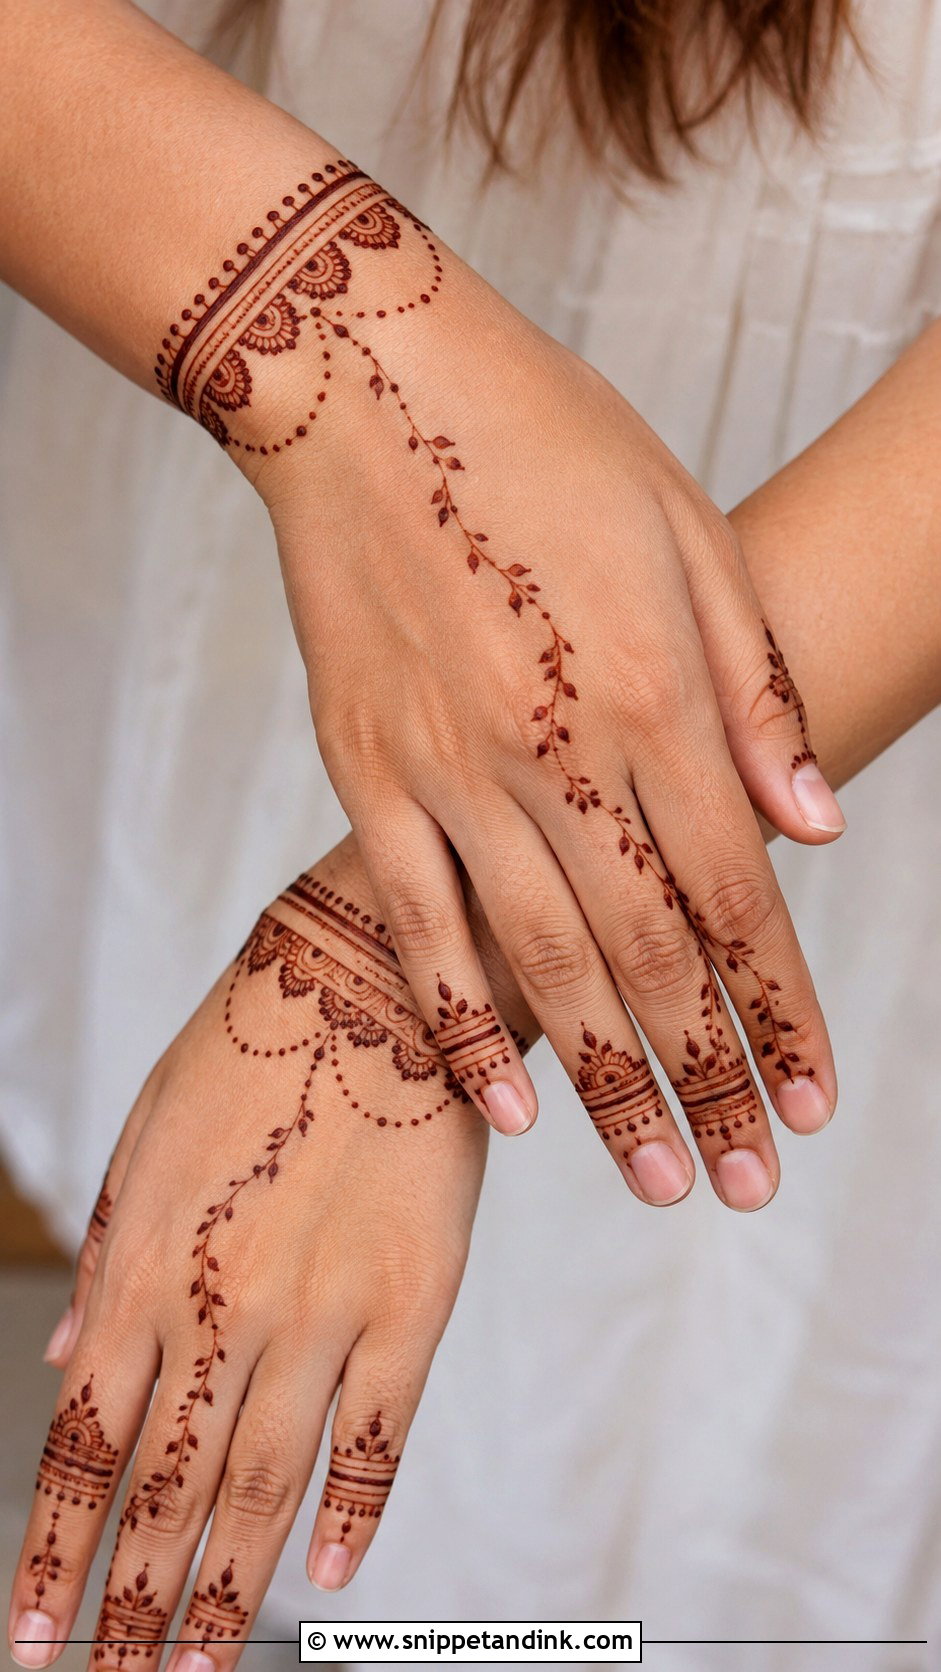
Wrist designs work like bracelets with light hand coverage. I draw two or three bands around the wrist with lines, dots, scallops and tiny leaves, then extend a small vine toward the middle of the back hand. Finger rings or fingertip details complete it. It’s quick and wears well with bangles or a watch as it fades. Keep the bands just above the crease so the paste doesn’t crack off when you bend your wrist.
Why the Stain Starts Orange and Deepens Over Two Days
The most common worry I hear is “it came out orange.” That’s normal. Fresh natural henna stains bright orange when the paste comes off, then darkens over the next 24 to 48 hours to brown or deep maroon. A design that looks pale at removal is not a failure.
Aftercare I give every client
- Leave the paste on as long as you can, at least six hours and ideally overnight.
- Once the paste is dry, dab on a little lemon juice mixed with sugar. It keeps the paste moist and stuck to the skin.
- Scrape the dried paste off with a blunt edge or rub it away. Don’t wash it off.
- Avoid water on the design for 12 to 24 hours.
- Keep your hands warm. Warmth helps the stain develop, cold slows it.
Placement changes the color too. Palms and fingertips stain darkest. Back hands, wrists and forearms come out lighter, so I make the lines there bolder. Simple designs with thin lines on the back hand will always be softer than palm work.
Small Henna Problems and How I Fix Them
- Smudged line while wet: wipe it quickly with a cotton bud, wait a moment, then redraw.
- Patchy stain: usually the paste fell off early. Next time seal it better and keep it on longer.
- Uneven color between hands: the dominant hand gets used more and loses paste sooner, so I apply it last.
- Design fading fast: avoid scrubbing, chlorine and harsh soaps. A thin layer of balm or oil before washing protects it.
Dots, Leaves and a Steady Cone Go a Long Way
You don’t need expert detail to make henna look good. A neat mandala, a flowing Arabic vine, a floral bracelet or clean finger bands look complete when the spacing is right. Pick a design that fits your time and the occasion, and practice on paper first if you’re drawing it yourself. Once dots, leaves and simple bands feel easy, paisleys, jaali and shading come naturally. Leave the paste on, seal it, keep it dry, and give it two days to show its true color.
You'll Like These Ideas:


Leave a Reply