
The back of the hand is the part of your mehndi people actually see. It shows when you hold a glass, fold your hands for a photo or reach out to greet someone, so even a small, well-placed motif does a lot of work there. When a client asks me for something light, I usually start on the back hand rather than the palm, because open skin between clean shapes reads far better than a crowded fill. The designs below run from Arabic trails and Indian mandalas to jewelry patterns and finger-only work, and each one can be scaled down for a first-timer or built up for a festive night.
Planning a Back-Hand Design Around Knuckles, Rings and Bangles
The back of the hand moves more than the palm, and it is shared with your jewelry. Before I draw anything, I ask the client to make a fist and open it again, and I watch where the skin folds. Lines placed right on the knuckle creases crack as the paste dries, and later the stain looks broken in exactly those spots.
- Rings: if you wear a ring every day, tell your artist which finger. I leave a band of bare skin there or design the henna to frame it.
- Bangles and watches: they rub the stain off the wrist faster than anywhere else, so a wrist border should sit slightly higher than where they rest.
- Sleeves: a three-quarter sleeve hides most of a long trail. Short designs that end at the wrist suit long sleeves better.
- Which hand gets more: I usually give the non-dominant hand slightly more detail. The hand you use more fades first, from washing and handling.
Finally, think about drying time. A simple back-hand design needs your hand still and dry for at least a couple of hours, so do not book it right before you need to cook, drive or change clothes.
1. Simple Back Hand Mehndi Design
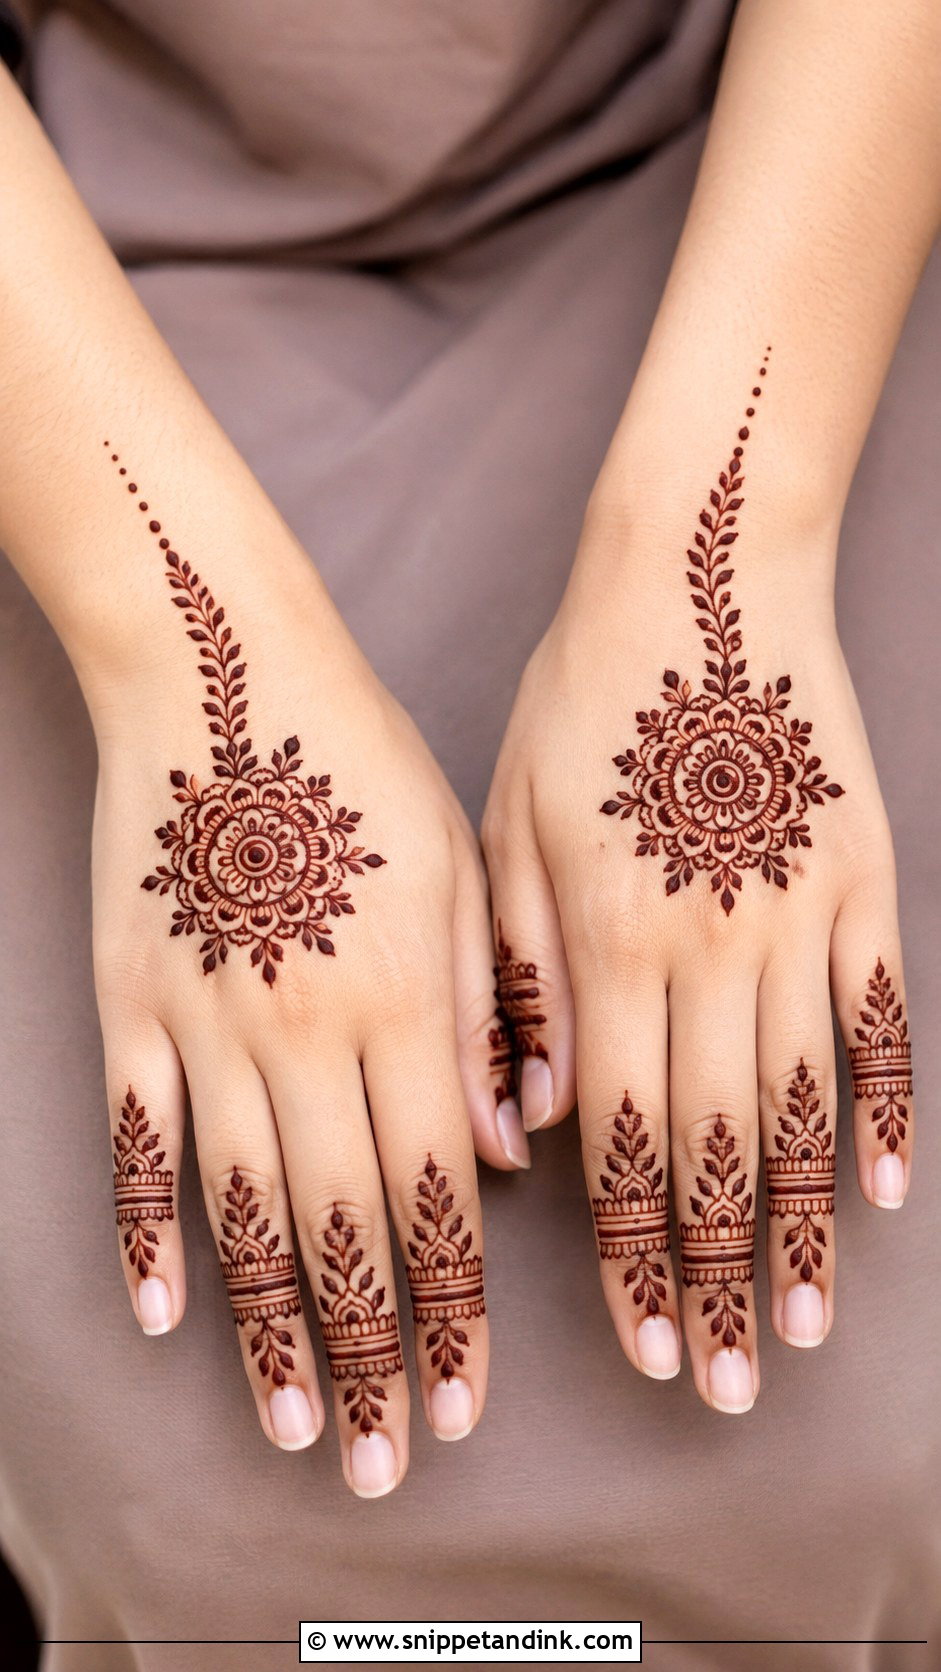
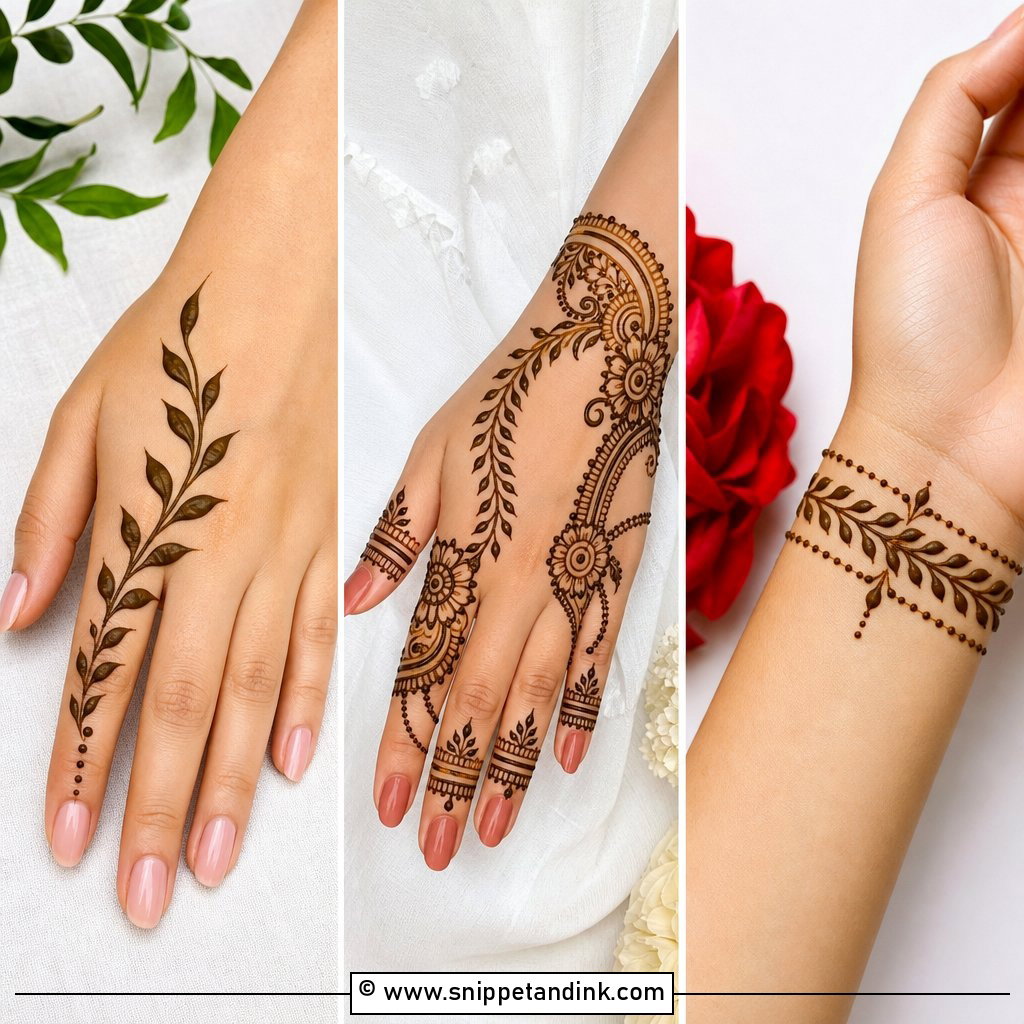
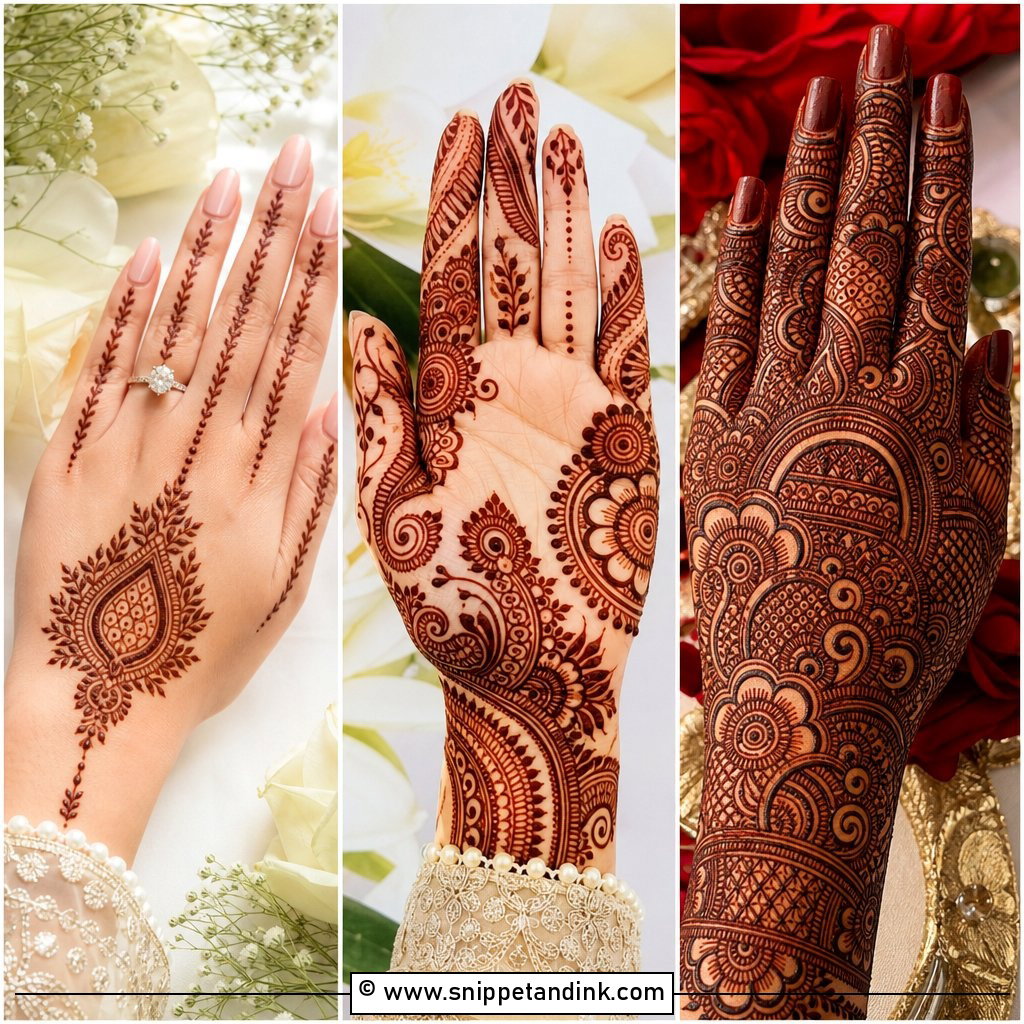
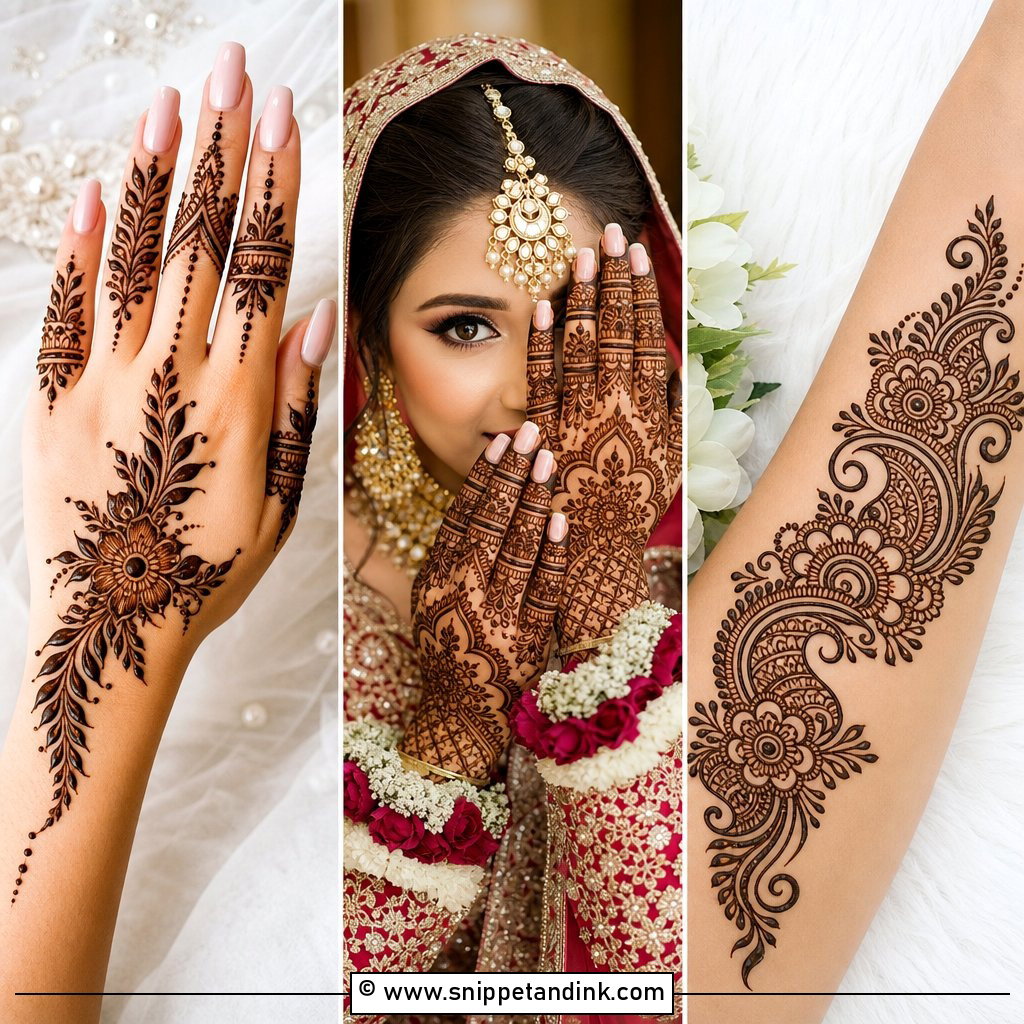
A simple back hand mehndi design needs one clear center point and not much else. I put a small flower or mandala just above the middle knuckle, then walk it toward the wrist with dots and thin leaves, and finish the fingers with matching bands. There is no shading and no dense fill, so it takes me well under half an hour per hand. If you only remember one thing, keep the center motif smaller than you think it should be; it grows as the paste spreads.
2. Simple Arabic Back Hand Mehndi Design
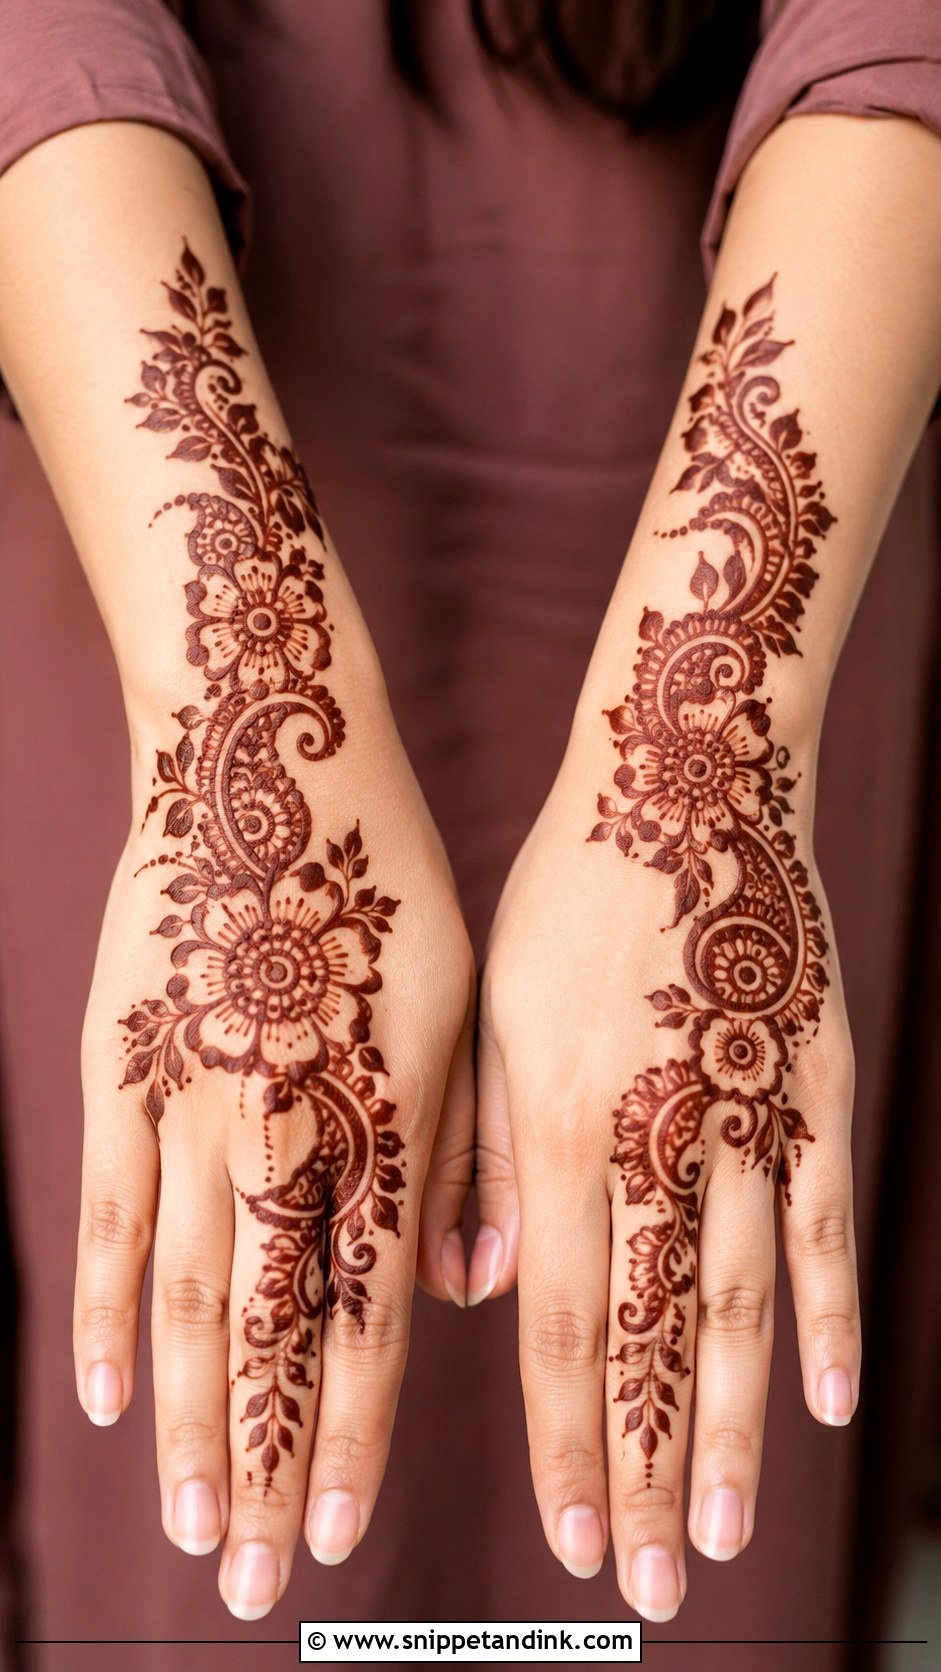
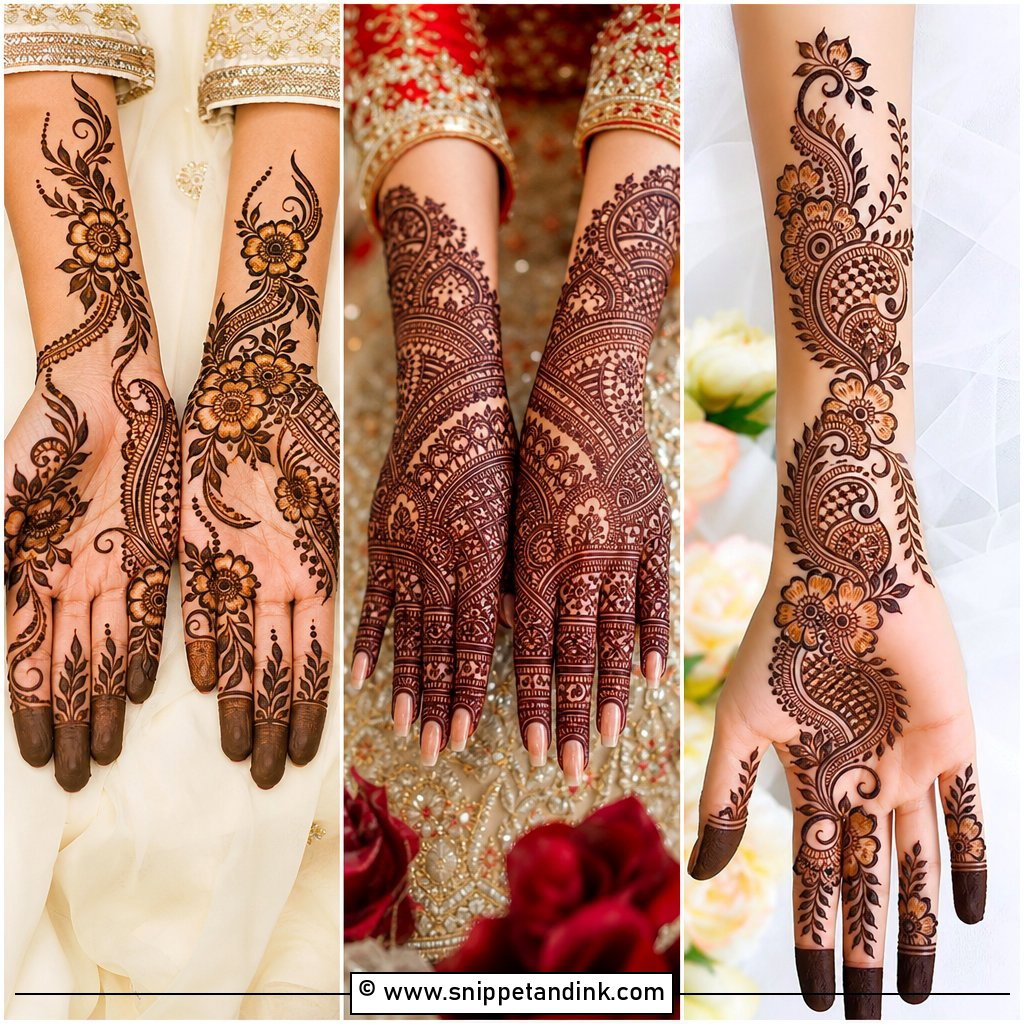
Arabic work on the back hand flows on a diagonal, usually from the outer wrist up toward the index or middle finger. The open skin between the flowers is the whole point, so I resist the urge to fill it. One large flower near the wrist, a curving vine and leafy detail on two or three fingers is enough. I pipe the outlines thicker than the inner lines, because the thick lines carry the stain and the thin ones give it texture. It also dries quickly, which matters if you have somewhere to be.
3. Floral Back Hand Mehndi Design
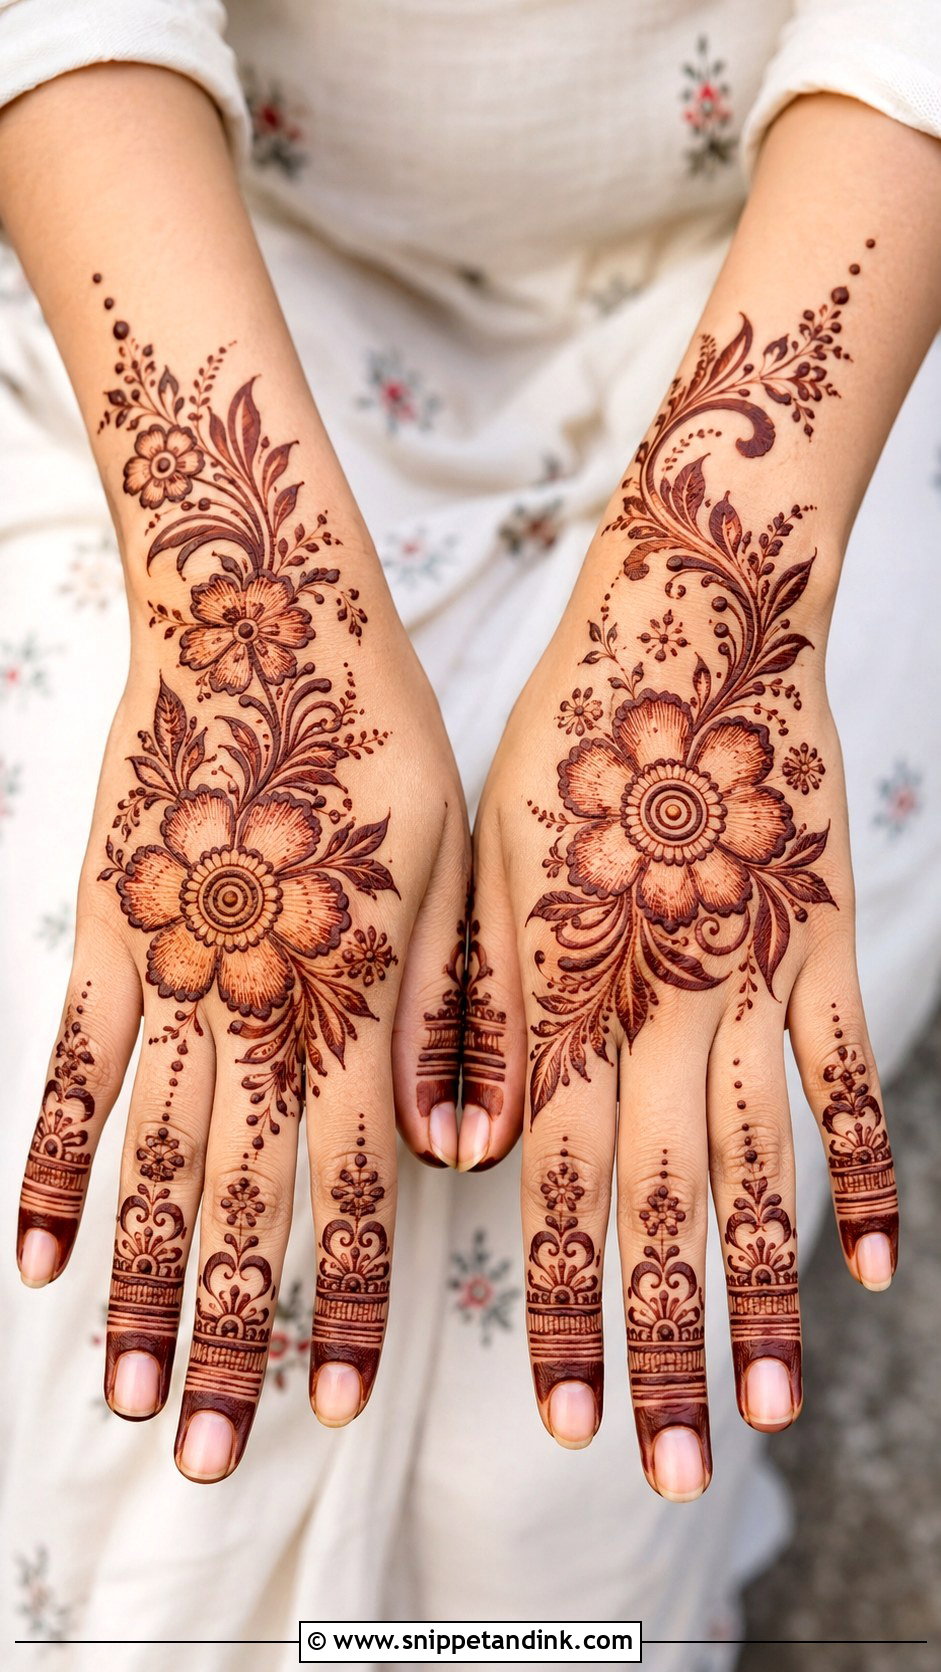
Florals sit well on the back hand because petals can follow the curve of the knuckles instead of fighting it. My usual layout is a medium flower in the center, a few smaller blossoms around it and a leafy trail to the wrist, with half-flowers and dots on the fingers. The mistake I see most in home attempts is petals of different sizes crammed together. Space them evenly and leave a few gaps empty; that is what keeps a floral design looking simple rather than plain.
4. Mandala Back Hand Mehndi Design
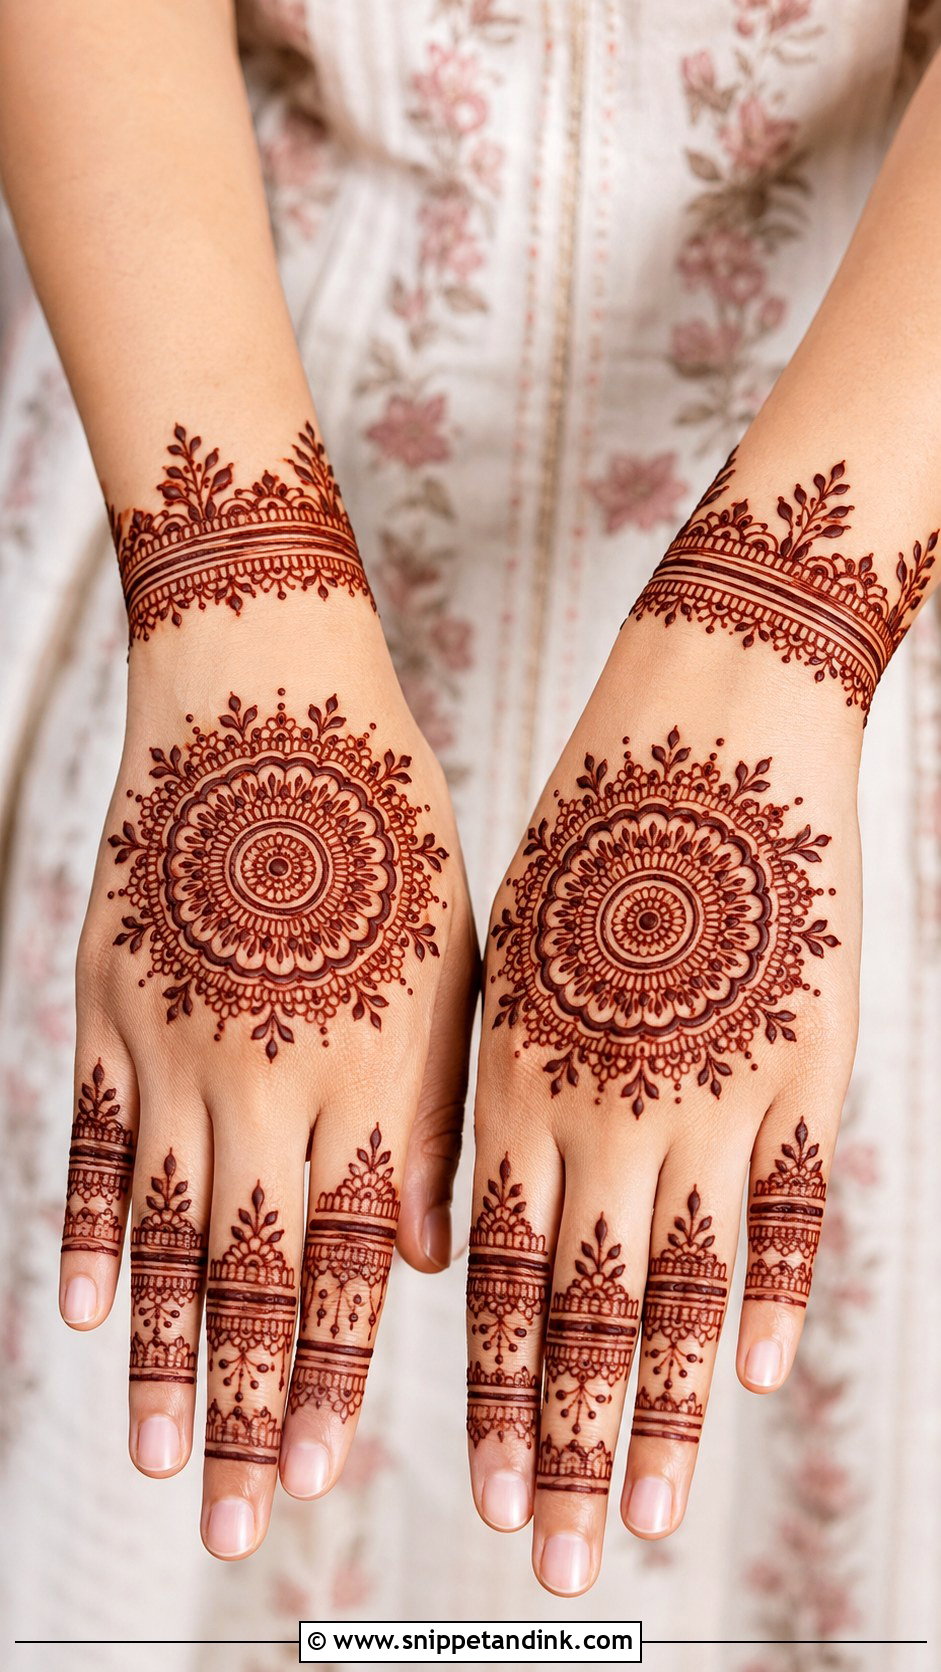
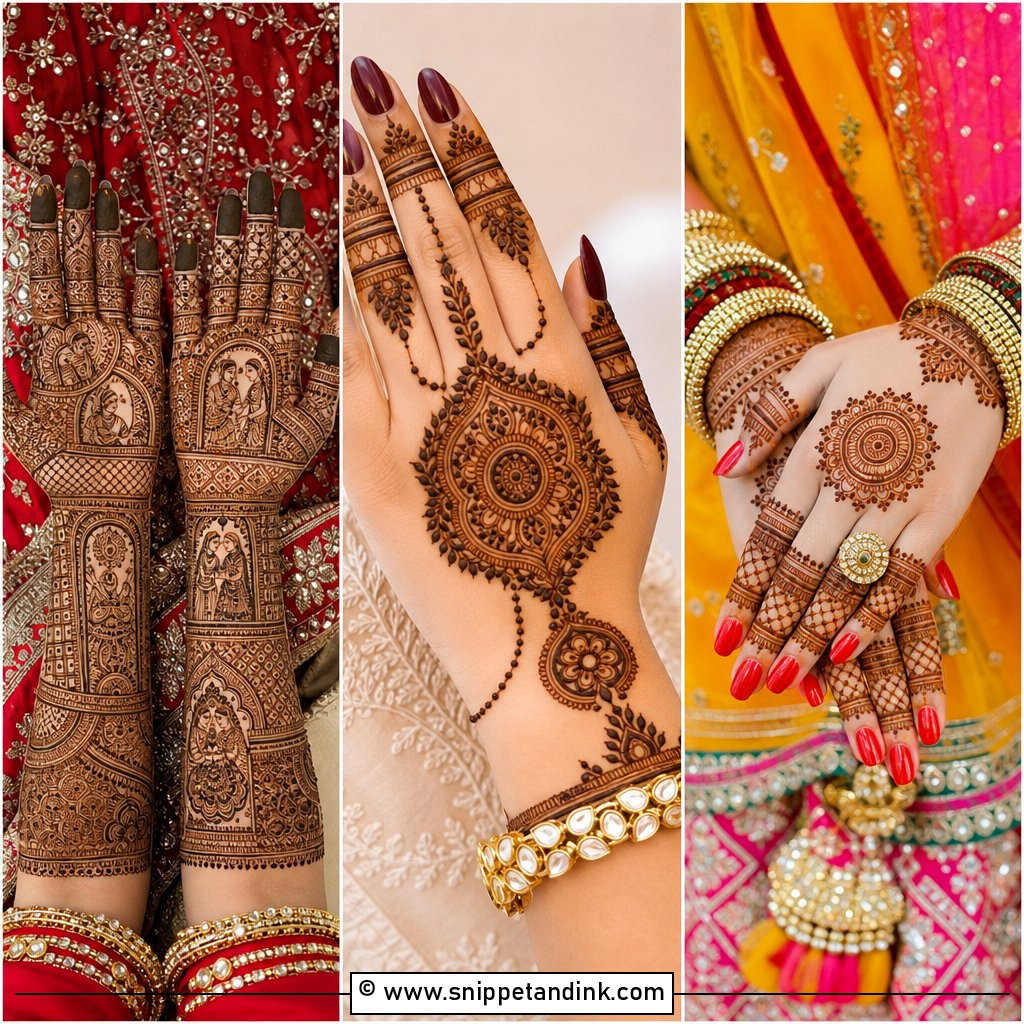
A mandala is the easiest way into simple henna if you like symmetry. I draw the outer circle first, very lightly, then build the rings inward so the shape stays round even on a hand that is slightly tilted. Matching rings and leaves on the fingers and a thin bracelet border at the wrist are all it needs. On a very narrow hand, I shrink the mandala and push it toward the center knuckles so it doesn’t wrap around the sides.
5. Easy Back Hand Mehndi Design For Beginners
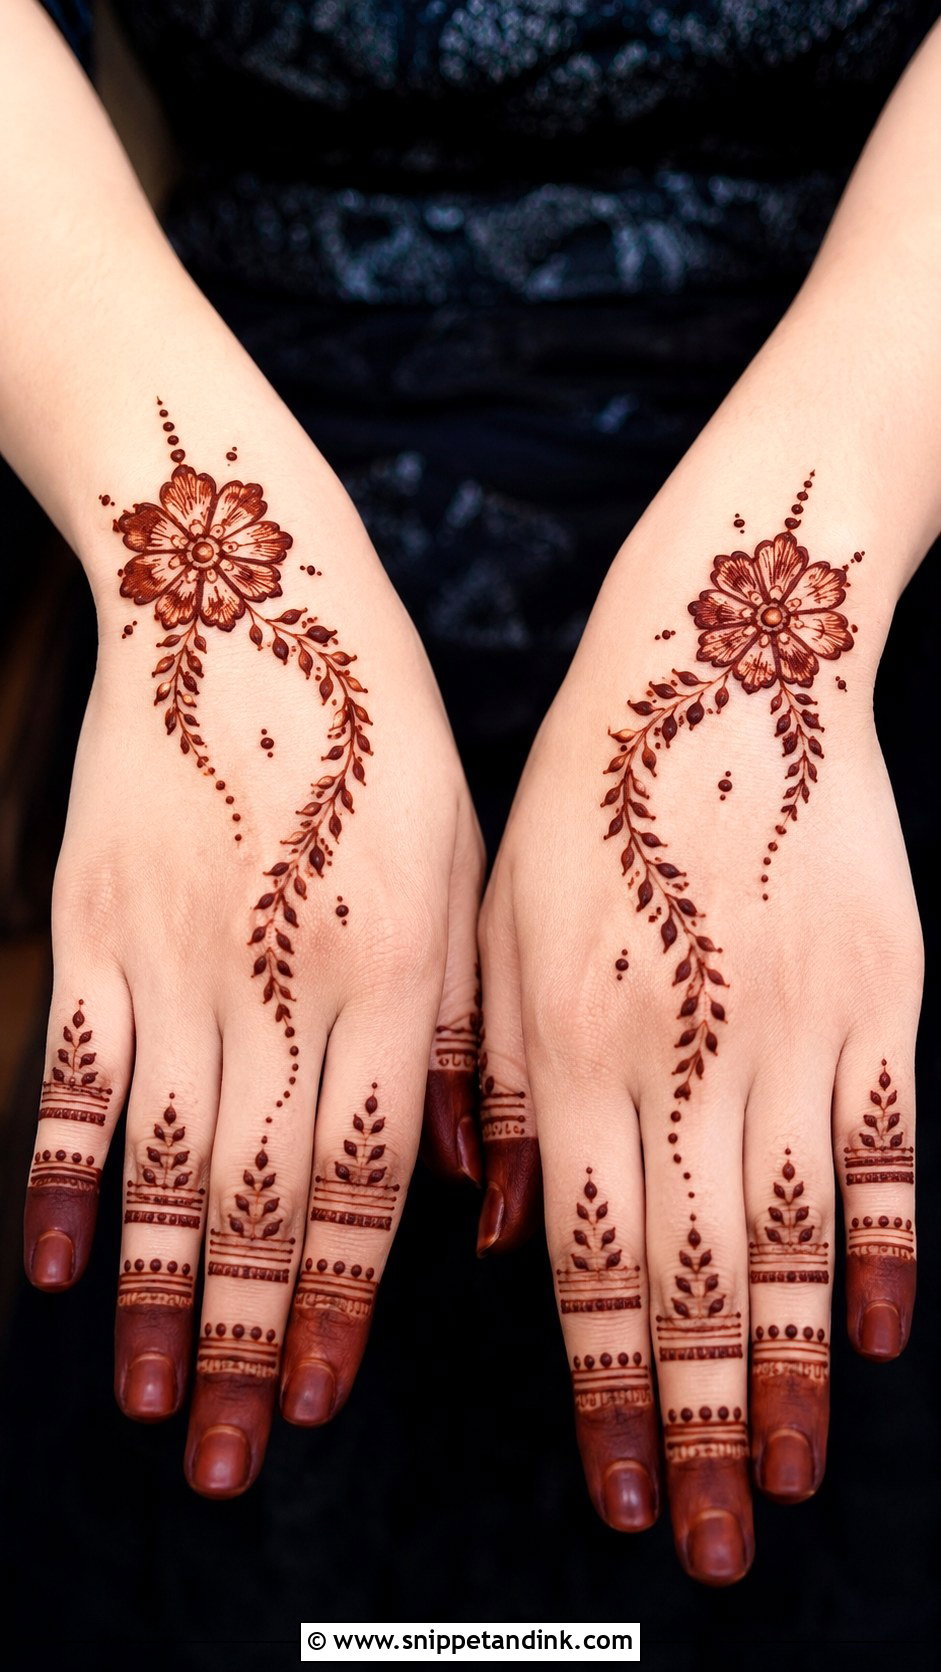
If you are doing your own mehndi, pick shapes you can repeat without thinking: a flower near the wrist, one curved vine and small leaves heading to the middle finger. Dotted lines fill gaps and hide wobbles. I teach beginners to hold the cone like a pen but rest the side of the hand on the table, because a floating wrist is what makes lines shake. Straight finger bands and shaded tips finish it, and nobody will notice a slightly uneven leaf once the stain develops.
6. Modern Back Hand Mehndi Design
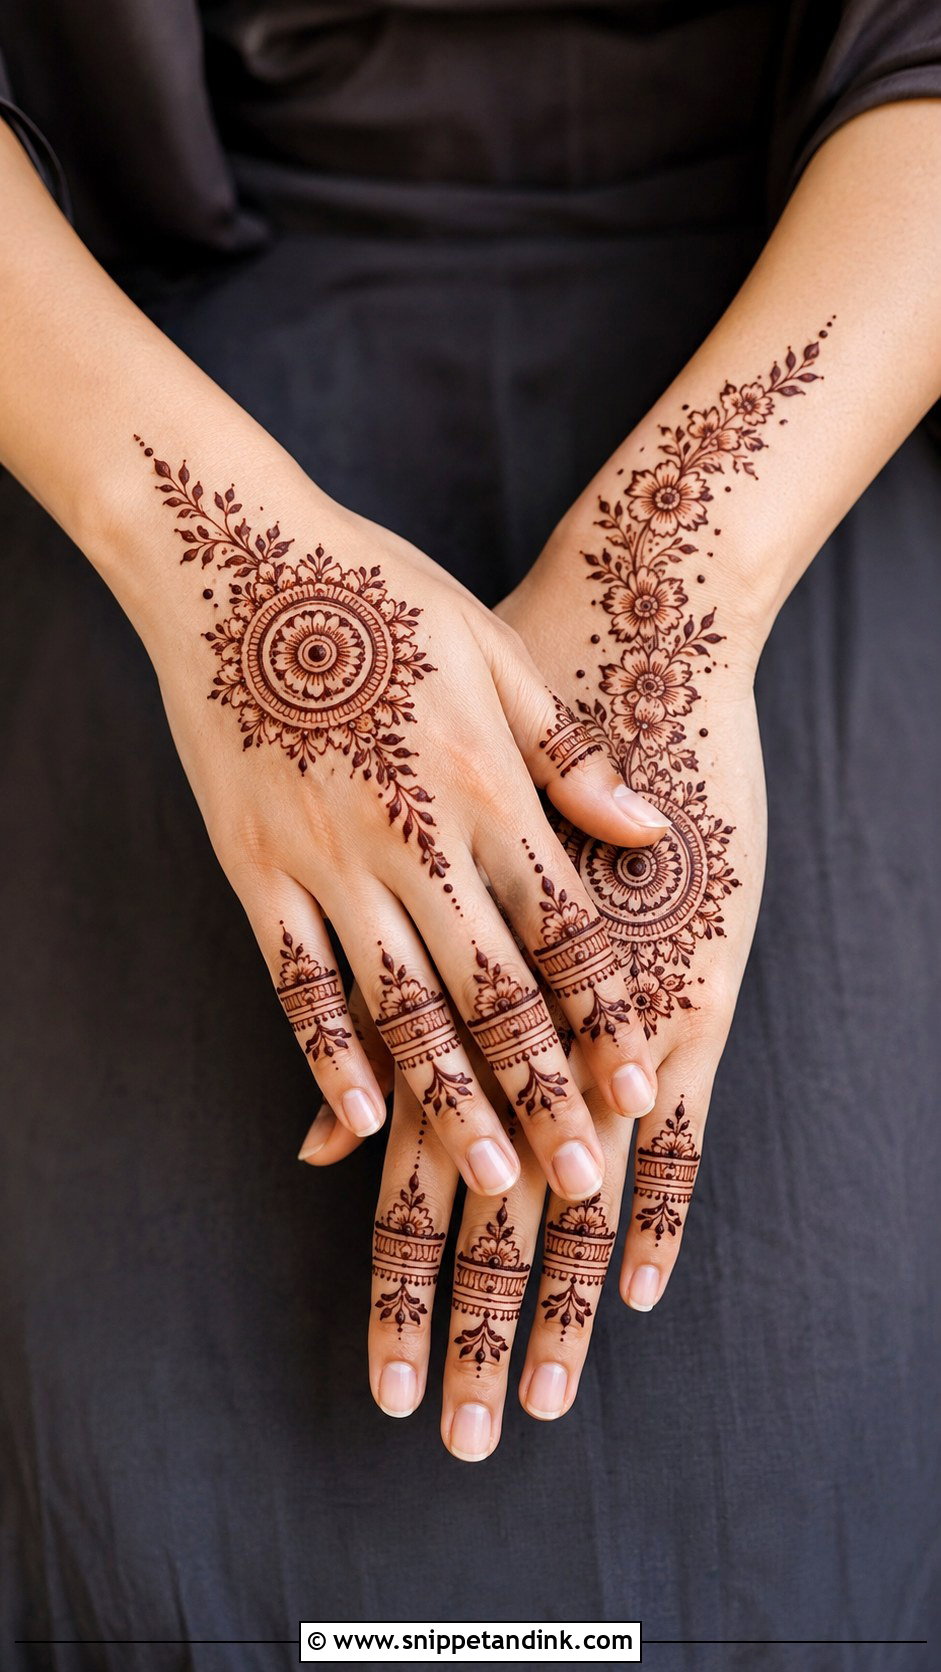
Modern back-hand work is about what you leave out. I place a small mandala near the center, run a couple of diagonal floral lines off it and give the fingers ring-like bands, then stop. The negative space around the main motif has to be deliberate, so I sketch the empty areas in my head before the cone touches skin. It suits short nails and minimal jewelry, and it looks good from the side, which is how hands are often caught on camera.
7. Minimal Back Hand Mehndi Design
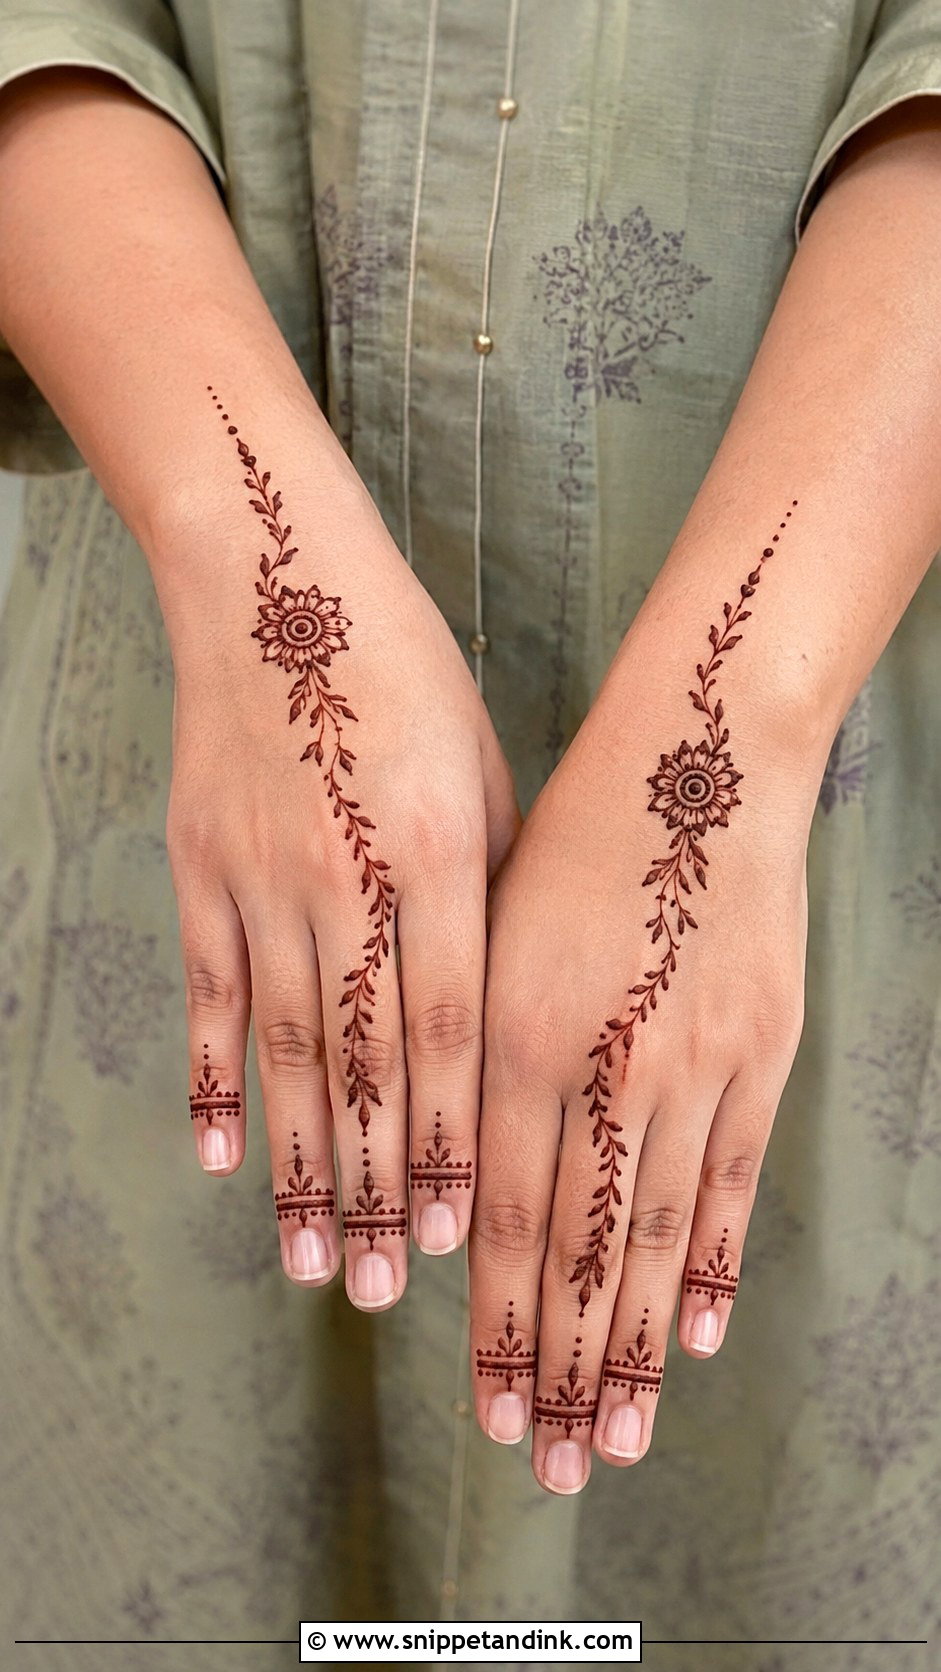
Minimal means one motif, a few dots and thin lines on the fingers. I keep the design inside the flat part of the back hand and away from the wrist bone, so it never looks like it is sliding off. It is the design I suggest to anyone nervous about henna for the first time, or to anyone who has to be back at a desk on Monday, because a small stain fades without looking patchy.
8. Full Back Hand Simple Mehndi Design
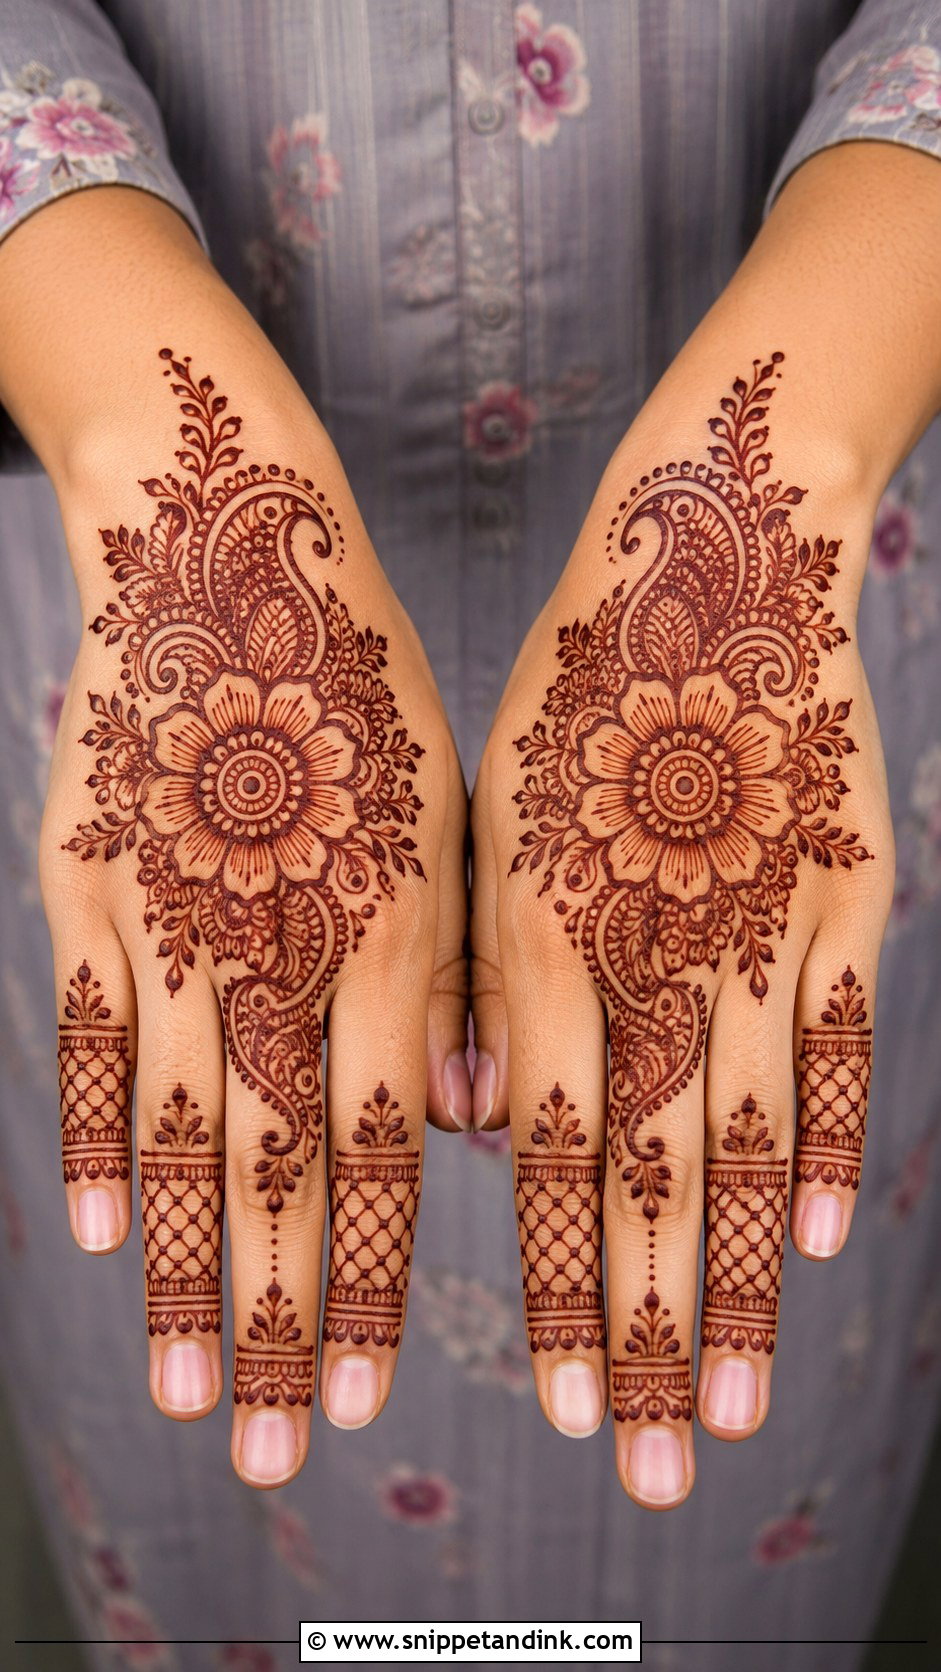
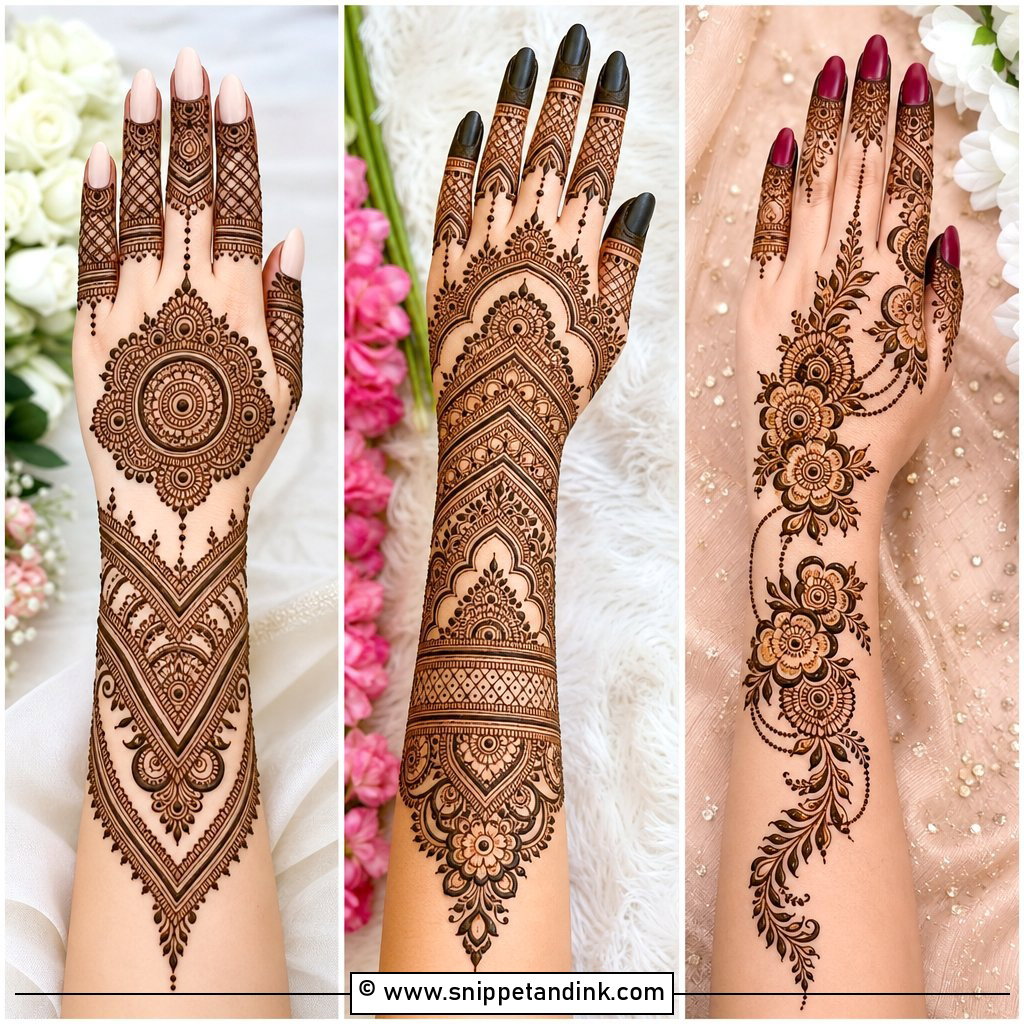
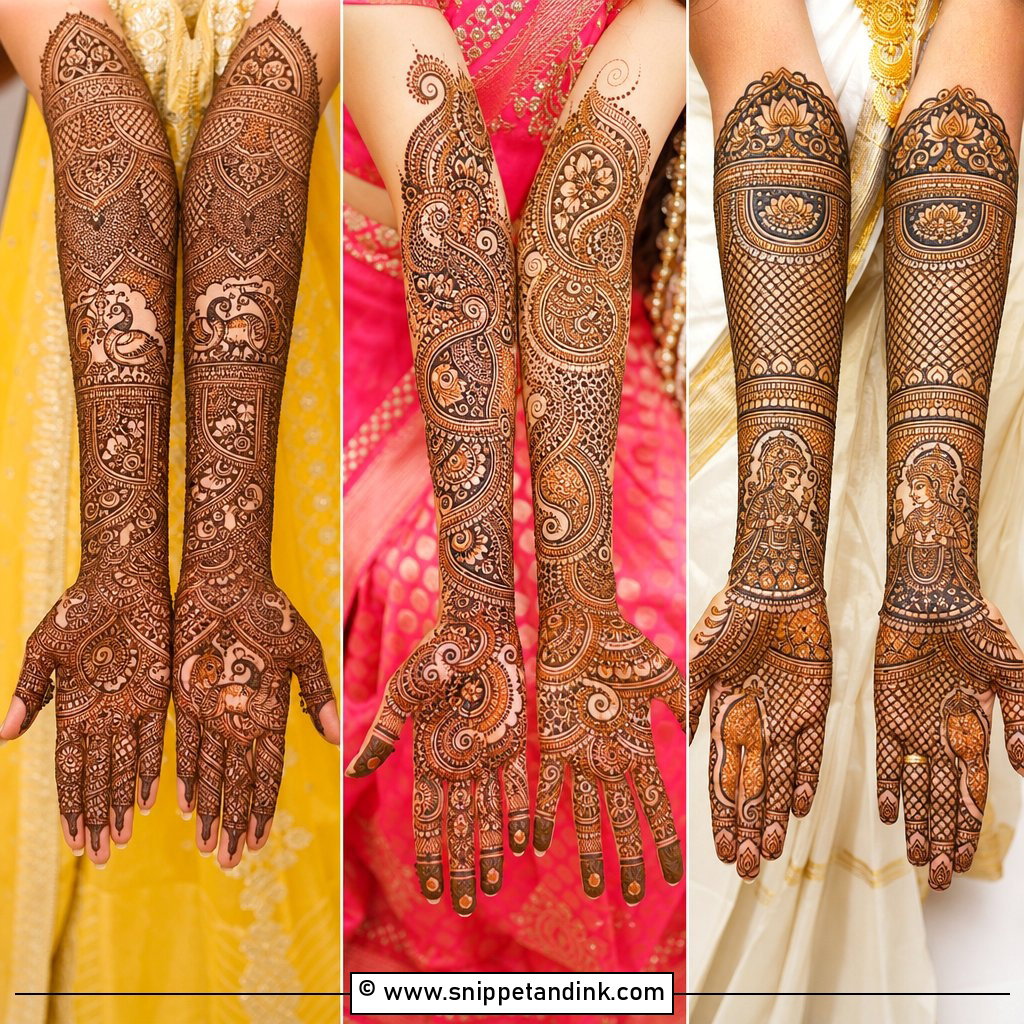
Full coverage does not have to mean hard. The trick is repetition: a paisley or floral base at the wrist, a large flower in the center and the same leaf shape used to connect everything. Fingers get bands, dots and small mesh sections. I keep outlines bold and fill light, because heavy fill on the back hand tends to stain unevenly; that skin is thinner than the palm and some areas will always come up lighter. Allow roughly double the time of a minimal design.
9. Half Back Hand Mehndi Design
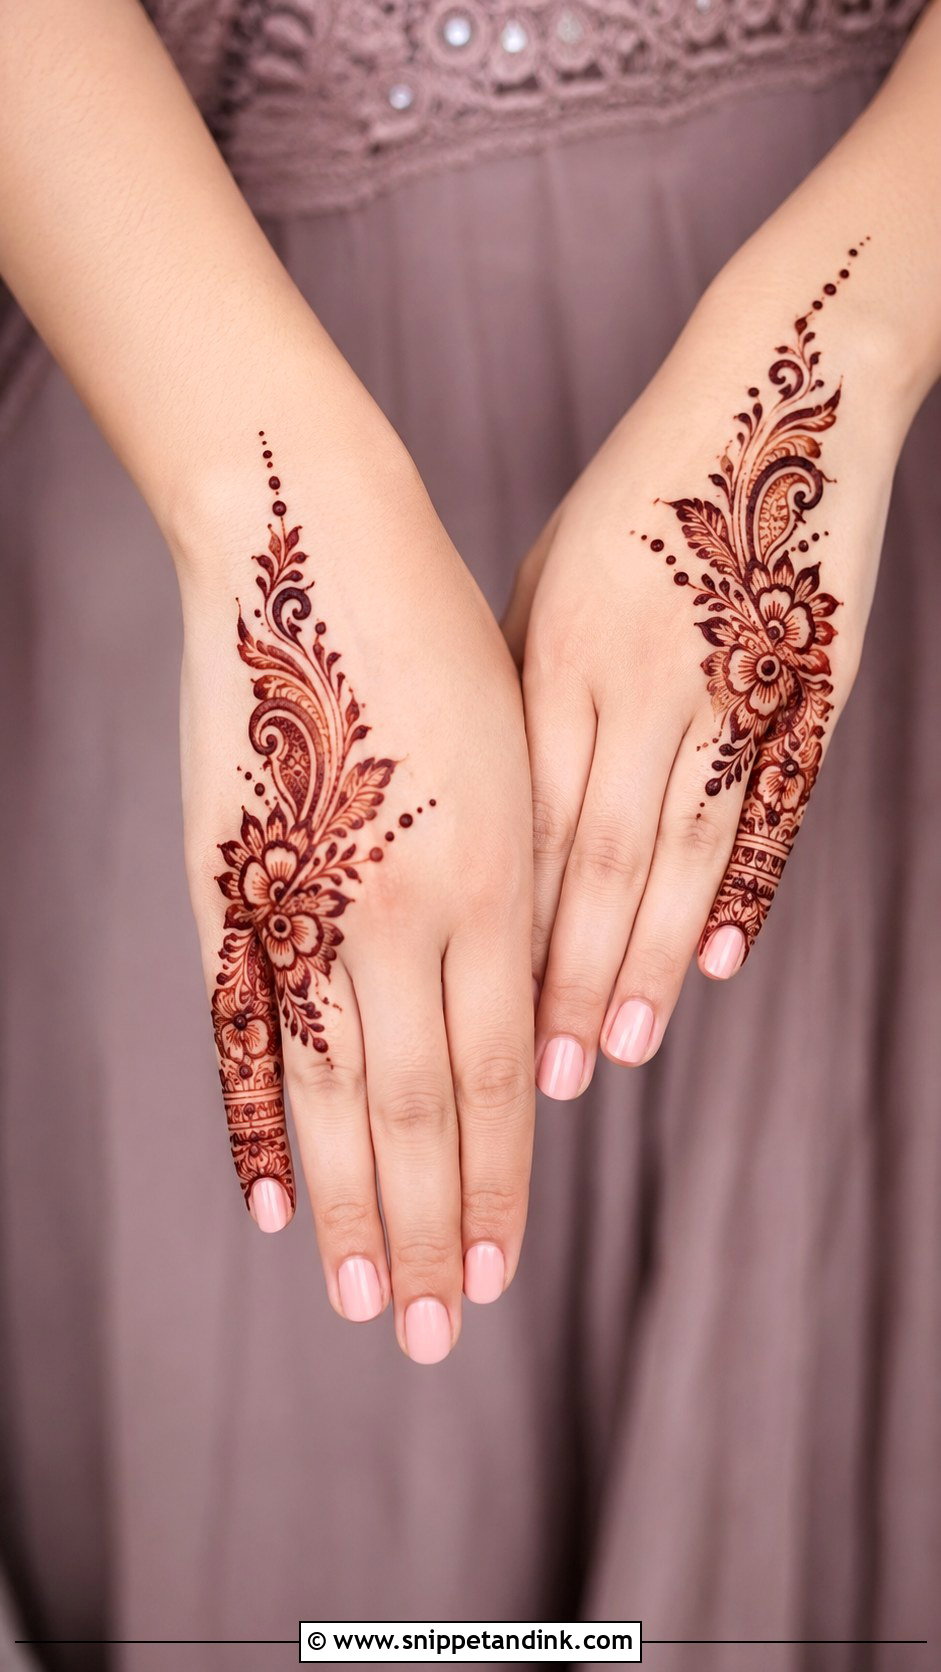
Half coverage is my favorite answer for someone who wants something done in twenty minutes. The design takes one side of the back hand, running from the wrist to a single finger in an Arabic-style diagonal of flowers, paisleys and leaves. That finger gets matching bands; the others stay bare or get a single dot. On a right-hander I usually run the trail toward the index finger of the left hand, so the open side faces the camera when you hold a bouquet or glass.
10. Finger Back Hand Mehndi Design
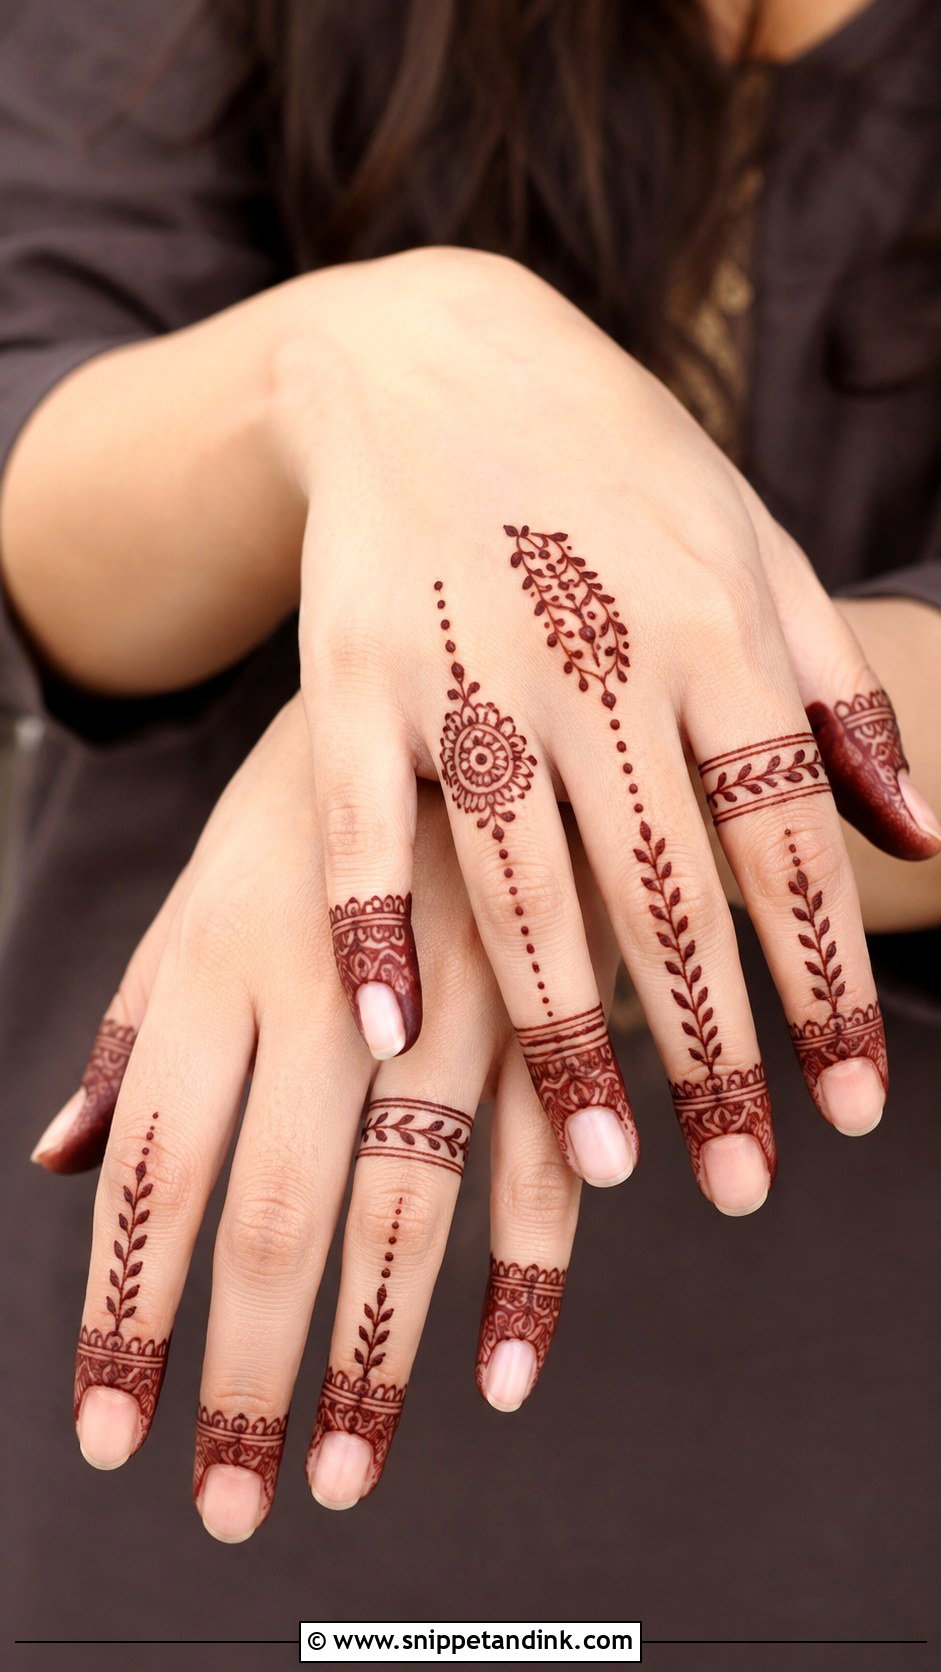
Here the fingers do the talking and the center of the hand stays nearly empty. I decorate the tips, add ring bands and leaf chains down each finger, and tie it together with a tiny motif near the knuckles. One thing I check first is the knuckle creases: lines that sit right in a crease crack as the hand bends, so I place bands just above or below them. Vary each finger slightly so it looks designed rather than stamped.
11. Bracelet Back Hand Mehndi Design
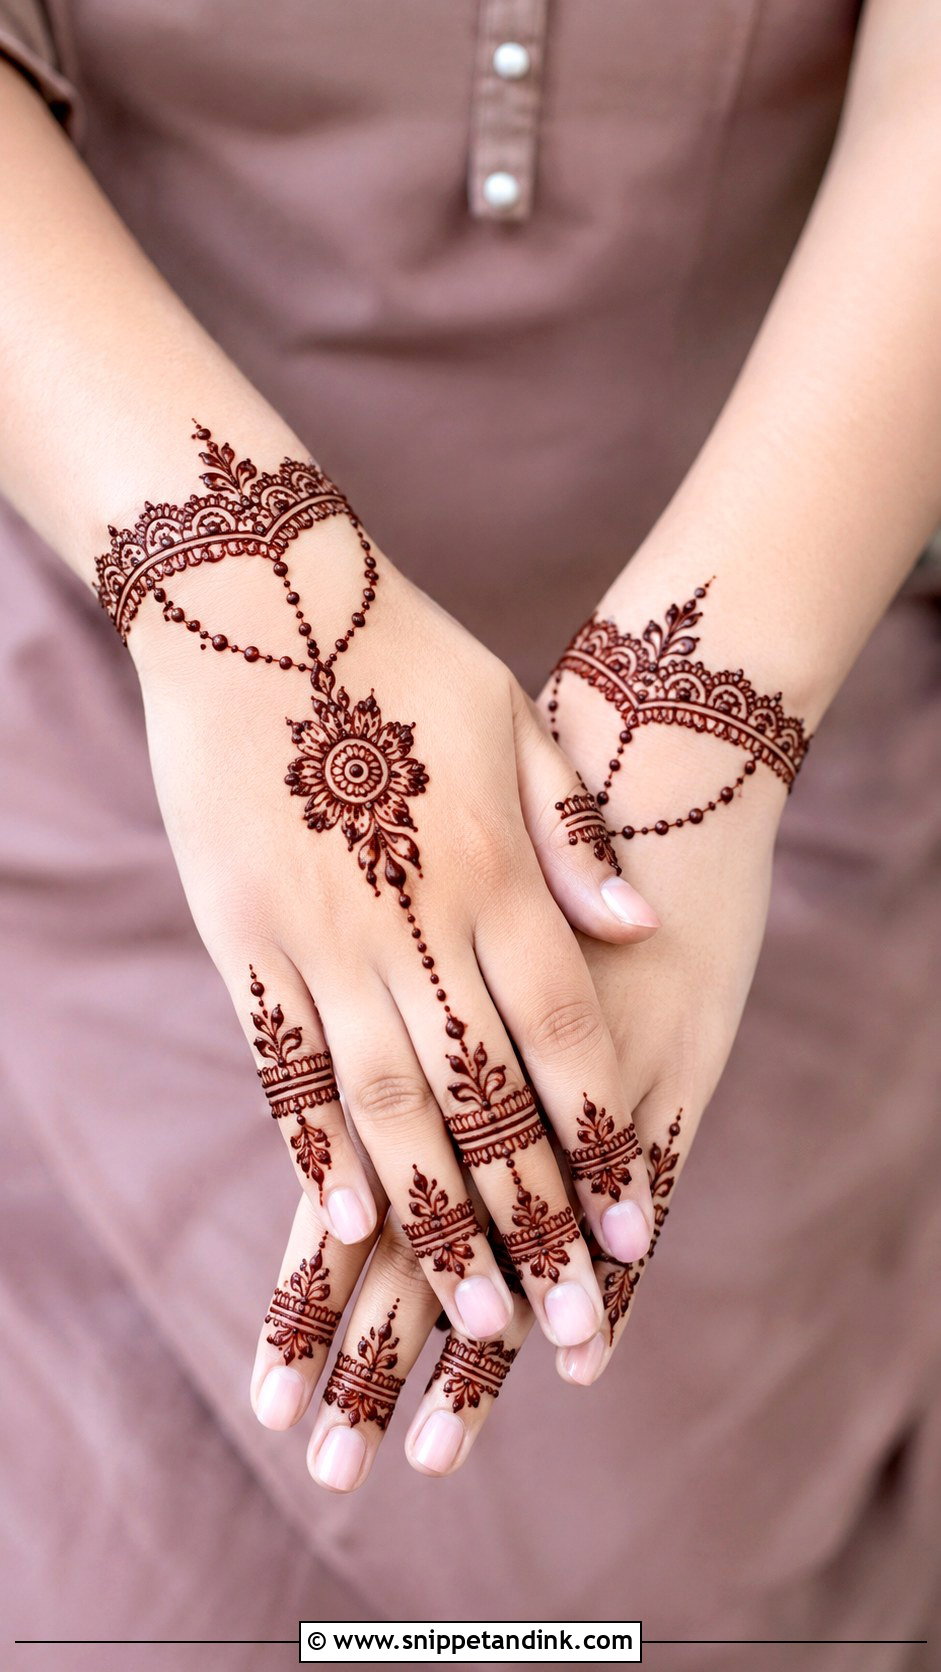
A bracelet design reads like jewelry made of henna. I start with the wrist band, using scallops, flowers or a dotted chain, then pull a thin line up to a small central motif and on to one finger, almost like a hand harness. If you’ll wear real bangles, ask your artist to place the band a finger-width above where they sit, otherwise the metal covers it. Keep the connecting lines fine; thick ones turn the effect into a glove.
12. Jewelry Back Hand Mehndi Design
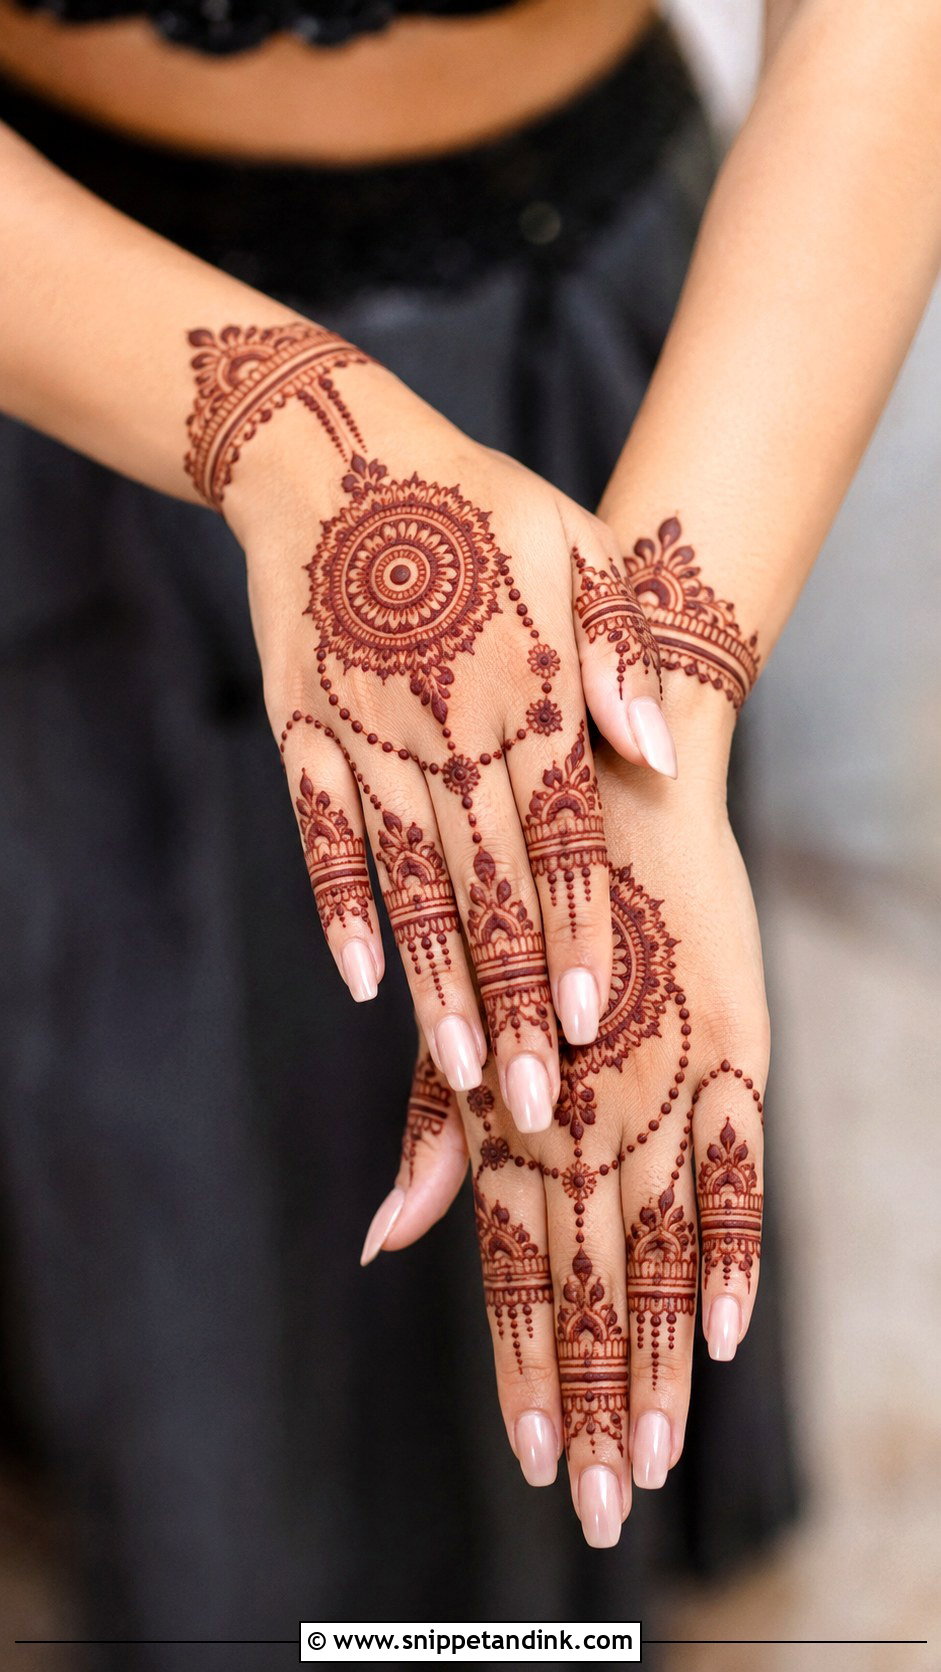
Jewelry designs give you rings, chains and a wrist ornament without wearing any of them. The usual build is ring patterns around the fingers, a few chain lines across the back hand and a bracelet border, anchored by a flower or paisley in the center. Chains need empty skin around them to read, so I never put jaali or heavy fill nearby. Tiny dots along the chain are what make it look delicate; I use a fine tip for those.
13. Rose Back Hand Mehndi Design
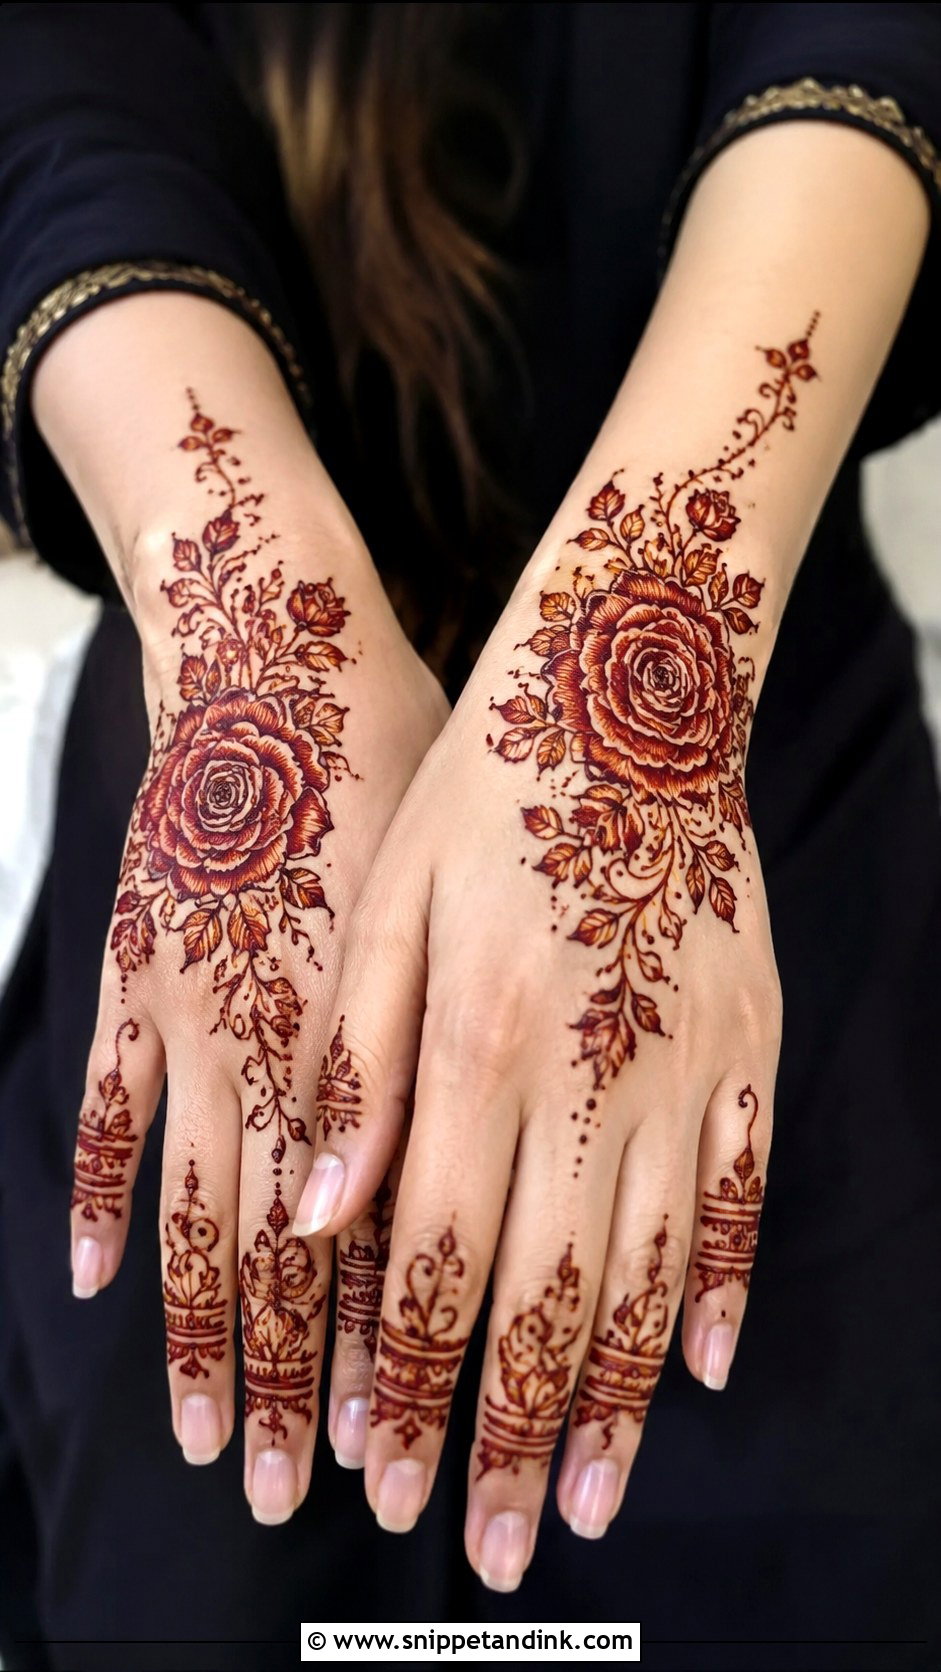
Everyone recognizes a rose, which is why it is a good single motif. I put one medium rose at the center or slightly off to the side, with curled leaves and a couple of buds, and keep the fingers to petals and bands. The petals need confident outlines and almost no shading. If you shade too much inside a rose, the stain fills in and you lose the layers, and it ends up looking like a blot.
14. Leaf Back Hand Mehndi Design
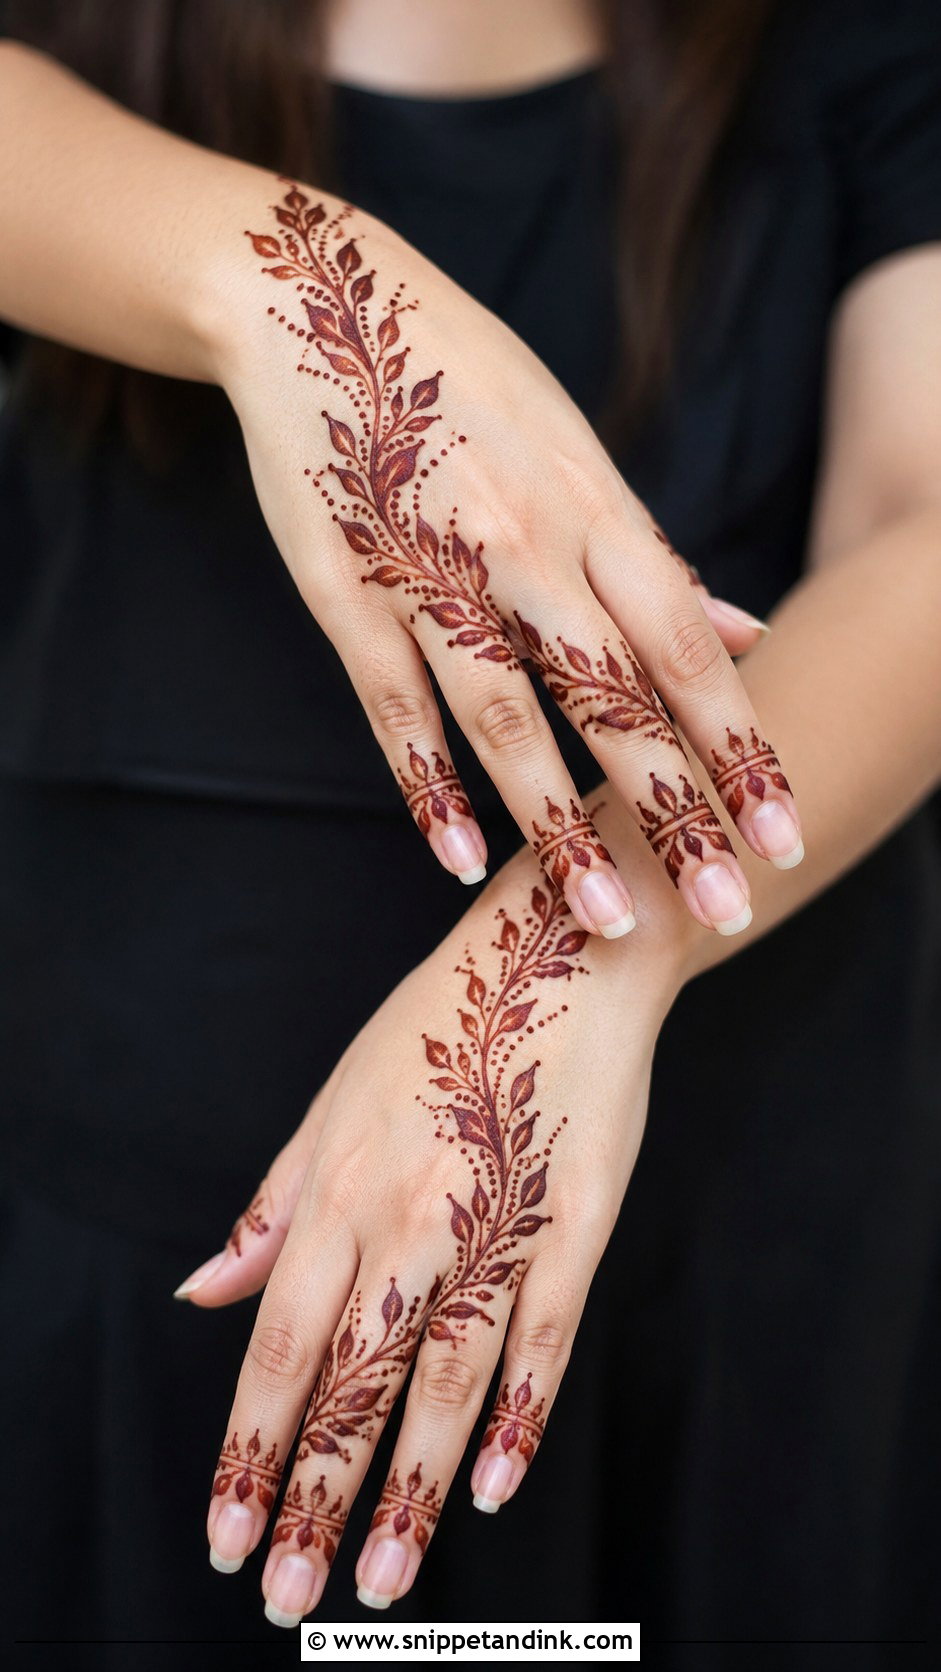
Leaves are the fastest thing I draw, and a single vine done well looks finished. It starts at the wrist and curves diagonally to the index or middle finger, with side leaves and dots, then thin leaf chains on the fingers. Draw the vine with a slight curve. A dead-straight stem across the knuckles looks stiff and makes the hand look wider.
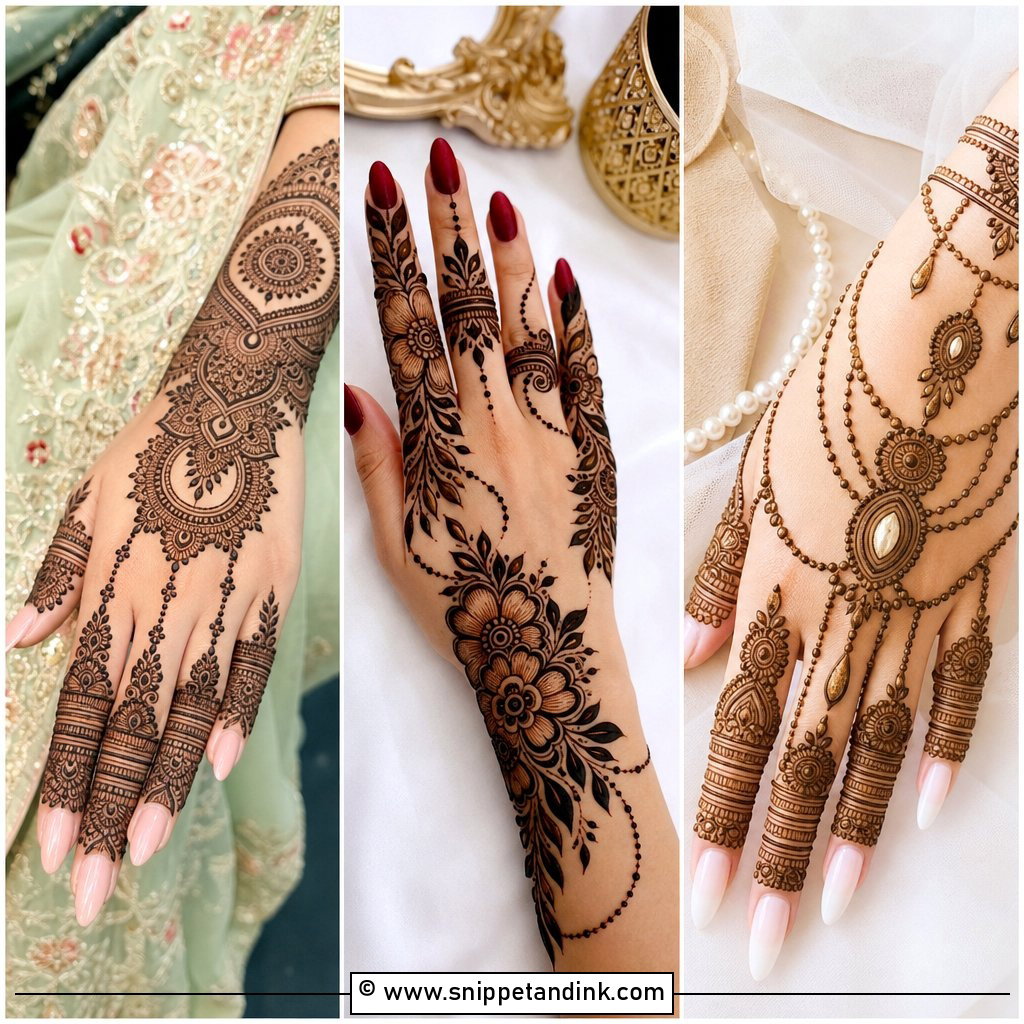
15. Paisley Back Hand Mehndi Design
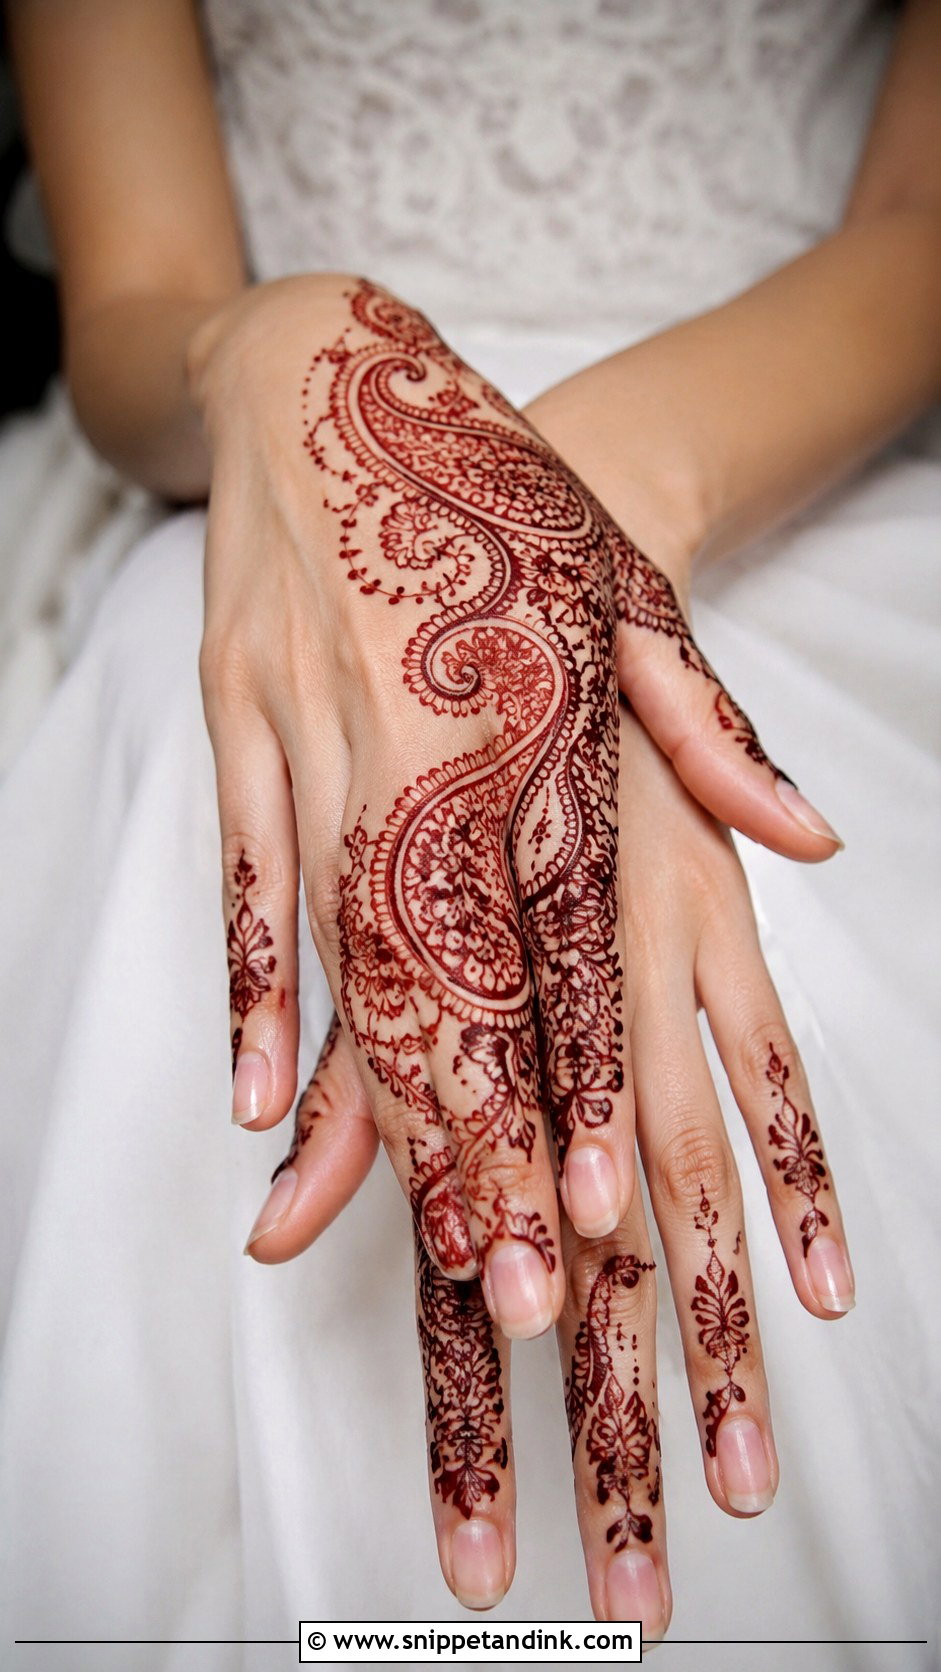
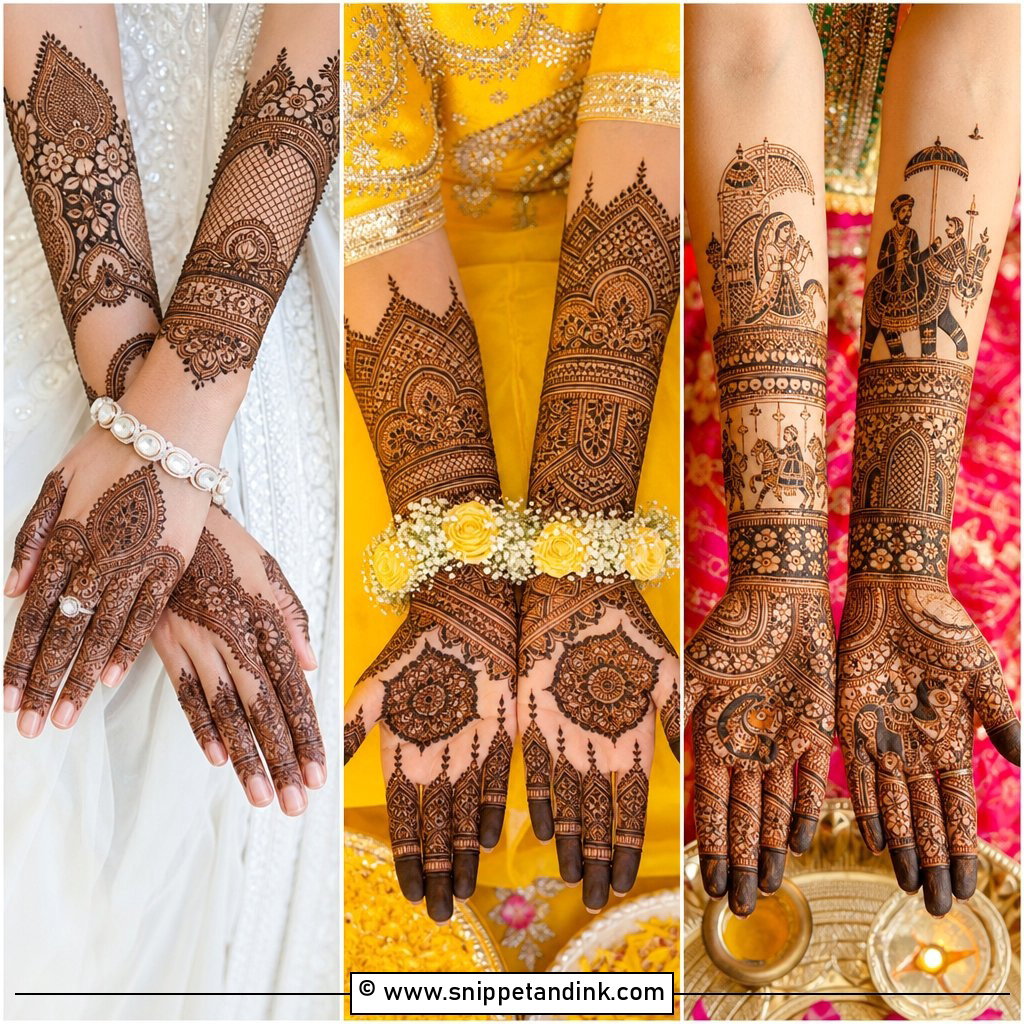
Paisley adds a traditional feel without dense bridal work. One or two medium paisleys near the wrist or center, surrounded by flowers, leaves and dotted curves, is plenty, with small paisley tips on the fingers to tie it together. Beginners tend to pack every paisley with tiny fill; resist that. A clean outline, three or four inner lines and a few dots read better once the stain matures.
16. Round Back Hand Mehndi Design
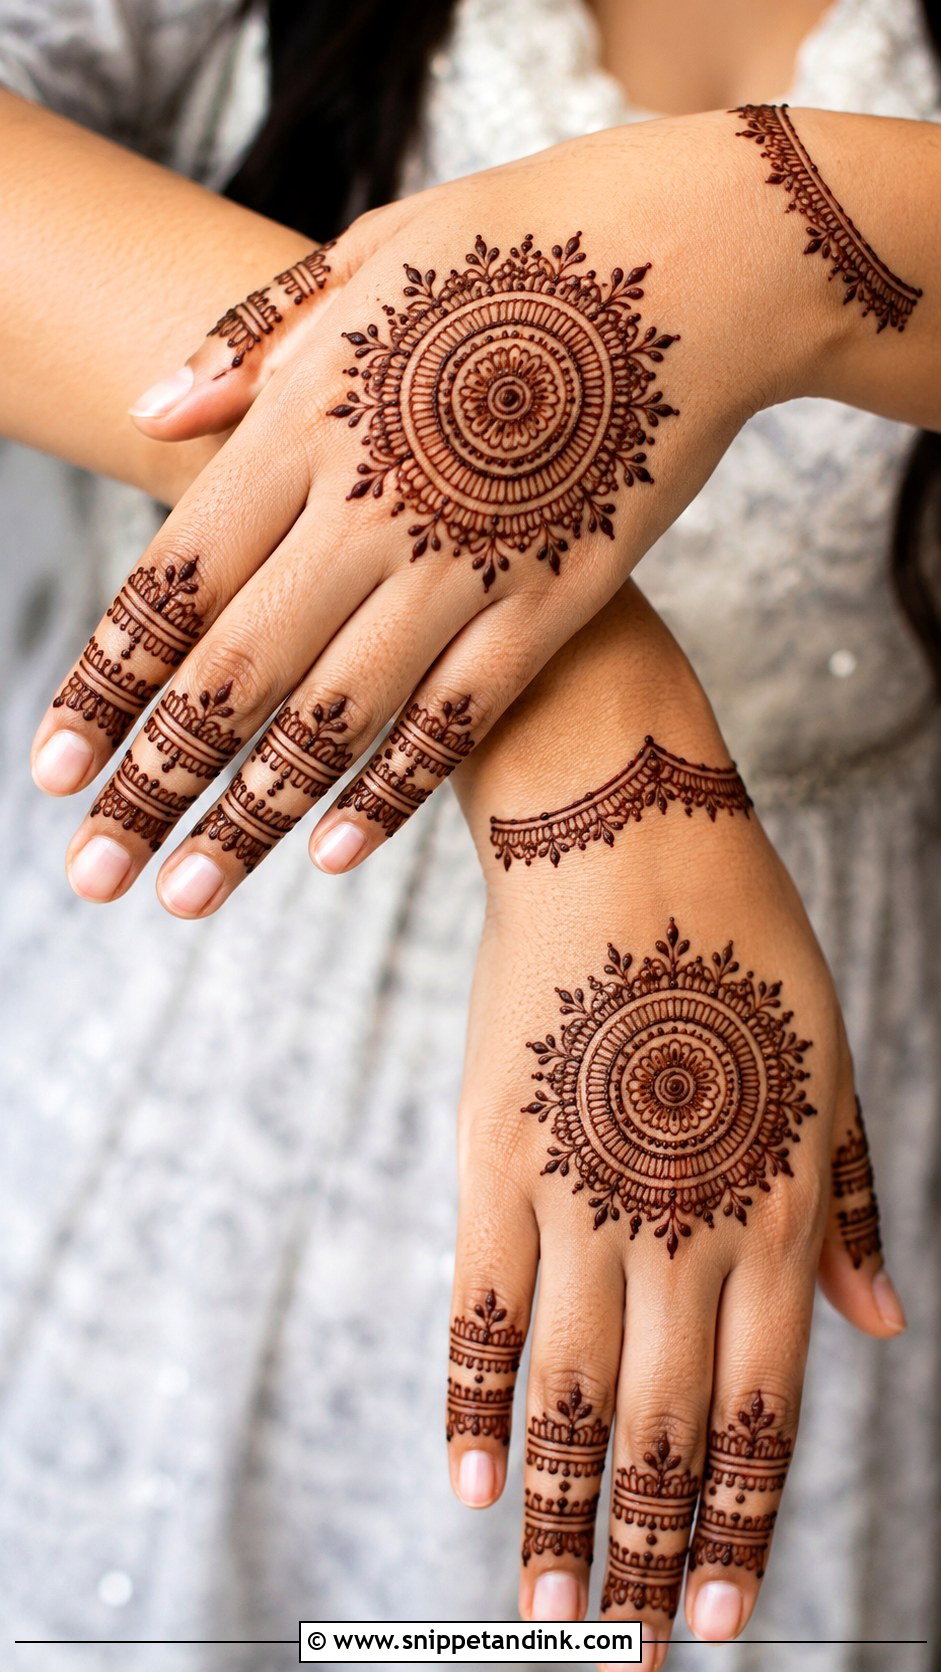
A round motif gives the back hand a clear focal point. It can be a mandala, a flower, a sunburst or a ring of dots, set in the center with small curls around it and matching bands on the fingers. The circle is easy to scale: small for a quiet look, wider for more coverage. The one thing I fuss over is the outline, because a lopsided circle is the first thing the eye catches.
17. Back Hand Mehndi Design With Dots
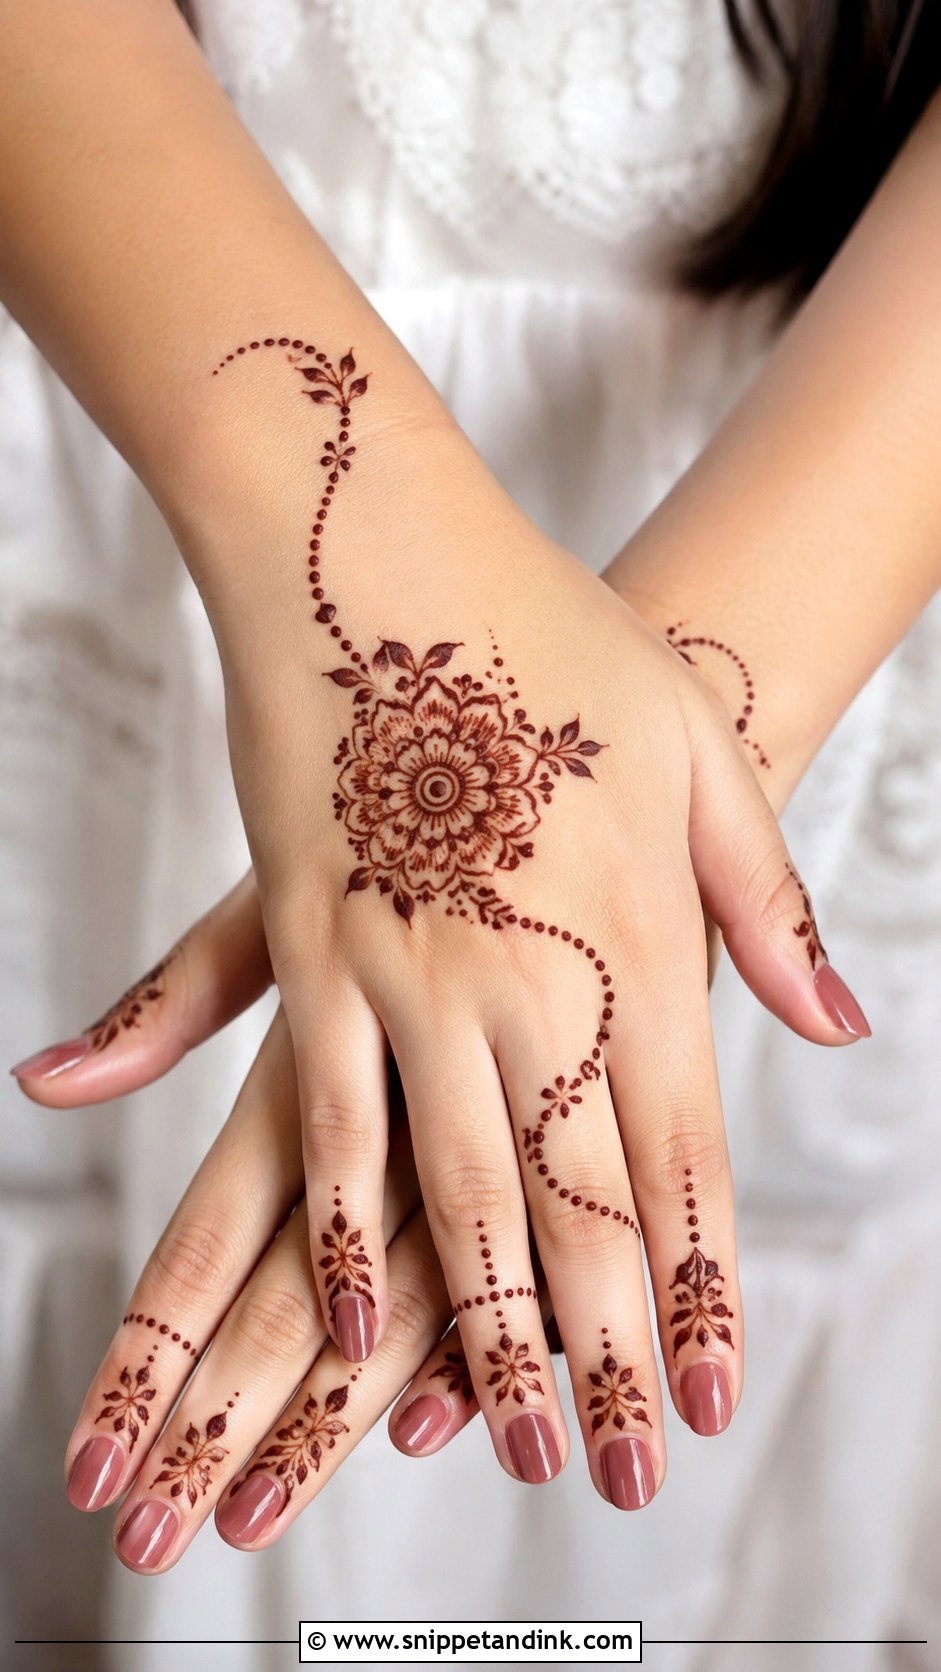
Dots are the most forgiving tool I have. A central flower, a curved vine and dotted trails toward the wrist and fingers make a complete design, and dots can also form chains, borders and soft fillers. They cover small gaps and pull a slightly lopsided design back into balance. Keep each size consistent: larger dots framing the main motif, tiny ones softening the edges. Mixed sizes in one row look accidental.
18. Back Hand Mehndi Design With Lines
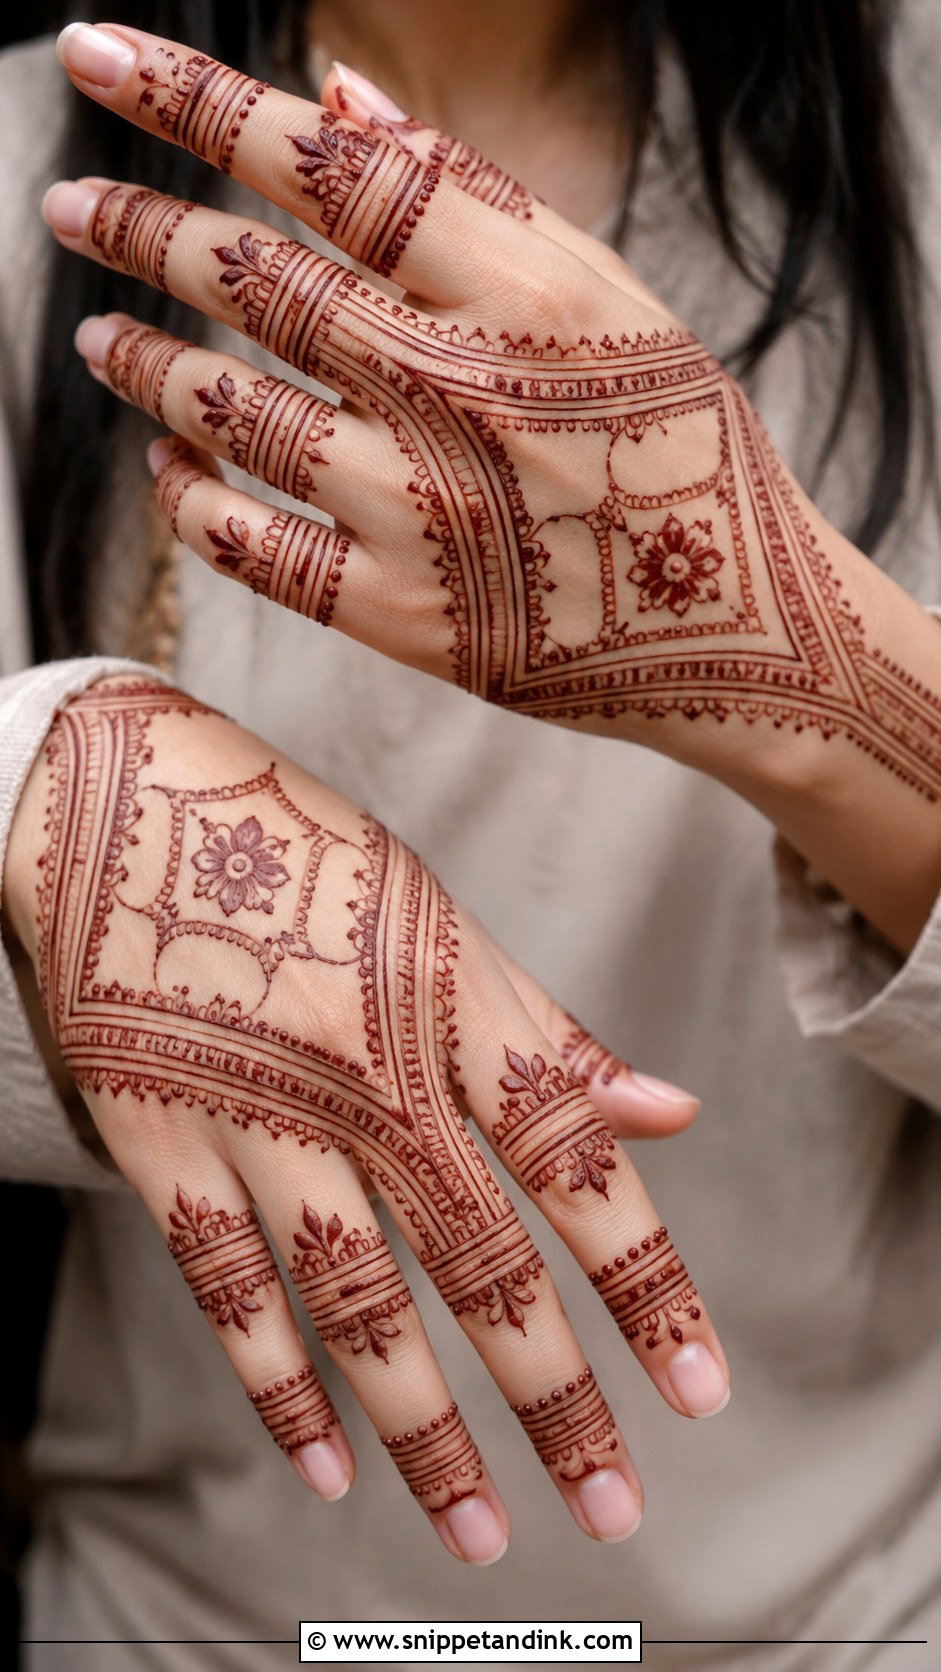
Line work is quick to apply and dries fast, which is why I reach for it when someone is short on time. Thin straight and curved lines and parallel bands give the hand structure, with a small flower or mandala in the center so it still feels like henna rather than a grid. Diagonal stripes and tiny dots between the finger bands finish it. Even spacing is the whole skill here; I keep my little finger resting on the client’s hand as a guide.
19. Back Hand Mehndi Design With Shading
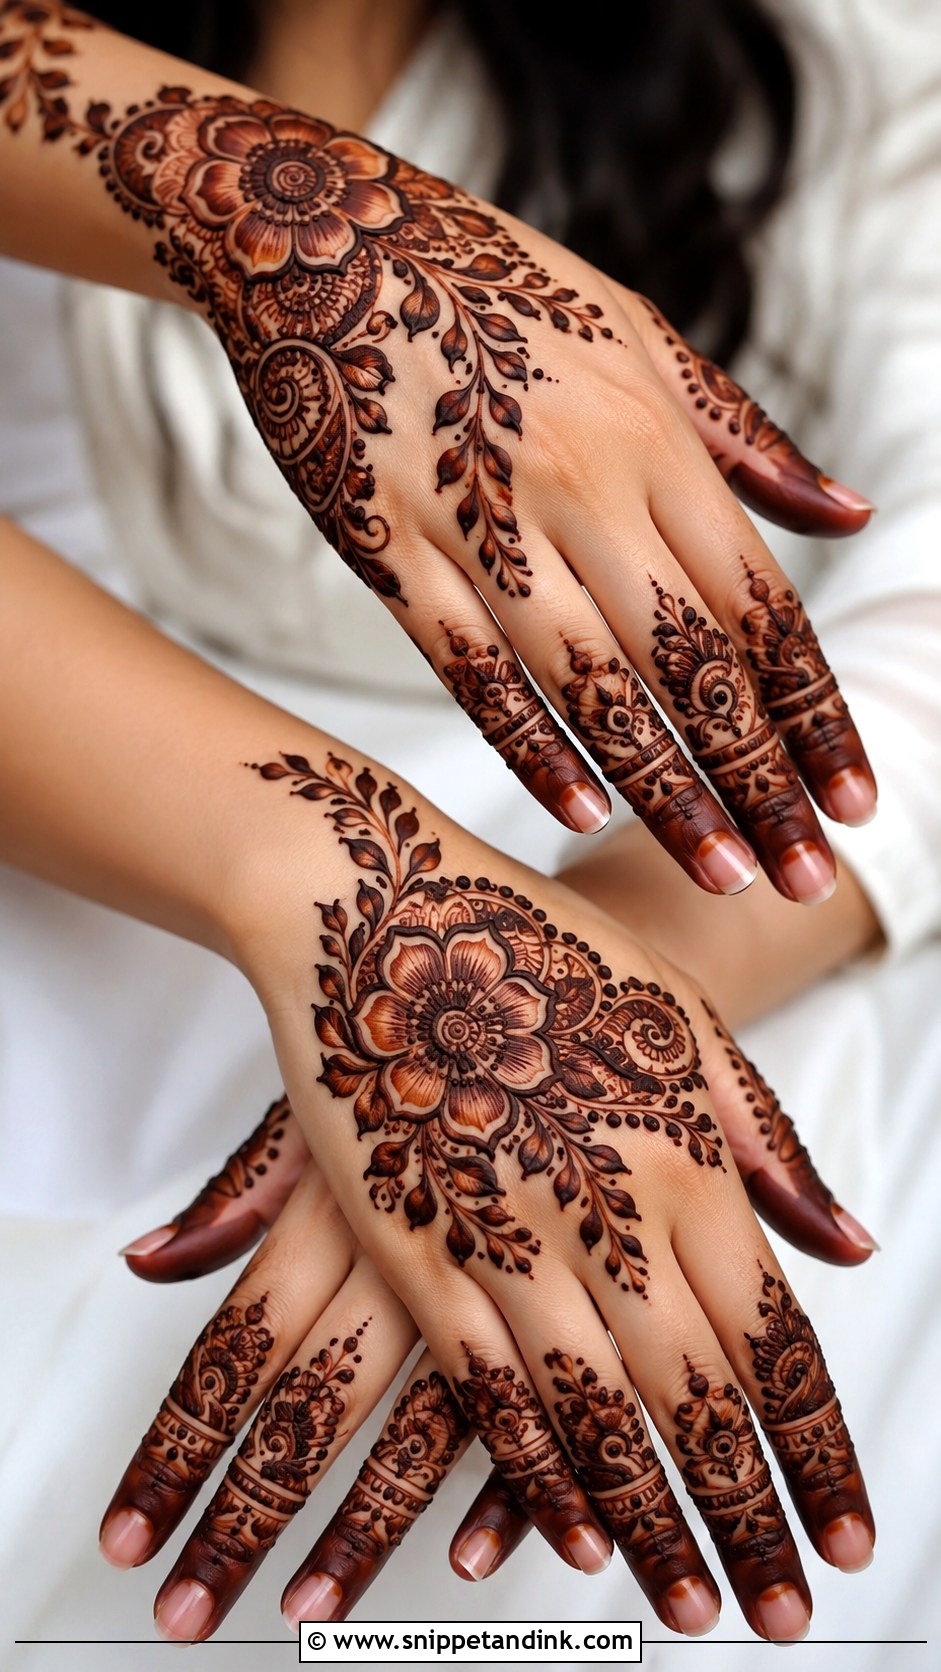
Shading adds depth without adding motifs. I pick one large flower, paisley or leaf trail and shade only some petals with light, fast strokes, leaving the rest as clean outlines with dotted borders. The fingers can carry shaded tips or shaded leaf bands. The pressure on the cone has to drop for shading; push too hard and you get a solid patch that stains darker than everything around it.
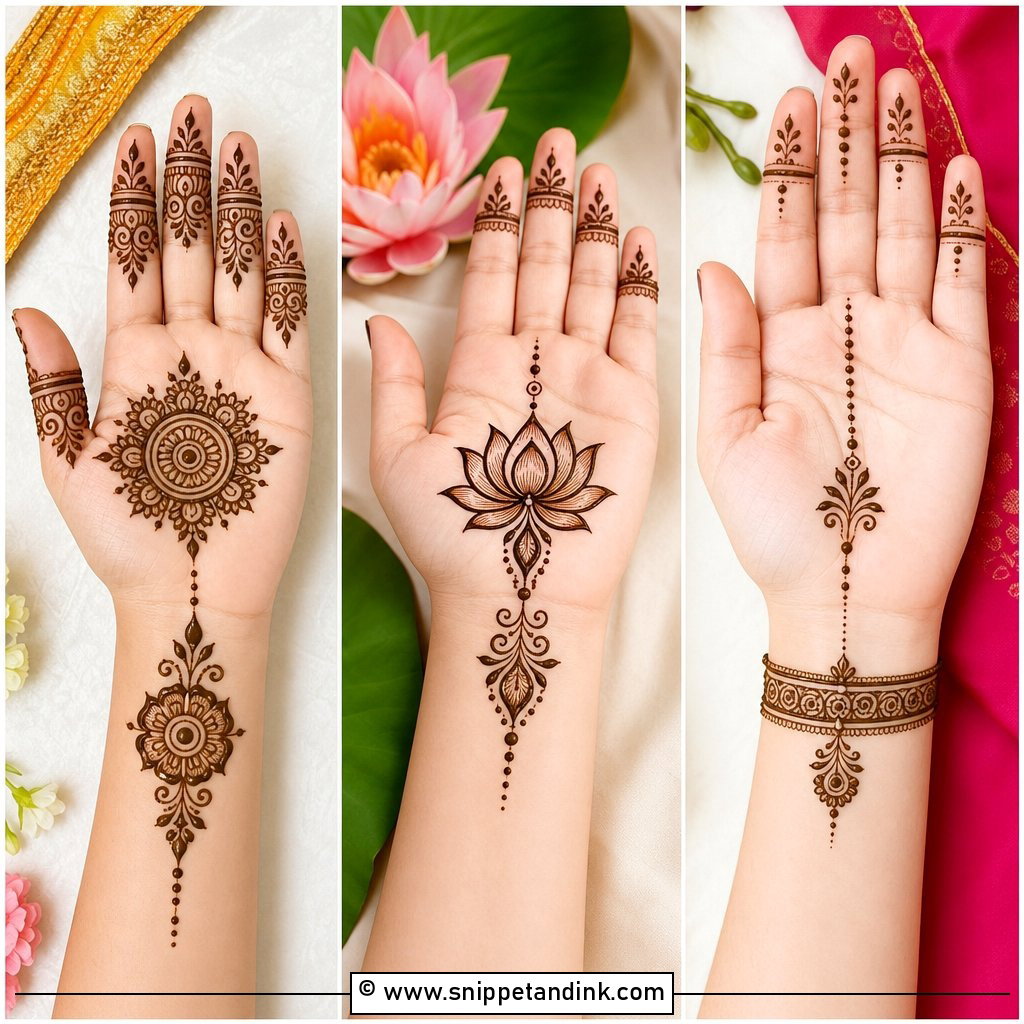
20. Back Hand Mehndi Design For Eid
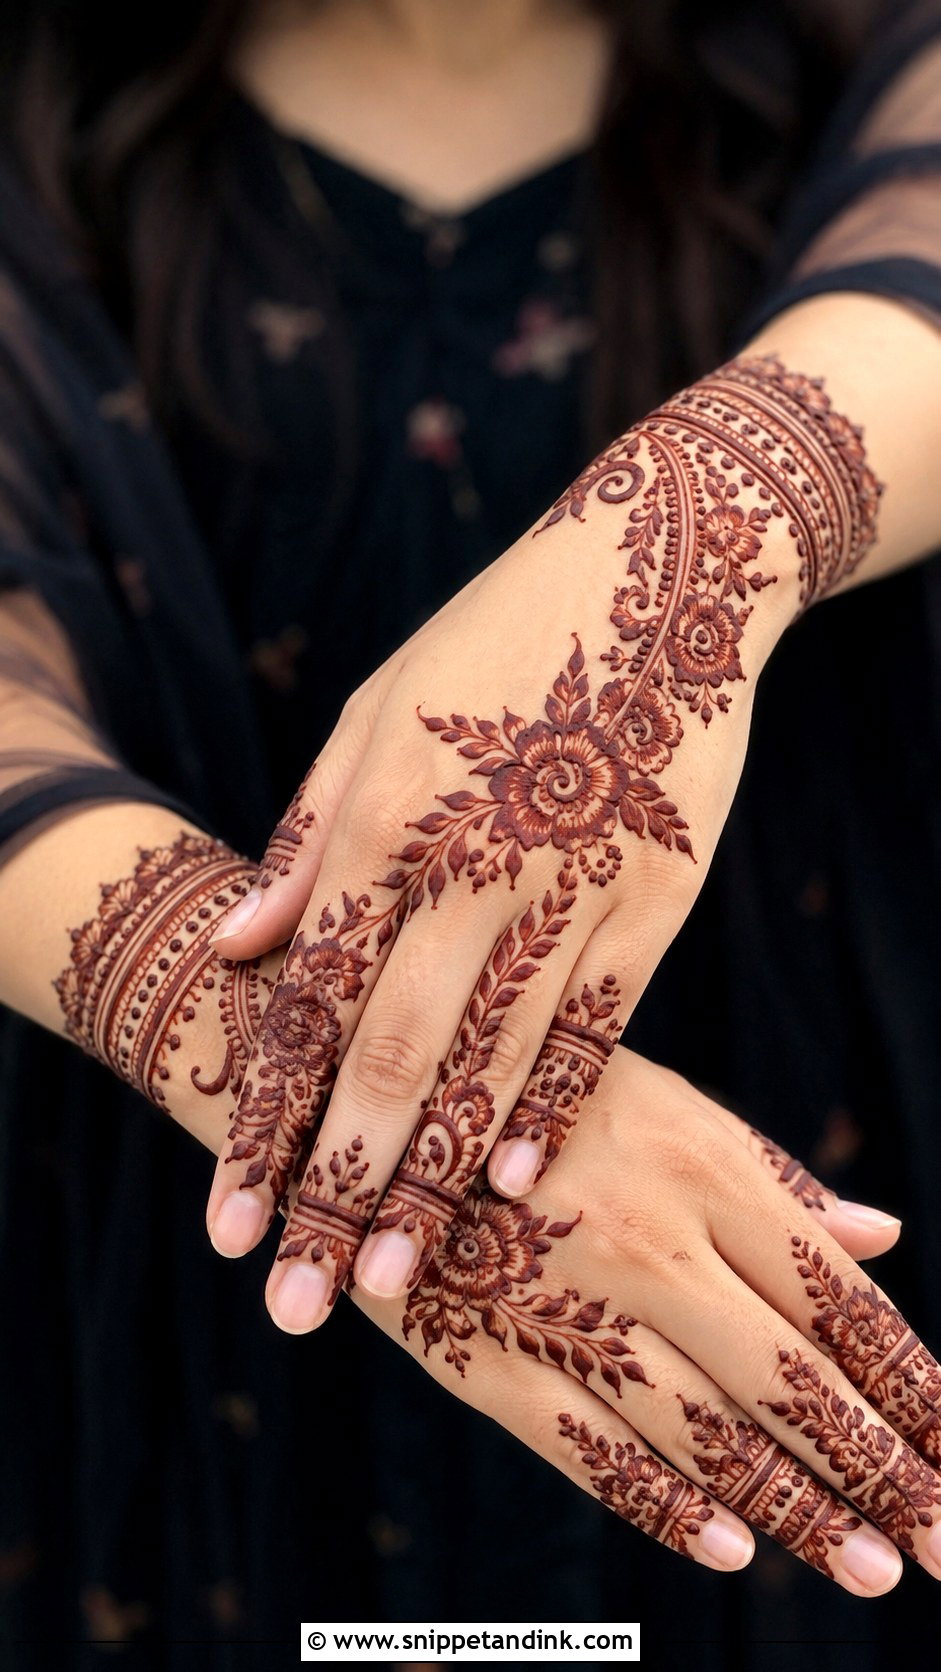
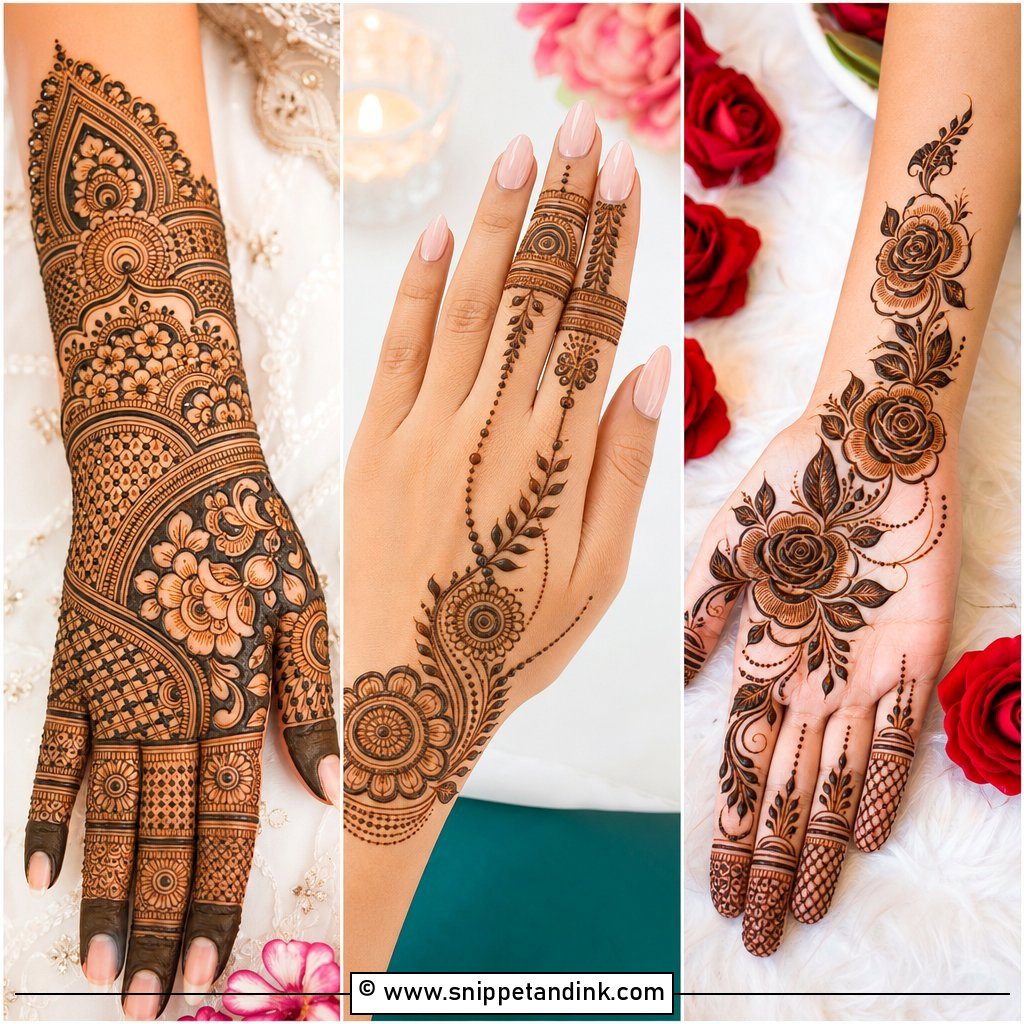
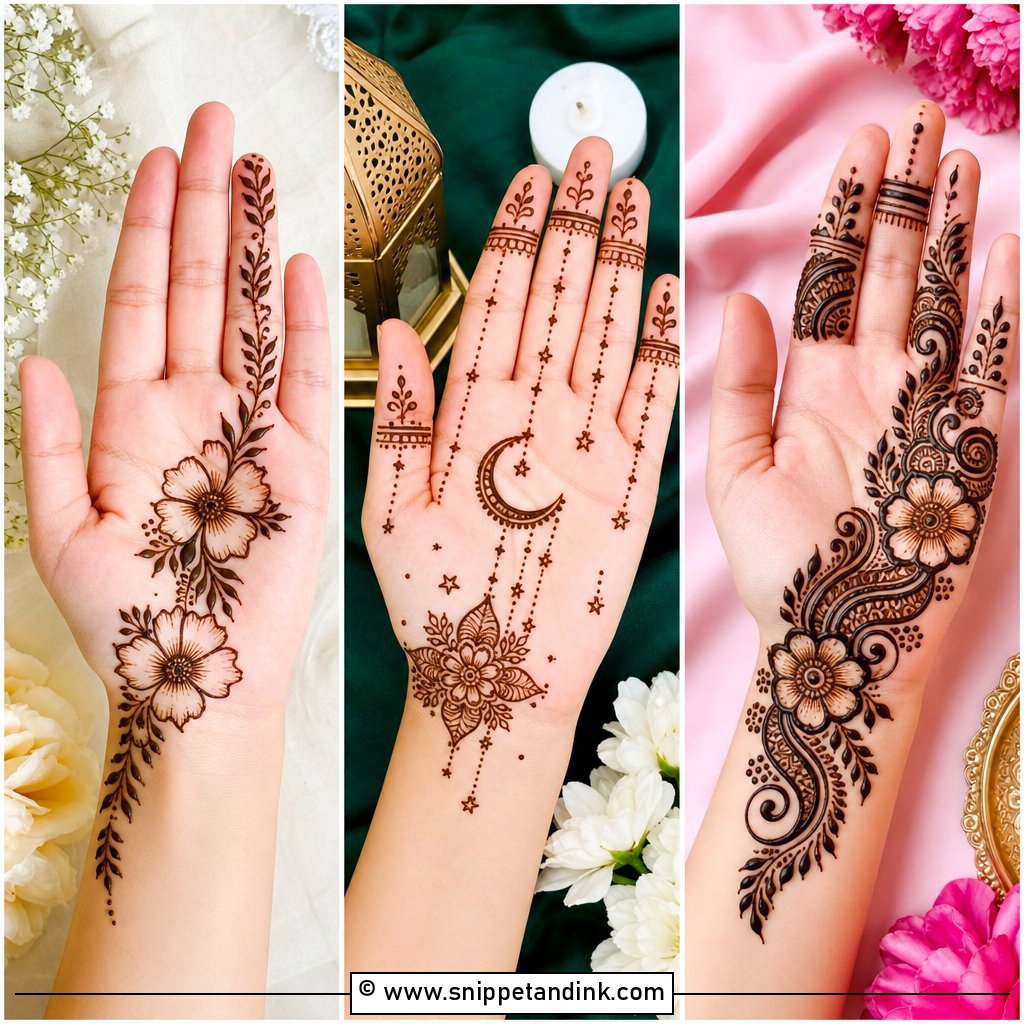
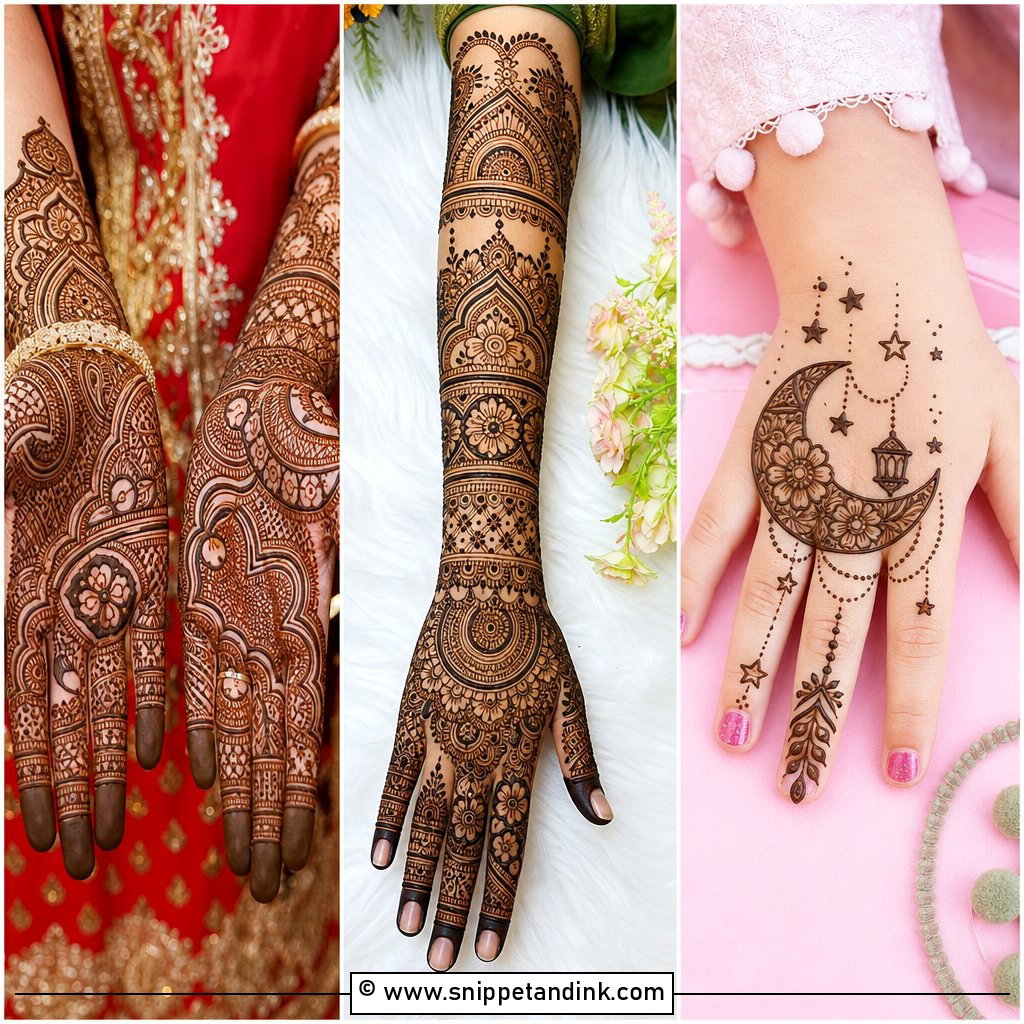
Eid mehndi often goes on the night before, while the house is busy, so I keep it comfortable to live in. Arabic flowers, leafy trails, slim finger bands and a bracelet border at the wrist cover it. I leave the center open enough to read the pattern with rings on. A diagonal flow is the safe layout, and bold outlines give you the darker stain you want for family photos the next morning.
21. Back Hand Mehndi Design For Diwali
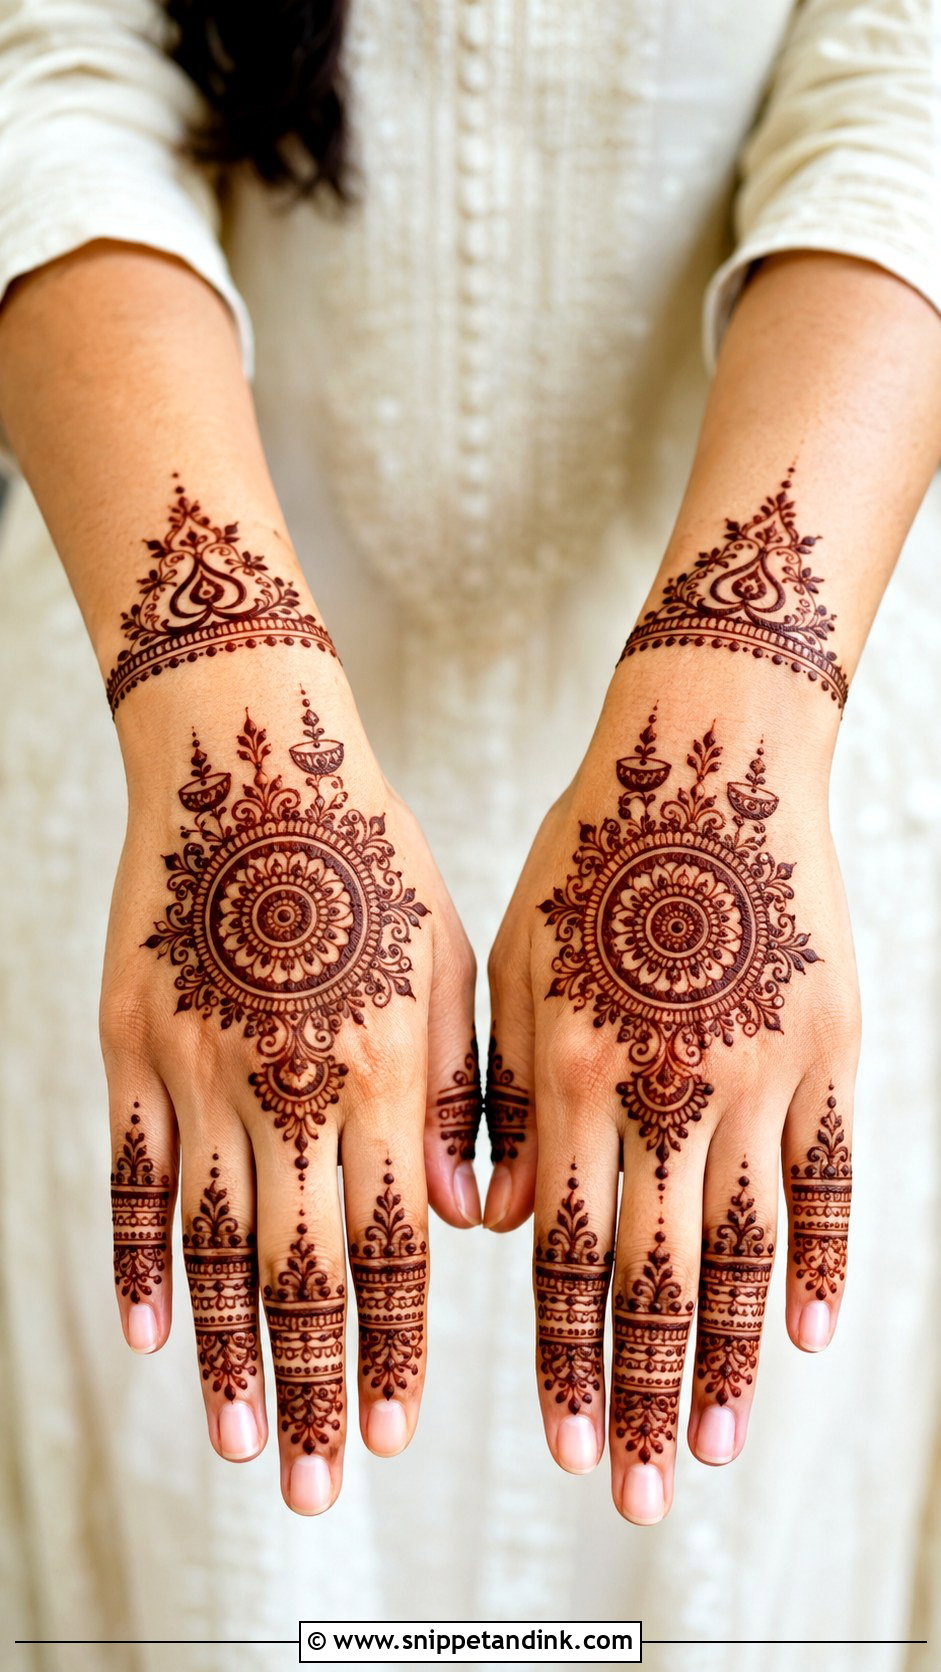
For Diwali I like a round mandala or floral center with little diya-shaped curves, leaves and dots, plus a wrist border and clean finger bands. Keep the main motif bold and everything around it lighter, so it holds up next to bright outfits and stacks of bangles. The back hand is on show during every greeting and every diya you light, so a clear center matters more than extra detail.
22. Back Hand Mehndi Design For Wedding Guest
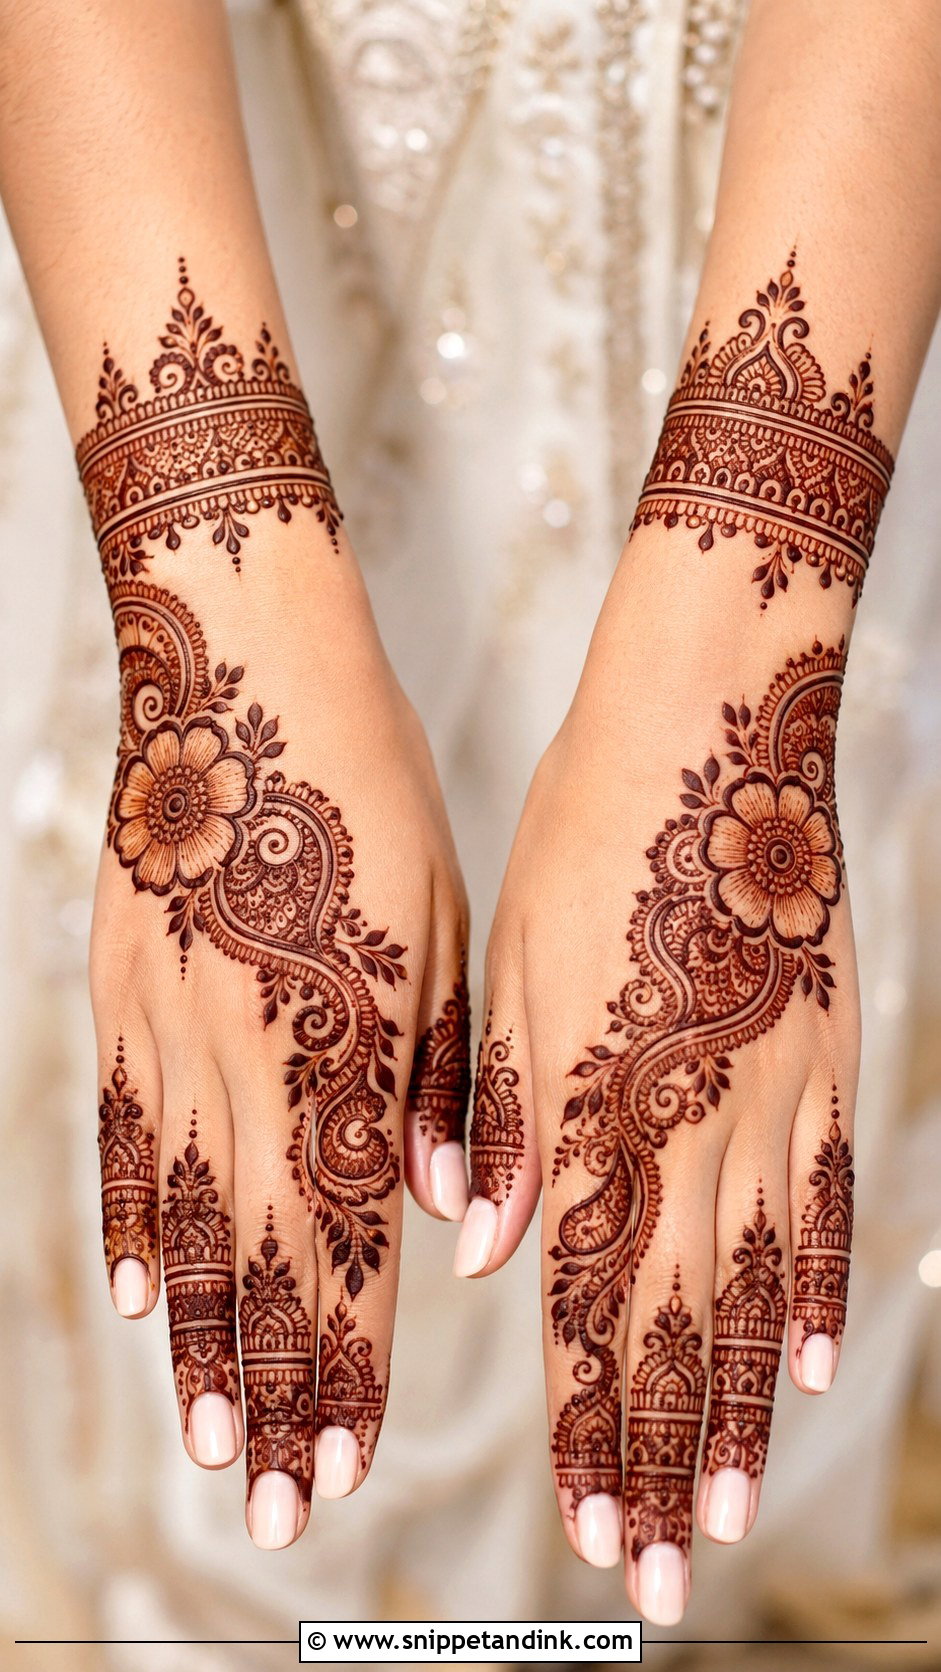
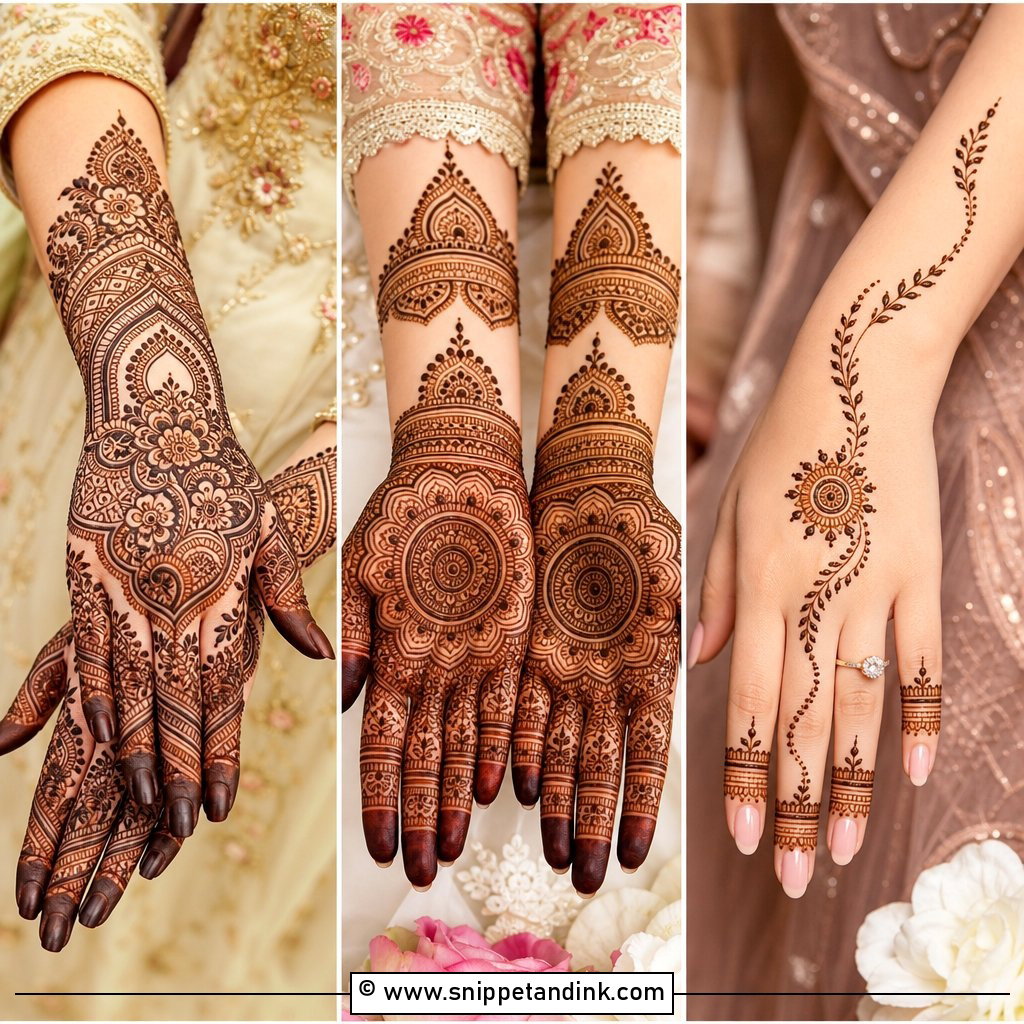
As a guest, your mehndi should be dressed up but clearly lighter than the bride’s. I usually do Indo-Arabic: a floral trail, small paisleys, neat finger work and a bracelet border, covering half to three-quarters of the back hand. Medium-sized motifs keep it rich without crowding. If the bride’s artist is also doing guests, ask how long each hand will take; queues at a mehndi night are real, and a simpler design gets you out of the chair.
23. Back Hand Mehndi Design For Bridesmaid
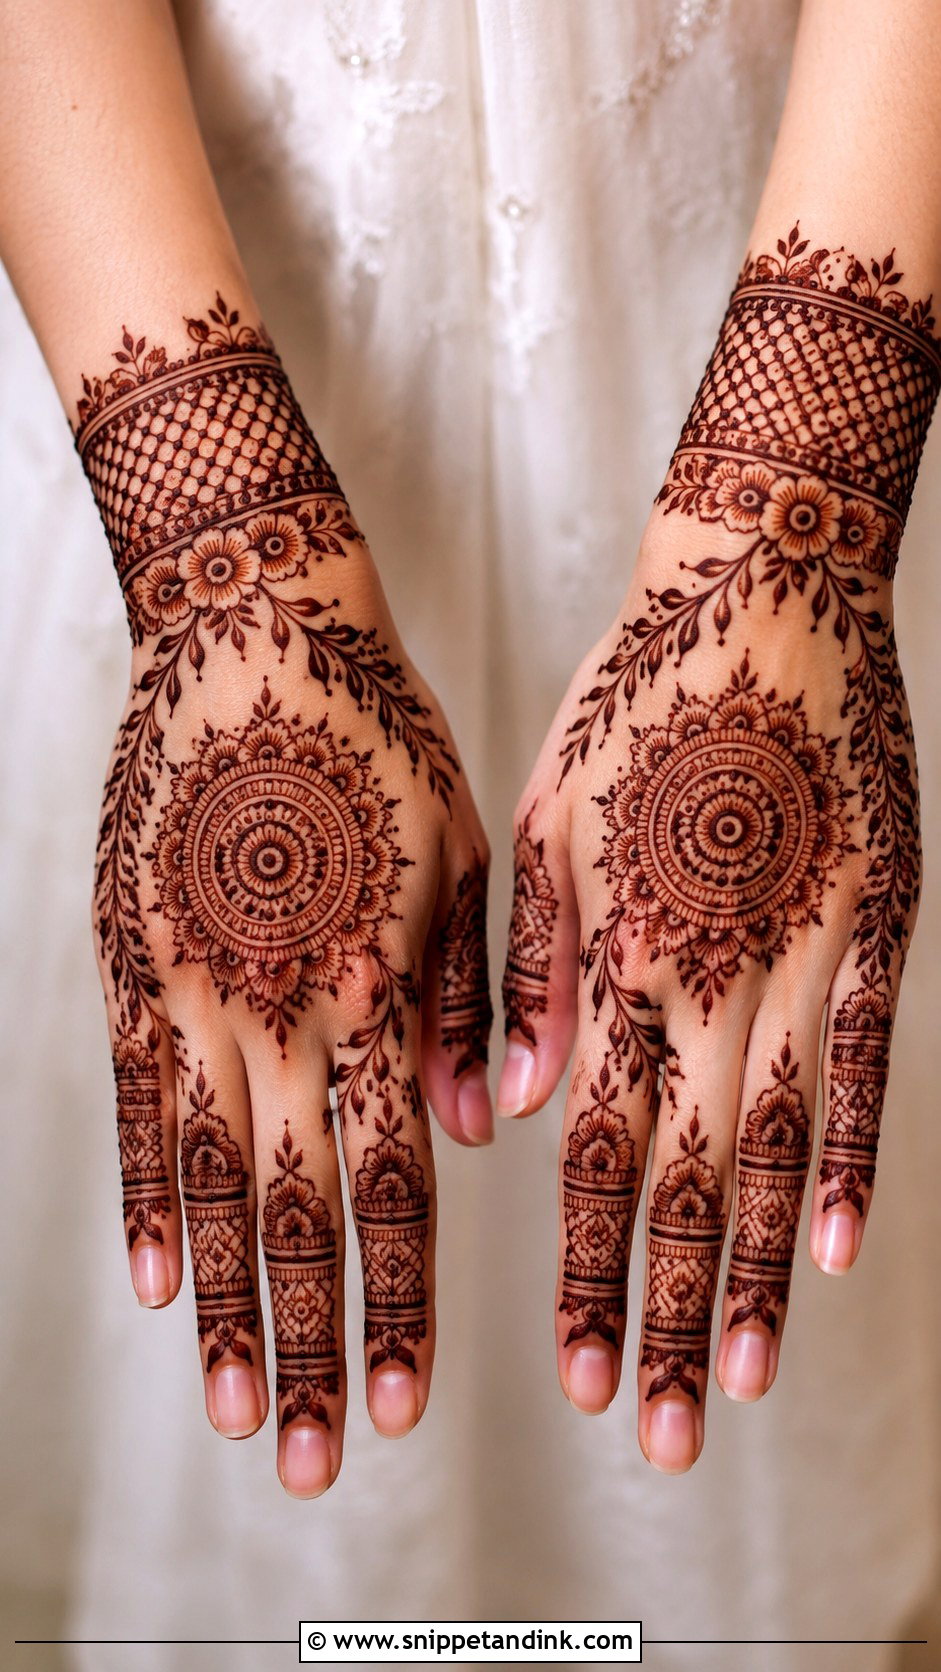
Bridesmaid designs sit between guest and bridal: a central mandala, side florals, leafy vines, detailed finger bands and a little mesh near the wrist. The pattern mirrors easily, so both hands match in group photos. I try to keep bridesmaids to a consistent level of coverage across the group, because one heavily done hand next to a light one is noticeable in a lineup.
24. Back Hand Mehndi Design For Kids
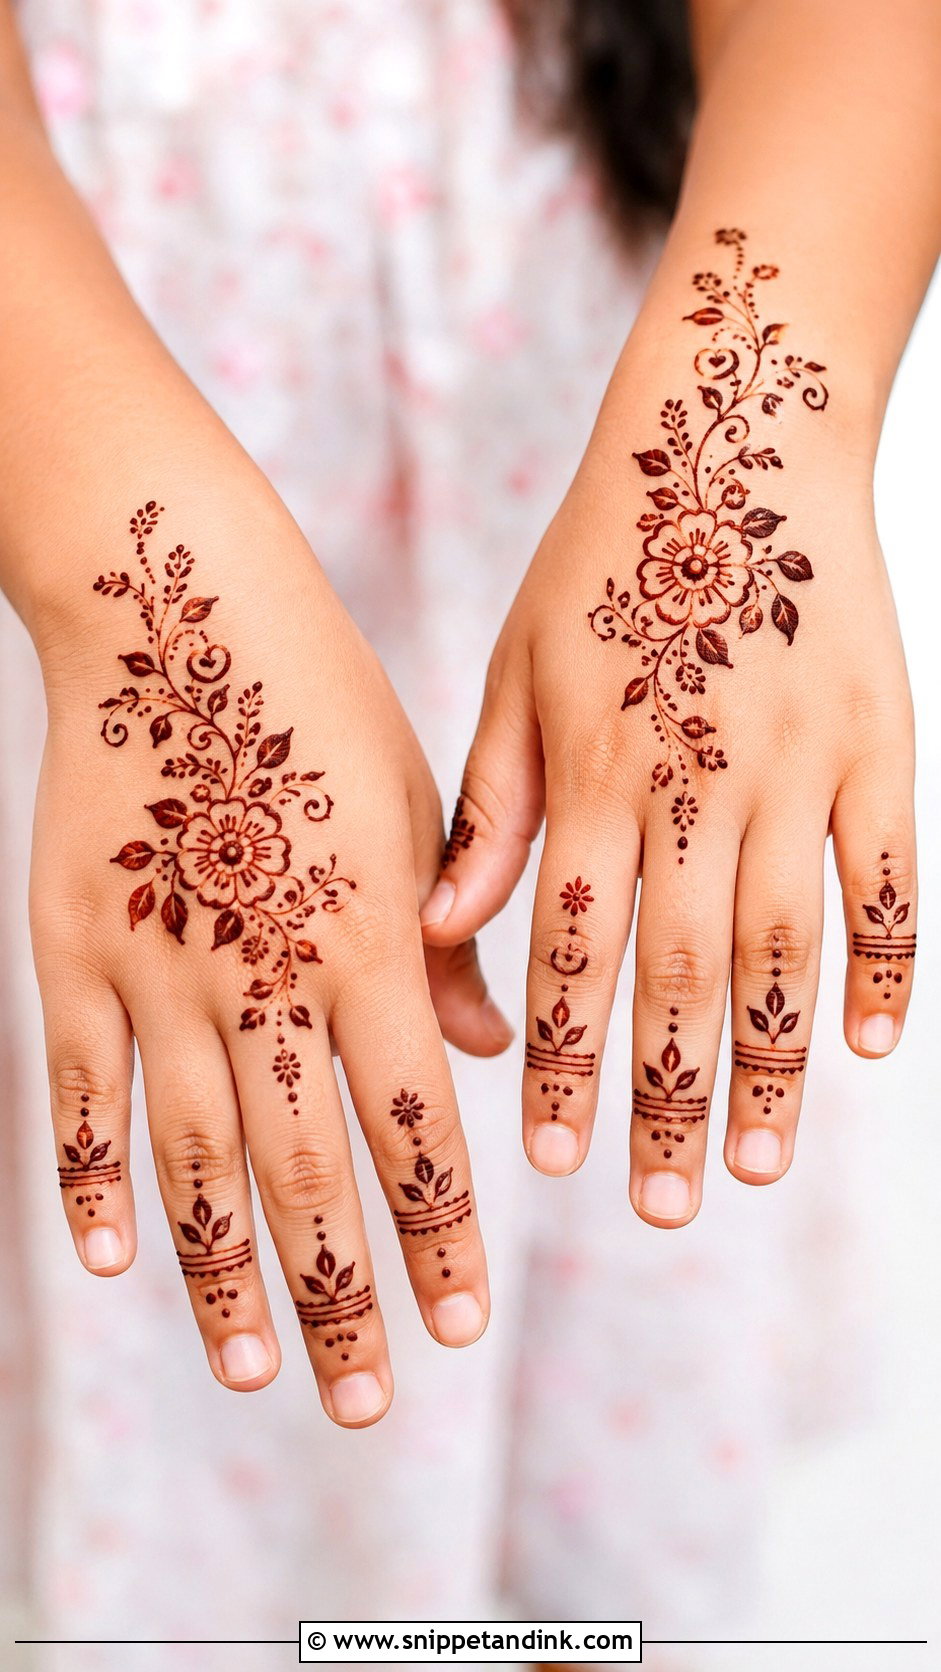
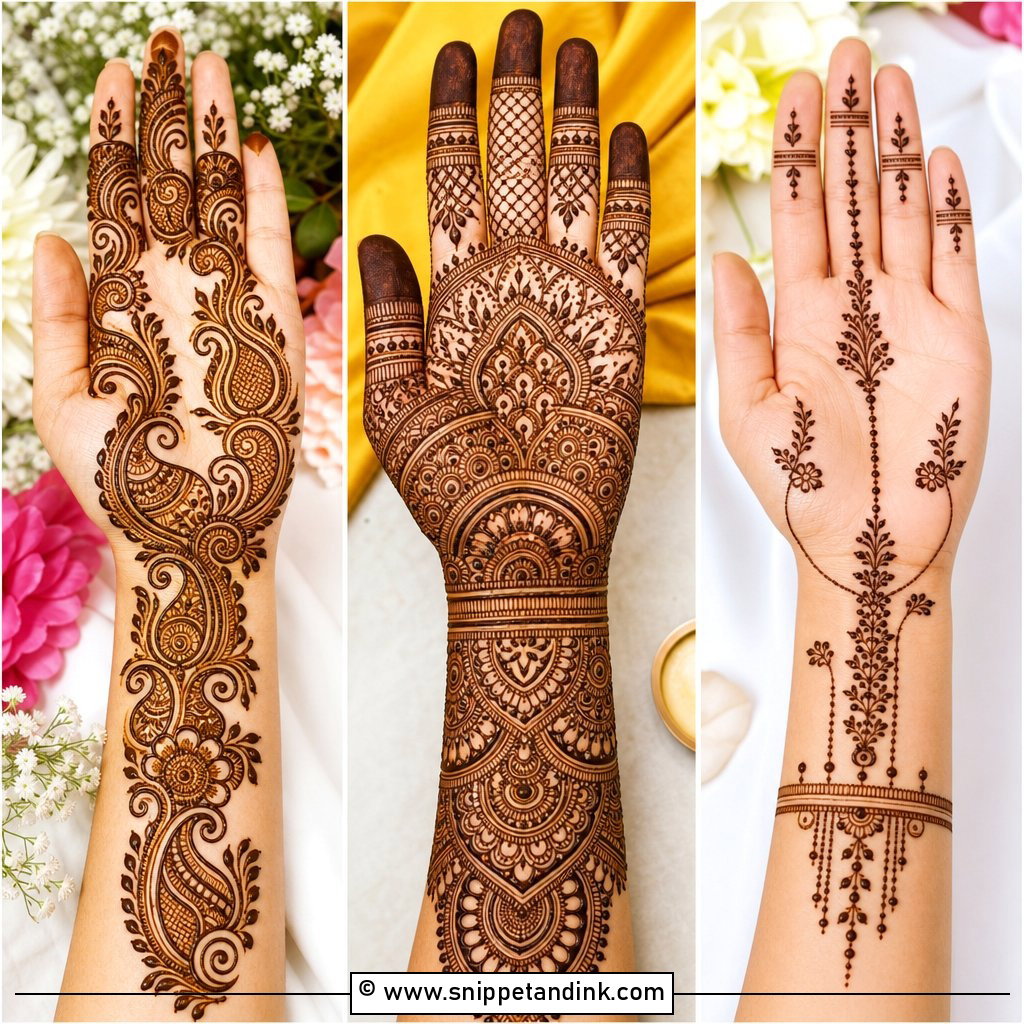
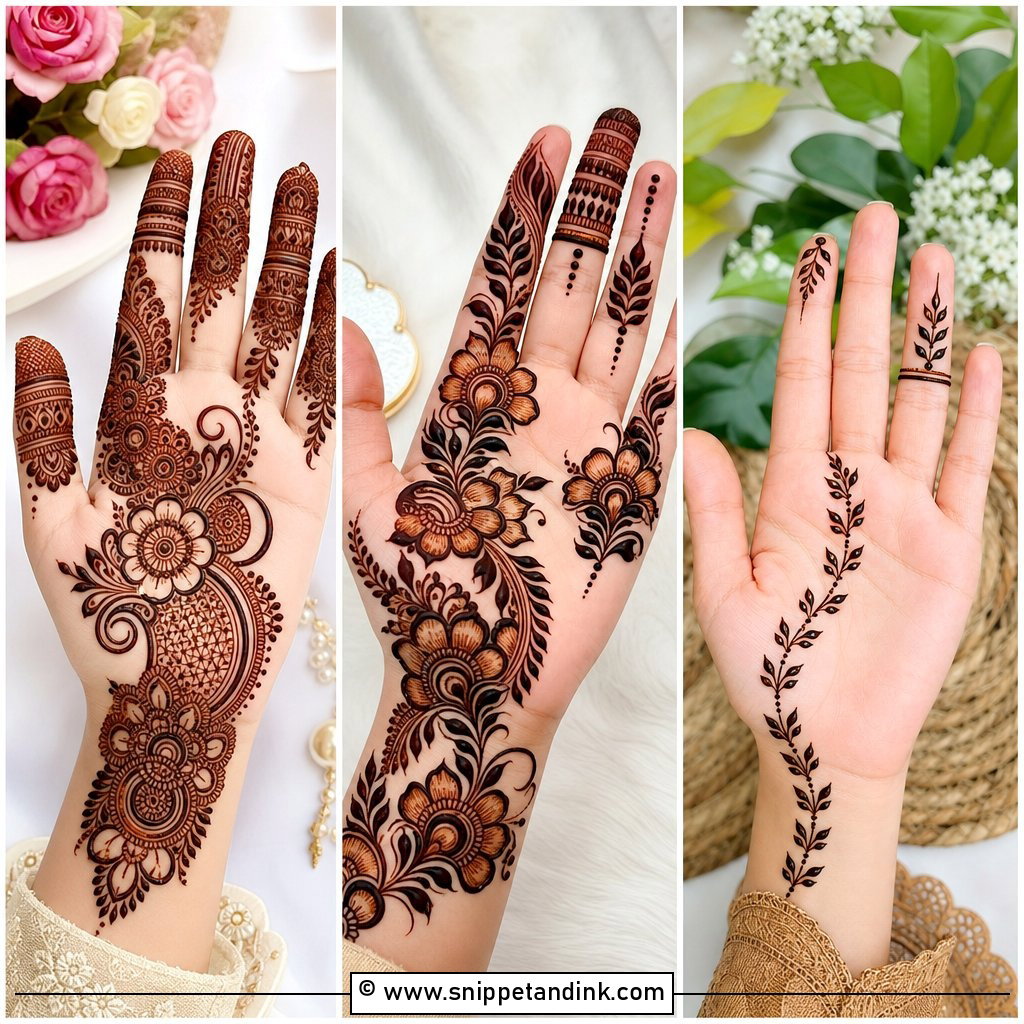
Children won’t sit still for long, so I keep their designs to one small motif: a flower, a butterfly shape or a tiny mandala, with dots, a few leaves and very light finger bands. Lines need to be bold enough to stain but without fine detail that smudges the moment they move. I also check the cone is natural henna only. Dark “black henna” pastes can contain chemical dyes that cause serious skin reactions, and children are the last people who should have them.
25. Back Hand Mehndi Design For Small Hands
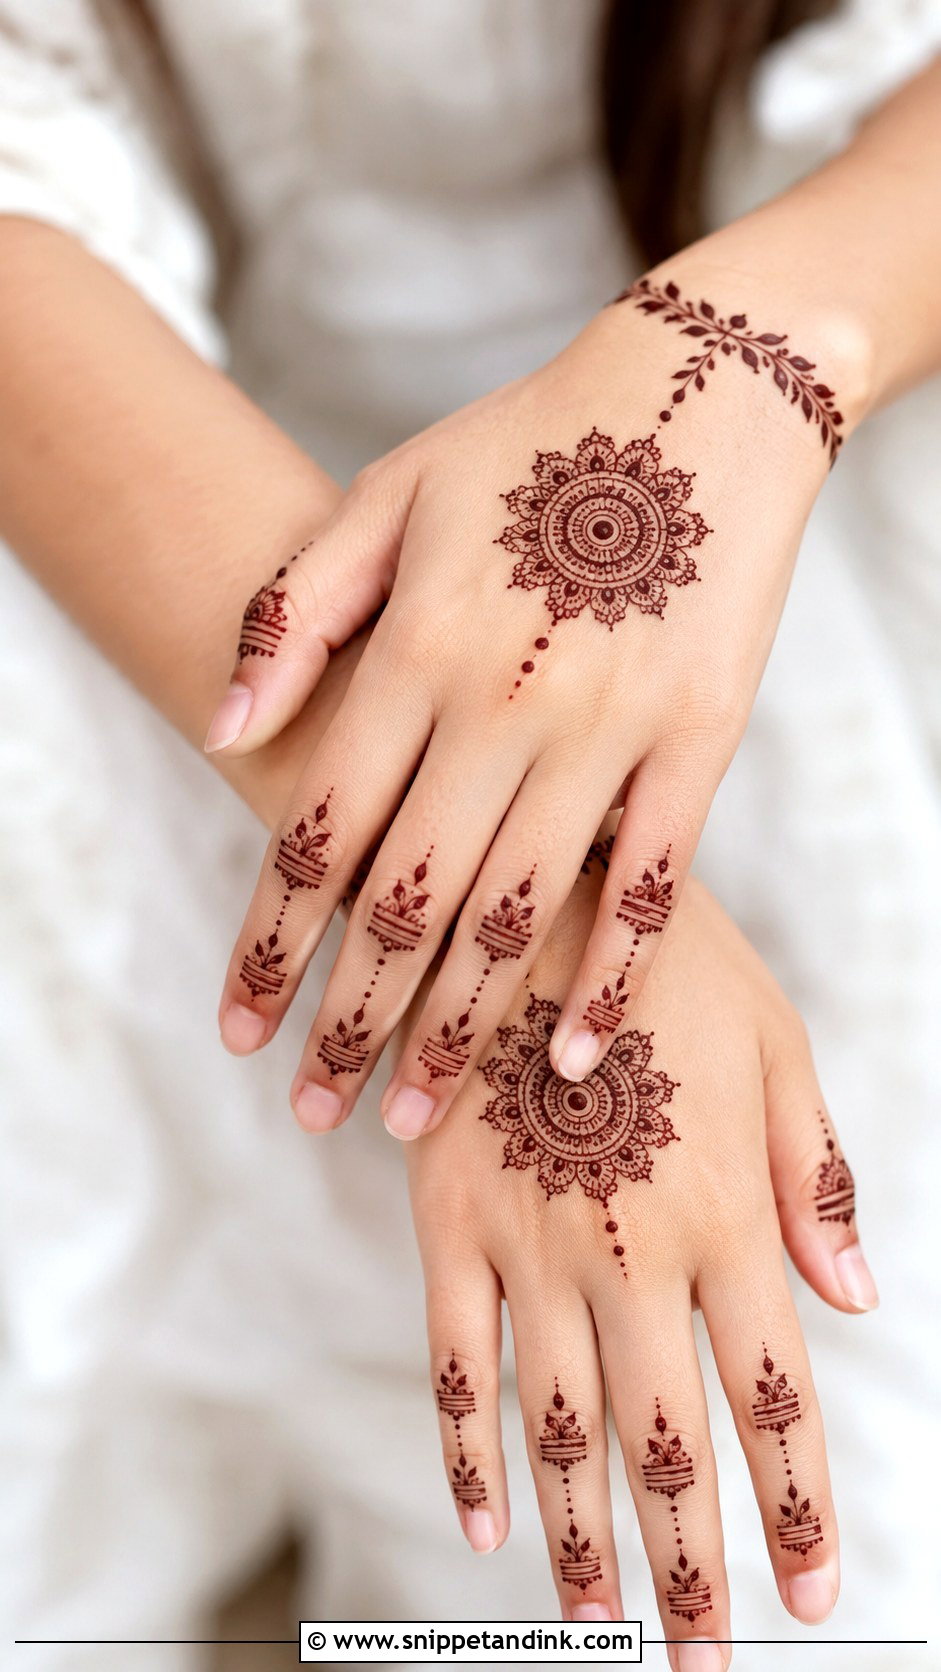
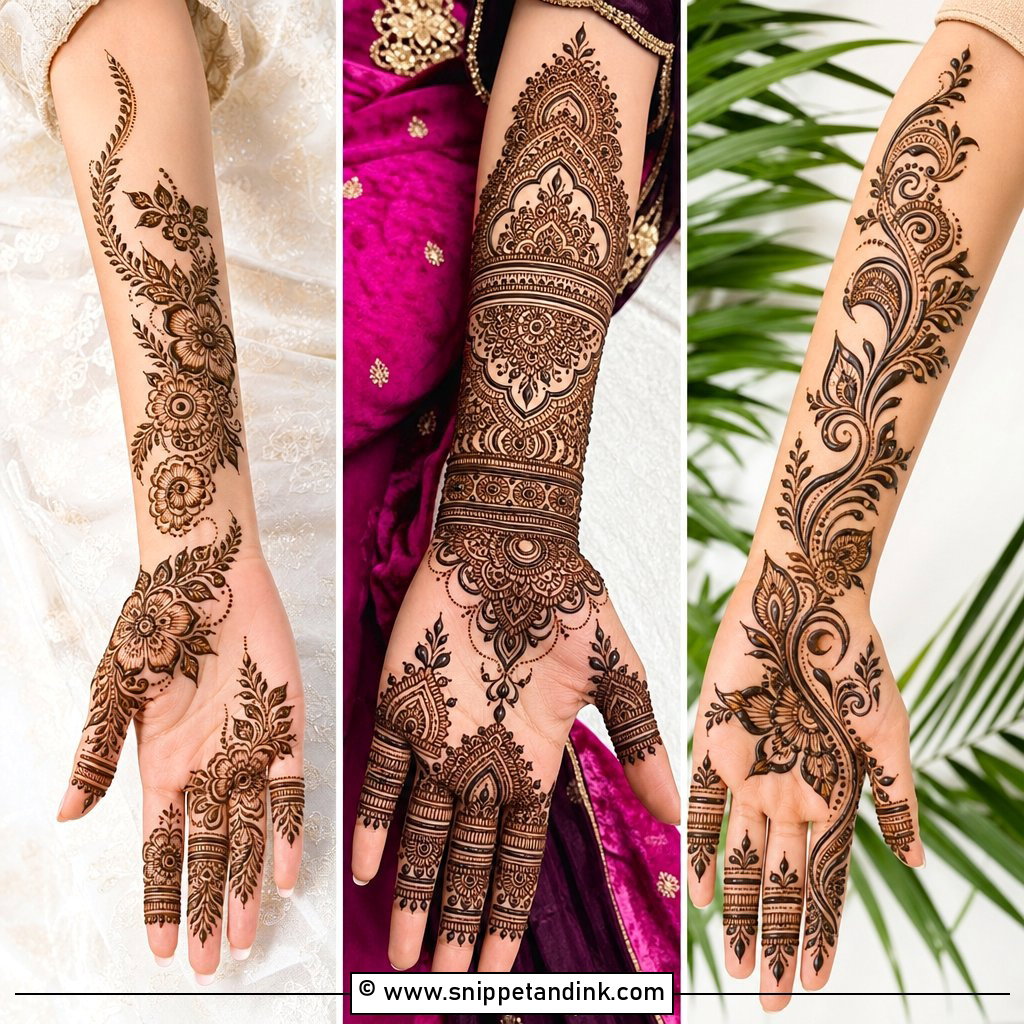
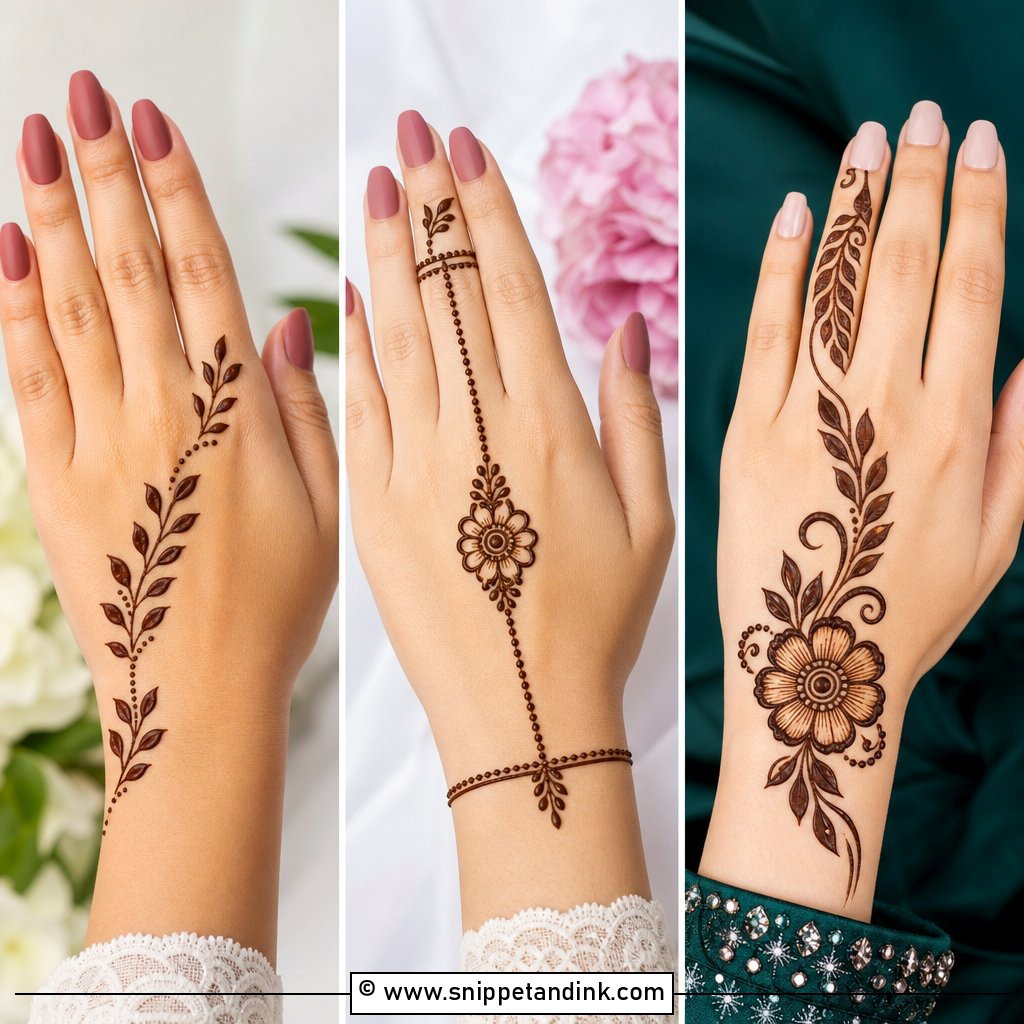
On small hands, big motifs crowd fast. I use one small mandala or flower, a short vine toward the wrist and slim finger accents, and skip large paisleys and thick wrist bands entirely. Fine lines and open spacing keep the hand looking delicate. Light finger work also makes the fingers look longer, which most people with small hands like.
26. Back Hand Mehndi Design For Long Fingers
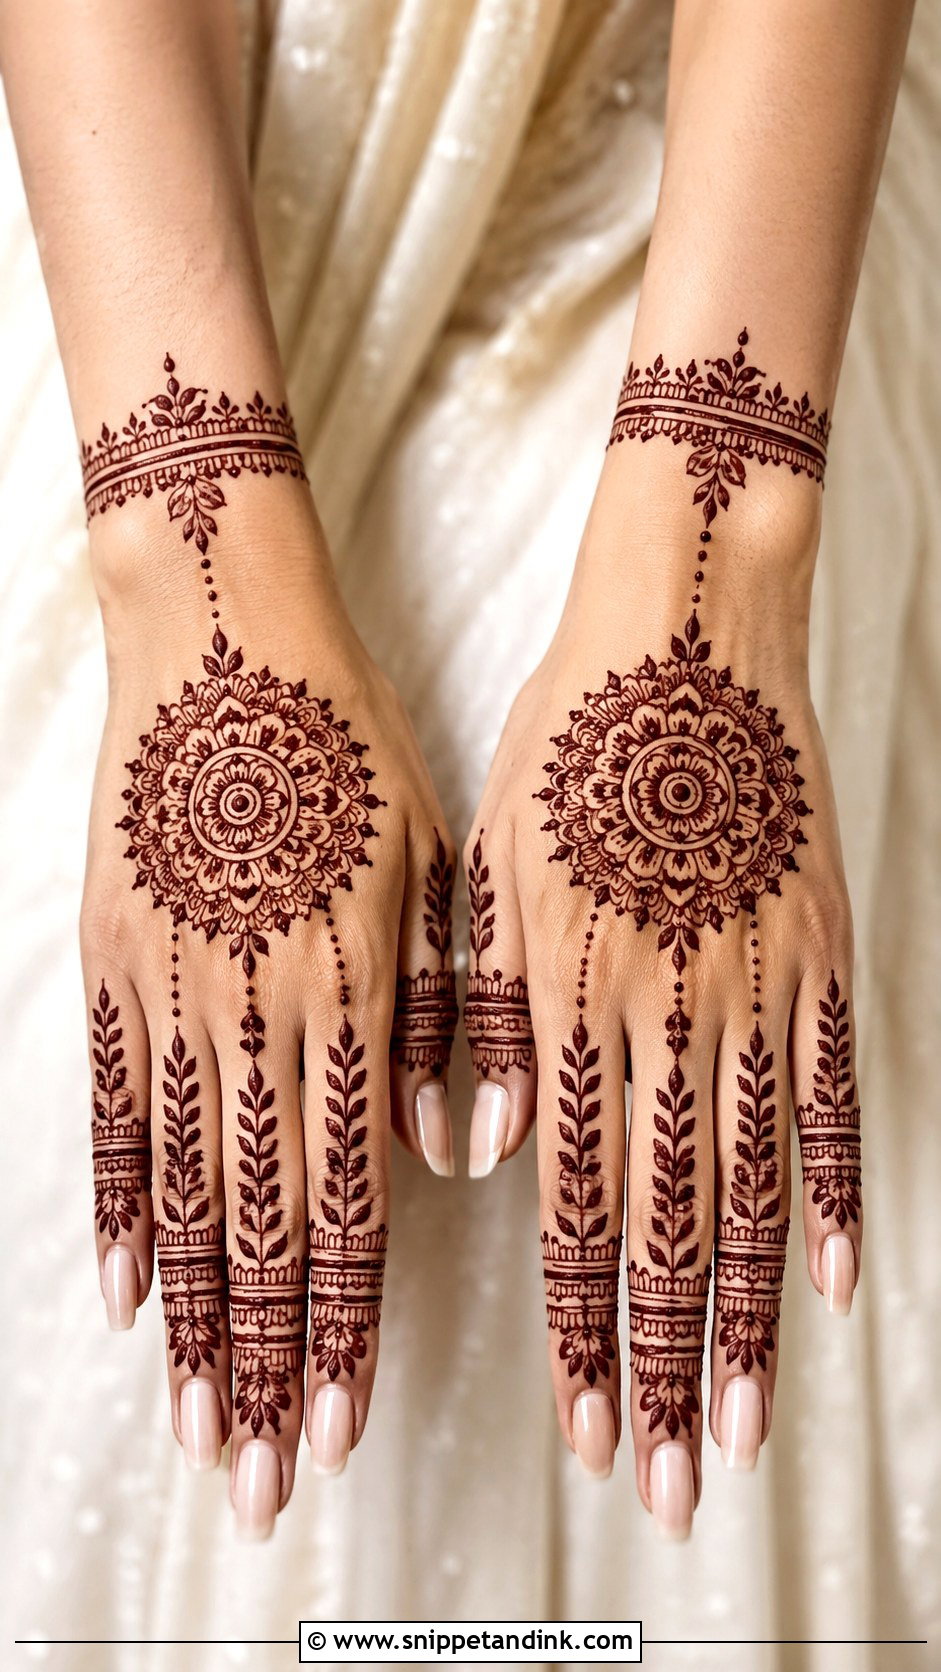
Long fingers give you room. I extend the bands, add leafy chains and slim geometric lines, and connect a medium flower or mandala to the fingers with dotted trails. The wrist can stay light. The risk is overdoing it: if every finger is heavy, the hand looks gloved. Vary the patterns a little from finger to finger so they relate without matching exactly.
27. Back Hand Mehndi Design For Short Fingers
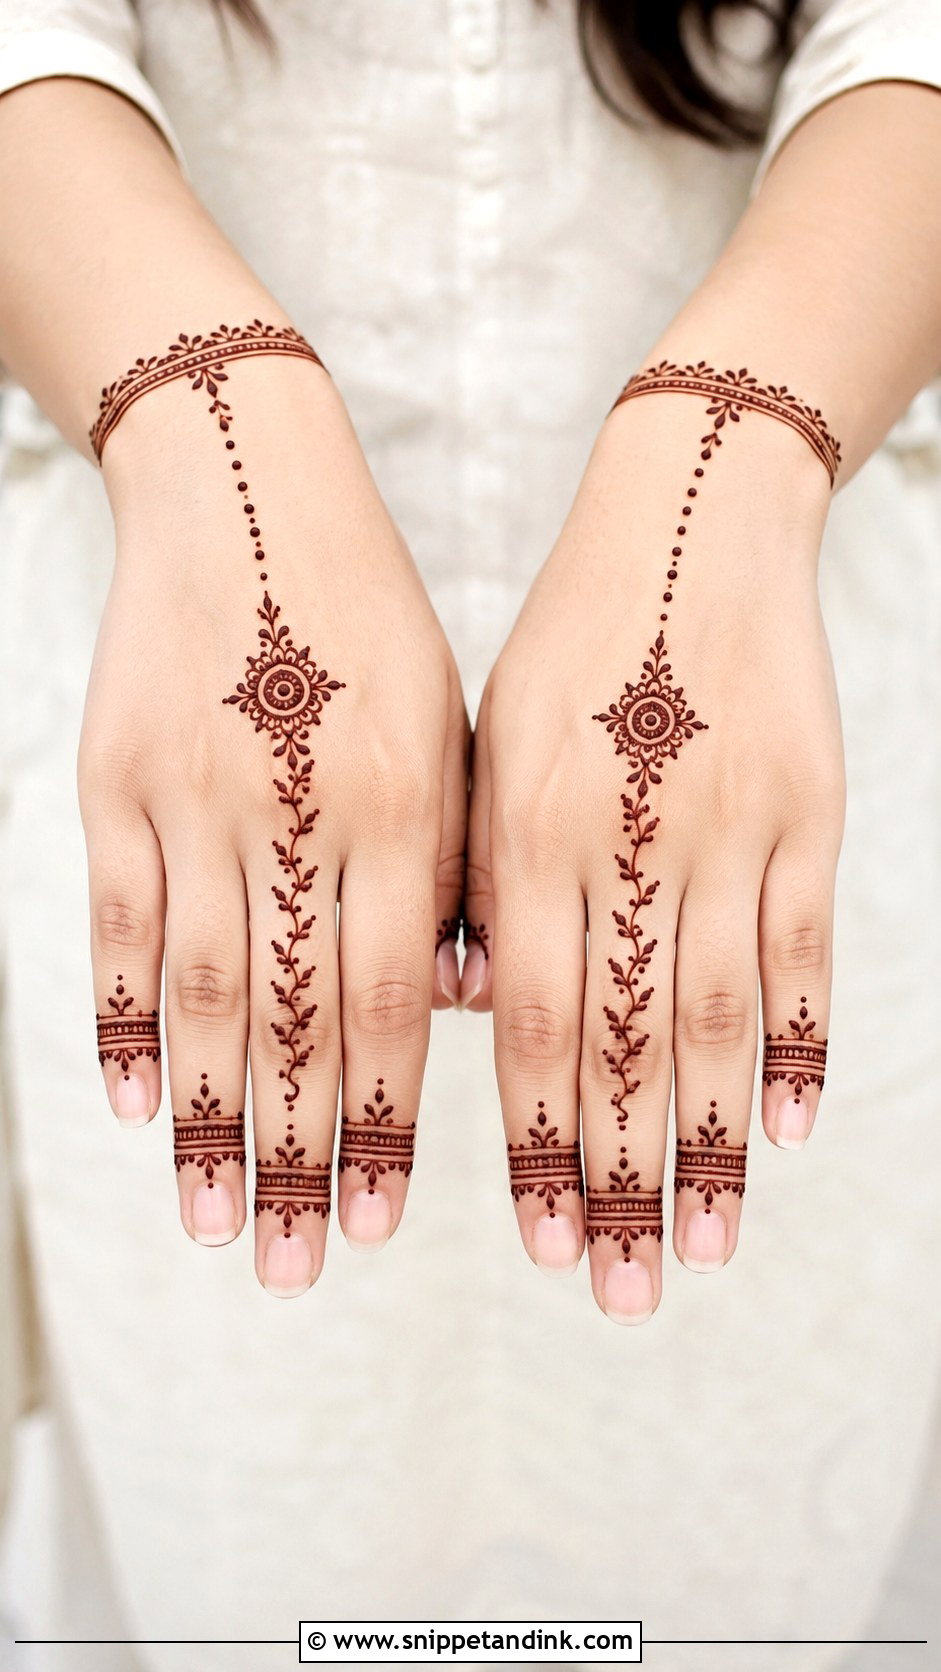
For shorter fingers, I work vertically. Slim vines, narrow bands and small leaves that point upward all help the eye travel toward the fingertips, while thick fingertip blocks do the opposite. A small central motif with a thin dotted trail to the middle finger is usually enough. Keep the wrist detail simple too, since a heavy cuff visually shortens the whole hand.
28. Back Hand Mehndi Design For Dark Skin
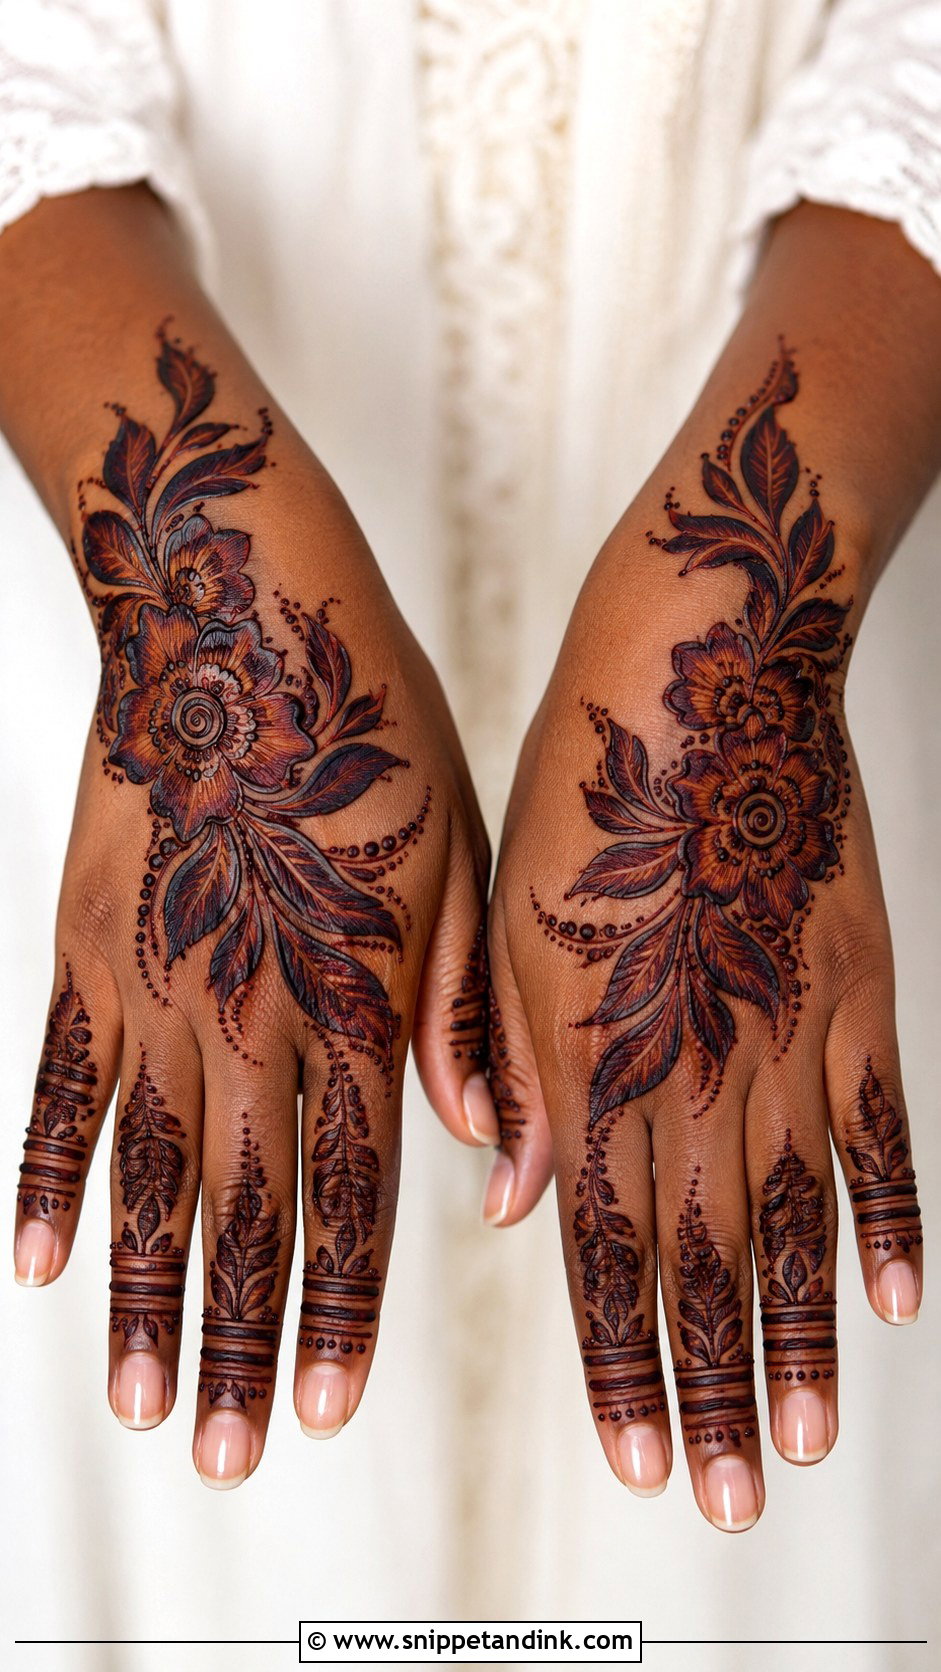
On deeper skin tones, natural henna stains a rich reddish-brown to maroon, and the contrast is softer than on lighter skin, so readability depends on spacing. I use large flowers, thick leaves and clear finger bands, and I avoid tiny fillers that merge once the stain develops. Bold outlines with open skin between motifs give the cleanest result. The design should still read clearly from across a room.
29. Back Hand Mehndi Design For Fair Skin
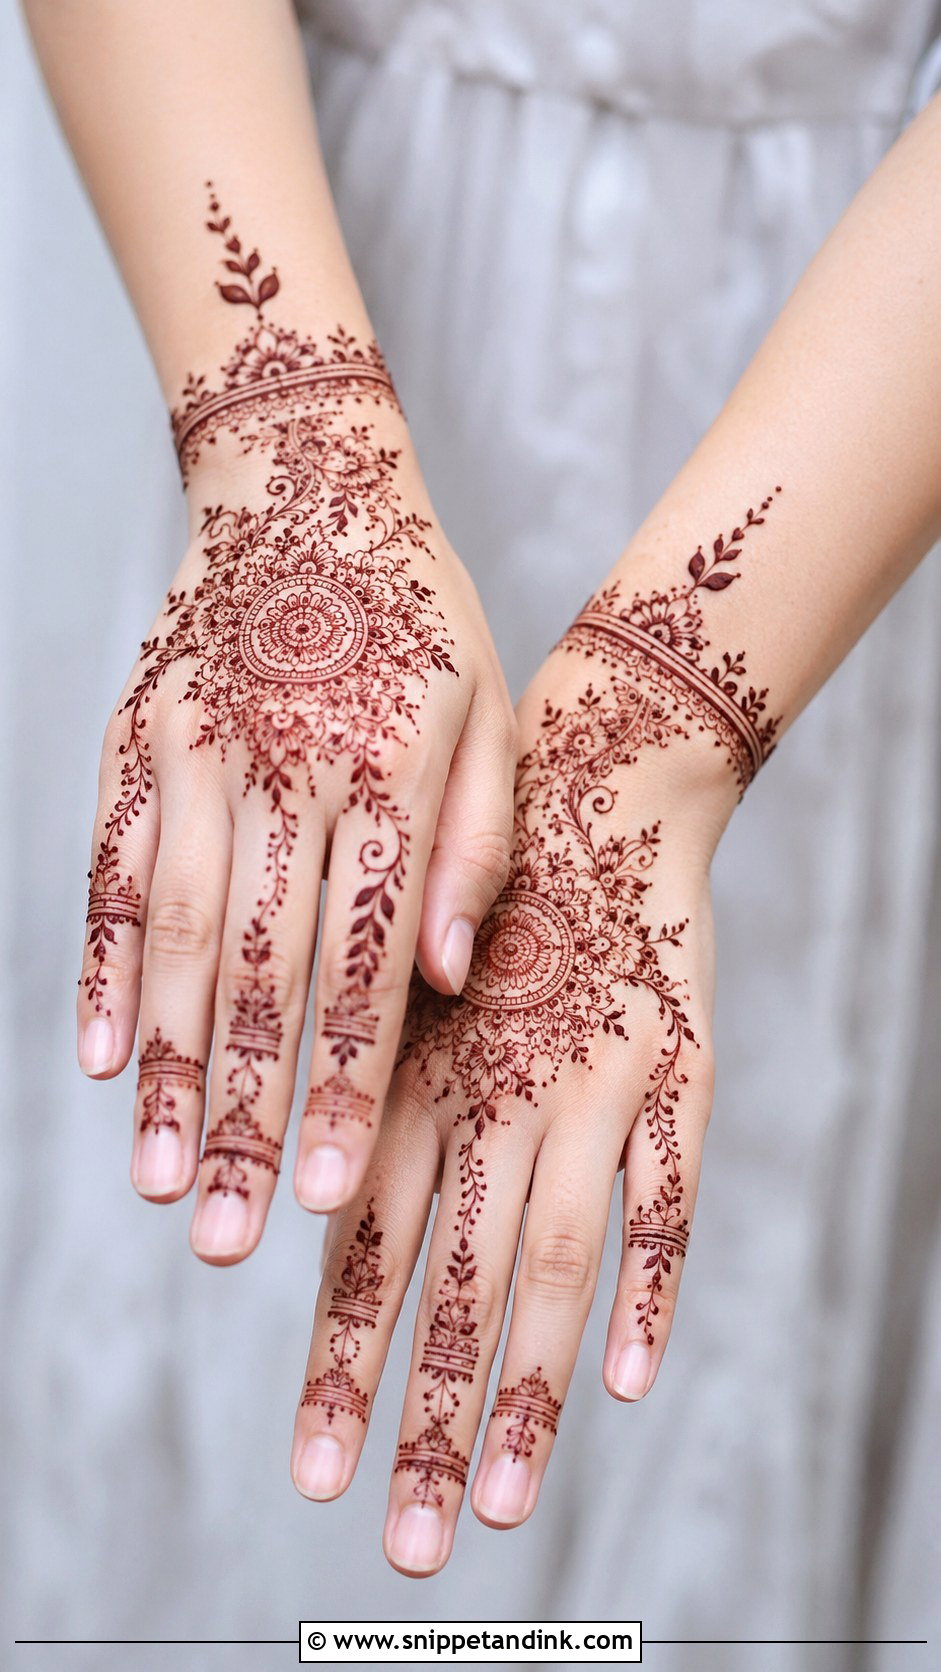
Lighter skin shows contrast quickly, even with fine line work. That means delicate florals, small mandalas and thin finger bands come through clearly, and a slim bracelet border at the wrist is often all the weight you need. It also shows every wobble, so I slow down on long lines. If you want a soft overall effect, keep the hand airy rather than dense.
30. Indo Arabic Back Hand Mehndi Design
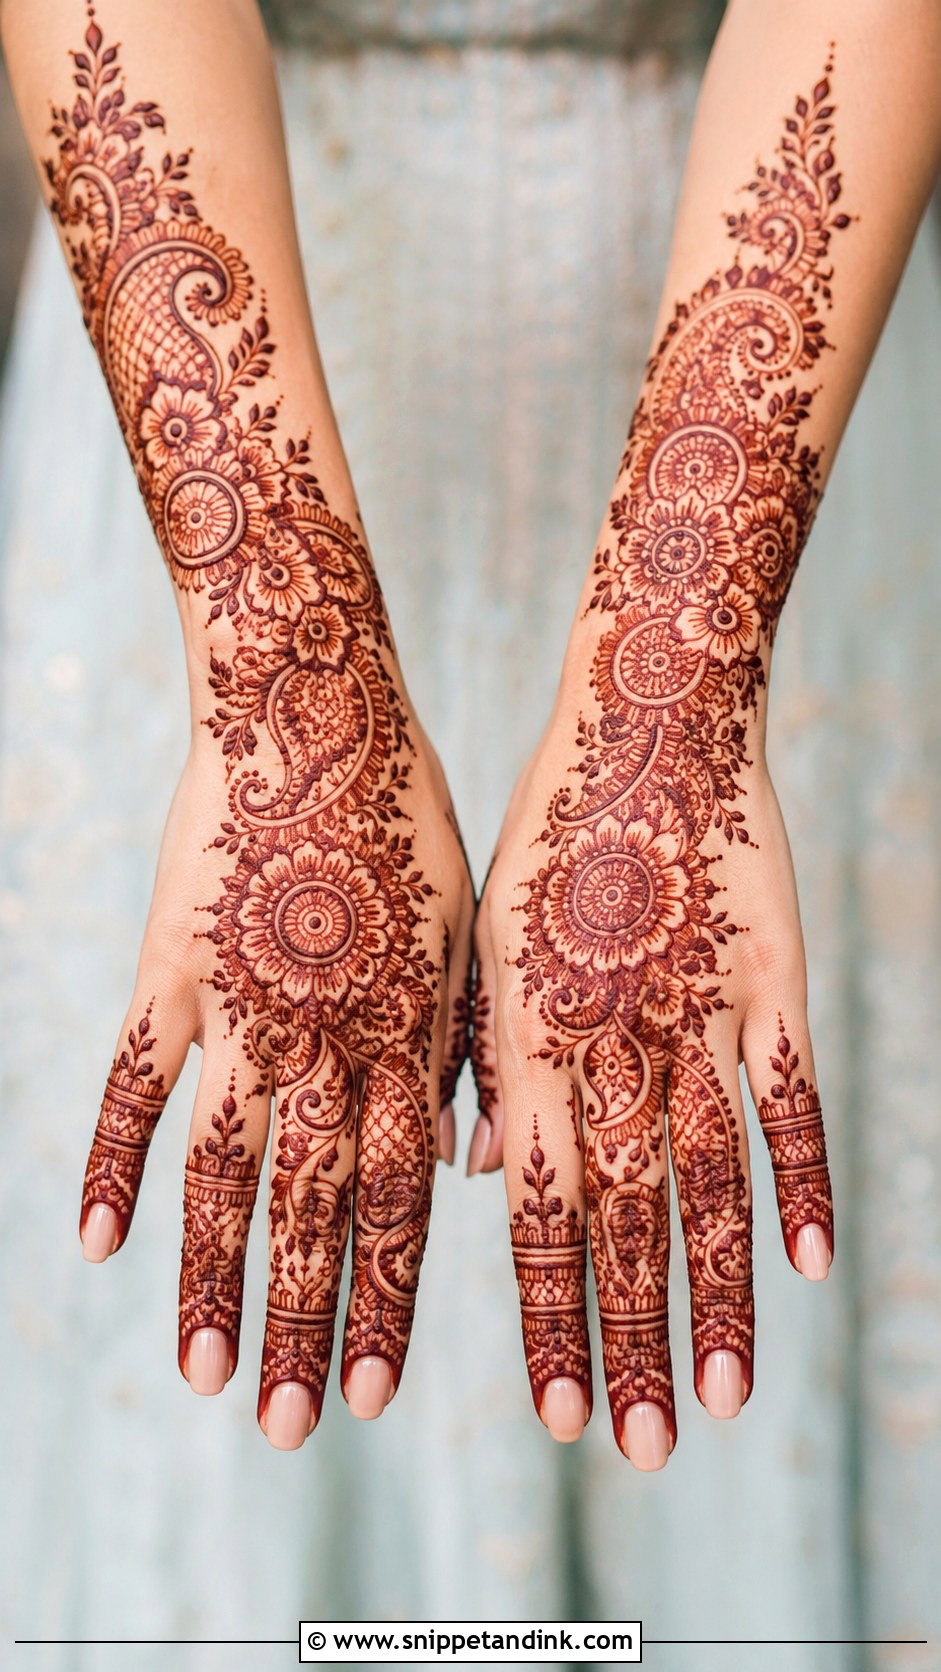
Indo-Arabic takes the bold flow of Arabic work and adds Indian detail inside it. I build a diagonal floral trail first, then add paisley accents, a small mandala and decorated fingers. It is fuller than plain Arabic and lighter than traditional bridal coverage. The main flowers stay bold; the Indian-style inner lines are fine and kept inside the outlines, with open gaps between motifs.
31. Indian Back Hand Mehndi Design
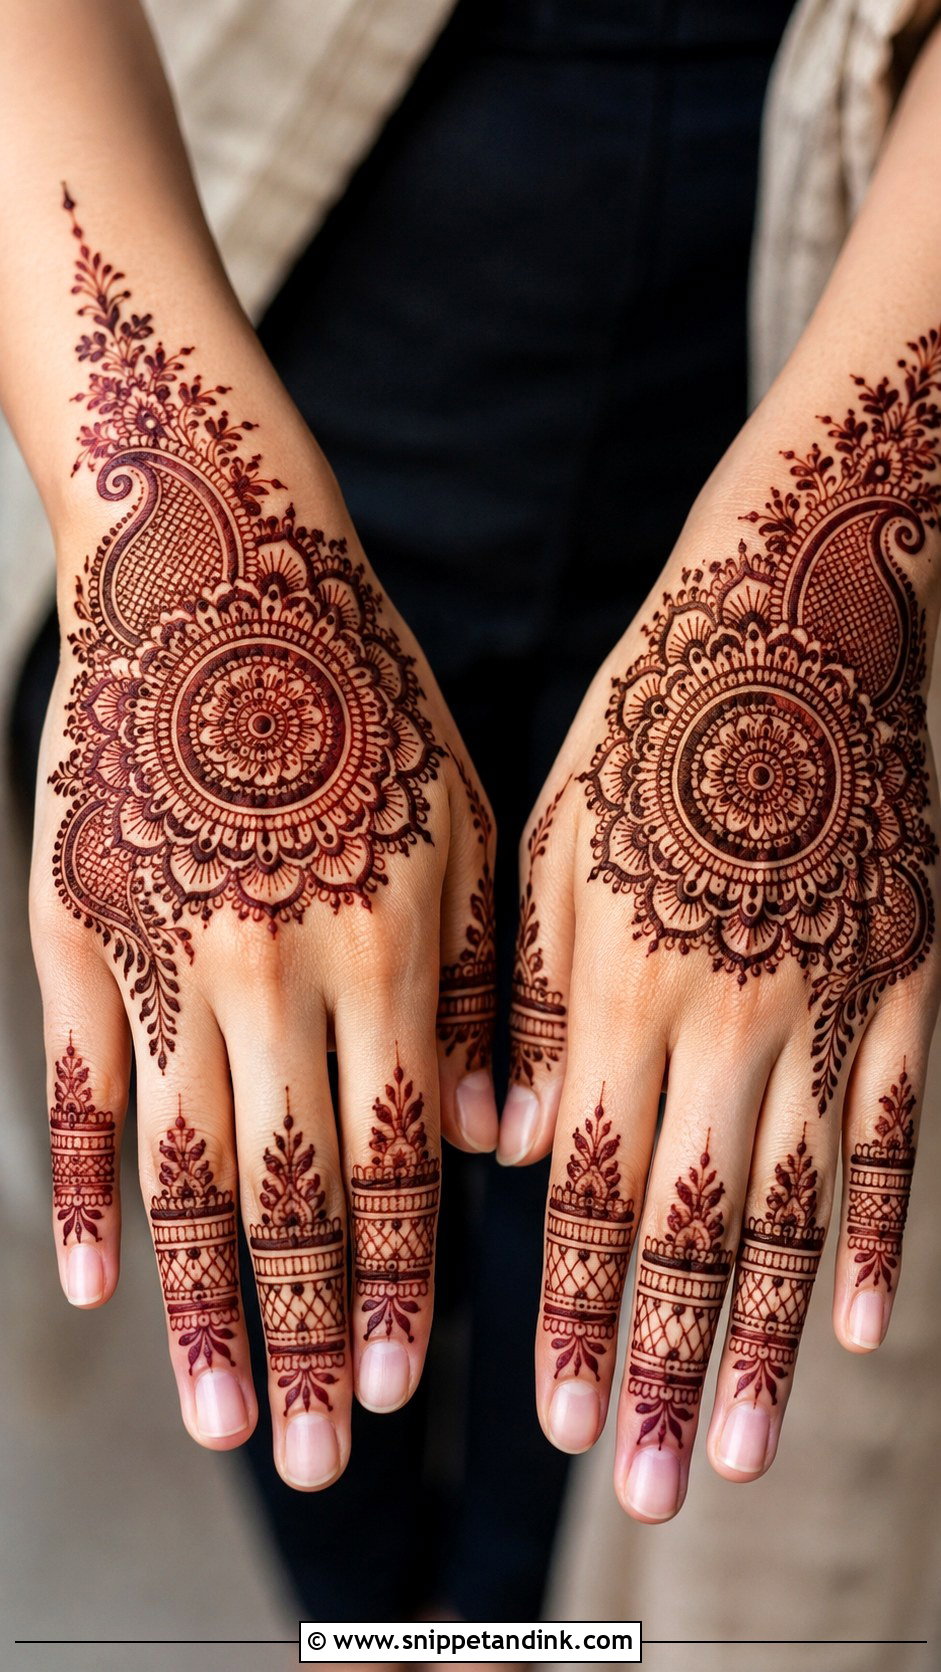
Traditional Indian back-hand work leans on symmetry and detail, so the simple version is about scale. I use a central mandala, paisleys at each side, floral borders and neat finger work, with dots and leafy fillers kept moderate. Larger motifs instead of tiny repeats keep it simple. It is my usual choice for pujas, Karwa Chauth and family weddings, because it looks traditional without taking an hour per hand.
32. Moroccan Back Hand Mehndi Design
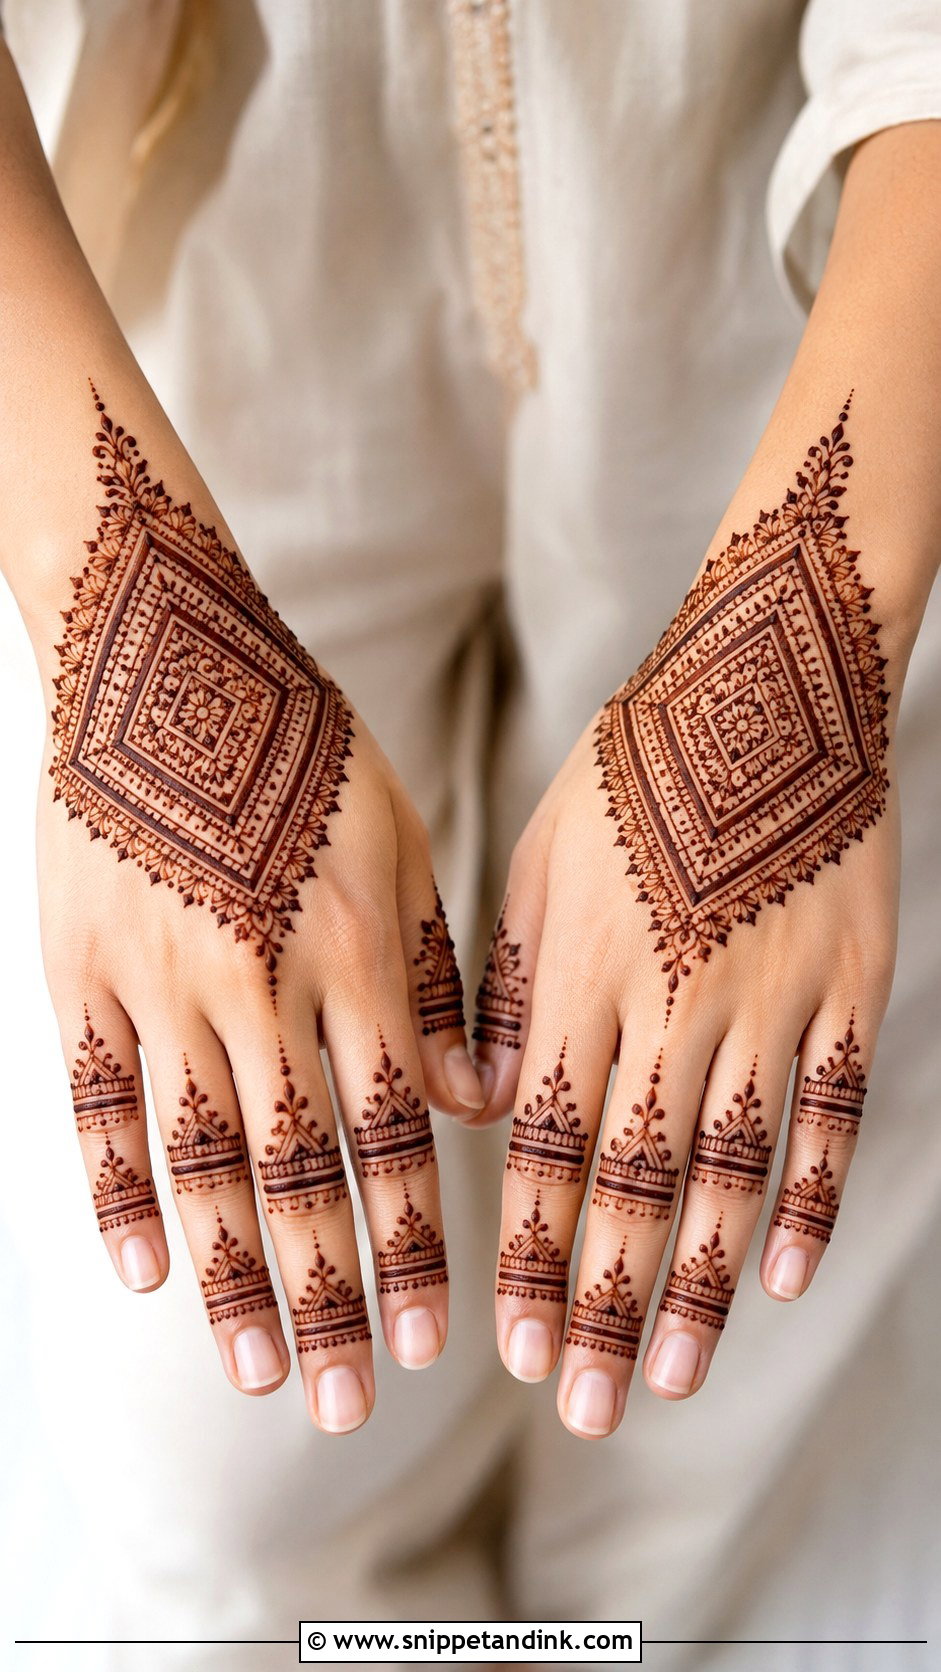
Moroccan-inspired designs swap flowers for geometry: diamonds, lines, triangles and dots. A diamond motif in the center, connected to a wrist band with straight lines and matching geometric bands on the fingers, is the classic layout. Straight lines are less forgiving than curves, so I mark key points with tiny dots first and join them. Repeated shapes make it surprisingly beginner-friendly once the grid is set.
33. Gulf Back Hand Mehndi Design
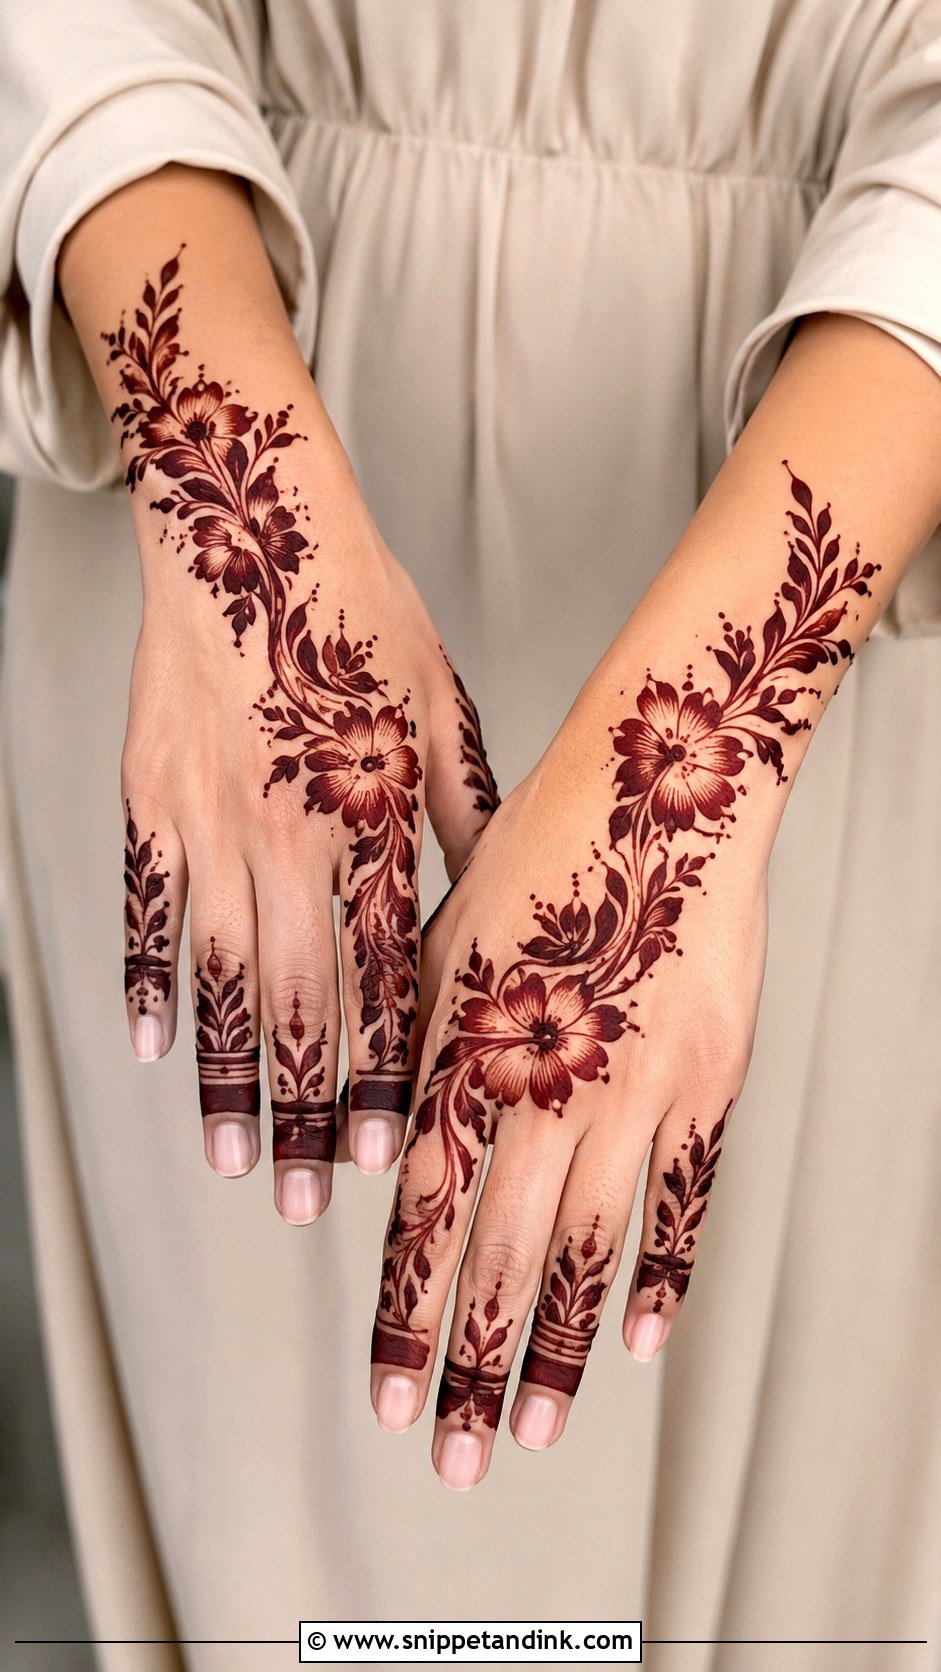
Khaleeji or Gulf-style henna is bold: large petals, thick strokes and plenty of open skin. The design flows from the wrist toward the fingers, with fingertips lightly decorated or simply banded. Because the shapes are big, the stain is easy to read and application is quick. I sometimes add a few small dots around the flowers to soften the open areas, but the strength of this style is restraint.
34. Back Hand Mehndi Design With Jaali
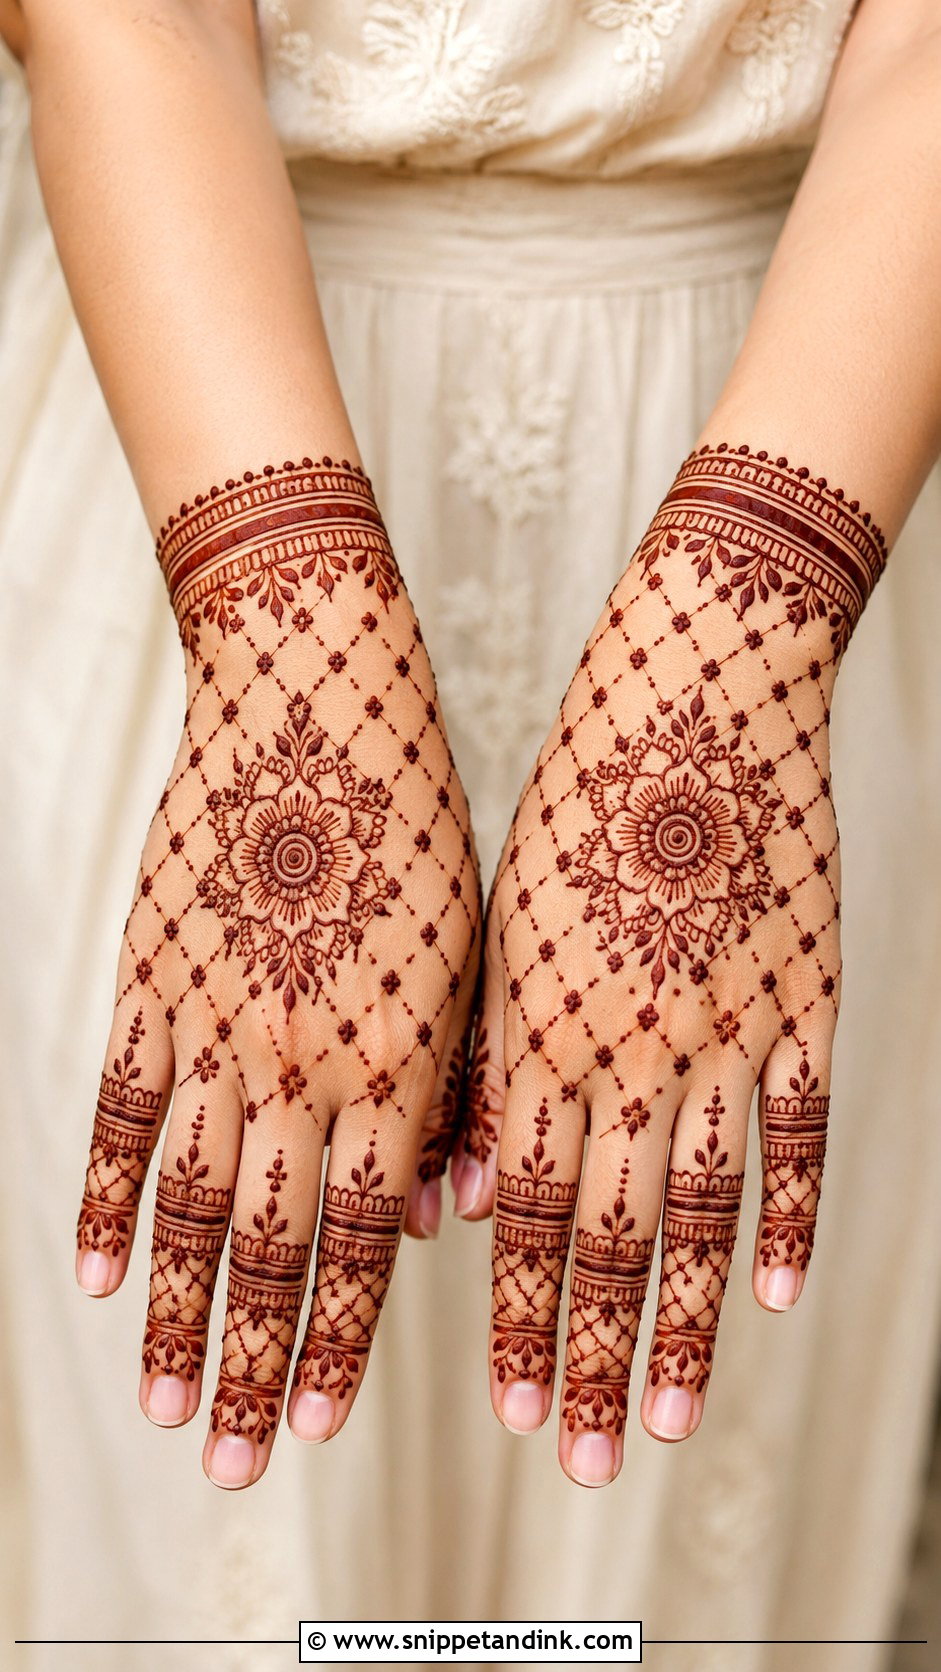
Jaali, the net pattern, looks intricate but is mostly straight lines. I put the mesh on one side of the hand or near the wrist and balance it with a flower or mandala in the center, plus small bands and mini mesh on the fingers. Medium squares are the safest size; tiny squares close up as the paste spreads and turn into a solid patch. A dot at each intersection makes it look finished.
35. Back Hand Mehndi Design With Wrist Band
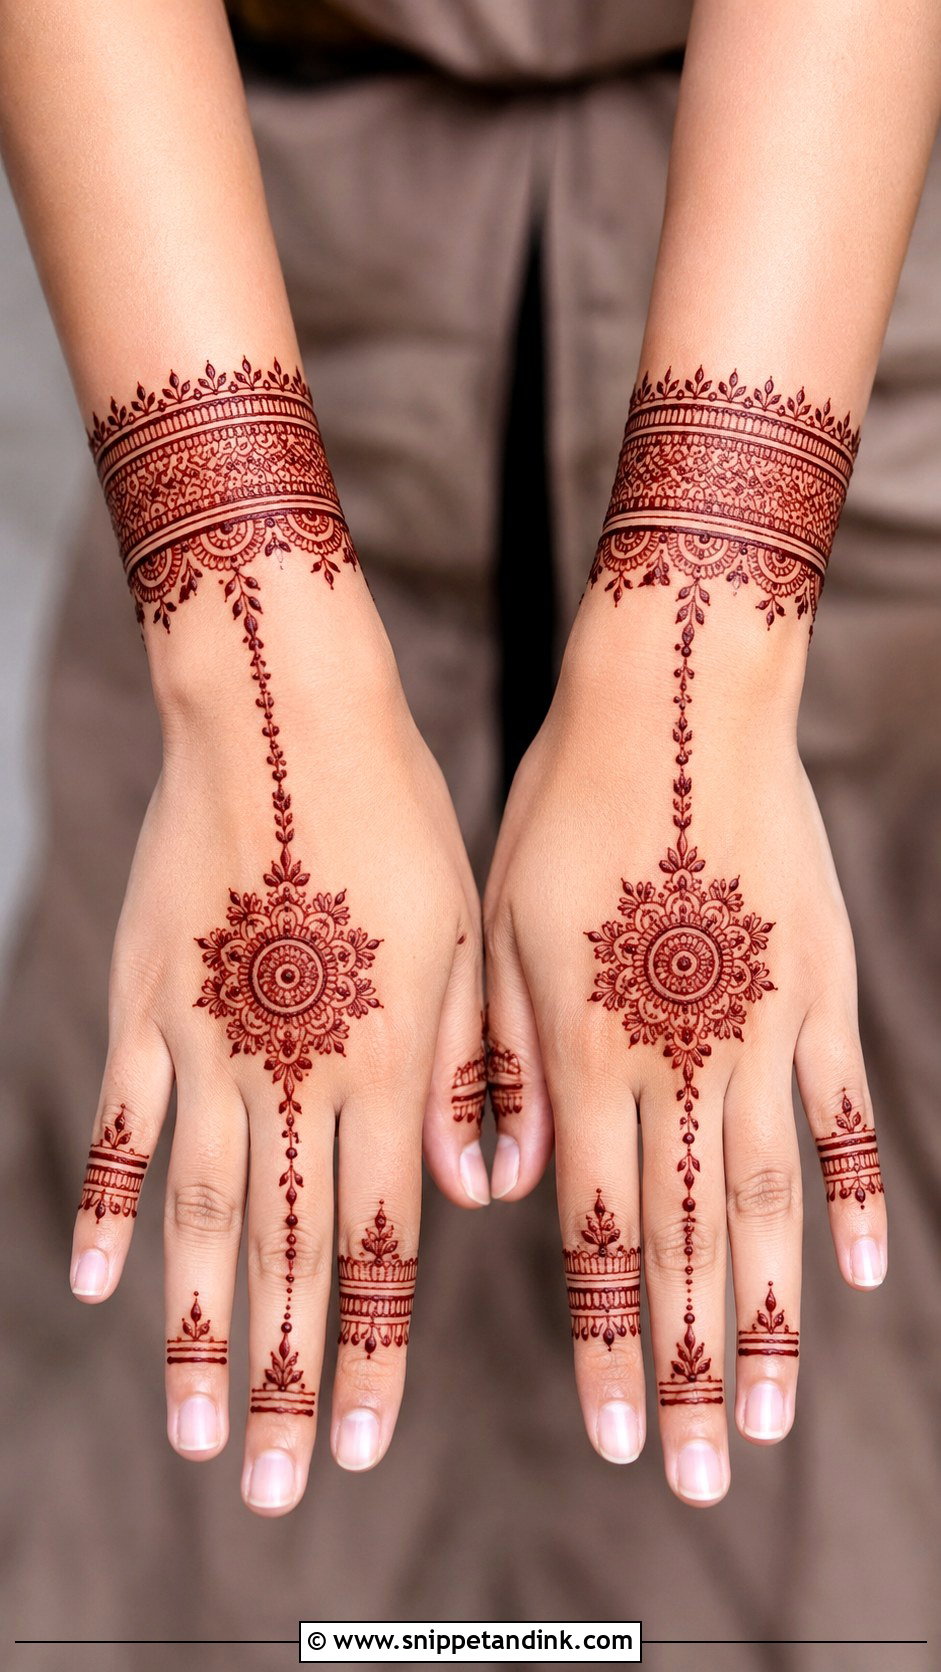
A wrist band gives the whole design a frame. I start with a bracelet-like border around the wrist in scallops, flowers, dots or plain lines, then run a slim vine or chain up to the back hand and keep the fingers light. For beginners it gives structure, because everything hangs off that band. Keep the connecting line thin and the border clean, and think about where your sleeves end before choosing its height.
Why the Back of the Hand Stains Lighter, and How I Darken It
People are often disappointed that the back of the hand comes up paler than the palm. That is normal. The skin there is thinner, it carries less of the outer layer that henna binds to, and it is usually cooler. Expect a softer brown on the back hand even when the palm goes deep.
The color also changes over time. When I scrape the paste off, the stain is bright orange. Over the next one to two days, it oxidizes to its final brown or maroon, so judge it then, not at removal.
- Leave the paste on as long as you can manage. Six to eight hours, or overnight, makes a real difference on this thinner skin.
- Dab on a little lemon and sugar once the paste is dry to the touch. It keeps the paste stuck to the skin. A light dab is enough; soaking it makes a sticky mess.
- Keep your hands warm. A cold room slows the stain, which is why I suggest holding a warm cup or wearing loose cotton gloves overnight.
- Scrape the dried paste off with a blunt edge or your fingernail instead of washing it off, then keep water away for as long as you reasonably can, ideally until the next day.
- Rub in a balm or a natural oil before showering for the first few days. It slows the fading caused by soap.
How Long Each Style Keeps You in the Chair
Time is the question I get asked most, and every artist works at a different speed, so treat these as rough guides. A minimal motif with finger bands is a quick job, often under twenty minutes per hand. Arabic trails and half coverage take a little longer. Full back-hand designs with jaali, shading or Indian detail can take three-quarters of an hour or more per hand. Add drying time on top. If you have several functions in one week, choose your heaviest design for the event closest to the day you want the darkest color, since the stain is at its best two days after application and fades slowly from there.
A Small Design, Done Cleanly, Reads Best
Back-hand mehndi can be minimal, floral, Arabic, Indian, geometric or jewelry-inspired, and the right one depends on your hand and the occasion more than on any trend. If you are new to it, stick with flowers, leaves, dots and simple bands. For something festive, add a mandala, paisleys, jaali or a bracelet border. Whatever you pick, clean lines and generous spacing will matter more than how much of the hand you cover.
You'll Like These Ideas:


Leave a Reply