
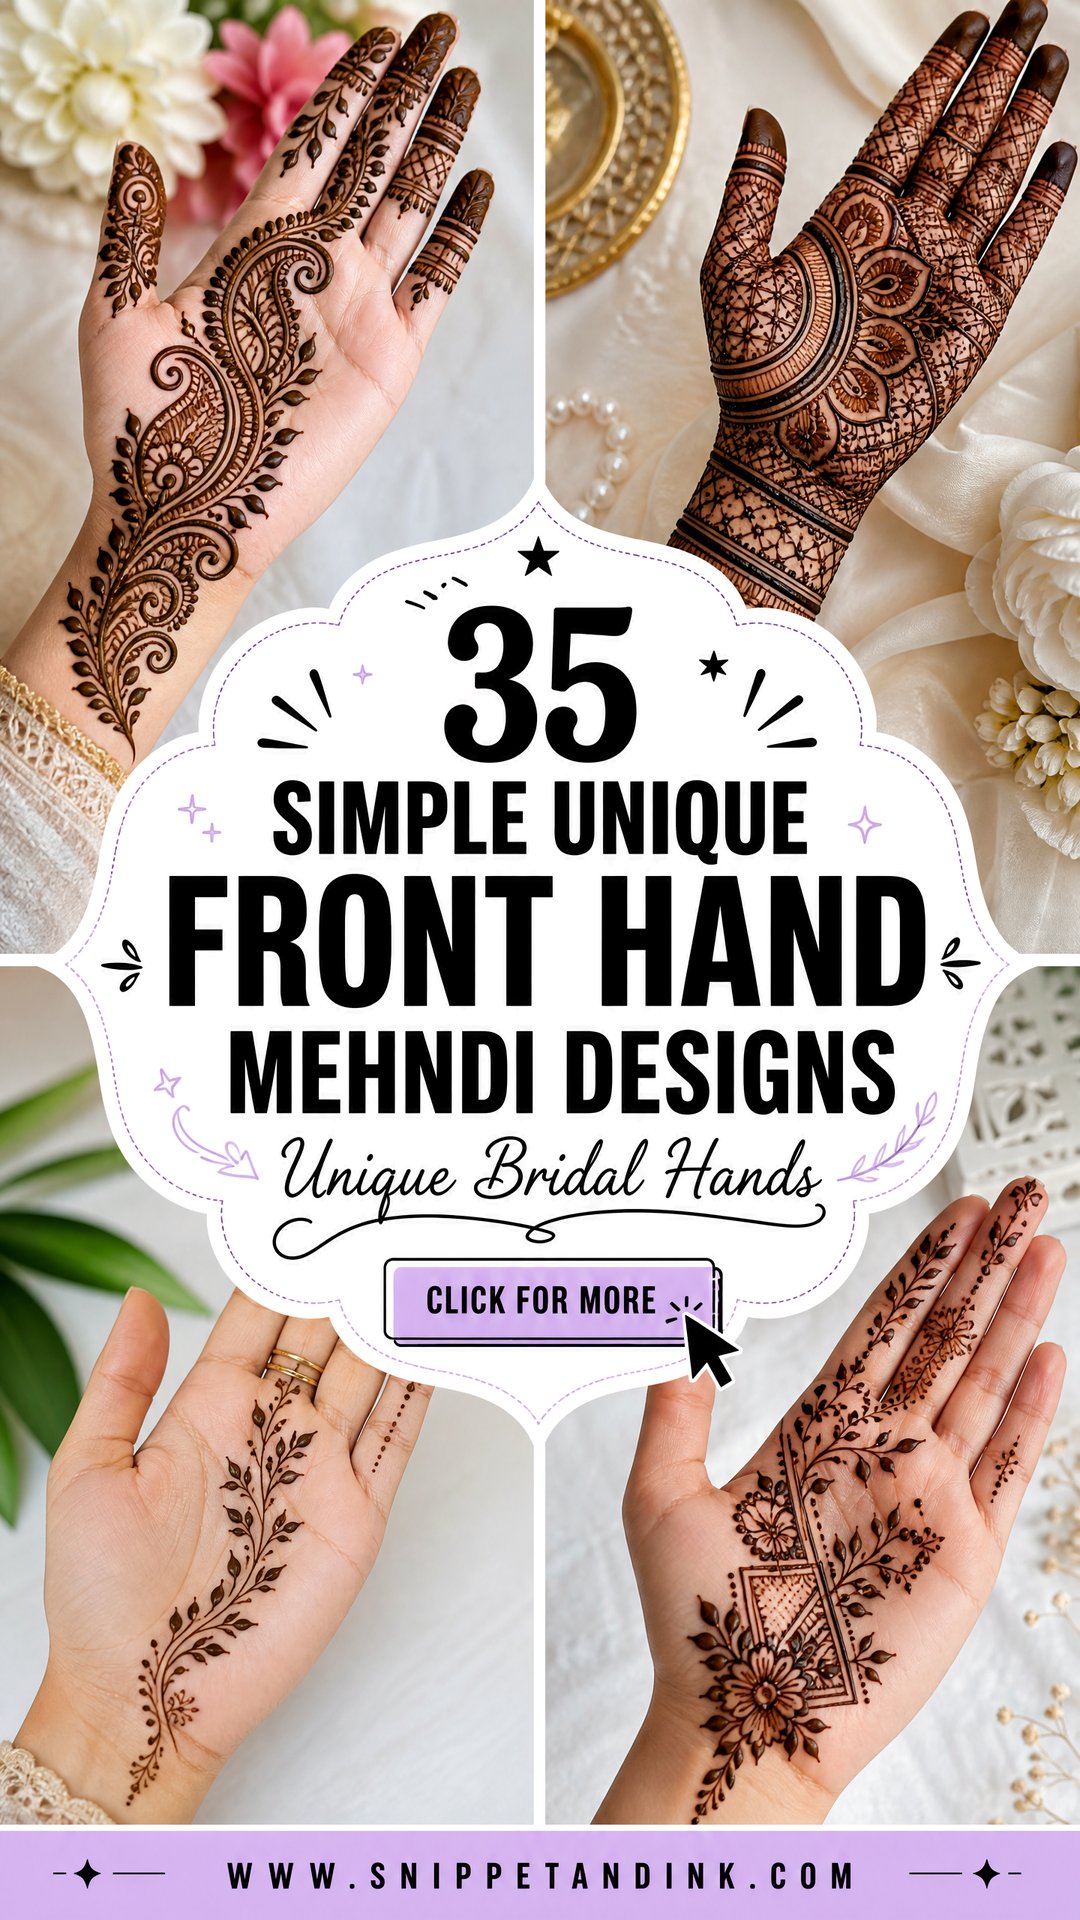
The palm is where henna has always lived. It takes the deepest stain on the hand, and it’s the side a bride holds up during rituals and turns toward the camera when she shows off her mehndi. A light front-hand design still dresses the palm, fingers, and wrist fully while keeping enough open skin to look clean. The 35 layouts below include mandalas, Arabic trails, paisley vines, jaali, florals, bracelet bands, leafy fingers and modern negative-space ideas, with notes on placement, stain and who each one suits. A bride after something lighter will find options here, and so will anyone dressing up for Eid, Diwali, family weddings and festive days.
What Your Palm Lines Tell Me Before I Start
Before I pick up the cone for a front-hand design, I ask the client to open her hand flat, then cup it, then make a loose fist. The palm has deep creases, and anything drawn across them gets folded the moment the hand relaxes. The center of a mandala, a name, or a fine jaali panel all belong on the flatter areas: the middle of the palm below the fingers, and the fleshy pad at the base of the thumb.
- Long, narrow palm: a diagonal trail or a vertical chain of motifs follows its shape.
- Broad, square palm: a centered mandala balances the width.
- Deep crease lines: put open space or simple dots over the creases rather than detailed motifs.
- Palms that sweat easily: keep the room cool and the hand out of direct heat while the paste is wet, or it lifts and smears.
The palm also takes the darkest stain on the hand, so motifs here need a little more space between them than on the back of the hand. Lines that look nicely separated while wet can merge as they darken.
1. Simple Front Hand Mehndi Design
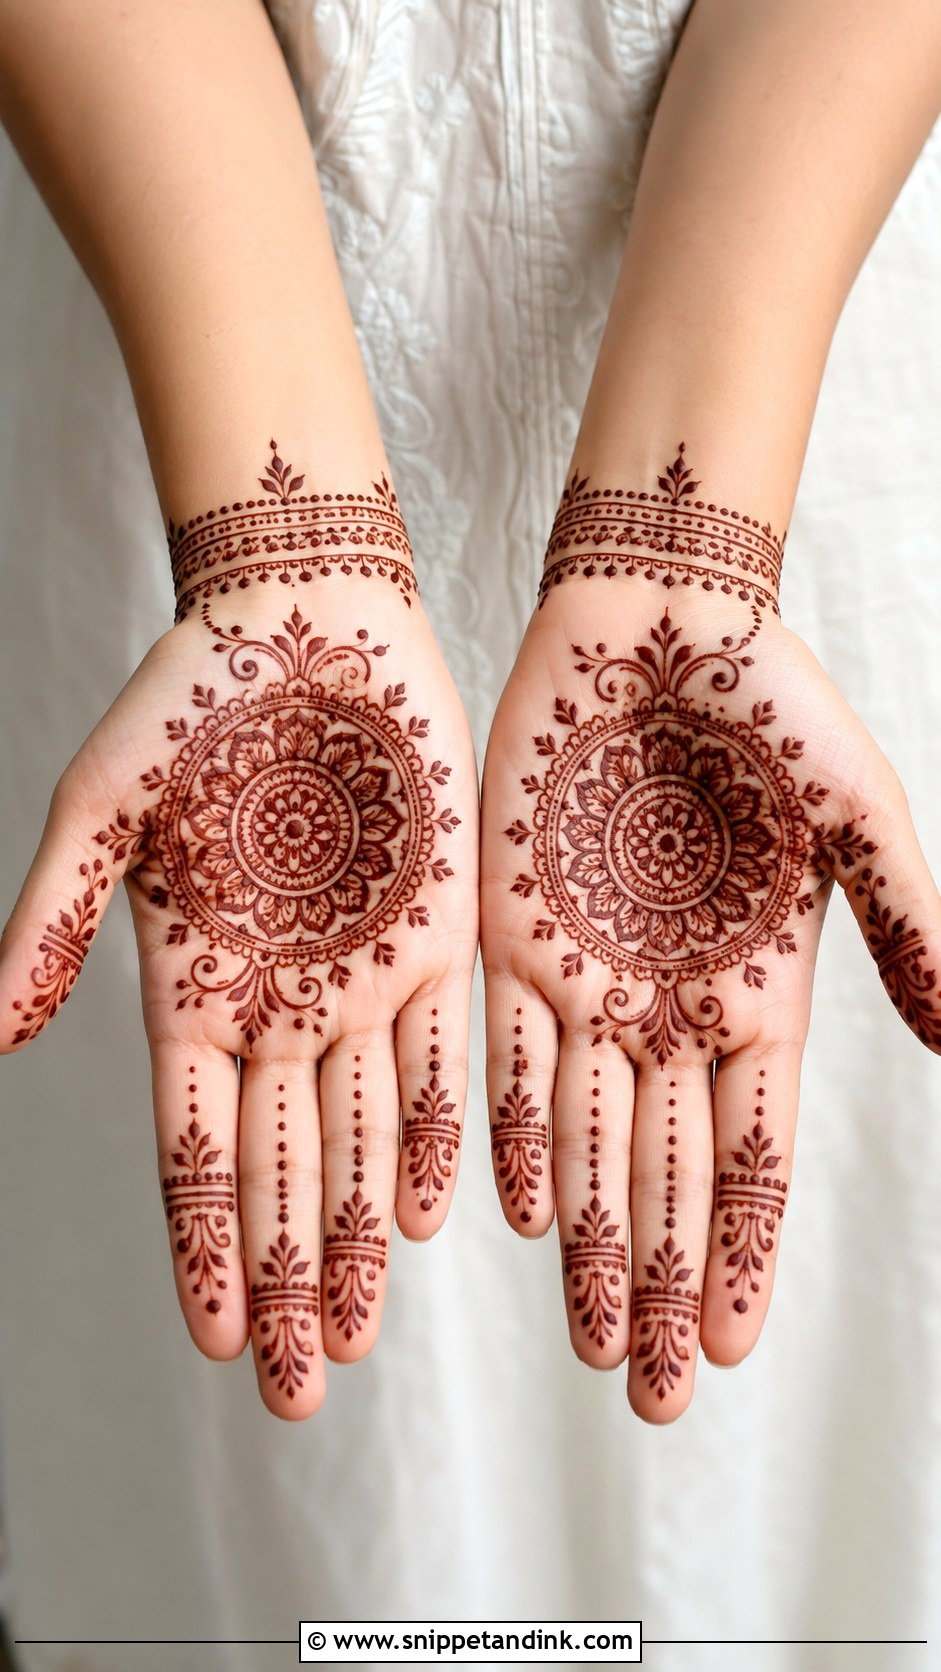
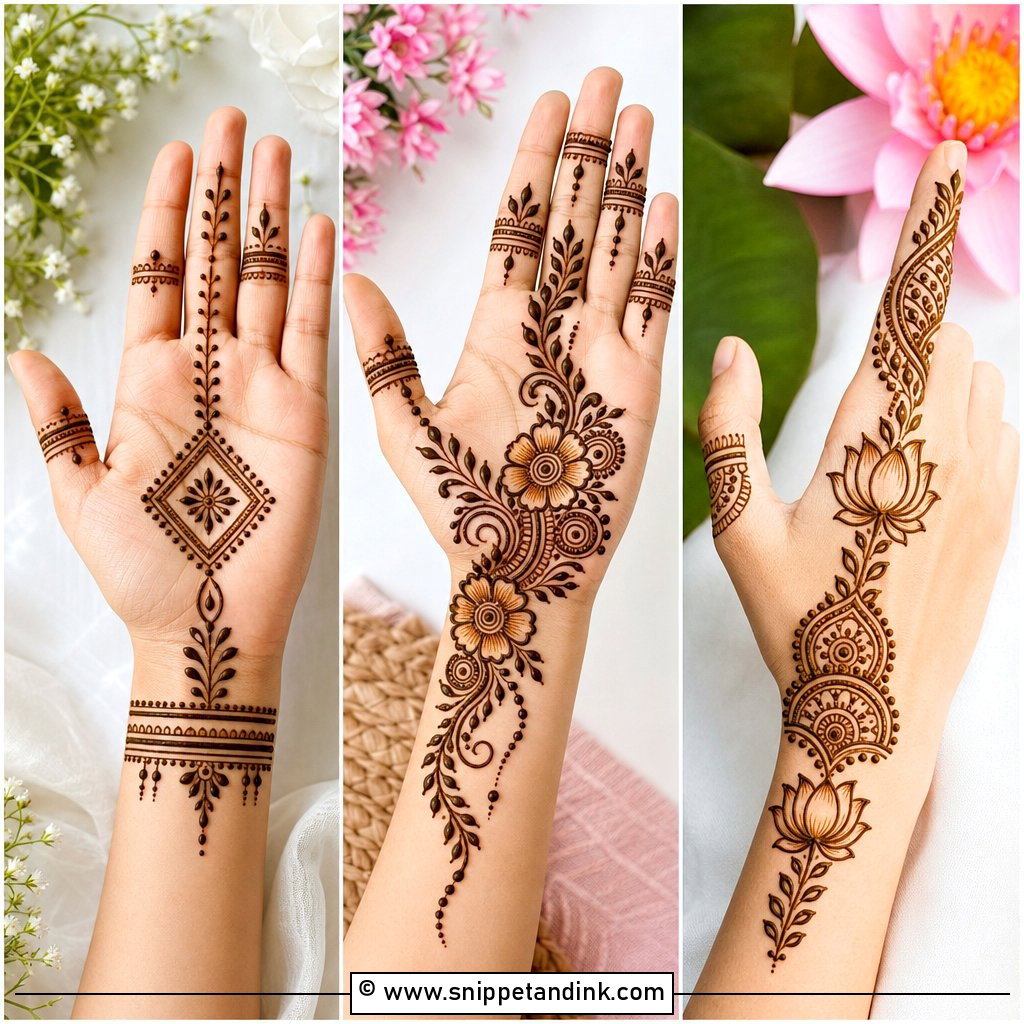
Here’s the layout I’d teach first. A small mandala or floral circle in the center of the palm, fine vines toward the fingers, a light bracelet band at the wrist, and small leaves, dots and thin lines on the fingers. Everything is easy to repeat and easy to correct. Younger girls and students love it. Keep the spacing clean and let the reddish-brown stain carry the look; on the palm, it will come out darker than you expect.
2. Easy Front Hand Mehndi Design
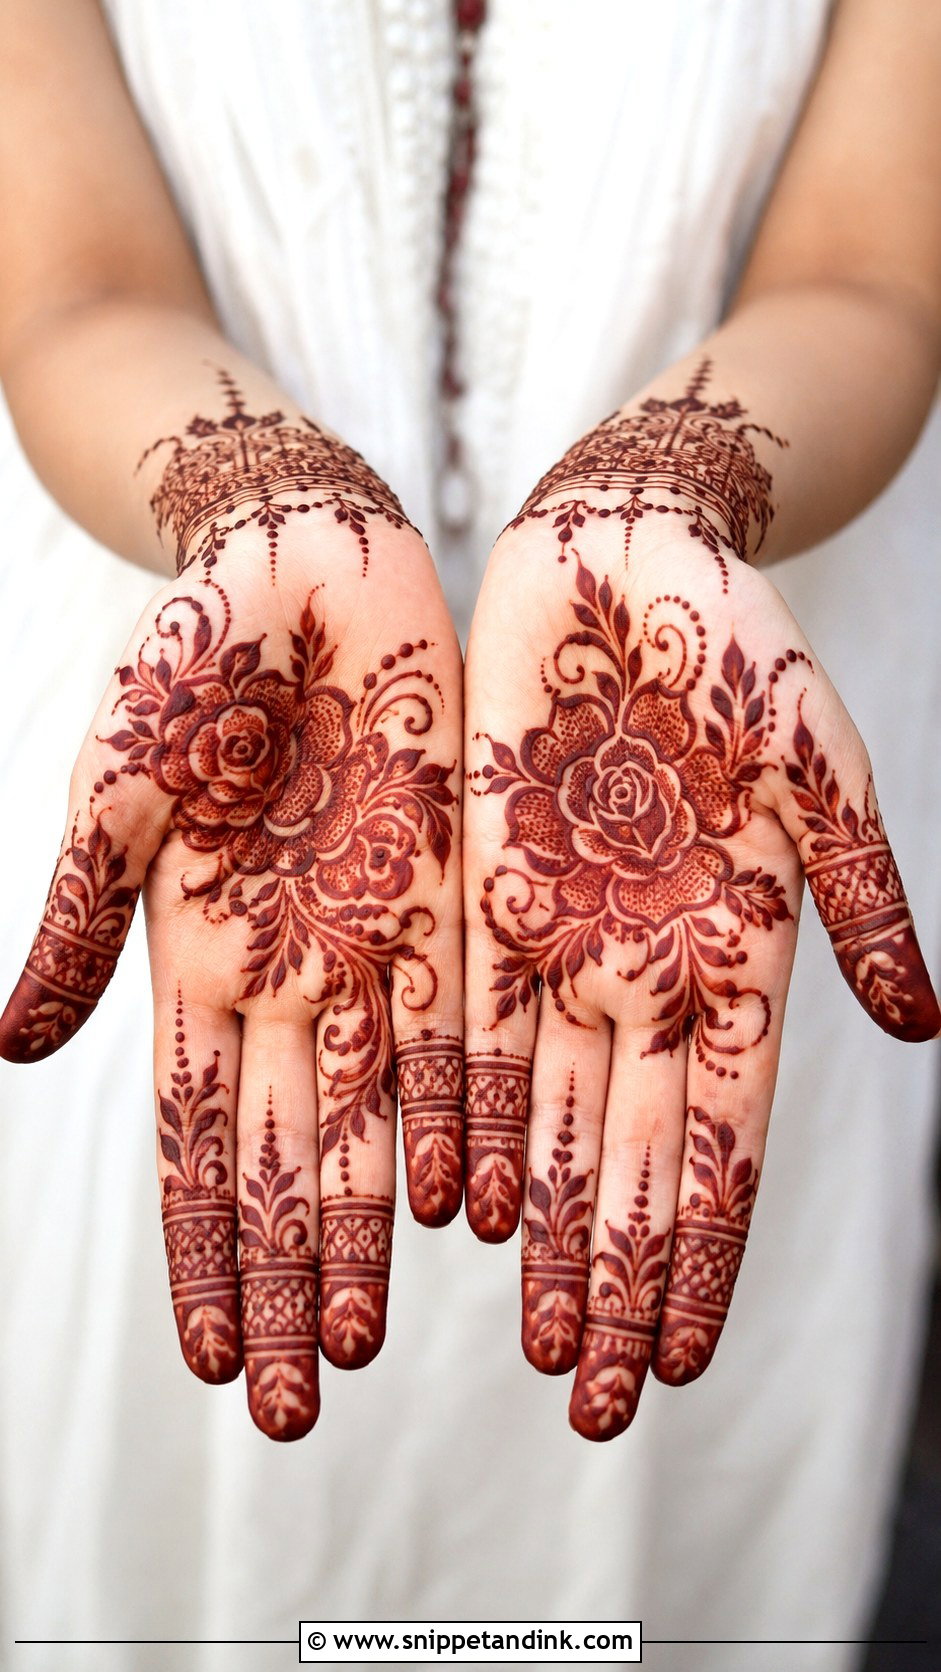
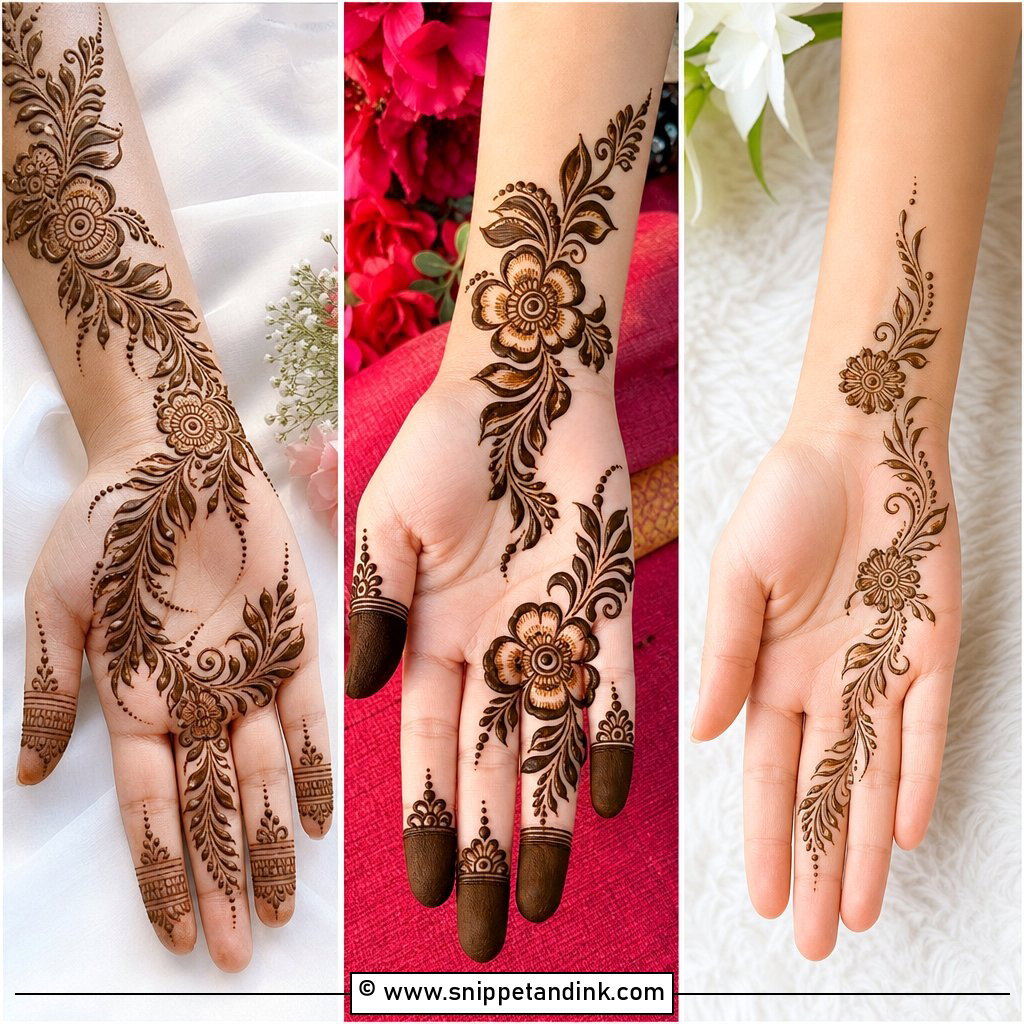
Quick doesn’t have to look unfinished. One bold flower on the palm, a few curved leaves around it, slim finger patterns that follow the same flow, and a curved vine or dotted chain at the wrist. That’s a full front-hand look without advanced cone control. I usually push the flower slightly off-center and let the design travel diagonally, leaving one side of the palm open. It’s my answer for last-minute bookings.
3. Arabic Front Hand Mehndi Design
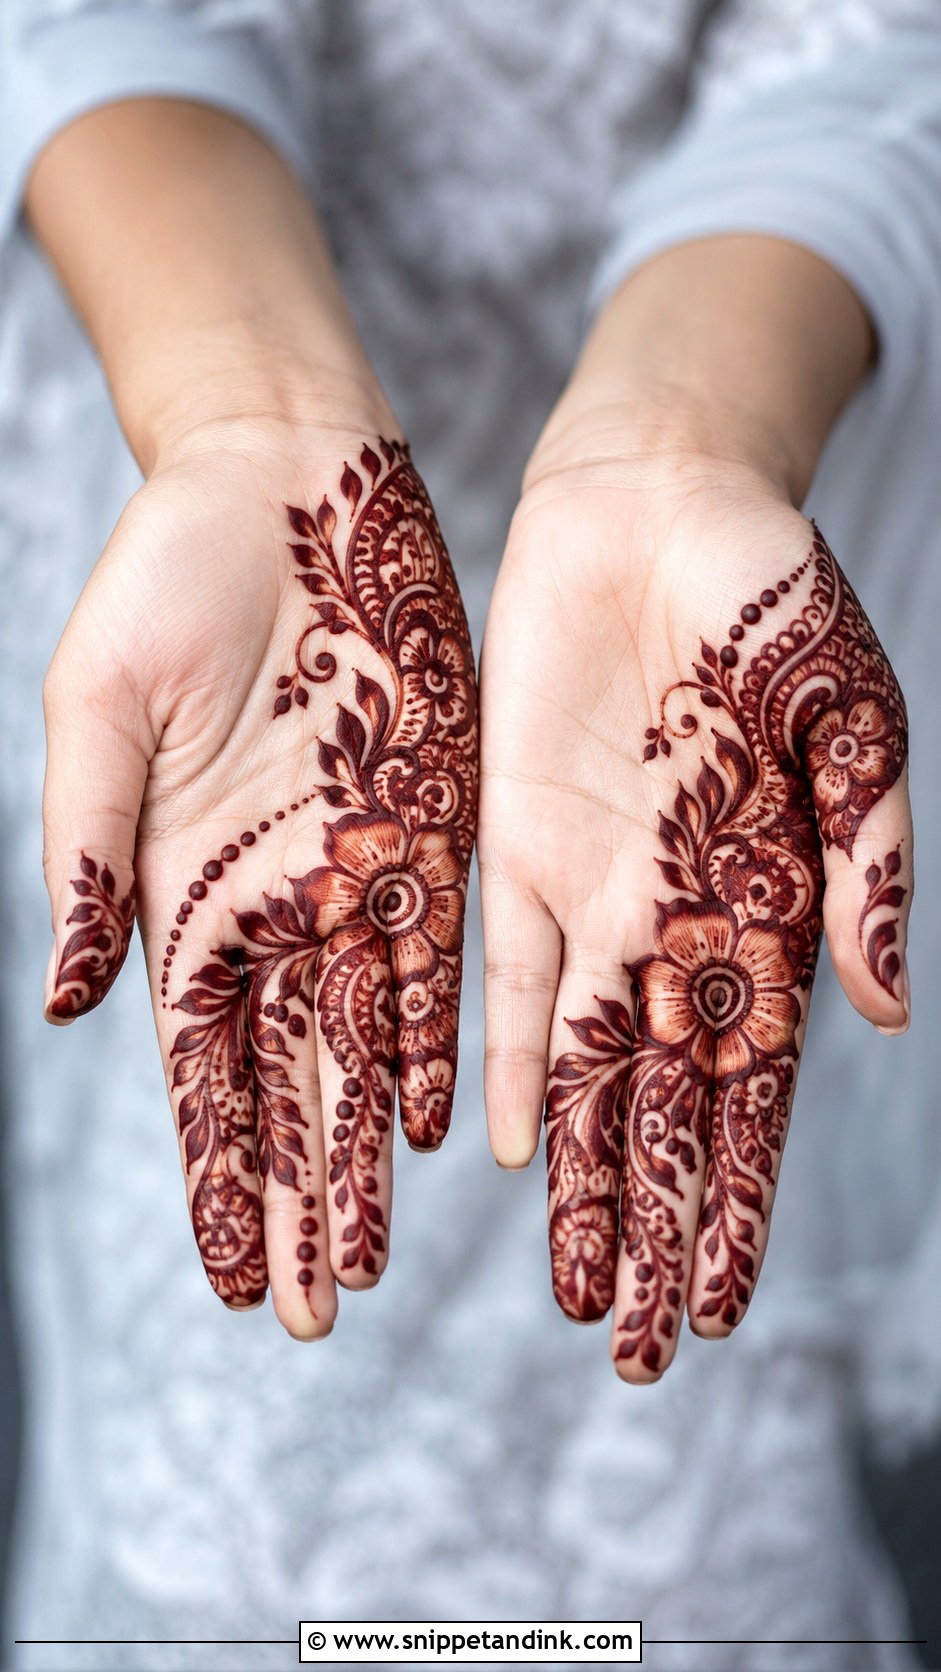
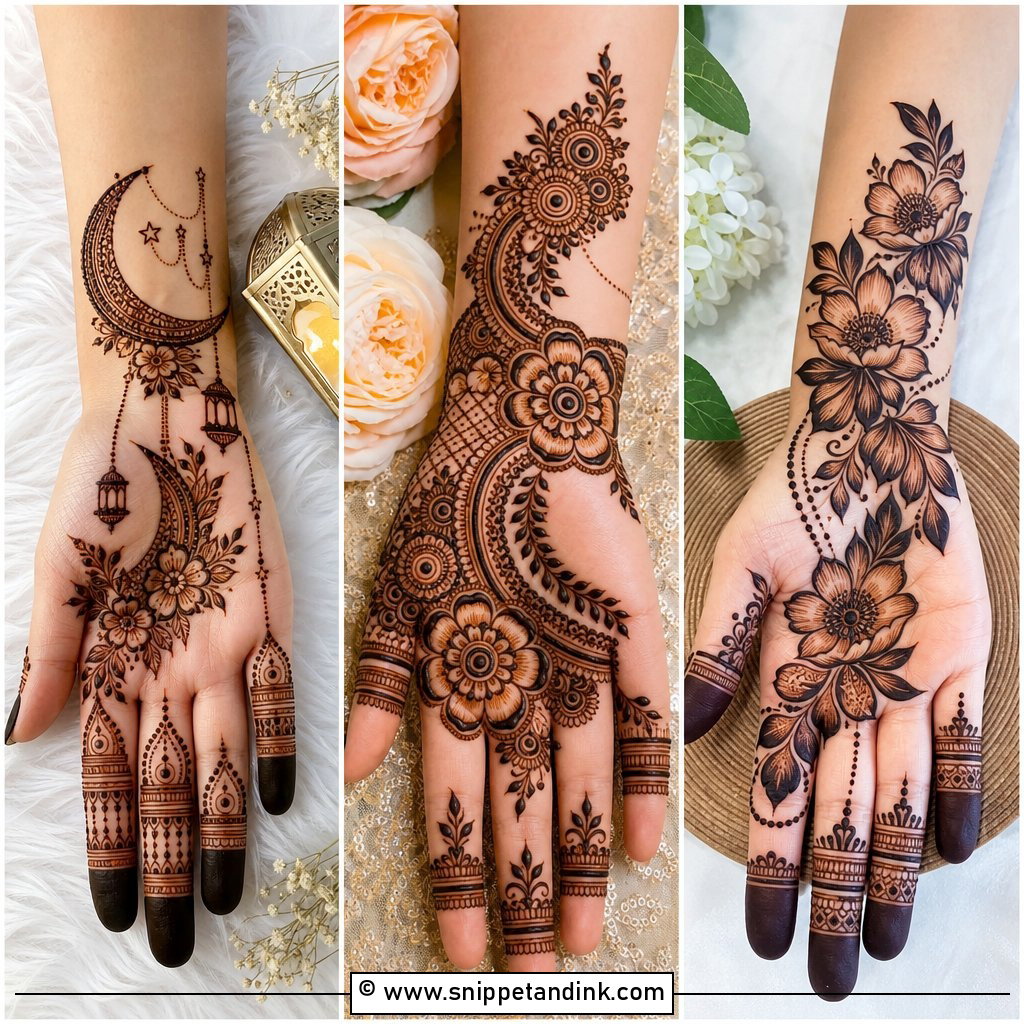
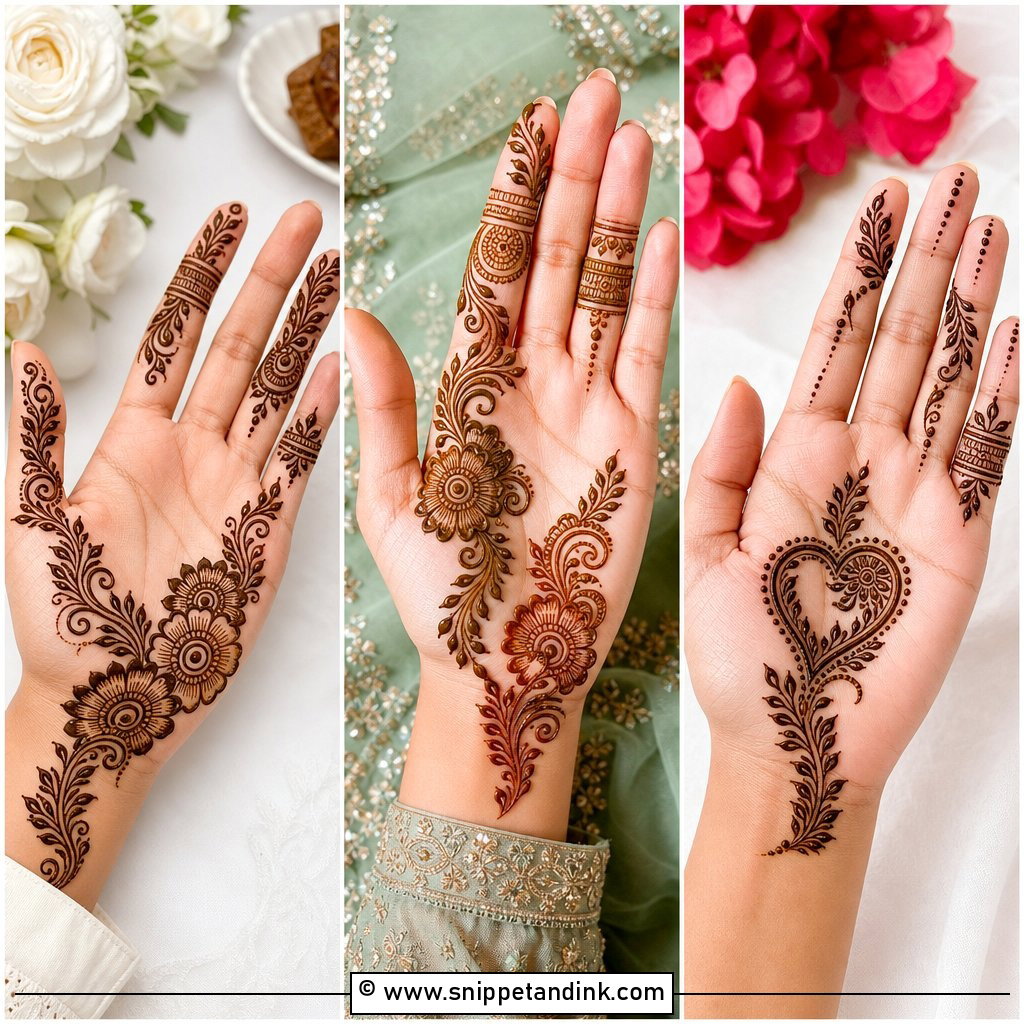
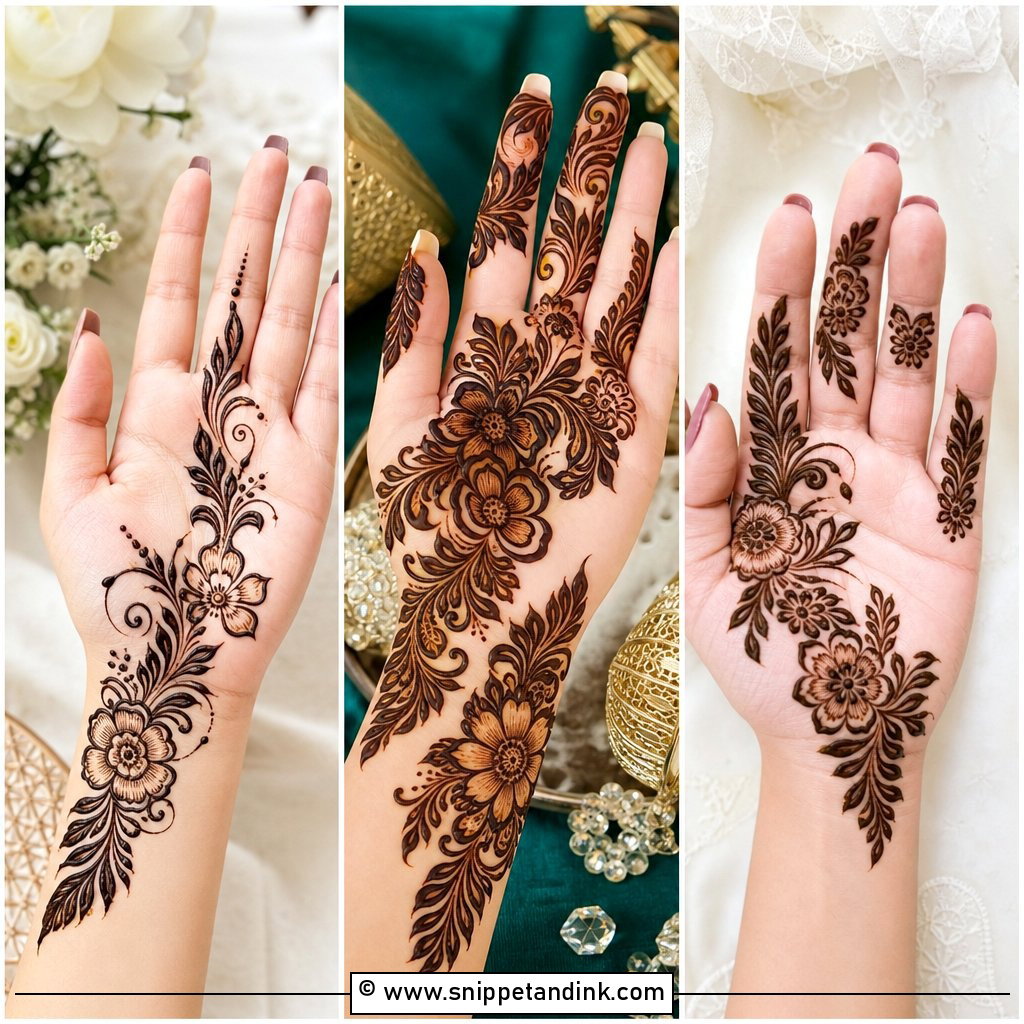
Arabic henna on the palm runs from the wrist toward the index finger in bold strokes and flowing vines, with large flowers, paisleys, shaded leaves and dotted curves. The empty spaces matter as much as the decorated ones. One warning about shading on the palm: because this skin takes color so strongly, densely shaded areas can turn into dark patches, so I keep shading thin and let the bold outlines define the shapes. Eid, parties and bridesmaids all suit it.
4. Floral Front Hand Mehndi Design
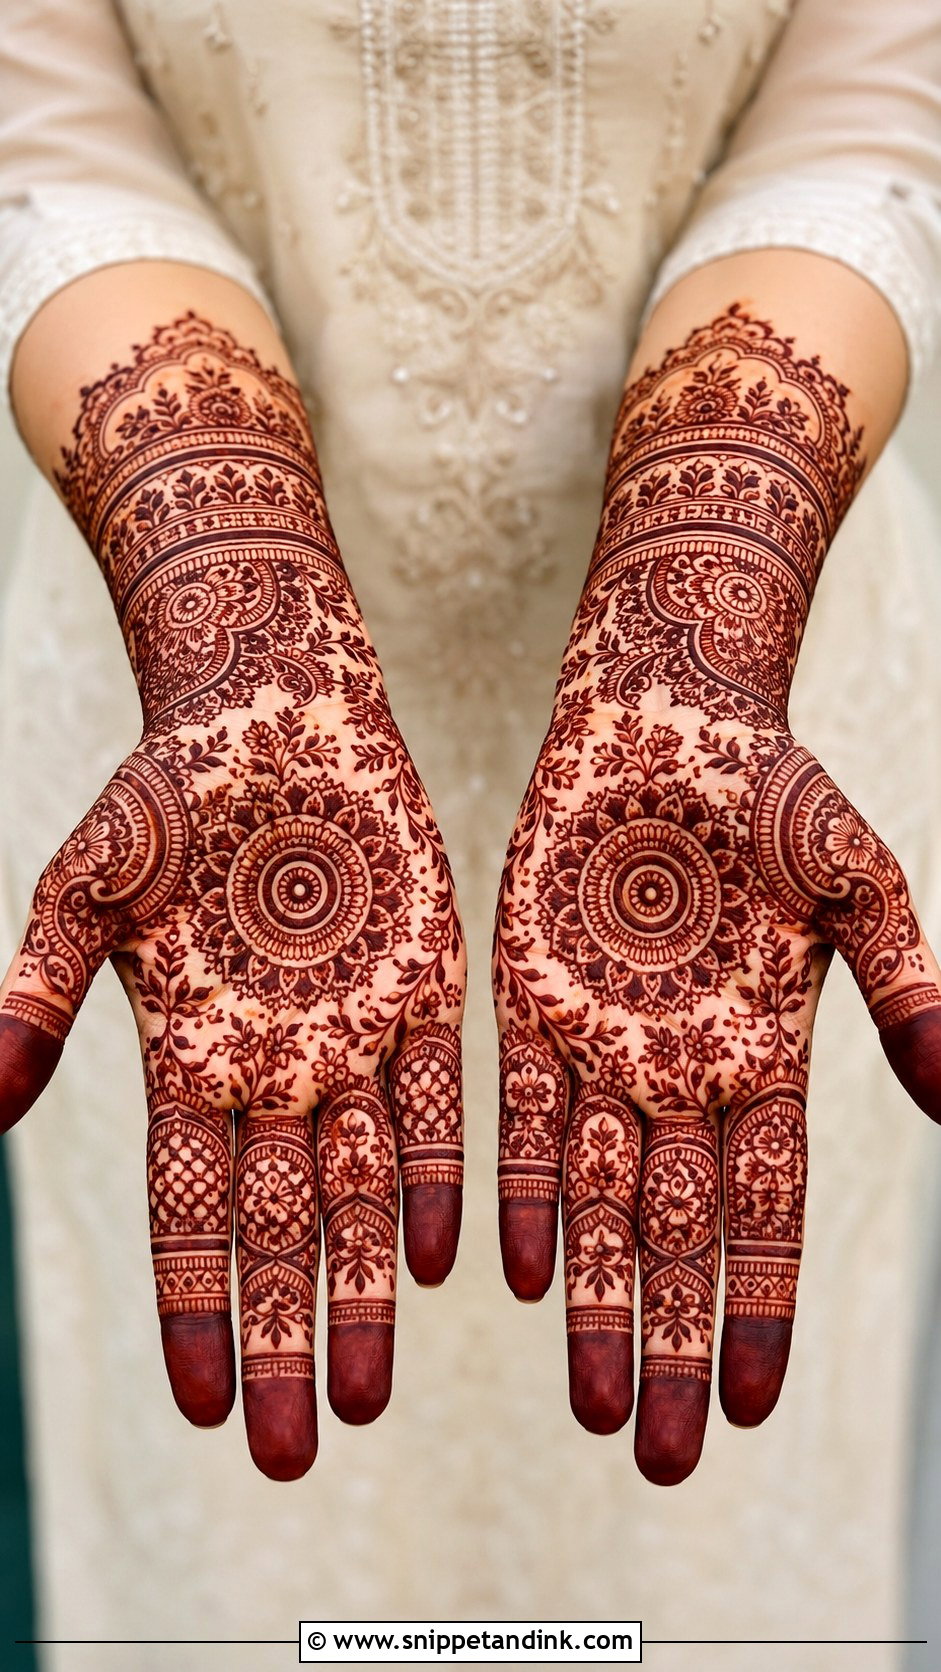
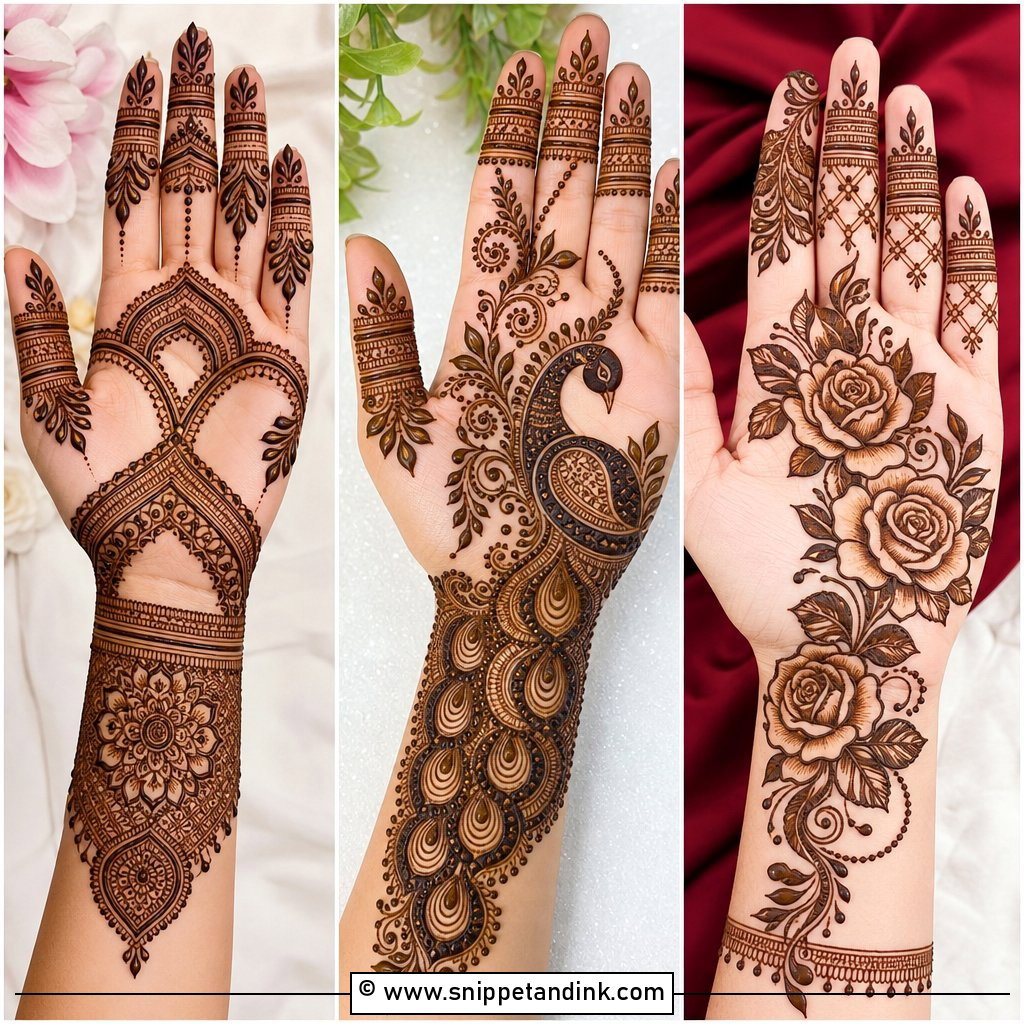
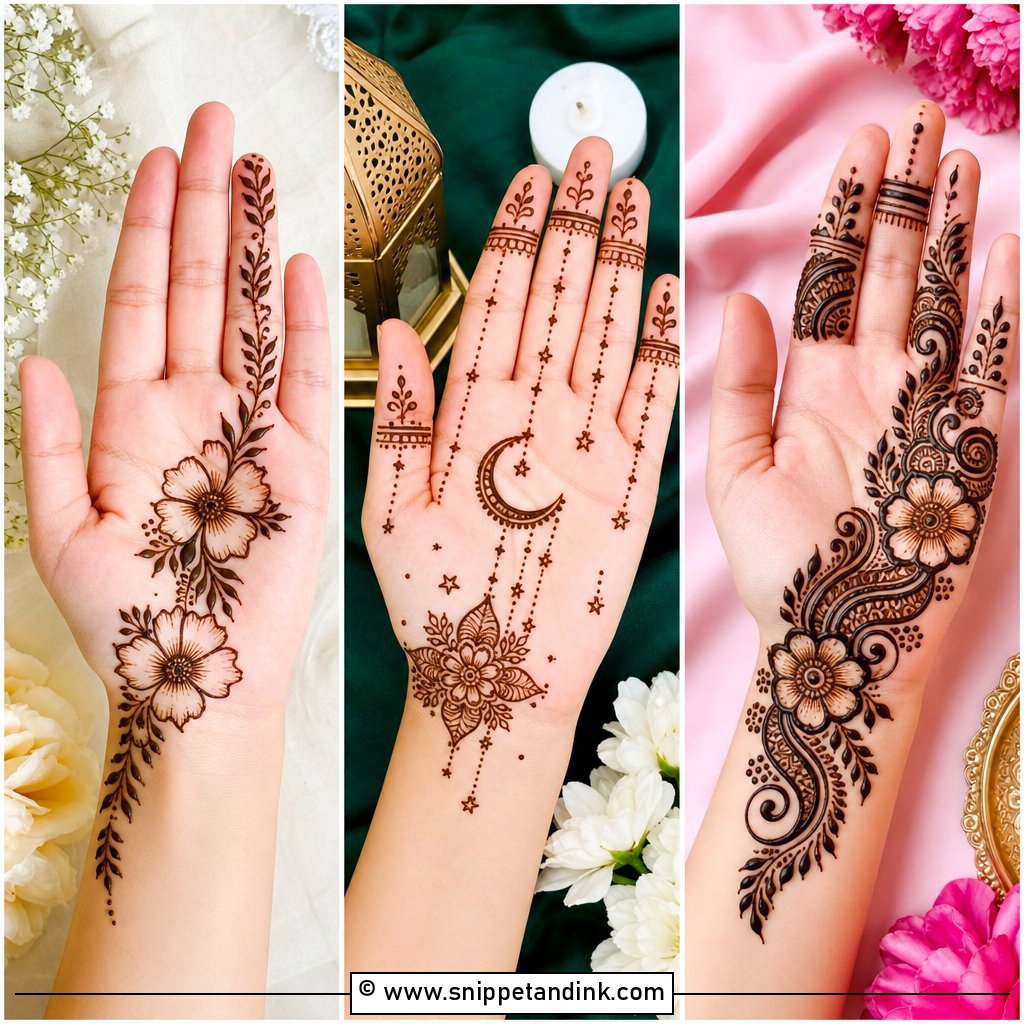
Flowers are the easiest motif to adapt to a hand. I place one main flower near the center of the palm, smaller blooms around it, and leafy vines stretching to the wrist and fingers. You can make the petals round, rose-like, lotus-shaped or a simple five-petal form, depending on your skill. Mini floral tips or light leafy bands finish the fingers. Mixing bold petals with tiny dot clusters gives detail without complication.
5. Mandala Front Hand Mehndi Design
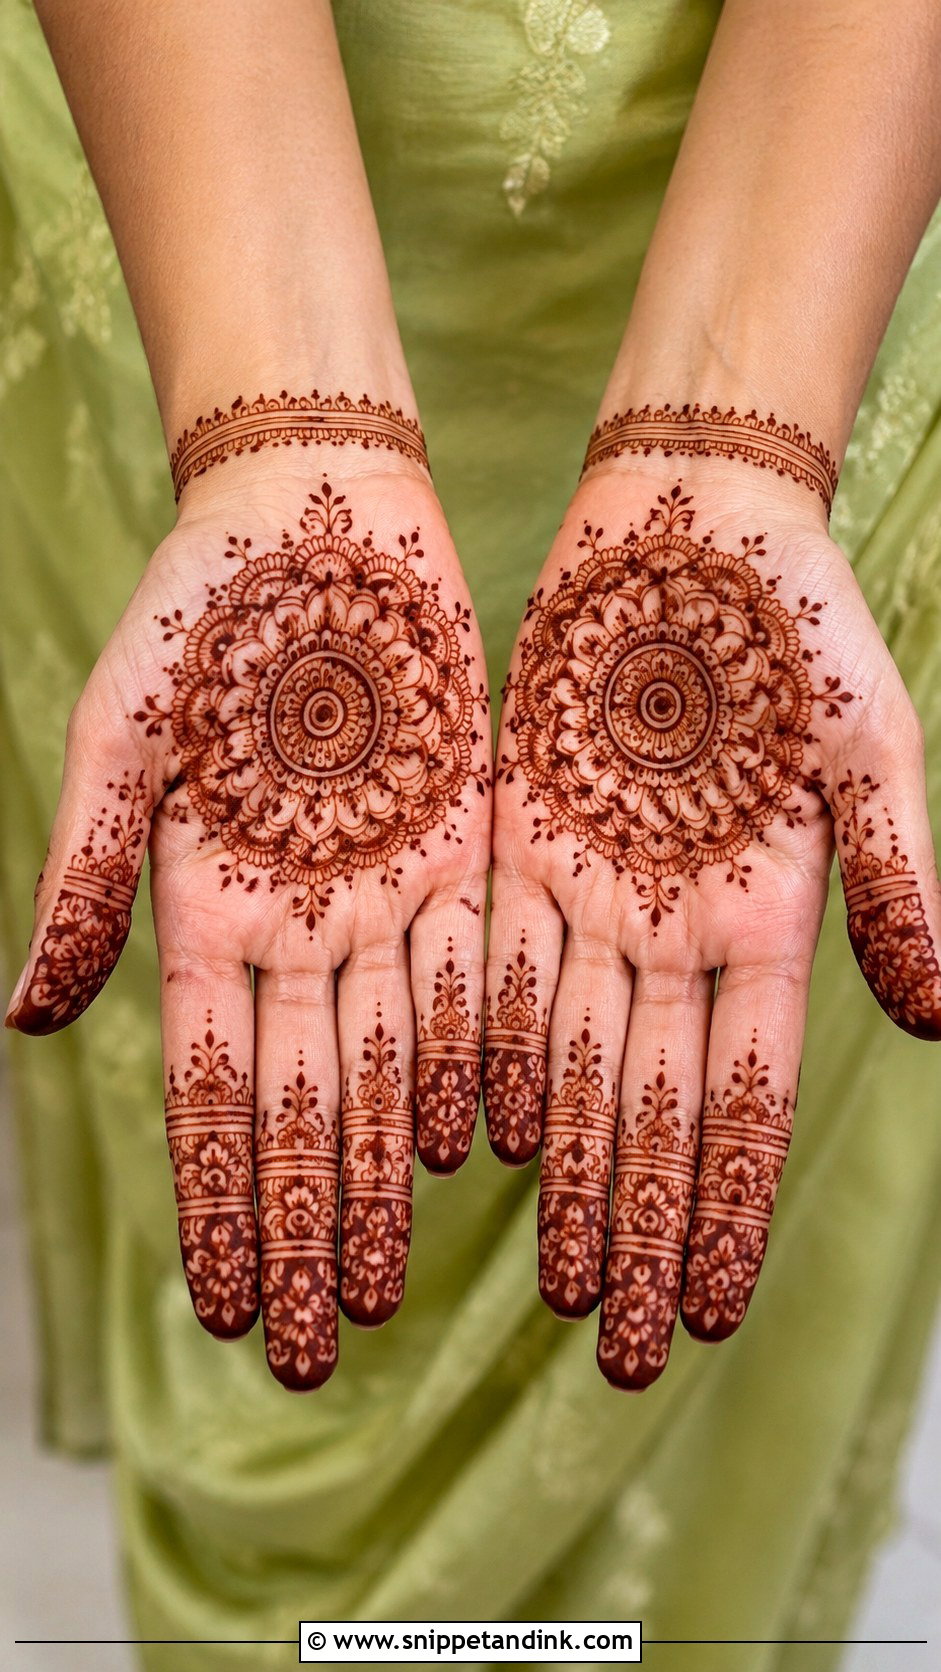
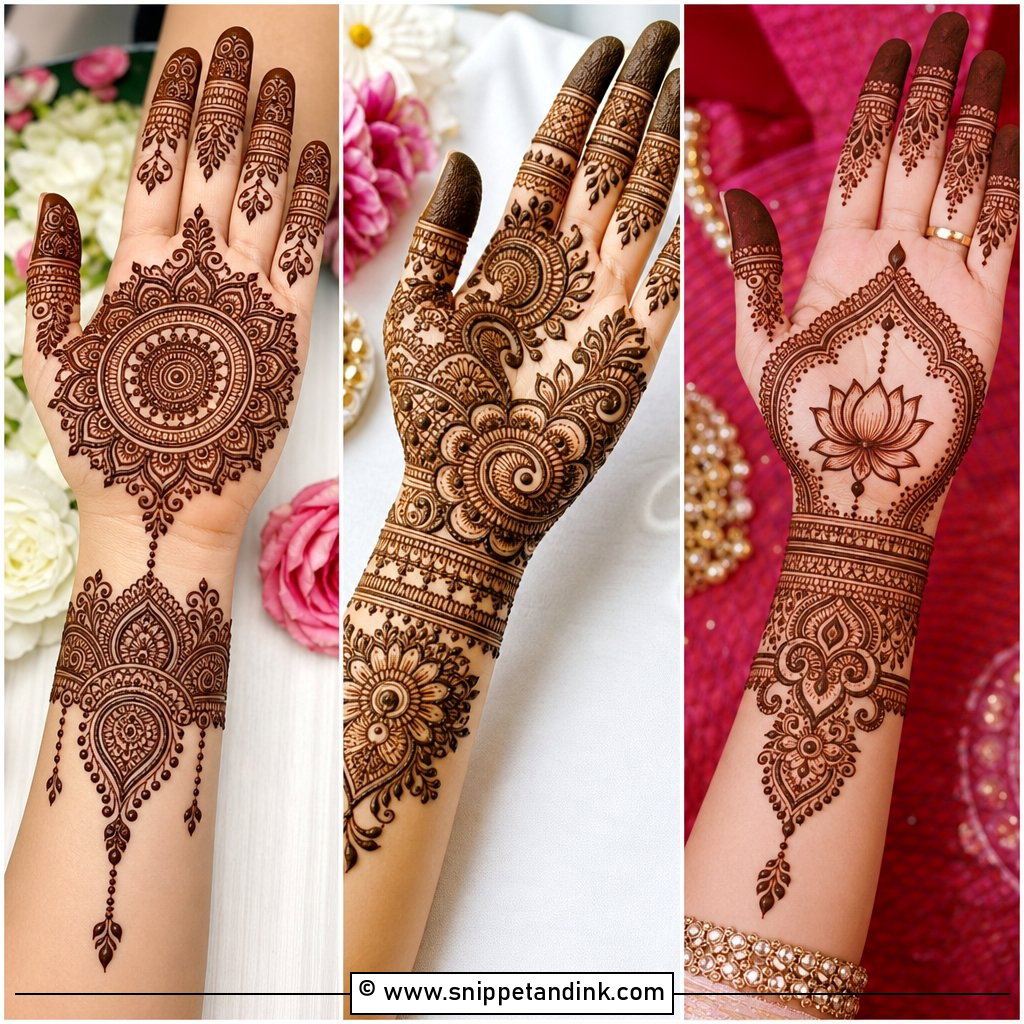
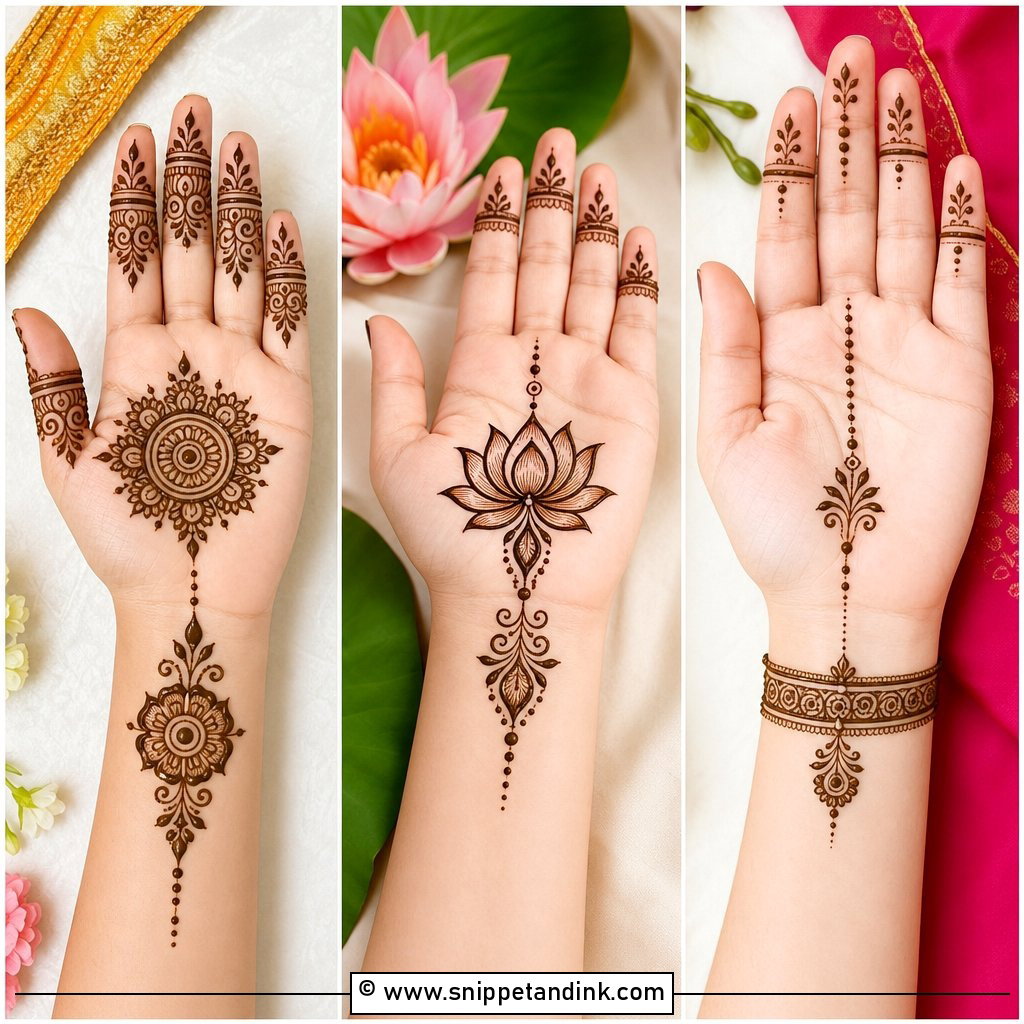
A palm mandala grows outward evenly, which is why it looks calm even when simple. Rings of petals, dots, curves and tiny lines circle the center, and the fingers get small bands, leafy tips or dotted lines so attention stays on the circle. Draw the center first and build slowly, ring by ring. Before starting, I ask the client to cup her hand slightly; the center of the mandala should sit where the palm stays flattest, not where the crease deepens.
6. Rose Front Hand Mehndi Design
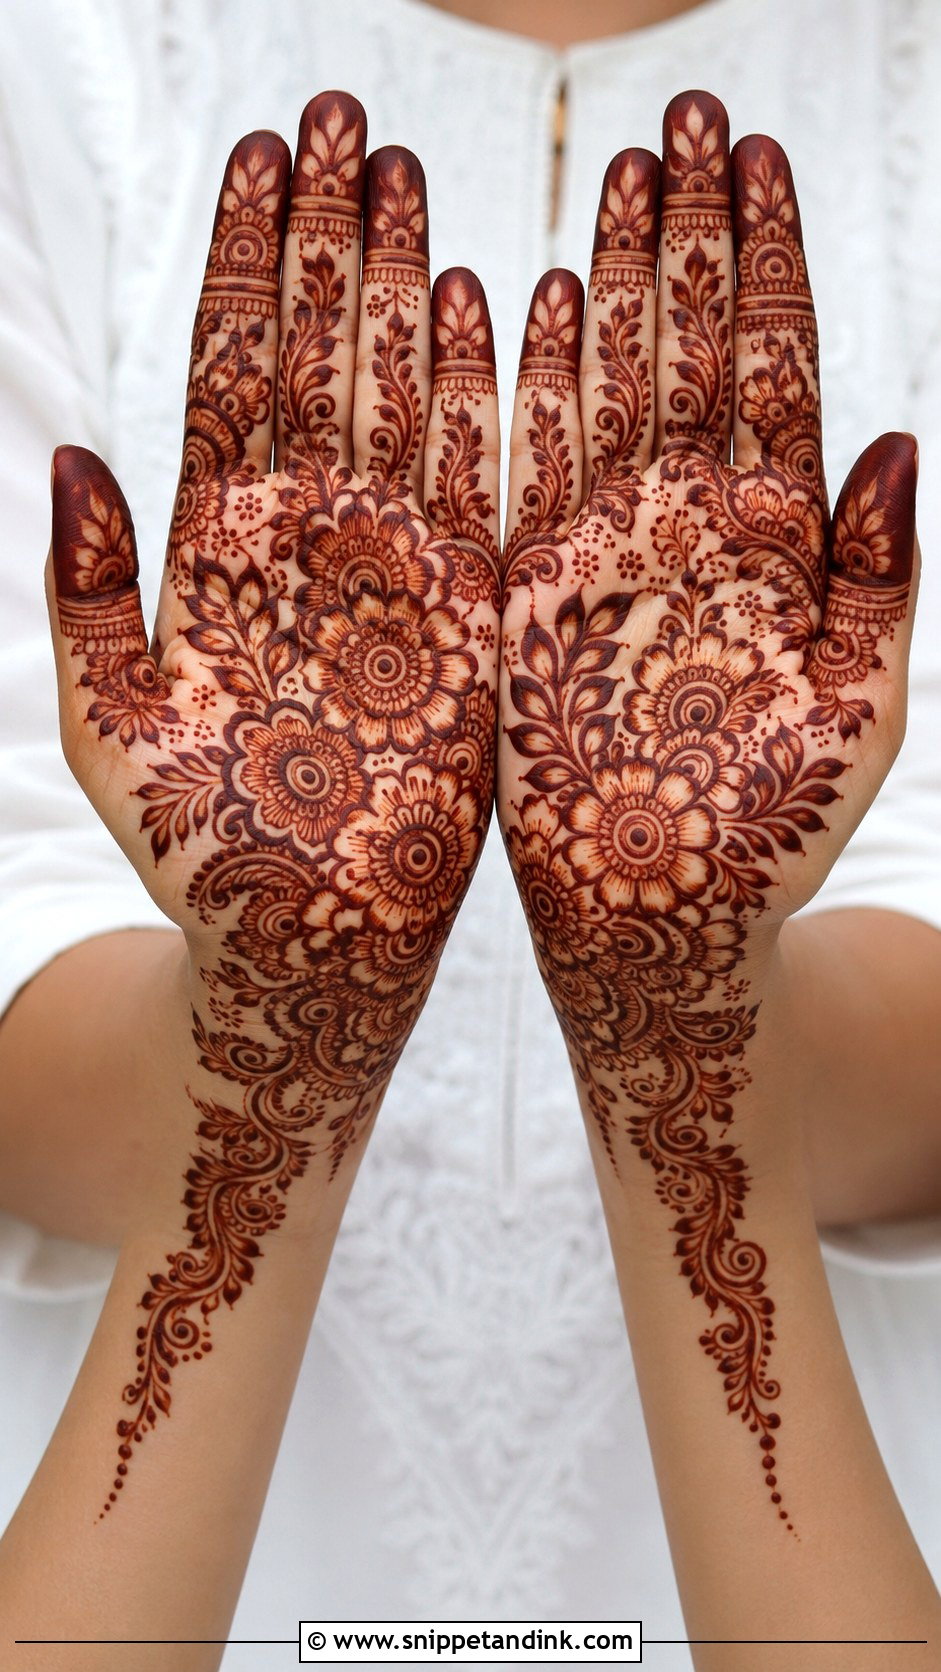
A rose bloom on one side of the palm, curved leaves, swirls and dotted trails toward the fingers, and a thin vine at the wrist that echoes the stem. Roses look fuller than basic flowers, which gives the design presence. Keep the petals rounded and shaded lightly. Heavy filling hides the rose shape, especially on the palm where the stain is strongest. Bridesmaids and light festive wear suit it.
7. Paisley Front Hand Mehndi Design
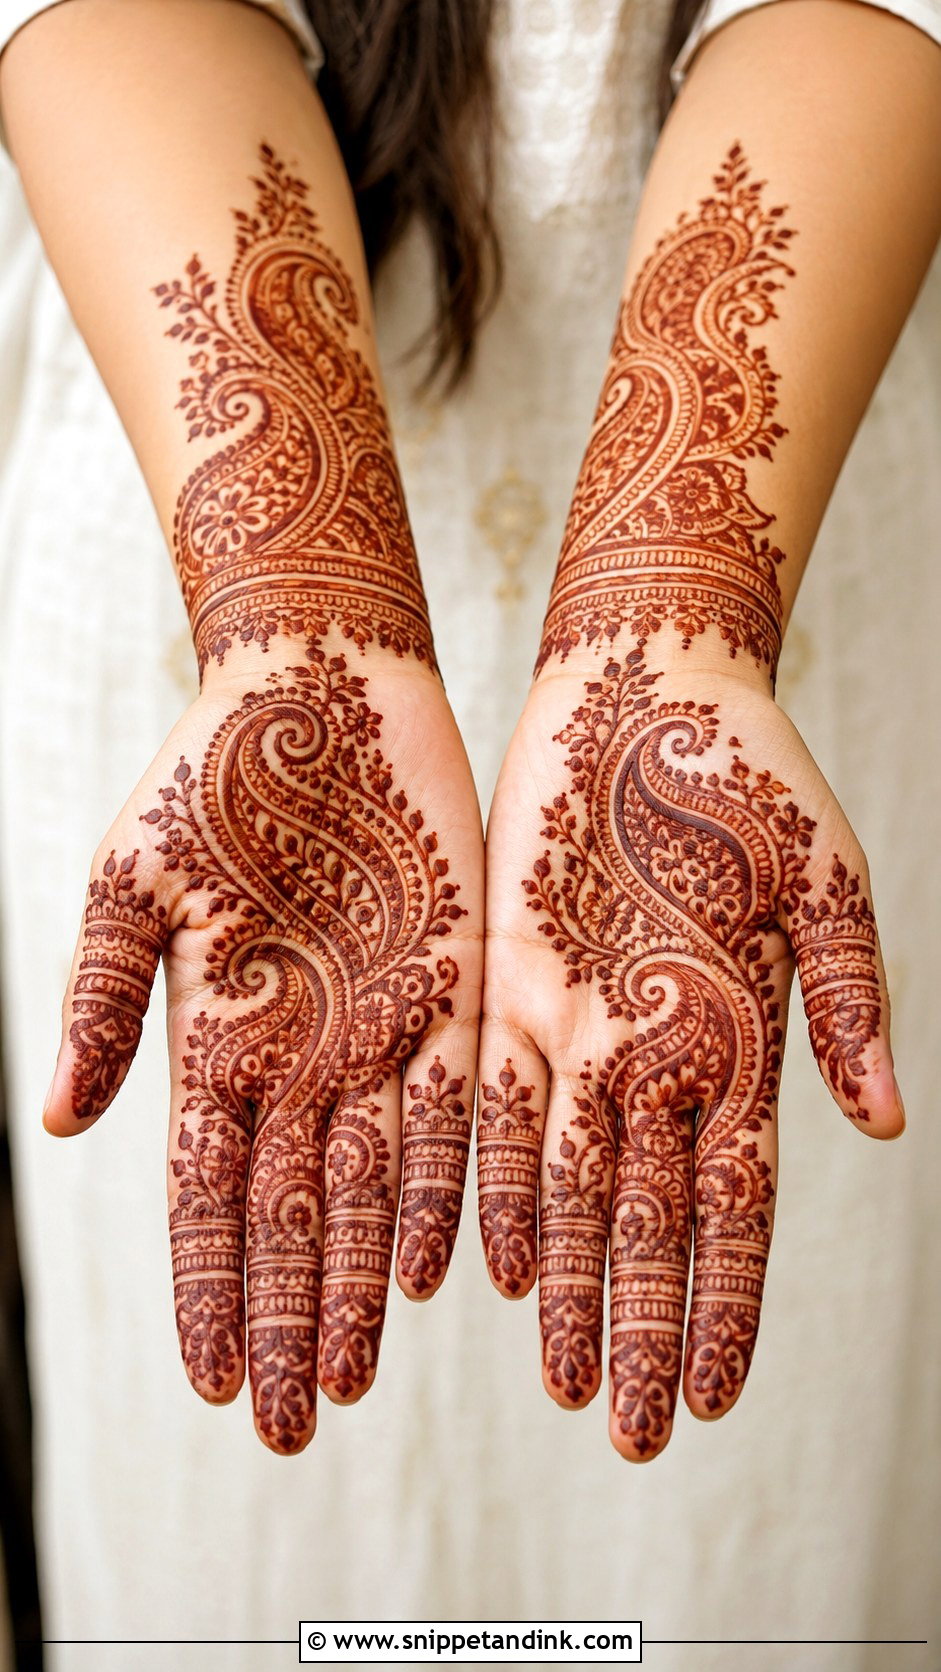
Two or three paisleys placed diagonally across the palm, with small florals and leaves in the gaps, give a traditional Indian feel without bridal weight. Fingers get matching curved lines or tiny paisley tips. My favorite variation pairs one large paisley near the wrist with a smaller one near the base of the fingers, which creates a sense of flow. Paisleys scale well, so they adjust easily to any hand.
8. Finger Front Hand Mehndi Design
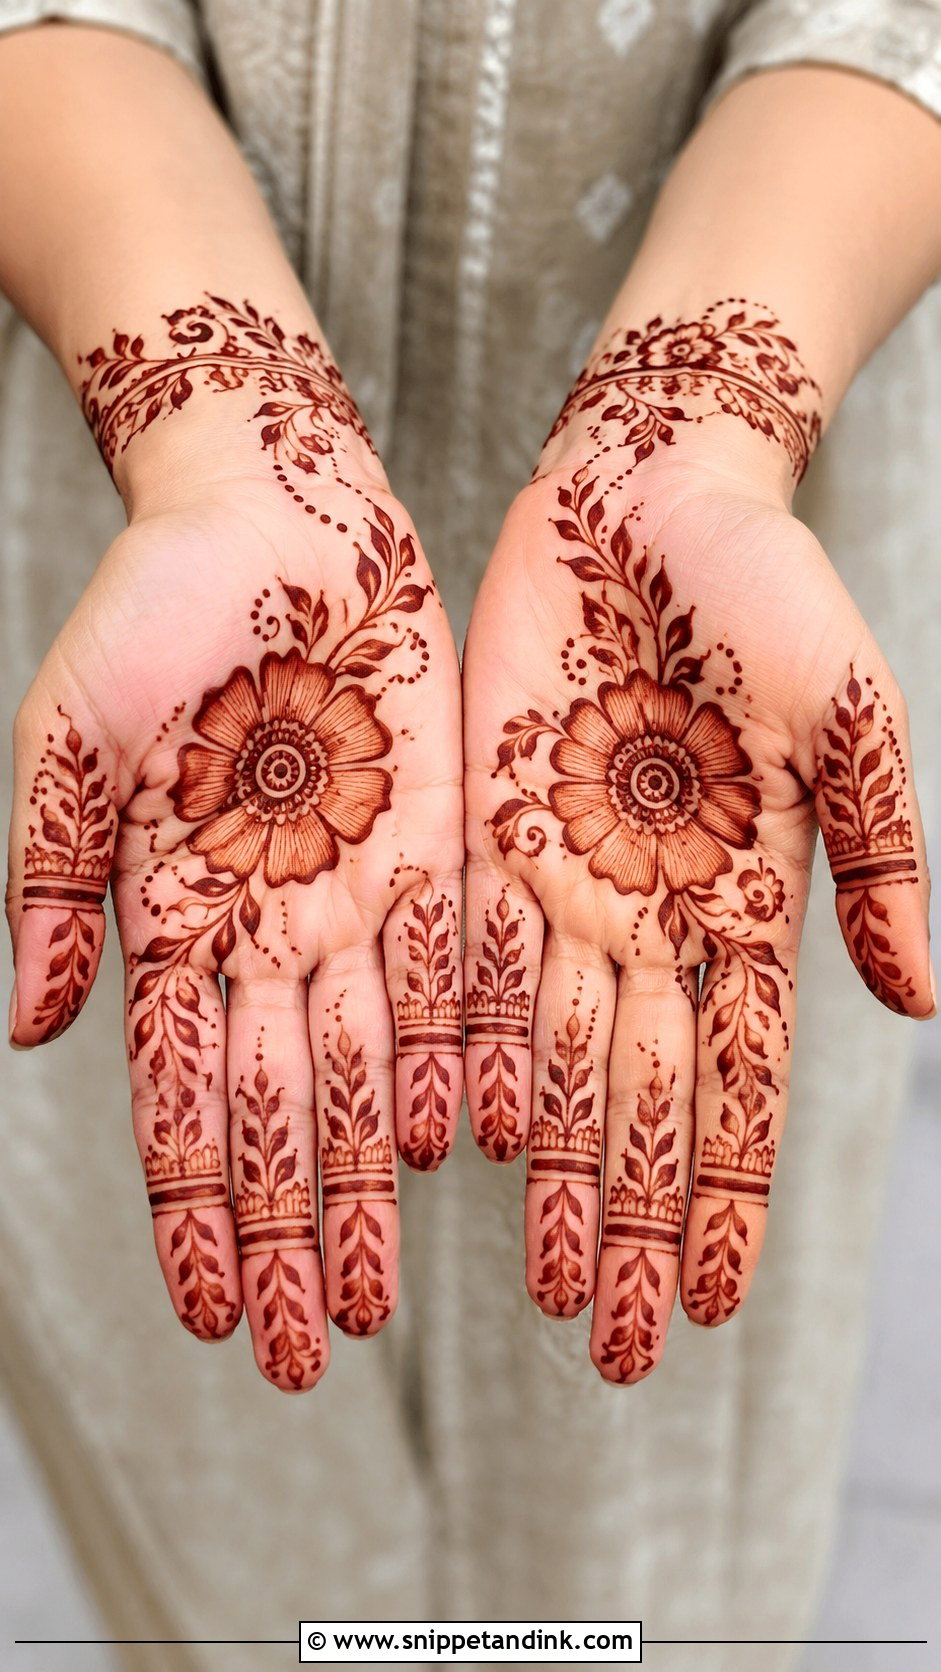
A finger front hand mehndi design puts the detail on the fingers and keeps the palm light: slim bands, dots, small leaves and tiny arches on every finger, with a small flower or mandala in the palm and a delicate bracelet line at the wrist. It’s practical for people who use their hands constantly, since the palm center stays clear. Make each finger a little different while repeating one shared detail, and it looks deliberate.
9. Palm Front Hand Mehndi Design
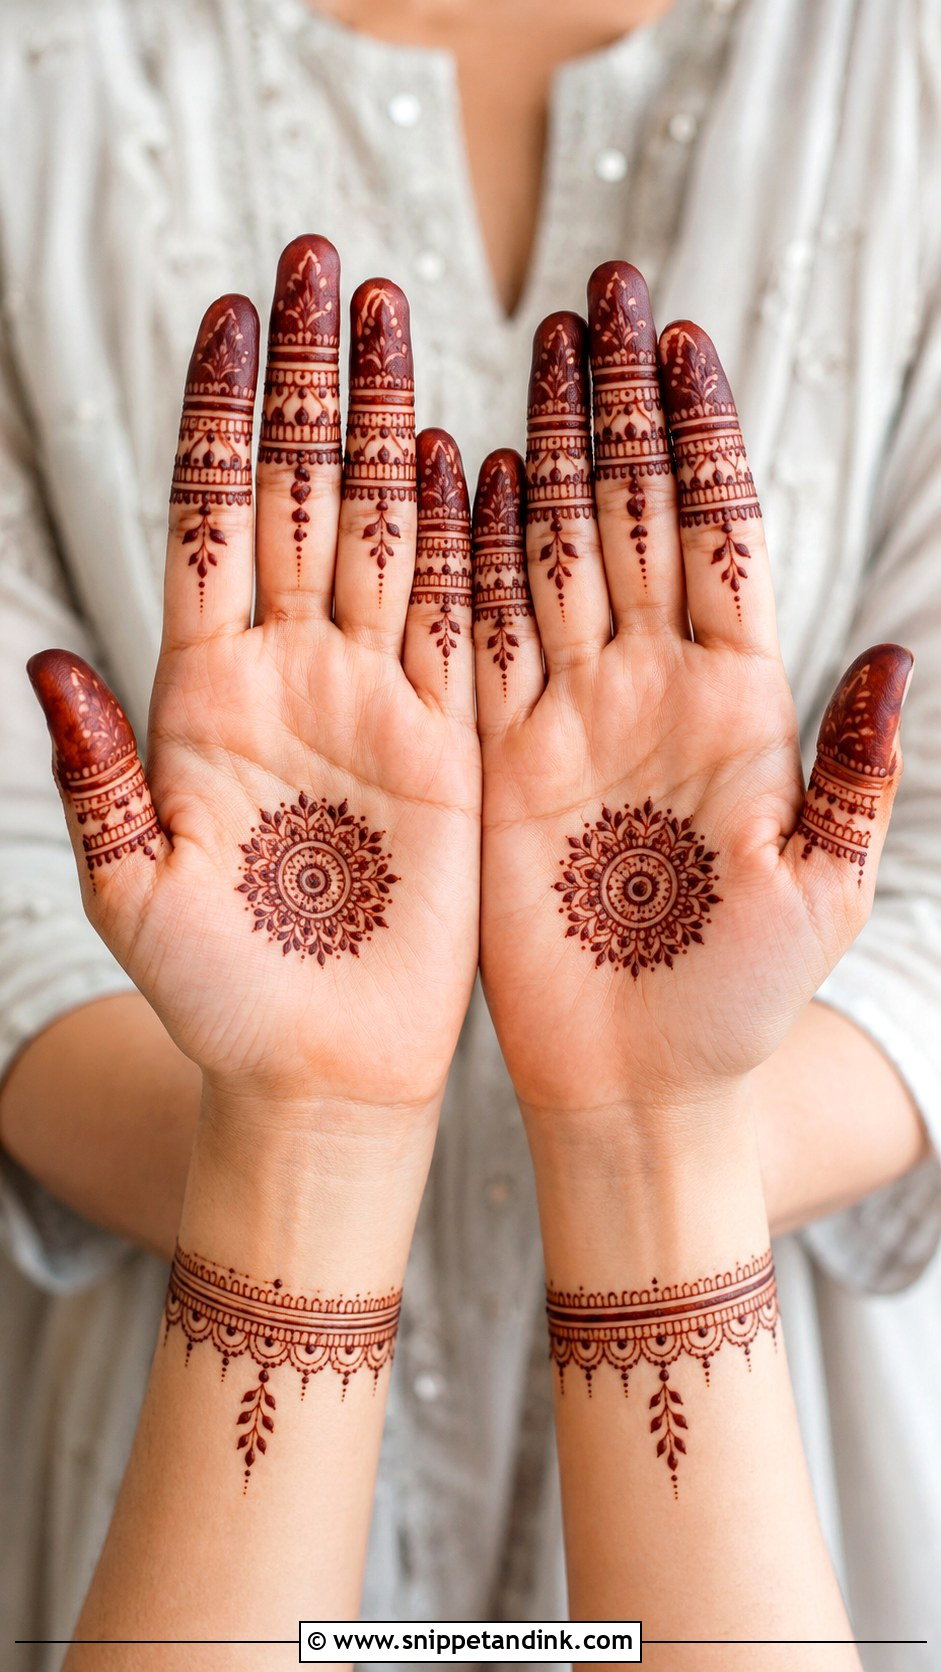
Palm-centered designs put the beauty where front-hand mehndi traditionally focuses. A round mandala, surrounding florals and light filler lines stop before the fingers, which get soft tips or dotted strips. It’s easy to wear for prayers and family events. I leave a clean border of bare skin around the central motif. That ring of empty space sharpens the design and lets the stain read clearly from across a room.
10. Full Front Hand Mehndi Design
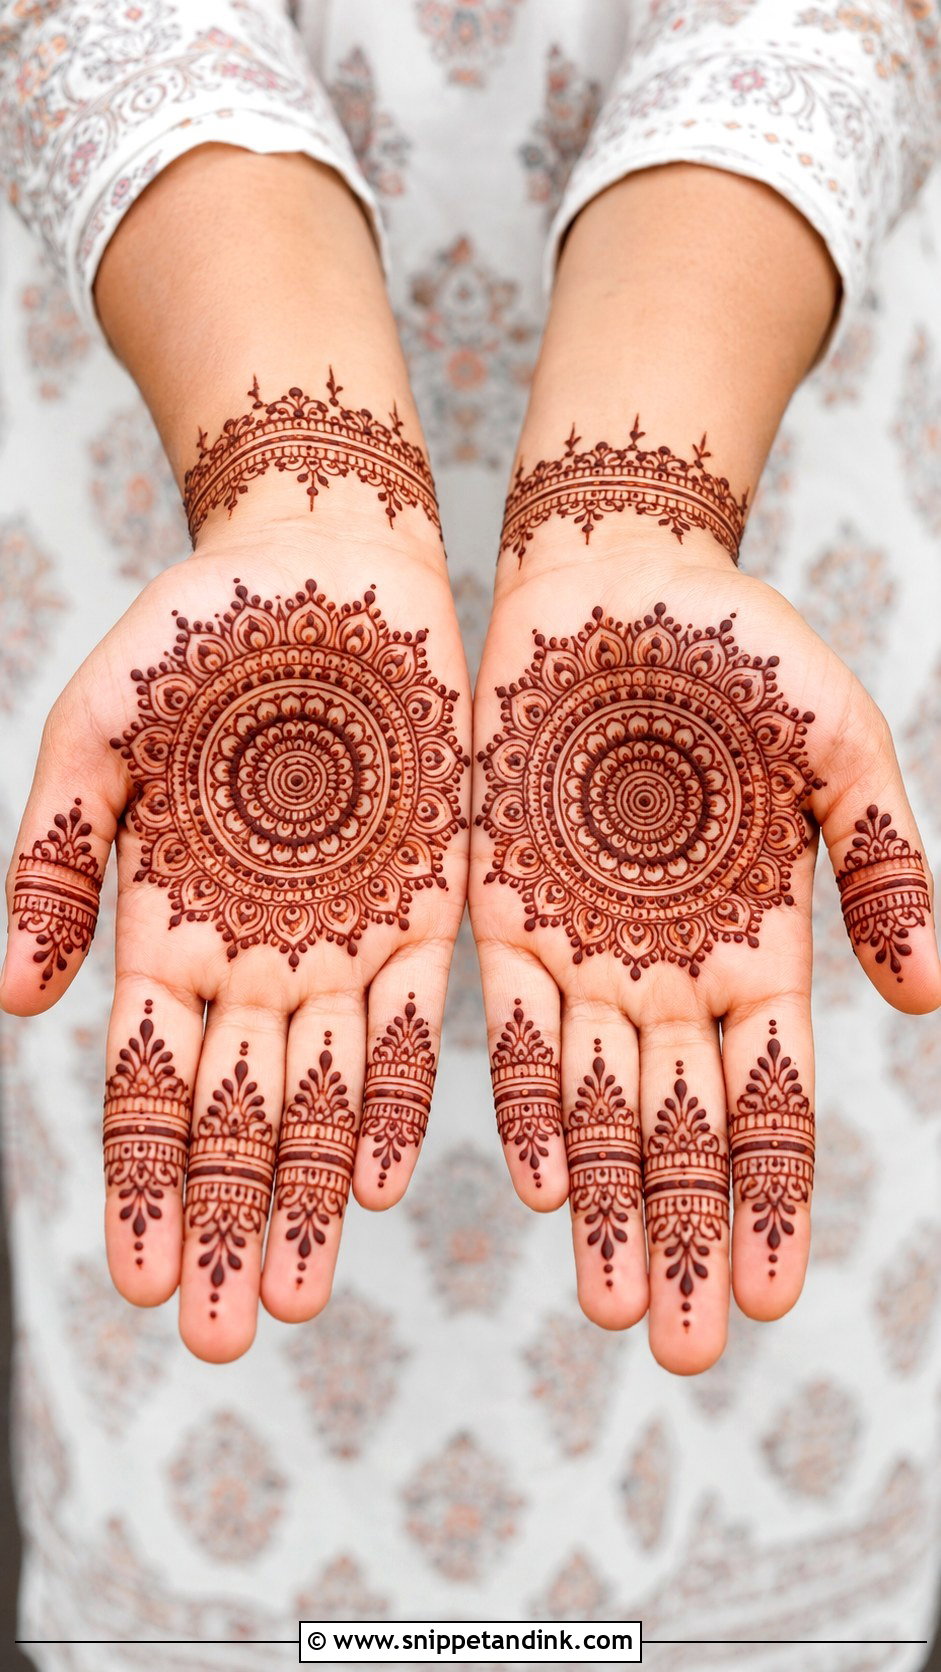
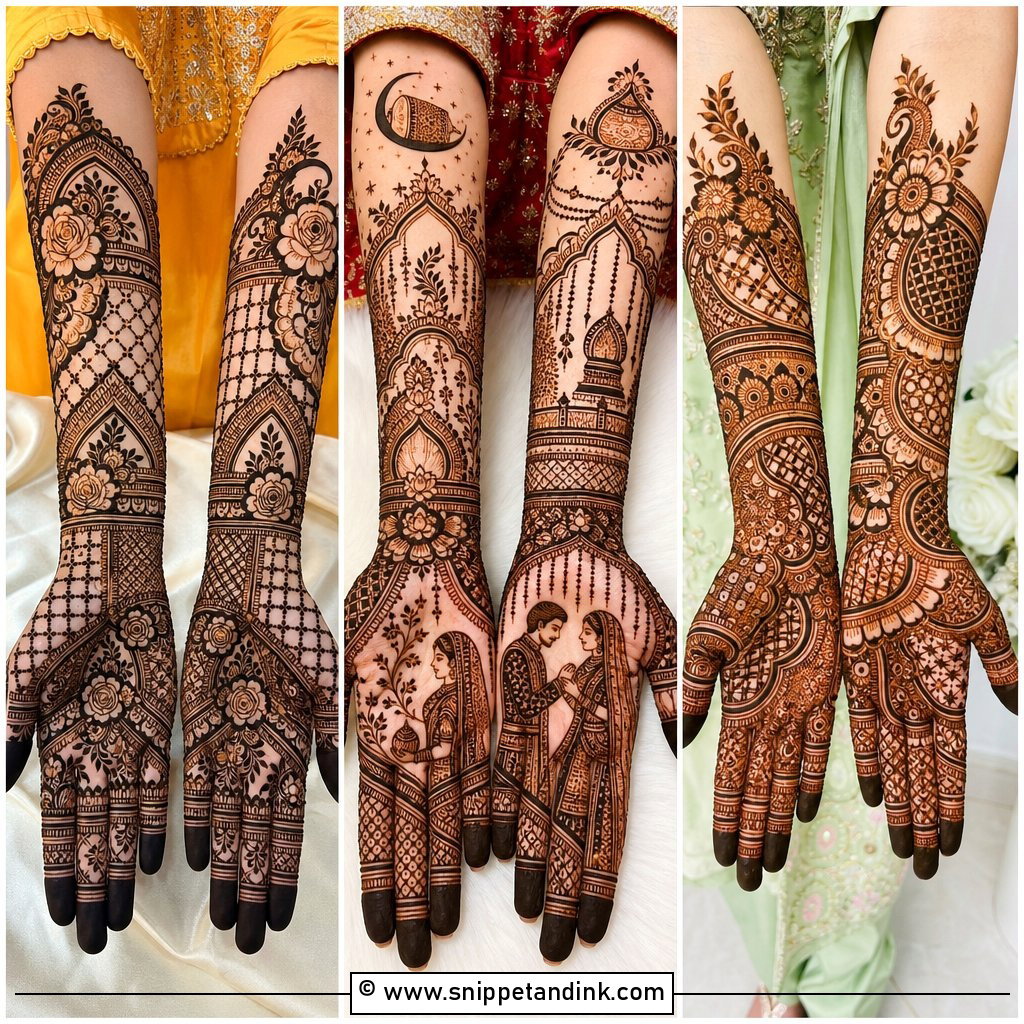
Full front-hand coverage covers the palm, fingers and wrist, but larger motifs keep it simple: a central mandala, paisley corners, floral vines and shaded finger bands, with two or three bracelet lines and small leaves at the wrist. Repeating similar shapes across the hand avoids a messy finish, and small open gaps between major sections keep it readable. A full palm takes a while to apply and the paste should stay on for hours, so plan a quiet evening around it.
11. Minimal Front Hand Mehndi Design
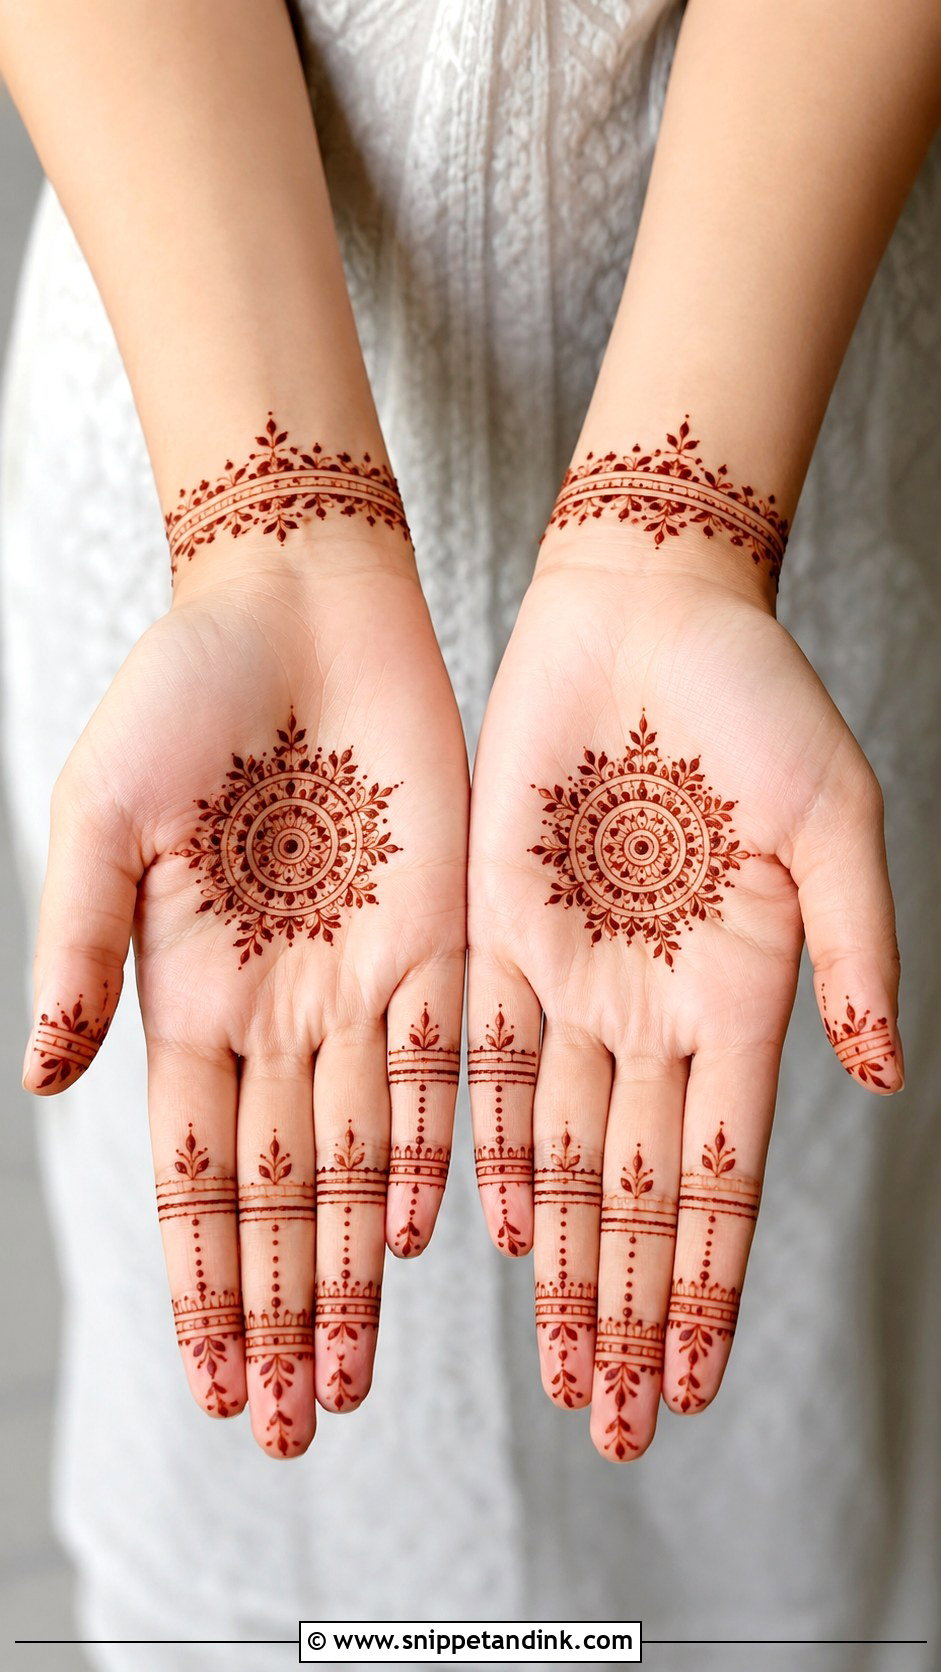
Minimal front-hand henna uses a small central motif, thin finger lines and one delicate wrist detail. A tiny mandala, half flower or leafy curve is enough if the spacing is right. It suits short nails and small hands, and it works for office celebrations. The empty palm is part of the design, so I decide where the bare skin goes before drawing anything. Fine lines on a palm still stain strongly, which is why minimal work looks crisp here.
12. Modern Front Hand Mehndi Design
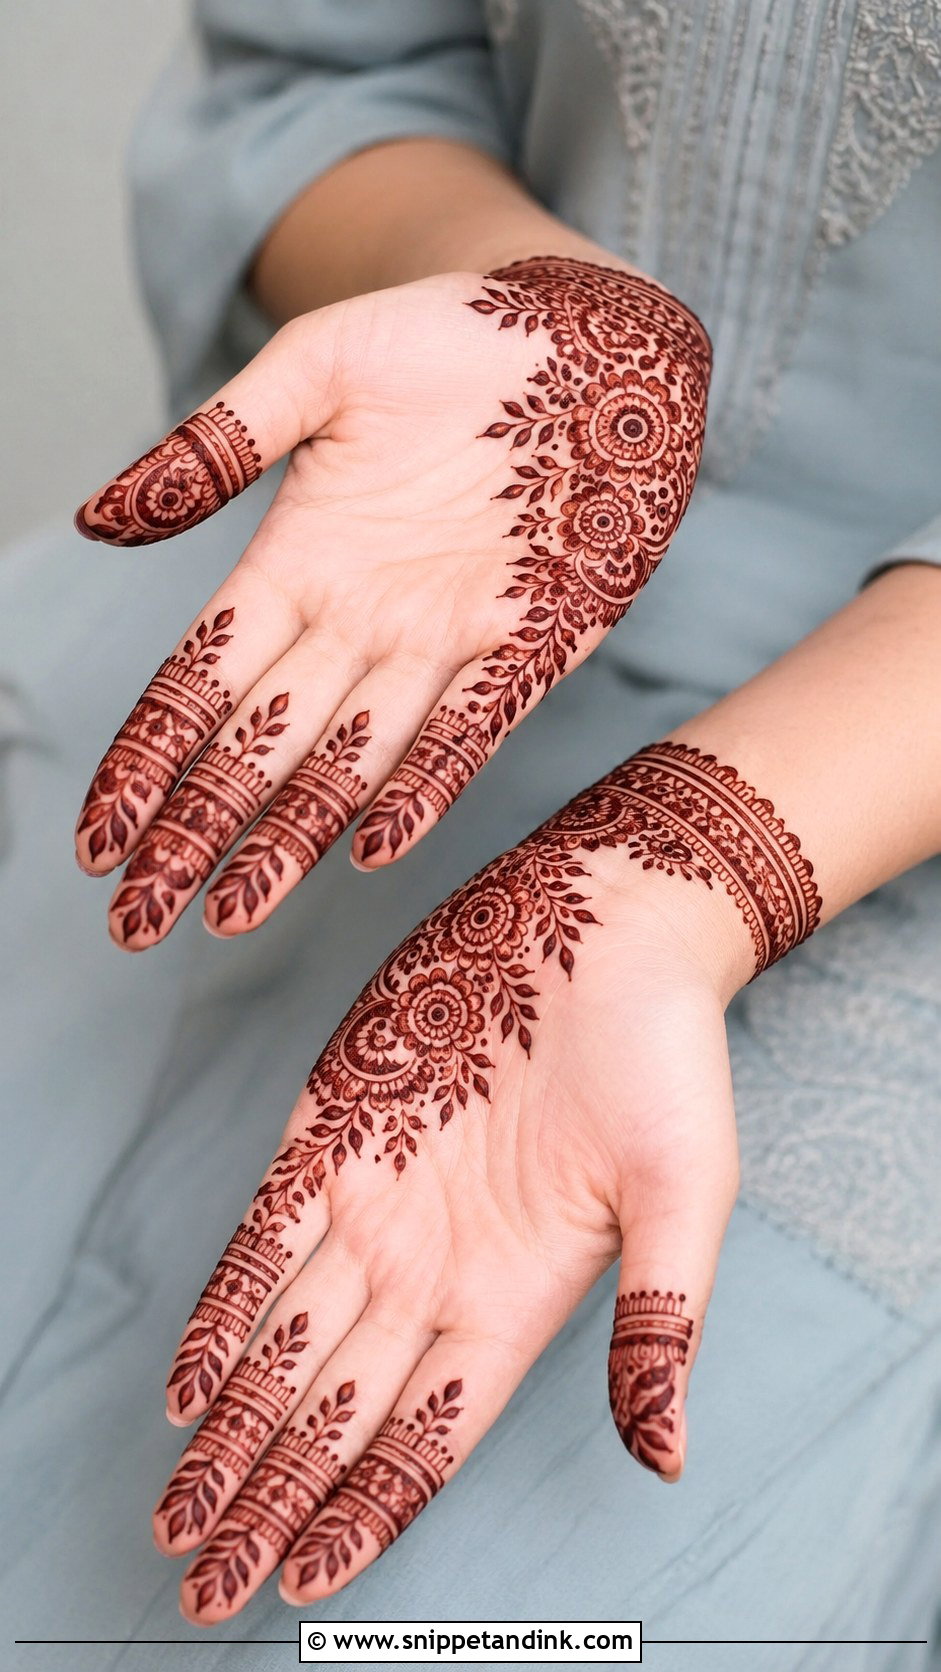
Modern front-hand designs pair traditional motifs with cleaner spacing. The version I’m asked for most puts a floral trail across one side of the palm and keeps the other side mostly open, with geometric bands, dots and slim leafy lines on the fingers and a simple cuff at the wrist. One bold element, a flower or a paisley, surrounded by very fine detail creates contrast. It suits fusion outfits as well as ethnic ones.
13. Indian Front Hand Mehndi Design
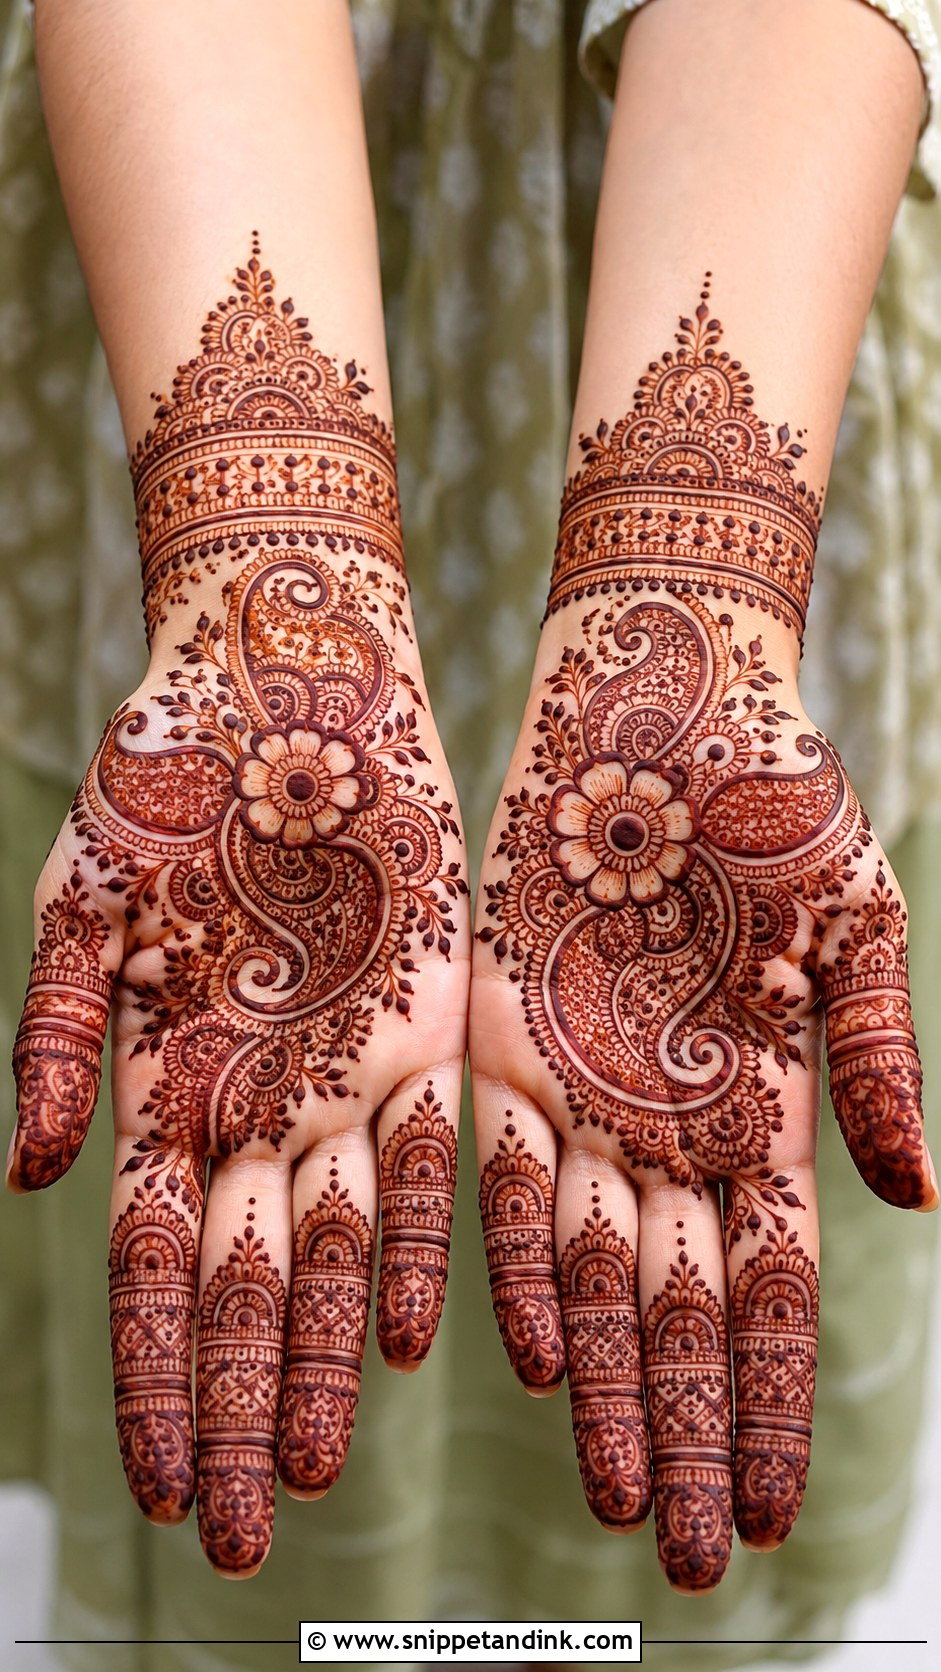
Indian front-hand henna uses paisleys, florals, dots, leaves and fine fillers. A simple version still feels rich if the motifs are placed carefully: a mandala or paisley in the palm, floral corners, small arches and dots on the fingers, and a bangle-style border at the wrist. The balance I aim for is bold outlines with light fillers. Fillers drawn too thick merge on the palm and the detail is lost once the stain matures.
14. Indo Arabic Front Hand Mehndi Design
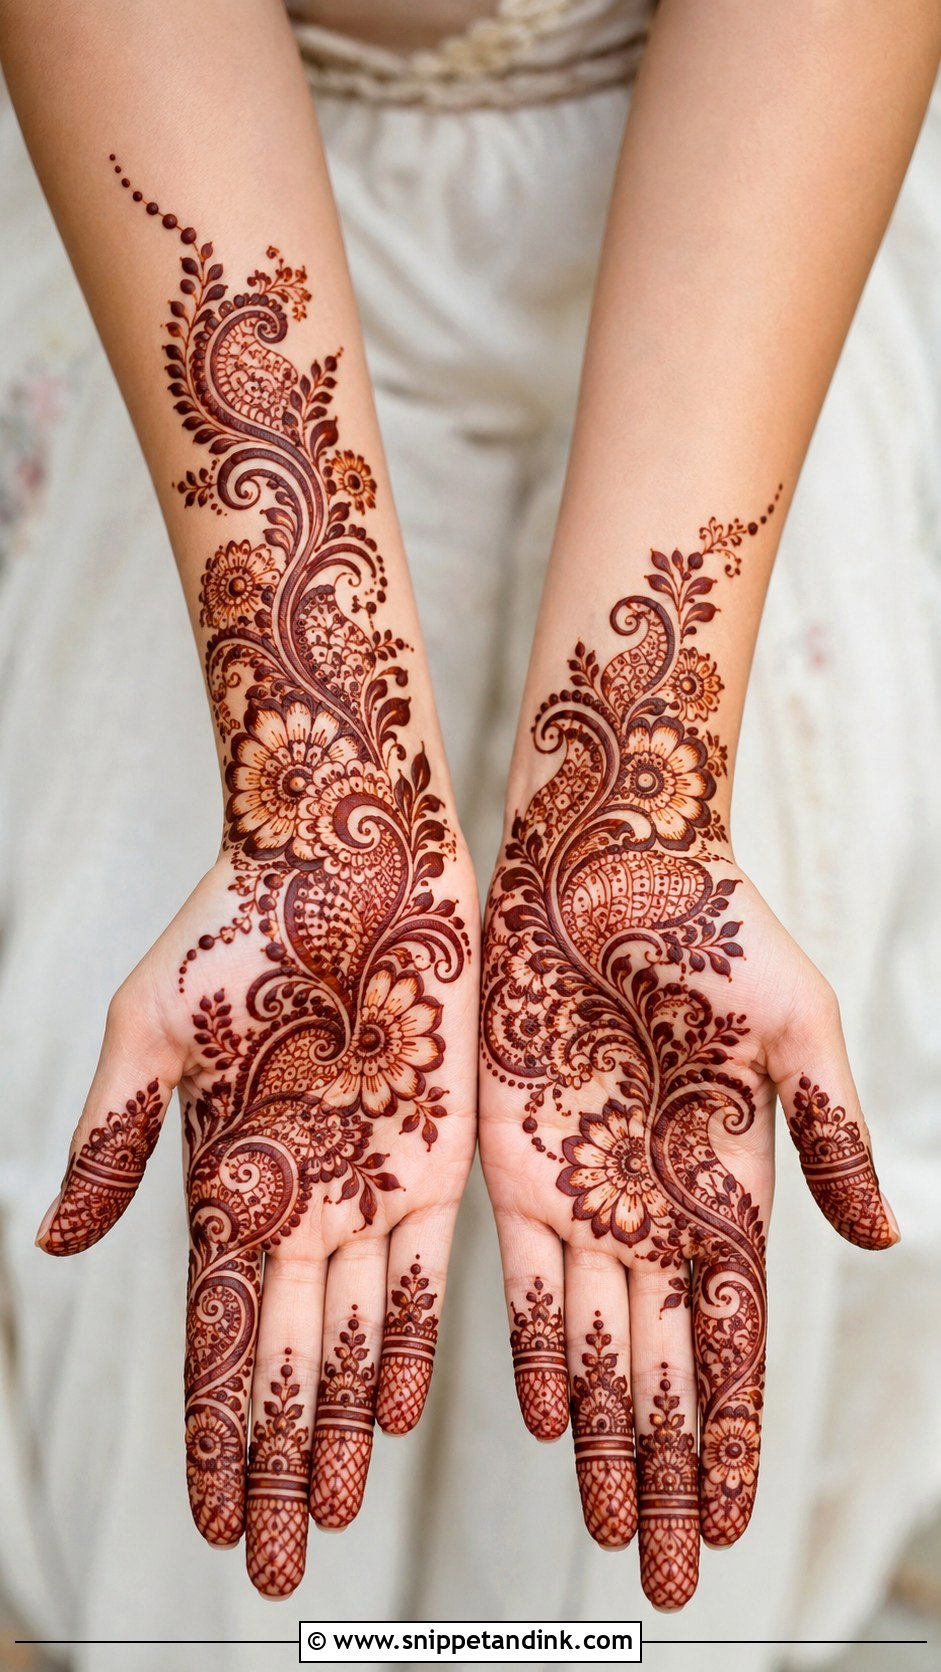
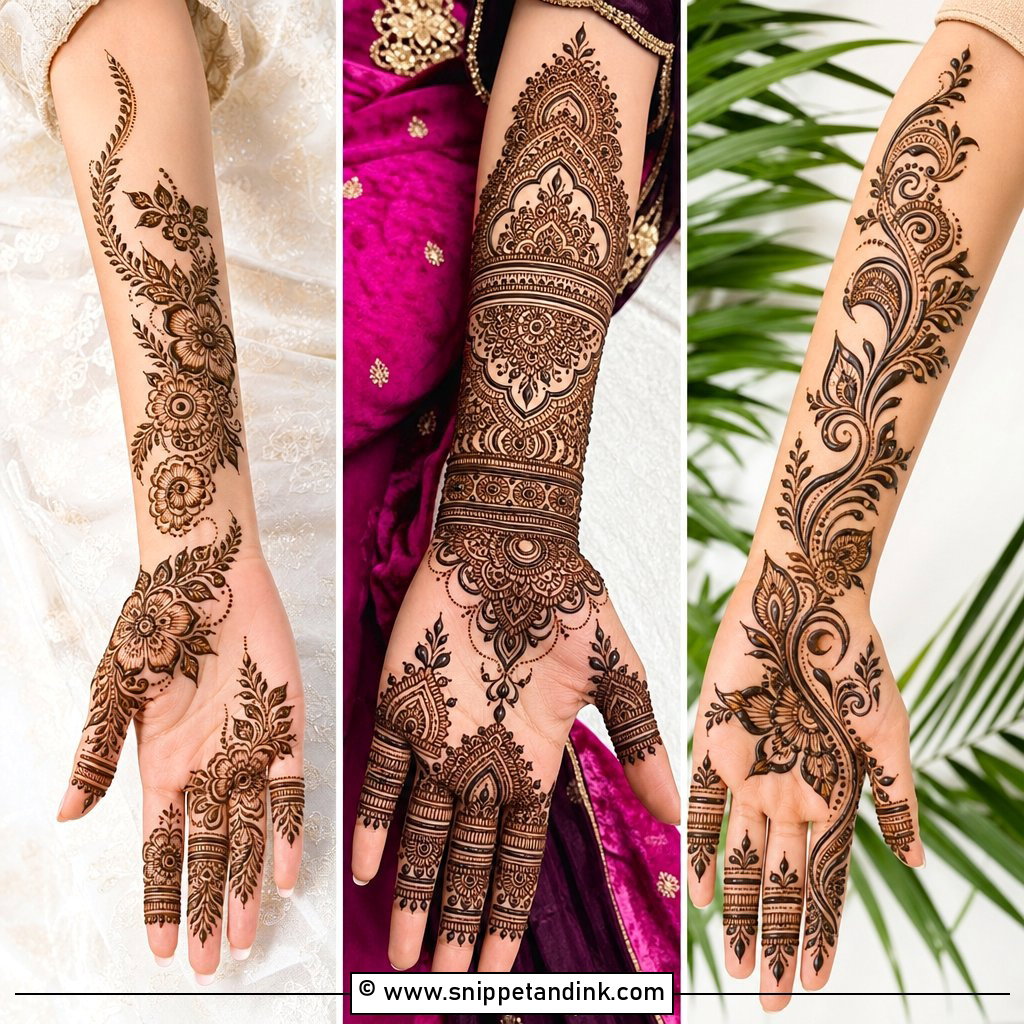
Indo Arabic front hand mehndi design work blends Arabic flow with Indian detail. The trail moves diagonally from the wrist to the index finger, built of paisleys, flowers and shaded leaves, with small Indian-style dots, curls and fine fillers added inside. I keep one side of the palm open and decorate the other richly, and the contrast is what makes it look stylish. Eid, Diwali and sangeet all suit it.
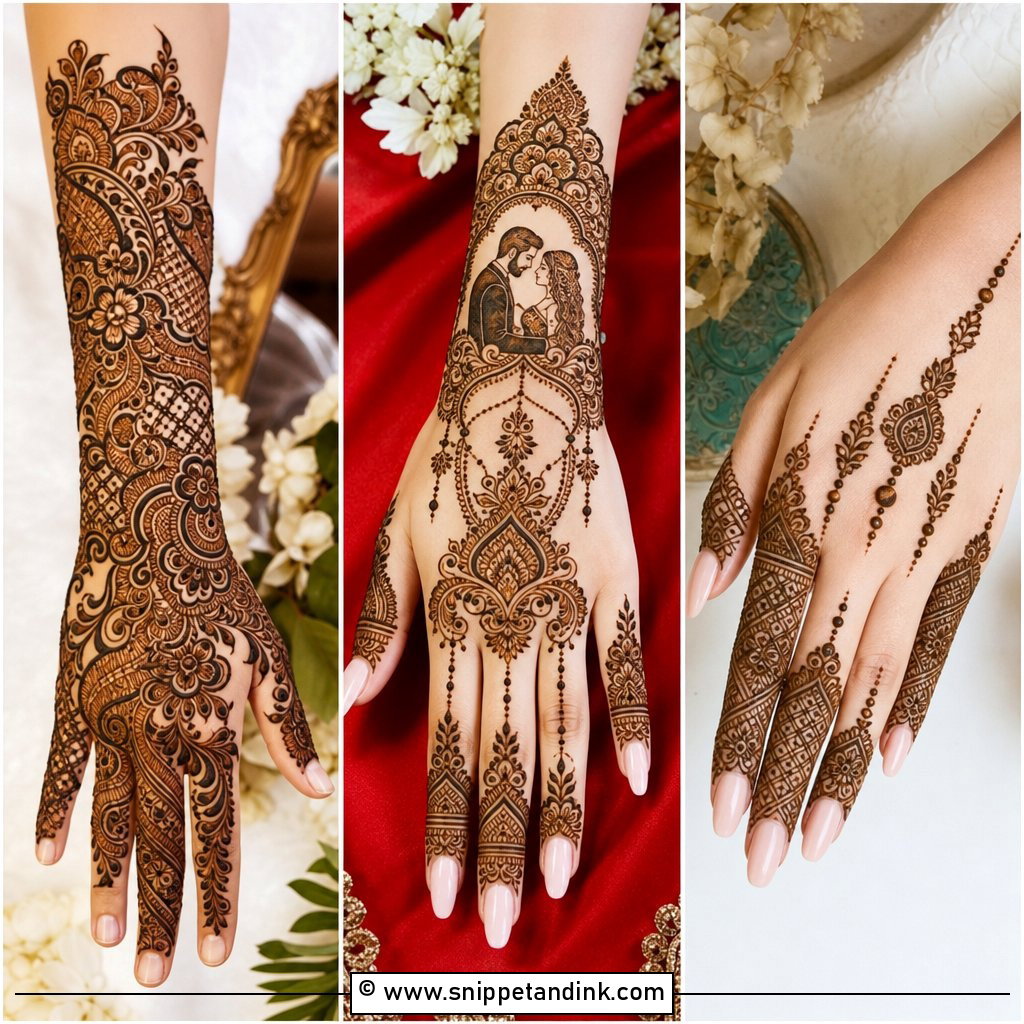
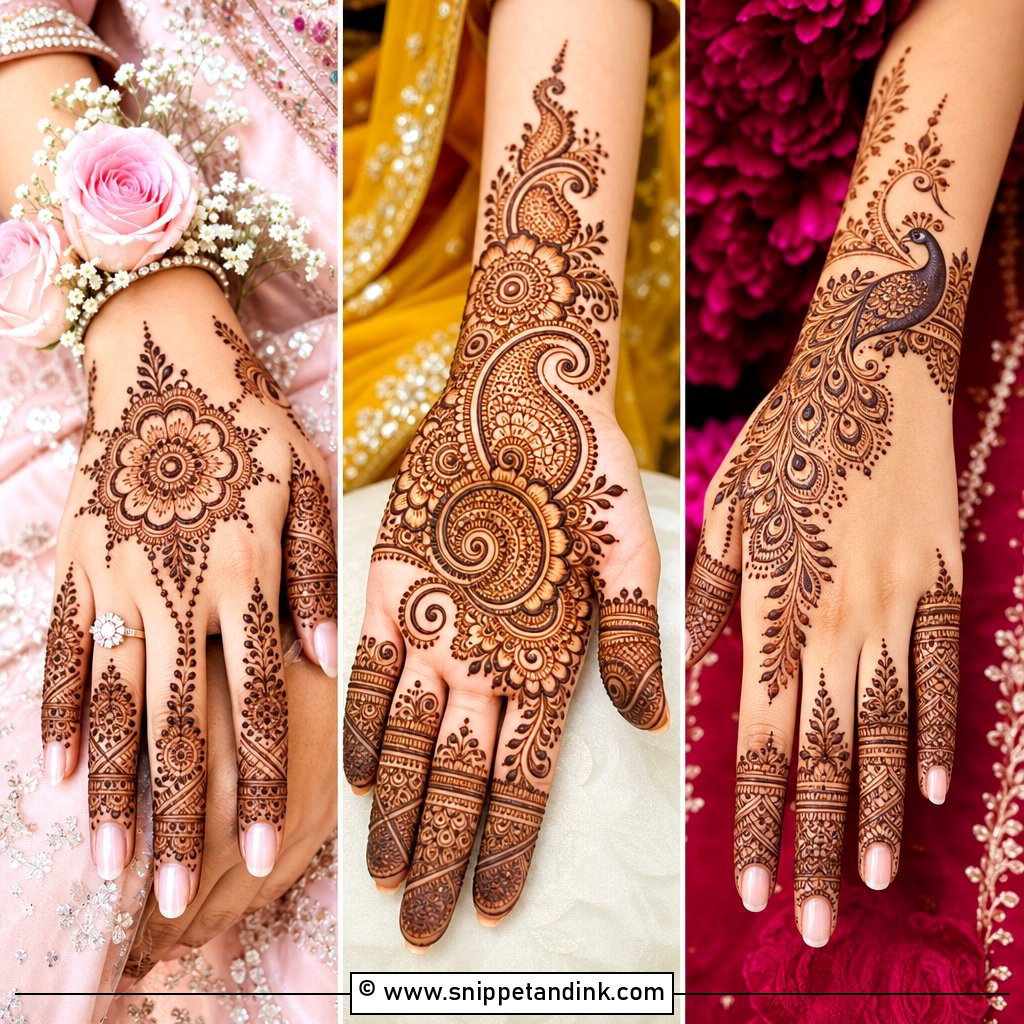
15. Moroccan Front Hand Mehndi Design
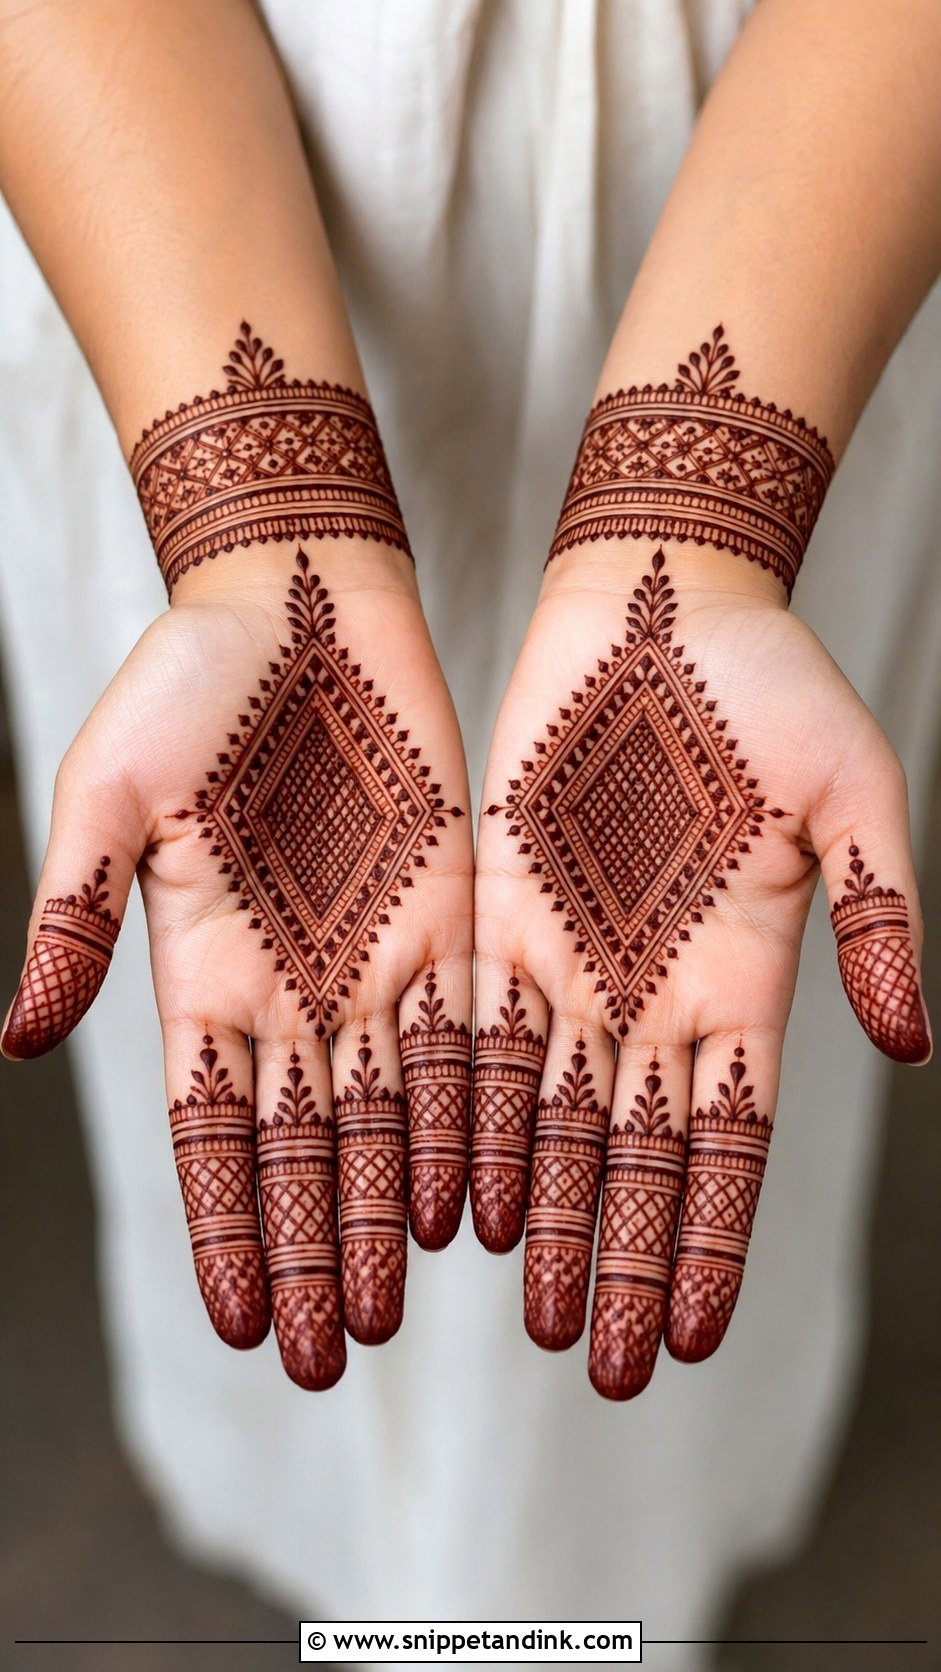
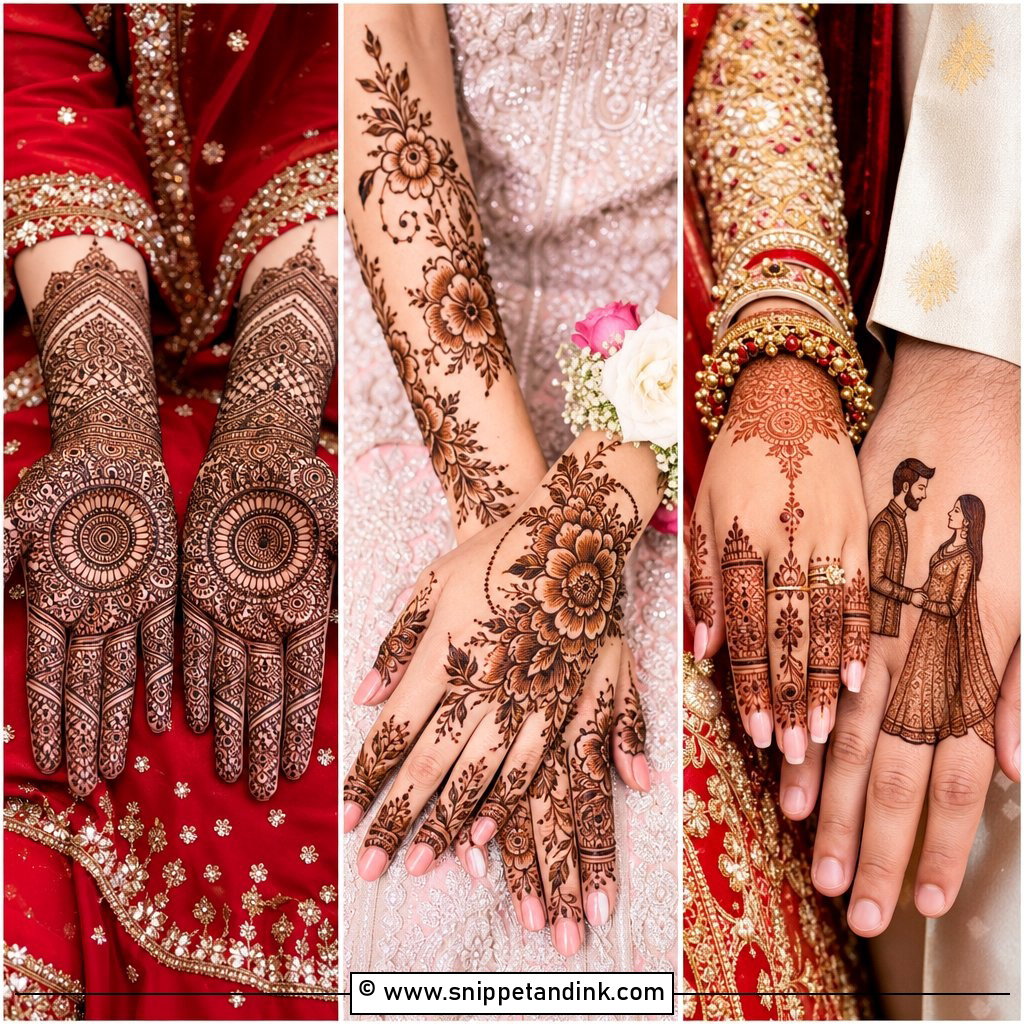
Moroccan henna on the palm swaps flowers for diamonds, triangles, lines, grids and small dots. It can start with a geometric palm panel and continue into finger bands, with a simple cuff of repeated shapes at the wrist. Use fewer shapes and repeat them clearly. A deep maroon stain on the palm makes sharp lines look striking. Geometry also forgives an unsteady hand less than florals do, so I mark guide dots first.
16. Gulf Front Hand Mehndi Design
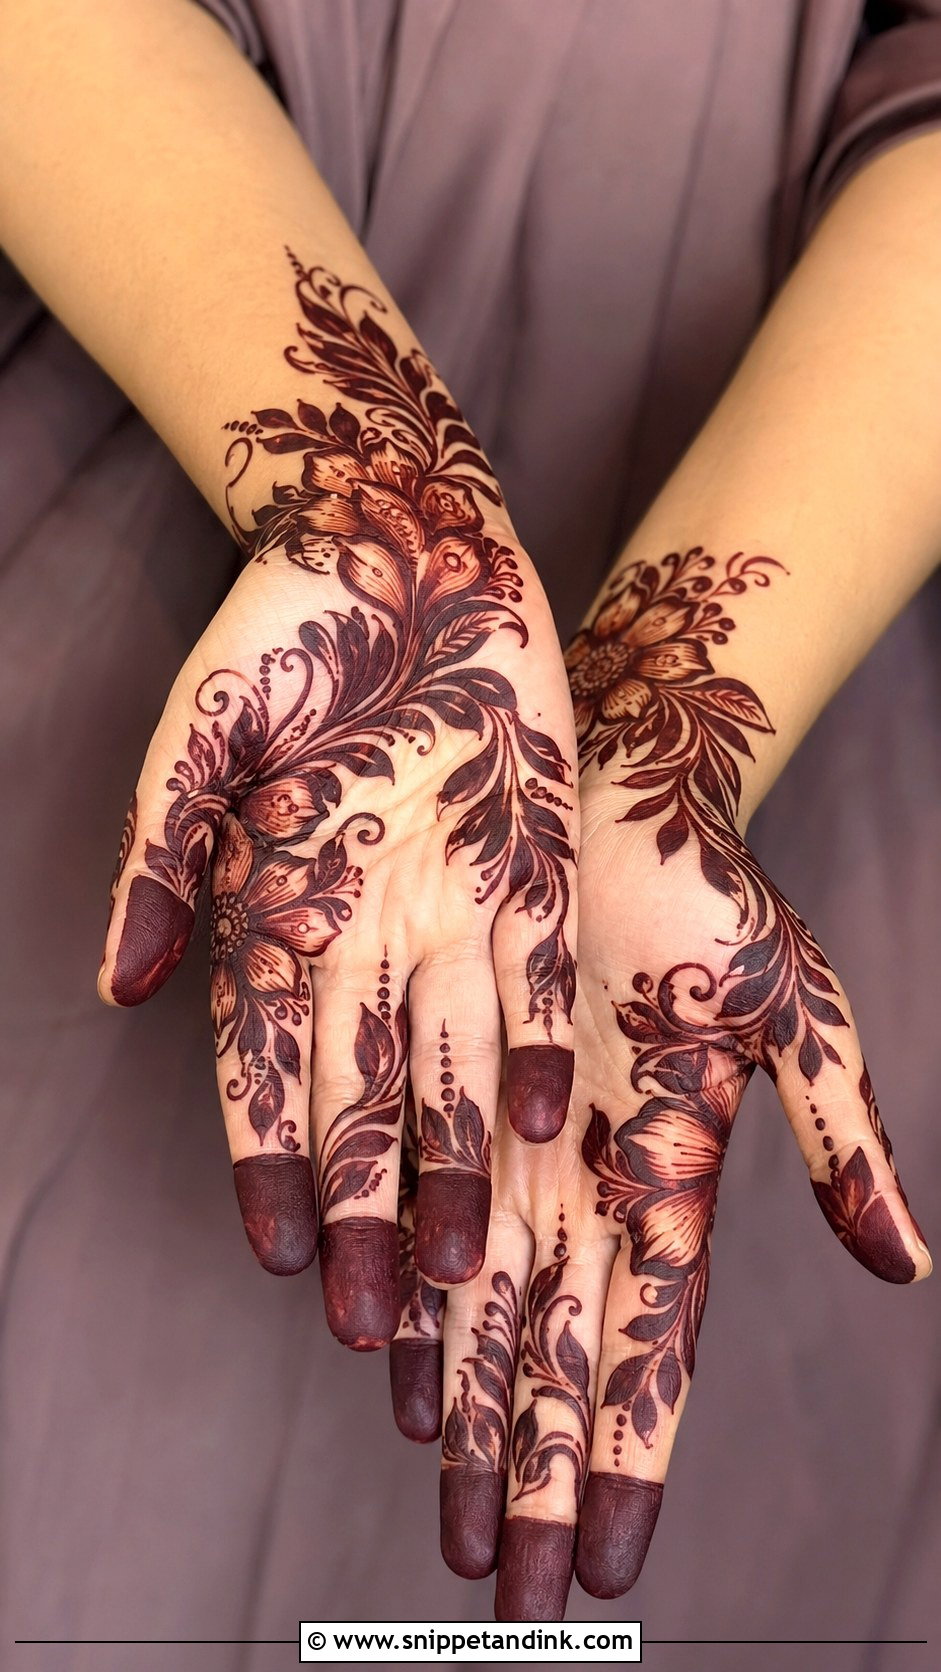
Khaleeji-inspired henna uses oversized florals, leafy curves and open spaces across the palm, often weighted to one side. Fingers get thick tips, leafy bands or short floral trails. Clear shapes are easy to see from a distance. Bold outlines and soft inner shading give the finish; I spread a thin layer of paste inside petals rather than filling them solid, since solid fill on the palm can go almost black and lose the shape.
17. Bracelet Front Hand Mehndi Design
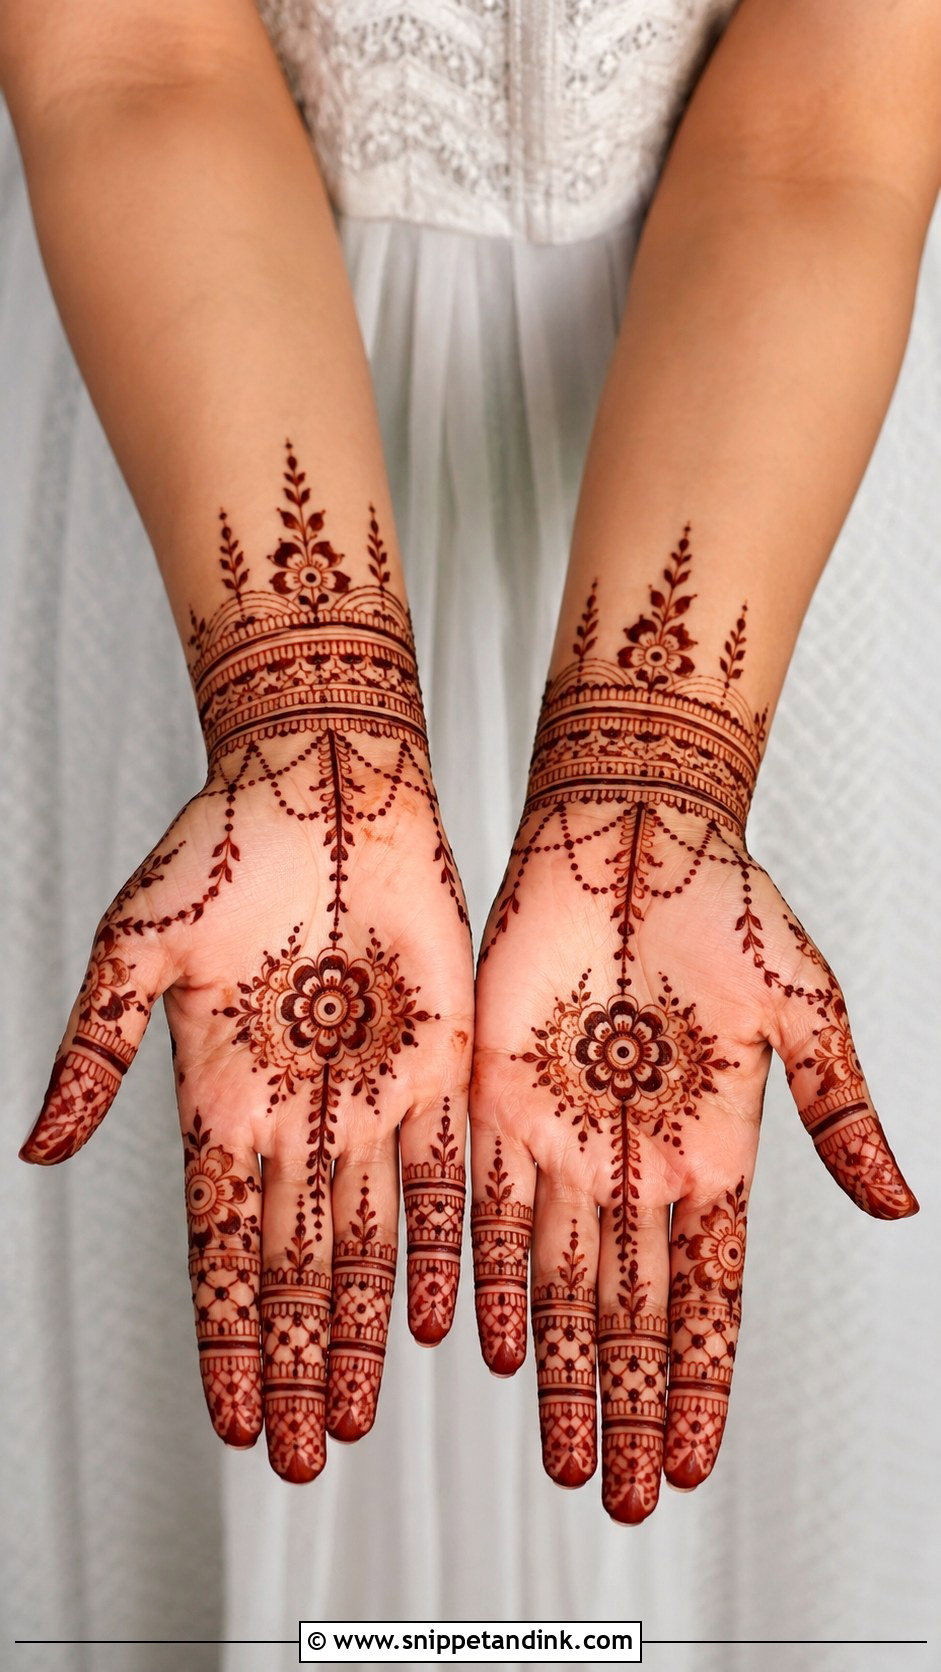
Bracelet designs on the front hand connect a small floral or mandala motif in the palm to the wrist with dotted chains, leafy lines or slim curves, and the wrist gets two or three bands with tiny petals or jaali. It looks dressed with bangles, and it suits engagements and minimal bridal events. Connecting the bracelet to one finger in a haath phool pattern echoes the traditional hand ornament. The inner wrist stains lighter, so leave the paste on longer there.
18. Jaali Front Hand Mehndi Design
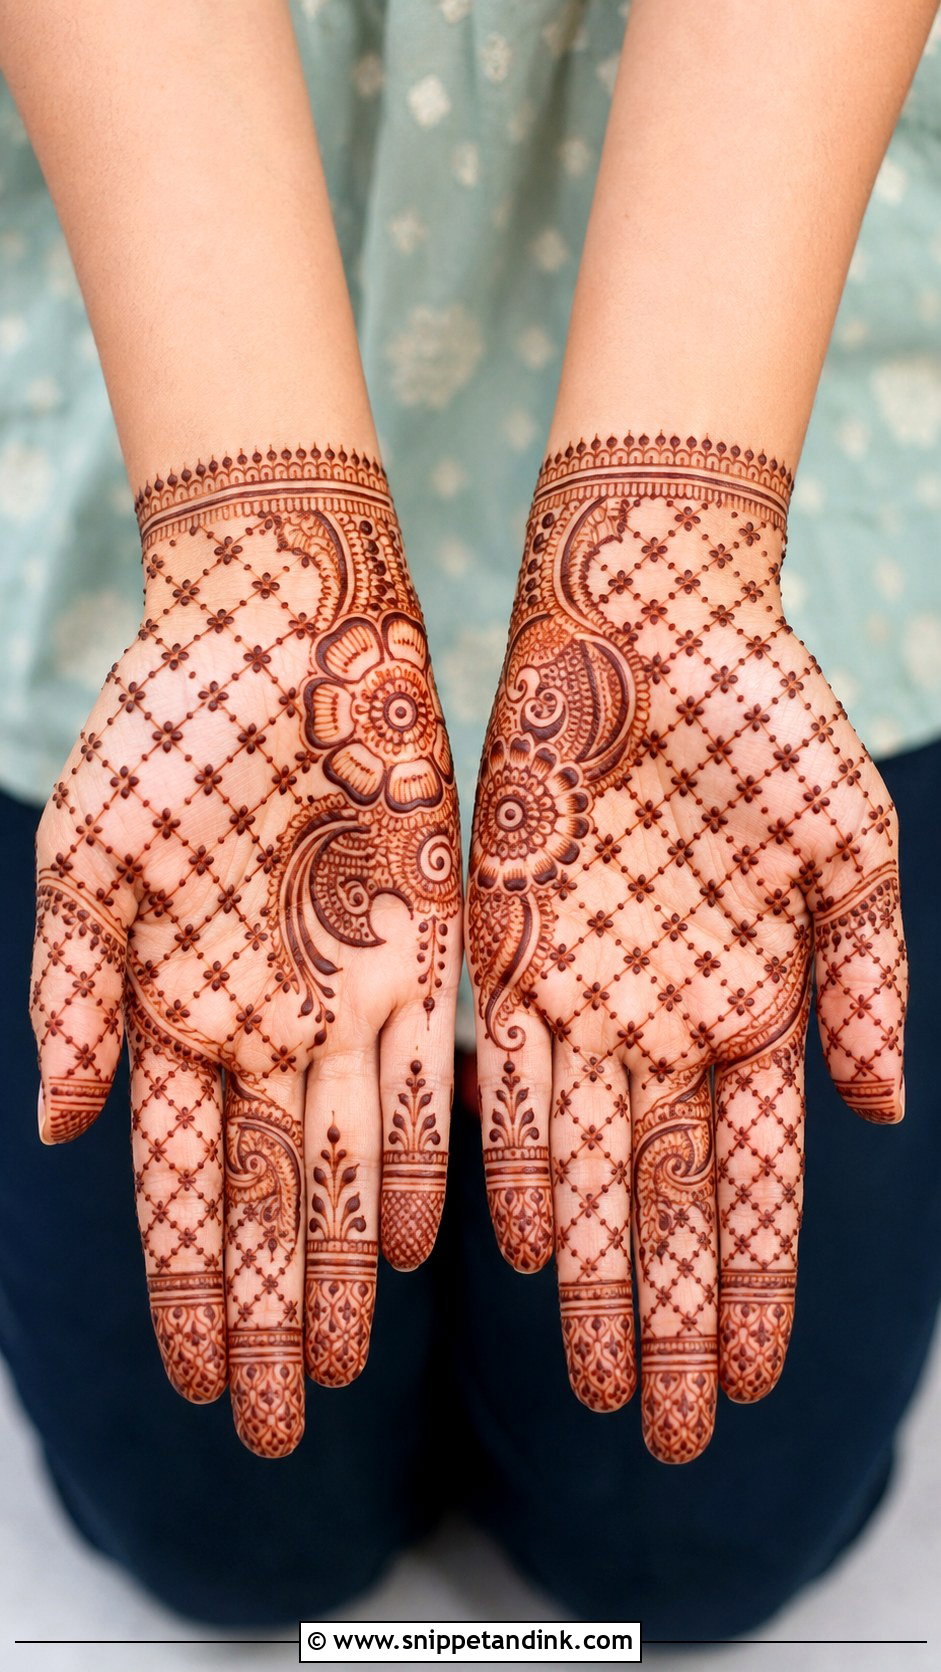
Jaali, the net pattern, looks detailed even in a small dose. I place a small panel on one side of the palm, set a flower or paisley beside it, and give the fingers matching crisscross lines, dots and narrow bands. Keep the squares even and don’t overfill. Tiny dots at the intersections make it look finished. On the palm, net lines spread slightly as they settle, so I space them a little wider than they need to look when wet.
19. Leaf Front Hand Mehndi Design
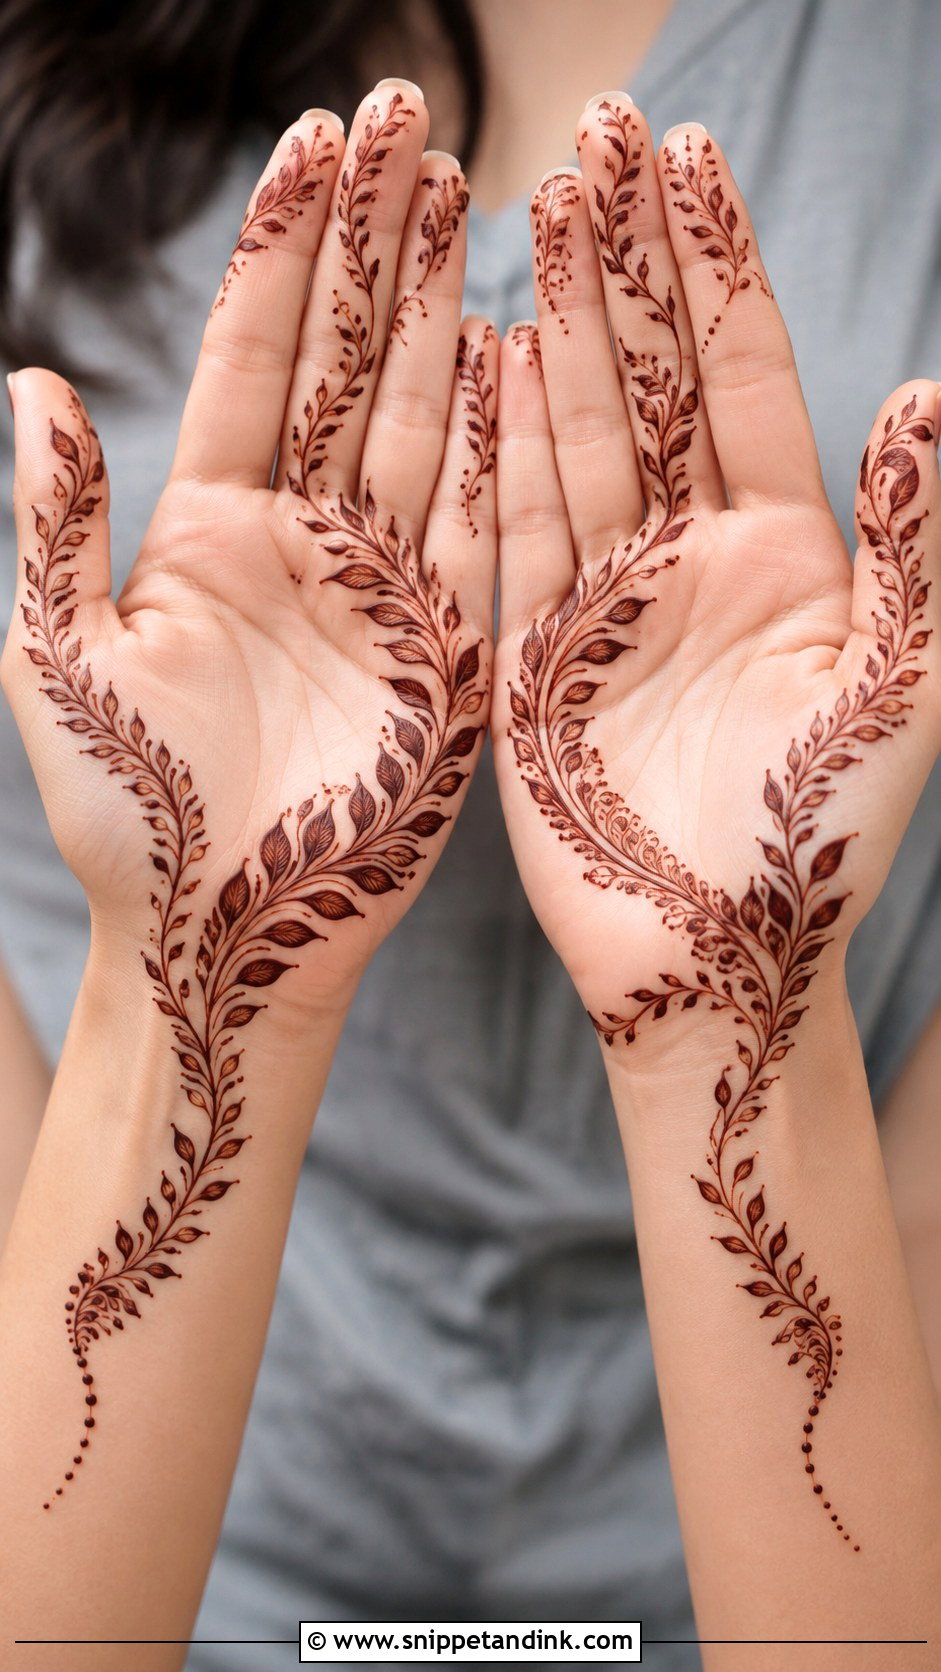
Leaf designs begin with a curved vine from the wrist across the palm toward the fingers, small leaves along it, dots and thin lines as fillers, and leafy tips or small branches on the fingers. Leaves are forgiving, which makes this a strong choice for beginners. I vary the sizes: larger leaves for boldness near the wrist and tiny ones for softness near the fingers. Outdoor celebrations and casual festivals suit it.
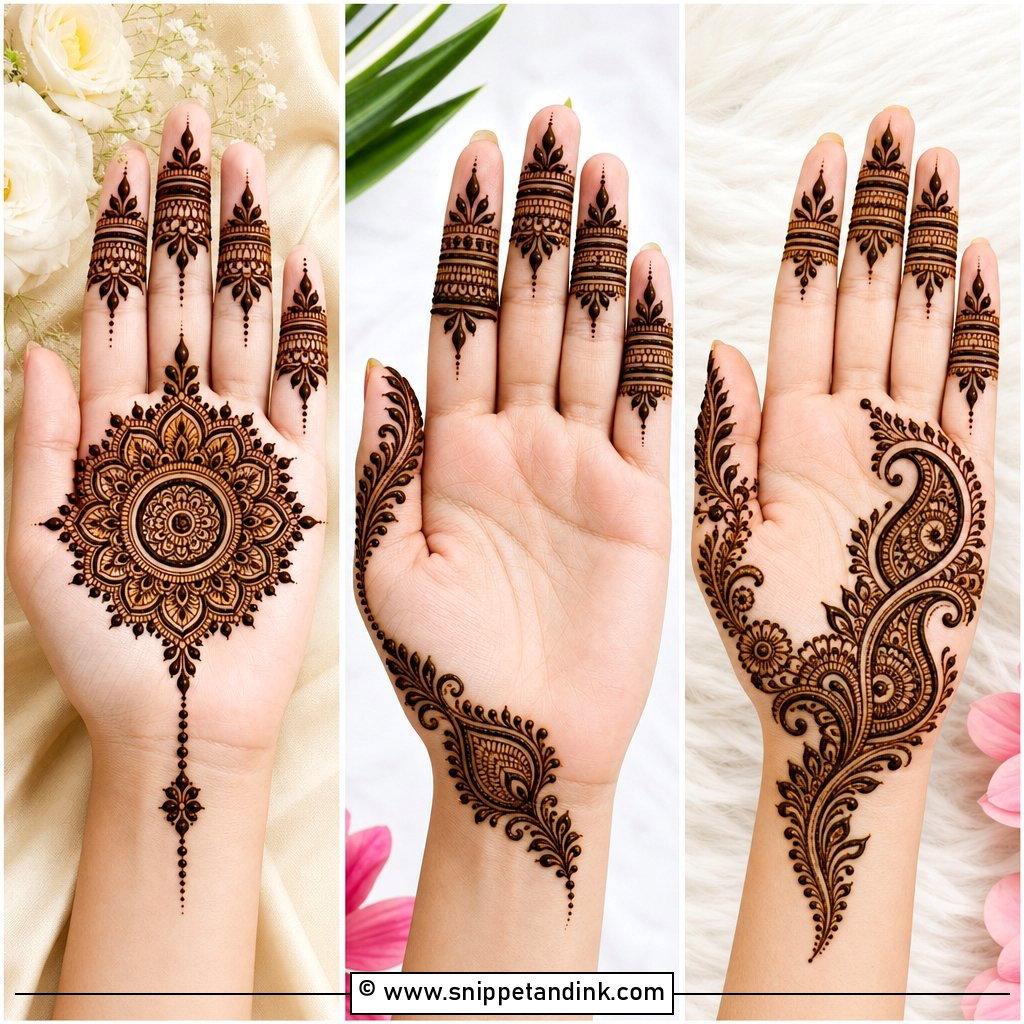
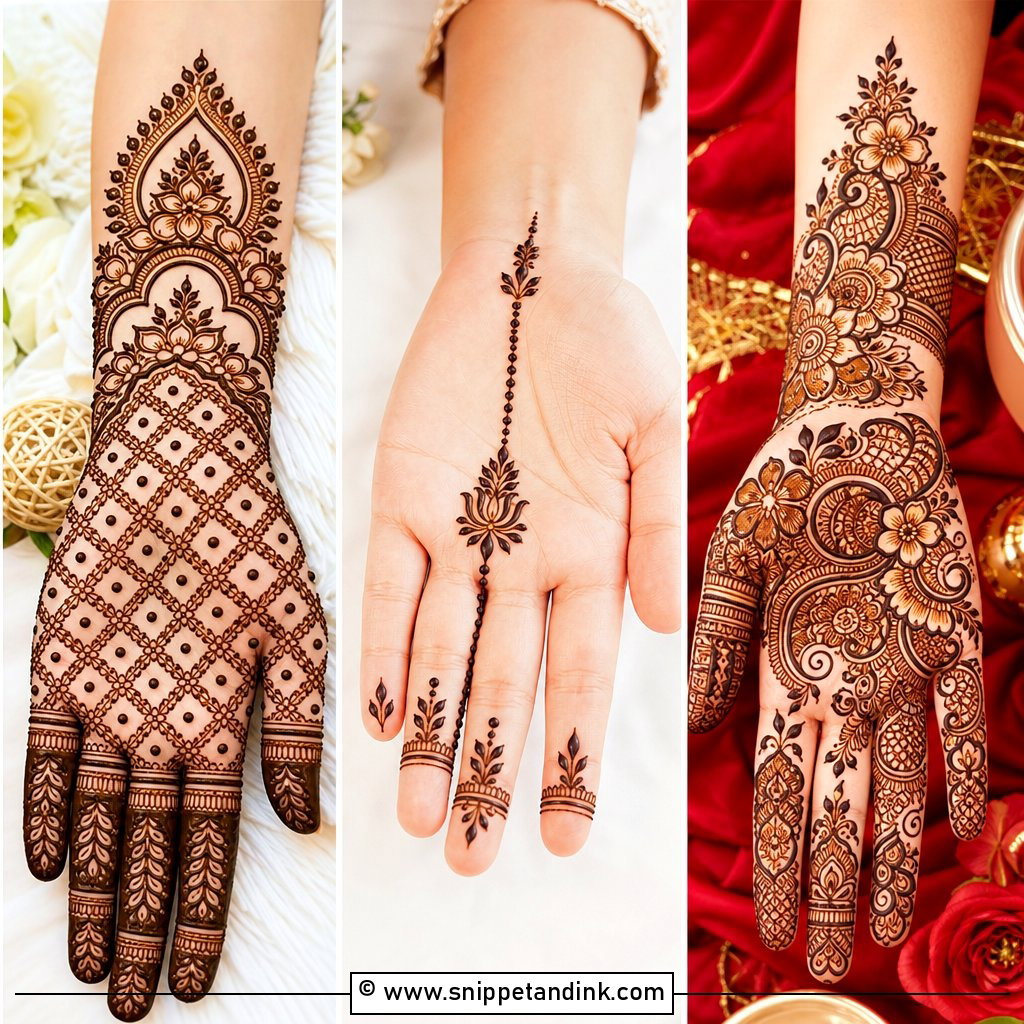
20. Lotus Front Hand Mehndi Design
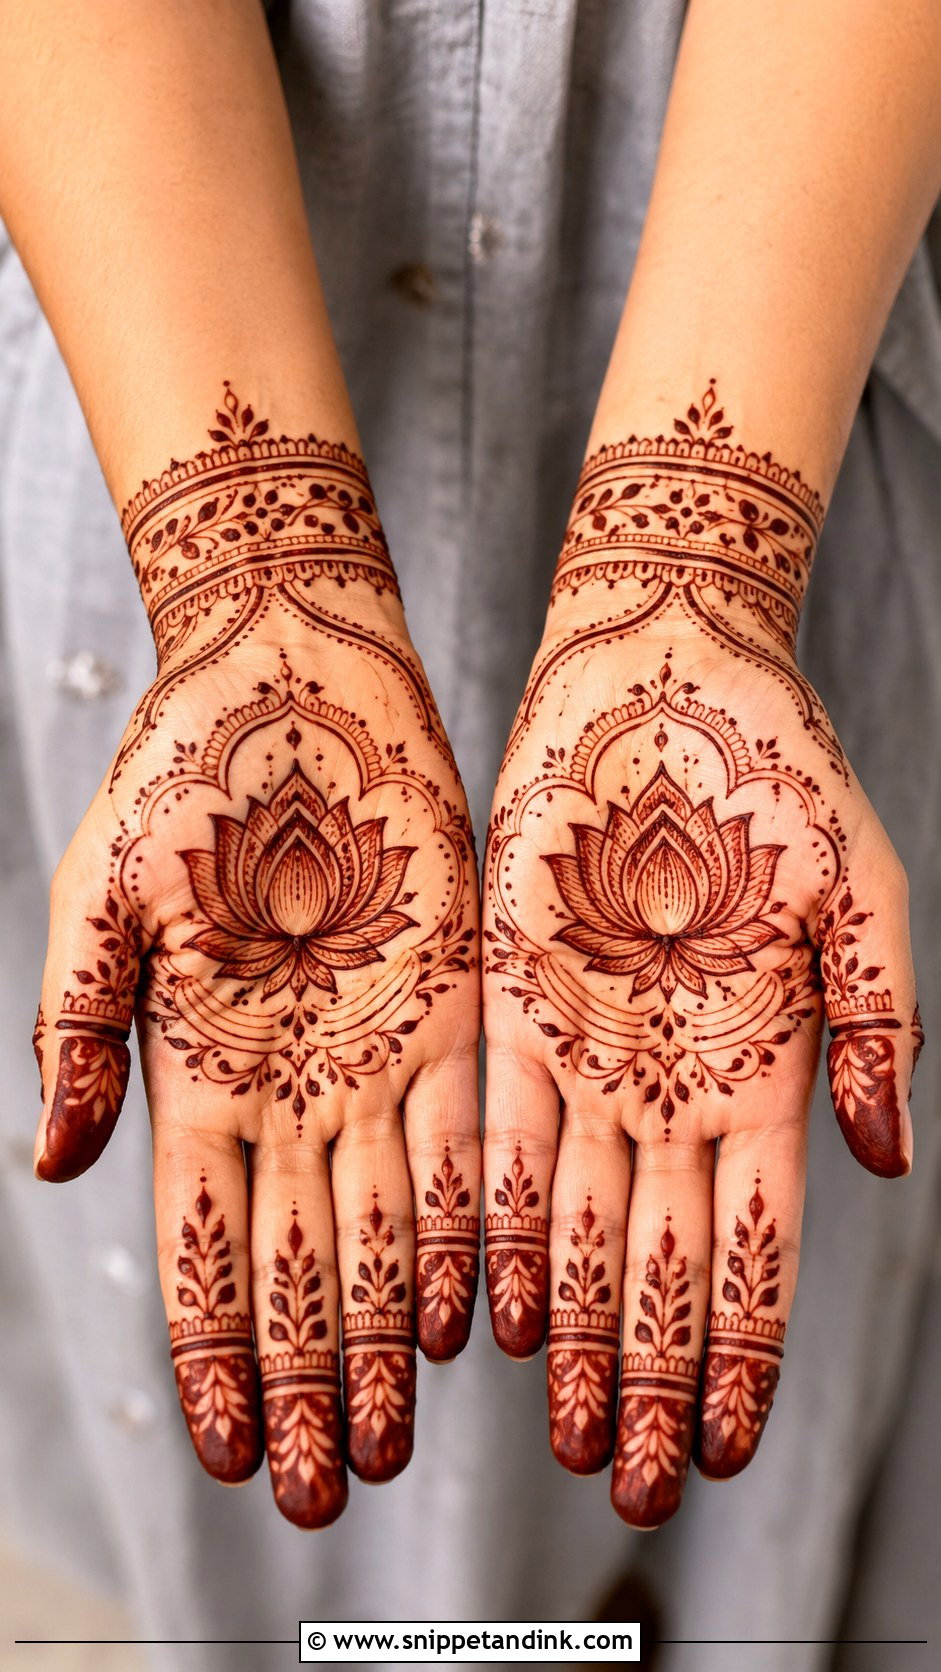
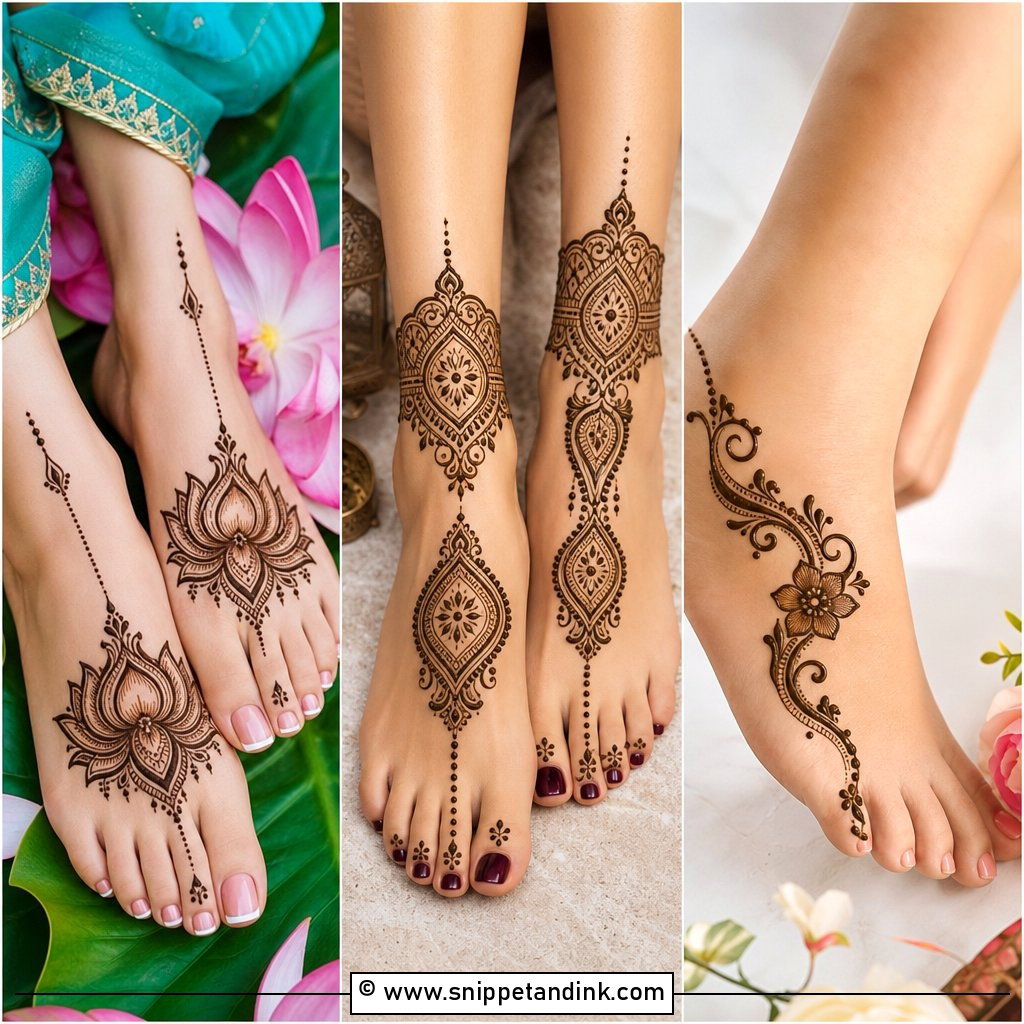
A lotus in the center of the palm or near the wrist, with curved lines spreading outward like ripples on water, gives a traditional look without heavy coverage. Slim petal bands and dotted trails decorate the fingers. The lotus carries meaning in many traditions, which is why it’s popular for cultural celebrations. Keep the petals wide and clear so the flower is still recognizable after the stain darkens, and add a few tiny leaves around it.
21. Peacock Front Hand Mehndi Design
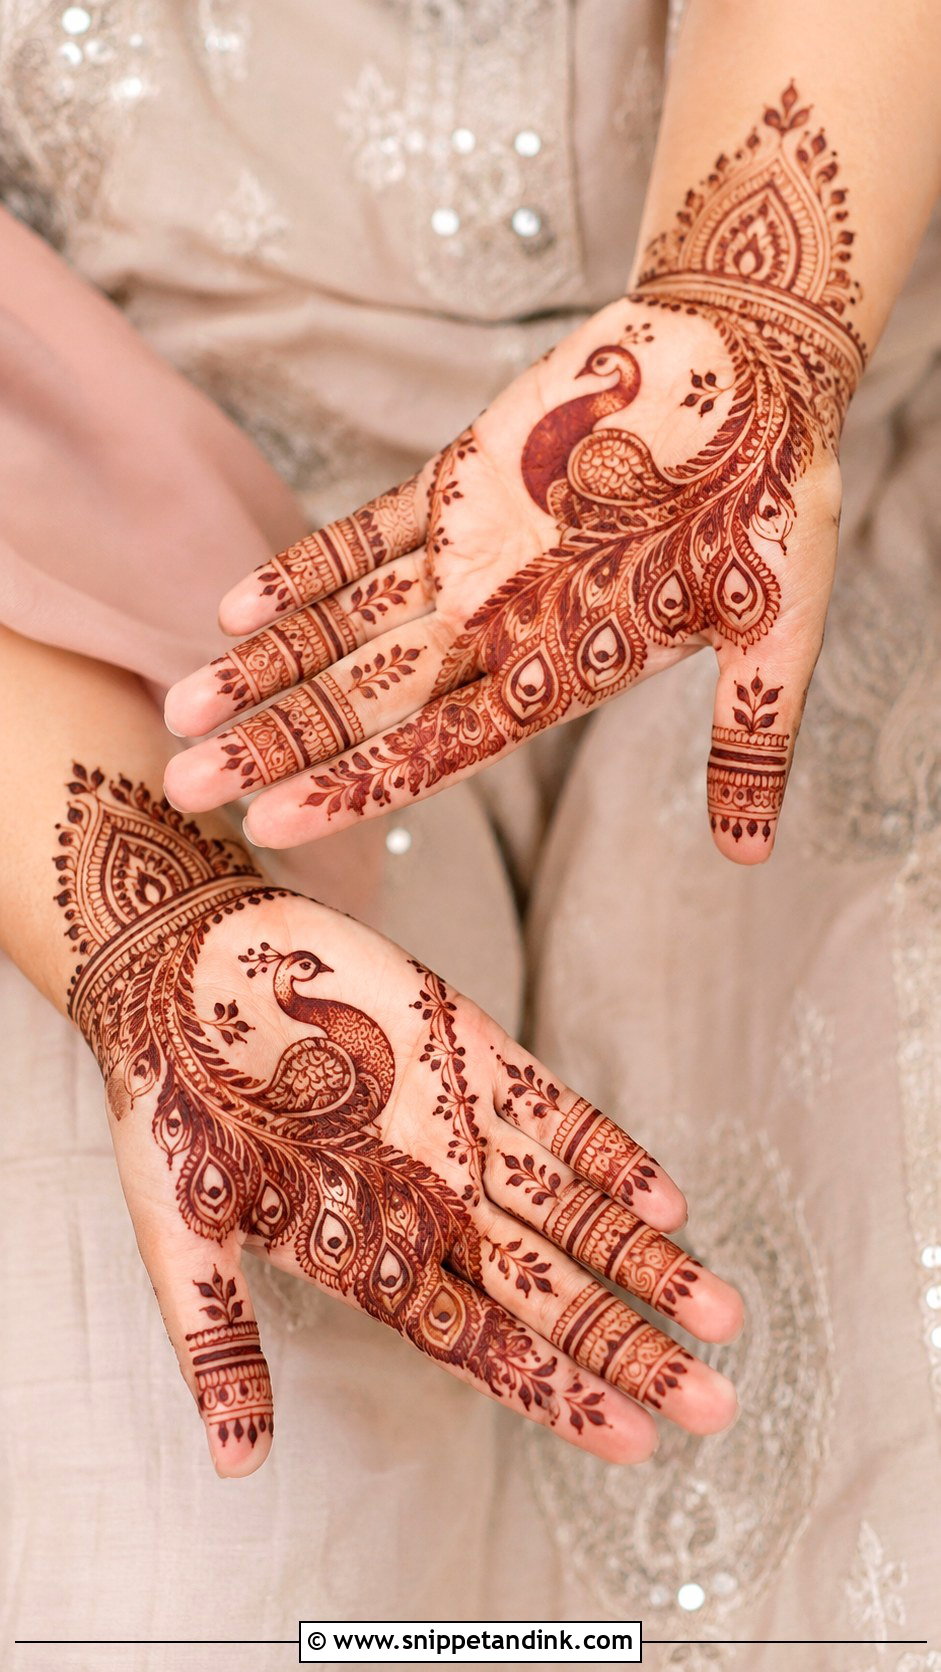
A small peacock body near the wrist or side of the palm, with its feather curve flowing toward the fingers, makes a traditional design that stays light. Paisleys, dots and leaf-like feather details complete it, and the fingers stay lighter with bands and tiny arches. Keep the peacock’s face and neck free of fillers; that silhouette is what makes the bird readable. Weddings, sangeet and family events all suit it.
22. Round Front Hand Mehndi Design
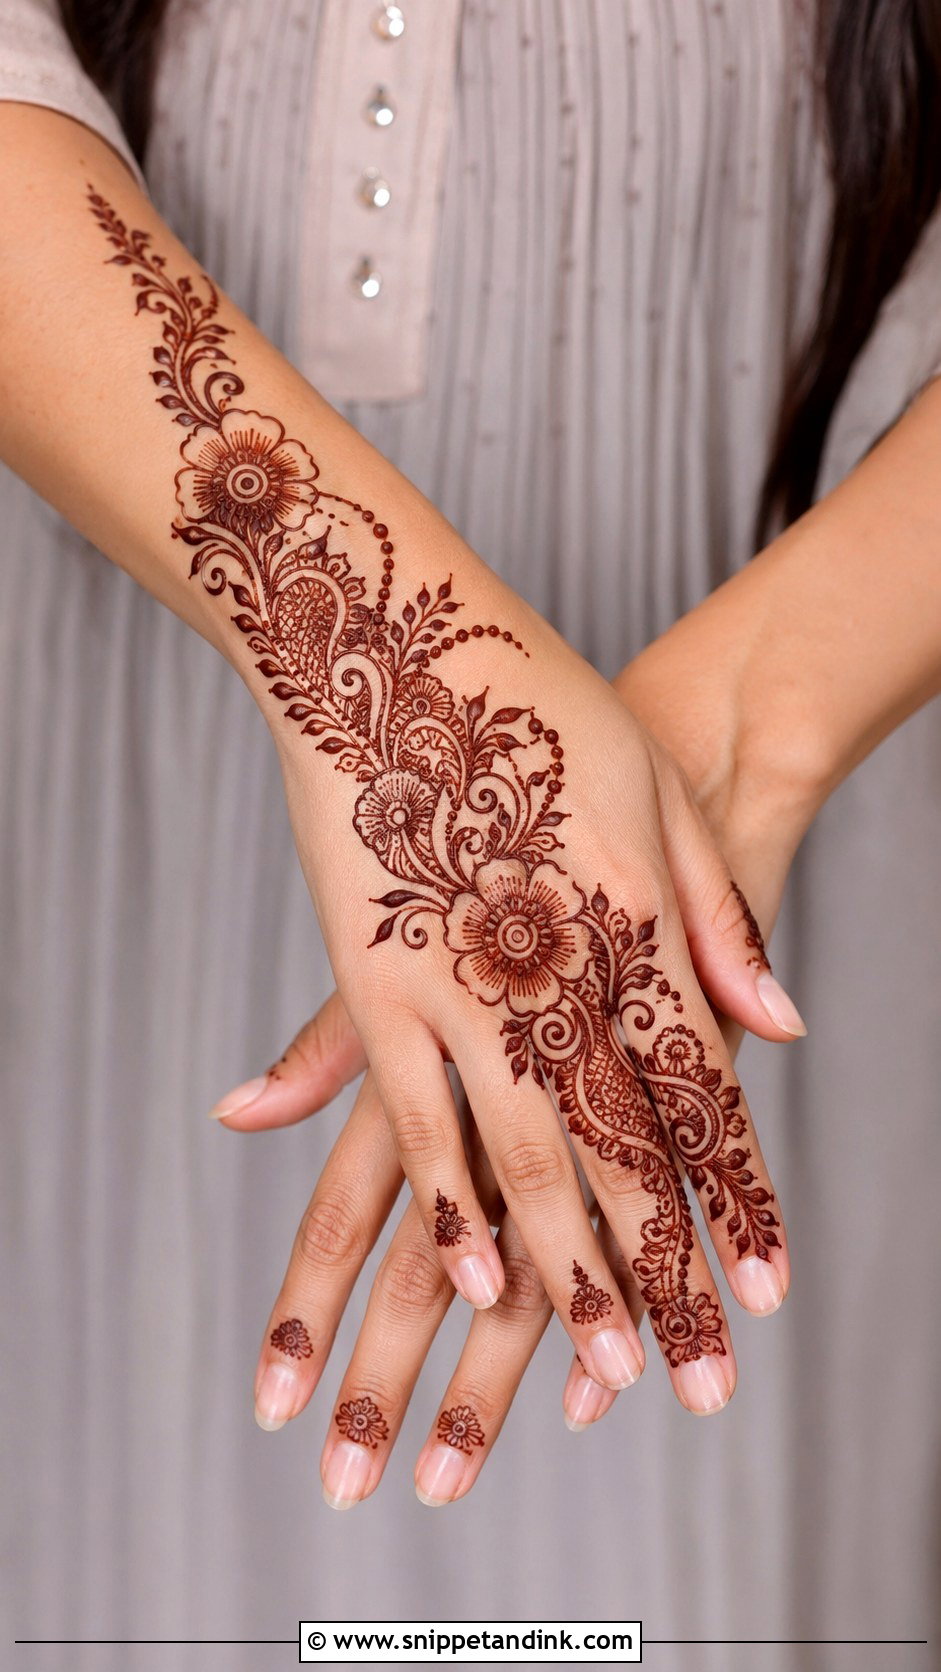
A round motif in the center of the palm, built from petals, dots, rings and fine lines, is the most familiar front-hand design there is. Fingers get simple tips, half circles and small leafy bands, and the wrist a narrow border. It grows from one center point, which makes it beginner-friendly. To make it a little different, I add a small floral trail from the circle toward the thumb or wrist.
23. Diagonal Front Hand Mehndi Design
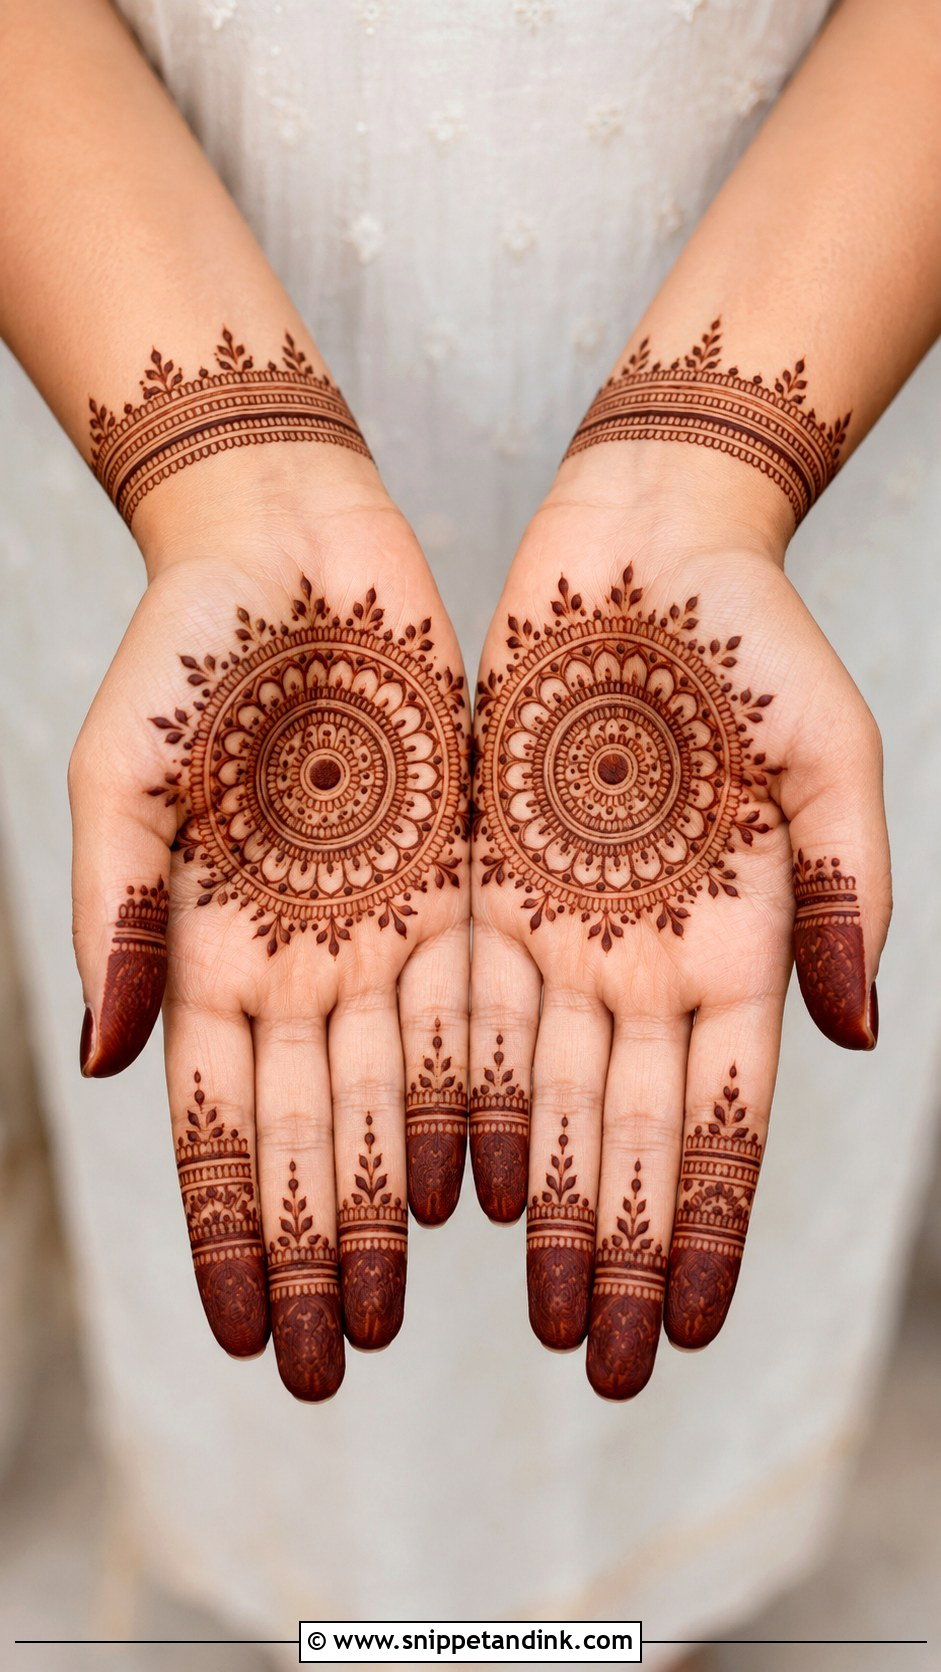
Diagonal designs start at one side of the wrist, cross the palm and end near the index or middle finger, built from florals, paisleys, leaves and dotted curves with open space on both sides. The diagonal flatters most hands and makes the fingers look longer. It’s also easier than a full hand, since you’re following one path. The line must stay smooth, so I lightly dot the route across the palm before drawing any motif on it.
24. Side Front Hand Mehndi Design
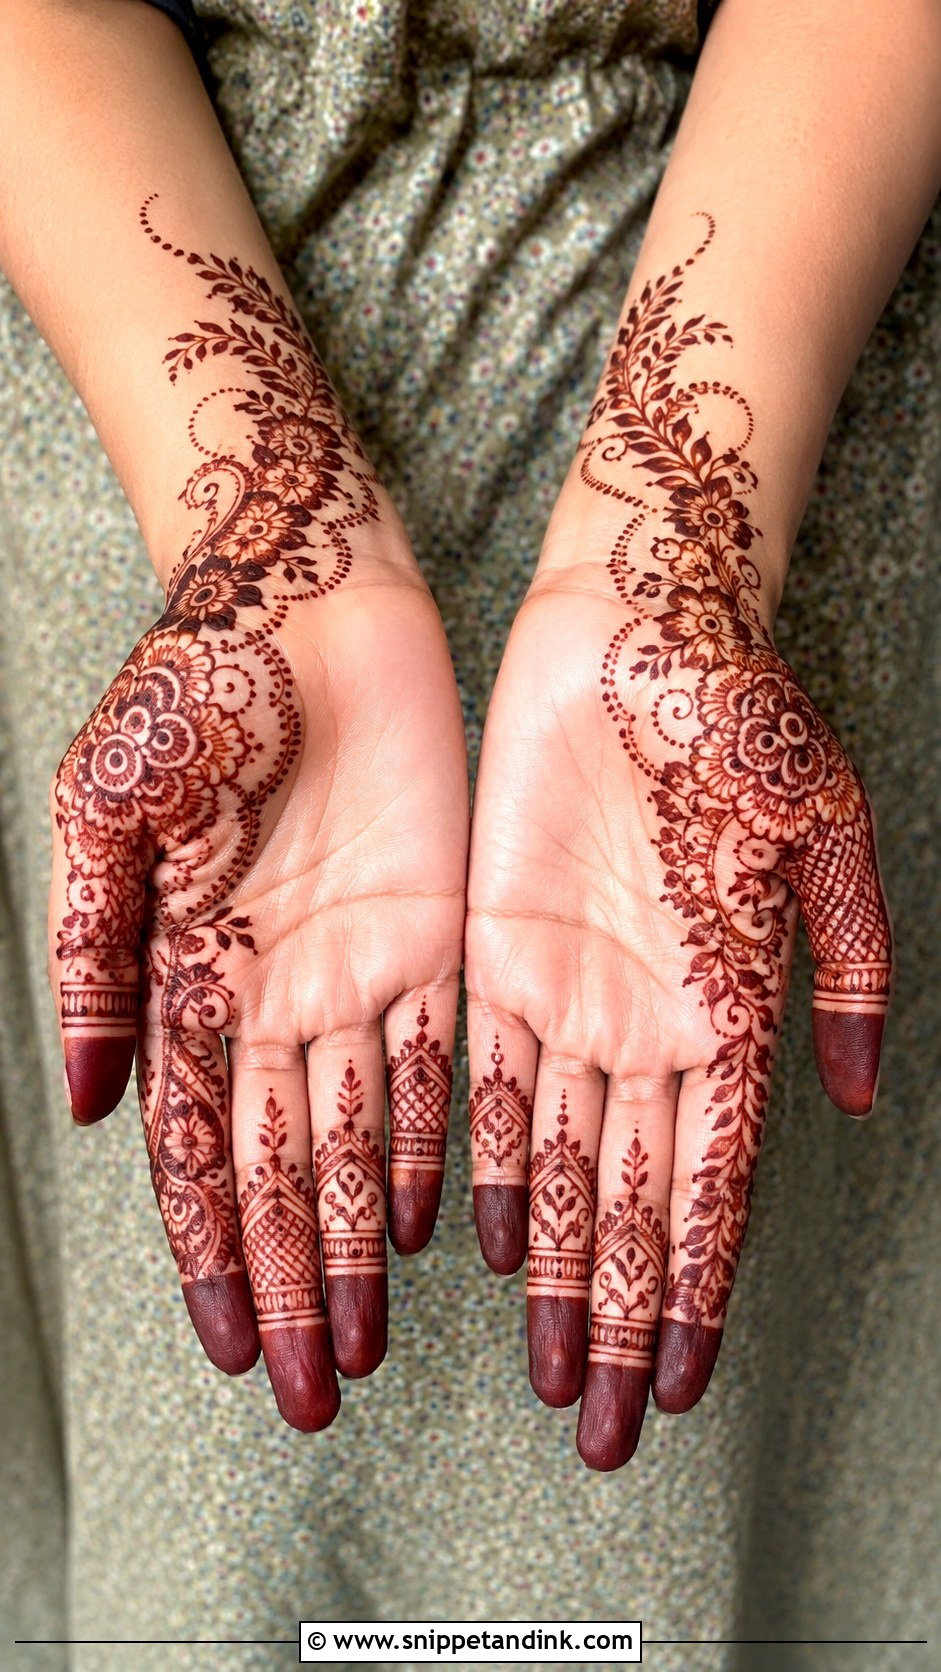
Side designs decorate one edge of the palm, usually the thumb side or the outer edge, and leave the center clean. A floral vine, paisley chain or leafy trail runs from the wrist to the fingers, and the fingers on that side are fuller while the others stay minimal. A small mandala at the base of the thumb adds a twist. The outer edge of the palm rubs on tables and bags, so keep that hand still and clear of surfaces while it dries.
25. Shaded Front Hand Mehndi Design
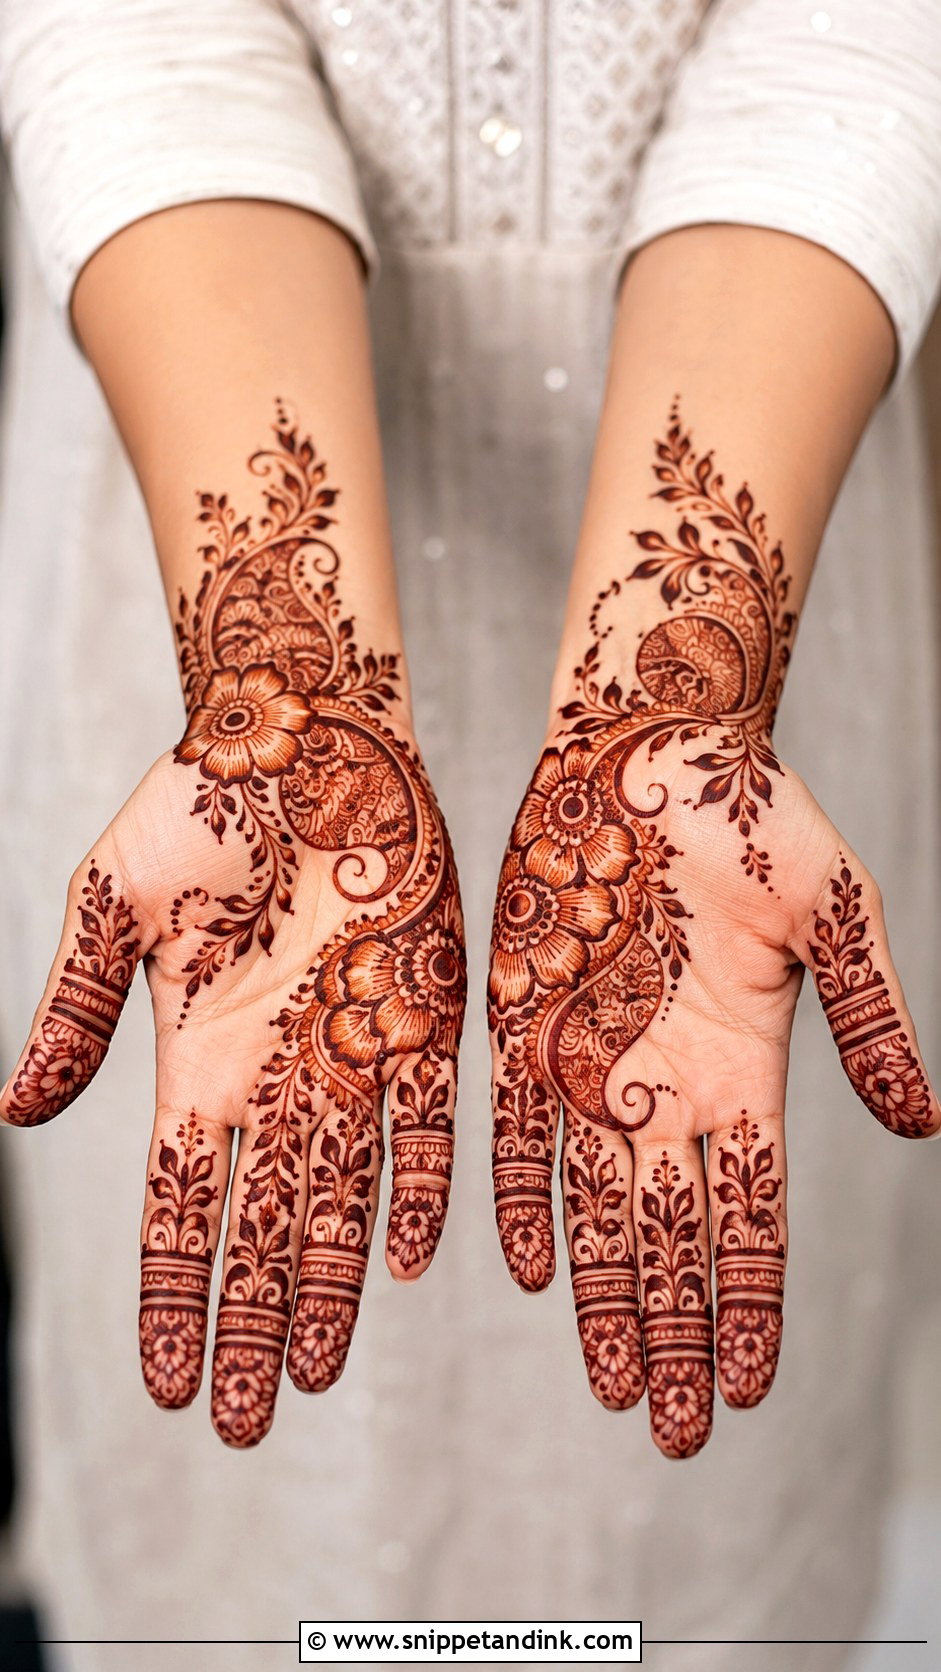
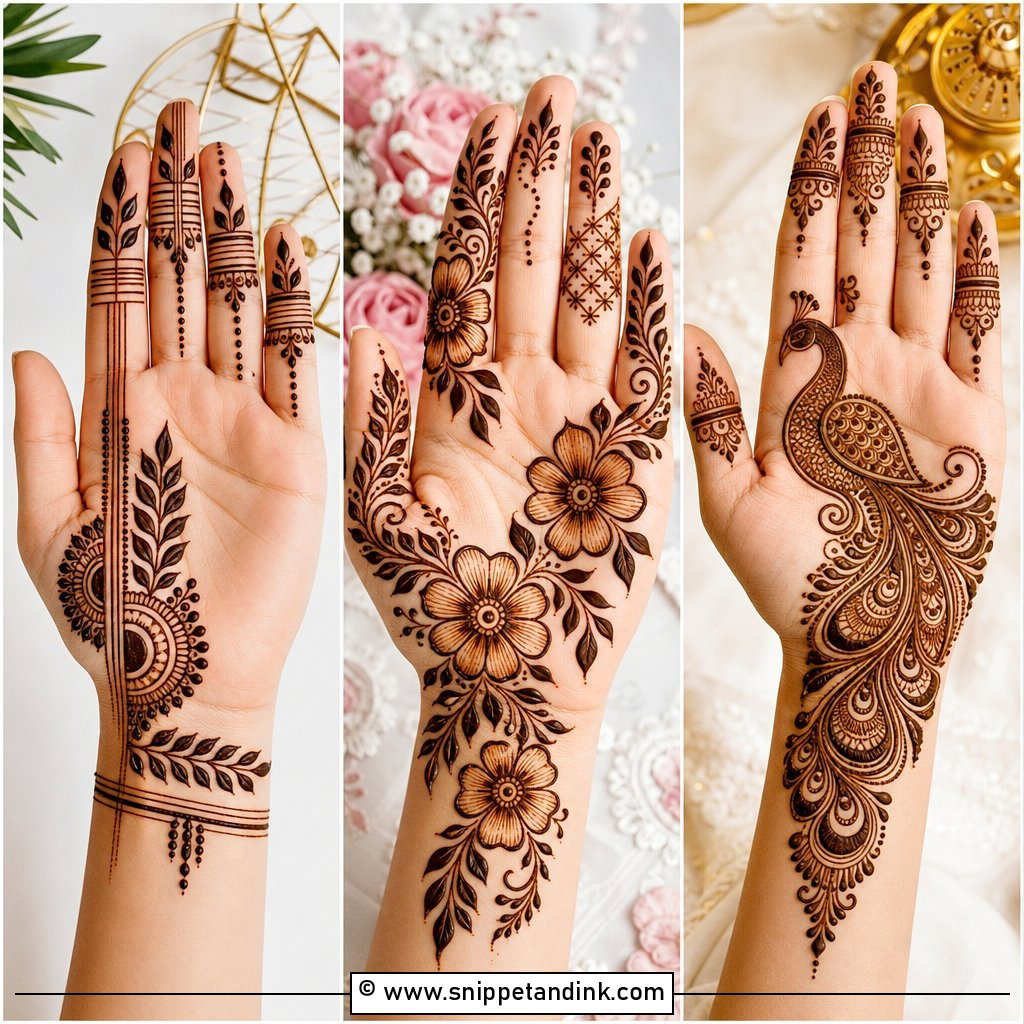
Shaded front-hand henna has gentle shading inside petals, leaves and paisleys. A central floral trail on the palm with simple finger bands is the base. Shading adds depth without many tiny fillers. Keep it even and use thin strokes, never dark blocks; on the palm, a block of paste stains so deeply that it reads as a blot rather than shadow. Bridesmaids and modern traditional outfits suit it.
26. Net Front Hand Mehndi Design
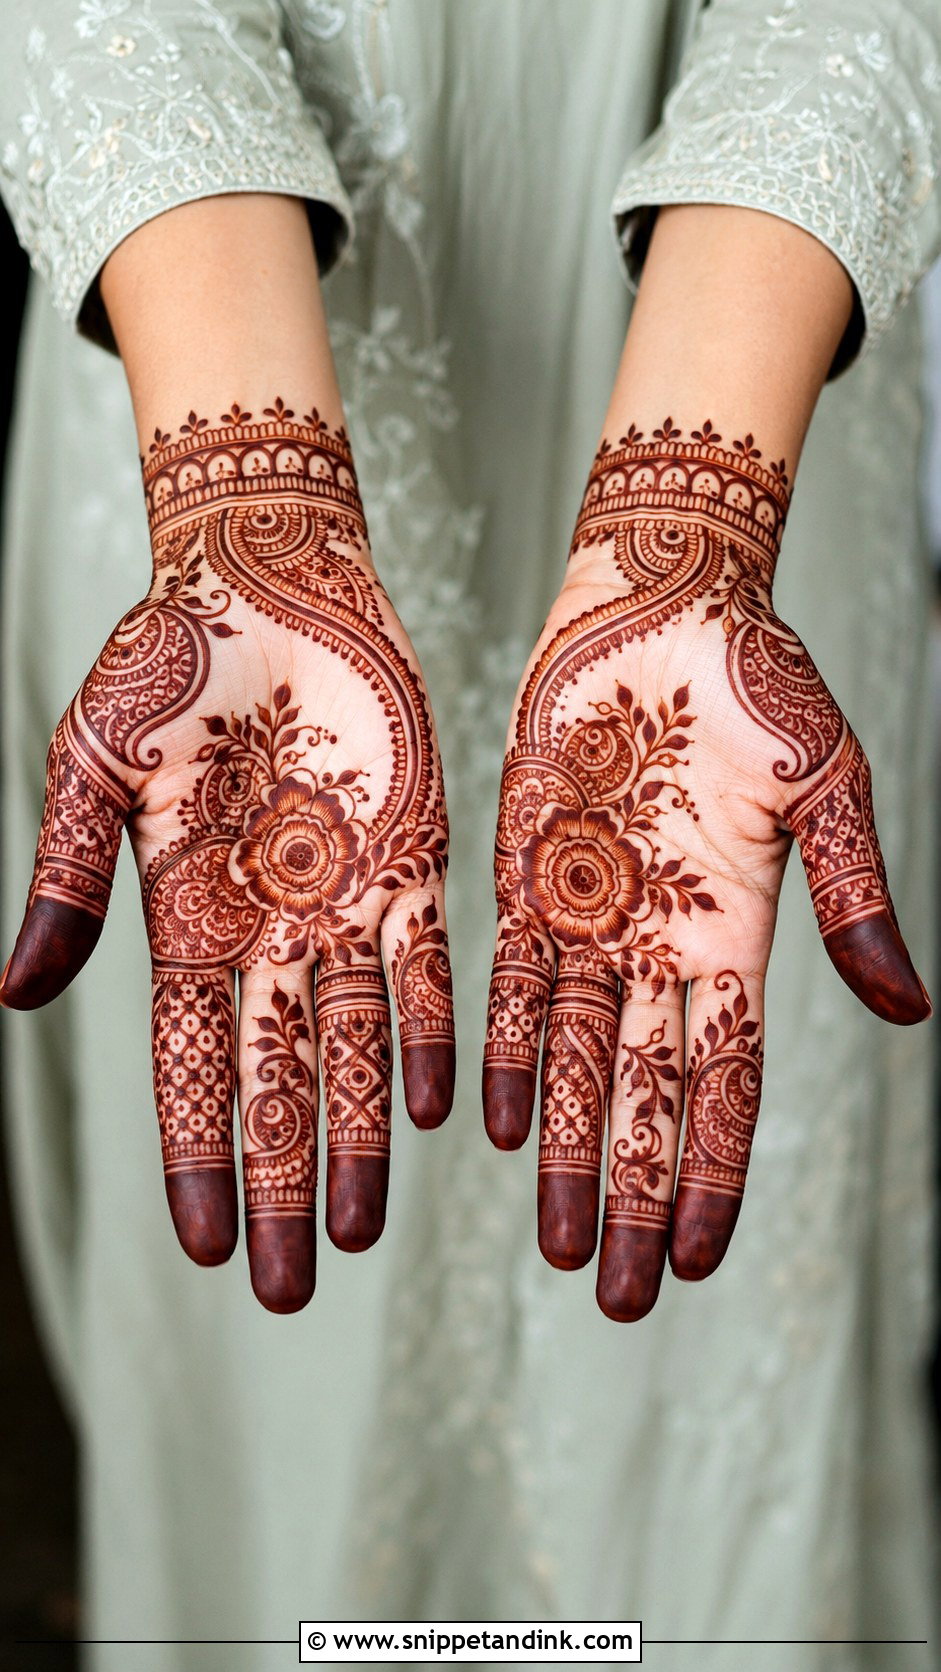
Net designs repeat crisscross lines across a panel of the palm, with a flower at one corner and matching finger grids. The wrist gets a slim border or bracelet. It fills the hand without complicated motifs and resembles delicate fabric, which suits weddings. Straight lines and even spacing are everything. I draw all lines in one direction, pause, then cross them, which stops the second set from dragging the first. Dots at the corners finish it.
27. Bridal Simple Front Hand Mehndi Design
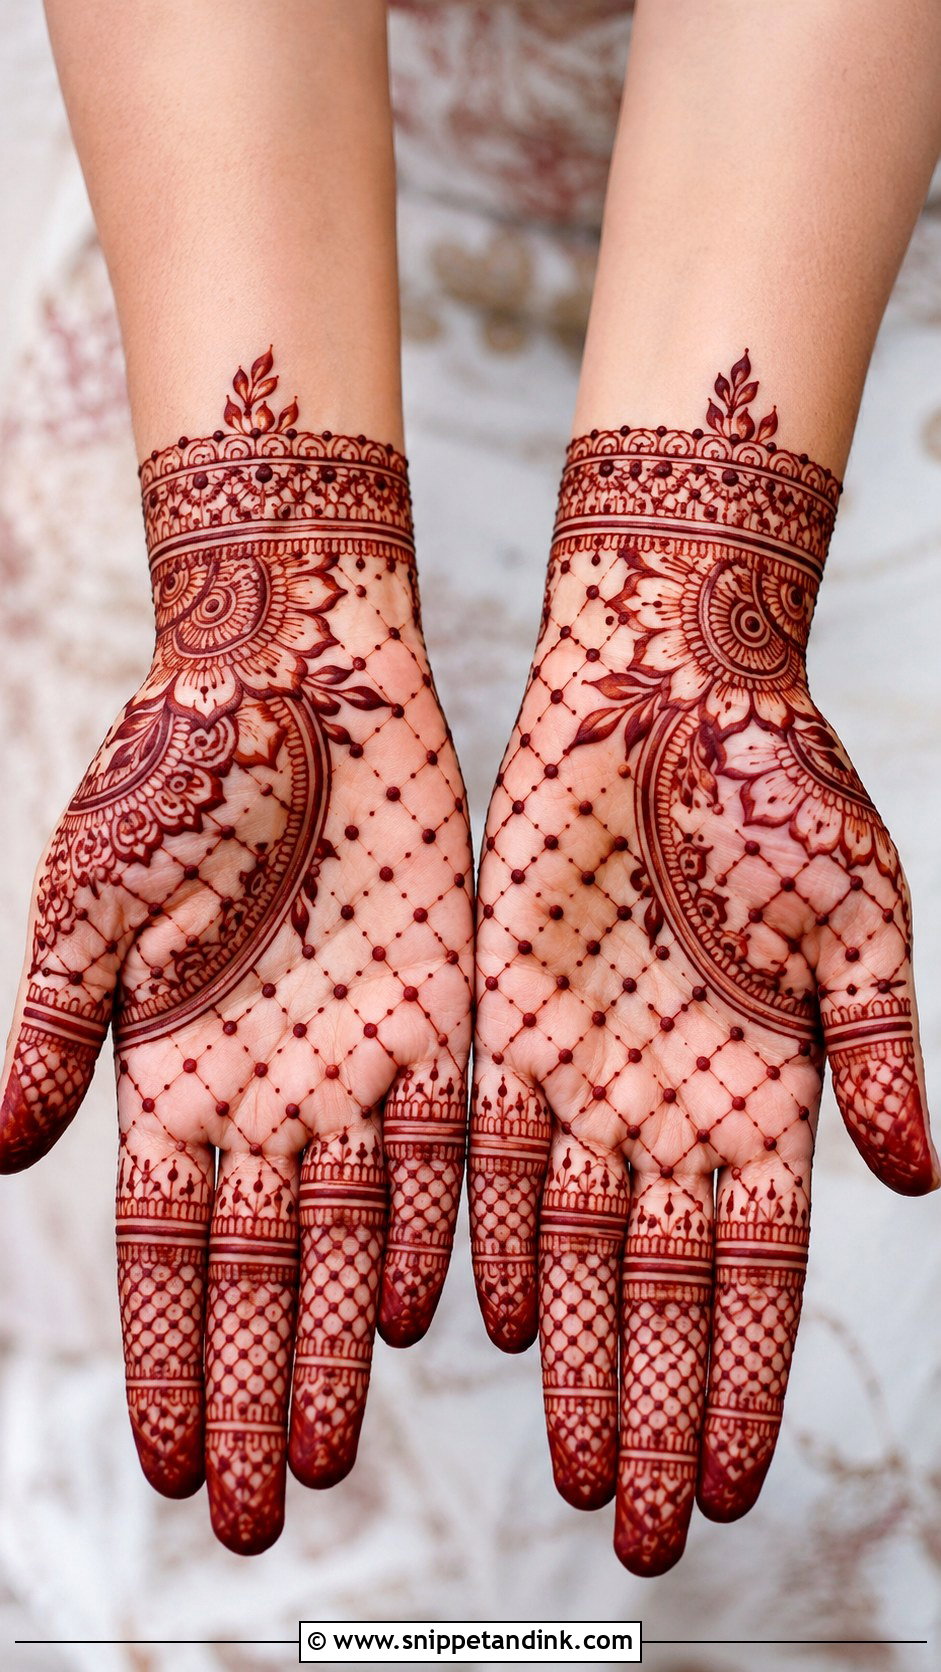
For a bride who wants elegance without heavy coverage, I draw a central mandala, small paisleys, floral wrist bands and fully decorated fingers. A tiny personal detail such as initials can be tucked in, but the overall layout stays clean. To keep it bridal, I make the wrist area slightly richer and fill the fingers neatly, with open space around the palm’s main motif. Bridal paste stays on overnight, so wrap the hands and sleep carefully. Intimate weddings and engagements suit it.
28. Festival Front Hand Mehndi Design
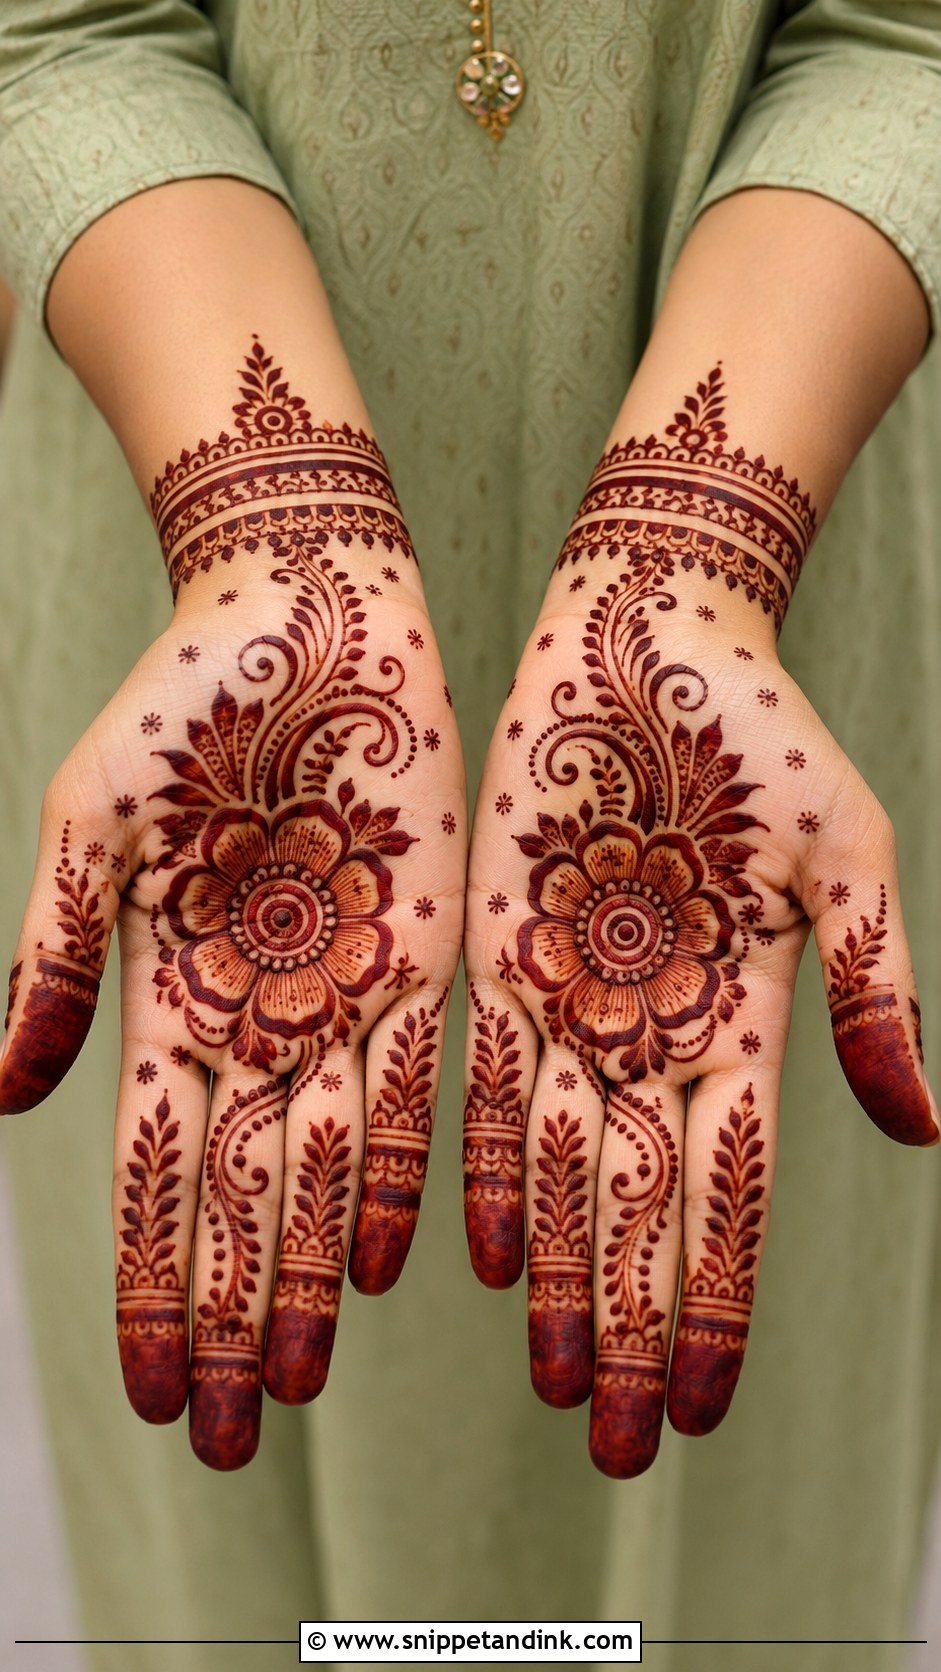
Festival front hand mehndi design work needs to be quick: a bold palm flower, dotted vines, leafy finger details and a simple wrist border. It works for Eid, Diwali, Karva Chauth, Teej and family celebrations. Open spaces keep it fresh and let the stain stand out. Tiny star-like dots, curved borders or layered petals add a festive note. Apply it a day or two before the festival so the color peaks on time.
29. Eid Front Hand Mehndi Design
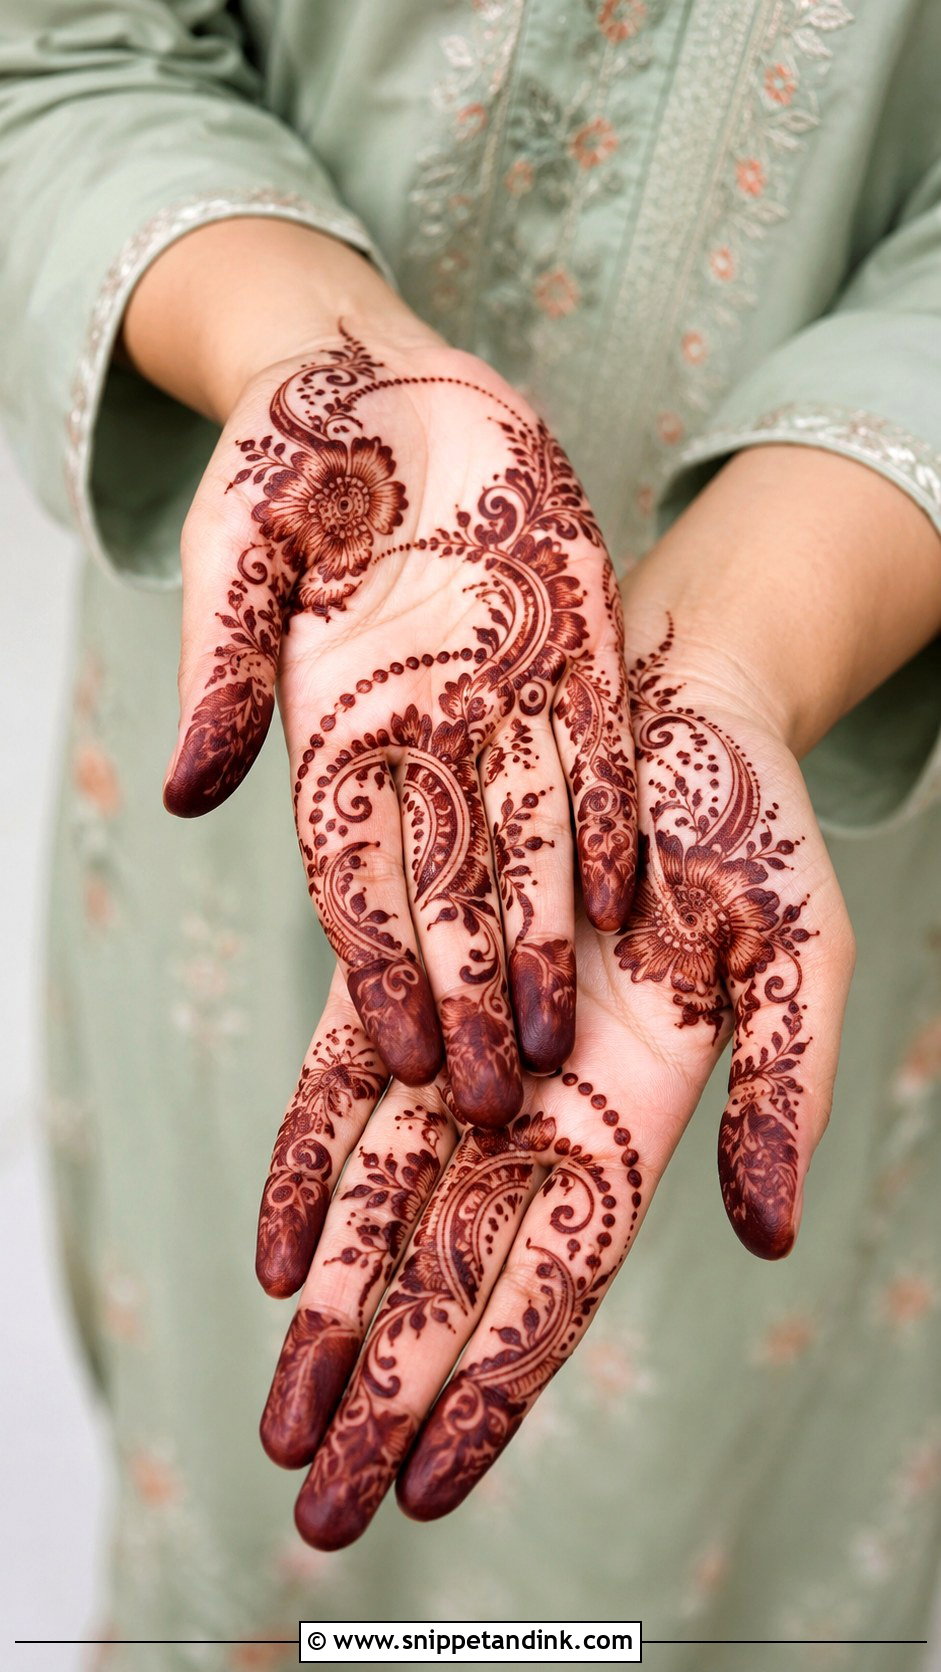
An Arabic-inspired trail suits Eid because it doesn’t crowd the palm. Large flowers, curved leaves and dotted lines move from the wrist toward the fingers, with lightly filled fingertips or slim bands. It leaves enough open skin to sit well with festive outfits and jewelry. A small crescent curve can be worked in subtly. Keep the flow soft and airy, and get it on the night before so the stain has darkened by morning prayers.
30. Wedding Guest Front Hand Mehndi Design
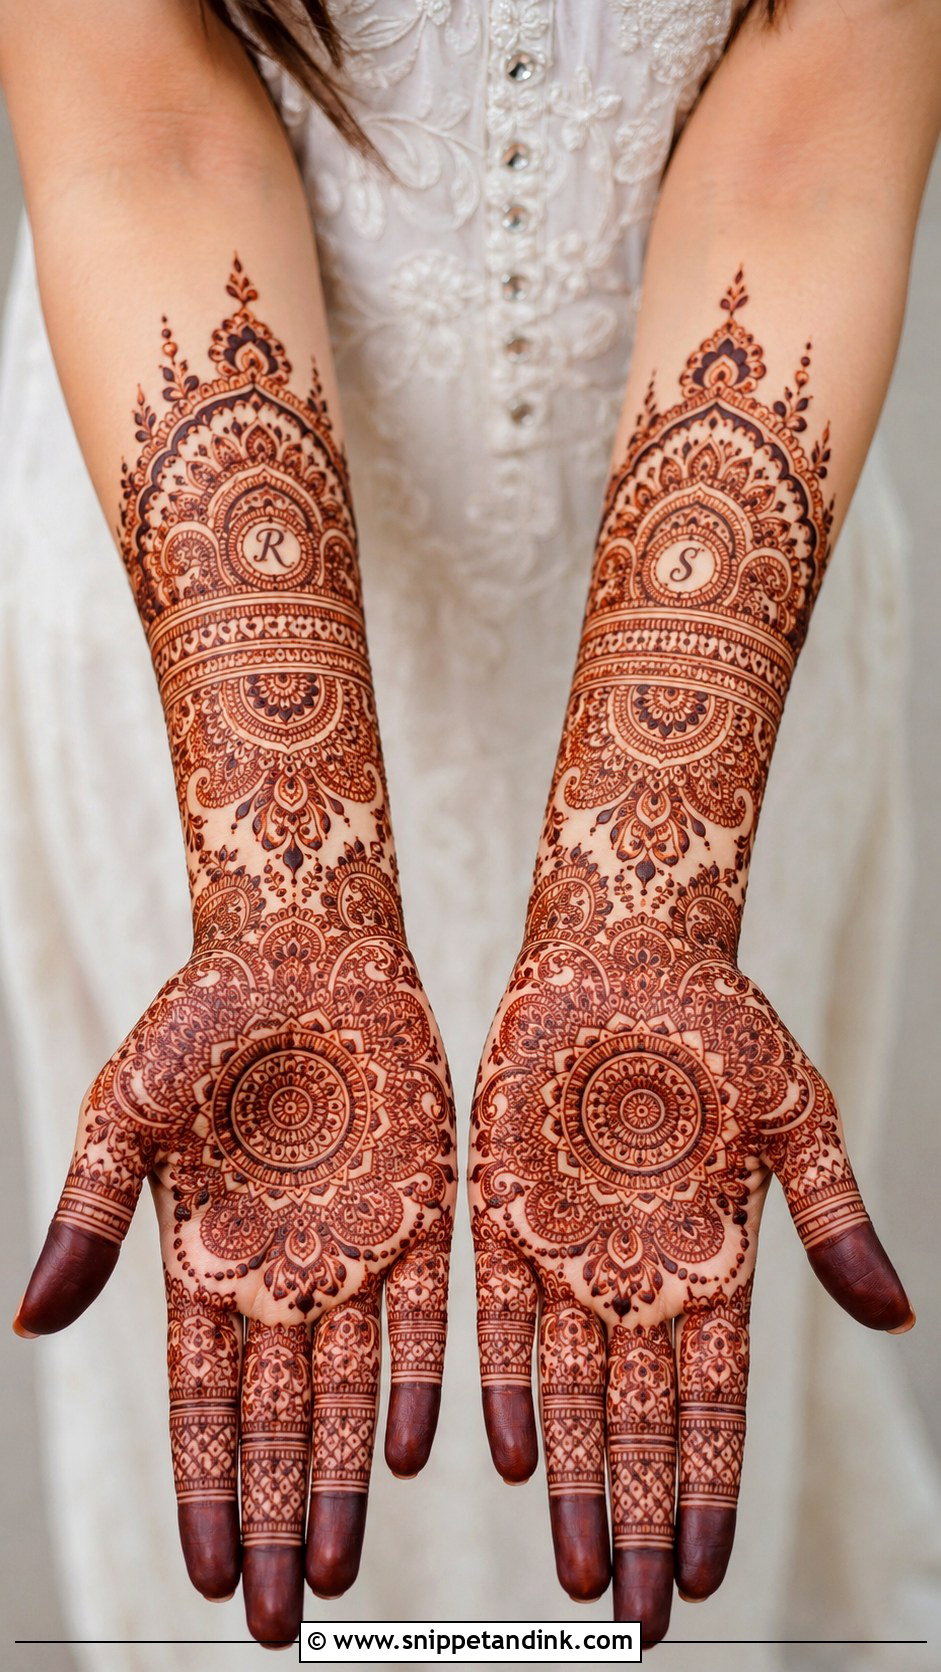
Guests should look polished but never bridal-heavy. I suggest a half-filled palm with florals, paisleys and a neat finger pattern, a bracelet band at the wrist and part of the palm left open. It looks right at ceremonies, receptions and in family photos, and it works for bridesmaids and close relatives too. Choose one statement motif, a rose or a peacock feather, and keep the rest lighter. The bride’s hands should always be the fullest in the room.
31. Beginner Front Hand Mehndi Design
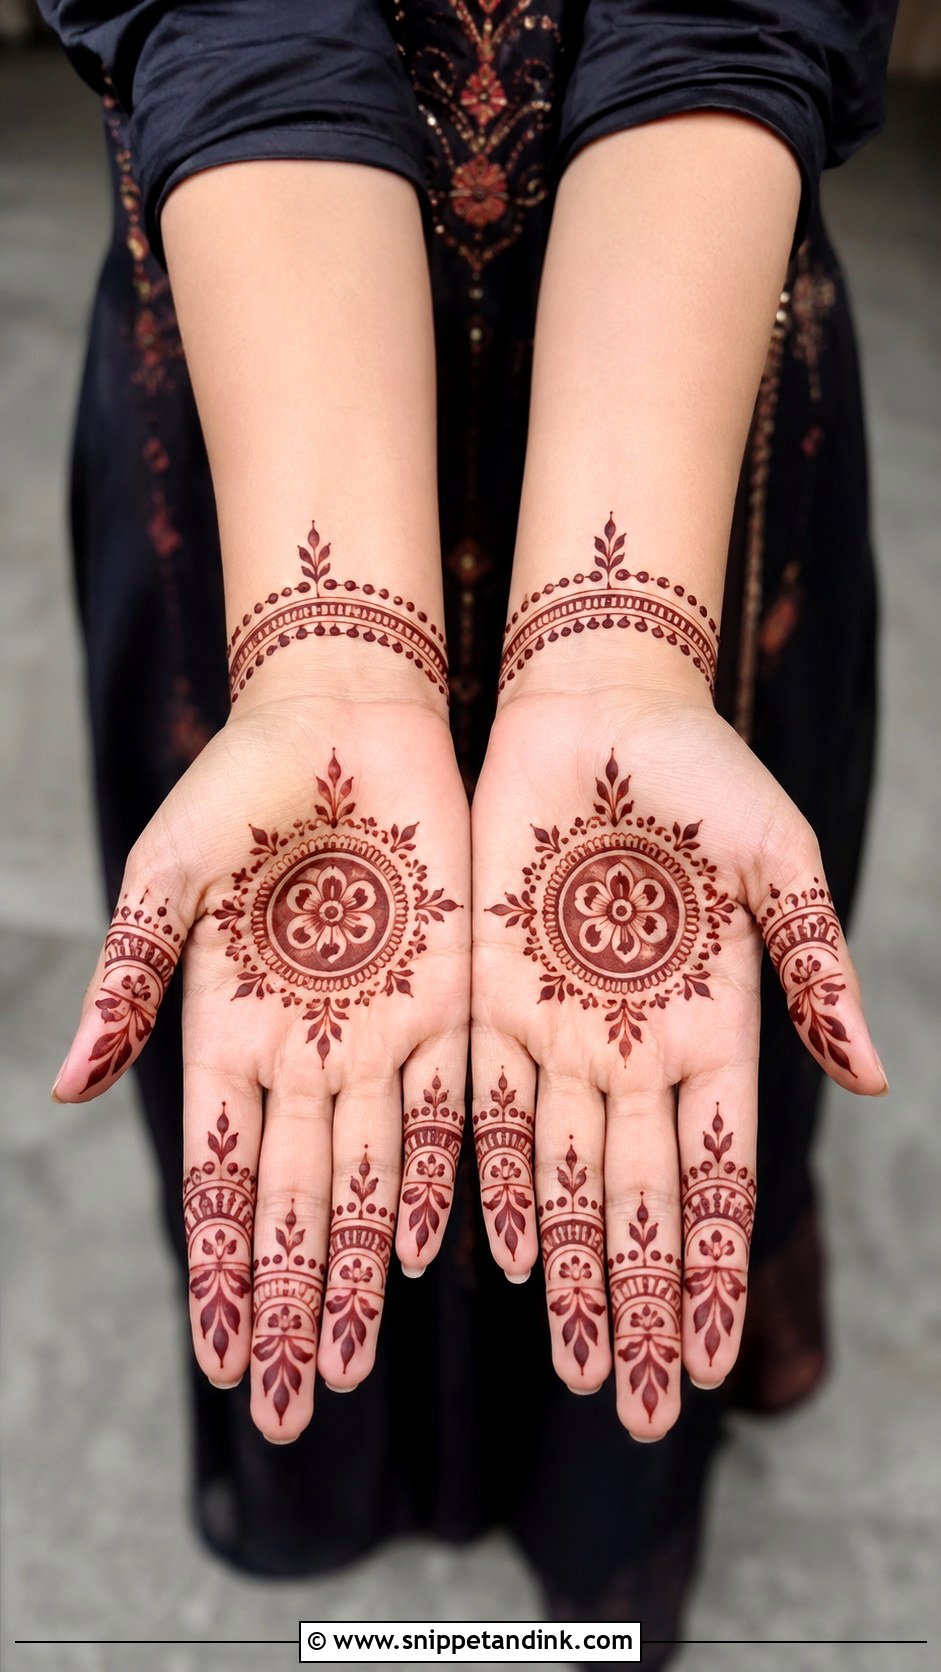
Beginners need shapes that still add up to a complete look. A round flower or mandala in the palm, dots, small leaves and curved lines around it, easy bands and tiny arches on each finger, and one curved wrist border. This layout teaches spacing, pressure and symmetry without overwhelm. Skip fine fillers for now. Clear outlines and repeated shapes always beat rushed, crowded details.
32. Kids Front Hand Mehndi Design
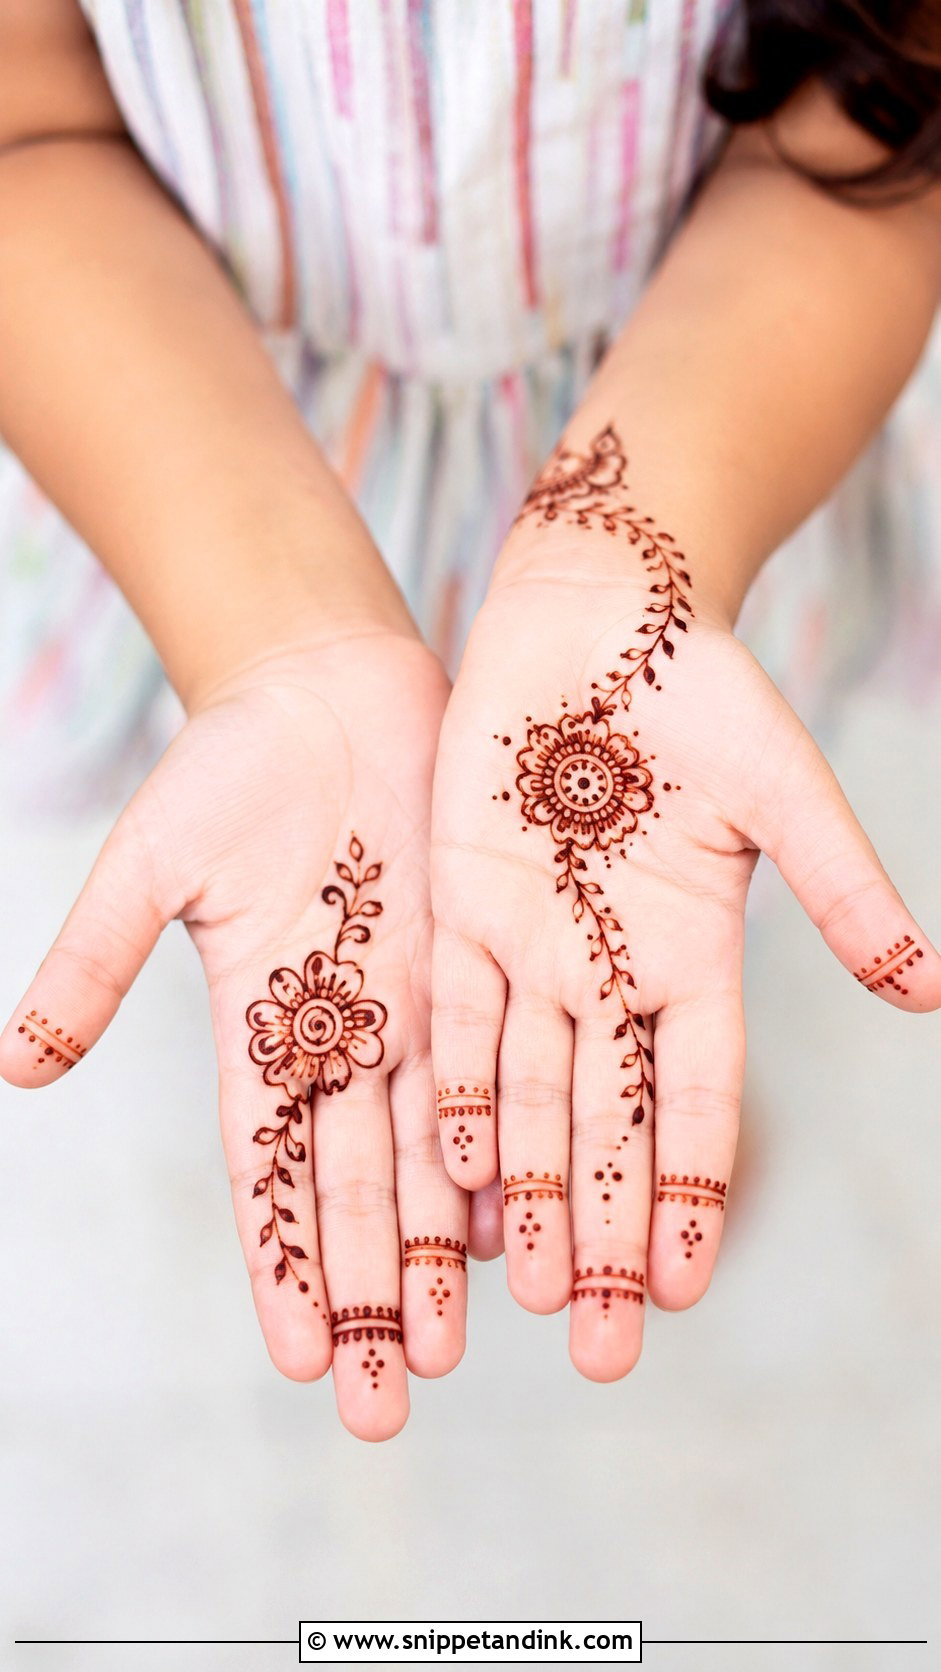
Kids front hand mehndi design work should be finished in a few minutes: a small flower, heart-like petals, a simple mandala or a leafy trail on the palm, with tiny dots, rings or short lines on the fingers and a very light wrist. Children’s palms sweat and they touch everything, so keep it small and let it dry before they play. Use only natural henna, never black henna. Cheerful shapes in a clean layout suit little hands best.
33. Teen Front Hand Mehndi Design
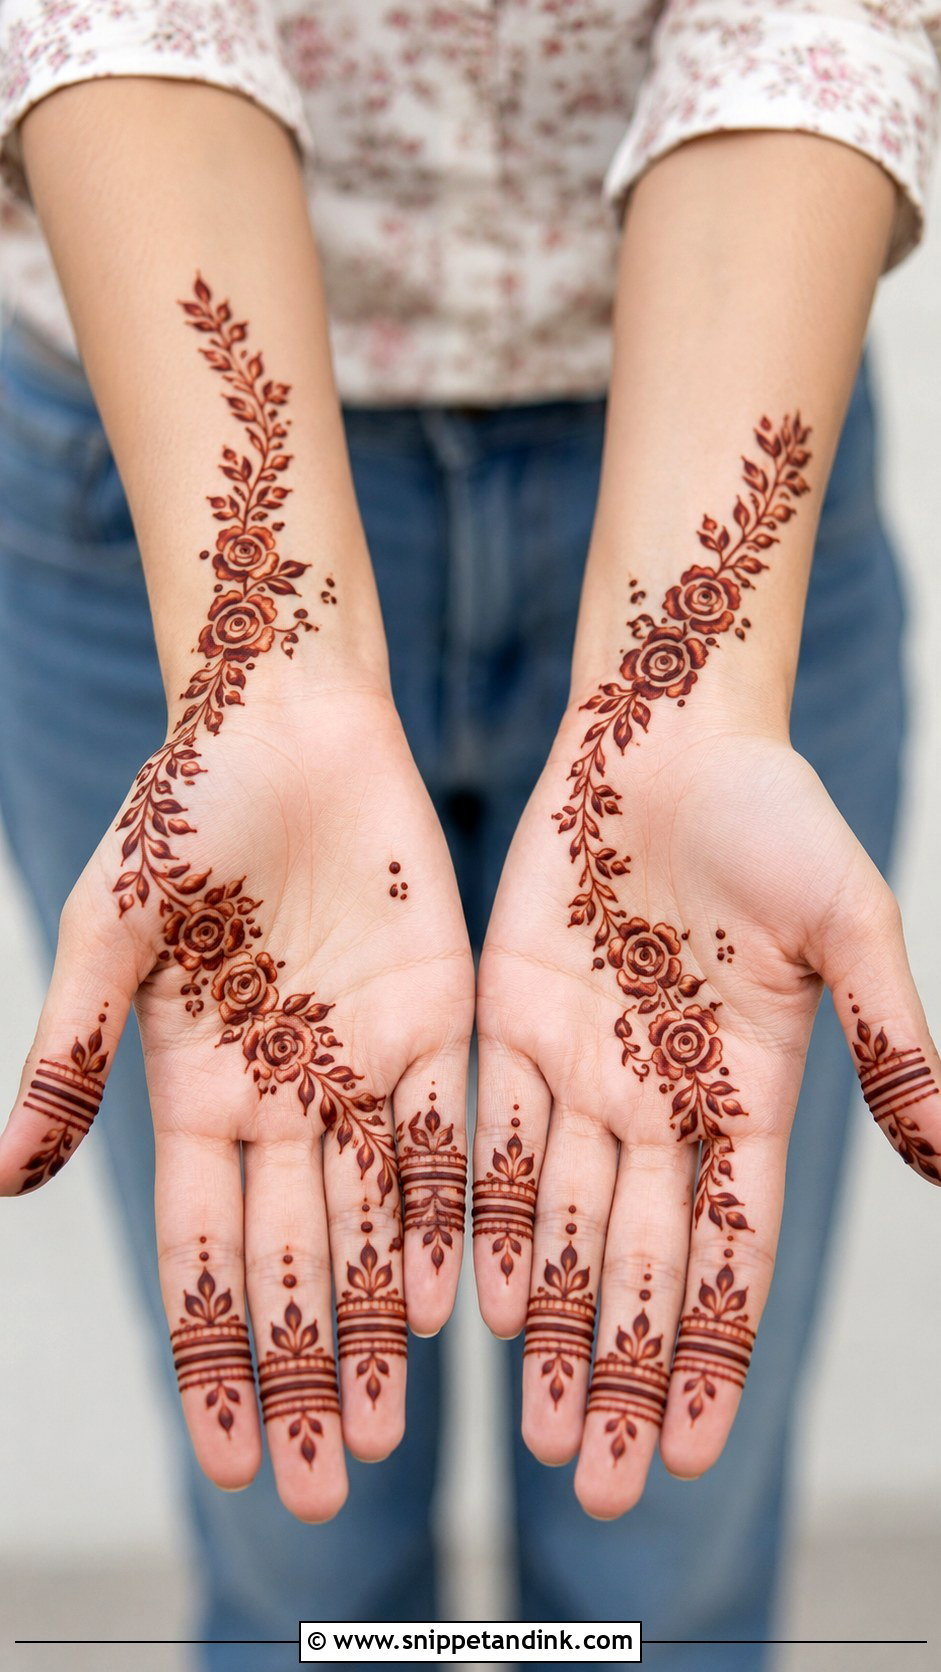
Teens usually want henna that looks current and photographs well. A modern diagonal vine, a small rose trail or a minimal mandala with finger bands makes a stylish full look, with enough detail to feel festive and enough open space to look fresh. Clean lines with tiny dot clusters and simple leaves keep it light. Give the palm one clear focal point and neat fingers, since that’s what shows in phone photos.
34. Small Hand Front Hand Mehndi Design
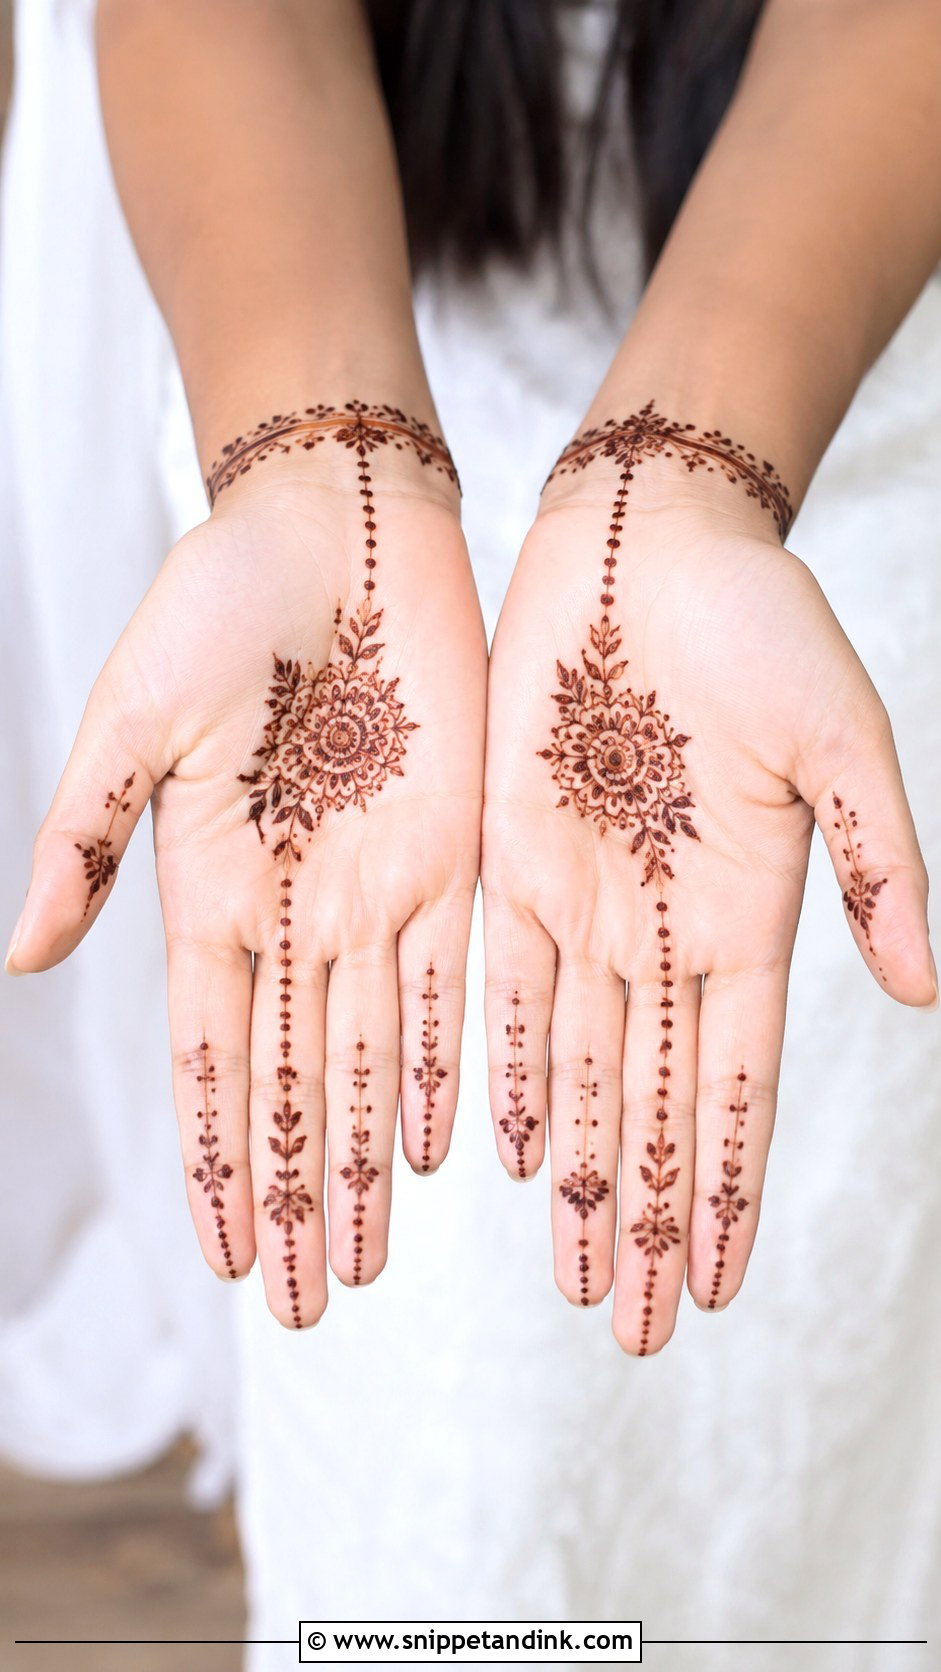
Small hands need careful spacing or the palm looks packed. Choose one main motif, a small mandala, flower or paisley, and build lightly around it with thin vines, tiny leaves and dotted borders. Several large motifs crowd a small palm, so avoid them. Slim, vertical finger designs add length. I often place the main design slightly off-center on petite hands, which creates flow and makes the palm look longer than a centered circle would.
35. Unique Front Hand Mehndi Design
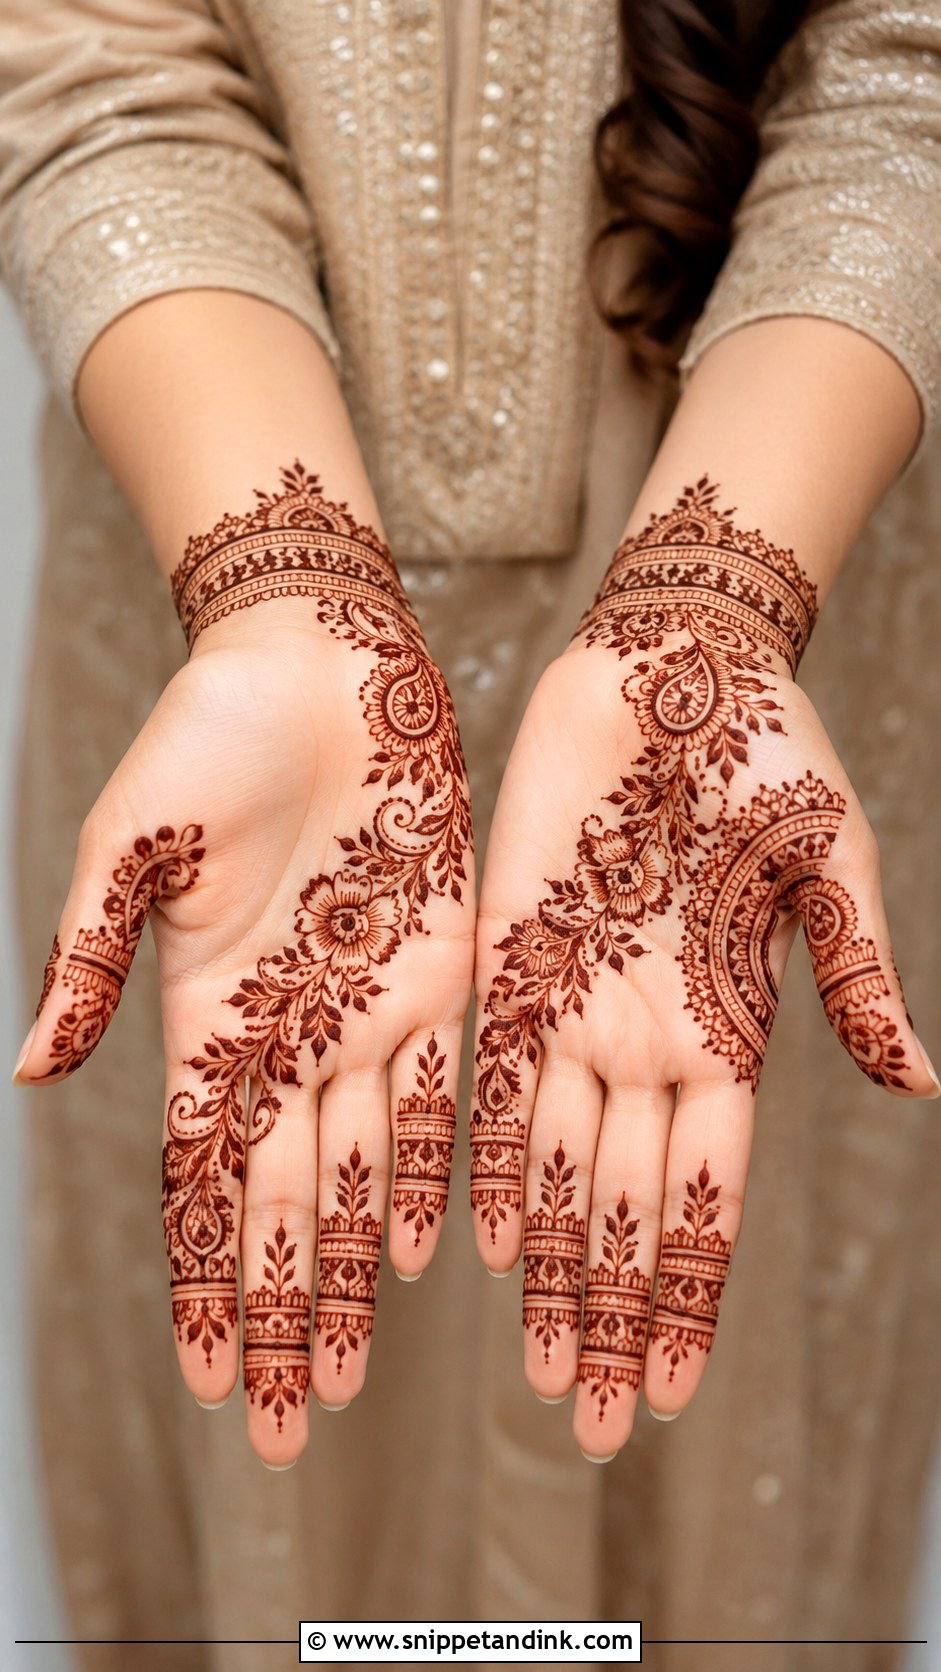
What makes a front-hand design feel unique is placement, spacing and the mix of motifs. Instead of a standard full palm, try combining a side mandala, a diagonal floral vine, geometric finger bands and a bracelet-style wrist. Give the palm one strong focal point and let the fingers and wrist support it. Unique doesn’t mean complicated; it means thoughtful. Clean lines and open space let every motif connect naturally.
From Trial Day to Wedding Morning
Brides who choose a lighter front-hand design still need the same timeline as a heavy one, because the stain behaves the same way. This is the order I give every bride.
- A few weeks out: a small trial on the palm. It shows how dark your skin stains with that artist’s paste and whether you react to it.
- The week before: book waxing, facials and any skin treatments now. Exfoliating after henna strips the stain.
- The day of application: wash your hands with plain soap and skip lotion, which creates a barrier the dye has to fight through.
- One to two days before the wedding: apply. The stain will peak around the second day.
- That night: keep the paste on, wrap the hands loosely, and stay warm.
- The morning after: scrape, don’t wash. Oil the hands before any water touches them.
- Wedding day: avoid sanitizer and hot water on the palms. Your nails can be painted, but skip a soak-heavy manicure.
If your palm stain looks orange on the first morning, don’t panic. It almost always deepens to reddish brown over the following day.
Let the Palm Do Most of the Work
These designs are simple enough to wear often and detailed enough to feel festive. Arabic trails, mandalas, florals, paisleys, jaali, bracelets and negative-space layouts can all be adjusted to your hand size, occasion and taste. Beginners should start with clear outlines and fewer fillers; for something richer, add shading, wrist bands or layered finger details. A front-hand design doesn’t need to be crowded. Balance, neatness and a flow that follows your palm are what make it work.
You'll Like These Ideas:


Leave a Reply