
Bridal mehndi is the one beauty detail that keeps developing after you leave the chair. The paste goes on dark green-brown, the stain comes off bright orange, and over the next two days it deepens to the reddish brown you see in wedding photos. That’s why I plan a bride’s design around her calendar as much as her outfit. Below are thirty bridal henna looks, from full Indian coverage and Arabic trails to Moroccan geometry and hidden initials, for palms, back hands, feet and forearms. Each comes with what I’d consider before choosing it.
Timing the Application So the Colour Peaks on the Day
Natural henna doesn’t show its final colour straight away. When the dried paste comes off, the stain is a bright orange. It darkens over the next 24 to 48 hours as it oxidises, then holds for a week or two before fading as the skin renews itself. So I usually apply bridal mehndi one to two days before the wedding, never on the morning.
- Full hands and feet take hours. Book a calm block of time, not a slot squeezed between events.
- Leave the paste on as long as you can, ideally six to eight hours or overnight.
- Wash hands with plain soap before your appointment, and skip lotion, oil or self-tan on those areas.
- Have waxing, scrubs and manicures done before the henna, not after.
Stain depth varies by person. Warm hands stain darker, and palms and fingertips always come out deeper than the back of the hand or forearms.
If you have never worn henna, I’d suggest a small test design a few weeks before. It shows how dark your skin takes the stain and confirms you have no reaction to the essential oil in the paste, so there are no surprises in the week of the wedding.
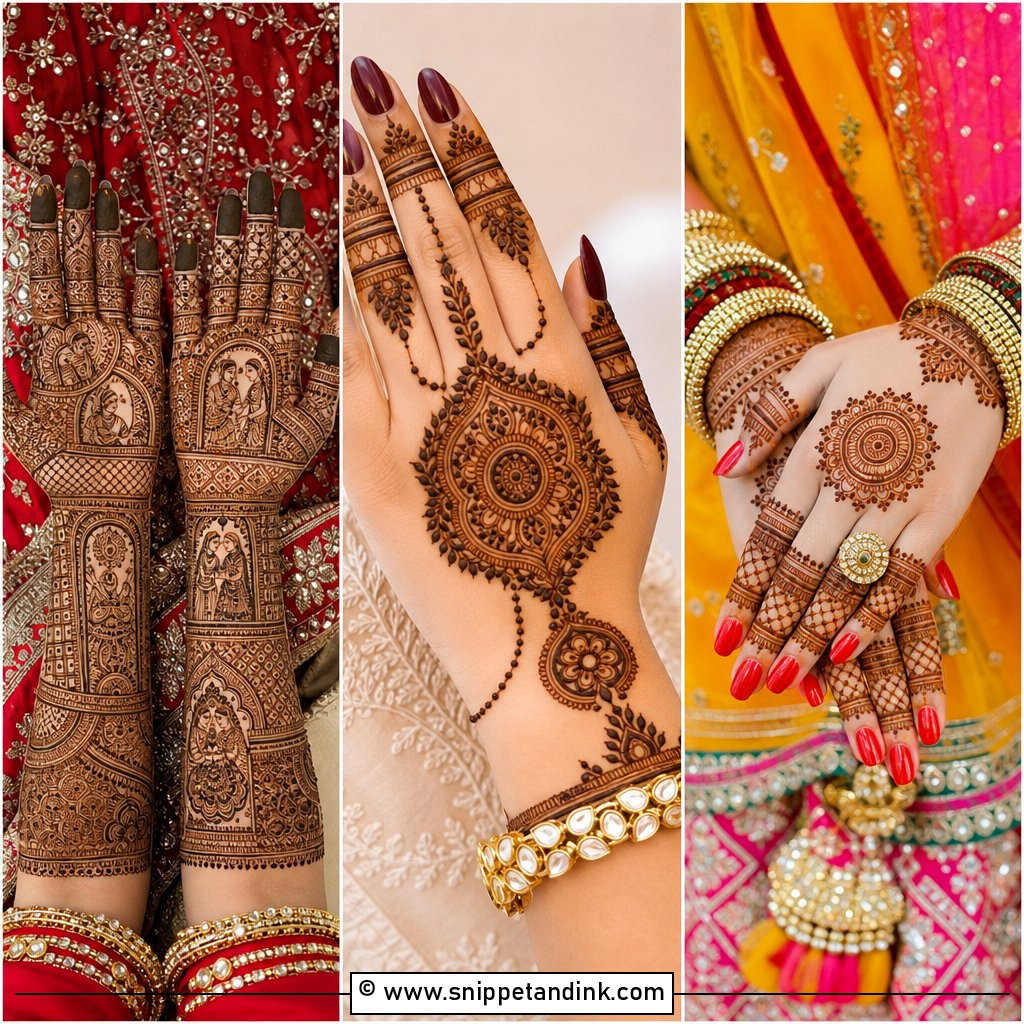
1. Full Hand Indian Bridal Wedding Henna Design
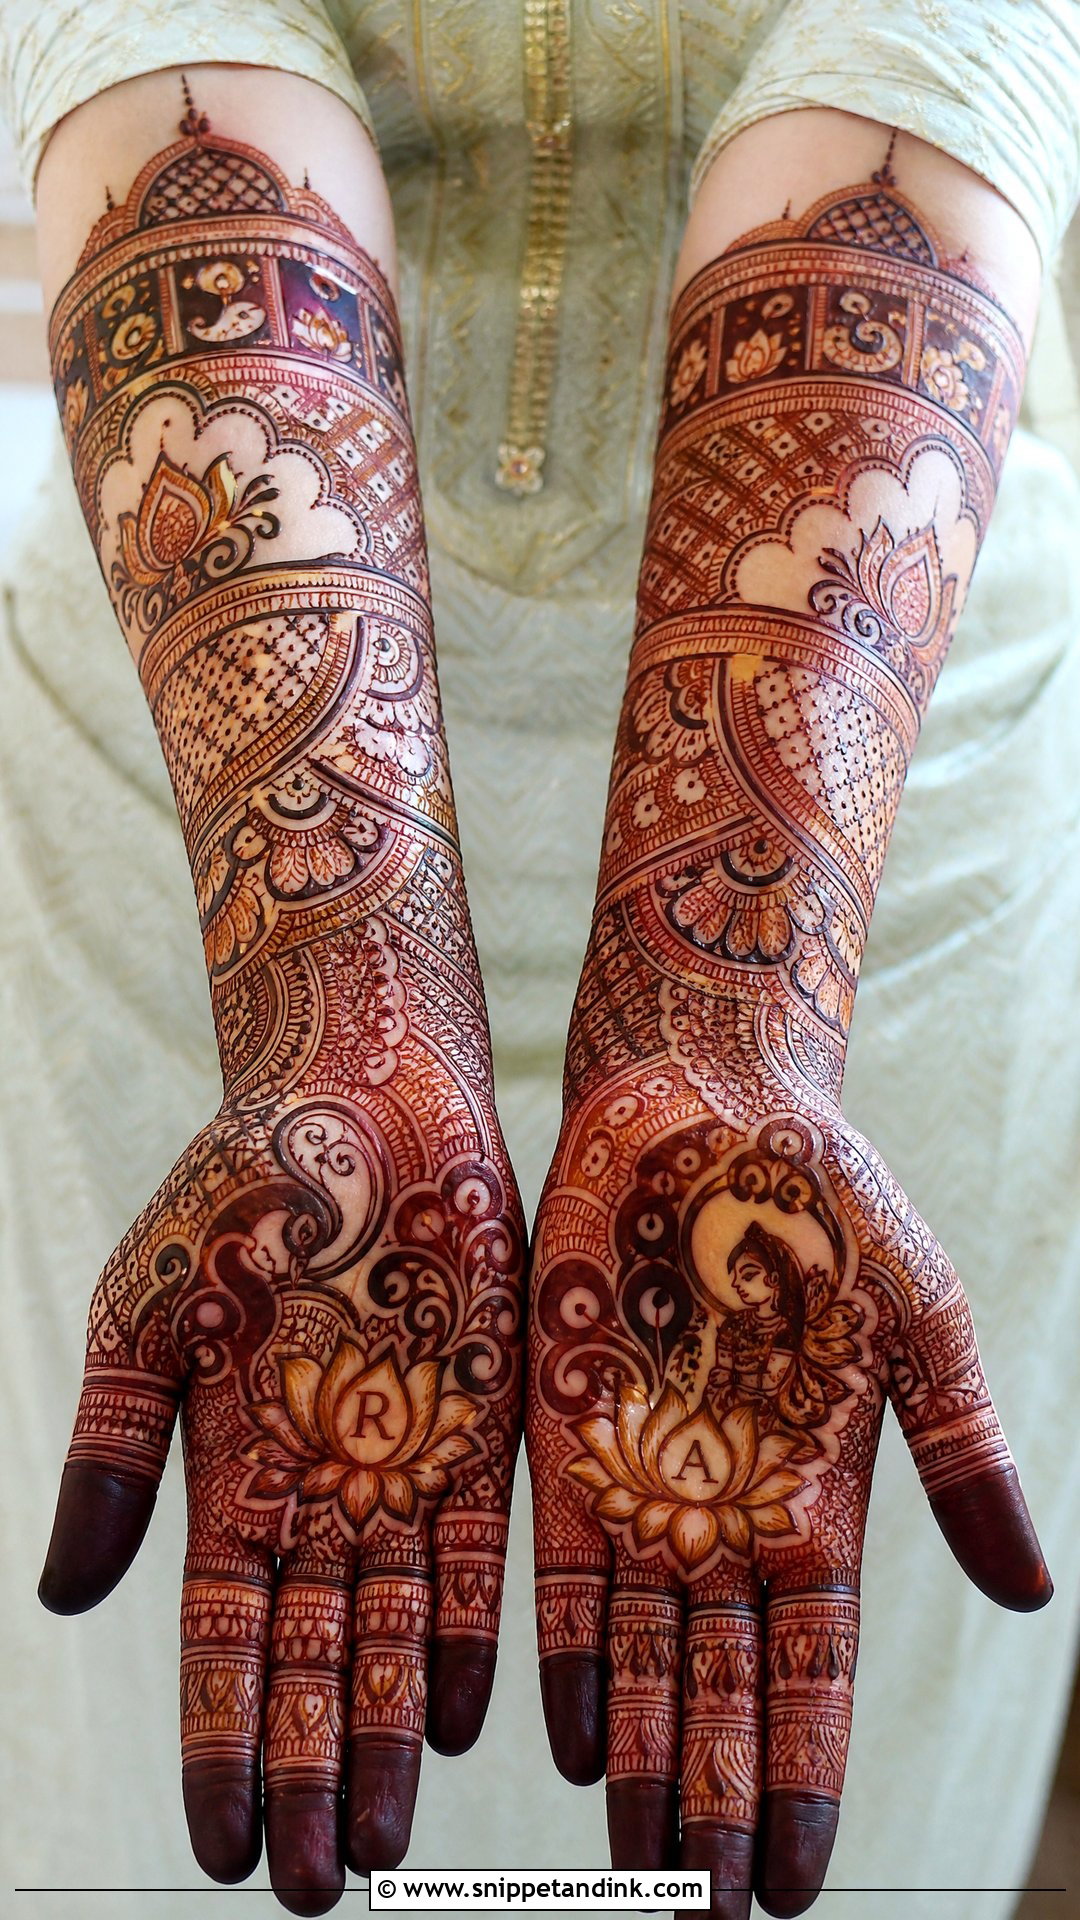
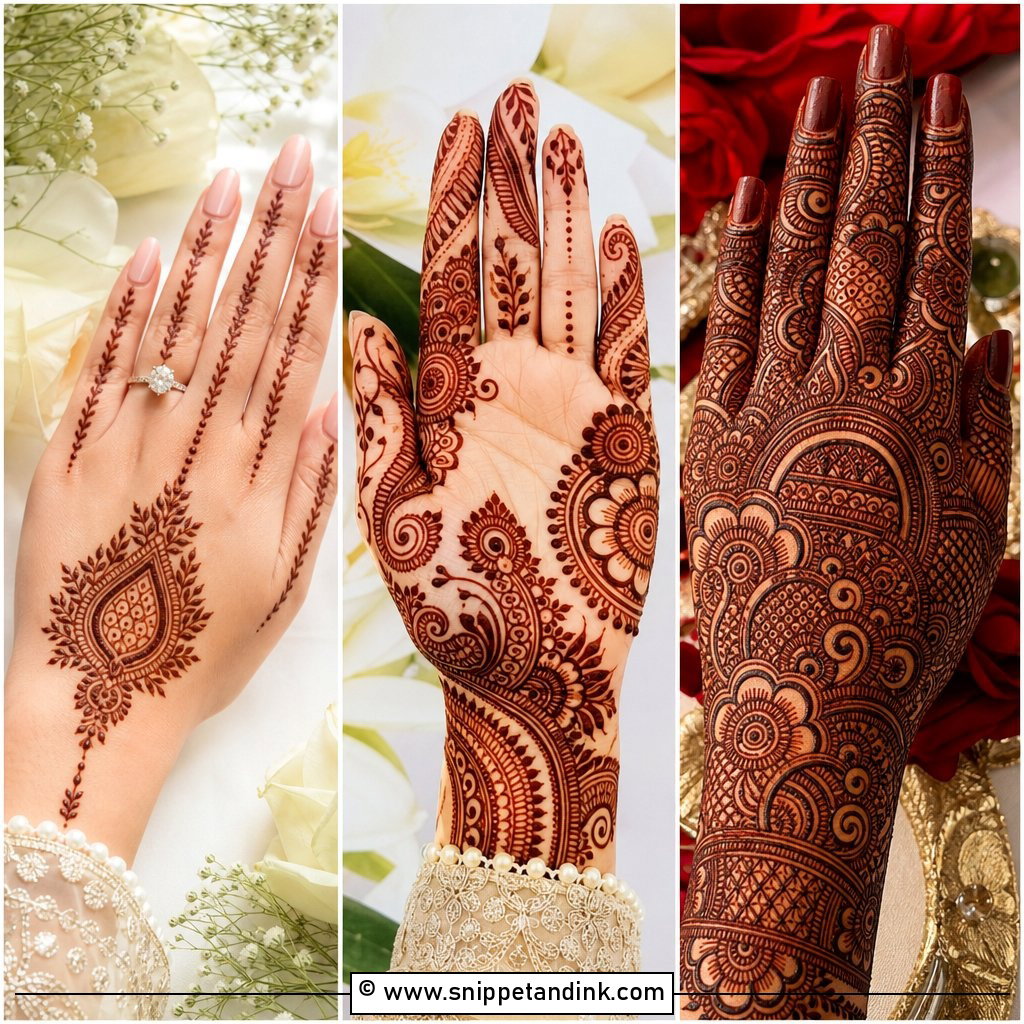
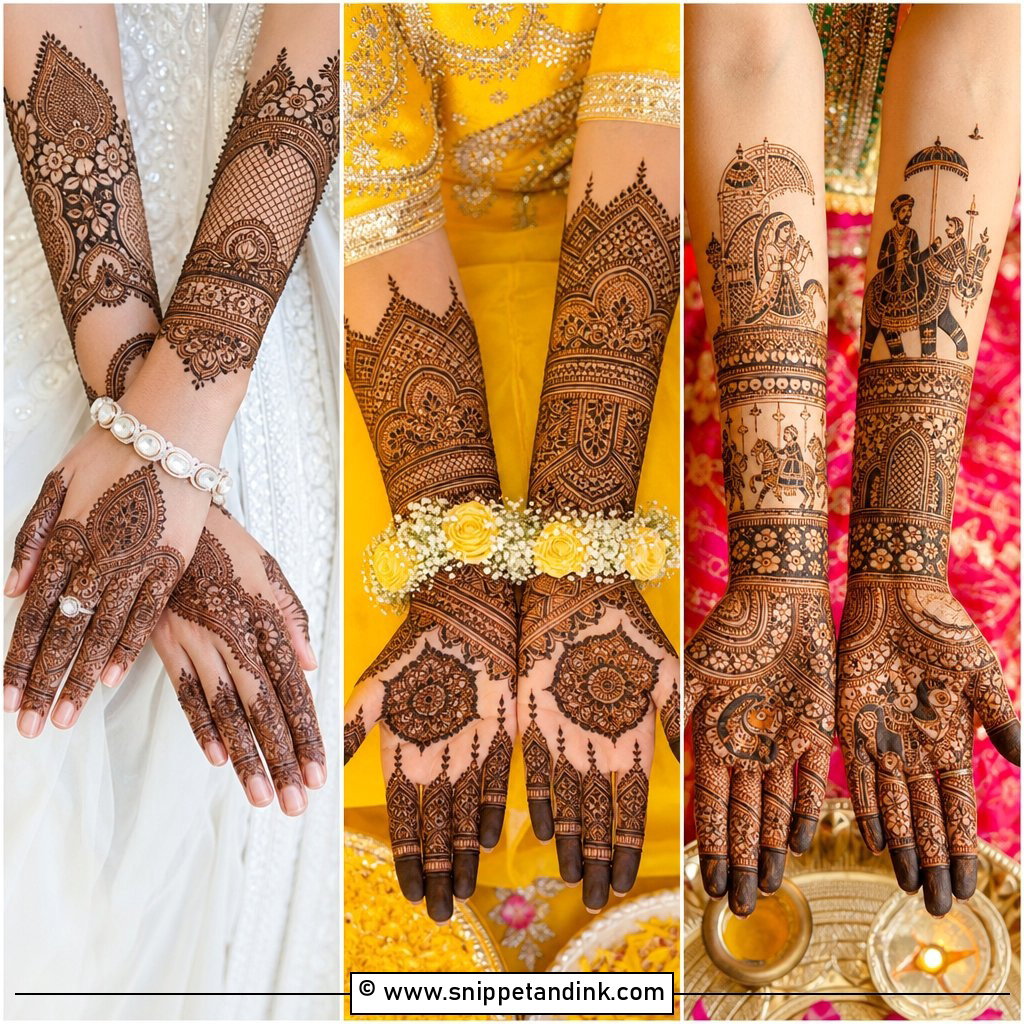
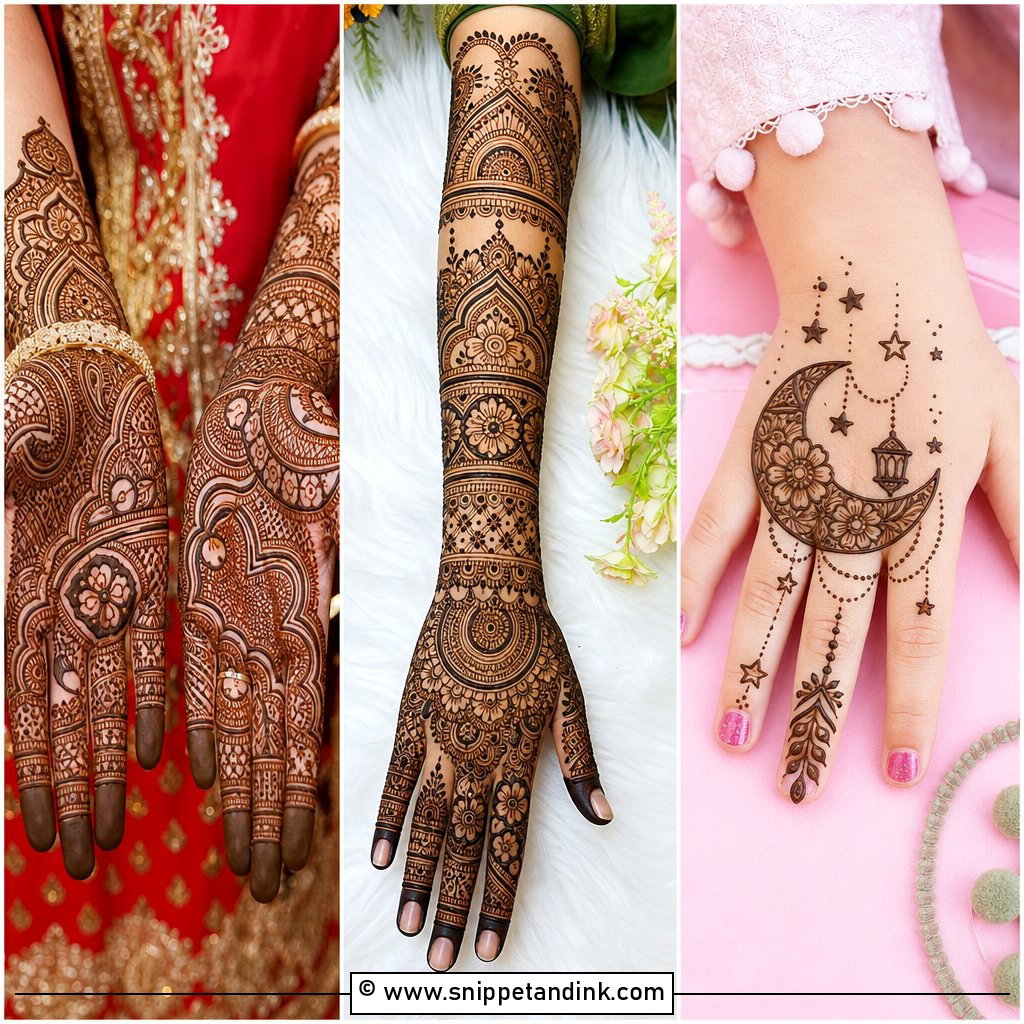
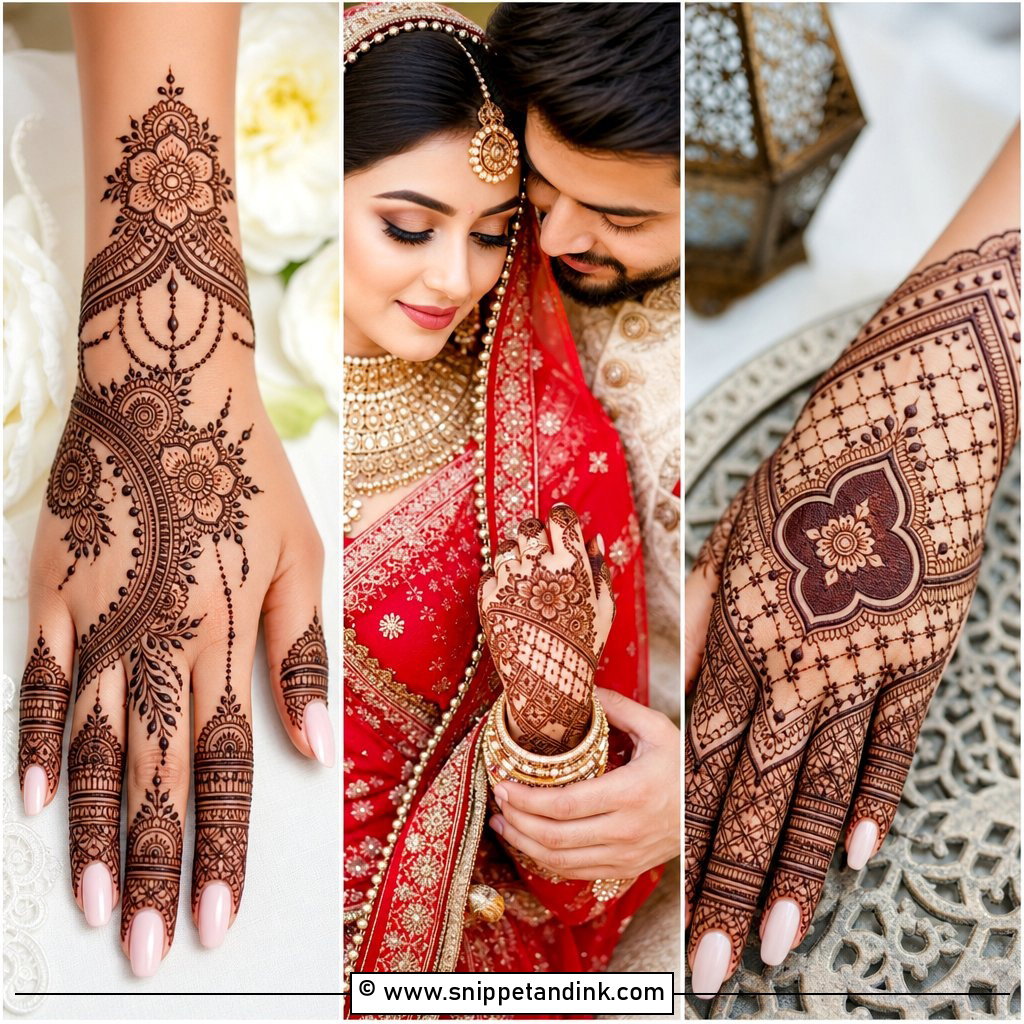
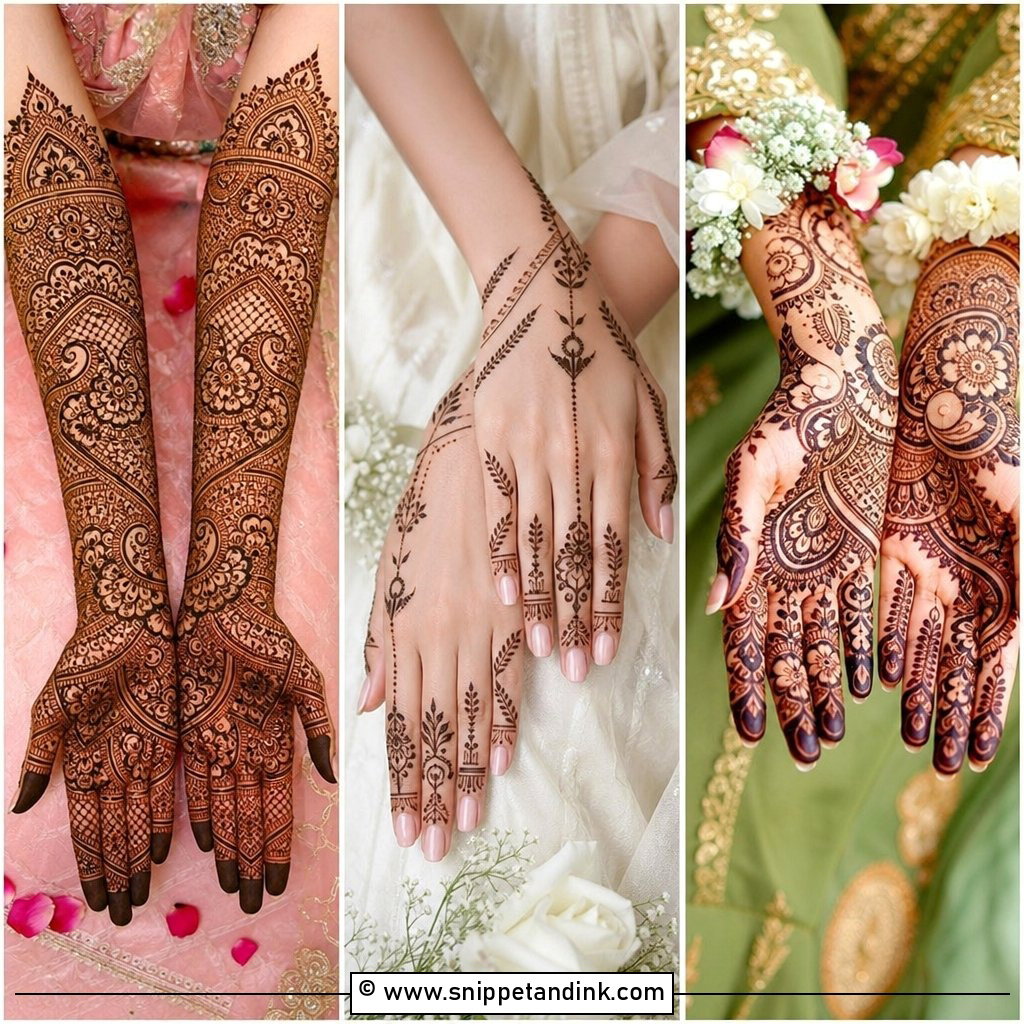
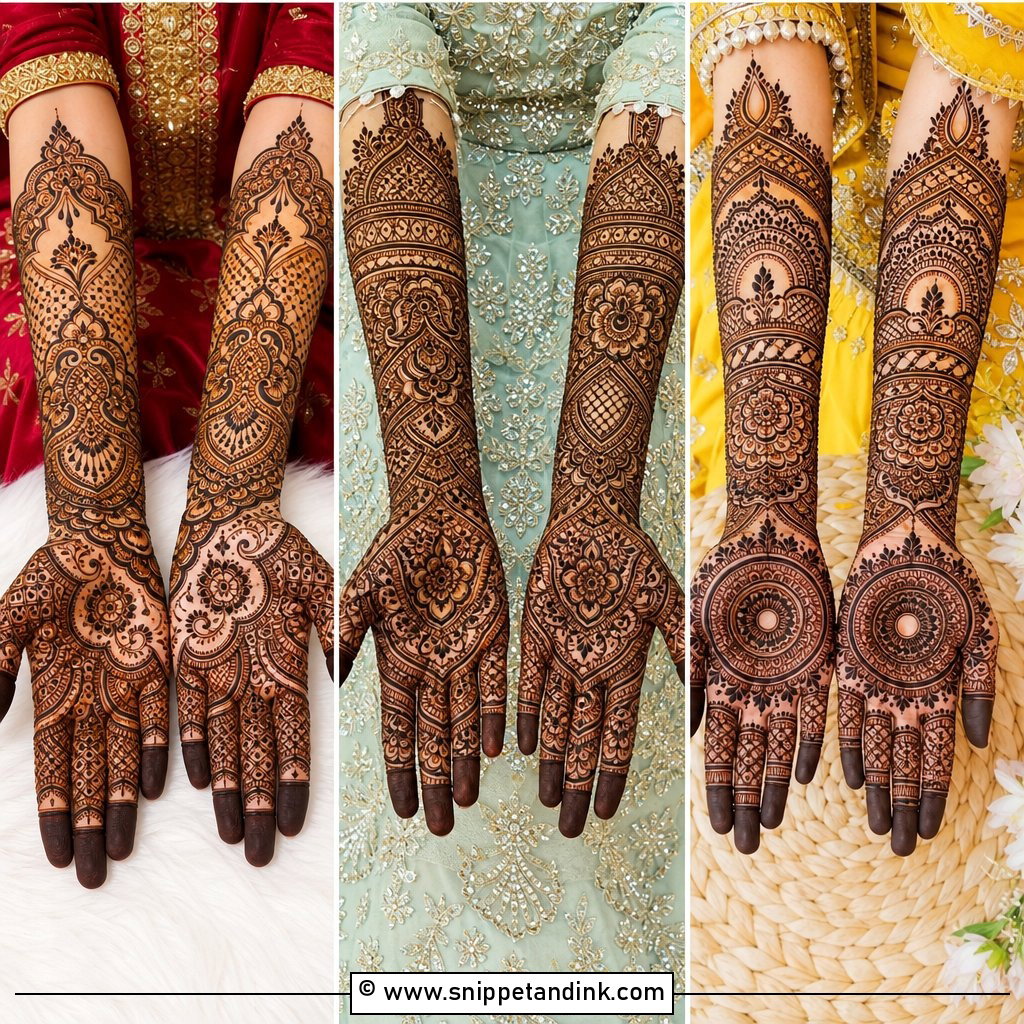
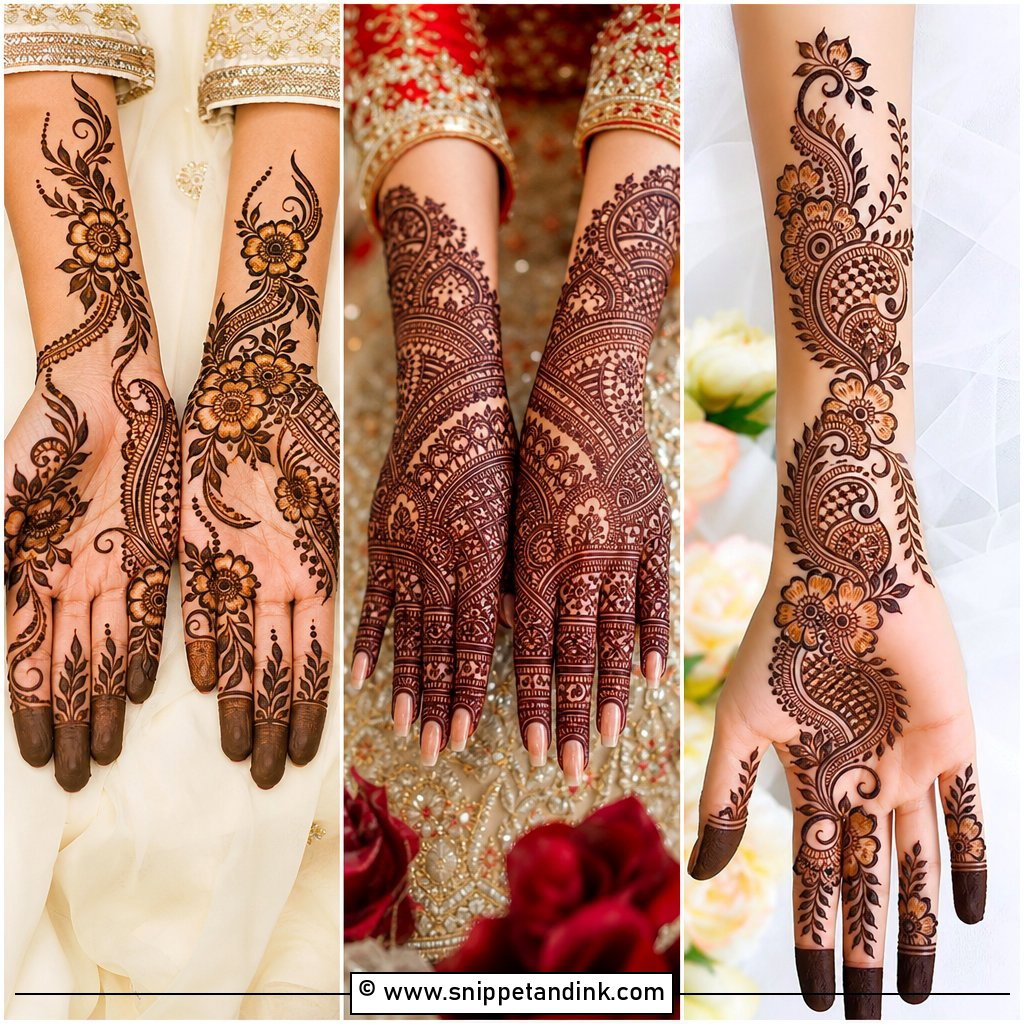
Full Indian bridal coverage runs from the fingertips to the forearms, packed with paisleys, lotus flowers, peacocks and fine filler. The challenge is keeping it readable. I divide the hand into zones with bands at the wrist and across the knuckles, then fill each zone separately, so the eye has somewhere to rest. Initials, a date or small bride and groom figures can hide inside. Plan for a long sitting; full hands front and back with forearms can take several hours.
2. Arabic Bridal Wedding Henna Design
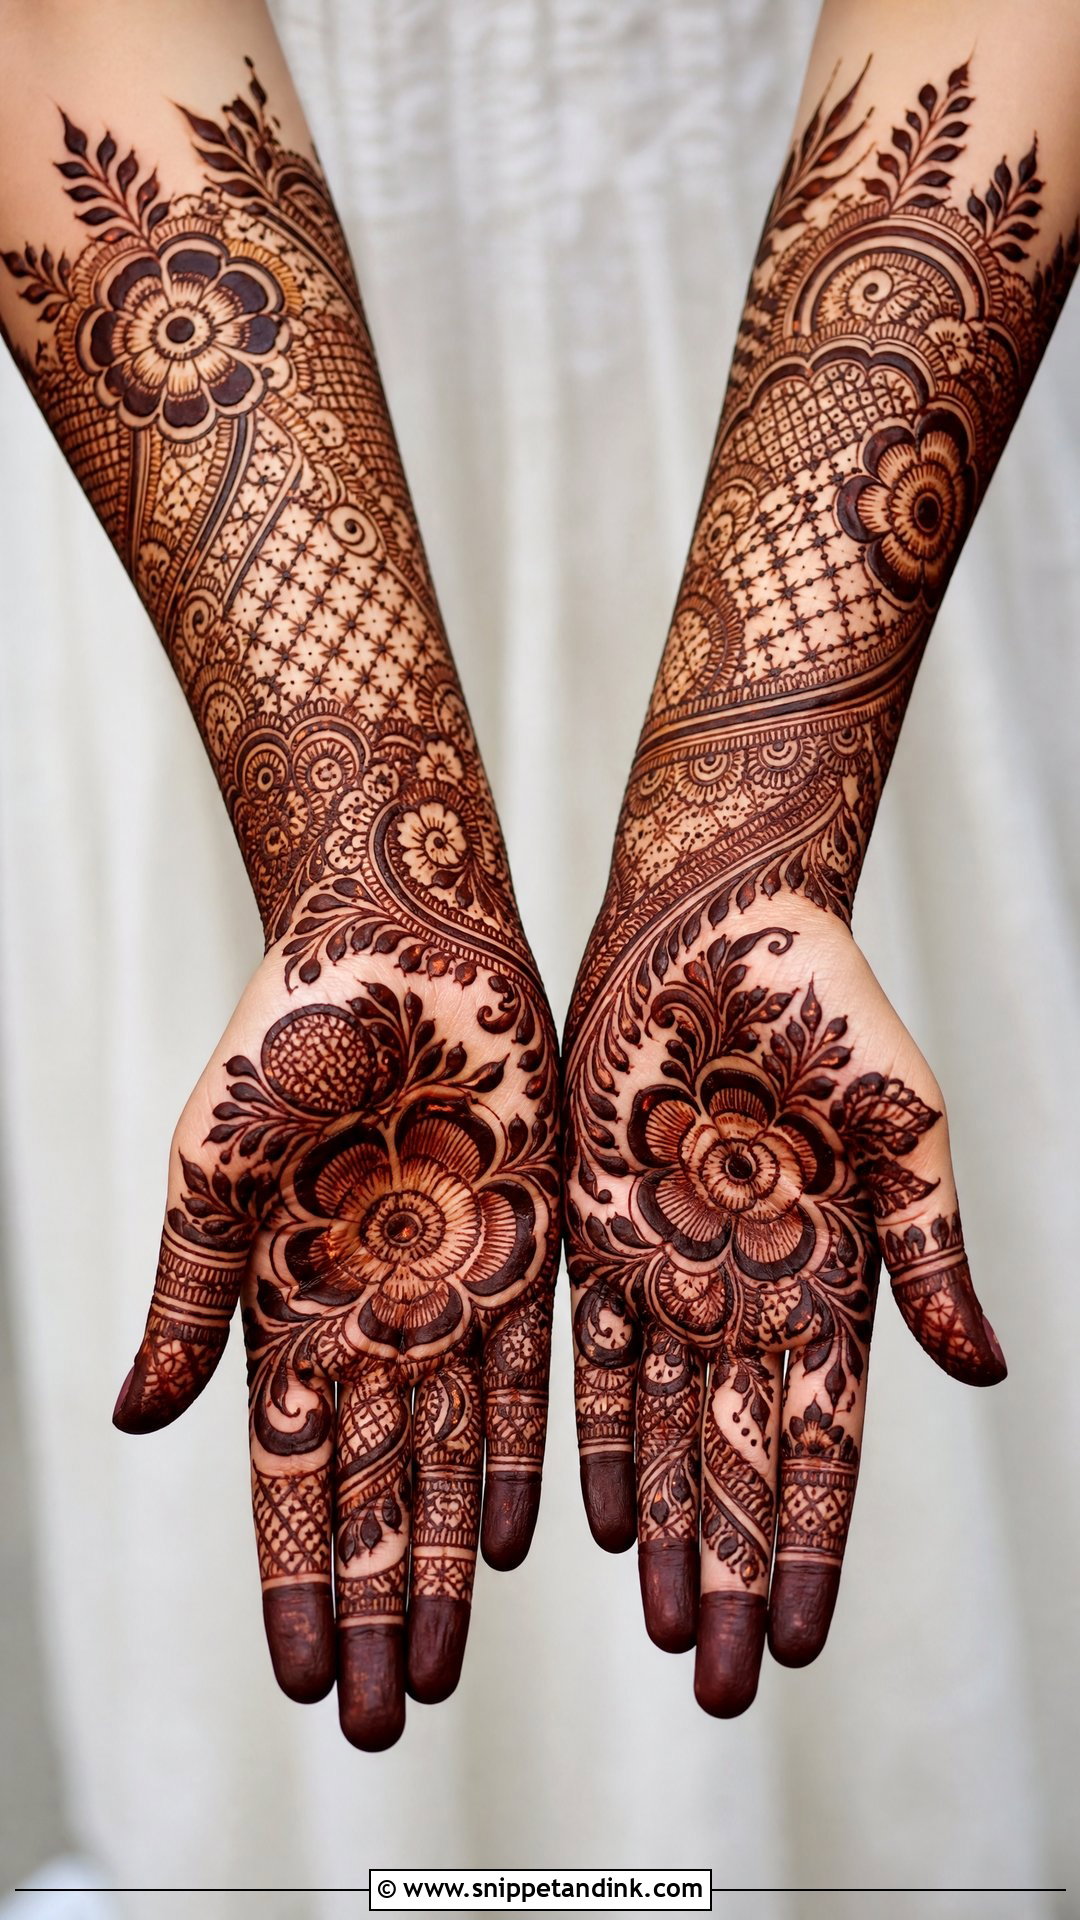
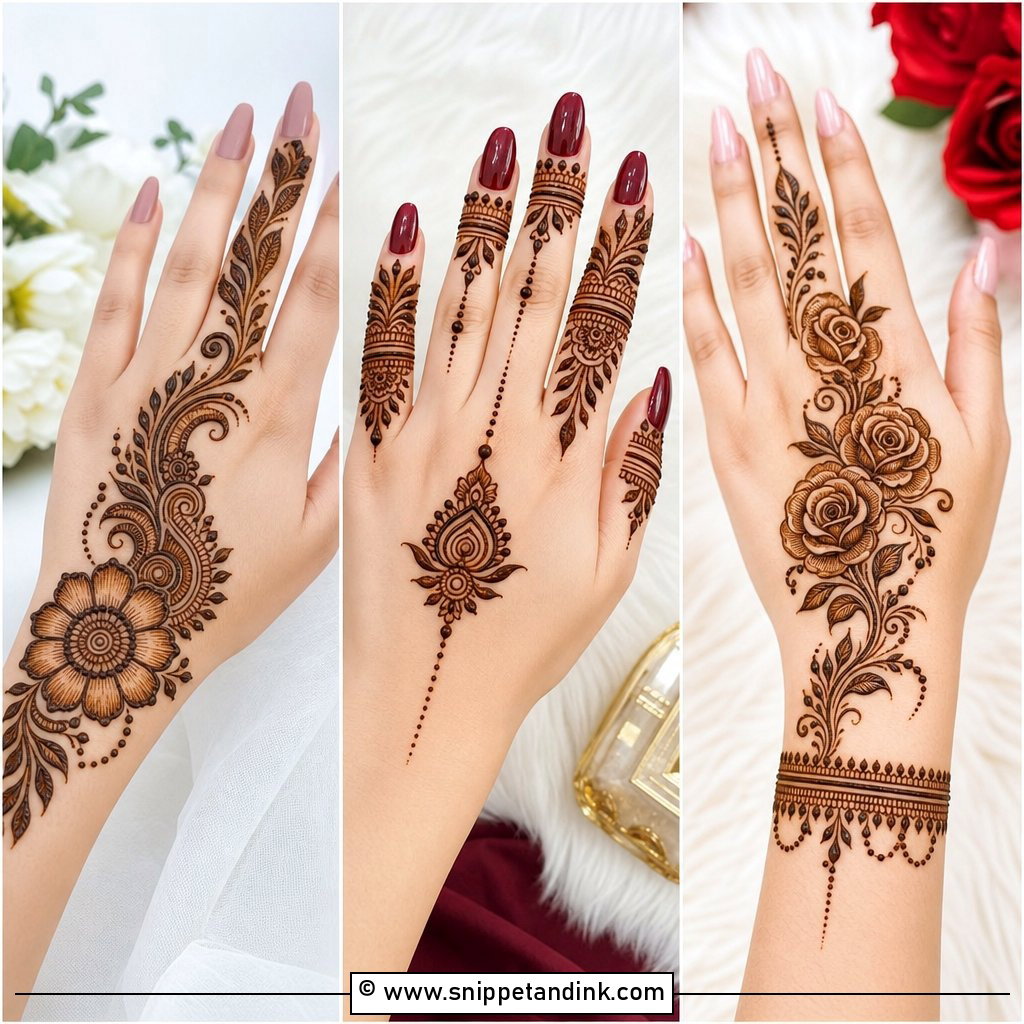
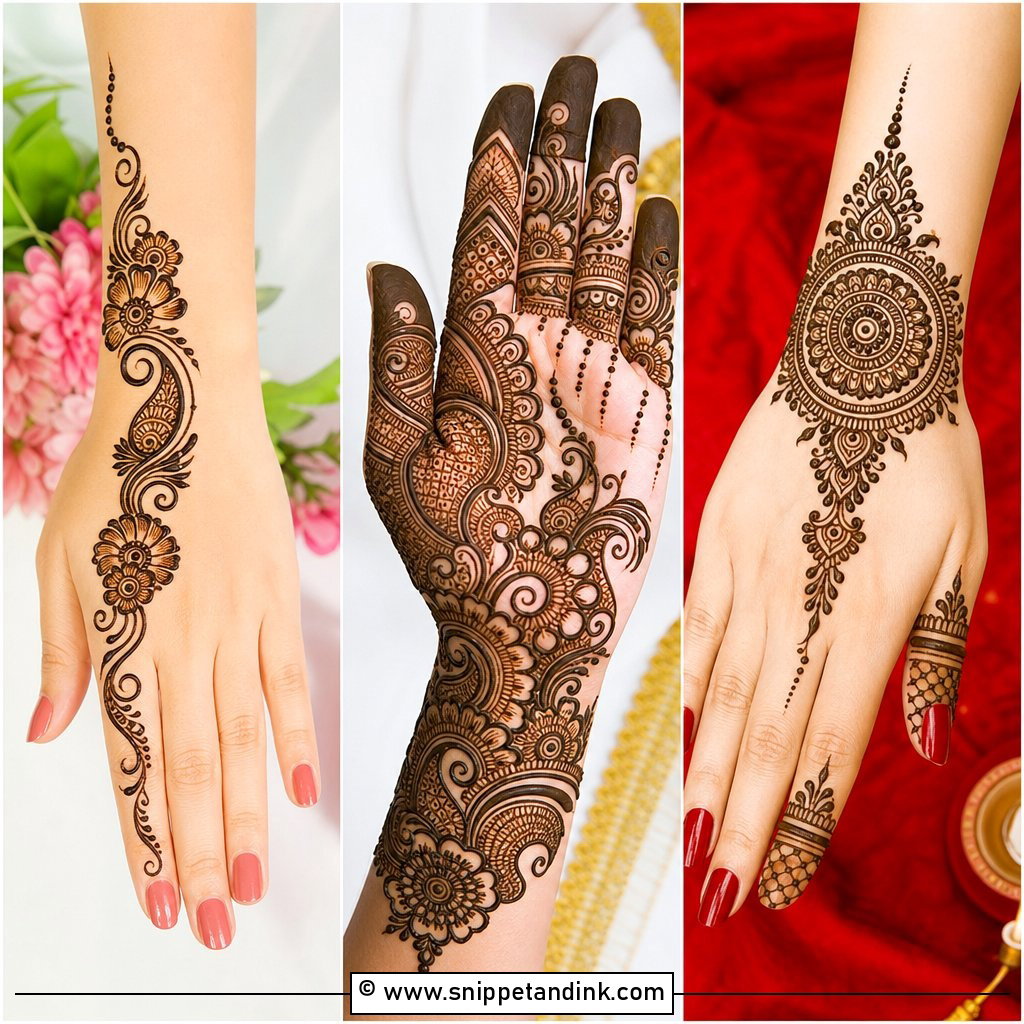
Arabic bridal henna works on bold, thick strokes that run diagonally across the hand, with open skin between the florals and vines. That open skin is what makes the stain look darker by contrast. It takes far less time than full traditional coverage, so it’s a good fit for a bride with a busy pre-wedding schedule. I use a slightly thicker cone tip for the outlines, which keeps them crisp when seen from across a room.
3. Indo Arabic Bridal Wedding Henna Design
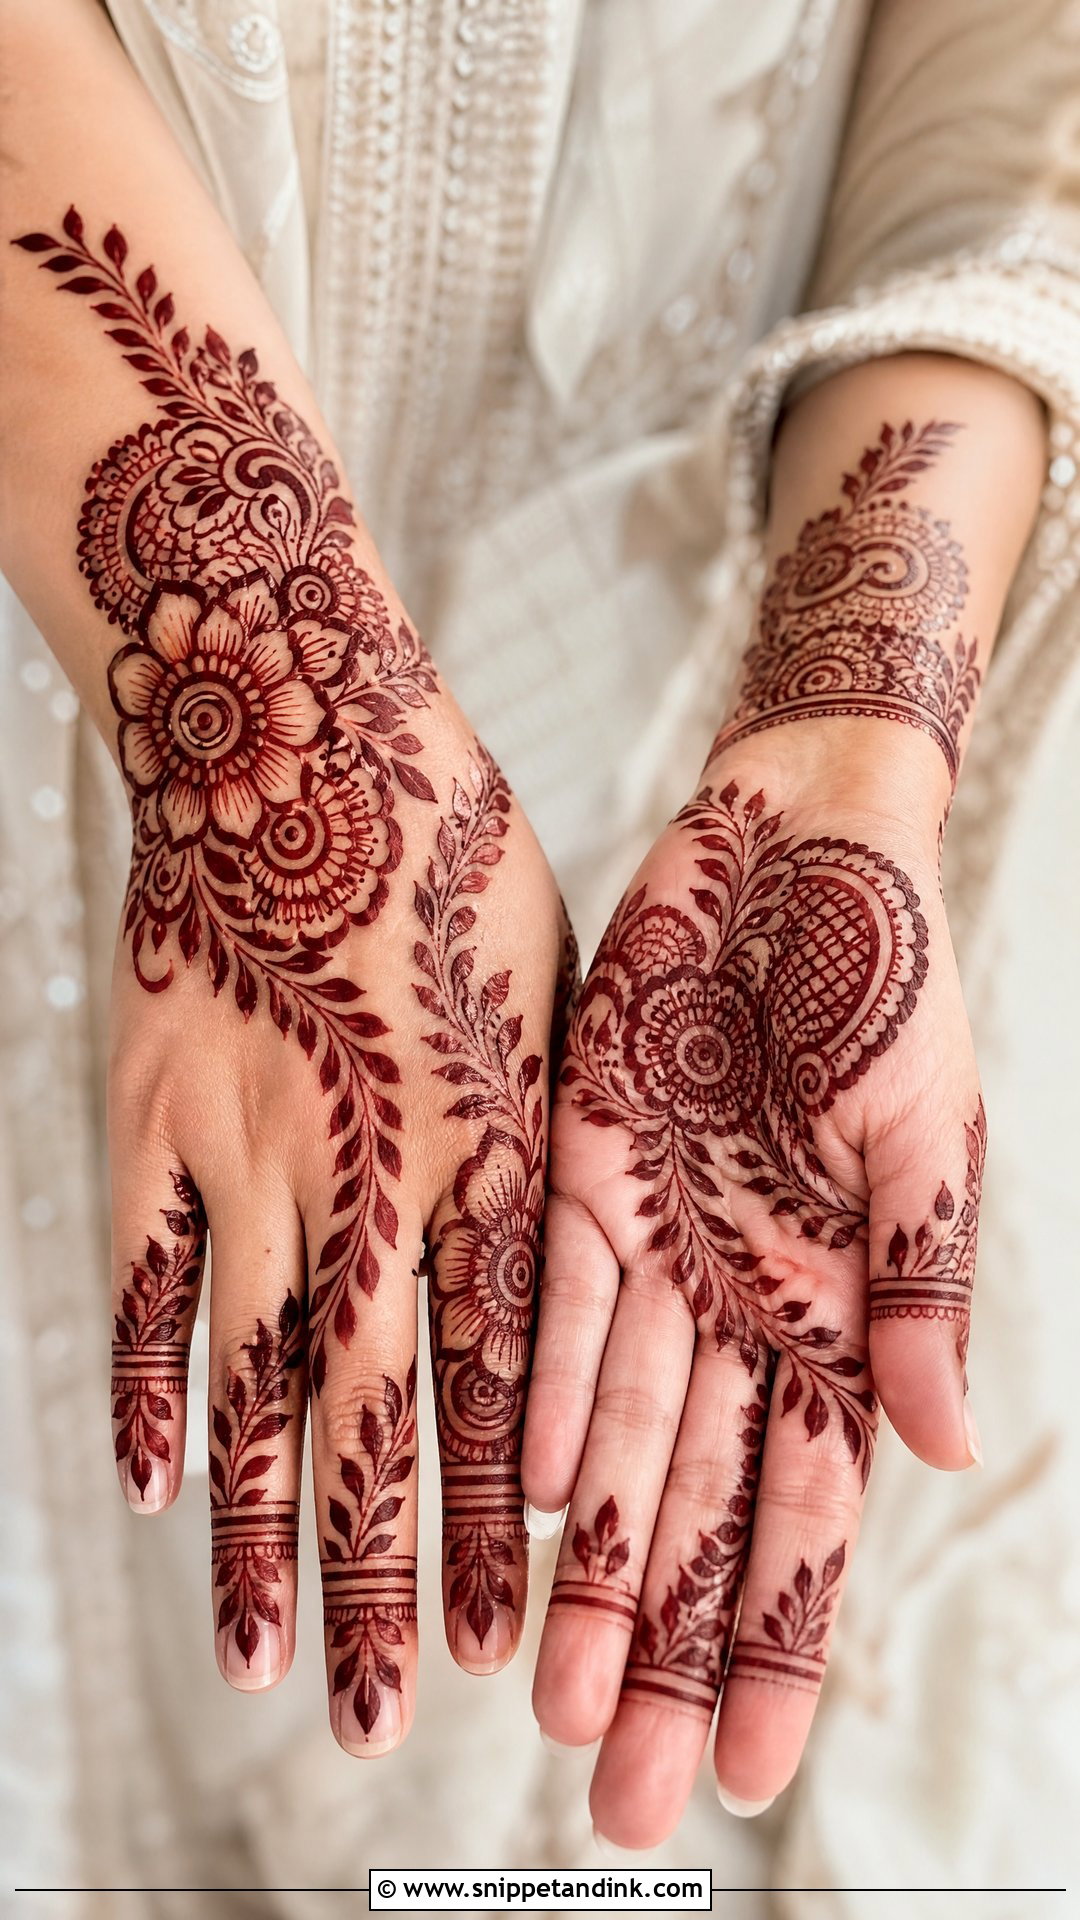
Indo-Arabic takes the flow of Arabic henna and fills its shapes with Indian detail: a diagonal floral trail, shaded petals, paisley borders and fine jaali. I suggest it when a bride likes richness but dislikes the crowded look of full coverage. Bracelet bands at the wrist finish both palms and back hands neatly. It’s also easy to make personal, since the open areas leave room for initials.
4. Simple Bridal Wedding Henna Design
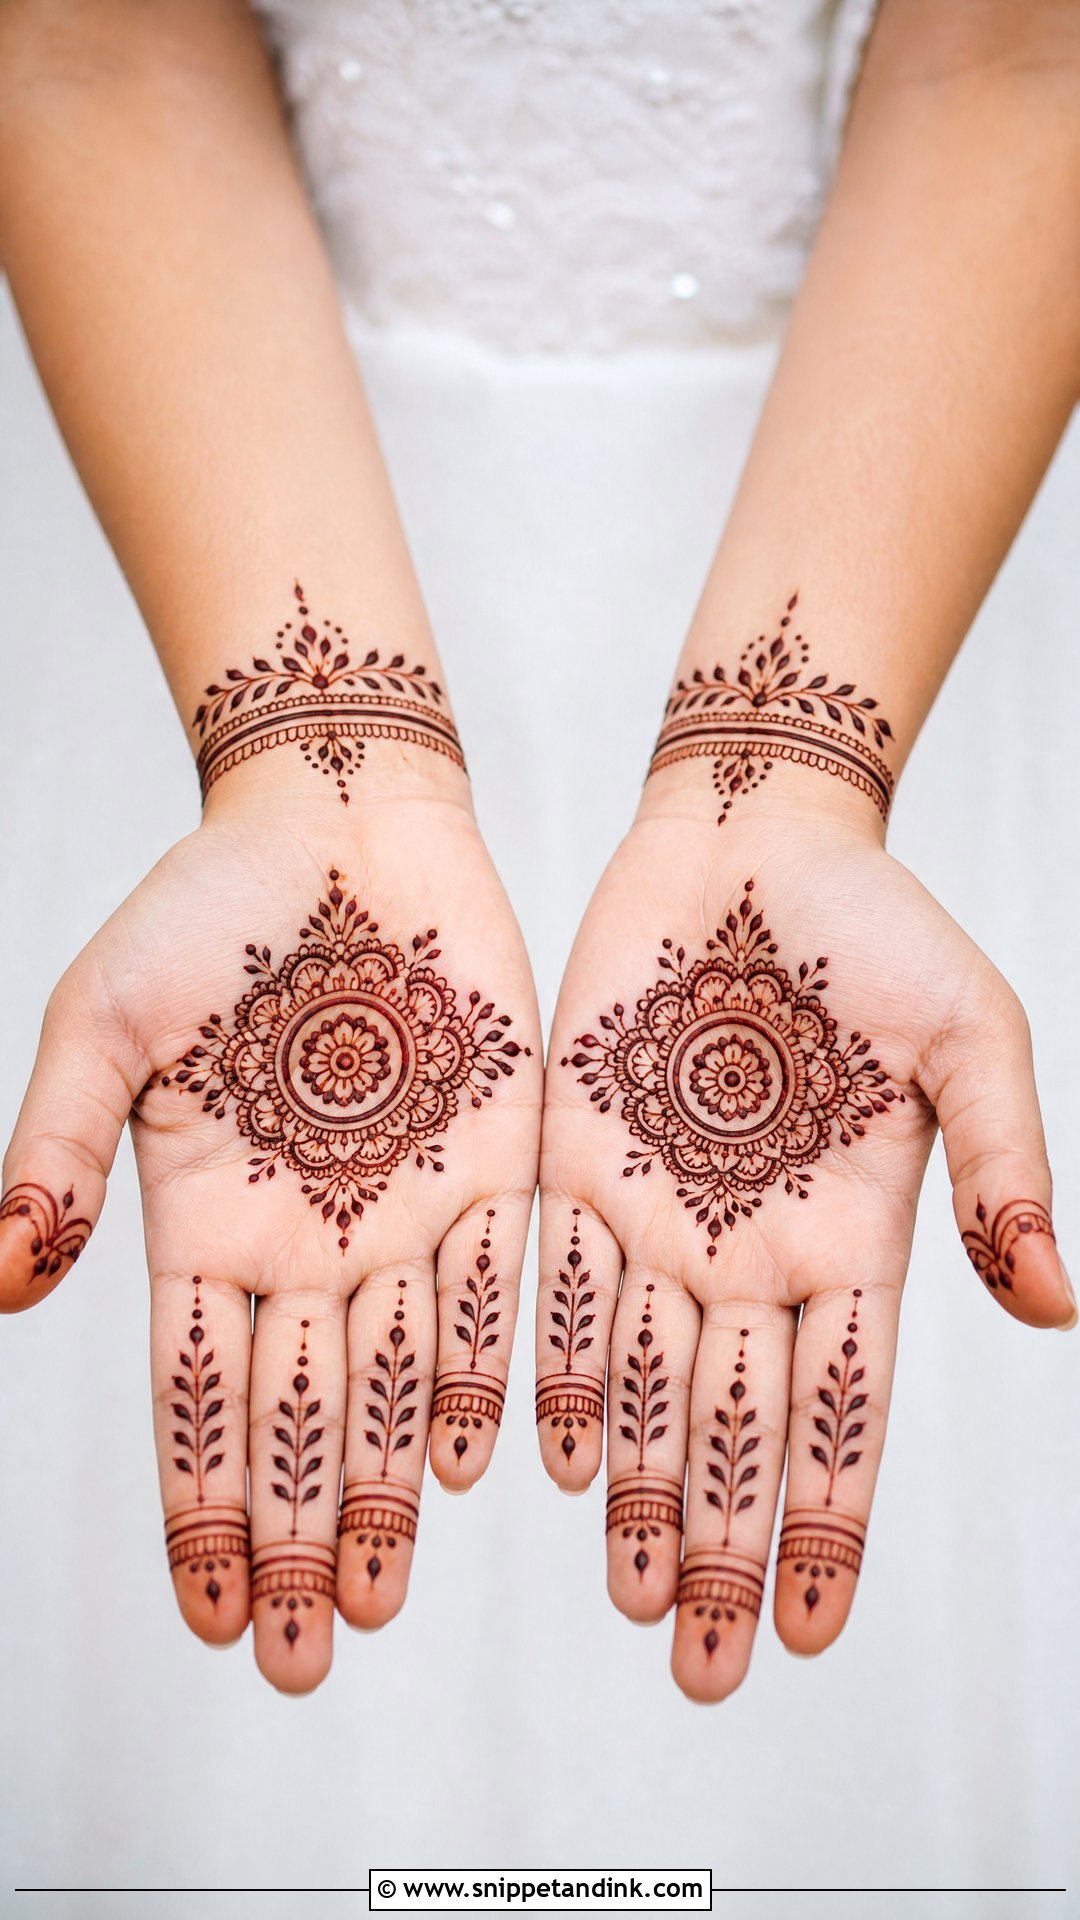
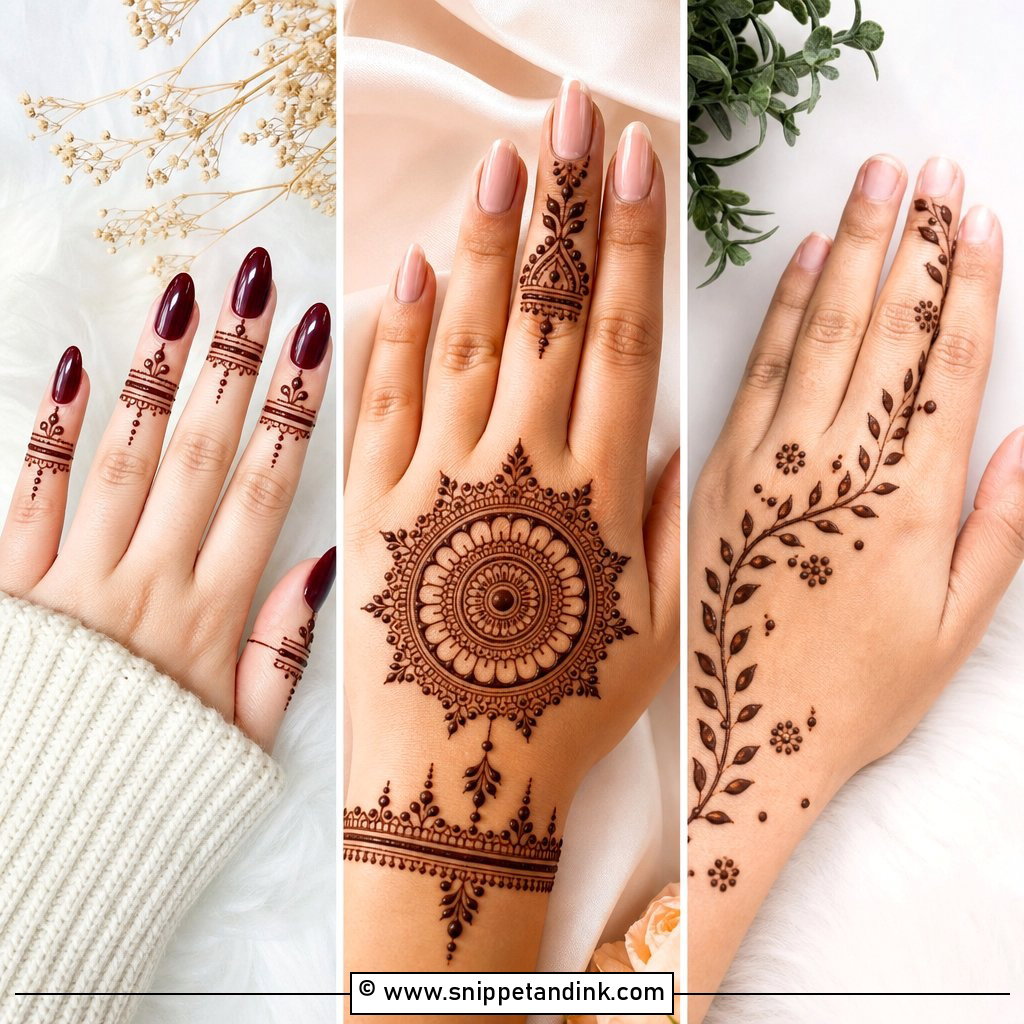
Simple bridal henna still needs planning, perhaps more than heavy work, because every line shows. My usual layout is a centred mandala on the palm, delicate finger patterns and a slim band at the wrist. Spacing matters more than detail here. It suits destination weddings and small ceremonies, and it’s quick to apply, which helps if you’re travelling the same week.
5. Minimal Bridal Wedding Henna Design
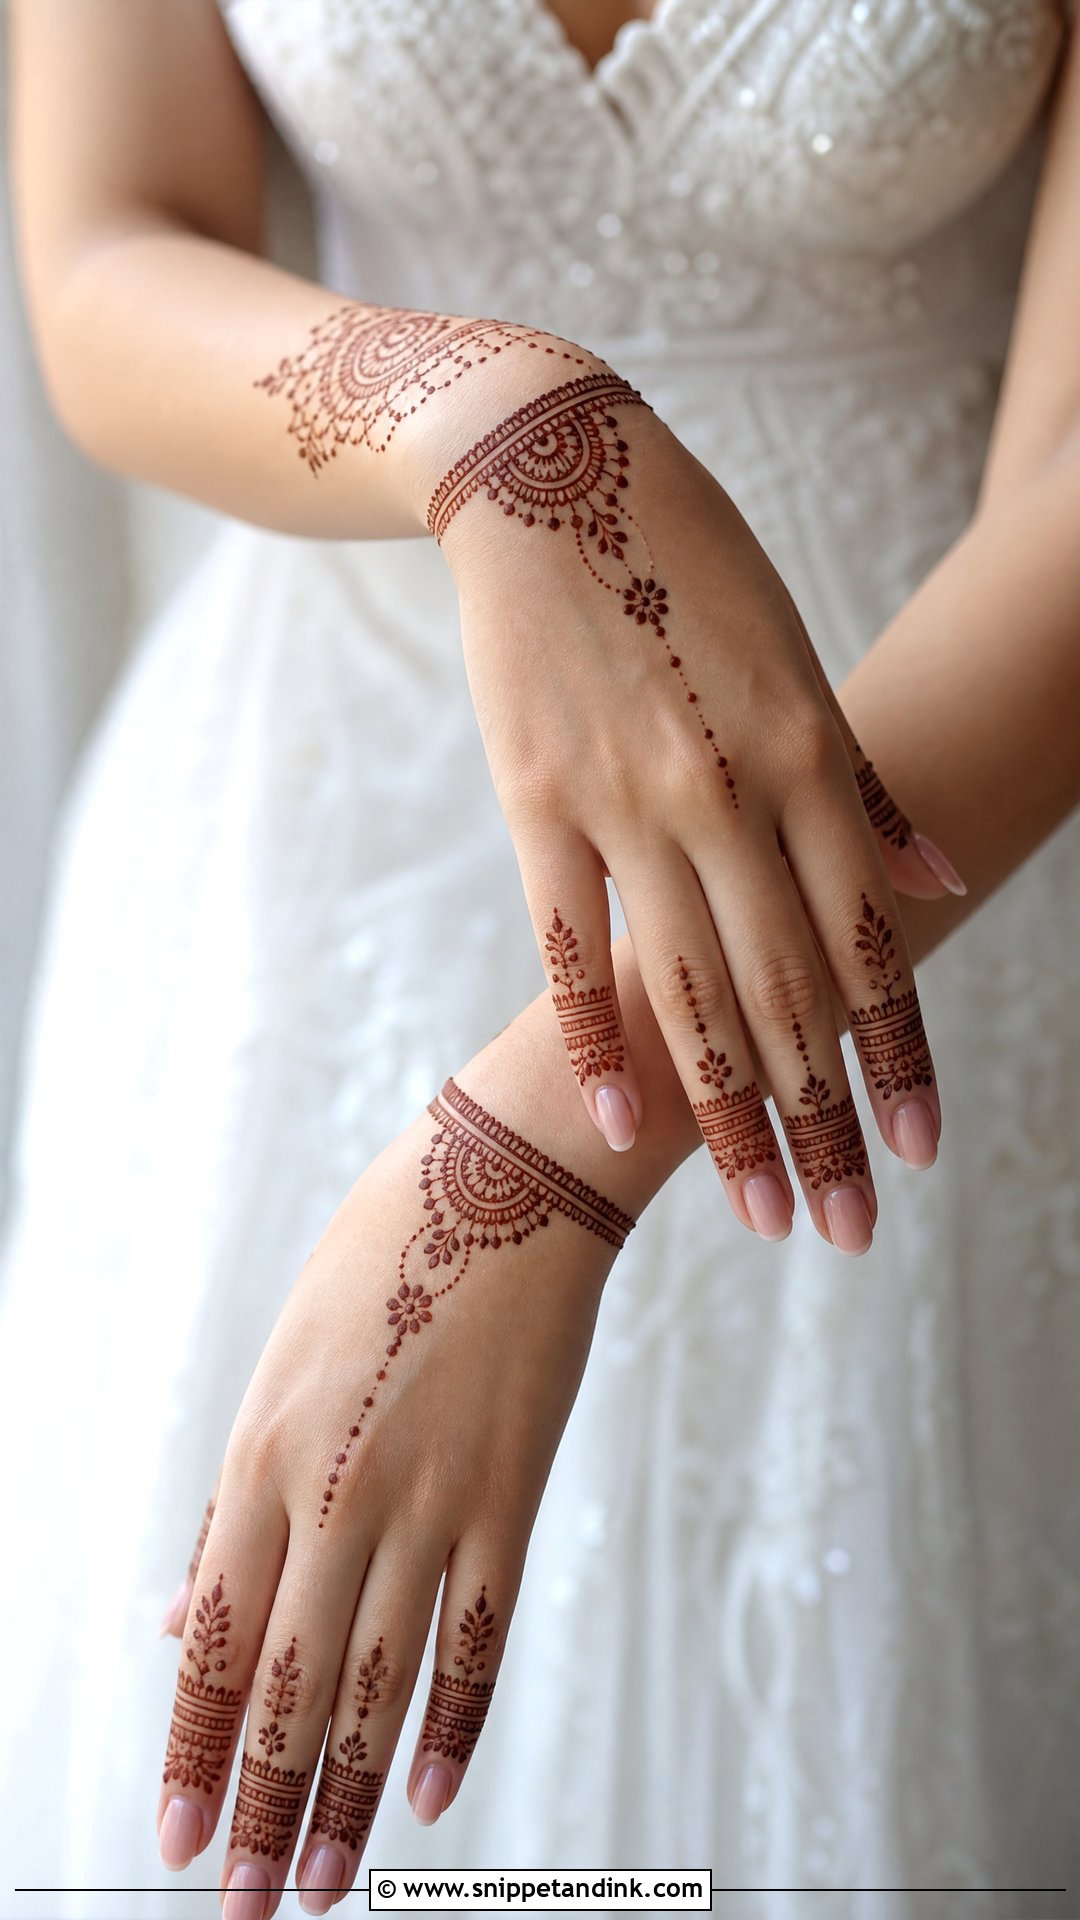
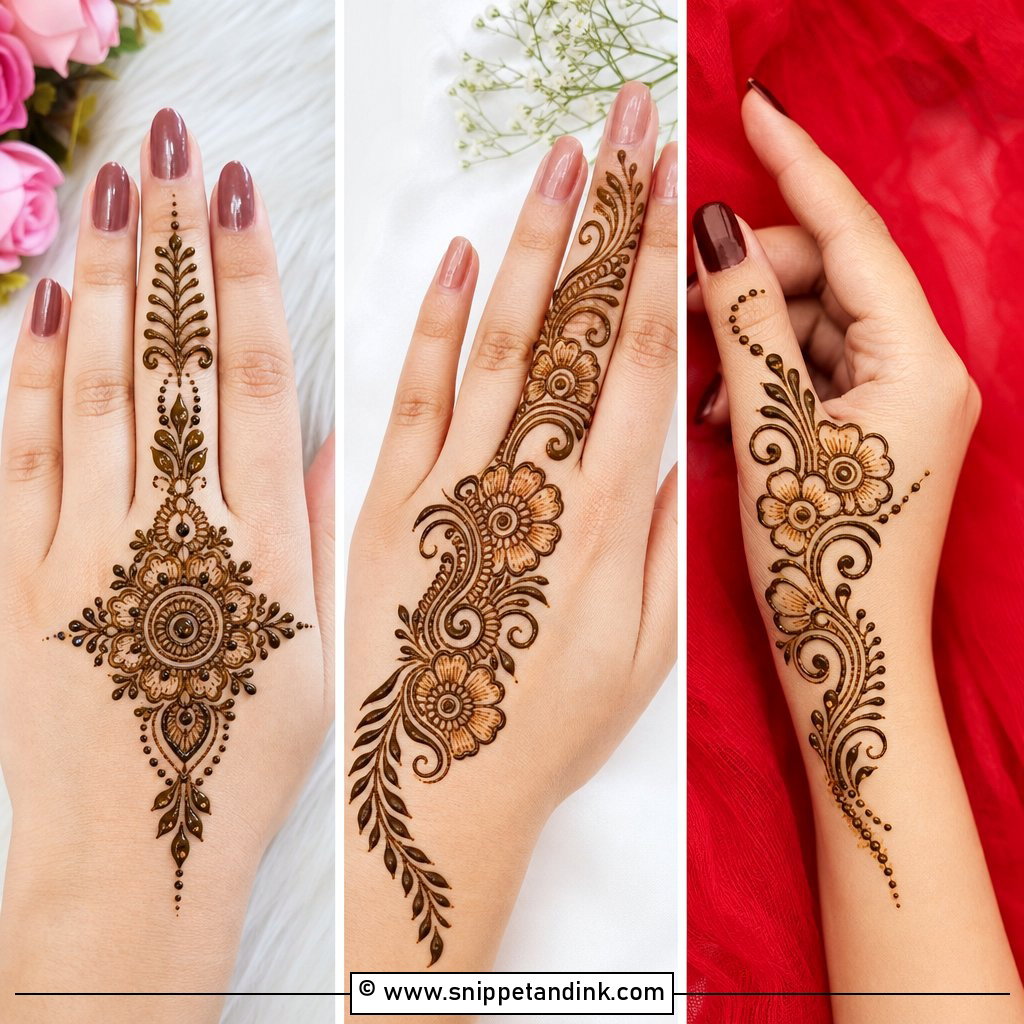
Minimal designs rely on placement: fingers, wrist and the centre of the palm, with lots of clean skin around them. I keep lines slim and avoid filling motifs completely, so the stain has contrast. Small florals, dots and a tiny mandala are enough. It sits well with sleek outfits and simple jewellery. One honest note: a light design shows any uneven staining more clearly, so prep your hands well.
6. Back Hand Bridal Wedding Henna Design
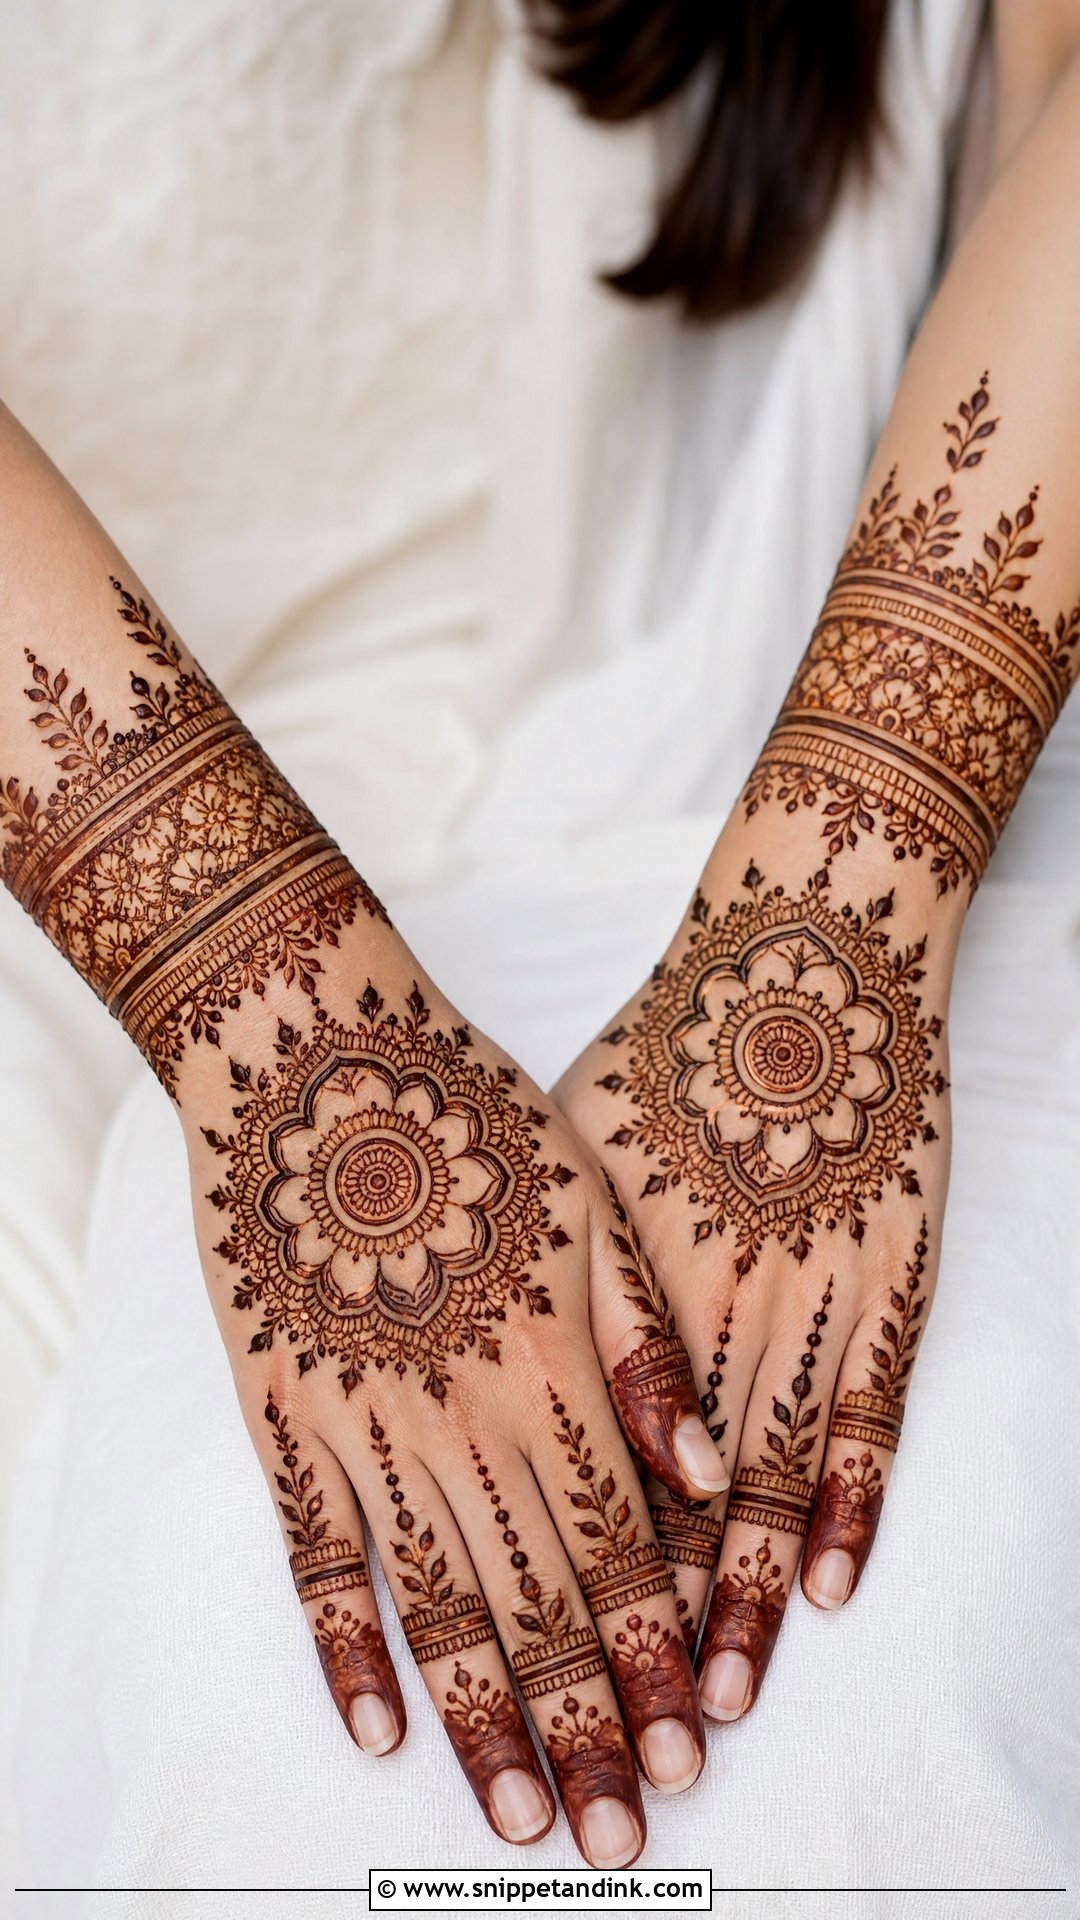
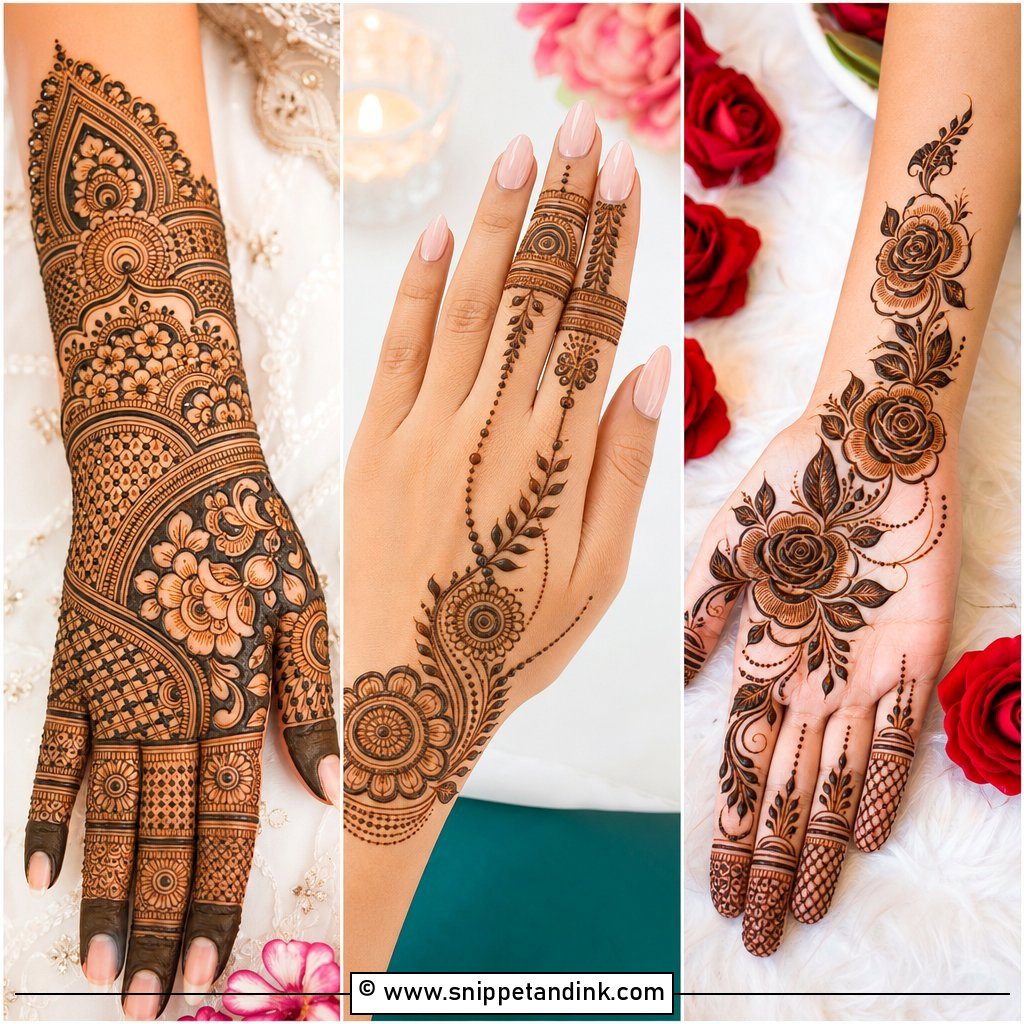
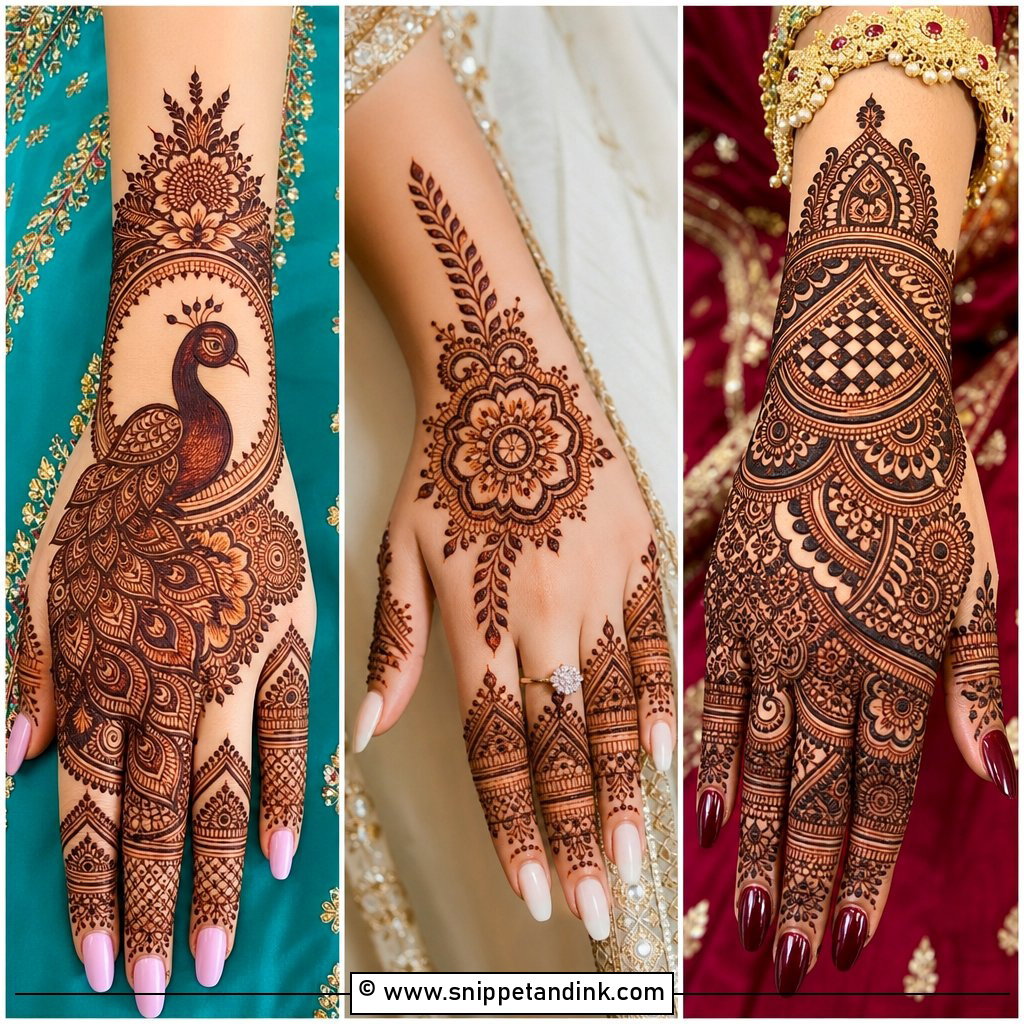
The back of the hand is what shows in ring shots and bouquet photos, so I plan it around the fingers and wrist. A central mandala with vines running up each finger is the classic layout. I follow the length of the fingers rather than cutting across them, which makes hands look longer. Back-hand skin stains lighter than palms, so expect a softer colour there.
7. Palm Bridal Wedding Henna Design
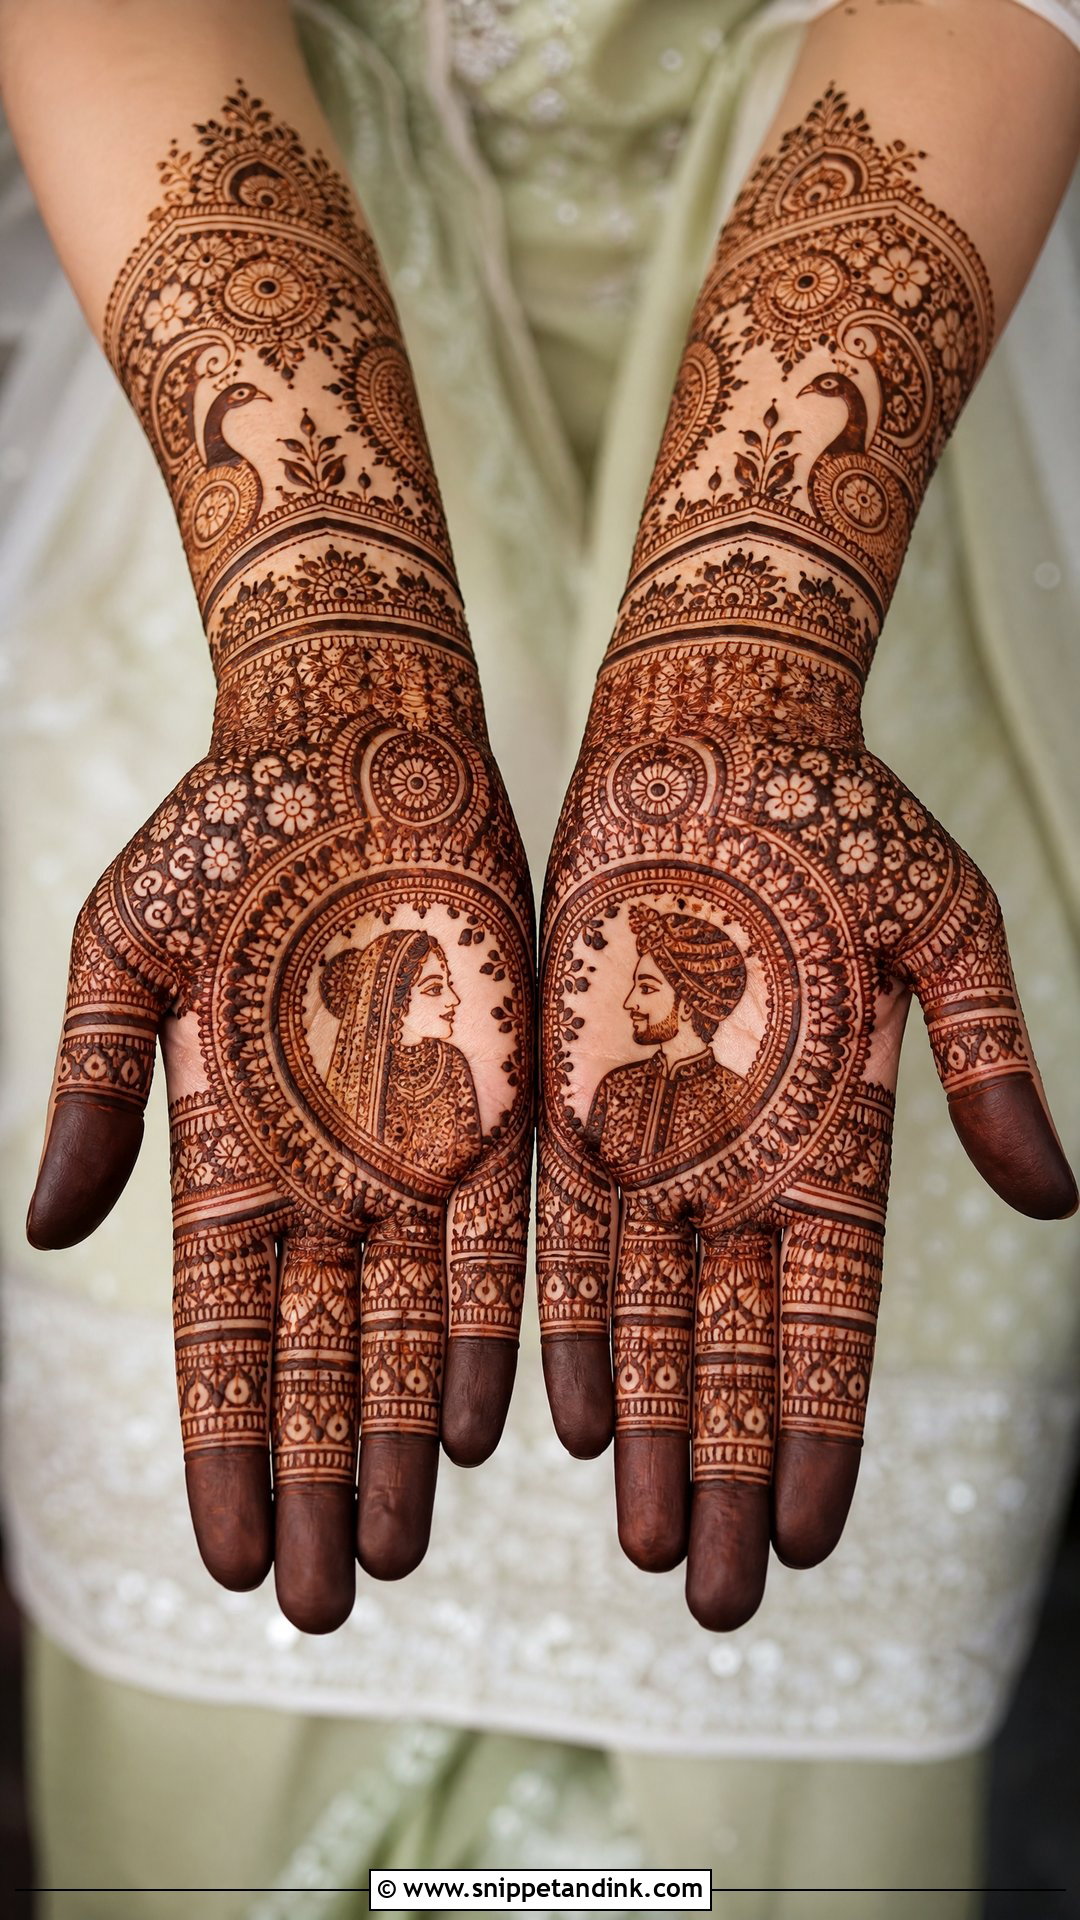
Palms stain the darkest of any area on the body, because the skin there is thicker. That’s why I save the most detailed storytelling for the palms: mandalas, paisleys, peacocks, and bride and groom figures split across the two hands, with floral borders tying them together. Dense fingertips and a wrist extension finish the look. Keep in mind you’ll avoid using your hands for hours while it dries.
8. Full Arm Bridal Wedding Henna Design
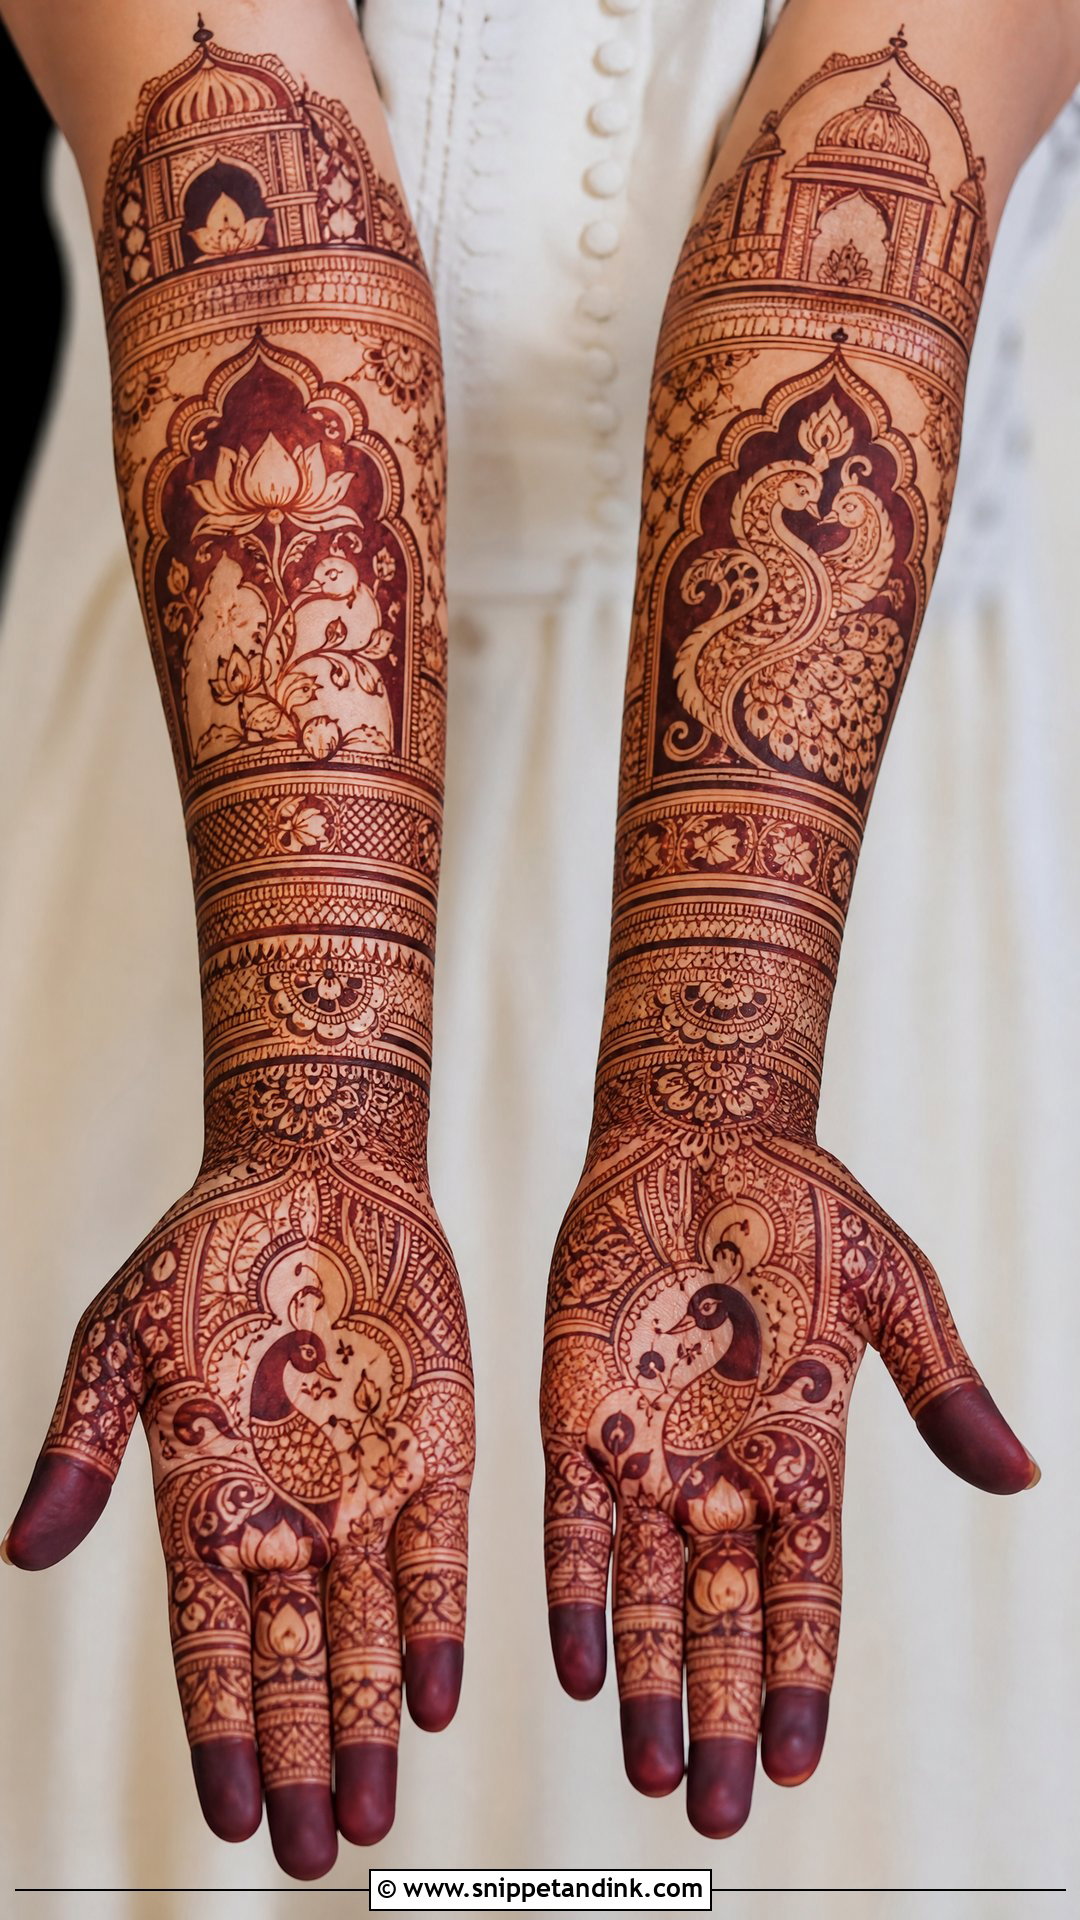
Full-arm bridal henna starts at the fingertips and runs past the wrist toward the elbow. On this much skin, layout is everything. I break it into horizontal sections with wide bands, then fill each with a different motif, so the arm doesn’t turn into one dense mass. Upper arms stain lighter than hands, so the colour fades gradually upward. Allow a full afternoon or evening for application.
9. Bridal Wedding Henna With Initials
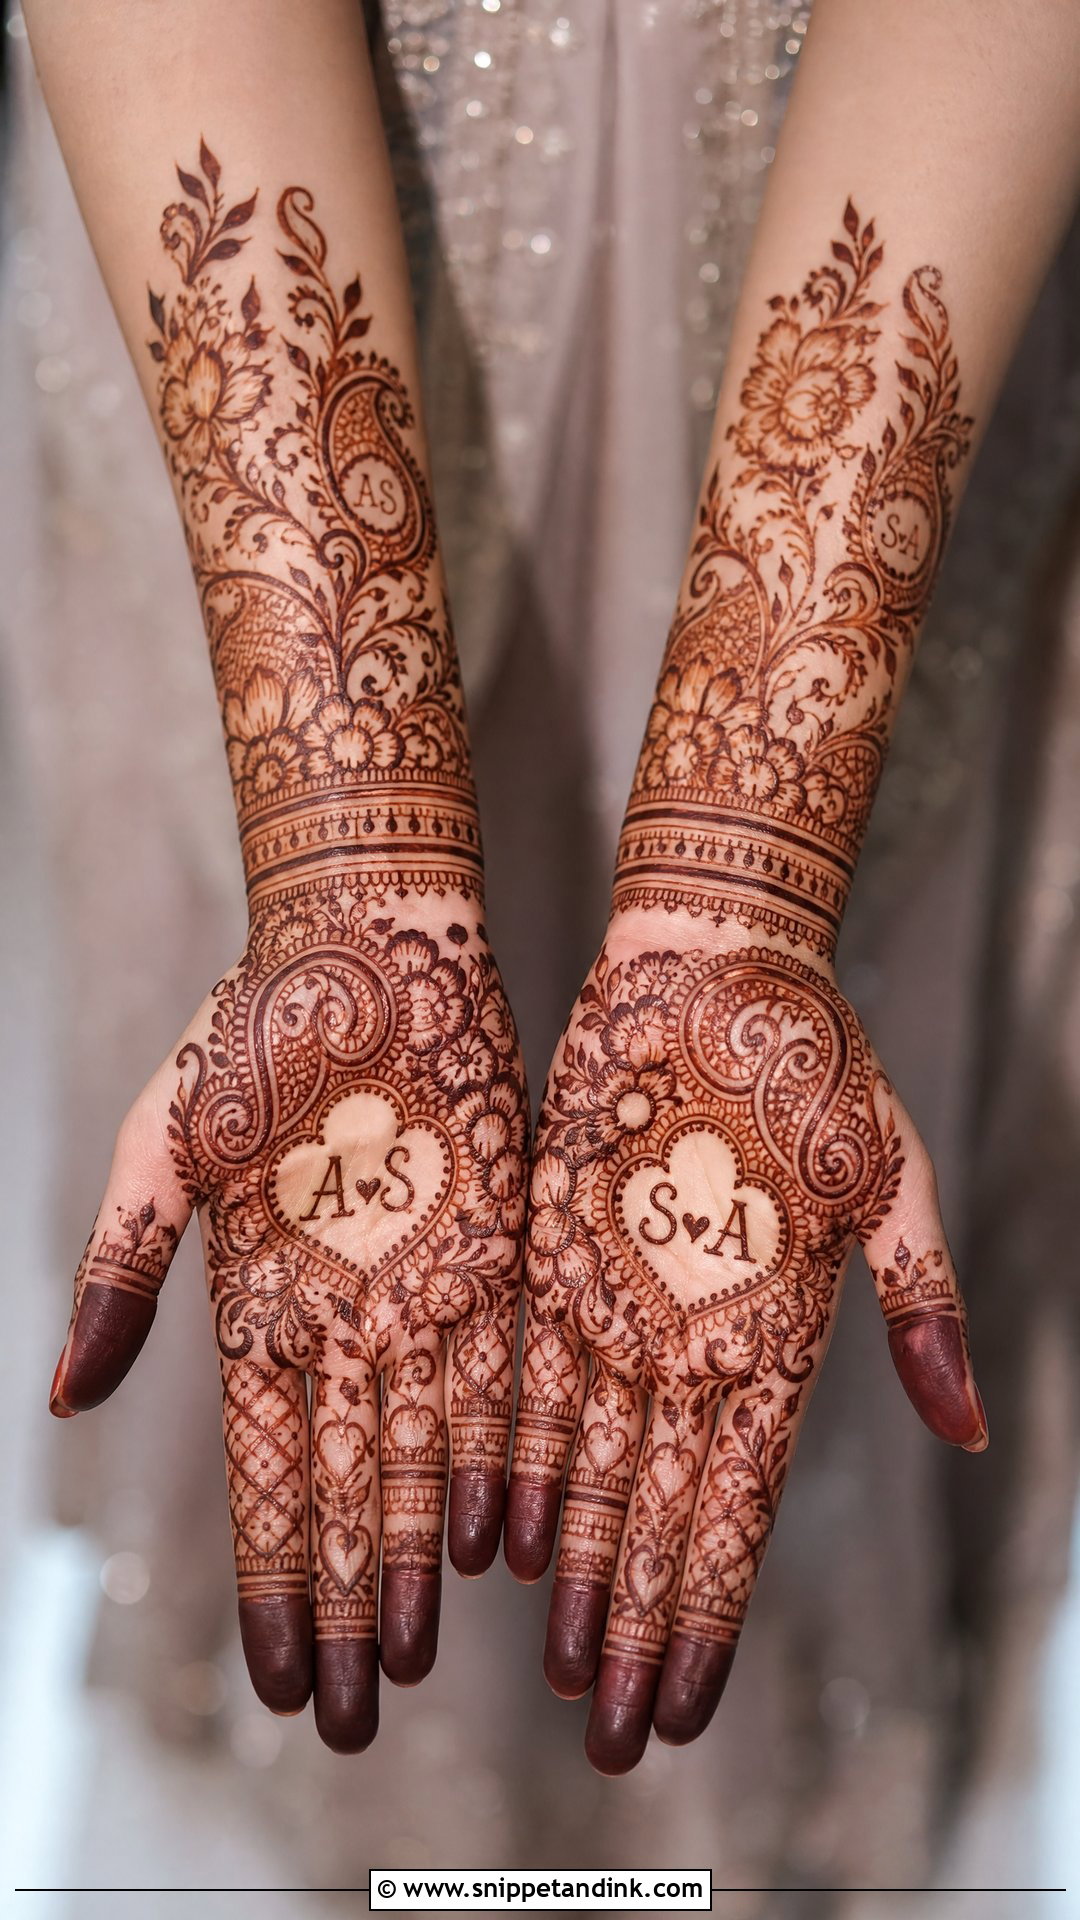
Initials can hide in a paisley, a mandala, a wrist band or a leafy vine. The trick is to write them in the same line weight as the pattern around them, so they blend in rather than looking added on. Some couples turn finding the initials into a game. It works in Indian, Arabic and Indo-Arabic layouts. A small date or heart can sit nearby.
10. Bridal Wedding Henna With Bride And Groom Art
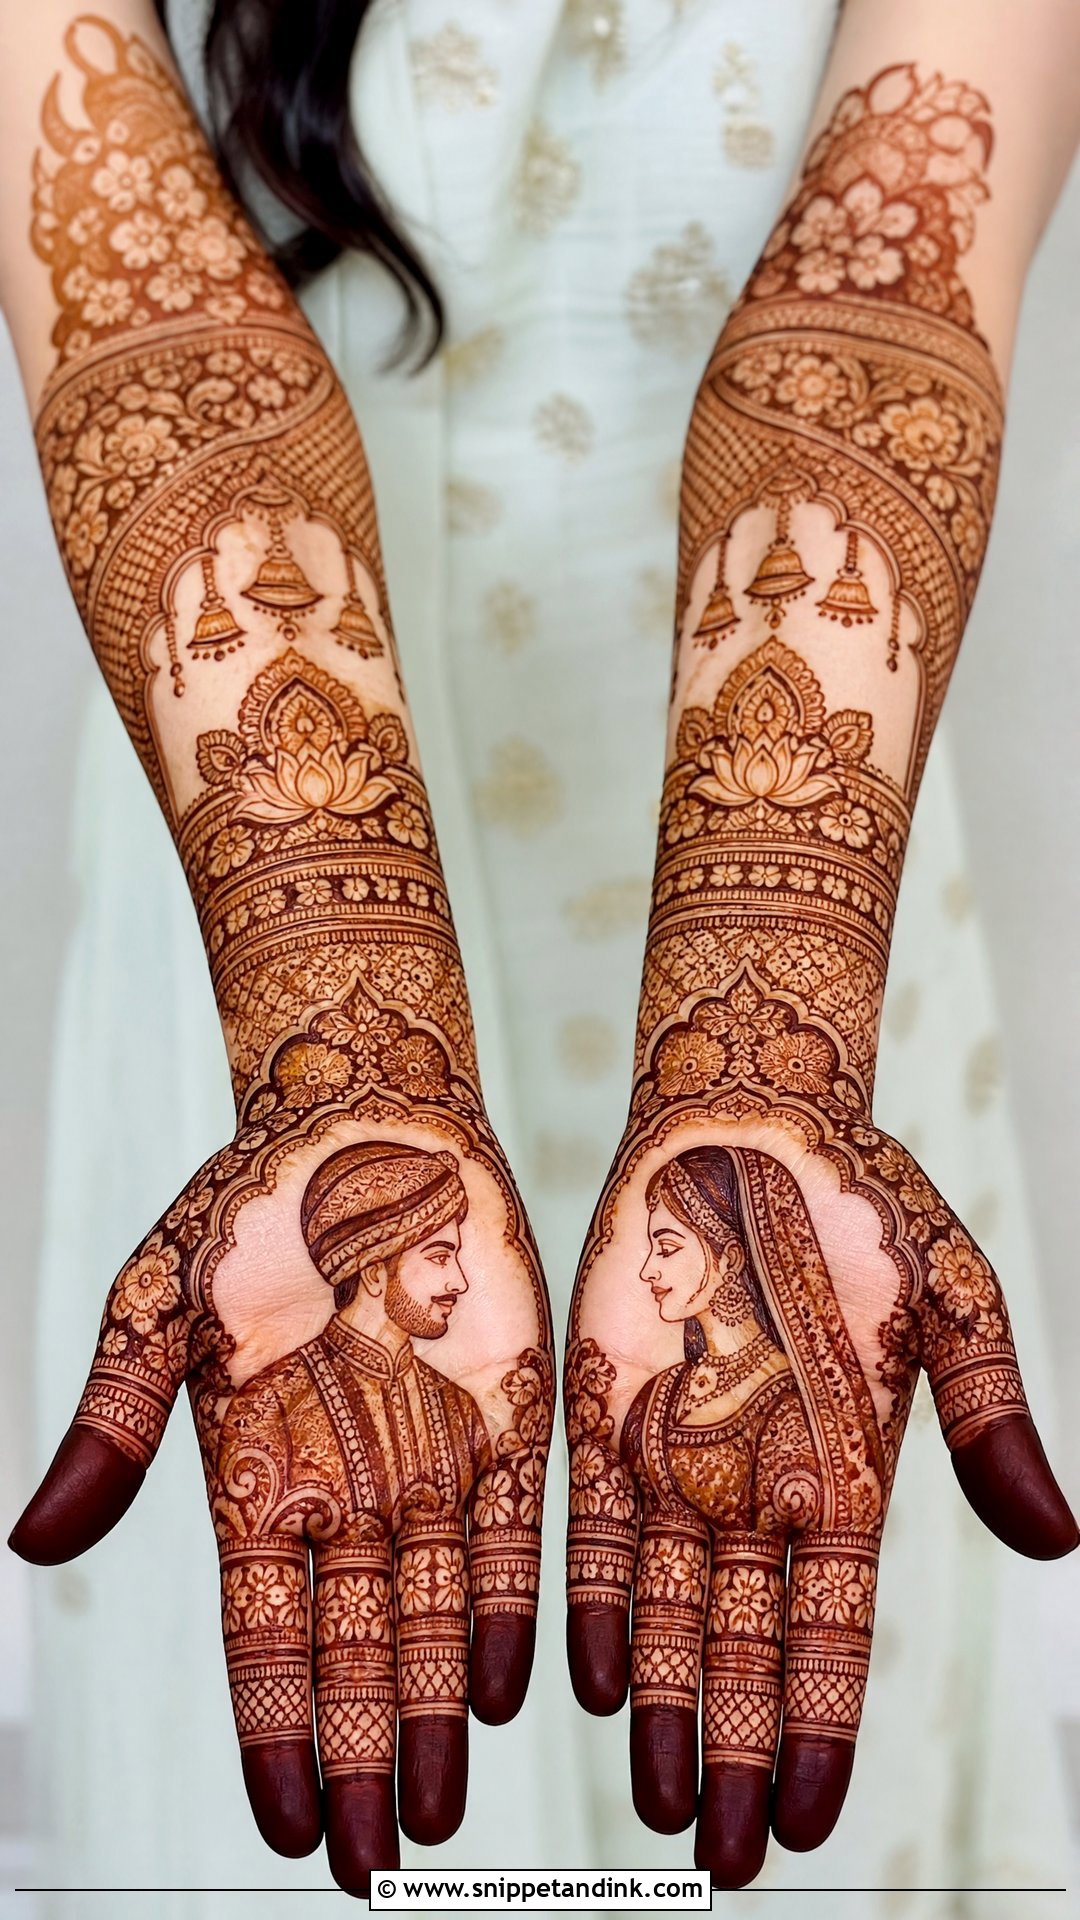
Bride and groom figures are some of the most precise work I do. Faces are tiny, and a single shaky line changes the expression, so I draw them first while my hand is fresh and the paste is at its best consistency. Florals, arches and borders frame them. Placing the bride on one palm and the groom on the other means the story is complete when the hands come together, which makes a lovely photo.
11. Peacock Bridal Wedding Henna Design
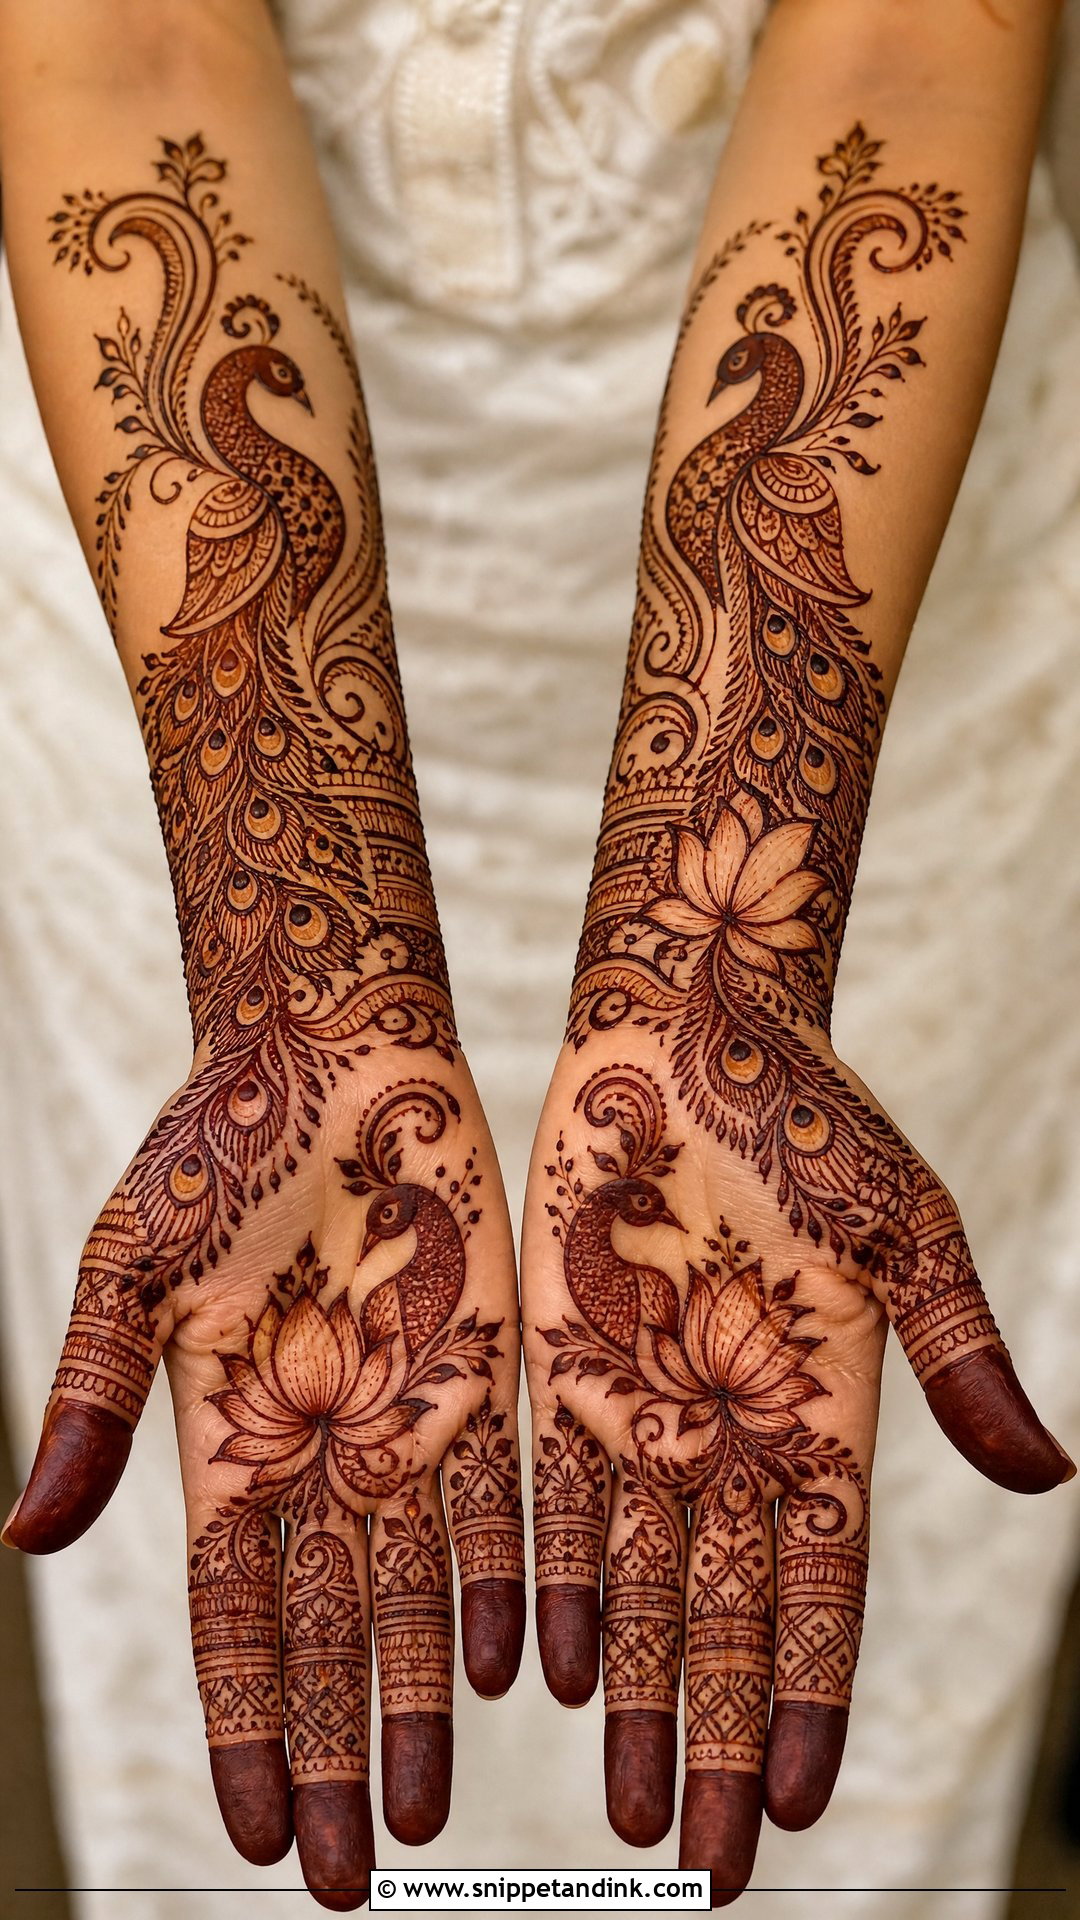
A peacock bridal wedding henna design usually puts the bird on the palm, wrist or forearm, with feathers flowing into paisleys and vines. I curve the feathers along the natural line of the hand, which gives the design movement. It works in full traditional layouts or lighter Indo-Arabic ones. Fine feather lines need a thin cone tip and steady paste.
12. Floral Bridal Wedding Henna Design
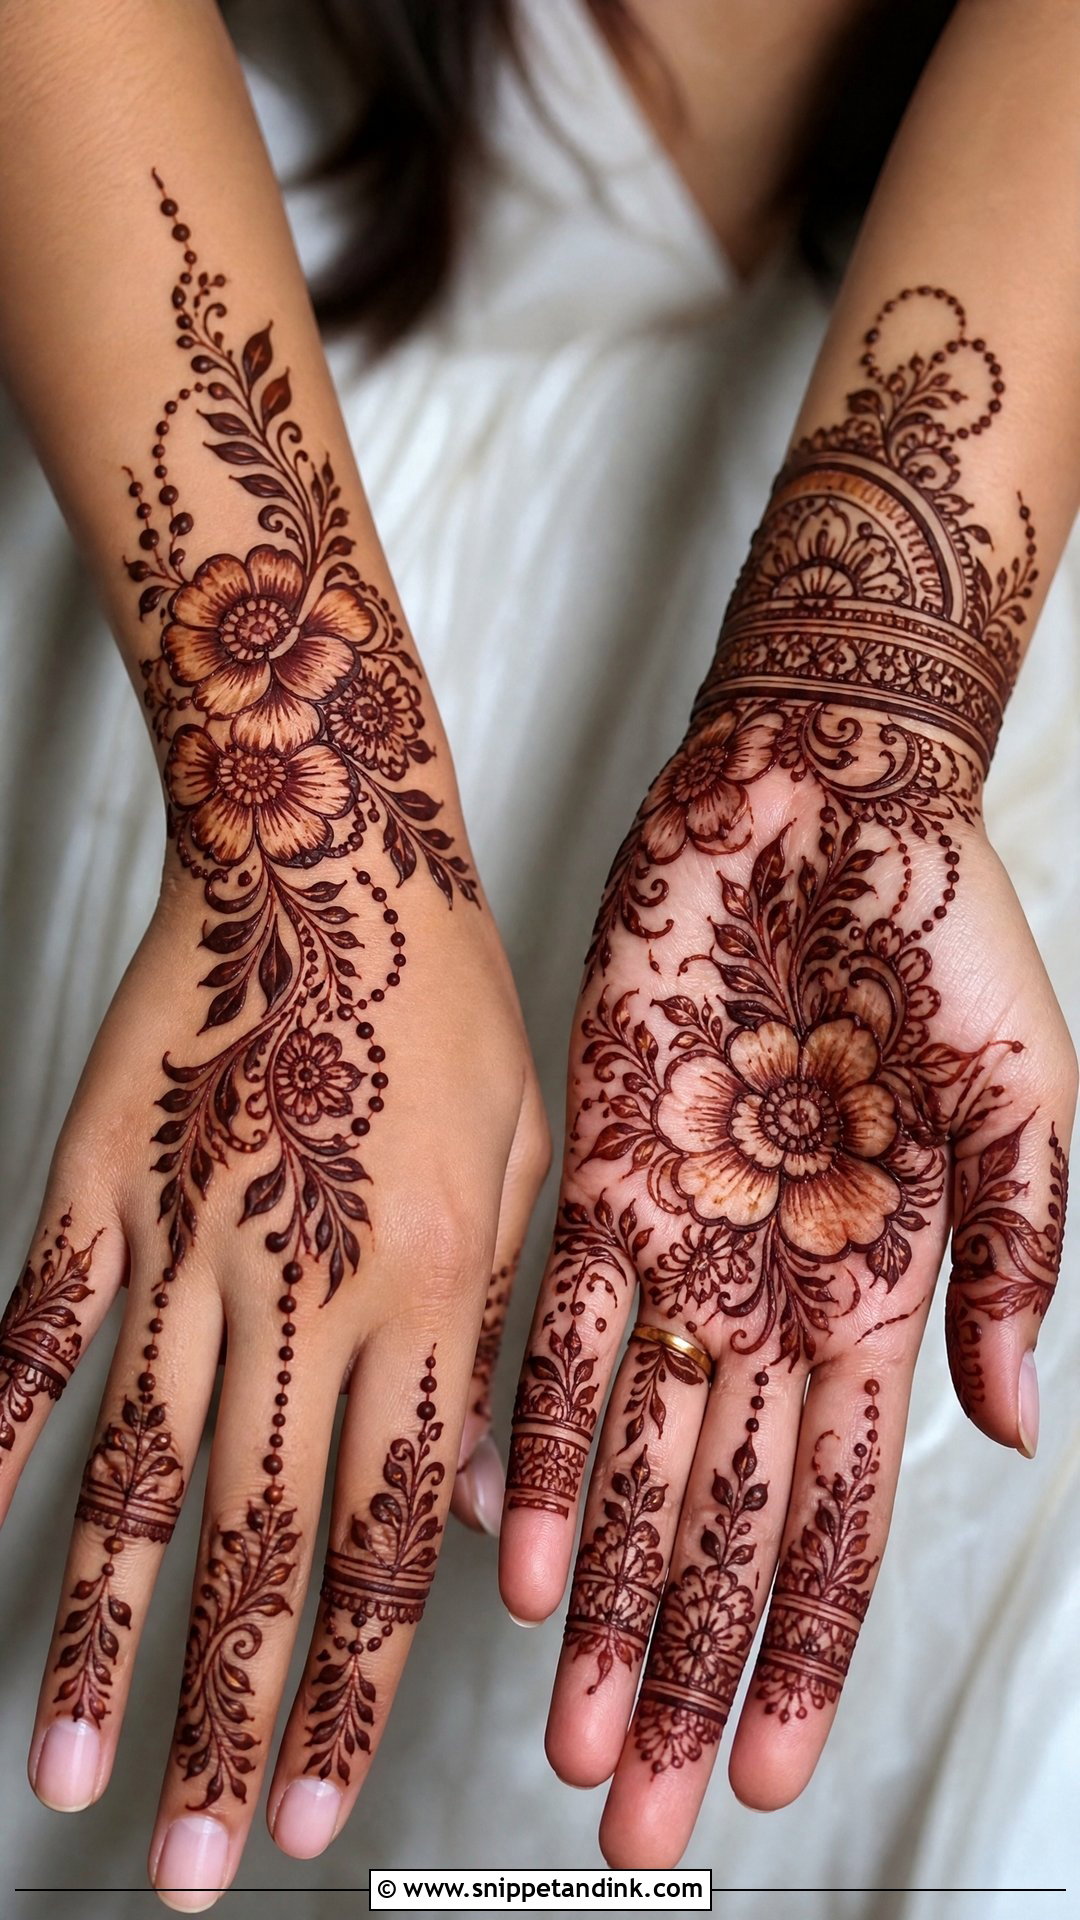
Florals scale easily, which is why they suit every hand shape. Large flowers anchor the palm or back hand, and smaller blossoms and leaves connect the fingers and wrist. I add shading inside petals by leaving fine gaps, so they read as dimensional once stained. Pair flowers with dots or bracelet bands to finish.
13. Paisley Bridal Wedding Henna Design
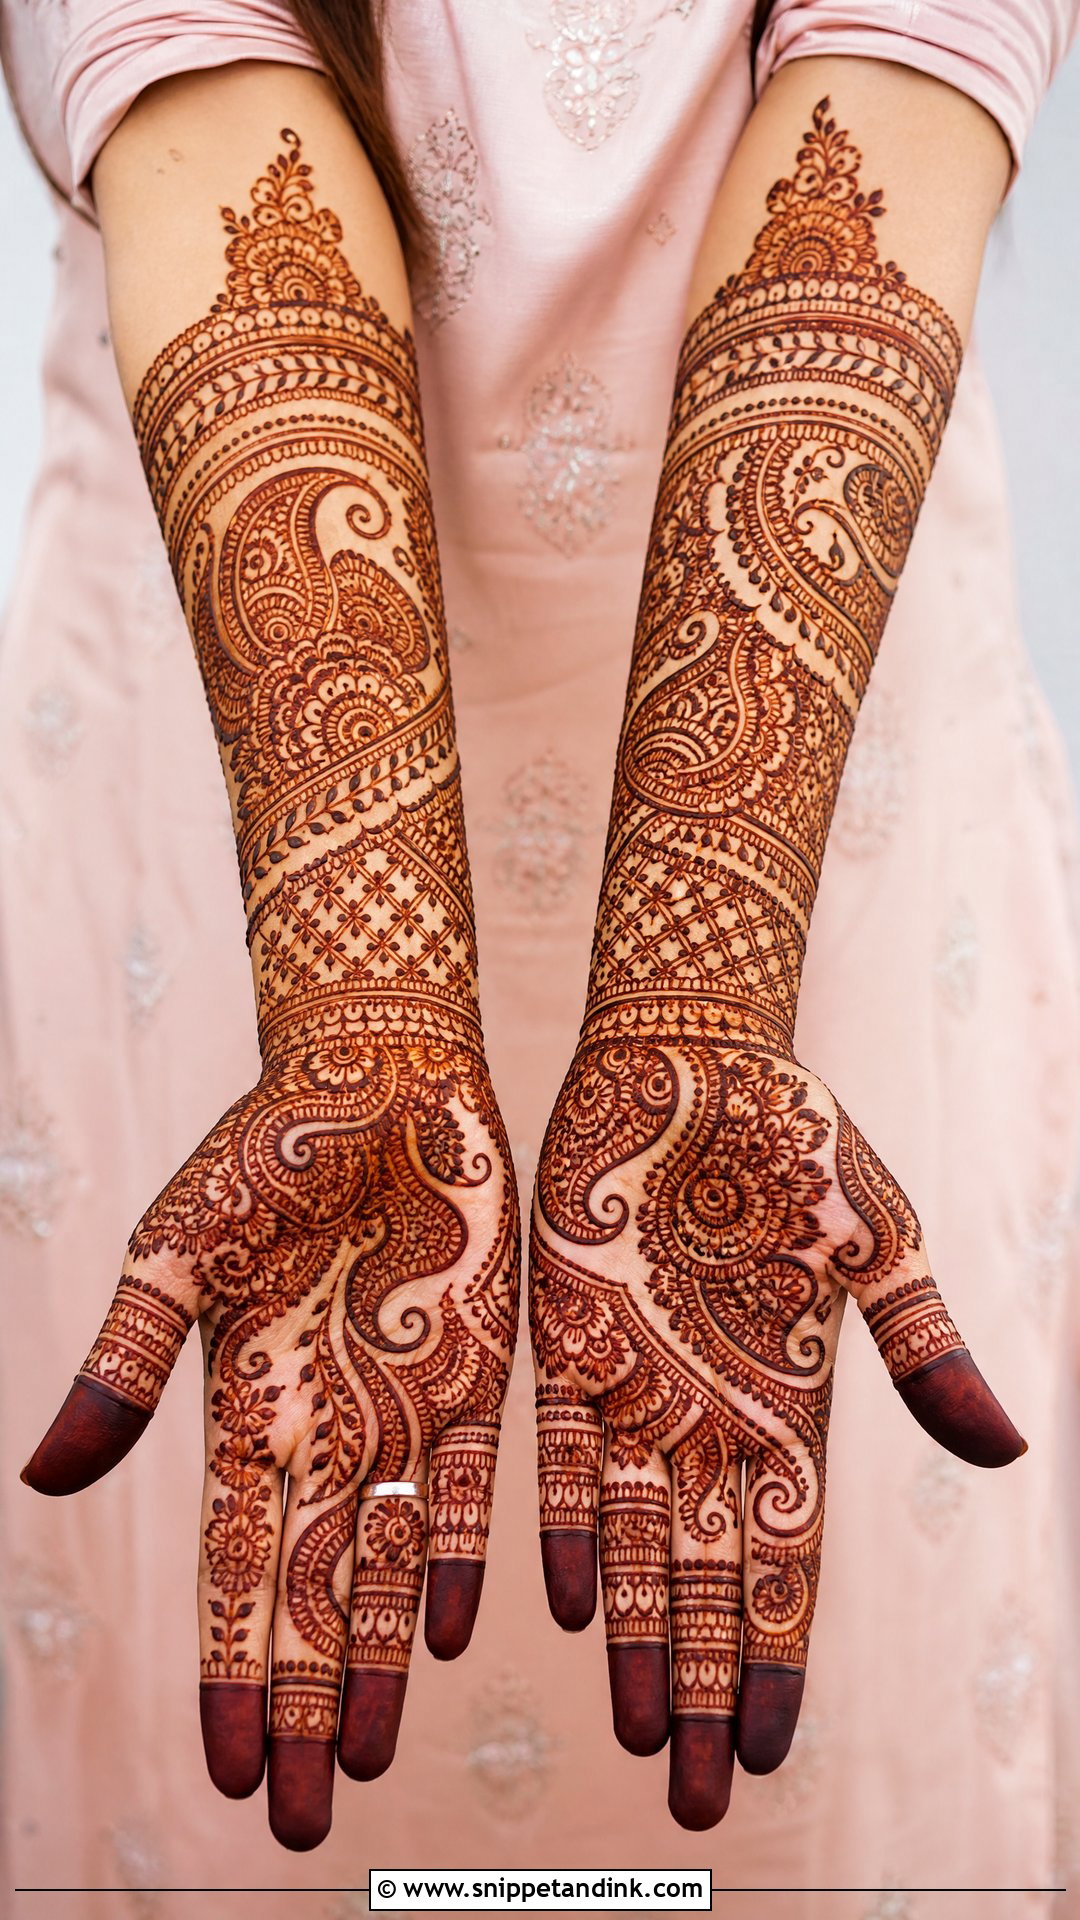
Paisleys are the backbone of traditional mehndi. Large ones on the palm or forearm, filled with florals, curls and fine lines, give a rich South Asian bridal look. Smaller paisleys work as fillers or on the fingers. I often hide initials in the tail of a paisley. This style pairs well with heavy lehengas and sarees.
14. Mandala Bridal Wedding Henna Design
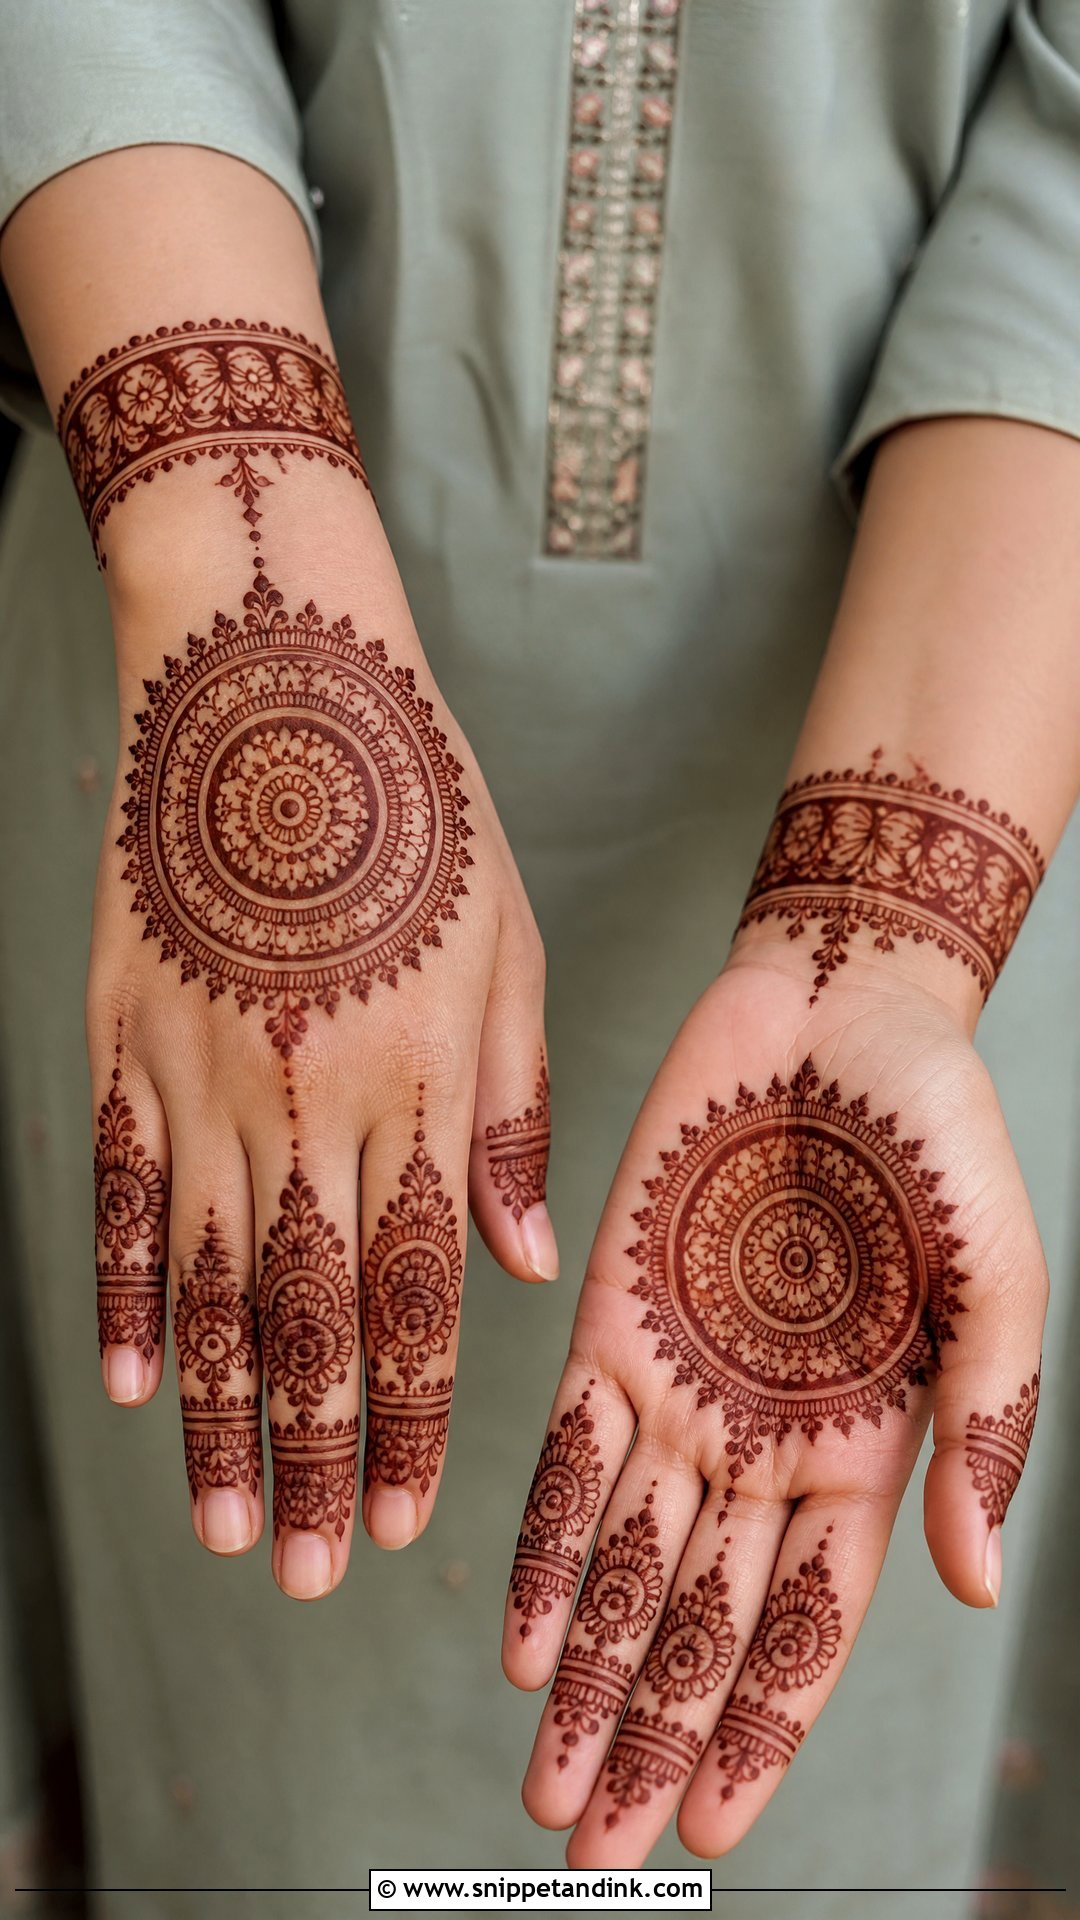
A mandala gives a design a centre. I place it in the palm or on the back of the hand, then build out with finger patterns and wrist bands. Drawing perfect circles freehand takes practice, so I start from the centre dot and work outward ring by ring. With extra finger and wrist detail, a mandala design moves from bridesmaid to bridal level.
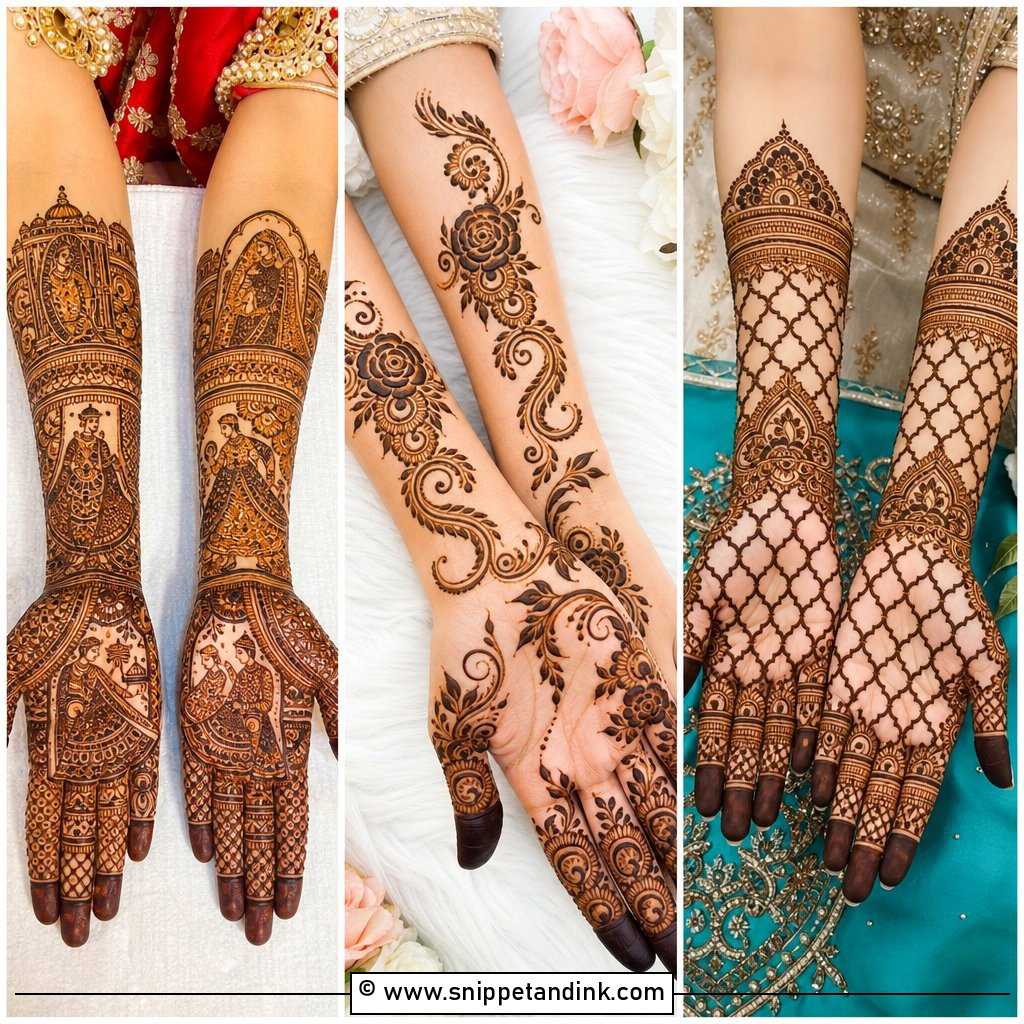
15. Jaali Bridal Wedding Henna Design
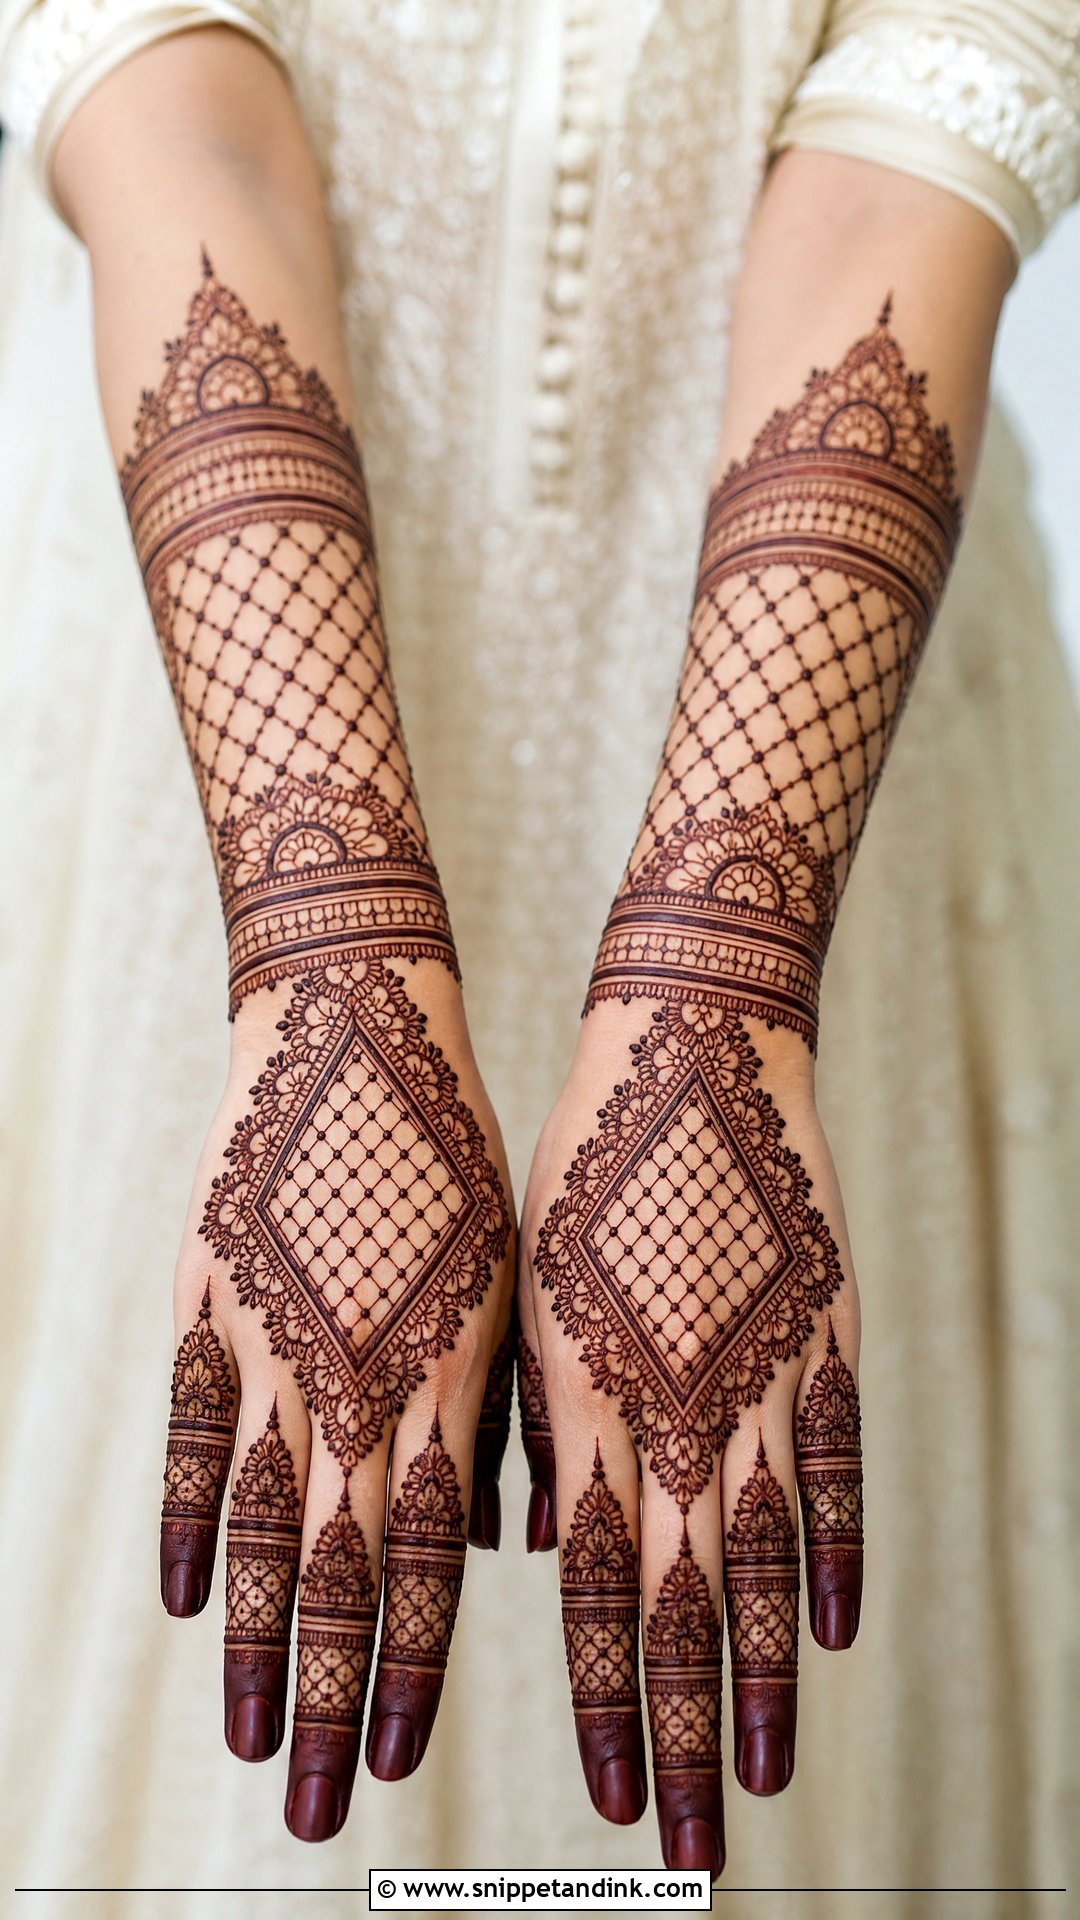
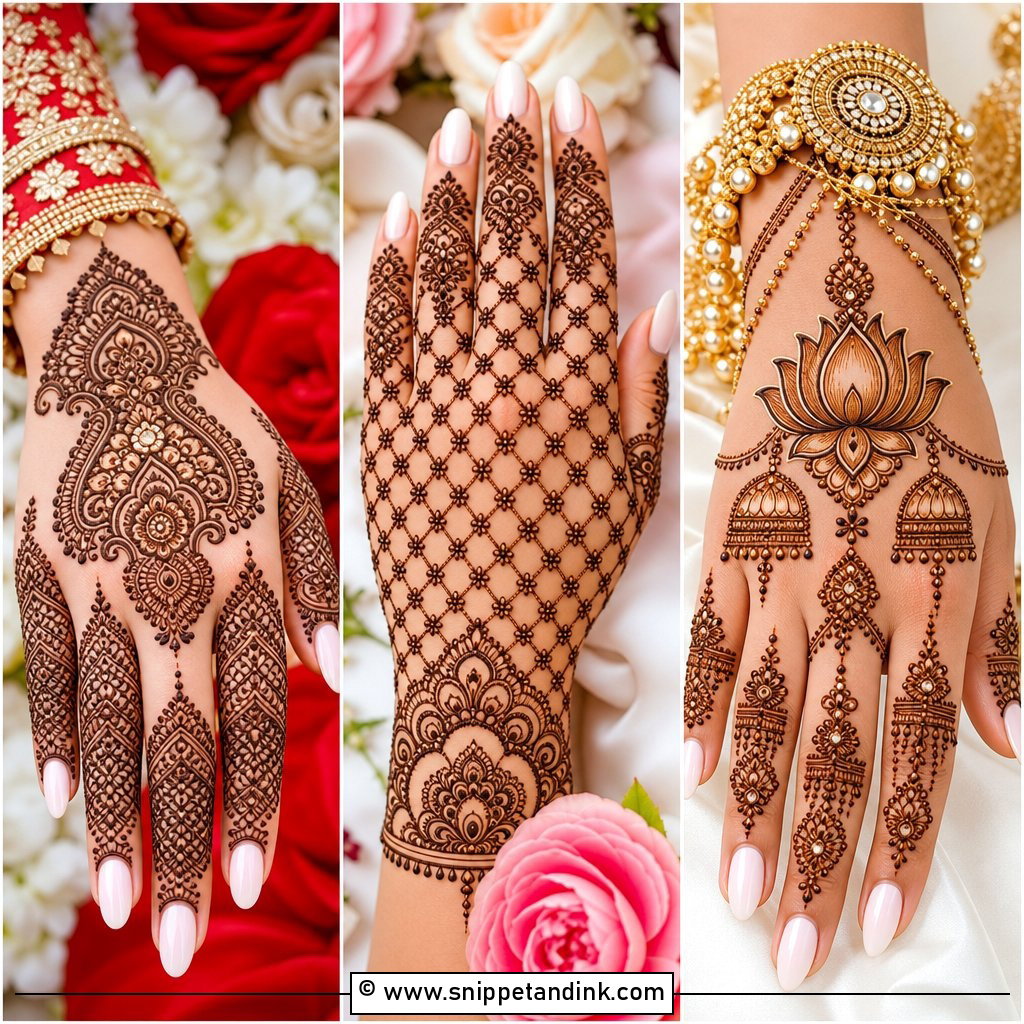
Jaali is mesh: grids, diamonds or curved net shapes that add texture without more flowers. I keep the lines even and the spacing consistent, then add small dots inside the grid for detail. The contrast between open mesh and dense sections makes it read clearly in photos. It frames rings and bangles well on the back hand.
16. Bracelet Bridal Wedding Henna Design
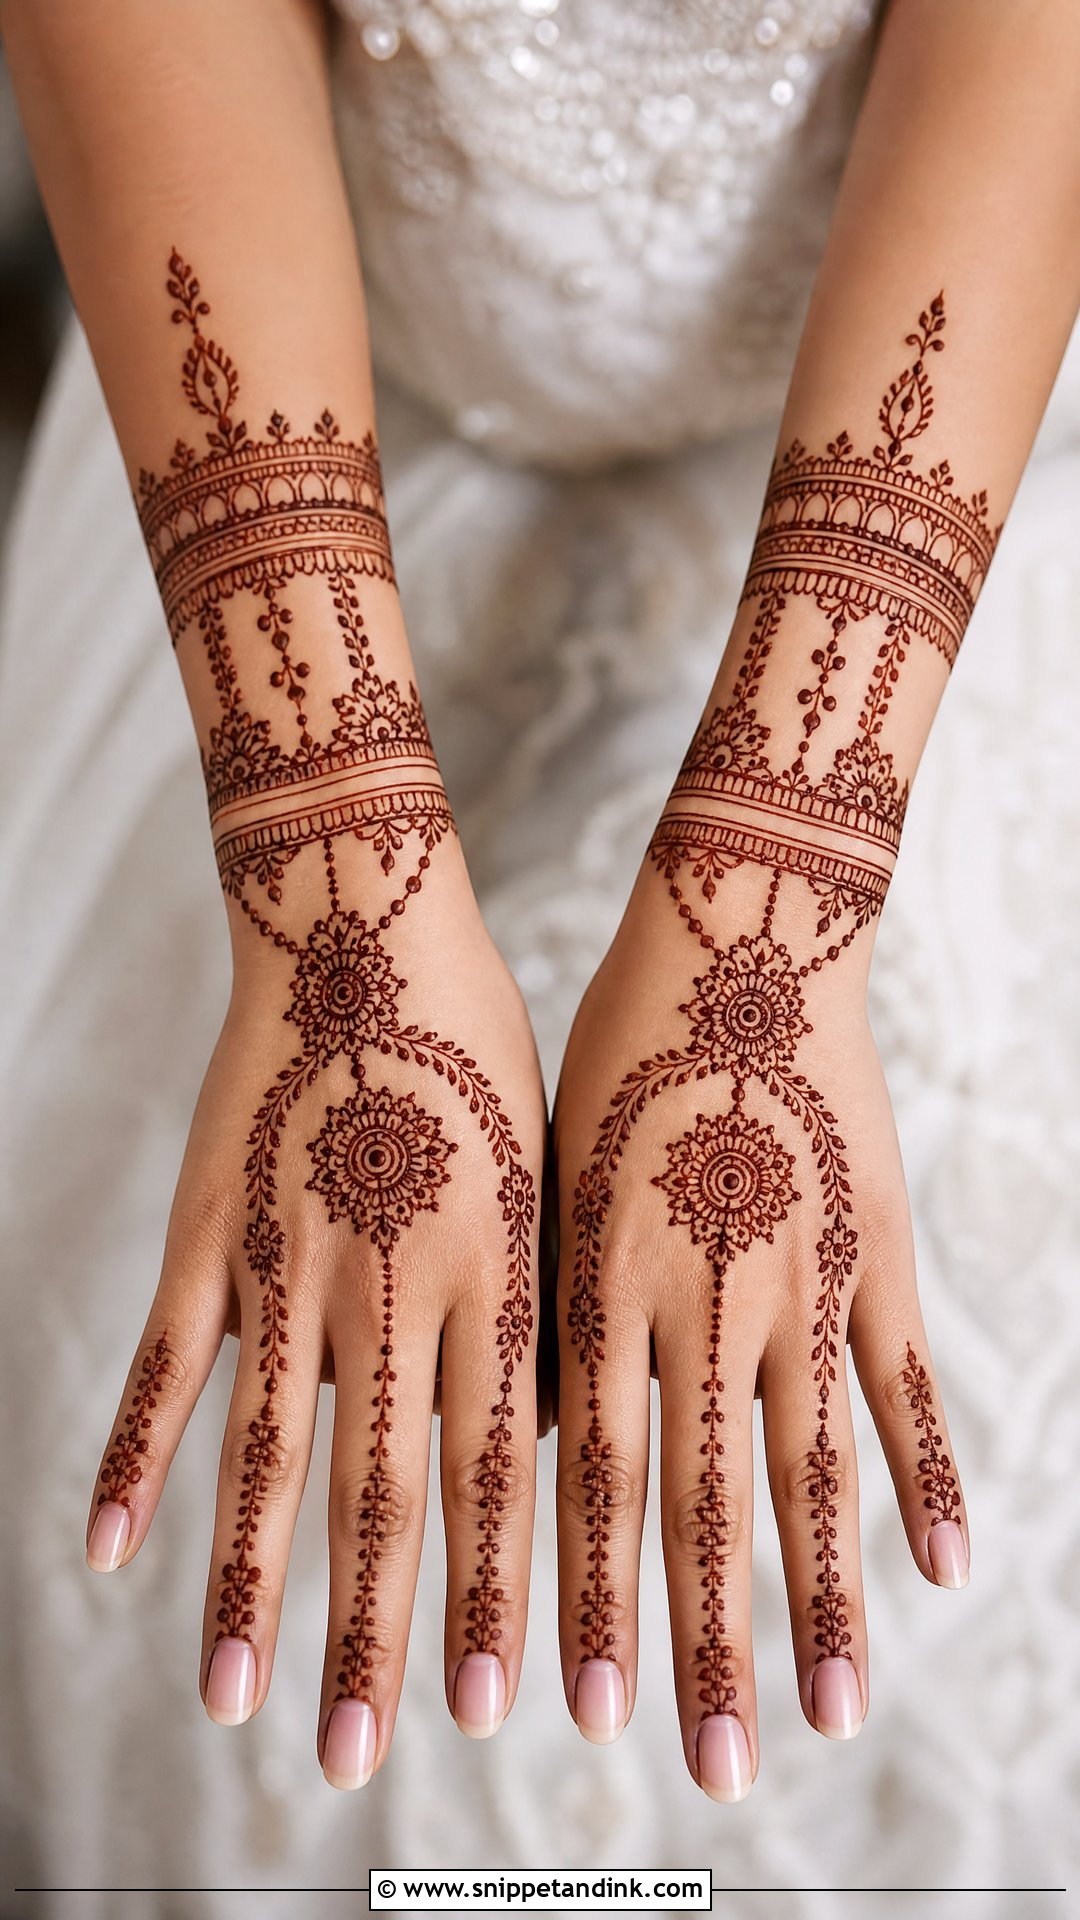
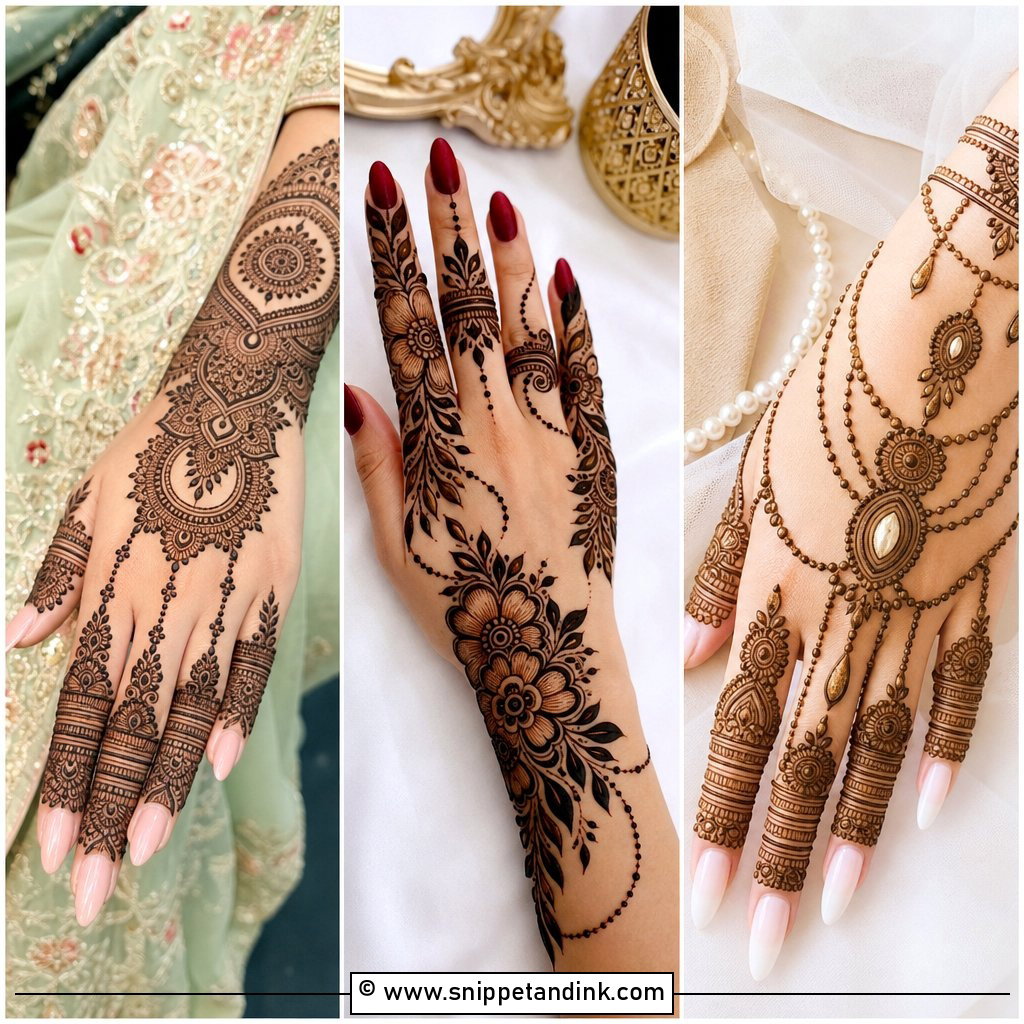
Bracelet designs make the wrist look like it’s wearing jewellery. I draw one or more bands around the wrist and connect them to the fingers with chains or vines. Thin bands suit minimal looks; wide cuffs can extend toward the forearm. Remember that real bangles will cover part of the band, so I place the main detail just above where they sit.
17. Finger Bridal Wedding Henna Design
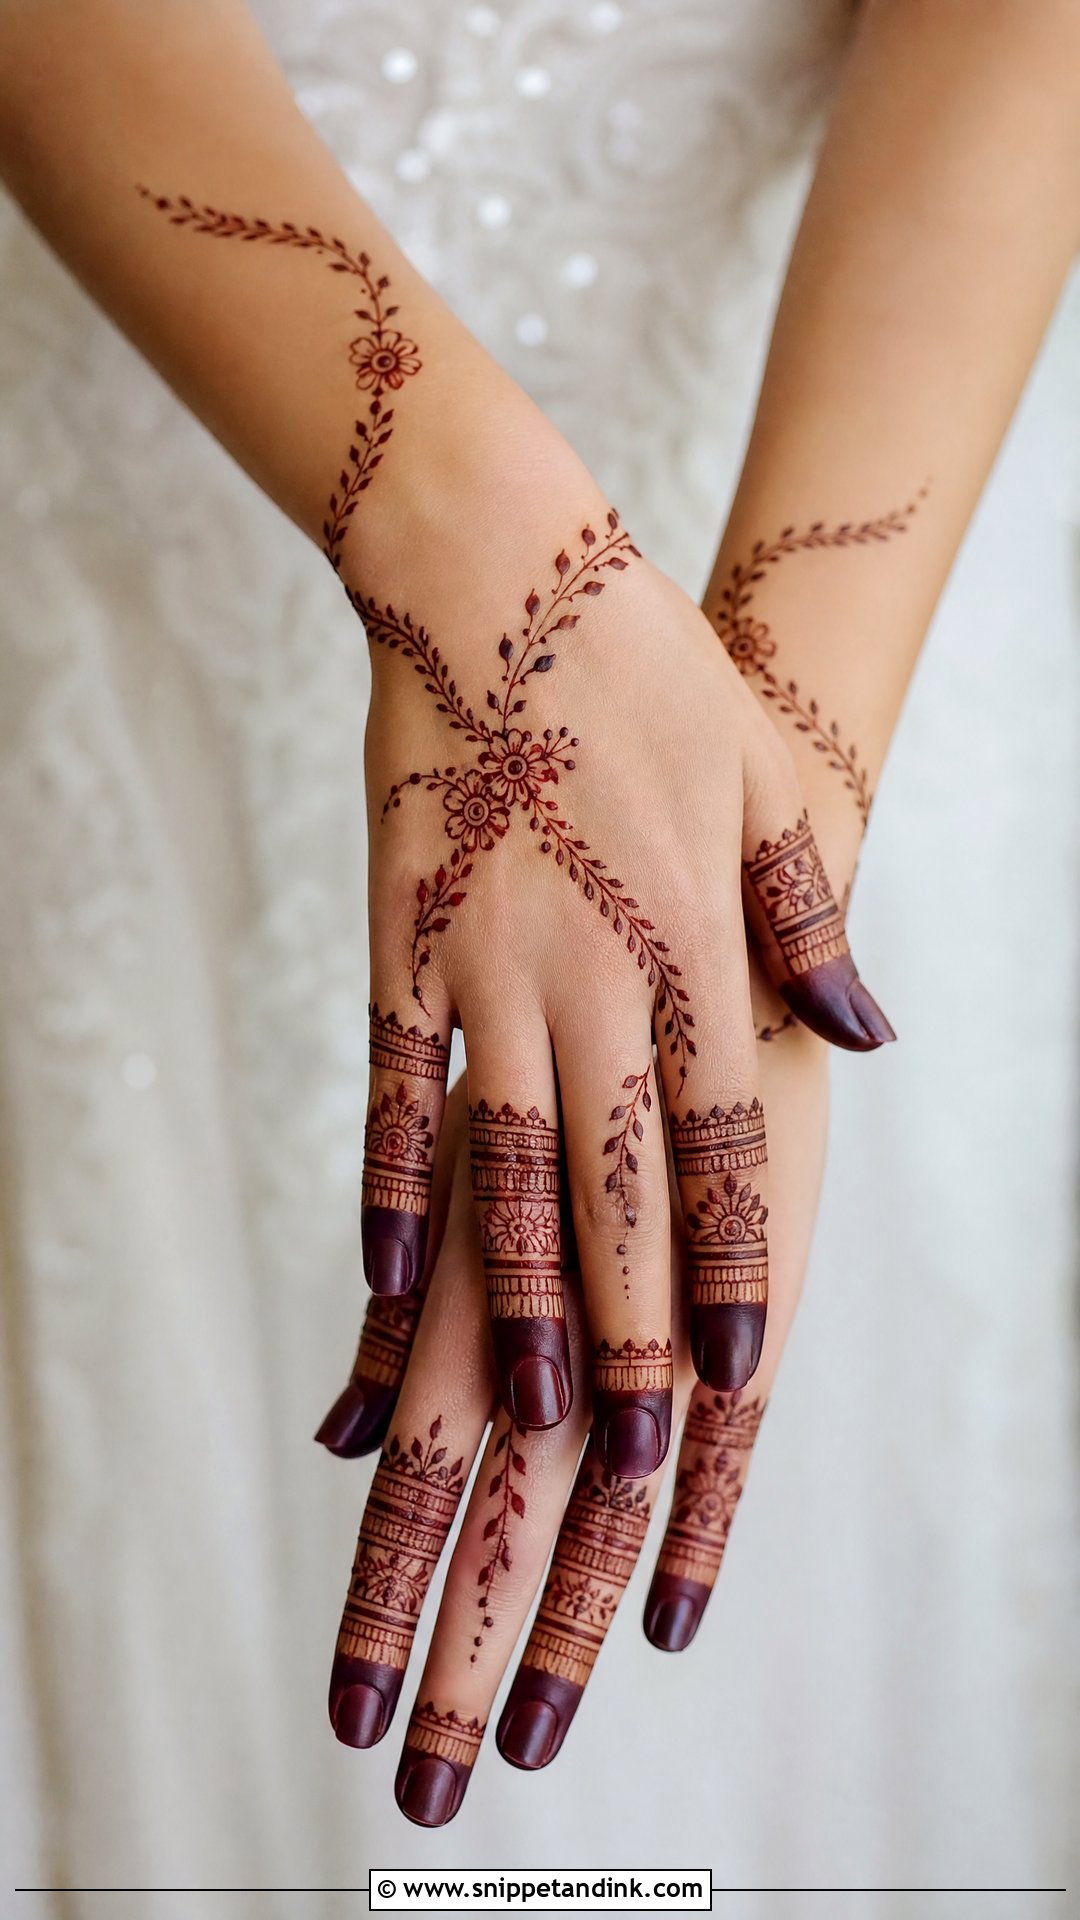
Finger-focused designs suit brides who want rings and nail colour to stand out. Filled fingertips, ring-like bands and fine geometric lines along each finger do most of the work. The palm can stay open. Fingertips stain very dark, so a fully filled tip will read as deep maroon. If you’re having a manicure, do it before the henna, not after.
18. Negative Space Bridal Wedding Henna Design
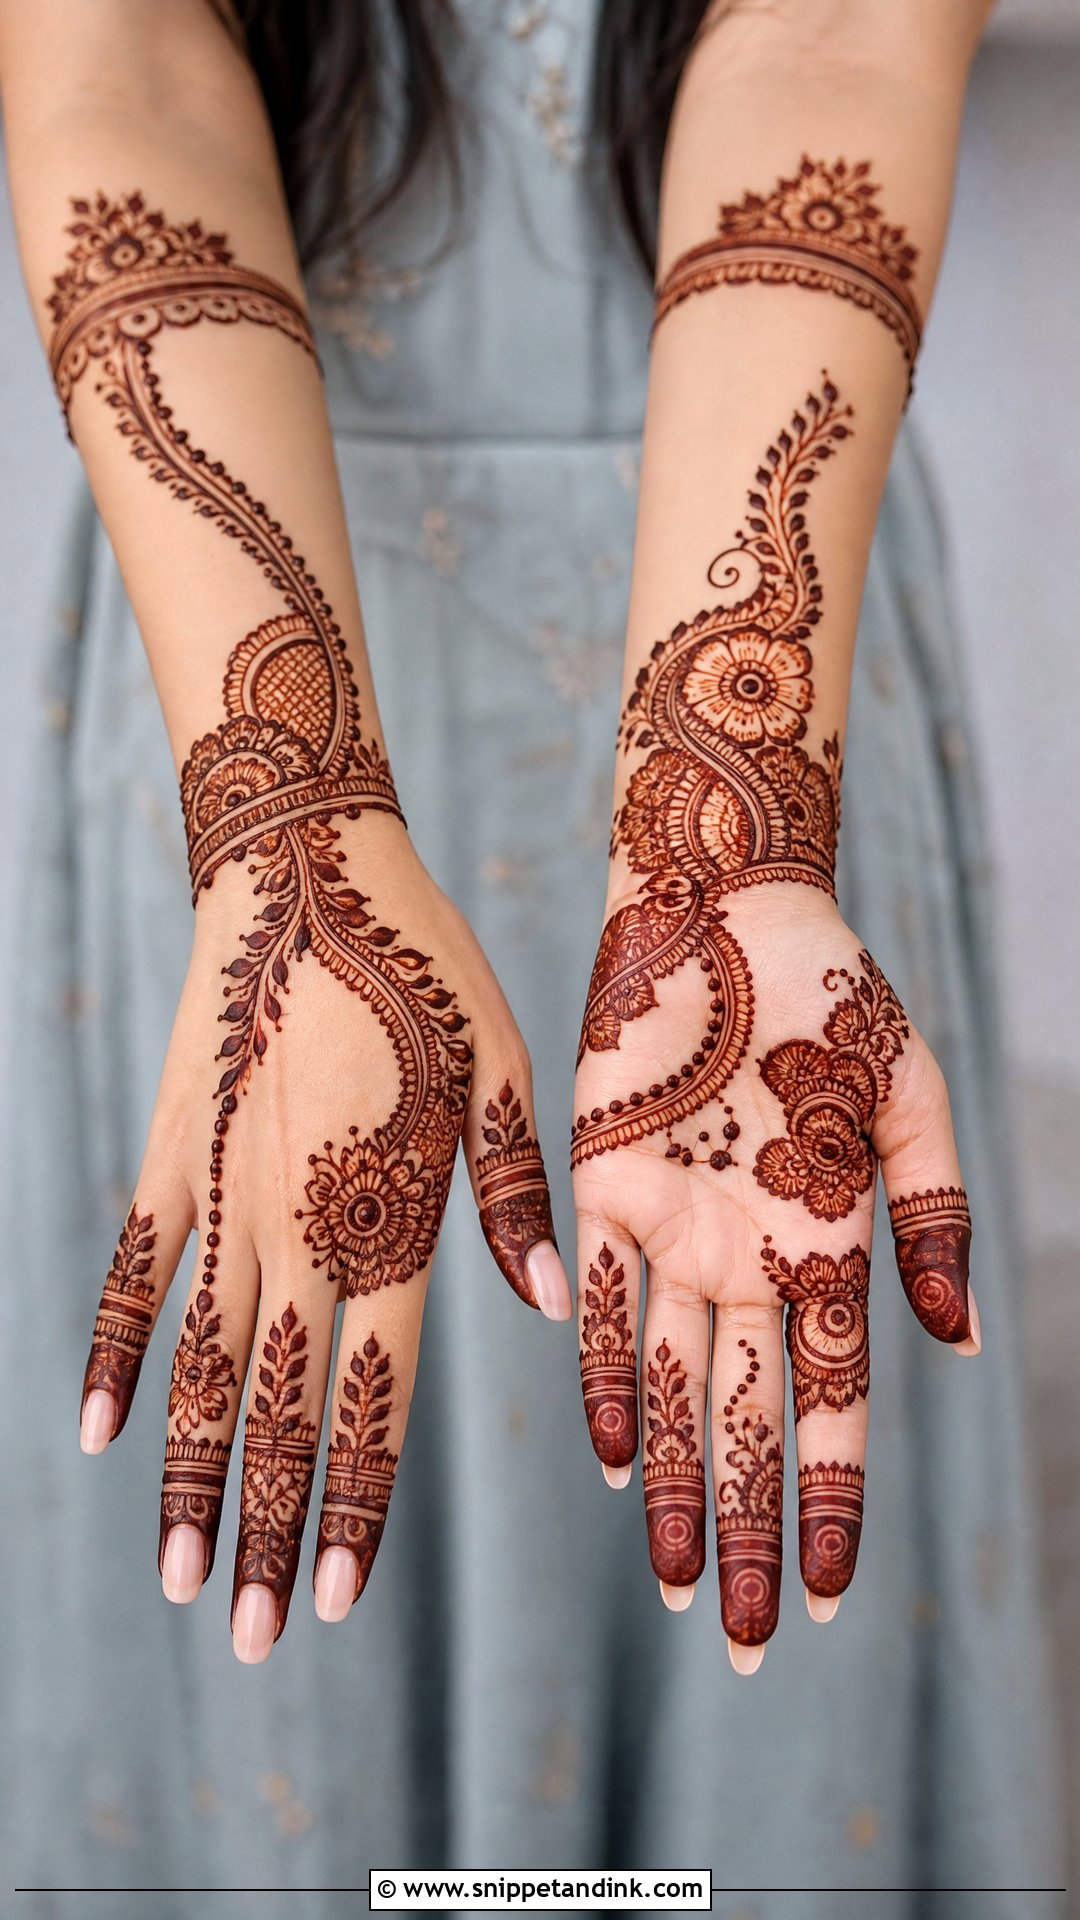
Negative space designs use clean skin as part of the pattern. Bold outlines and open gaps make florals and paisleys look sharper. The spacing has to look deliberate. I sketch the layout lightly on both hands first so they balance. The result is modern and still festive.
19. Gulf Khaleeji Bridal Wedding Henna Design
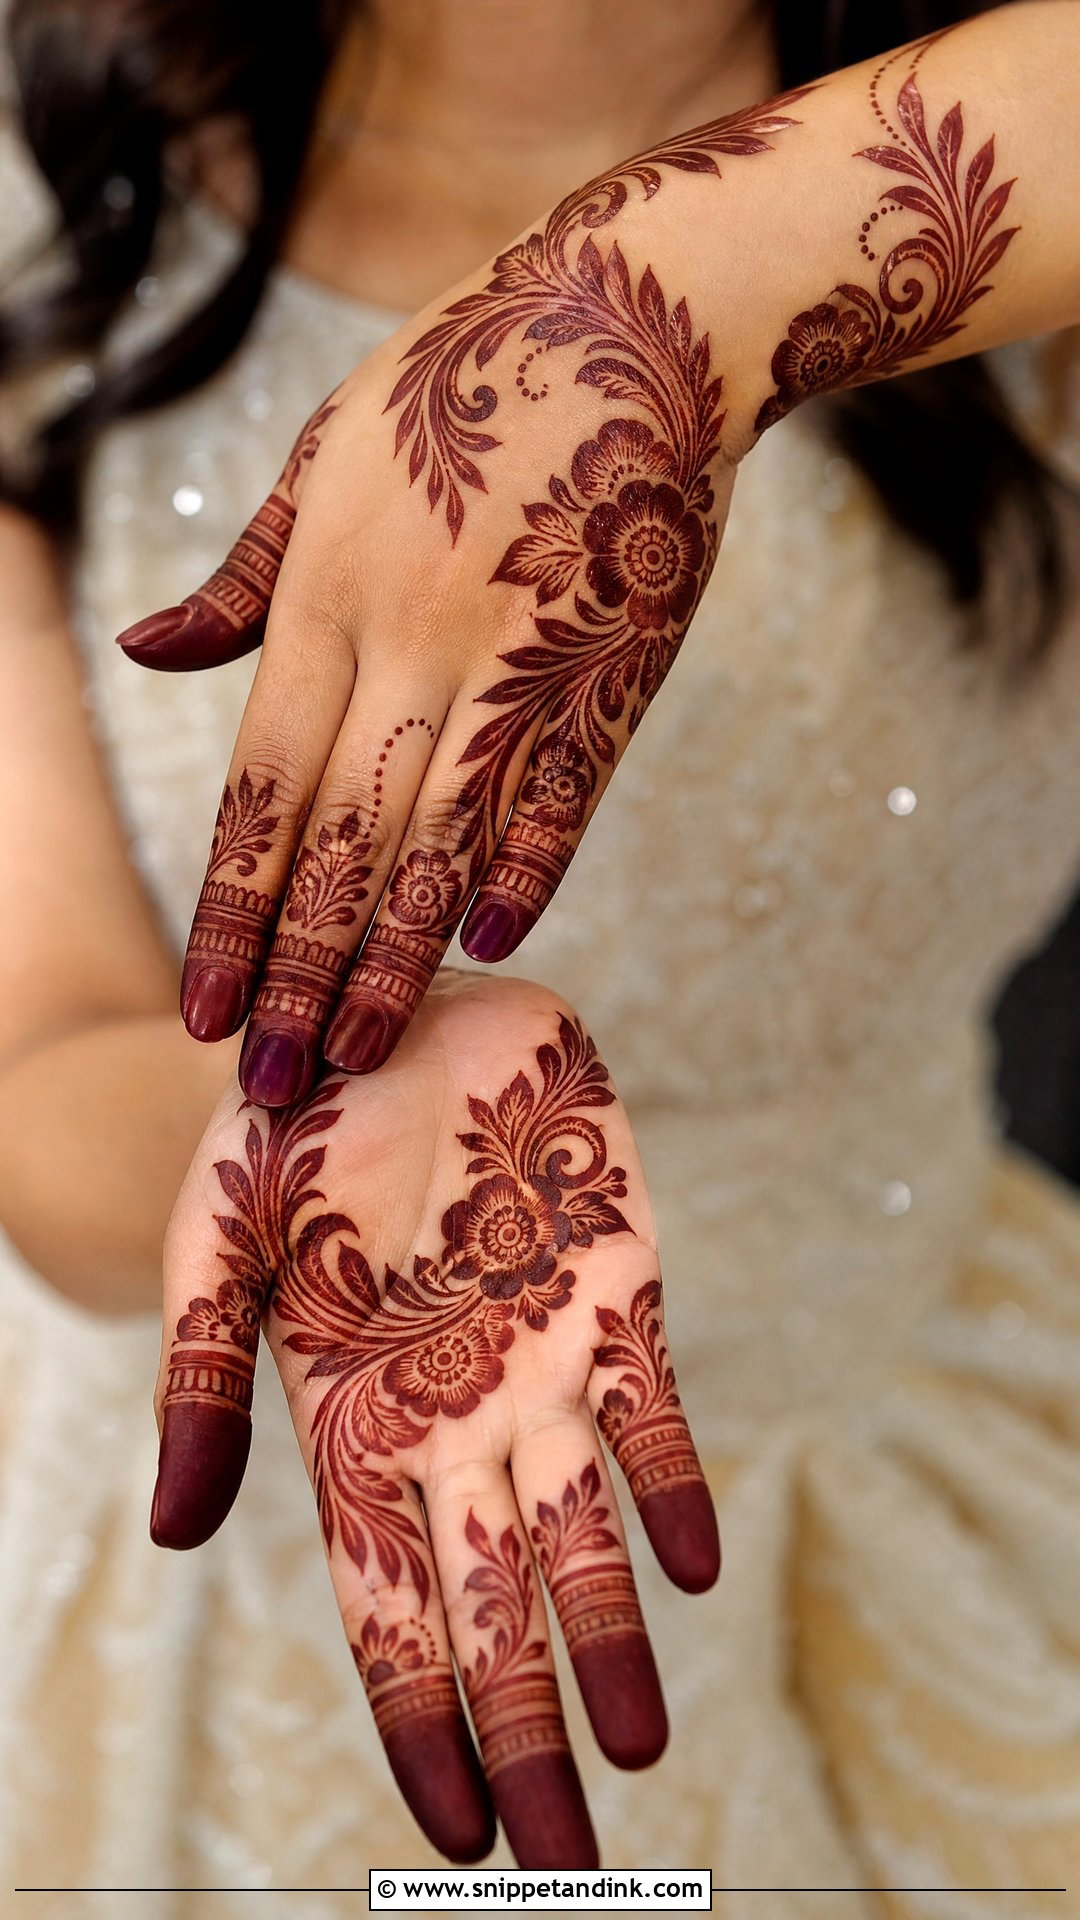
Gulf Khaleeji henna uses bold florals, thick strokes and wide open spaces, flowing across the hand in sweeping lines. I use a slightly thicker tip and confident, quick movements, which is what gives the style its look. It needs less filler than Indian work, so it’s faster. Gold jewellery suits it well.
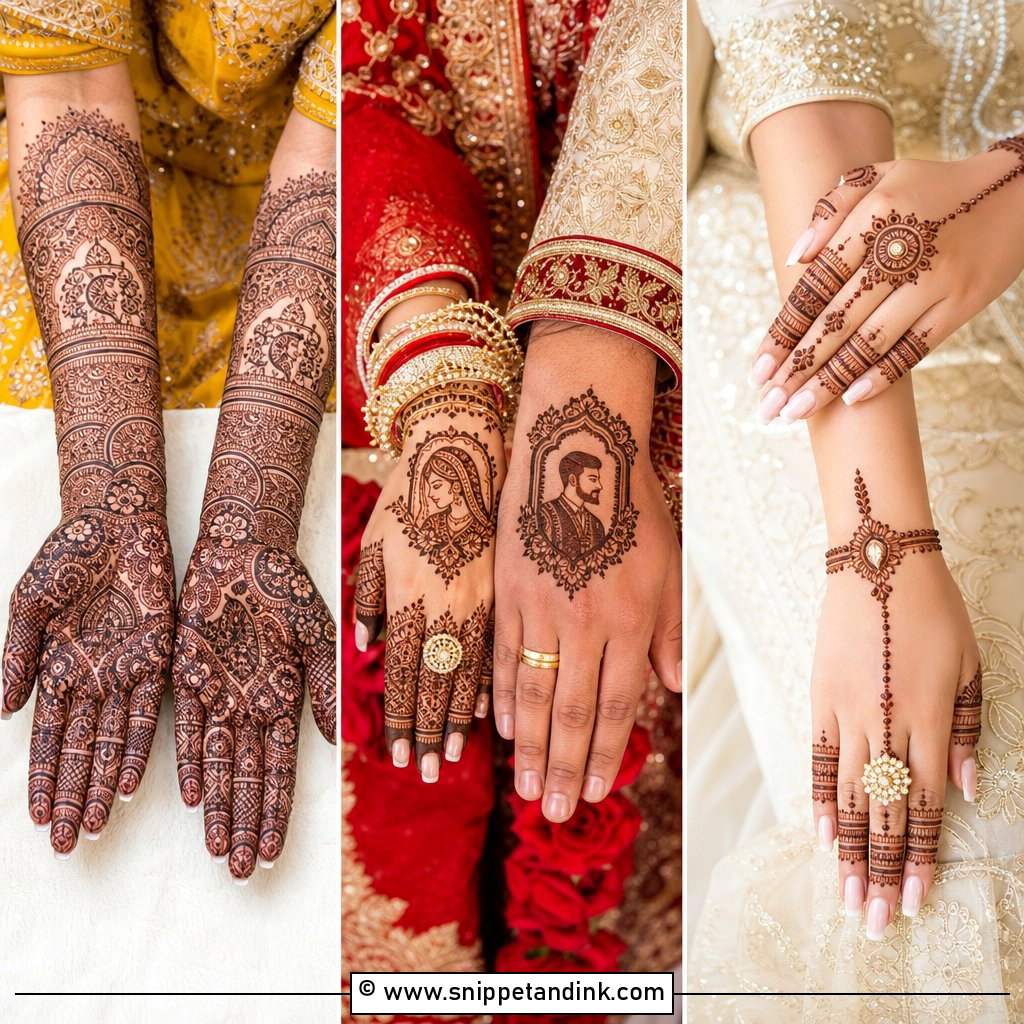
20. Moroccan Bridal Wedding Henna Design
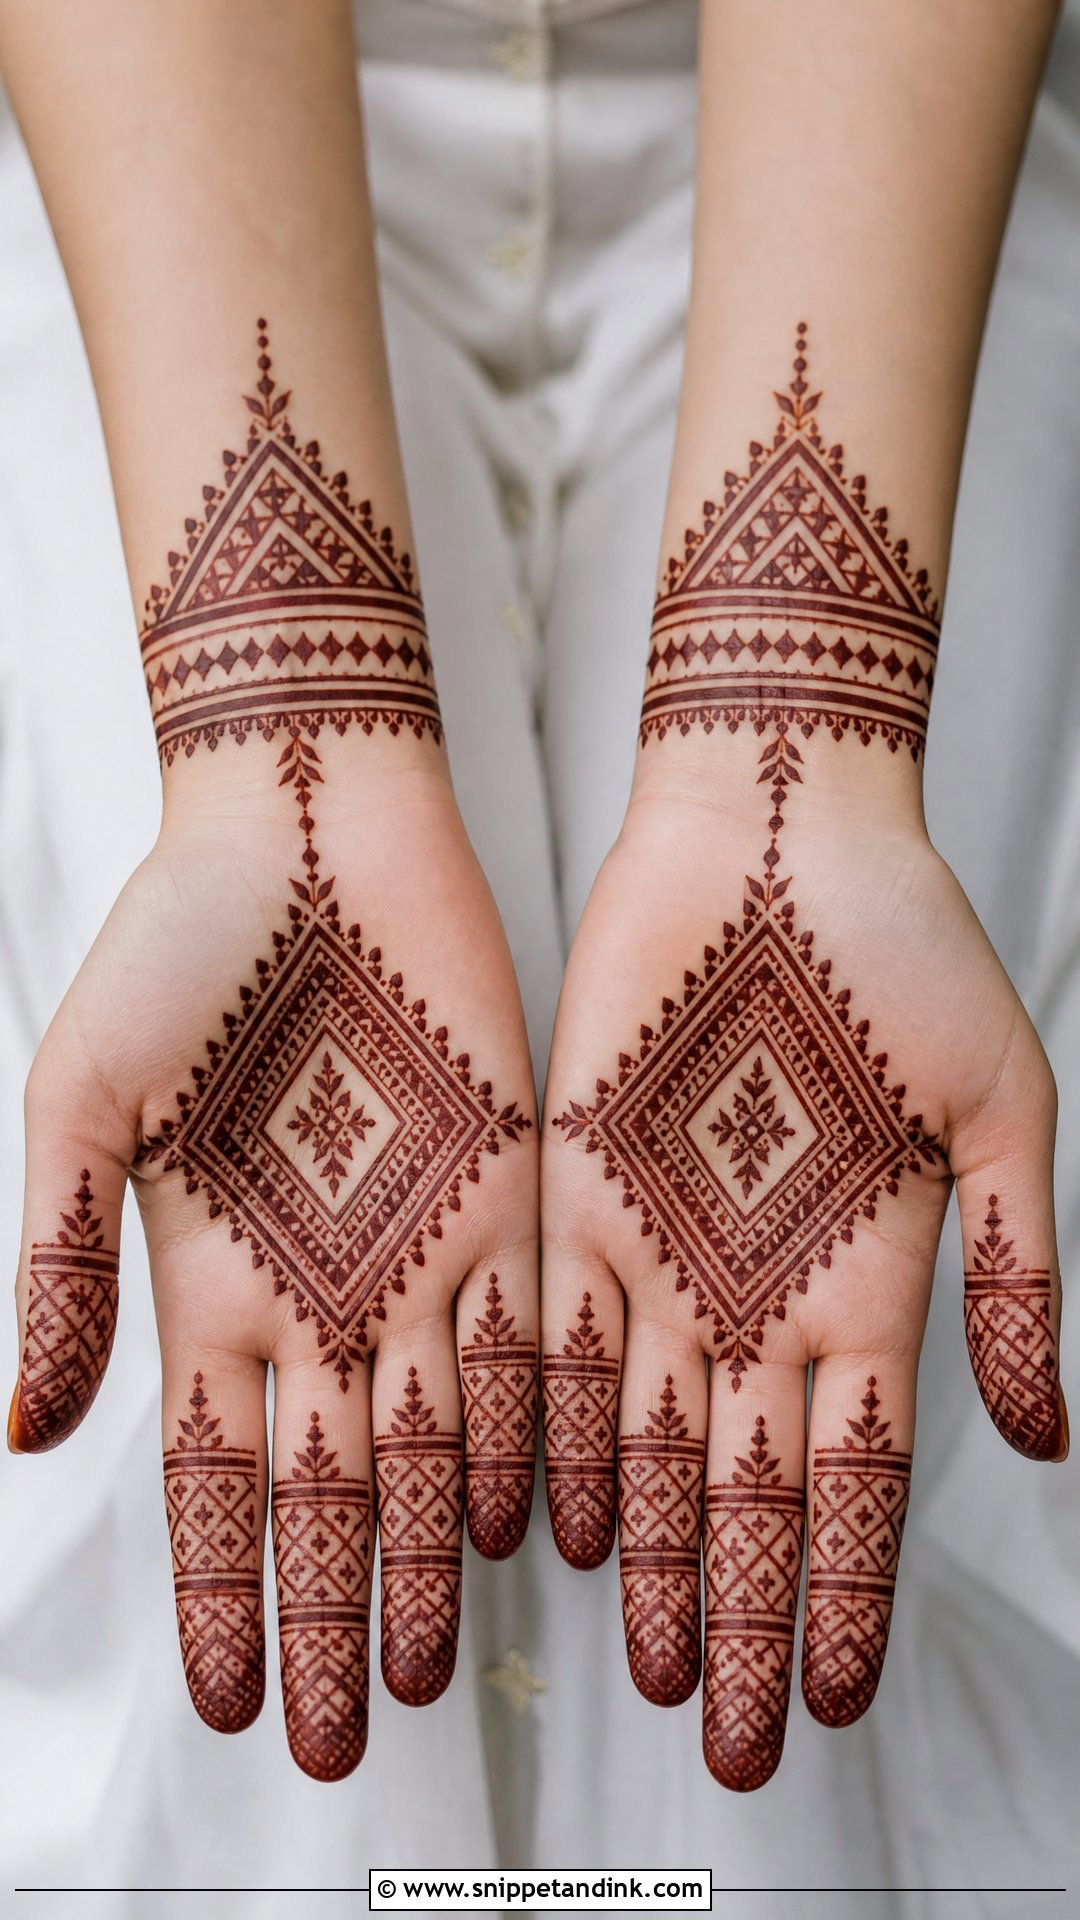
Moroccan henna is geometric: diamonds, triangles, lines and grids. It’s built on symmetry, so I mark key points before drawing. It can cover the palm and fingers or extend into a wrist cuff. Choose it if florals feel too soft for your outfit. Crisp lines matter, so the paste has to be smooth and lump-free.
21. Rajasthani Bridal Wedding Henna Design
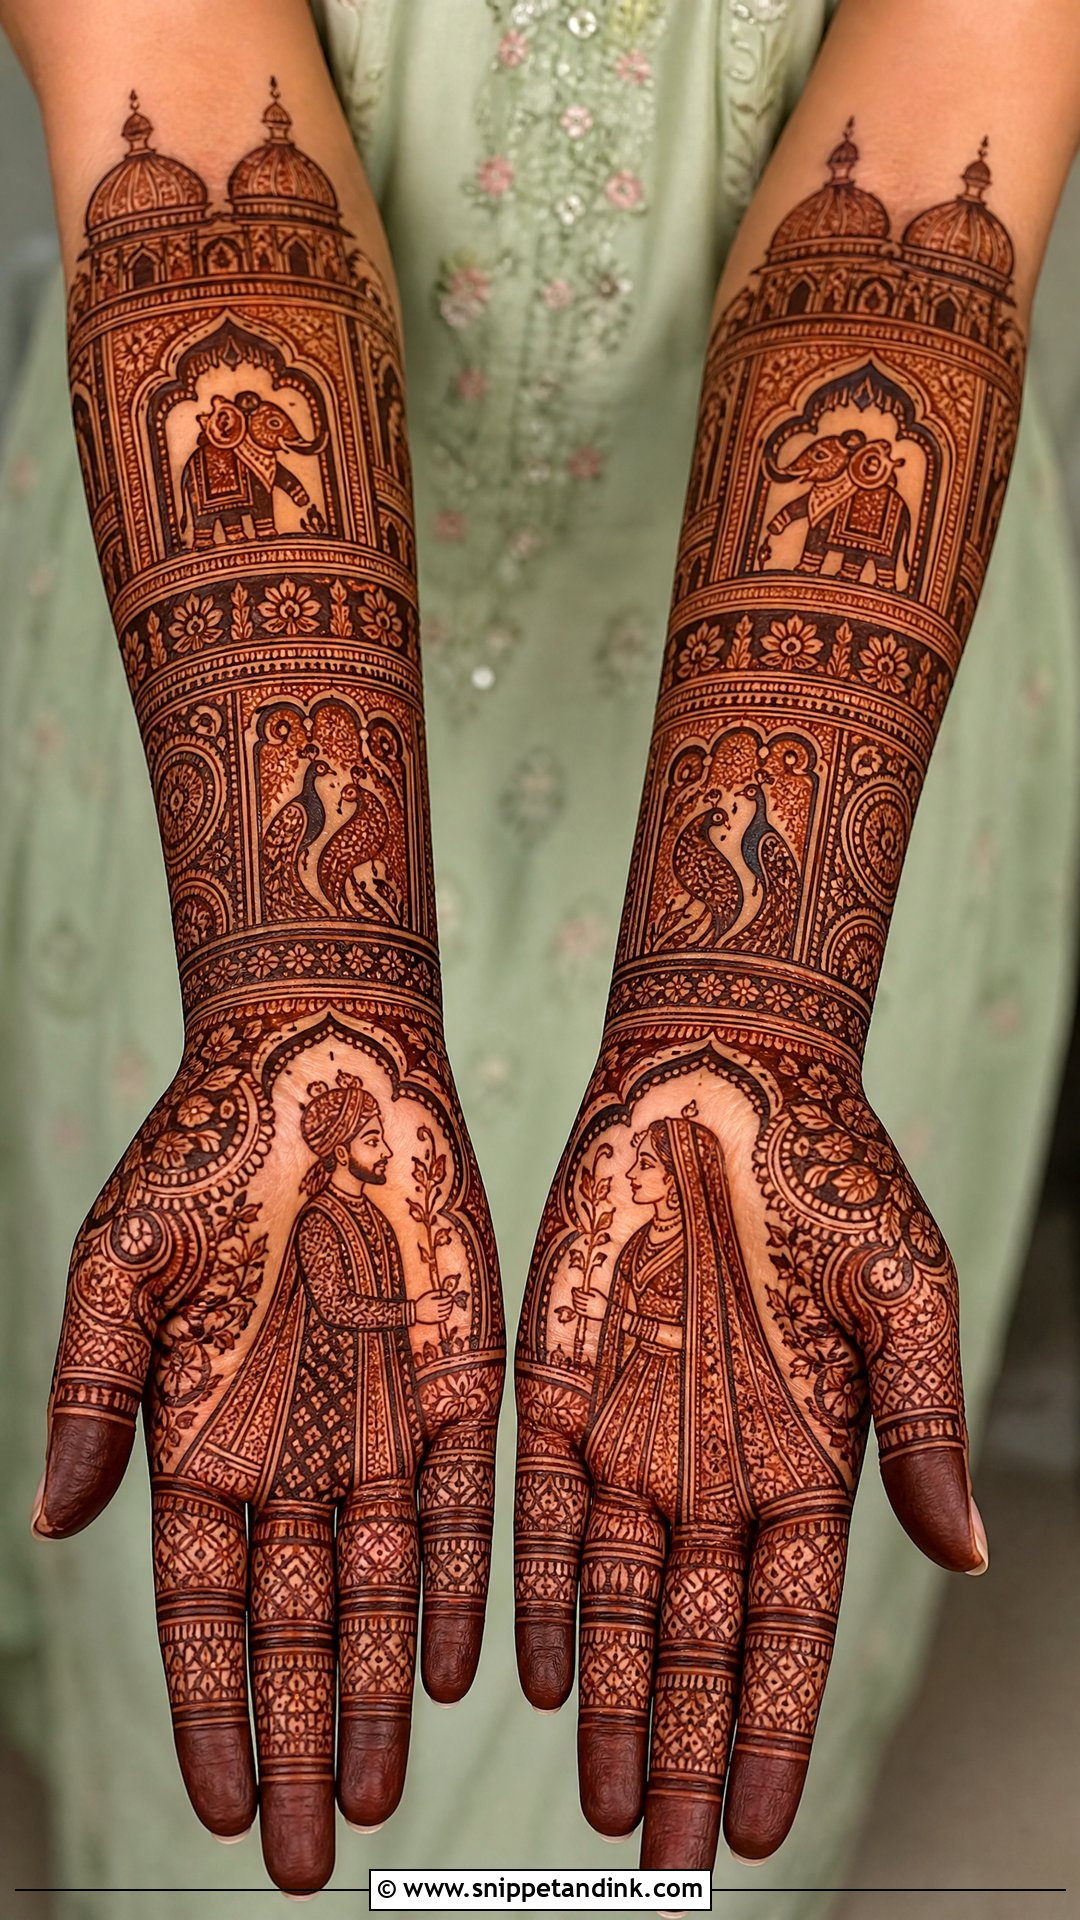
Rajasthani bridal henna is dense storytelling: bride and groom figures, palace arches, elephants and peacocks across the full hand and forearm. The detail is tiny and time-consuming, so book an artist who specialises in it and plan for a long sitting. It pairs with traditional lehengas and heavy jewellery.
22. Pakistani Bridal Wedding Henna Design
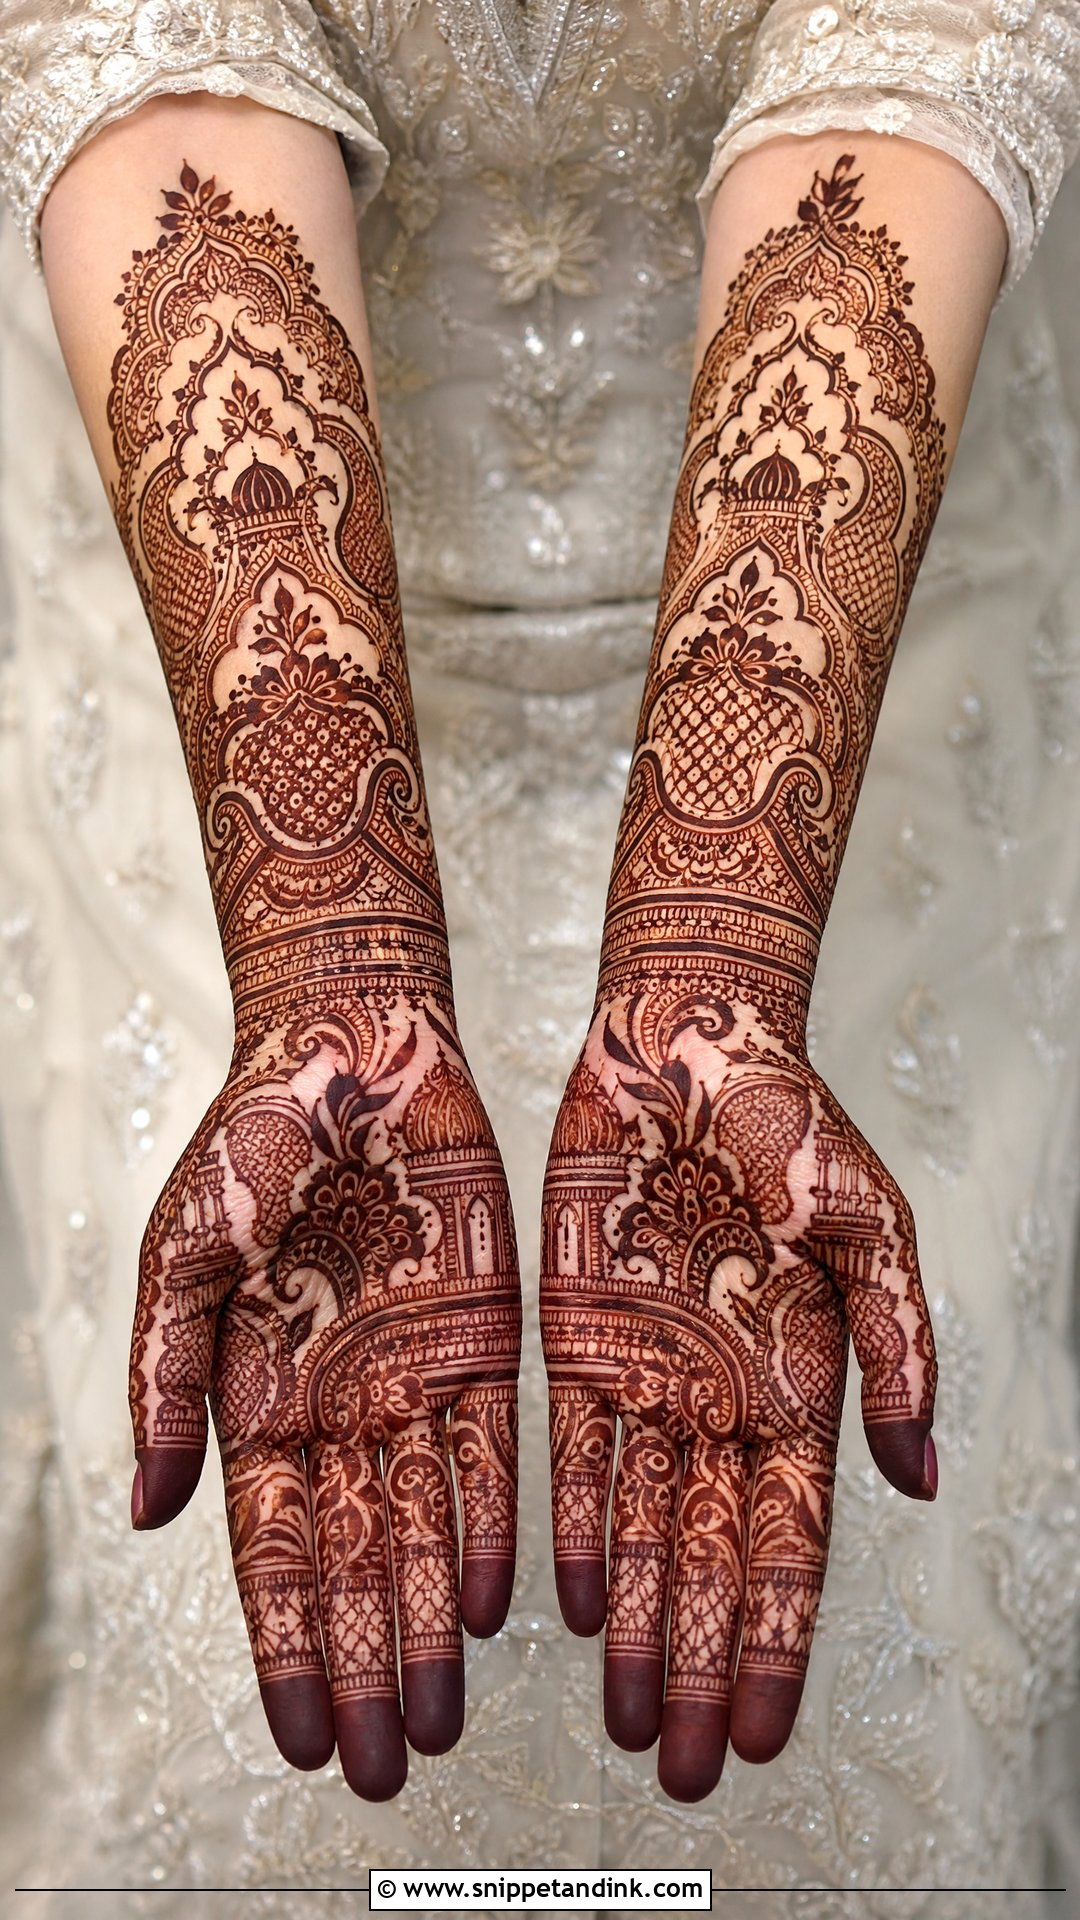
A Pakistani bridal wedding henna design blends dense detail with flowing lines: florals, paisleys, domes, jaali and filled fingertips. It suits shararas, ghararas and lehengas. Brides often go heavy for the nikah or walima and lighter for pre-wedding events. I balance dense areas with flowing ones so it stays neat.
23. South Indian Bridal Wedding Henna Design
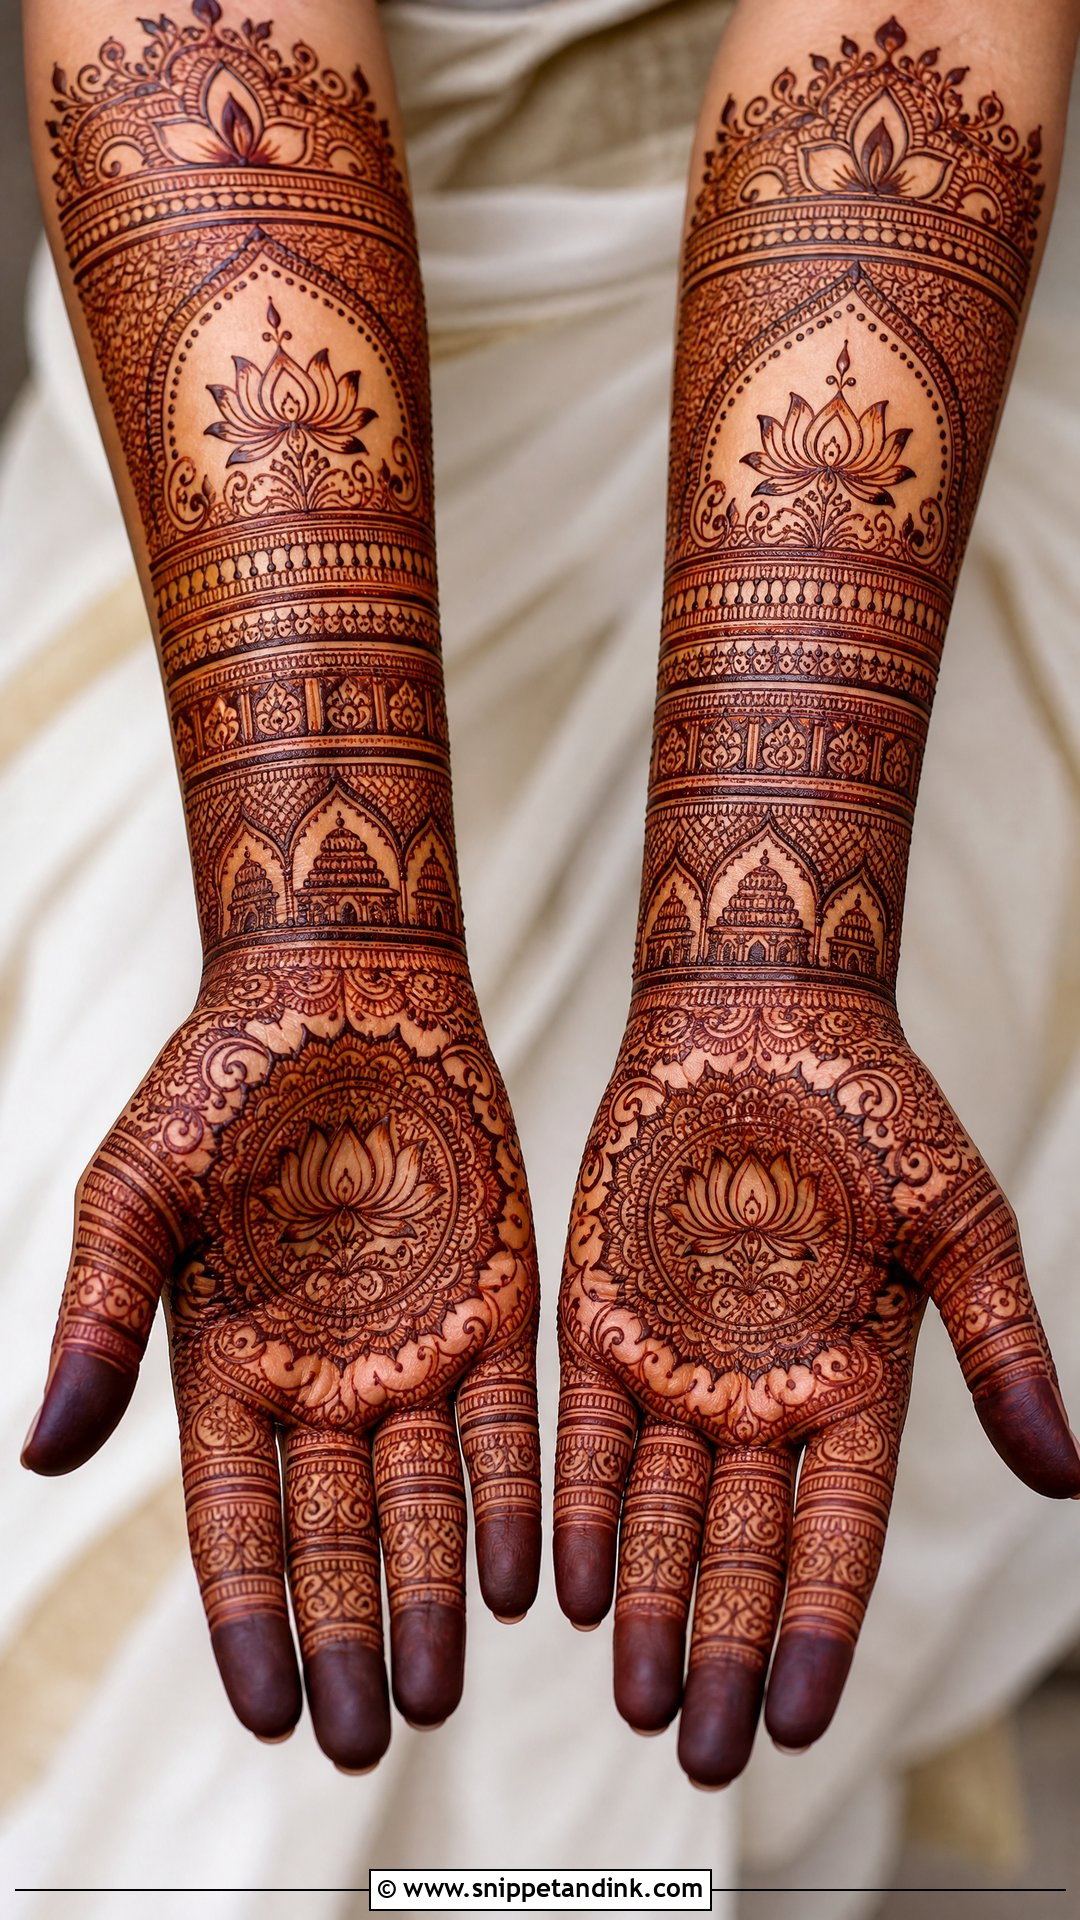
South Indian bridal henna uses lotus motifs, temple-inspired borders, mango paisleys and mandalas. Back-hand bracelet designs frame gold bangles. I’d keep coverage moderate if your temple jewellery is heavy, so the henna doesn’t compete. It pairs with silk sarees.
24. Modern Bridal Wedding Henna Design
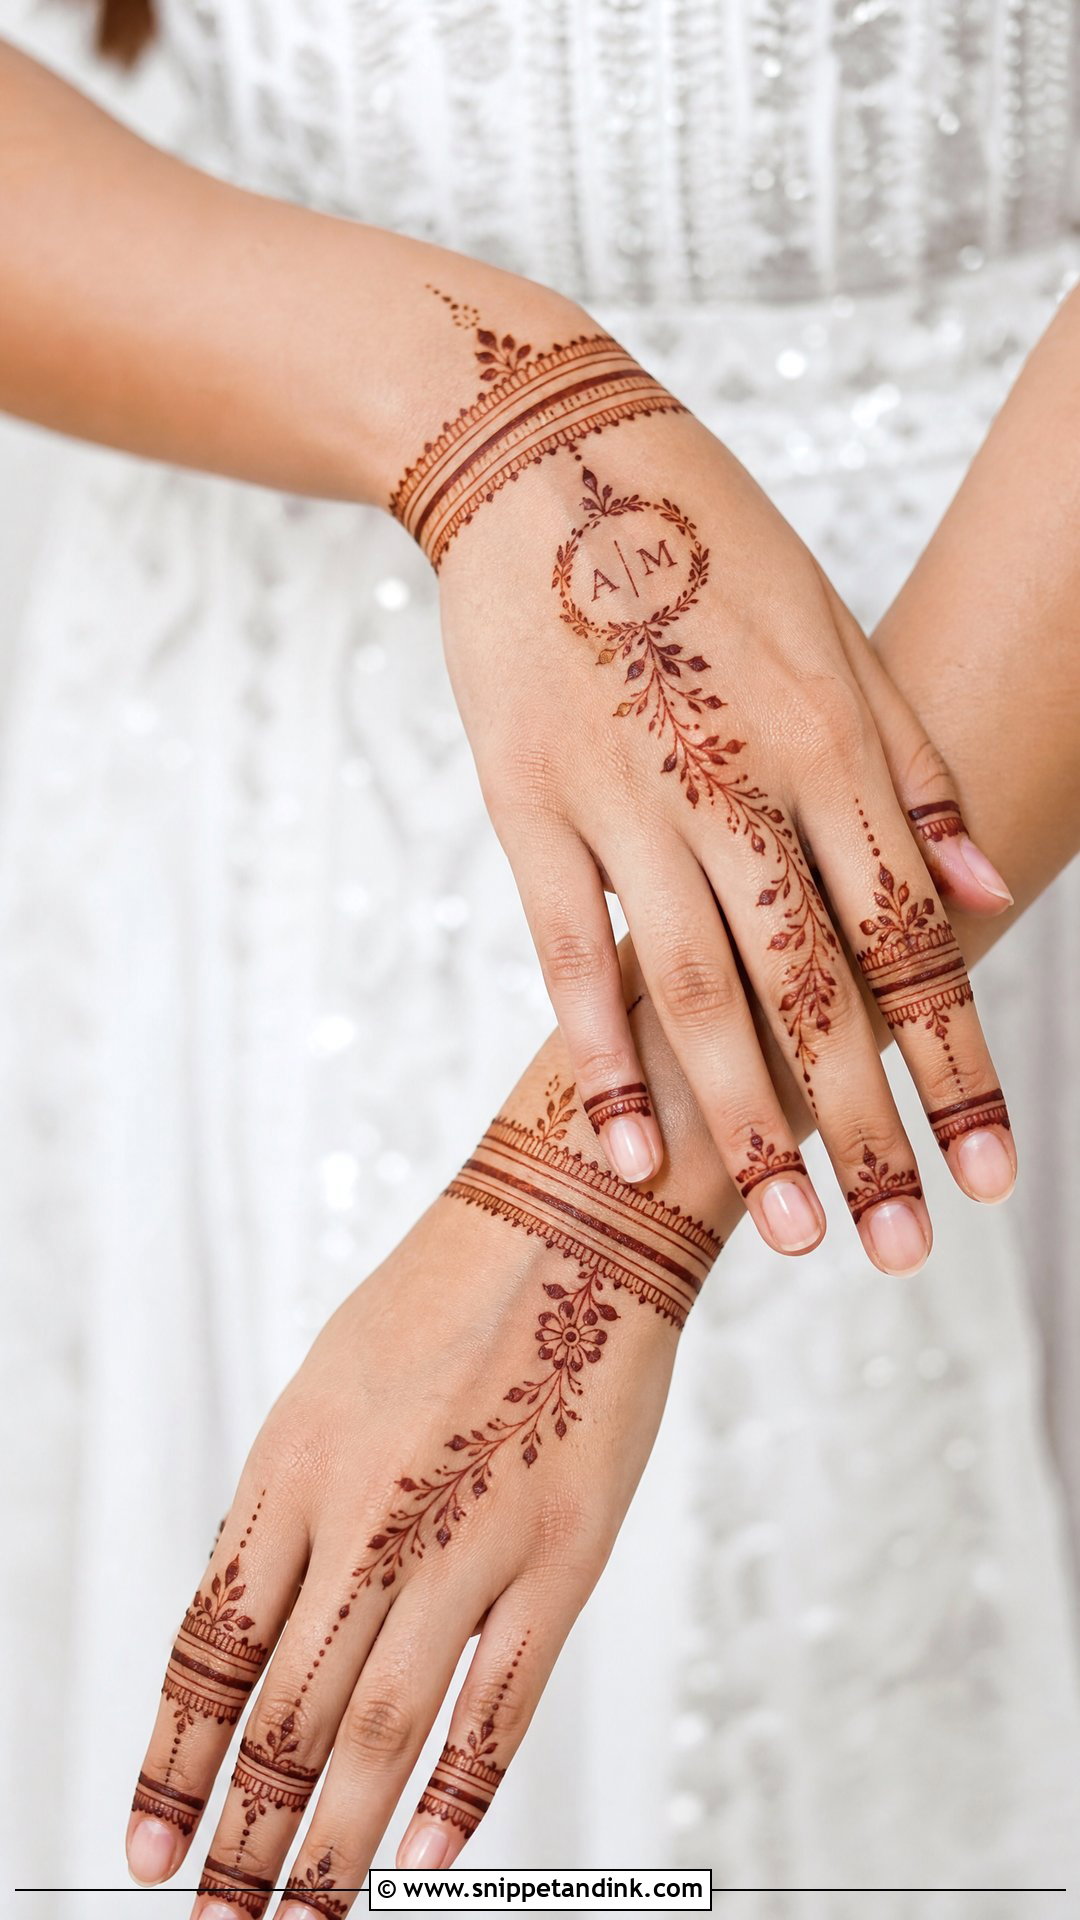
Modern bridal henna focuses on placement: clean spacing, slim florals, geometric accents and bracelet bands. It suits fusion weddings and contemporary outfits. A complete version includes matching palms and back hands with a short forearm extension. Each motif has room to read clearly.
25. Royal Bridal Wedding Henna Design
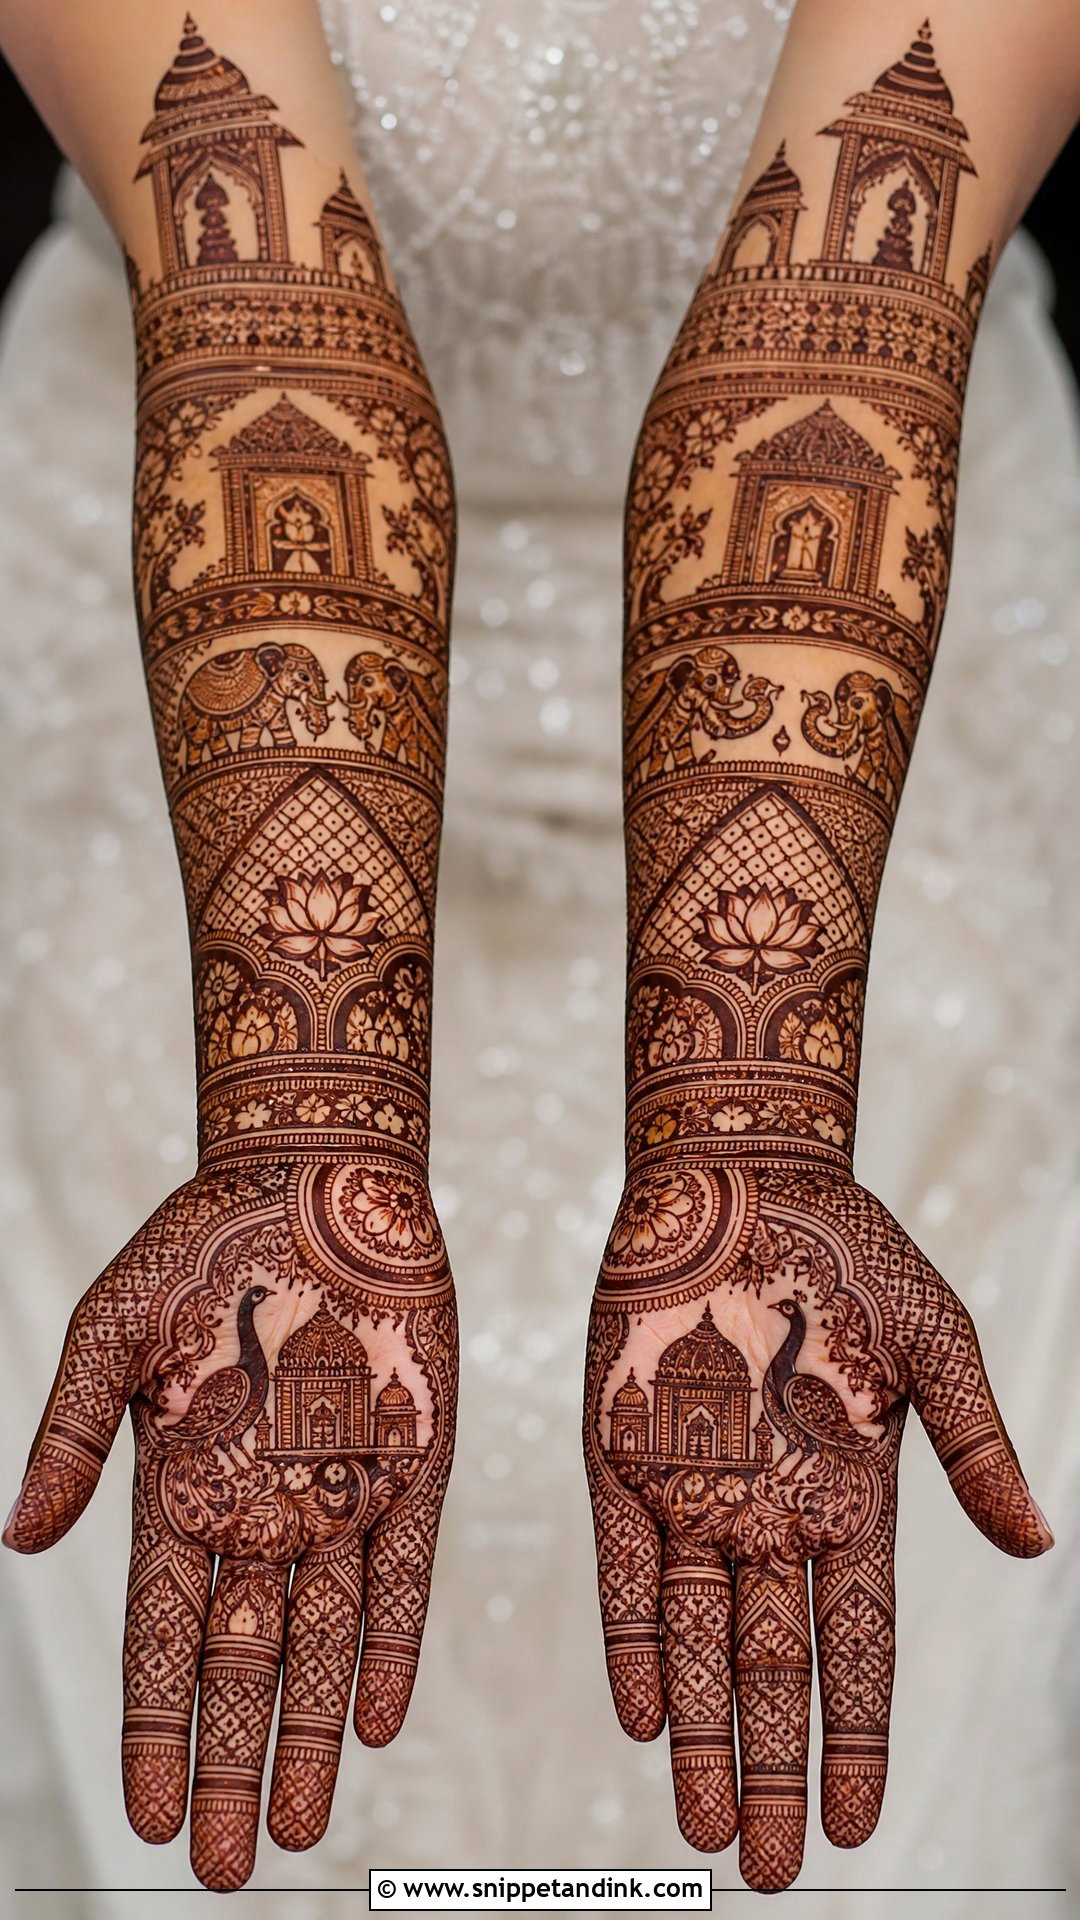
Royal bridal henna is grand: palace domes, peacocks, elephants, lotus flowers and heavy forearm coverage, divided into sections with borders. That structure keeps it readable. Adding initials makes it personal. A deep maroon stain shows the detail best, so follow aftercare carefully.
26. Engagement Wedding Henna Design
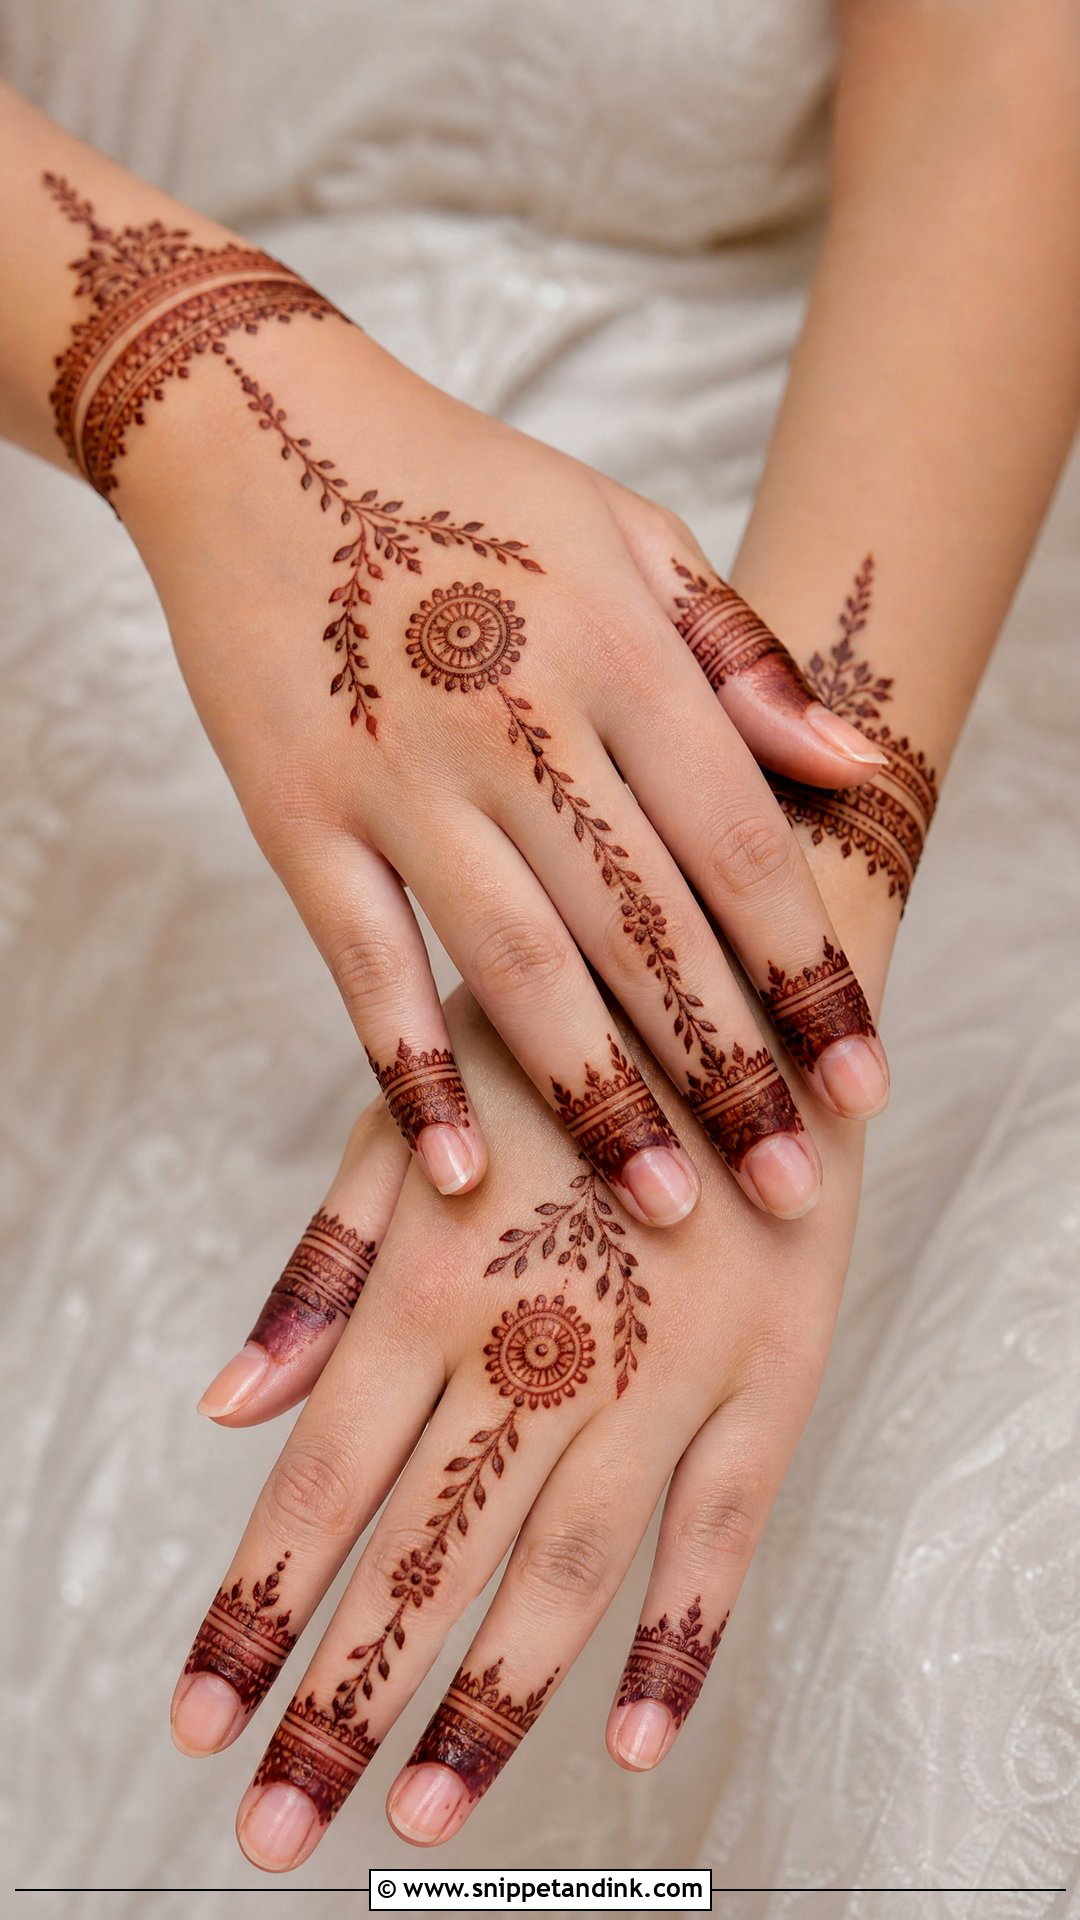
Engagement henna is lighter than the main bridal design. I plan it around the ring: the ring finger stays open or lightly patterned so the ring stands out. The palm can carry a small mandala. Arabic, minimal or Indo-Arabic all work.
27. Reception Bridal Wedding Henna Design
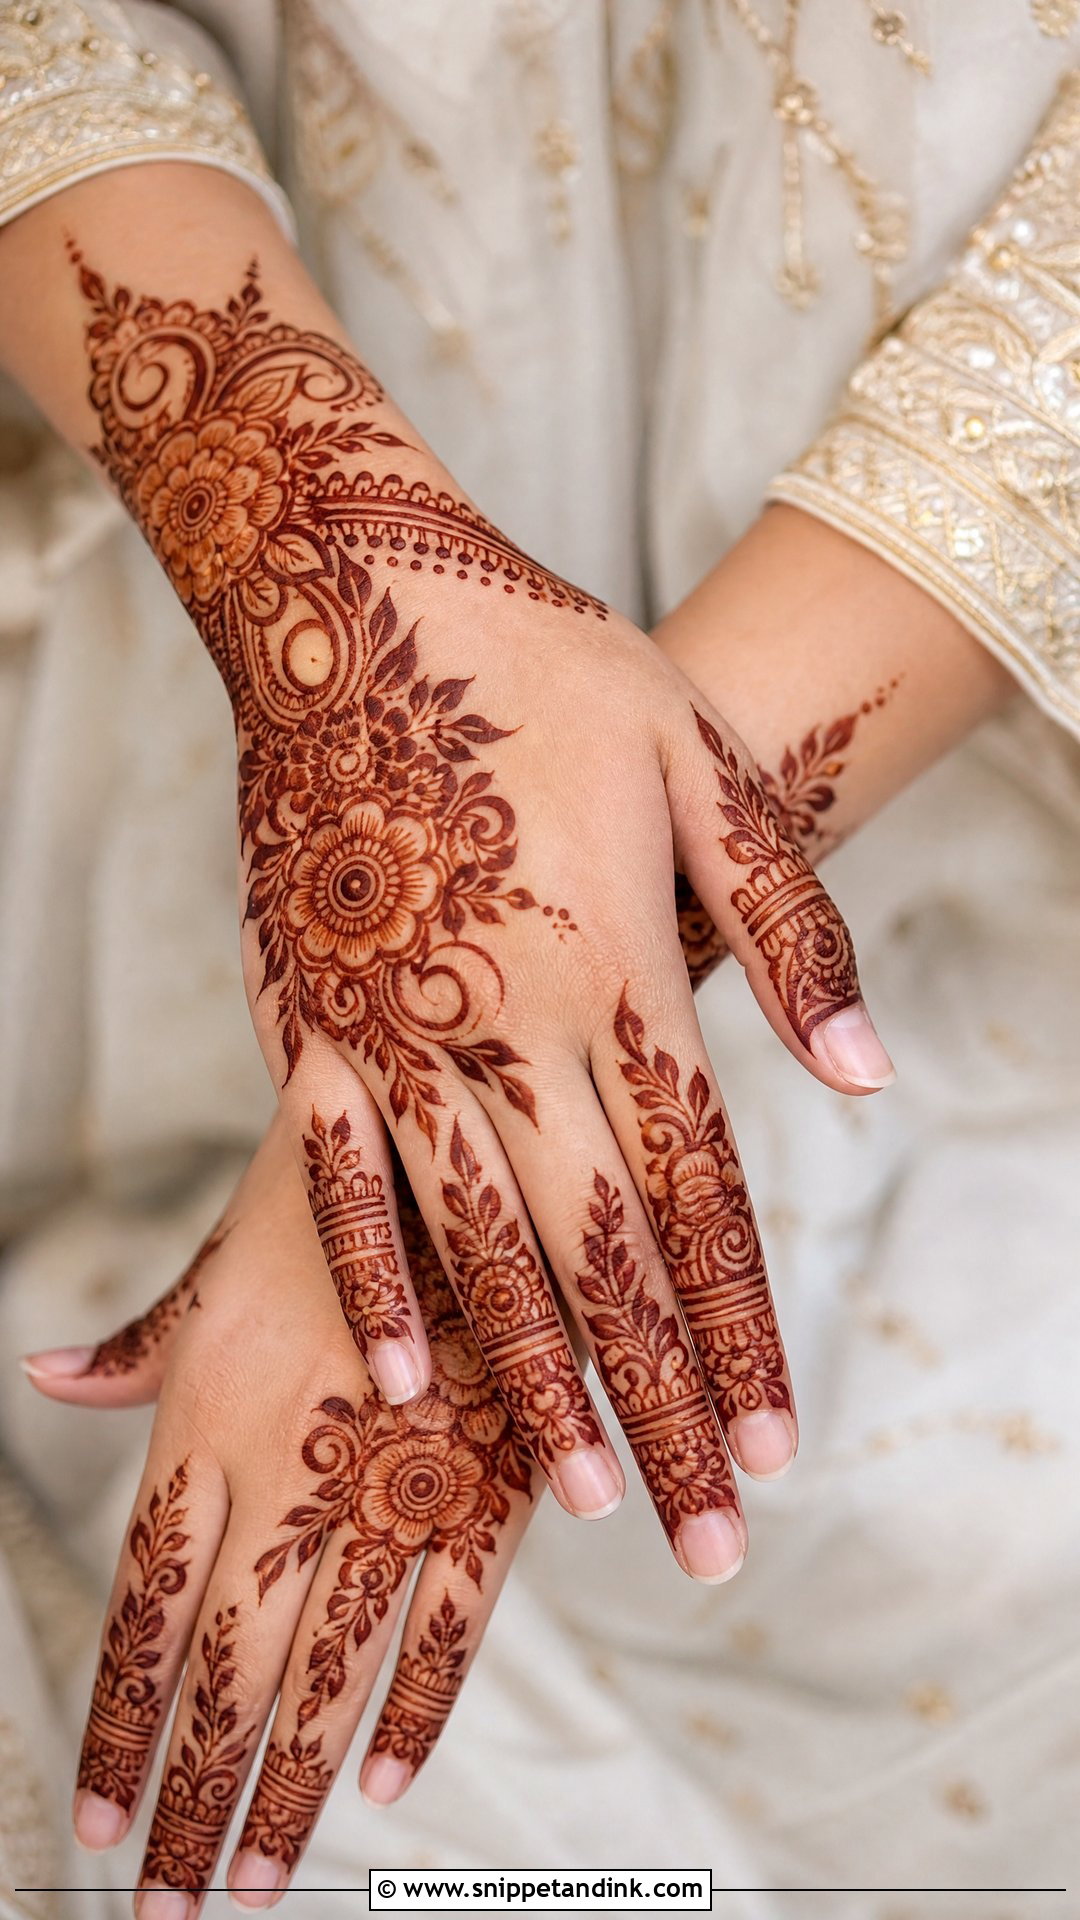
Reception henna can lean modern: clean lines, floral trails, bracelet cuffs and negative space. Back-hand designs show clearly while greeting guests. If the bride already wore heavy henna earlier, that stain will still be visible, so I design around it rather than over it.
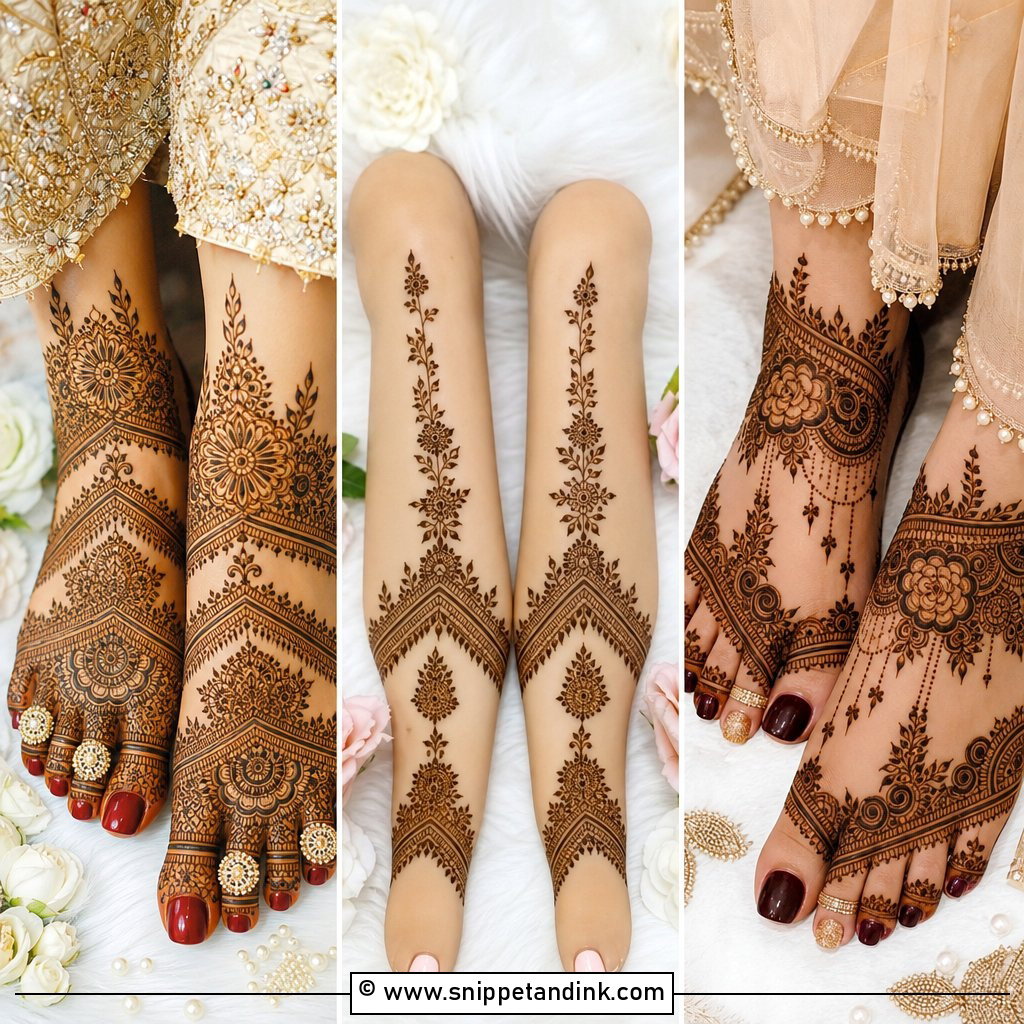
28. Bridal Foot Wedding Henna Design
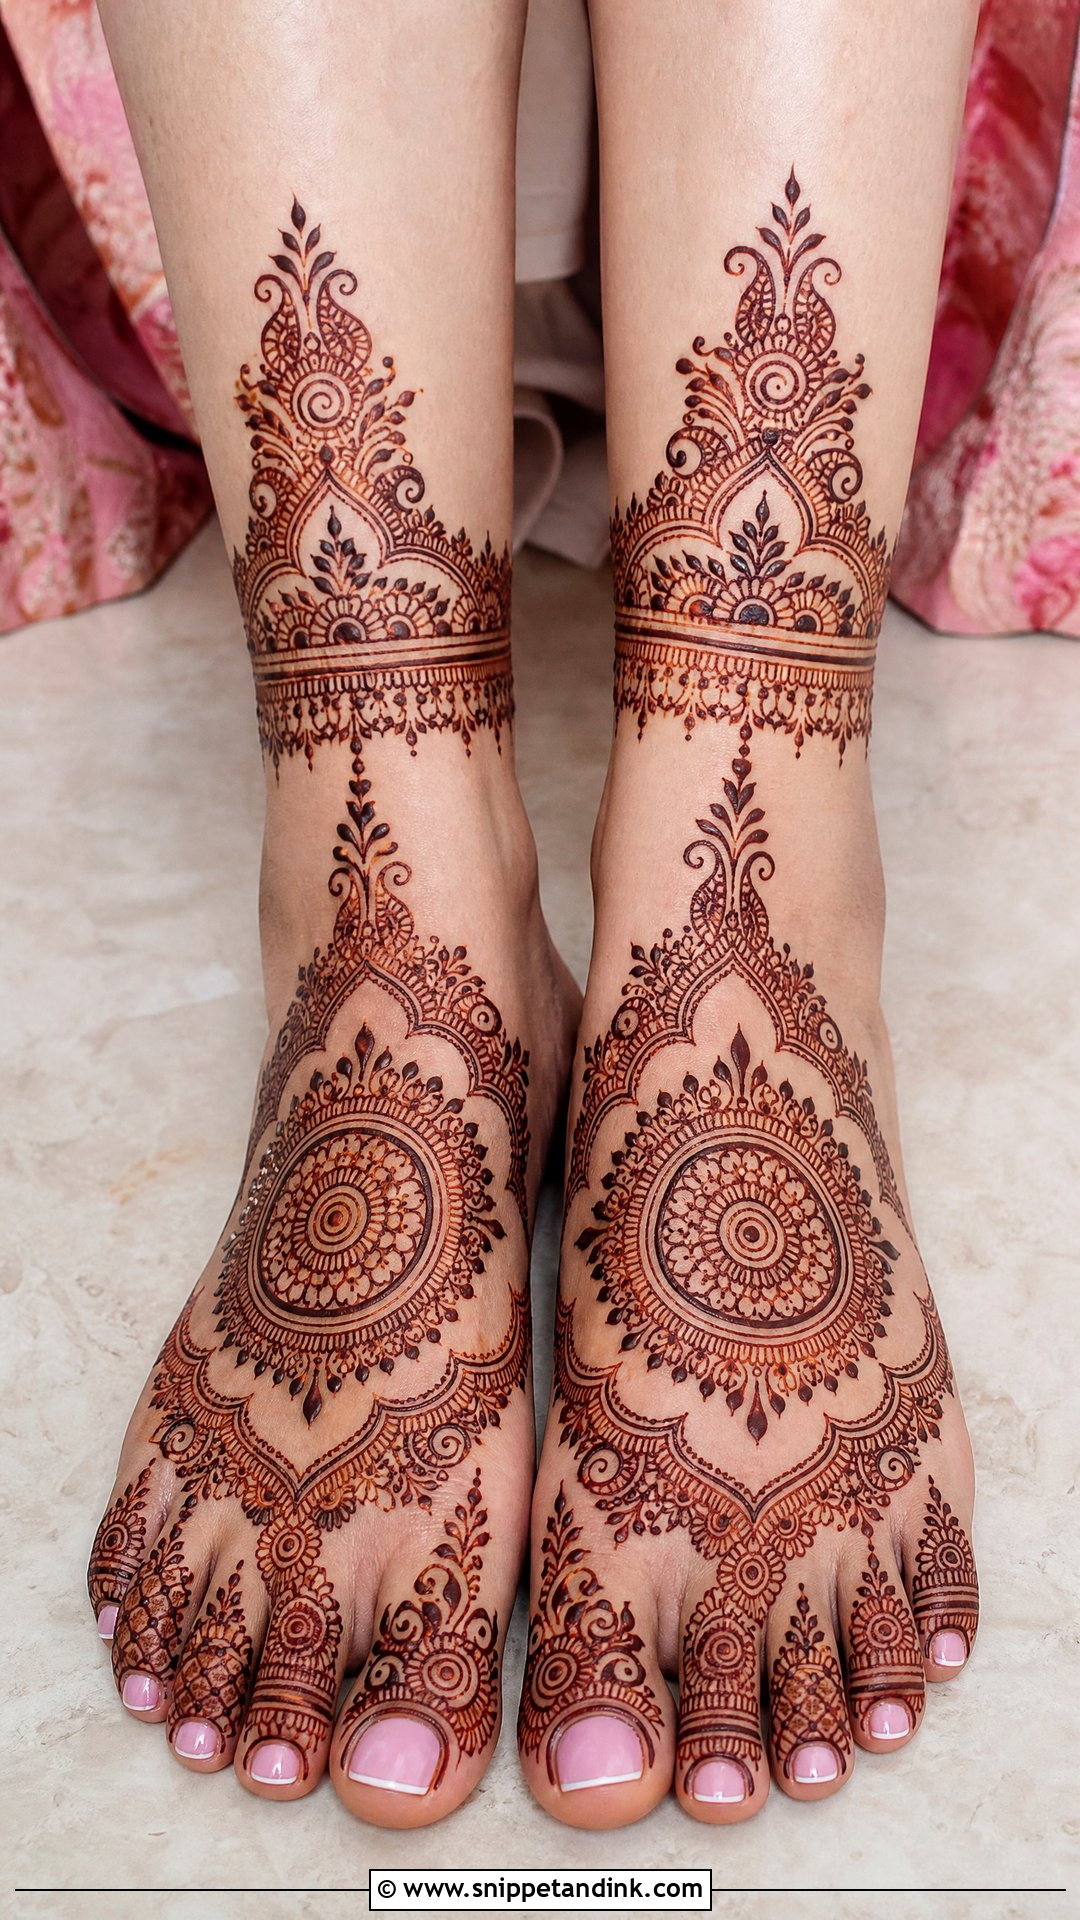
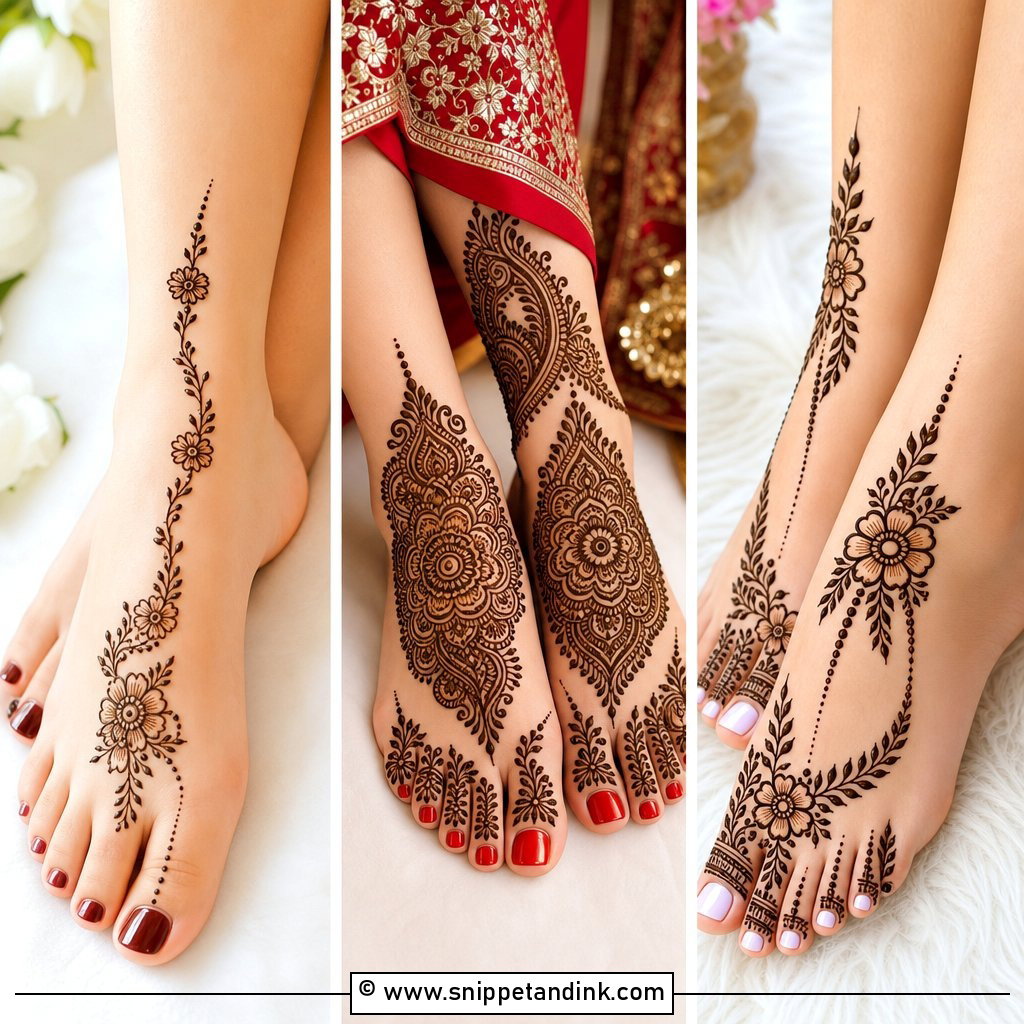
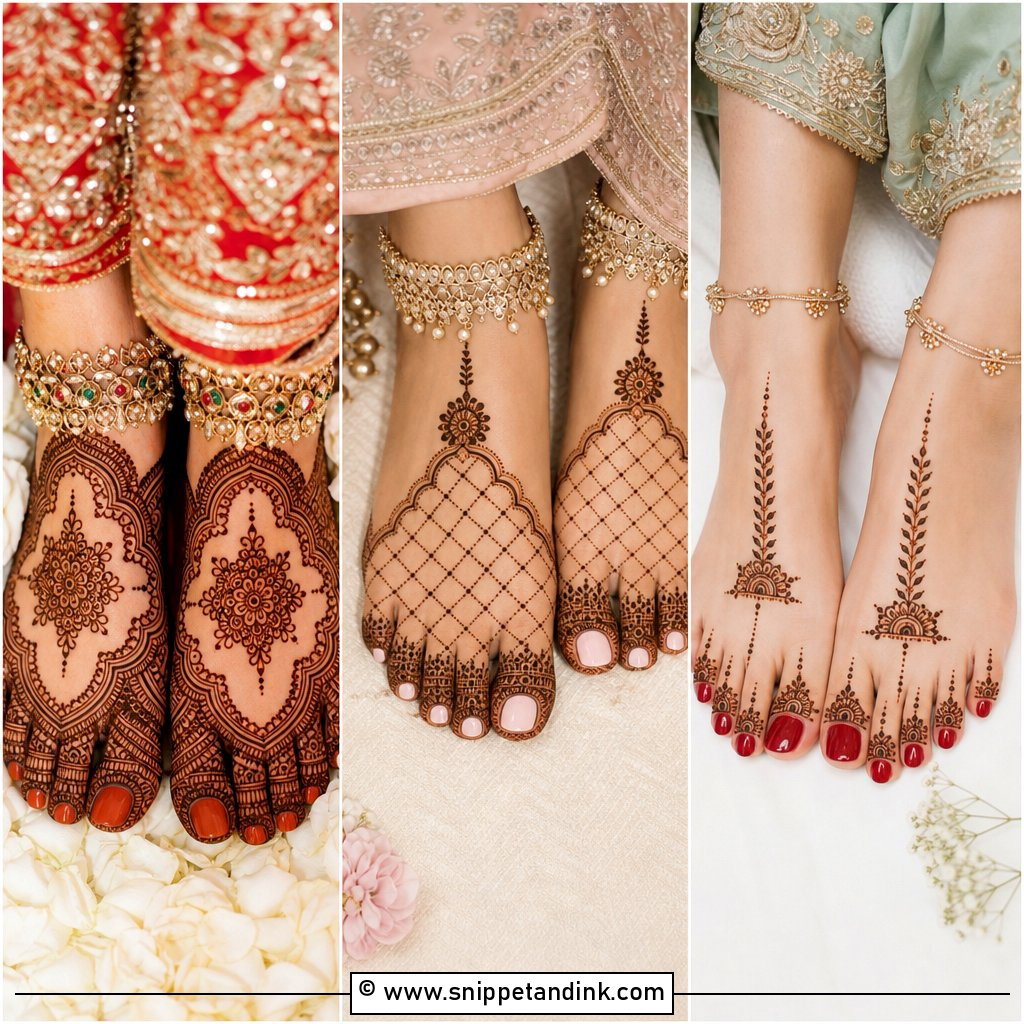
Foot henna covers the toes, the tops of the feet, ankles, and lower legs with florals, paisleys and anklet-like bands. Feet stain very dark, often darker than hands. I follow the shape of the foot, and I’d avoid the sole if you’ll be walking soon after. Sit still with feet up while it dries.
29. White Bridal Wedding Henna Design
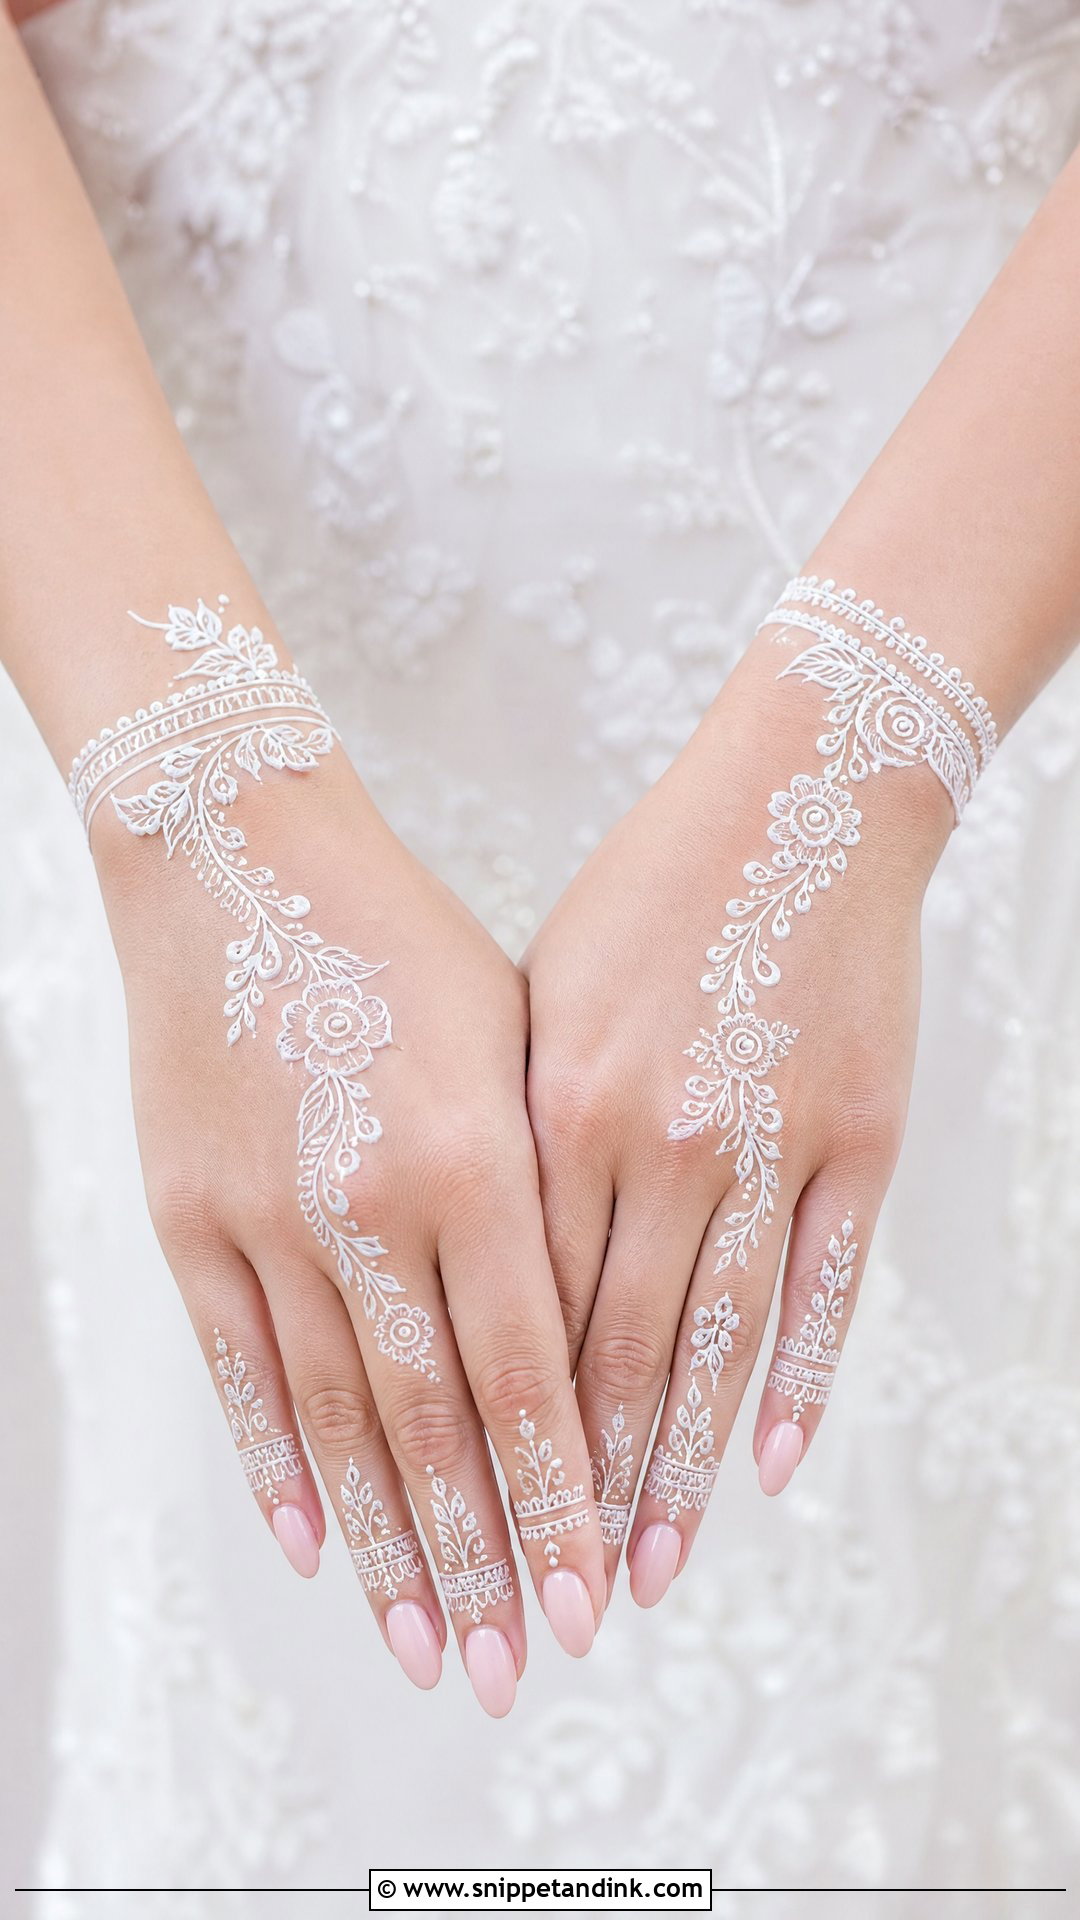
White henna isn’t henna at all. It’s a cosmetic paste or skin-safe adhesive that sits on top of the skin rather than staining it, so it lasts a day or so, not weeks. It suits short events and photos. I keep the pattern clean and avoid crowding, since white designs look raised and lace-like. Patch test it first if you have sensitive skin.
30. Glitter Bridal Wedding Henna Design
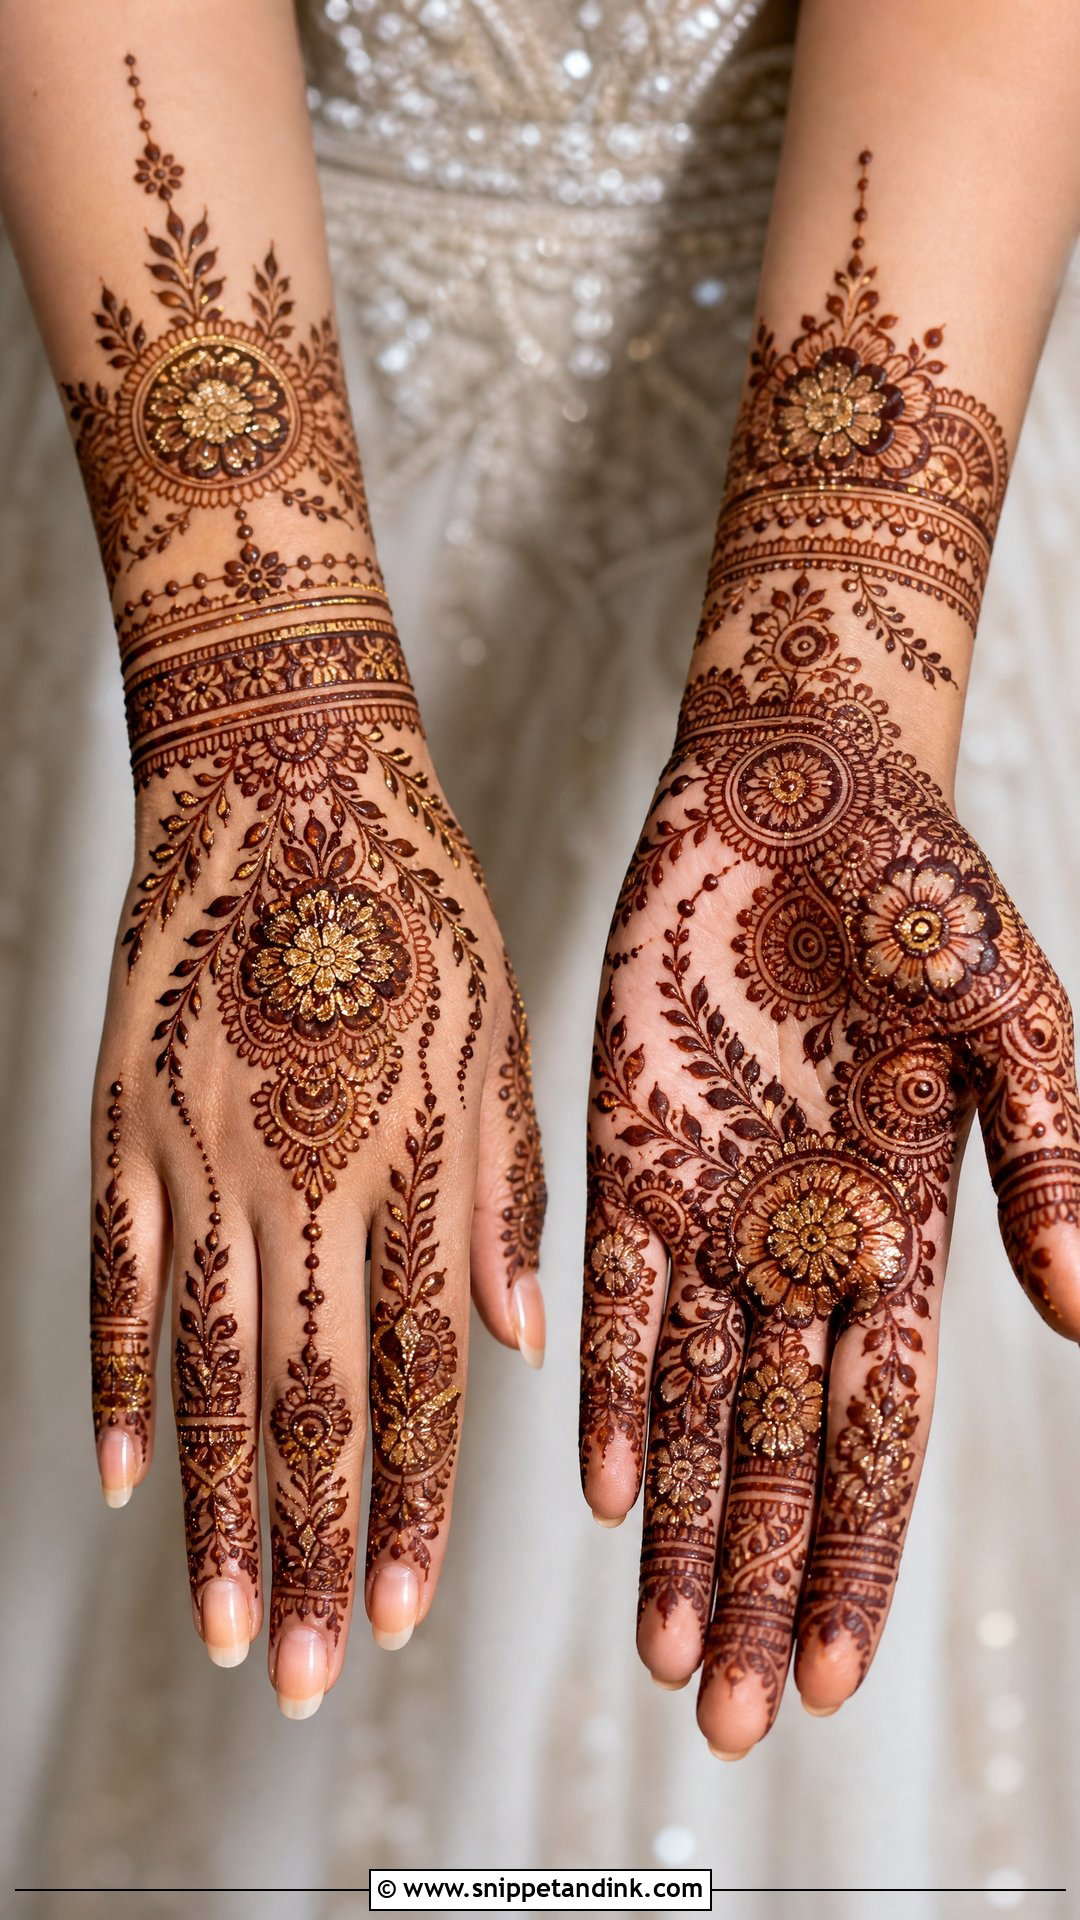
Glitter adds shine as an accent over dried henna or as a separate body art layer. Gold, bronze or champagne glitter can highlight floral centres or wrist bands. I use it sparingly. It’s a temporary effect, so it suits a mehndi party or sangeet rather than the main ceremony.
The First 48 Hours After the Paste Comes Off
Aftercare decides how dark your mehndi gets. Don’t wash the paste off; scrape it with a blunt edge or rub it off with your fingers. Then keep water away for as long as you can, ideally twelve to twenty-four hours. Water at this stage stops the stain developing.
- While the paste is on, dab it with a lemon and sugar mix so it stays stuck to the skin.
- After scraping, rub in a little natural balm or oil before showering.
- Keep hands warm. Cold slows the darkening.
- Avoid chlorine pools, hand sanitiser and harsh soaps in the days before the wedding.
Pastes I refuse to use
So-called black henna that stains black within an hour usually contains PPD, a hair-dye chemical that can cause serious skin reactions and scarring. Real henna is never black. Ask your artist what’s in the cone; a good one makes their own paste from henna powder, lemon or water, sugar and an essential oil, and will happily tell you.
A Deep Stain Says More Than Extra Motifs
Bridal henna can go in many directions, from full Indian coverage to Arabic trails and minimal fingers. Base your choice on your outfit, your jewellery, the ceremony and how long you can sit. Plan the application date so the stain peaks on the wedding day. Clean lines and a deep stain matter more than how much skin is covered.
You'll Like These Ideas:


Leave a Reply