
The varmala, or jaimala, is the moment the bride and groom exchange flower garlands, and putting it on the bride’s hands turns her mehndi into a small piece of storytelling. It’s also one of the hardest briefs I take. Figures need clean, thin lines and steady paste, and a face that spreads by half a millimetre stops looking like a face once it stains. Below are the garland-exchange layouts I draw most, from full portrait palms to a pair of tiny garlands on the wrist, with notes on how much space each needs and how each reads after the stain develops.
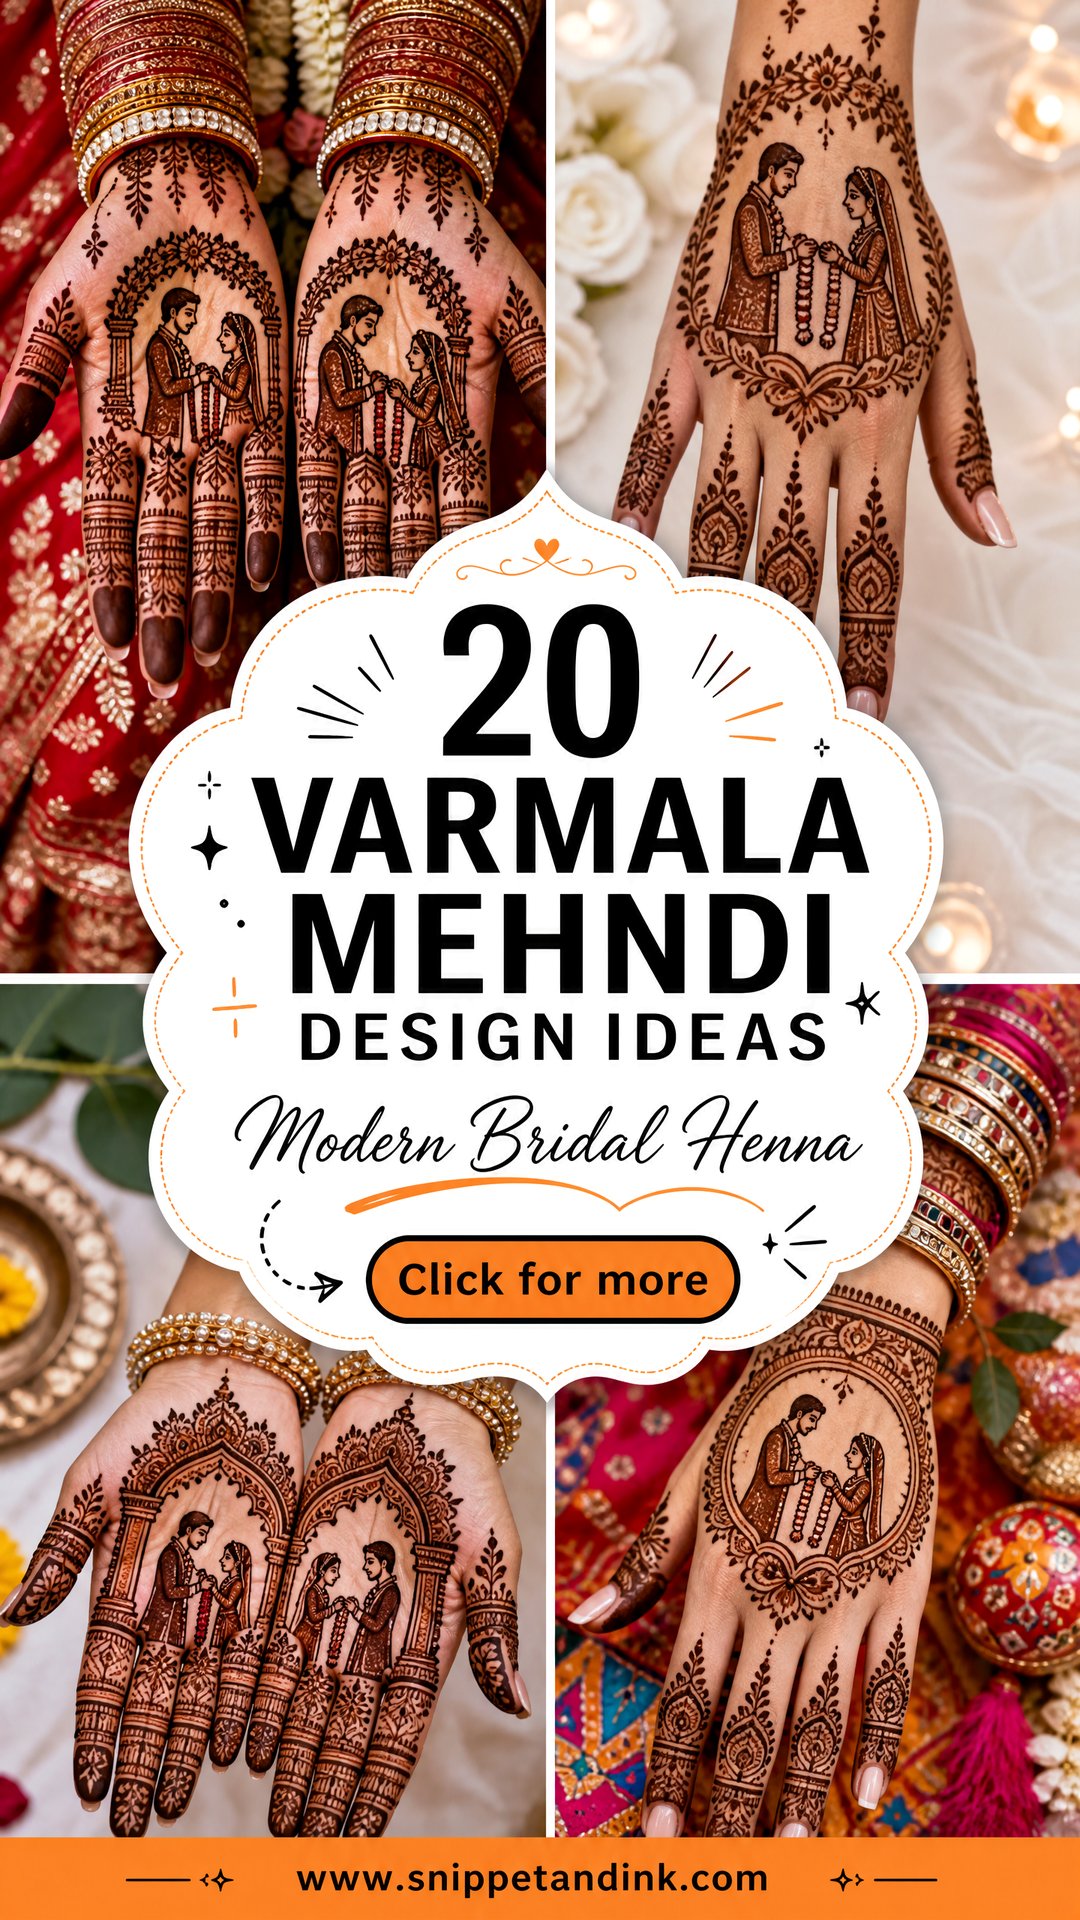
Mapping the Garland Exchange Across Two Palms
Before I draw anything, I hold the bride’s hands side by side and decide where the couple will stand. Most brides want the groom on the left palm and the bride on the right, but if you’re going to pose for the classic hands-together photo, the garland has to cross the gap where your palms meet. I mark that line with dots first.
Scale comes next. On a small palm, a full figure with a face, jewellery and outfit detail ends up tiny, and tiny faces blur. In that case I suggest a half-length figure or a silhouette instead. Bring these to your consultation:
- Two or three reference designs you love, and one you dislike
- Photos of your outfit and the groom’s, if you want them echoed
- Exact spellings of any names, initials or dates
- How long you can sit, since figure work is slow
I’ll also ask about your ceremony timing. Bridal mehndi is usually applied one or two days before the wedding so the colour peaks on the day itself.
1. Full Hand Varmala Mehndi Design
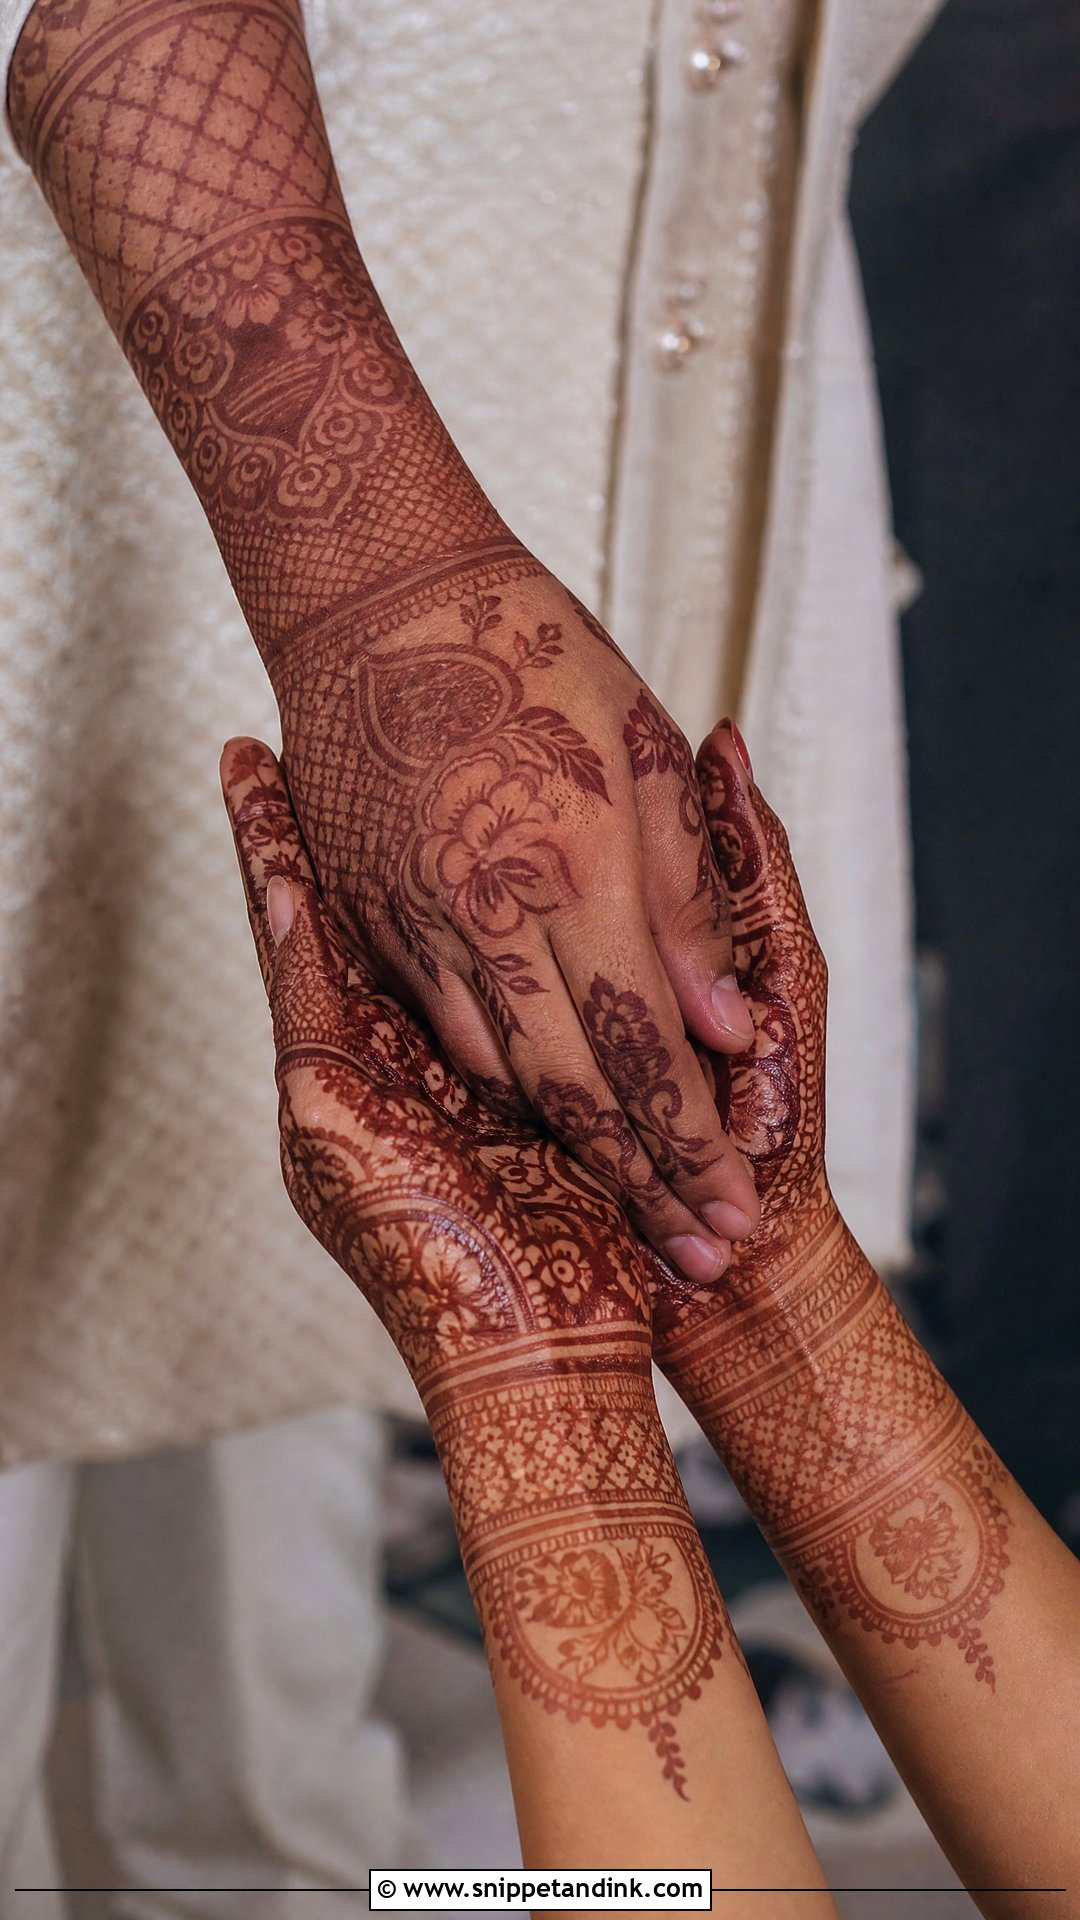
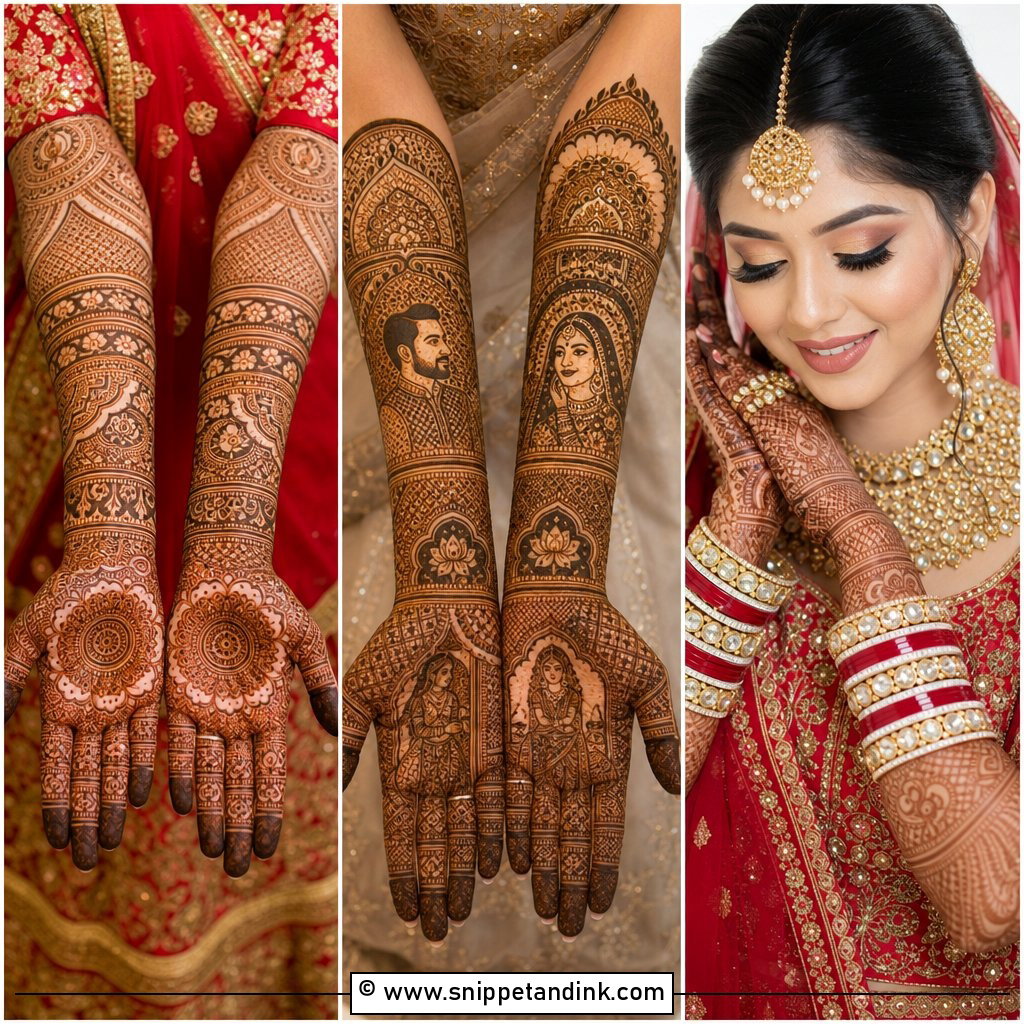
This is the classic layout: the couple holding garlands on the palms, with paisley, florals and net filling the fingers, wrists and forearms. I plan both hands as one scene. Bride on one palm, groom on the other, so the exchange only completes when you press your hands side by side. That join has to line up, so I sketch the garland ends with a few dots on both palms before committing to either. Keep the faces simple; fine features blur as paste dries and lifts.
2. Bridal Varmala Mehndi Design
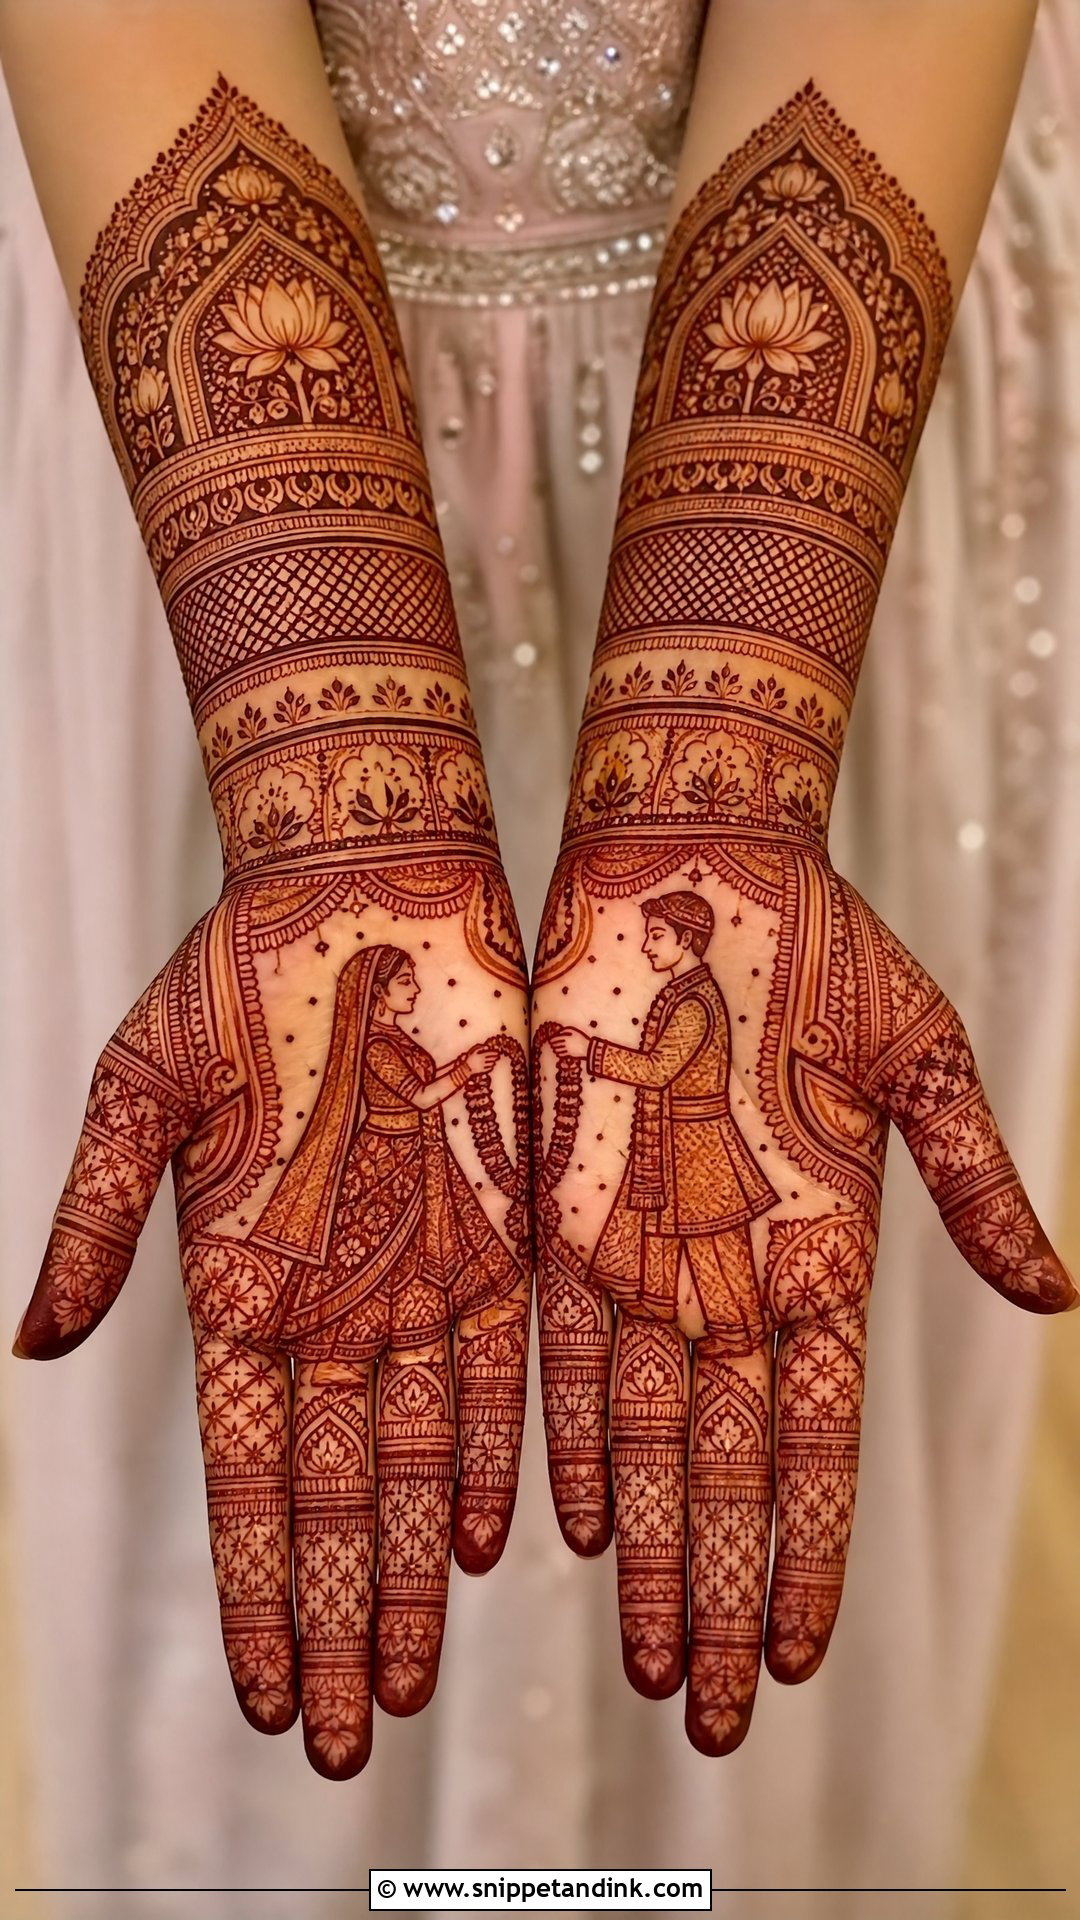
A full bridal design keeps the ceremony in the centre of the palm and surrounds it with dense filling: lotus bands at the wrist, peacock curves on the forearm and vines along the fingers. Balance decides whether it works. I leave a slightly lighter ring of filling around the scene, almost like a mount around a photograph, so the couple doesn’t sink into the pattern. Hide the wedding date or couple initials near the wrist if you’d like a detail only you know about.
3. Simple Varmala Mehndi Design
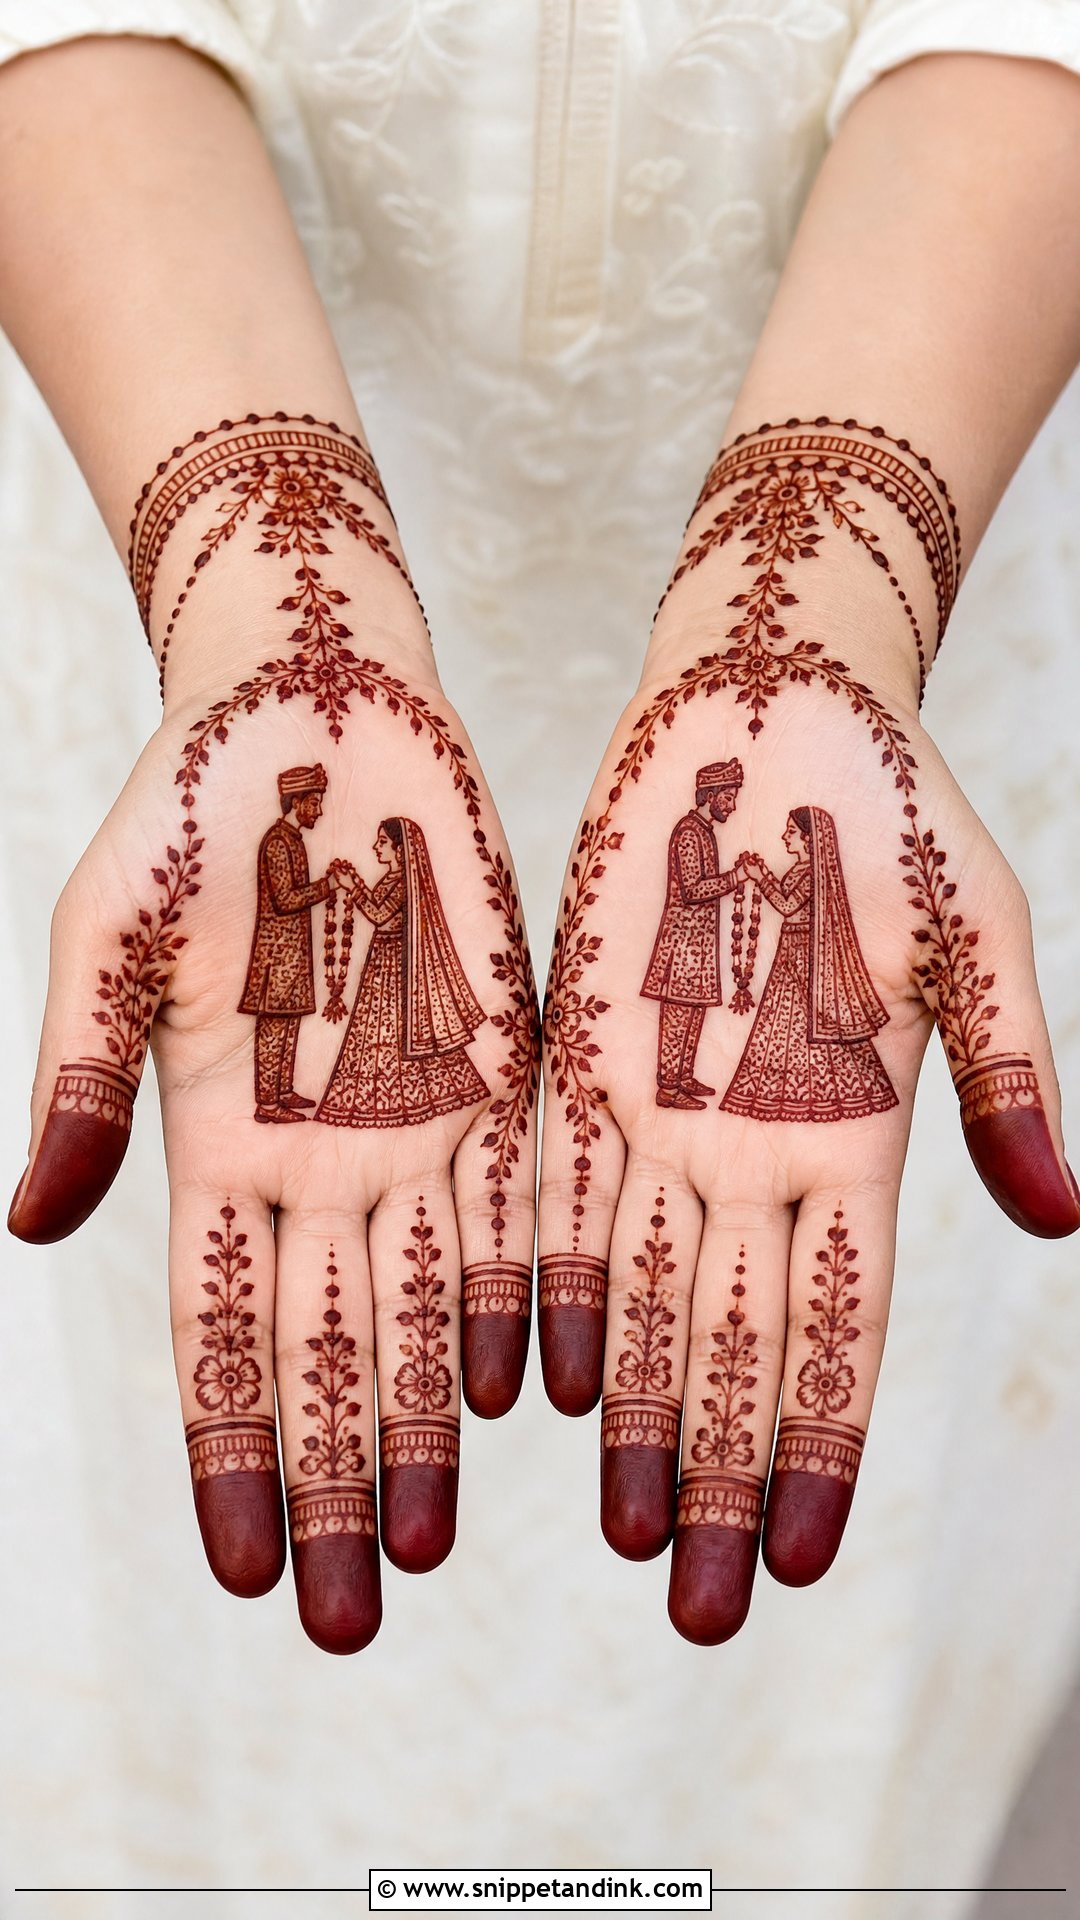
Not every bride wants a full hand. Two small figures, two garlands or a simple silhouette on the palm keep the meaning with far less coverage, and the rest of the hand gets clean floral trails and open space. It suits a roka, an engagement or a court wedding too. In simple designs I draw the motifs slightly larger and the lines thin, because small motifs with thick lines merge into blobs when the stain darkens.
4. Front Hand Varmala Mehndi Design
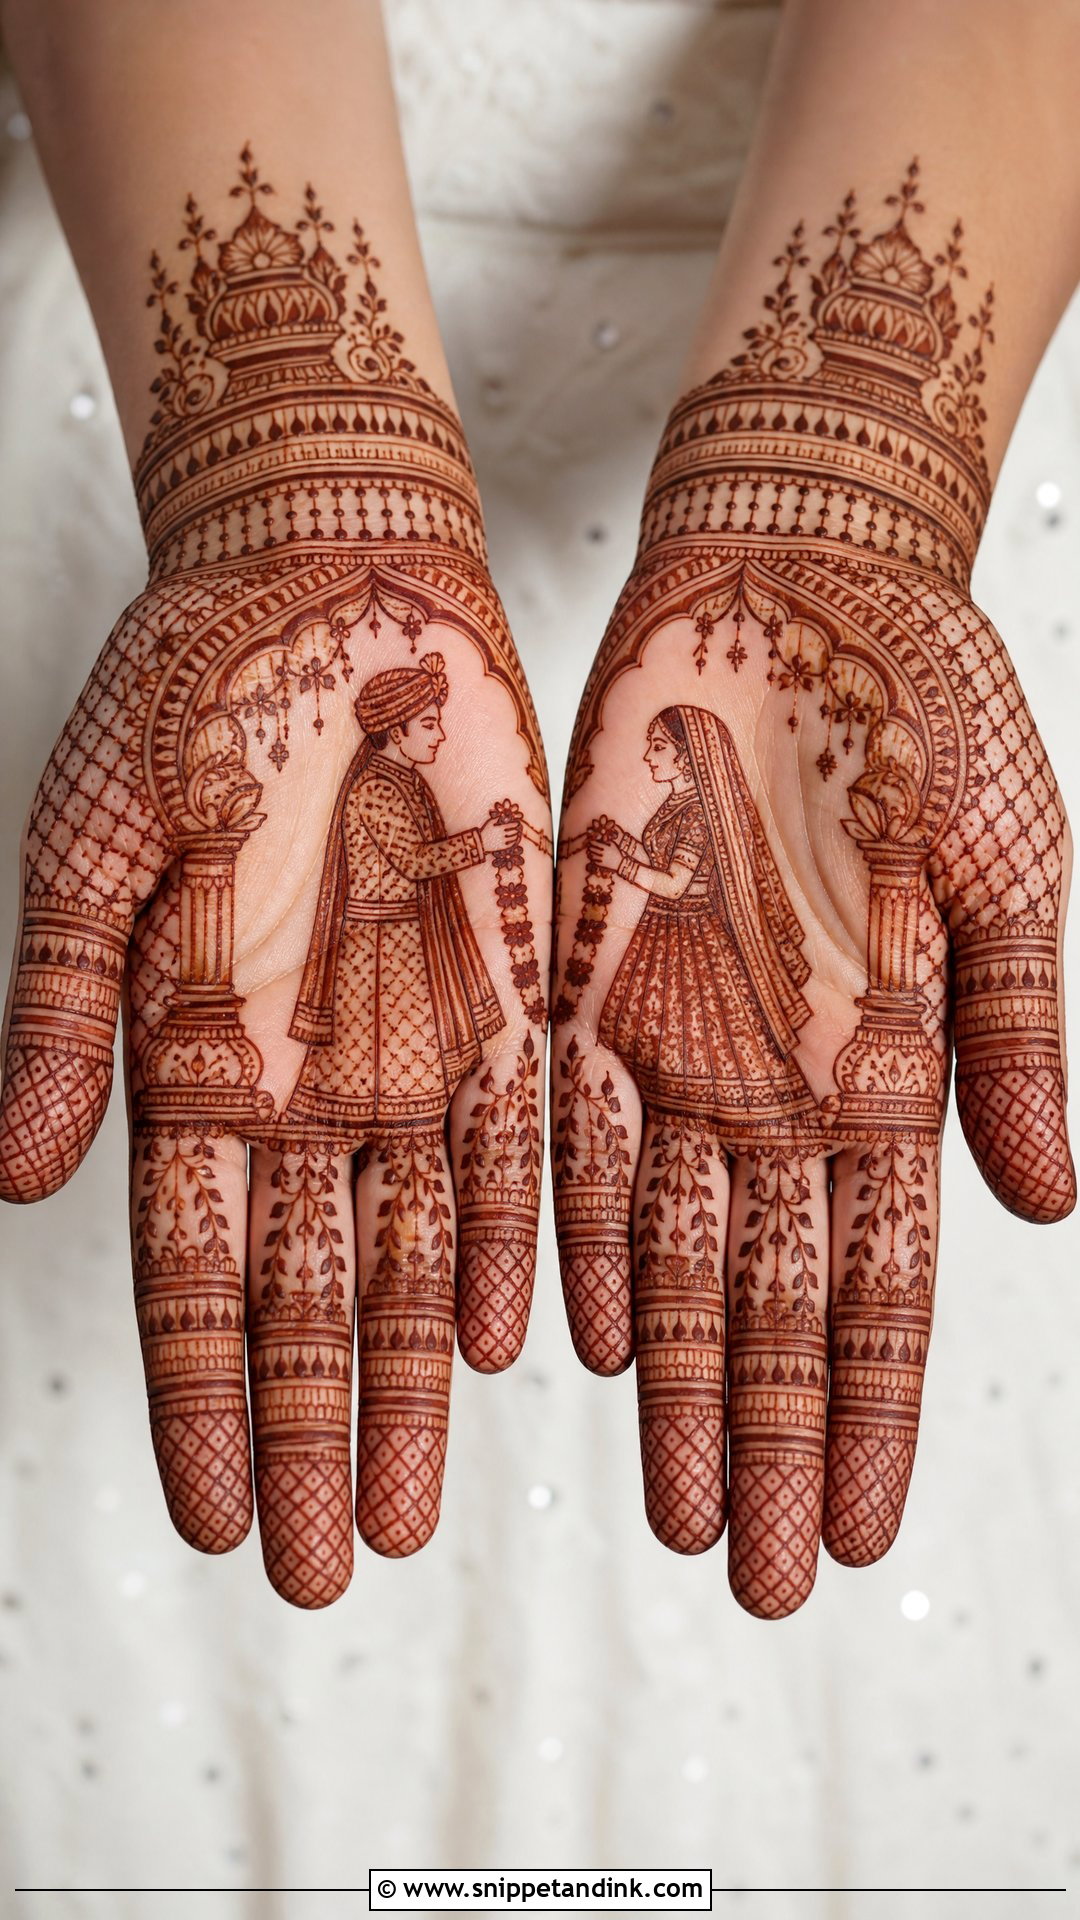
Putting the scene on the front of the hand makes sense because palms stain darker than anywhere else; the skin there is thicker and holds dye well. That means the figures come out bold and readable in close-ups. Fingers can carry vines or jaali, and the wrists can take a mandap arch or kalash border. If you want the varmala visible during rituals when your palms are open, this is the layout I’d recommend.
5. Back Hand Varmala Mehndi Design
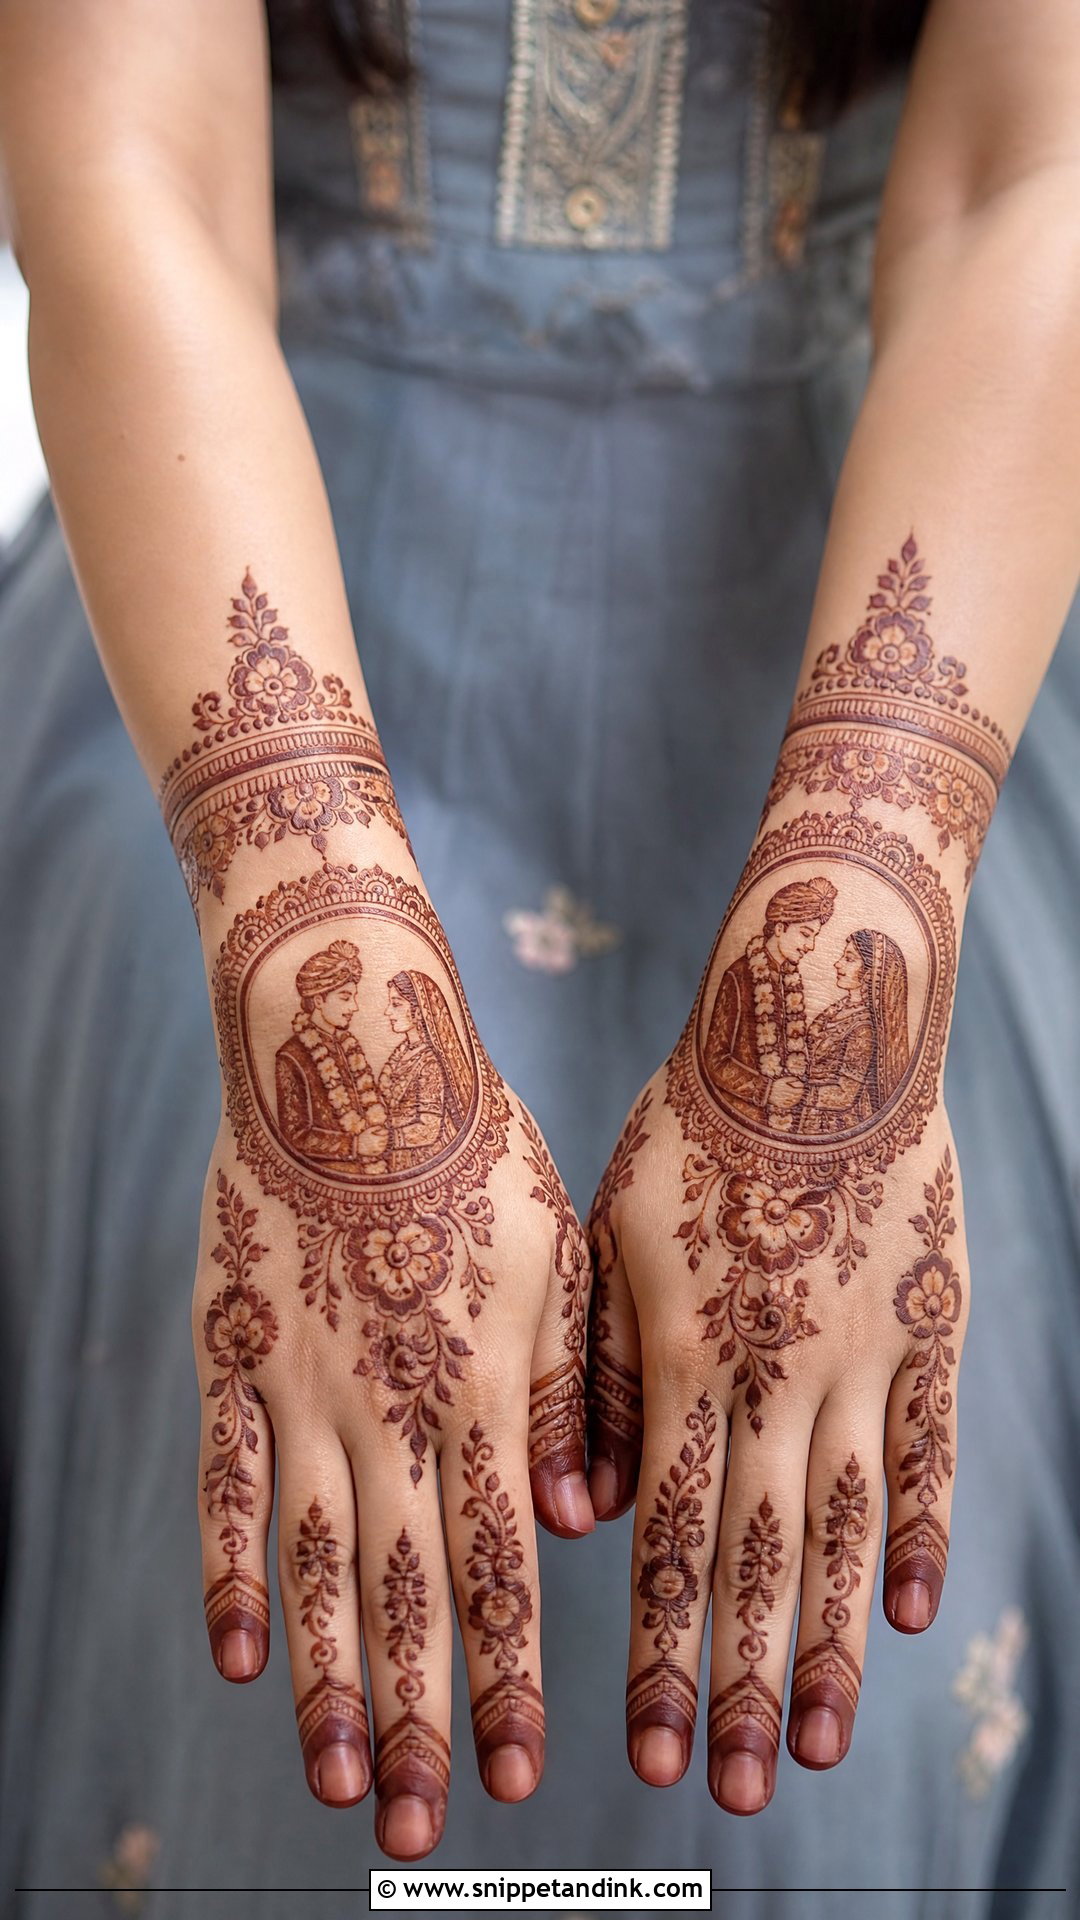
The back of the hand stains lighter than the palm, so a varmala scene there should be small, simple and drawn with slightly heavier lines than I’d use on the palm. I frame a compact couple with mandala circles and an ornamental cuff at the wrist, and keep the fingers to leafy trails. It shows in ring shots and when you hold a bouquet, which the palm never does. Avoid fine facial detail here; it fades first.
6. Varmala Portrait Mehndi Design
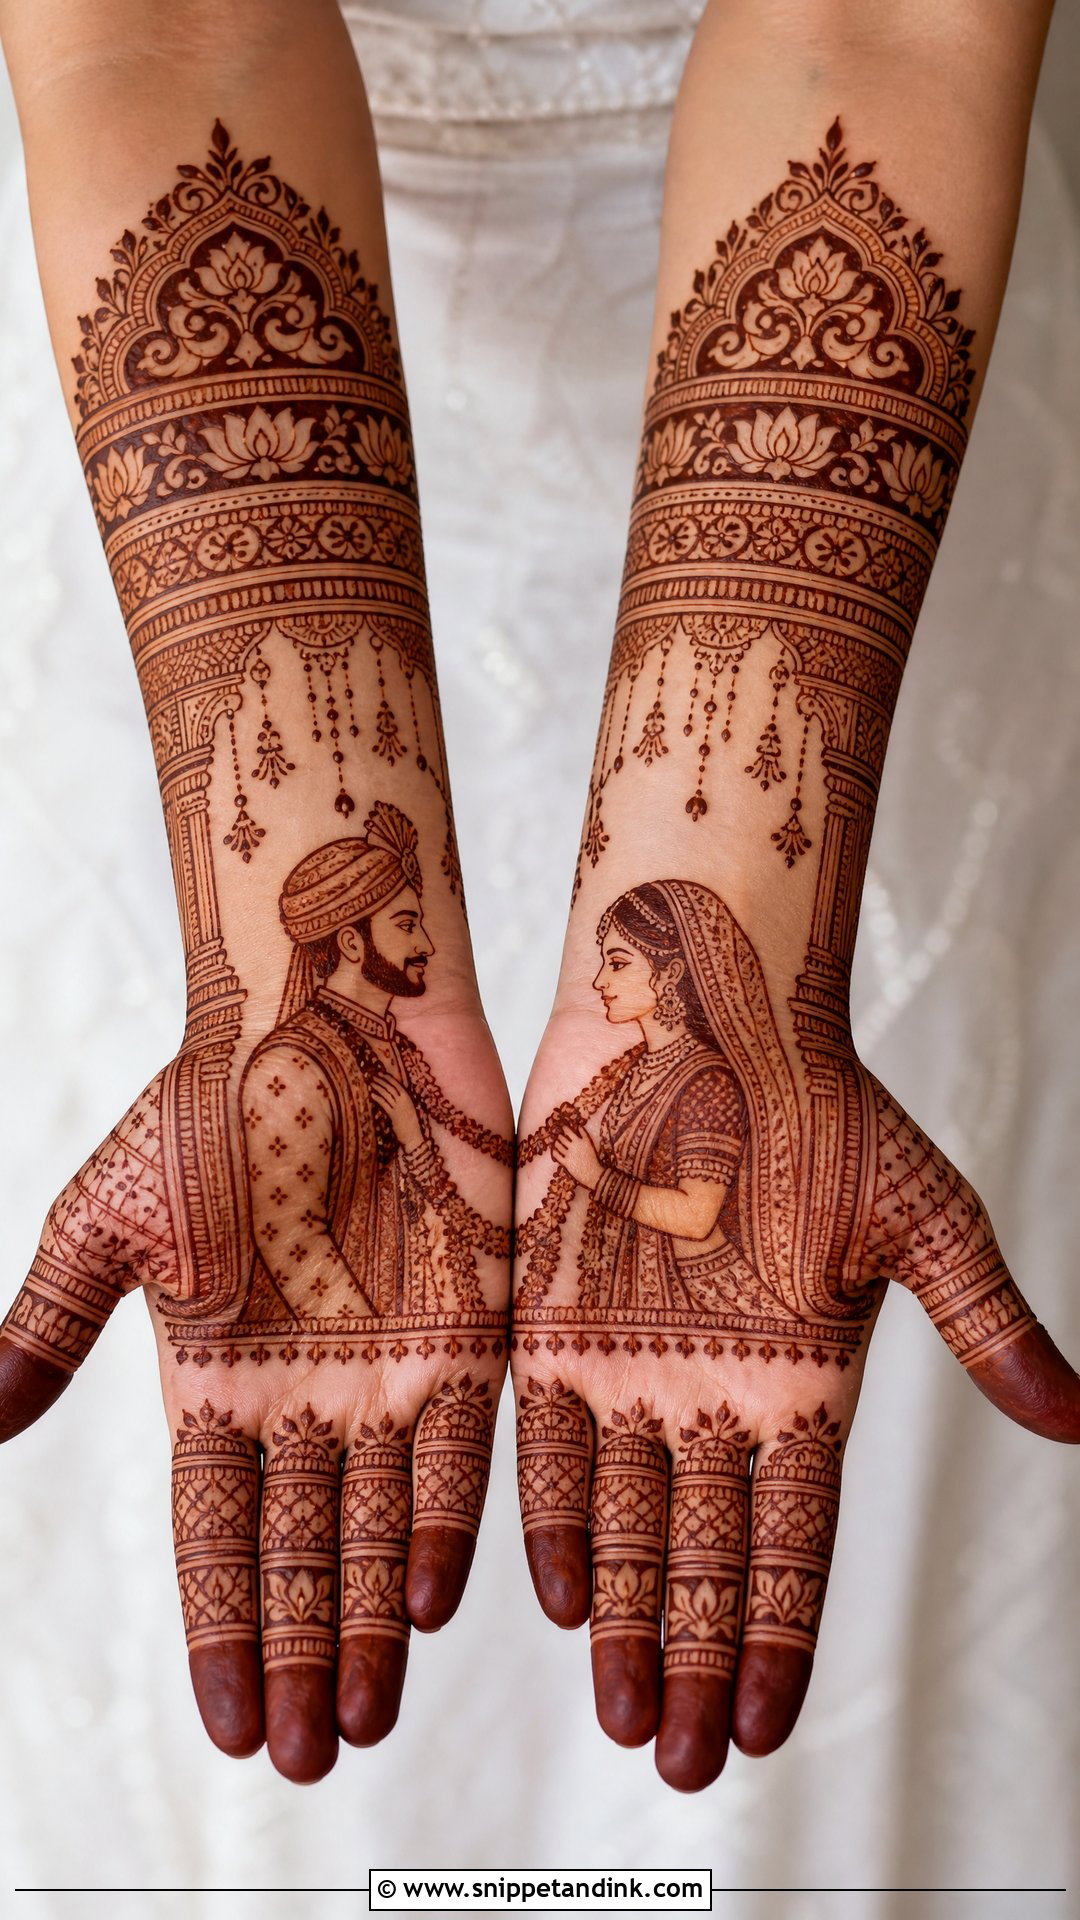
Portrait mehndi shows the couple as drawn faces, usually turned toward each other with garlands raised. It needs room, so it suits wider palms or a layout that runs onto the forearm. Many brides send me photos of their outfits so I can echo the lehenga border or the sehra. Clear space around the faces is non-negotiable. If I fill too close, the faces disappear when the stain deepens. Book extra time for this one; portrait work is slow.
7. Mandap Varmala Mehndi Design
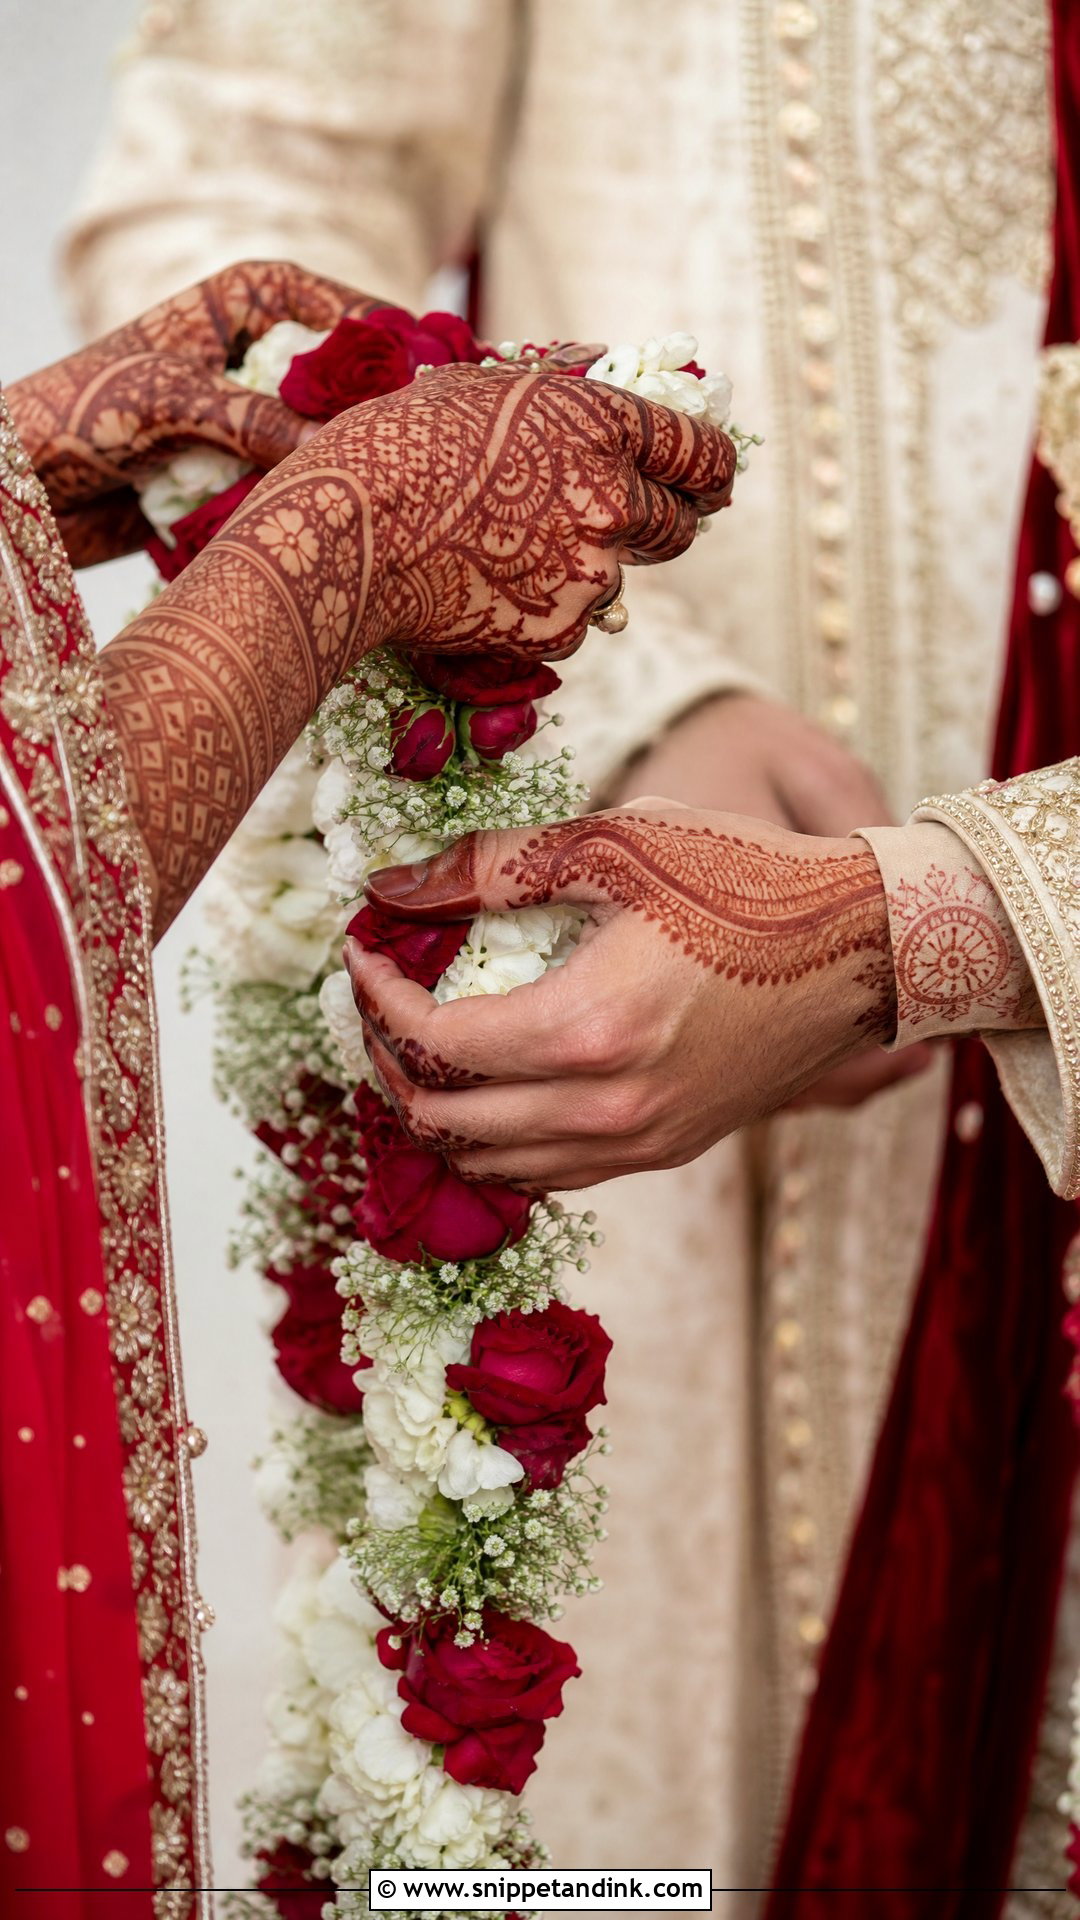
Here the couple stands under a mandap, with arches, pillars, hanging flowers and lamps framing them. The mandap shape naturally contains the scene, which makes it one of the easier figure layouts to balance. I draw the pillars first as guide lines and fit the couple inside. Paisleys, floral bands and small checks on the fingers connect the rest of the hand to the scene.
8. Jaimala Varmala Mehndi Design
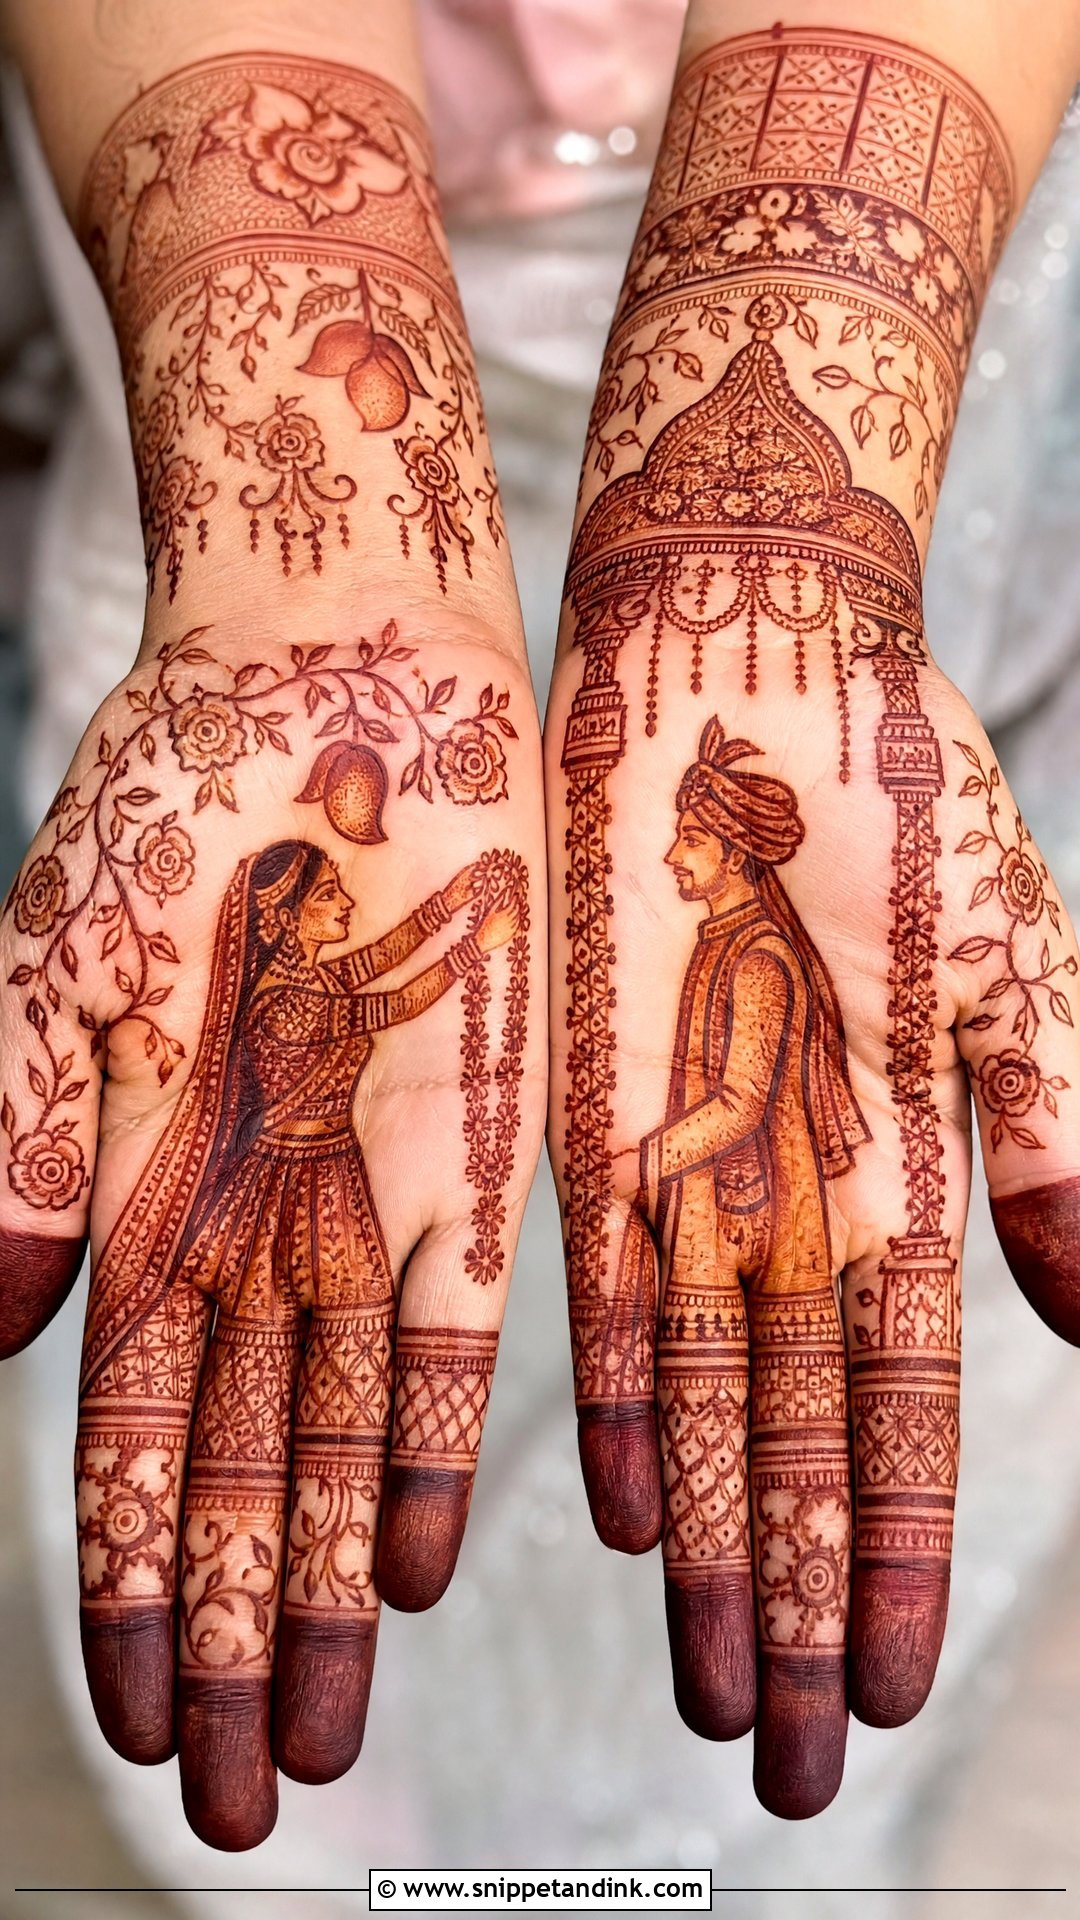
Jaimala and varmala name the same ceremony in many families; the word changes with region more than the design does. I put the garland exchange at the emotional centre, often with the bride lifting her garland on one palm and the groom under a floral canopy on the other. Rose vines, mango motifs and lace-like borders fill the rest. Keep the figures’ arms as simple as possible; drawn arms are where figure work most often looks stiff.
9. Dulha Dulhan Varmala Mehndi Design
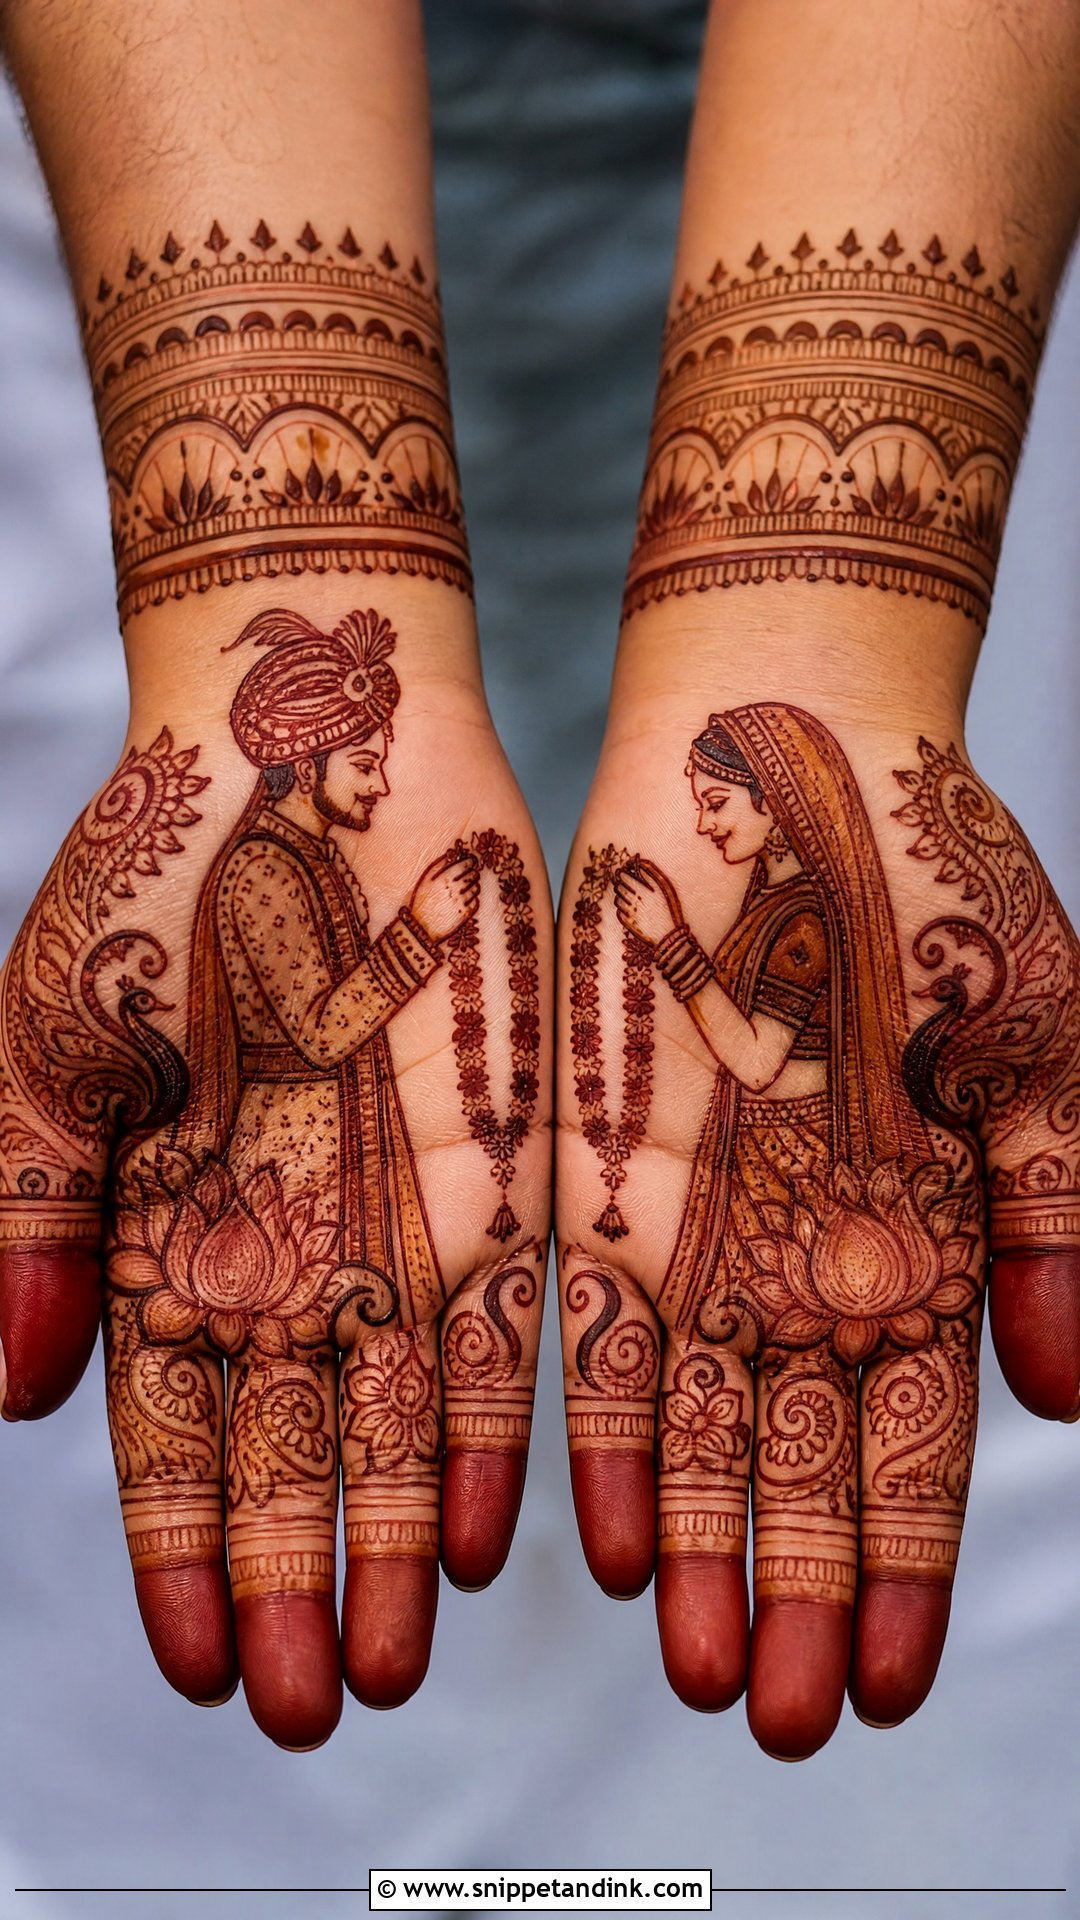
A dulha dulhan varmala mehndi design draws the groom in turban, sherwani or sehra and the bride in veil, jewellery and lehenga, with the garlands linking them. Each palm usually carries one figure, and matching bands at the wrist tie the hands together. I keep the costume detail to a few strong lines: the sehra strings, the dupatta edge. Too many tiny details on small figures run together once the paste sits for hours.
10. Indian Varmala Mehndi Design
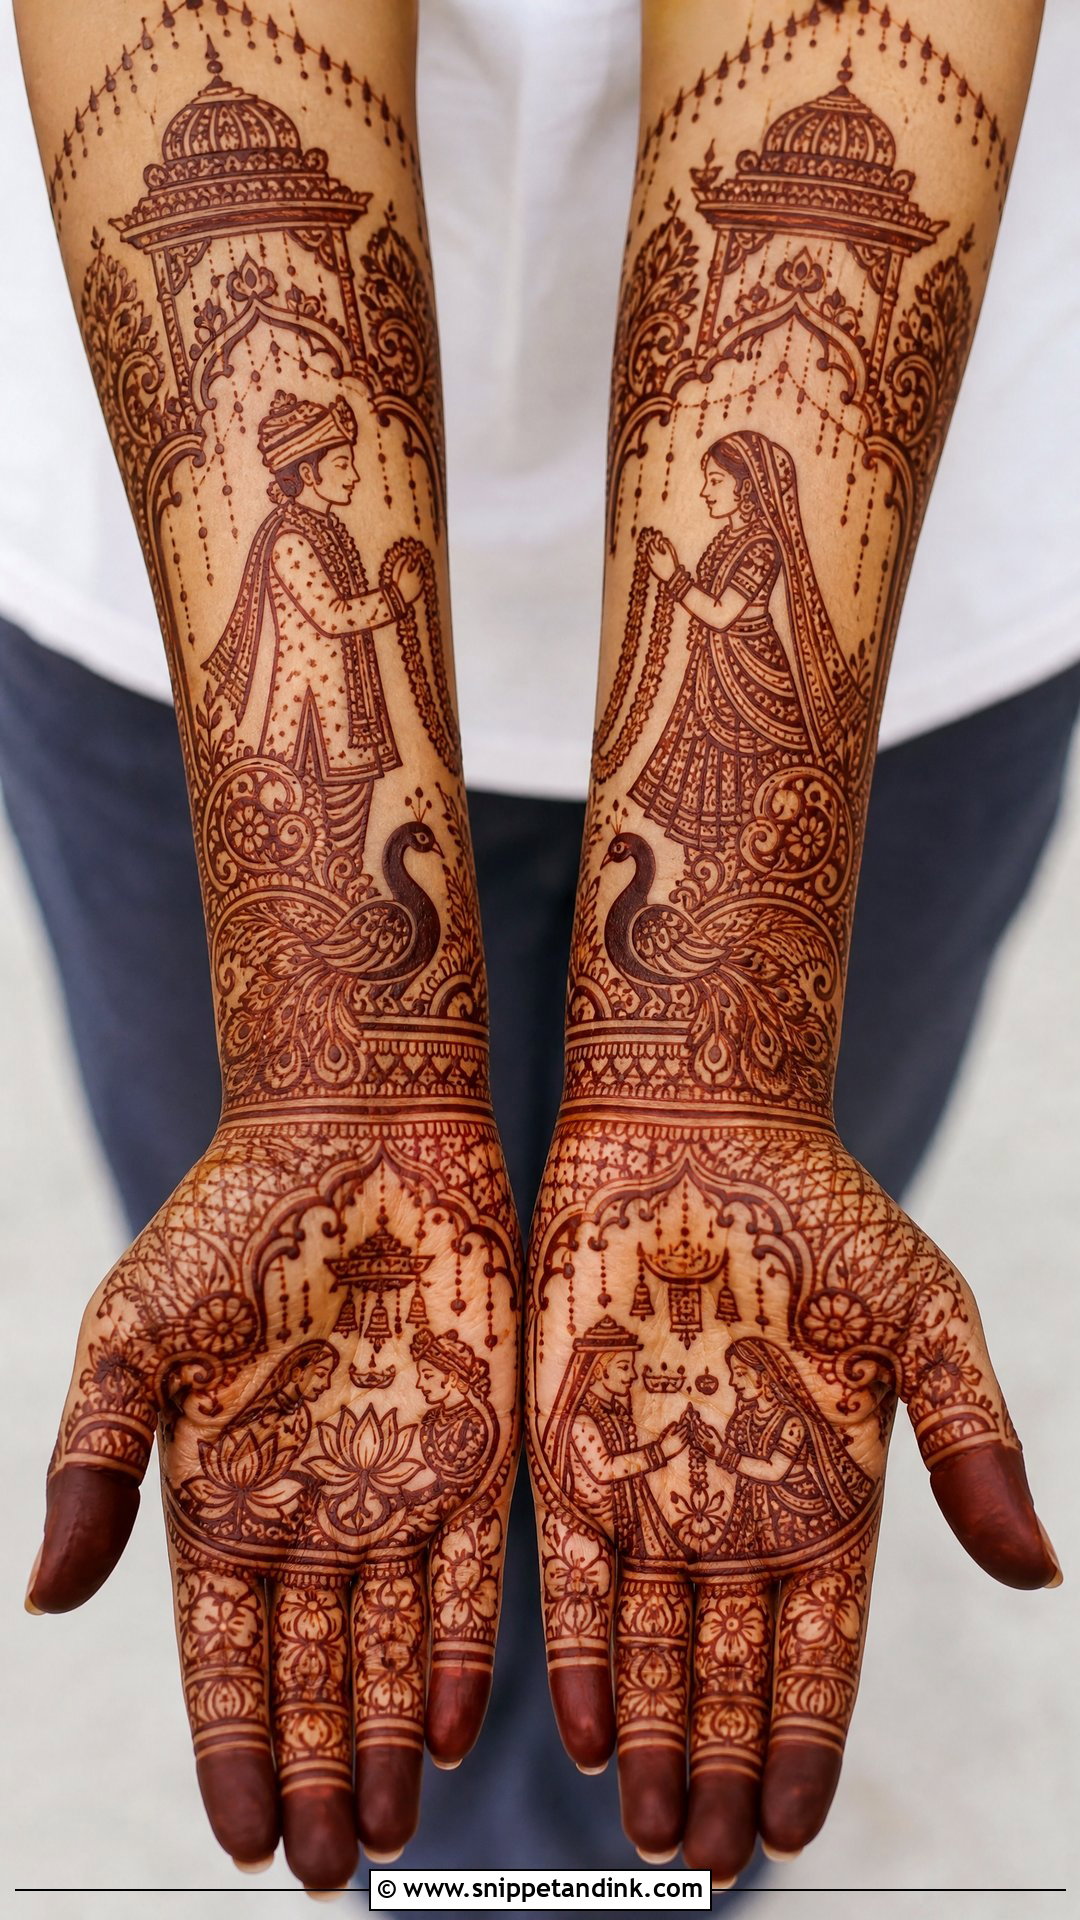
Dense traditional mehndi surrounds the scene with paisleys, lotuses, peacocks, mandap lines and small borders across palm, fingers, wrist and forearm. I aim for symmetry that isn’t mirror-flat: one hand carries the ceremony, the other carries complementary motifs that answer it. Coverage this heavy takes many hours, and you’ll need to sit still, so plan a comfortable chair, a snack someone else can feed you and a phone charger within reach.
11. Rajasthani Varmala Mehndi Design
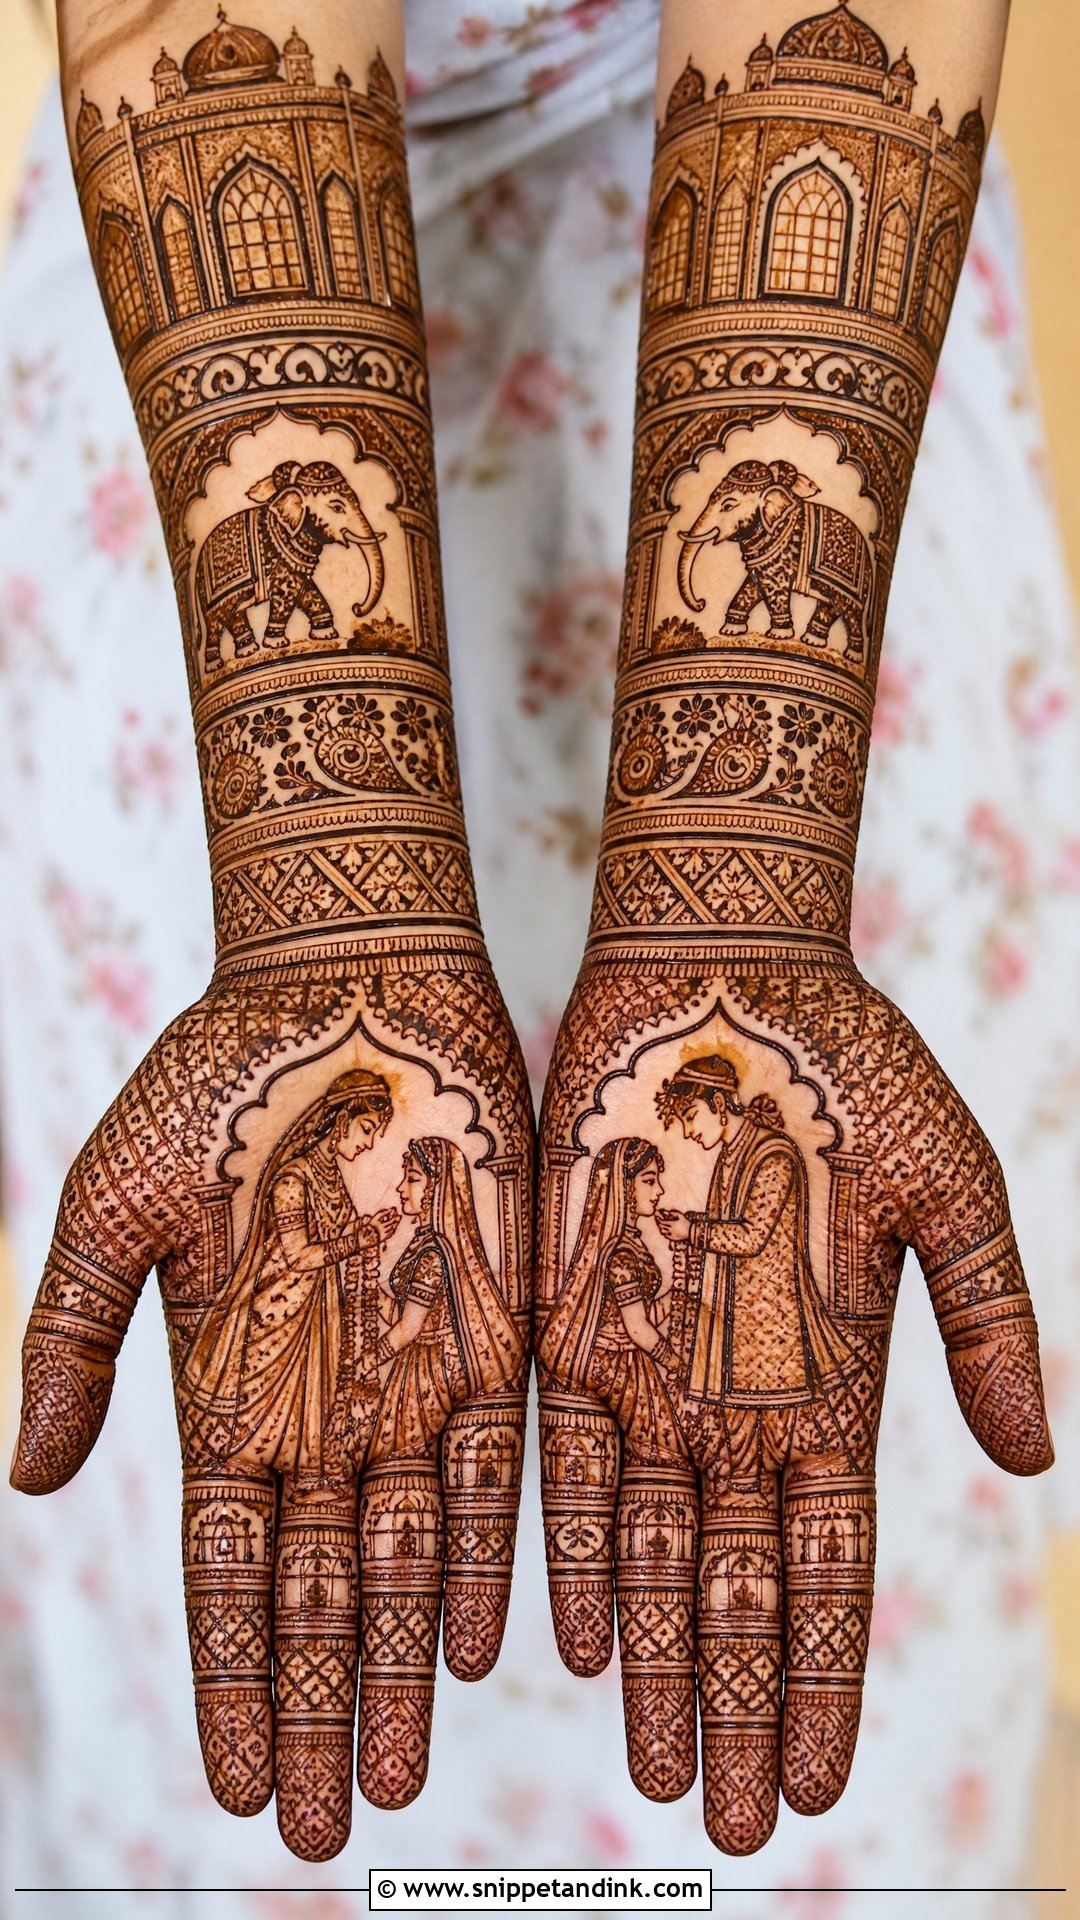
A Rajasthani varmala mehndi design draws on folk painting: dulha-dulhan figures, jharokha windows, elephants, peacocks and very fine filling. Setting the couple inside an arch makes it read like a miniature painting. Because the filling is so dense, I leave a thin clean channel around each important figure. Without it, the figures dissolve into the background once everything stains the same deep colour.
12. Arabic Varmala Mehndi Design
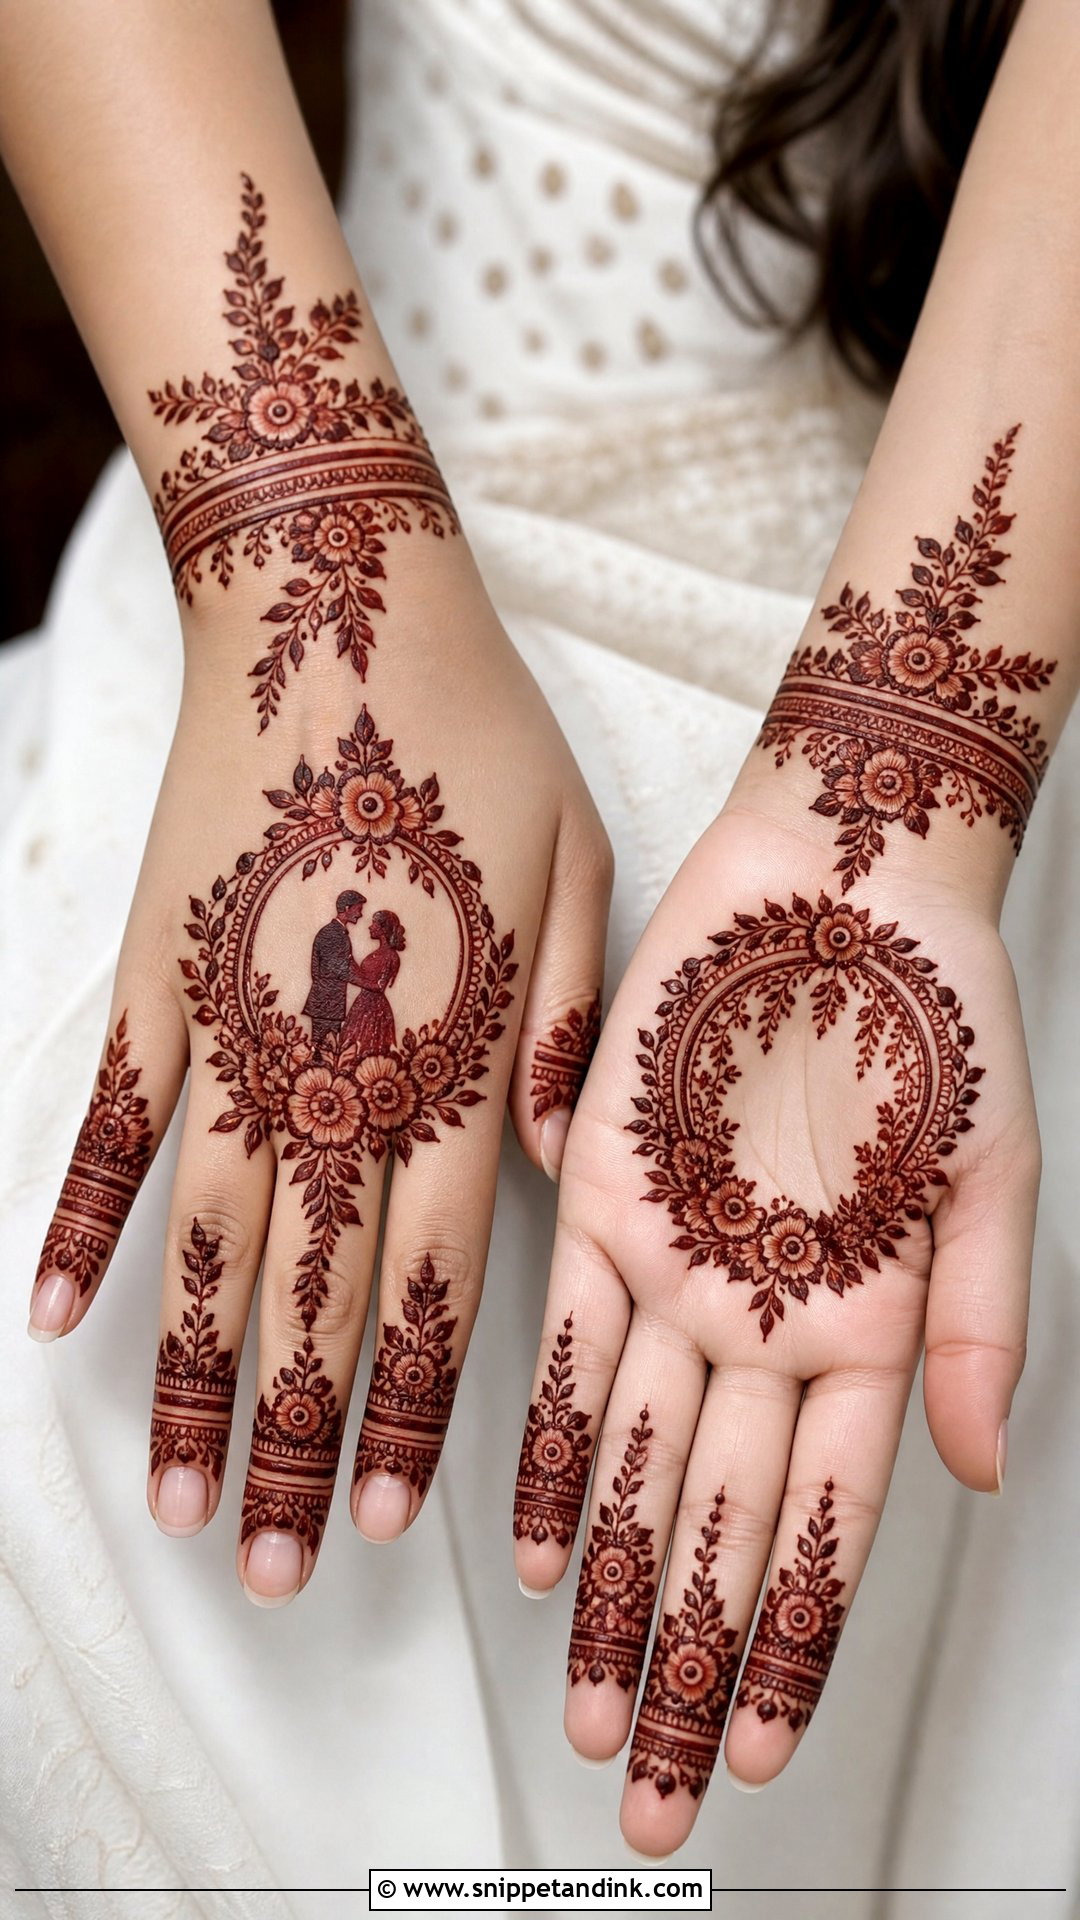
Arabic style uses bold flowers, leafy trails and open space rather than fine filling. A small couple silhouette or two garlands sit inside a floral frame on the back of the hand or palm. It’s quicker than Indian bridal work and suits sisters and bridesmaids who want a wedding motif without full coverage. Bold flowers forgive a less-than-perfect stain far better than intricate figures.
13. Indo Arabic Varmala Mehndi Design
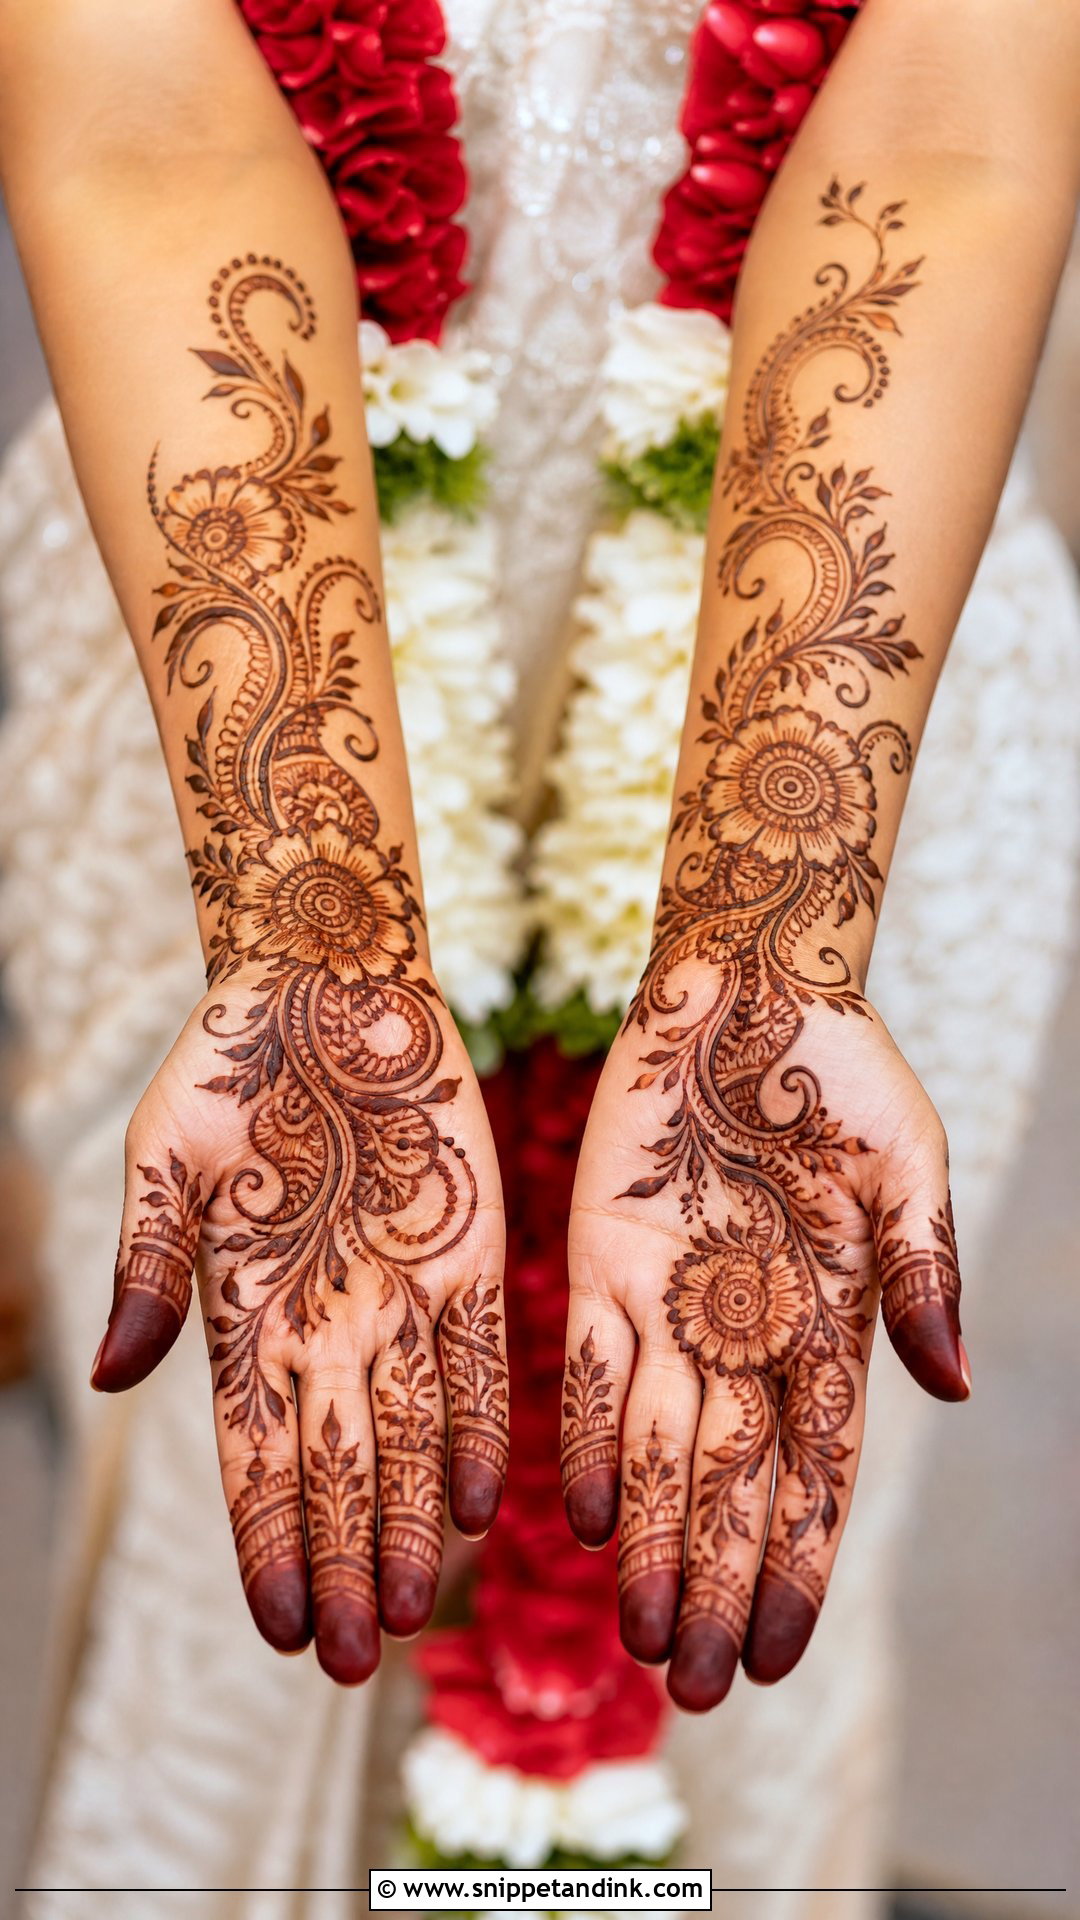
Indo-Arabic mixes Indian detail with Arabic flow. A neat scene sits in the centre and the rest of the hand uses bold florals, paisley curves and shaded leaves with open space between them. I often run it diagonally from palm to forearm, which makes the hand look longer. It’s my usual suggestion for a bride who wants a bridal feel but dreads eight hours in the chair.
14. Minimal Varmala Mehndi Design
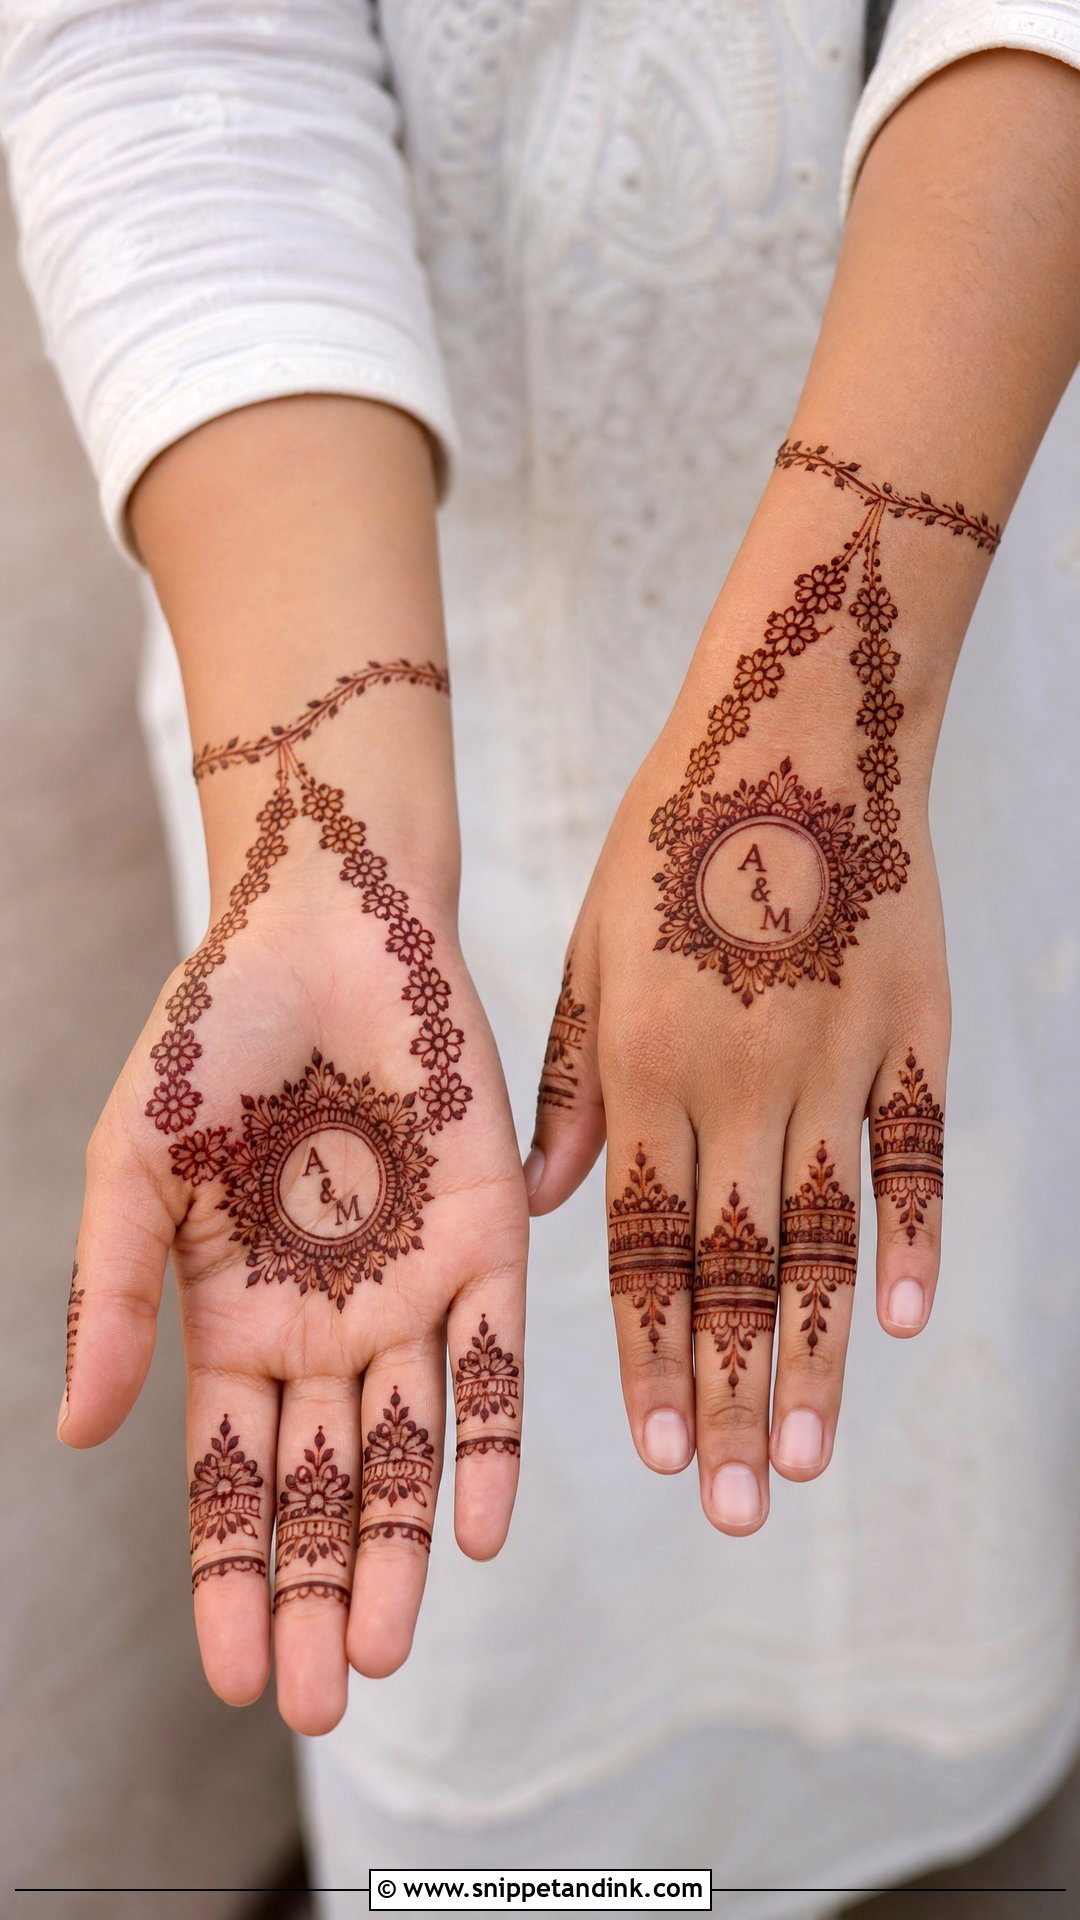
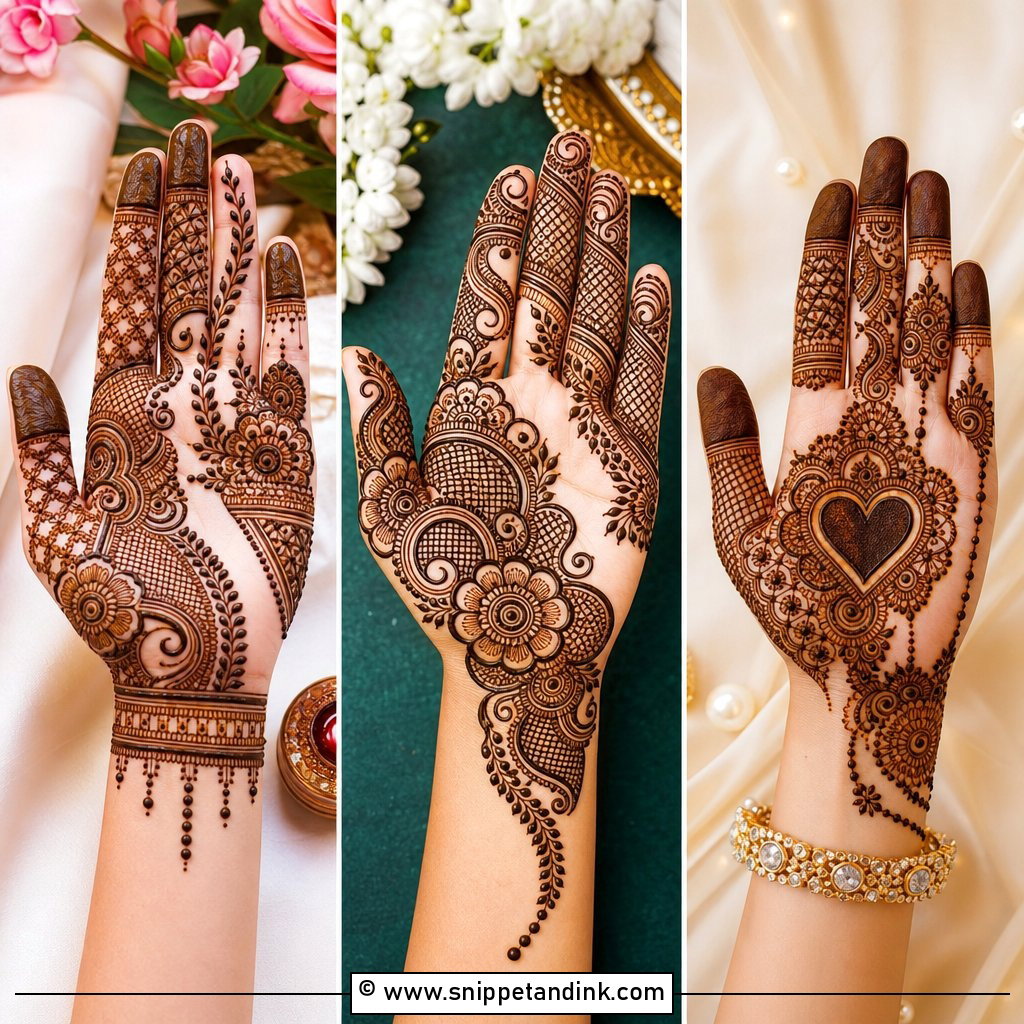
Two small garlands, tiny initials, a delicate mandala and slim finger lines can be the whole design. Plenty of clean skin around the motif keeps it readable. It’s practical when you have several functions and want something lighter for engagement, haldi or a welcome dinner. Keep the garland motif in the centre of the hand so the design still clearly belongs to the varmala.
15. Modern Varmala Mehndi Design
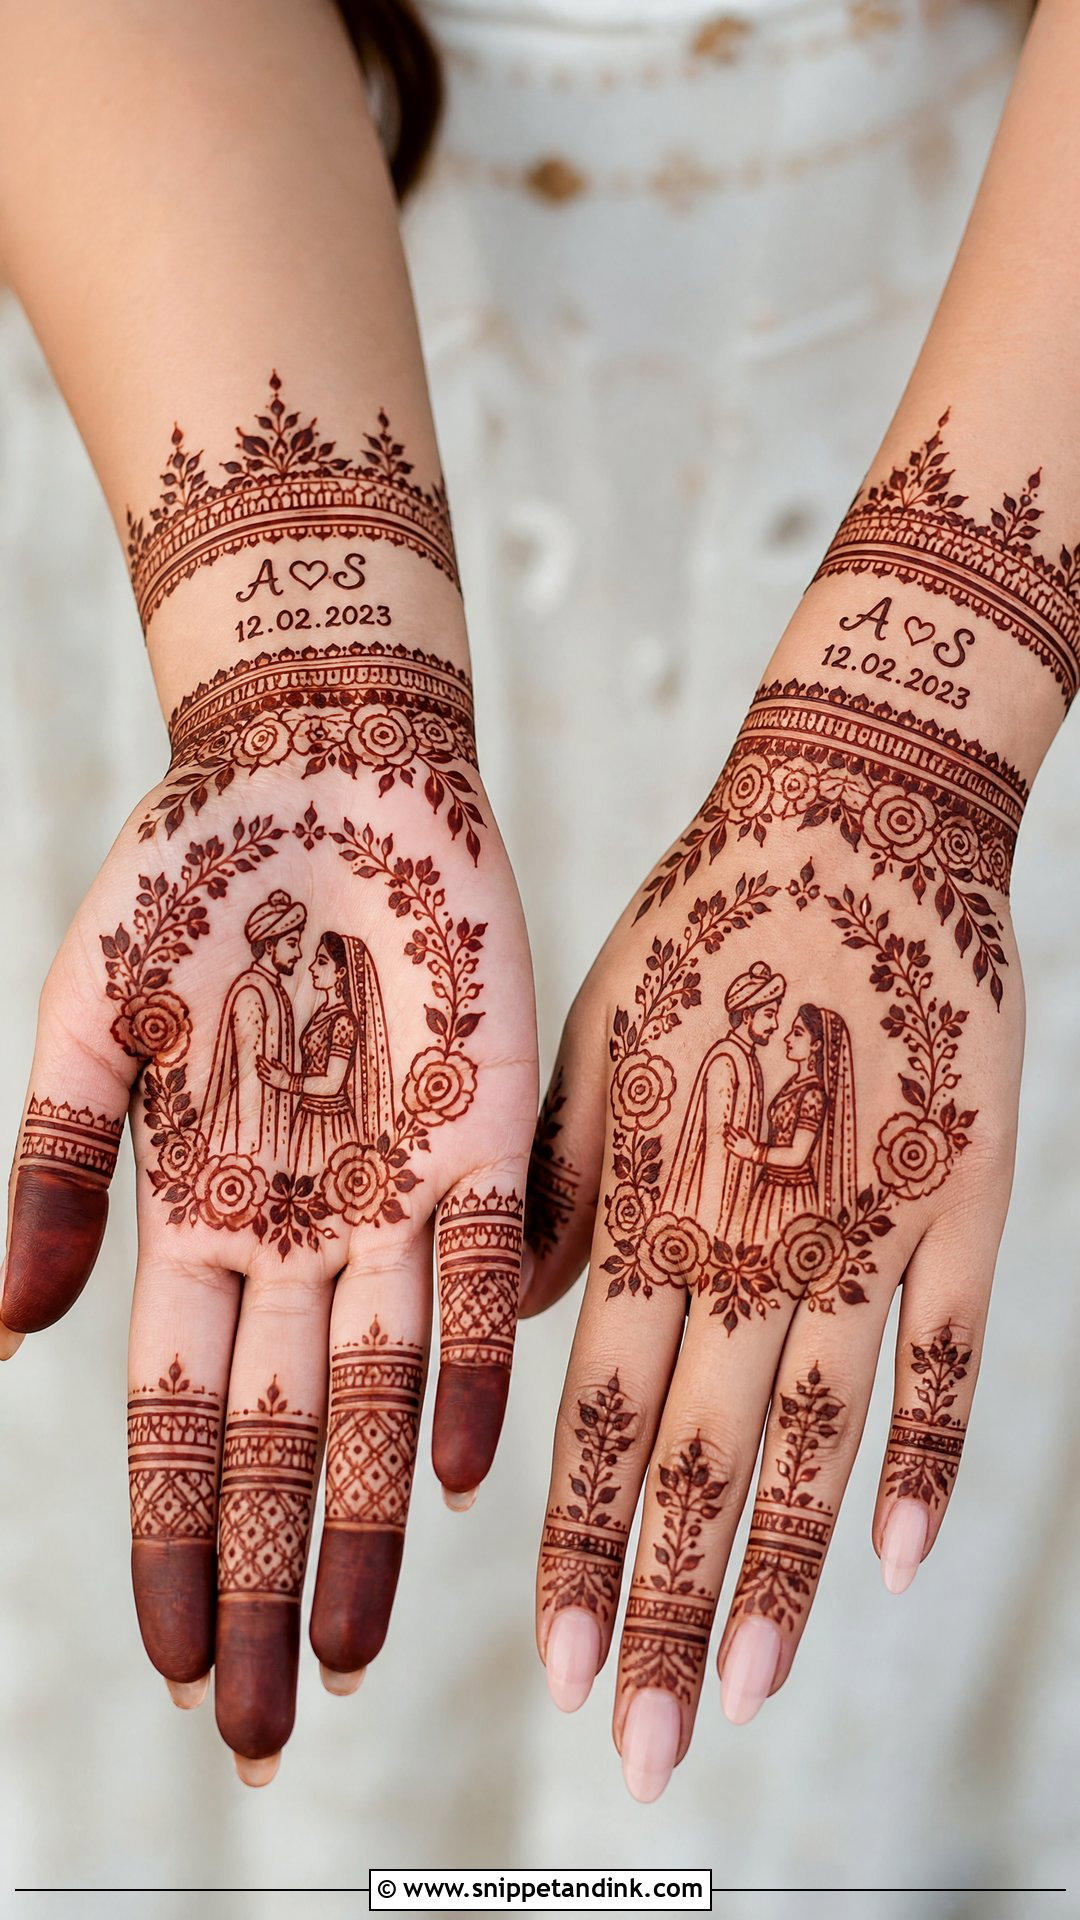
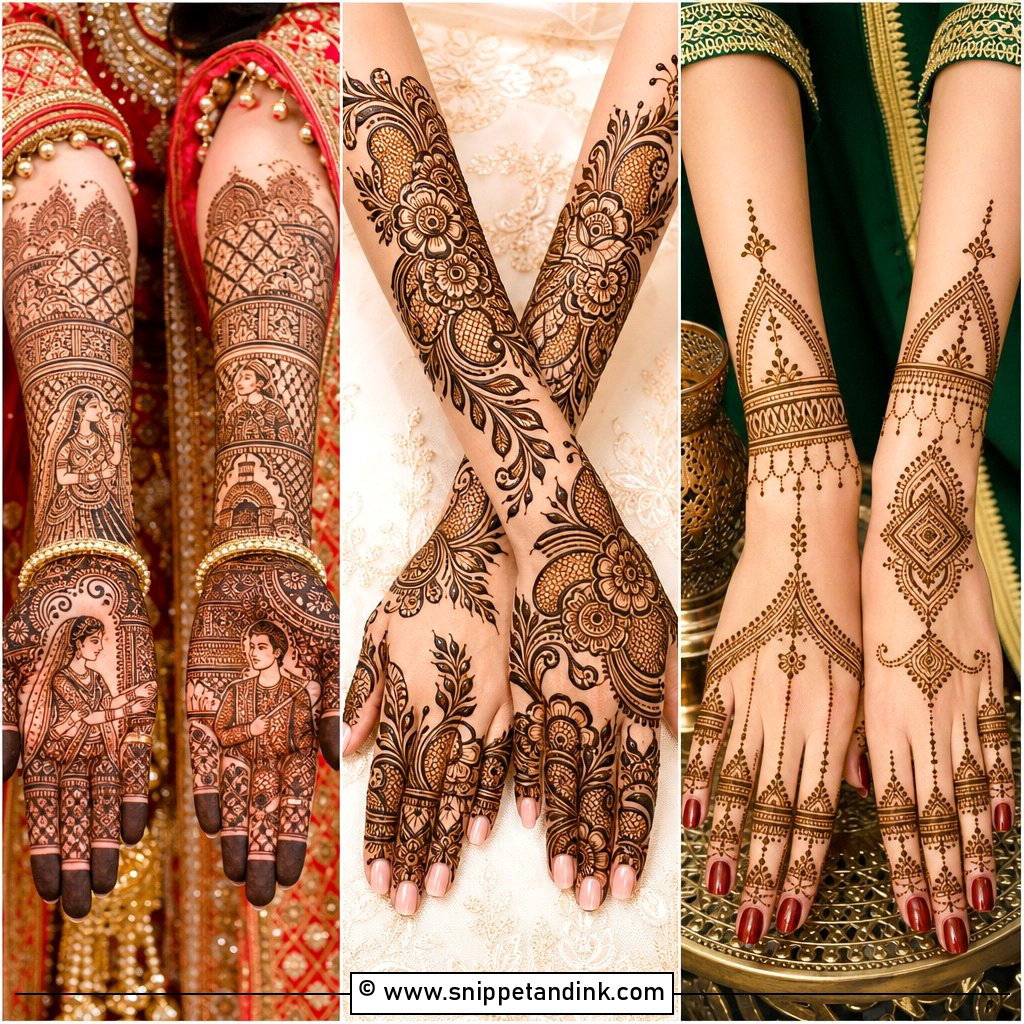
A modern version swaps realistic figures for clean outlines, silhouettes, geometric borders and negative space. Garlands become bold floral loops, and initials or the date can sit near the wrist. Silhouettes are easier to read than faces after staining, which is one reason I like this approach. It suits pastel lehengas and fusion outfits.
16. Peacock Varmala Mehndi Design
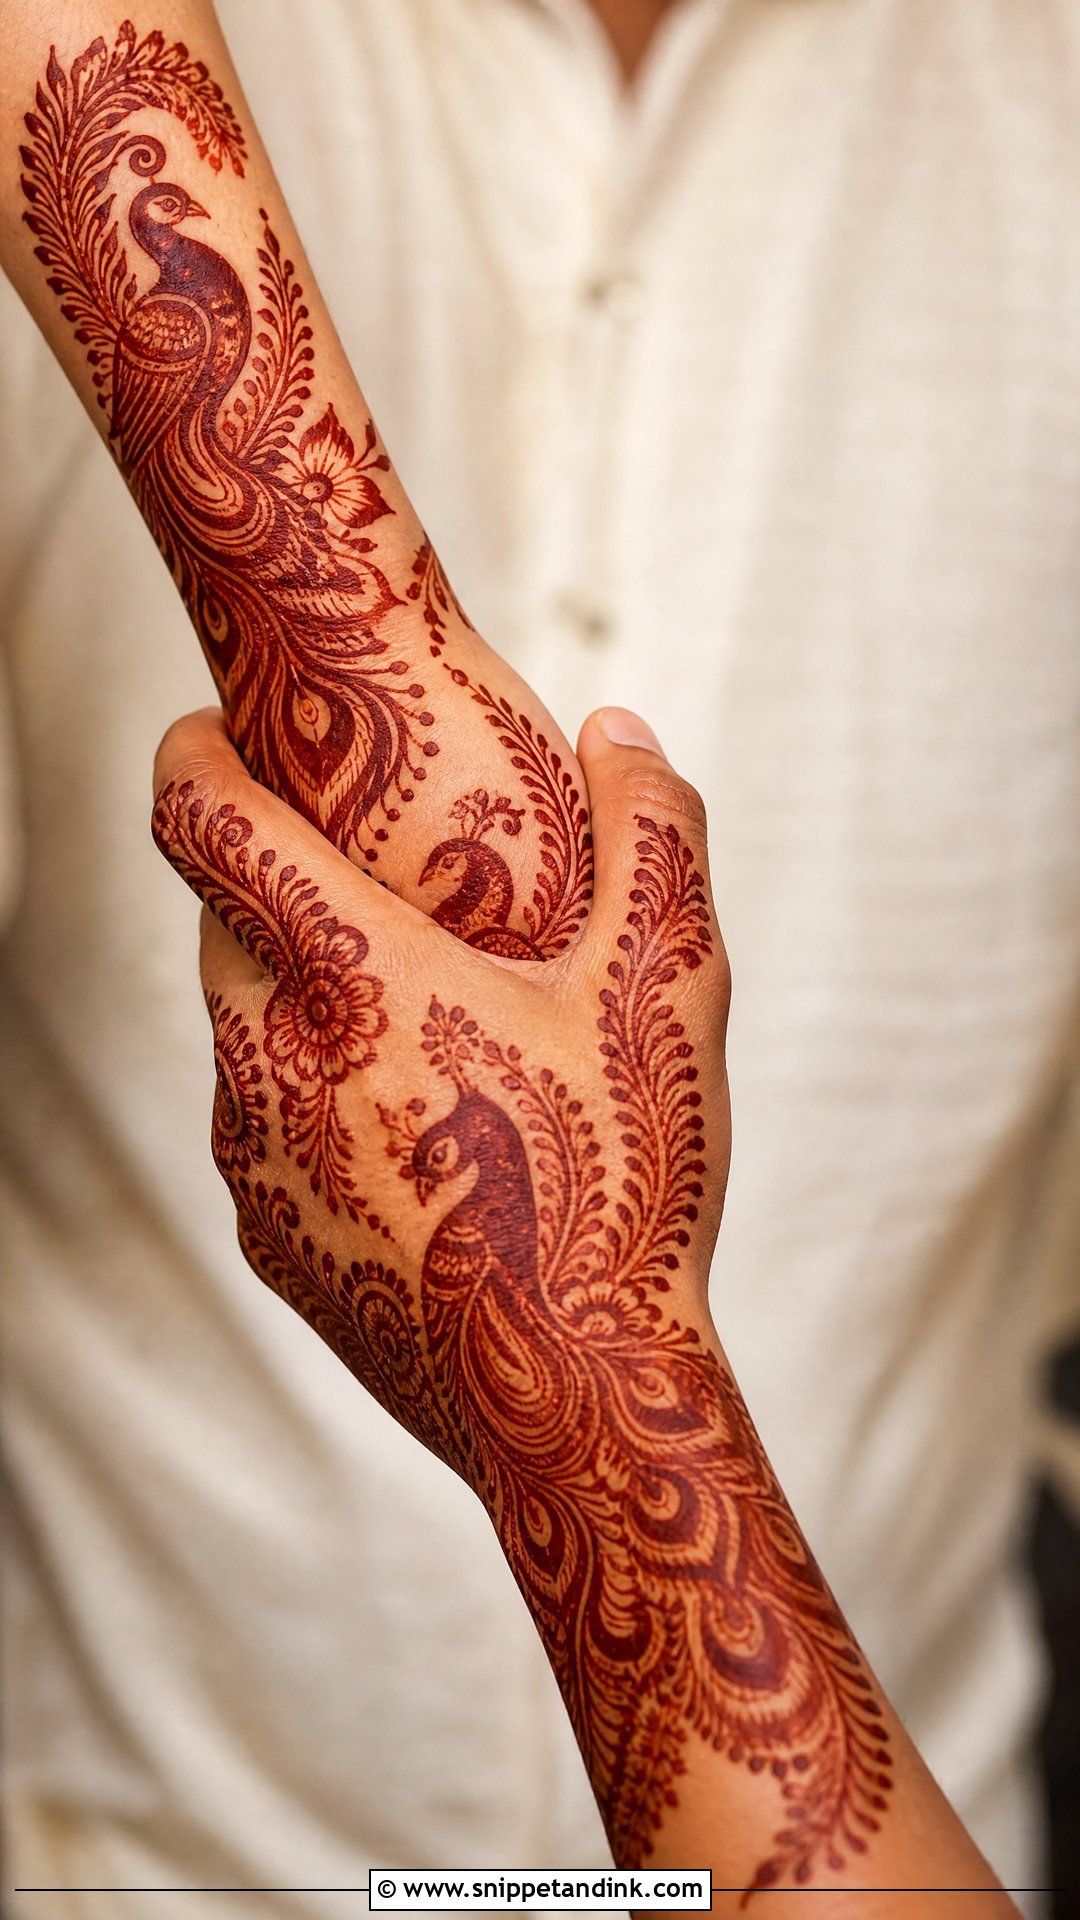
Peacock feathers curving around the garland exchange frame the couple and flow naturally from palm to wrist. I keep the feathers on the outer edges and forearm so the centre stays clear for the figures. Feather eyes need a tiny open centre; filled in solid, they look like dark spots in the final stain. Small florals, dots and feather lines suit the fingers.
17. Lotus Varmala Mehndi Design
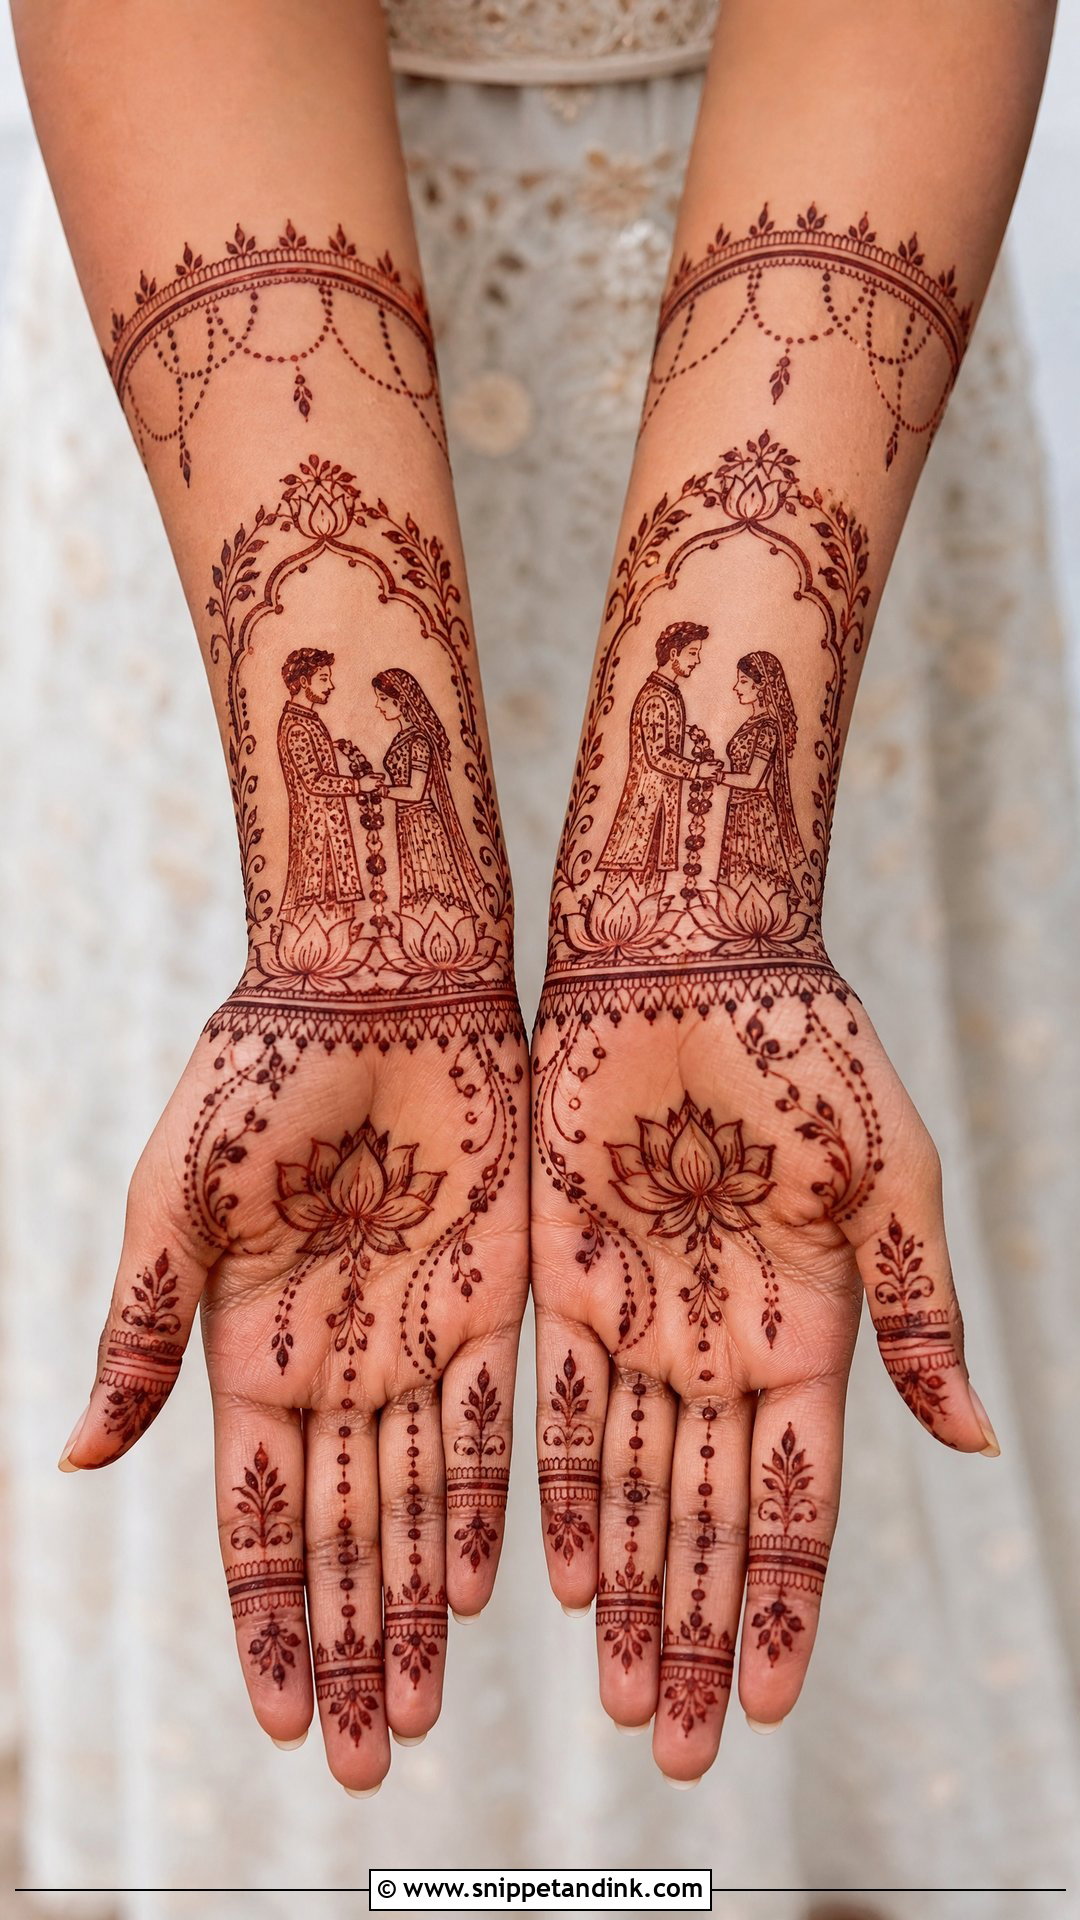
Lotus petals forming a frame around the couple feel sacred and give the hand natural spacing. Lotus bands at the wrists and petal chains on the fingers keep it softer than paisley-heavy work. Because lotus shapes are large and open, they hold their outline well, and on a good stain they come up deep maroon. It suits front-hand and full-hand layouts.
18. Paisley Varmala Mehndi Design
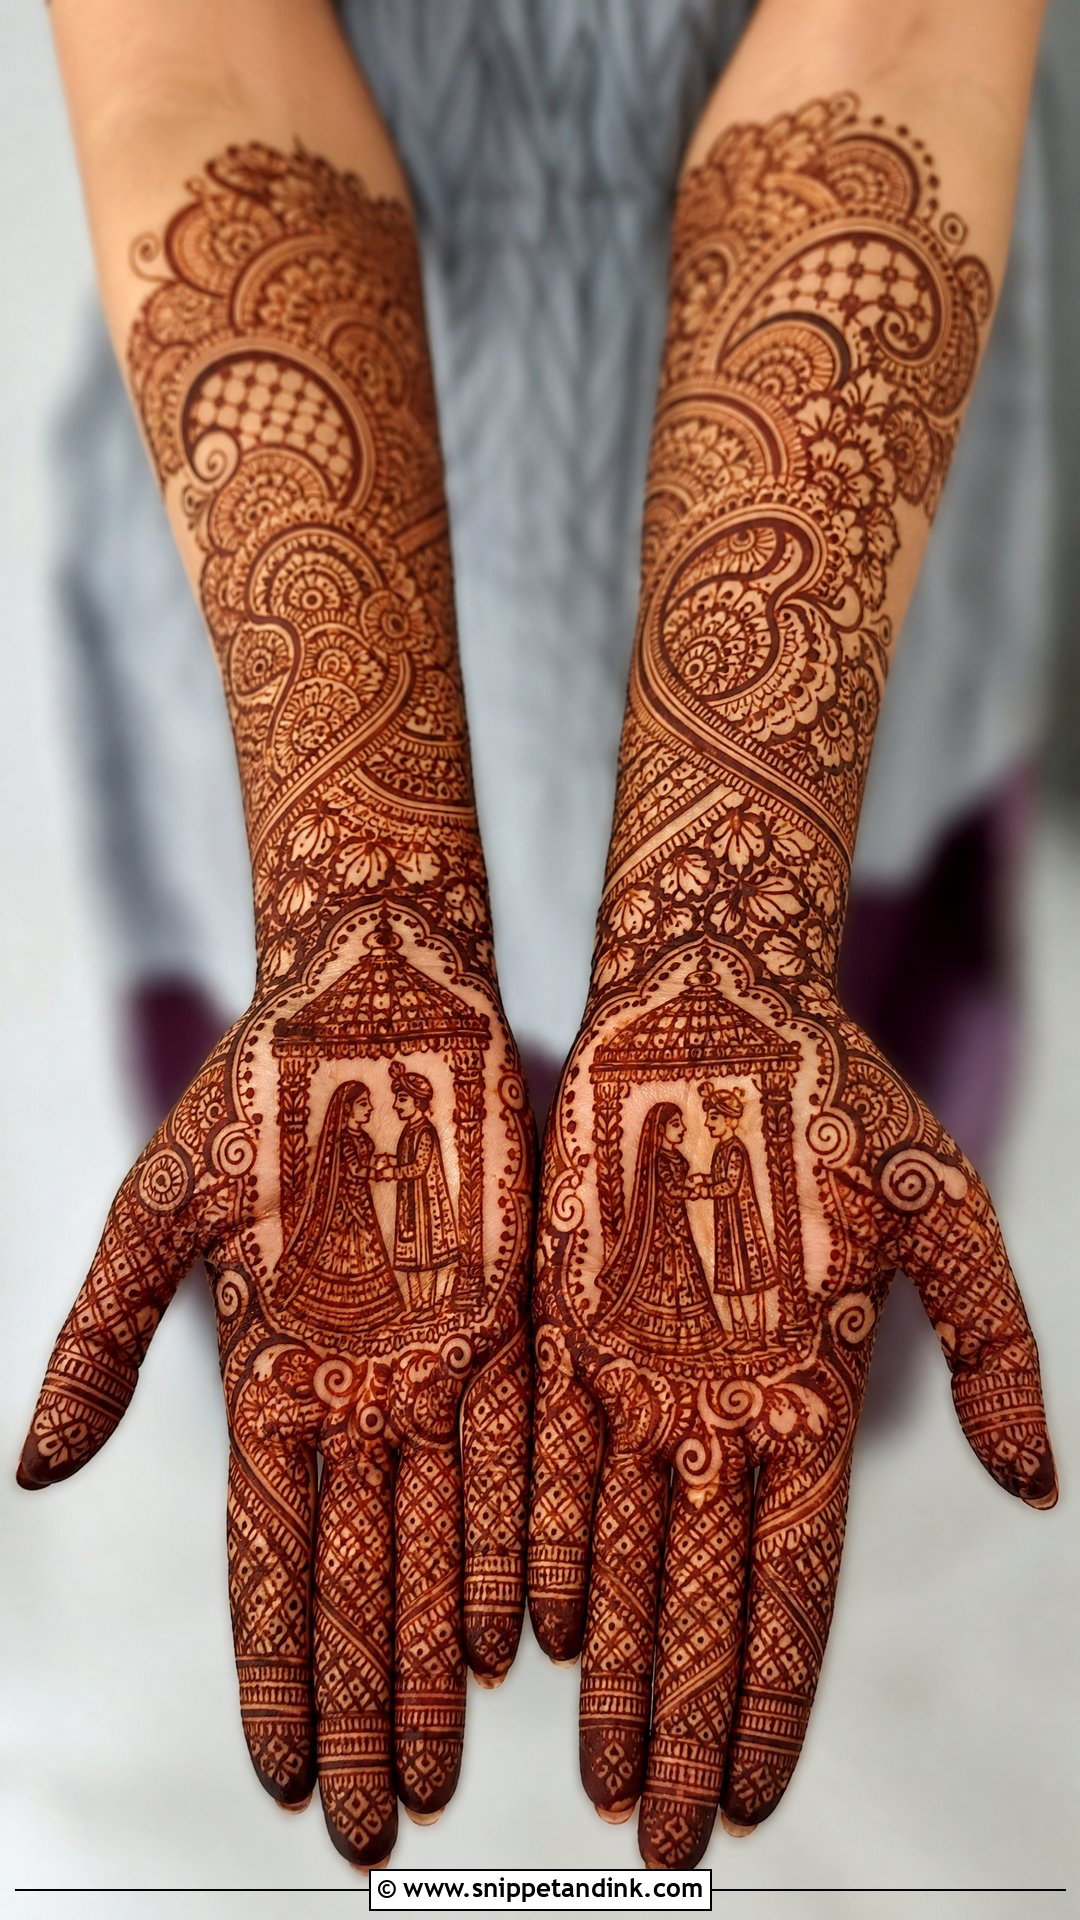
Paisleys fill space smoothly and give the hand a traditional flow around the scene. The couple sits under a small mandap on the palm, with layered paisley trails, floral filling and fine dots down the wrists and forearms. My rule is to draw the figures slightly larger than the biggest paisley. If the paisleys are bigger, the eye goes to them first and the wedding moment gets lost.
19. Personalized Varmala Mehndi Design
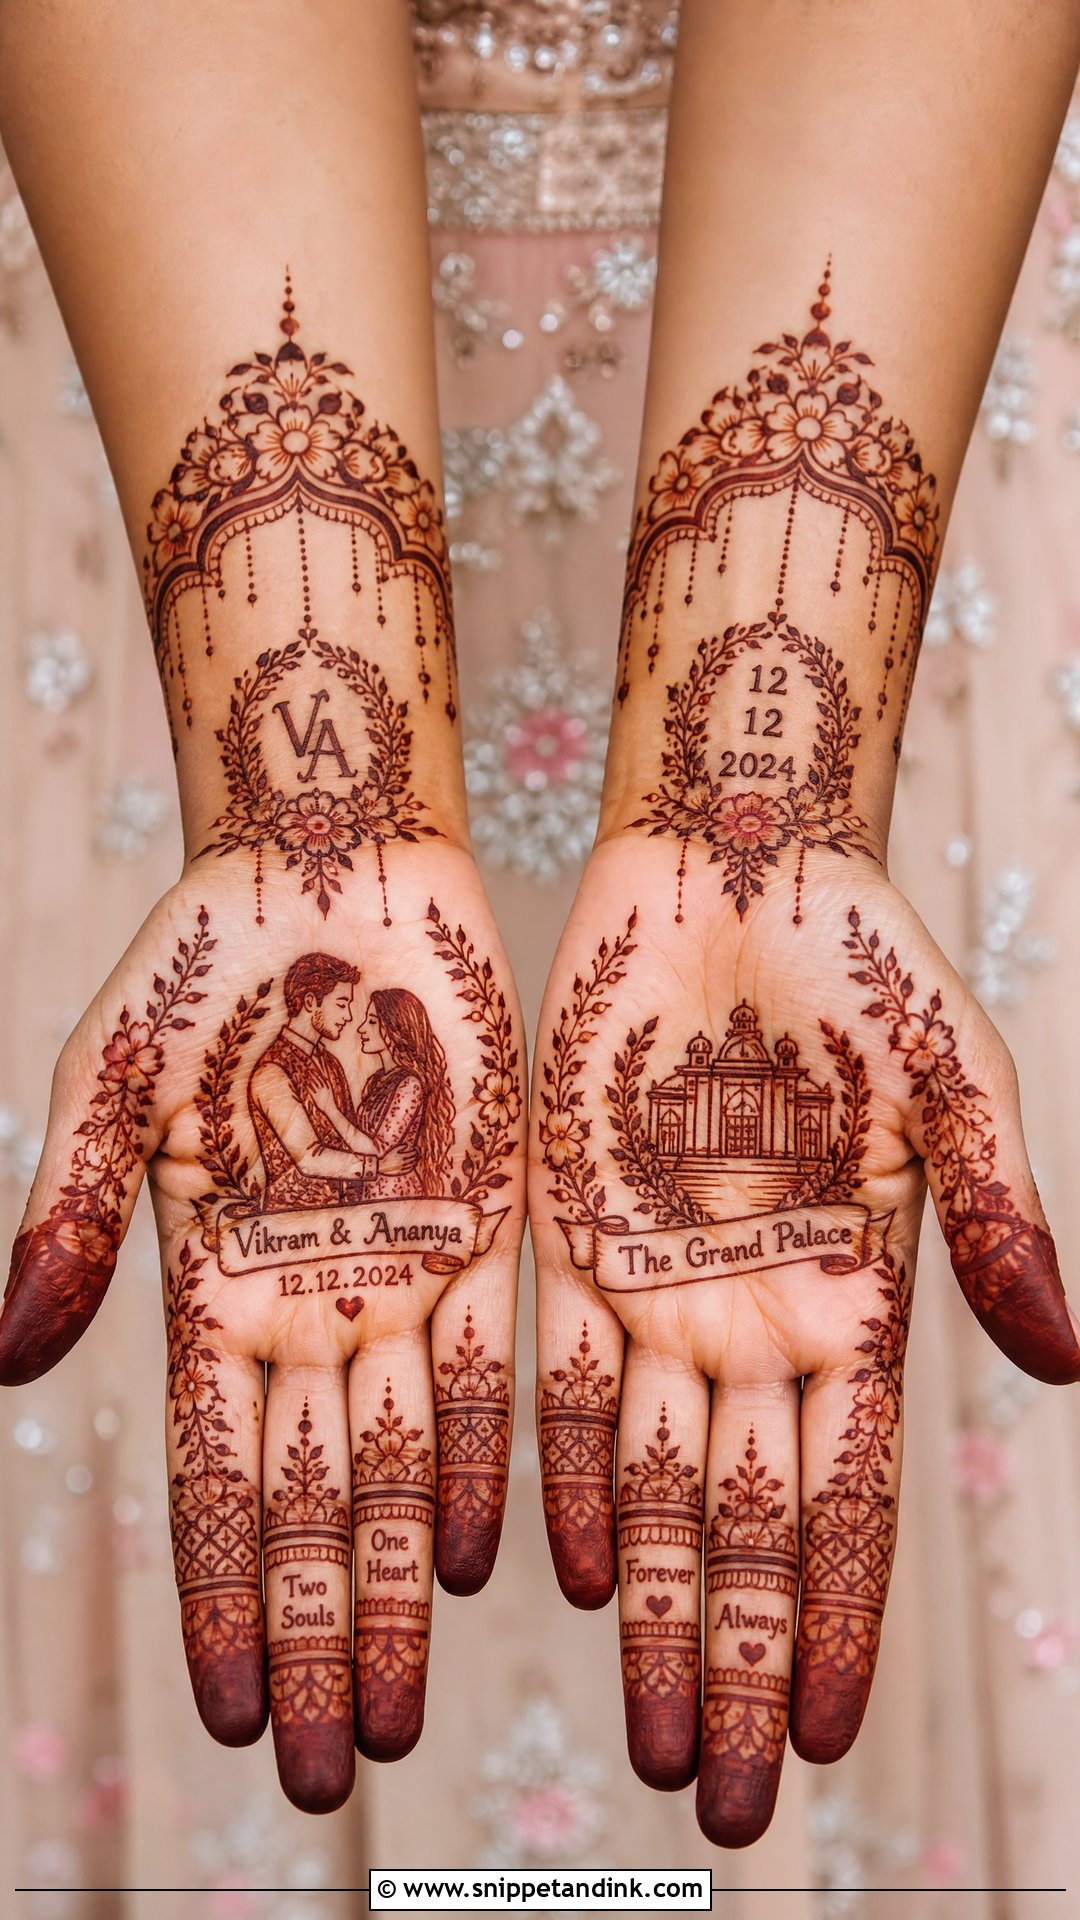
Names, initials, the wedding date, a venue symbol, a pet name or a hidden message for the groom to find can sit around the garland exchange. Send me the details before the appointment, written out exactly as you want them; spelling a name wrong in henna can’t be undone. Choose three or four touches at most and keep them around the wrist, fingers or lower forearm, with the varmala scene in the centre.
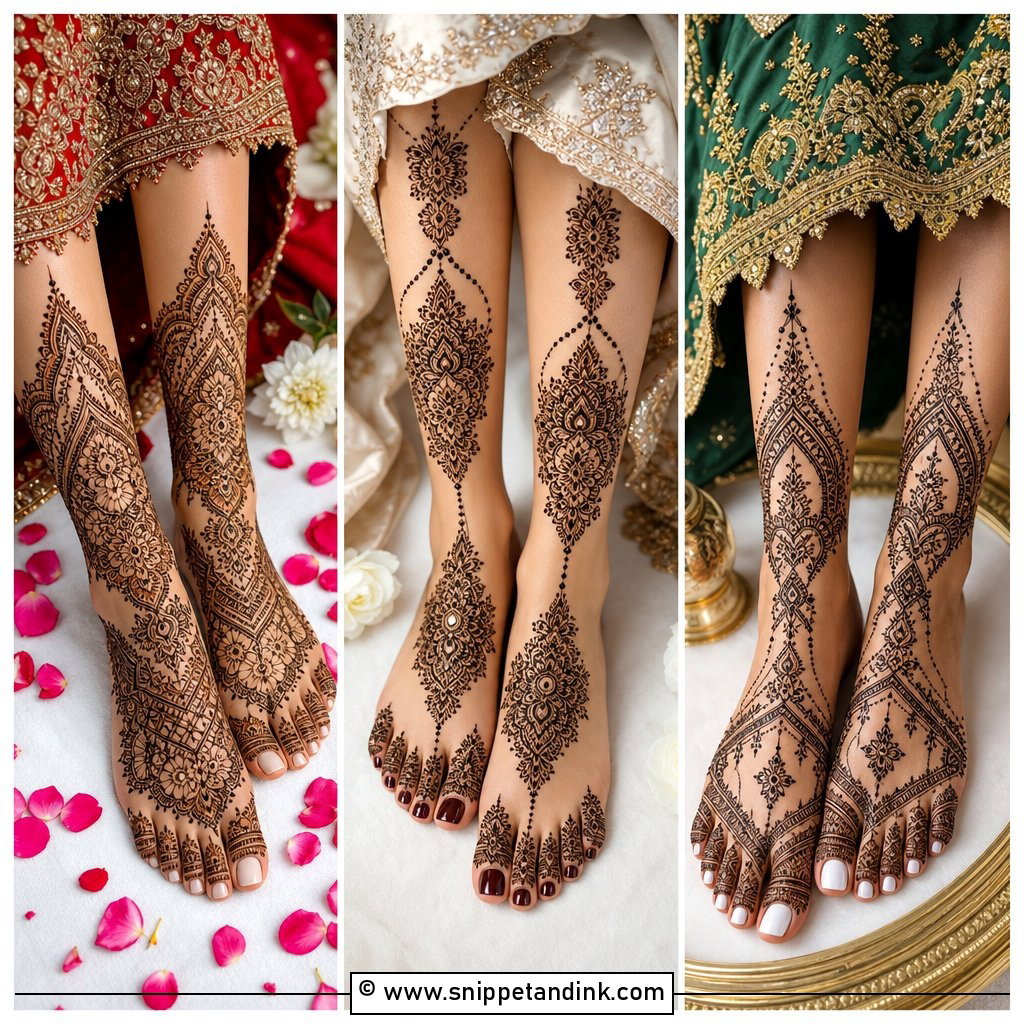
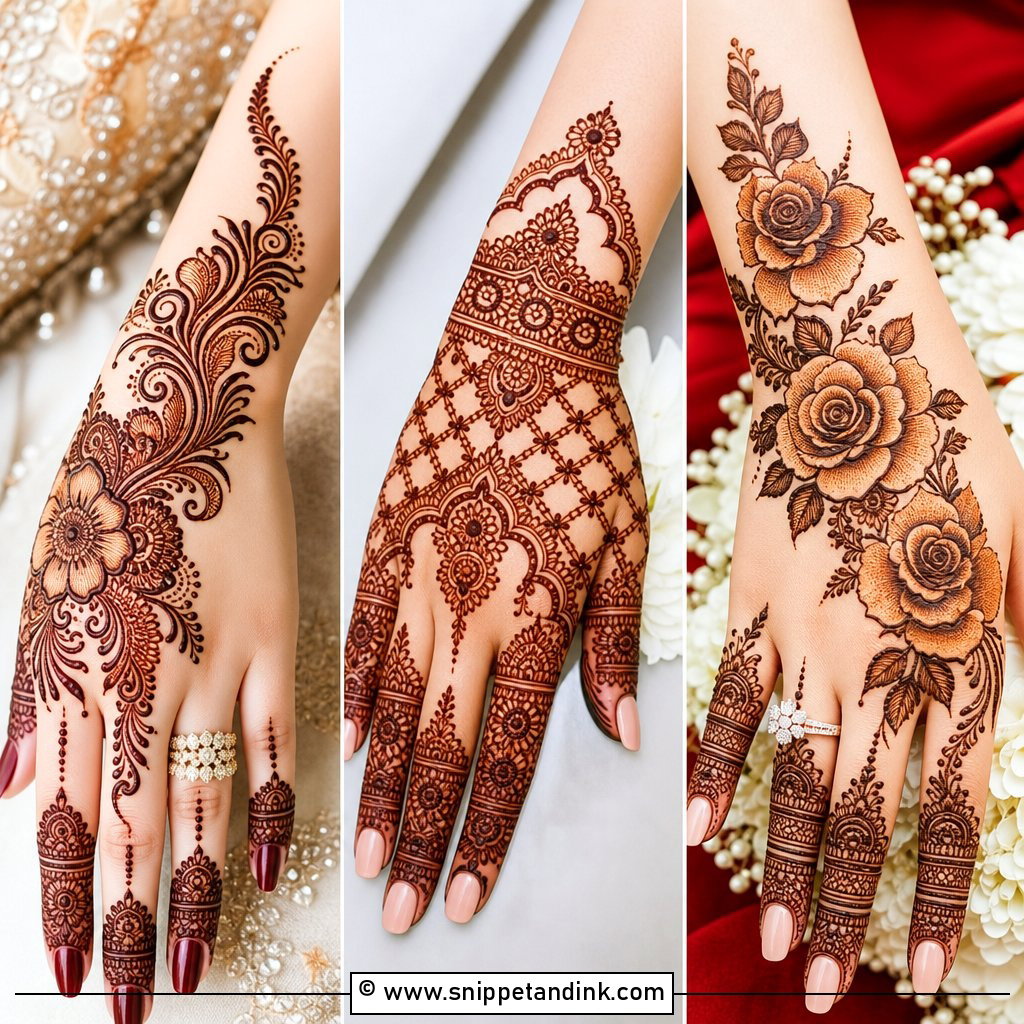
20. Varmala Mehndi Design For Bride
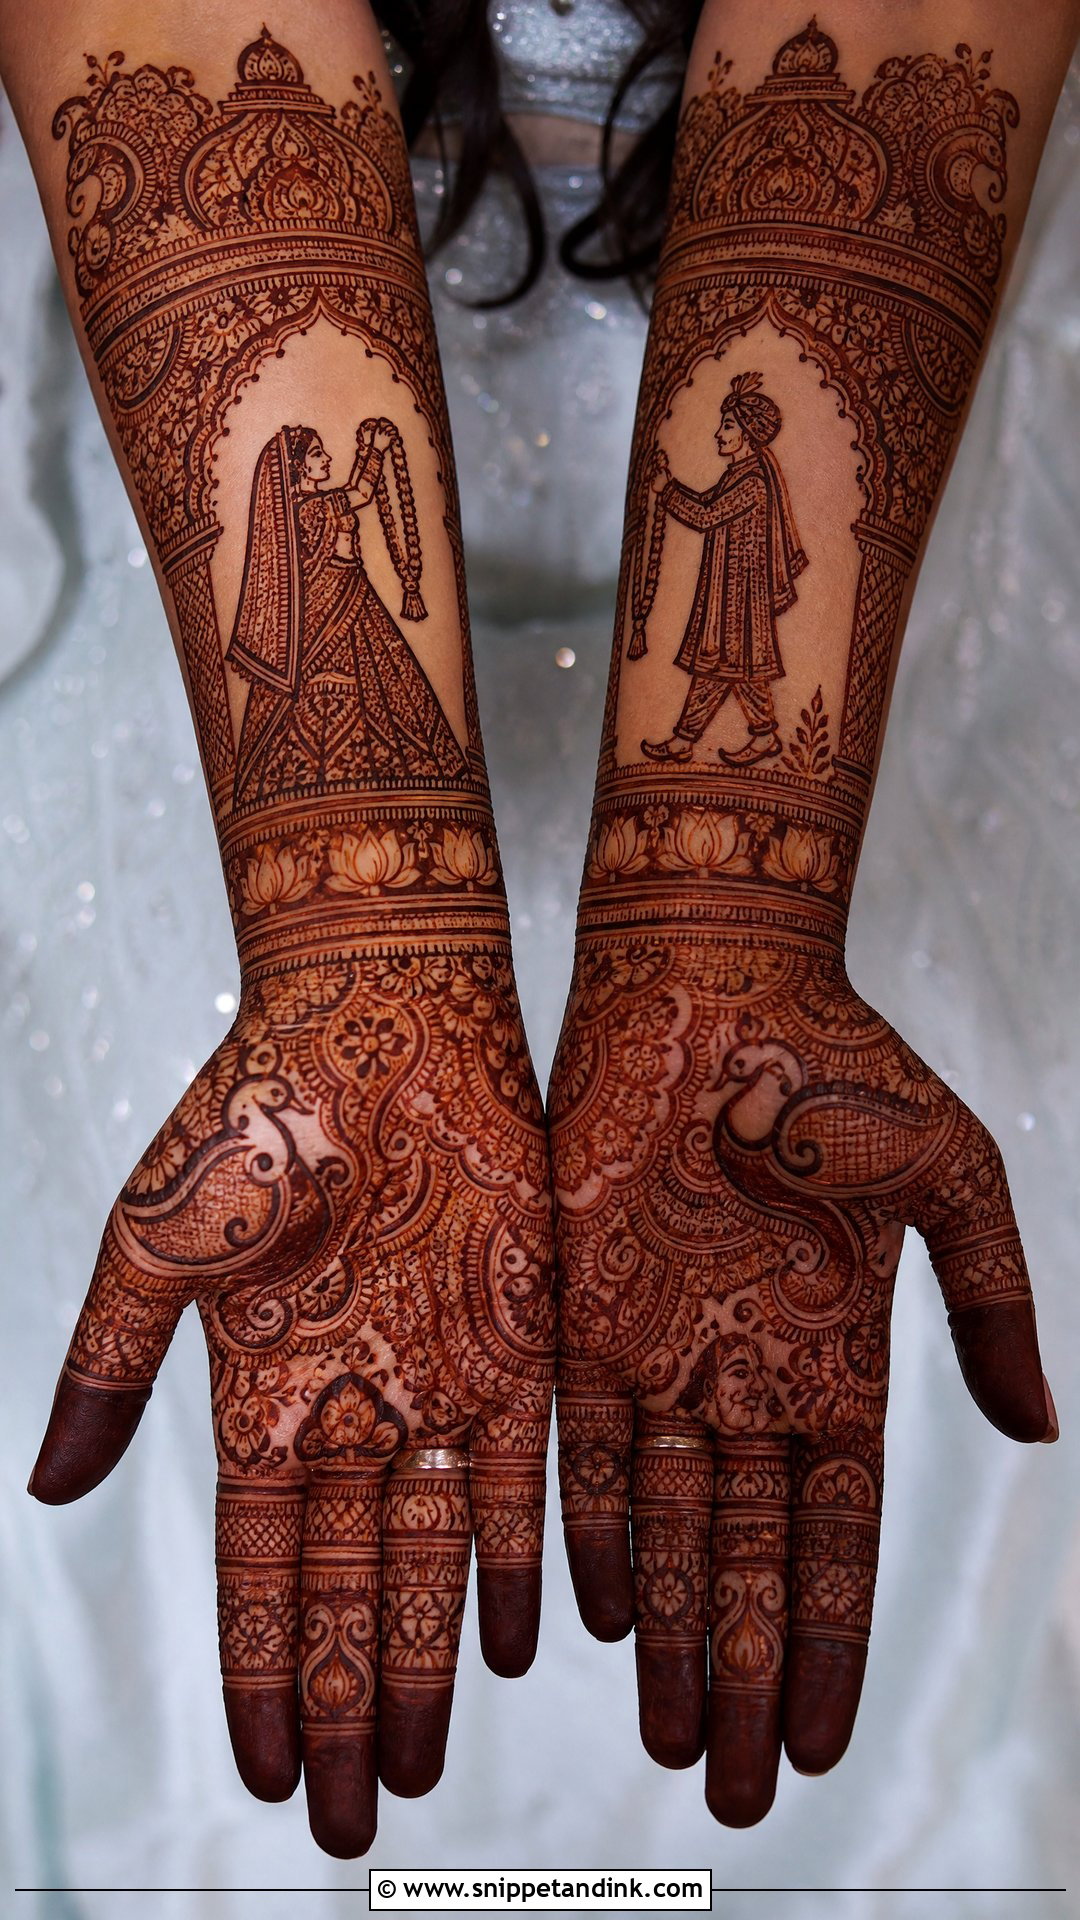
Match the design to your outfit, the ceremony and how long you can sit. A traditional wedding often calls for full coverage with figures, mandap arches, paisley and peacocks. If you prefer cleaner hands, a minimal or Indo-Arabic layout with a small garland motif works. The heaviest design isn’t always the best. The best is the one that stays clear after staining, so share reference photos and decide with your artist where the varmala moment should sit.
Faces Blur Faster Than Flowers
When the paste comes off, the stain is bright orange. It darkens to reddish brown and then maroon over the next day or two, and as it darkens, fine lines get wider. That’s why figure work needs more clean skin around it than floral work. A flower can lose a bit of edge and still look like a flower; a face that loses an eye doesn’t.
Cone quality matters as much as skill. Freshly made paste with a smooth, toothpaste consistency gives thin, even lines, while old or lumpy paste skips and spreads. Ask your artist whether she mixes her own cones fresh for bridal work.
Aftercare for a deep stain
- Leave the paste on for at least six hours, overnight if you can
- Dab a little lemon and sugar mix on once it dries to keep it stuck to the skin
- Scrape the dried paste off with a blunt edge; don’t wash it off
- Keep the hands away from water for several hours afterwards
- Keep your hands warm, since a cold room slows the colour
Is the Garland Exchange the Right Centre for Your Hands?
A varmala design puts one of the happiest moments of the wedding on your hands. Full Indian layouts, portraits, mandap scenes and Rajasthani patterns suit brides who love detail; minimal and Indo-Arabic versions suit those who want something lighter. Whichever you choose, keep the garland exchange clear, give the figures room, and allow two days for the stain to reach its deepest colour before the ceremony.
You'll Like These Ideas:


Leave a Reply