
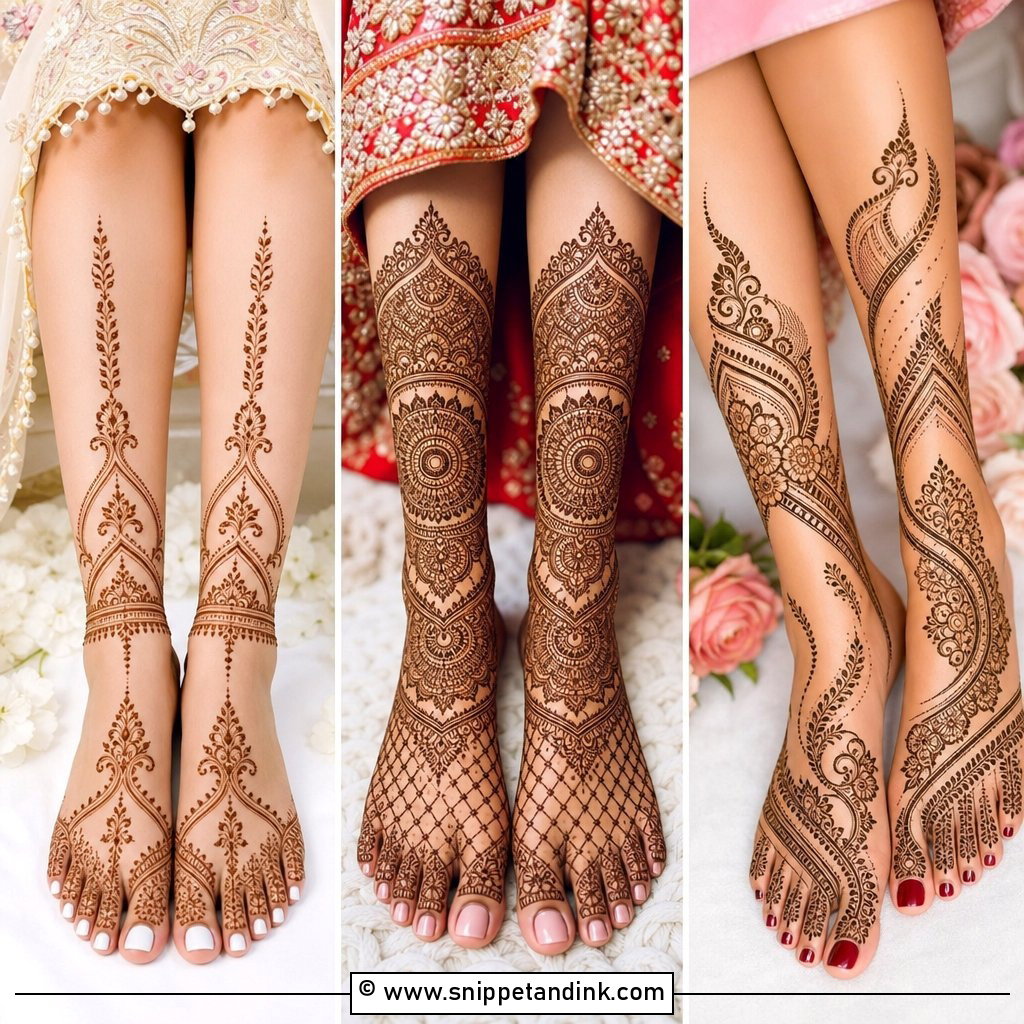
Bridal mehndi is one of the few parts of a wedding look that’s drawn directly onto you, and once the paste is off, it stays for a week or two whether you love it or not. That’s why I spend the first part of every consultation on the bride’s outfit, jewellery and how many hours she can realistically sit still, before we look at a single pattern. The designs below cover classic Indian full coverage, Arabic trails, florals, mandalas, peacocks, portraits, jaali, Moroccan geometry and bracelet styles. Some suit heavy lehengas and long ceremonies, others suit a short nikkah or a civil wedding, and I’ve noted what each one asks of you and your artist.
Scheduling the Application So the Colour Peaks on the Wedding Day
Fresh henna stain is bright orange when the paste comes off. It darkens over the next one to two days as the dye oxidises, so a design applied the morning of the wedding will still look orange in your photos. I aim to apply bridal mehndi about two days before the ceremony, which is why so many families hold the mehndi night then.
Sitting time depends on coverage and detail, so ask your artist for an honest estimate. A short half-hand Arabic design can be quick, while full bridal hands and feet with portraits or Rajasthani scenes can take most of an afternoon. Eat beforehand, use the bathroom, and have someone ready to hold your drink and phone.
Ask what is in the cone
Natural henna paste is made from henna powder, a liquid such as lemon juice or water, sugar and an essential oil. It never stains black on contact. Anything sold as instant black henna may contain PPD, a hair-dye chemical that can cause serious skin reactions, and I’d refuse it outright. If you’ve reacted to henna or essential oils before, ask for a small patch test a week or two ahead.
1. Full Hand Bridal Wedding Mehndi Design
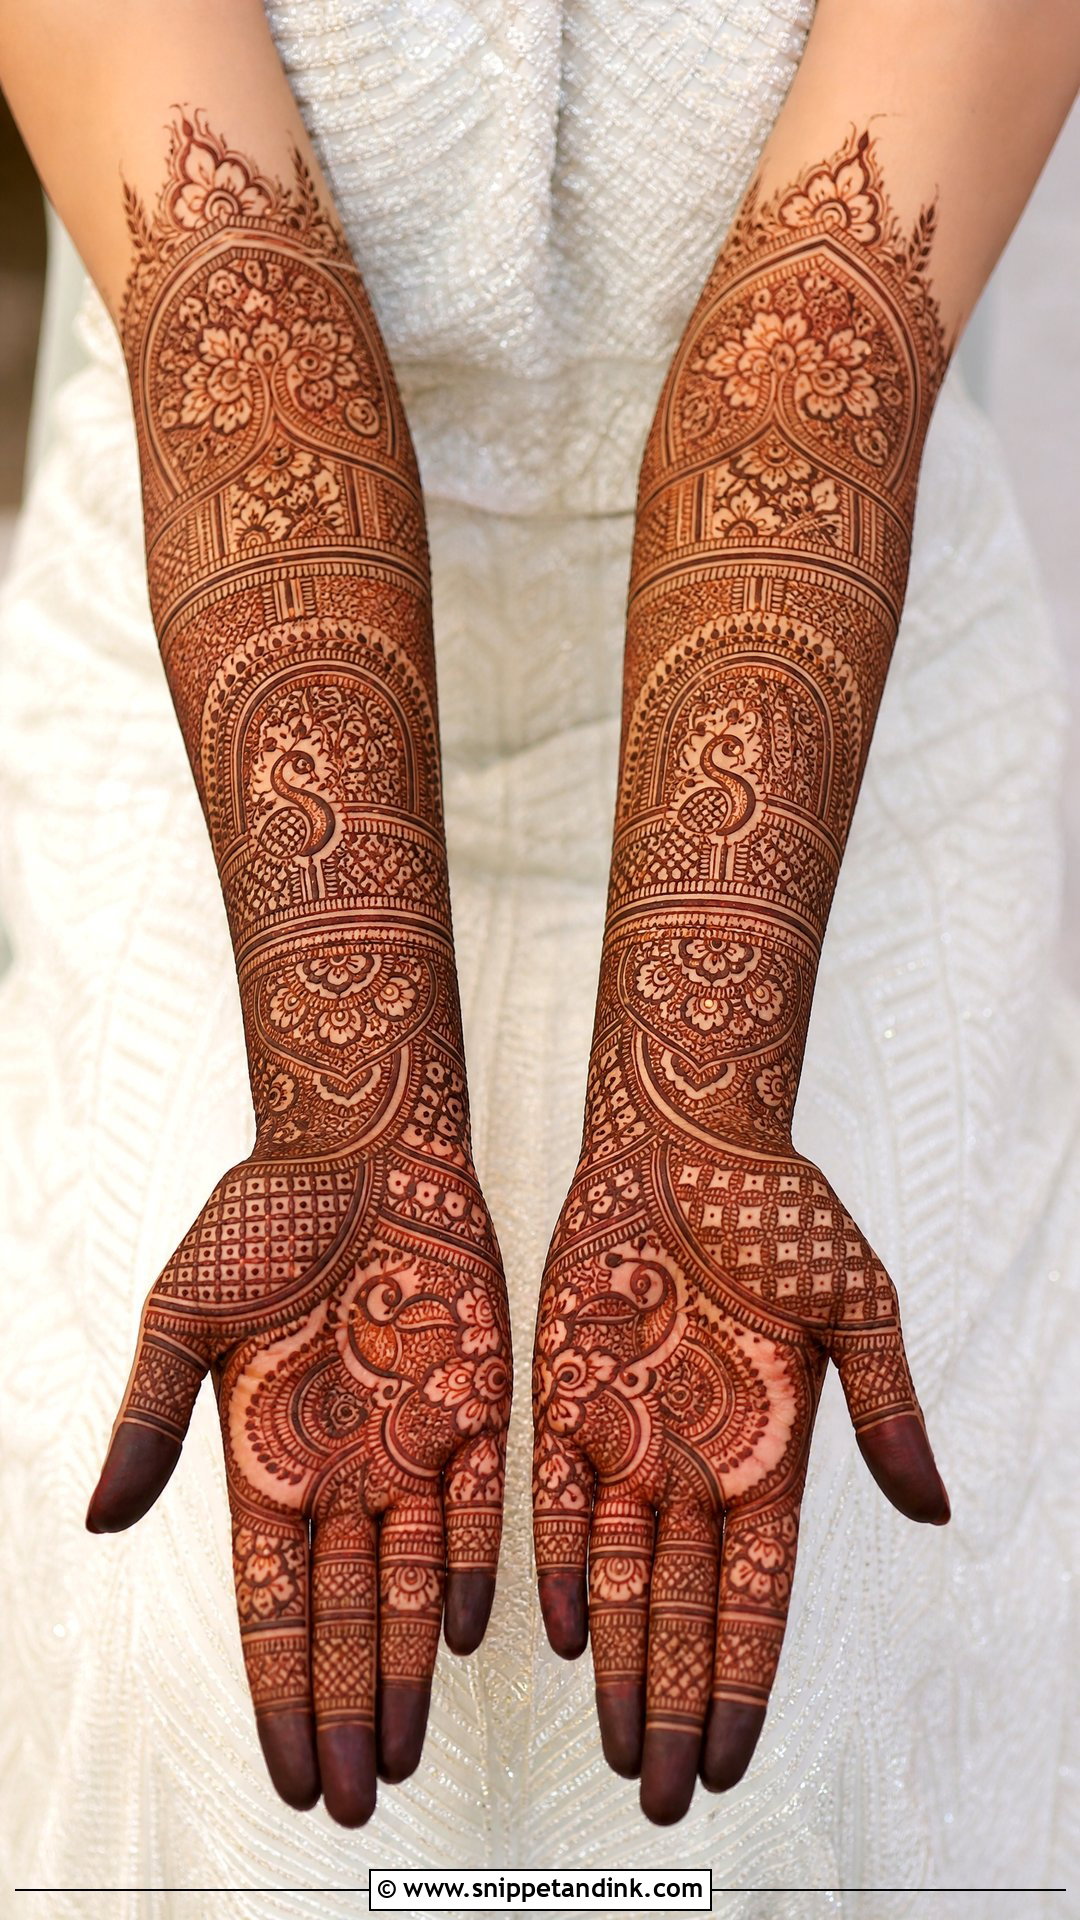
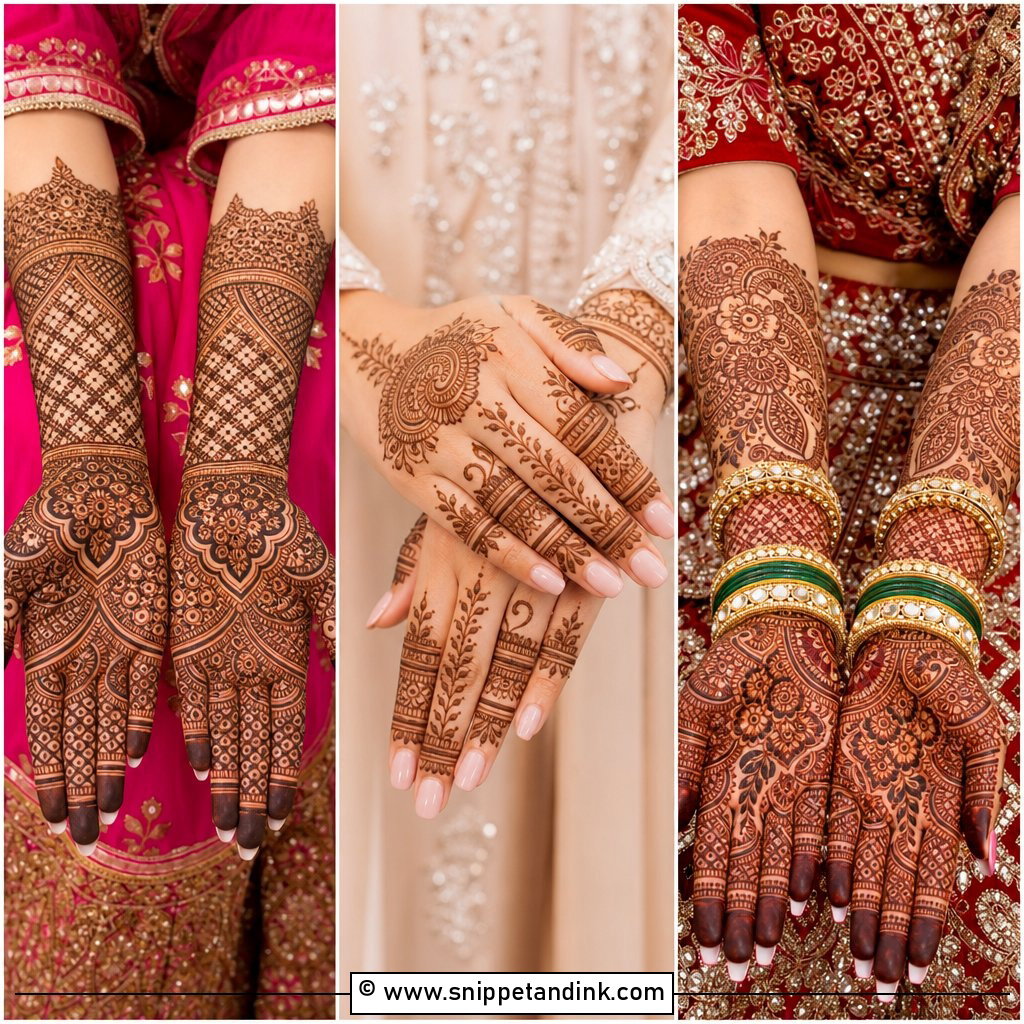
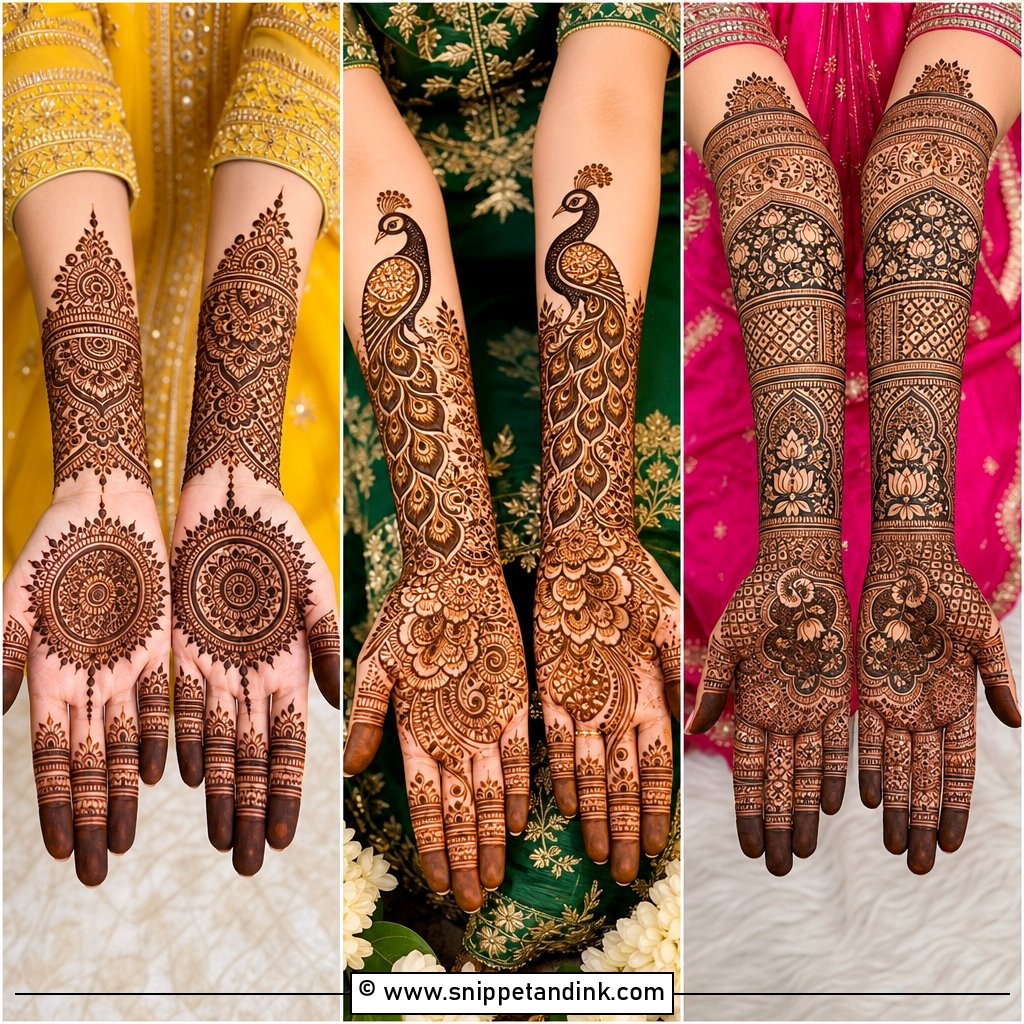
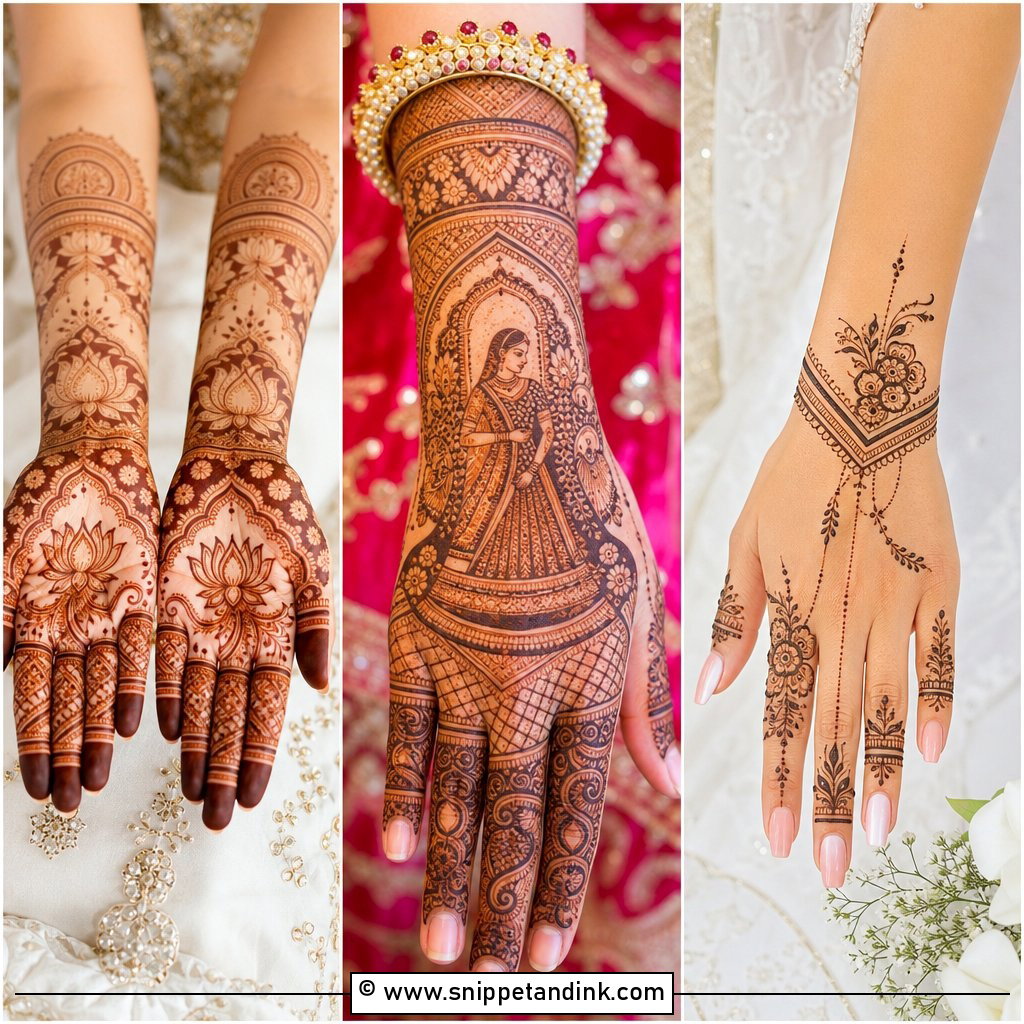
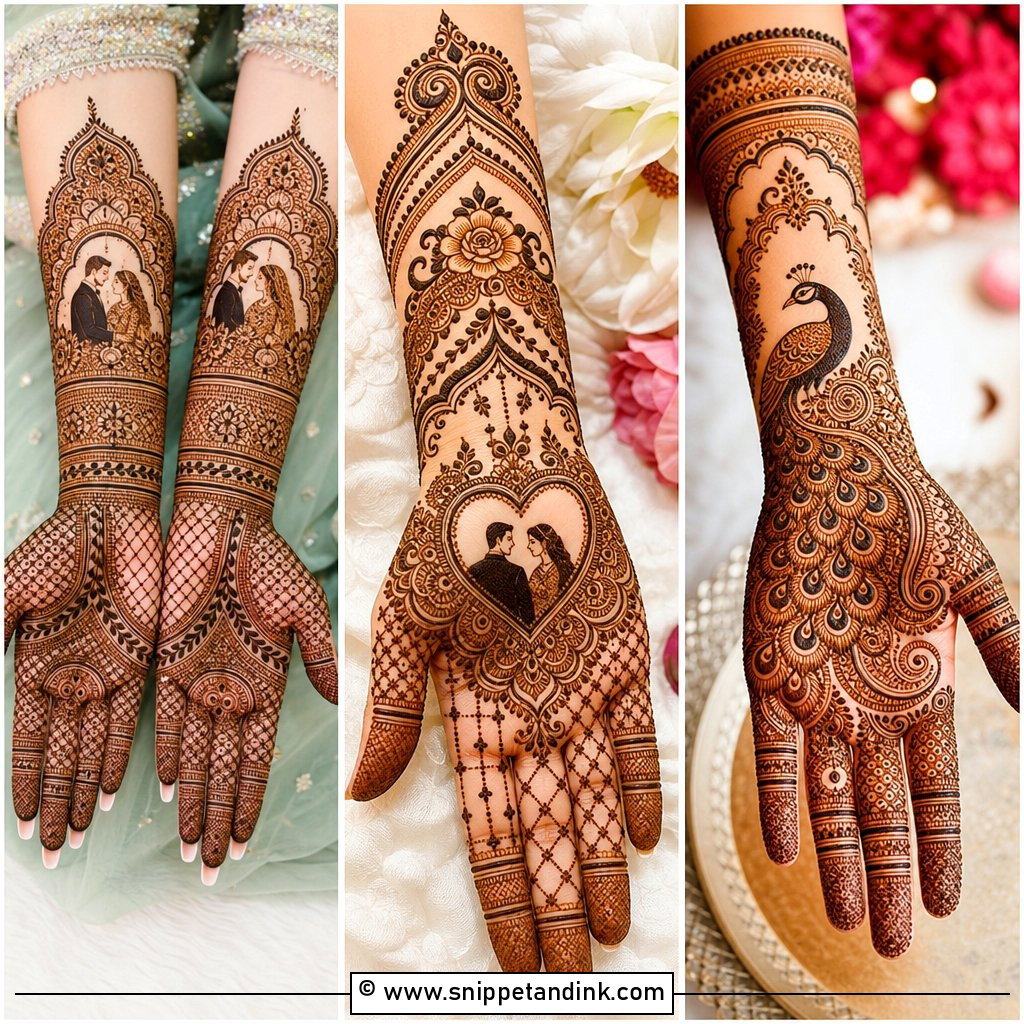
Full hand coverage is the traditional bridal choice: palms, fingers, wrists and forearms filled with paisleys, florals, peacocks, mandalas, vines and fine filler. It’s also the design that most often turns into a dark blur when the artist fills every gap. When I draw a full bridal hand, I place the large motifs first and leave a hairline of skin around each one, so after the stain darkens the shapes still read in photos. Initials, dates and small symbols can hide inside the filler. Plan for several hours on both sides of the hands; it suits lehengas, sarees, shararas and heavily embroidered outfits.
2. Arabic Wedding Mehndi Design
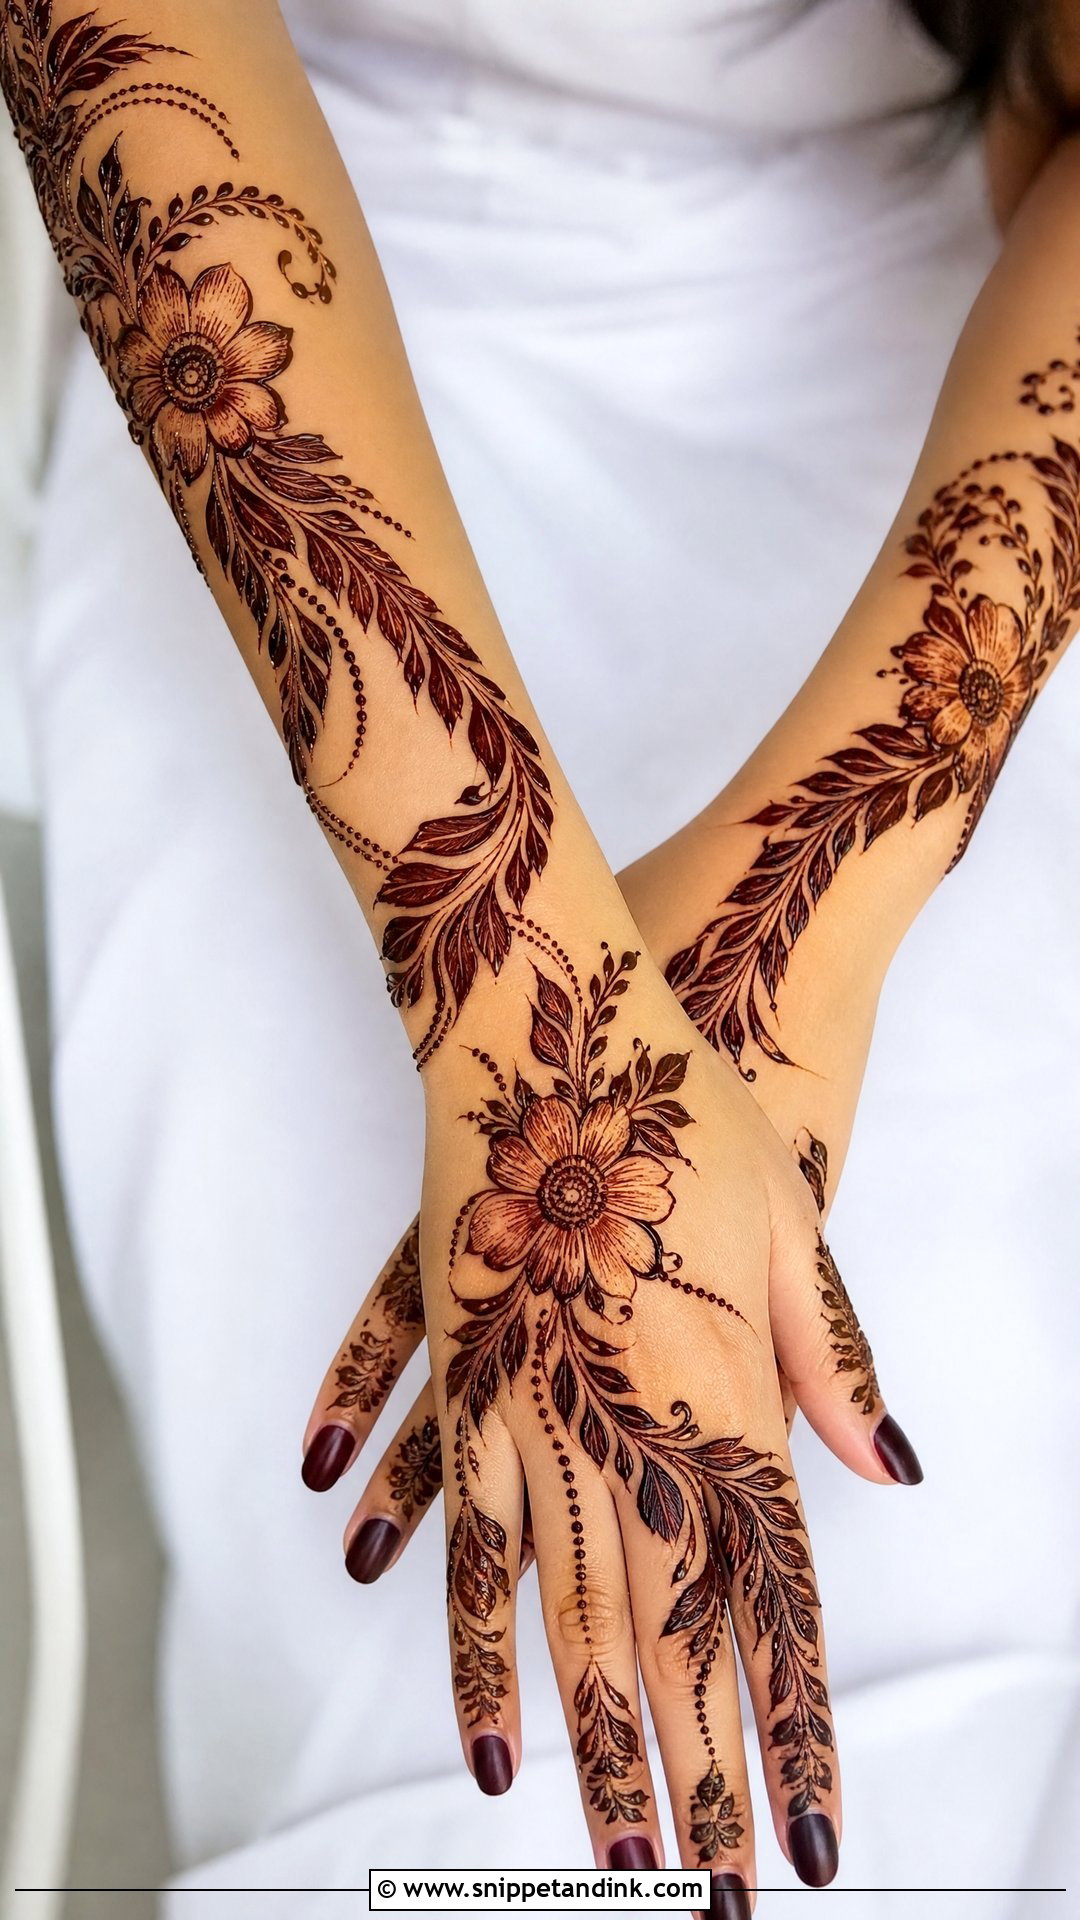
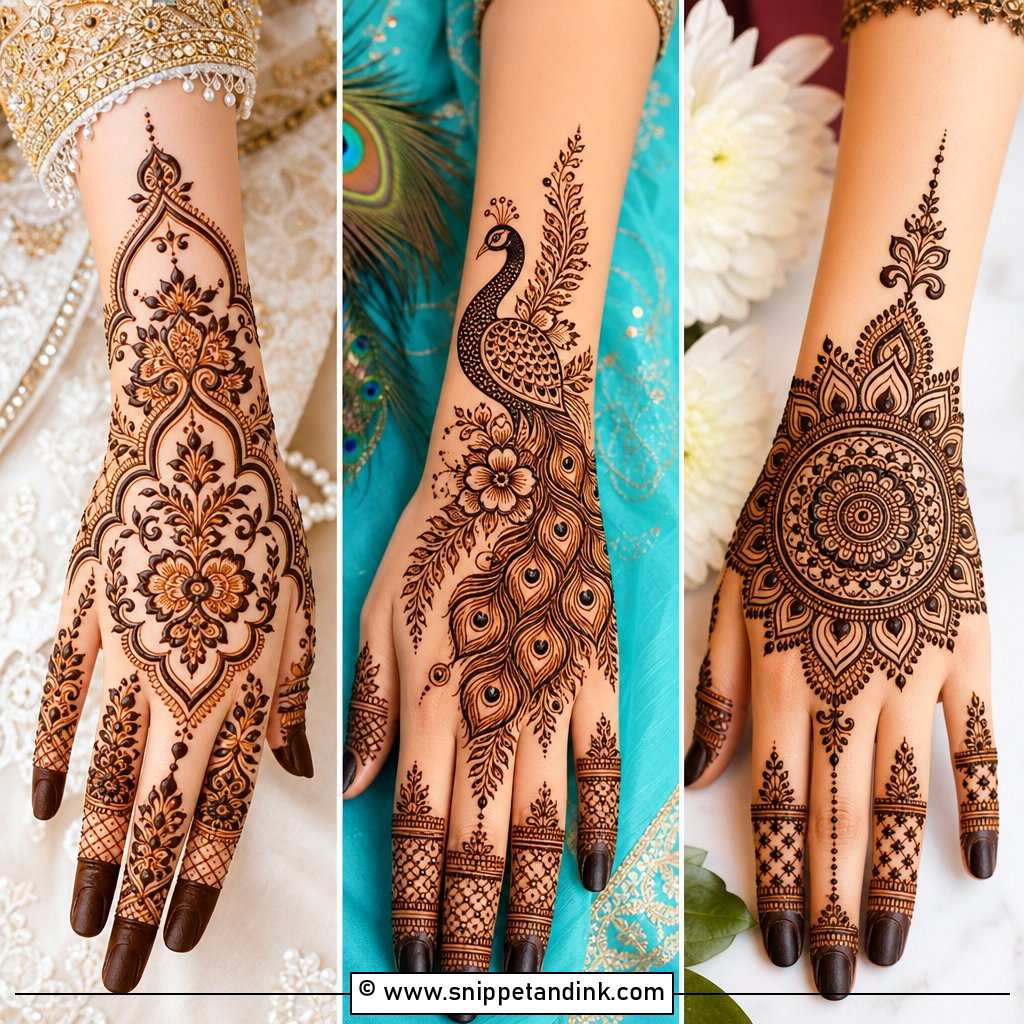
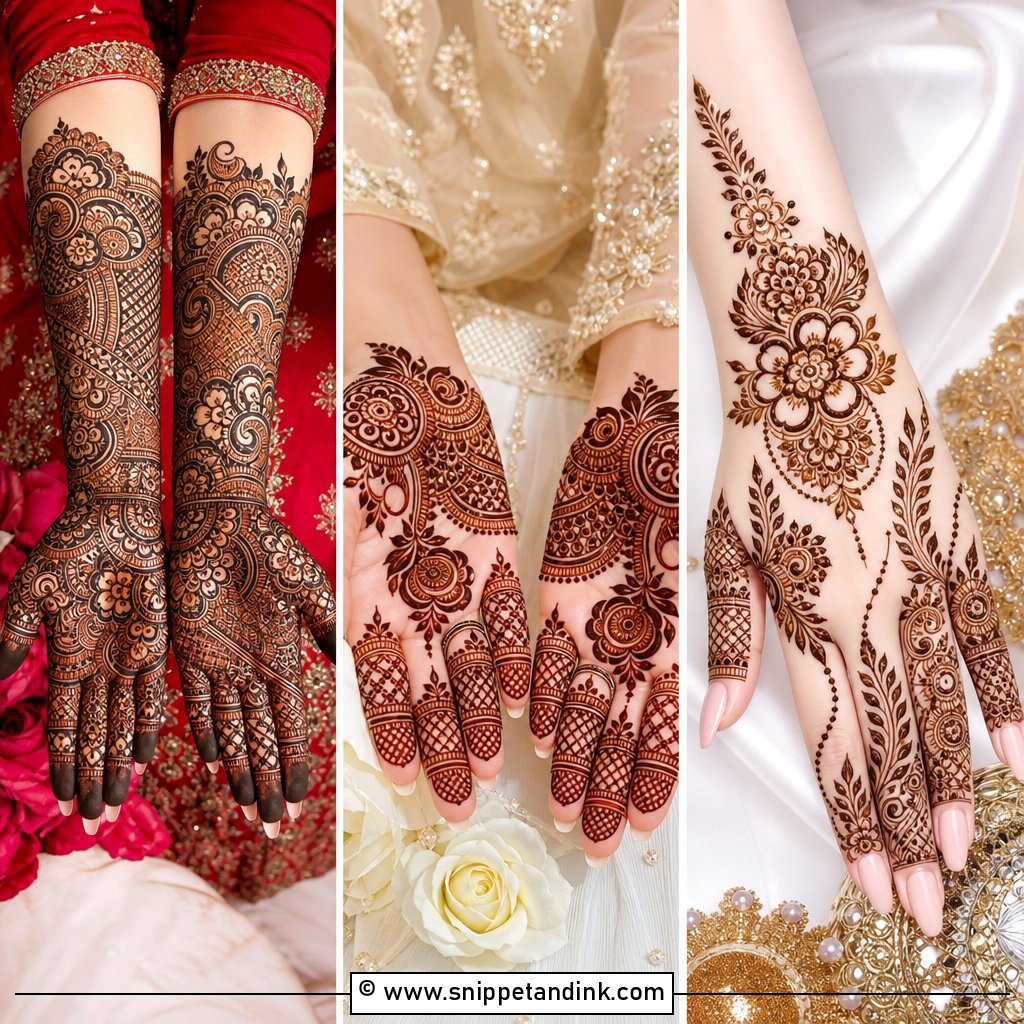
An Arabic wedding mehndi design moves diagonally across the palm and back of the hand in bold flower clusters and leafy trails, with plenty of bare skin around them. That open space is what makes the stain look so rich once it deepens to reddish-brown. It’s quicker to apply than full Indian coverage and far more comfortable to sit through. For a bride, I extend the trail from the fingertips to the forearm and add shading, curved bands and dotted borders so it reads as bridal rather than party henna. It also scales down well for bridesmaids.
3. Indo Arabic Wedding Mehndi Design
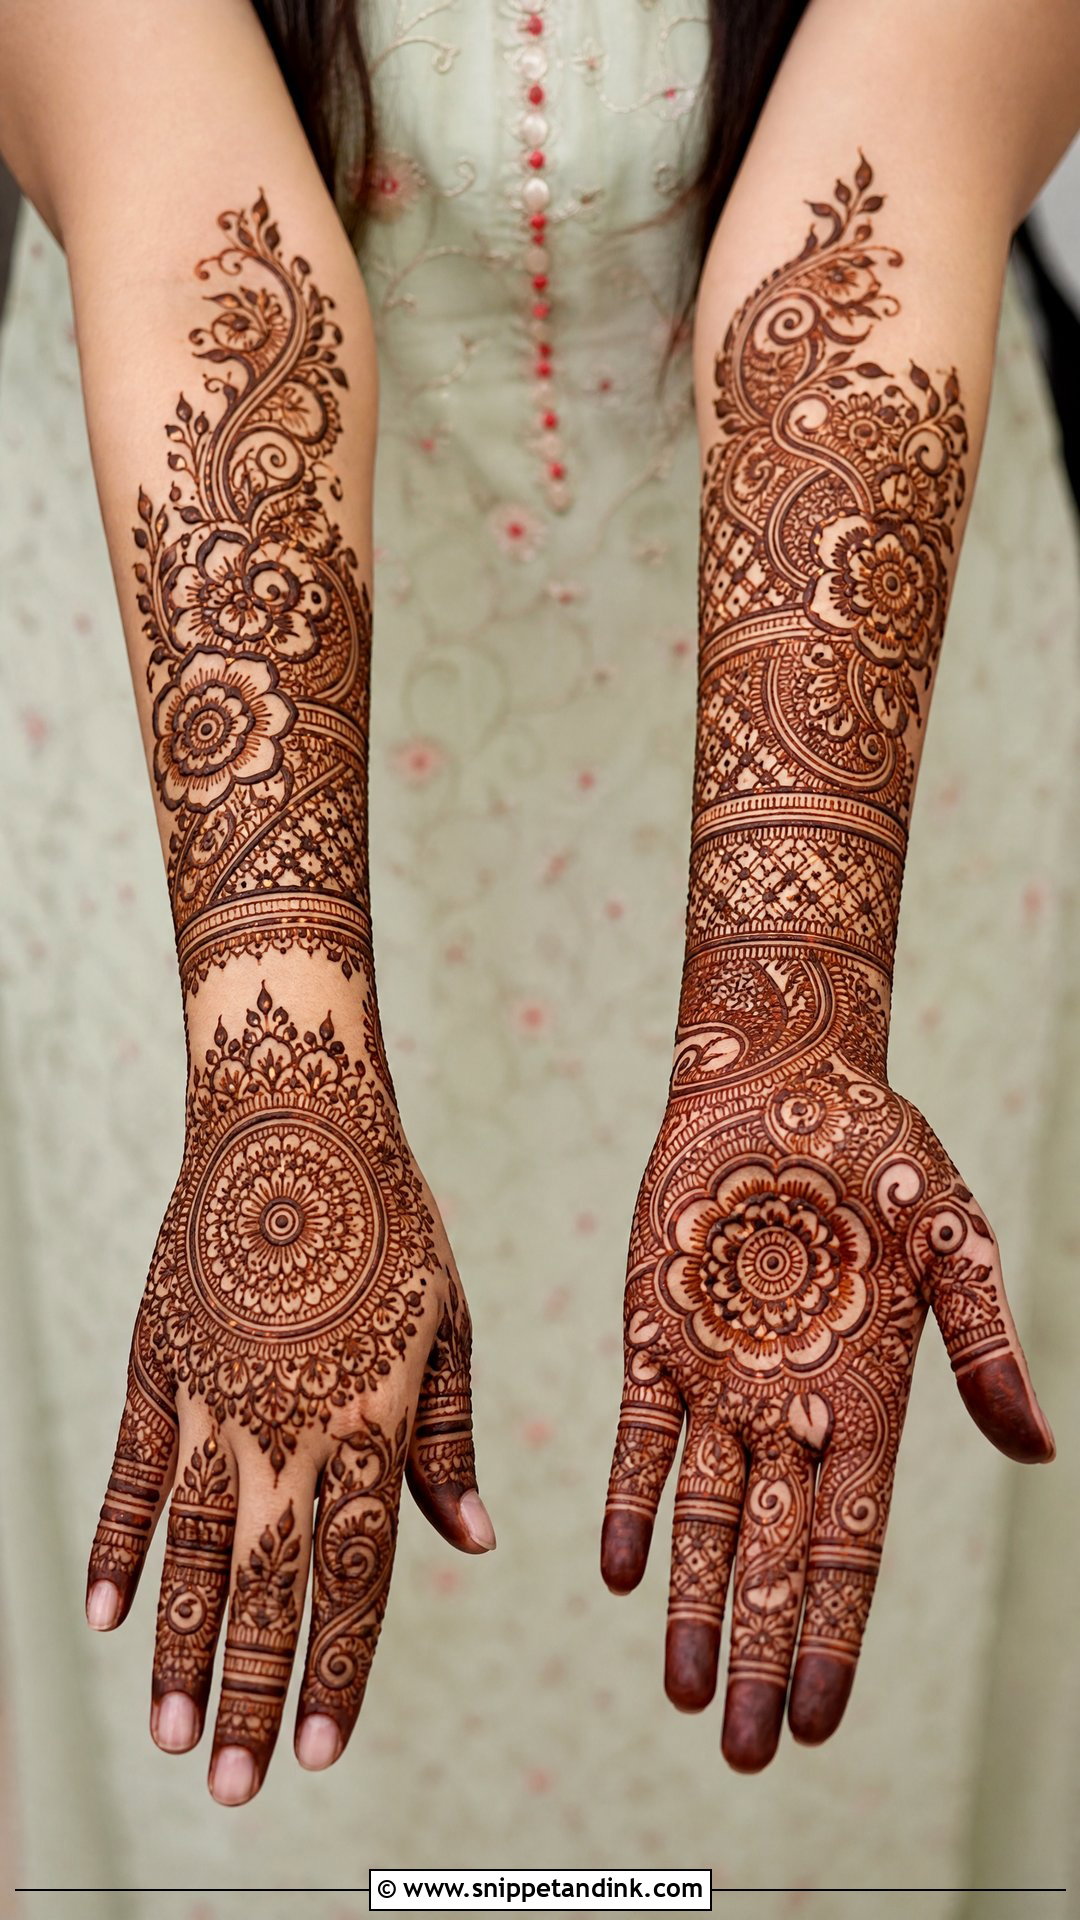
Indo-Arabic is the compromise I suggest most. You get Indian paisleys, mandala centres, jaali and wrist cuffs, but laid out with Arabic spacing and flow, so the hand never looks solid. The trick is coordination: I plan the palm and the back hand as one design, so a vine that leaves the palm at the wrist picks up on the back of the hand. It can be built heavy for the bride and lighter for sisters and friends, all in one family of motifs, which keeps group photos looking connected.
4. Simple Wedding Mehndi Design
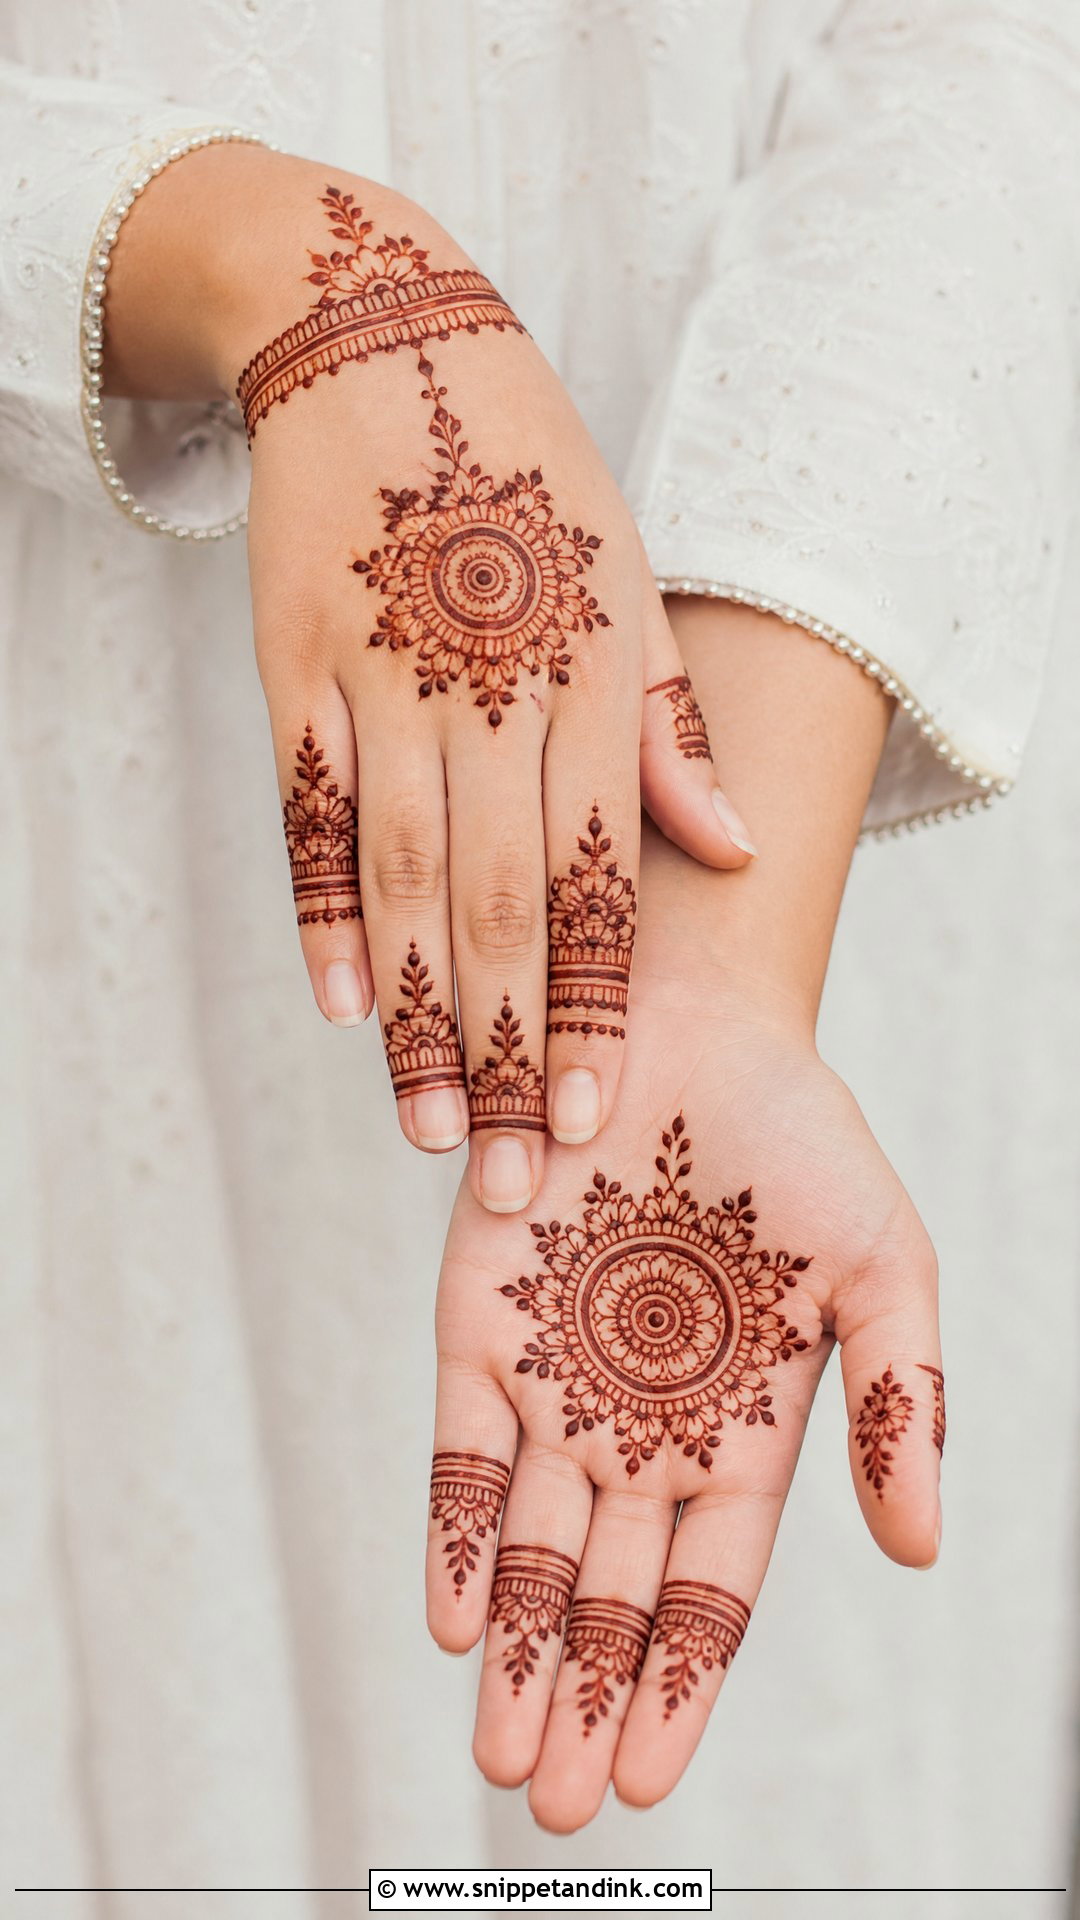
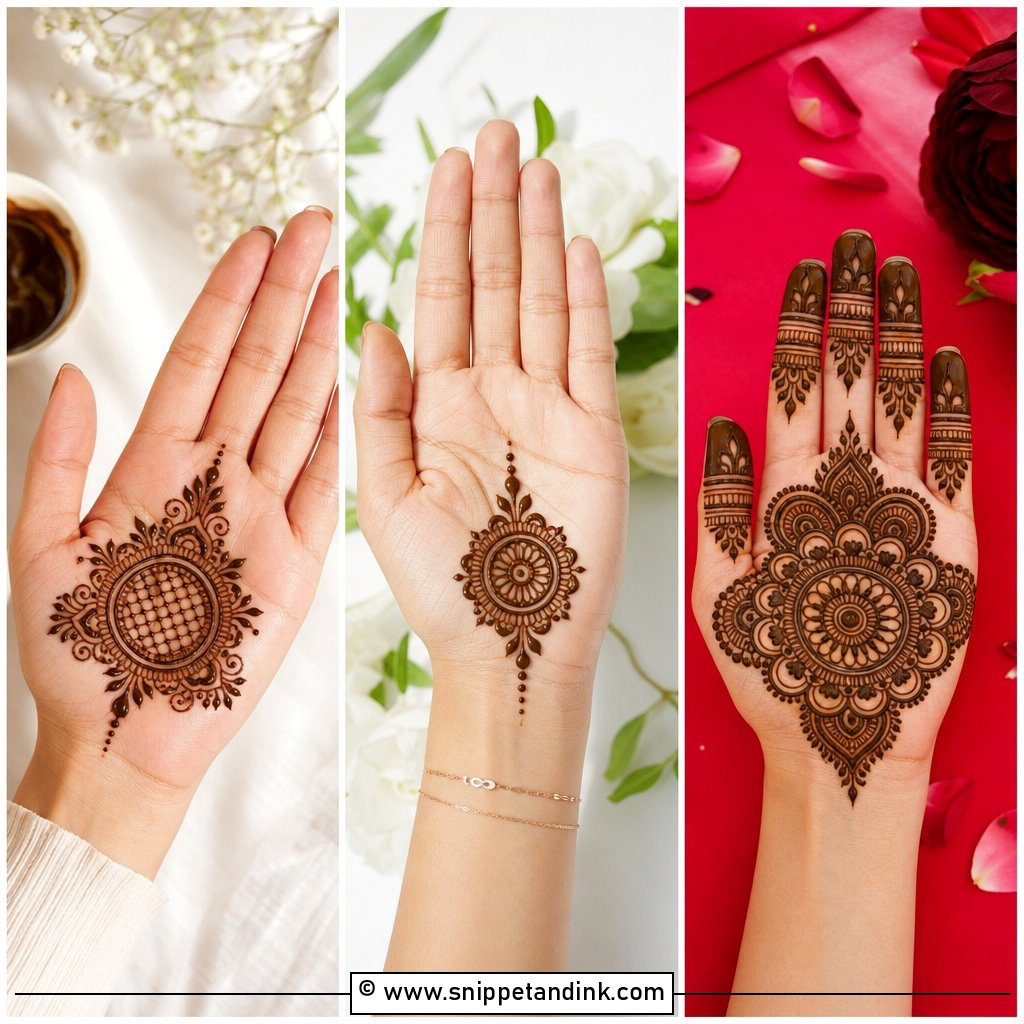
Simple doesn’t mean plain; it means every line is visible, so there is nowhere to hide a shaky hand. This design usually has a central mandala, delicate finger patterns, slim wrist bands, small florals and clean negative space. It’s comfortable through long events, and it suits intimate weddings, courthouse ceremonies and destination weddings where nobody wants to sit for five hours. To keep it bridal, I add a matching back-hand design and make the wrist detail a little fuller than you’d see on a guest.
5. Front Hand Wedding Mehndi Design
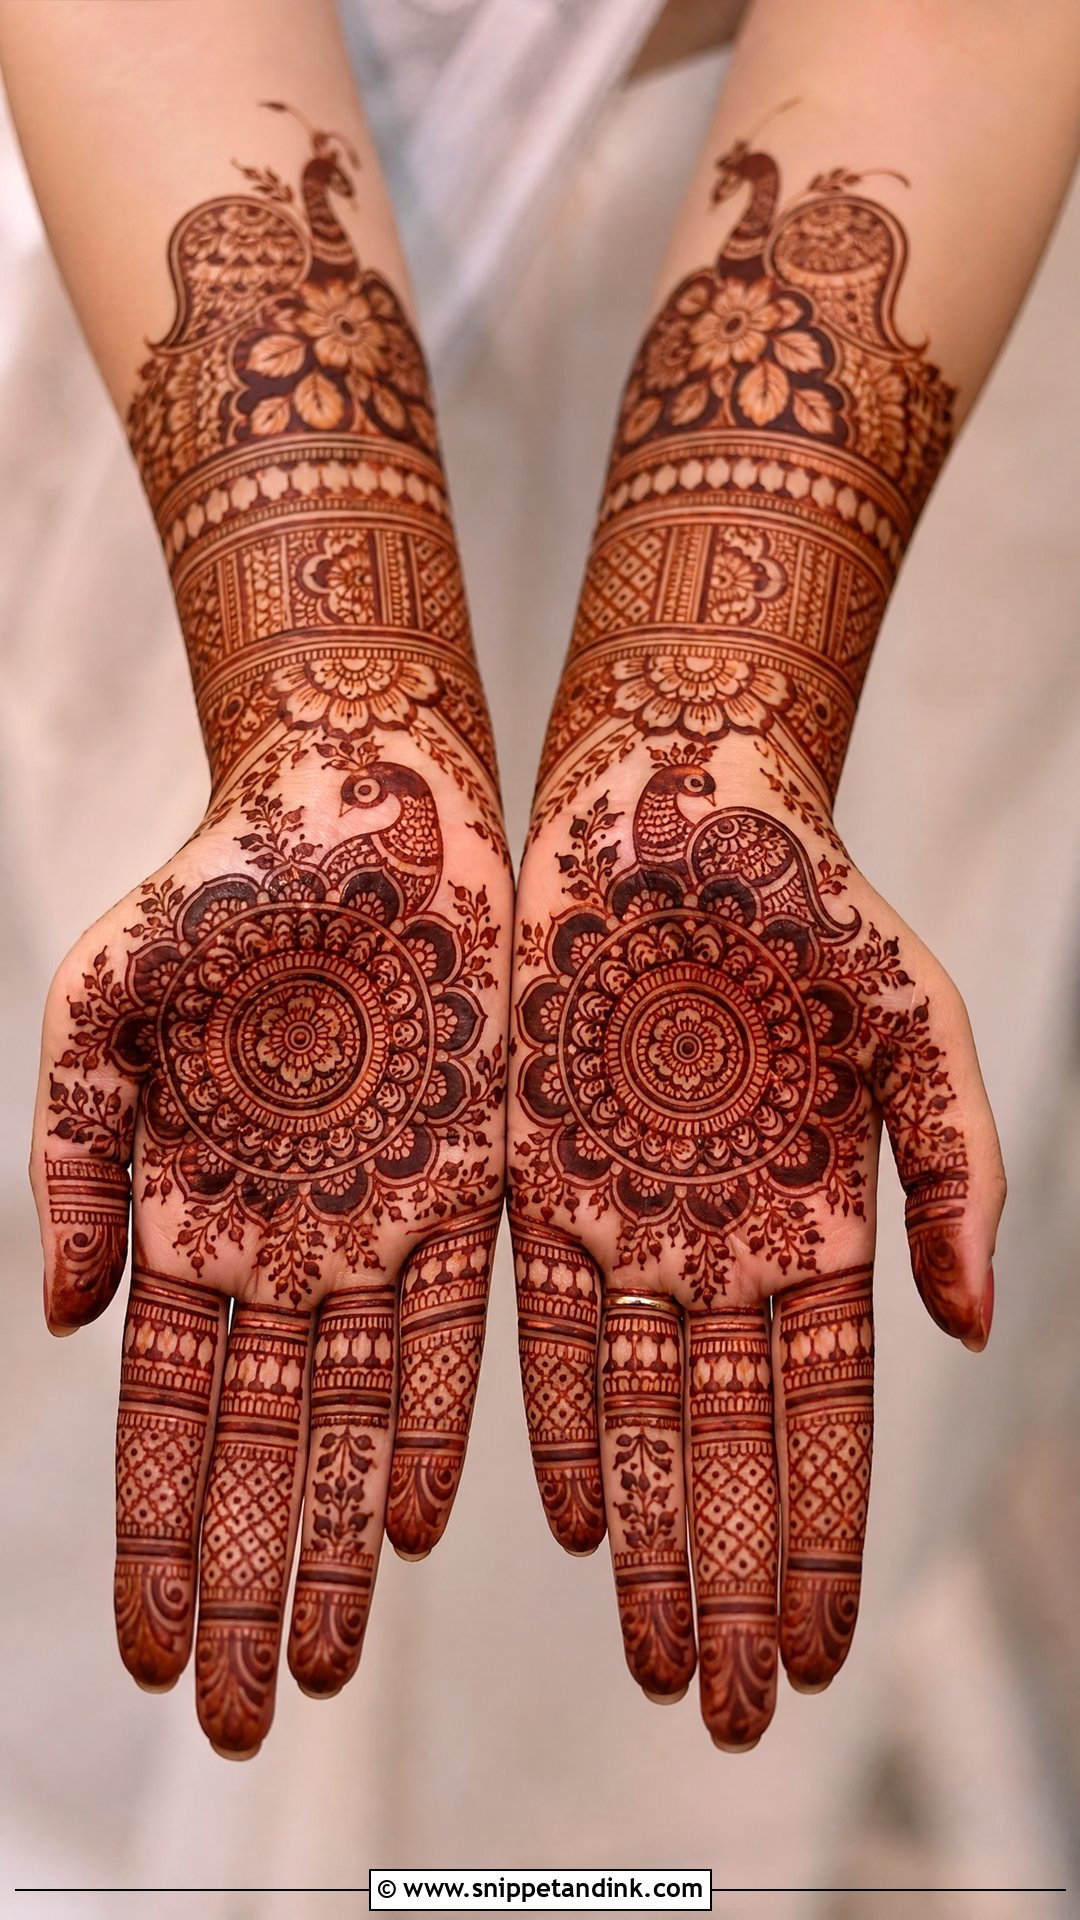
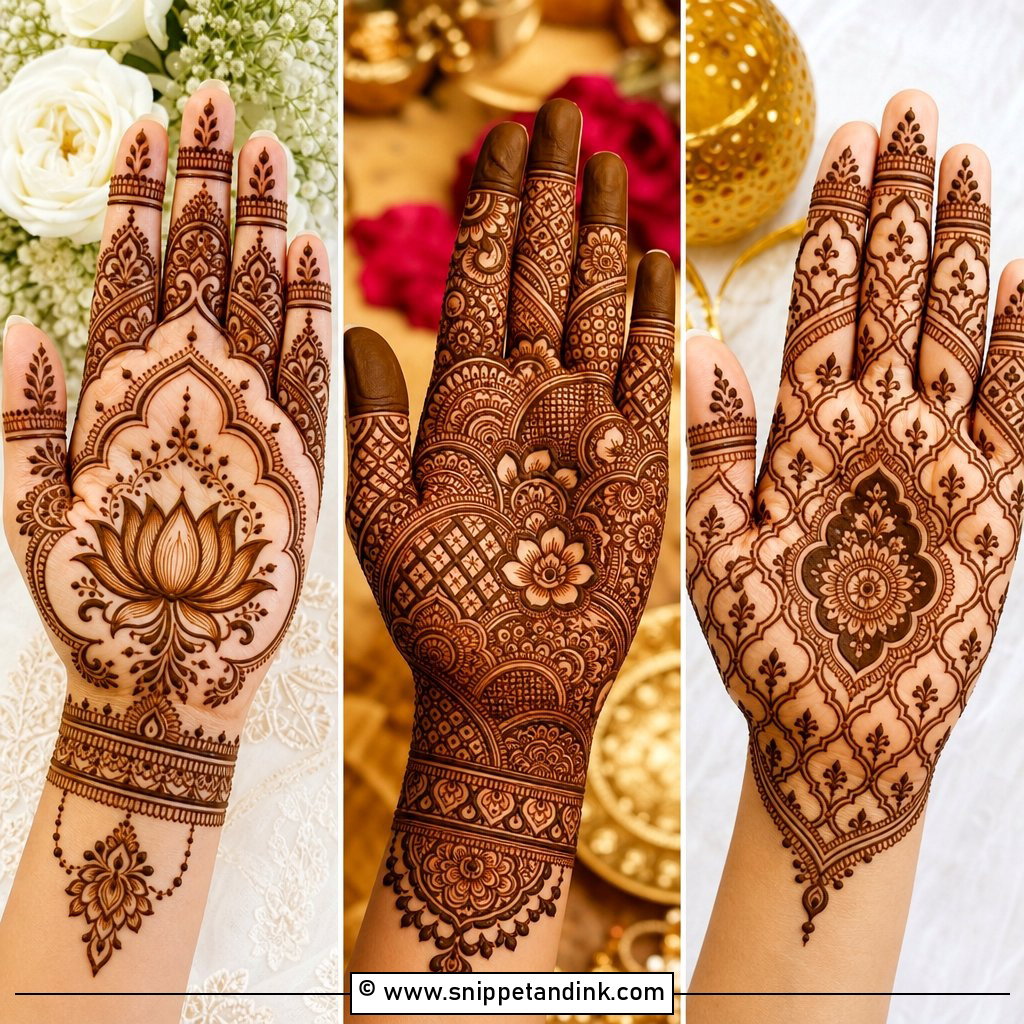
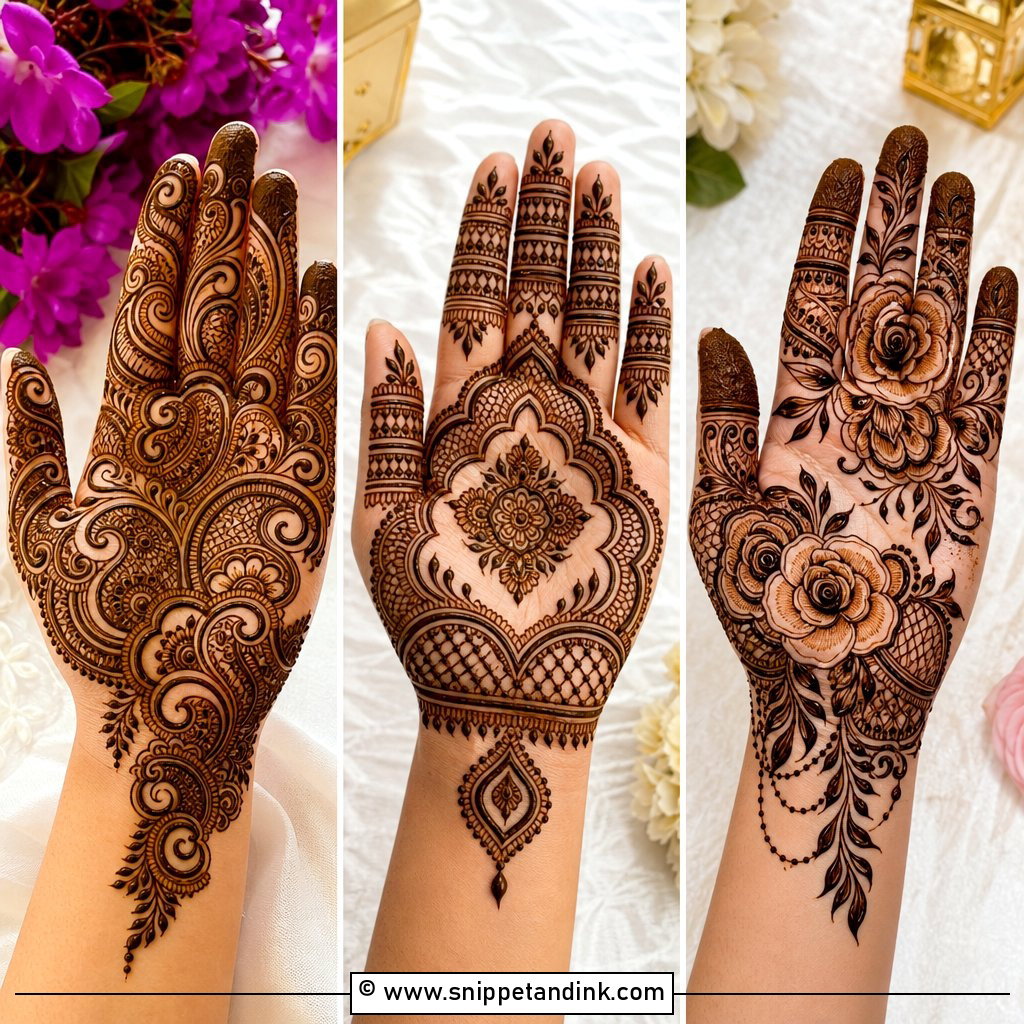
Palms take the darkest stain on the body, because the skin there is thicker and holds more of the dye. That’s why the front of the hand is where I put the most detailed work: round mandalas at the centre, paisley borders, peacocks, floral vines and fine filler. For a traditional finish, dense symmetrical palms. For a modern one, a few deliberate clean gaps around the main motifs. Hidden names and initials usually live here too. Keep in mind that the palm is also the first area to fade, since it’s the part you wash and use most.
6. Back Hand Wedding Mehndi Design
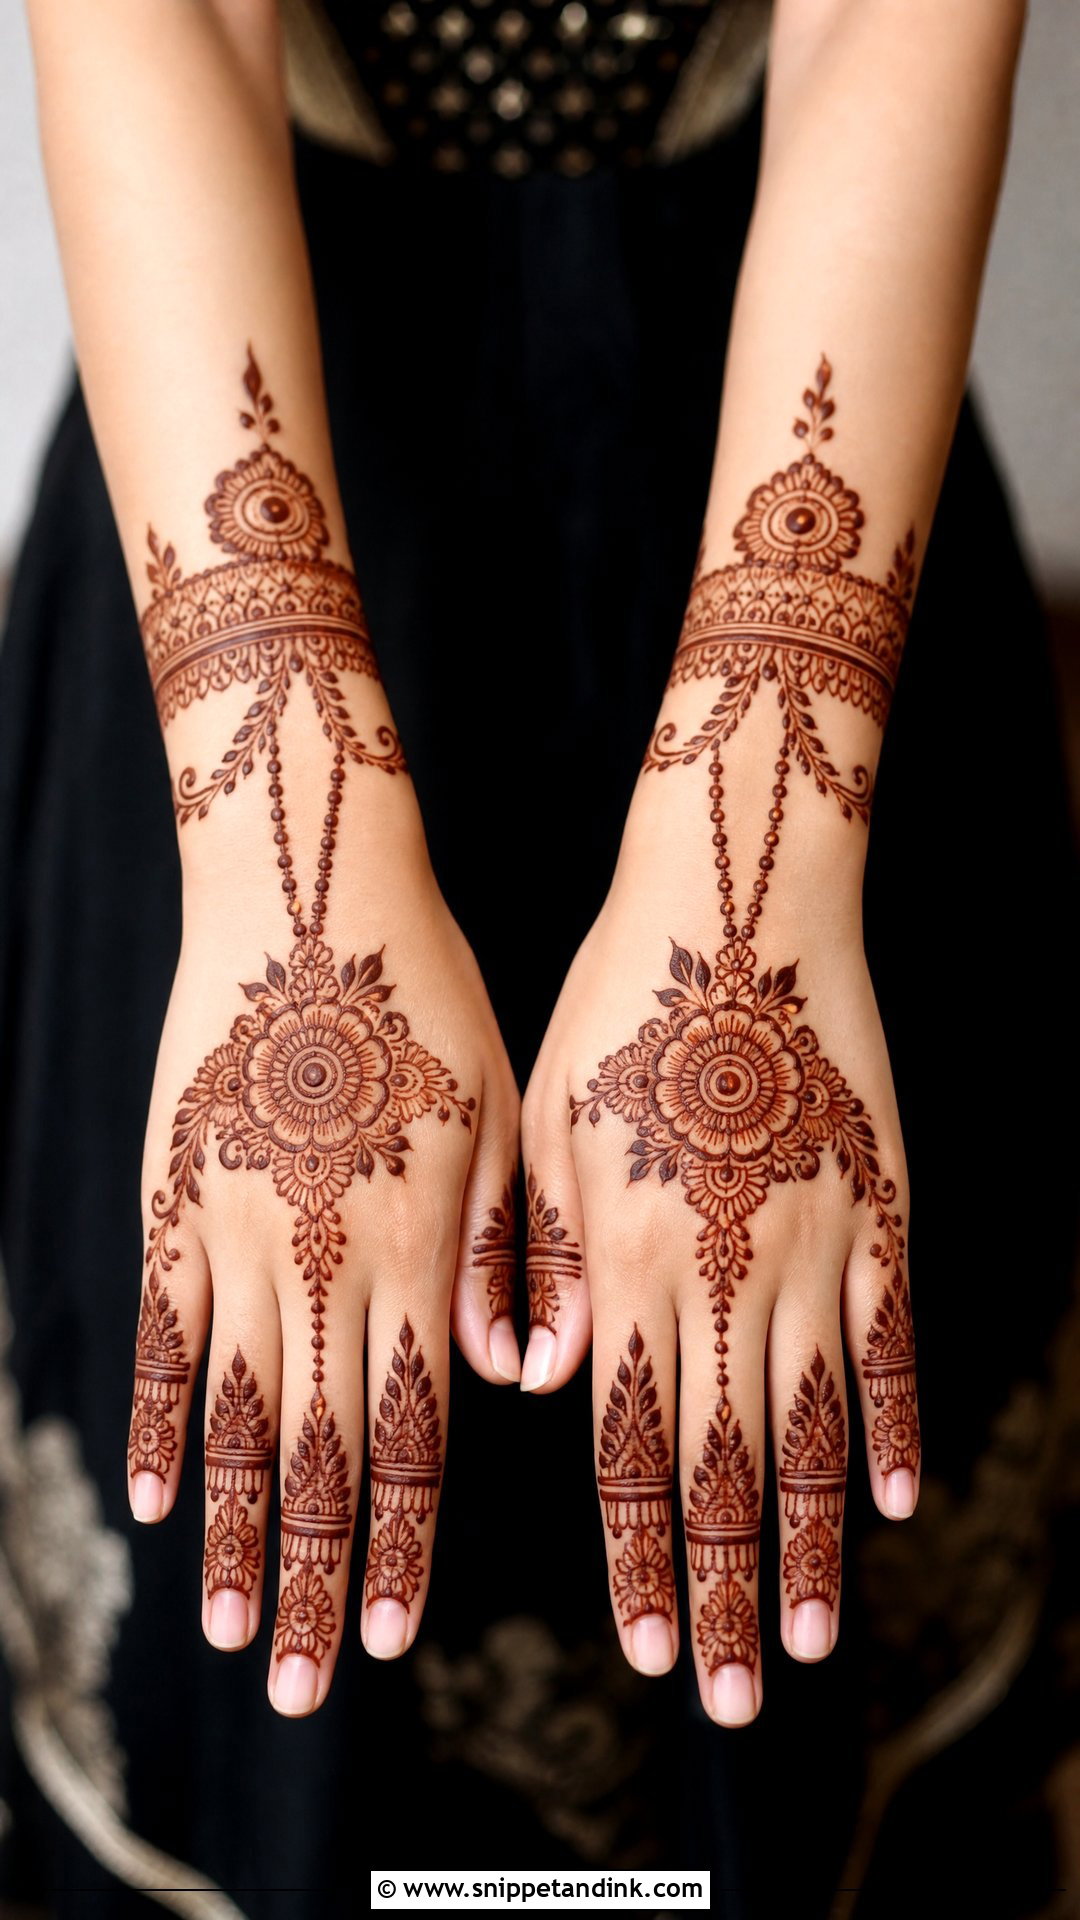
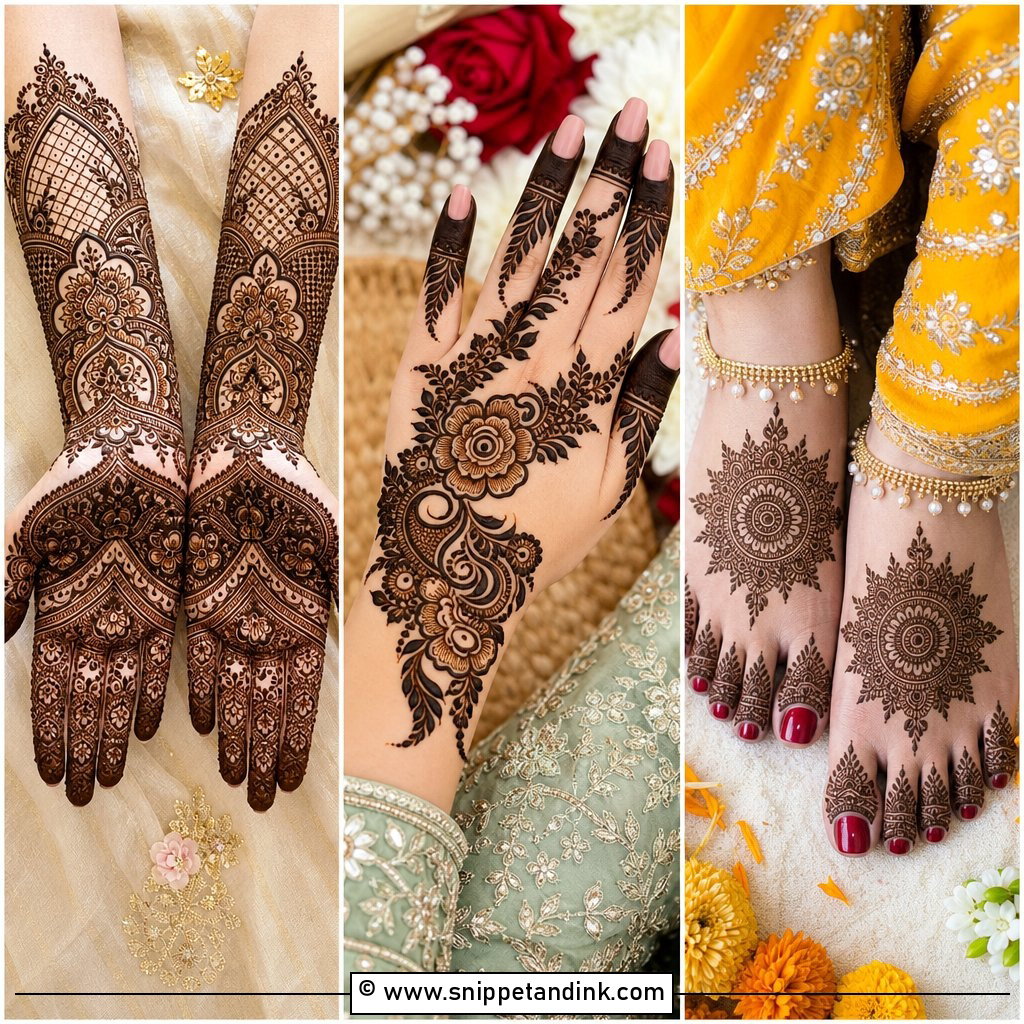
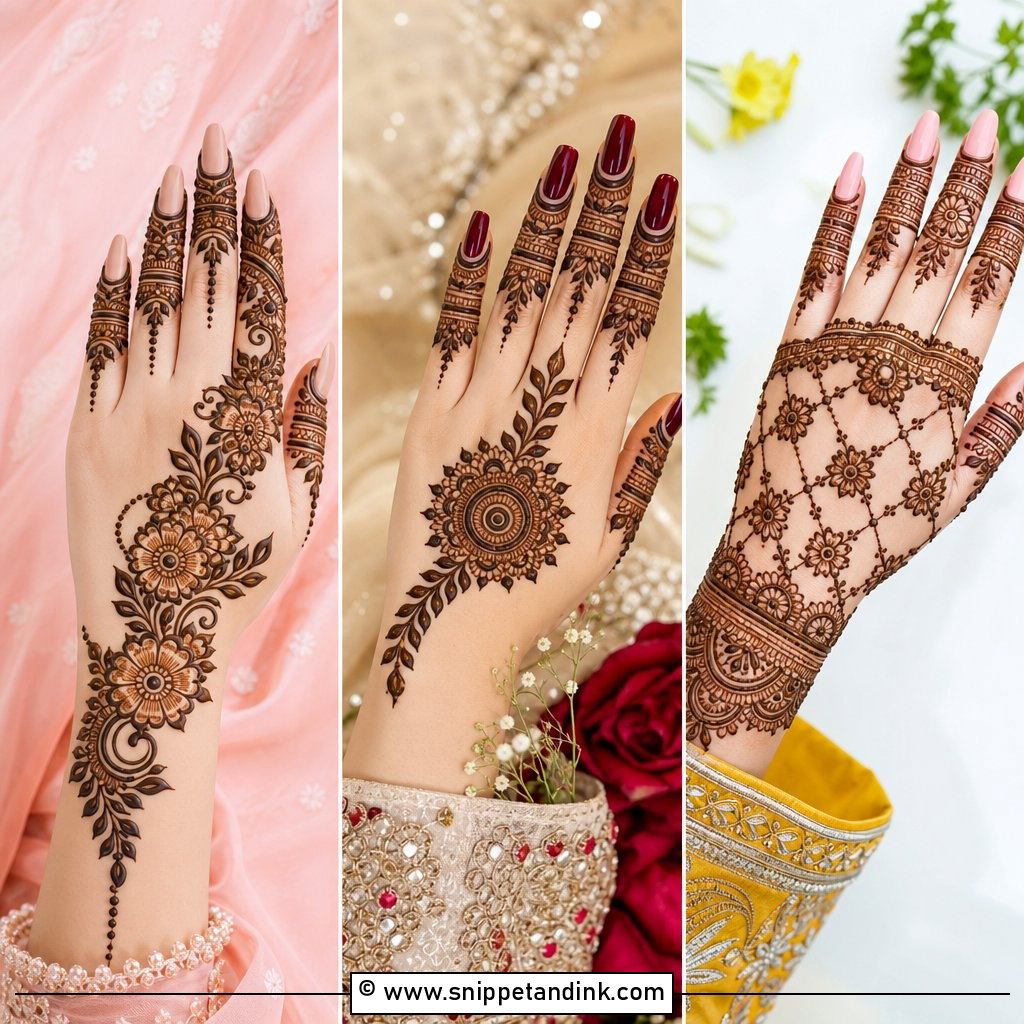
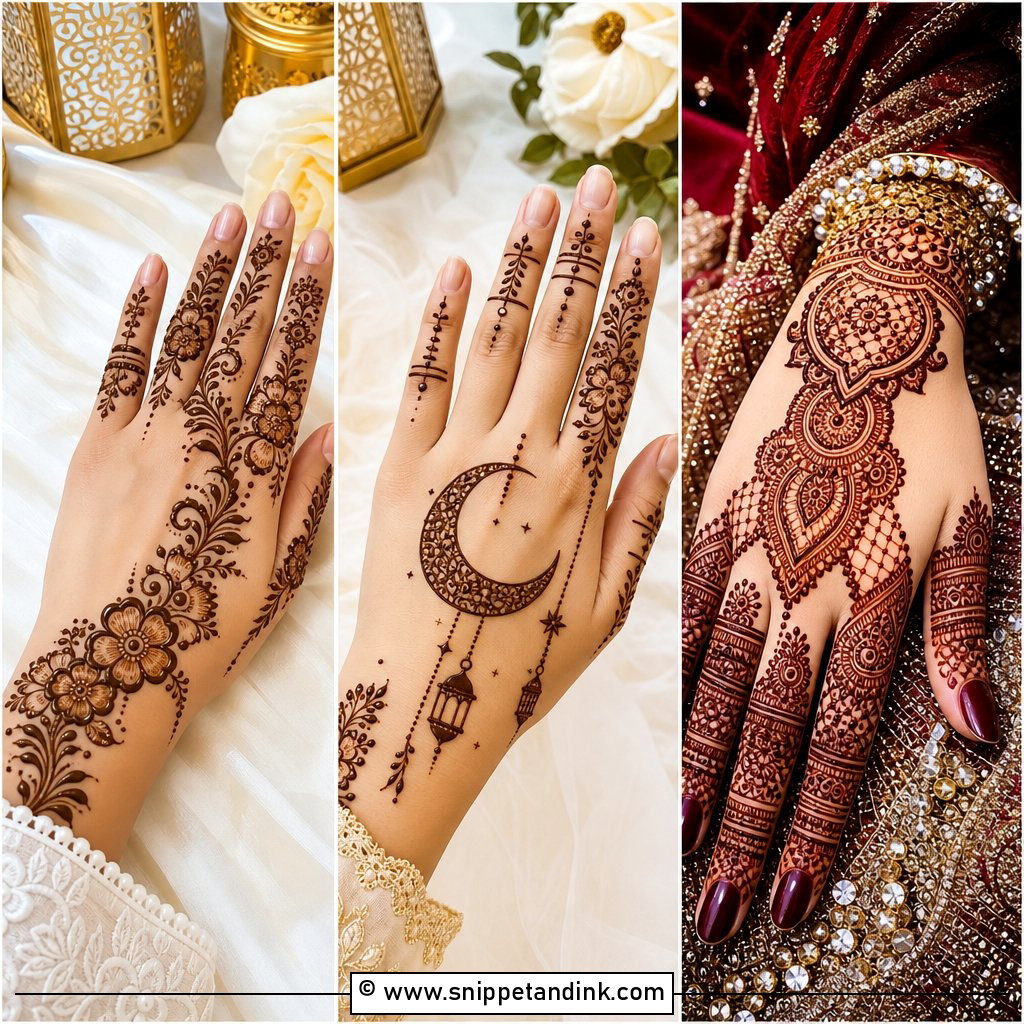
A back hand wedding mehndi design is the one in almost every photo, holding the bouquet, showing the ring or resting on the outfit. It needs strong structure because the back of the hand stains lighter than the palm. I use bolder outlines here and lean on bracelet cuffs, finger chains, floral trails, mandala centres and hathphool layouts. Vertical lines, leaves and slim borders on the fingers make them look longer. It can stay minimal or run from fingertip to forearm, and it sits well beside bangles, rings and nail art.
7. Mandala Wedding Mehndi Design
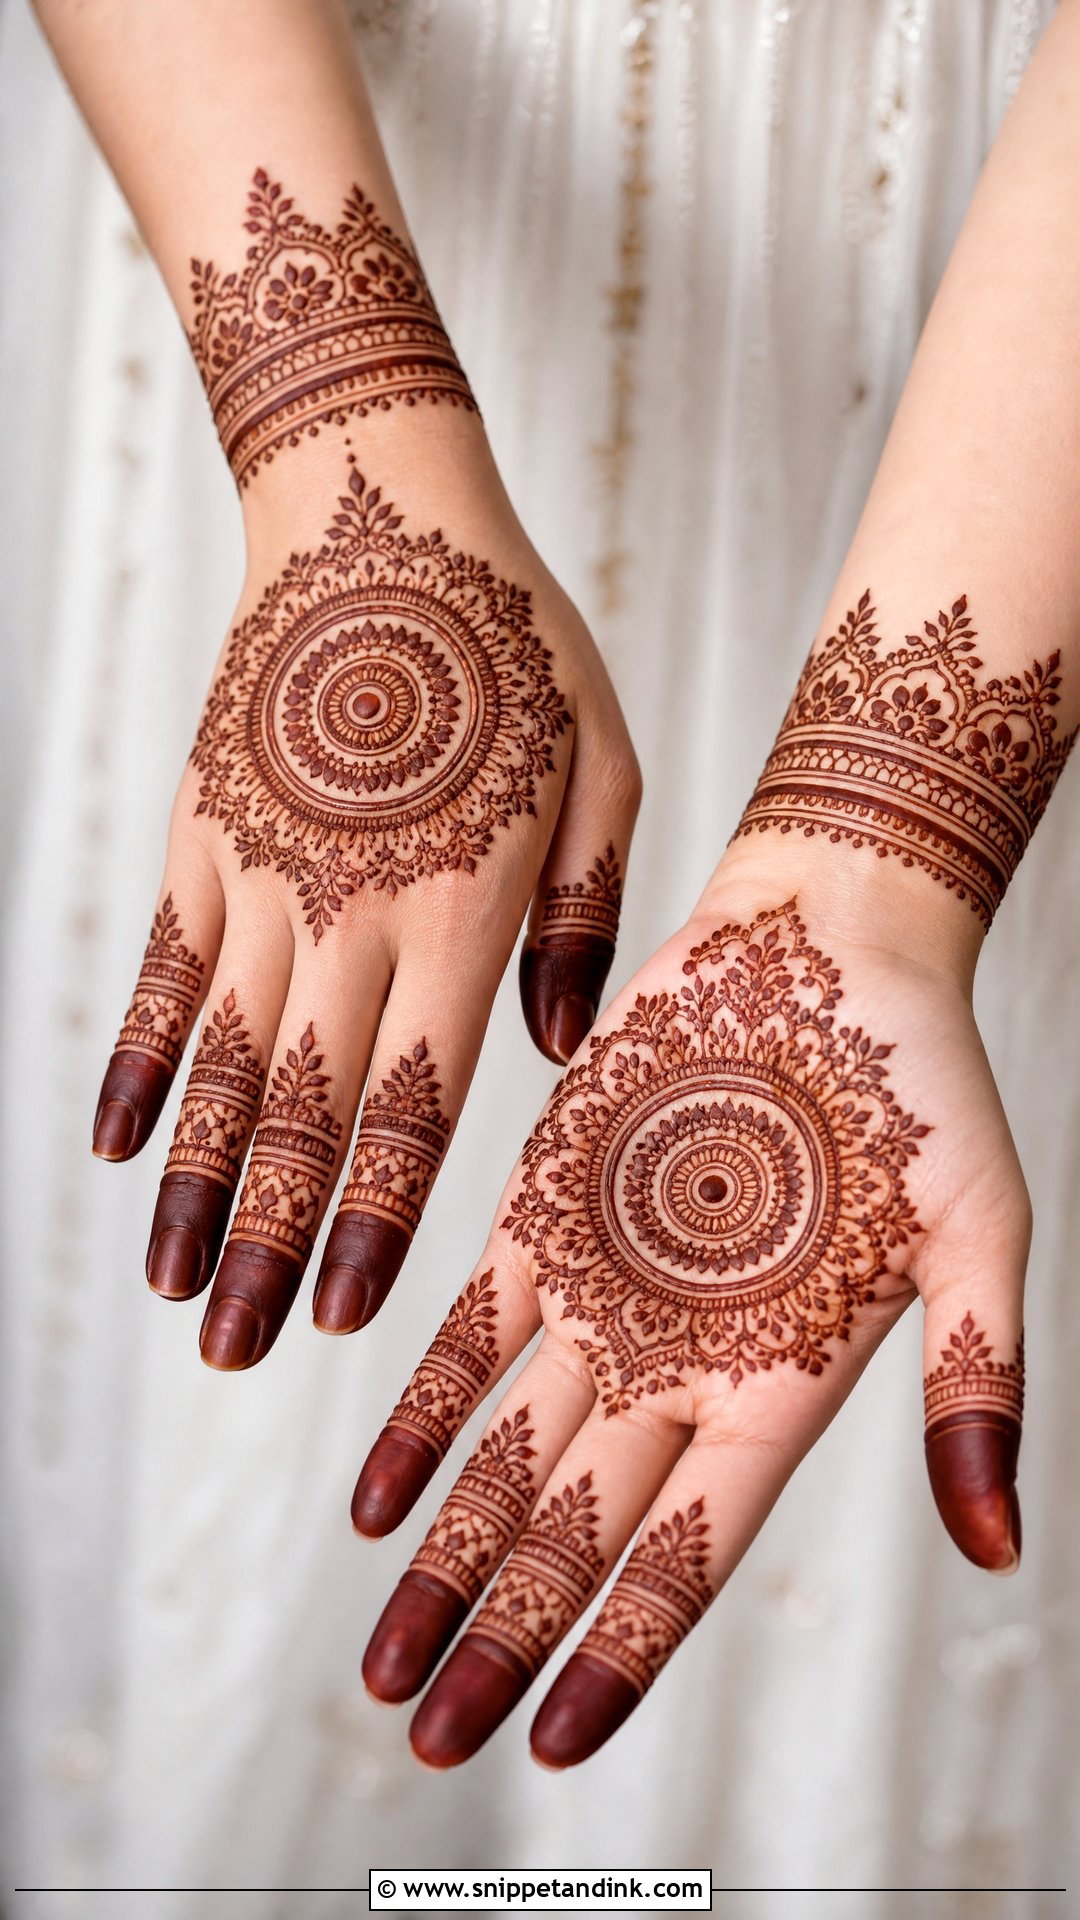
A mandala gives the hand a calm centre. The circle sits in the middle of the palm or back hand, with rings of petals, dots, leaves and fine borders around it. On its own, though, it can look like a quick party design, so for a bride I connect it to decorated fingers, wrist cuffs and floral extensions. Symmetry is unforgiving here; I draw the outer ring in sections and check it from a distance before filling, because a lopsided circle is obvious. Matching mandalas on both hands photograph cleanly because the eye always has a centre point.
8. Floral Wedding Mehndi Design
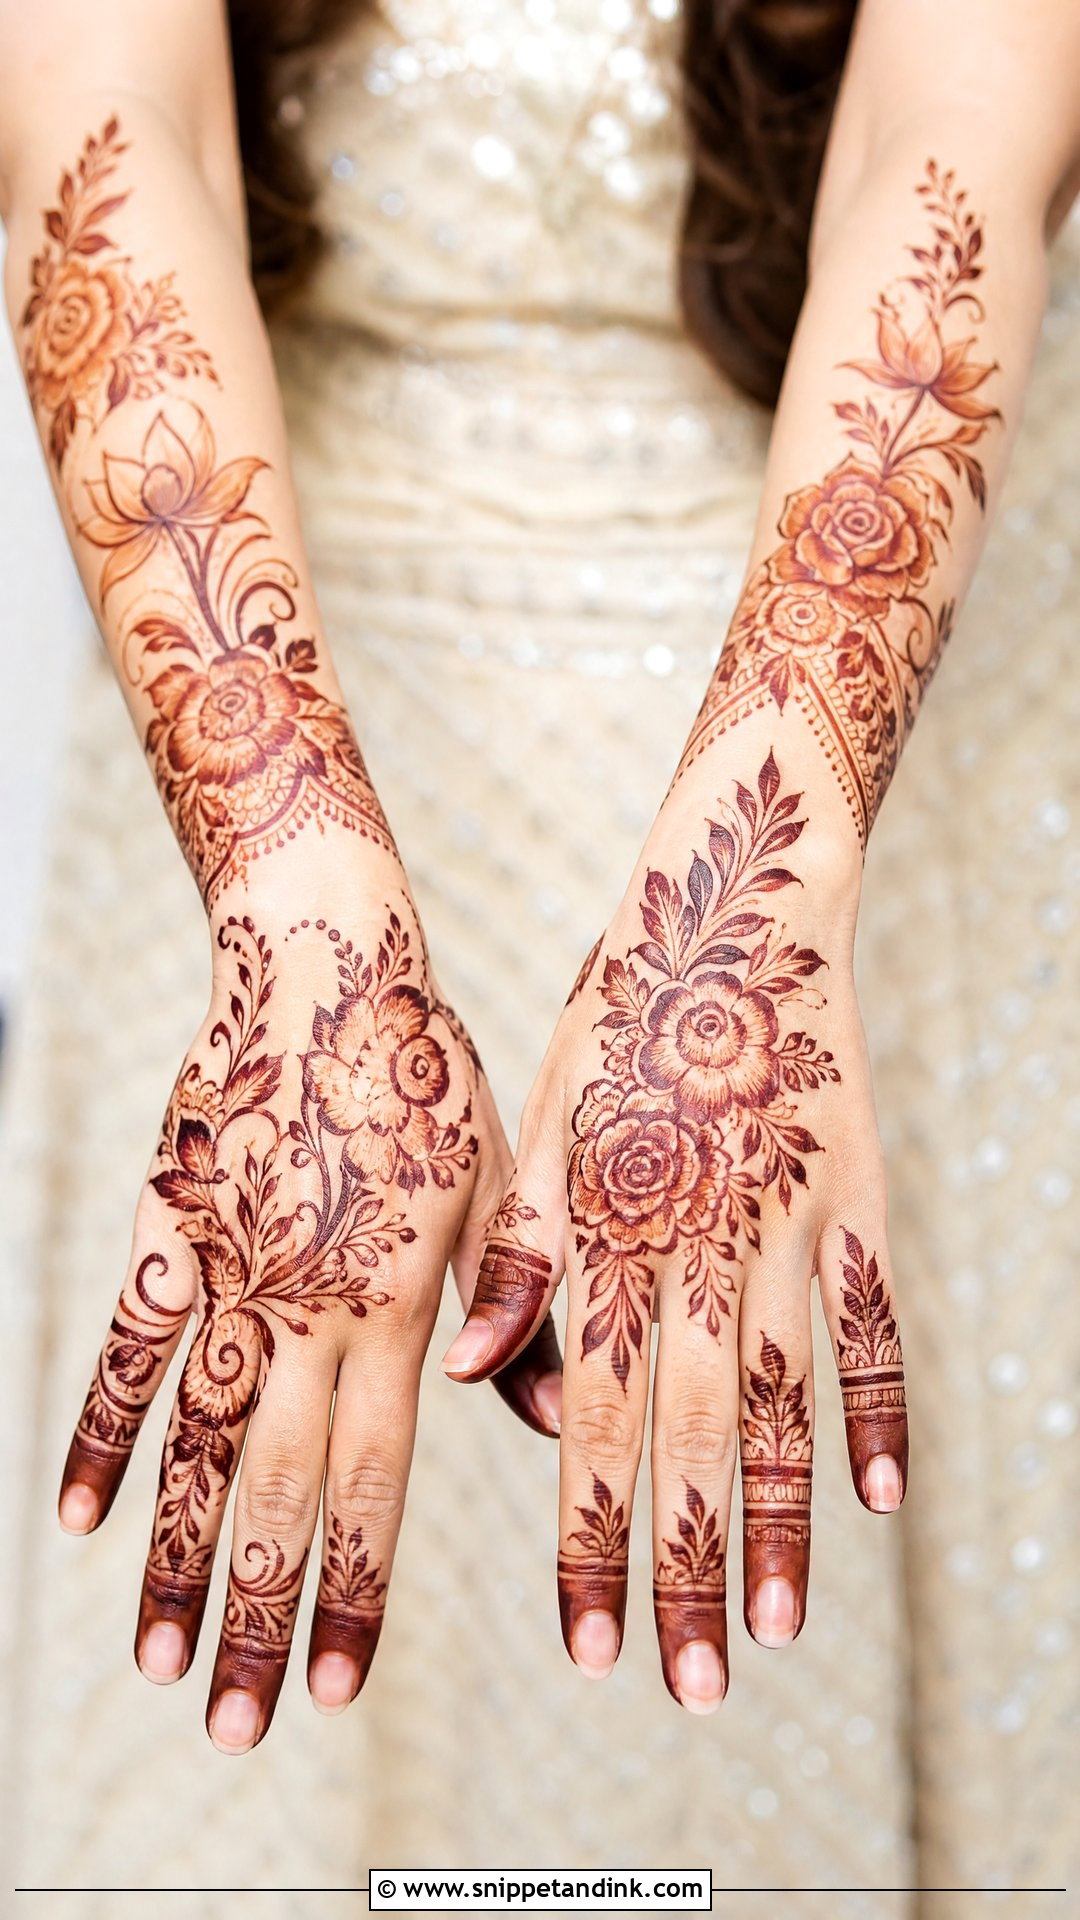
Florals soften any coverage level. I use roses, lotus shapes, small blossoms and flowing stems across palms, fingers, back hands and wrists. They suit almost any outfit and skin tone, which is part of why they’re so often requested. Combine flowers with paisleys and fine net filling for a traditional look; use bigger blooms and more open skin for a modern one. What I pay attention to is direction. The design should travel naturally from the fingers toward the wrist, the way a real vine grows, not sit in disconnected clusters.
9. Peacock Wedding Mehndi Design
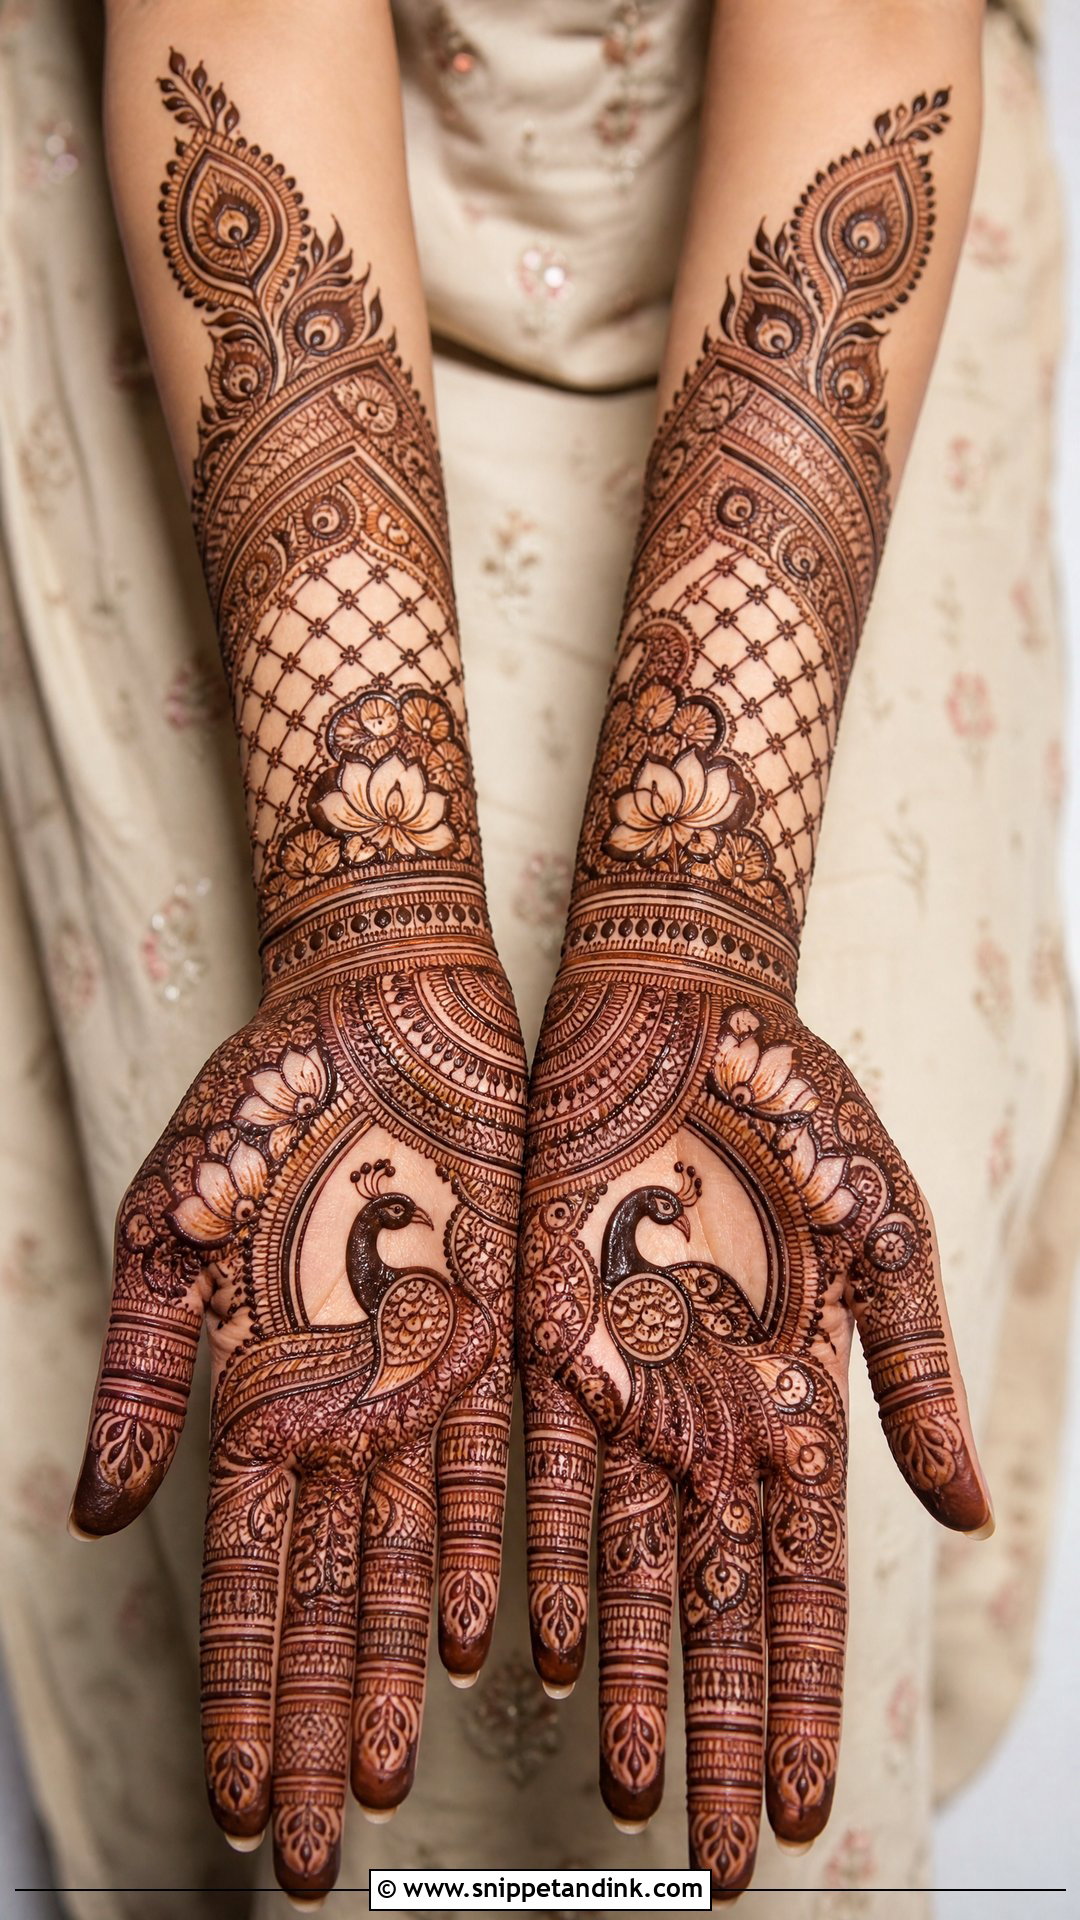
A peacock is the motif I’d put on a traditional Indian bride’s hands if she asked for one strong symbol. It can sit on the palm, wrist or forearm, with feathers spreading into paisleys, flowers and curved lines, blending into jaali, lotus motifs and fine filler. It belongs inside the full design rather than floating alone. The common mistake is a peacock drawn too finely; once the filler around it stains just as dark, the bird disappears. I give the body and neck a bolder outline so it stays readable after staining.
10. Portrait Wedding Mehndi Design
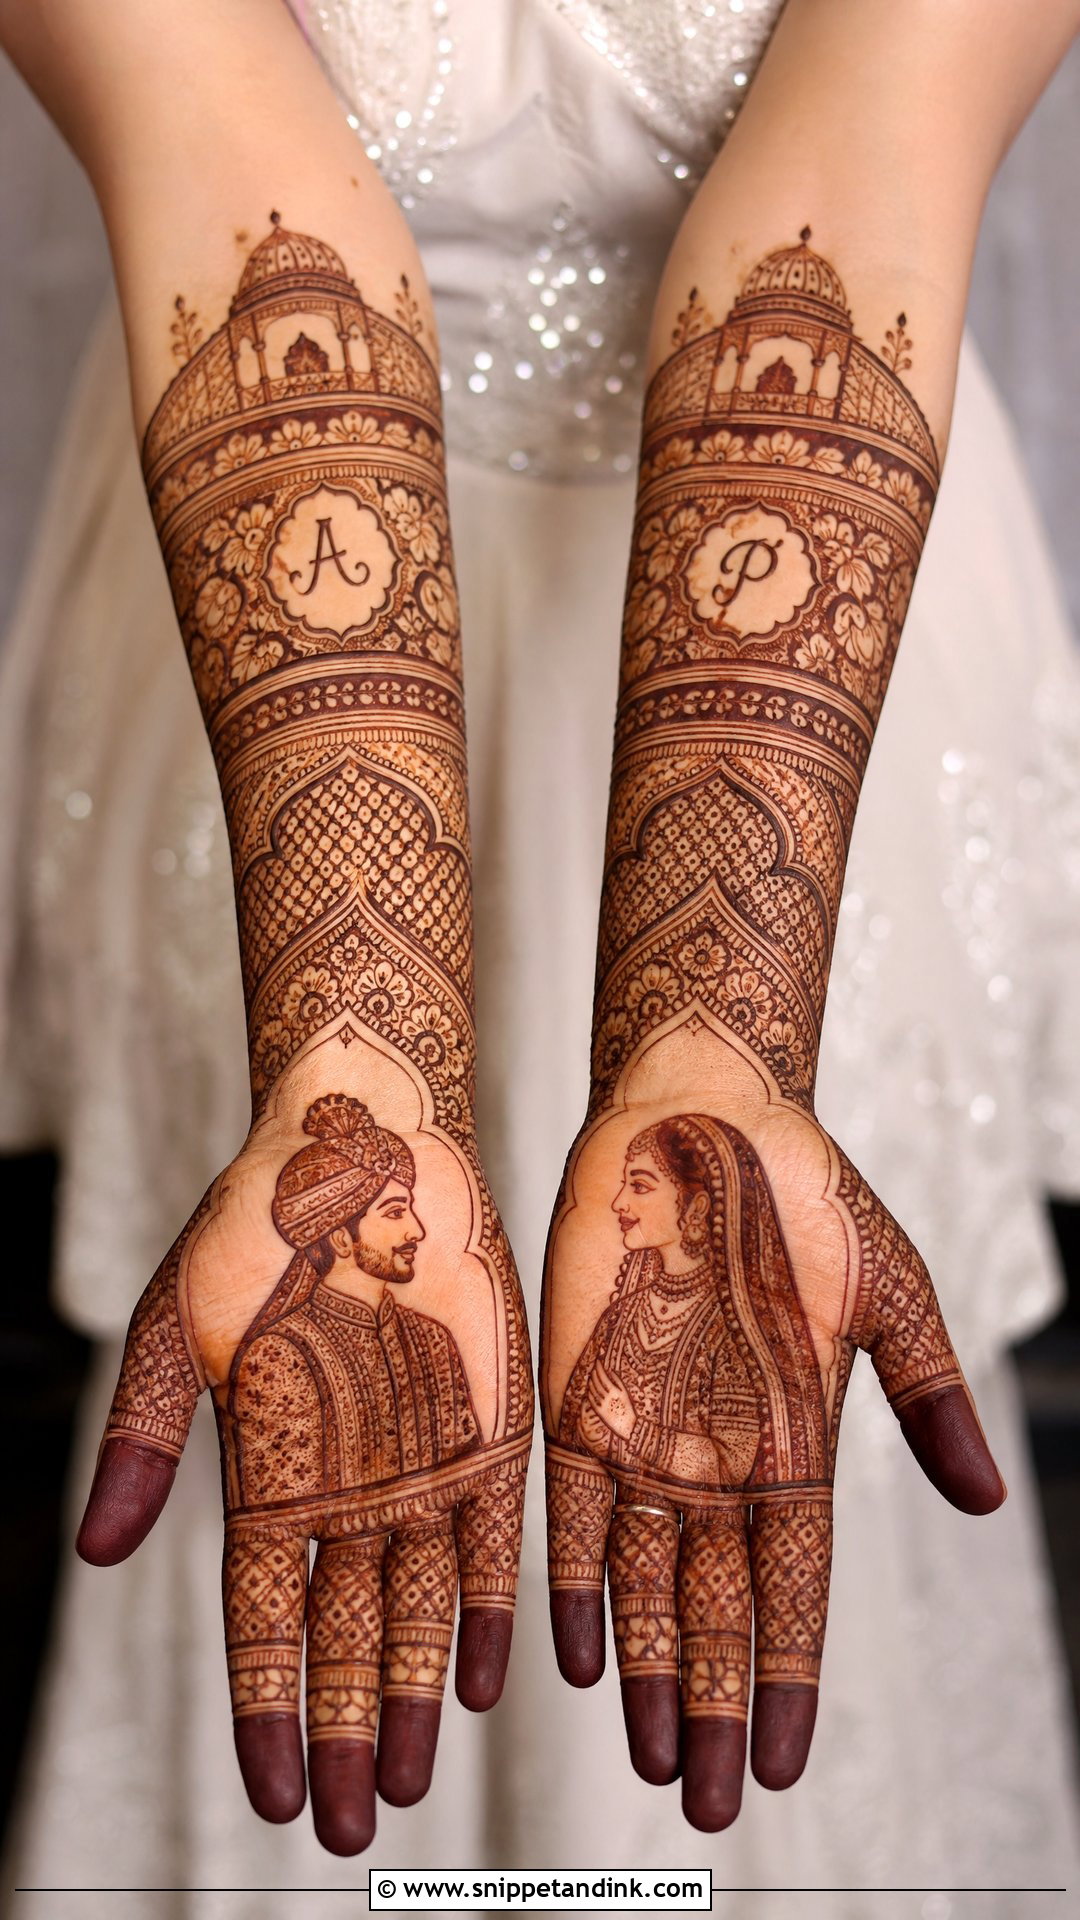
A portrait wedding mehndi design turns the hands into a story: a small bride and groom, a wedding scene, the proposal, a palace arch, or hidden initials. Faces are the hardest thing I draw in henna. Paste spreads slightly as it sits, so a line that’s a fraction too thick can change an expression, and that’s why portraits need room on full hands or forearms and an artist whose portfolio shows real faces, not just florals. Frame the figures with florals, paisleys, jaali and borders so they look like part of the bridal design.
11. Rajasthani Wedding Mehndi Design
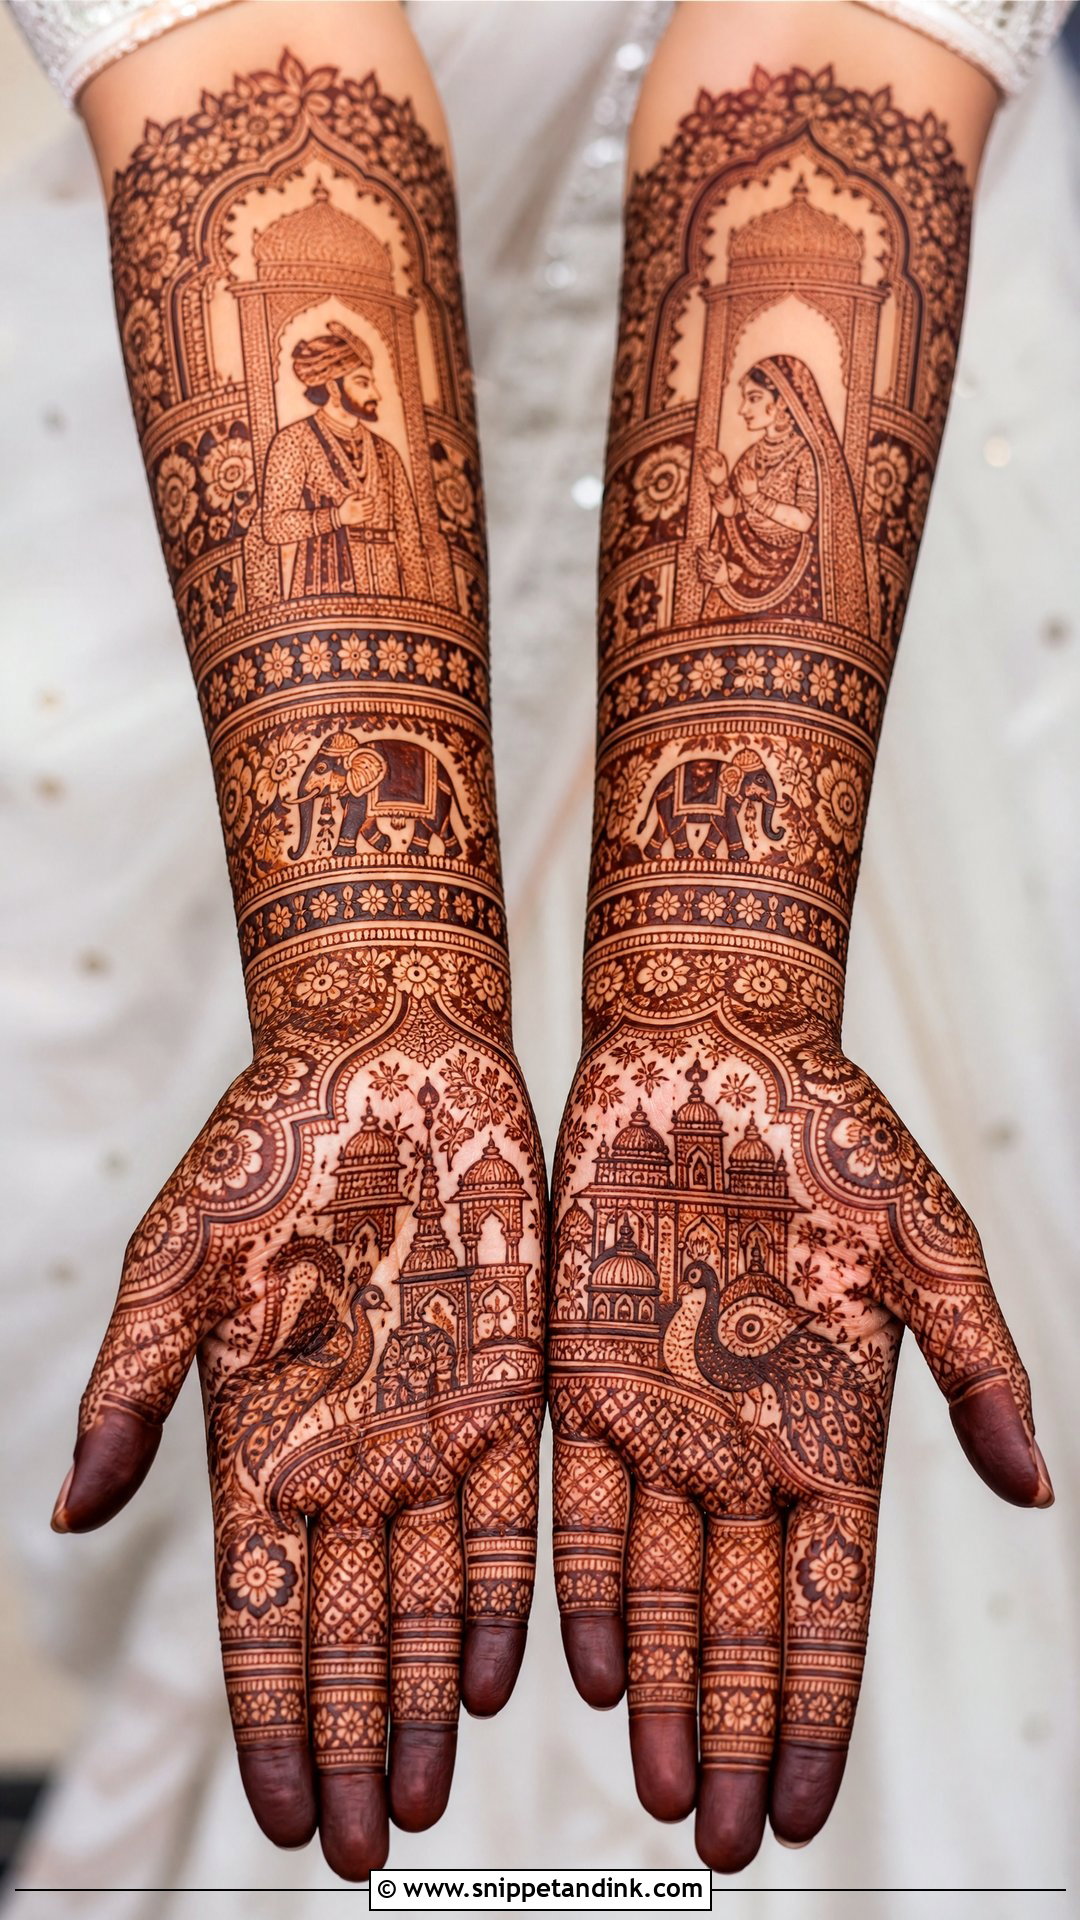
Rajasthani mehndi is storytelling at full density: bride and groom figures, elephants, palaces, peacocks, dhol players, paisleys and traditional filler, usually from fingertips to forearms. It takes the longest of anything here, so book it with enough time and expect to sit still for a long stretch. The details are small, which means the cone needs a very fine tip and a consistent paste. I link both hands with matching borders or mirrored scenes so they read as a pair. Heavy bangles and rich traditional fabrics are its natural partners.
12. Pakistani Wedding Mehndi Design
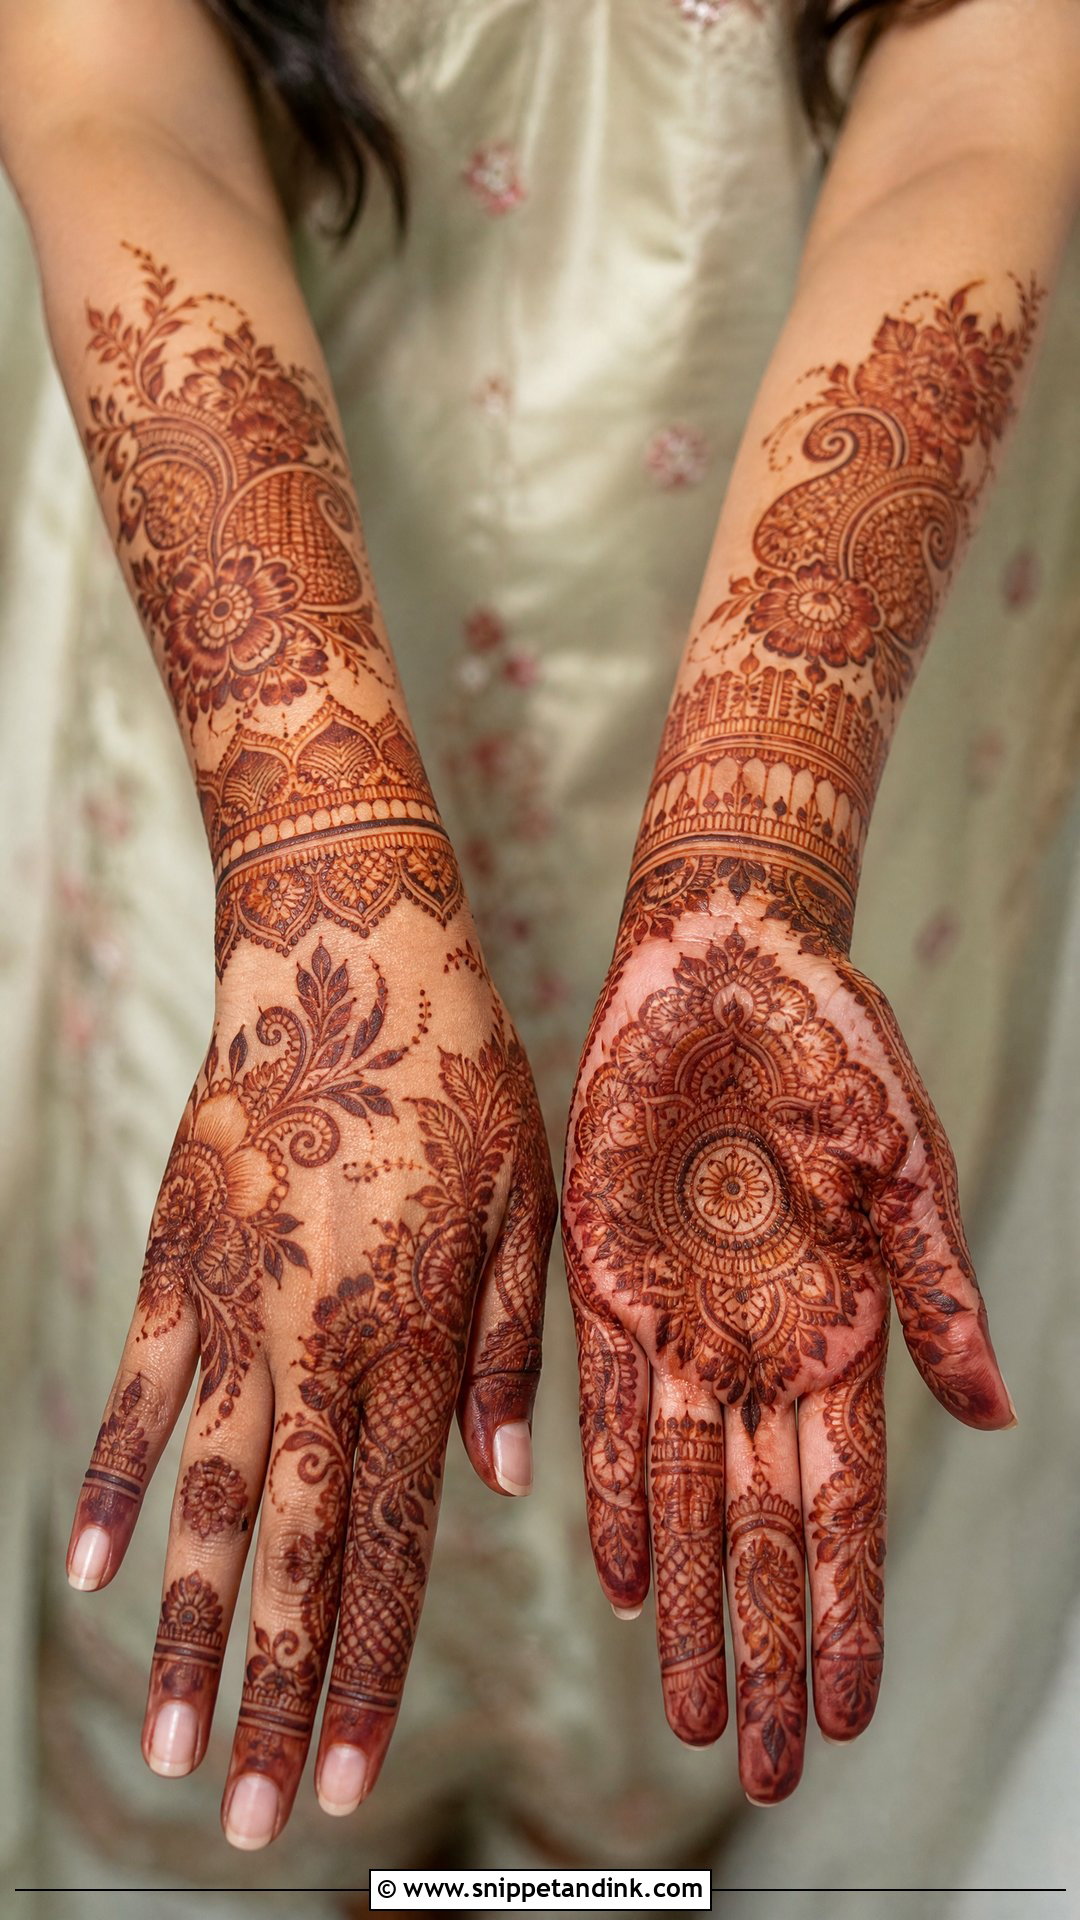
A Pakistani wedding mehndi design often balances delicate detail with graceful spacing: floral vines, paisley trails, mandala palms, fine shading, net work and ornamental wrist bands. Compared with very dense Indian bridal work, many of these layouts flow more softly. They can cover the full hand or run semi-heavy from fingers to forearm. They suit nikkah, walima and mehndi night. Shading is the detail I’d look for in an artist’s portfolio; done with a lighter, thinner paste line, it adds depth that solid fill can’t.
13. Moroccan Wedding Mehndi Design
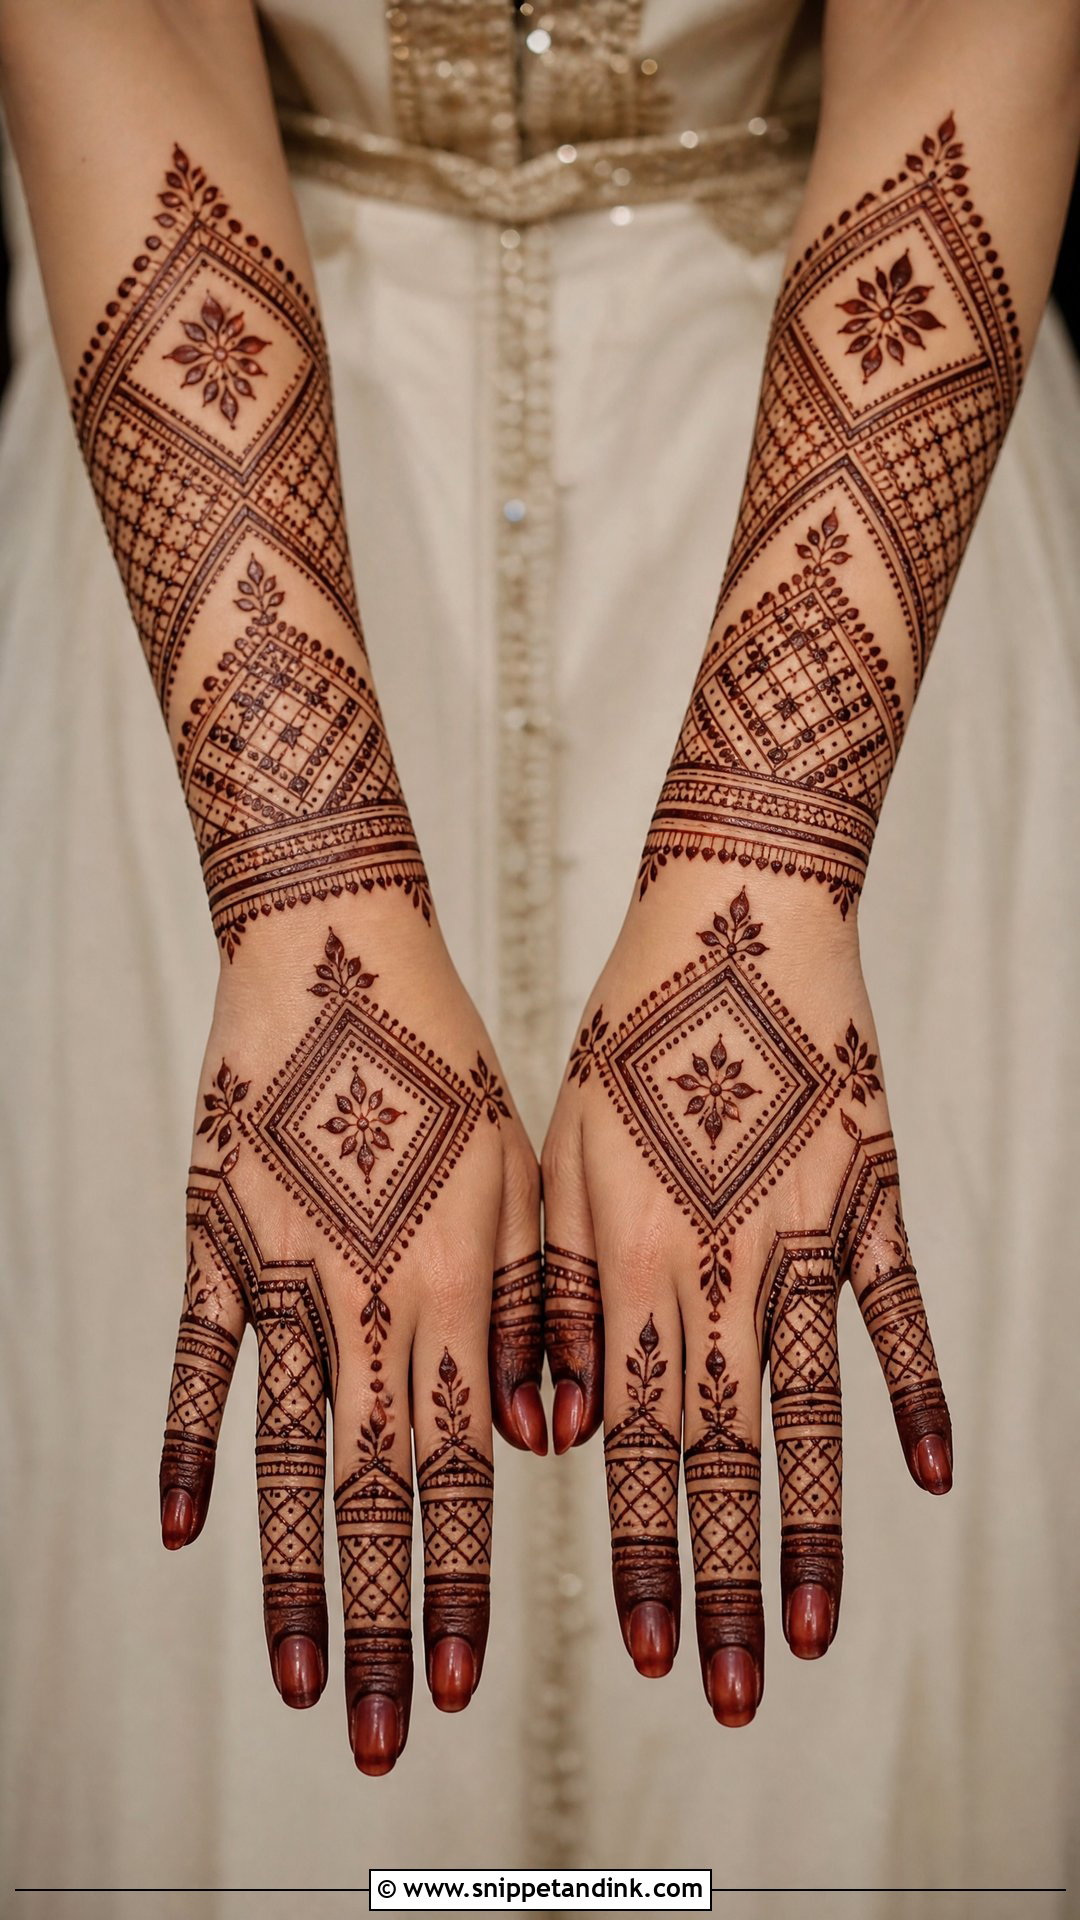
Moroccan patterns swap vines for geometry: diamonds, lines, triangles, grids, dots and symmetrical borders. Because the lines are straight and sharp, they read clearly in photos even at a distance. That precision is also the challenge; a straight henna line needs steady pressure on the cone from start to finish. For a wedding, I extend the geometry into cuffs, finger panels and wrist-to-forearm sections, and sometimes soften the edges with a few small florals or leaves. It’s a good fit for a bride who wants something less common than standard floral mehndi.
14. Gulf Wedding Mehndi Design
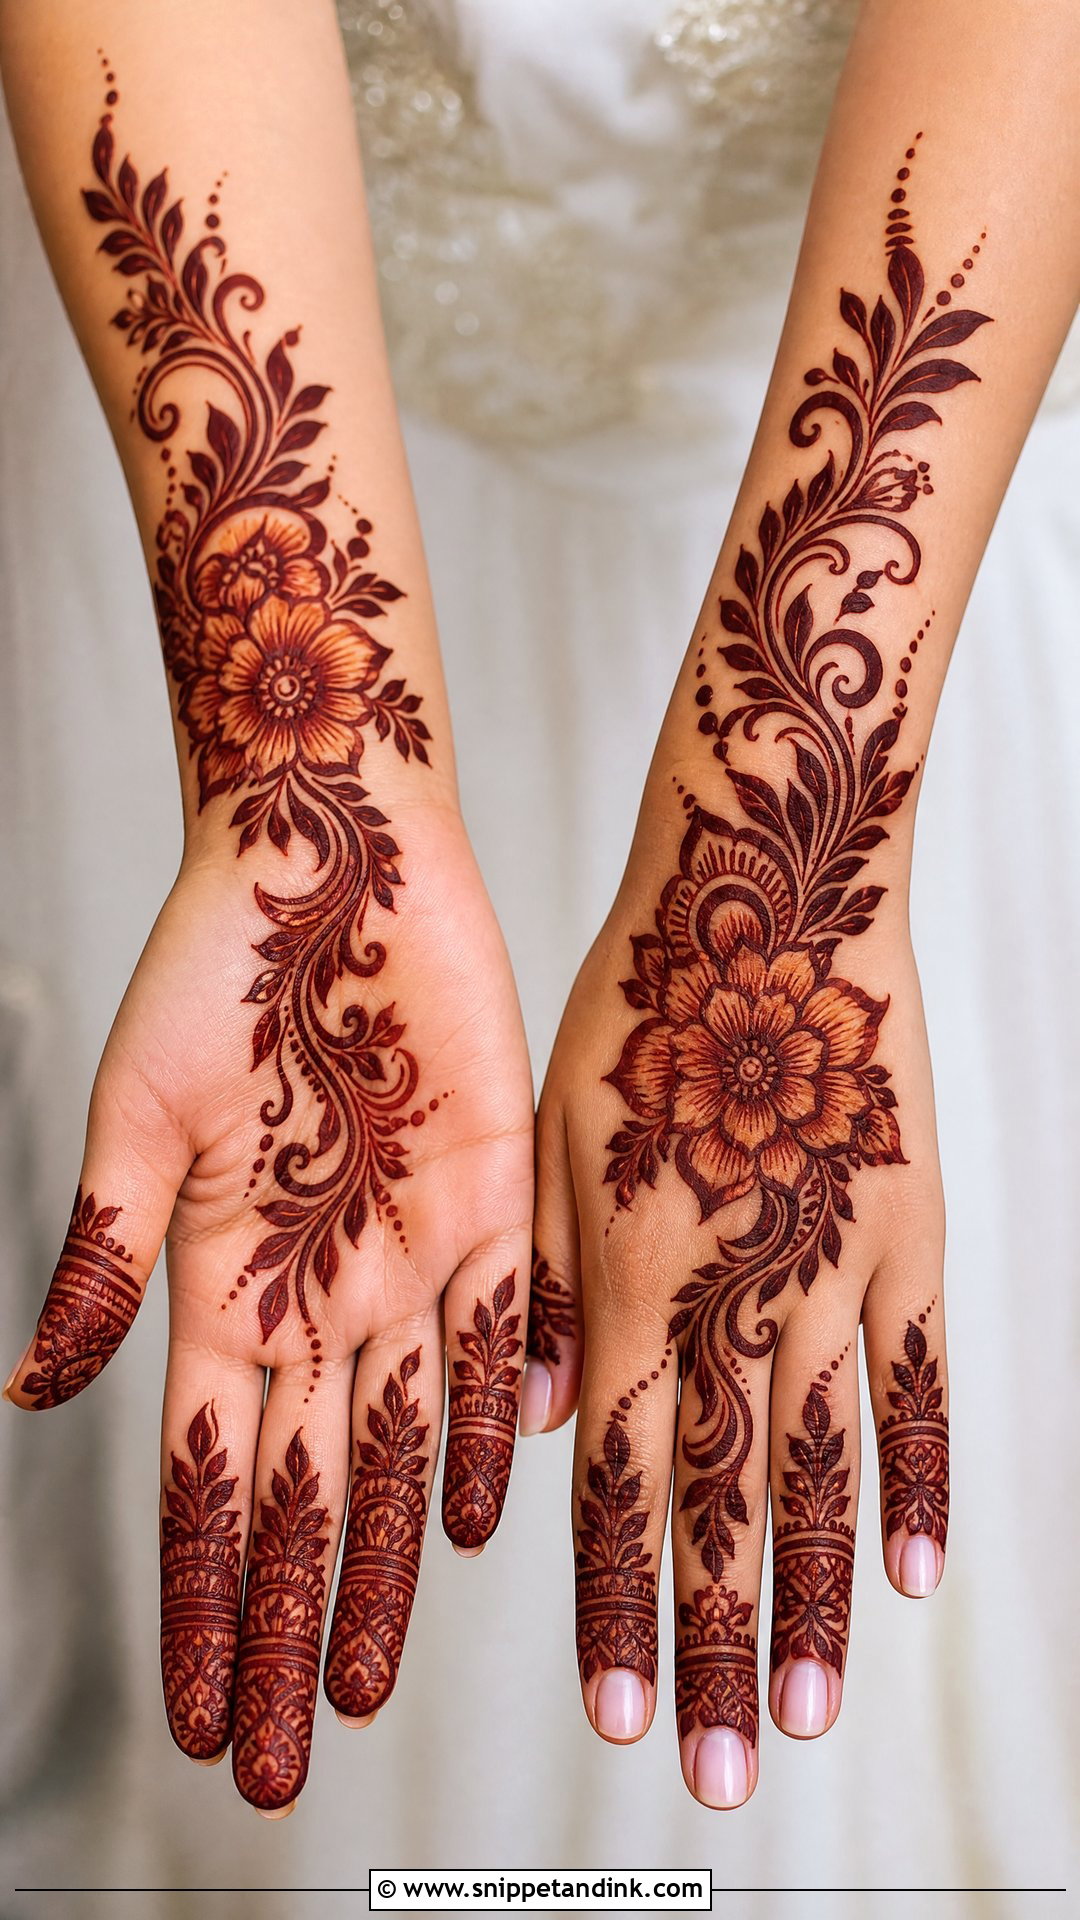
A Gulf wedding mehndi design, often inspired by Khaleeji henna, uses large shaded flowers, leafy branches, thick outlines and generous open space. It’s bold rather than dense. It sits best on the back hand and palm, with a floral trail running from the fingers toward the wrist. For a bride, I extend it to the forearm and add fingertip detail, dotted accents and fine inner lines. Thick outlines need thicker paste flow, so it’s applied faster than Indian bridal work, which suits brides short on time.
15. Minimal Wedding Mehndi Design
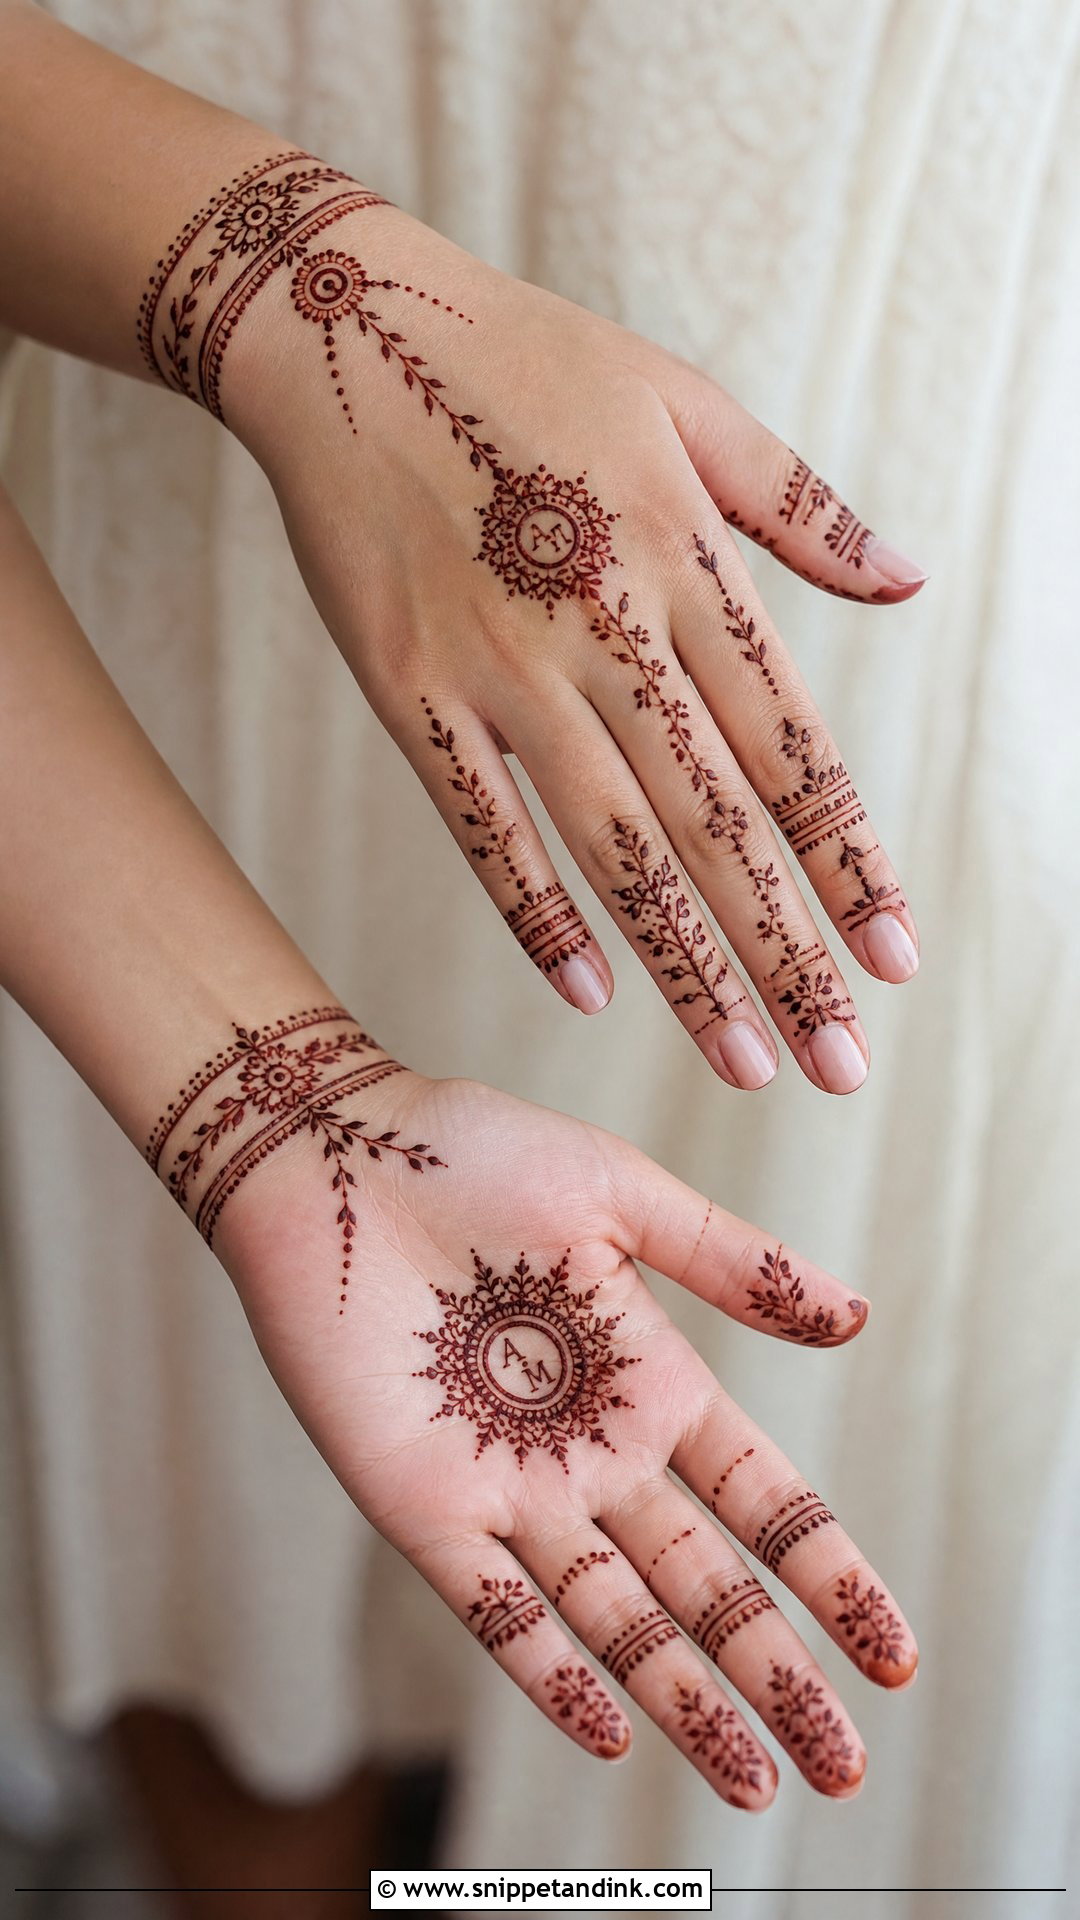
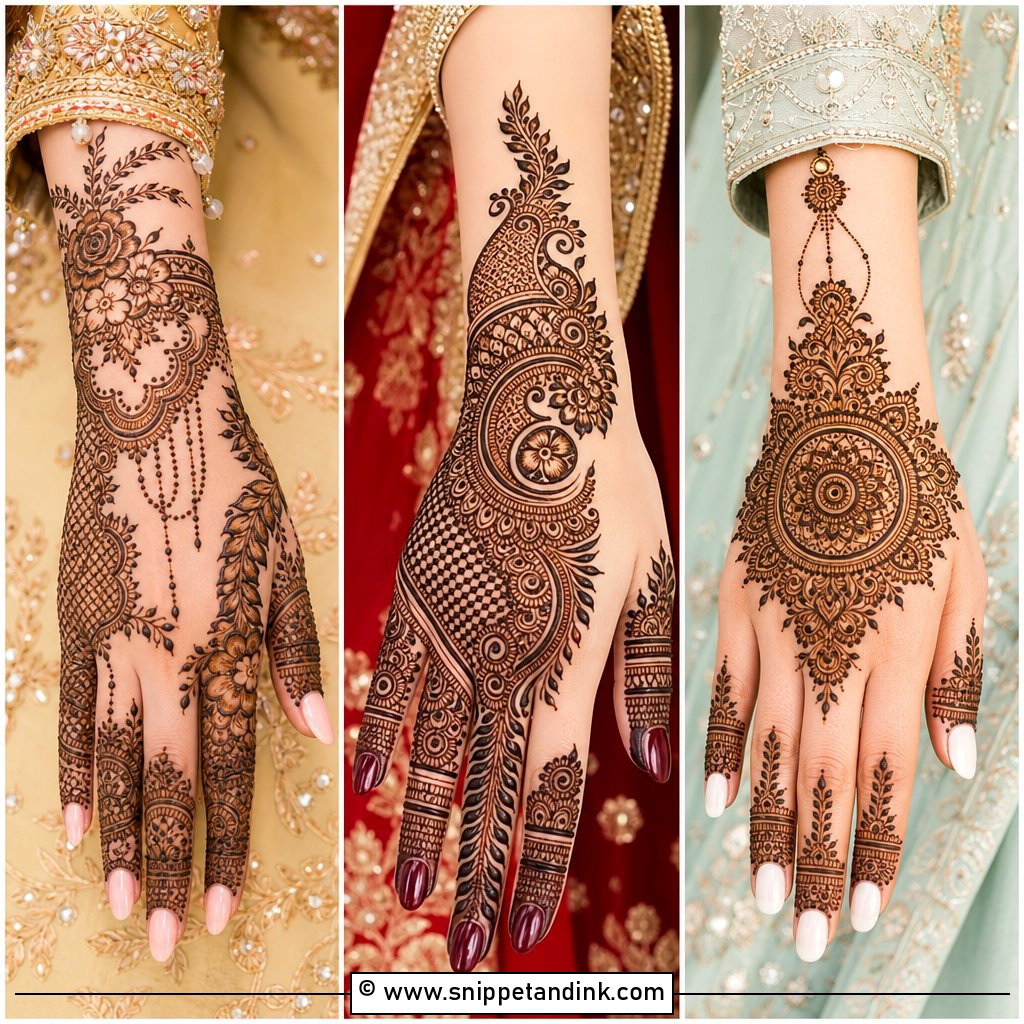
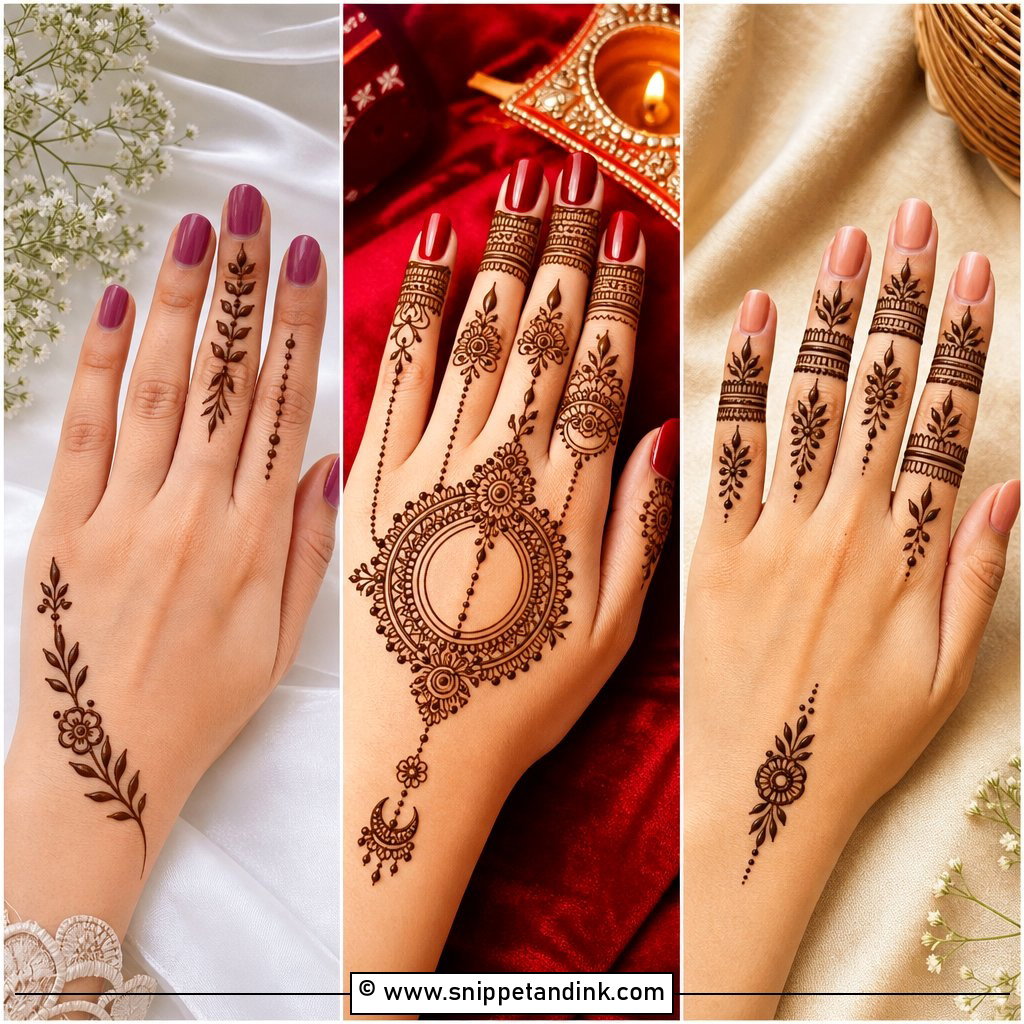
Minimal mehndi uses slim lines, small mandalas, finger detail, delicate vines and bracelet-like wrist bands, with a lot of skin showing. It’s quick, comfortable and suits civil weddings, beach weddings and destination ceremonies. On minimal work I care most about symmetry between the hands, since the eye compares them instantly. A tiny initial or date near the wrist personalises it. It pairs naturally with simple jewellery, soft makeup and modern bridal outfits.
16. Jewelry Wedding Mehndi Design
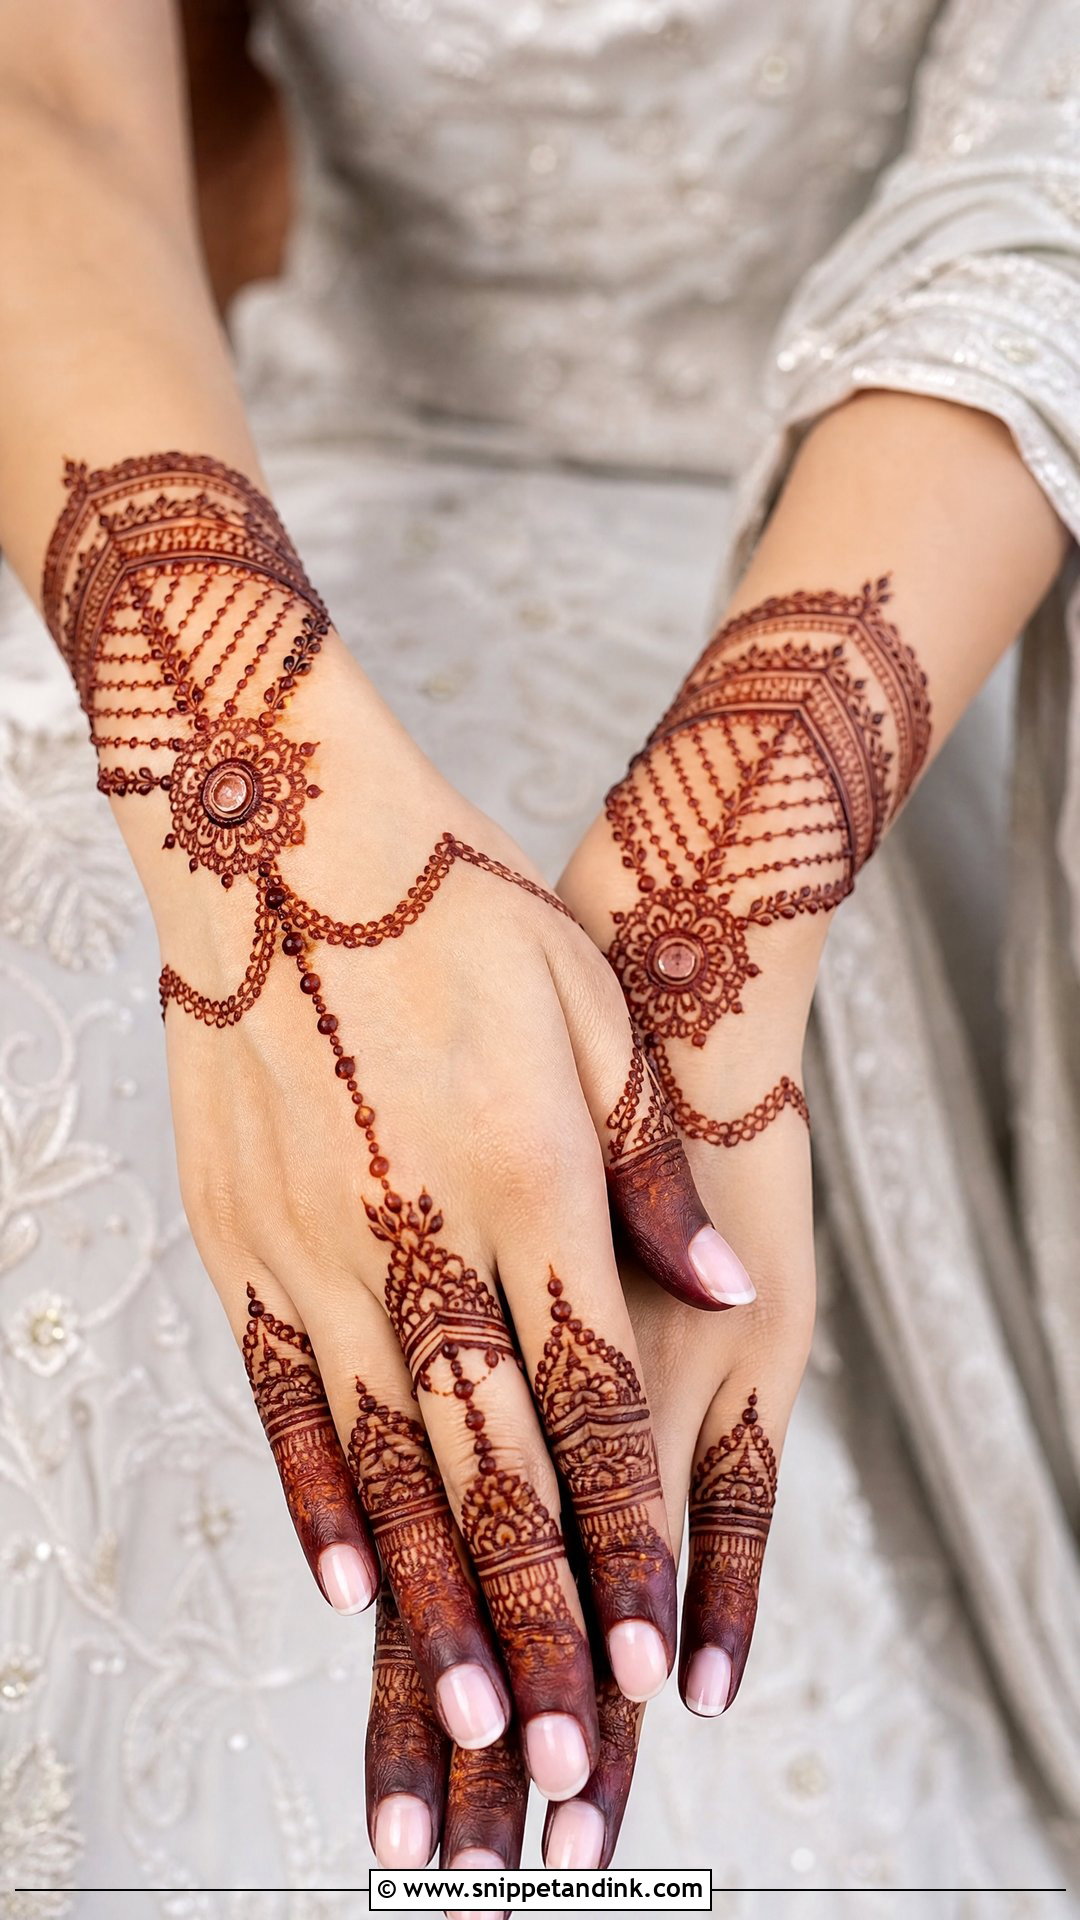
Jewellery mehndi draws ornaments onto the hand: ring shapes, finger chains, bracelet cuffs, hathphool patterns and bead-like drops across the back of the hand. It starts at the fingers, connects across the back hand and finishes at the wrist with a band. I ask brides to bring their actual rings and bangles, because a drawn ring that sits where the real one will be just disappears, and a cuff drawn exactly where the bangles rest gets hidden. Florals, mandalas or fine mesh can make it fuller. It’s at its best in close-up hand shots.
17. Jaali Wedding Mehndi Design
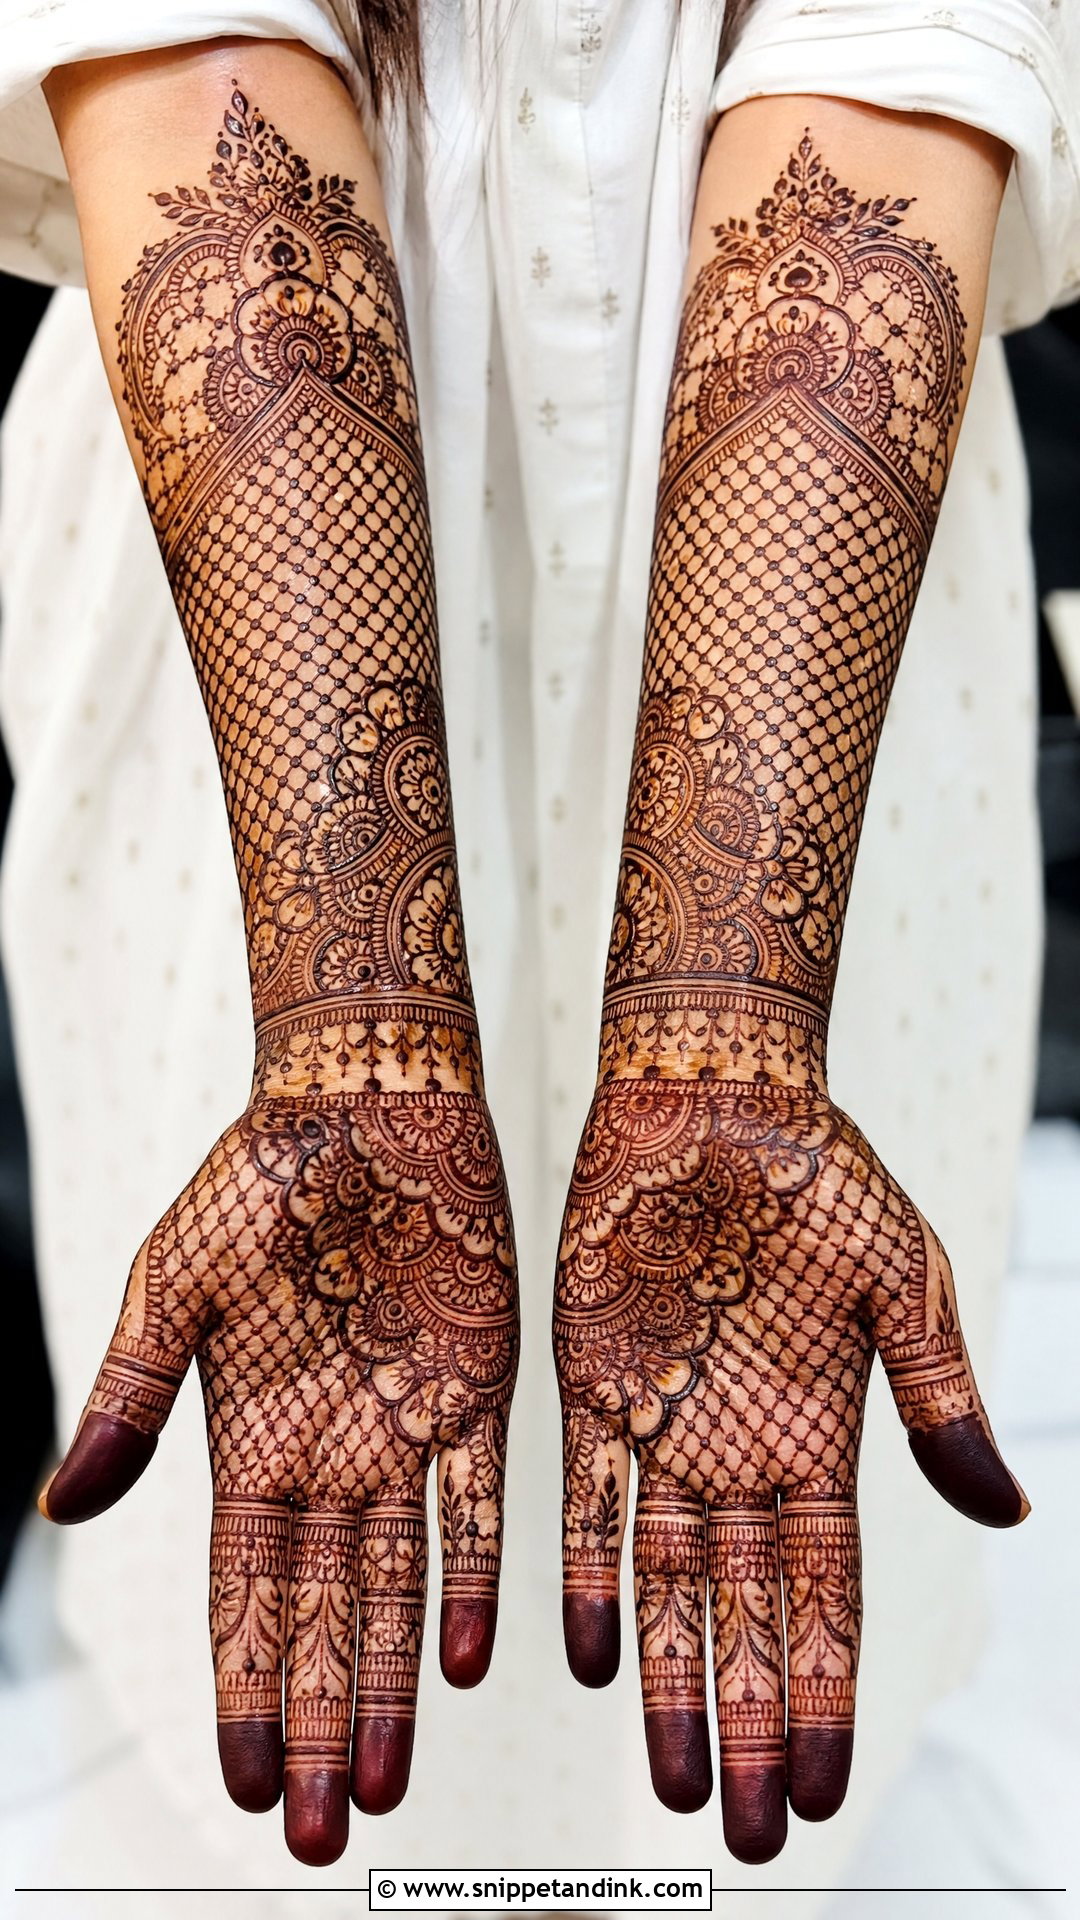
Jaali is henna lace: net-like mesh on the back hand, fingers or forearm, often with a fuller traditional palm. If your outfit has lace, net or embroidery, the mehndi can echo that texture. My rule is that mesh is background, not the whole design. A hand that’s all jaali from top to bottom looks flat, so I break it with focal florals, paisleys, mandalas or detailed wrist bands. The fine crossing lines need a very thin, consistent paste, otherwise neighbouring lines bleed together and the net fills in.
18. Bracelet Wedding Mehndi Design
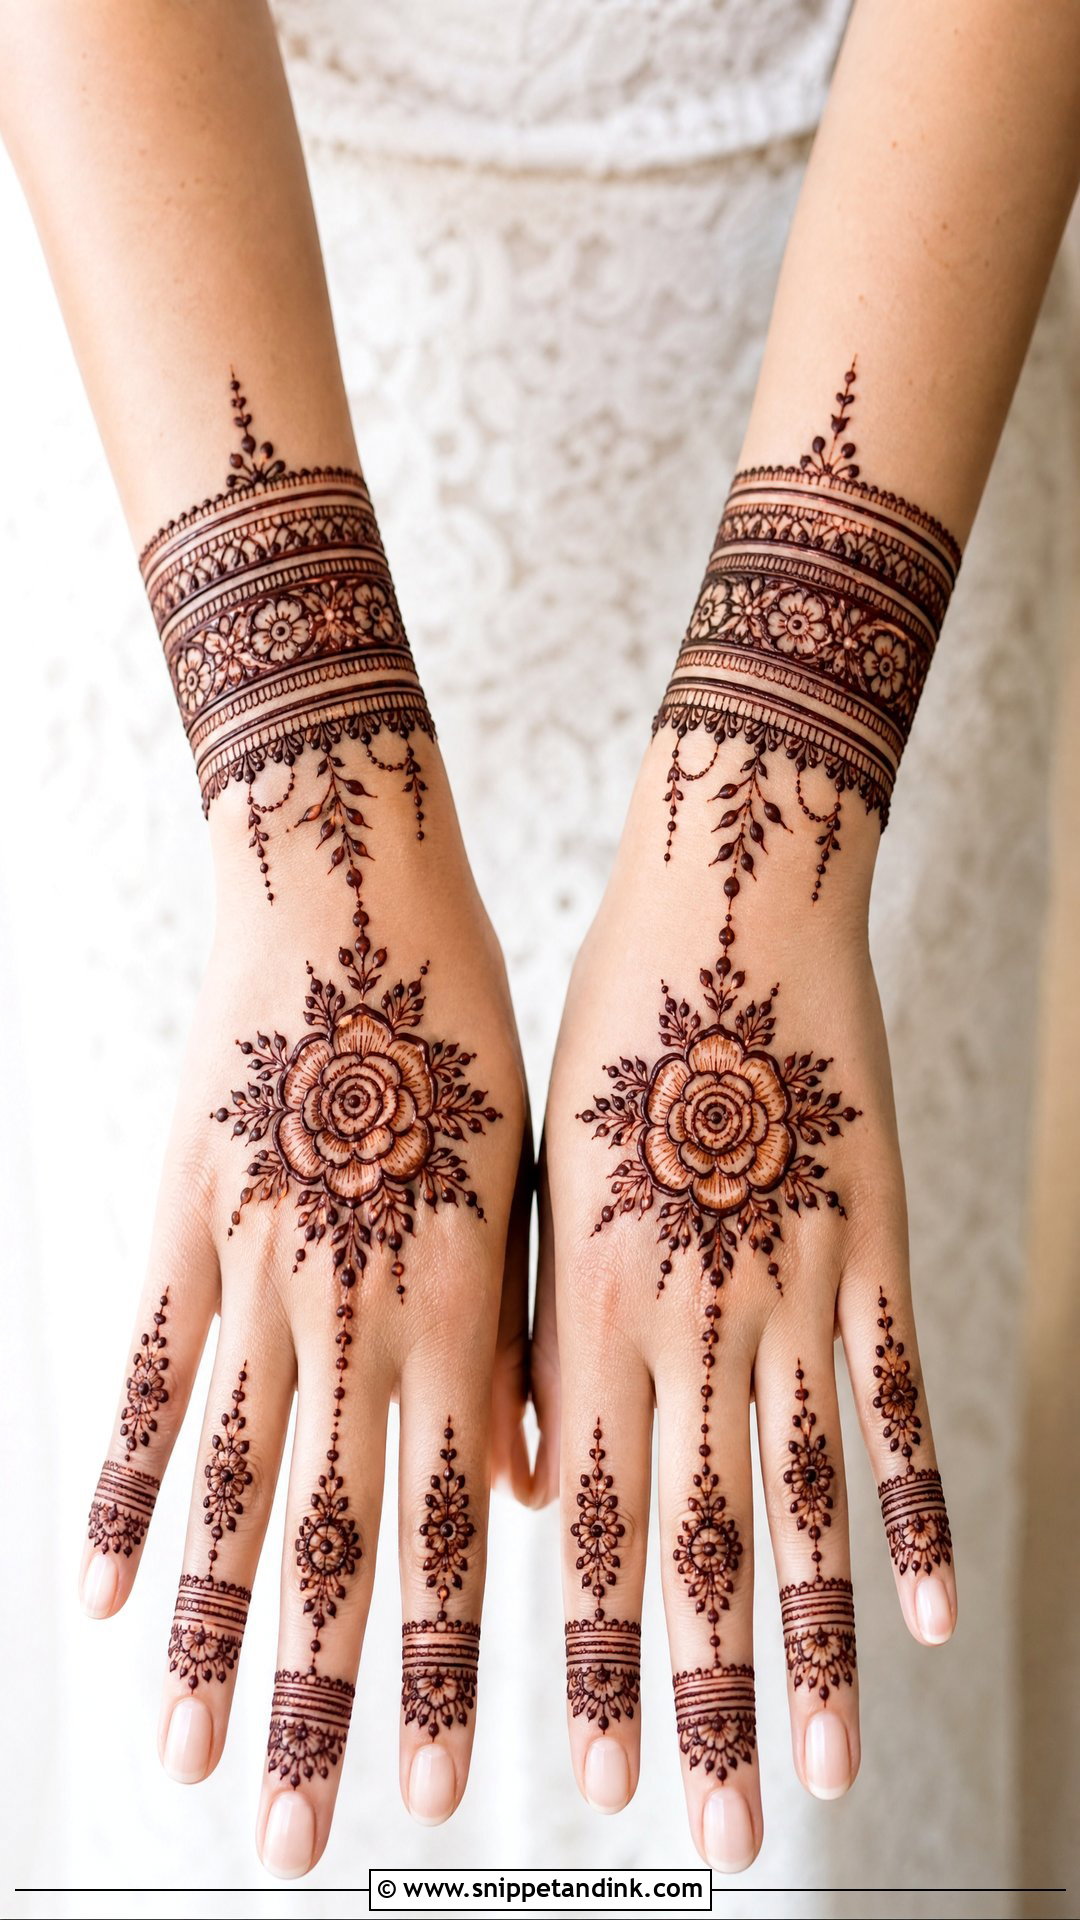
Bracelet mehndi centres on the wrist and back hand and looks like layered bangles: wide cuffs, thin bands, finger chains, floral centres and dangling dots. It doesn’t cover the arm, which makes it a good choice for pre-wedding events, engagements and bridesmaids. For a bride, I make the fingertips more detailed and the wrist band fuller, and I make sure the chains and cuffs connect so it reads as one ornament rather than separate stamps. Real bangles sit right on top of it, so it should complement them, not compete.
19. Half Hand Wedding Mehndi Design
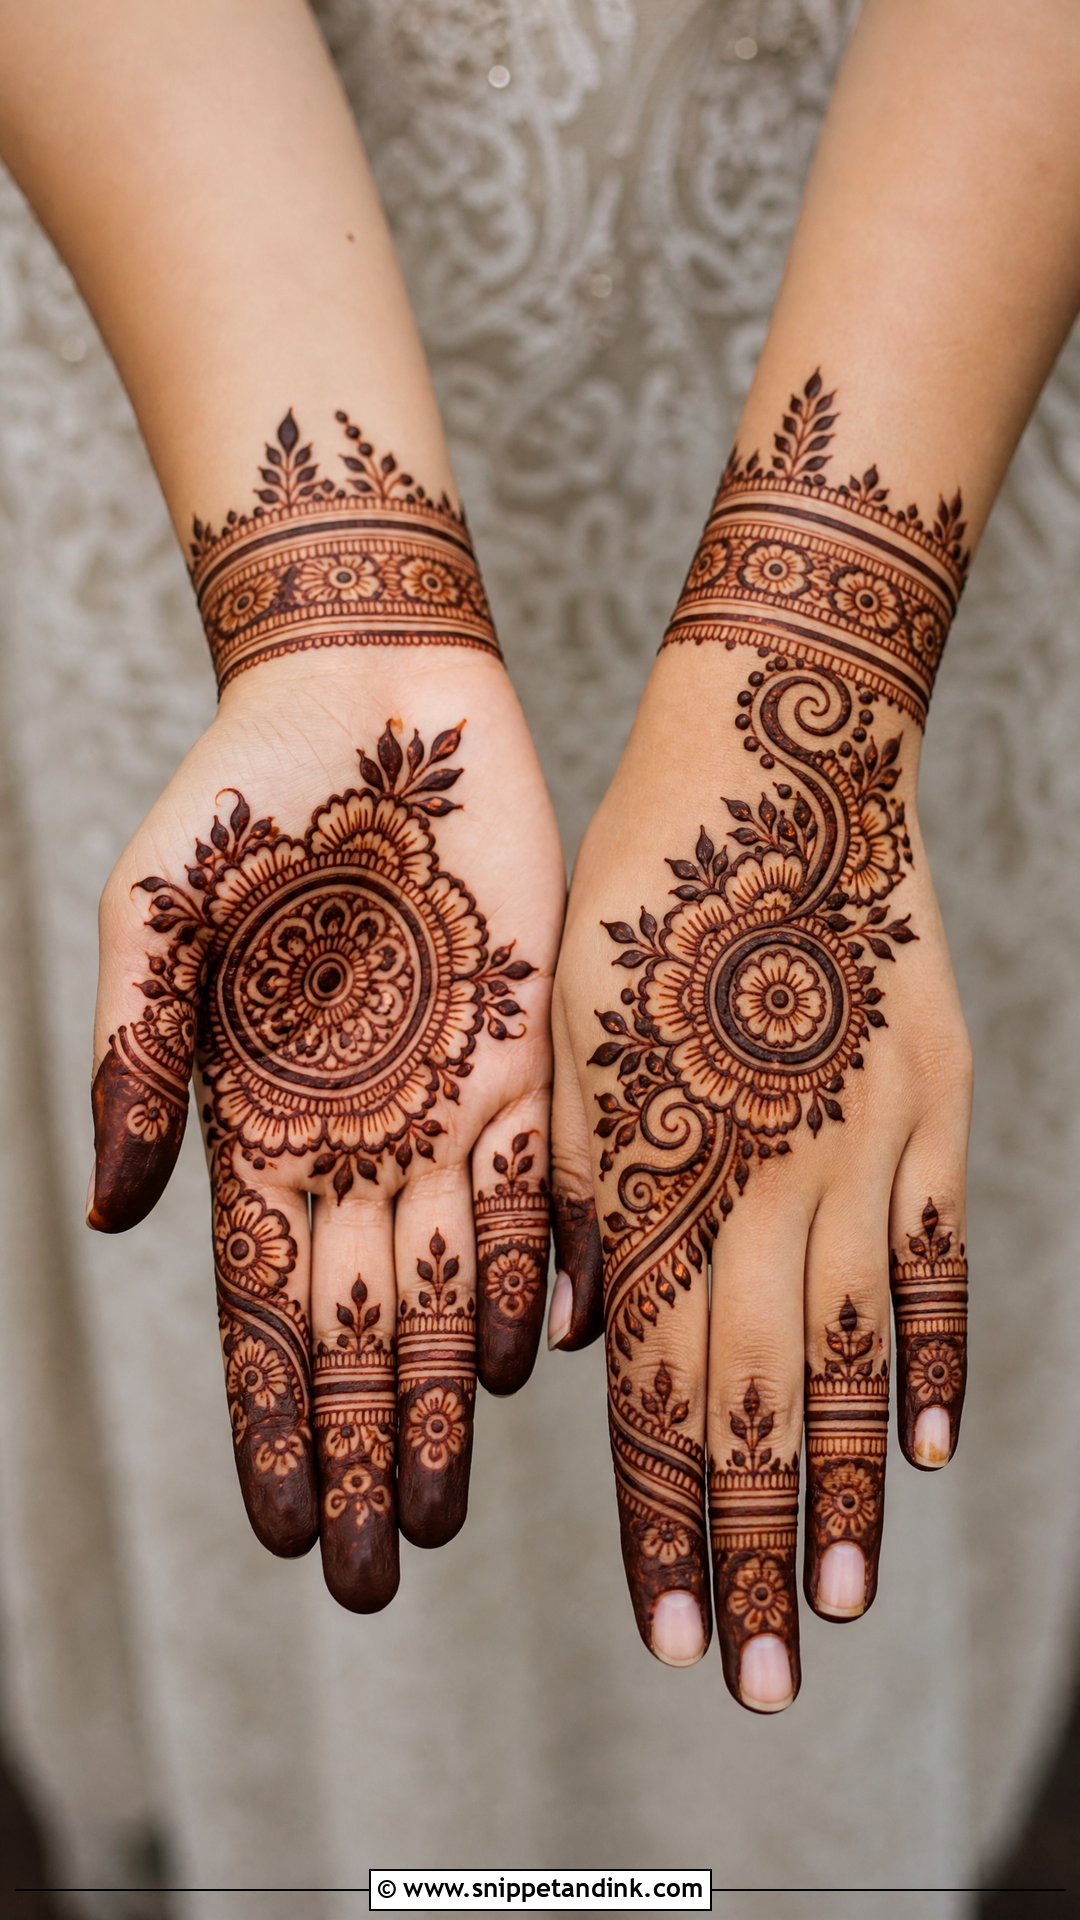
A half hand wedding mehndi design covers fingers, palms and wrists and stops before the mid-forearm. It can be traditional, Arabic, floral, mandala-based or Indo-Arabic, depending on your outfit. It’s far easier to sit through than full arm coverage. Where I stop the design matters: I end it at a clean band just above the wrist crease, so it looks finished instead of cut off when sleeves or bangles shift. Strong wrist bands, detailed fingertips and a clear centre motif keep it from looking casual.
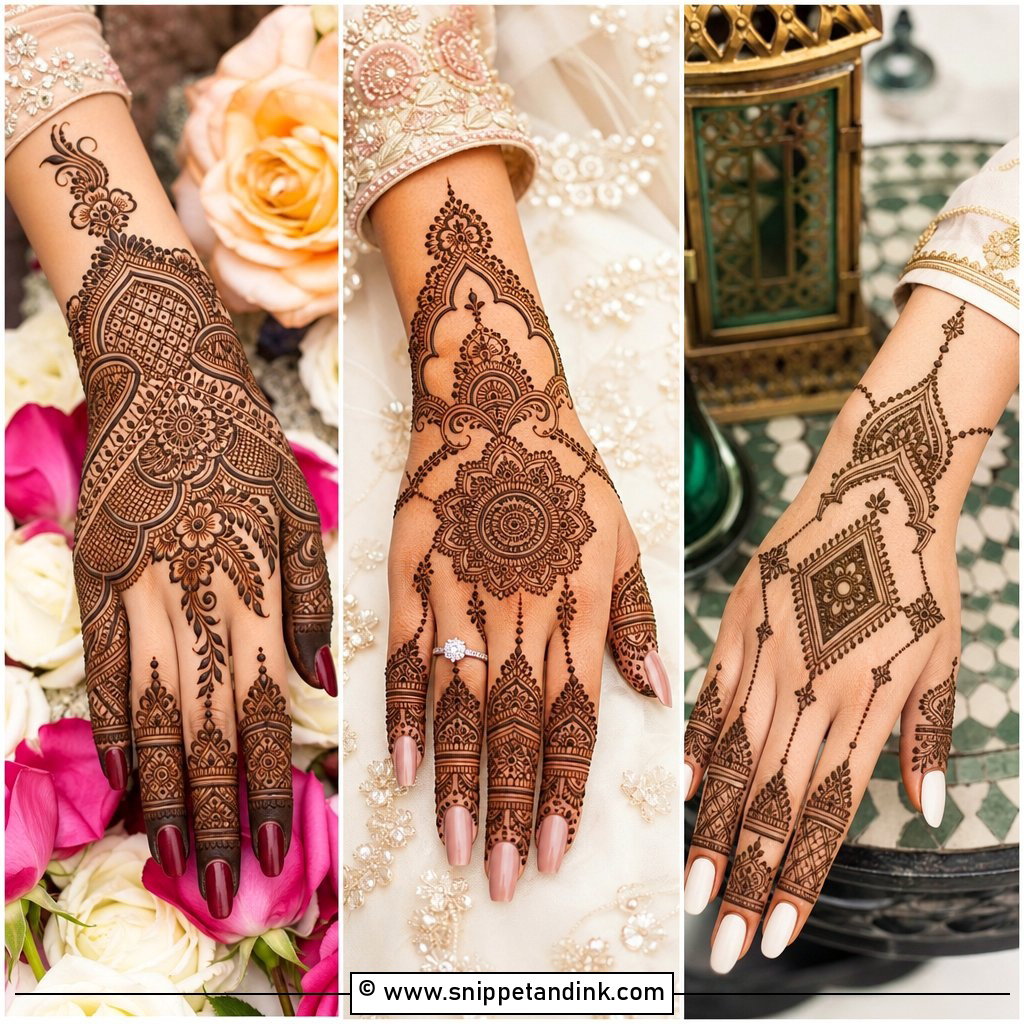
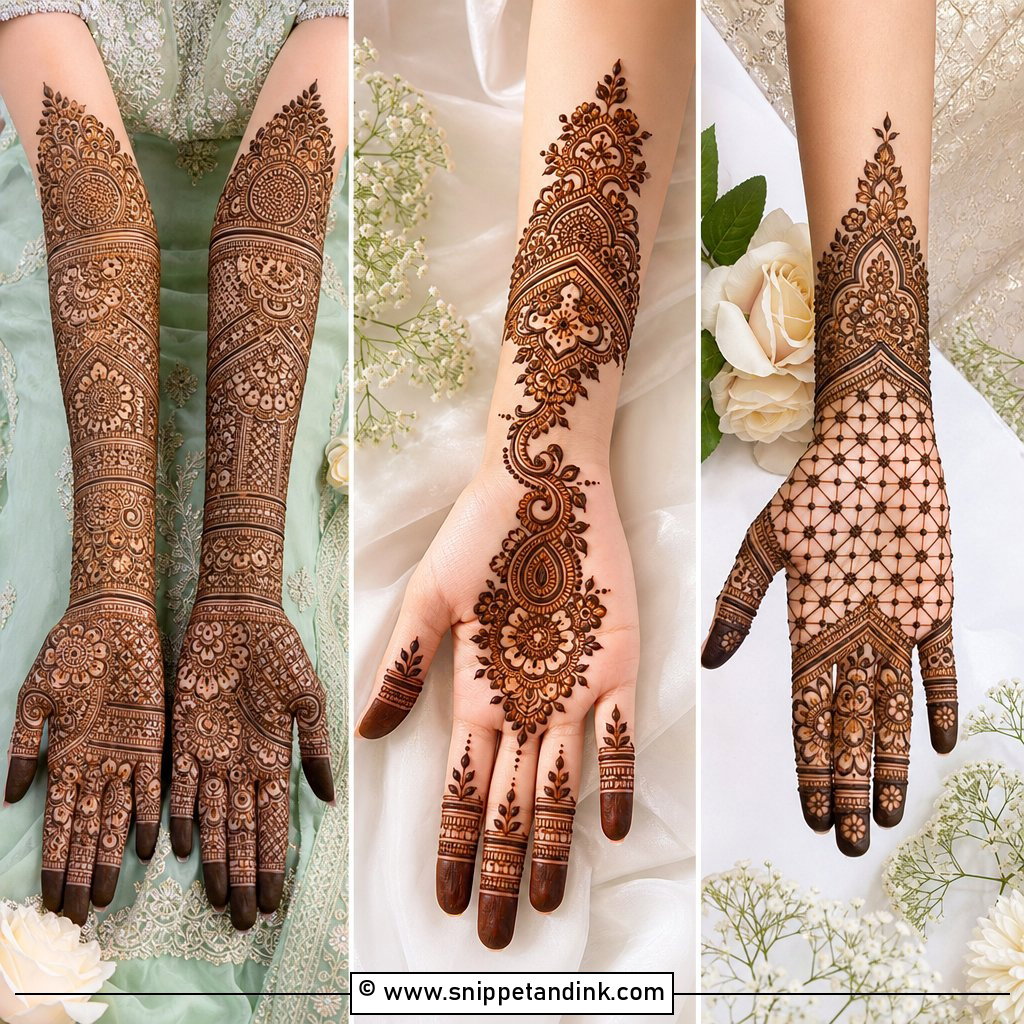
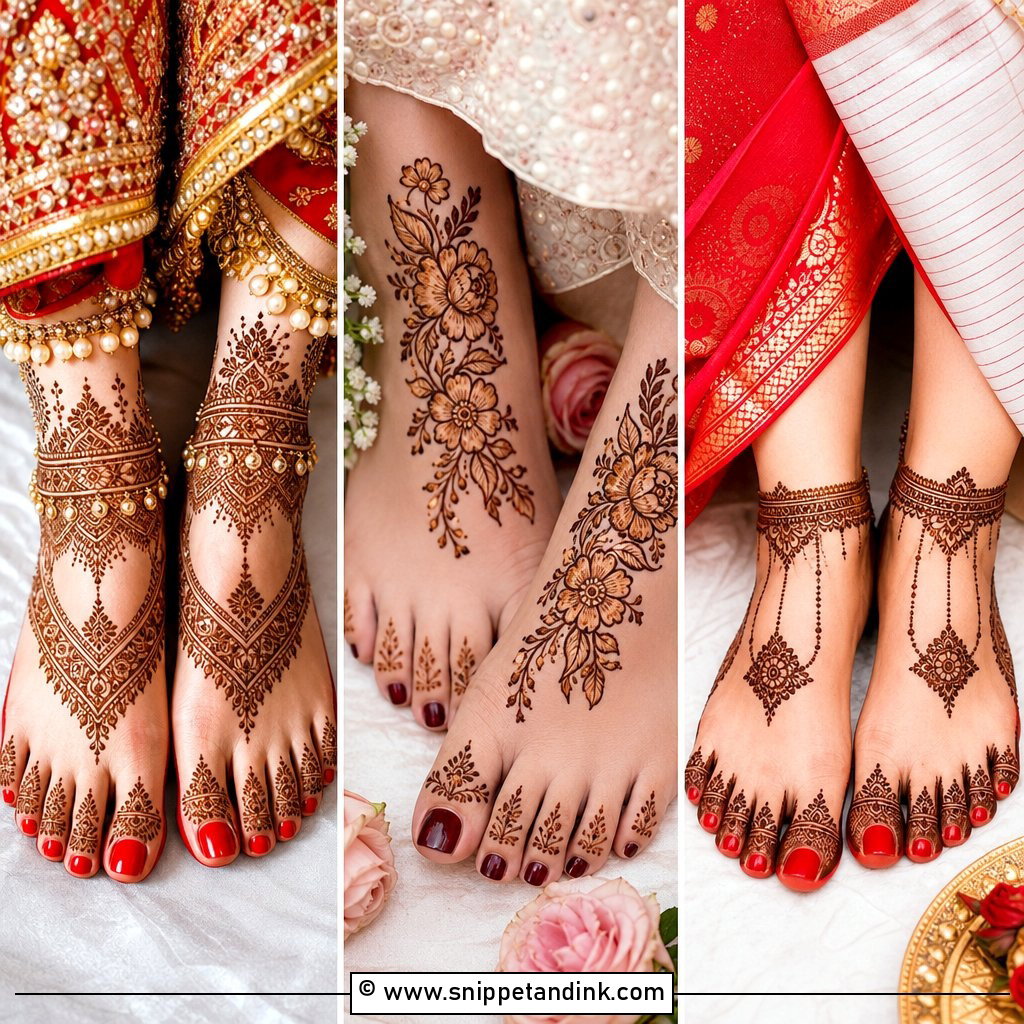
20. Modern Wedding Mehndi Design
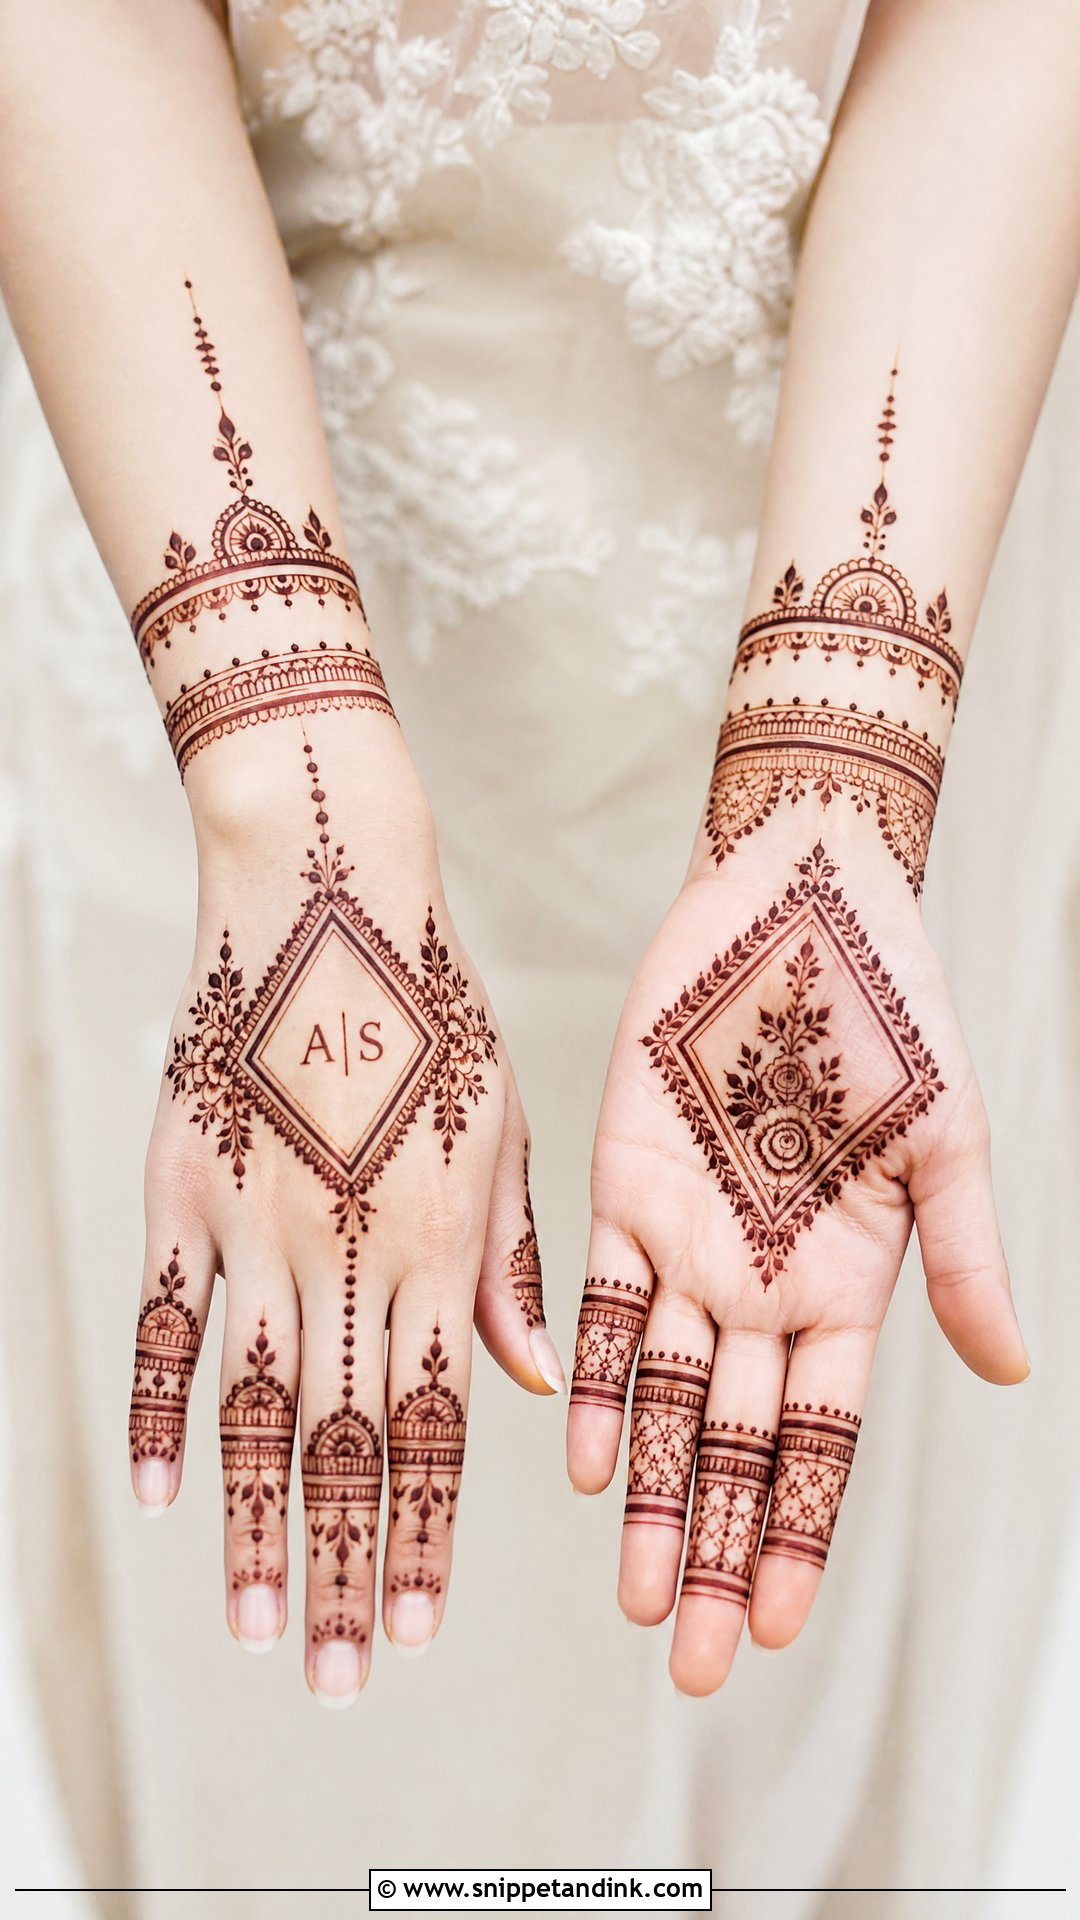
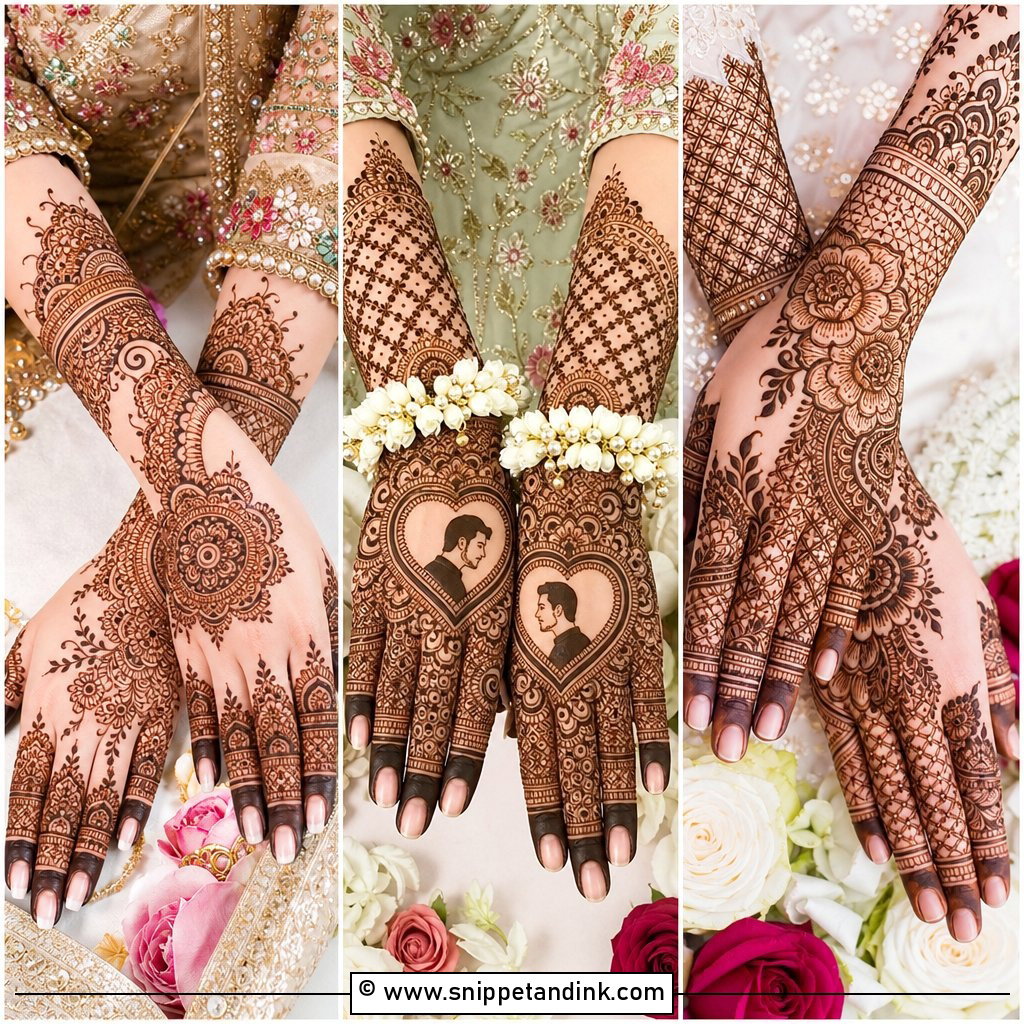
Modern mehndi uses negative space, geometric borders, delicate florals, initials, slim cuffs, clean finger work and sometimes an asymmetrical flow. Instead of filling every area, I let spacing highlight the main shapes, which means planning the layout before the first line goes on. It suits contemporary lehengas, fusion outfits, gowns and simple jewellery. The hands don’t need to mirror each other, but they should feel related: the same motifs, the same weight of line, so the pair looks considered in close-ups.
Getting the Stain From Orange to Deep Maroon
How dark your mehndi turns depends as much on the next day as on the paste. This is the aftercare I give every bride:
- Leave the paste on as long as you can. Six to eight hours is good; overnight is better.
- Once it starts drying, dab on a light lemon and sugar mix to keep the paste stuck to the skin. Don’t soak it.
- Wrap loosely or keep the hands warm. Warmth helps the dye develop.
- Scrape the dried paste off with a blunt edge or your fingers. Don’t wash it off.
- Avoid water on the design for as long as possible, ideally the rest of the day.
- Rub a little balm or natural oil over the stain before showers, and skip scrubs, waxing and hand sanitiser on those areas until after the wedding.
Expect the palms and fingertips to stain deepest and the forearms and back of the hands to come out lighter. That’s how skin works, not a sign of bad paste. Manicures should be done before your mehndi, not after, since soaking and buffing will lift the colour.
Your Hands Will Carry This Design for Two Weeks
The right mehndi for you depends on your outfit, ceremony, comfort and how much time you can give the artist. Some brides want dense traditional hands with paisleys and peacocks; others want Arabic trails, a single mandala, jewellery patterns or modern open space. Whatever you pick, it should look good in real life and clear in photos. Before your appointment, save a few references, decide on coverage, and mention any initials, dates or personal details you want hidden in the design. Pick a layout that suits your hands and your schedule, and look after the paste once it’s on.
You'll Like These Ideas:


Leave a Reply