
A bridal design starts long before the cone touches skin. When a bride sits down with me, I want to know three things first: what she’s wearing, how many hours she can realistically sit still, and how dark she hopes the stain will be on the wedding morning. The ideas below run from dense Rajasthani storytelling to airy Arabic trails, with portraits, lotus work, jaali and quieter modern layouts in between. Read them with your own hands in mind, because finger length, skin tone and the jewelry you’ll stack on top all change which of these will actually look right on you.
Why Your Palms Stain Darker Than Your Forearms
Henna dye binds to the outer layer of skin, and that layer is thickest on the palms, fingertips and soles. Those areas come out deepest. The back of the hand stains a step lighter, the forearm lighter again, and the upper arm lightest of all. I plan every bridal layout around this, putting the details that matter most, a portrait, a name, a central mandala, where the color will be strongest.
It also explains why two brides with the same design end up with different results. Body warmth, how long the paste stays on, and how much the skin is washed in the first day all shift the final color. Cooler hands tend to stain lighter, which is why I ask brides to keep warm while the paste is on.
What I ask at a consultation
- Your outfit and its embroidery, so motifs can echo it
- How long you can sit, honestly, including breaks
- Whether you’ve had henna before and how it stained
- Any skin sensitivity, since I always want a small patch test with my paste beforehand
- Where rings, bangles and kalire will sit, so I don’t hide fine work under them
1. Full Hand Indian Bridal Mehndi Design
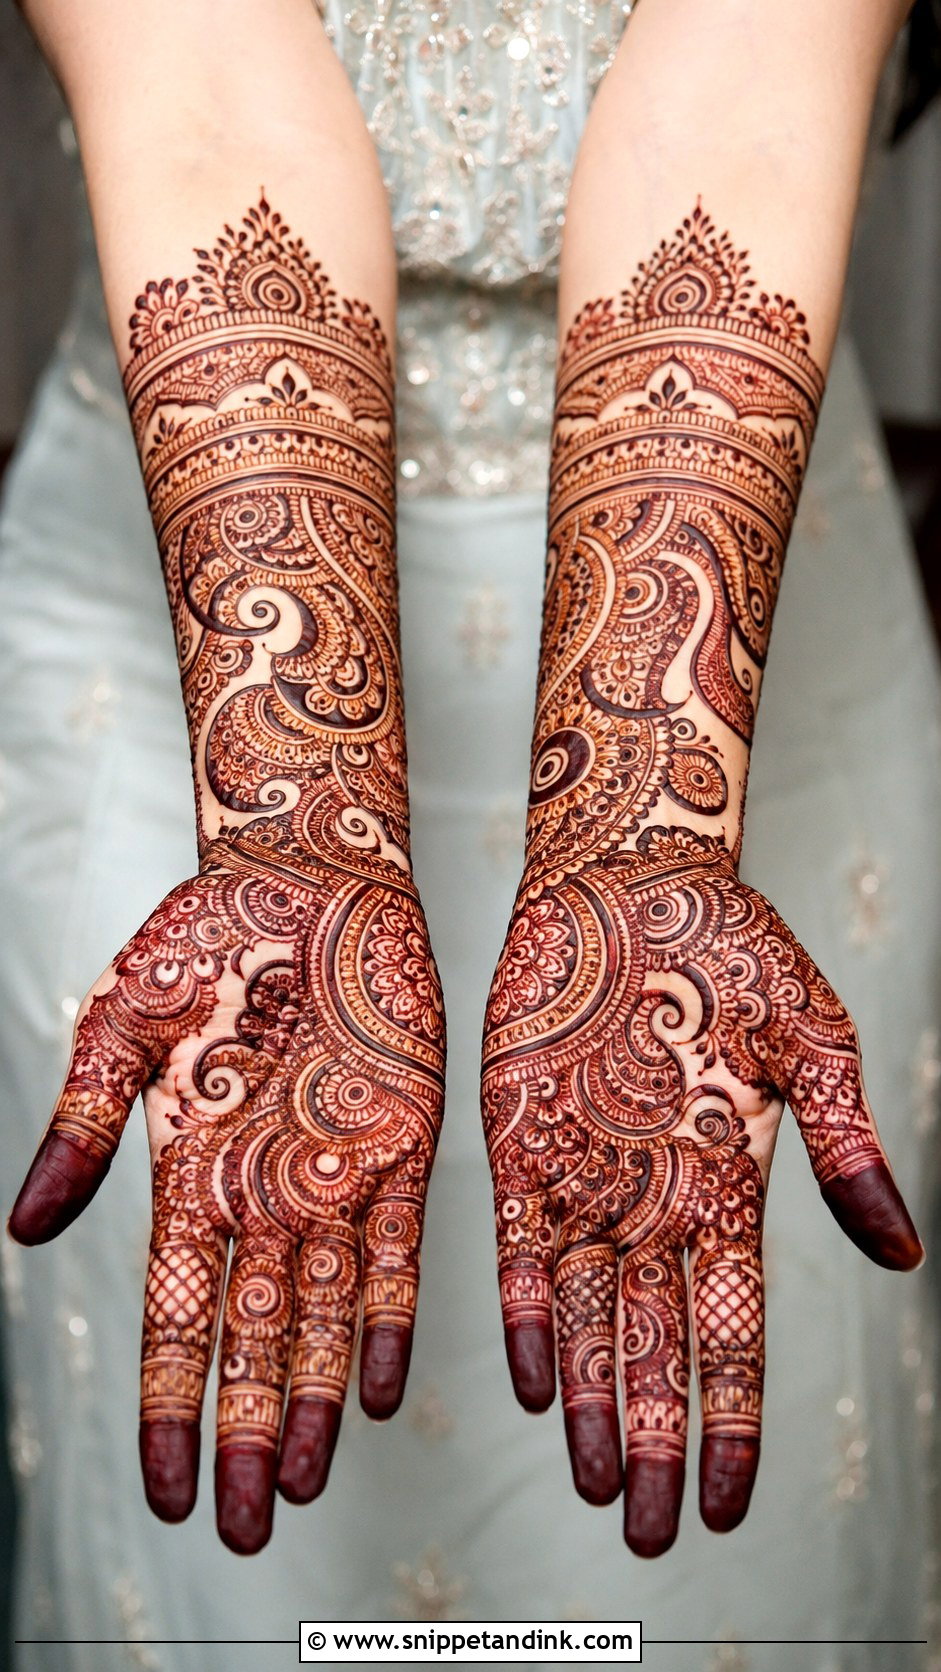
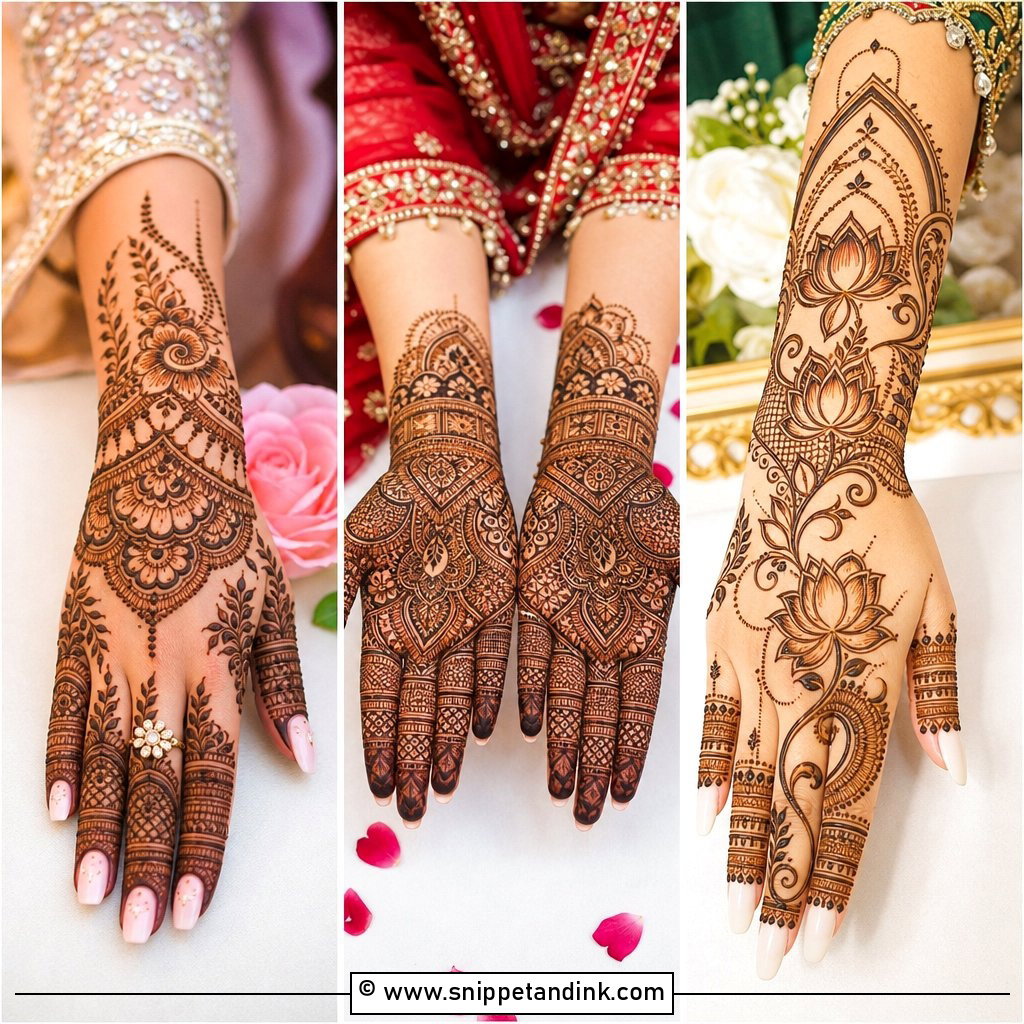
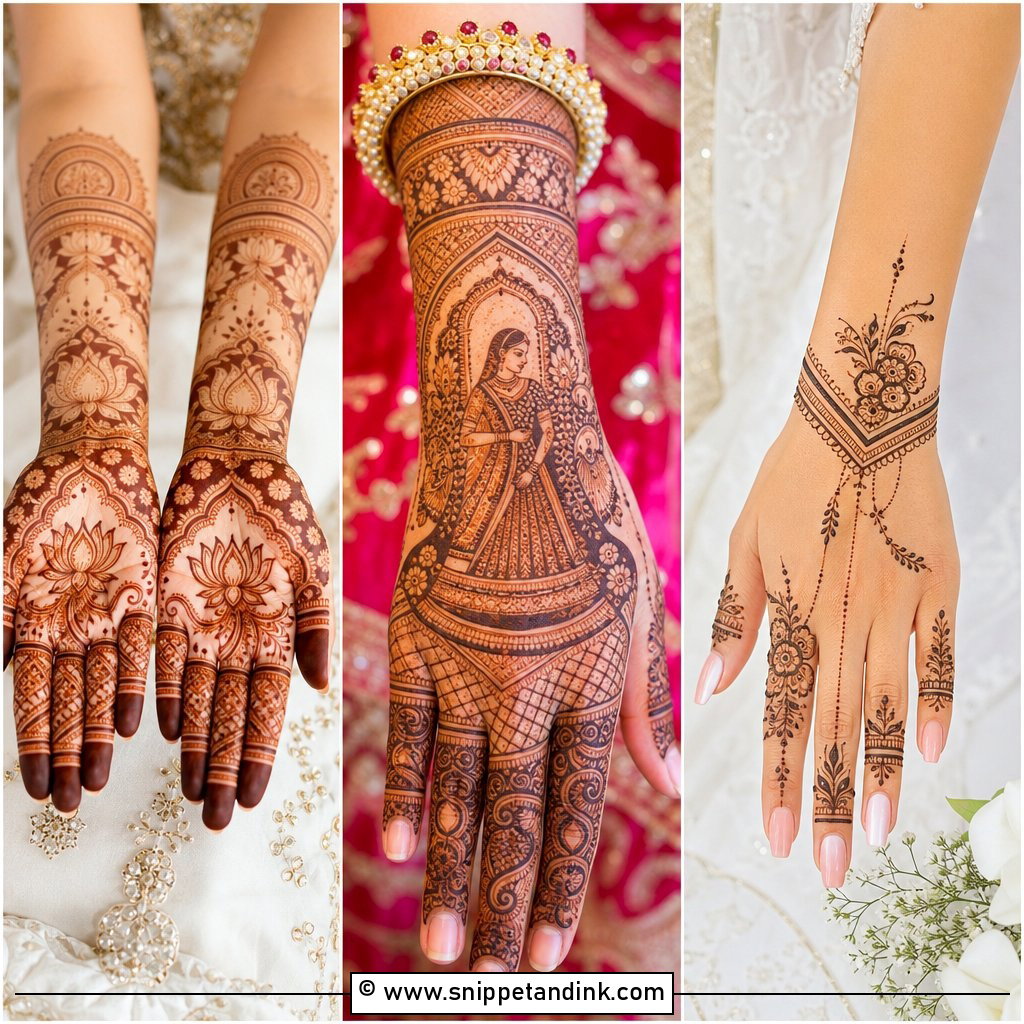
This is the design most families picture when they say “bridal mehndi”: palm, fingers, wrist and forearm packed with paisleys, florals, mandalas and peacocks, held together by fine filler. It matches heavily embroidered lehengas and sarees because the hands carry the same level of detail as the fabric. Plan for a long sitting. I always block out the central palm motif first and keep a thin open margin around it, otherwise the filler creeps in and the focal point disappears in photos. Initials or a date tuck in easily among the small details.
2. Arabic Bridal Mehndi Full Hand
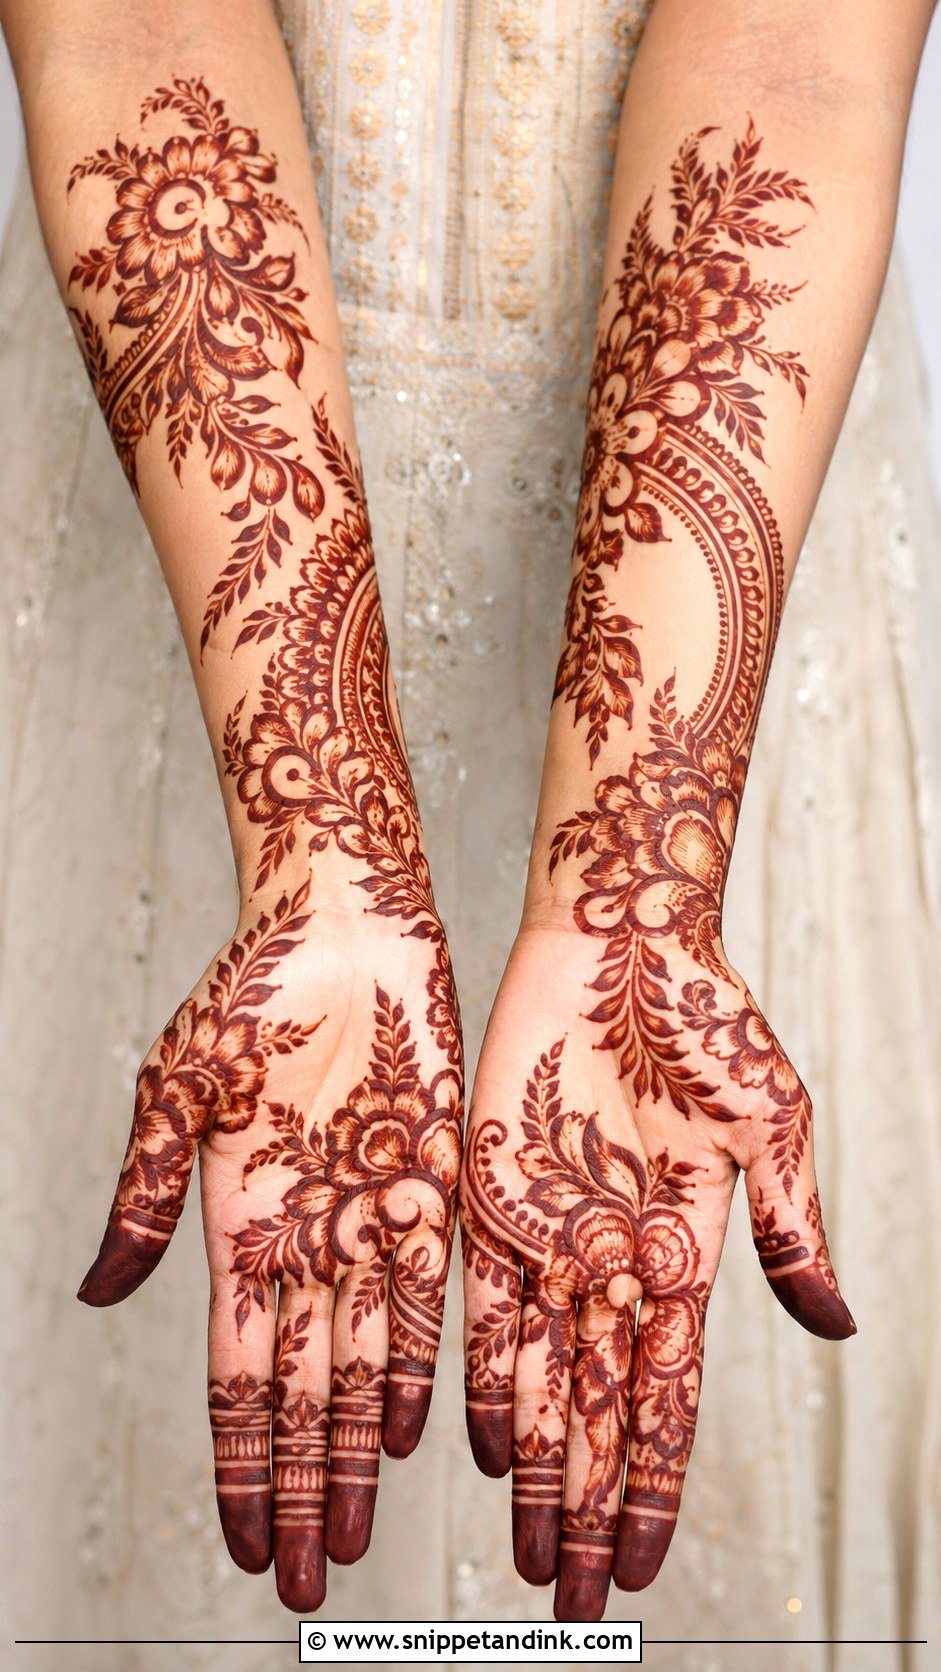
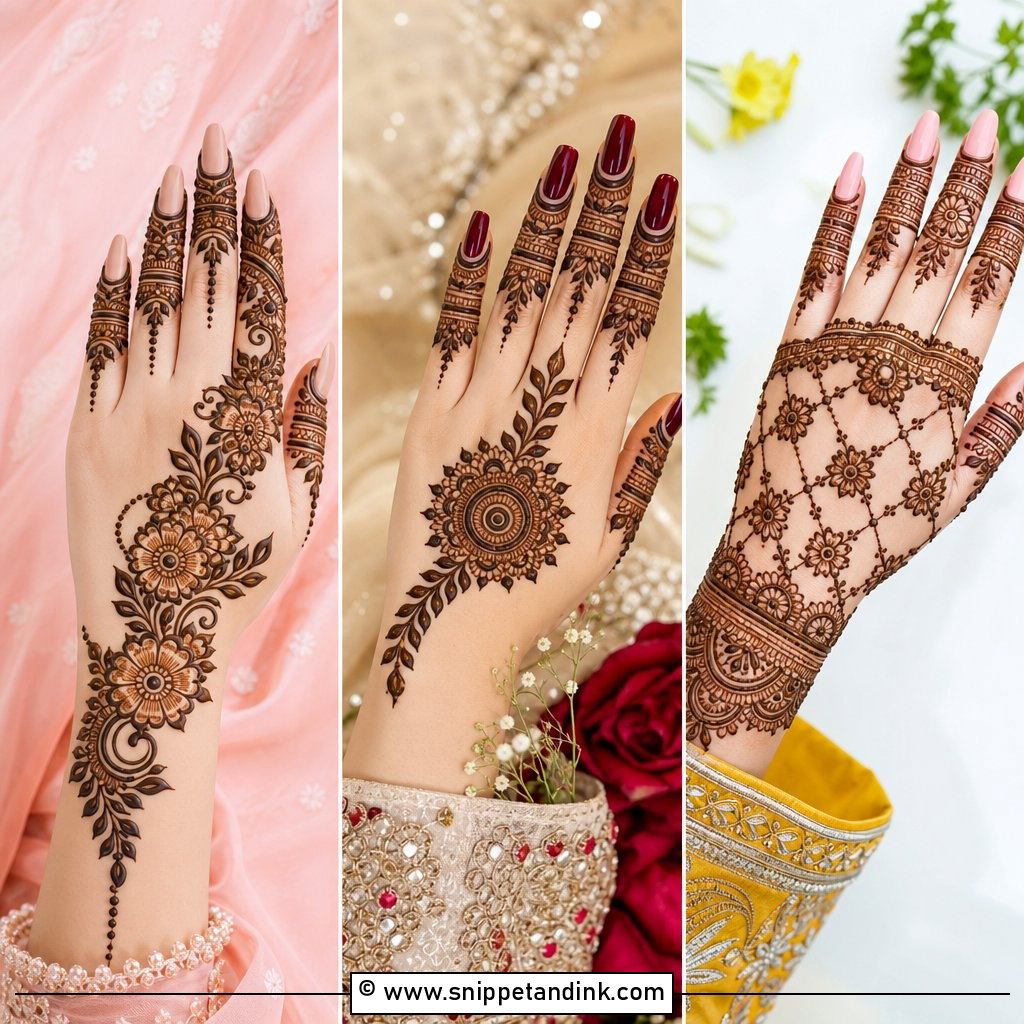
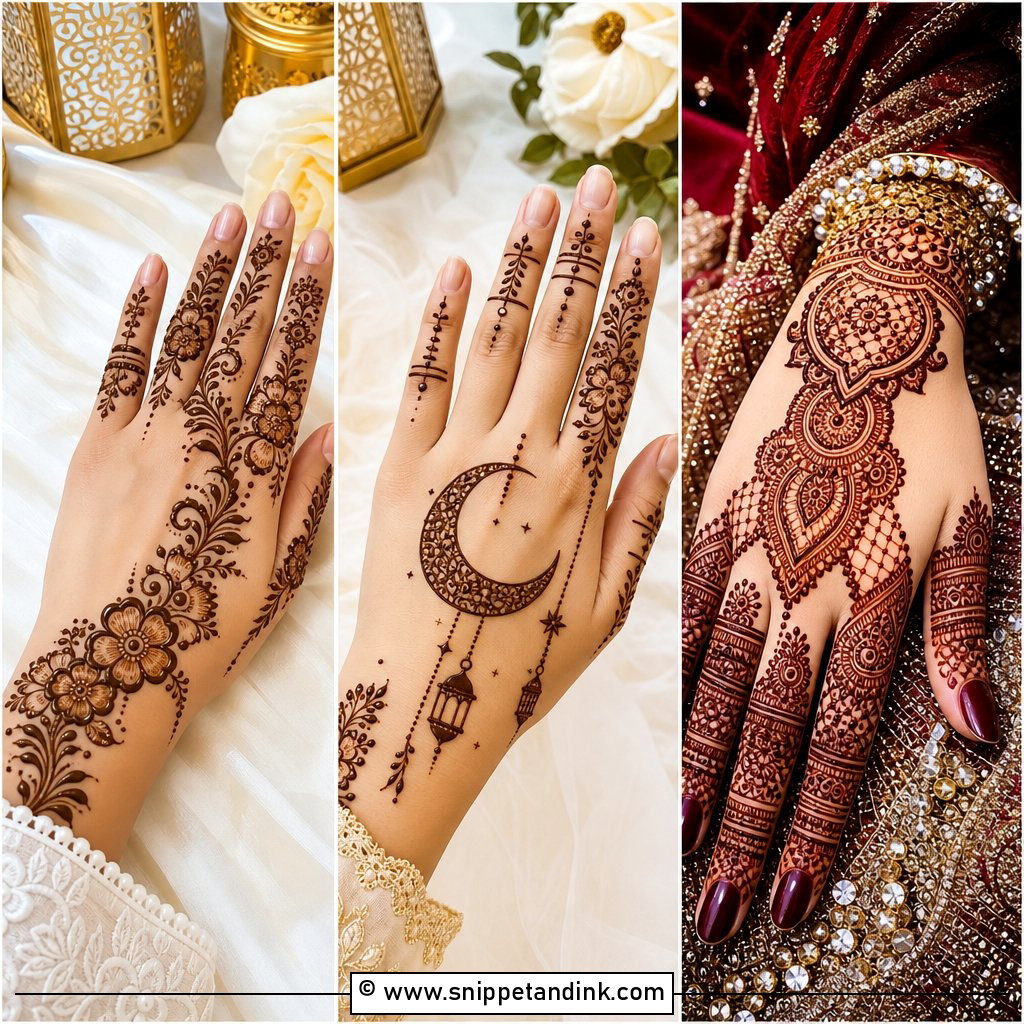
Arabic layouts give you drama with far less density. Big floral vines and leaves run diagonally from the fingertips to the wrist, and the open skin between them is part of the design. That diagonal is the real reason they flatter: it pulls the eye along the hand and makes it read longer. I use a thicker cone line here than for Indian work, since bold petals need a solid deposit of paste to stain evenly. To push it toward bridal, I add shaded roses, a cuff at the wrist and filled fingertips.
3. Indo Arabic Bridal Mehndi Design
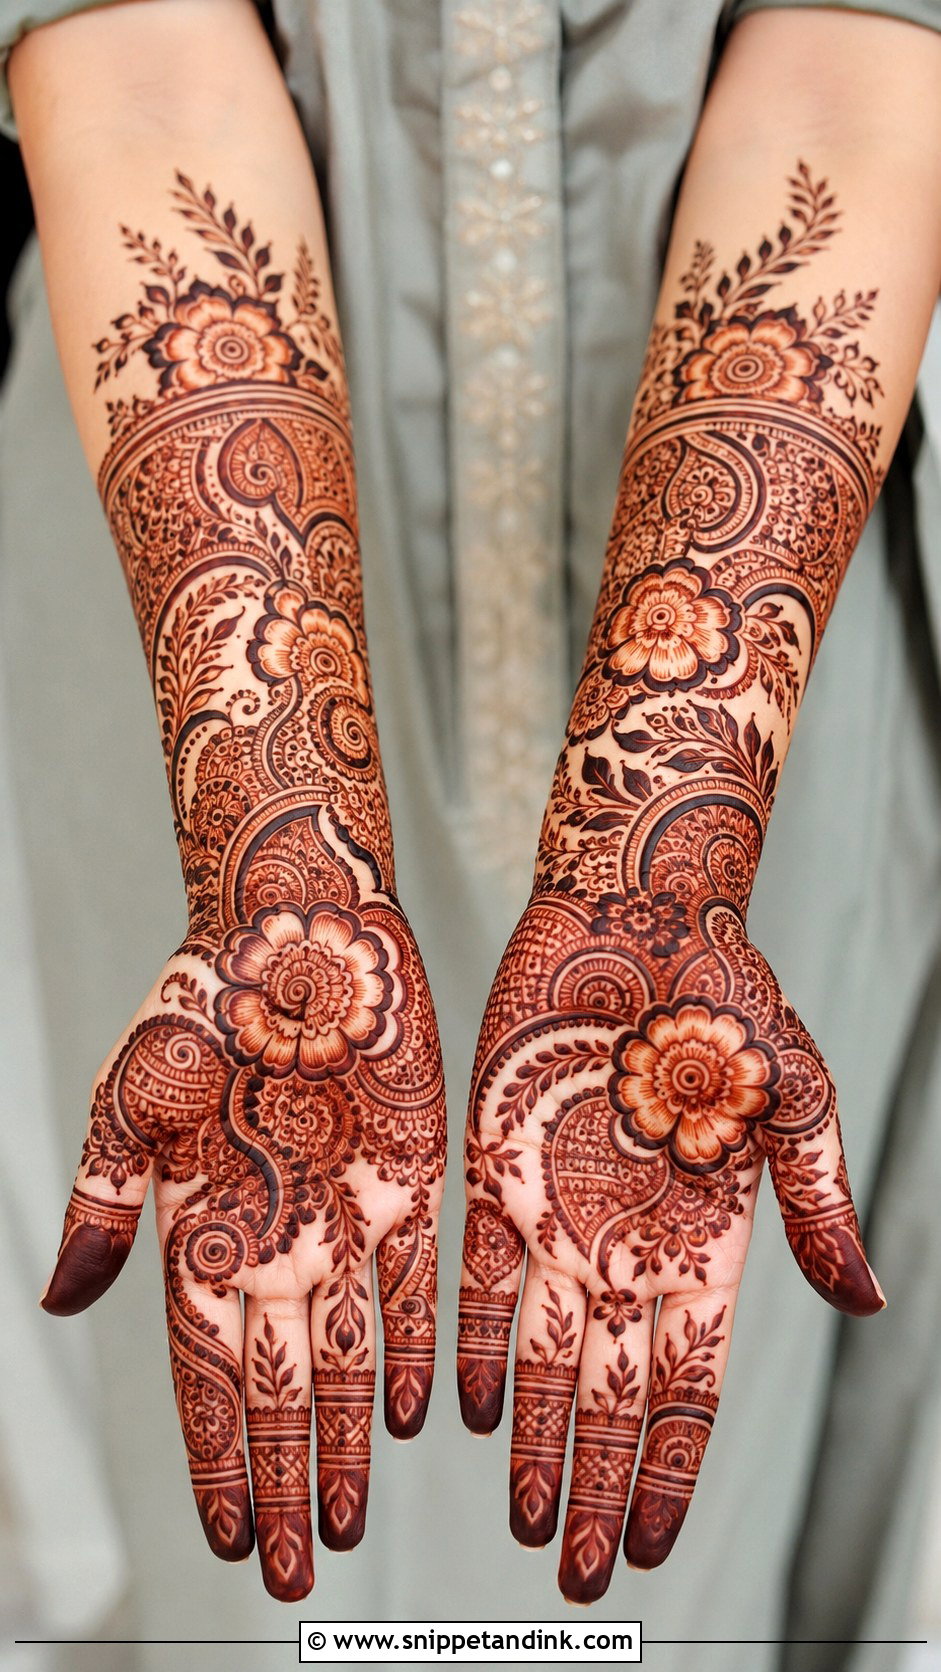
Indo-Arabic takes the flowing frame of Arabic work and fills parts of it with Indian detail, so you get coverage that still breathes. My usual plan is bold floral trails as the skeleton, then mandalas, paisley borders and fine dots inside selected spaces. It balances well on both the front and back of the hand. Ask for heavier fingertips and a decorated wrist cuff, and choose one personal element rather than five. Too many hidden extras turn this style back into a crowded full-hand design.
4. Pakistani Bridal Mehndi Full Hand
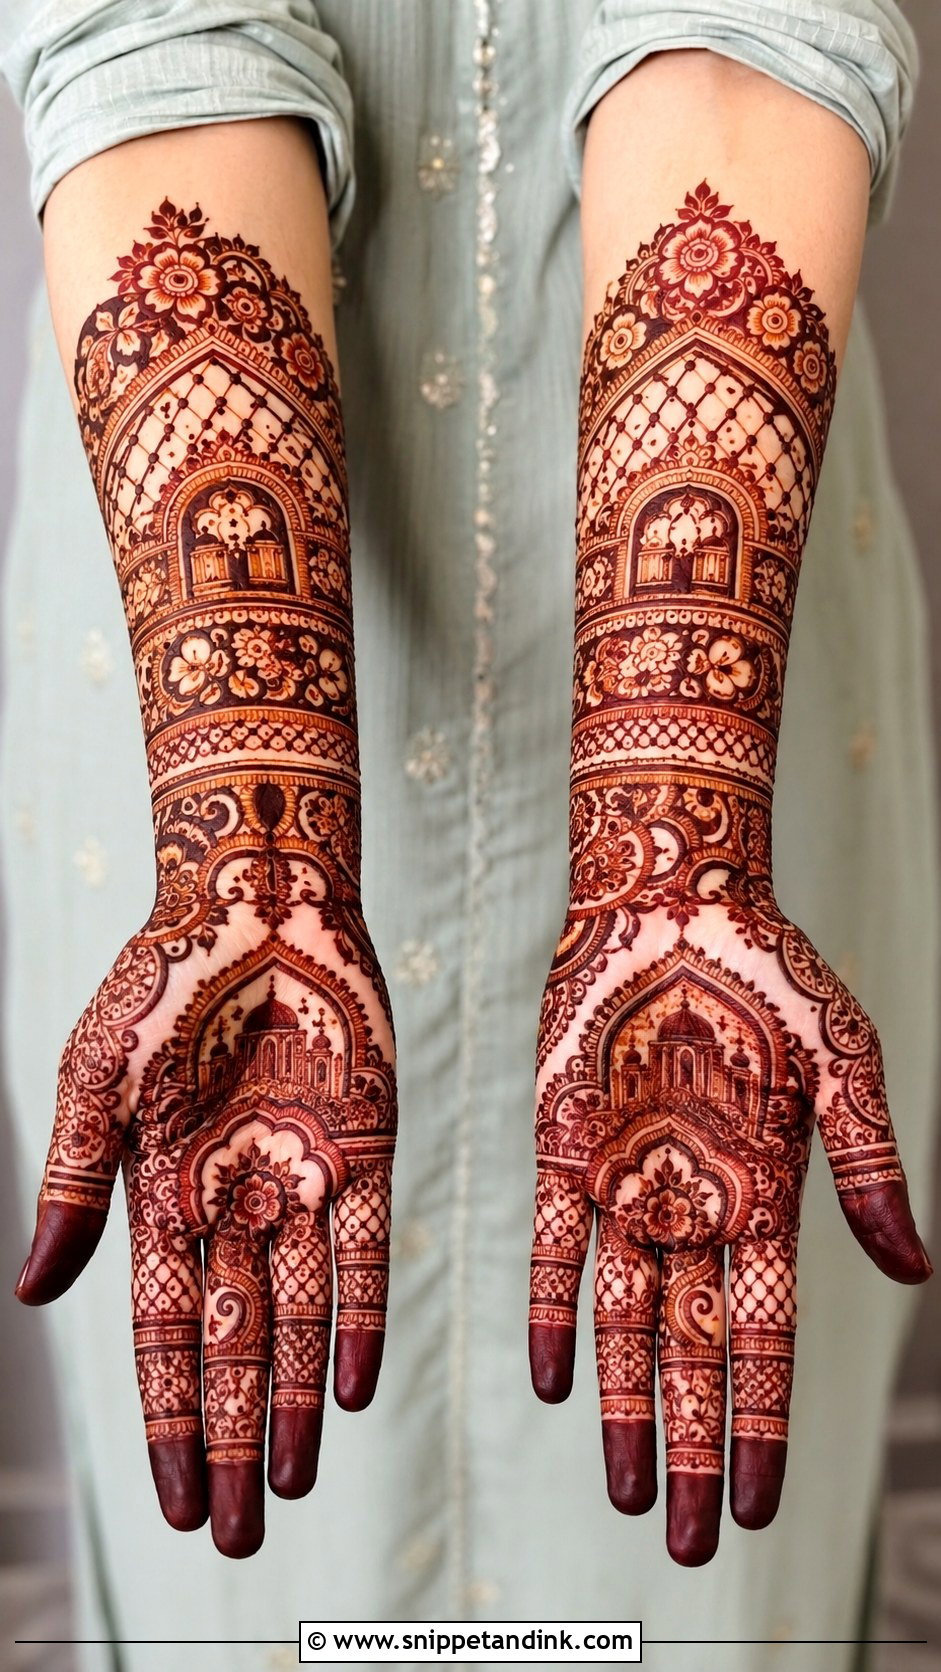
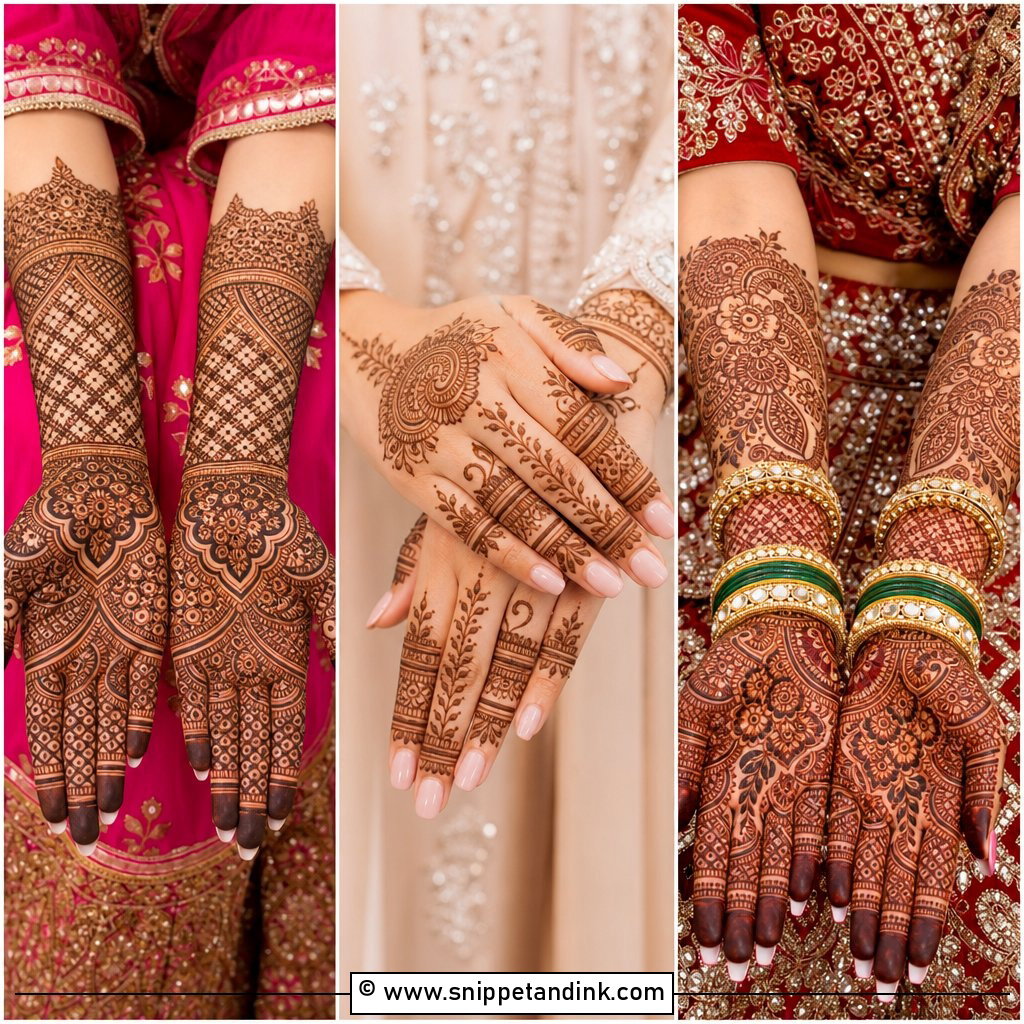
Pakistani bridal mehndi full hand designs are dense but disciplined. You’ll often see domes, floral bands, paisleys and jaali panels arranged with careful symmetry from fingertip to forearm. The symmetry is what makes or breaks it: if the left and right hands don’t mirror each other, it shows the moment you hold them up together. I draw guide points along both forearms before filling anything. It sits naturally with shararas, ghararas and heavily worked dupattas, as long as one clear palm motif leads and everything else supports it.
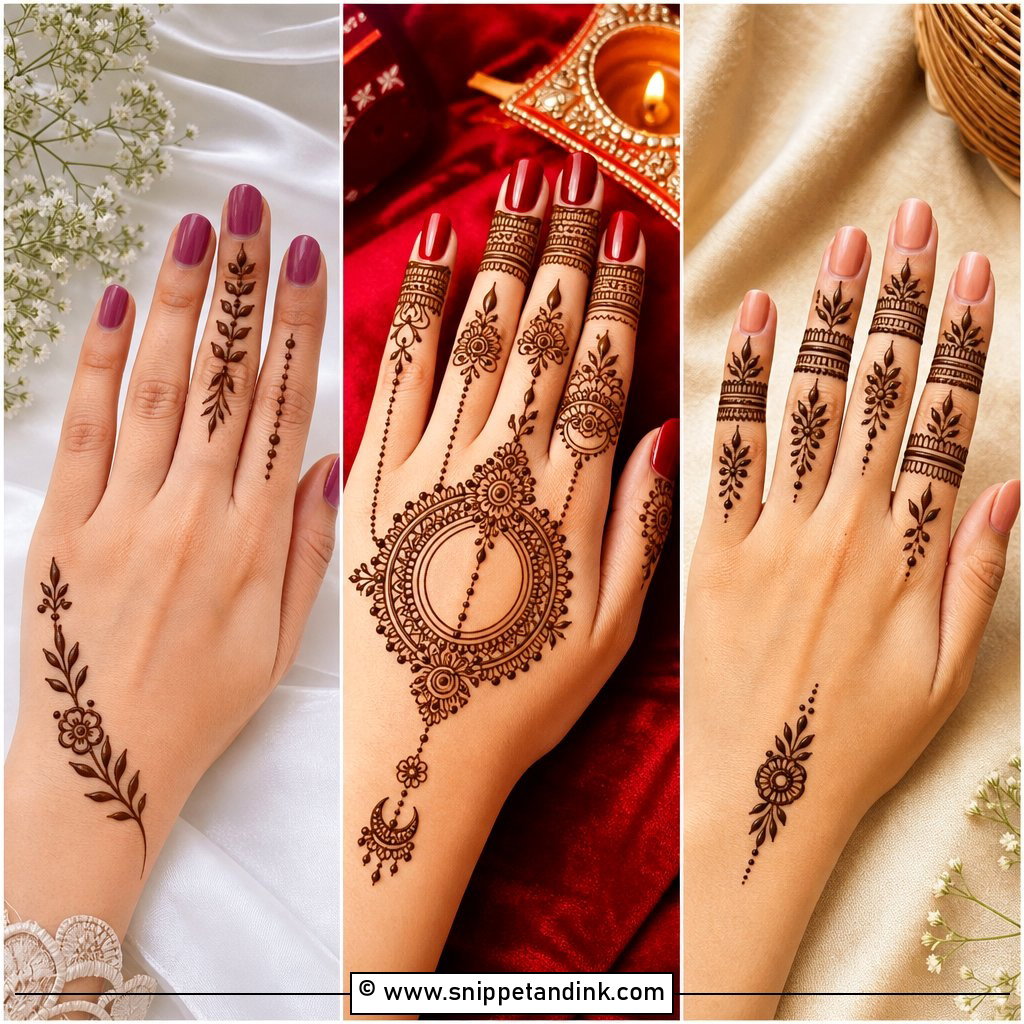
5. Rajasthani Bridal Mehndi Design
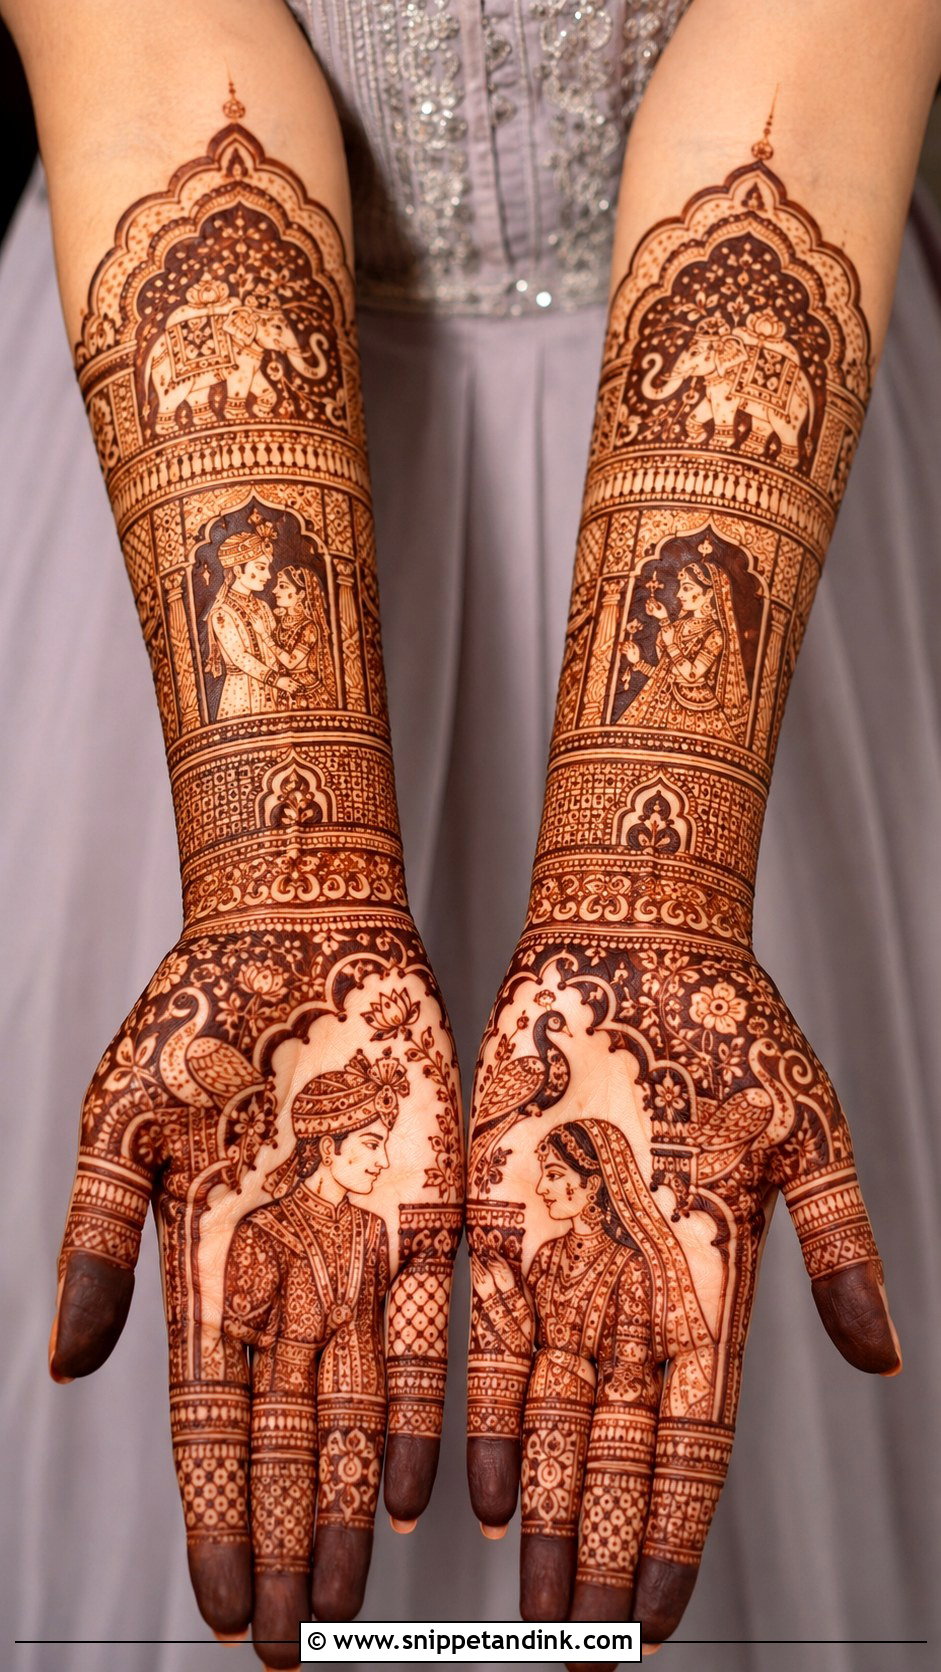
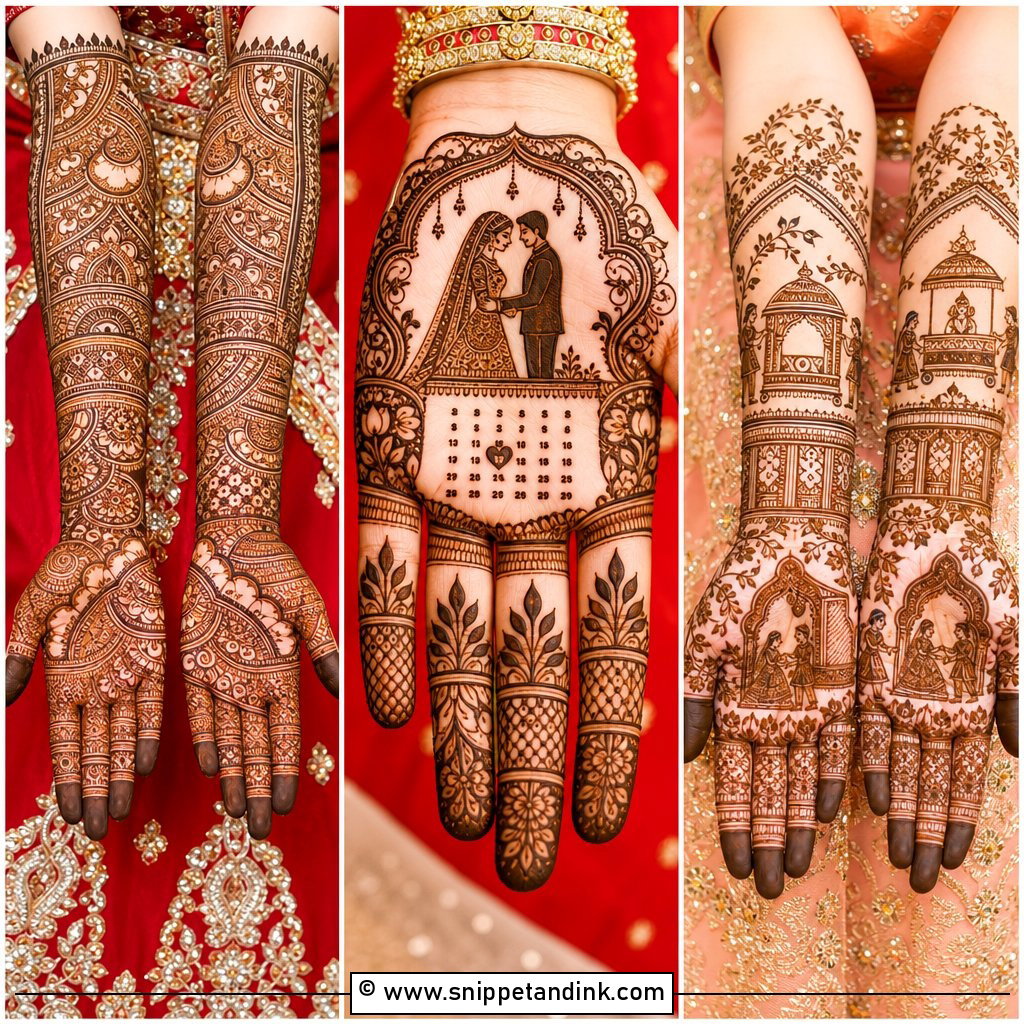
Rajasthani work tells a story: bride and groom figures, elephants, peacocks, a palanquin, lotus panels and royal arches, often running close to the elbow. It suits heritage outfits and long ceremonies where the hands are on display. The line work has to be steady and fine, so look closely at an artist’s figure work before booking. A doli scene or your partner’s initials hidden in a paisley personalise it. One honest warning: this much detail on the forearm stains lighter than the palm, so expect the story to read softer near the elbow.
6. Marwari Bridal Mehndi Design
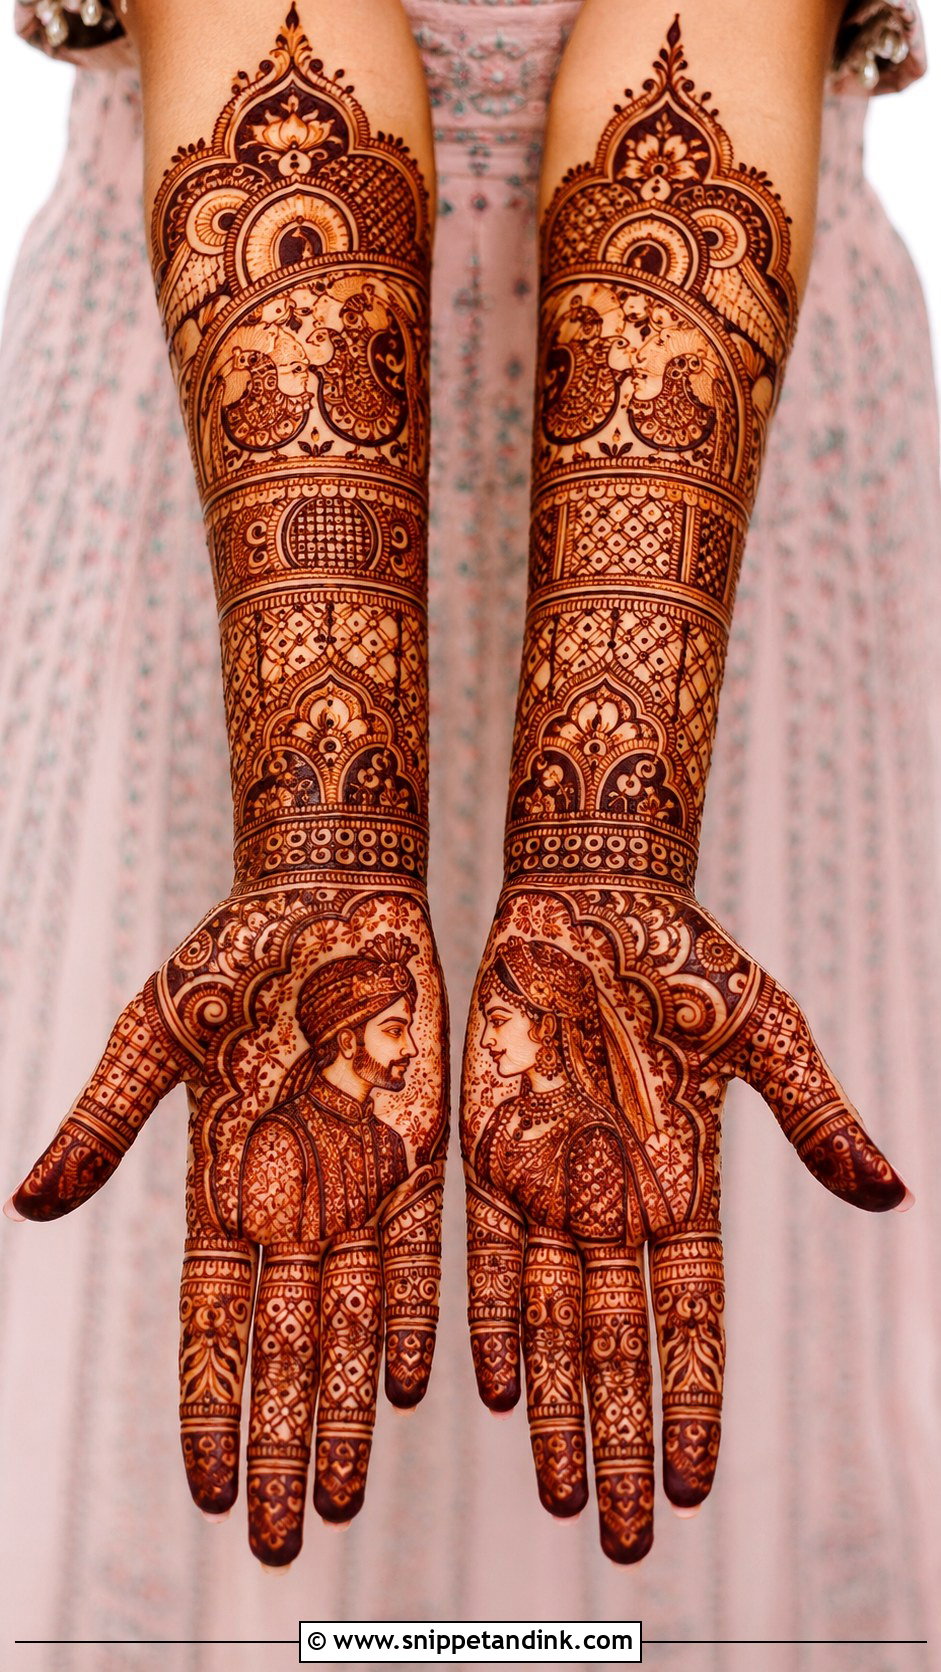
Marwari designs leave almost no bare skin. Bride-groom portraits, paisley grids, peacock curves and mandala centres fill the hands, and once the stain matures the whole hand reads as one deep, rich surface. Red, maroon, orange and gold outfits all sit well against it. The trap is mud: when everything is equally dense, nothing stands out. I divide the hand into zones, palm story art, wrist bangle bands and forearm panels, with a thin unfilled line between each so the eye can rest.
7. Rajputi Bridal Mehndi Design
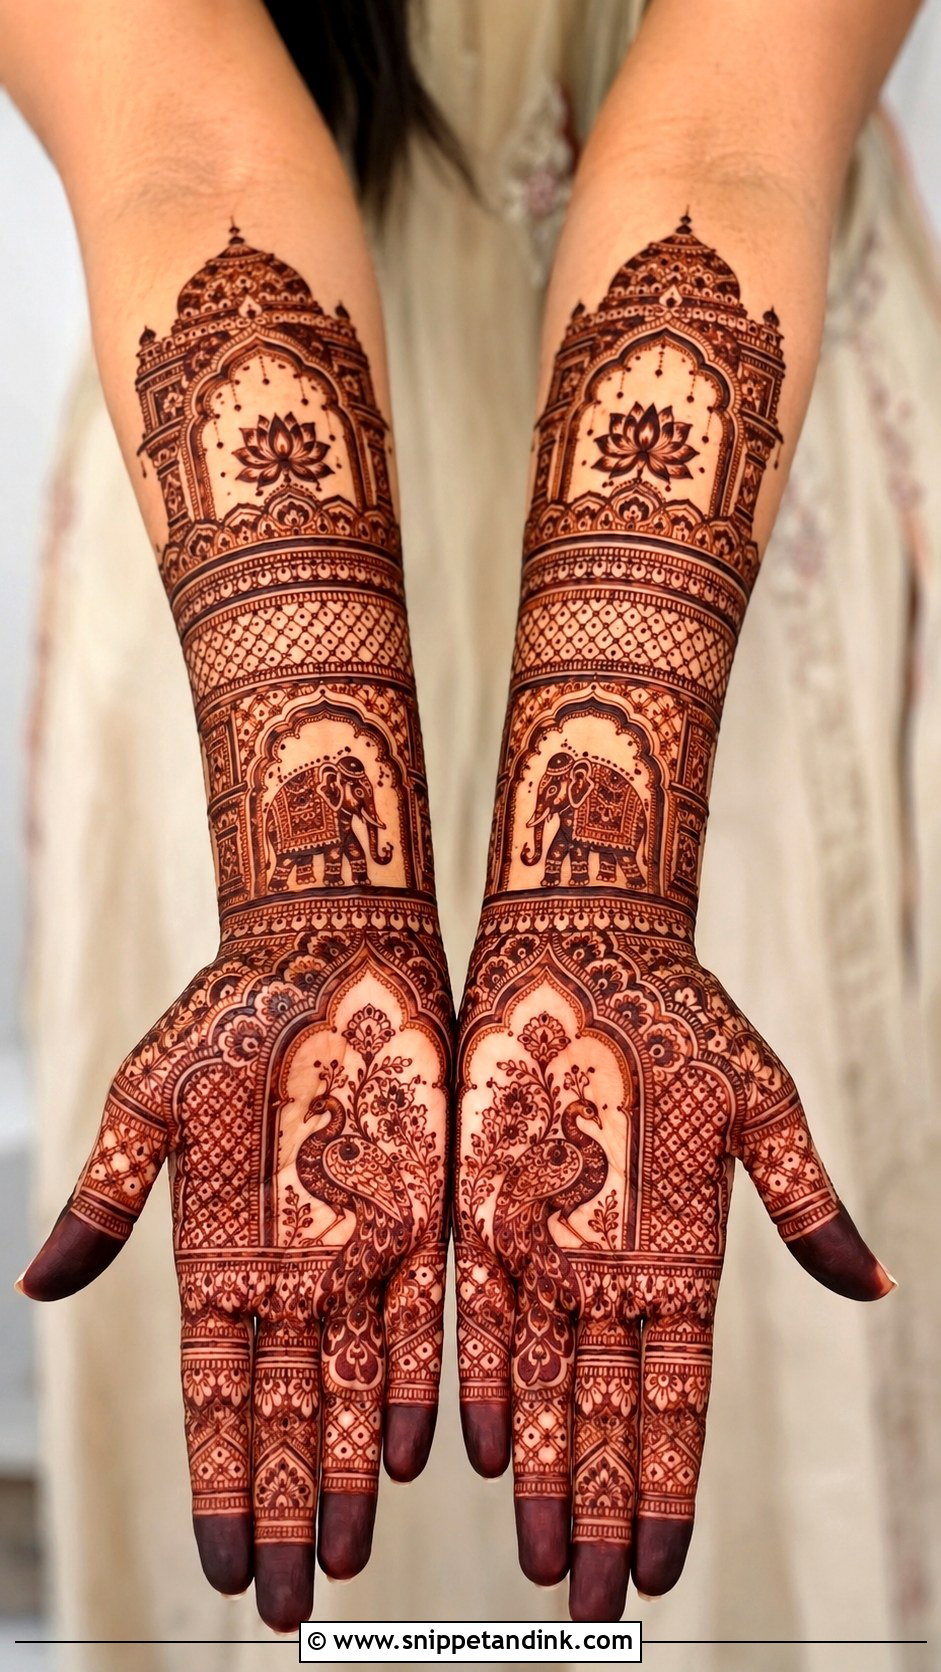
Rajputi mehndi is ordered and symmetrical, built from palace arches, lotus motifs, peacocks, elephants and fine jaali bands that climb the forearm. Next to a Rajputi poshak and heavy jewelry, it looks like part of the outfit rather than an extra. I usually put a mandala or a couple portrait in the palm and keep the forearm for decorative panels and borders. If your embroidery has a heritage motif, bring a photo of it; I can repeat that shape in the cuff so the hands and fabric speak the same language.
8. Bridal Mehndi Design With Bride And Groom Portrait
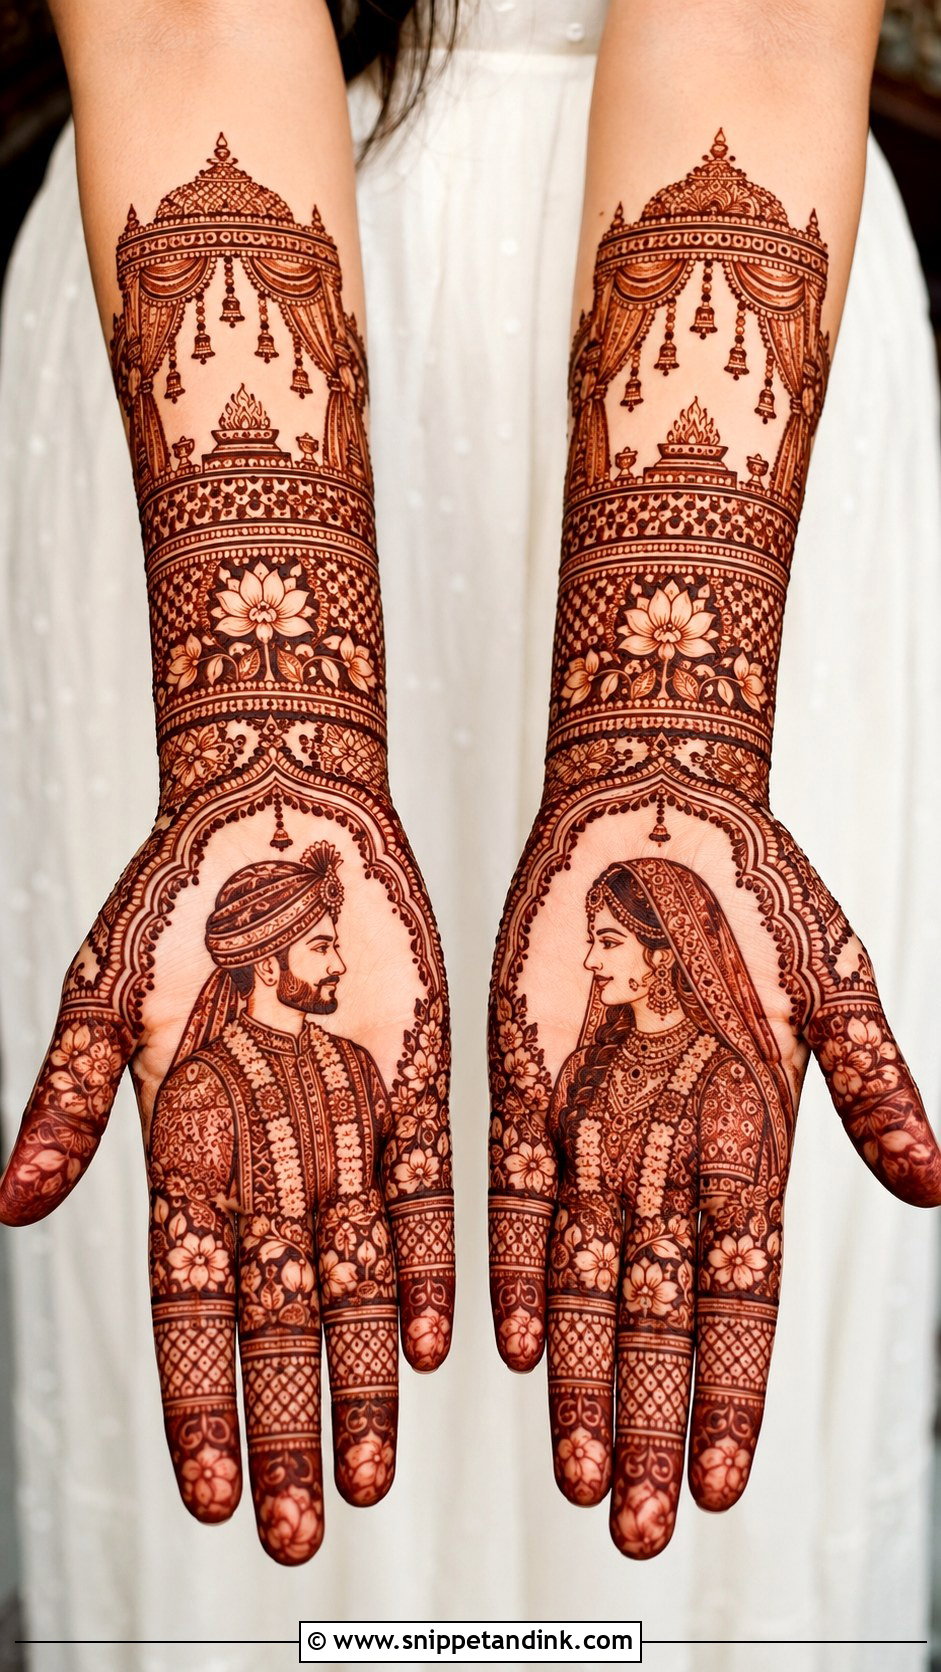
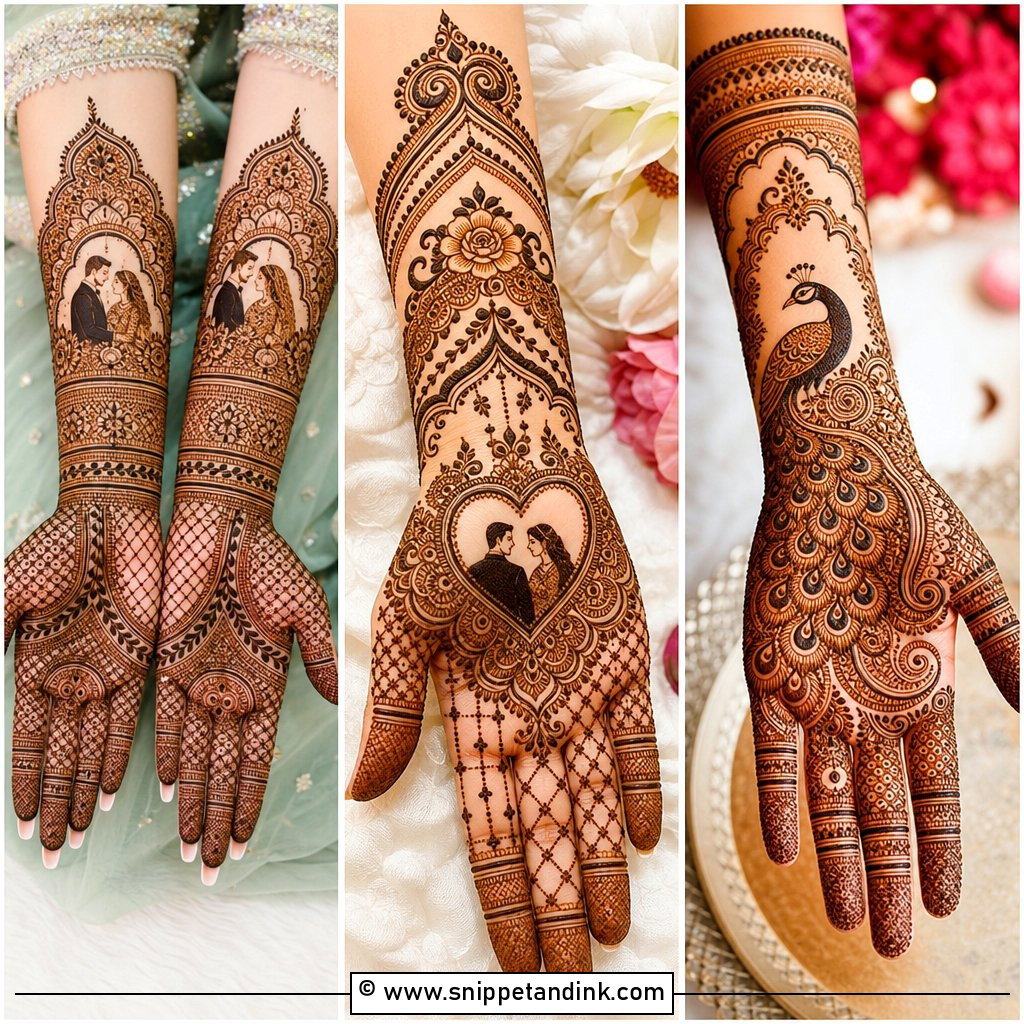
Splitting a portrait across two palms, bride on one and groom on the other, gives you a photo moment when the hands meet. Mandap details, garlands, a doli or your date can surround them. Faces need room, so this only works in full-hand or forearm layouts. Portrait henna is a specialist skill; a slightly wrong eye or jaw changes the whole expression, so ask any artist to show you portraits they’ve drawn on real hands, not just on paper. I keep the surrounding pattern lighter so the faces stay the focus.
9. Bridal Mehndi Design With Groom Name
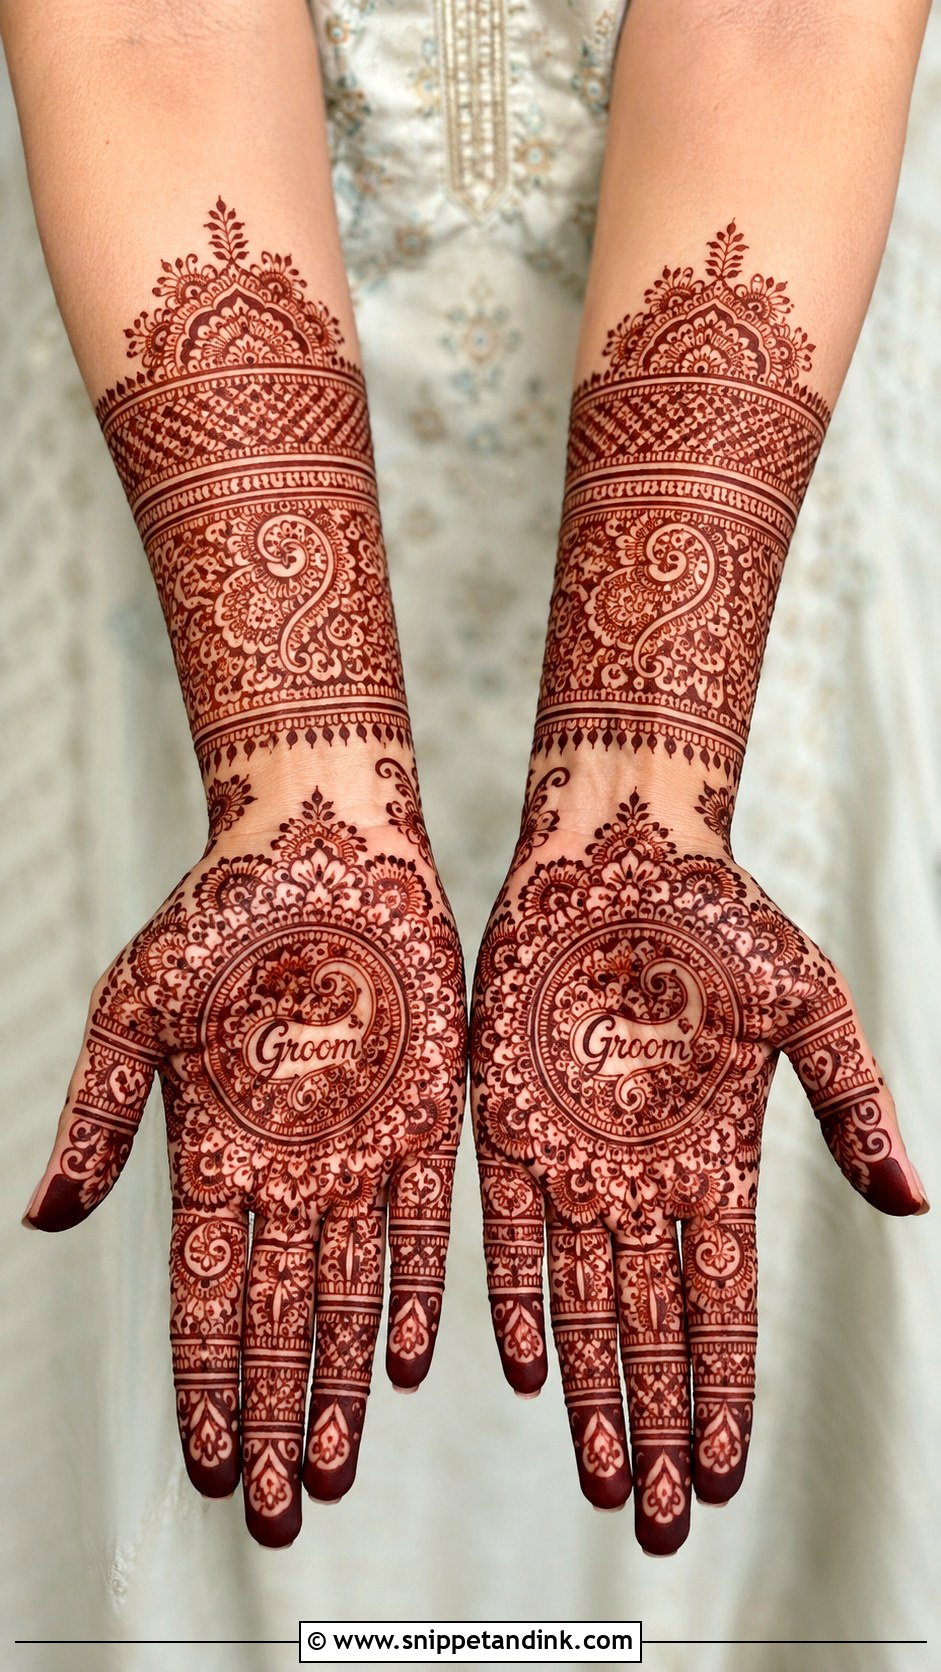
Hiding the groom’s name is an old ritual and still one of the most requested details I draw. A bridal mehndi design with groom name can tuck the letters into a paisley, a vine, a jaali square or the wrist cuff. If you want the game of him searching for it, I’ll weave the script into the pattern so it isn’t obvious. If you’d rather everyone can read it, it needs a clear open space. Letters written randomly on top of finished work always look stuck on.
10. Bridal Mehndi Design With Wedding Date
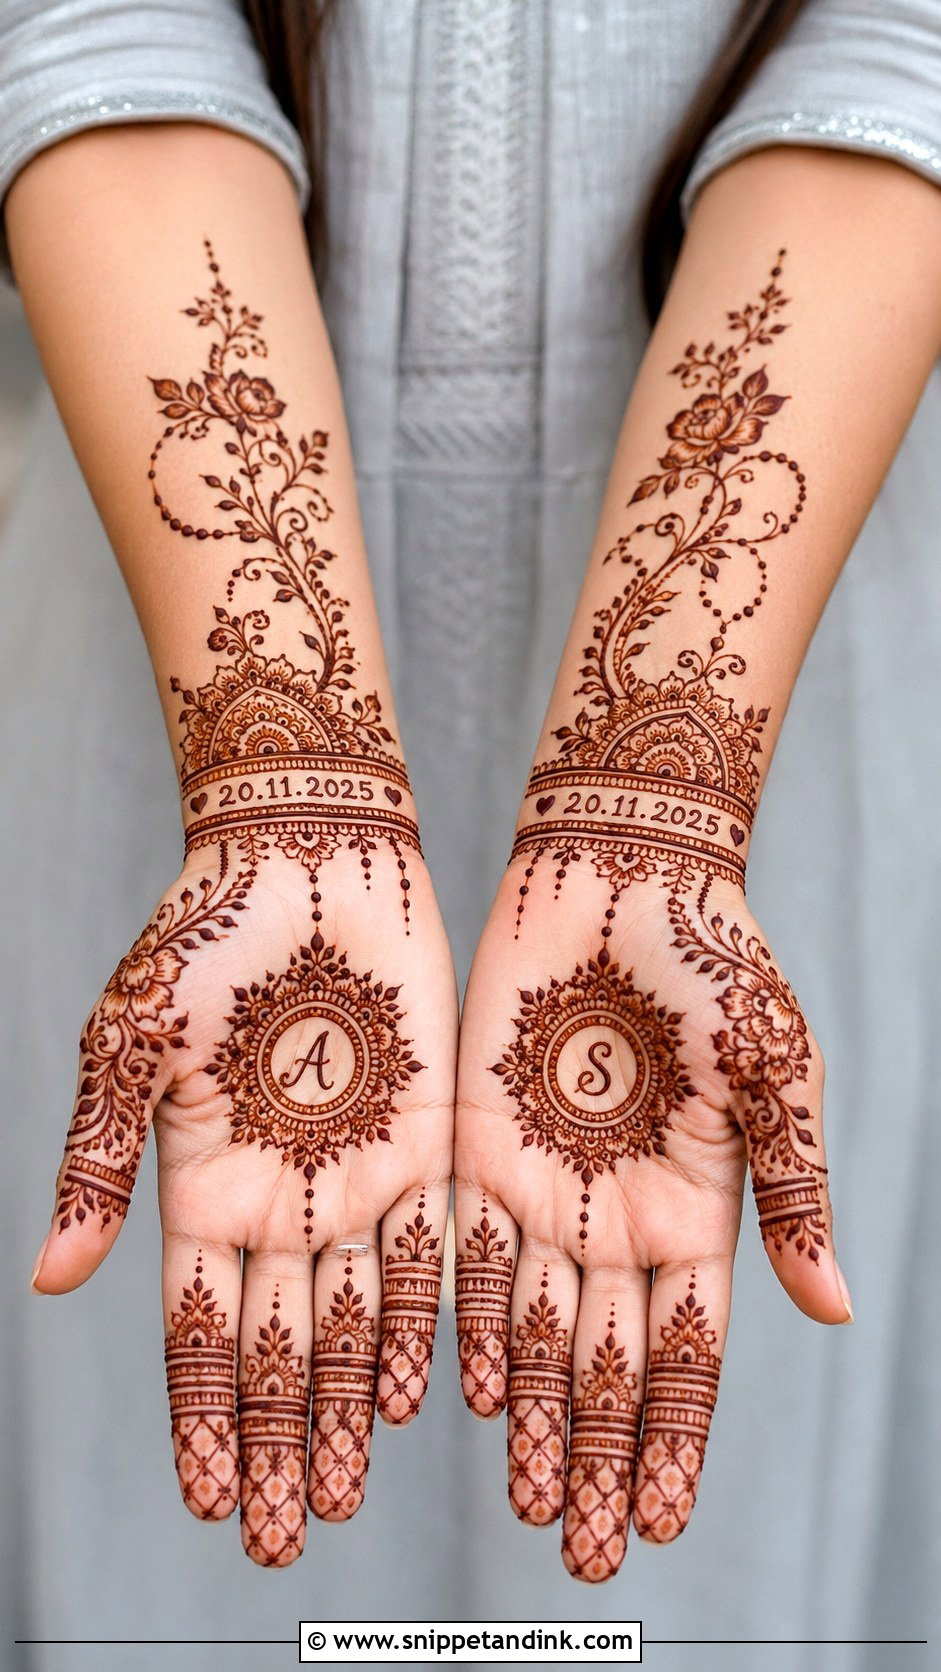
Numbers are harder to hide than letters, so a date usually works best in plain sight: a small line inside a wrist band, under a mandala or along the forearm border. Pair it with initials or a tiny symbol if you like. Close-up ring shots are where it shows. I keep dates out of dense filler, because a 6 and an 8 in fine henna blur together once the stain darkens and the edges spread slightly.
11. Lotus Bridal Mehndi Design
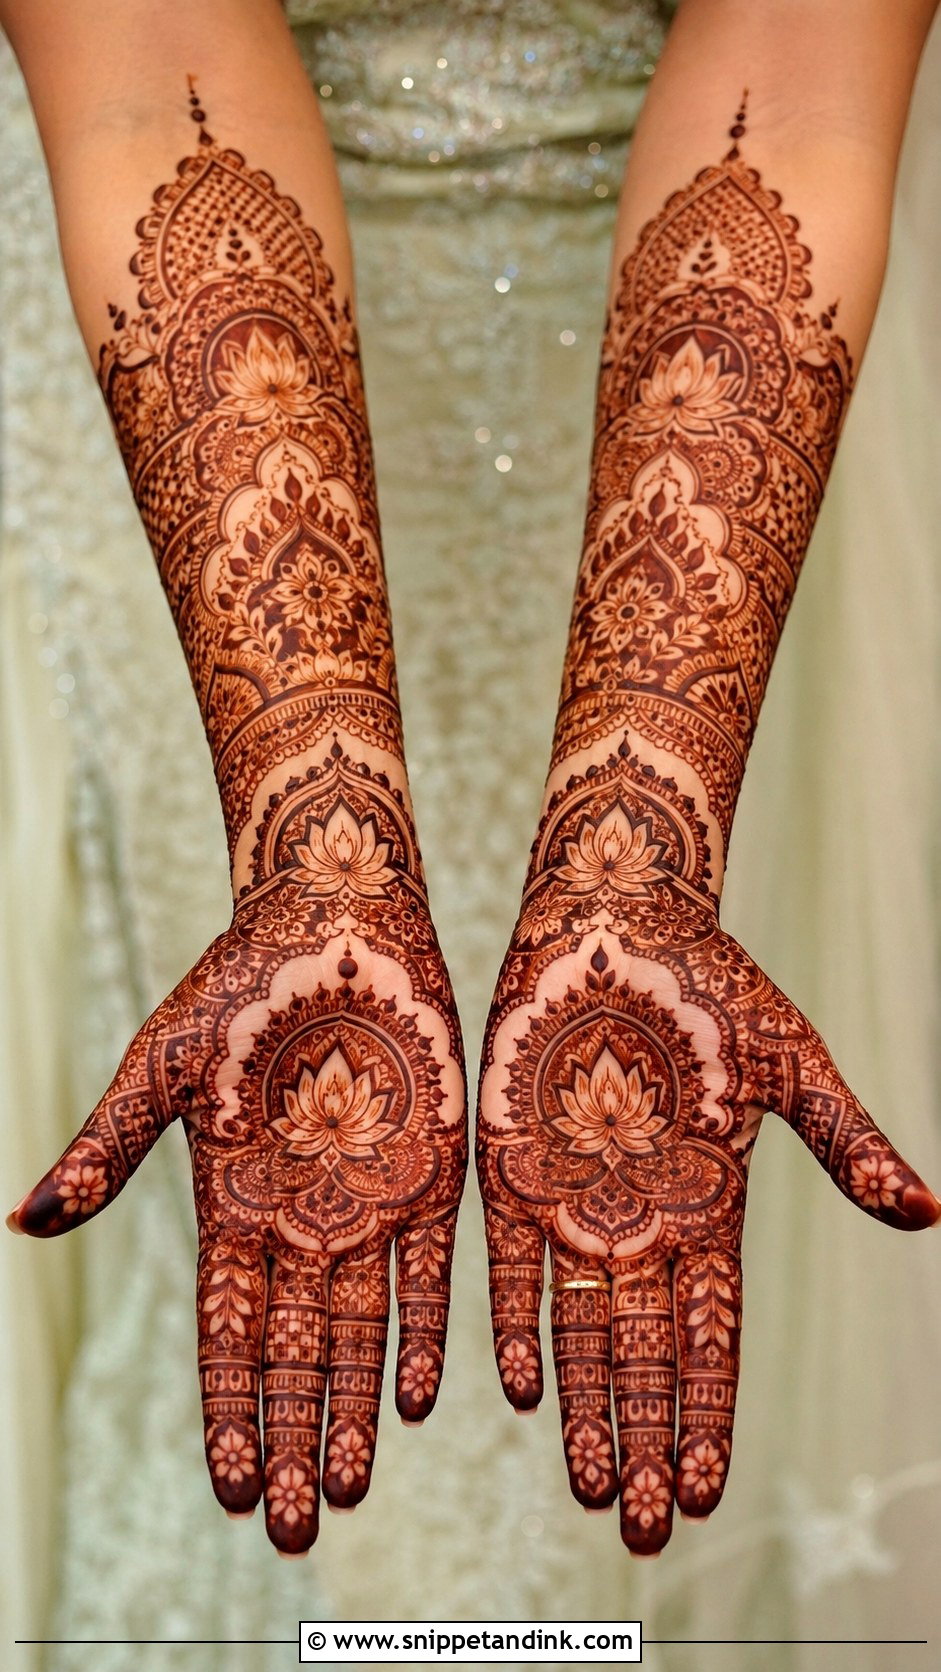
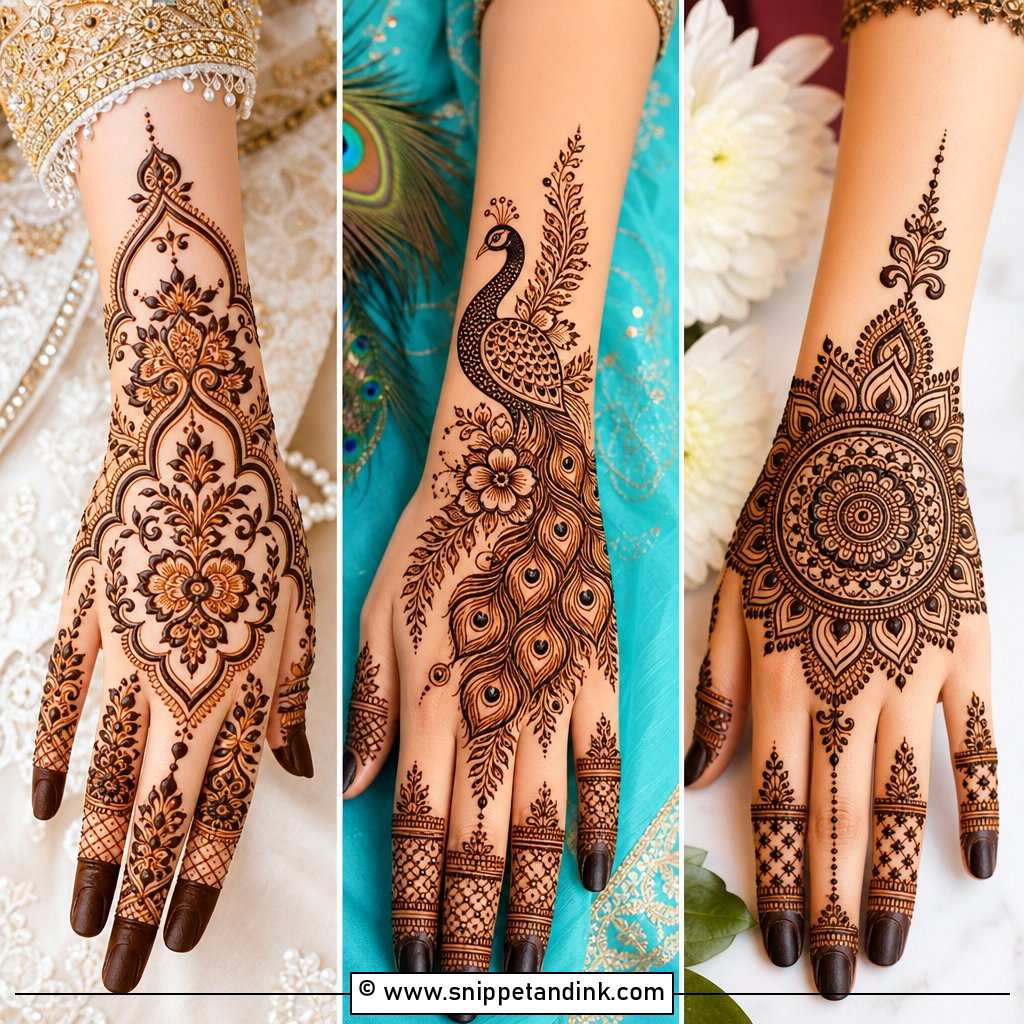
The lotus is one of the most forgiving motifs I work with. Its layered petals sit well on palms, wrists, forearms and back hands, and it reads as either traditional or modern depending on what surrounds it. Packed into mandalas with paisley filler, it looks classic; drawn large with fine vines and open skin, it looks current. A balanced full hand might use a lotus mandala on the palm, petal borders around the wrist and leafy trails up the fingers. Pastel outfits and temple jewelry both suit it.
12. Peacock Bridal Mehndi Design
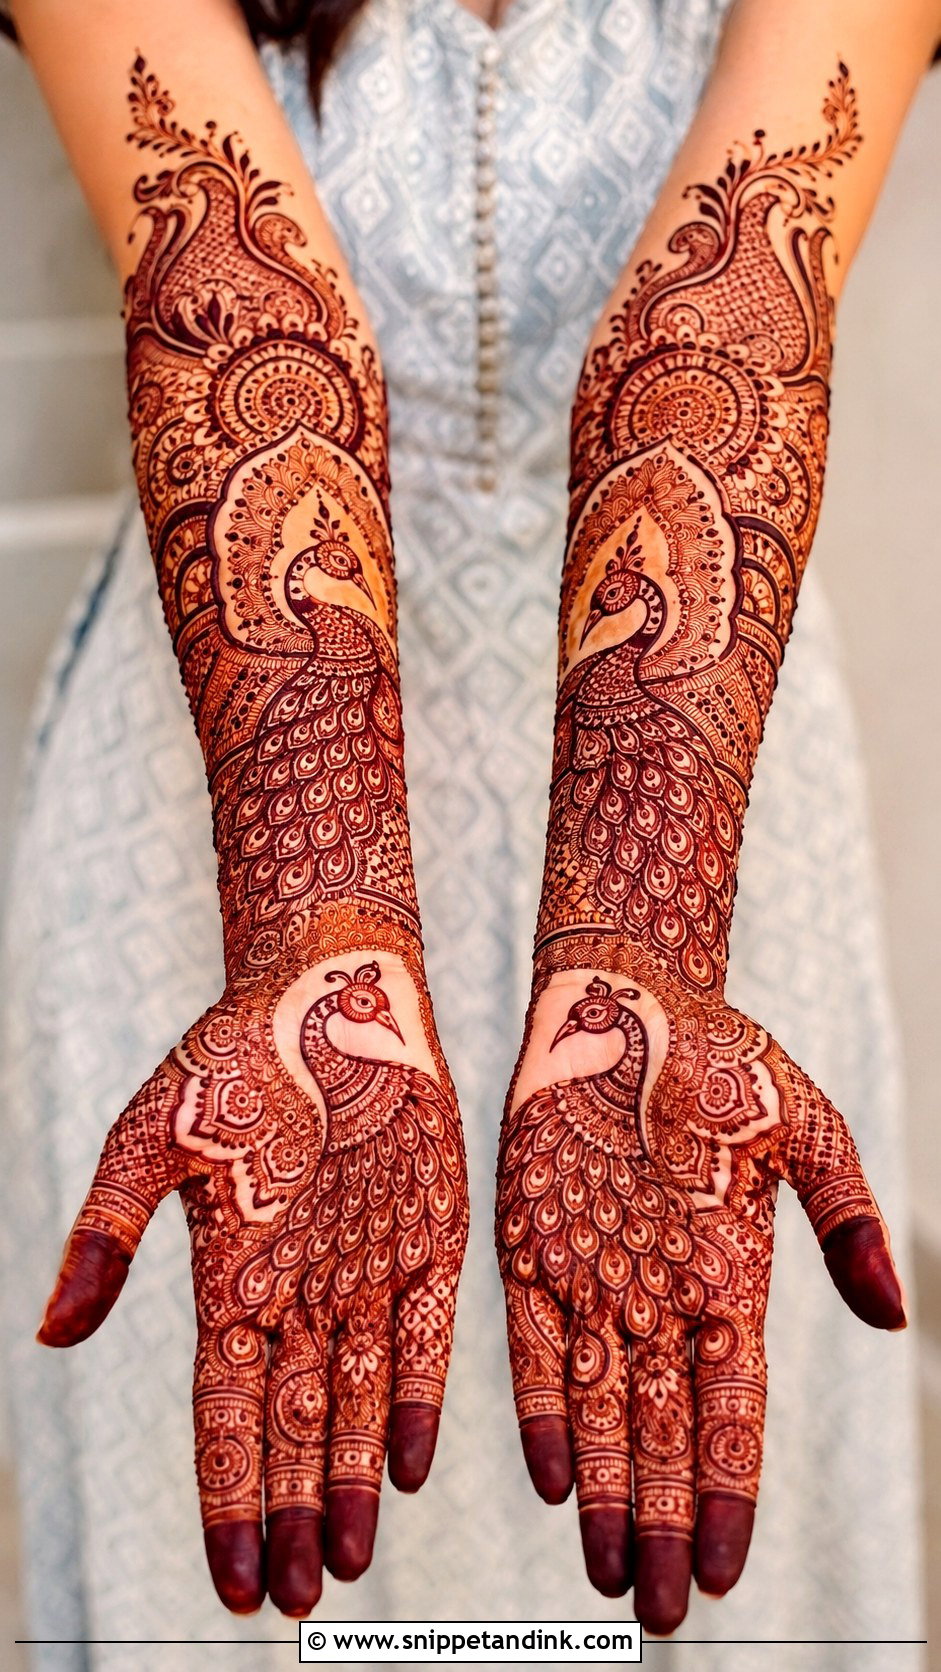
The curve of a peacock’s neck follows the hand naturally, which is why it shows up in so many bridal layouts as the main motif on a palm, back hand or forearm. Its tail feathers can melt into paisleys, florals and net filler. I draw the body first and the feathers last, because the feathers are where I adjust the shape to fit the hand. Jewel tones like royal blue, green and gold suit it, and mirrored peacocks on both hands, or one peacock paired with a lotus mandala, finish the set.
13. Mandala Bridal Mehndi Design
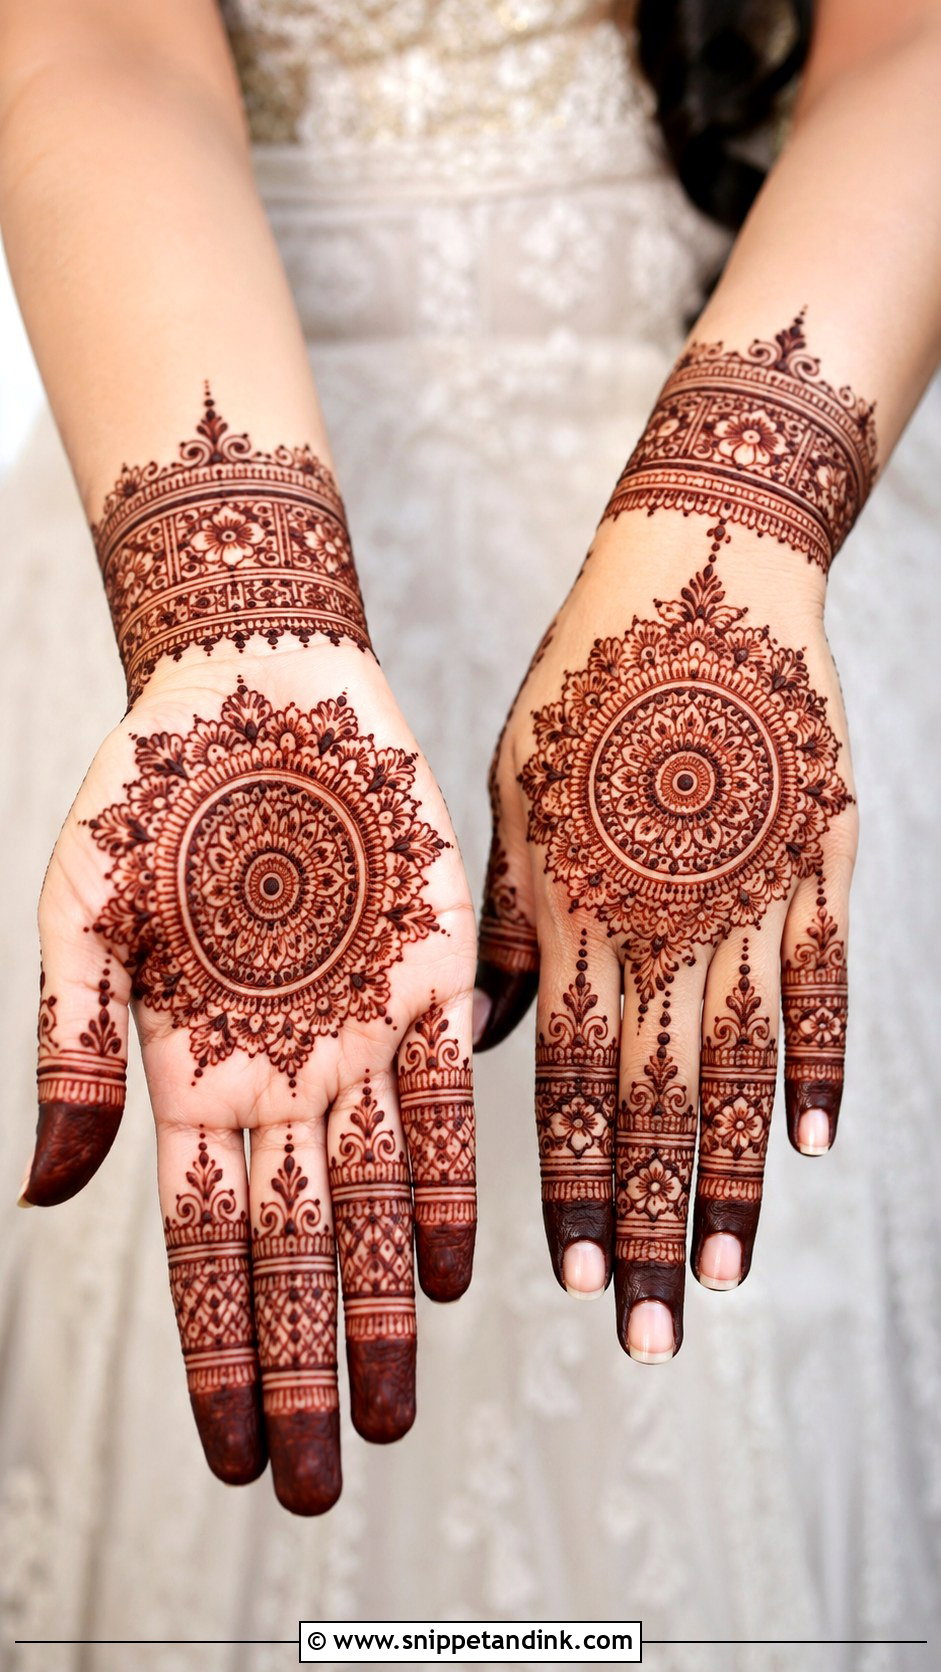
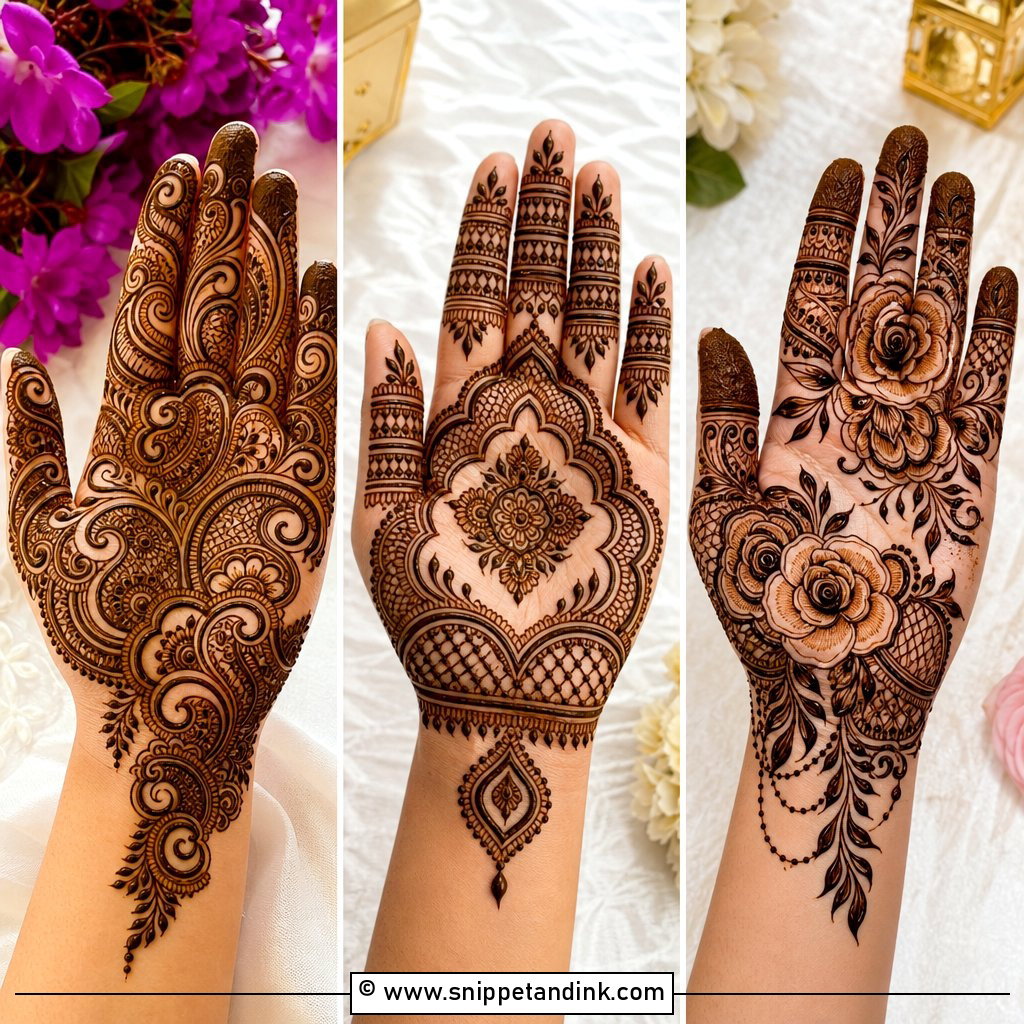
Few things photograph as cleanly as one well-drawn mandala. Centred on the palm or back hand, with matching bands, dots and fine lines on the fingers and wrist, it gives a clear focal point that can be as light or as heavy as you like. The circle has to be truly round. I start from the middle and build outward ring by ring, checking from arm’s length, because a lopsided mandala is the first thing a camera exposes. Add wrist cuffs, forearm panels and fingertip work for the wedding day; keep it bare for engagement or haldi.
14. Jaali Bridal Mehndi Design
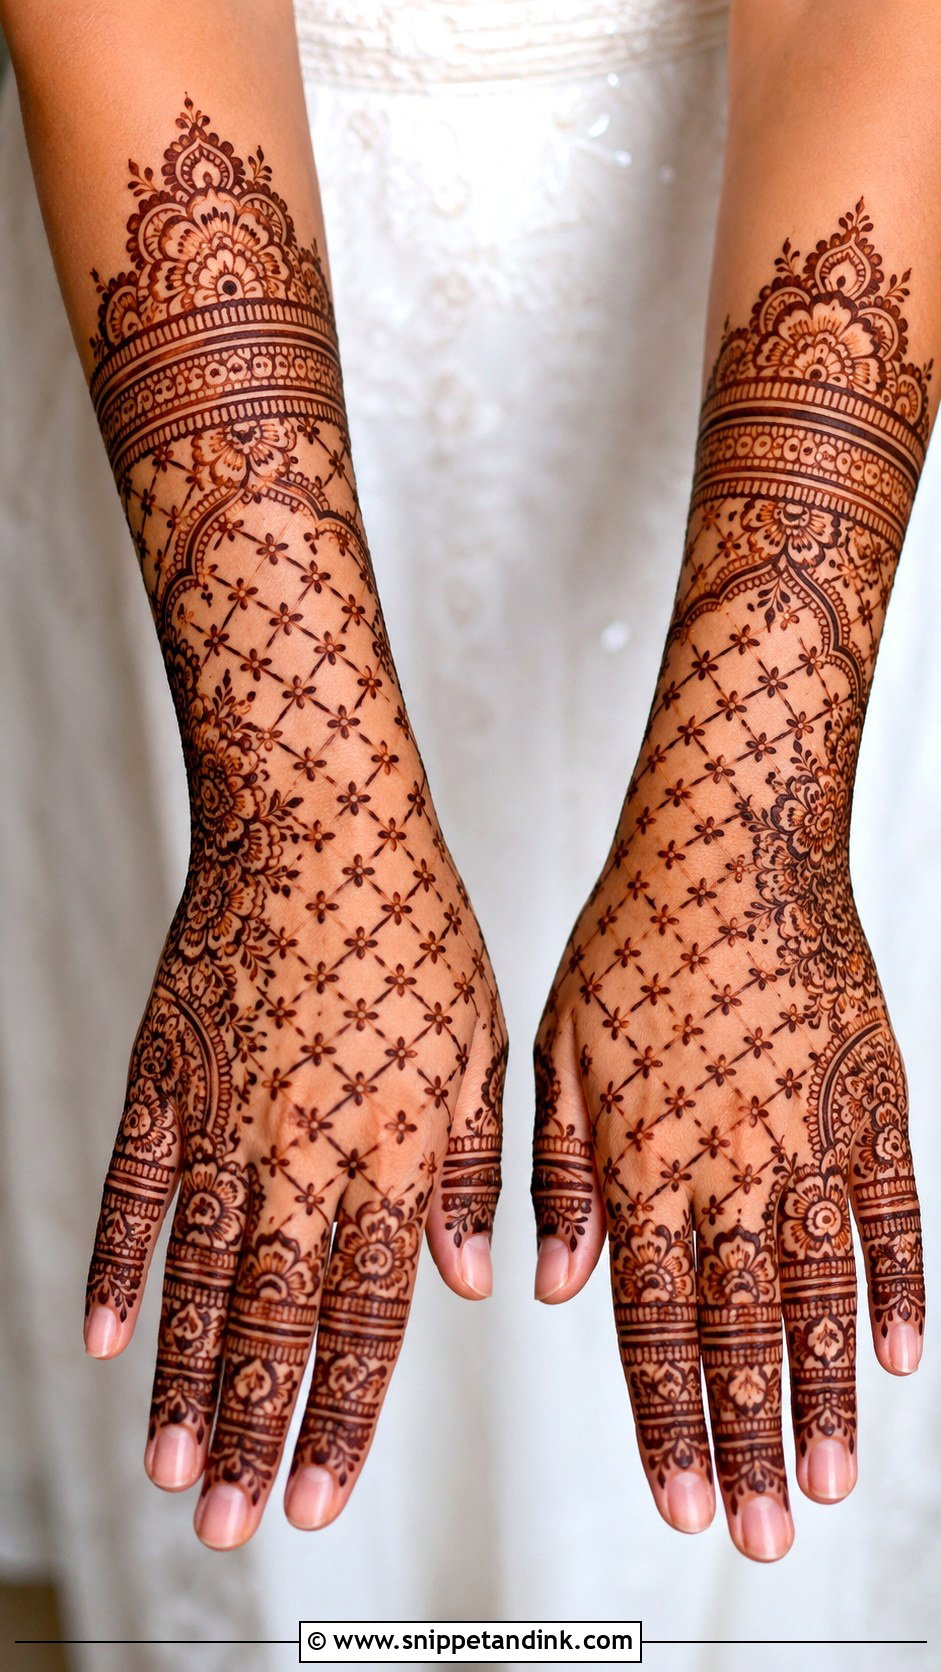
Jaali is lace drawn in henna: grids, tiny dots, small florals and fine borders. It’s most popular on the back hand because it looks like a bridal glove or hand jewelry. It suits brides who want detail without heaviness. The difficulty is spacing. Every square of the mesh needs to be even, and the lines must be thin enough that they don’t merge as the stain matures, so look at an artist’s jaali close up. Rings, bangles and kalire sit well on top because the mesh frames the jewelry instead of competing with it.
15. Floral Bridal Mehndi Full Hand
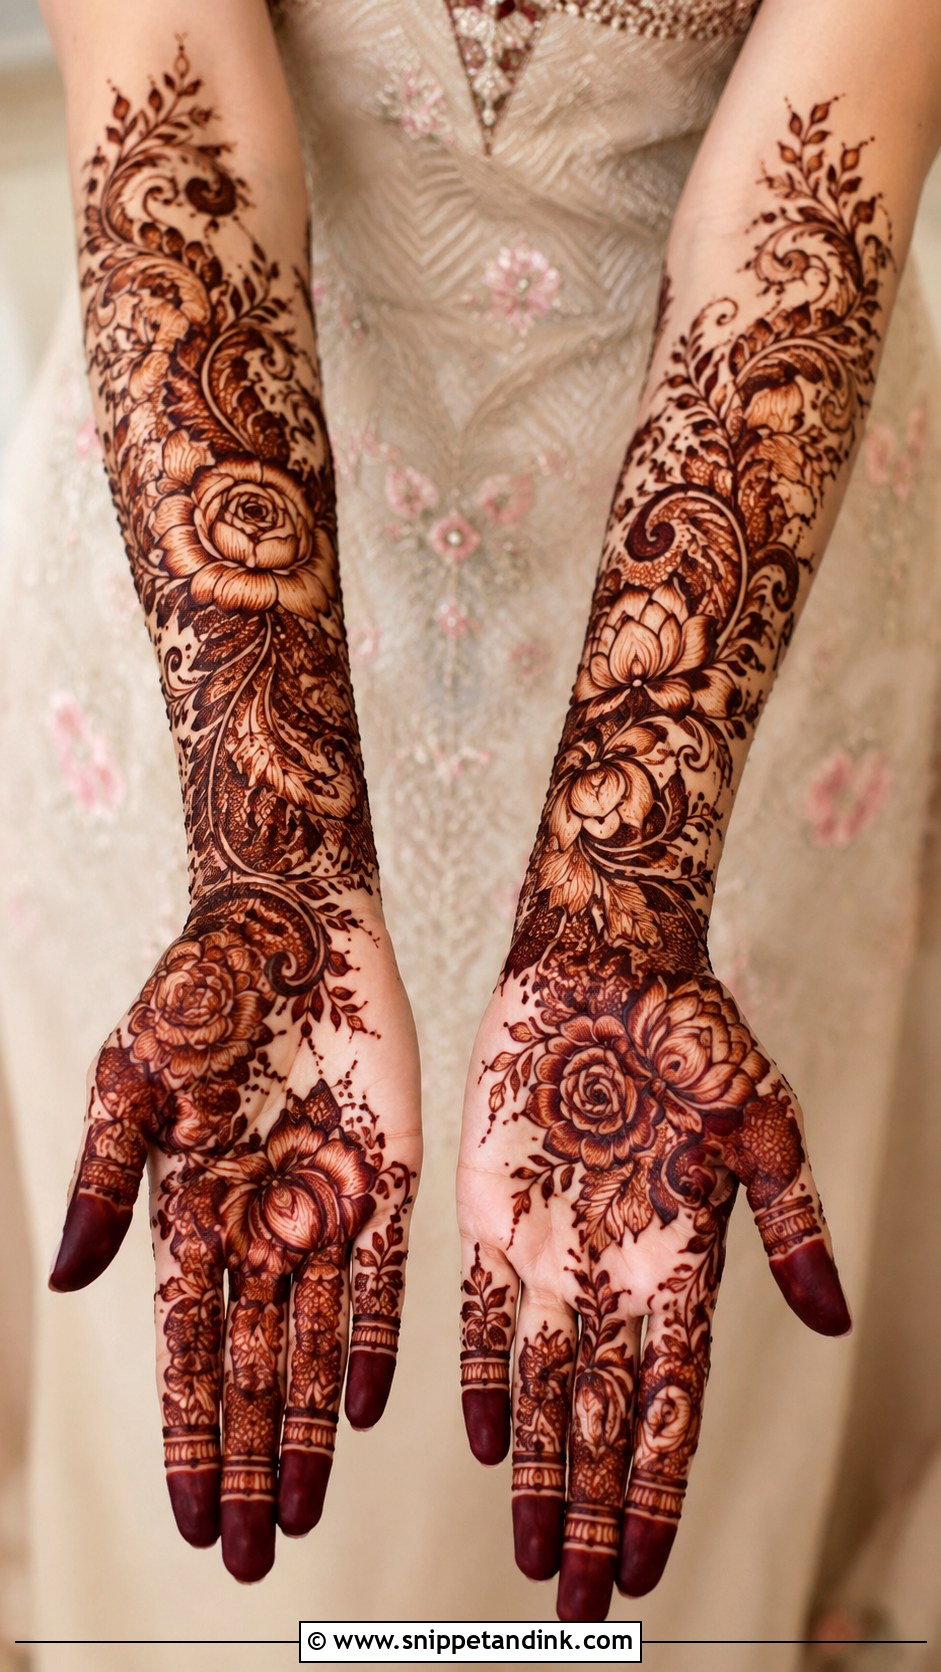
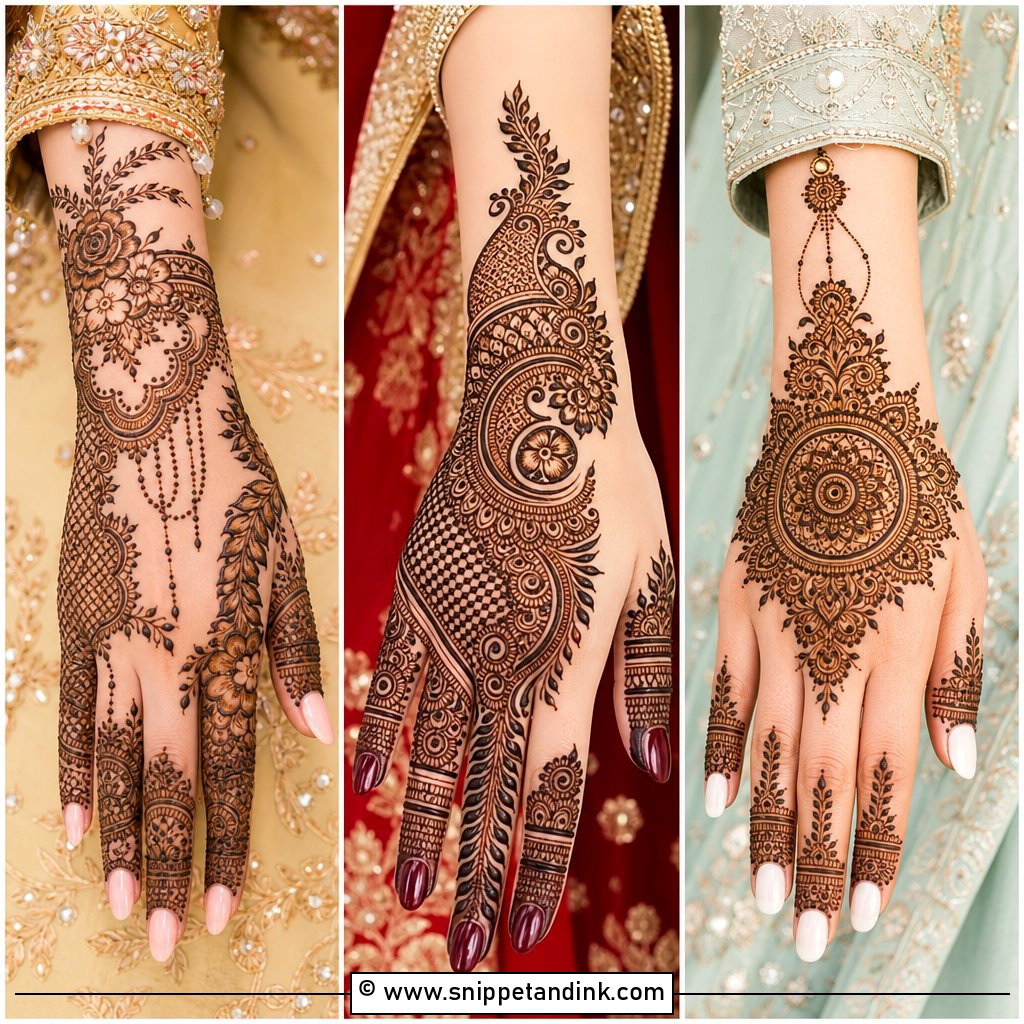
Roses, lotuses, jasmine-like blooms, leafy vines and shaded petals make up most floral bridal work. Florals feel feminine without being strictly traditional, and they can run diagonally like Arabic work or fill the hand Indian-style. Shading is where skill shows: I create it with fine lines and dots, not by smearing paste, because smudged shading just stains as a blotch. Bold fingertips and a wrist band make it bridal. Florals are also easy to recognise in photos, which helps on soft, pastel styling and garden ceremonies.
16. Paisley Bridal Mehndi Design
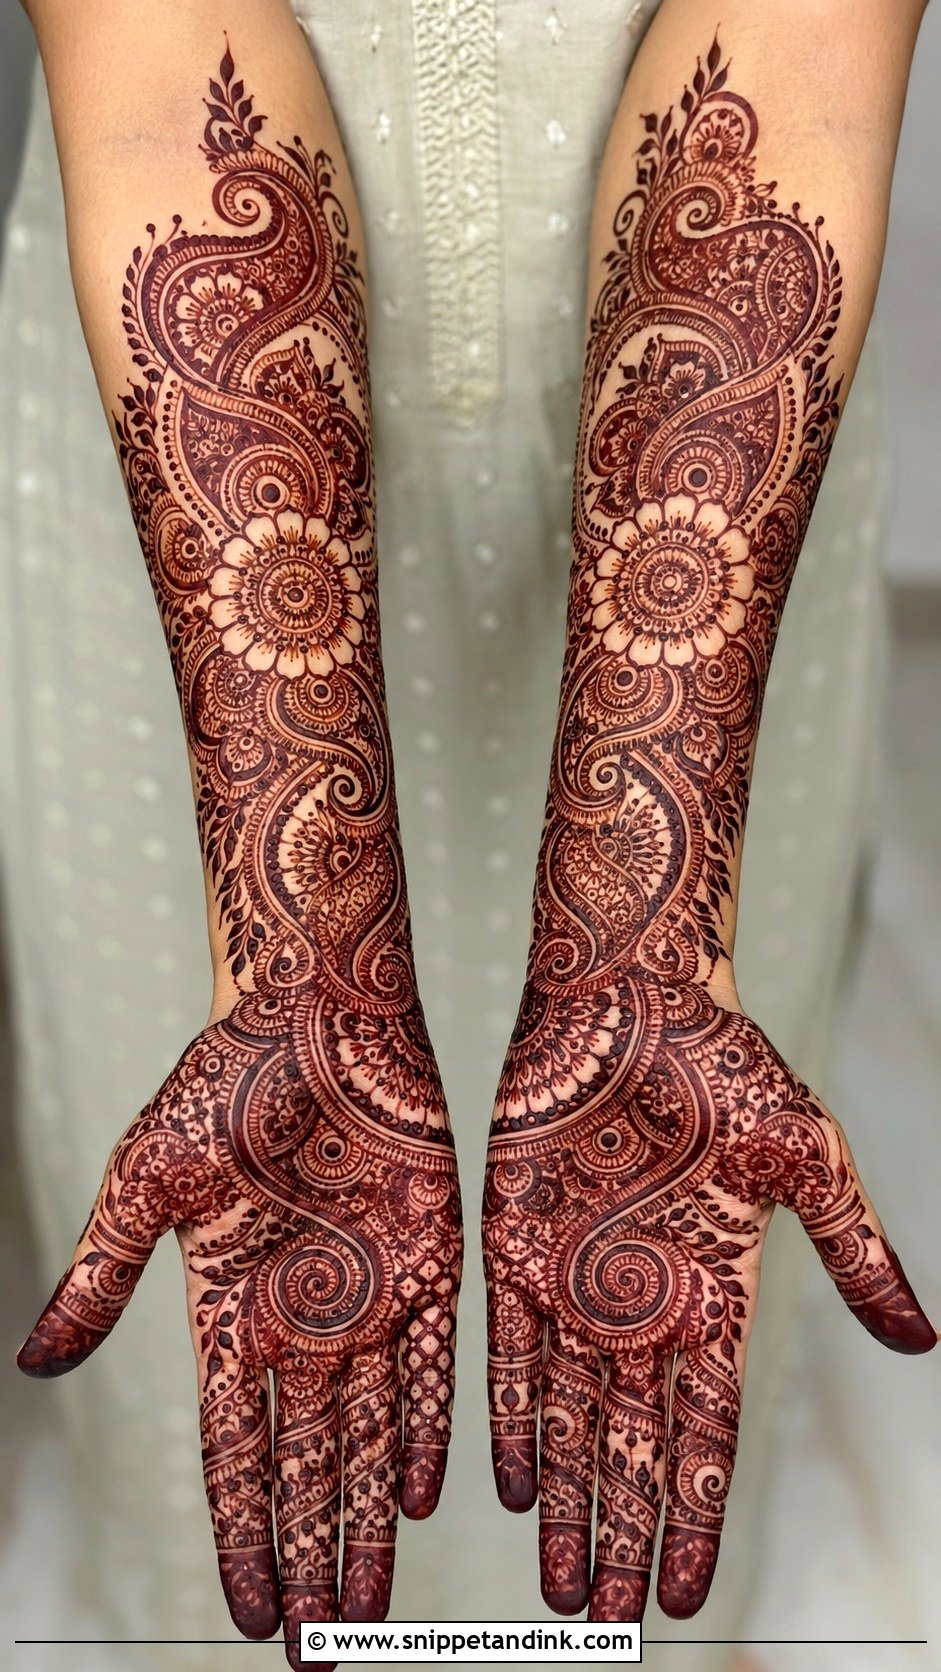
Paisleys scale up or down, which makes them useful in both dense and open layouts. Chains of curved paisleys, floral centres, dotted borders and leafy accents follow the natural bend of the palm and forearm. If you want a traditional look without portraits, this is the motif I’d build on. Open spacing between them makes the design feel modern; packing them with filler keeps it classic. Ask your artist to vary the paisley sizes, since a row of identical ones looks stamped rather than drawn.
17. Dulhan Bridal Mehndi Design
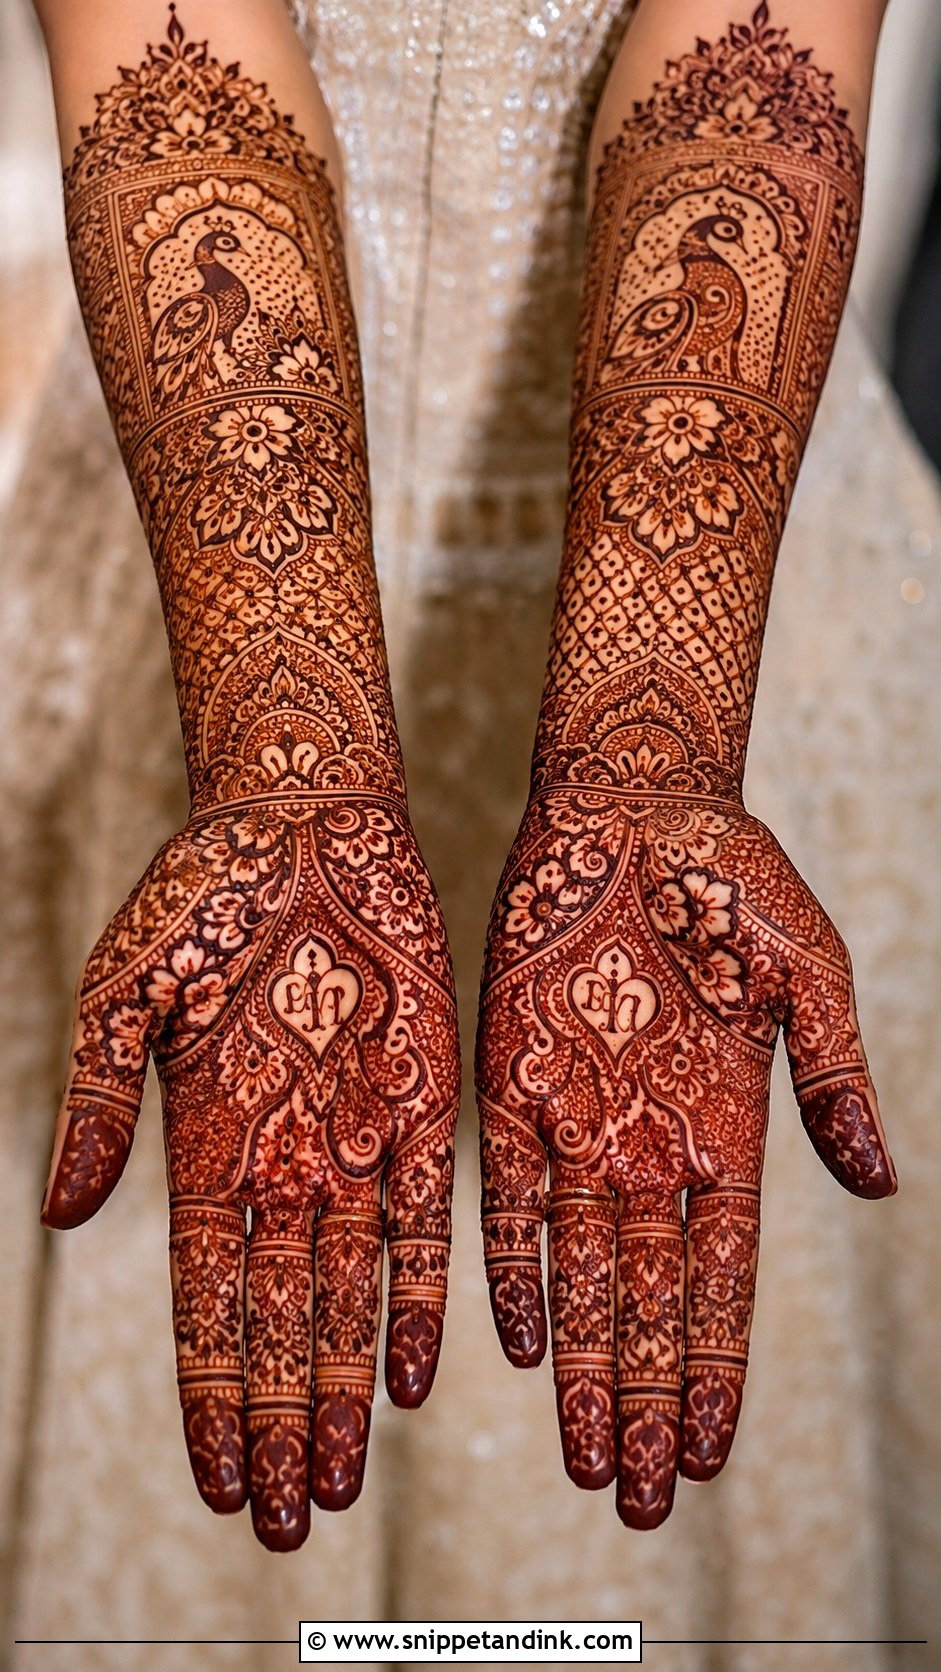
“Dulhan” mehndi means the full bridal treatment: dense coverage, groom initials, traditional symbols, fine filler and forearm work, in an Indian, Pakistani, Rajasthani or Indo-Arabic base depending on your outfit and family. The difference between a good one and a chaotic one is structure. I plan clear sections, fingers, palm, wrist cuff, forearm, so each reads as intentional. Rituals, florals, mandalas, peacocks and jewelry cuffs can all appear. Choose this only if you’re prepared to sit for many hours and keep the paste on overnight.
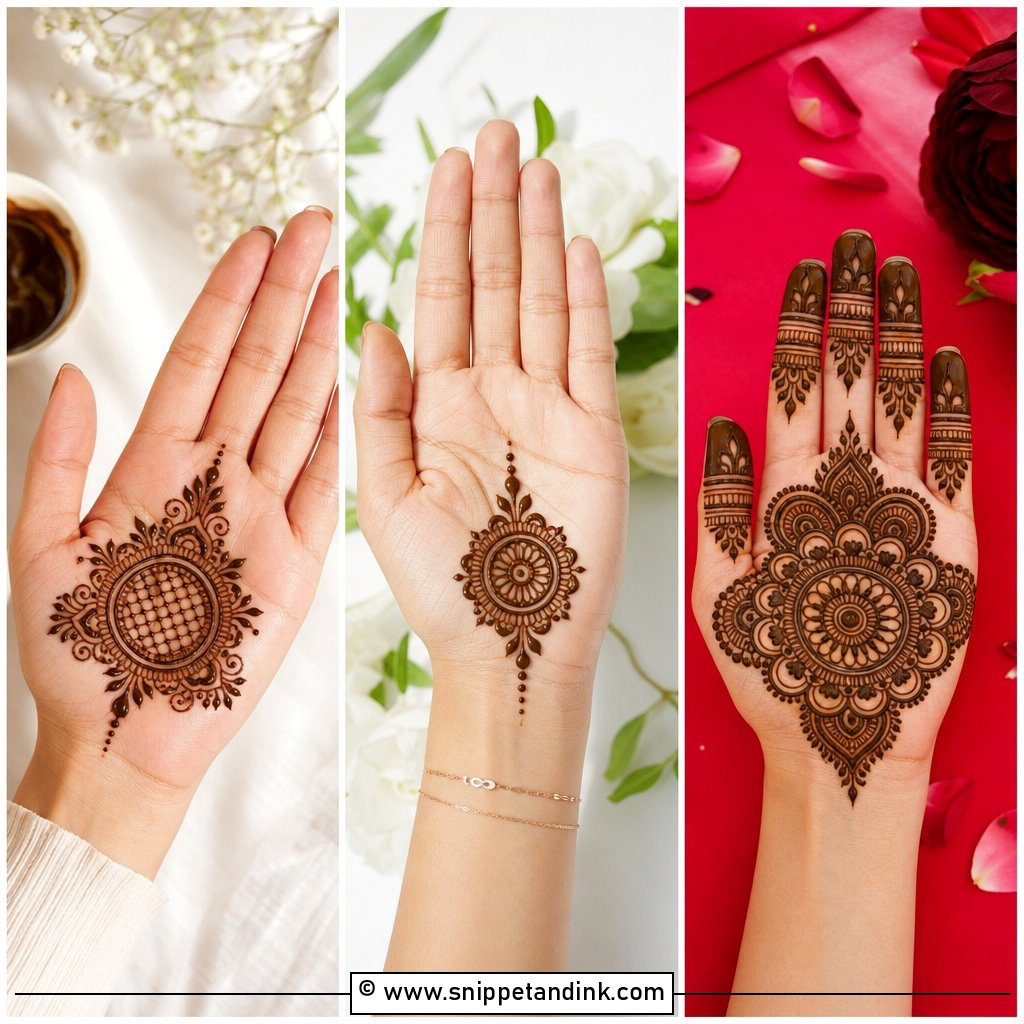
18. Simple Bridal Mehndi Design
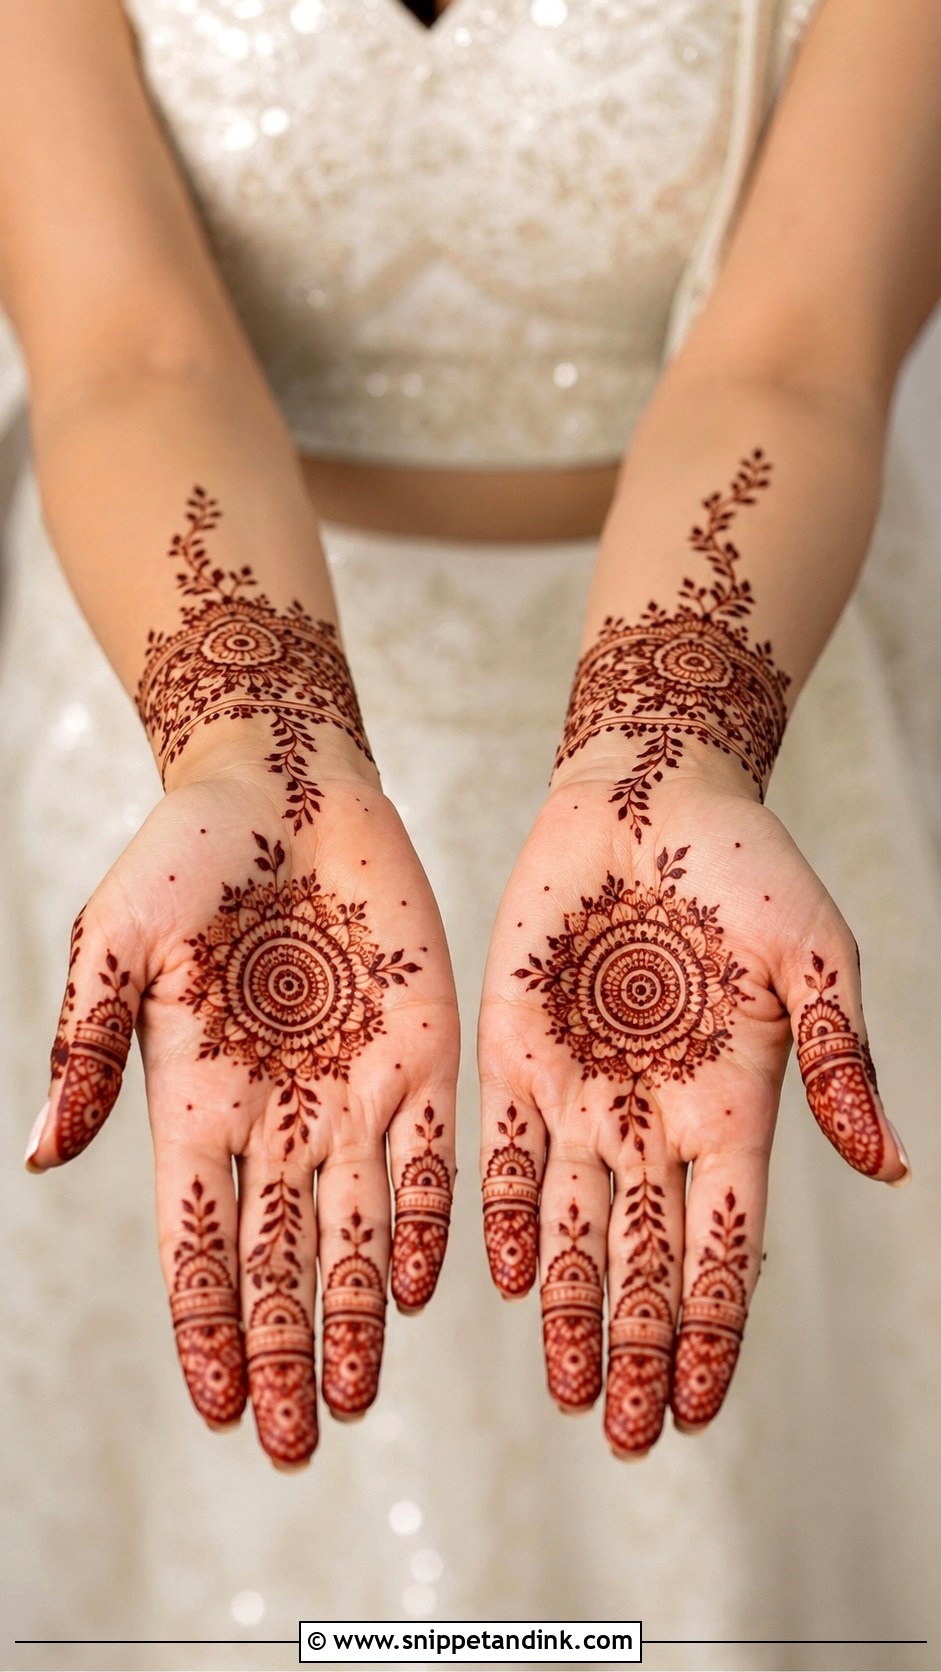
A simple design still looks bridal if it’s planned. My go-to light layout is a central mandala, a floral wrist cuff, decorated fingers and a few leafy trails, which takes a fraction of the sitting time of a full hand. It lets your jewelry, nail color and embroidery take more attention. It fits intimate weddings, courthouse ceremonies, nikahs and engagement functions. With so much skin showing, every line is visible, so neatness matters more here than in heavy work, not less.
19. Minimal Bridal Mehndi Design
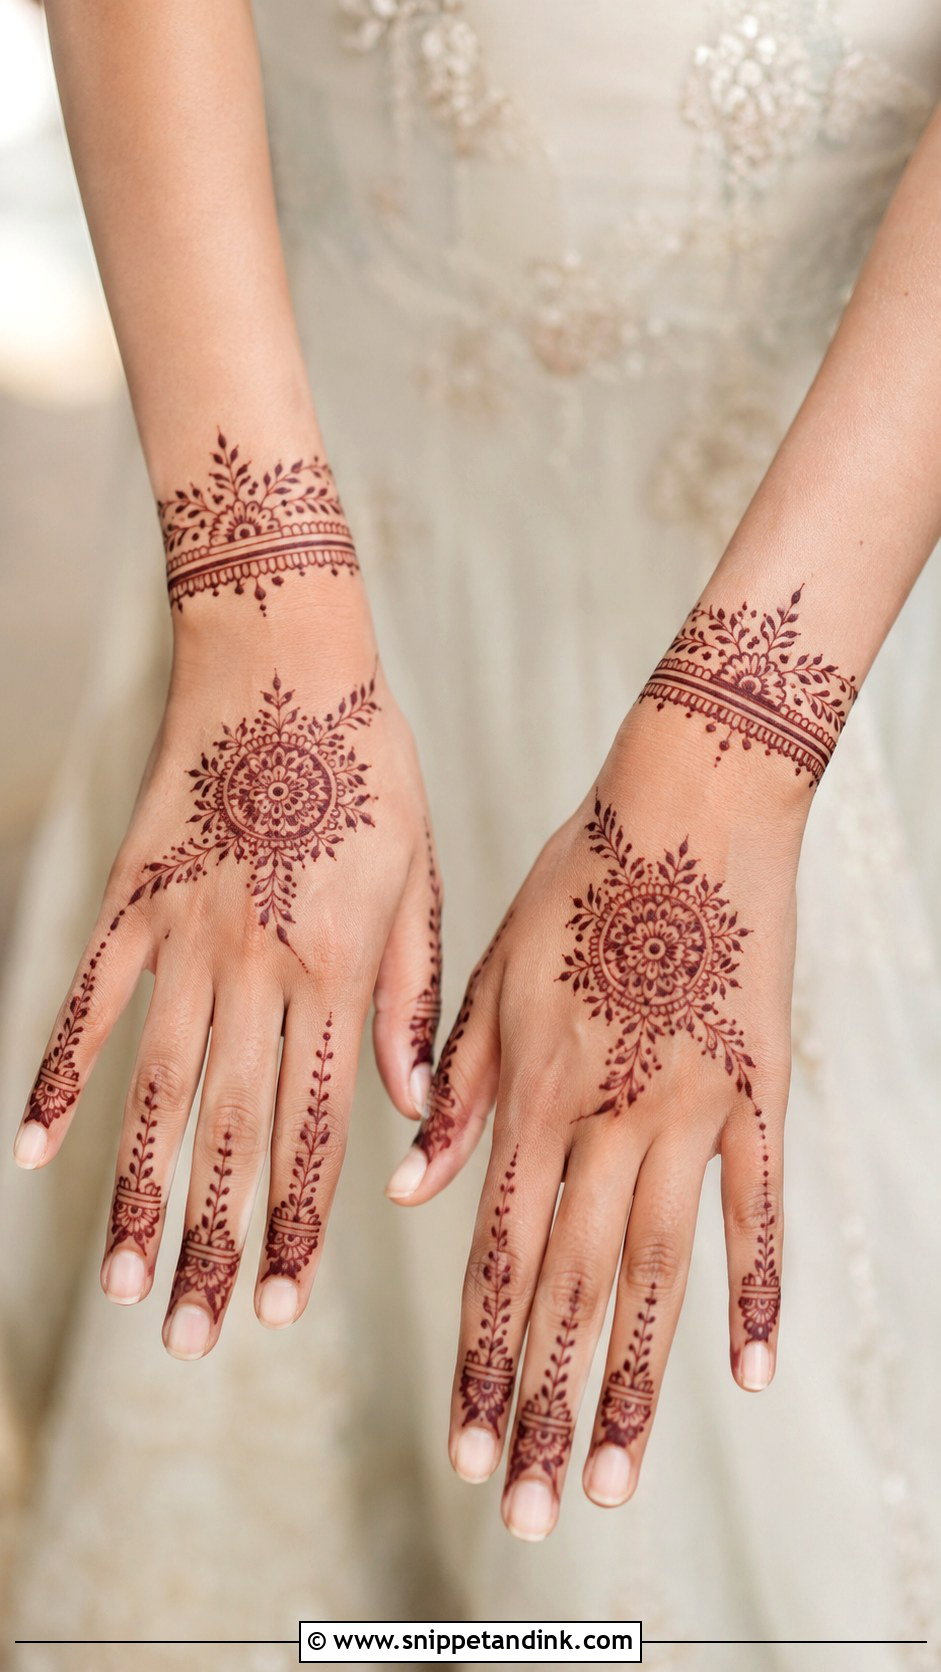
Minimal bridal mehndi uses a handful of chosen motifs, fine florals, a small mandala, leafy trails, a bracelet band and finger detail, and leaves plenty of skin bare. It’s comfortable and quick, which helps at destination weddings and pre-wedding events. The risk is that it reads as a party design rather than a bridal one. I add one personal element, initials or a date near the wrist, so it clearly belongs to the wedding. Skip this if your family expects a traditional dense design; a light hand can feel underdressed next to an heirloom outfit.
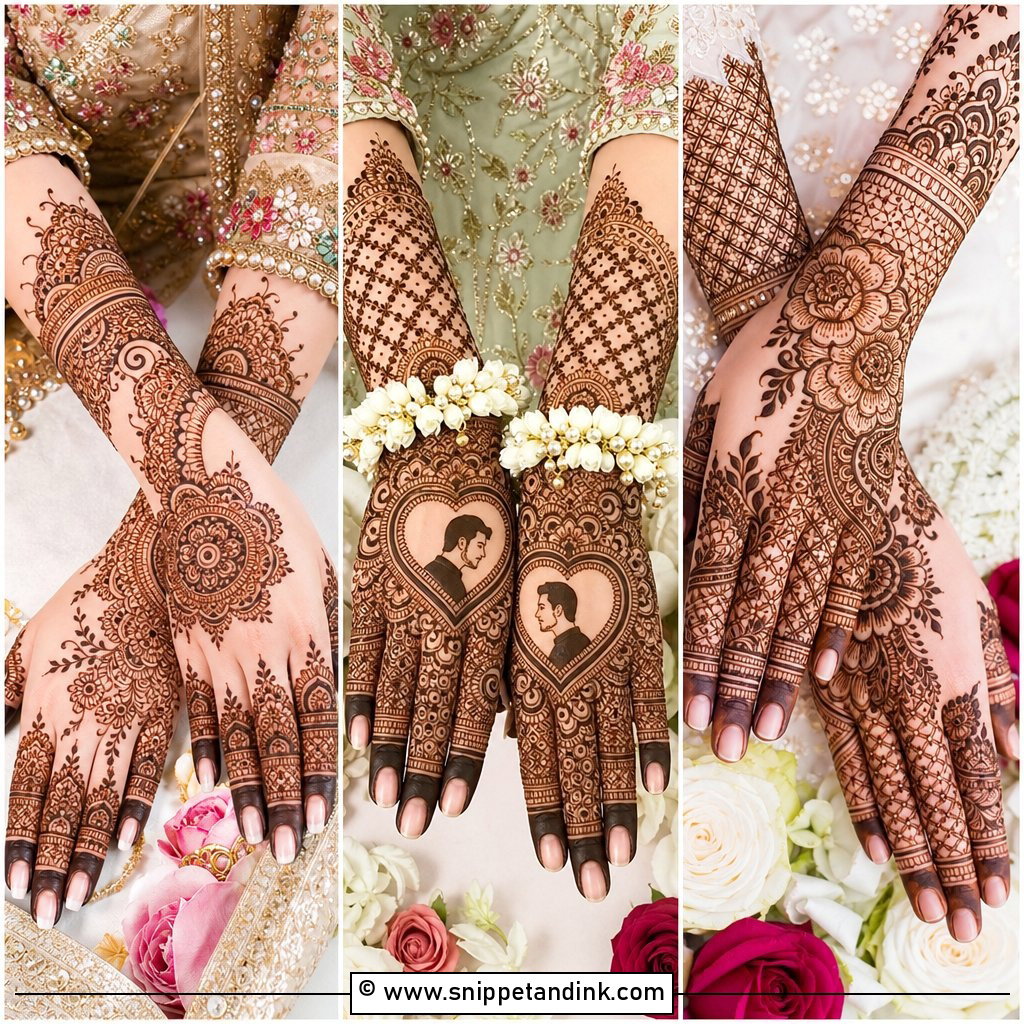
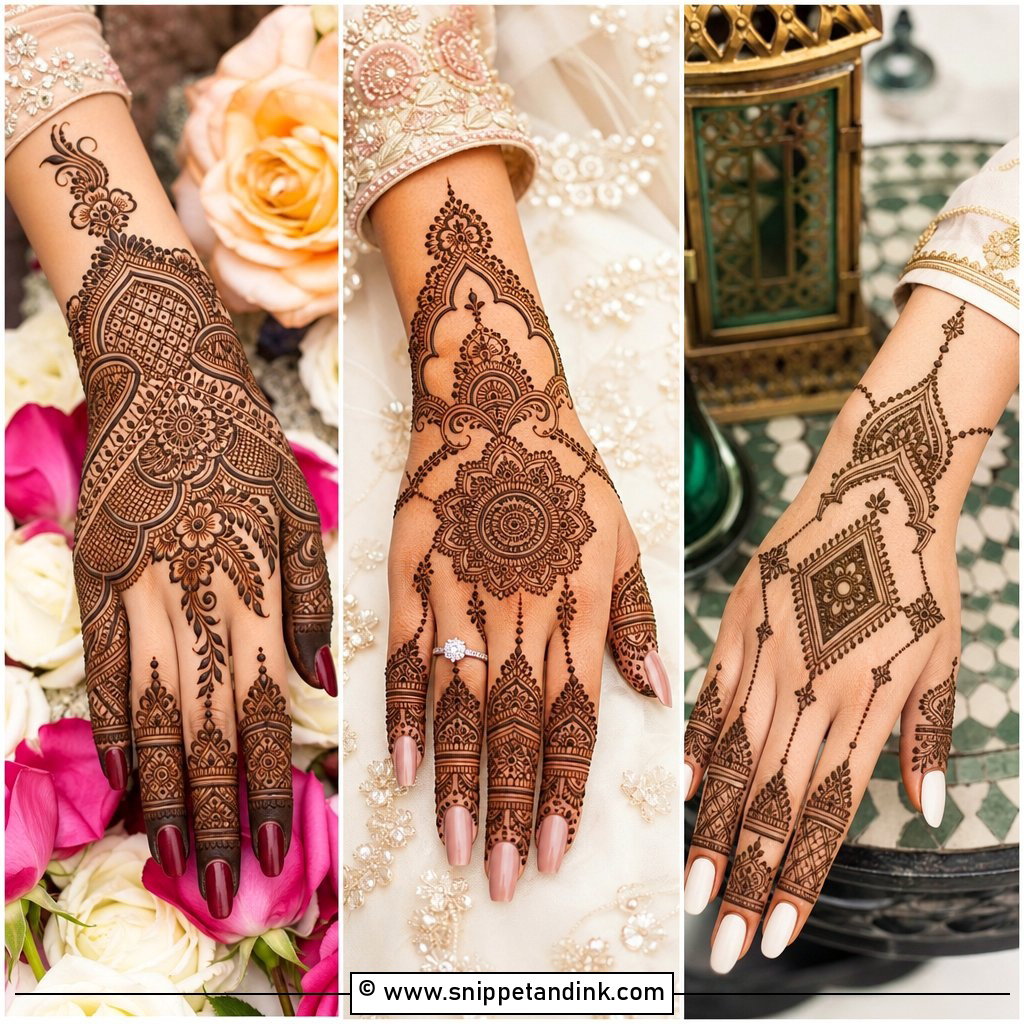
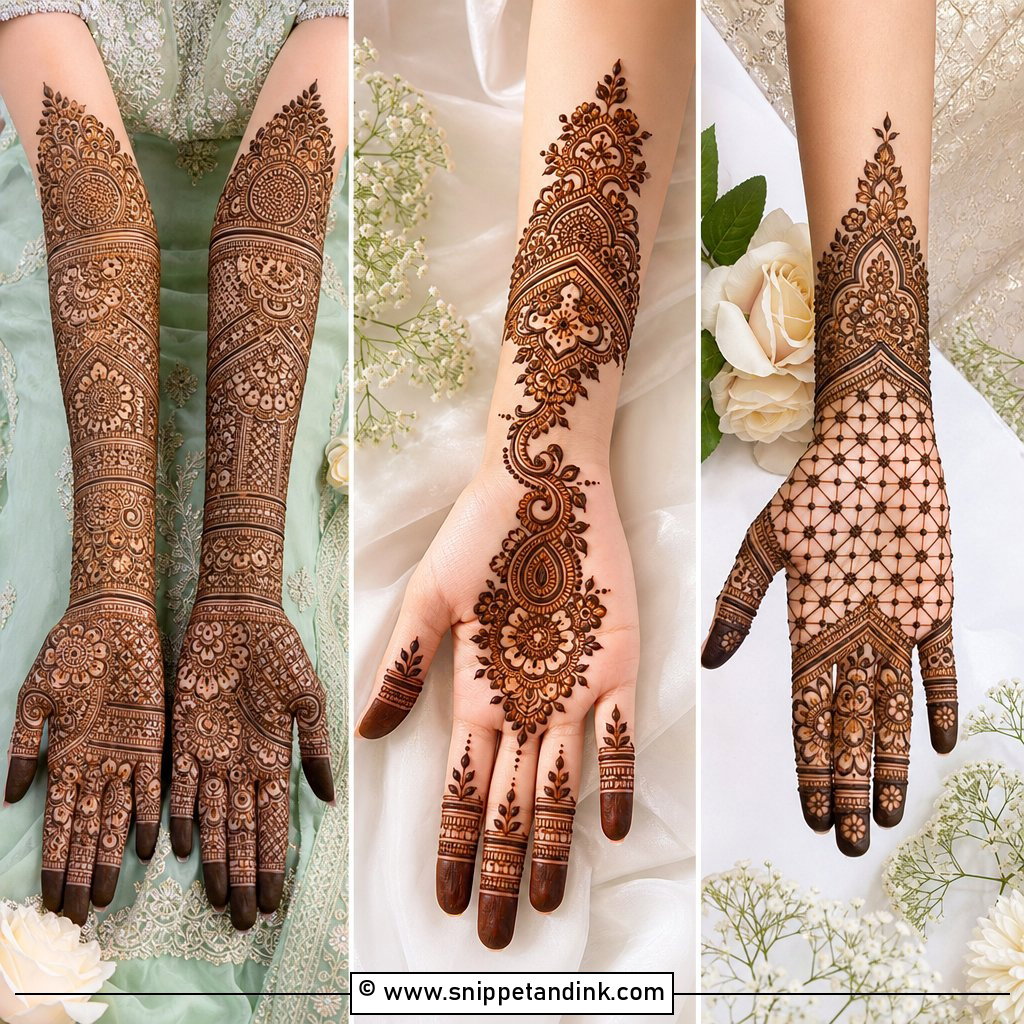
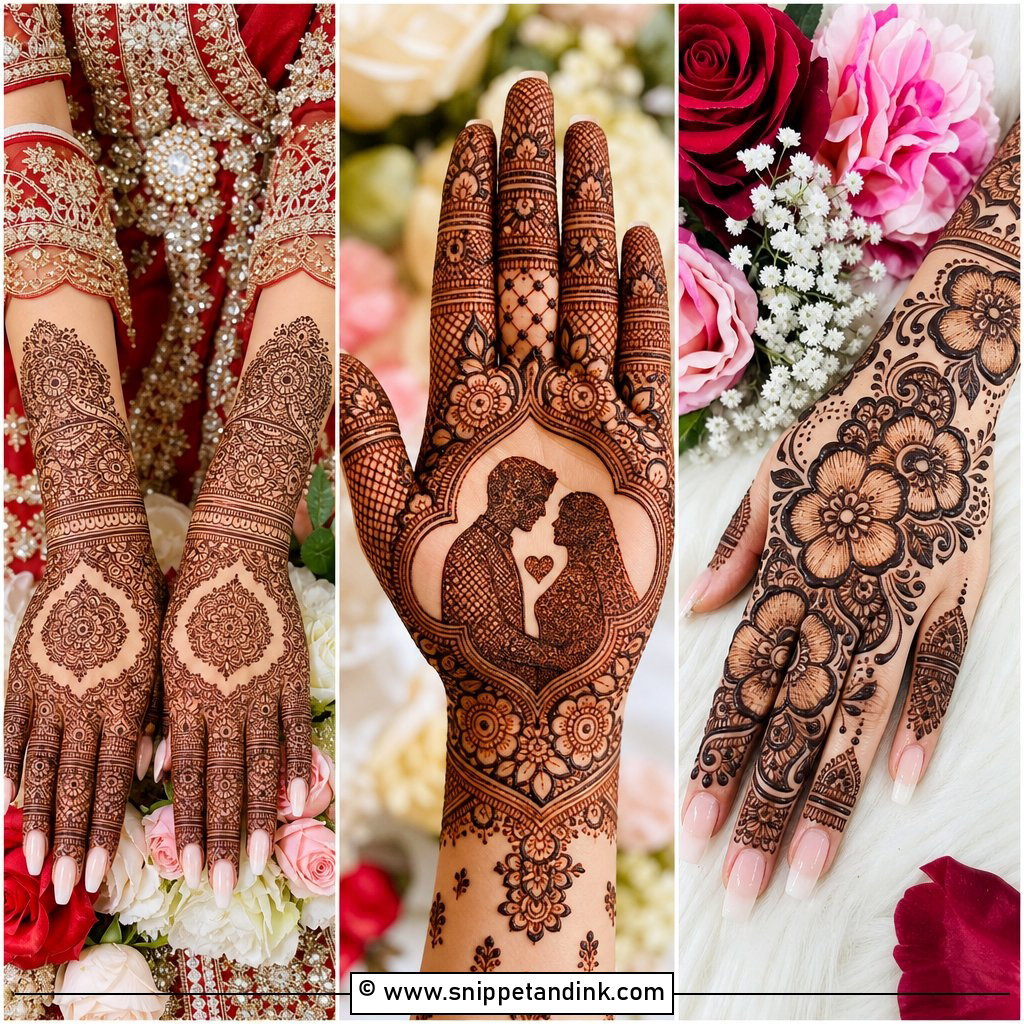
20. Modern Bridal Mehndi Design
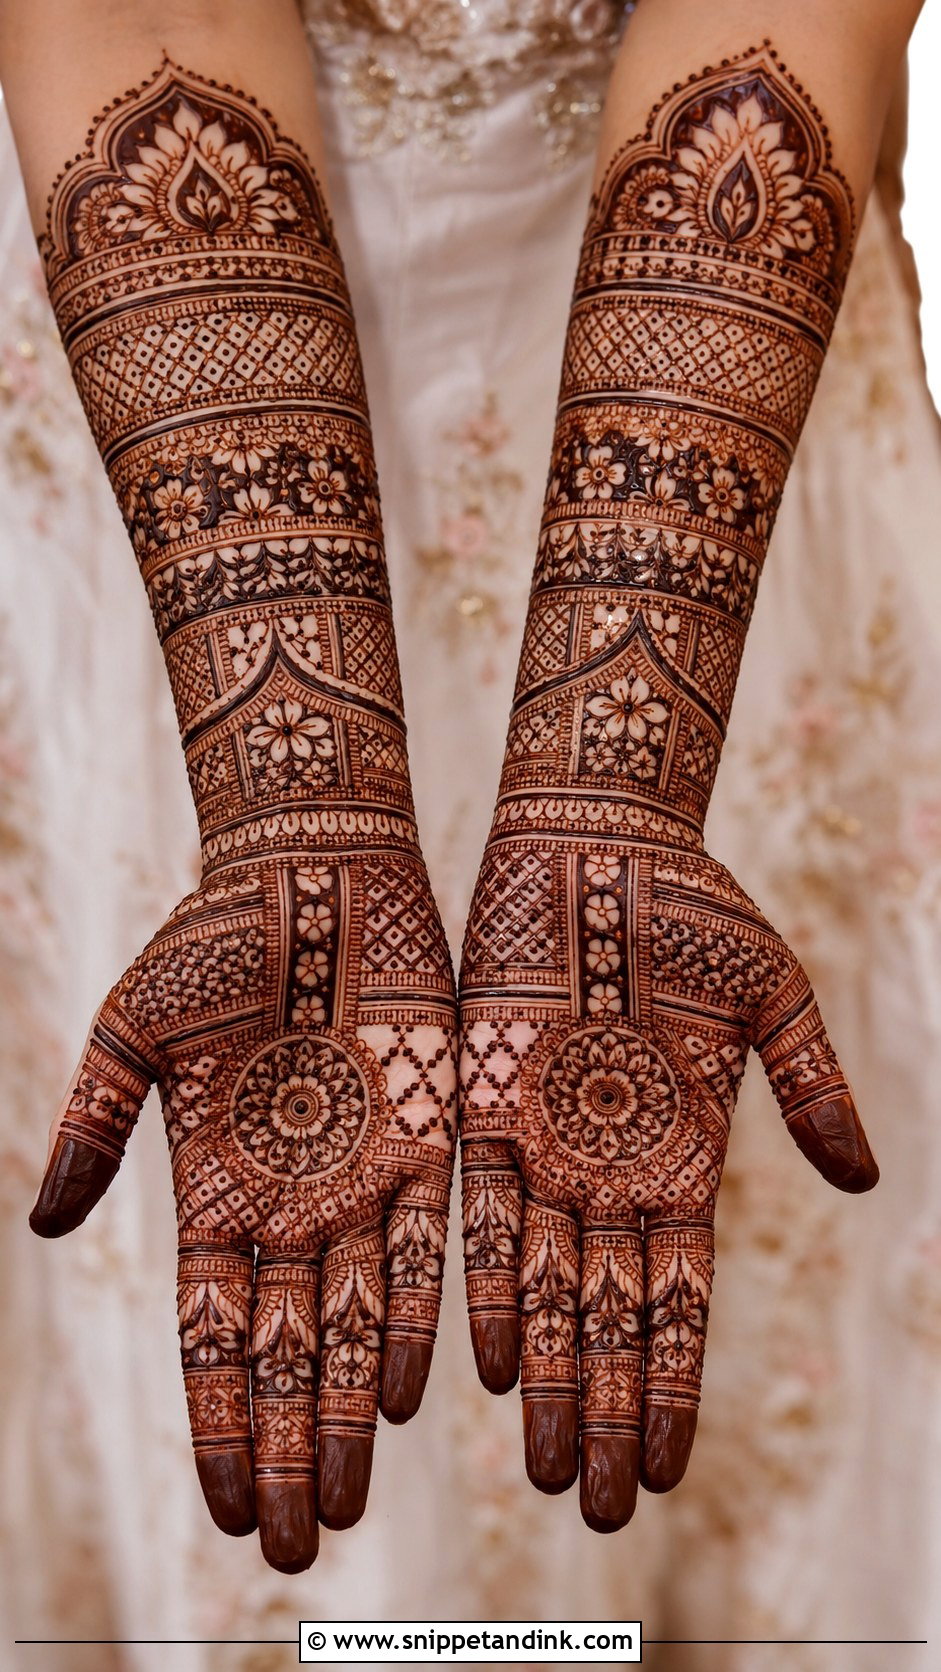
Modern layouts lean on negative space, geometric sections, fine-line flowers and placements that run in unexpected directions from wrist to forearm. They aren’t dense; they depend on balance and clean outlines. Contemporary lehengas, Indo-western outfits and sleek jewelry suit them. Because there’s less filler to hide a wobble, I slow down on outlines in modern work. Ask your artist to leave real space around the main motifs on the palm; that open skin is what keeps the design sharp in close-ups and video.
21. Bridal Mehndi Back Hand Design
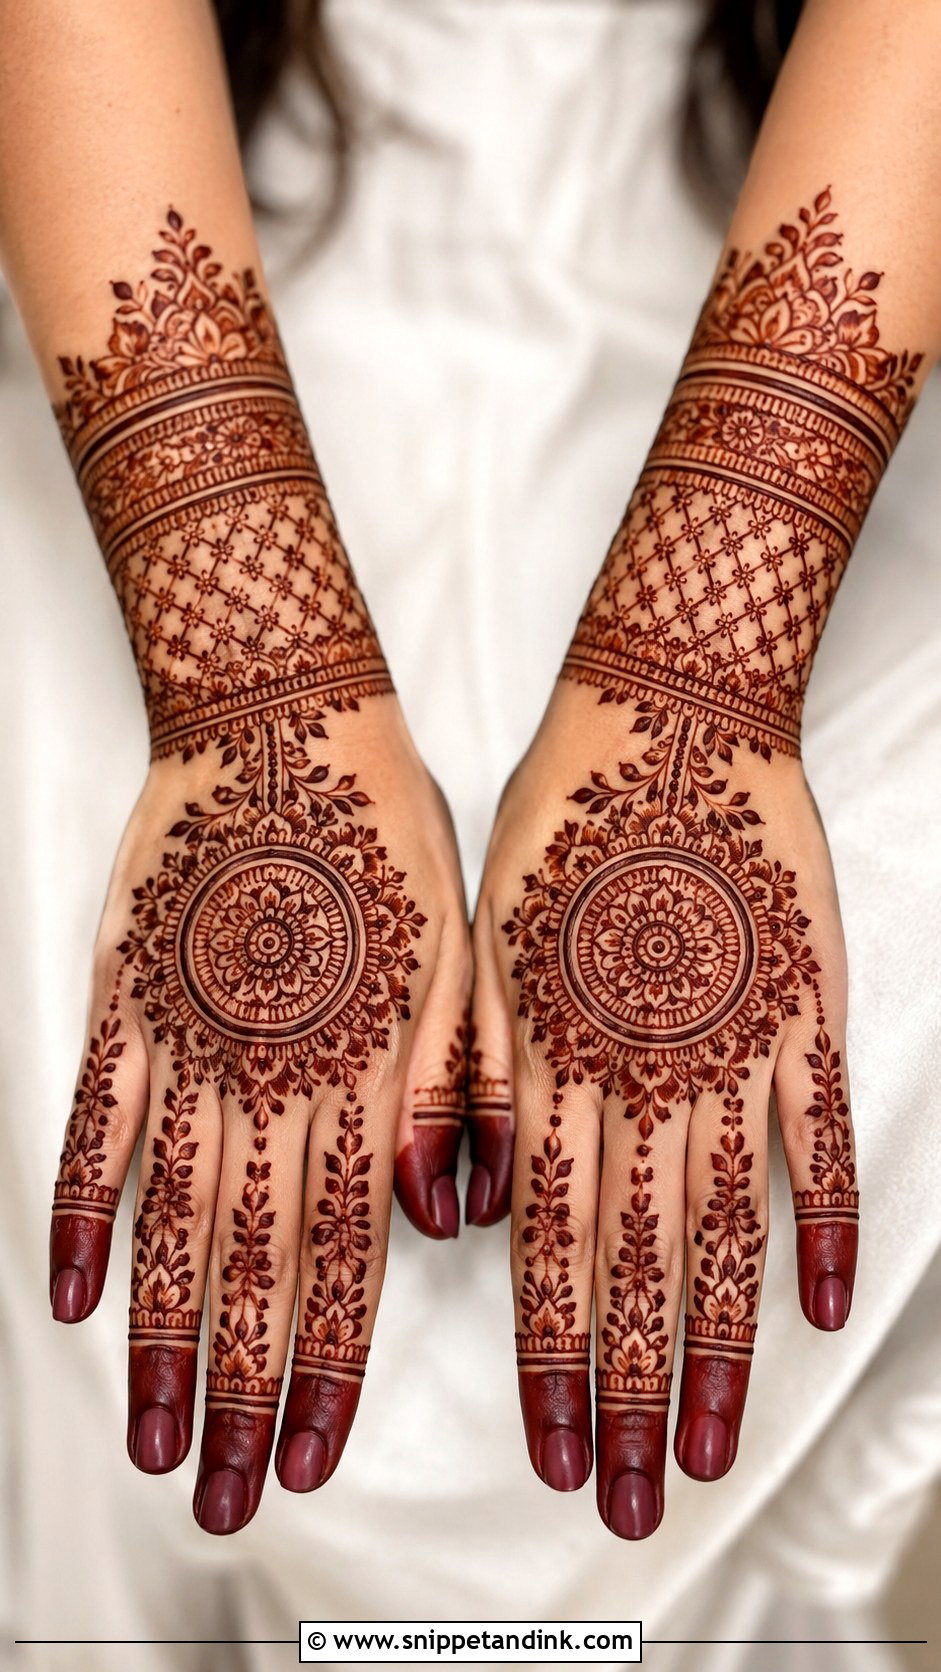
The back of the hand is what everyone sees during the ring exchange and in most ceremony photos, so it has to look tidy around rings and bangles. Mandalas, jaali mesh, floral trails, cuffs and finger panels all work here. Pick symmetry with a central motif or flow with a diagonal Arabic trail; mixing both usually looks confused. I finish the wrist like a cuff and link the fingers with chains or dots. One note: back-of-hand skin stains lighter than the palm, so expect this side to settle a shade softer.
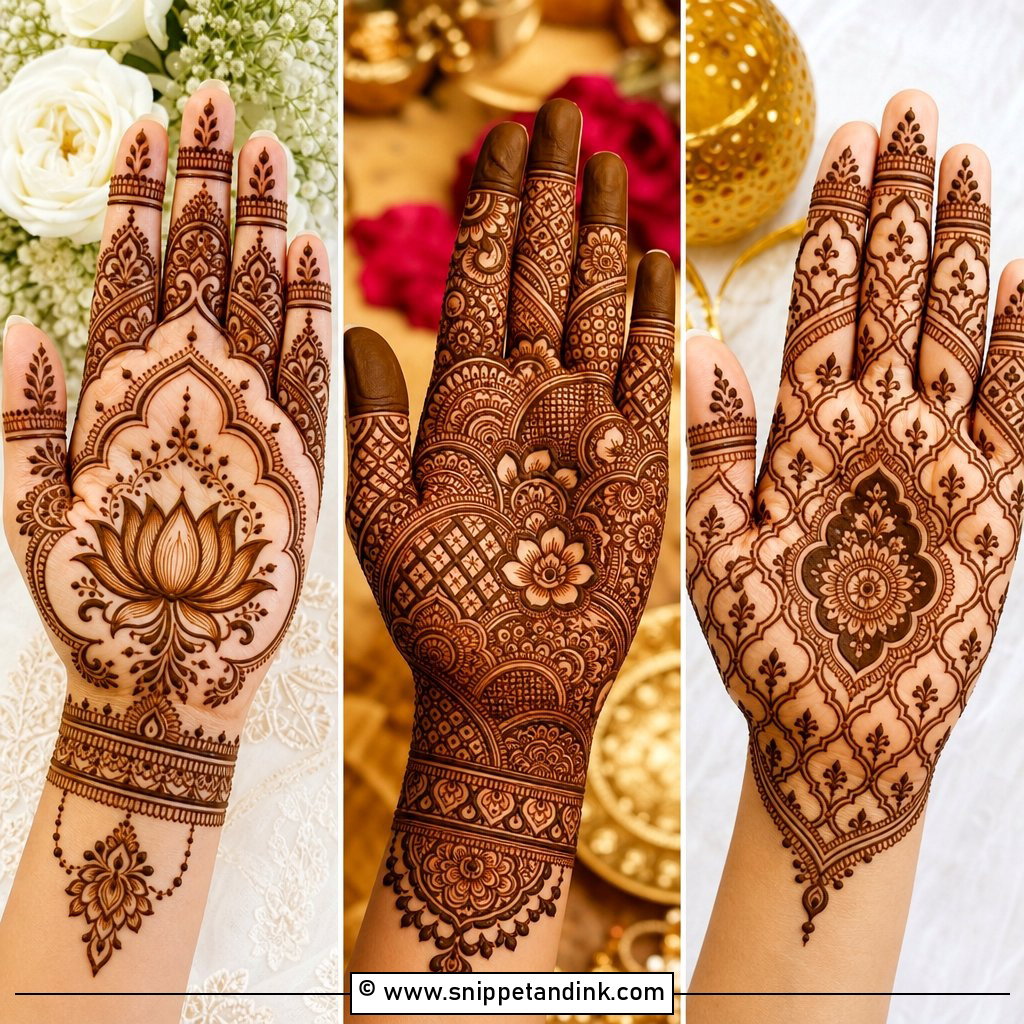
22. Bridal Mehndi Front Hand Design
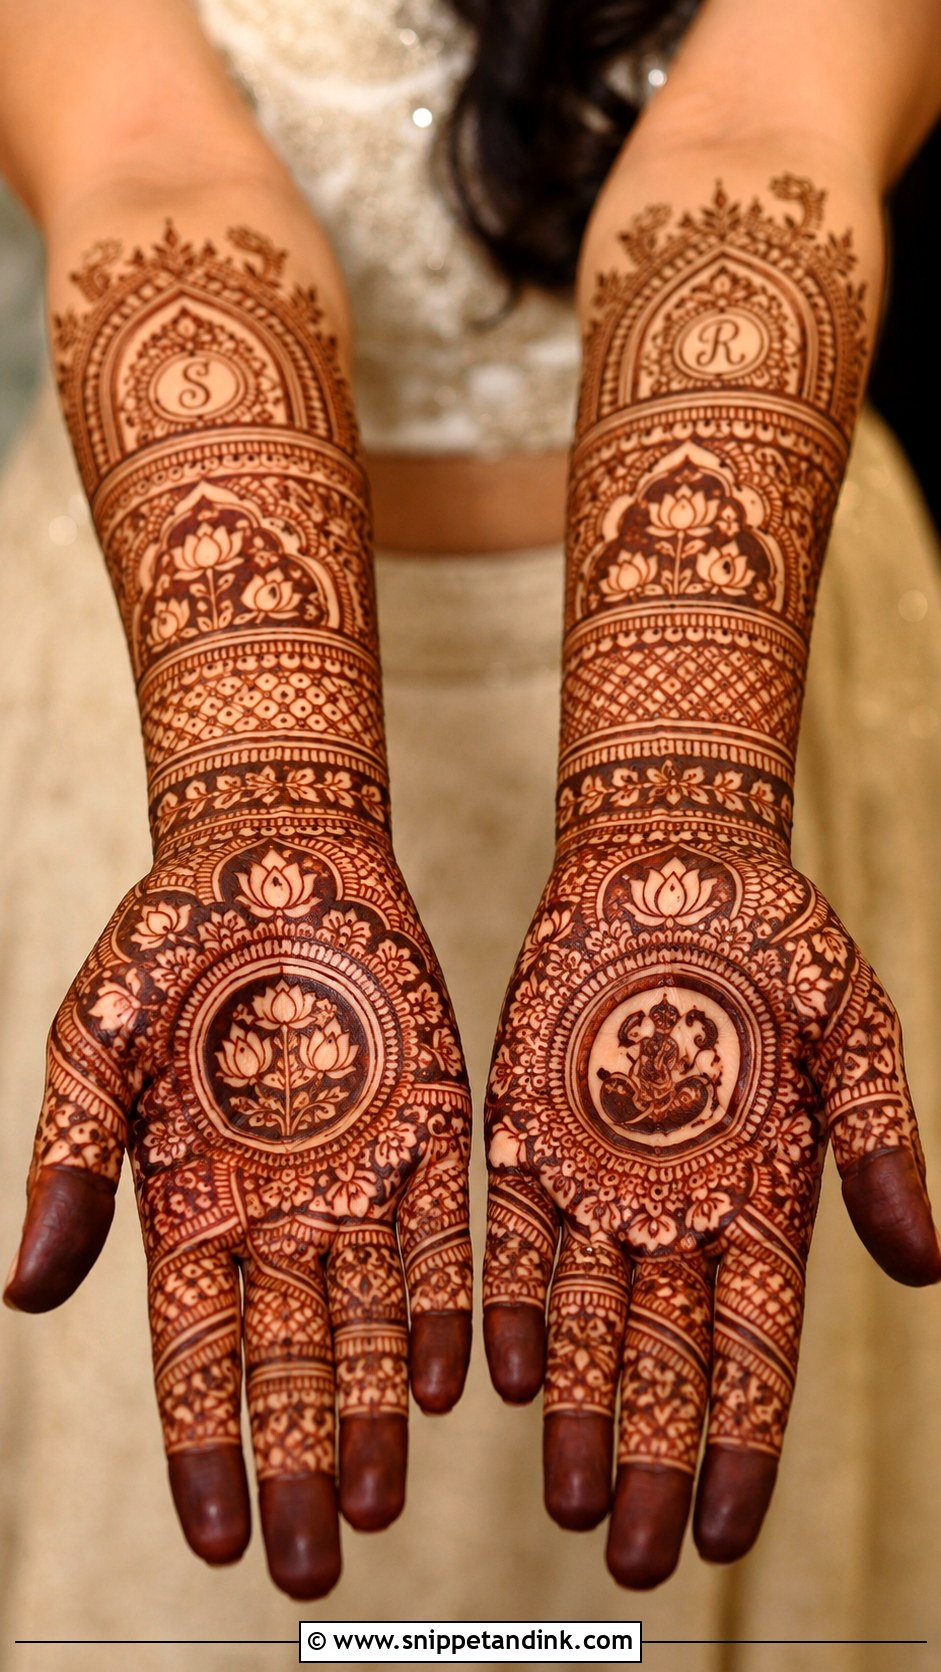
The palm is where henna stains darkest and where most meaningful details go: mandalas, portraits, lotuses, wedding symbols and hidden names. Since it’s in so many ritual photos, it needs to stay readable. I draw a strong centre first, then build borders, vines, dots and finger patterns around it. Fully filled fingertips give the boldest stain; delicate caps give a lighter finish. If you sweat a lot through the palms, tell your artist, as damp skin can blur fine filler while the paste is still wet.
23. Bridal Mehndi Design For Short Fingers
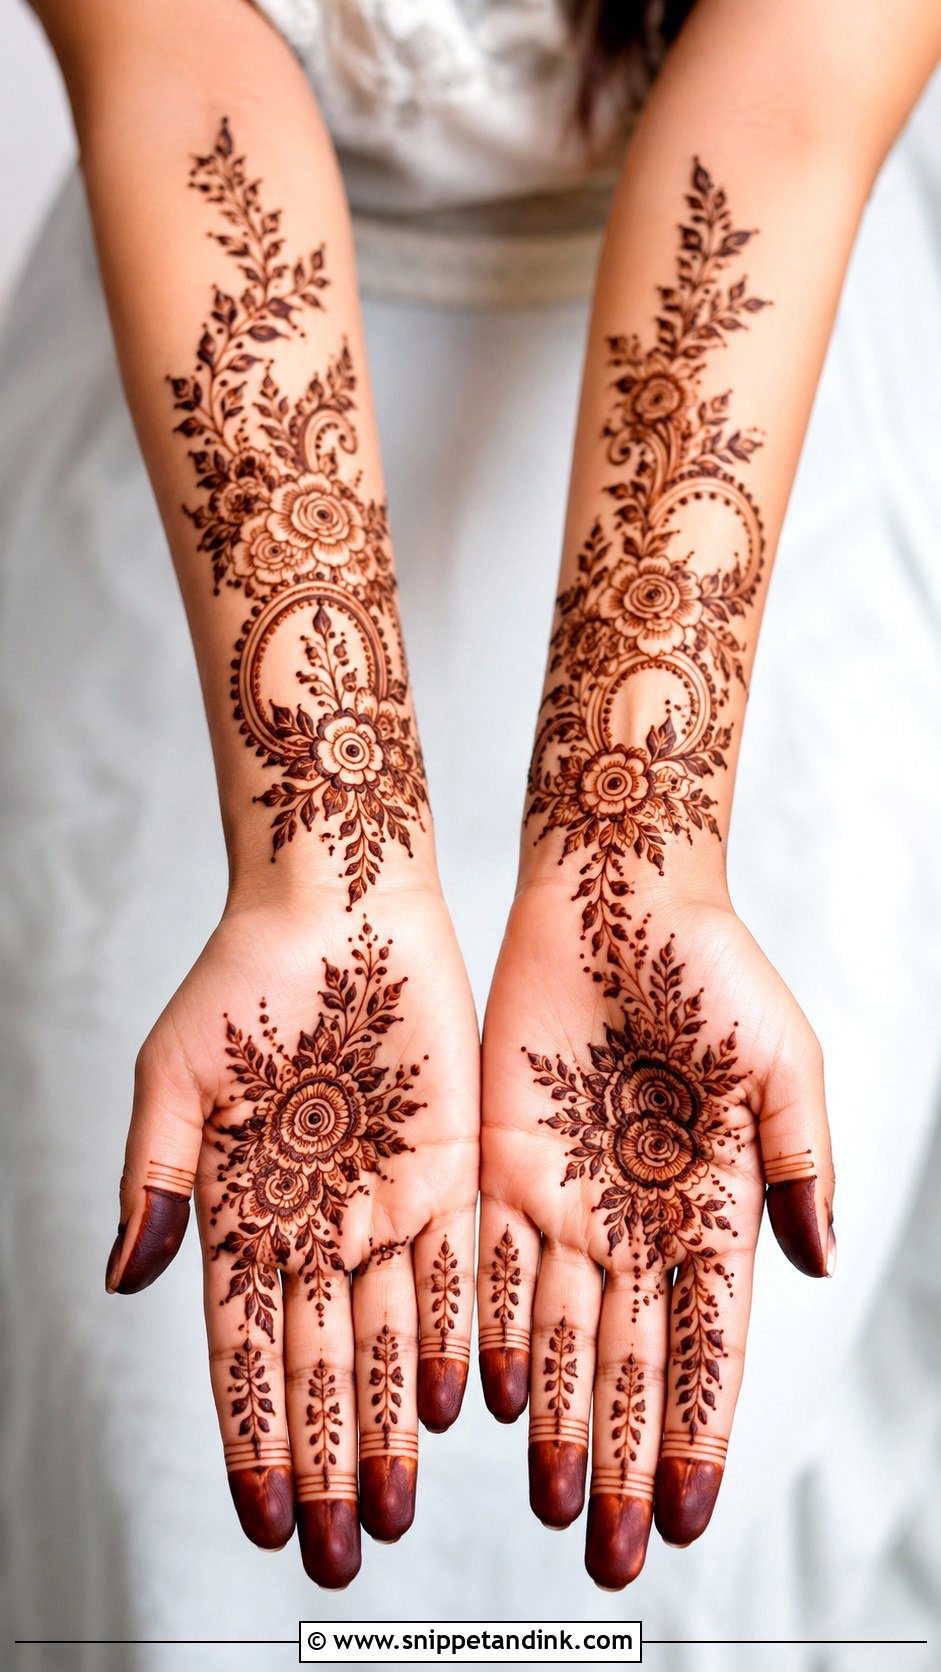
For shorter fingers, every choice should pull the eye upward. I use vertical finger patterns, slim trails, narrow bands and fine lines, and avoid wide horizontal blocks. Heavy fully filled fingertips shorten the finger visually, so I usually give caps or a thin tip instead. A diagonal palm layout helps too. In full coverage, keep the palm motif medium-sized and let the wrist work flow into the forearm. Arabic and Indo-Arabic styles suit short fingers well because their trails carry movement.
24. Bridal Mehndi Design For Long Fingers
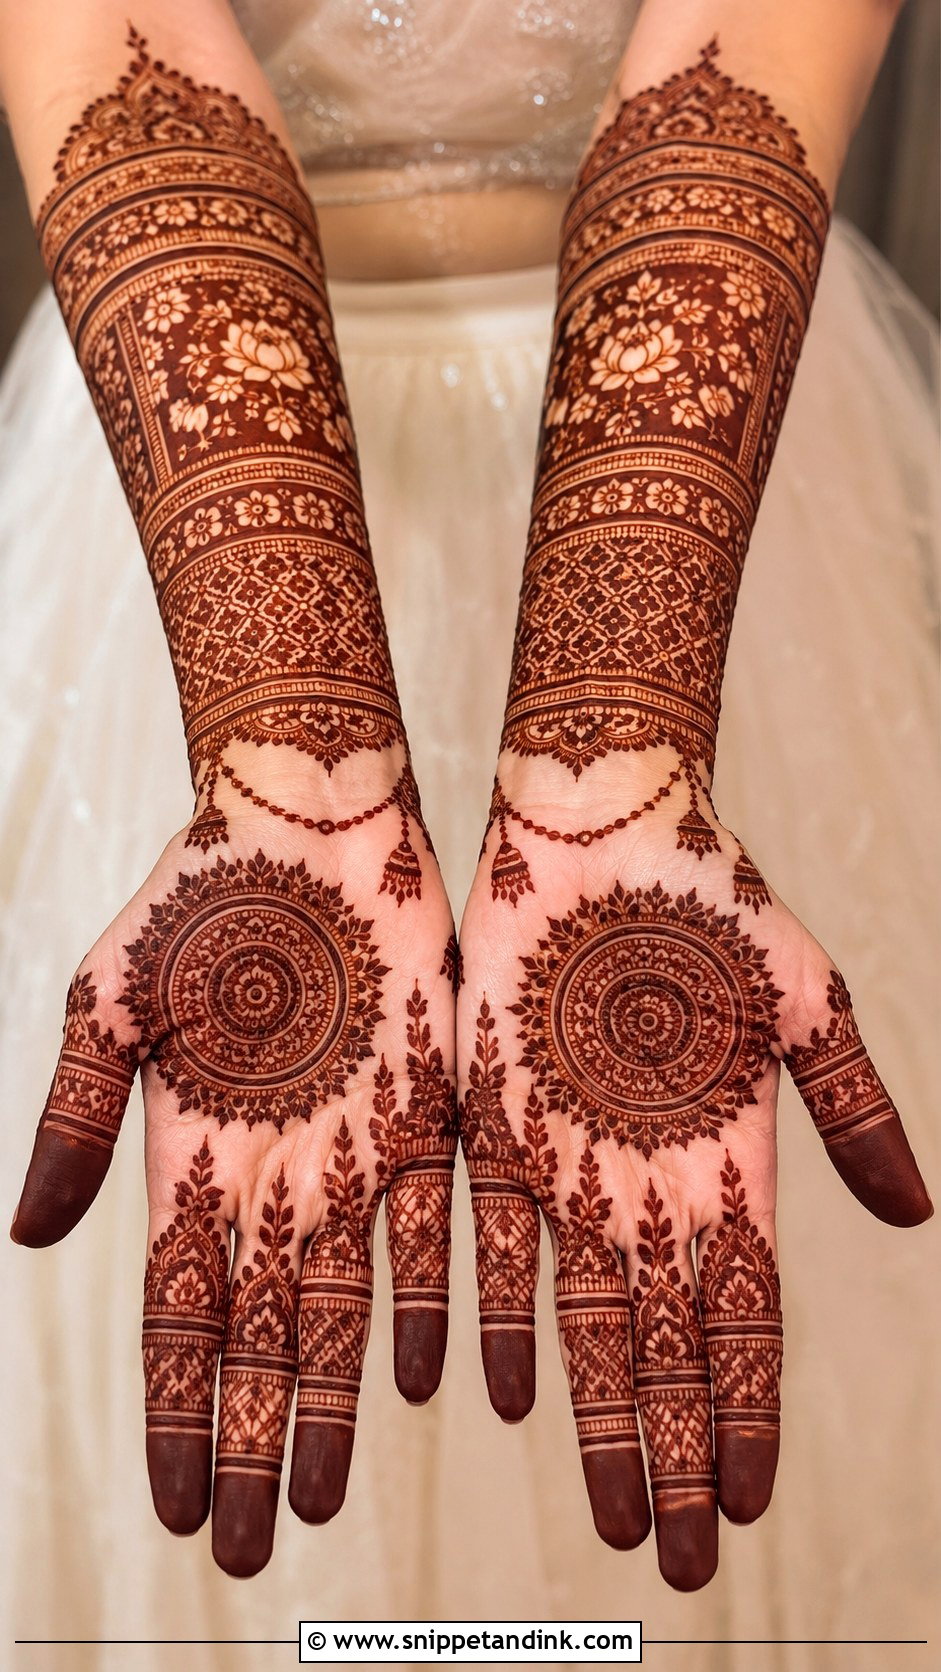
Long fingers can carry far more detail without looking crowded: stacked bands, jaali panels, vines, fingertip caps and ornamental lines. A full palm mandala or paisley balances their length. Dense Indian or Pakistani work with detailed finger sections looks regal; open Arabic florals look softer. Long fingers also suit ring-style mehndi and delicate chains. My one rule on fingers is coordination: each finger can differ, but they need to share a motif or the hand looks random.
25. Bridal Mehndi Design For Dark Skin
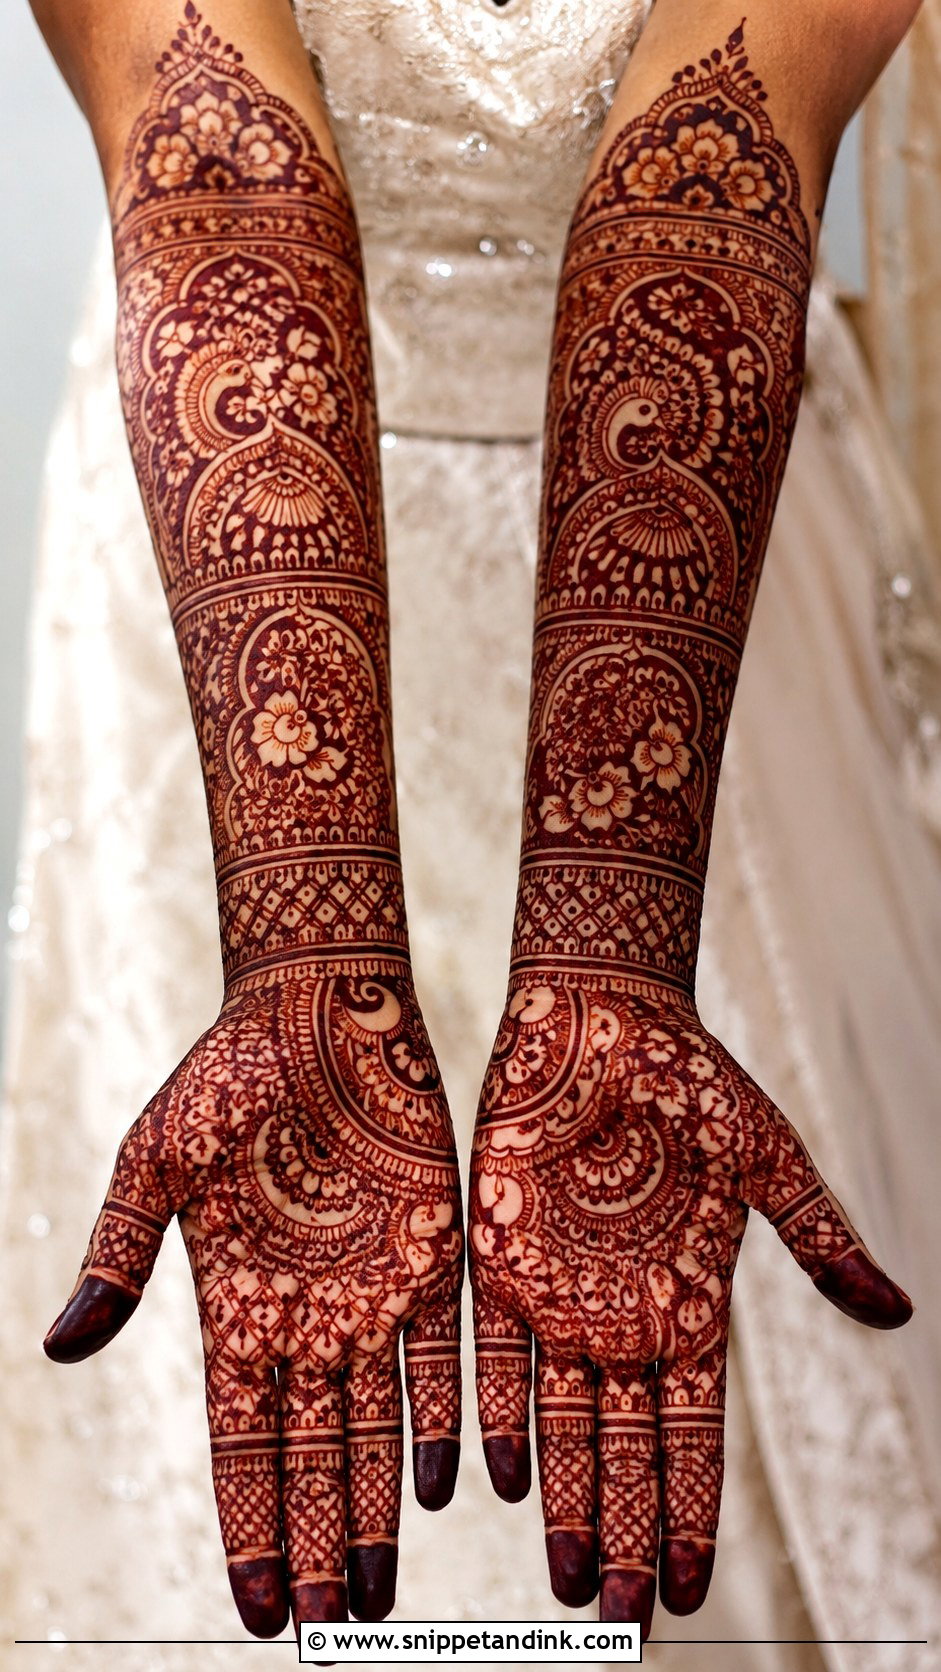
On deeper skin, natural henna matures to rich reddish-brown or maroon, and it reads best through bold, clear, well-spaced motifs. Strong outlines on florals, paisleys, mandalas, peacocks and jaali carry further than very tiny filler, which can disappear in photos. Arabic, Indo-Arabic and bold Indian styles are all flattering. Aftercare matters even more here: keep the paste on as long as you can, avoid water early, and give the stain a full day or two to deepen before judging the color. Anyone offering instant jet-black results is likely using chemical “black henna”, which I would never put on a bride’s skin.
26. Bridal Mehndi Design For Fair Skin
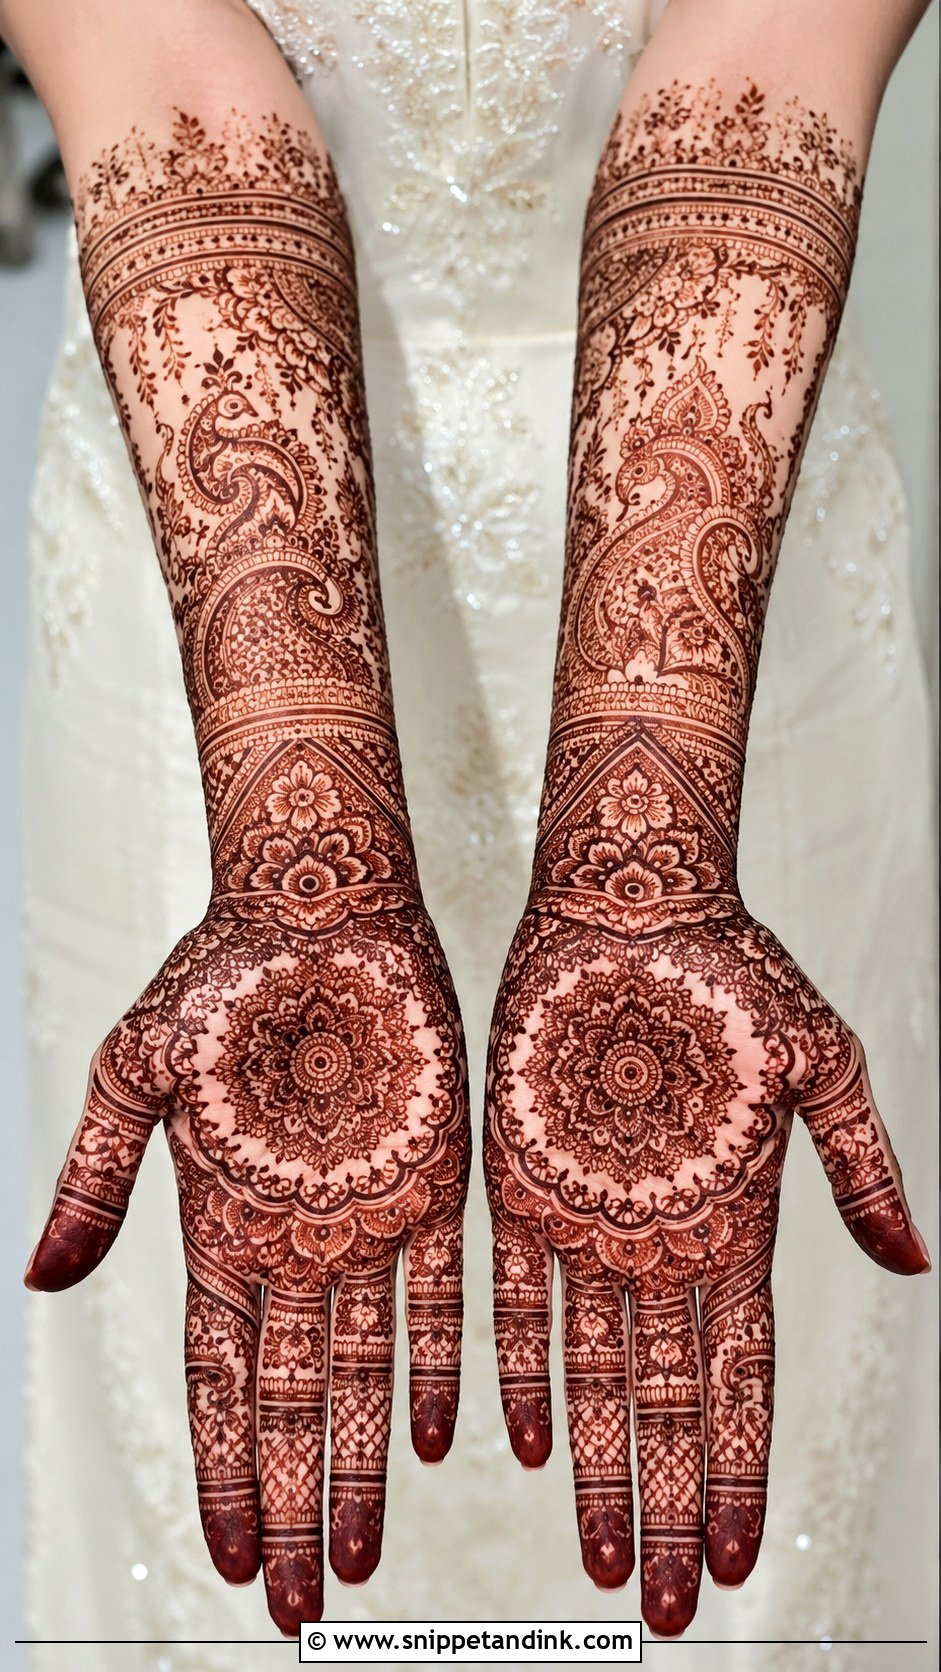
On lighter skin the stain shows contrast from the first hour, which means both fine detail and bold motifs read well, and every flaw in the line work shows too. Dense Indian patterns, delicate jaali, floral vines, mandalas and modern minimal layouts all work. Deep maroon looks particularly rich against fair skin. Since the early orange stage is very visible, I schedule the application far enough ahead that the wedding morning sees the darkened color, not the first flush. Balance the coverage against your jewelry so the hands don’t overpower it.
27. Bridal Mehndi Design For Engagement
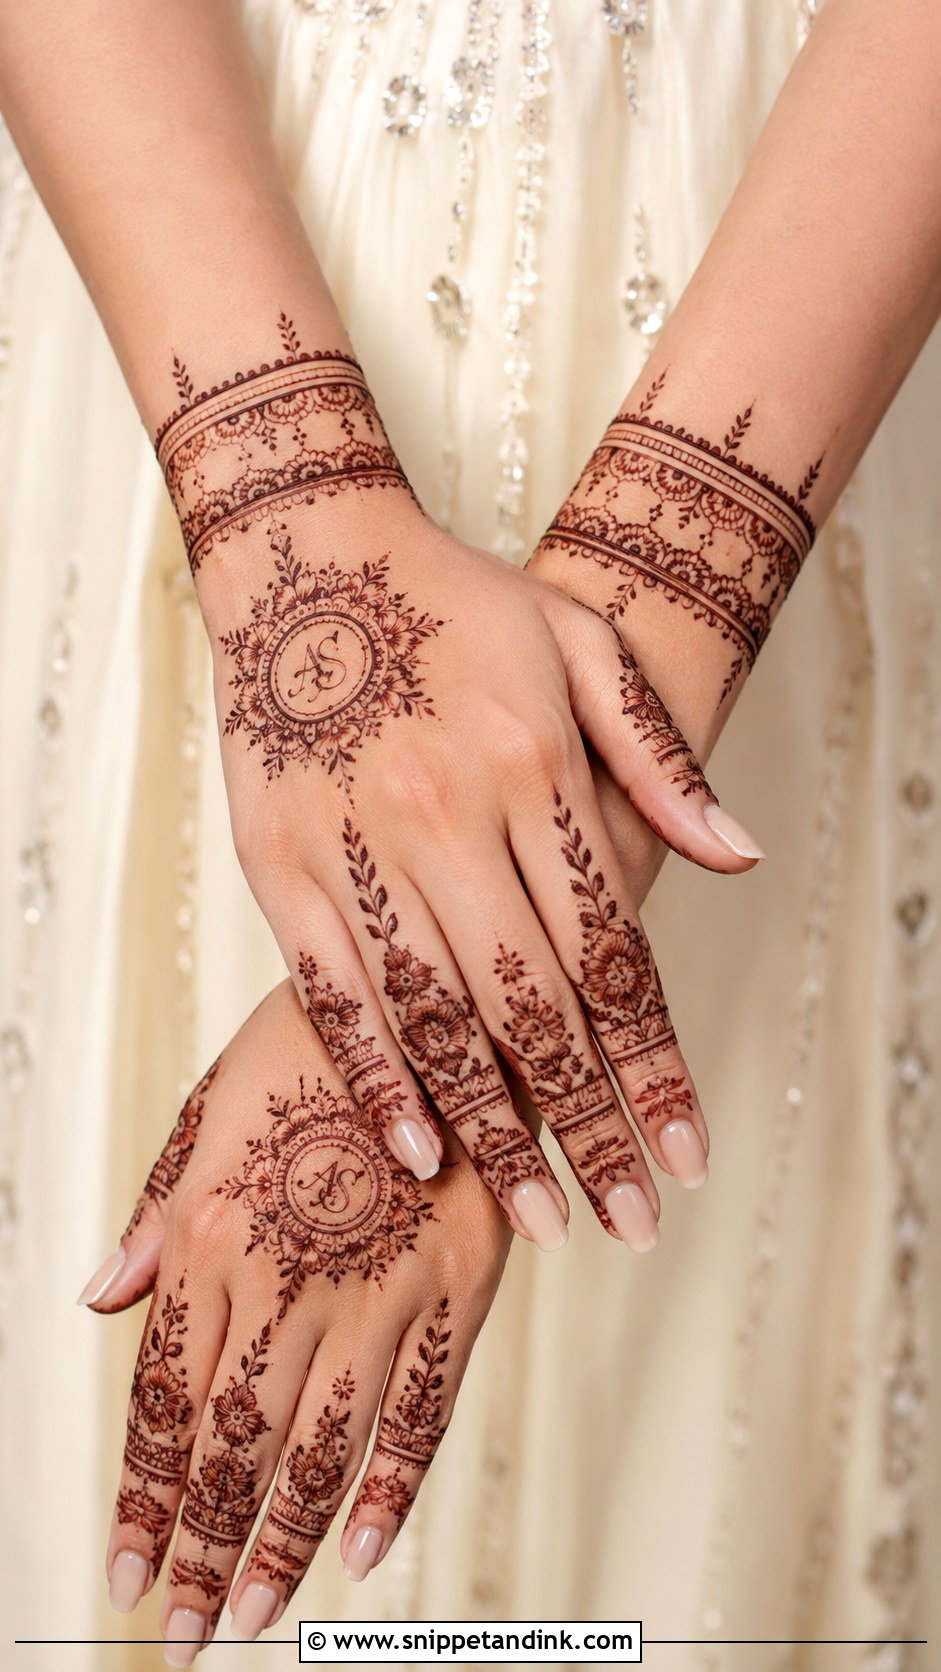
Bridal mehndi design for engagement should feel special without stealing the wedding design’s thunder, unless you want a grand look for both. Back-hand mandalas, floral trails, ring-style finger patterns, cuffs and light palm work all suit it. The ring is the star, so I keep the ring finger fairly open on the left hand. Initials, a small date or a tiny heart add meaning. Indo-Arabic and simple florals work well, and comfort counts, since you’ll be holding your hand out for close-ups all evening.
28. Bridal Mehndi Design For Reception
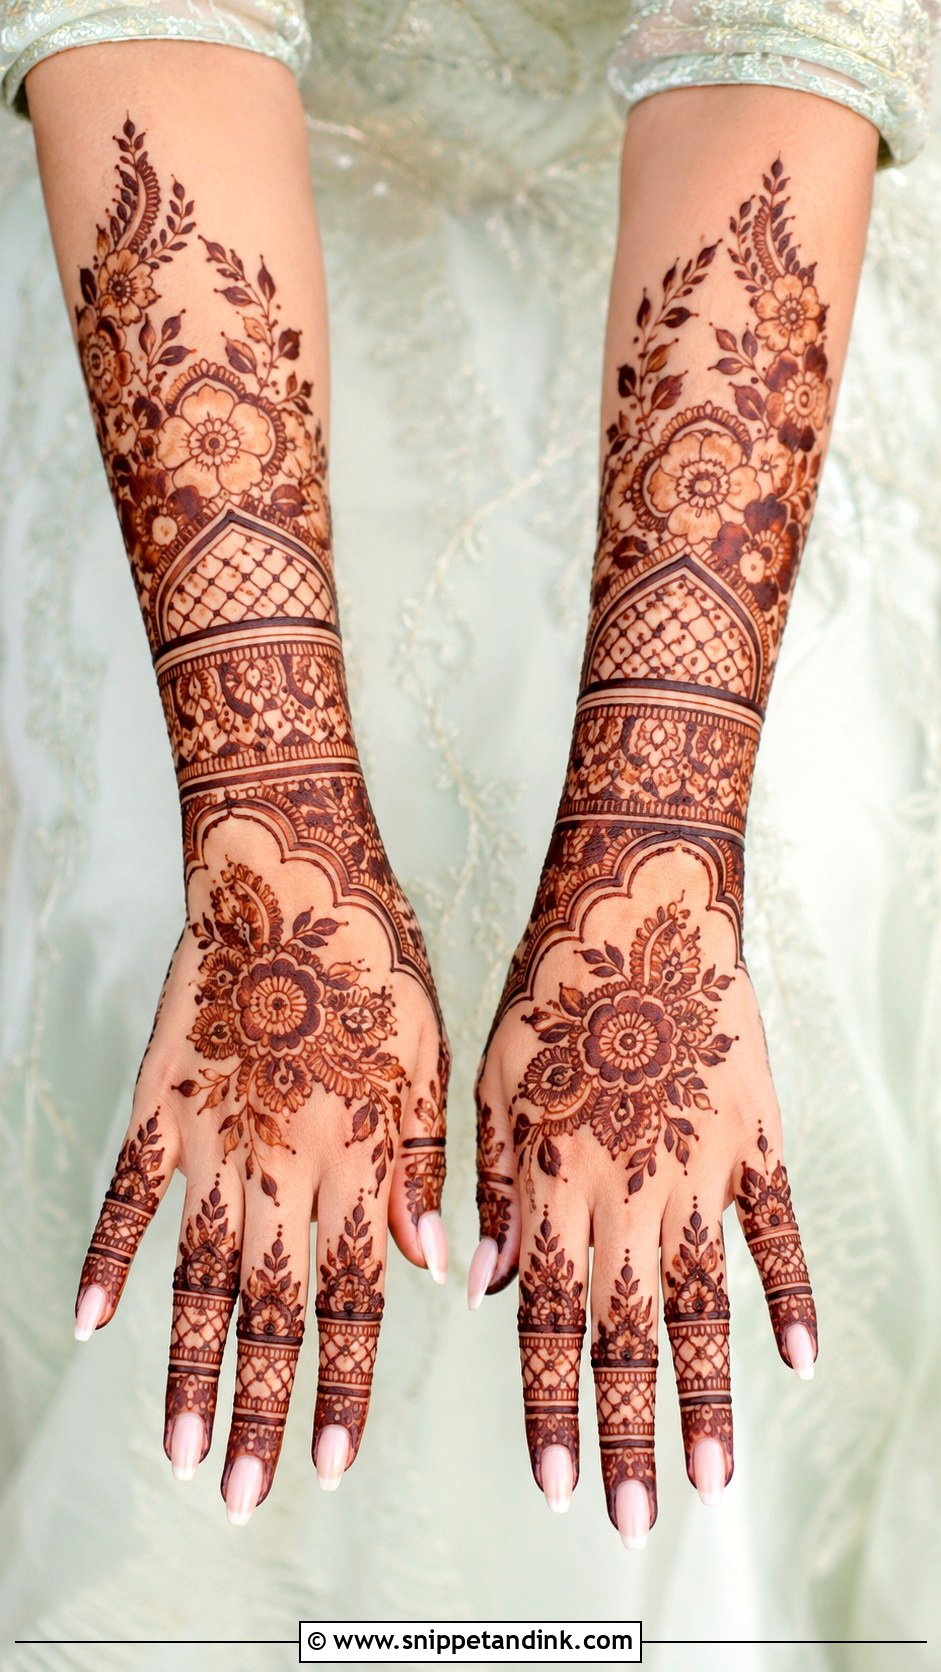
In most cases your reception mehndi is simply your wedding stain a day or two later, often at its darkest, so nothing new needs applying. If you’re having separate henna for a reception held well after the wedding, choose a clean Indo-Arabic layout, a floral back hand, bracelet work or a jaali pattern that suits a gown, saree or contemporary lehenga. Open spaces and bold motifs hold up under bright evening light better than fine filler. Refined finger detail and wrist cuffs dress it up without making it busy.
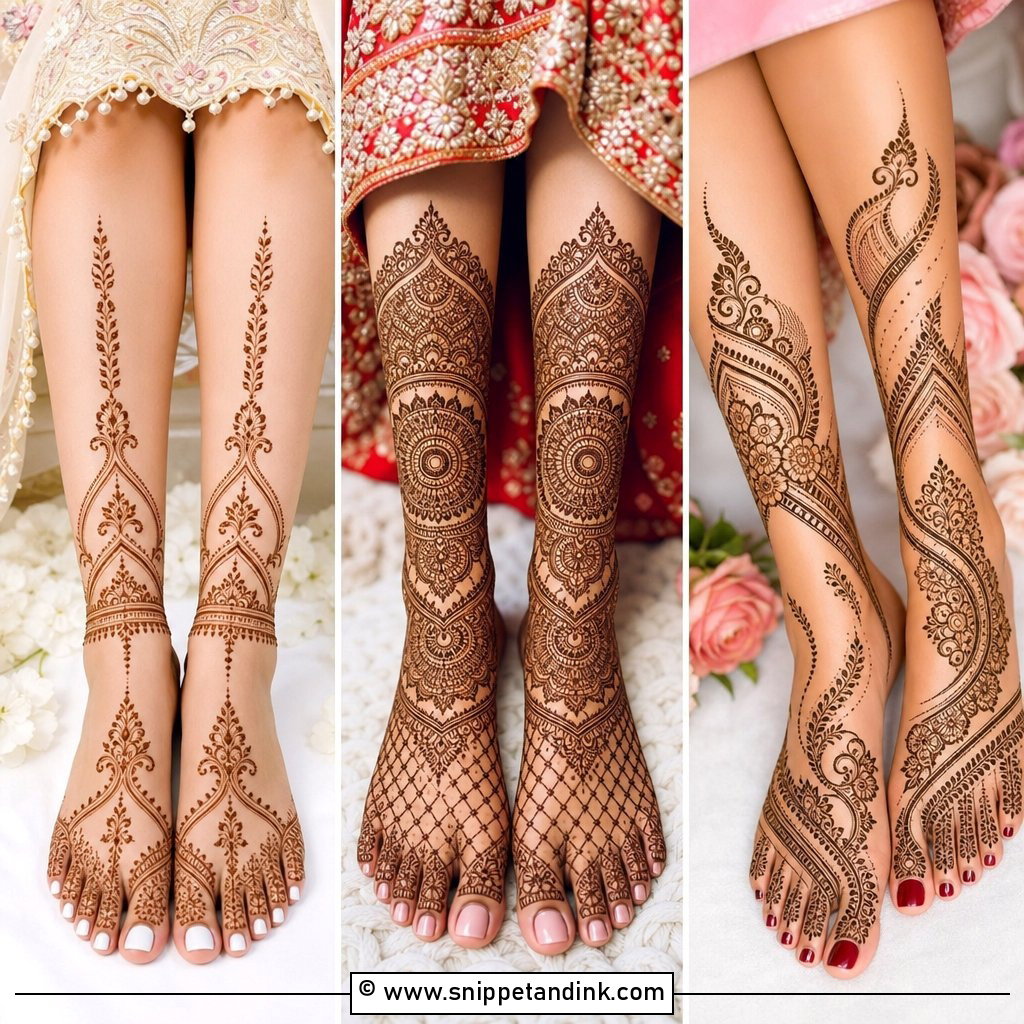
29. Bridal Foot Mehndi Design
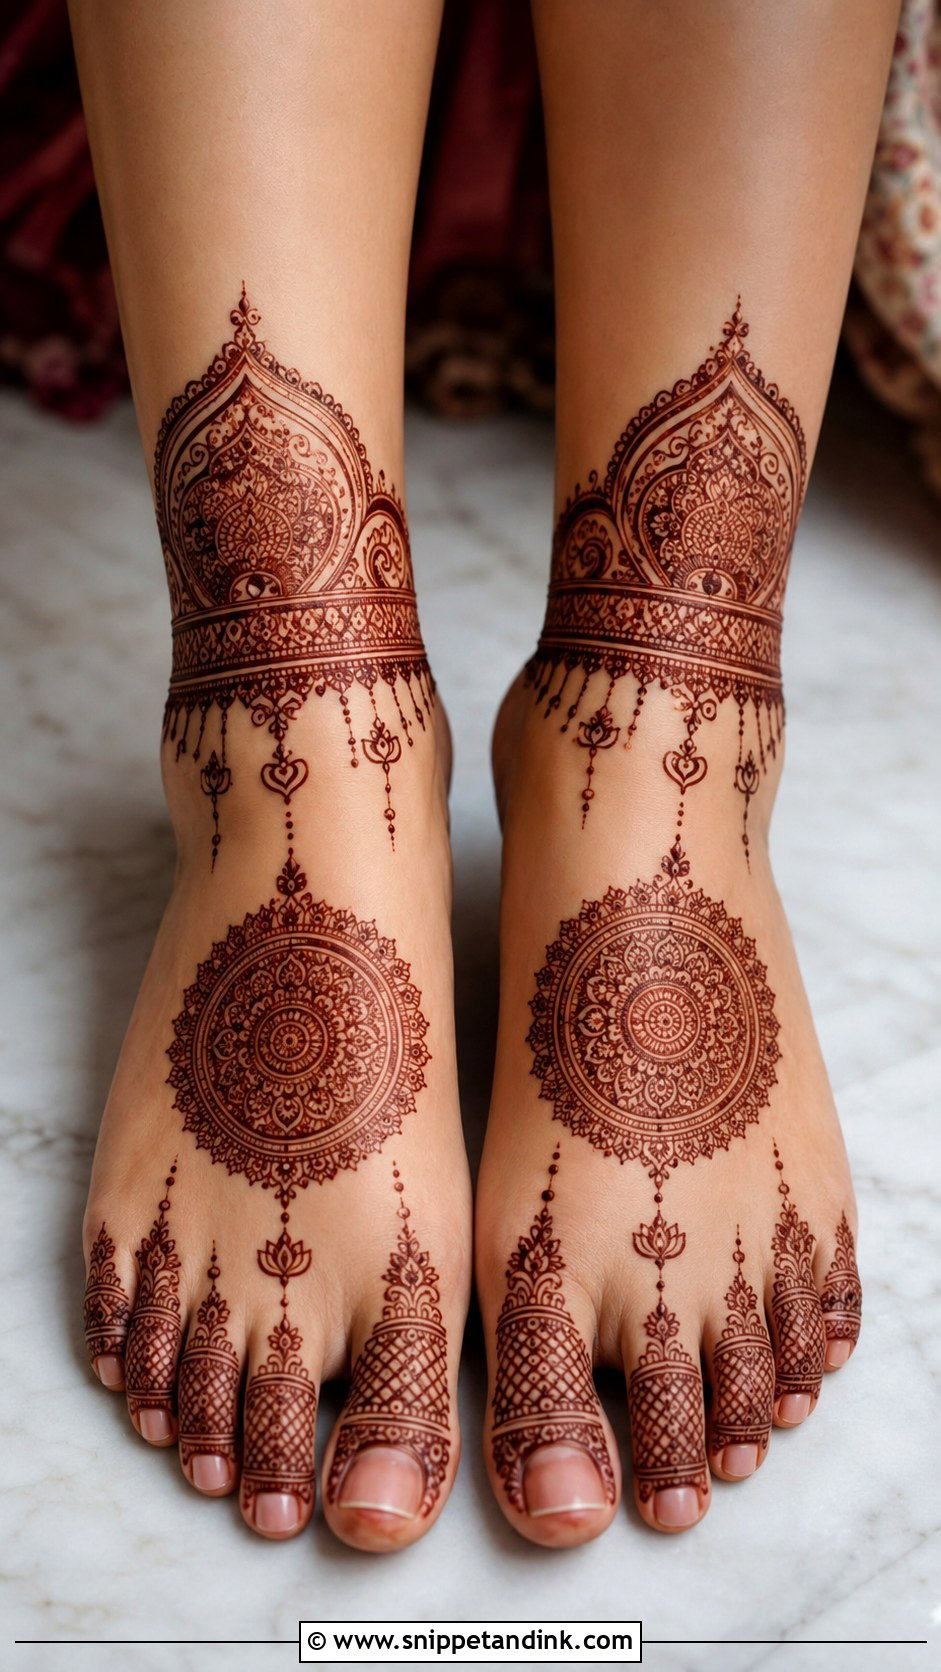
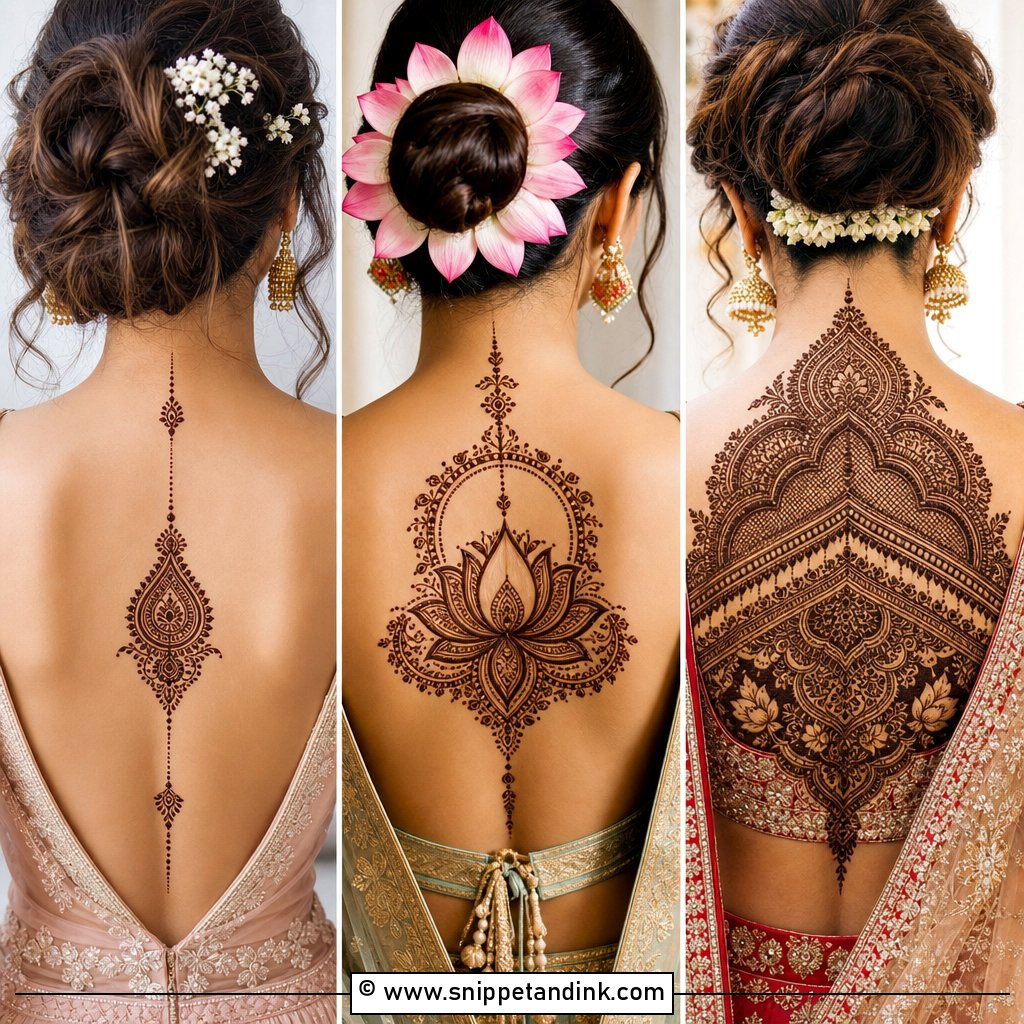
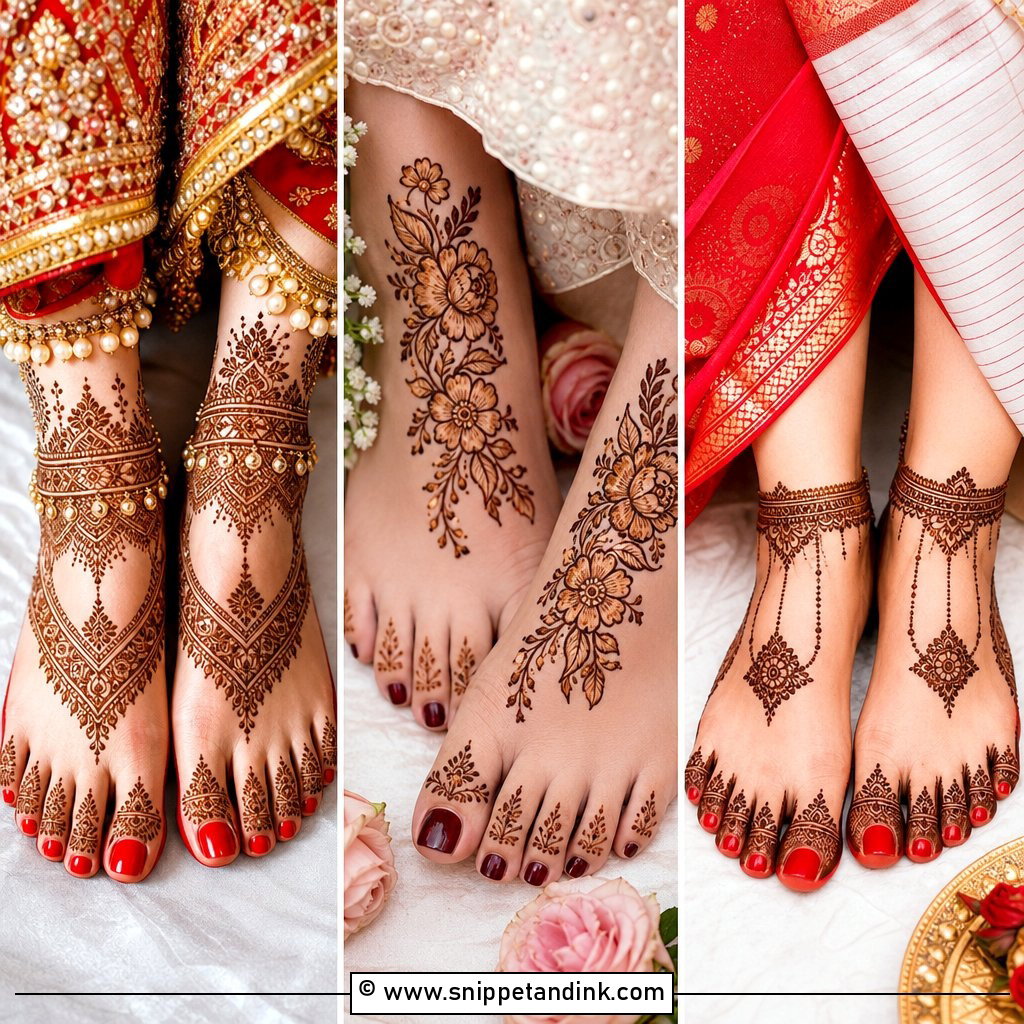
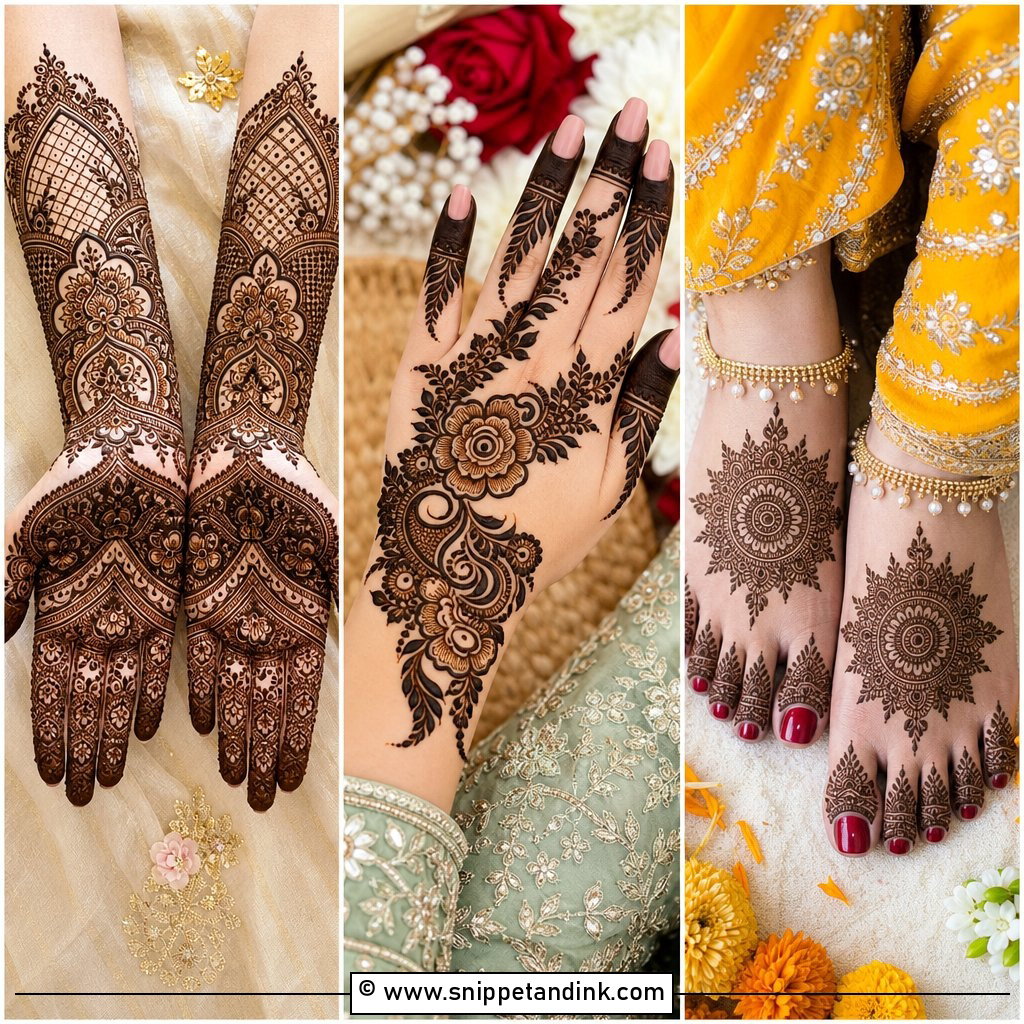
Foot mehndi completes the look when you’re wearing open footwear, anklets or toe rings. Common choices are a mandala on the top of the foot, lotus trails, anklet borders, paisley panels and toe detailing, either covering toes to ankles or staying light around the foot. I repeat a motif from the hands so the set feels coordinated. Feet stain very dark, often darker than the hands, but they rub constantly, so I keep paste away from strap lines and ask brides to stay barefoot or in loose slippers until the paste comes off.
30. Bridal Mehndi Design For Legs
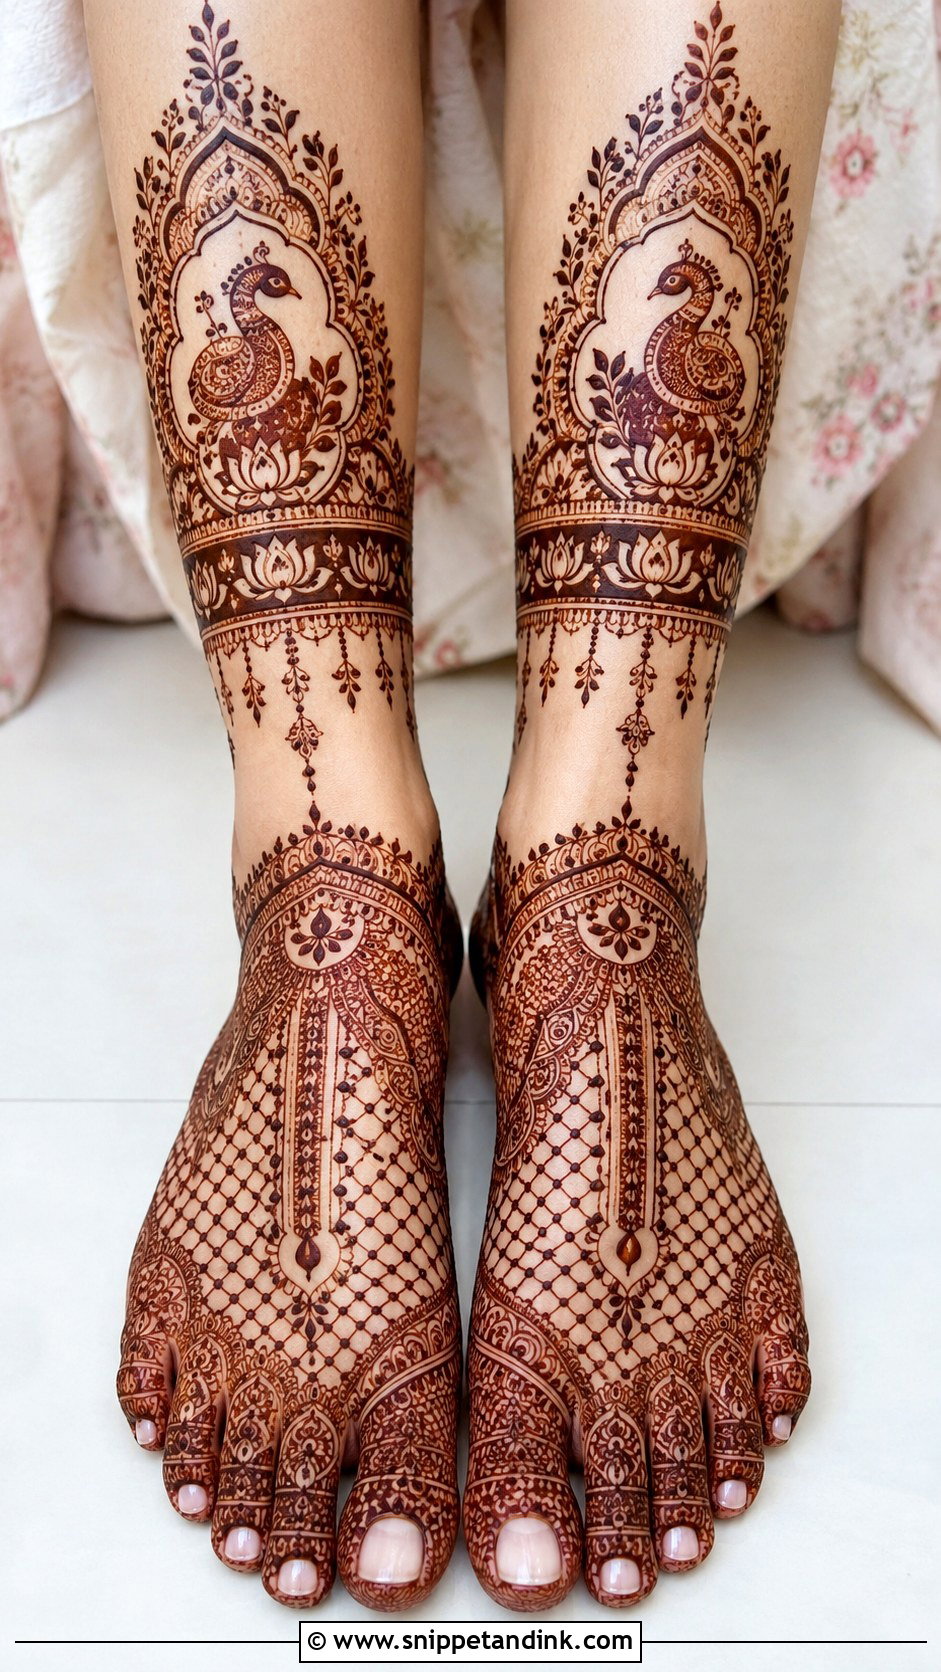
Bridal mehndi design for legs carries the design past the ankle to the calves or just below the knee. Lotus bands, paisley panels, peacocks, anklet borders, jaali and vertical trails are typical. It shows during rituals in lehengas and sarees that lift at the ankle. Because the area is large and curved, I draw bold, well-spaced motifs; fine filler gets lost on the shin. Repeating a flower or border from your hands ties the whole set together. Factor in the extra time: legs can add hours to an already long sitting.
The Two Days Between Paste and Ceremony
Freshly scraped natural henna is bright orange, not red. Over the next day or two it oxidises and darkens to its deepest shade, and that is the color you want on your wedding morning. So I book bridal applications one to two days before the main ceremony, never the same morning.
My aftercare routine for brides
- Leave the dried paste on for at least six to eight hours; overnight is better.
- Dab on a little lemon and sugar sealant while it dries so it stays in contact with the skin.
- Scrape the paste off with a blunt edge or your fingers. Don’t wash it off.
- Keep water off the design for as long as you reasonably can, ideally until the next day.
- Stay warm. Heat helps the stain develop.
- Skip waxing, scrubs and chlorinated pools until after the wedding, since exfoliating removes stained skin.
If the stain looks pale the next morning, don’t panic and don’t reapply over it. It almost always deepens through the day. A thin coat of balm or a natural oil before washing up can help protect it through all the ritual handwashing that comes with a wedding.
Planning a Five-Hour Sitting You Can Actually Get Through
Dense full-hand and leg work can run for many hours, and the bride can’t use her hands for much of it. Eat a proper meal before we start, use the bathroom right before the paste goes on, and have someone ready to feed you and hold your phone. I work one side at a time where I can, so one hand is free longer.
Wear something with loose, short sleeves and a neckline you won’t need to pull over your head afterwards. Sleeping in paste is easier with a cotton sheet you don’t mind staining and your hands wrapped loosely in tissue, never plastic, which traps sweat and smudges the lines.
How Your Hands Should Feel on the Morning of the Wedding
Heavy traditional coverage, an open Arabic trail, modern negative space or a light floral hand can all be right; what matters is how it sits with your outfit, hand shape, jewelry and schedule. Before your consultation, save a few references you love, mark where you want initials, dates or portraits, and agree the application day with your artist so the stain peaks at the ceremony. Do that, and the design on your hands will feel like yours rather than a copy of someone else’s.
You'll Like These Ideas:


Leave a Reply