
Feet and lower legs take henna differently from hands. The skin on the top of the foot and around the ankle is thicker than the inner arm, so it stains deep, while the calf usually comes up a shade or two lighter. That one fact shapes most of what I suggest below. You’ll find full bridal coverage, airy Arabic trails, geometric ankle bands and negative-space work, drawn from Indian, Arabic, Indo-Arabic, Moroccan and Gulf traditions, for weddings, Eid, Diwali, Karwa Chauth, engagements and smaller family functions. For each one I’ve added what I’d actually tell you in the chair: how long it takes, where it smudges and who should skip it.
Getting Your Legs Ready the Day Before a Long Henna Sitting
Leg mehndi is less about the design and more about logistics. Once paste is on your feet, you can’t walk, you can’t easily use the bathroom, and you can’t put shoes on for hours. Most of the problems I see come from things that should have been sorted the day before.
- Wax or shave a day or two ahead, never after. Hair removal after application strips the top layer of stained skin and the design fades patchy.
- Exfoliate gently the day before, then skip body lotion and oil on the legs on the day. Henna needs clean, dry skin to bind.
- Wear loose, wide trousers or a skirt you can lift above the knee. Tight leggings pressed against wet paste ruin the design.
- Eat and use the bathroom right before we start. For knee-high bridal work, you’ll be seated for a long stretch.
- Bring a low stool or cushion. I work best when your heel rests at about knee height, so I’m not bending your ankle to reach the sides.
If you’re having hands and feet done on the same day, I usually start with the feet. That way your hands stay free for the first part, and the feet get the longest time with paste on, which they need because they’re the part you’ll be walking on.
Ask what is in the cone
Natural henna never stains black. It starts bright orange, then deepens to reddish brown or maroon over a day or two. If anyone offers instant black henna for legs, say no: those pastes often contain PPD, a hair dye chemical that can cause serious skin reactions. A good artist will happily tell you what her paste is made from.
1. Full Leg Bridal Mehndi Design
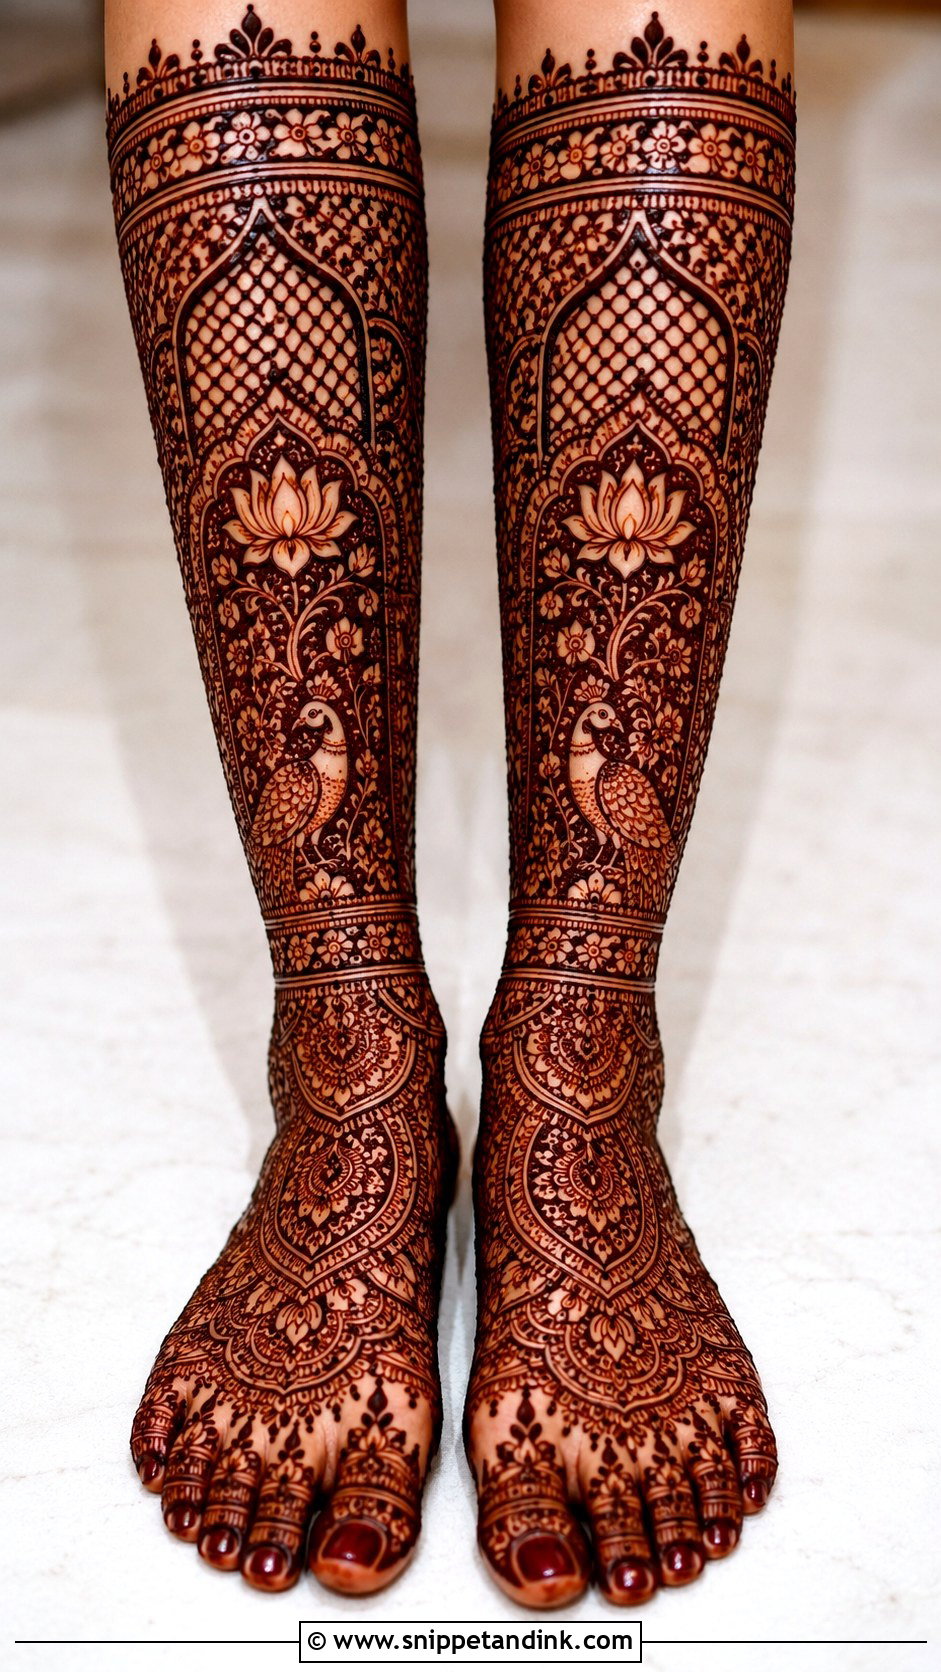
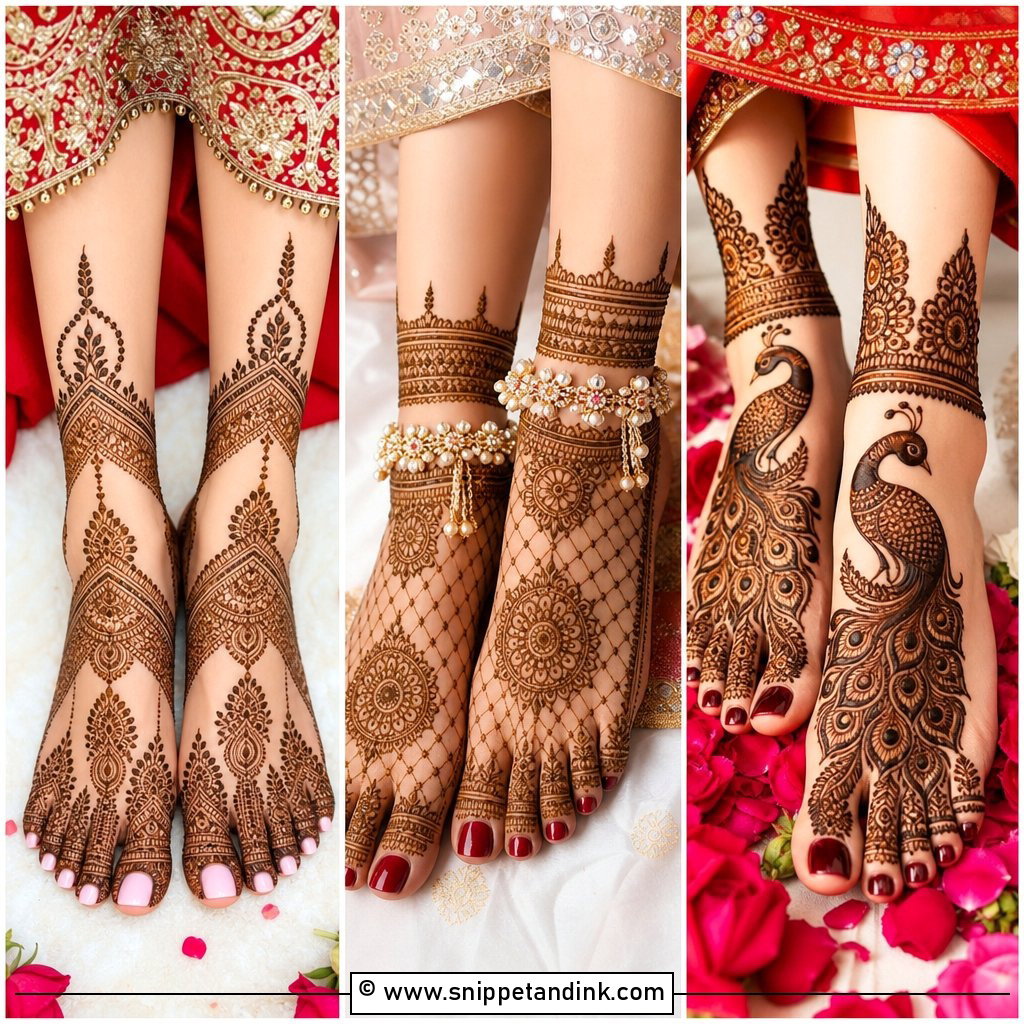
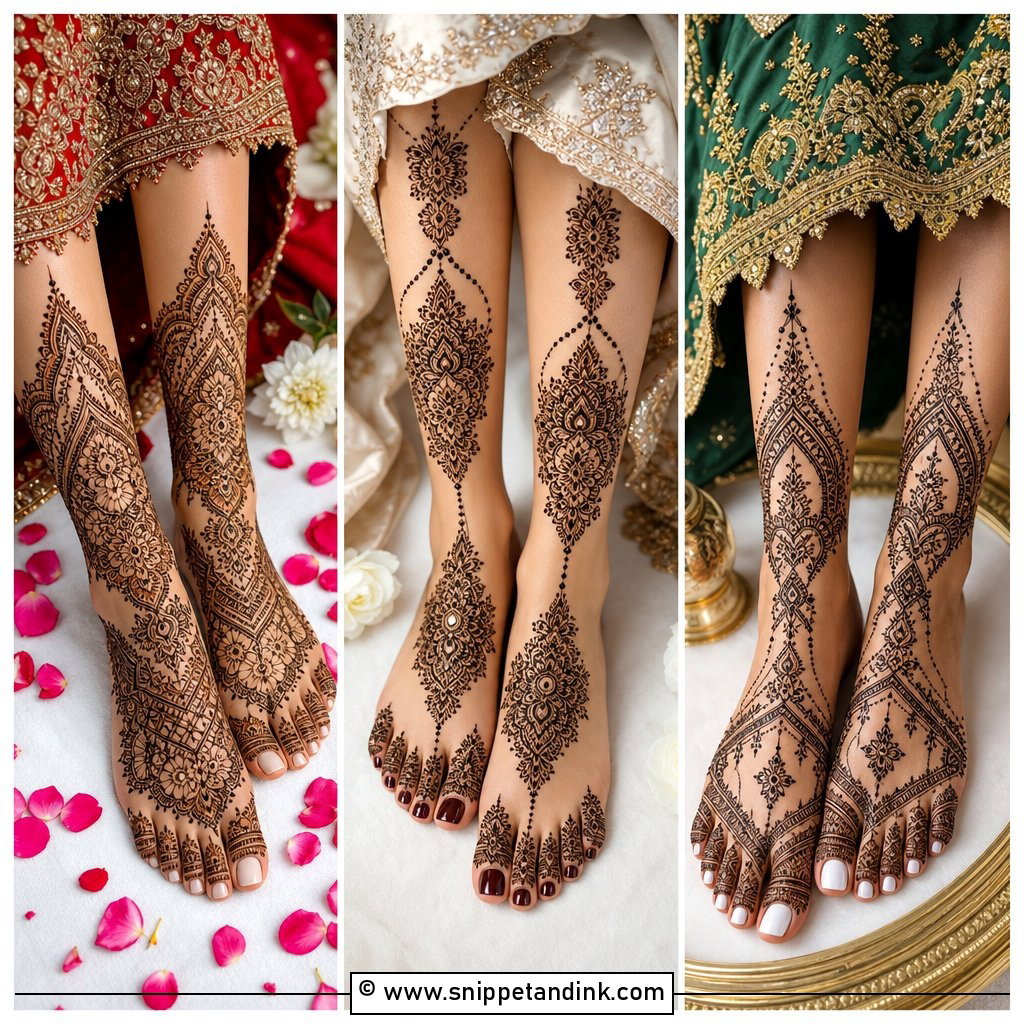
A full leg bridal mehndi design runs from the toes to just below the knee, packed with paisleys, lotus flowers, peacocks, jaali mesh, mandalas and fine fillers. I plan this one in sections: feet first, then ankles, then shins, and I let each section set before I move higher so you aren’t resting a wet calf on a wet heel. Expect several hours for both legs, and plan to stay seated for a good while after. The detail stays visible under a lehenga, saree or gharara hem, and it suits bridal anklets because the chains sit over open bands. I keep the centre of the foot calmer than the toes so it doesn’t read as a dark blur in photos.
2. Simple Leg Mehndi Design
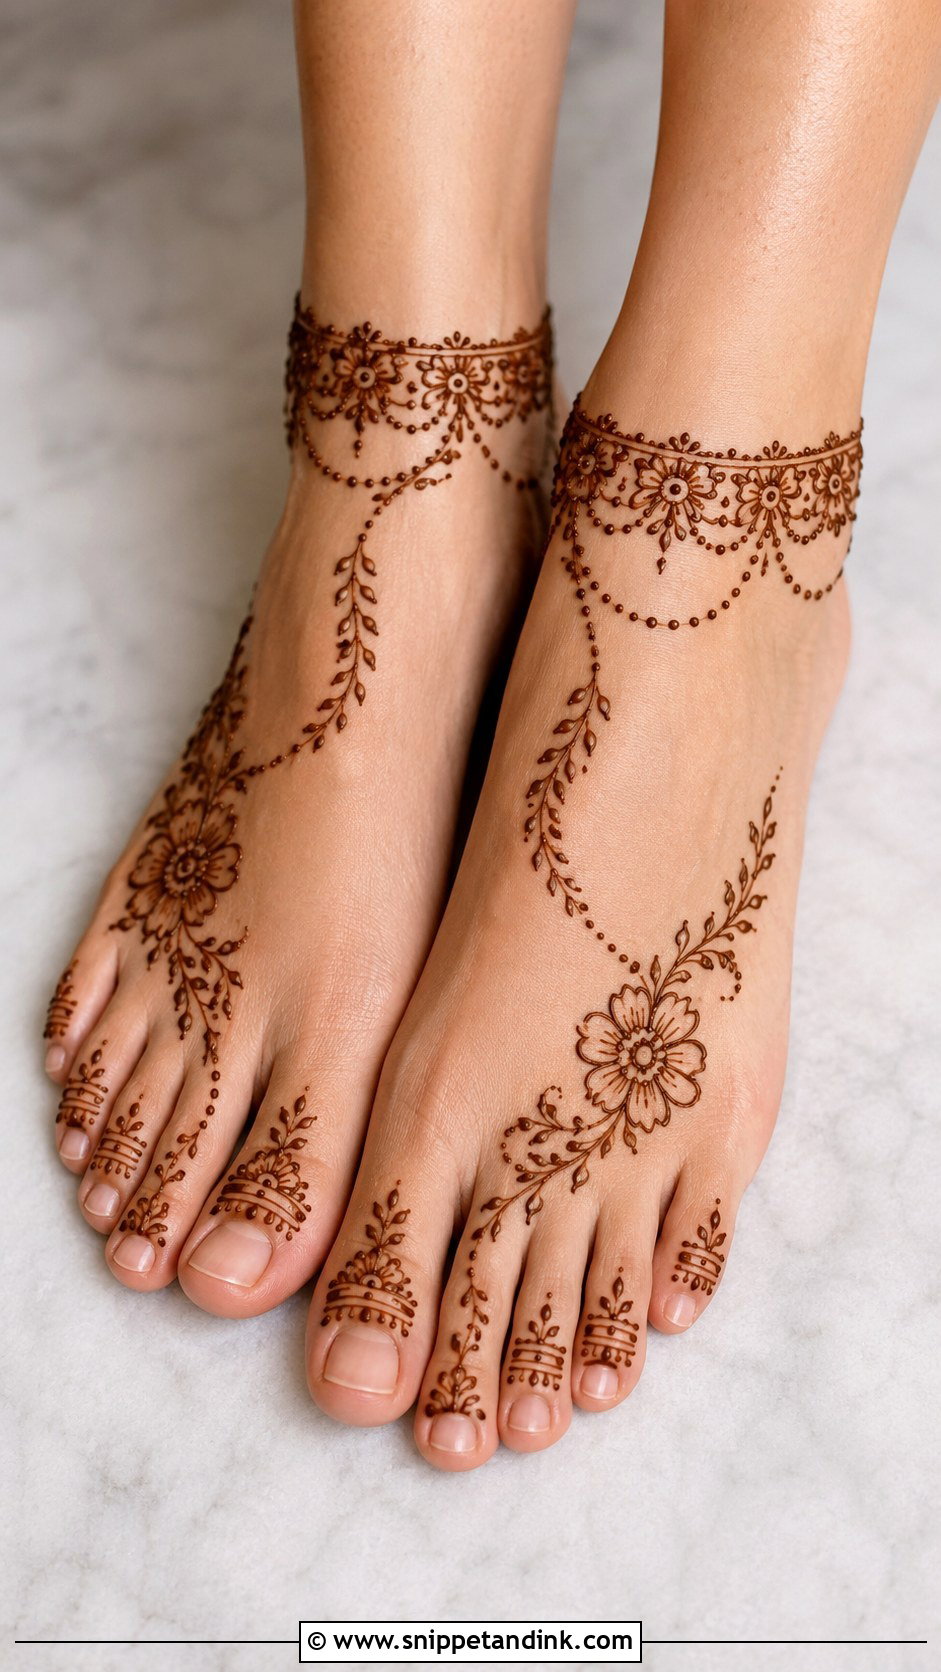
When someone tells me they can only sit for half an hour, this is where we land. A few flowers near the toes or along the side of the foot, a curve of leaves toward the ankle, some dots and a soft band. The open skin keeps it fresh, and because each motif has room around it, the stain reads clearly instead of merging. Guests, bridesmaids and teens tend to ask for it, and it’s easy to do lighter on one foot if you’d rather not match.
3. Arabic Leg Mehndi Design
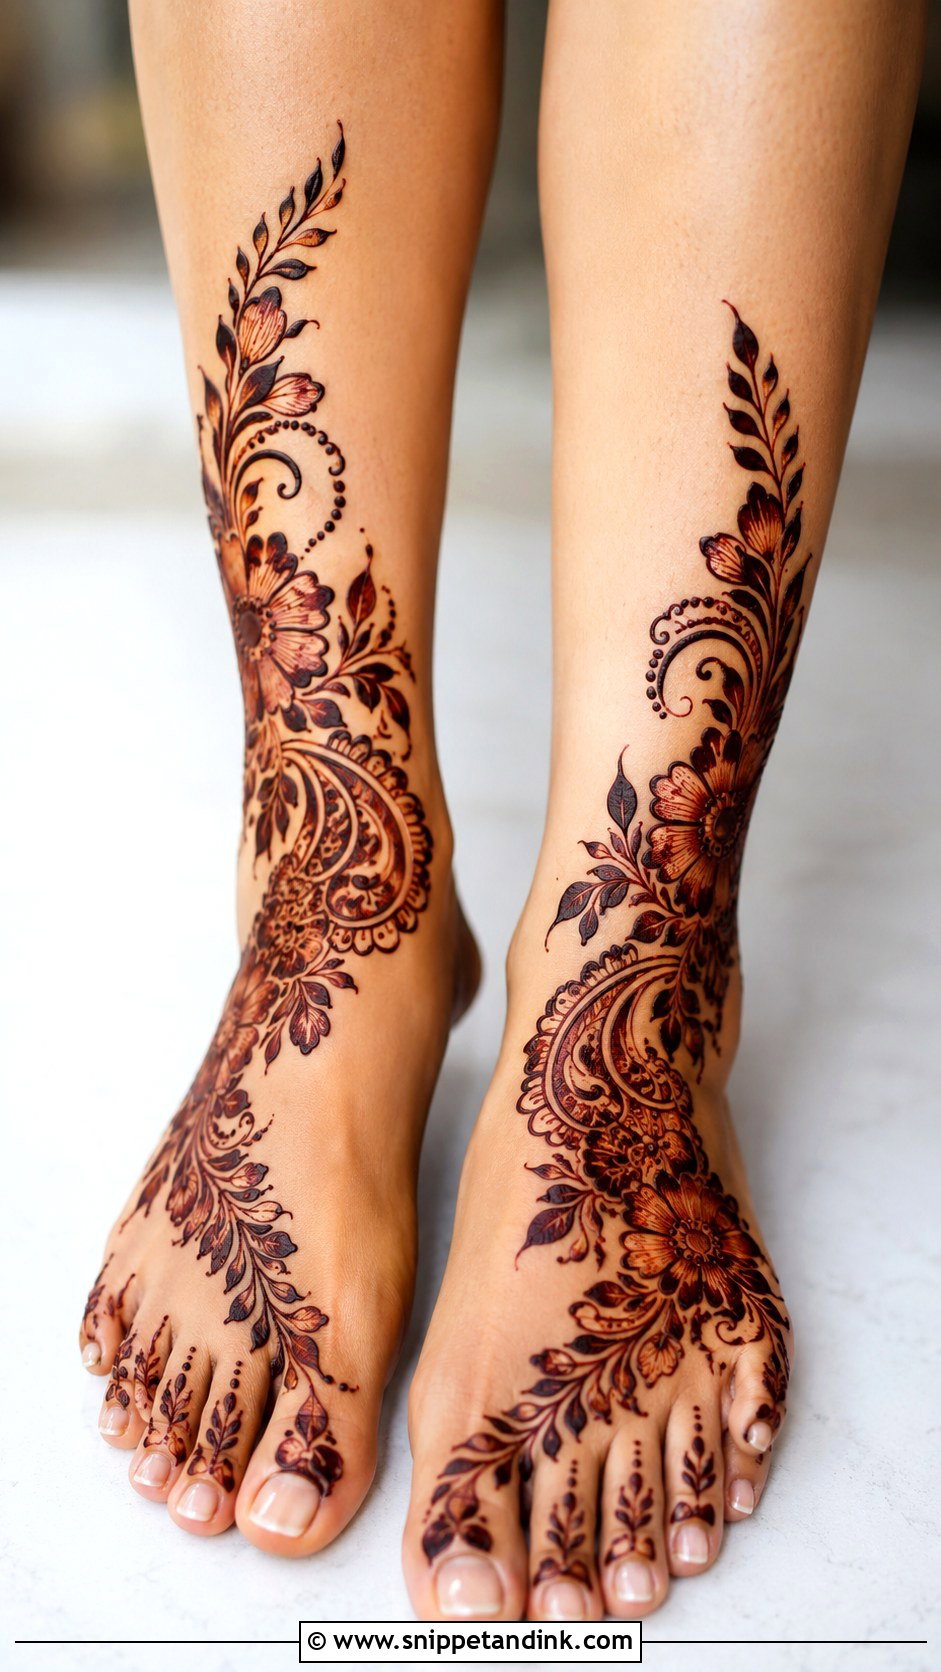
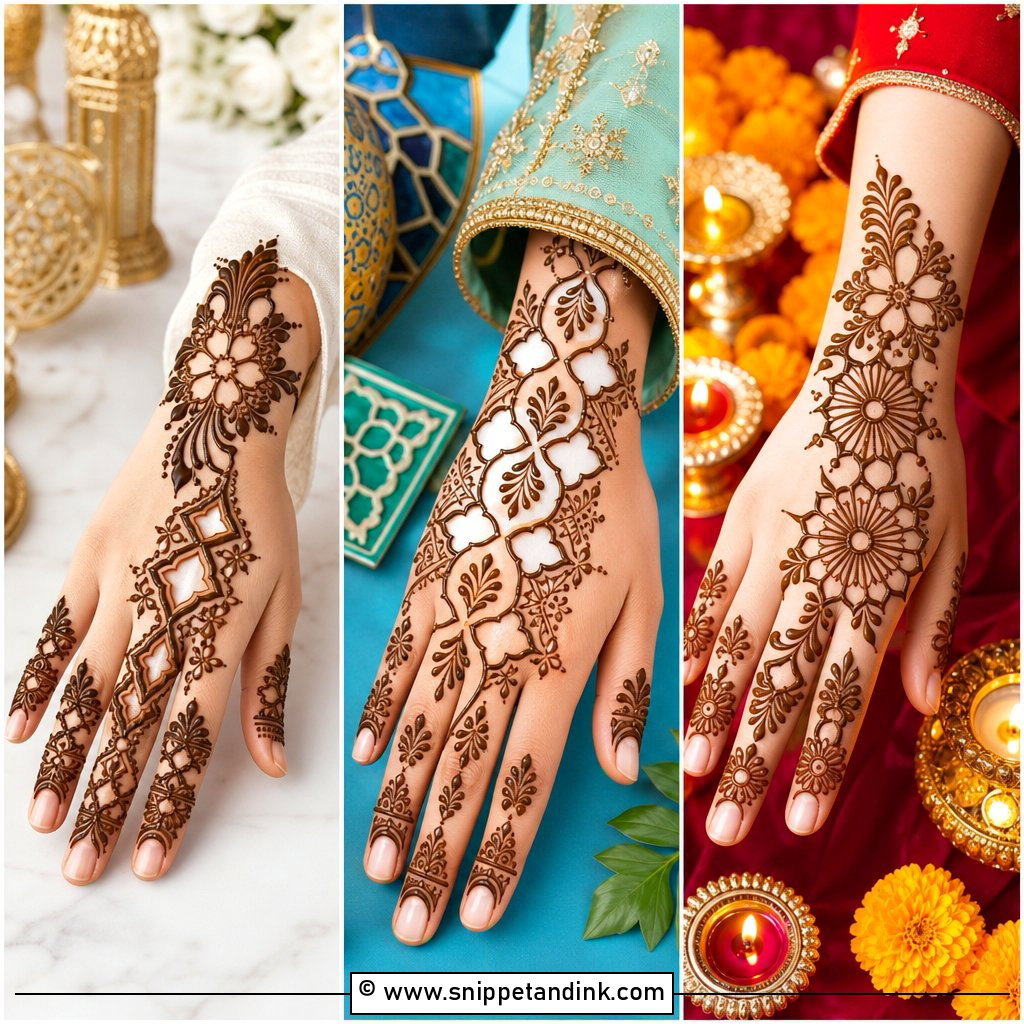
Arabic leg mehndi usually travels diagonally from the toes over the foot and up toward the ankle or calf, with large flowers, leafy vines, thick outlines and shaded petals. The shading is the part people underestimate. I pull the cone along the inside edge of a petal so the paste is thin there and thick on the outline, which gives that gradient once it stains. It reads well from across a room, which is why it’s popular for Eid, engagements and party nights. Ask for clear negative space between sections, or the trail turns into one dark streak by day two.
4. Indian Leg Mehndi Design
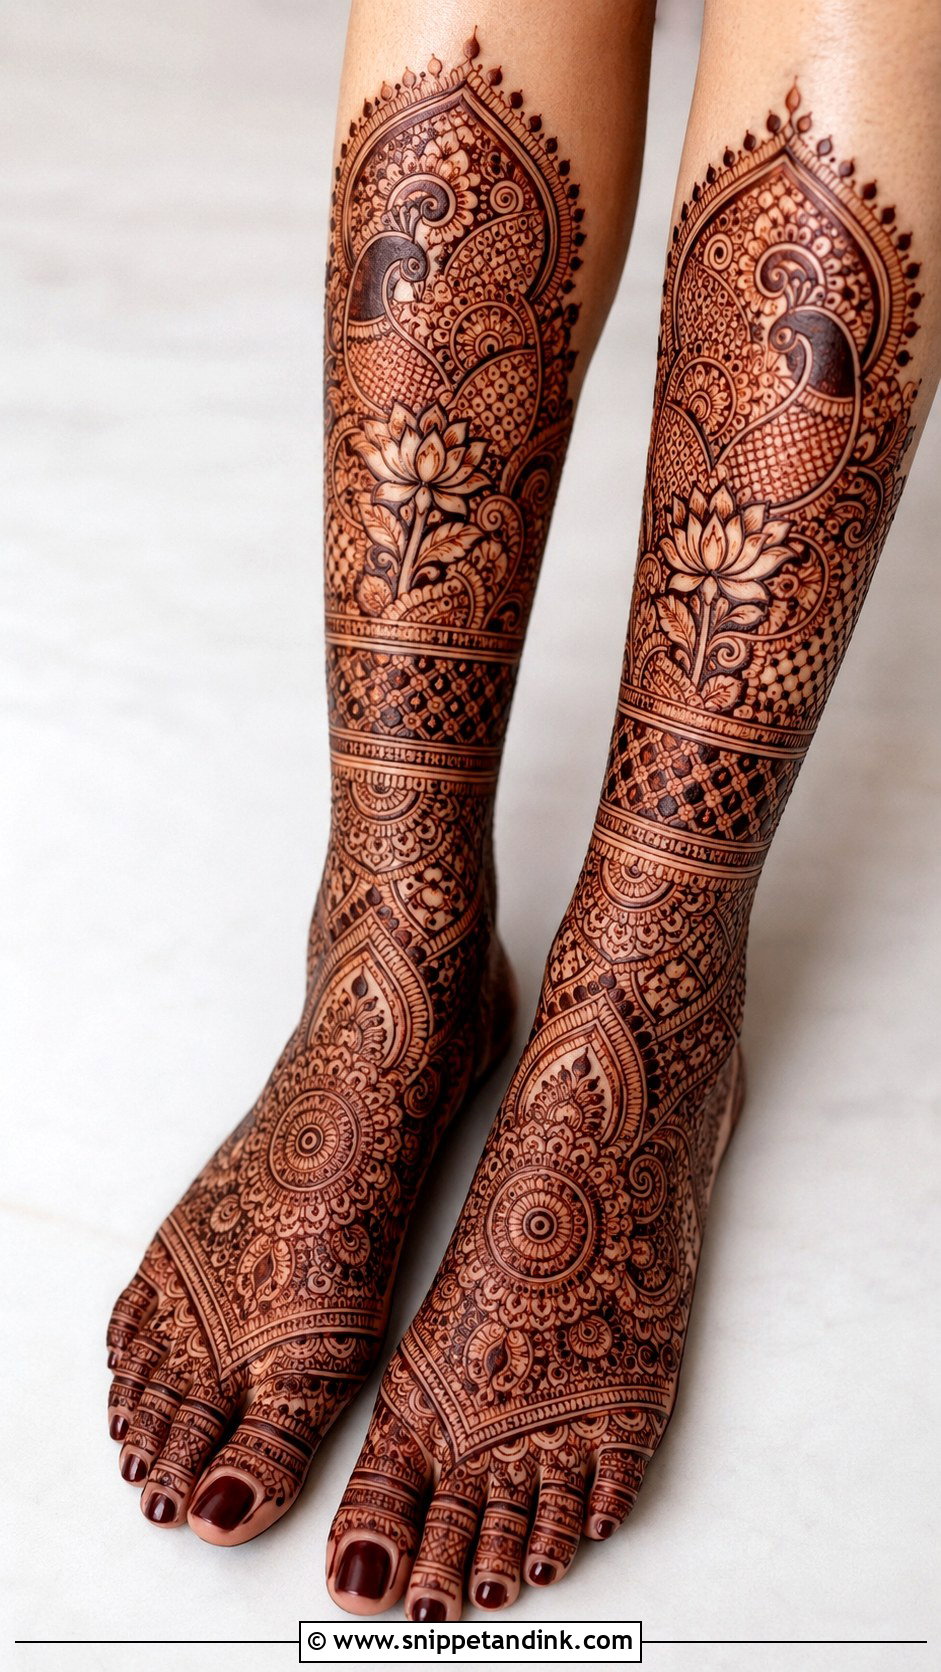
Indian leg designs are symmetrical and dense: peacocks, paisleys, lotus motifs, temple borders, mandala centres, tiny checks and dotted fillers. They can stop at the ankle or climb higher for a bride. The hard part is matching both feet, because no two feet are the same shape, so I draw the central motif on one foot, check it against the other before filling, and adjust the toe work rather than the centre. It’s the natural choice for weddings, Karwa Chauth and Teej, where fuller coverage is expected.
5. Indo Arabic Leg Mehndi Design
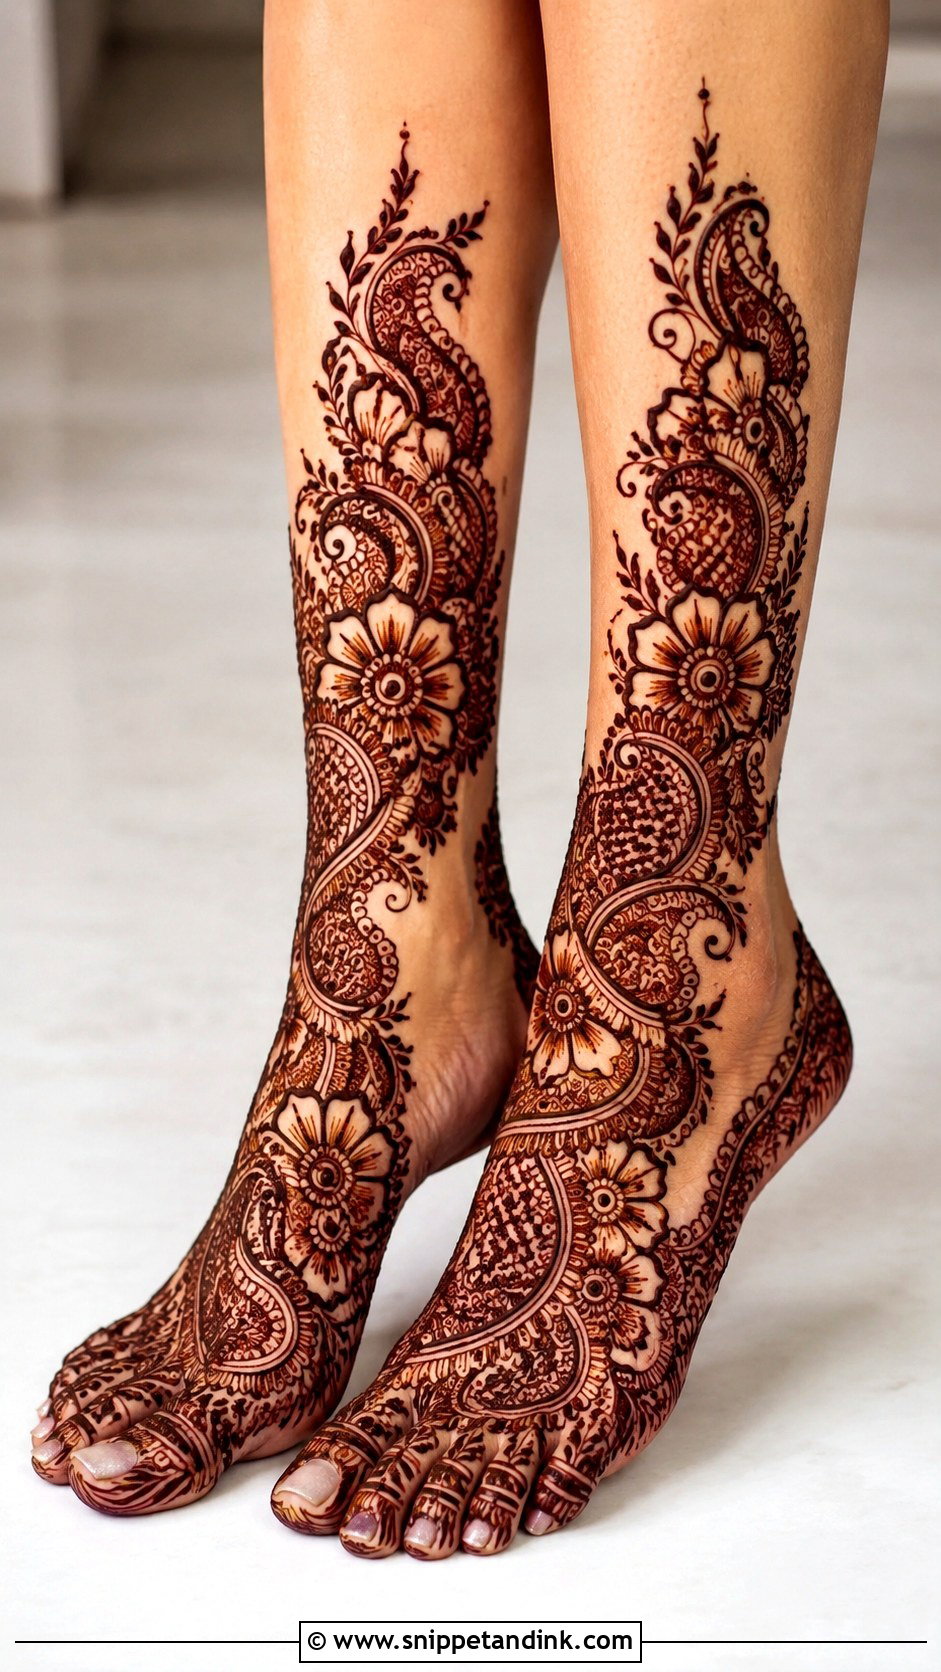
Indo-Arabic mixes the bold spacing of Arabic work with the fine fillers of Indian mehndi: large flowers and paisley trails as the frame, small jaali and mandala pockets inside them. I outline the whole structure first and only then fill, because if I start filling early the bold shapes lose their edges. It suits a bride who wants depth without full coverage, and it’s a good fit for sisters and bridesmaids who want to look related to the bride without copying her. On the leg, it looks best running from toes to mid-calf.
6. Moroccan Leg Mehndi Design
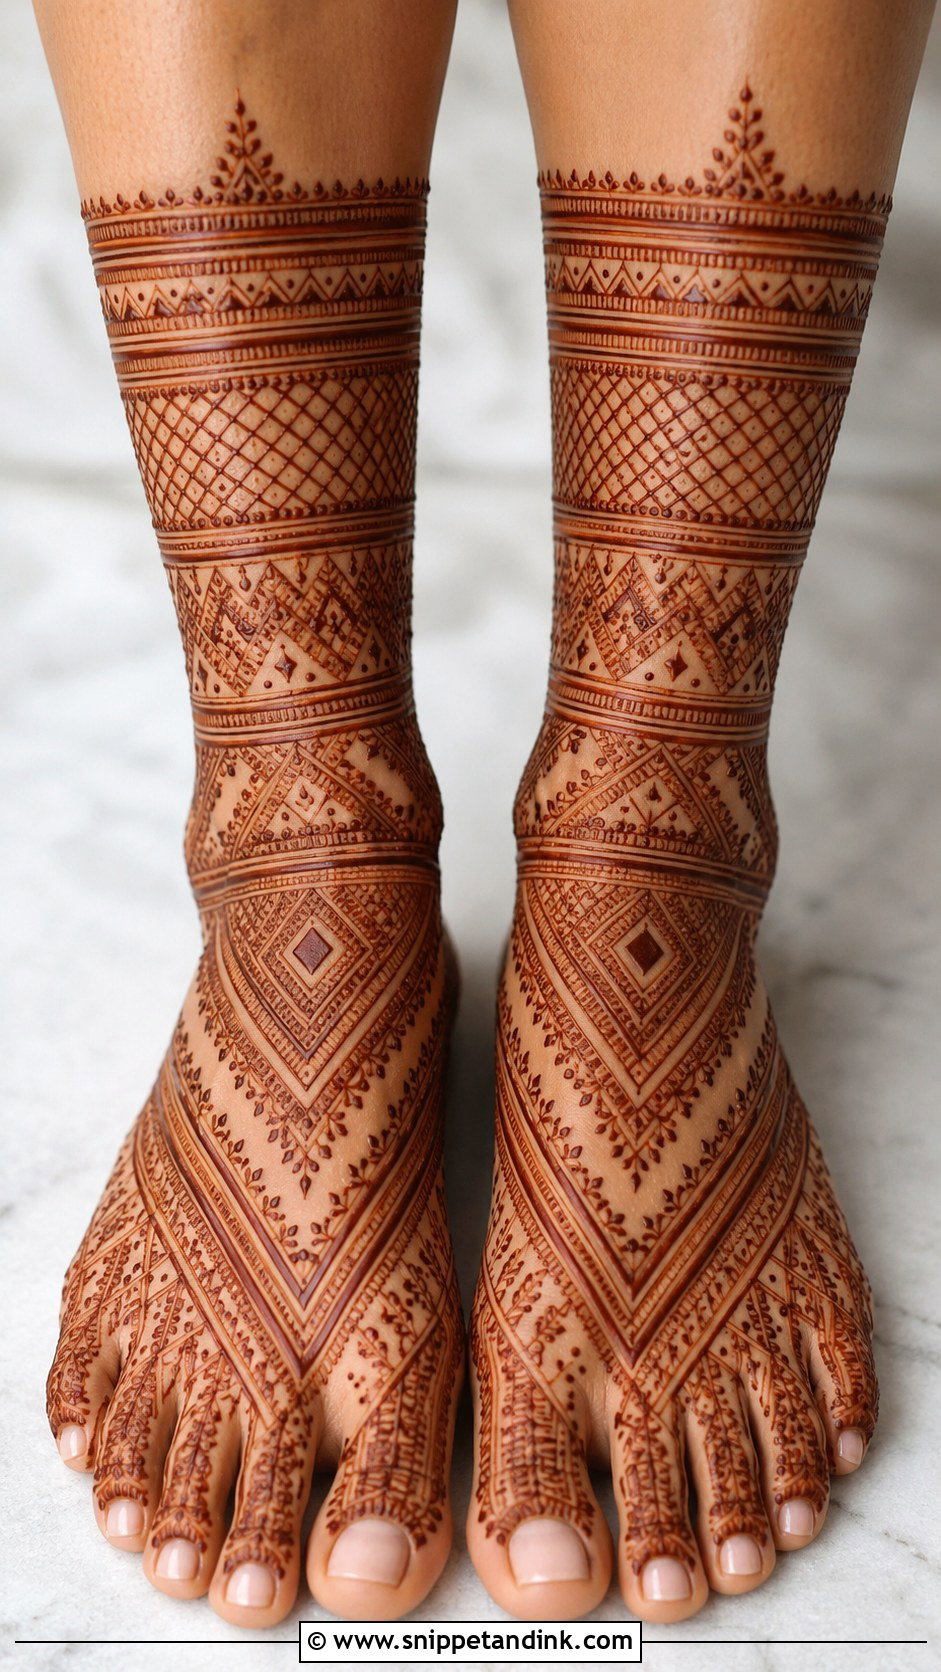
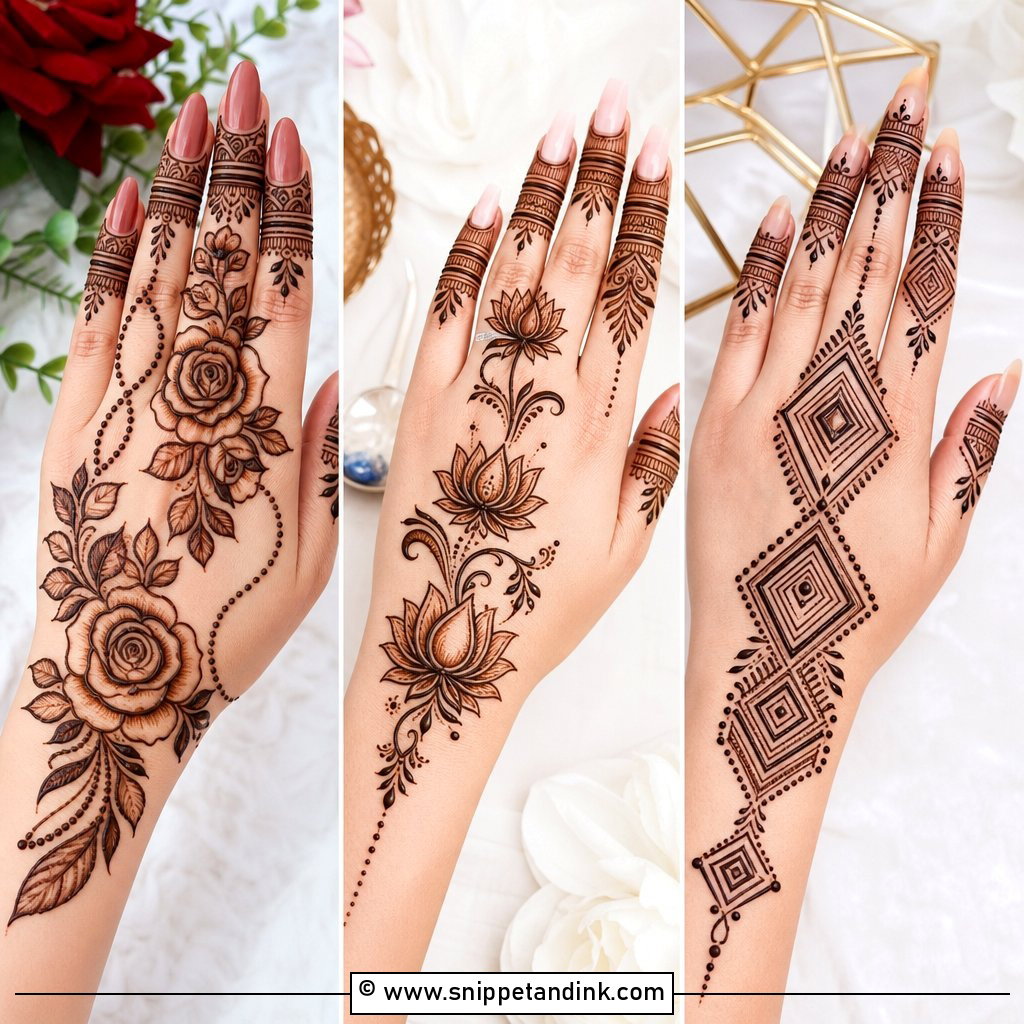
Moroccan work uses diamonds, triangles, grids, chevrons and dots instead of flowers. It’s unforgiving: a wobbly floral petal looks organic, a wobbly straight line just looks wrong. I mark the centre line of the foot with a few dots before I start so the bands stay square to the ankle. It sits well across the top of the foot, around the ankle or as a single calf band, and it pairs with fusion outfits better than traditional motifs do. If your artist mostly does florals, ask to see geometric work first.
7. Mandala Leg Mehndi Design
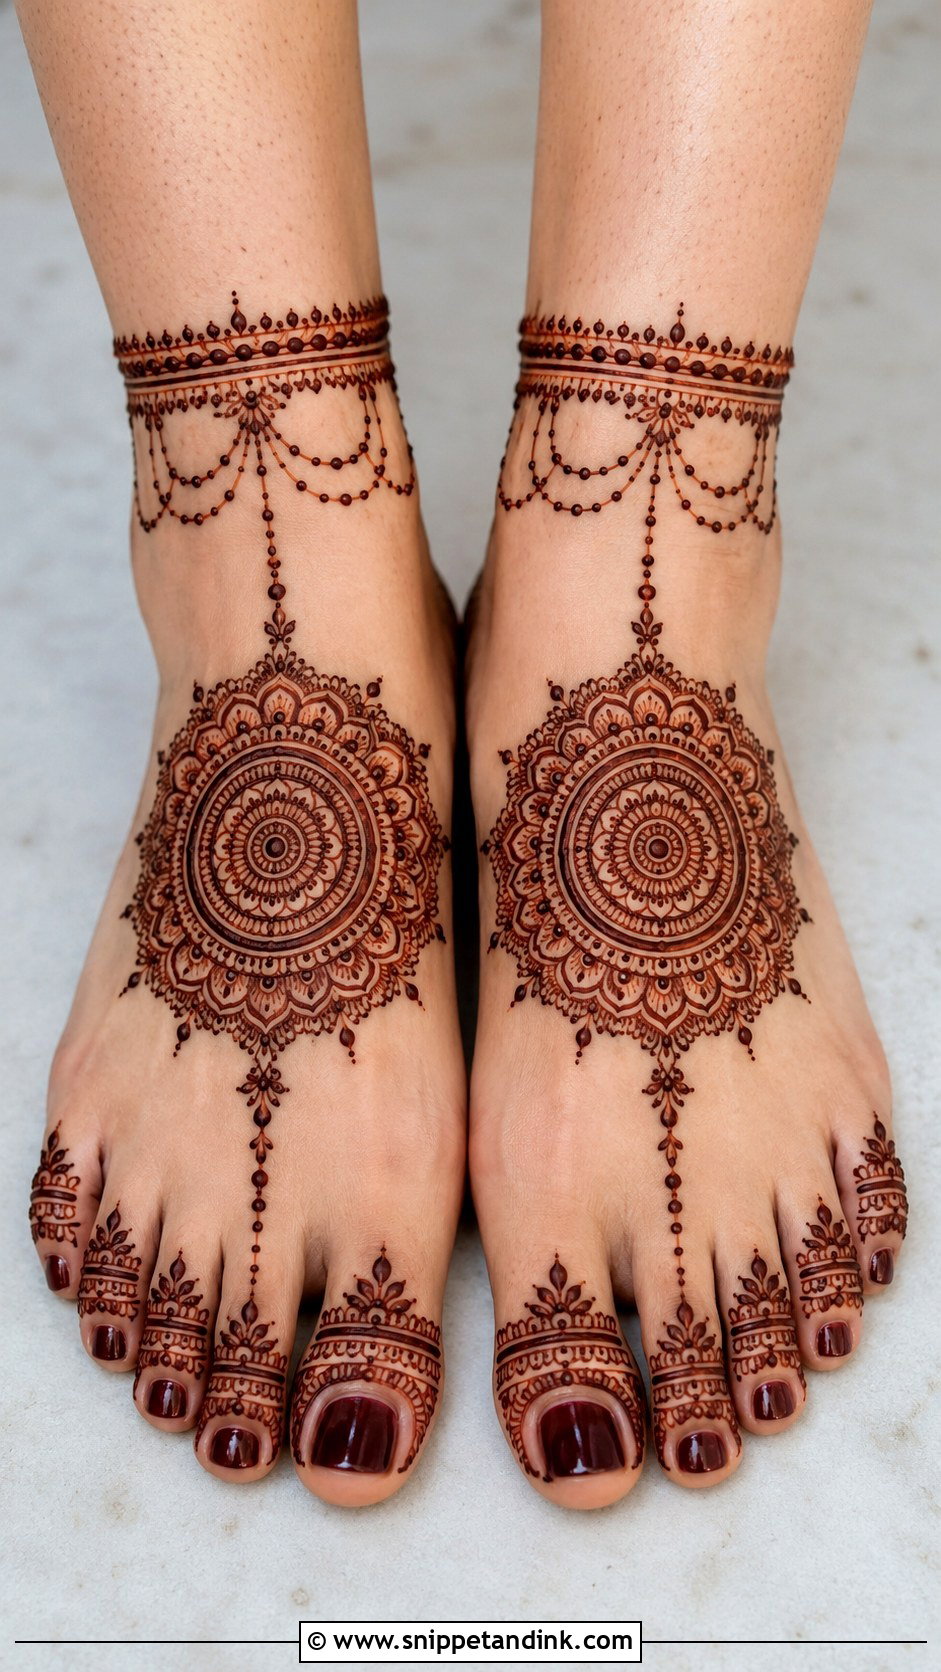
The mandala sits on the top of the foot, around the ankle or low on the shin, with petals, chains, leaves and small borders growing out of it. Placement matters more than people think. The top of the foot flexes when you walk, so I keep the mandala slightly toward the ankle side of the arch where the skin creases less, otherwise the circle distorts as you move. Dense toe work and an ankle band turn this into a bridal design. On its own, it’s a calm choice for smaller functions and it shows well in top-down shots of the feet.
8. Floral Leg Mehndi Design
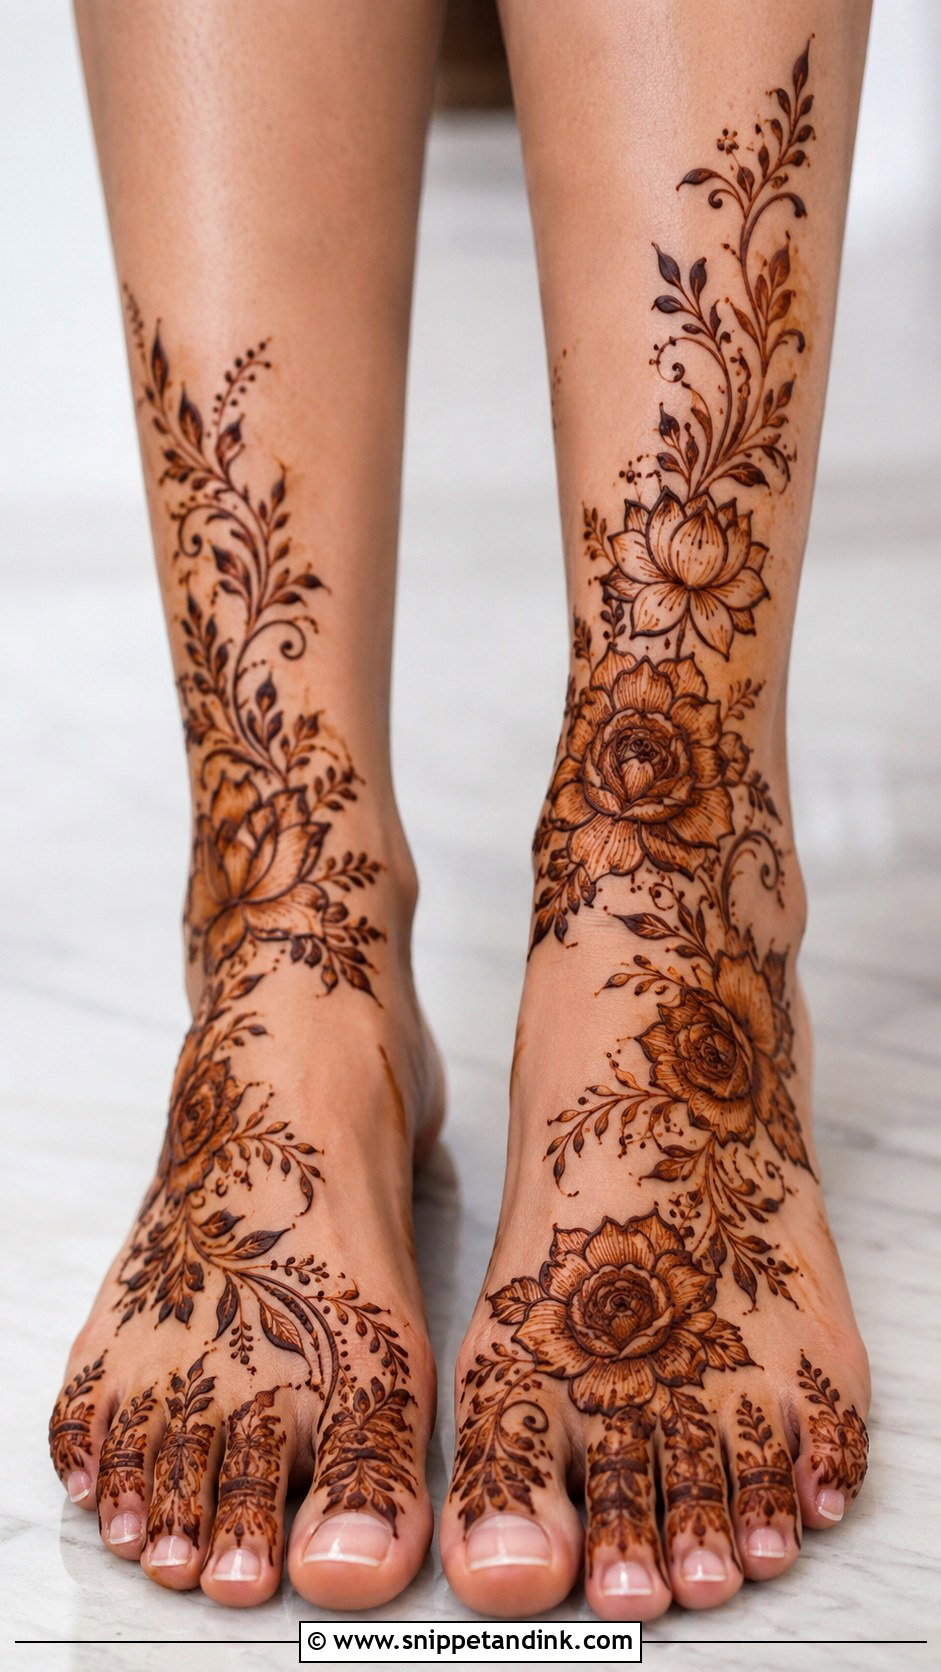
Floral leg mehndi changes completely with flower size. Big roses and lotus blooms with heavy shading read bridal; small buds on thin stems read casual. I generally go up one size on feet compared to hands, because tiny florals on the broad top of a foot can look scattered. It runs naturally from toes to ankle and can trail lightly up the calf. For a modern finish, leave real gaps between the flowers rather than filling every space.
9. Peacock Leg Mehndi Design
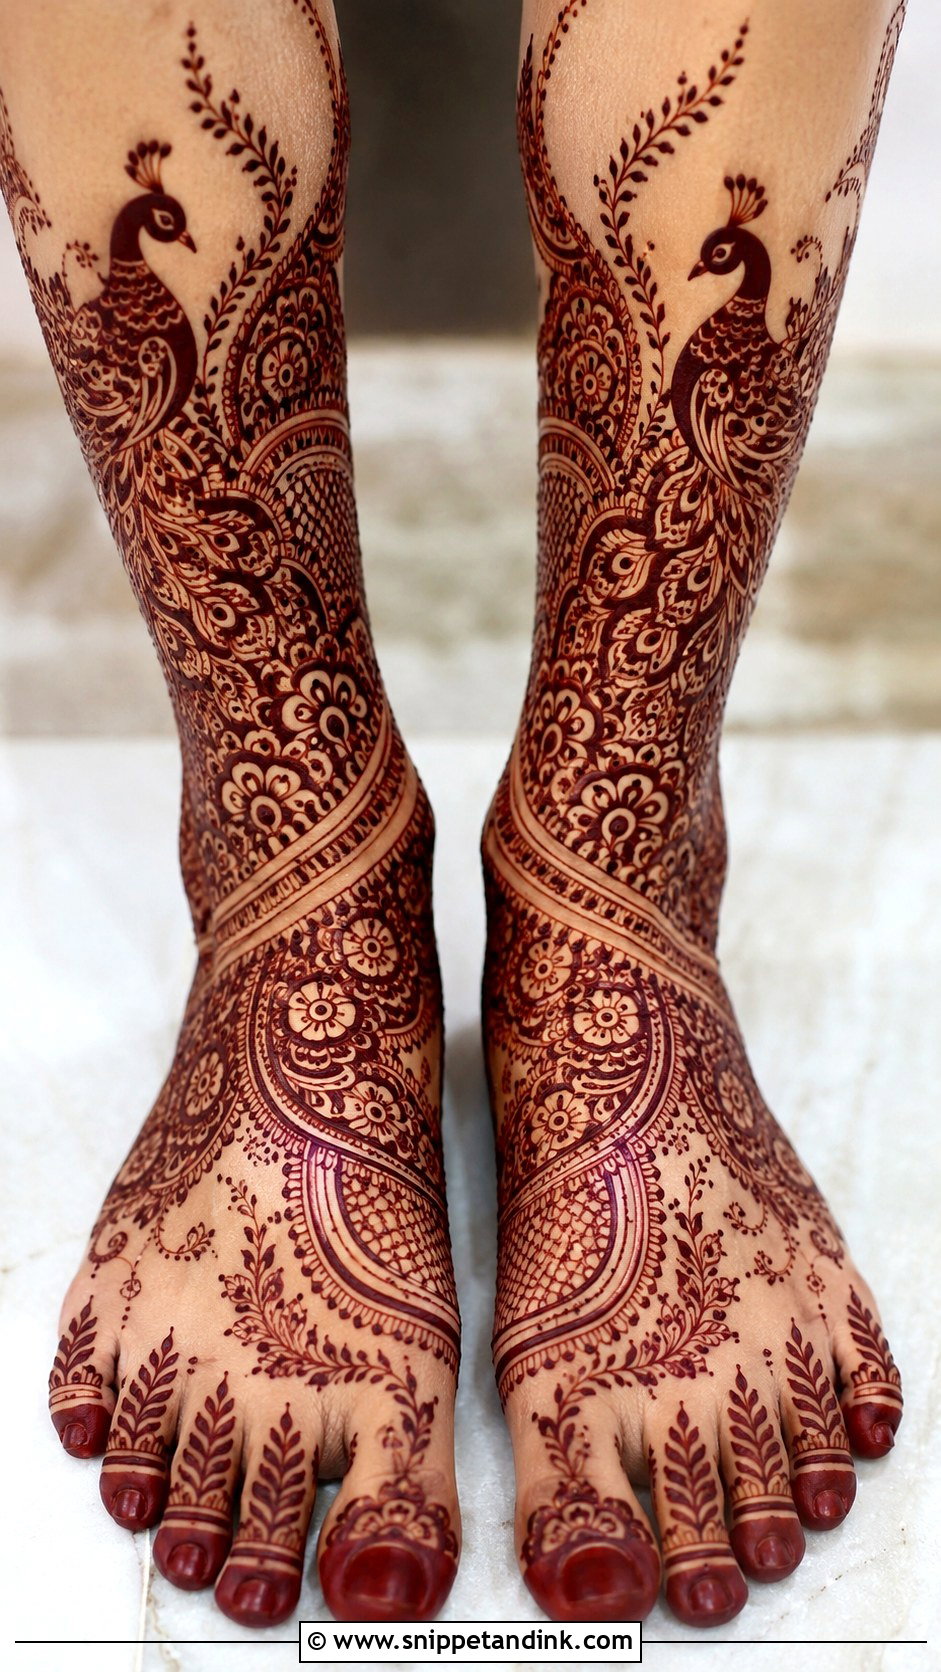
A peacock can sit on top of the foot, by the ankle or along the shin, with the tail feathers flowing into paisleys and leaves. The one thing I watch is that the bird stays readable: once the feathers are packed with checks, swirls and dots, the head and neck can disappear into the filler. I leave a thin halo of bare skin around the body so the outline survives the stain. For something lighter, one peacock per foot with a plain ankle border is plenty.
10. Anklet Leg Mehndi Design
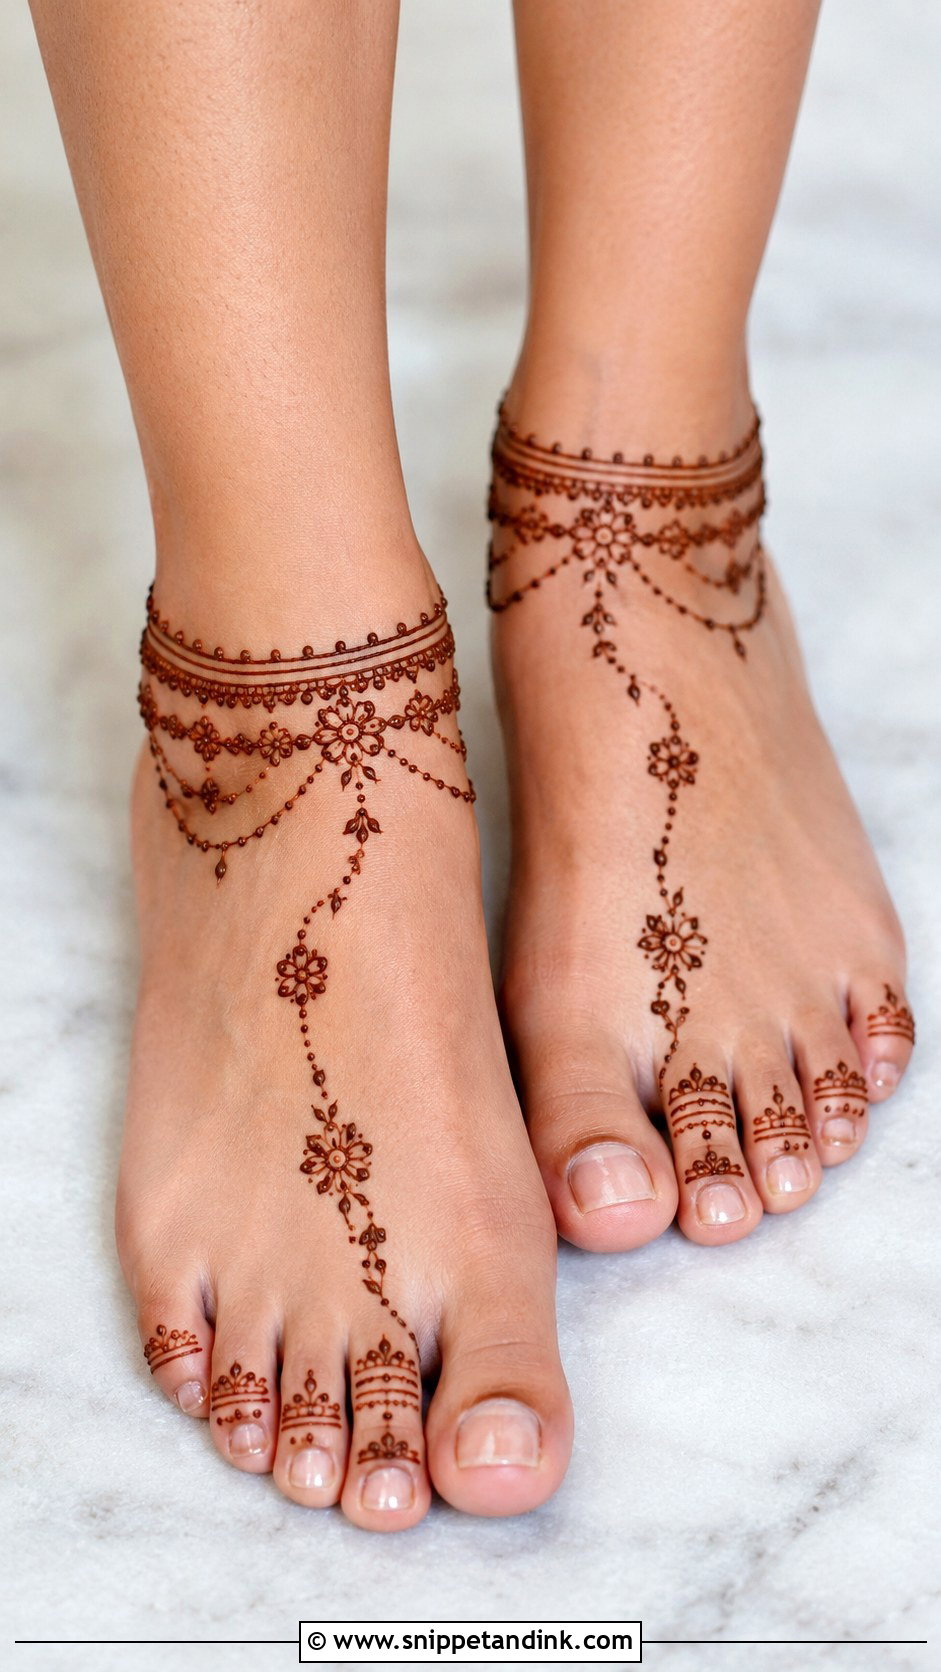
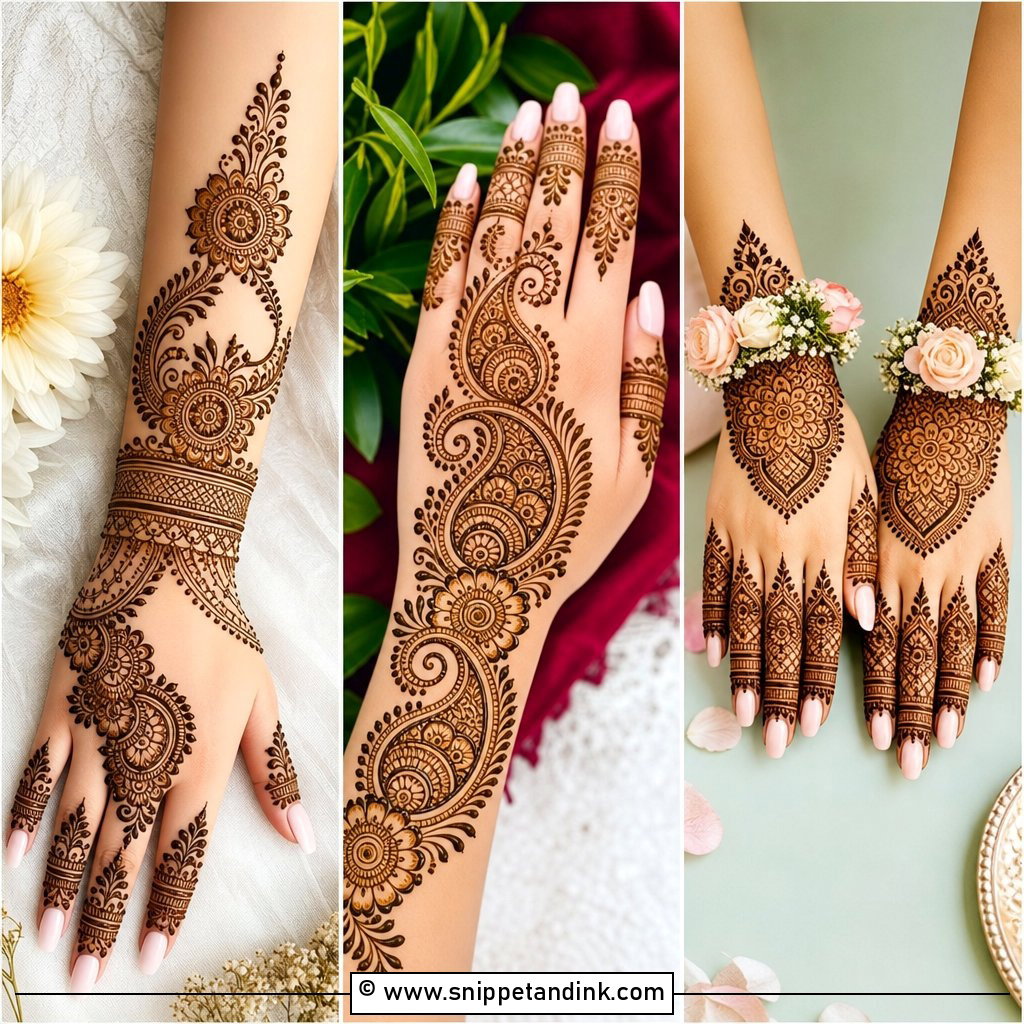
An anklet design wraps the ankle in bands, chains, dots, tiny flowers and hanging bead shapes, sometimes with toe-ring details or a short foot trail. It’s quick, which makes it a favourite for bridesmaids. Levelling it is the fiddly part. Ankle bones sit at different heights on the inner and outer side, so a band drawn parallel to the floor looks tilted on the leg. I follow the line of the bone, not the floor, and check both feet side by side before closing the band.
11. Jewelry Leg Mehndi Design
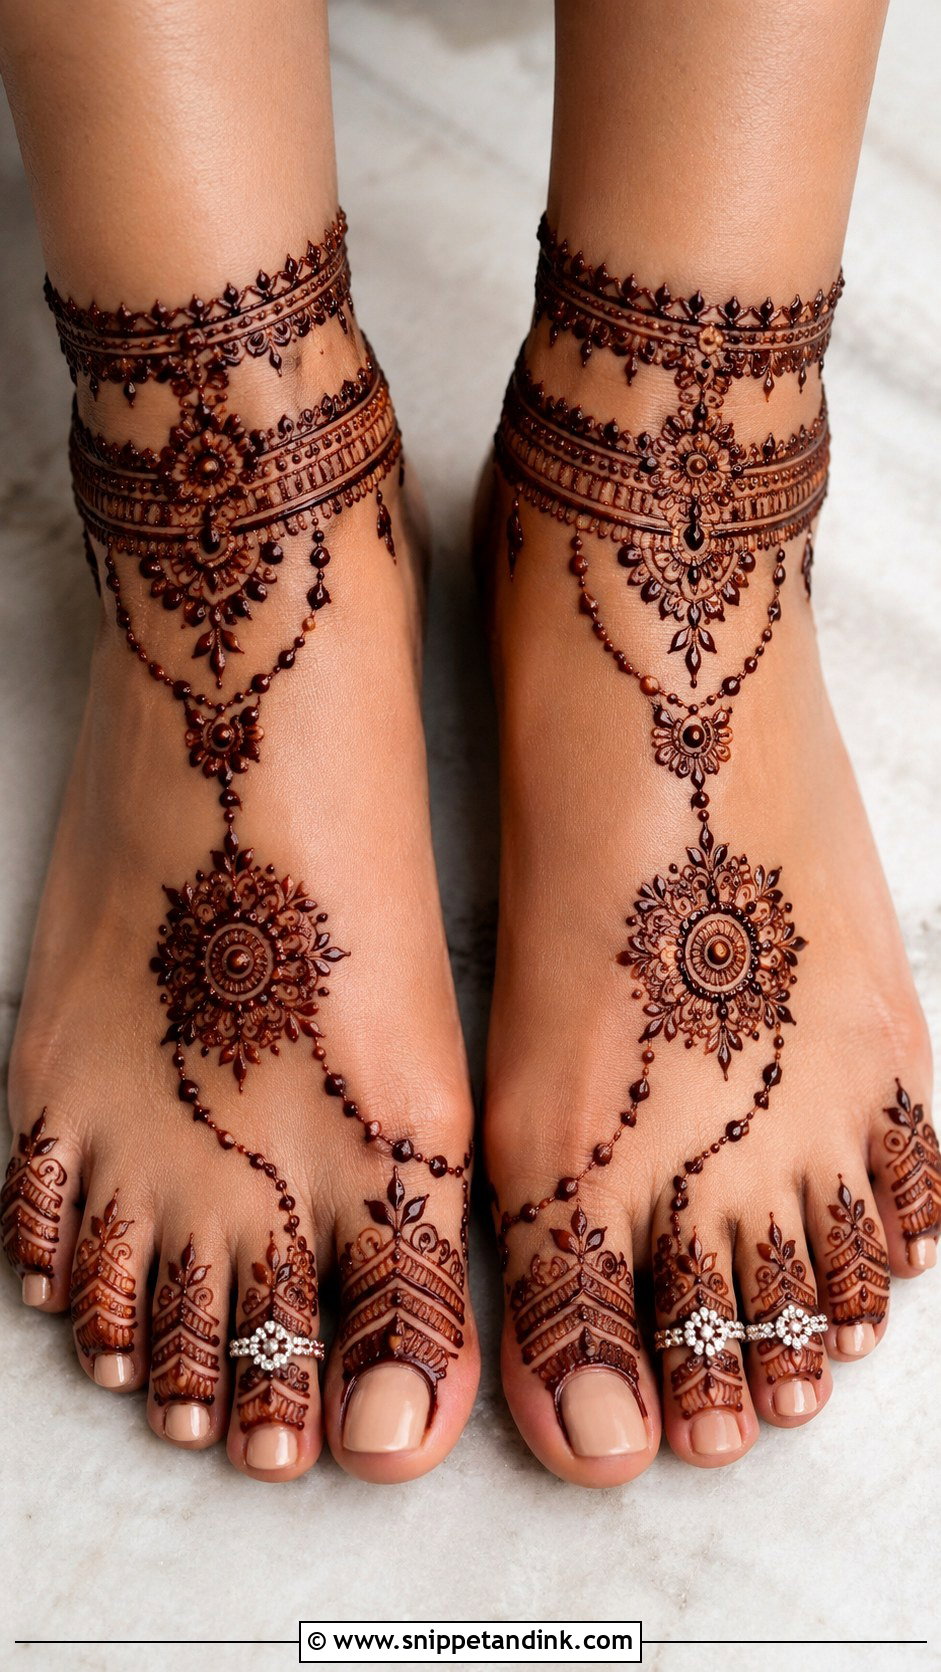
Jewelry-style mehndi builds payal bands, toe rings, chain links and pendant drops in henna, usually with a small motif on top of the foot. It’s the one I suggest to brides who’ll be barefoot for rituals or photos, since it reads as adornment even without real silver on. Fine lines carry this design, so the paste needs to be smooth and slightly runny for long chain strokes. If the cone is lumpy, the chain breaks into dashes and the effect is lost. Polished toenails finish it.
12. Bridal Feet Mehndi Design
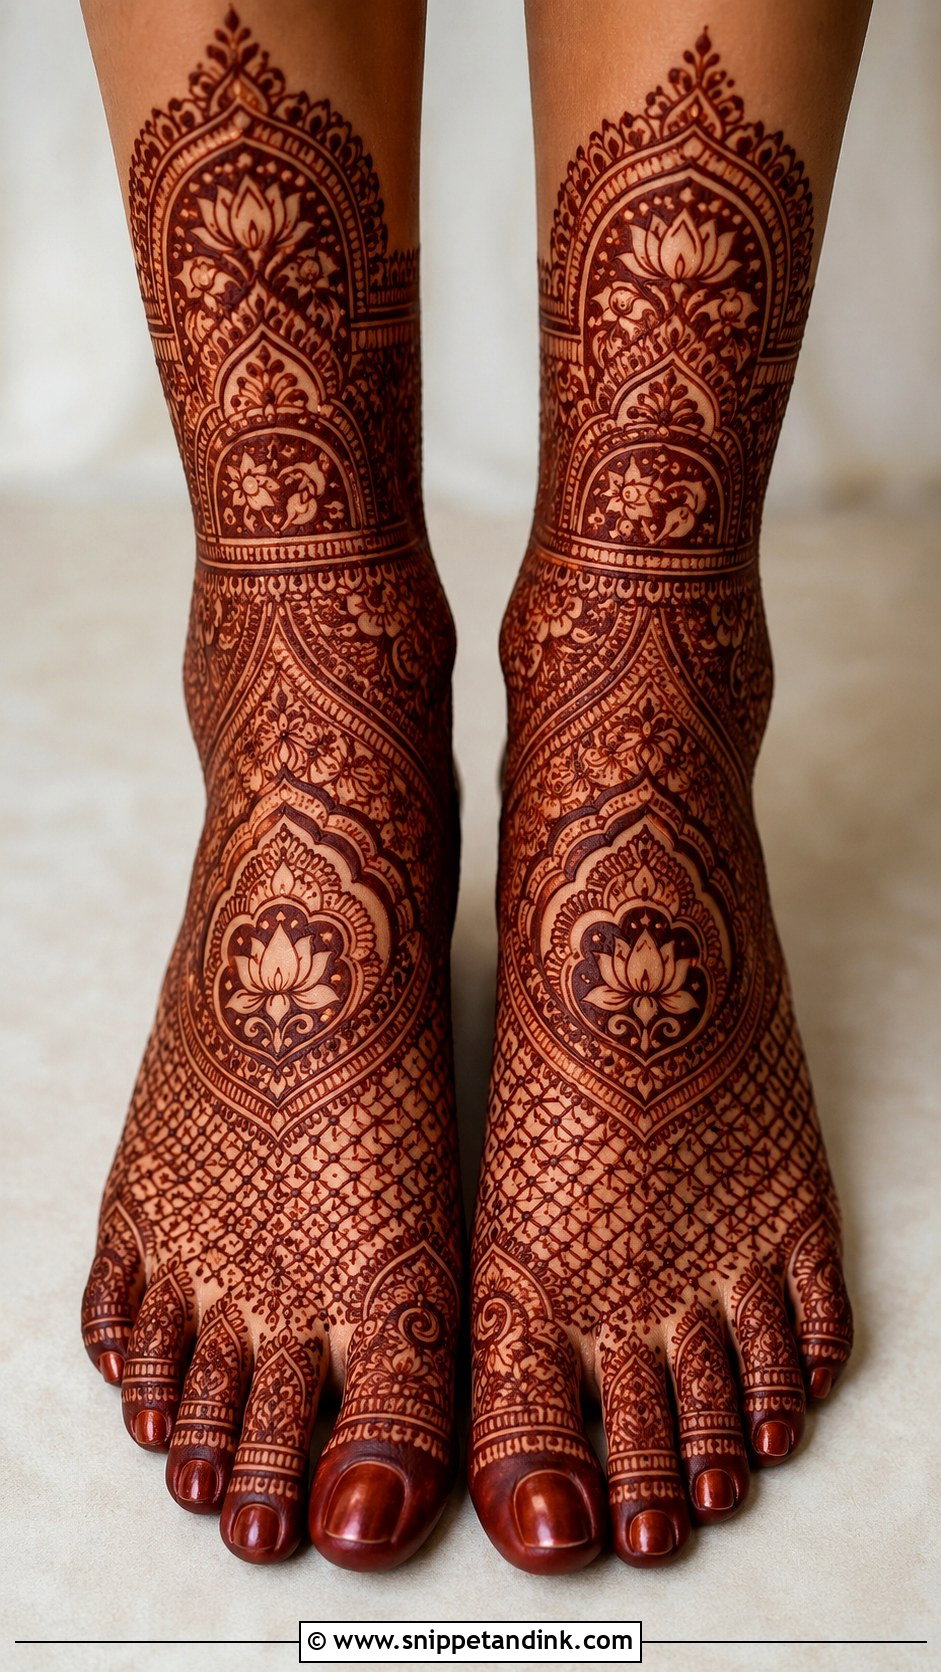
Bridal feet mehndi stays on the feet and ankles, covering toes, soles, top of the foot and sometimes a little of the shin. It’s the most comfortable bridal option under a heavy outfit, and it holds up in close-ups. The soles are worth thinking about: they stain darkest of anywhere on the body, but they also wear fastest because you walk on them, so I keep sole patterns bolder and save the finest work for the top of the foot. Initials or a small personal symbol can be hidden near the arch.
13. Front Leg Mehndi Design
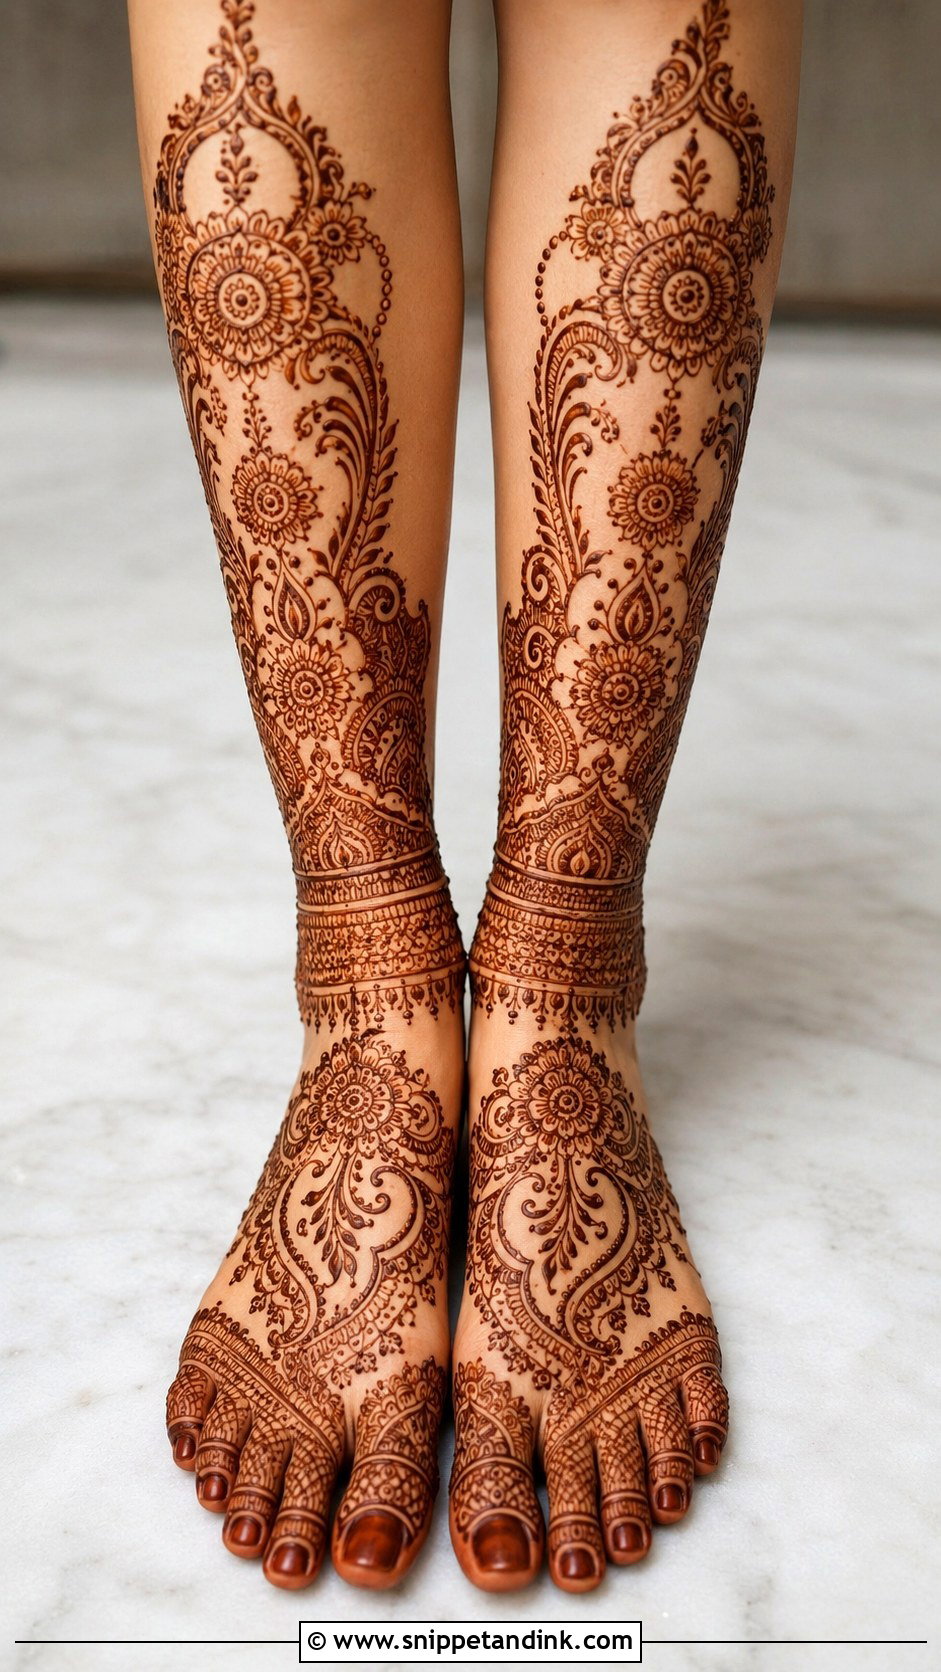
Front placement runs from the top of the foot straight up the shin, so the main artwork stays visible whether you stand, sit or wear open footwear. I follow the shinbone as a guide line, which is what gives that lengthening effect. Vertical paisleys, mandala chains and peacock trails all suit it. The shin has less padding than the calf and the skin is thinner, so expect a slightly lighter stain there than on the foot. If you’d like the legs decorated without heavy sides, this is the placement I’d point you to.
14. Side Leg Mehndi Design
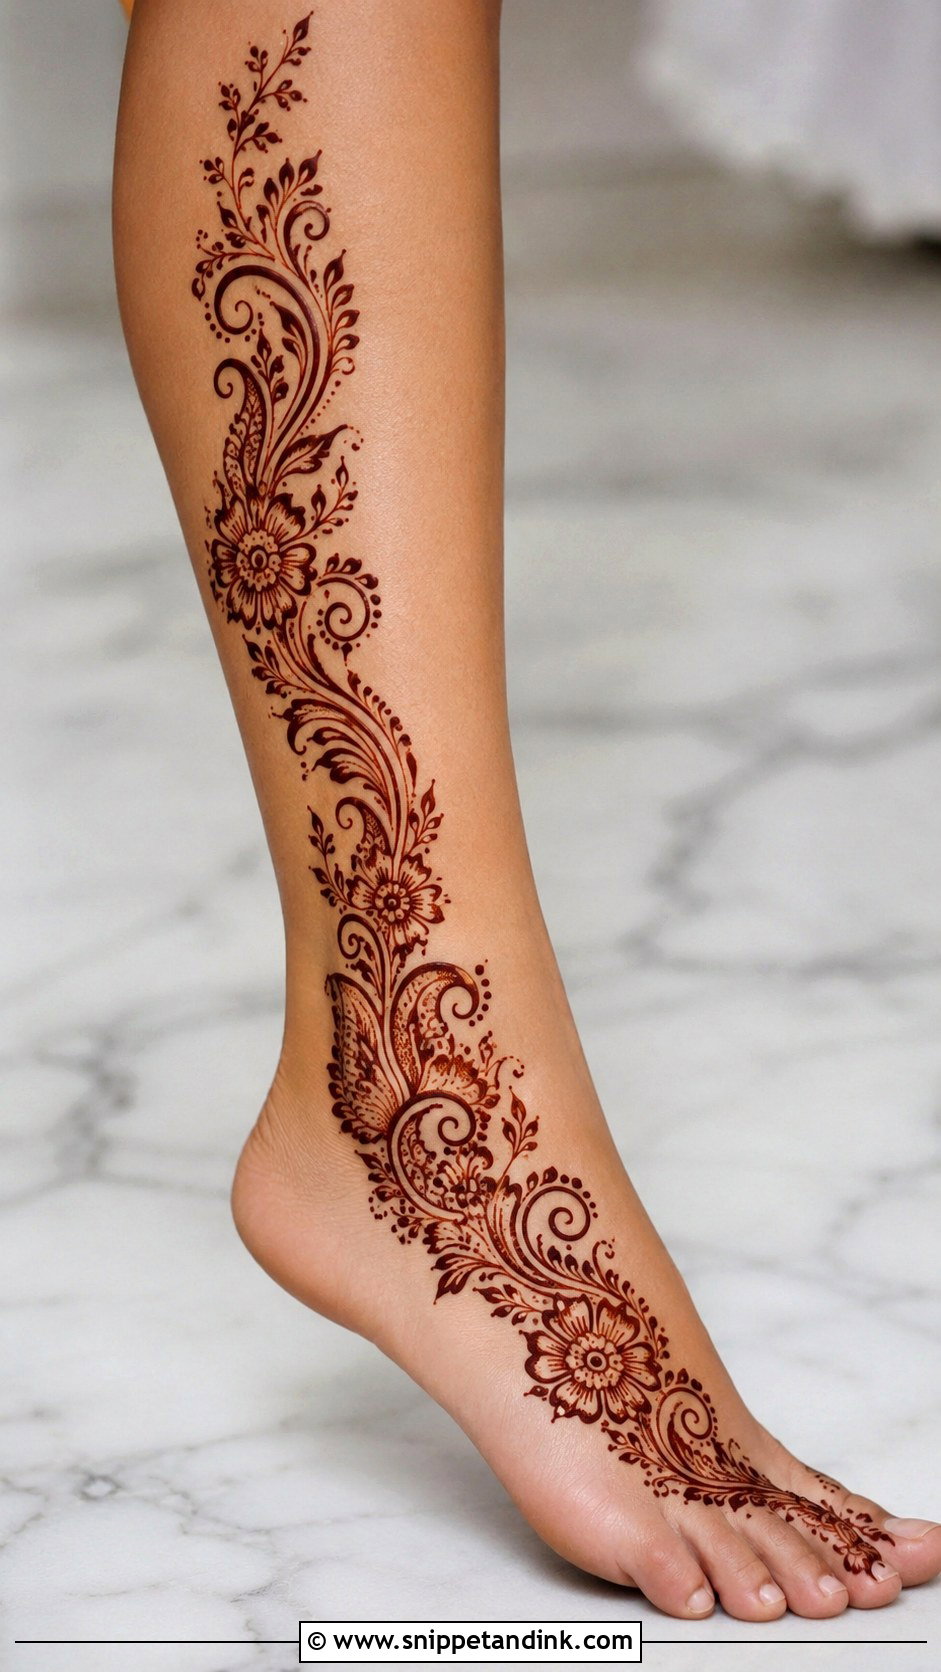
Side placement puts the main design along the outer foot, ankle and side of the calf, so it peeks out from a slit skirt, saree drape or cropped festive pants. Since most of the detail sits on one side, it’s lighter and faster than full coverage. I keep the trail climbing in a gentle curve; a boxy panel on the side of the leg looks stuck on. Choose which leg faces the camera before we start, because that’s the one that gets the design.
15. Back Leg Mehndi Design
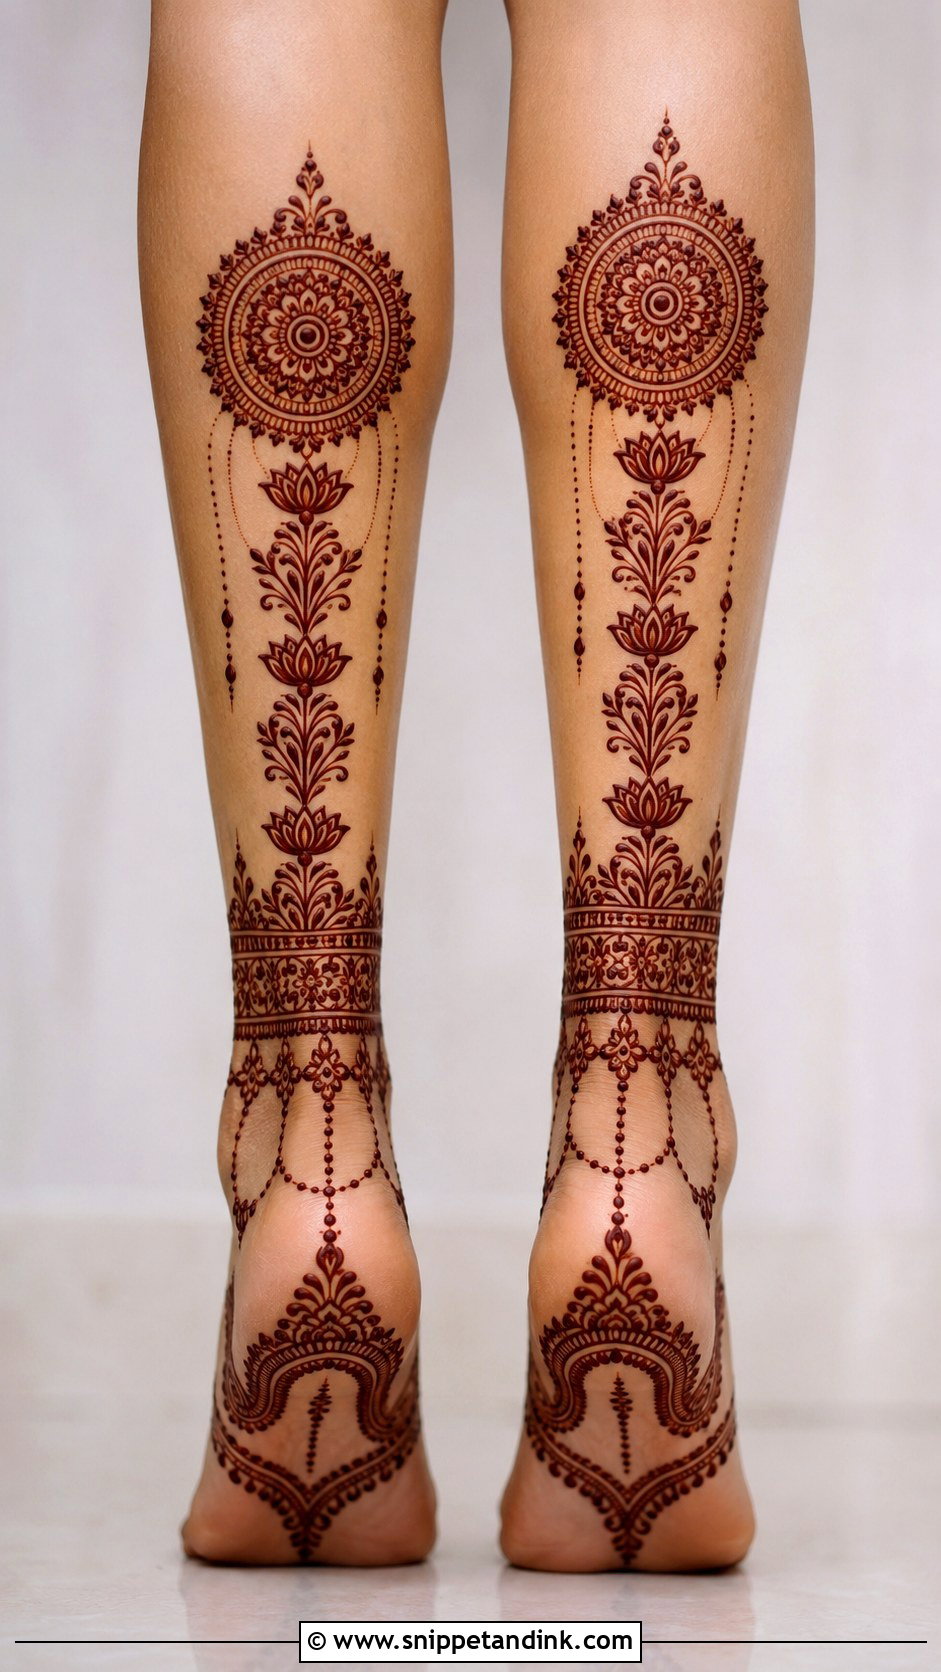
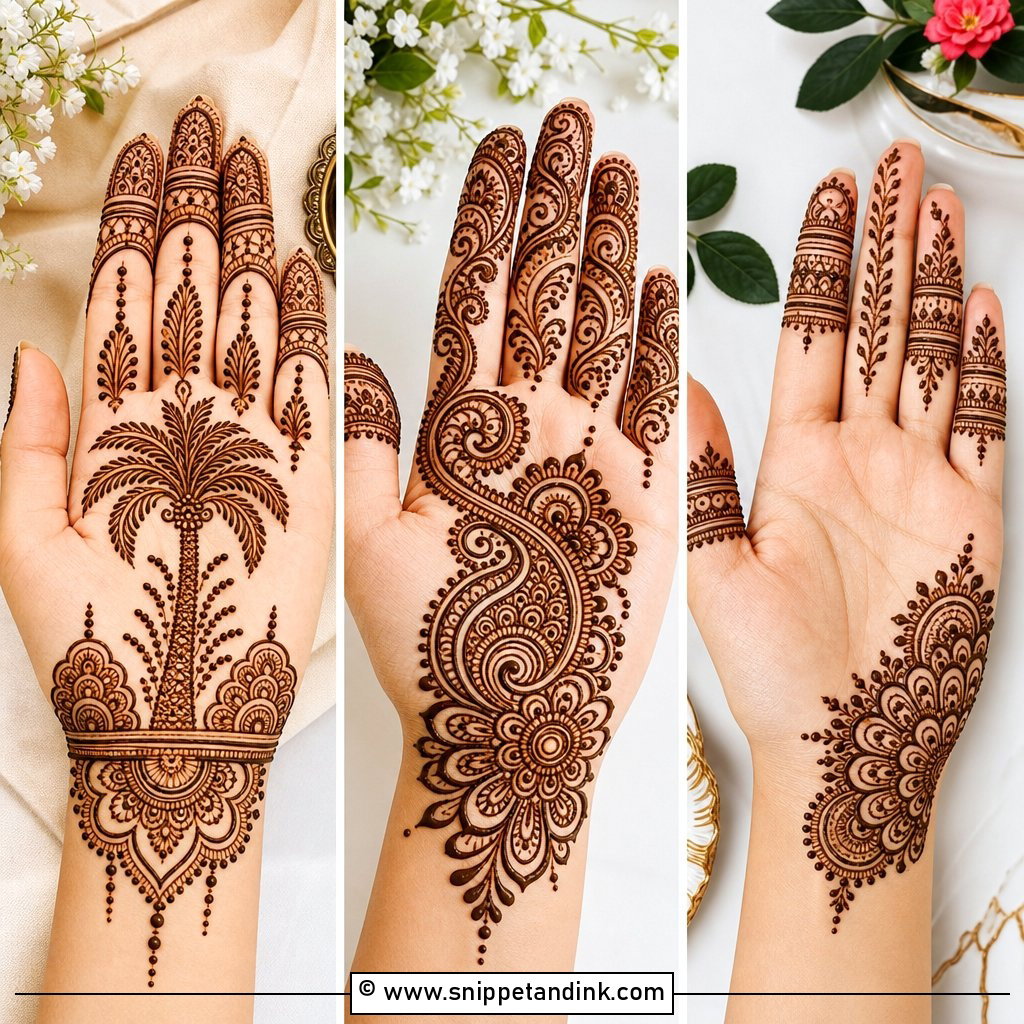
Back placement covers the heel, back of the ankle and calf. It’s subtle from the front and a lovely surprise when you turn. The back of the ankle is the tricky zone: the Achilles area bends with every step and the skin folds, so fine filler there smudges while wet and blurs as it stains. I keep that crease clear and put the detail just above and below it. It needs open-back footwear to be seen, and it looks richest when the stain has had its full two days to darken.
16. Foot To Calf Mehndi Design
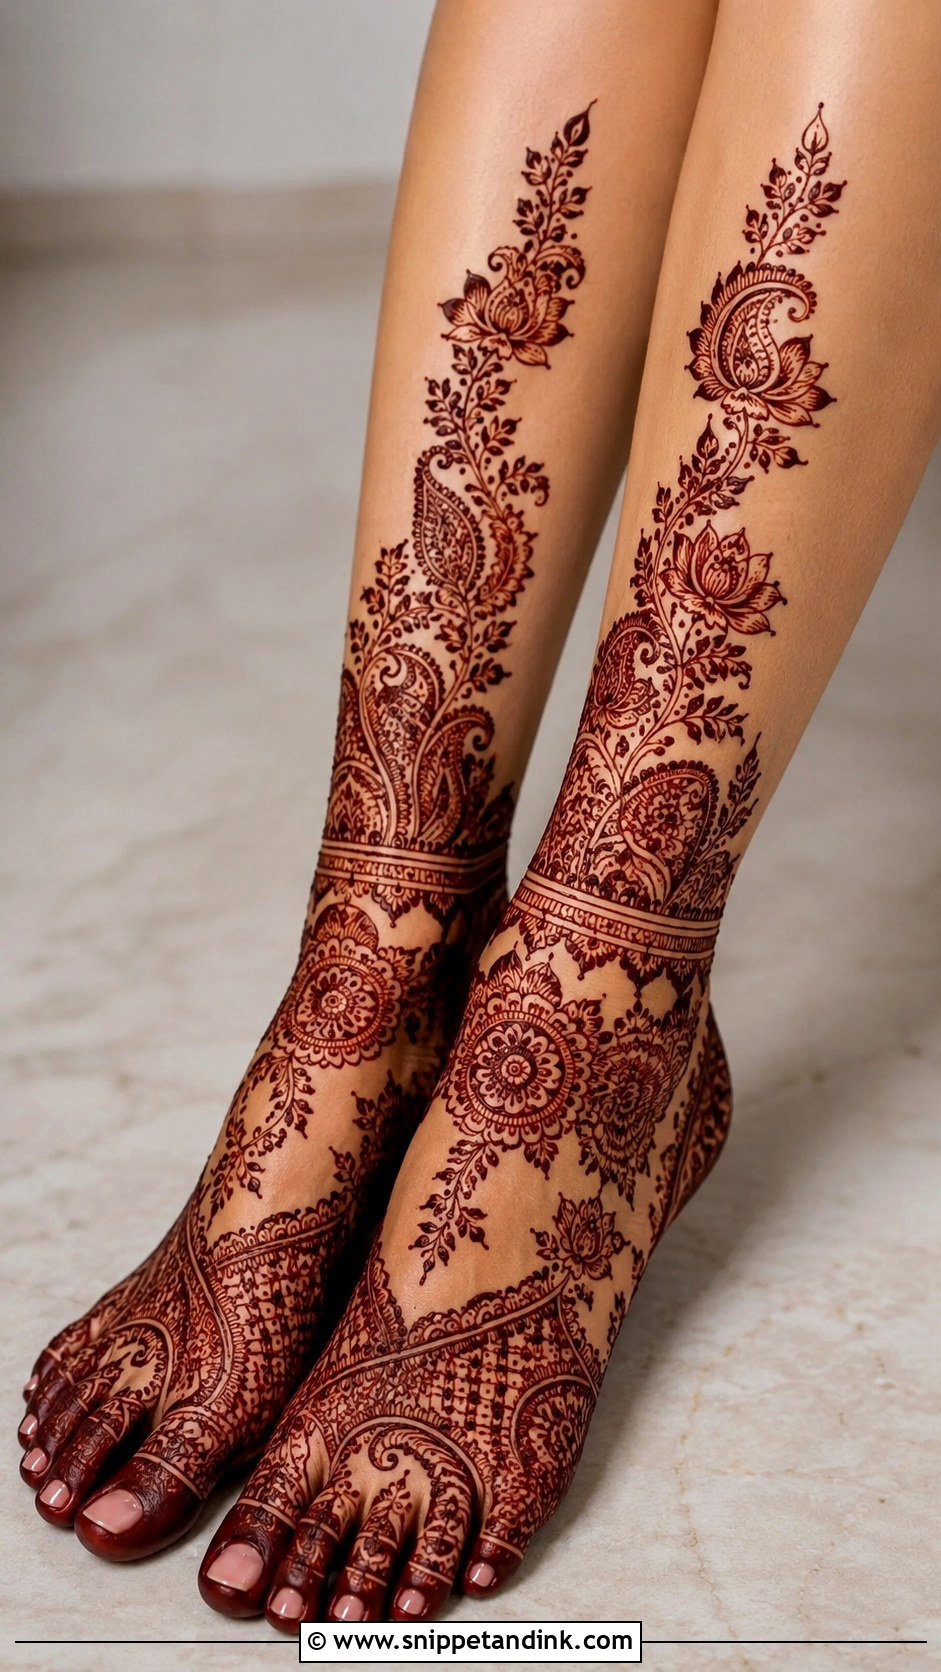
Foot-to-calf sits between full bridal coverage and simple foot work. It starts at the toes, wraps the ankle and climbs toward the calf as one connected trail of vines, paisleys, lotus chains or bands. I suggest it when a bride wants visible detail but can’t sit through a knee-high design. If your outfit has heavy embroidery at the hem, I keep the calf lighter so the two don’t compete. The connection points at the ankle are where I take the most care, since a broken link there makes it look like two separate designs.
17. Half Leg Mehndi Design
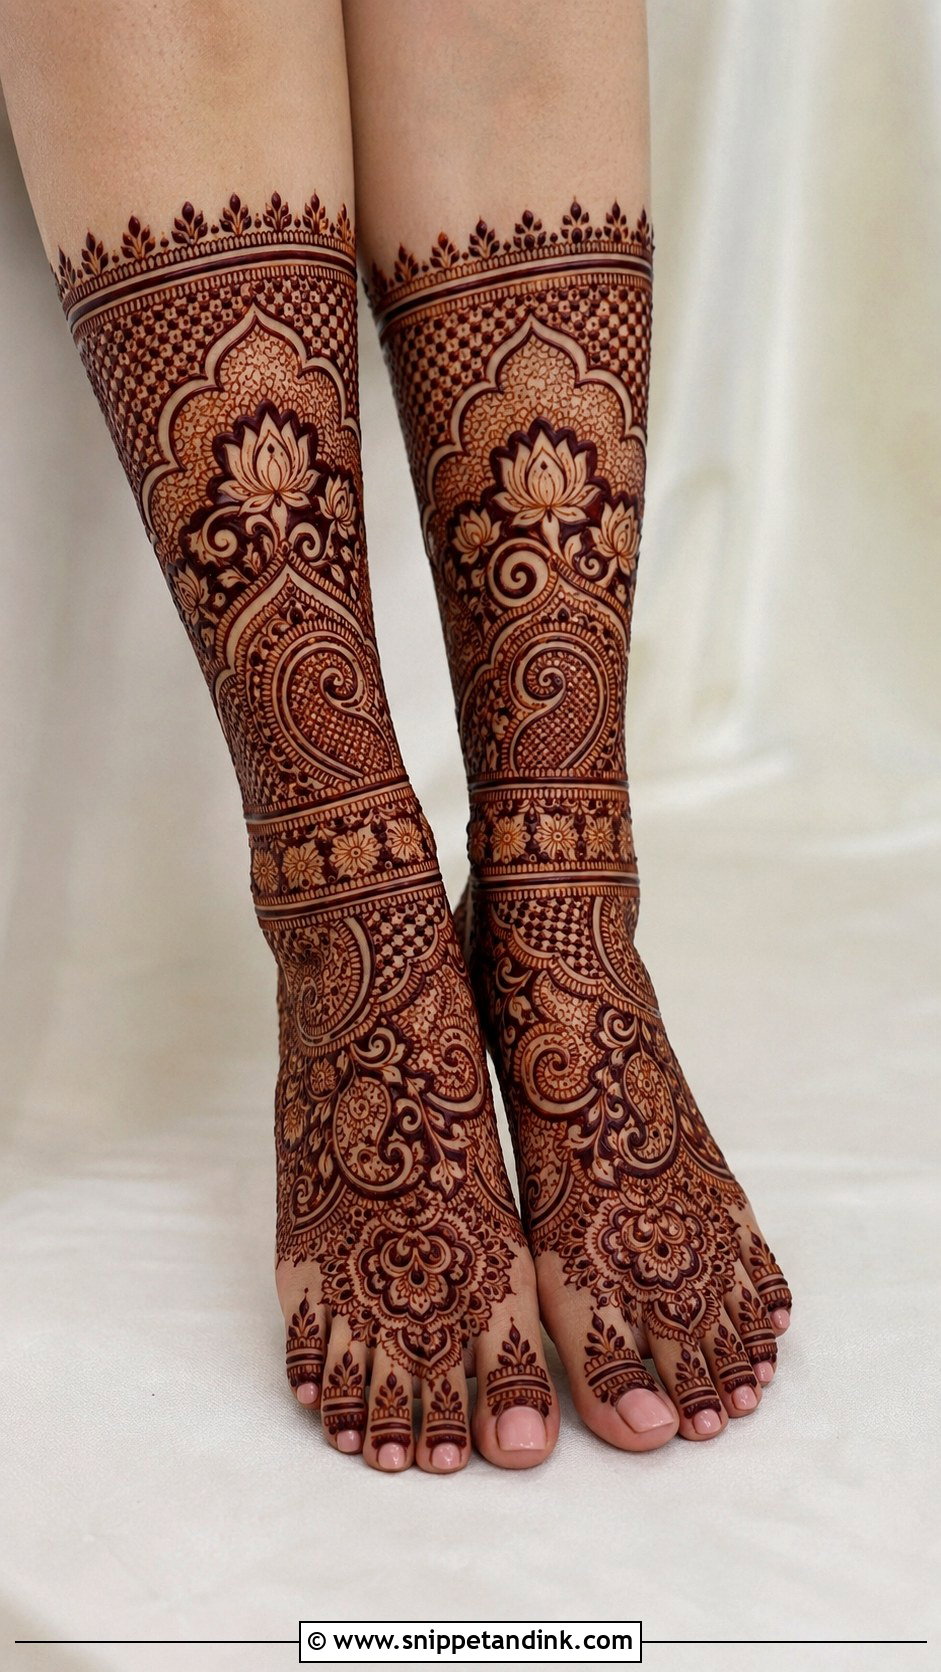
Half leg designs cover the feet, ankles and the lower half of the leg, giving a full look in noticeably less chair time than a knee-high bridal pattern. Coverage can be dense Indian work with jaali fillers or open Arabic florals. What makes it look finished is the top edge. I always close it with a band or border around the calf, because a design that just fades out looks like the artist ran out of time. With lehengas, shararas and sarees, that edge often sits right where the hem moves, which is exactly where you want it.
18. Minimal Leg Mehndi Design
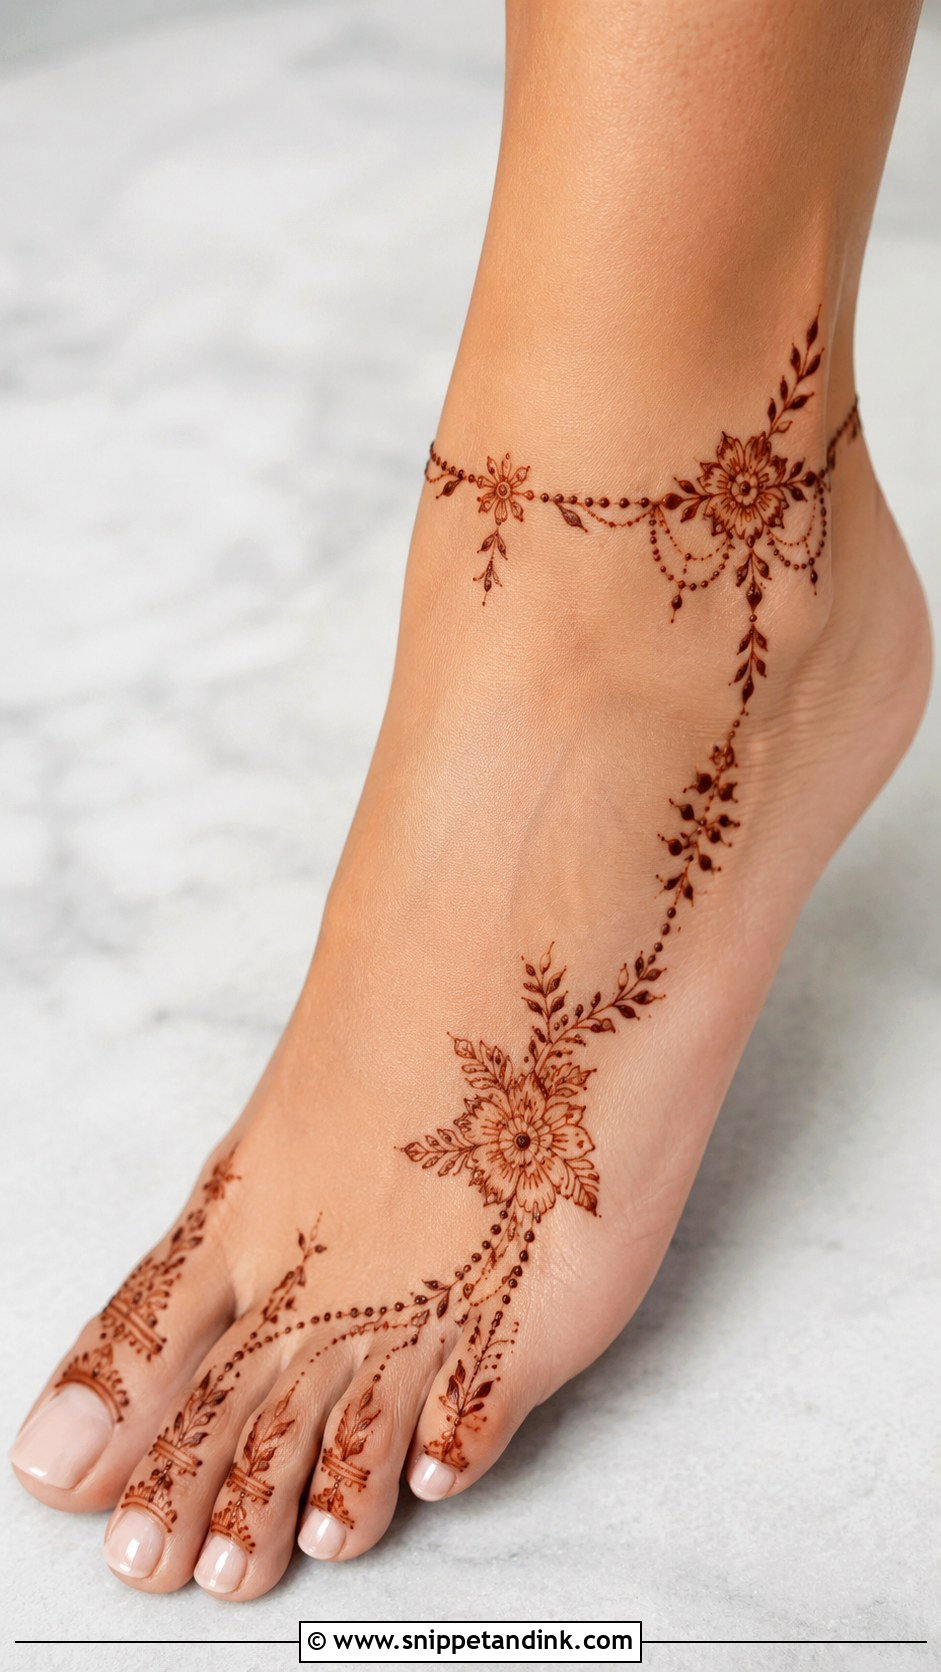
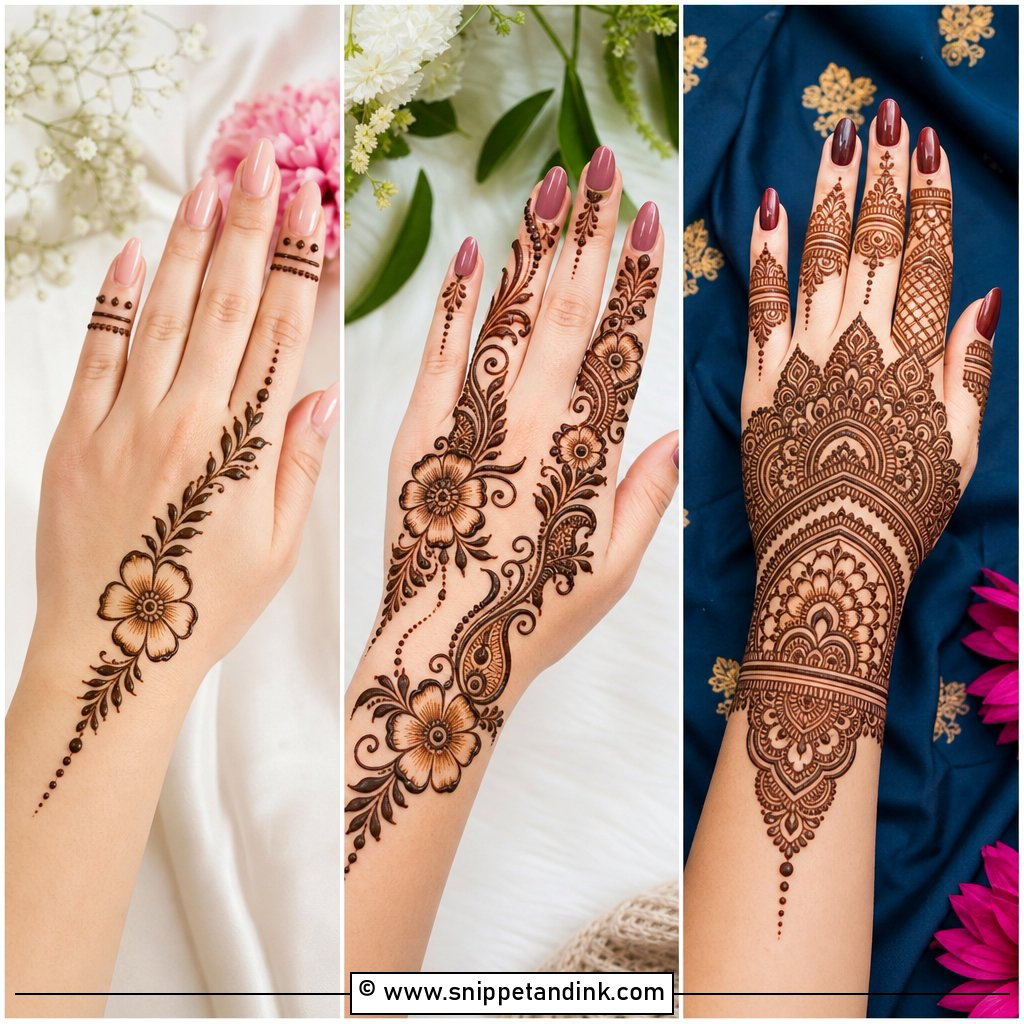
Minimal leg mehndi is a few small motifs, thin lines, dots and maybe a slim ankle band. I’d recommend it for office-friendly celebrations, college events and small family gatherings, or for anyone who’s never worn henna and wants to see how their skin takes it. It can sit just on the ankle, across the toes or along one side of the foot. Negative space does the work here, so resist adding more. Keep in mind that a thin line stains thinner too; on a light stain day, a very delicate design can fade to almost nothing within a week.
19. Easy Leg Mehndi Design
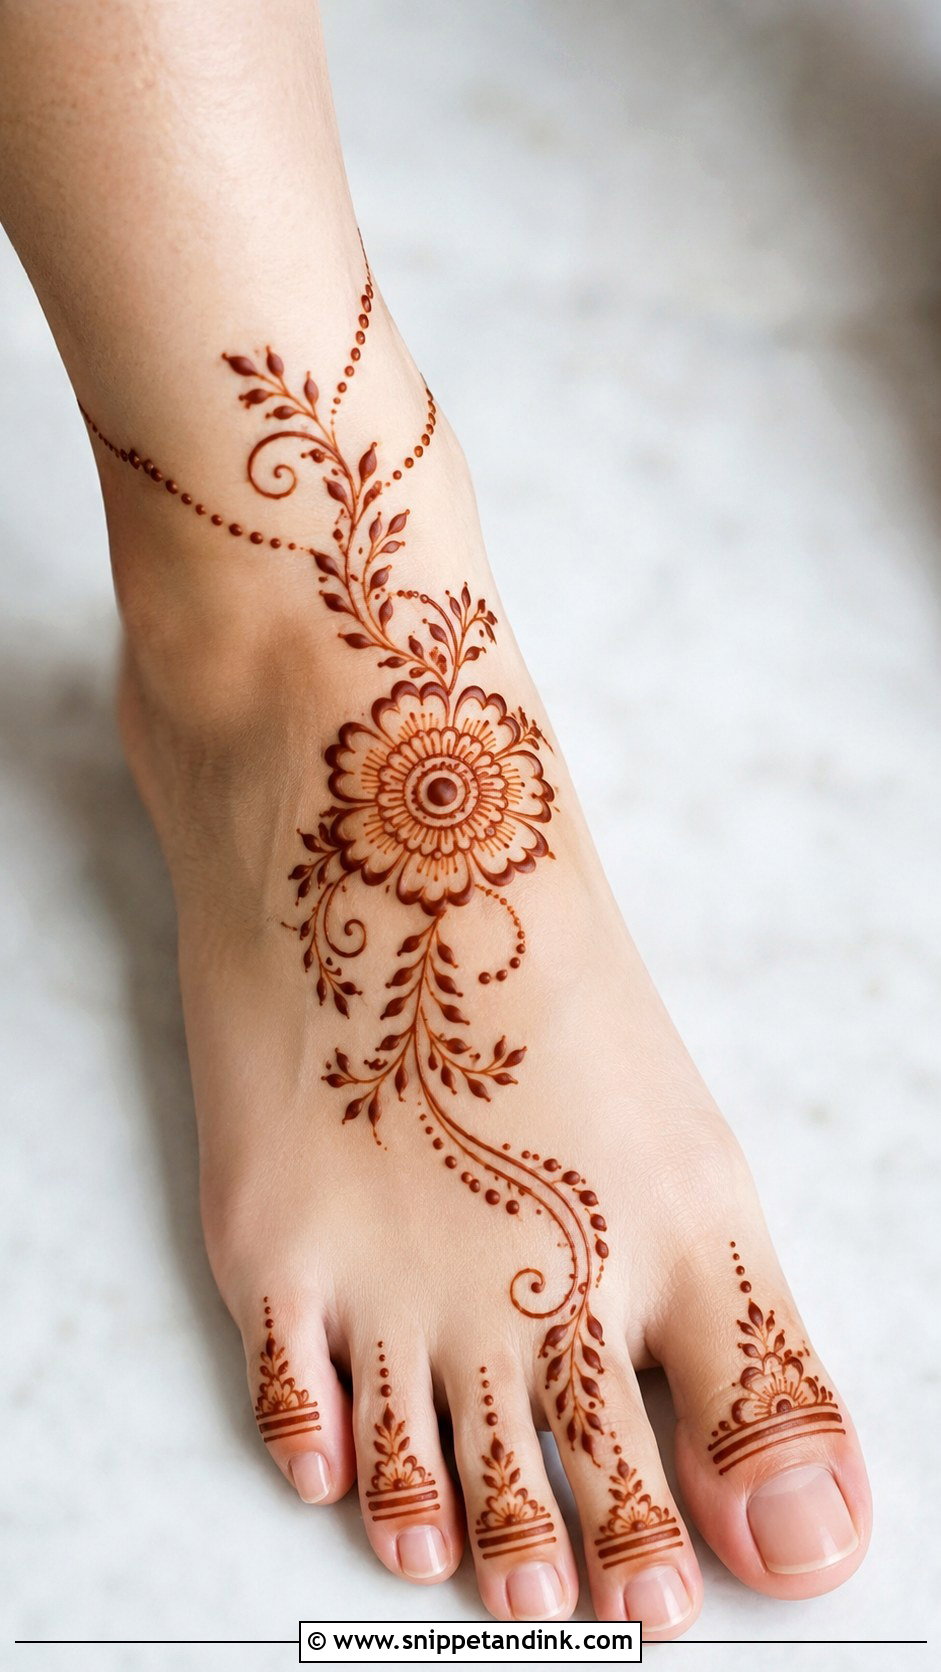
For an easy design, start with one flower or small mandala on top of the foot, add a few curving vines toward the ankle, and finish with dots, leaves and simple toe tips. If you’re applying it yourself, skip the tiny fillers. Feet are awkward to reach, and the angle you hold the cone at makes small details smudge easily. Bigger petals and clean outlines are much more forgiving. It’s also the design I’d do on kids, who rarely sit still long enough for anything finer.
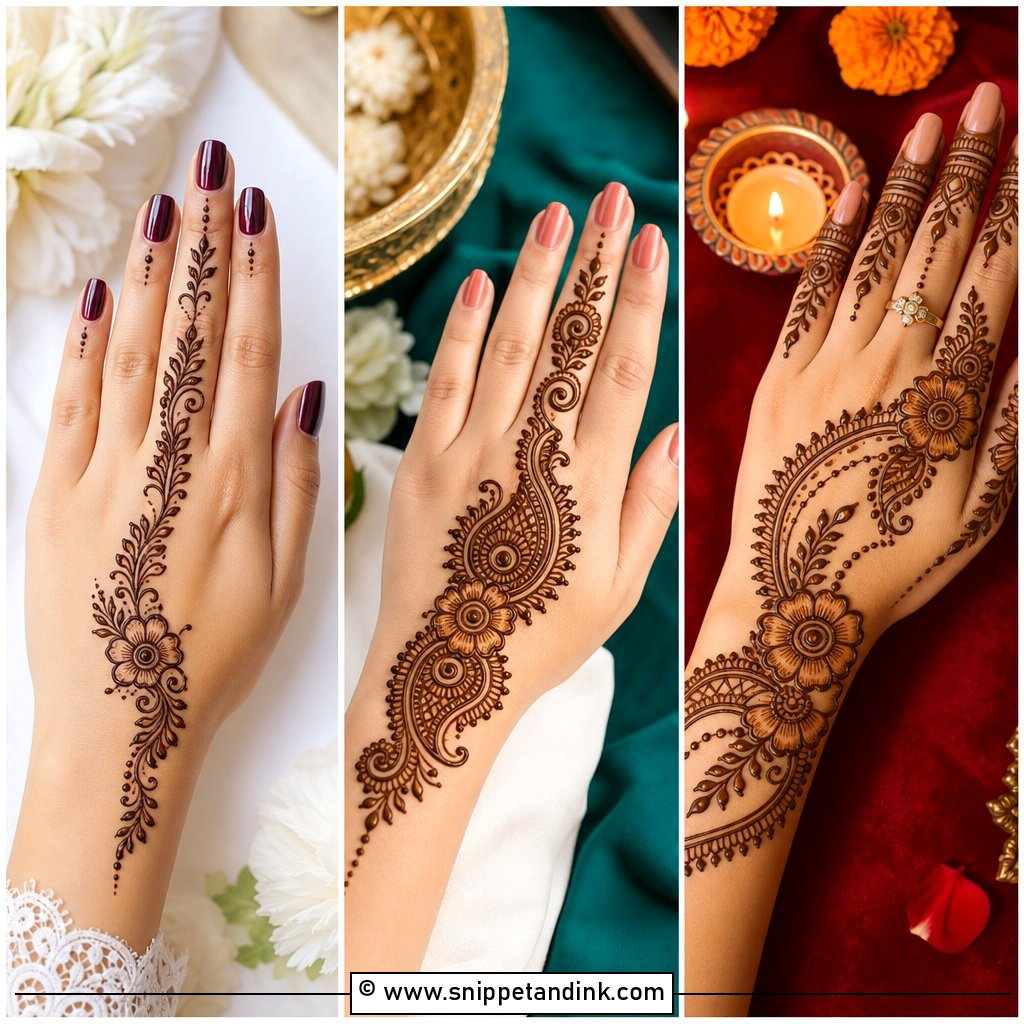
20. Stylish Leg Mehndi Design
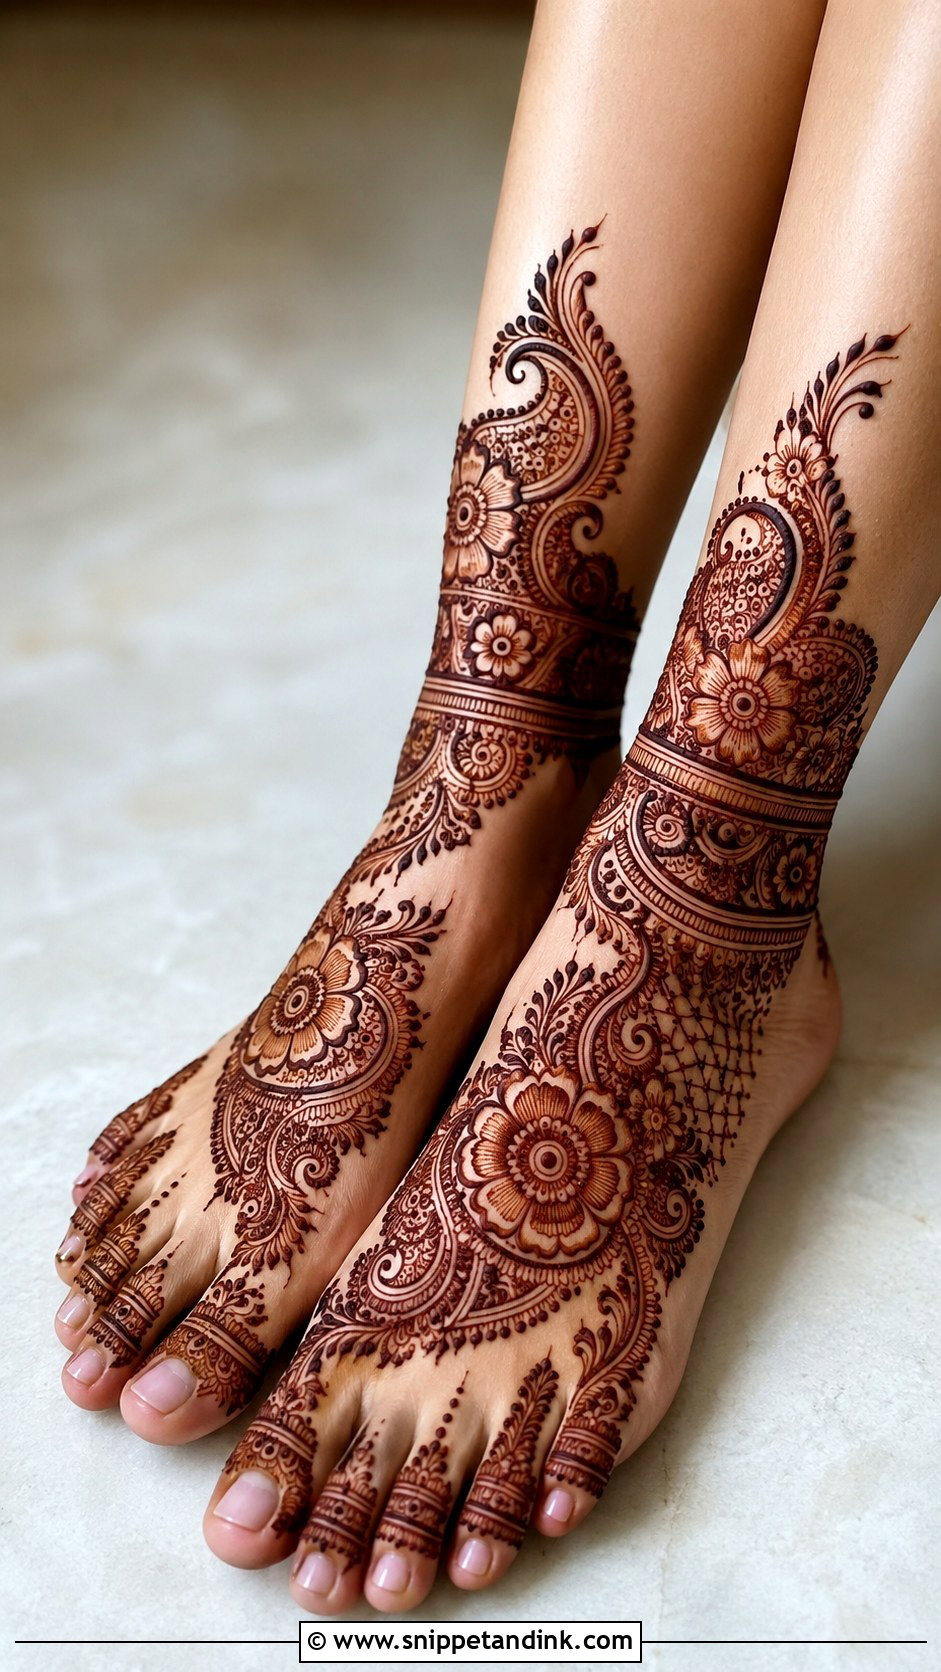
Stylish leg mehndi mixes modern spacing with classic motifs: bold florals, clean ankle cuffs, negative-space curves and slim toe detailing. It sits between dense Indian work and a very simple pattern, and it suits engagements, Eid, Diwali and pre-wedding shoots. My rule for matching it to clothes: heavy embroidery calls for open Arabic patterns, while plain fabric can carry stronger geometric detail. Every section should have a reason to be there, including the empty ones.
21. Modern Leg Mehndi Design
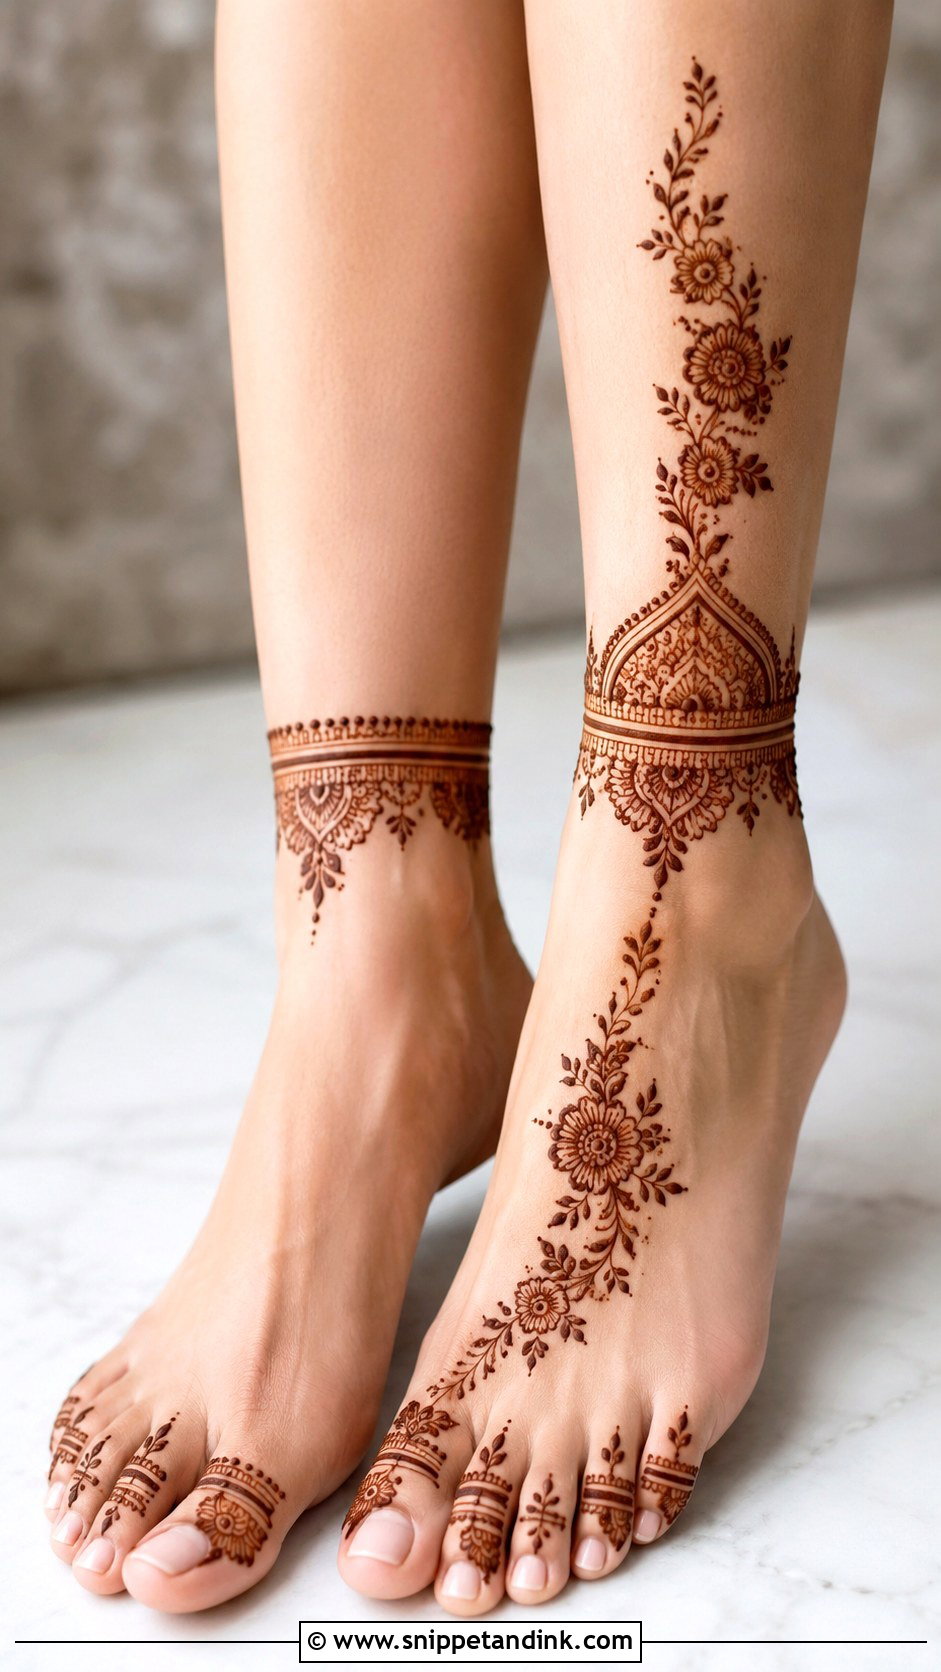
Modern leg mehndi is about placement and restraint. It might be one bold floral trail, a clean ankle cuff, a single mandala near the shin, or geometric panels across the foot, often asymmetrical with light toe work. Because there’s less henna on the skin, every line is exposed, so I take more care with consistency here than on a dense design where small wobbles hide. It goes well with Indo-western outfits, simple sarees and pared-back bridal looks. Sharp and uncluttered is what keeps it from looking unfinished.
22. Traditional Leg Mehndi Design
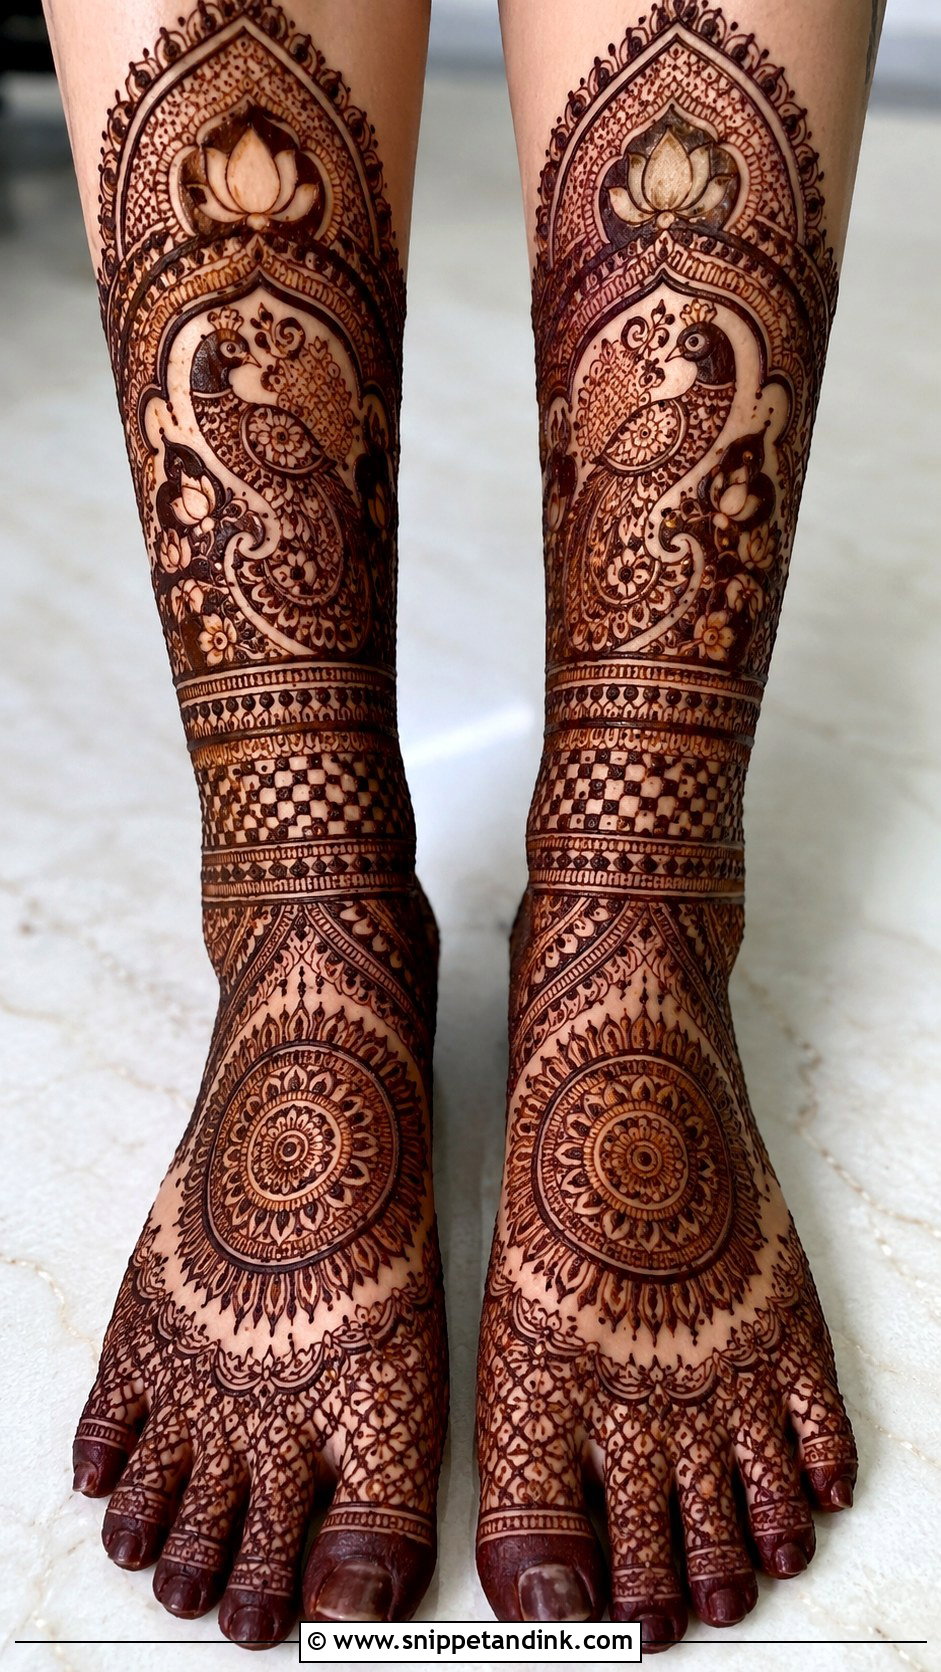
Traditional leg mehndi pulls together paisleys, peacocks, lotus flowers, vines, mandalas, checks and fine fillers, usually covering the feet and ankles and rising higher depending on the occasion. Symmetry between the two legs and a clear closing border are what I check before calling it done. Expect a reddish-brown on day one that deepens toward maroon over the next couple of days. It sits naturally beside heavy jewelry, sarees and lehengas.
23. Lotus Leg Mehndi Design
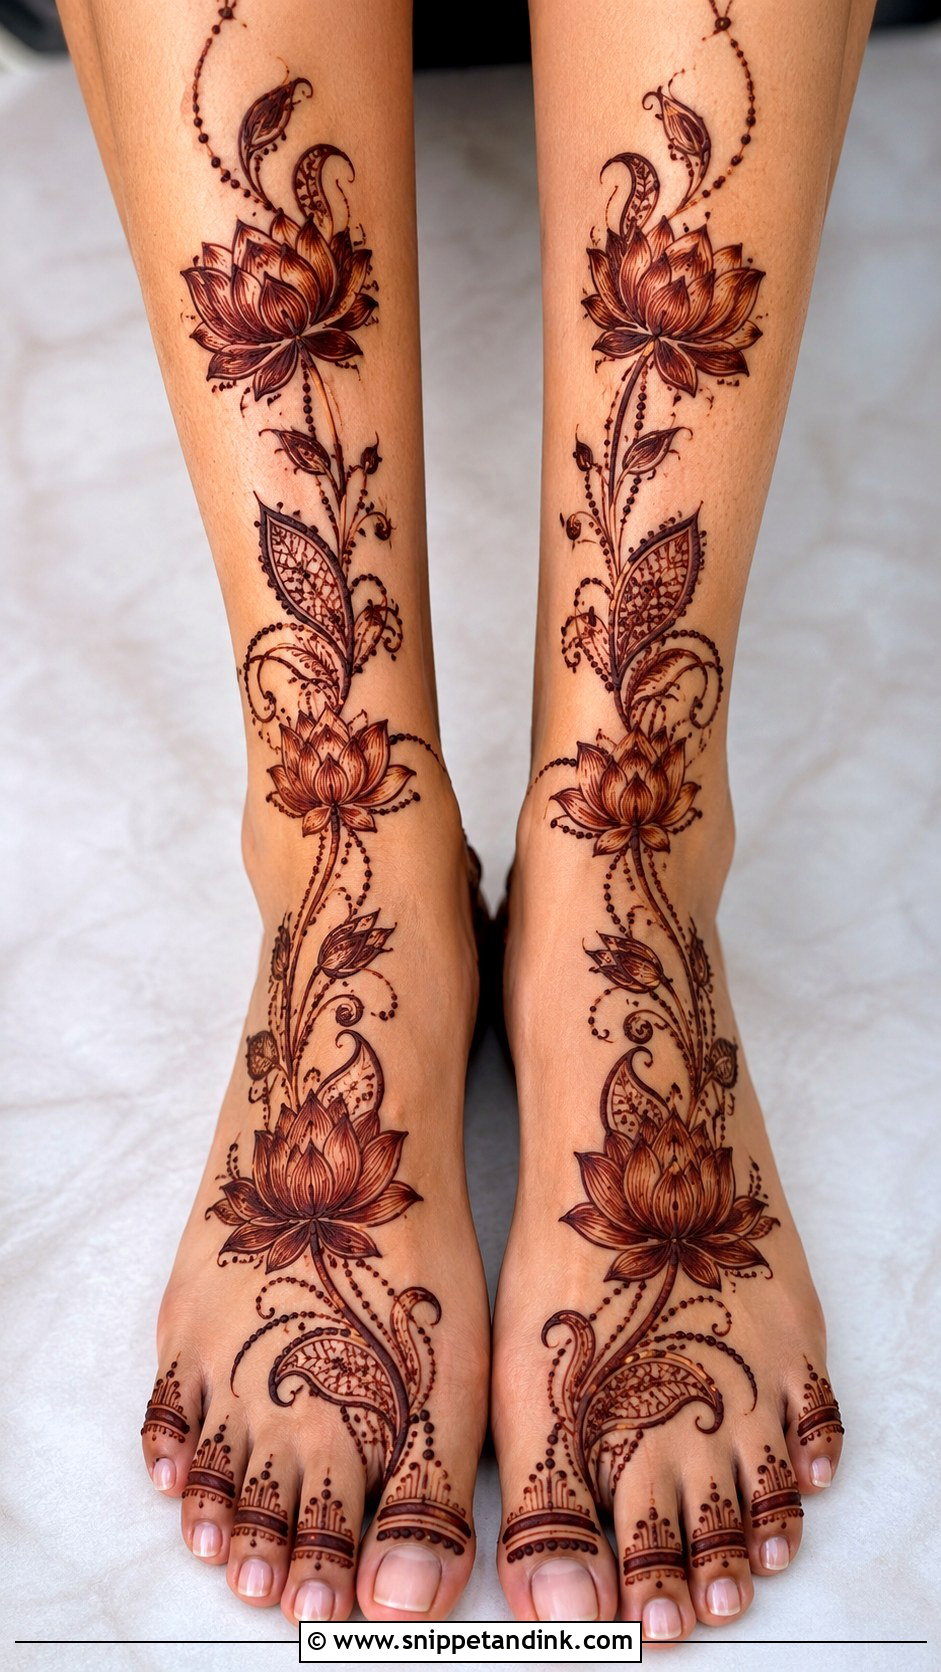
The lotus is easy to recognise even from a distance, so I often use it as the anchor on top of the foot, with buds and leaves trailing toward the ankle or calf. For a bride, I surround it with paisleys, jaali and fillers; for a lighter version, I leave it open and add thin vines. Petal spacing is my main concern. Henna lines swell slightly as the stain develops, and petals drawn too close end up touching, which flattens the flower into a blob. It’s a common choice for ceremonies with a spiritual focus.
24. Paisley Leg Mehndi Design
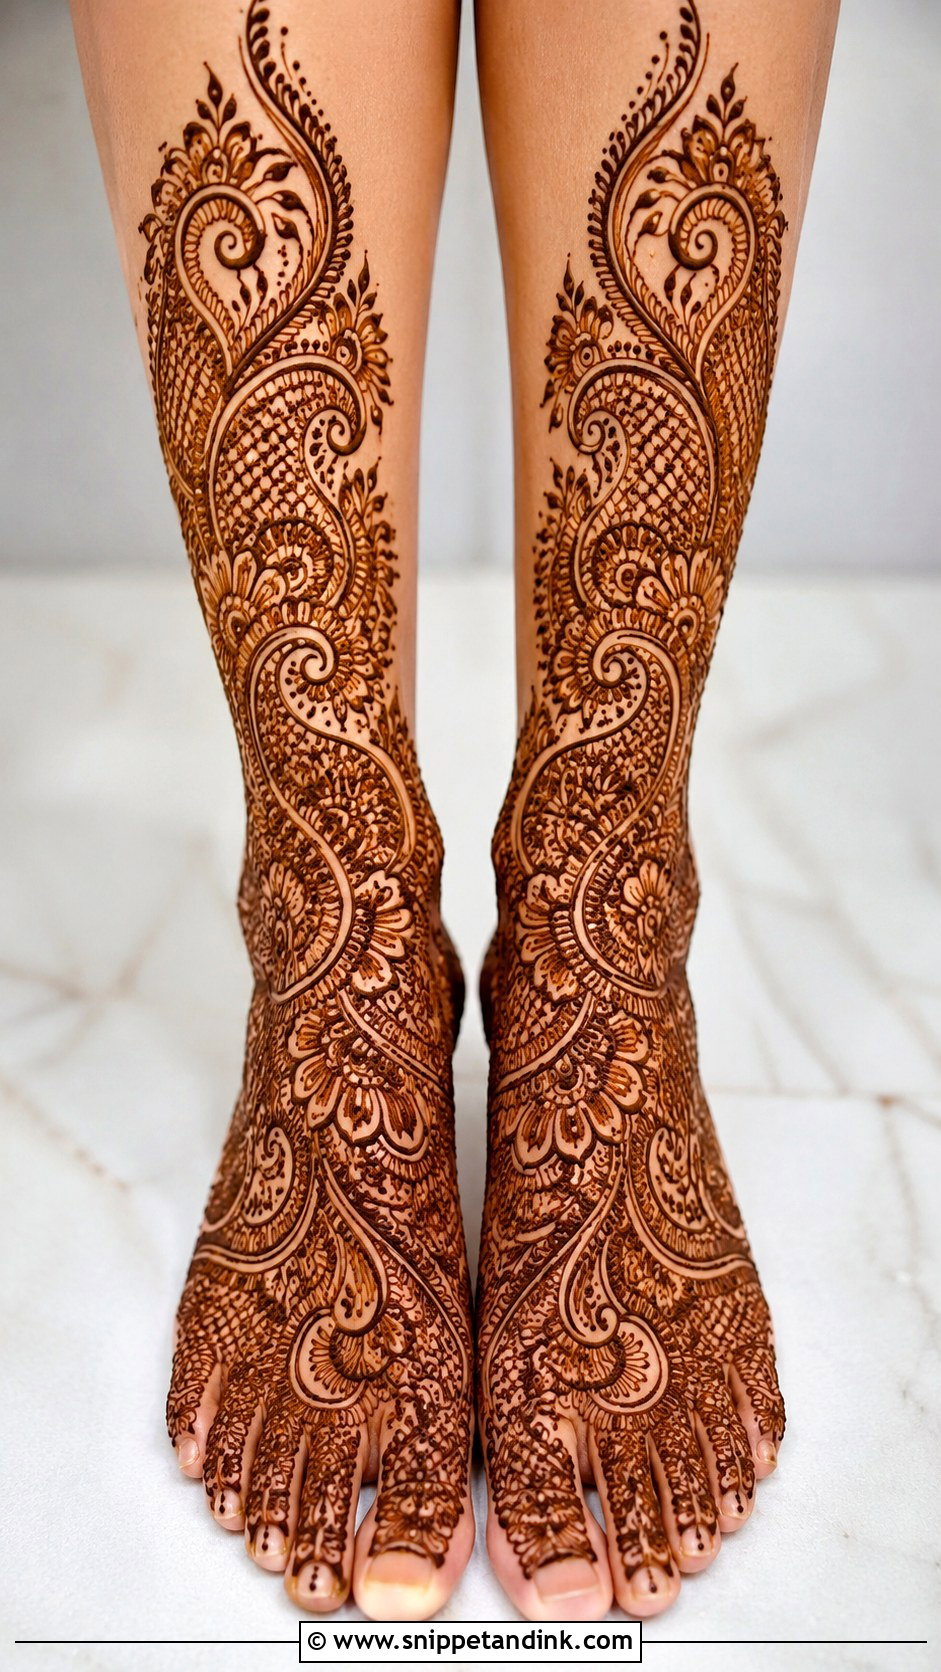
Paisley is the motif I reach for most on legs, because its curve follows the foot, ankle and shin without fighting them. It can be filled with flowers, dots, spirals, leaves or checks, used as one big shape with side details, or stacked into a full bridal leg. It sits comfortably in Indian, Arabic and Indo-Arabic styles. It’s also forgiving: I can stretch a paisley on a long narrow foot or round it off on a wide one, which is much harder to do with a mandala.
25. Jaali Leg Mehndi Design
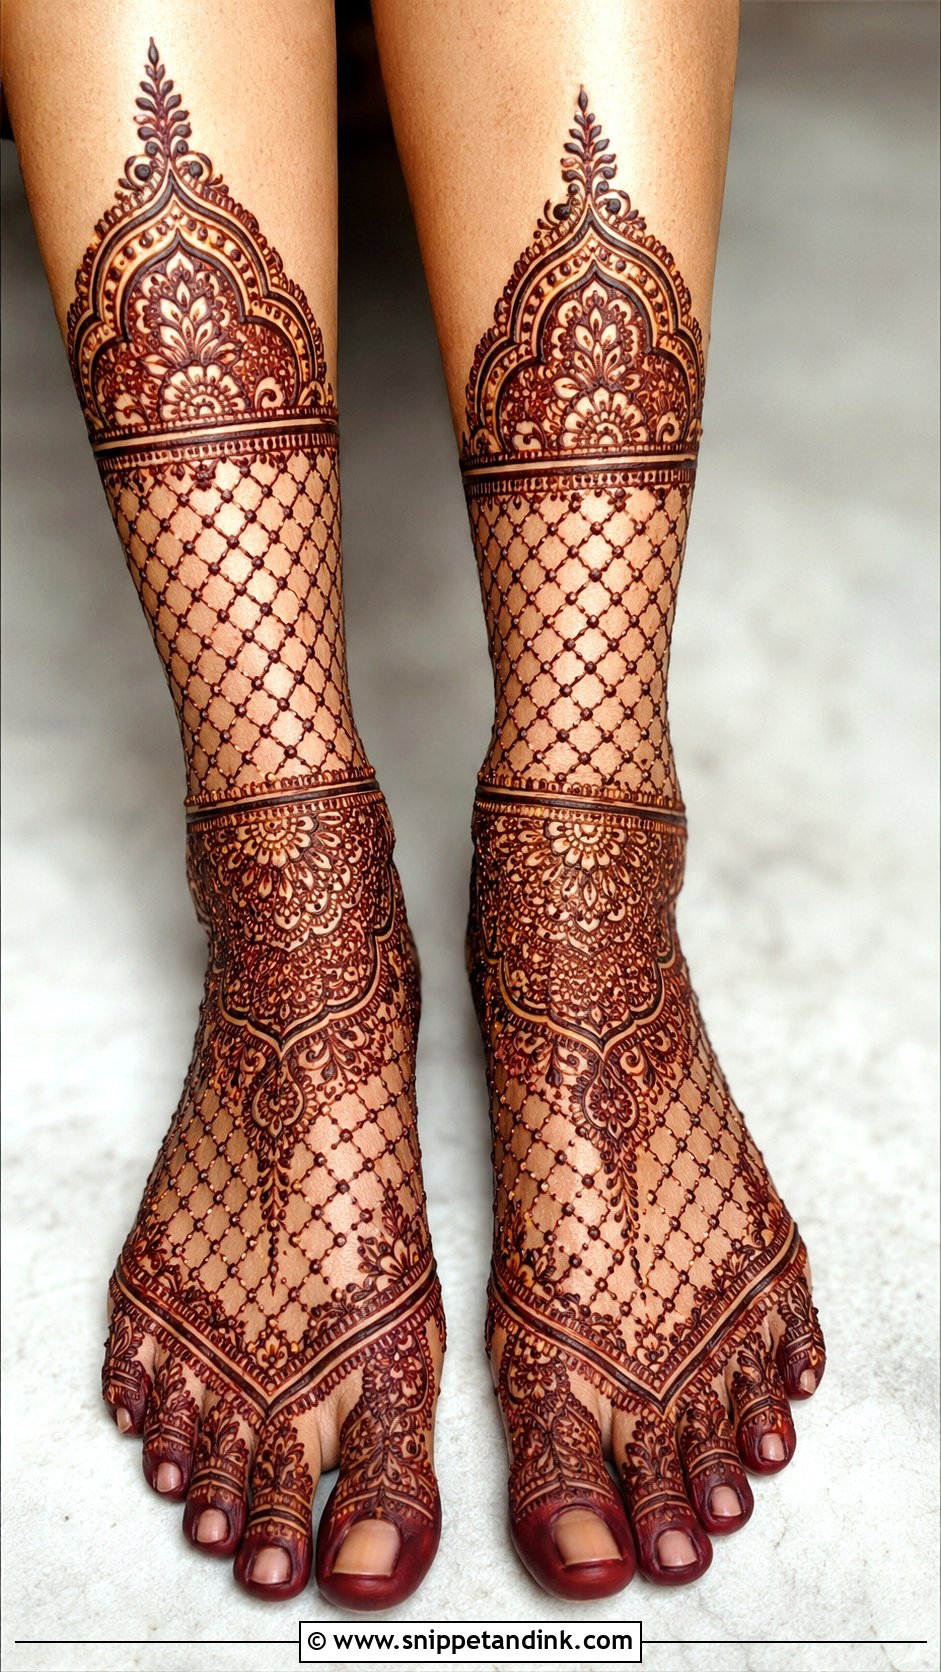
Jaali is a mesh pattern that gives a lace effect on the foot or leg, often framed by flowers, mandalas or ankle bands. Brides like it because it looks dense while still showing small squares of skin. It’s also the first thing to go wrong when the paste is inconsistent: if the lines aren’t even, the grid looks messy rather than lacy. I keep the mesh lines thin and evenly spaced, and for a modern take I limit jaali to a few panels instead of the whole leg.
26. Rose Leg Mehndi Design
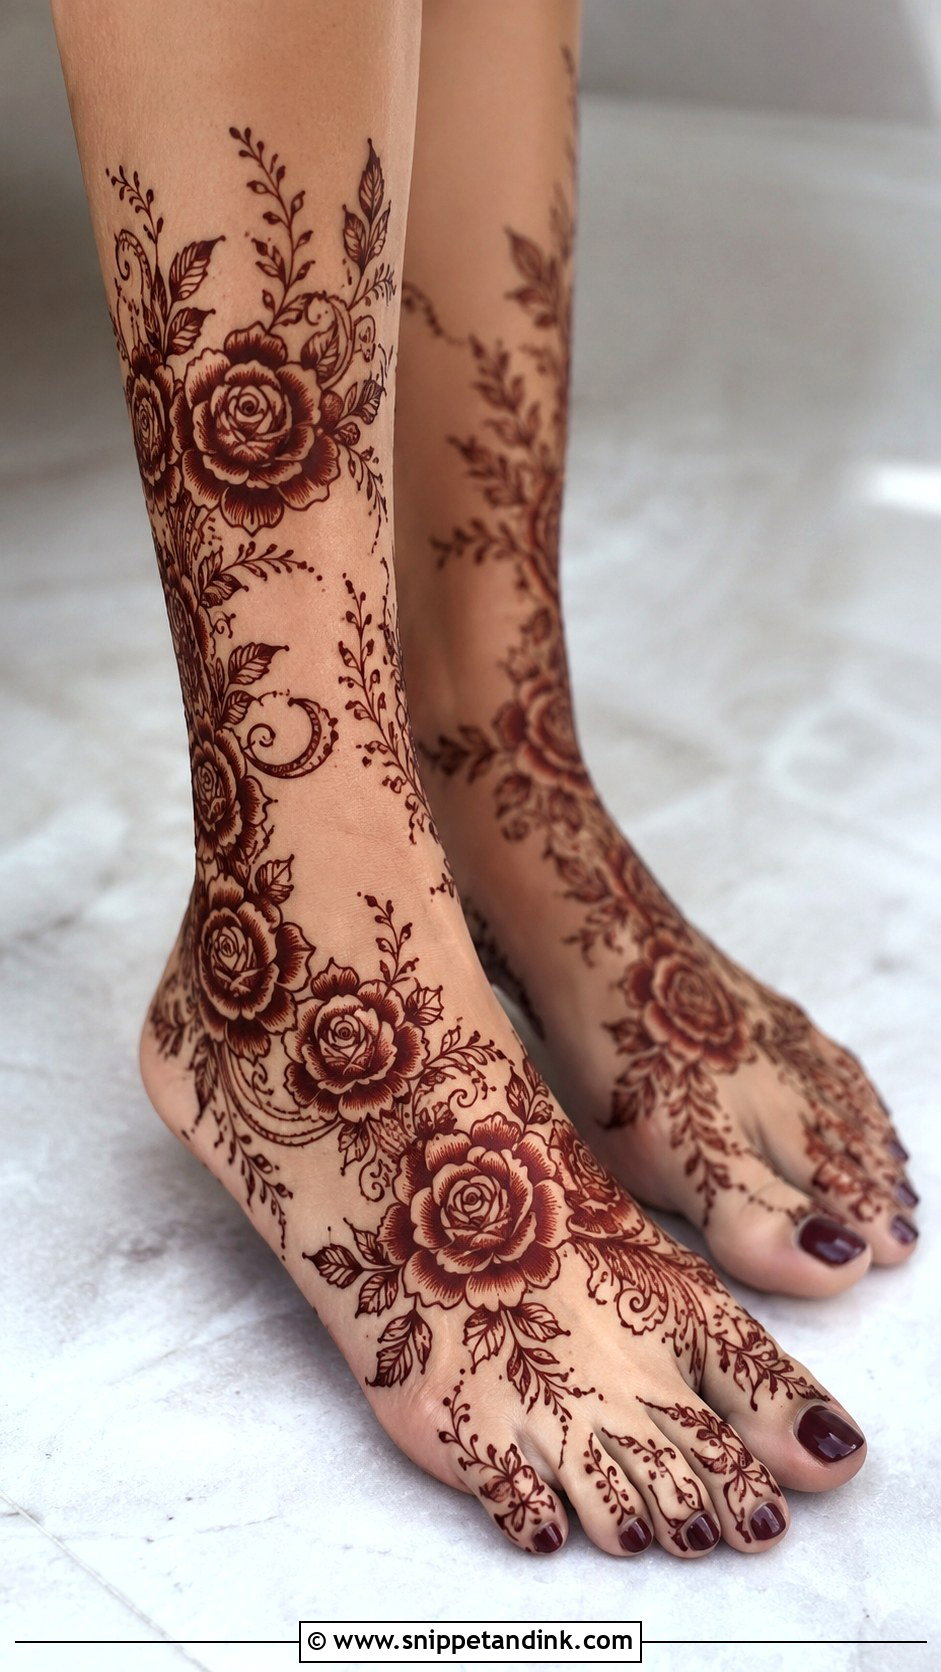
Large roses moving diagonally across the foot, with leaves and curved stems trailing toward the ankle, are a staple of Arabic and Indo-Arabic work. The open spacing suits roses, since bold outlines keep each bloom readable. For a bride, I add shaded petals, buds, paisleys and dotted chains; for something simple, one rose near the ankle and a light vine is enough. The shaded petals are what give roses their depth once the stain darkens, so ask your artist to show you how she shades before she starts.
27. Vine Leg Mehndi Design
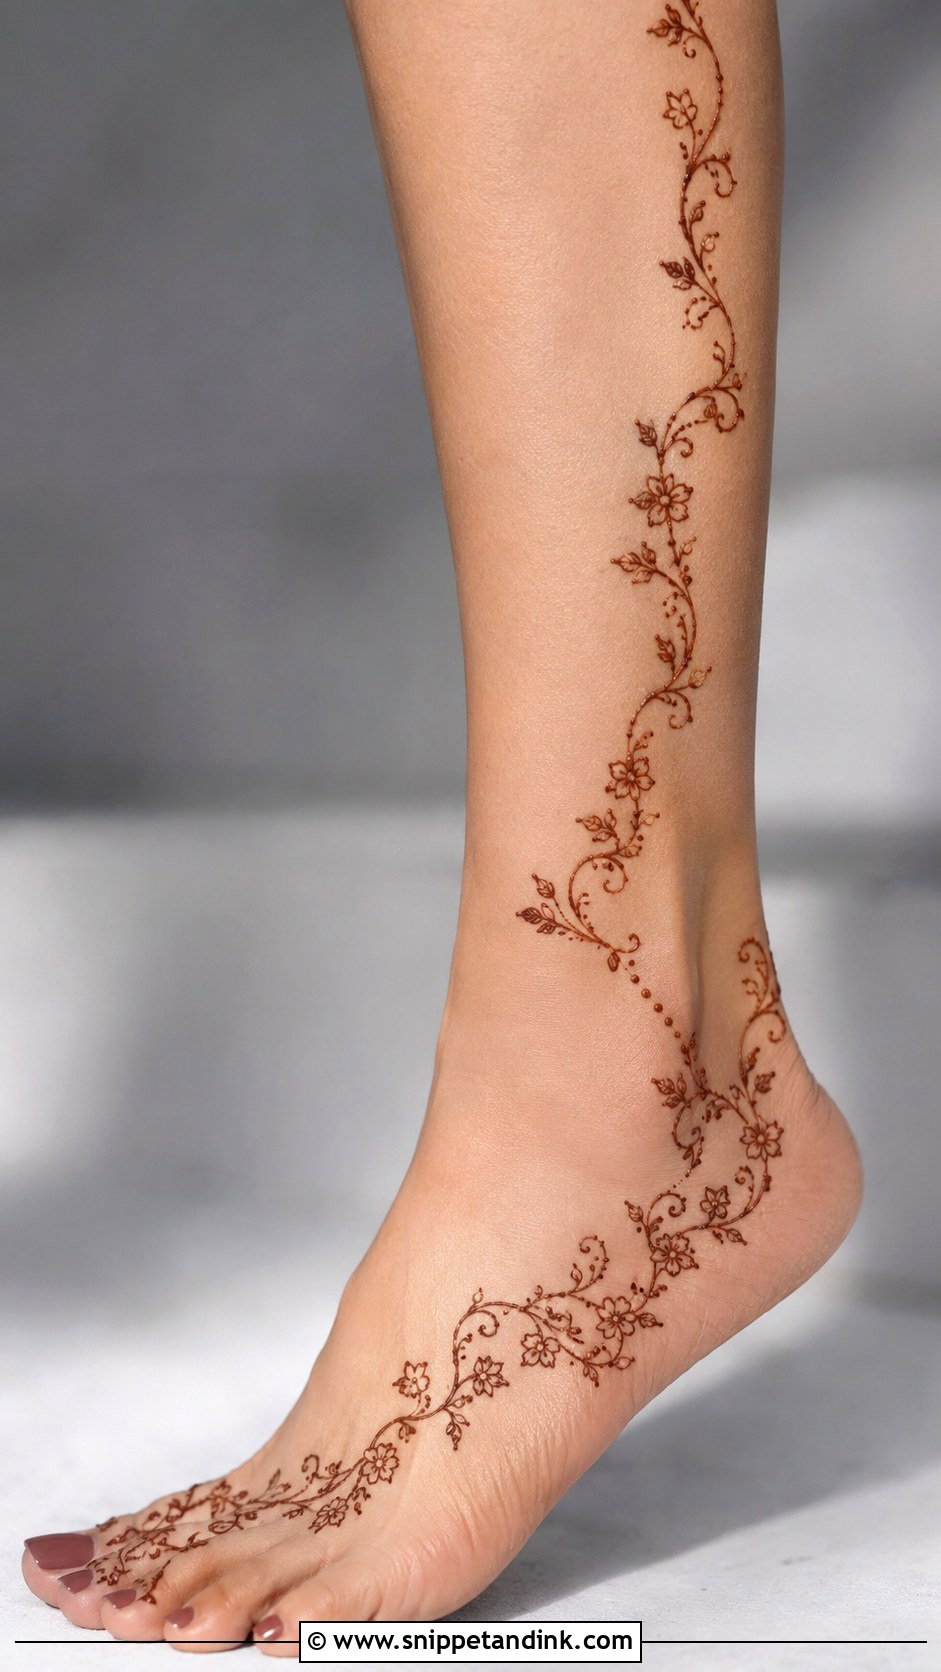
A vine starts at the toes, curls over the foot, wraps the ankle and climbs the calf with leaves, small flowers, dots and tendrils. It adds length without heavy coverage, and it runs along the side of the leg very naturally. I keep the main stem one even thickness from start to finish; if it thins out halfway up the calf, it looks like the cone ran dry. A slim ankle band or a row of bead-like dots makes it read more festive.
28. Toe Leg Mehndi Design
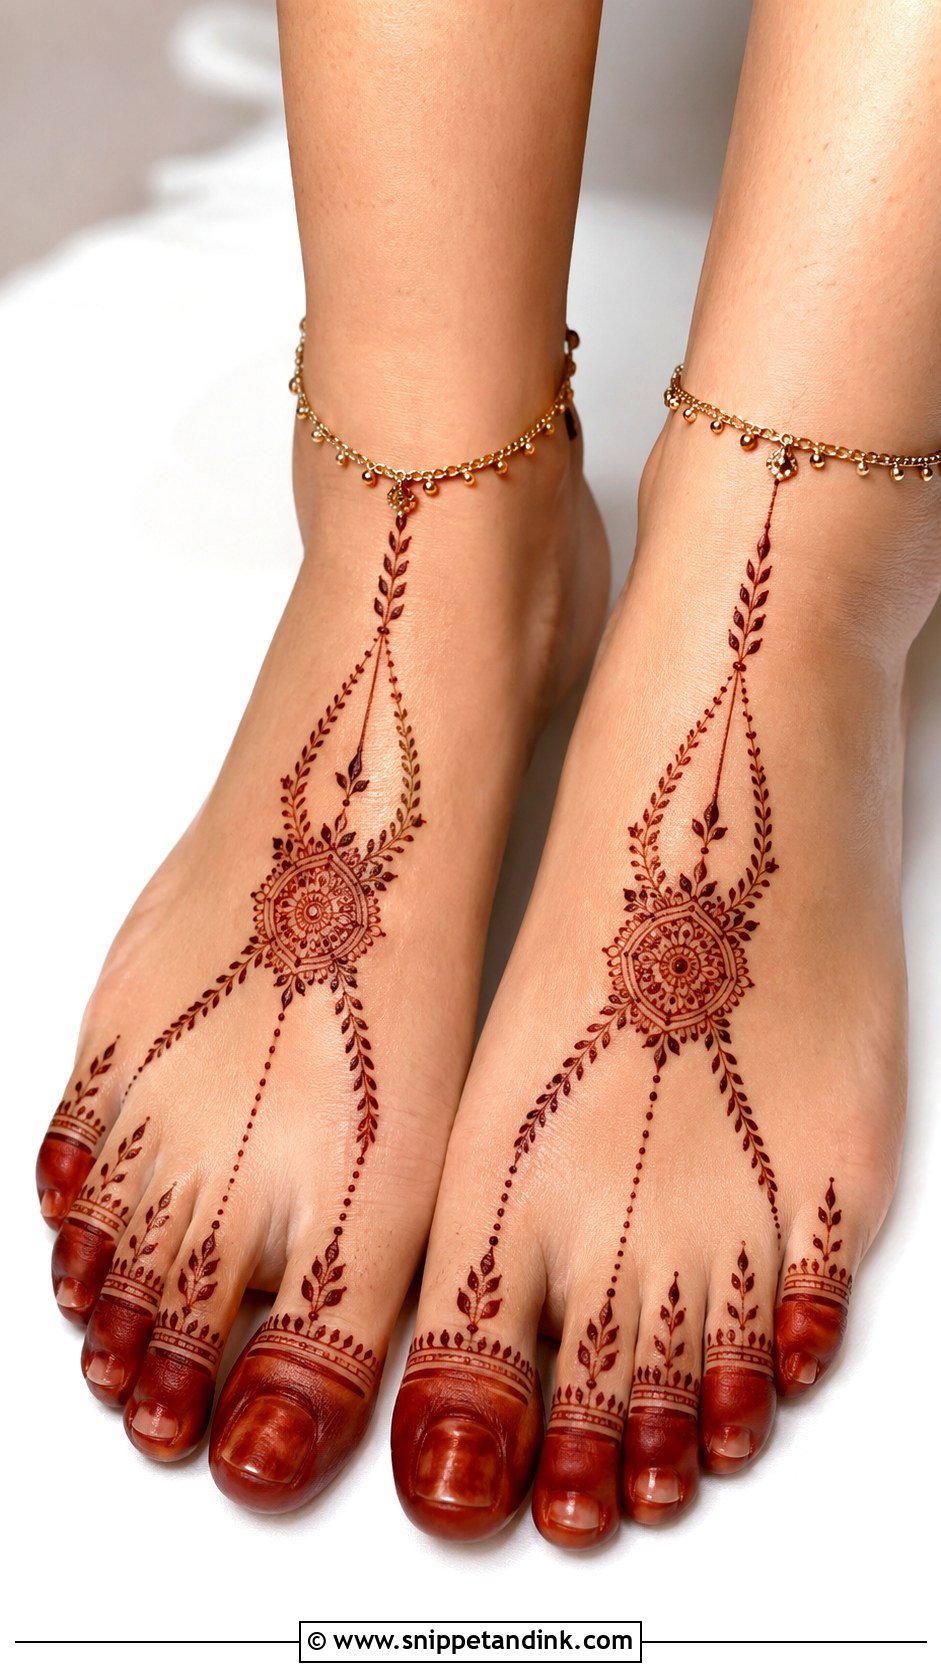
Toe mehndi concentrates on the toes and front of the foot: caps, small leaves, dots, ring-like bands and lines that link to a central motif or ankle chain. Fully dipped toe tips stain very dark because that skin is thick, which gives a strong frame for the rest of the foot. I keep the toe designs close to identical so the front of the foot looks tidy. It’s useful for sandals, open footwear and barefoot rituals, and it’s quick enough to add at the end of any leg design.
29. Eid Leg Mehndi Design
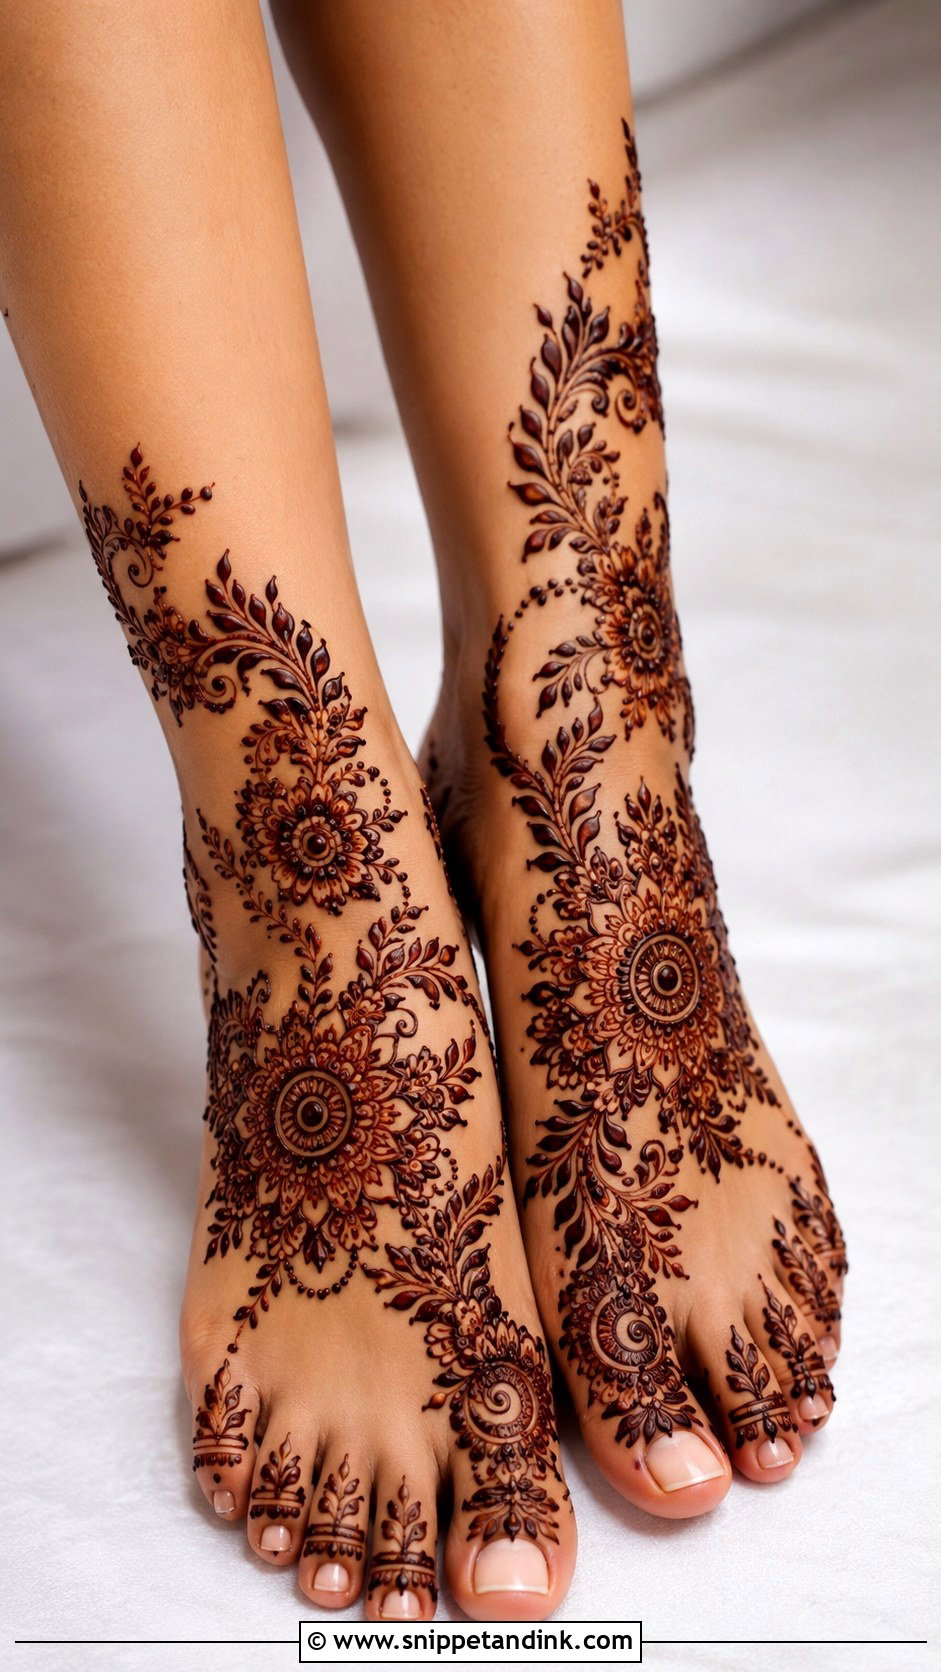
For Eid, most people want Arabic florals, leafy vines, anklet bands, mandalas and open paisley trails, because they look festive without hours in a chair, often the night before when everyone in the family is queuing for a turn. Coverage usually sits on the feet and ankles, keeping the calves light. It goes with embroidered suits, kaftans, sarees and shararas. Matching floral trails on both feet and neat toe details make it look polished, and generous negative space keeps it fresh.
30. Karwa Chauth Leg Mehndi Design
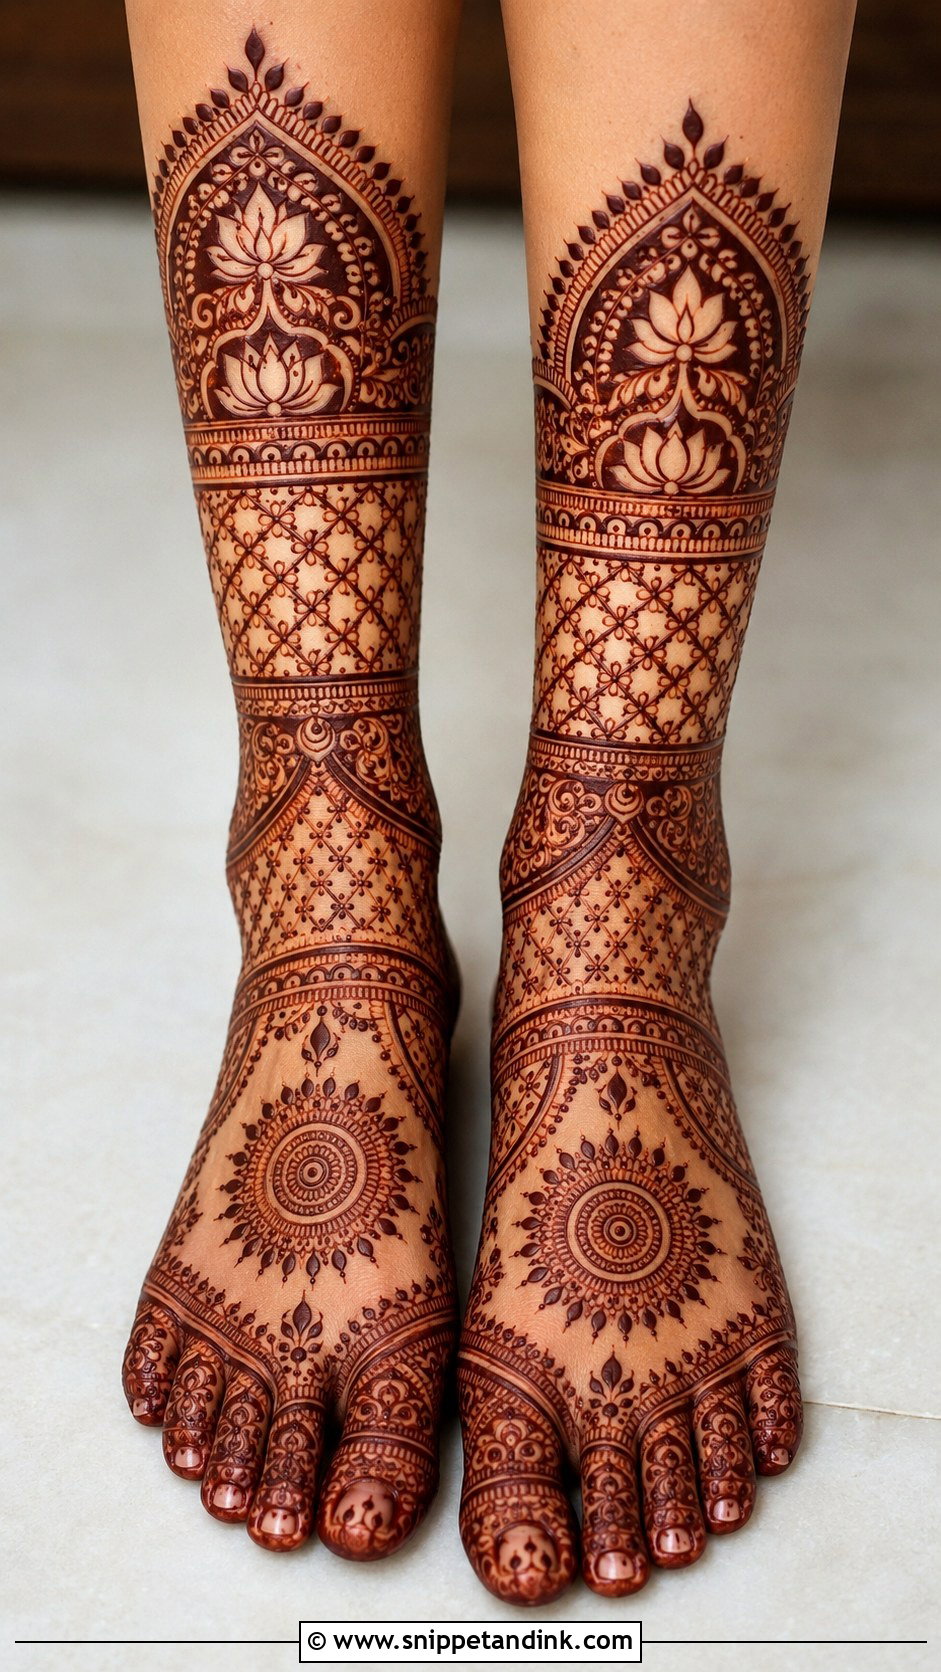
Karwa Chauth designs tend to be traditional and a bit heavier than everyday mehndi: mandalas, paisleys, lotus flowers, jaali panels, ankle bands and fine fillers. Since the henna is often applied a day or two before, plan around the stain: applying two days ahead means it peaks right on the day. Toes to ankle or lower shin is the comfortable sweet spot under a saree. Tiny initials or matching motifs on both feet add a personal touch without breaking the traditional feel.
31. Diwali Leg Mehndi Design
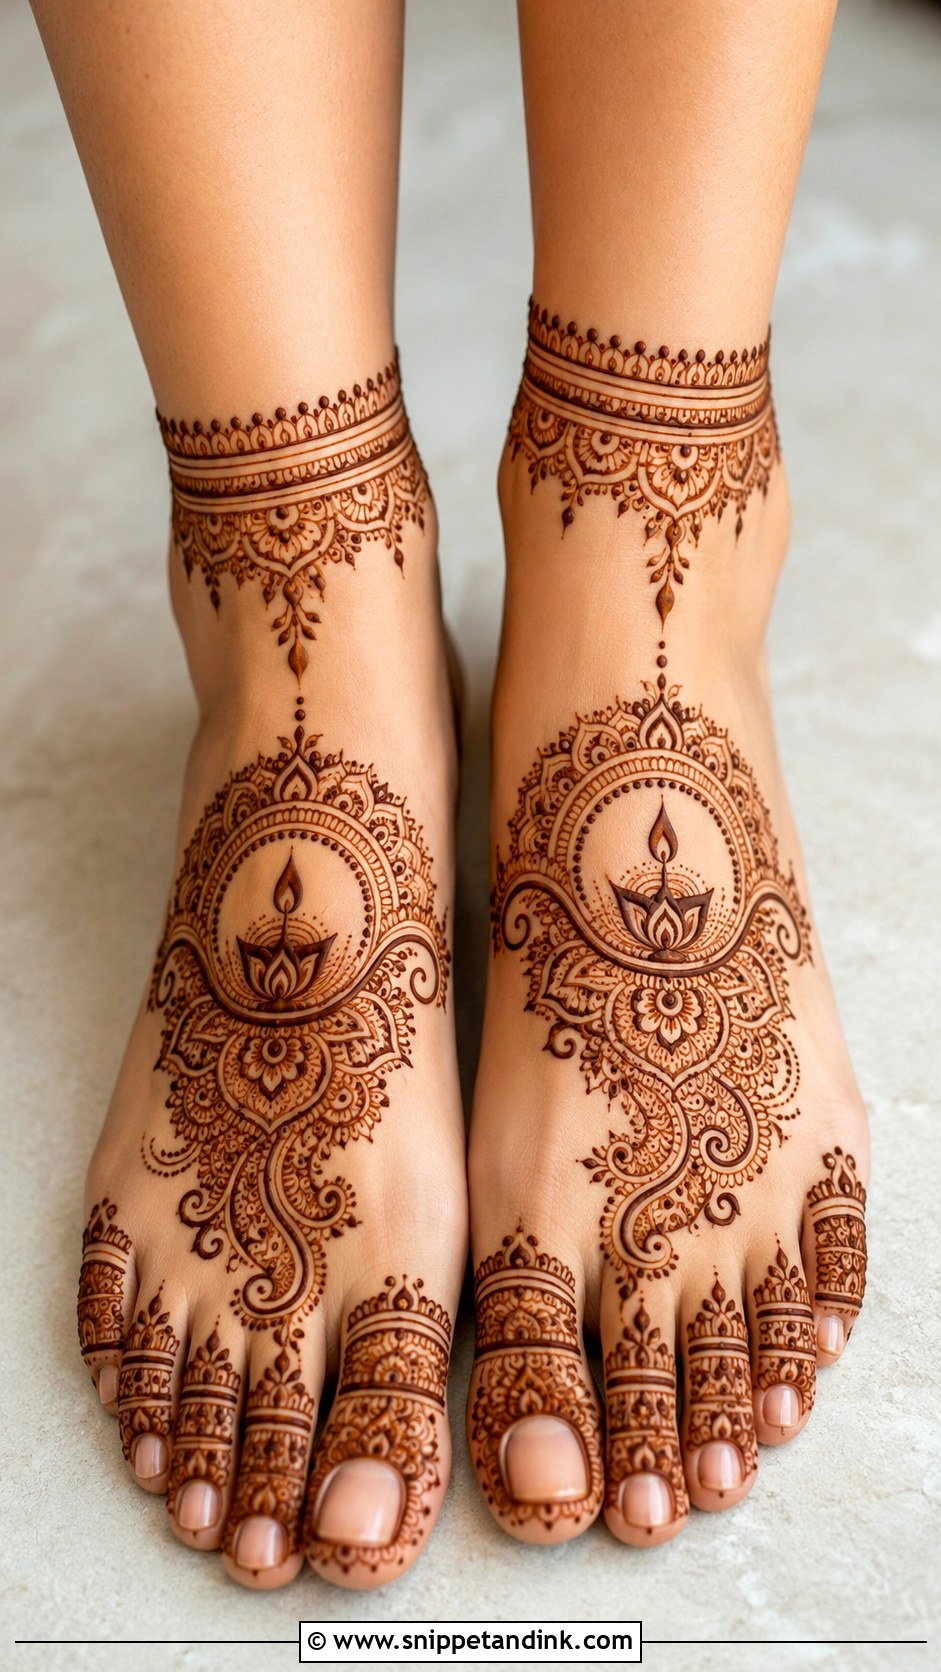
Diwali leg mehndi can stay festive without being heavy, which matters when you’re busy with cooking, guests and lighting diyas. Floral trails, mandalas, diya-inspired curves, dotted borders, paisleys and slim ankle bands all fit. A neat foot-to-ankle design is usually enough. If you’d like more, extend it up the shin with lotus or paisley details. With all the moving around that week, simpler bold shapes also survive better than fine filler on the parts of the foot that rub in footwear.
32. Engagement Leg Mehndi Design
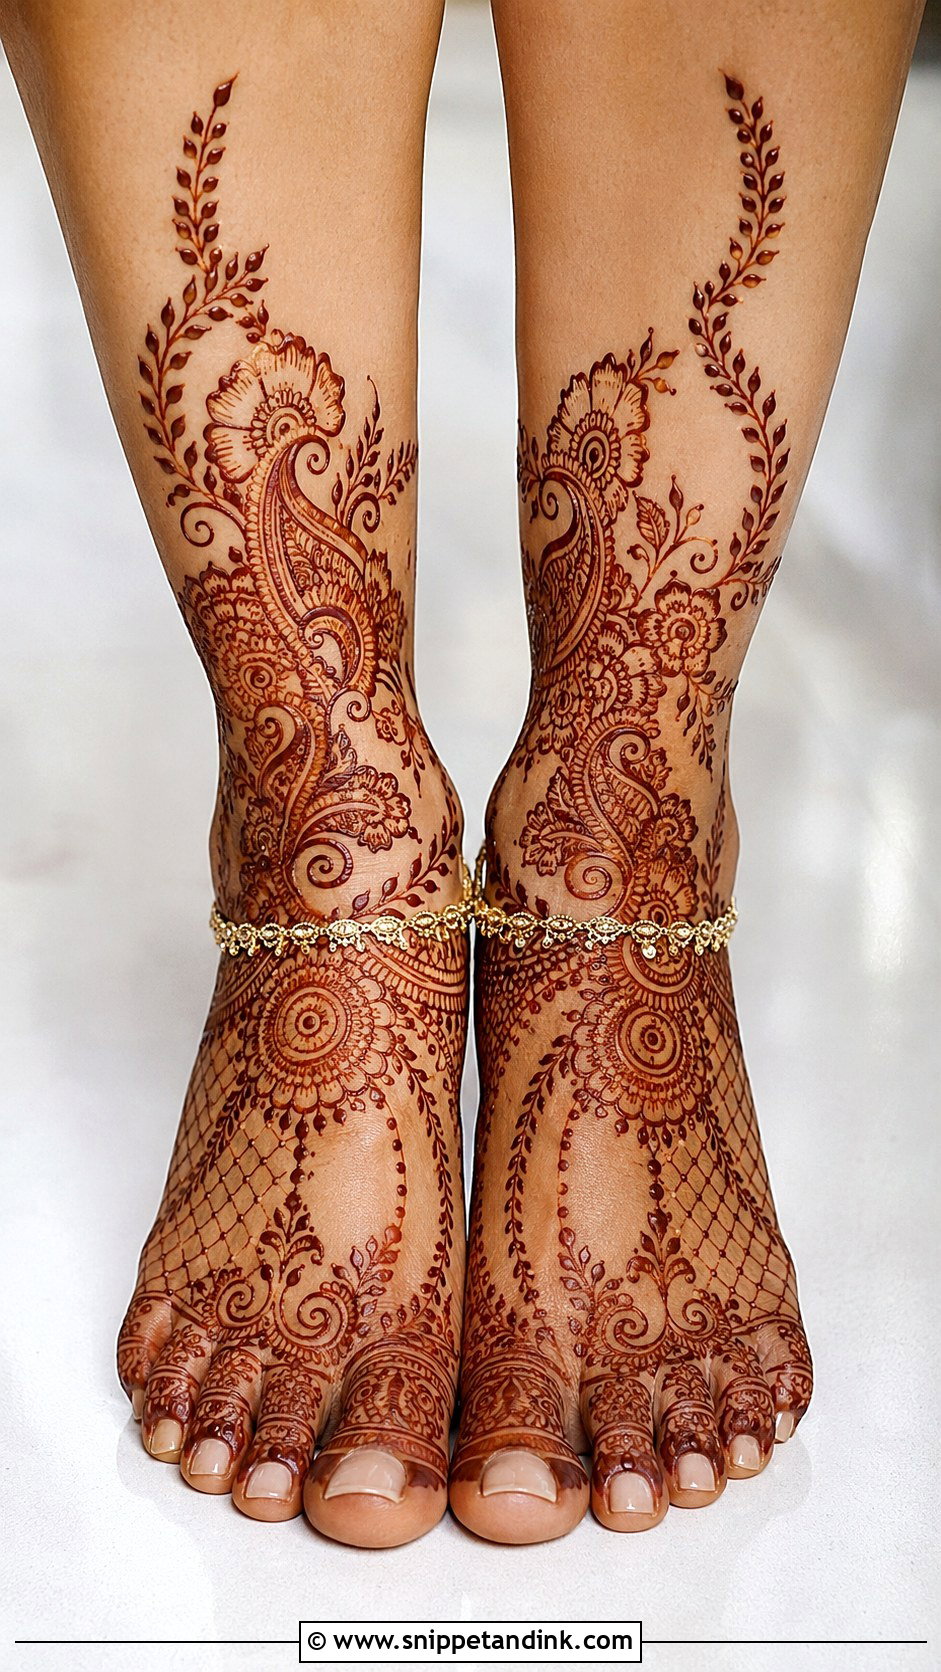
Engagement leg mehndi should feel polished but leave room for something heavier at the wedding. Floral vines, jewelry-style anklets, soft mandalas, paisley trails and light jaali panels on the feet and ankles, rising slightly toward the calf, usually hit the right level. It sits well under lehengas, gowns, sarees and Indo-western outfits. If the wedding is only a few weeks later, I keep the engagement design lighter on the soles, so any remaining stain doesn’t clash with the bridal pattern later.
33. Dulhan Leg Mehndi Design
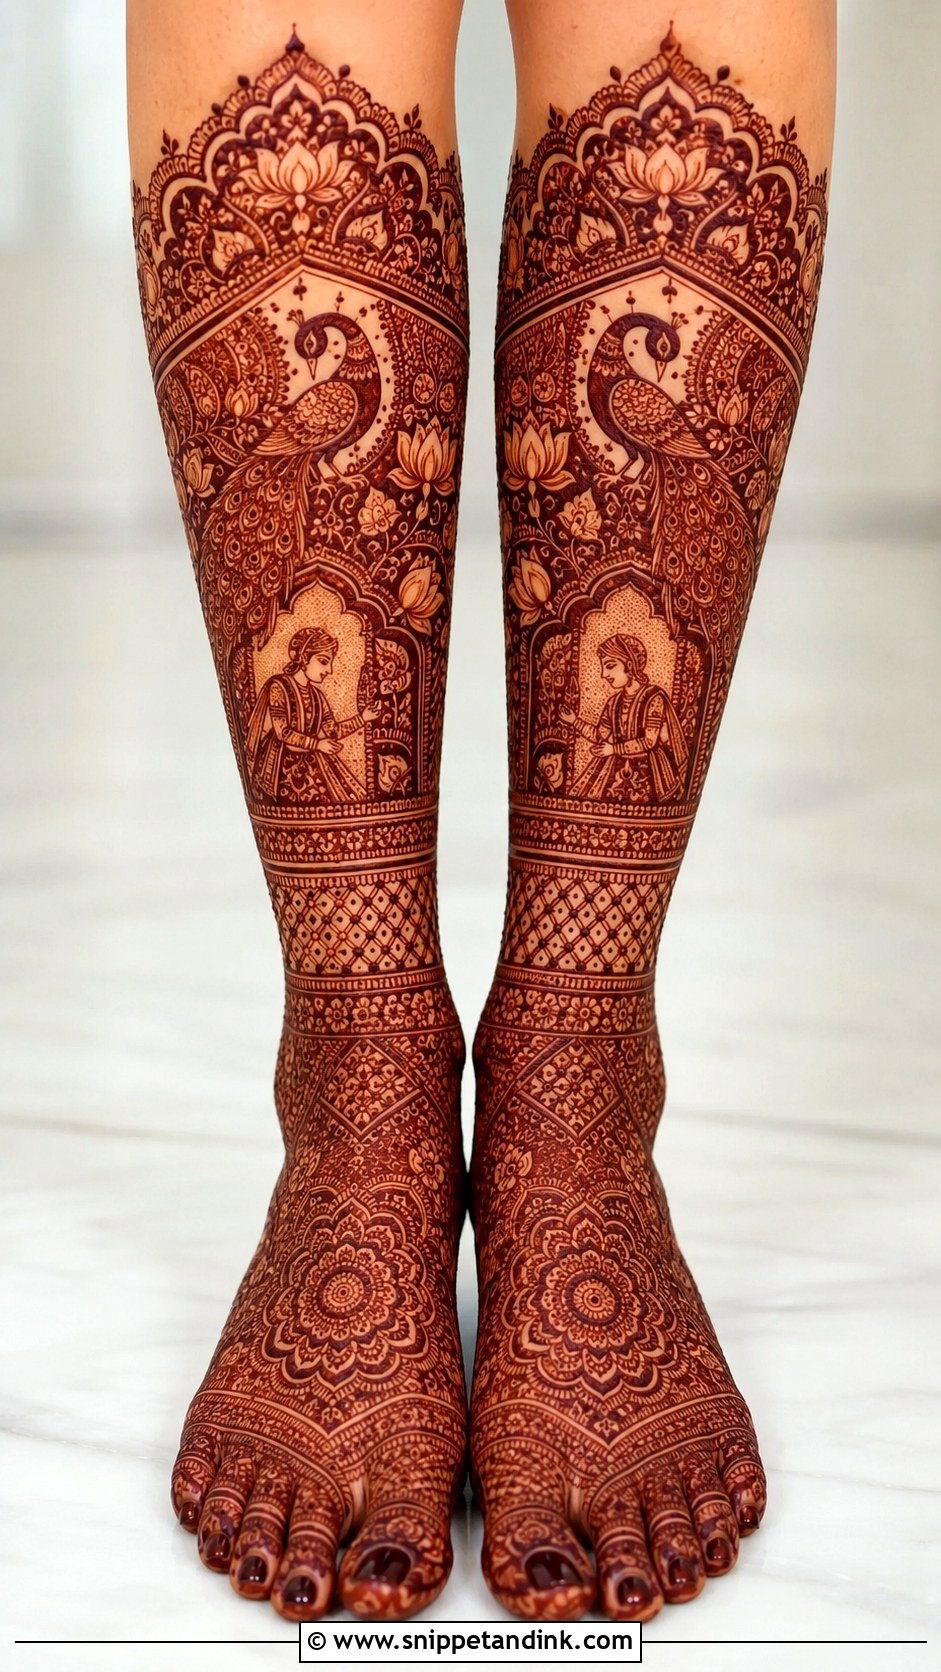
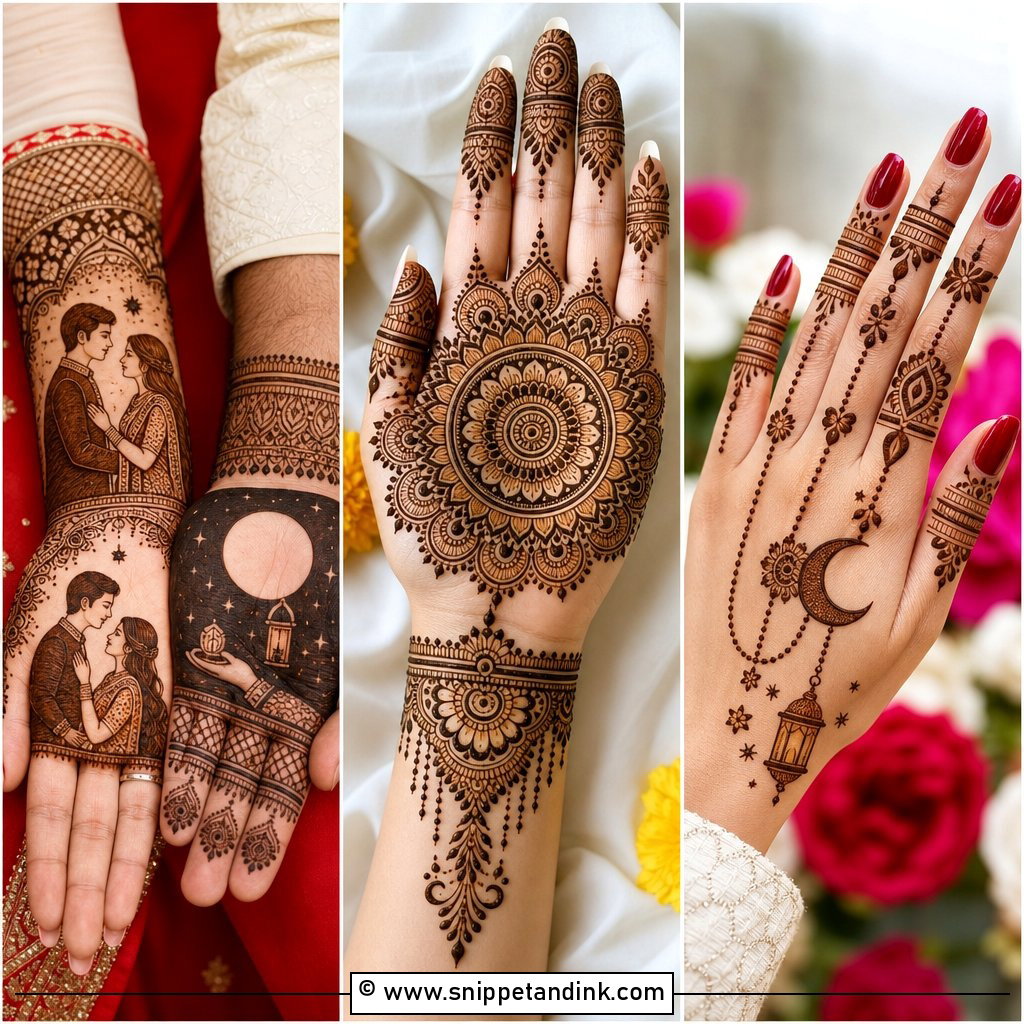
Dulhan leg mehndi is the fullest version: dense, symmetrical and rich with peacocks, lotus flowers, paisleys, bride and groom figures, mandalas, jaali, temple borders and initials, from toes to calves or higher. I book it as its own session, separate from the hands where possible, because sitting still for both in one go is hard on any bride. It needs long, careful drying, and the night after is spent with feet wrapped and off the floor. Plan it two days before the wedding so the stain is at its darkest for the ceremony and close-ups.
34. Calf Leg Mehndi Design
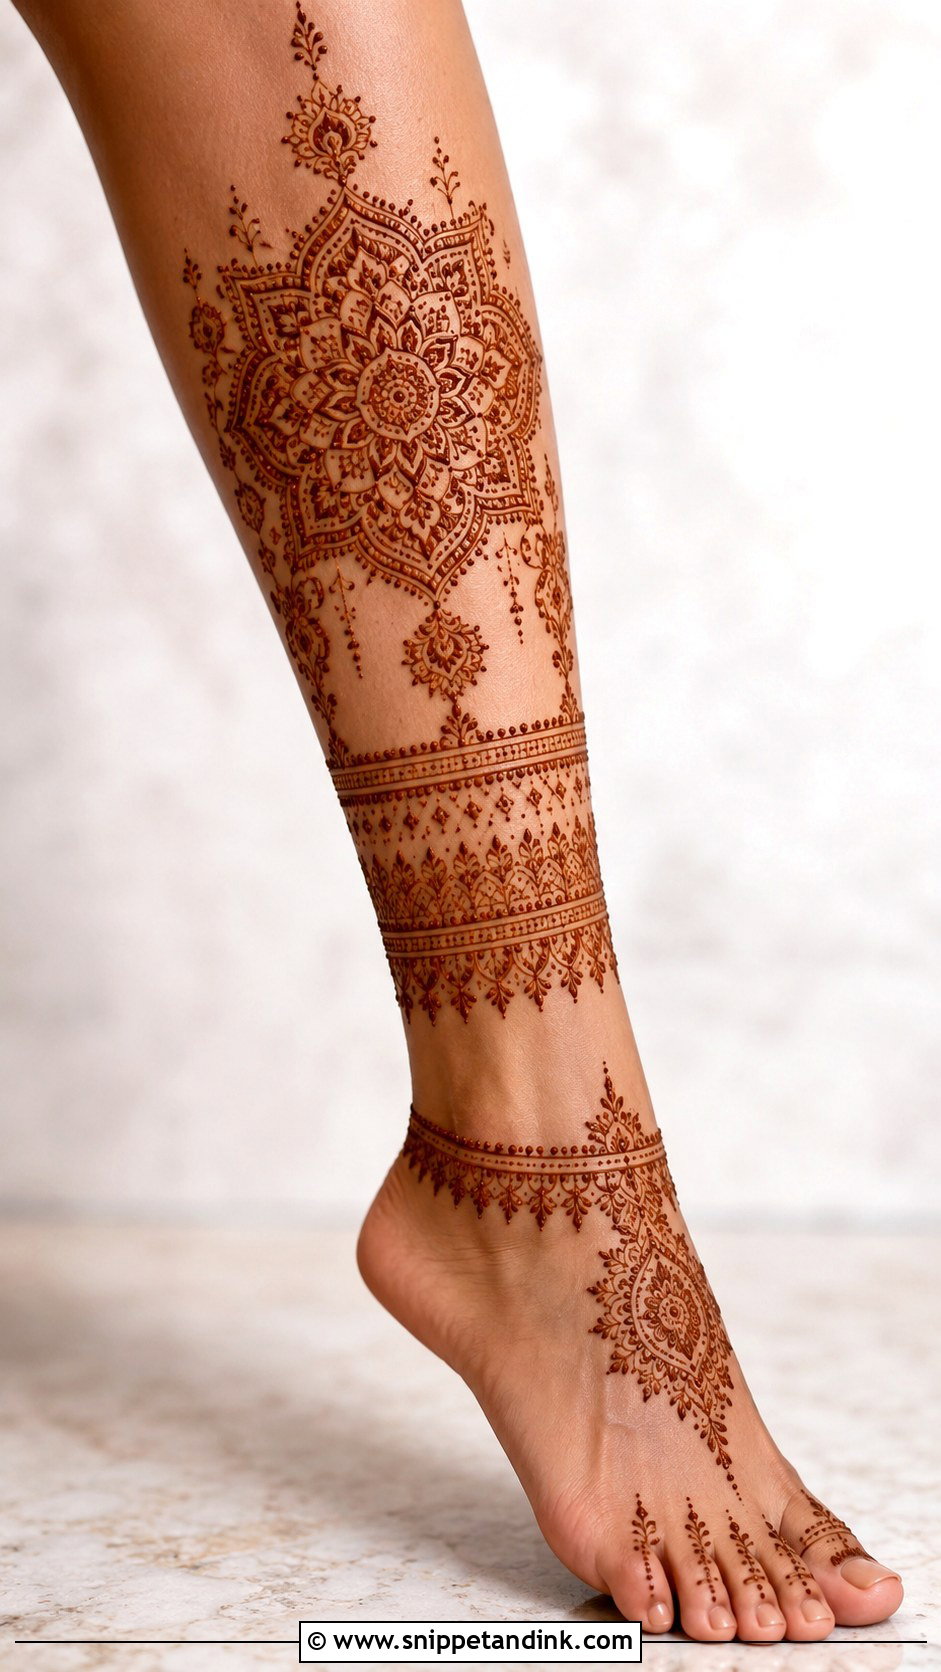
Calf designs place the main artwork on the lower or middle calf as a vertical trail, a circular mandala, a floral panel or a band. They make sense when your outfit shows the back or side of the leg. The calf is a large, curved surface, so I scale motifs up; small scattered shapes there look lost from even a few steps away. Keep in mind that calf skin generally stains lighter than the foot, so the calf section may look a shade softer than the rest of the design.
35. Full Foot Leg Mehndi Design
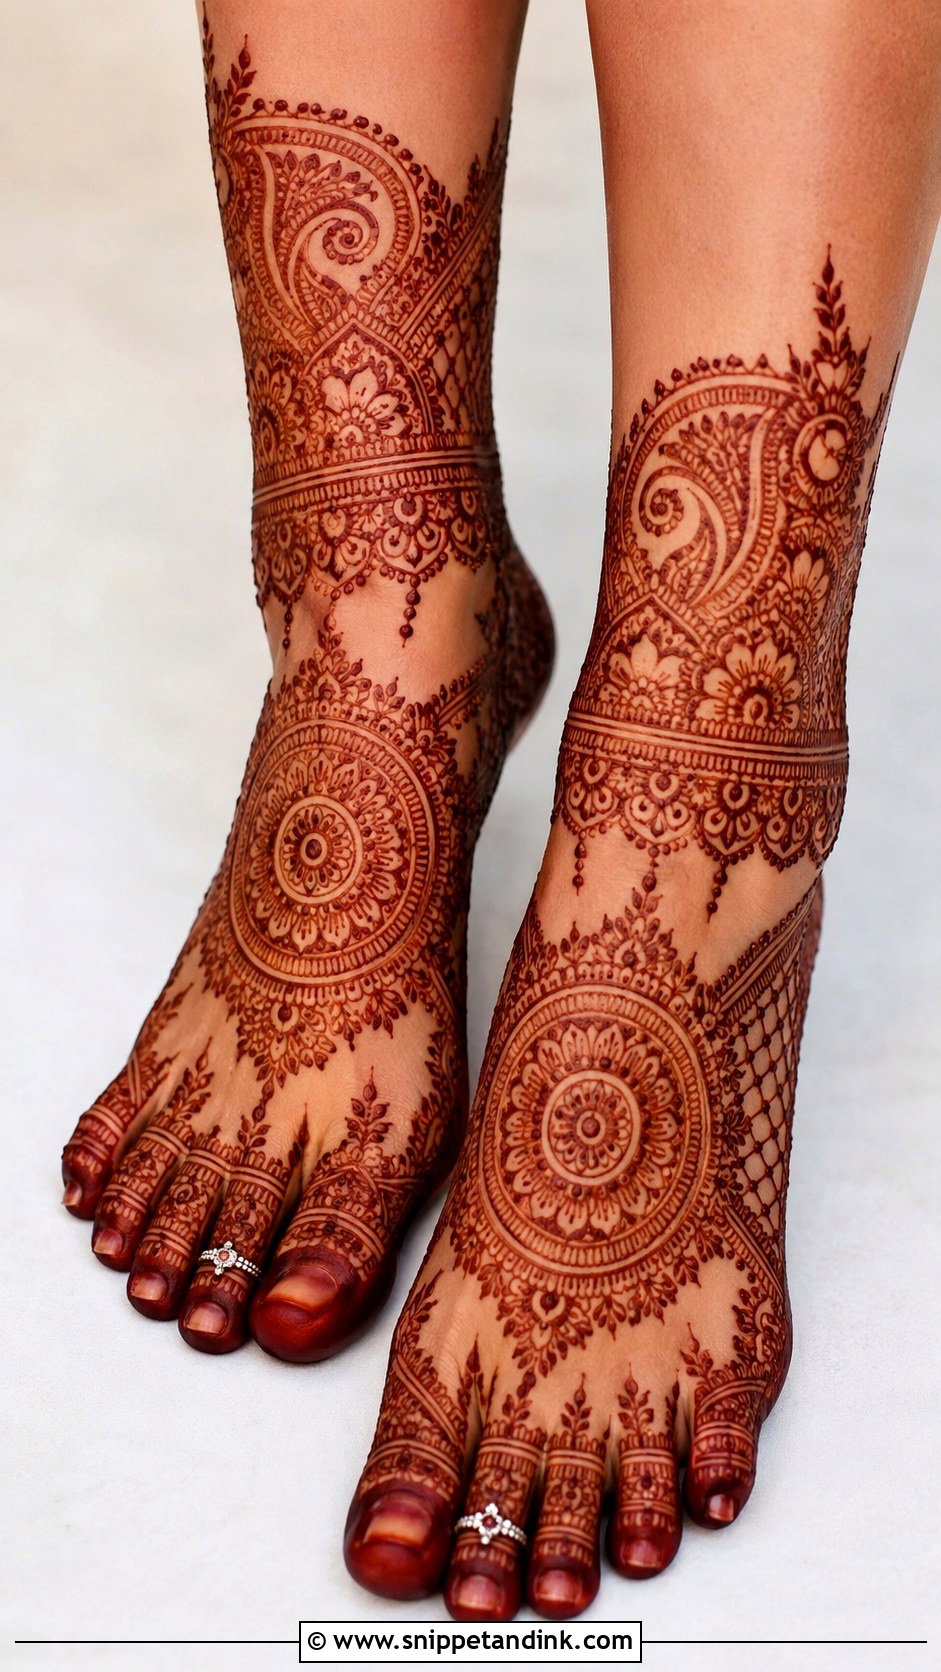
A full foot leg mehndi design covers the top of the foot, toes, sides and ankle and stops below the calf. It gives a complete festive look without committing to full-leg bridal work. Mandalas, paisleys, flowers, jaali, toe rings and anklet borders all fit. I set the central motif first, then build out to the toes, and finish the toe details last so I can match them across both feet. It suits open footwear and works for almost any occasion on the calendar.
Why Your Soles Go Darker Than Your Calves, and How to Protect Both
Expect a gradient on your legs. Soles and toes stain darkest because the skin there is thickest. The top of the foot comes next, and the shin and calf usually end up a shade or two lighter. That’s normal, not a sign of bad paste, and it’s why I plan the boldest part of a design low on the foot.
Aftercare decides how dark it gets. Leave the paste on as long as you can, ideally overnight. I dab a little lemon and sugar mix over dried paste to keep it sticking to the skin. At night, a loose pair of cotton socks over a layer of tissue keeps the paste in place and the feet warm, and warmth helps the stain develop. Then scrape the dry paste off rather than washing it, and keep water away from your legs for as long as you can afterwards.
The first week on your feet
Feet fade faster than hands, because walking, socks and shoes rub the stain away. To slow that down, rub a little natural oil or balm over the design before showers, avoid long hot baths and swimming pools, and go easy on foot scrubs. Most foot designs look their best for about a week, then fade gradually. If the soles go patchy before the rest, that’s friction, not the henna.
Coverage, Hem Length and Sitting Time Decide It
All of these come back to three choices: how far up the leg you want to go, how long you can sit, and what the hem of your outfit will show. Dense Indian, lotus, peacock, paisley and jaali work suit a traditional look; Arabic, minimal, vine, anklet and jewelry styles are easier to wear for a long day. Moroccan geometry and negative-space work pair best with modern outfits. Settle on coverage and timing first, and the motifs become the easy part.
You'll Like These Ideas:


Leave a Reply