
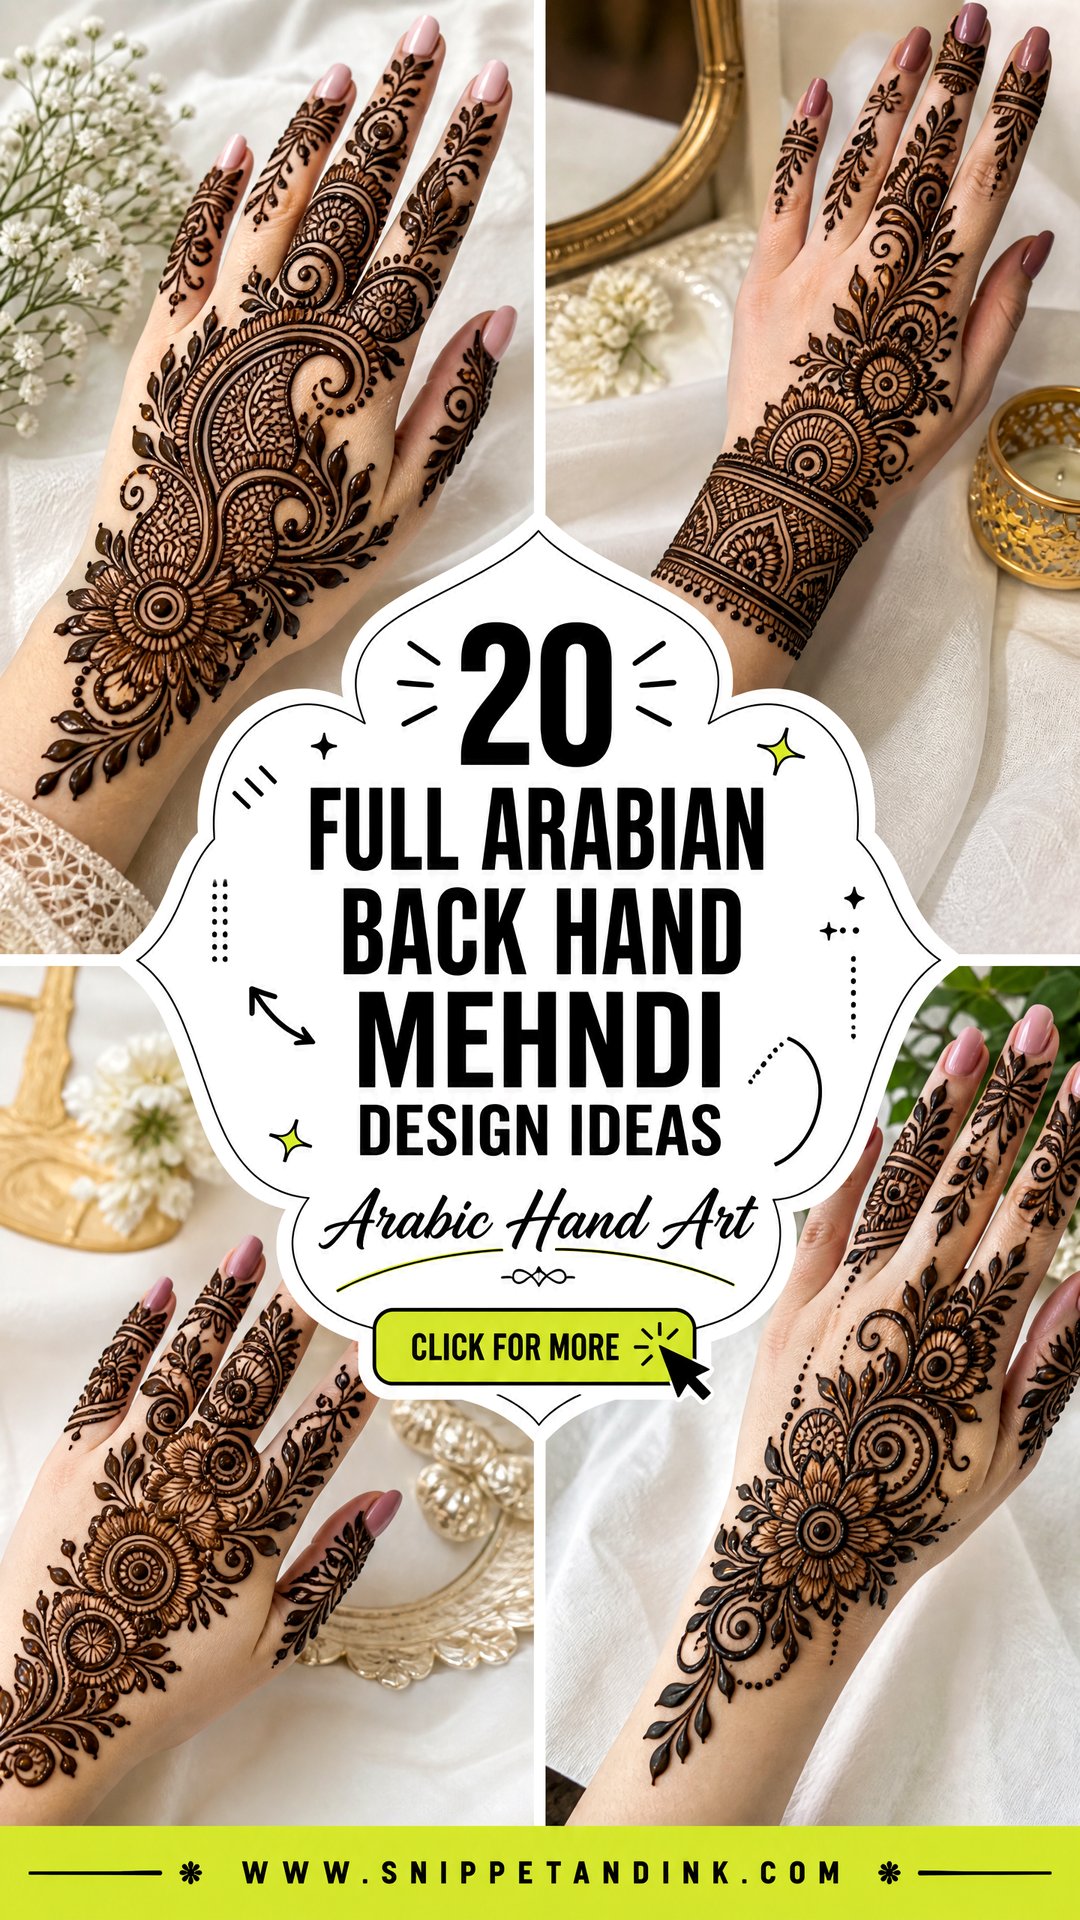
Arabic mehndi on the back of the hand works because of what it leaves out. Instead of packing every millimeter the way a traditional Indian bridal design does, it runs bold trails of flowers and leaves across the hand and lets bare skin sit between them, so each curve reads clearly from across a room. A full version usually begins at the fingertips, sweeps across the back of the hand and ends in a cuff or a trail up the forearm. I apply these for Eid, engagements, sangeet nights and as guest henna at weddings. The twenty layouts below range from light and minimal to heavy and bridal, with notes on how I’d place each one and what to watch for.
Where I Start the Diagonal on a Back Hand
Almost every Arabic back hand design hangs on one diagonal line, and where that line starts decides how the hand will look. I ask the client to rest her hand flat and relaxed, then trace the path mentally before the cone touches skin.
- Long, slim fingers: start the trail at the index finger and run it down toward the outer wrist. The slant exaggerates length, so keep motifs medium in size.
- Short fingers or a broad hand: start lower, at the knuckle line, and keep the finger work to slim bands. A strong diagonal across a wide hand narrows it visually.
- Small hands and children: use fewer, smaller motifs. A big central rose on a small hand leaves no room for the open spacing that makes the style work.
- Both hands: mirror the diagonal so the trails point toward each other when the hands are held side by side.
I also look at how the wrist bones sit. The cuff should end just above the wrist crease, not on it, because the crease folds every time the hand moves and the paste cracks there first.
1. Full Arabic Floral Back Hand Mehndi Design
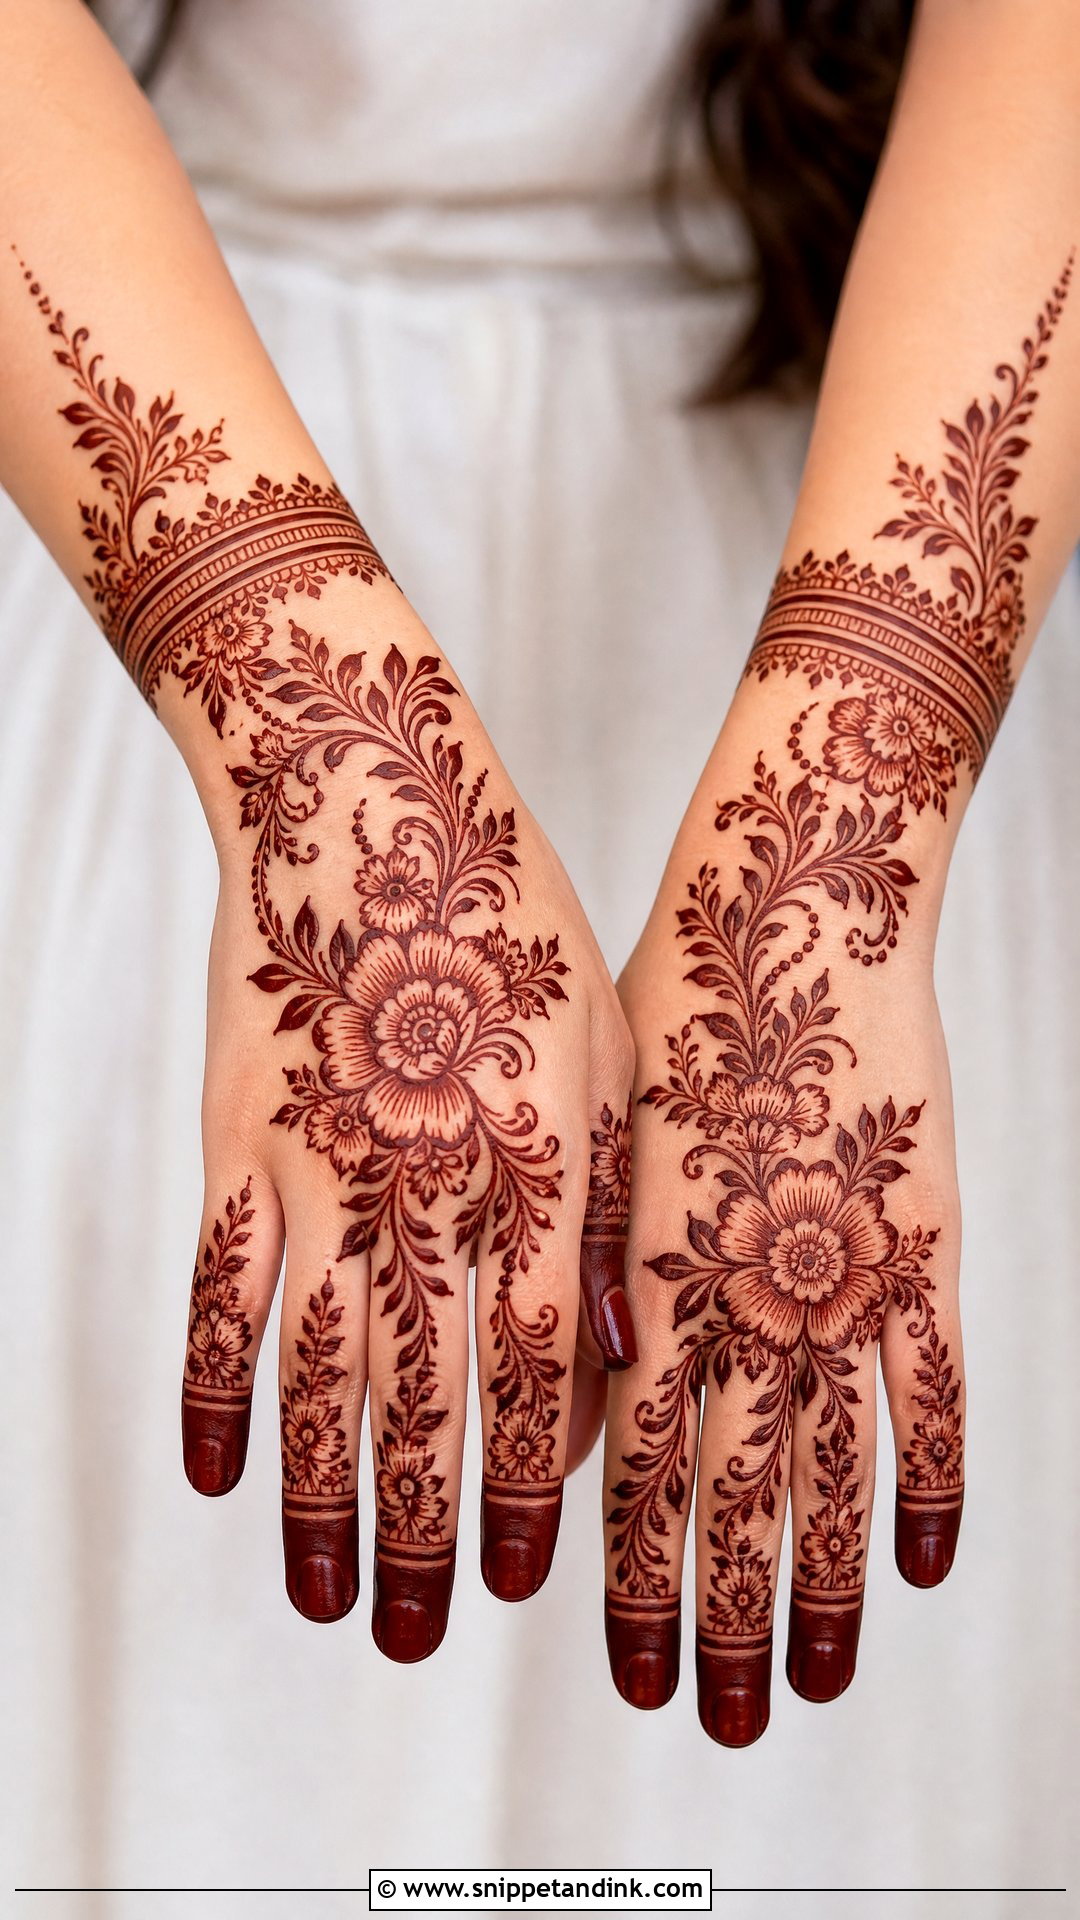
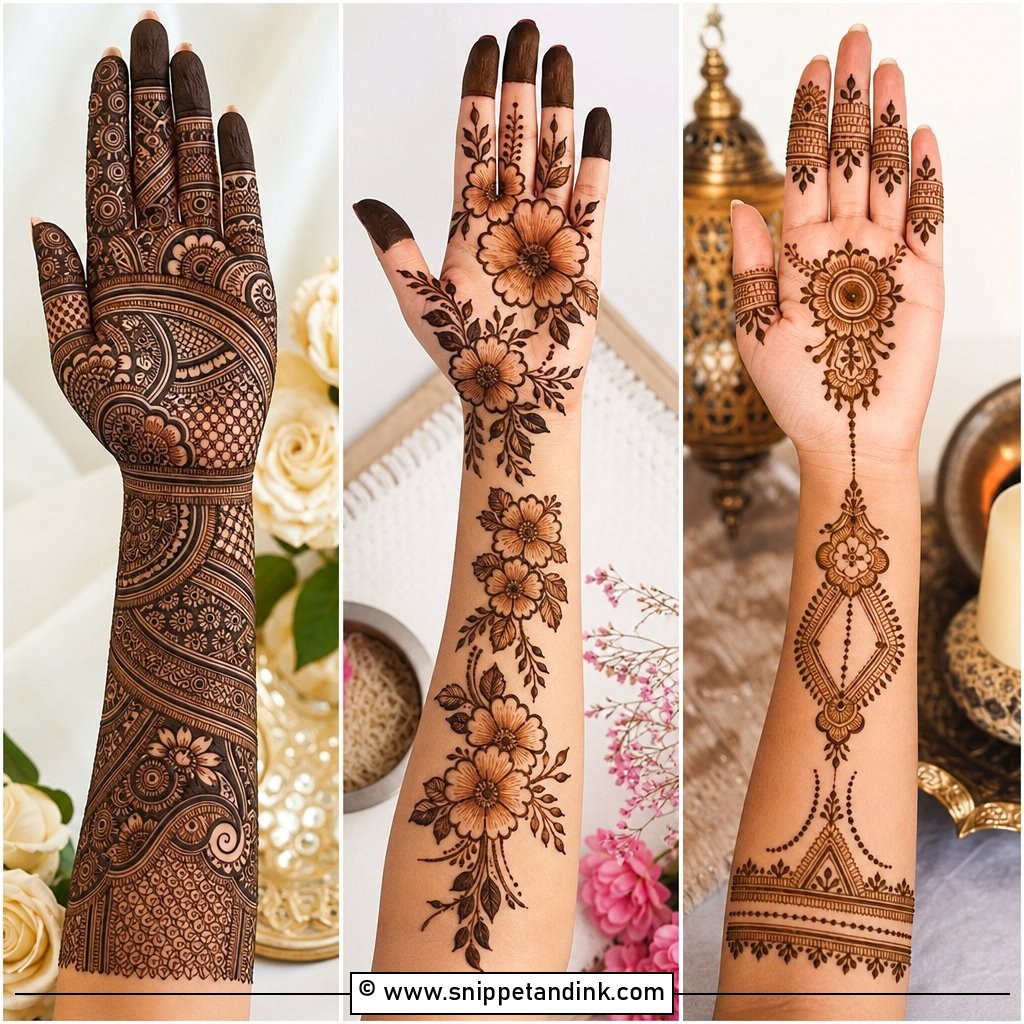
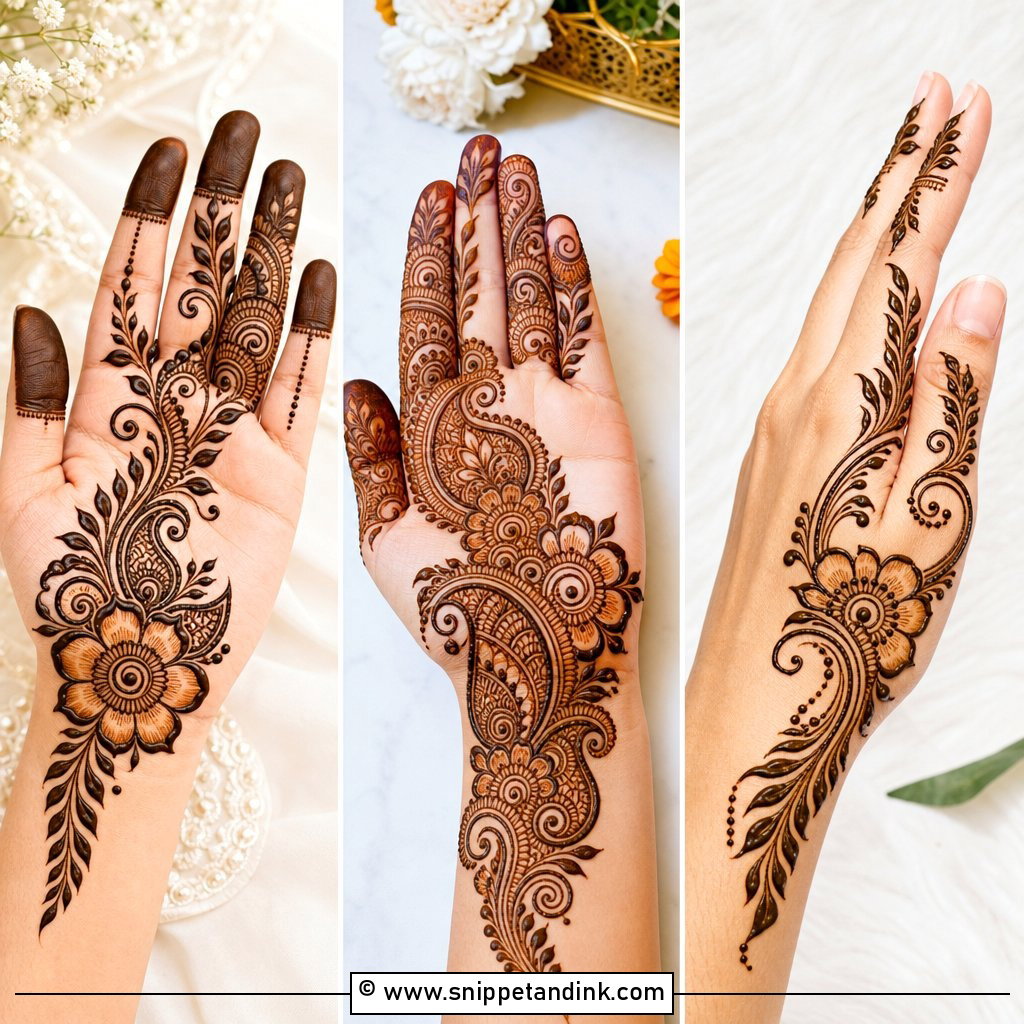
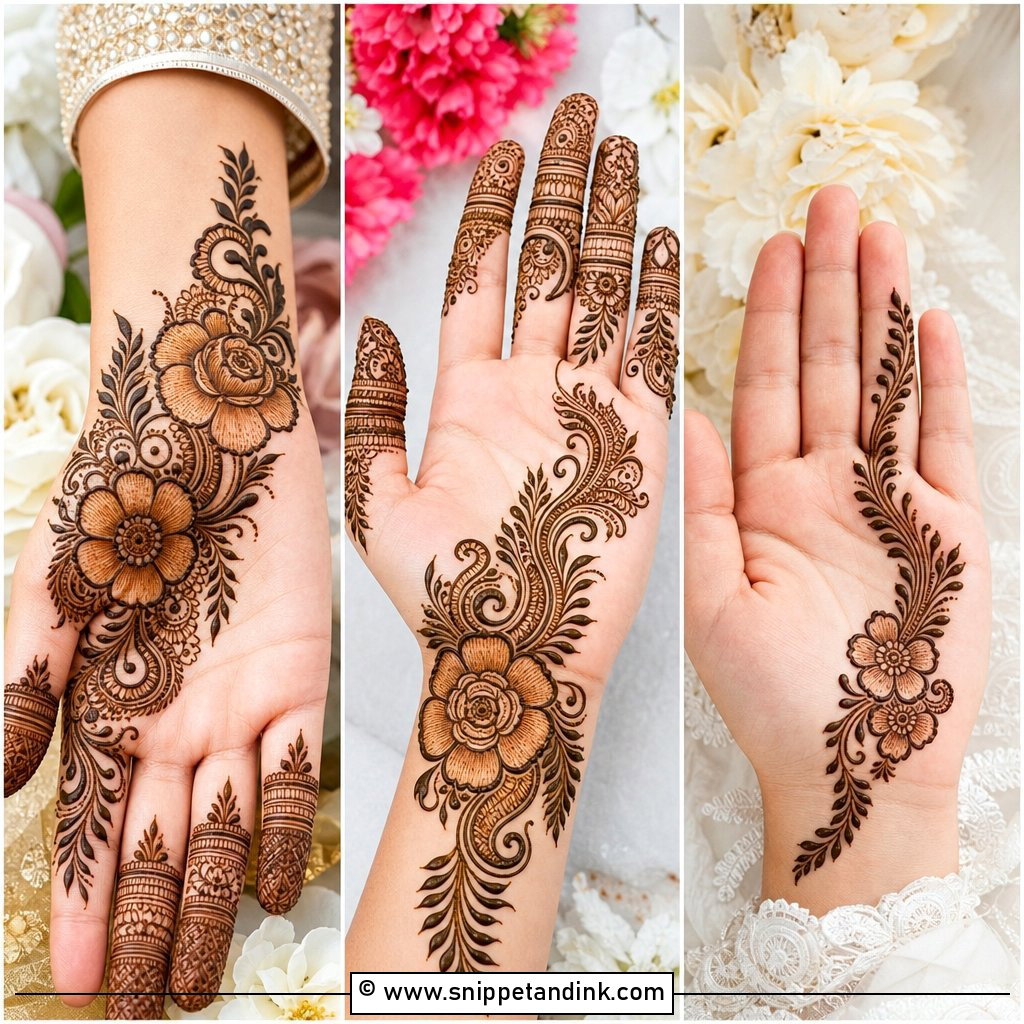
This is the layout I draw more than any other, because it suits almost every hand. A full Arabic floral back hand design opens with small flowers on the fingers, then a vine carries the eye diagonally from the index finger down toward the opposite side of the wrist. The big central flower goes about a third of the way down the hand, not dead center, which keeps the diagonal moving. Shading inside the petals gives depth. Running the trail on a slant also makes fingers look longer, which is why so many guests ask for it.
2. Full Arabic Bridal Back Hand Mehndi Design
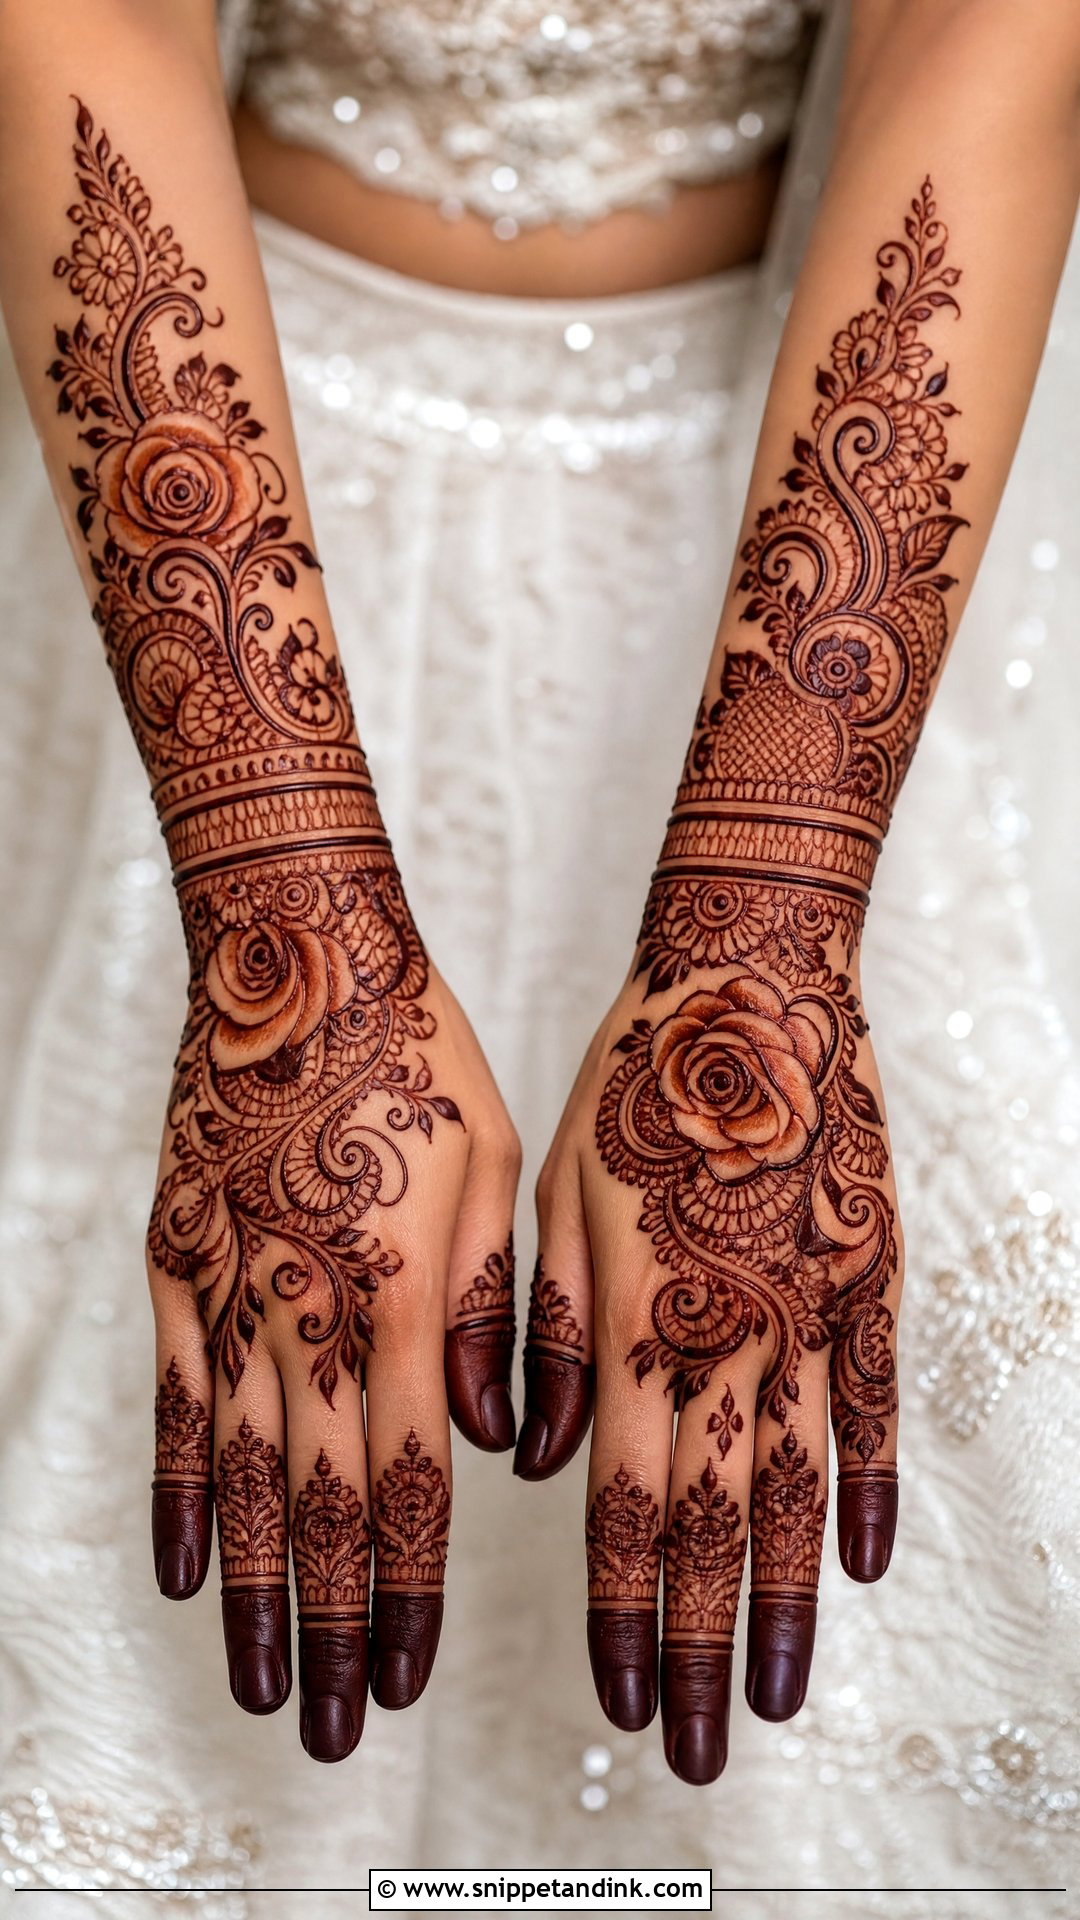
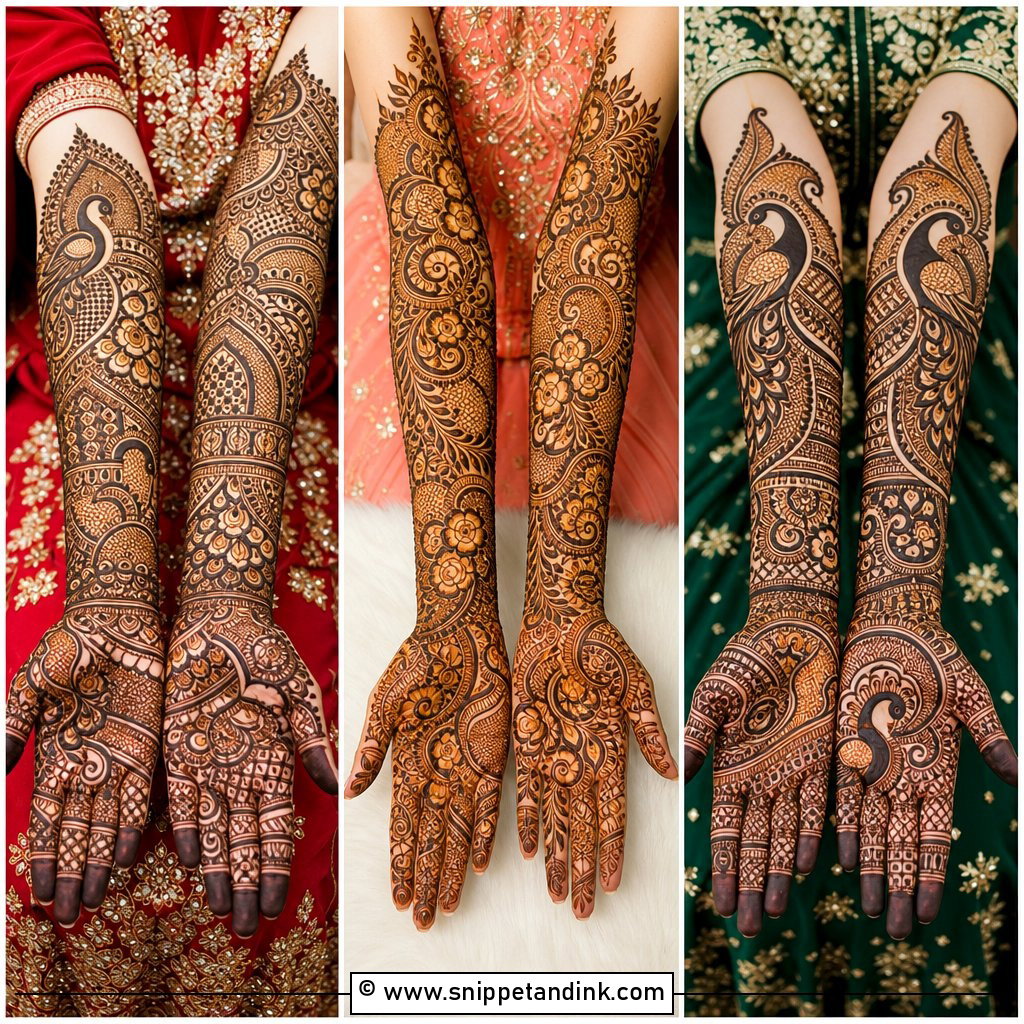
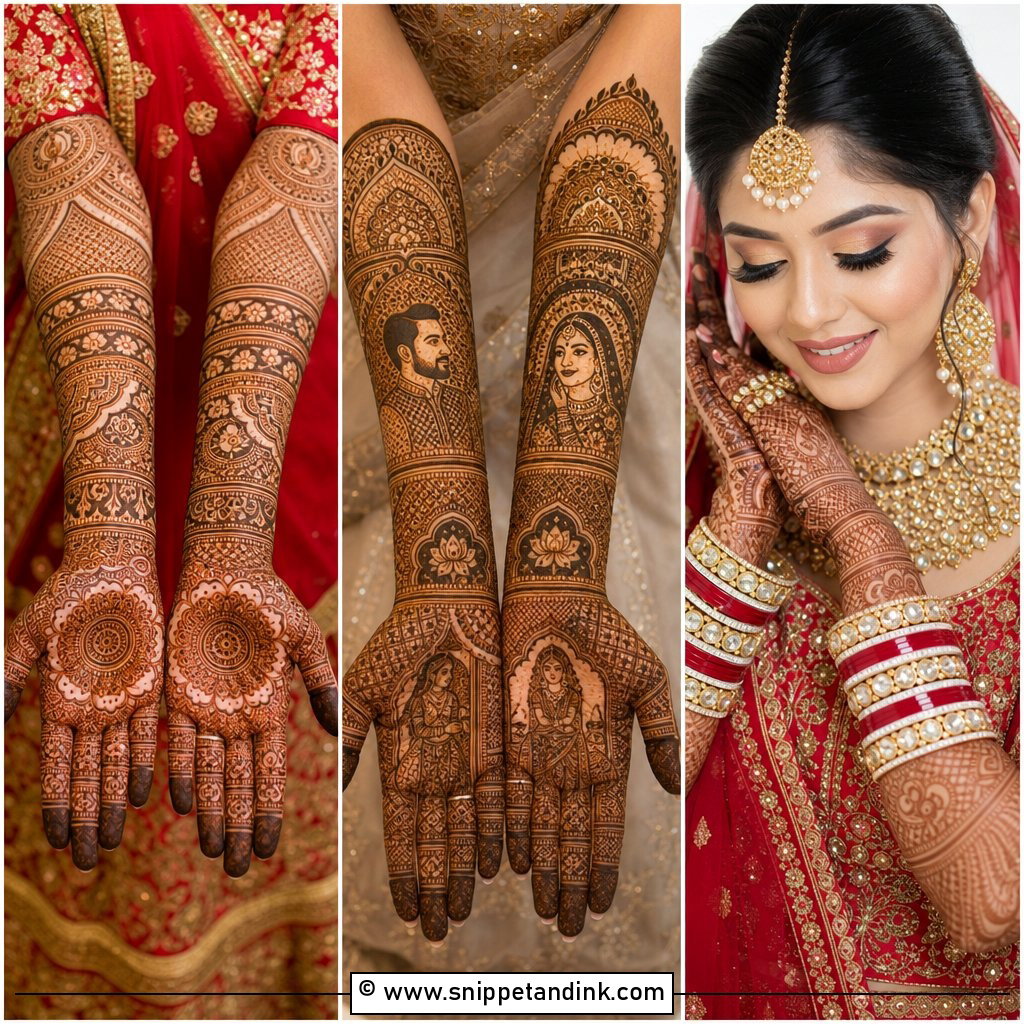
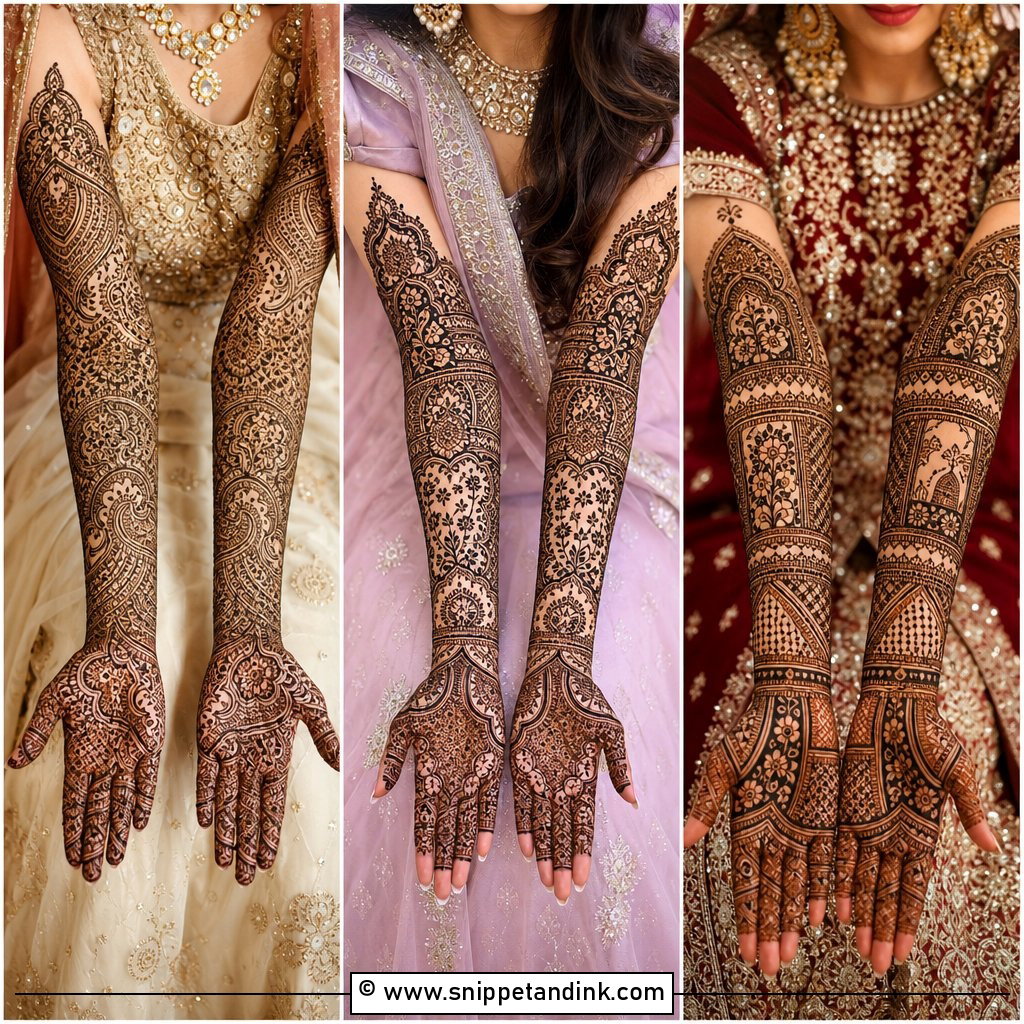
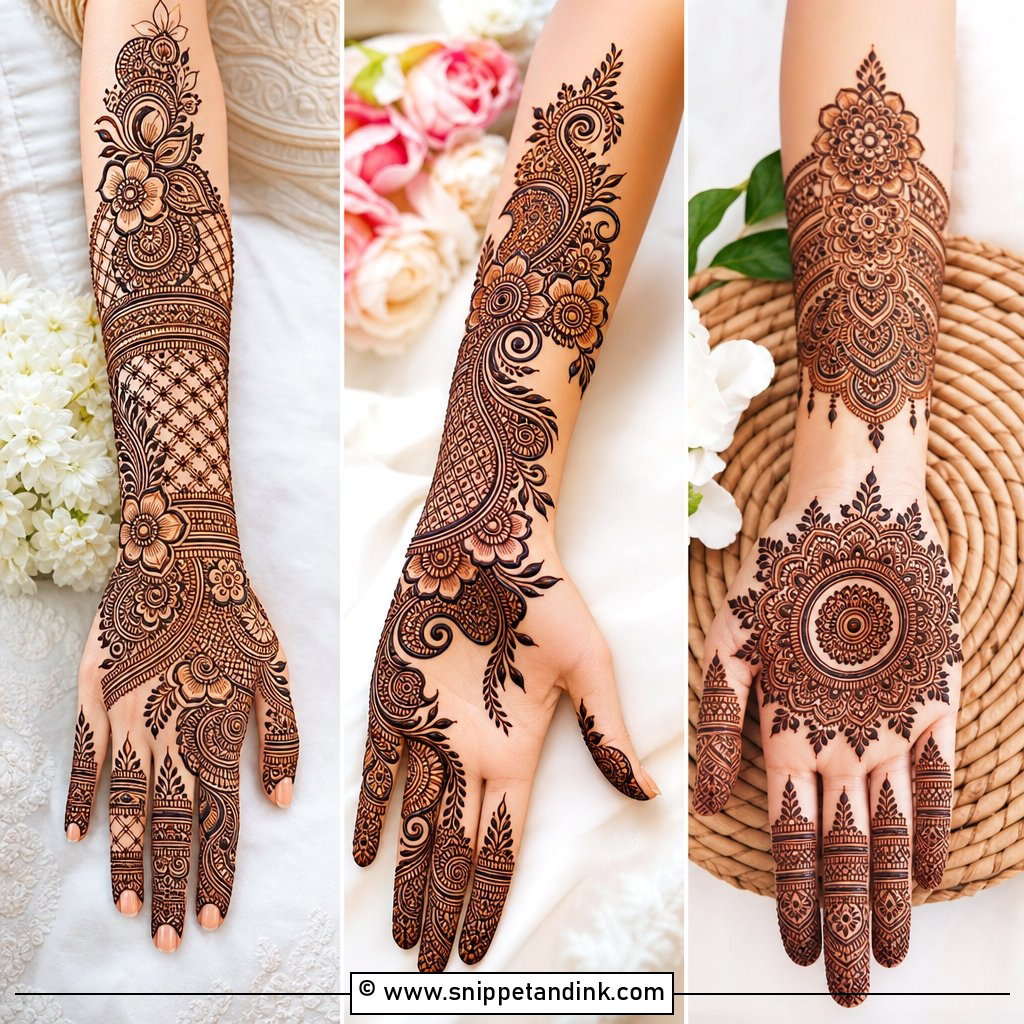
When a bride asks for full coverage without the dense Indian look, I build this layout around large roses, paisleys and lace panels, with the fingertips fully filled. It can run from the nails to the forearm. The difference from Indian bridal work is the gaps: I leave a deliberate ring of bare skin around each main motif so it stands apart once the stain develops. Bridal Arabic work takes me longer than people expect, because the bold outlines have to be smooth on the first pass. A shaky line in a thick cone stroke can’t be hidden with filler the way it can in a dense design.
3. Full Arabic Rose Back Hand Mehndi Design
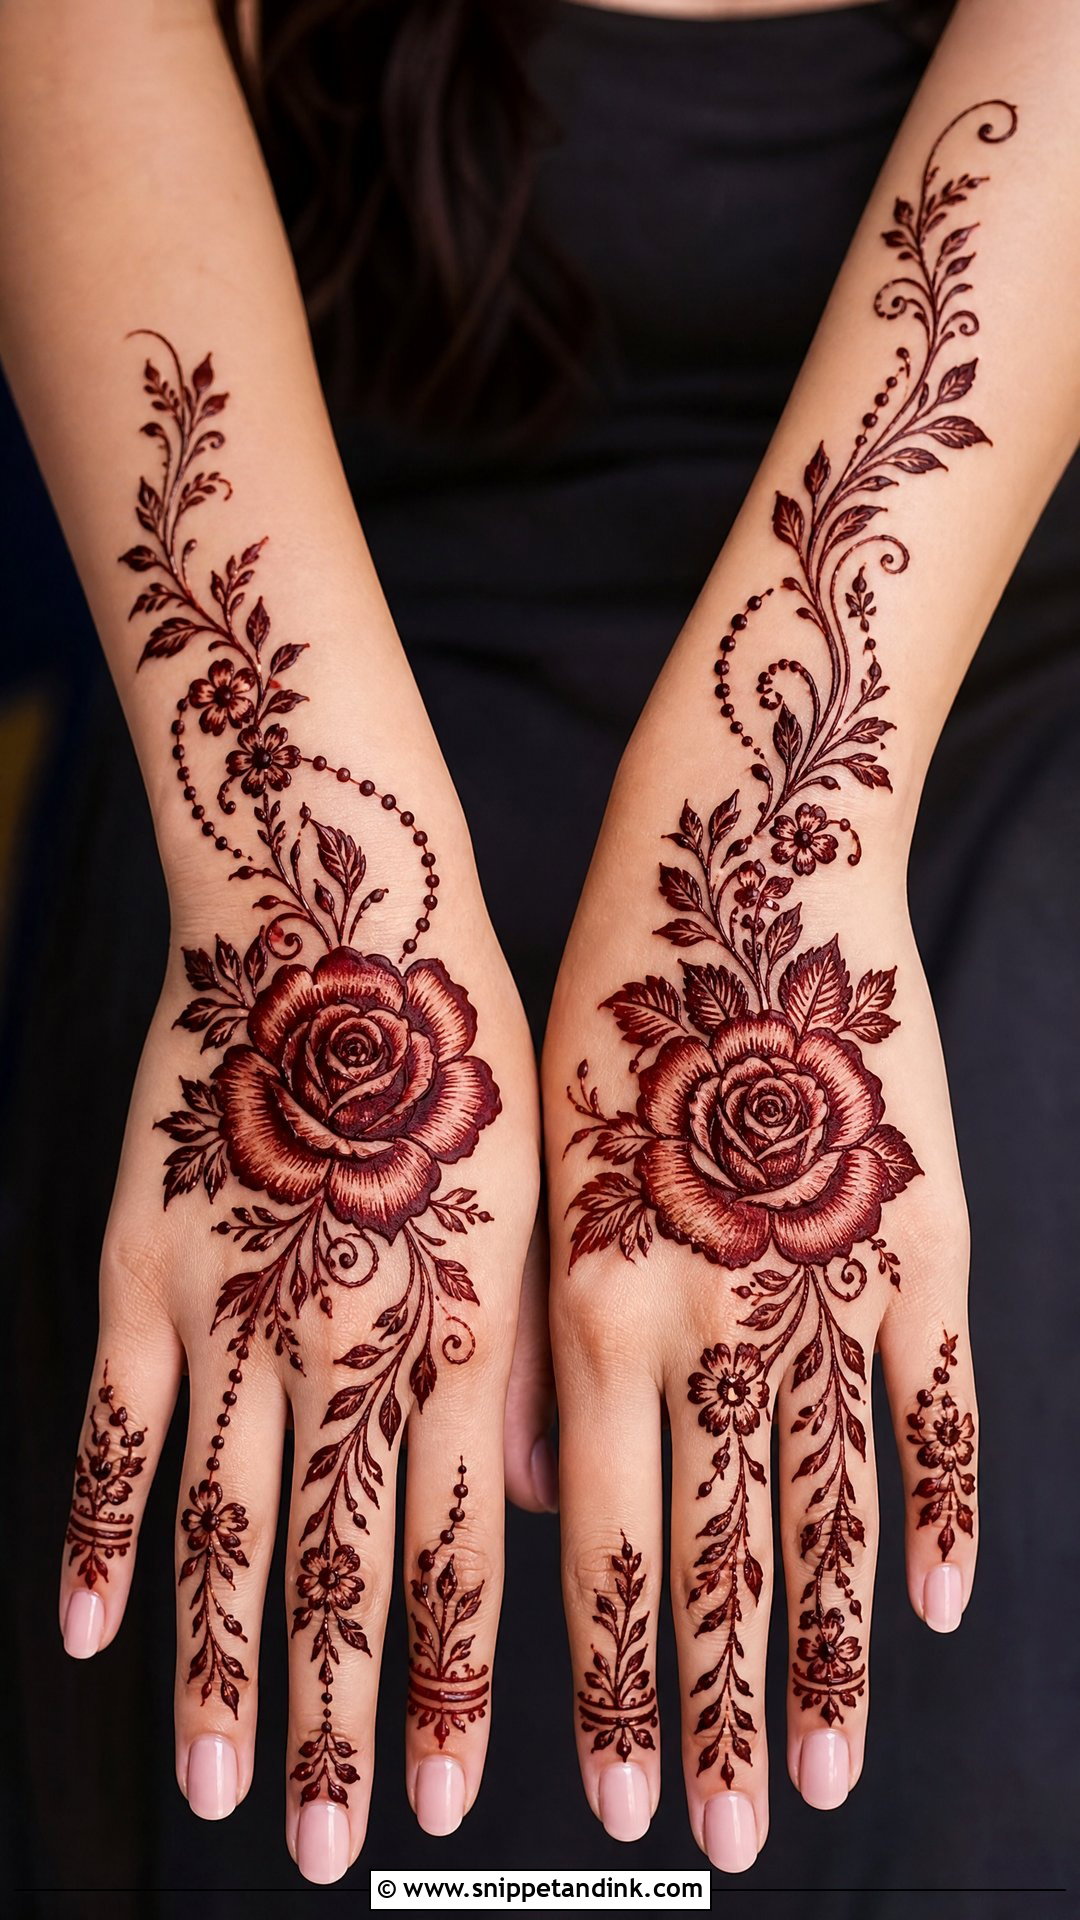
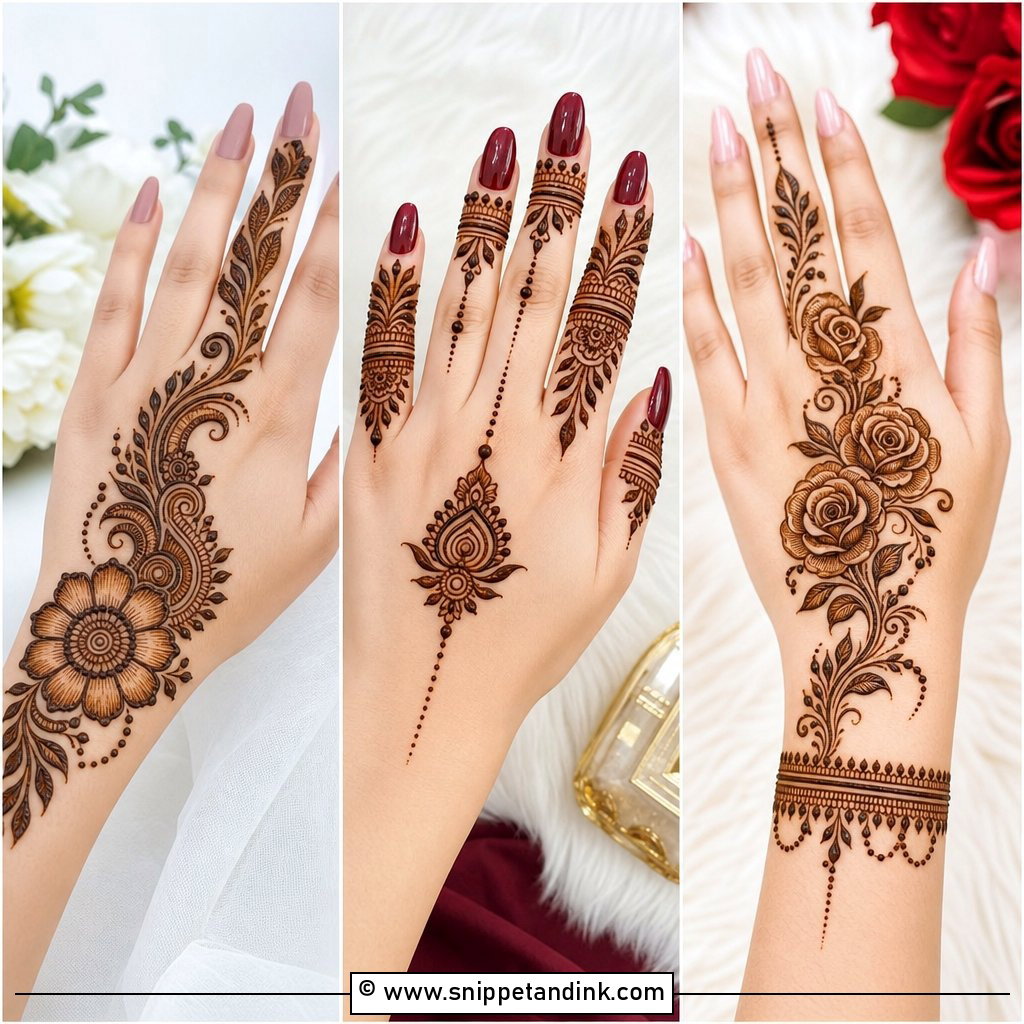
Roses are the motif I get asked for most, and they are harder than they look. One large rose sits near the middle of the hand, smaller ones climb the fingers and a few drop toward the wrist, joined by curved leaves and dotted vines. Each petal needs its own clean outline before I shade the inner edge, otherwise the rose turns into a blob as the stain darkens. The bare skin around each flower is what keeps it crisp. I can angle the rose trail diagonally for long fingers or curve it into a bracelet for shorter hands.
4. Full Arabic Paisley Back Hand Mehndi Design
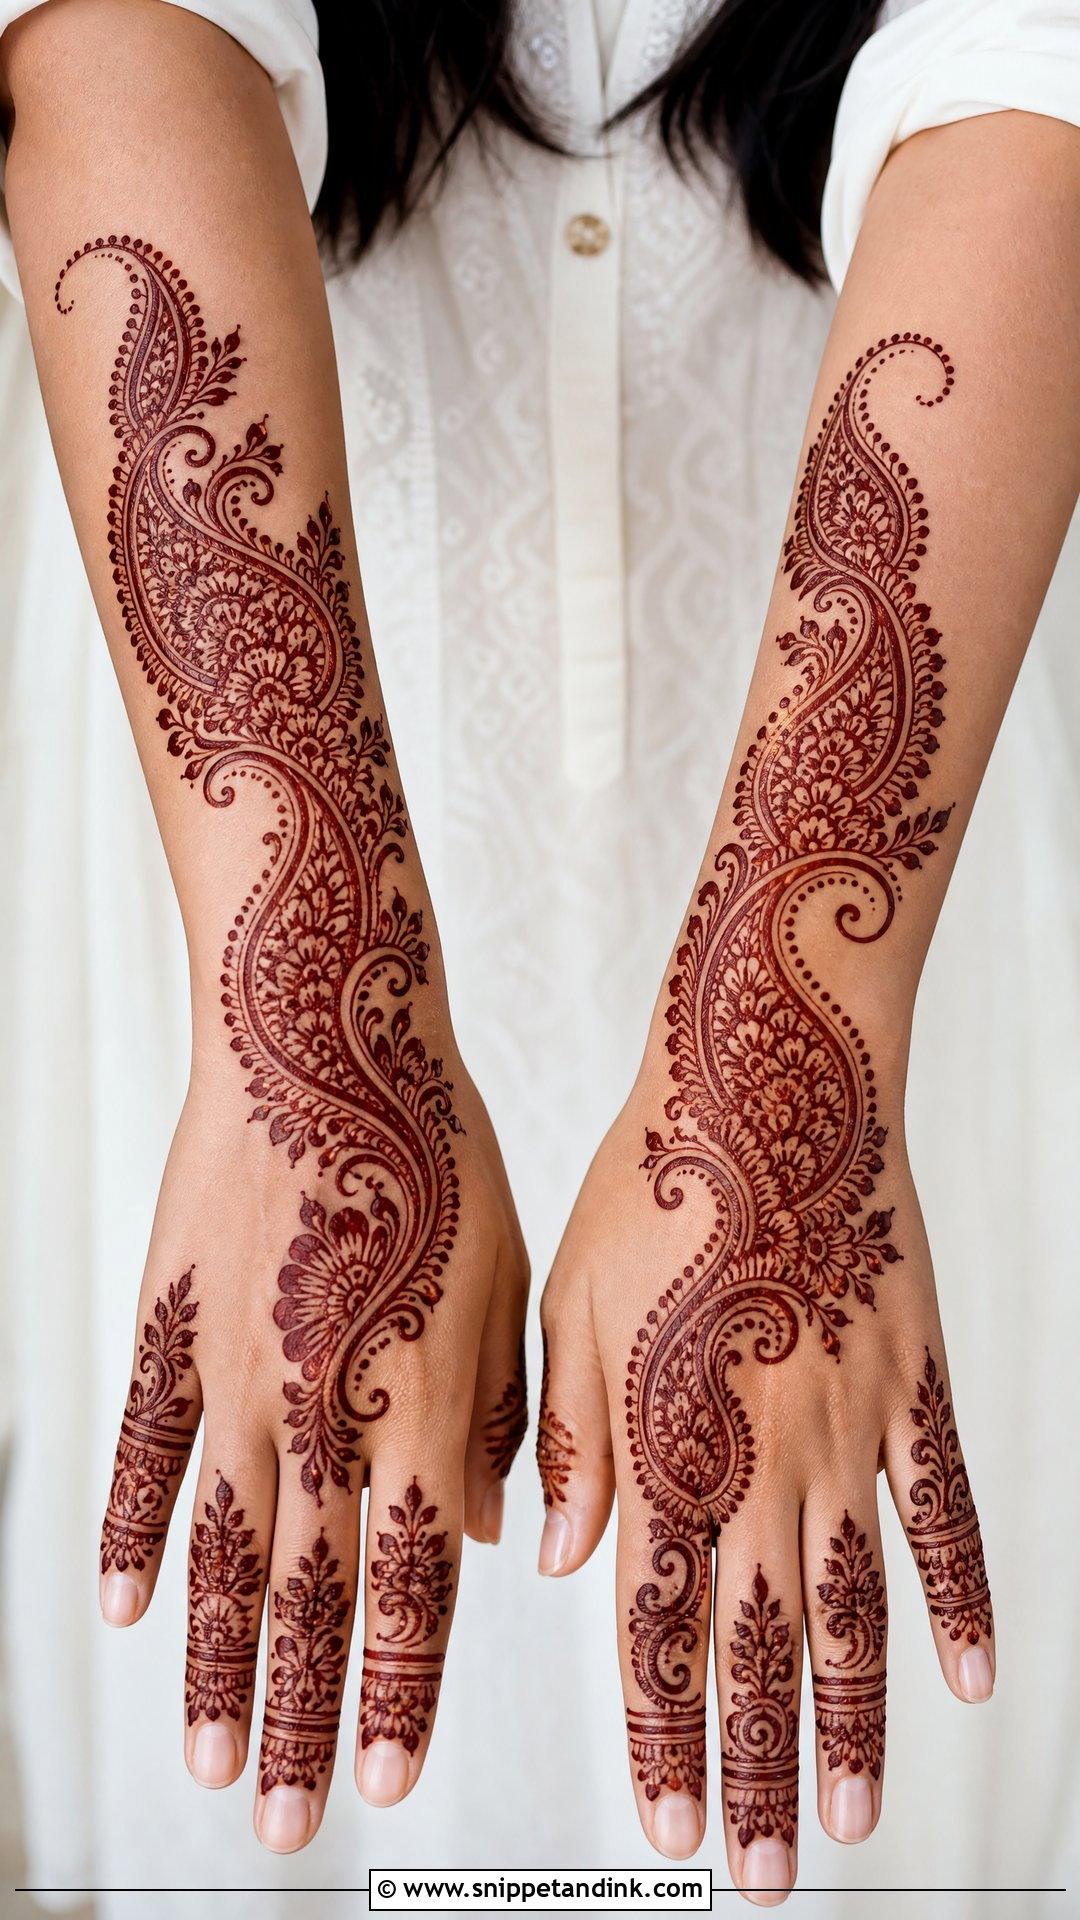
Paisley gives Arabic mehndi its sense of motion. I start with small paisleys near the knuckles and let them grow larger as they travel across the hand toward the wrist, then fill each one with tiny flowers, dots or a fine net. The trail must stay on a gentle slant; set paisleys in a straight vertical row and the hand looks stiff. This is a design I do a lot for Karwa Chauth and Eid, since it sits well with traditional suits and sarees without becoming heavy.
5. Full Arabic Mandala Back Hand Mehndi Design
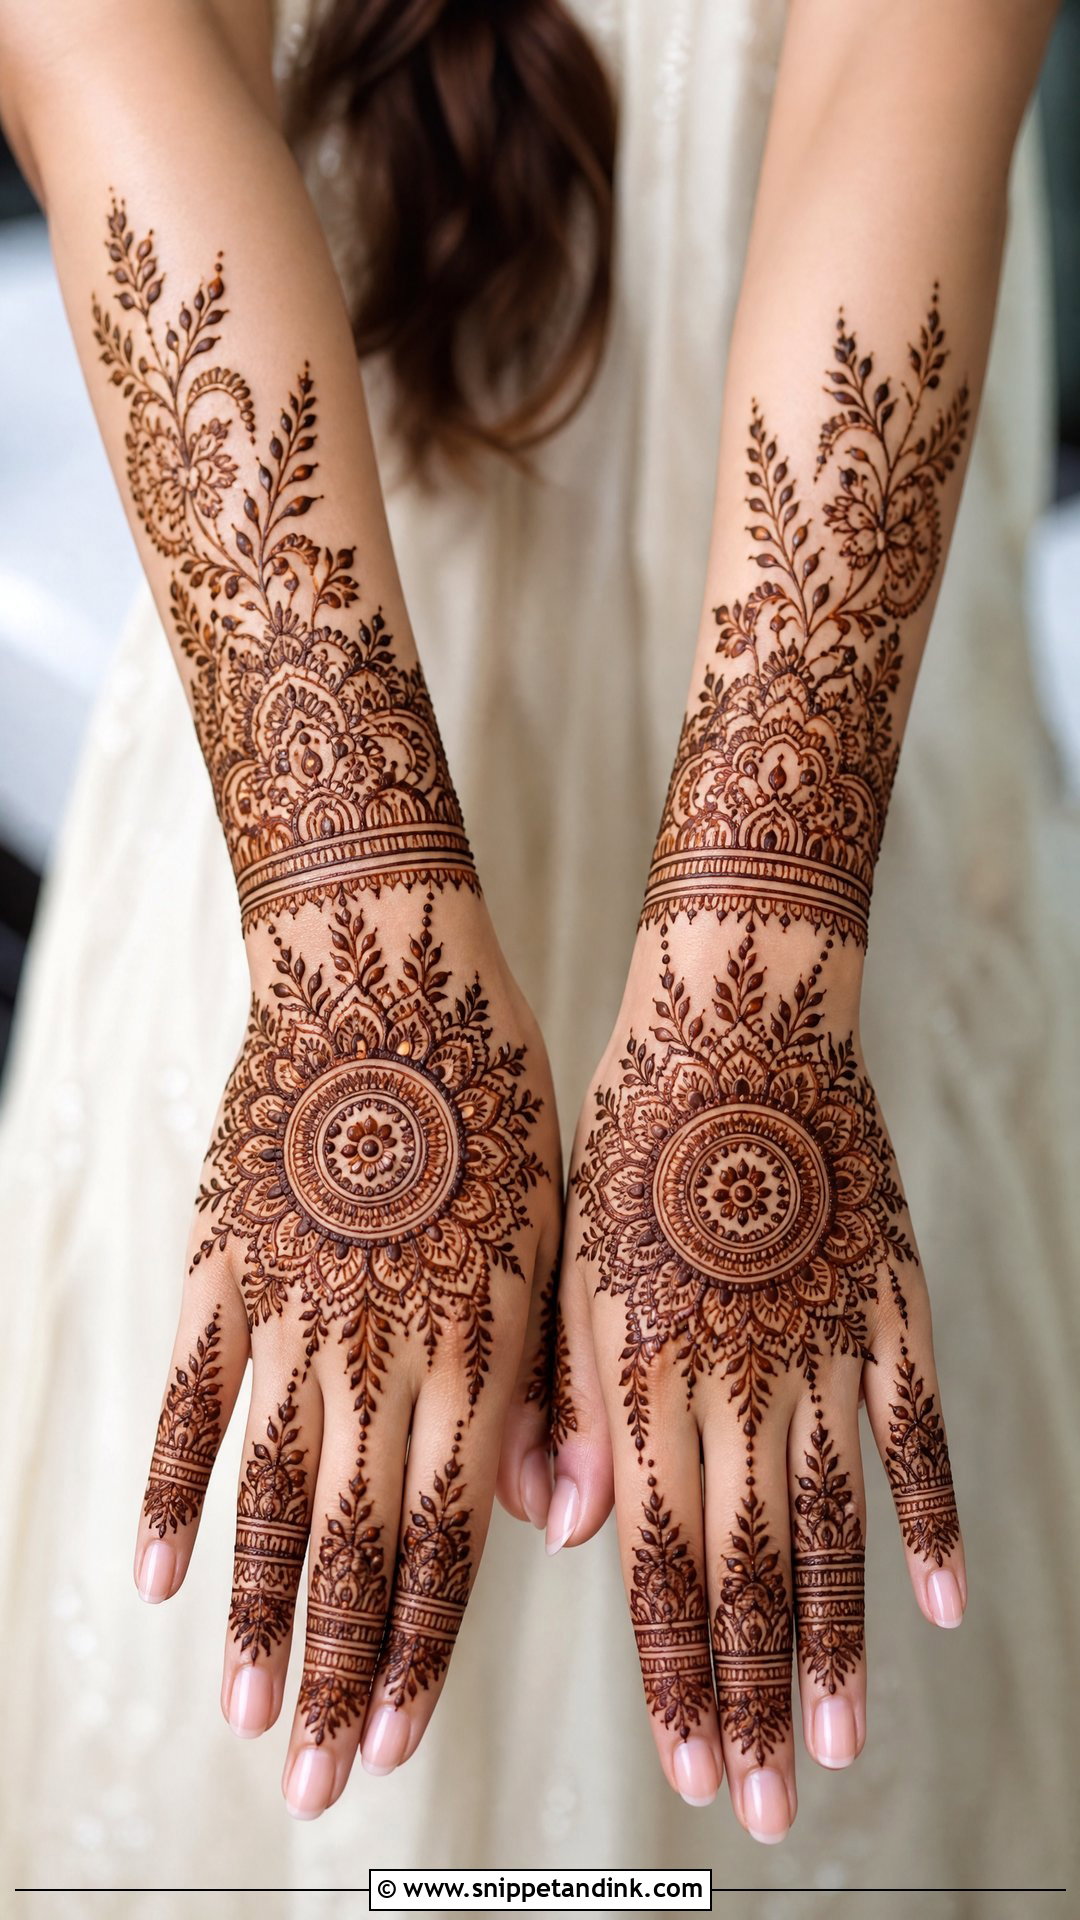
A mandala gives an Arabic design a fixed center. I place the circle in the middle of the back of the hand, then let floral trails and leaves reach out from it toward the fingers and wrist. The risk with mandalas is that they pull the design toward Indian density, so I keep the space around the circle open and the trails light. Circles are unforgiving: a lopsided ring shows instantly in close-up photos. I draw the outer ring first in small dots, check it from a distance, then join them.
6. Full Arabic Jaali Back Hand Mehndi Design
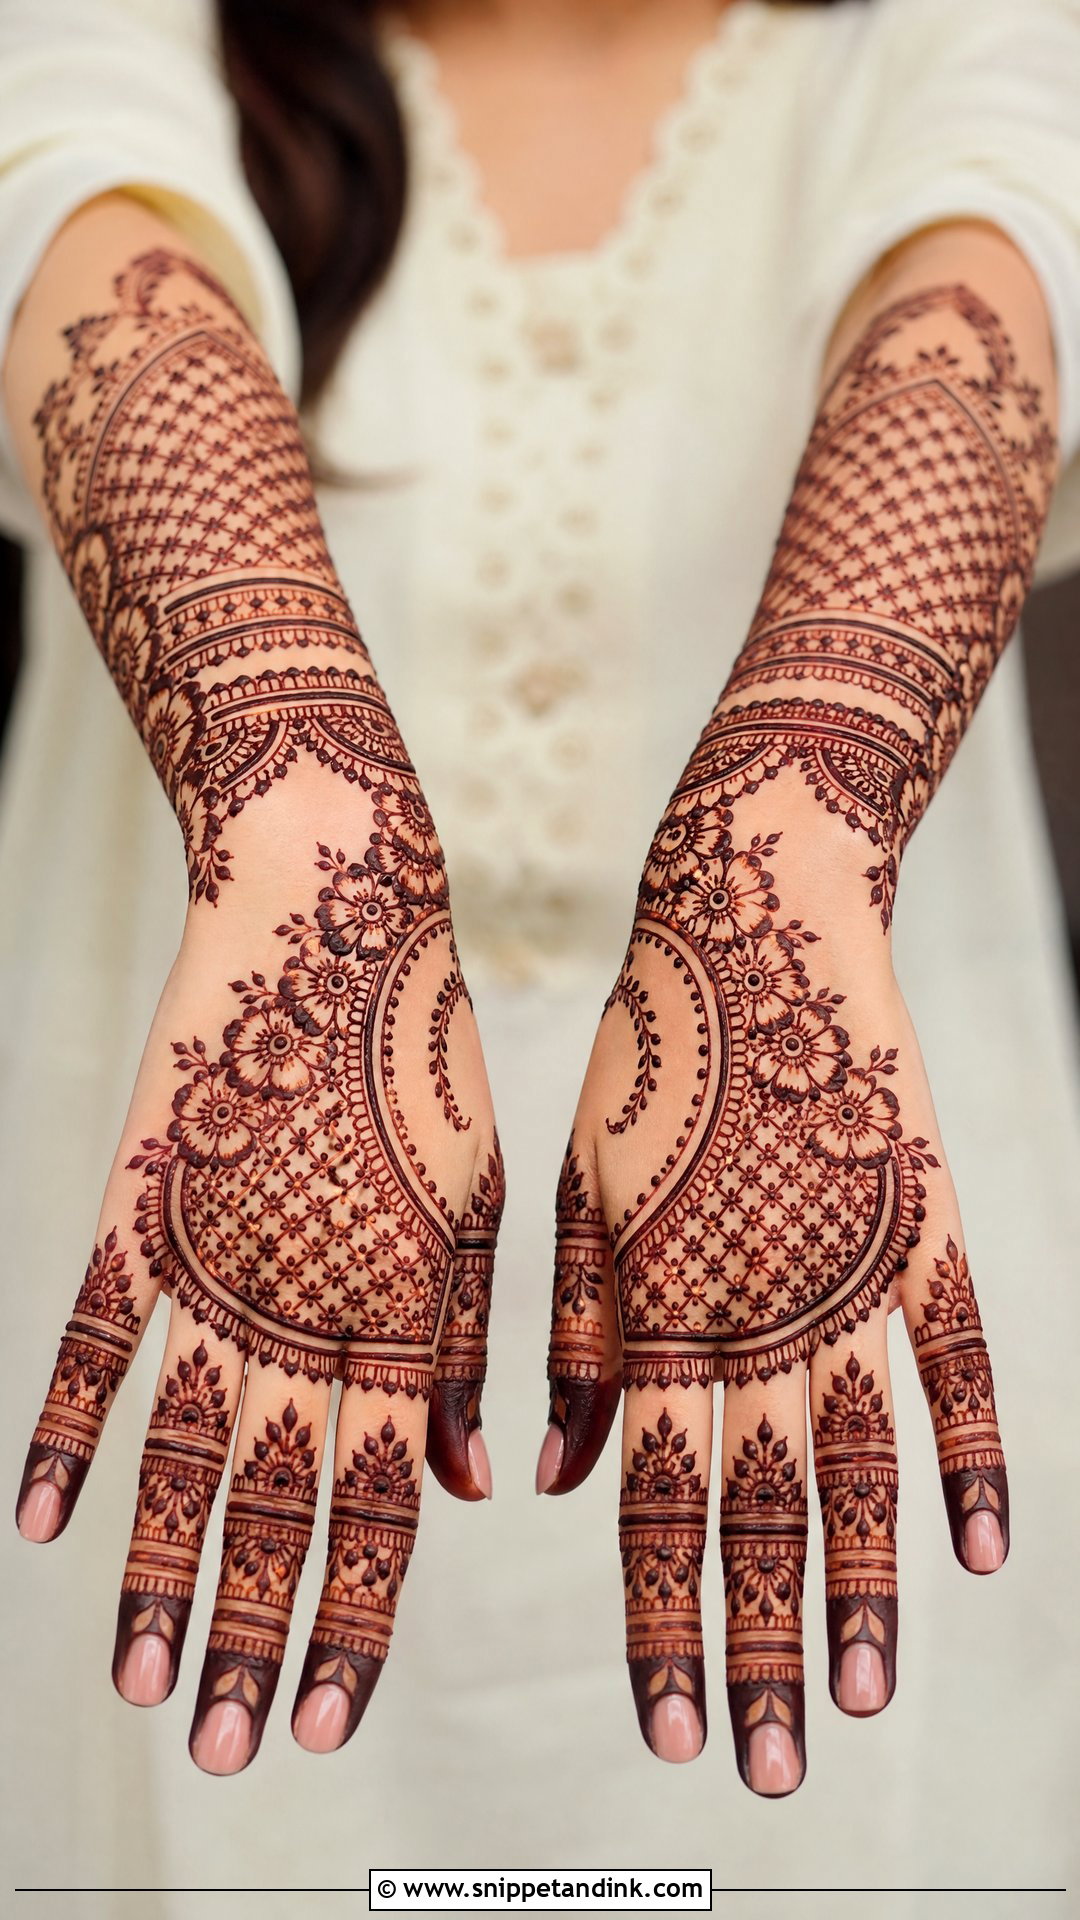
Jaali is the mesh or lattice that gives a lace effect. On a full back hand I’ll lay a band of jaali across a diagonal section or around the wrist, framed by flowers and leaves, and match the fingers with thin bands. The lines must be evenly spaced; if one square is wider than its neighbors the whole net looks off. I place tiny dots in some of the squares to break up the grid. Jaali takes longer to apply than it looks, so bridesmaids booking this should allow extra time in the schedule.
7. Full Arabic Finger Heavy Back Hand Mehndi Design
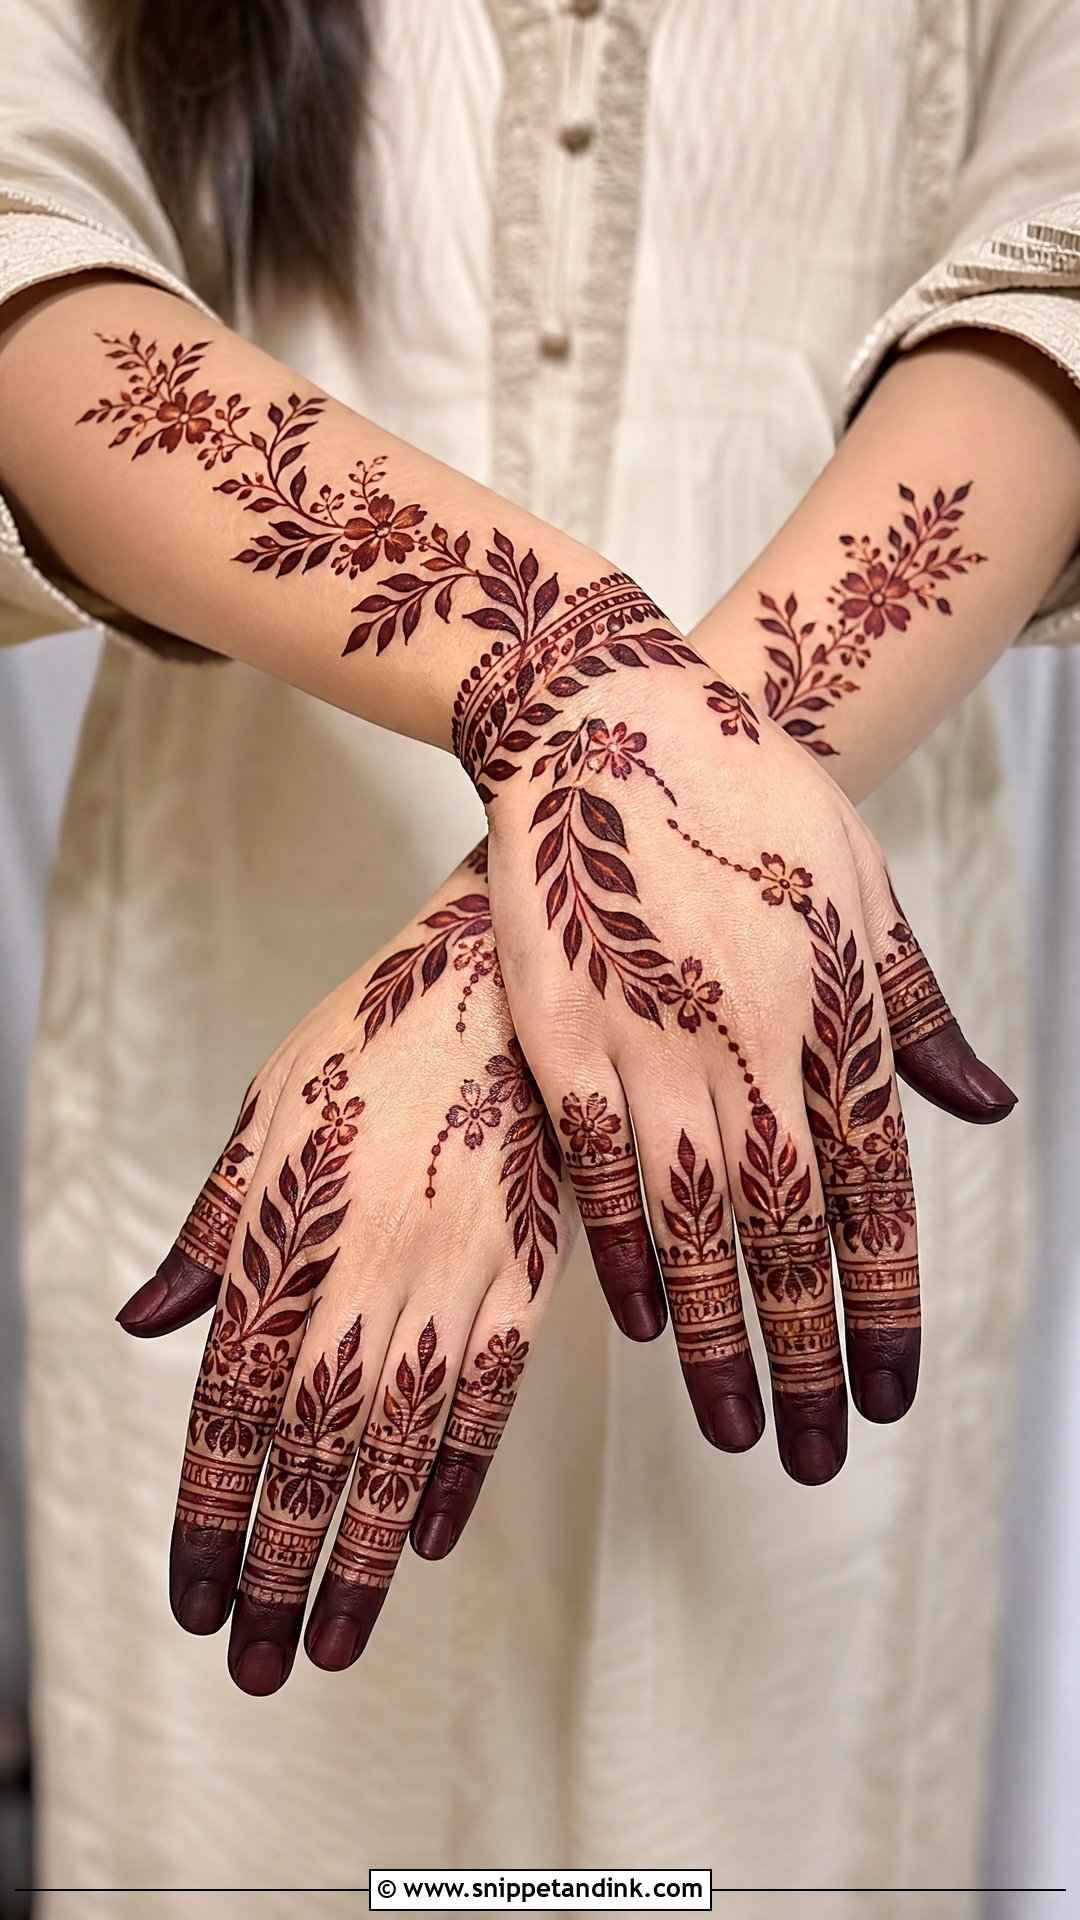
Some clients care more about their fingers than the back of the hand, especially if they’ll wear stacked rings. Here I fill the fingertips solidly, add ring-style bands and leafy strips on each finger, then keep the back of the hand lighter with a single vine or central flower linking everything together. Filled fingertips stain the darkest part of any design because the paste sits thick there. Because the finger area is the focus, I leave a clean gap where a real ring will sit, so the band doesn’t cover the best part of the henna.
8. Full Arabic Wrist Cuff Back Hand Mehndi Design
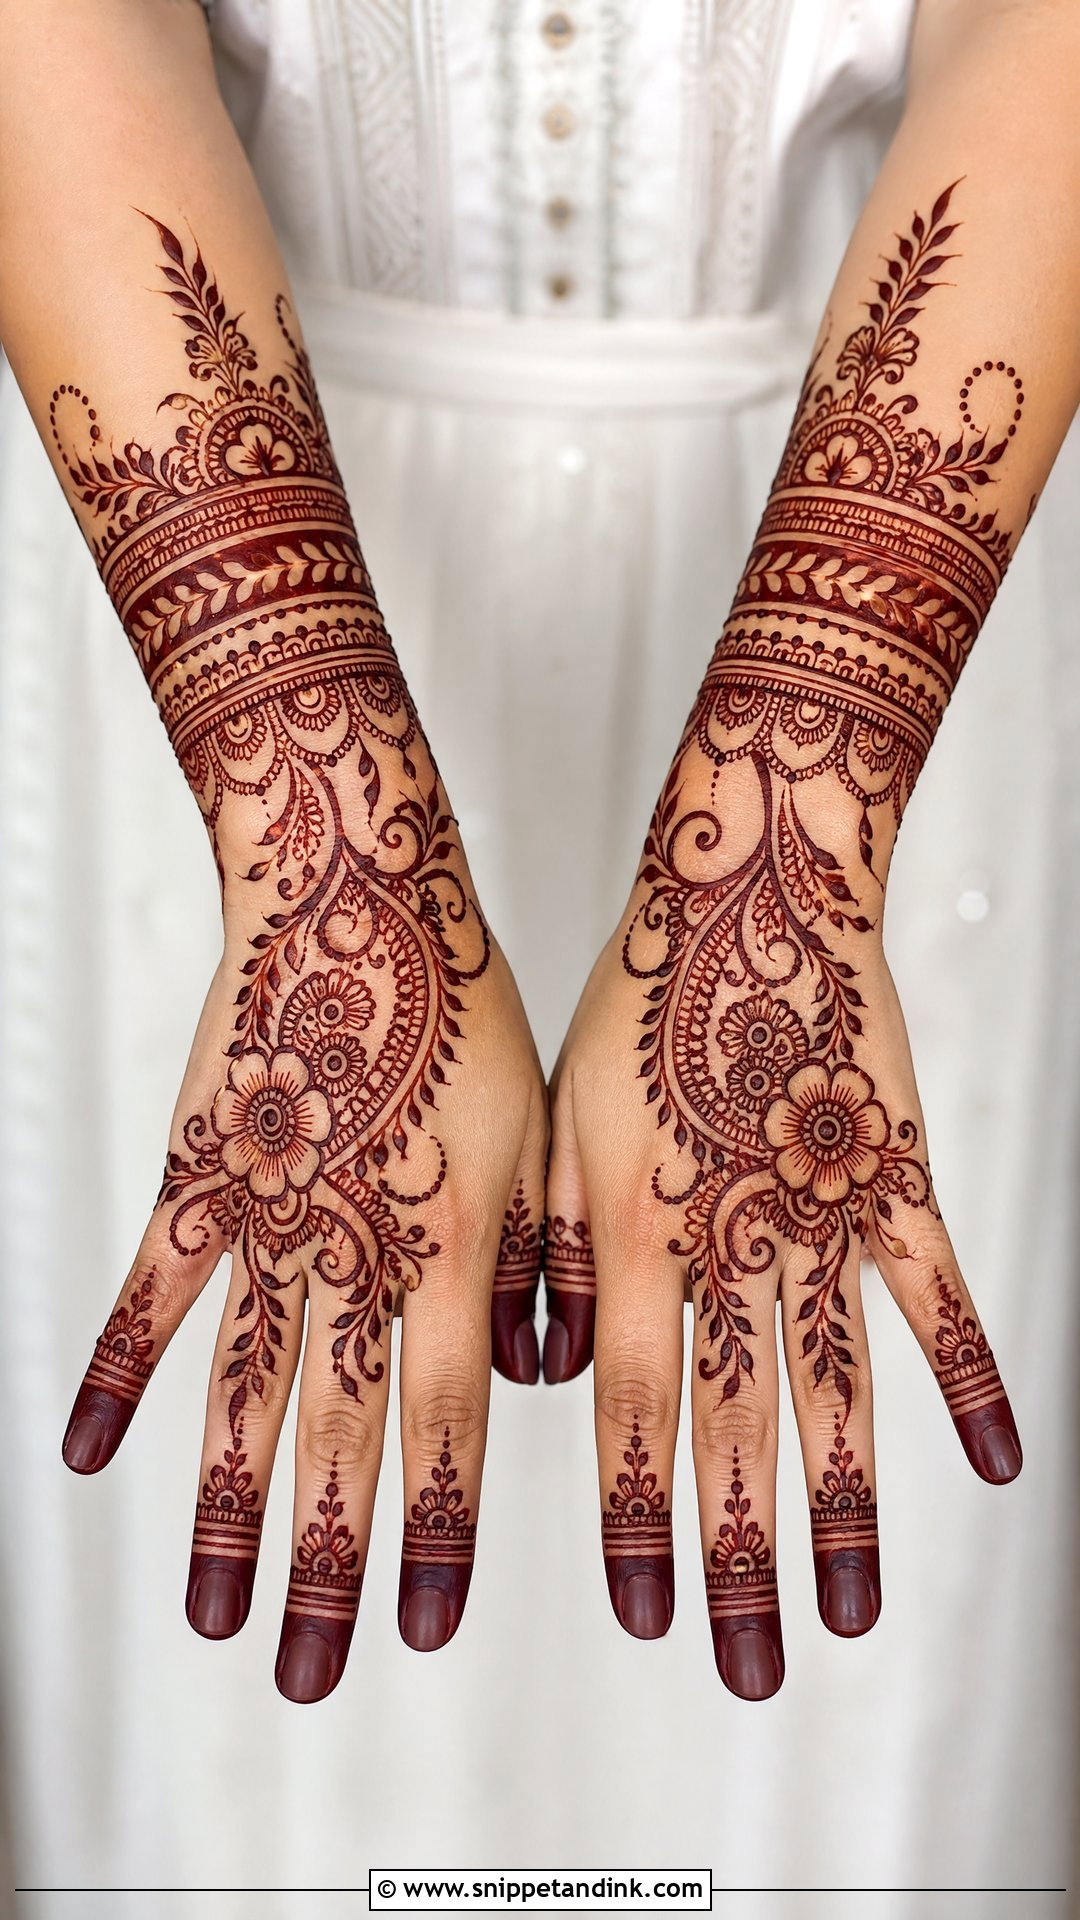
With a cuff design the wrist does the heavy lifting. I build layered bands of flowers, dots and leaves around the wrist, then let one curved vine climb toward the fingers so the hand still feels covered. The cuff can be a slim two-line band or a wide bridal panel. One practical point: the wrist bends constantly, and paste cracks there first while drying. I ask clients to keep the wrist still and slightly straight until the paste has set, otherwise the cuff lines crack and the stain comes out patchy.
9. Full Arabic Chain Back Hand Mehndi Design
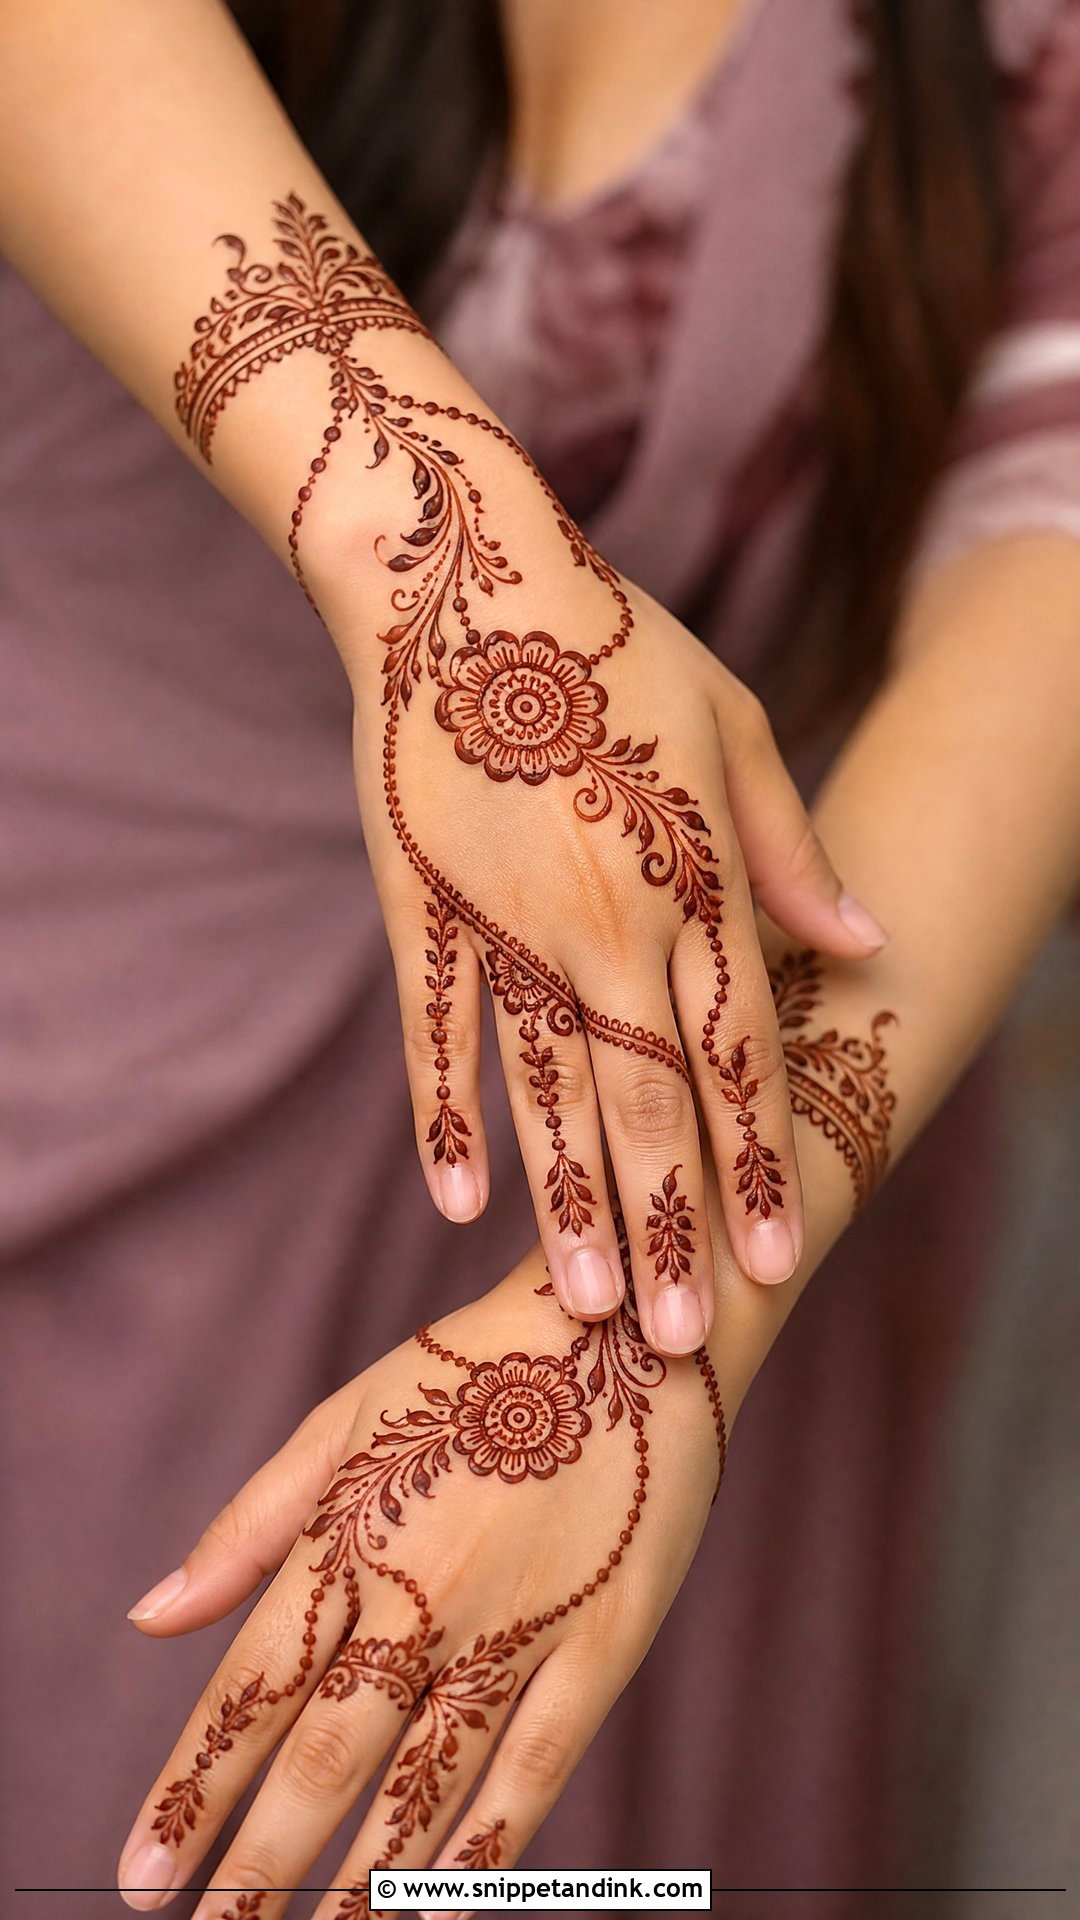
This layout copies a hand harness. Dotted chains and small floral links connect a wrist cuff to finger rings, often with a flower or small mandala sitting in the middle like a pendant. To make it read as a full design rather than just lines, I add decorated fingers and short vines near the knuckles. The chains are drawn as a row of evenly sized dots, which takes a steady cone and an unhurried hand. It suits engagement events and lighter bridal looks.
10. Full Arabic Leafy Back Hand Mehndi Design
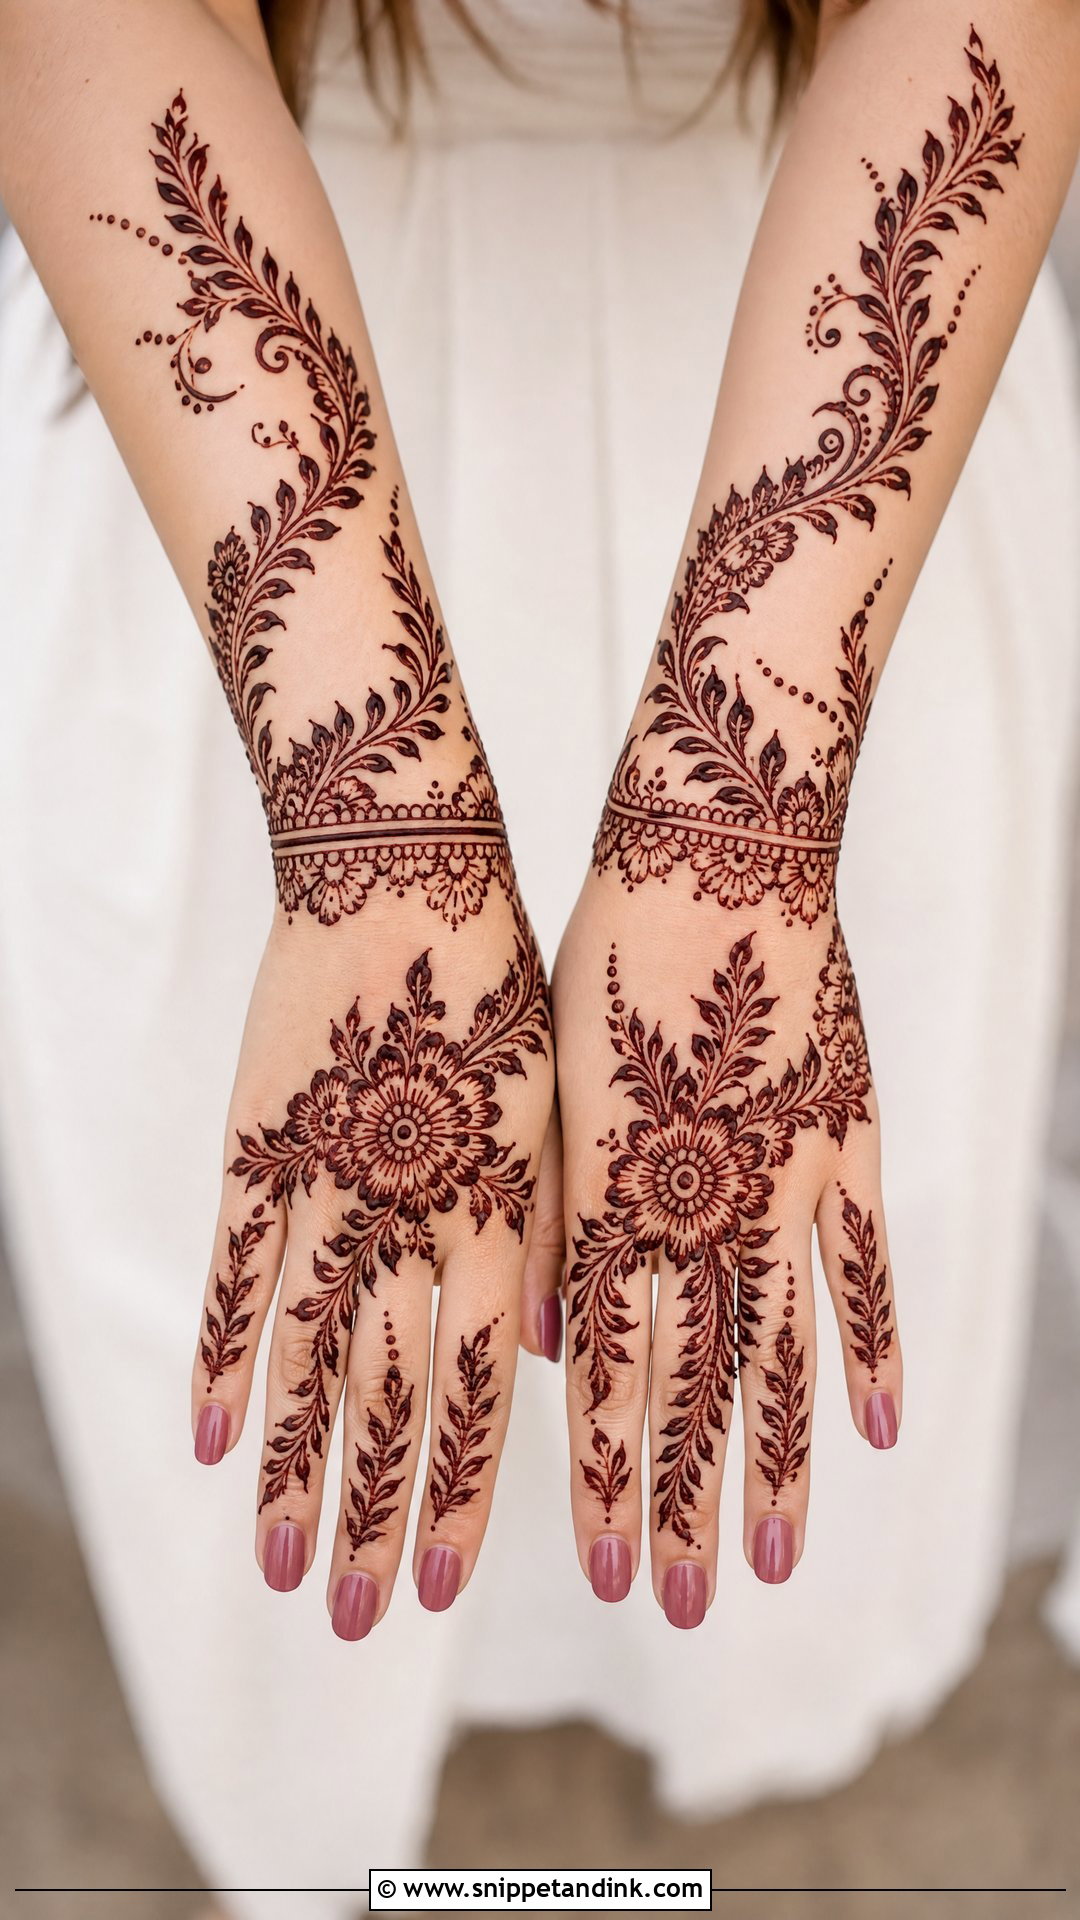
Leaves are the backbone of Arabian mehndi, and a design built from them alone can still feel full. I run curved vines from the wrist up toward the index finger and set leaves along them, alternating sides so the trail doesn’t look like a ladder. A few small flowers and dots add texture. This is the layout I’d suggest to anyone learning, because a leaf is a single pressure stroke: press, pull and lift. Practise that one stroke on paper until the tips come out pointed rather than rounded.
11. Full Arabic Gulf Back Hand Mehndi Design
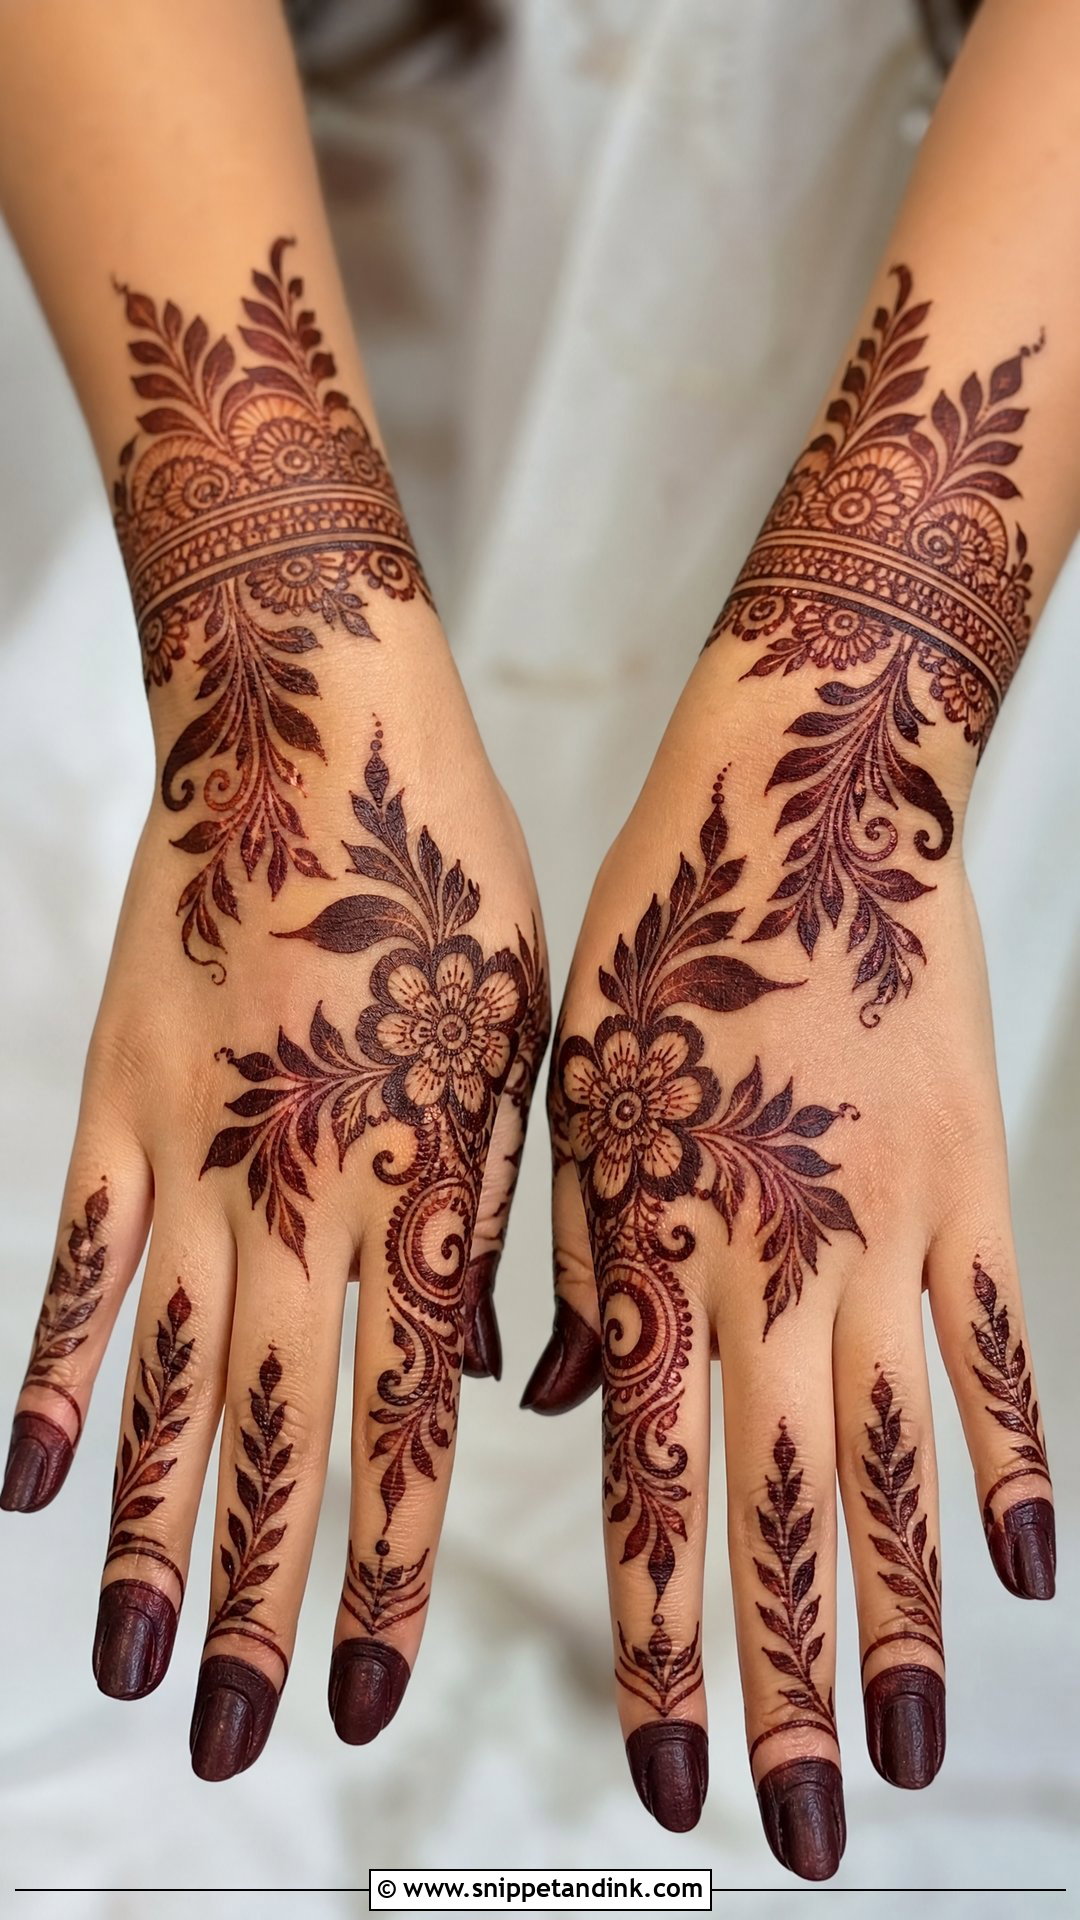
Gulf style is the boldest Arabic look I apply. It uses large flowers, thick leafy strokes, solid black-looking fingertips and sweeping vines, with strong contrast between heavily filled areas and plain skin. That contrast is why it reads from far away. I use a slightly thicker cone tip for these outlines. The style needs confident hands from the artist; hesitant strokes show as wobbles in thick lines. If you want henna that shows up clearly in evening photos, this is the one I’d point you to.
12. Full Arabic Dubai Back Hand Mehndi Design
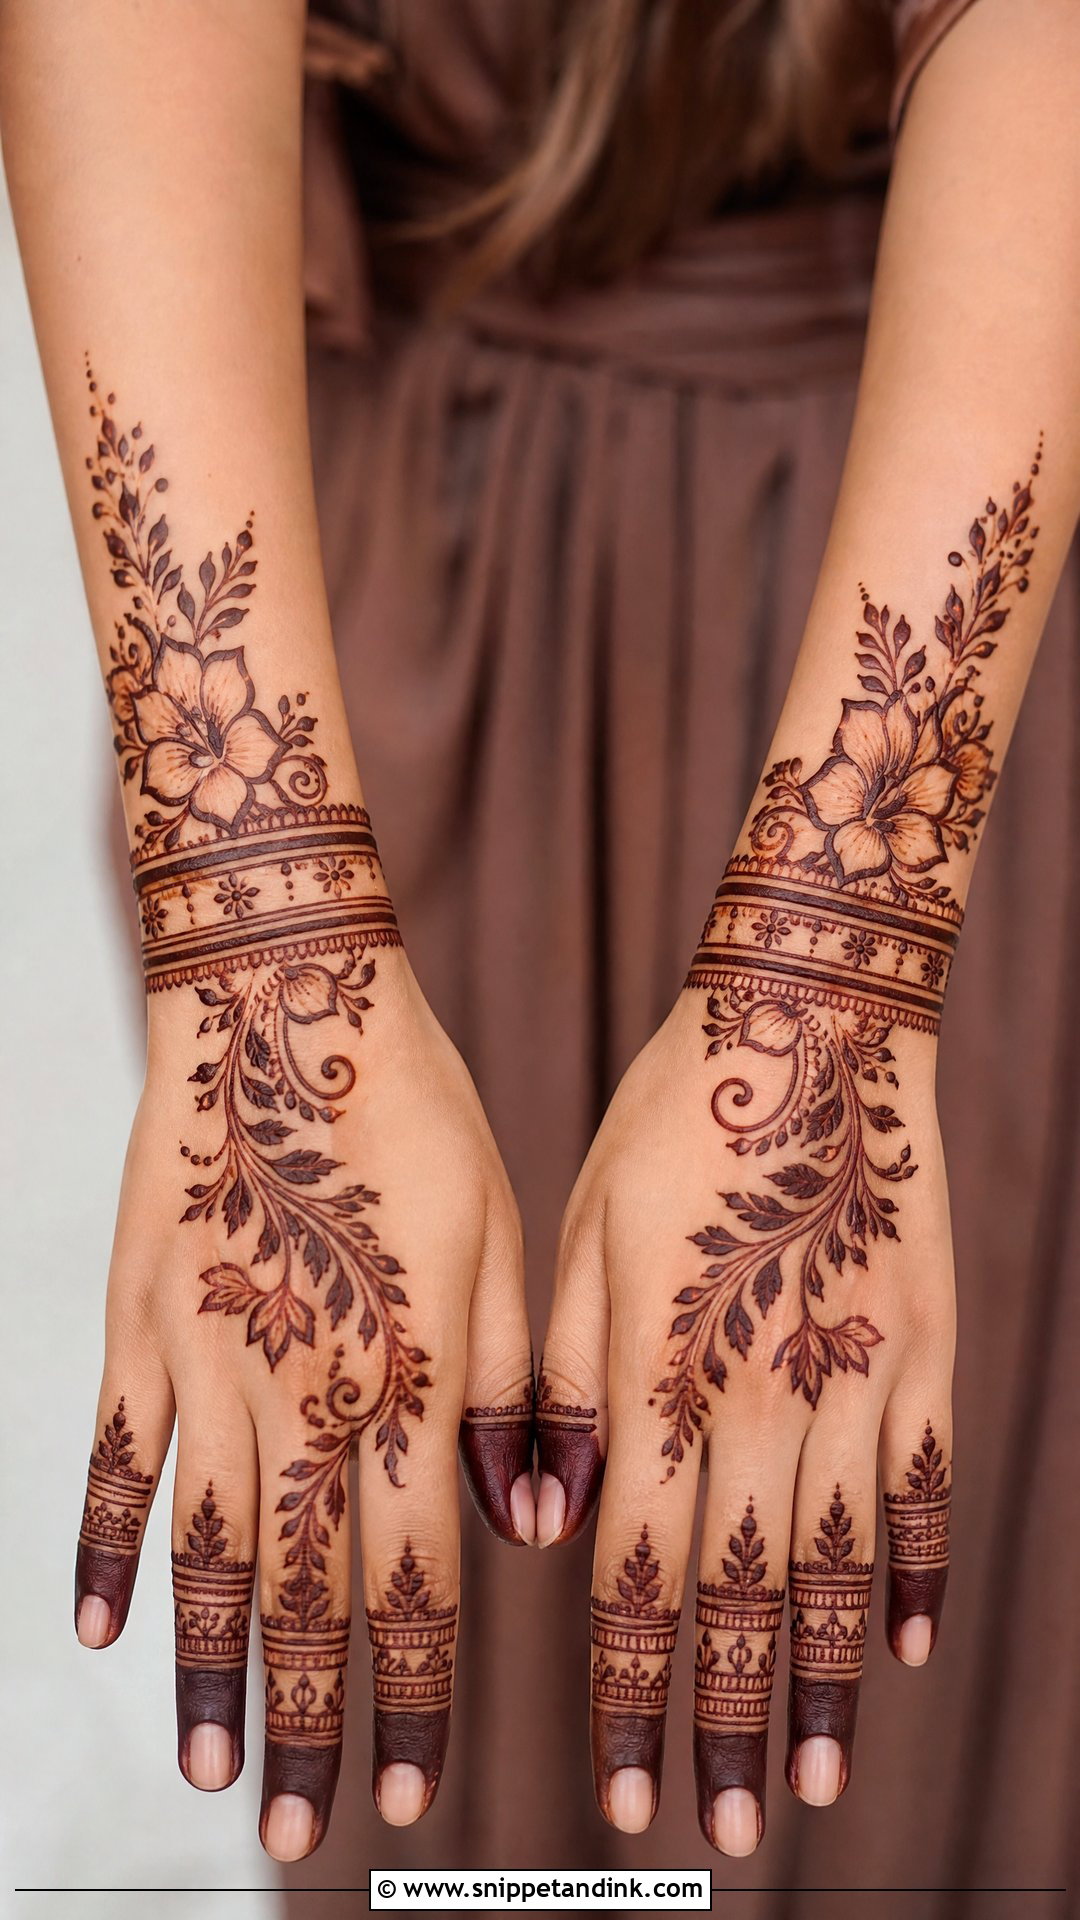
Dubai style is the sleeker relative of Gulf work. It combines bold flowers, fine leafy vines, bracelet bands and stylish negative space, usually laid out on a diagonal with neat gaps of skin. The fingers get rings and small shaded tips, and the wrist often has a slim cuff that sits like jewelry. When I do both hands, I mirror the layout instead of copying it, so the diagonals point toward each other when the hands are held together for photos.
13. Full Arabic Indo Arabic Back Hand Mehndi Design
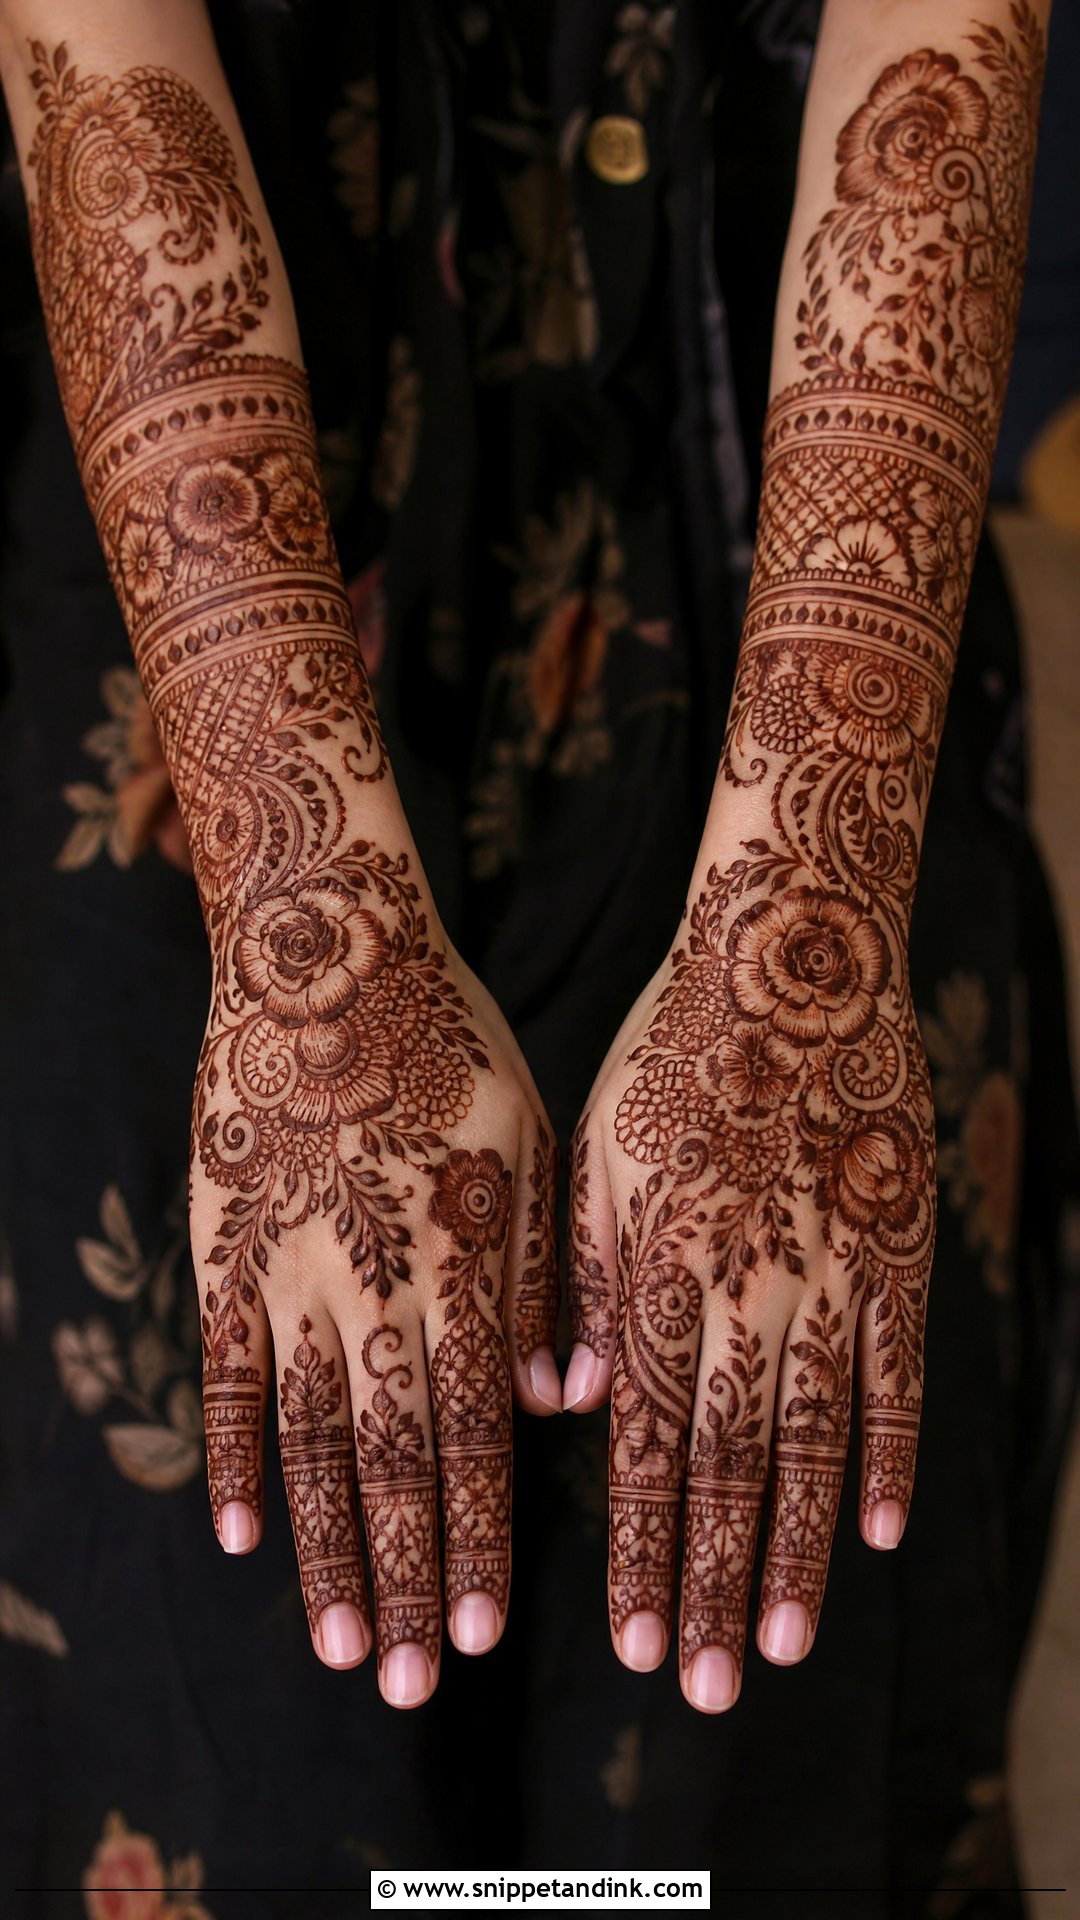
A full Indo Arabic back hand design is the middle ground. It keeps the Arabic diagonal and open spacing but fills some motifs with Indian detail: checks, tiny dots, fine shading and small paisleys. This is where many clients end up when plain Arabic feels too sparse and full Indian bridal too dense. The skill is restraint. I decide in advance which two or three motifs get the fine filling, and leave the rest as clean outlines, otherwise it drifts into full density and loses the flow.
14. Full Arabic Peacock Back Hand Mehndi Design
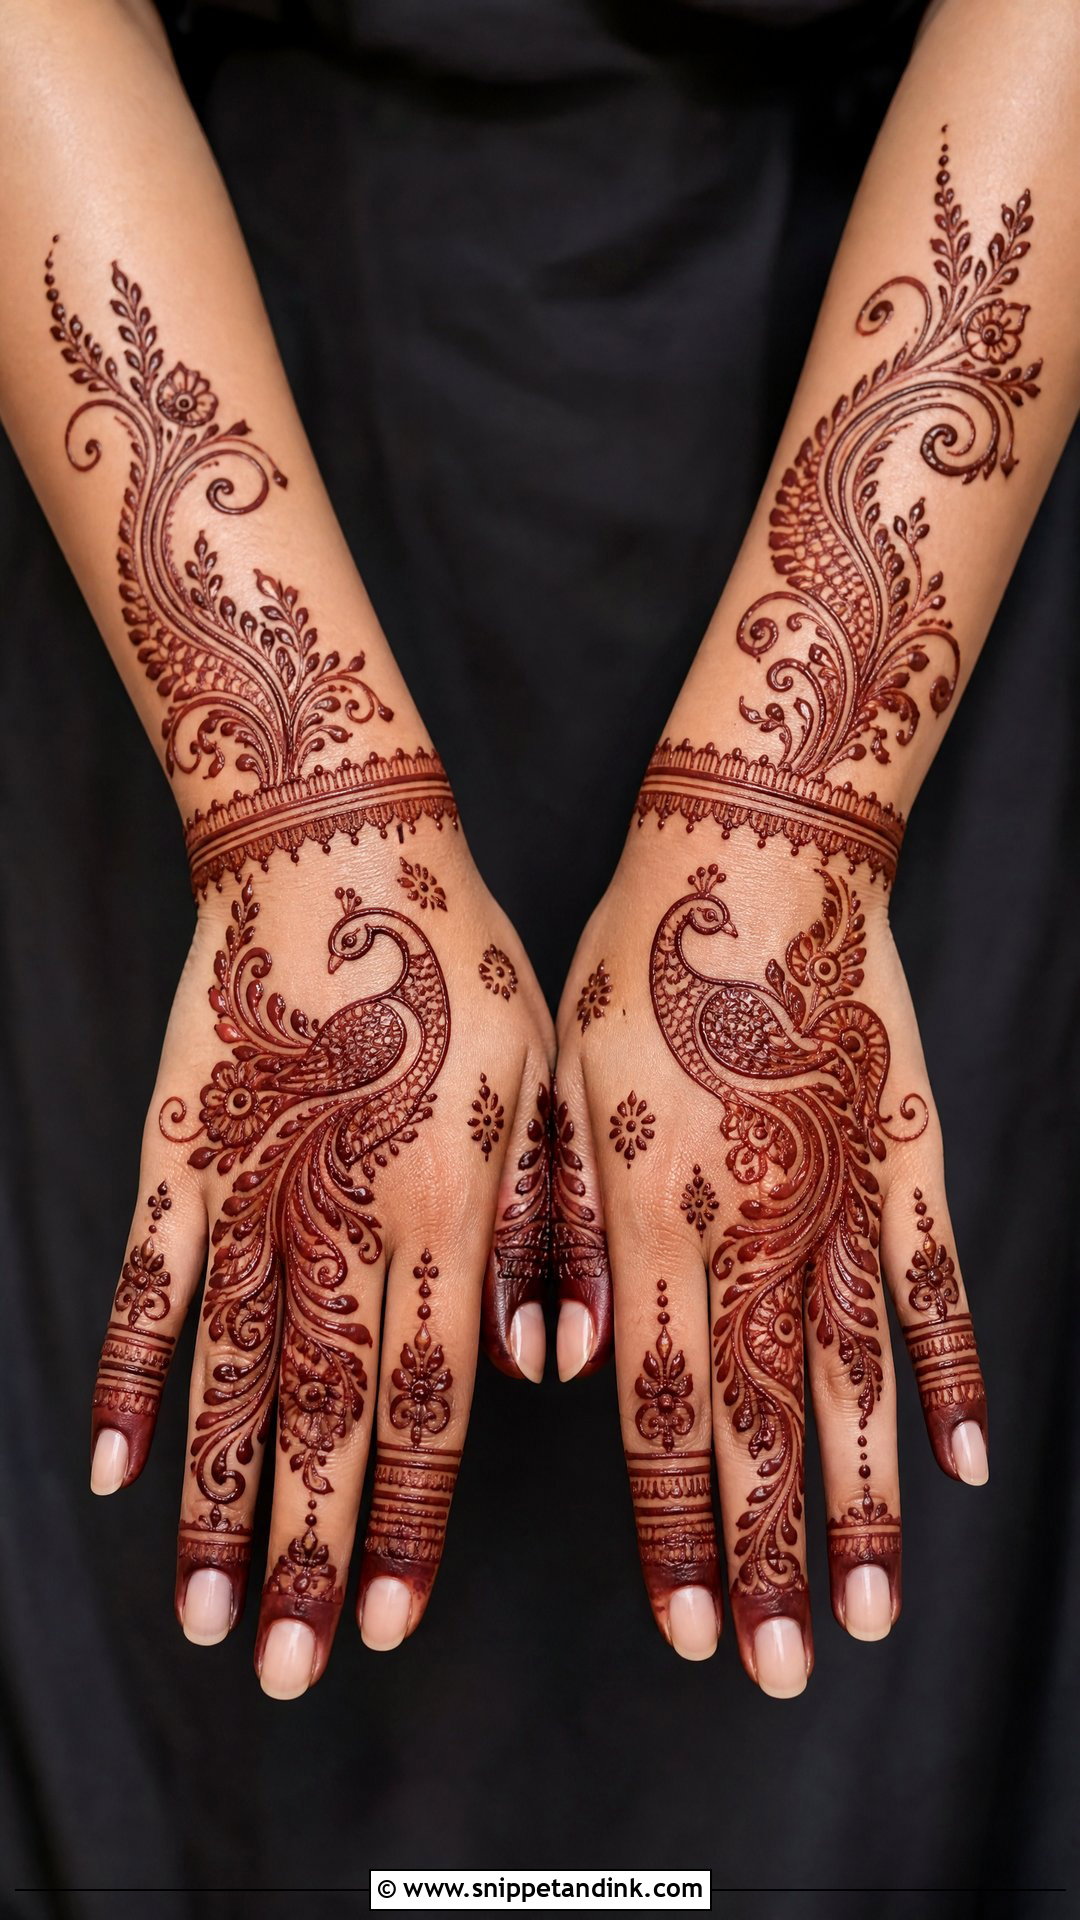
Peacocks look festive, but they need careful sizing. I place the bird near the center of the hand or along the wrist and let its feathers trail into the floral vines, so it becomes part of the flow rather than a sticker on top. Too large a peacock swallows the back of the hand and breaks the Arabic spacing. Keep it to about a third of the hand. The feather eyes need tiny, precise circles, and that’s the detail that separates a skilled application from a rushed one.
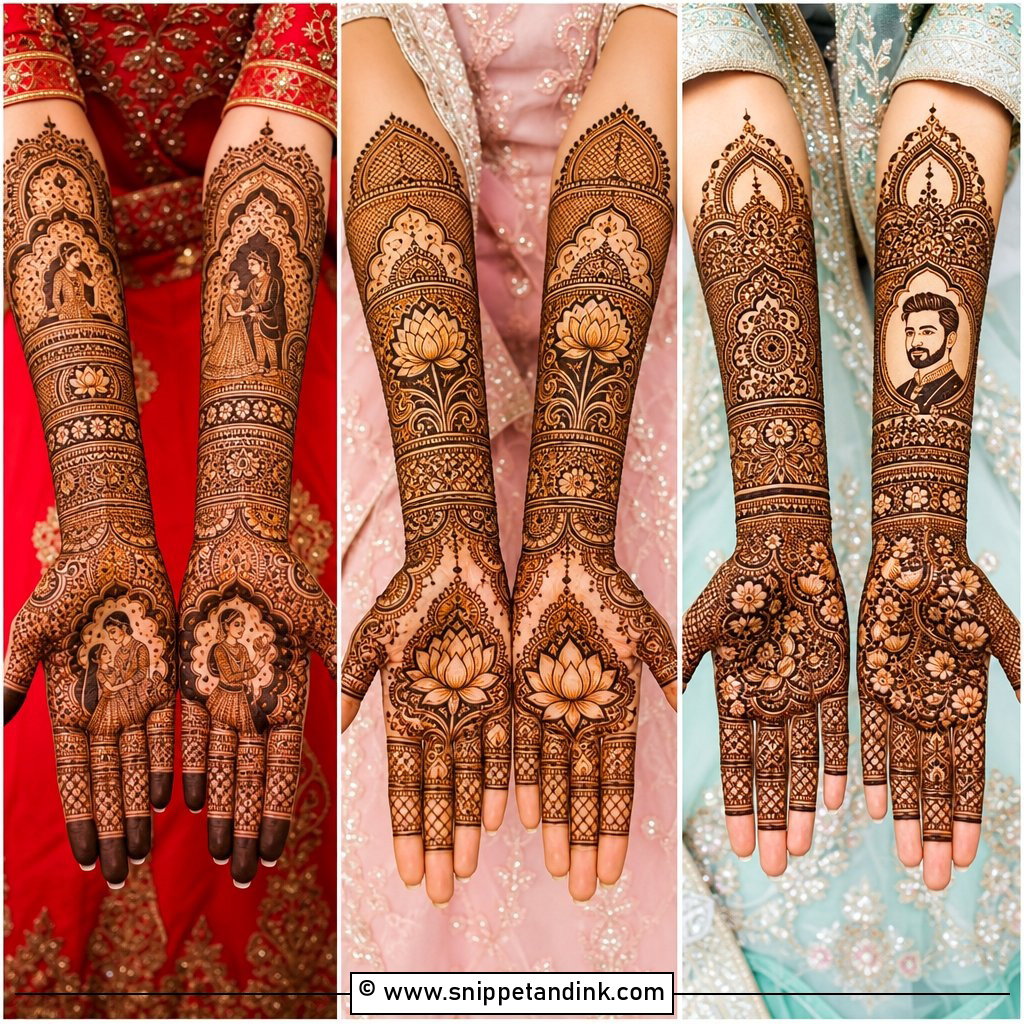
15. Full Arabic Minimal Back Hand Mehndi Design
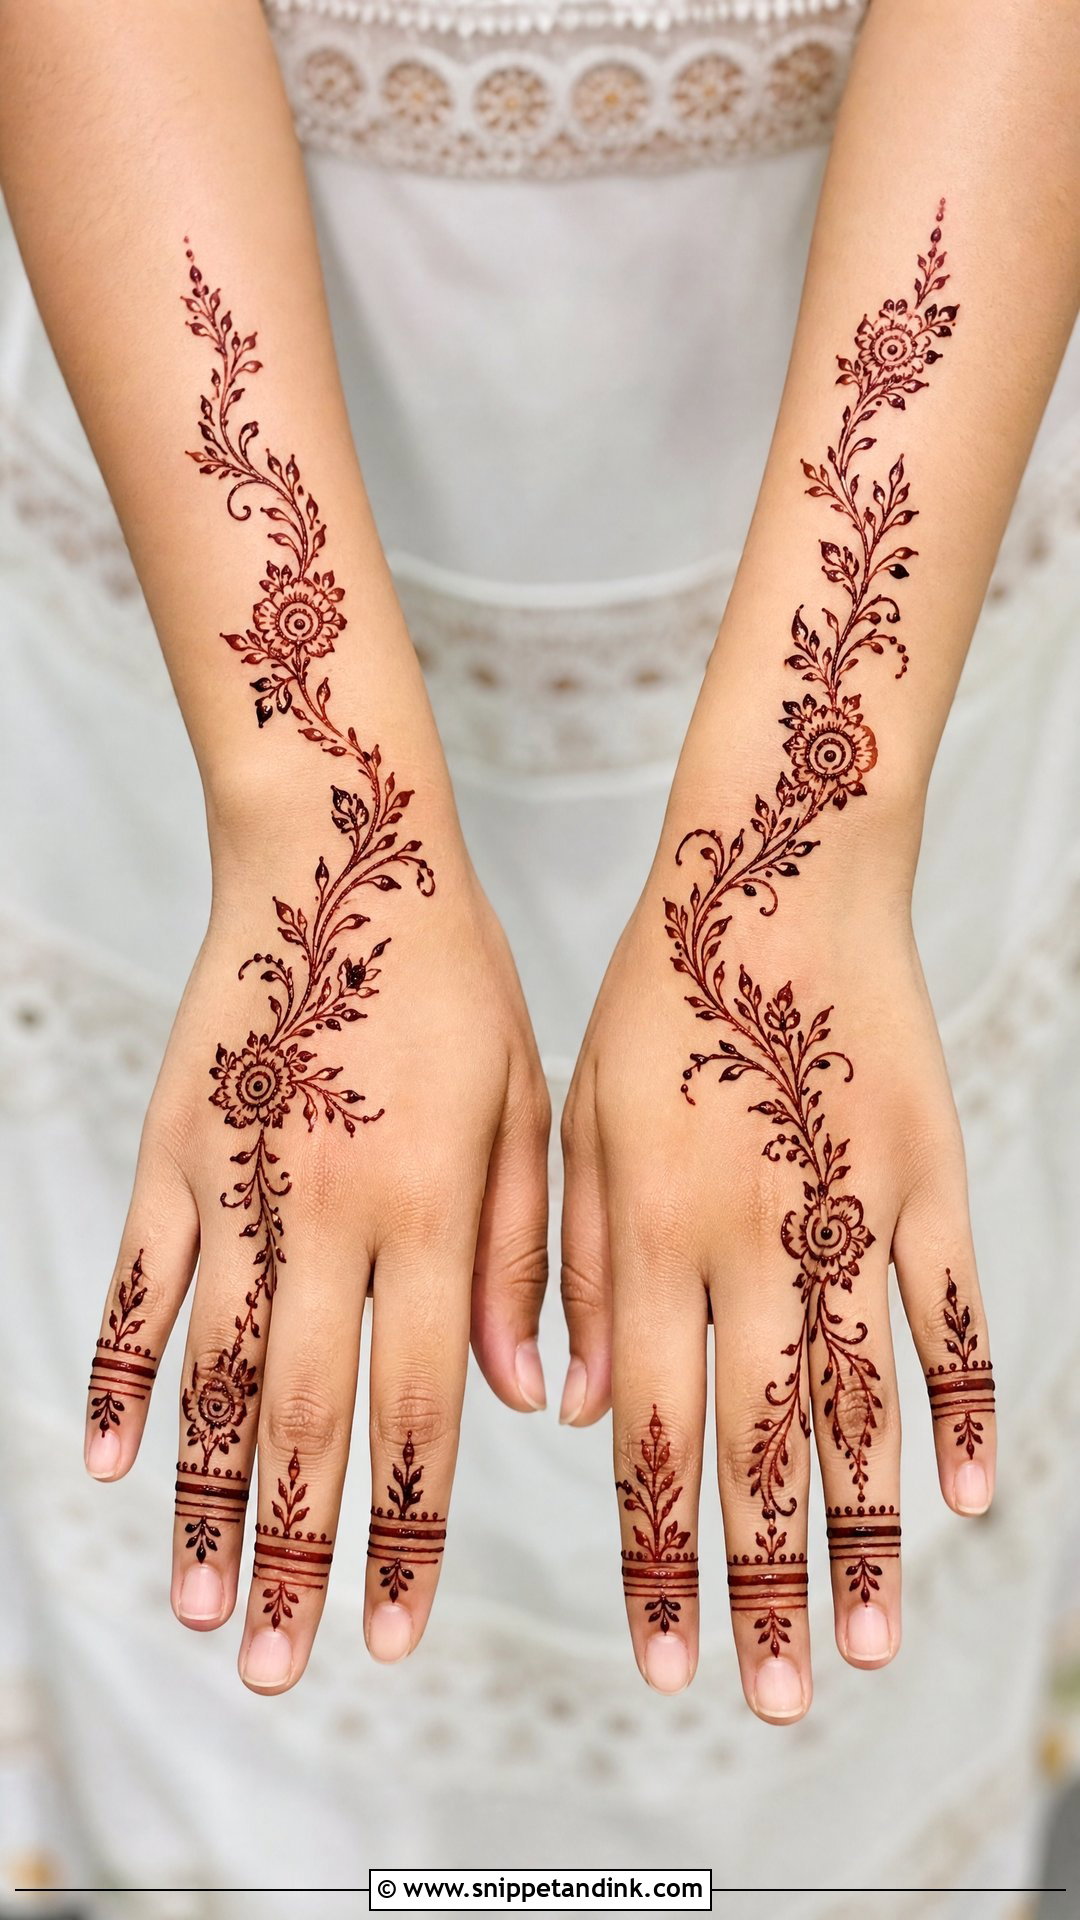
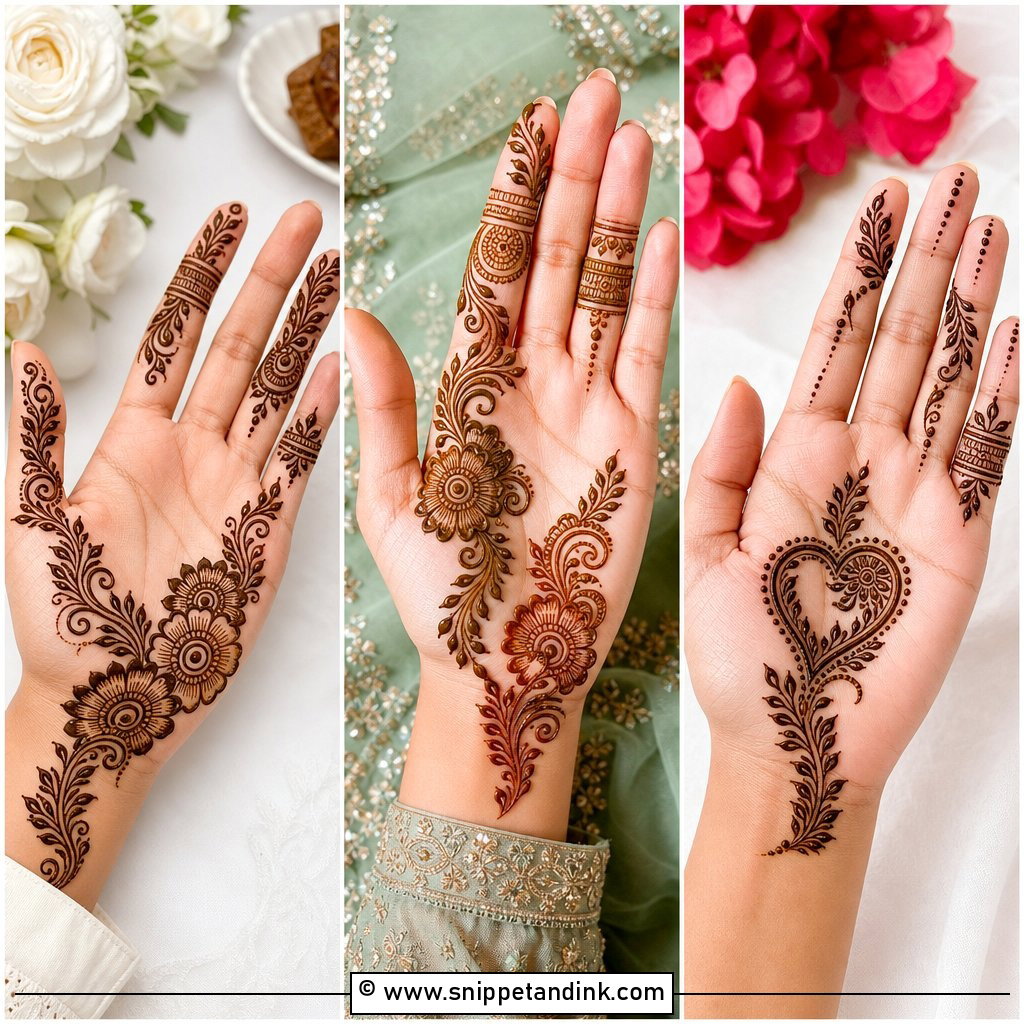
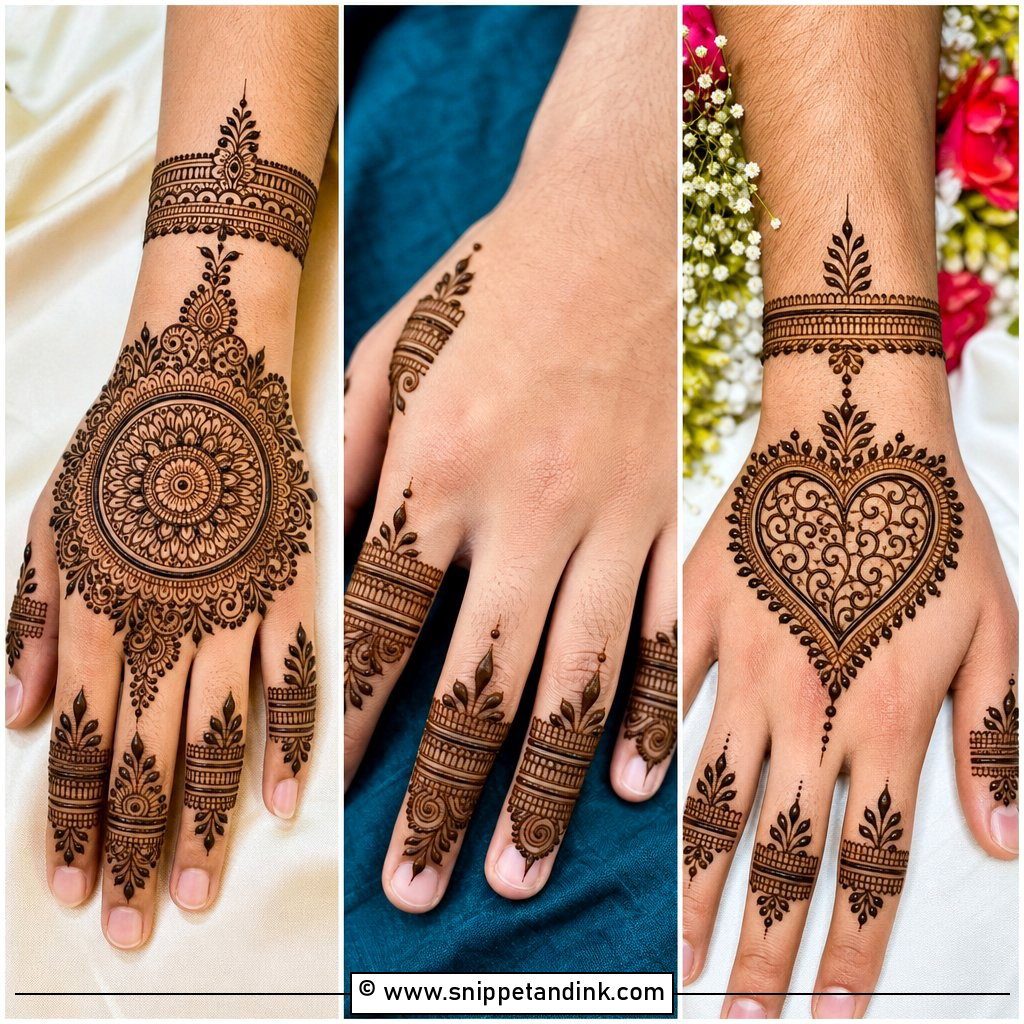
Minimal doesn’t mean empty. A full minimal design still runs from fingertip to wrist, but with slim floral trails, simple leaves, plain finger bands and a light bracelet. The placement does the work. It’s my suggestion for office parties, school events or anyone who wants henna they can wear to work the next week. It also takes far less time to apply and dries sooner, though the stain itself needs the same hours of paste contact as any heavier design to come out dark.
16. Full Arabic Eid Back Hand Mehndi Design
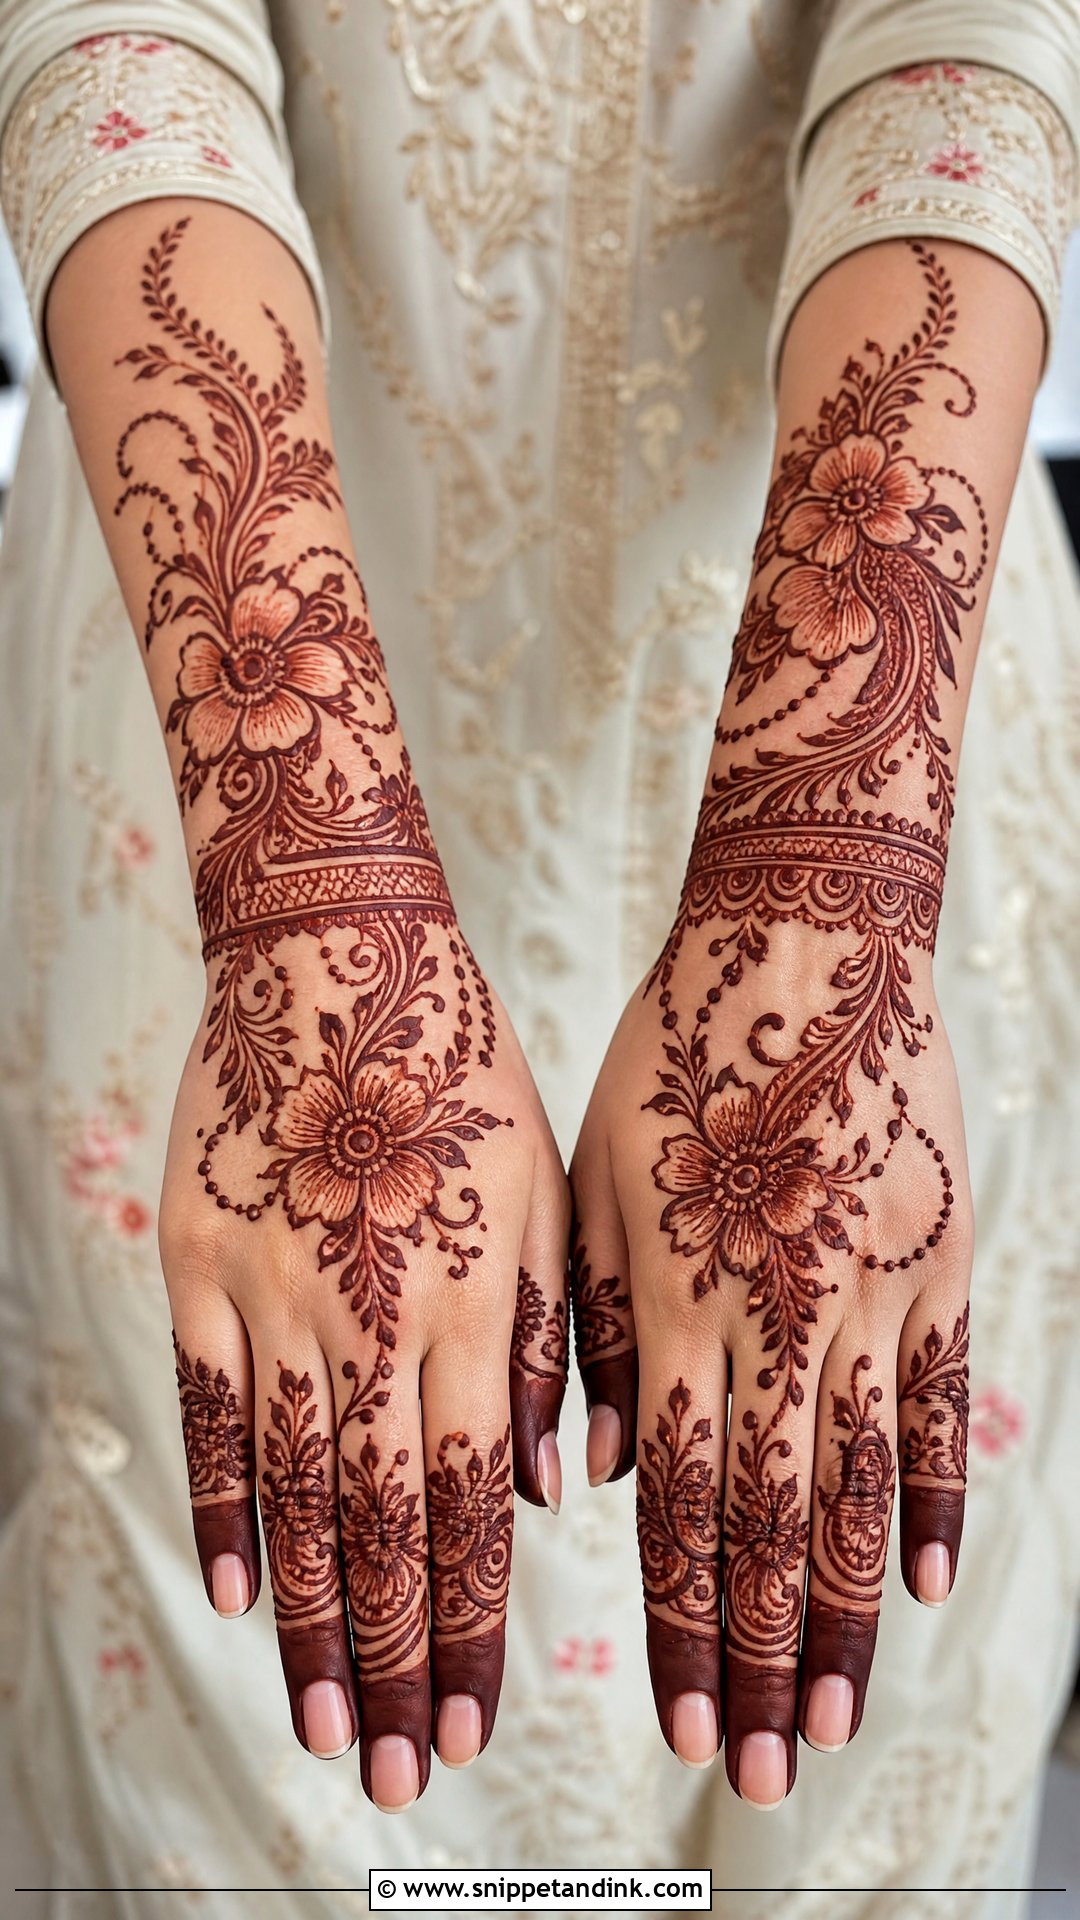
Eid henna has to be done quickly, because Chaand Raat is the busiest night of my year. A full Eid back hand design typically has floral vines, leafy trails, filled fingertips and a wrist band, enough to look festive in family photos without feeling bridal. A diagonal layout slims the hand; a central floral layout feels more balanced on smaller hands. It works for every age, from young girls to grandmothers, and I adjust the density to suit each person rather than drawing the same pattern for everyone.
17. Full Arabic Engagement Back Hand Mehndi Design
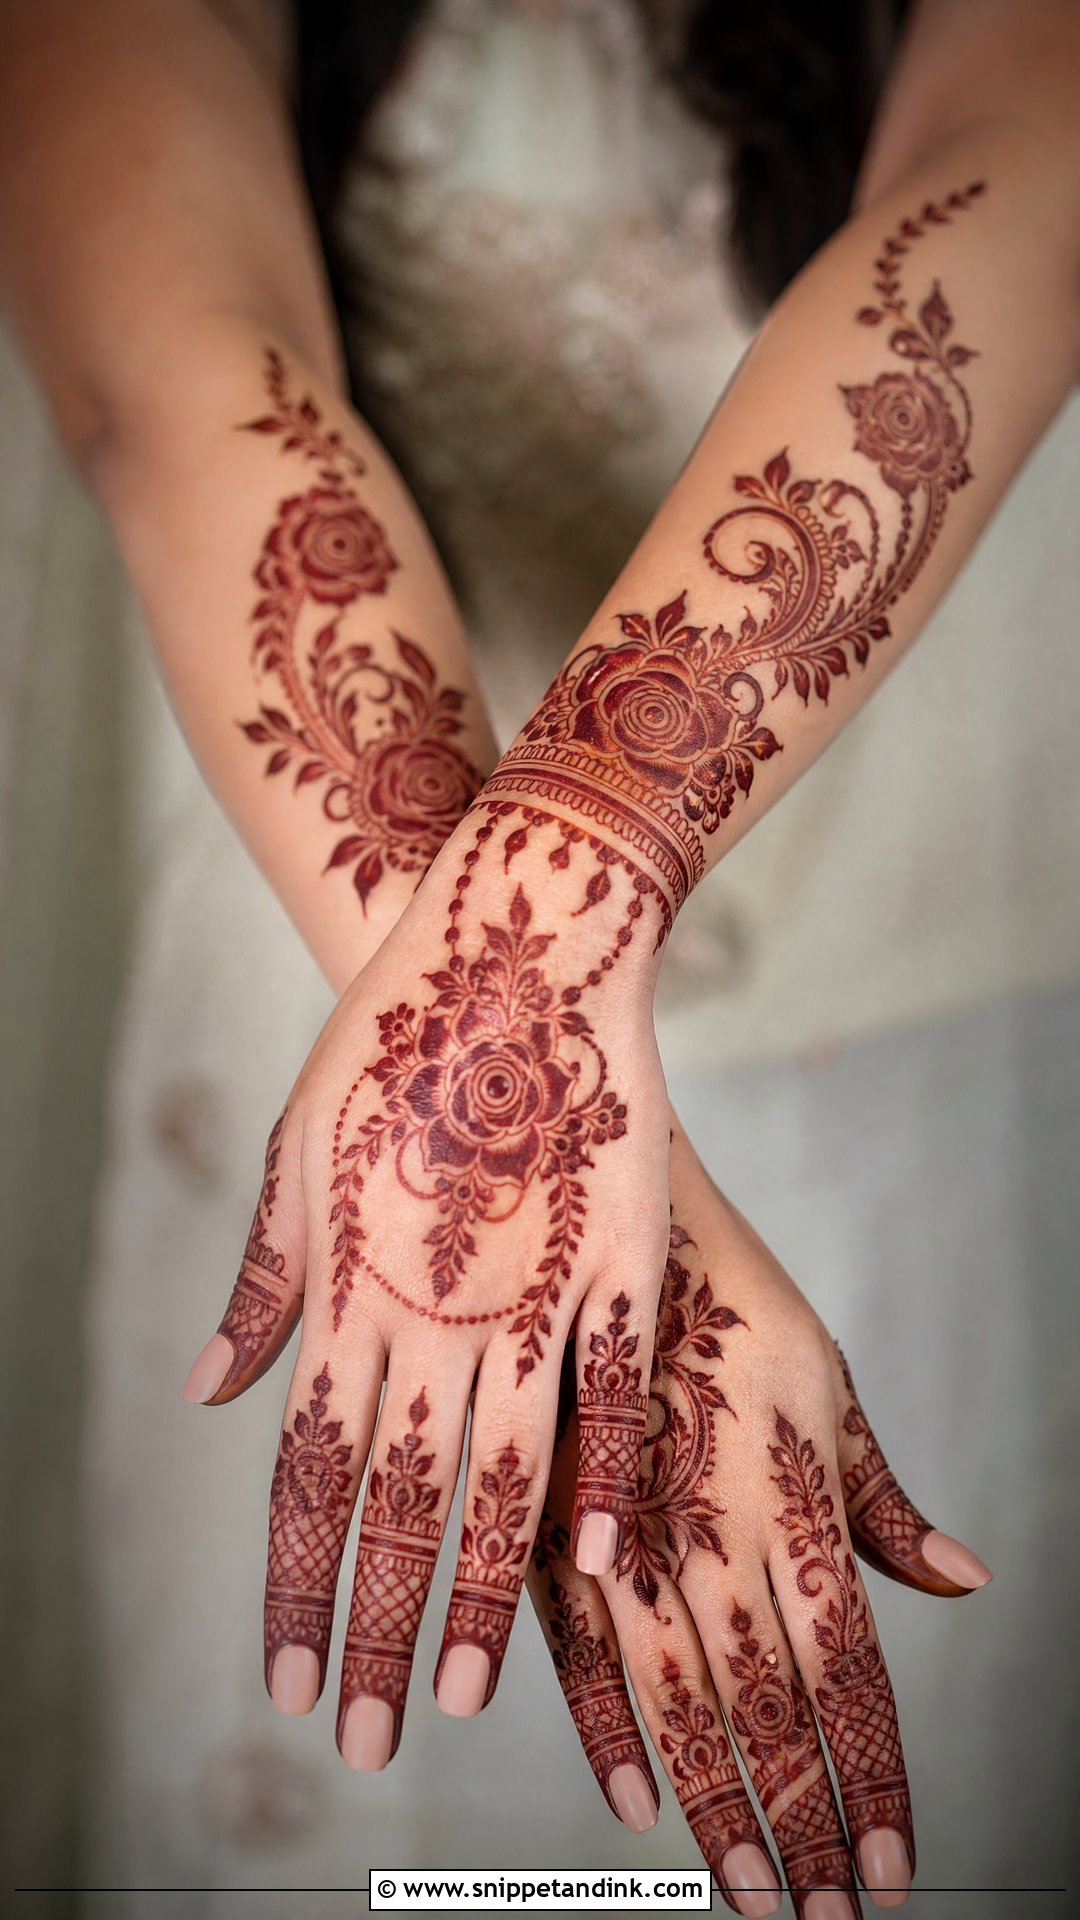
Engagement henna needs to frame the ring, not hide it. I keep the ring finger lighter than the others and draw a clear gap where the ring will sit, then build rose trails, ring-style finger bands, a bracelet cuff and fine chains around it. A central flower or small mandala on the back of the hand gives the ring photos a focal point. Avoid very dark, solid fingertips on the ring hand, since they compete with the stone.
18. Full Arabic Simple Back Hand Mehndi Design
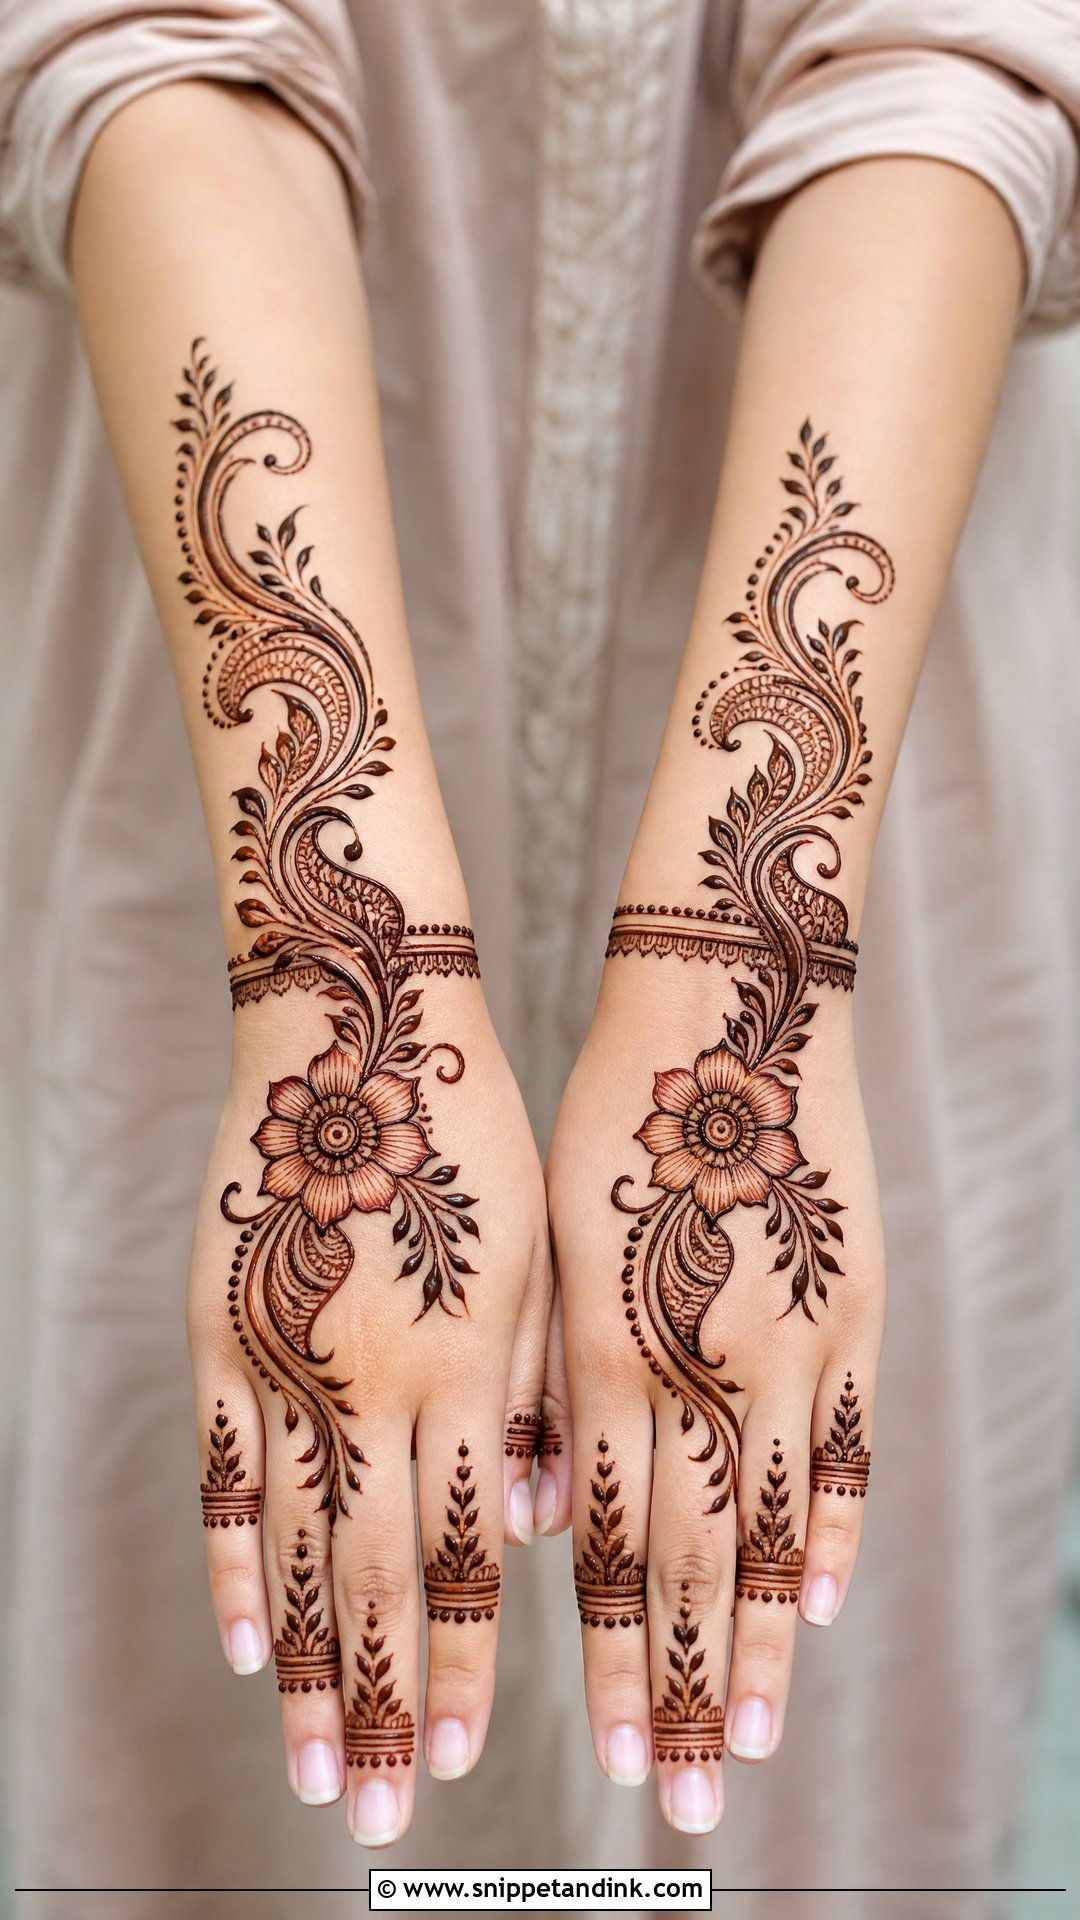
Simple layouts suit last-minute plans and casual family visits. One main flower, a few paisley curves, leafy vines, basic finger patterns and a small bracelet band are enough to make the hand look finished. I can apply this in a fraction of the time of a bridal design. Because there are so few elements, spacing is everything: if the main flower sits too high or too low, the whole hand looks unbalanced. I sketch where it will go with a couple of dots before committing.
19. Full Arabic Shaded Back Hand Mehndi Design
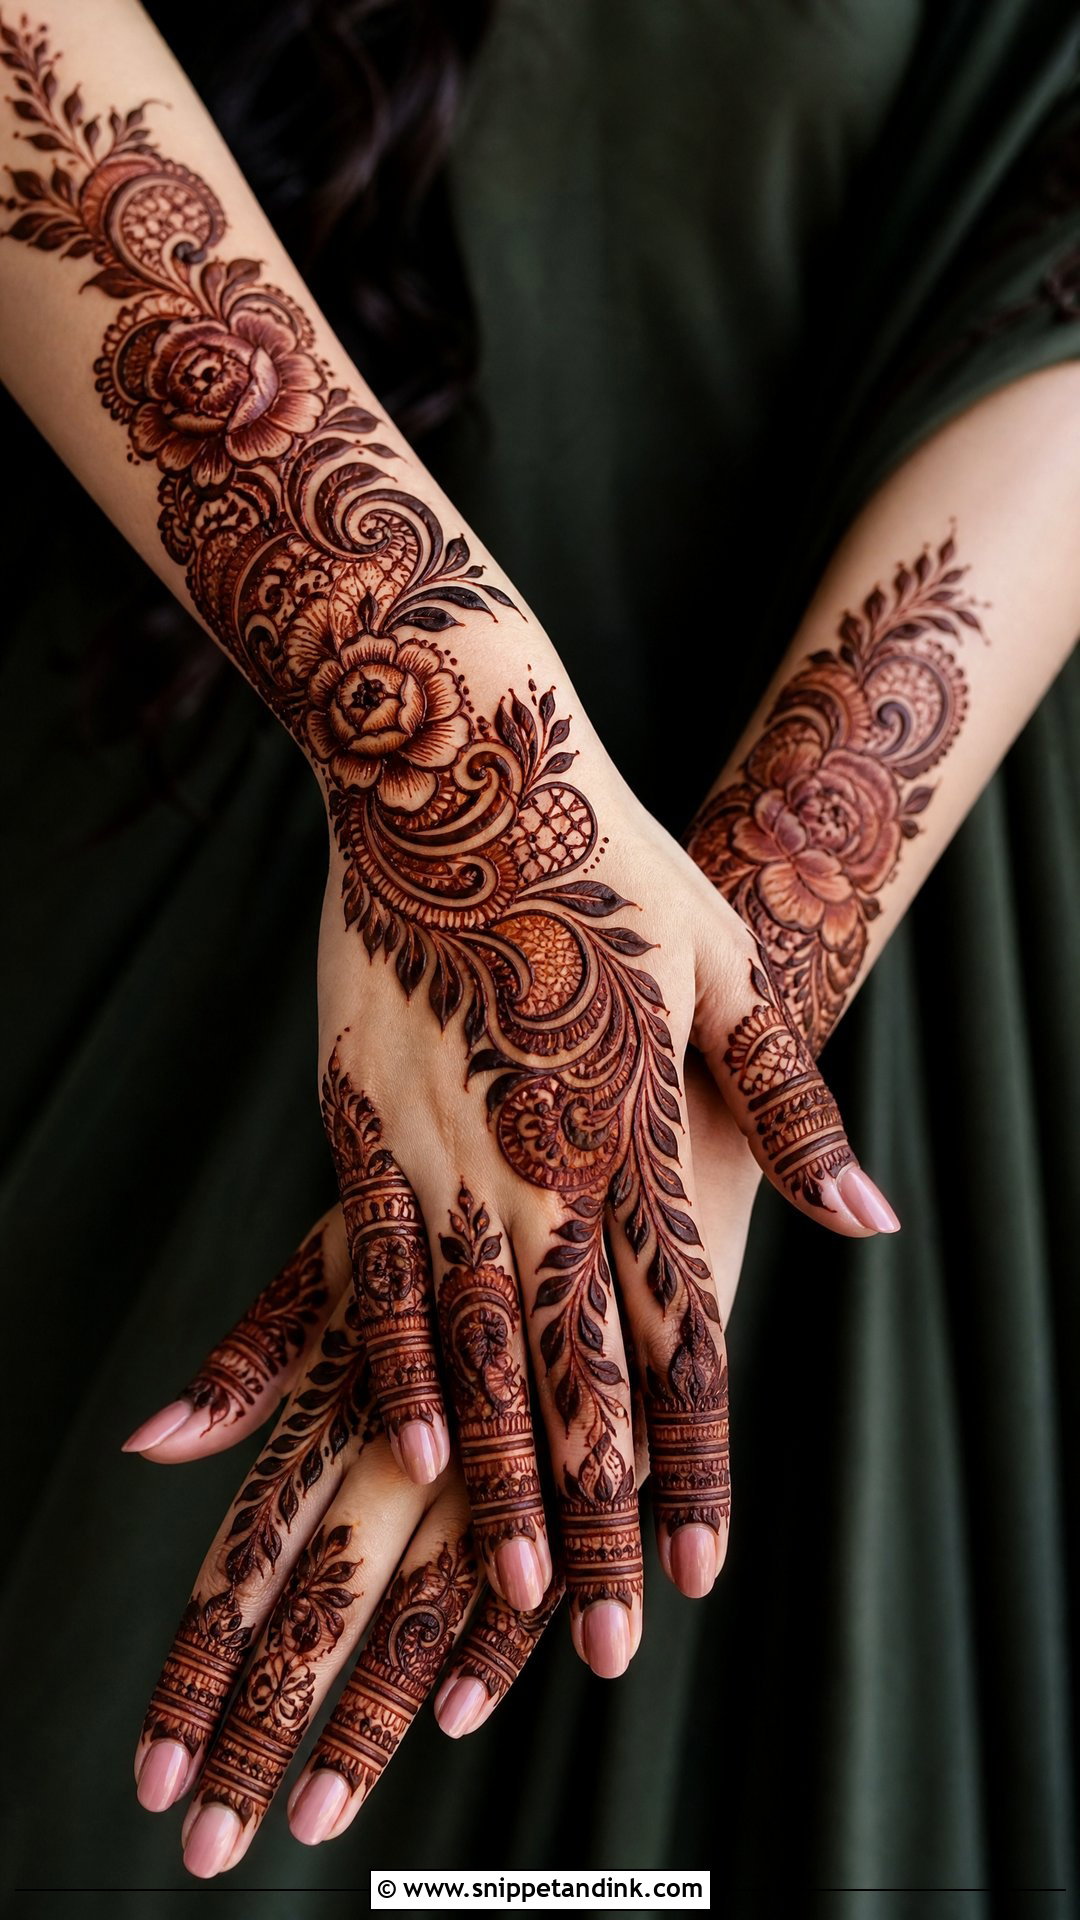
Shading is what gives Arabic mehndi its dimension. I draw a crisp outline first, then fill only the inner edge of each petal or paisley with a lighter, feathered stroke, leaving the outer line sharp. As the stain darkens over the next day or two, the thin shaded areas come out lighter than the outlines, which creates the soft gradient. Shading works best with fresh paste that flows easily; old, thick paste turns shading into blotches. The fingers can carry shaded bands to match.
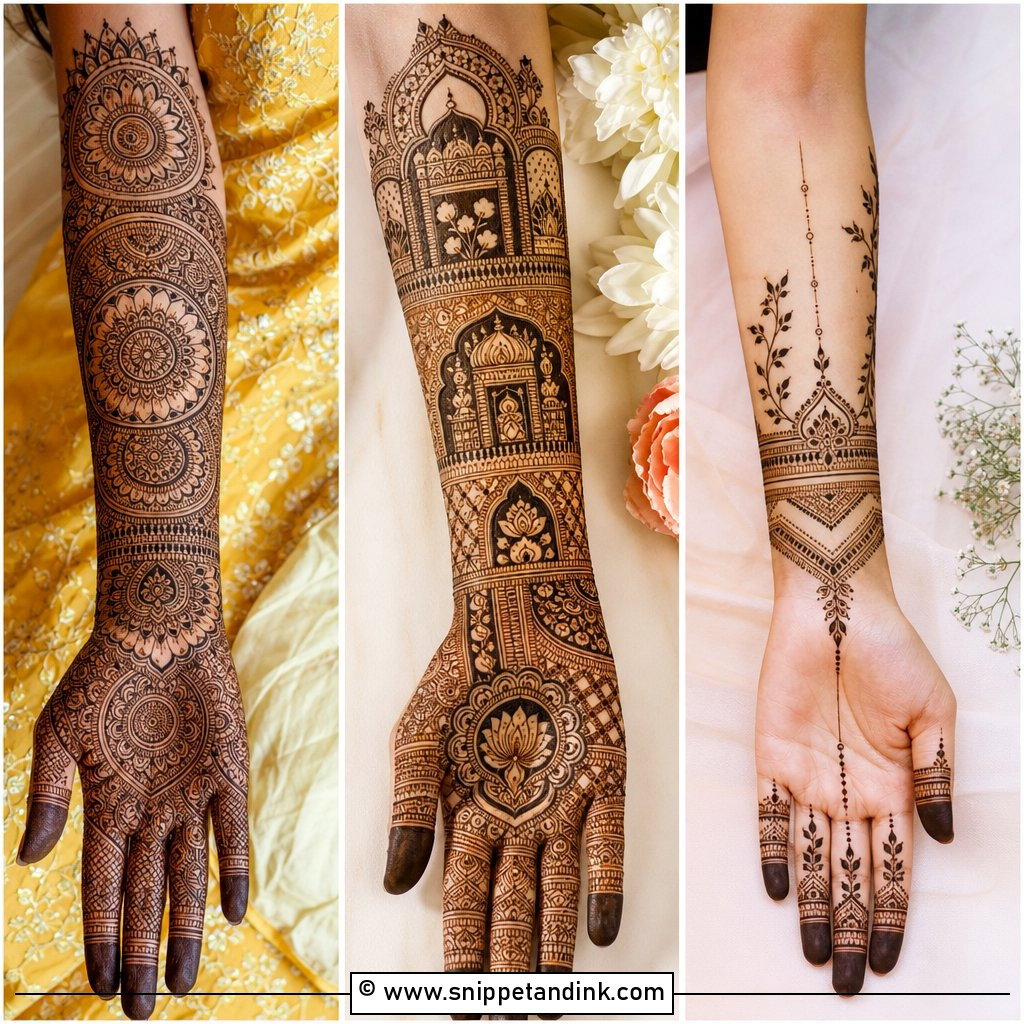
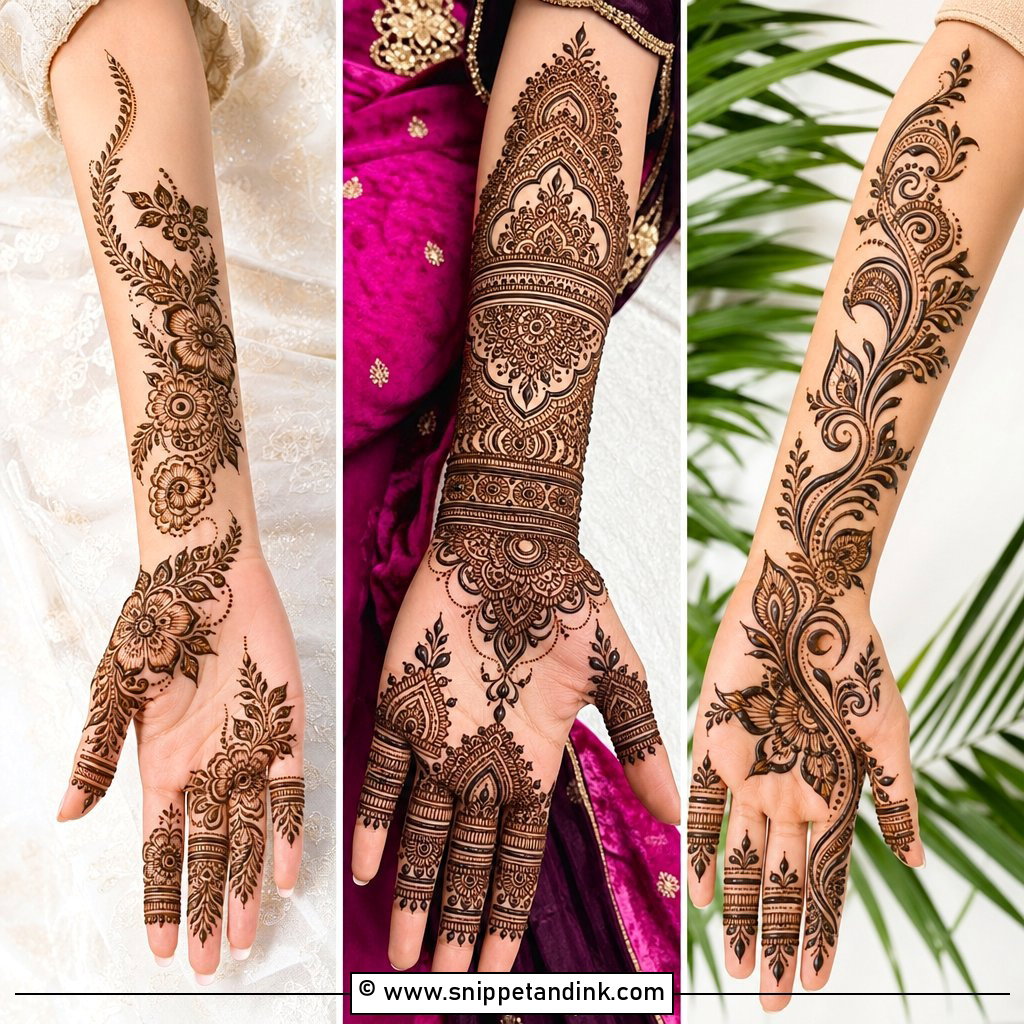
20. Full Arabic Modern Back Hand Mehndi Design
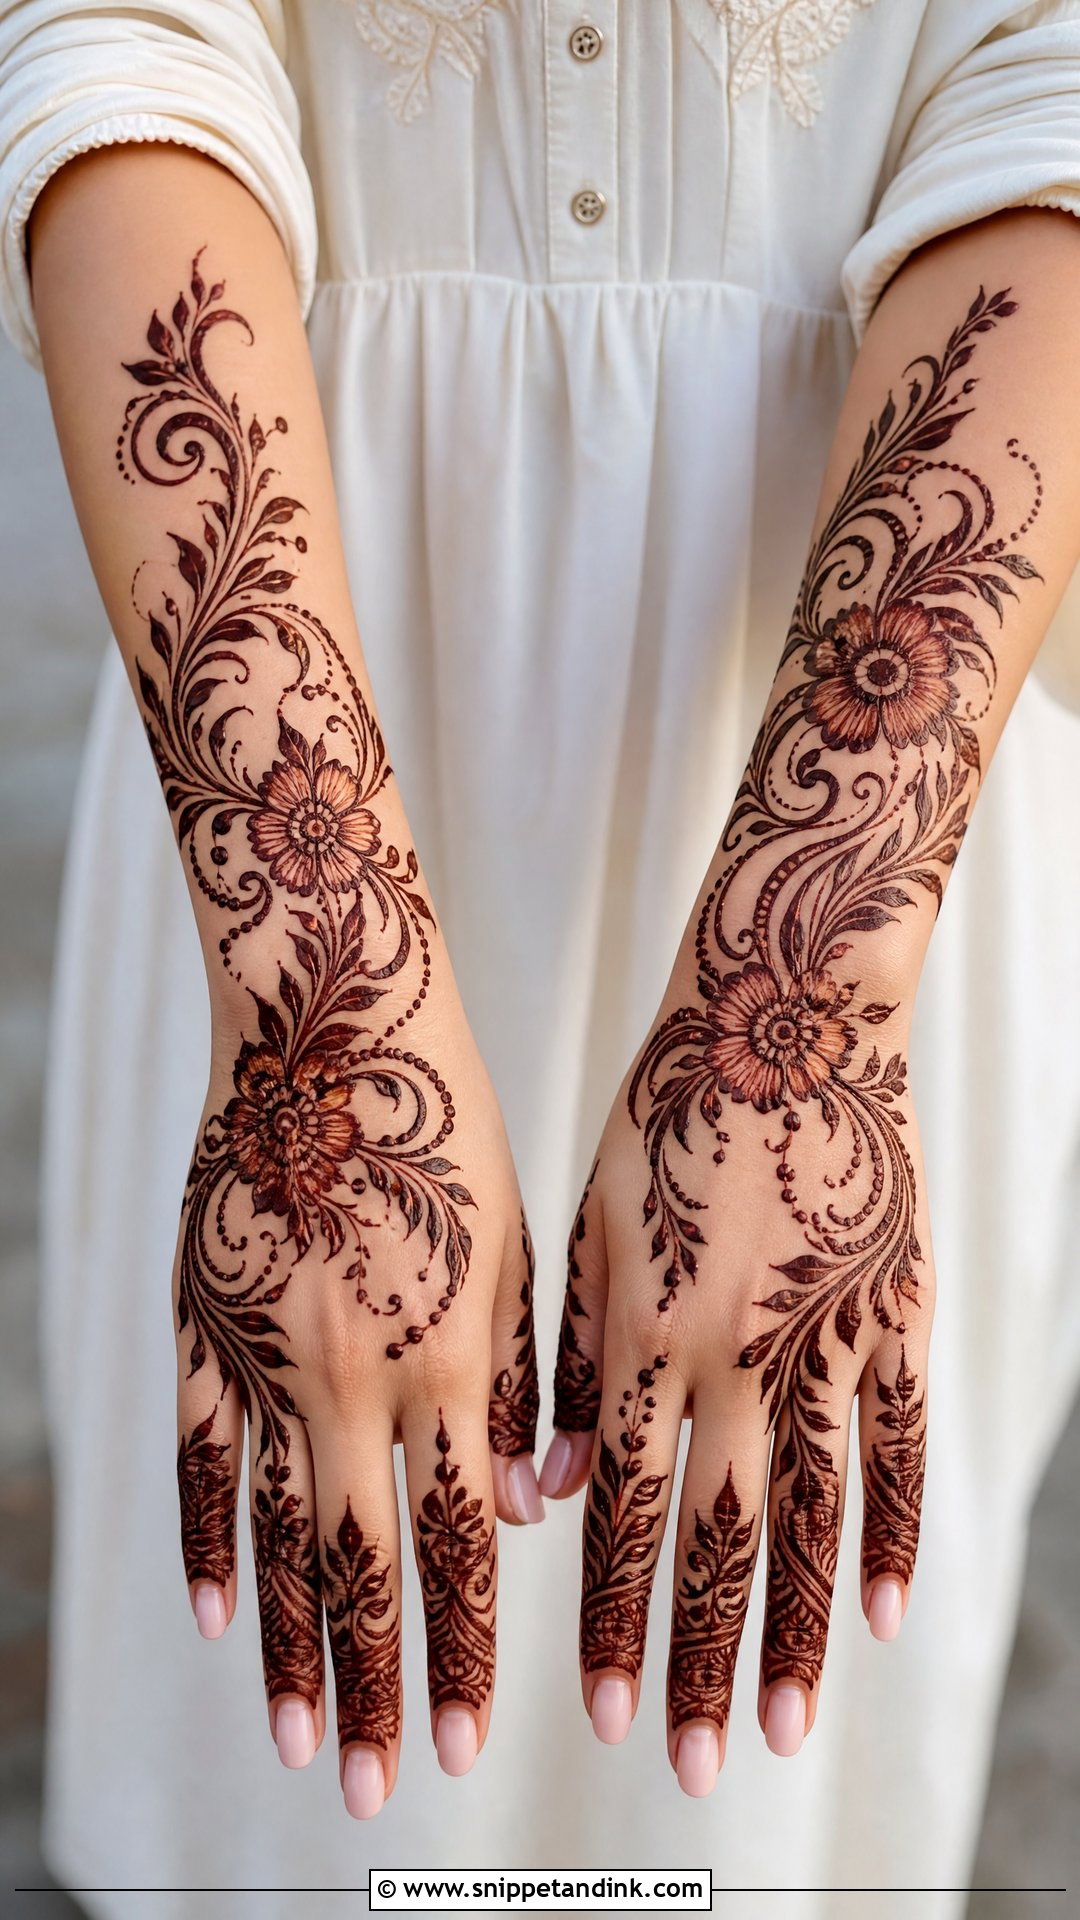
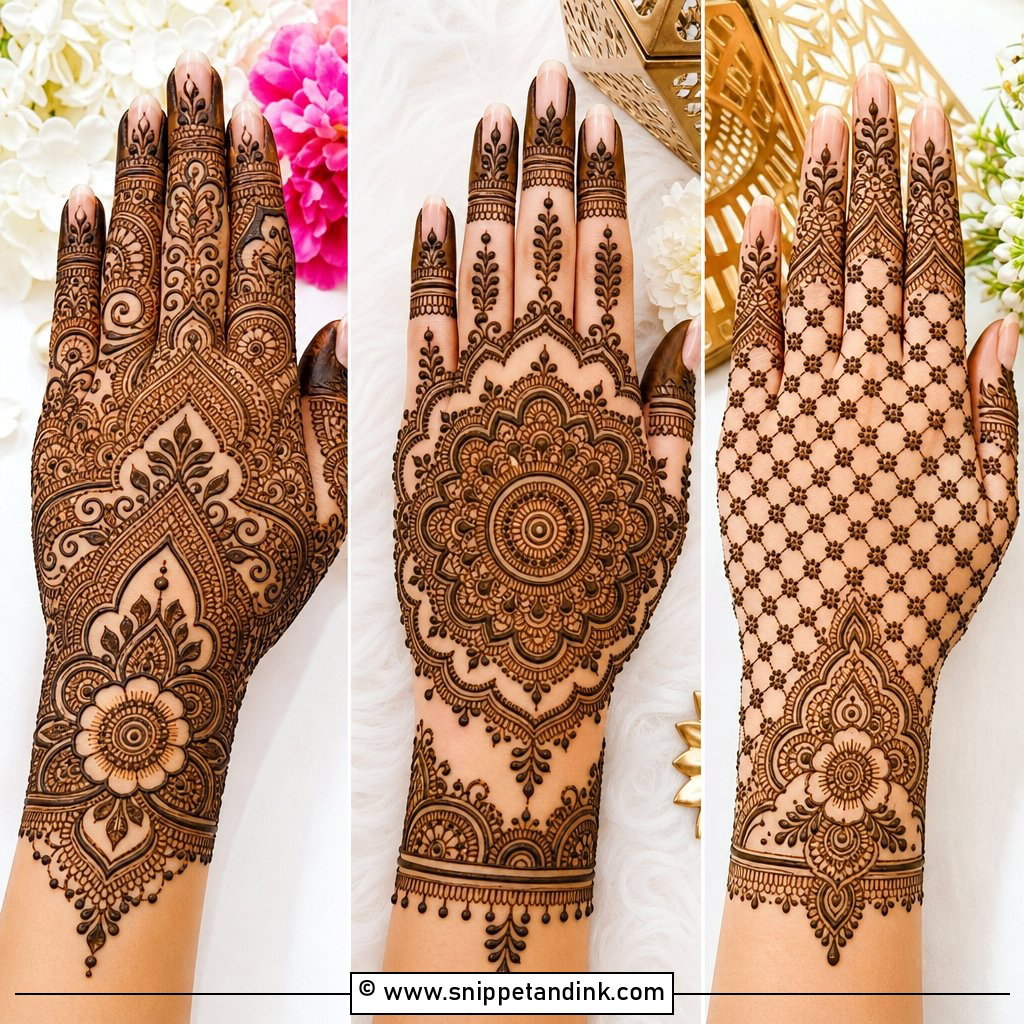
Modern Arabic designs keep the traditional motifs but use more empty space and a few abstract curves, bracelet bands and clustered flowers. The layout follows the hand’s natural shape from wrist to fingertips, so the design moves with the bones rather than sitting flat on top. I keep the main motifs bold and use very little filler. This style suits younger brides and guests wearing fusion outfits, where heavy traditional henna can feel out of place next to a modern silhouette.
Why the Back of the Hand Stains Lighter, and What Helps
Clients are often surprised that the same paste comes out darker on their palms than on the back of the hand. The skin on the back of the hand has a thinner outer layer than the palm, so it takes up less dye and the stain naturally develops a shade or two lighter. You can’t change that, but you can give it the best chance.
Keep the paste on
Leave dried paste on for as long as you can, ideally six to eight hours or overnight. Dab on a little lemon and sugar mix once the paste is dry to help it stay stuck, and wrap the hands loosely if you’re sleeping in it.
Scrape, don’t wash
Scrape the dry paste off with a blunt edge rather than rinsing it. Then keep the hands away from water for as long as you reasonably can that day. The stain starts orange and deepens to a reddish brown over the next 24 to 48 hours, which is why I always plan bridal henna two days before the wedding rather than the night before.
Avoid anything sold as black henna
Natural henna never stains black. Instant black pastes usually contain chemical dye that can cause serious skin reactions. If an artist offers a black stain in an hour, say no and ask for natural paste.
Which Back Hand Layout Fits Your Occasion?
The right layout depends on the event and how much time you have in the chair. Minimal and simple trails suit quick festive plans, jewelry-style chains and cuffs suit engagement photos, and Gulf, shaded and Indo Arabic work give the most impact for weddings. Whatever you pick, look for smooth vines, clean fingers and a wrist detail that ties the hand together. Then give the paste time to stay on, because a well-drawn design with a weak stain will always look unfinished.
You'll Like These Ideas:


Leave a Reply