
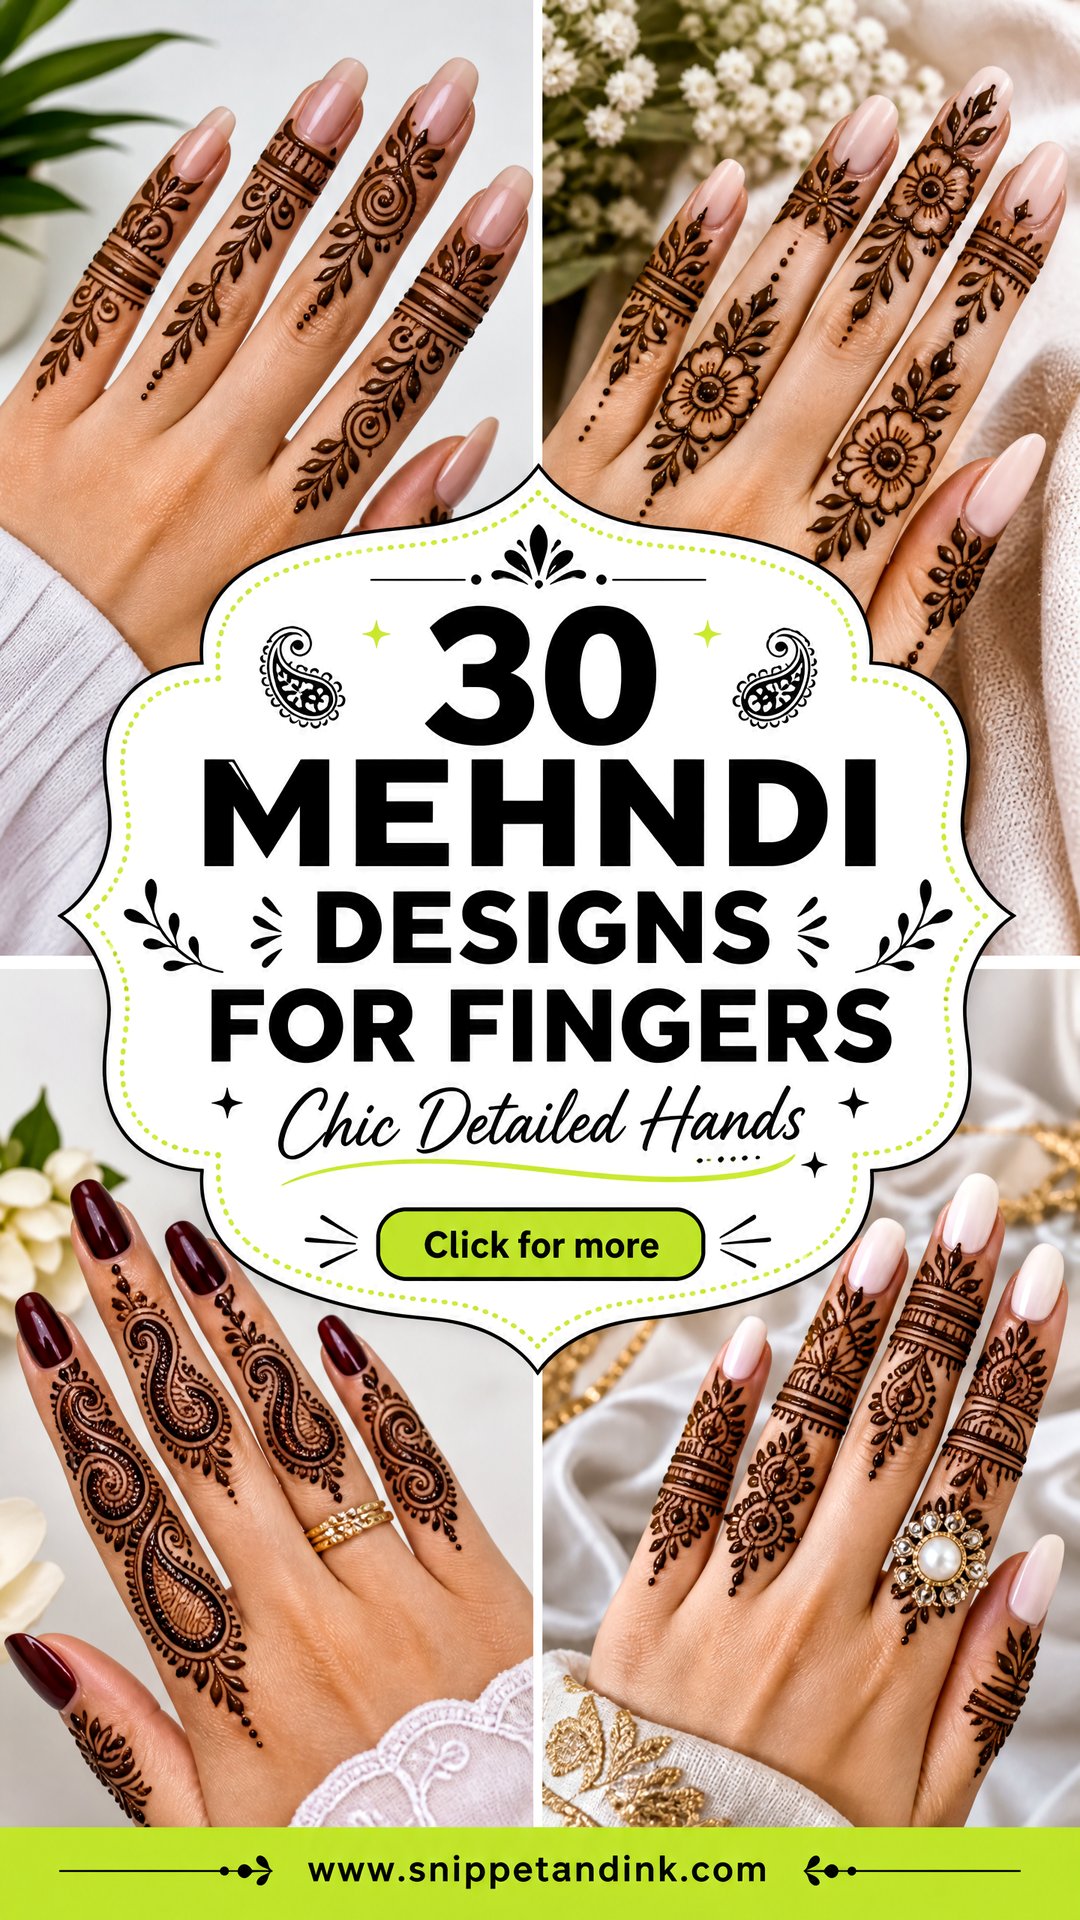
Fingers are the most forgiving place to start with henna and, oddly, the most demanding place to finish it. A few bands and dots can carry a whole look for Eid, a wedding, an engagement or an ordinary weekend, yet every wobble shows on such a narrow space. The designs below cover simple, bridal, Arabic, Indian, jewelry-style and geometric fingers, plus layouts for short fingers, long fingers, children and guests. I’ve noted where each one bends well, where it smudges, and which hand shapes it flatters.
Knuckles, Creases and Fingertips: Drawing on a Hand That Bends
Fingers move more than any other part of the body henna goes on, and that changes how I place every line. A design that looks perfect with the hand held flat can crack and blur the first time you curl your fingers while the paste is wet.
- Keep bands and heavy lines between the joint creases, not on them. Fine dots across a crease are fine; thick paste there splits.
- Fingertips stain darkest, often a deep reddish brown, so tip caps will always be the boldest part of the hand. Plan the rest of the design around that.
- The sides of the fingers rub against each other. Leave a slim gap of bare skin along the edges so wet paste doesn’t transfer to the next finger.
- Hold your fingers slightly apart while the paste dries, resting the hand palm down on a flat surface.
1. Simple Finger Mehndi Design
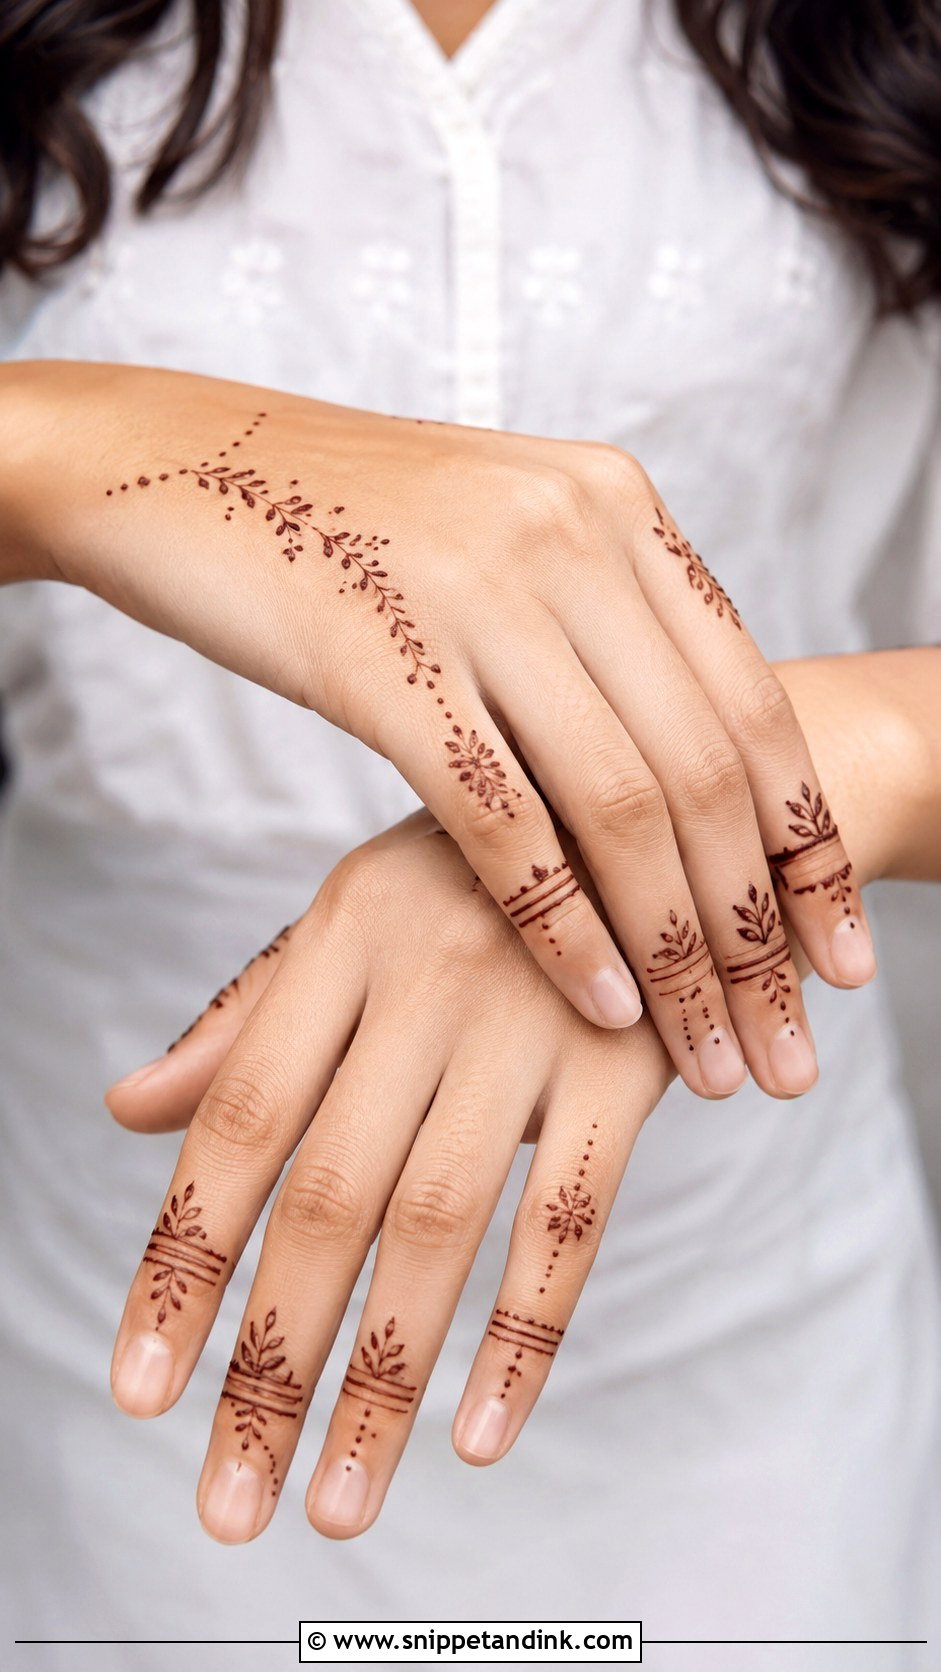
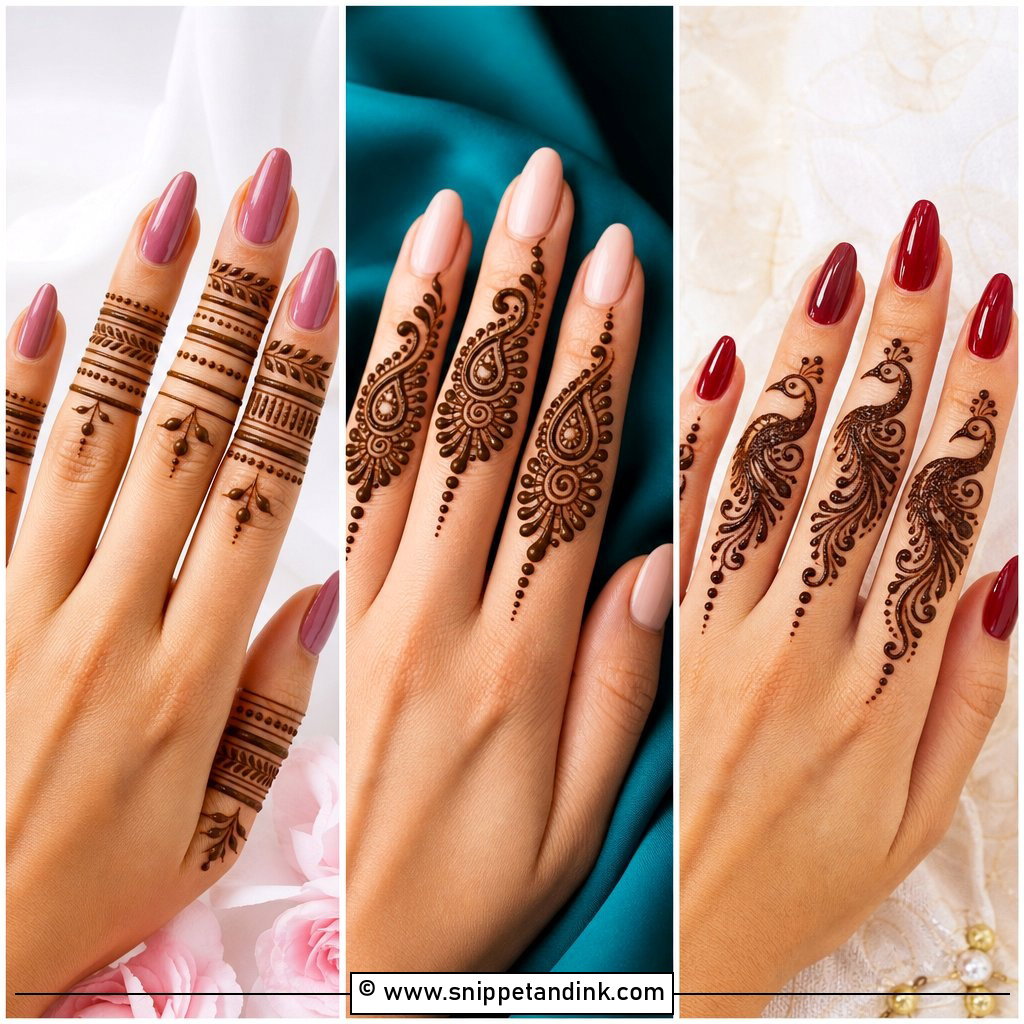
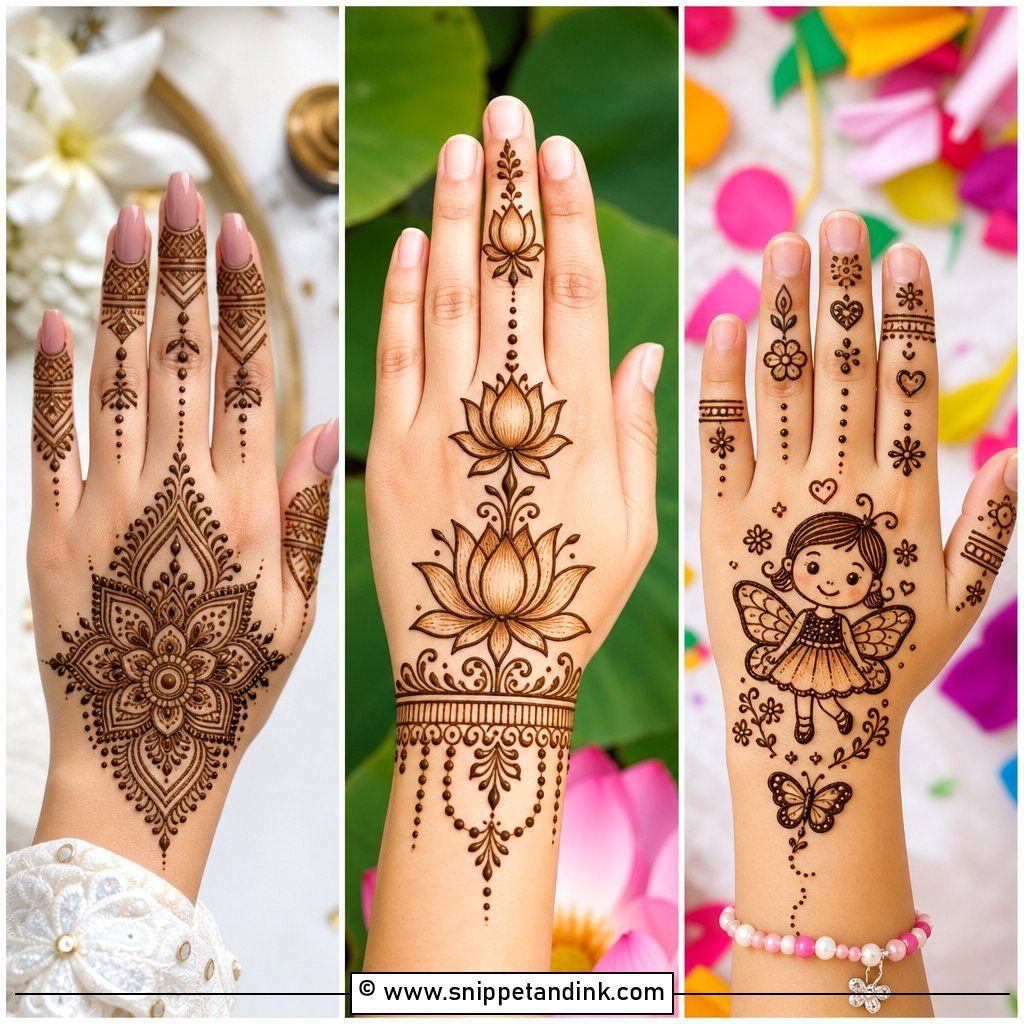
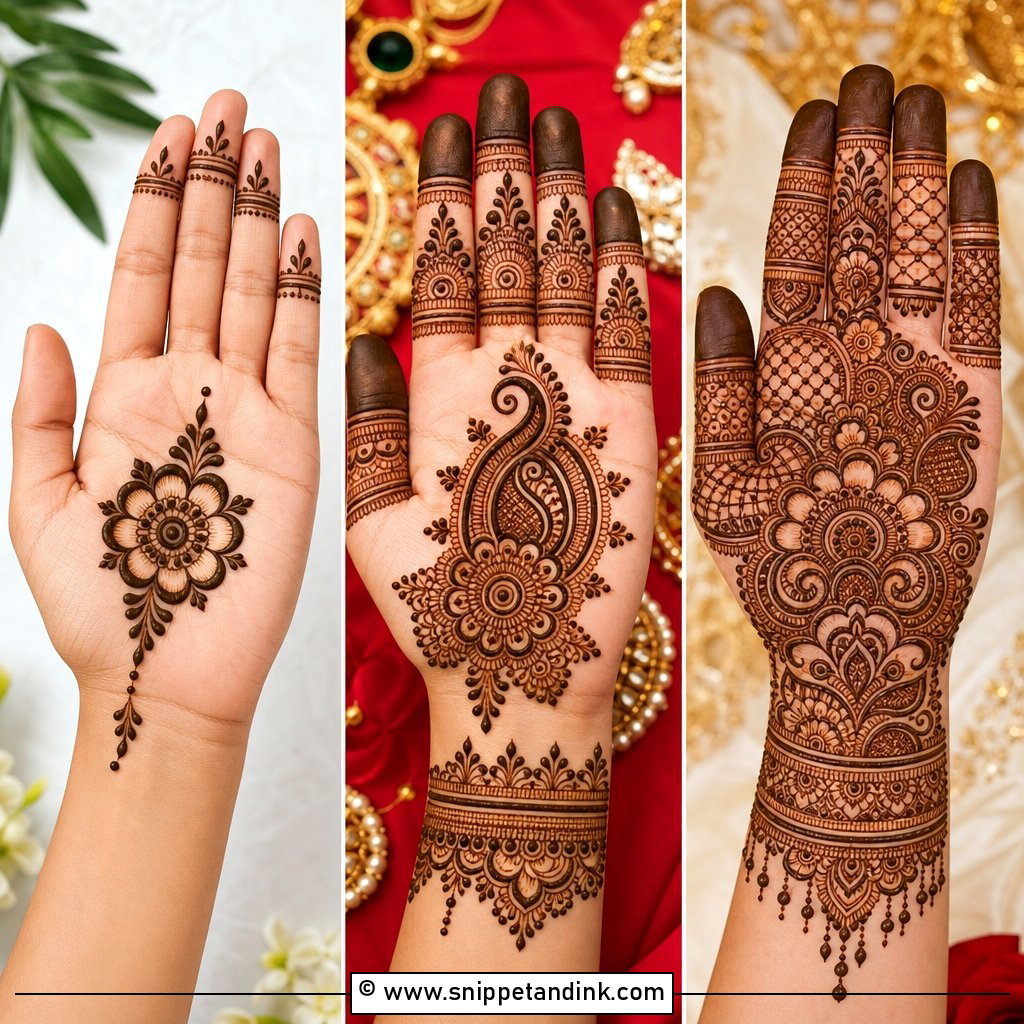
Thin lines, tiny dots, leaf sprigs and half flowers on each finger, with the palm or back of the hand left almost bare. It’s the design I’d hand a beginner first, because the spacing is loose enough to hide small mistakes. Match all five fingers for a tidy result, or give the index and ring fingers a little more weight to add rhythm. It’s light enough for school events and casual family gatherings and still looks finished.
2. Arabic Finger Mehndi Design
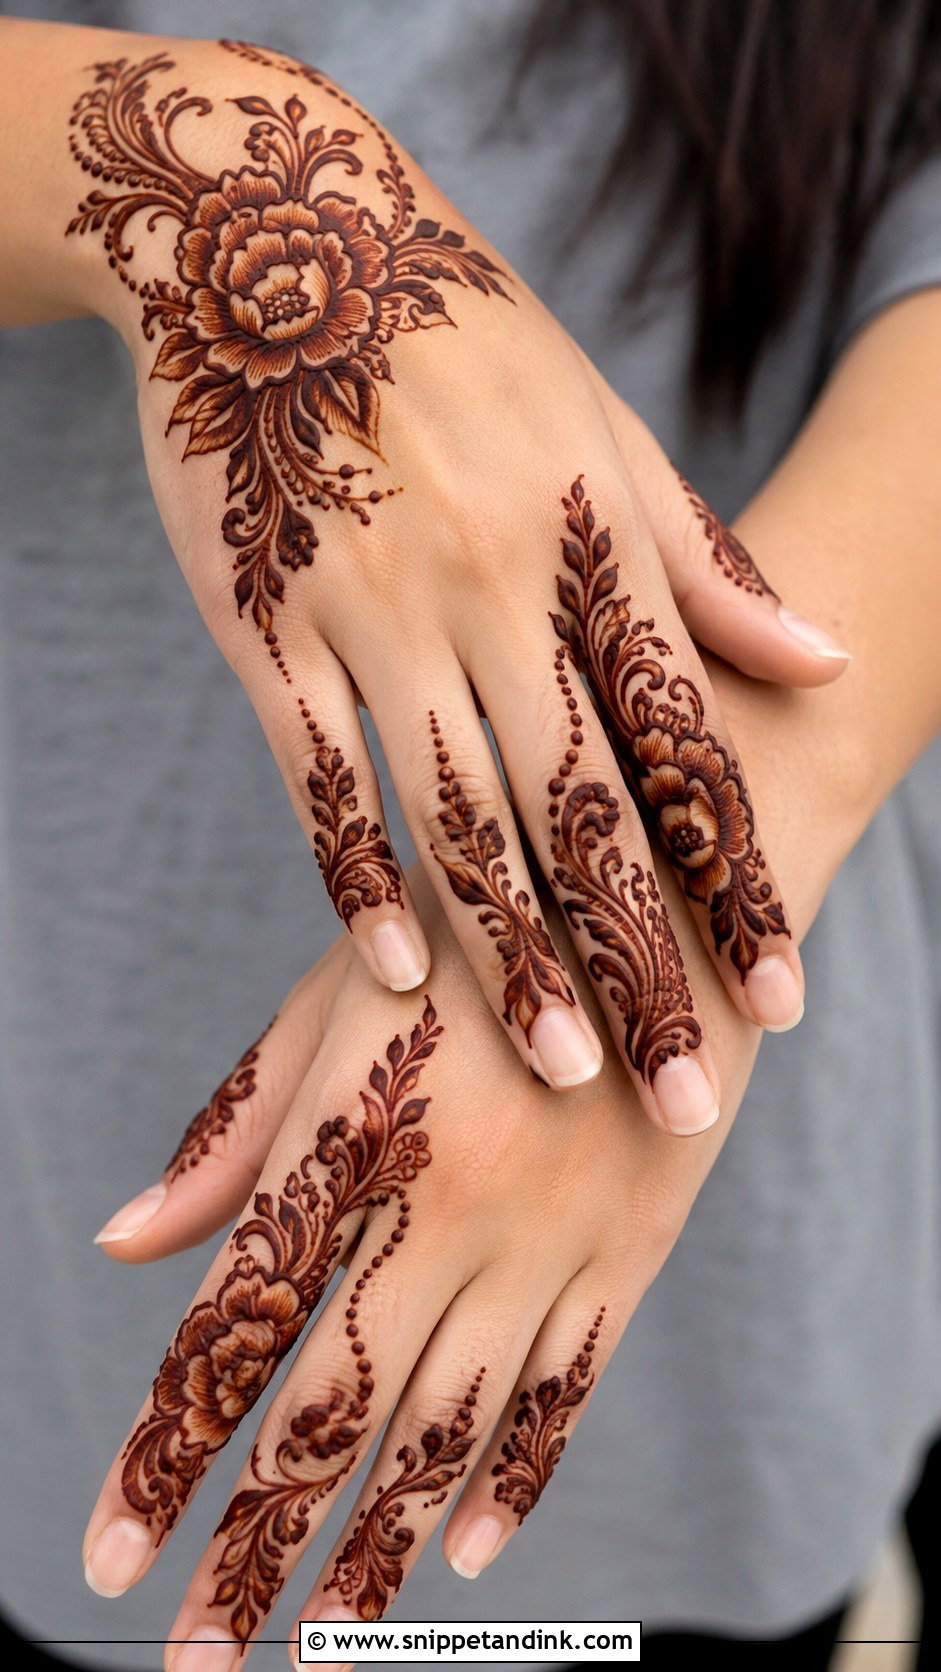
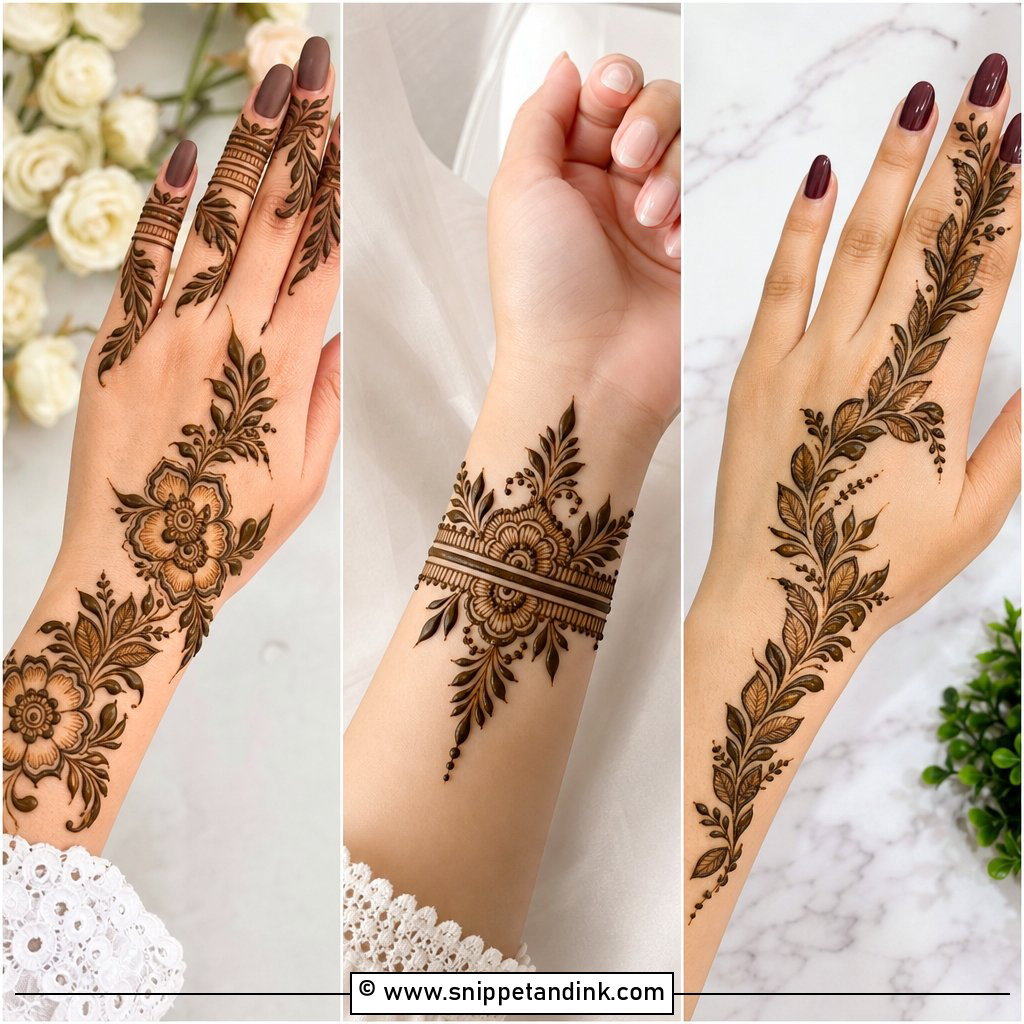
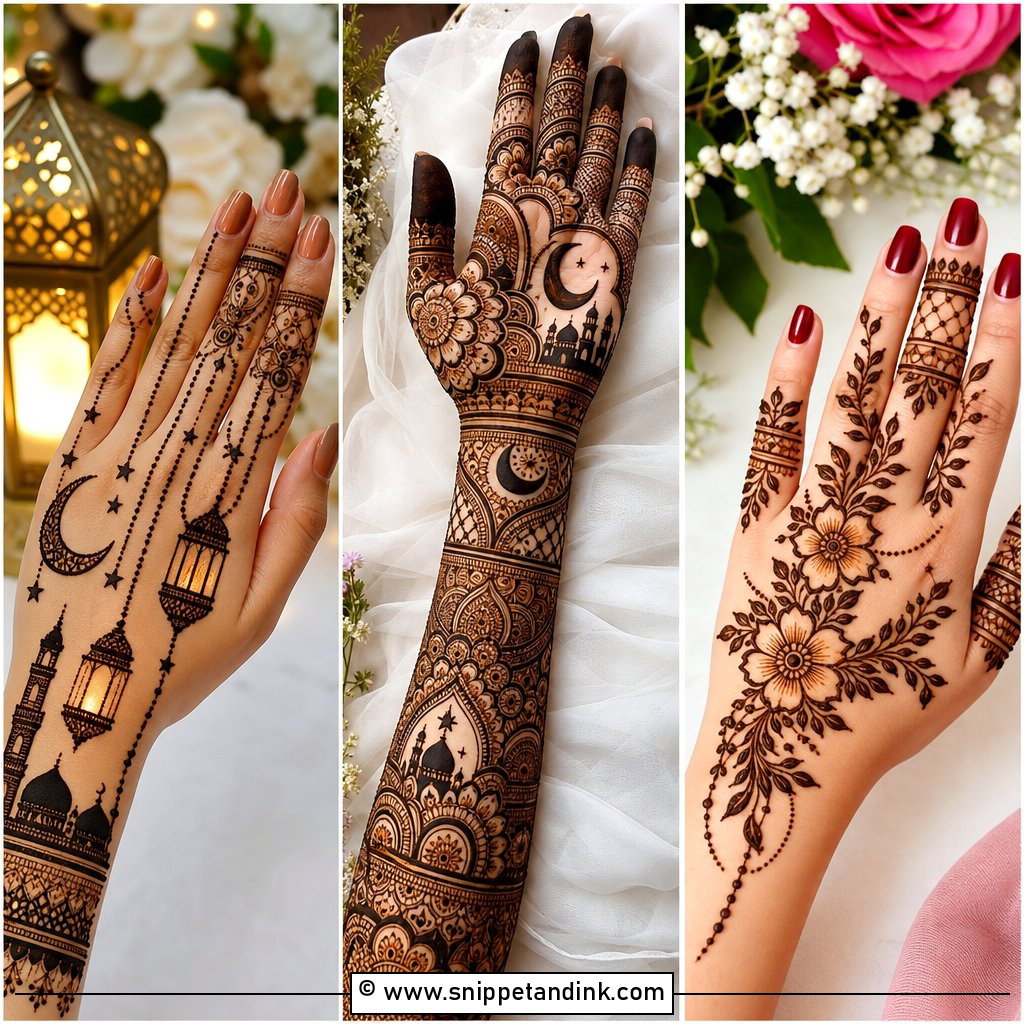
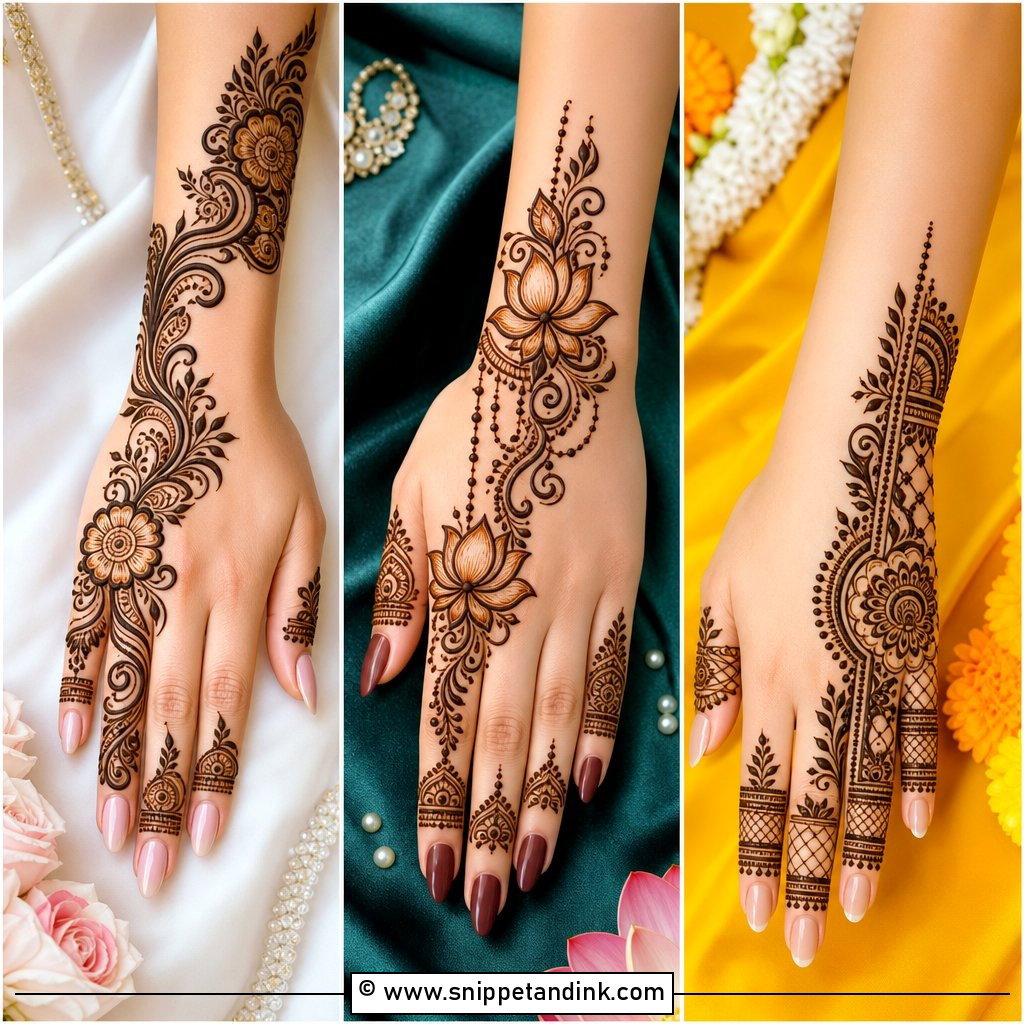
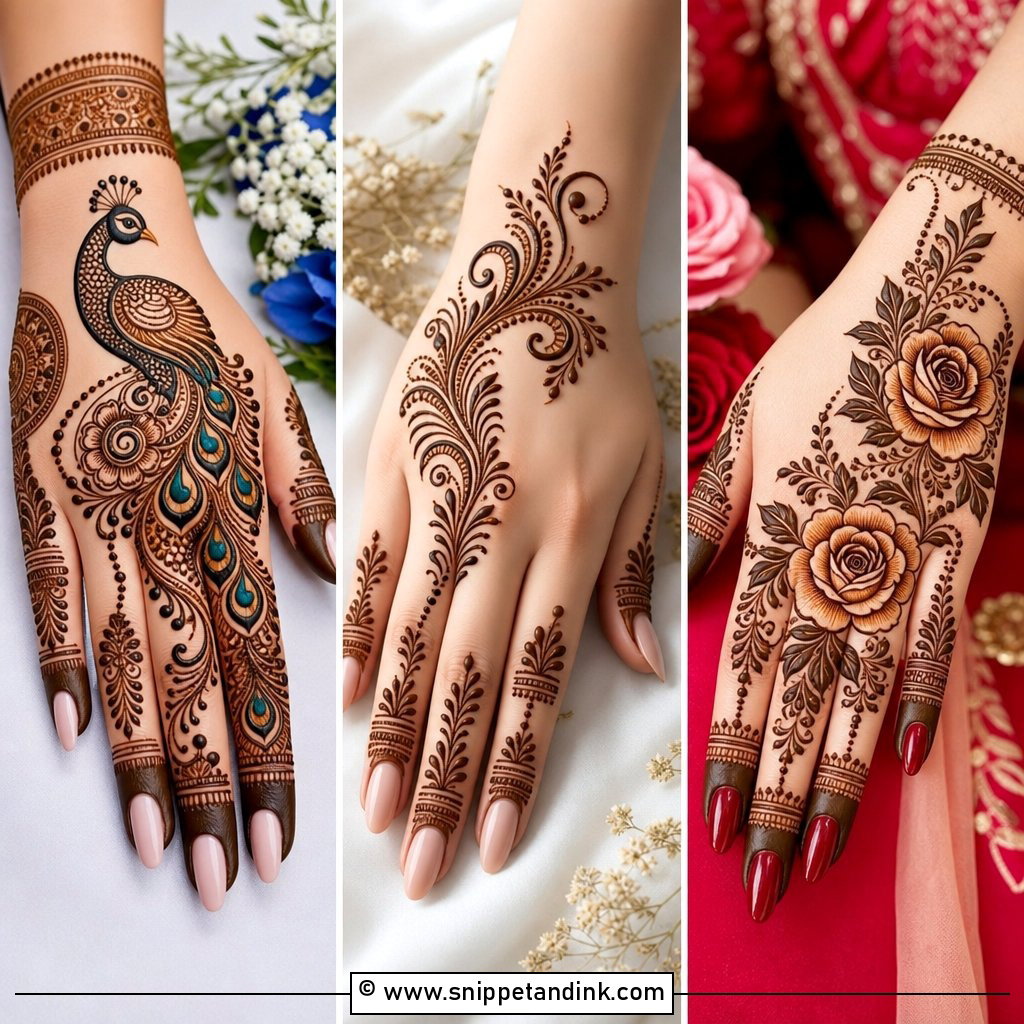
Arabic finger work usually starts at one side of the wrist or back of the hand and travels up through vines, flowers and curved leaves onto the fingers, where it picks up shaded petals, thick outlines and dotted lines with skin showing between them. It goes on faster than dense Indian fill. I keep the outlines on Arabic fingers deliberately heavier, since bold lines hold more paste and come up as the darkest part of the stain. Rings and bangles sit well beside it.
3. Back Hand Finger Mehndi Design
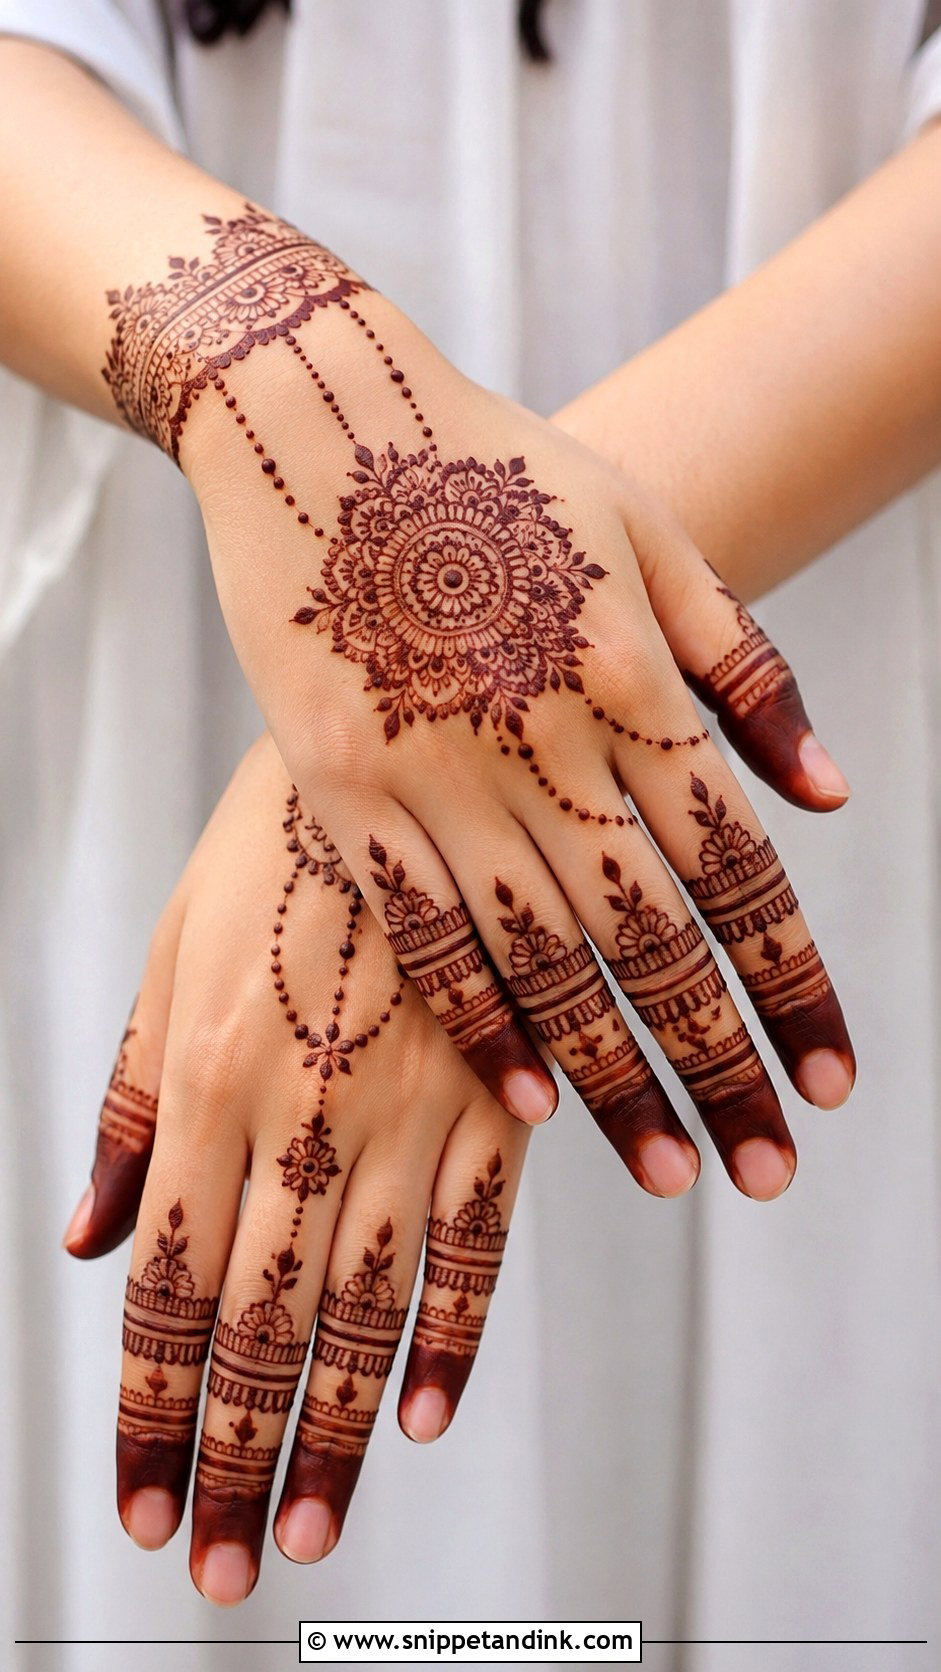
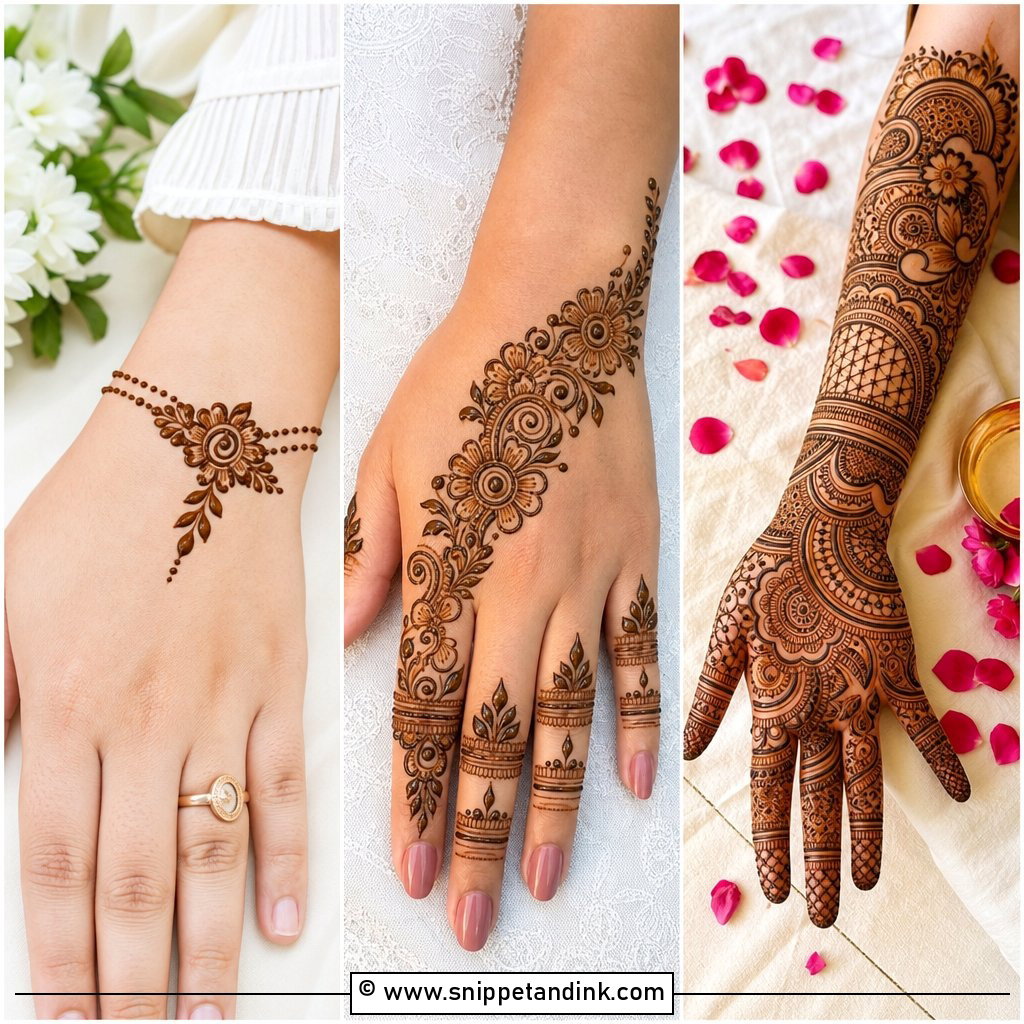
The back of the fingers is what people see when you talk, eat or hold a cup, so it gets photographed more than anything else on the hand. This layout decorates the fingers from tips to knuckles and adds a small centrepiece or bracelet detail near the wrist, with the back of the hand open or holding a mandala, trail or chain. The common failure is fingers that look busy beside an empty centre, so I balance the weight between the two. It’s a good choice for engagements, Eid and bridesmaids.
4. Front Hand Finger Mehndi Design
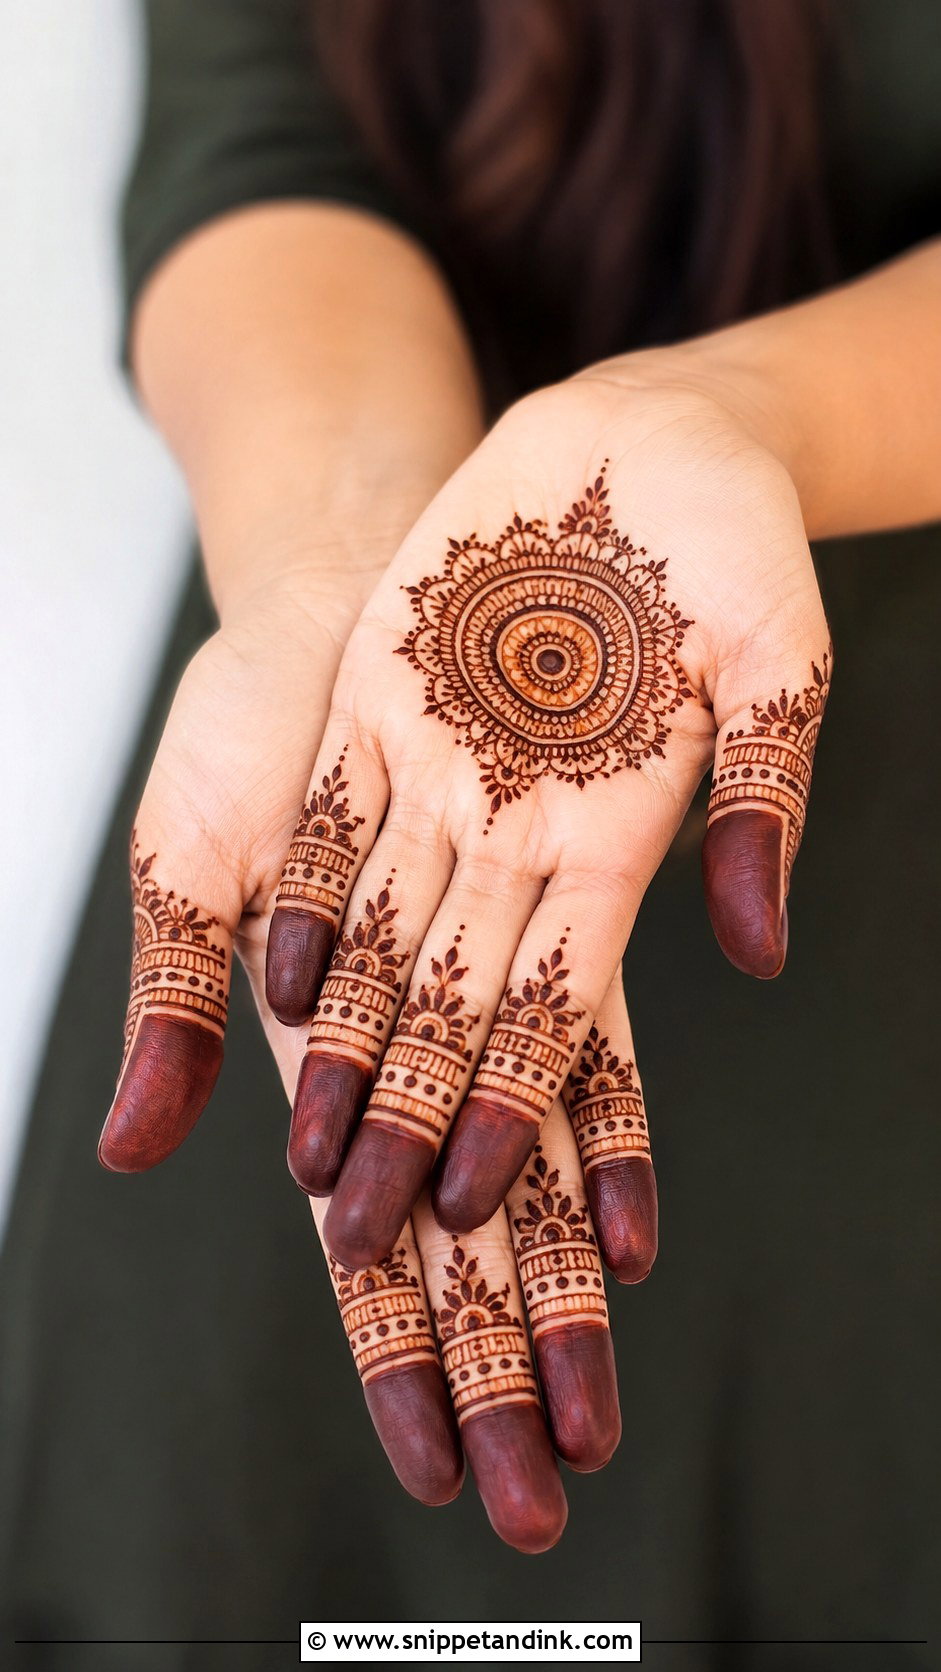
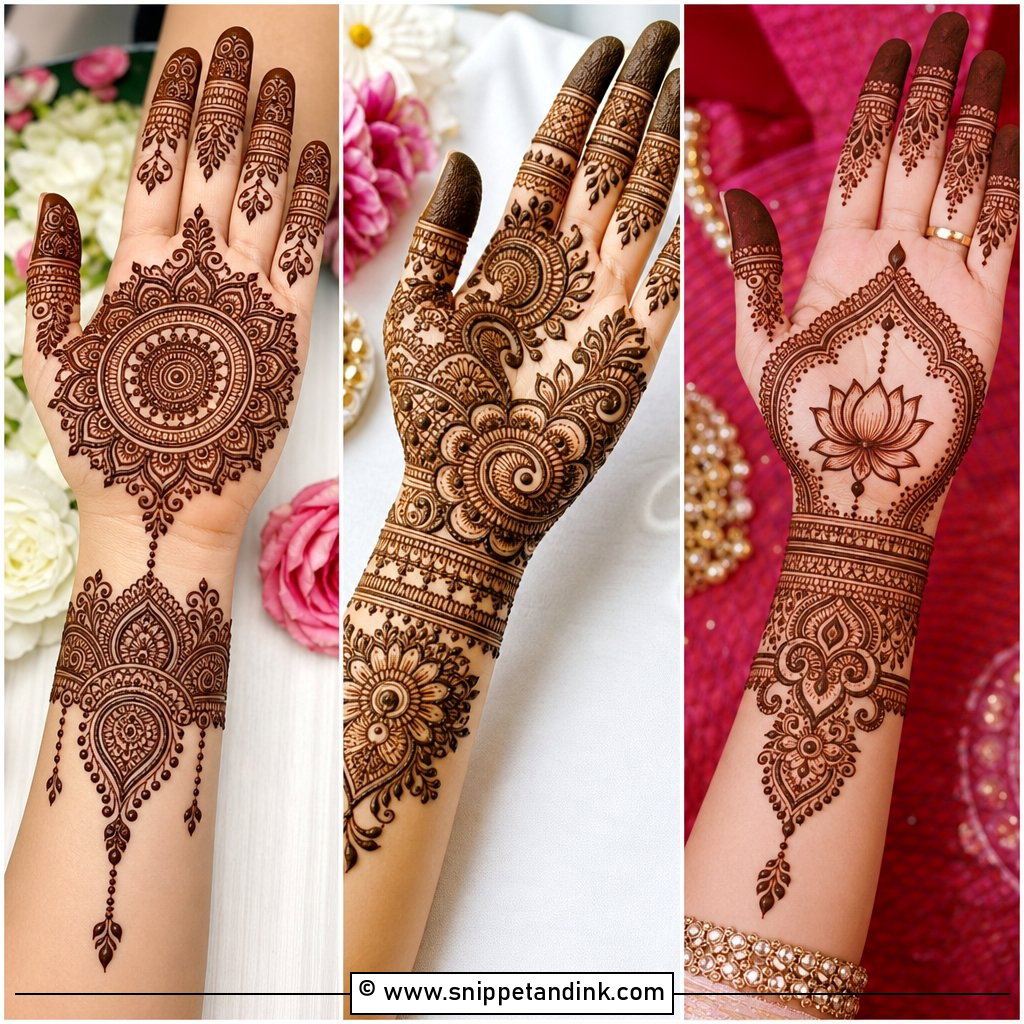
On the palm side, I start with detailed fingertips, run slim bands up each finger and connect them to a small palm mandala or floral circle. Palms and inner fingers take the stain deeply, so even simple patterns look rich once dry. The one rule I never break here is to keep heavy lines off the joint creases. Paste on a crease cracks as soon as you bend your finger, and the stain there comes out broken.
5. Full Finger Mehndi Design
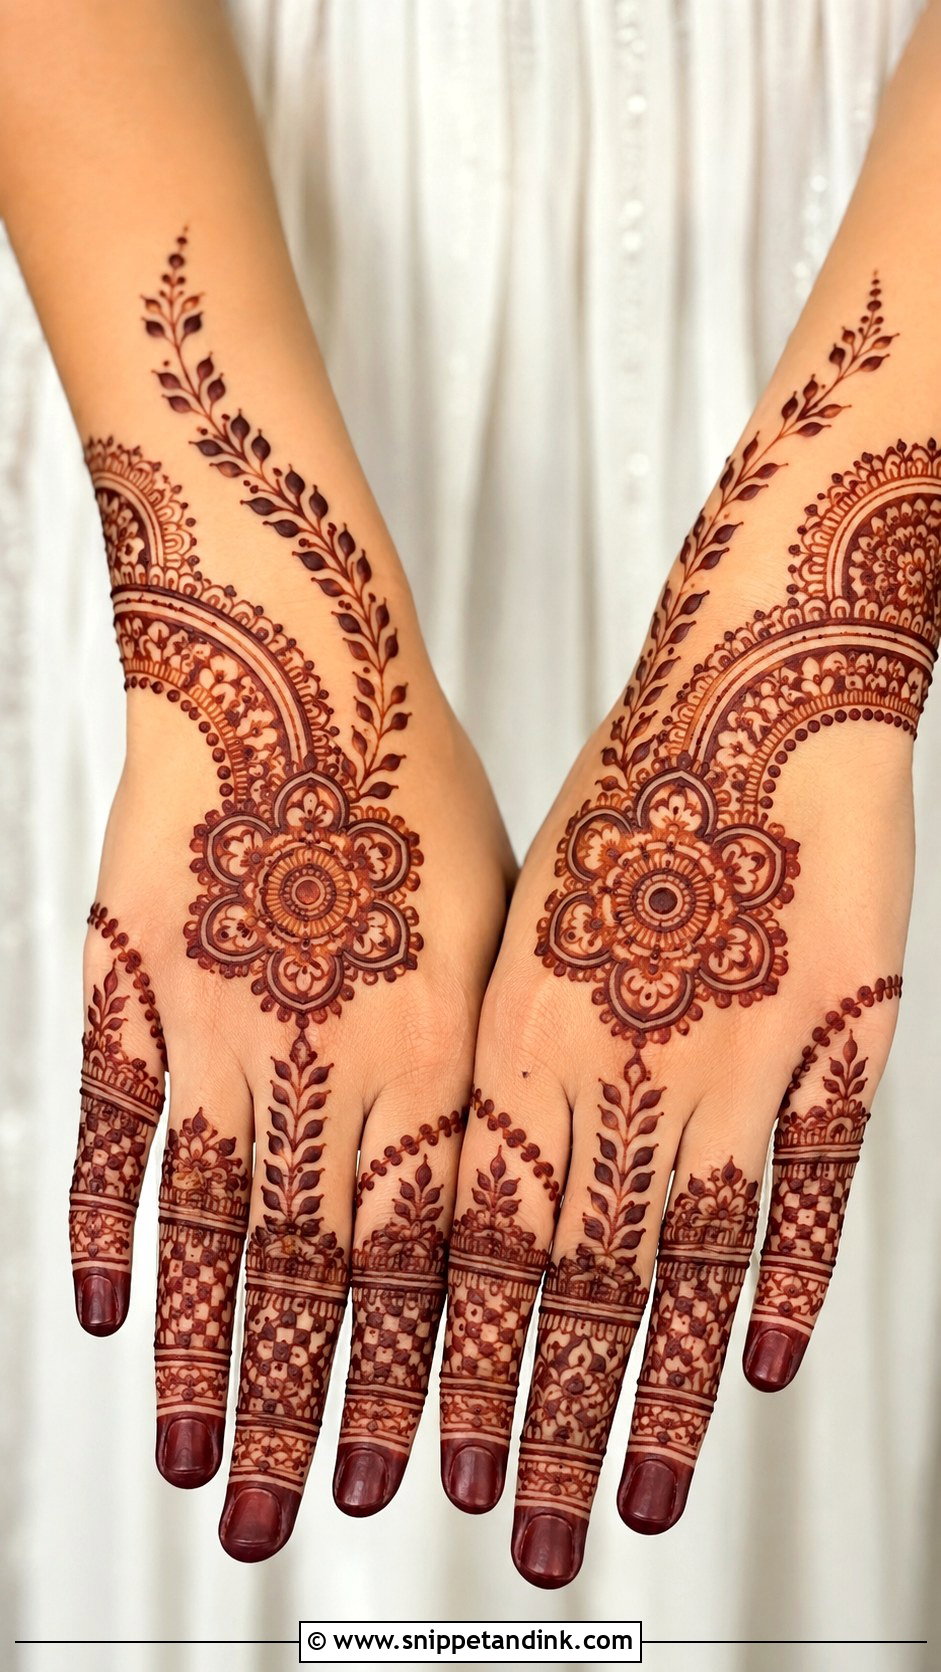
Every finger covered from tip to base, mixing checks, tiny petals, leaf chains, dots and curved bands. Variety is the appeal, and also where it goes wrong. I run one shared element through all five fingers, matching tip caps or the same dotted border, so the hand reads as one design instead of five samples. With fingers this full, the palm or back of the hand can stay simple and the whole thing still looks complete.
6. Minimal Finger Mehndi Design
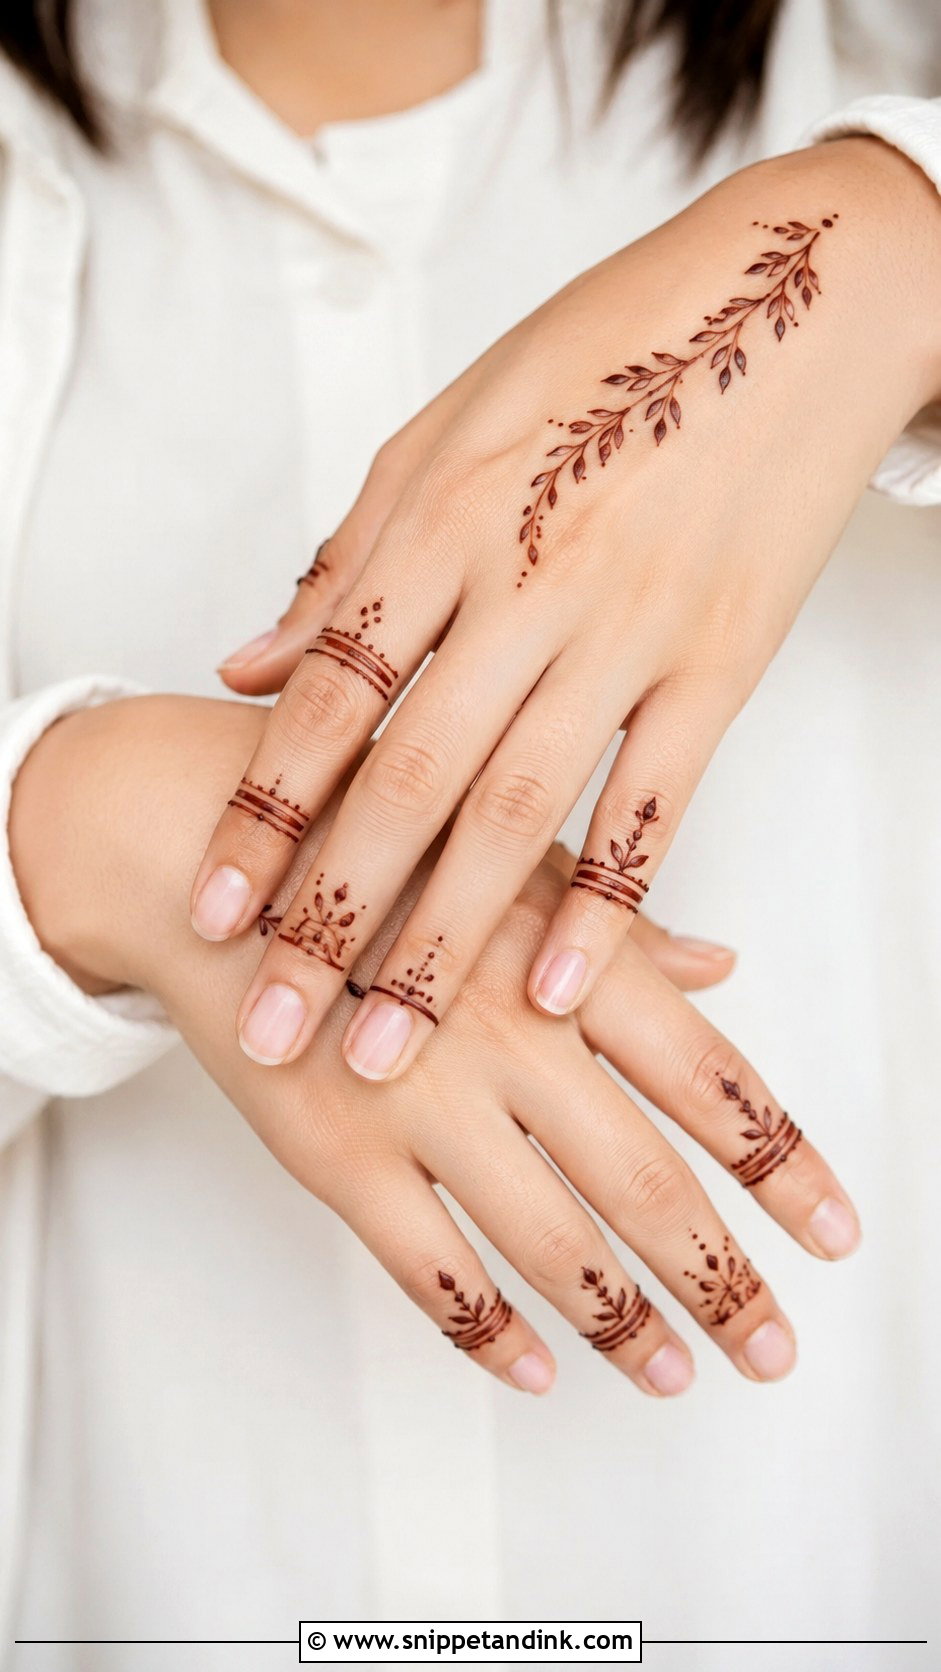
Two or three fingers decorated, the rest left bare: tiny rings, slim lines, small leaves and a few dots placed exactly. Minimal finger henna looks best on the back of the hand with natural nails or a plain polish. I use the finest cone tip I have for this and keep the spacing identical between elements, because in a design this sparse your eye measures every gap. Good for office celebrations, college events and anyone who wants henna that is barely there.
7. Bridal Finger Mehndi Design
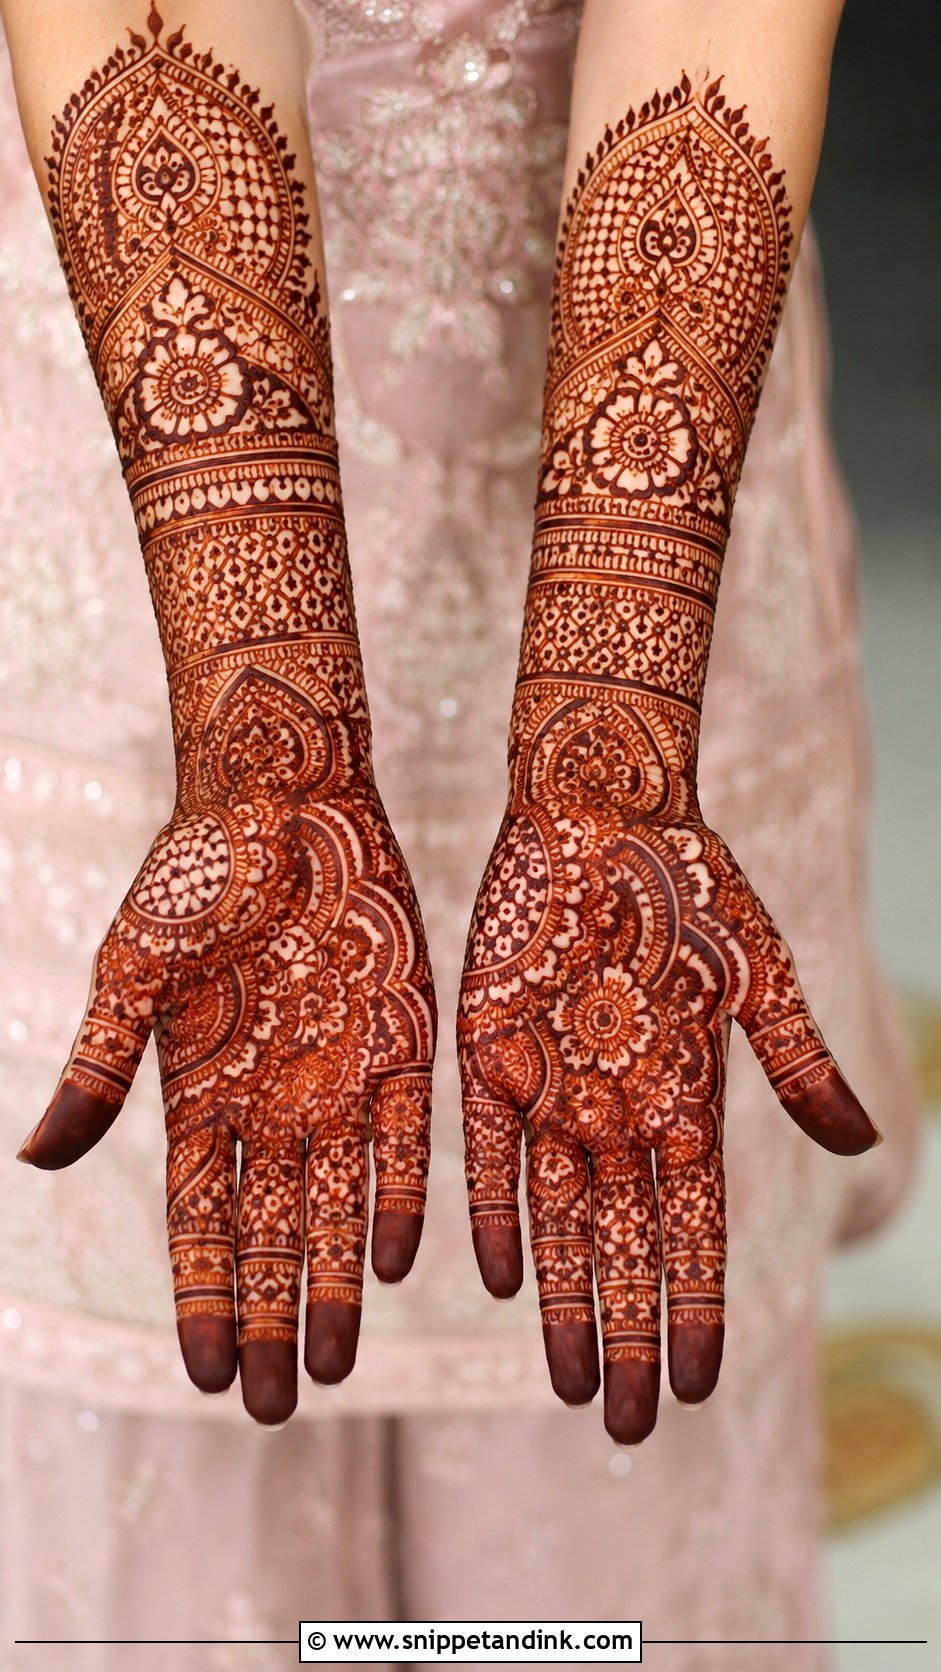
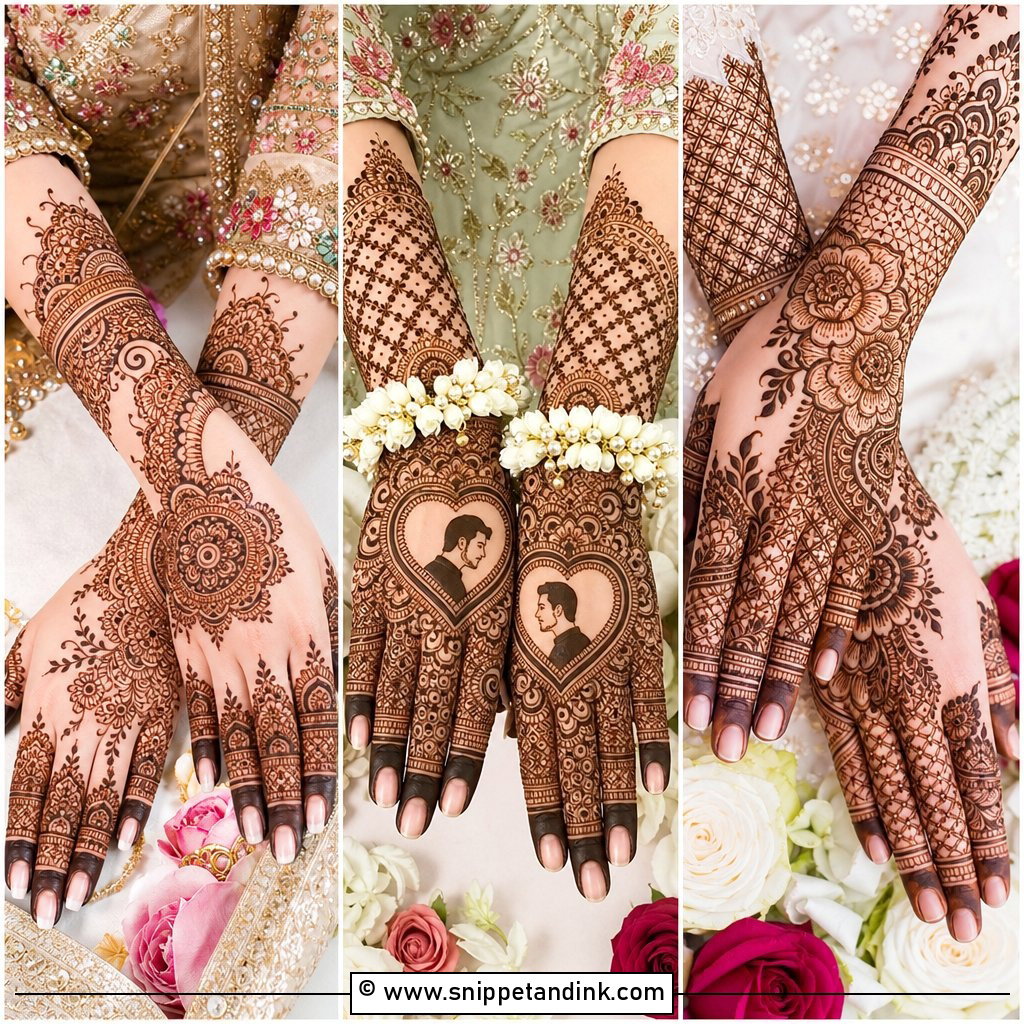
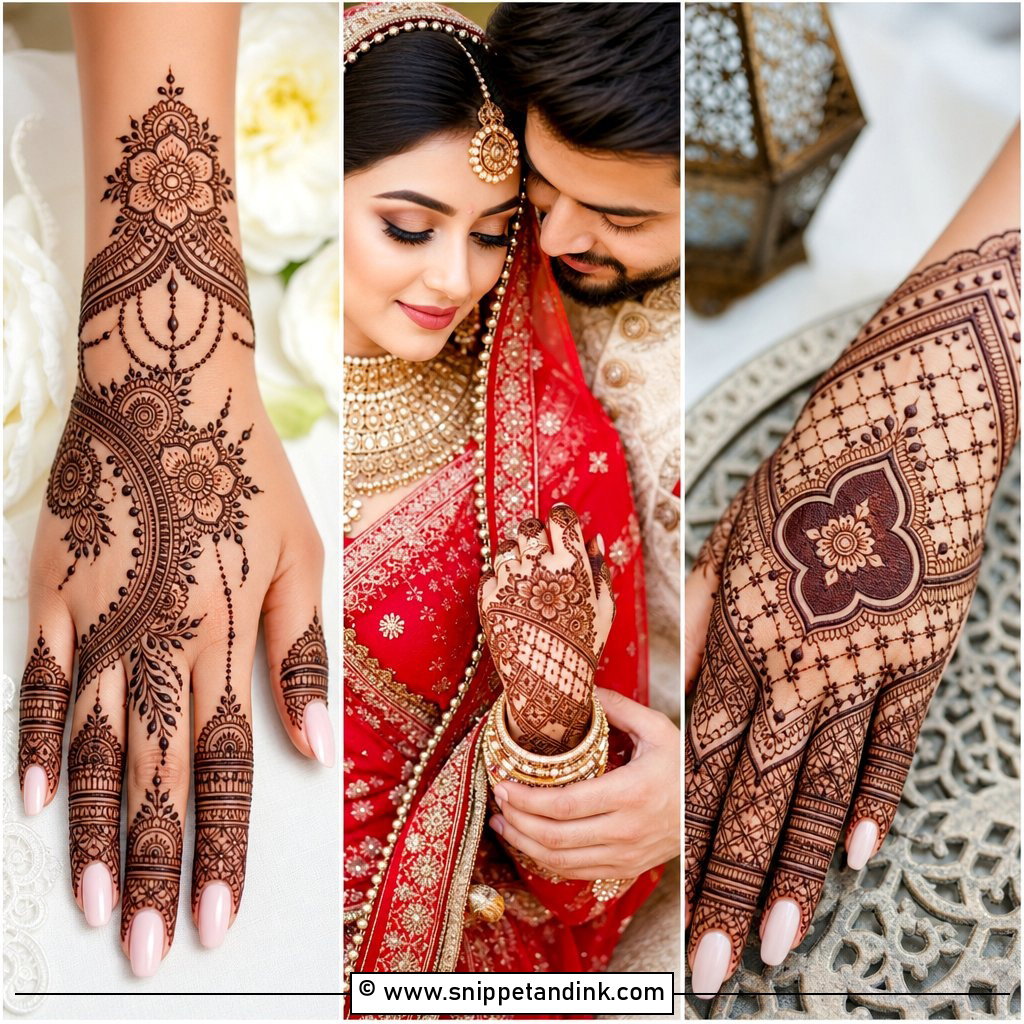
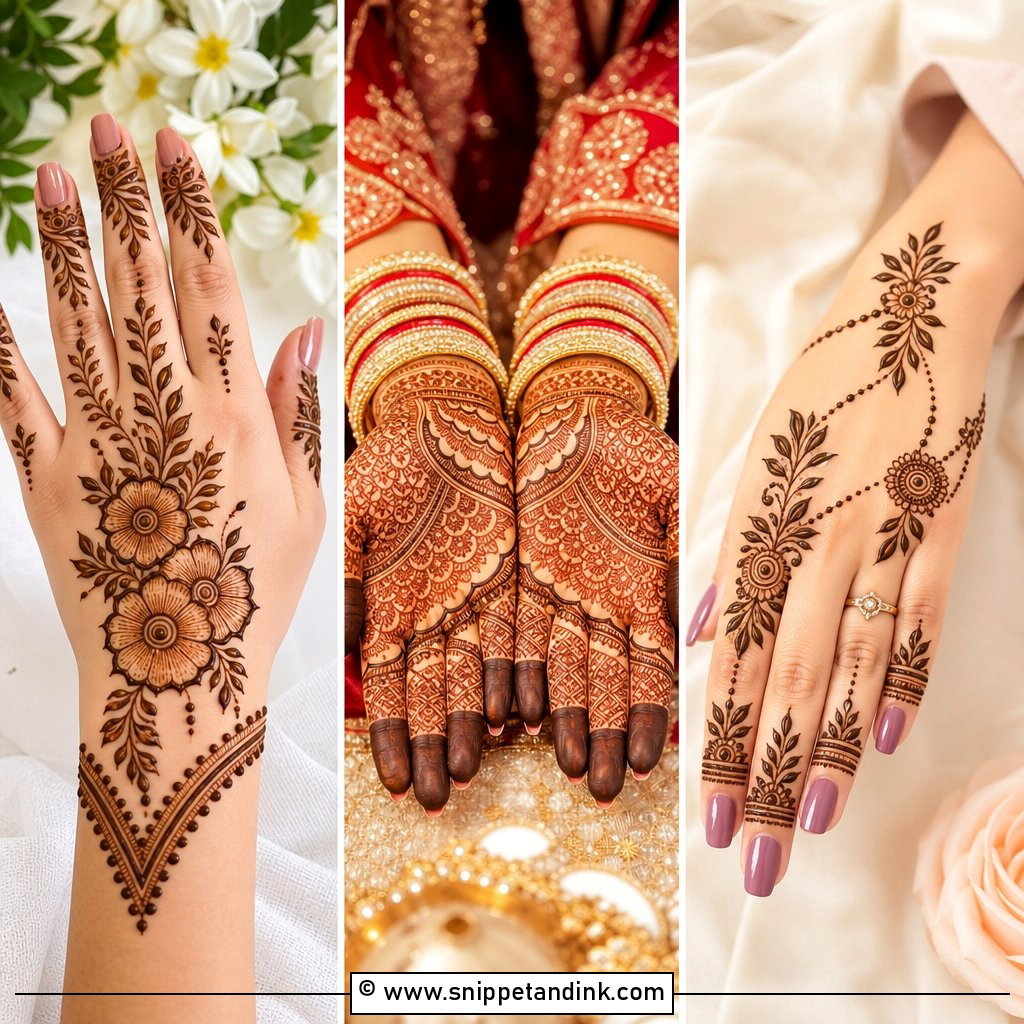
Bridal fingers need to match the density of the rest of the bridal hand: fine jaali, paisley tips, leafy borders, miniature flowers and filled bands, joining a full palm, a wrist cuff or a back-hand mandala. Ring shots and close-up portraits magnify fingers more than any other area. I vary the pattern slightly on each finger but keep the density equal, which keeps a bride’s hand from looking patchy in close-ups.
8. Ring Finger Mehndi Design
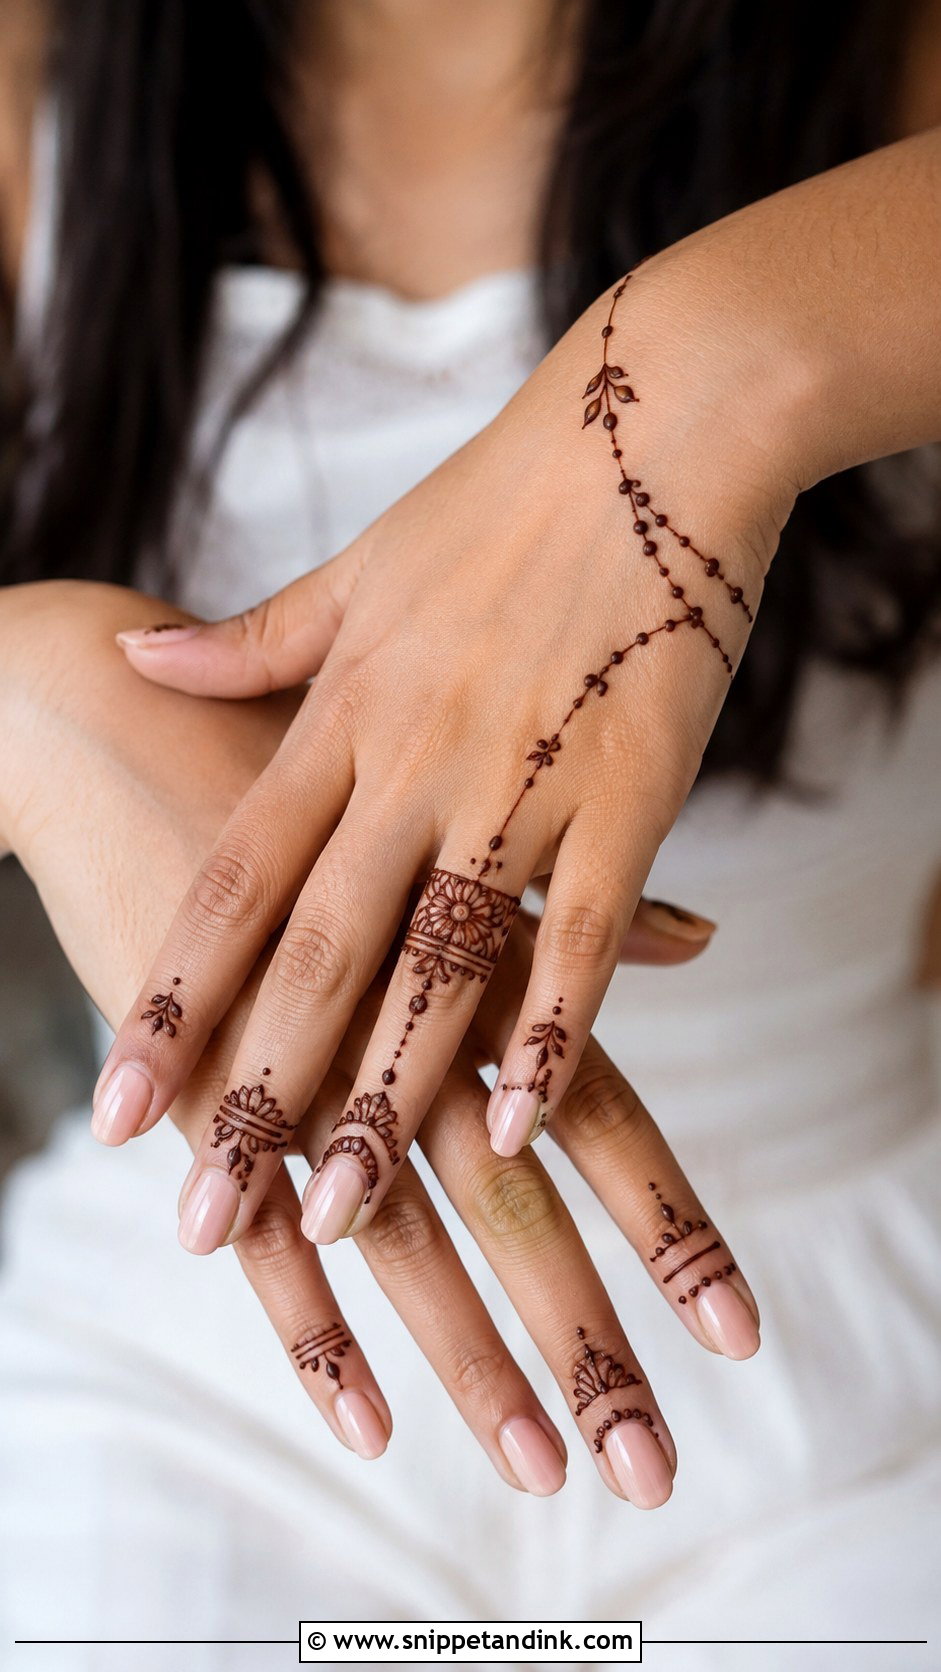
The ring finger gets the most detail while the others stay lighter: a floral band at the base, dotted chains along the finger and a small mandala or bracelet linking to the back of the hand. The henna should frame the ring rather than sit under it. I leave the band area and the knuckle clear so the ring slides on and off without rubbing the fresh stain. It suits brides, bridesmaids and engagement guests alike.
9. Finger Mehndi Design With Mandala
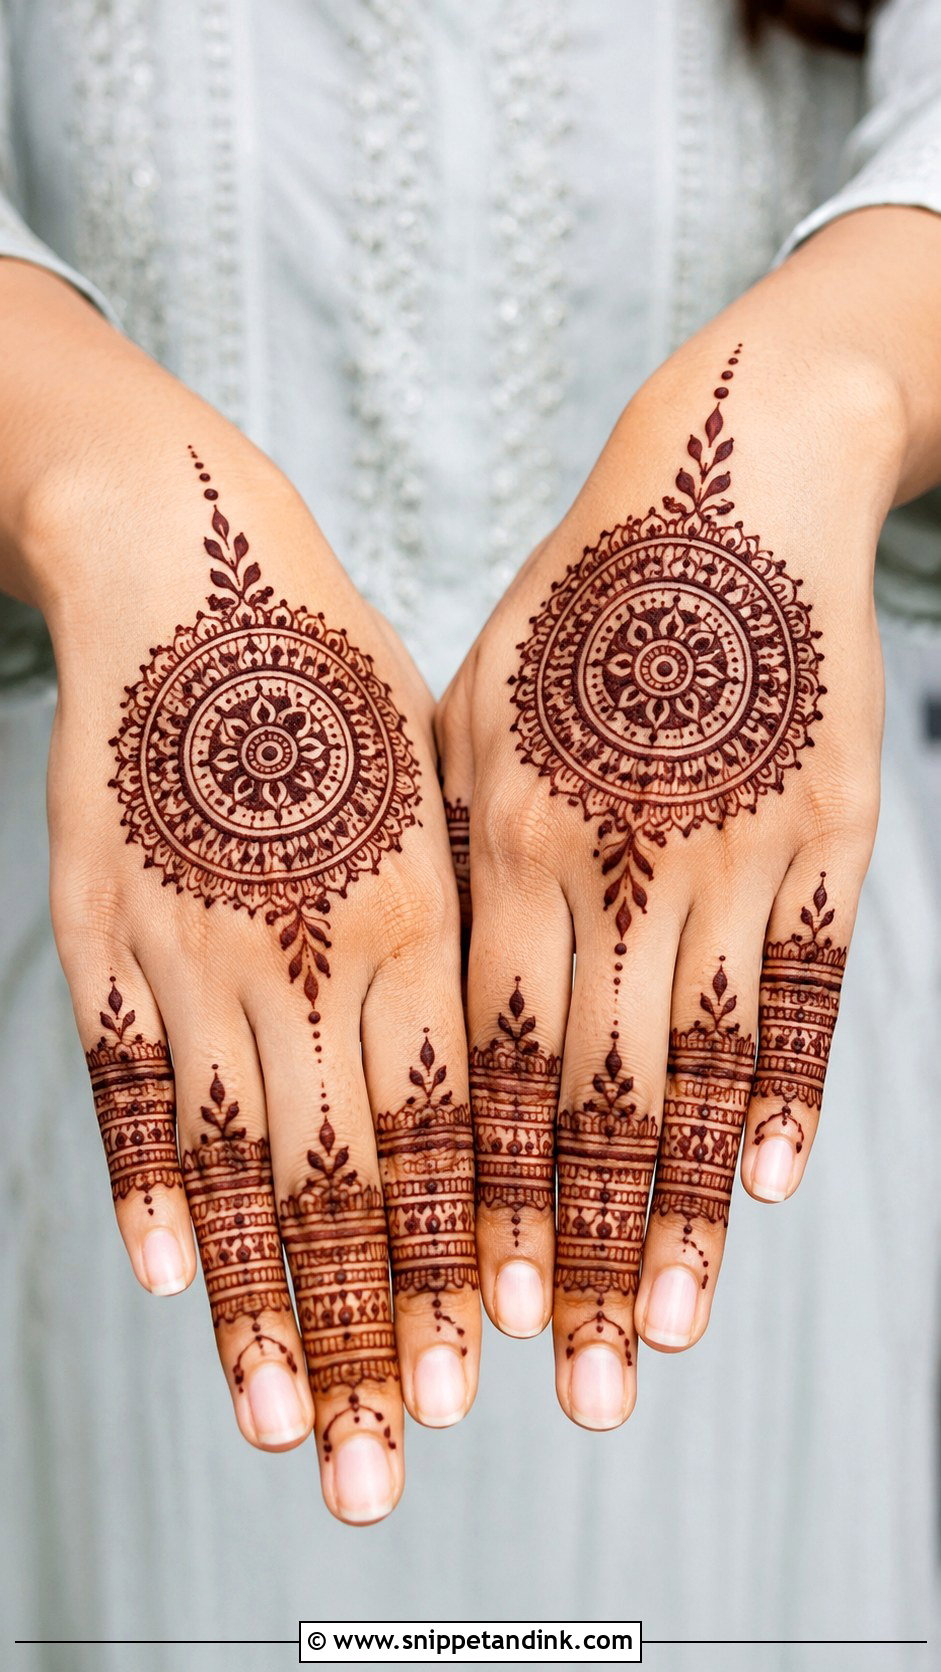
A mandala on the back of the hand or the palm, with fingers carrying matching bands, dots and leaf lines. The centred circle makes the whole hand easy to photograph. On slim fingers a round mandala adds softness; with long detailed finger work, I keep the mandala smaller so the two don’t fight for attention. Festivals, family weddings and haldi functions all suit this structure.
10. Finger Mehndi Design With Jaali
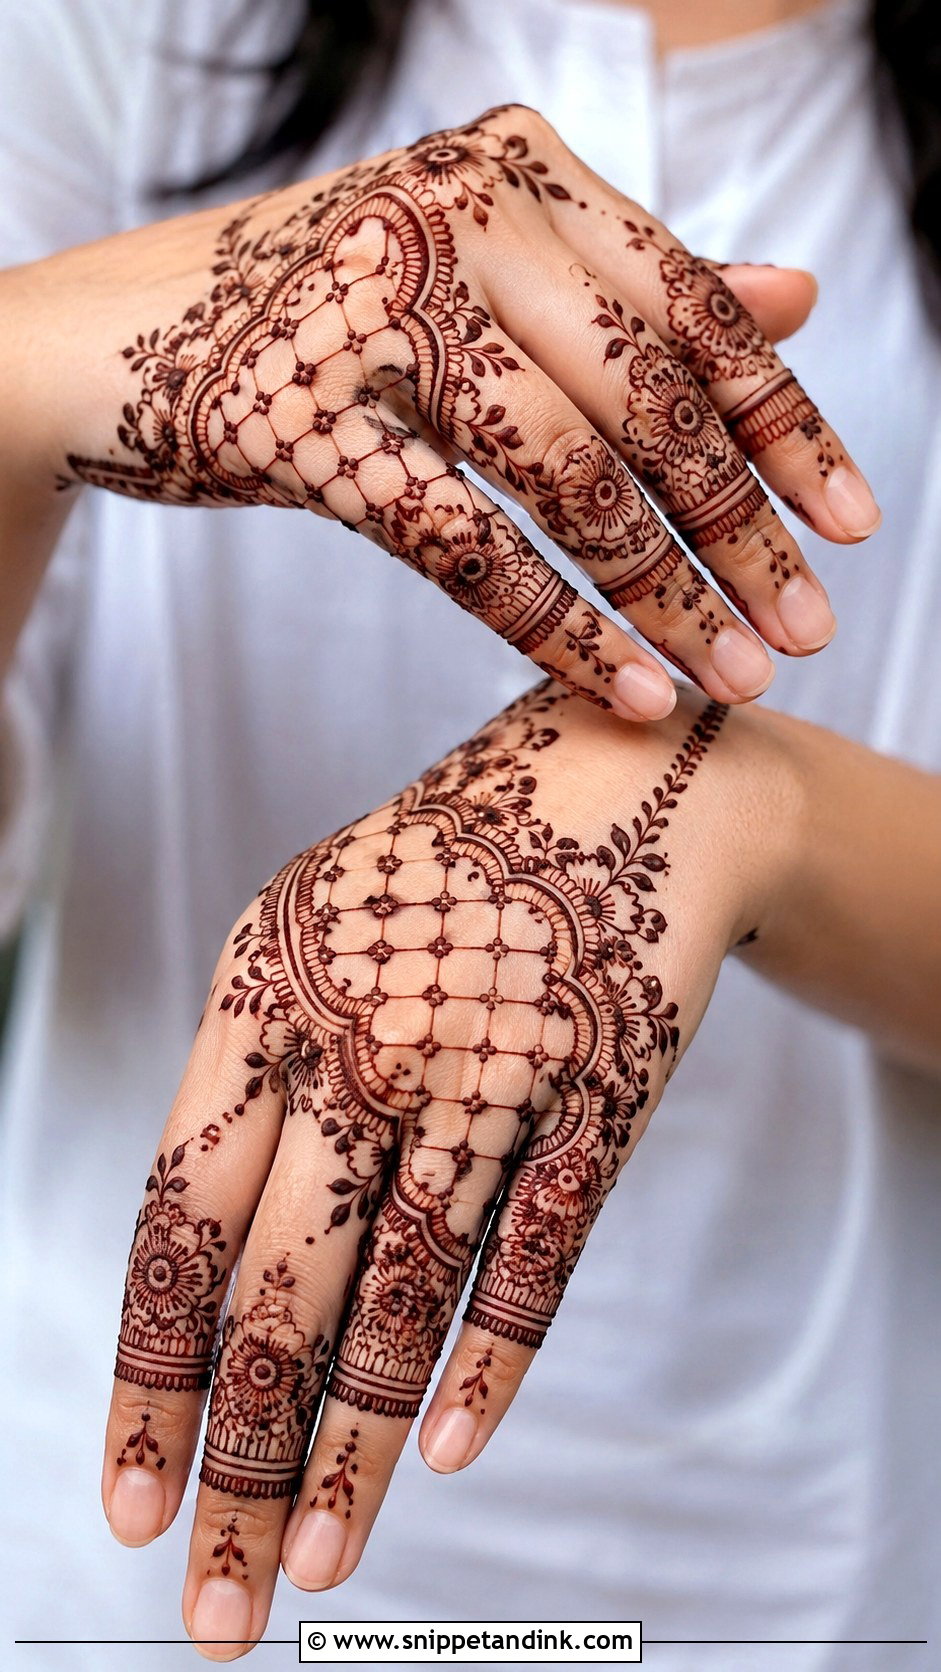
Net-like jaali can run along one or two fingers, across all the tips or as a back-hand panel joined to the fingers. The lines must be evenly spaced; I finish each intersection with a tiny dot, which hides slight unevenness and makes the mesh look deliberate. Soft floral borders balance the geometry of the grid. It reads well in close-up hand poses and suits brides, sisters of the bride and festive looks.
11. Finger Mehndi Design With Flowers
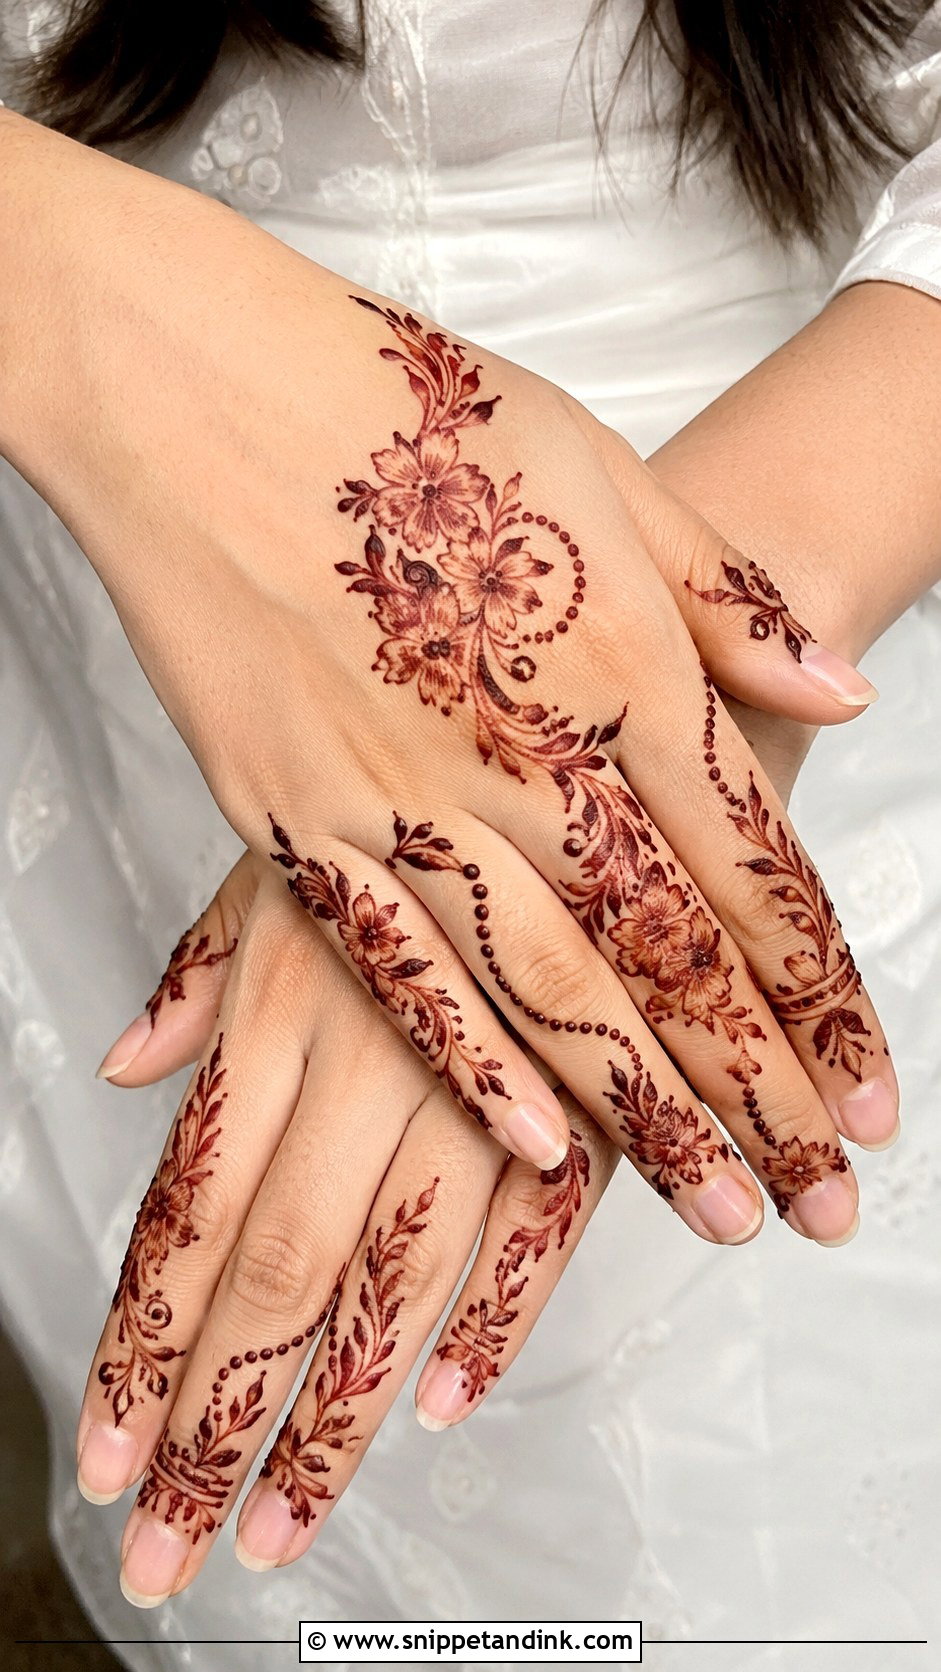
Small blossoms near the fingertips and leafy vines running down toward the hand: floral fingers suit nearly every hand shape and occasion. Bold outlines and shaded petals give a fuller look; open petals ringed with dots give a softer one. Depending on density, it can be Arabic, Indian or Indo-Arabic. On the back of the hand, the floral trail joins a wrist cuff or small centrepiece very naturally.
12. Finger Mehndi Design With Leaves
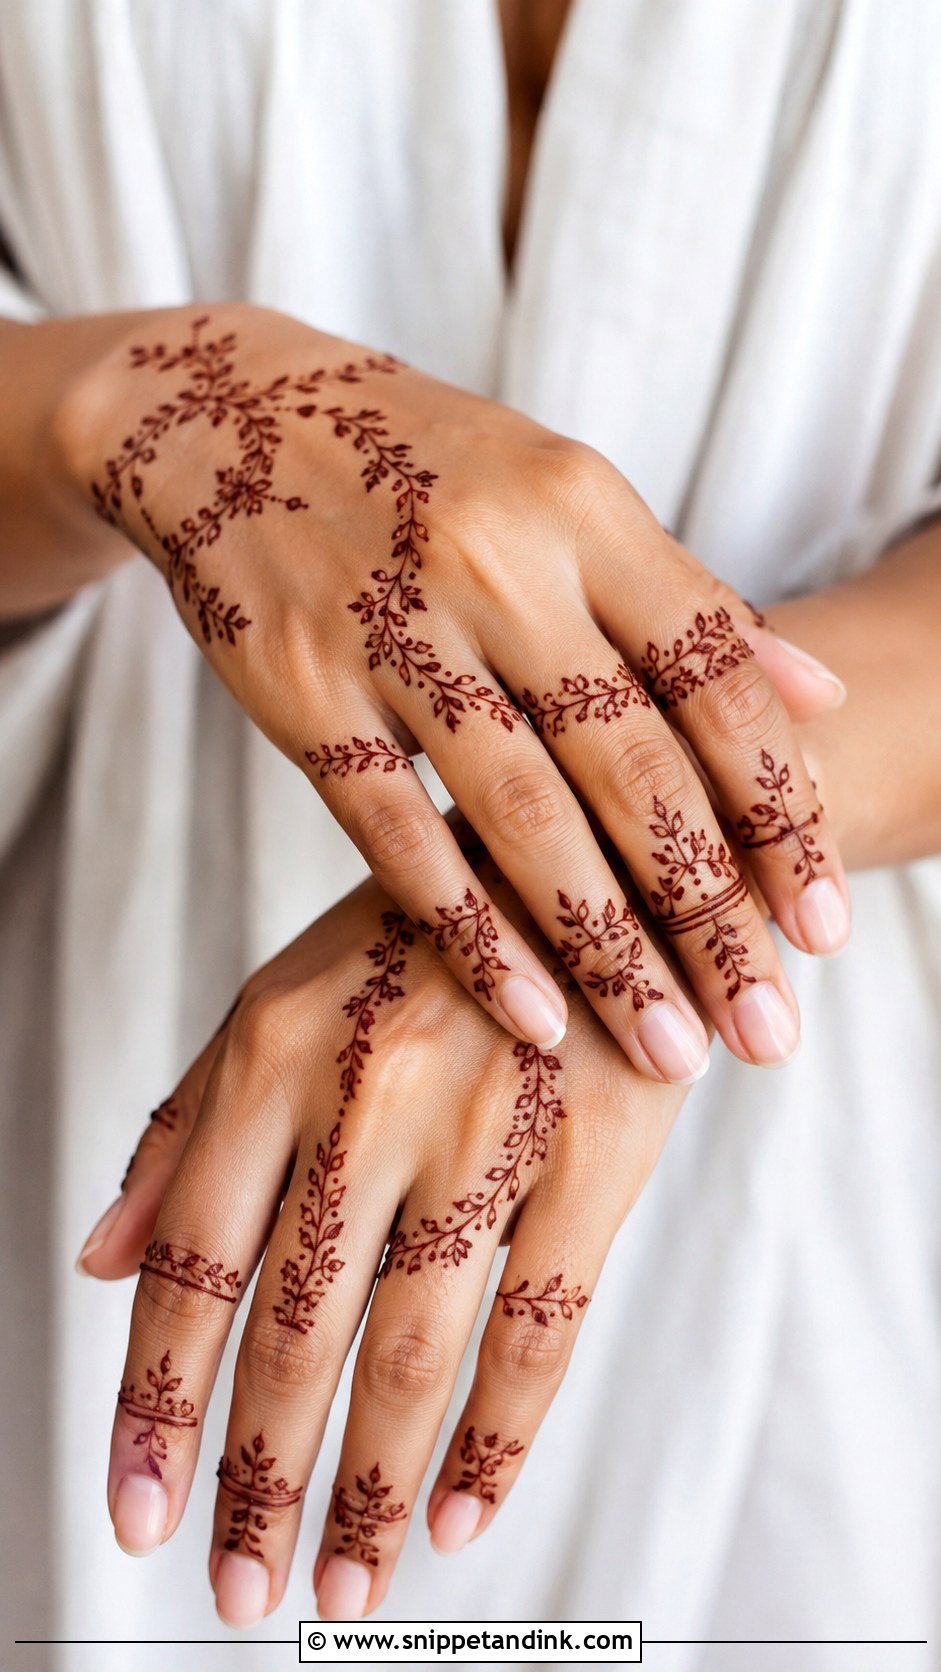
Use tiny leaf chains, curved vines or alternating leaf bands, set along the length of each finger so the finger looks slimmer. Leave the fingertips empty for a modern feel or fill them for a traditional one. Leaves are the shape I teach first, since a leaf is just two curves meeting at a point, and they still look good drawn imperfectly. They mix easily with Arabic trails, minimal designs and bracelet patterns.
13. Finger Mehndi Design With Dots
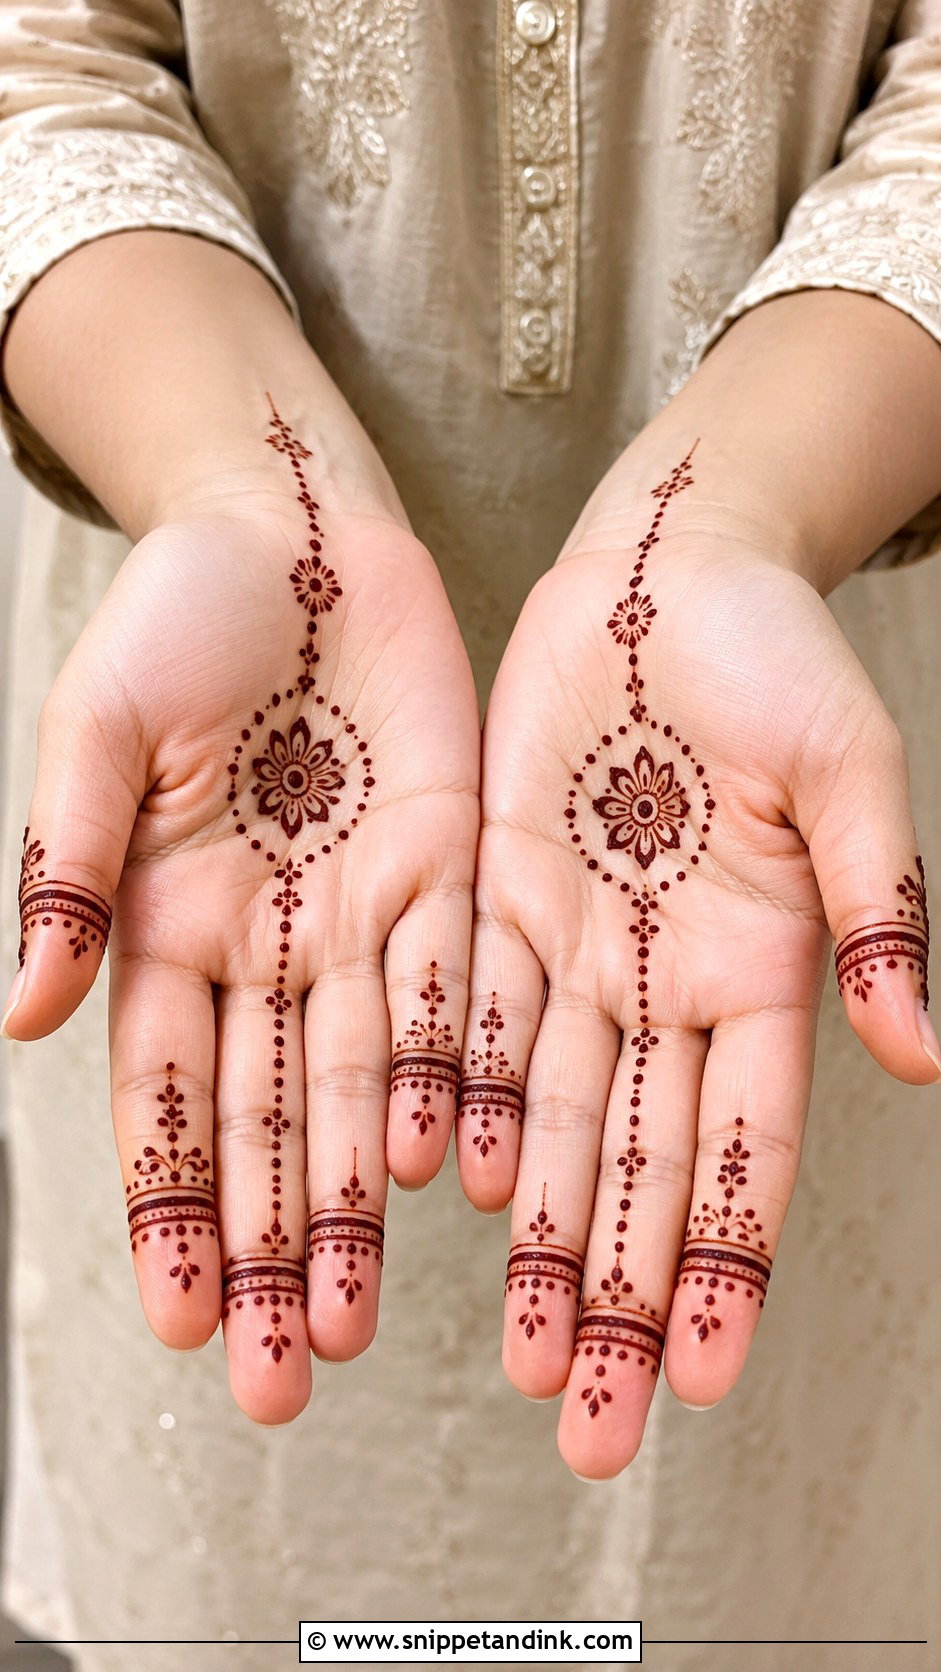
Dots outline bands, fill gaps between lines, frame flowers or form chains along the fingers. They look effortless but take control: every dot should be the same size, which means the same squeeze and the same quick lift each time. Pair dotted fingers with a small mandala, a wrist cuff or bare skin. It’s fast, suits children’s henna, and is the most forgiving design for a first attempt at home.
14. Finger Mehndi Design With Lines
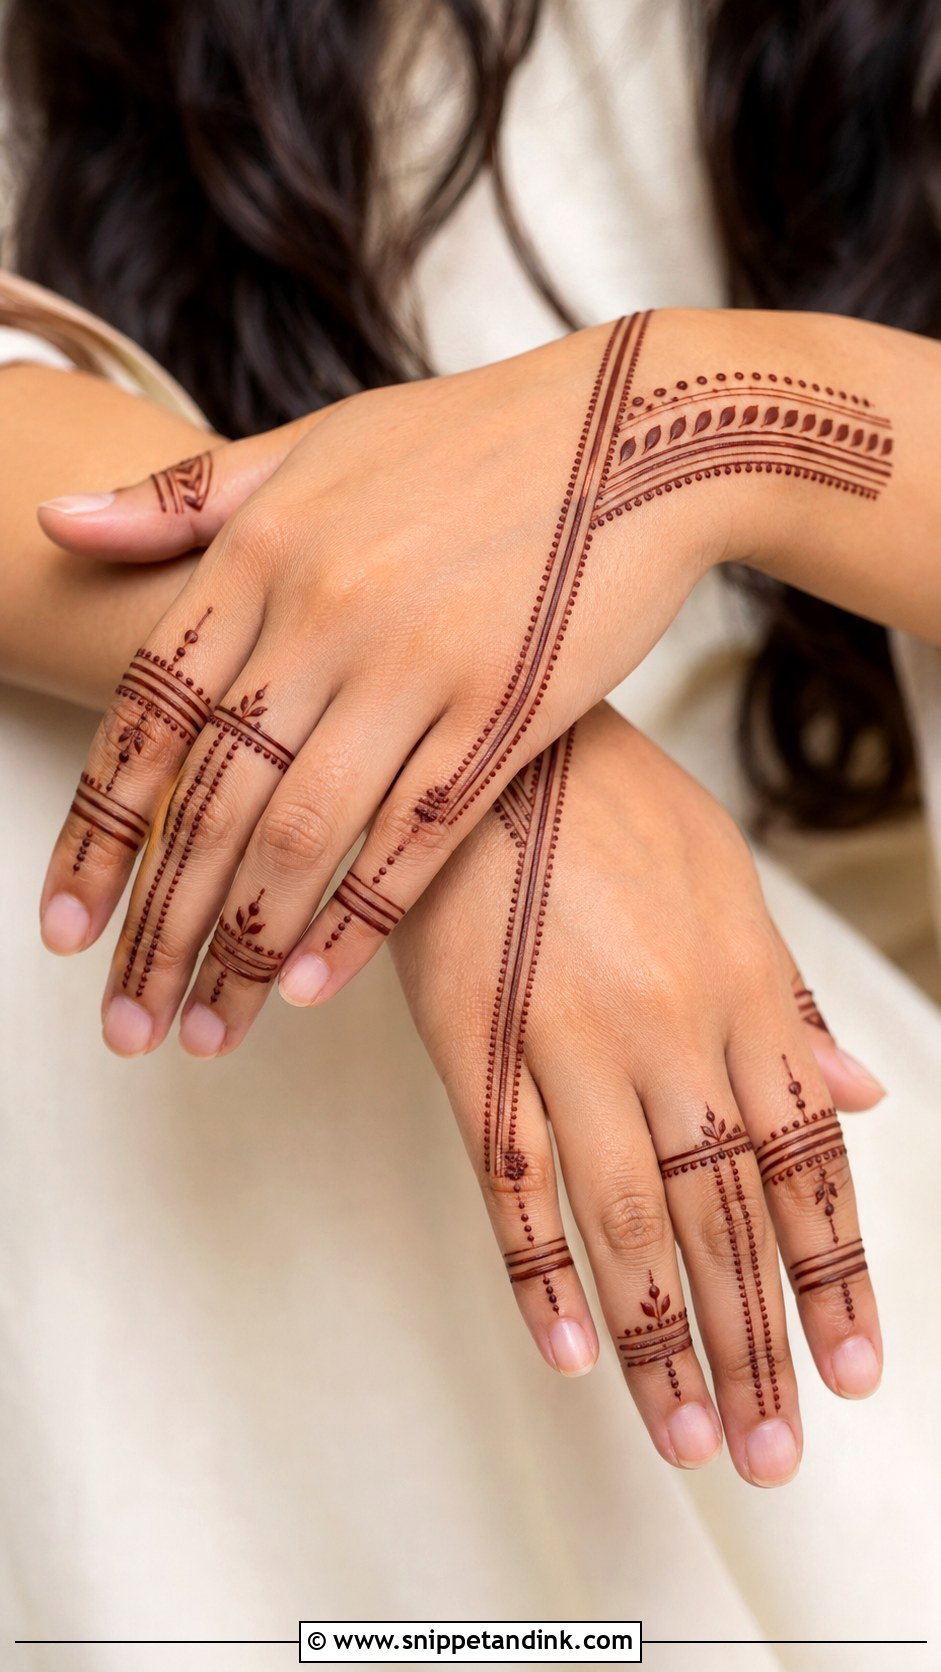
Straight, diagonal and curved lines form bands around the fingers, long trails down the centre or layered sections near the tips. Line work only looks clean when the lines are thin, smooth and evenly spaced, so I draw each one in a single steady pull with my wrist braced. A few dots or tiny leaves add detail without losing that crispness. Vertical lines also make short fingers look longer, which is worth knowing.
15. Finger Mehndi Design With Paisley
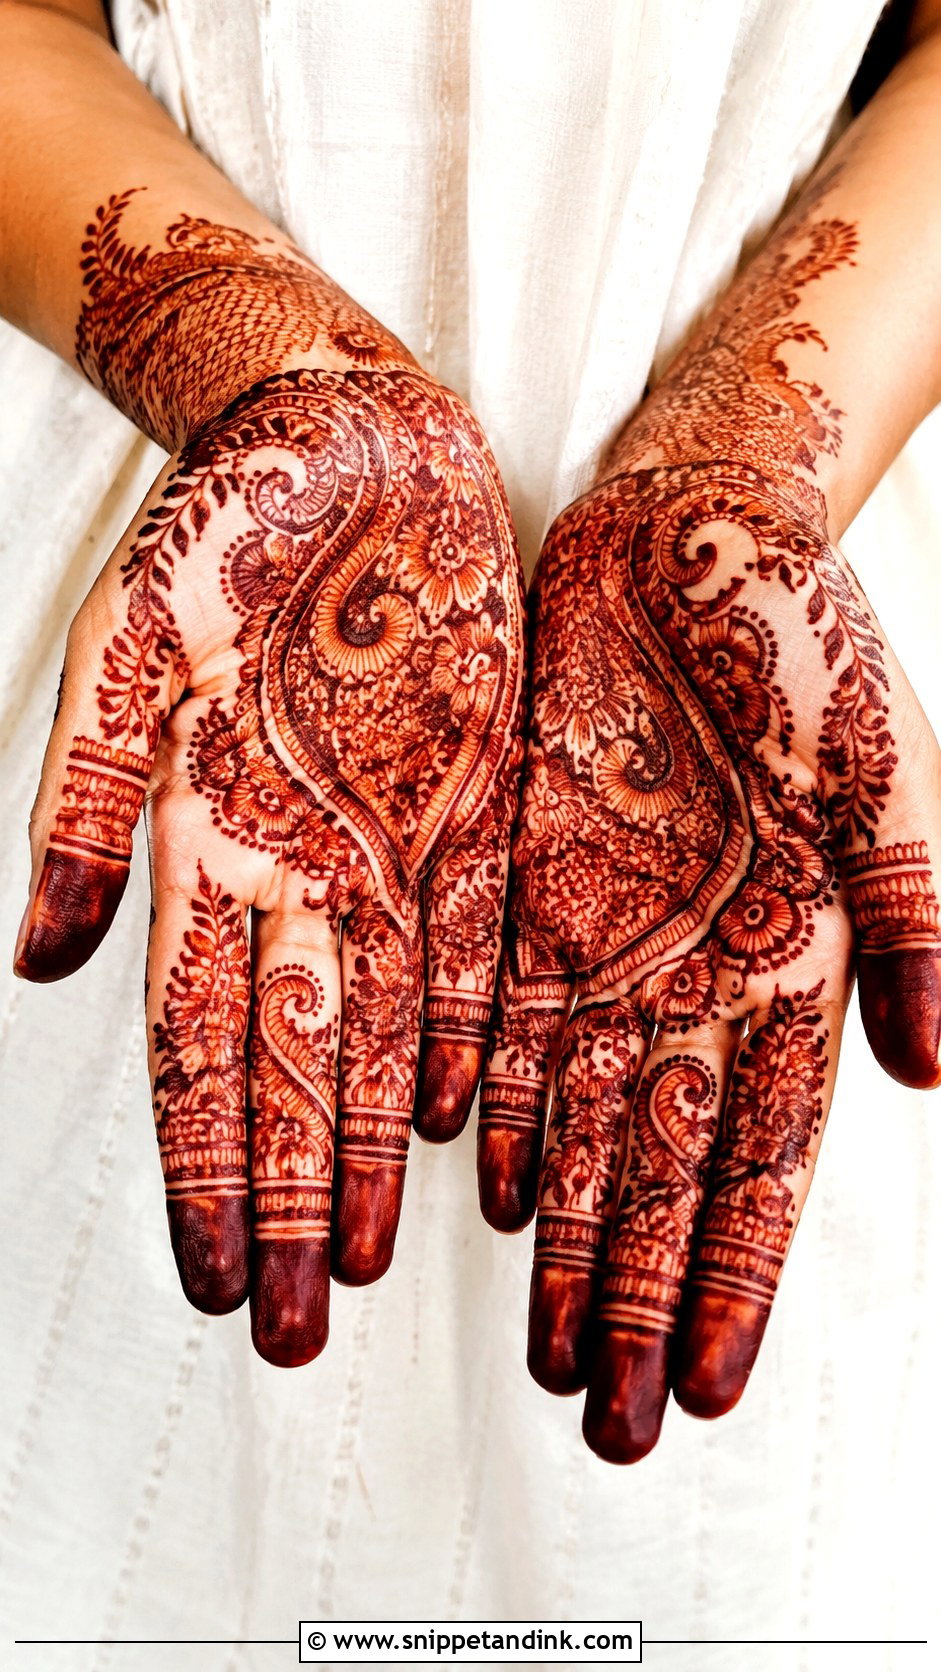
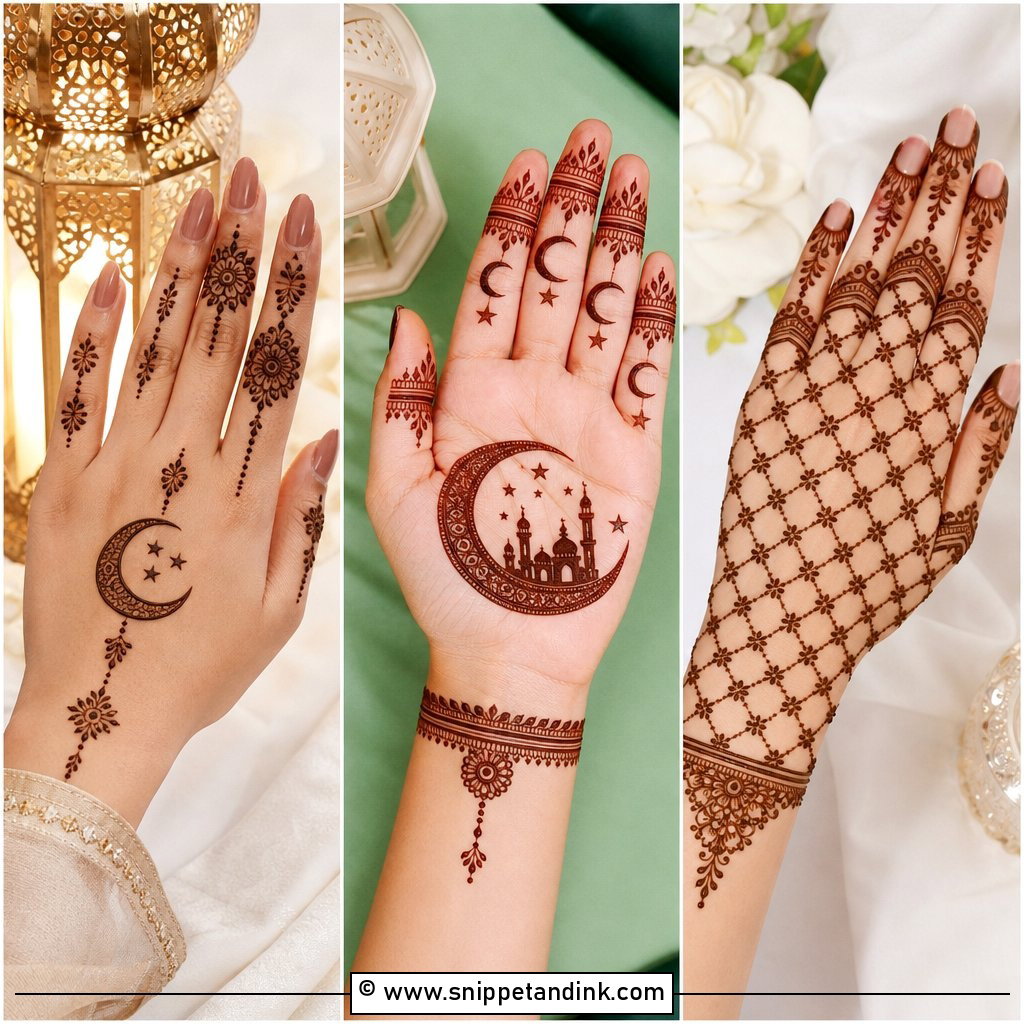
Small curved paisleys along the index finger, the ring finger or across all of them bring a classic Indian feel to a small space. Tiny flowers, leaf borders and dotted outlines suit them. Paisley gets dense quickly on a narrow finger, so I size it to fill about two-thirds of the finger’s width and leave clean space around it. Festive events, wedding guests and traditional outfits are a natural fit, and it links easily to a palm or back-hand design.
16. Finger Mehndi Design With Vines
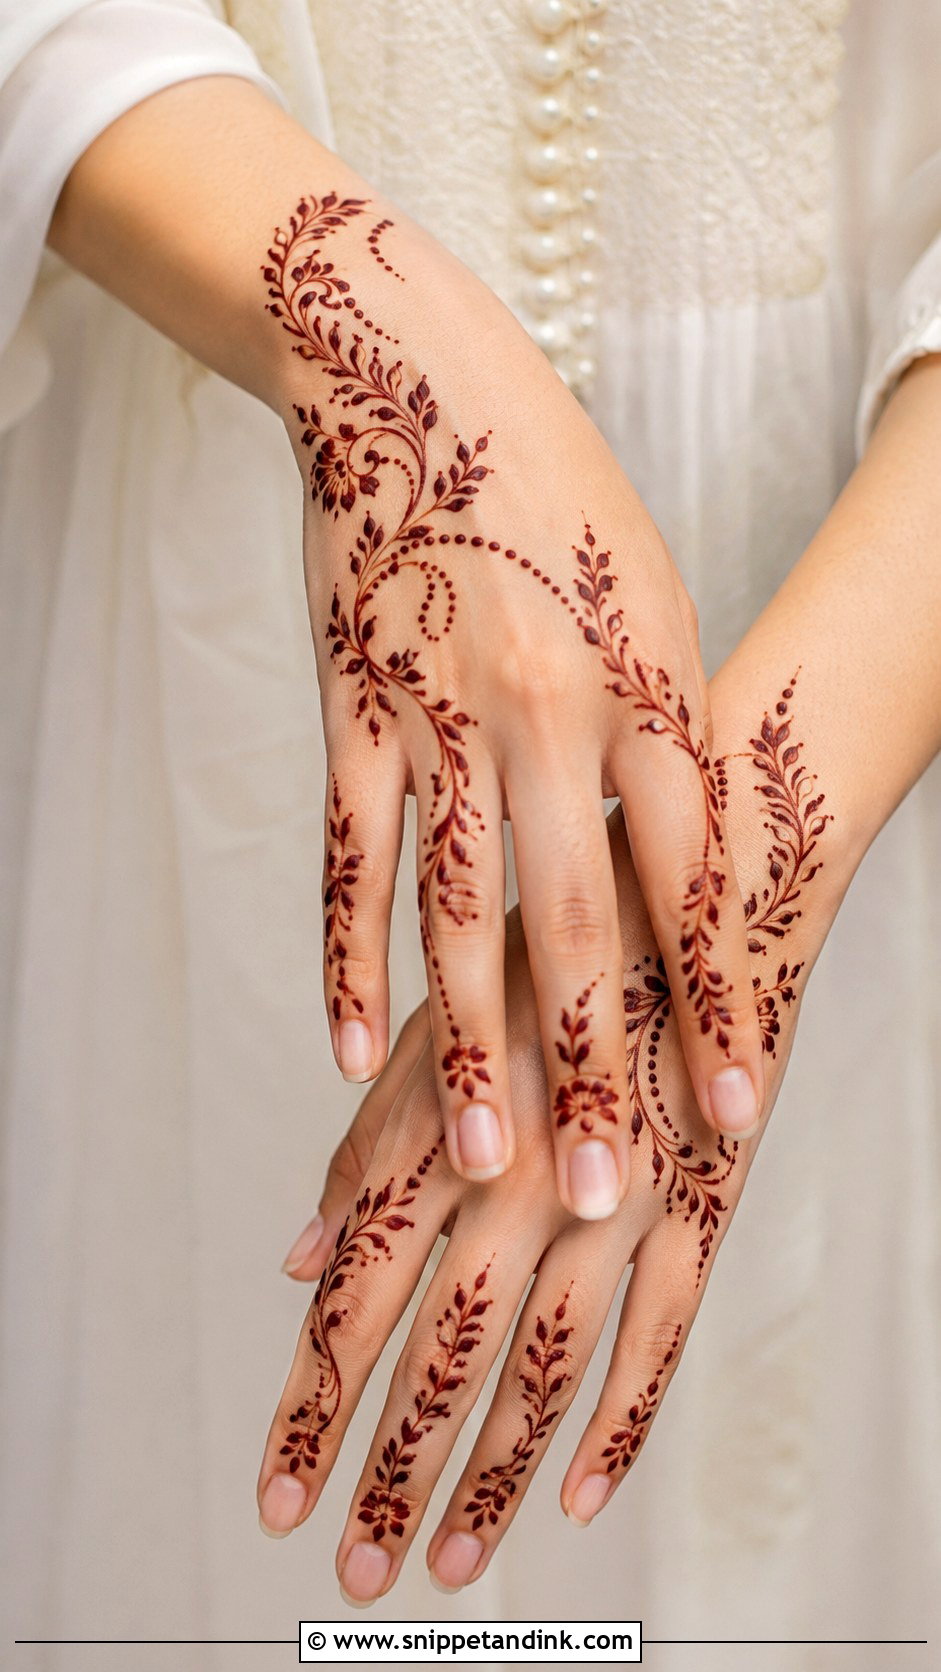
A vine can start at the wrist, cross the back of the hand and continue onto one or more fingers, or run as a slim line up each finger with small leaves and dots. Either way it moves with the hand and leaves plenty of open skin. Vines adapt to any finger length; I just stretch or shorten the spacing between leaves. Eid, simple weddings and engagement parties suit this delicate, complete look.
17. Finger Mehndi Design With Bracelet
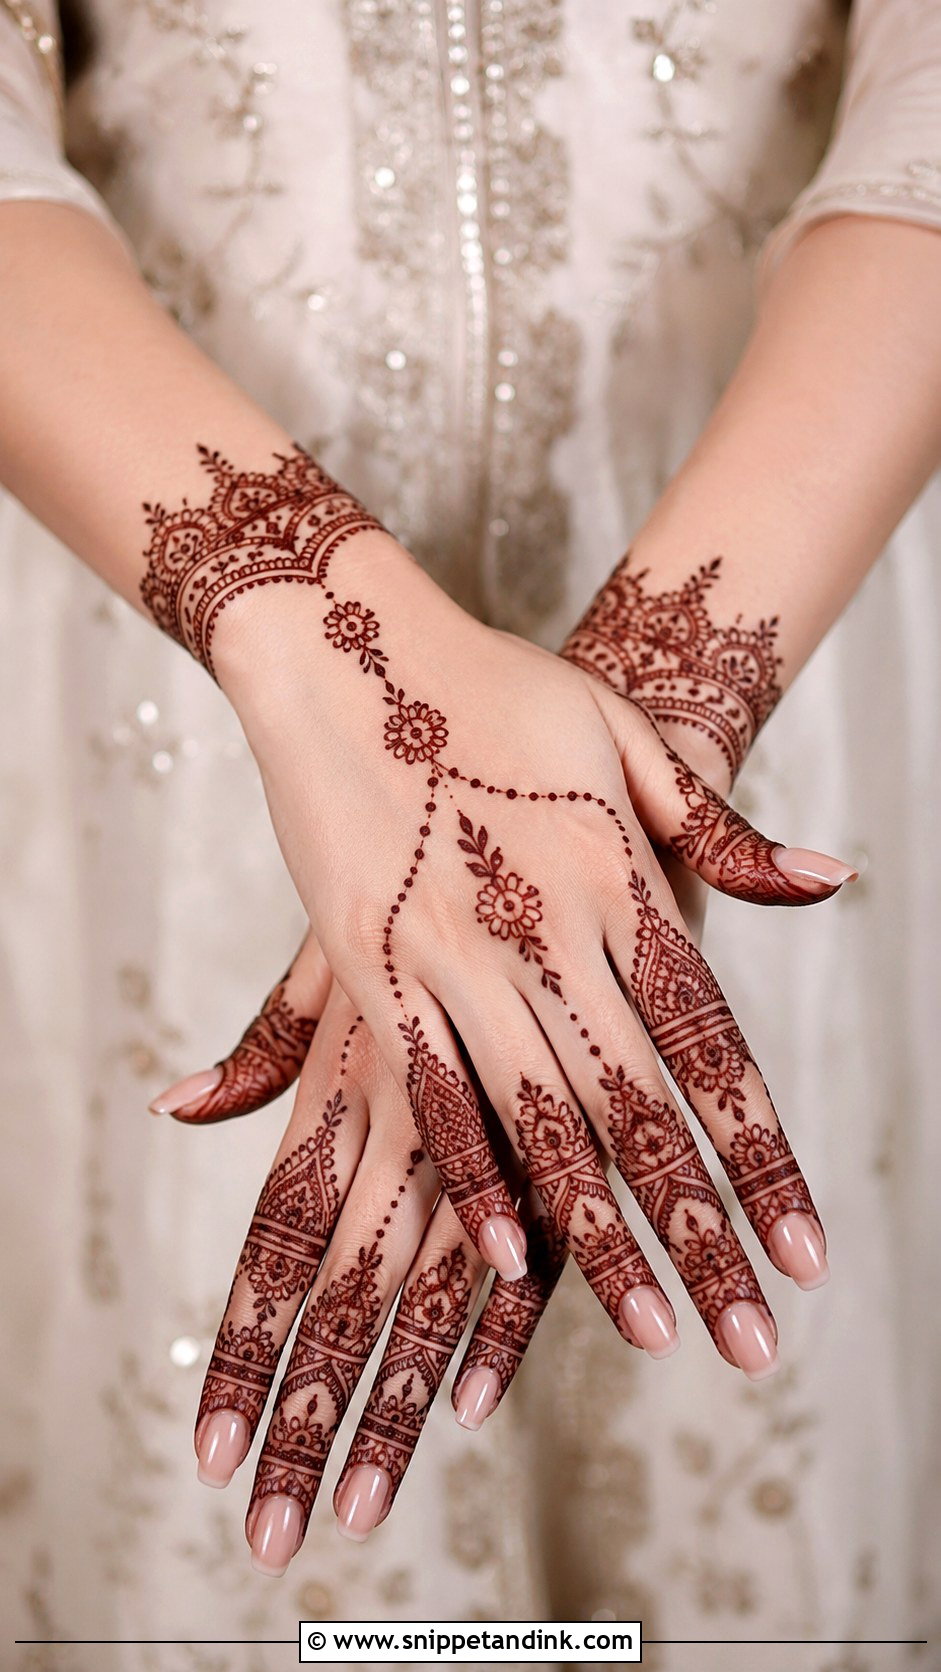
Decorated fingers linked by dotted chains or curved lines to a band around the wrist, with the back of the hand mostly open so the finger detail and wrist cuff stand out. It looks like jewelry without wearing any. Keep the chains thin for a minimal version or add florals, jaali and a bold wrist border for something festive. I draw the chain links last, after the fingers and cuff are placed, so the curve hangs naturally between them.
18. Finger Mehndi Design With Rings
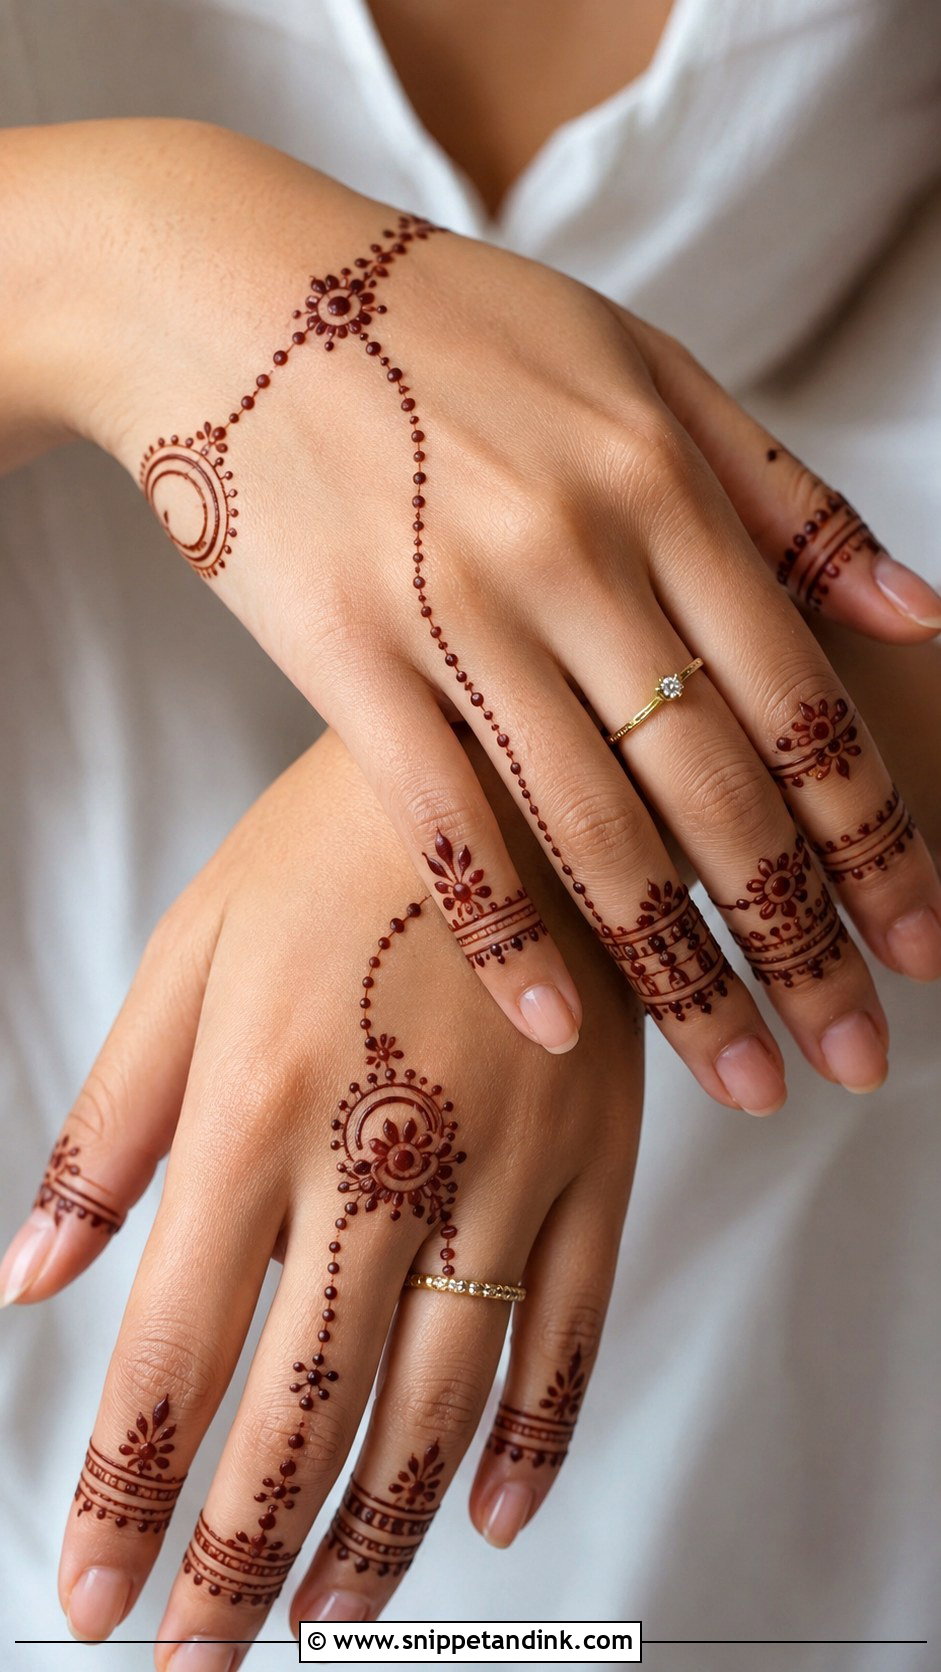
Small henna rings around the joints or the base of the fingers instead of full coverage: plain bands, floral rings, dotted circles or a little jaali. A fine chain can connect them to a back-hand motif. It’s light and works well alongside real rings. Keep the bands even and fairly thin. A thick band right on a knuckle crease cracks when you make a fist, so I place them just above or below the crease.
19. Finger Mehndi Design For Short Fingers
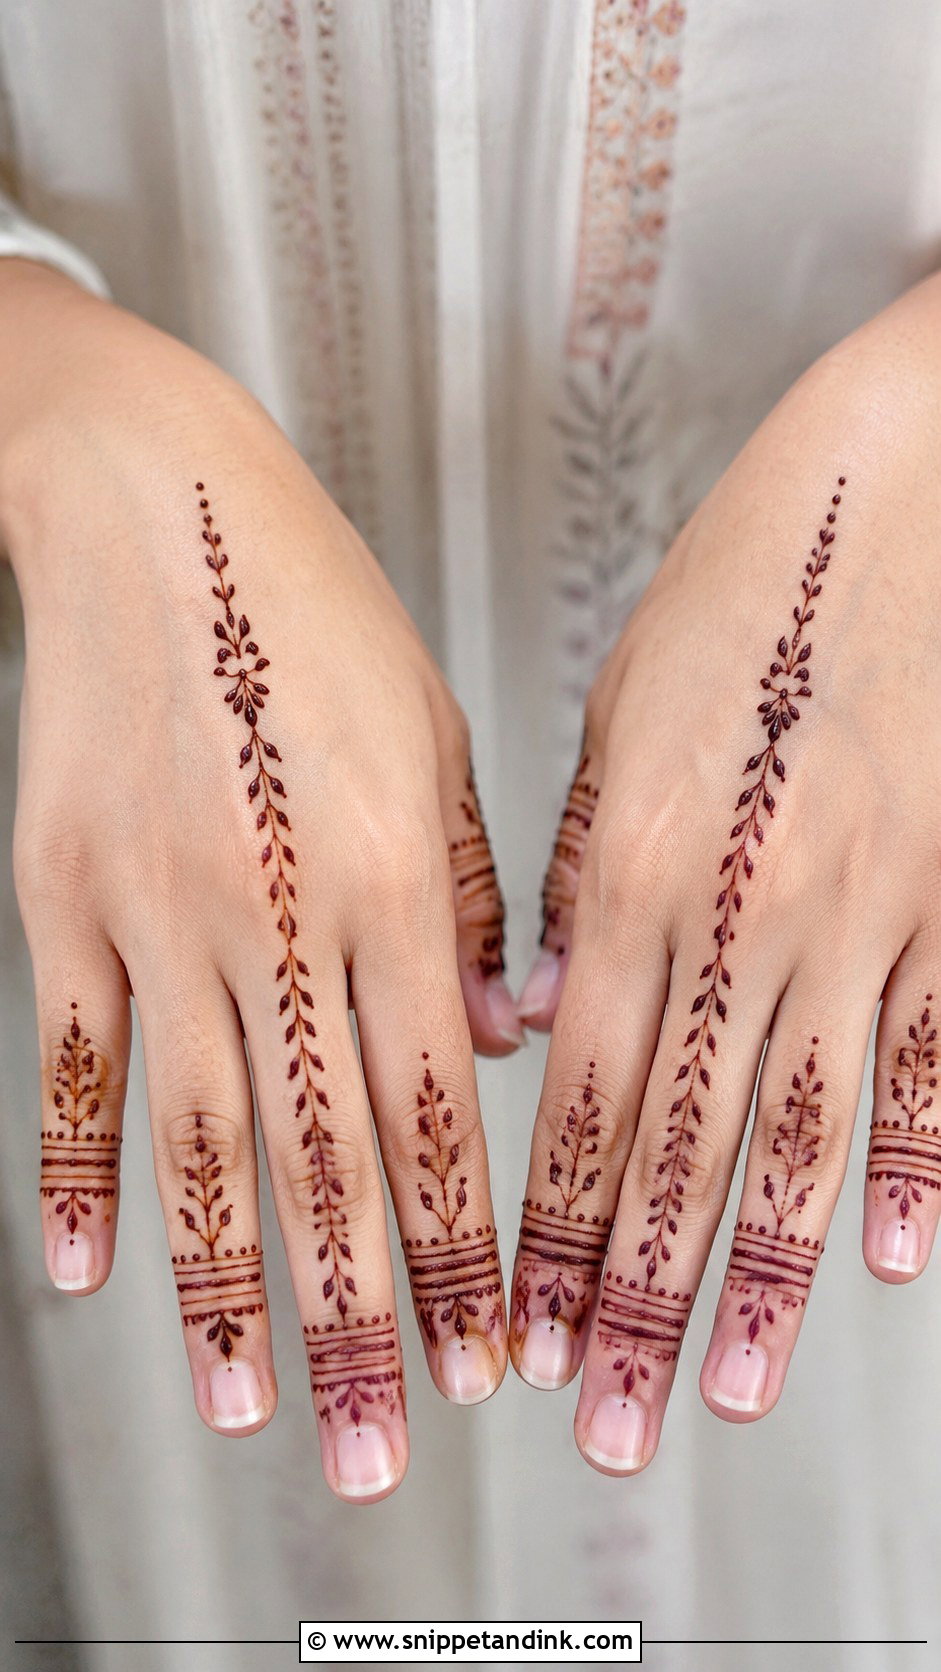
Short fingers look longer with vertical flow: centre lines, slim vines, small leaf trails and narrow bands with open space between them. What I avoid on short fingers is heavy fingertip caps and big round motifs on every finger; both visually chop the finger into pieces. Lightly filled tips and a small back-hand mandala or wrist bracelet finish the hand without crowding it.
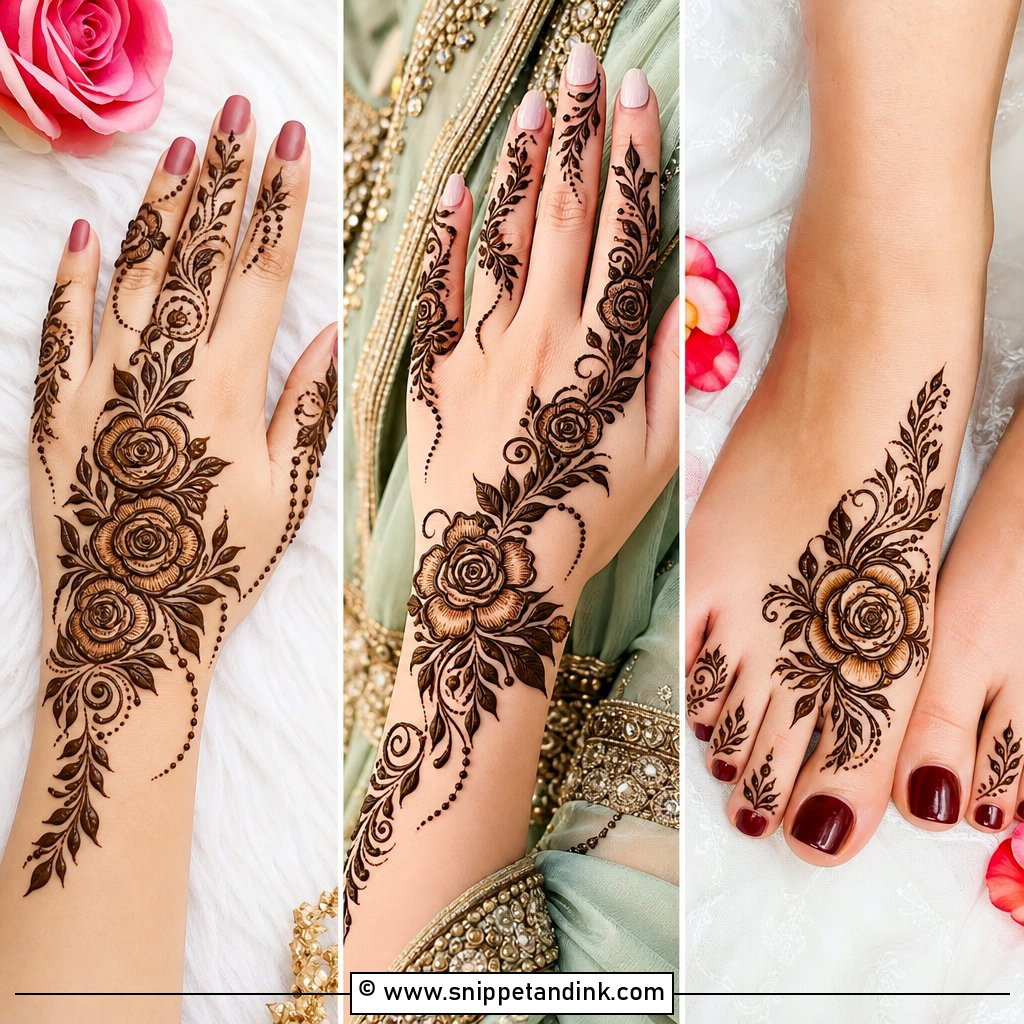
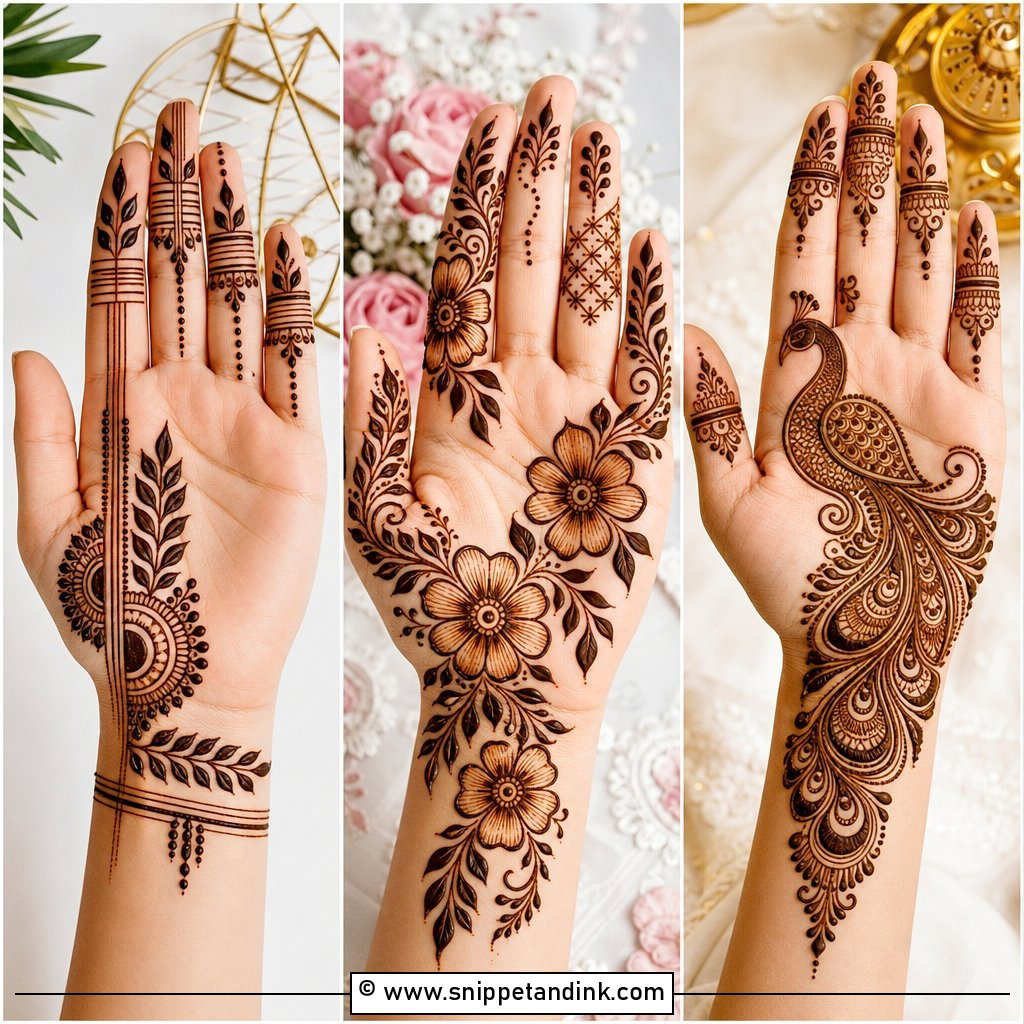
20. Finger Mehndi Design For Long Fingers
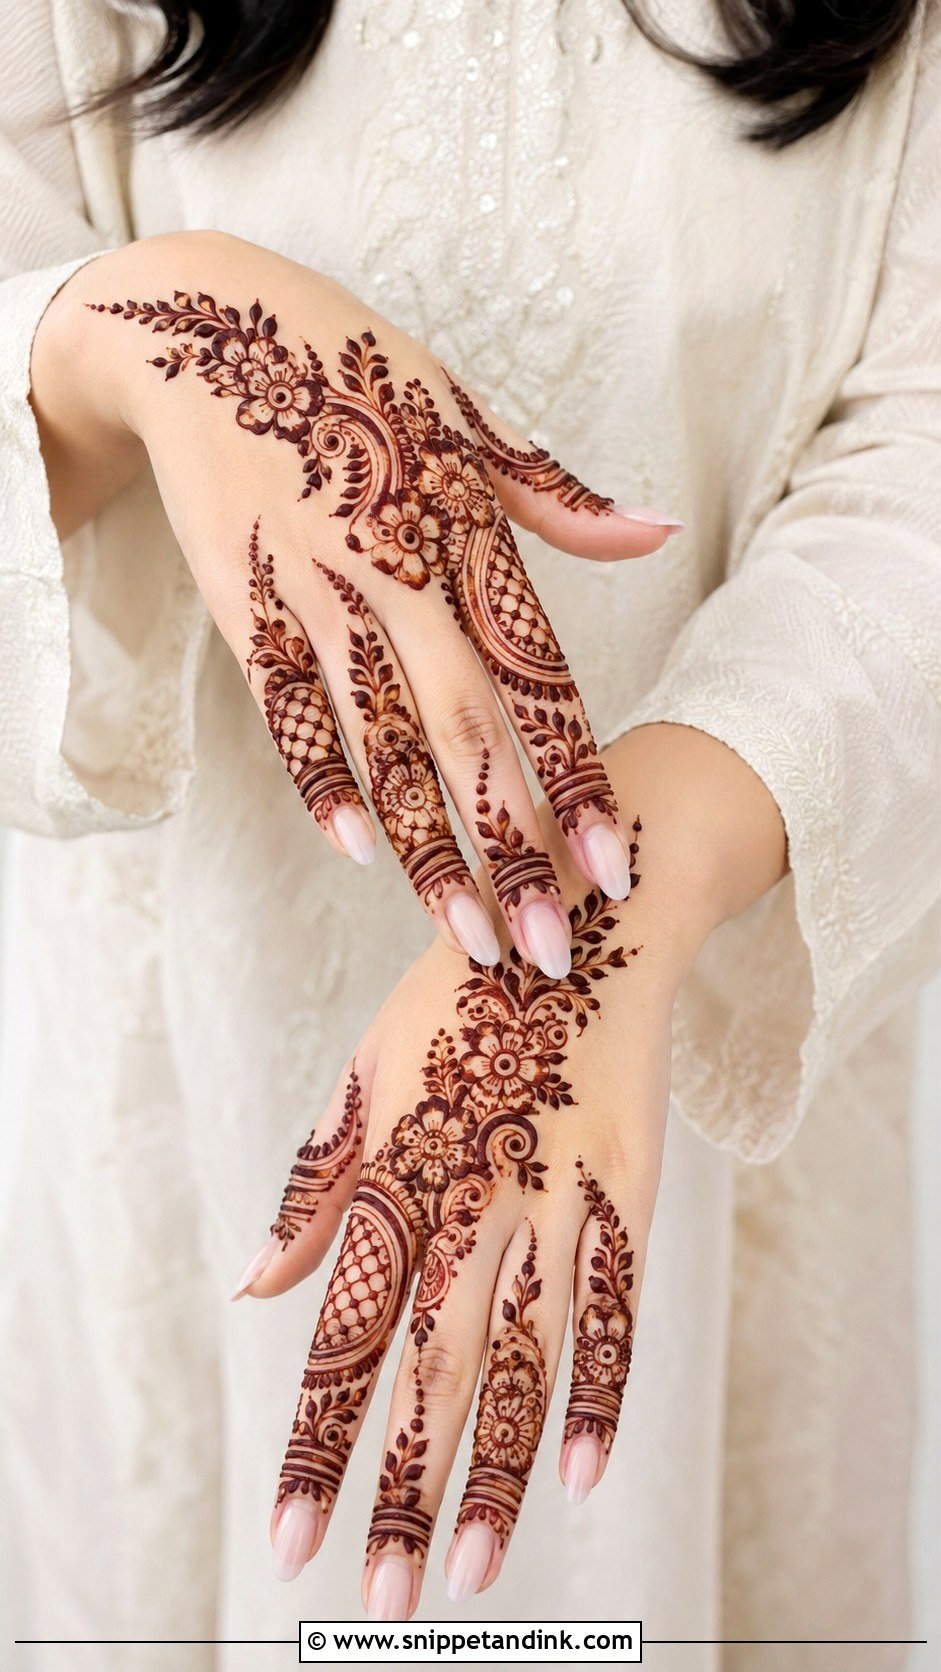
Long fingers have room for layered bands and different textures on each finger: jaali, florals, dots, leaf vines and shaded sections. They still need one repeated element, matching tip borders or dotted outlines, to hold the hand together. Arabic trails stretching from the wrist to the index finger suit long hands especially well. Go minimal or bridal; the detail shows clearly in close-ups.
21. Finger Mehndi Design For Kids
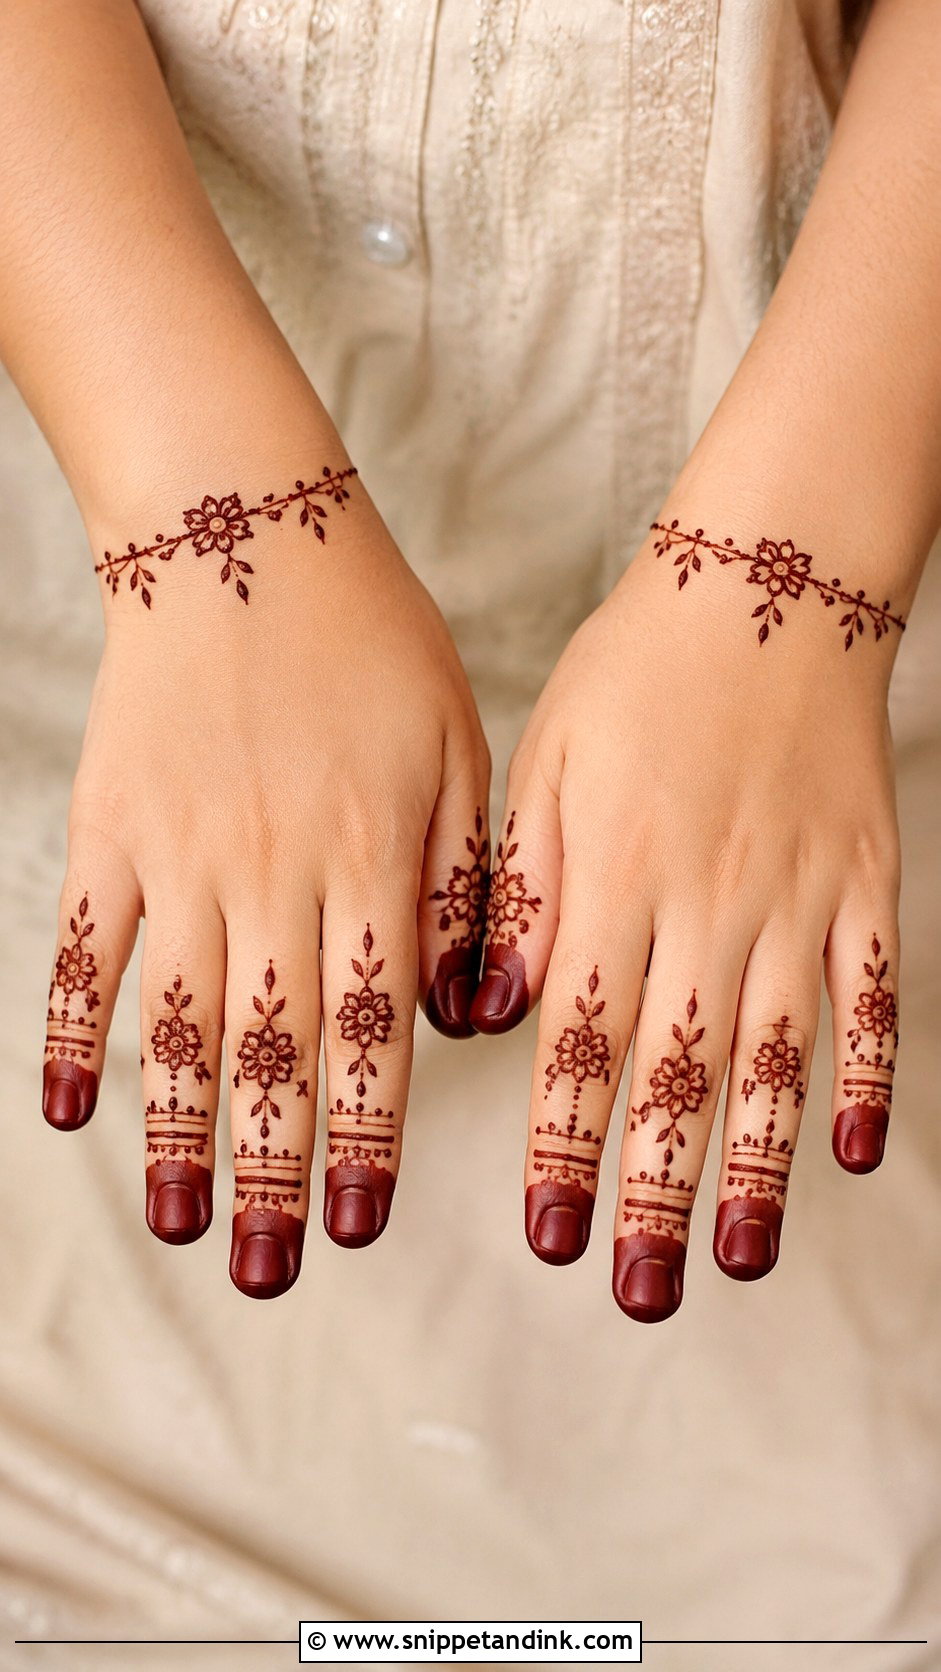
Children need henna that’s fast and fun: small flowers, dots, tiny leaves, simple tip caps and mini bracelet bands. Fingers are ideal because they dry quickly and the child can still use the rest of the hand. I keep the design light so the paste doesn’t stay wet long, and link one or two decorated fingers to a short floral trail on the back of the hand. Family weddings, Eid and school events all suit it.
22. Finger Mehndi Design For Eid
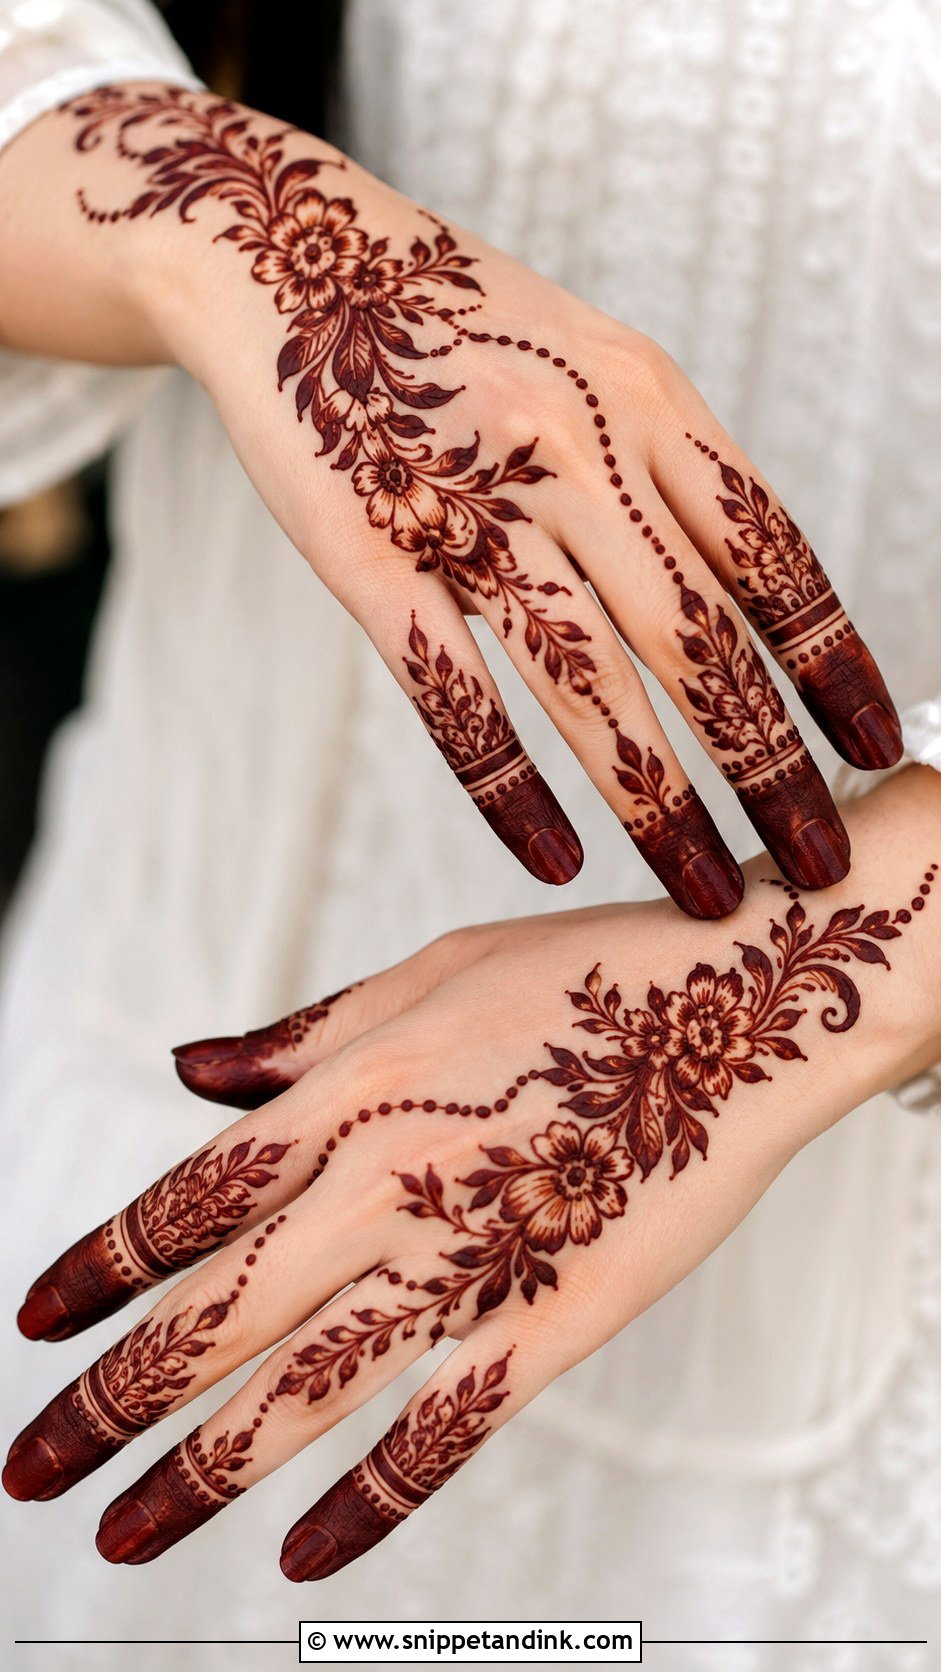
Arabic finger trails, leafy bands, floral tips and bracelet chains are the usual Eid choices, often on the back of the hand with the palm left clear. Filled fingertips and dotted borders around the knuckles give a traditional finish; slim floral vines with more open skin feel modern. Apply it the evening before Eid so the stain has deepened from orange by morning prayers and lasts through the visits.
23. Finger Mehndi Design For Wedding Guest
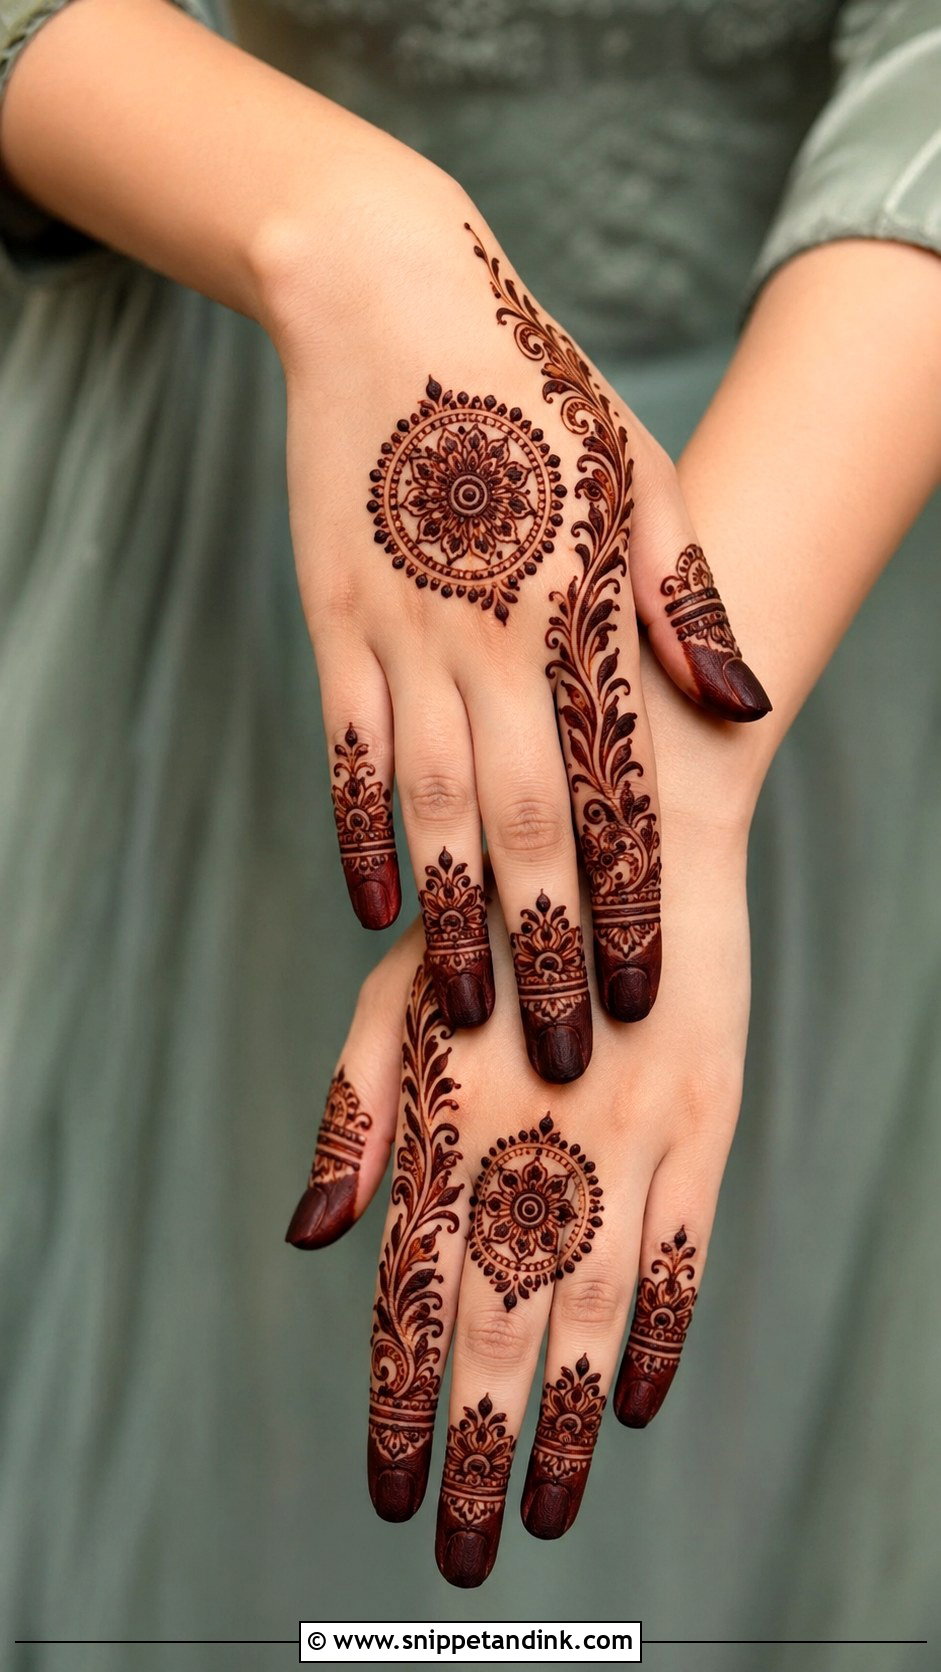
Guests should look dressed up without competing with the bride. Decorated fingertips, floral finger bands and a small back-hand centrepiece work, as does an Arabic trail ending on the index or middle finger. The hand needs to stay usable for dancing, eating and greeting people, so I keep guest designs to something that dries quickly. Clean outlines, dots and open spacing go with sarees, lehengas, suits and fusion outfits.
24. Finger Mehndi Design For Engagement
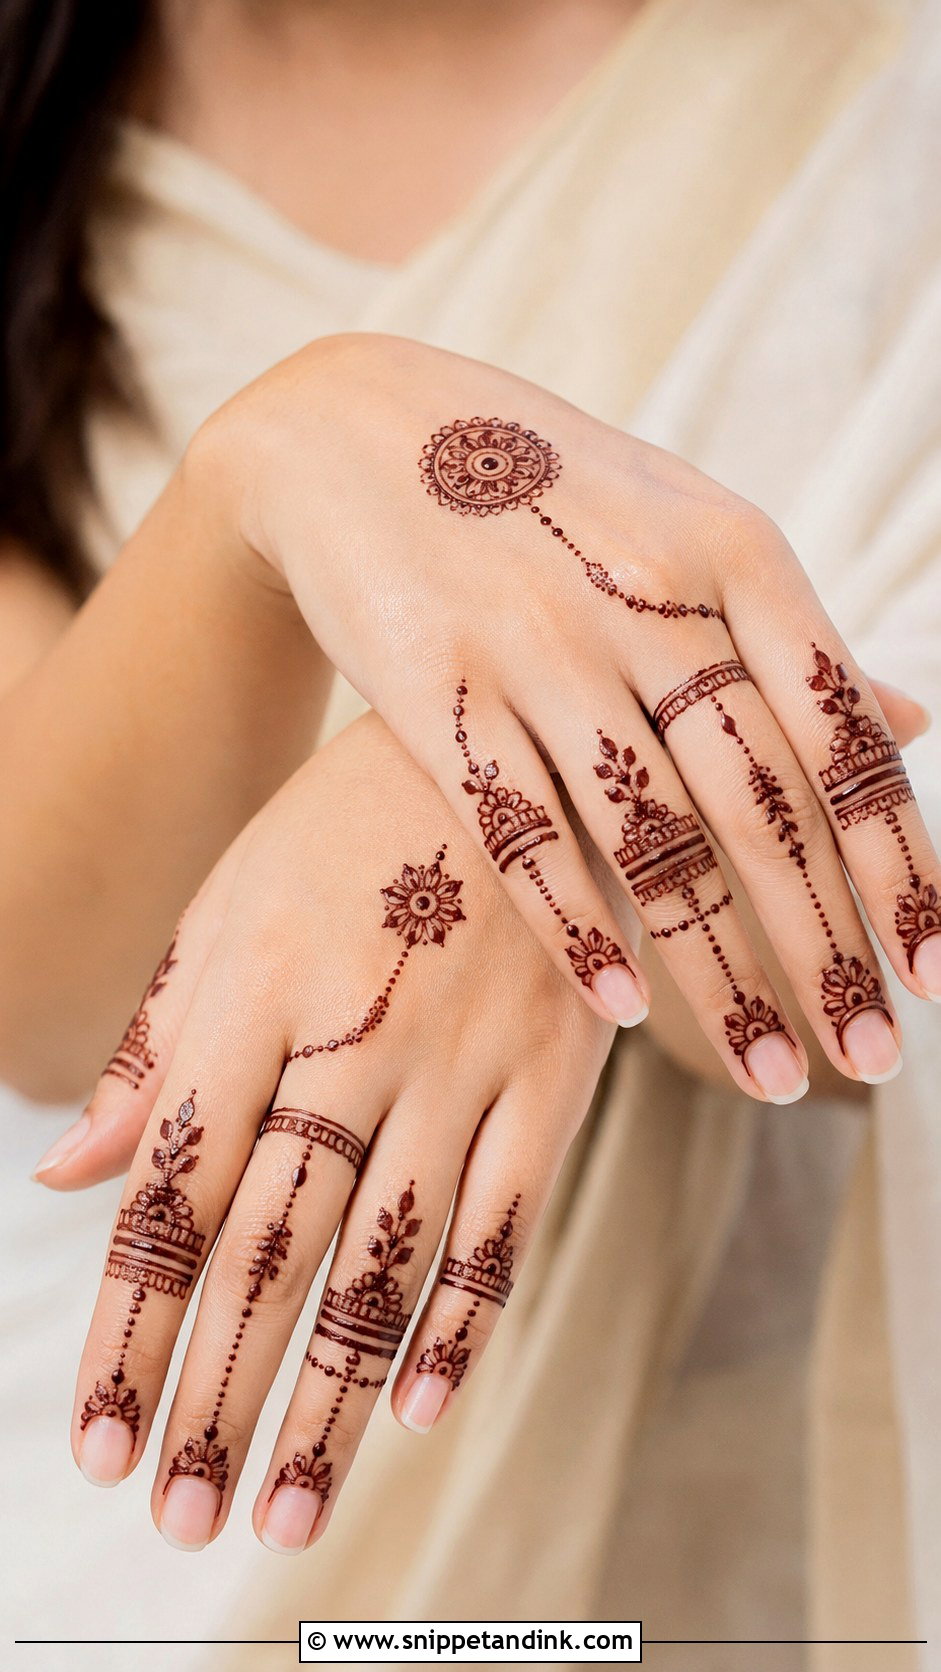
The ring finger leads: a good engagement layout uses delicate ring bands, dotted chains, floral tips and a small mandala on the back of the hand. Extra detail on the ring finger is fine, but the place where the ring sits should stay nearly clear, with soft negative space around it so the stone stands out in close-ups. Indo-Arabic gives a fuller feel, while a jewelry-style pattern looks more modern.
25. Finger Mehndi Design For Bridesmaid
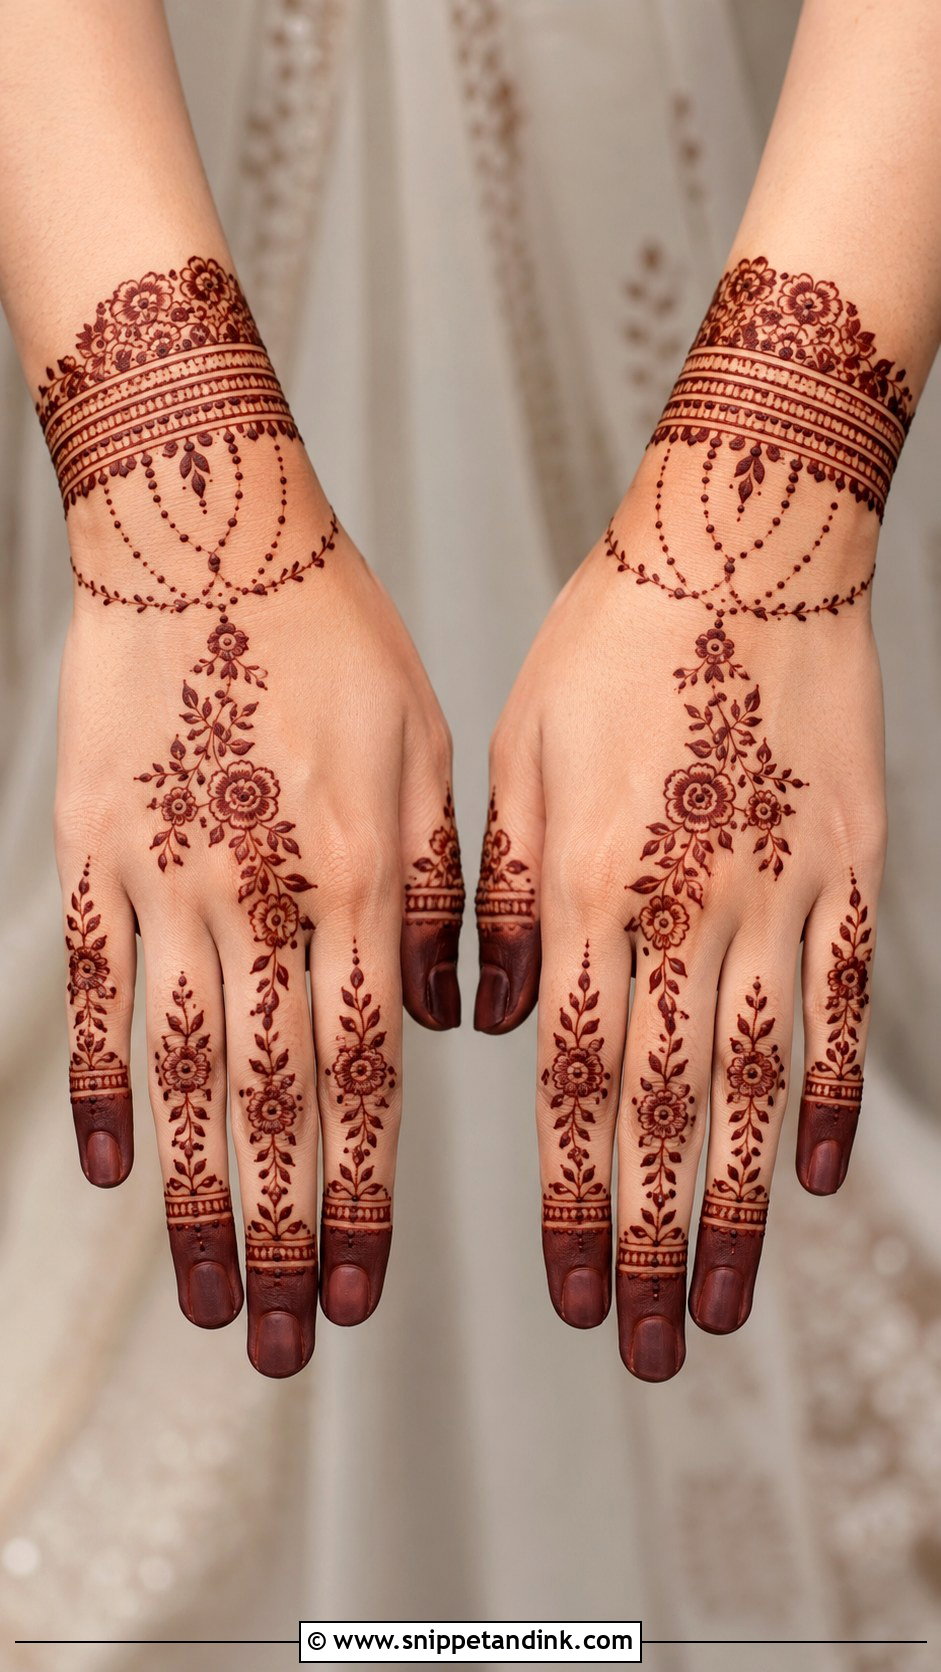
Bridesmaids need enough detail for photos without competing with the bride’s fuller design: floral finger trails, bracelet cuffs and open back-hand spacing. A group can coordinate with the same fingertip caps and different wrist details. Bridesmaids are usually busy helping, so I keep their henna quick to apply and quick to dry. Arabic and Indo-Arabic fingers work well for the mehndi night, sangeet and wedding day.
26. Indian Finger Mehndi Design
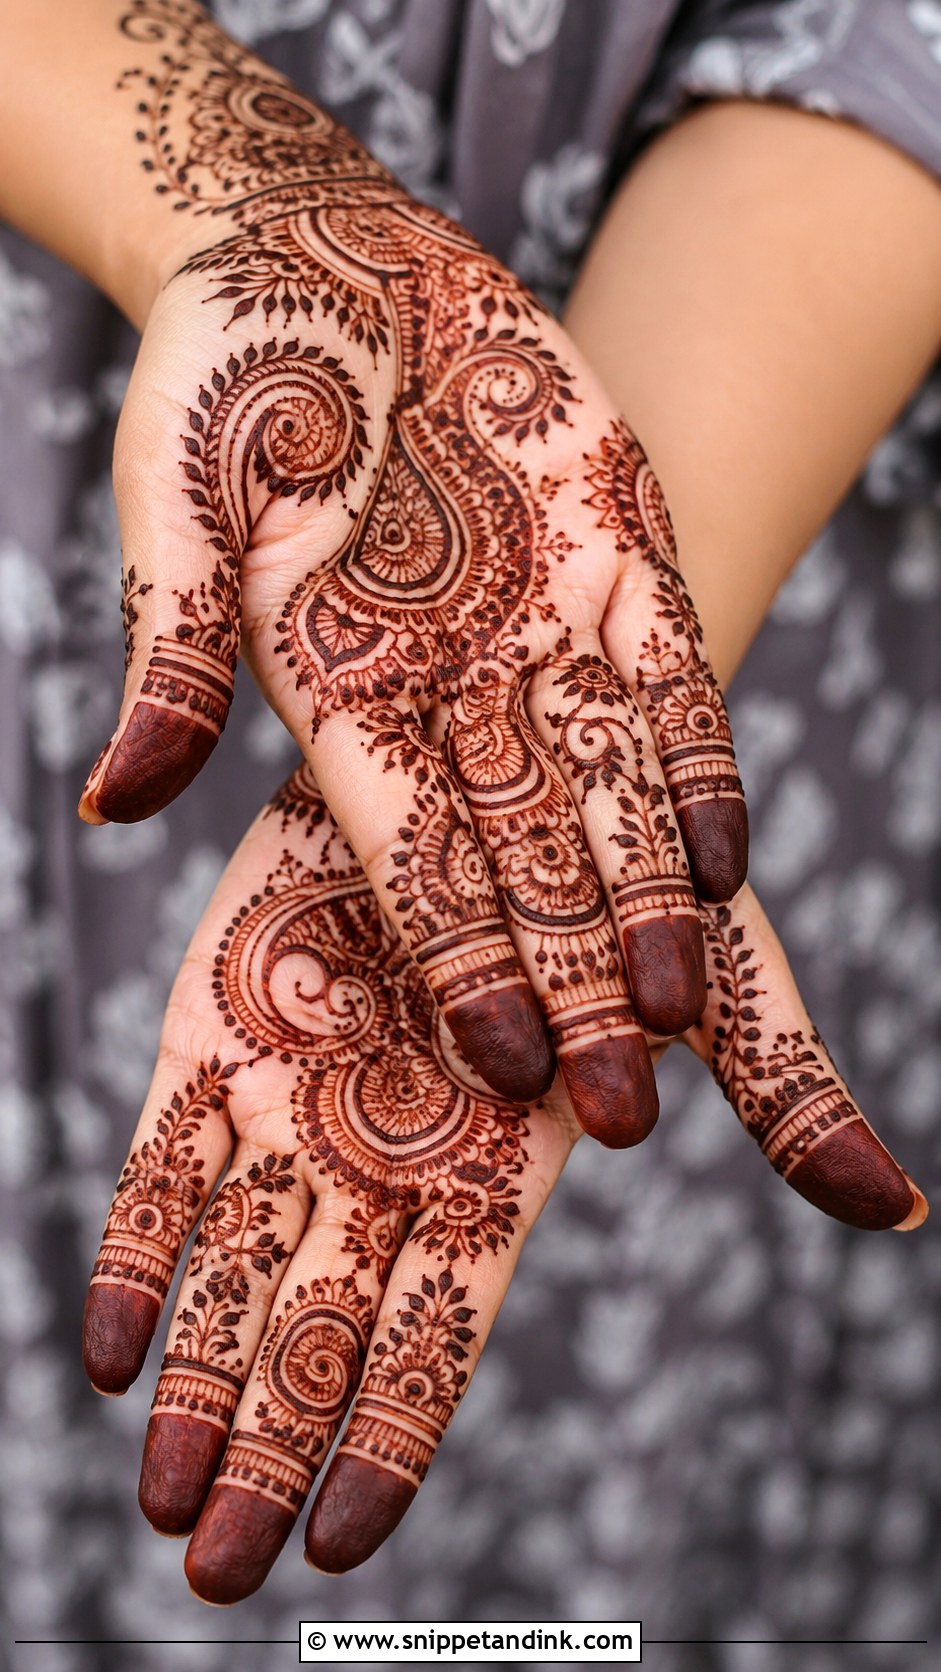
Paisleys, tiny florals, dots, leaf borders and fine curved lines give Indian finger henna its traditional richness. In a fuller version the pattern runs into a palm mandala or bridal back; in a lighter one only the fingers are detailed. It suits weddings, Karwa Chauth and Diwali. On a narrow finger, small repeated elements look neater than several large motifs, so I stick to one or two shapes per finger.
27. Indo Arabic Finger Mehndi Design
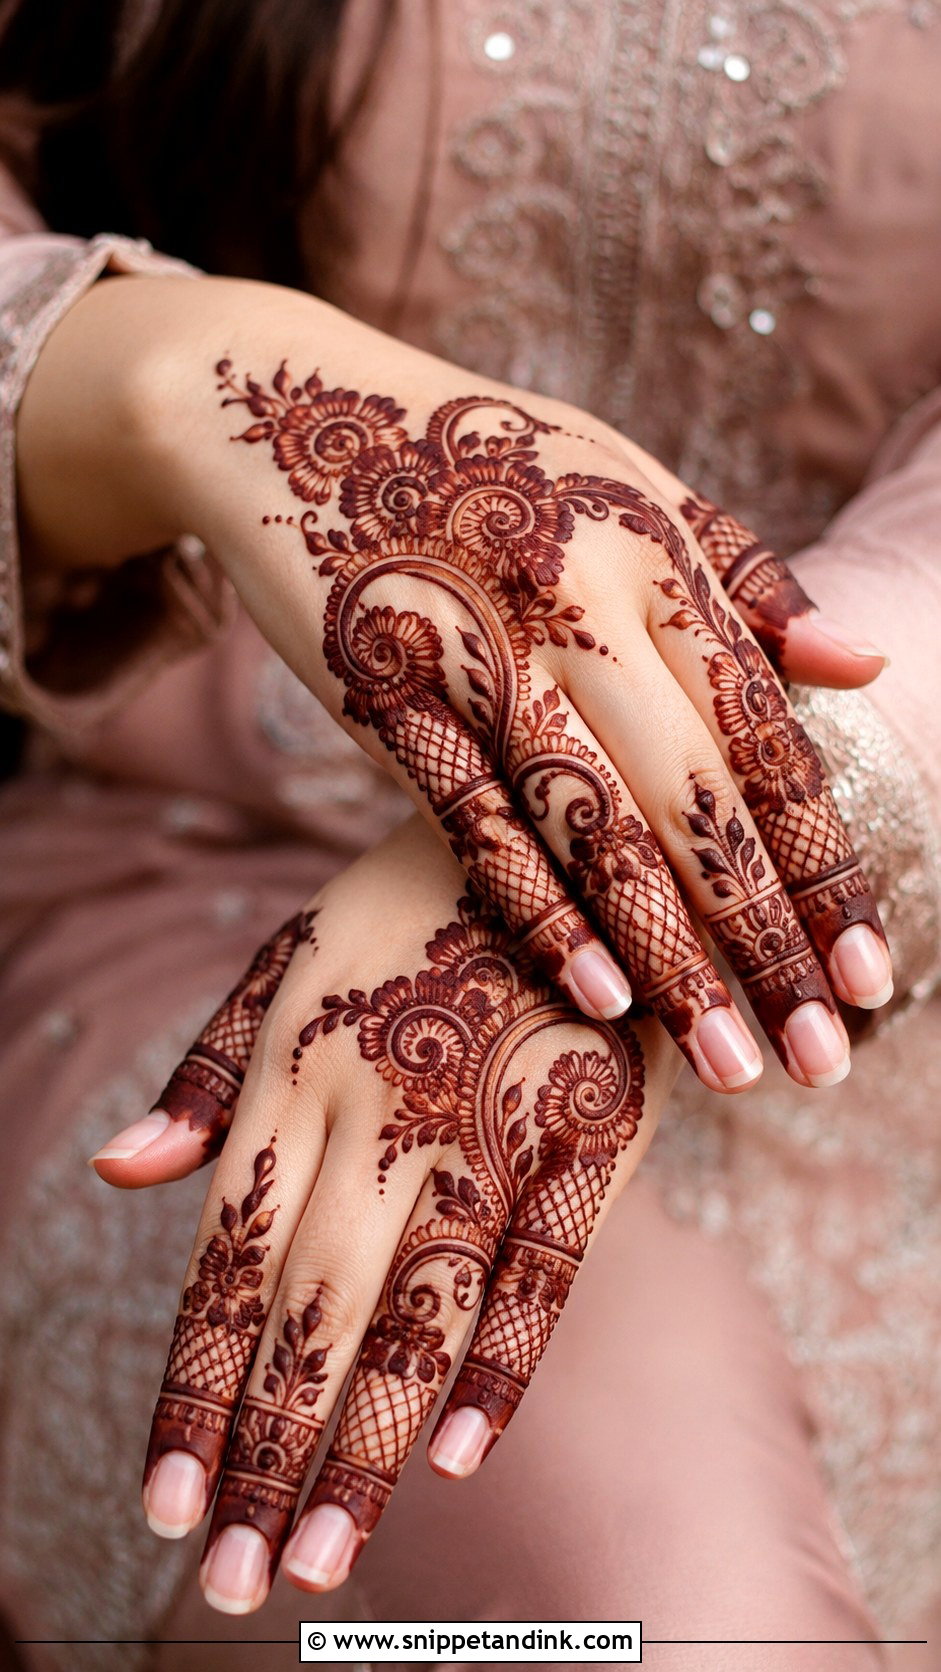
Large flowers or paisleys on the back of the hand, then detailed finger bands with dots, leaves and small mesh sections: Indo Arabic mixes the bold flow of one tradition with the fine detail of the other. Negative space keeps it modern. It scales easily, light for guests and heavier for bridesmaids, and it suits most hand shapes because I can stretch the trail to match finger length.
28. Moroccan Finger Mehndi Design
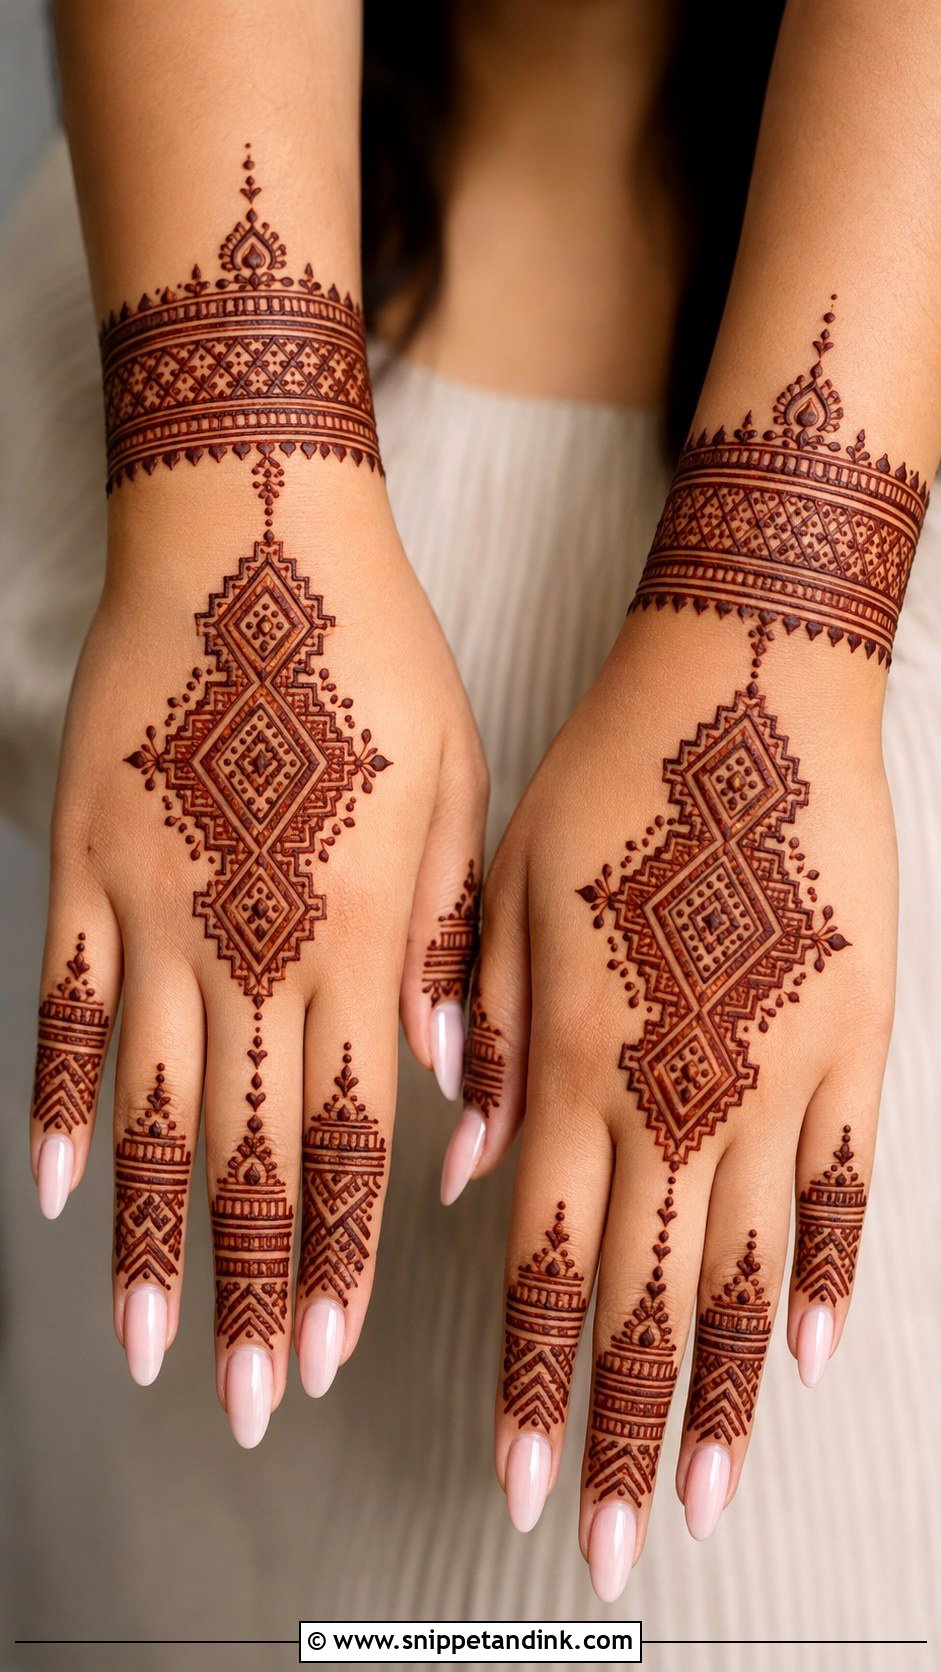
Diamonds, grids, straight lines, triangles, dots and repeated blocks across the fingers make a geometric alternative to florals. Cover all fingers evenly or give two of them stronger detail, and finish with a matching wrist band or small back-hand panel. Precise spacing is everything; if you’re drawing it yourself, a light guide dot at each corner before joining the lines helps. Keep curves out if you want the geometry to read clearly.
29. Gulf Finger Mehndi Design
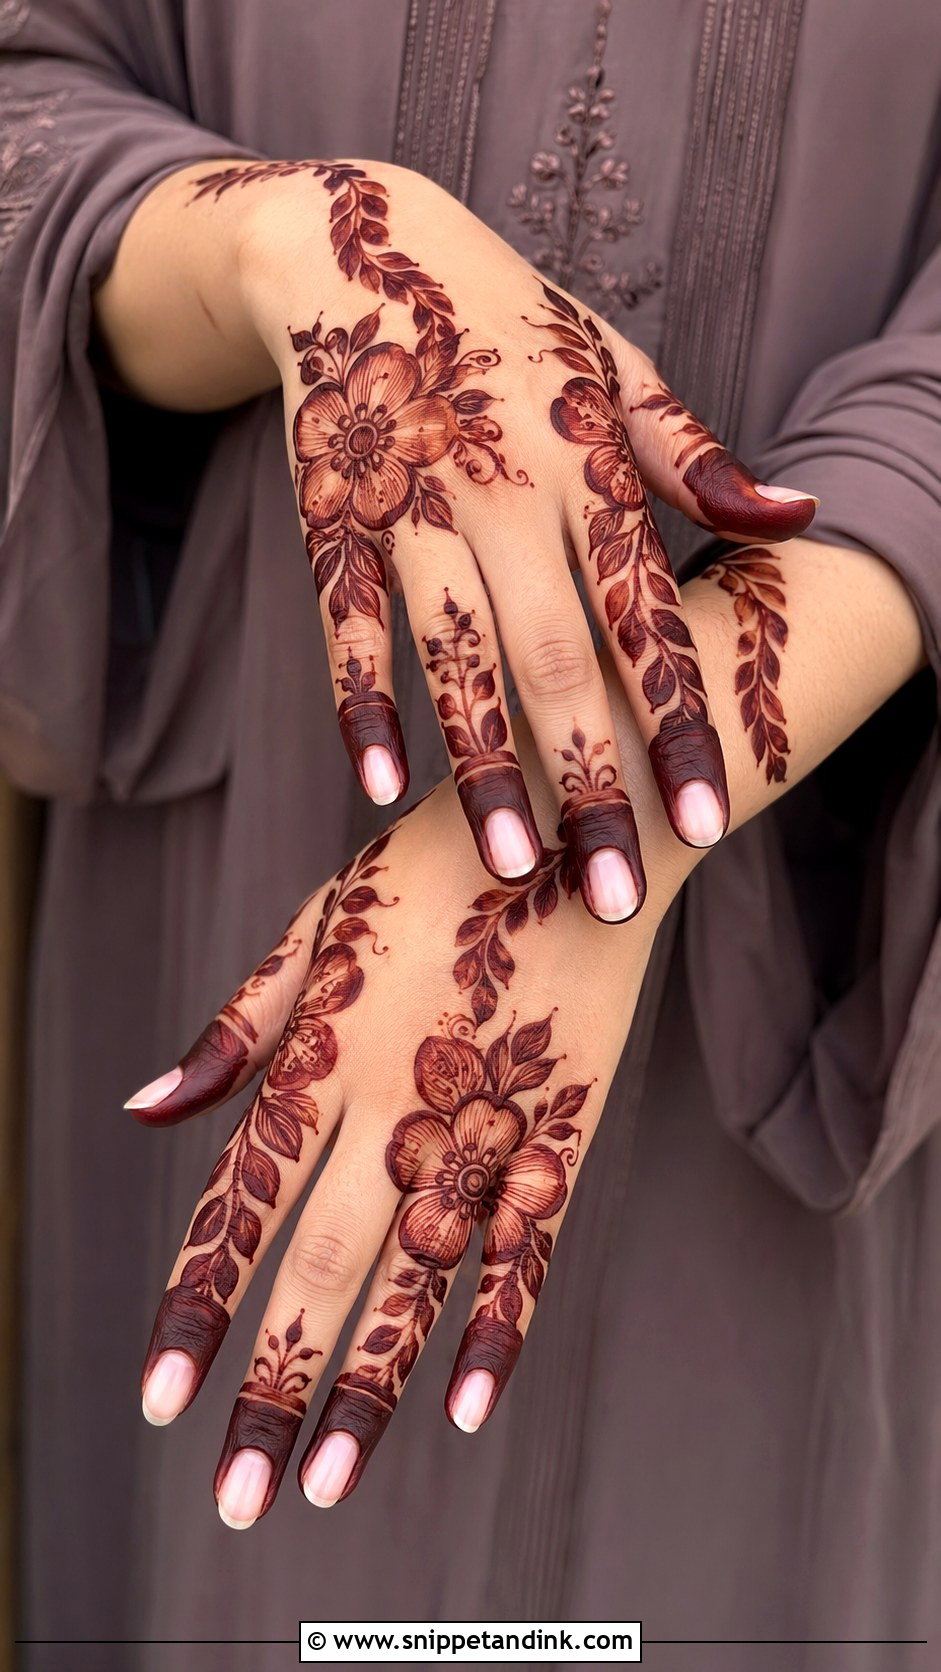
Gulf, or Khaleeji-inspired, finger henna uses bold florals, leafy trails, shaded petals and open spacing, with thick fingertip details and larger motifs than Indian finger work. On the back of the hand a bold trail can sweep from wrist to fingers. Fine dots and open shading soften it; darker filled tips and stronger outlines make it festive. The filled tips will be the darkest part of the stain, since fingertips take colour most deeply.
30. Modern Finger Mehndi Design
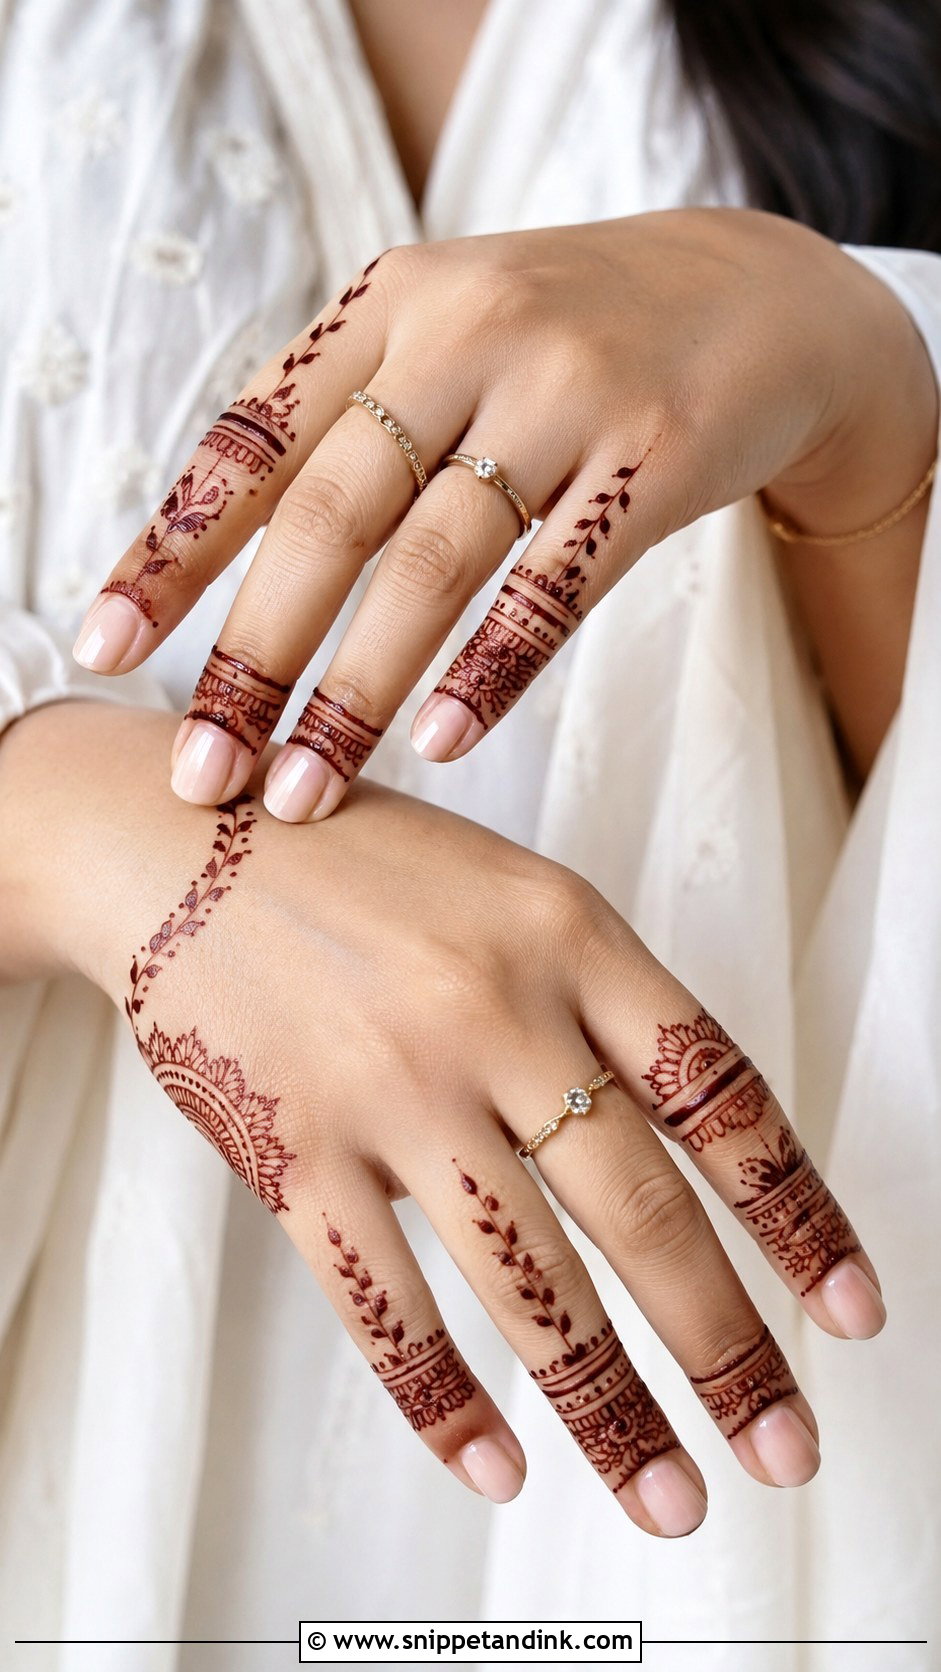
Selected fingers carry rings, chains, half-mandalas, slim vines or geometric bands, and the back of the hand holds one small motif or stays almost bare. Modern finger henna is about placement more than quantity. Symmetry gives a polished finish, while an asymmetrical trail feels trendier. I plan modern designs on both hands together before starting, because with so little on the skin, an unplanned mismatch is very noticeable.
Drawing Finger Henna Yourself at Home
Finger designs are where most people try henna on their own hands for the first time. These are the habits that make the biggest difference:
- Test the cone on a paper towel first. The line should flow evenly with light pressure; if you have to squeeze hard, the paste is too thick or the tip too small.
- Brace the wrist of your drawing hand on the table. Steady lines come from a still wrist, not a steady arm.
- Do your non-dominant hand first while you’re fresh, then switch to the harder side.
- Turn the hand you’re decorating instead of twisting your drawing hand around it.
- Keep a damp cotton bud nearby. A mistake wiped within a few seconds leaves barely a mark; wait a minute and it stains.
Nails and cuticles
Henna stains nails and cuticles orange, and that lasts until the nail grows out. If you don’t want that, rub petroleum jelly over each nail and cuticle before you start, or paint your nails first. Some traditions dip the fingertips deliberately for the dark nail colour; just decide beforehand which look you want.
Start With One Finger and Build Out
Fingers can carry simple, detailed, traditional or modern henna, which makes them the most flexible place to wear it. A dotted pattern suits everyday wear, a bold Arabic trail suits celebrations, and a full bridal finger layout belongs in wedding photos. Your occasion, hand shape, time and comfort decide the rest. Clean spacing, steady lines and balanced motifs matter more than complexity. Pick one design from this list, try it on a single finger, and adjust coverage and detail from there.
You'll Like These Ideas:


Leave a Reply