
A light design is often harder to get right than a full bridal hand, because there is nowhere for a wobbly line to hide. What makes it work is spacing: clear motifs, open skin between them, and coverage that looks planned rather than unfinished. The twenty layouts below are complete hand looks, not single motifs, and they draw on Indian, Arabic, Indo-Arabic, Moroccan and Gulf styles. Most of them take me well under an hour per pair of hands, so they suit a mehndi night guest list, Eid, a small engagement, or a bride who simply doesn’t want her hands covered to the elbow.
Matching the Amount of Henna to the Event and the Hours You Have
Before anyone picks a design, I ask two questions: what is the event, and how long will the paste stay on? A light design applied in a rush and scraped off after an hour will look pale no matter how neat it is. A simple layout given a full evening to sit will look rich.
- Guest at a mehndi night: a finger design, bracelet or leaf trail on the back of one or both hands. Expect roughly ten to twenty minutes per hand with an artist.
- Bridesmaid or close family: an Indo Arabic or zoned full hand design that echoes the bride without copying her.
- Bride who wants it light: a wrist-to-forearm layout with one personal hidden detail, applied two days before the wedding so the colour peaks on the day.
- Eid or a festival morning: apply the evening before, and choose bold flowers over fine filling so it’s done before you’re tired.
Hand shape matters too. Diagonal trails make shorter hands look longer, while a centred mandala suits a broad palm. If you have very dry skin or work with your hands, the back of the hand will fade sooner than the palm, so put your favourite motif on the palm.
1. Simple Arabic Floral Mehndi Design
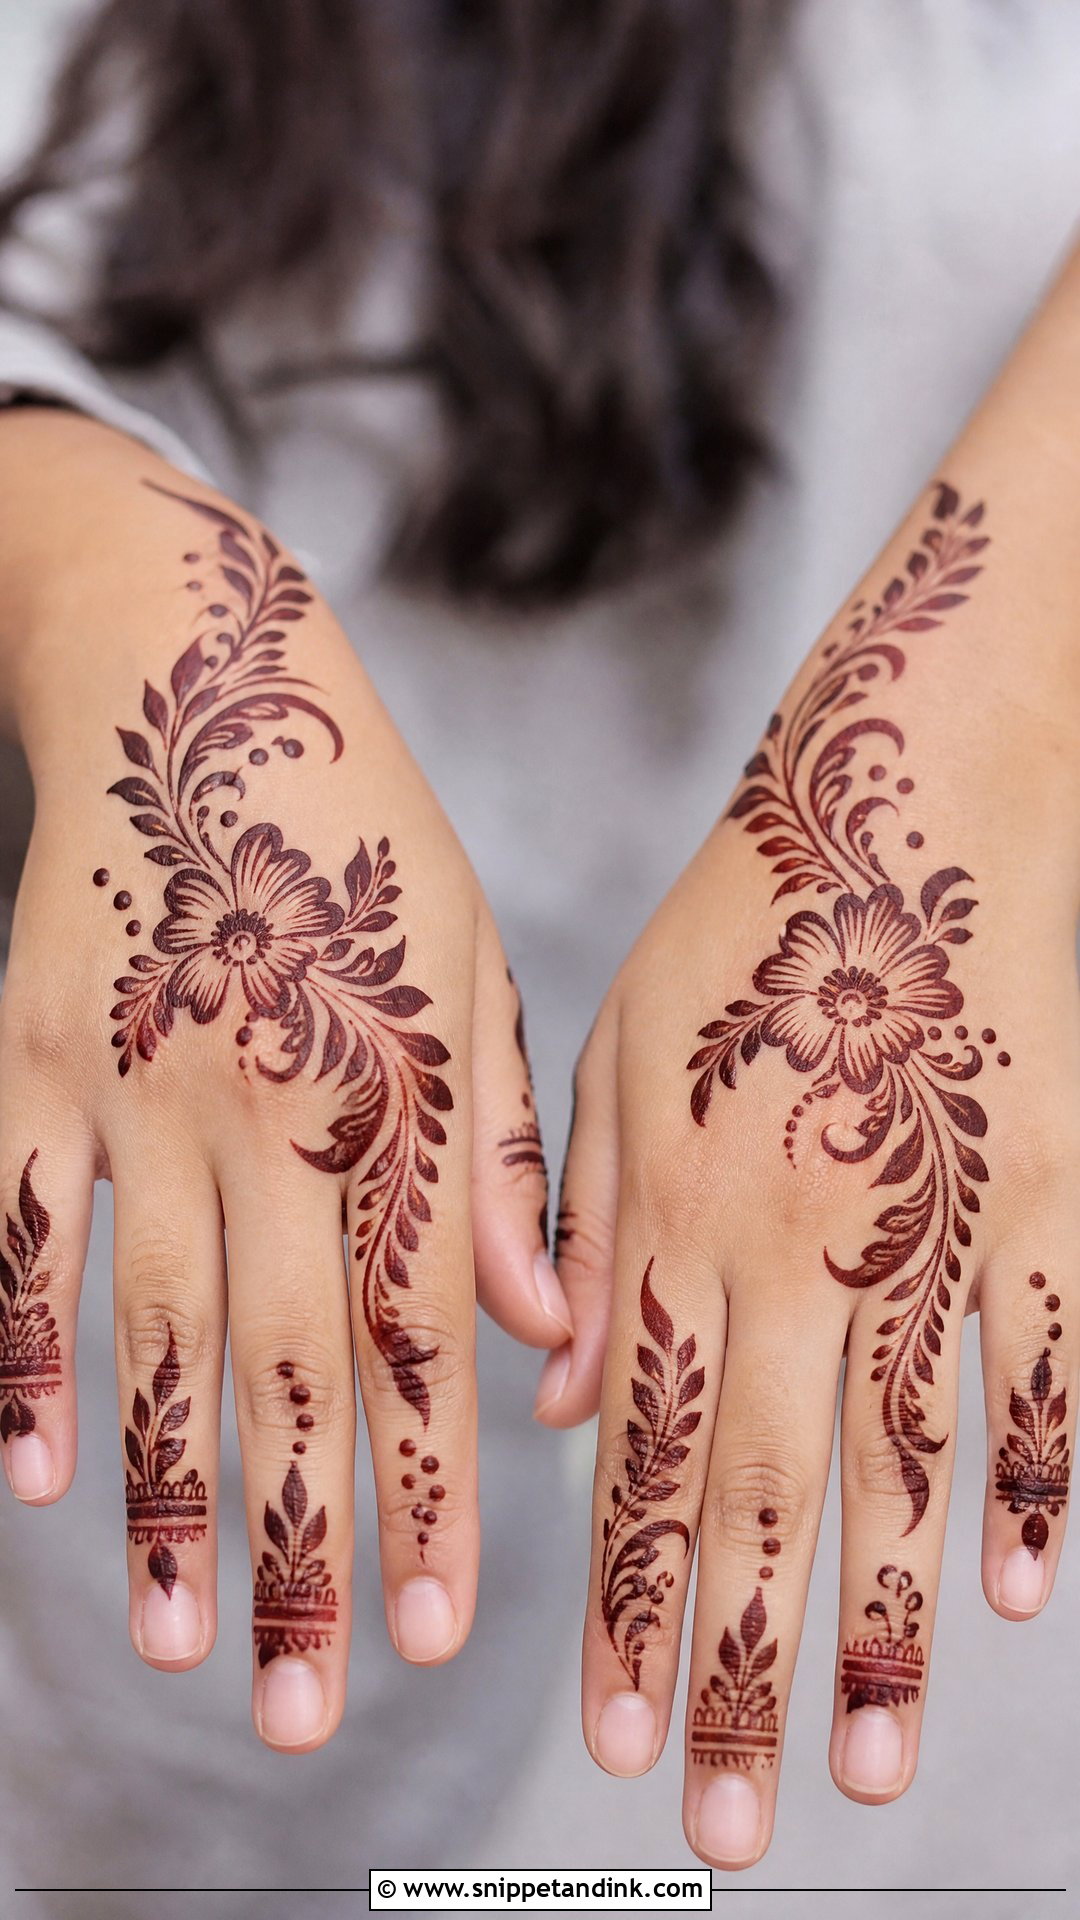
A simple Arabic floral mehndi design runs diagonally from the wrist toward one or two fingers, with bold flowers, curved vines and small dots, and plenty of bare skin between them. That negative space is the whole design, so I protect it. When I teach this layout, I tell students to make the flowers bigger than feels natural, because thin paste lines shrink visually once the stain develops. Shaded petals look lovely but only add them if your cone pressure is steady; a shaky shading stroke reads as a smudge on the back of the hand.
2. Simple Mandala Mehndi Design
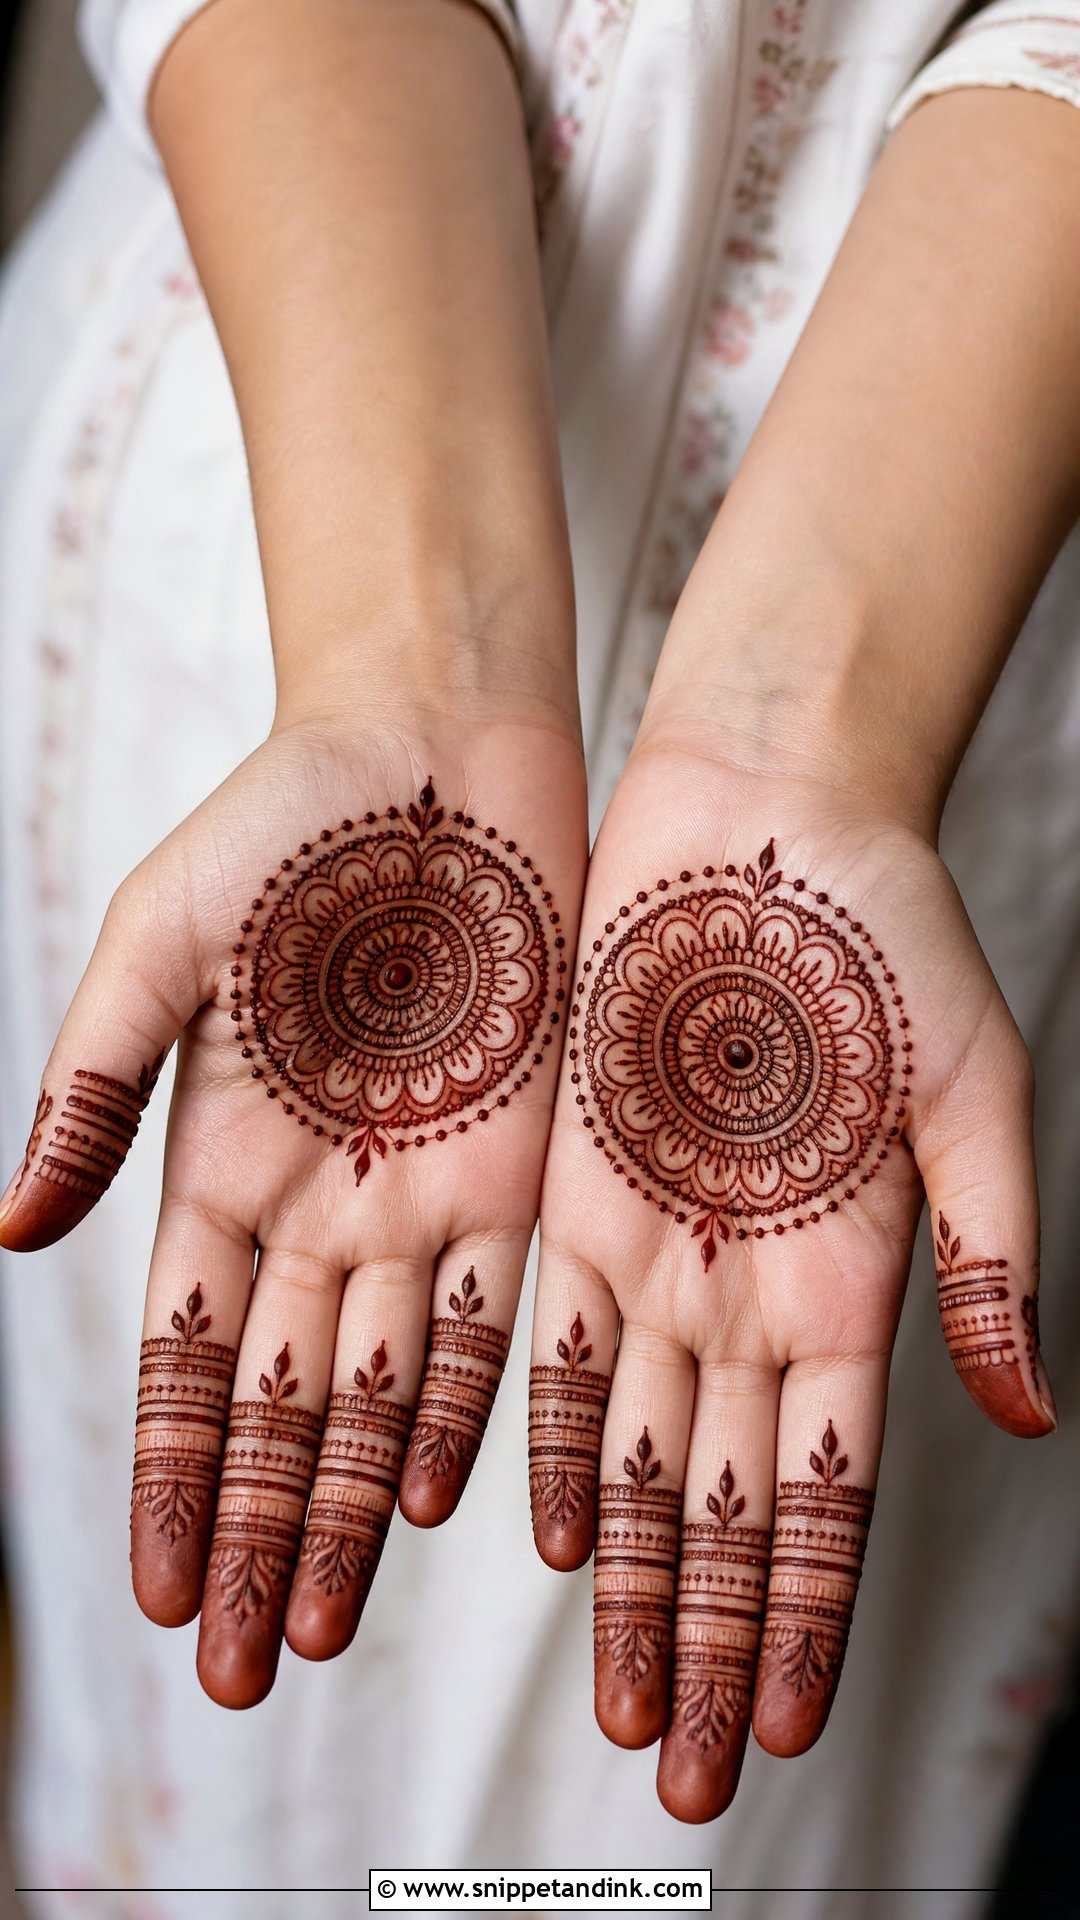
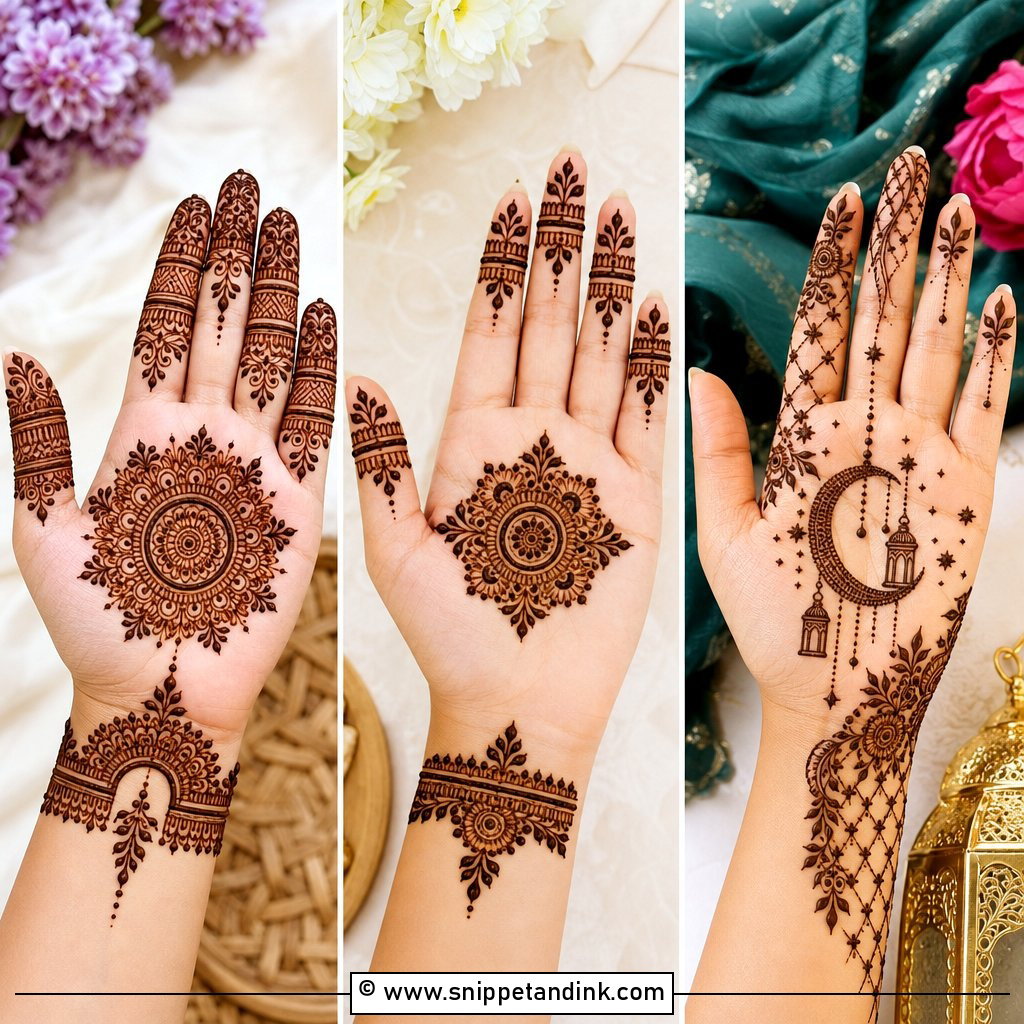
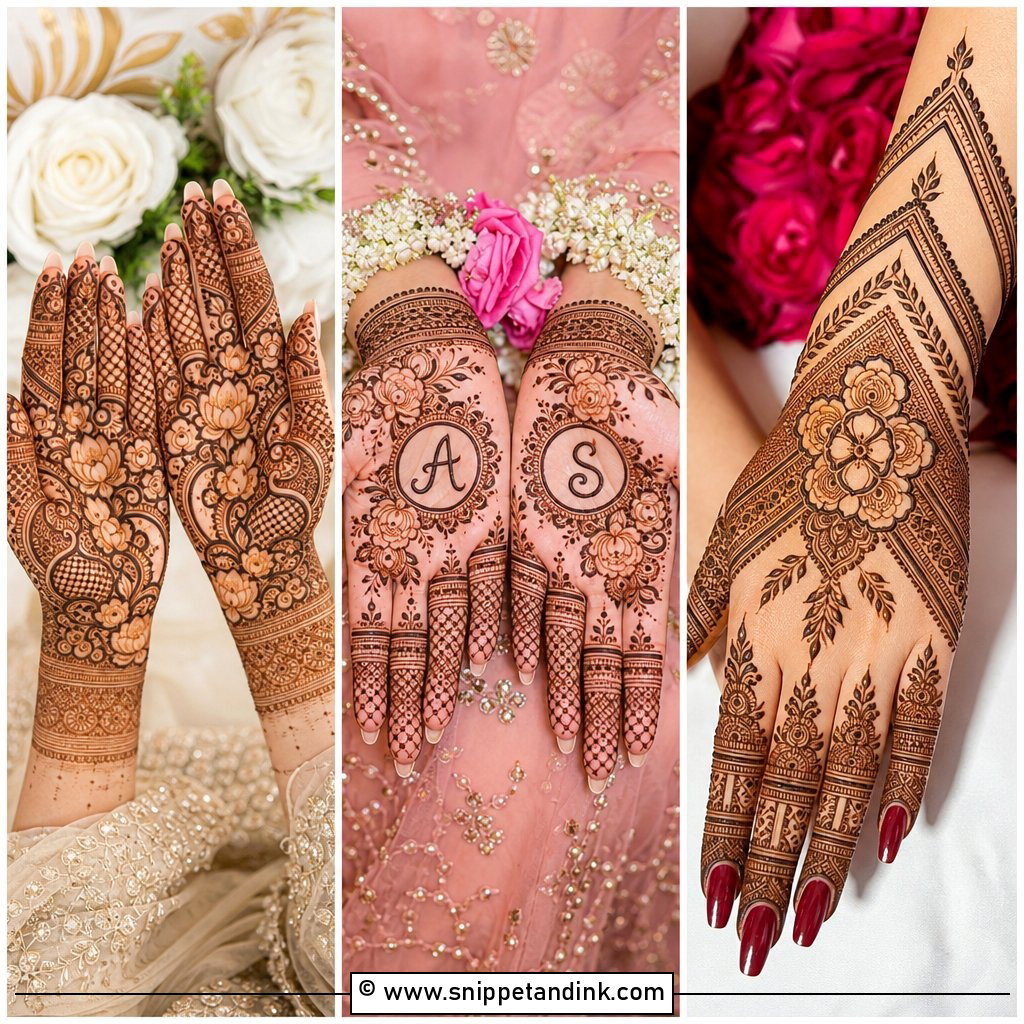
The mandala is the layout I give beginners first. You start with a small circle in the centre of the palm or back hand and build outward ring by ring: petals, then dots, then tiny arches. Fingers stay quiet with bands or dotted tips. The thing that usually goes wrong is drift, where each ring gets slightly more oval than the last, so I turn the client’s hand rather than my wrist as I work around it. Leave a few millimetres of clean skin around the finished circle and the shape will still read clearly once the stain darkens.
3. Simple Back Hand Mehndi Design
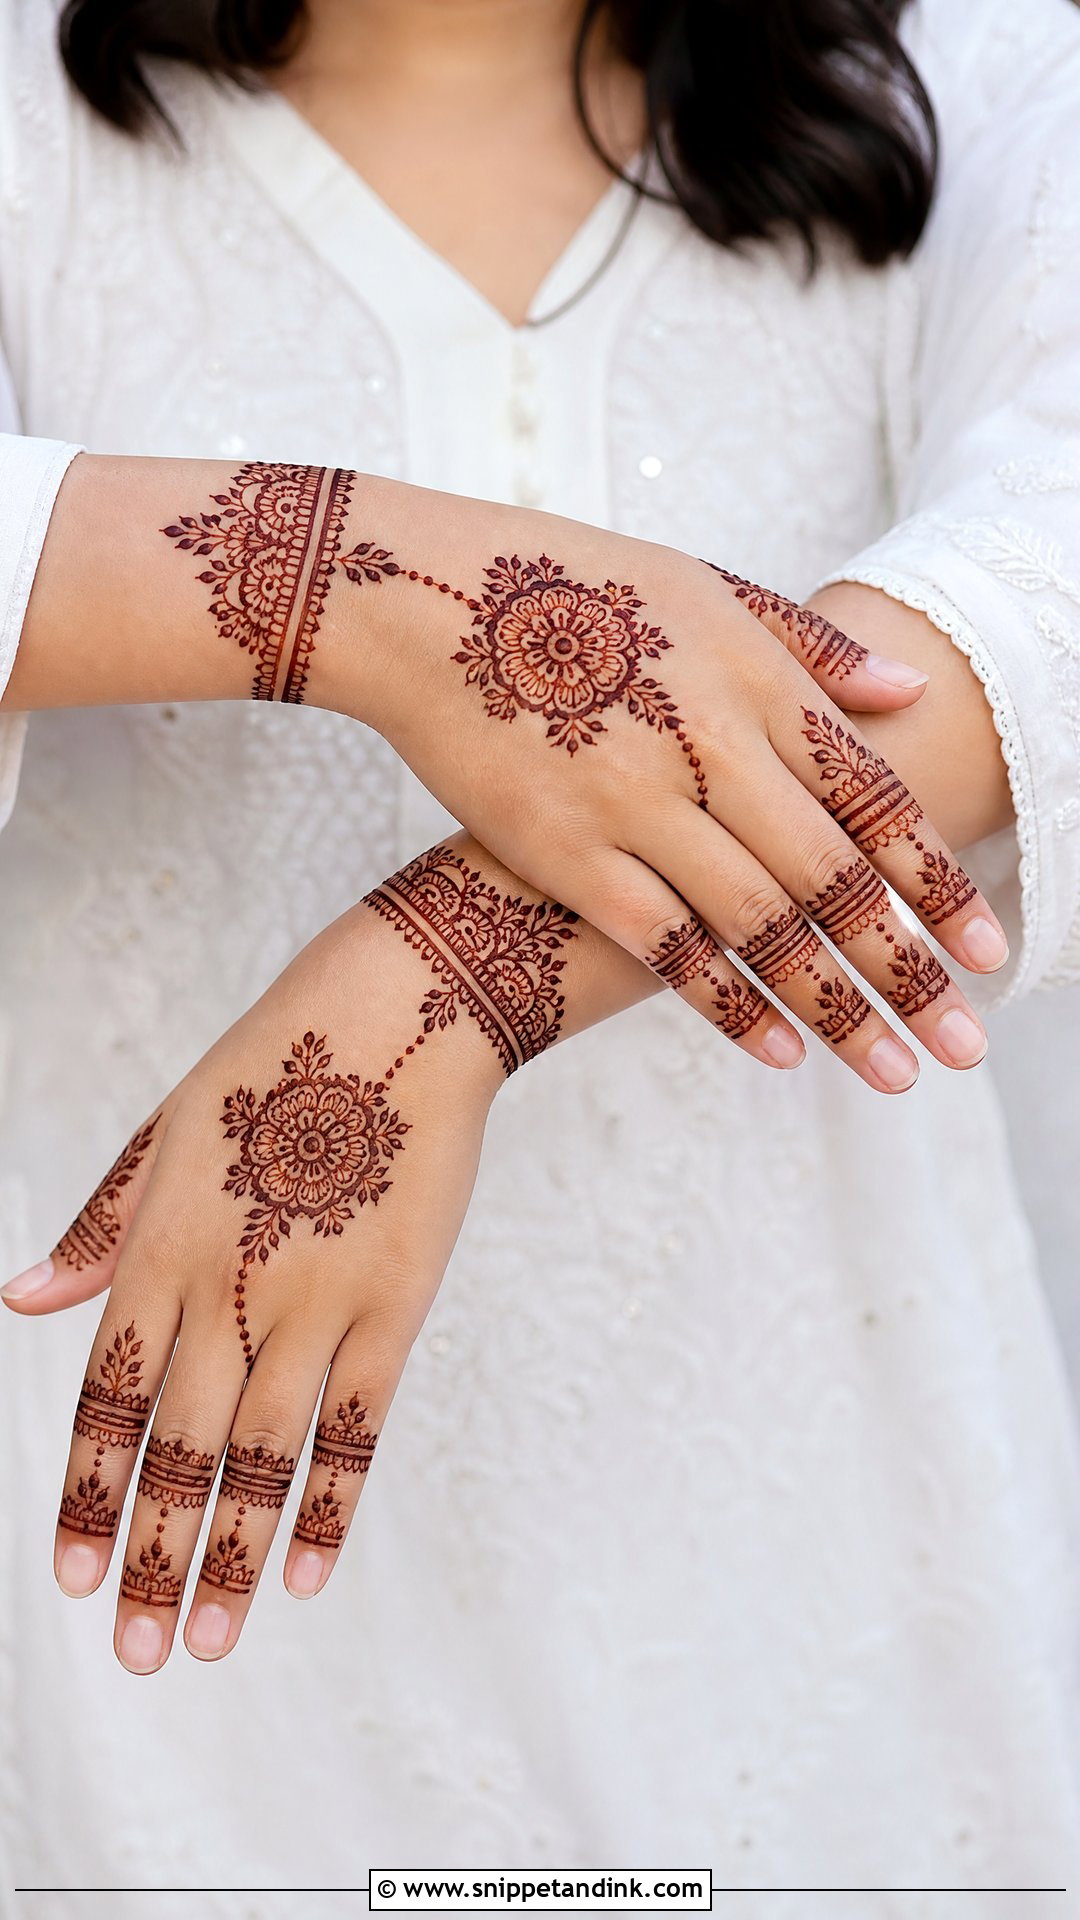
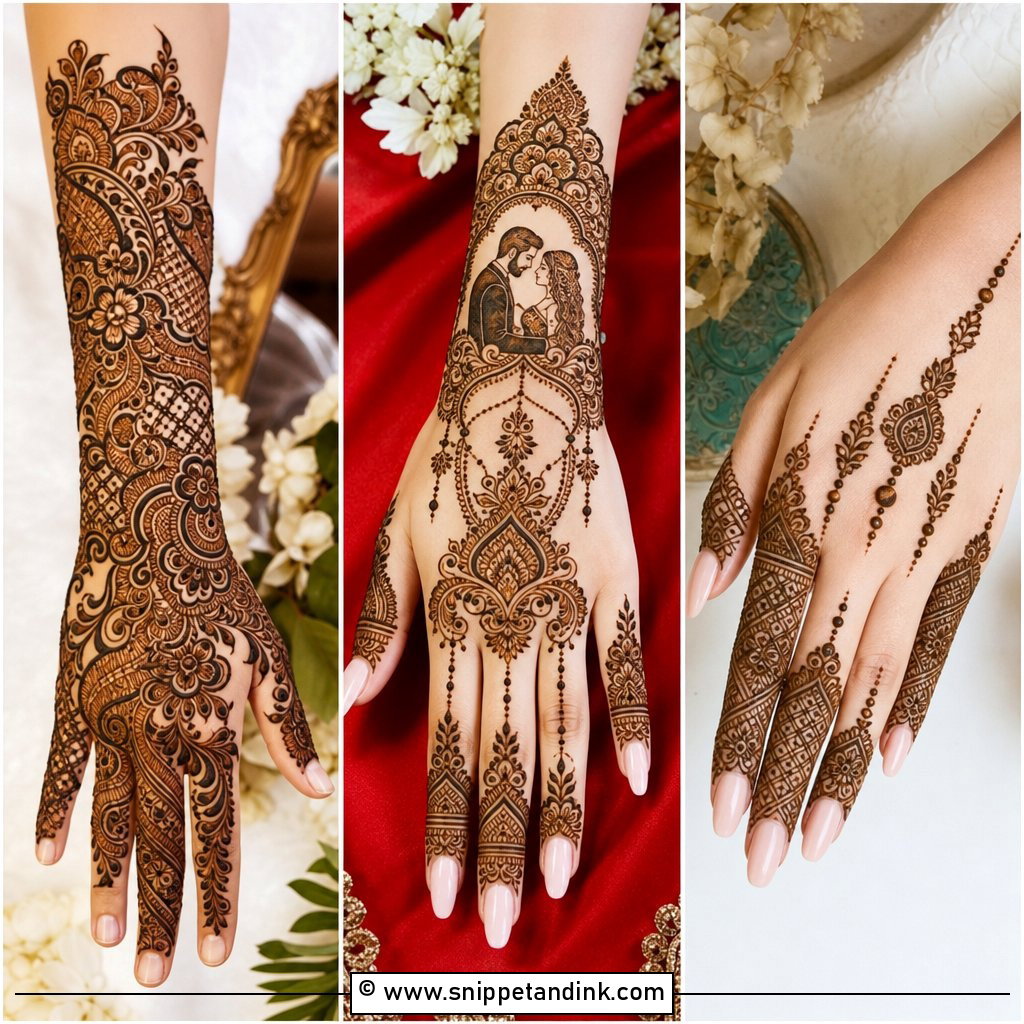
The back of the hand is flat and visible, which is why it forgives so little and rewards so much. I begin with a small wrist band, then link it to one central flower, paisley or mandala with a dotted chain or a fine vine, and finish with ring bands or small fingertip caps. Don’t fill every gap. Dots and little leaves are where you can disguise a slip, so I keep a few in reserve for exactly that. Check where the client’s bangles sit before you place the wrist band, or the jewellery will cover your best line.
4. Simple Front Hand Mehndi Design
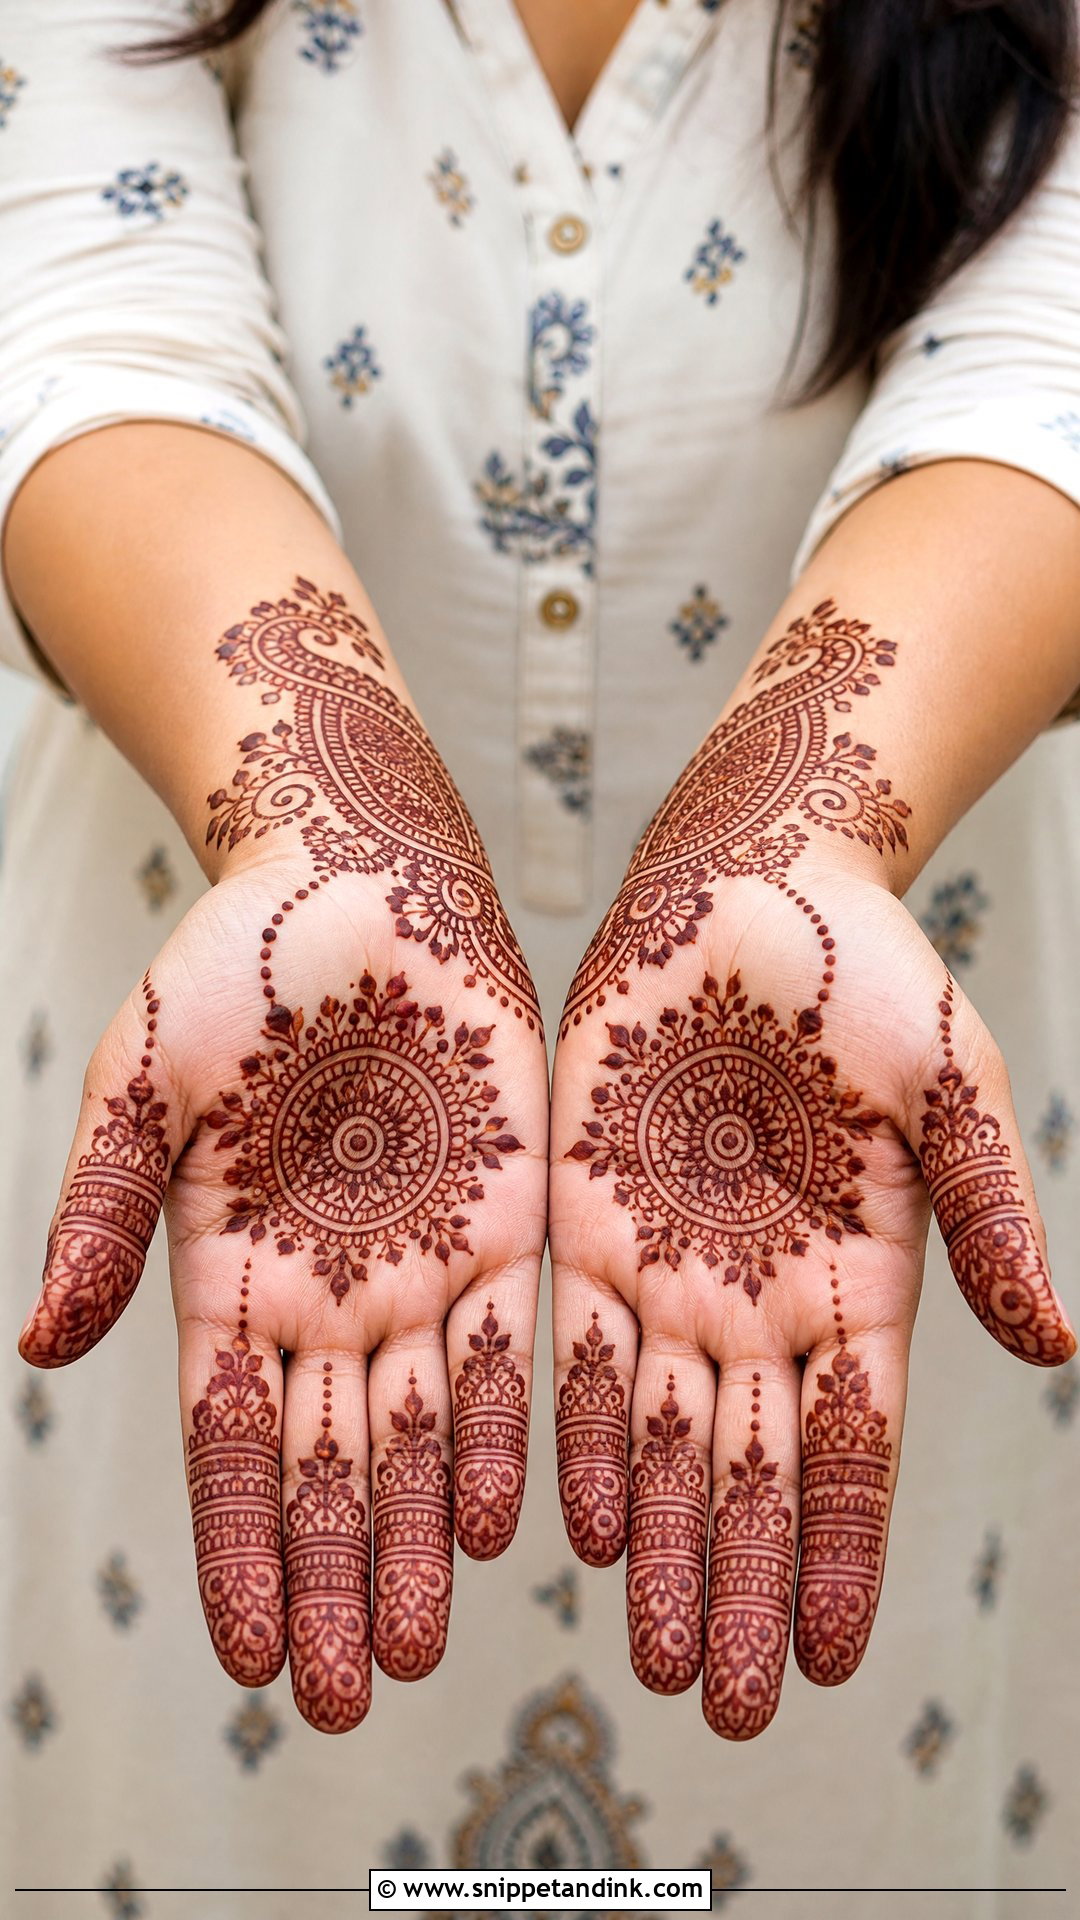
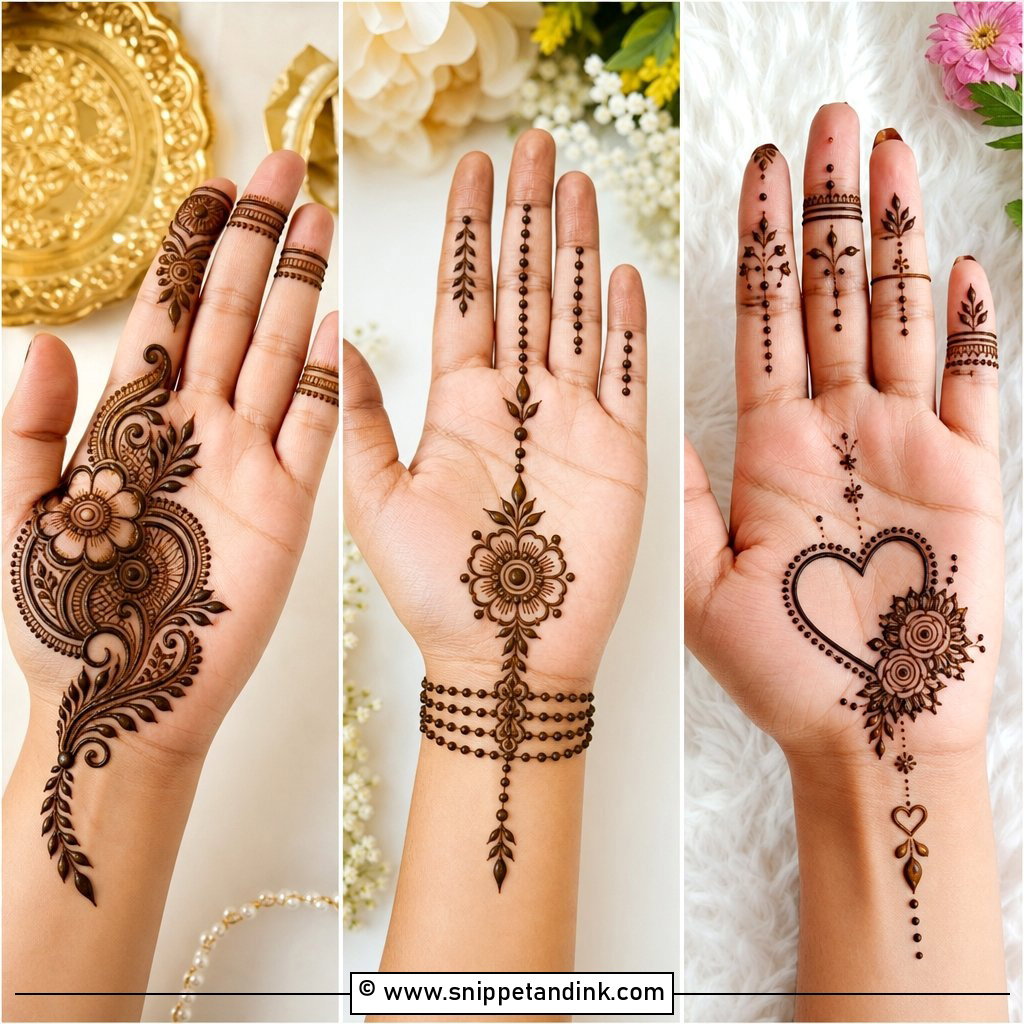
Palm designs stain darker than anything on the back of the hand because the skin there is thicker and holds more of the dye, so the palm can carry a little more detail without looking heavy. I place a round mandala or flower in the centre, add curved paisleys near the wrist, and echo one small element on each finger. Fill only the main shapes with fine lines and dots. One honest warning: the palm creases constantly, so the paste cracks and lifts faster there. Sit with your hands open and still for the first half hour.
5. Simple Finger Mehndi Design
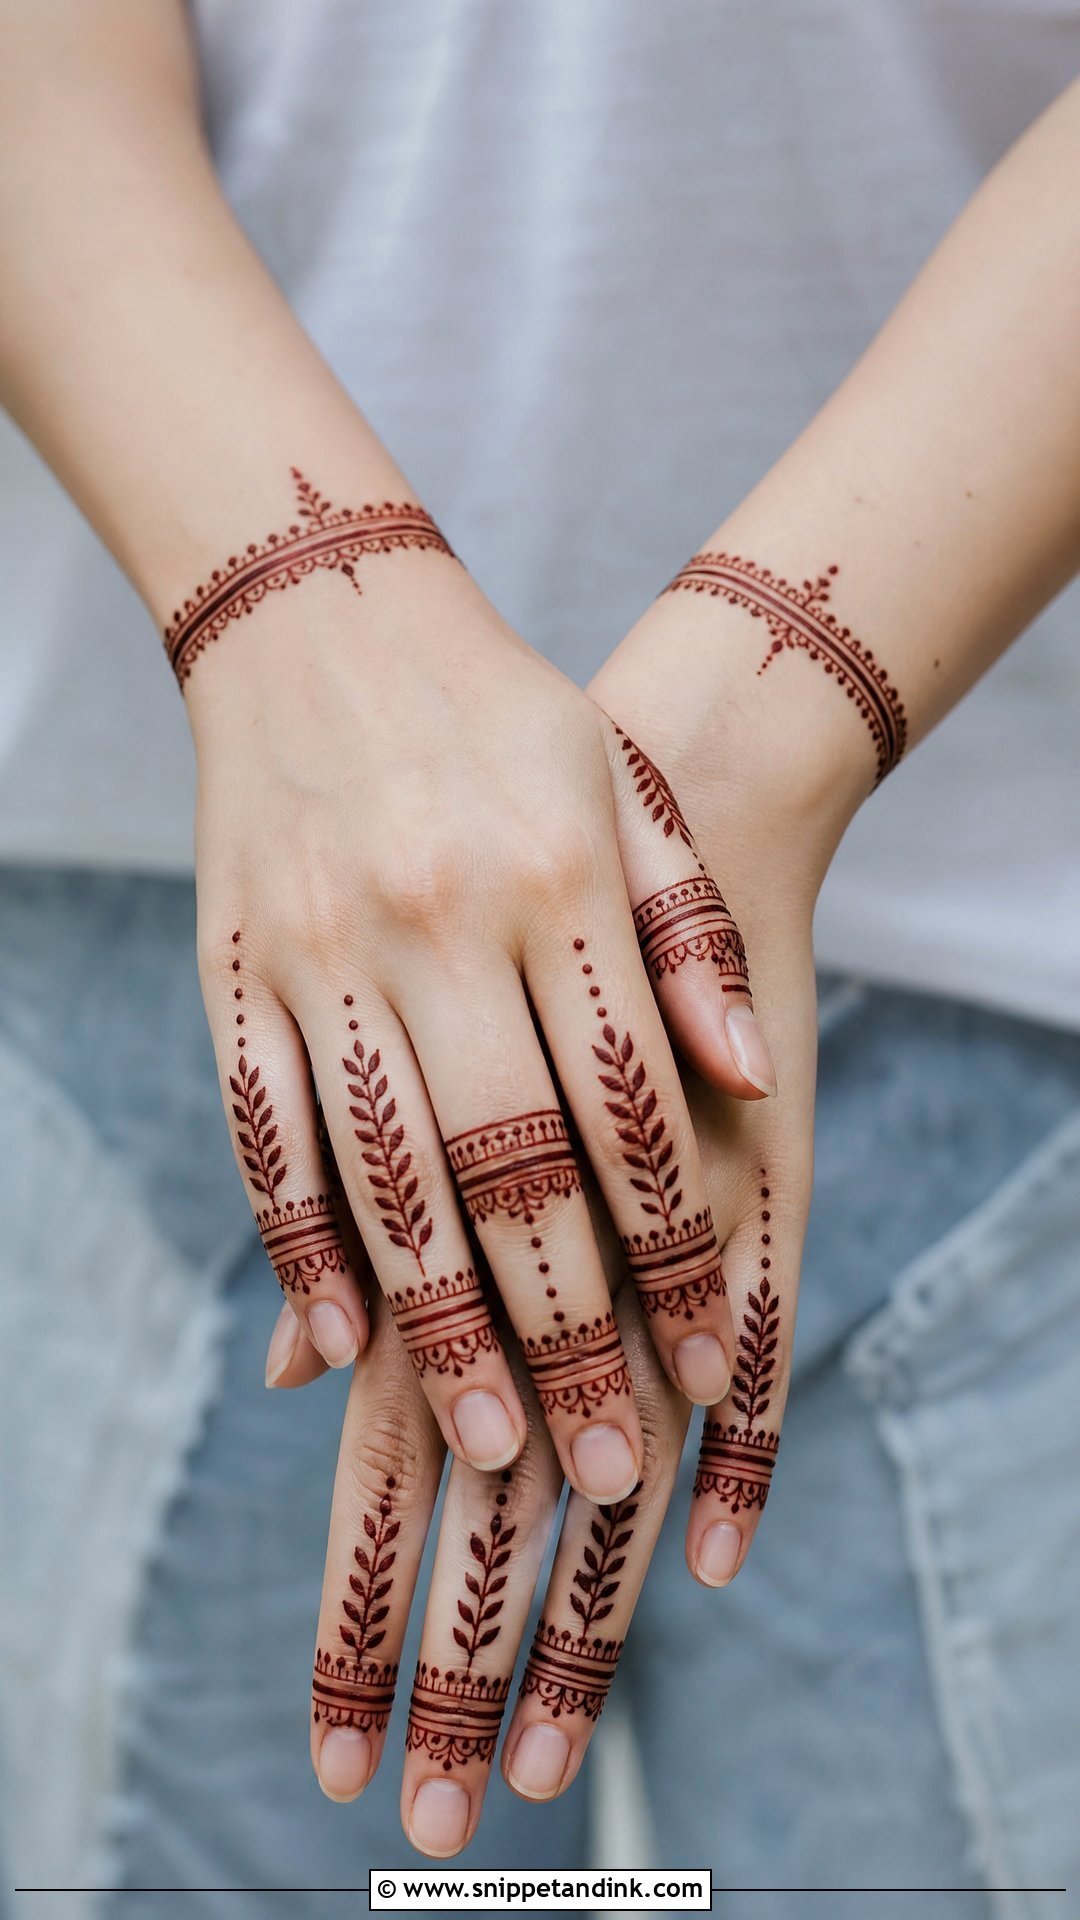
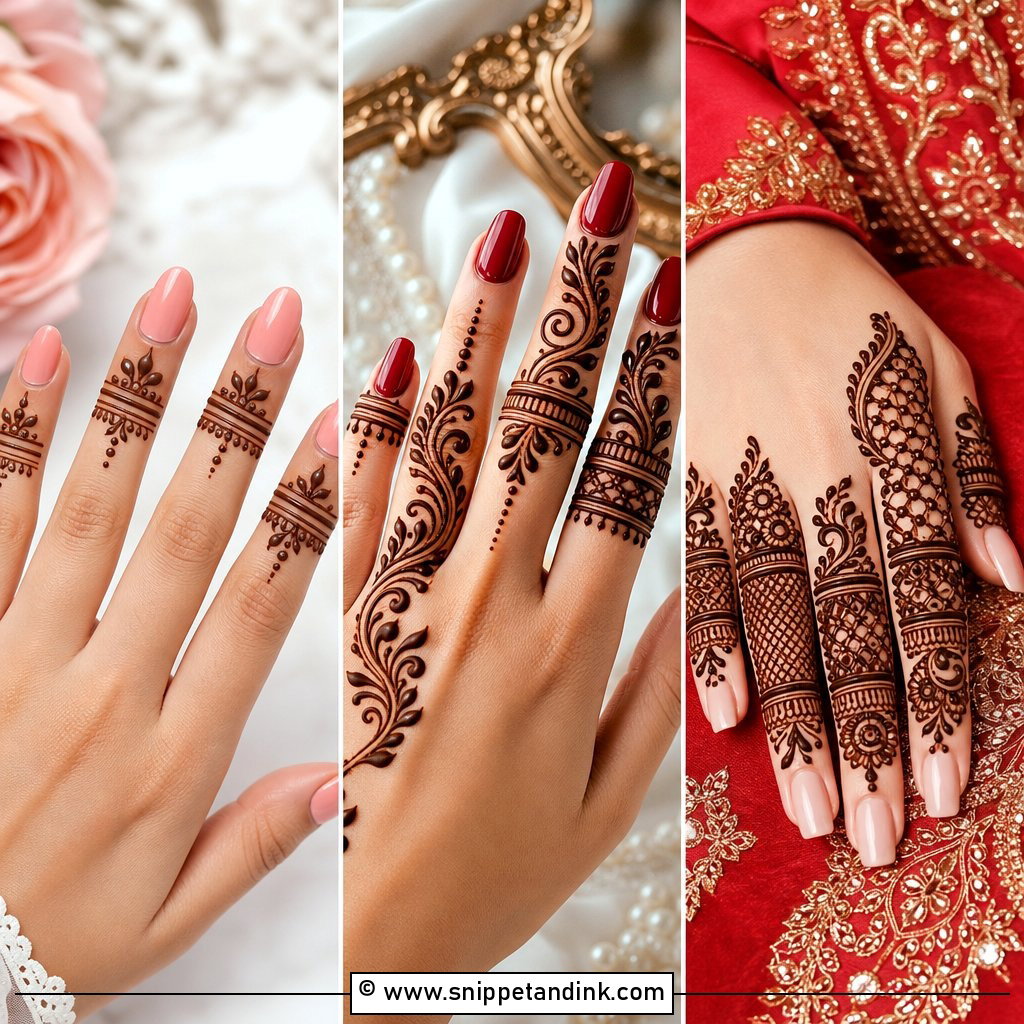
Finger-only work looks complete when the fingers and wrist are planned as one piece. I draw ring-style bands on each finger, a leafy line running down the middle of each, and a soft bracelet at the wrist, leaving the back of the hand almost bare or adding a single flower near the knuckles. It’s a quick design, often fifteen minutes a hand. Fingertips and the sides of the fingers take a deep stain, but the skin near the knuckles takes less, so I keep the heavier lines toward the tips. Repeat one pattern across all five fingers so they look connected.
6. Simple Bracelet Mehndi Design
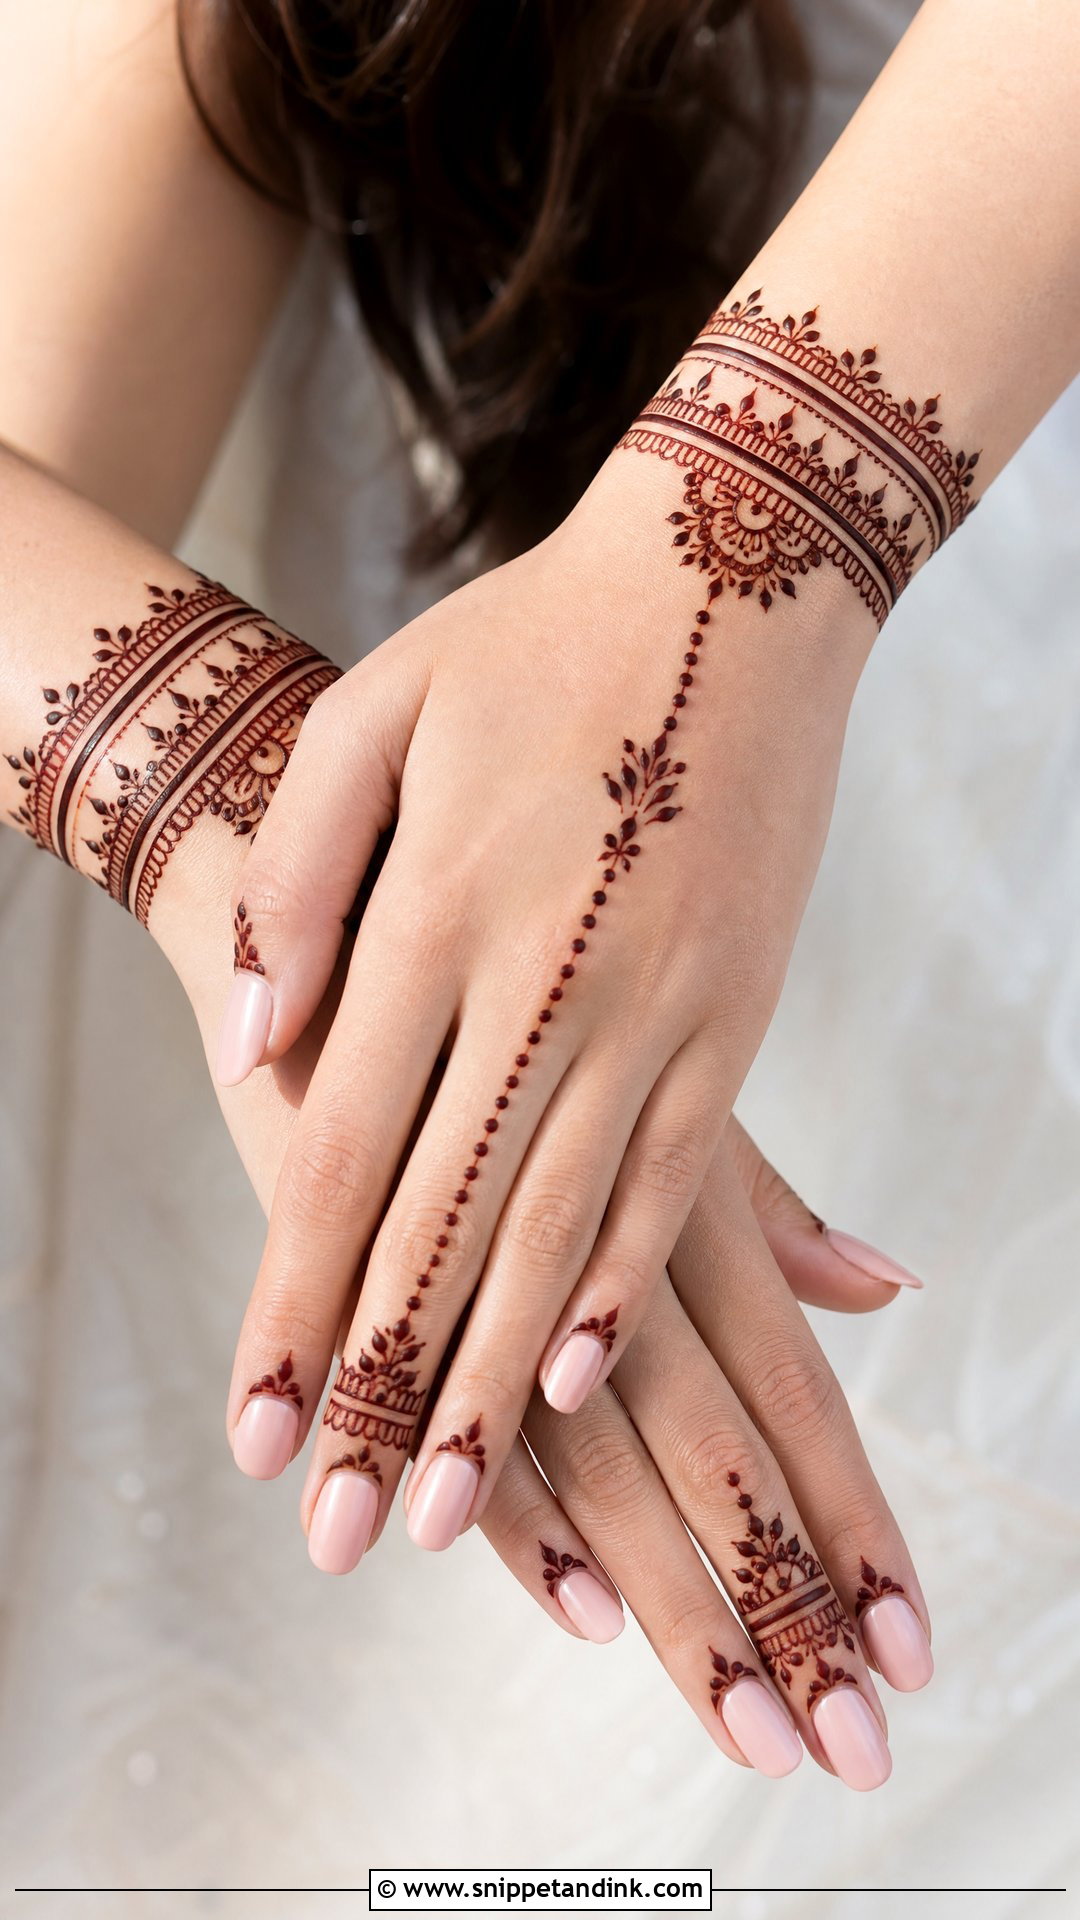
A bracelet design is henna that behaves like jewellery. Two or three curved bands go around the wrist, filled with scallops or mini flowers, then one dotted chain runs to the middle or ring finger and ends in a small ring pattern. The wrist is a thin-skinned area that stains lighter than the palm, so I draw the bracelet bands a touch thicker than the finger chain. Ask the wearer to keep the paste on for several hours; wrist designs are the first to rub off against sleeves and handbags.
7. Simple Rose Mehndi Design
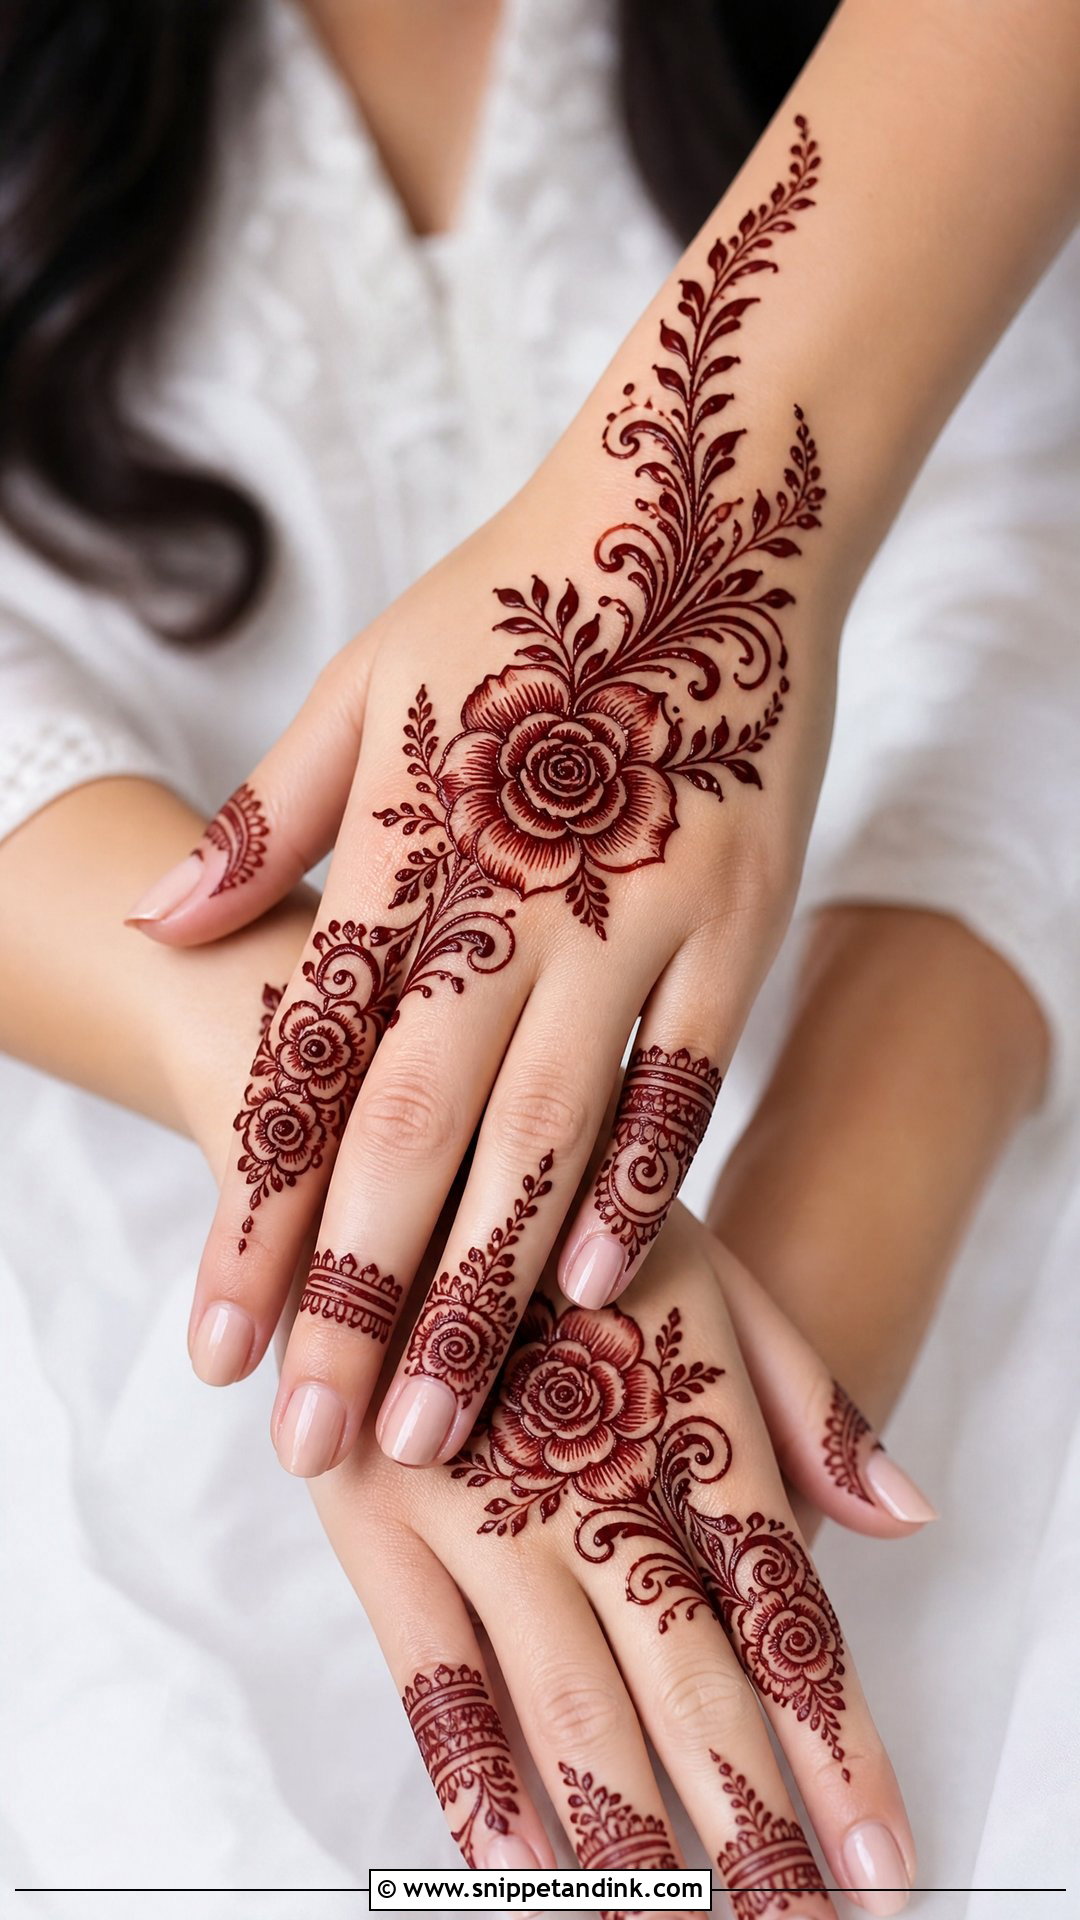
Roses are one of the few motifs bold enough to carry a hand on their own. I place one large rose slightly off-centre on the back of the hand, two smaller ones near the wrist, and join them with curved leafy vines, keeping the fingers to slim bands and dots. The petals have to be clear, rounded strokes. If you fill them in with lines the rose turns into a dark blob once it stains, which is the most common thing I correct on self-applied rose designs. It sits nicely alongside engagement and festive outfits.
8. Simple Paisley Mehndi Design
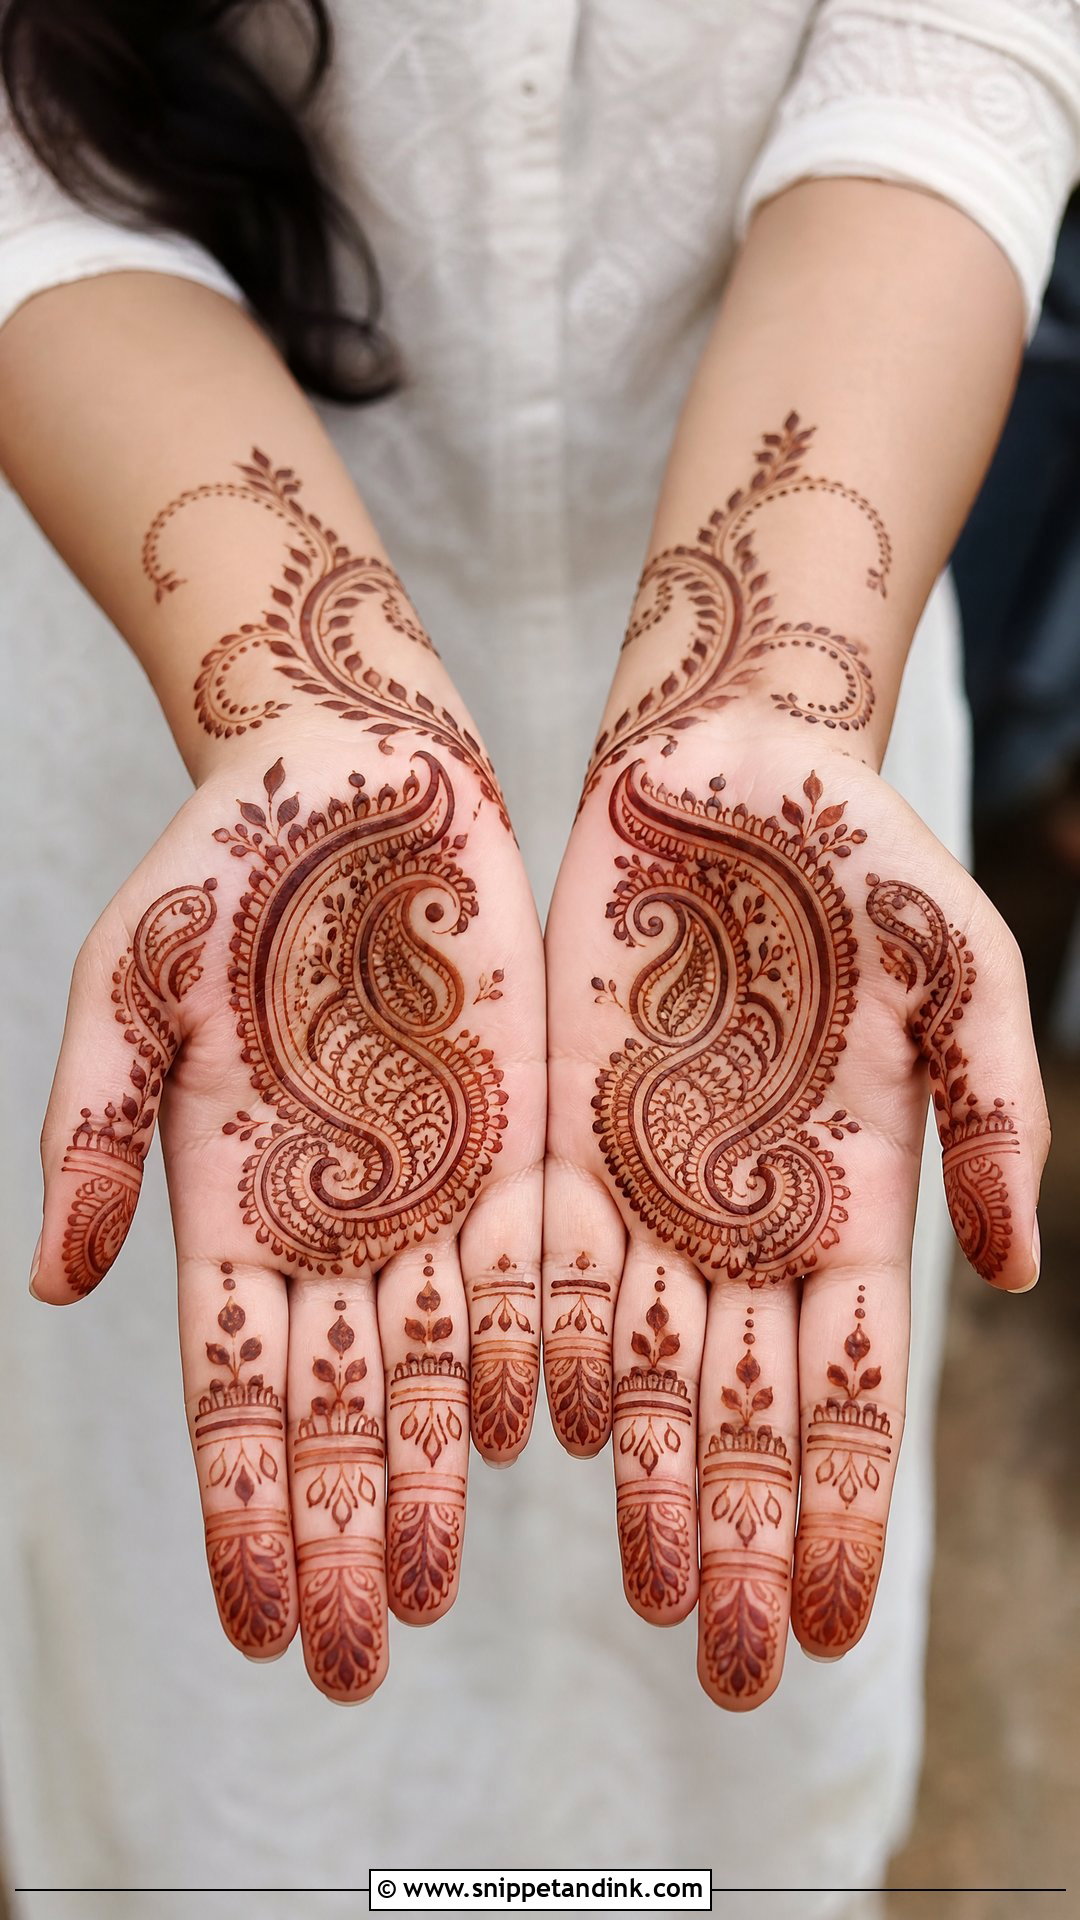
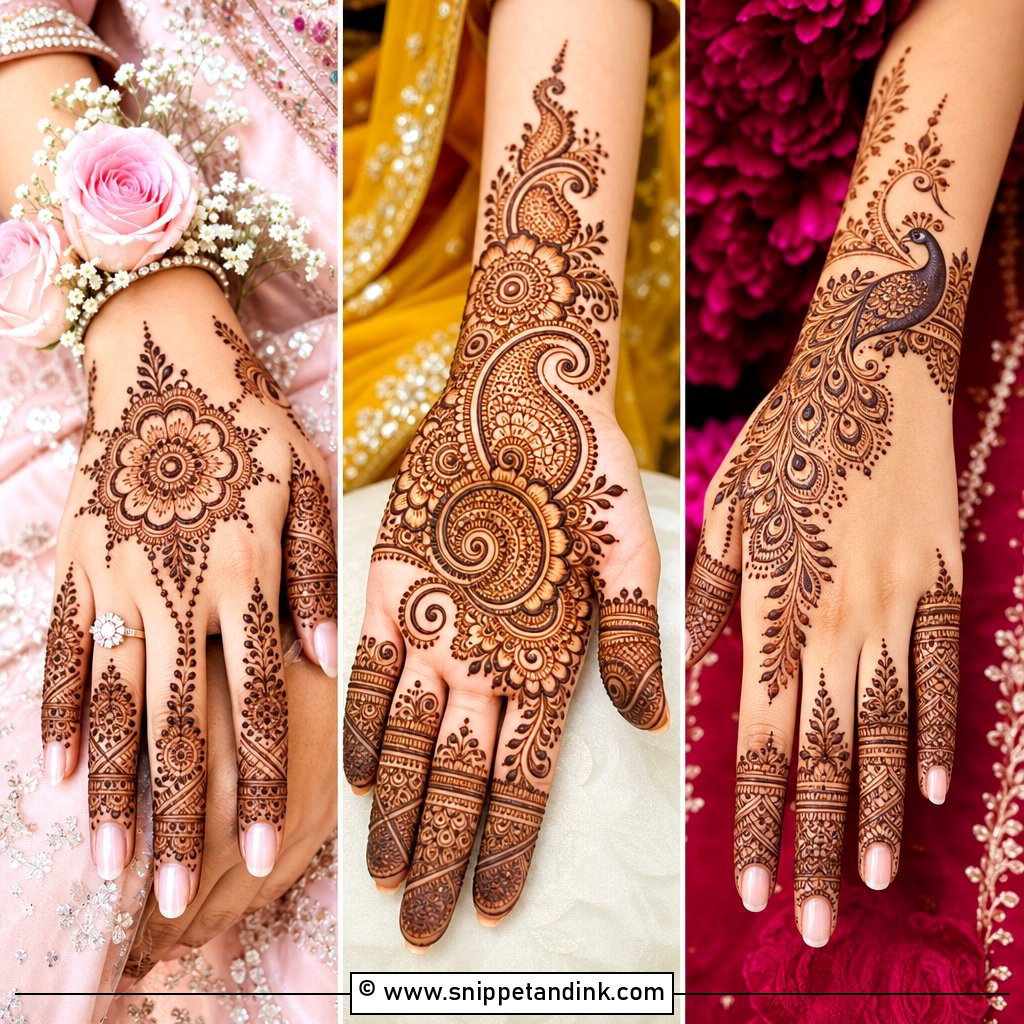
The paisley has survived every trend cycle because its curve adapts to any hand. For a full look, one medium paisley sits near the centre, with smaller ones flowing toward the wrist and index finger, and leafy vines around them to soften the edges. Keep the outer border bold and the inner filling fine. If a hand is narrow, I stretch the paisley longer rather than making it smaller, so the filling still has room to breathe. It gives a traditional Indian feel without tipping into dense bridal coverage.
9. Simple Leaf Trail Mehndi Design
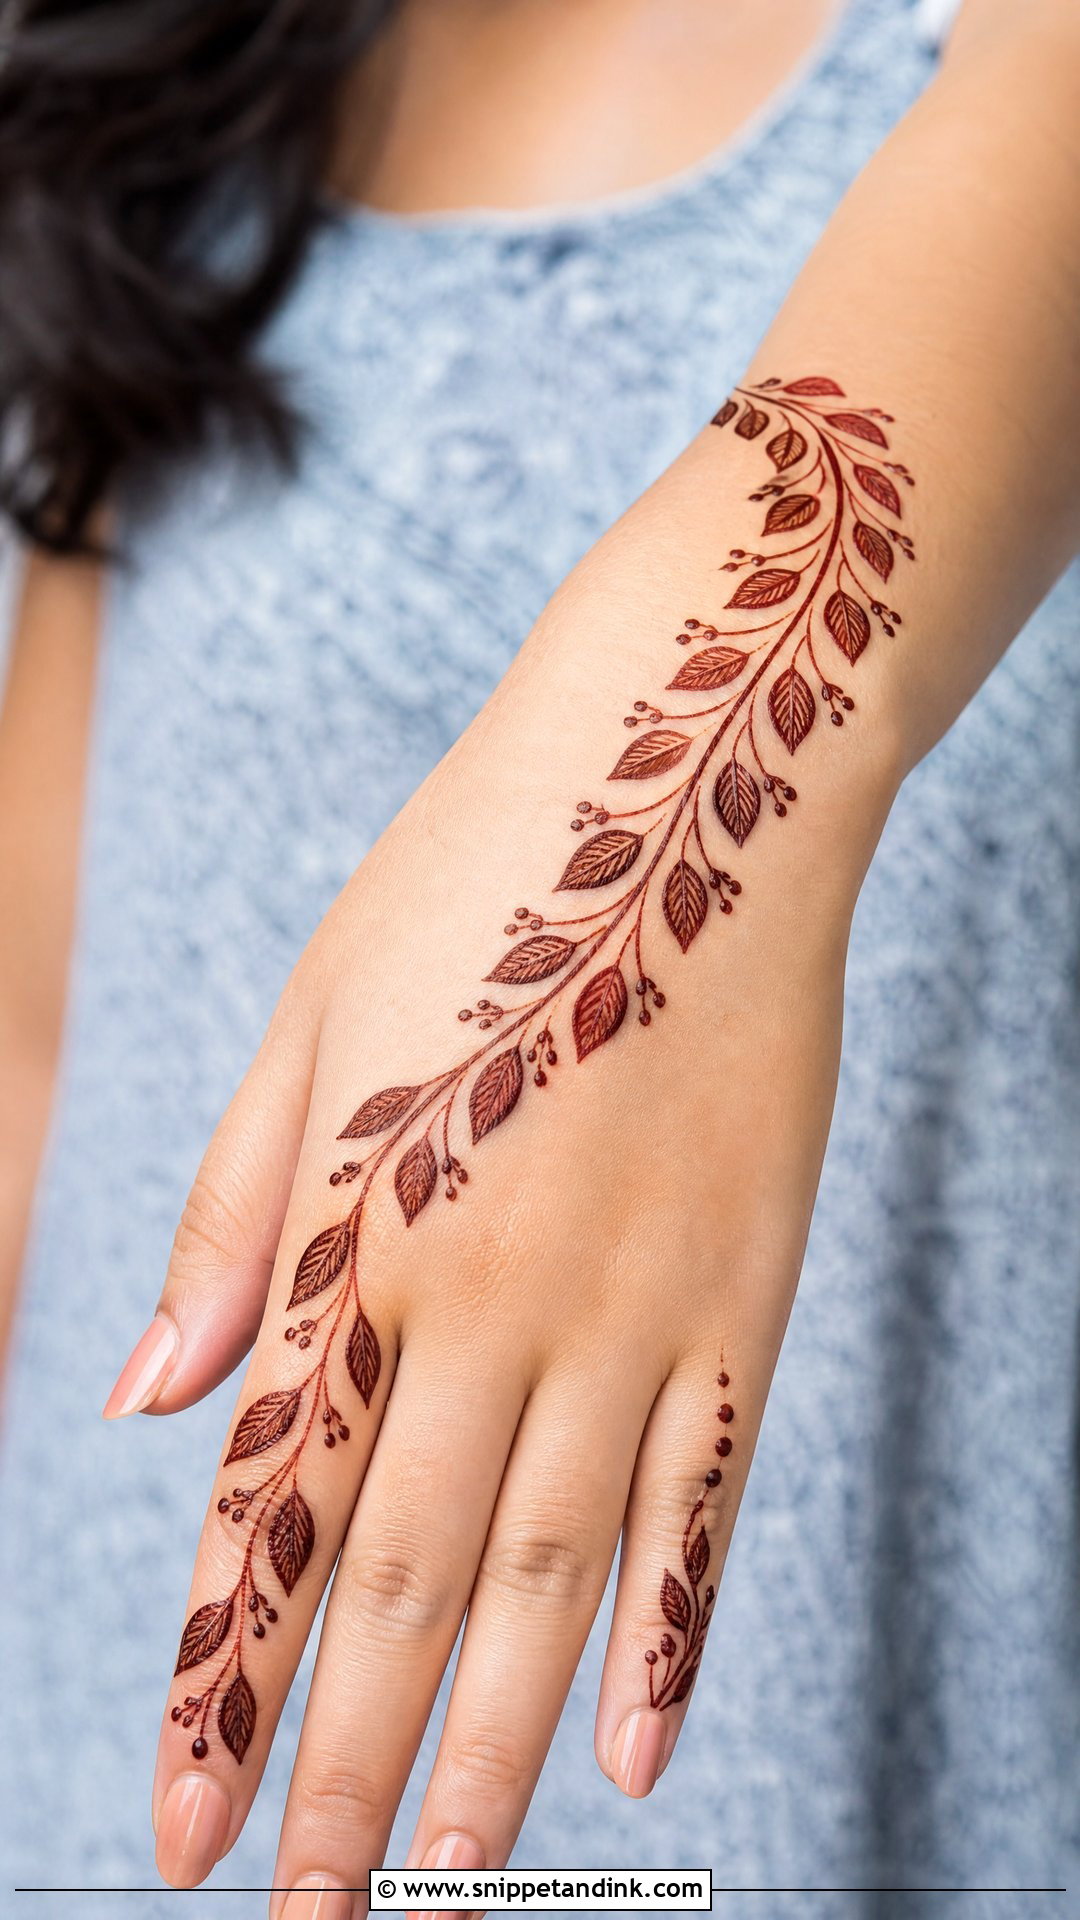
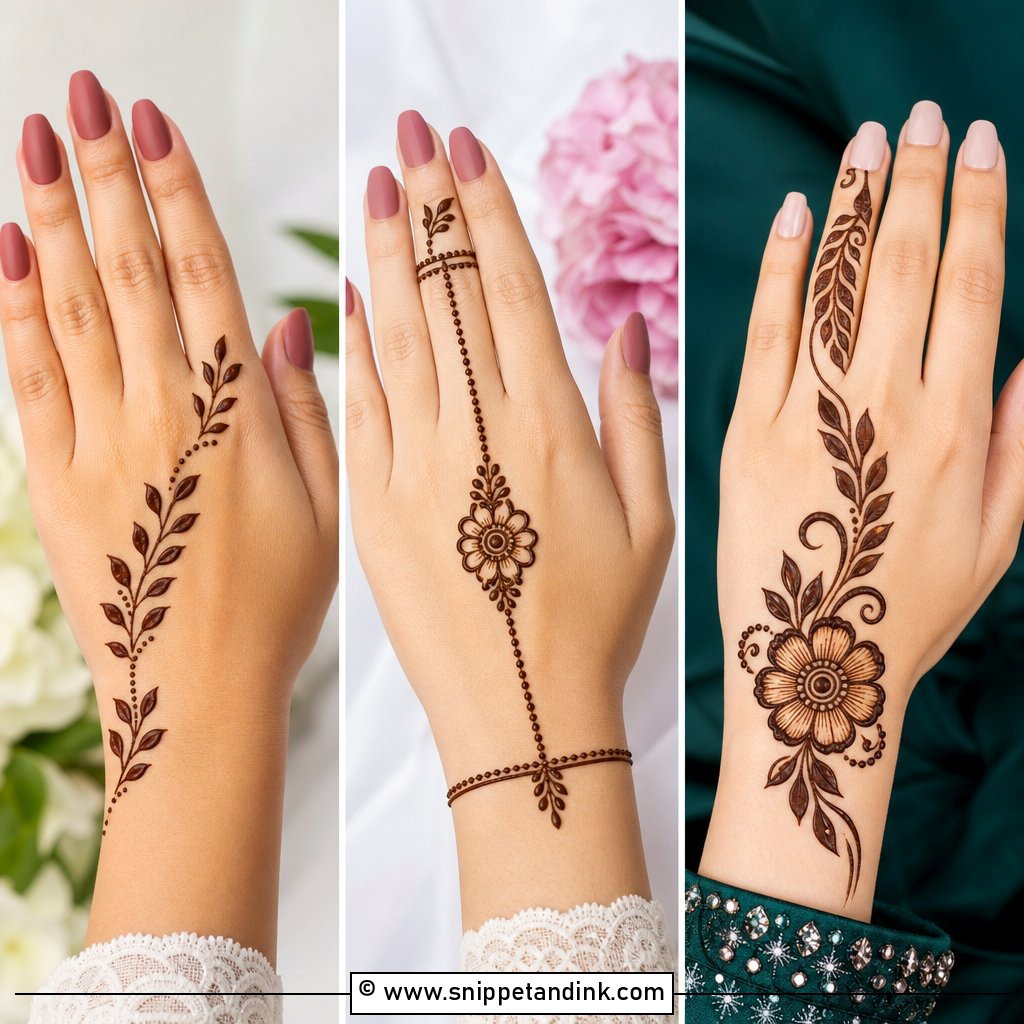
Leaf trails are the fastest complete design I know. A curved vine starts at the wrist and runs diagonally across the back of the hand to the index or middle finger, with leaves on both sides and a few dots or buds in the gaps. Don’t fuss over making the leaves identical; slight variation looks more natural than forced symmetry. Because the trail follows the line of the hand, it visually lengthens short fingers, which is why I suggest it to guests with smaller hands.
10. Simple Jaali Mehndi Design
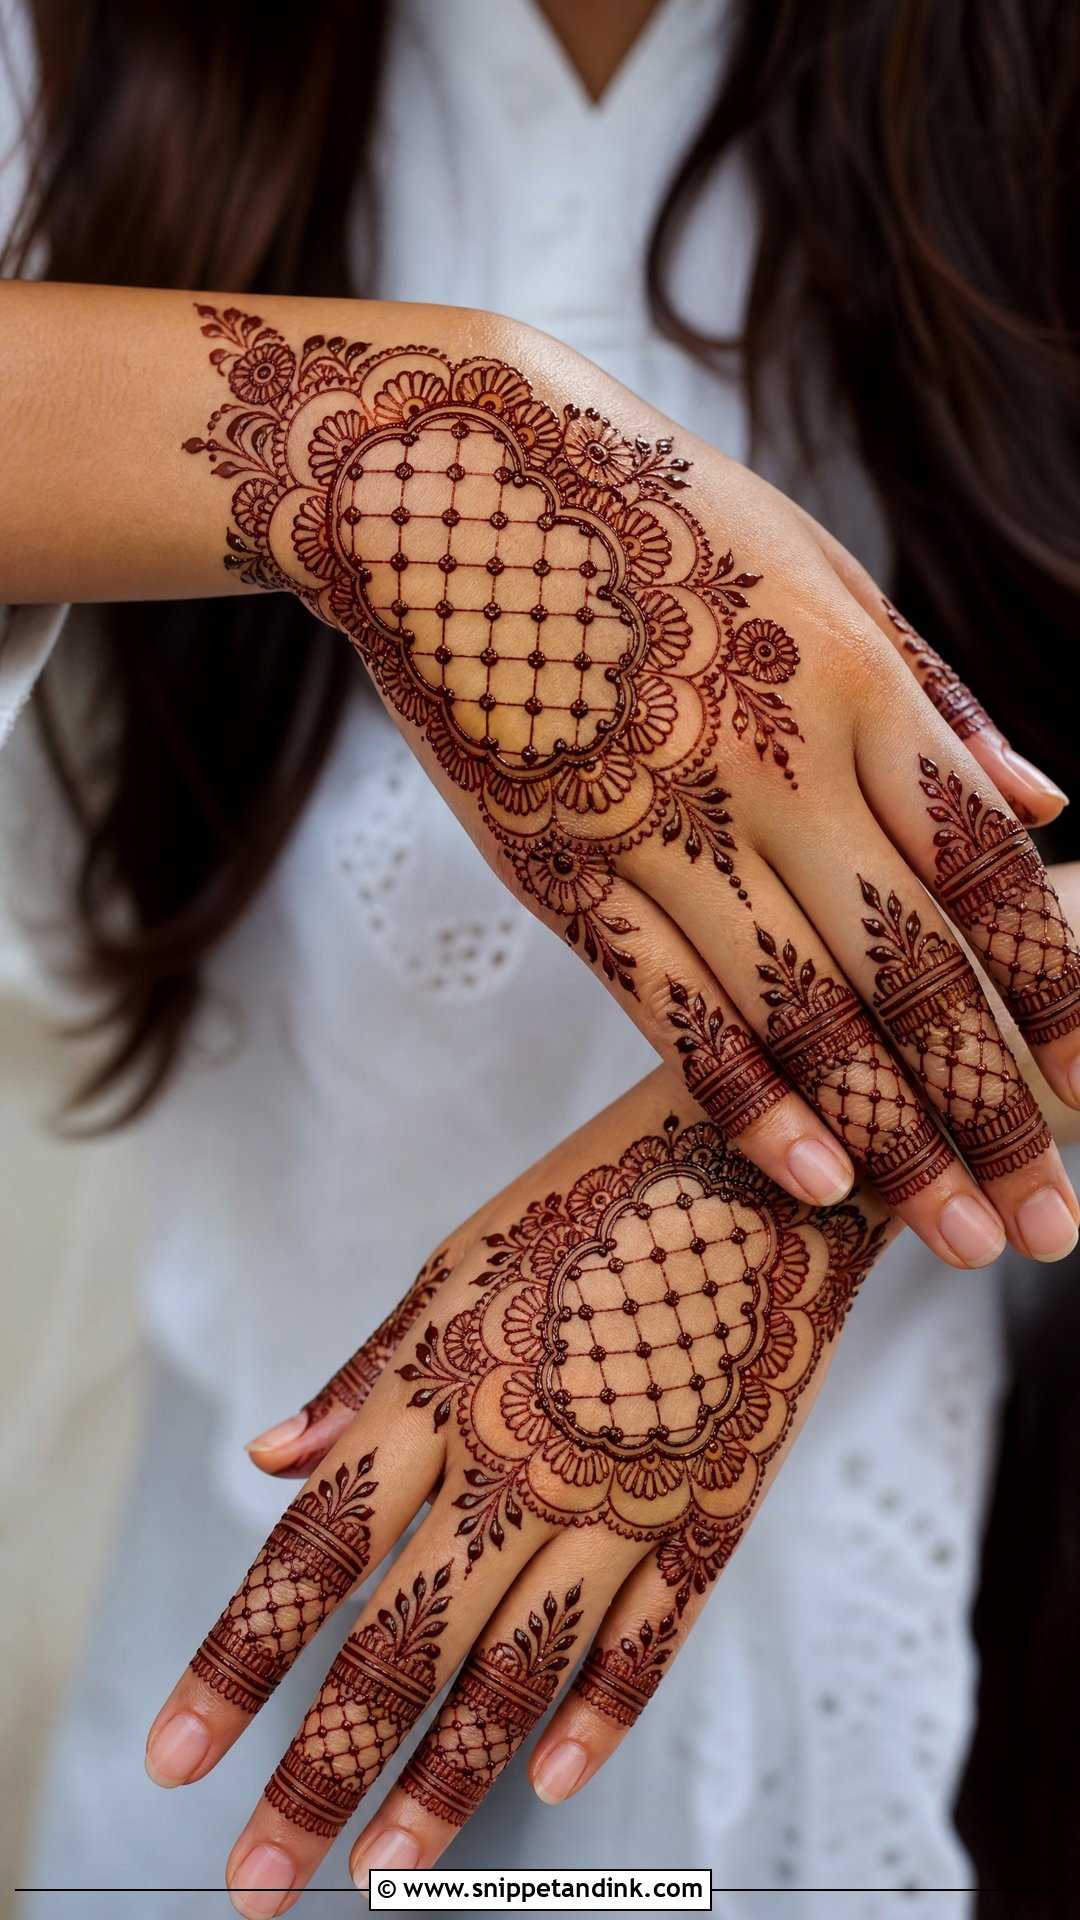
Jaali, the mesh pattern, adds texture, but it only works as one feature area. I draw a single neat mesh panel on the back of the hand or palm and frame it with flowers or a small mandala, then repeat a tiny section on the fingers. The lines must be evenly spaced, which means drawing all the lines in one direction first and then crossing them, rather than building square by square. A dot at each crossing hides slight wobbles. Put jaali everywhere and the stain turns into a muddy patch.
11. Simple Indo Arabic Mehndi Design
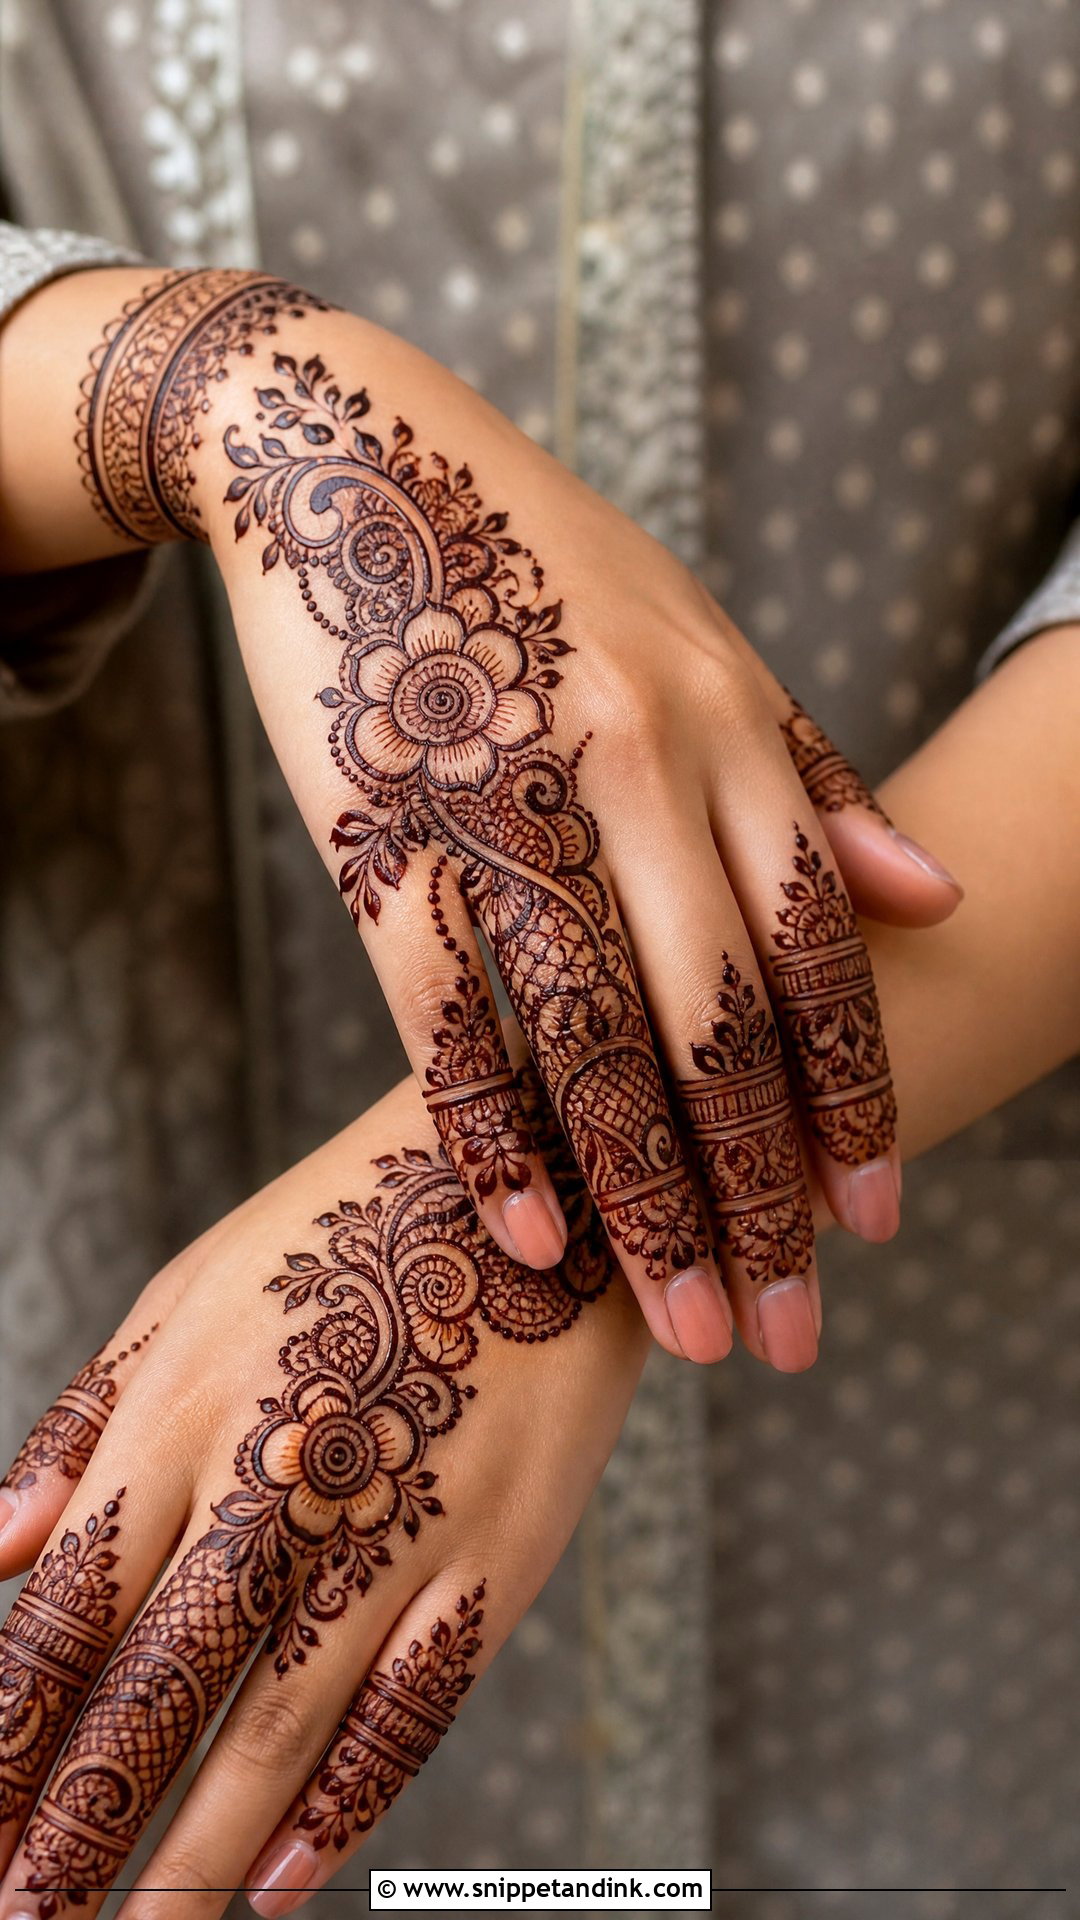
Indo Arabic is my usual suggestion for someone who finds minimal mehndi too plain but doesn’t want bridal density. The structure is Arabic, a diagonal floral trail with open spacing, and the detail is Indian: fine dots, tiny paisleys and delicate finger bands. Use thick outlines for the flowers and thin inner lines, otherwise the two styles fight each other. It adapts easily to both slim and wide hands, and it suits Eid, Diwali, weddings and family events equally well.
12. Simple Moroccan Mehndi Design
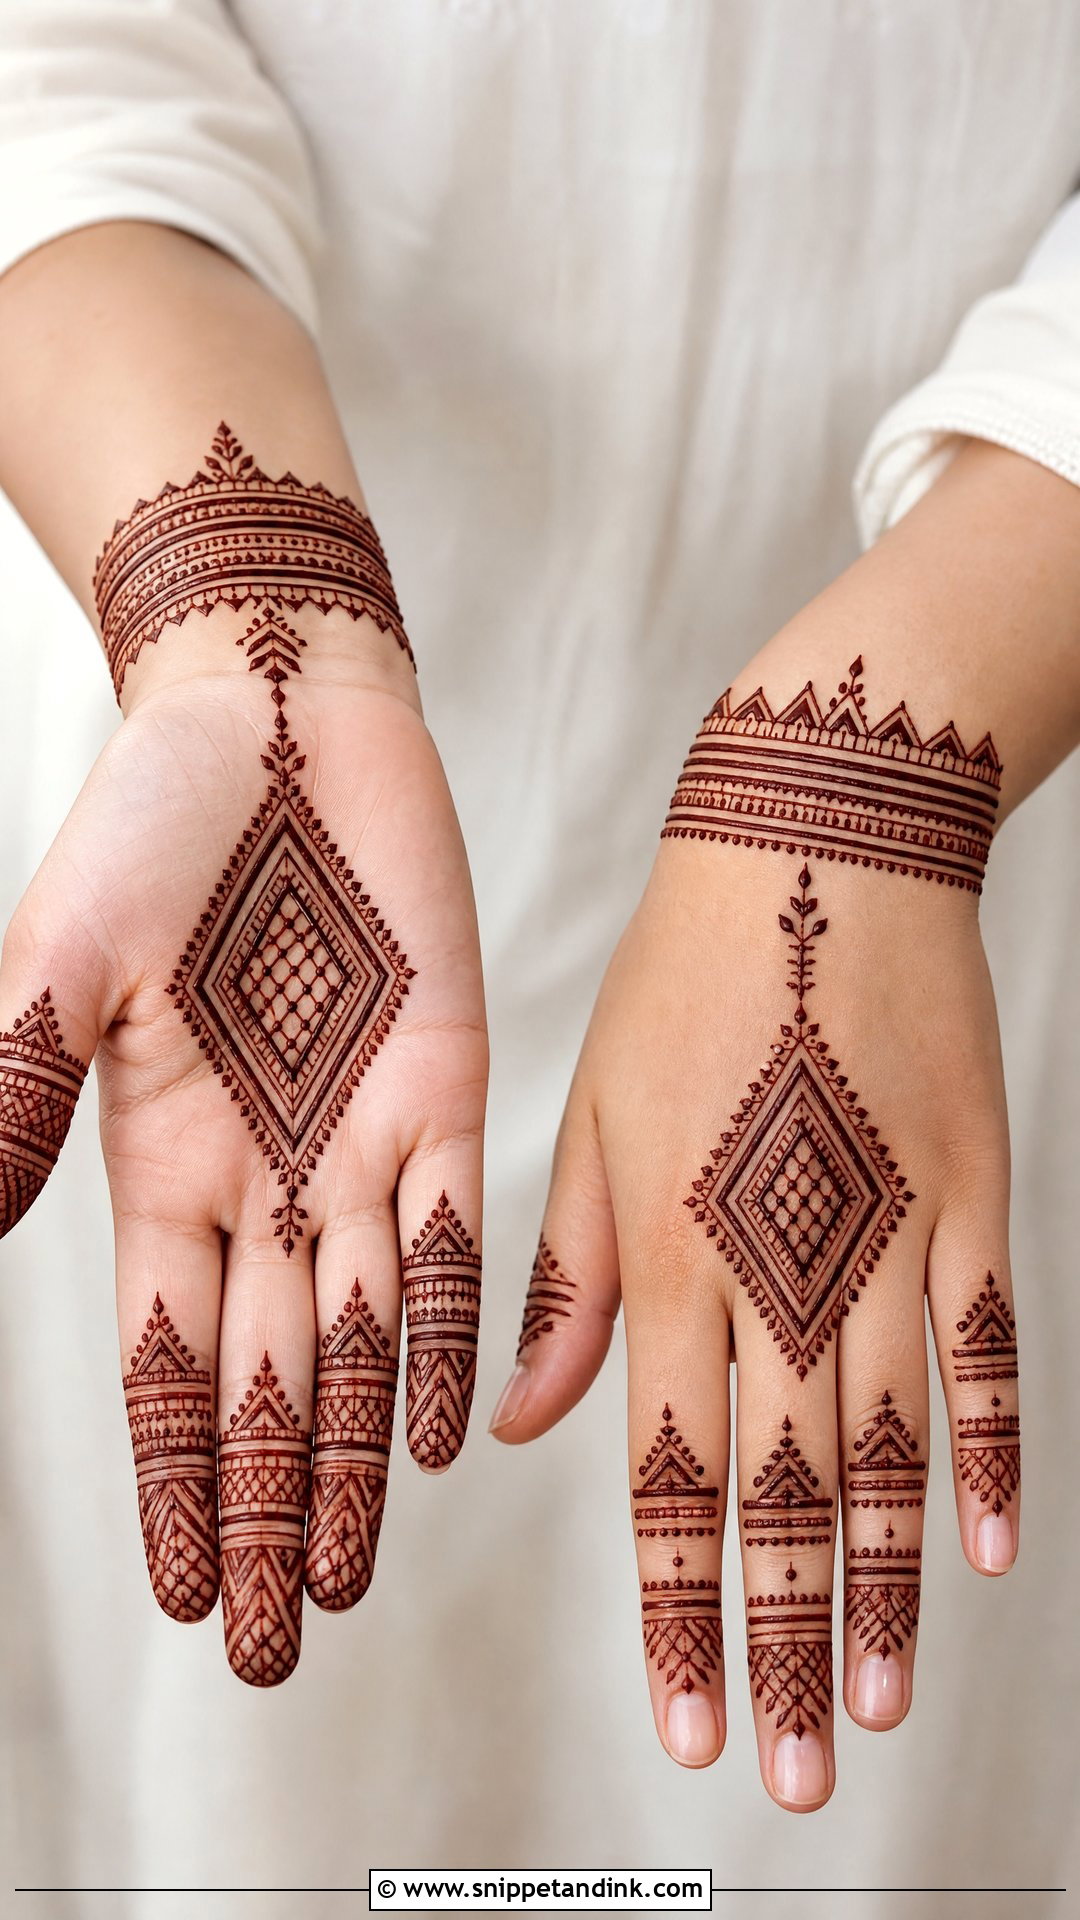
Moroccan work trades flowers for geometric patterns: diamonds, triangles, grids, straight bands and dotted borders. I start with one central geometric panel and run slim patterned strips toward the fingers and wrist. Straight lines are less forgiving than curves, so I pull them in one confident stroke with the cone held a little higher off the skin, and I’d steer an absolute beginner toward the fewest shapes repeated carefully. It suits fusion outfits and anyone tired of florals.
13. Simple Gulf Mehndi Design
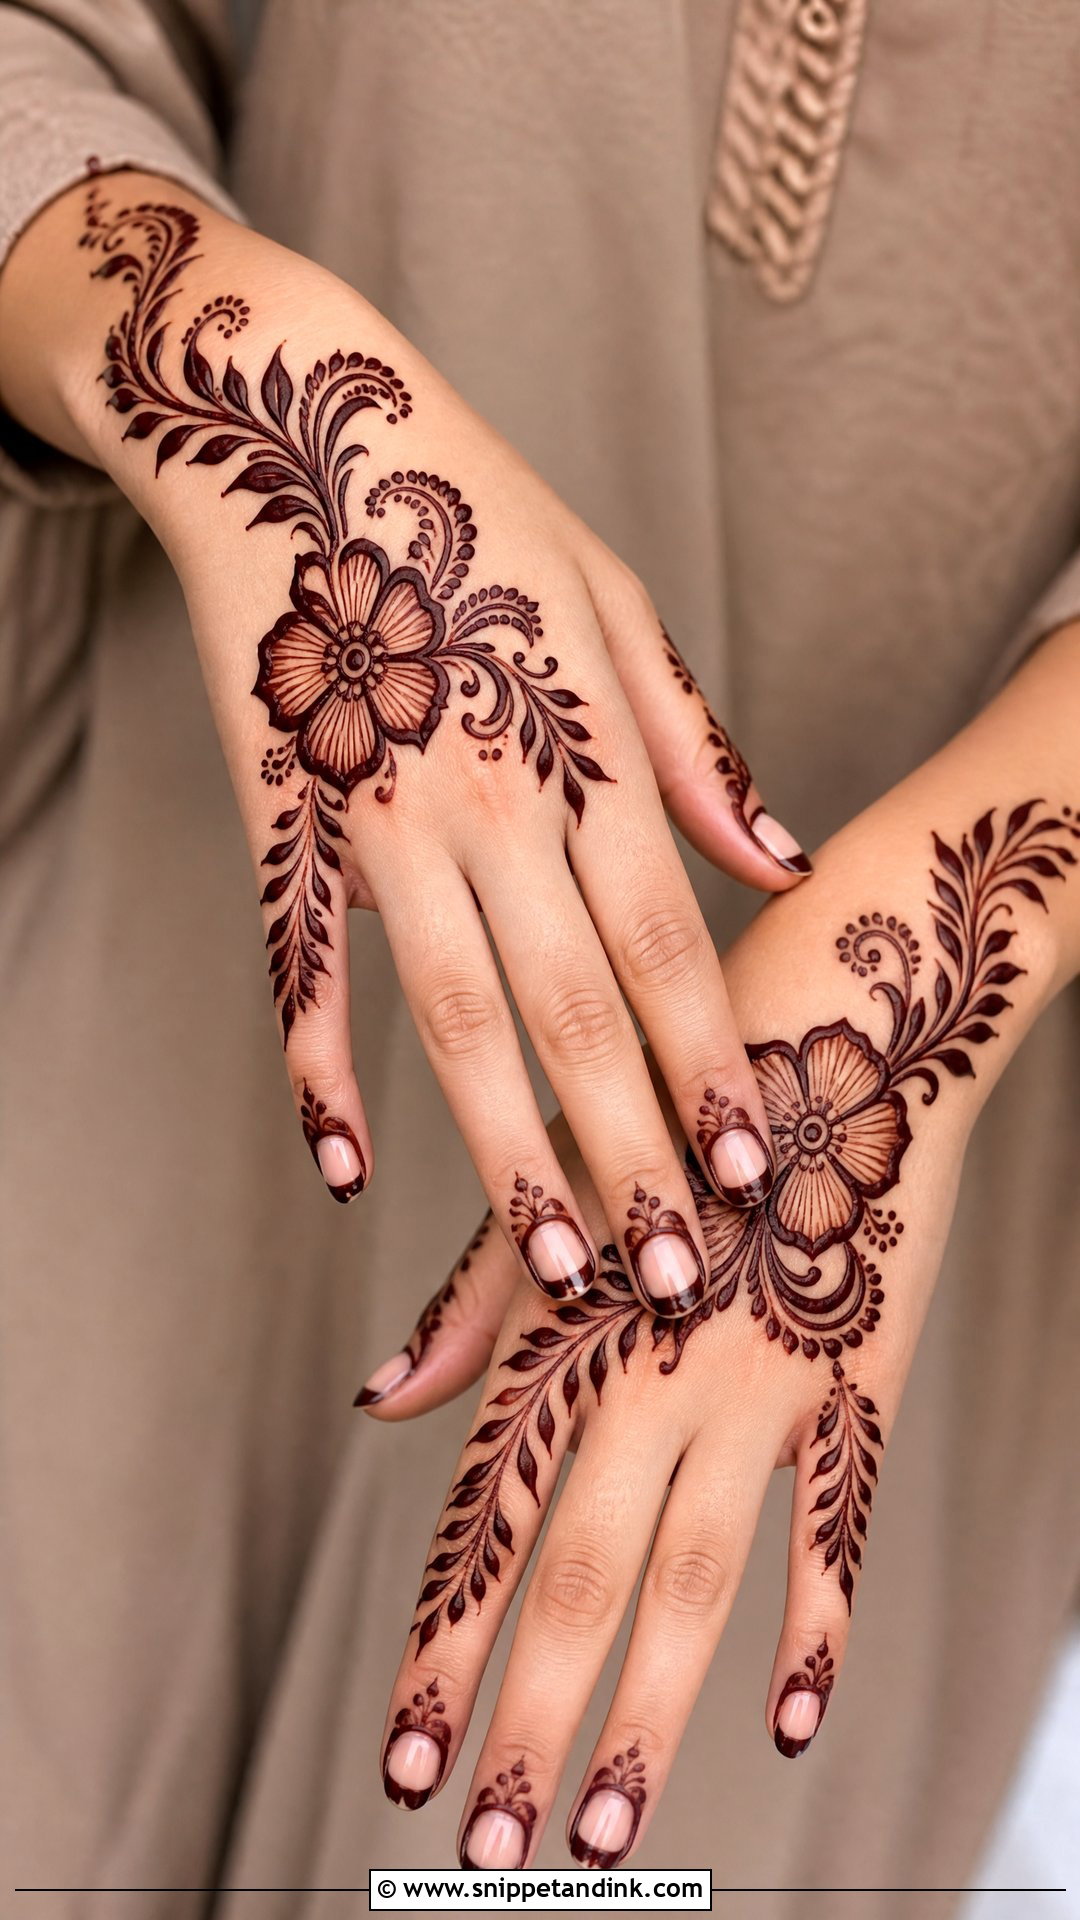
Gulf or Khaleeji mehndi is about big, confident flowers and generous spacing. One large flower sits near the wrist, another near the knuckles, joined by leafy curves, with thick fingertips and small petals or side trails on the fingers. The outlines are heavy and the inner petals stay lightly detailed, so the stain looks dark and graphic from across a room. That heavy outline needs thicker paste and more of it, so I cut a slightly wider cone tip for this style than for fine Indian work.
14. Simple Minimal Mehndi Design
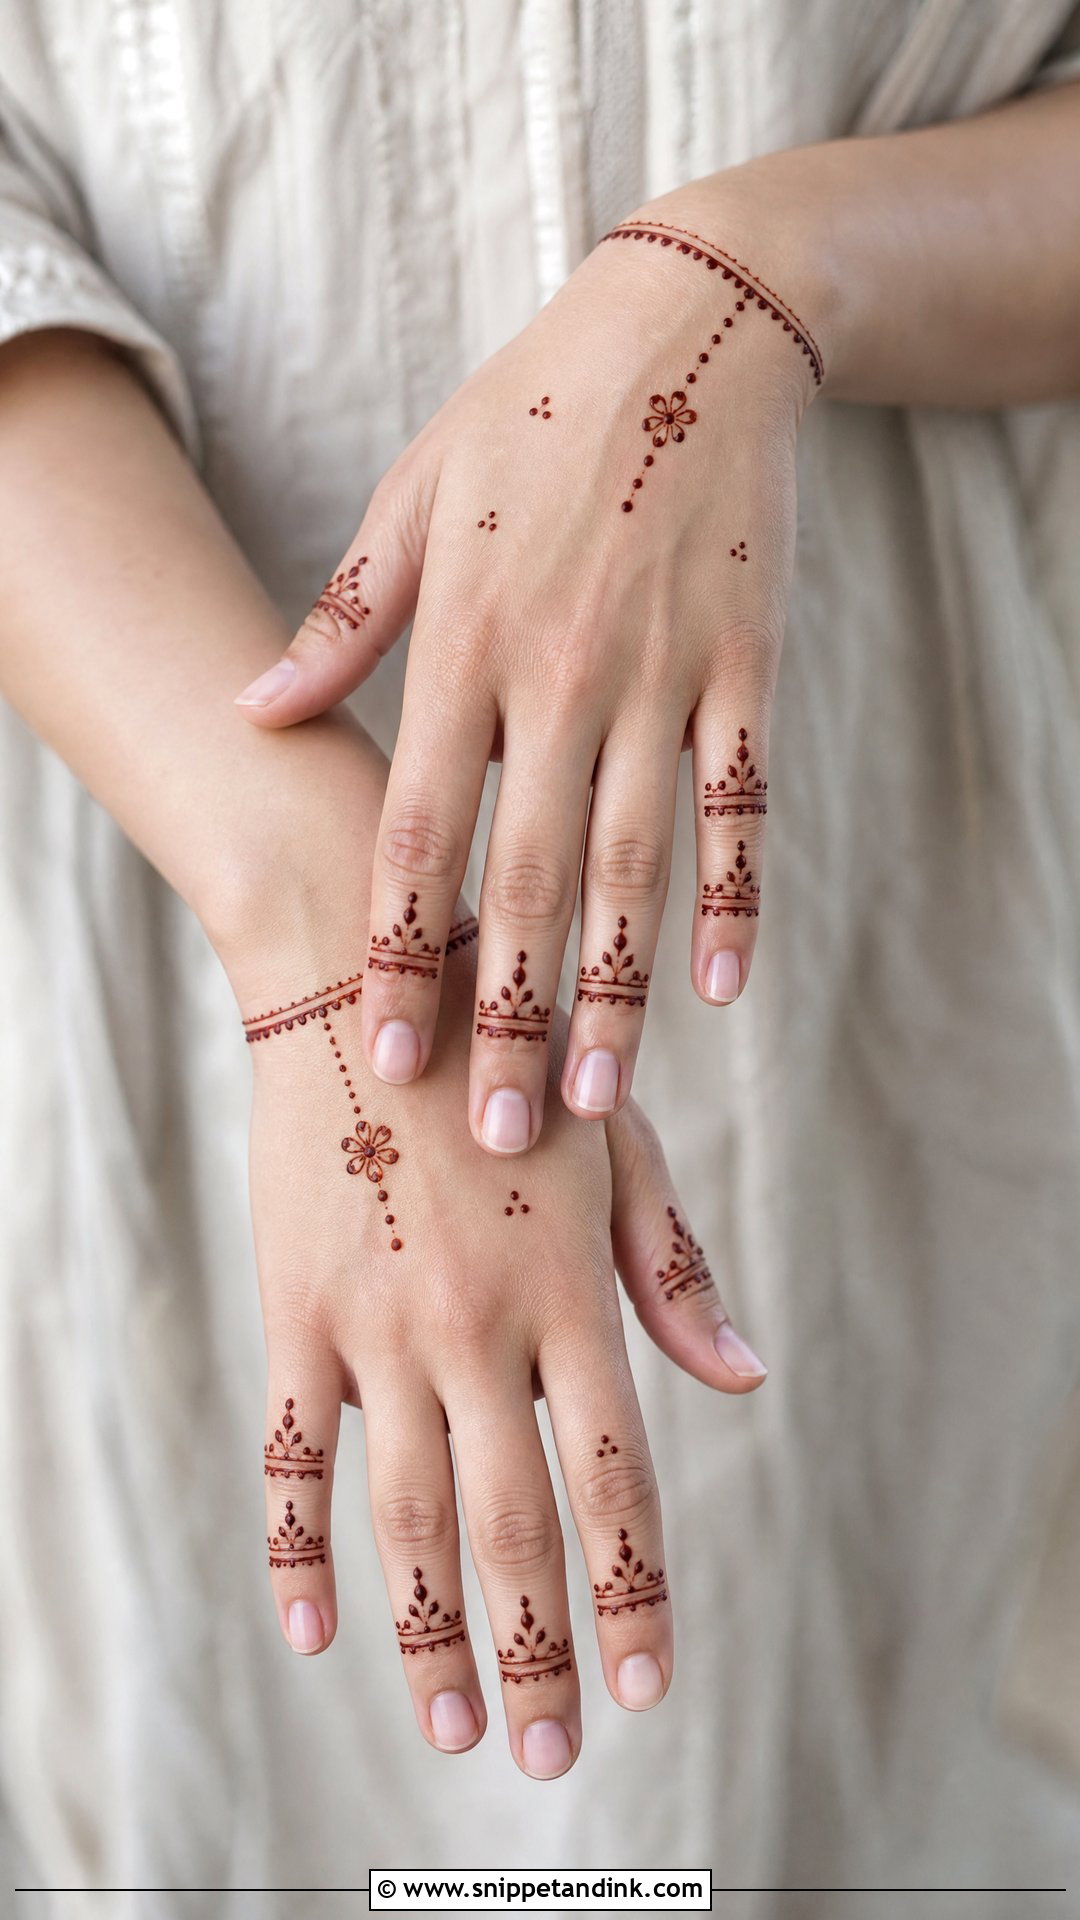
Minimal doesn’t mean careless. Tiny finger bands, a few dots near the knuckles, a slim wrist line and one small flower or mandala: with so few elements, every line is on show. The temptation is to add filler because there’s empty skin. Resist it. The spacing is what makes the design look intentional. I find this works best for first-time henna wearers and for anyone who needs something discreet enough for work the following week.
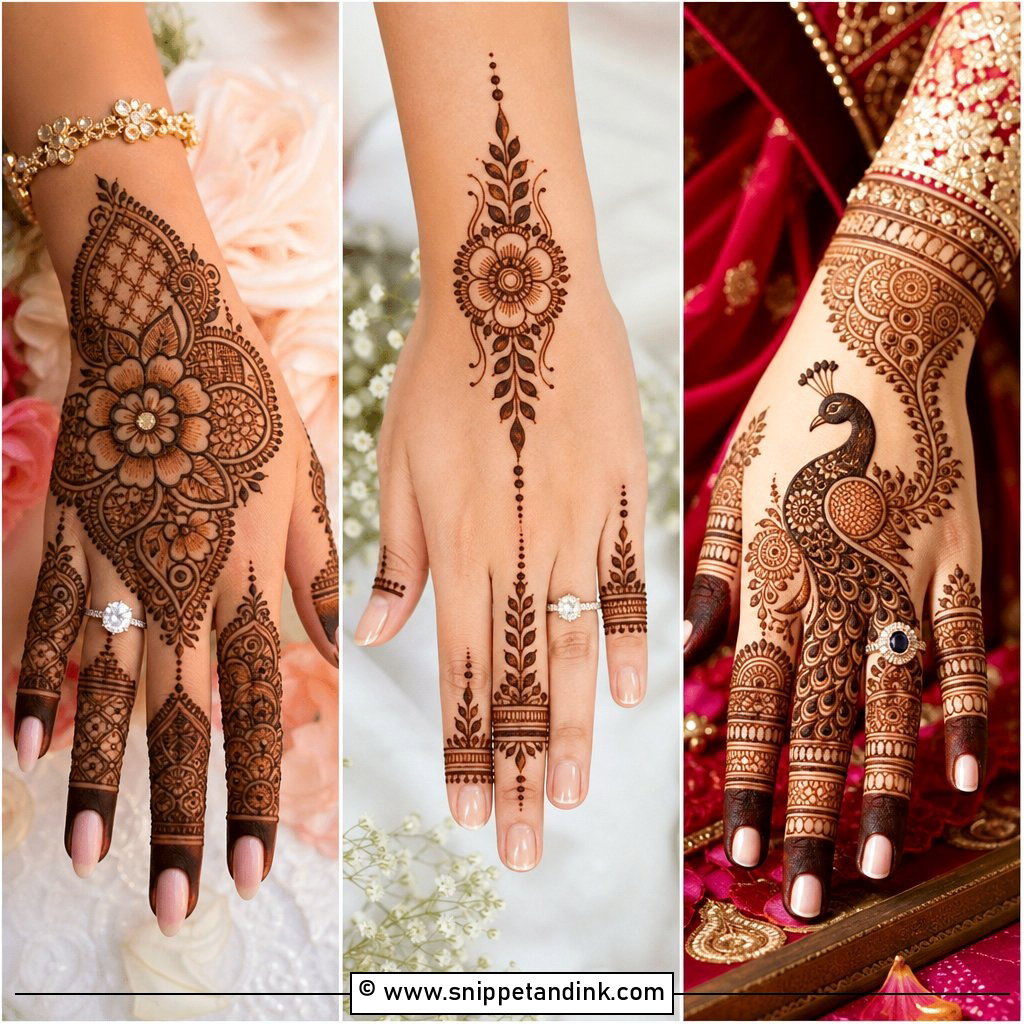
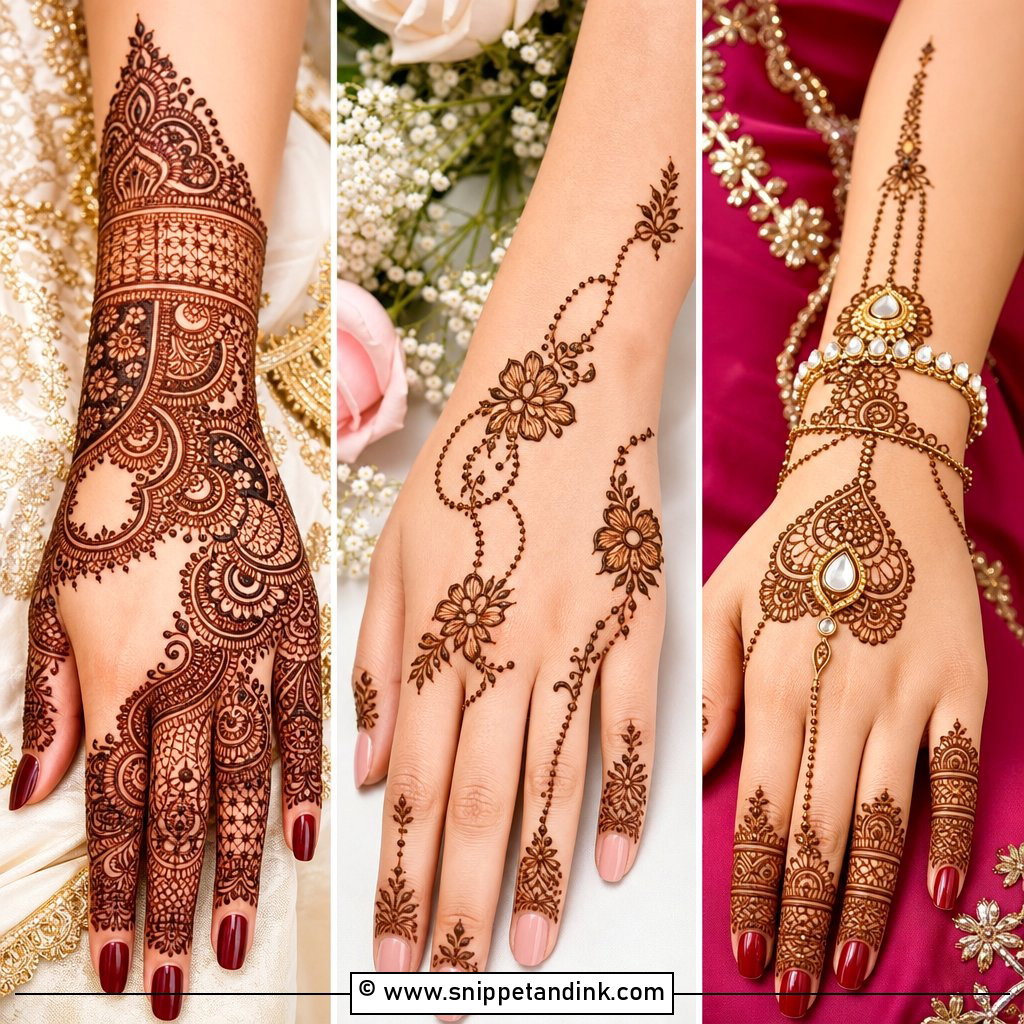
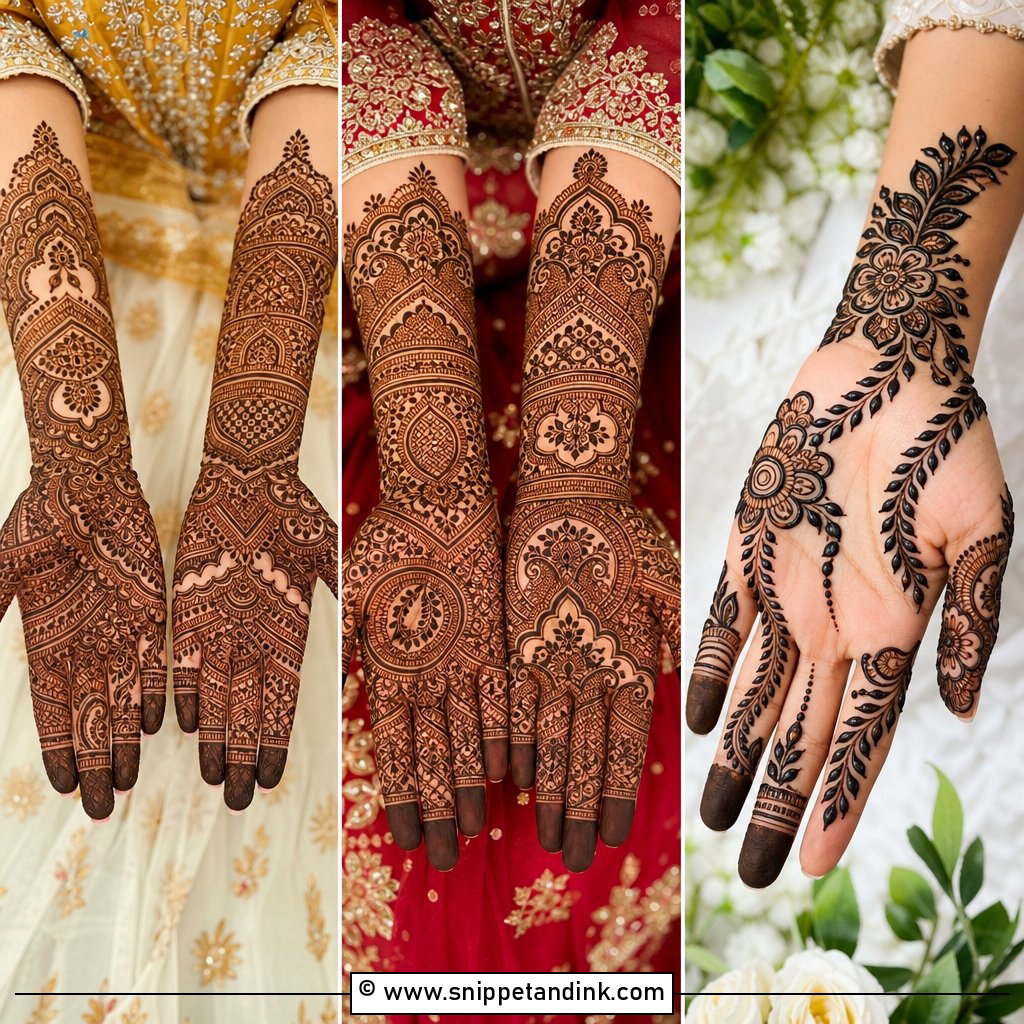
15. Simple Full Hand Mehndi Design
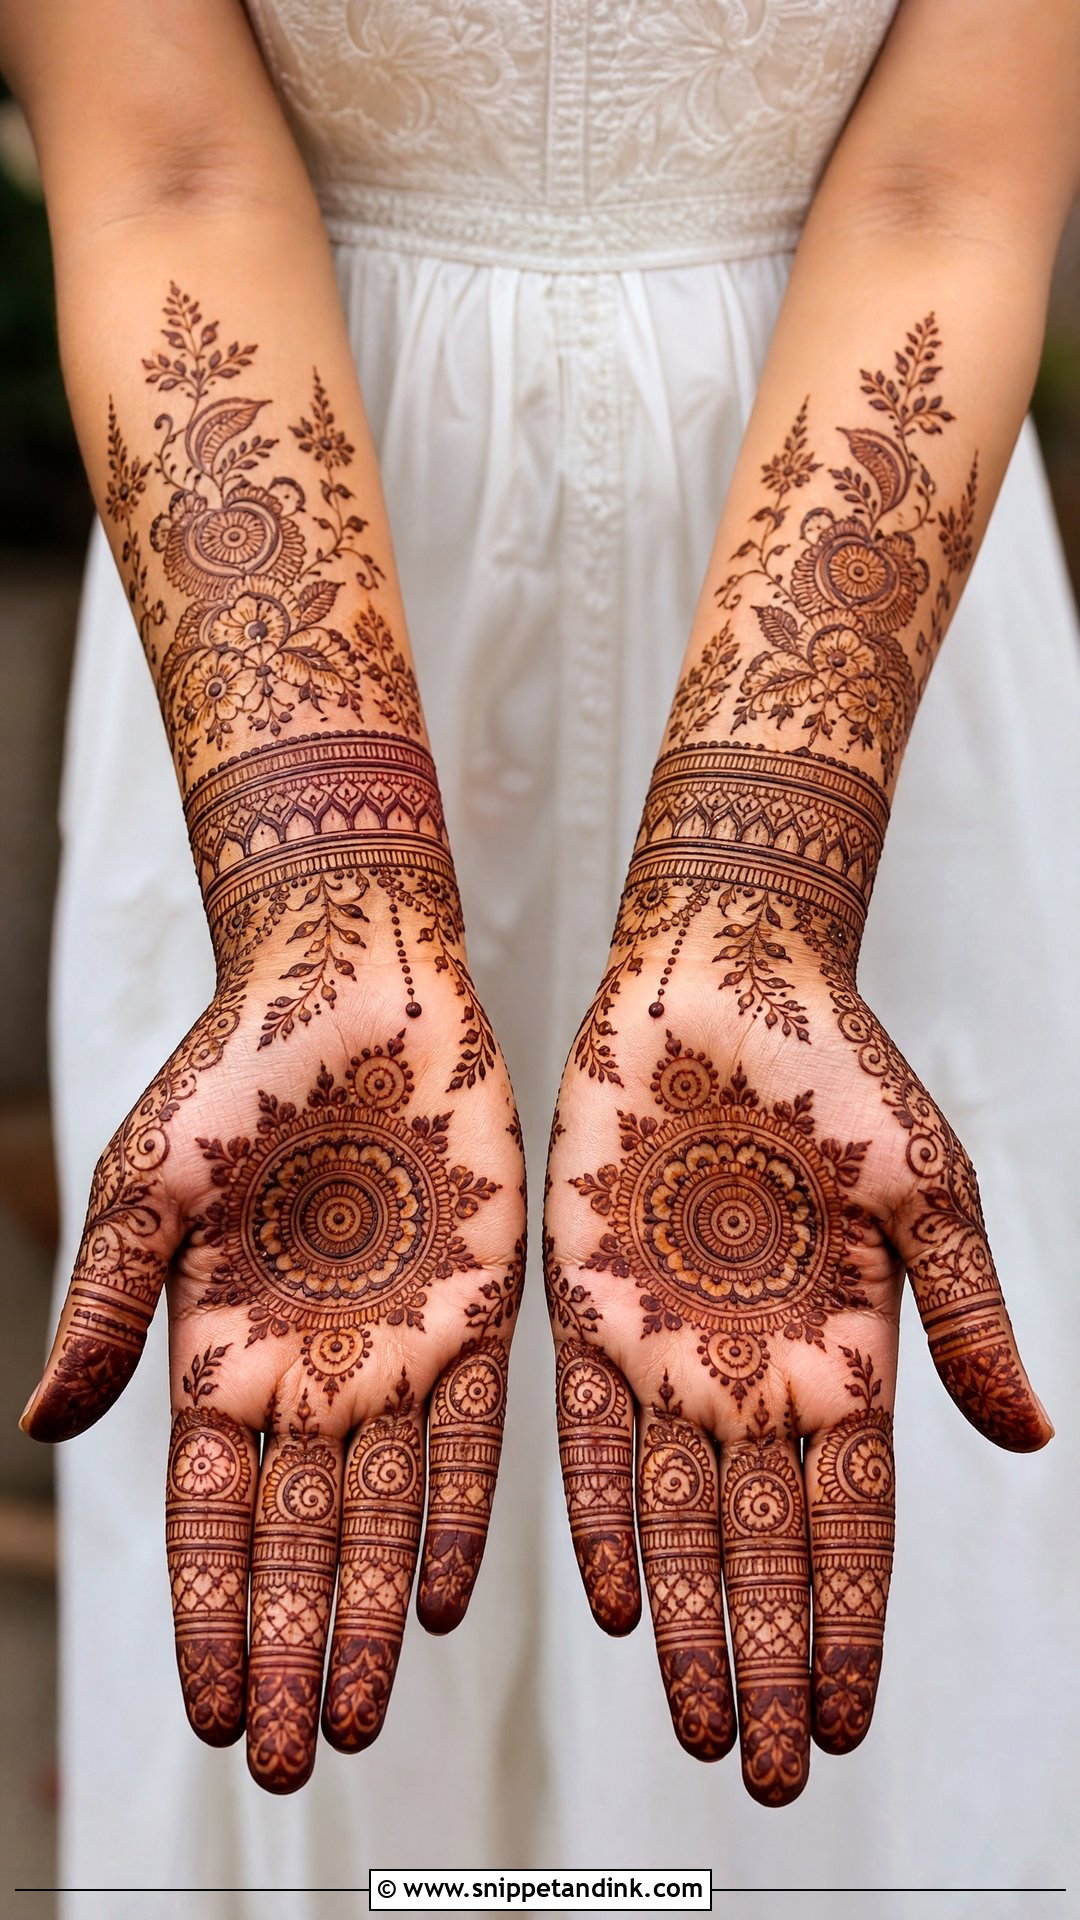
For more coverage that still reads as simple, I divide the hand into zones: a wrist cuff, one centrepiece, finger bands, and a few light vines joining them. The trick is to repeat two or three motifs instead of introducing a new one in every zone. I always leave a small gap between sections, because henna lines spread slightly as the stain develops, and touching sections blur into one dark patch. Bridesmaids often choose this when they want to look coordinated with the bride without matching her density.
16. Simple Peacock Mehndi Design
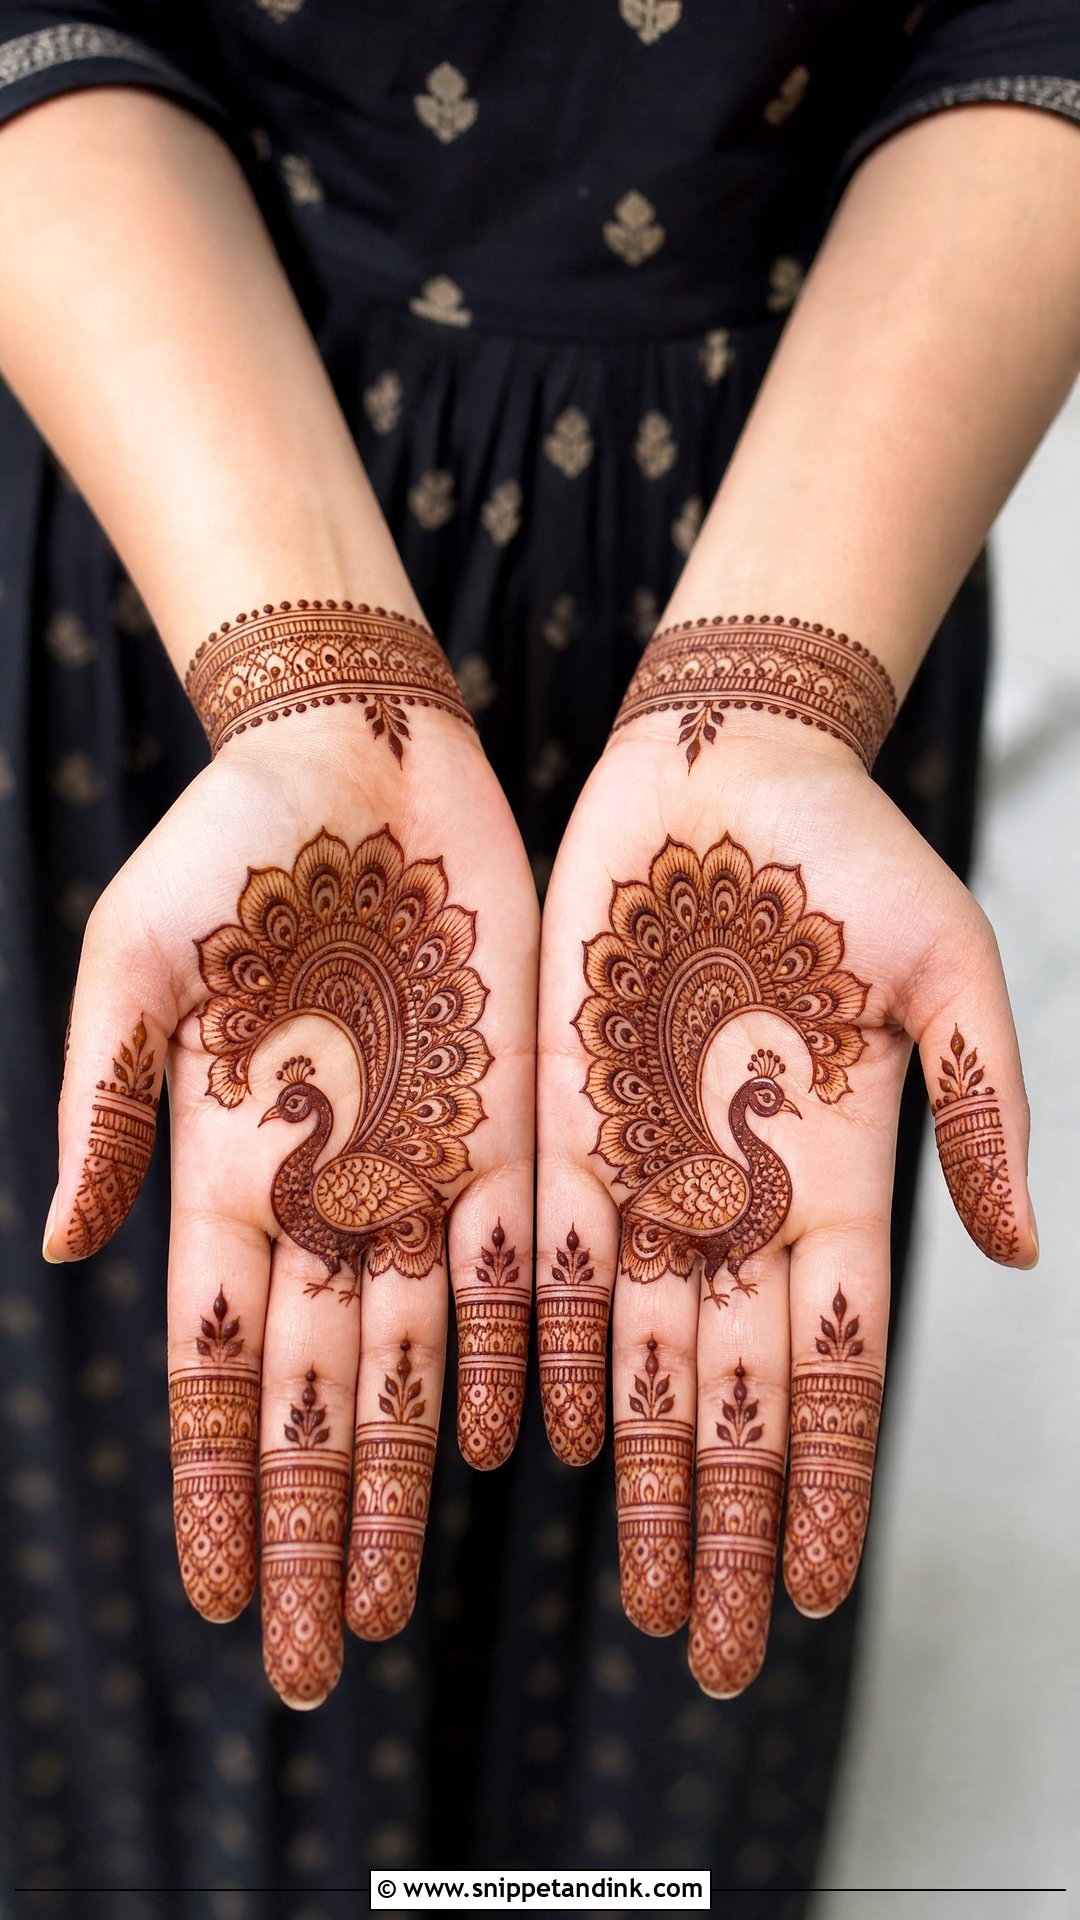
A simple peacock mehndi design gives a traditional Indian touch without full bridal detail. One small peacock goes on the palm or back of the hand, with a gently curved neck and a fan-shaped tail filled with dots, short lines and tiny petals, then a wrist border and light finger patterns finish it. Keep the peacock’s outline bold, because fine feather filling softens as the paste dries and flakes. If the bird is tiny, I simplify the tail to three or four feather shapes so it doesn’t stain as a smudge.
17. Simple Flower Vine Mehndi Design
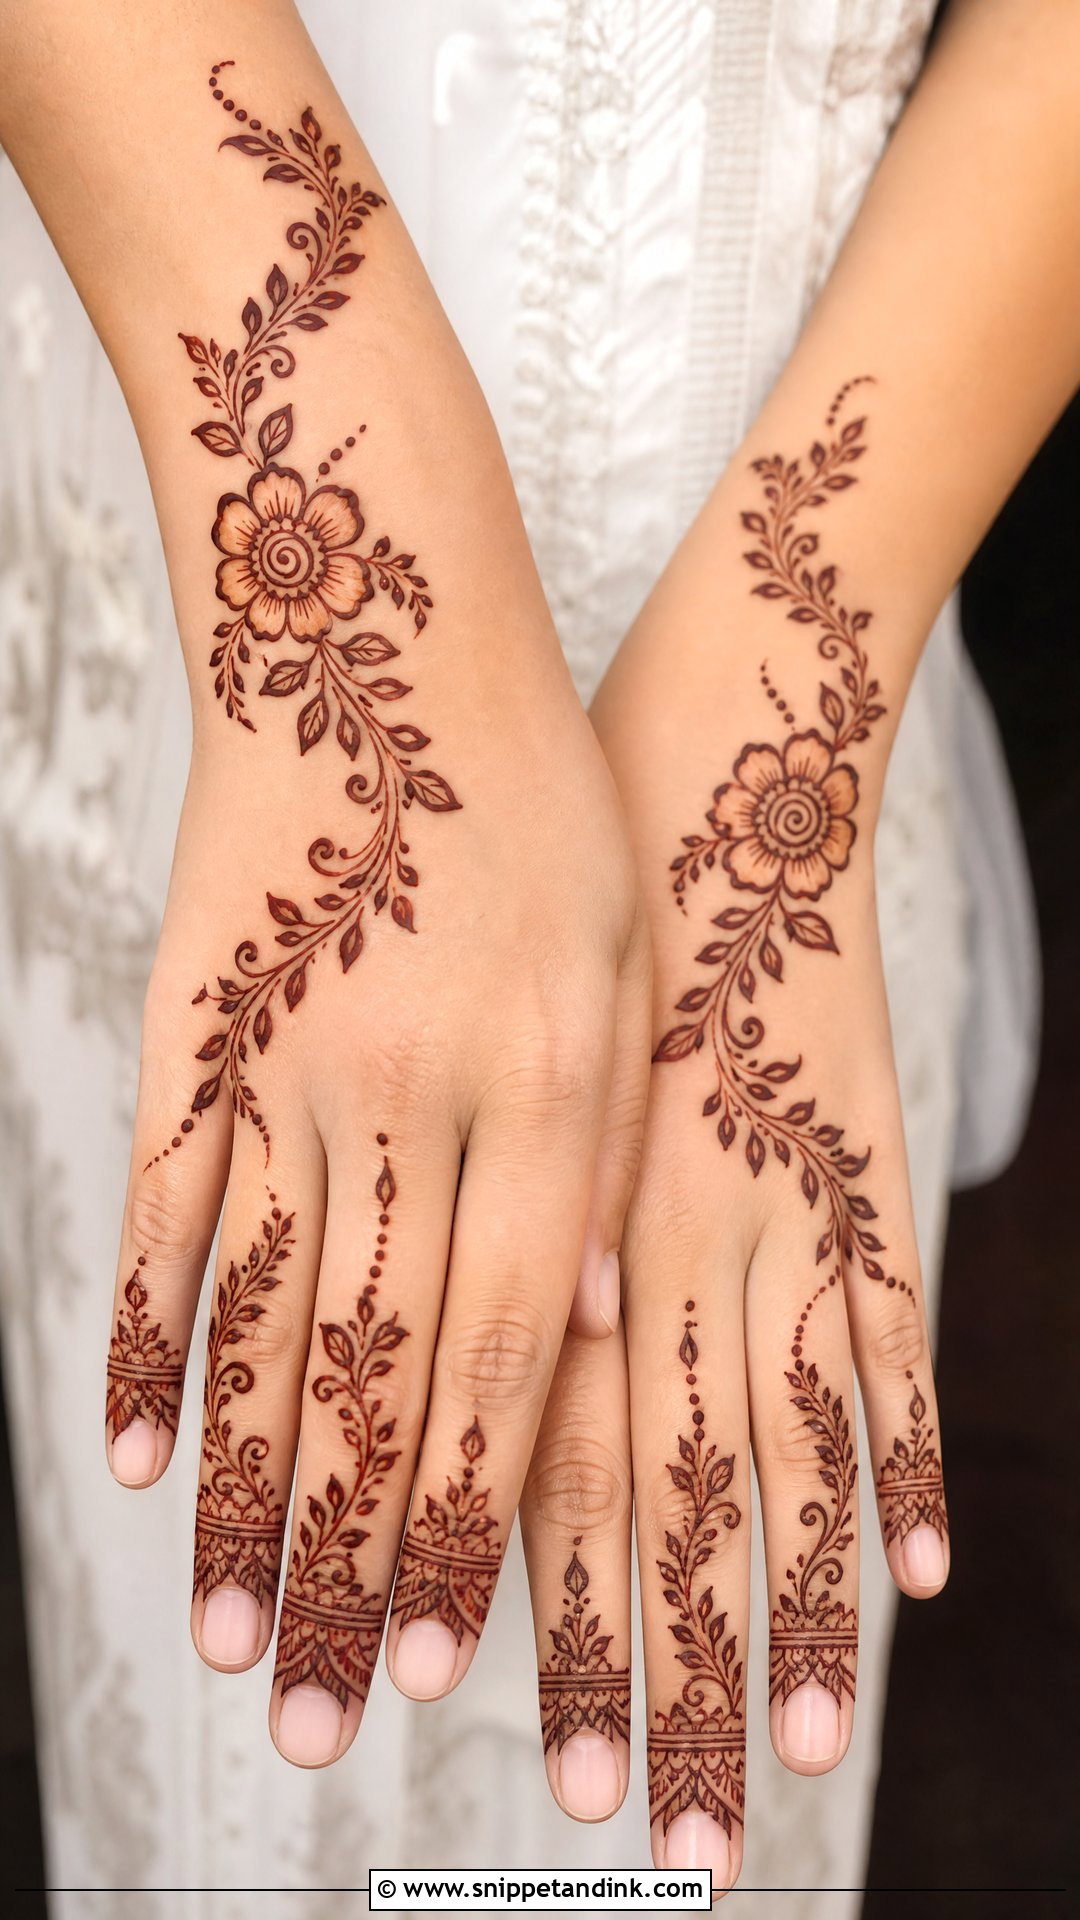
This is the design I’d hand to a nervous first-timer applying her own henna. A flower near the wrist, a curved vine across the back of the hand, two or three smaller flowers along the path and leaves filling the gaps, with the vine finishing on one finger. It doesn’t need symmetry, which takes the pressure off. The one rule is distance: keep the flowers well apart, because blooms placed too close together merge once the stain darkens.
18. Simple Half Hand Mehndi Design
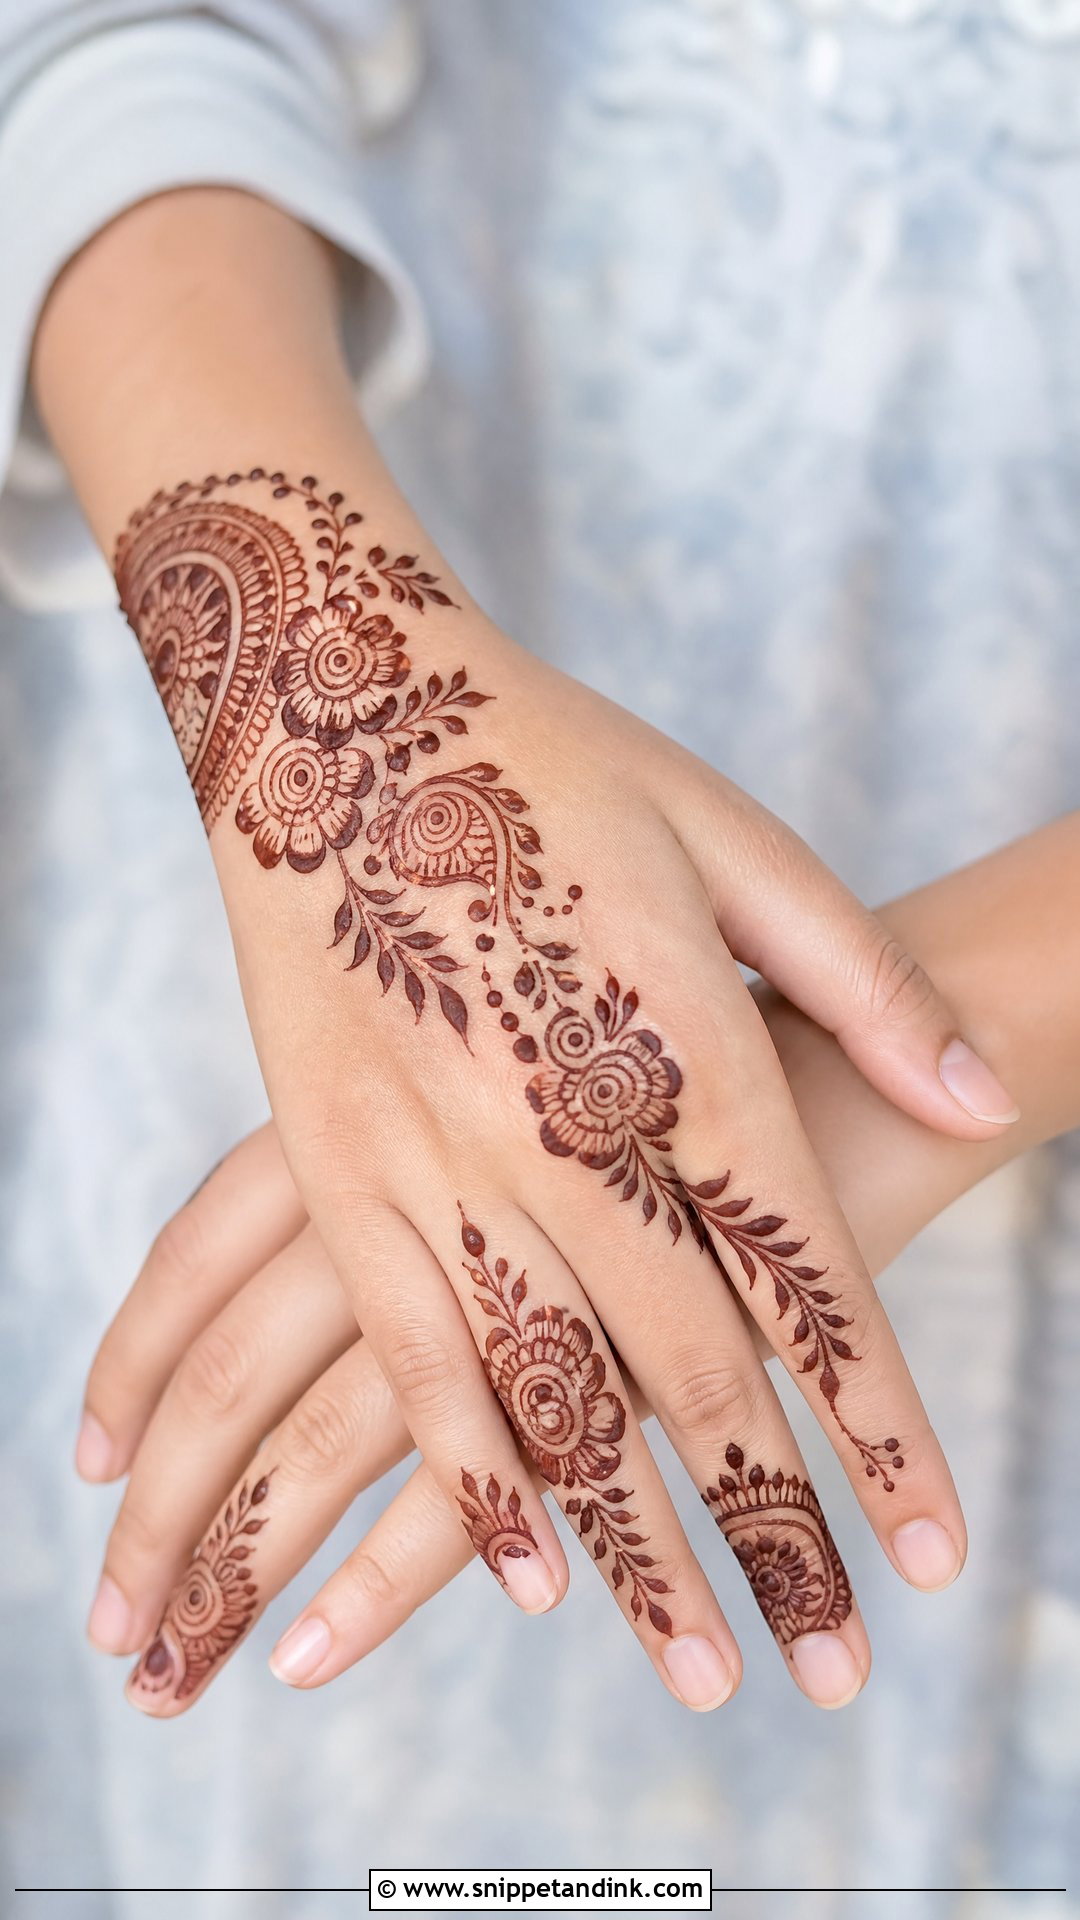
Half hand designs decorate one side and leave the other open. On the back of the hand I sweep a floral trail from the wrist to the index finger; on the palm I place a half mandala near one edge with small paisleys travelling toward the fingers. It’s quicker than a full pattern, which makes it my go-to for last-minute bookings. I check which side faces the camera when she holds a bouquet or a plate, and put the decorated half there.
19. Simple Eid Mehndi Design
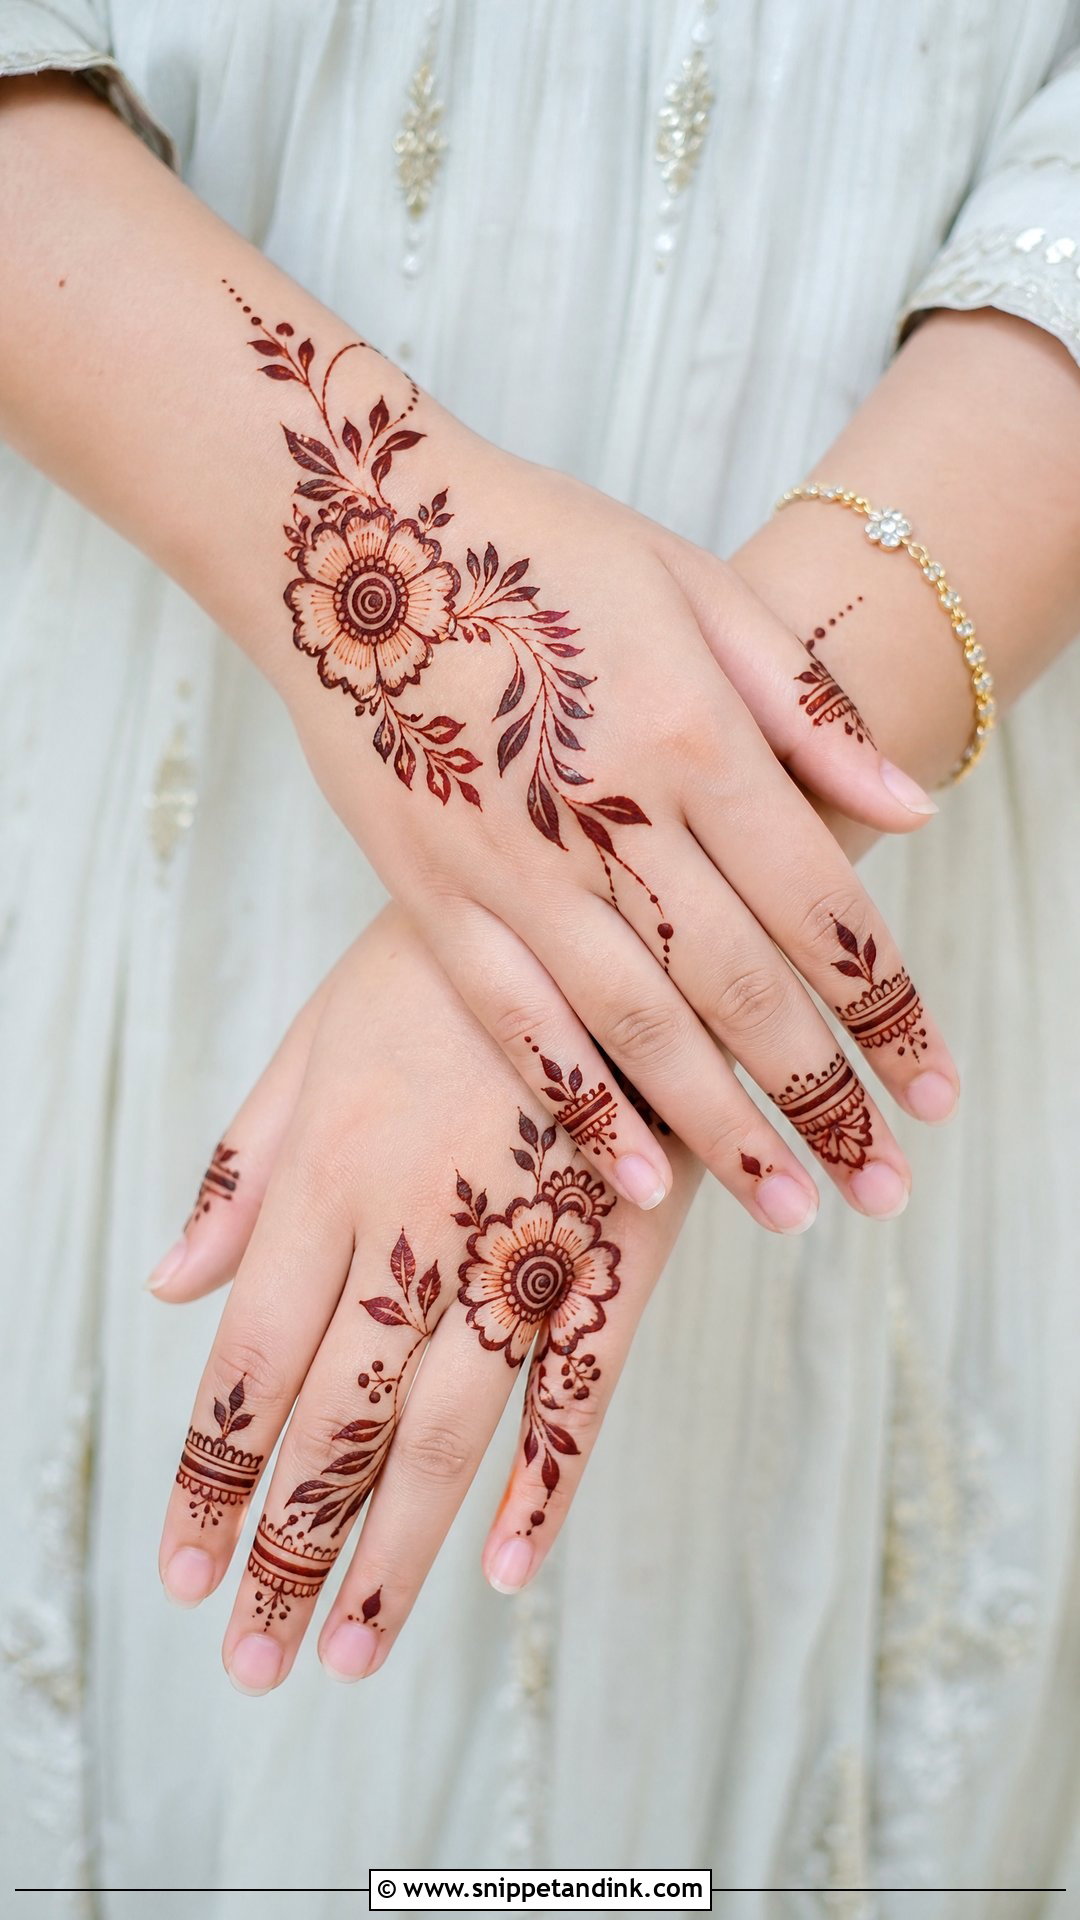
A simple Eid mehndi design needs to be quick, because it often gets applied late the night before, after a long day. An Arabic floral trail on the back of the hand, a small wrist bracelet and decorated fingers covers it, with the centre left open or holding one small mandala. Applied in the evening, the stain will still be orange at the morning prayer and noticeably richer by the afternoon visits, so plan accordingly. It sits well alongside bangles and traditional outfits.
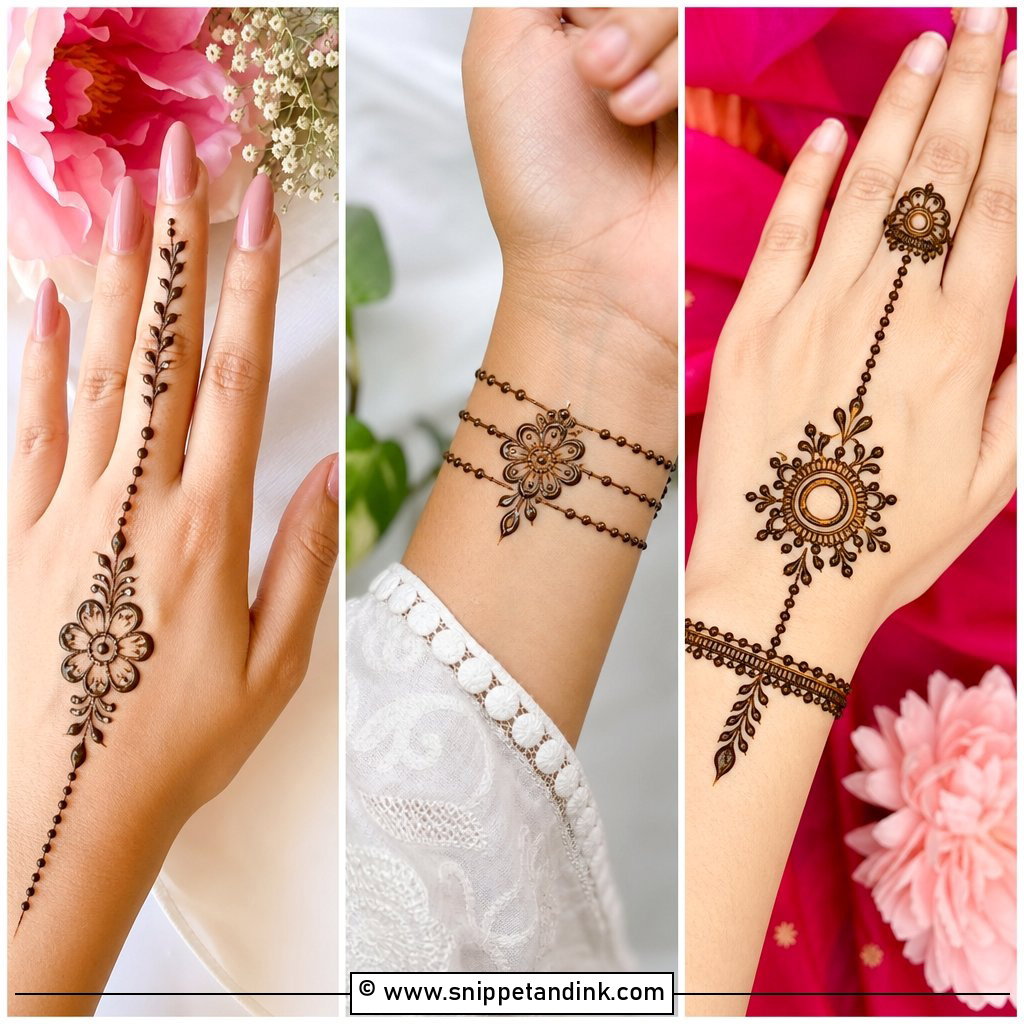
20. Simple Bridal Mehndi Design
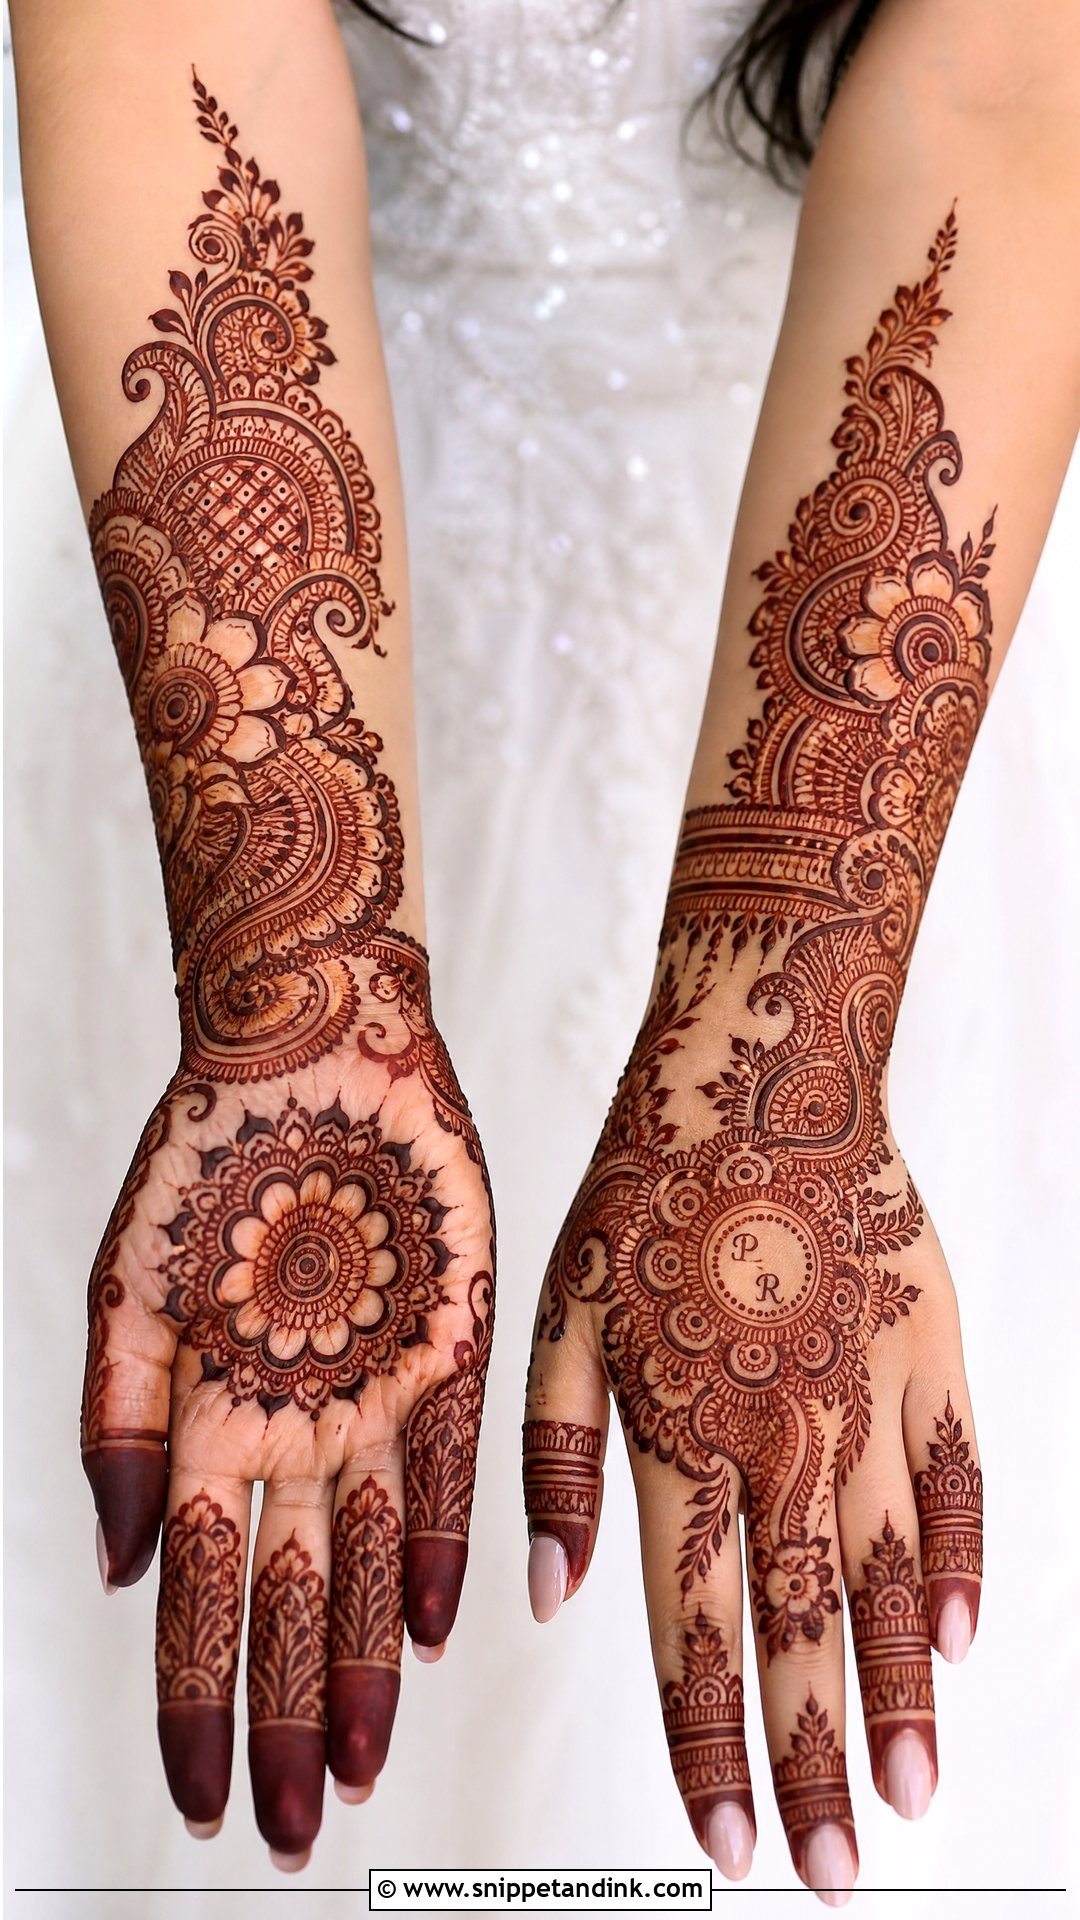
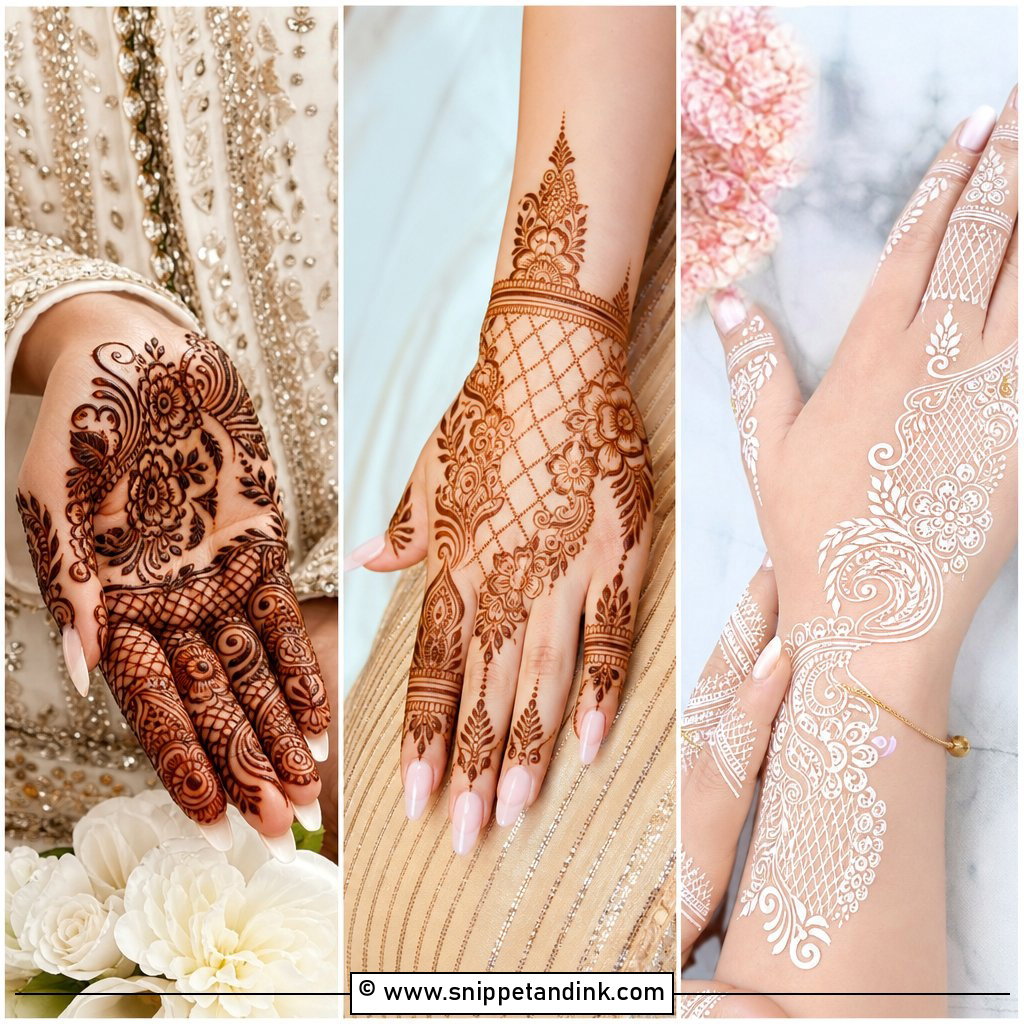
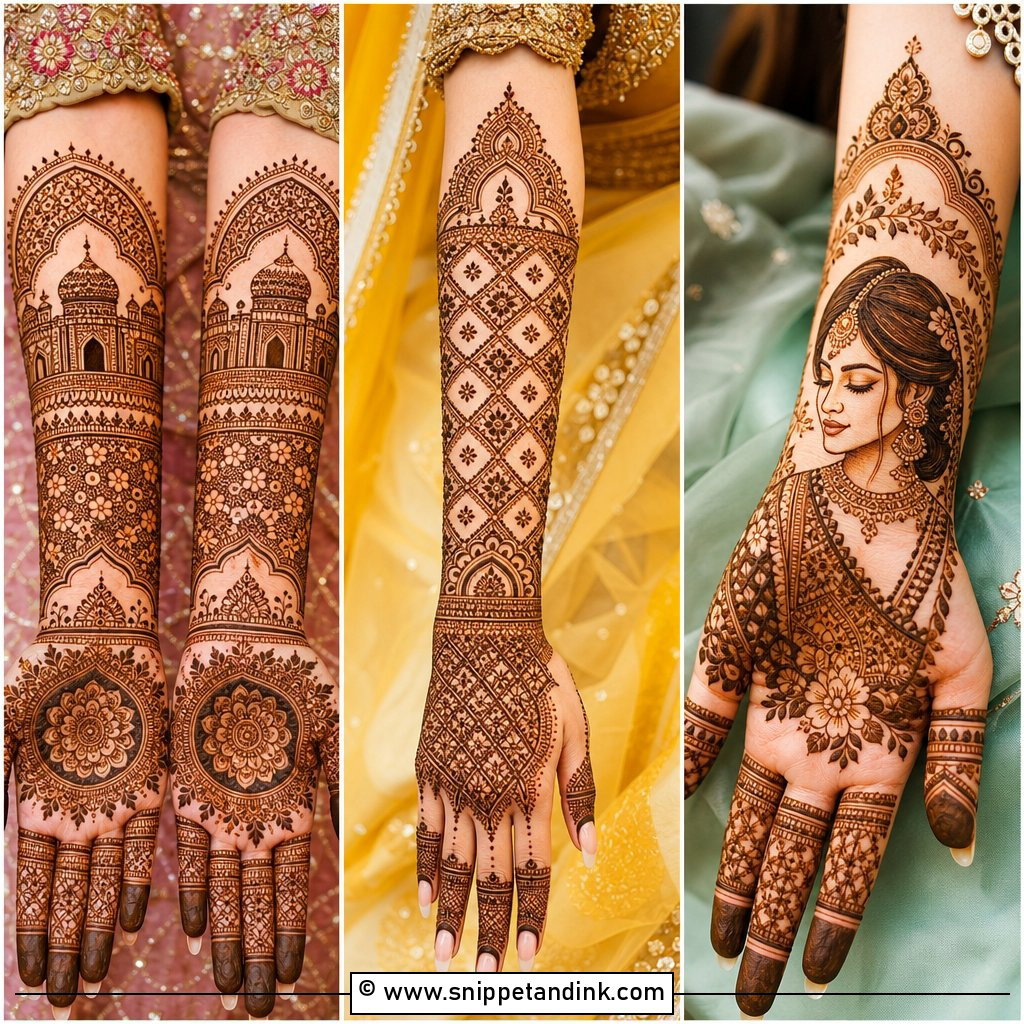
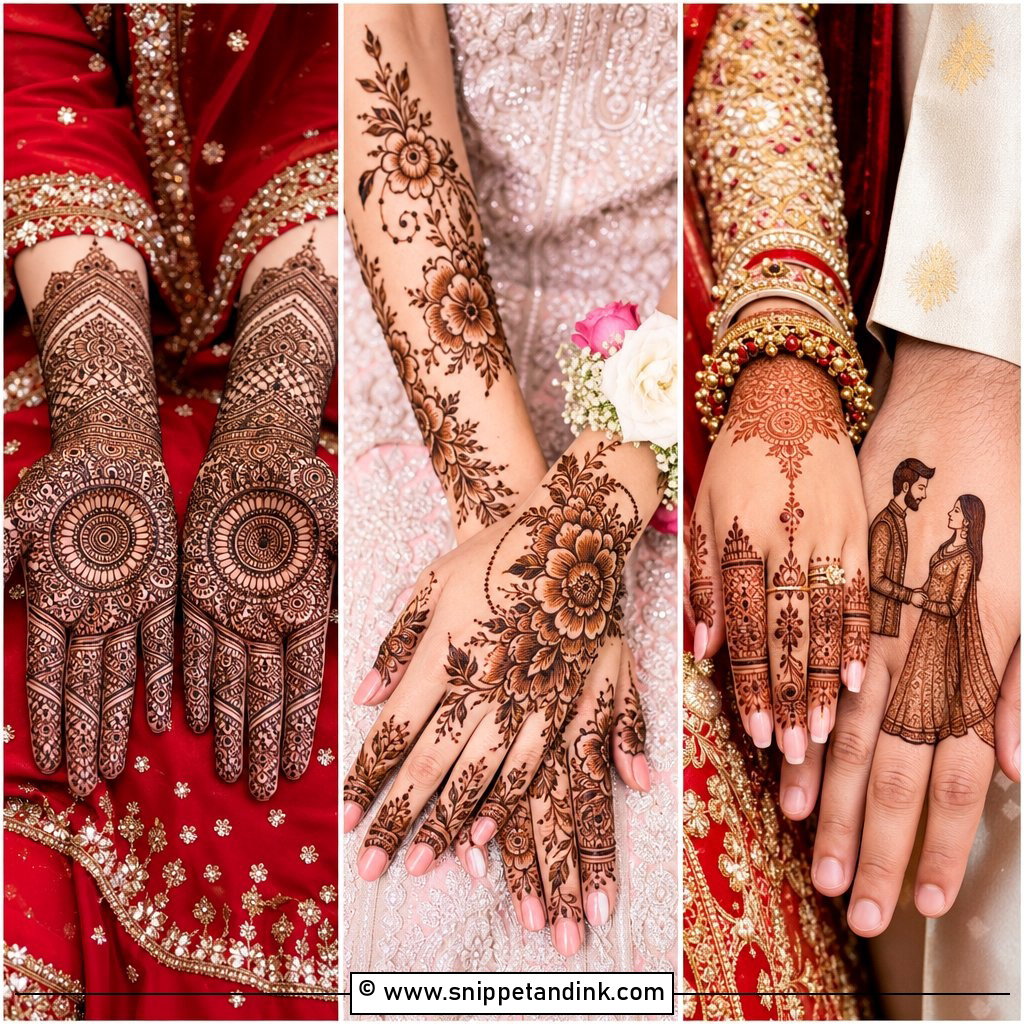
Not every bride wants mehndi to the elbow. For a lighter bridal look, I extend a refined design from wrist to mid-forearm with flowers, paisleys and a mandala on the palm, and an Arabic-inspired floral trail on the back of the hand. Many brides ask me to hide the groom’s initials or a small symbol somewhere; in a light design there are fewer places to hide them, so we agree on the spot before I start. It suits intimate weddings and engagements, and it feels comfortable for a long day.
Getting a Deep Stain From a Light Design
With simple mehndi there’s less ink on the skin, so the colour of each line counts for more. Natural henna always comes off orange. It deepens to reddish brown over the next one to two days as it oxidises, so judge the result on day two, never the morning you scrape it off.
- Wash and dry your hands before the appointment and skip lotion or oil; a film on the skin stops the dye from binding.
- Keep the paste on for at least four to six hours, longer if you can sleep in it with the design loosely wrapped.
- Dab on a little lemon and sugar once the paste is dry to the touch, so it stays stuck to the skin instead of flaking early.
- Scrape the dried paste off with a blunt edge or your fingernail. Don’t wash it off.
- Avoid water on the design for the next twelve hours or so, then a little natural oil before washing helps protect the colour.
- Warmth helps the stain develop, so keep your hands warm rather than holding cold drinks all evening.
One cone I refuse to use
Be wary of any paste sold as black henna or promising a jet black stain within an hour. Real henna never stains black. Those pastes often contain PPD, a hair dye chemical that can cause blistering and lifelong sensitivity. Ask your artist what is in her paste, and if you buy ready-made cones, check the ingredients and do a small patch test a day or two before your event.
Practising at Home Before the Real Thing
If you’re doing your own hands, practise on paper first, then on your leg or forearm a week ahead. Most of the trouble I see in self-applied designs comes from cone control rather than the pattern. Keep the tip just above the skin and let the paste fall onto it, pressing evenly, instead of dragging the tip across. Start with your non-dominant hand while you’re fresh, because the second hand is always harder to do well. Leave the fine dots for last, once the main shapes are down and you can see where the gaps actually are.
Where a Light Design Earns Its Place
A clean mandala, a diagonal Arabic trail, a bracelet pattern or a rose vine can look every bit as finished as heavy bridal work, as long as the layout is planned before the cone touches the skin. Choose by occasion, by how much time you have, and by how steady your hand is if you’re doing it yourself. If you’re a beginner, start with bold outlines, open spacing and one motif you repeat. Then give the paste time; the colour you see the next day is the design people will remember.
You'll Like These Ideas:


Leave a Reply