
Henna changes how hands look in a way no ring or bangle can, because the pattern follows every knuckle and crease. What I’ve learned at the cone is that the right design depends less on the trend and more on the hand in front of me: its length, how much time the wearer can sit still, and whether the stain needs to peak on a wedding morning or simply look fresh at an Eid lunch. Below are 35 designs I draw regularly, from dense Indian bridal palms and open Arabic trails to Moroccan geometry, Khaleeji florals and quick minimal pieces, with notes on spacing, placement and where each one tends to go wrong.
Mapping a Design Onto Your Own Hands Before the Cone Touches Skin
The photo you bring me is a starting point, not a stencil. A design drawn on a long, slim hand will look crowded on a short, broad one, and the forearm panel in a picture may end exactly where your sleeve or bangles begin. So before I draw, I look at three things: your hand length, your outfit’s sleeve, and what you’ll be doing with your hands in the hours after.
- Show me the sleeve. If your blouse or kurta ends mid-forearm, I stop the design just below it so the panel isn’t cut off in photos.
- Say which hand wears the ring or holds the bouquet. I keep that hand’s ring finger more open.
- Tell me how long you can sit. Fingers and backs of hands are quick; full bridal palms and forearms take several hours for both hands.
- Mention any skin sensitivity or allergies so I can patch test the paste and check the essential oils in it.
For a wedding, I book bridal application one to two days before the ceremony. Henna comes off orange and darkens toward maroon over roughly 48 hours, so applying the night before means you’d walk into the ceremony with colour that hasn’t finished developing.
1. Simple Front Hand Mehndi Design
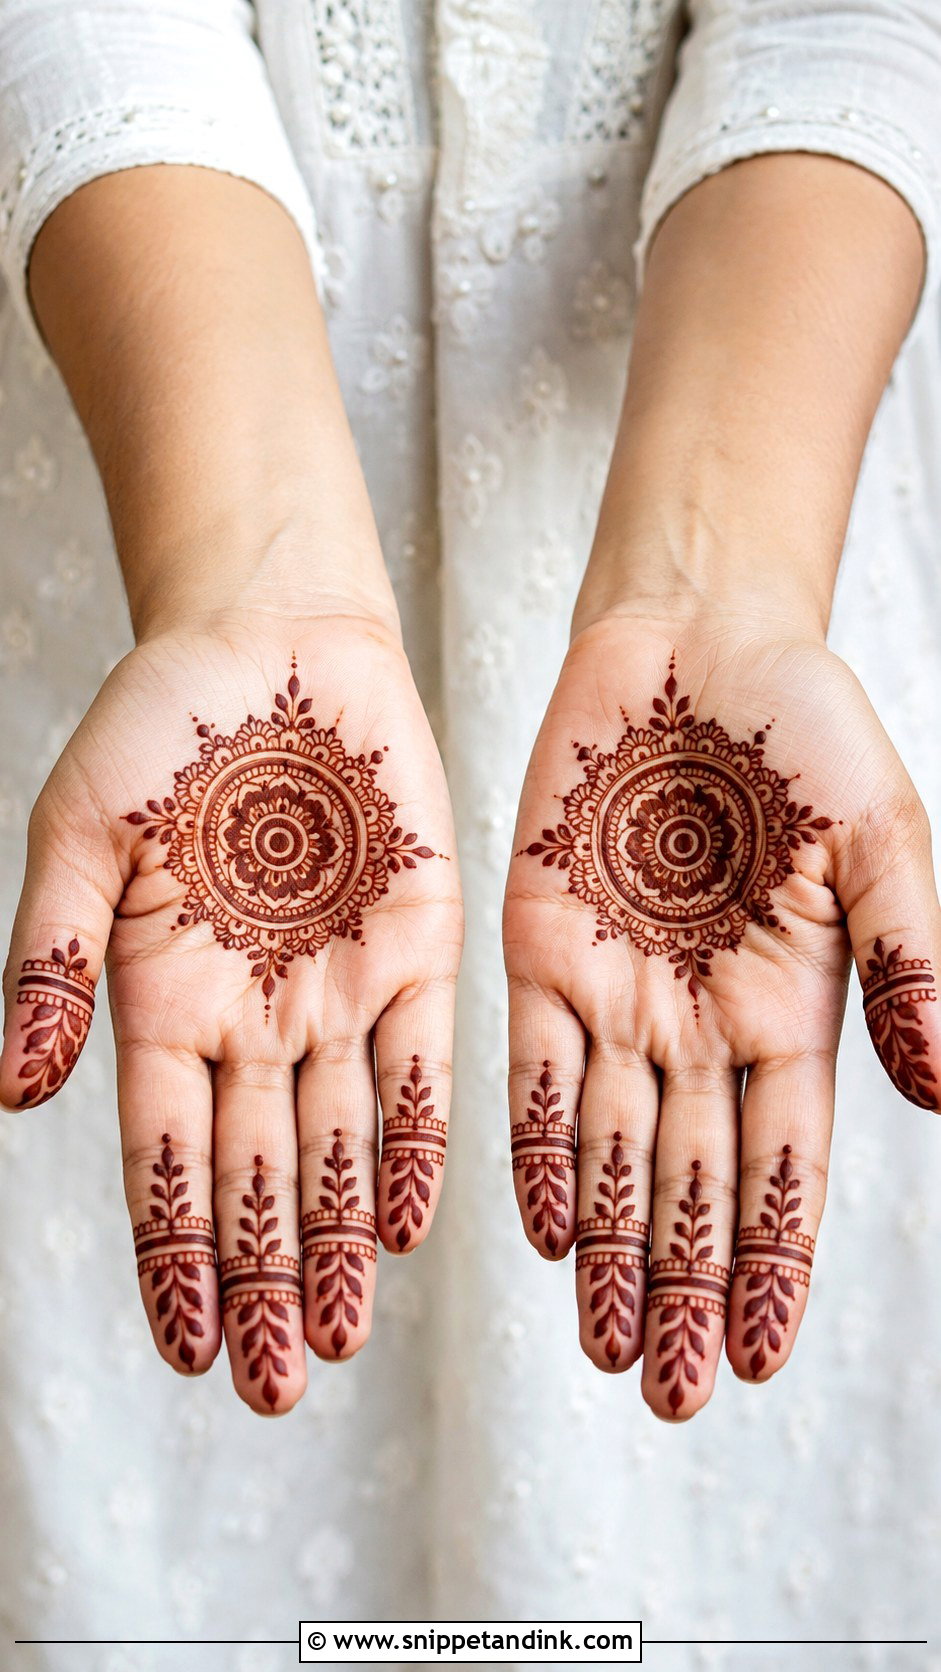
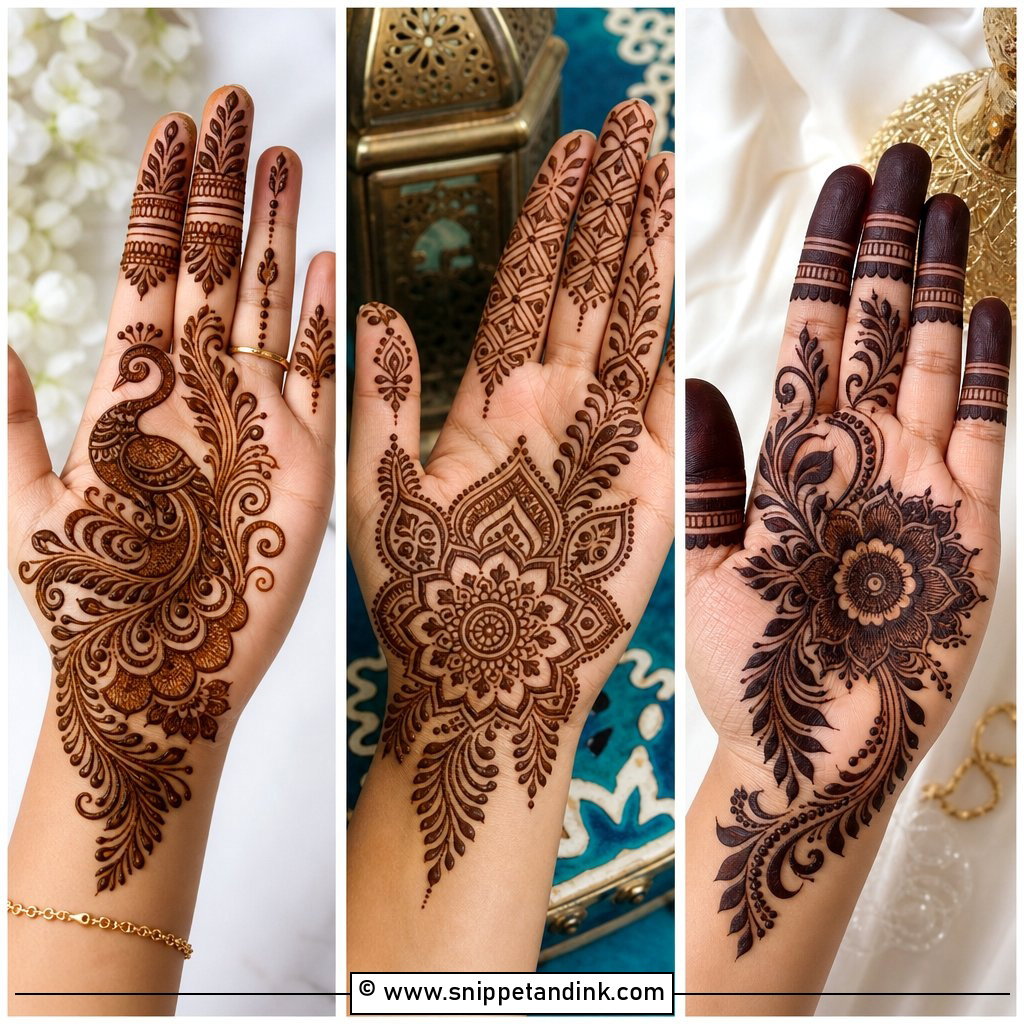
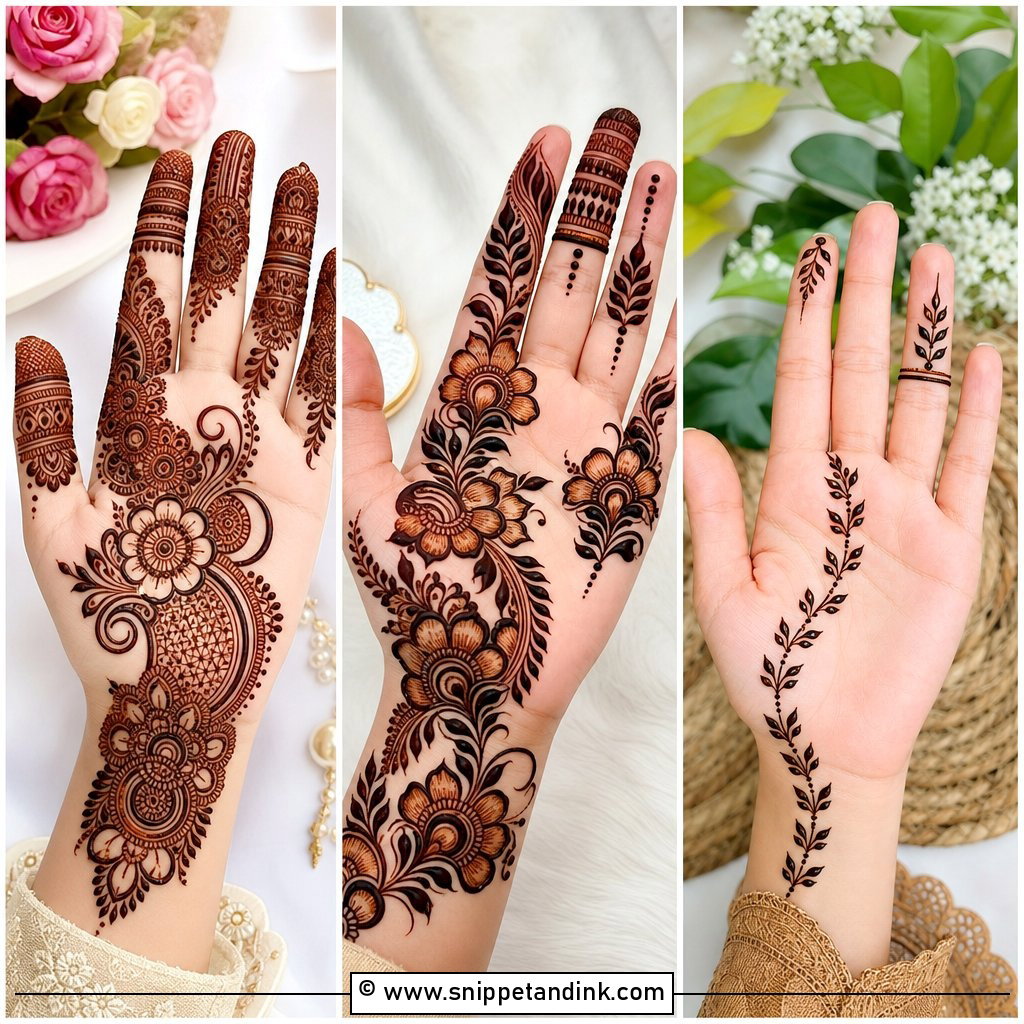
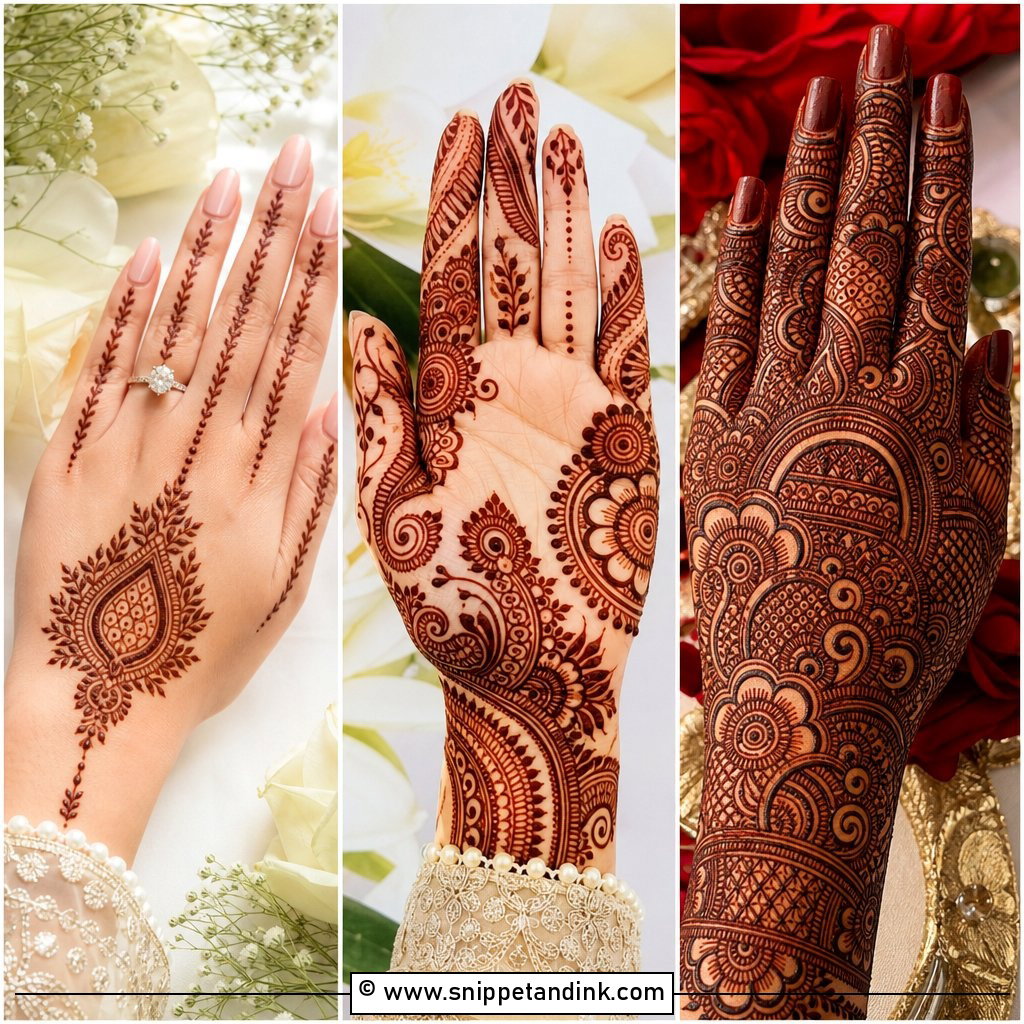
I start almost every simple palm with a small mandala or flower in the centre, because the palm crease gives a natural resting point for it. From there, thin finger lines, a few leaves and a curved border are enough. The thing that makes or breaks it is the bare skin between motifs: if I crowd the gaps, the stain merges into a blotch by day two. On small hands I scale the flowers down and keep the vines thin, otherwise one bloom swallows the whole palm.
2. Arabic Mehndi Design For Hands
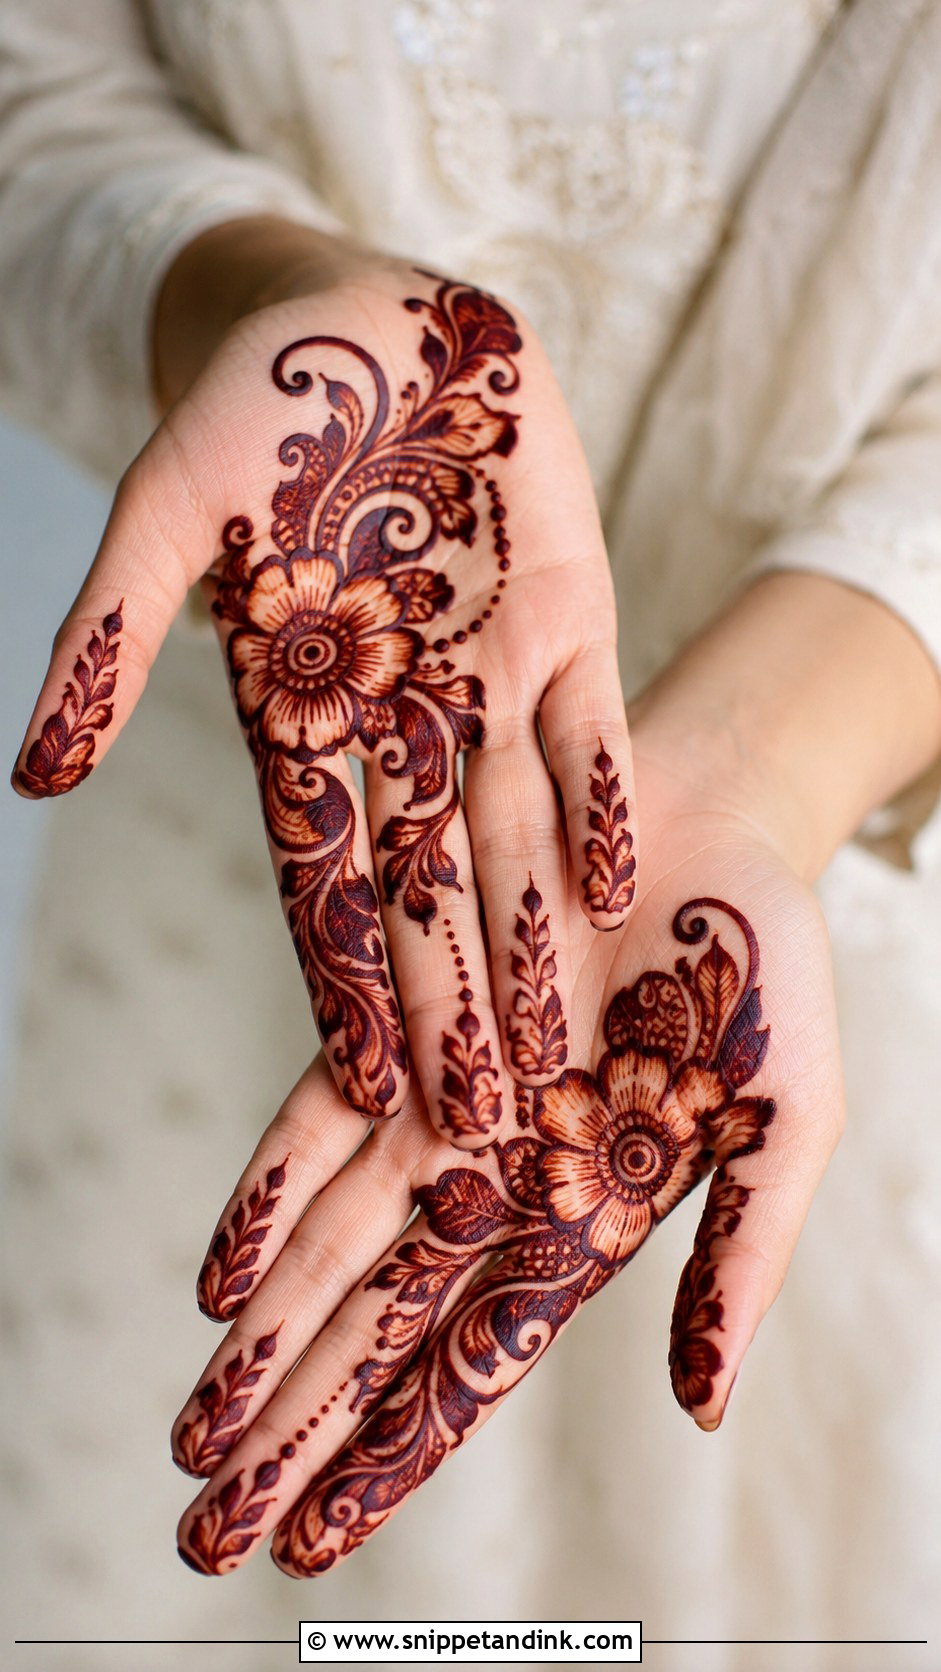
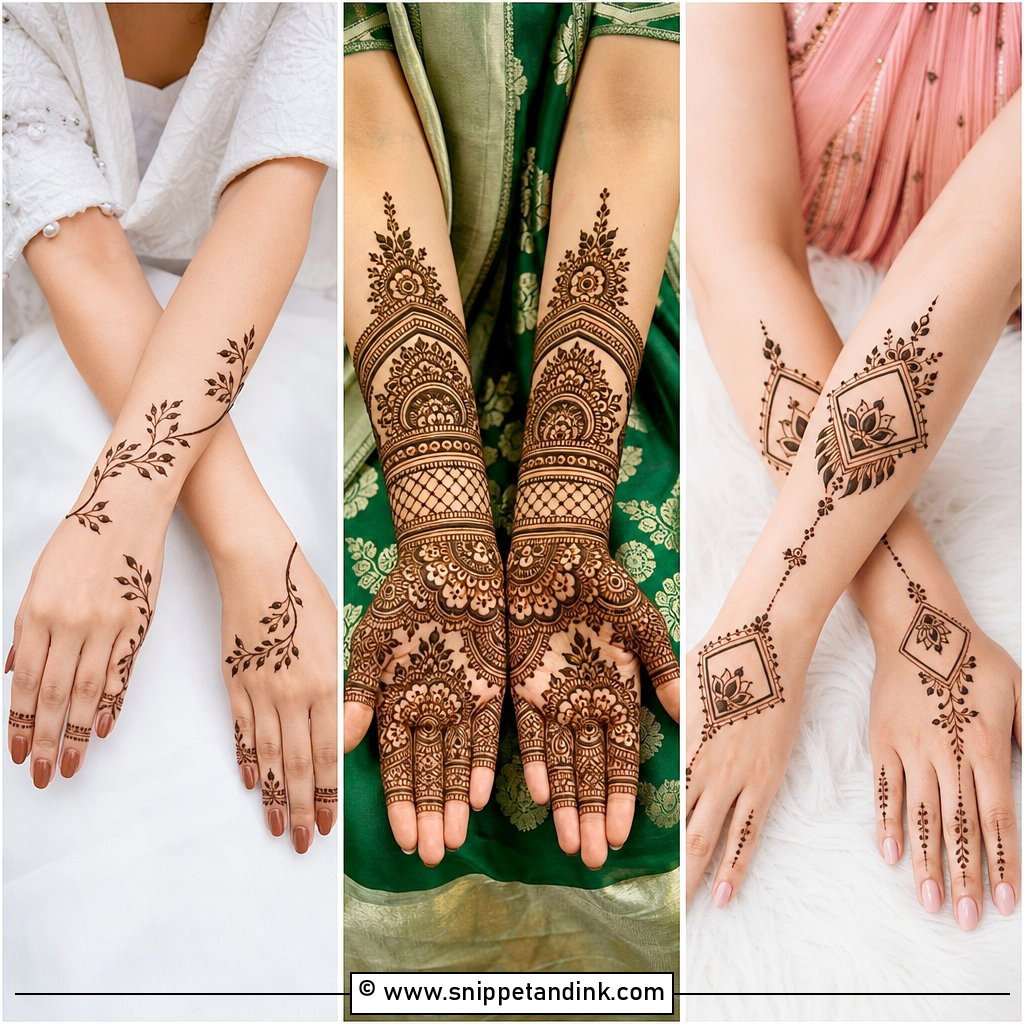
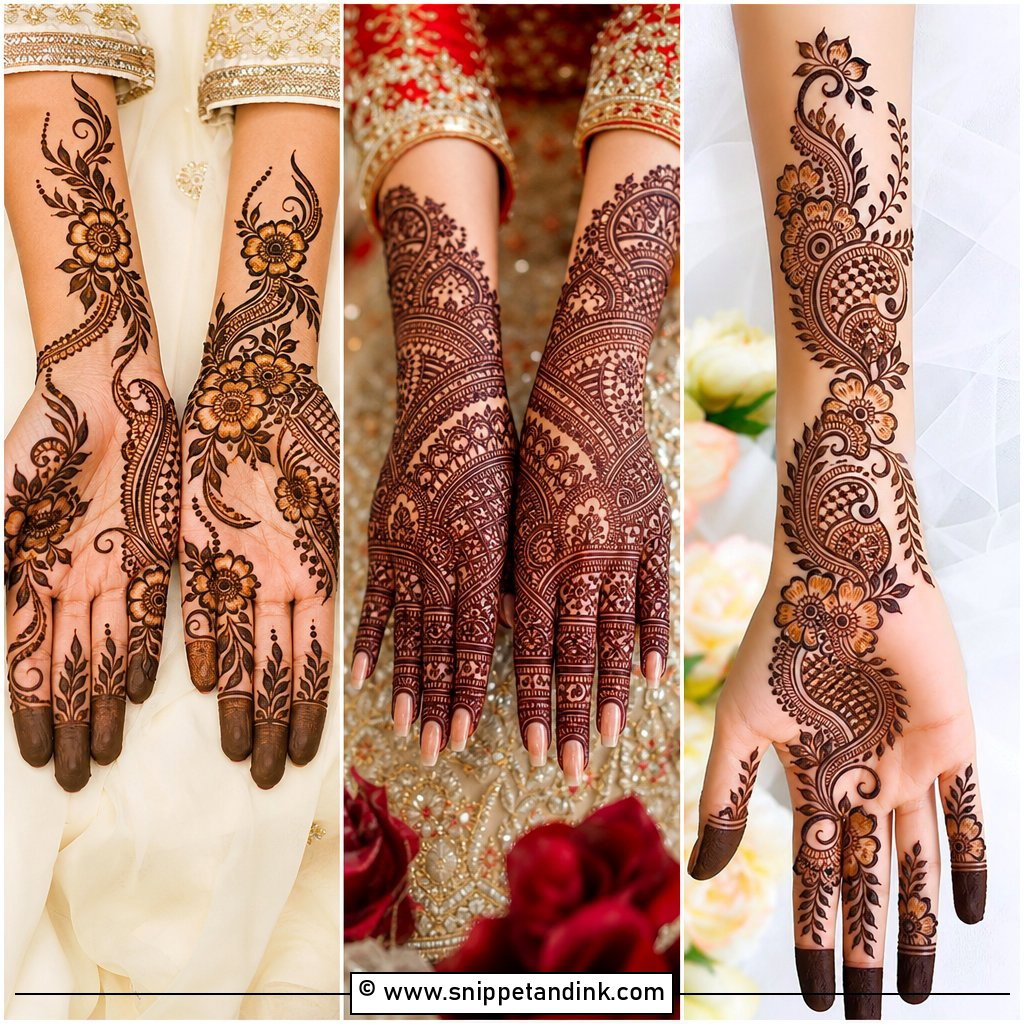
Arabic mehndi design for hands runs on a diagonal, usually from one side of the wrist up to the index or middle finger, and that slant is what makes the hand read longer. I build it with bold petals, shaded leaves and dotted trails, and I leave real gaps on purpose. Shading is done by thinning the paste line rather than pressing harder, which keeps the gradient from turning into a solid patch. If you want it to feel current, I’d leave one half of the palm completely clear.
3. Bridal Full Hand Mehndi Design
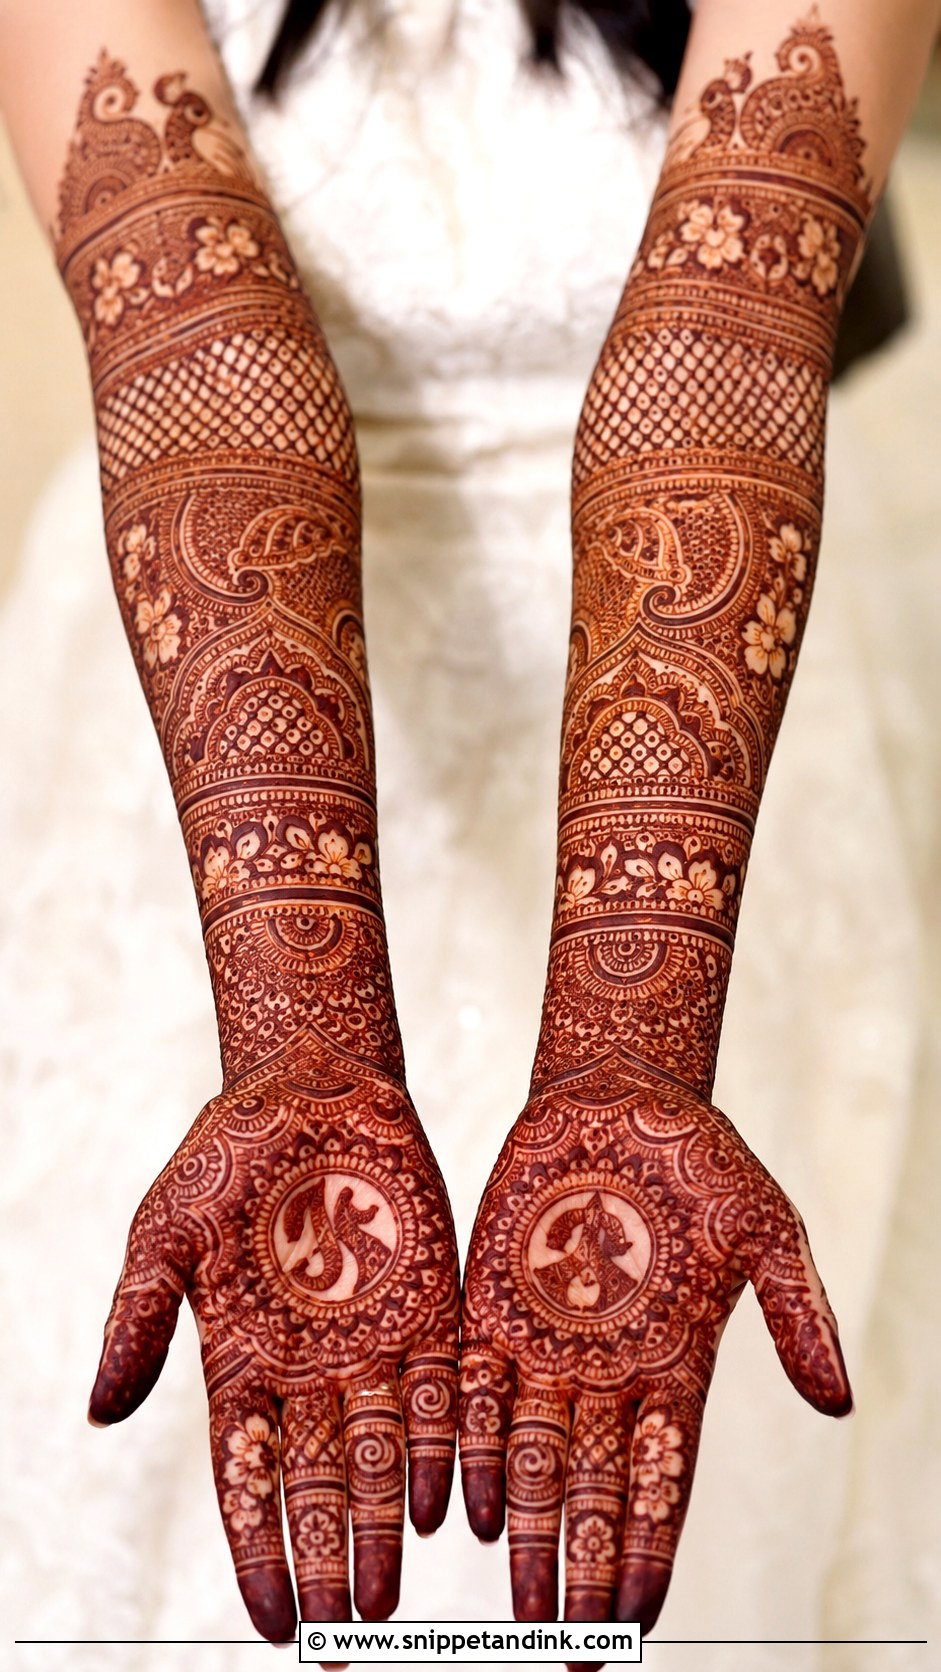
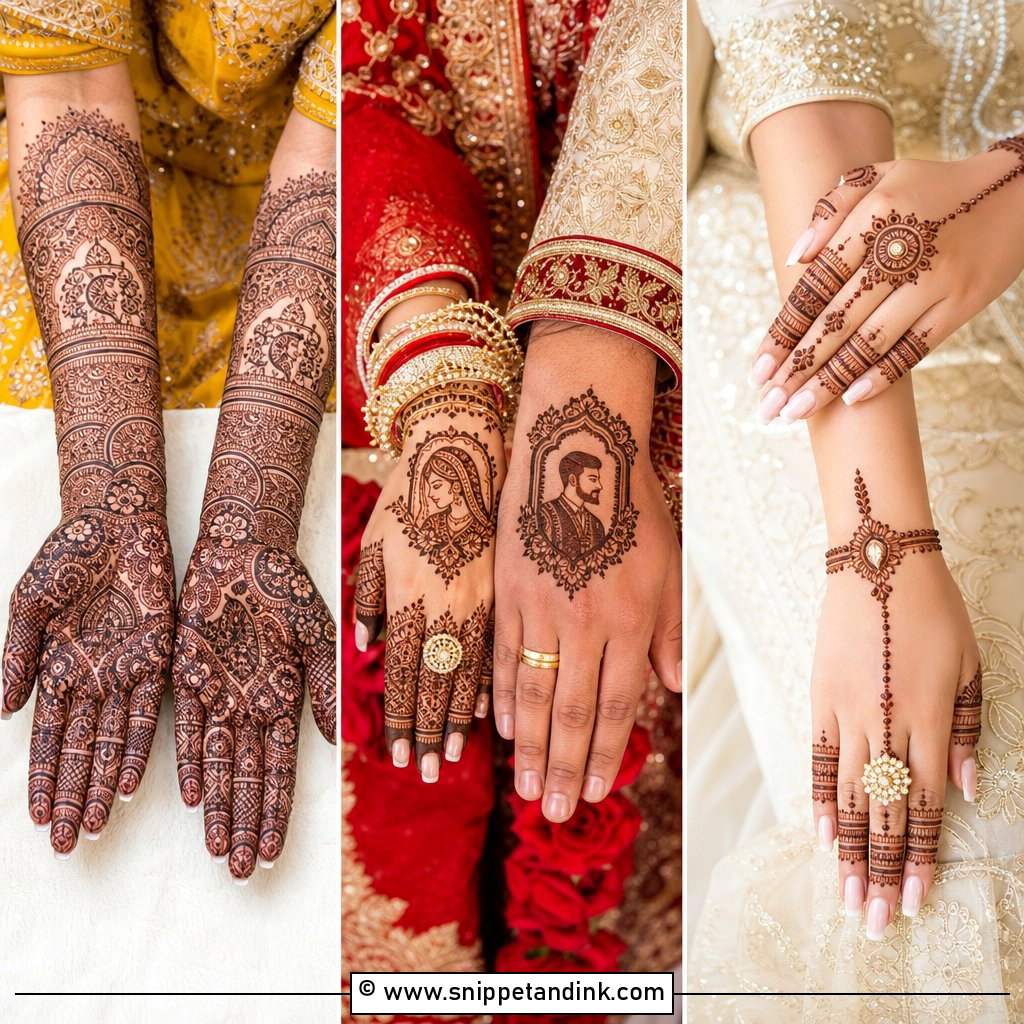
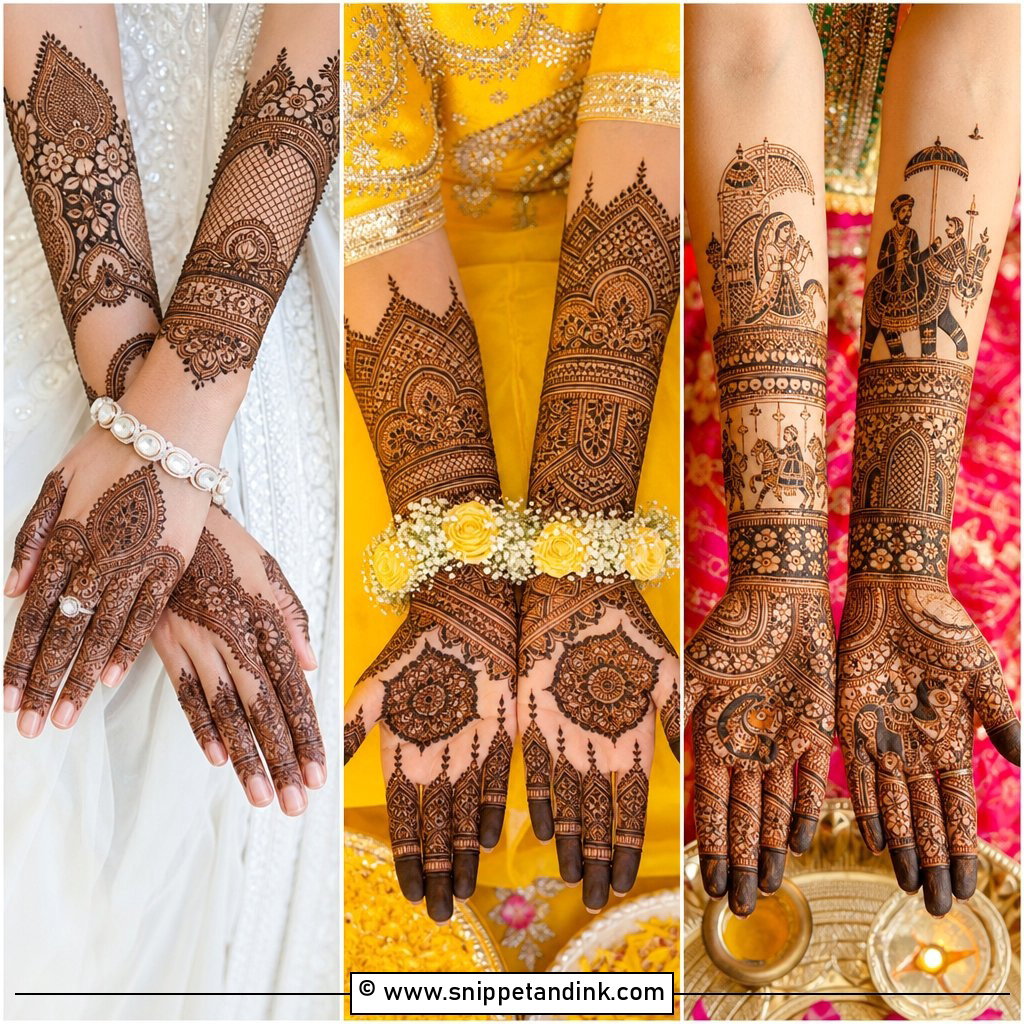
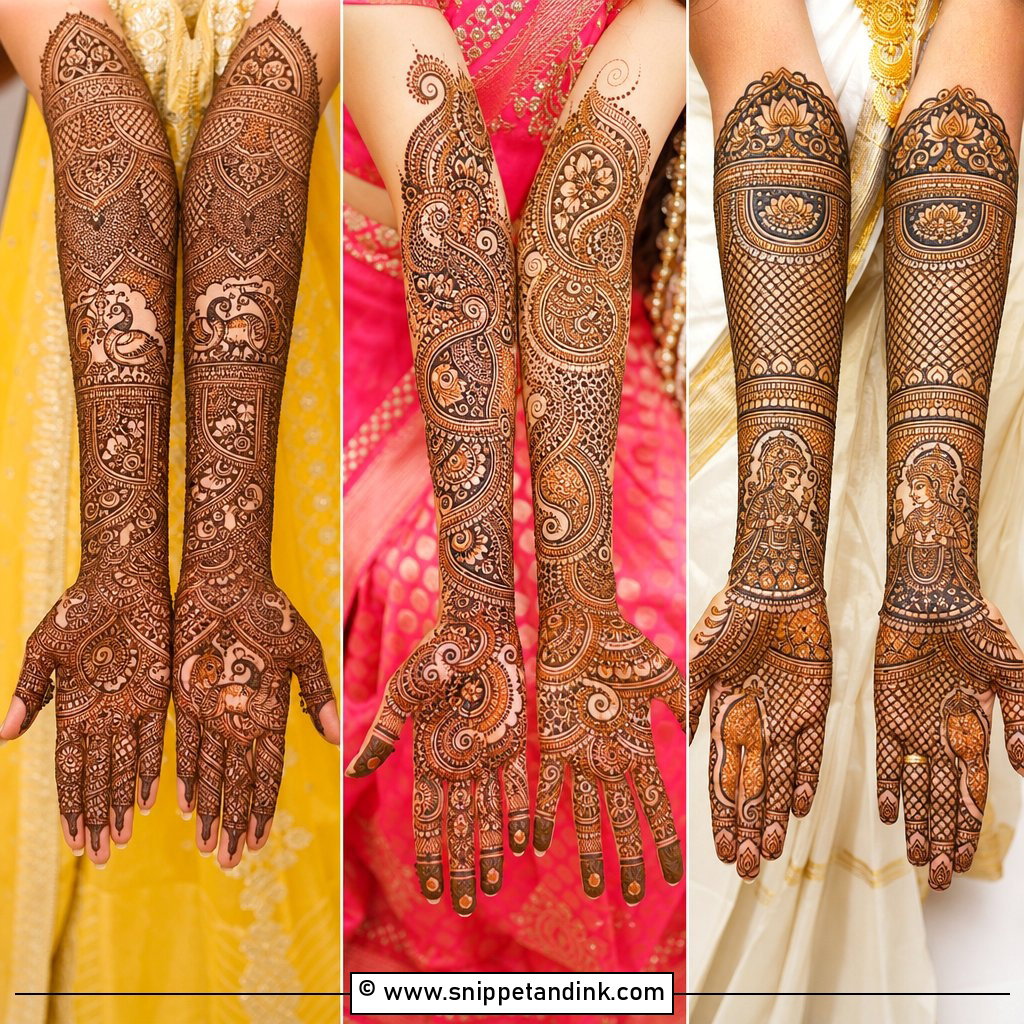
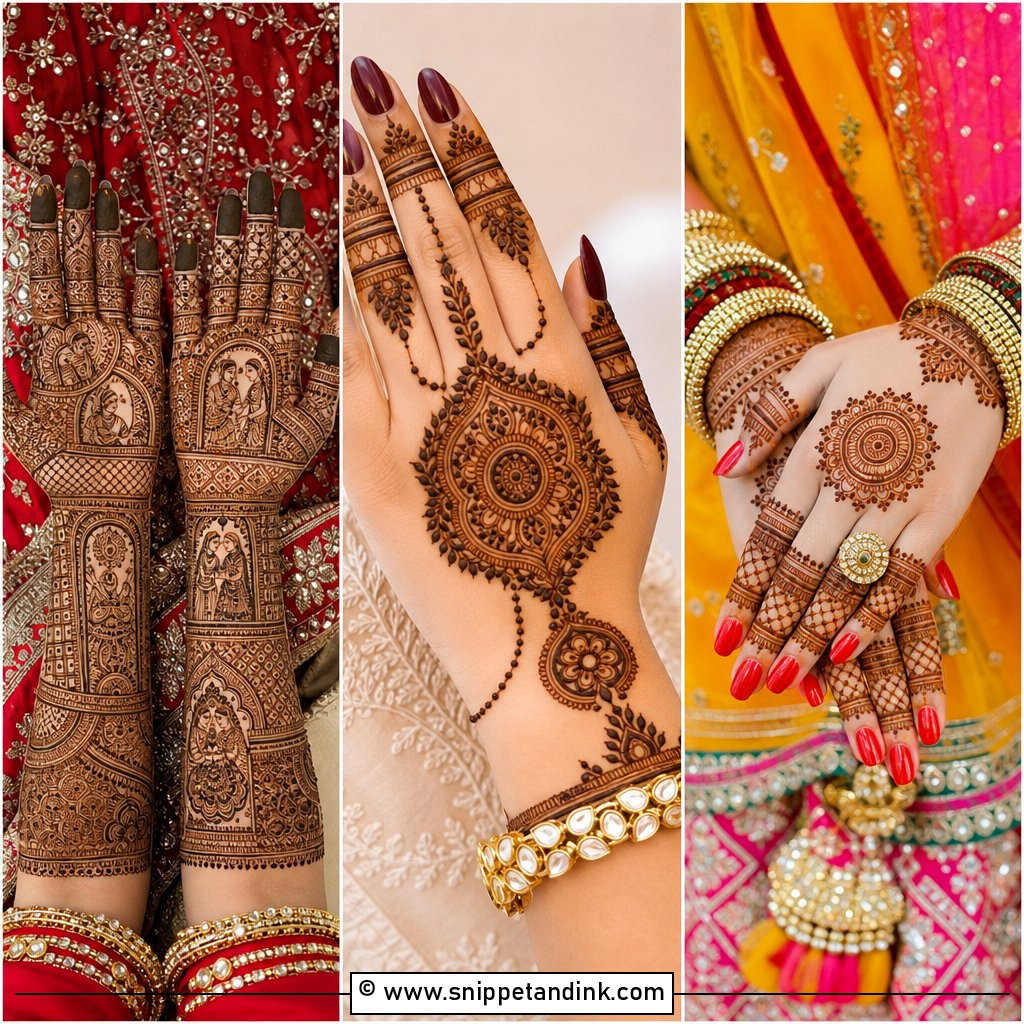
A full bridal hand is a long sitting. I map it before I draw: where the central motif sits, where the wrist band breaks, where the forearm panel ends, so both hands mirror without me measuring every line. Paisleys, peacocks, mandalas and jaali fill the space, and many brides ask me to hide initials, a date or a small couple portrait inside. Expect several hours for both hands and arms, and plan food, a phone stand and a bathroom break before I start, because once the paste is on, you are not using your hands.
4. Back Hand Mehndi Design
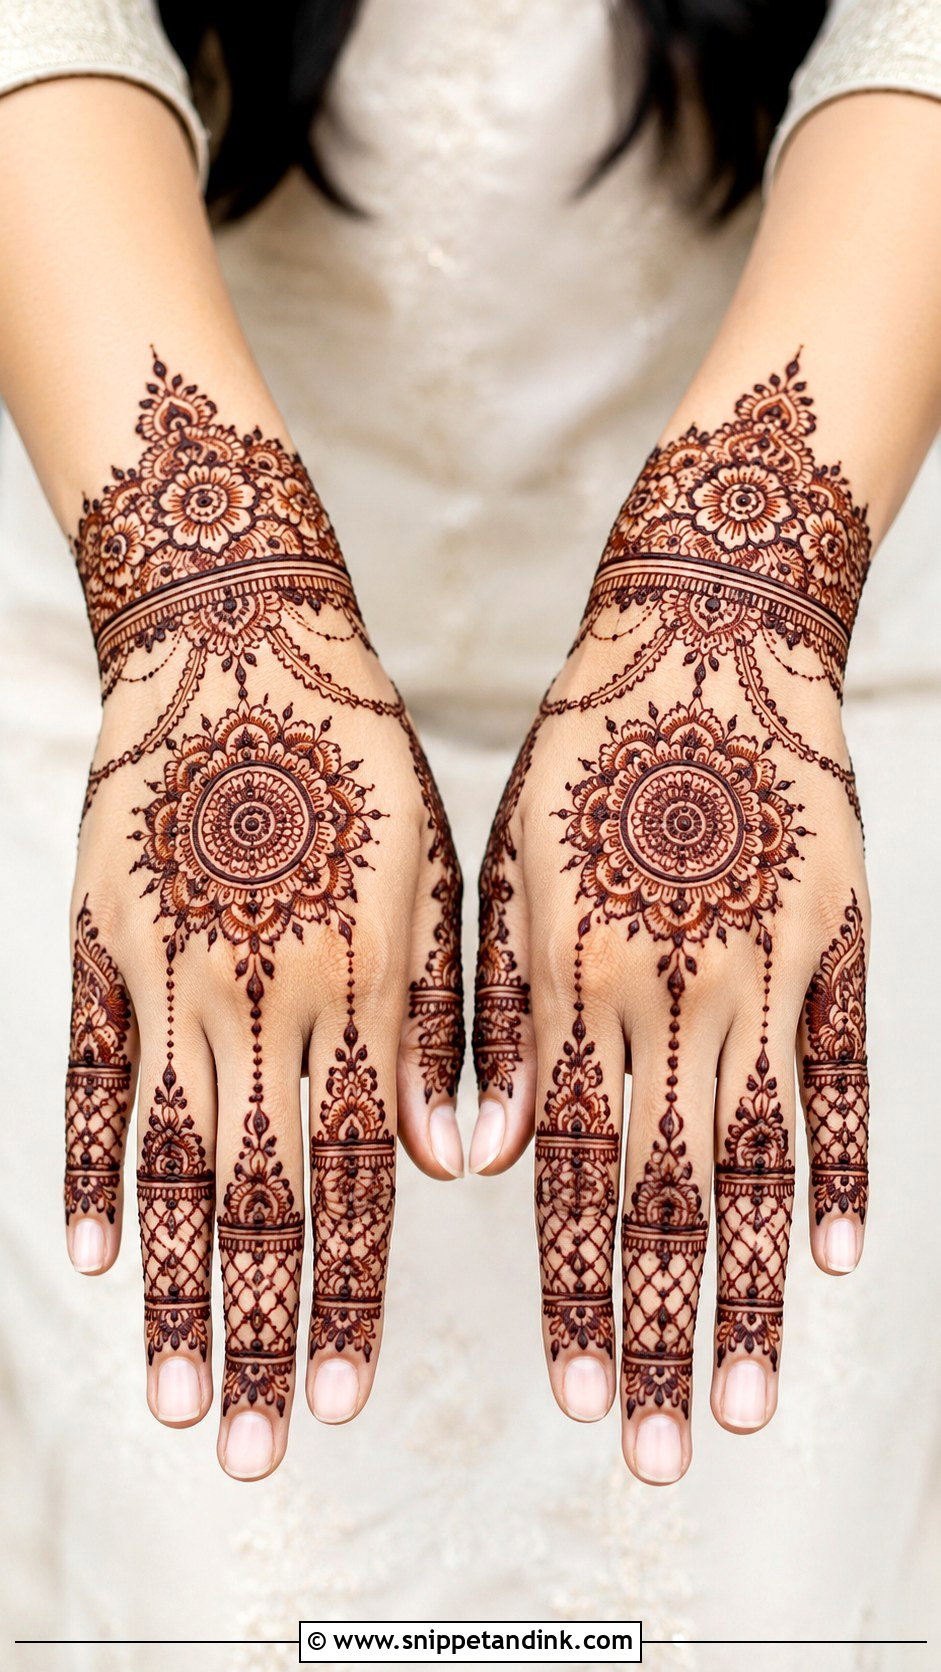
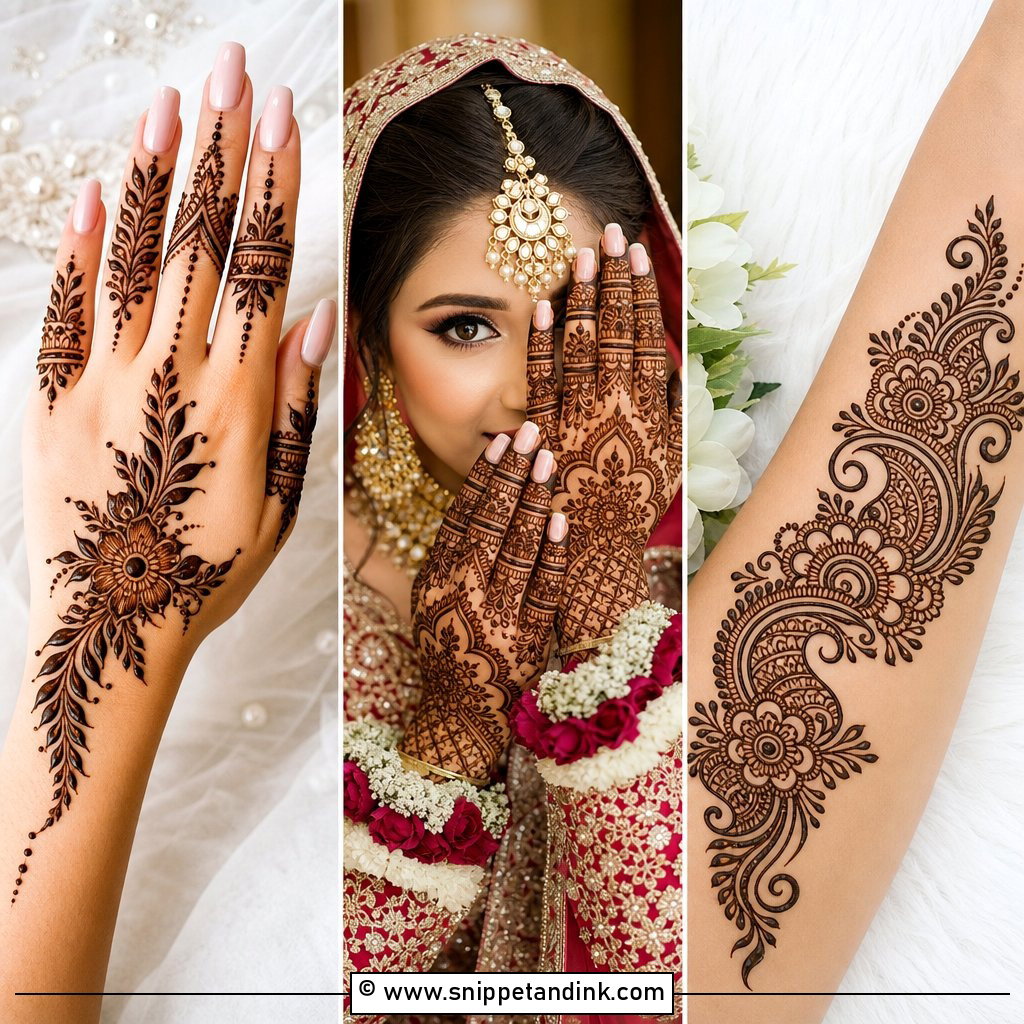
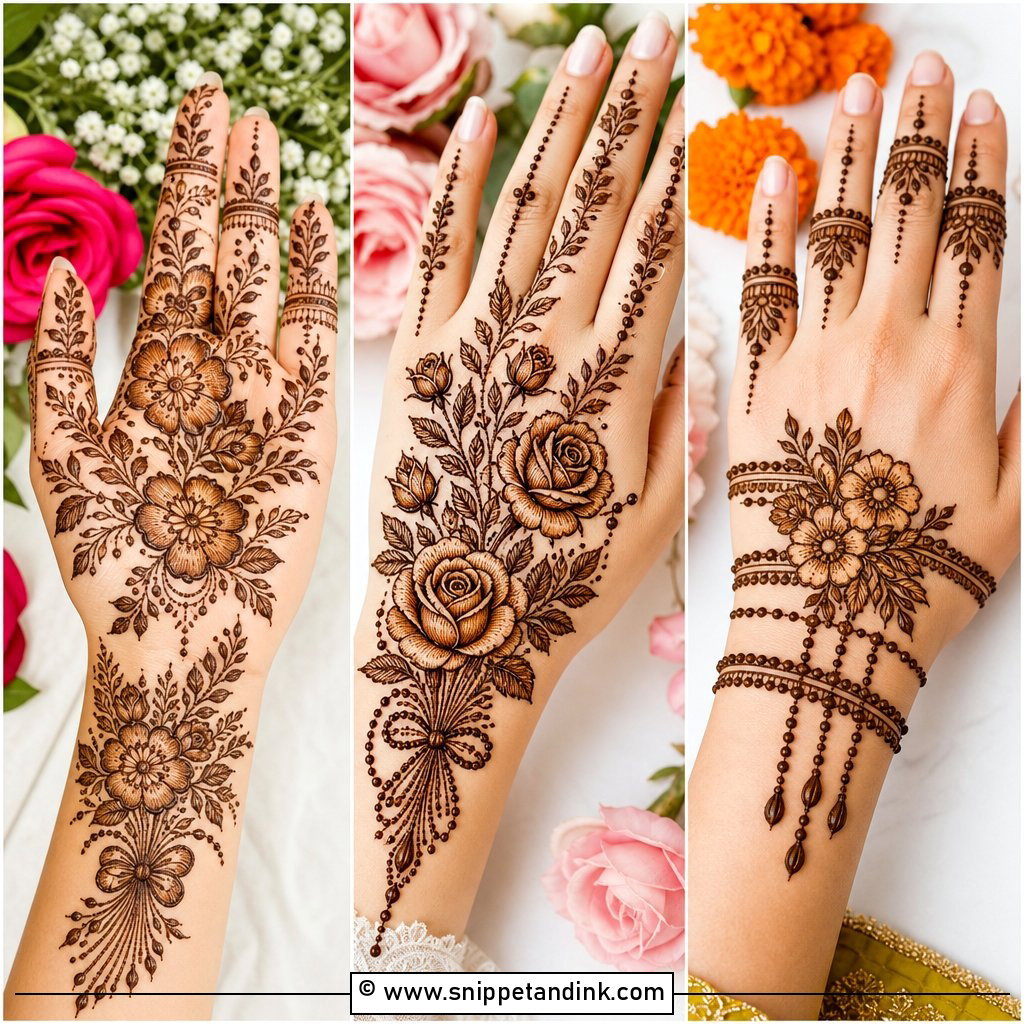
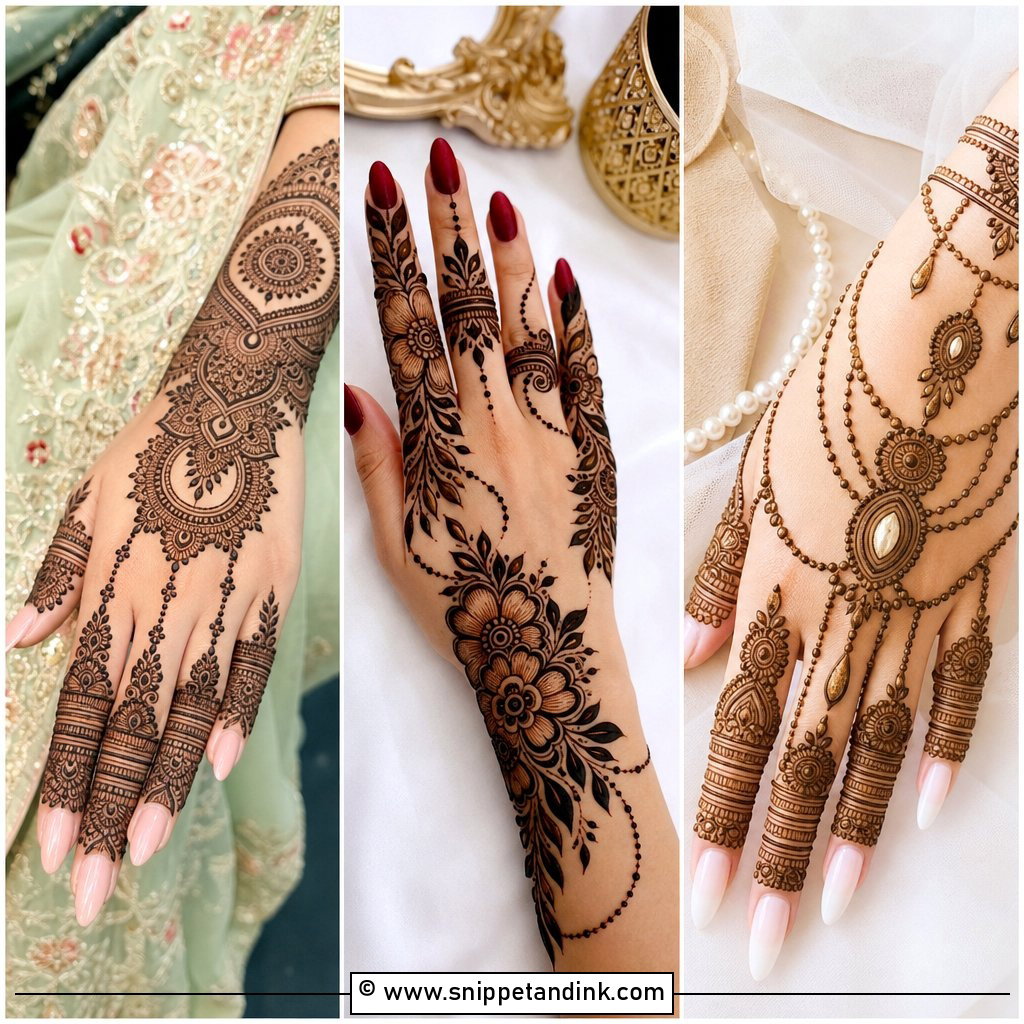
Back hand mehndi design is what ends up in the ring and bangle shots, so I treat it as the display side. My usual layout is a central mandala, a floral bracelet at the wrist and fine chains leading to each finger. Keep in mind that the back of the hand stains lighter than the palm because the skin is thicker and drier there, so I draw the lines slightly bolder to compensate. For a casual event, open vines are enough; for a wedding I add jaali and fuller finger work so the design stands on its own without jewelry.
5. Modern Mehndi Design
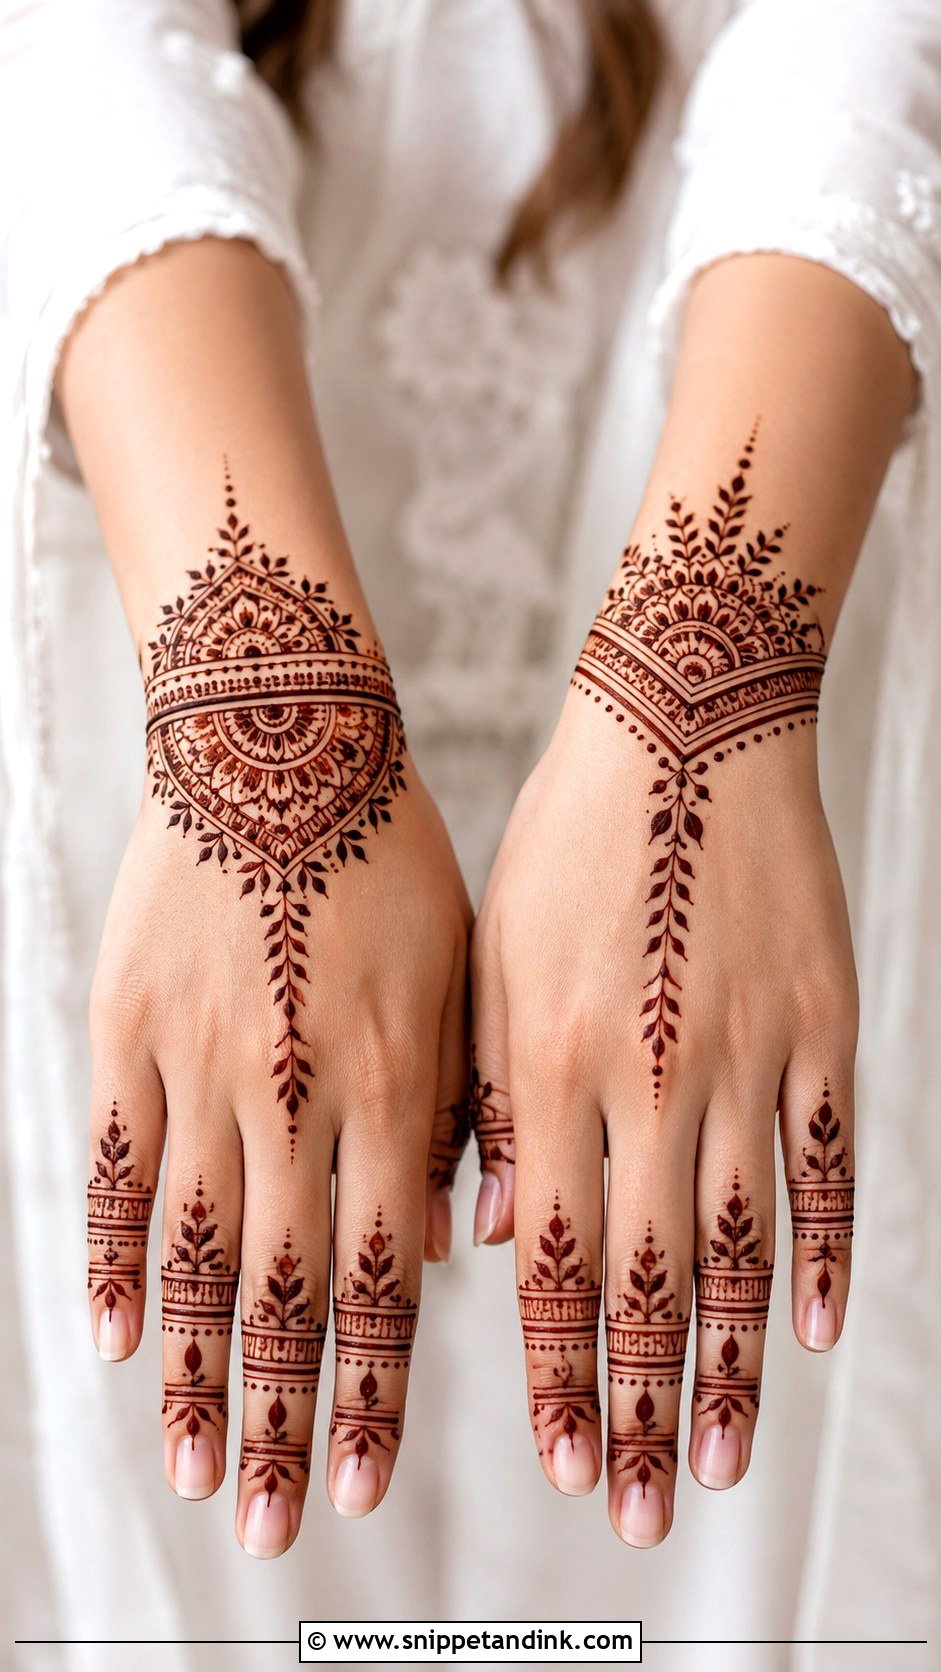
Modern designs live on negative space: geometric lines, half mandalas, a leafy trail, neat finger bands. They are quicker to apply and easier to wear with fusion outfits. The catch is that clean work shows every wobble. There is no dense filler to hide a shaky line, so I’d only go minimal with an artist whose steady line work you’ve already seen in close-up photos.
6. Mandala Mehndi Design
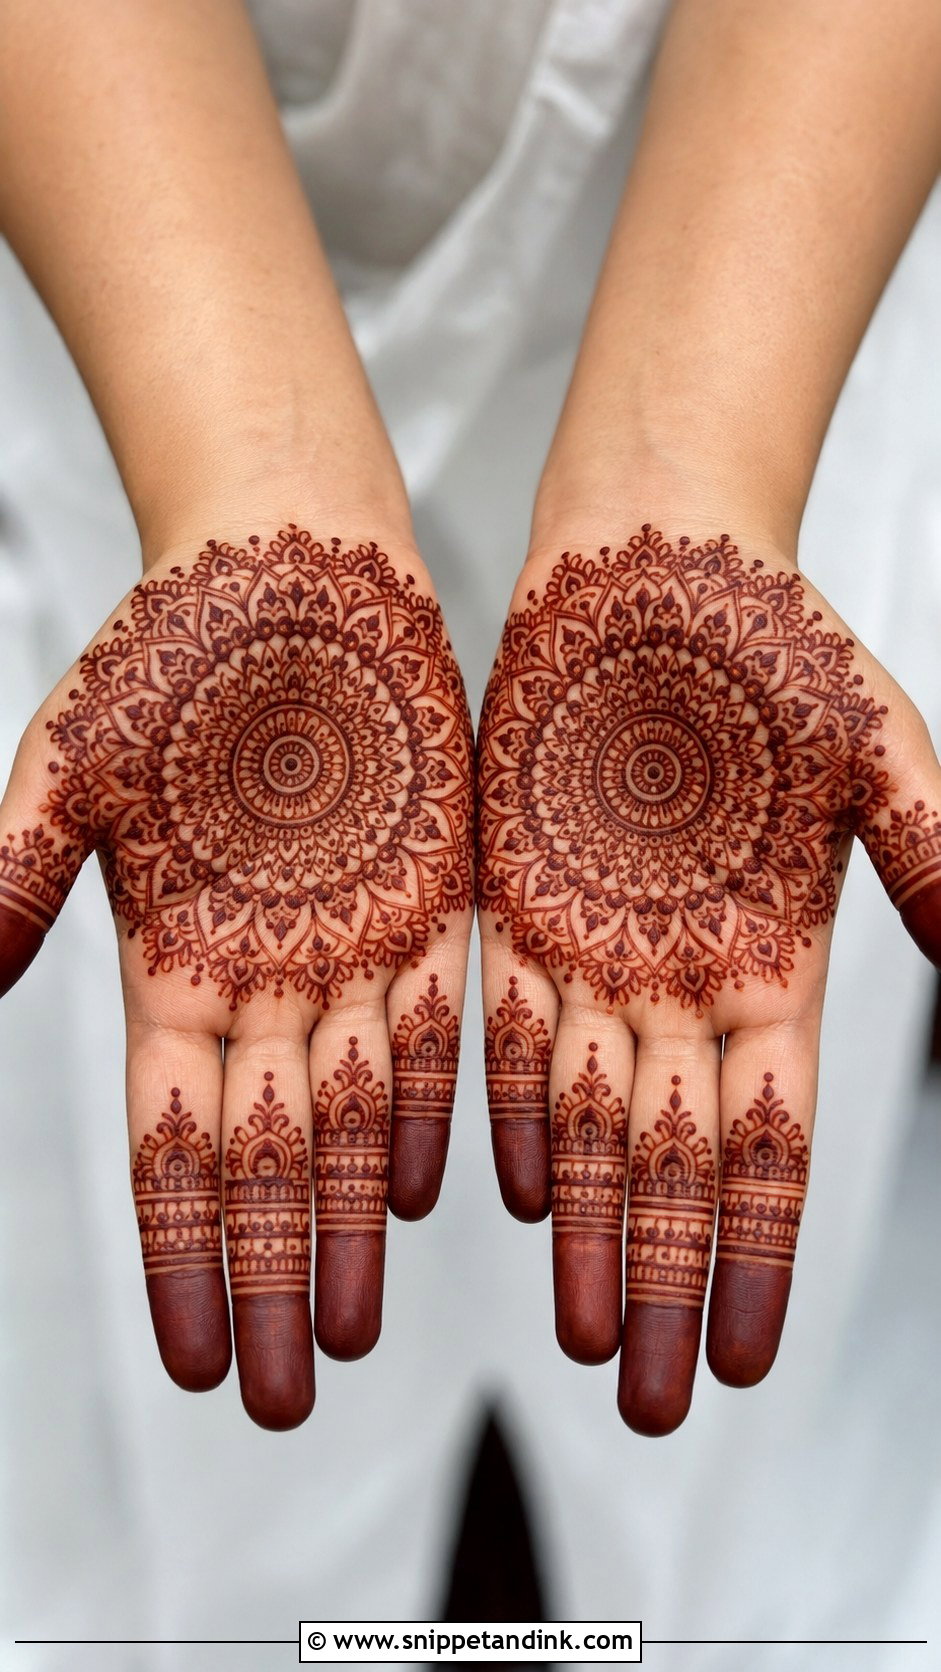
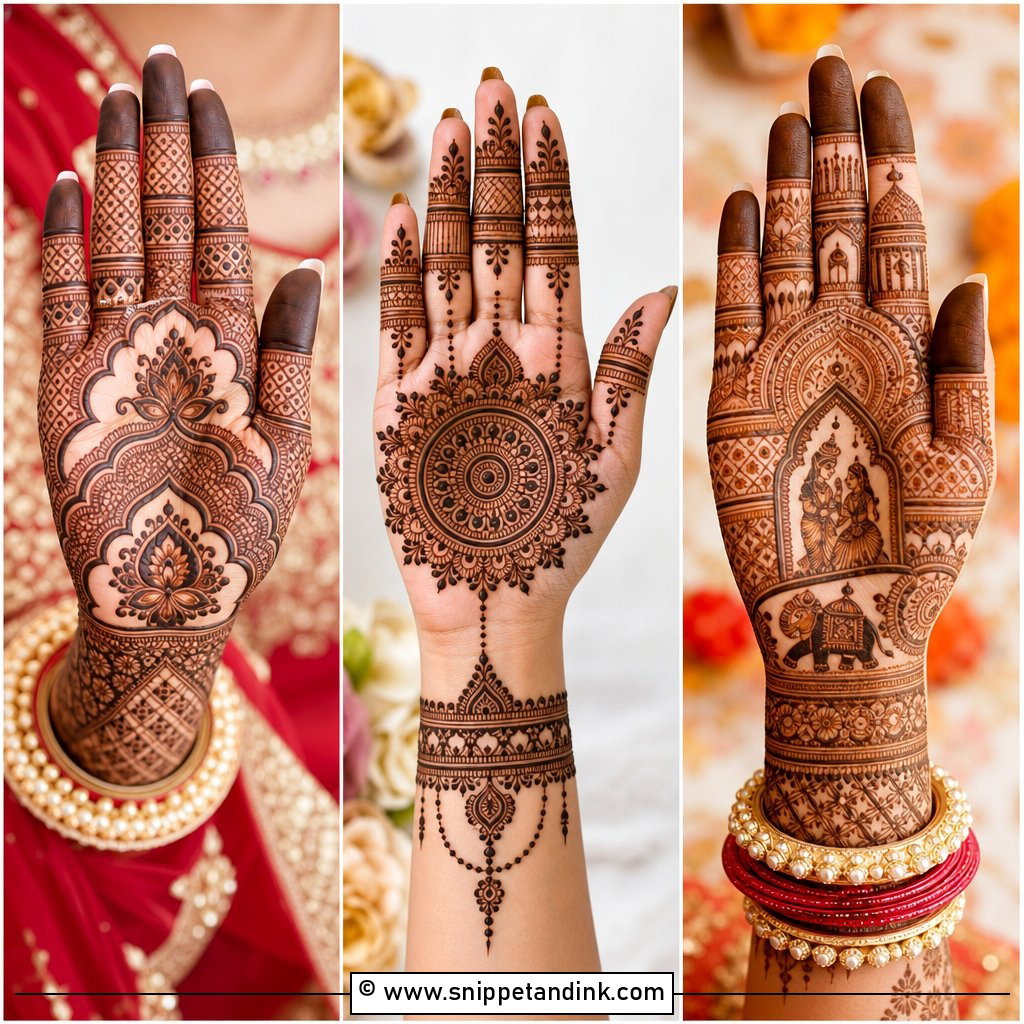
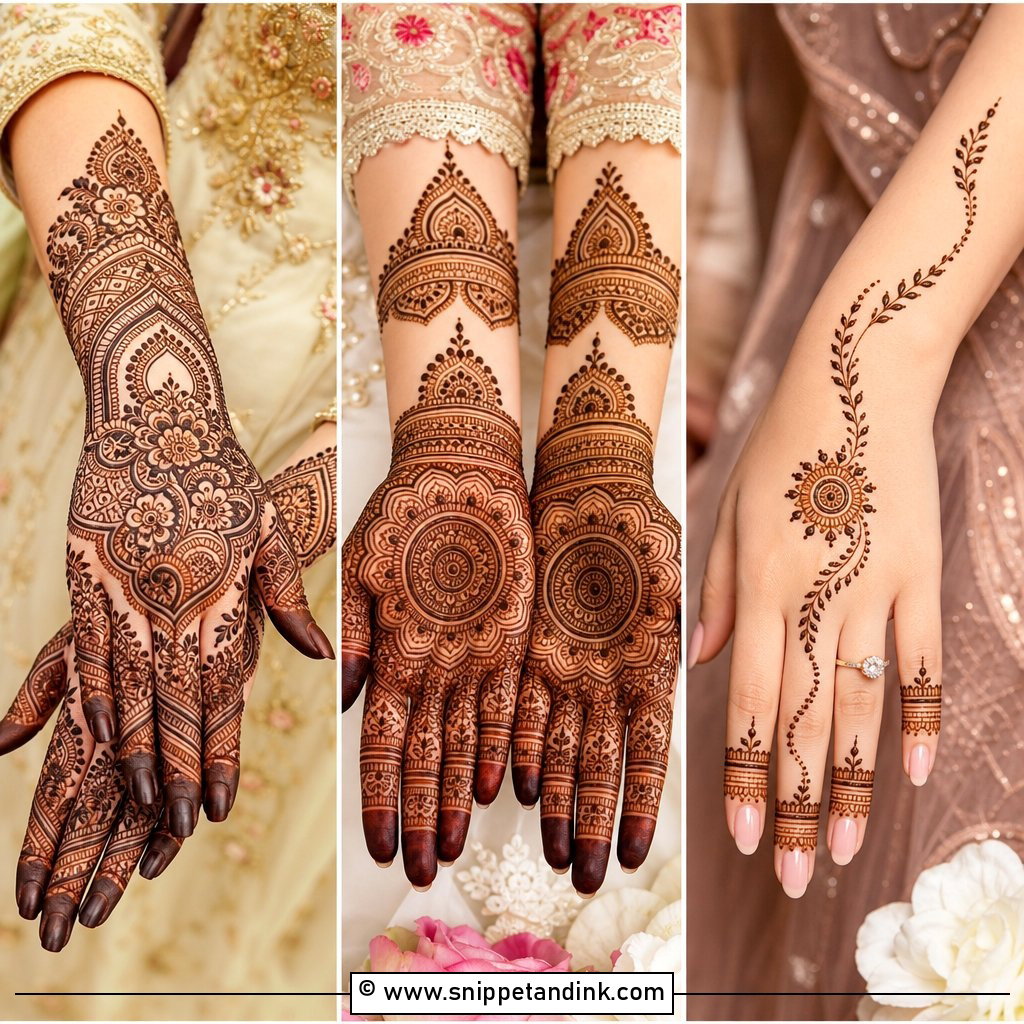
A mandala is built outward from a centre dot, ring by ring: petals, dots, a band of fine lines, then a border. Symmetry is the whole point, so the first circle has to be truly round; if it leans, every ring after it leans too. On the palm it reads traditional, on the back of the hand it looks more modern. I keep fingers simple with this one so the circle stays the focus.
7. Floral Mehndi Design
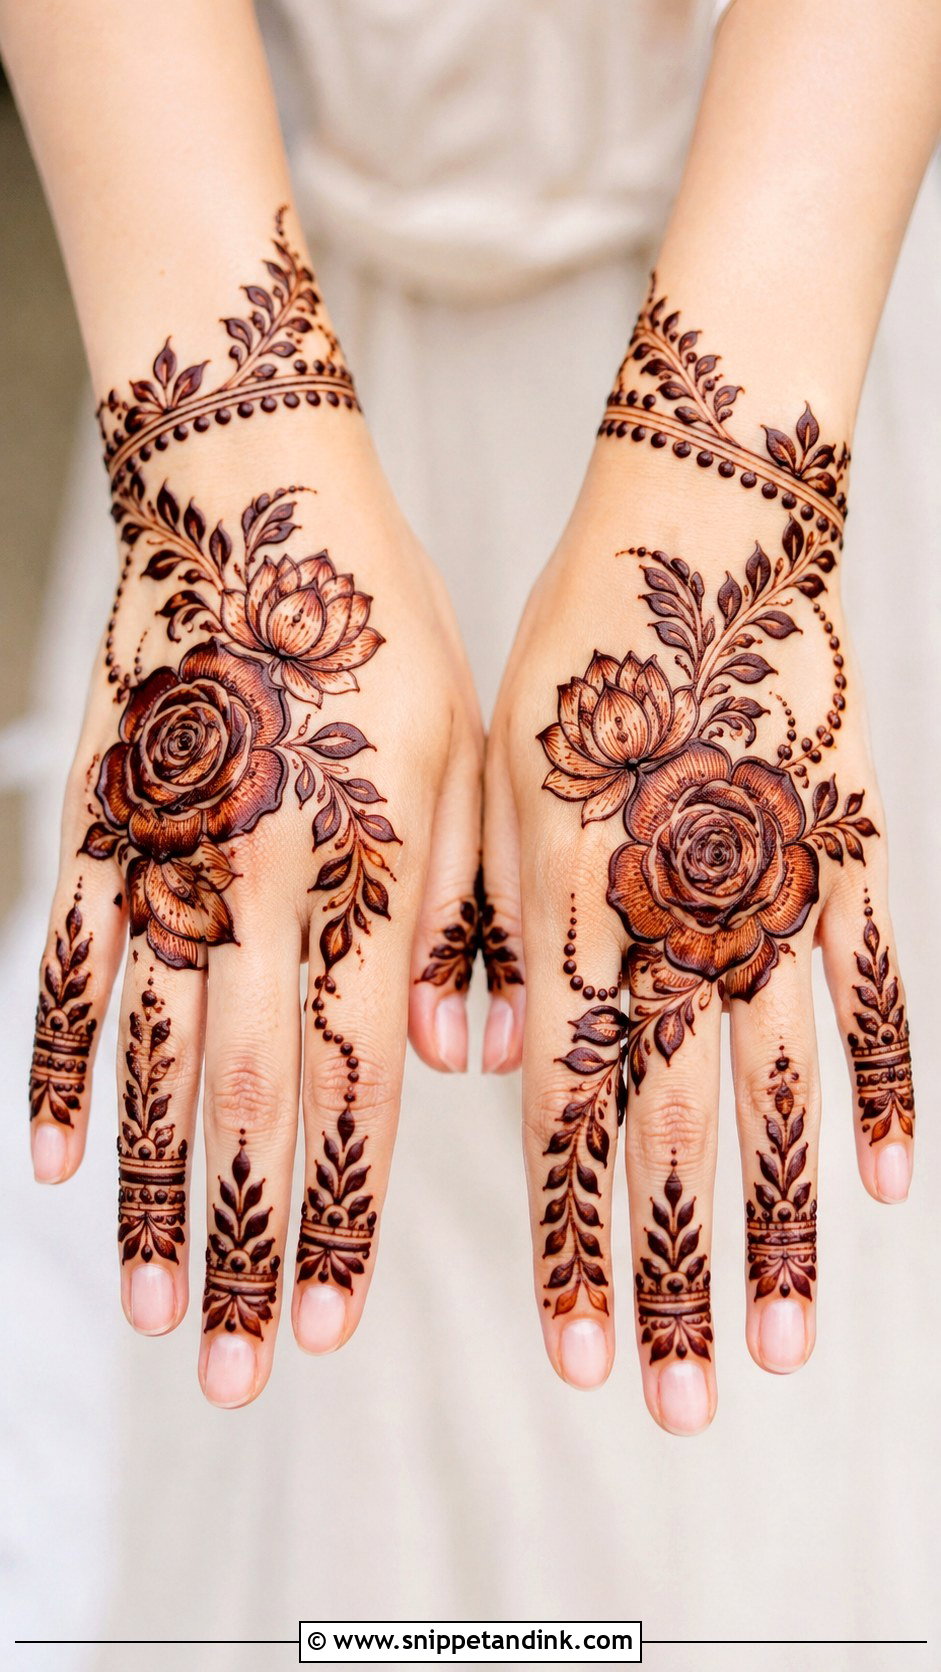
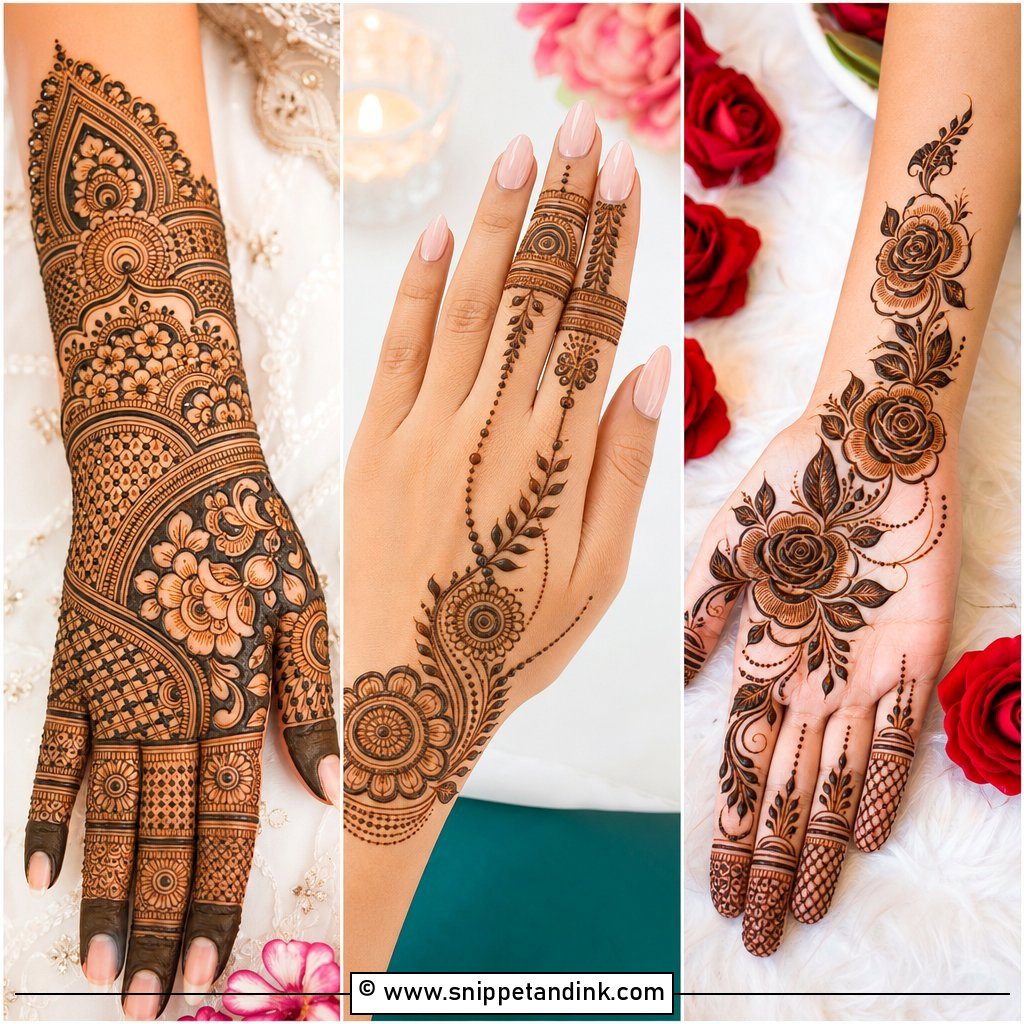
Flowers suit almost every hand shape, which is why they never leave my sketchbook. For a light version I place one large bloom near the wrist and let a vine climb toward the index finger. For a fuller hand I combine roses or lotus shapes with paisleys and lace-like borders. My one rule: outline petals boldly, because thin inner petal lines fade first as the stain wears off.
8. Indian Mehndi Design
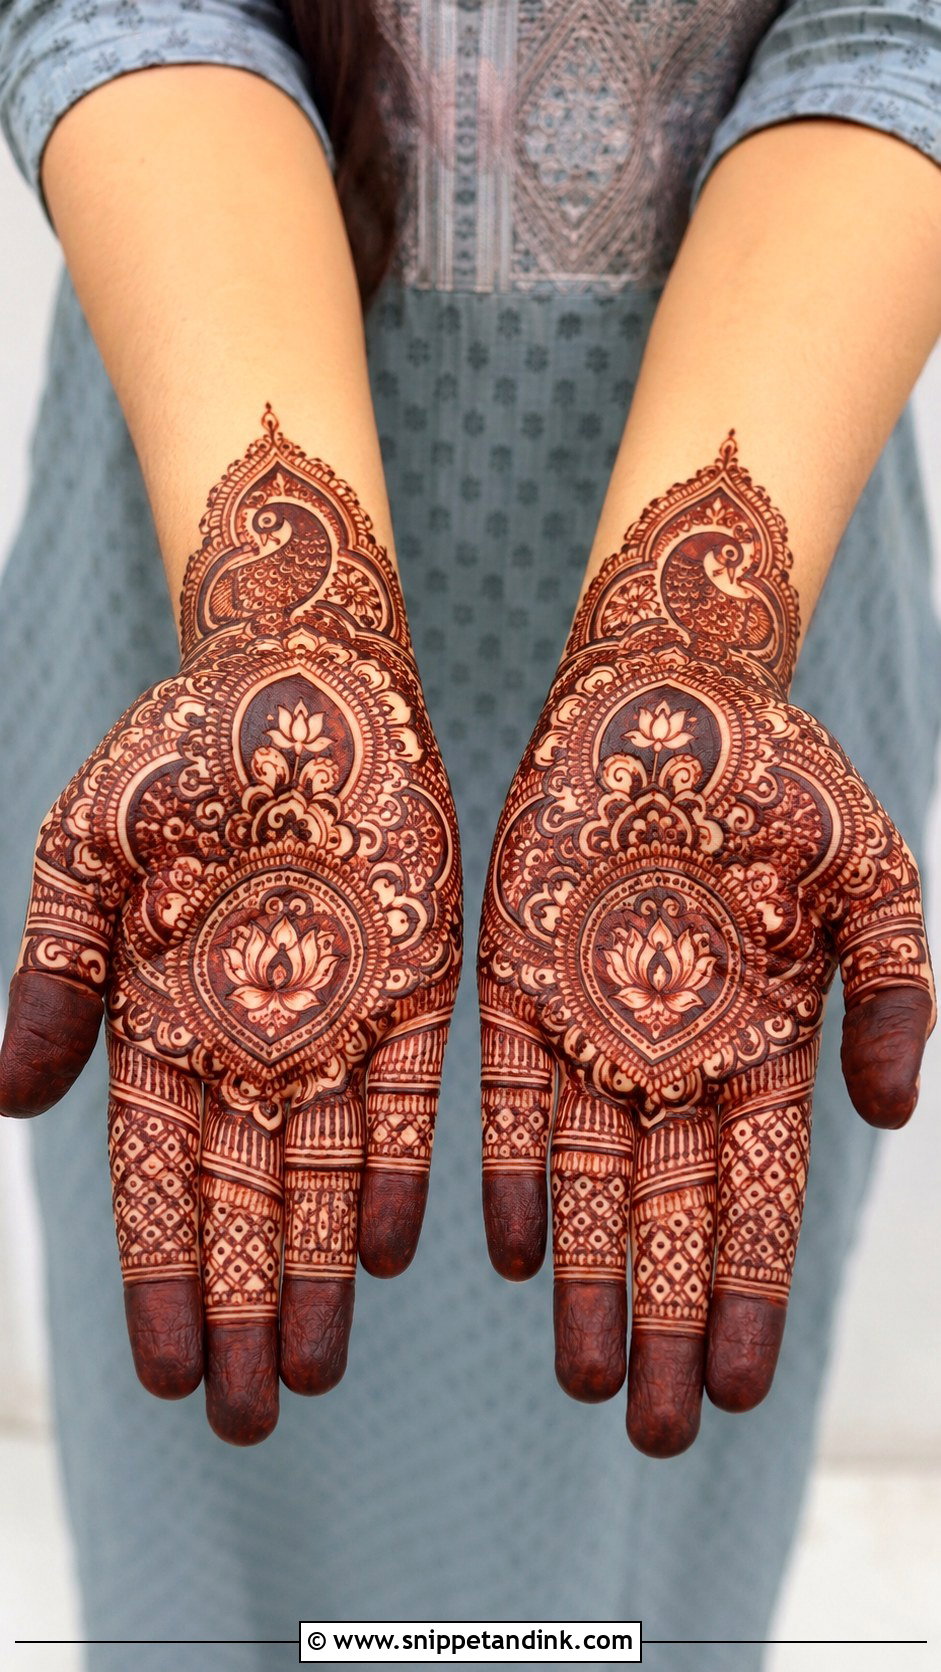
Indian mehndi design is dense and detail-heavy: paisleys, peacocks, lotus flowers, filled fingertips and curved borders packed across the palm. It’s the style I draw most for weddings, Karwa Chauth and Teej. Density is a trade-off, though. Very tight filler on a warm, sweaty palm can bleed slightly as it dries, so I keep a hairline of skin between fine lines. If full coverage feels like too much, keep a bold centre and use smaller fillers around it.
9. Indo Arabic Mehndi Design
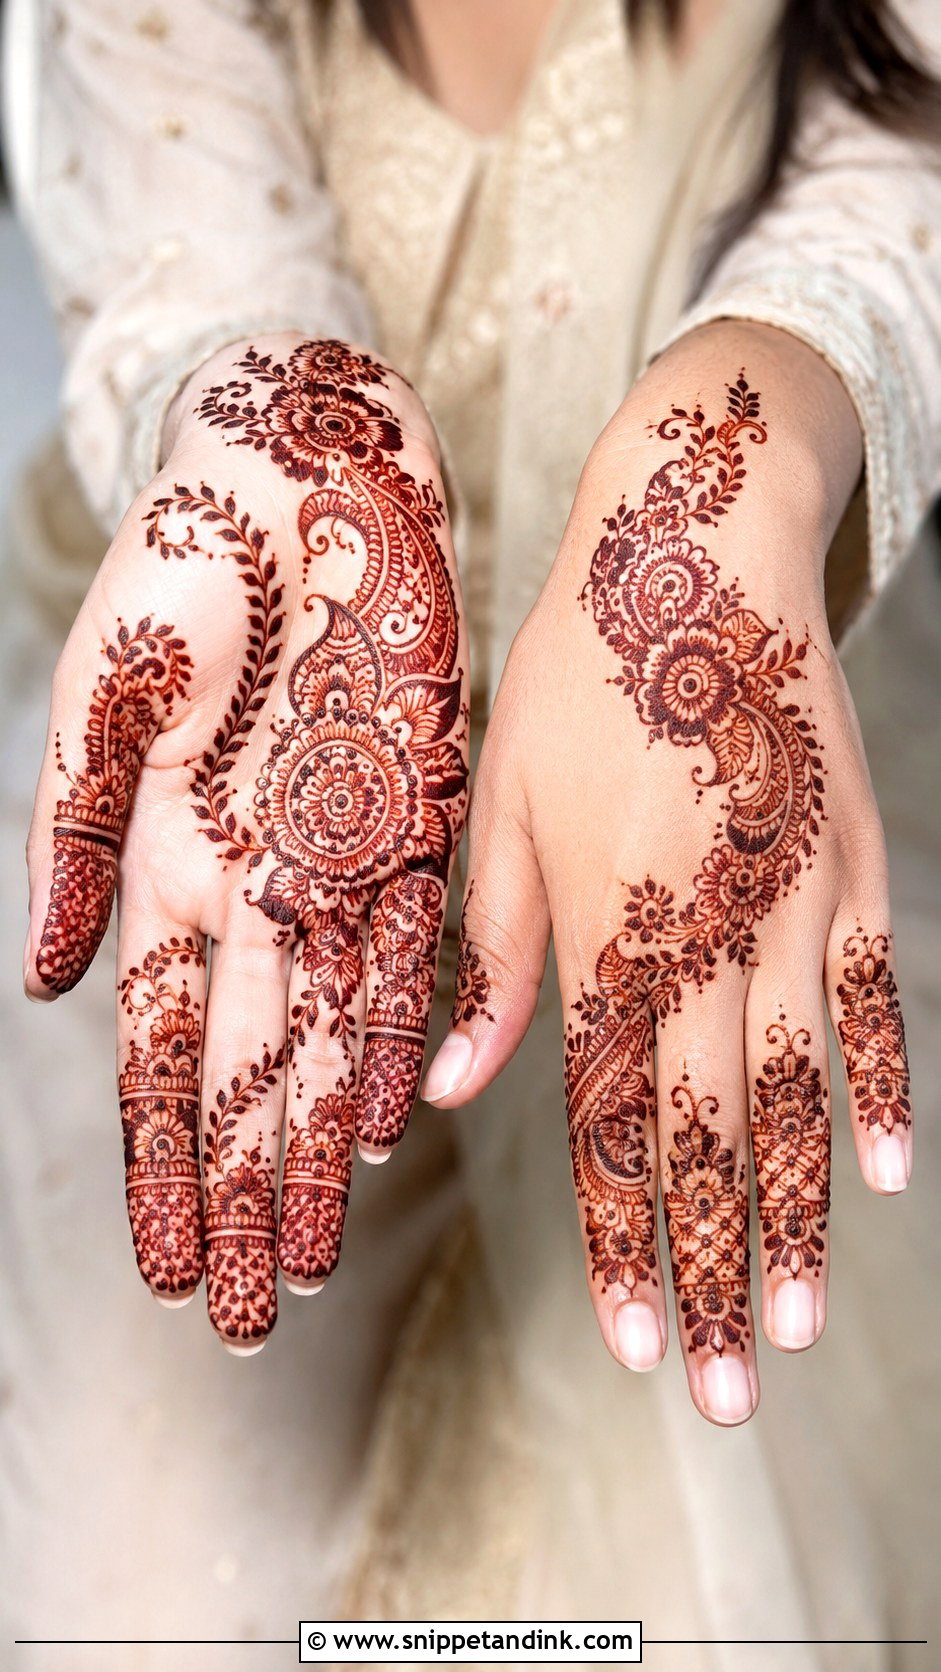
Indo-Arabic takes the diagonal flow and open spacing of Arabic work and drops Indian fine detail inside the larger shapes. A big Arabic flower might hold a small jaali panel; a paisley might carry fine Indian shading. I suggest it to sisters of the bride and close family because it reads rich in photos without taking as long as full bridal coverage. Both palms and backs handle it well.
10. Peacock Mehndi Design
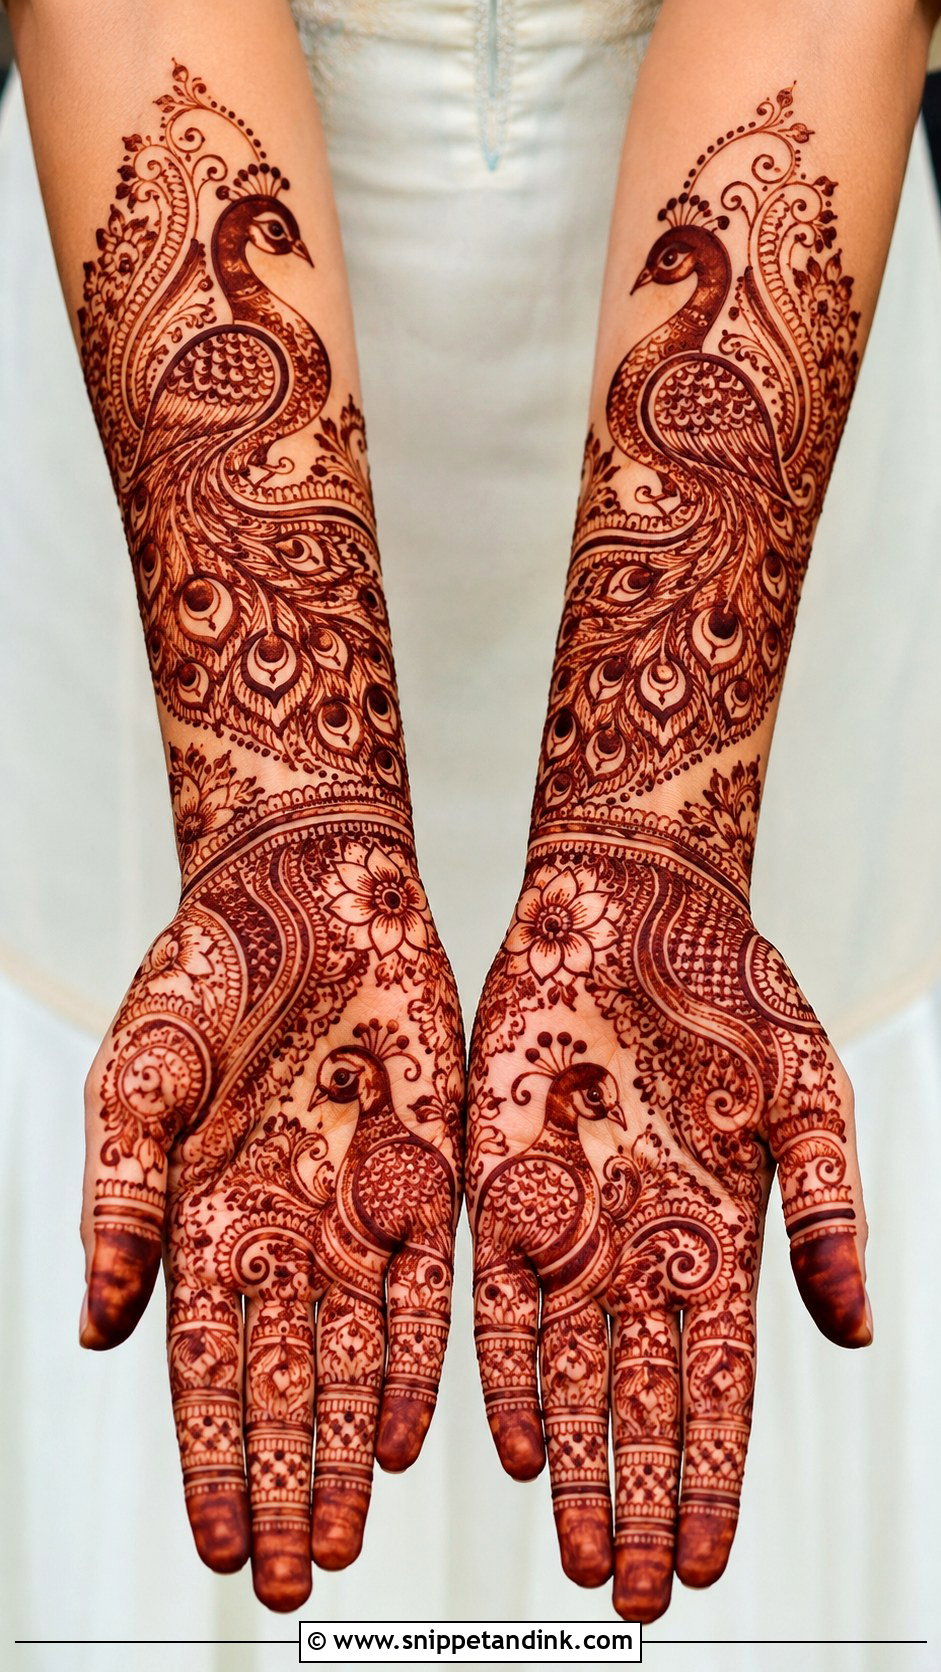
Peacocks give the hand drama on their own, so I avoid crowding them. I let the feather lines sweep along the length of the fingers or up the forearm, following the hand rather than fighting it. The neck and beak are the parts people judge, so I draw those first while my hand is freshest. A small peacock on a lighter background suits festivals; for bridal, I pair it with lotus or jaali.
11. Paisley Mehndi Design
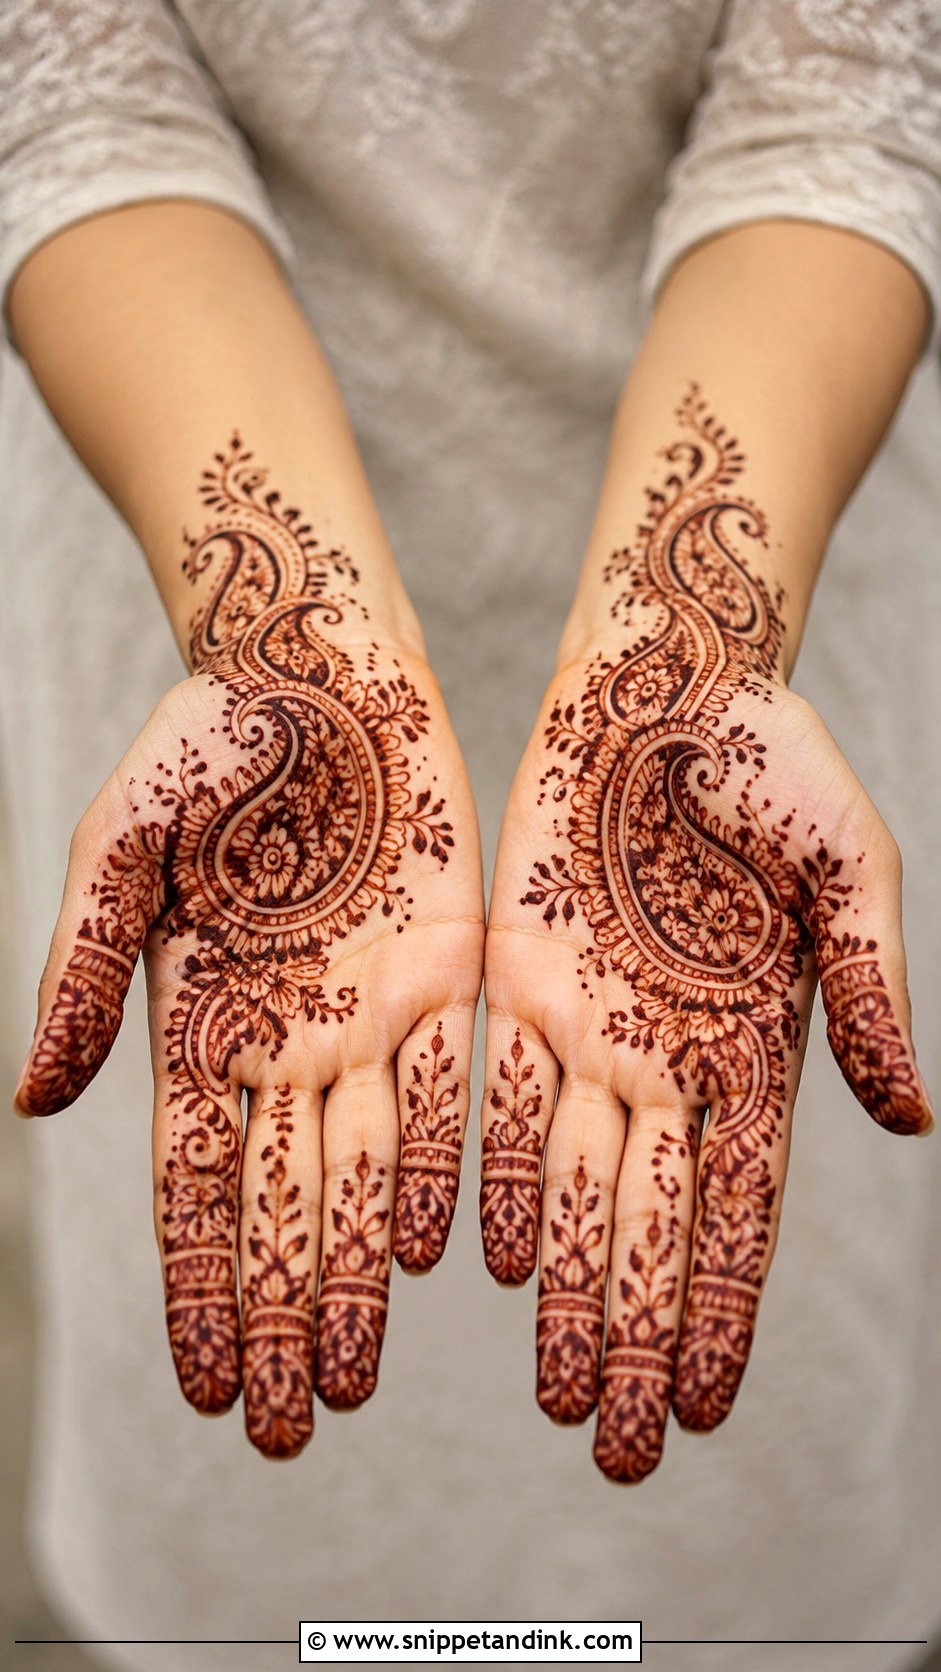
The paisley is the most forgiving motif I know: it can anchor a palm, repeat along a wrist or trail across the back of the hand. Scale matters more than people expect. Broad palms take large paisleys; narrow hands look cluttered with them, so I go smaller and repeat. A bold outline with fine lines or tiny petals inside keeps each one readable after the stain matures.
12. Minimal Mehndi Design
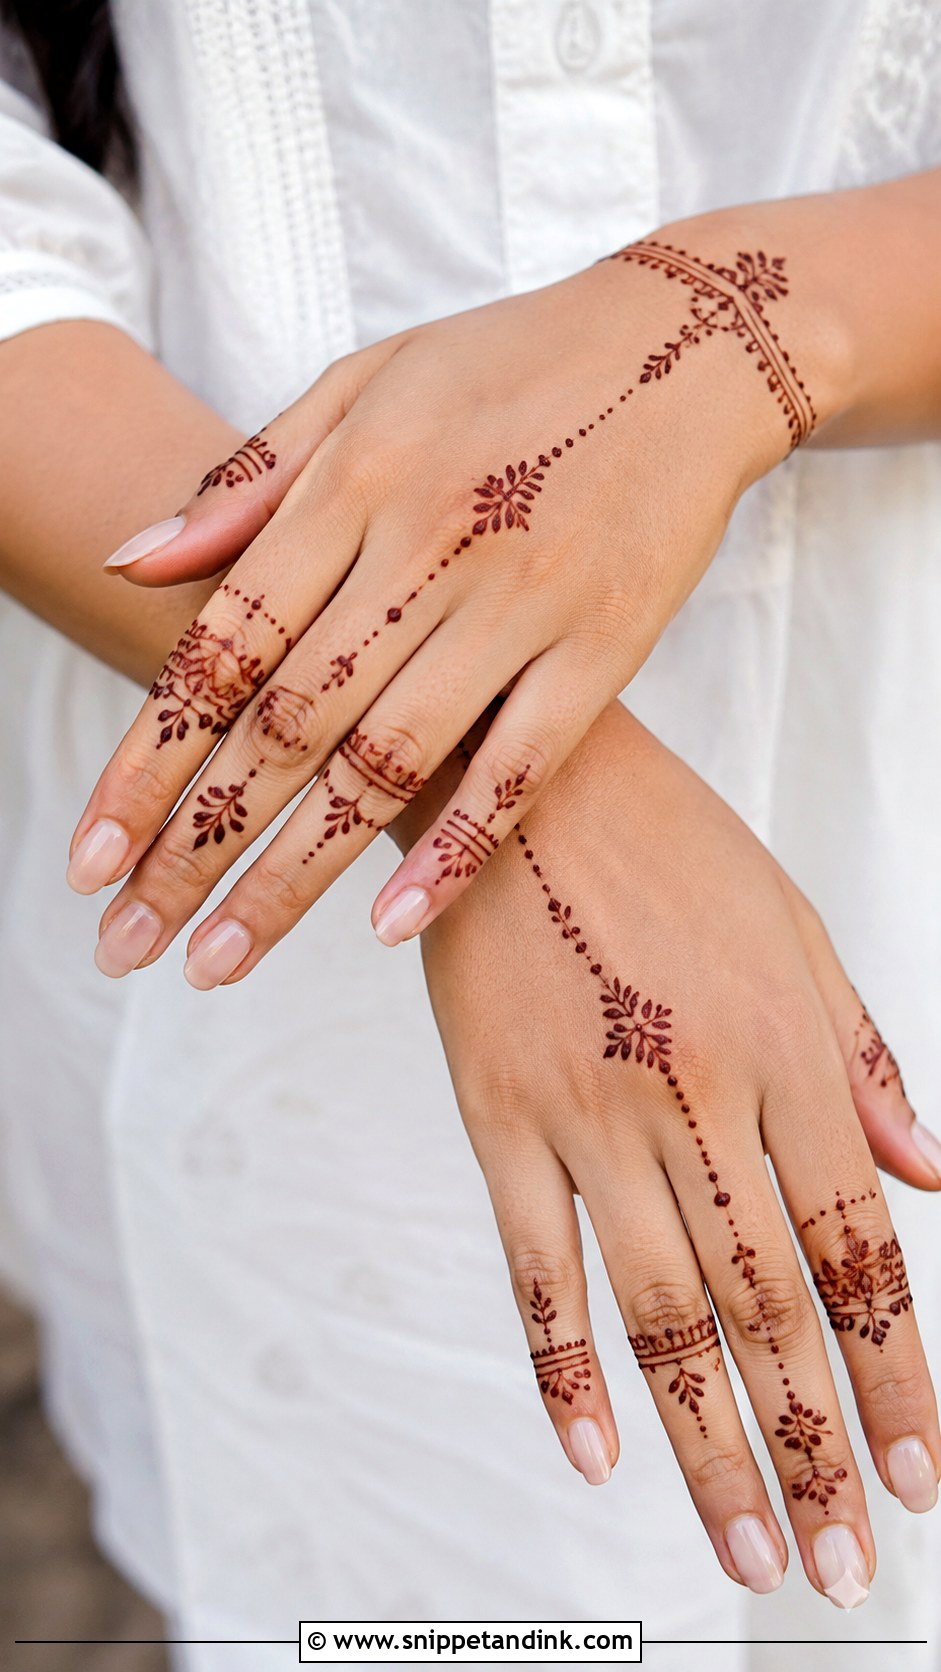
Minimal henna is one focus point and plenty of bare skin: a small mandala, a bracelet line or a single floral trail. It’s what I suggest for office weeks after a festival, or for someone trying mehndi for the first time. Resist adding “just one more” motif. Two focal points on a minimal hand stop looking minimal.
13. Finger Mehndi Design
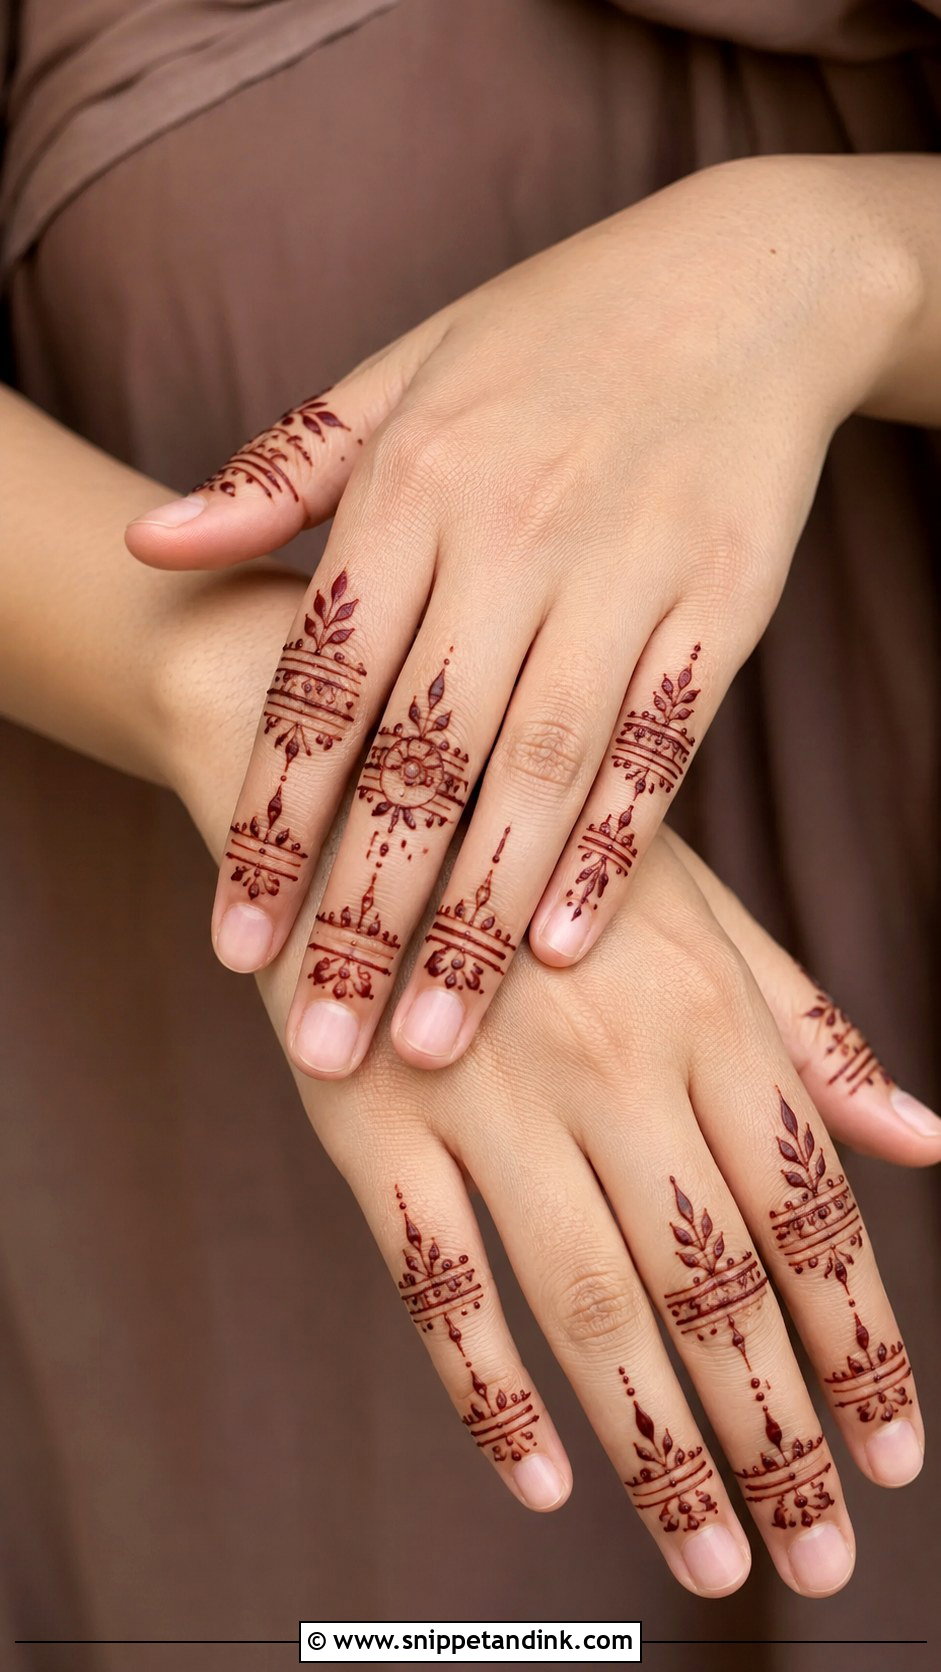
Fingers stain darker than almost anywhere else on the hand, so a finger-only design gives a lot of colour for very little time in the chair. I use leafy tips, ring bands, vertical lines and small florals from knuckle to nail. Draw the bands just below each knuckle crease, not on it, or the line cracks every time the finger bends while the paste is wet. Connect the fingers to a small wrist cuff if you want it to look more finished.
14. Jewellery Mehndi Design
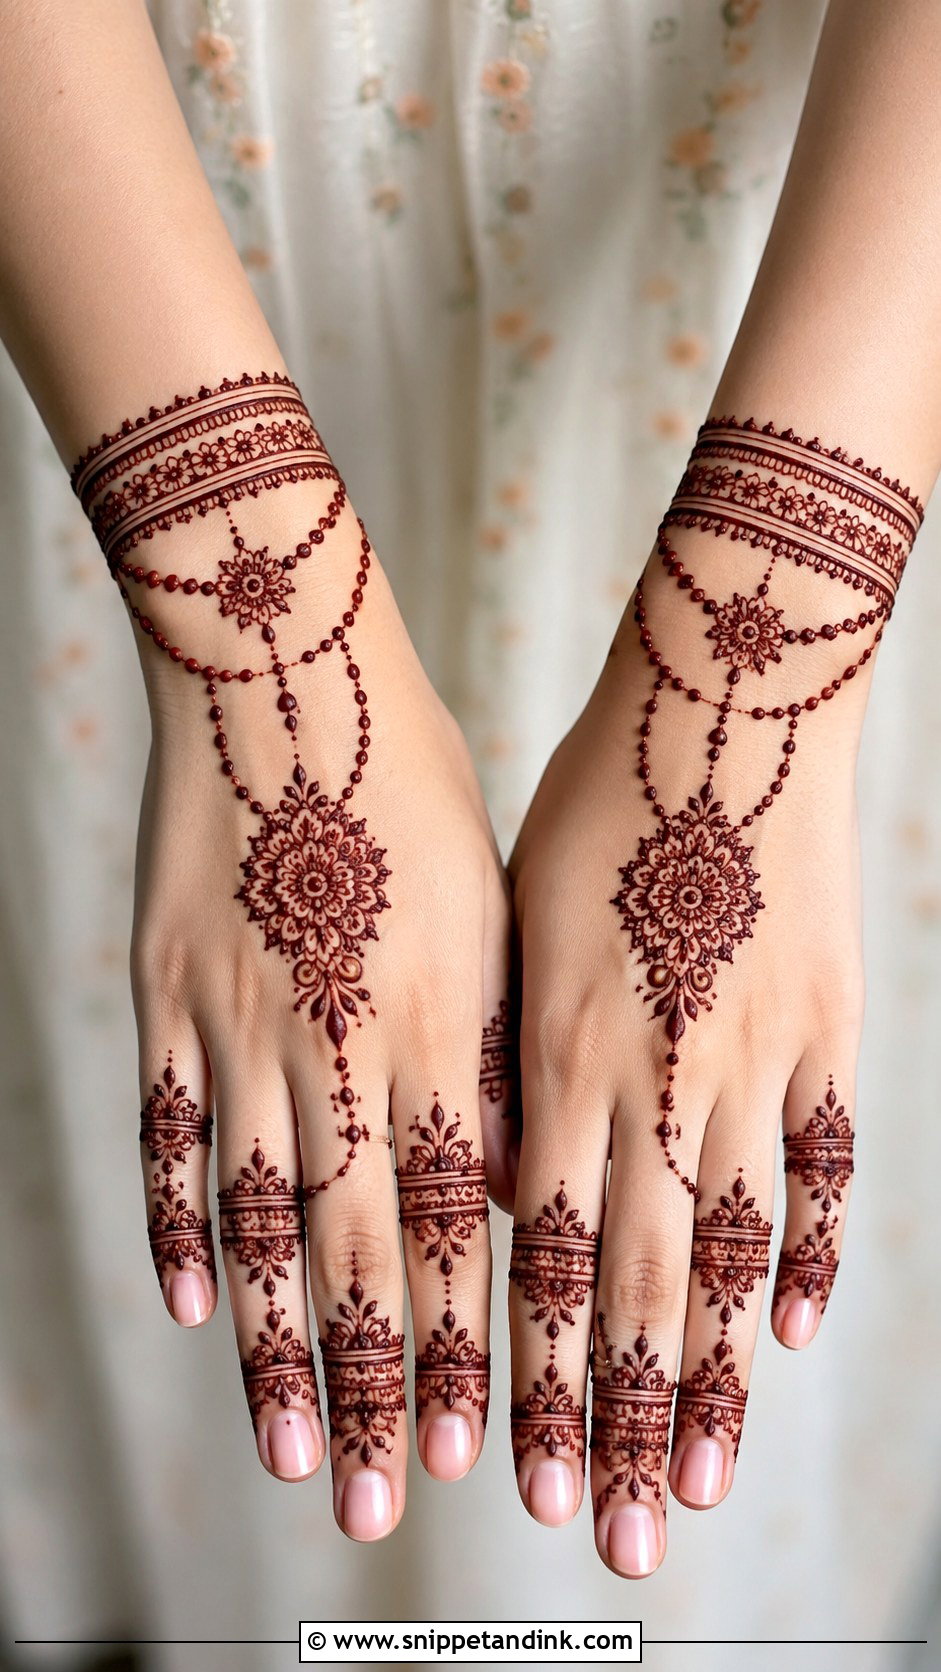
Jewellery mehndi draws the accessories instead of wearing them: a bracelet band, a chain running to the middle finger, ring loops and a pendant on the back of the hand. I line the main chain up with the middle finger’s tendon so it sits straight when the hand relaxes. Keep the chains thin. A floral or mandala pendant gives the piece a clear centre, and it suits guests who don’t want to wear heavy real jewelry all day.
15. Bracelet Mehndi Design
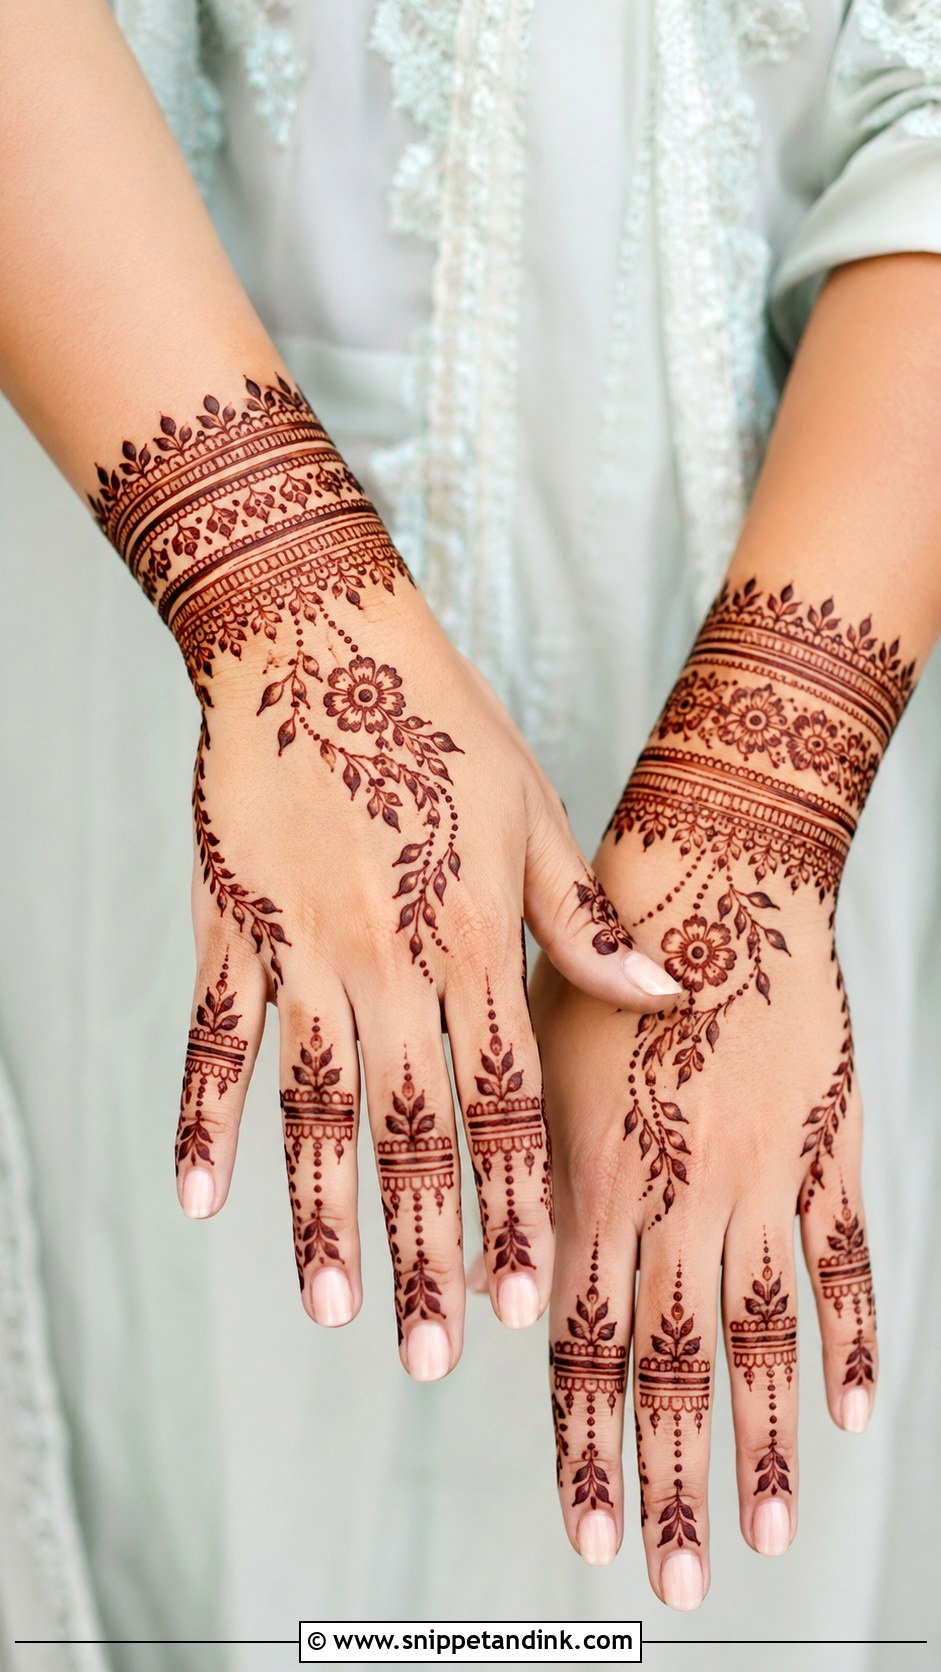
A wrist bracelet is the quickest way to make a hand look finished. I draw it as a cuff that dips slightly onto the hand, with small flowers or leafy borders. Thin and spaced reads modern; a wide, layered cuff reads festive. One practical point: the wrist rubs against sleeves and bangles, so this area needs the longest drying time before anything slides over it.
16. Jaali Mehndi Design
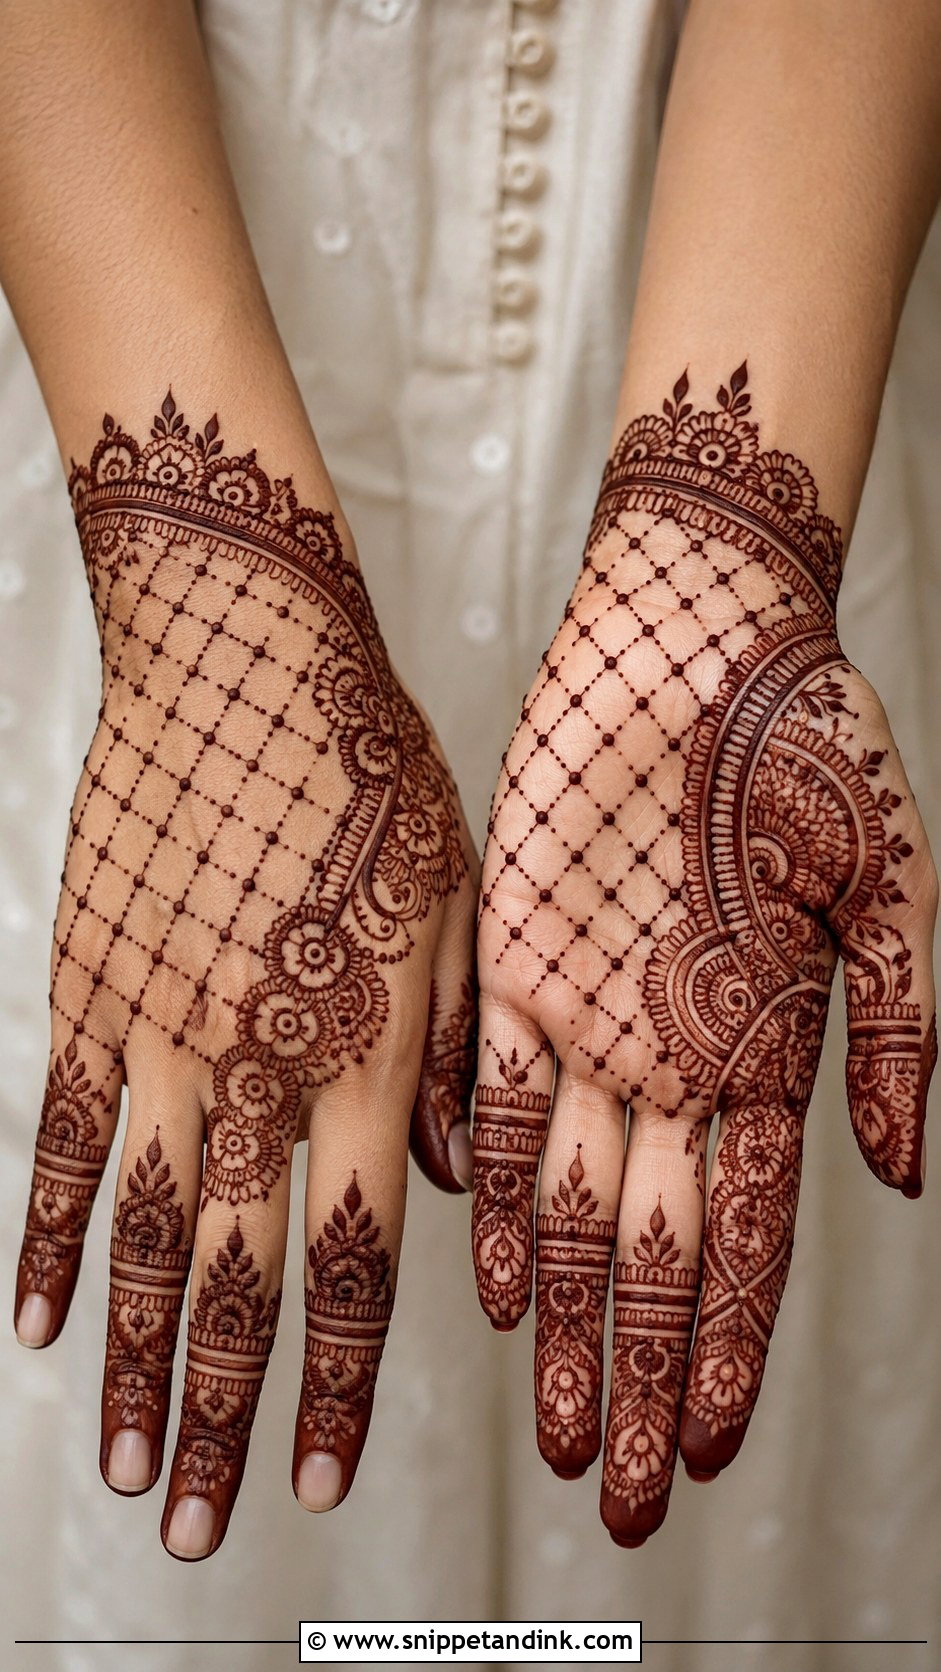
Jaali is a net of crossing lines, dots and tiny flowers that looks like lace. The trick is spacing. Henna lines spread a fraction as they dry and darken, so a mesh that looks crisp when wet can fill in by the next day. I draw the grid a little wider than looks right in the moment, and I frame it with bold floral edges so the lace has a clear border.
17. Moroccan Mehndi Design
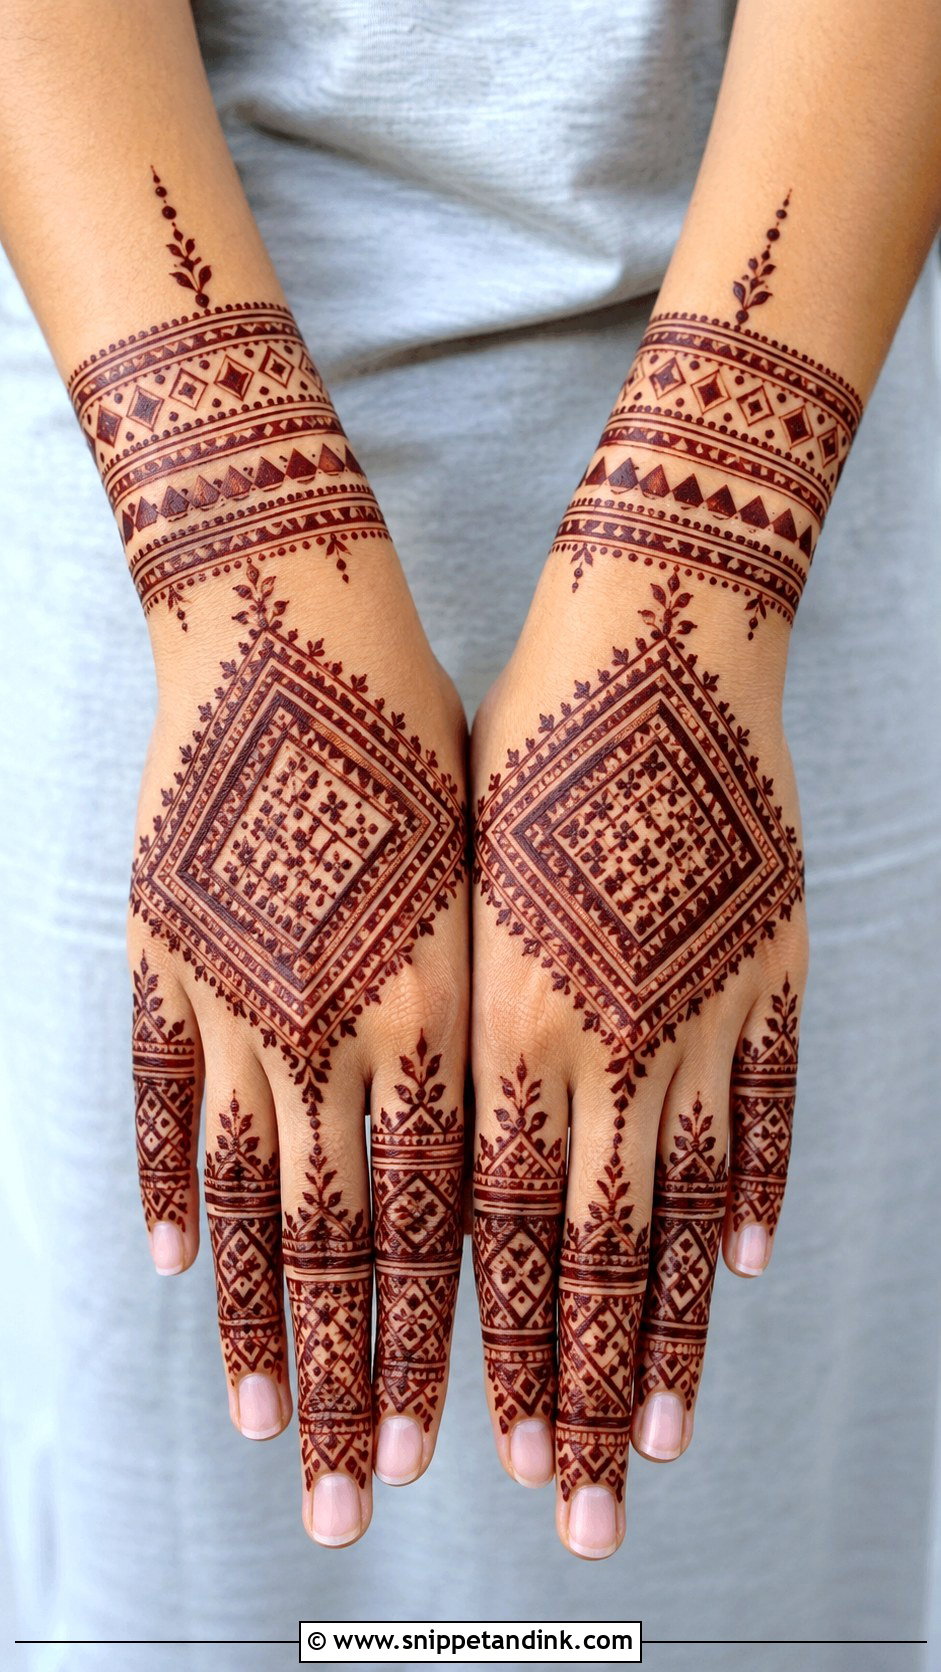
Moroccan work swaps curves for geometry: diamonds, triangles, grids, dots and blocks of solid fill. It sits well on the back of the hand and fingers because straight lines can follow the bones. I’d pick it for anyone who wants something that won’t look like everyone else’s hands at a family function. Straight lines need a steady cone and a confident speed, so slow, hesitant work shows up as wavy edges.
18. Gulf Khaleeji Mehndi Design
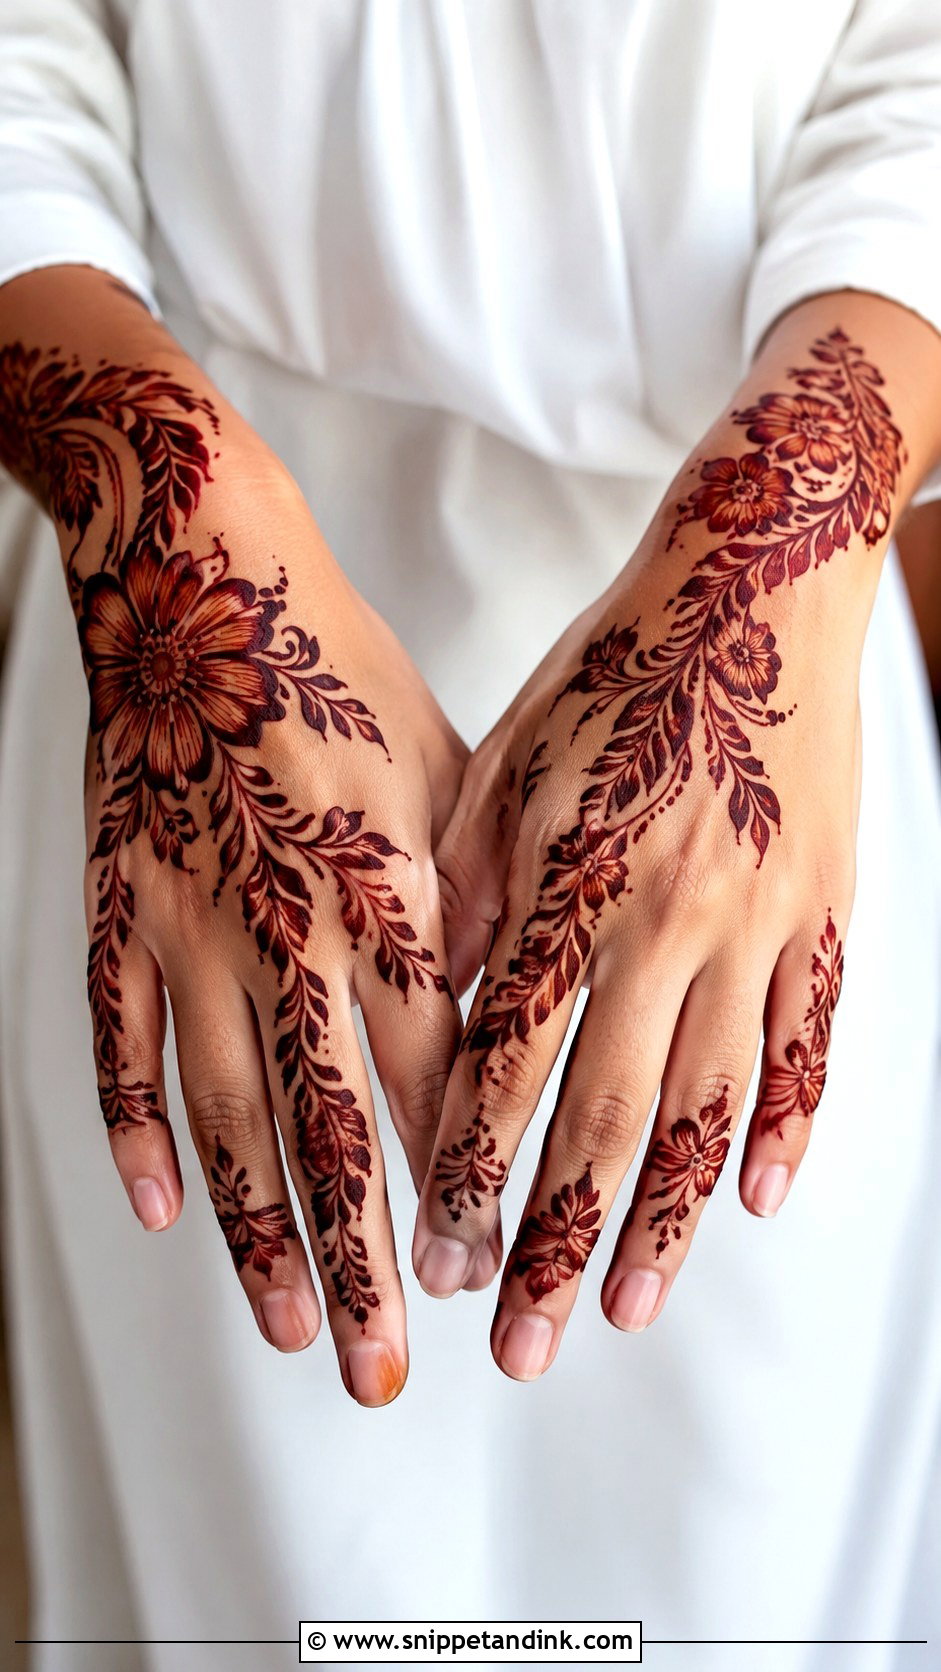
Gulf Khaleeji mehndi design uses big flowers, leafy trails and a lot of open skin, so it feels lighter than dense Indian work. I build the drama near the wrist with the largest blooms and let finger accents taper off. The look depends on smooth shading inside the petals, which I do by thinning the paste stroke. If the outline isn’t strong, the shading floats and the flower loses its shape.
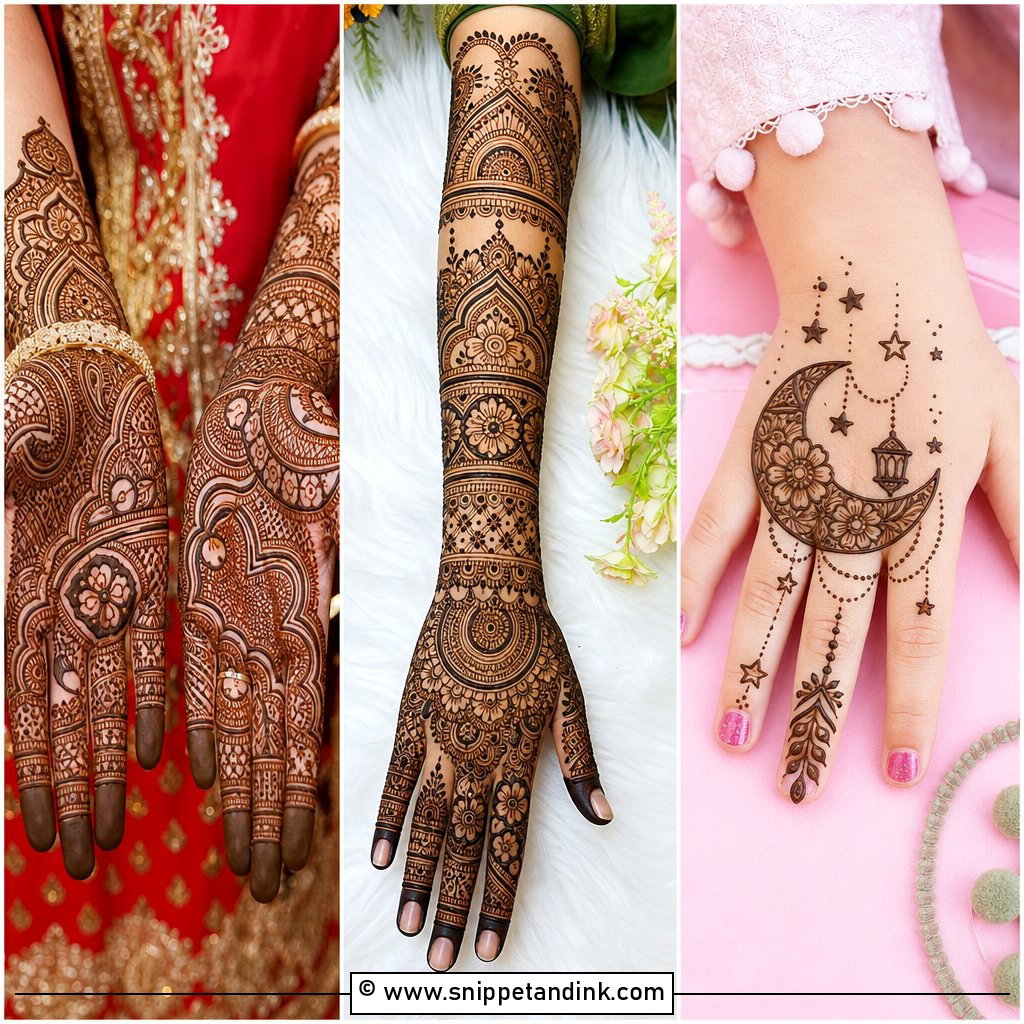
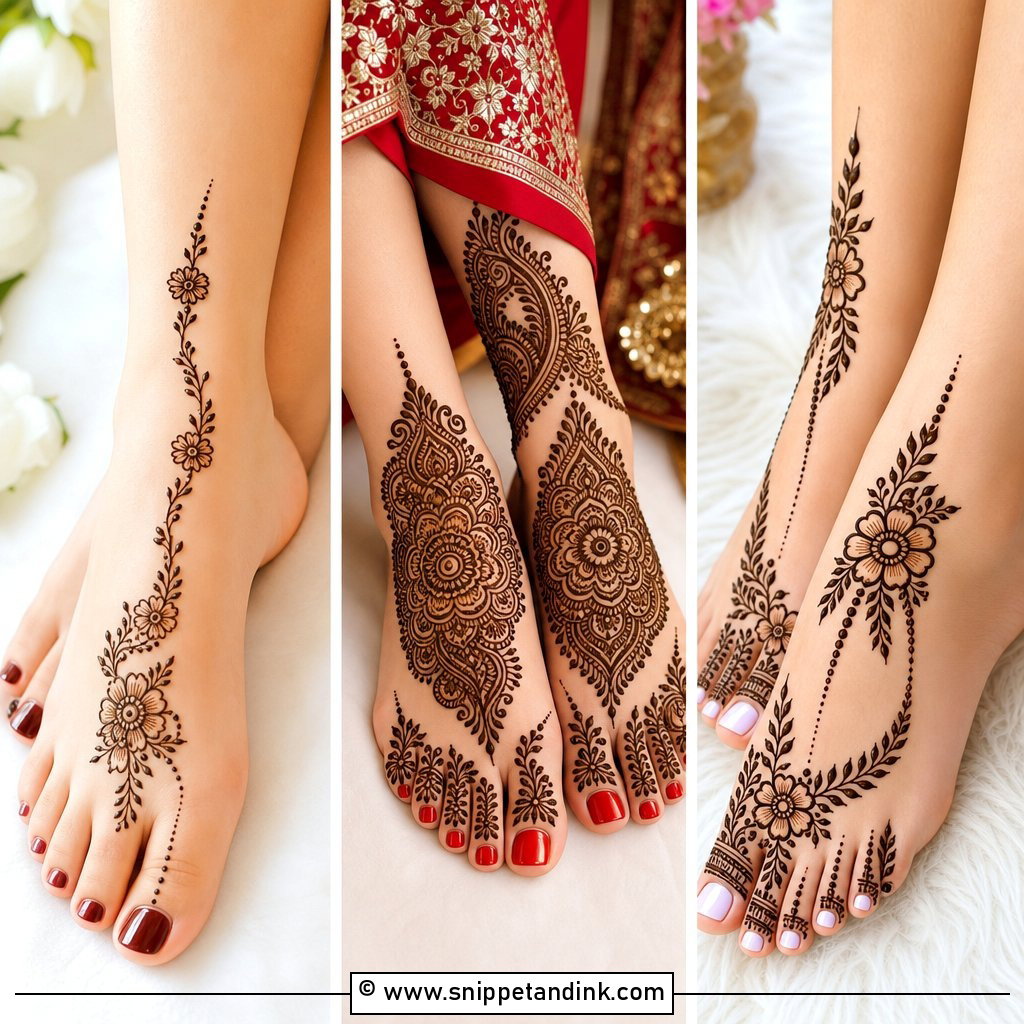
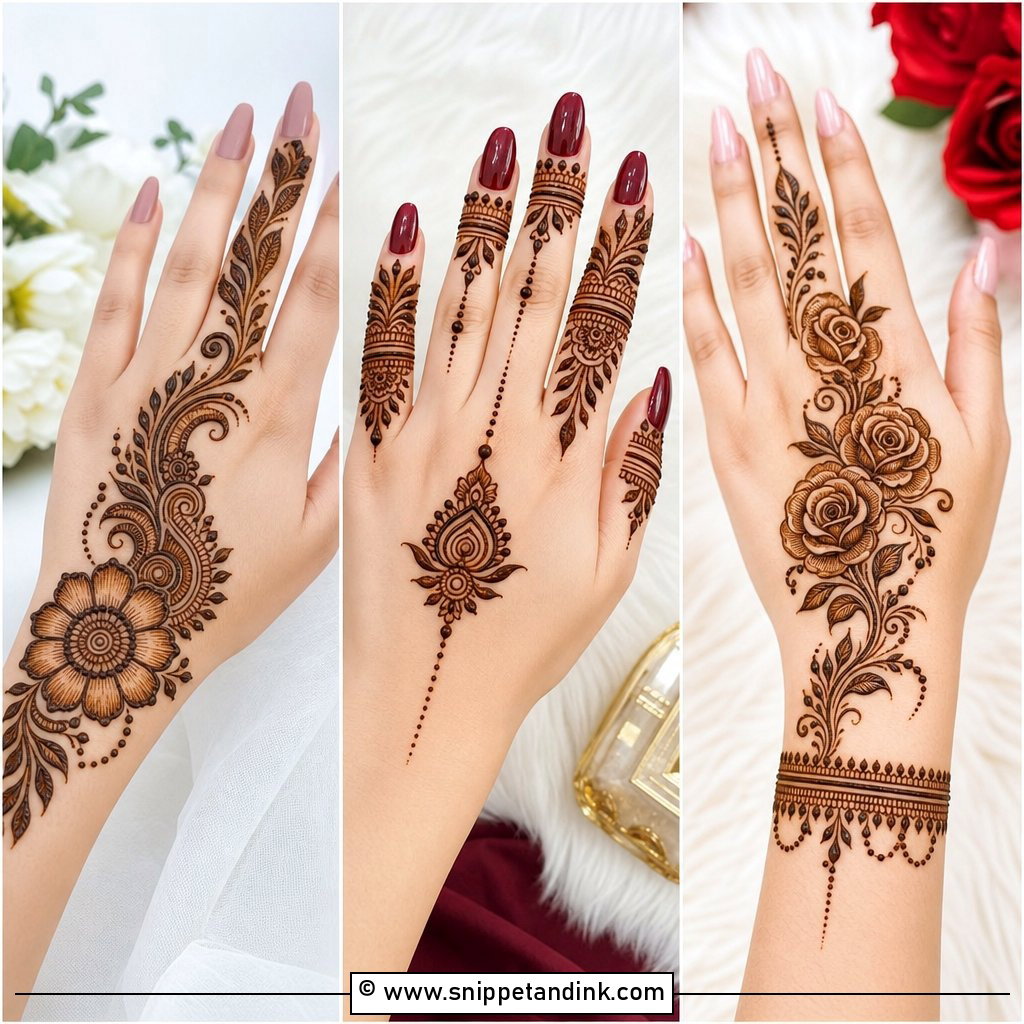
19. Eid Mehndi Design
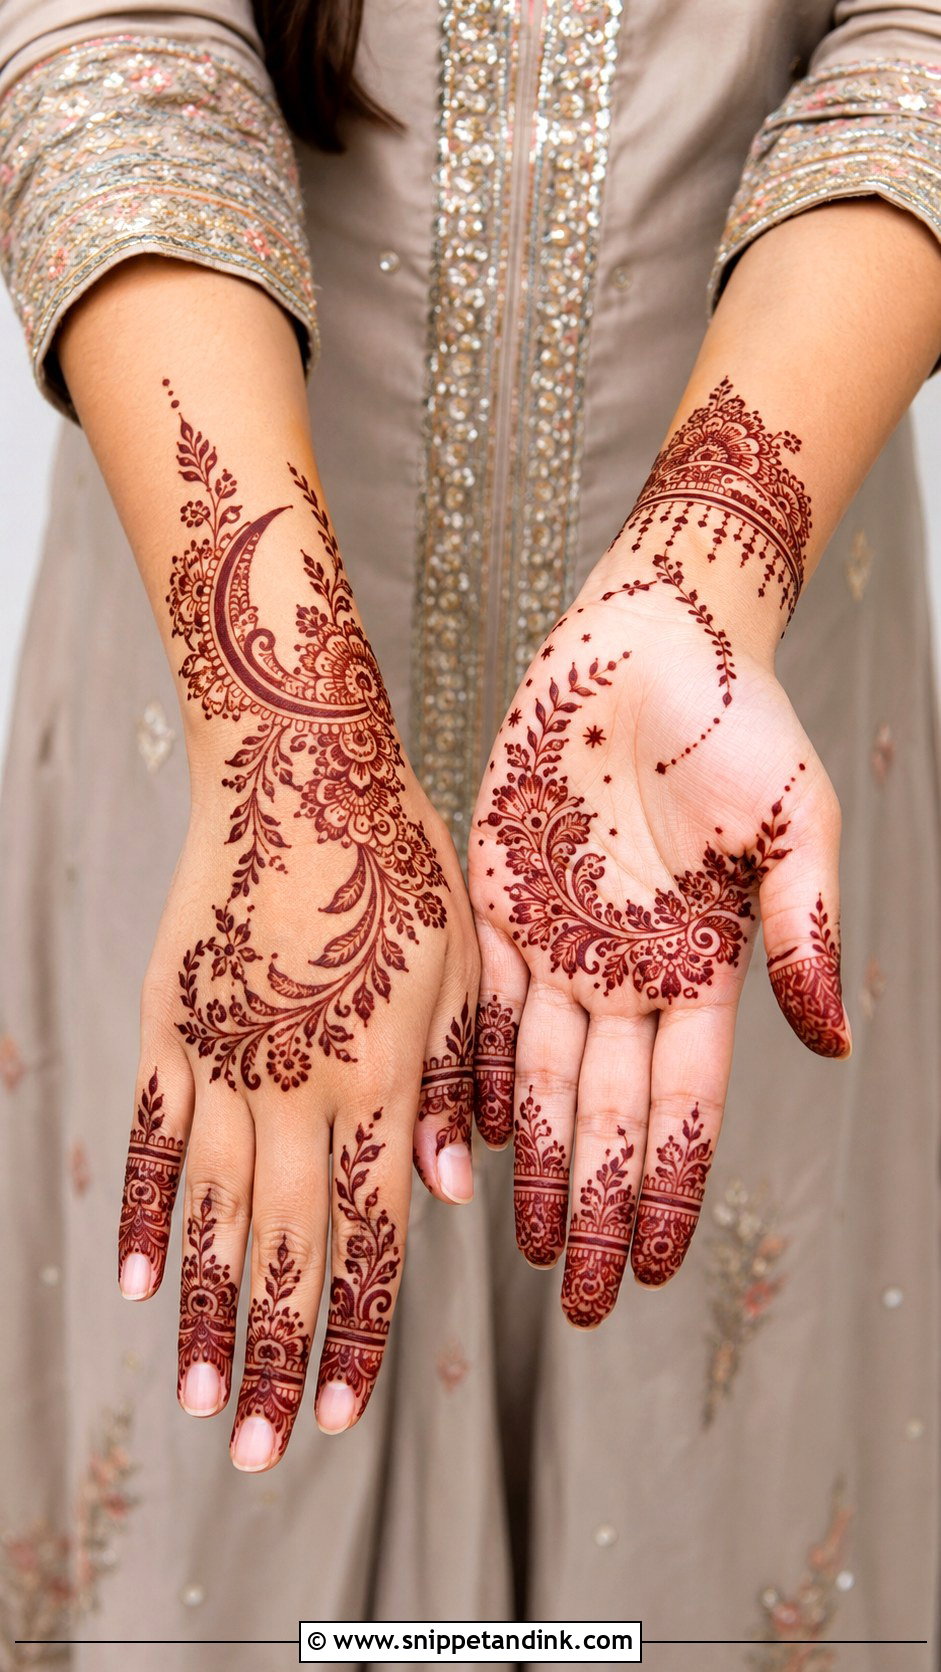
Eid henna usually goes on the night before, which means the stain is still deepening during morning prayers and the visits that follow. I like a back-hand Arabic floral with a neat wrist border because it shows with bangles, and the palms stay free for cooking and serving. If you want a fuller palm, go for mandalas and paisleys and start early in the evening so the paste can stay on overnight.
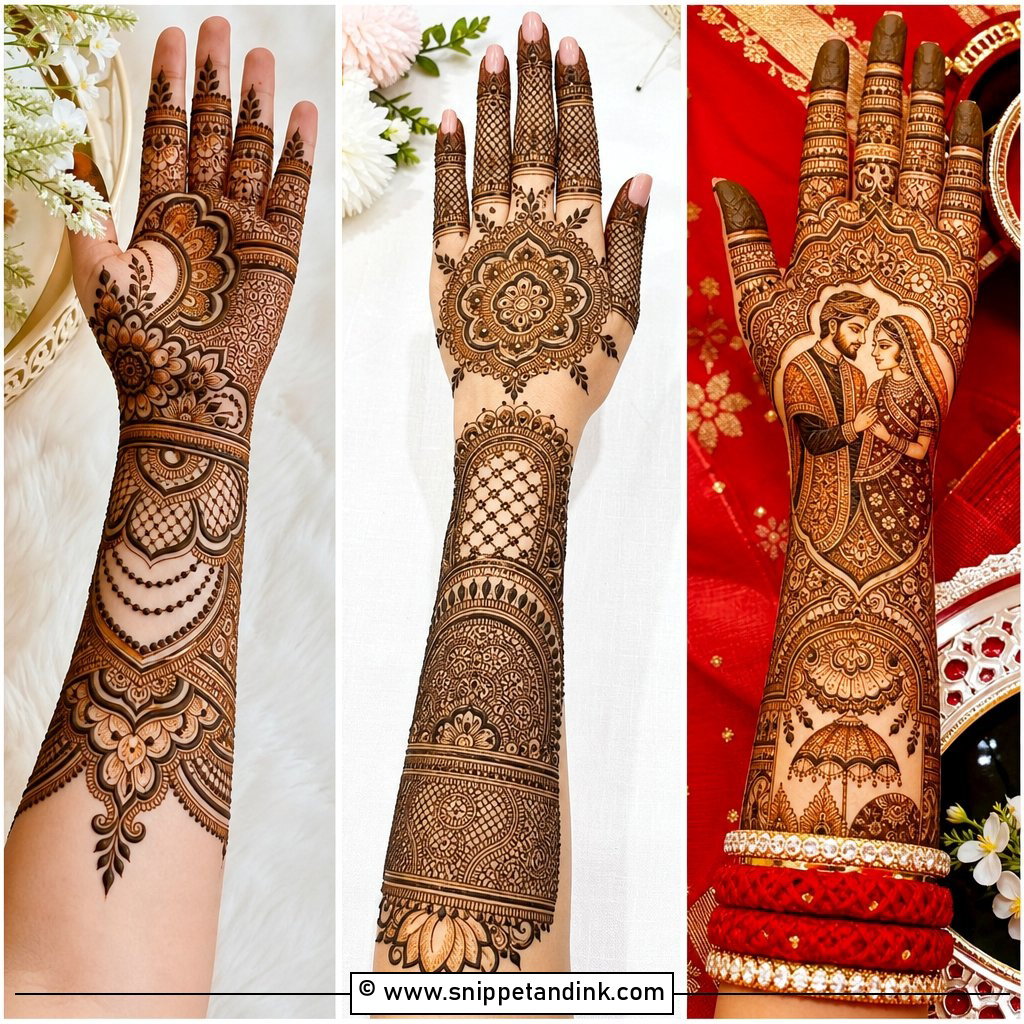
20. Diwali Mehndi Design
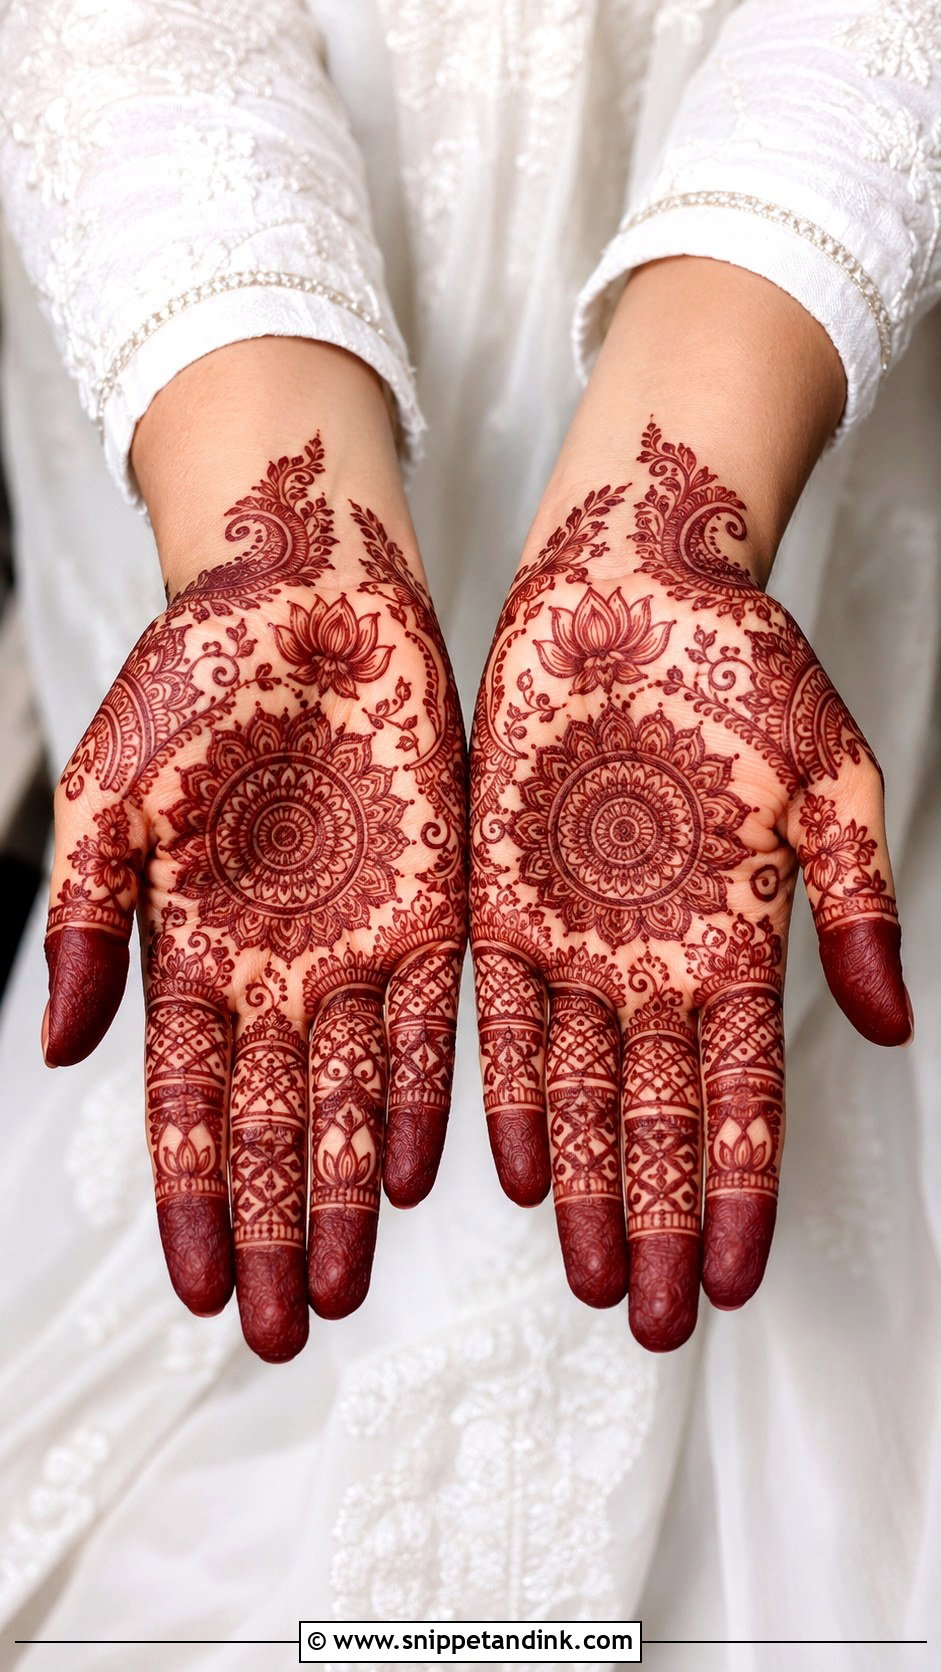
Diwali means lamps, cooking, rangoli and a lot of hand use, so placement matters as much as the motif. A full palm mandala with filled fingertips is the classic puja choice, while a back-hand floral trail with a bracelet suits a party. If you’ll be helping in the kitchen the day before, I’d keep the palm lighter and put the detail on the back of the hand, where it won’t get scrubbed off.
21. Karwa Chauth Mehndi Design
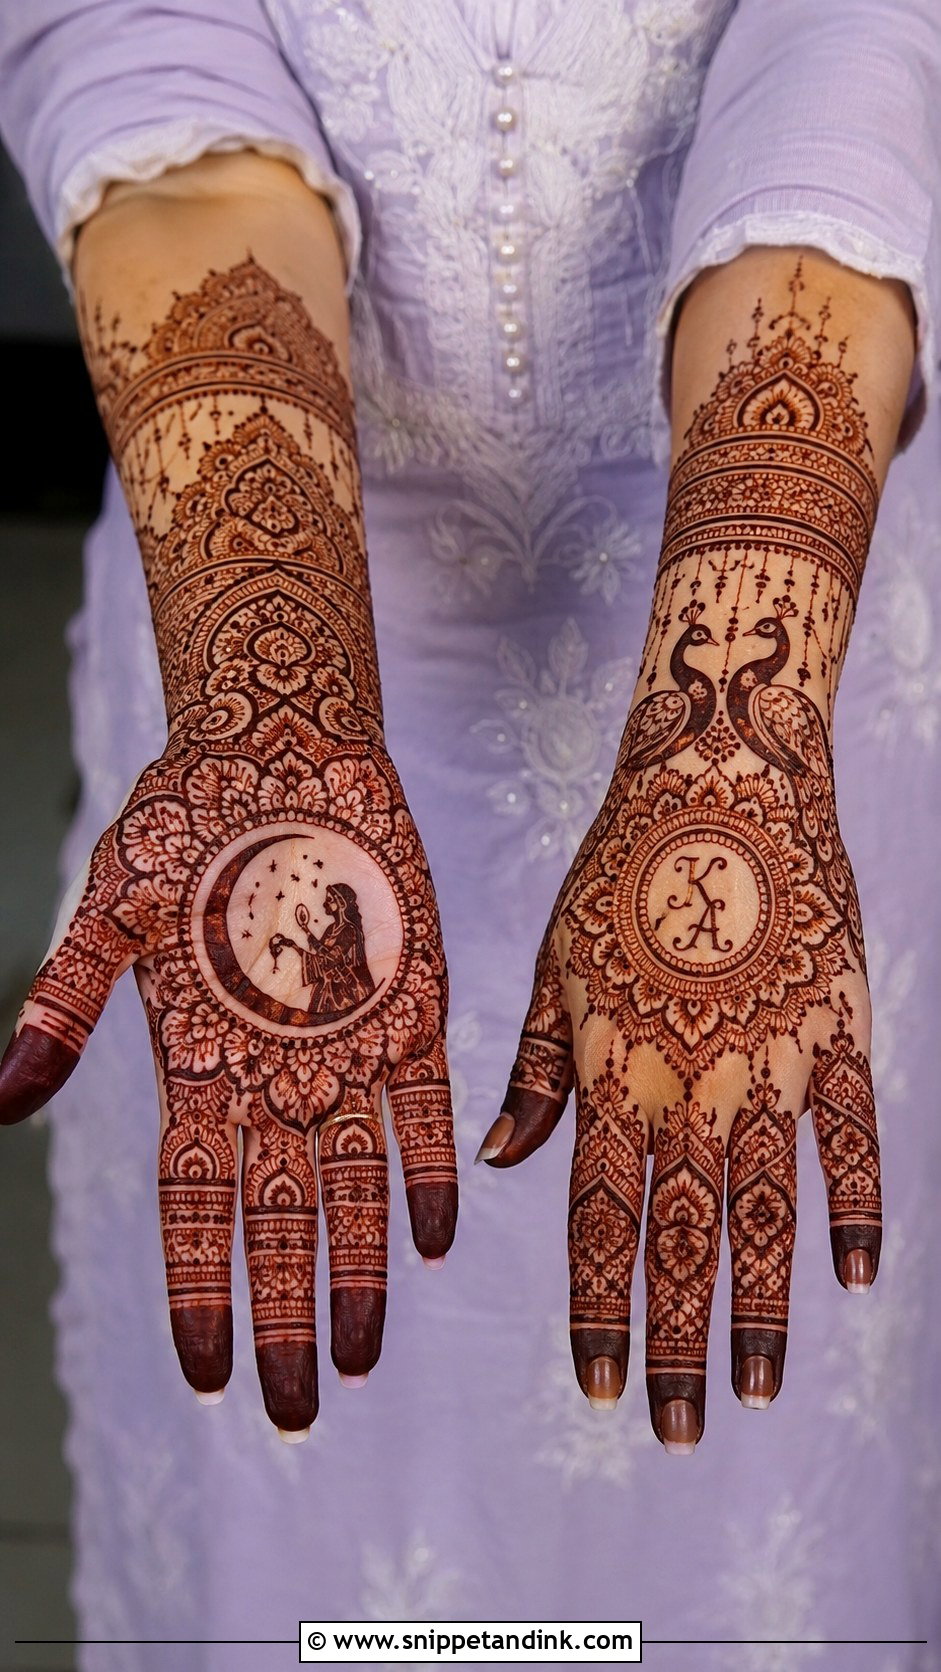
For Karwa Chauth most women I draw for want a full, traditional palm: mandalas, paisleys, a moon motif, filled fingertips, sometimes initials. A deep stain matters here, so aftercare is half the job. Keep the paste on for as many hours as you can, ideally overnight, then scrape it off rather than washing, and keep water away for the rest of the day. The colour keeps darkening for about two days.
22. Engagement Mehndi Design
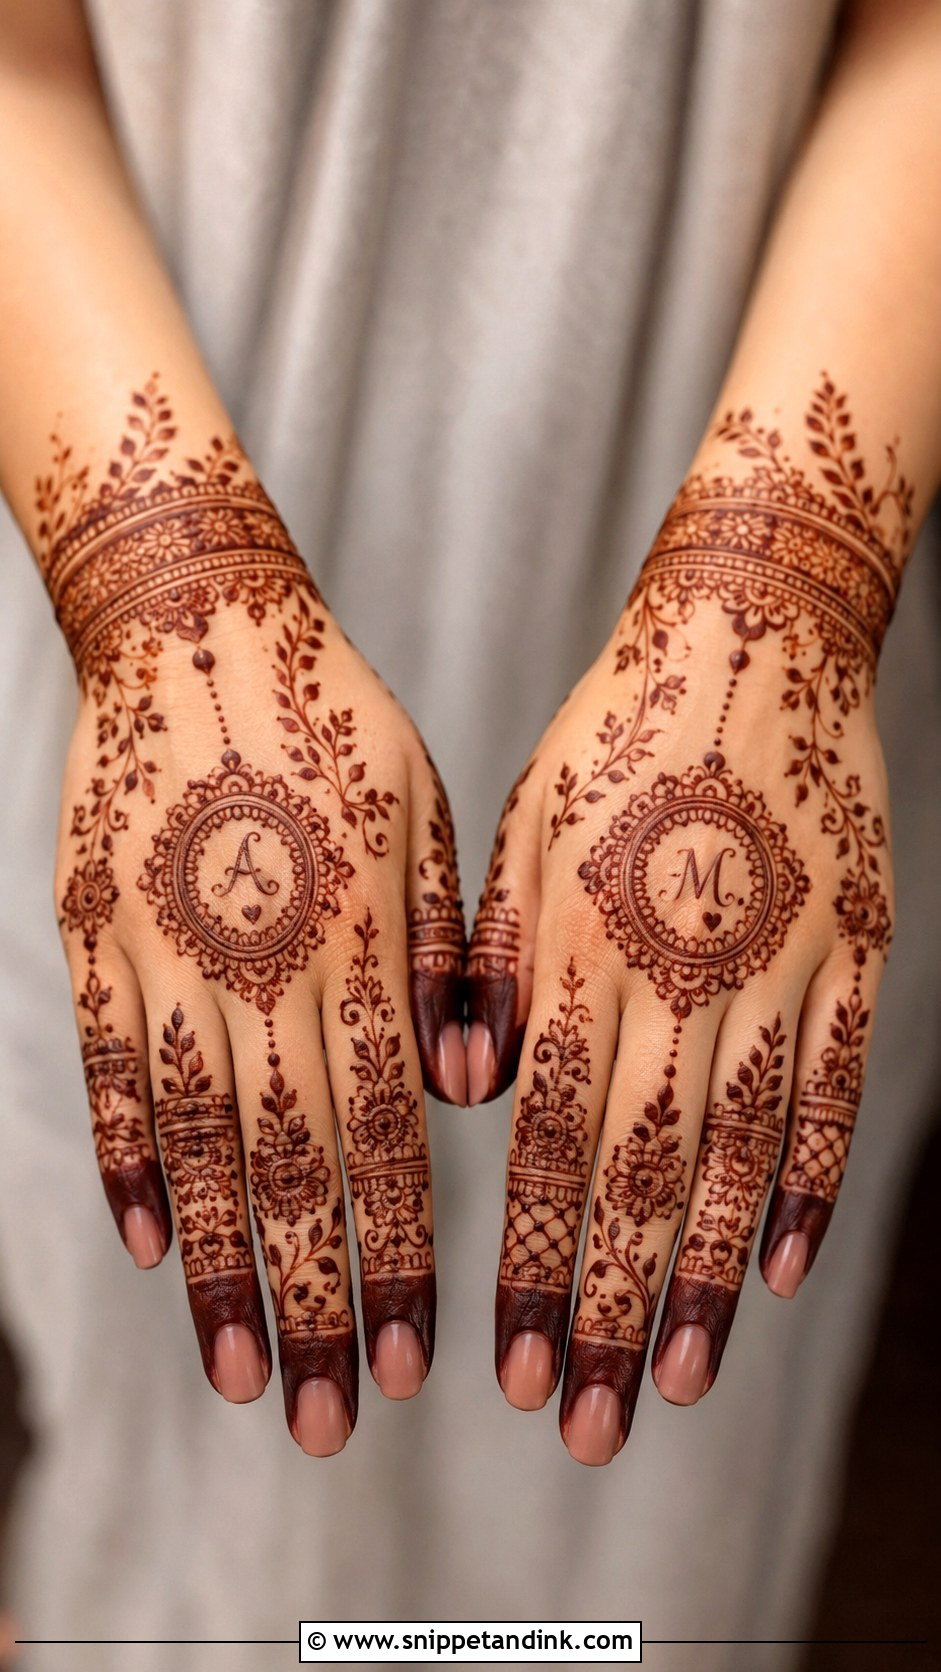
Engagement mehndi design has one job: frame the ring. On the ring hand I keep the area around the ring finger fairly open, with fine bands rather than heavy fill, so the stone is the first thing the camera finds. Floral trails, a bracelet and small initials work around it. Remember the stain is still orange if the paste came off that morning, so I schedule it for the day before whenever I can.
23. Wedding Guest Mehndi Design
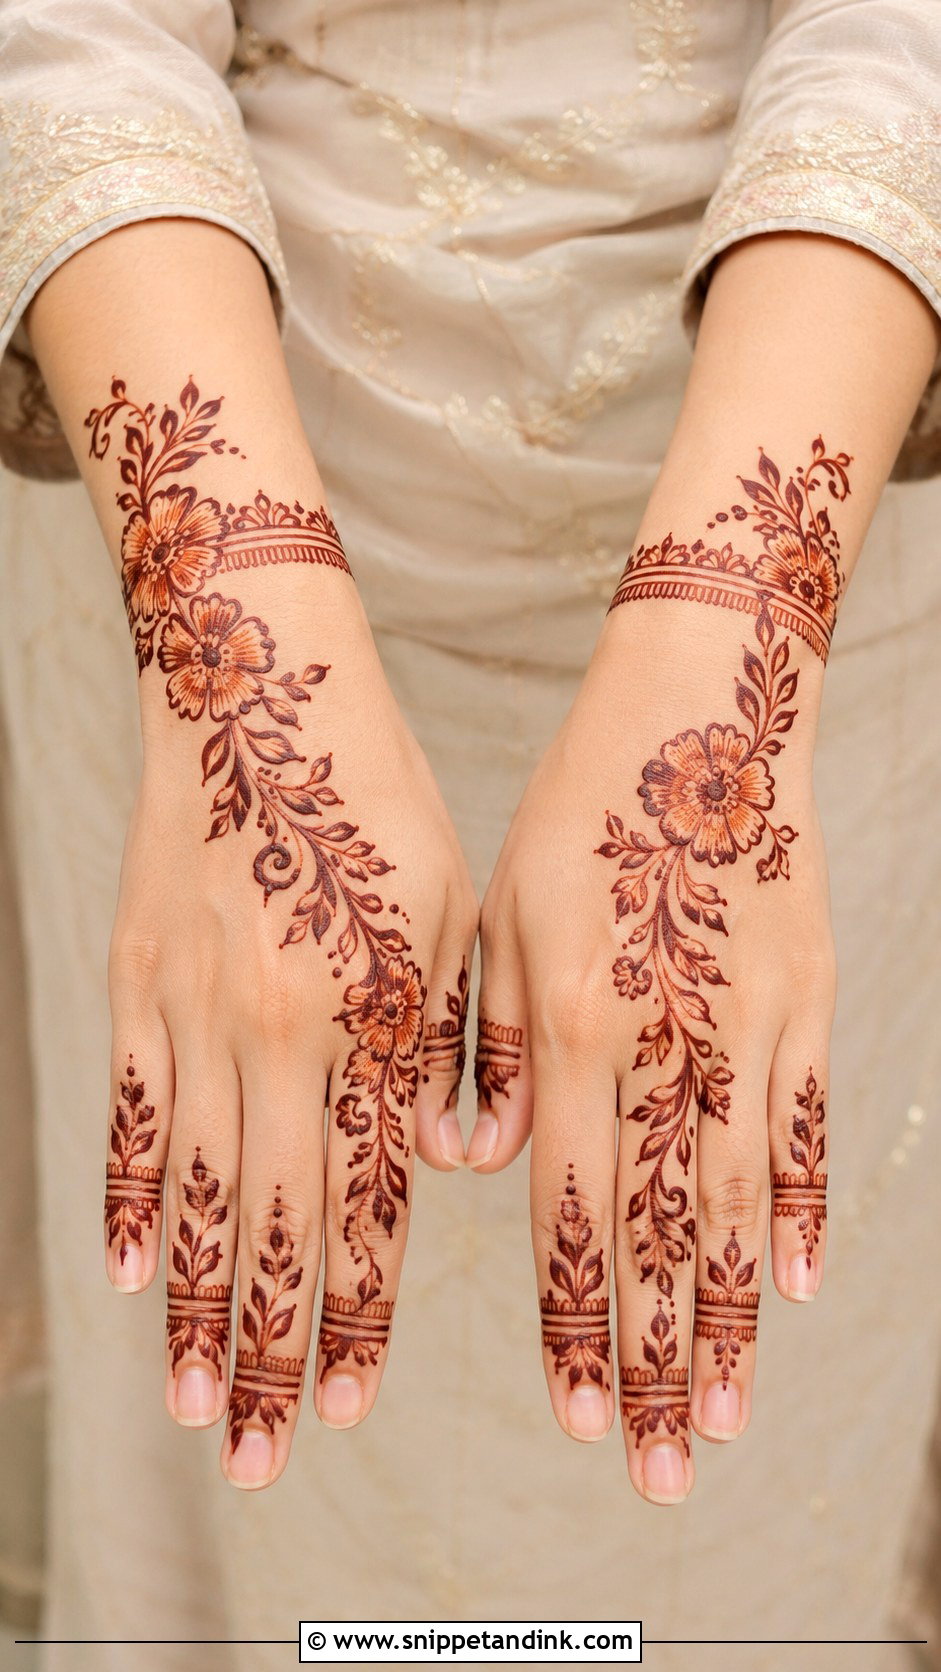
Guests should sit a step below the bride in coverage, so I usually stop at the wrist. A back-hand floral trail, simple finger details and a small palm motif is plenty. Arabic and Indo-Arabic suit guests well because they look full quickly, which matters when I have a queue of aunties and cousins at a mehndi night. Medium coverage moves easily from haldi to sangeet to reception.
24. Bridesmaid Mehndi Design
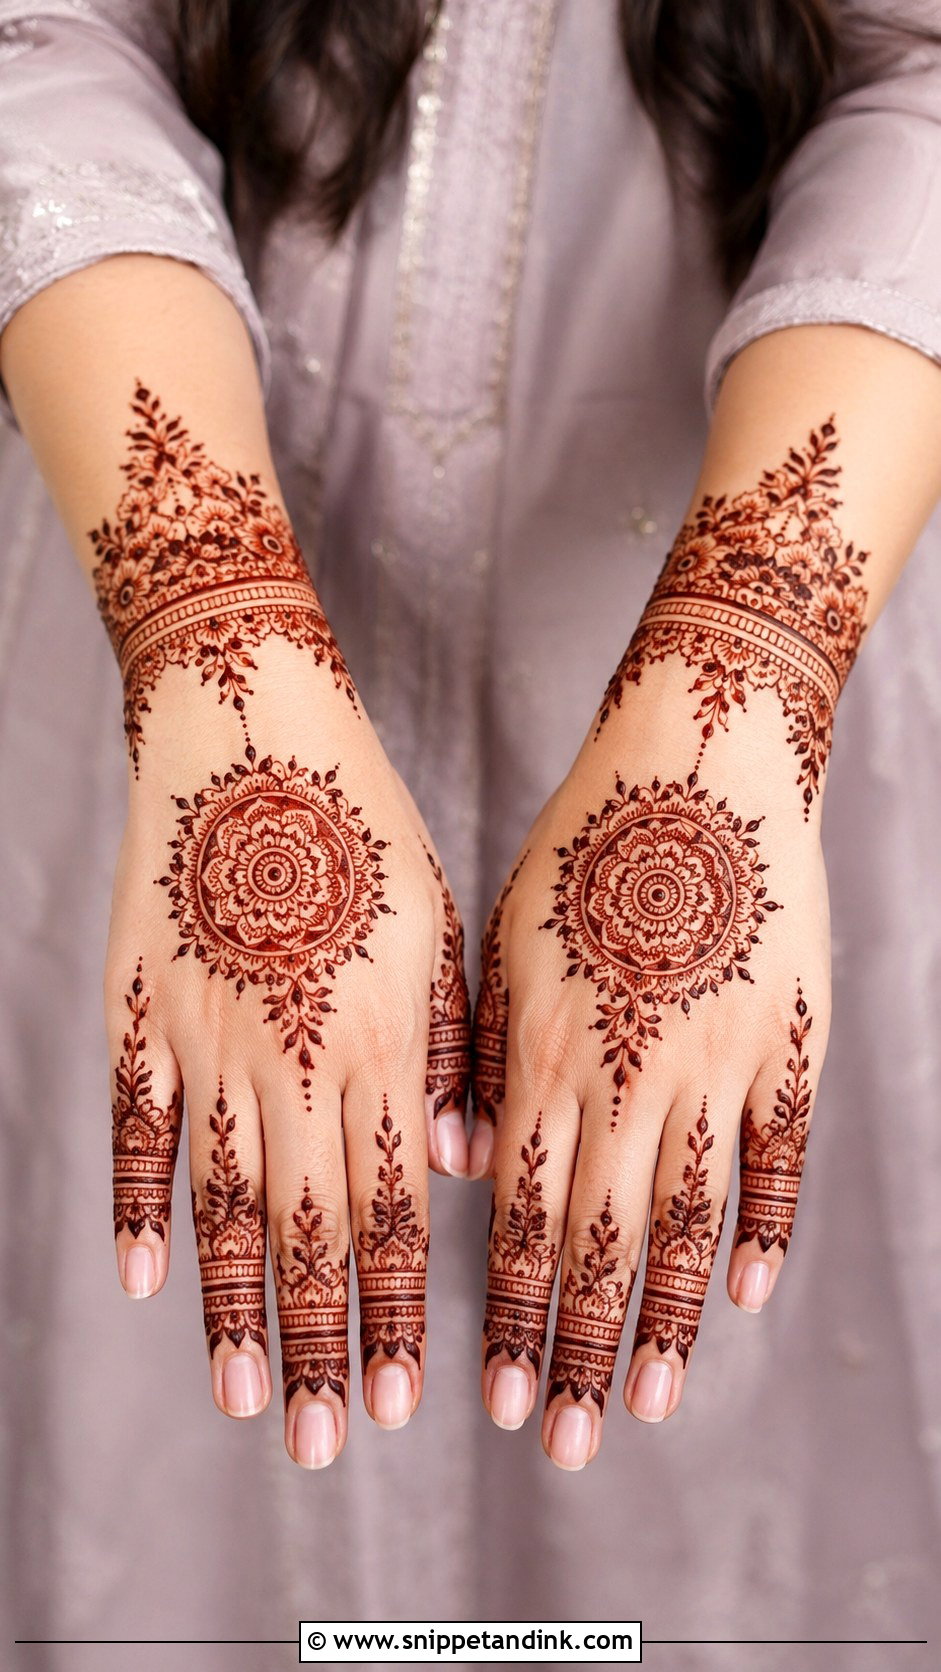
With bridesmaids I aim for coordination rather than copies: same placement and motif family, slightly different details. Matching back-hand mandalas or floral cuffs read well in group photos. Bridesmaids carry bags, pin dupattas and dance, so I keep them at medium coverage and make sure they have time for the paste to dry before they are pulled into helping.
25. Full Hand Arabic Mehndi Design
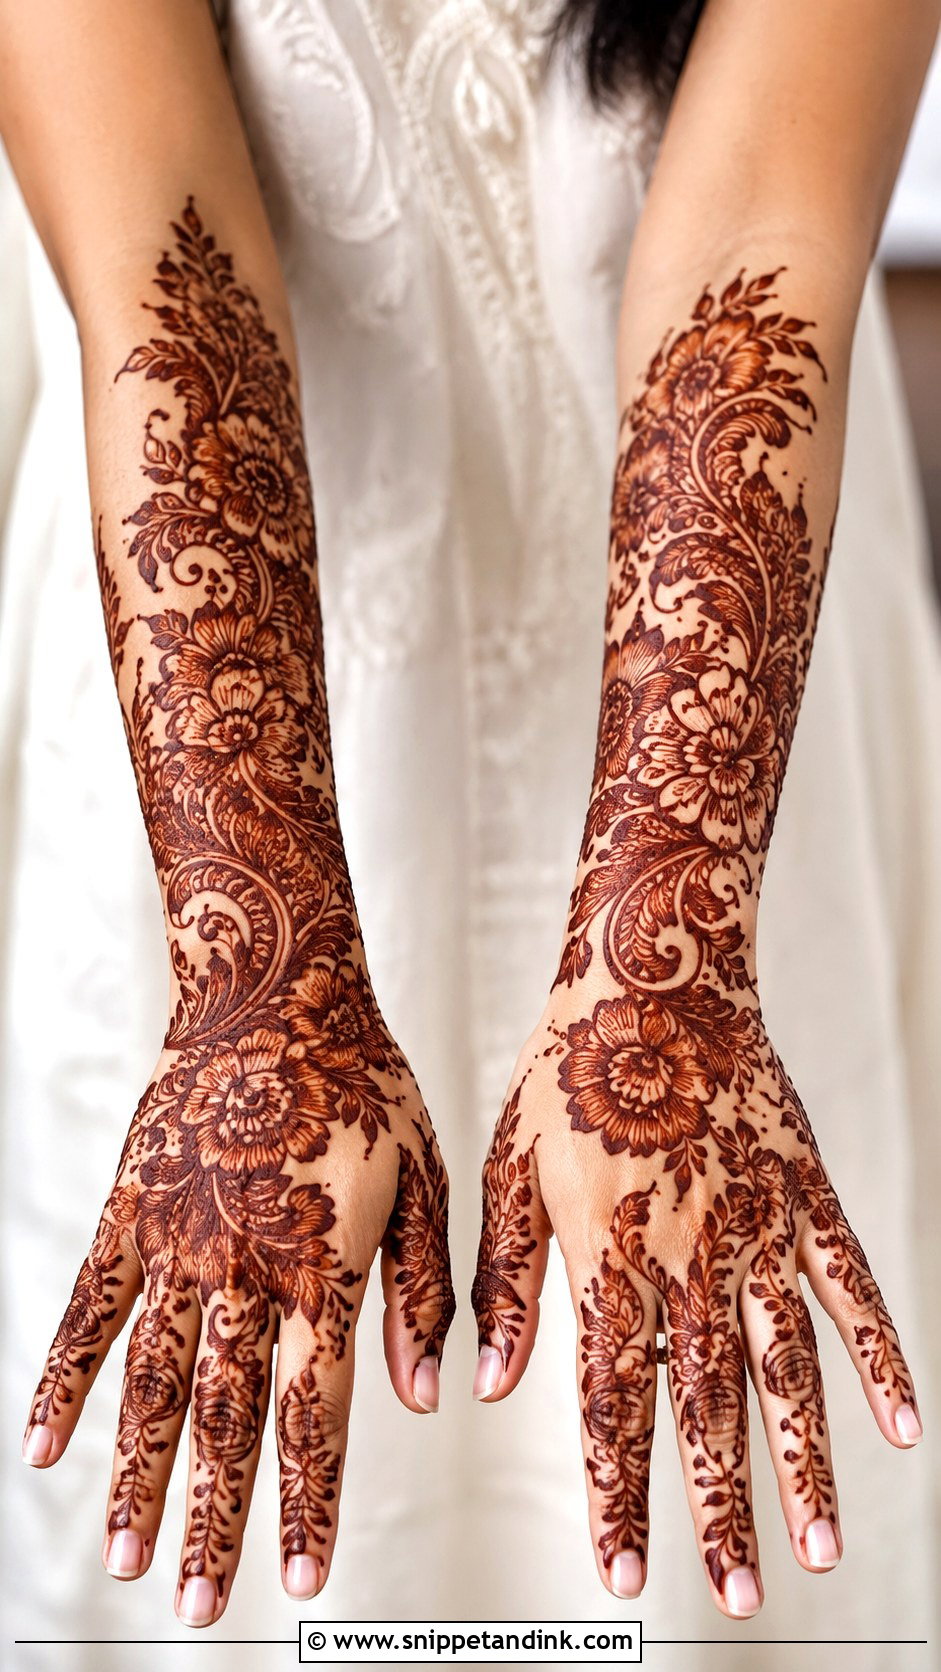
Full-coverage Arabic covers fingertip to forearm with large flowers, sweeping vines and shaded leaves, yet keeps open gaps that dense bridal work doesn’t. I let the vine flow with the arm instead of forcing a perfect mirror on both hands; slight asymmetry looks deliberate in this style. It’s a good middle path for a bride who wants length and drama but not hours of fine filler.
26. Front Hand Bridal Mehndi Design
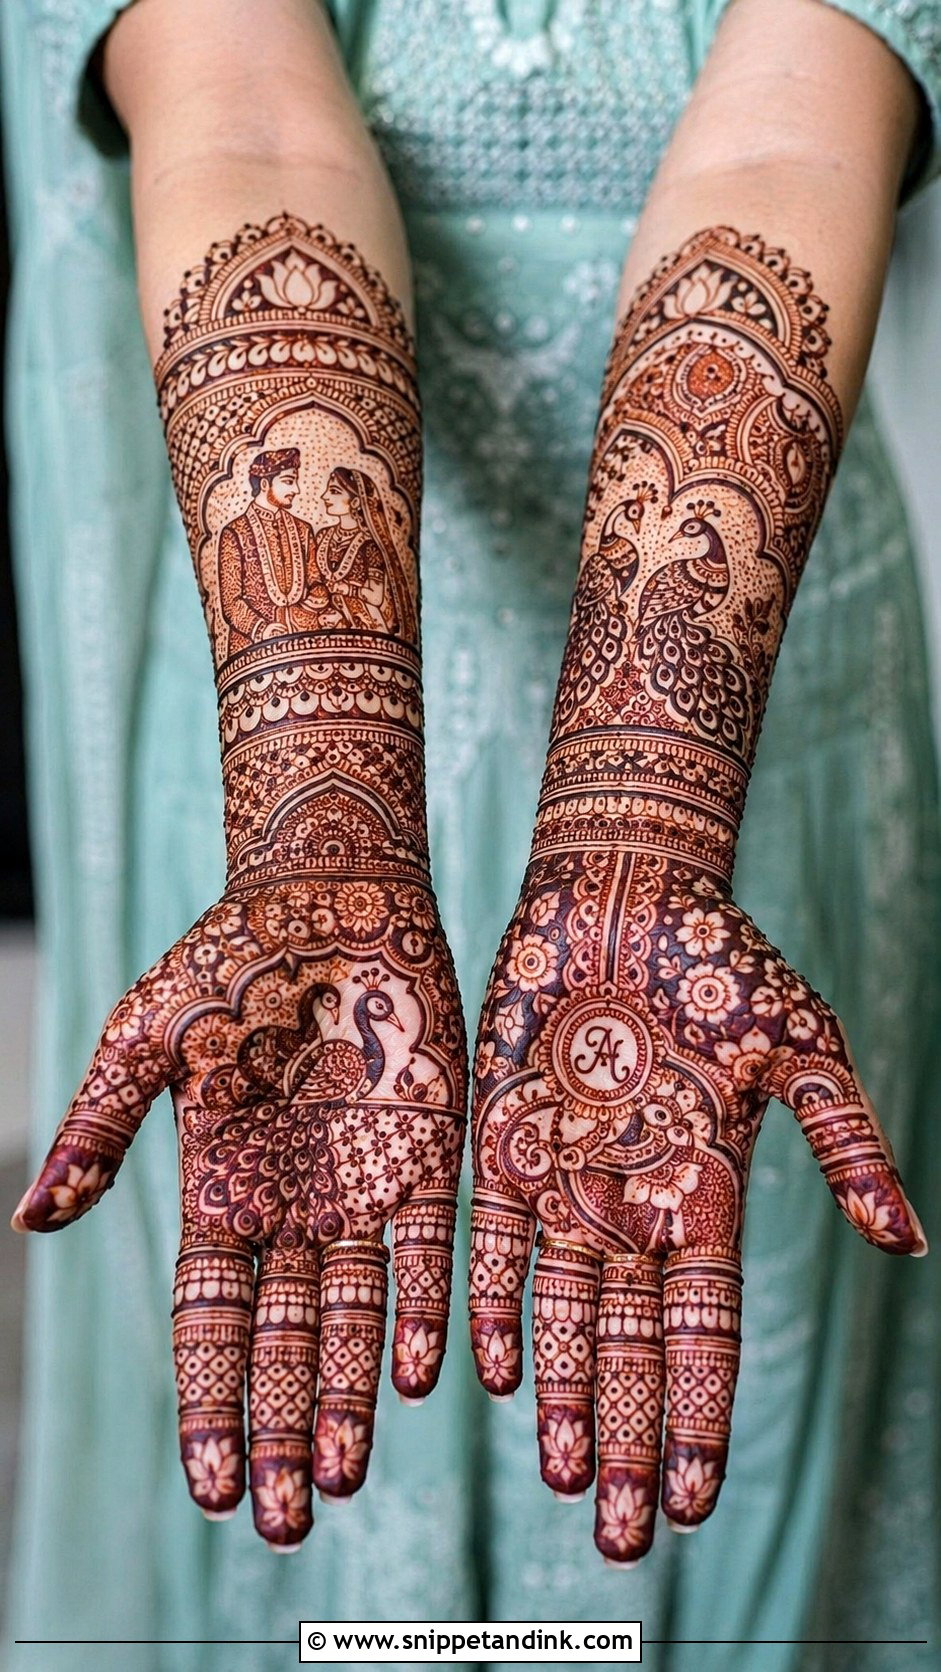
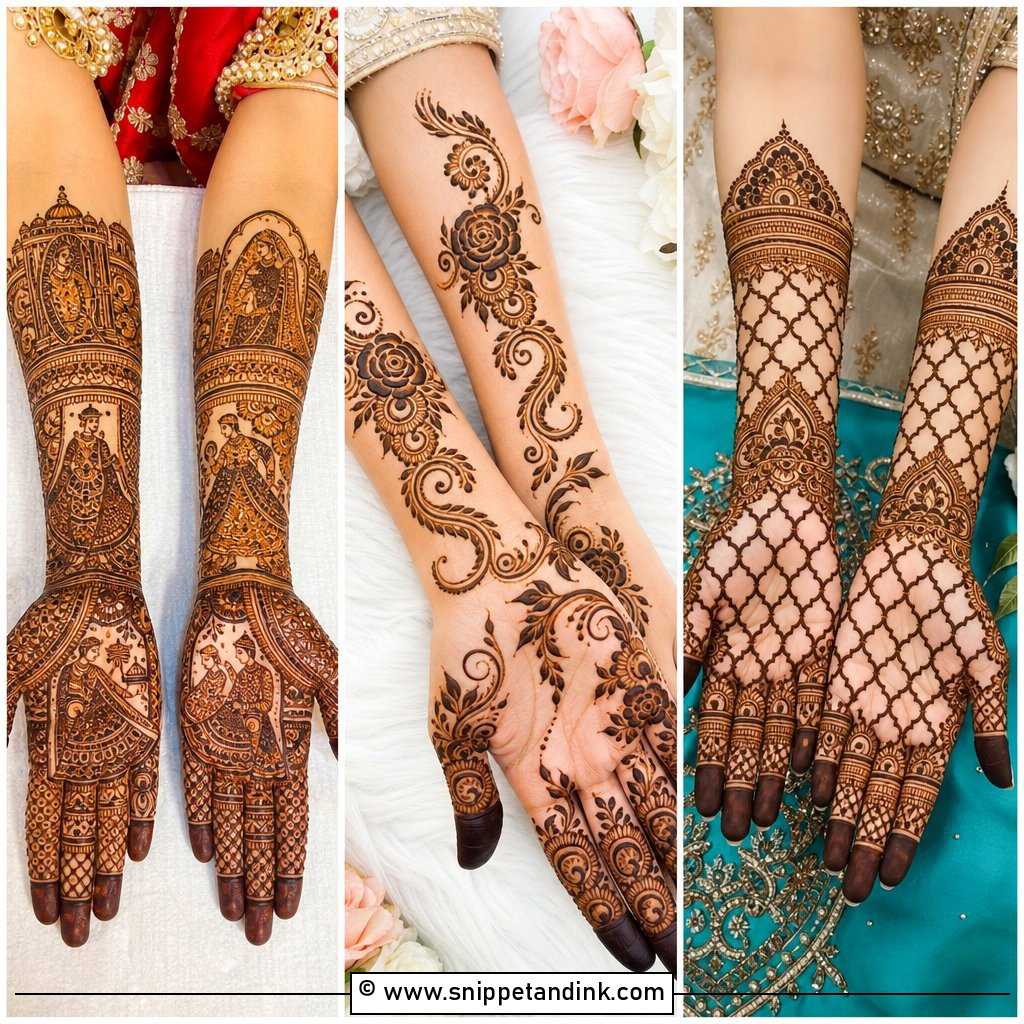
The palm is what everyone sees during rituals, especially when hands are held up for photos. Full bridal palms carry mandalas, bride and groom figures, peacocks and fine filler, with laced finger bands and a strong wrist extension. My worry with very dense palms is readability: from a few feet away, too much filler looks like a dark smudge. I leave clean channels around the main figures so they still read in a wide shot.
27. Back Hand Bridal Mehndi Design
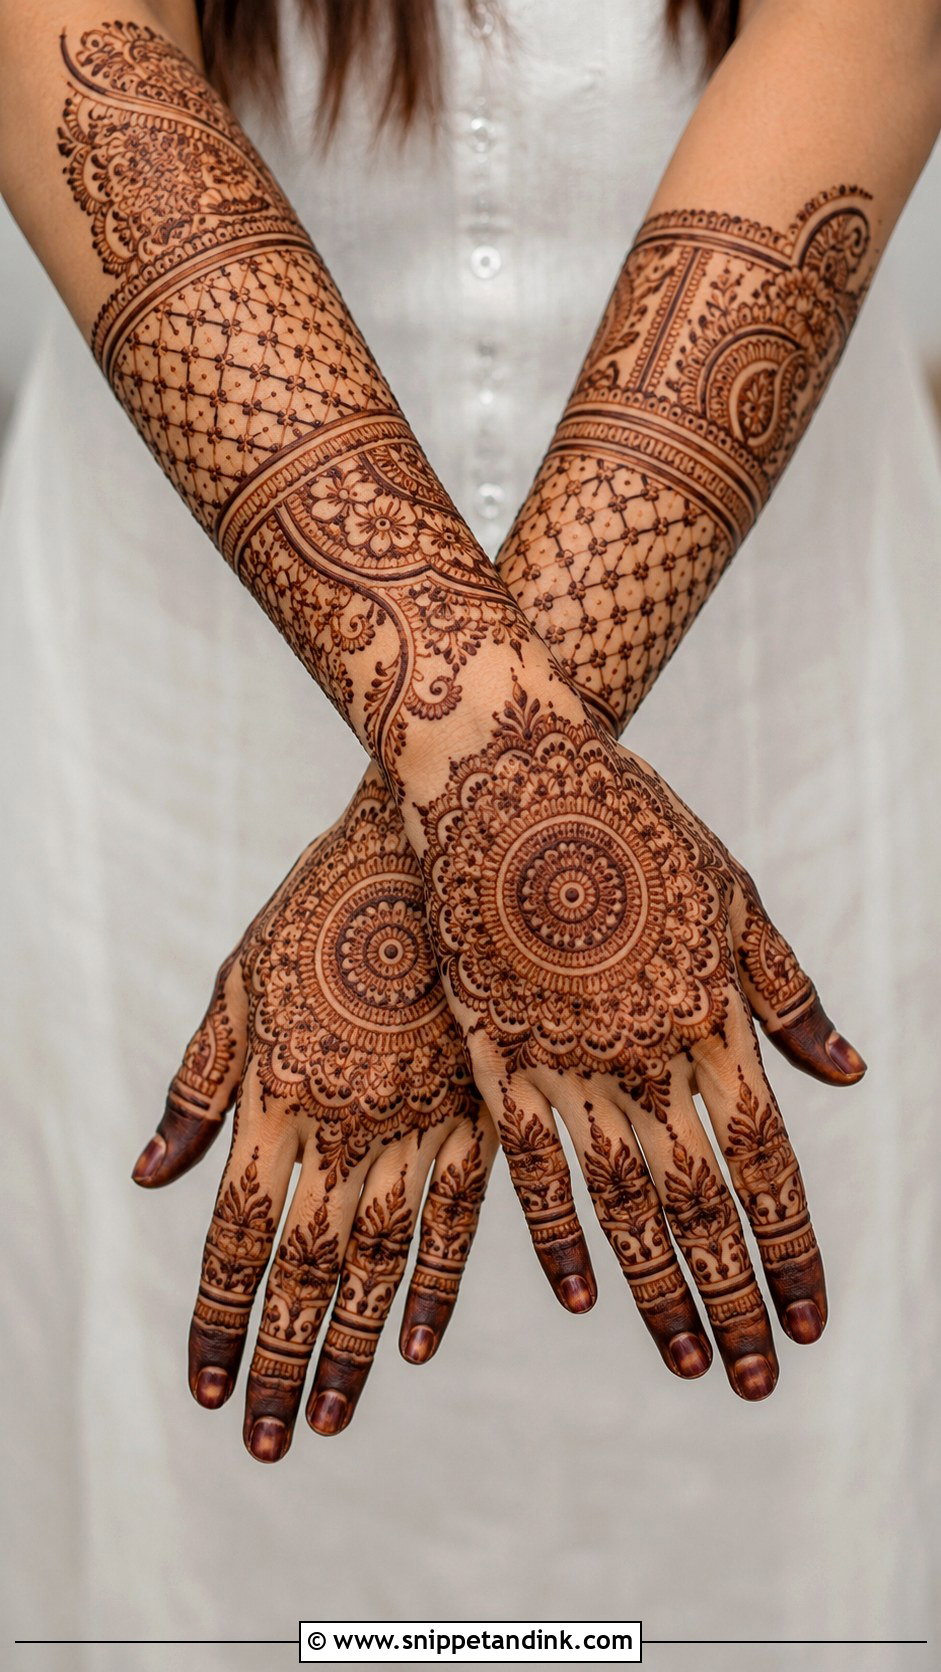
Back-of-hand bridal work shows in every jewelry and dupatta shot, so I give it a strong central motif with bold borders and build jaali, florals and paisley trails around it. Some brides want mirrored hands; others like two designs that share a theme, which I find easier to make look intentional. Pay attention to the wrist: it’s the joint between hand and forearm panels, and a weak band there makes the whole design look disconnected.
28. Lotus Mehndi Design
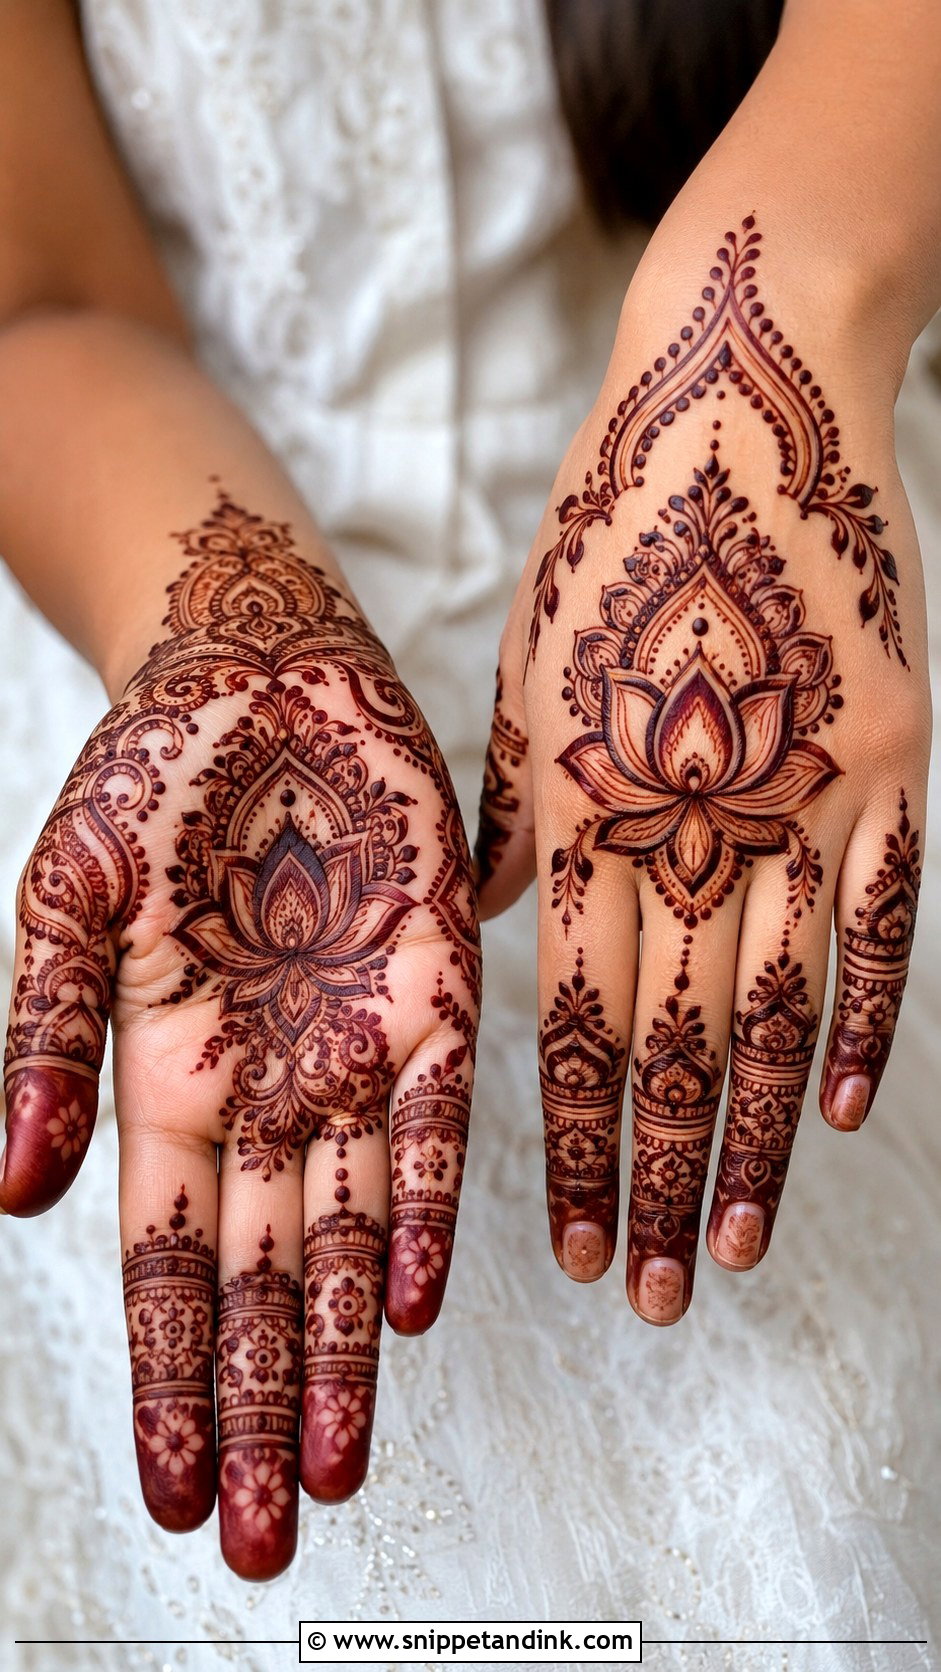
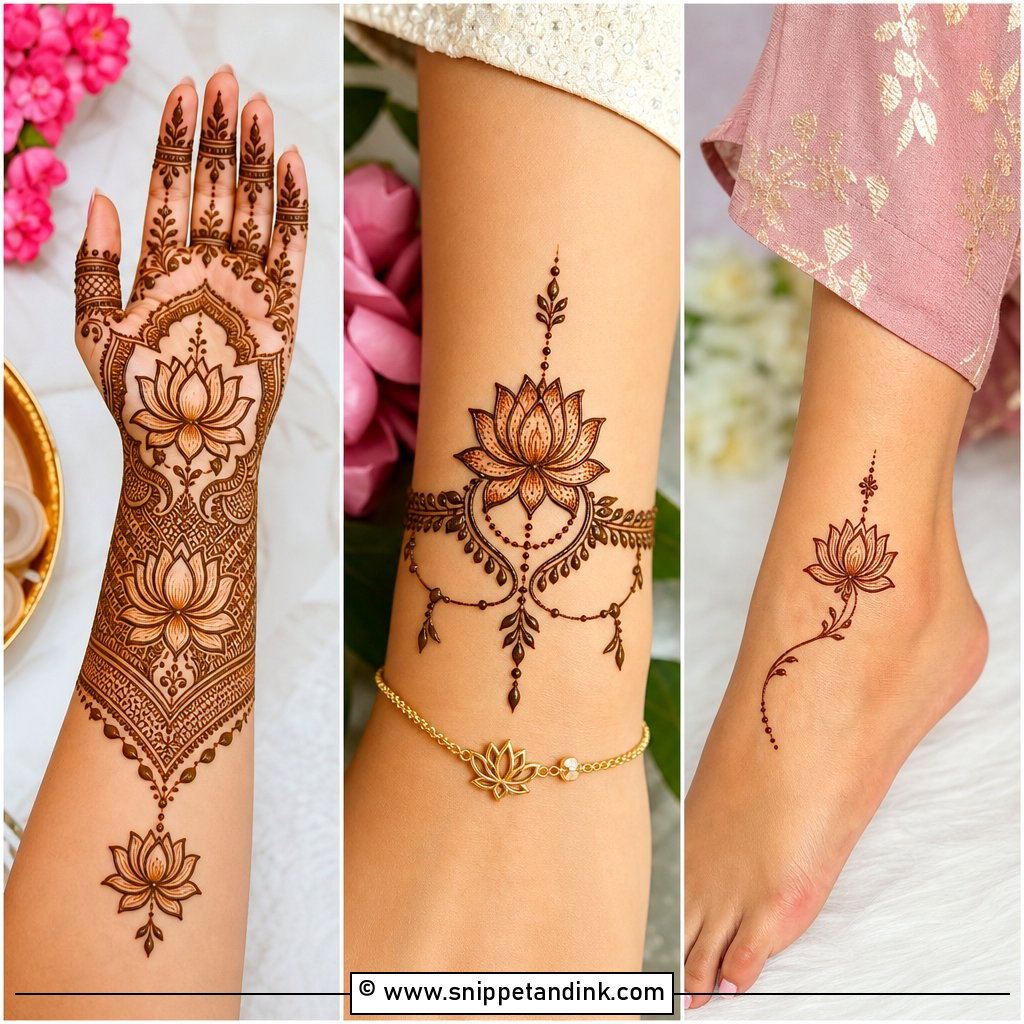
Lotus works at the centre of a palm, inside a mandala or as a single large bloom on the back of the hand. Its petals need to be rounded and evenly spaced, and I draw the inner layer first so the outer petals can wrap around it. Small lotus buds on the fingers tie it together. It suits puja days and bridal hands equally.
29. Rose Mehndi Design
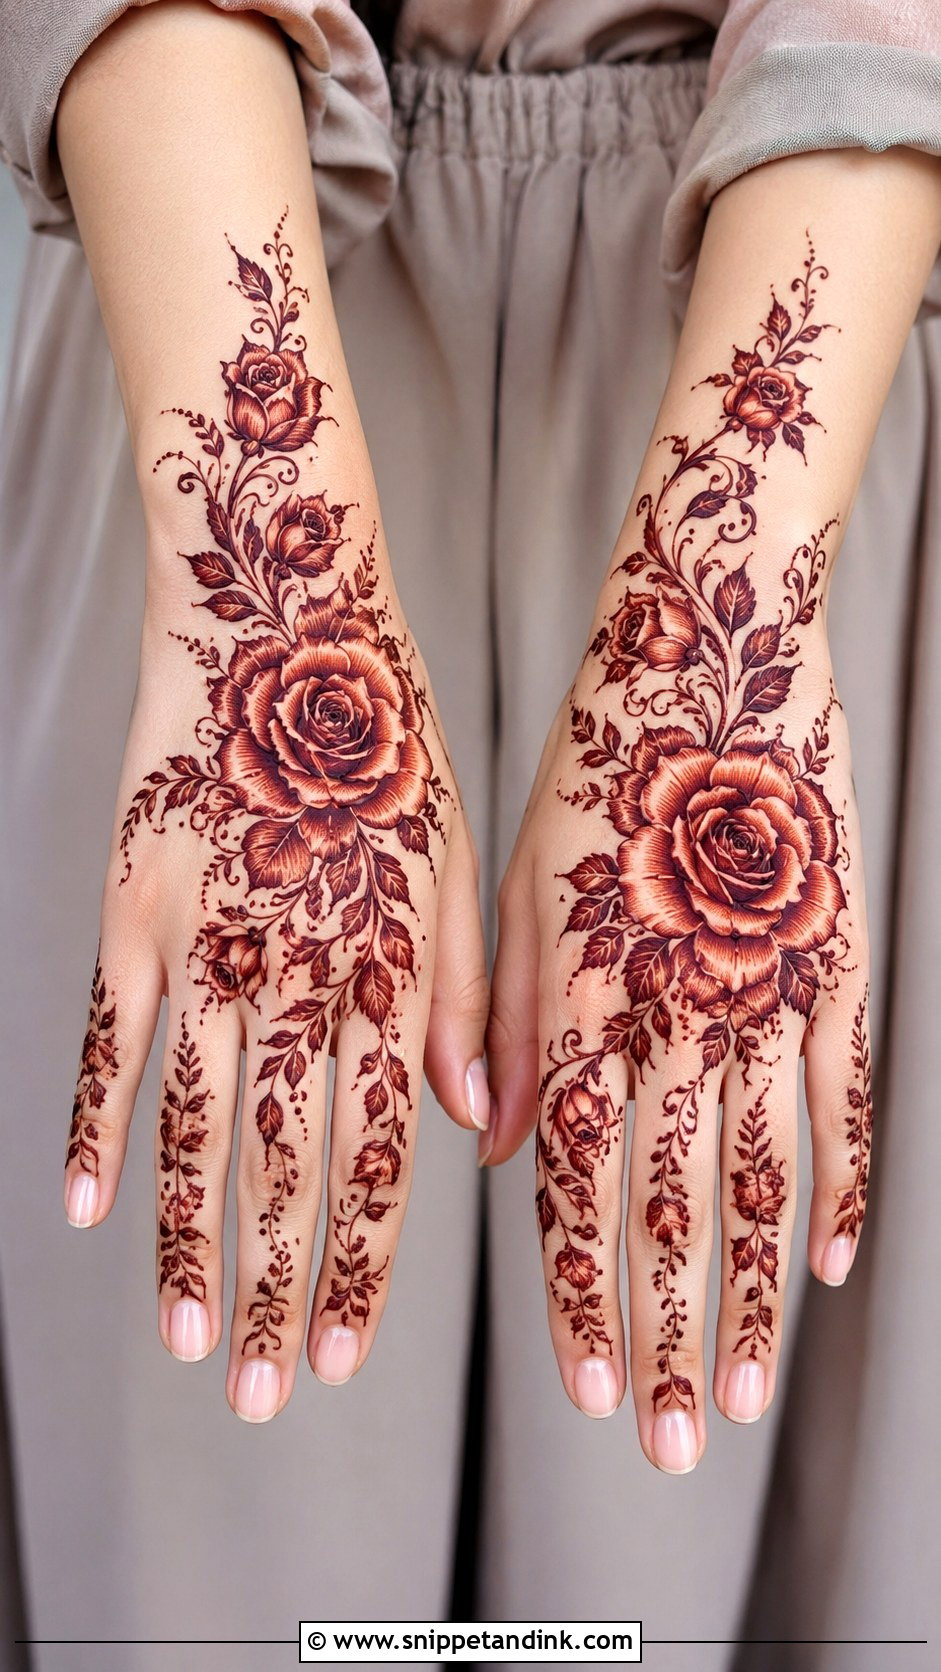
Roses are all about contrast: a bold outer outline with delicate inner petal lines. That contrast is what keeps the flower readable as the stain matures. I usually place one large rose near the wrist with smaller ones scattered toward the fingers, and keep the background light so the roses carry the design.
30. Rajasthani Mehndi Design
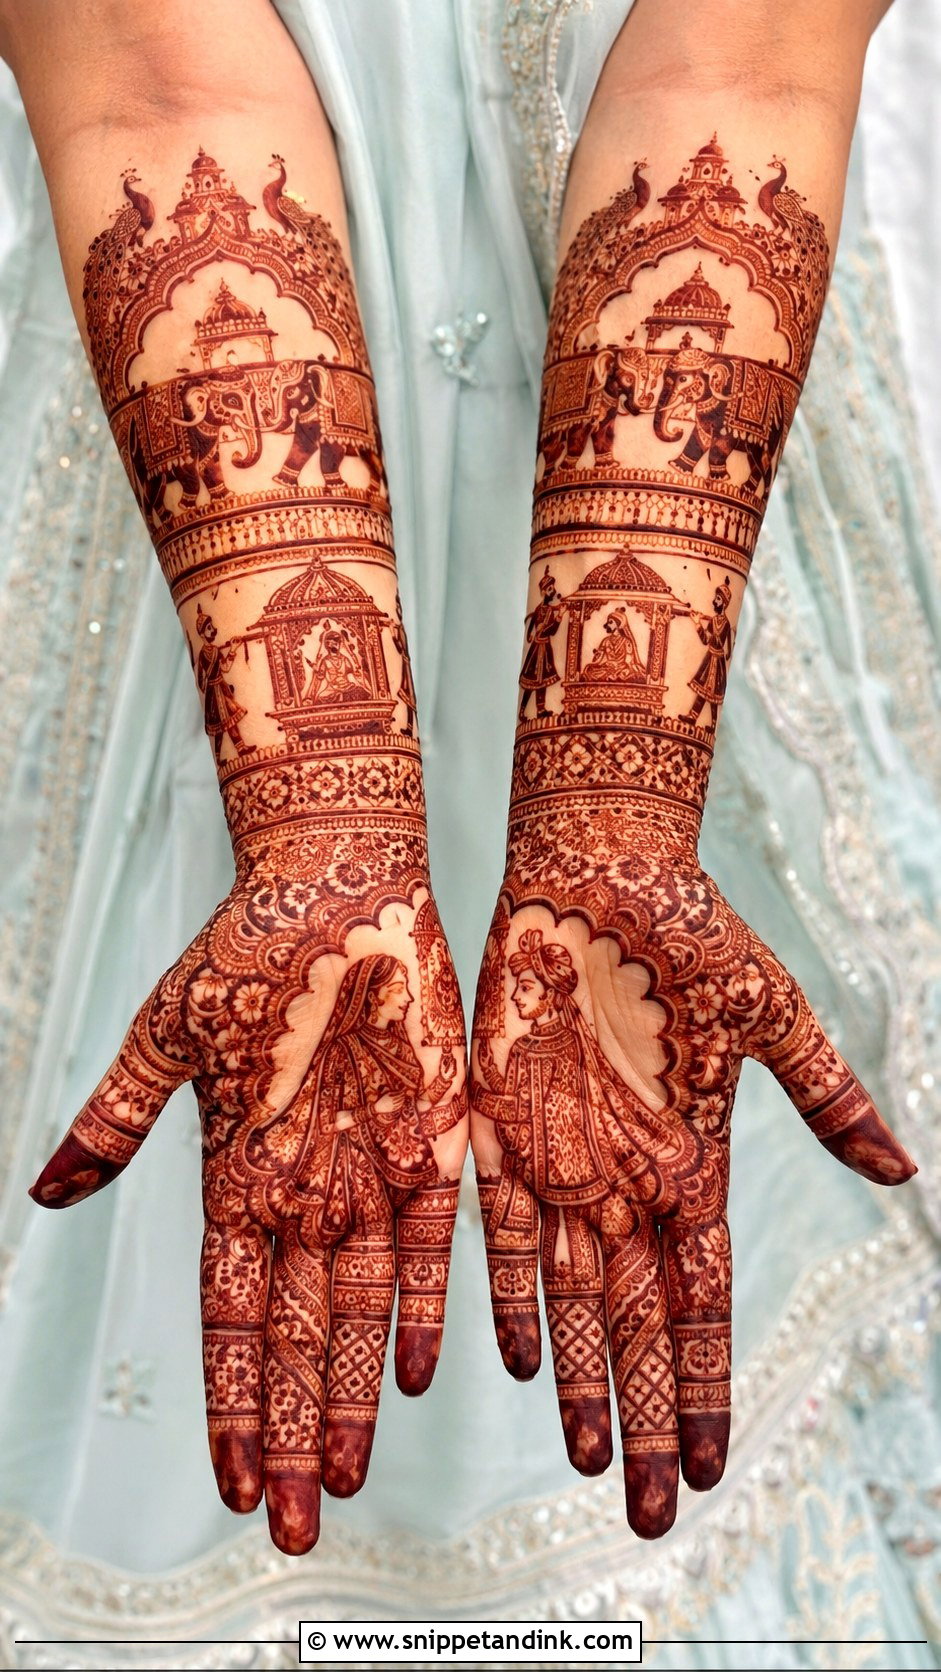
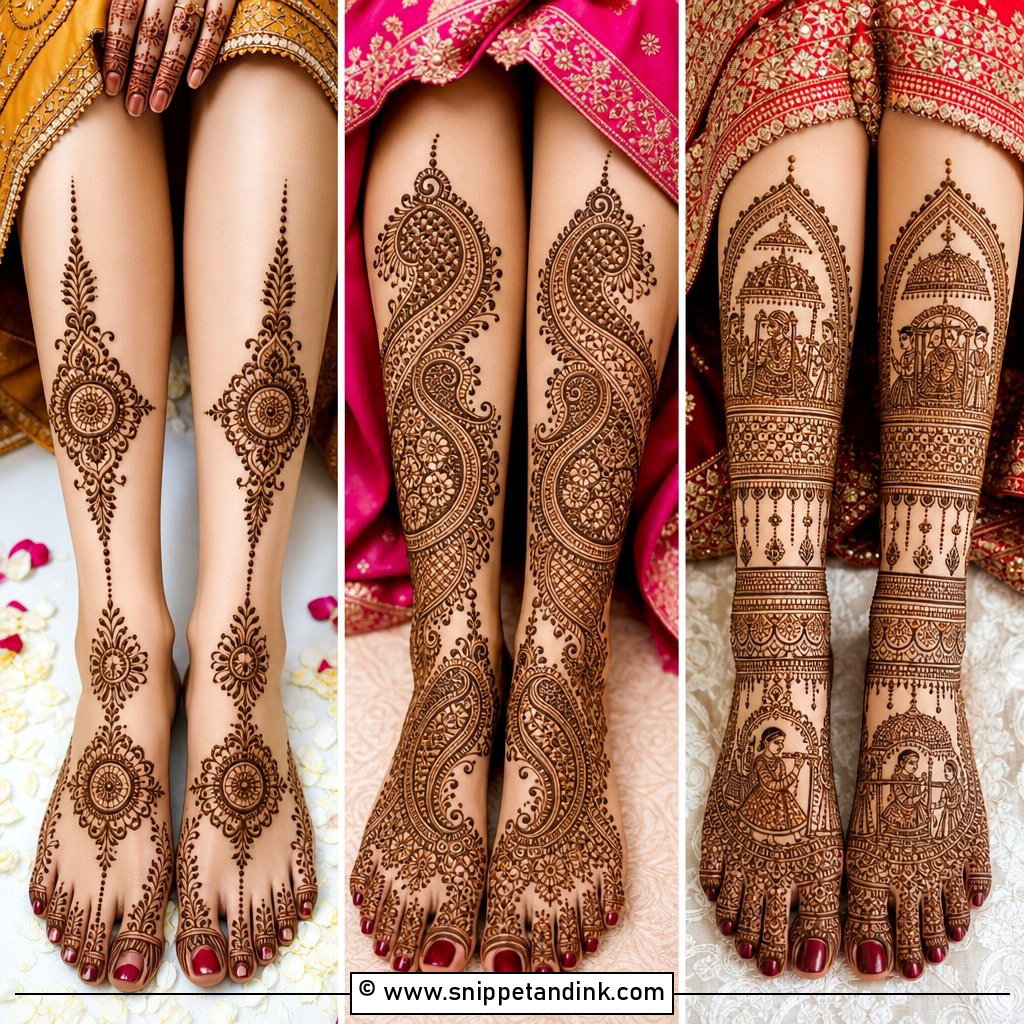
Rajasthani mehndi tells stories across the hands and forearms: bride and groom, elephants, palanquins, peacocks and royal borders, each in its own panel. It takes patience on both sides of the cone. I draft the figures first and fill between them afterwards, otherwise the faces end up squeezed into whatever space is left. A deep maroon stain makes the figures read, so this one really benefits from overnight paste.
31. Pakistani Mehndi Design
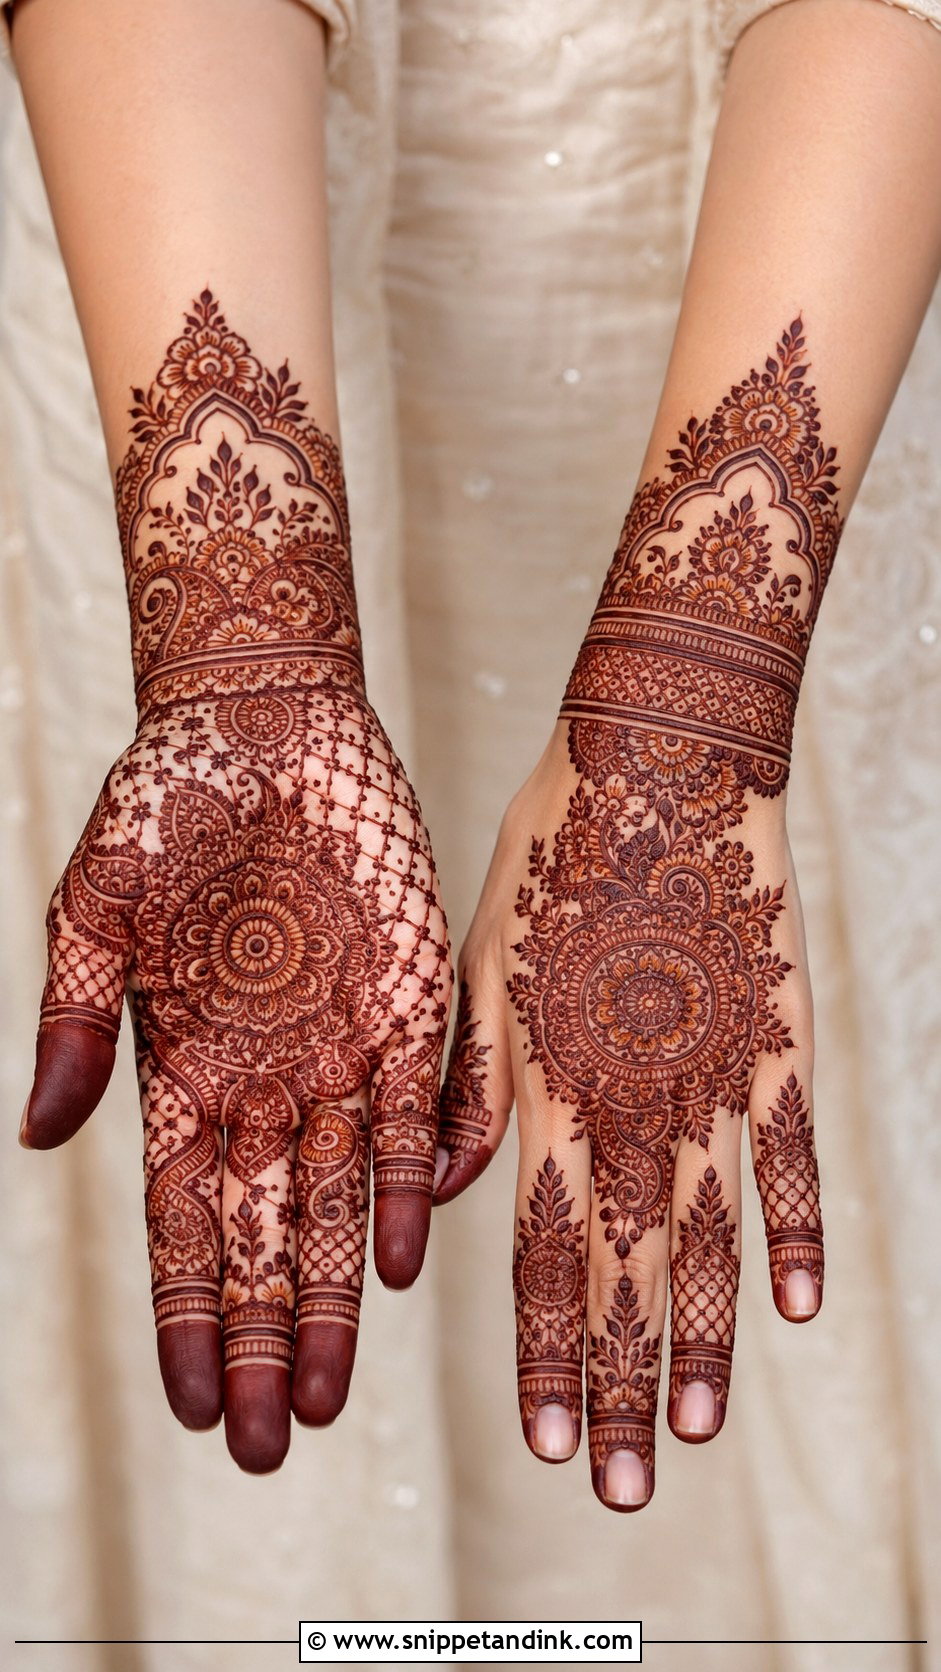
Pakistani mehndi design balances filled sections with open space, mixing mandalas, florals, jaali and bold wrist borders. I put the traditional elements on the palm and a central motif with finger detailing on the back. It scales well: dense for a bride, medium for Eid or family weddings. Neat outlines and soft shading keep it from tipping into clutter.
32. Kids Mehndi Design
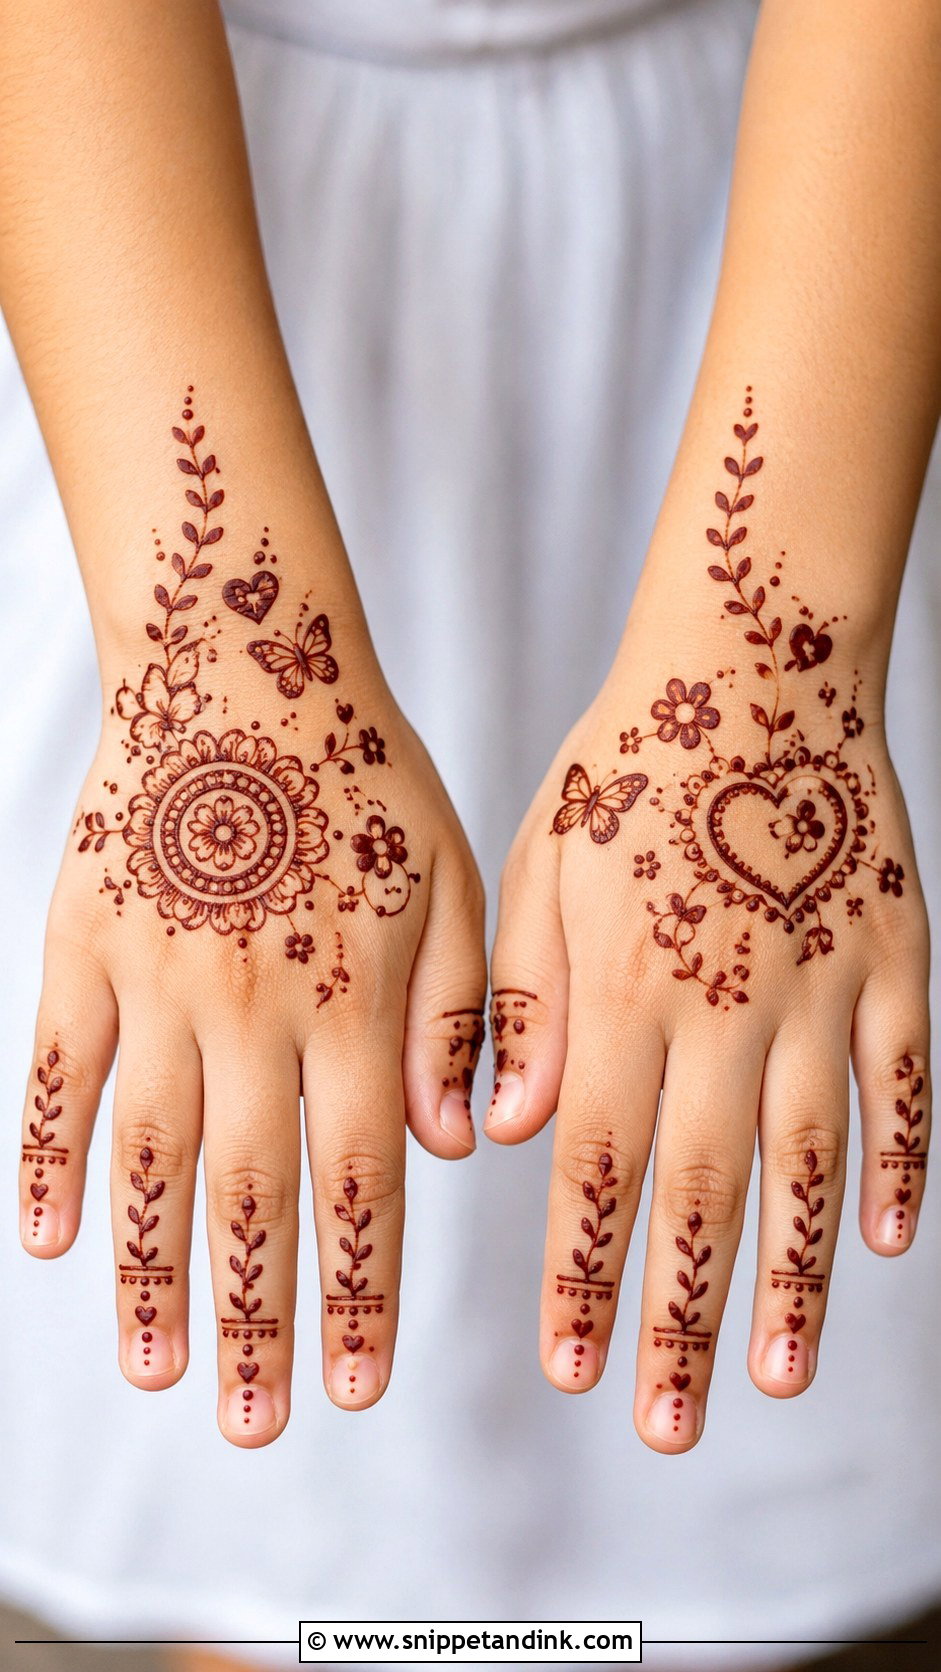
Children don’t sit still for long, so I keep their designs to a few minutes: a small flower, a butterfly, a heart or a tiny bracelet with a vine to one finger. I put it on the back of the hand because palms get touched and smudged constantly. Use only natural henna with a known ingredient list, and never the so-called black henna, which can contain PPD and cause serious skin reactions.
33. Easy Mehndi Design For Beginners
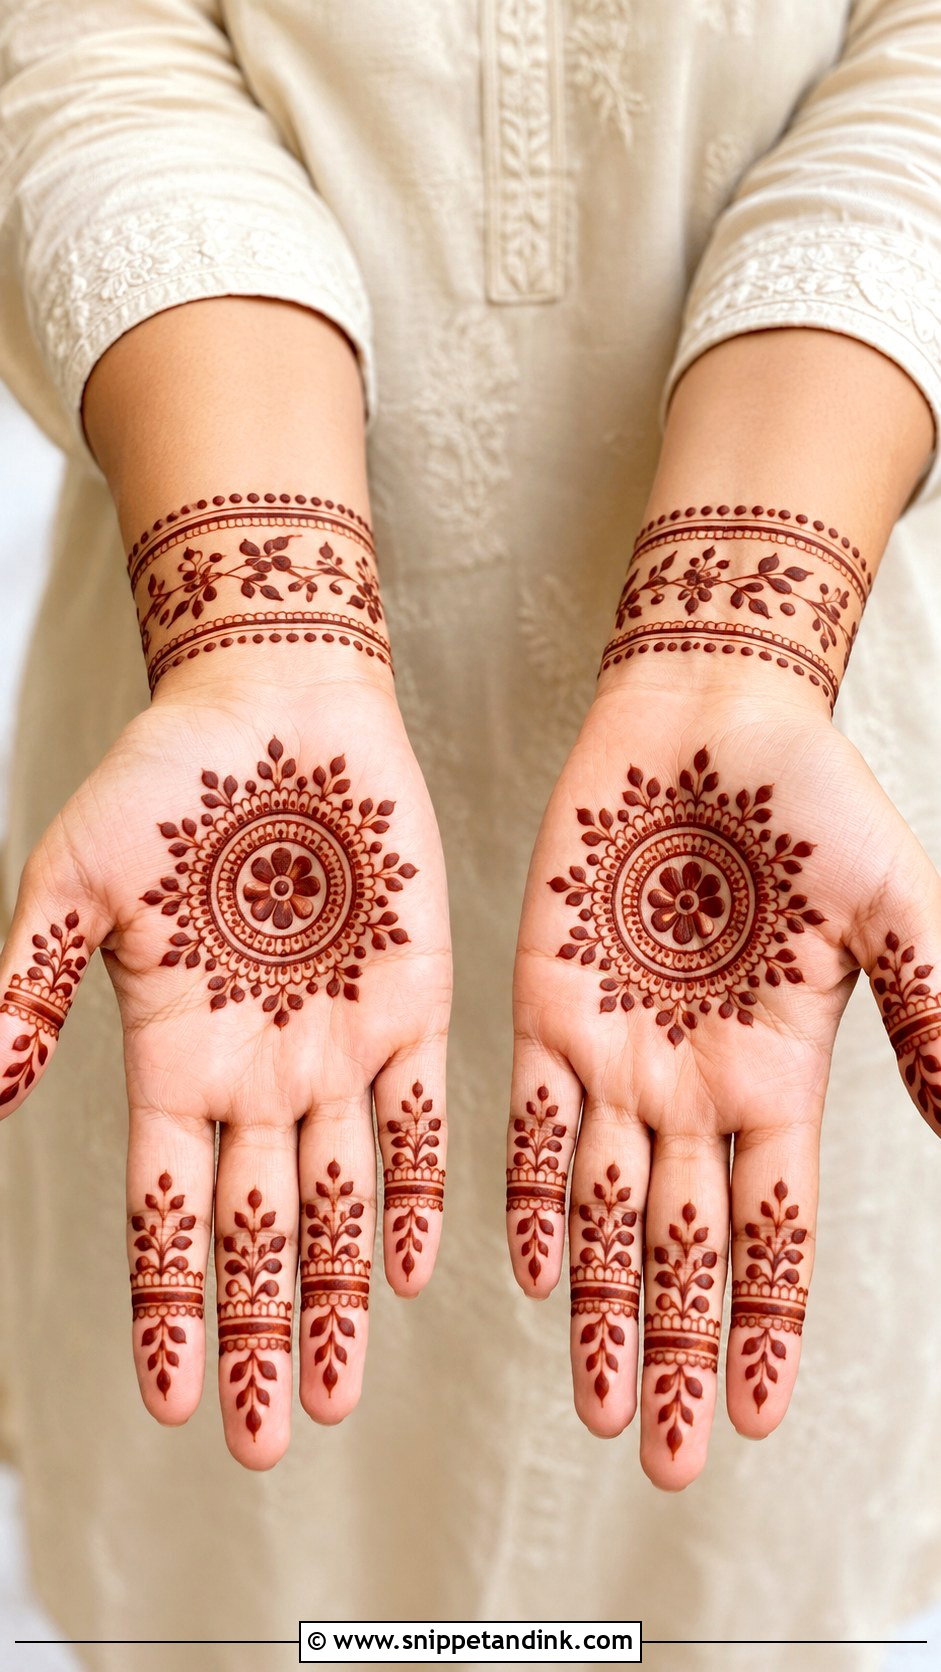
When I teach beginners, I give them repeatable shapes: a dot, a teardrop petal, a leaf, a curved line. Put those together and you get a palm mandala with leafy vines and a basic wrist border, or an Arabic trail of three flowers. Practise on paper first to learn steady cone pressure. Skip the tiny fillers until your lines stop wobbling; clean simple work looks better than ambitious shaky work.
34. Side Hand Mehndi Design
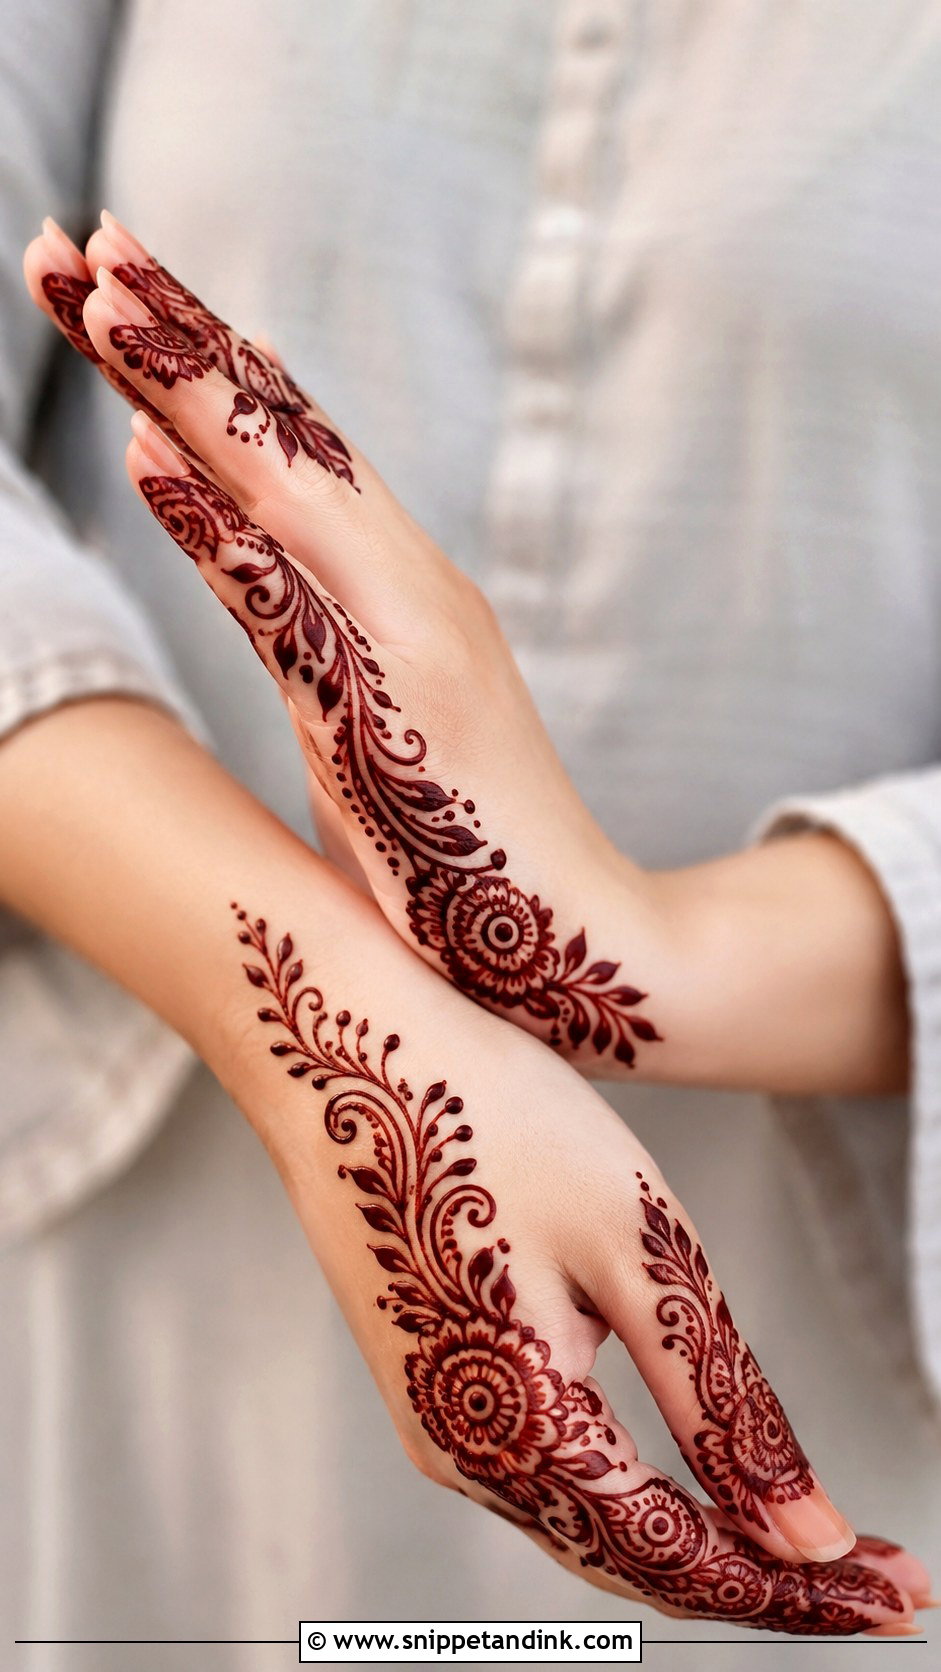
Side placement runs from the wrist along the outer edge of the palm and up to the little or index finger, leaving the rest of the hand bare. It slims the look of the hand and goes on quickly. The edge of the hand bends and rubs a lot, so I draw on a relaxed, flat hand and ask you to keep it still until the surface dries.
35. Full Palm Mehndi Design
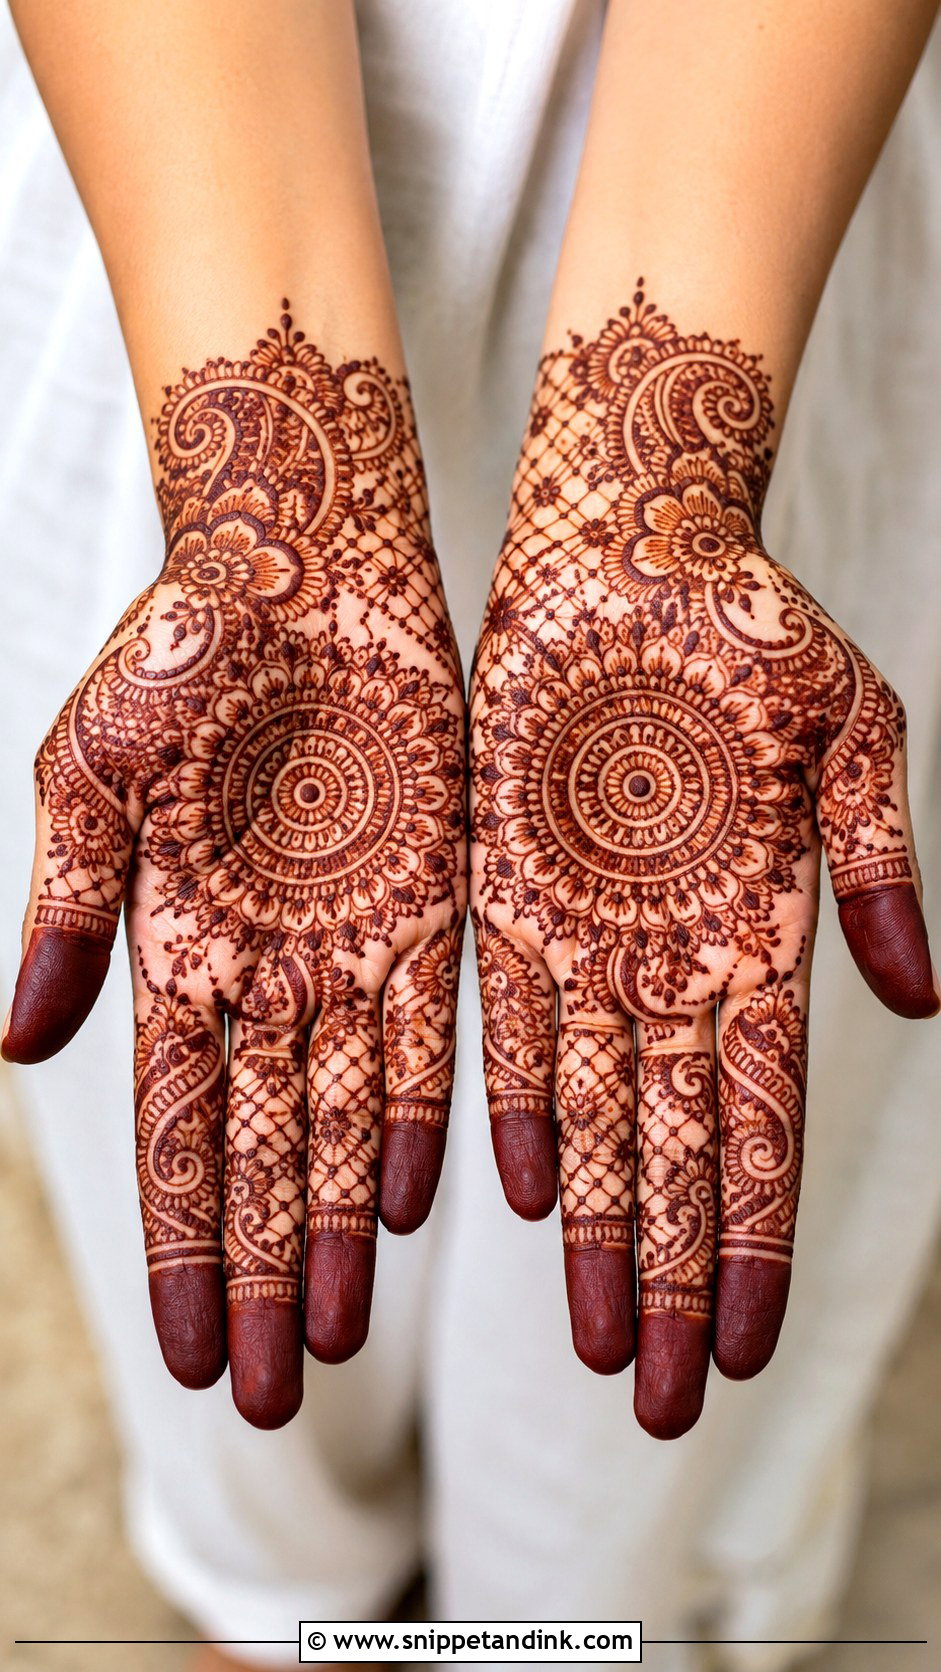
Full palm designs give the richest stain because palm skin takes henna so well. I fill it with a central mandala, paisleys, florals and jaali, then decide on the fingers: fully dipped tips for a bold, traditional look, or bands and leaves for something softer. The common mistake is cramming fillers until the main motif disappears, so I protect the centre before I add anything else.
The First Two Days After the Paste Comes Off
Most of a stain’s depth is decided after I’ve packed up my cones. Paste needs time on the skin, warmth, and as little water as possible early on. Here is the routine I give every bride and guest:
- Leave the paste on for as long as you can manage. Six hours is a reasonable minimum; overnight is better for bridal hands.
- Once it is dry to the touch, dab on a little lemon and sugar mix so the paste stays stuck to the skin. Don’t soak it.
- Scrape the dried paste off with a blunt edge or your fingernail. Don’t wash it off.
- Keep water away for as long as you can that day, then rub a little balm or oil over the design before showering.
- Expect bright orange at first. Keep your hands warm and the colour will darken over the next day or two.
After that, the things that fade it fastest are hot water, soap, chlorine, hand sanitiser and scrubbing. Wear gloves for dishes, skip waxing or exfoliating the area before the wedding, and don’t worry when the palms fade before the backs of your hands. Palm skin renews quickly, so that’s normal.
If the colour comes up paler than you hoped
Some skin simply stains lighter, and cold hands, a short paste time or an early wash are the usual causes. Warmth helps: hold a mug of tea, wear gloves, sit near a heater. What I’d never do is reach for a darker product on the day. Anything that promises an instant black stain is not natural henna, and that’s the stuff that causes chemical burns and lasting skin reactions.
Which Hands Get Which Design
Traditional celebrations suit Indian, Rajasthani, peacock and paisley work; quicker, lighter occasions suit Arabic, Khaleeji, minimal, finger and side placements; and Indo-Arabic, mandala, bracelet and jewellery designs sit comfortably in between. Pick by the event, the outfit and how many hours you can give me in the chair, not by how busy the photo looks. Then use good natural paste, give it time on the skin, and let the colour finish developing before the day you want it to be seen.
You'll Like These Ideas:


Leave a Reply