
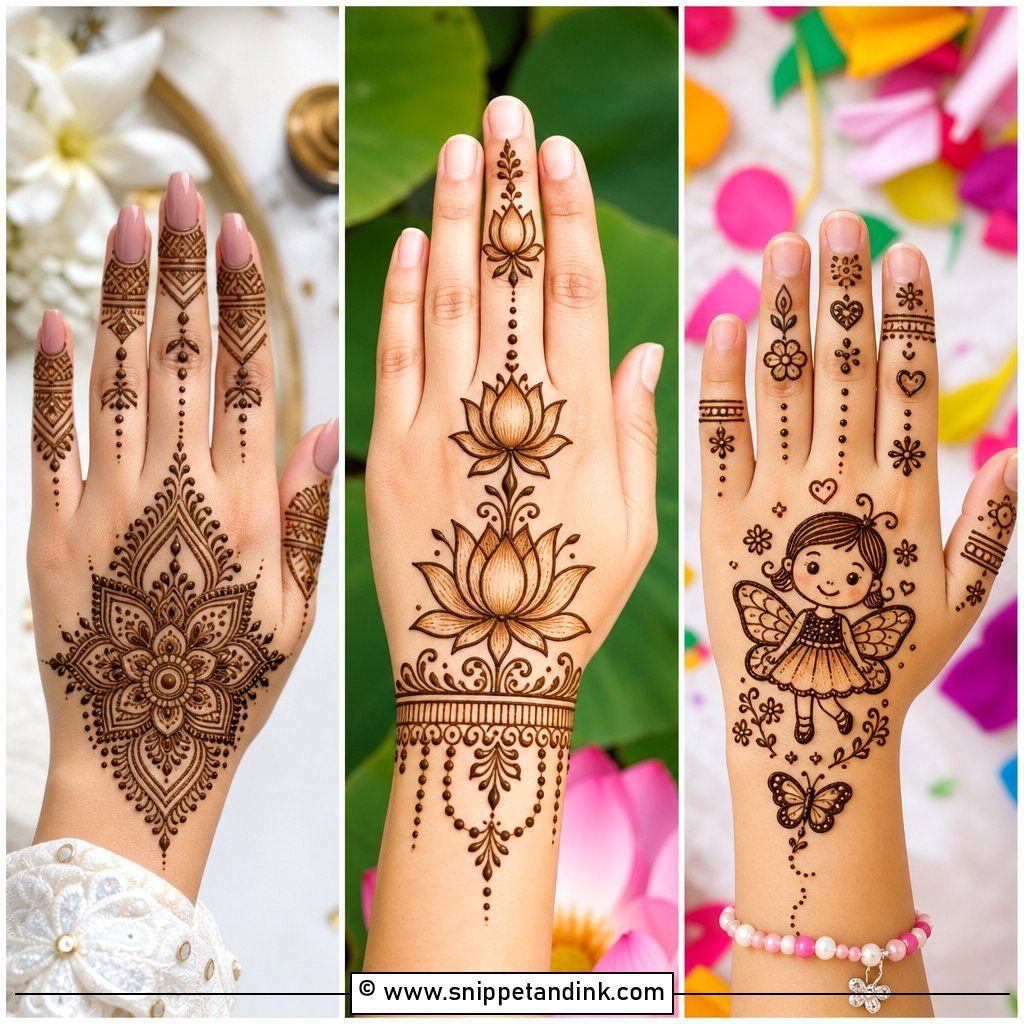
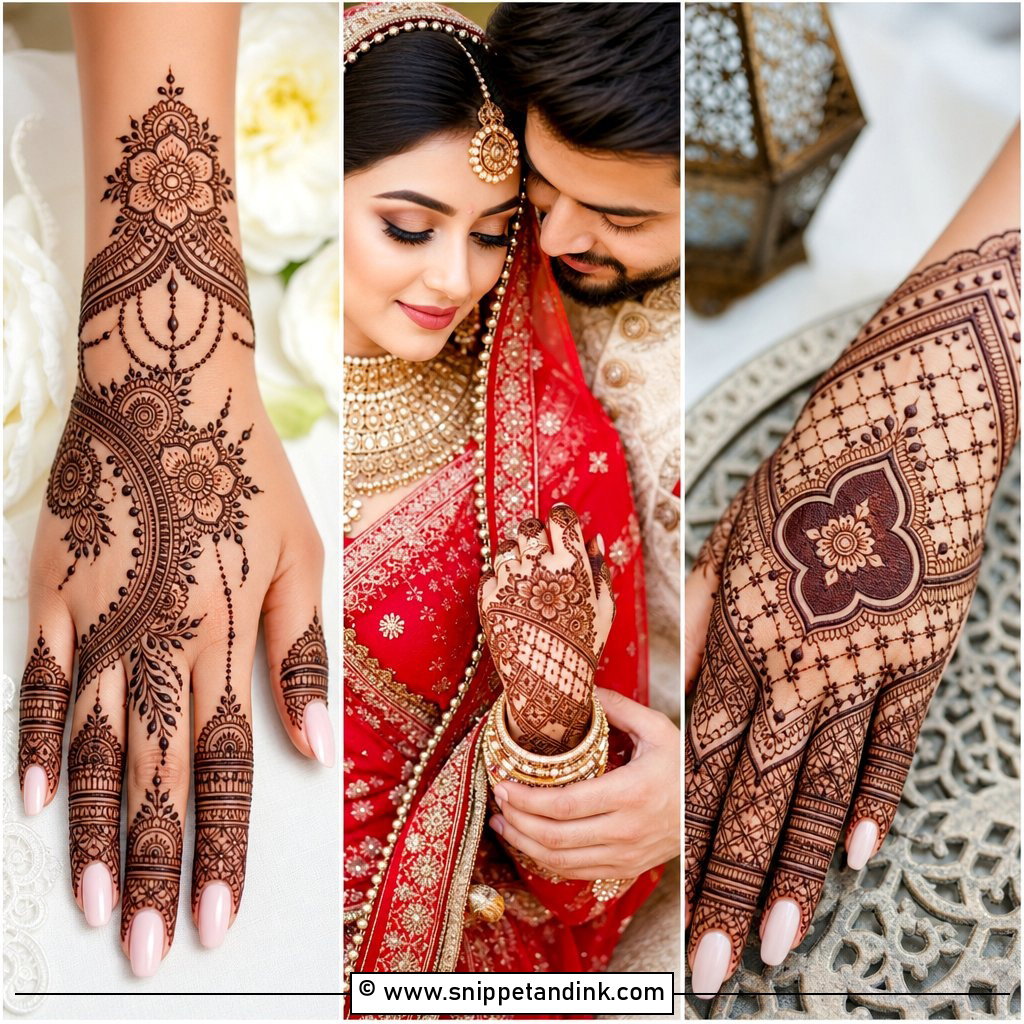
Finger mehndi is what I suggest to anyone who wants decorated hands but not a full palm or back hand of henna. It goes on in minutes, dries quickly, and suits Eid, Diwali, weddings, school functions or everyday festive dressing. Most finger patterns are made of bands, dots, leaves and checks with plenty of bare skin, which makes them good beginner territory. You can keep everything on the fingers or let a fine line run to the wrist like jewellery. Below are thirty ways to do it, with notes on finger length, placement and what usually trips people up.
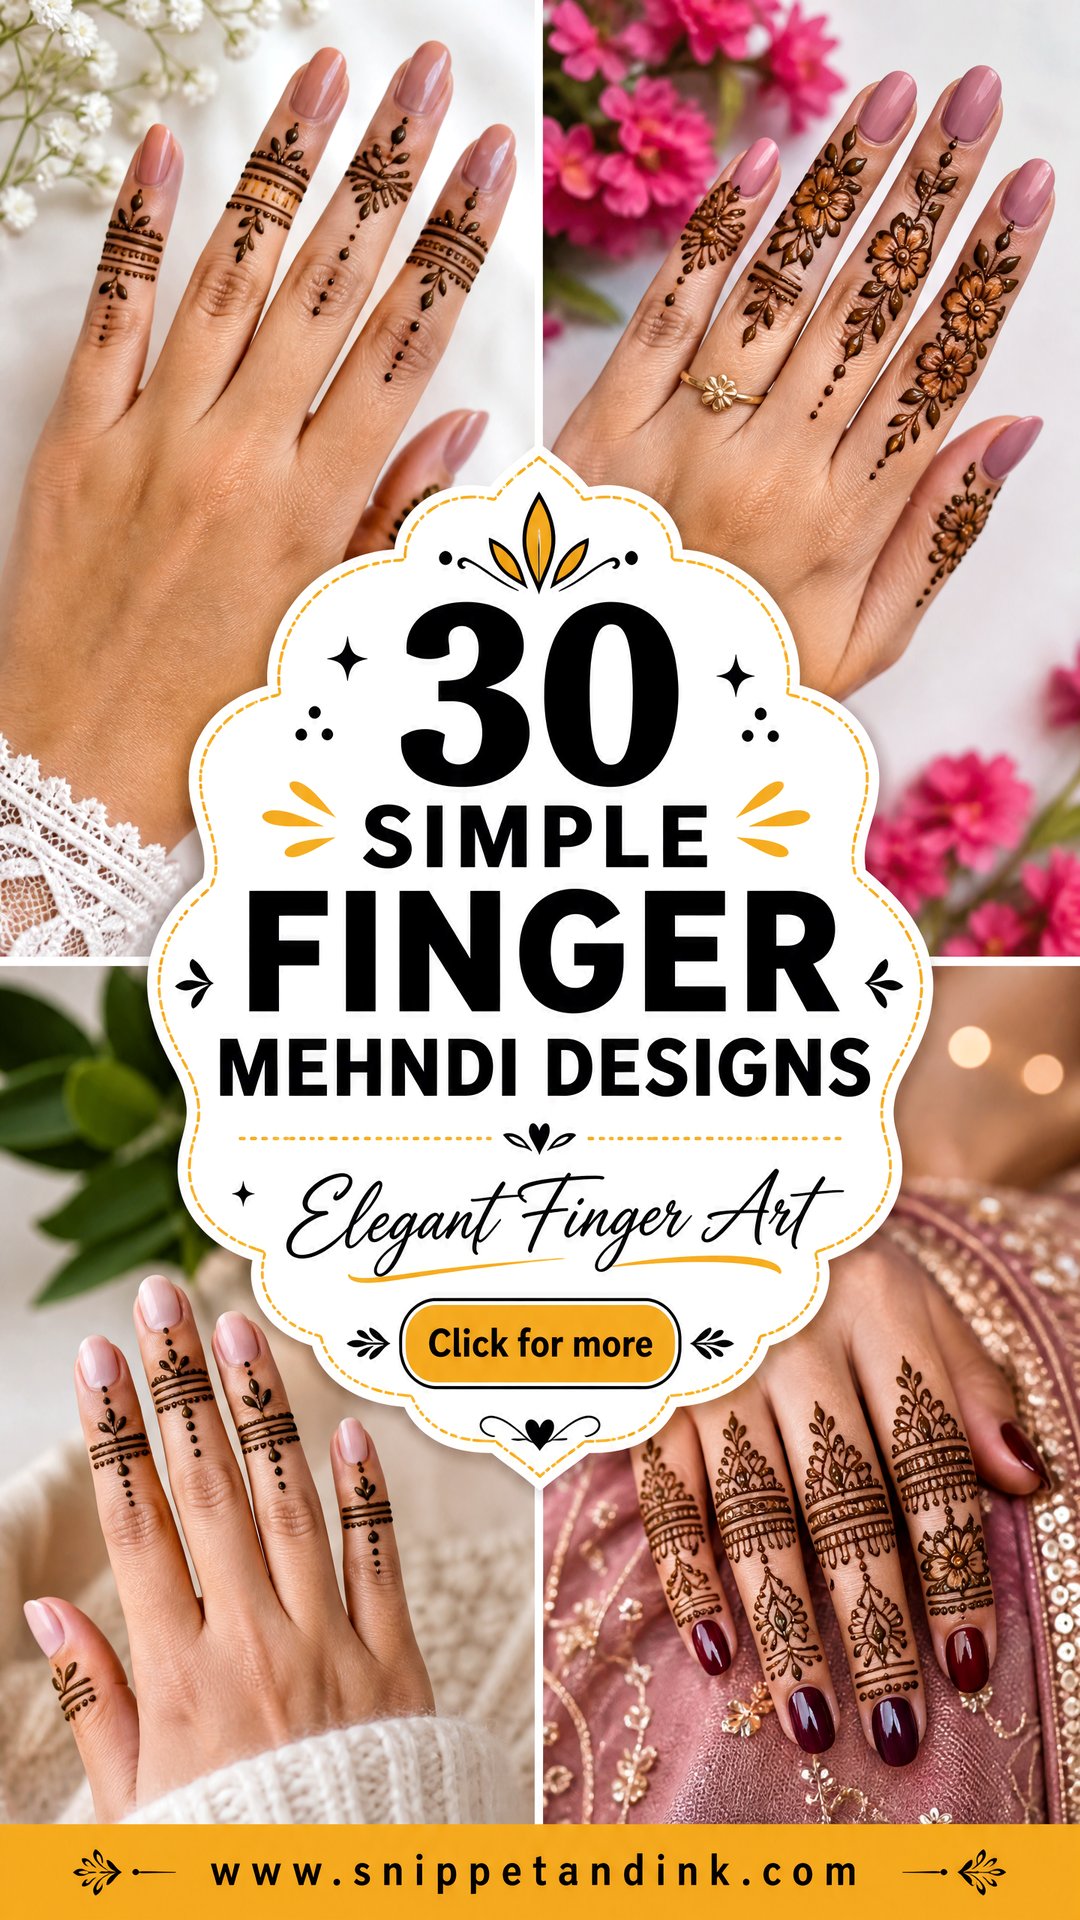
Rings, Nail Polish and Henna on the Same Fingers
Fingers are where henna meets everything else you wear on your hands, so I plan around that before I draw a single band.
If you’ll be wearing rings
Tell your artist which fingers will carry rings and roughly where they sit. I either leave a clean band of skin there, so the ring looks intentional against bare skin, or draw a band the ring will sit just above. A ring placed over fine detail hides the work, and metal rubbing on fresh paste smudges it, so keep rings off until the dried paste has been scraped away.
If you want painted nails
Henna stains nails and cuticles orange, and that colour grows out rather than washing off. If you don’t want it, paint your nails before the mehndi; even a clear coat acts as a barrier, and a gel manicure can stay on. Acetone remover dries the skin around the nail and can lighten the stain there, so I’d wait a few days before changing polish.
If your hands are never still
Fingers are the part of the hand you use most, so they smudge first. If you’ll be cooking, typing or holding a baby soon after application, choose designs that stay on the backs and sides of the fingers and leave the palm side of the tips bare.
1. Simple Finger Mehndi Design Front Hand
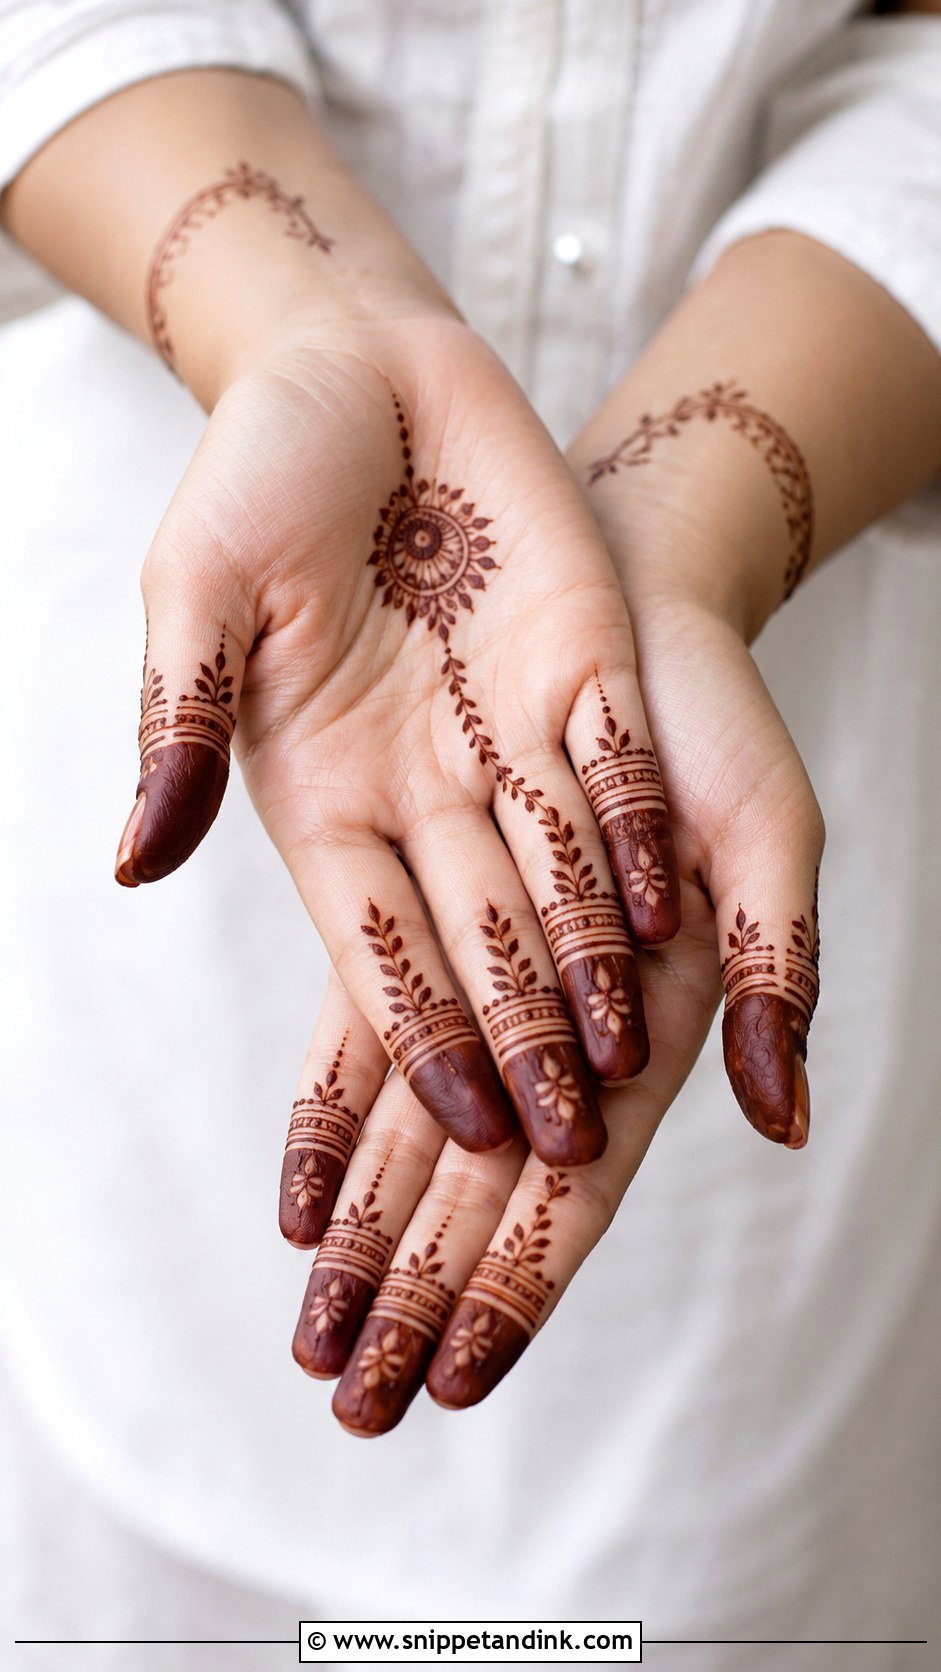
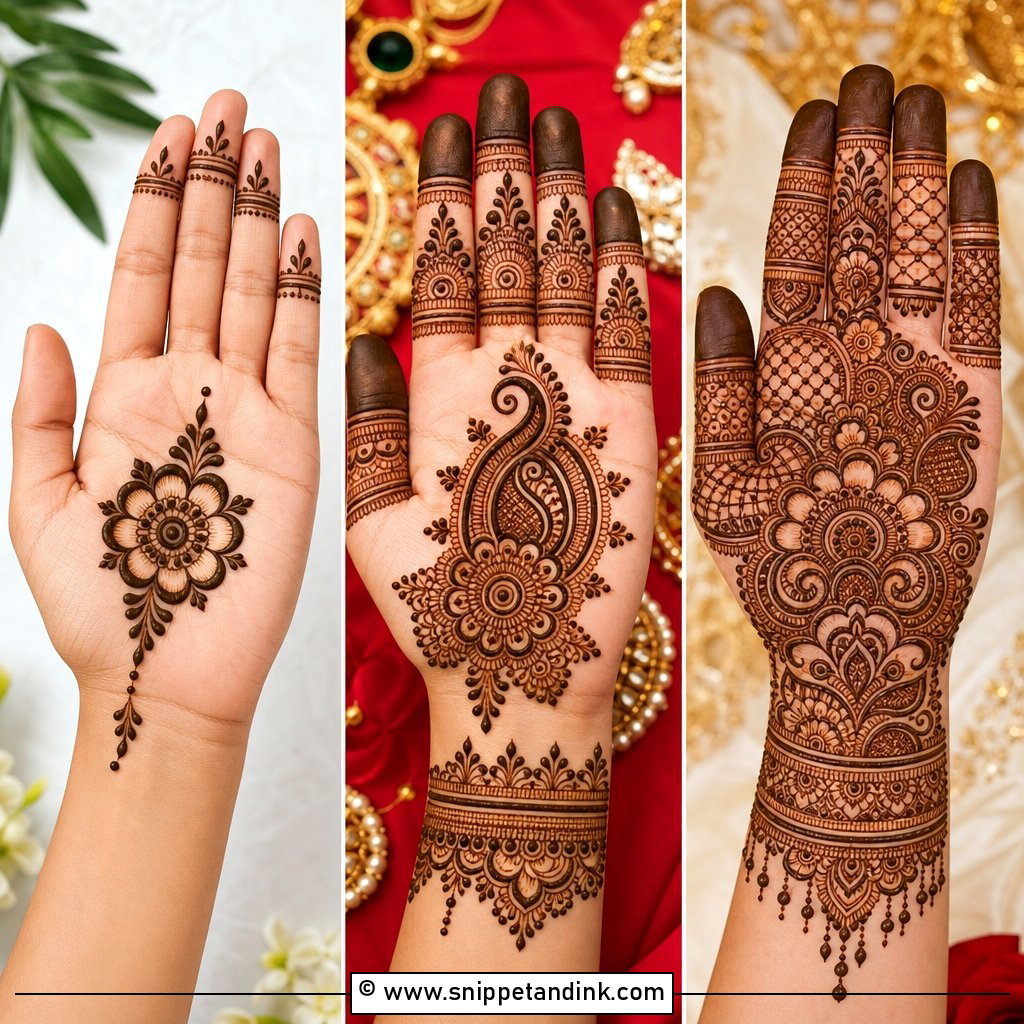
A simple finger mehndi design on the front hand leaves the palm clean and puts the work where the eye goes when you hold a cup or a phone. I begin with thin bands across each finger, then dots and tiny leaves around the joints. Fingertips can be filled or left open. The palm side of the fingers stains darker than almost anywhere else, so even very fine bands show up well there. If the hand looks unfinished, a small dot trail from the middle finger into the palm settles it.
2. Simple Finger Mehndi Design Back Hand
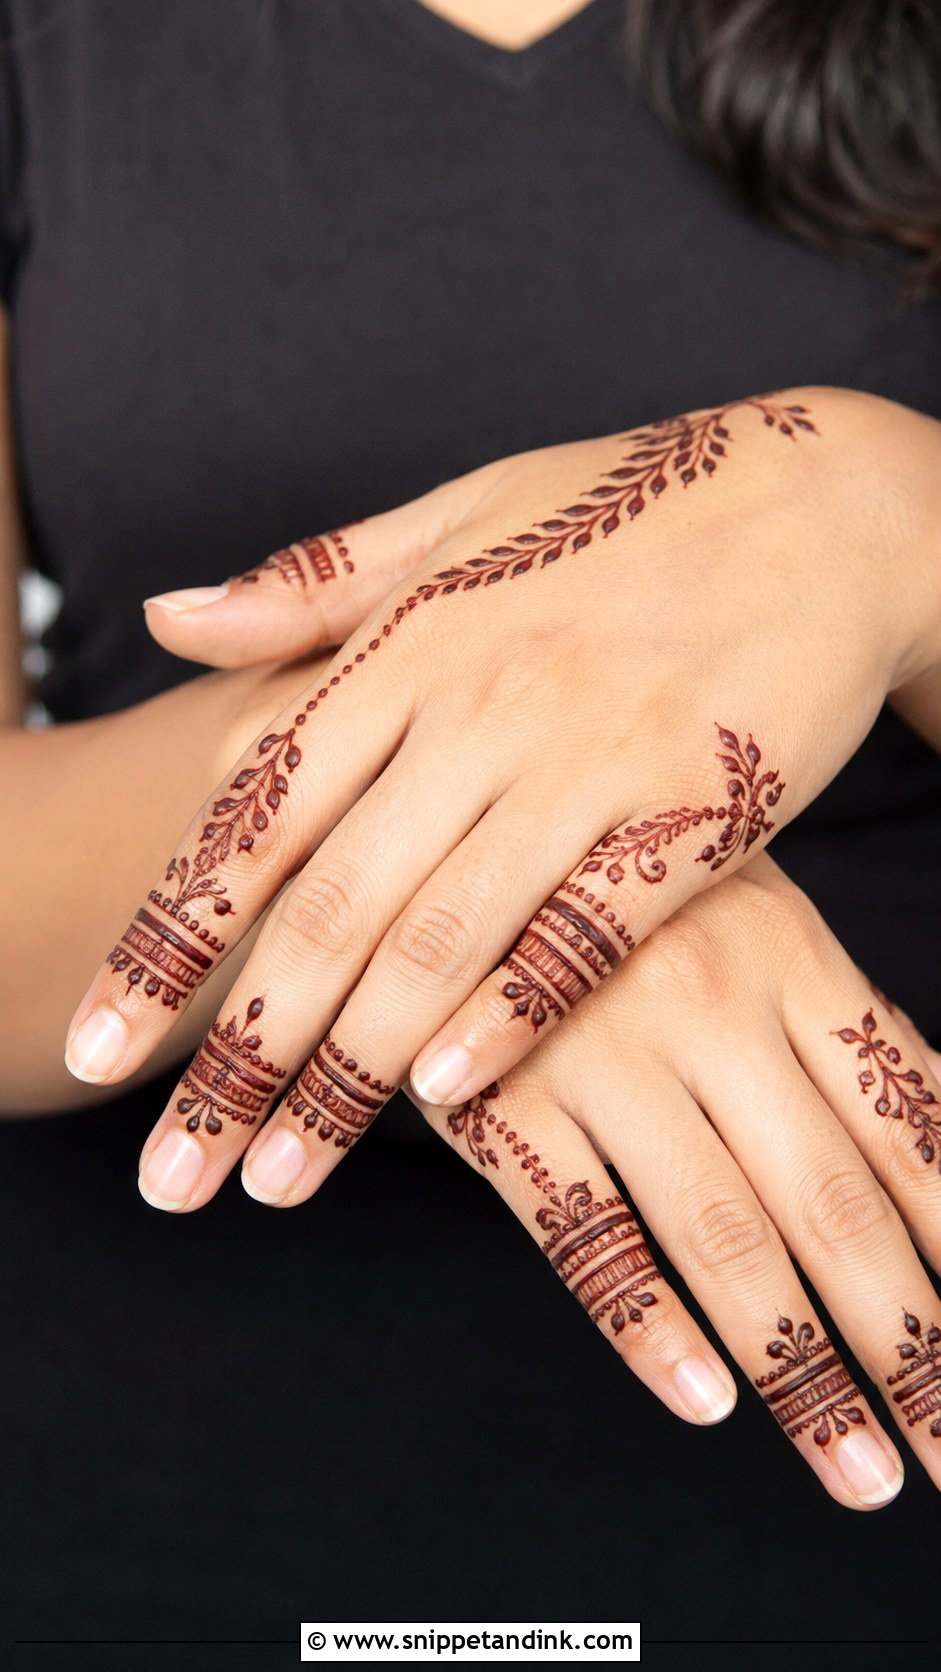
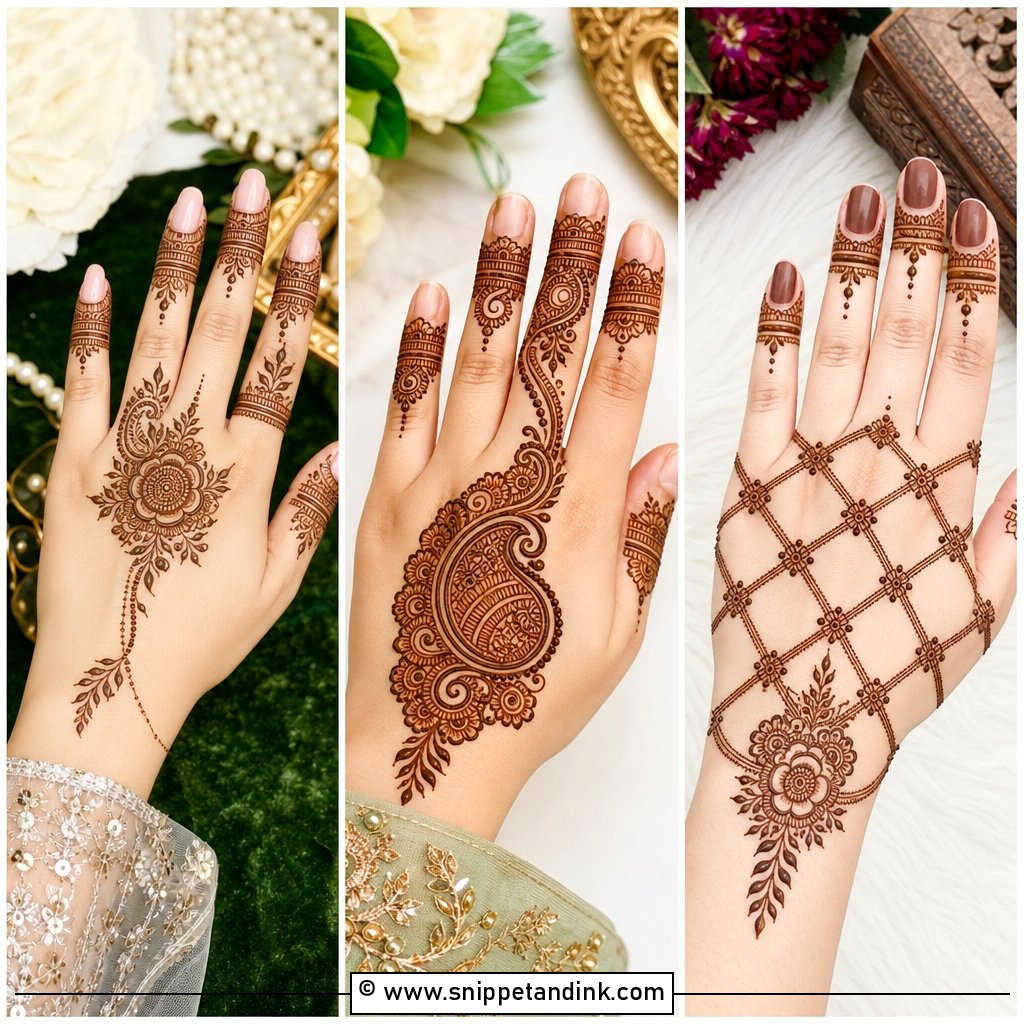
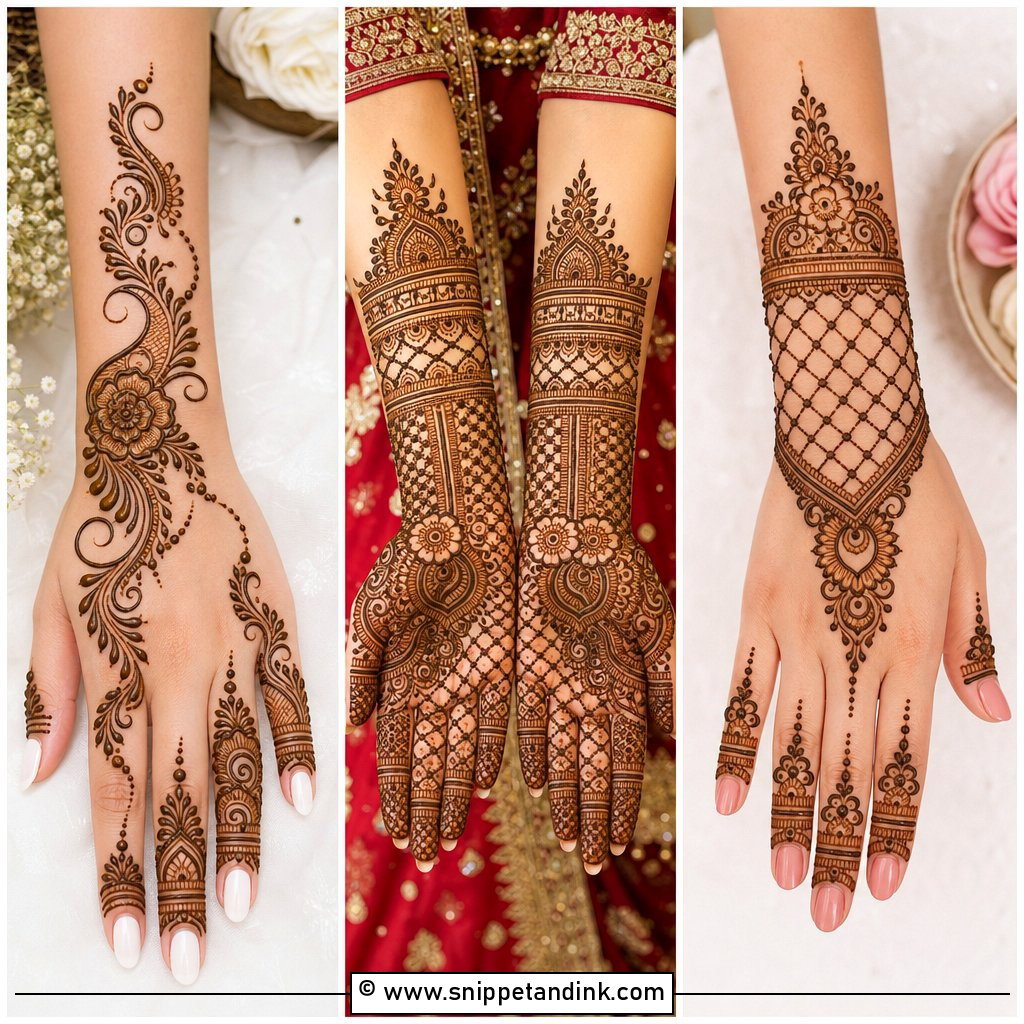
On the back of the hand, fingers are what people actually notice when you gesture or lift a glass, so keeping the design there makes sense. Fine bands, leafy lines and small ring-like details do the work, and a tiny wrist bracelet or short chain can join them. I leave the knuckles open, because henna sitting in that loose, wrinkled skin looks blotchy once it stains. The backs of the fingers also stain lighter than the fronts, so I use slightly bolder lines here than I would on the palm side.
3. Arabic Finger Mehndi Design
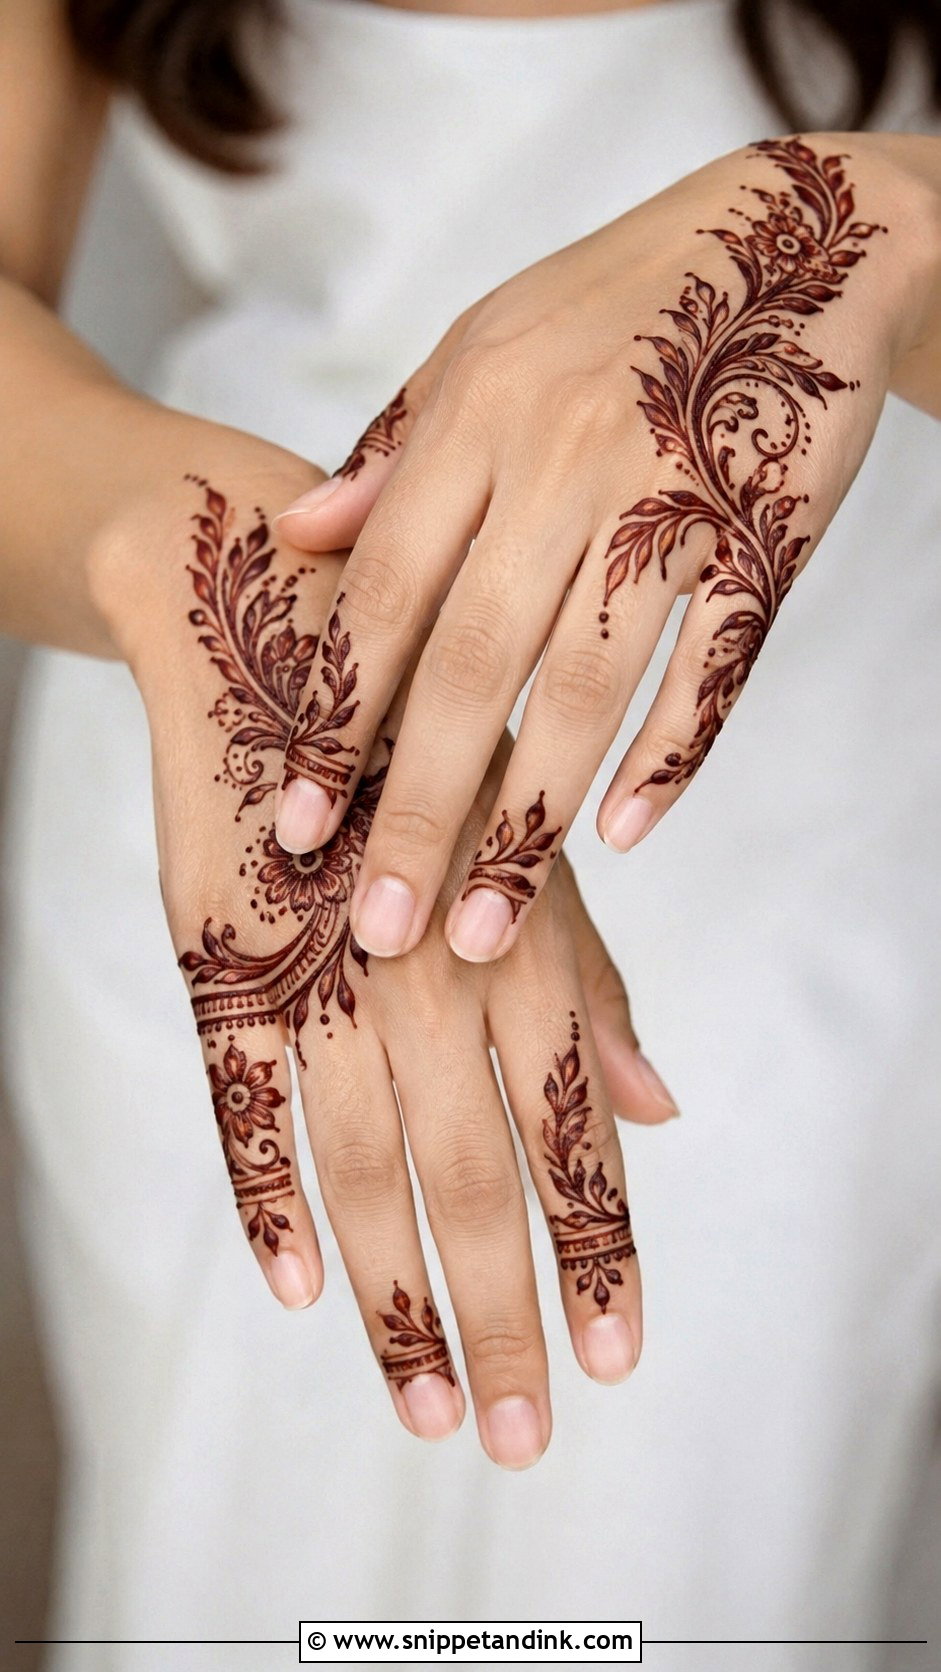
Arabic finger designs are about flow: bold curves, thicker outlines and open spacing. For a simple version, I draw small floral trails from the fingertip downward and run curved leaves and dots along one side of each finger. Not every finger needs equal weight. Two bold fingers with the rest kept light is the balance that reads as Arabic rather than random. Because the lines run lengthwise, this style flatters shorter fingers too, and a clean palm keeps it fresh.
4. Minimal Finger Mehndi Design
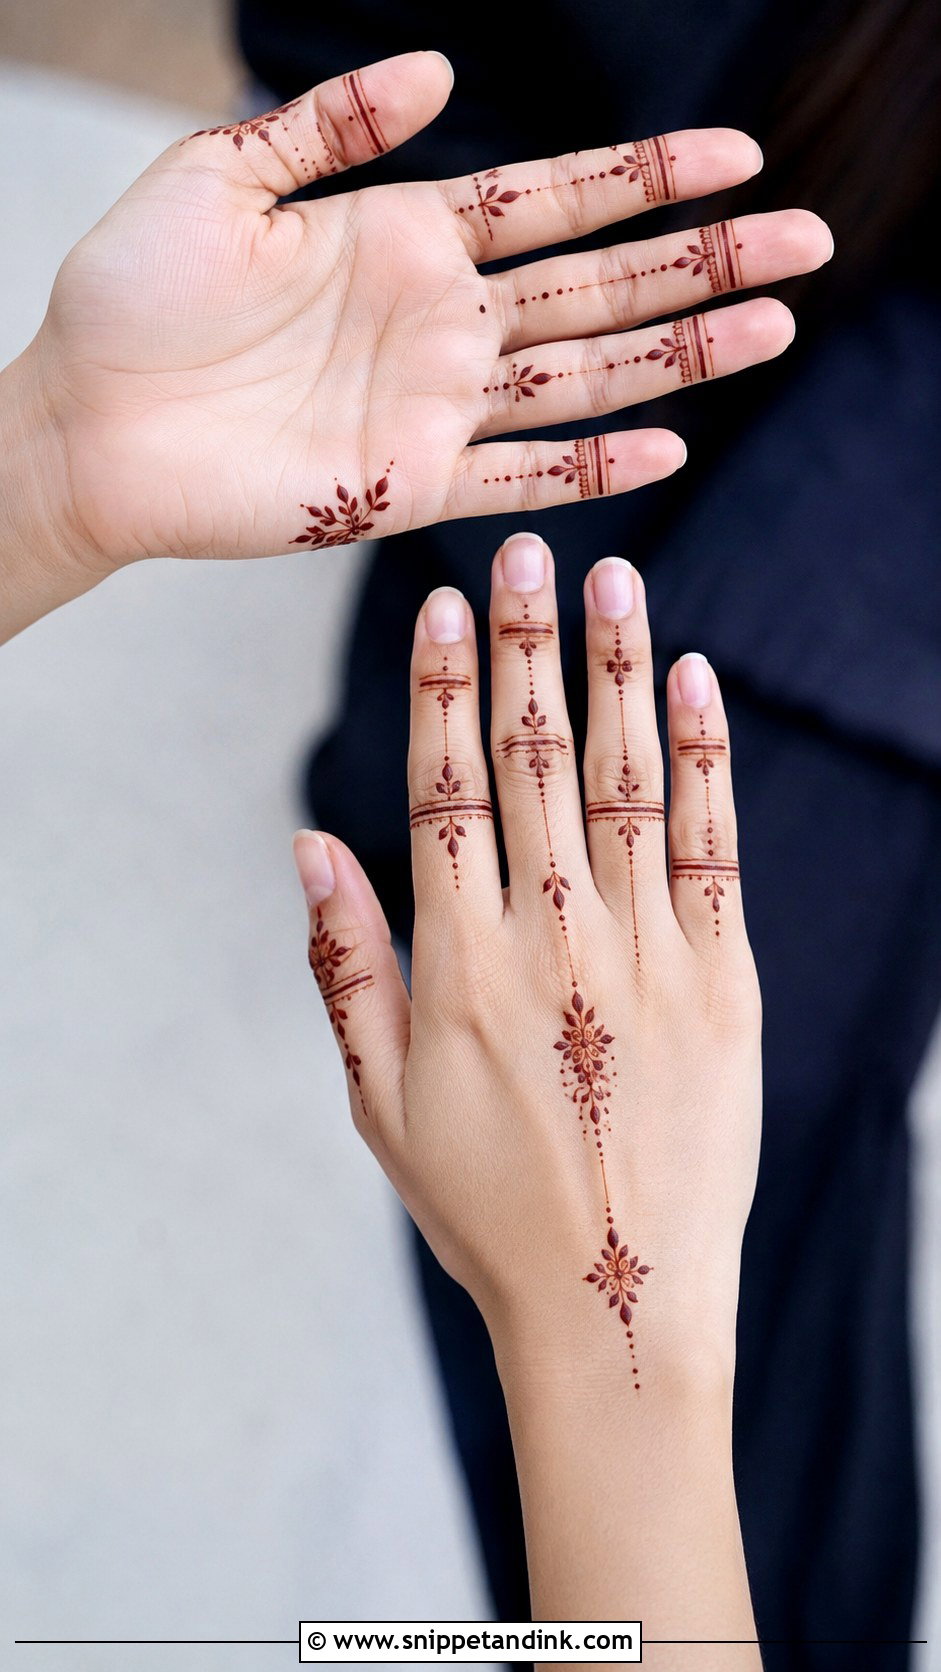
Minimal here means one thin ring band, a dotted line and a tiny leaf or flower per finger, with the palm and back hand left bare. It’s what I’d do for someone who dislikes heavy mehndi, or a young girl trying henna for the first time. The catch is neatness. With so little on the skin, one wobbly band is the first thing anyone sees. And let the stain darken properly, since a minimal design in pale orange looks unfinished in a way a fuller design doesn’t.
5. Full Finger Mehndi Design
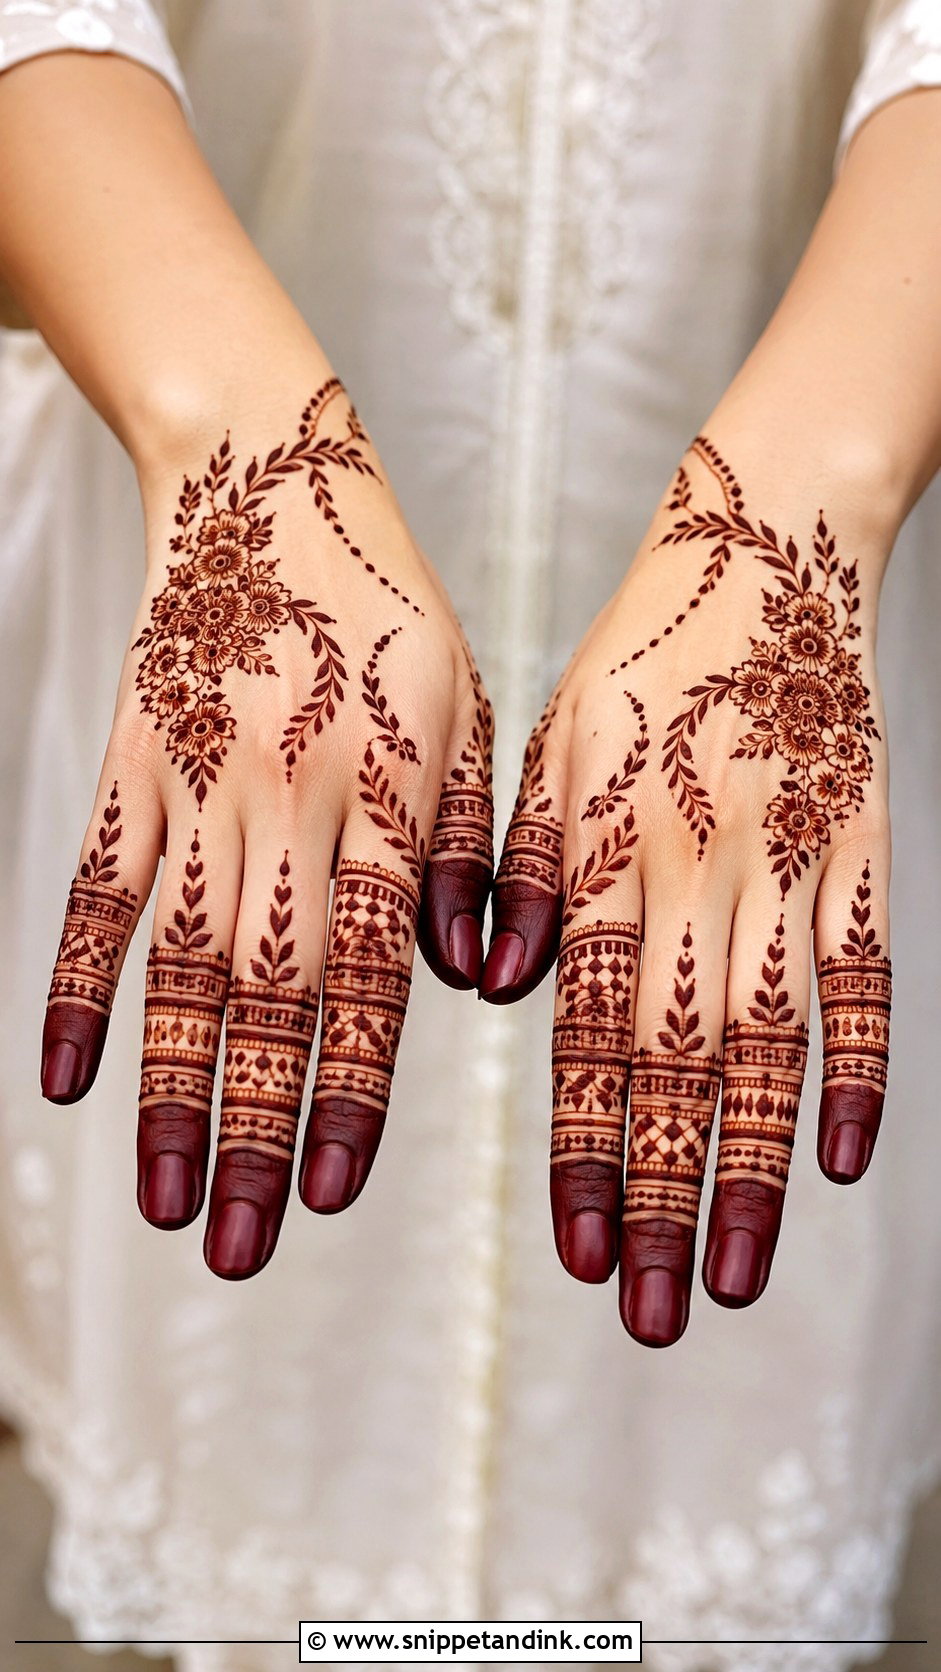
Full finger coverage runs from fingertip to base on every finger while the rest of the hand stays plain. Stacked bands, tiny flowers, checks, leaf vines and dotted borders all fit. My rule is different patterns on each finger but the same line weight throughout; otherwise one finger looks heavier and the whole hand reads lopsided. Filling the tips gives a traditional finish. Near the joints I switch to finer detail, which keeps the fingers looking long.
6. Finger Mehndi Design With Ring Pattern
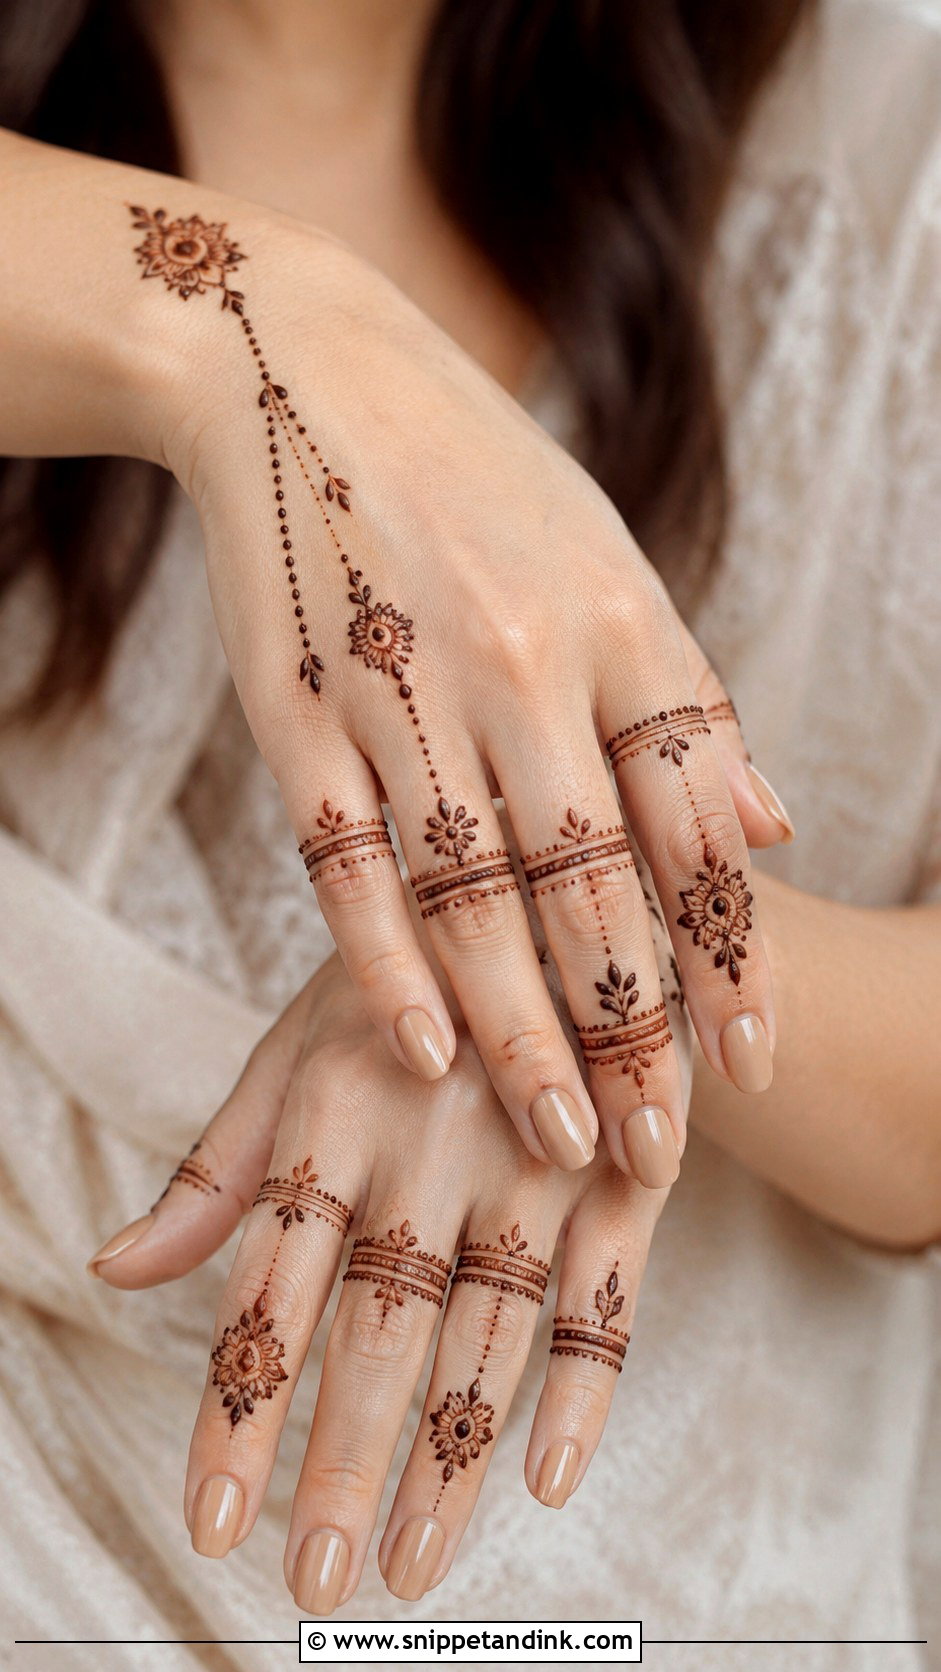
This is henna standing in for jewellery: one or two ring bands linked by dotted chains or tiny leaf trails, a small flower on the ring finger and thin bands on the others. On the back of the hand it follows exactly where real rings sit, so it looks natural up close. The risk is bands drawn too close together. Paste relaxes slightly as it dries, and two neighbouring lines can fuse into one, so I leave a little more space than looks necessary.
7. Finger Mehndi Design With Bracelet
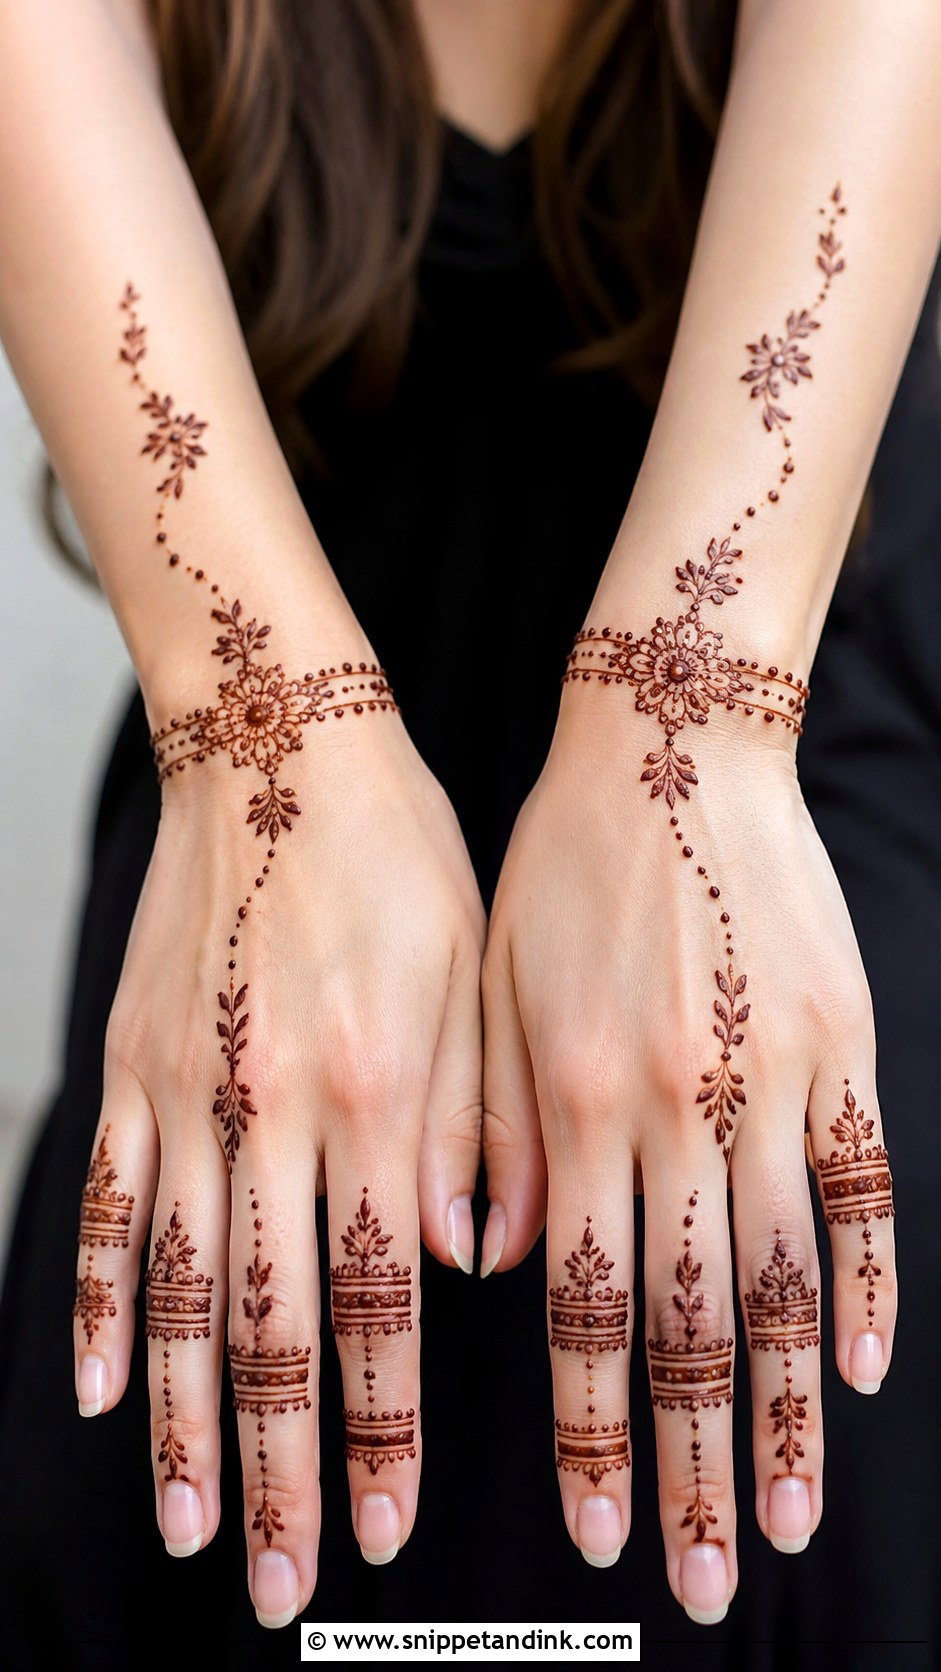
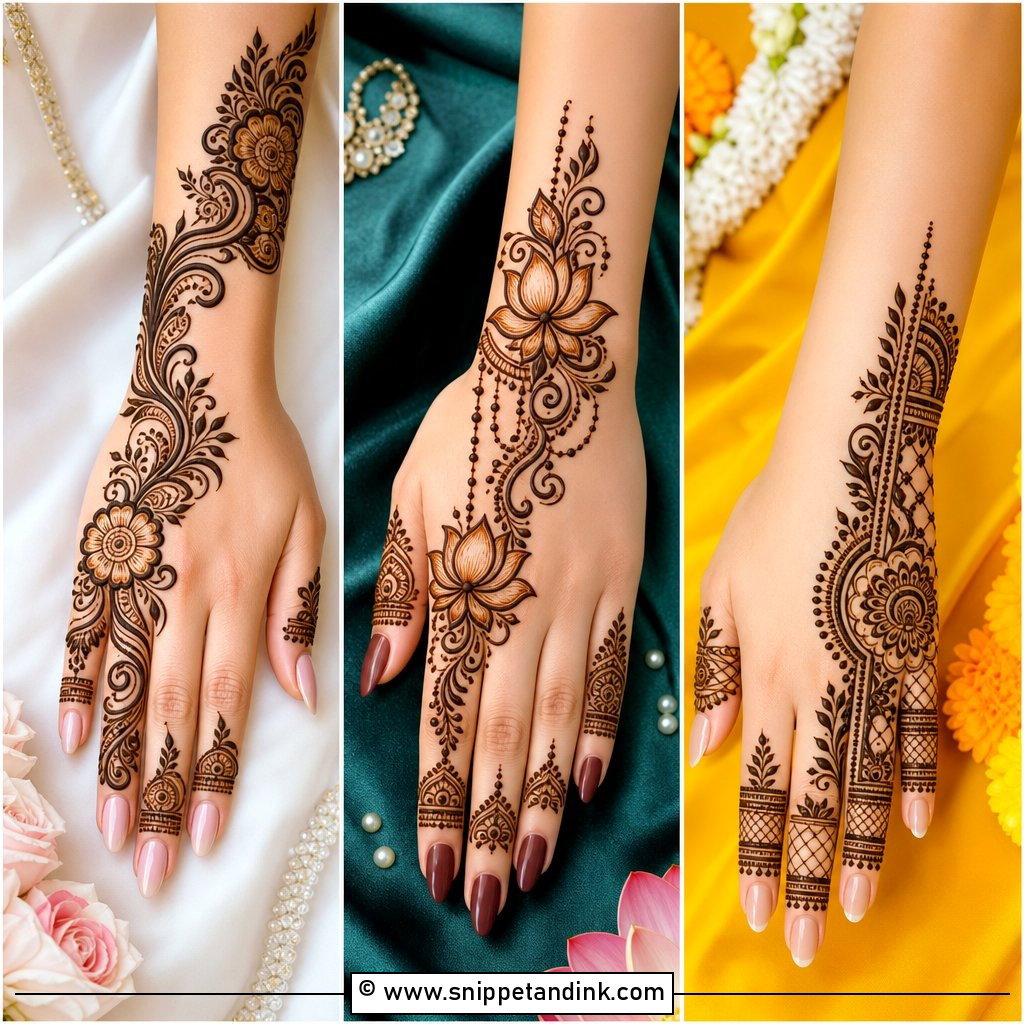
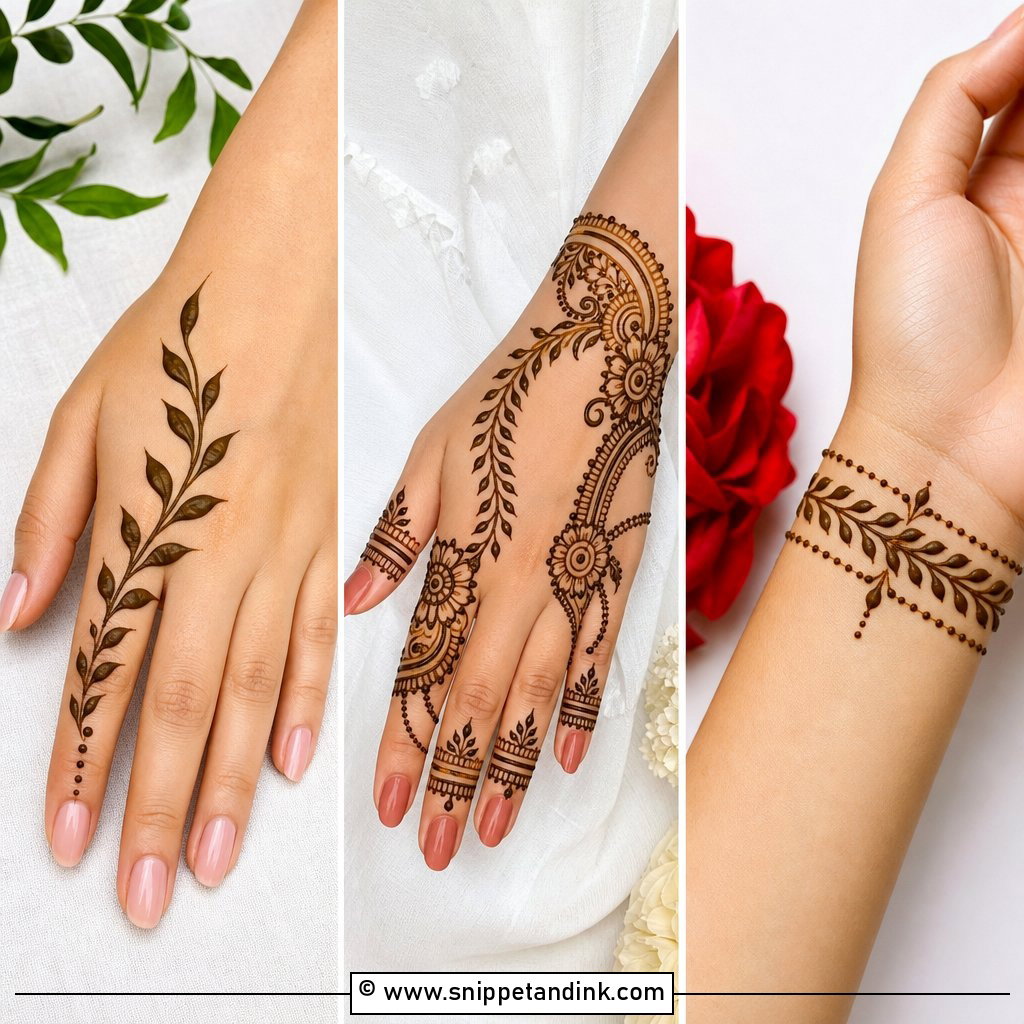
Bracelet designs start with finger bands and connect them to a slim wrist cuff through a dotted chain, a leafy line or a curved trail. On the back of the hand that link from finger to wrist feels natural, almost like a hand chain. Keep the cuff thin for everyday wear or add small flowers for weddings, Eid and Diwali. The connecting chain is where people go too thick. I draw it last, with the lightest pressure of the whole design, so it stays a suggestion rather than a stripe.
8. Finger Mehndi Design With Dots
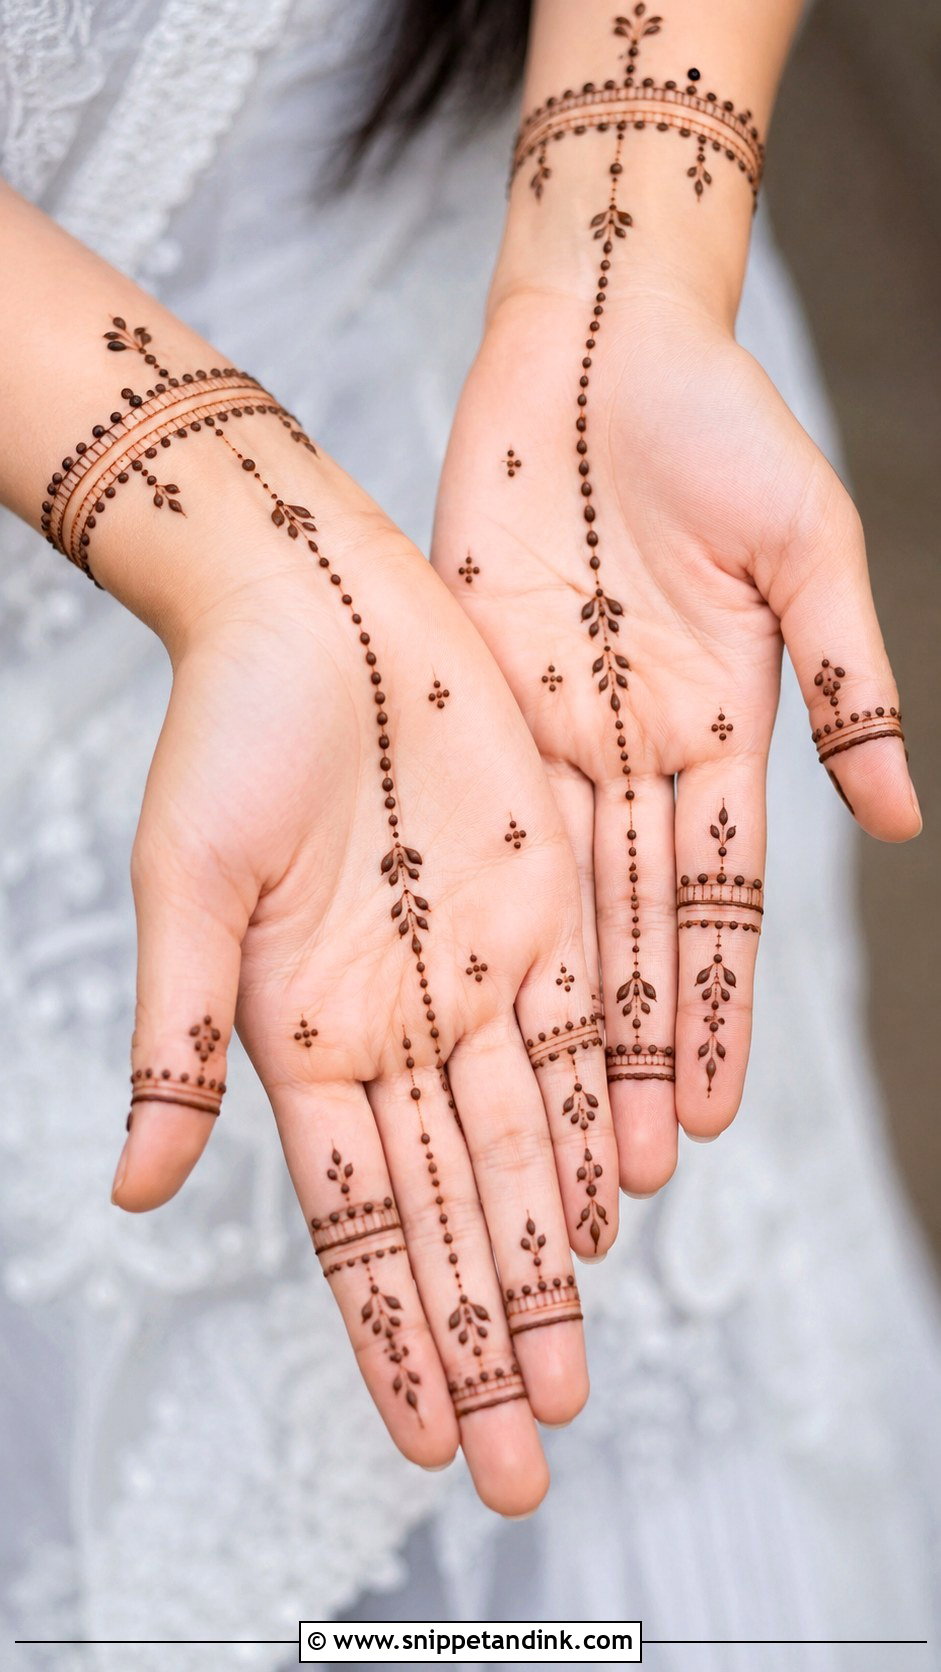
Dots carry more of a design than people expect. Dotted borders, dot chains and tiny clusters around simple bands make a complete look, with the palm or back hand left empty or given a short dot trail near the base of the fingers. Dots need no shading and no curves, so kids and teens manage them easily. What makes them look neat is spacing. I grade them, larger at the base and smaller toward the tip, which quietly lengthens the finger.
9. Finger Mehndi Design With Leaves
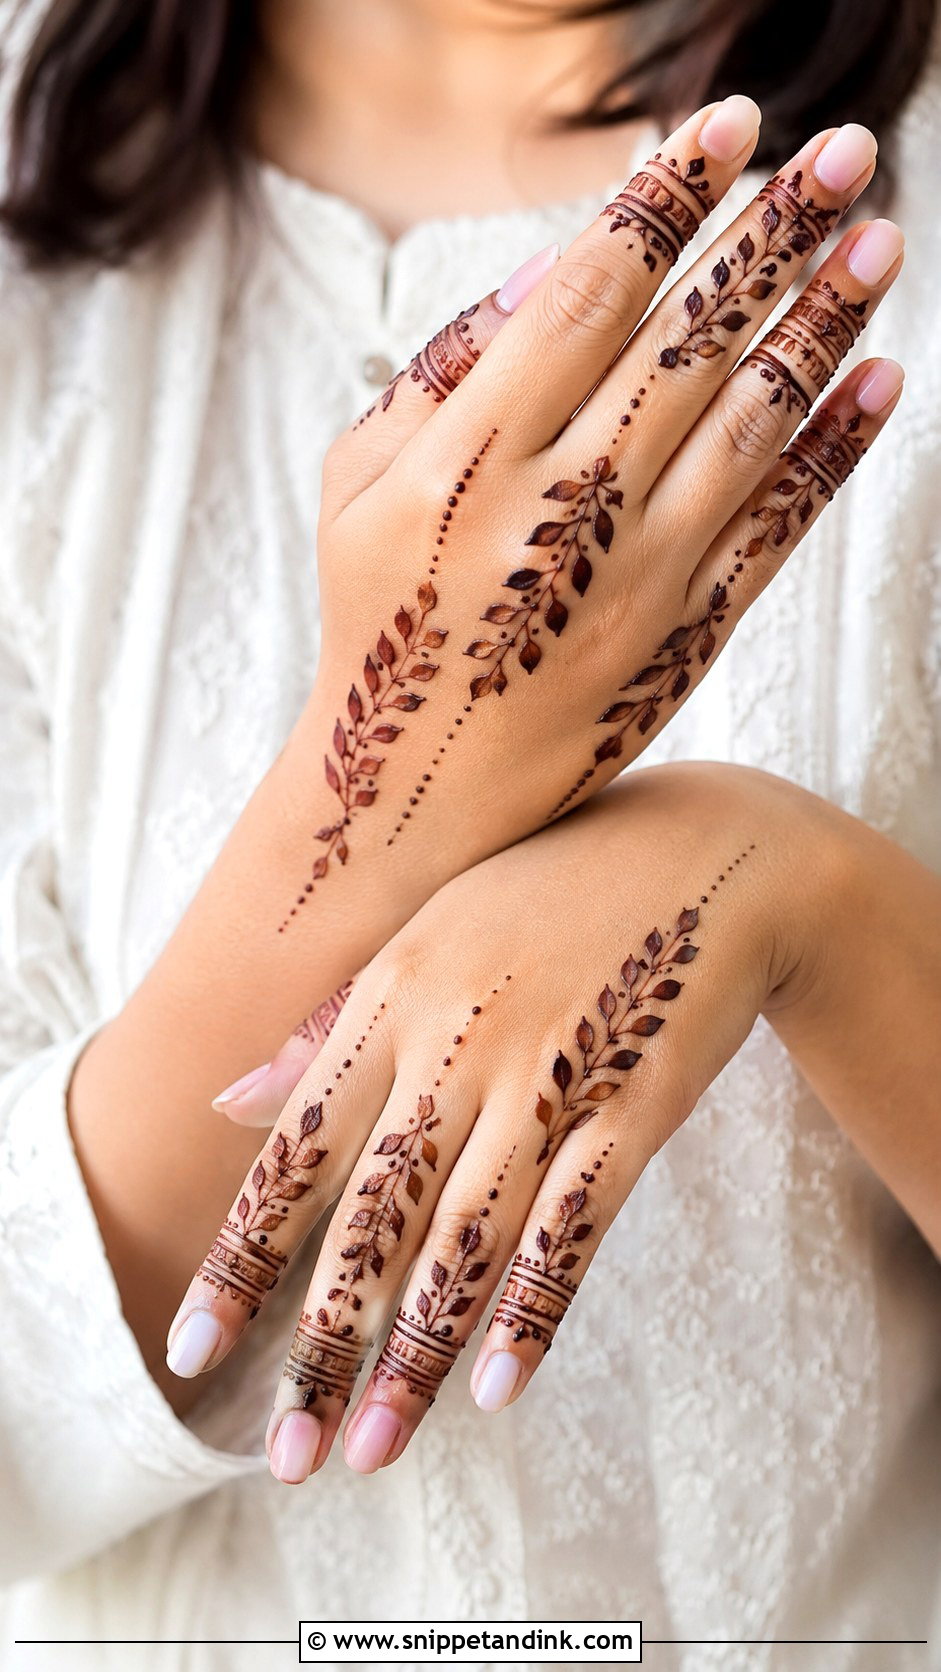
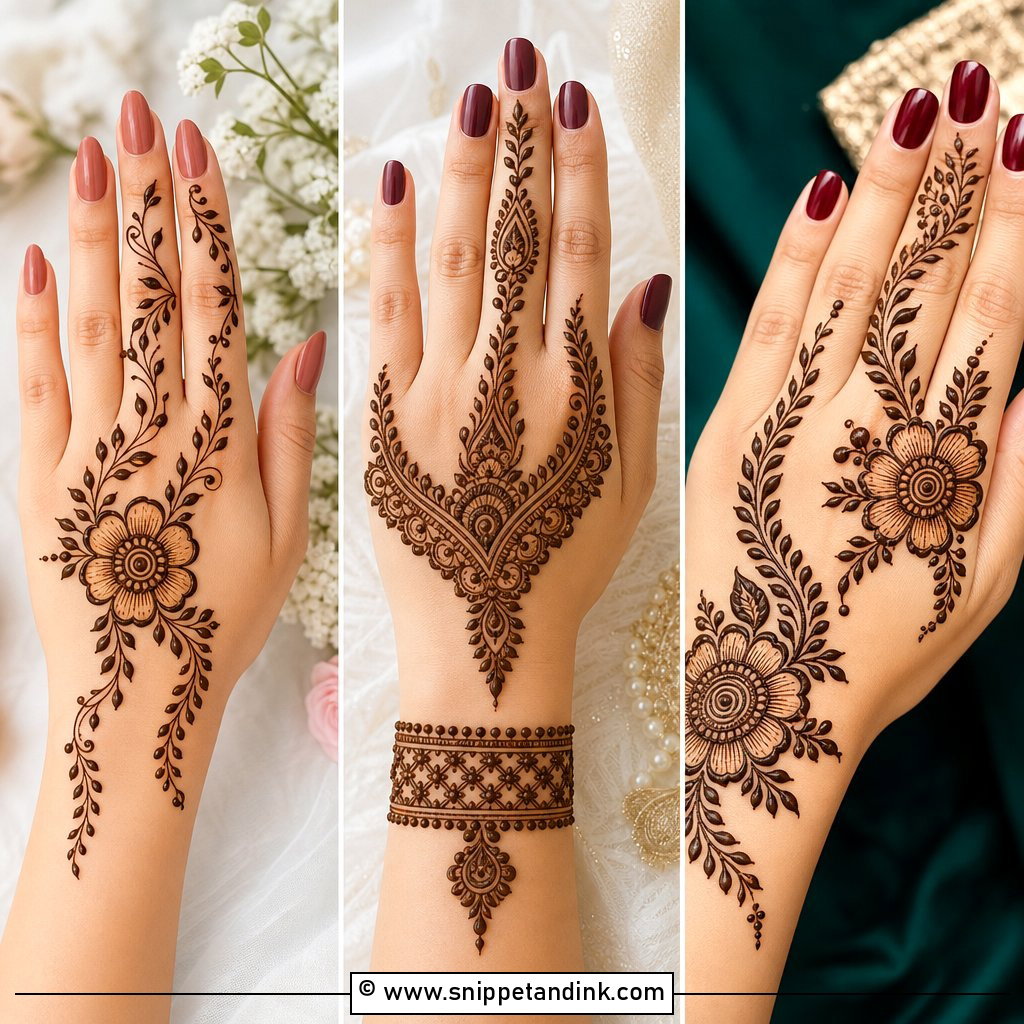
A slim vine along one side of each finger, with small leaves alternating left and right, is about as natural as finger mehndi gets. Leaves fill space without adding weight, and in a vertical line they make fingers look longer. I keep them small on short fingers and let them stretch a little on slim ones. Thin ring bands or dotted borders can frame it if it needs more. It sits equally well on the palm side or the back of the hand.
10. Finger Mehndi Design With Flowers
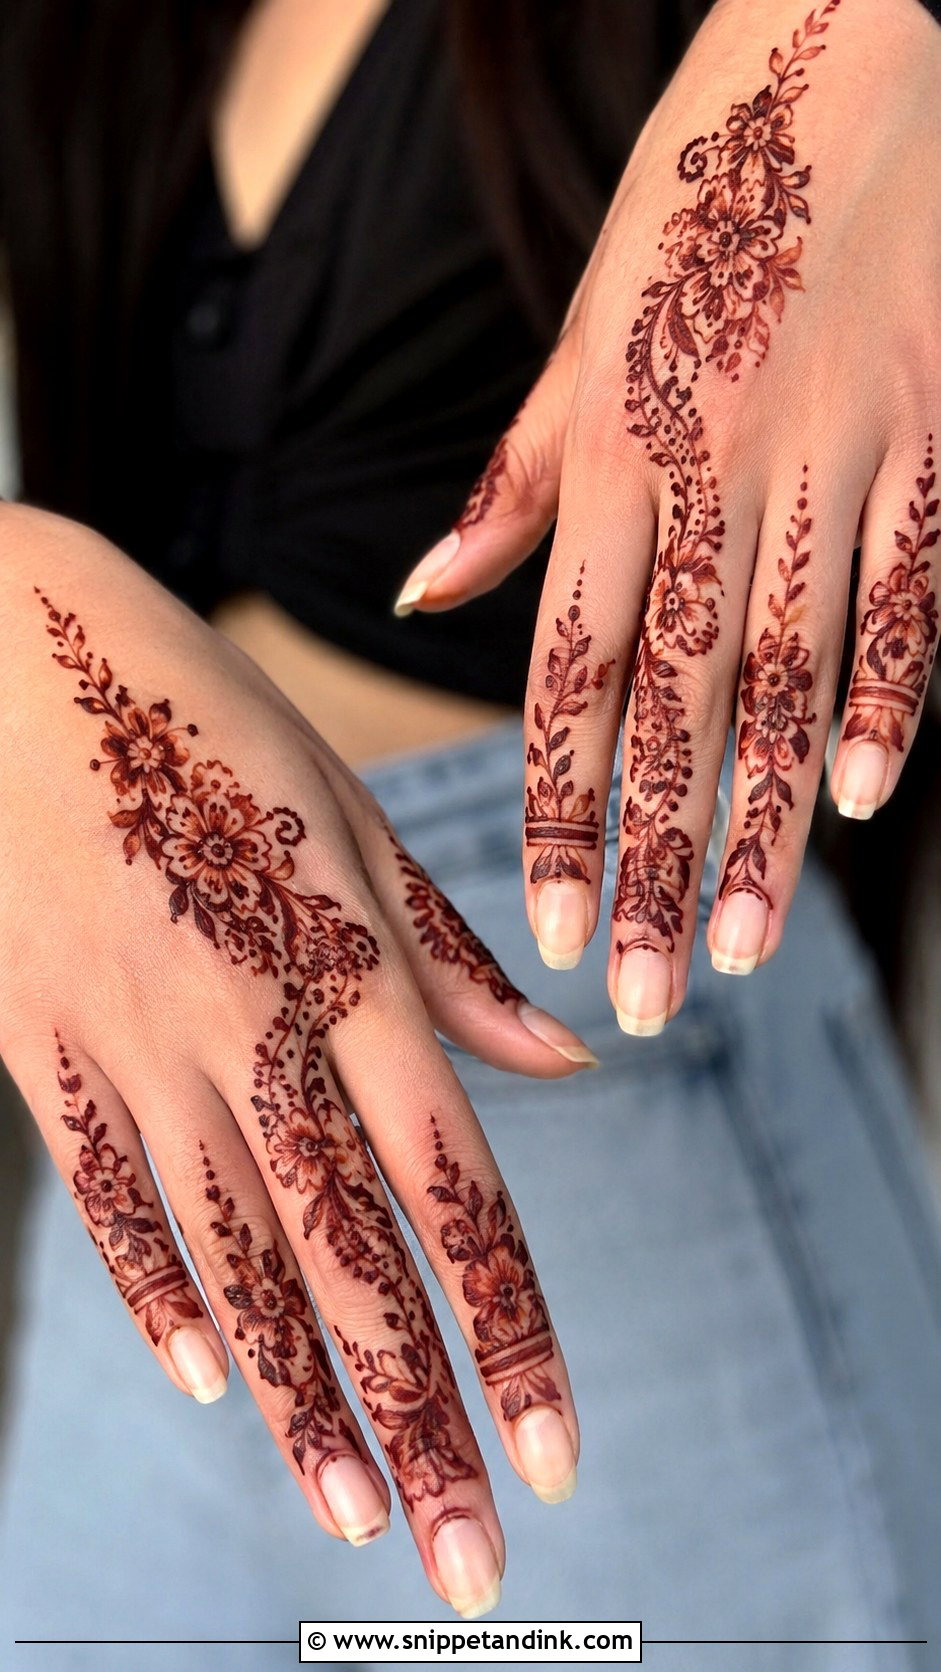
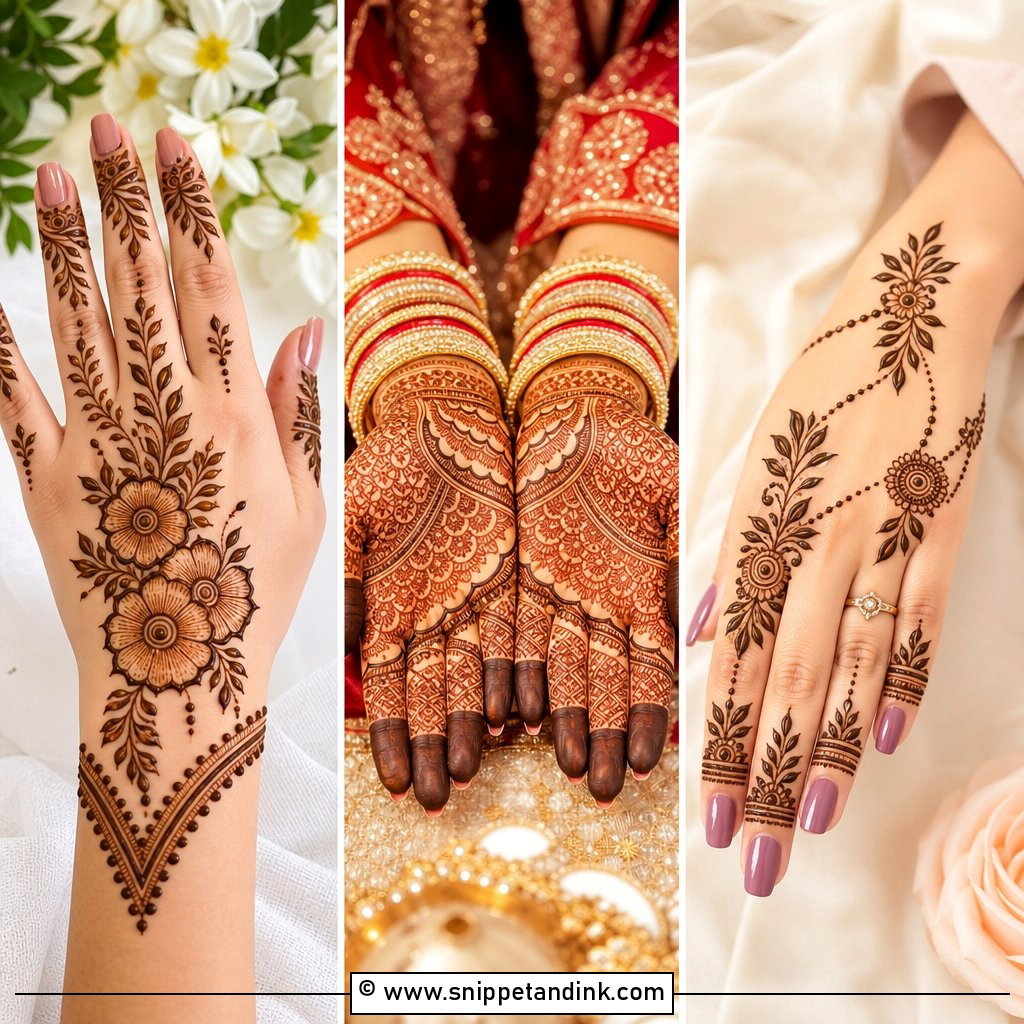
Tiny flowers near the tips, knuckles or base of the fingers, joined by small leaves, dots and curves, soften the hand without adding difficulty. Spread them lightly over every finger or make one finger the floral focus. The mistake I see most is petals drawn too close together; at finger scale they merge, and the stain shows a blob instead of a flower. Keep each petal open with a clear gap at the centre. A few empty spaces between blooms keep the result modern rather than busy, which suits bridesmaids.
11. Finger Mehndi Design With Mandala
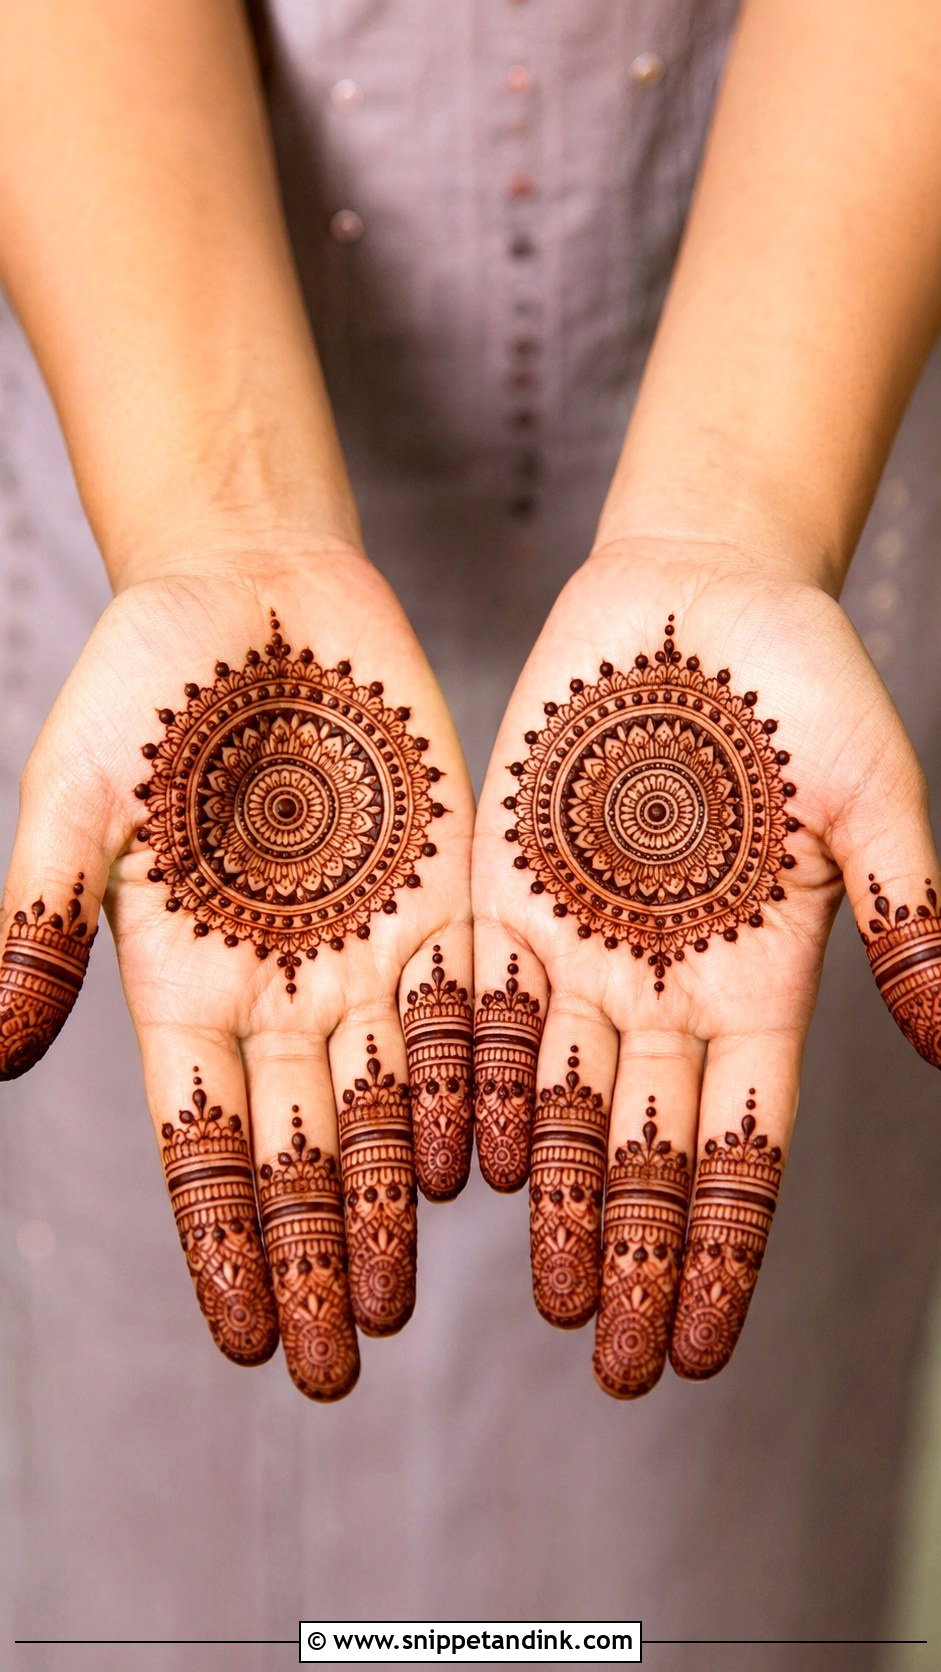
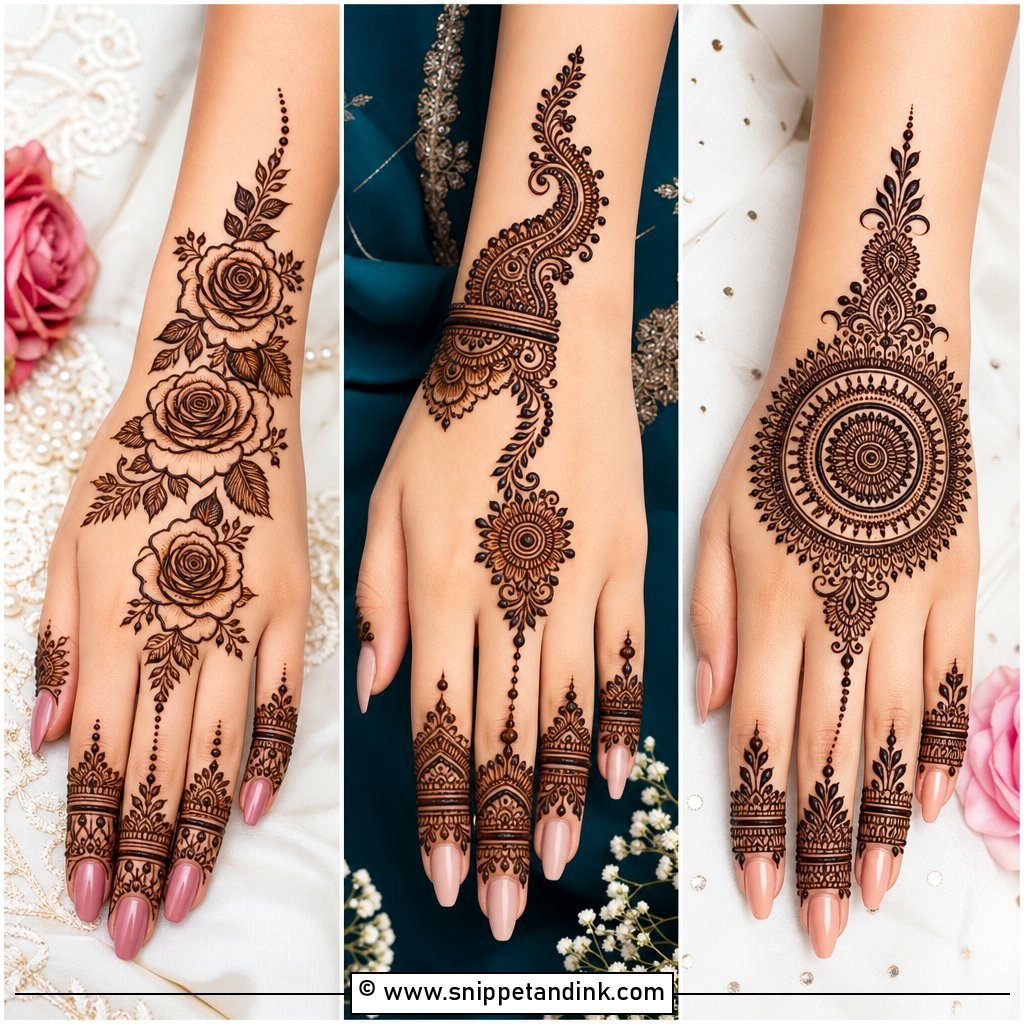
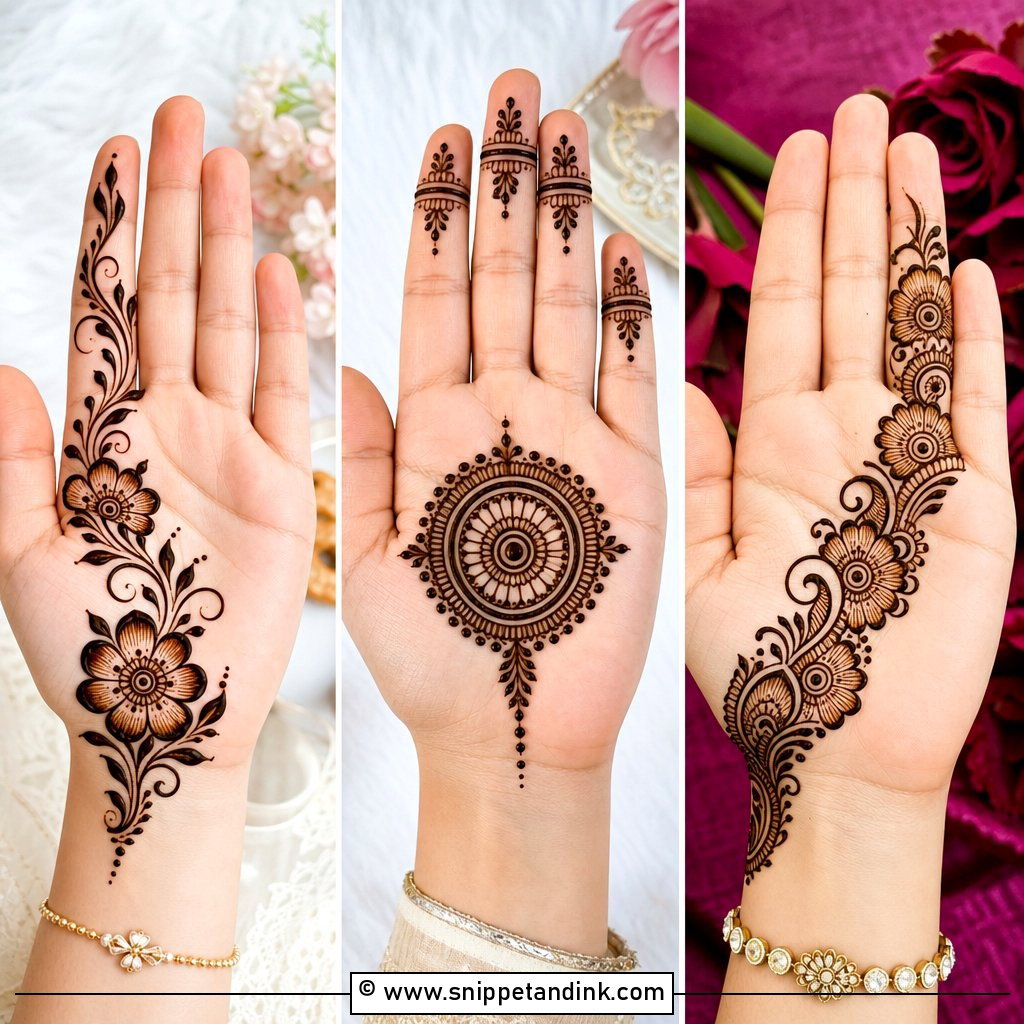
A small mandala at the base of the middle finger or on the upper palm, with bands extending up each finger, gives balance without full coverage. Keep the mandala tiny: a dot, a ring, a row of petal outlines. I centre it under the middle finger rather than in the middle of the palm, because that’s where the eye lands as it travels down from the fingers. Matching lines and leaves on the fingers complete it. People who like traditional mehndi but not a full hand tend to settle here.
12. Finger Mehndi Design With Jaali
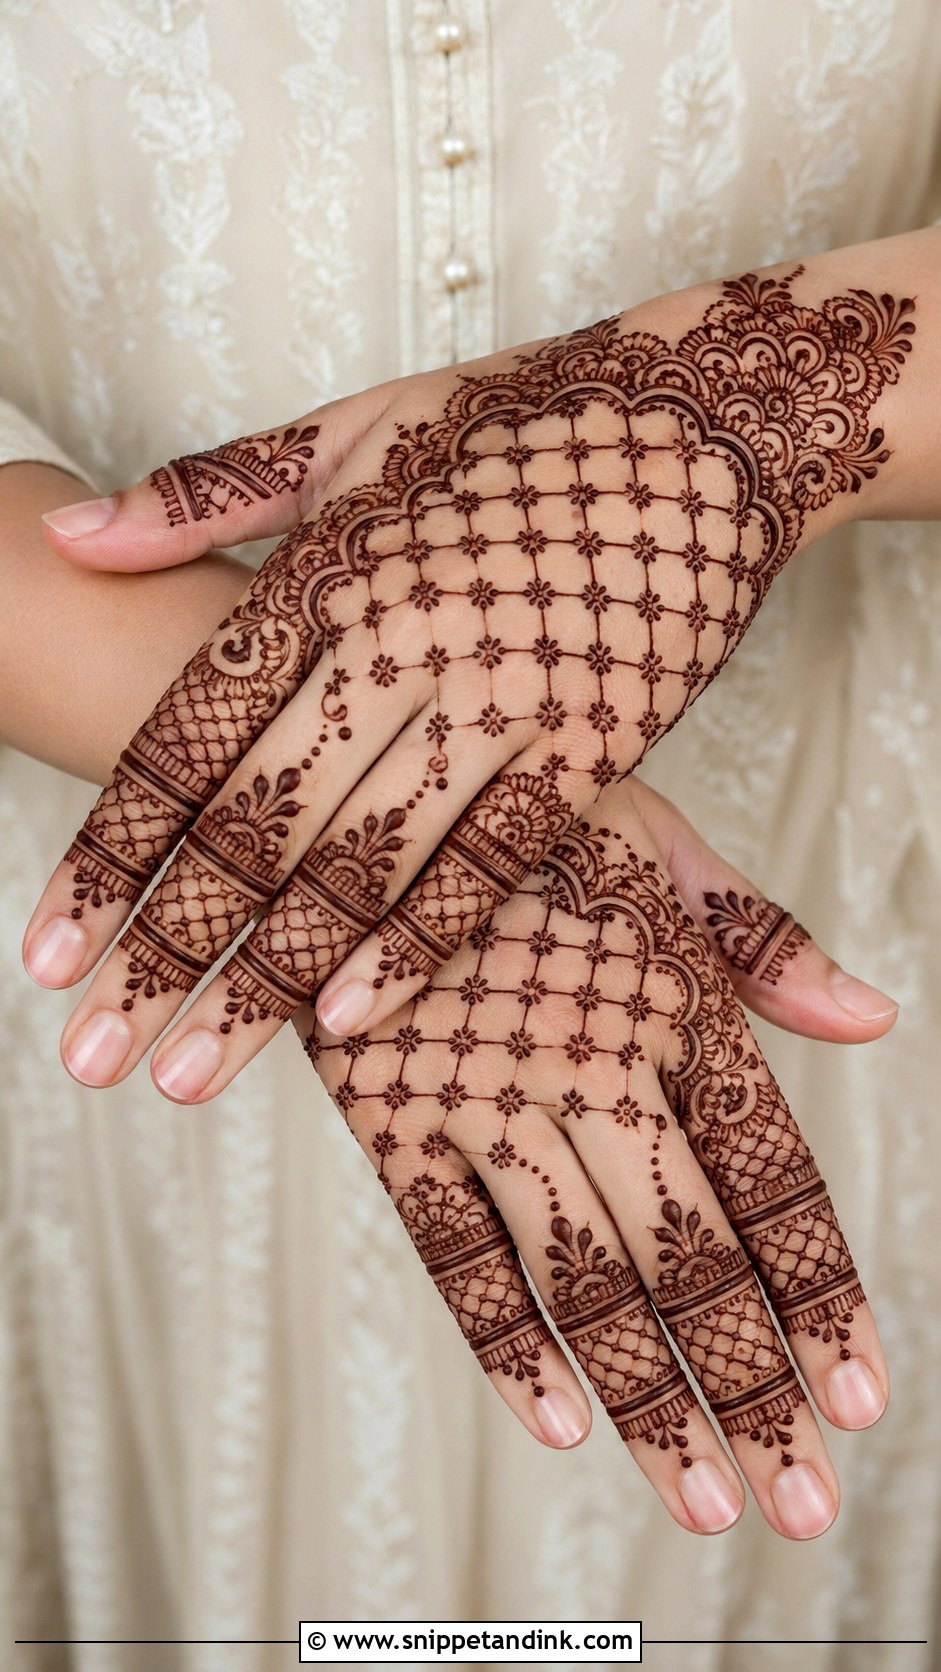
Jaali on fingers means a small mesh section on one or two fingers, balanced by plain bands and dots on the rest. It’s most effective on the back of the hand, where it gives a light glove effect. Even squares or diamonds are essential, because uneven mesh at this scale looks messy fast. I draw every line in one direction across the finger first, then cross them all, rather than drawing each square separately. Tiny flowers at the corners of the mesh finish it, and it’s a step dressier than plain bands for engagements and weddings.
13. Finger Mehndi Design With Lines
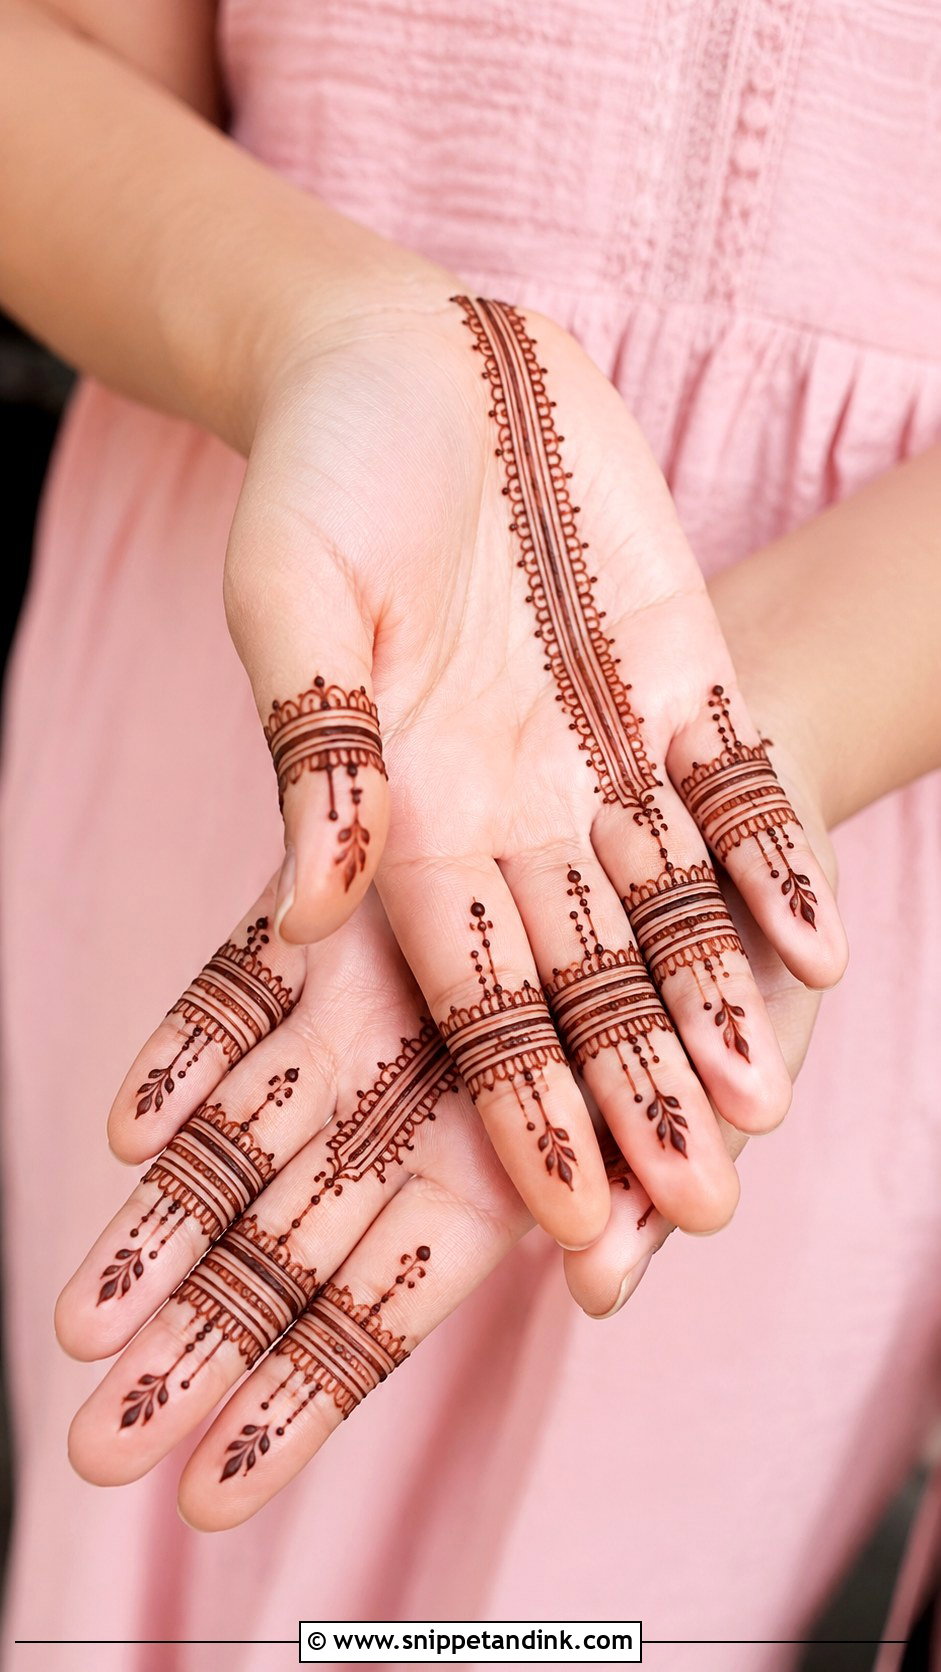
Lines are the fastest route to a finished finger. Horizontal bands around each finger, a few vertical lines between them for contrast, maybe a couple of dots or leaves if it feels plain. It’s my last-minute option, and it suits modern outfits because the result is sharp. The real skill is steady cone pressure: squeeze harder at the start of each stroke and every line ends up thicker at one end, which shows clearly on a design this simple.
14. Finger Mehndi Design With Vines
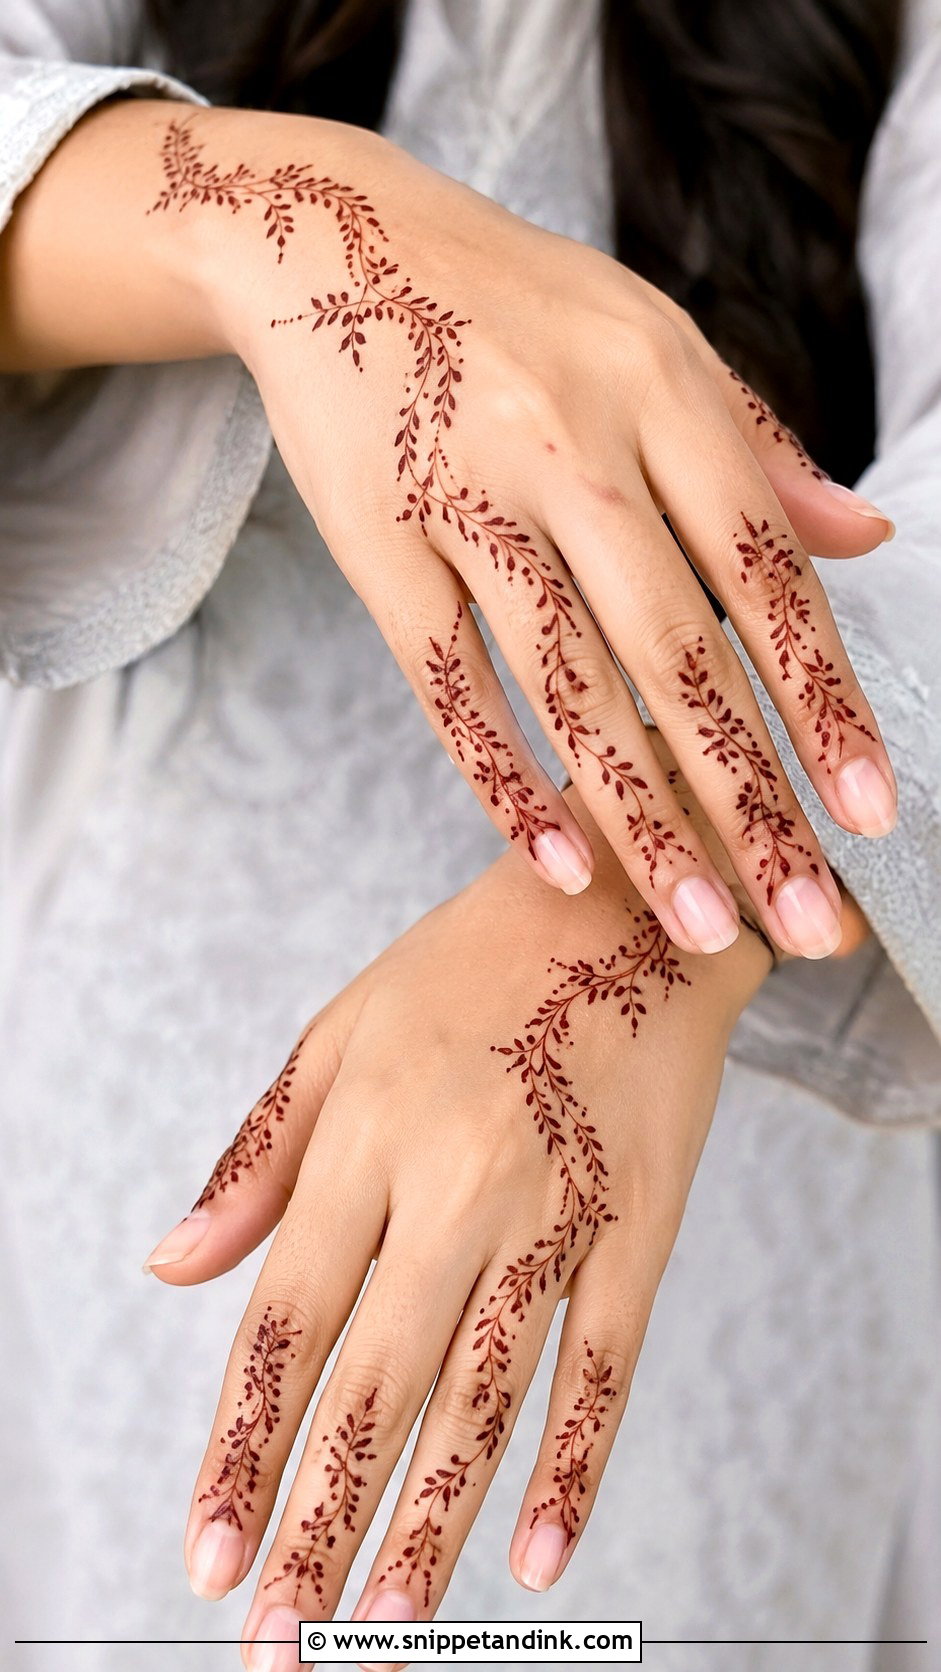
A thin vine curving from fingertip to base, with tiny leaves and dots along the stem, moves with the shape of the finger. Repeat it on each finger or make one heavier as the focus. Soft curves don’t need to be symmetrical, which is a relief for beginners. I leave open skin on either side of the vine so it reads clearly once stained. Lovely for daytime celebrations where you want something light.
15. Finger Mehndi Design With Paisley
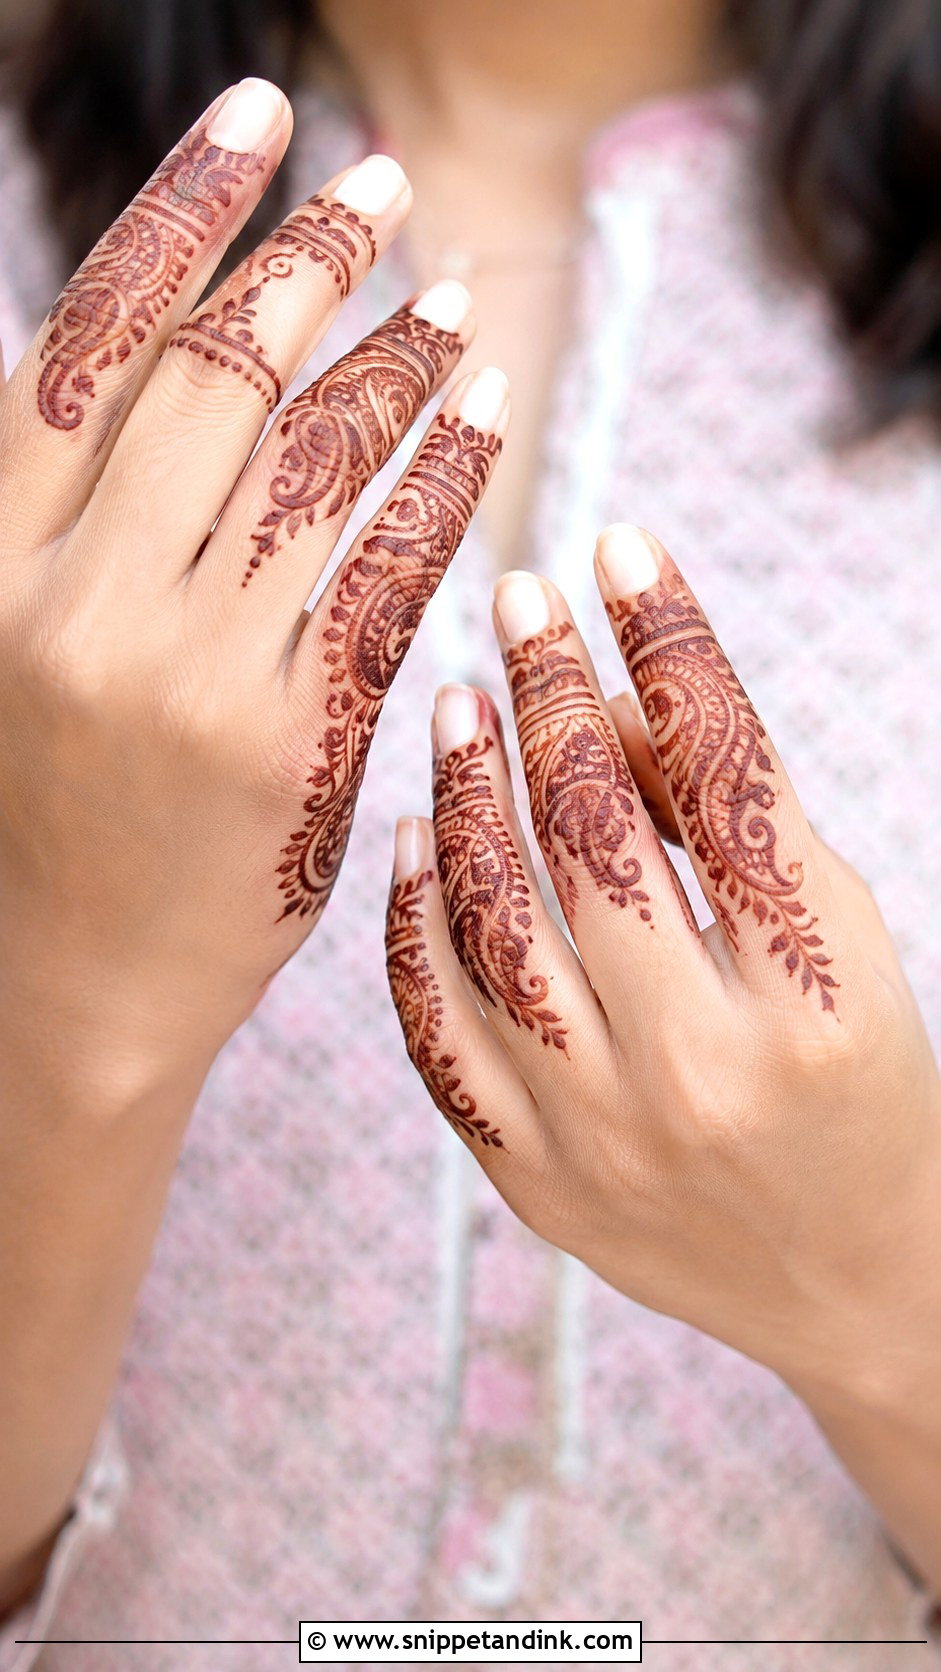
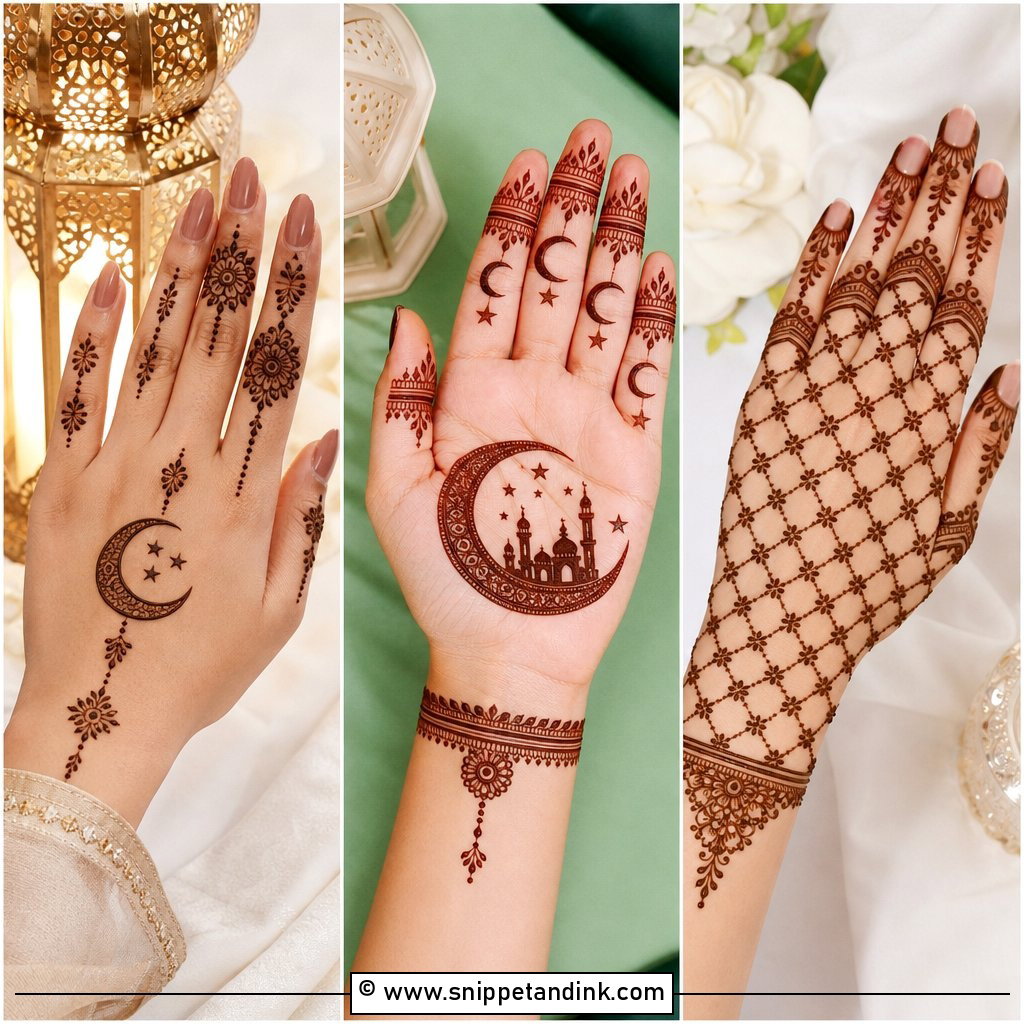
Paisley gives finger mehndi an Indian feel in a small space. Set a little paisley near the base or along the side of a finger, outline it, and add tiny leaves and dots; one on the index finger with lighter bands on the others is enough. Size is the whole challenge. Fingers are narrow, and a paisley wider than the finger wraps around the side and distorts when you bend. I keep each one no wider than the flat top of the finger.
16. Finger Mehndi Design With Checks
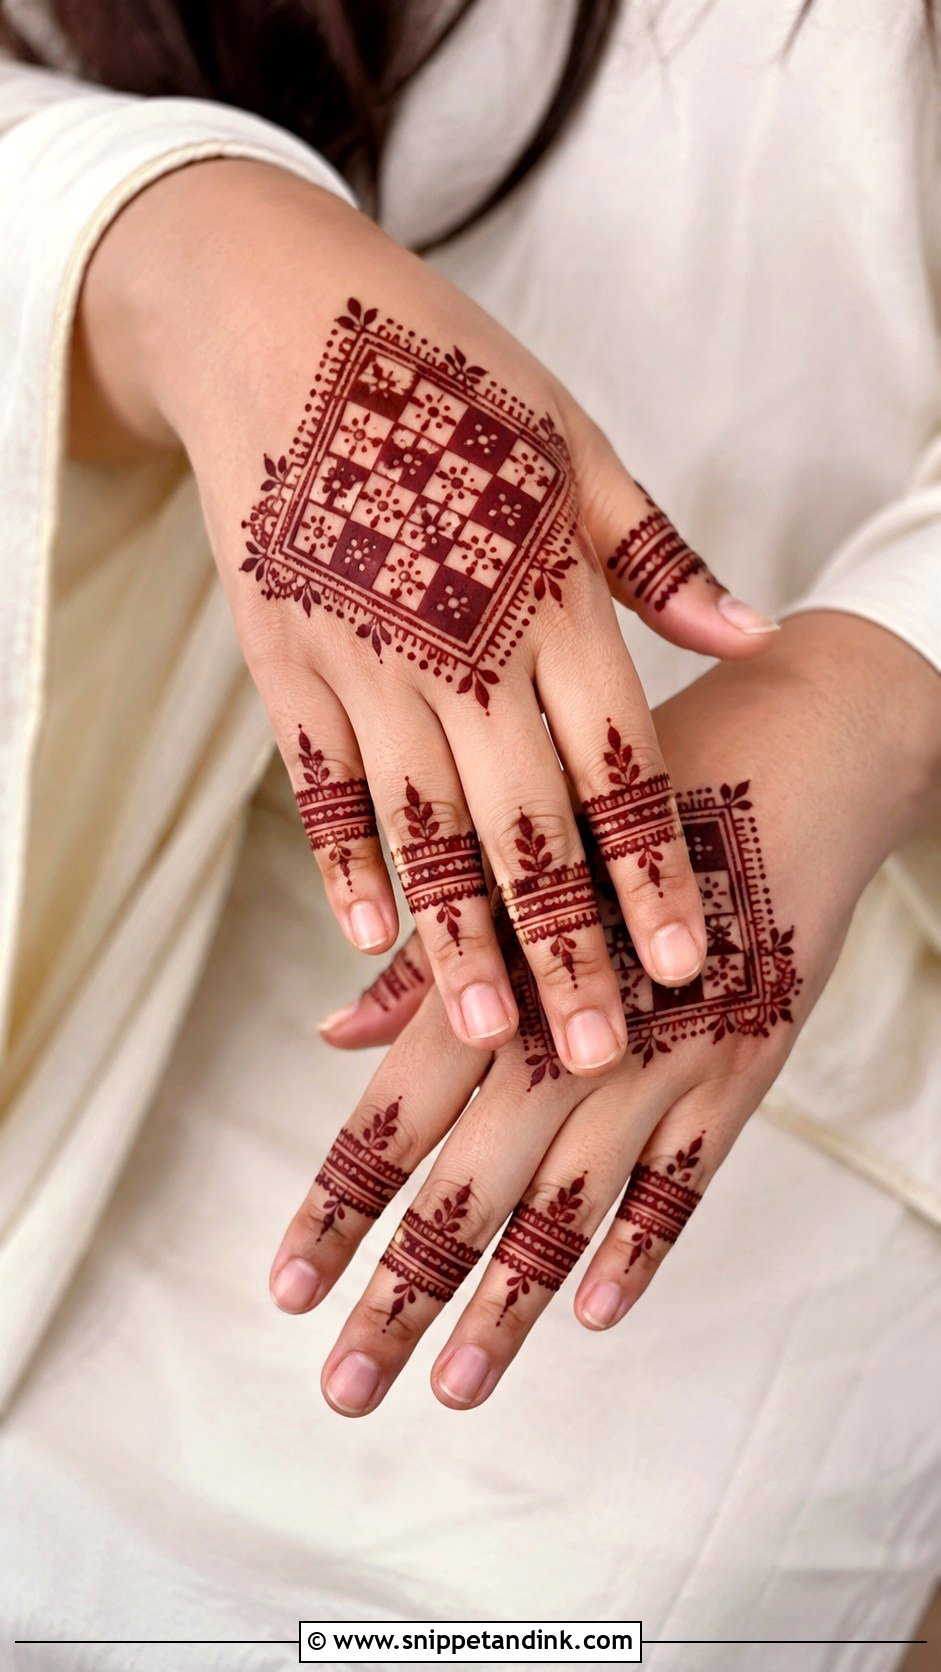
Checks look smart and structured: small squares or diamonds on selected finger sections, dots inside or around them, and plain bands on the remaining fingers so the hand doesn’t get heavy. Back hand placement suits them best. Draw two guide lines first and cross them carefully; that’s the method that keeps the squares even. It goes well with parties and modern ethnic outfits.
17. Finger Mehndi Design With Fingertips
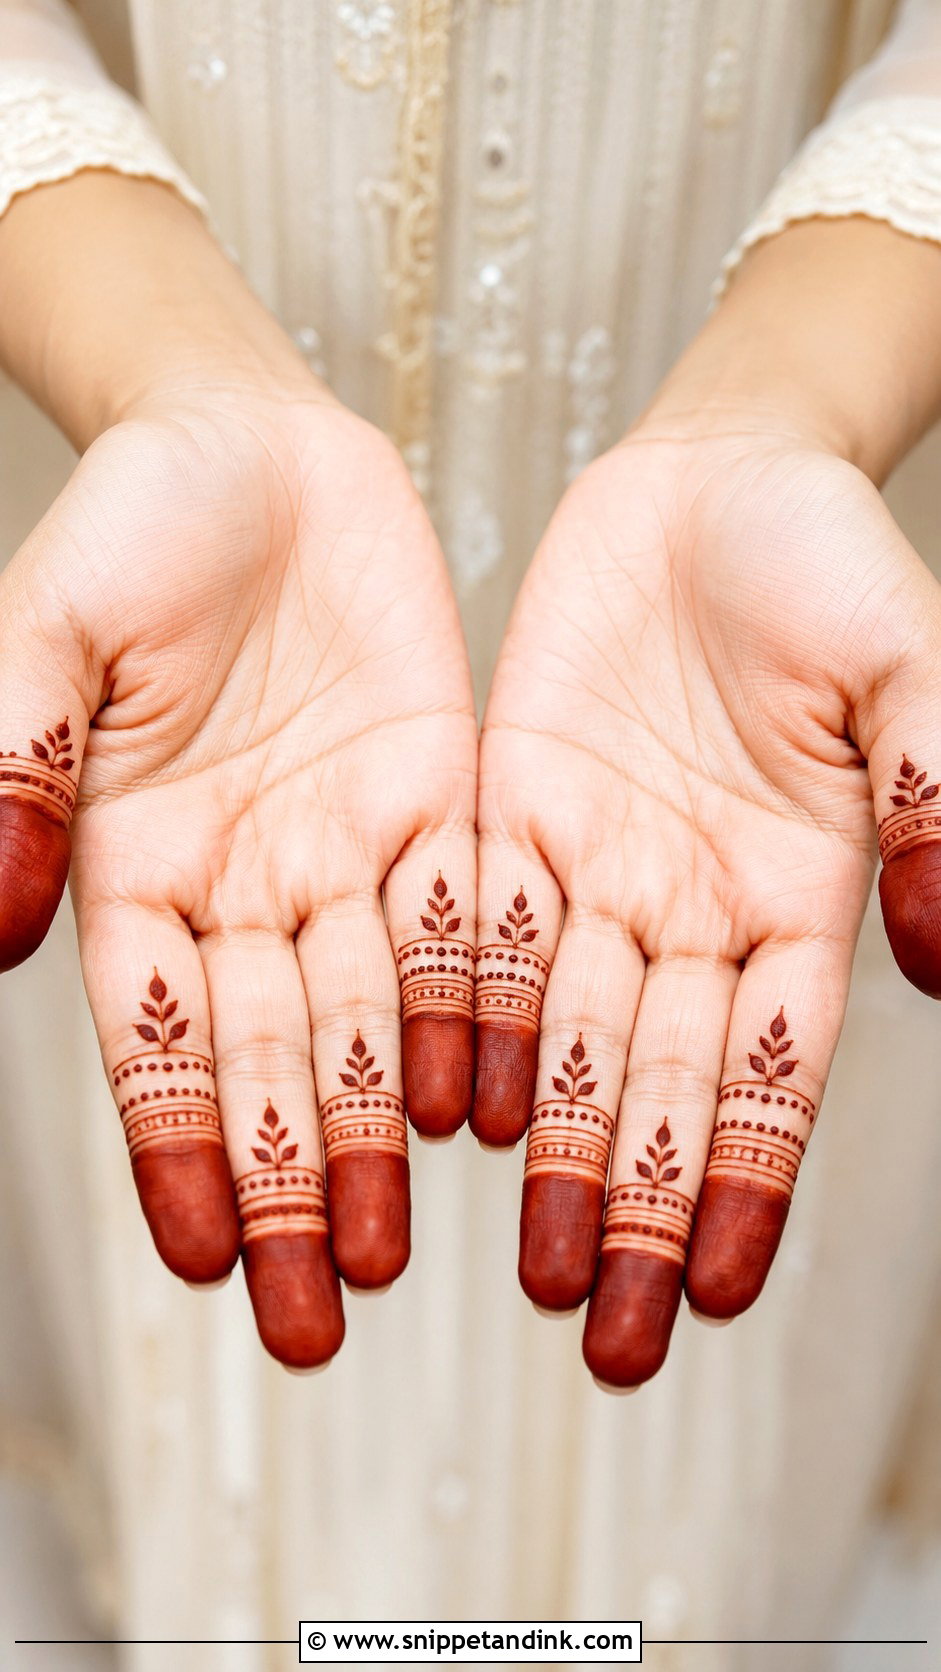
Filled fingertips are one of the oldest finger designs and still one of the most practical. The tips are solid henna and the lower finger gets thin bands, dots or leaf lines, a contrast that gives a strong stain without covering much skin. Fingertips naturally stain darkest, so even a beginner gets rich colour here. Shape the filled edge as a smooth curve just below the nail line; a jagged edge is the giveaway of a rushed job. Filling only the middle and ring fingertips gives a softer version.
18. Finger Mehndi Design For Short Fingers
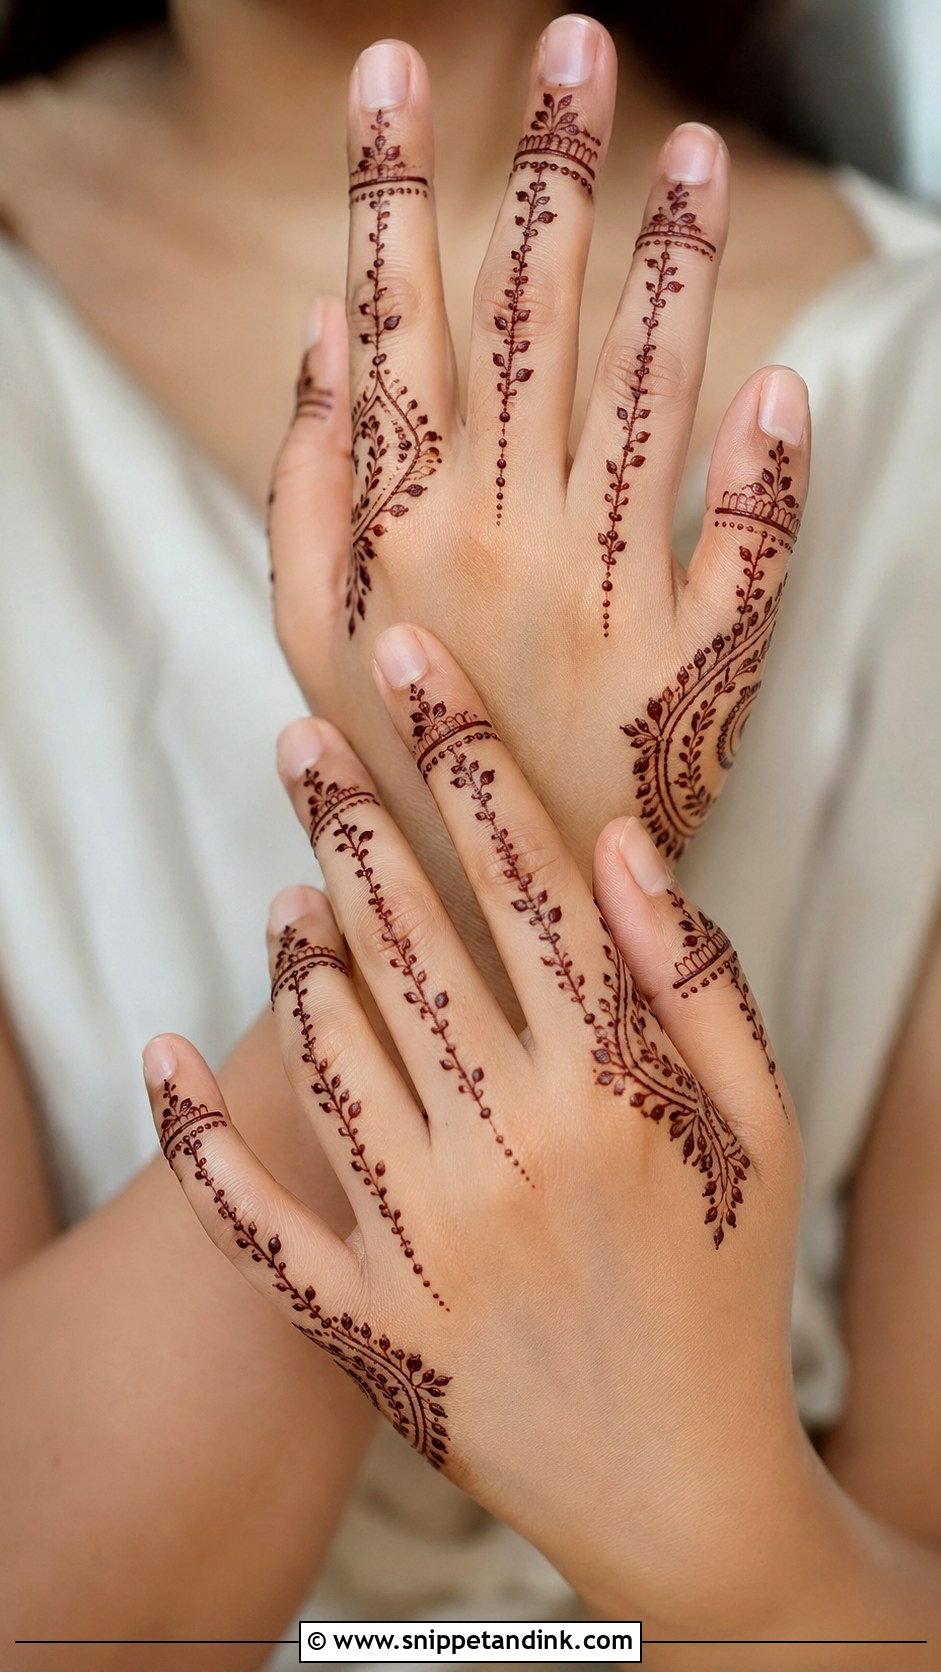
Short fingers look longest with vertical, open finger mehndi patterns: thin vines, slim bands and small dots running from tip to base. Thick horizontal blocks at every joint cut the finger into segments and shorten it visually, so I avoid them on short fingers. One side vine with tiny leaves does the lengthening for you. Leave the fingertips lightly filled or open, and keep the whole thing airy.
19. Finger Mehndi Design For Long Fingers
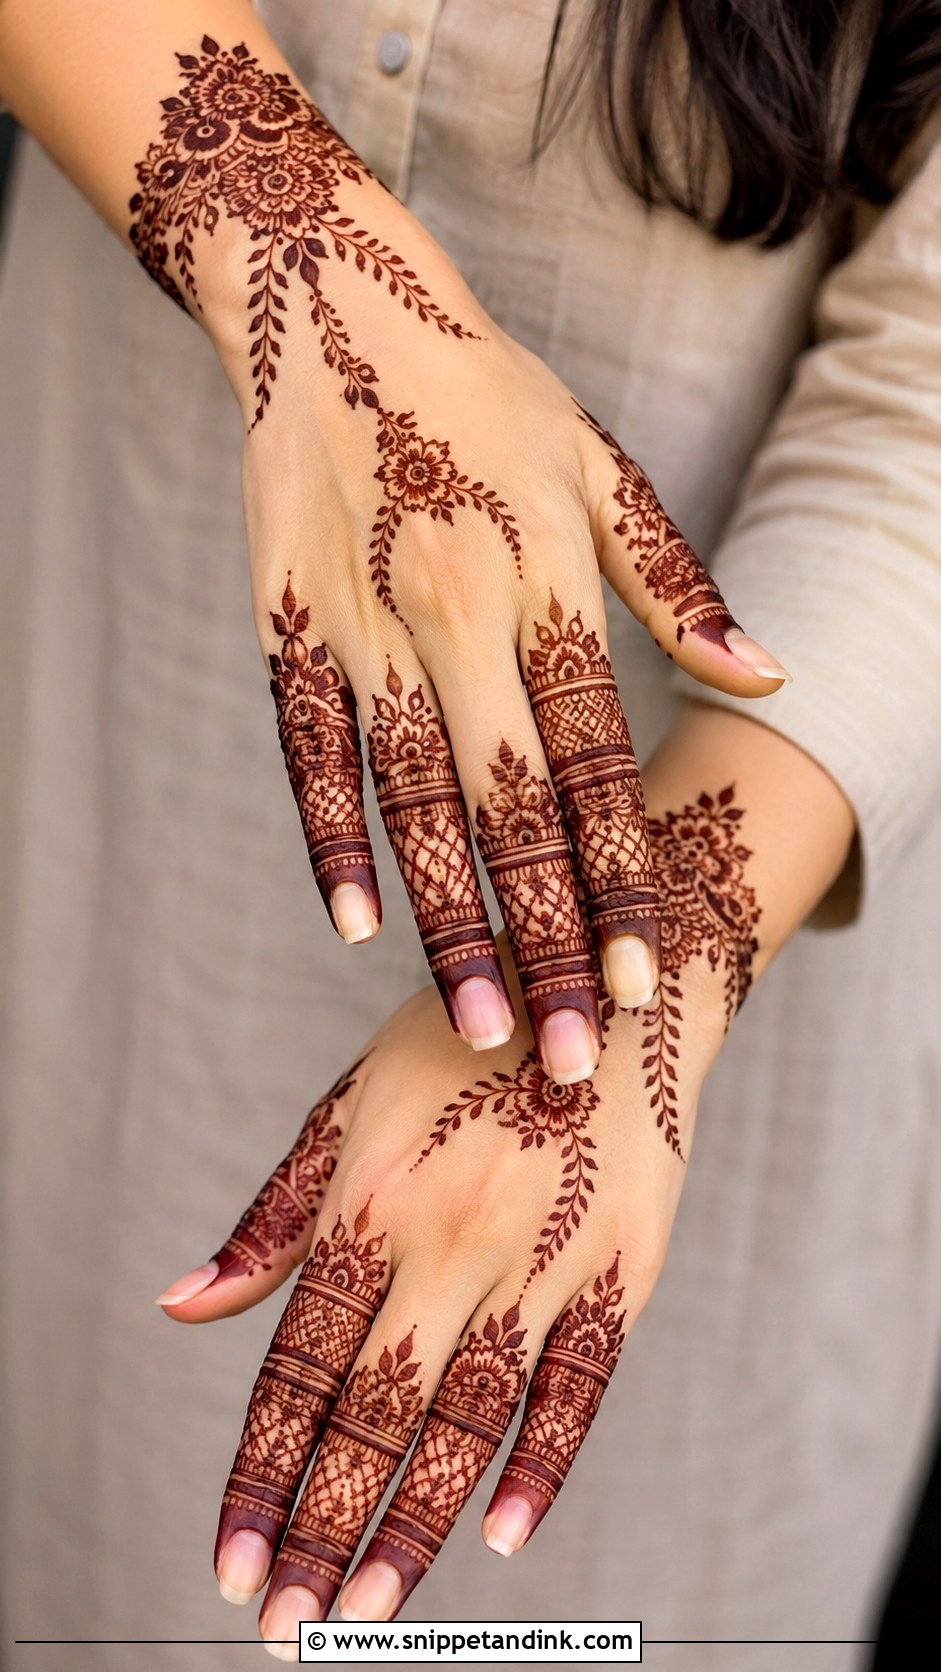
Long fingers can carry bolder work: stacked bands, floral tips, leaf trails and small jaali sections, with a different pattern on each finger and no risk of crowding. Keep the palm or back hand light so the length stays the focus. A bracelet connection also suits long fingers. I use medium-thick outlines here with fine detail inside, which balances the extra space, and it’s the finger shape that holds up best in close-up wedding photos.
20. Finger Mehndi Design For Kids
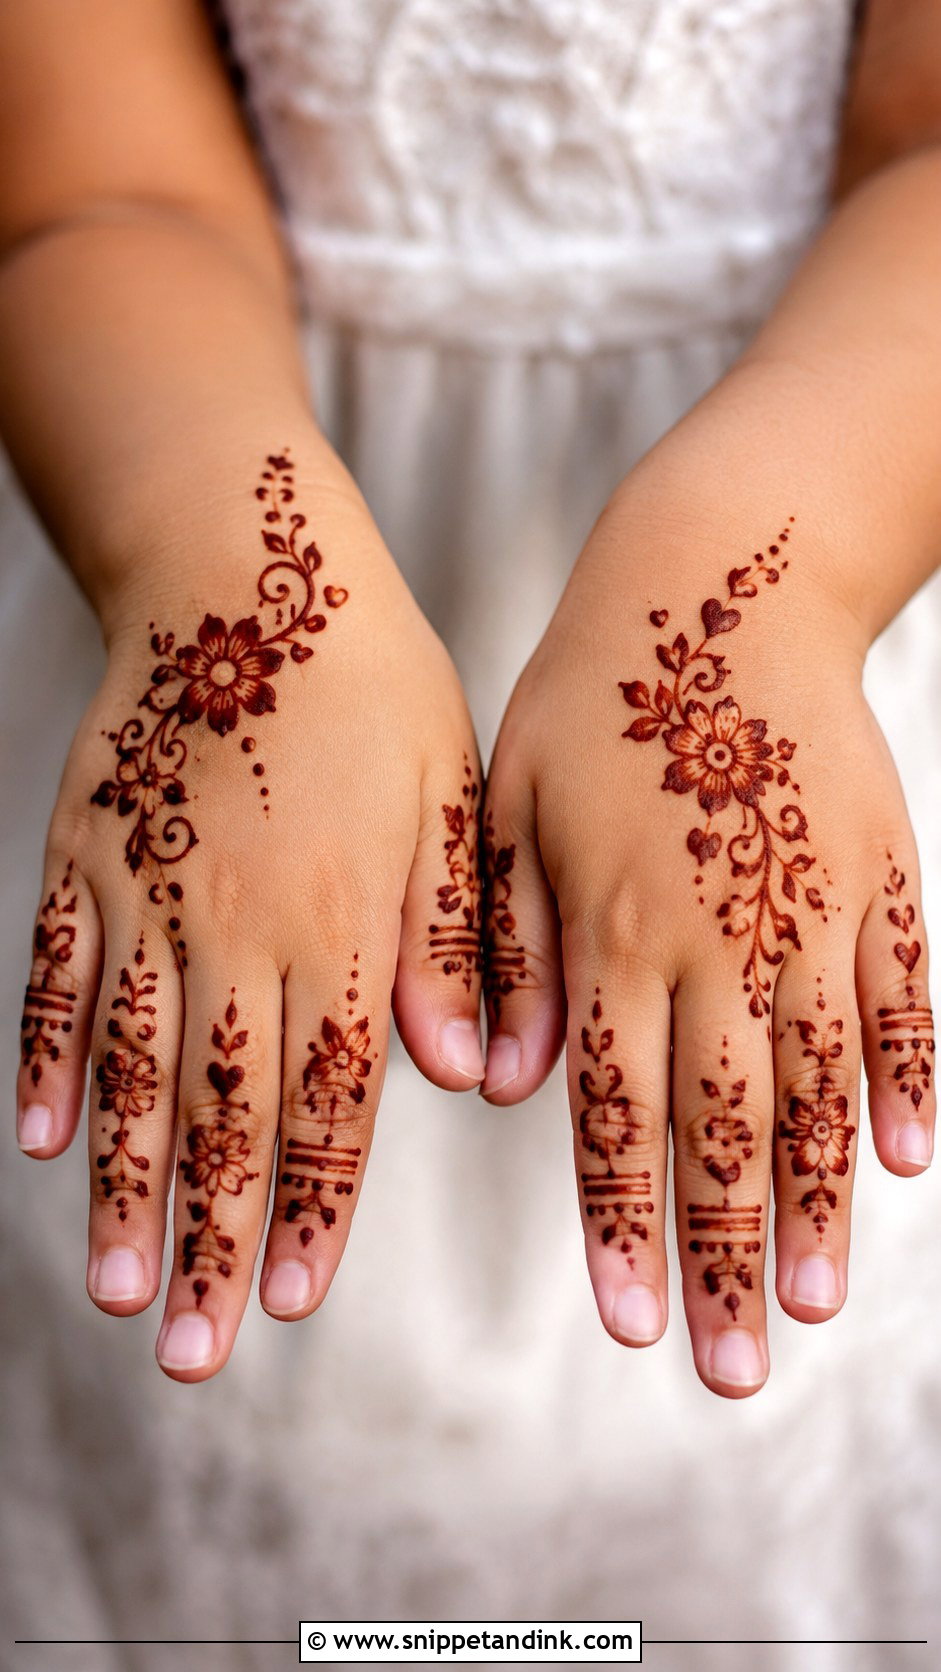
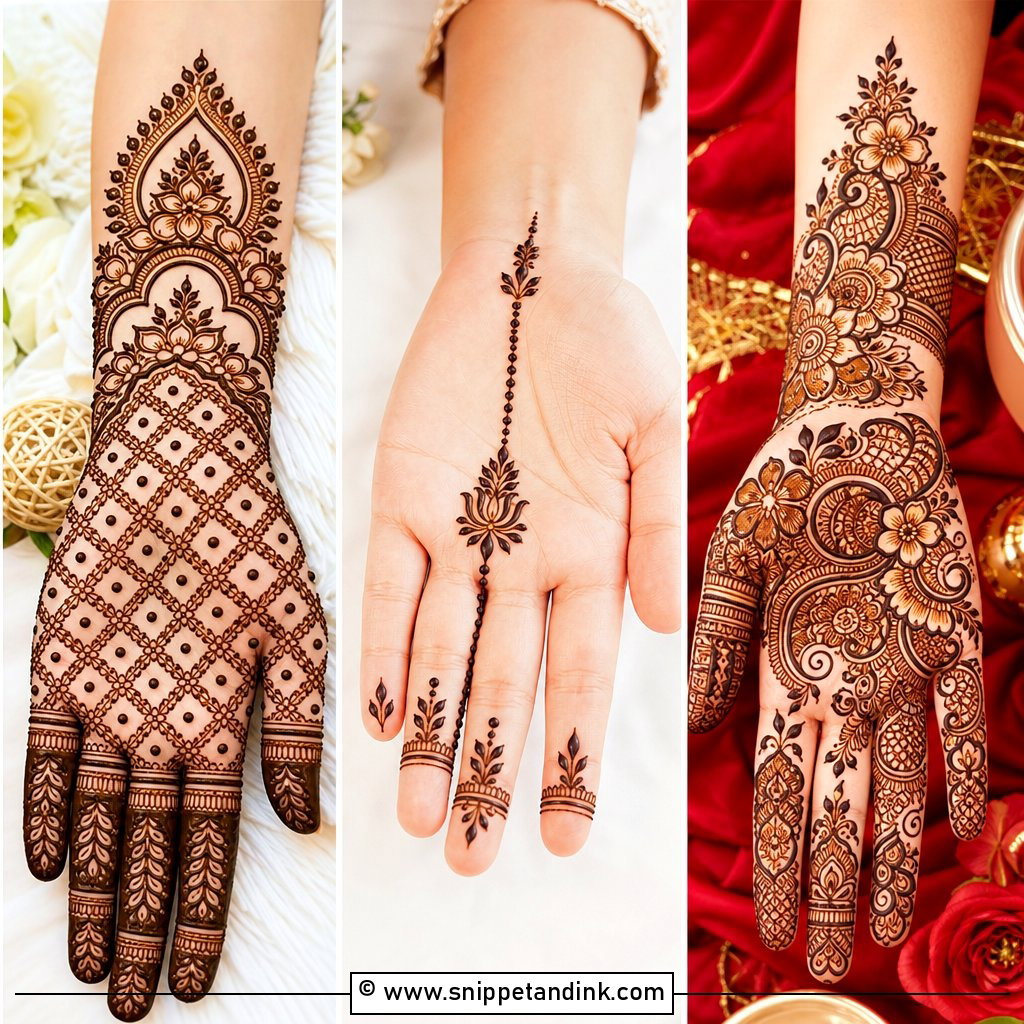
For kids, keep it to the fingers: dots, tiny flowers, small hearts, leaf lines and thin bands. It dries fast, and a child can’t smudge what isn’t on the palm. One flower at the base of each finger with dots running up to the tip is plenty. Rounded motifs and open spacing suit small hands. I stick to natural paste with children and keep the session short, so it’s done before their patience runs out.
21. Finger Mehndi Design For Beginners
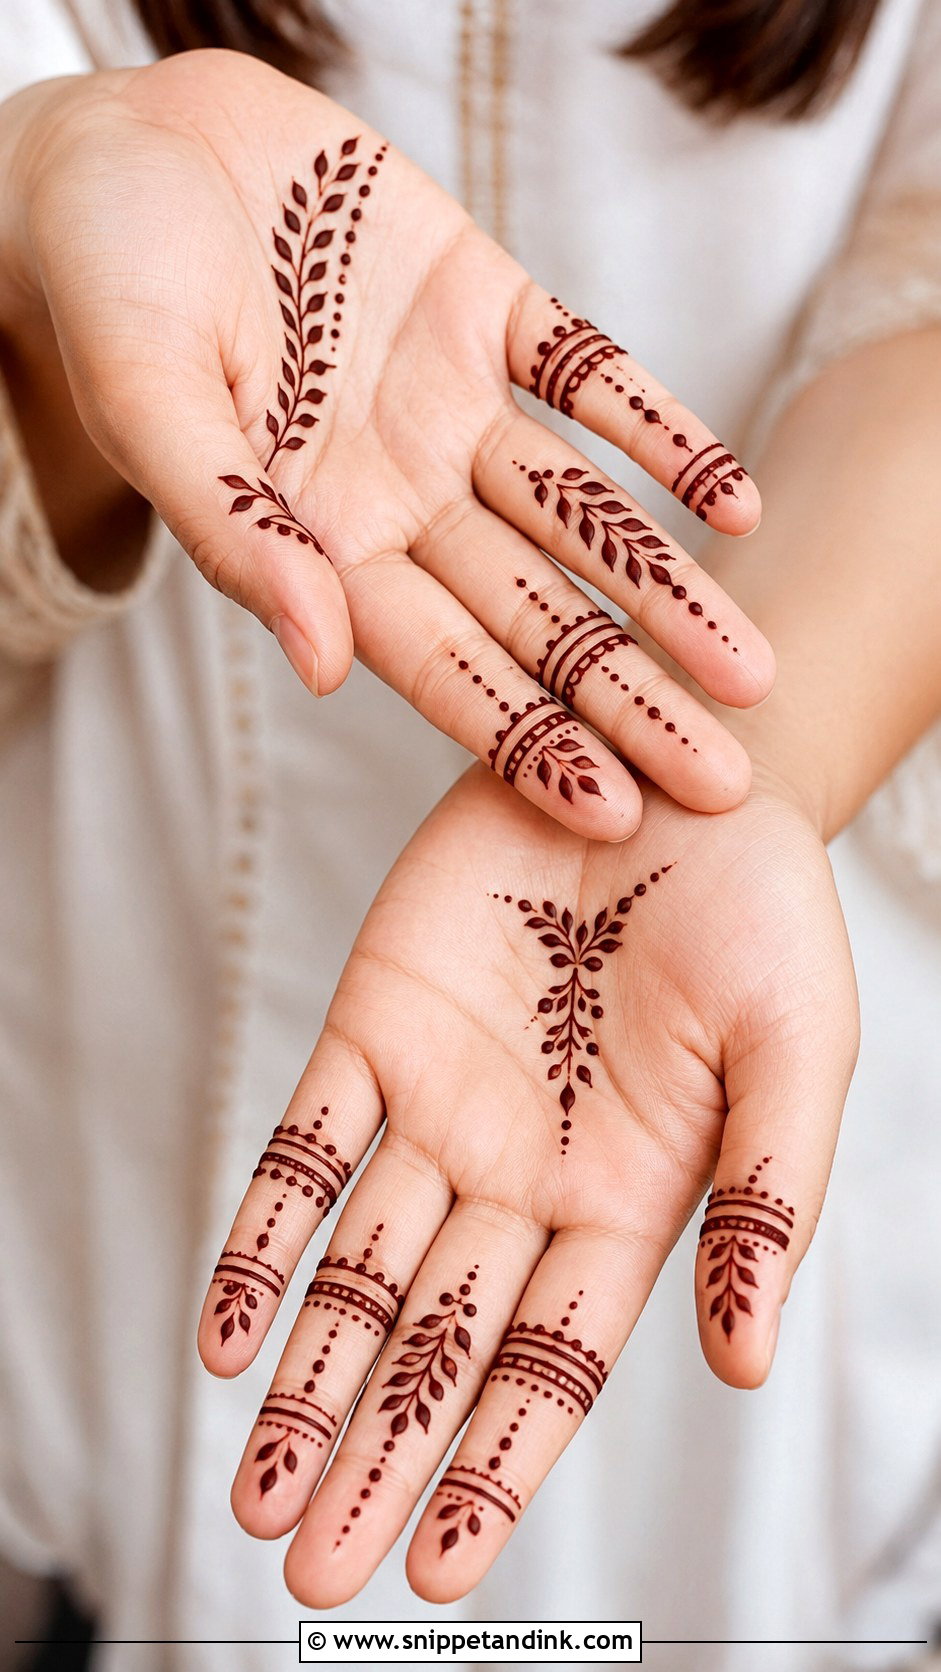
As a first design, try three thin bands on each finger with dots above and below them, and small leaves on the ring finger if you want one feature. It teaches lines, dots and small curves, the basics of cone control. Aim for symmetry but don’t fret if every finger differs a little; slight handmade variation is part of what henna is. It’s quick enough for casual wear or a rushed festive morning.
22. Finger Mehndi Design For Eid
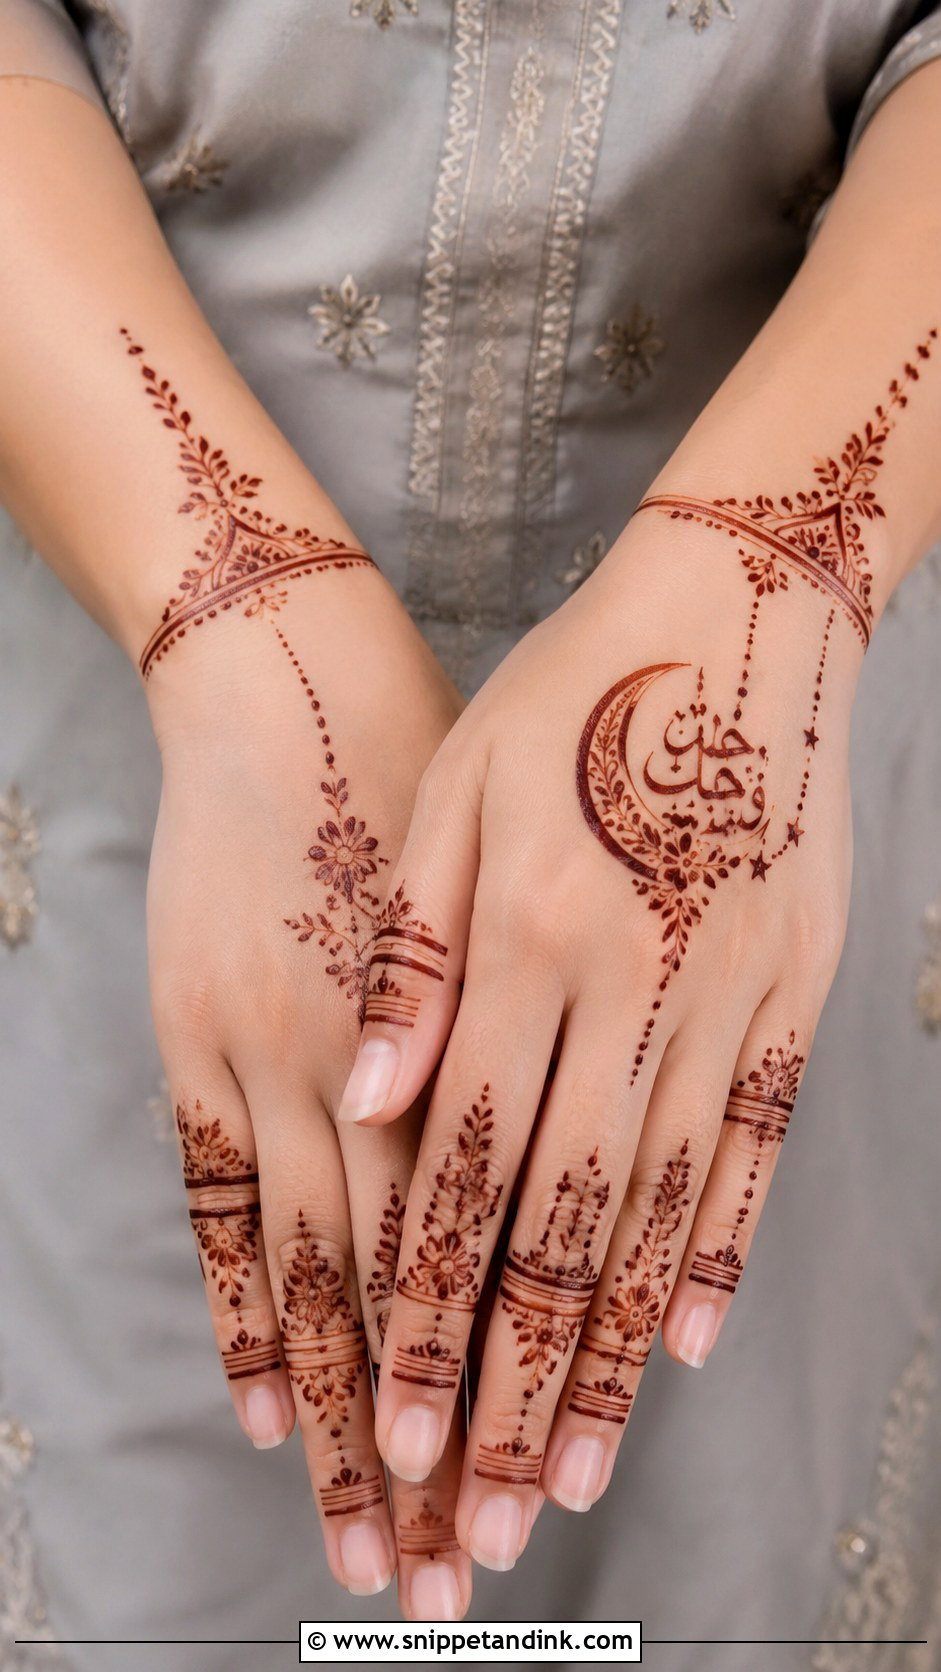
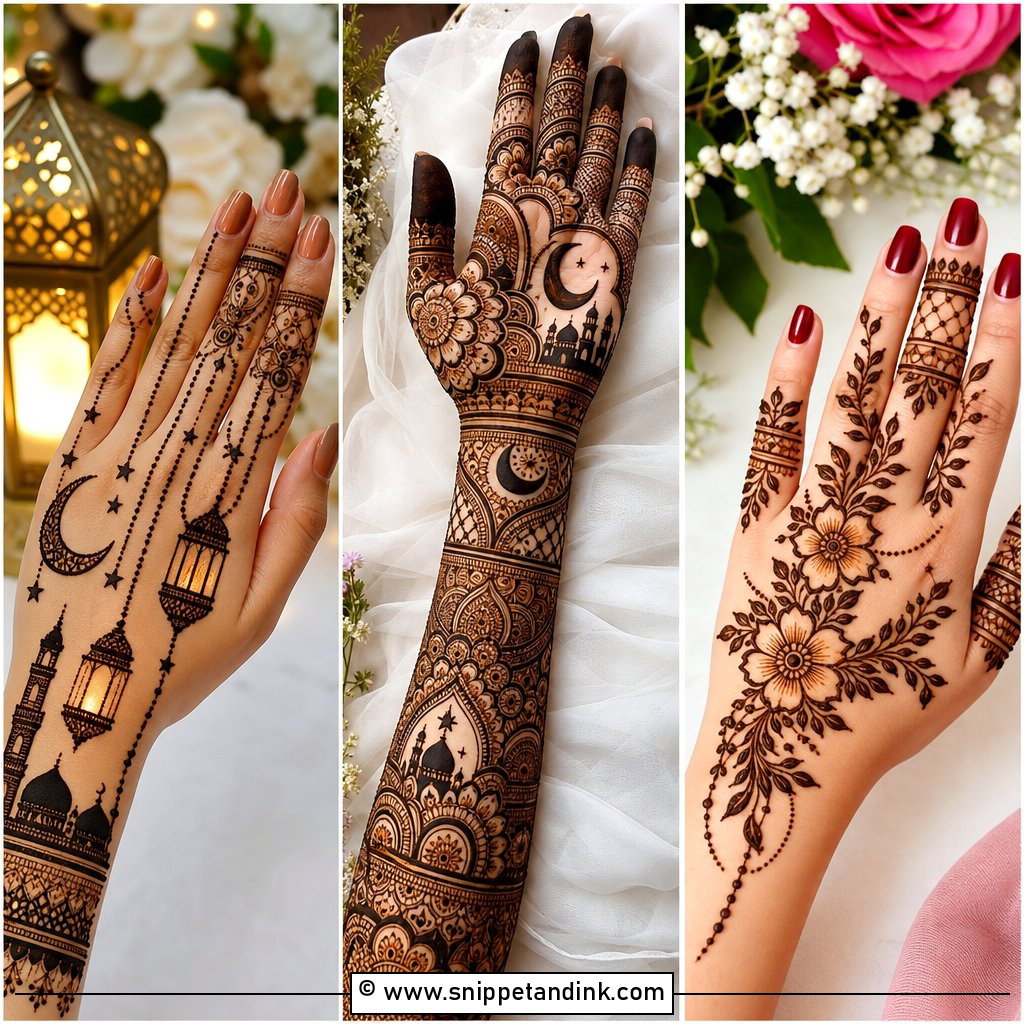
For Eid, I combine Arabic-style florals, dotted chains and slim finger bands, often with a small link to the wrist. Making the ring finger the detailed one and keeping the others simple balances the hand against bangles and rings. A small crescent-like curve can be worked in as a festive detail, kept subtle. Don’t make it dense if you need it dry before the celebrations start. Given a night to develop, the stain turns deep maroon, and that colour is what makes such a simple design feel festive.
23. Finger Mehndi Design For Diwali
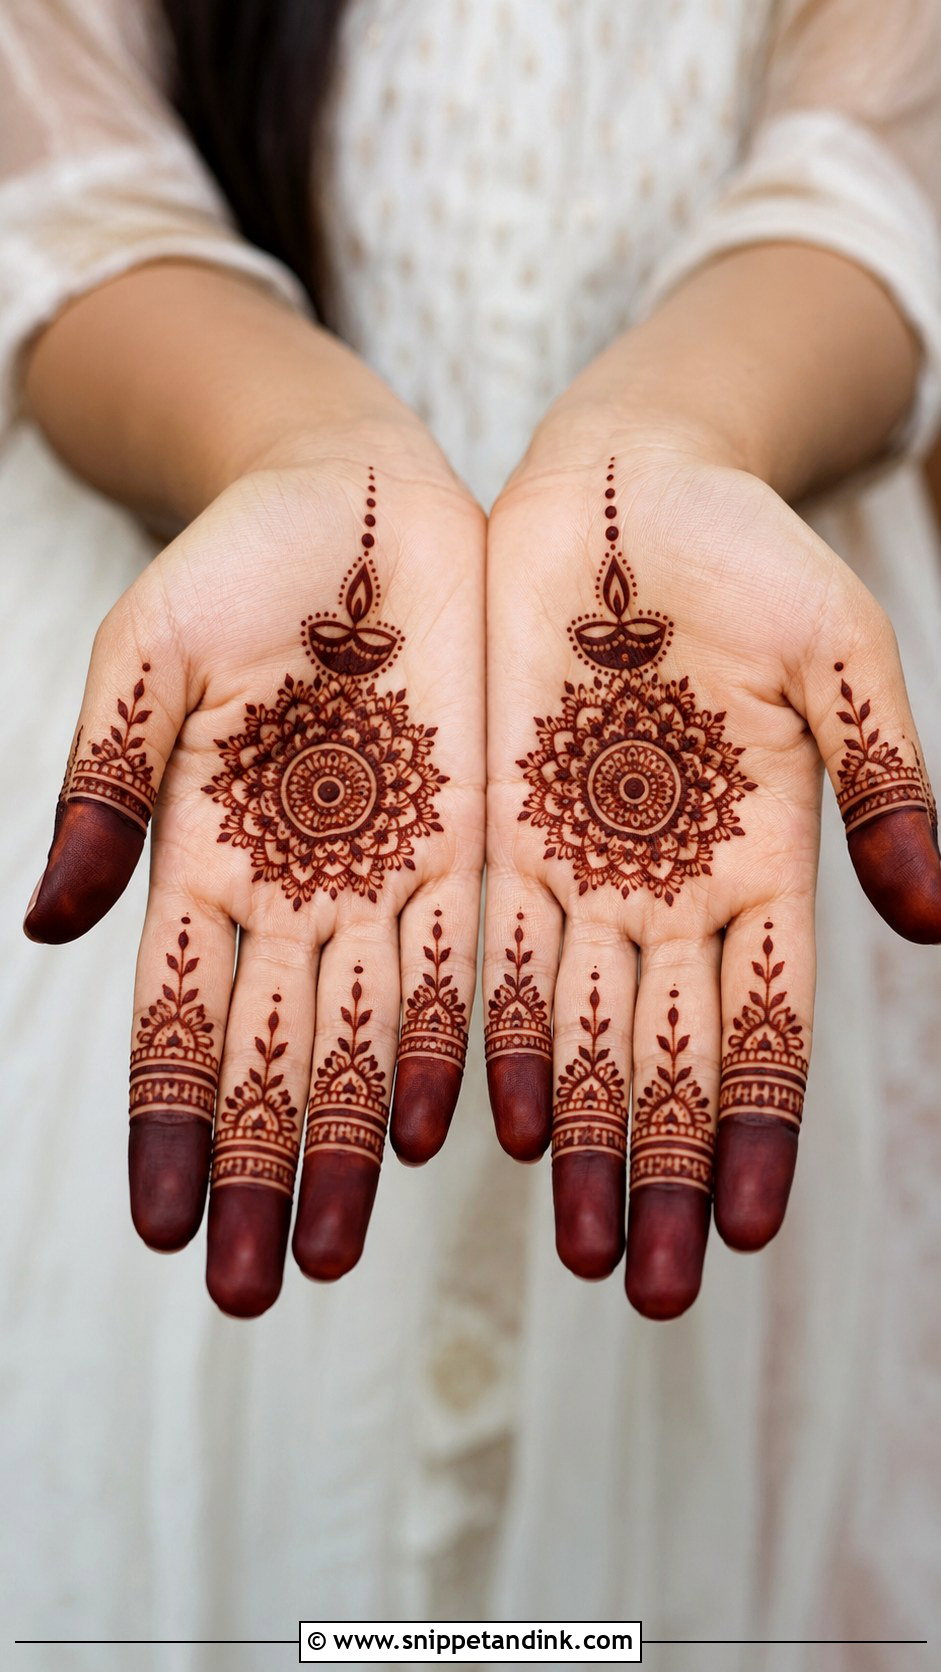
Diwali finger designs can stay neat: a small mandala, fingertip bands, dots and leaf trails, perhaps one tiny diya outline near the base of the middle finger, with the rest kept clean. Under bright festive lights, open spacing keeps the stain looking crisp rather than muddy. Short on time? Decorate only the front of the fingers and add a small dot trail on the palm. It sits comfortably with traditional outfits and festive jewellery.
24. Finger Mehndi Design For Wedding Guests
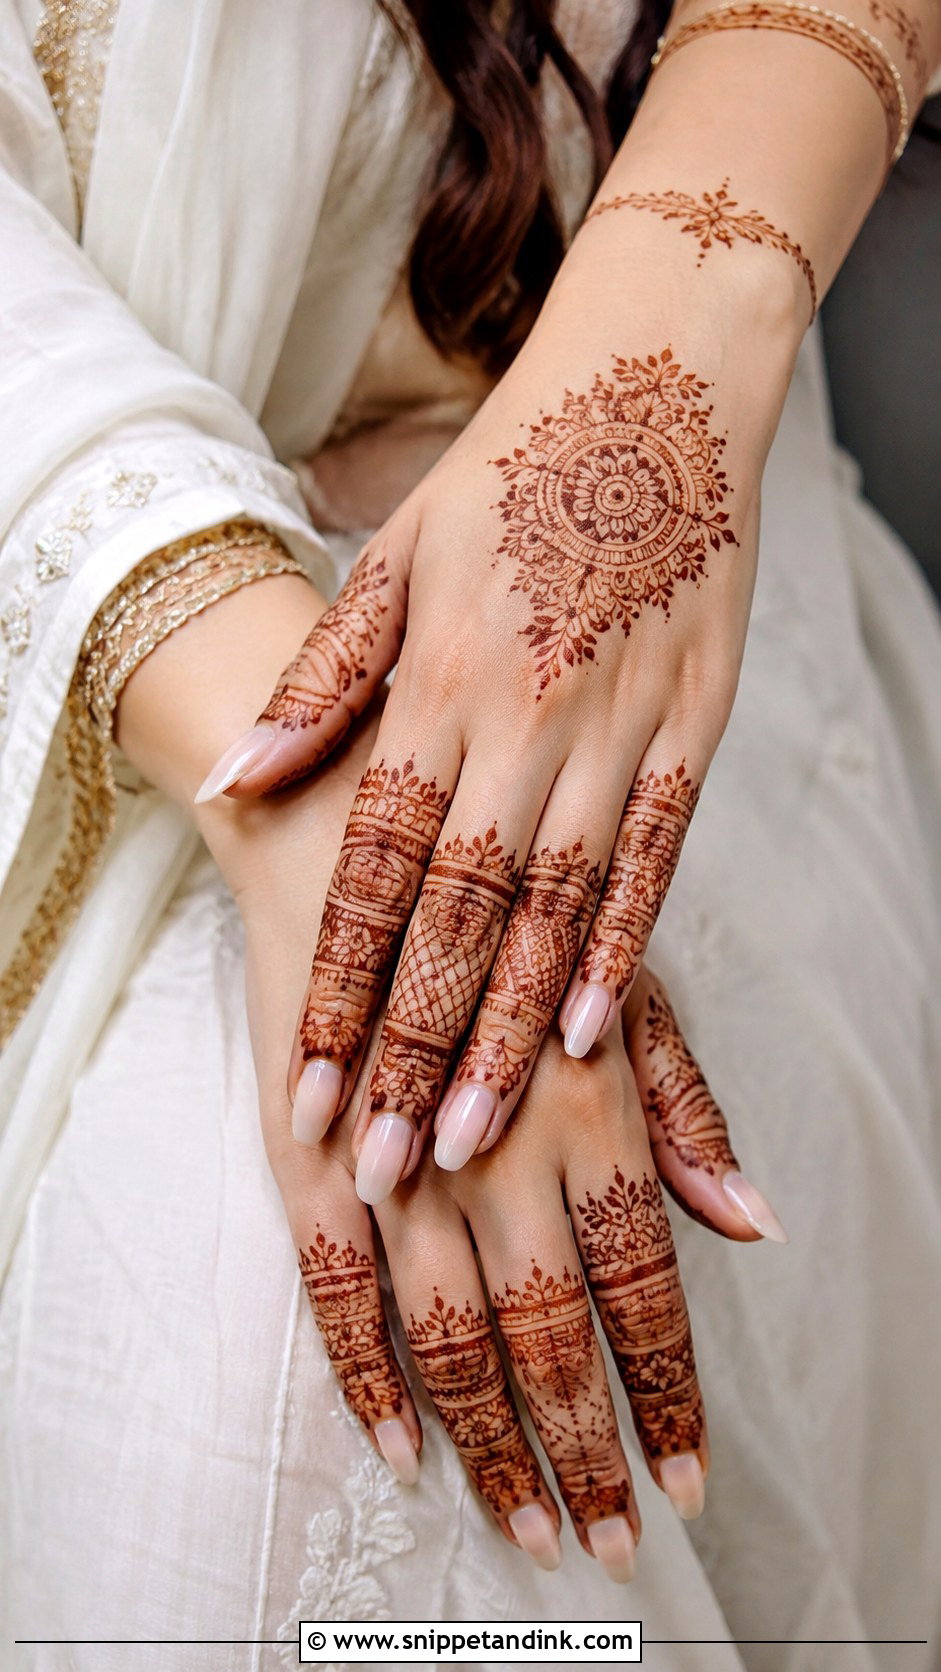
Guests need mehndi that looks dressed up without rivalling the bride. Flowers, ring bands and a fine wrist chain land at the right level and keep the hand light. You can add a small mandala near the finger base or a tiny jaali panel on the ring finger for detail. Leaving the palm mostly open means it dries faster, which matters when it’s applied at the mehndi night itself and you’d like to eat. Sangeet, engagement parties and receptions all suit this weight.
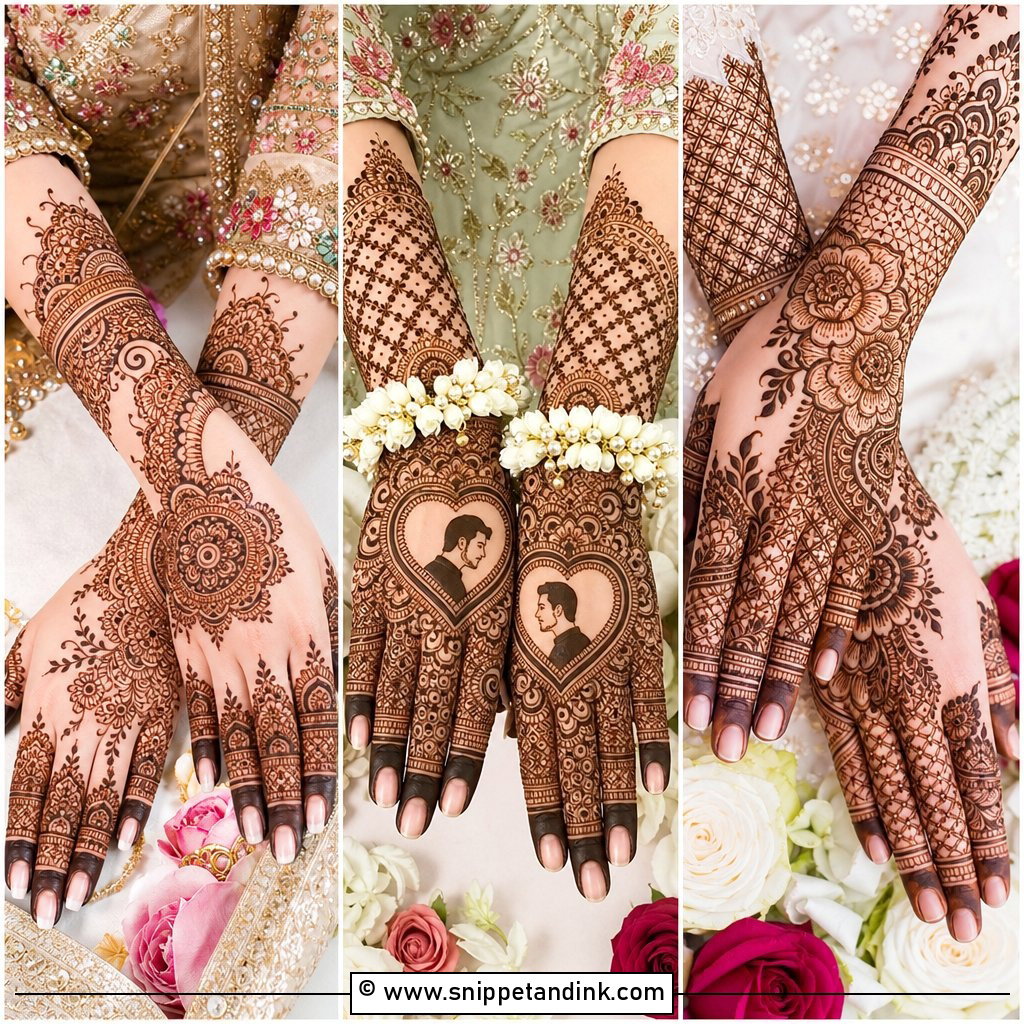
25. Finger Mehndi Design For Bridesmaids
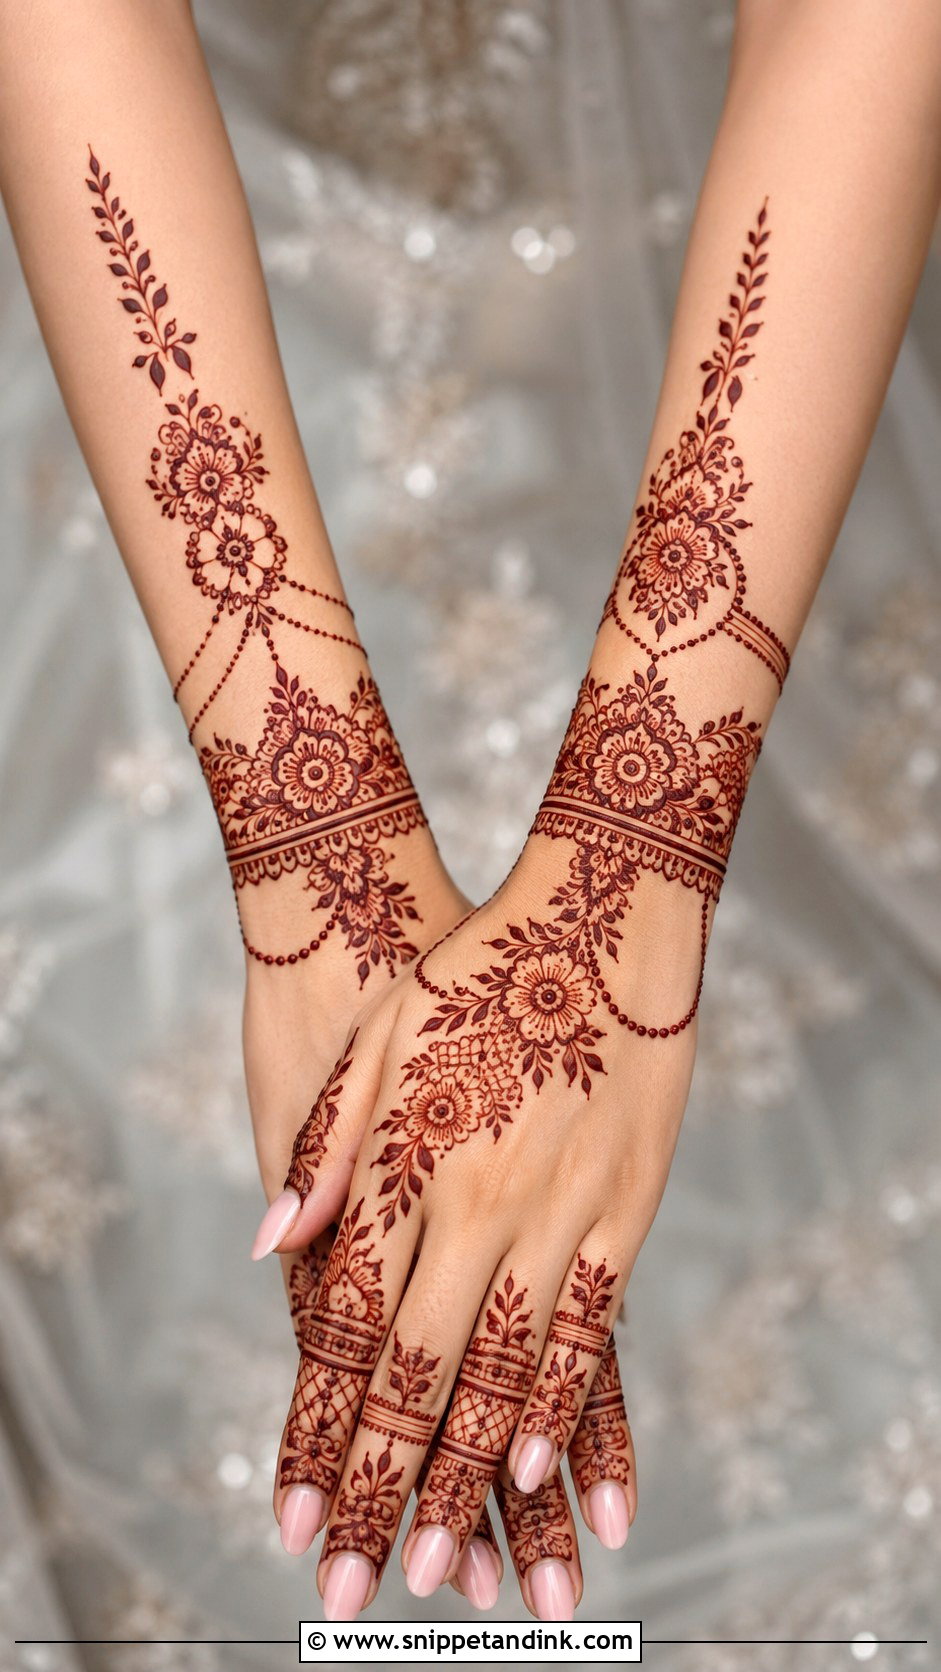
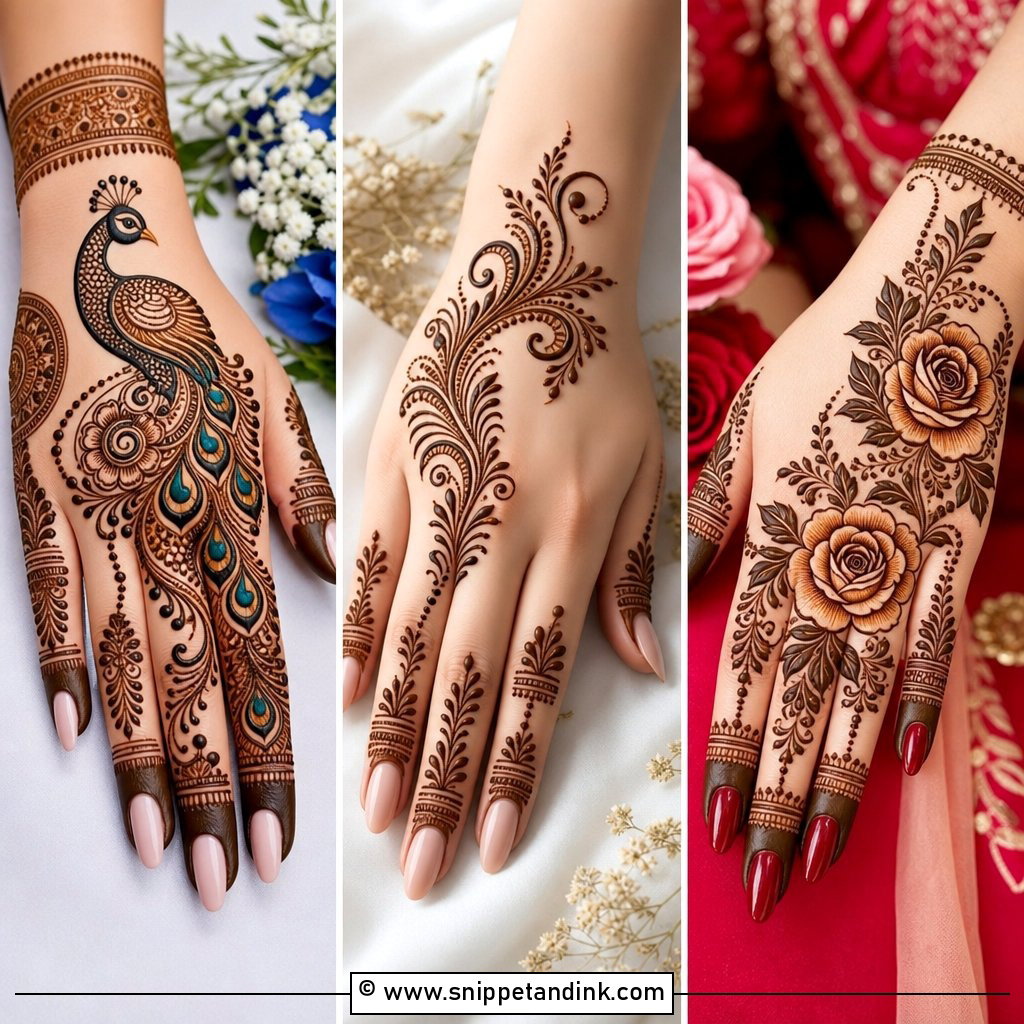
Bridesmaid finger designs sit a step above everyday henna: floral fingers, leafy side trails, ring patterns and a thin bracelet link. Make the ring finger the feature with a flower and a little jaali, and keep the others to bands and dots. For a group of sisters and cousins, I draw the same base layout on everyone and vary one finger each, which looks coordinated in group photos without being identical. Have everyone apply on the same day so the stains match in depth.
26. Finger Mehndi Design With Negative Space
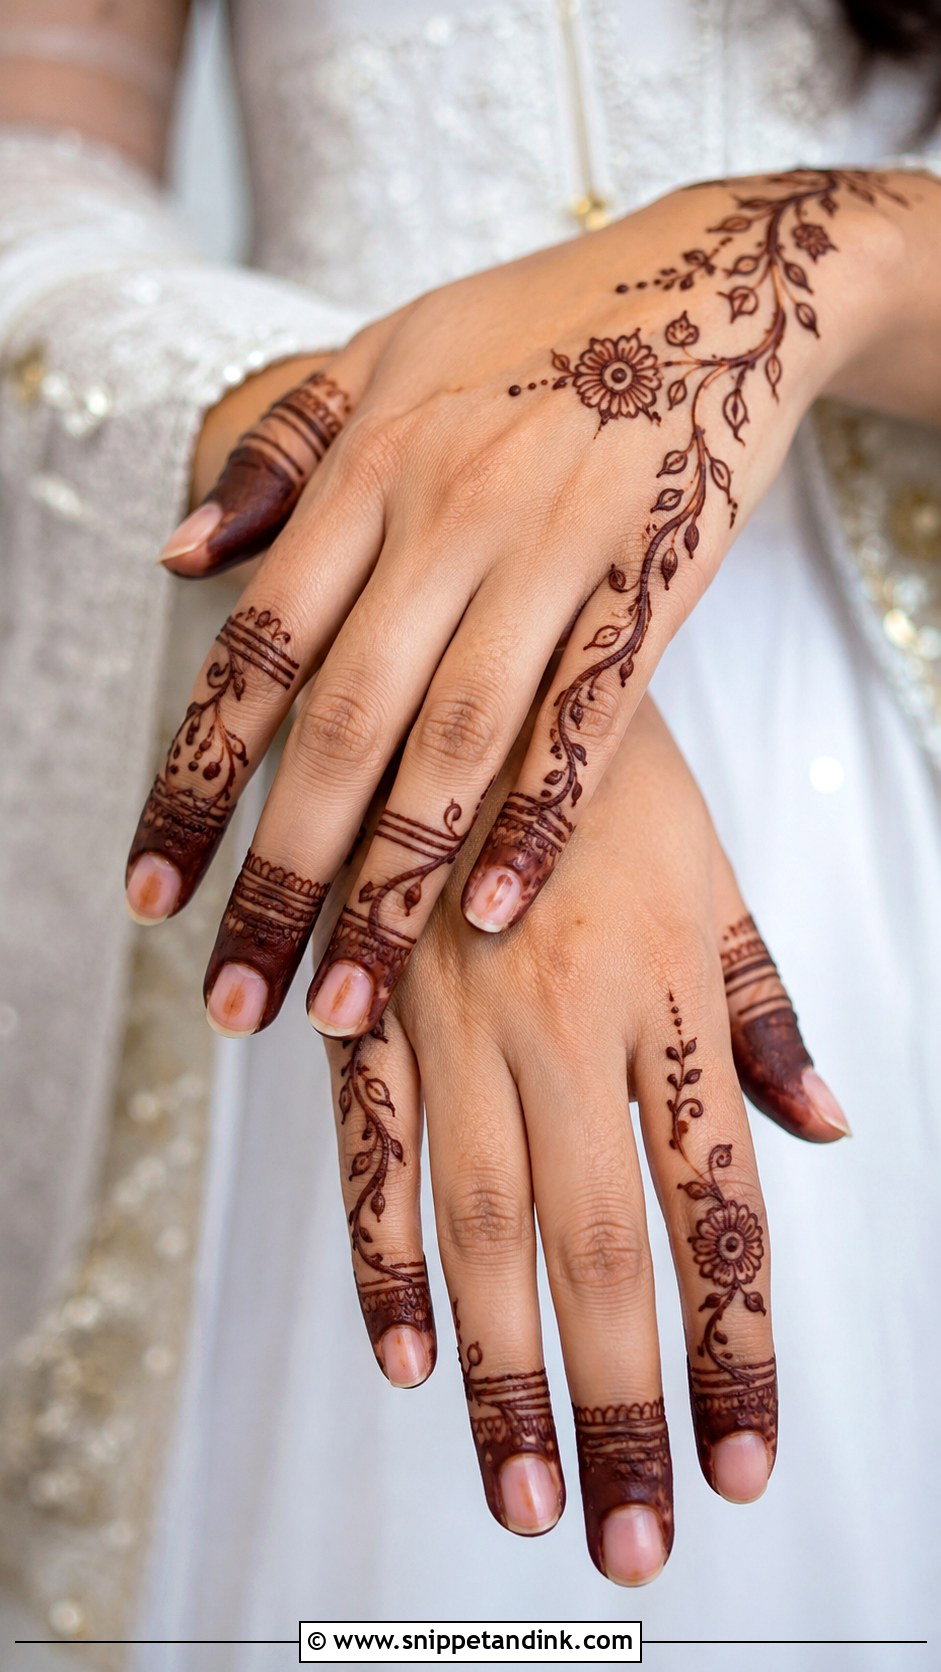
Negative space means deliberate gaps between bands, flowers and vines, so each detail stands alone. Open finger rings, half-filled fingertips and side vines with an empty centre all rely on it. Fingers have very little room, and gaps are what stop a simple design turning crowded. Keep the pattern consistent from finger to finger. It suits Indian and Indo-Arabic touches alike.
27. Finger Mehndi Design With Side Pattern
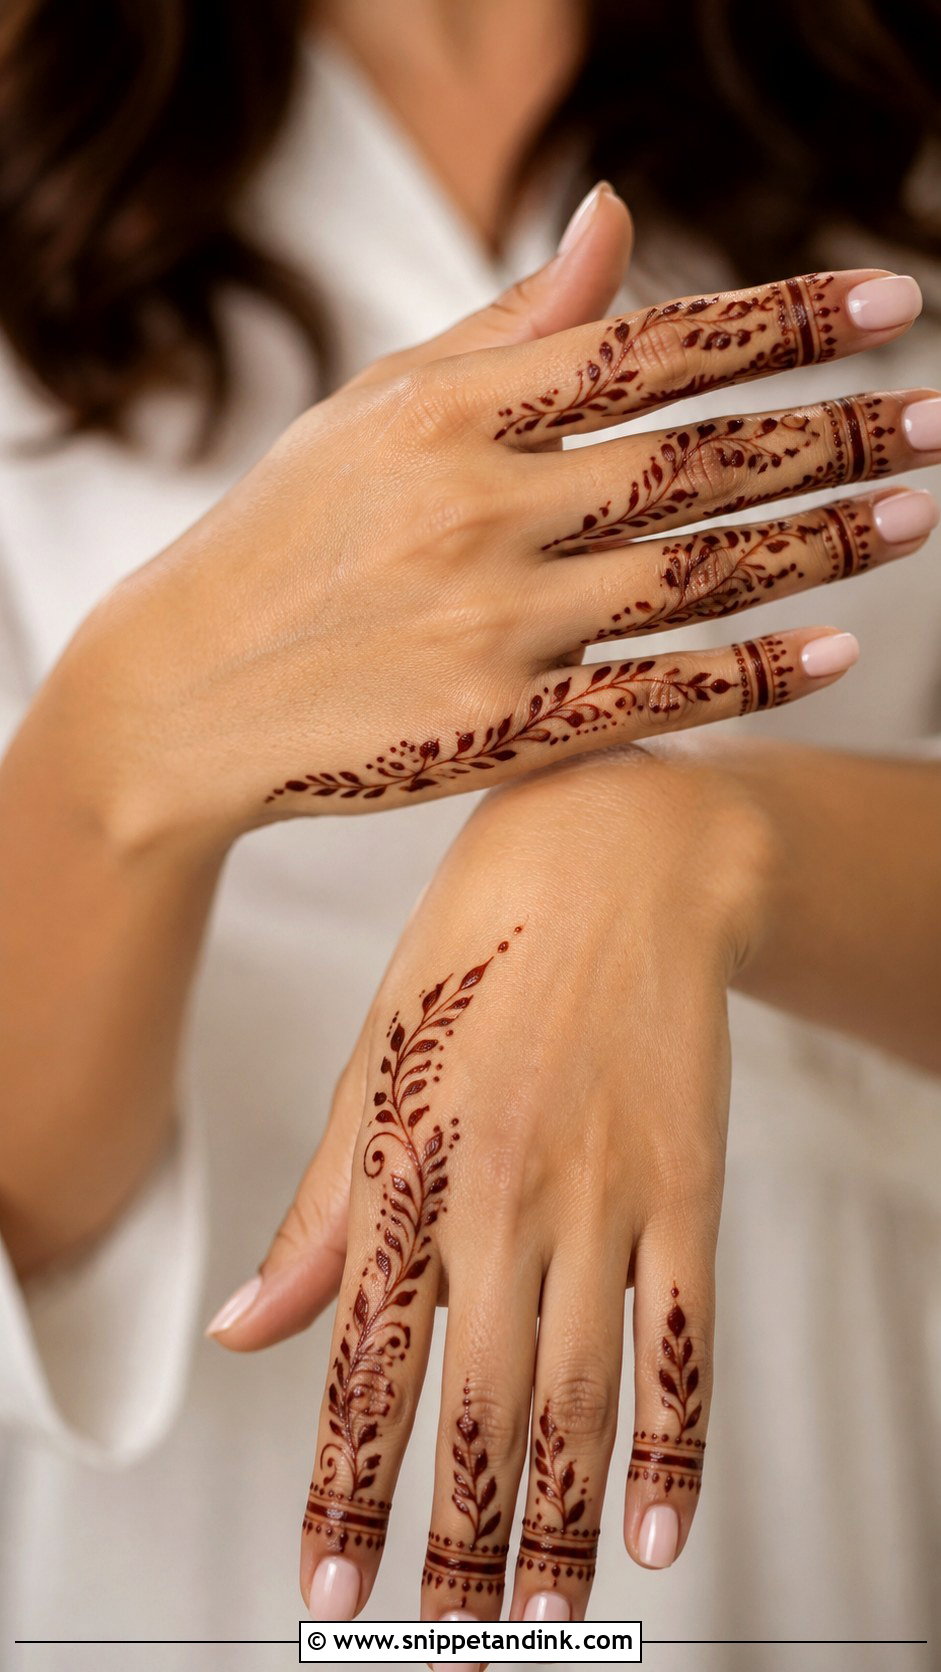
Decorating only one side of each finger leaves the centre open and makes fingers look slimmer. Tiny leaves, dots, curved lines or small flowers run along the outer edge, with one fine band near the tip for balance. Because the eye follows the edge, it lengthens short and long fingers alike. When I apply it, I turn the hand so the side of the finger faces me squarely. Drawing on a curved edge at an angle is what makes these lines drift.
28. Finger Mehndi Design With One Finger Focus
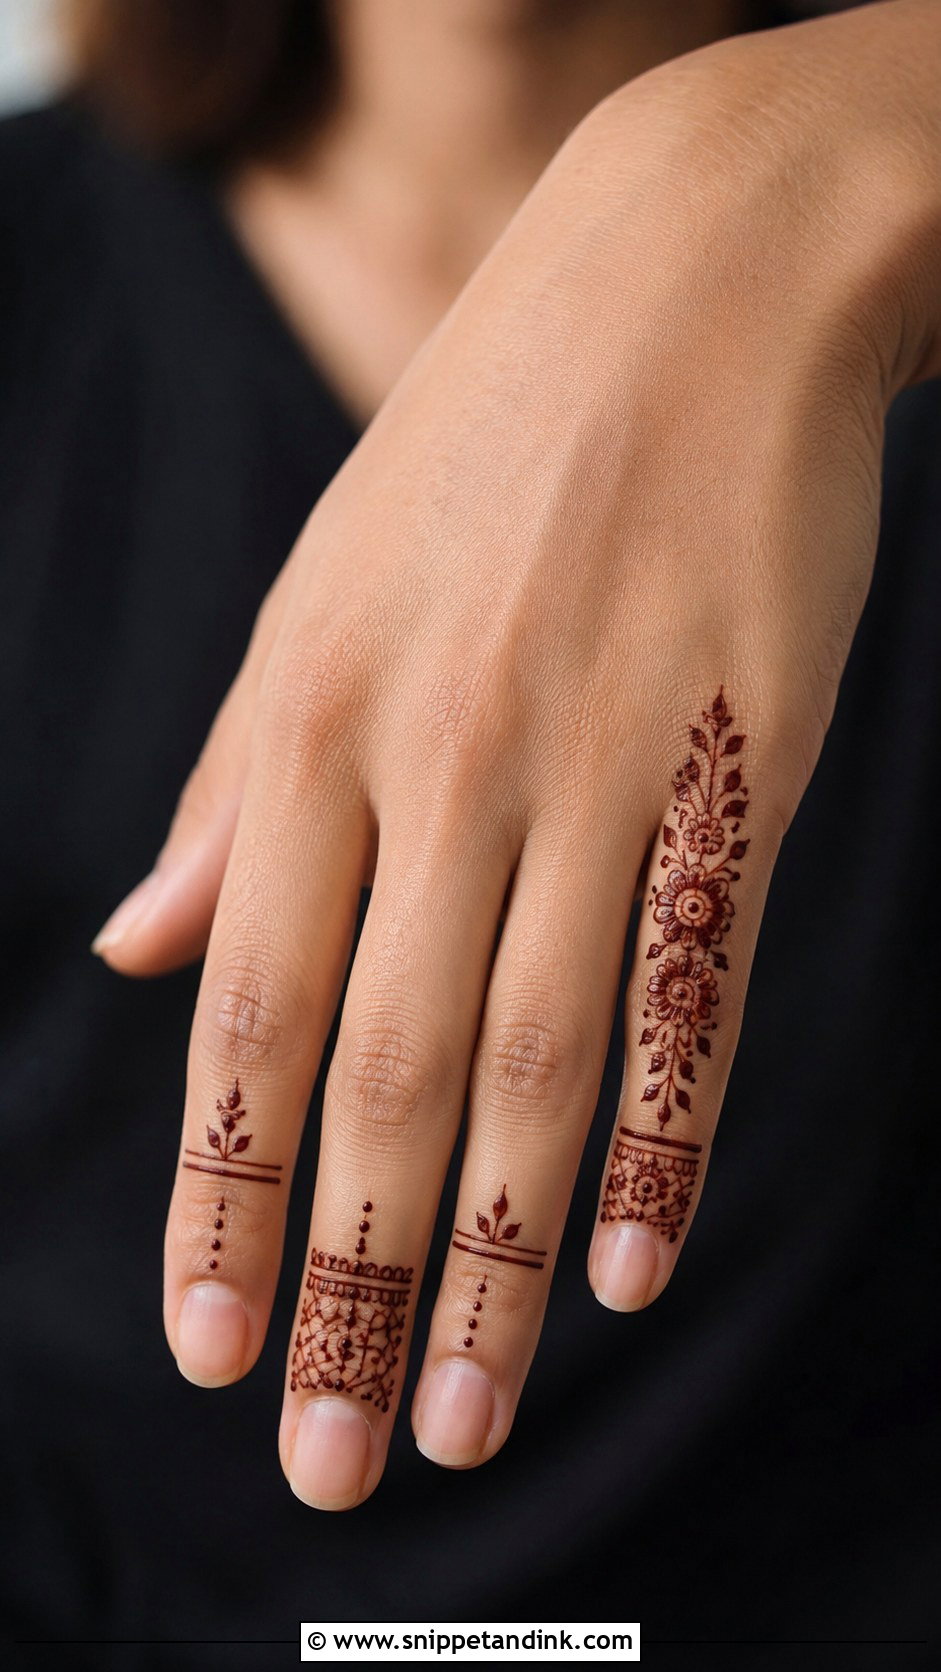
Here one finger carries the whole design, usually the index or ring finger, while the others stay bare or get a few dots. That finger can hold a floral trail, stacked bands, leaves and small checks. It takes minutes and gives a clear focal point, which students and minimal-henna fans like. Because a single finger is the design, I take more care over it than over a whole hand of simple bands. A tiny dot trail at the wrist adds balance if it needs any.
29. Finger Mehndi Design With Back Hand Trail
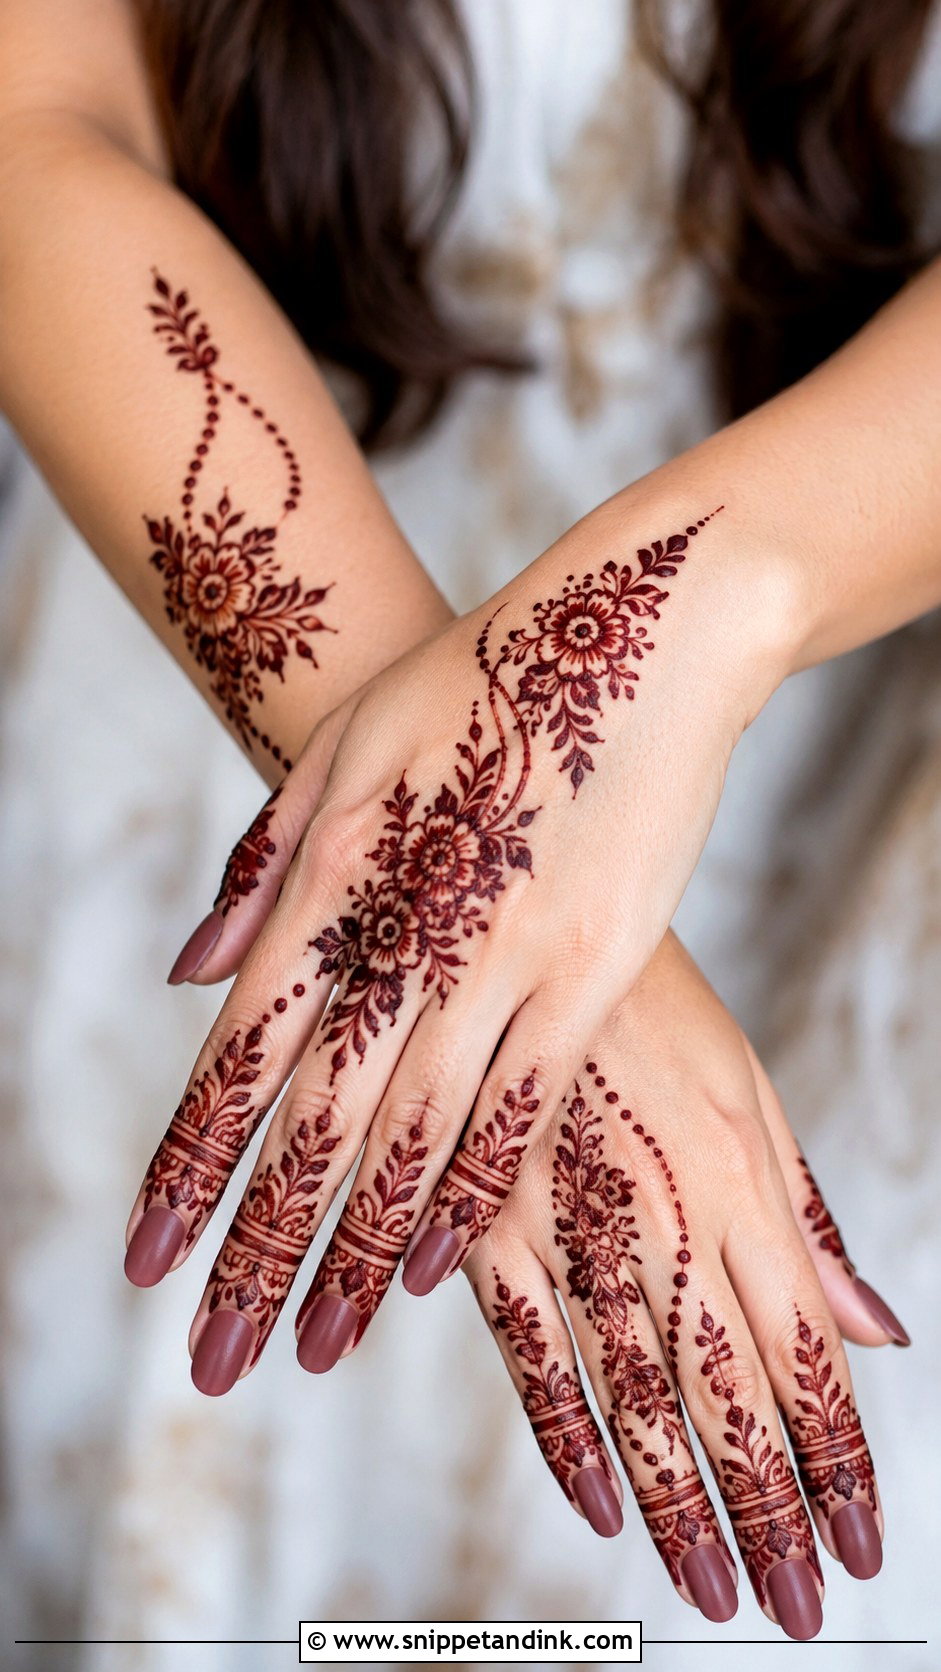
Decorated fingers with a thin vine, dotted chain or floral line running toward the wrist give a complete look that’s still simple. Keep the trail narrow, or it turns into a full back hand design. It should follow a natural diagonal, usually from the index finger toward the outer wrist bone, which is the line the hand already suggests. Leaves keep it soft; small flowers make it festive. It pairs well with rings and bangles at Eid, Diwali and weddings.
30. Finger Mehndi Design With Palm Detail
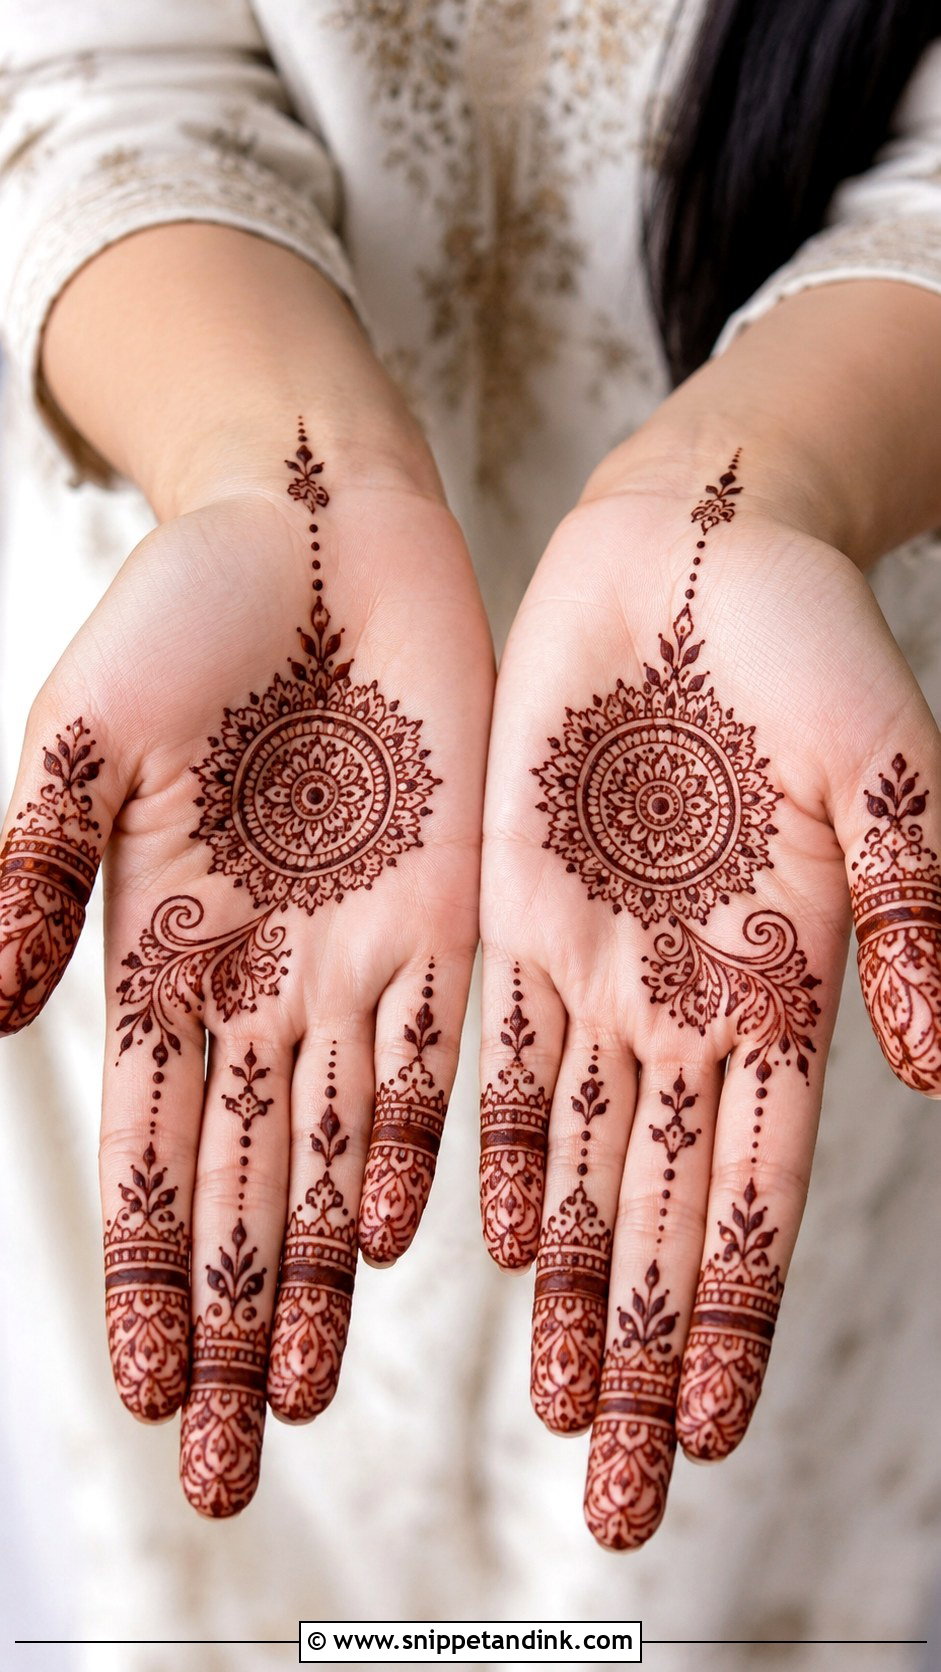
A finger mehndi design with palm detail adds one small motif under decorated fingers: a mini mandala, flower or paisley, centred or set slightly below the fingers. The palm motif can be basic, which helps beginners. I leave a clear band of skin between the fingers and the palm piece. The crease just below the fingers folds every time you grip something, and paste placed right on it smears before it dries.
Fingers Fade First, and a Few Habits Slow That Down
The palm side of the fingers stains dark, but it also sees more washing and friction than any other part of the hand, so that’s where a design starts to blur. These habits buy you extra days:
- Keep the paste on as long as you can the first time. Longer contact gives a deeper stain, and a deeper stain lasts longer.
- Rub a little natural oil or balm over the design before you wash your hands or shower; it acts as a light barrier.
- Wear gloves for dishes and cleaning for the first several days.
- Go easy on hand sanitiser, since alcohol dries the skin and speeds up fading.
Even with care, the palm side of the fingers usually softens within a week, while the backs hold their lines a little longer. That’s simply skin renewing itself, not a sign the henna was poor.
A Smudge Can Be Lifted, a Stain Cannot
Small mistakes on fingers are almost guaranteed, because a finger moves the moment you forget about it. Wet paste can be lifted if you act quickly. I keep a cotton bud or toothpick nearby, scoop the smudge off in one movement and dab the spot with a dry tissue. Don’t rub; rubbing pushes paste into the skin and leaves an orange shadow.
If the paste has sat for a while, faint colour will remain, and the honest fix is to make the mark part of the design: a dot, a leaf or a slightly wider band. Once the stain has developed there’s no taking it back, so think twice before letting a beginner practise on a hand you need for an event the next day.
Ten Fingers, Ten Small Canvases
Finger mehndi rewards restraint. Minimal or traditional, Arabic or floral, every design here relies on clean spacing, steady lines and details sized for your own fingers. For a light hand, dots, leaves, side patterns and negative space are enough. For something more festive, try ring patterns, bracelet trails, jaali or a small mandala. Pick a layout that suits your finger length, then give the stain time to do the rest.
You'll Like These Ideas:


Leave a Reply