
Bridal henna used to mean one dense pattern, palm to elbow, with very little skin left showing. Brides now come to me with sleeve lengths, ring stacks and photo plans already in mind, and the design gets built around those. Some still want the full traditional coverage, while others ask for open Arabic trails, a single mandala, geometric bands or lines that mimic jewelry. What has changed most is the spacing. A good modern layout leaves breathing room between motifs, so the stain reads clearly instead of blurring into one dark mass. Below are twenty layouts I draw for weddings, from royal full-arm patterns to a light trail across the back of the hand, with what each one needs from you and from your artist.
Sleeves, Bangles and Where Your Henna Will Actually Show
Before I sketch anything, I ask to see the outfit. A full-sleeve kurta or a long-sleeve gown hides most of the forearm, so time spent on elbow-length detail is time nobody sees. A sleeveless blouse puts the whole arm on display, and an uneven border at the elbow suddenly matters.
Bangles cover more than people expect. A stack of chooda or kangan can sit across two or three inches of wrist, so I plan a quieter band there and save the finest work for the back of the hand and the palm. Rings and a haath phool cover the finger base, which is why jewelry-style designs often stop where the real jewelry starts.
Then think about the photographs. The back of the hand is in ring shots and bouquet shots, the palms in ritual moments. If your budget or patience runs short, spend it on those two areas first.
1. Full Hand Bridal Mehndi Design
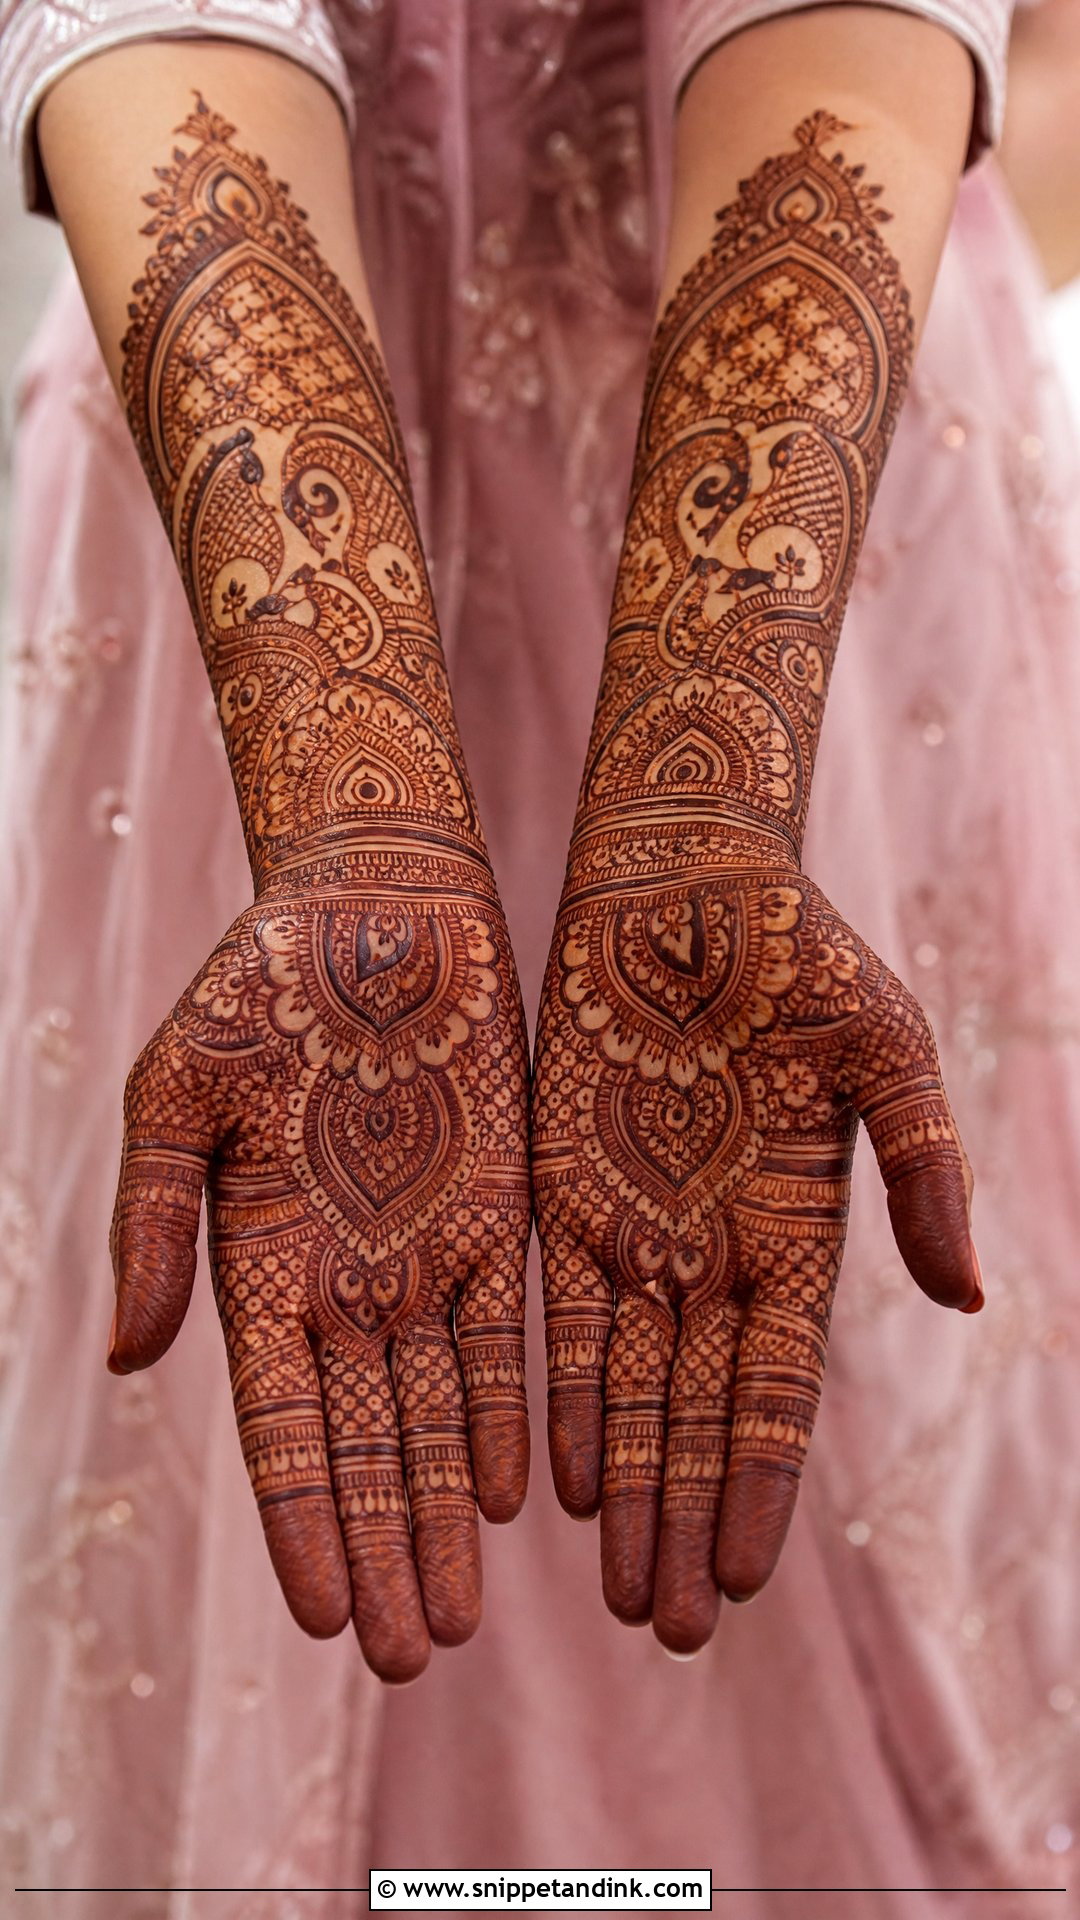
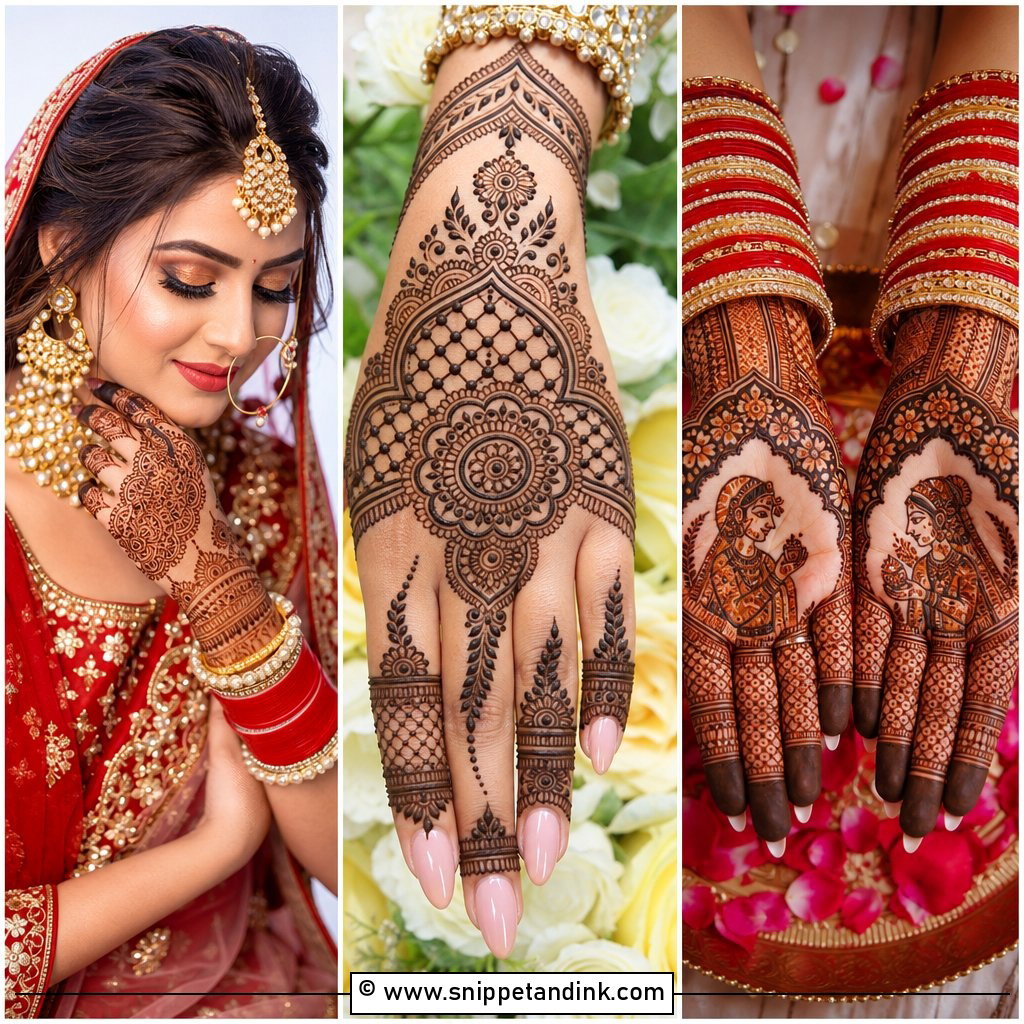
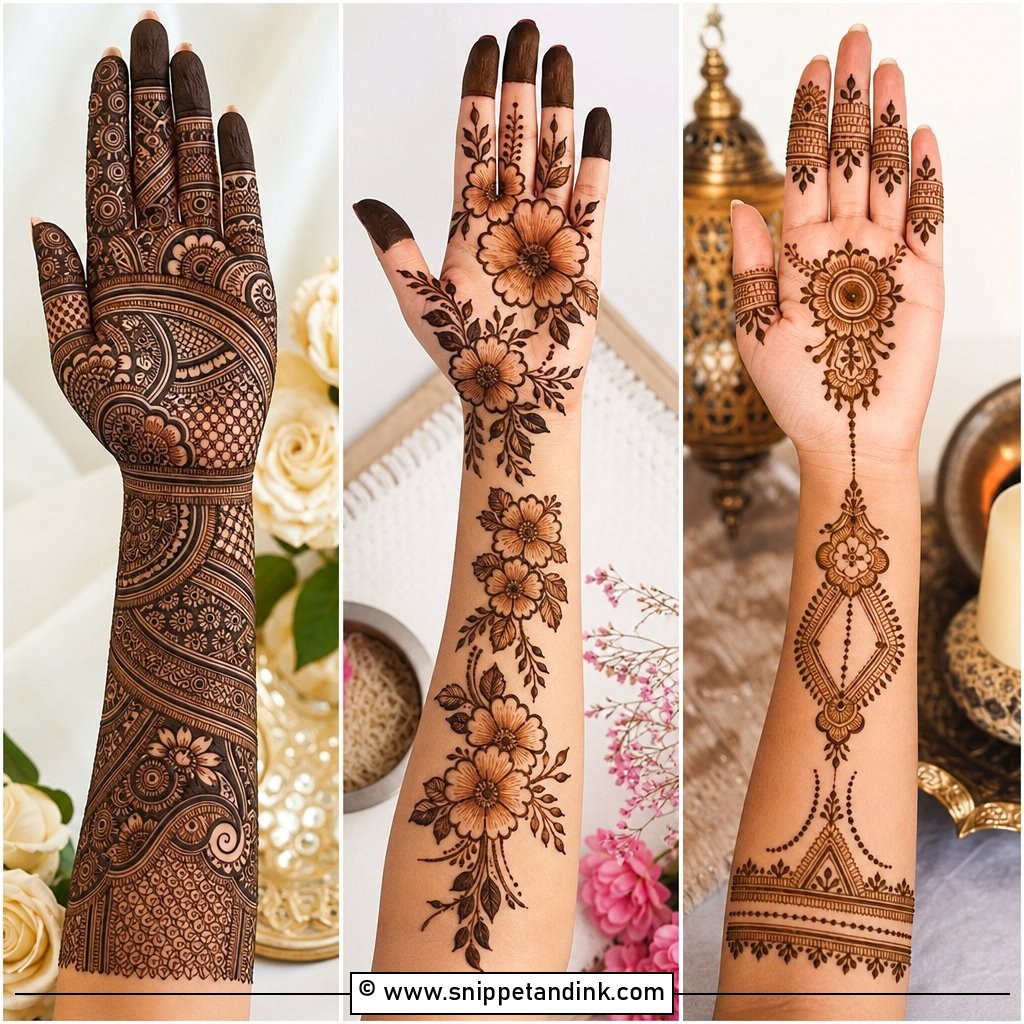
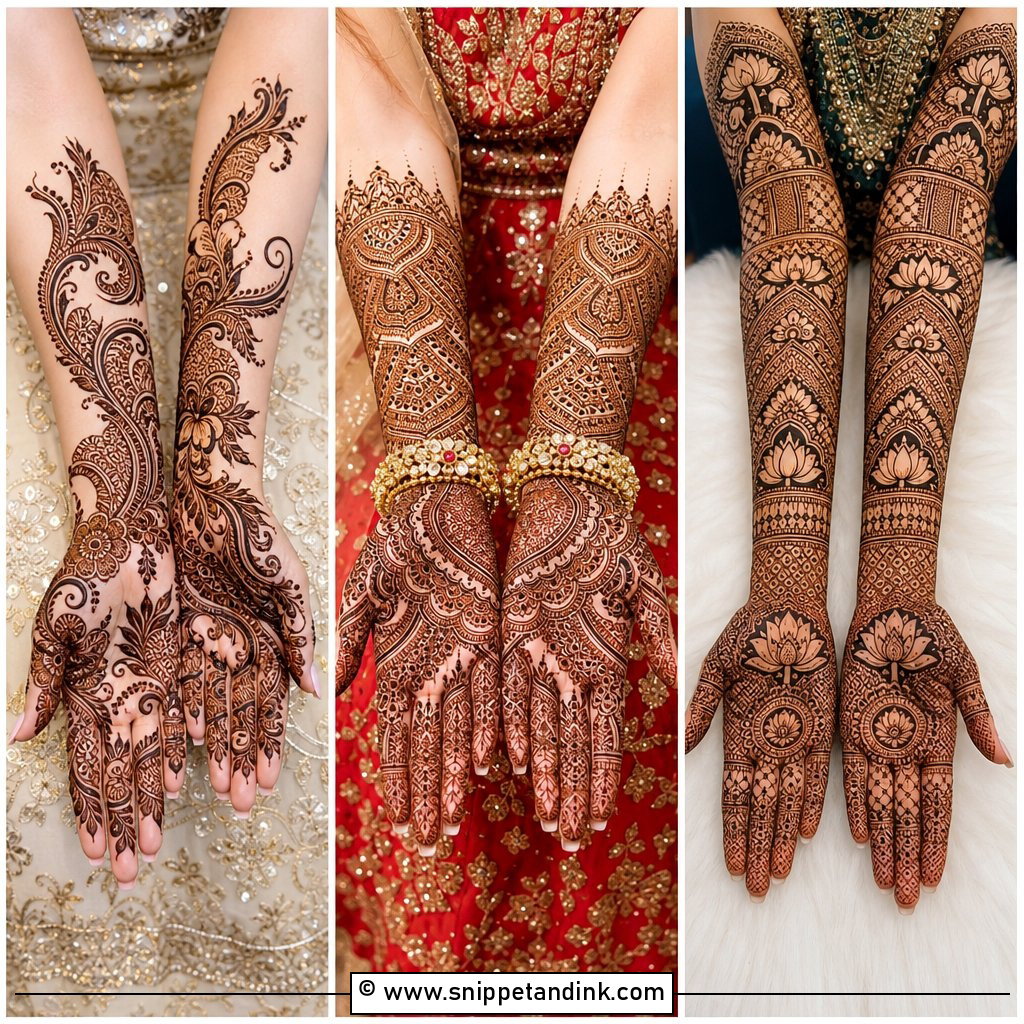
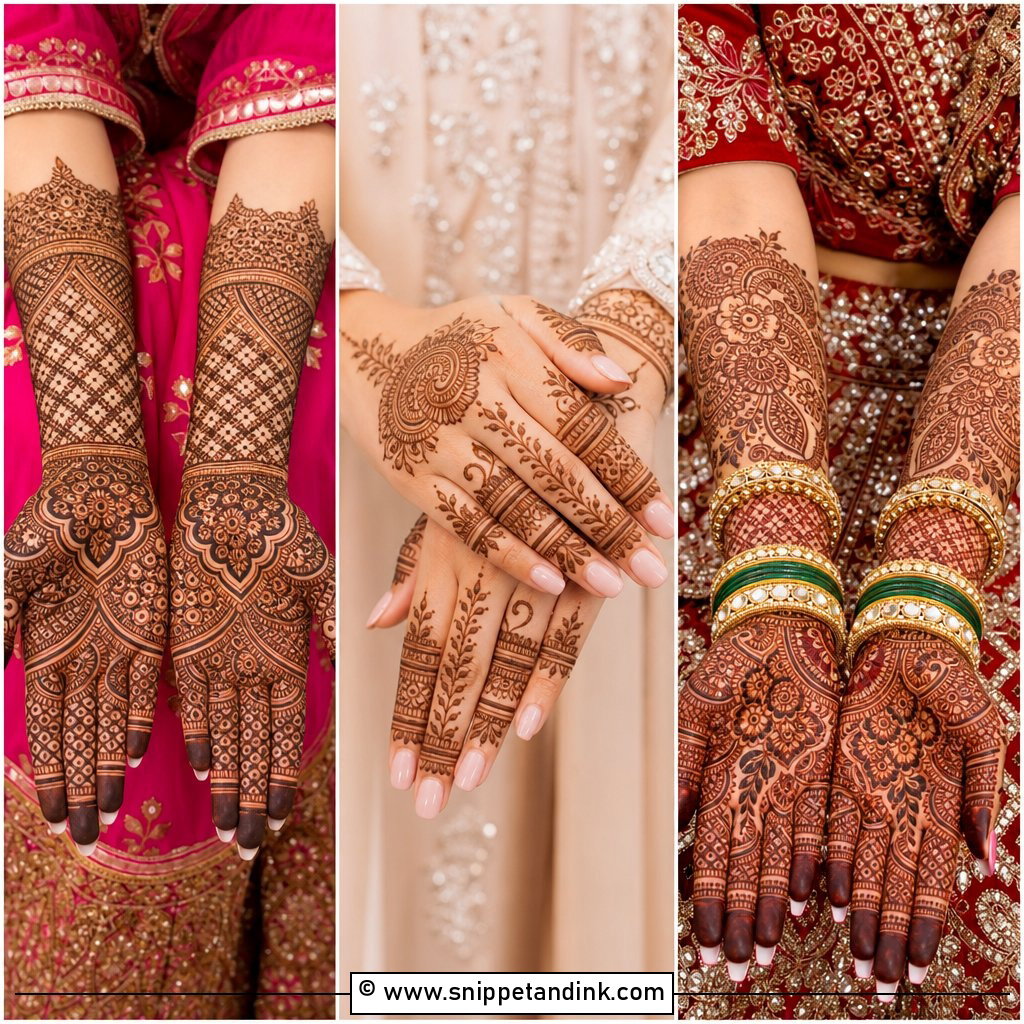
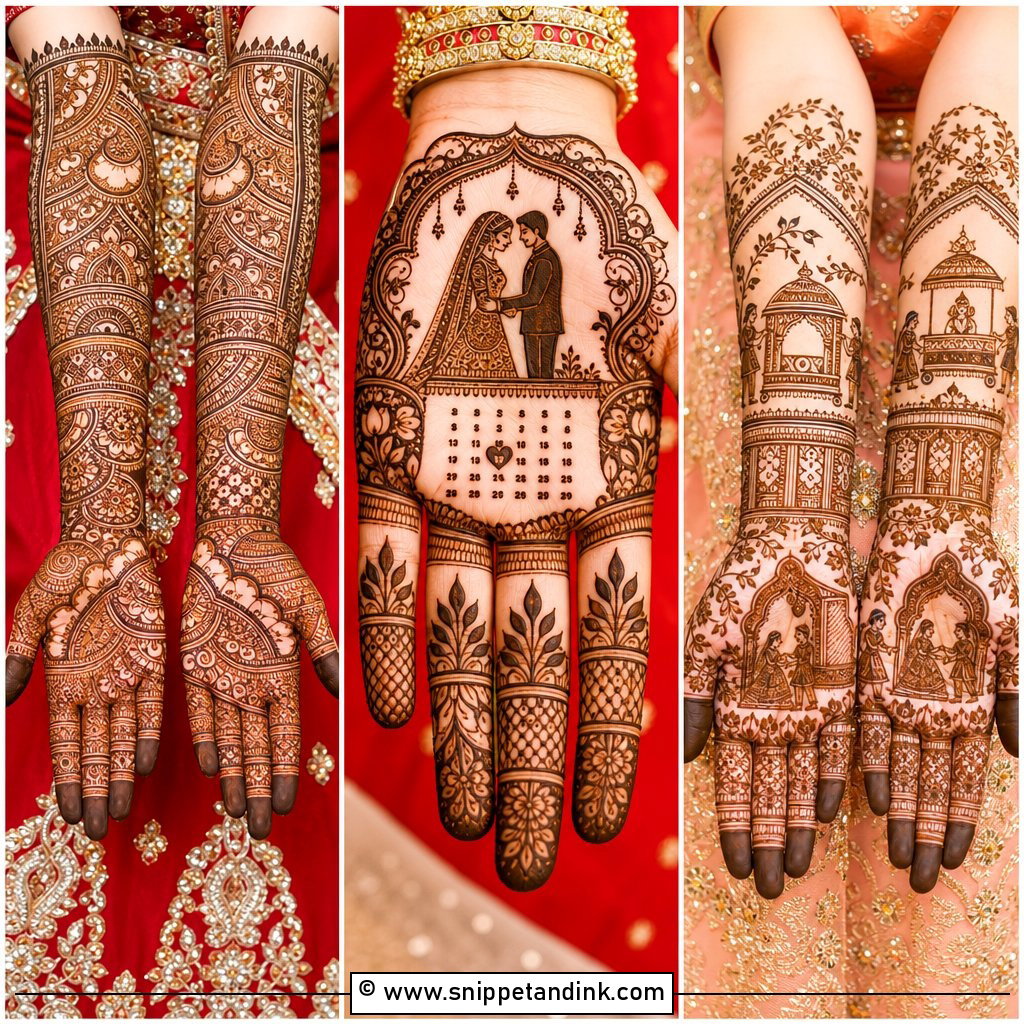
This is the design that covers palms, backs of the hands, wrists and forearms, and it takes the longest to sit for. When I plan one, I divide each hand into zones first: a bold centerpiece in the palm, finer jaali toward the wrist, and a more open border up the forearm. Without that hierarchy, dense work looks like a dark smudge from a few feet away. Paisleys, peacocks and mandalas all fit here. It pairs naturally with a heavily embroidered lehenga or saree, where lighter henna would look unfinished next to the outfit.
2. Arabic Bridal Mehndi Design
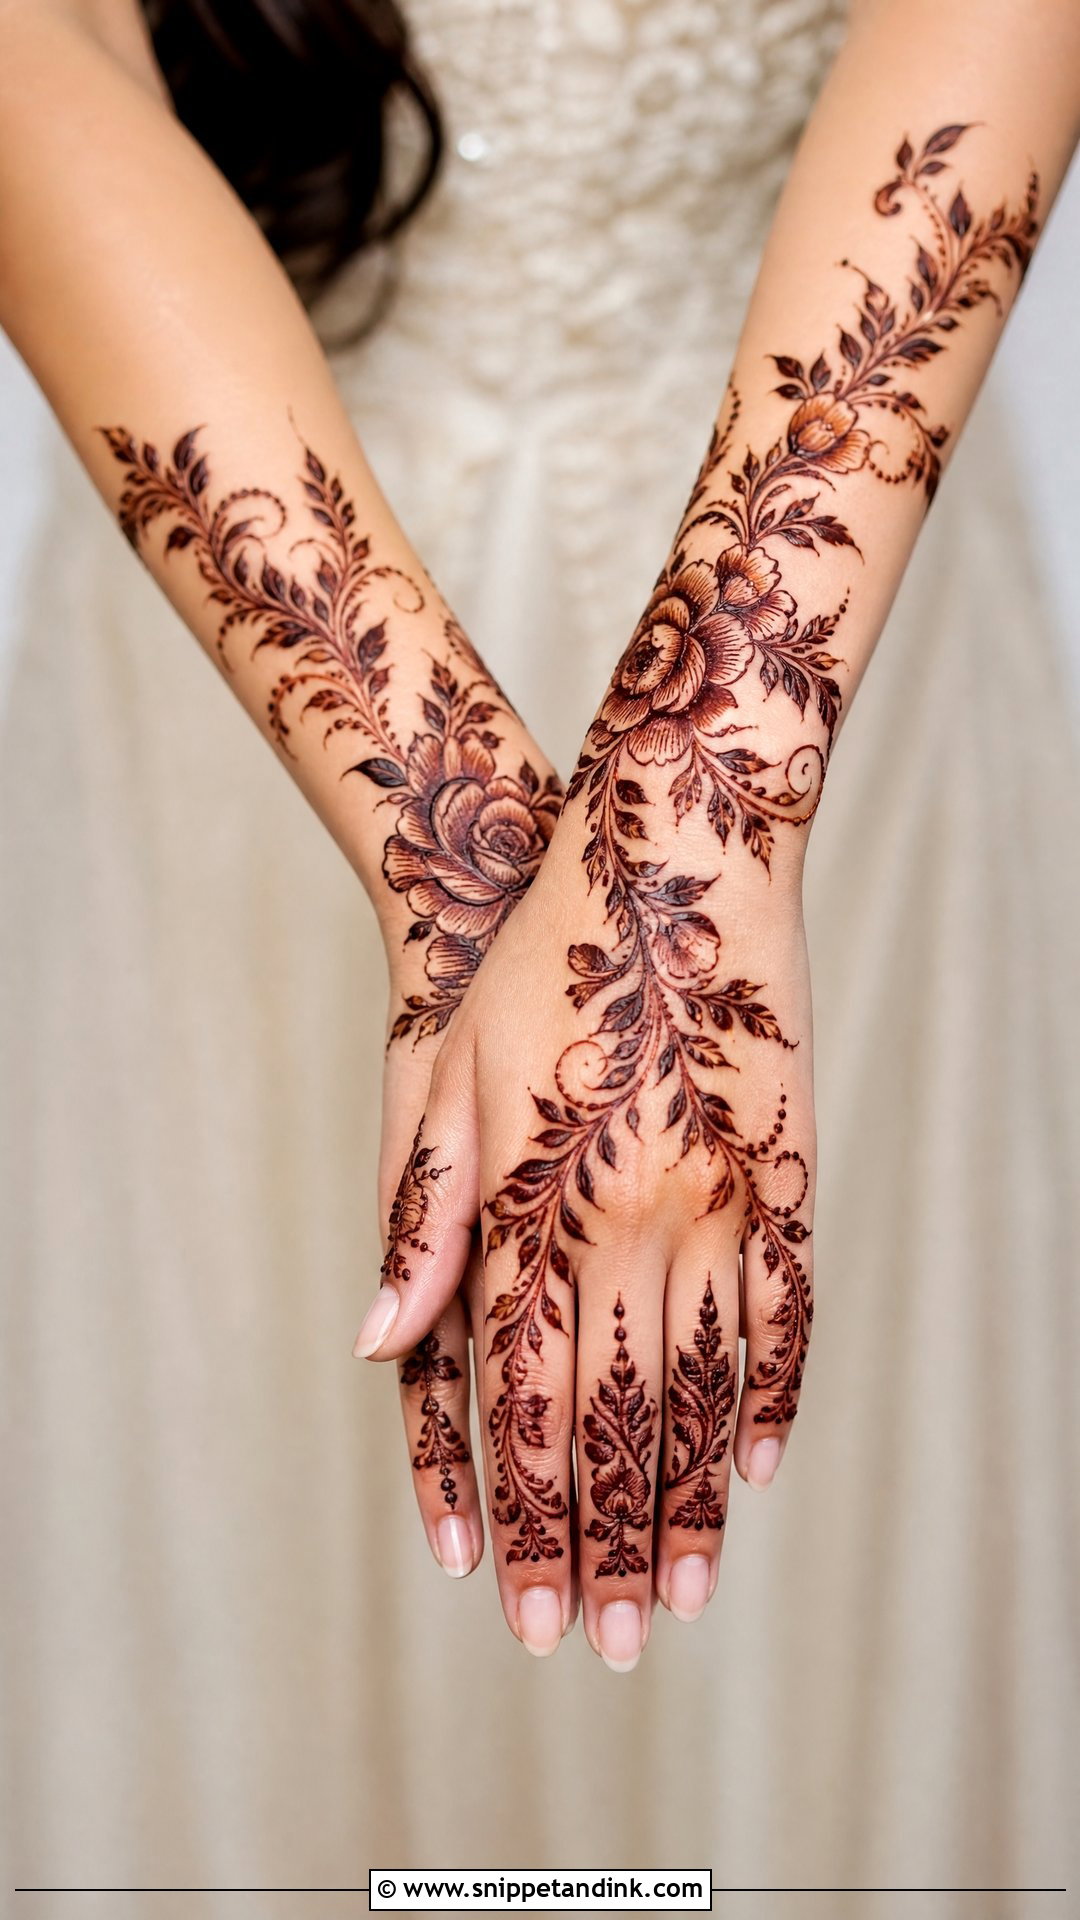
Arabic work runs diagonally across the hand in big flowers, curling leaves and shaded petals, and it leaves plenty of bare skin on purpose. That negative space is why it photographs so cleanly. I usually start the trail at the index finger and let it sweep toward the outer wrist, then finish with a cuff so it doesn’t stop abruptly. It’s a common pick for the nikah, the engagement or the sangeet. For the wedding itself, I extend the trail up the forearm so it carries the weight a bridal look needs.
3. Indo Arabic Bridal Mehndi Design
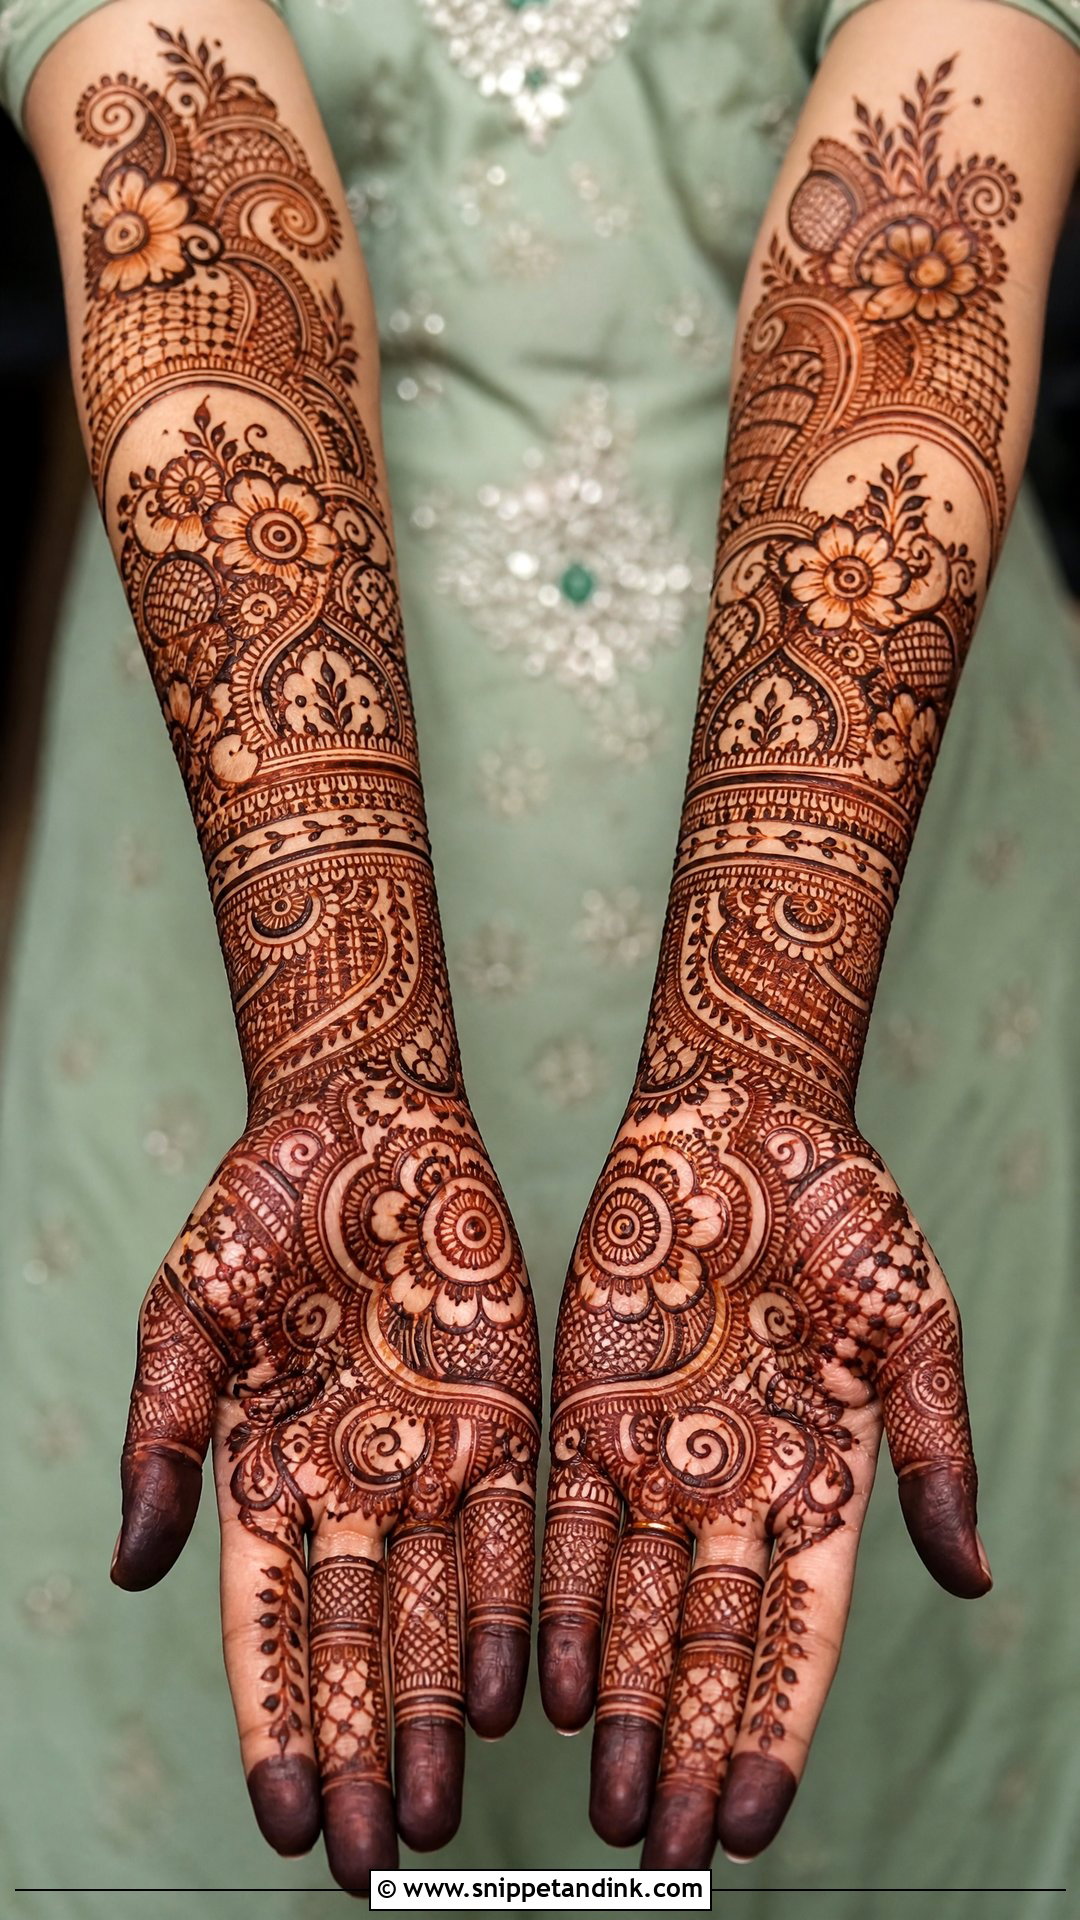
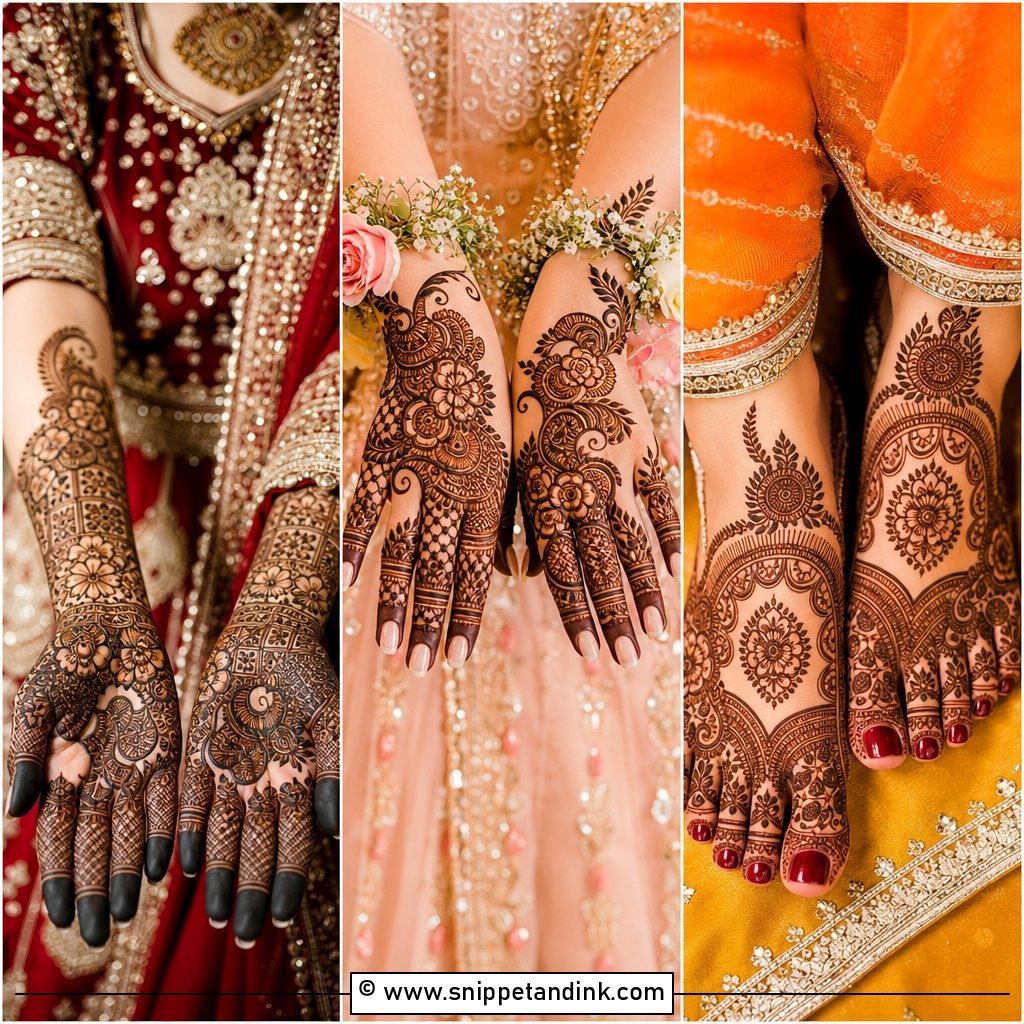
Indo-Arabic mixes the flow of Arabic trails with the fine filling of Indian bridal work: big flowers and paisleys alongside mesh panels, dots and leafy borders. The palm can hold a mandala or a paisley cluster while the back of the hand carries a diagonal floral trail. The mistake I see is filling every gap with detail just because there’s room. Leave a few small open spaces around the main motifs and the pattern looks deliberate, which matters even more if you’re stacking statement rings and bangles over it.
4. Minimal Bridal Mehndi Design
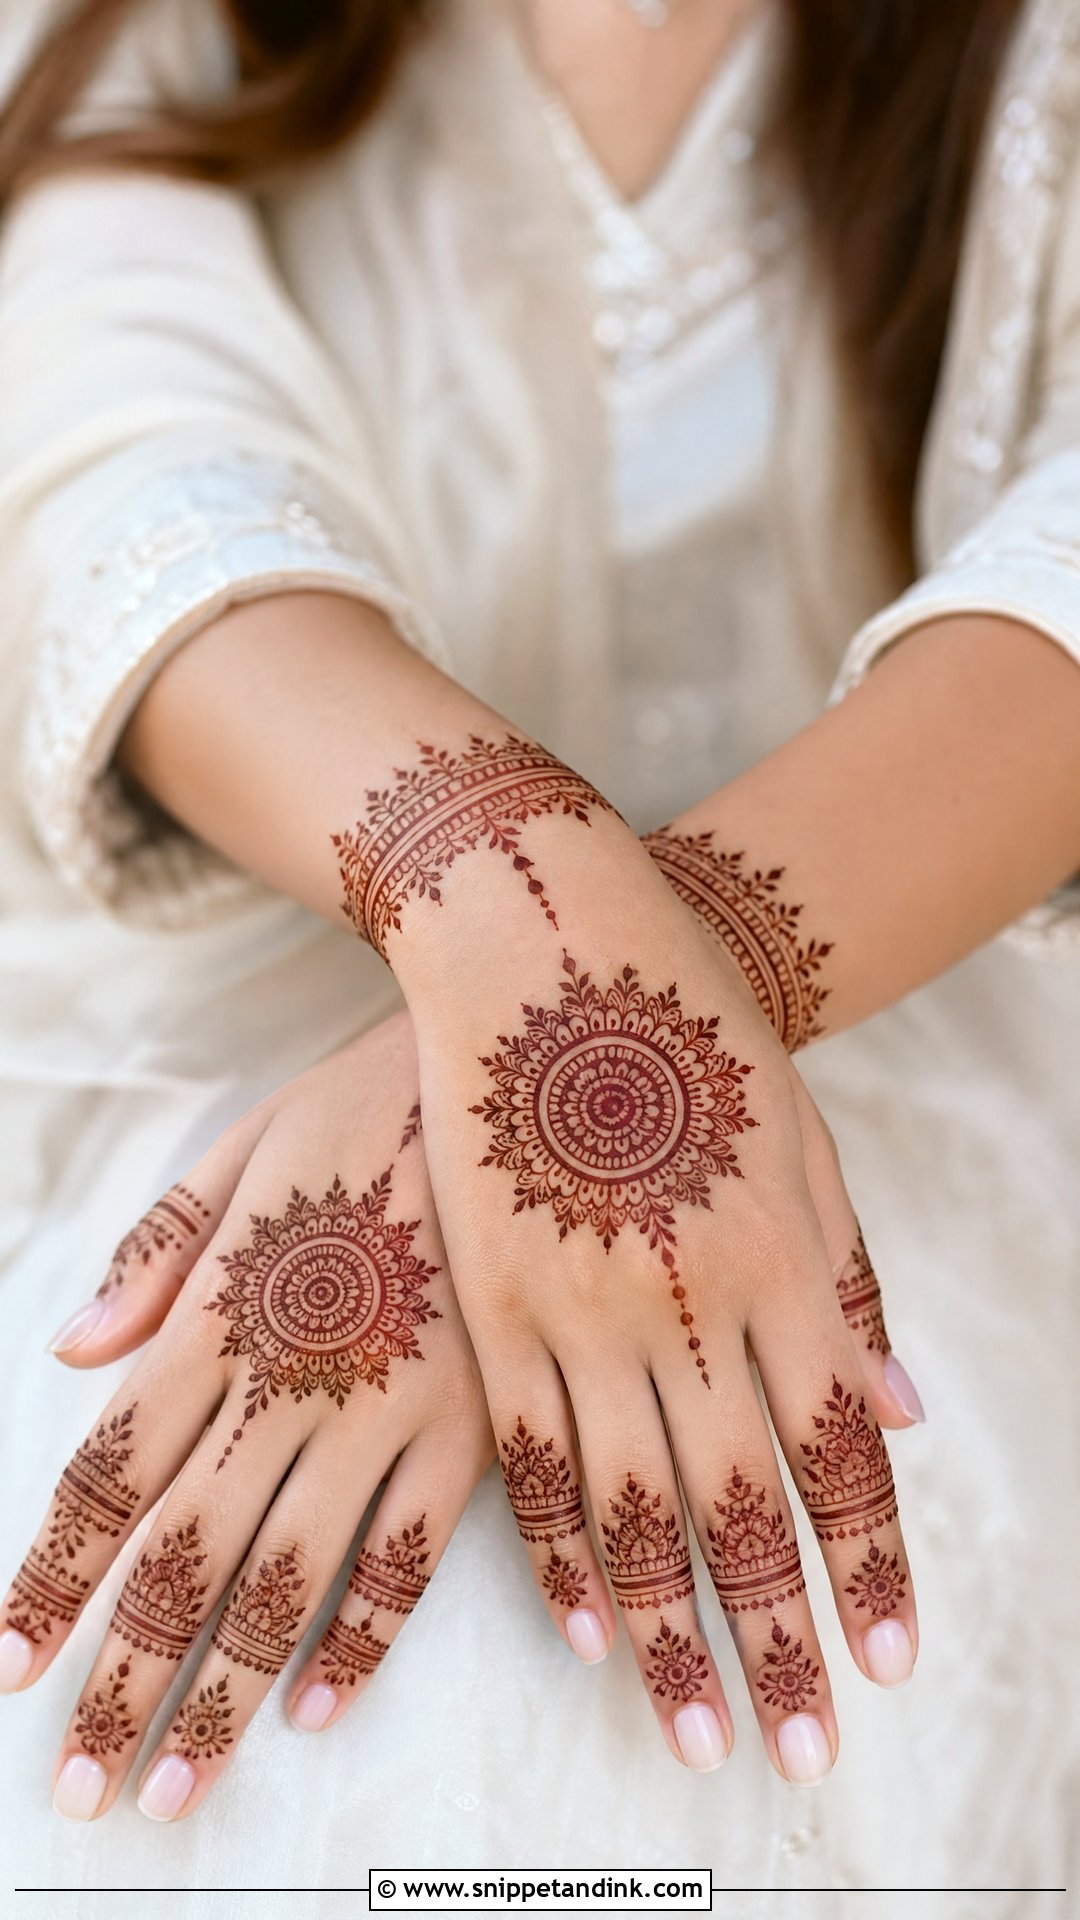
A minimal bridal design still has to look bridal, and that comes from symmetry and clean lines rather than coverage. Clean mandalas, delicate finger bands, a bracelet at the wrist and a few floral lines can be enough. I’d keep the two hands mirrored and the line weight consistent, because in a sparse design every wobble shows. Initials or a tiny lace border can add something personal. It sits well with pastel outfits and lighter jewelry, and it’s quick to apply, which helps if the mehndi falls on a crowded day.
5. Modern Mandala Bridal Mehndi Design
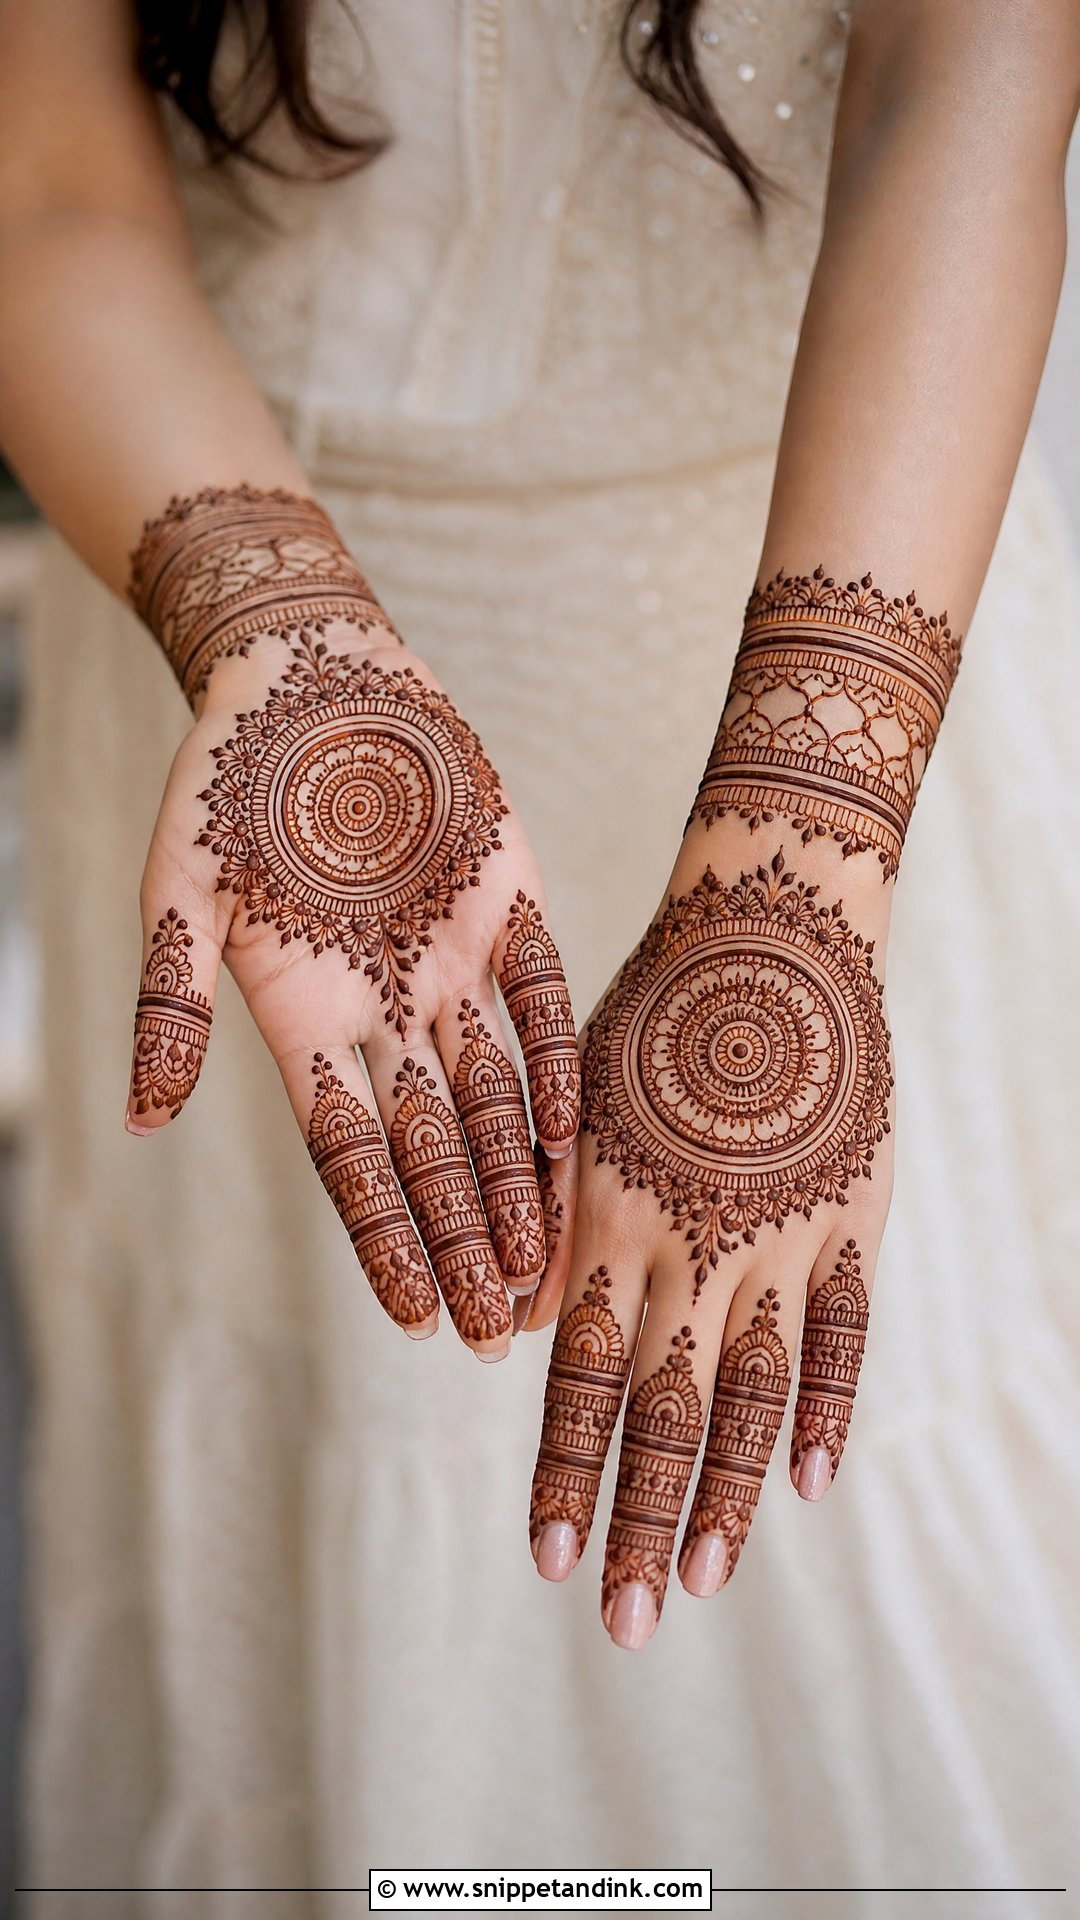
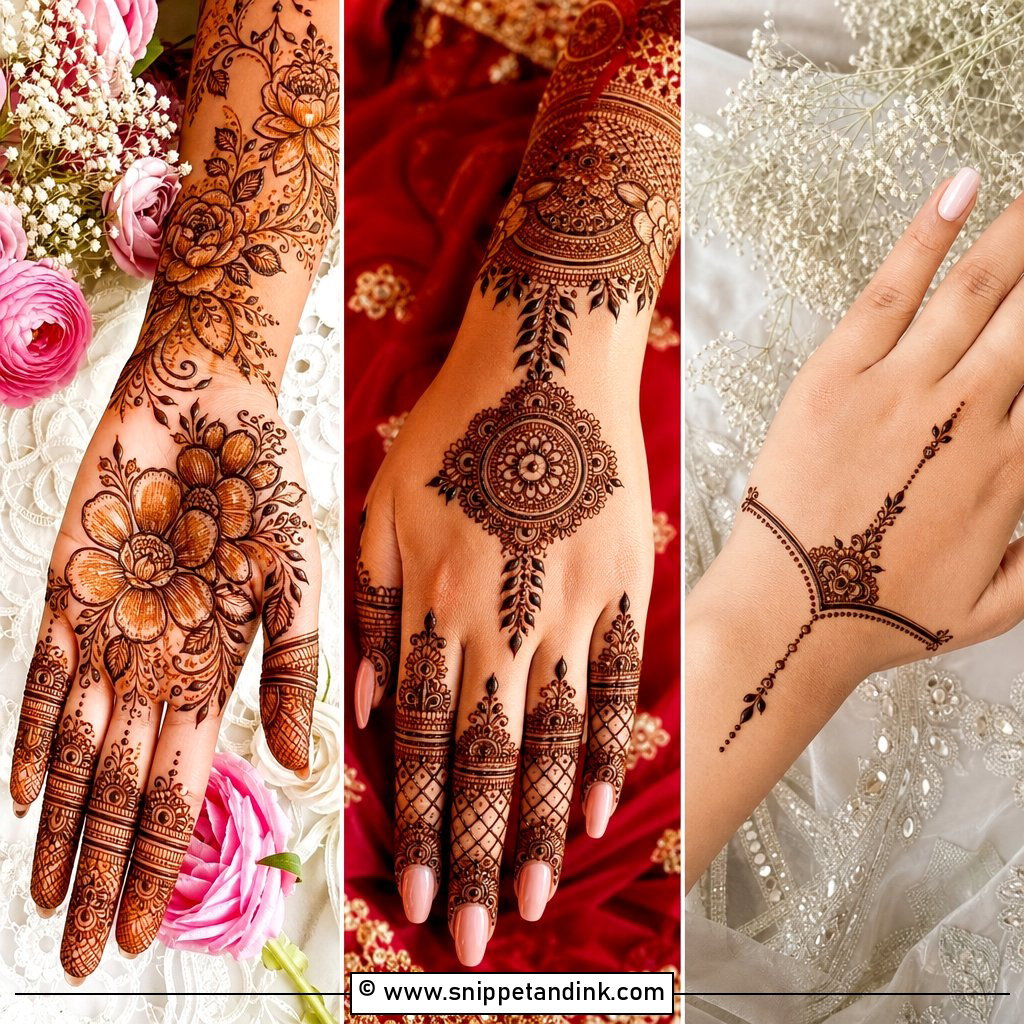
Centered and symmetrical, a mandala layout puts one large circle in the palm and matching dots, leaves or floral bands on the fingers. On the back of the hand the mandala sits in the middle with bracelet-like wrist detailing beneath it. Getting the circle truly round is harder than it looks on a palm that curves, so I mark the center point first and build outward ring by ring. For more weight, I extend lace borders or light jaali toward the forearm. Spacing adjusts easily, so it works on both small hands and long ones.
6. Bridal Mehndi Design With Bride And Groom Portrait
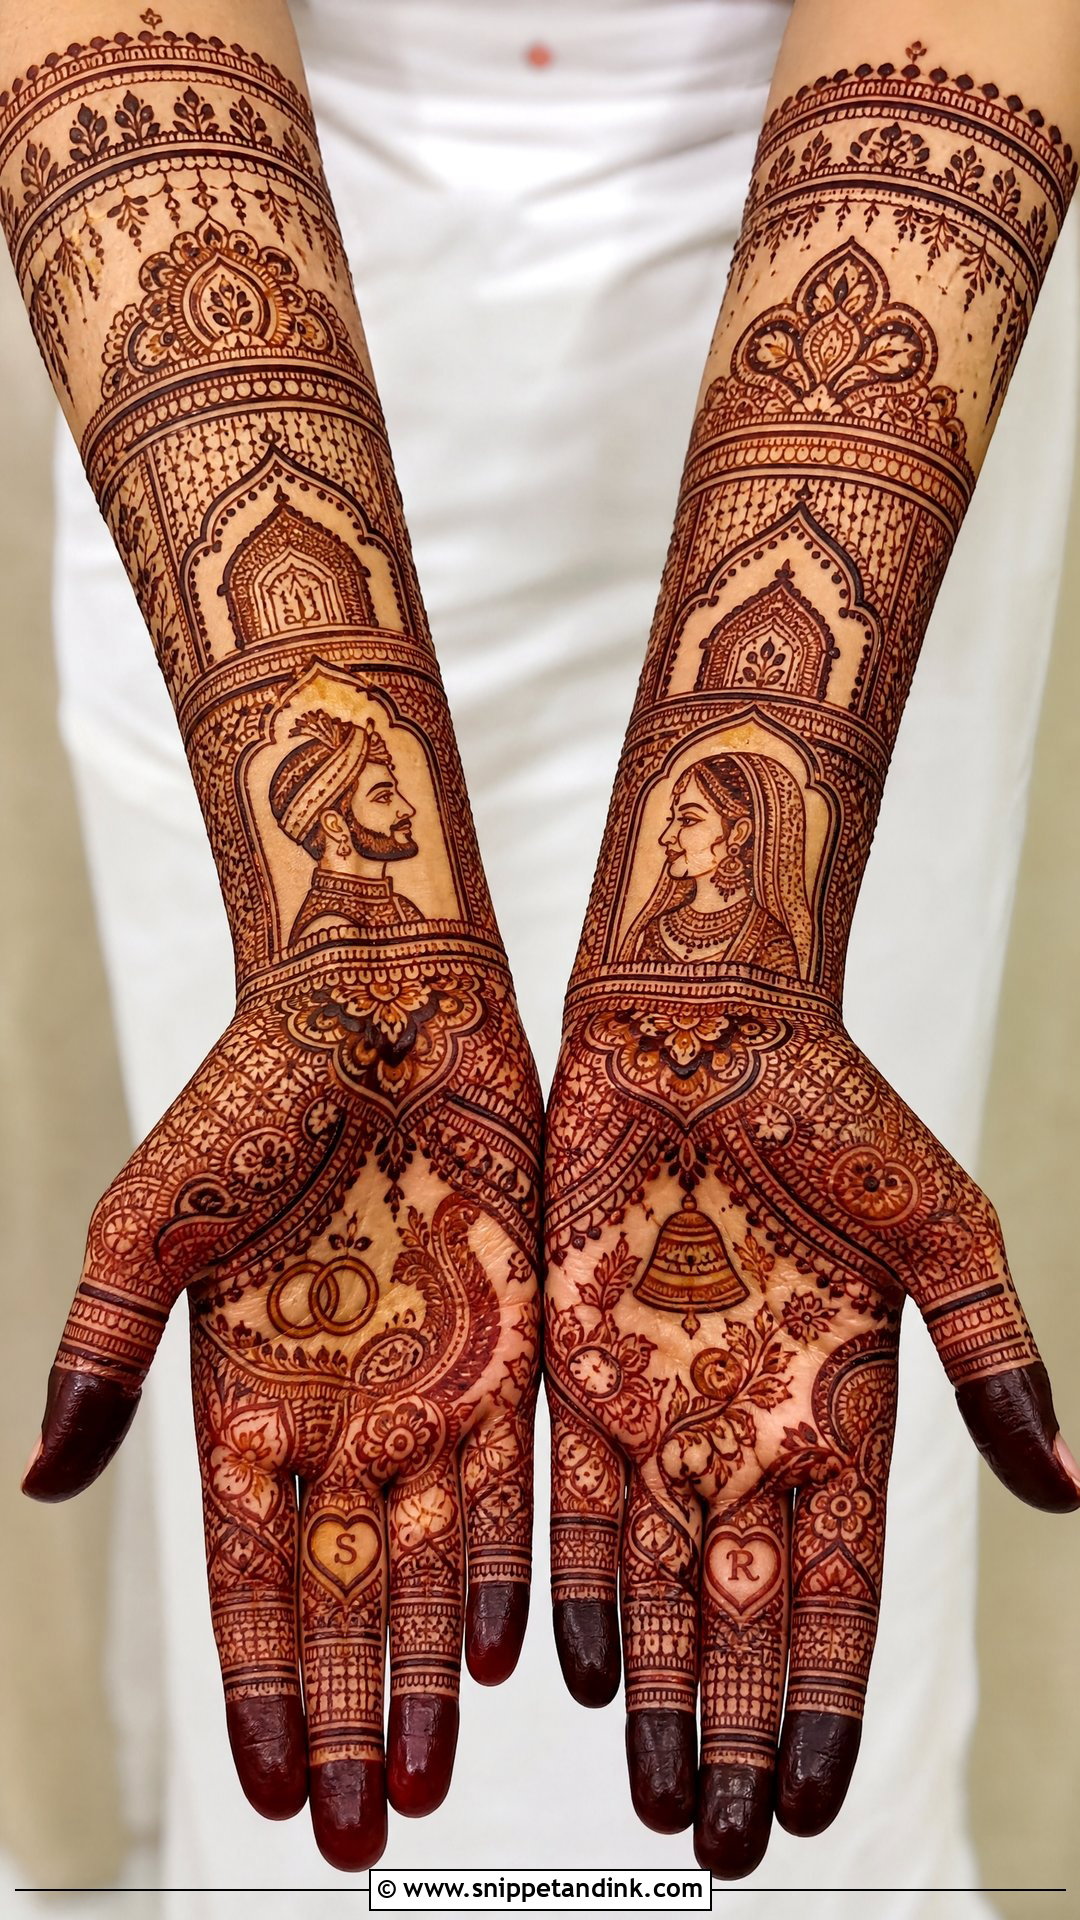
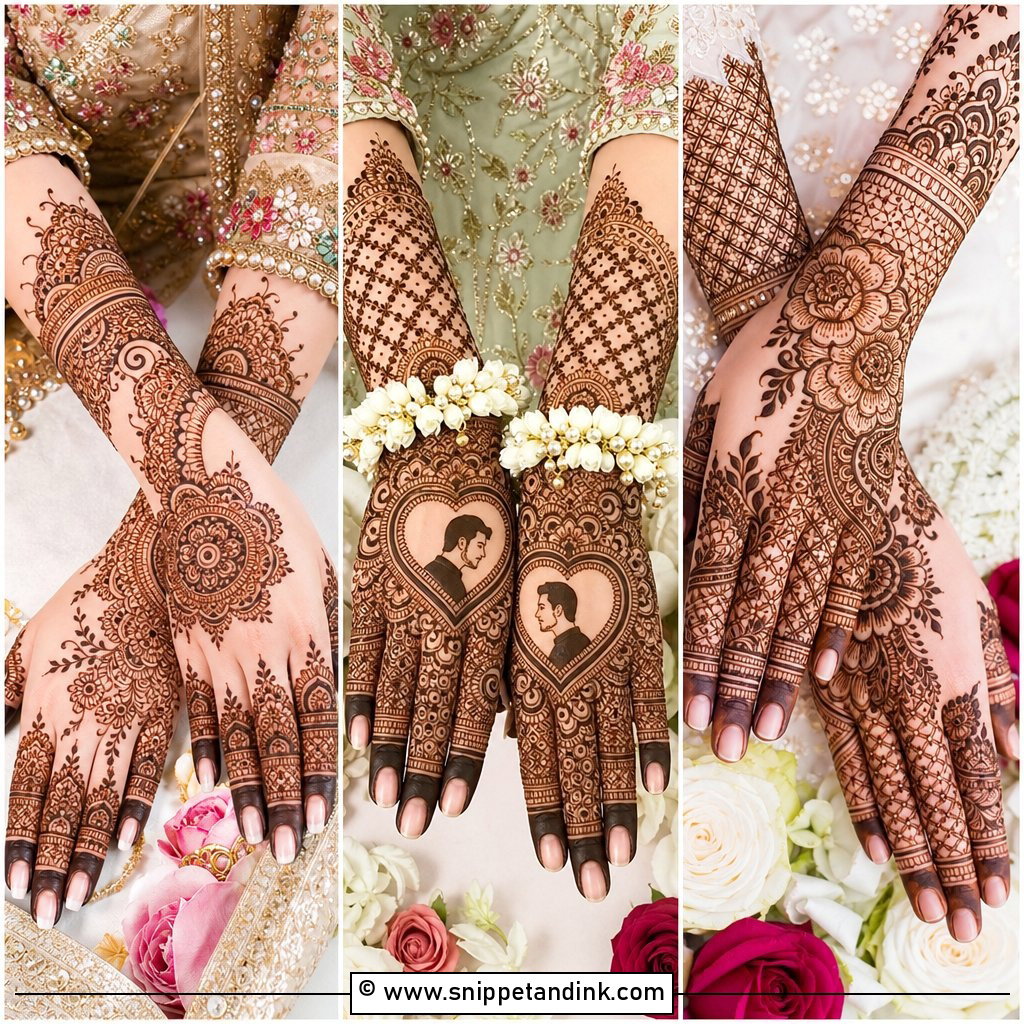
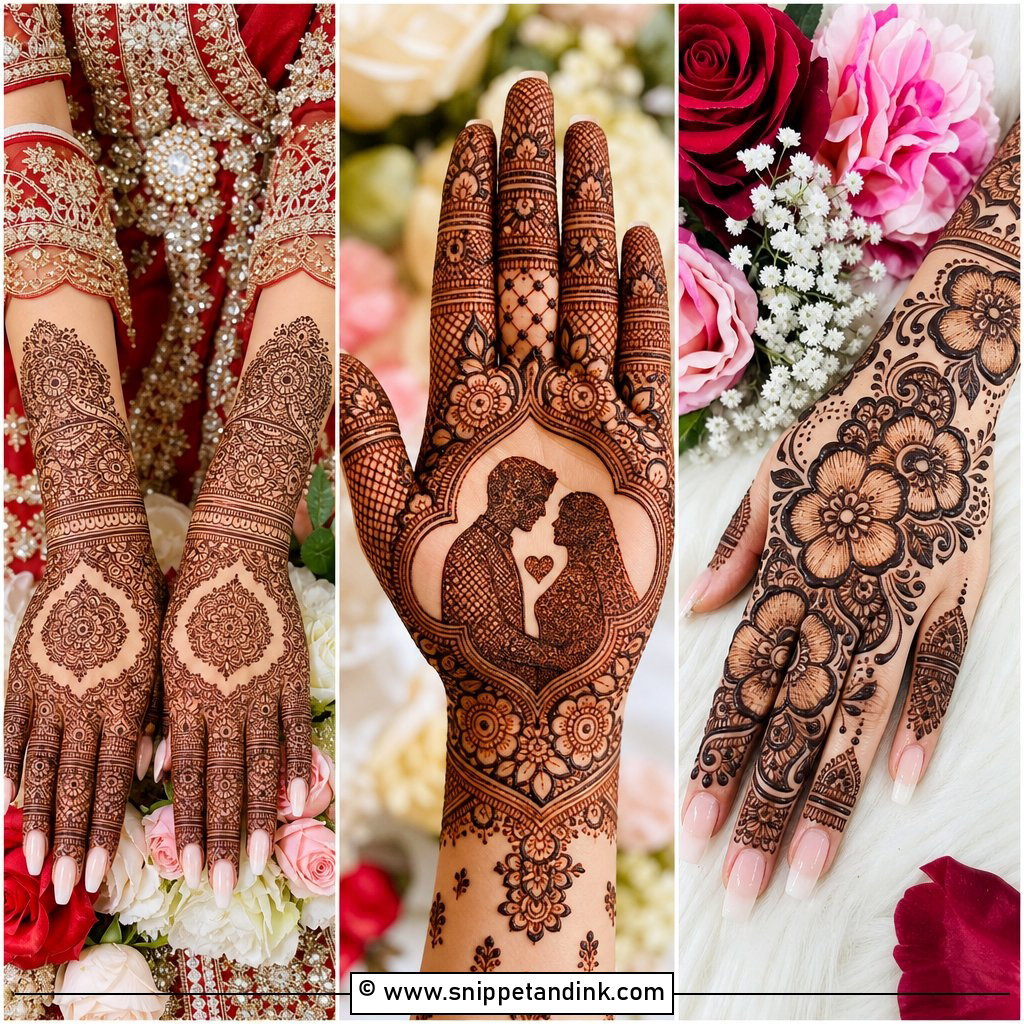
Portrait work is where an artist’s skill shows most, so look at close-up photos of her previous faces before booking. The palm or forearm holds small illustrated figures of the couple, framed by florals, paisleys and fine borders. Faces need clean, open space around them; if the filler crowds in, the features blur once the stain darkens. Some brides add initials or a tiny scene from their story. Allow extra application time, and accept that a portrait on a curved palm will always read best when the hand is held flat for the camera.
7. Rajasthani Bridal Mehndi Design
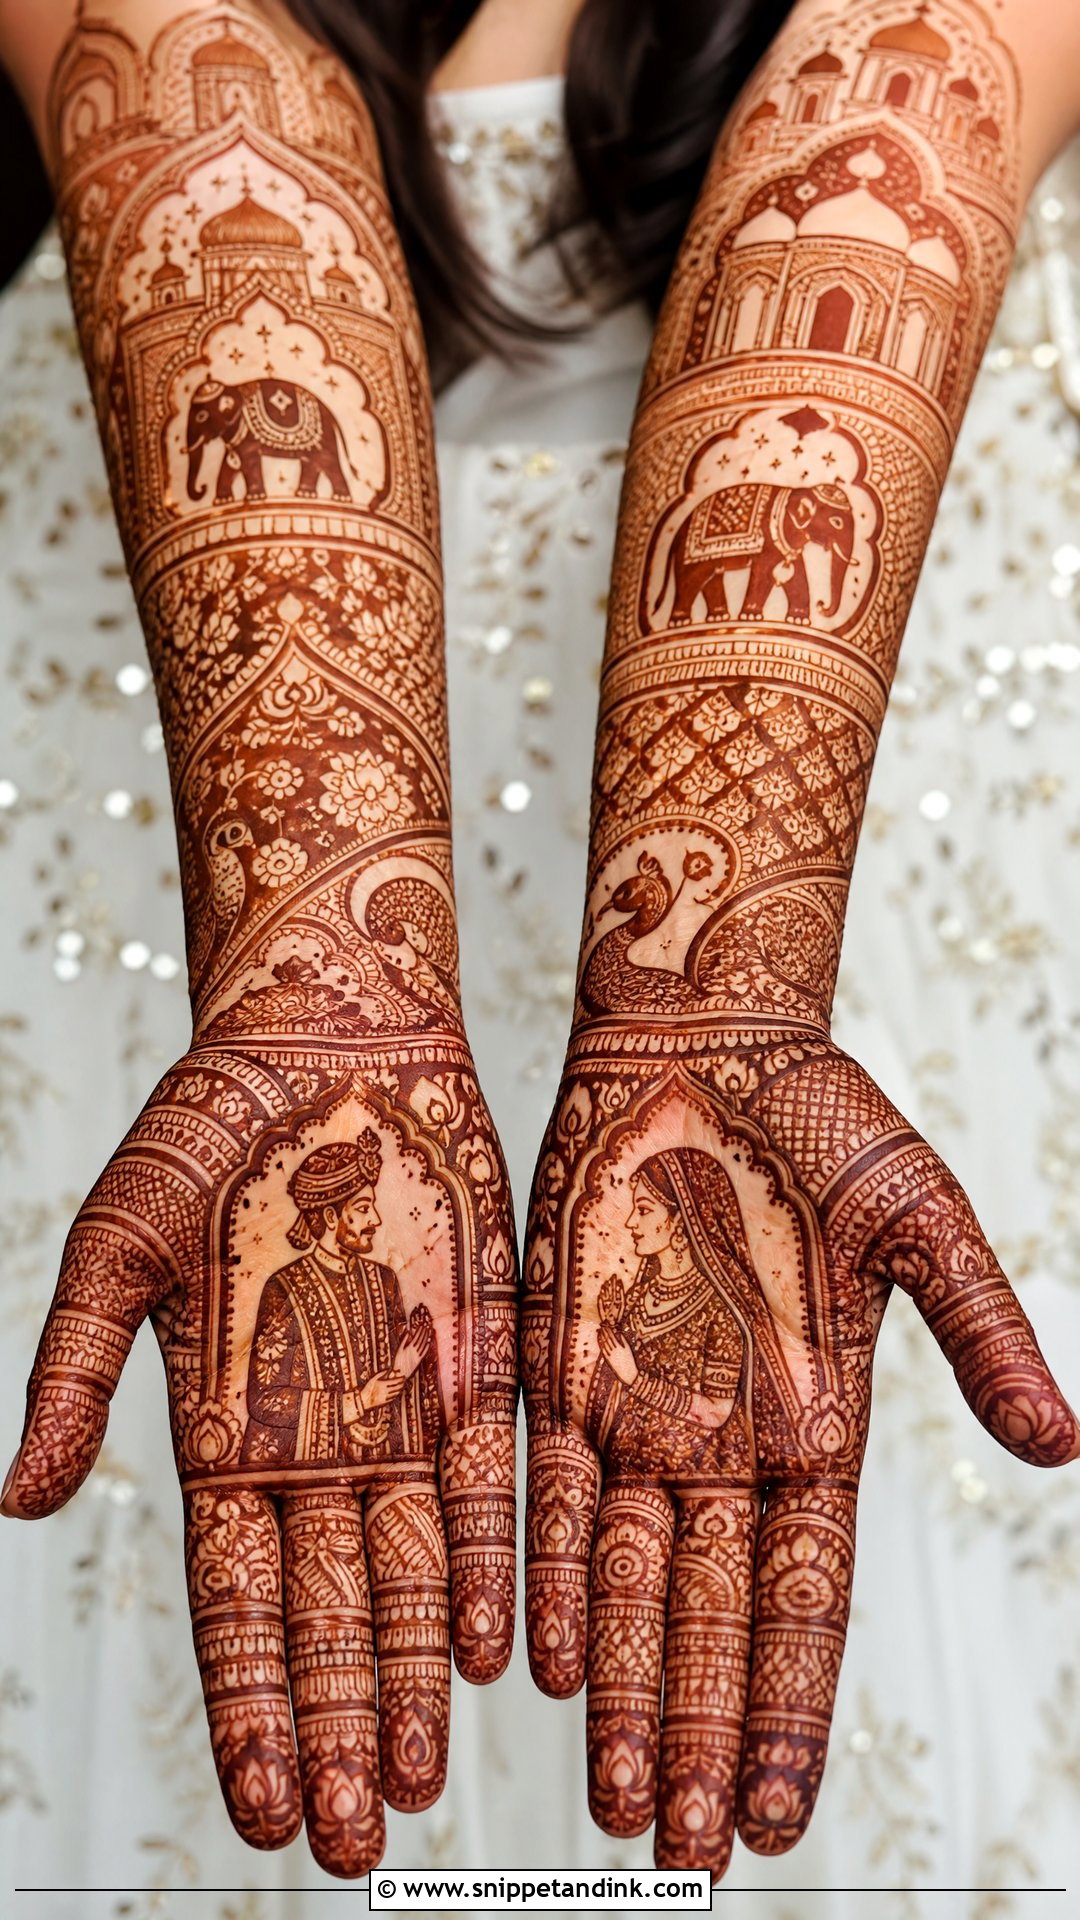
Rajasthani mehndi tells a story across the hands: the couple, elephants, palace arches, peacocks, lotus flowers and fine filler between them. Because there’s so much going on, I draw clear panel lines first, like frames in a comic strip, and fill each one separately. That’s what keeps a dense design readable rather than flat. It suits heritage-inspired outfits in red, maroon or gold. Expect a long sitting, and plan your meal and bathroom breaks before the paste goes on.
8. Moroccan Bridal Mehndi Design
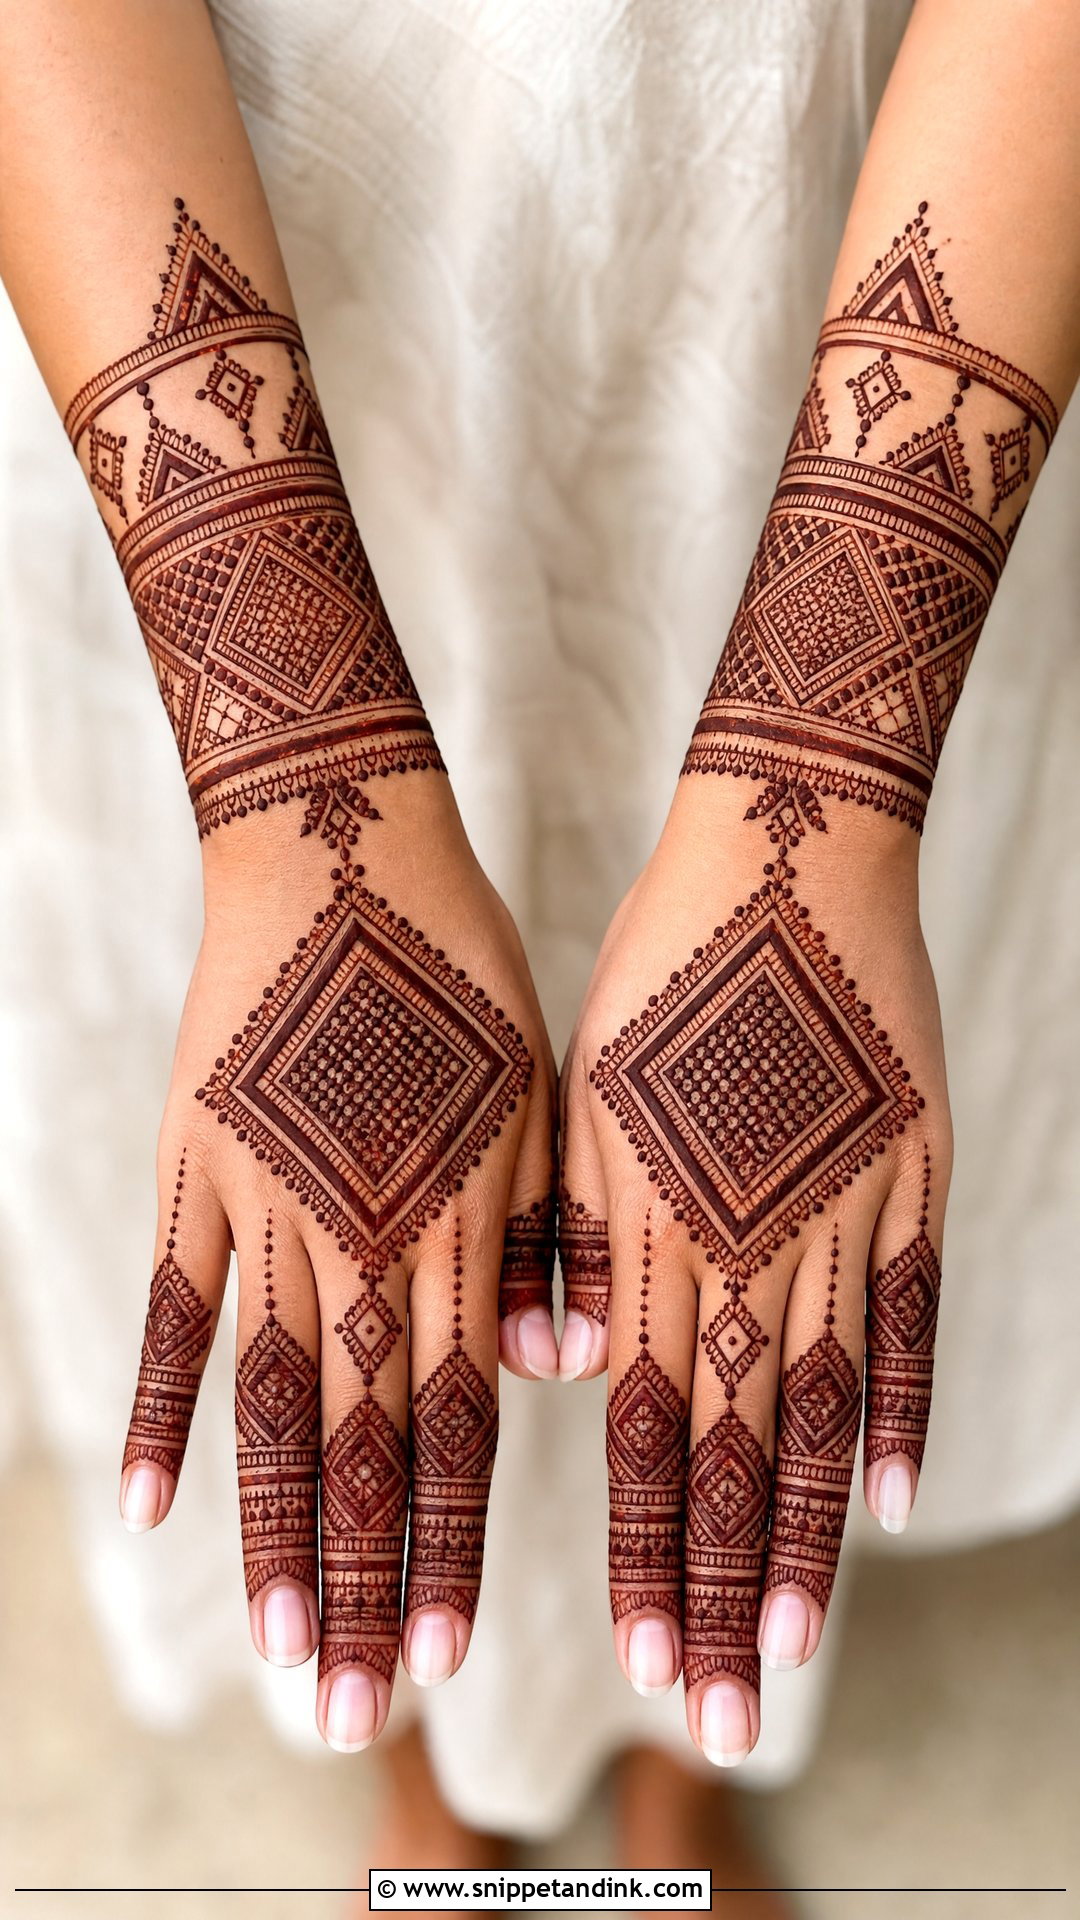
Moroccan designs are geometric: diamonds, triangles, grids and symmetrical bands instead of florals. On a bride they can cover the fingers, back of the hand, wrist and forearm in a tidy, almost architectural layout. Straight lines are less forgiving than curves, so I work slowly and check alignment from a distance after each band. A few tiny flowers or dotted borders soften the edges if pure geometry feels too stark. It’s a strong option with a contemporary or fusion outfit and minimal jewelry.
9. Back Hand Bridal Mehndi Design
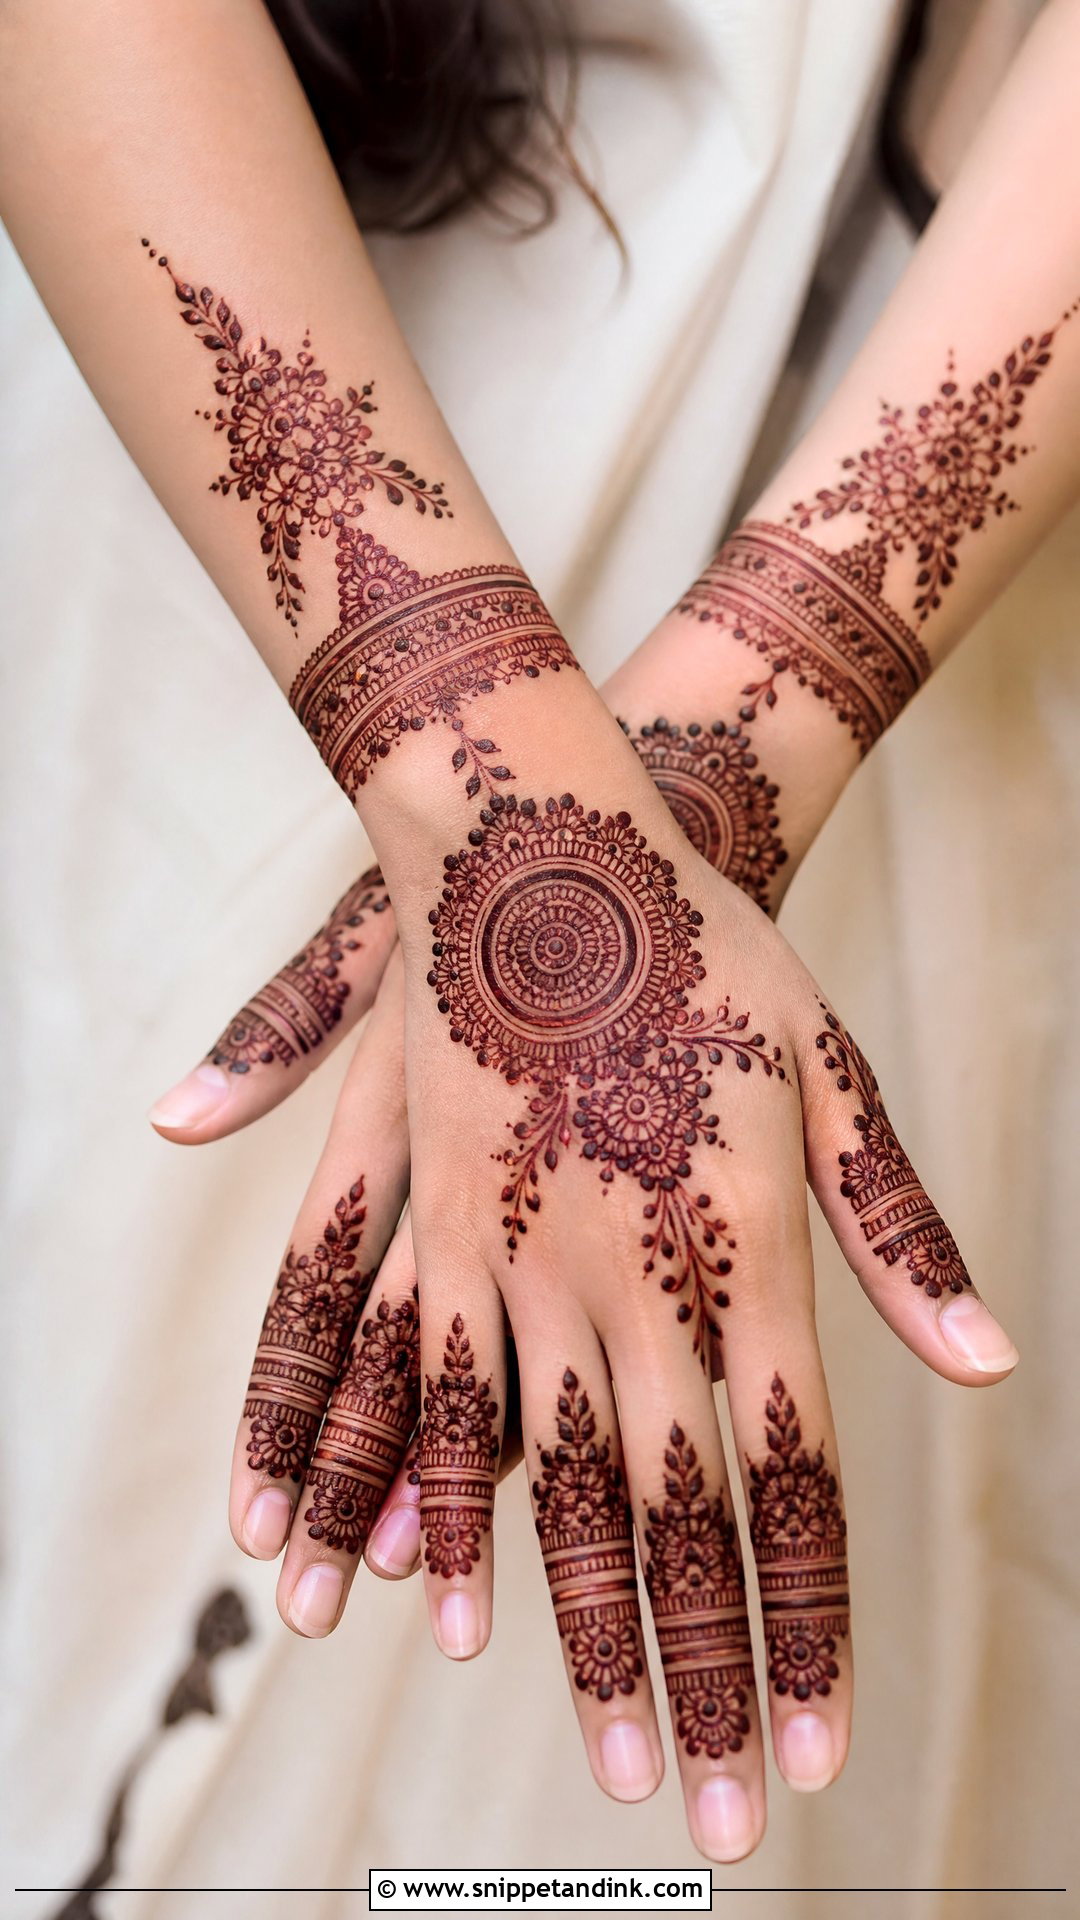
The back of the hand gets photographed more than any other part: ring shots, bouquet shots, jewelry close-ups. Modern back-hand designs might use a central mandala, a diagonal trail, a bracelet cuff or finger bands, and the best ones balance fingers, wrist and center so nothing looks lopsided. I keep the knuckle area especially clean, since skin there folds and crowded filling looks messy the moment you make a fist. It pairs easily with a haath phool and rings, and suits brides who’d rather leave the palm lighter.
10. Front Hand Bridal Mehndi Design
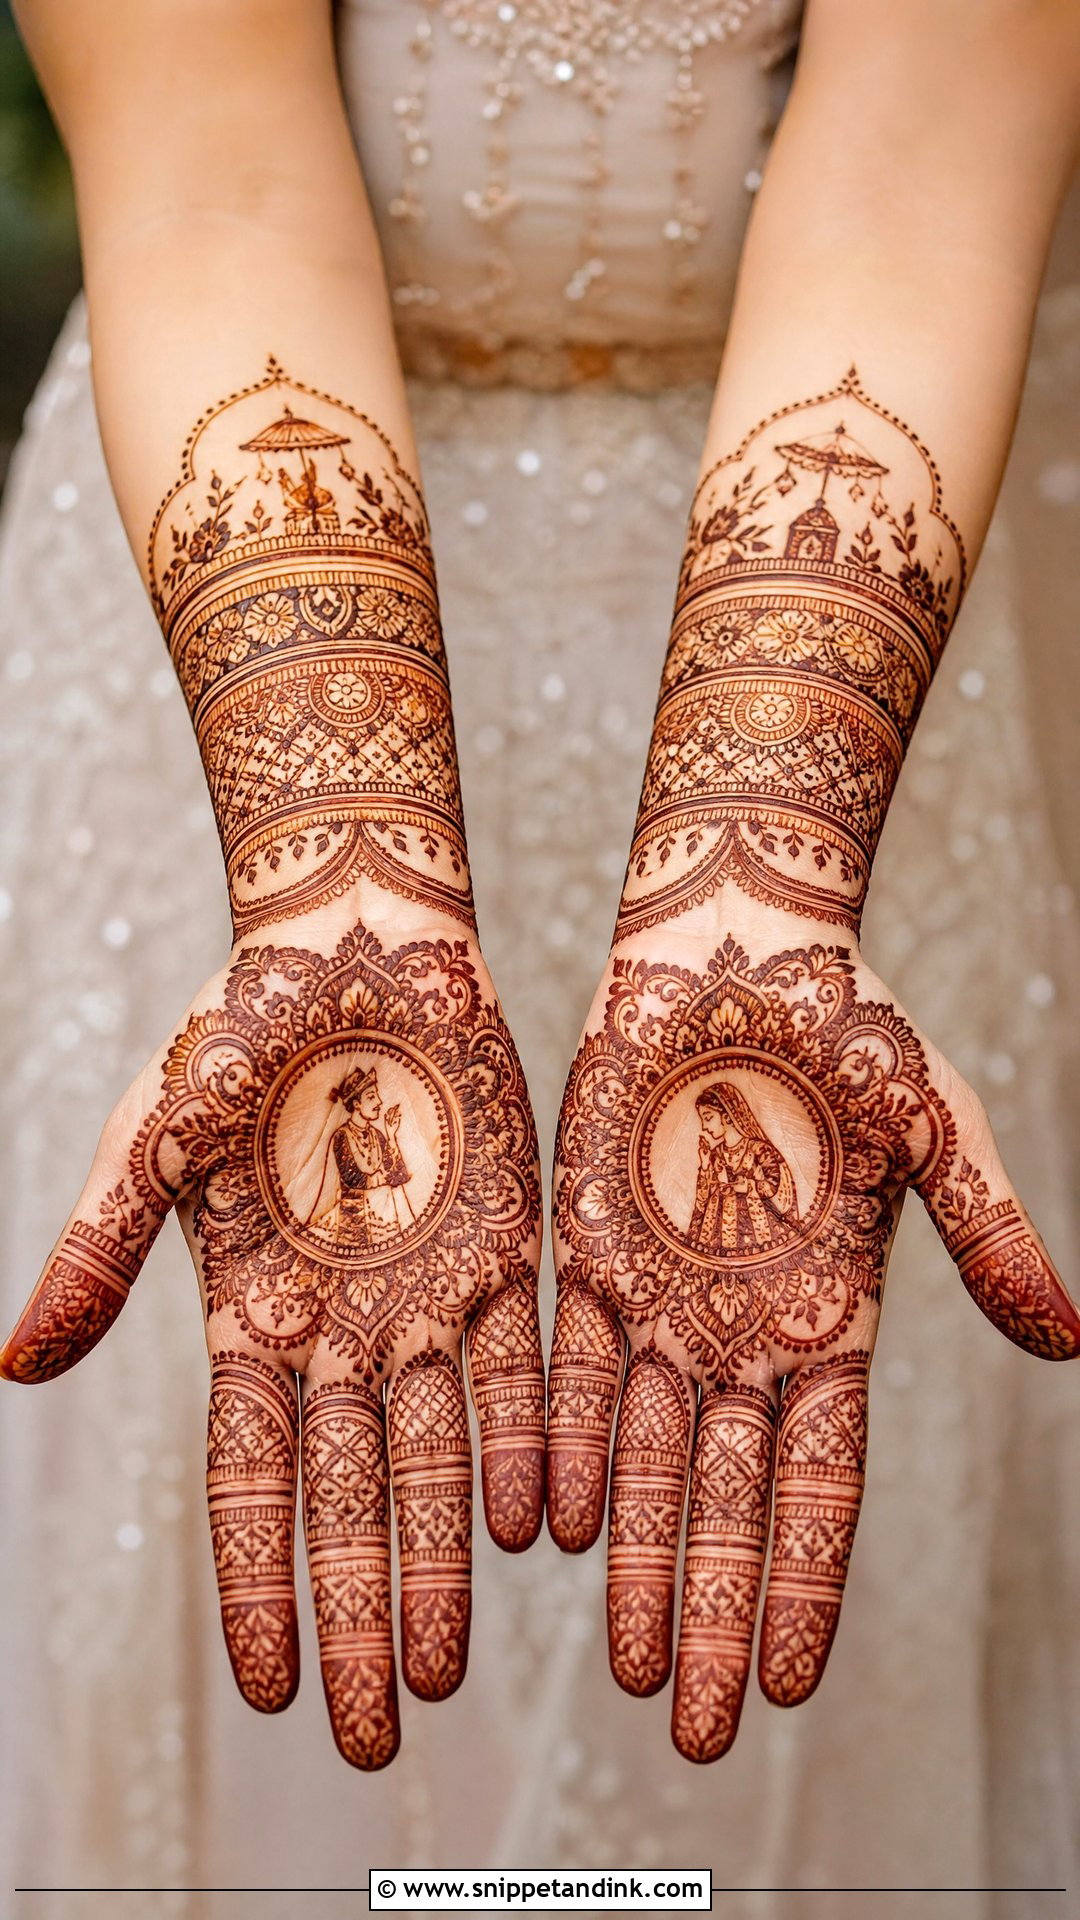
Palms take the darkest stain on the body, because the skin there is thick and absorbs the dye well. That’s why bold central motifs look so rich in a front-hand design: a mandala in one palm and a paisley cluster in the other, or matching floral panels on both. Many brides add initials or symbolic motifs inside the palm. I keep the finger detailing identical on both hands and connect palm to wrist with a soft border, so the hands read as a pair in ritual photos where they’re held together.
11. Bridal Mehndi Design For Fingers
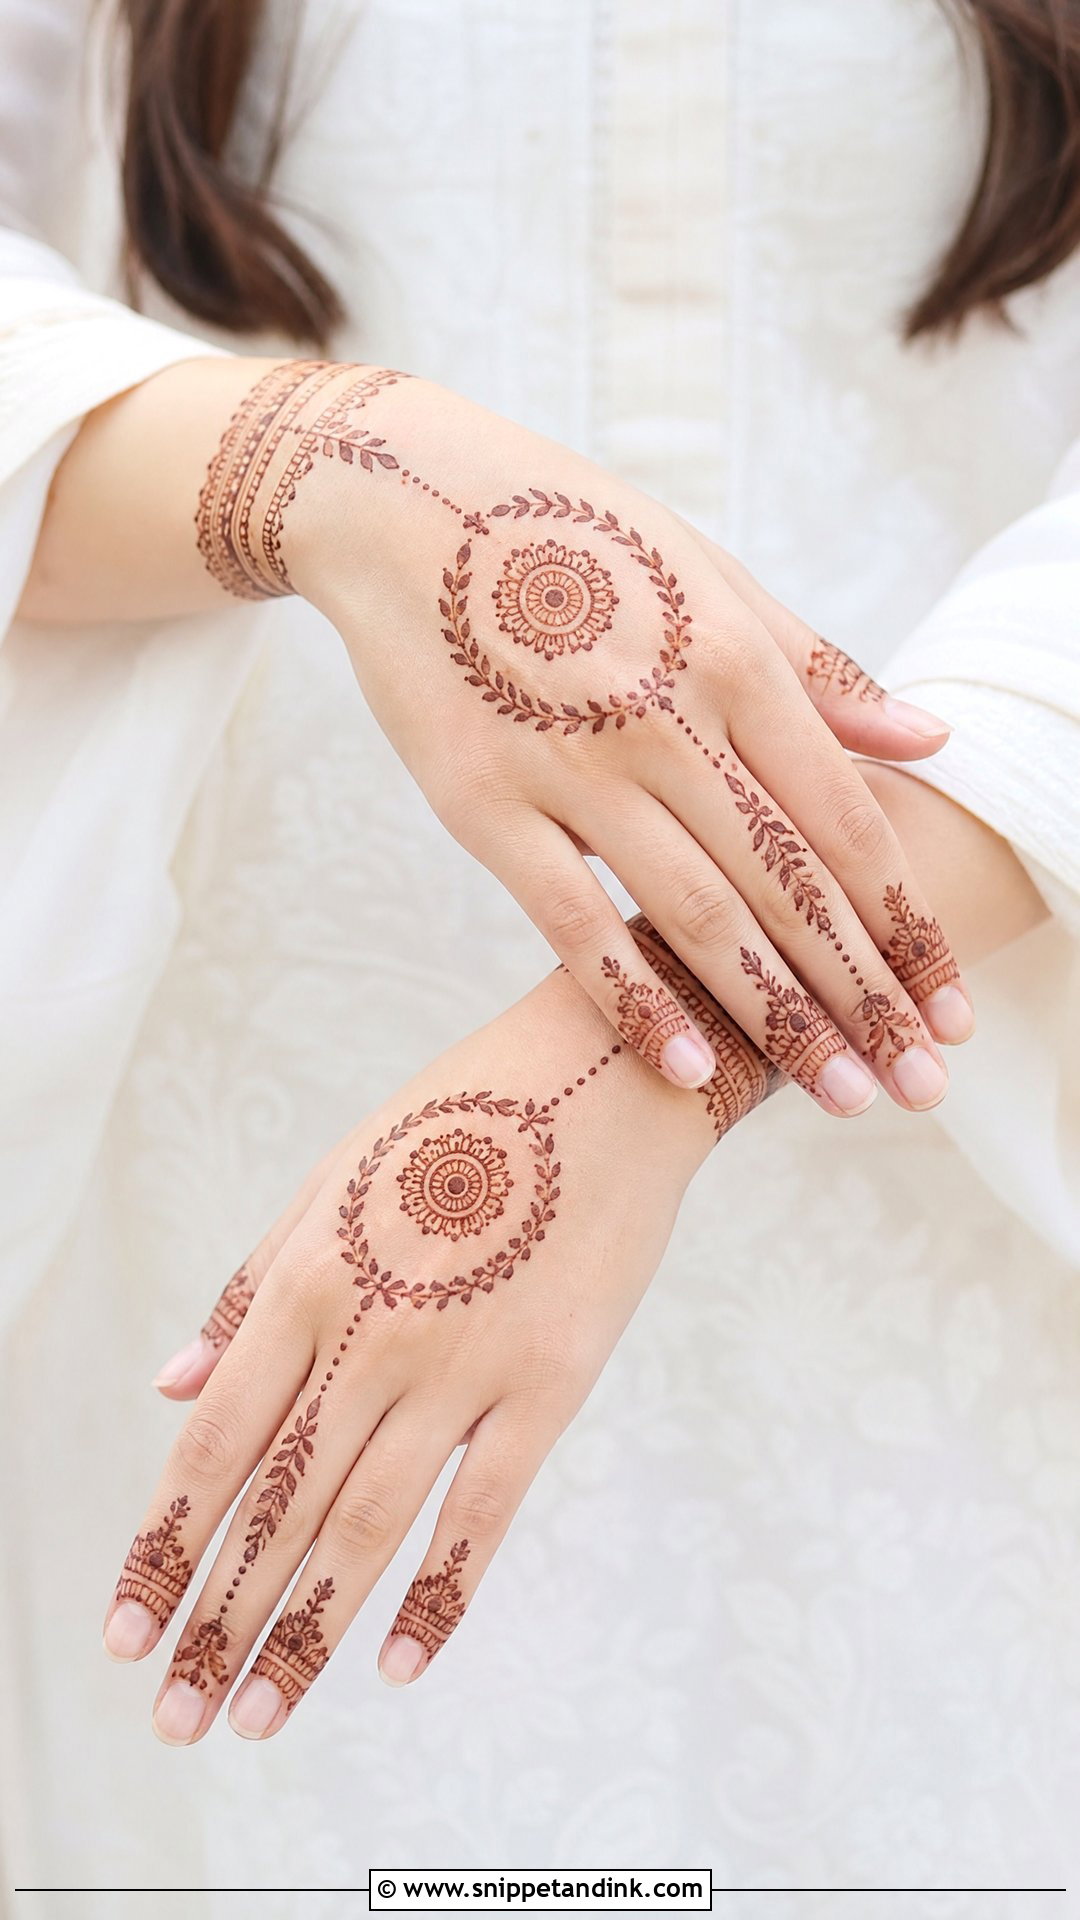
Here the detail lives on the fingers rather than the palm: fingers with rings, leafy bands, dots and fine lace lines, with the palm almost bare or holding a small mandala. Fingertips stain very dark, so I keep the bands thin to stop them looking heavy. A wrist bracelet or a slim connecting line to the back of the hand makes it feel finished rather than abandoned halfway. It’s comfortable to wear and looks especially neat with long nails and simple jewelry.
12. Bridal Mehndi Design With Lotus Motif
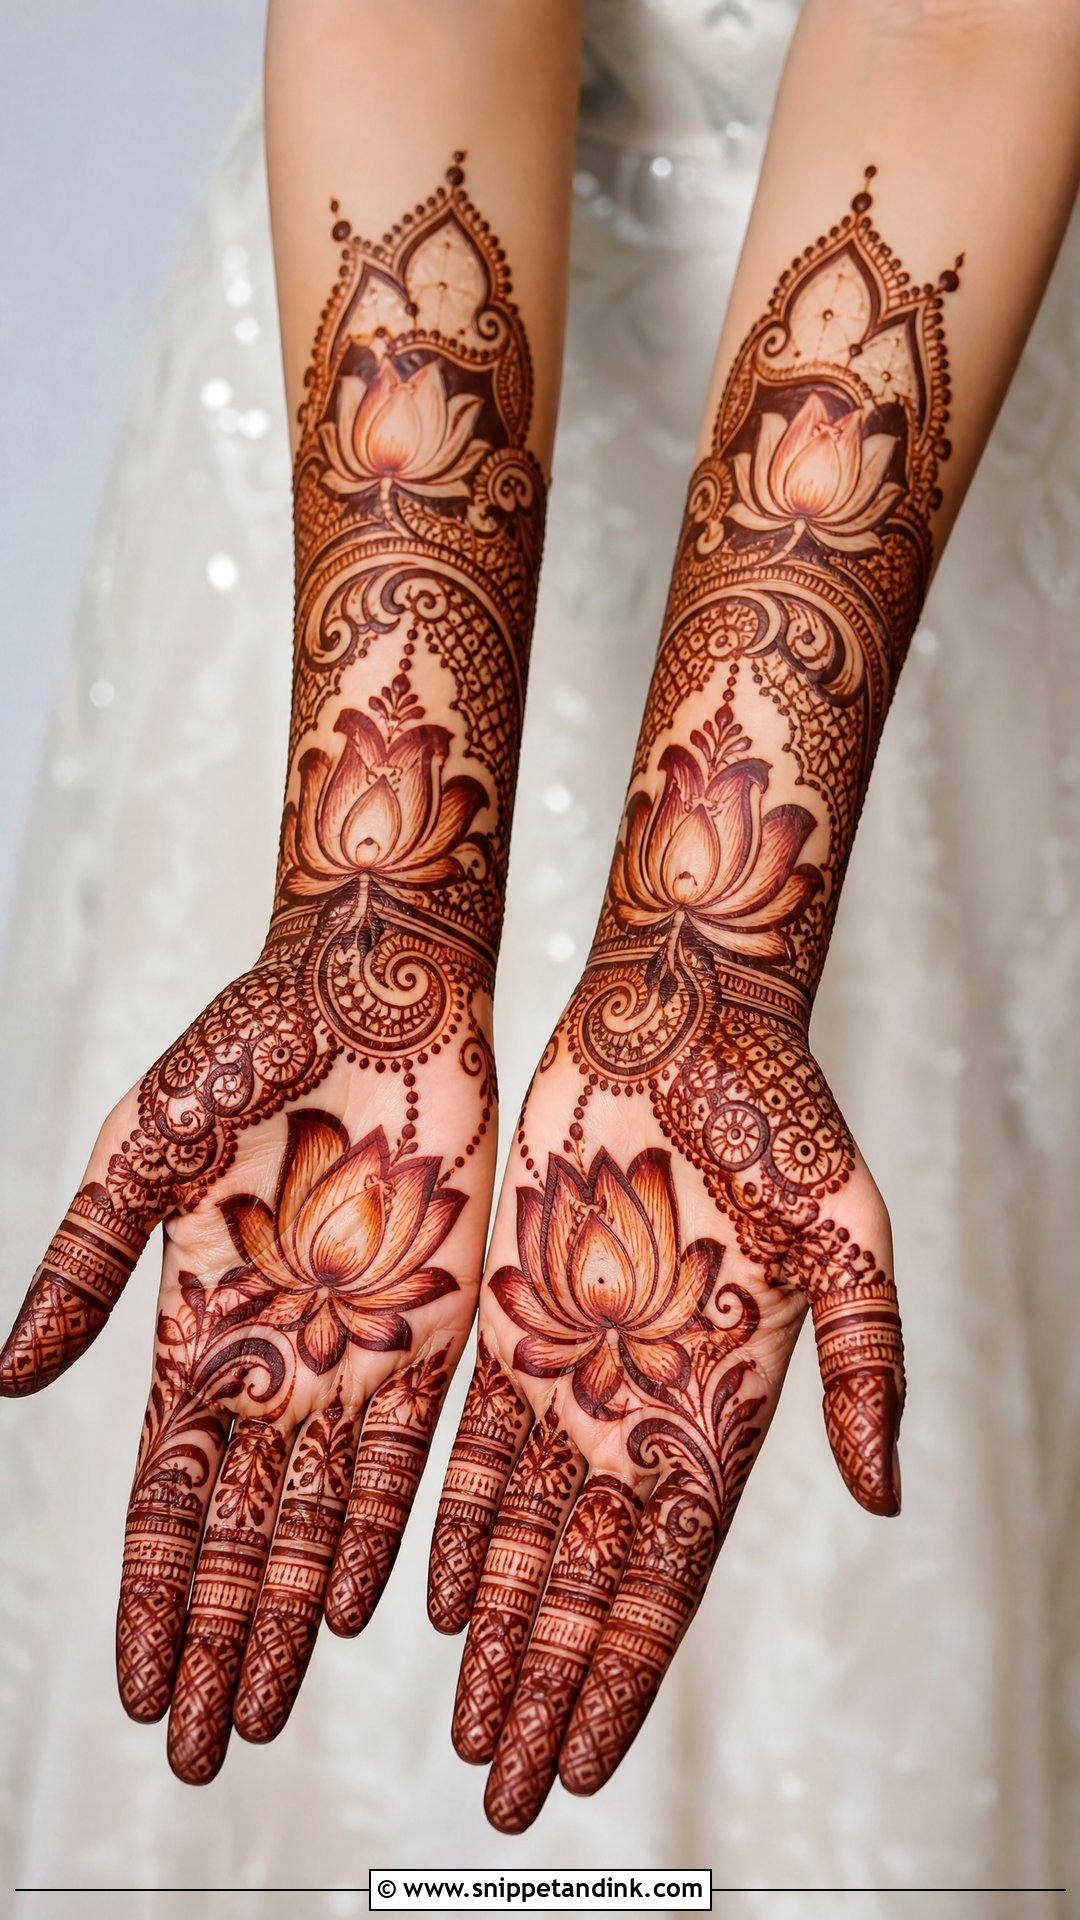
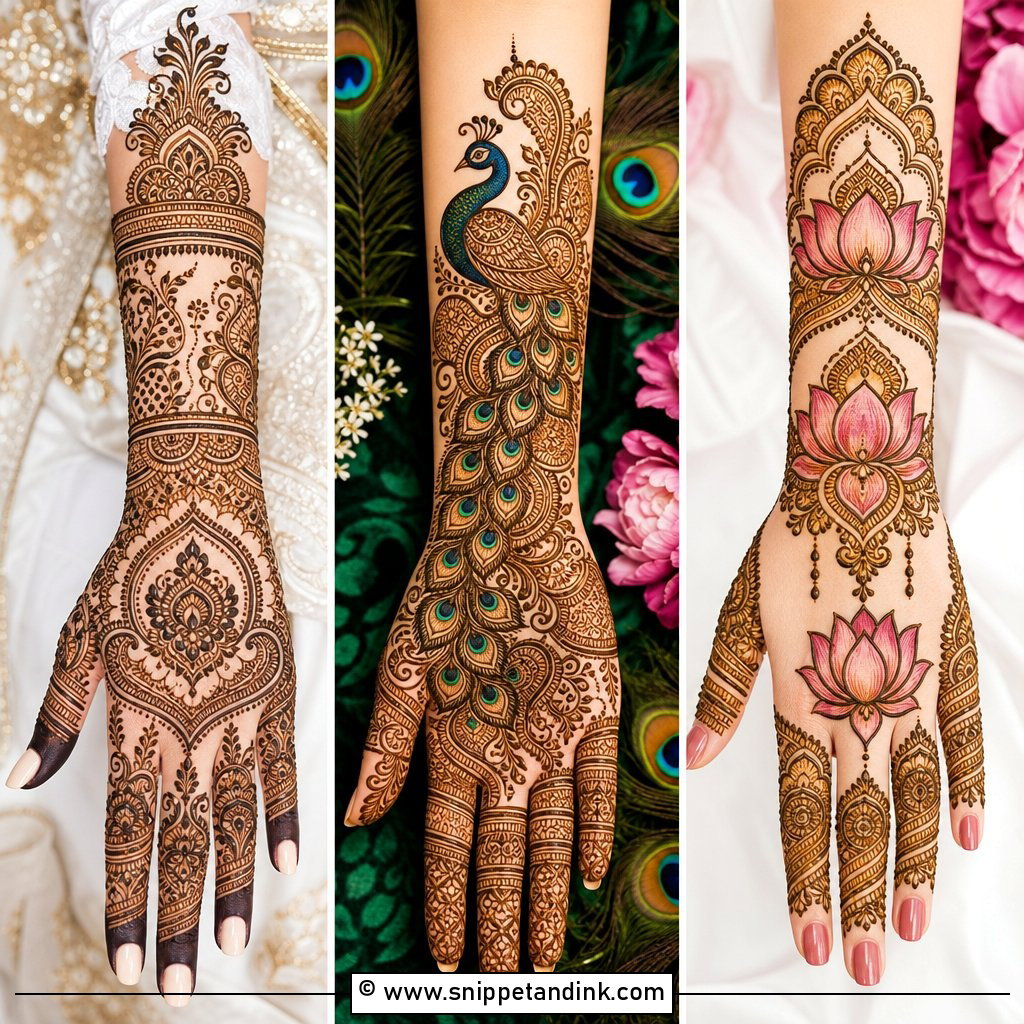
The lotus can be a large palm motif, the centerpiece of a wrist cuff, or a repeating pattern up the forearm. I draw the petals with a clean outline and soft shading at the base, leaving the tips open so they don’t fill in as the stain deepens. It pairs with paisleys, vines and jaali for a fuller layout. For a lighter result, keep one large lotus and cut back the filler around it. The shape carries meaning for many brides, which is often why they ask for it.
13. Bridal Mehndi Design With Peacock Motif
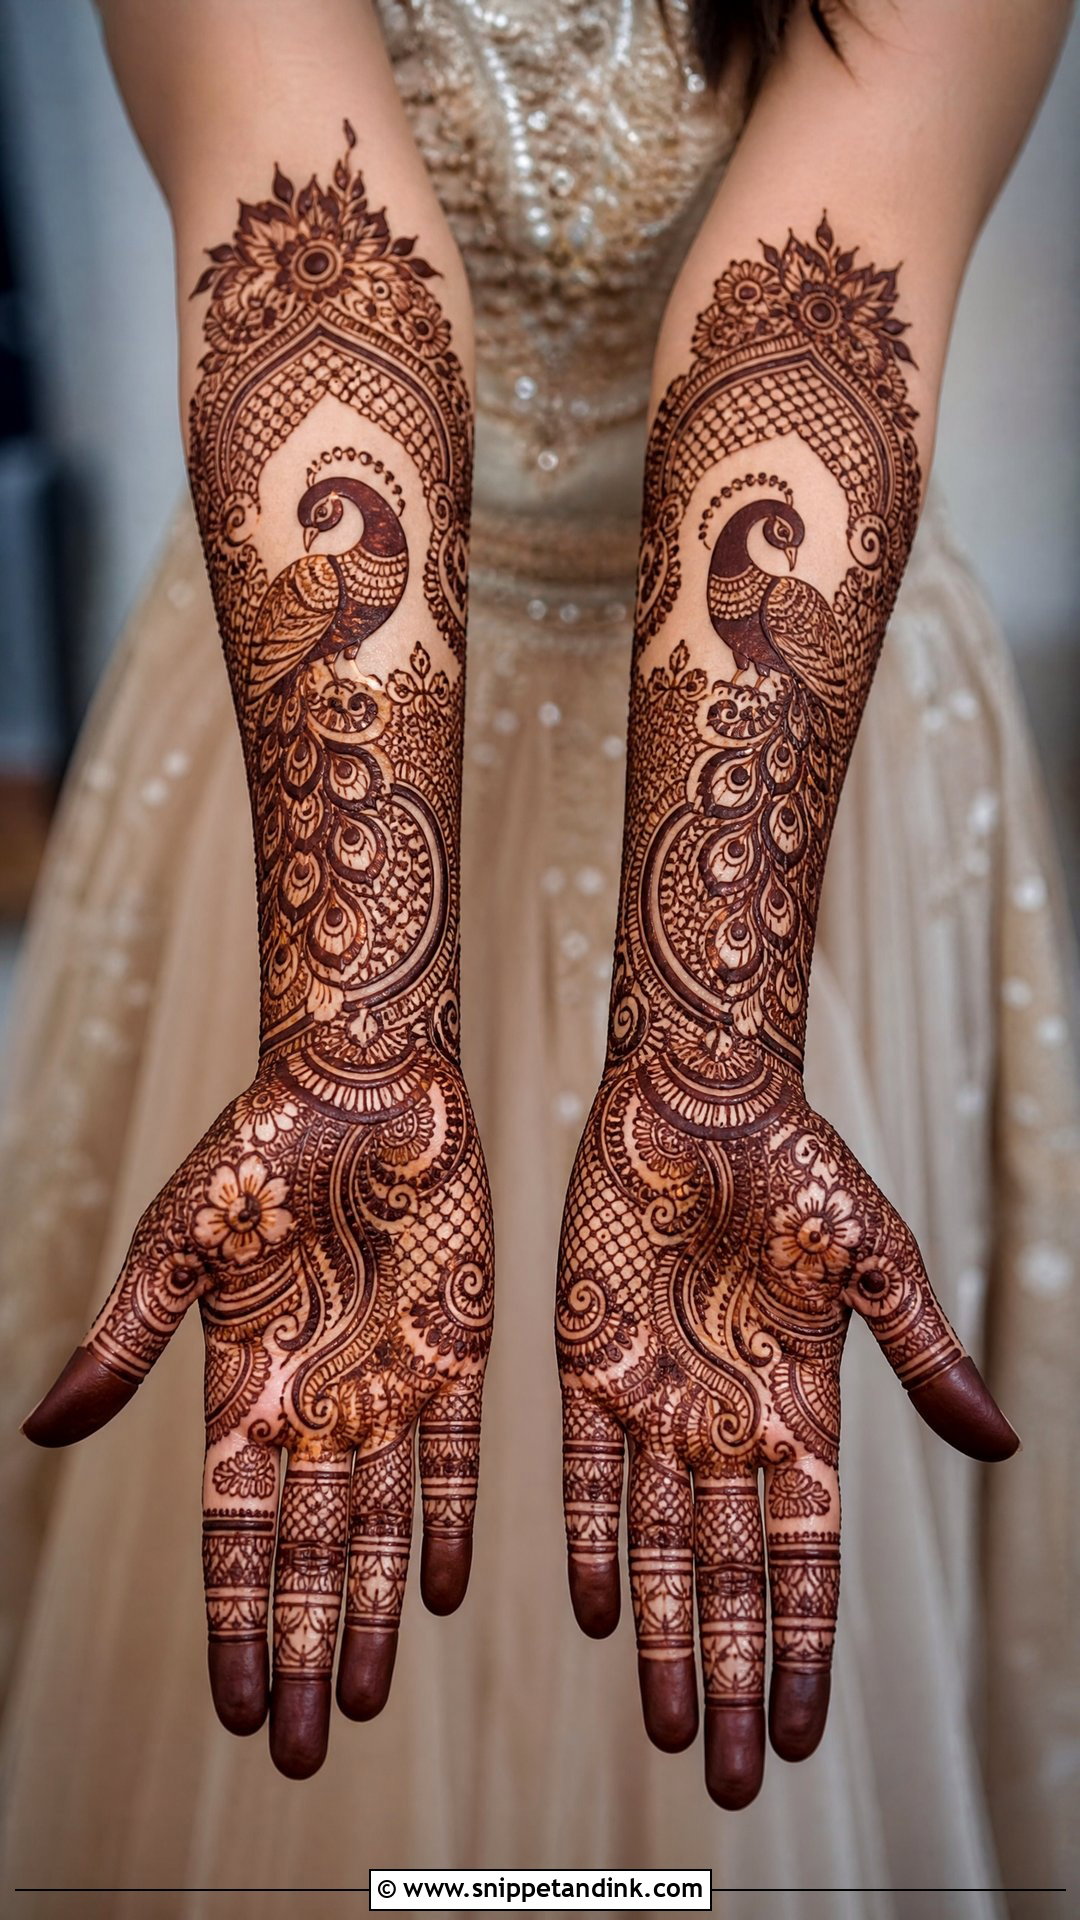
One bold peacock reads better than five small ones, and that’s how most modern versions handle it now. The bird sits on the palm, wrist or forearm, framed by paisleys, flowers and fine mesh, with the feathers sweeping into the fingers or wrapping the wrist like a cuff. The feather lines need space between them; drawn too close, they merge as the color darkens over the next two days. It suits classic outfits, silk sarees and heavy traditional jewelry.
14. Bridal Mehndi Design With Jaali Pattern
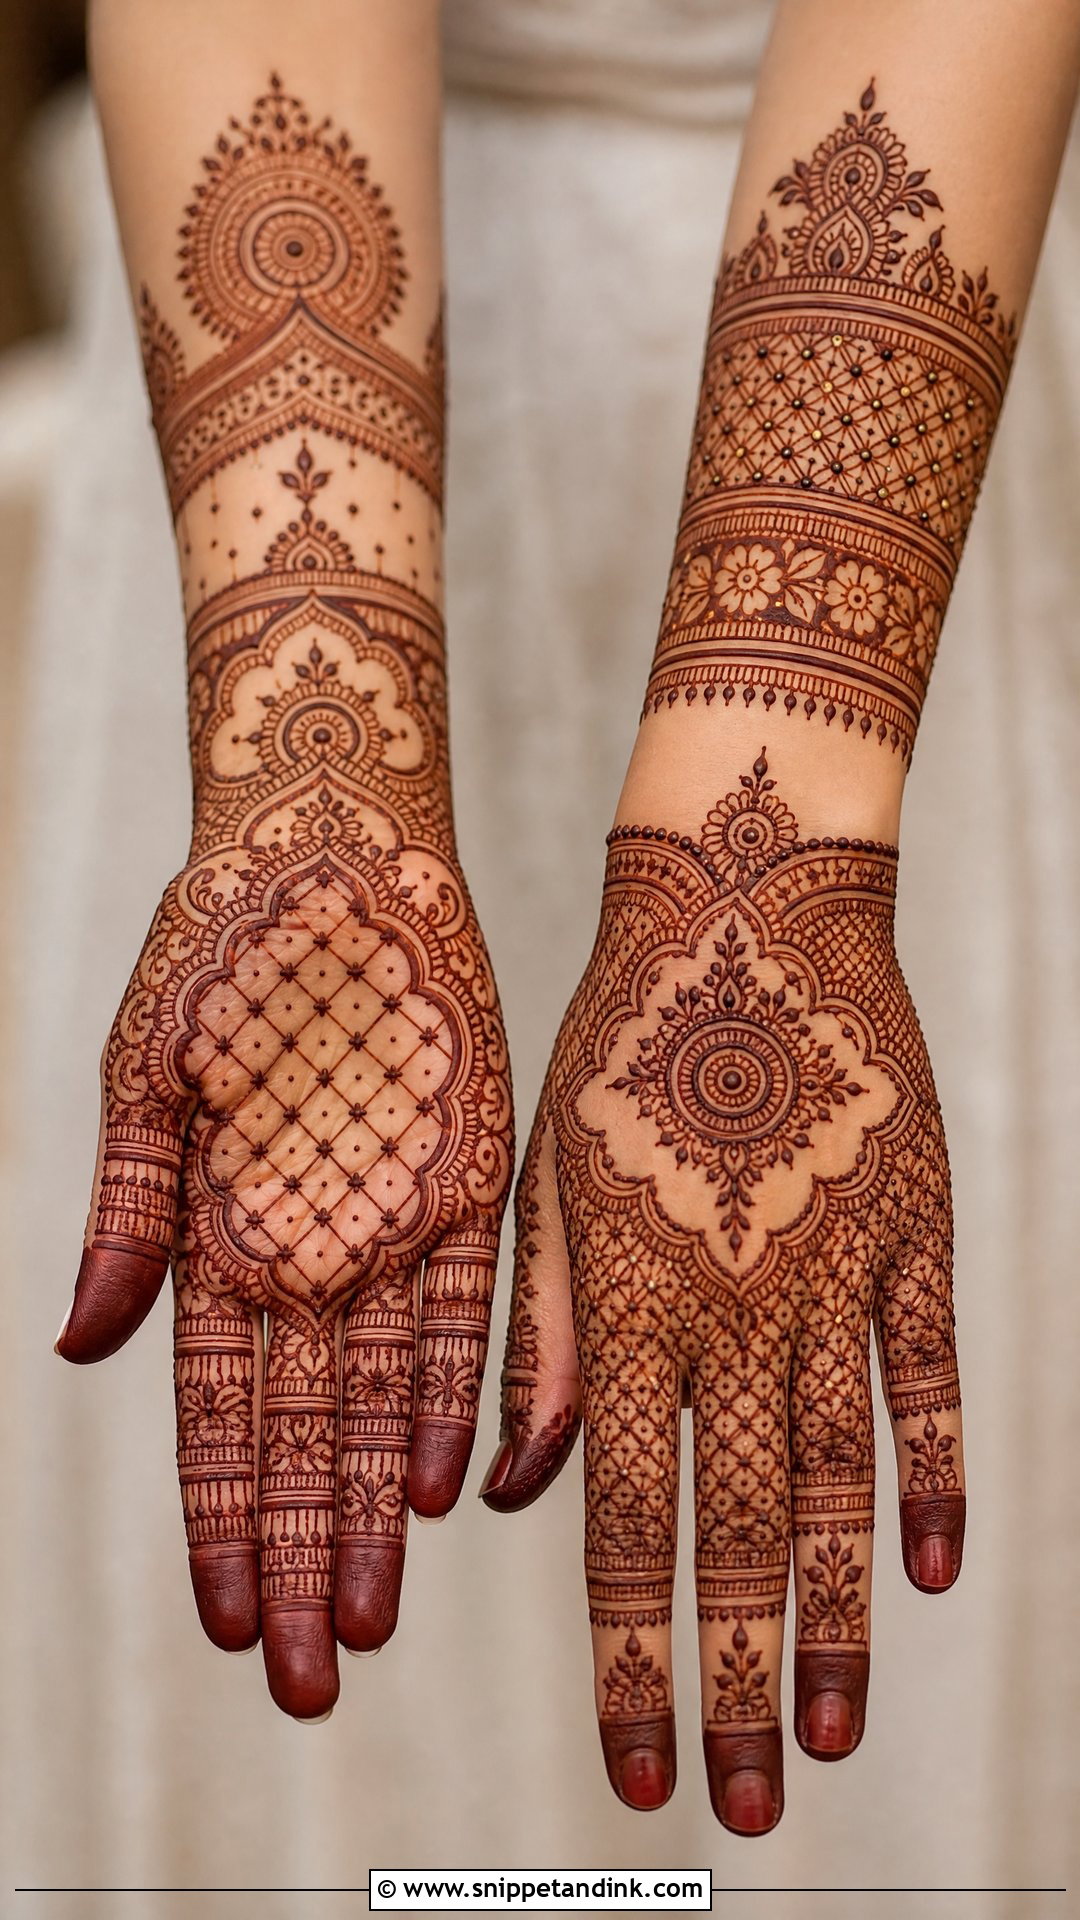
Jaali gives the hand a lace effect through mesh grids, fine checks, diamonds and tiny dots. It follows the shape of the back of the hand and forearm especially well. Used everywhere, though, it turns into texture with no focus. I place jaali in a few chosen panels and frame each one with a bold motif, so the eye has somewhere to rest. The lines have to be very fine and even, which means fresh, smooth paste and a steady cone.
15. Bridal Mehndi Design With Wedding Hashtag
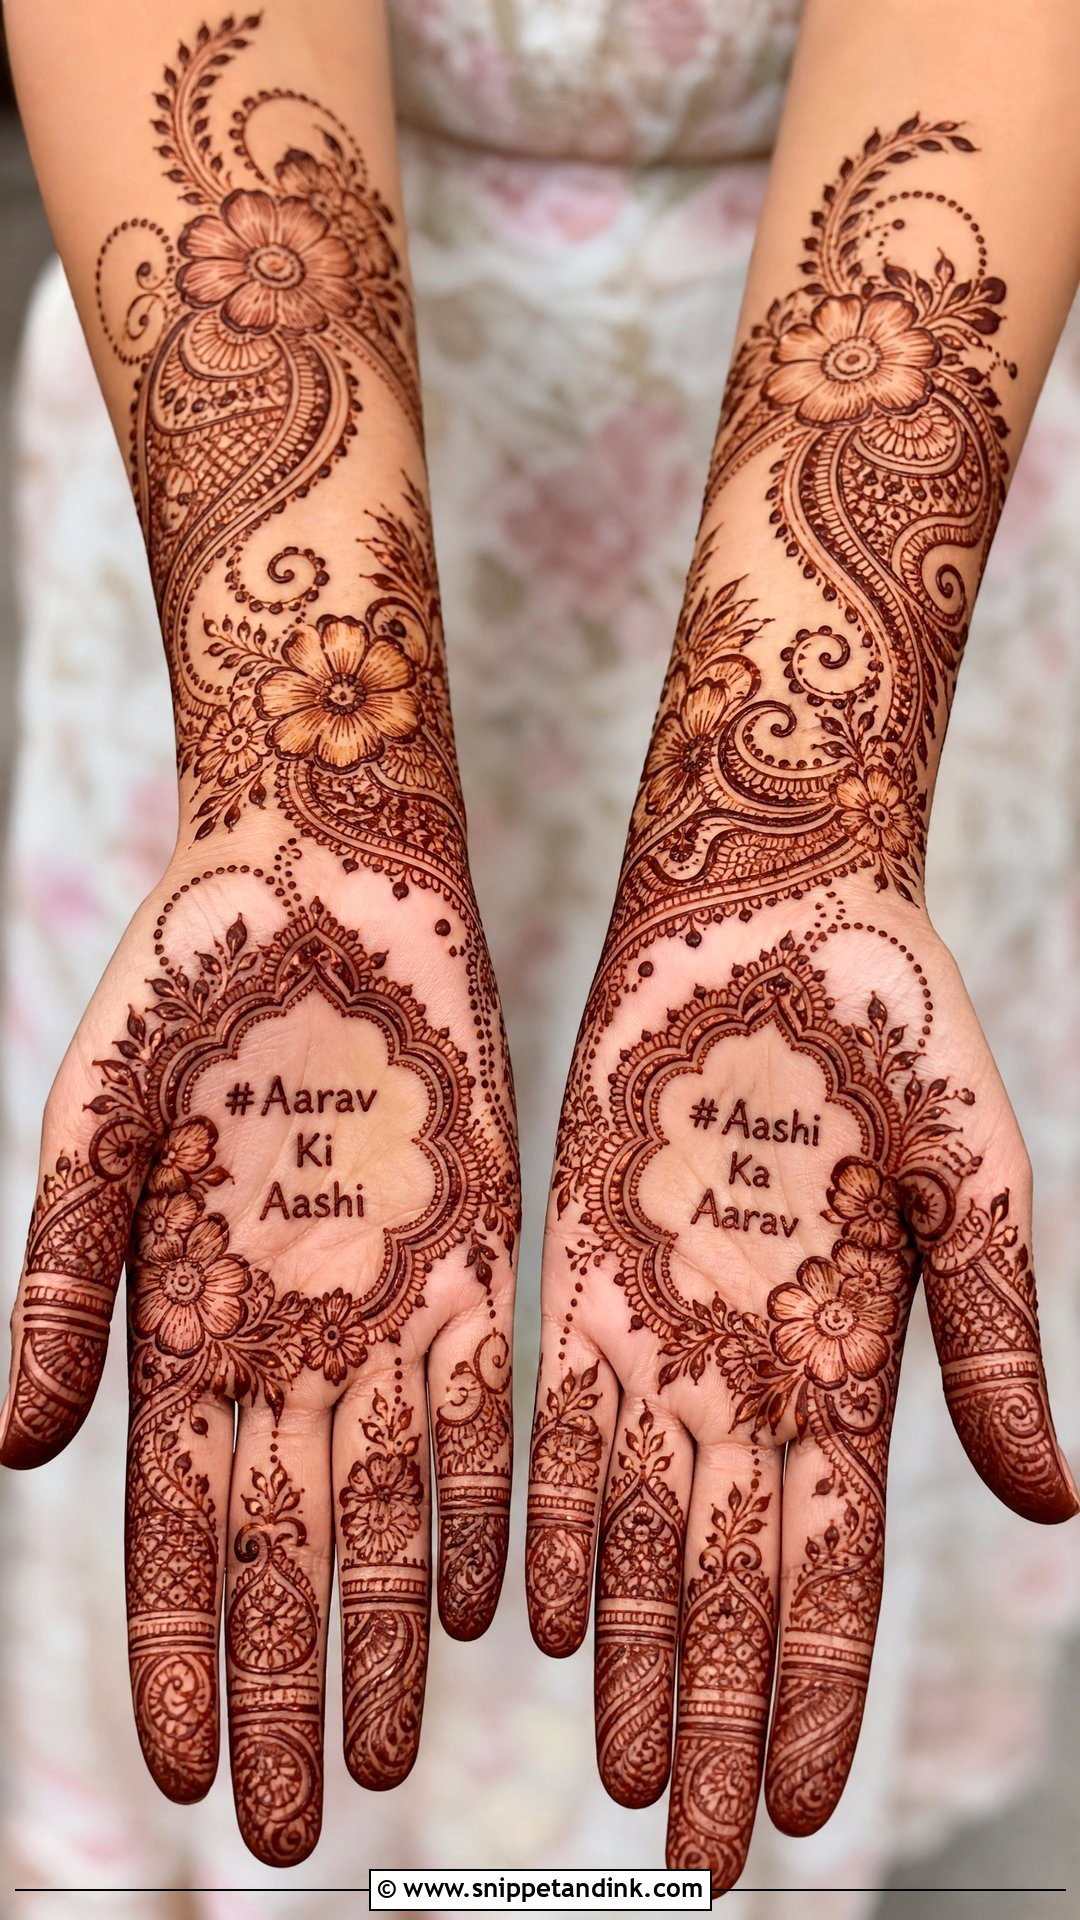
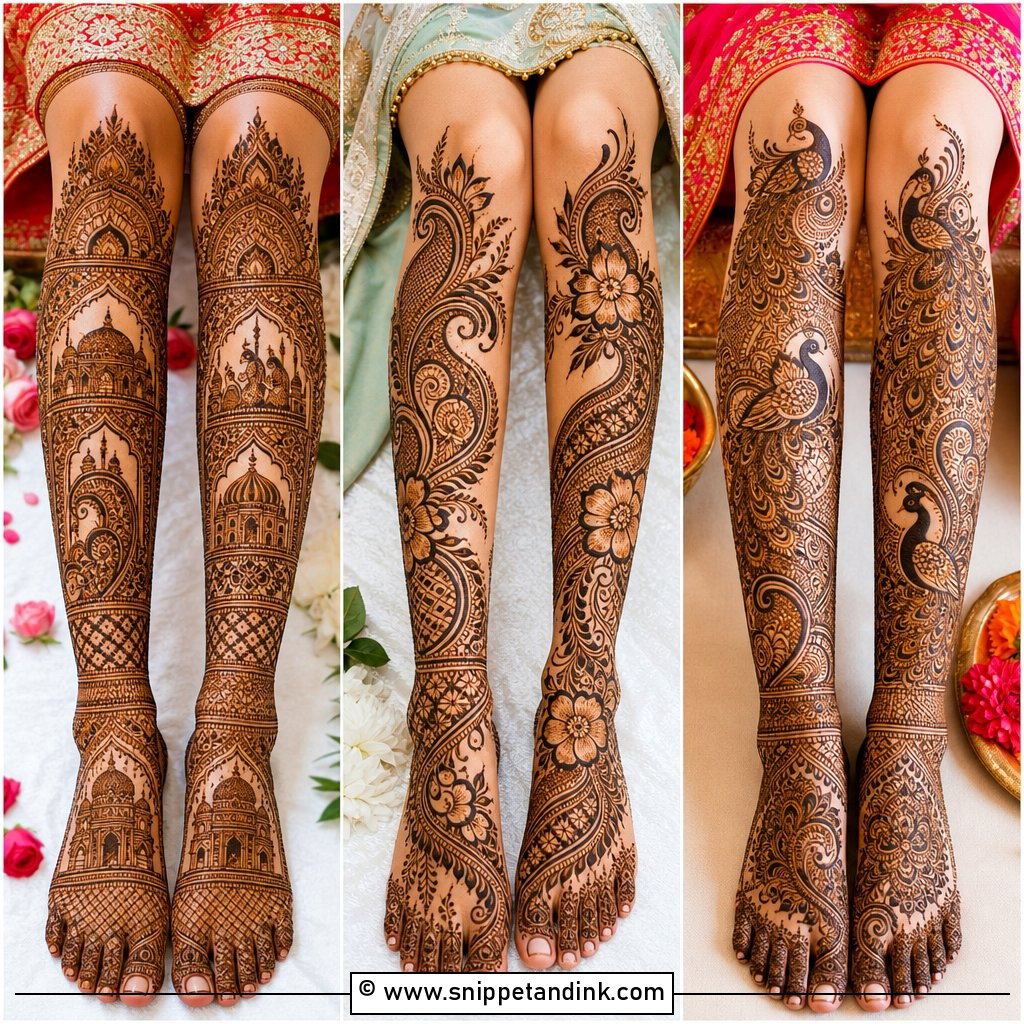
A hashtag hidden in a wrist band or framed on the palm is a playful, modern addition to traditional henna. Readability is everything. Short hashtags work; long ones get cramped, and letters with small enclosed spaces like ‘e’ and ‘a’ can fill in when the stain darkens. I write the text in clear, slightly open lettering and surround it with florals or a mandala border. Guests do notice it in close-ups, and it gives the photographer one more detail to catch.
16. Bridal Mehndi Design With Initials
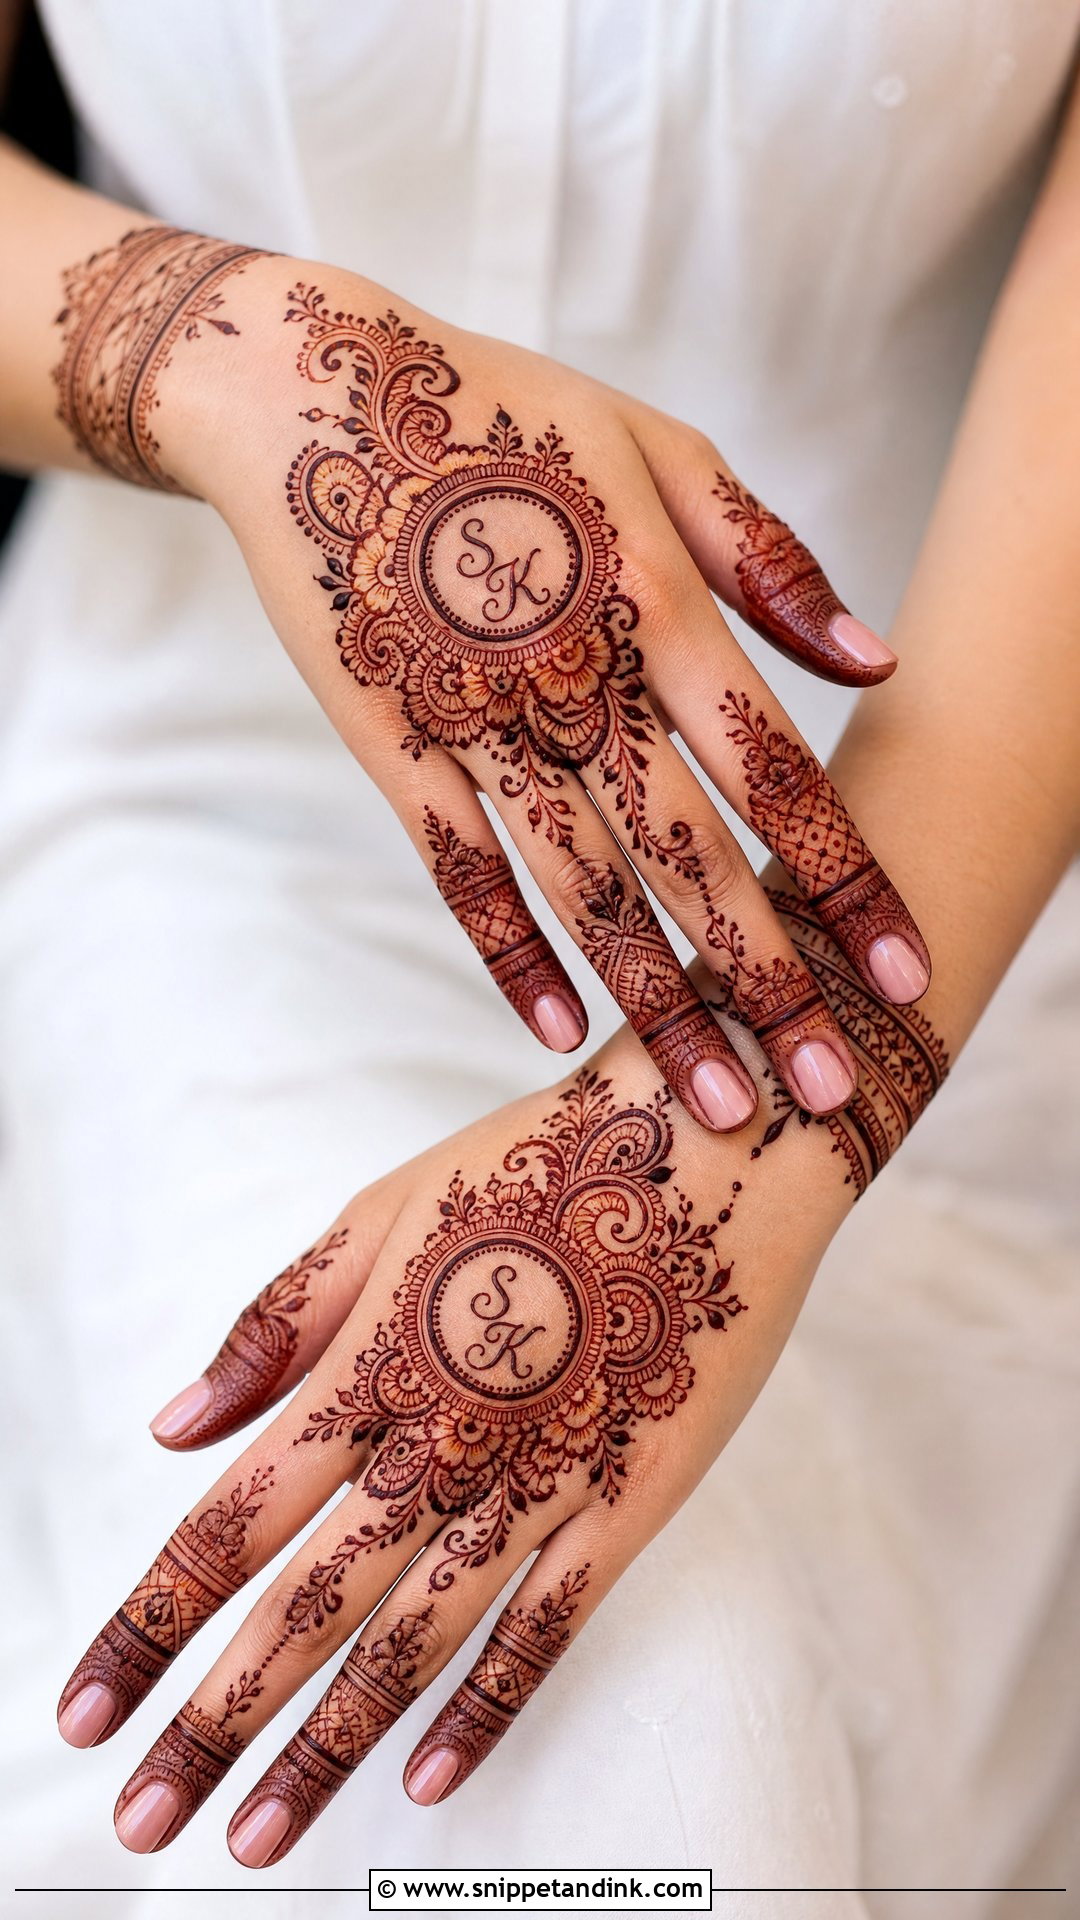
Hiding the groom’s initials in the design is an old tradition, and many couples still turn it into a game where he has to find the letters. I tuck them into a paisley, a mandala ring or a vine near the wrist. Keep them subtle and woven into the pattern, otherwise the game is over in two seconds. Flowers, leaves and fine curves around the letters help them blend. It works inside nearly any style here, from full-hand to minimal.
17. Bridal Mehndi Design With Jewelry Pattern
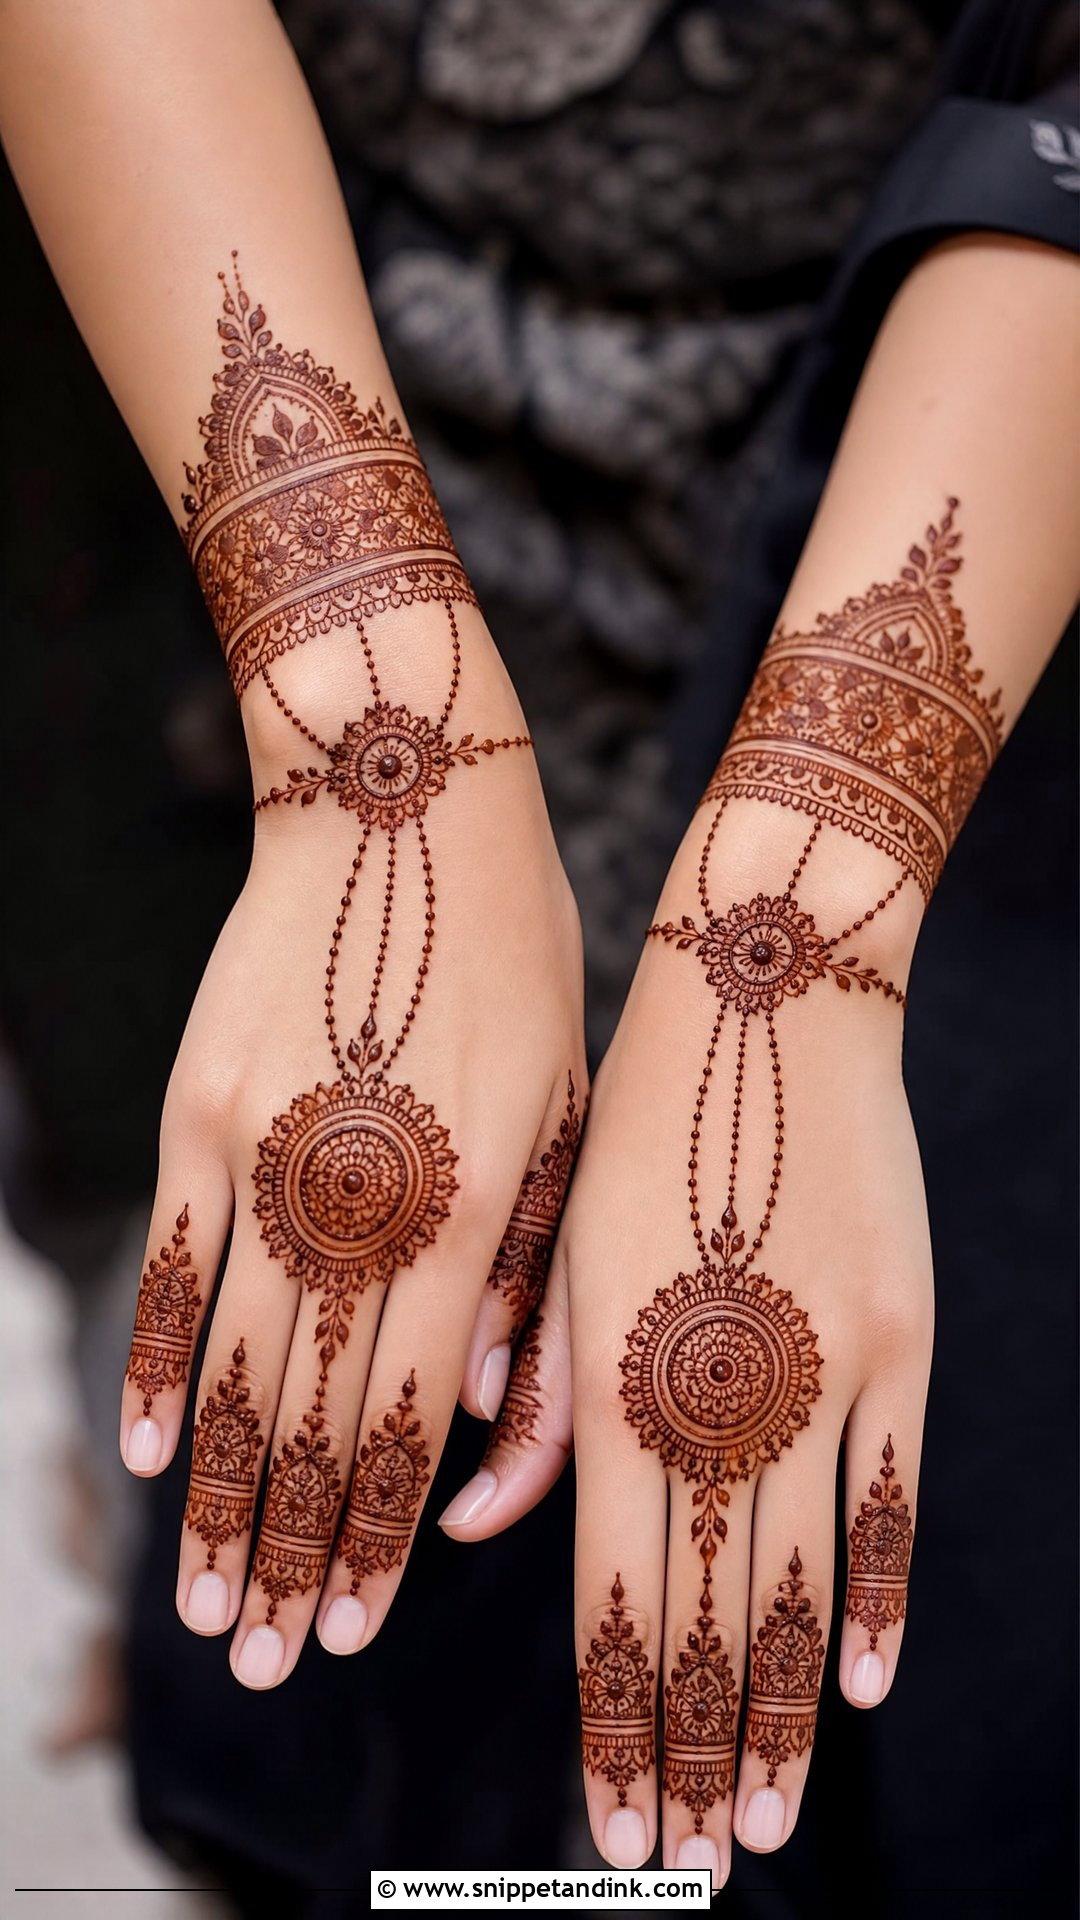
Henna drawn as jewelry: ring chains, bracelet cuffs, finger bands and hathphool-style lines running from the fingers to the wrist. The lines are slim and symmetrical, which lengthens the hand visually. It looks complete on the back of the hand even before real jewelry goes on. If your actual pieces are heavy, though, the two compete, so I’d draw a lighter version or let the henna stop where the bangles start. A small mandala or an Arabic side trail can round it out.
18. White Bridal Mehndi Design
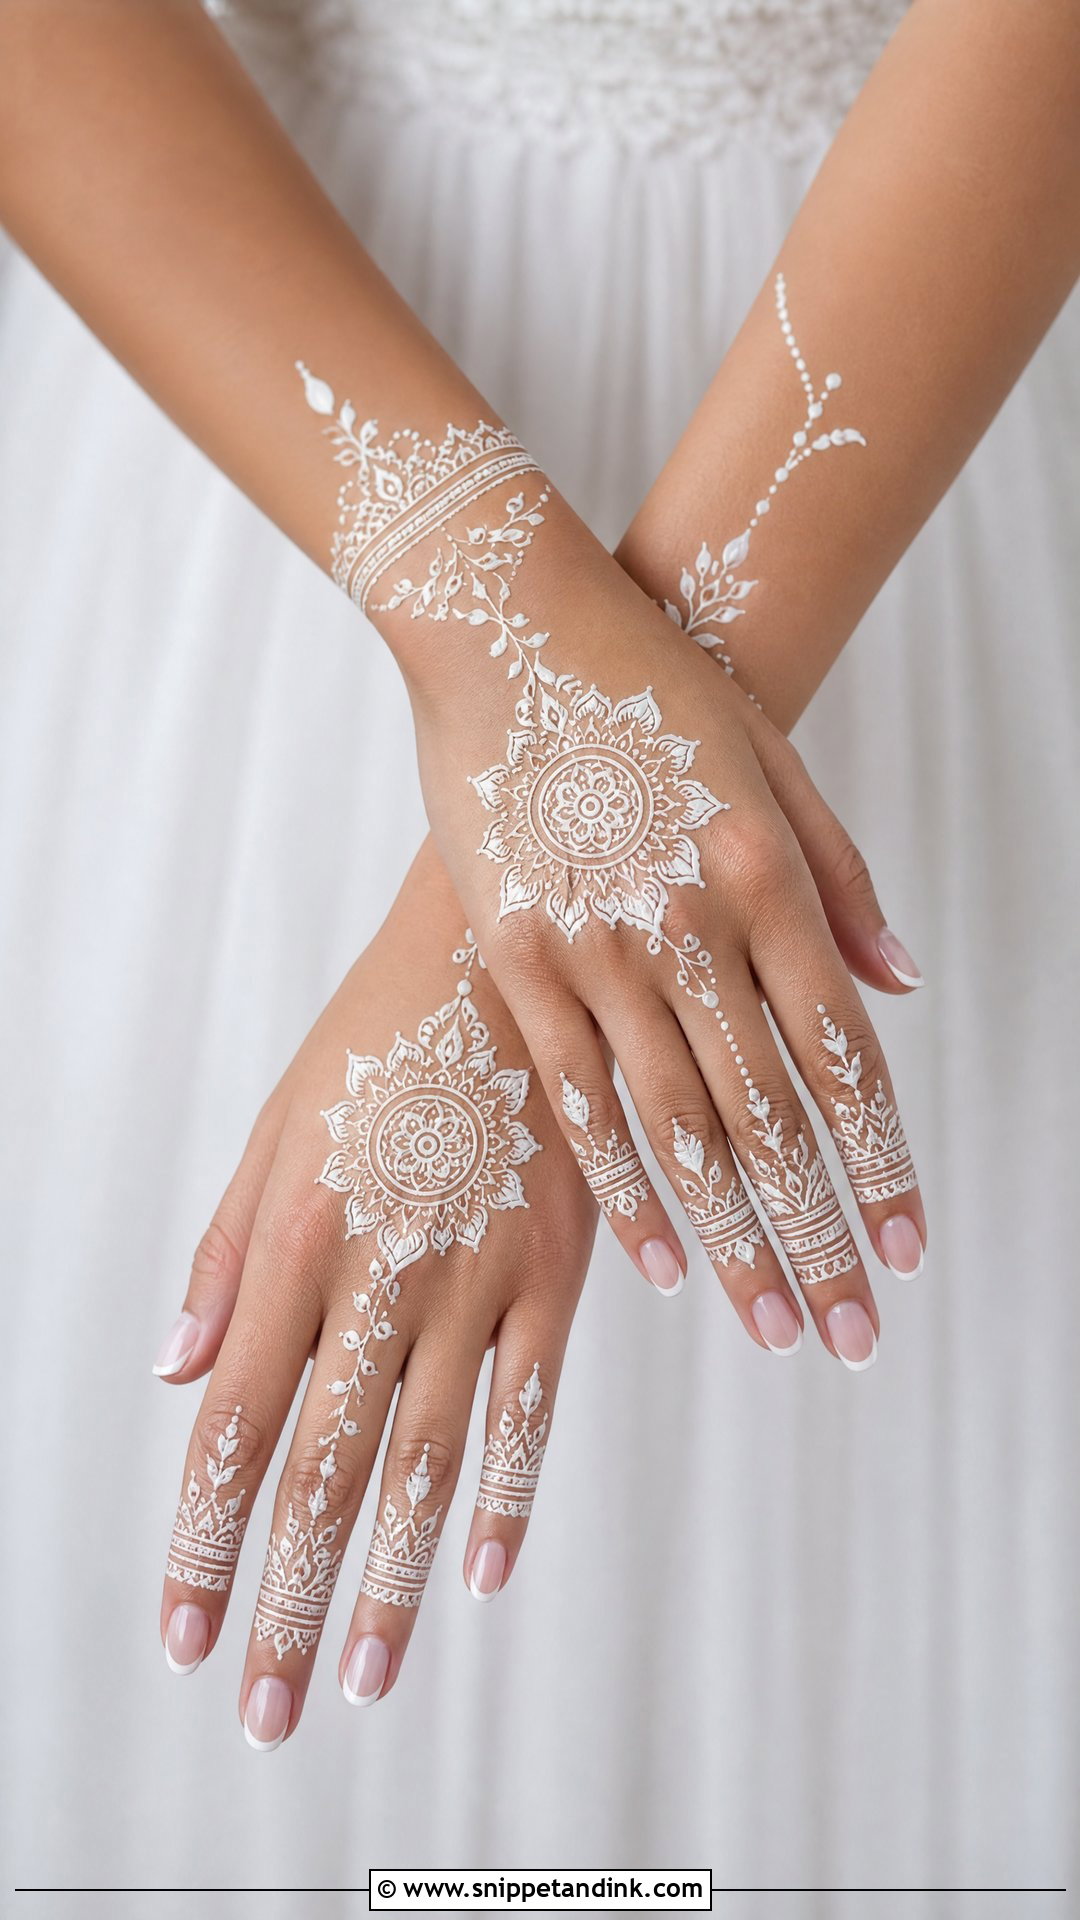
White mehndi isn’t henna at all. It’s a cosmetic body paint or skin-safe adhesive, often finished with glitter, and it sits on top of the skin rather than staining it. That means no color development and no lasting design; it lasts for the event and often smudges or flakes with handling. I’d use it for a reception, a pre-wedding party or a styled shoot, not for a long ceremony day. It pairs nicely with pastel outfits, ivory gowns and silver jewelry. Keep the pattern open and not too dense, and patch test the product first, because skin reactions to adhesives do happen.
19. Simple Full Arm Bridal Mehndi Design
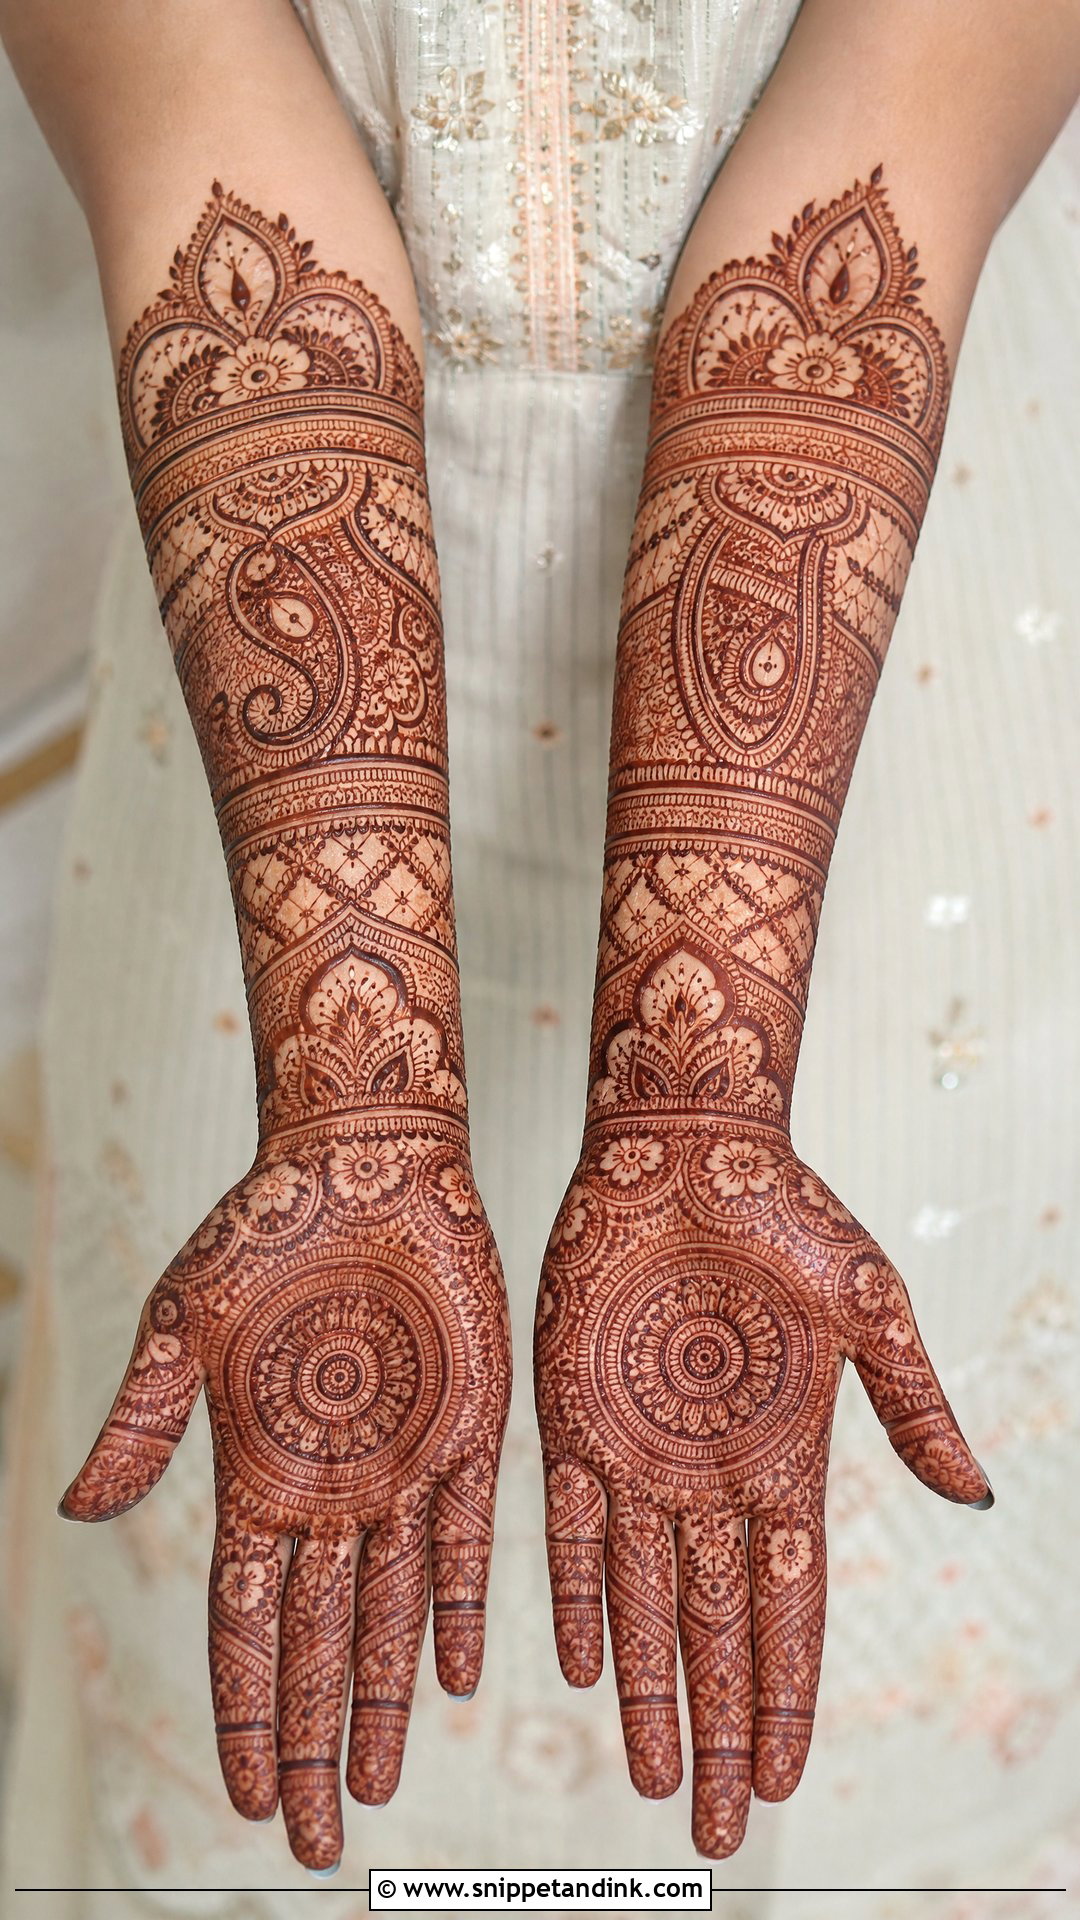
Full-arm coverage doesn’t have to mean dense filling. This layout runs from fingertips to elbow using larger motifs, clean borders and repeated floral or paisley sections, with skin showing in between. It’s a good fit for sleeveless, short-sleeve or sheer-sleeve outfits where the arm will be on show. Keep in mind that the upper forearm stains lighter than the palm, since the skin is thinner there, so I put the boldest elements near the hand. Plan for a long sitting even though the design is simpler.
20. Gulf Bridal Mehndi Design
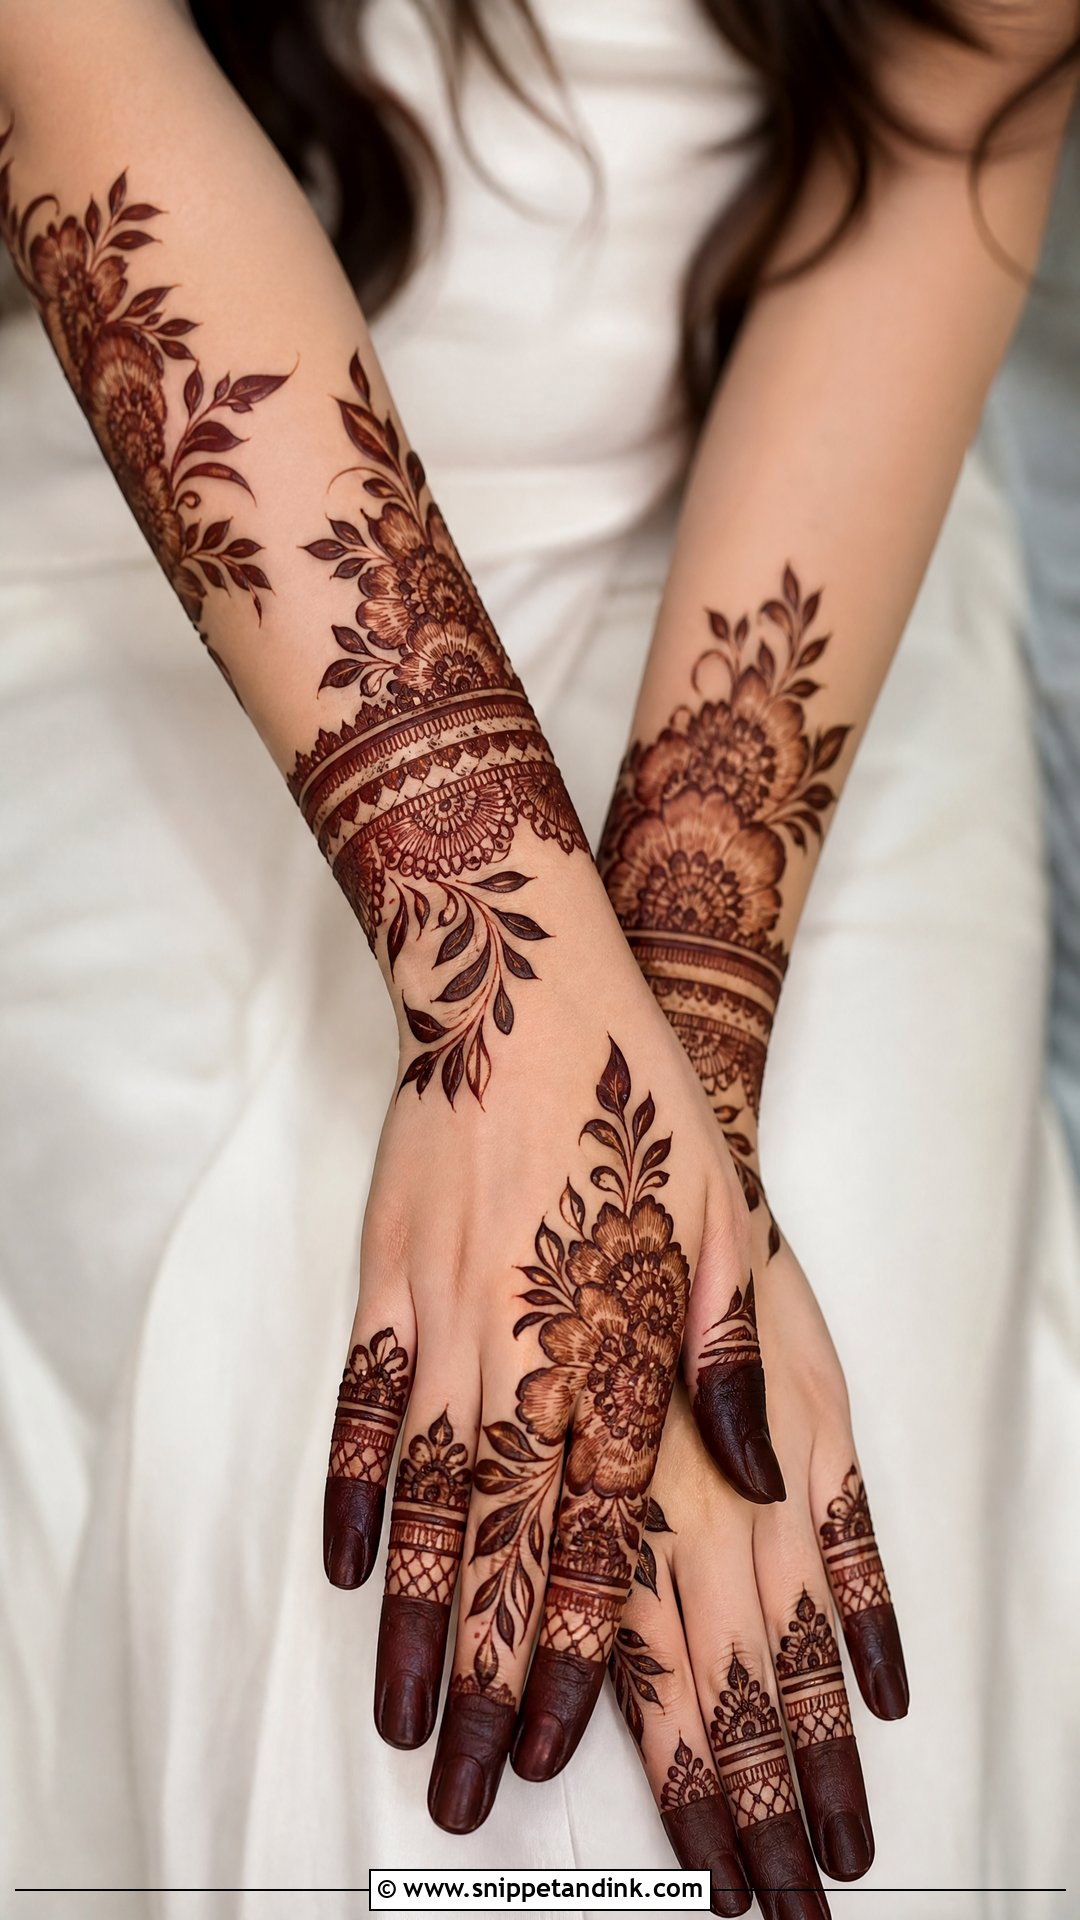
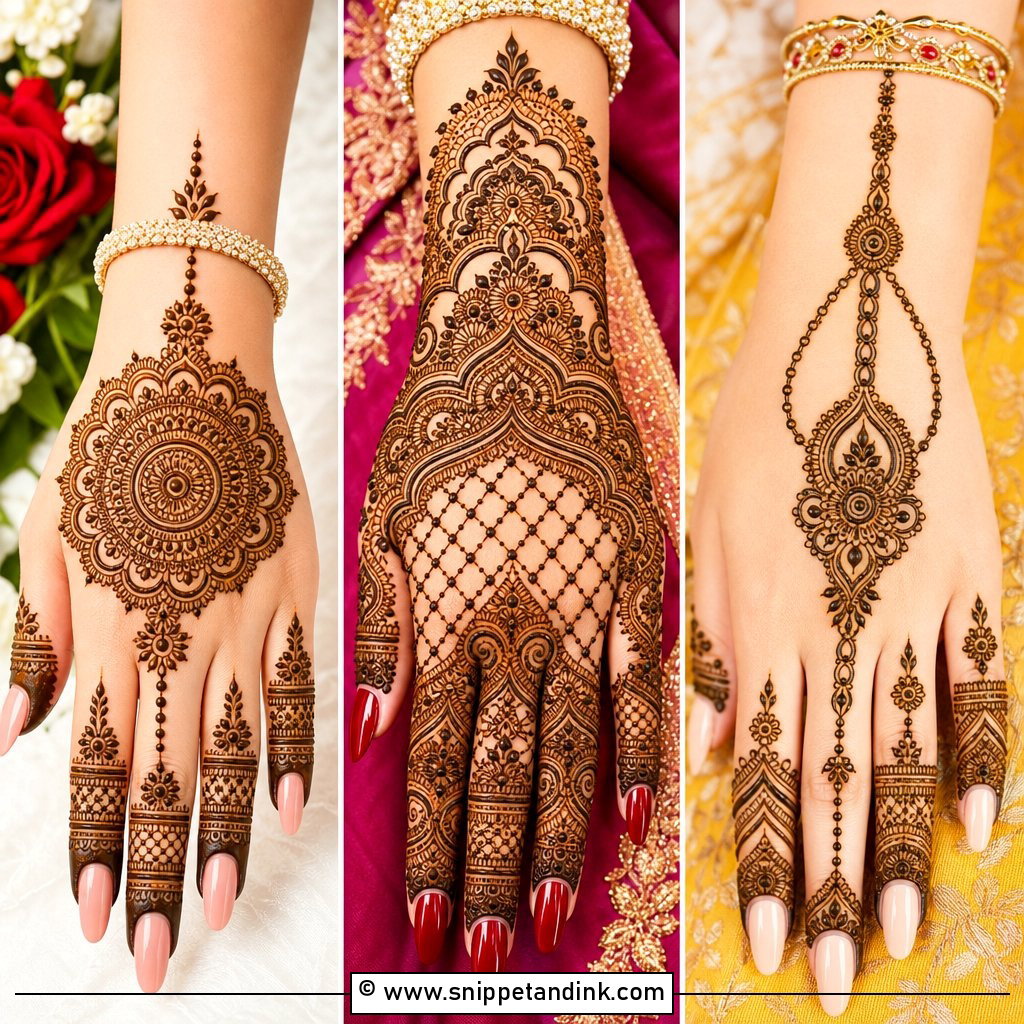
Khaleeji-style work is defined by bold flowers, thick outlines, flowing leaves and generous spacing. Gulf bridal mehndi moves across the palm, back of the hand and forearm in one trail, less crowded than Indian bridal work but much bolder than minimal designs. Those thick outlines are drawn with a slightly wider cone tip, and the open skin around them makes the dark stain look richer. For a bridal version, I add fine finger details and a strong wrist cuff. It holds its own next to ornate jewelry, in traditional and contemporary outfits alike.
Ask About the Paste Before You Ask About the Pattern
Natural henna paste is made from dried henna leaf powder, an acidic liquid like lemon juice, a little sugar and essential oils. It goes on dark green or brown and leaves an orange stain that deepens to reddish brown over the next day or two. If an artist promises black color within an hour, the paste likely contains PPD or another dye, which can cause painful reactions and scarring. Ask what’s in the cone, and if you have sensitive skin, have a small patch done a few days ahead.
The First Two Days After the Paste Comes Off
While it dries
Leave the paste on as long as you can manage, ideally six to eight hours or overnight. Most artists dab on a lemon and sugar mix once it’s dry, which keeps the paste stuck to the skin. Keep your hands warm, since warmth helps the dye release.
When you remove it
- Scrape the dried paste off with a blunt edge or rub it away; don’t wash it off.
- Keep water off the design for as long as possible, ideally the rest of that day.
- A thin layer of balm or natural oil protects the stain before showers.
- Avoid scrubs, harsh soaps and chlorine pools until after the wedding.
- Schedule manicures and waxing before application, not after.
Don’t judge the color on the morning you remove the paste. The stain keeps darkening for up to forty-eight hours, which is why I prefer applying one or two days before the ceremony rather than the night before.
A Stain Dark Enough for the Ring Shots
The right design is the one that suits your outfit, your jewelry and how long you can realistically sit still. Some brides want full Indian coverage; others are happier with an Arabic trail, a single mandala or a few initials tucked into the palm. Whatever you pick, the stain matters as much as the pattern. Book an artist whose fine work you’ve seen up close, apply a day or two before the wedding, and give the color its full time to deepen. A clean design on well-cared-for skin will outshine a complicated one that faded early.
You'll Like These Ideas:


Leave a Reply