
A bridal mehndi design is something I plan with the bride before I ever pick up a cone, because once the paste is on, there’s no erasing a line. Detailed work also takes hours, so the choices below come down to how much coverage you want, how long you can sit still, and how the stain will read in photos two days later. You’ll see full Indian coverage, back-hand layouts, Arabic trails, Indo-Arabic fusion and portrait scenes, with paisleys, jaali grids, mandalas, peacocks and initials worked through them. For each one I’ve noted what it asks of the artist and of you.
When to Book Your Henna Night So the Colour Peaks on Time
Natural henna doesn’t show its final colour straight away. When I scrape off the dried paste, the stain is bright orange. Over the next one to two days it oxidises and deepens to red-brown or maroon. That’s why I recommend applying bridal mehndi one or two days before the wedding, not the morning of.
- Leave the paste on as long as you comfortably can, ideally overnight. Longer contact means a darker stain.
- Allow plenty of time for application. A full bridal design on hands and arms can take several hours.
- Plan your manicure, waxing and exfoliation before the mehndi, not after. Scrubbing or waxing afterwards fades the stain.
- Eat, use the bathroom and get comfortable before we start. You won’t have the use of your hands for a while.
1. Full Hand Indian Bridal Mehndi Design
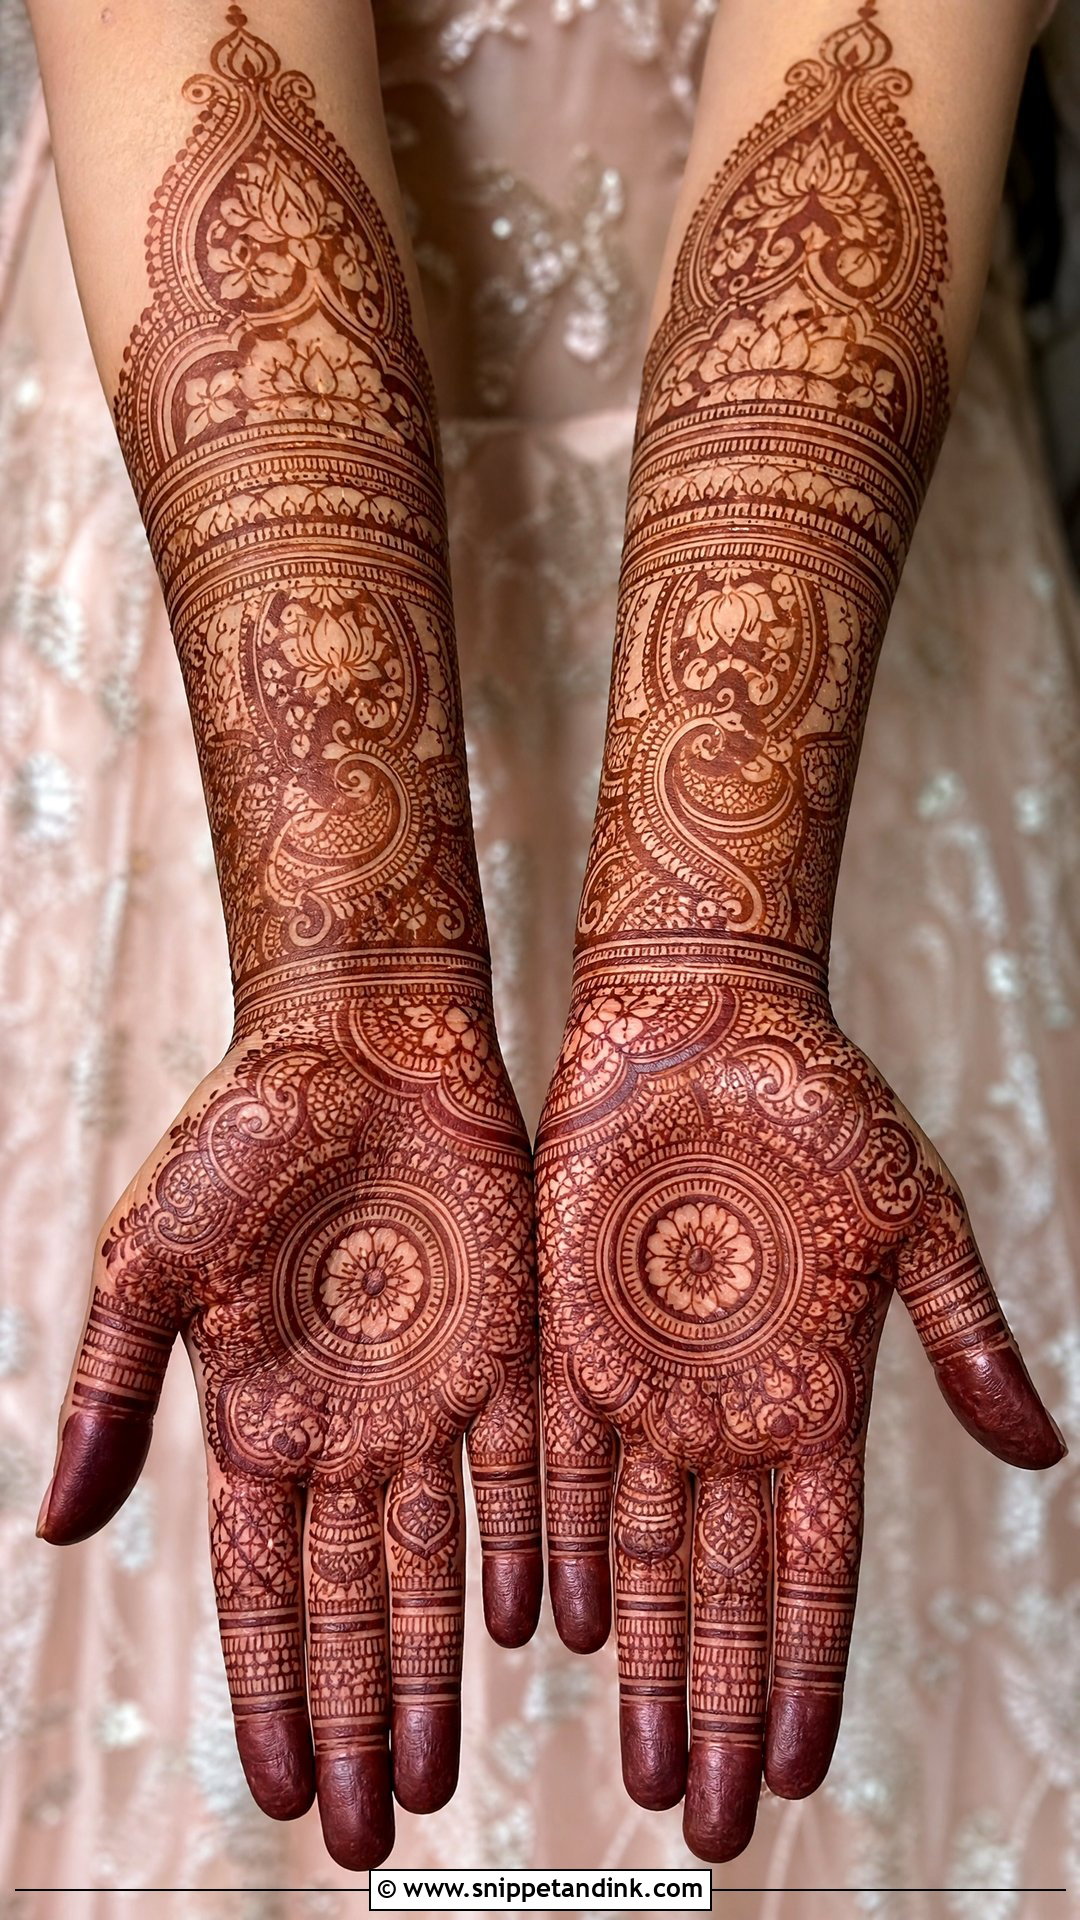
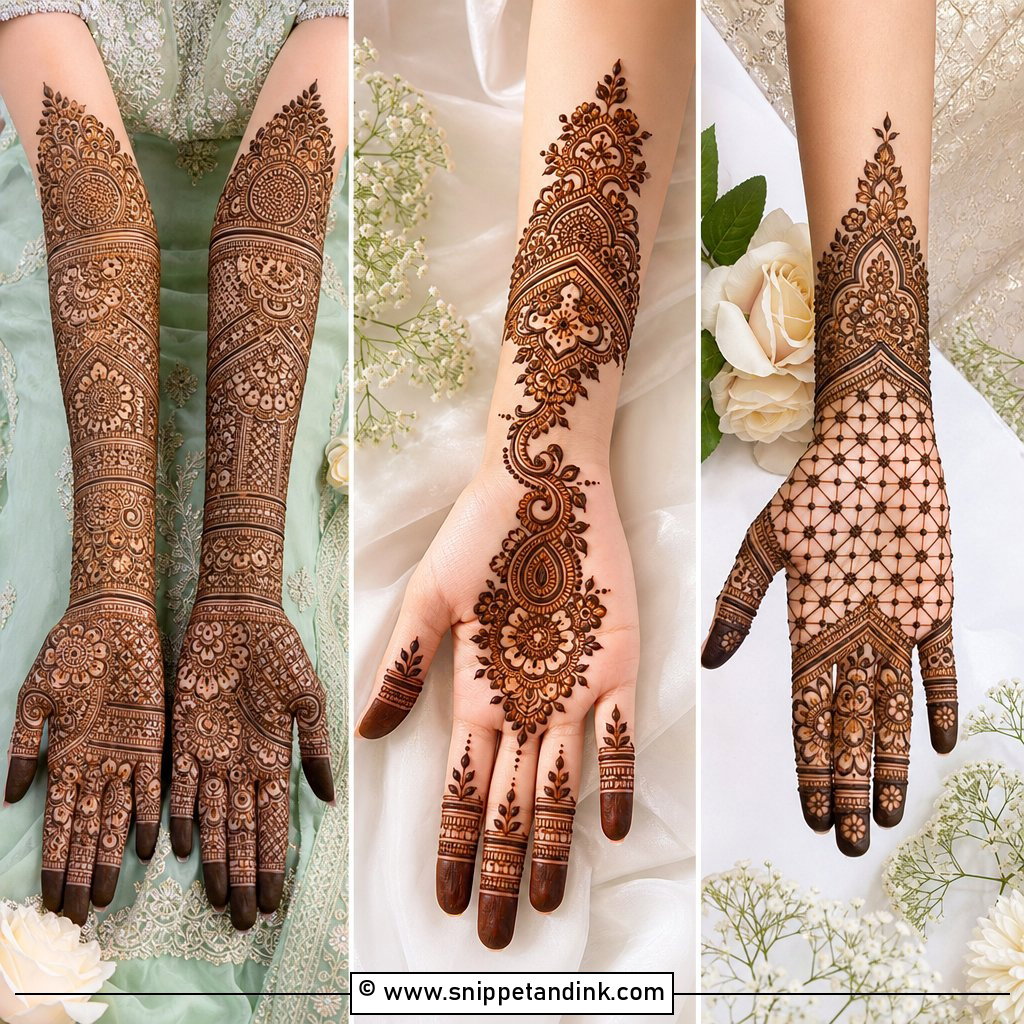
Full-hand Indian bridal work fills the palms, fingers, wrists and forearms with almost no bare skin. I usually begin with the centrepiece on the palm, a mandala or the bride and groom, and build outwards with paisleys, lotus, peacocks and vines, finishing the fingers with fine checks and dots. This is the longest sitting of any design here, often most of an afternoon or evening for both sides of both hands. The payoff is that dense lines stain as a single deep field, so it looks finished from every angle.
2. Arabic Bridal Mehndi Design Full Hand
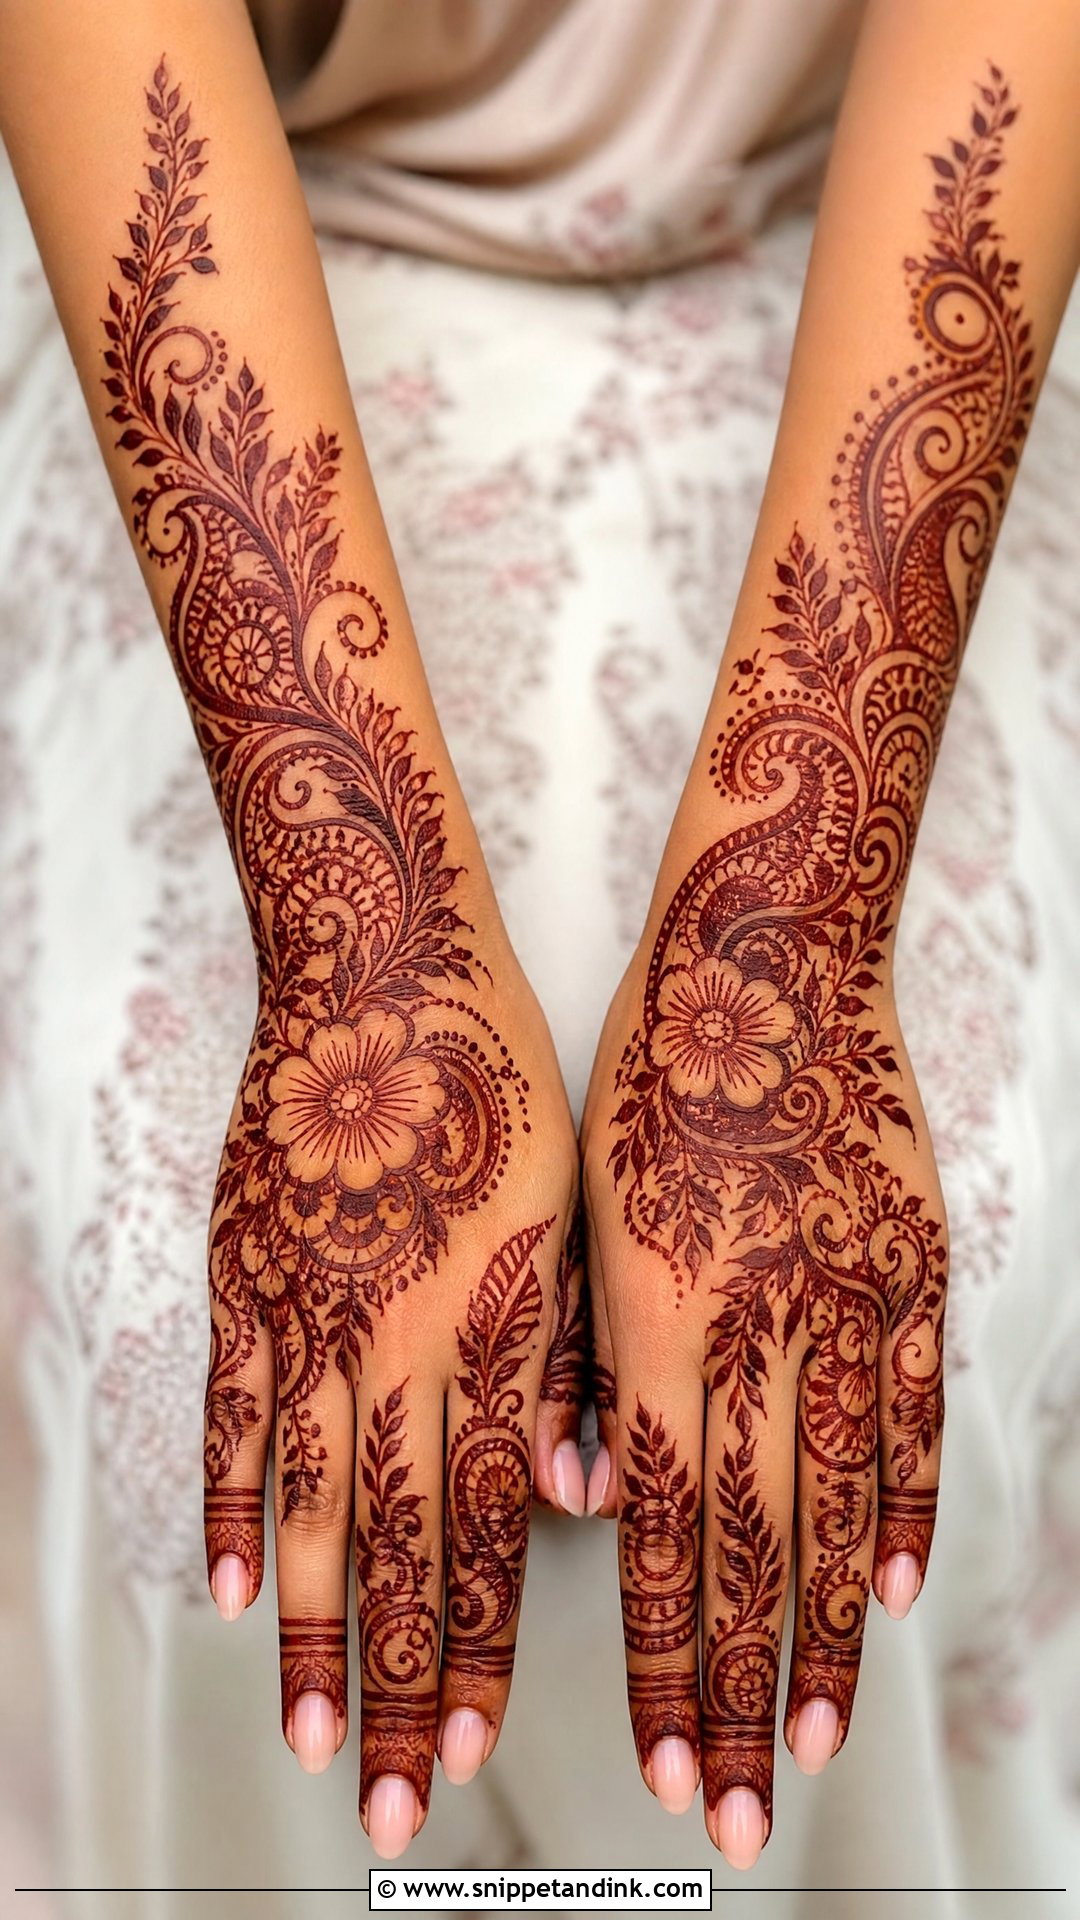
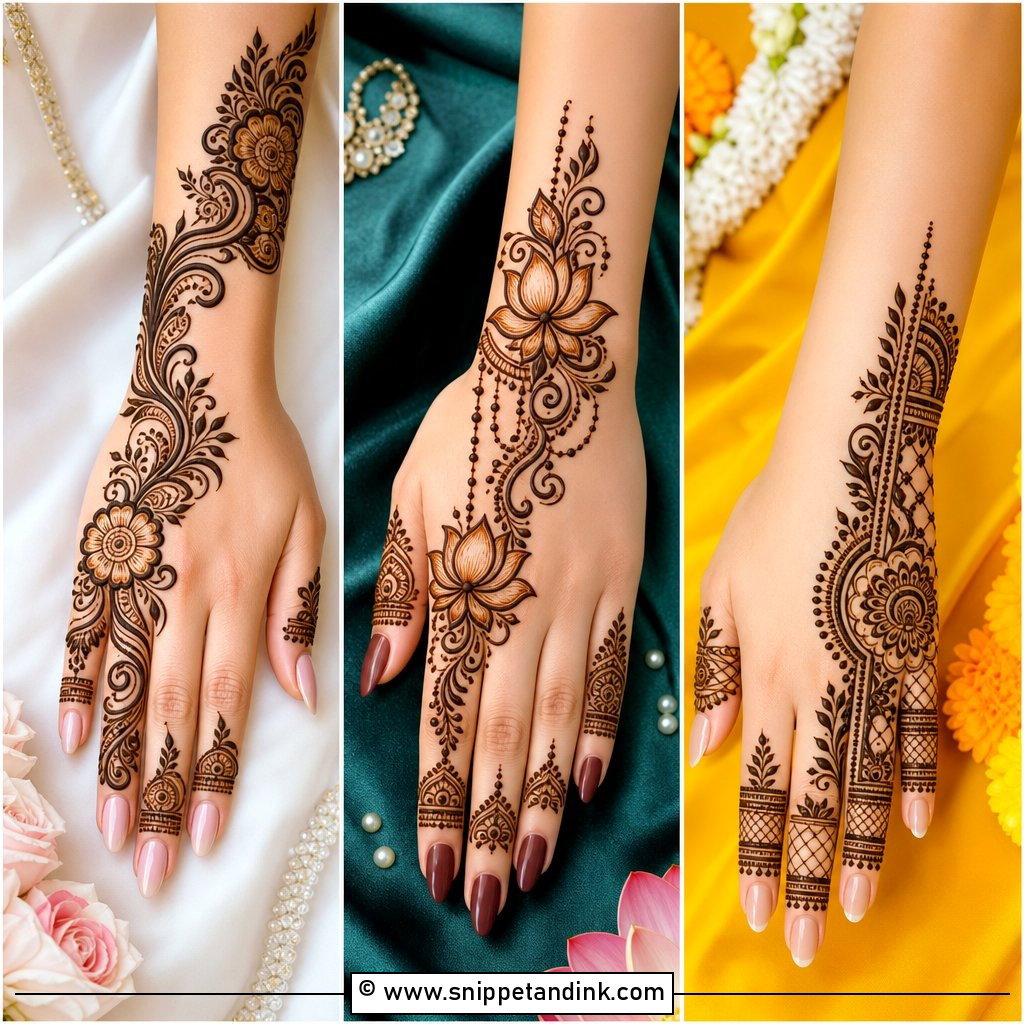
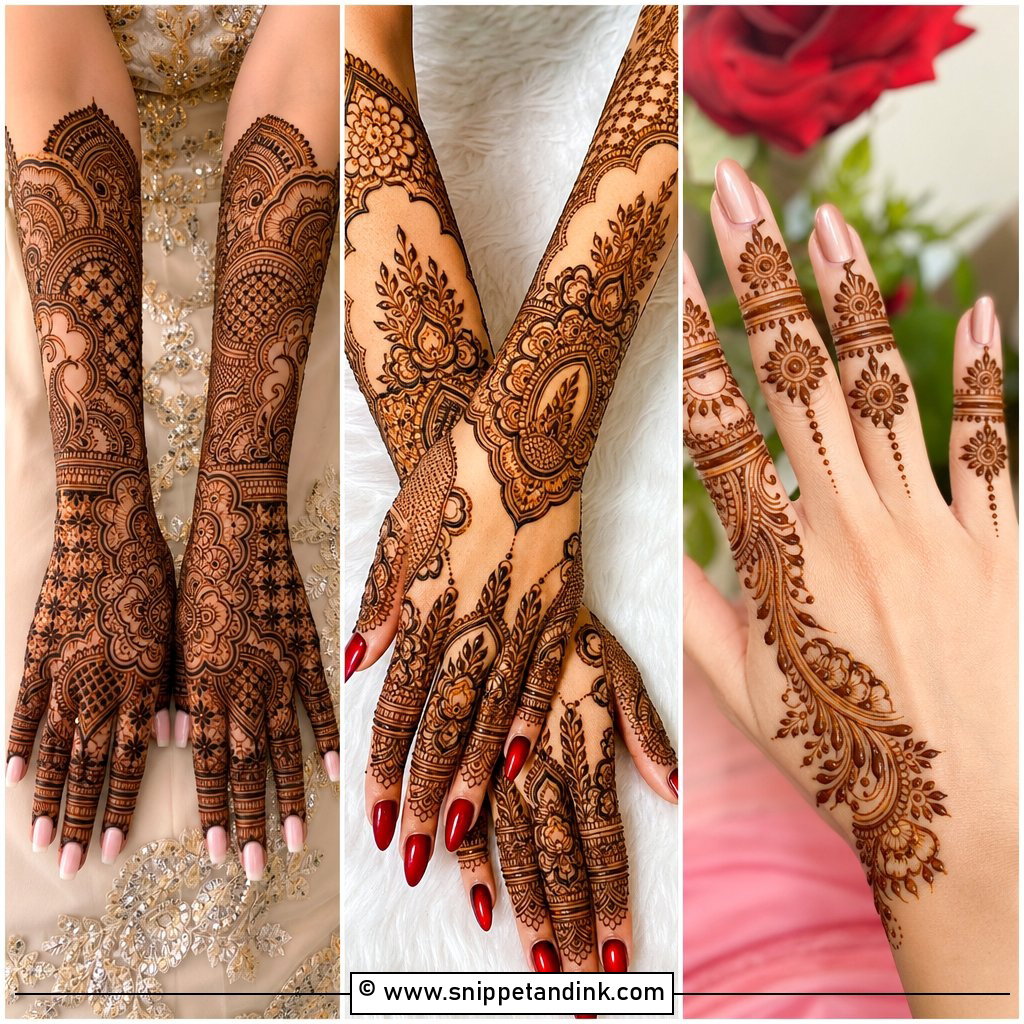
Arabic bridal work leaves breathing space. Large flowers, paisleys and leafy trails run diagonally from the fingertips toward the forearm, with bare skin between them. Because the shapes are big, I shade them with thicker outlines and fill some petals solid so the stain reads clearly from a distance. It’s quicker to apply than full Indian coverage and a good fit if you want bridal hands without the crowding. Wrist bands and leafy finger detail tie both sides together.
3. Indo Arabic Bridal Mehndi Design
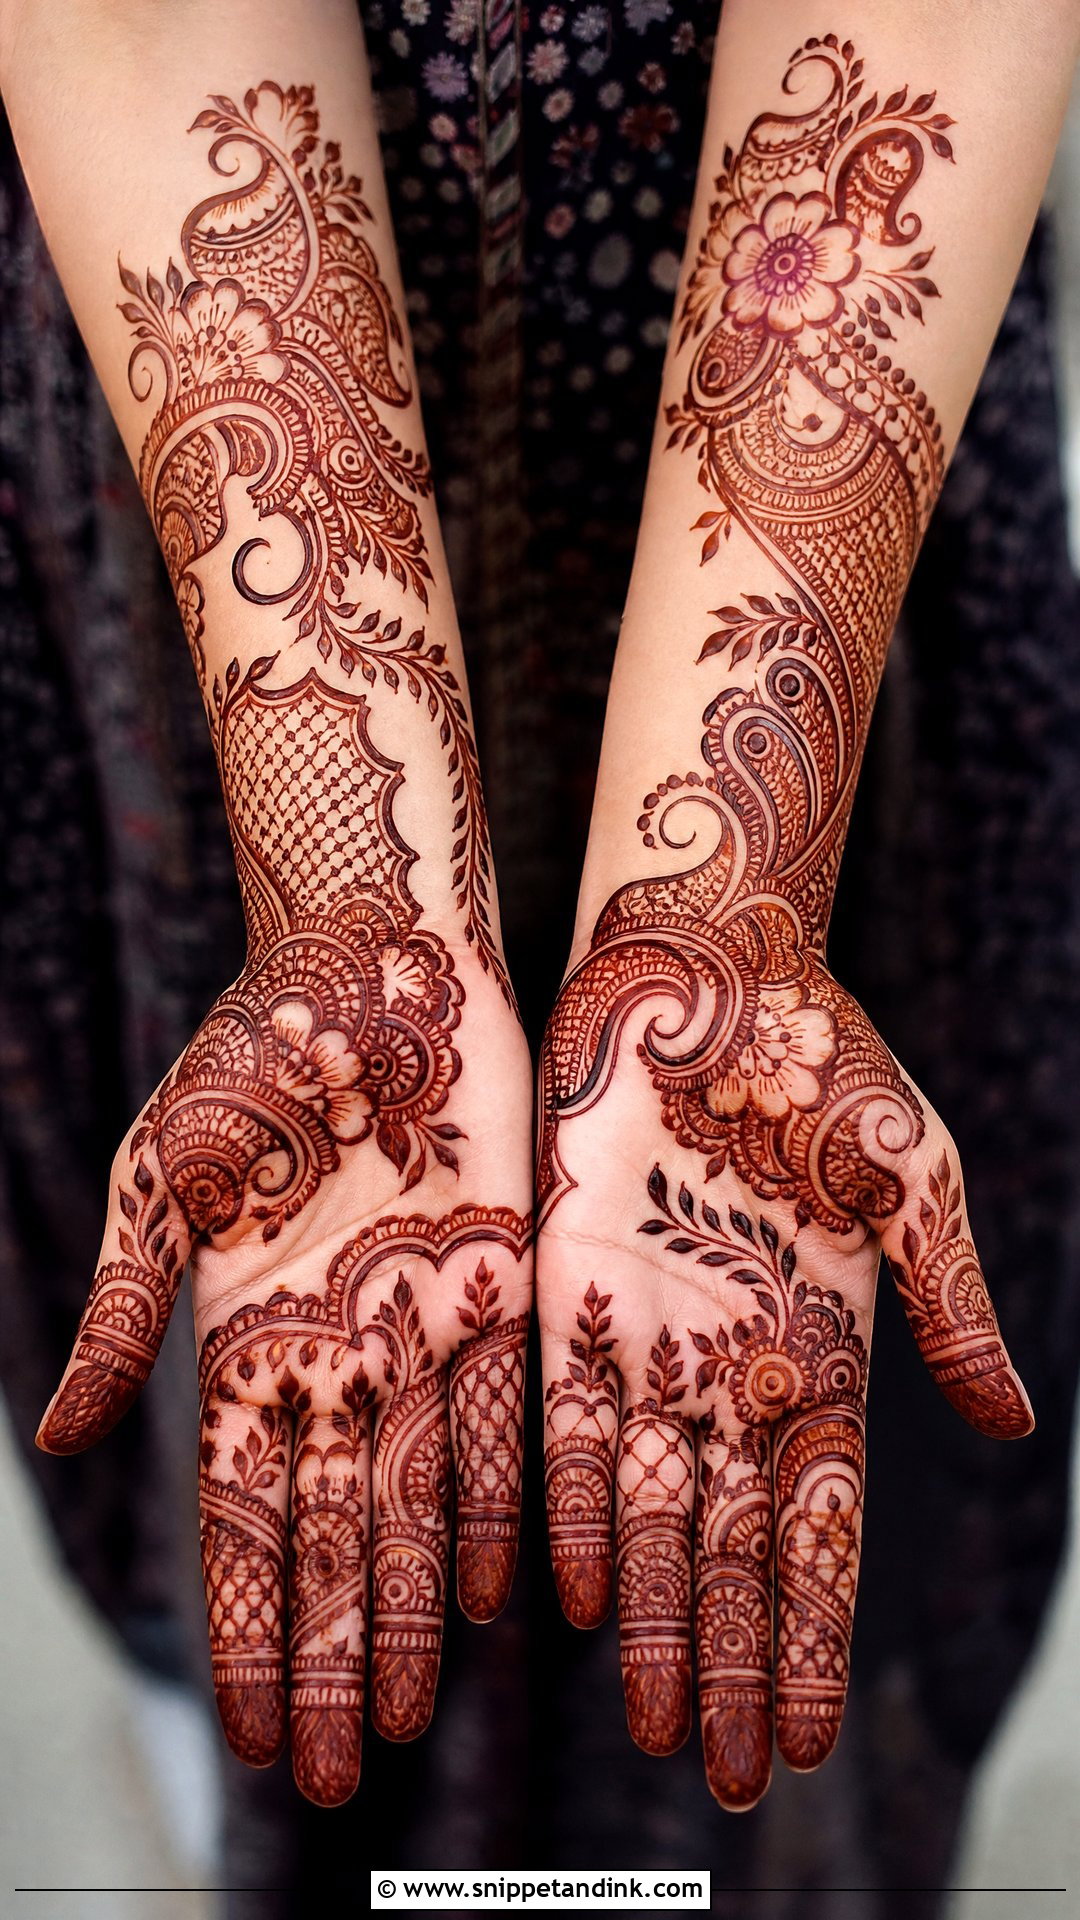
Indo Arabic bridal mehndi design borrows dense Indian detail for the palm and Arabic flow for the trails. I keep the jaali and fine filler inside defined sections and let the vines between them stay open, which stops the hand looking muddy once the stain darkens. It’s a good compromise if you can’t decide between the two styles. Initials or a small date can be hidden in one of the filled sections.
4. Dulha Dulhan Bridal Mehndi Design
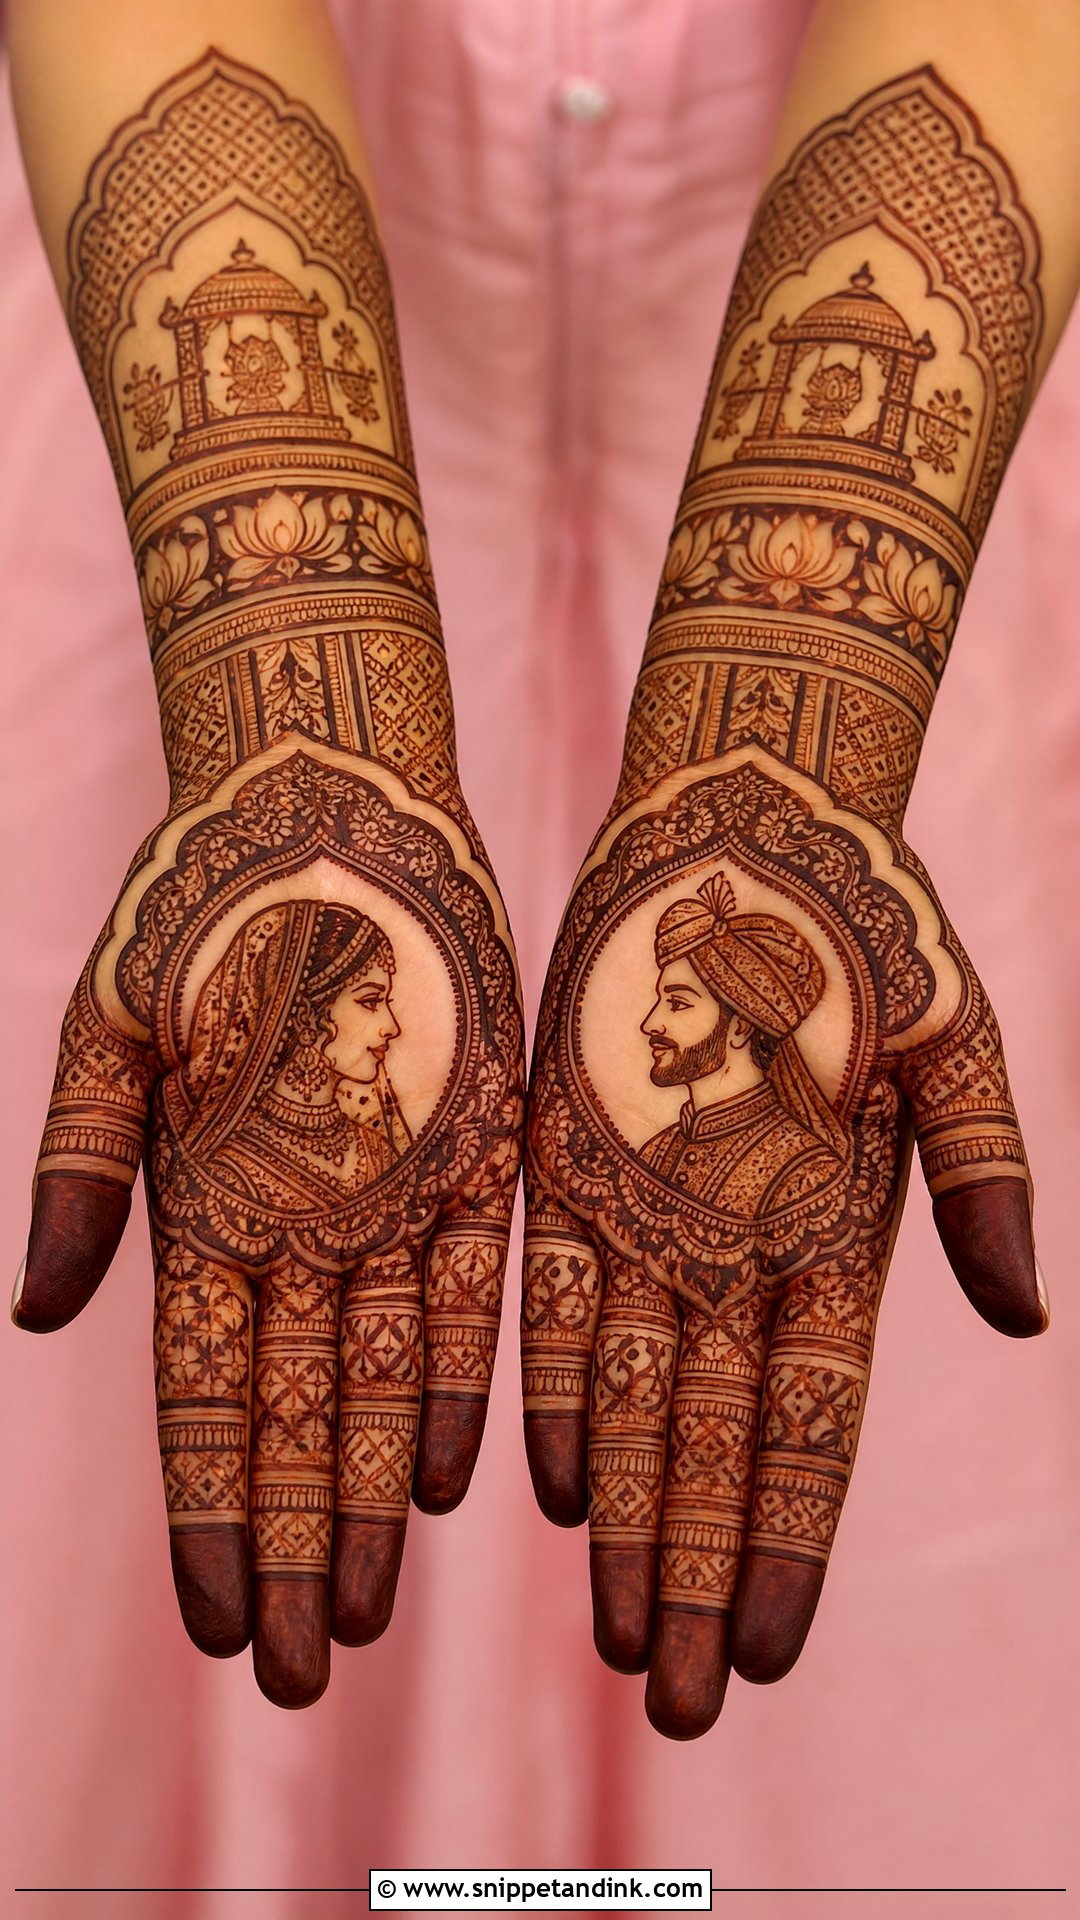
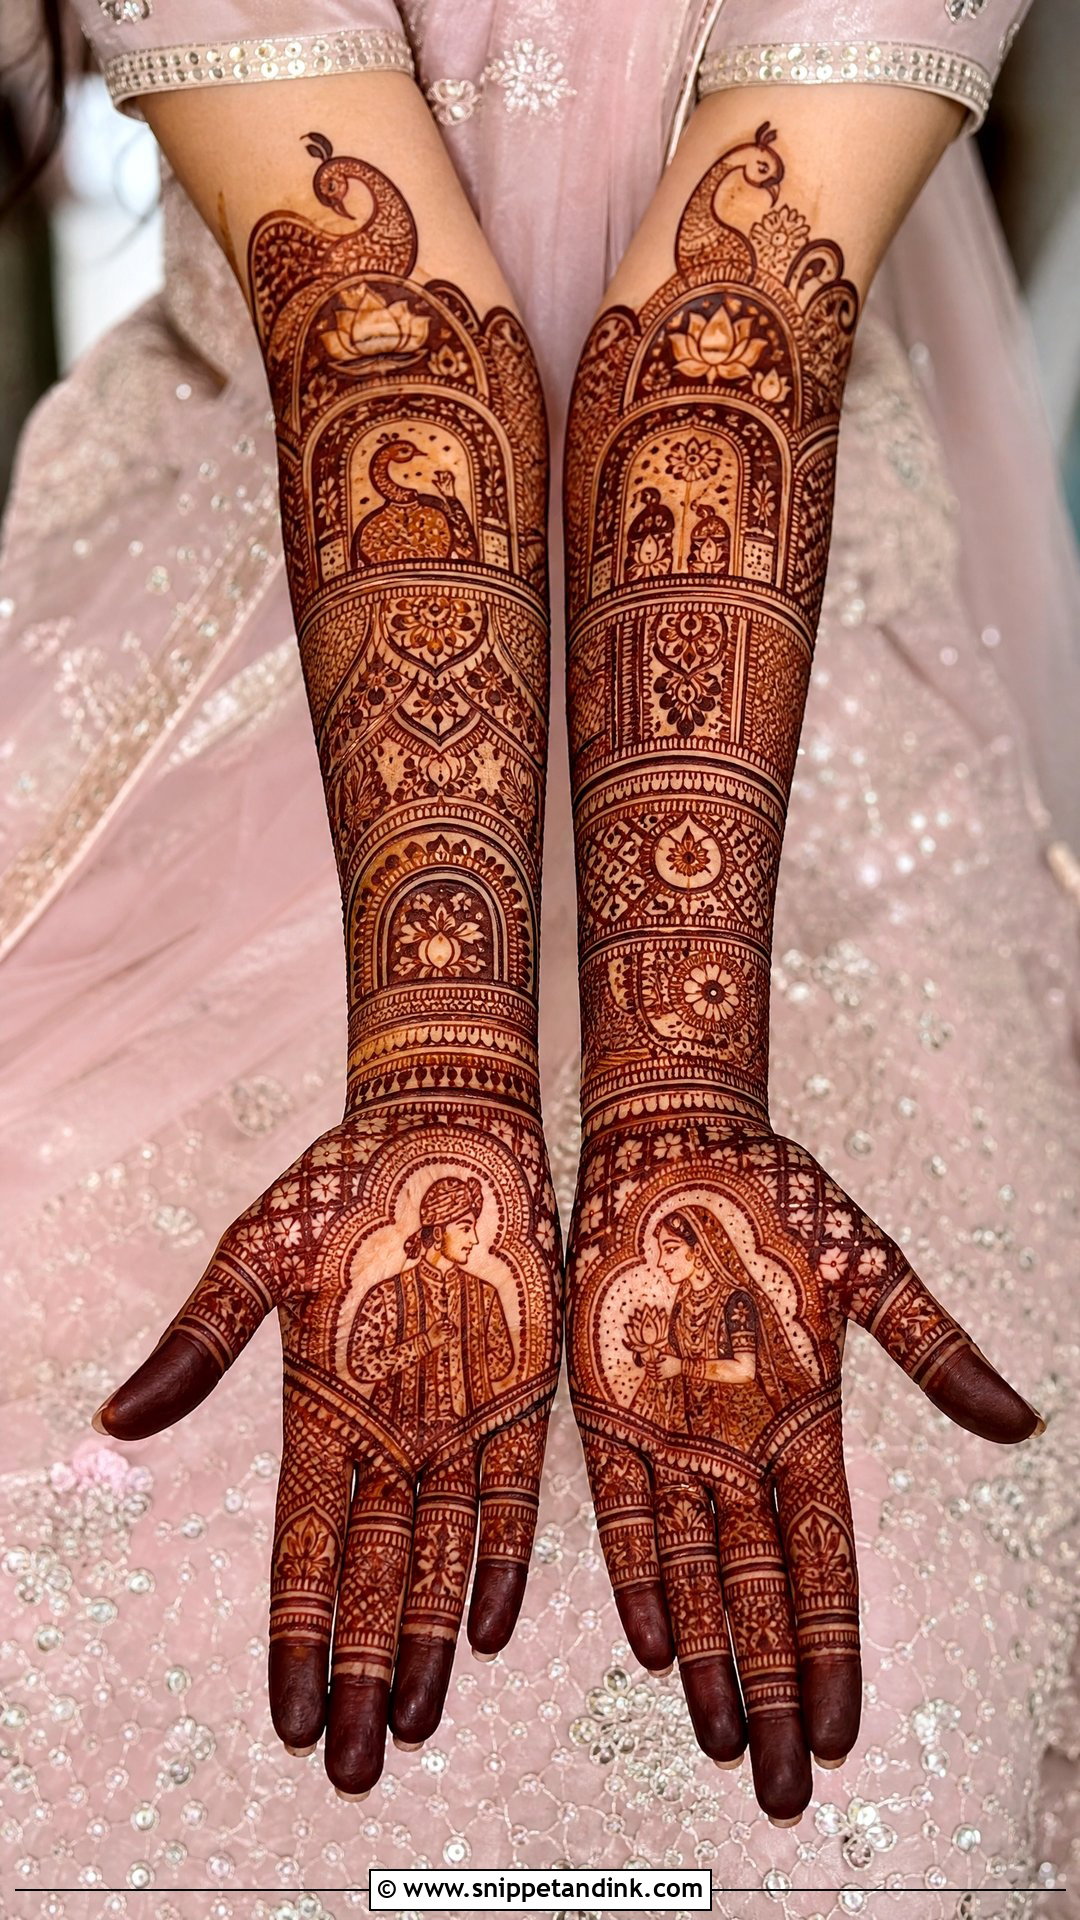
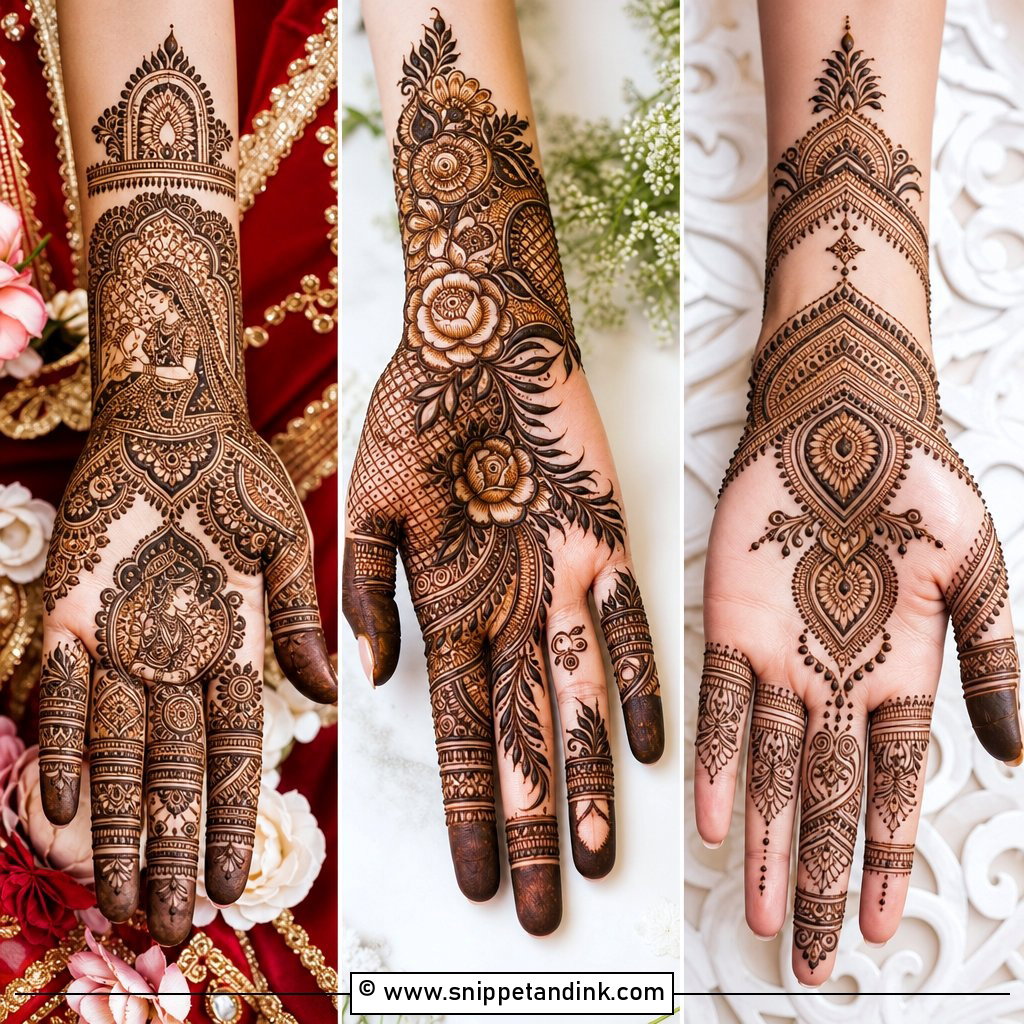
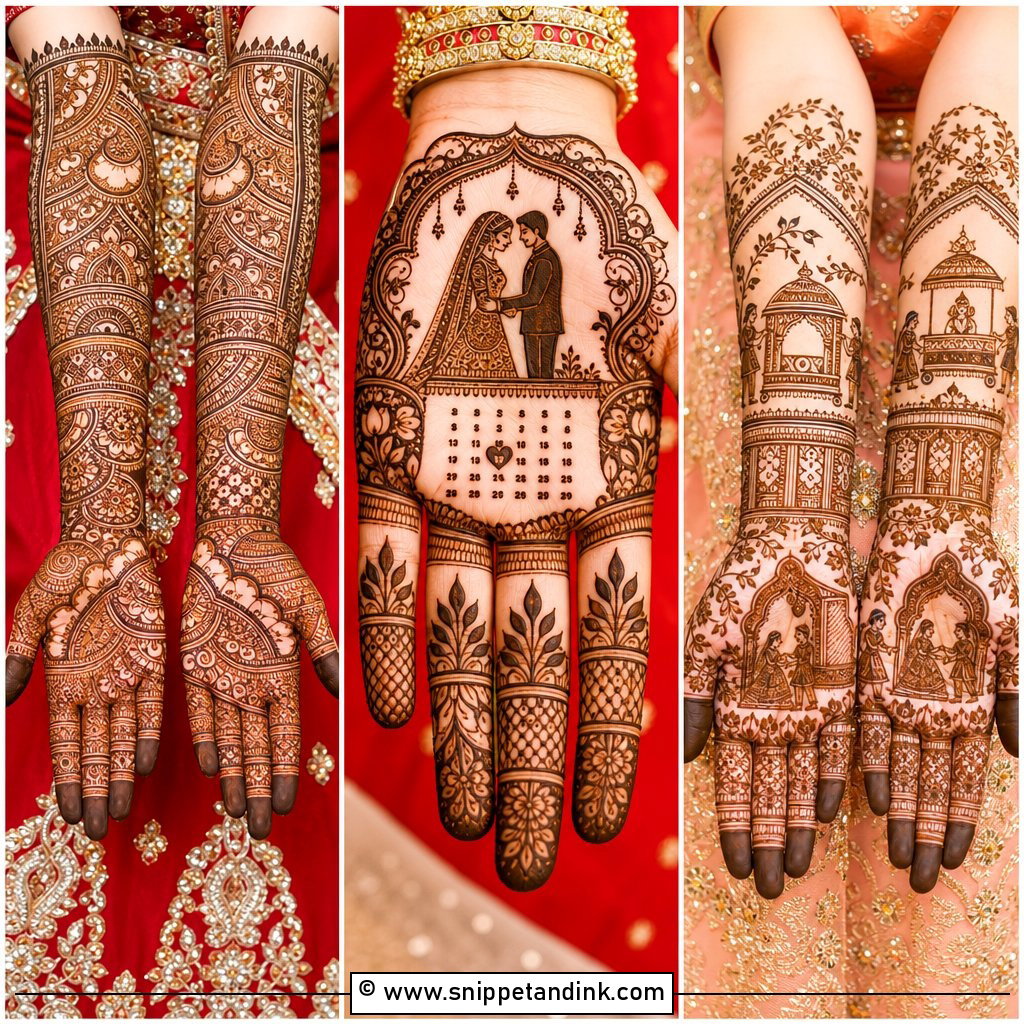
Portraits of the couple on each palm, framed by a doli, kalash, lotus and mandalas, make the hand into a scene. Faces are the hardest thing I draw in henna: a line that’s a fraction too thick can change an expression, and features blur slightly as the stain spreads. I keep the bride’s portrait and the groom’s at a decent size with simple features, and leave a little space around them. Forearms can carry palace windows or elephant borders to finish the story.
5. Rajasthani Bridal Mehndi Design
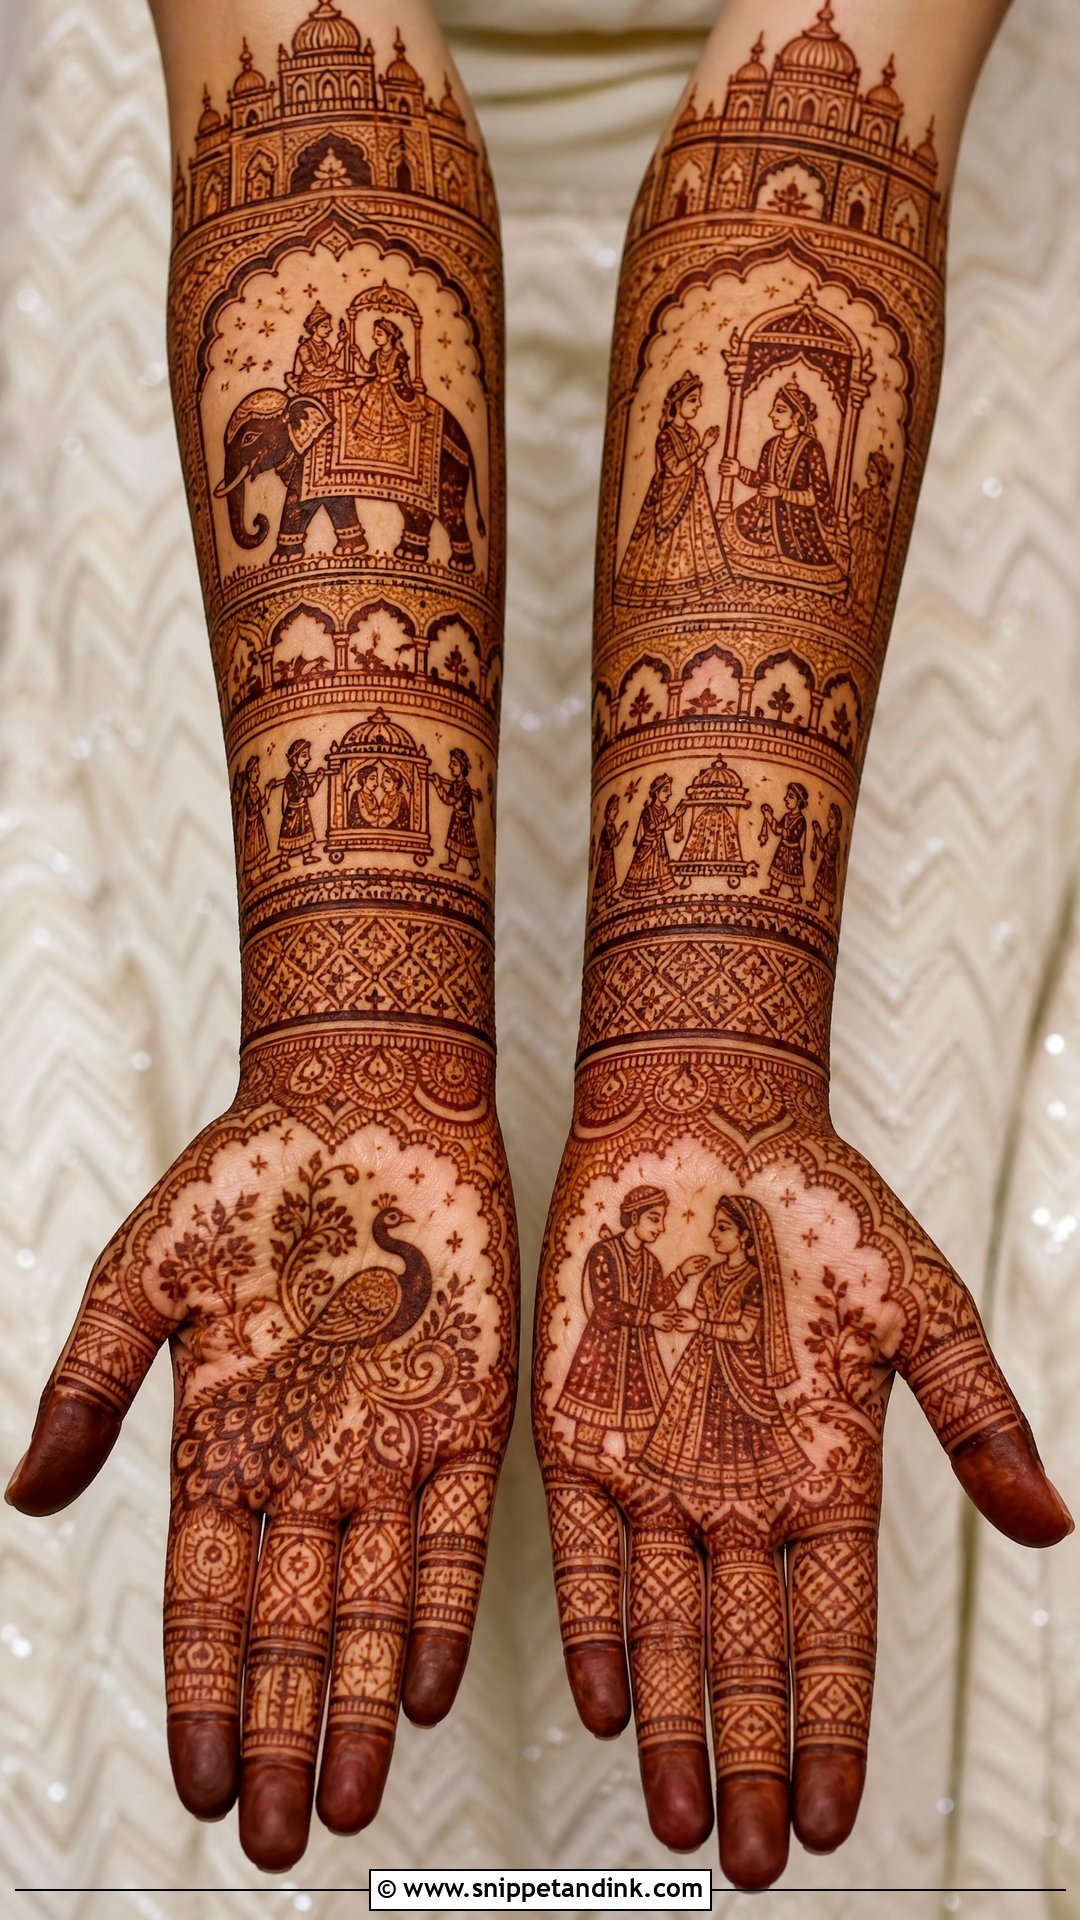
Rajasthani bridal mehndi design is dense and narrative, from fingertips to forearms, with peacocks, elephants, palace arches, doli scenes and mirror-work patterns. It needs no glitter because the detail carries it. I layer the forearm in bands, each with its own filler, so the eye moves up the arm instead of seeing one block. It suits heavy bridal outfits and heirloom jewellery, but it’s long work, so plan for a full sitting.
6. Pakistani Bridal Mehndi Design
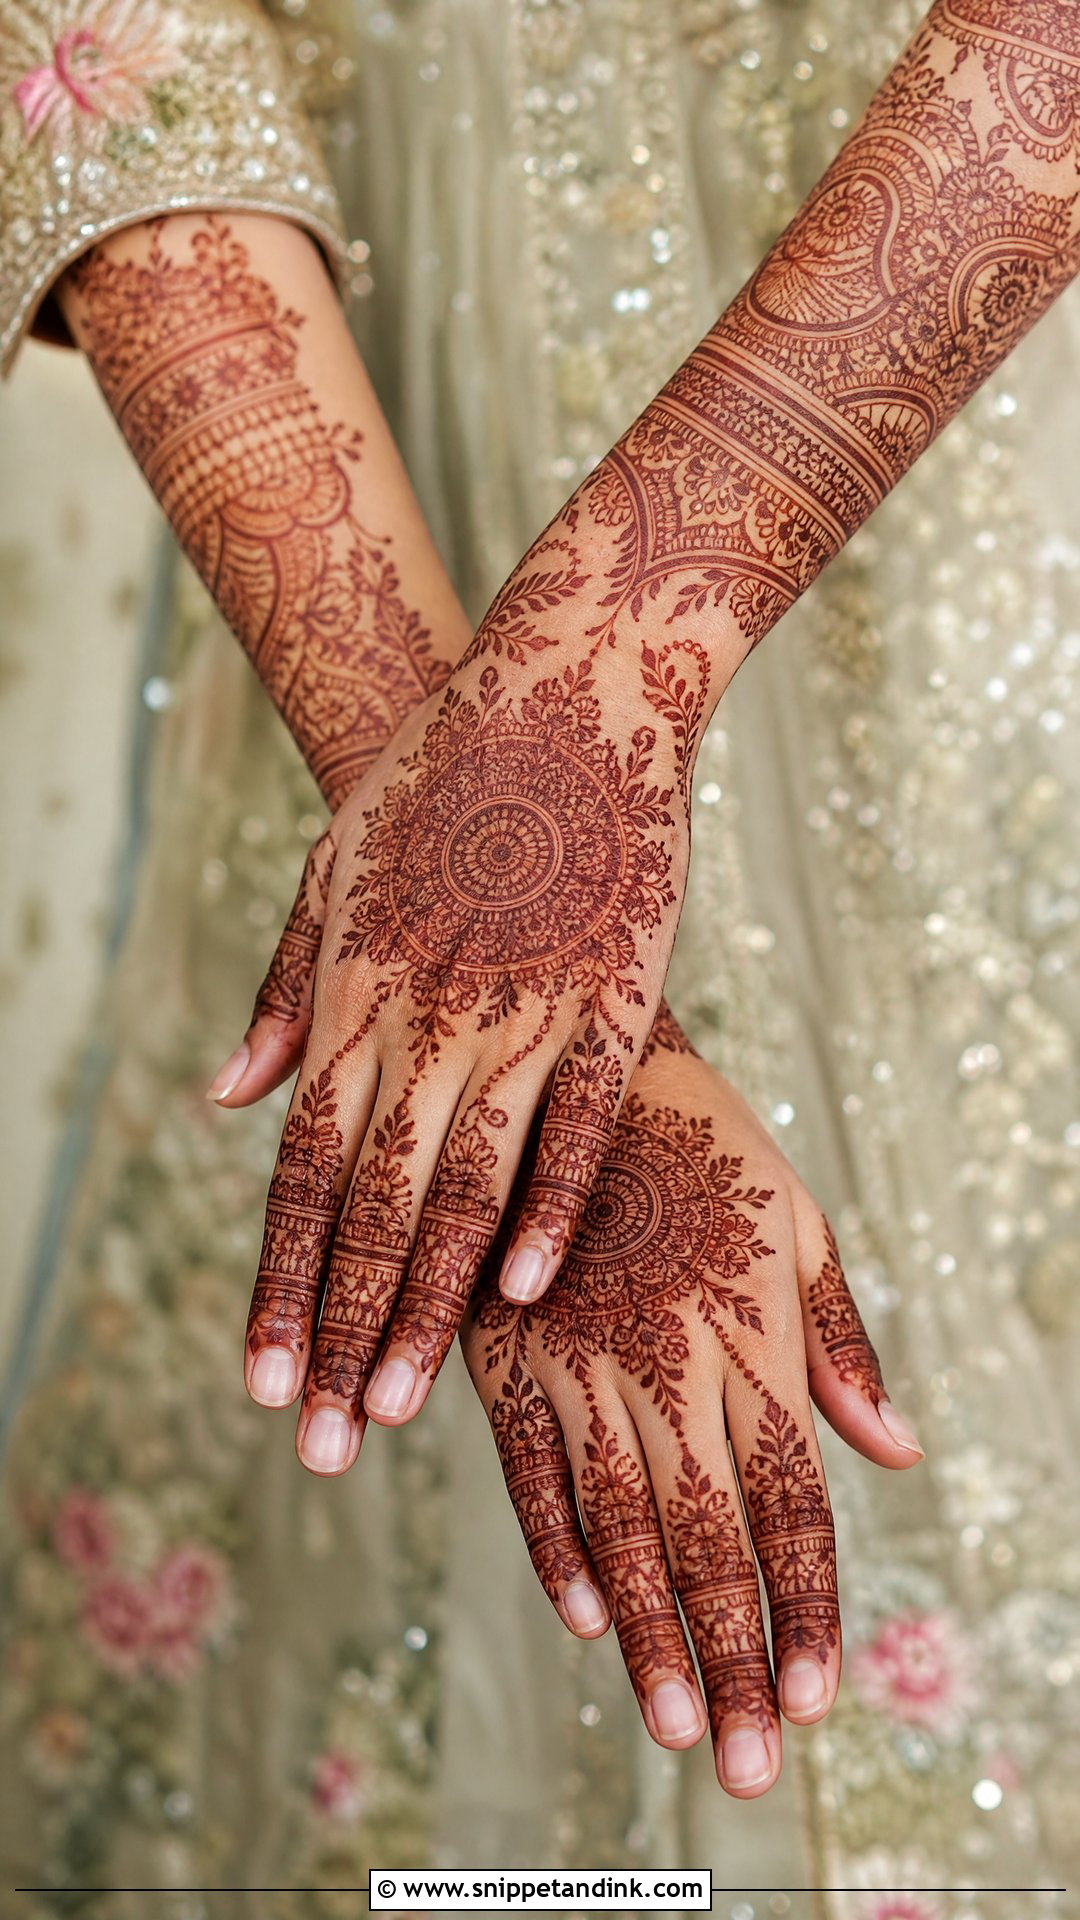
Pakistani bridal work mixes dense filling with Arabic-style movement, and it often covers both front and back hands, sometimes up toward the elbow. The skill is in the balance: lots of detail that still reads as organised. I work the back hand around a central medallion with bracelet bands and ring chains, then keep the palms richly filled. Ask your artist to show you the full layout on paper first; a well-planned Pakistani design never looks messy, even at this density.
7. Peacock Bridal Mehndi Design
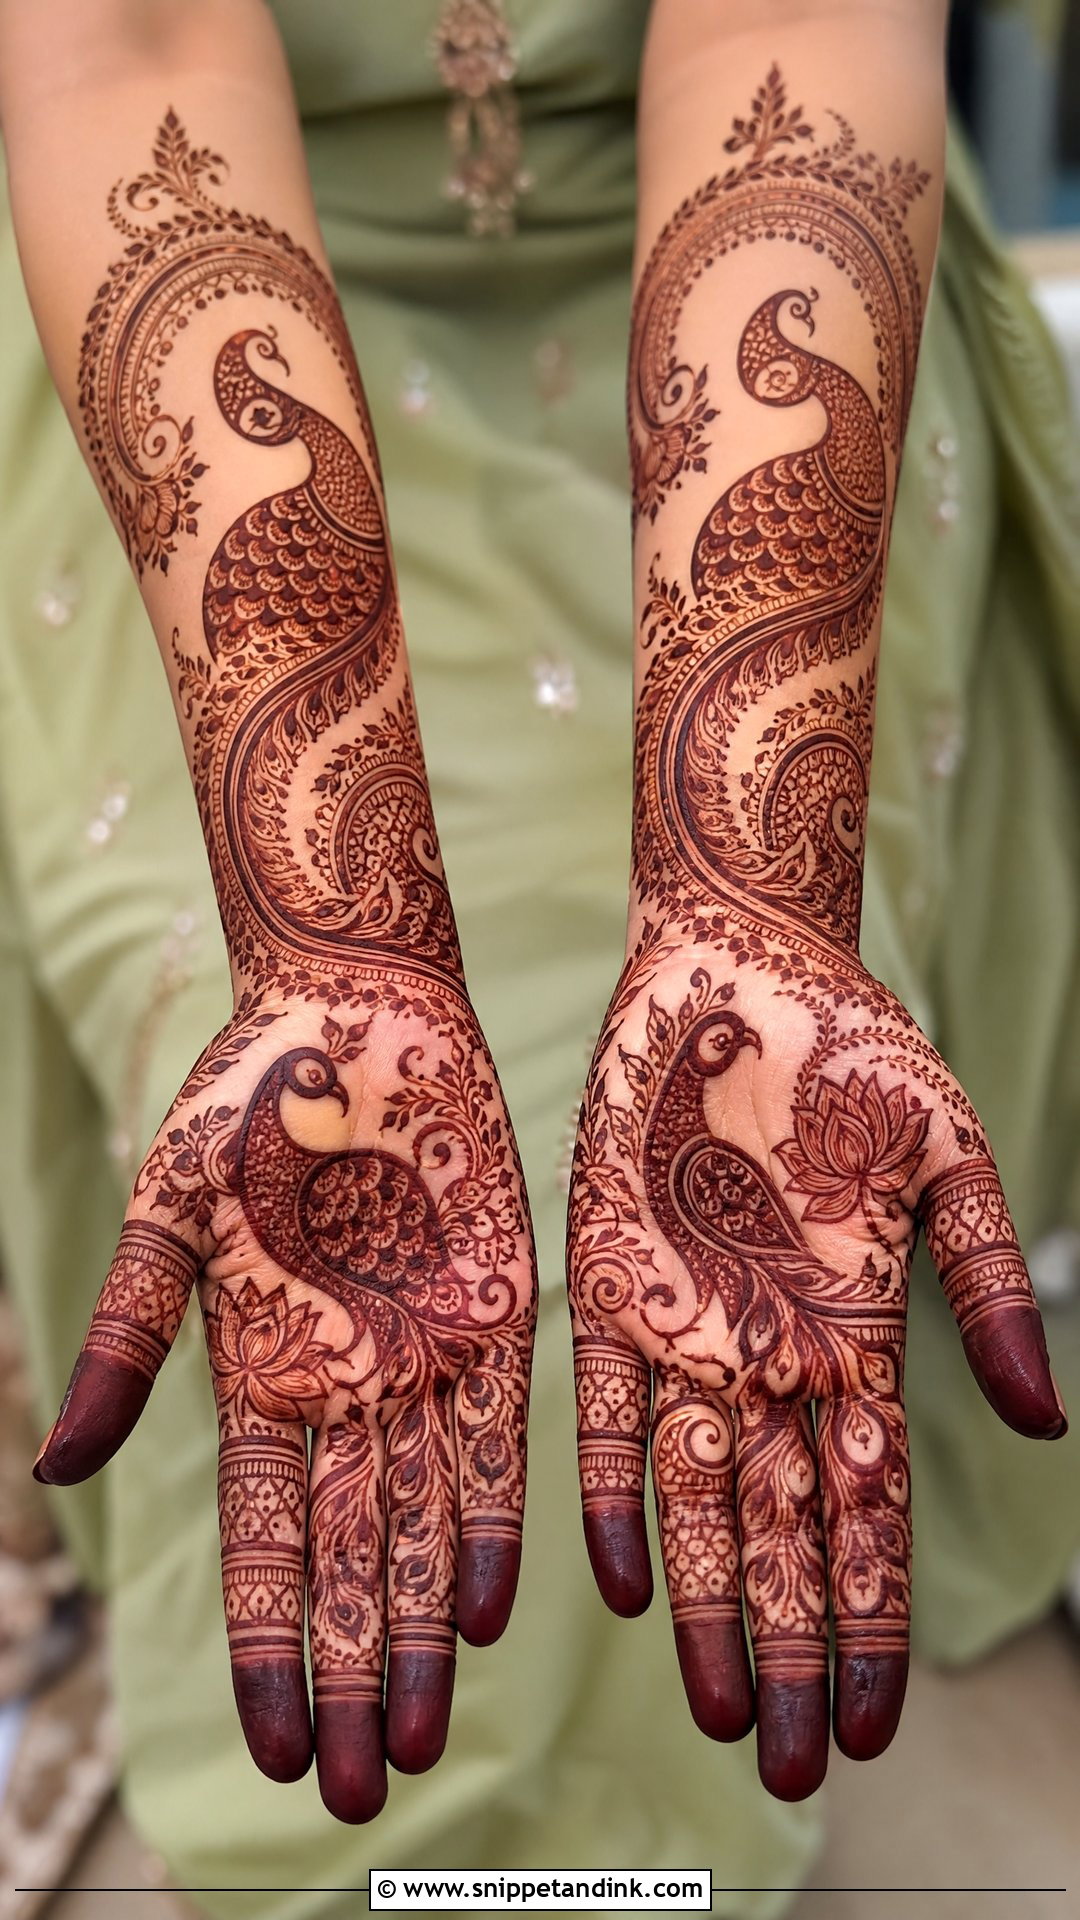
Peacocks give a design movement without portraits. I usually place one large peacock on the palm or across the wrist and let the feathers trail toward the fingers. The feather eyes are where detail gets lost: if the inner circles are drawn too small, they stain as solid dots. I’d go a little bigger than the reference photo. It pairs well with kundan or peacock-themed jewellery.
8. Mandala Bridal Mehndi Design
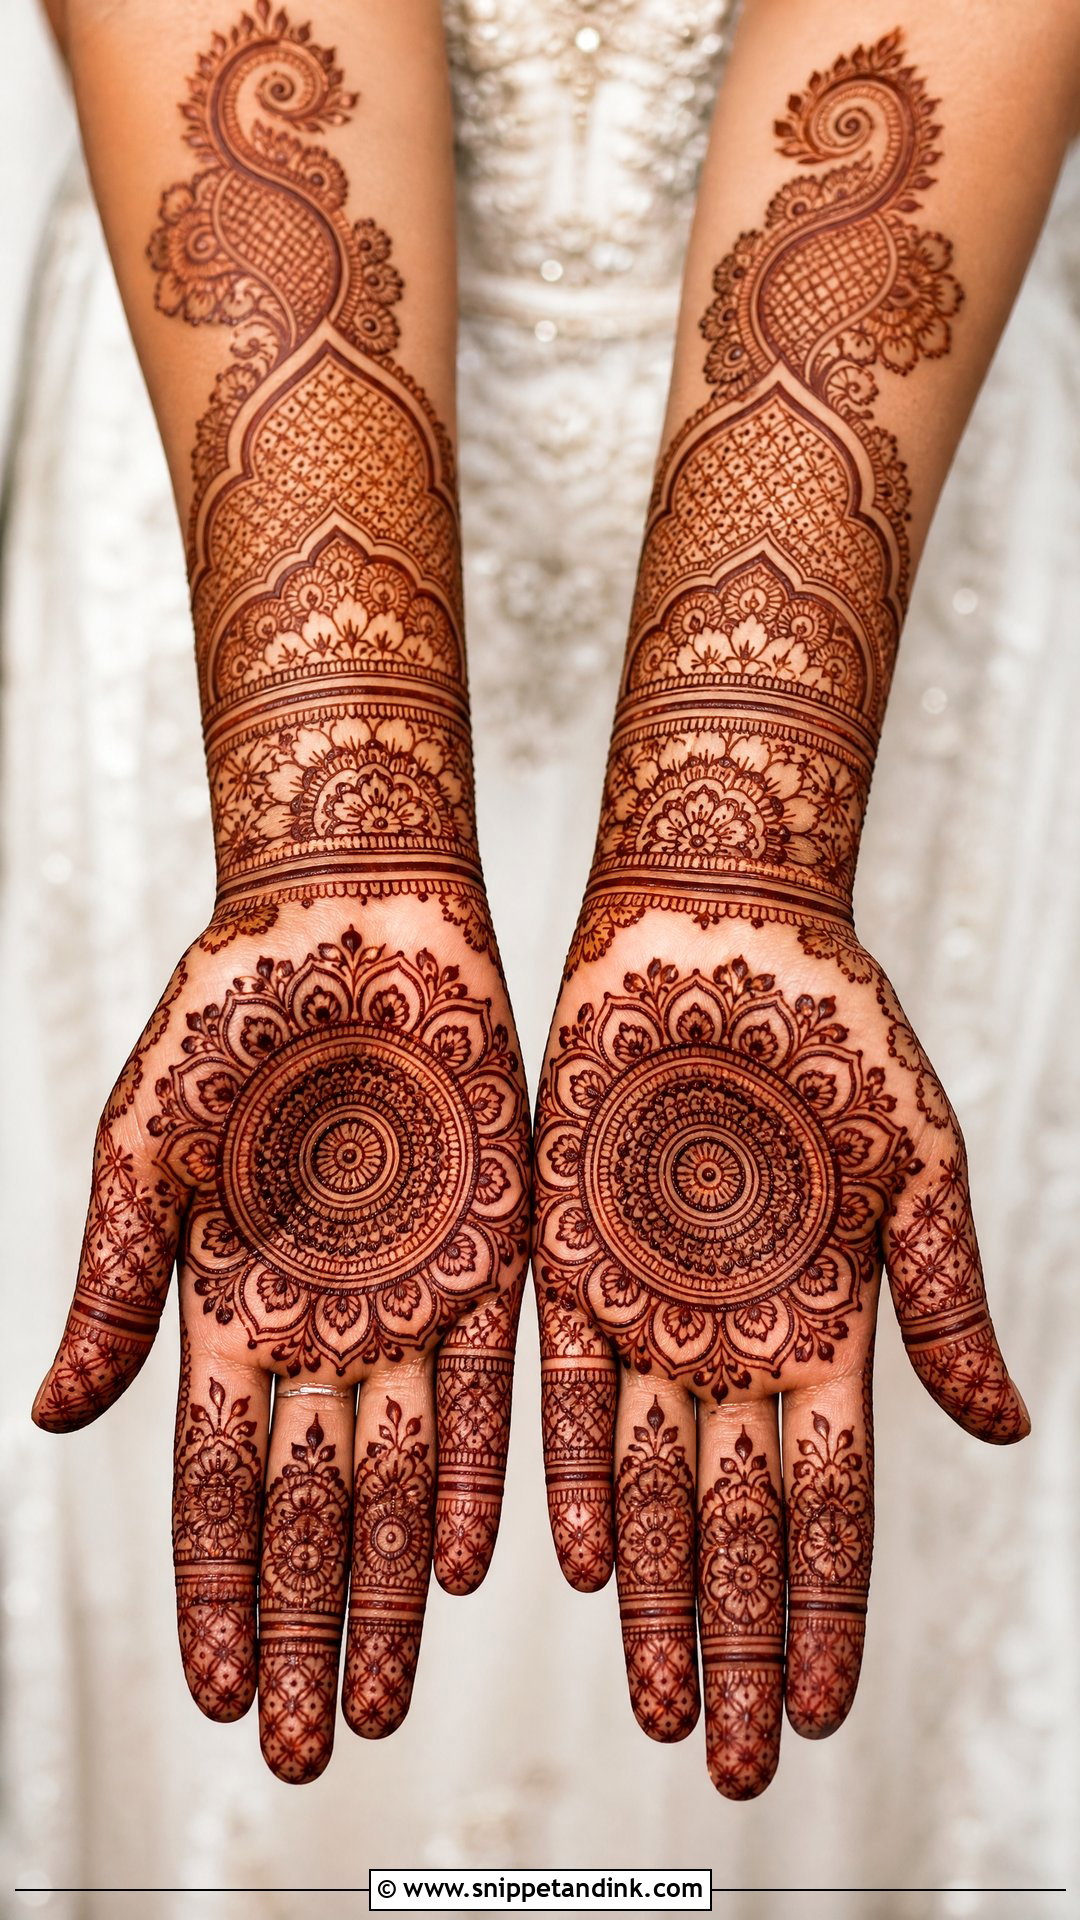
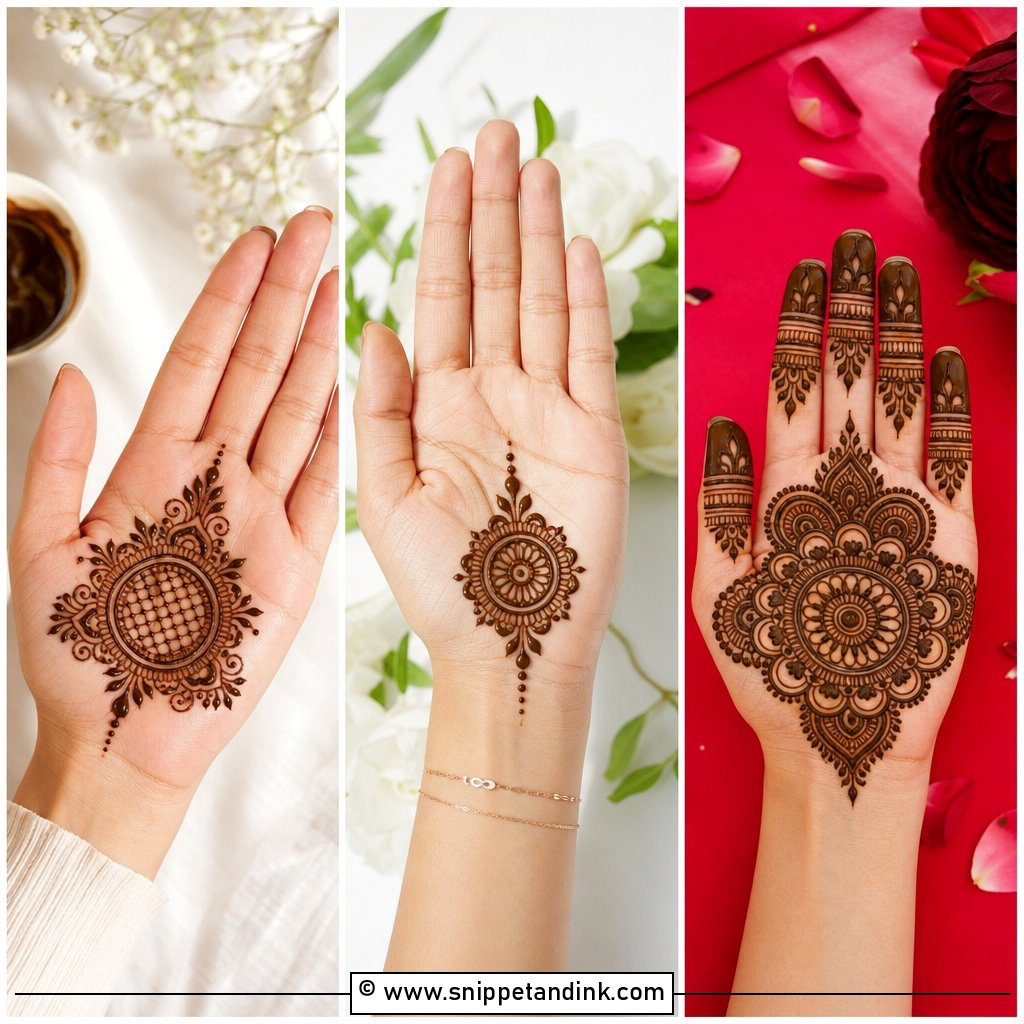
A mandala in the centre of the palm gives a clear focal point, which is why it works so well when you hold your hands up for portraits. I build the rings outwards from a small centre, alternating petals, dots and lace, and the symmetry has to be checked from above every few rings, since a slight tilt shows up badly once it darkens. It can be kept simple or filled very finely. Matching bands on the wrist and forearm complete it.
9. Jaali Bridal Mehndi Design
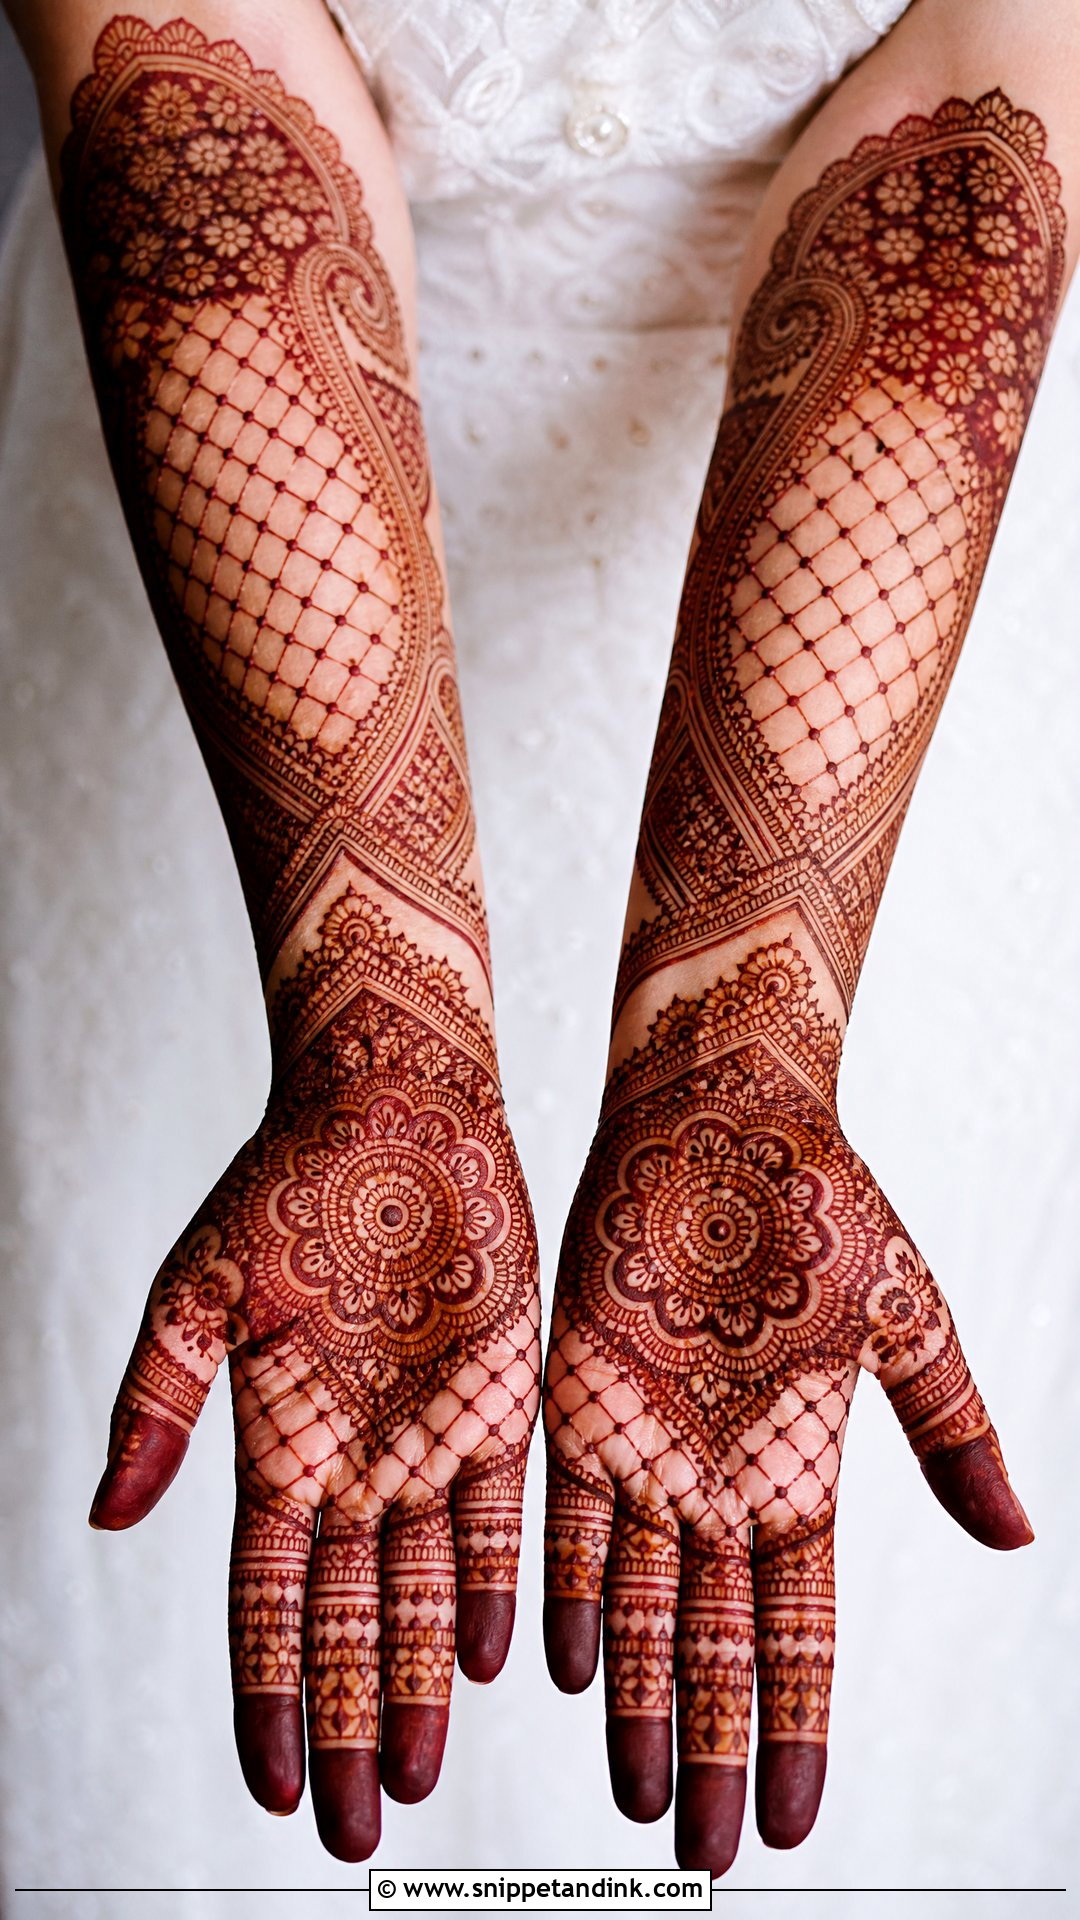
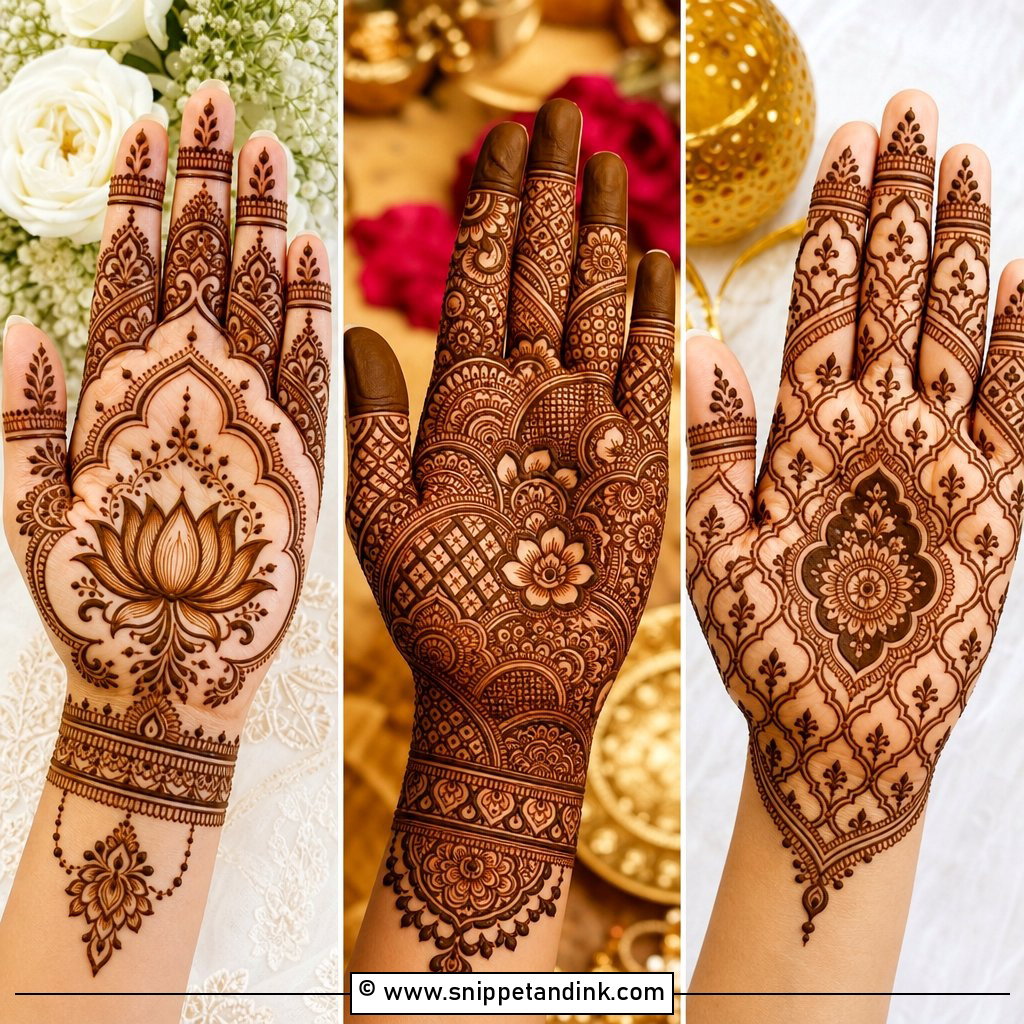
Jaali is a grid of crossing lines that looks like lace. It needs a very fine, steady cone, because uneven gaps in the mesh are obvious after staining. I don’t use it everywhere; on its own it can look flat, so I mix it with mandalas and paisleys and keep jaali to defined panels. The open grid looks good with rings, as skin shows through around them.
10. Lotus Bridal Mehndi Design
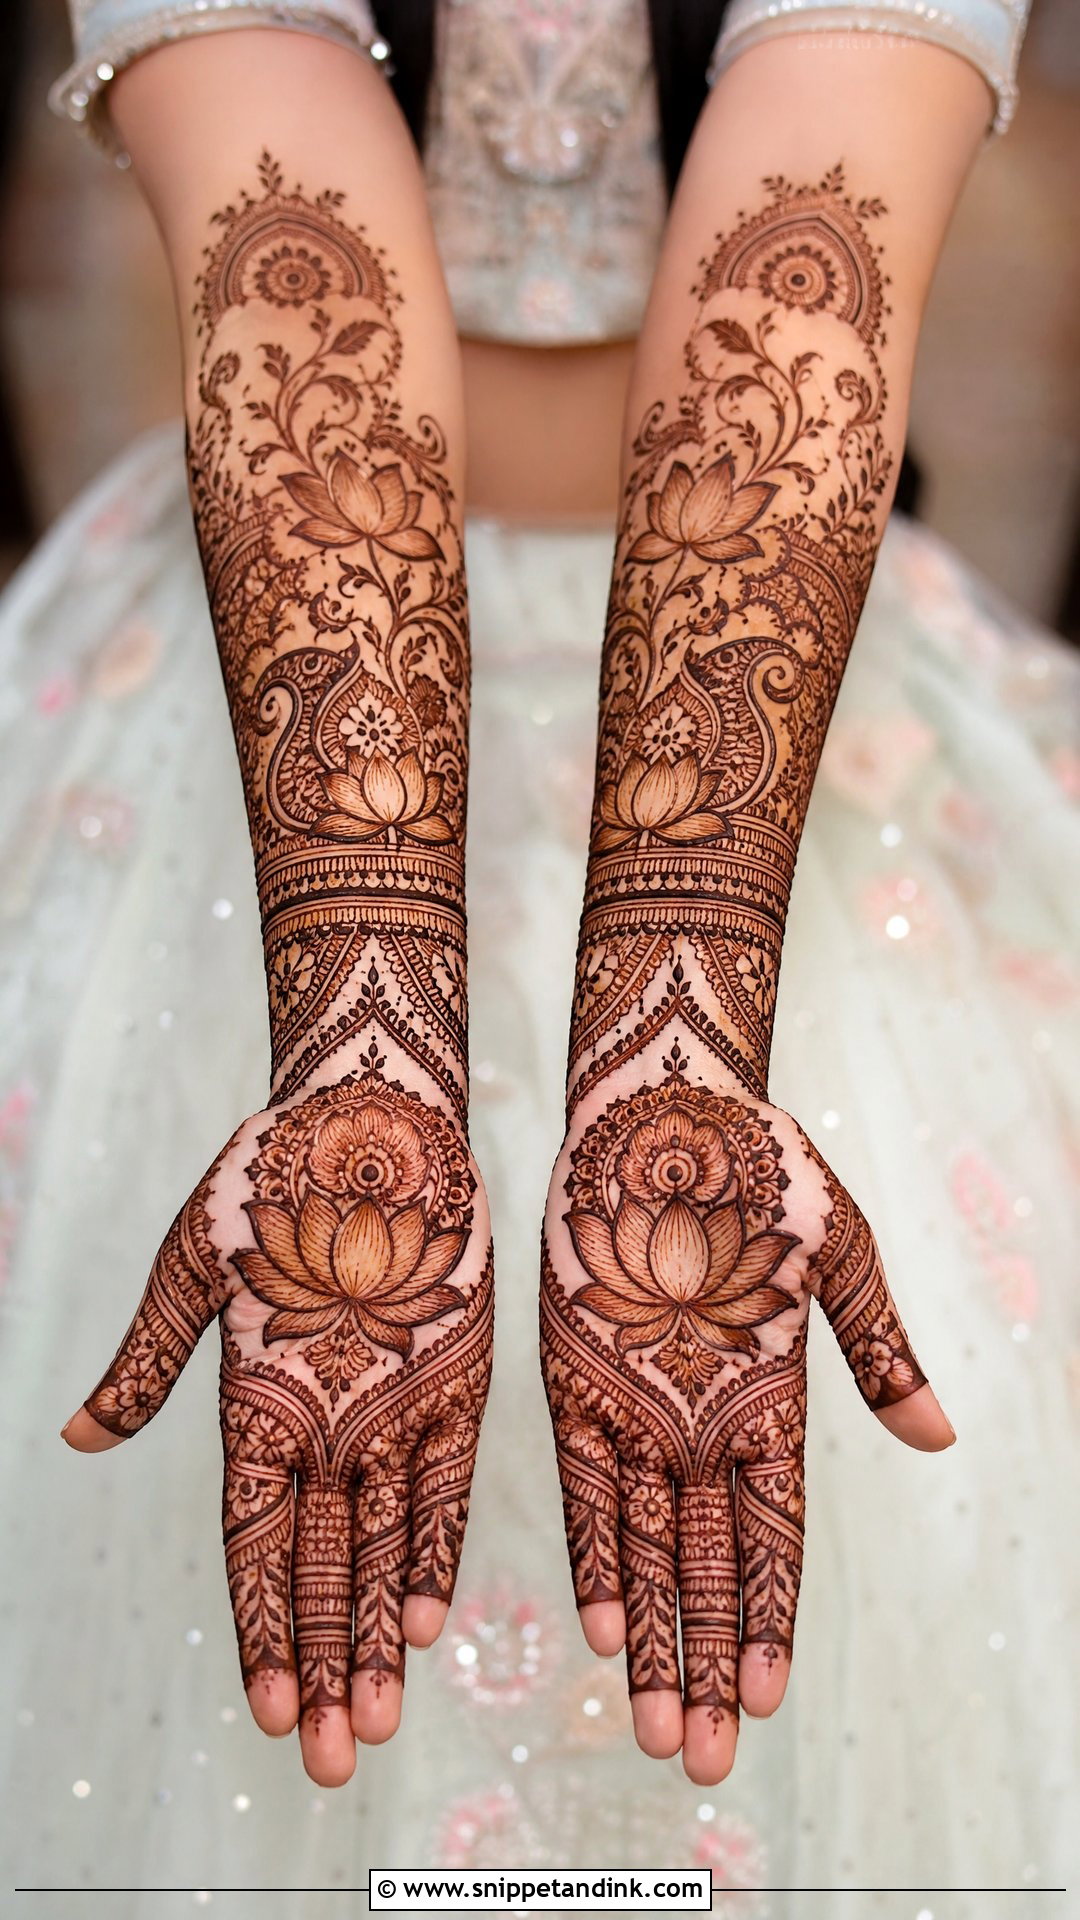
Lotus motifs are bold and keep their shape after staining, which makes them reliable for a bride who worries about a blurry result. I use the lotus as a palm centre, a wrist band, or a repeated border up the forearm. Shading alternate petals gives depth without more lines. Connect the palm and wrist with vines so the fingers don’t feel separate from the rest.
11. Minimal Bridal Mehndi Design
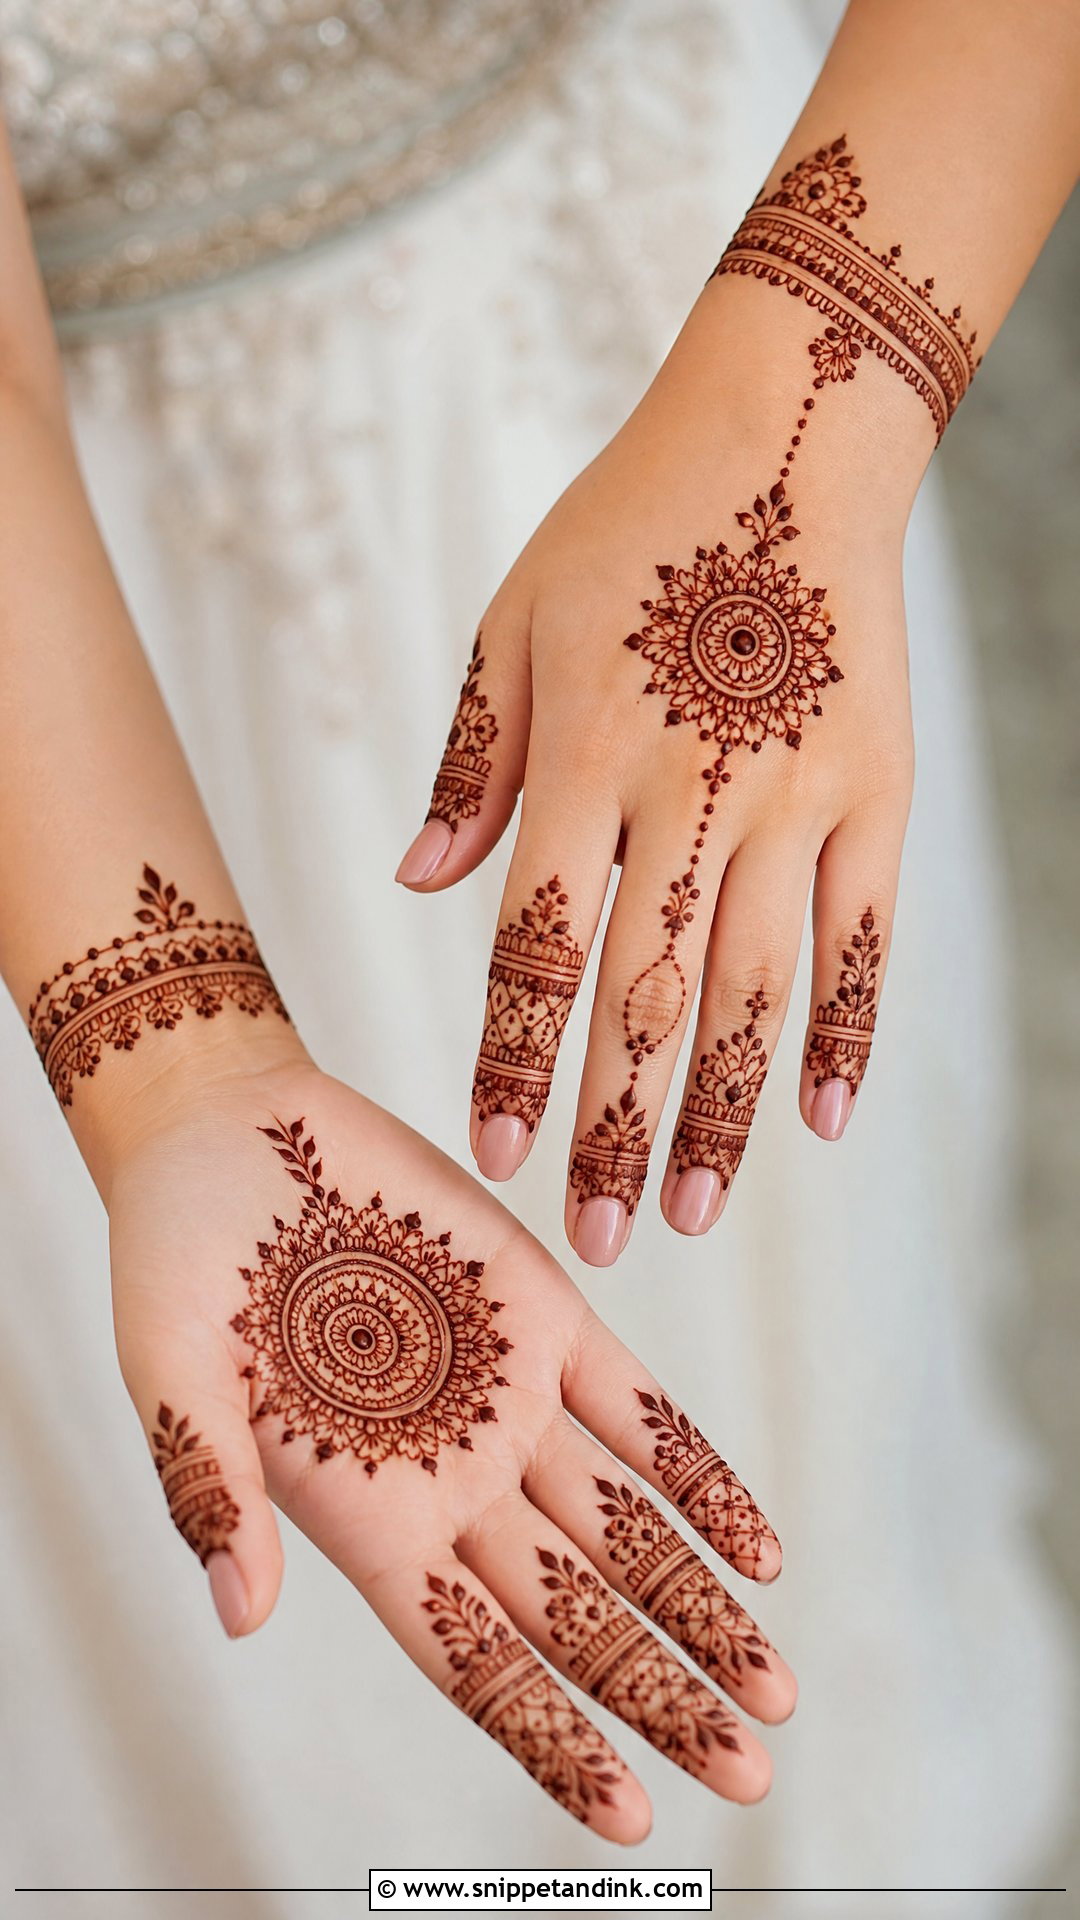
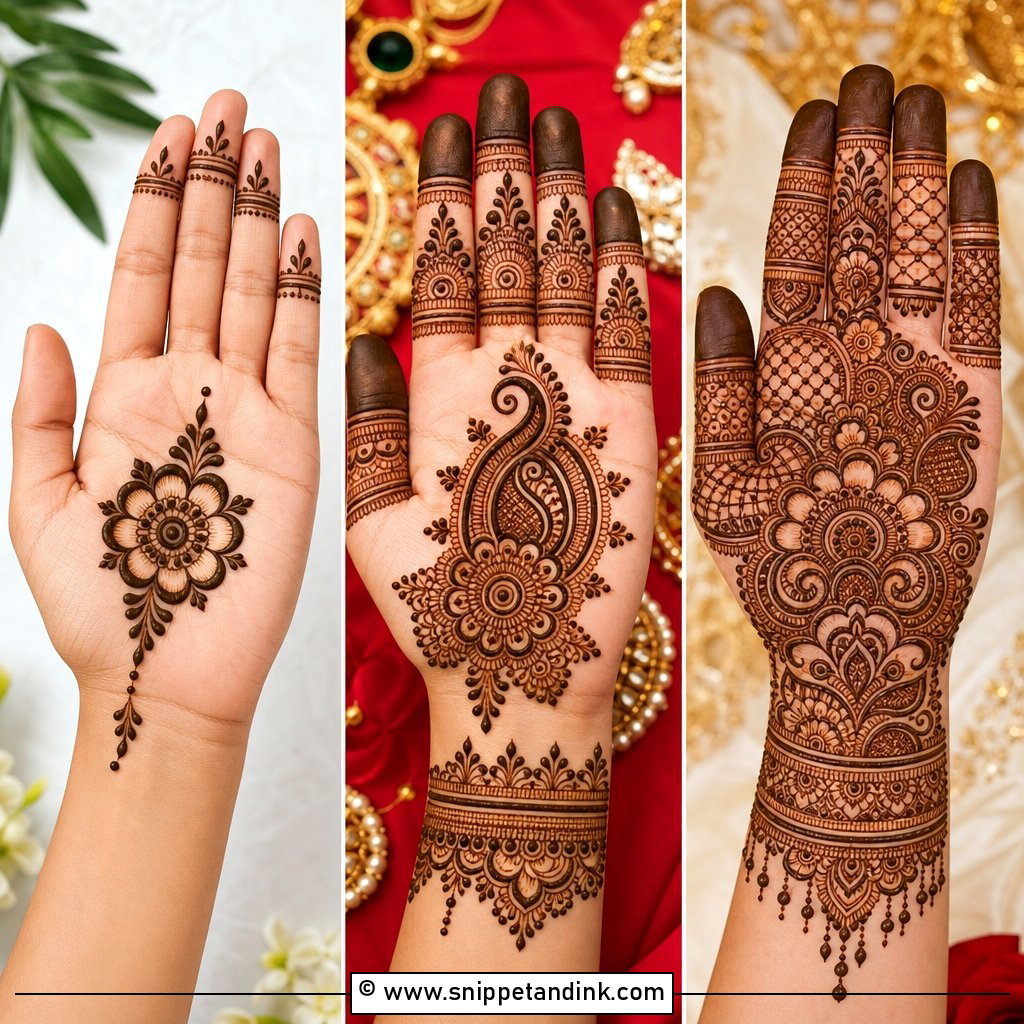
Not every bride wants coverage to the elbow. A minimal bridal design can be a palm mandala, detailed fingers, wrist bands and small florals with plenty of bare skin. The key is that each motif is finished properly, so it reads as deliberate rather than incomplete. It suits intimate weddings, destination ceremonies and lighter outfits, and it takes a fraction of the time. On the back hand, a ring-chain layout works well.
12. Modern Bridal Mehndi Design
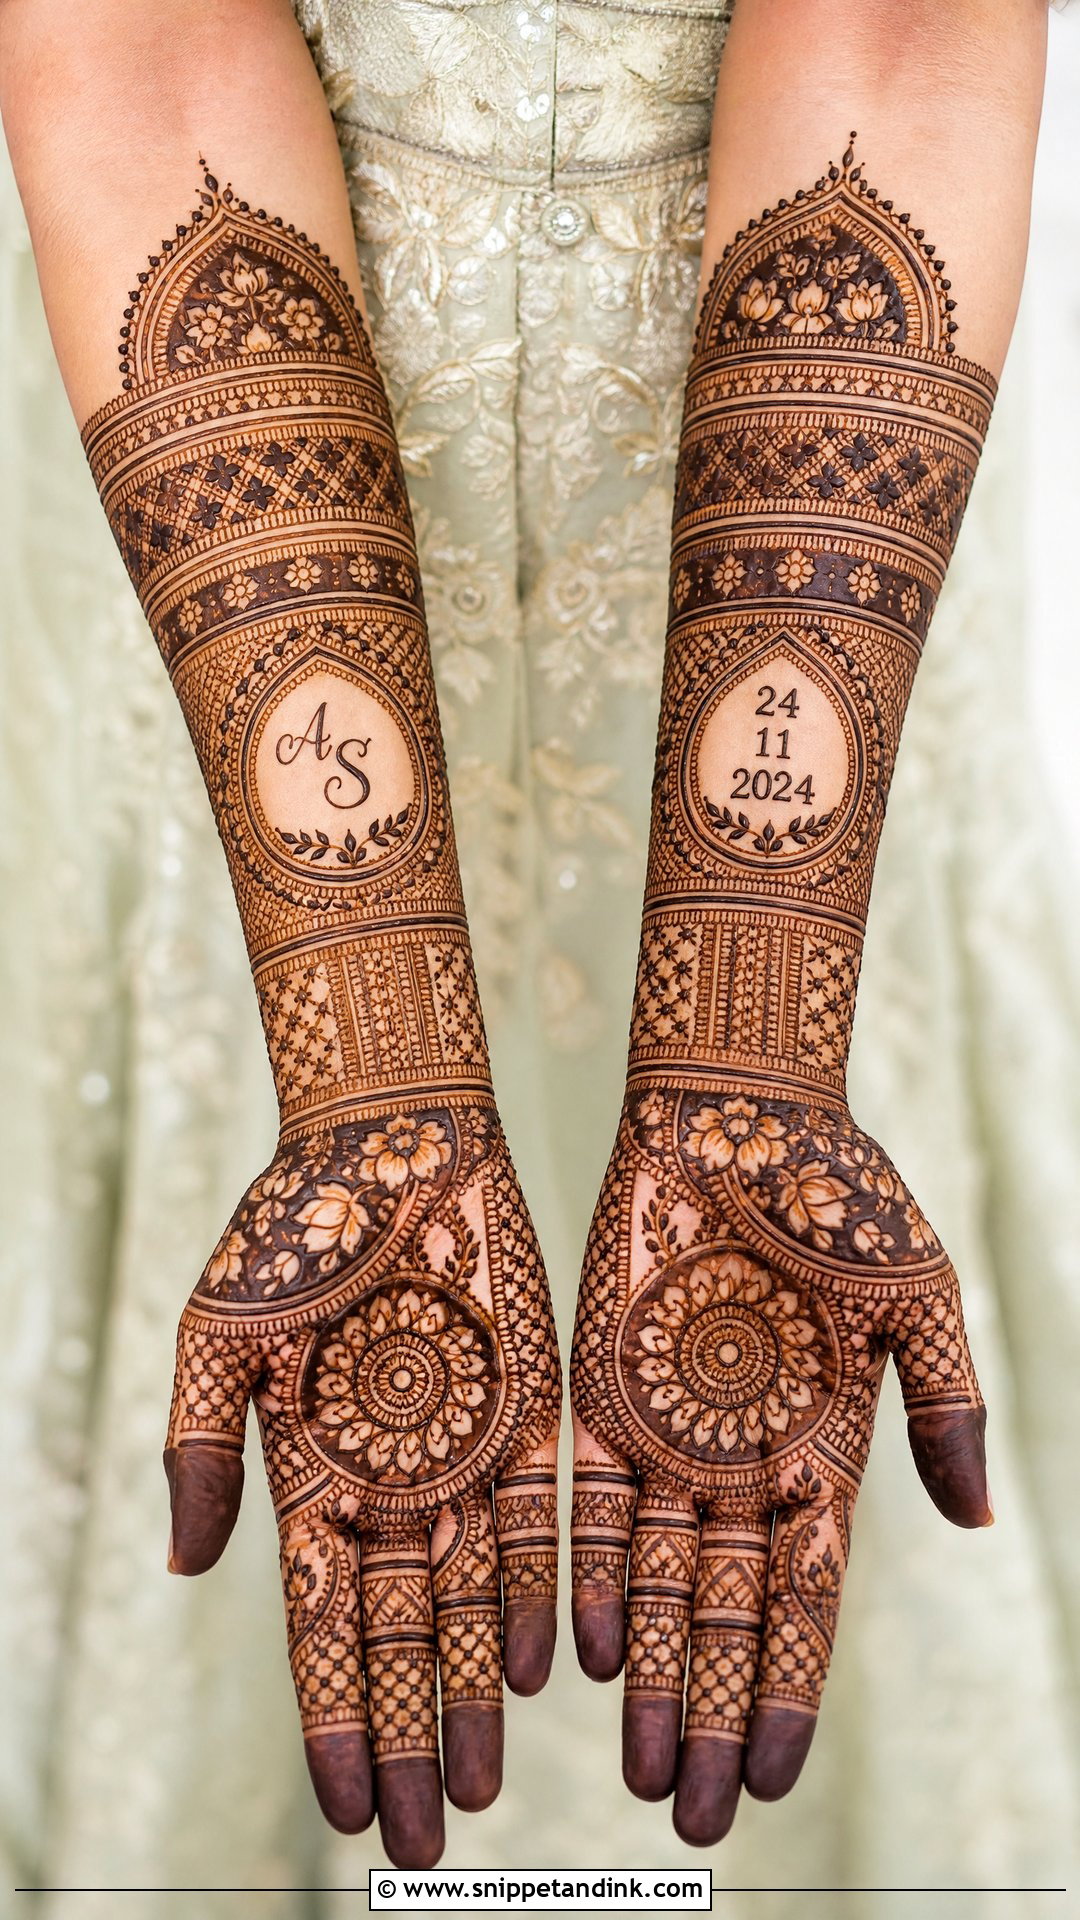
Modern designs use clean spacing, geometric bands, initials, dates and floral trails instead of filling the whole hand. They can still be detailed, but the detail sits in fewer, sharper areas. I put initials near the wrist where they’re easy to find and photograph, and keep the fingers detailed so the hand still feels bridal. This style shows up well in close-up photography because each motif has room.
13. Moroccan Bridal Mehndi Design
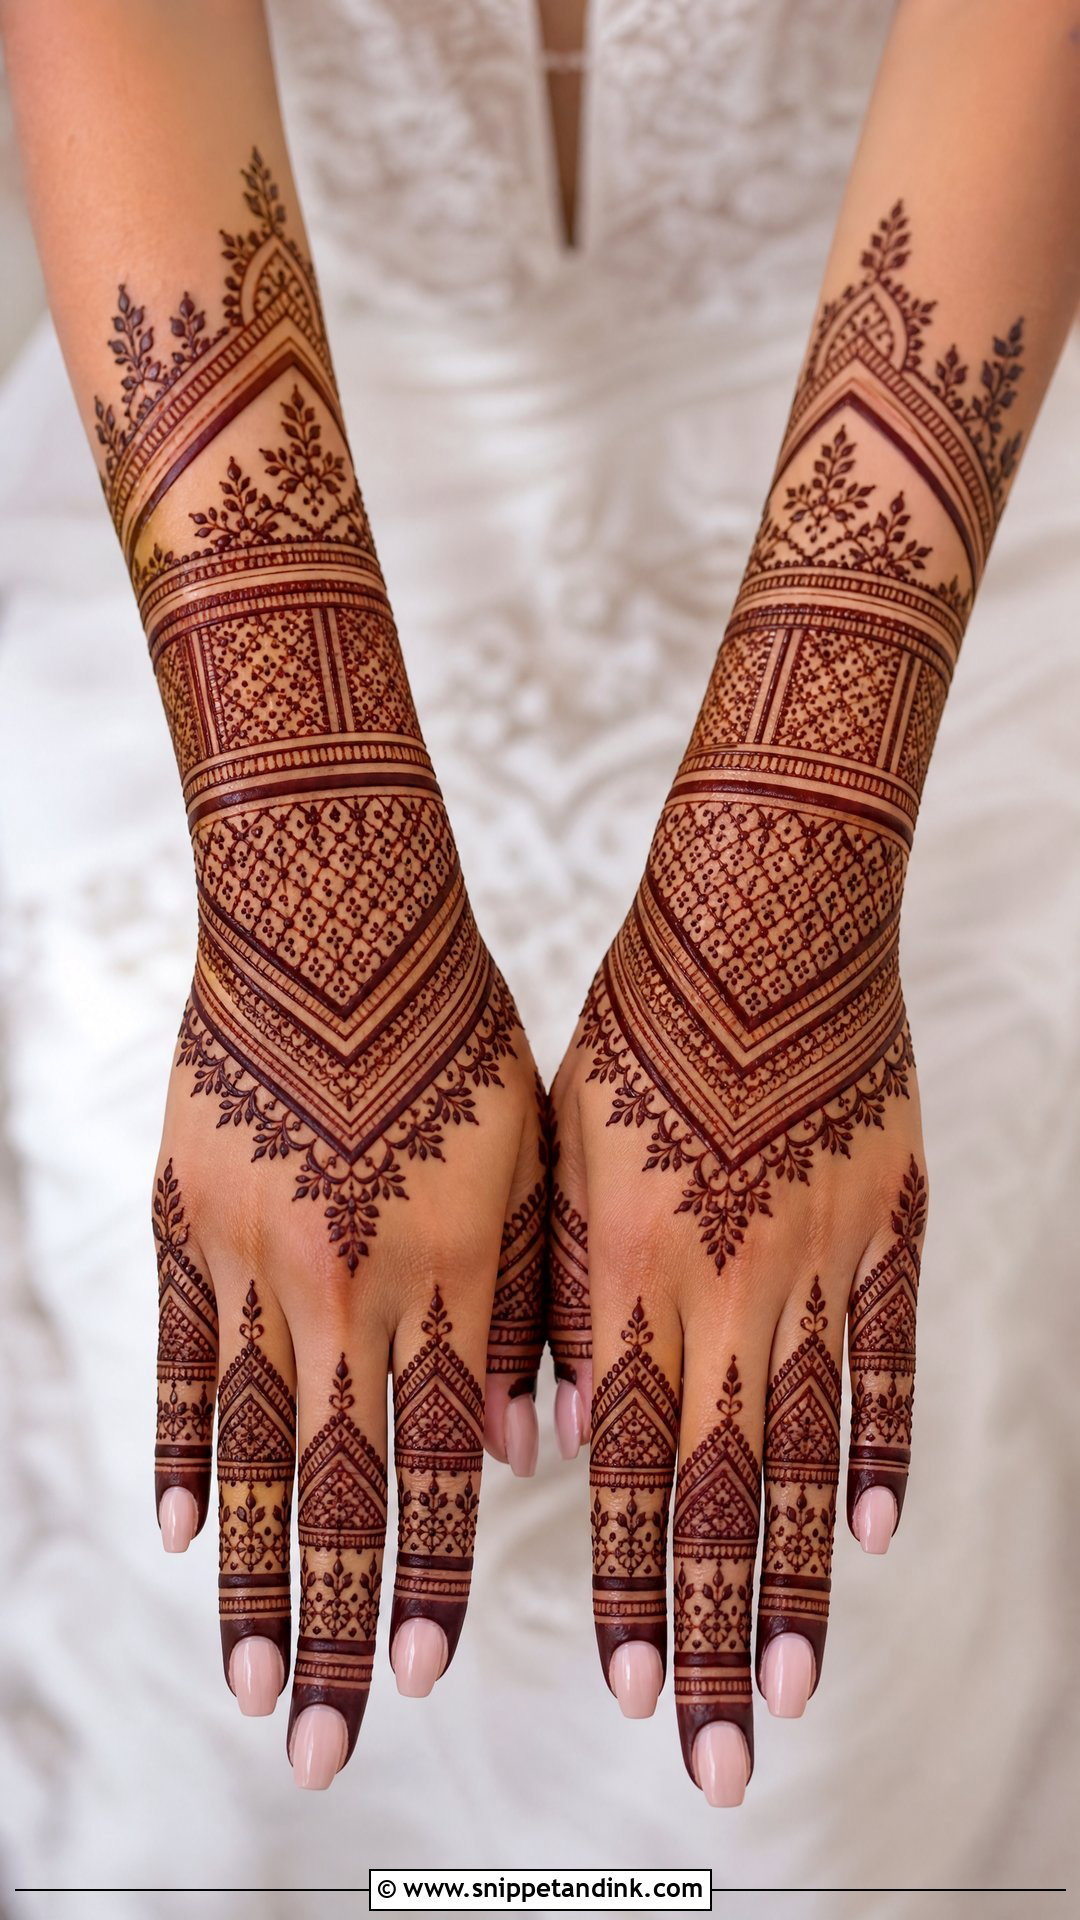
Moroccan-inspired work swaps florals for diamonds, triangles, chevrons and grids. Straight lines are less forgiving than curves, so I check the paste consistency before starting; a cone that’s even slightly too runny wobbles on a long straight stroke. Small dots or flowers between the geometric sections soften it. It’s an unusual choice and a good one if you want something different from paisleys and peacocks.
14. Gulf Bridal Mehndi Design
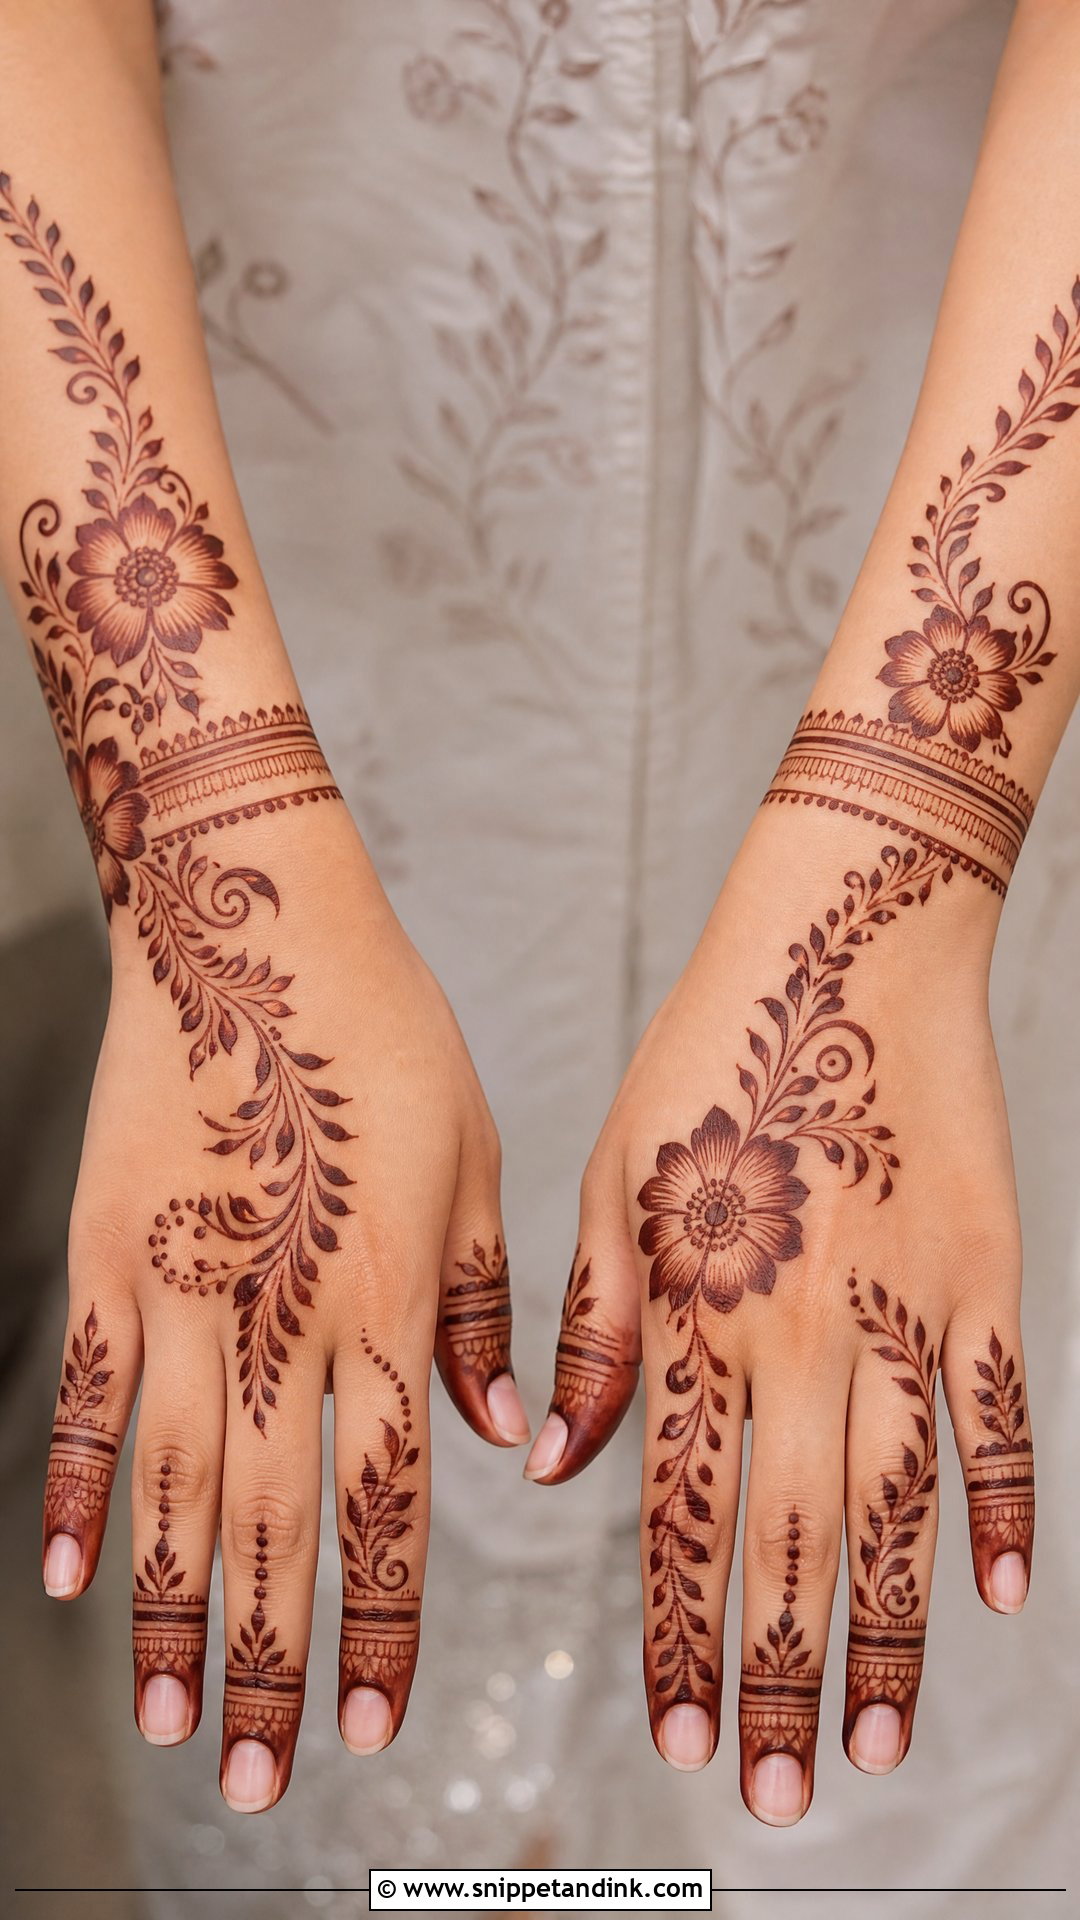
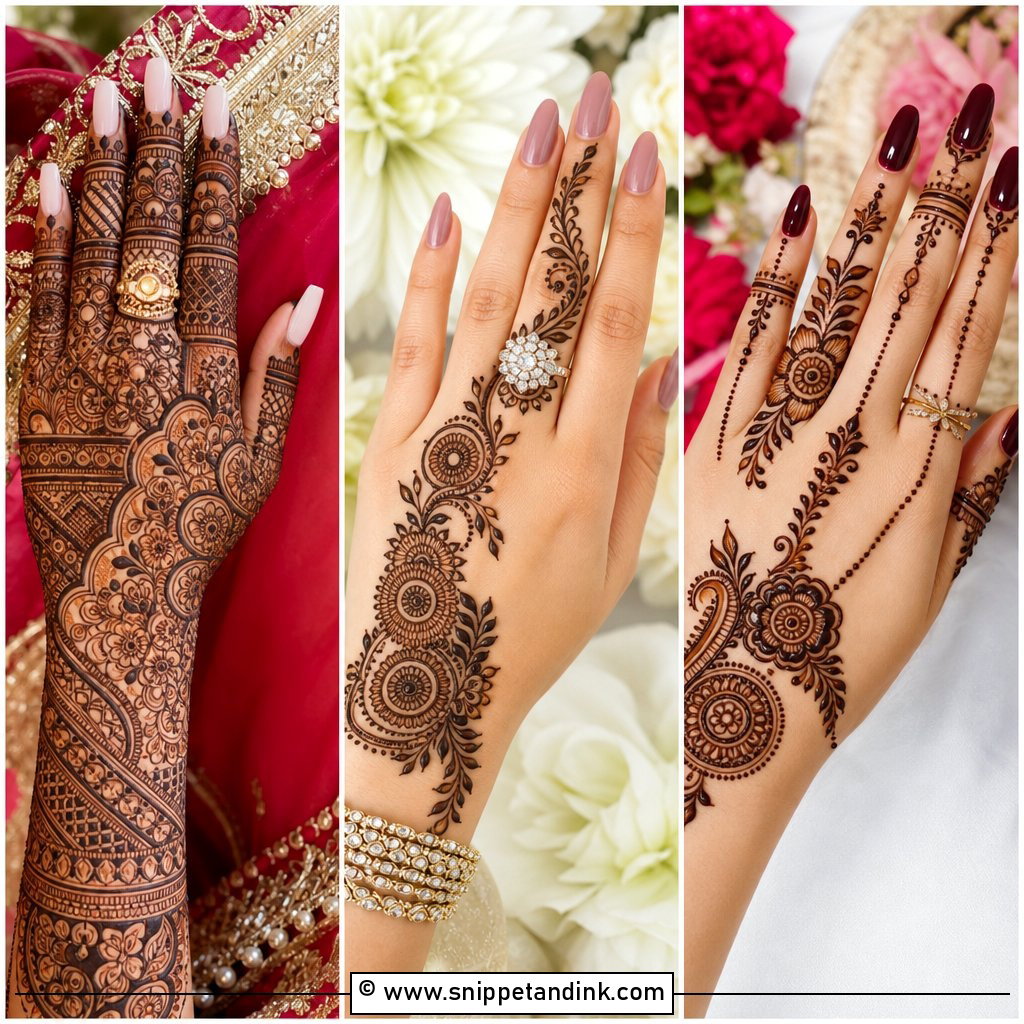
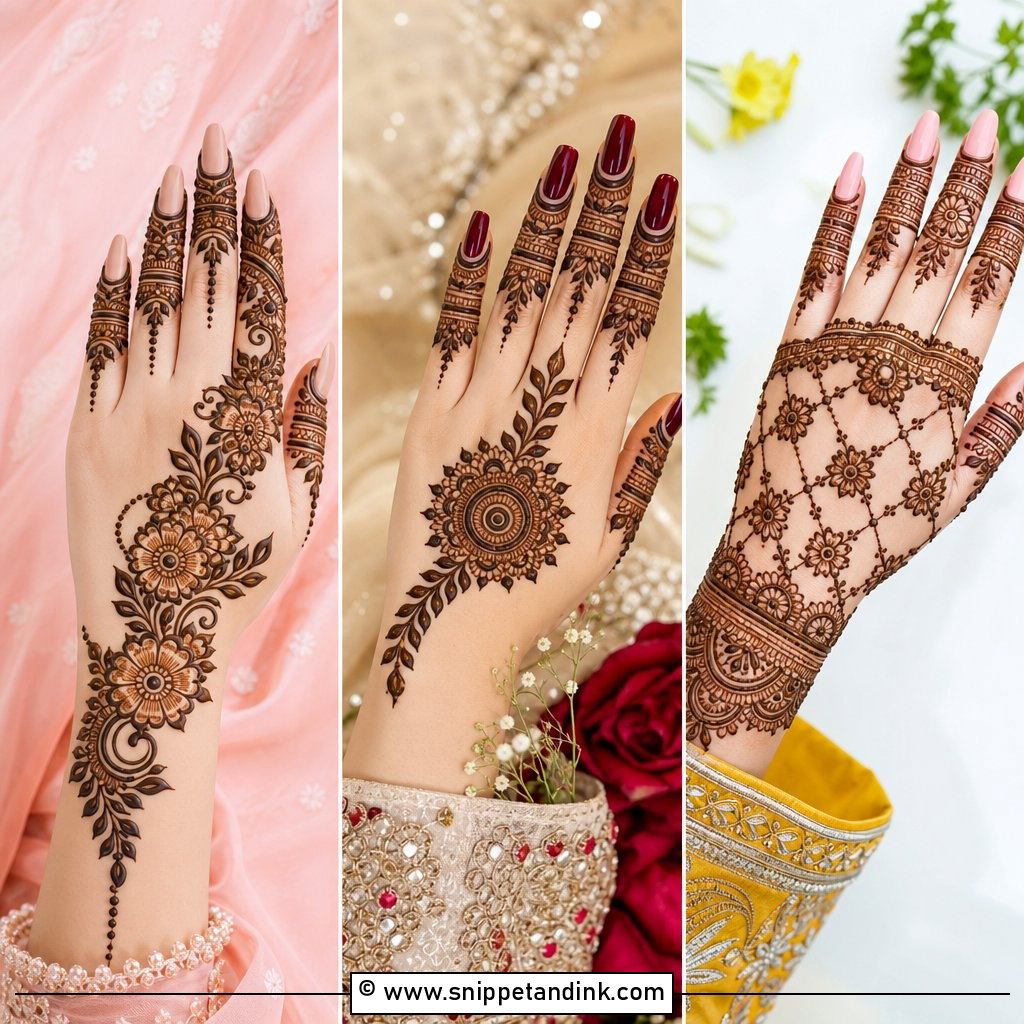
Gulf bridal mehndi design, the Khaleeji style, is bold florals and vines moving diagonally across the hand with clean skin between them. For a bride, I add more detail inside the petals, wrist bands and leafy finger extensions. Large solid-filled shapes take a deep stain best, so this is a style that rewards good aftercare. Keep jewellery simple so the design stays the focus.
15. Bracelet Bridal Mehndi Design
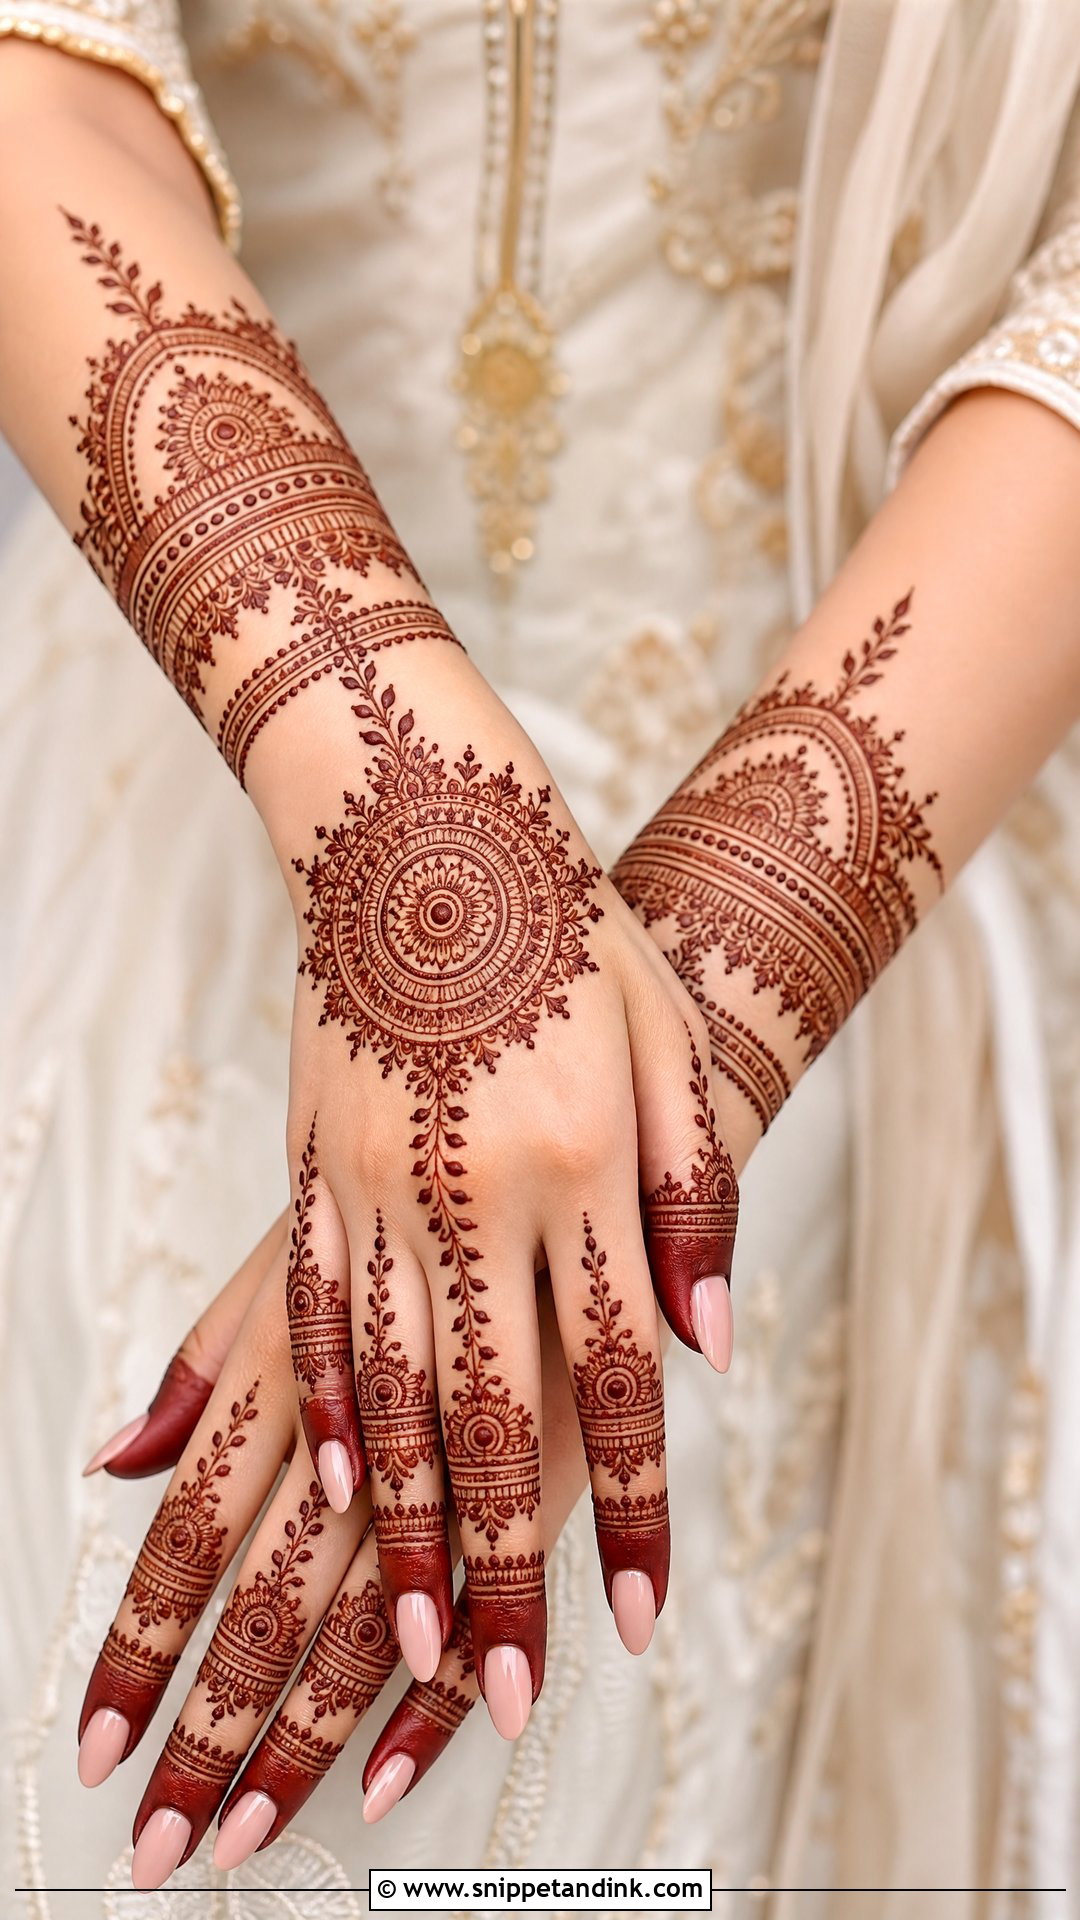
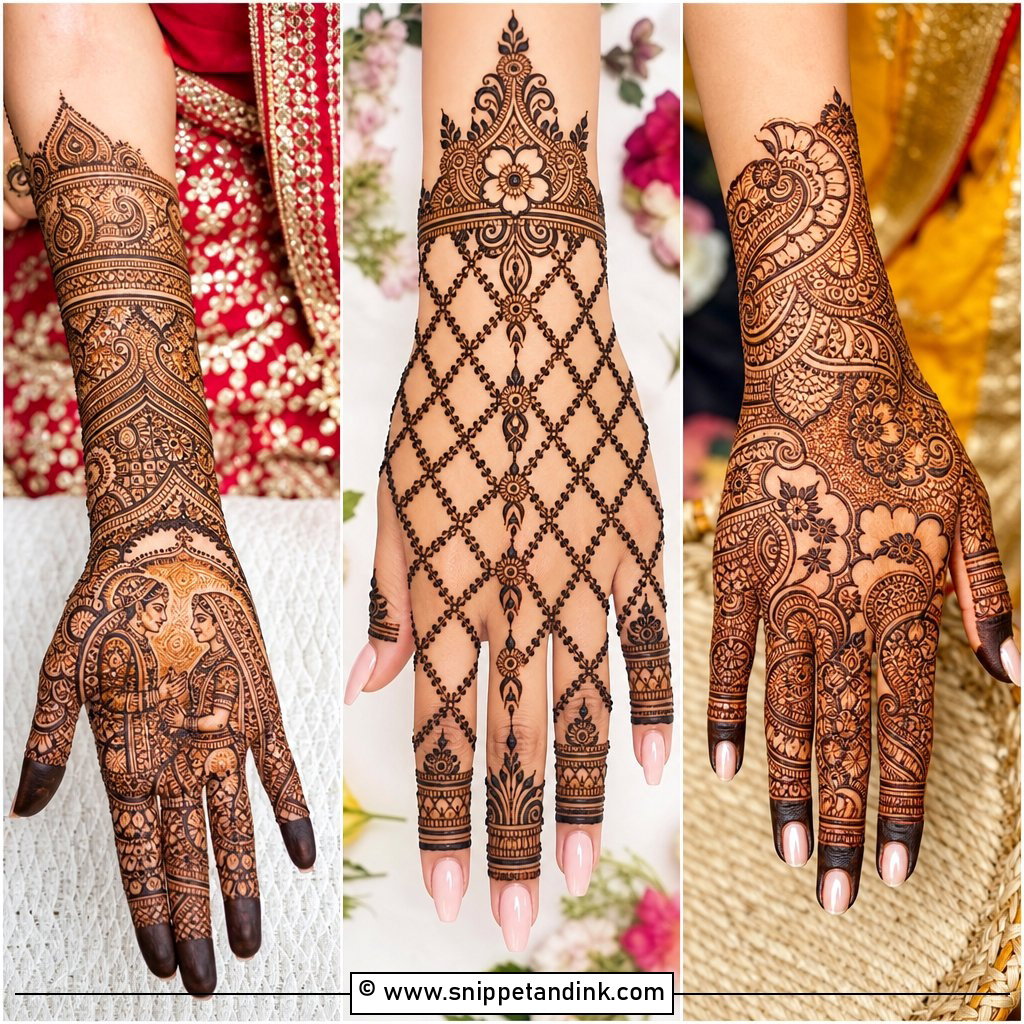
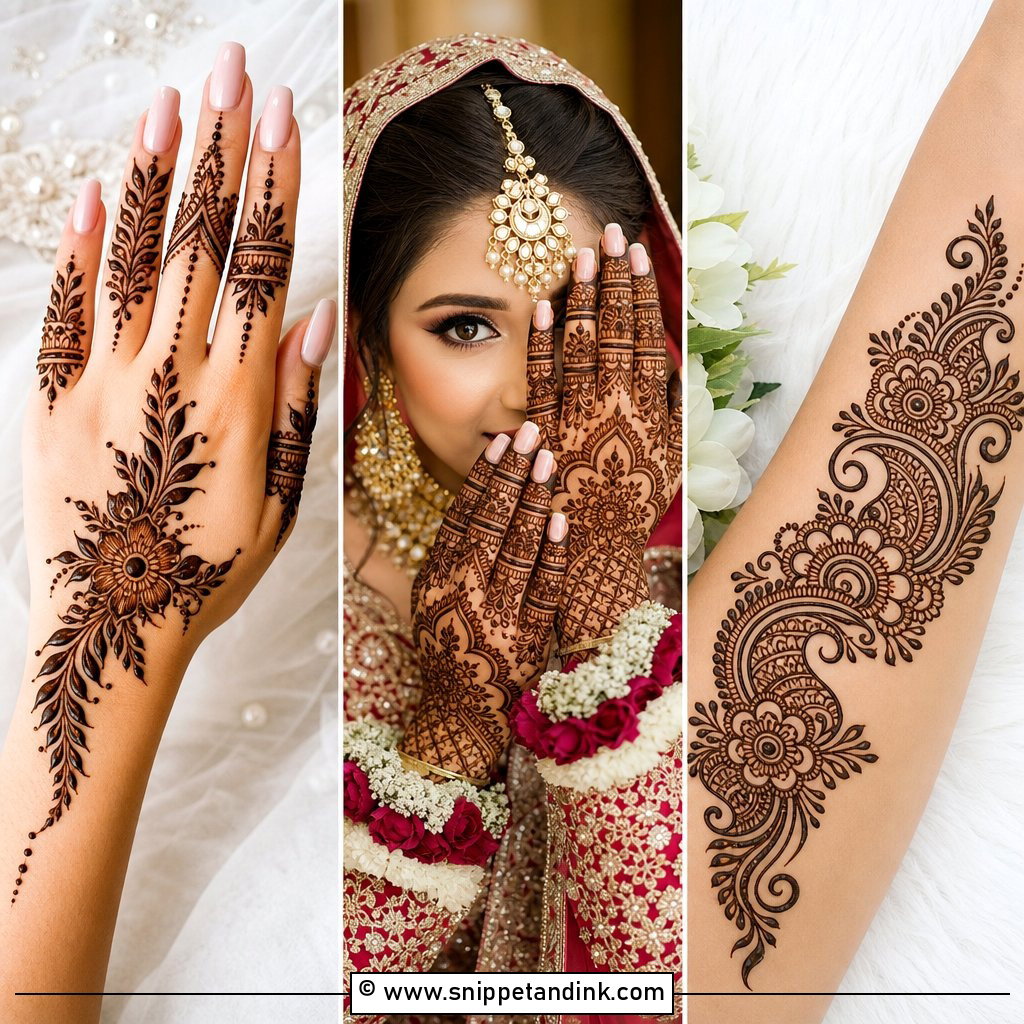
Bracelet designs make henna look like jewellery: a central motif on the back of the hand linked to wrist bands and finger chains. Symmetry is everything, because real jewellery is symmetrical, so I measure the chain spacing against the finger joints. It complements bangles, rings and hathphool. Light versions take little time, and you can extend it up the forearm for a fuller bridal look.
16. Portrait Bridal Mehndi Design
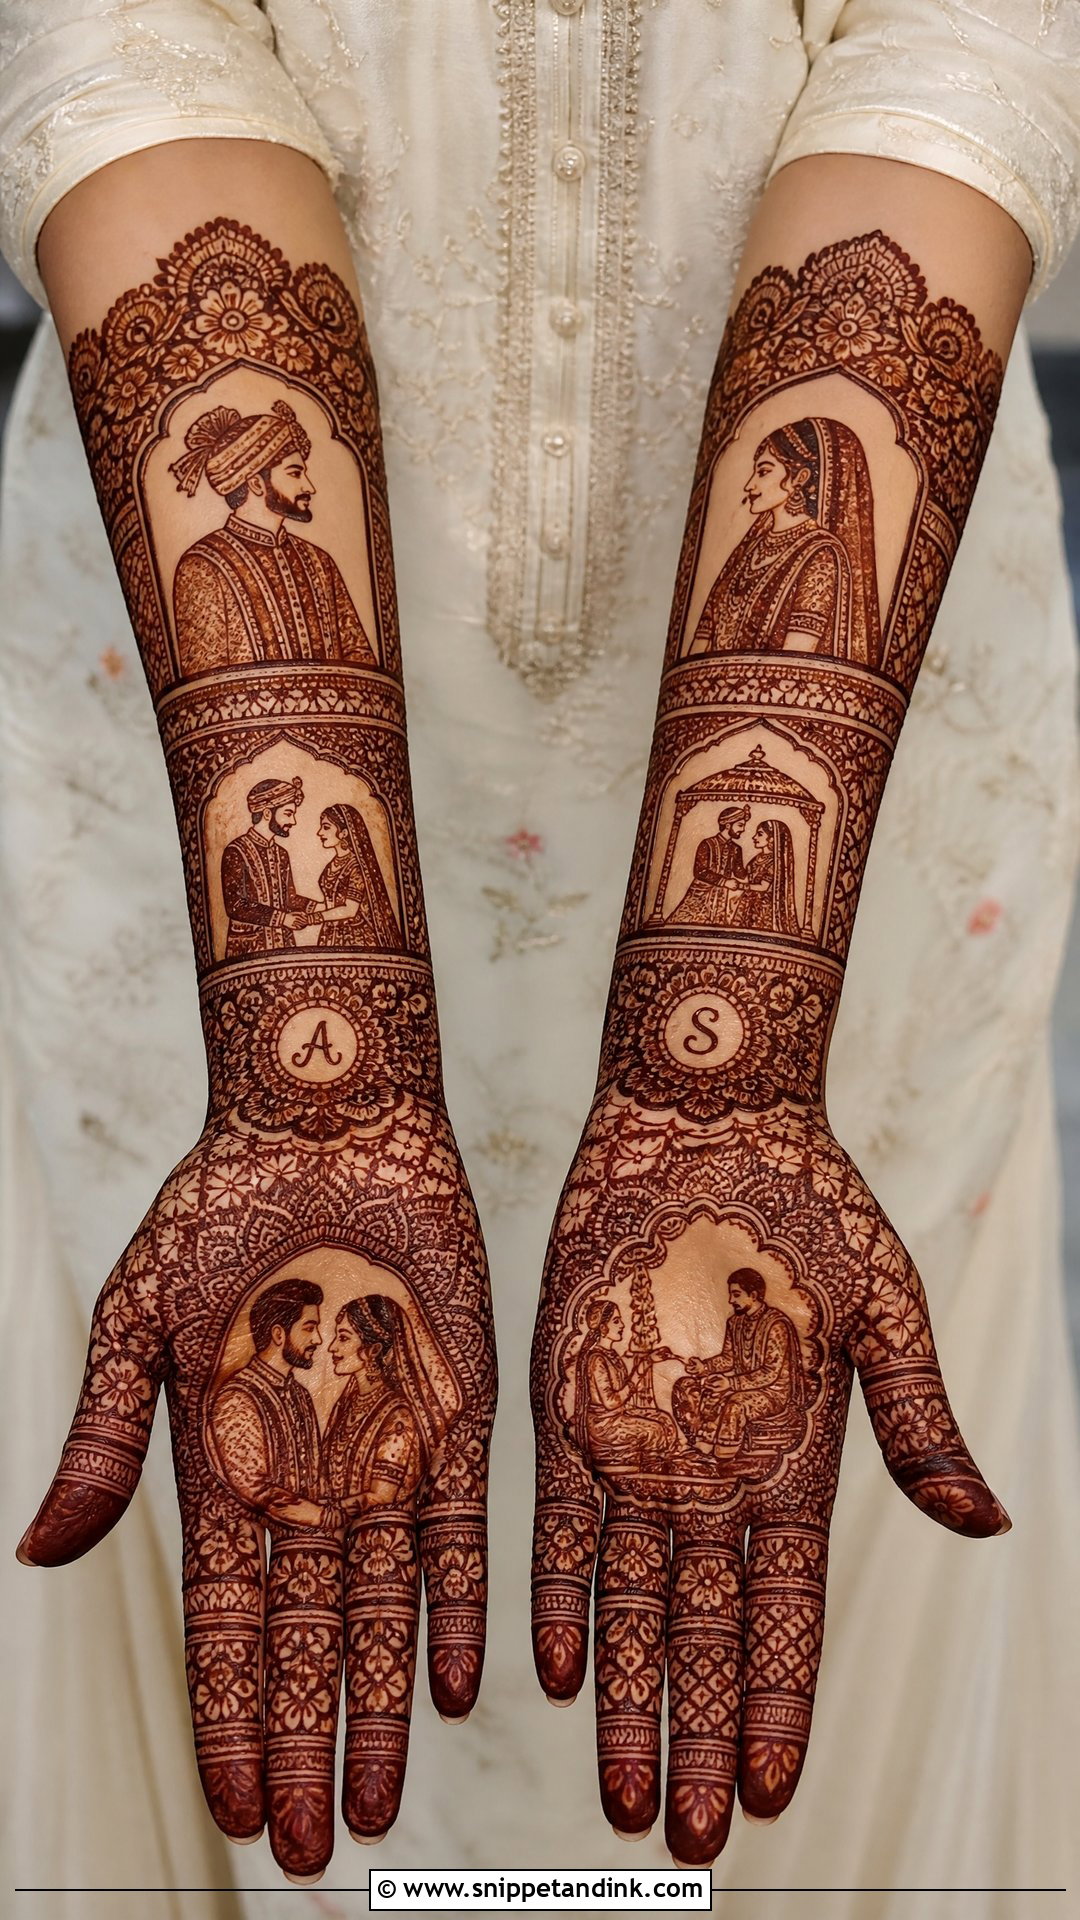
A portrait design can show the couple, a wedding scene, or a moment from your relationship. It needs an experienced artist, so ask to see photos of her own portrait work, not inspiration images. I keep surrounding filler lighter so the figures don’t get lost, and I can hide a name or date in the borders. Give your artist the details of what you’d like included in advance so she can plan the layout.
17. Royal Bridal Mehndi Design
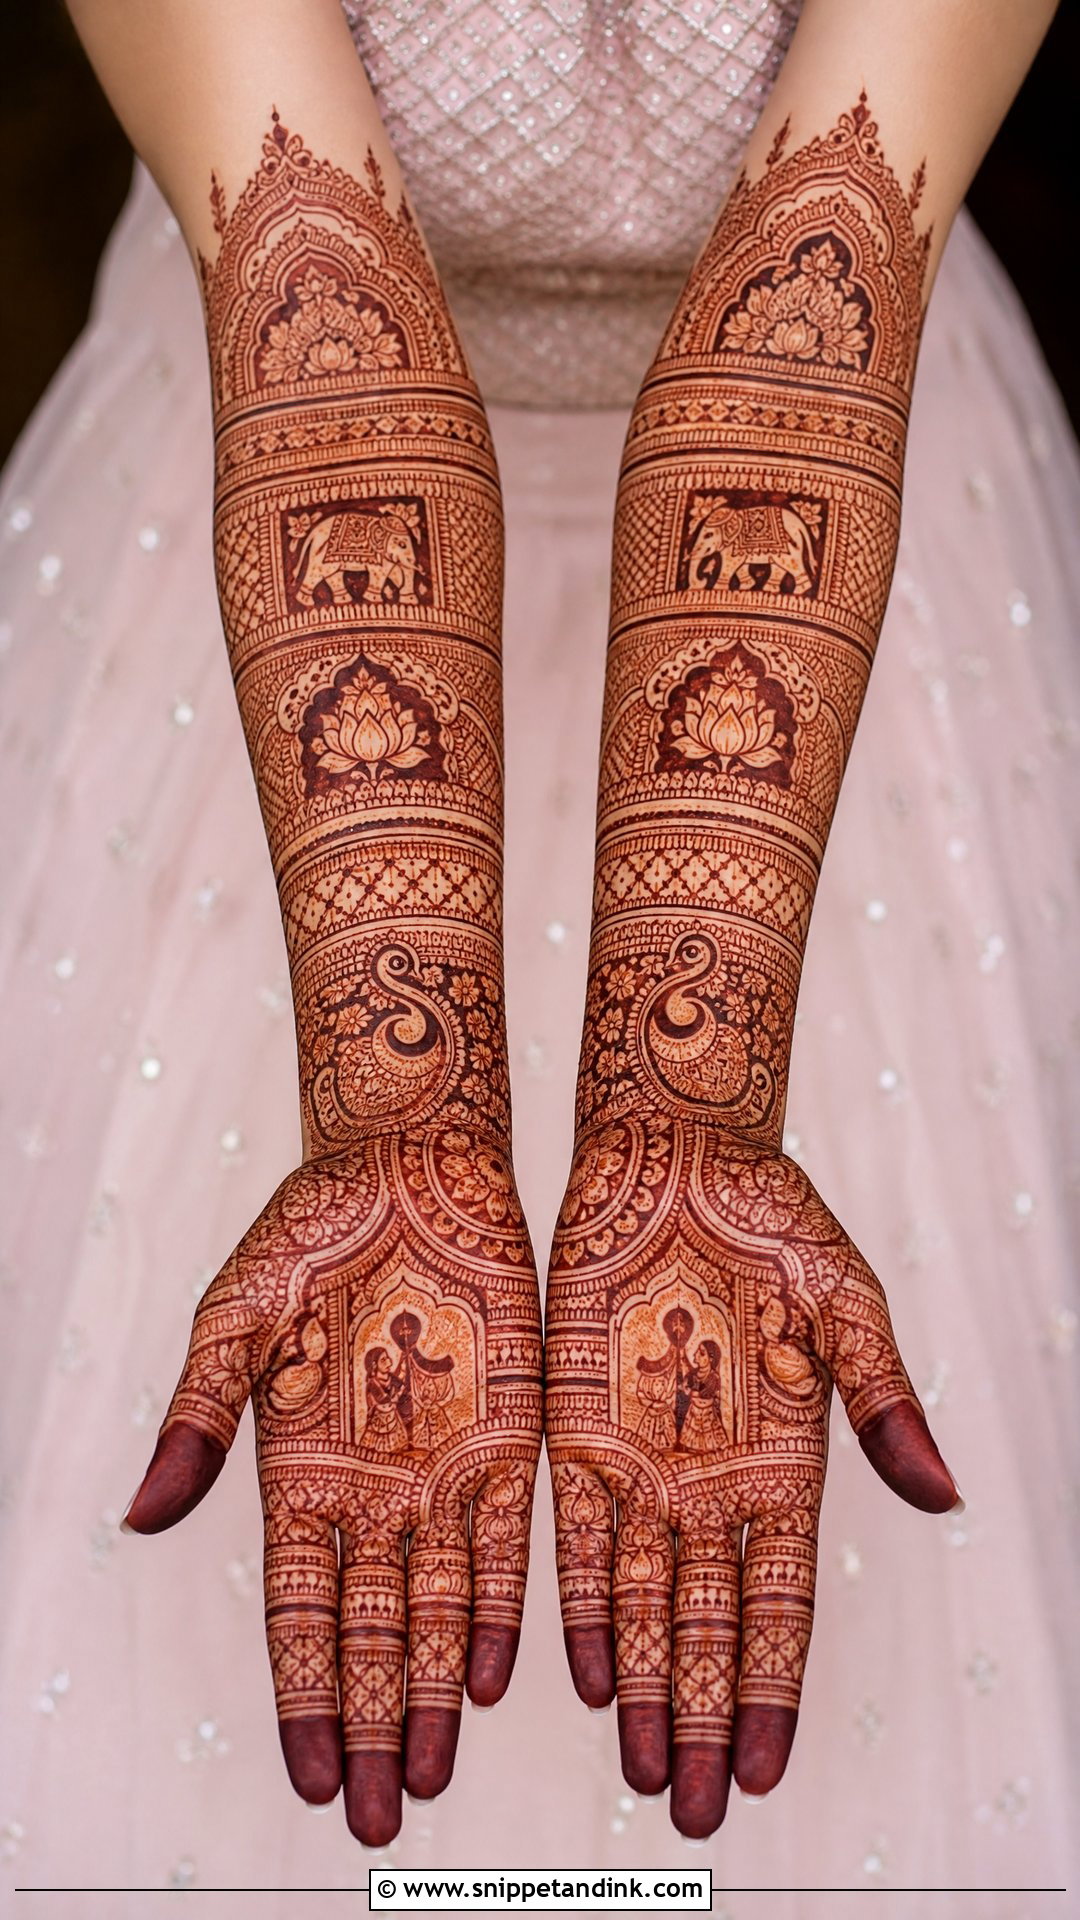
Royal designs feature palace arches, elephants, peacock borders, lotus panels and jaali windows running up the forearms. Both hands should be coordinated, even if the motifs differ slightly, so I sketch both sides before starting. It is long work, and I’d ask you to book the time generously rather than rush the last hour. The result suits heavy bridal outfits and long-sleeved blouses that end mid-forearm.
18. Floral Bridal Mehndi Design
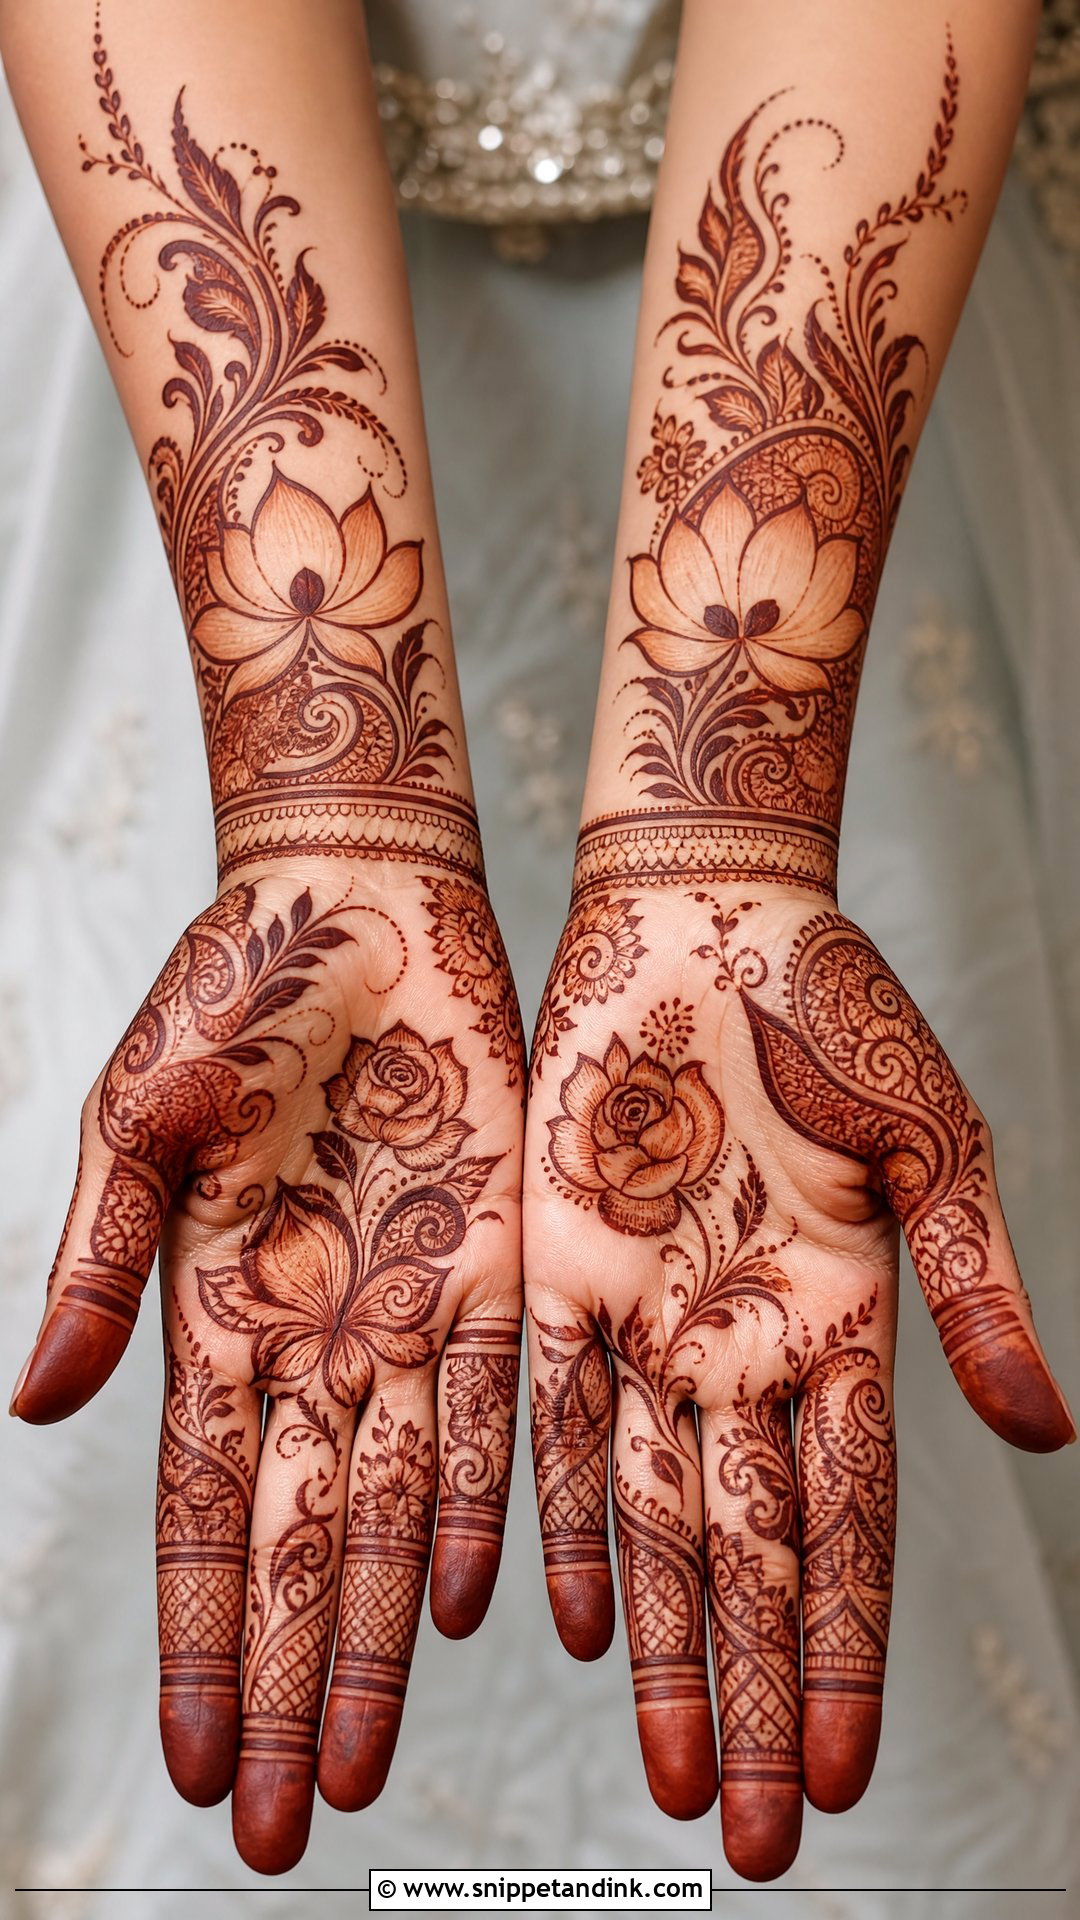
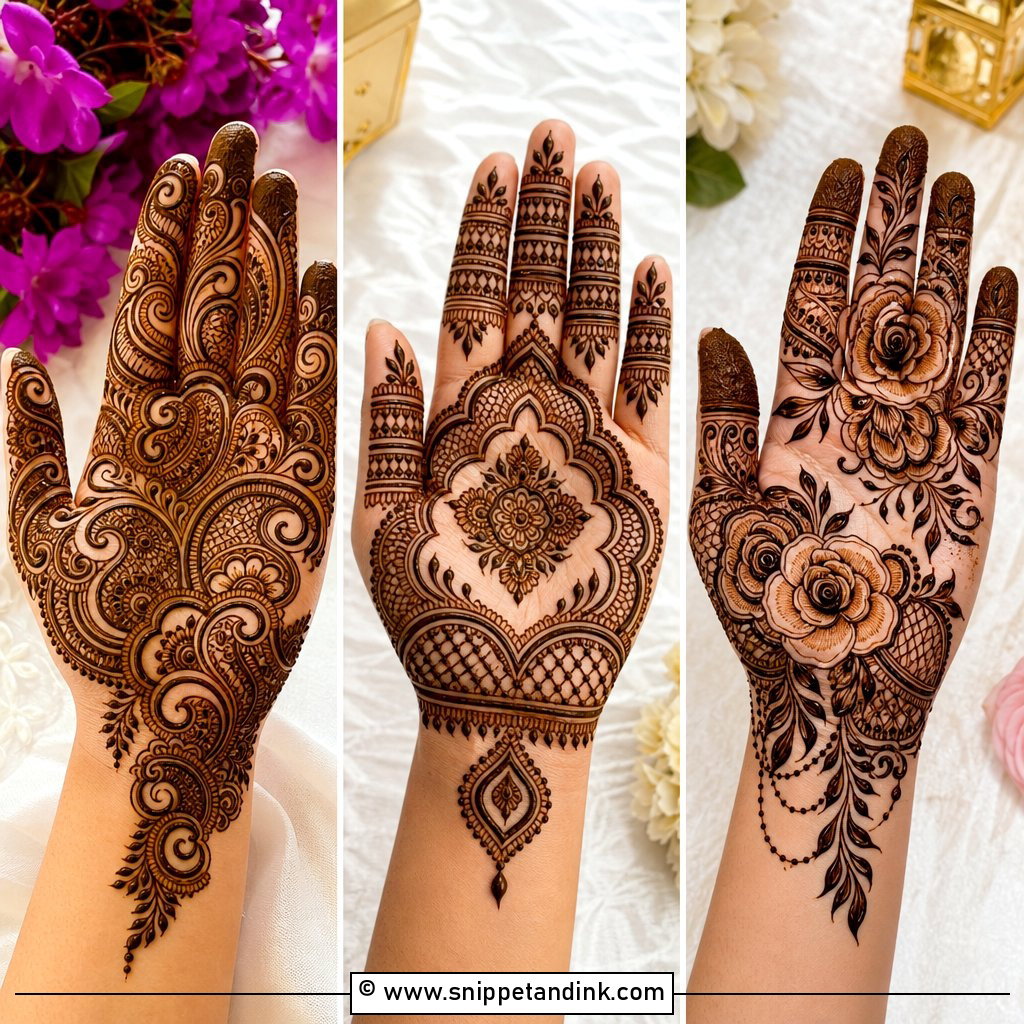
Floral layouts are soft and romantic without figures or storytelling. Roses, lotus, vines and small blossoms can be arranged Indian, Arabic or Indo-Arabic depending on how dense I make them. I put the largest flowers on the palm and wrist and let smaller ones fill the fingers and borders. Adding a paisley or a jaali panel keeps it from looking too casual for a bride.
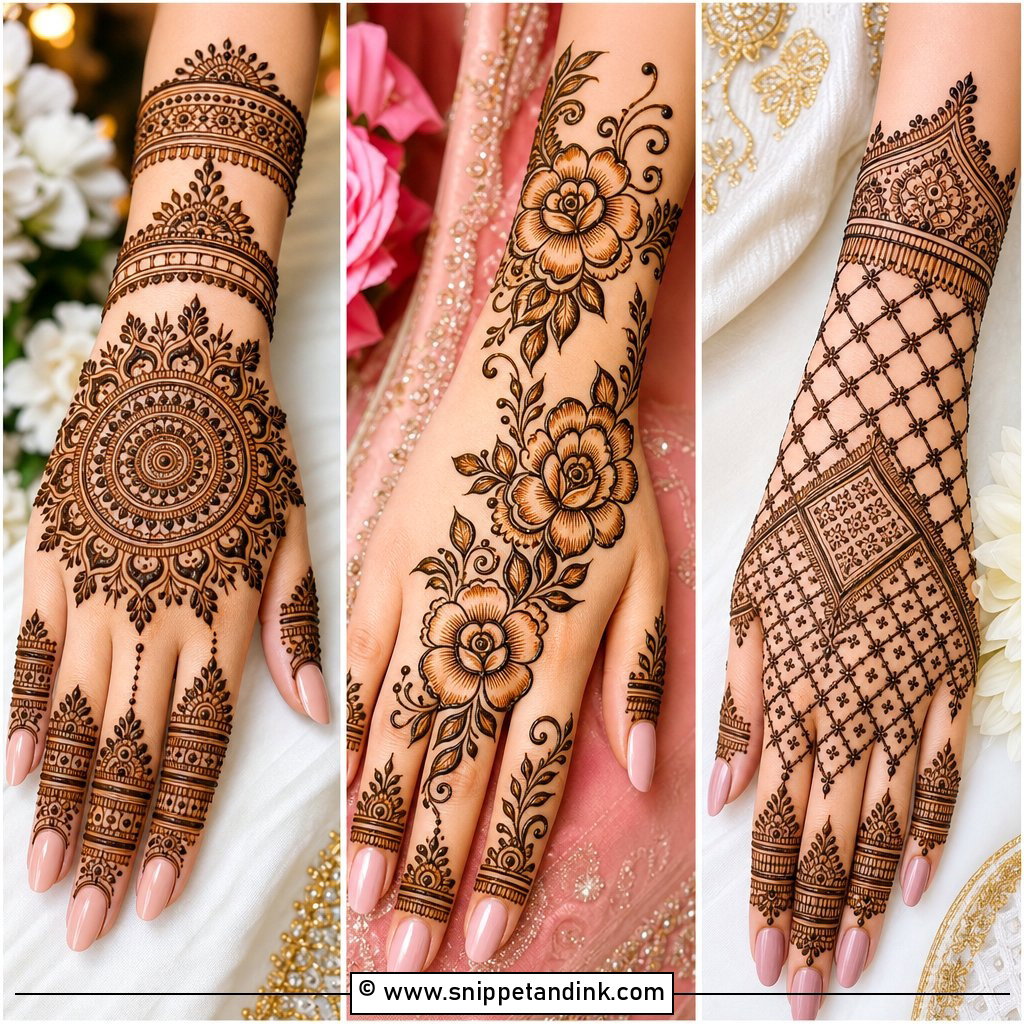
19. Back Hand Bridal Mehndi Design
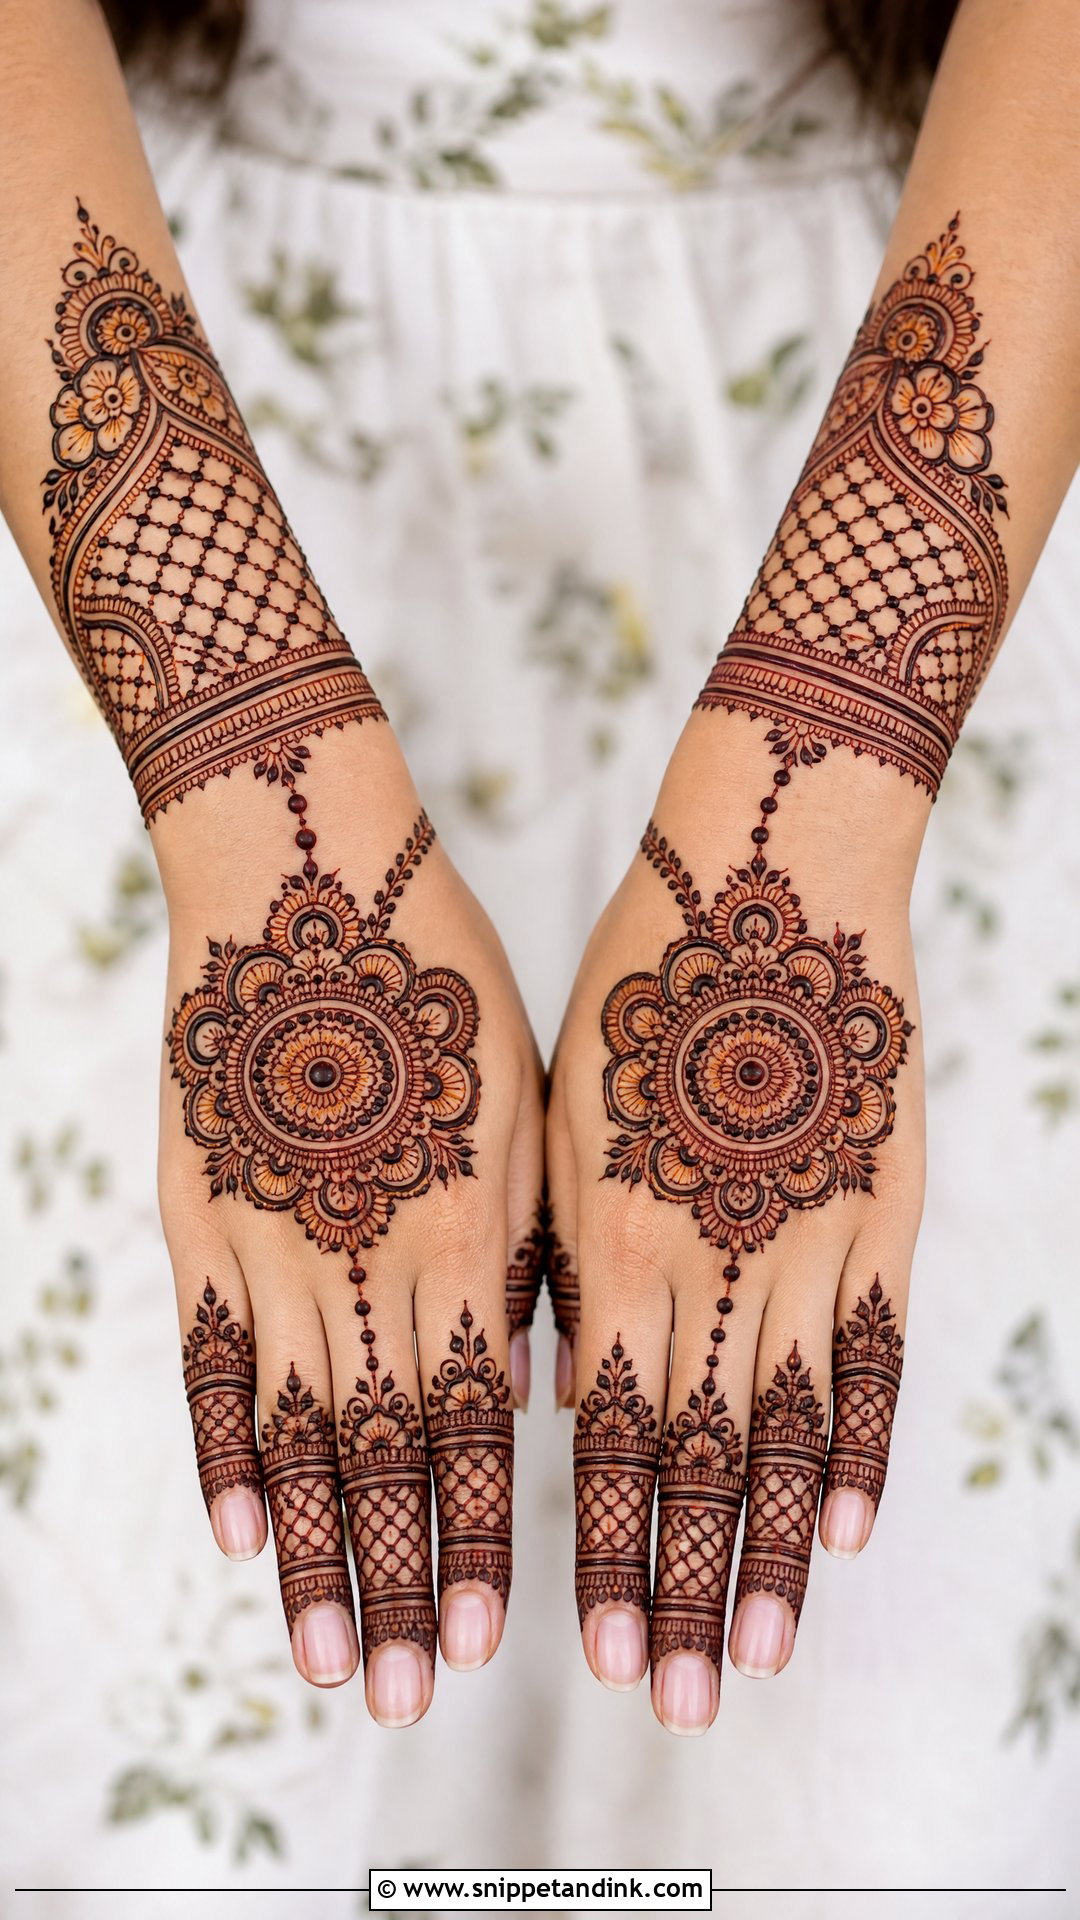
The back of the hand appears in almost every jewellery and ring photo, so I treat it as seriously as the palm. A central mandala or medallion, detailed fingers, wrist bands and connecting chains form the basic layout. Back-of-hand skin stains lighter than the palm, which is normal, so I draw these lines a little bolder. Match it to the front design so both sides look connected.
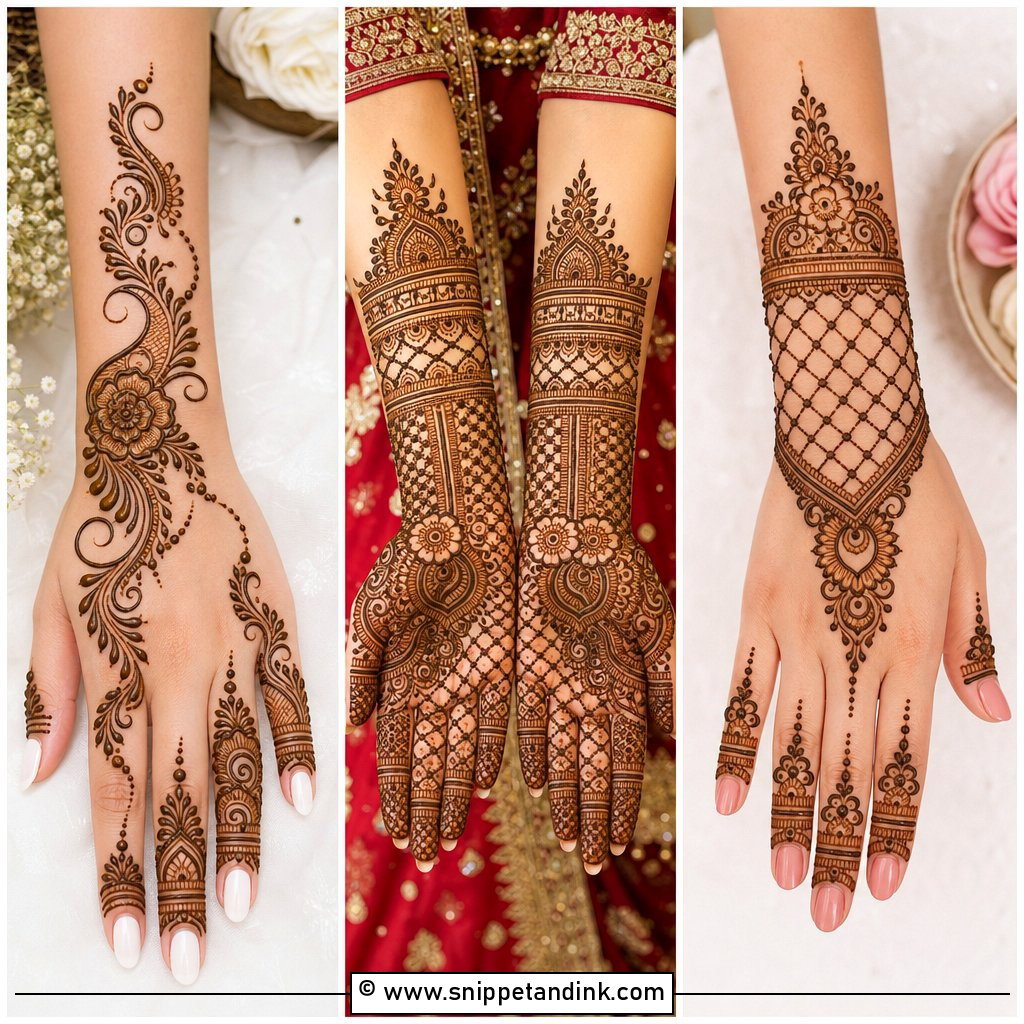
20. Front Hand Bridal Mehndi Design
The palm is usually where the stain is darkest, and it’s the side guests see during the ceremony. I give it one clear focal point and repeat supporting motifs around it rather than crowding several big ones together. The fingers and wrist should support the palm without looking disconnected. A single theme carried from fingertips to forearm reads much better in photos than three competing ones.
Aftercare From Scraping the Paste to the First Wash
Aftercare decides half the colour. Two brides with the same paste from the same artist can end up with very different stains depending on what they do afterwards.
- Once the paste starts drying, dab on a light lemon and sugar mix so it stays stuck to the skin.
- When you’re ready, scrape the paste off with a blunt edge or your fingernail. Don’t wash it off.
- Keep water away from the design for the first several hours, ideally until the next day.
- Keep your hands warm. Warmth helps the stain develop; cold air-conditioning slows it down.
- Avoid chlorine, harsh soaps and hand sanitiser on the design until after the wedding.
Natural Henna Only: Red Flags in a Cone
The only safe bridal mehndi is natural henna made from the plant’s leaves, mixed with lemon juice, sugar and essential oils. So-called black henna, or cones promising a dark stain in an hour, may contain PPD, a hair-dye chemical that can cause serious skin reactions and lasting scars.
Ask your artist what’s in her paste and whether she mixes it fresh. Natural henna has an earthy, slightly herbal smell and stains orange first, never black. If you have sensitive skin, try a small patch on your arm a week or two before the wedding.
Your Outfit, Your Sitting Time and the Stain You Want
Once you know the difference between dense traditional work, open Arabic flow, portraits, royal motifs and minimal layouts, the decision gets much easier. Dense Indian, Rajasthani, Pakistani and royal designs suit brides who love detail and can sit for a long session. Arabic, Gulf, bracelet and minimal designs suit those who want clean elegance and less time in the chair. Add portraits, initials or symbols if you want it personal, and bring your outfit photos and jewellery to the consultation so your artist can design around them.
You'll Like These Ideas:


Leave a Reply