
Bridal mehndi is the one part of a wedding look that keeps changing after it’s applied. The paste comes off orange, deepens over two days, and is at its richest just when the ceremonies begin, so the design has to work with the stain as much as with your outfit. I’ve drawn everything from dense Indian full-hand mehndi to open Arabic trails, mandala palms and fingertip-only patterns, and the most crowded design is rarely the best one. What matters is how it fits your hands, your jewellery and how long you can sit still. Here are twenty bridal styles, with what I watch for when I draw each of them.
Plan the Sitting Two Days Out
Henna stain develops slowly. When the paste flakes off, the skin underneath is a pale orange, and it darkens over the next 24 to 48 hours to a deep reddish brown. That’s why I like bridal mehndi done one to two days before the wedding, not the evening before. Applied too early, the stain starts to fade at the fingertips just as the photos begin.
Time is the other thing brides underestimate. A heavy full-hand and forearm design can take several hours, and feet add more. Wear something loose with short sleeves, eat before we start, use the bathroom first, and have someone ready to help with drinks and your phone.
- Exfoliate and moisturise in the days before, but put no lotion or oil on your hands on the day itself; paste needs clean, dry skin.
- Skip waxing or a manicure on the day of application, since freshly treated skin can sting and stain unevenly.
- If you get a gel manicure, have it done before the mehndi, not after, so the nail tech’s soaking doesn’t lift the fresh stain.
1. Full Hand Bridal Mehndi Design
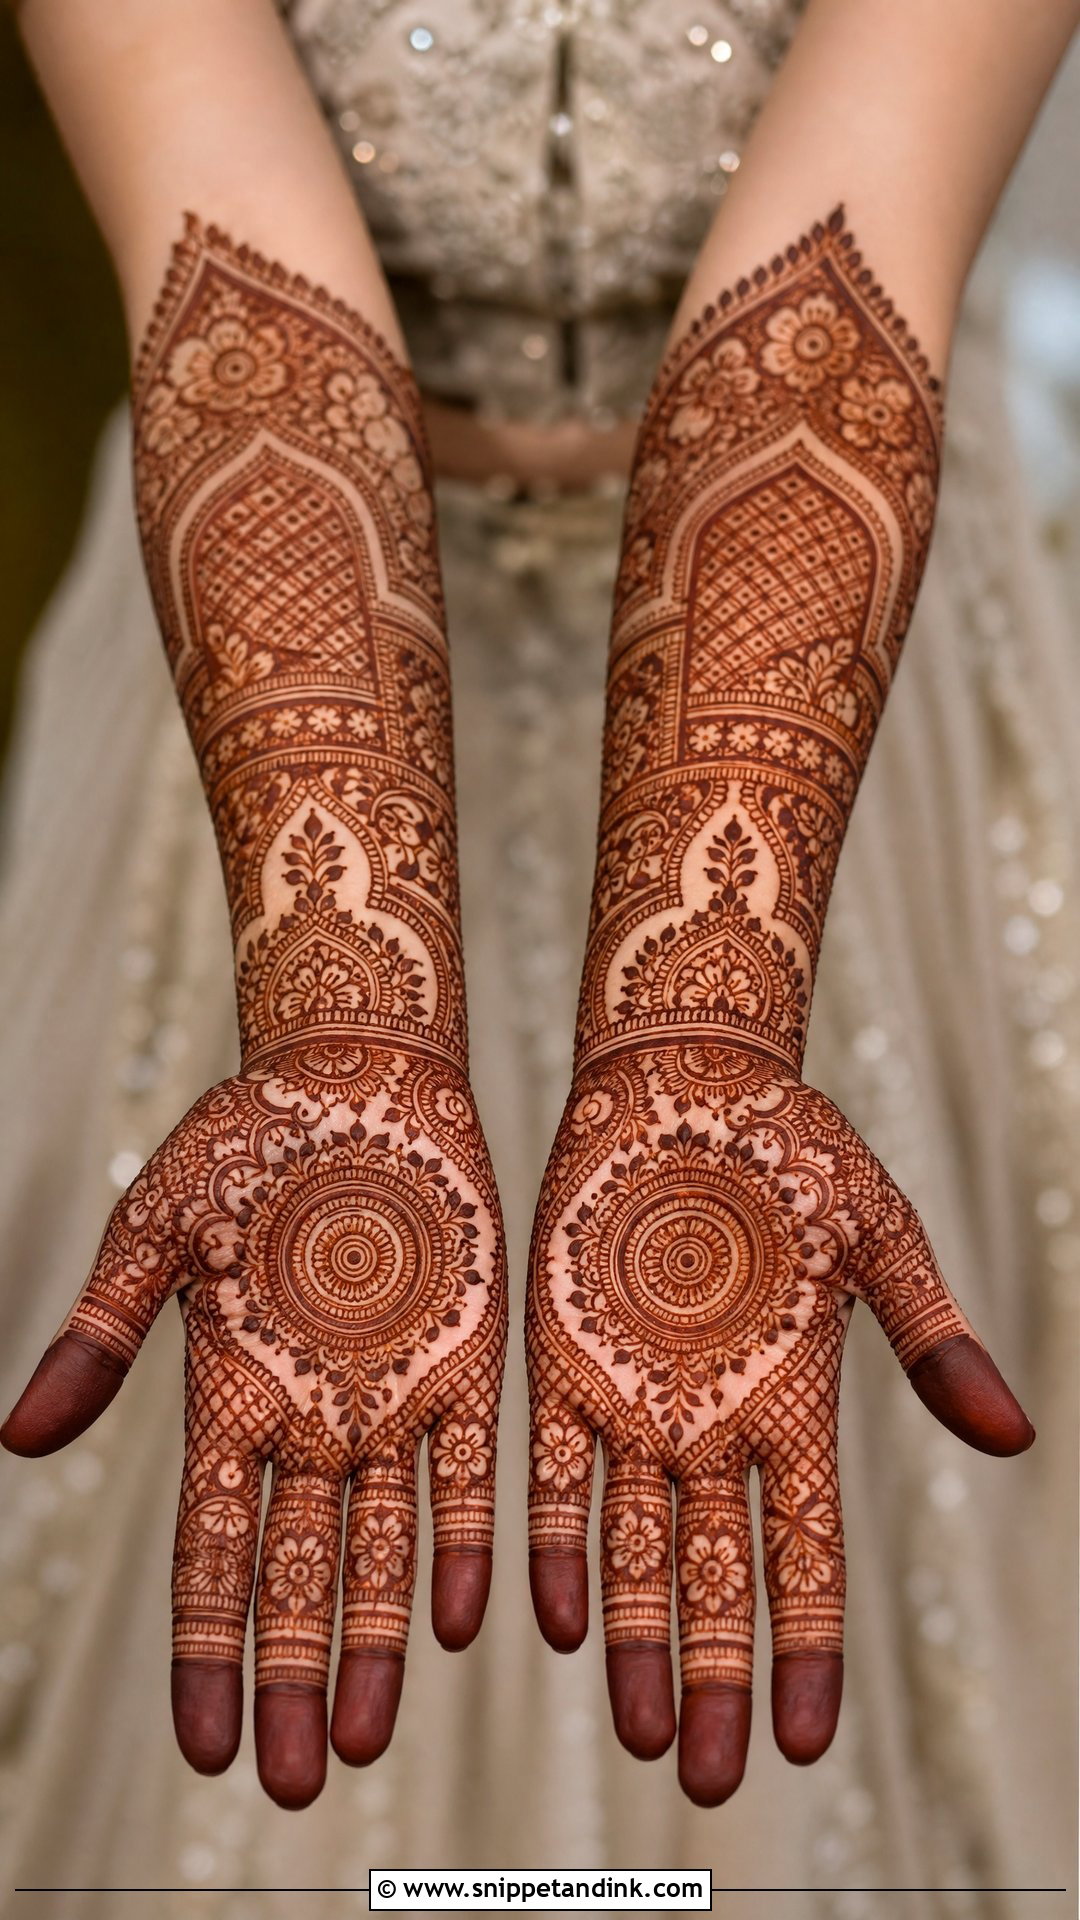
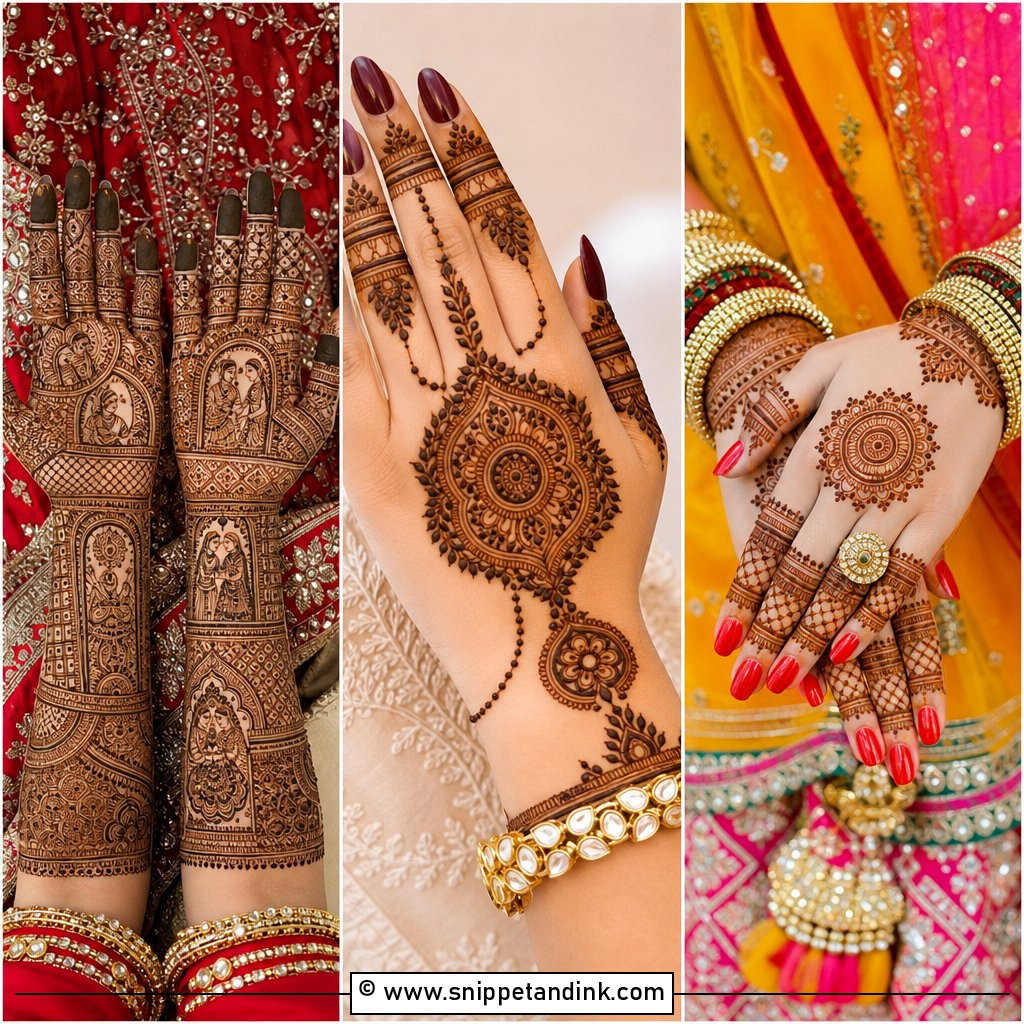
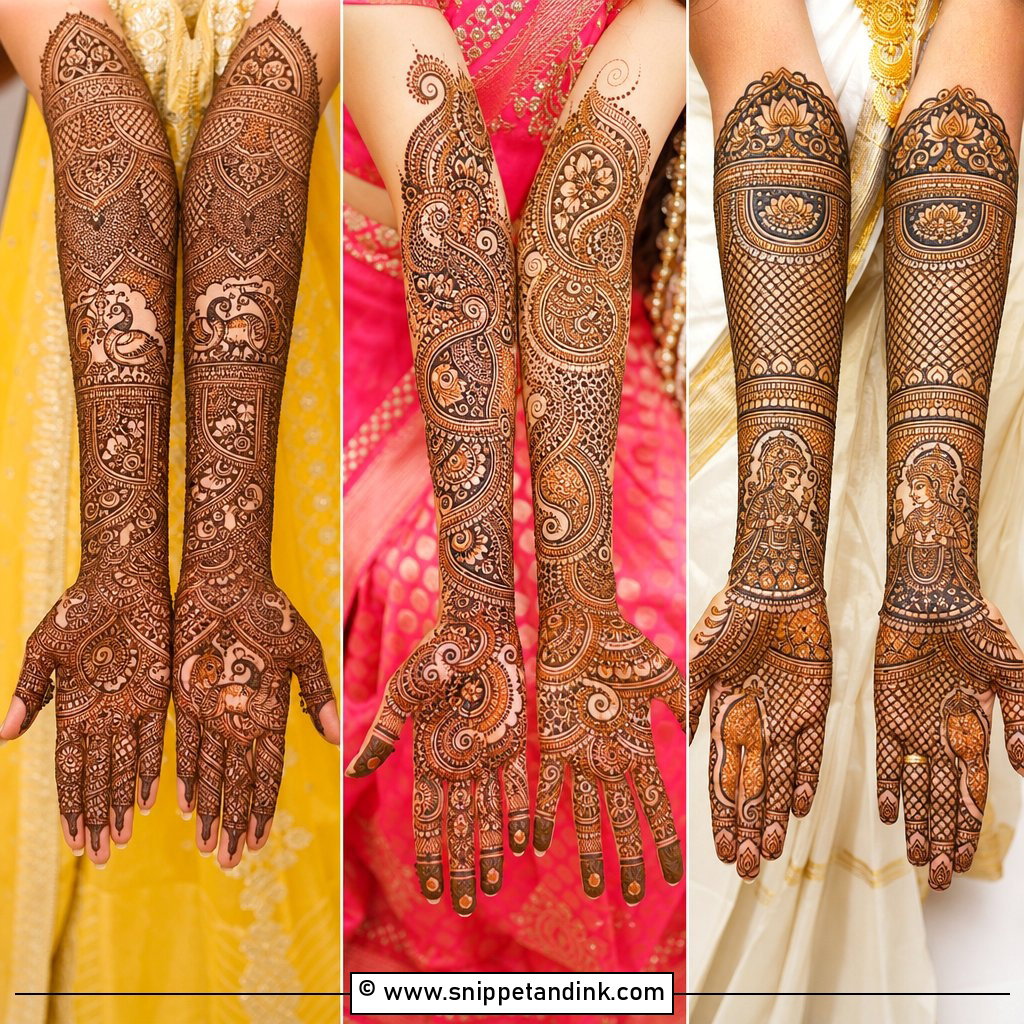
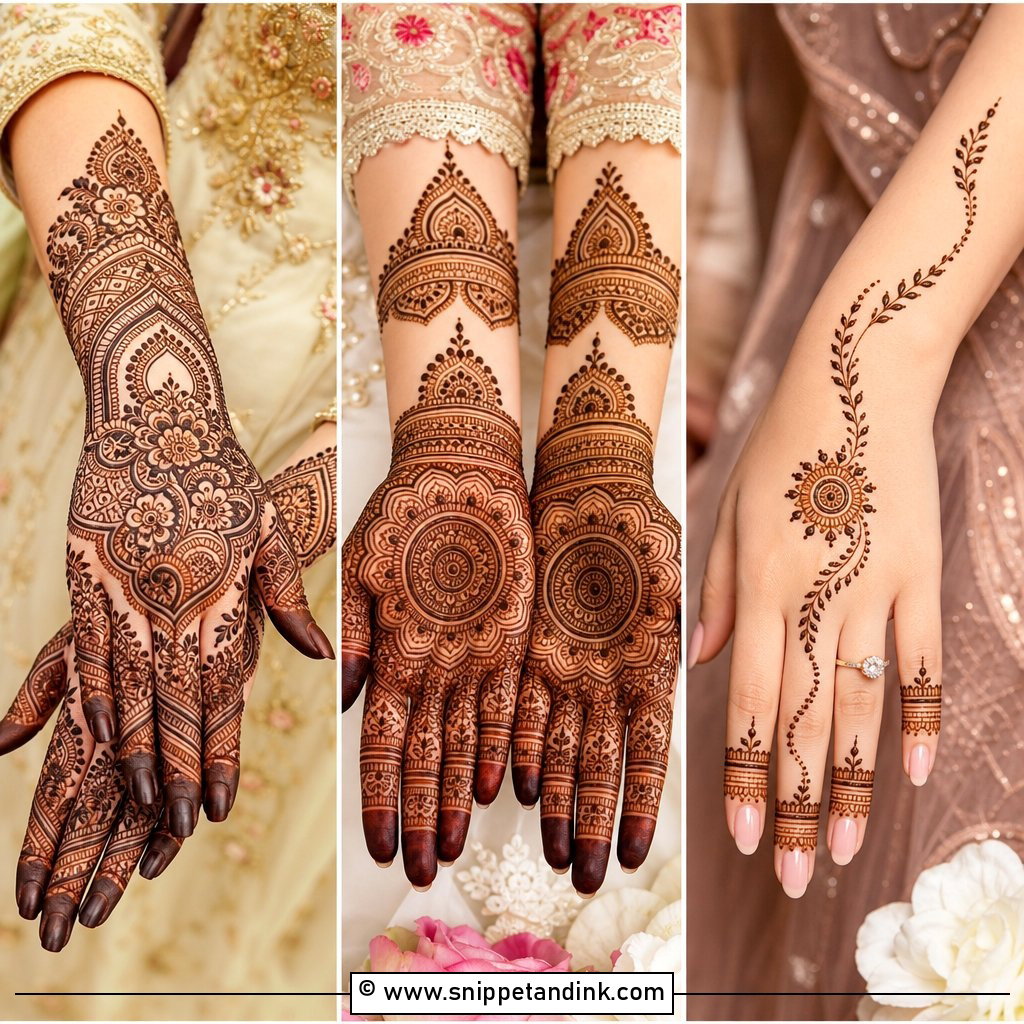
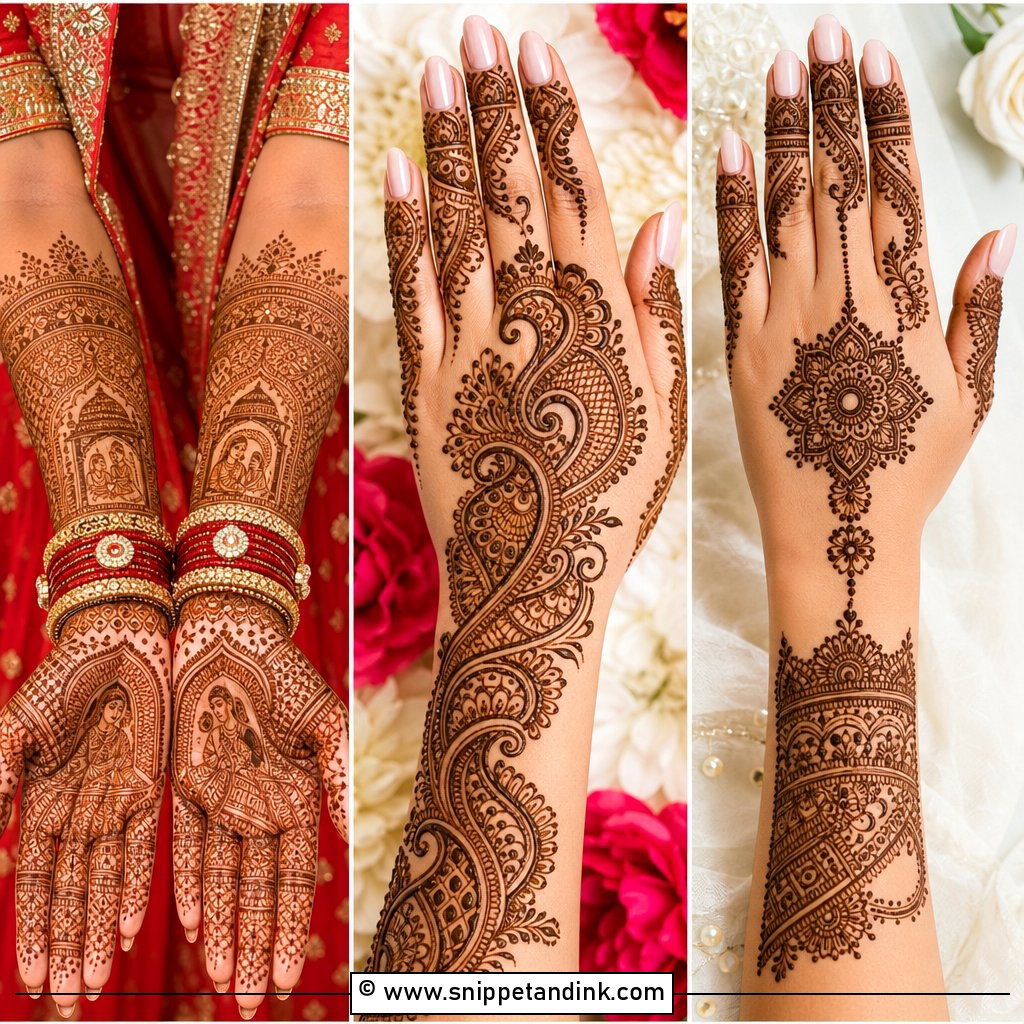
Full coverage from fingertips to wrist or forearm is the classic bridal request, built from paisleys, flowers, vines, mandalas, jaali nets and small fillers. The risk is a hand that turns into one dark mass once the stain develops. I leave thin channels of skin between the main sections and keep the wrist band slightly more open than the palm, which gives the eye somewhere to rest. The motifs in the centre of the palm and the middle of the back hand are the ones people will see, so I draw those first, while the bride is fresh and still.
2. Indian Bridal Mehndi Design
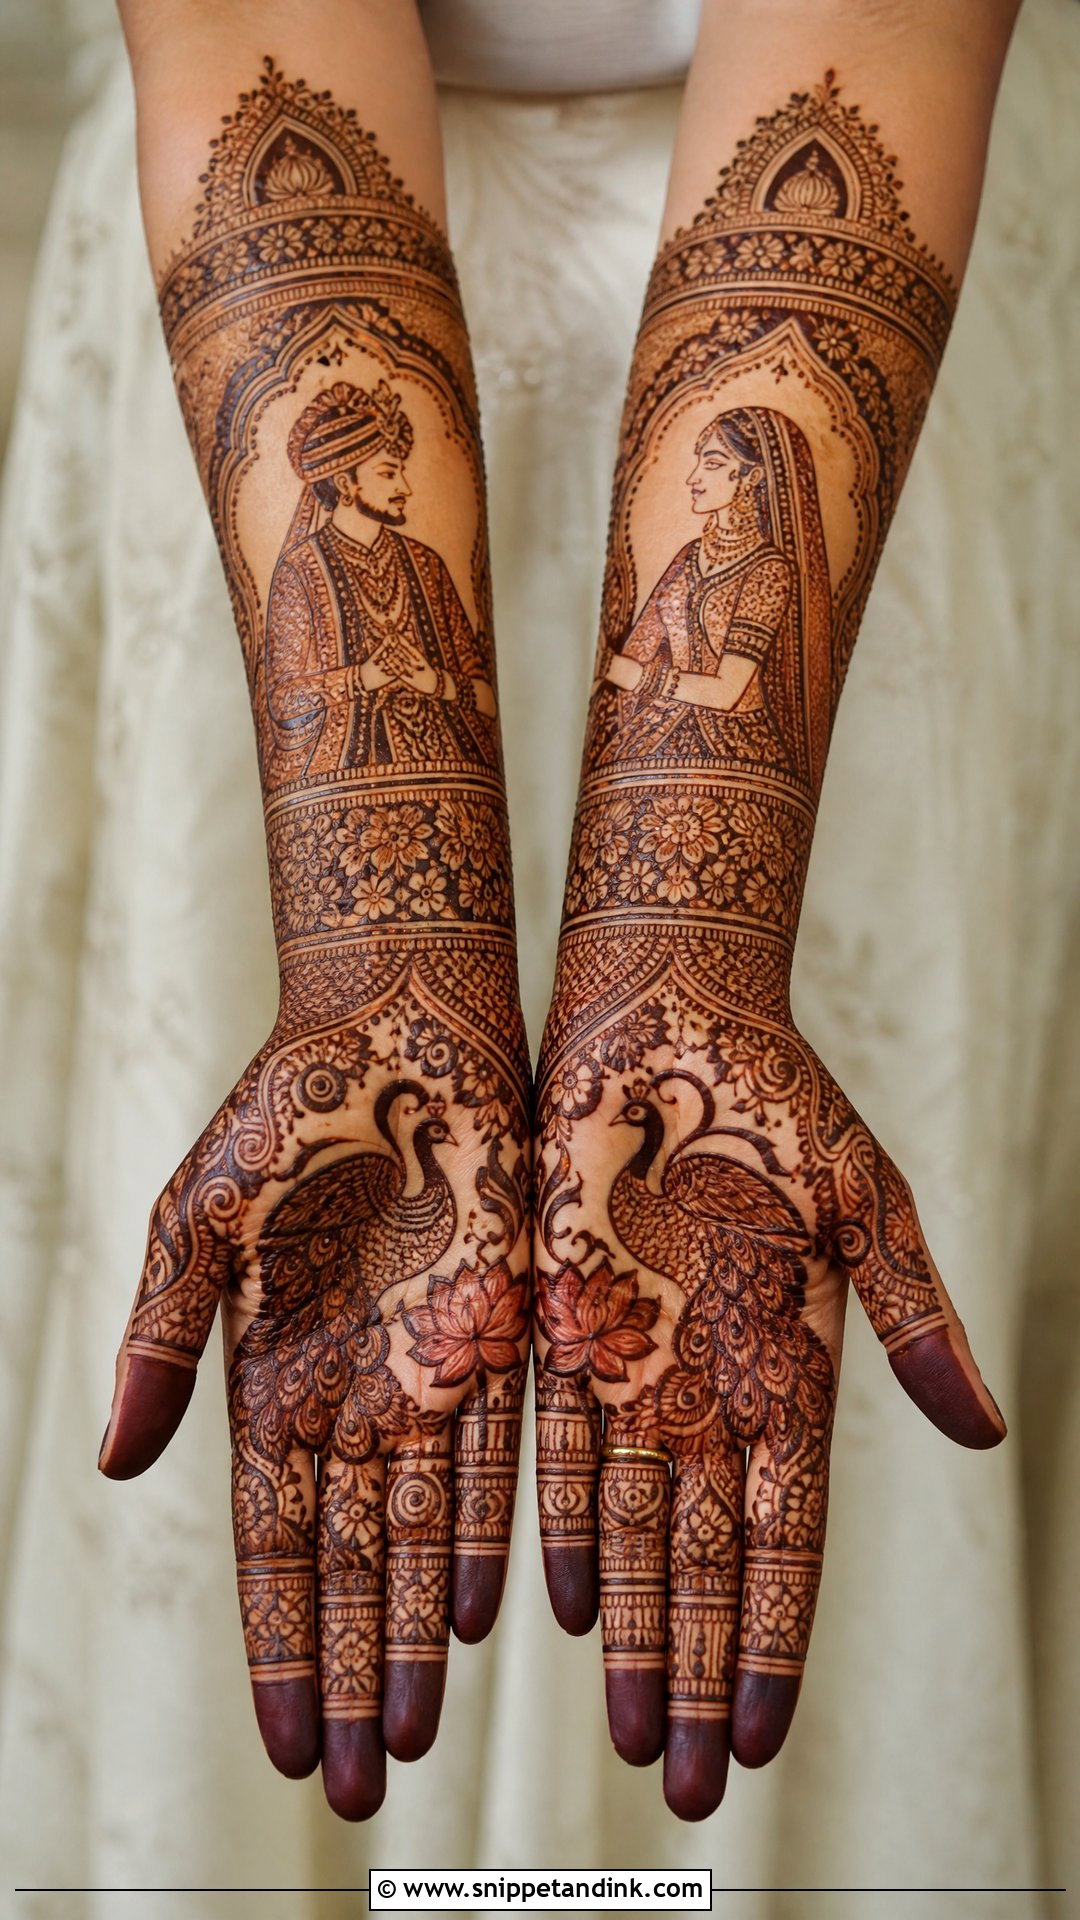
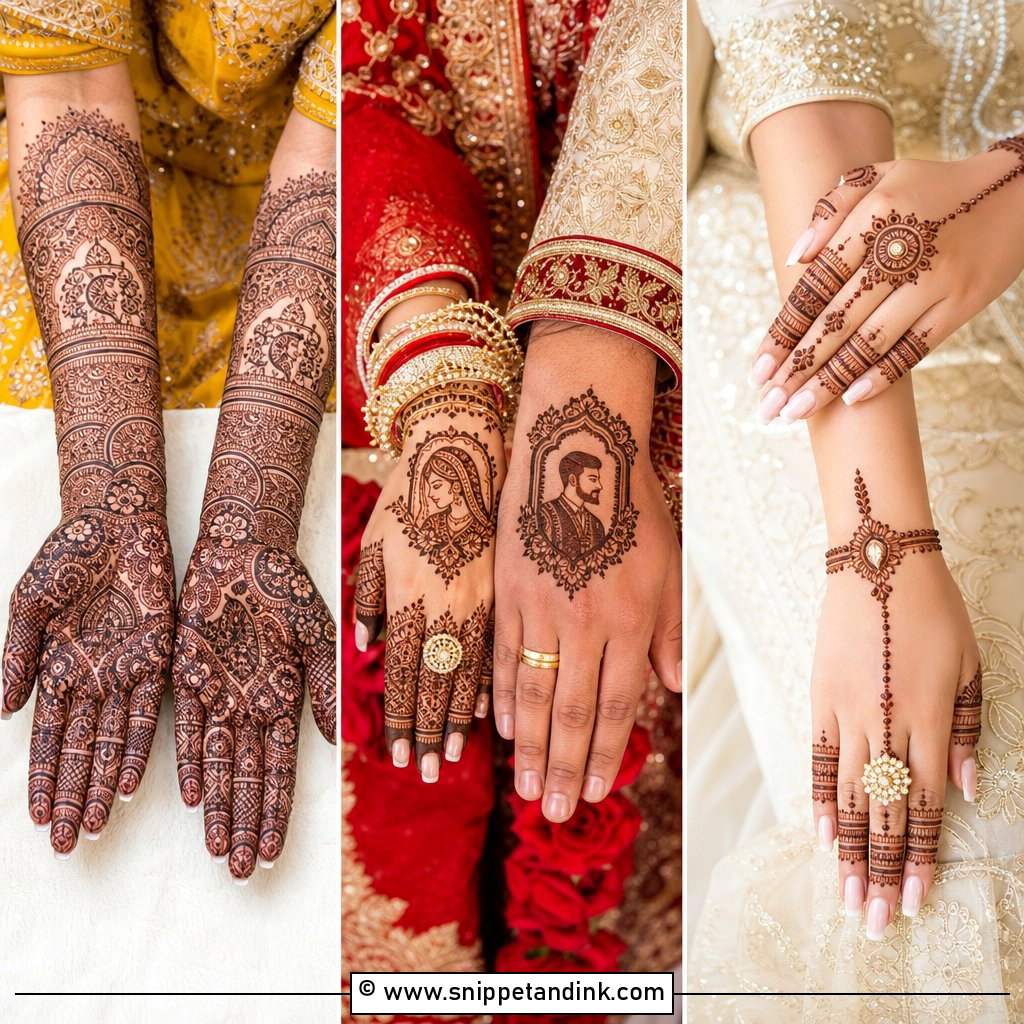
Traditional Indian bridal work carries a lot of meaning in a small space: peacocks, lotus, paisleys, the bride and groom, the kalash, a dhol, and often the groom’s initials hidden somewhere for him to find. The palms usually hold the main story and the forearms carry layered borders and mesh. This style takes the longest of anything I do, often several hours for both hands, so I ask brides to eat beforehand and set the day aside. Fine figures can’t be hurried. A rushed face or a wobbly border shows clearly once the stain darkens.
3. Arabic Bridal Mehndi Design
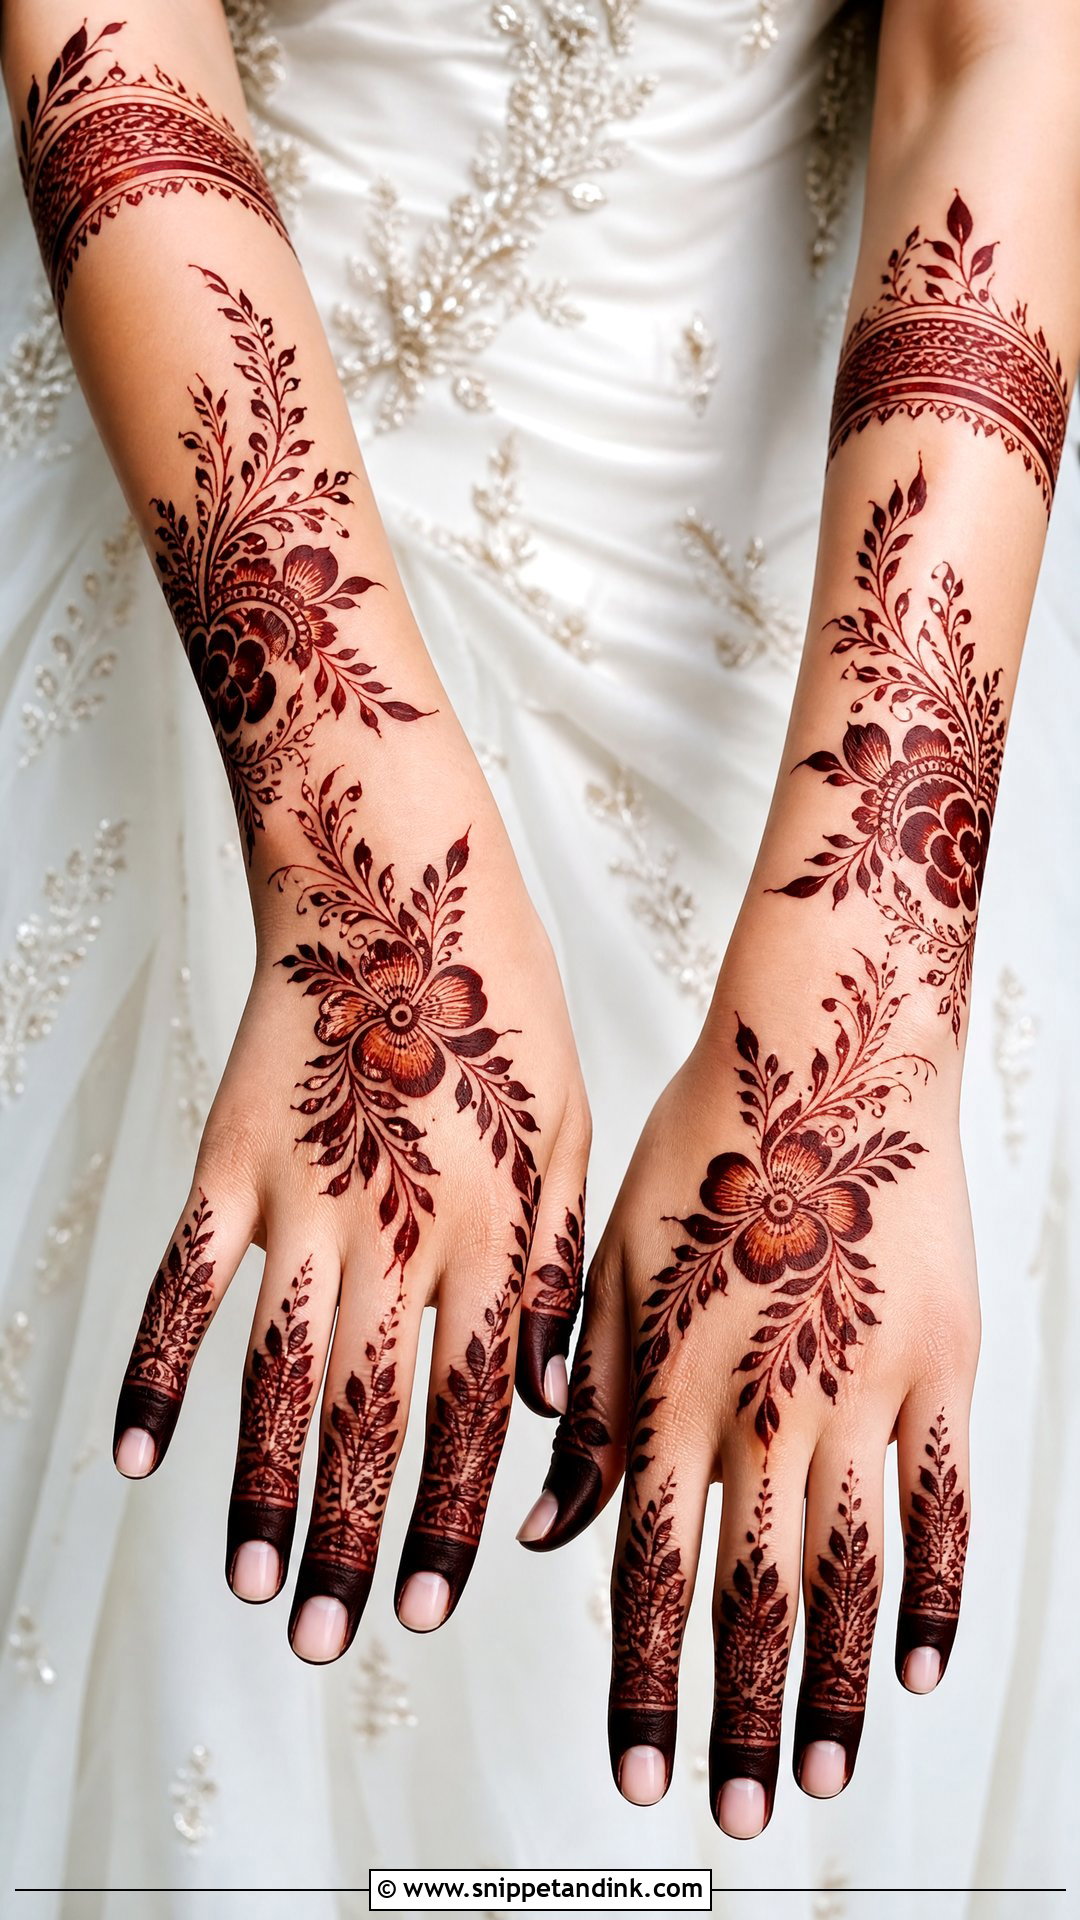
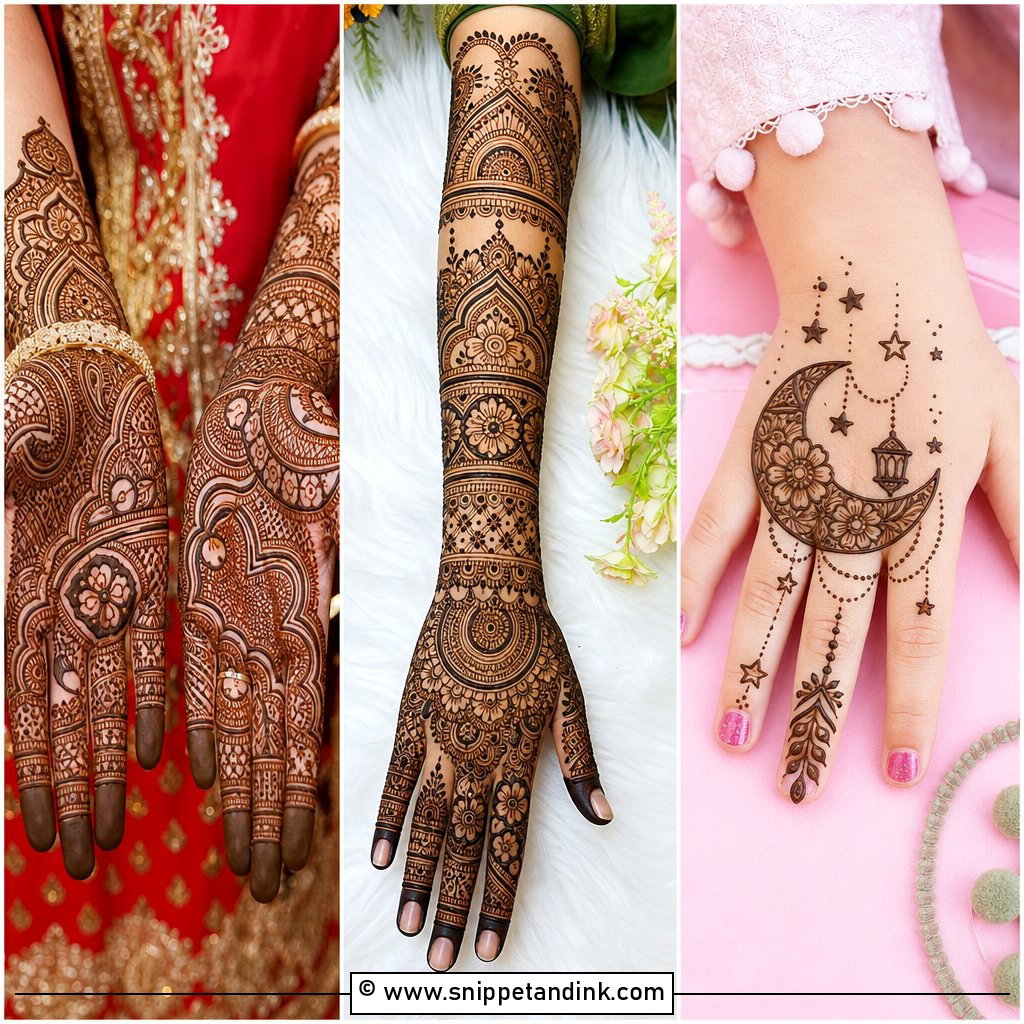
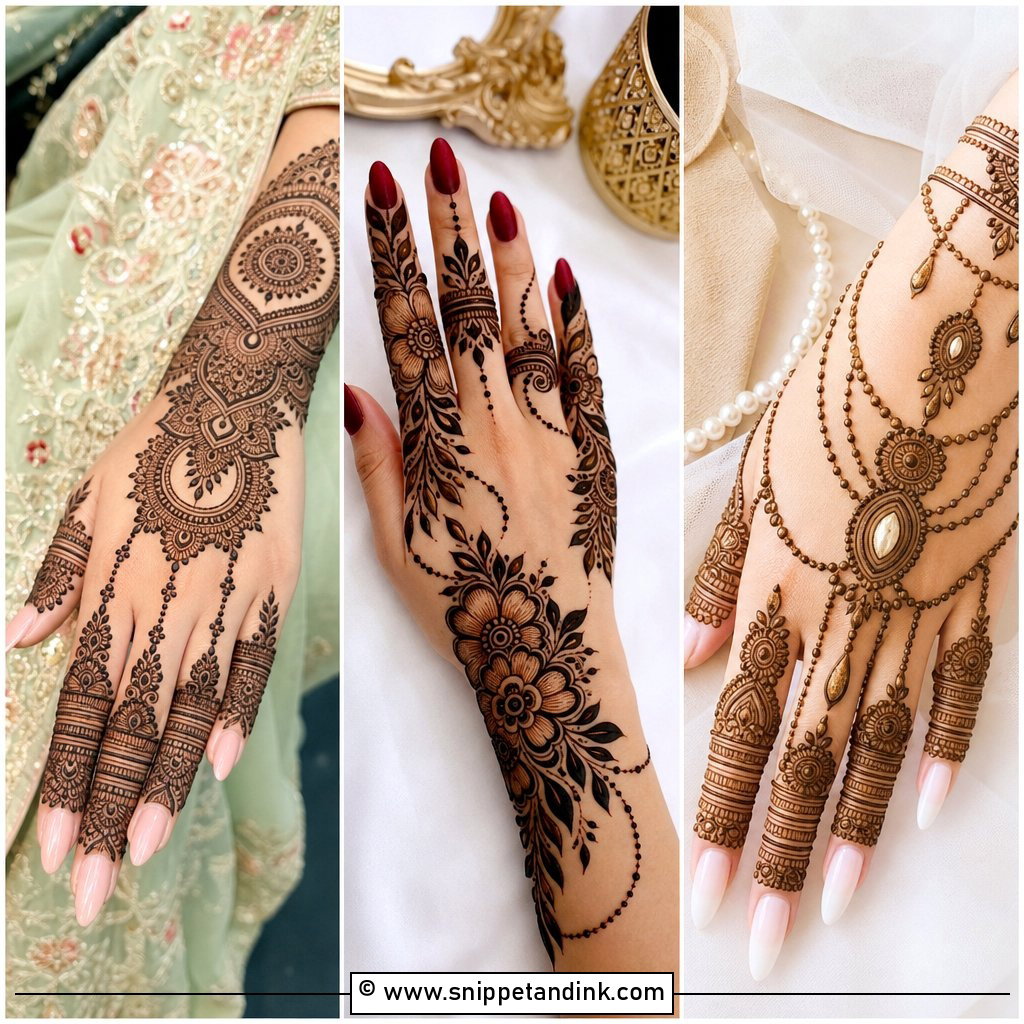
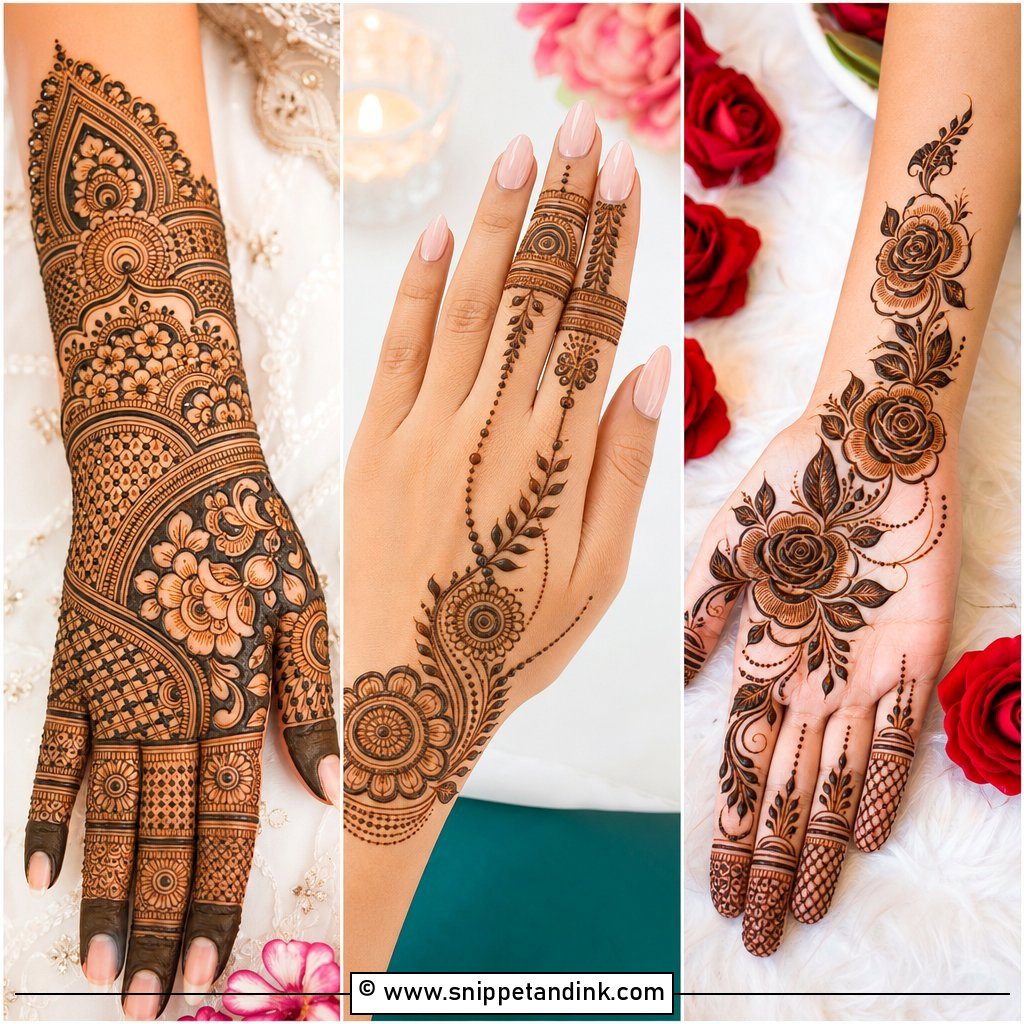
Arabic layouts are built on movement: bold flowers and vines that run diagonally across the hand with plenty of bare skin left between them. That diagonal line makes the hand look longer, and large motifs stay readable from across a room. For a bride, I fill it out with shaded petals, leafy trails, a wrist cuff and decorated fingers, but I keep the open space; once it’s filled in, it stops being Arabic. It suits brides who want something visibly bridal without hours of fine filling, and it’s also kinder on a tight schedule.
4. Indo Arabic Bridal Mehndi Design
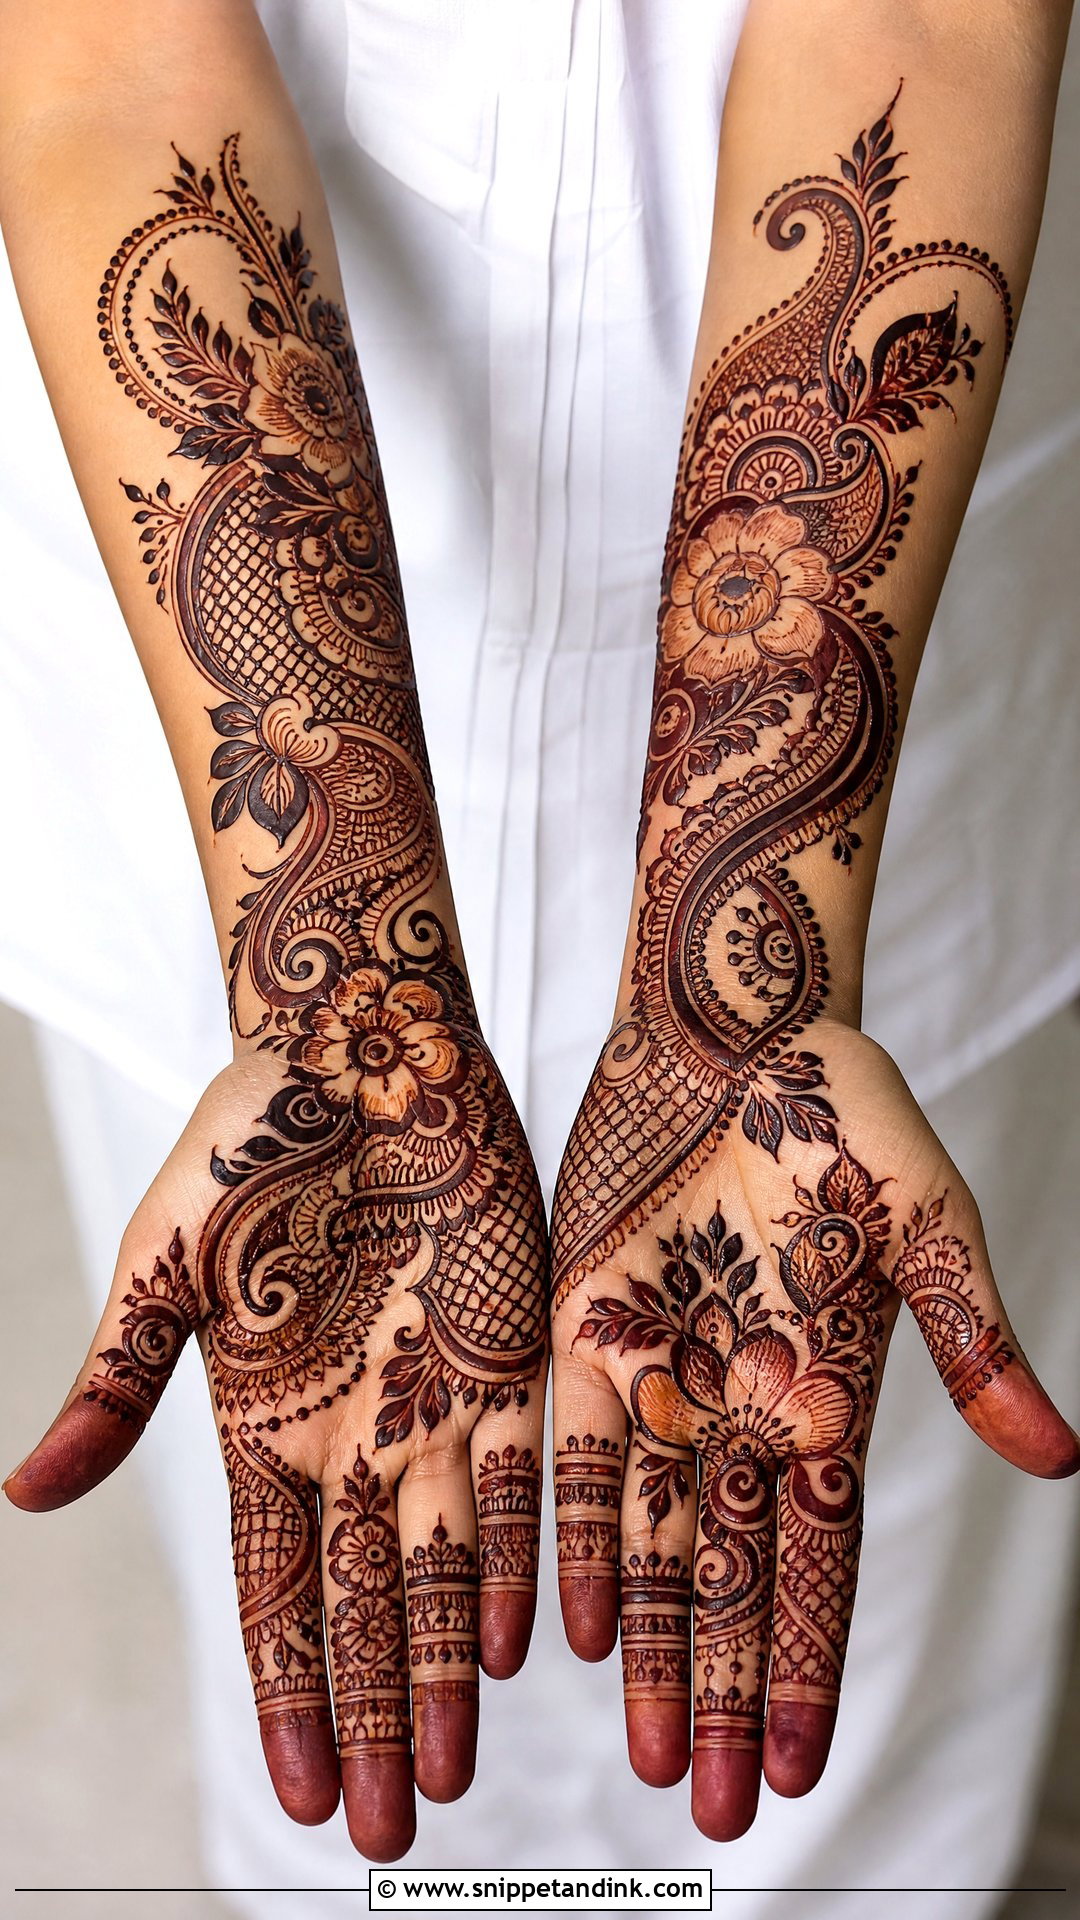
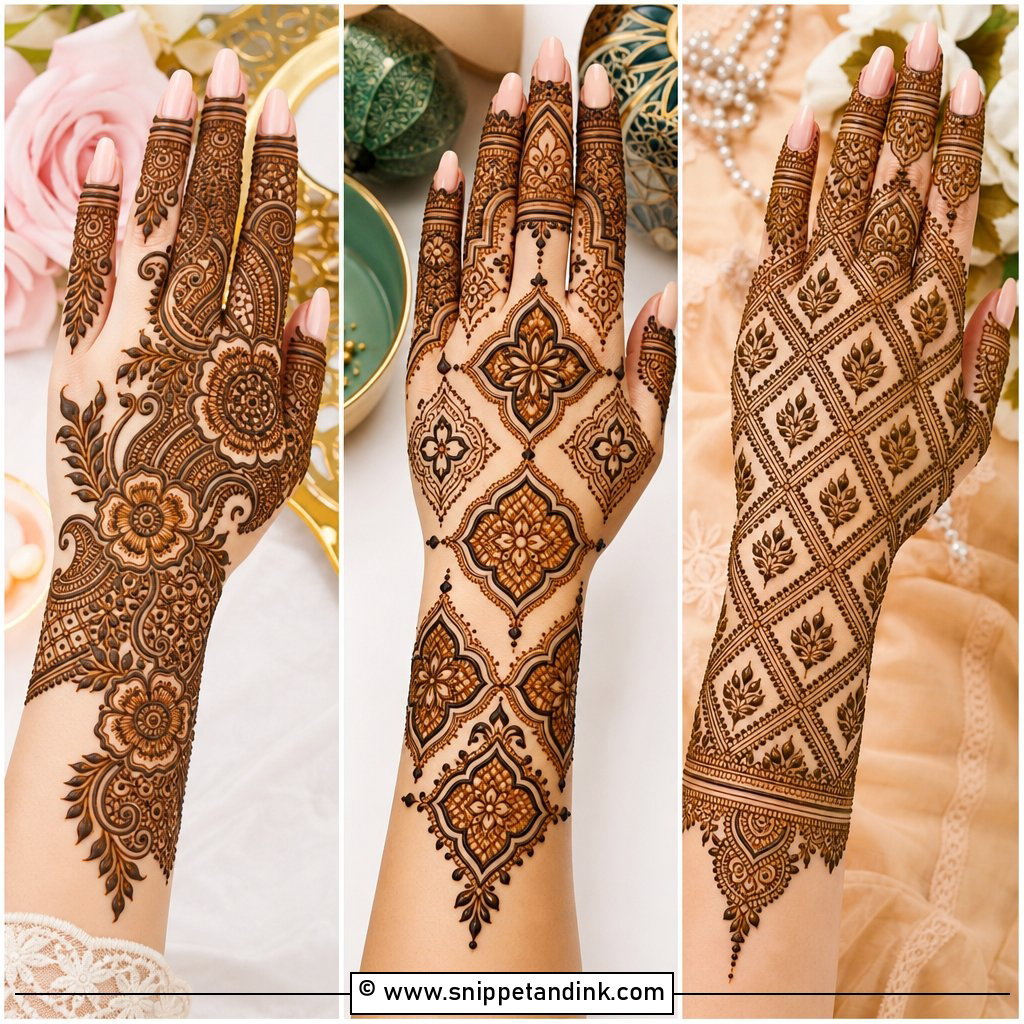
Indo-Arabic takes the bold flowing shapes of Arabic work and fills them with Indian detail: checks, dots, leaves and shaded sections inside large flowers or paisleys. It can run across the palm, back hand and forearm without looking crowded, because the big outlines keep their structure. I often suggest it to brides who love fine work but worry about sitting for a full traditional design, since the open areas cut the time down. It sits comfortably with both traditional and fusion outfits.
5. Rajasthani Bridal Mehndi Design
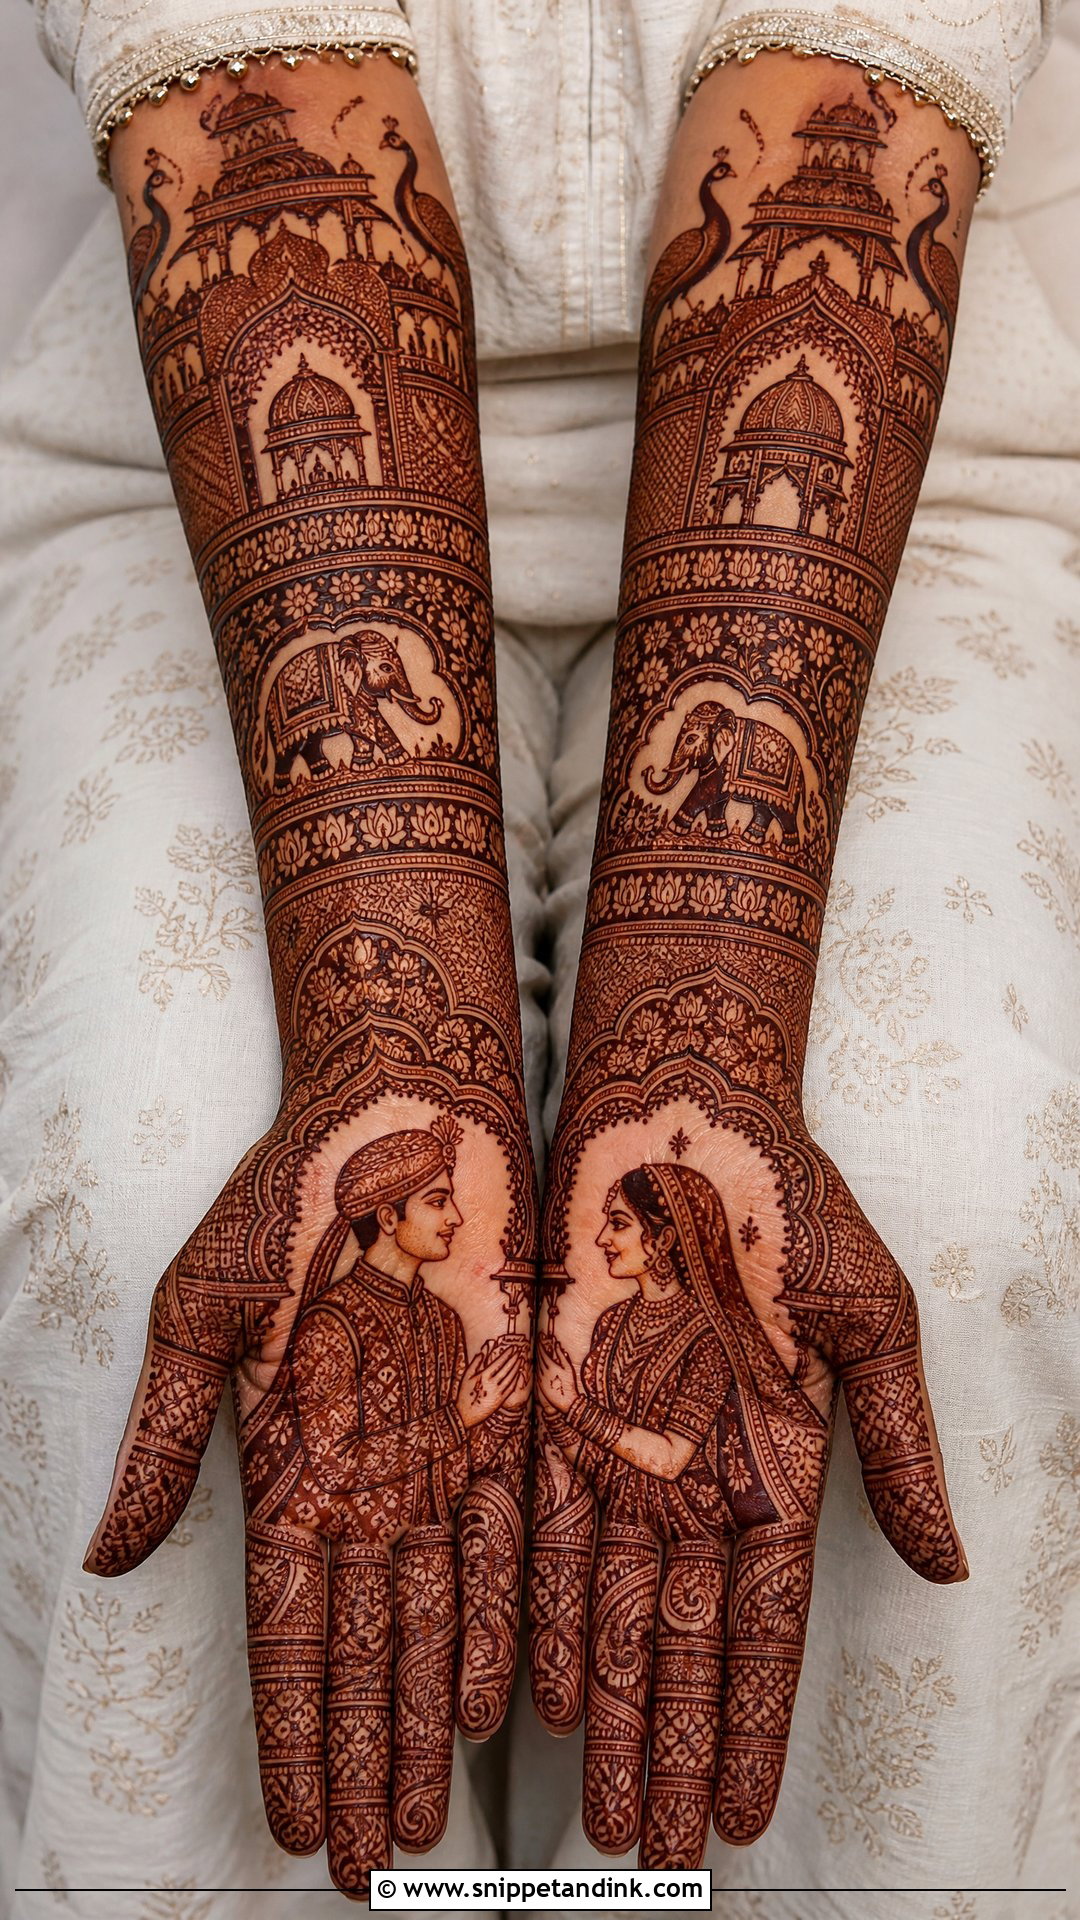
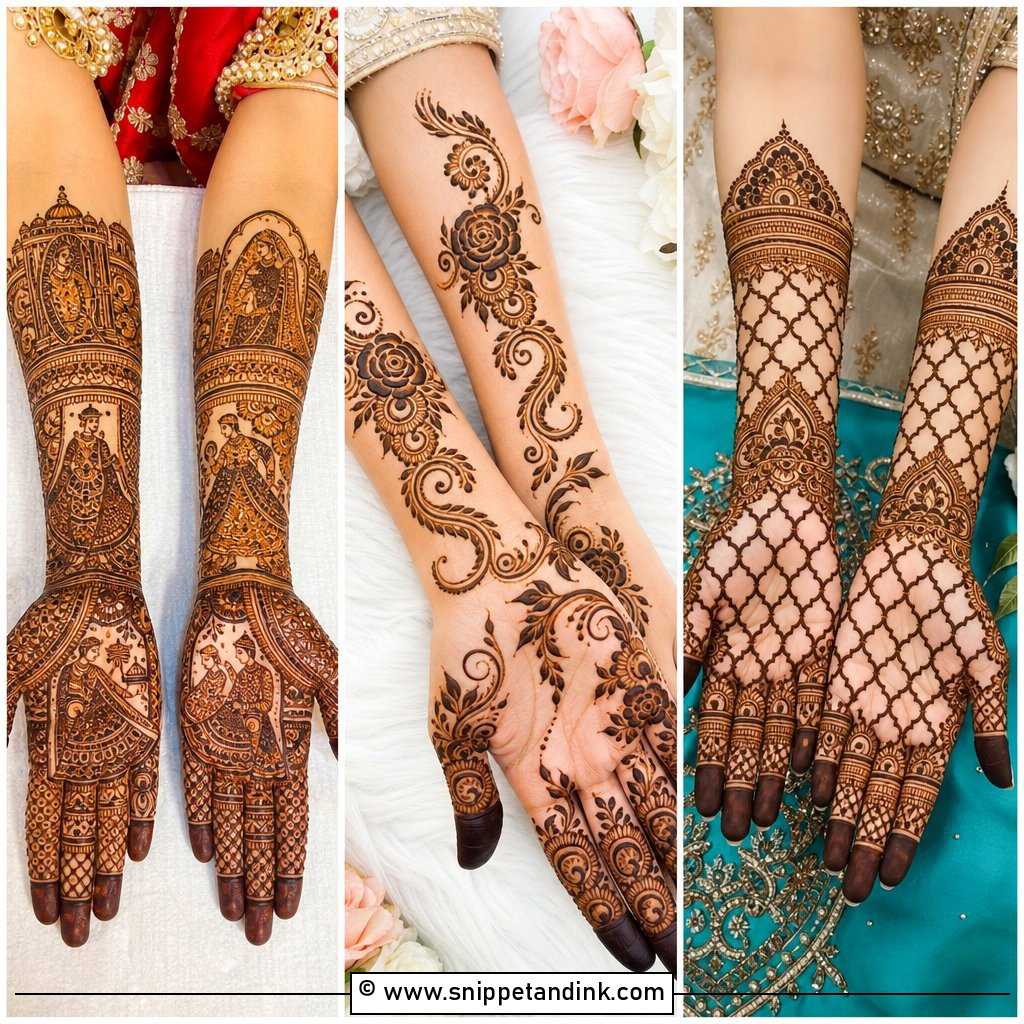
Rajasthani work tells a story across both arms: bride and groom figures, elephants, palace arches, peacocks and wedding scenes, set in tight symmetrical panels. The hands often mirror each other or carry two halves of one scene. Figures are the hardest thing in mehndi to draw cleanly, so look closely at an artist’s past faces and hands before booking, not only at their florals. With heavy lehengas, layered bangles and traditional jewellery, this is the most regal option on the list, and also one of the longest sittings.
6. Pakistani Bridal Mehndi Design
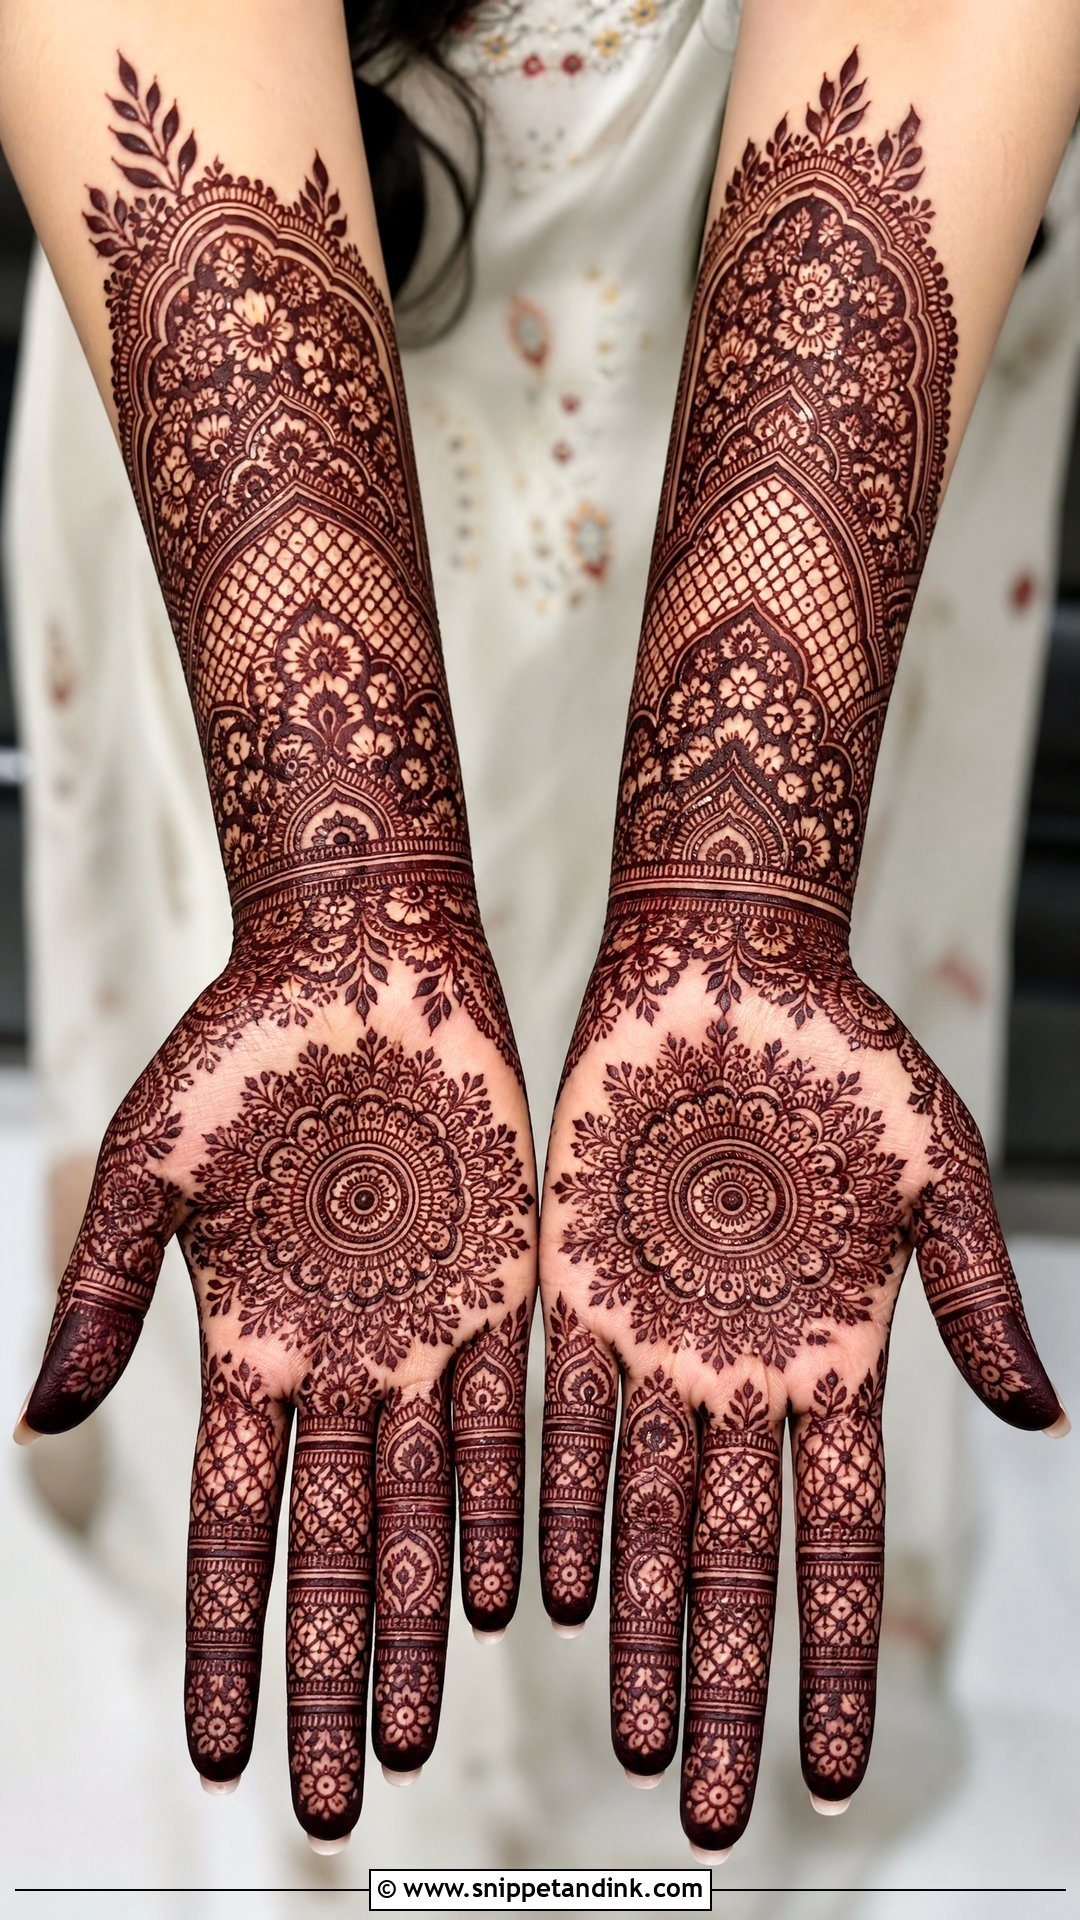
Compared with dense Indian layouts, Pakistani bridal work tends to breathe a little more: floral vines, dome shapes, paisleys, mandalas, netted sections and strong finger patterns, set with deliberate gaps. Wrist-to-forearm flows are common. It looks good on both front and back hands and suits a nikkah, walima, mehndi night or reception. I adjust the weight to the outfit: a heavily embroidered gharara can take bolder work, while a pale outfit usually looks better with lighter lines.
7. Moroccan Bridal Mehndi Design
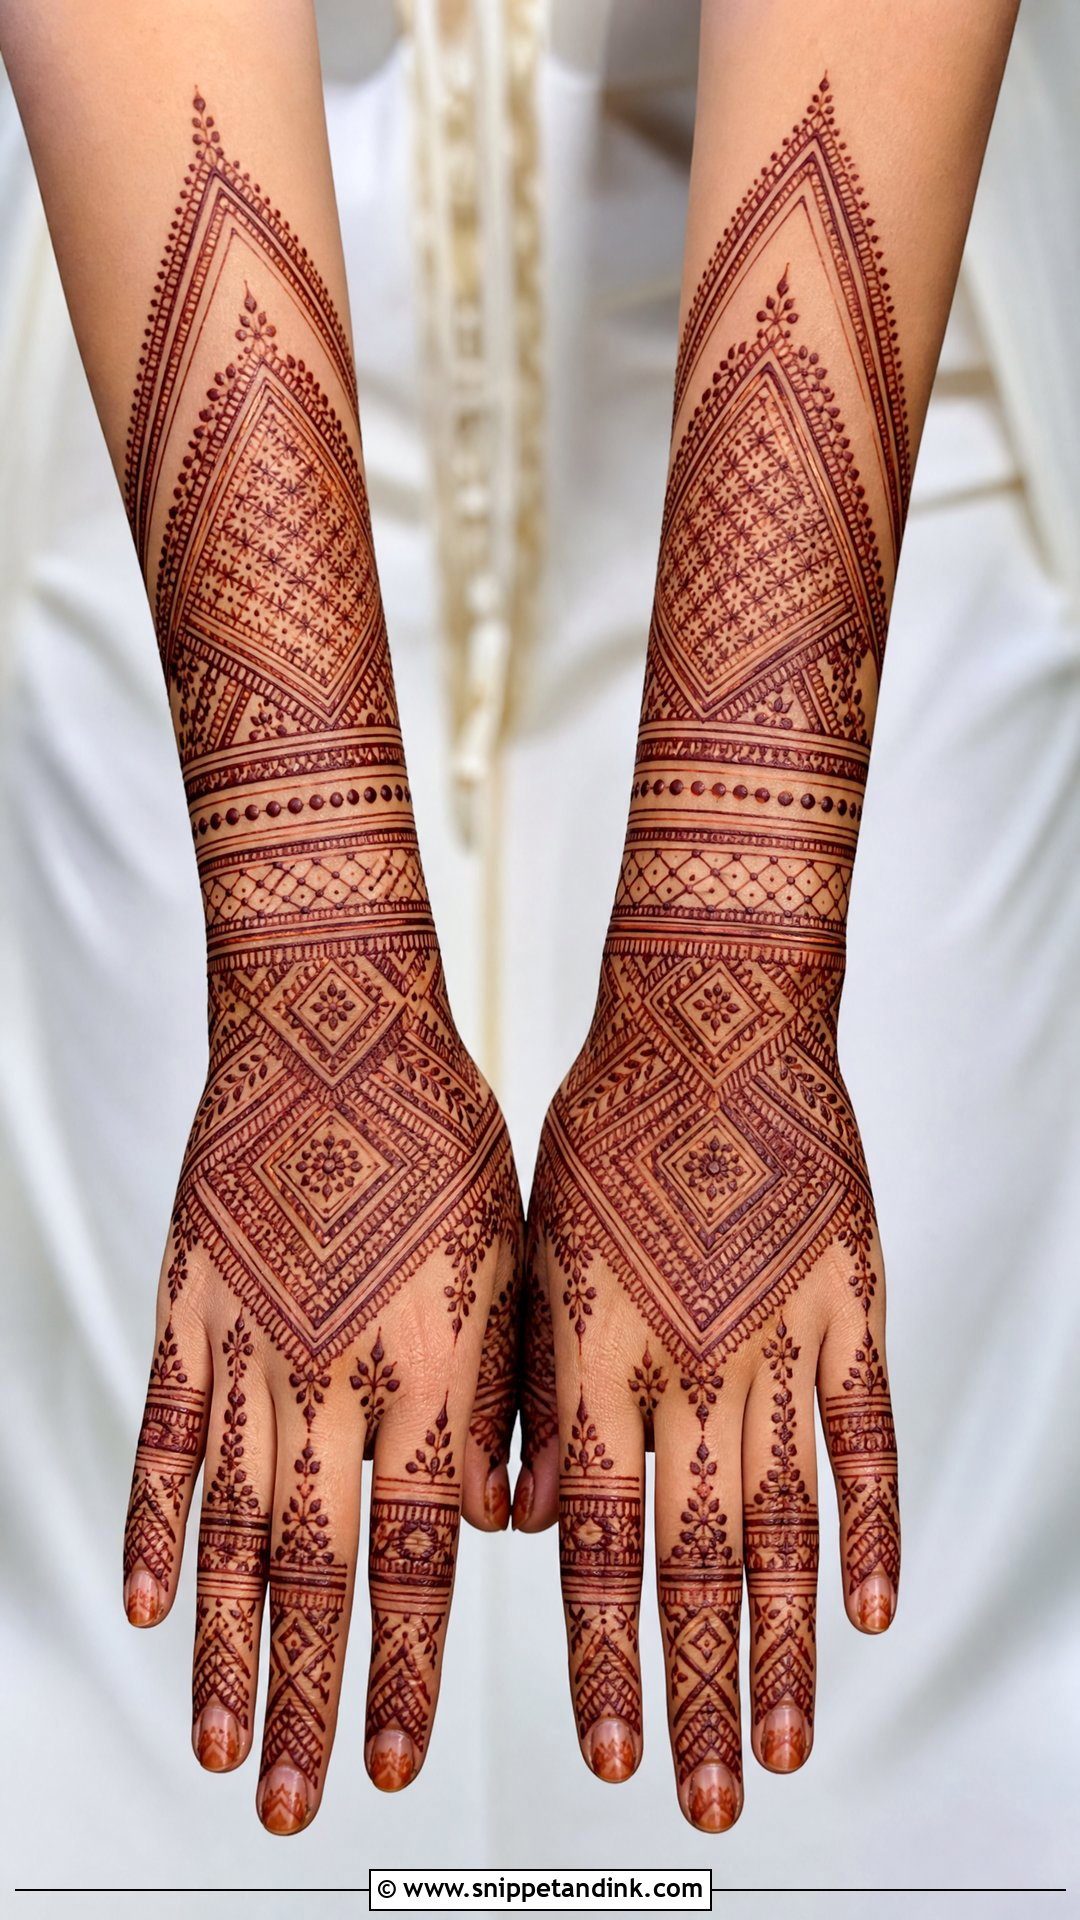
Moroccan-style henna swaps flowers for geometry: diamonds, triangles, grids, straight lines, zigzags and dotted bands. It needs a steady hand and a different cone technique, since straight lines show every wobble that a curved petal would hide. For a bride I extend it from the fingers up the forearm in stacked cuffs and panels. It suits fusion weddings and brides who wear sharp, modern jewellery. If you’re mixing it with traditional florals, keep the geometric part to one zone, such as the fingers, so the two styles don’t fight.
8. Gulf Bridal Mehndi Design
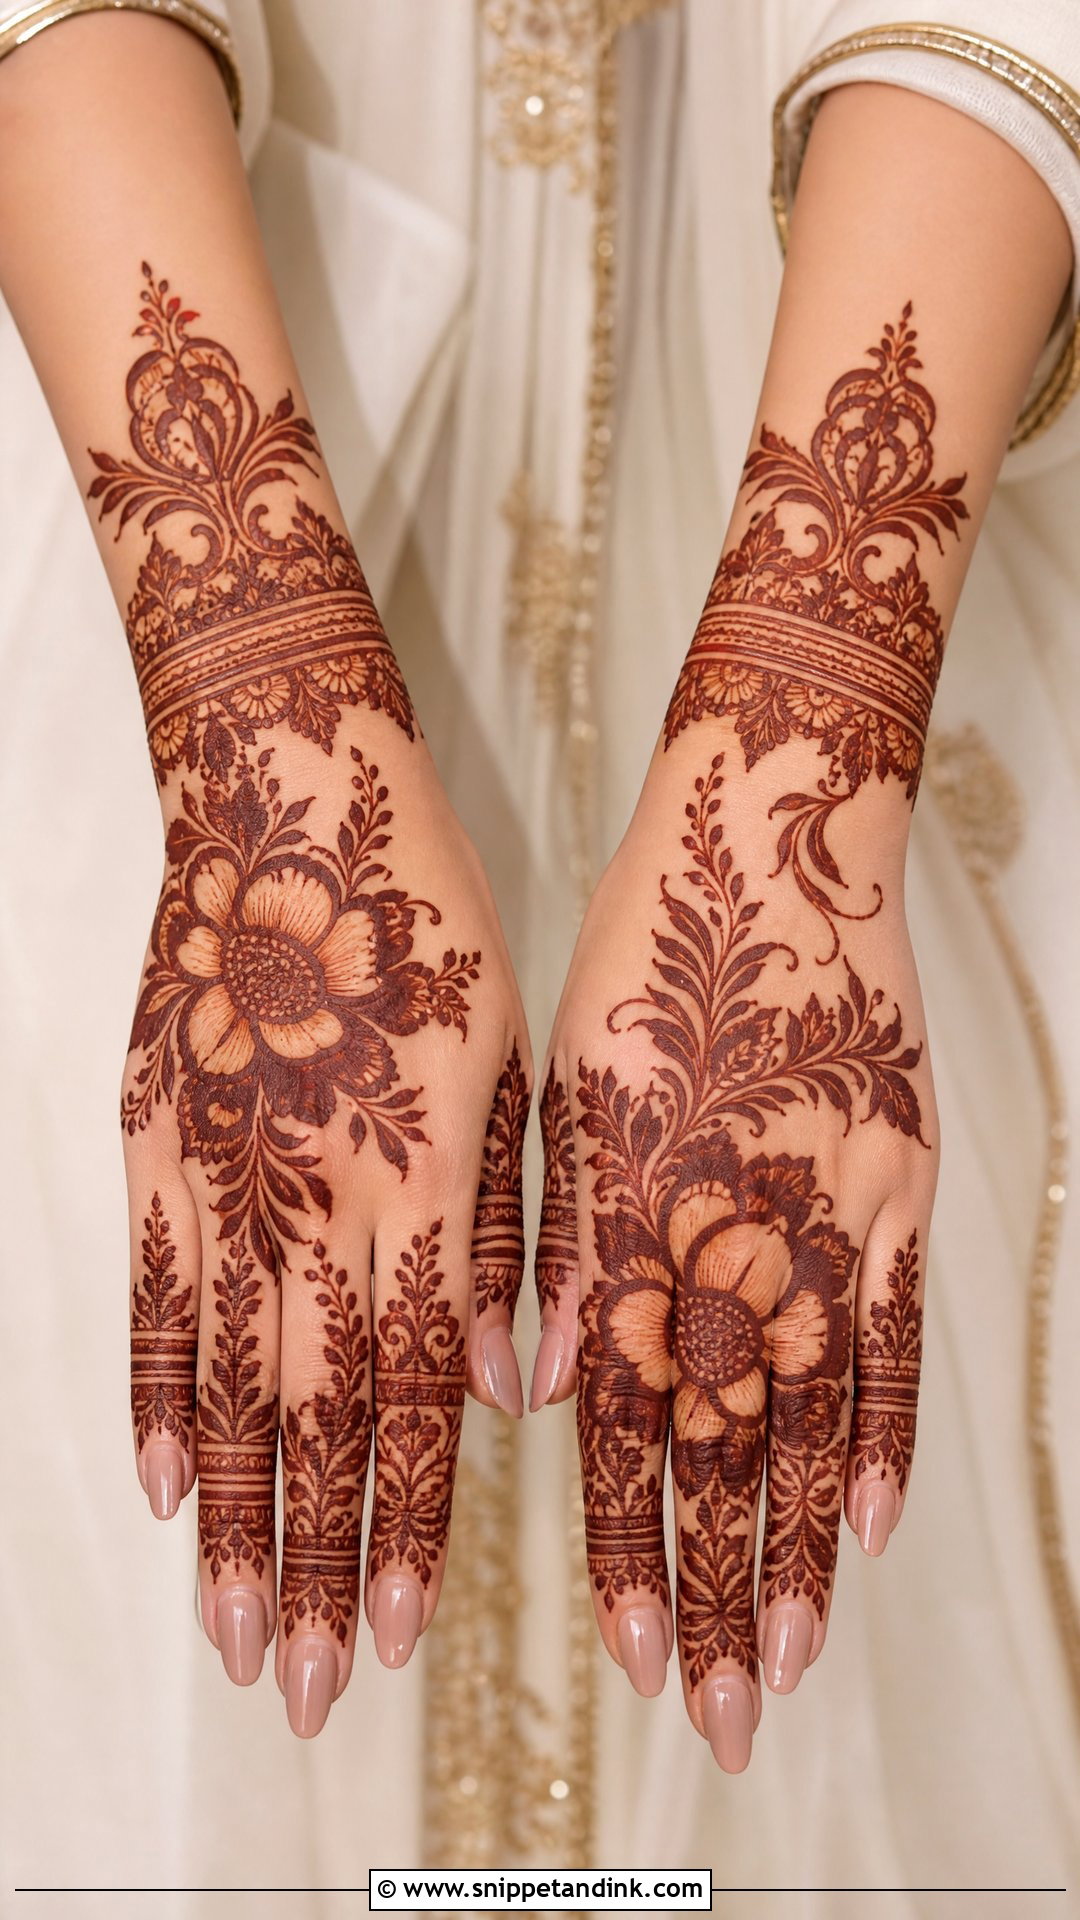
Khaleeji or Gulf henna uses large, bold flowers and leaves with wide, dark-filled areas, and those filled sections are where the paste quality really shows: a good, fresh paste stains evenly, while a tired one leaves patchy shading. The design leaves plenty of skin bare, so it looks rich without covering everything. On the back hand it reads almost like jewellery, circling the fingers and wrist. Fine Indian fillers can be added for a fuller wedding version, and the motifs stay clear even in distant group photos.
9. Mandala Bridal Mehndi Design
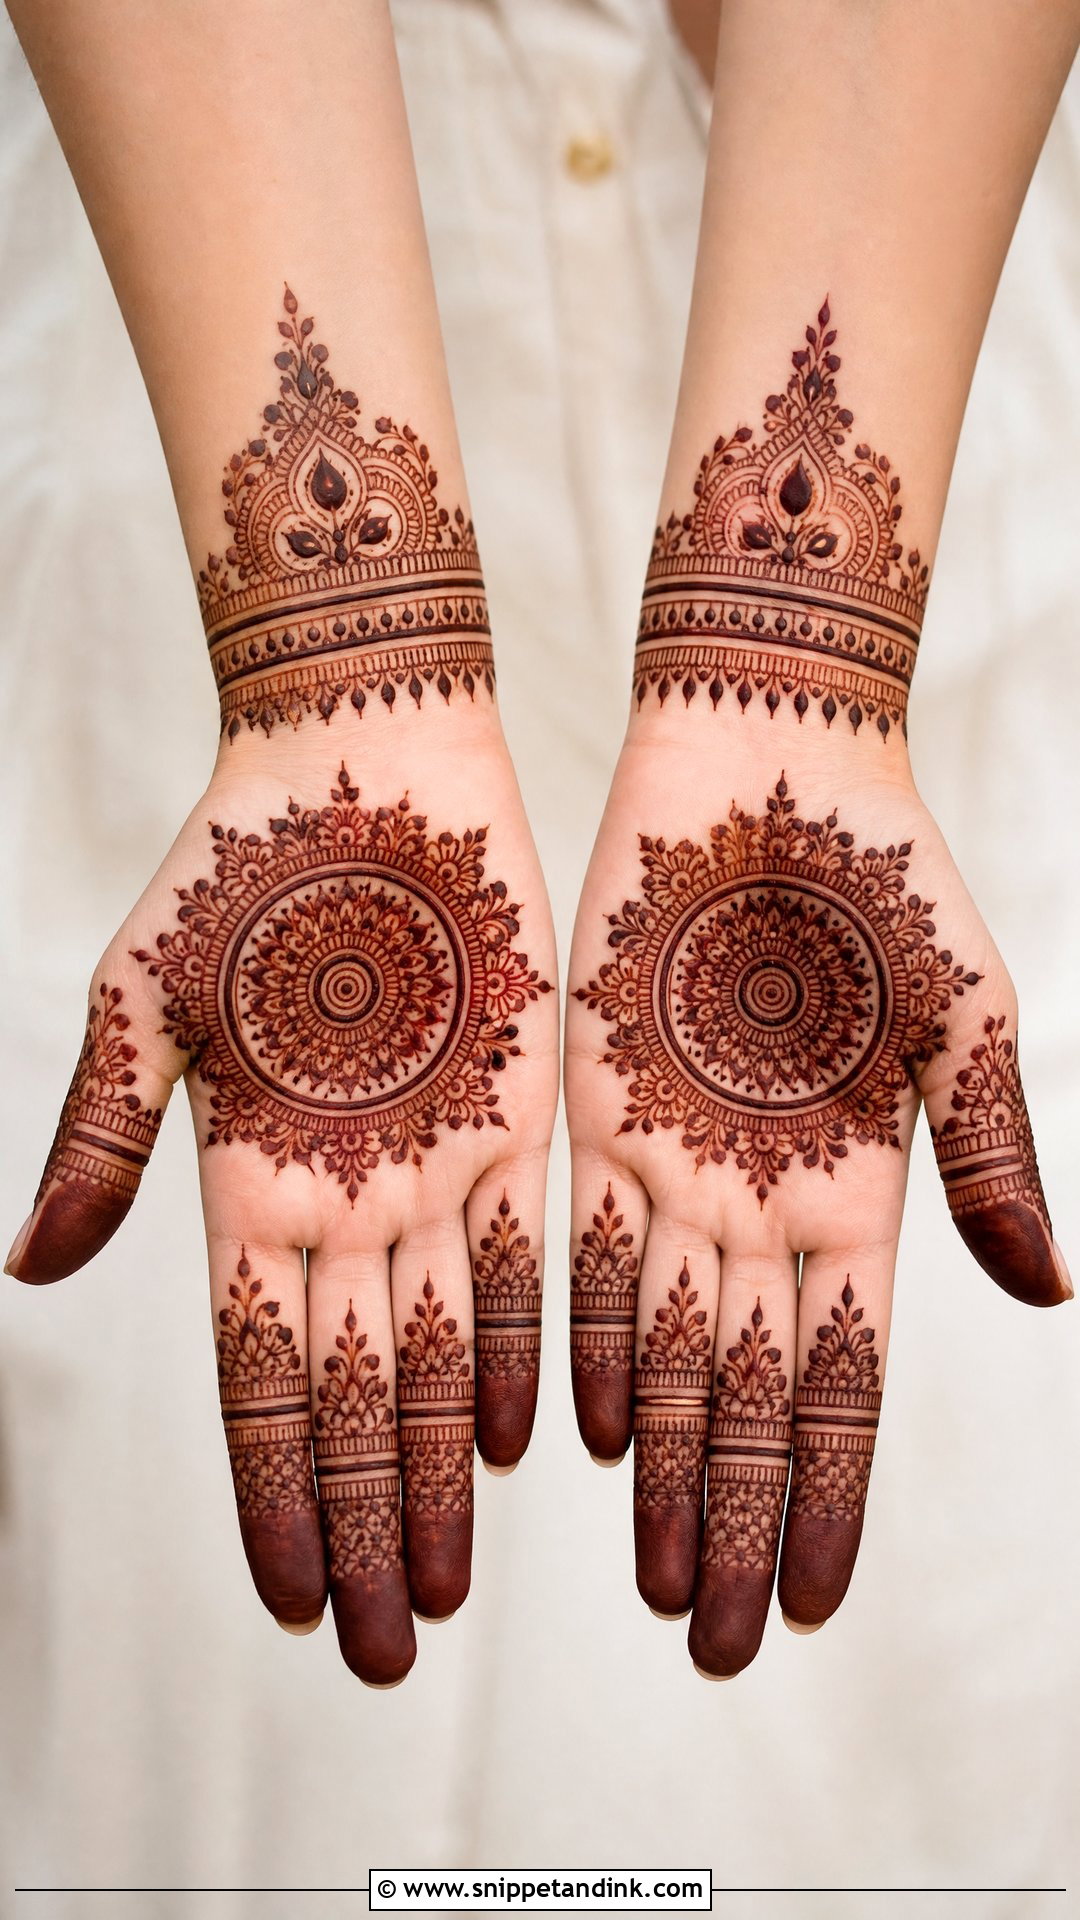
A mandala gives the hand a calm centre point, usually in the palm or on the back of the hand, with finger details, wrist bands and vines growing outward from it. The circle has to be truly round and evenly spaced, which is harder than it looks on a curved palm, so I mark the centre with a dot first and build outward ring by ring. It suits round, square and slim hands. Leave a little breathing room around it; crowding the edges is the quickest way to spoil a mandala.
10. Peacock Bridal Mehndi Design
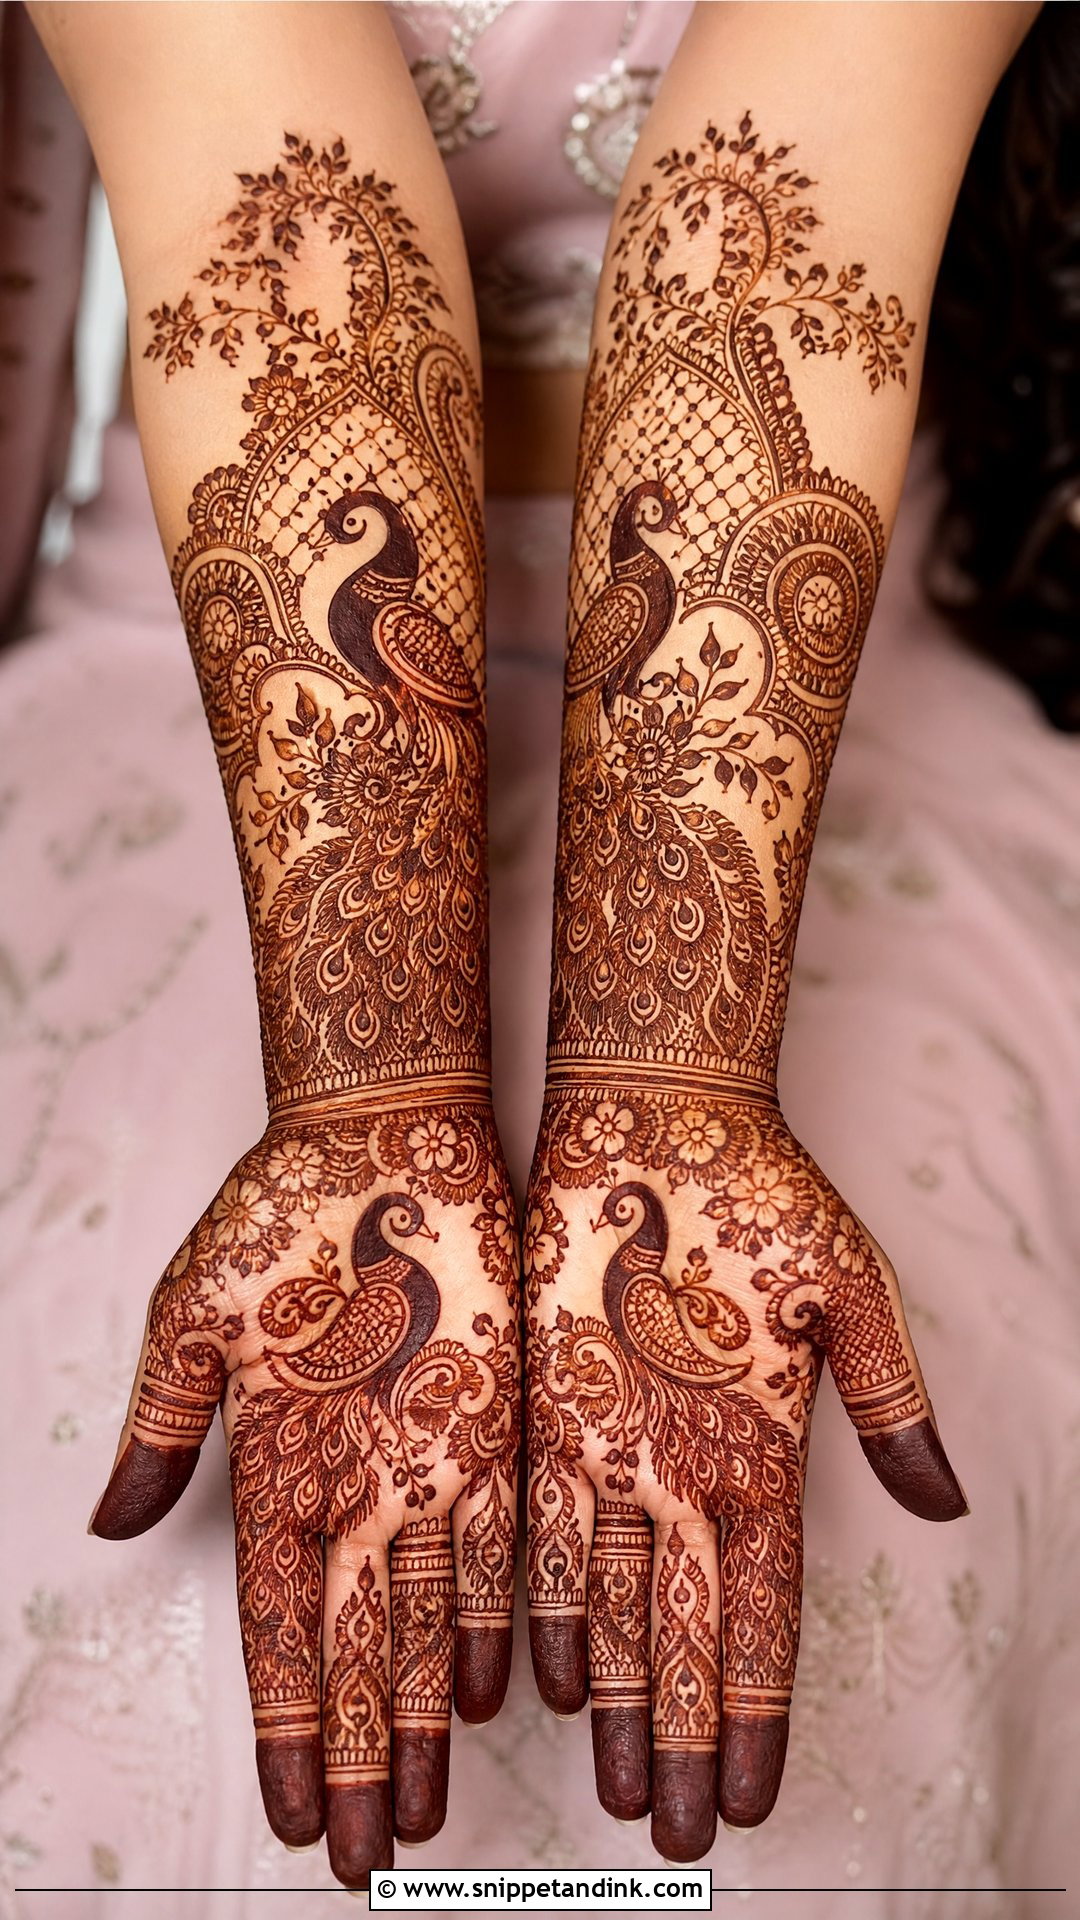
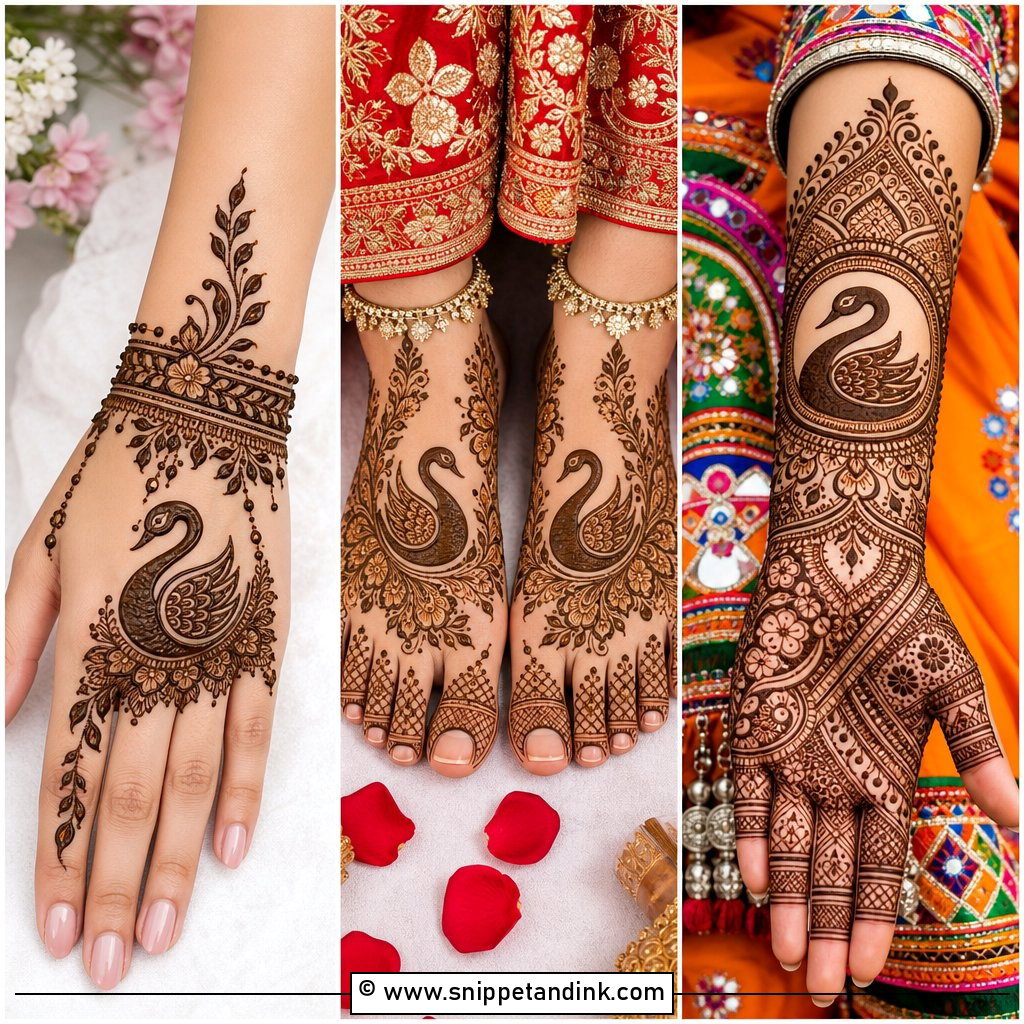
The peacock’s long tail feathers give a design natural movement, which is why it’s such a favourite in Indian and Rajasthani bridal mehndi. It can sit on the palm, back hand or forearm, with feathers sweeping into paisleys, florals and vines. For a lighter take, I draw one large peacock on each hand with open space around the feathers. For a heavy bridal set, the feathers are filled with jaali, dots and tiny flowers. Either way, the neck and head need clean, confident strokes, since that’s where the eye lands first.
11. Lotus Bridal Mehndi Design
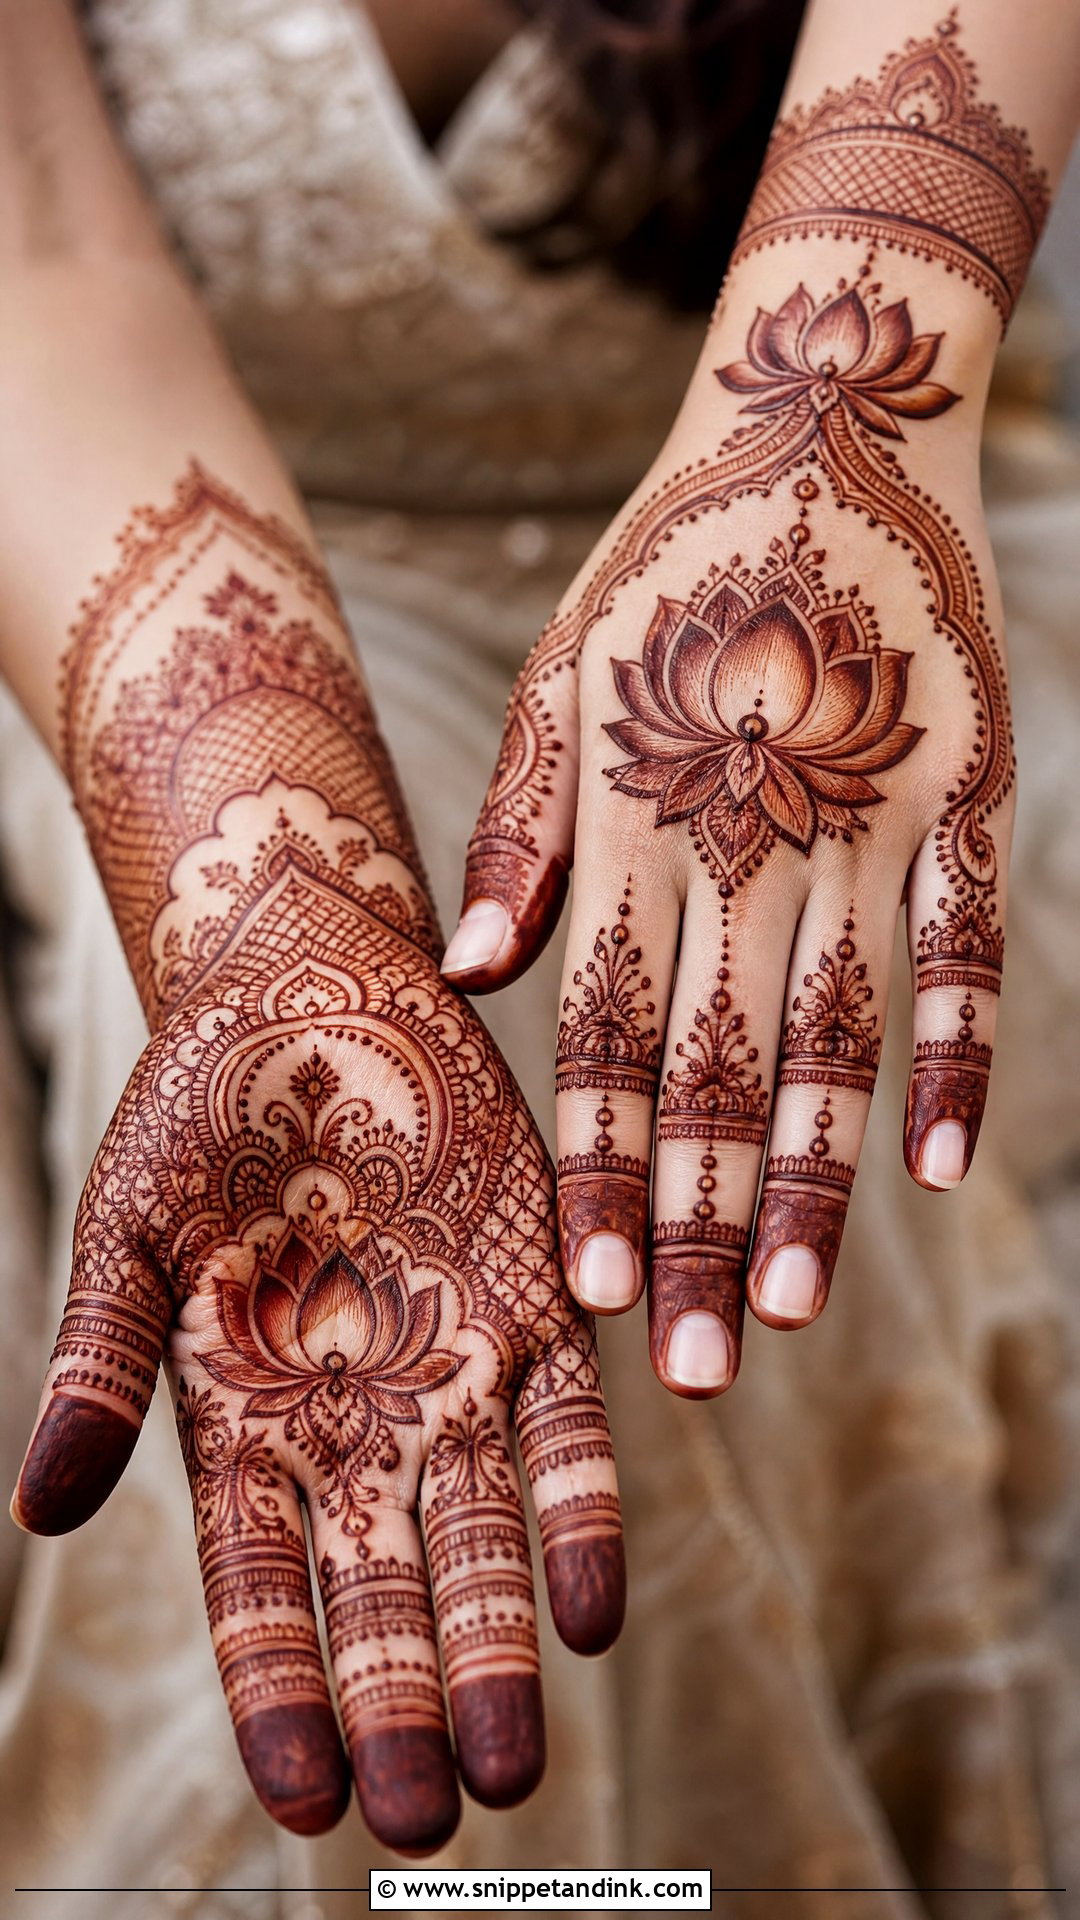
Lotus motifs have a sacred association for many families and a soft, rounded shape that sits well in palms, wrist cuffs, forearm panels and back-hand centrepieces. Petals can be shaded for depth or edged with tiny dots for a finer finish. Shading needs a thinner, controlled line of paste; a heavy hand turns it into a solid block once stained. On its own, a lotus design can look sparse for a bride, so I pair it with mandalas, paisleys, vines or fine mesh. It sits nicely with pastel outfits and temple jewellery.
12. Portrait Bridal Mehndi Design
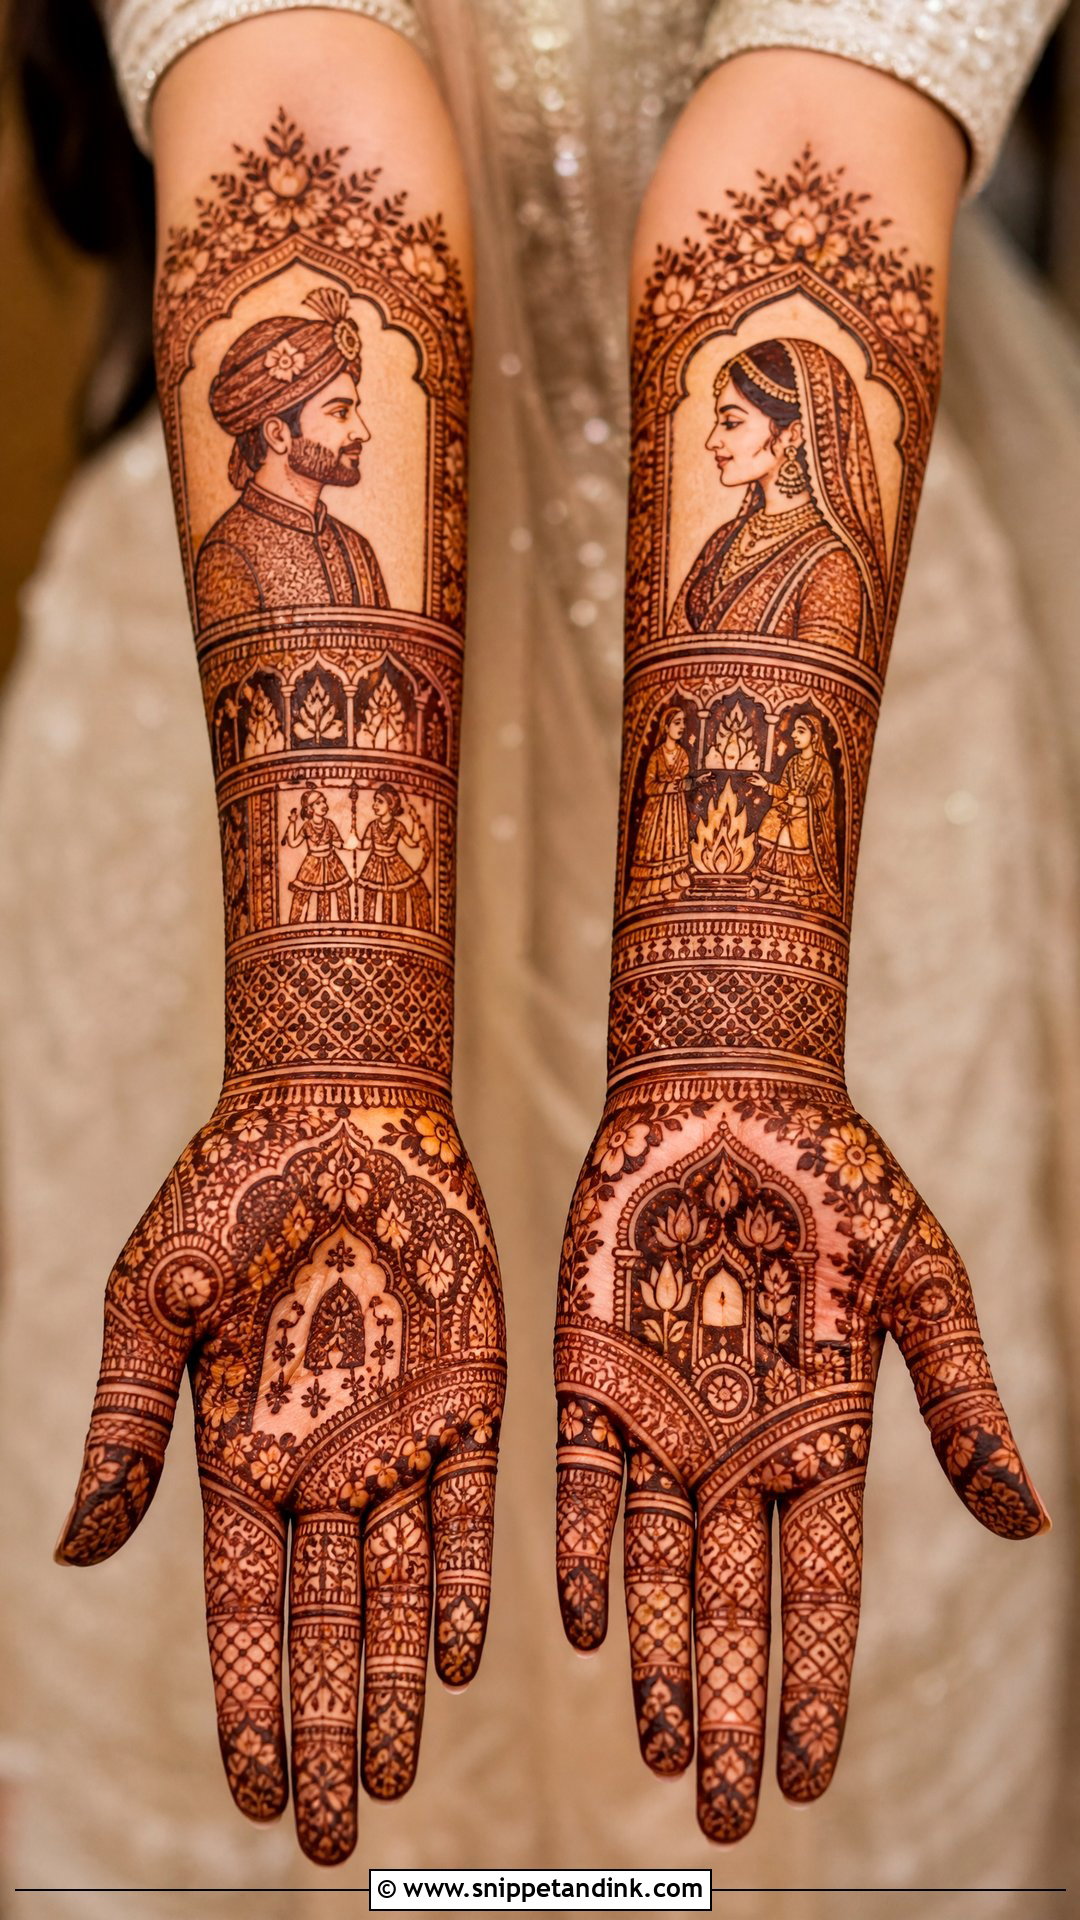
Portrait mehndi turns your hands into a keepsake: the couple’s faces, a proposal scene, wedding rituals, the venue, a pet or a meaningful date. Faces need room, so they go on the palms or forearms, and the surrounding pattern should stay quiet so the portraits lead. Send your artist reference photos well before the day. Portraits also stain differently from line work, because fine features can blur if the paste is too thick, so ask to see healed stain photos of an artist’s portraits, not just photos with the paste still on.
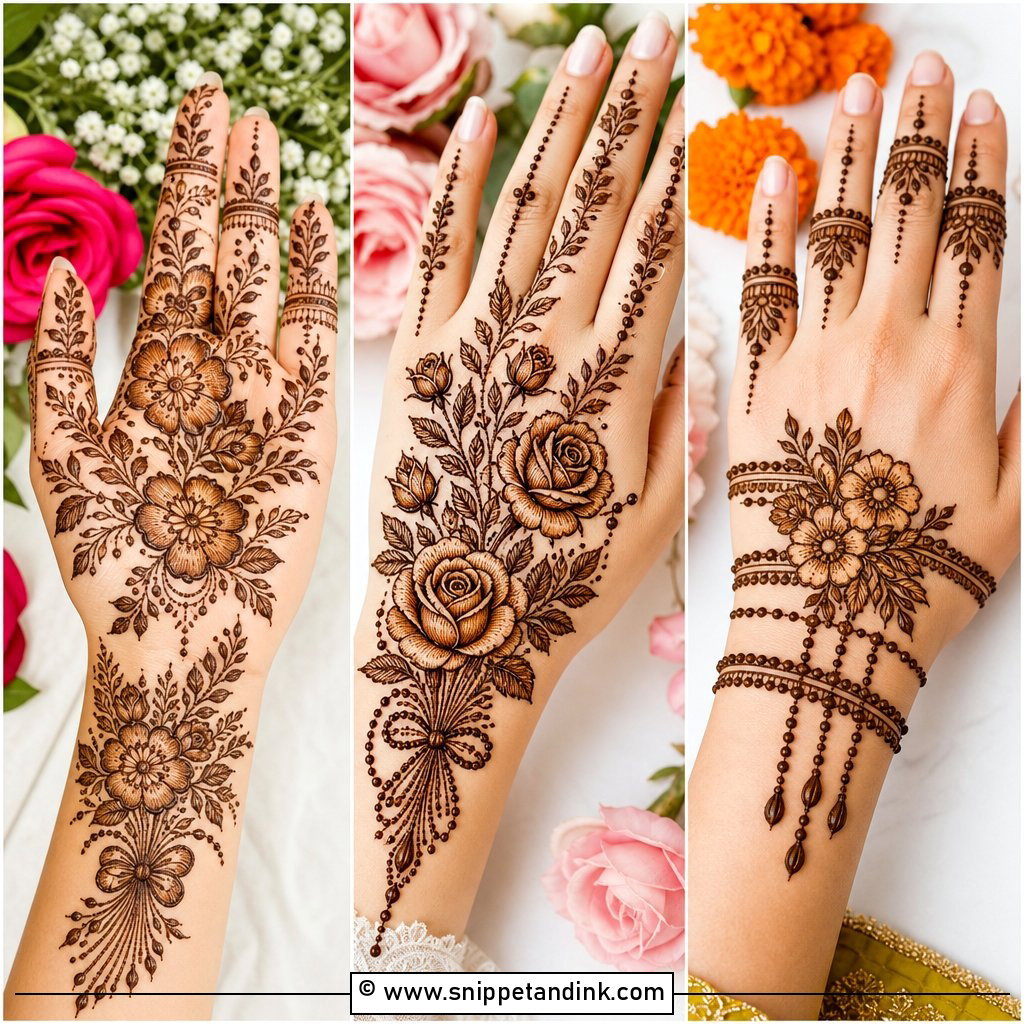
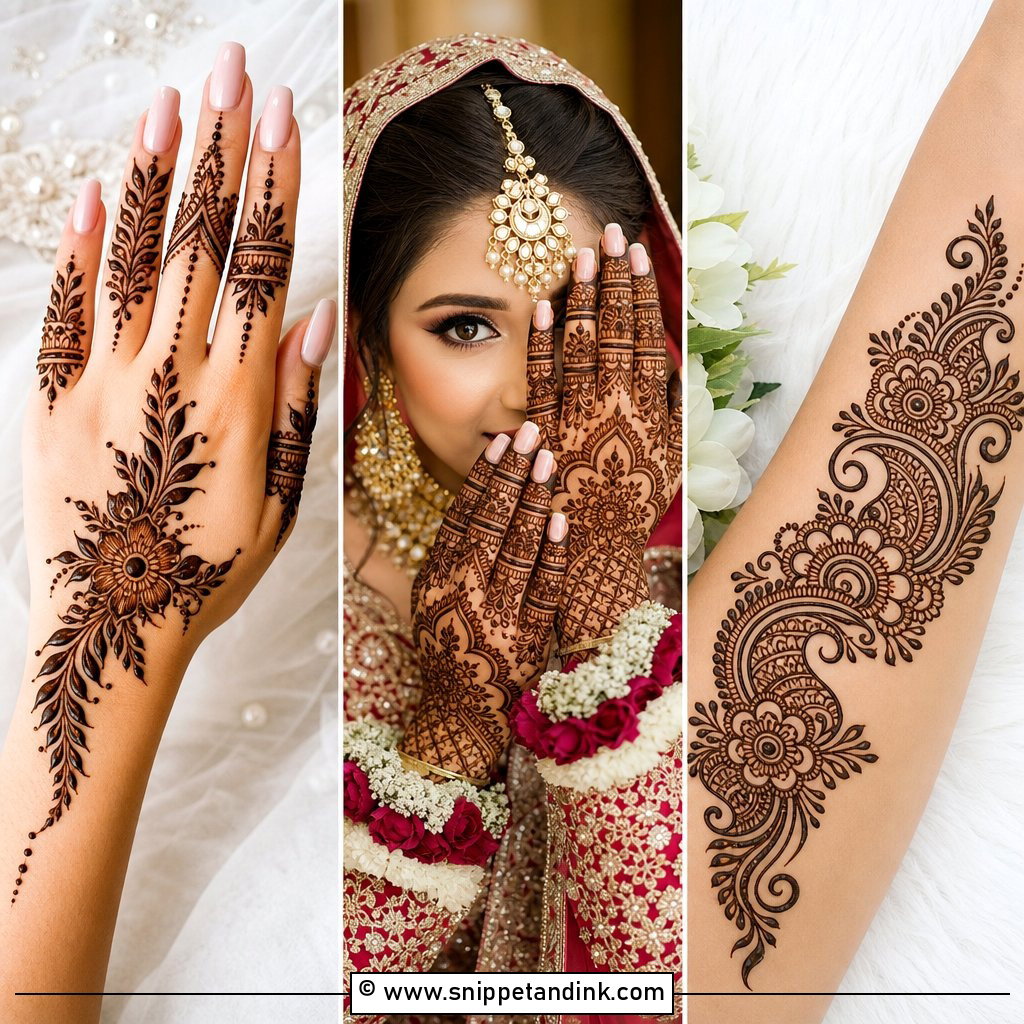
13. Minimal Bridal Mehndi Design
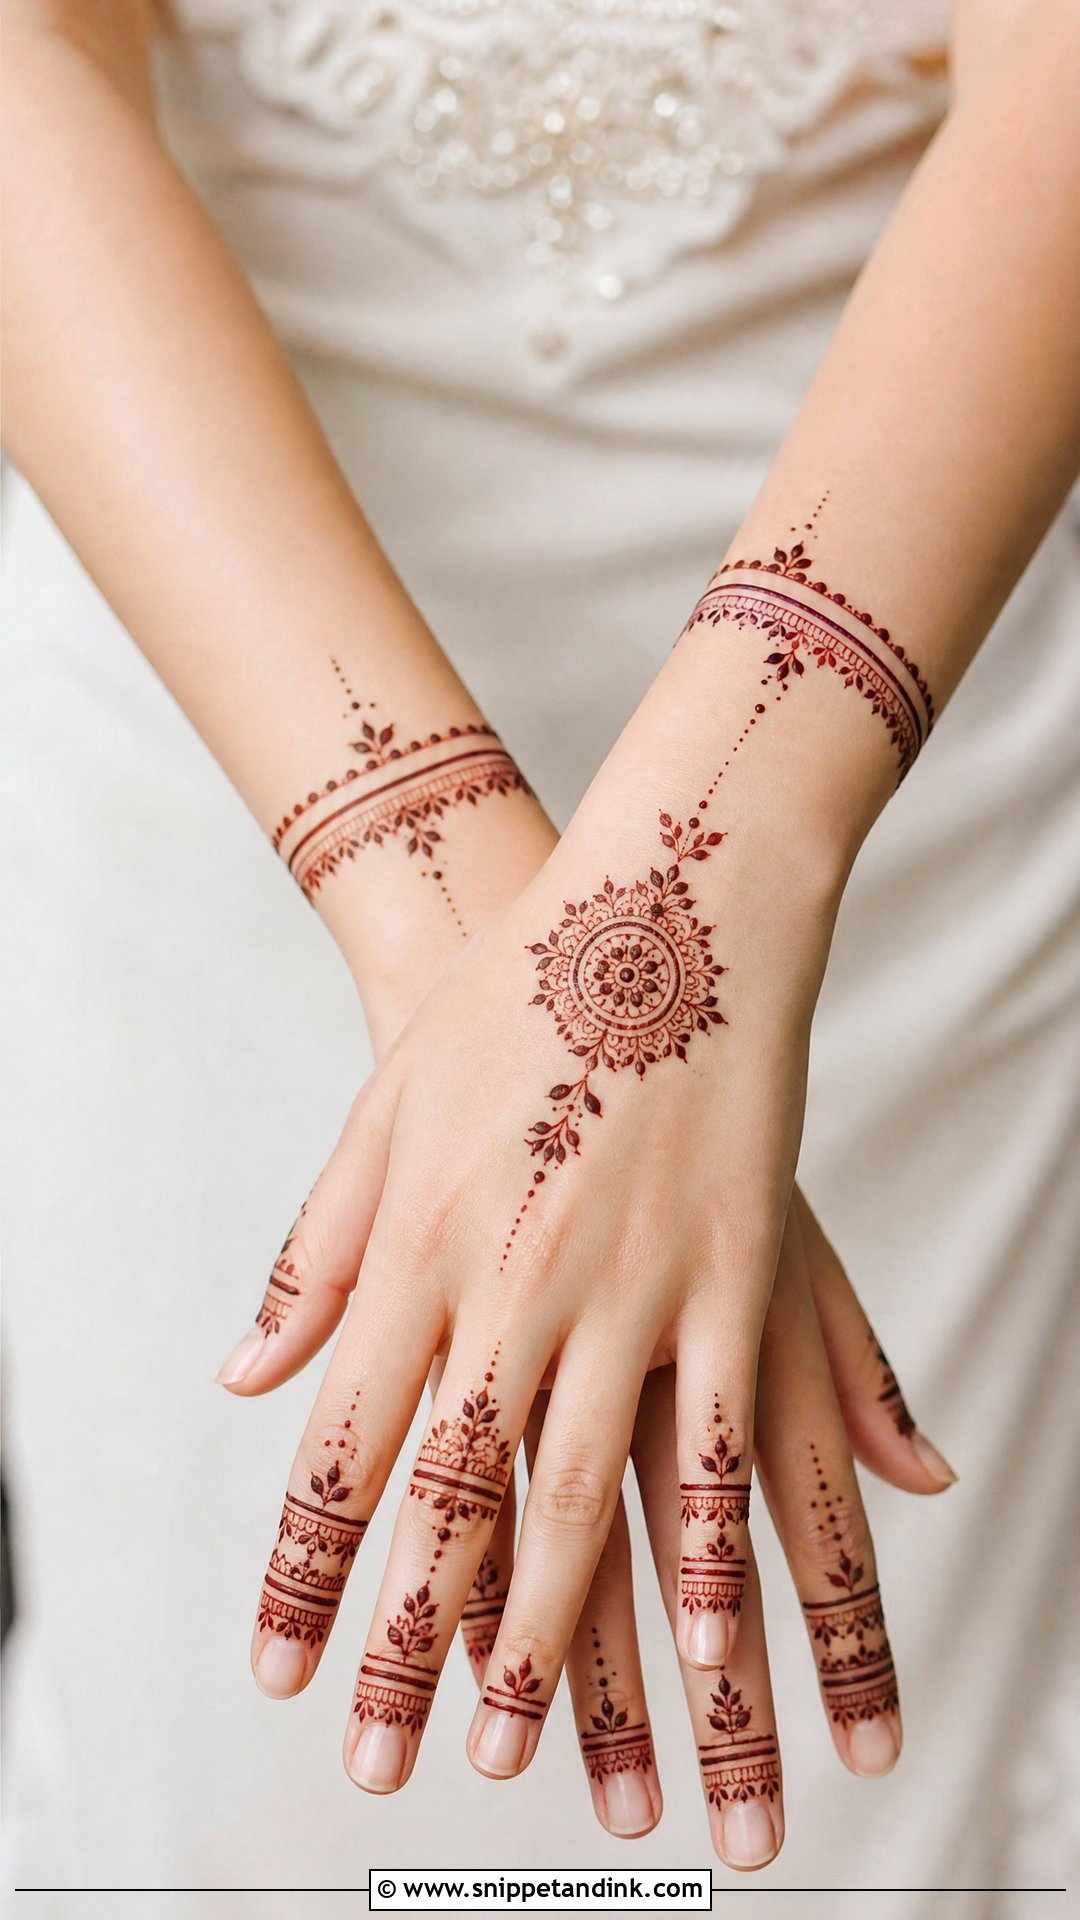
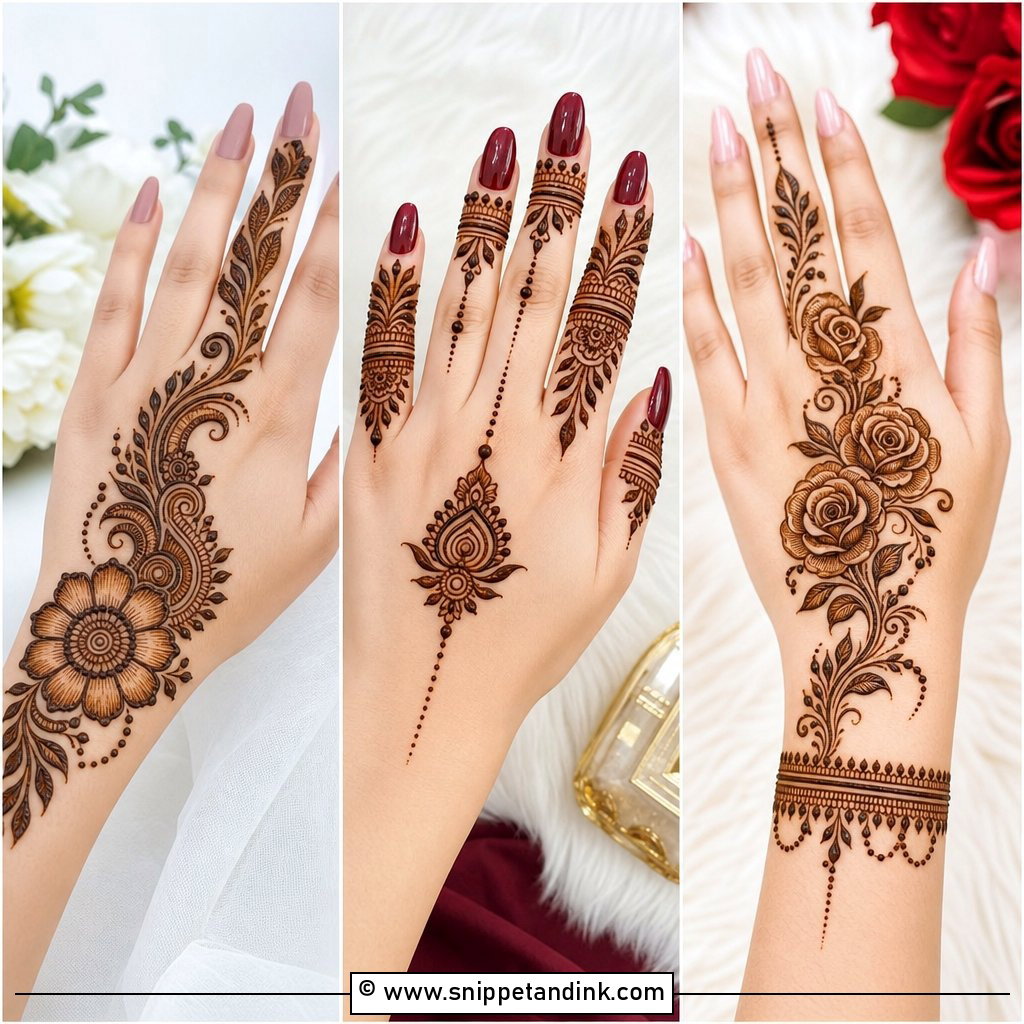
Not every bride wants hours in the chair. A minimal design might be delicate finger patterns, a small mandala, a fine floral trail, a bracelet-style wrist band or an open back-hand piece, and it can still feel bridal with neat lines and careful placement. It suits intimate weddings, civil ceremonies, destination weddings and brides who need to keep their hands free for most of the day. A hidden initial or a tiny wedding symbol adds a personal touch without extra time.
14. Modern Bridal Mehndi Design
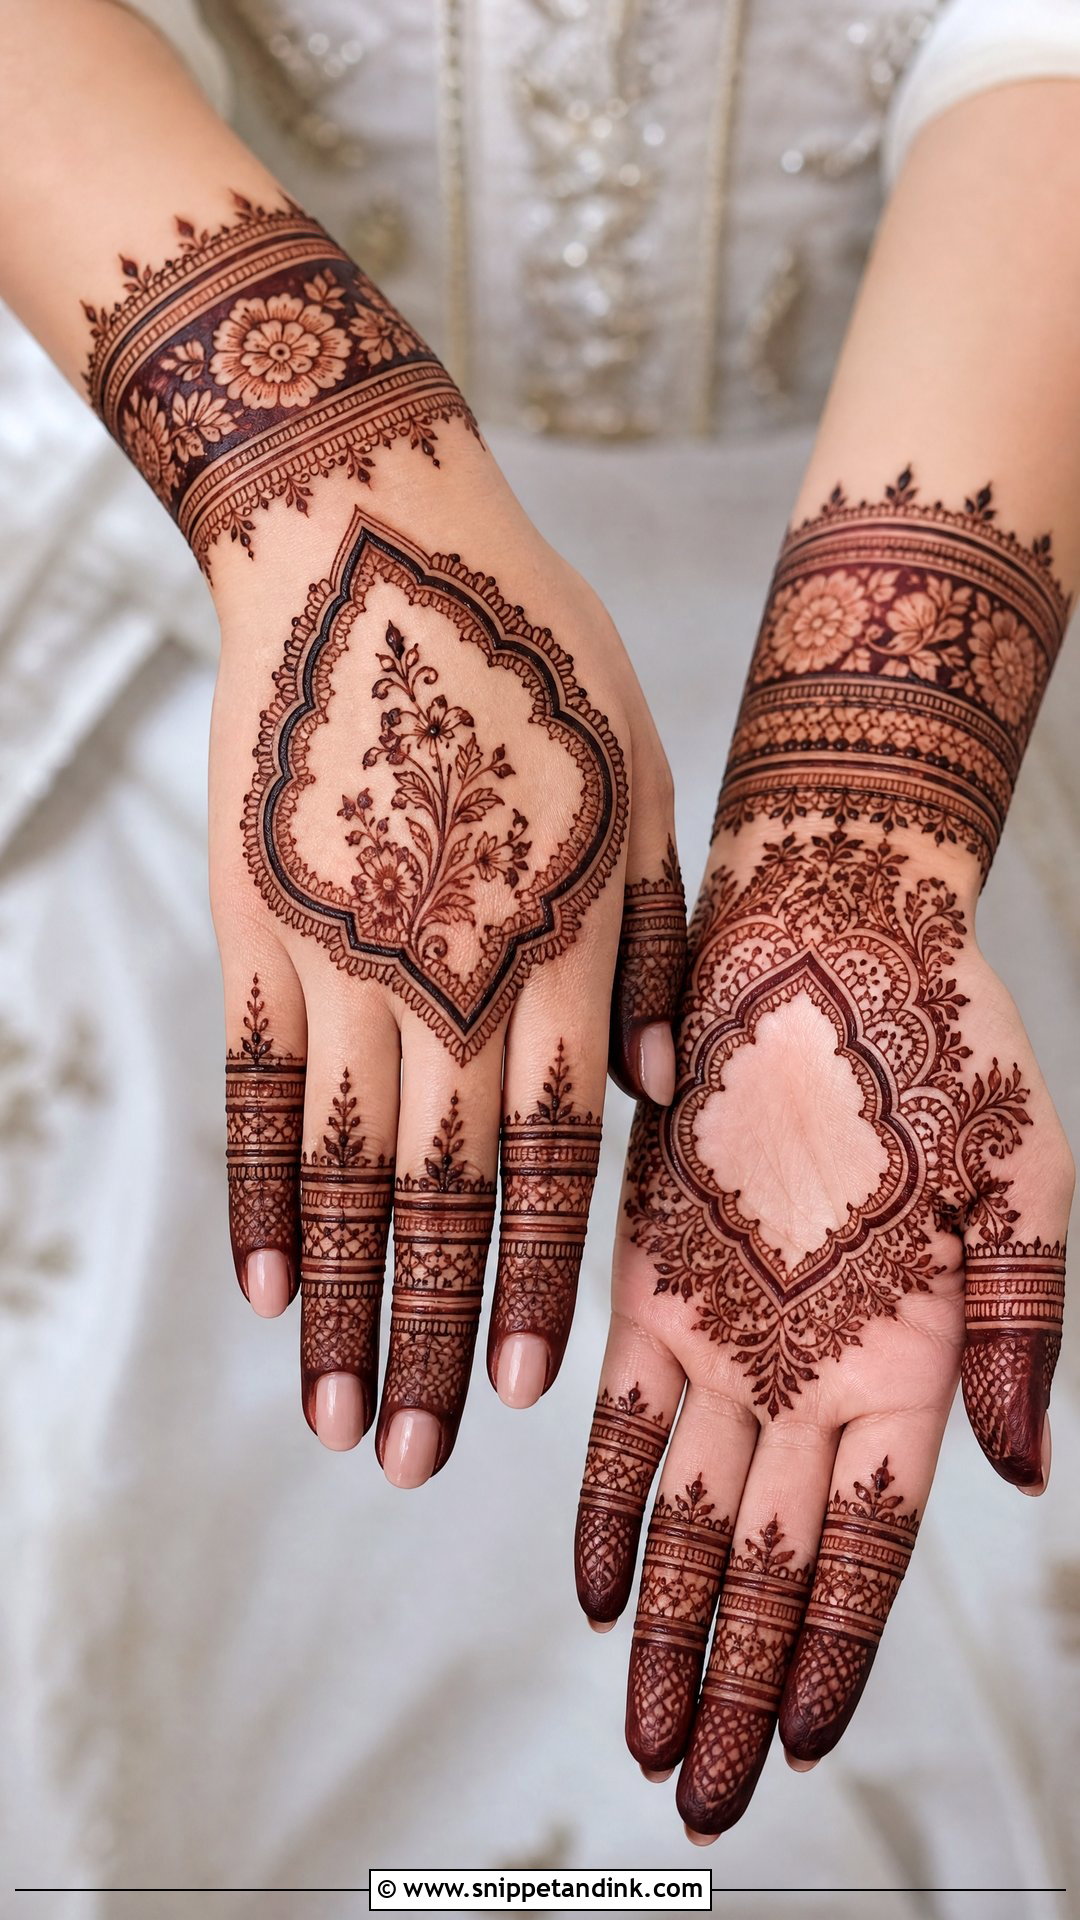
Modern bridal work breaks the hand into sections instead of filling it: negative space, geometric borders, floral cuffs, fine-line detail, finger rings and bracelet patterns. Paisleys and mandalas still appear, just arranged with more air around them. It suits contemporary lehengas, saree gowns, fusion outfits and minimal jewellery. The challenge is that sparse designs show every uneven line, so this style needs a confident artist even though it looks simpler.
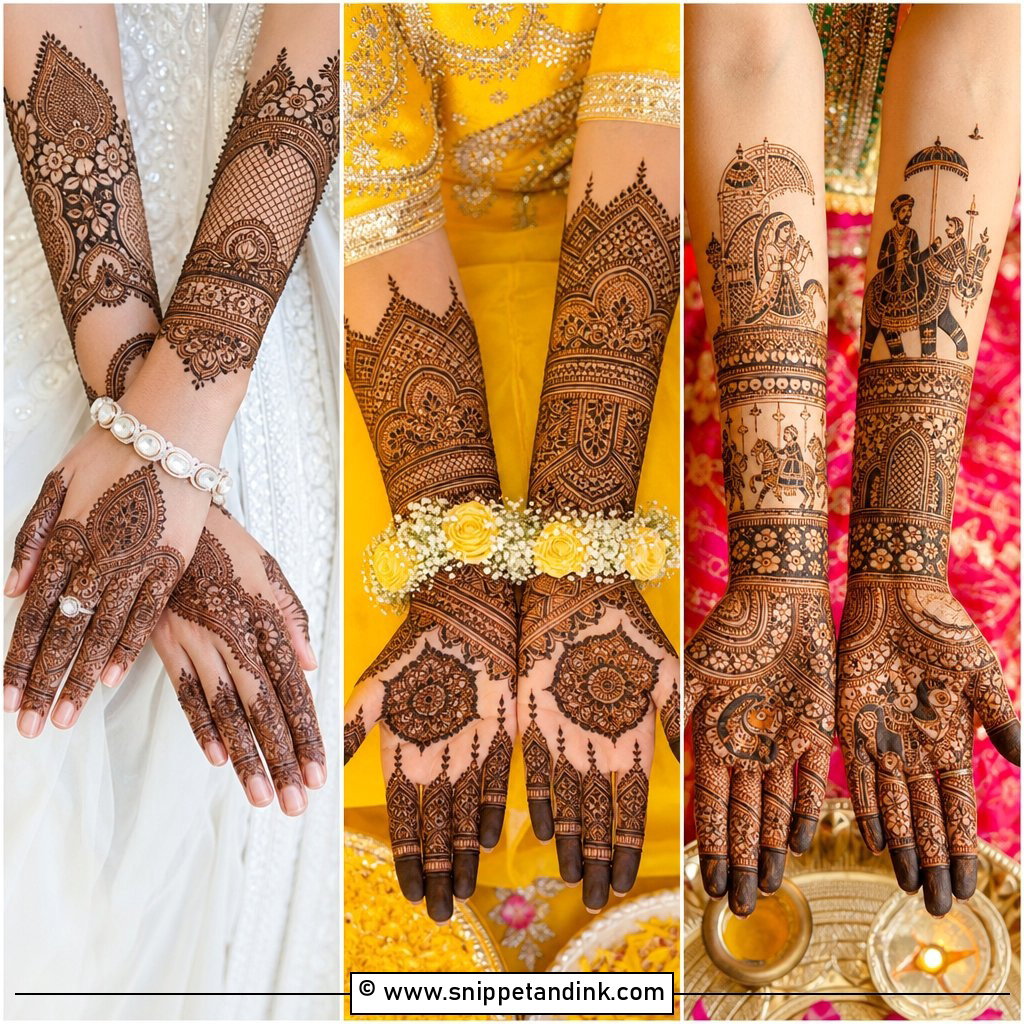
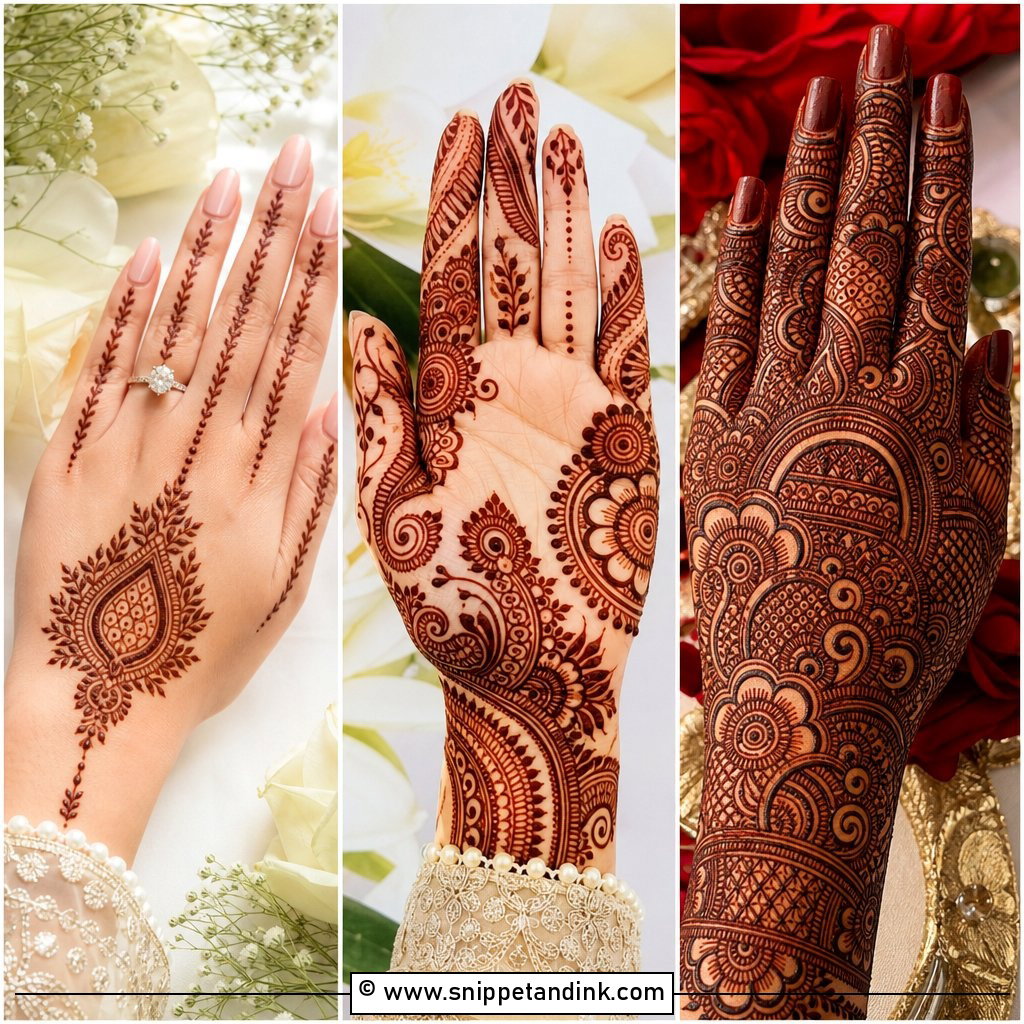
15. Back Hand Bridal Mehndi Design
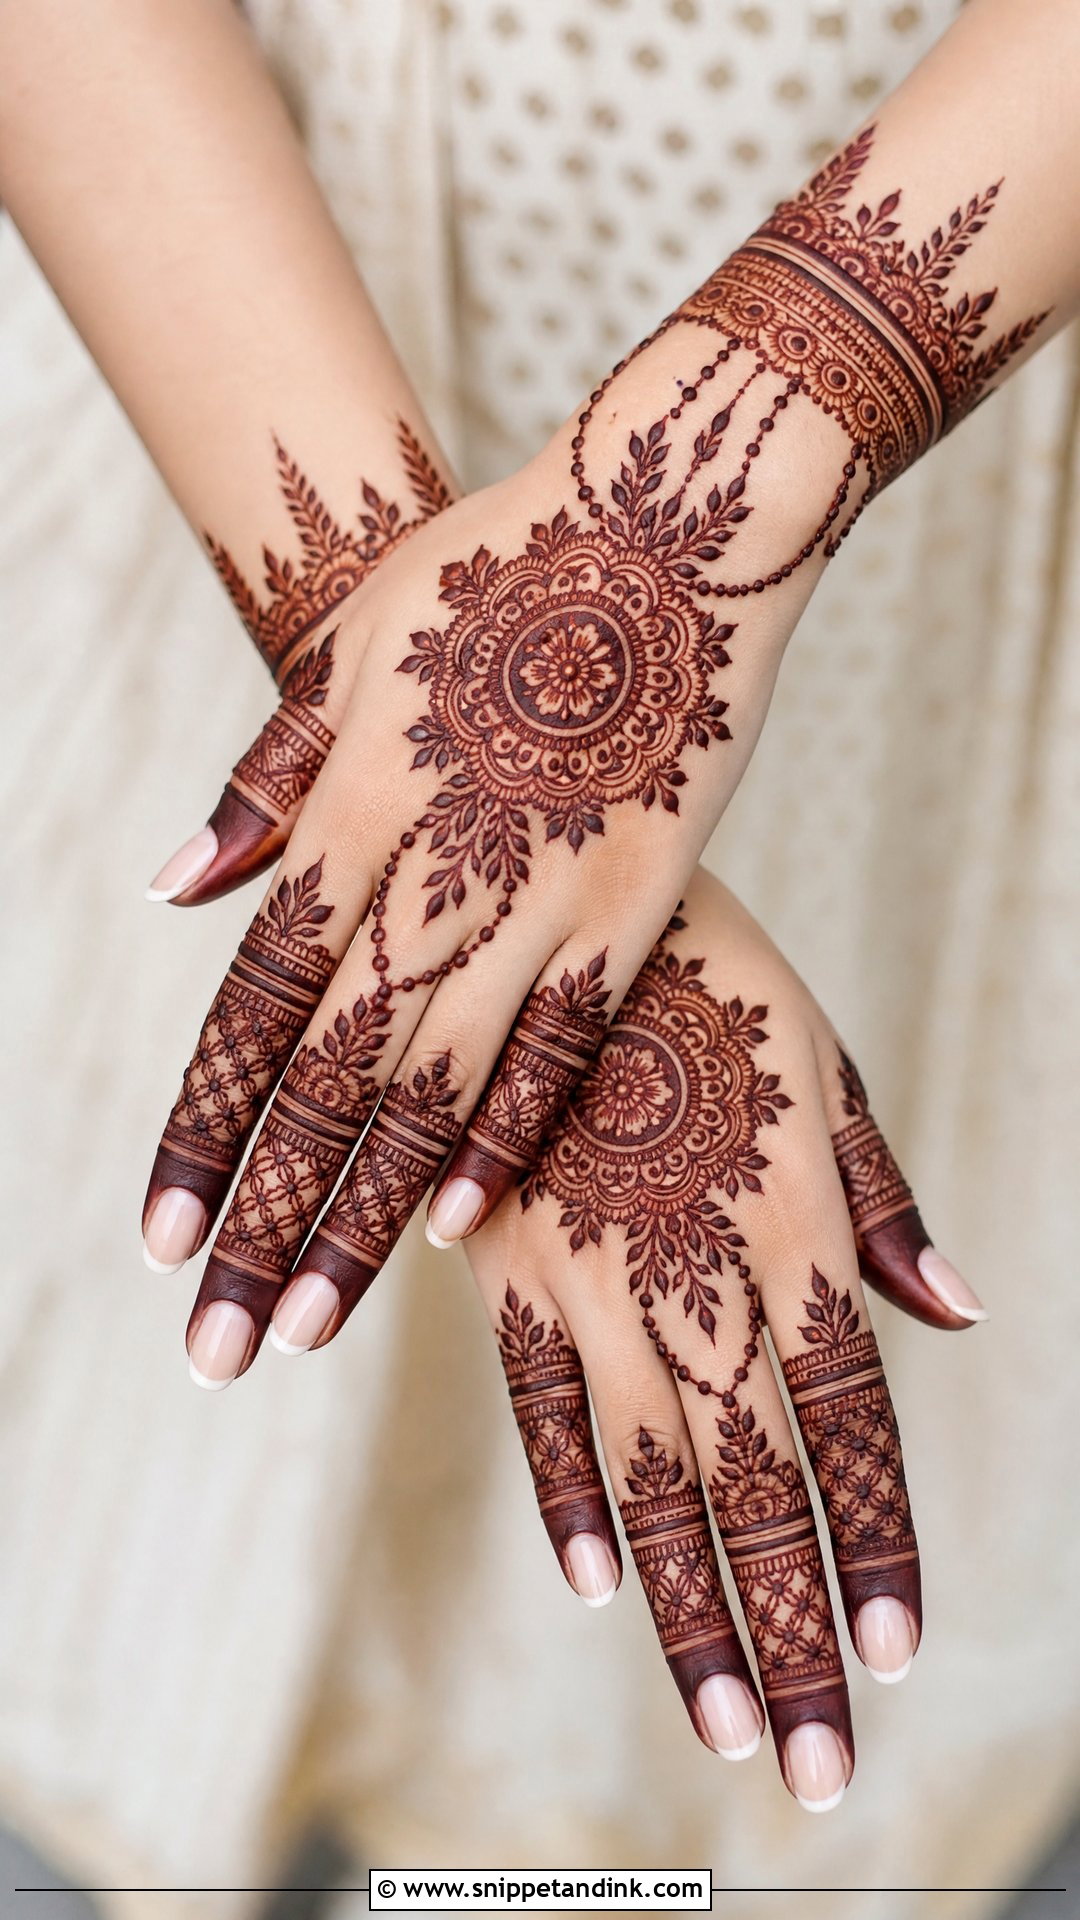
The back of the hand is what shows in ring shots, bouquet poses and jewellery close-ups, so I treat it as its own composition rather than an afterthought. A central mandala, floral trails, finger coverings, bracelet bands or a haath phool inspired layout all work here, as long as the fingers, hand and wrist connect as one piece. If you’re wearing heavy rings or bangles, I leave space where they’ll sit so the jewellery isn’t hiding the best part of the design. Some brides go lighter on the palms and fuller here for the photos.
16. Front Hand Bridal Mehndi Design
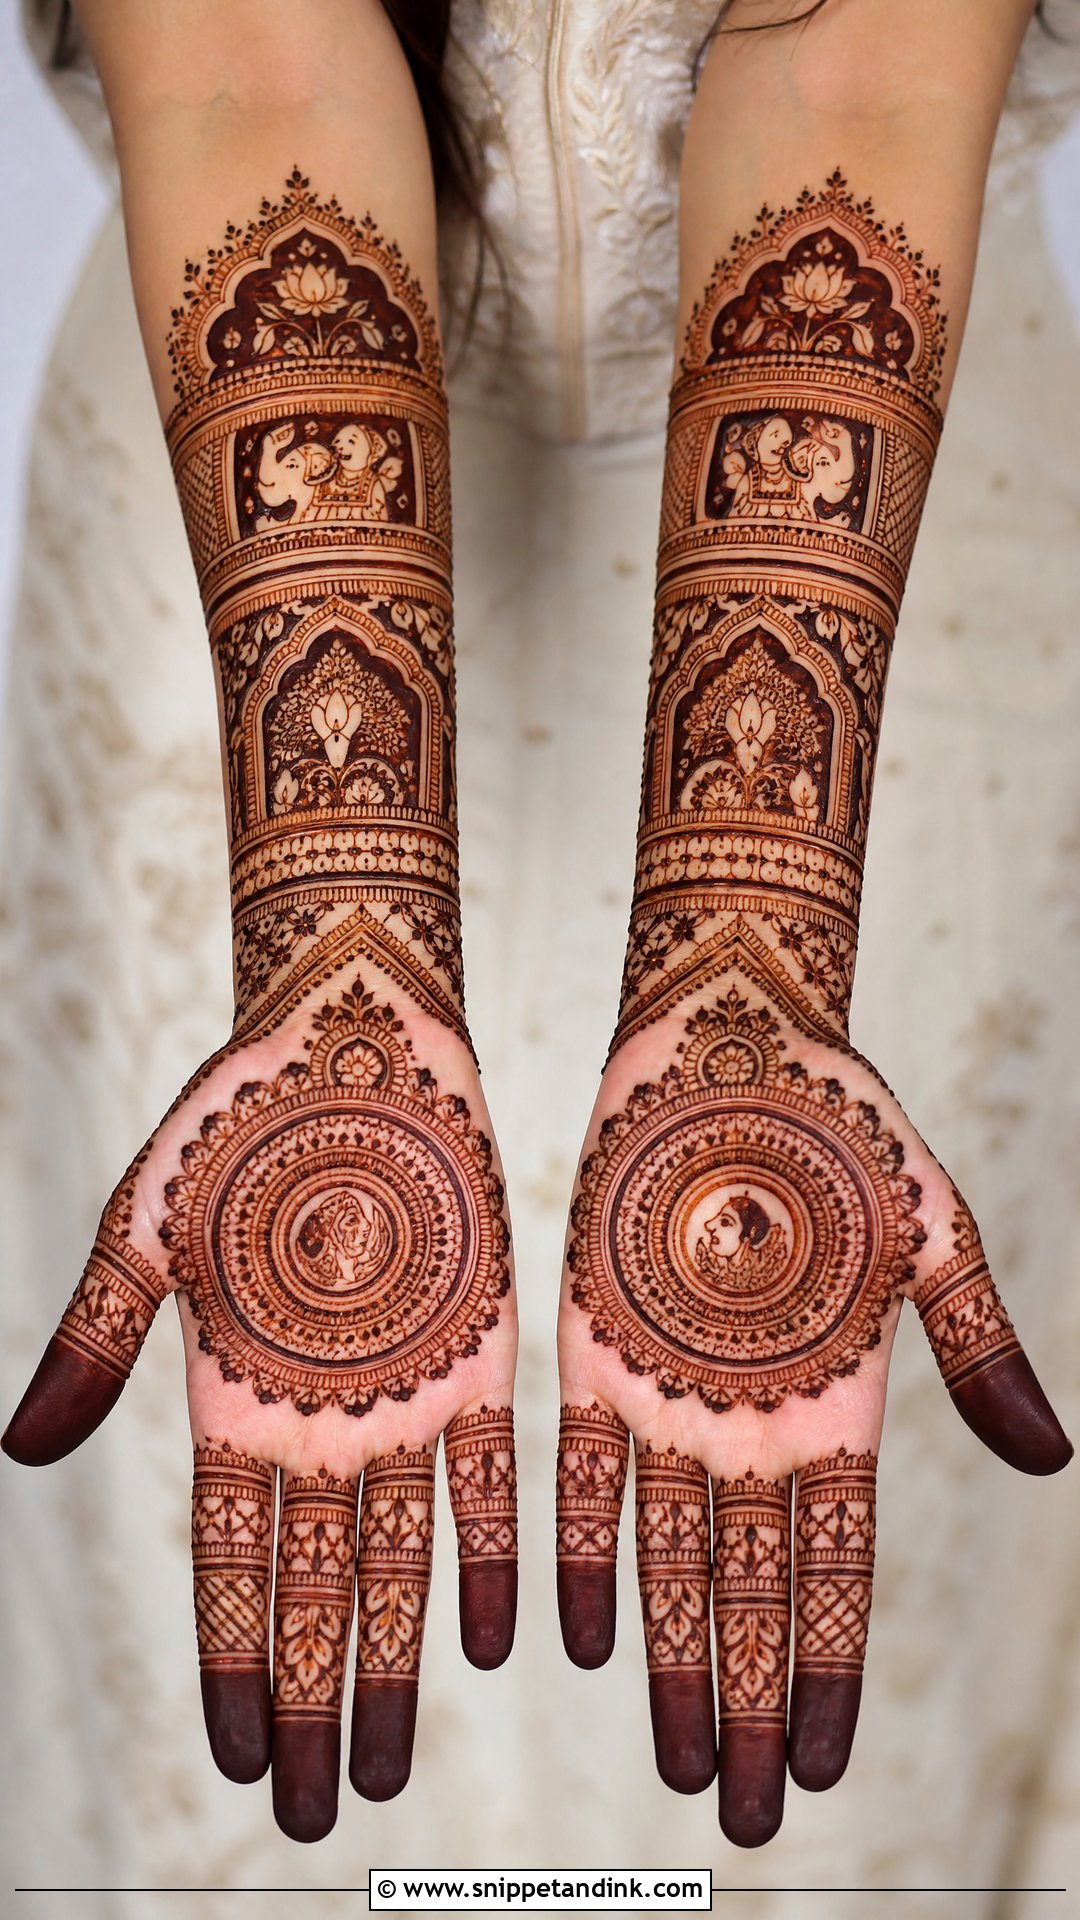
When a bride opens her hands for the camera, the palms carry the most detailed work: mandalas, portraits, paisleys, wedding symbols and symmetrical panels. Palms also stain darker than anywhere else on the body, so very dense filling can swallow the main motifs once the colour develops. I keep the key shapes outlined and give them a little space. Fingers can be fully covered or finished with bands and tips, depending on the rest of the design.
17. Bridal Mehndi Design With Names
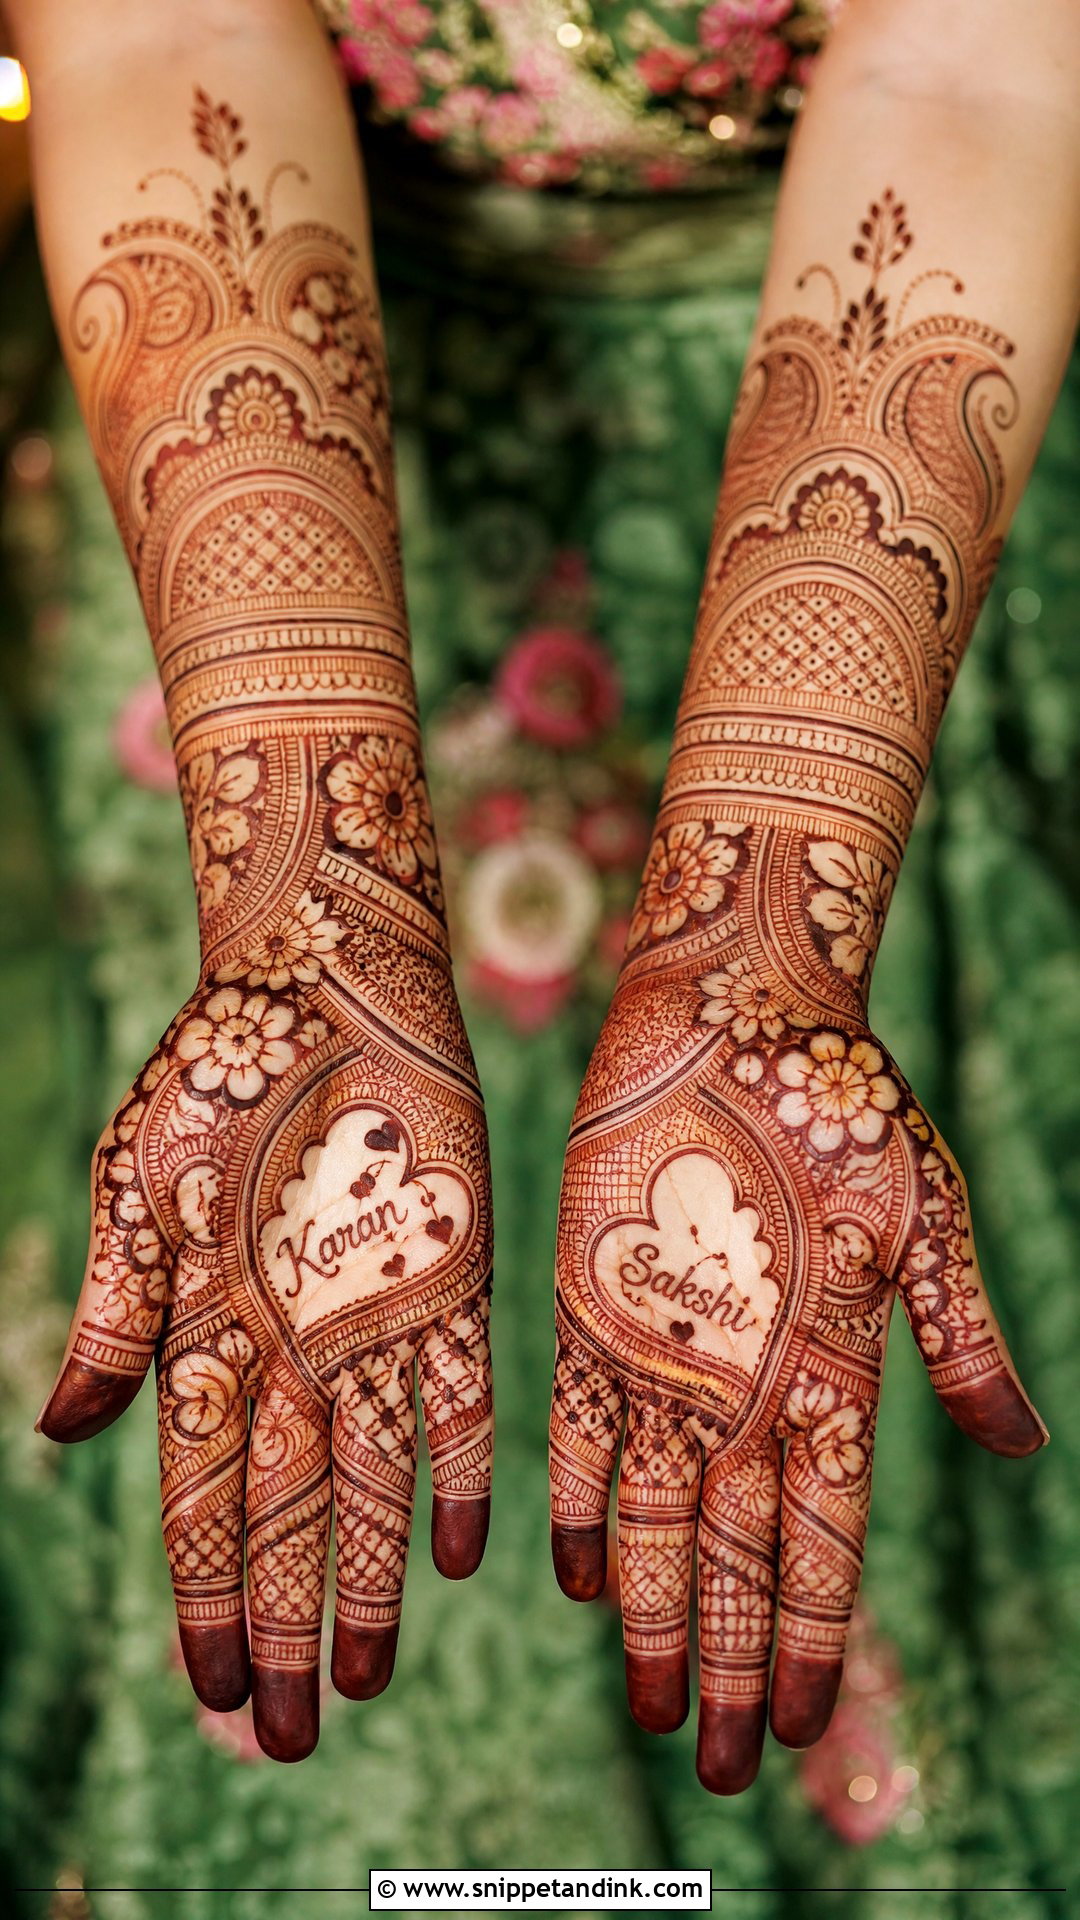
Hiding the groom’s name in the design is one of the oldest bits of fun at a wedding. Bridal mehndi design with names can carry his name, initials, the date or a meaningful word inside paisleys, jaali, petals or wrist borders, either easy to spot or well disguised for him to search for. The practical point is readability after staining. I write letters slightly larger than the fillers around them and keep them out of the darkest, densest sections, because small letters in heavy fill blur into the pattern. It works with Indian, Arabic, Indo-Arabic and minimal layouts.
18. Bridal Mehndi Design For Short Hands
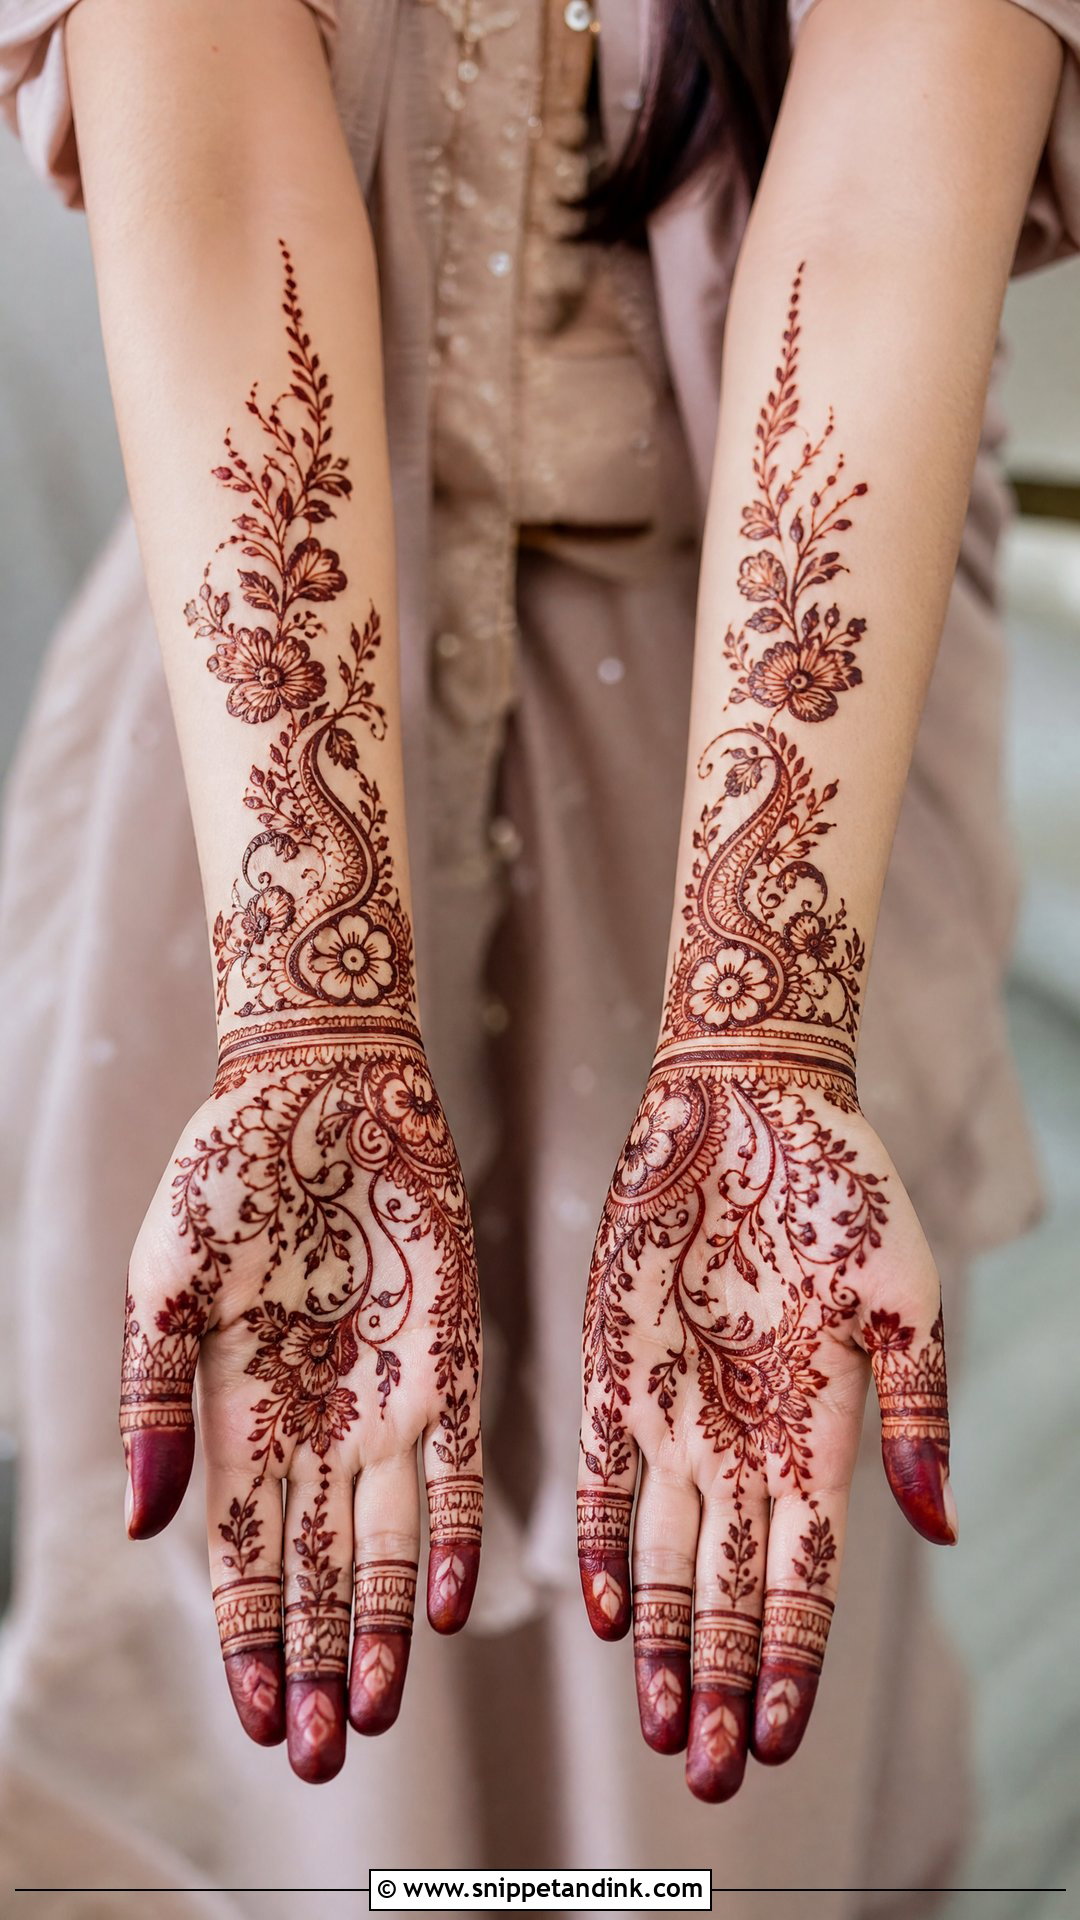
On smaller hands, my aim is to draw the eye upward. Diagonal Arabic trails, vertical vines, slim paisleys and a long wrist extension all lengthen the hand, while one huge round motif covering the palm makes it look smaller. I use medium-sized flowers, stretched mandalas, fine lines and some open space near the edges. Finger designs should move upward too, with neat bands or leafy tips. A flow from wrist to forearm adds length, and with that kind of placement a short hand looks balanced and fully bridal.
19. Bridal Mehndi Design For Long Hands
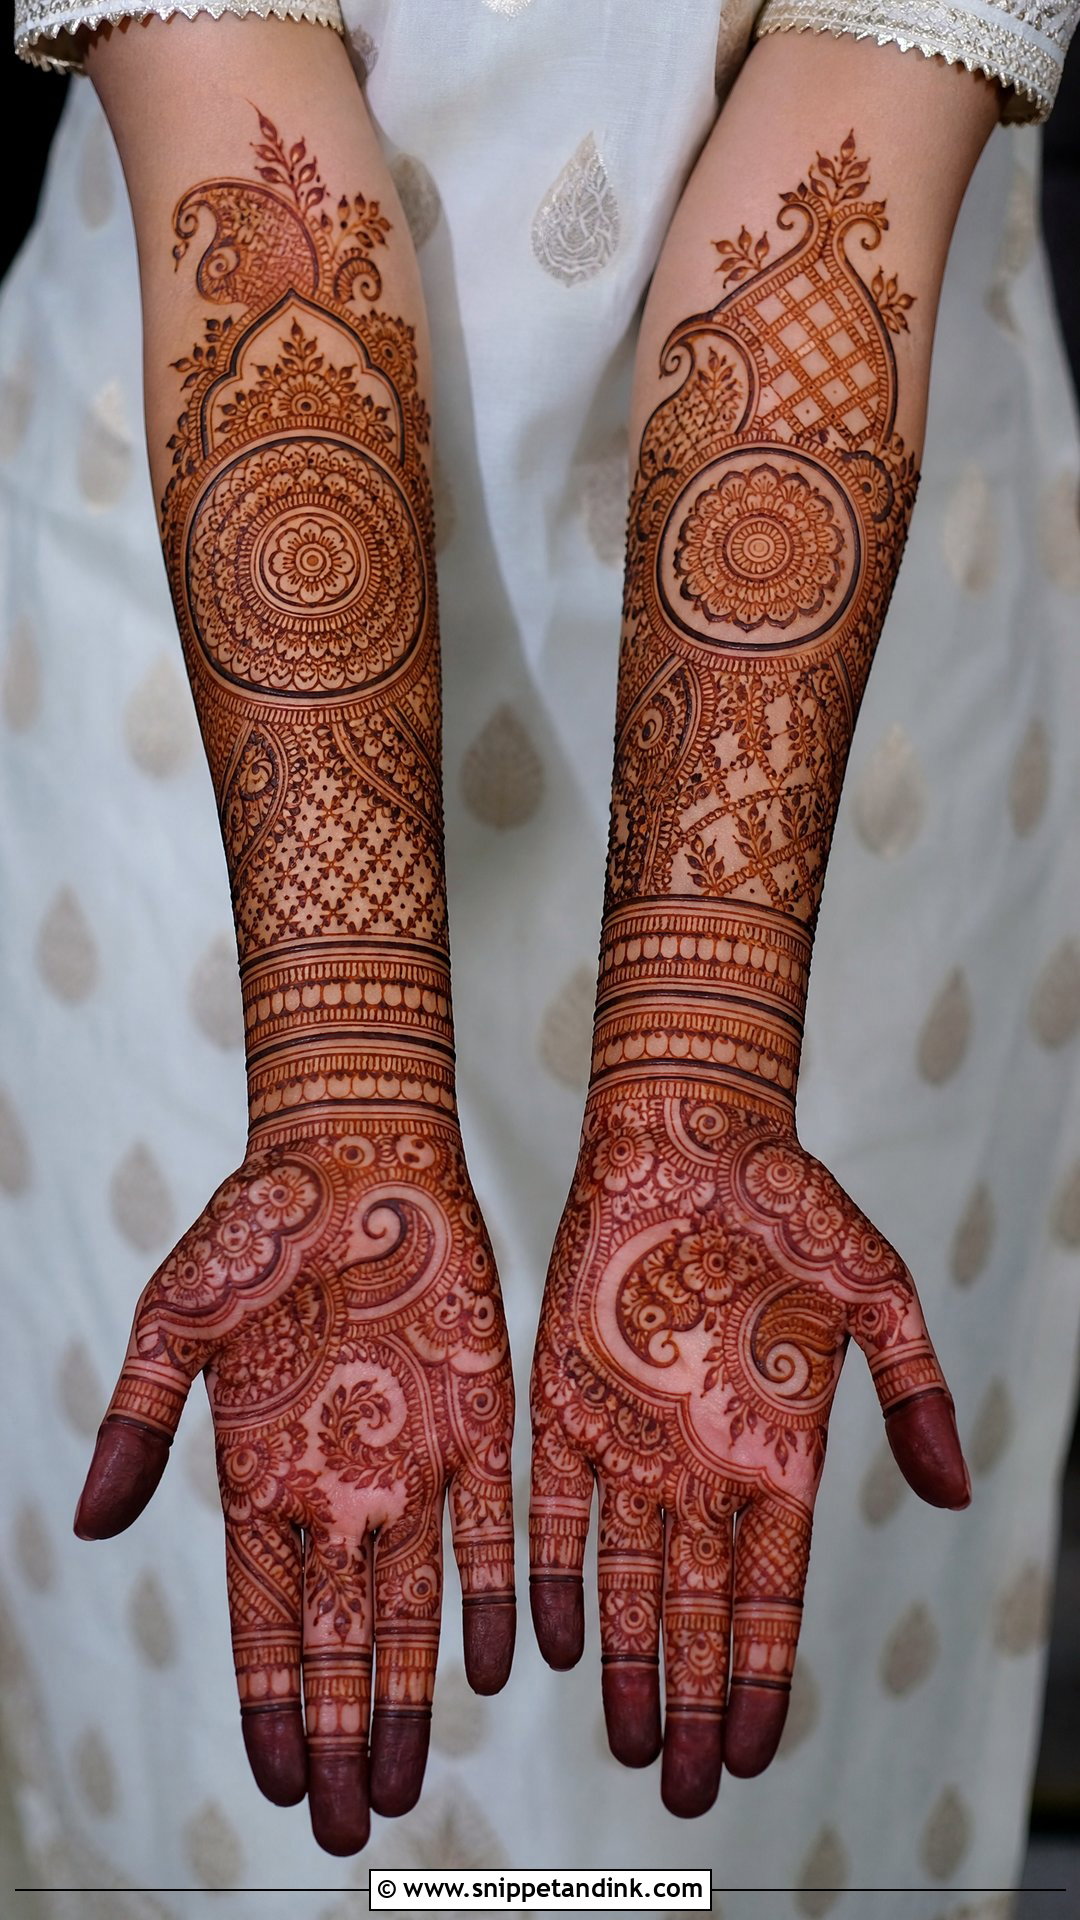
Long hands and fingers give me room for large mandalas, extended paisleys, full floral panels, jaali grids and layered wrist-to-forearm work. The thing to avoid is making a long hand look narrow, so I use wider motifs and horizontal bands to add balance. Fingers can take bold filled tips, ring patterns or stacked sections. Long hands also suit portraits and heavy Indian bridal layouts, because there’s space to add detail without crowding.
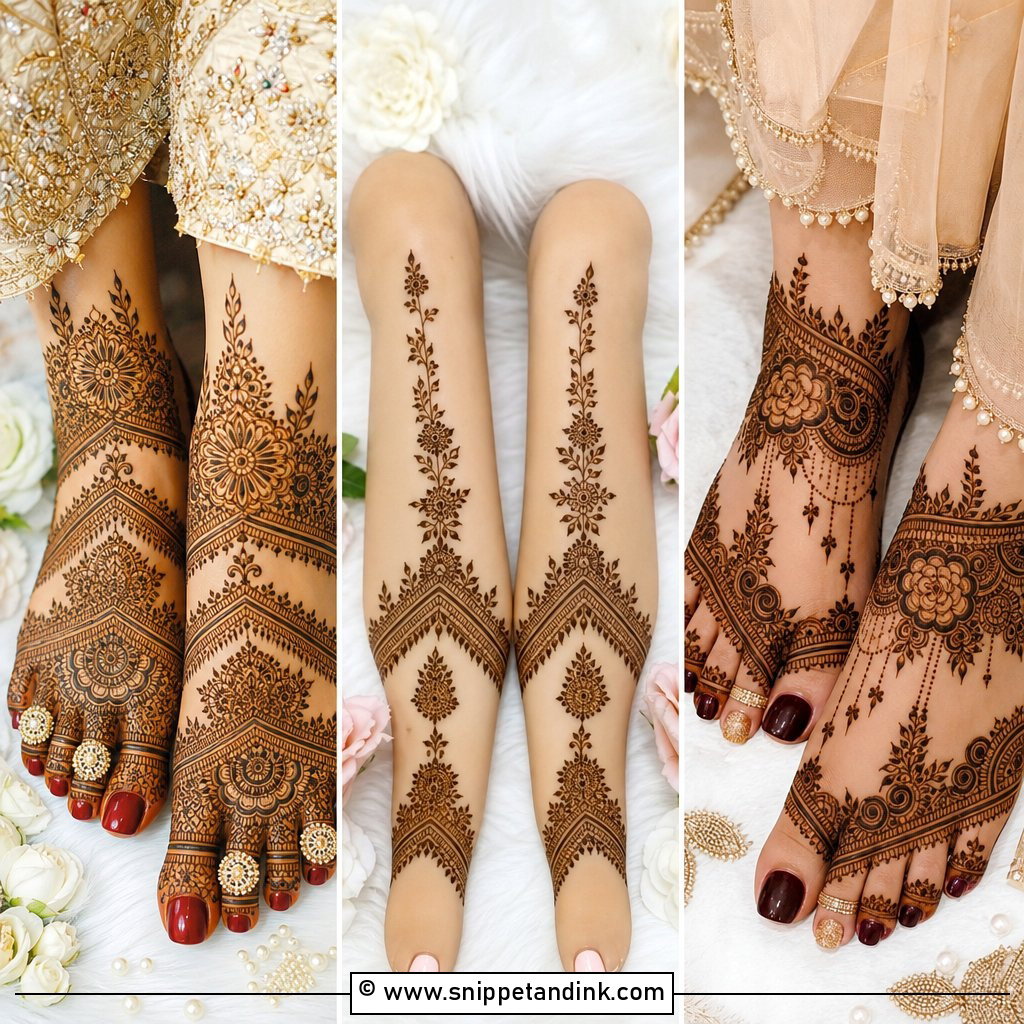
20. Bridal Mehndi Design For Feet
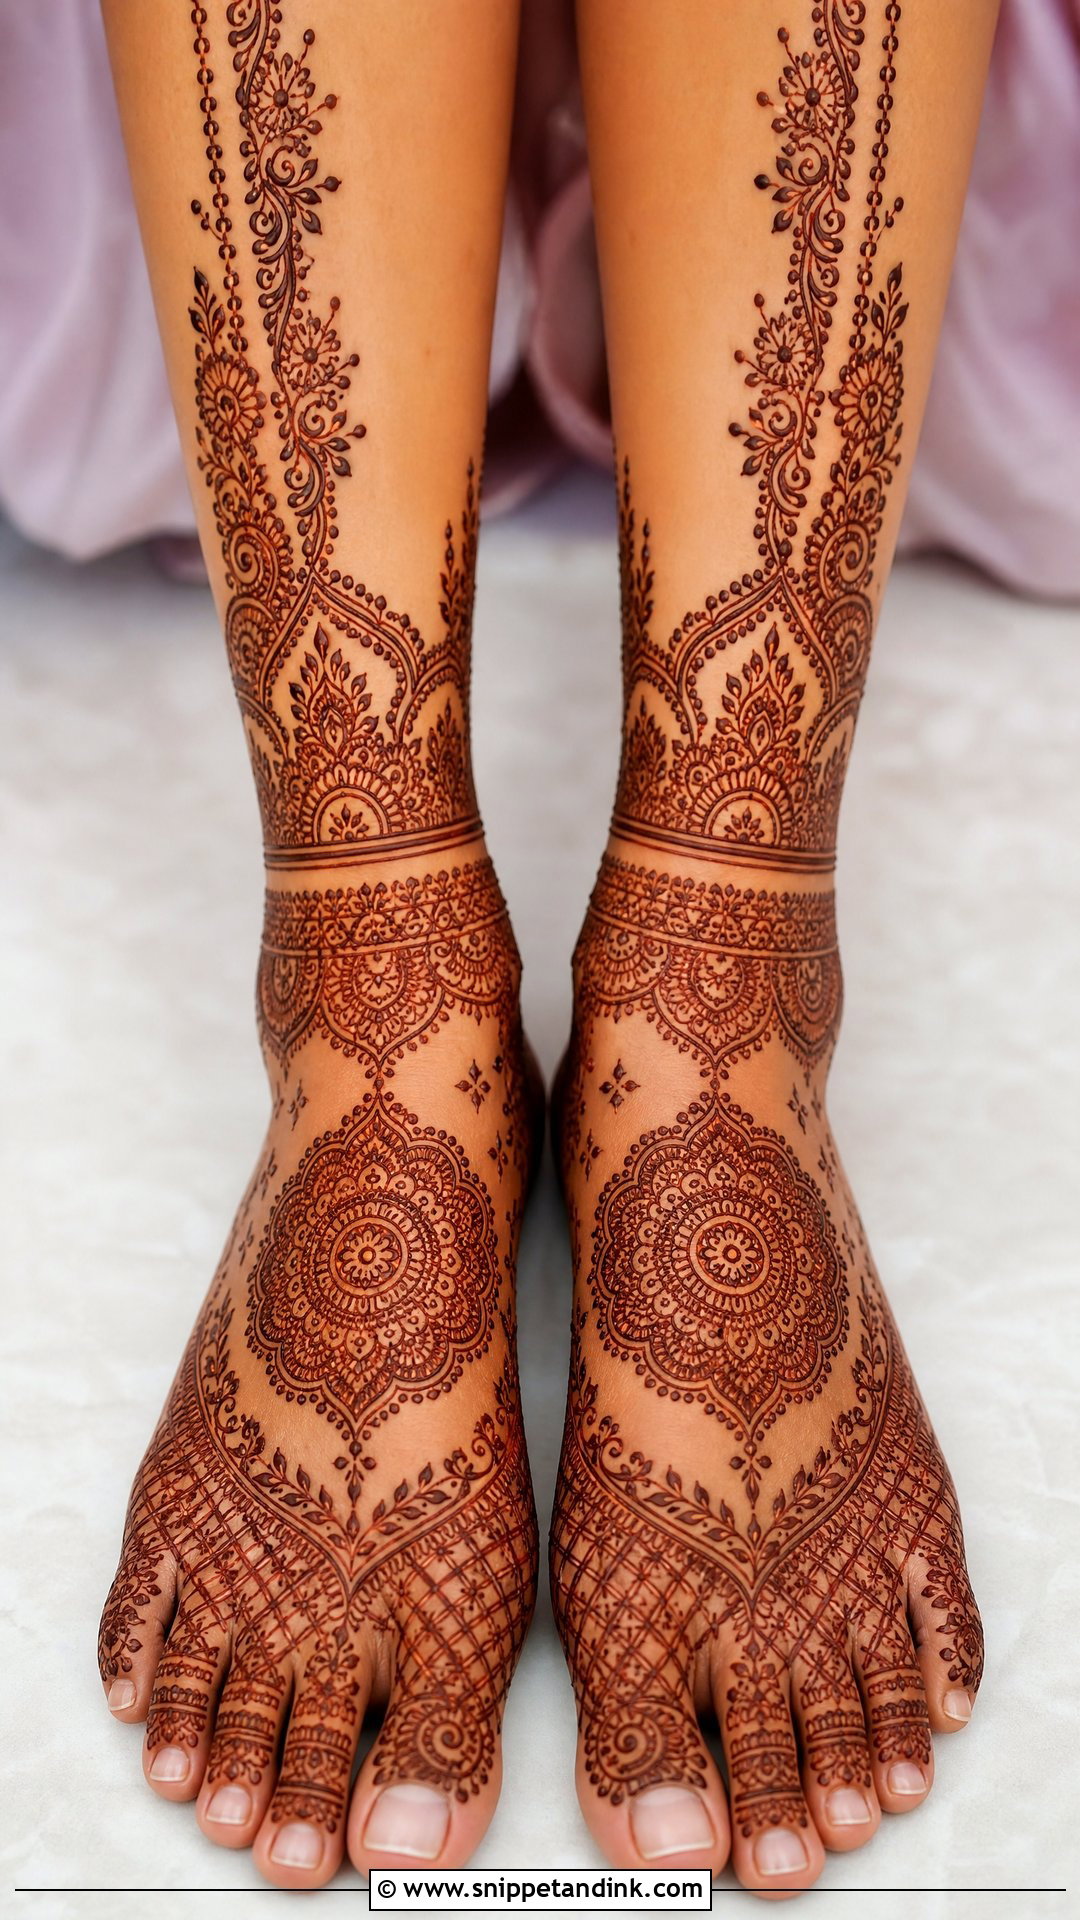
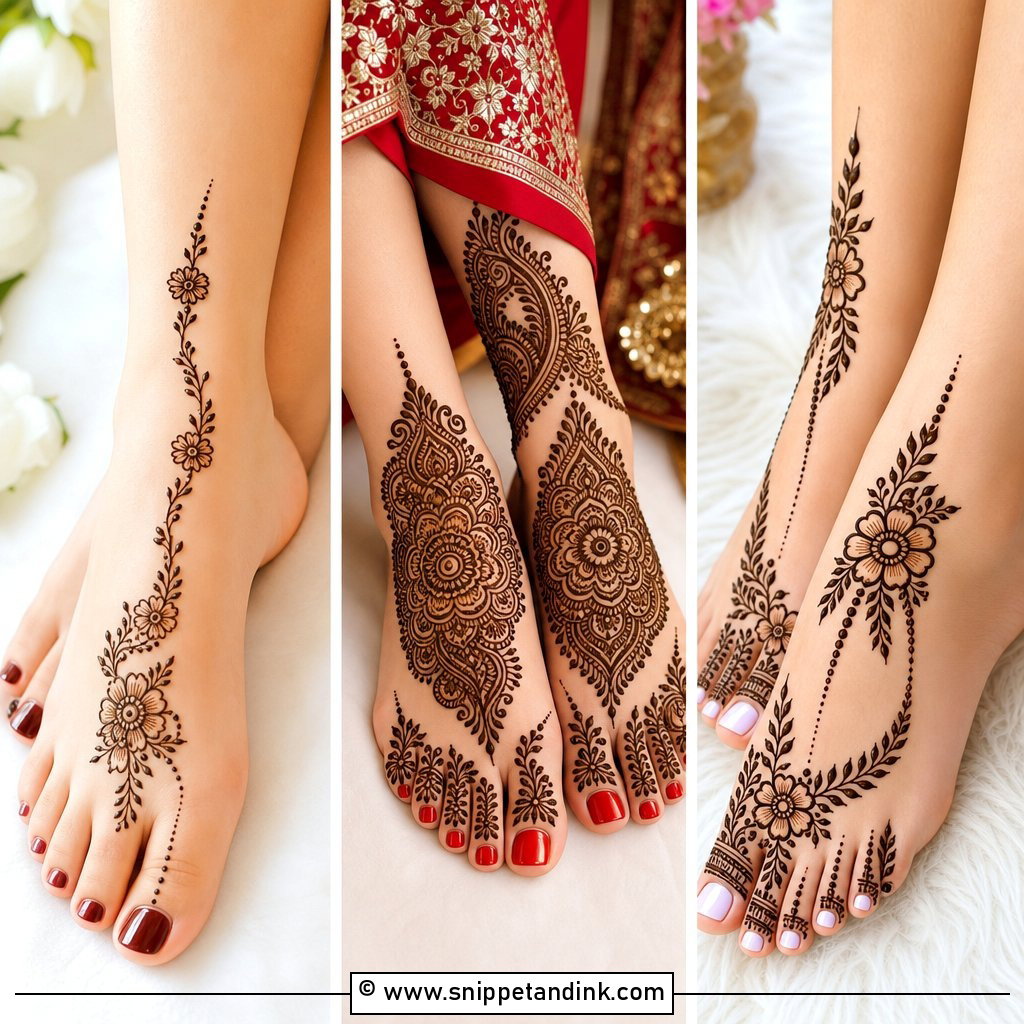
Feet complete the bridal look, especially with anklets and open sandals. They can be simple around the toes or covered from toes to ankle, with mandalas on the top of the foot, paisley ankle bands, vines, net patterns and toe details; heavier designs extend above the ankle like an anklet. Feet stain very dark, but they also take longest to dry and you can’t walk until they do, so I usually do them last and ask brides to plan for sitting with their feet up. Both feet should mirror each other for the photos.
What the Paste Needs After I Put Down the Cone
How dark your stain gets depends as much on the next twelve hours as on the paste itself.
- Keep the paste on as long as you comfortably can, ideally six hours or overnight. Longer contact gives a deeper stain.
- When it’s dry to the touch, I dab on a lemon and sugar mix to help it stick. Don’t overdo it; a soaked design can smudge.
- Keep your hands warm. Heat helps the dye move into the skin, while cold air slows it down.
- Scrape the dried paste off with a blunt edge or your fingers. Don’t wash it off.
- Avoid water on the design for as long as possible after removal, ideally until the next day.
Over the following days, the stain lasts longest if you go easy on scrubbing, chlorine and hand sanitiser. Most bridal stains fade gradually over one to three weeks as the skin renews, starting at the palms, which are used the most.
Natural Henna Only, and How to Tell
Real henna paste is green or brown, smells earthy or of essential oils, and never stains black. A cone that promises jet-black colour within an hour is very likely so-called black henna containing PPD, a hair-dye chemical that can cause blistering and lasting skin reactions. Ask your artist what’s in her paste. If you have sensitive skin, a small patch on the inner arm a few days ahead is a sensible precaution, even with natural henna.
A Design Should Still Read From Across the Room
Heavy Indian and Rajasthani work feels grand and traditional; Arabic, Gulf and minimal layouts look cleaner and more modern; Indo-Arabic sits between them. Names, portraits, lotus, peacocks and mandalas add meaning. Whatever you choose, the test I use is distance: step back a few metres from your hands, and the main shapes should still be clear. Book an artist whose stained results you’ve seen, share your references early, and protect the drying and darkening time. A well-placed design with a deep, even stain will always look better than a crowded one.
You'll Like These Ideas:


Leave a Reply