
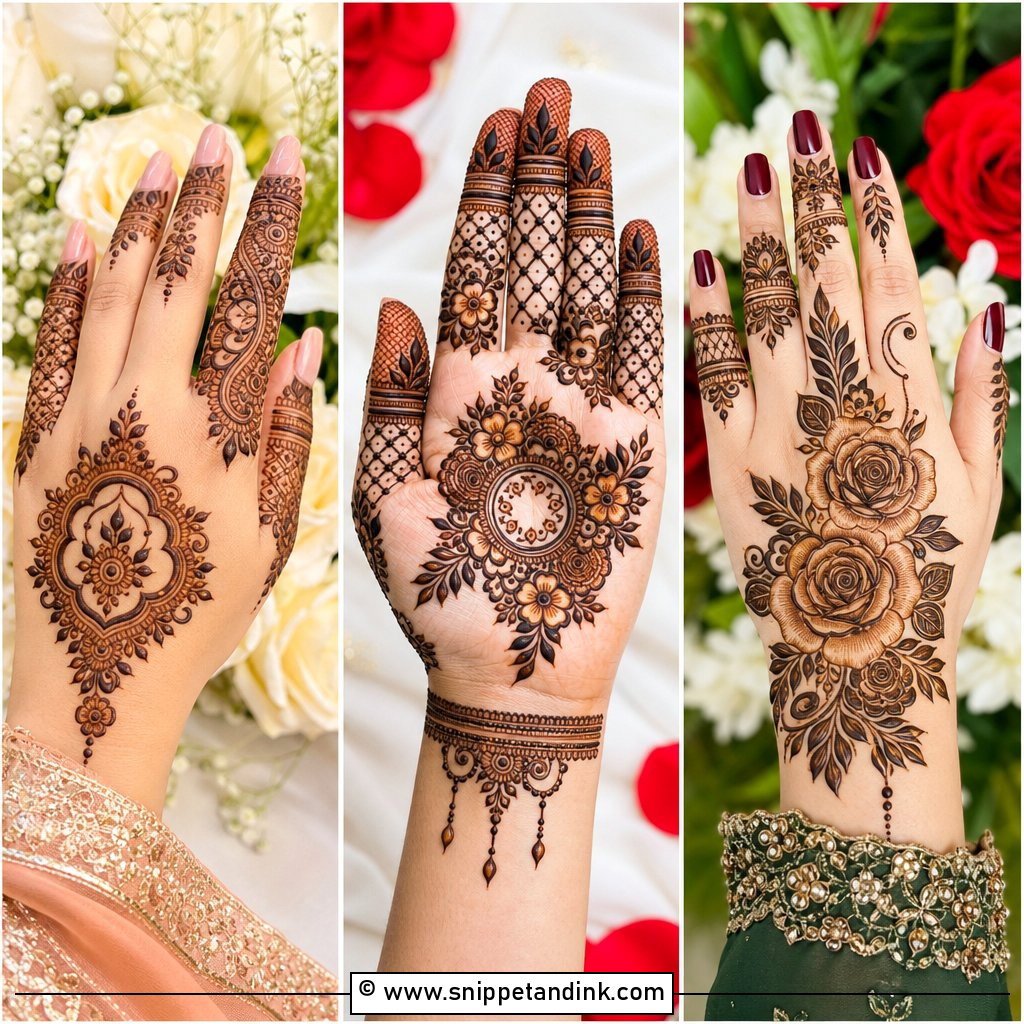
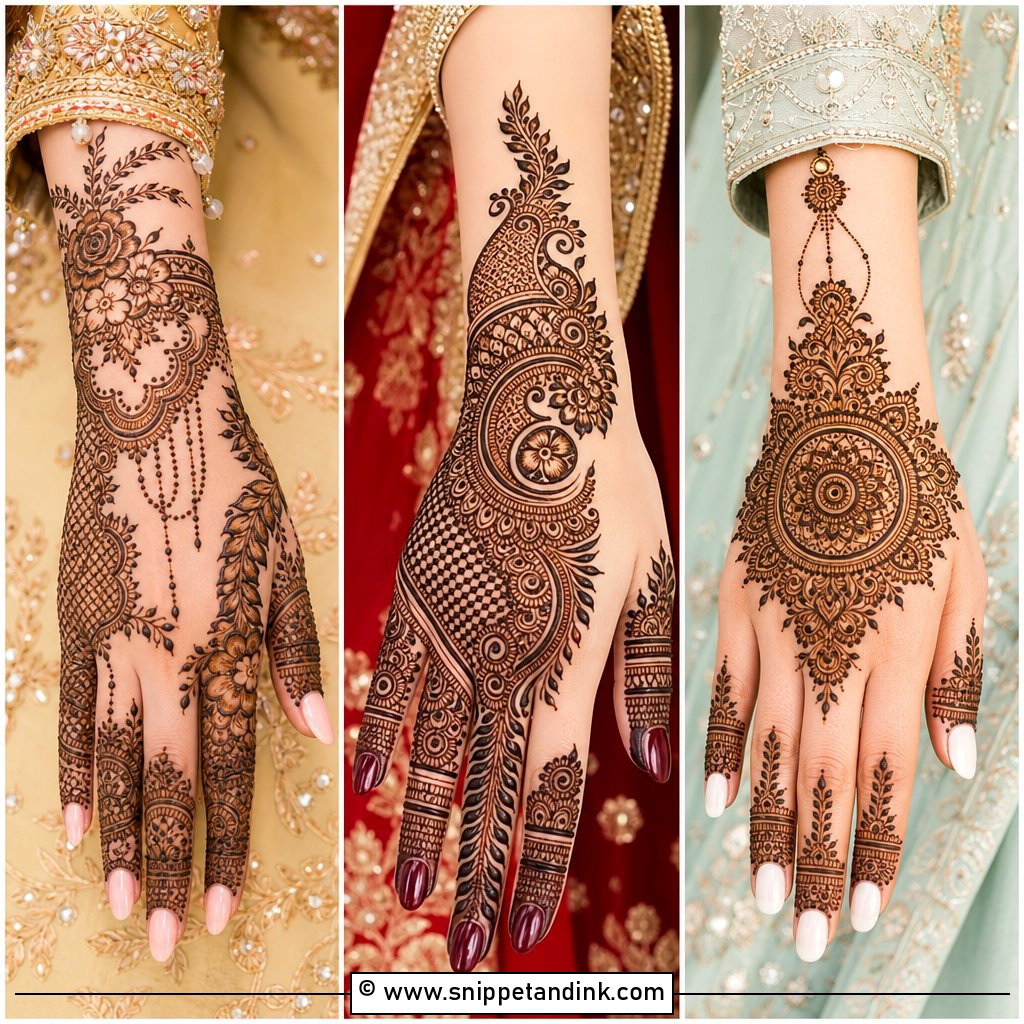
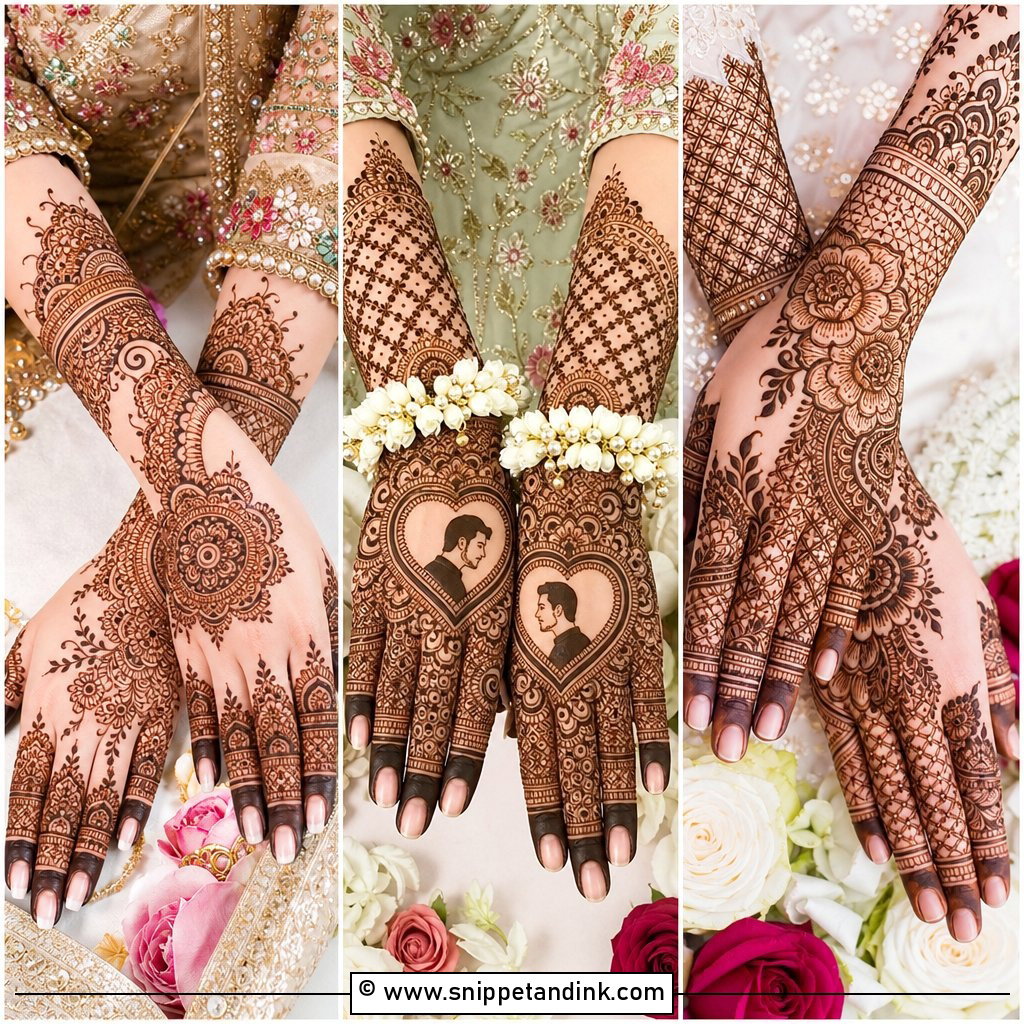
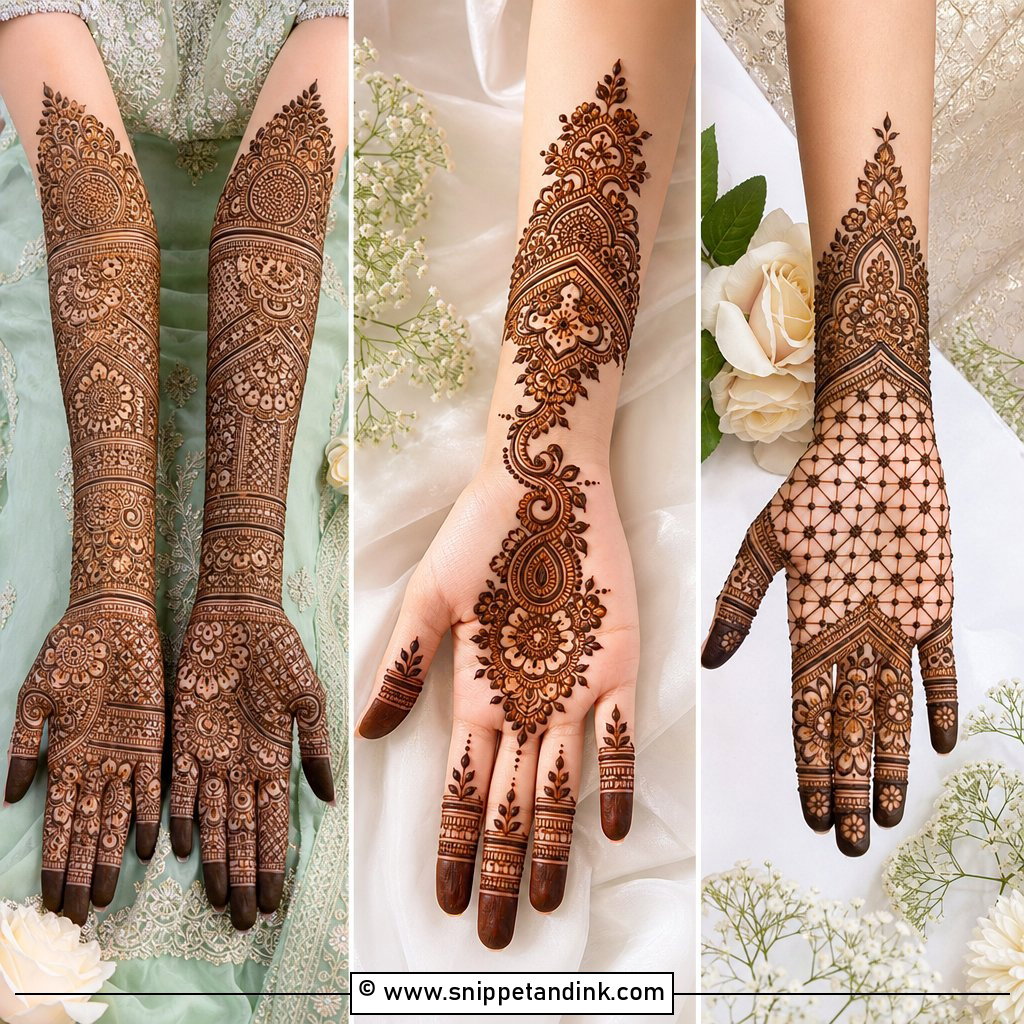
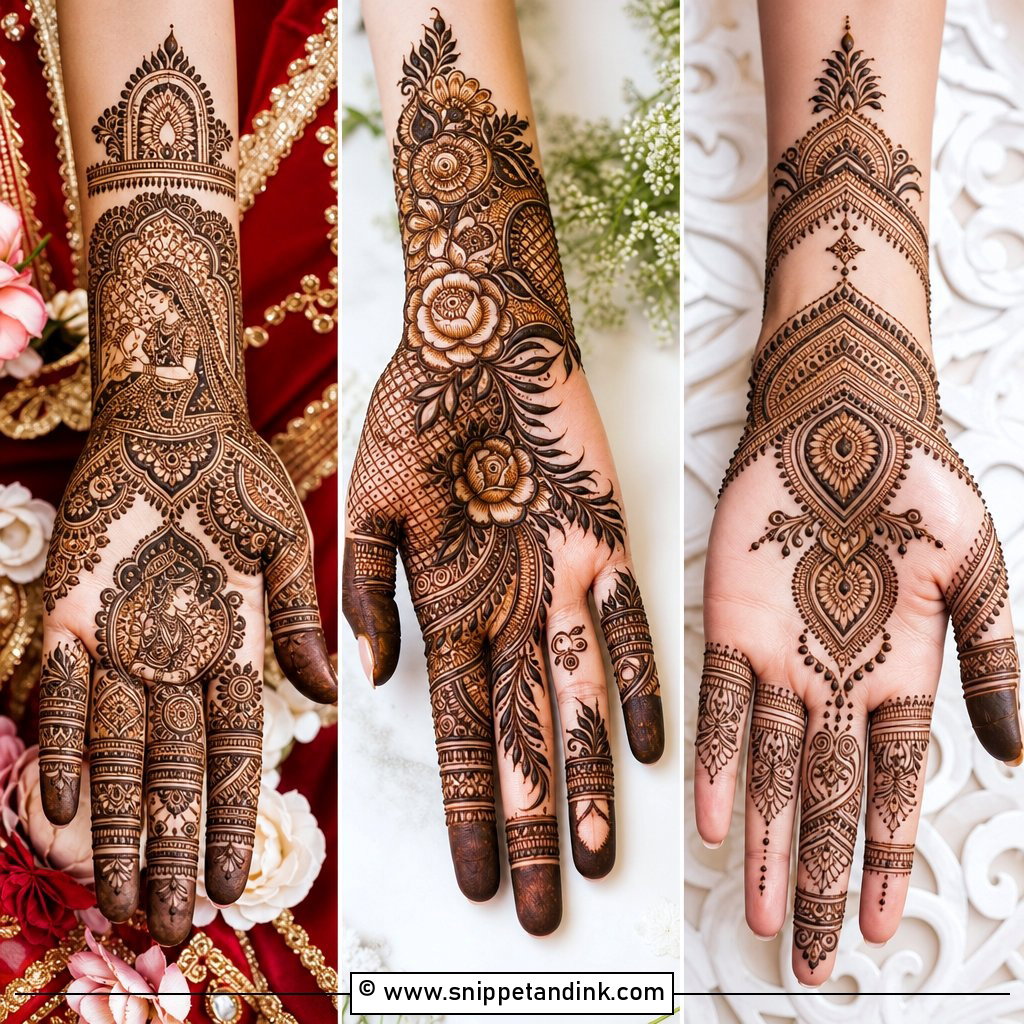
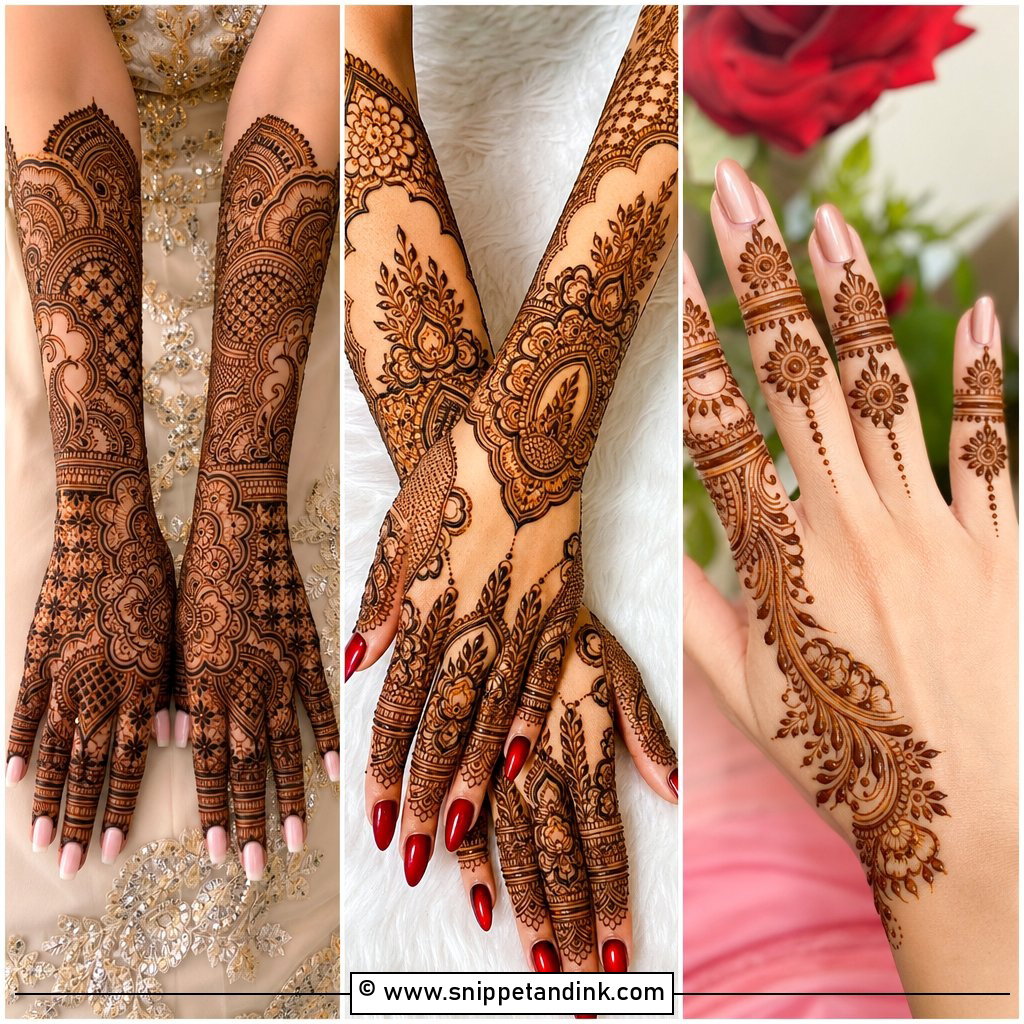
A centre design puts one strong motif in the middle of the palm or the back of the hand and lets everything else support it. I reach for this layout constantly: for Eid, Karwa Chauth and Diwali, for engagement functions, for bridesmaids who need to be done in twenty minutes, and for bridal hands that need a clear focal point inside a fuller design. The centre can stay small with dots and finger detailing or carry a mandala, paisley, jaali or bracelet band. Below are twenty versions I apply often, with notes on how each one is drawn and who it really suits.
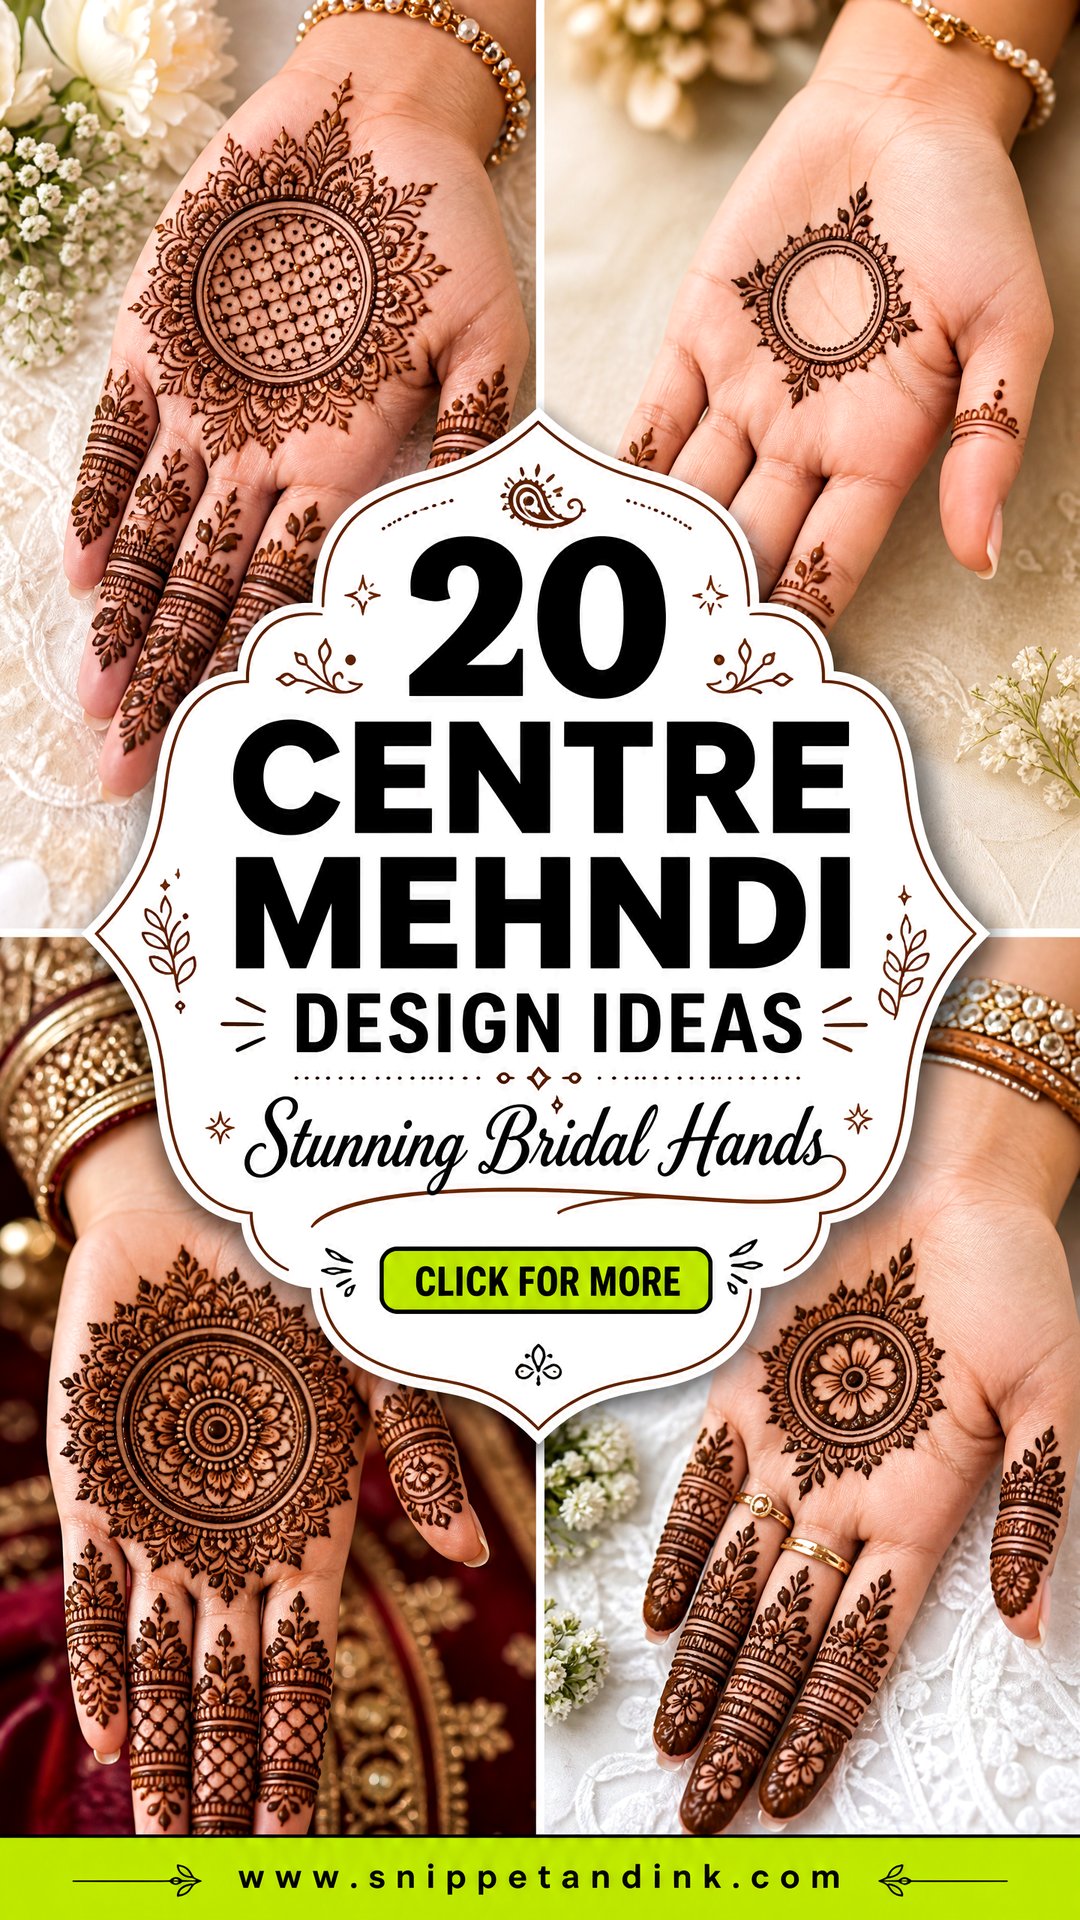
Where the Centre of Your Palm Really Sits
The middle of a palm isn’t where most people think it is. When I map a centre design, I ask the client to relax her hand and cup it slightly, because that’s how it will sit in nearly every photo. The visual centre usually lands a little below the point where the main palm lines cross, closer to the wrist than you’d expect.
- I mark the centre with a single dot first and check it with the hand flat and cupped before drawing anything else.
- Deep creases split a motif in two. I either shrink the design to sit between them or plan the pattern so a crease falls in a gap, never through a petal.
- On a narrow palm, round motifs look better slightly smaller with longer finger work. On a wide palm, a larger mandala or a paisley that follows the curve fills the space naturally.
- If you’ll show the backs of your hands more than the palms, as many brides do in portraits, put the stronger motif on the back hand and keep the palm simpler.
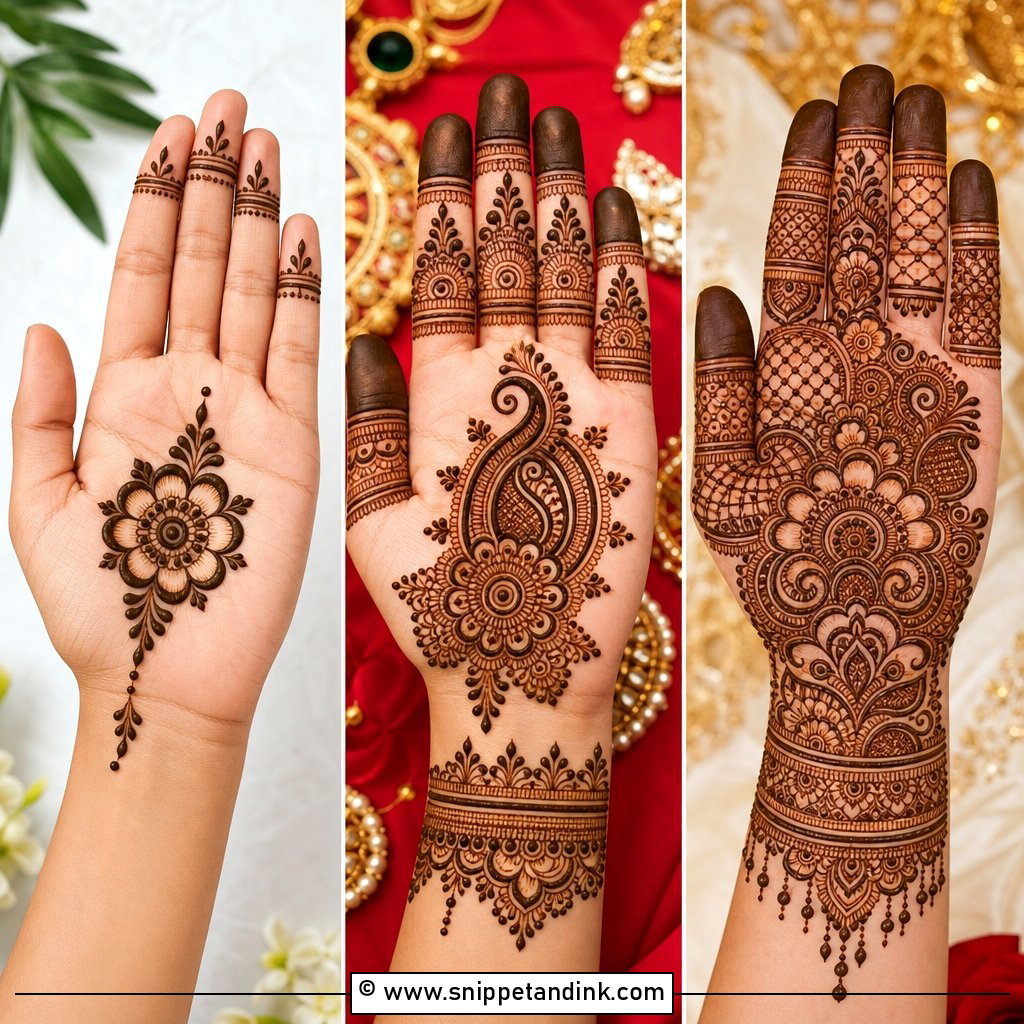
1. Simple Mandala Centre Mehndi Design
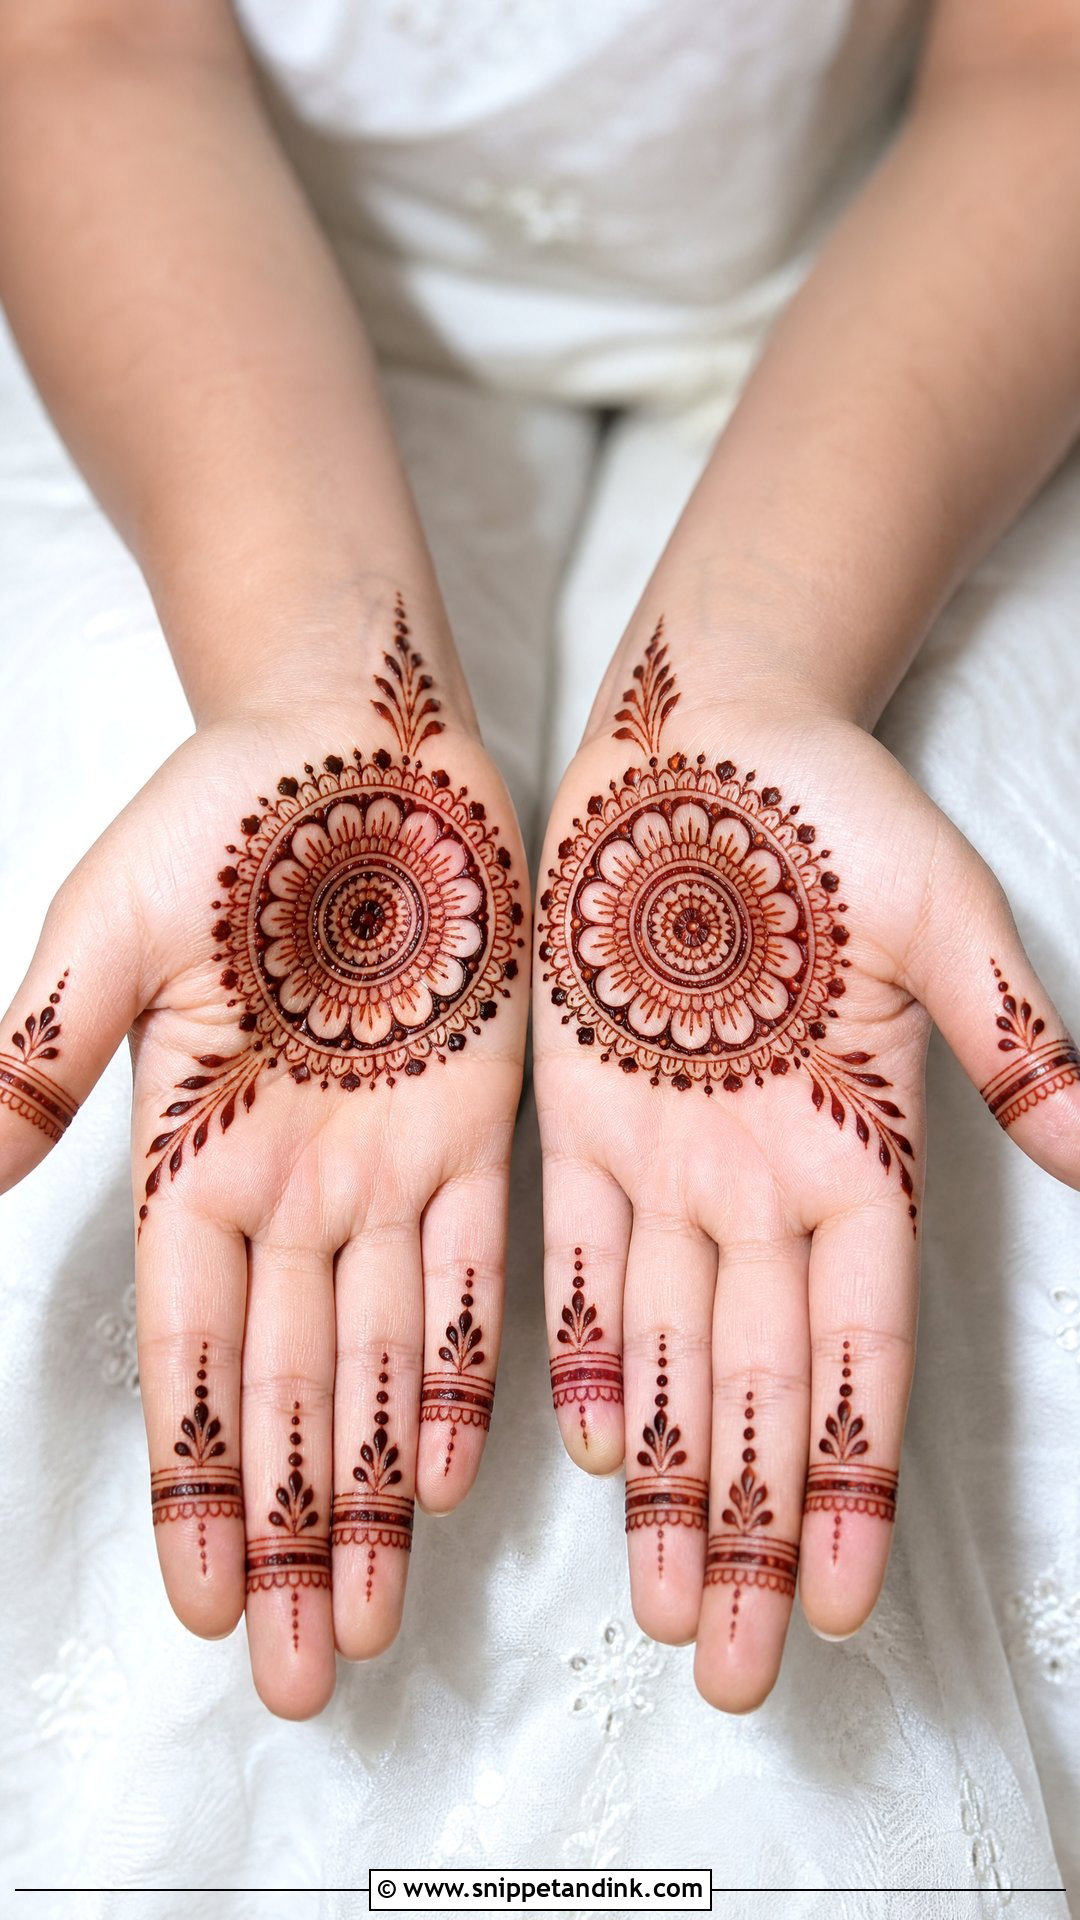
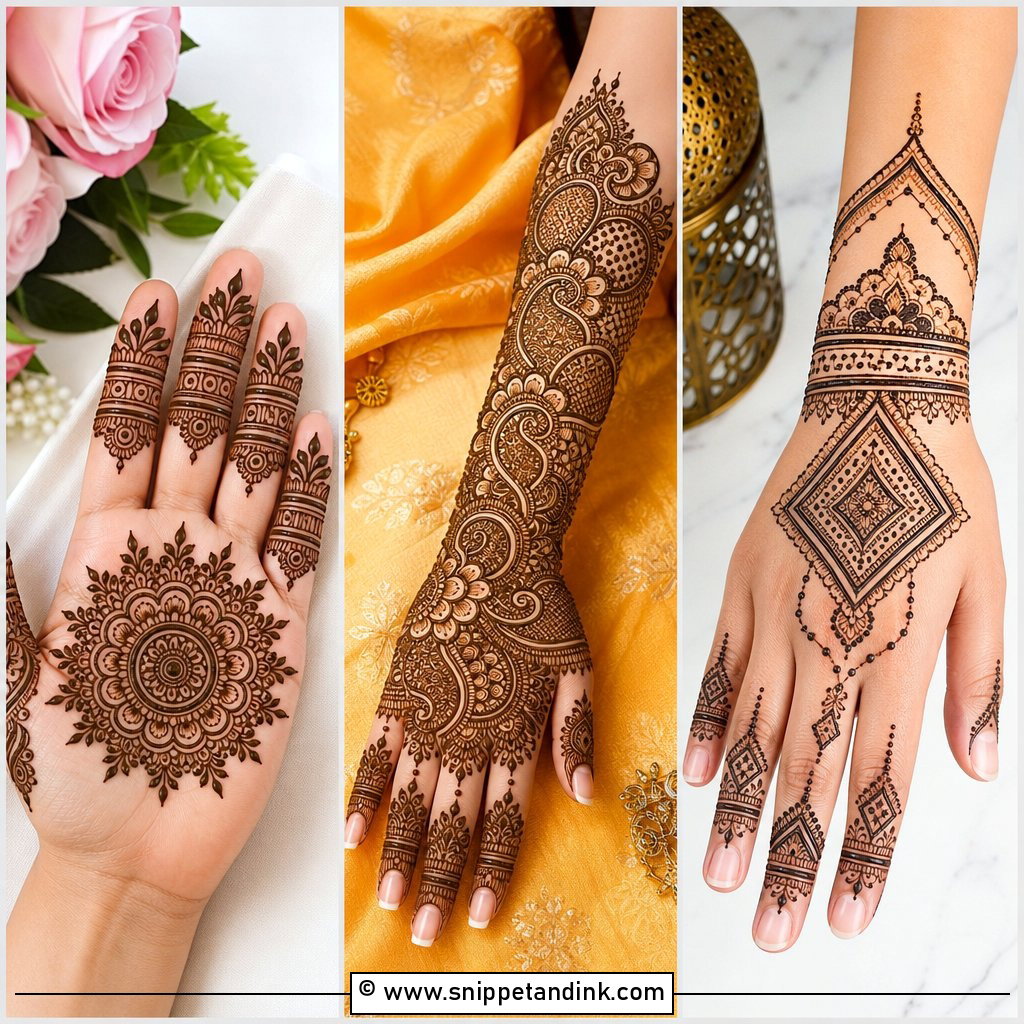
The simple mandala is where I start most first-time clients. I pipe a small circle in the middle of the palm, then grow it outward ring by ring: petals, dots, a thin line, small leaves. Working from the middle out keeps the circle round, which matters because a mandala that drifts toward the thumb looks lopsided the moment you cup your hand. Keep the fingers light with matching bands or shaded tips. A little bare skin around the mandala makes its edge look sharper once it stains.
2. Tikki Centre Mehndi Design
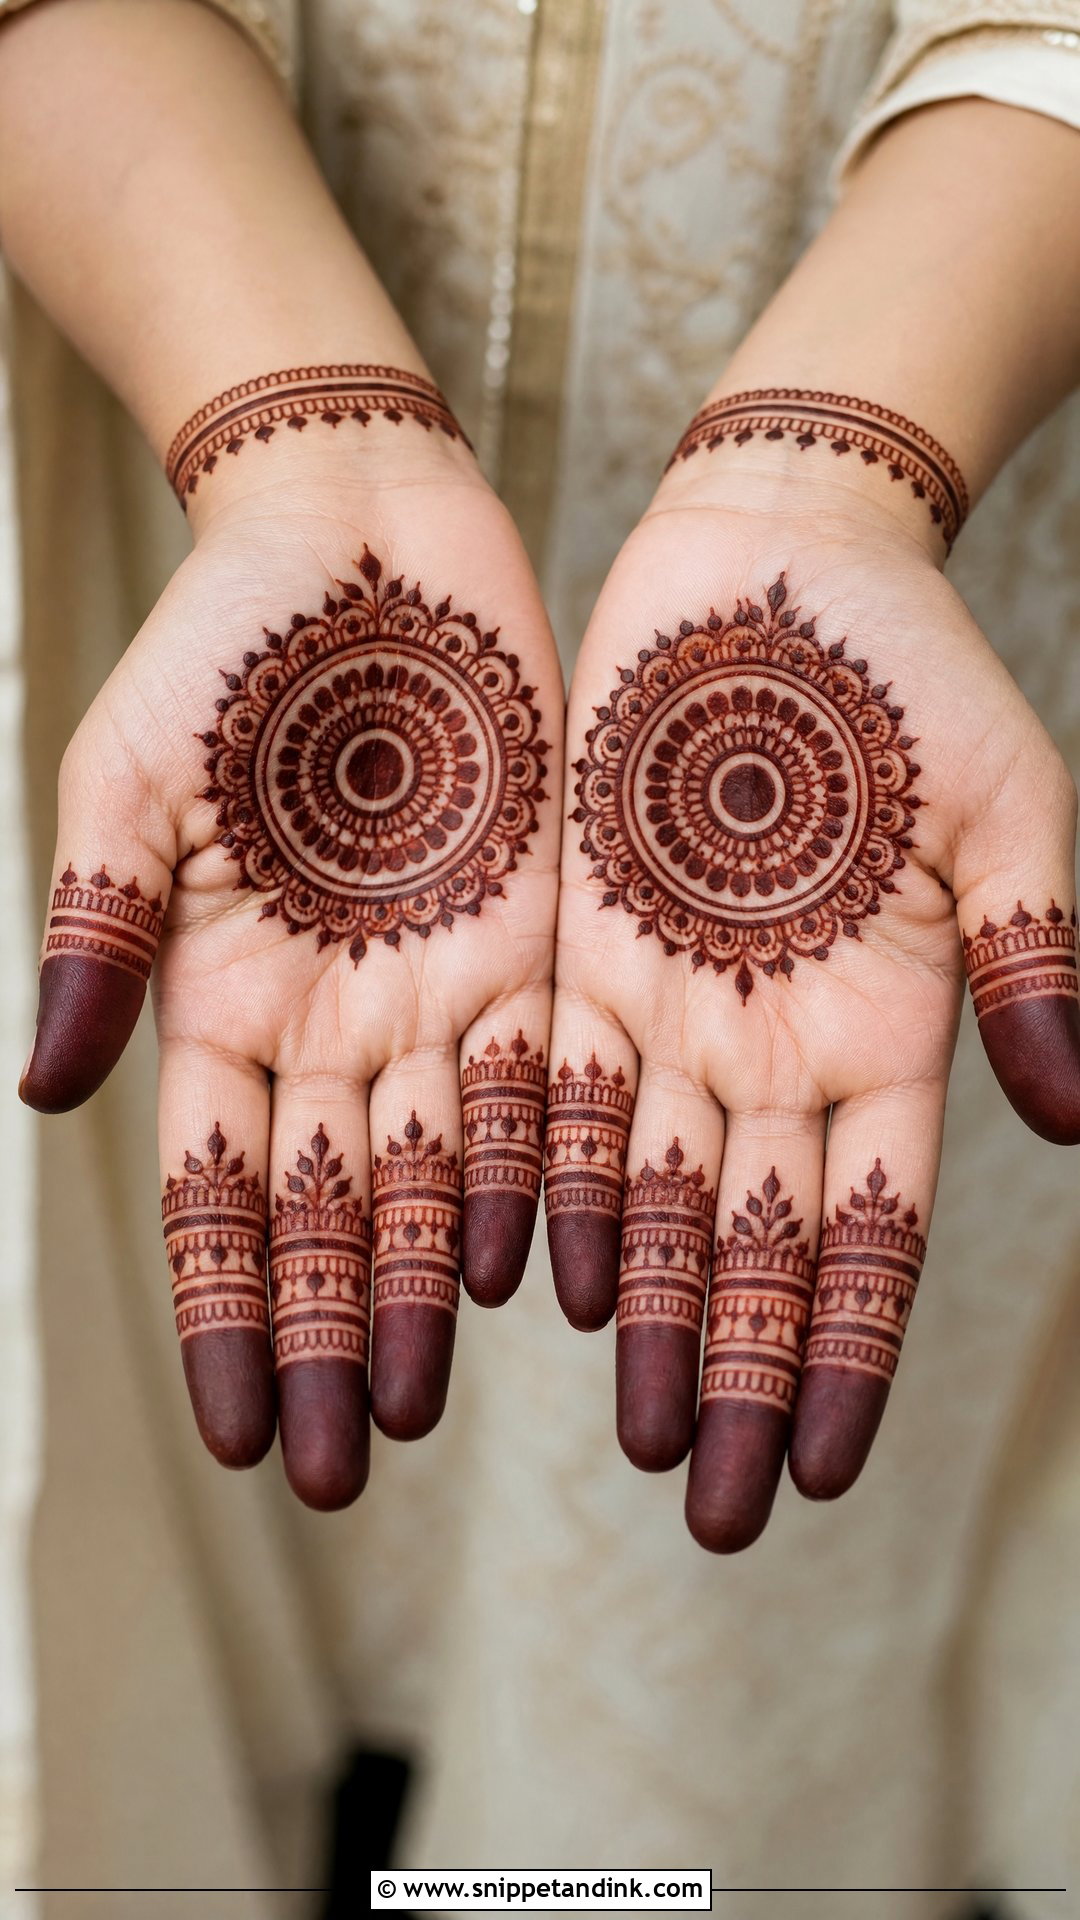
A tikki is a bold filled circle in the palm, ringed with dots, scallops, petals or thin borders. It’s quick, and that solid fill is also the part that stains darkest, because thick paste sits on the skin longer before it dries. I see it most at Eid, weddings and family functions where a clean palm feels complete on its own. Filled fingertips keep it classic; a pair of slim wrist lines makes it look newer. Even a tikki the size of a coin dresses the hand if it’s centred properly.
3. Floral Centre Mehndi Design
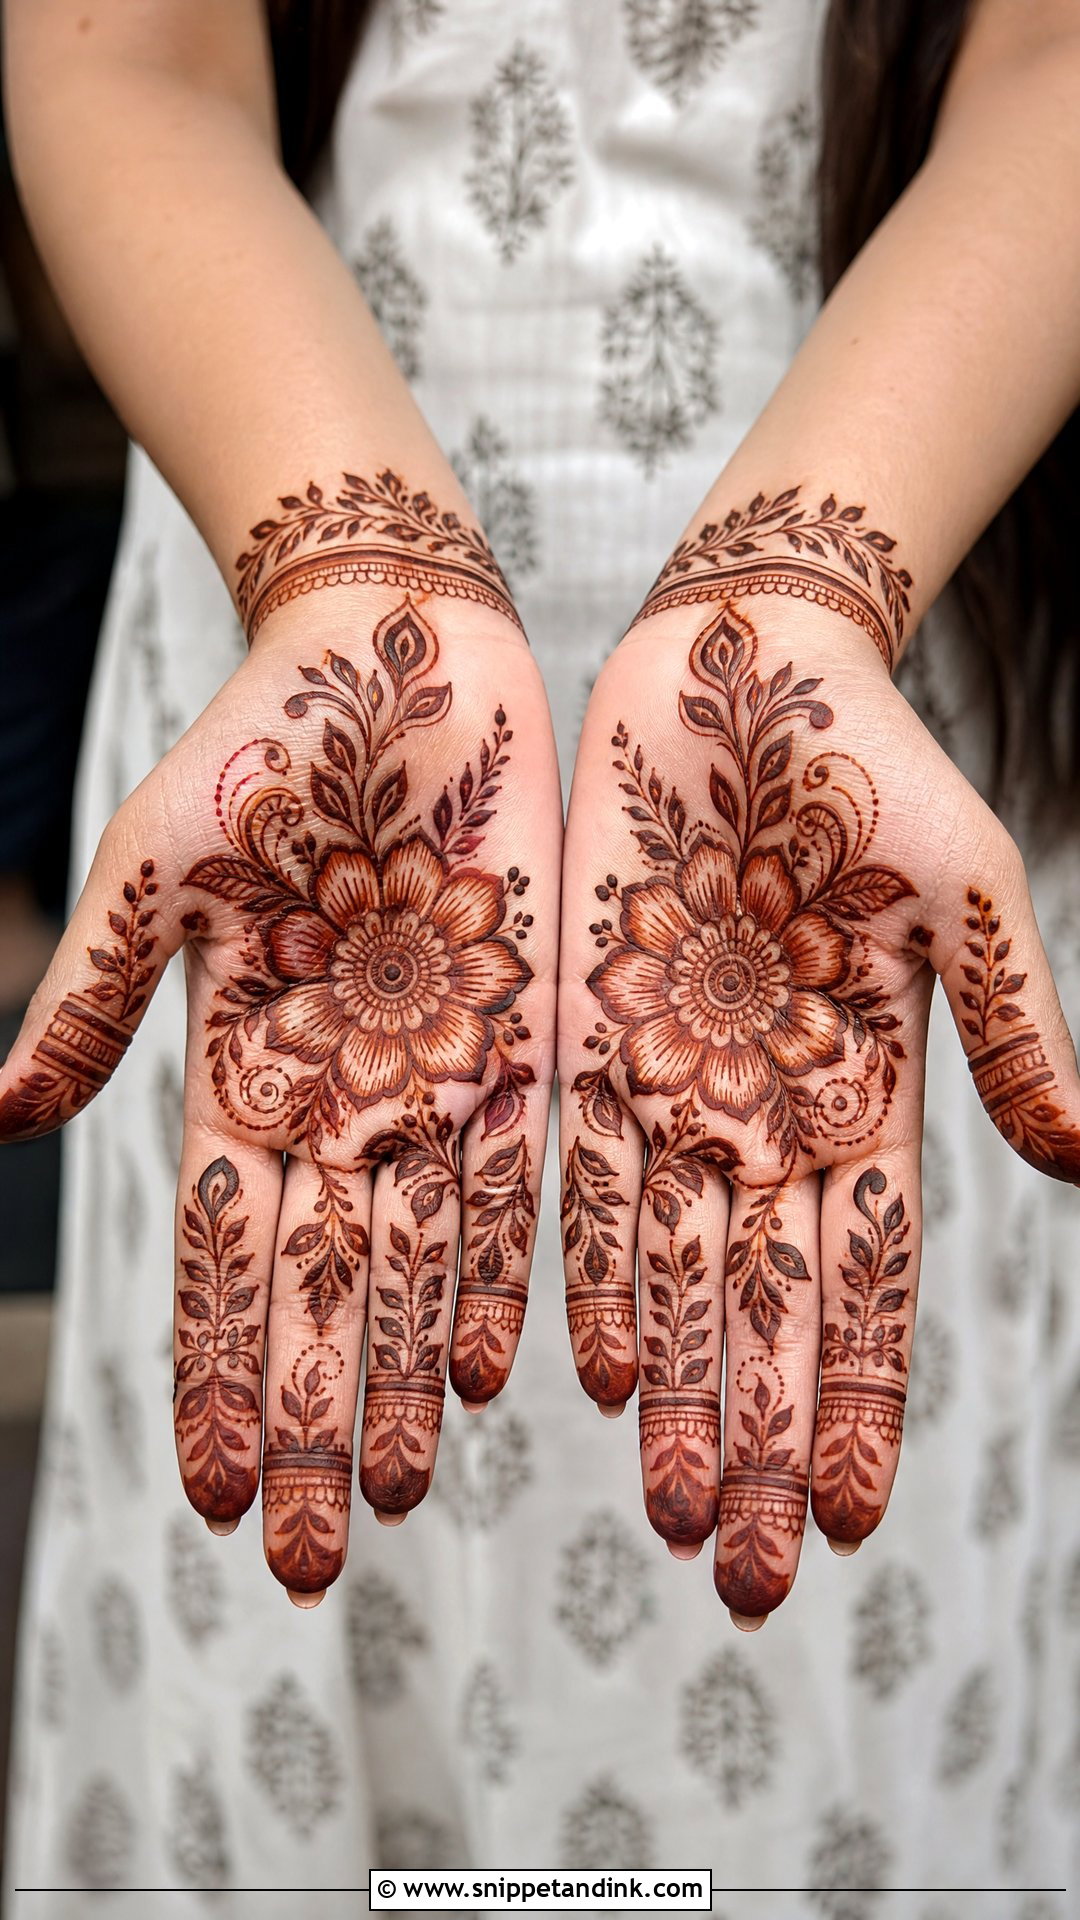
A floral centre places one large rose, lotus or layered bloom in the palm, with leaves, dots, vines and finger trails around it. The size of the flower is the decision I make first. On a small hand or a child’s hand, I keep the bloom to about half the palm width; on adults it can spread almost edge to edge. For a modern effect, I outline the flower in a thicker line and keep every filler around it fine. That contrast is what makes the bloom read from a distance.
4. Arabic Centre Mehndi Design
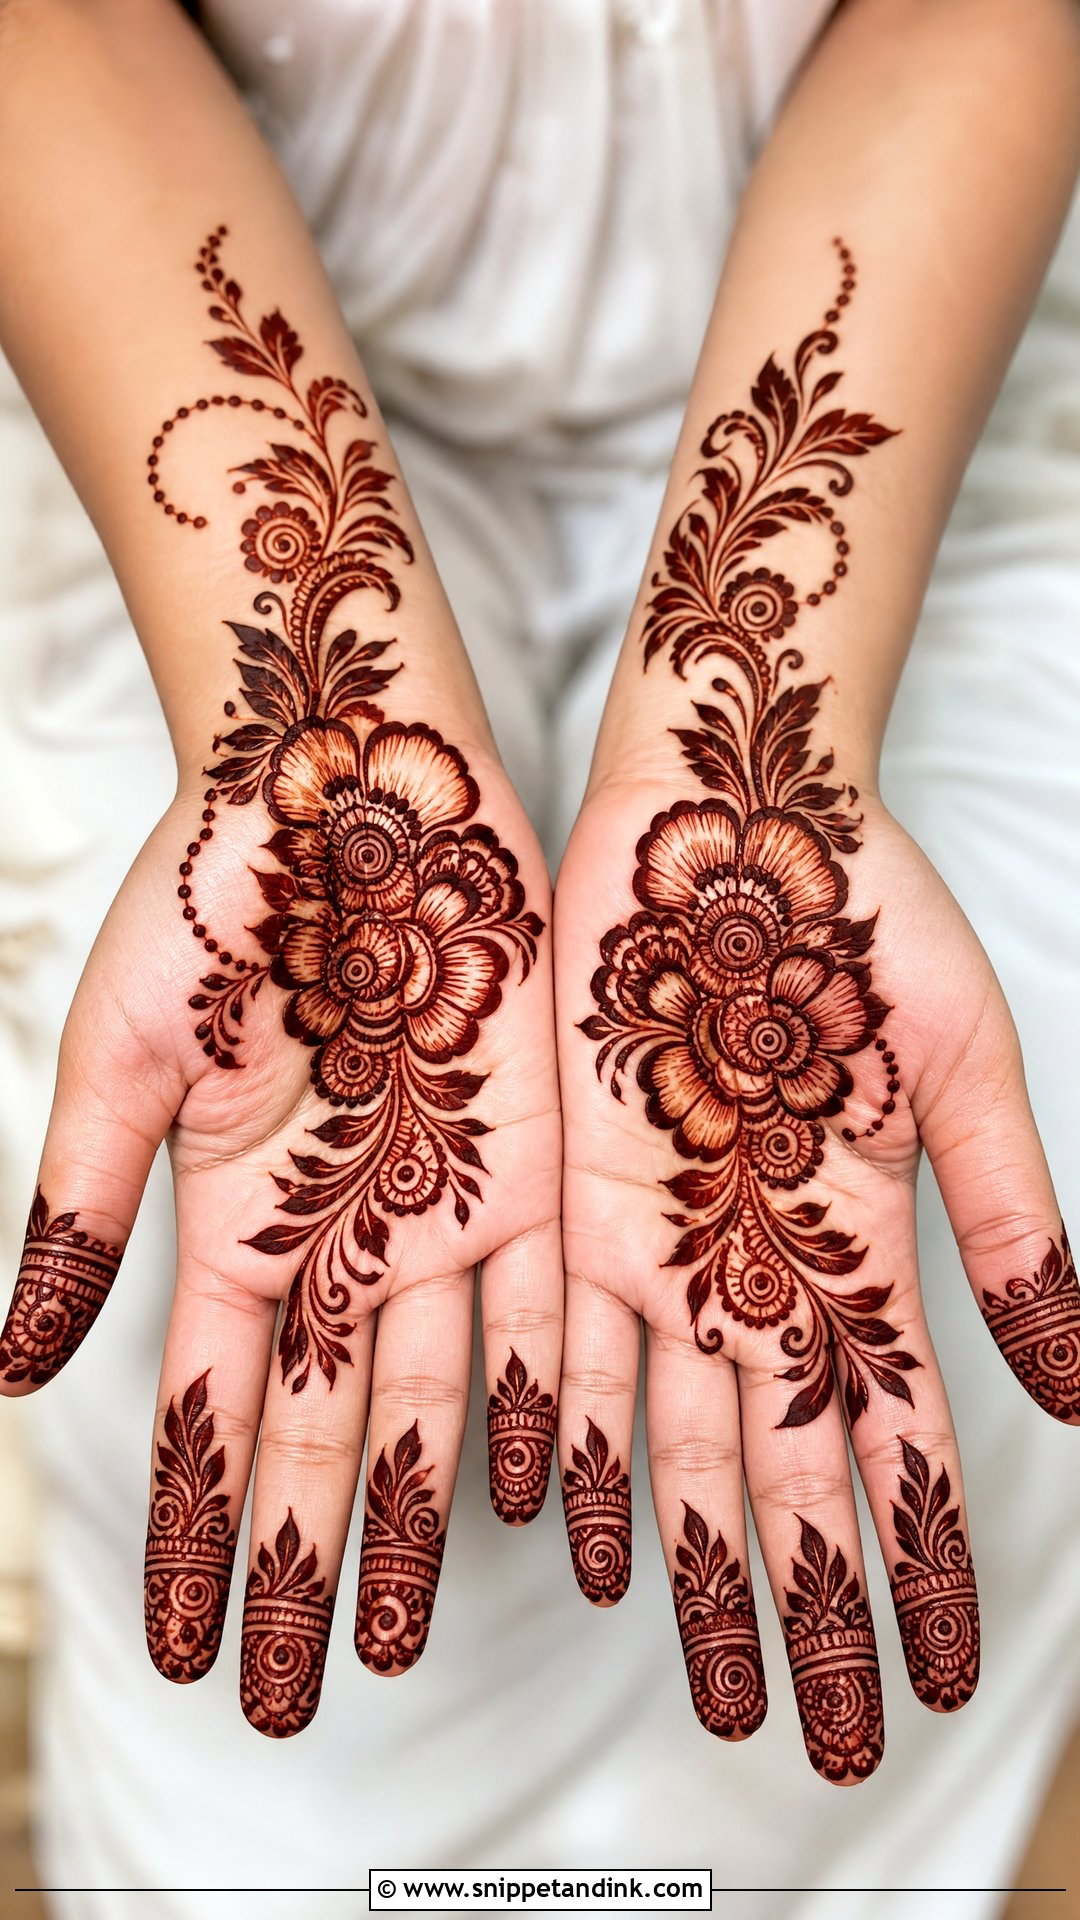
Arabic centre work uses bold lines and open skin: a strong floral or paisley motif sits mid-palm and sweeps out in leaves toward the fingers or wrist. Because so much of the hand stays bare, the design goes on fast, and guests at a wedding can be done between other clients. I add shading inside petals with a lighter stroke and dotted curves for depth. It isn’t the right choice if you want coverage; the gaps are the point, and they show clearly in photos.
5. Indo-Arabic Centre Mehndi Design
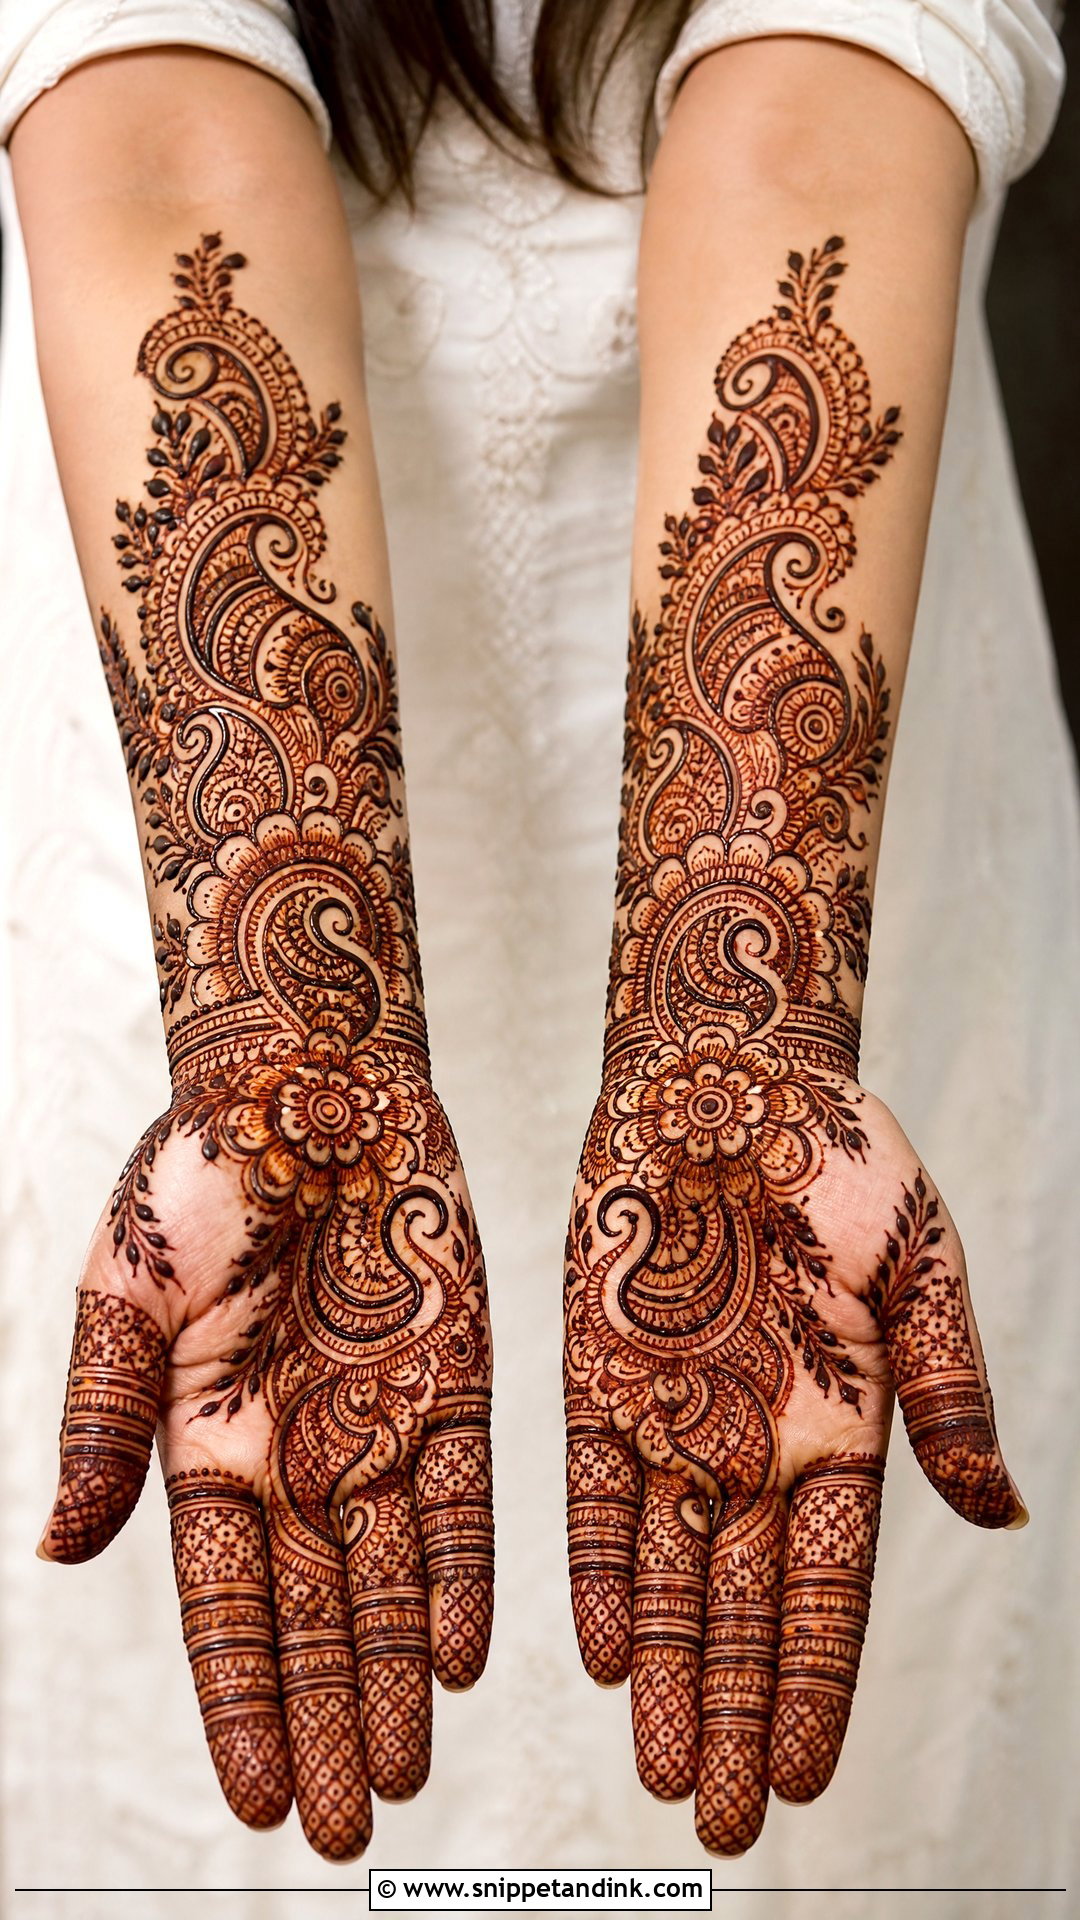
An Indo-Arabic centre mehndi design mixes the bold flow of Arabic henna with the fine fillers of Indian work. The centre can be a flower, paisley or mandala, then I add small fillers, leafy vines, dots and curved borders around it, leaving one side of the palm a little more open so the diagonal flow survives. The fingers get the detail: bands, petals or mesh. I suggest this for sisters of the bride and bridesmaids, who want more than a guest design without competing with the bride’s hands.
6. Paisley Centre Mehndi Design
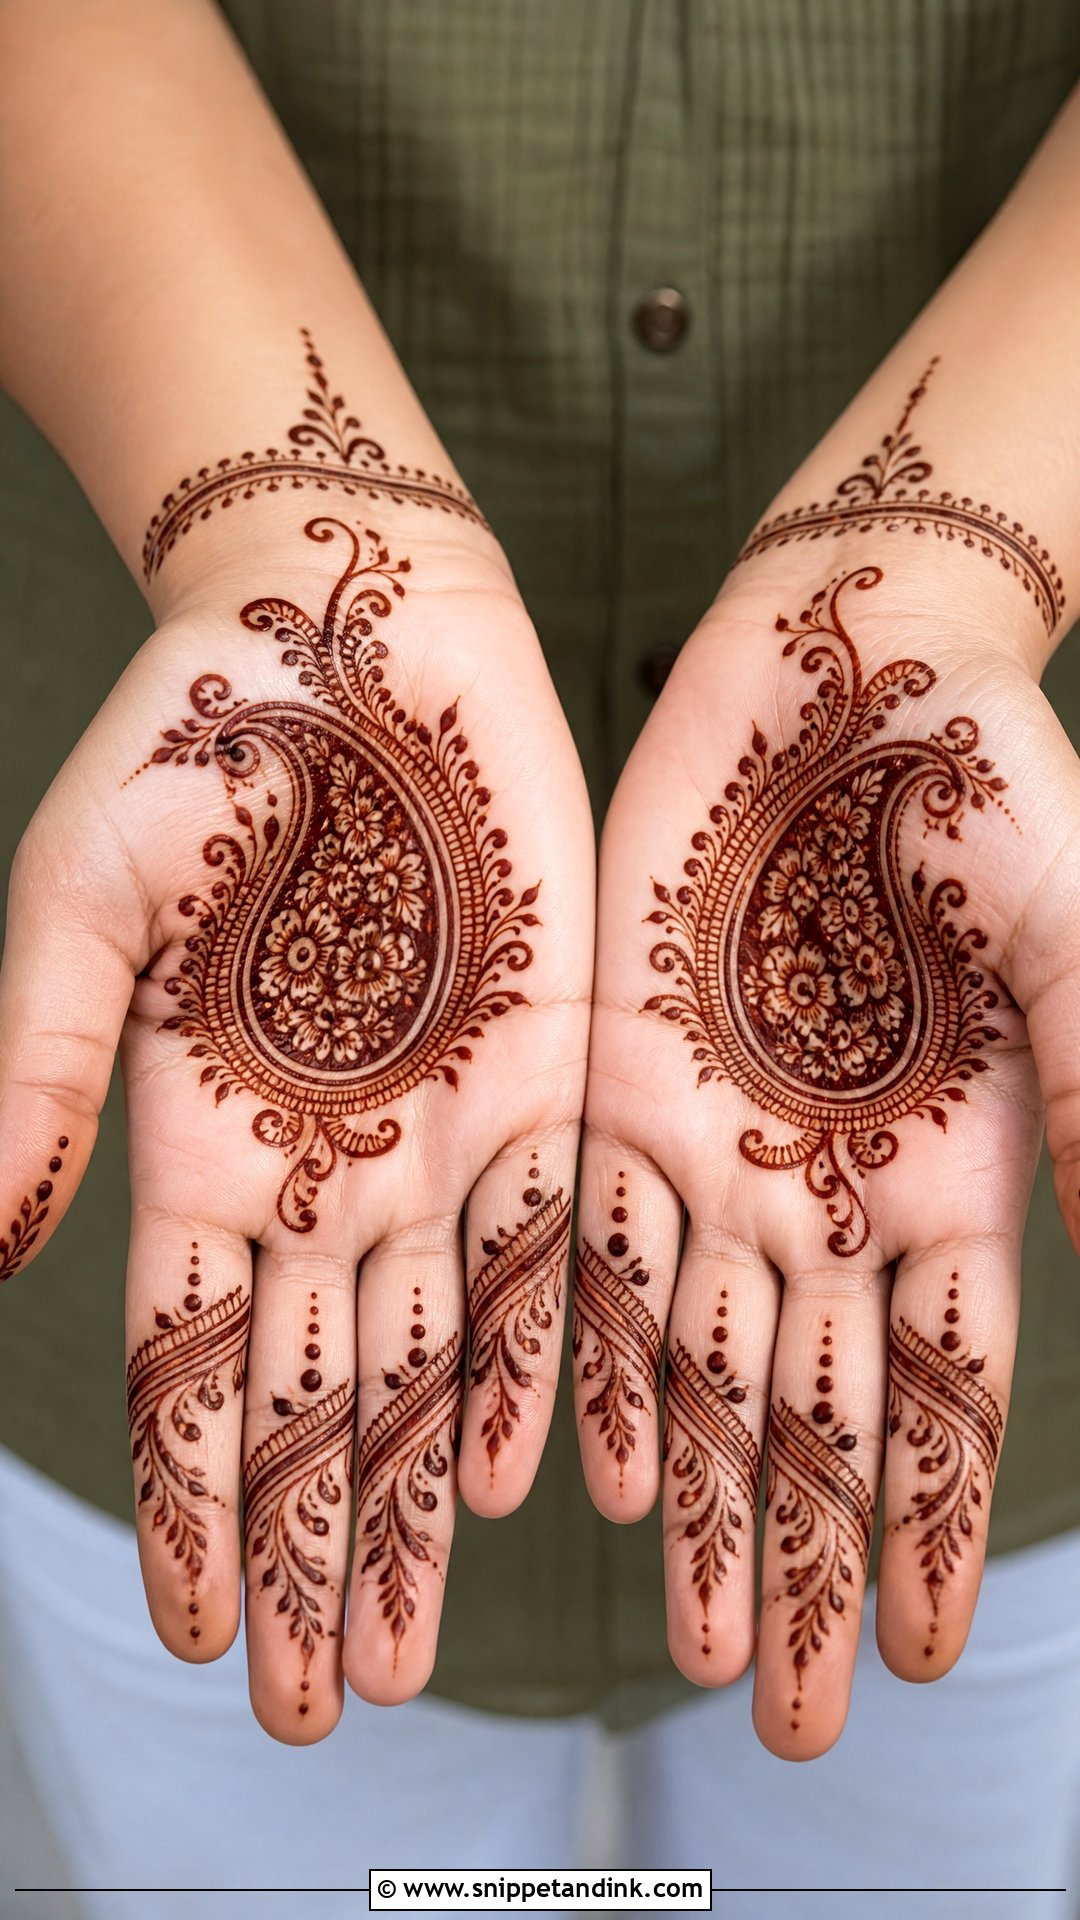
The paisley fits the palm naturally because its curved mango shape follows the hollow of the hand. I draw one large paisley, fill it with tiny flowers, lines and dots, and sometimes frame it with a half-mandala border so it feels finished. The tail of the paisley should point toward the thumb or the wrist, not into the palm crease, or the curve breaks when the hand closes. Simple diagonal bands on the fingers keep attention on the centre. It flatters both short and long palms.
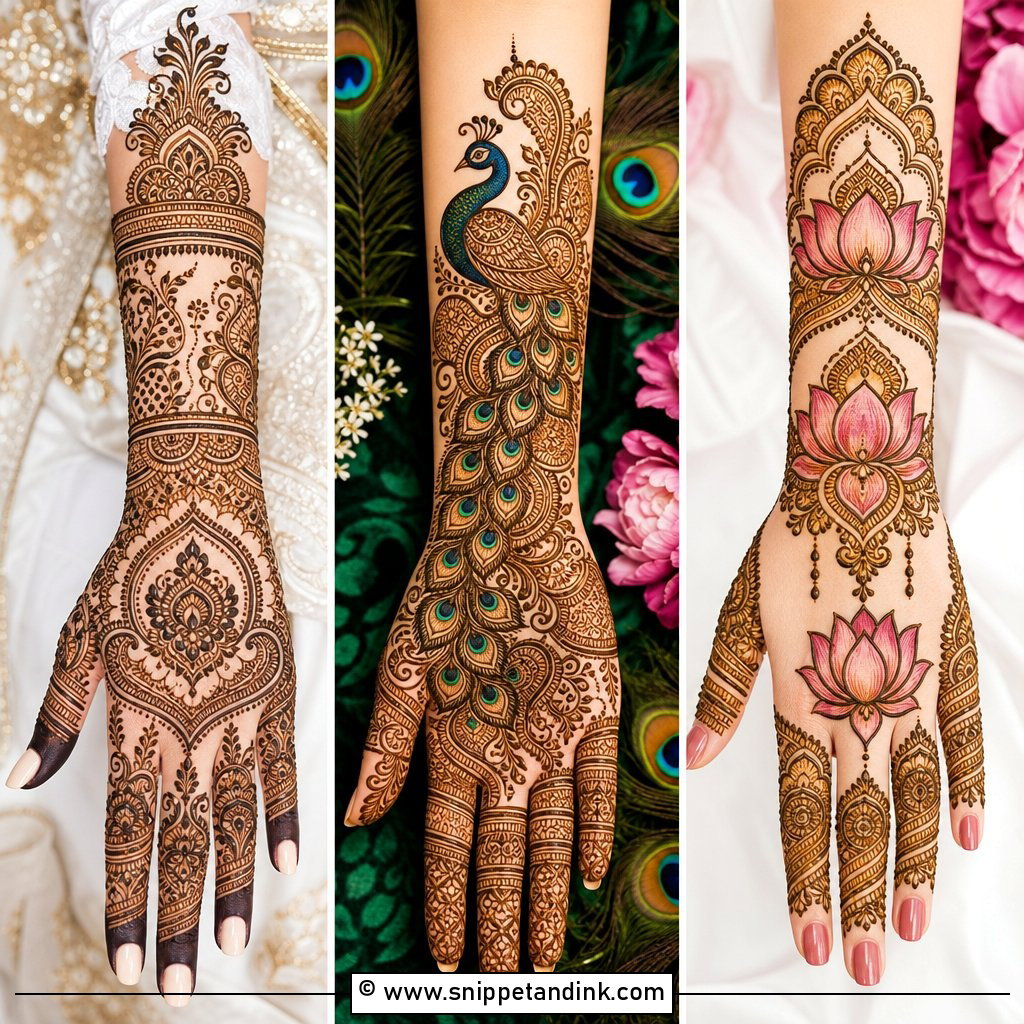
7. Lotus Centre Mehndi Design
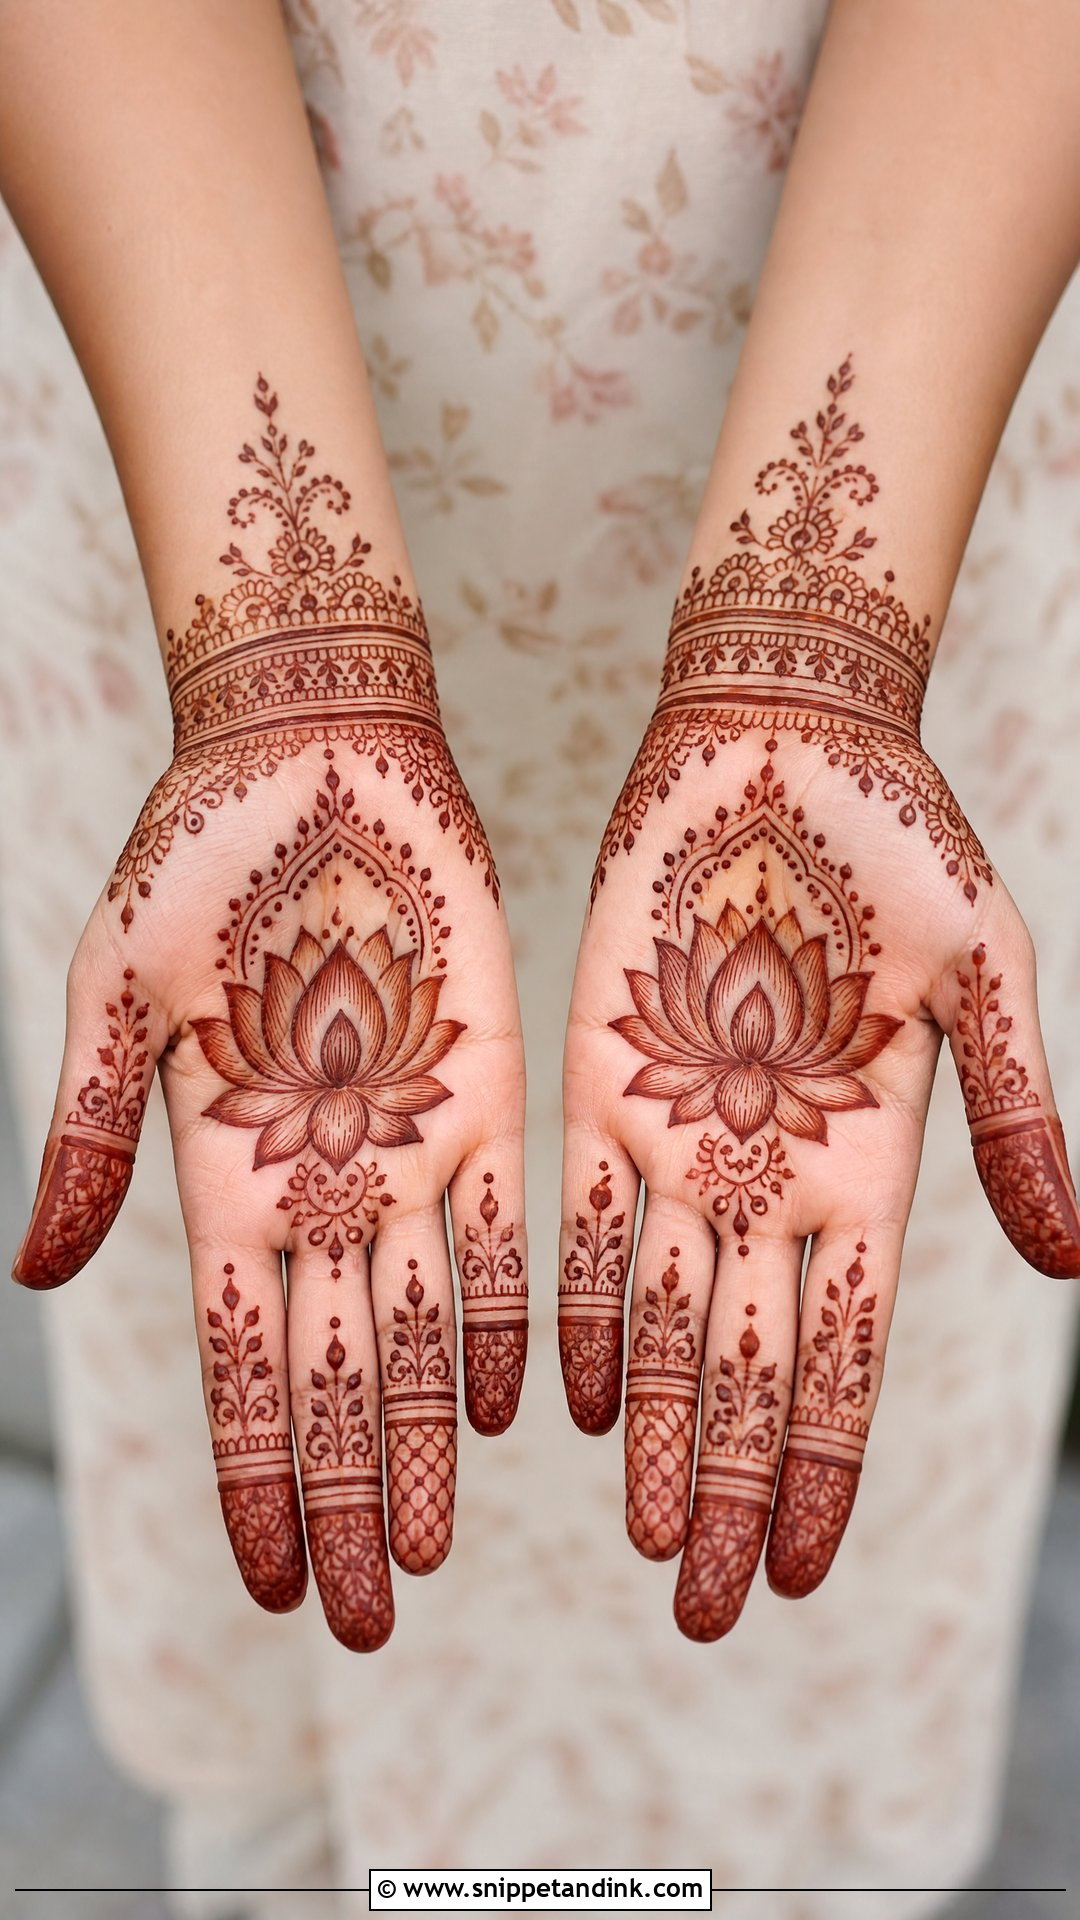
The lotus suits the palm because its petals open outward in an even fan. I draw one open lotus, then dots, fine arches and small leaves around it. It comes up often for engagement events, pujas and lighter bridal looks. Thin outlines with gaps between petals give a soft result; shaded petals and a wrist cuff make it heavier. One thing I check is petal count: an odd number looks more natural, while an even number reads more like a geometric mandala.
8. Peacock Centre Mehndi Design
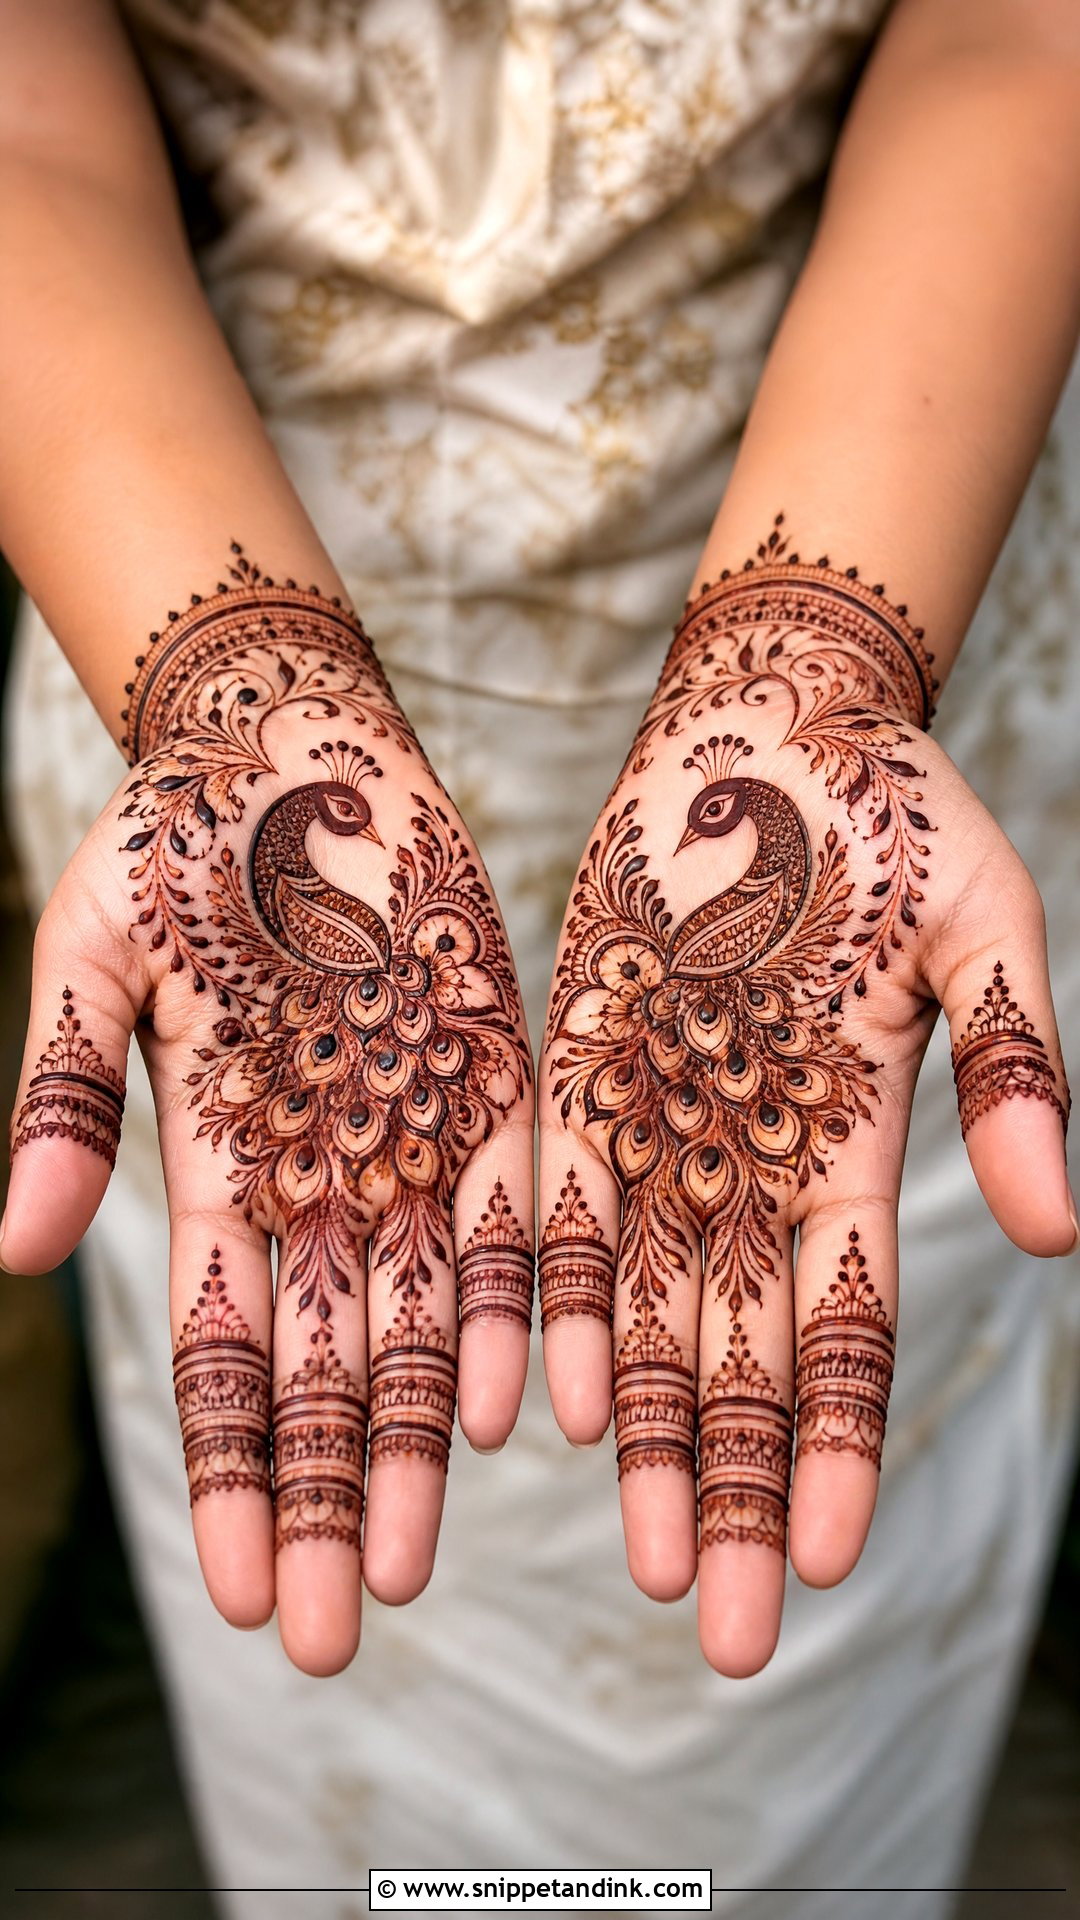
A peacock centre puts the bird mid-palm with its feathers fanning toward the fingers or wrist. It’s more pictorial than a mandala, so I save it for weddings, sangeet and mehndi nights where people will look closely. I keep the peacock’s body clean and nearly solid so it stains dark, and put all the detail into the feathers. If the body gets too many fine lines, it turns muddy after a day. Small finger bands balance the weight of the motif.
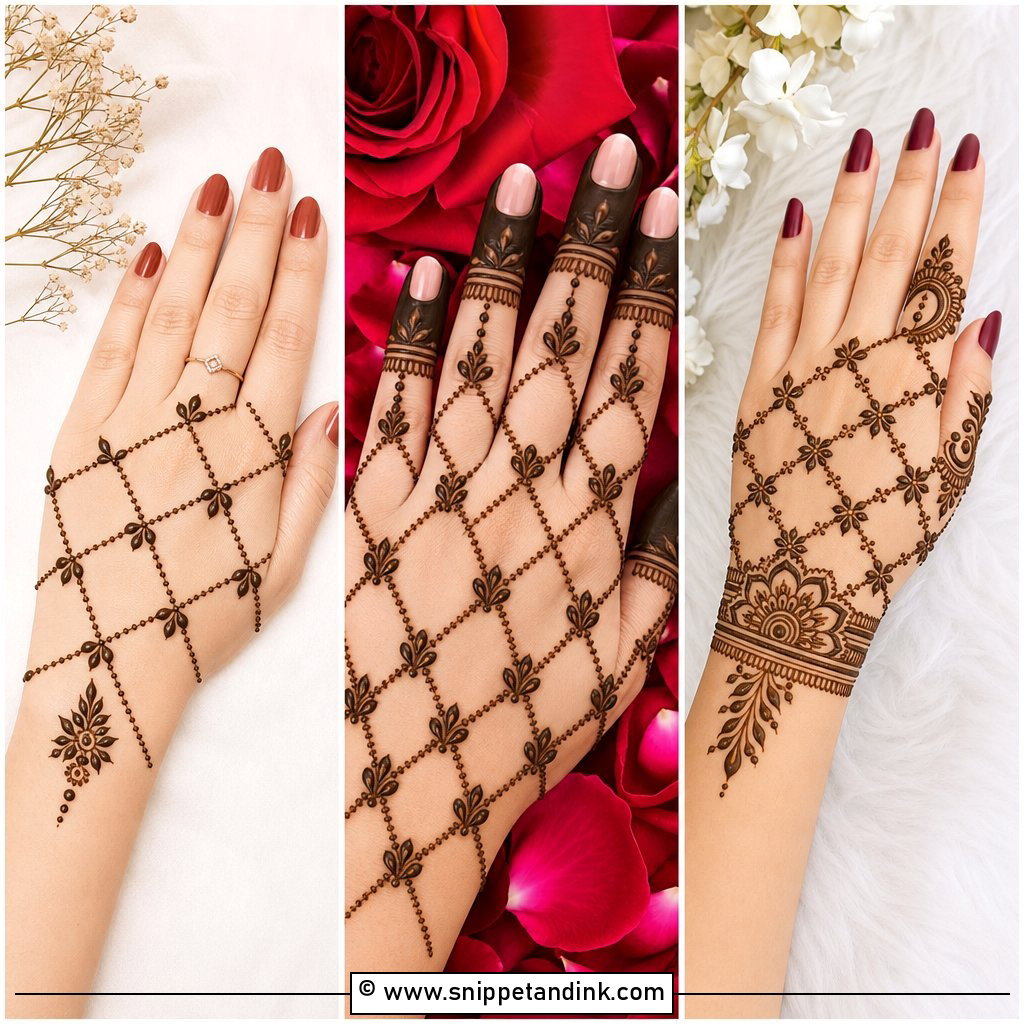
9. Jaal Centre Mehndi Design
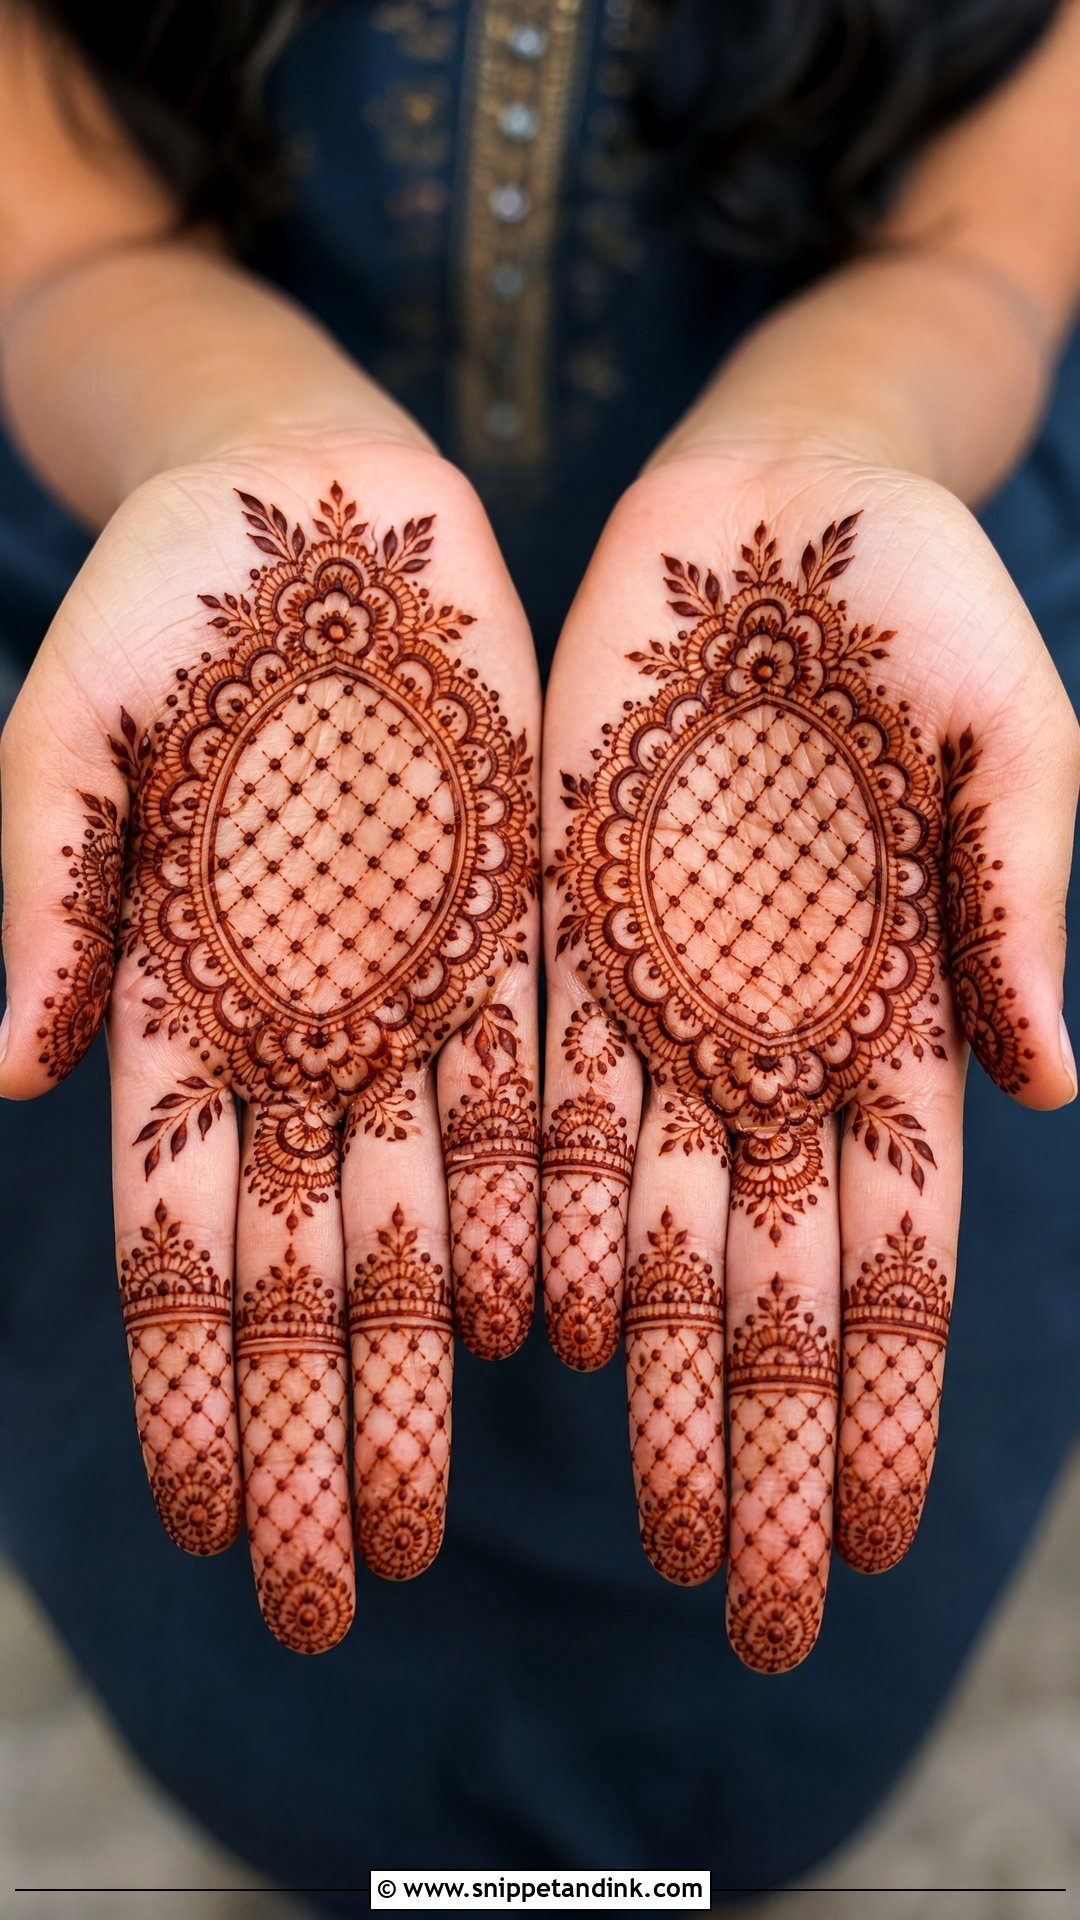
Do you like detail that still looks organized? A jaal uses a mesh or net in the middle of the palm, framed by flowers, dots or curved borders. I adjust the grid to the hand: diamonds on a long palm, softer rounded cells on a wide one. A dot inside each cell finishes it. The common mistake is drawing the net lines too close together, which makes the stain blur into a solid patch. Matching lines or mini mesh on the fingers ties it together.
10. Geometric Centre Mehndi Design
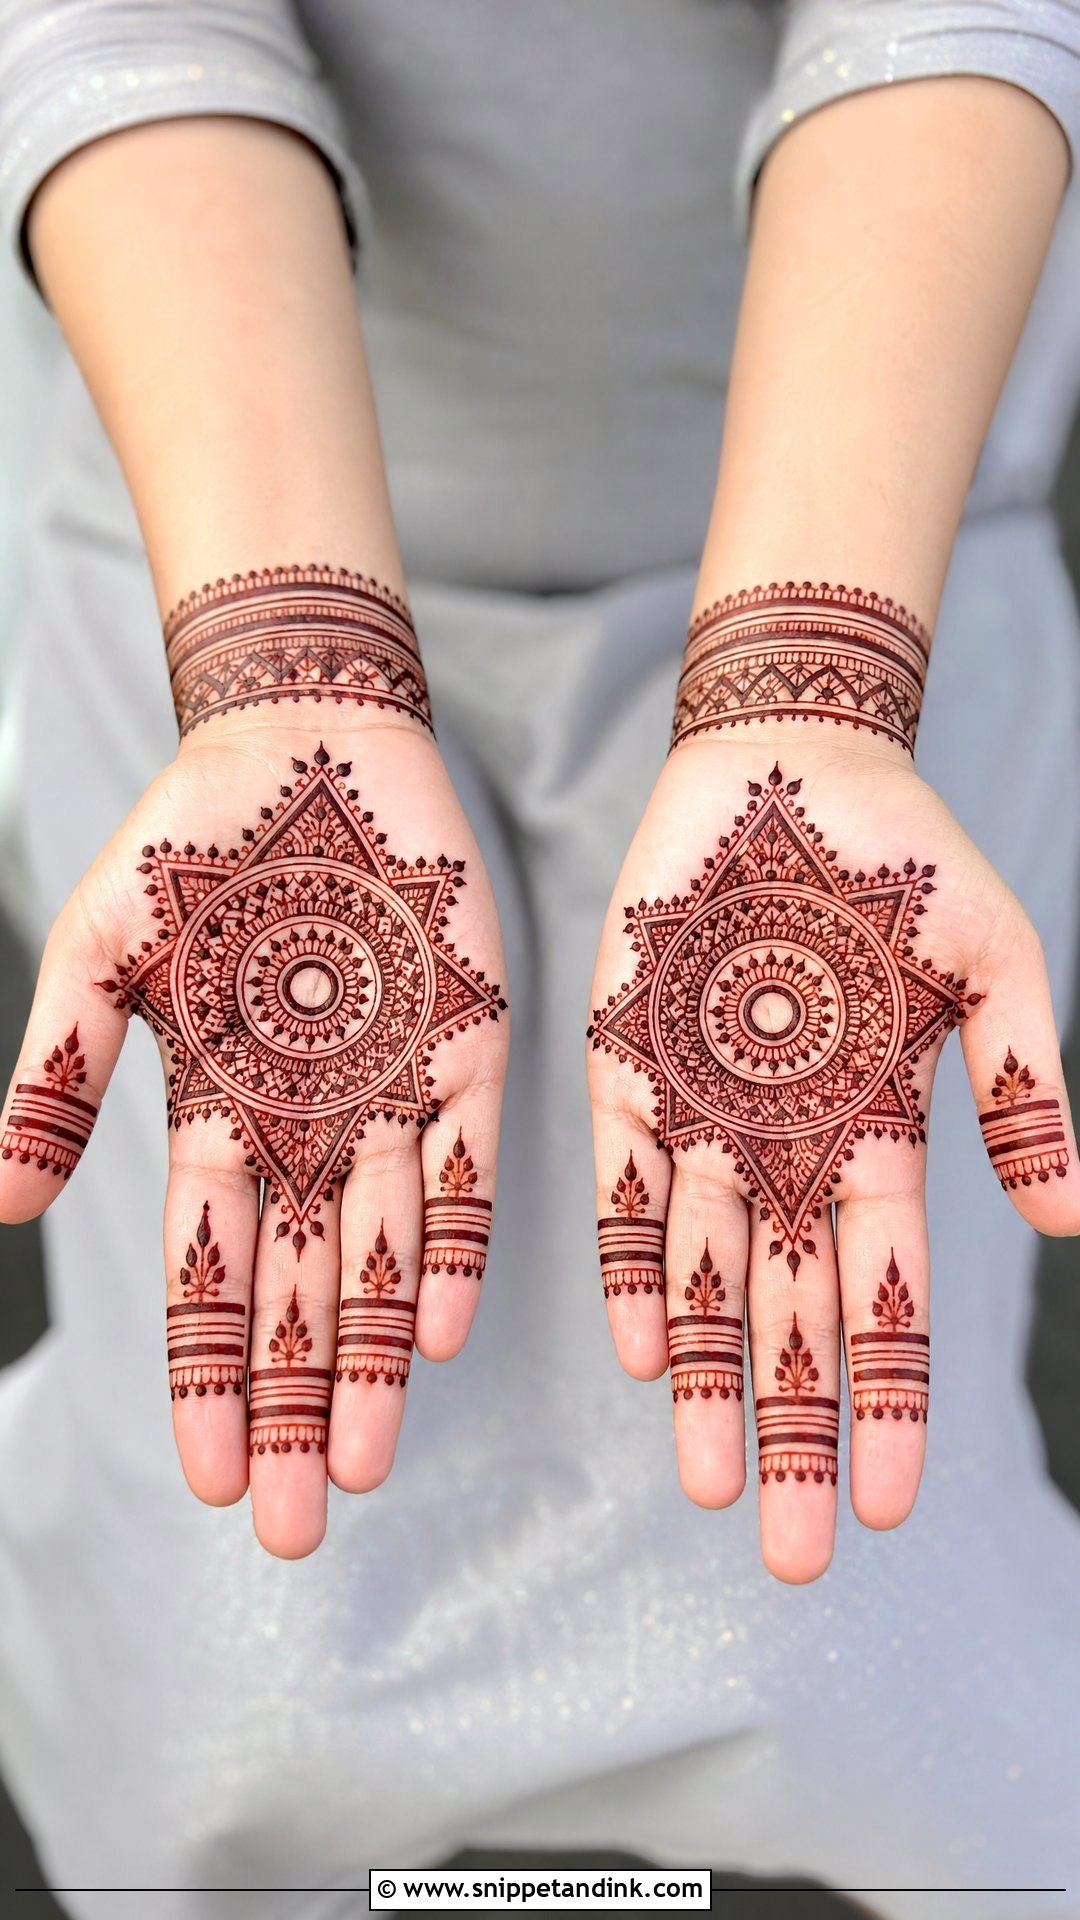
A geometric centre builds a circular mandala out of triangles, diamonds, squares and clean lines, which keeps it tied to traditional henna even though it reads modern. Straight finger bands, dotted borders and a simple wrist strip keep the whole hand sharp. My cone has to be steady for this one; a wobble in a straight line is much more visible than in a flower. Even spacing is everything, and I avoid packing the centre, since geometric work shows the skin between lines as part of the design.
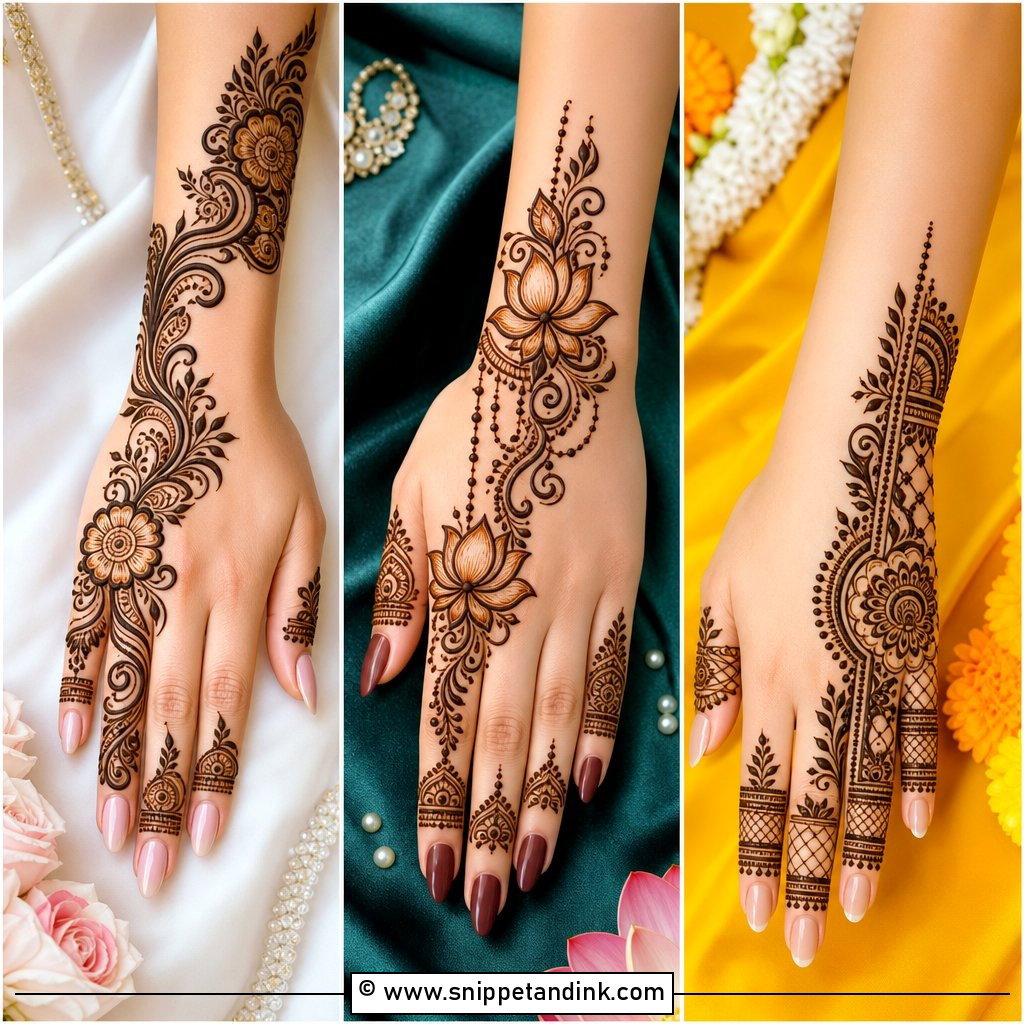
11. Back Hand Centre Mehndi Design
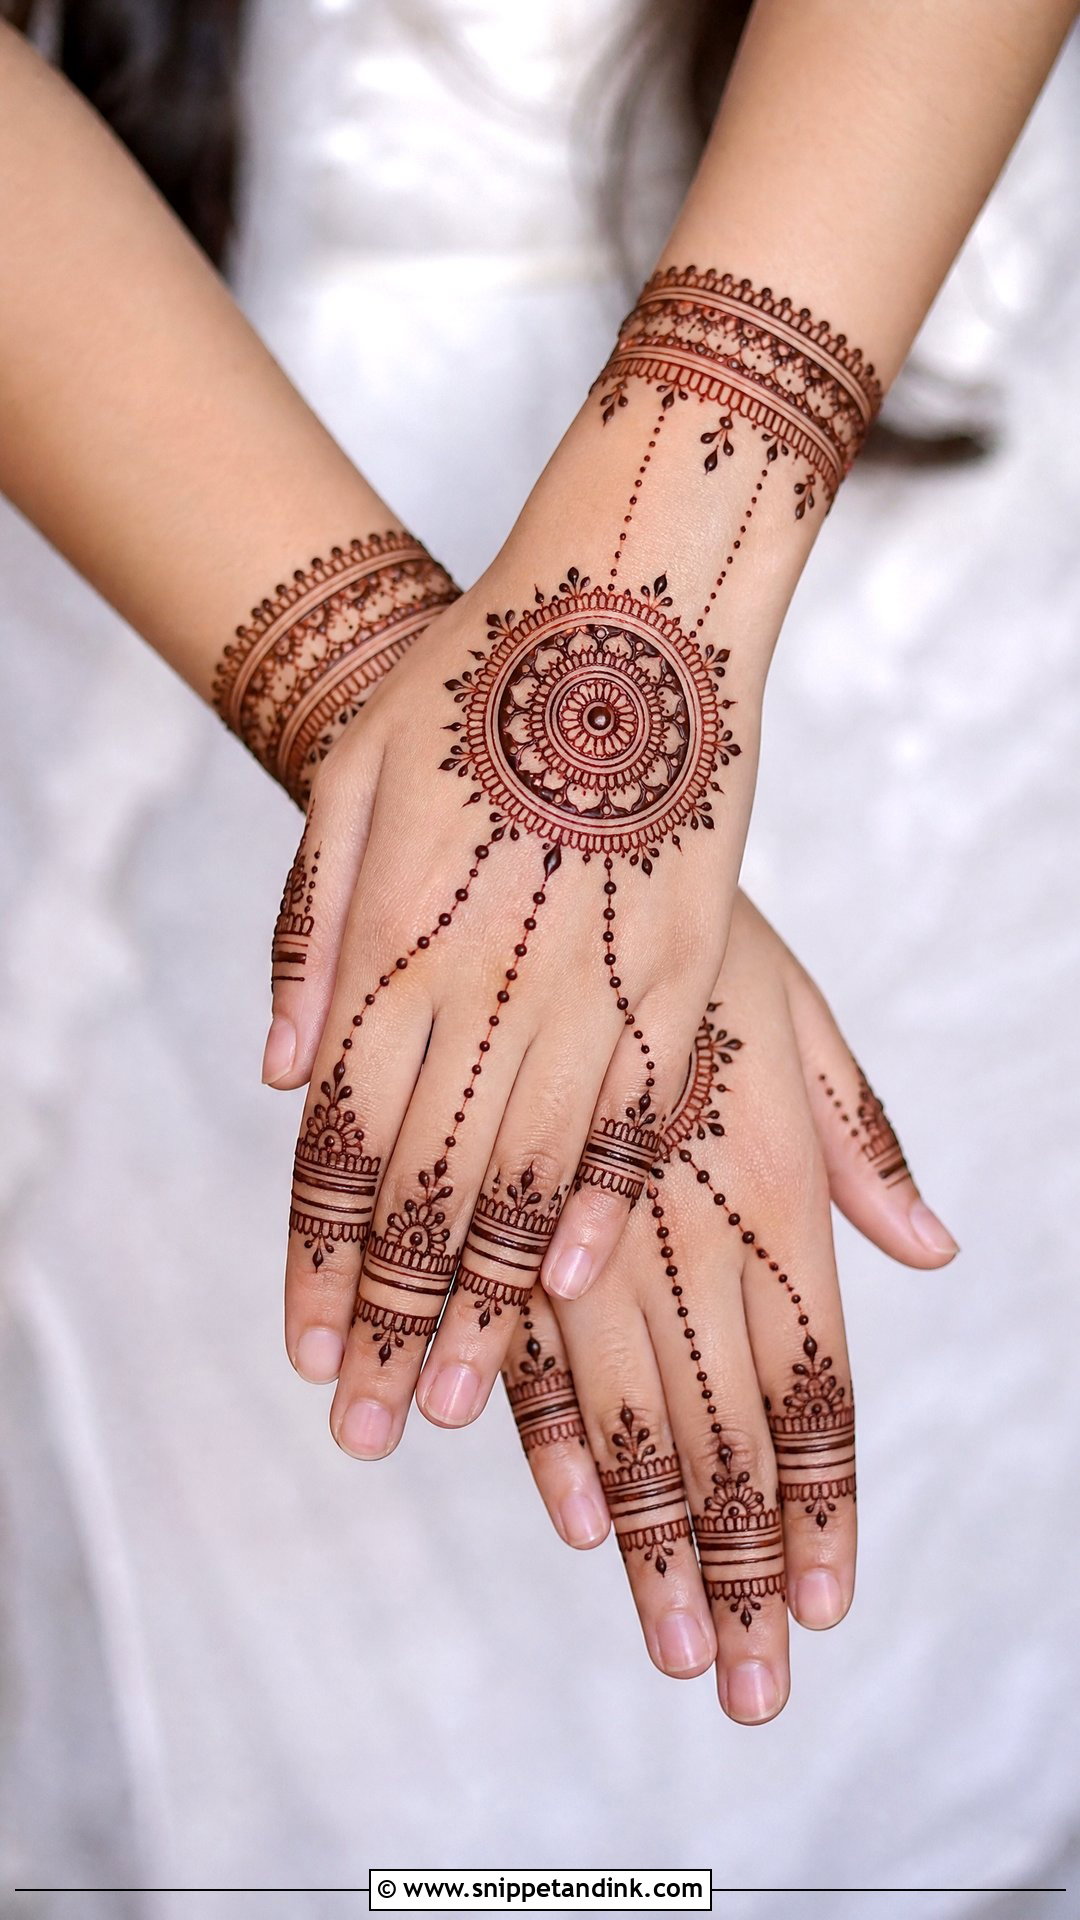
On the back hand, the centre motif usually sits just below the knuckles: a mandala, flower, sunburst or a pattern that imitates jewelry. From there it reaches the fingers with rings, chains, dots and small leaves, and often joins a bracelet at the wrist. Back-hand skin is thinner than the palm, so the stain will come out lighter, usually a warm orange-brown. I tell clients that in advance. Keeping the centre bold and the fingers delicate helps it read like hand jewelry.
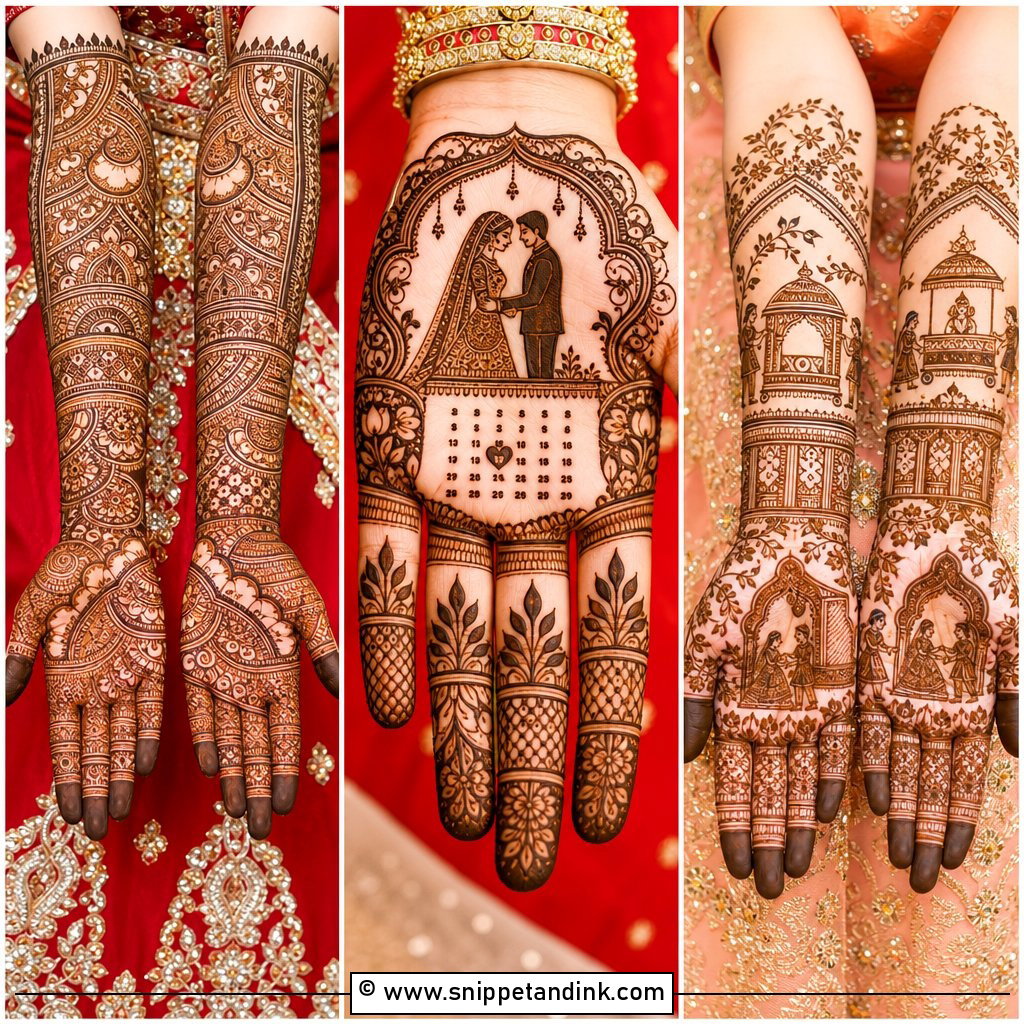
12. Bridal Centre Mehndi Design
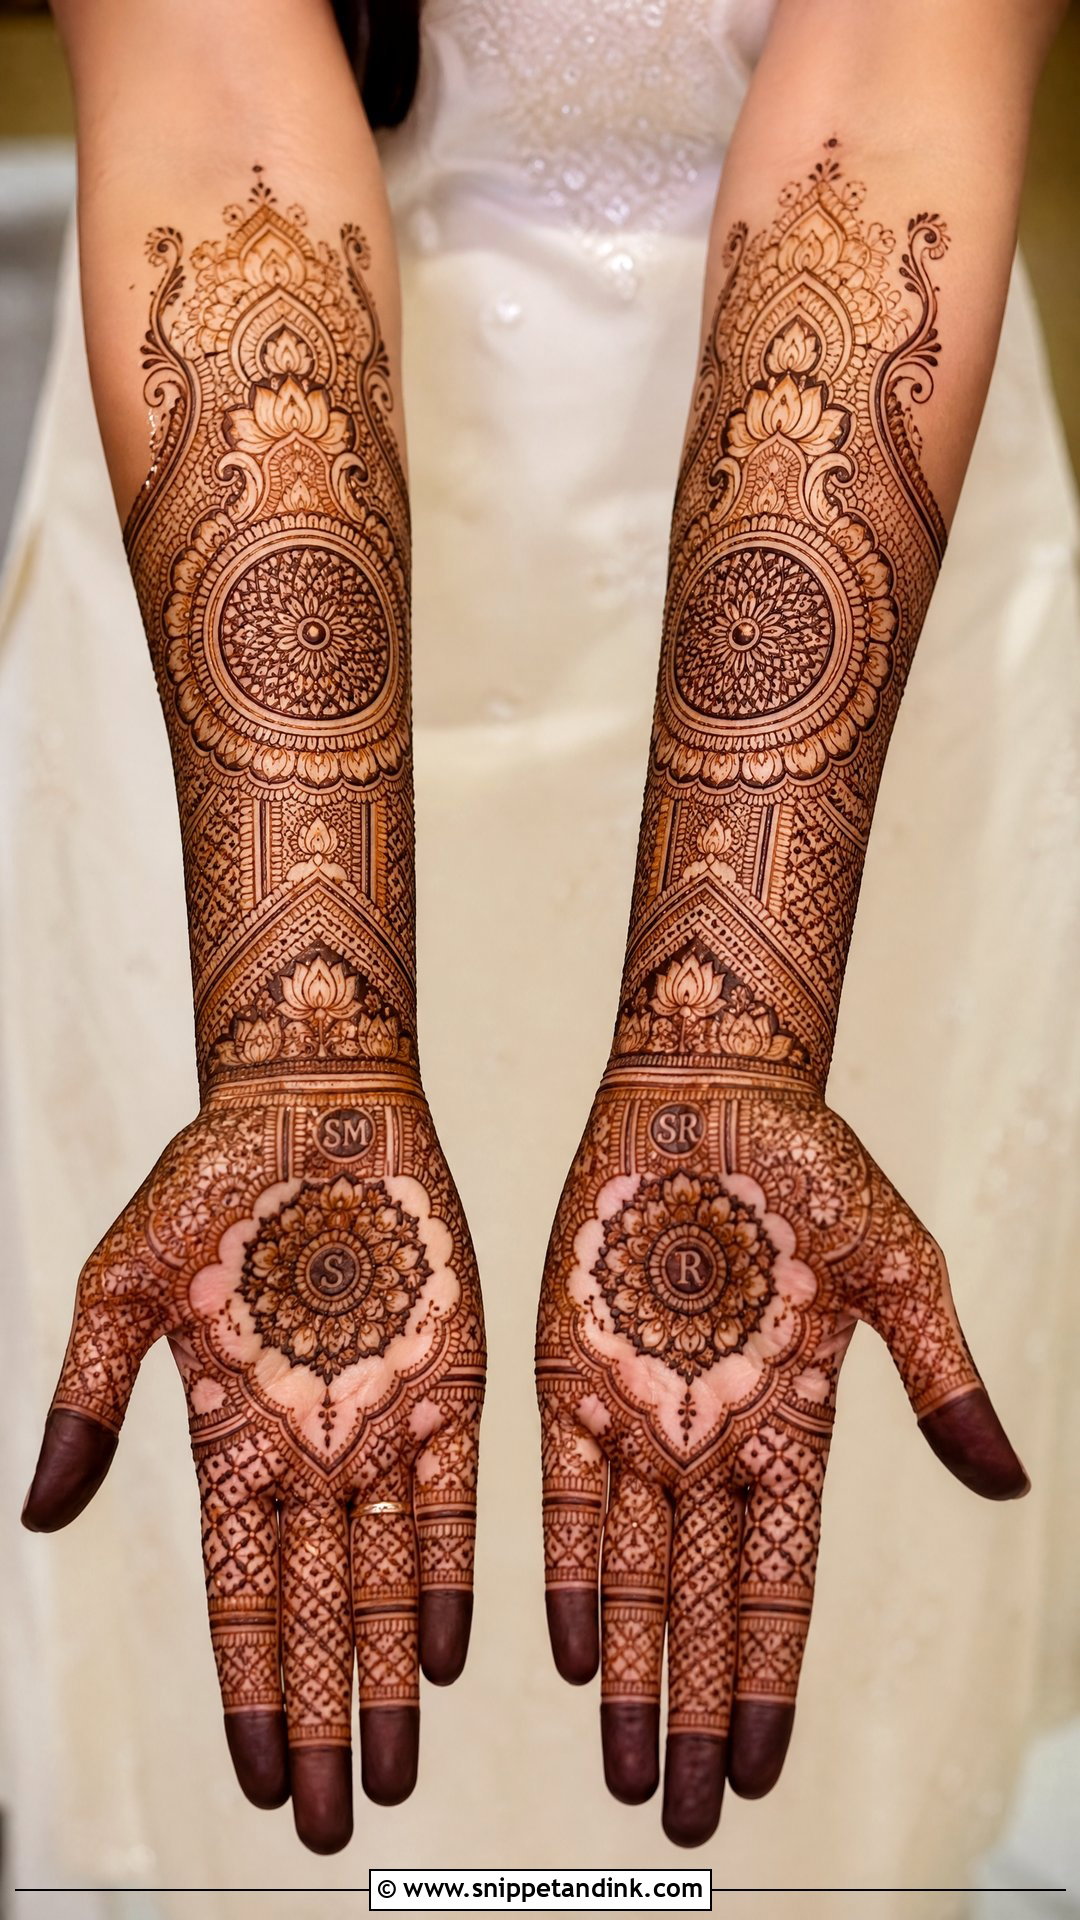
A bridal centre keeps one clear focal point in the palm even when the rest of the hand is full. The centre might hold a mandala, a bride and groom figure, a lotus, a paisley or the couple’s initials, with jaali, flowers, leaves, borders and a forearm extension around it. I plan bridal centres with the photographer in mind: the palm motif needs to be readable when the hands are held up together. Fingers should be detailed but not busy. With a deep maroon stain and traditional jewelry, this layout looks complete.
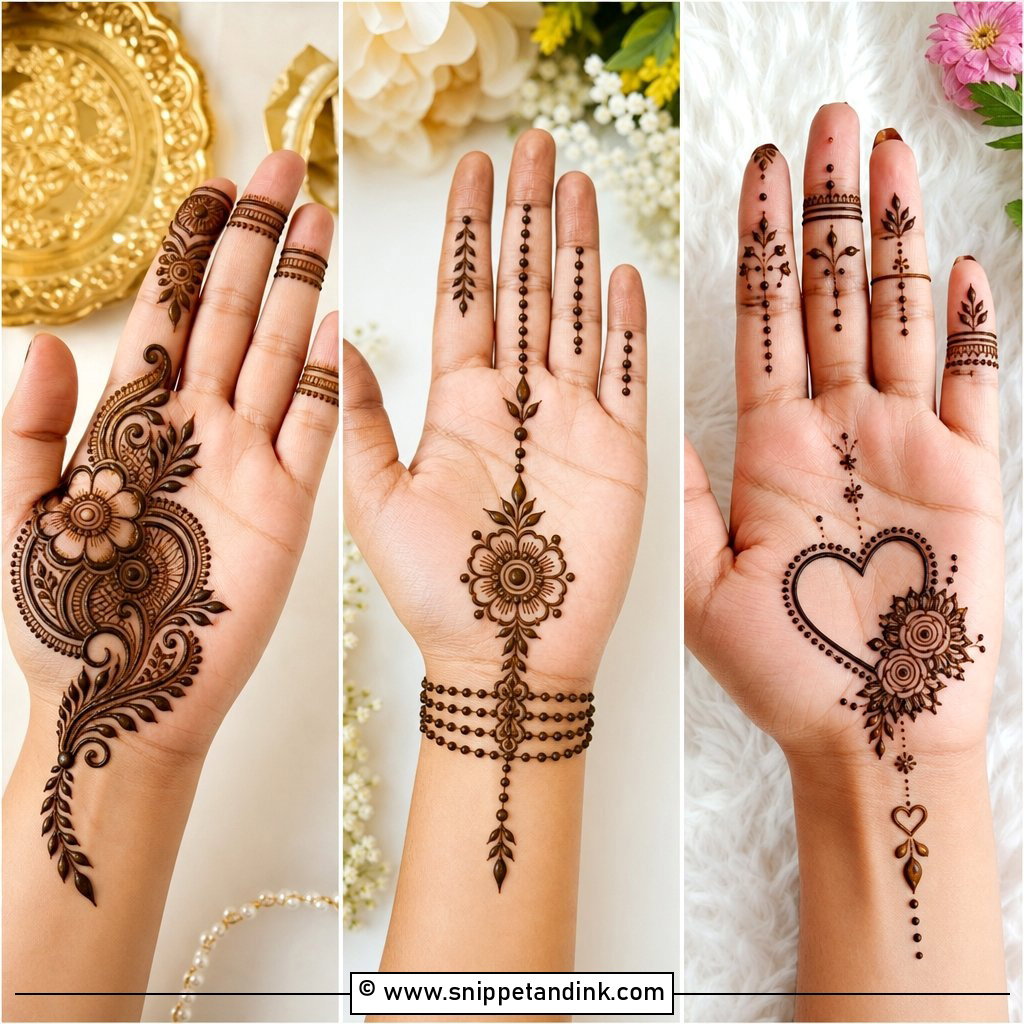
13. Minimal Centre Mehndi Design
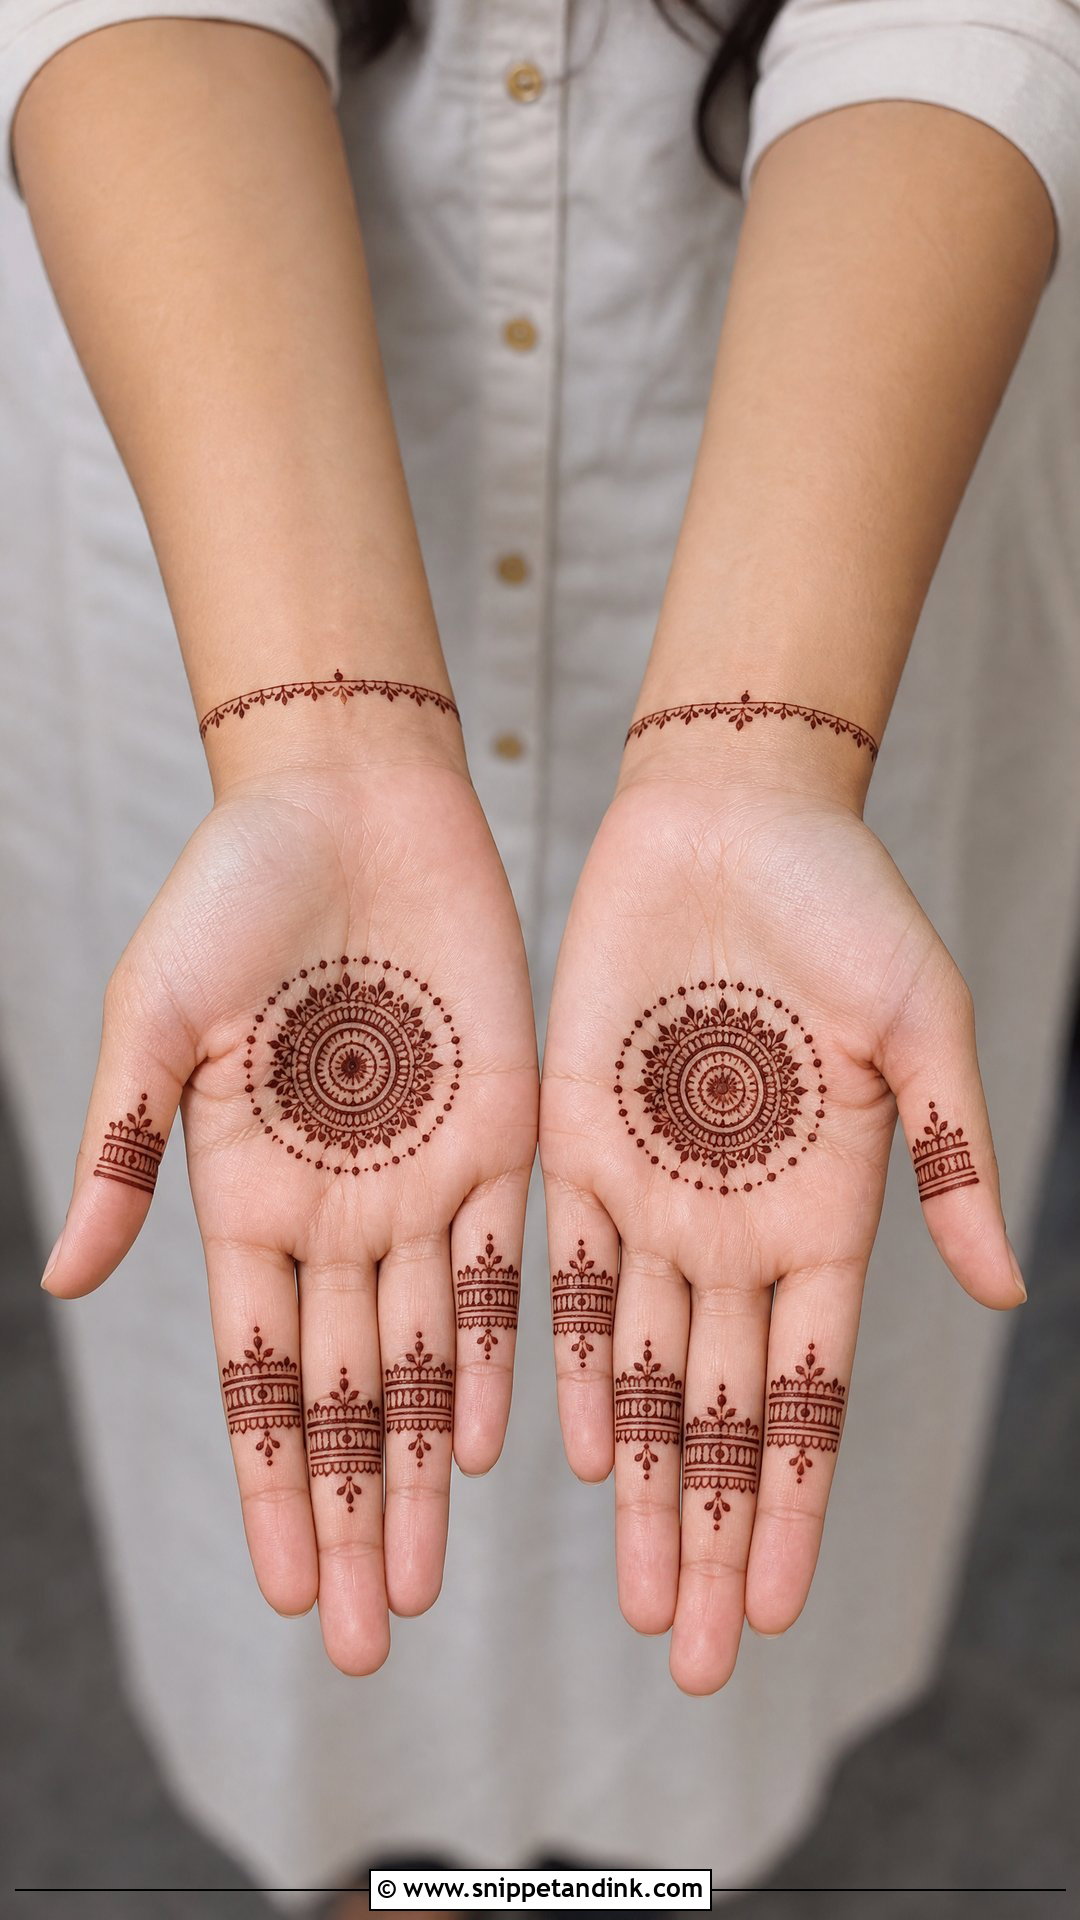
A minimal centre is a small mandala, tiny flower, crescent shape or dot circle, with most of the hand left open apart from fine rings or a slim wrist line. It takes me a few minutes and suits school events, office-friendly festivals and last-minute plans. Small designs leave nowhere to hide, though. A shaky line or an off-centre placement shows immediately, so I’d rather spend an extra minute marking the middle with a dot before I start.
14. Full Palm Centre Mehndi Design
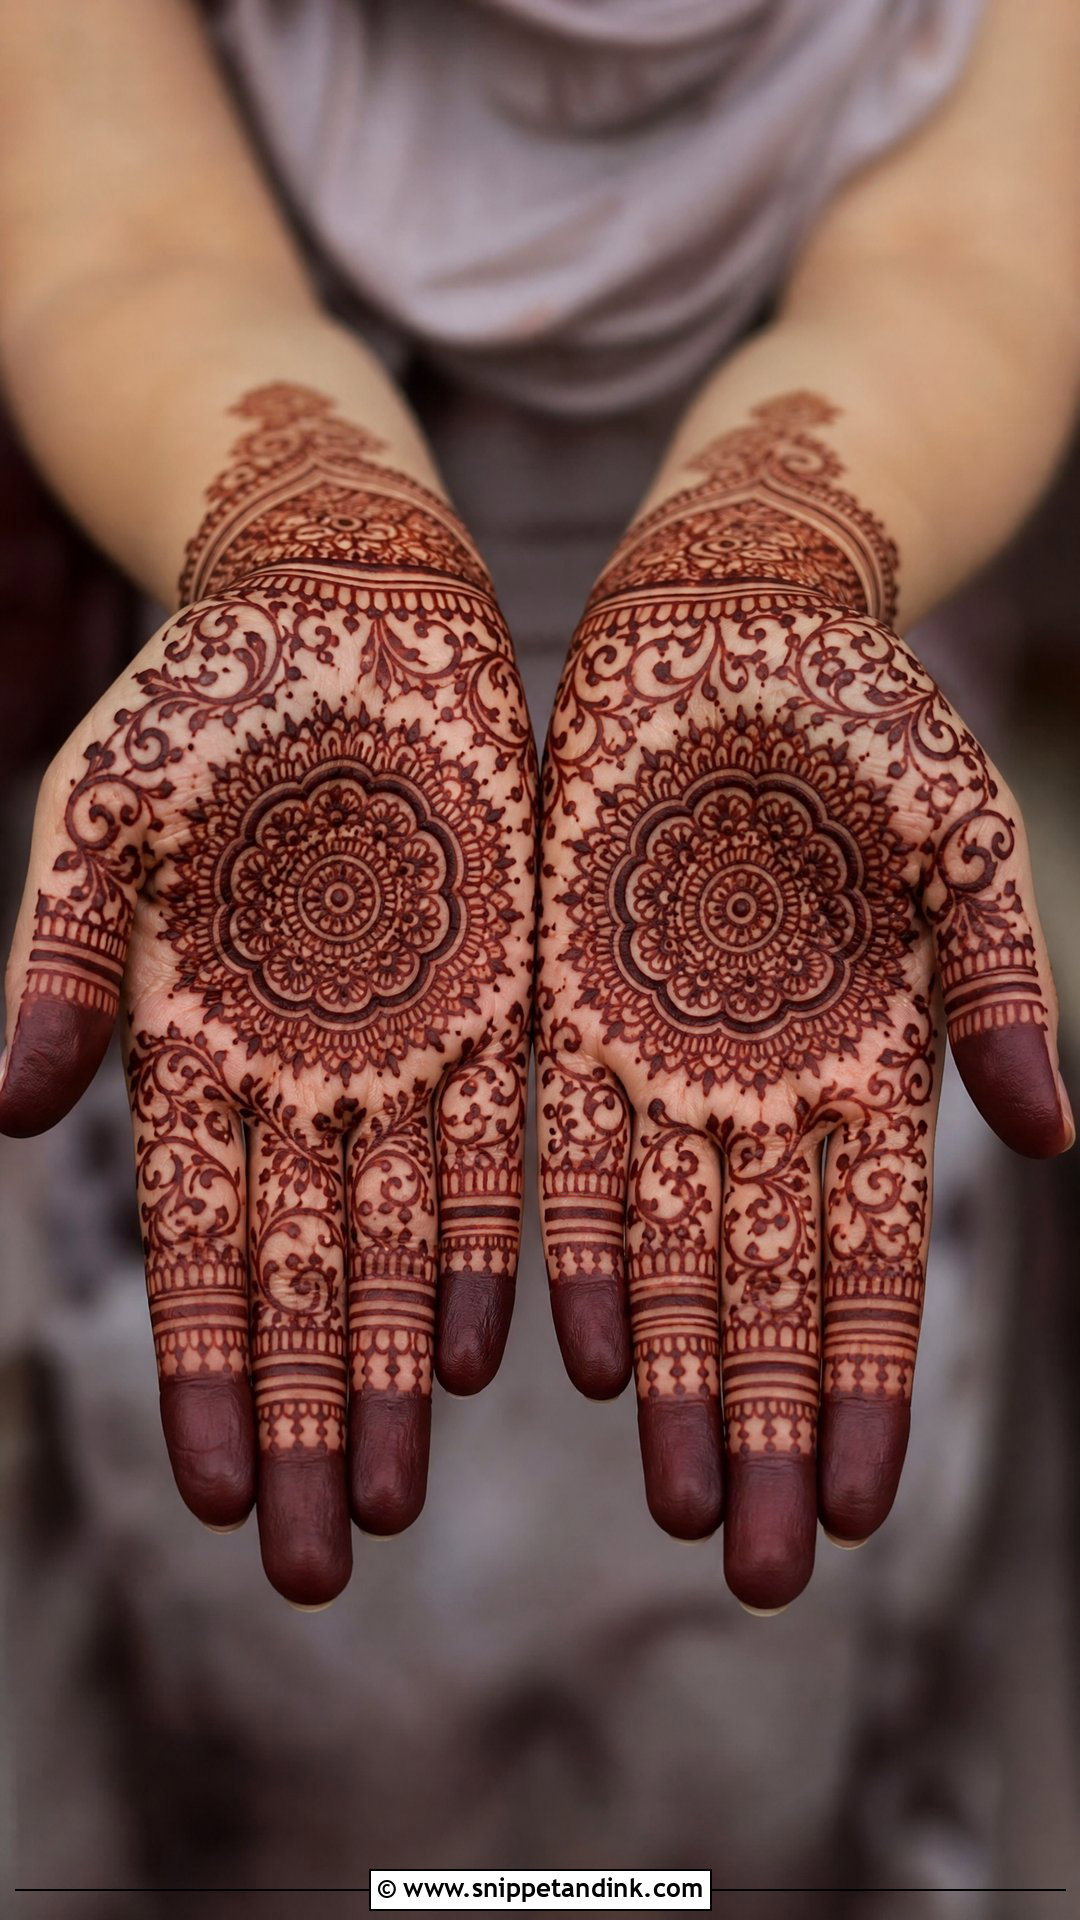
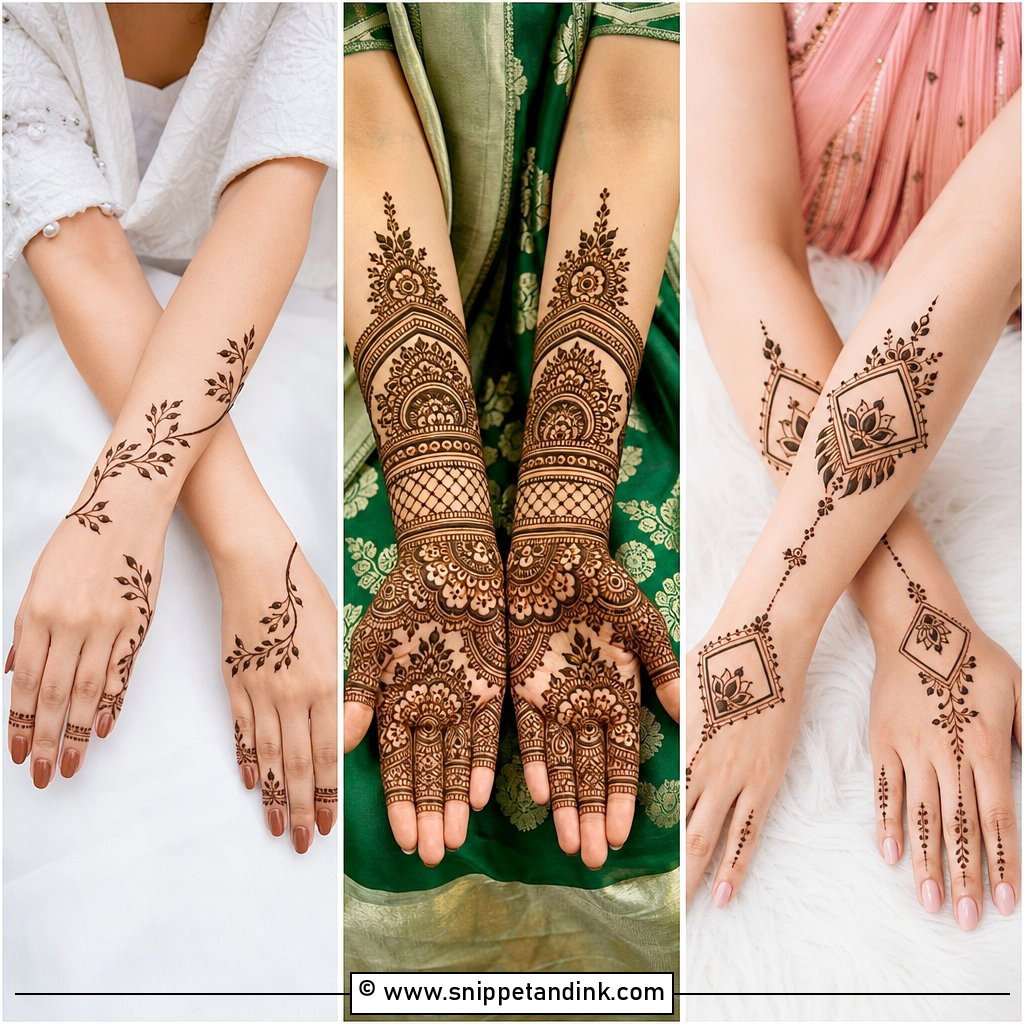
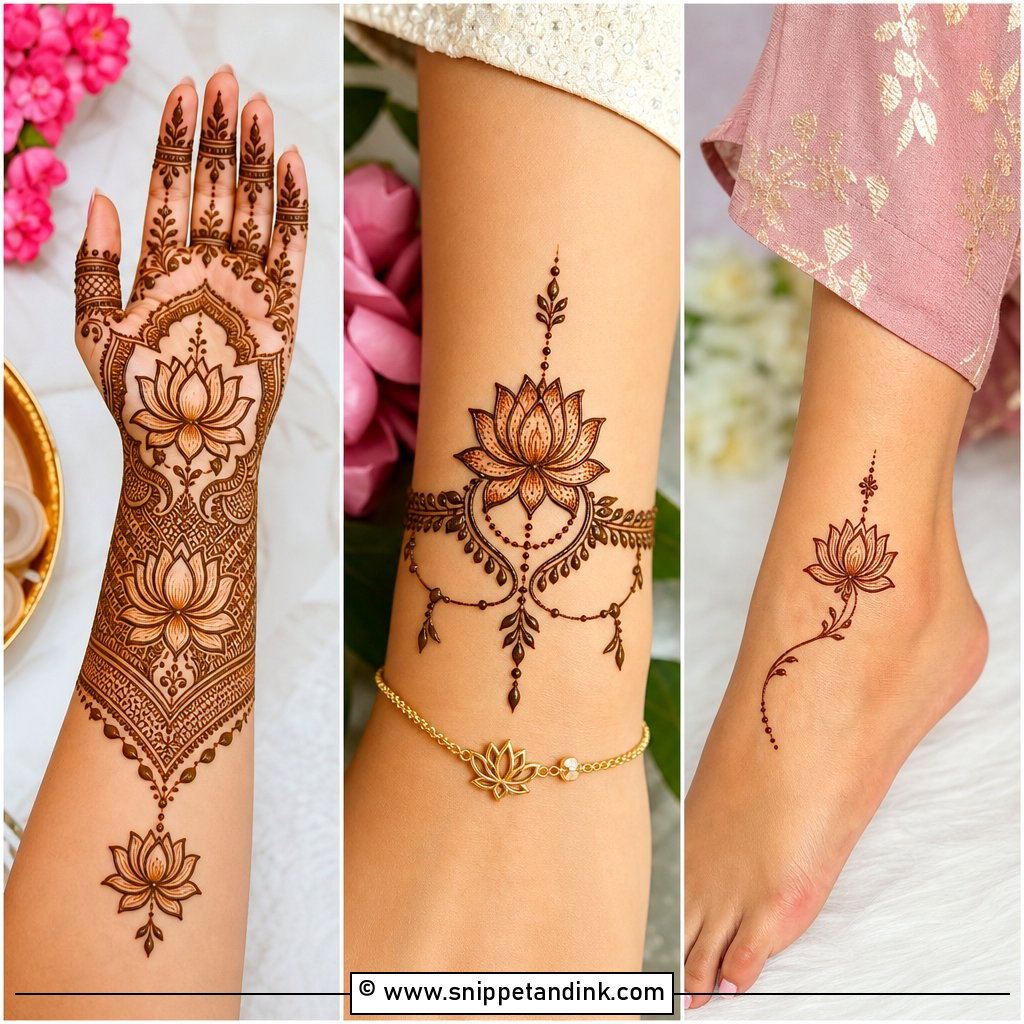
A full palm centre still keeps one large mandala, flower or paisley in charge while vines, dots, curves and borders fill the rest of the palm. Fingers get matching bands or fingertip fills. I use it for festivals and family weddings when a client wants visible mehndi but not a forearm. My rule is to keep the main motif clearly larger than any filler; once the fillers grow to the same scale, the eye can’t find the centre anymore.
15. Bracelet Centre Mehndi Design
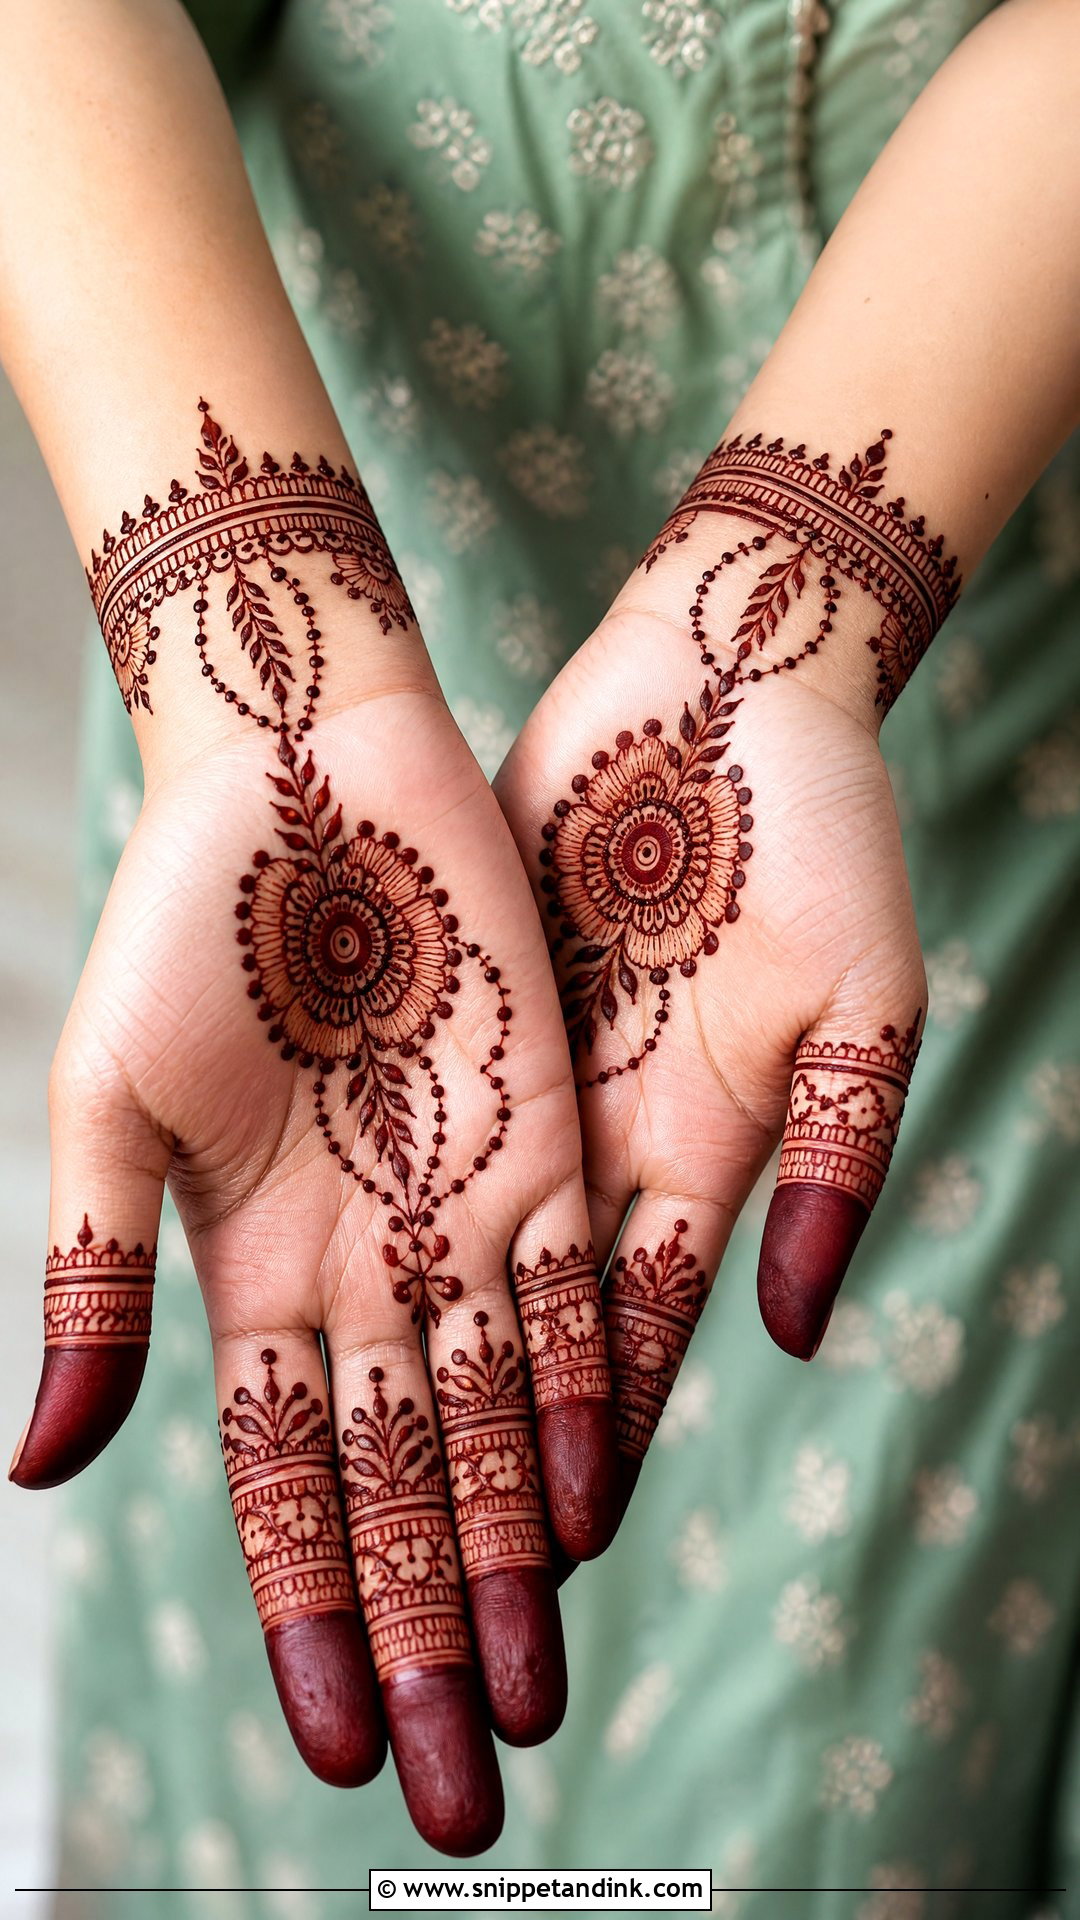
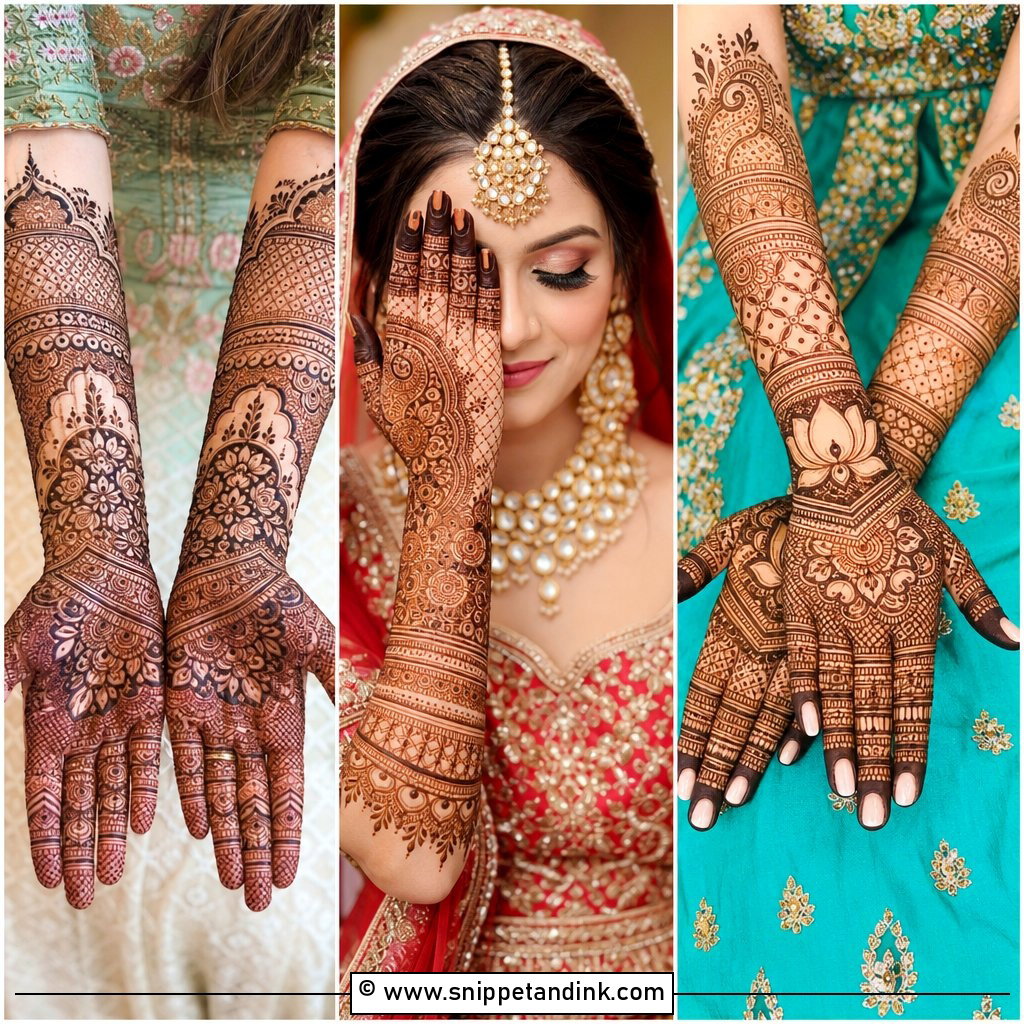
A bracelet centre mehndi design links the palm motif to a wrist band so the hand looks like it’s wearing jewelry. The centre can be a flower, mandala or tikki; thin chains, dotted strings or leafy trails run toward the wrist, where a band of scallops, lines or beads closes it. I measure the band against where your bangles will sit, since a band hidden under glass bangles is wasted work. It suits engagement parties and guest looks and sits comfortably beside rings.
16. Finger Detail Centre Mehndi Design
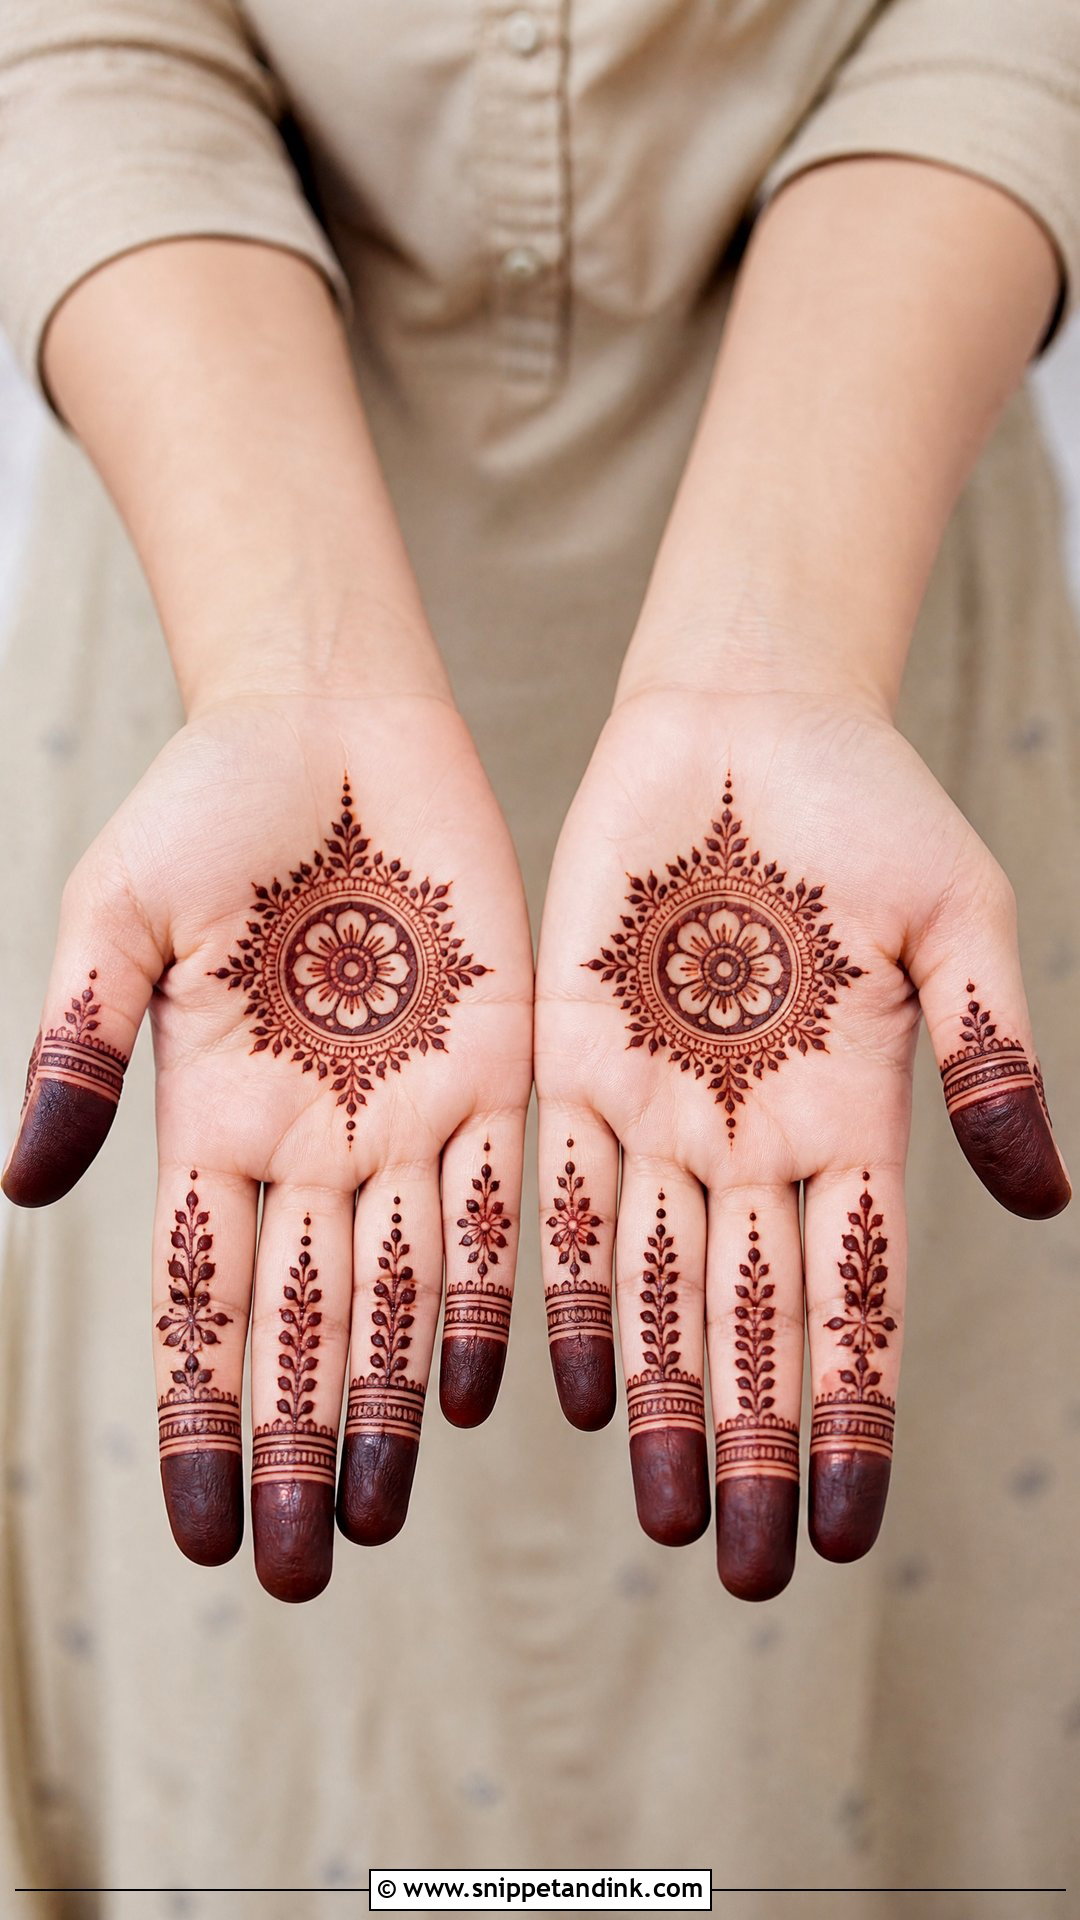
Sometimes the fingers carry the design and the palm motif stays modest. Here I place a neat centre and spend the time on the fingers: vertical lines, dots, leafy bands, mini florals, shaded tips or ring-style sections. Repeating the same detail on each finger is what makes it look coordinated. Finger skin stains well, especially the tips, so this layout develops a strong colour even when the palm work is light. A bare or lightly marked wrist keeps it modern.
17. Modern Centre Mehndi Design
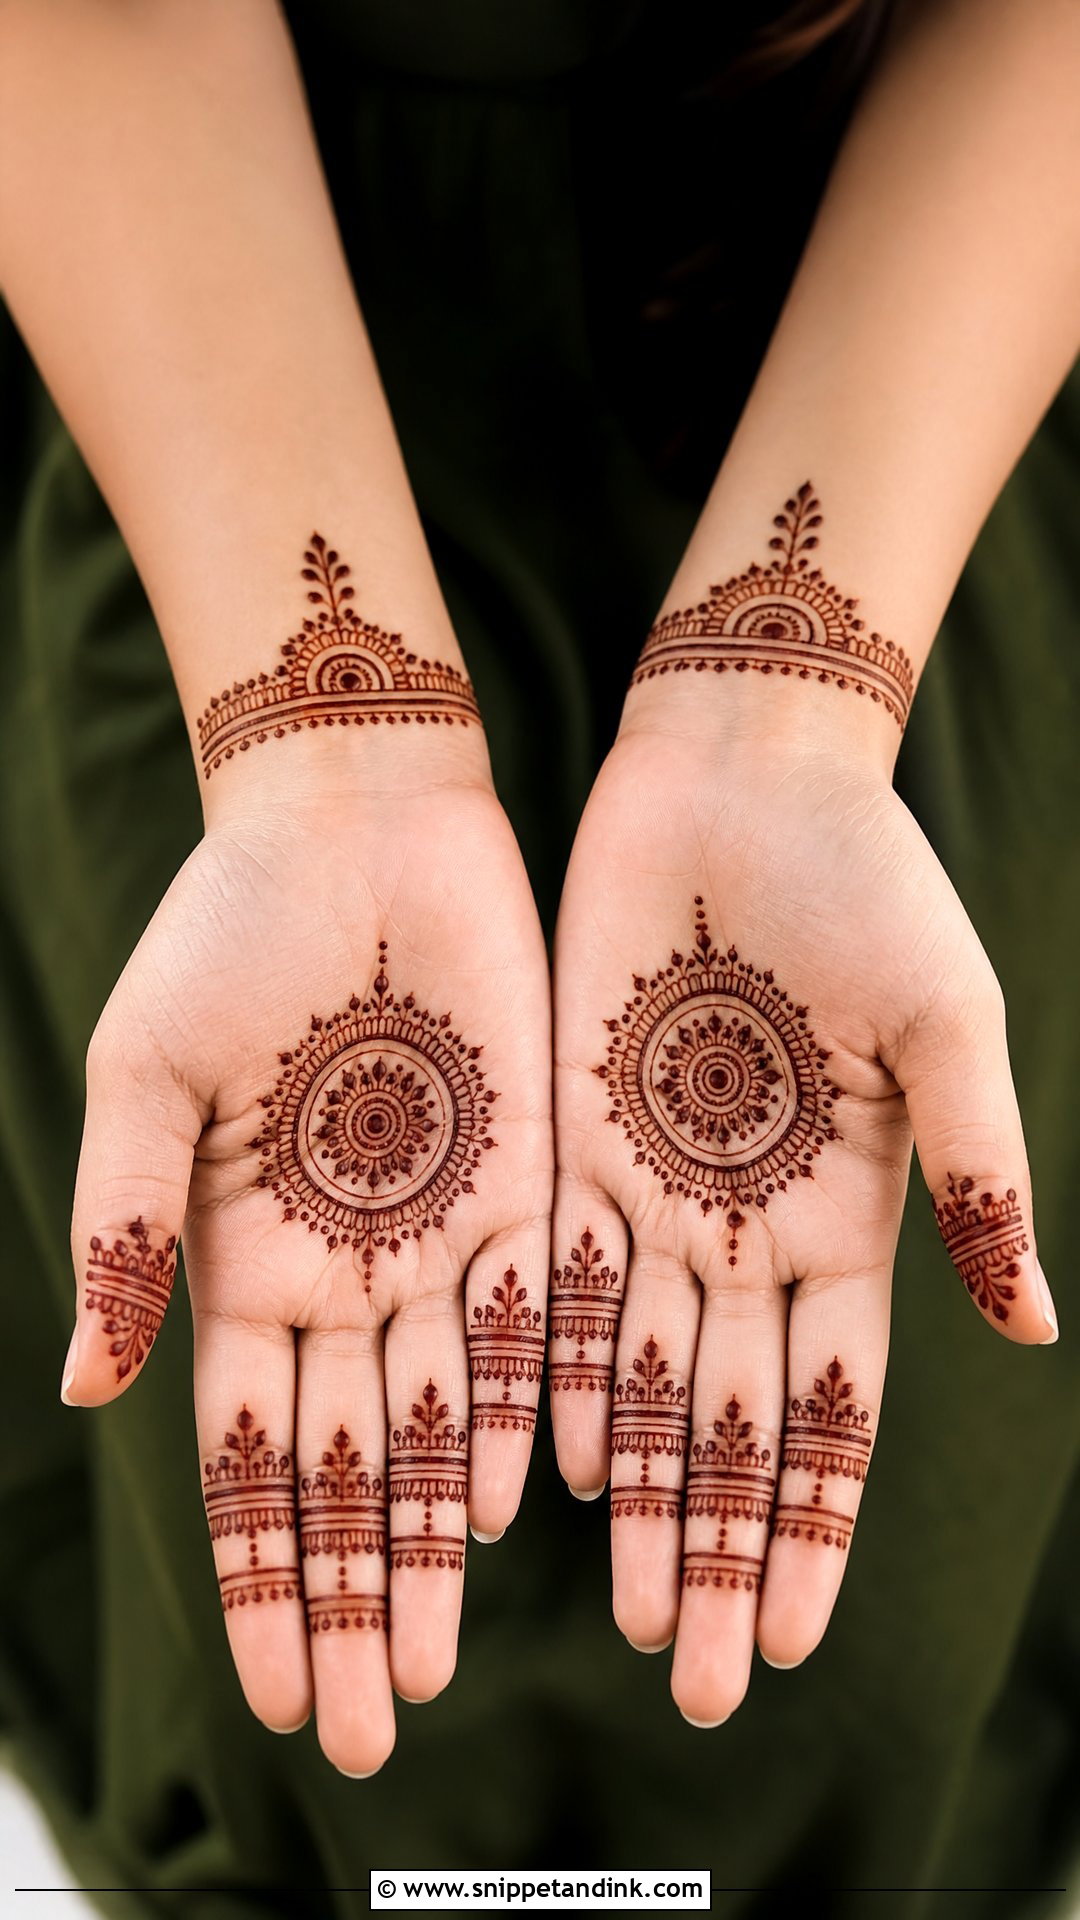
A modern centre is about placement and open space. The motif might be a small mandala, floral circle, bow shape, abstract curve or fine geometric pattern, with clear skin all around it and delicate finger bands or a slim wrist accent to finish. I see it requested by younger clients who’ll wear the henna with both traditional and western outfits. The risk is a design that looks unfinished; I place the motif slightly toward the base of the palm, which tends to look more intentional than dead centre.
18. Eid Centre Mehndi Design
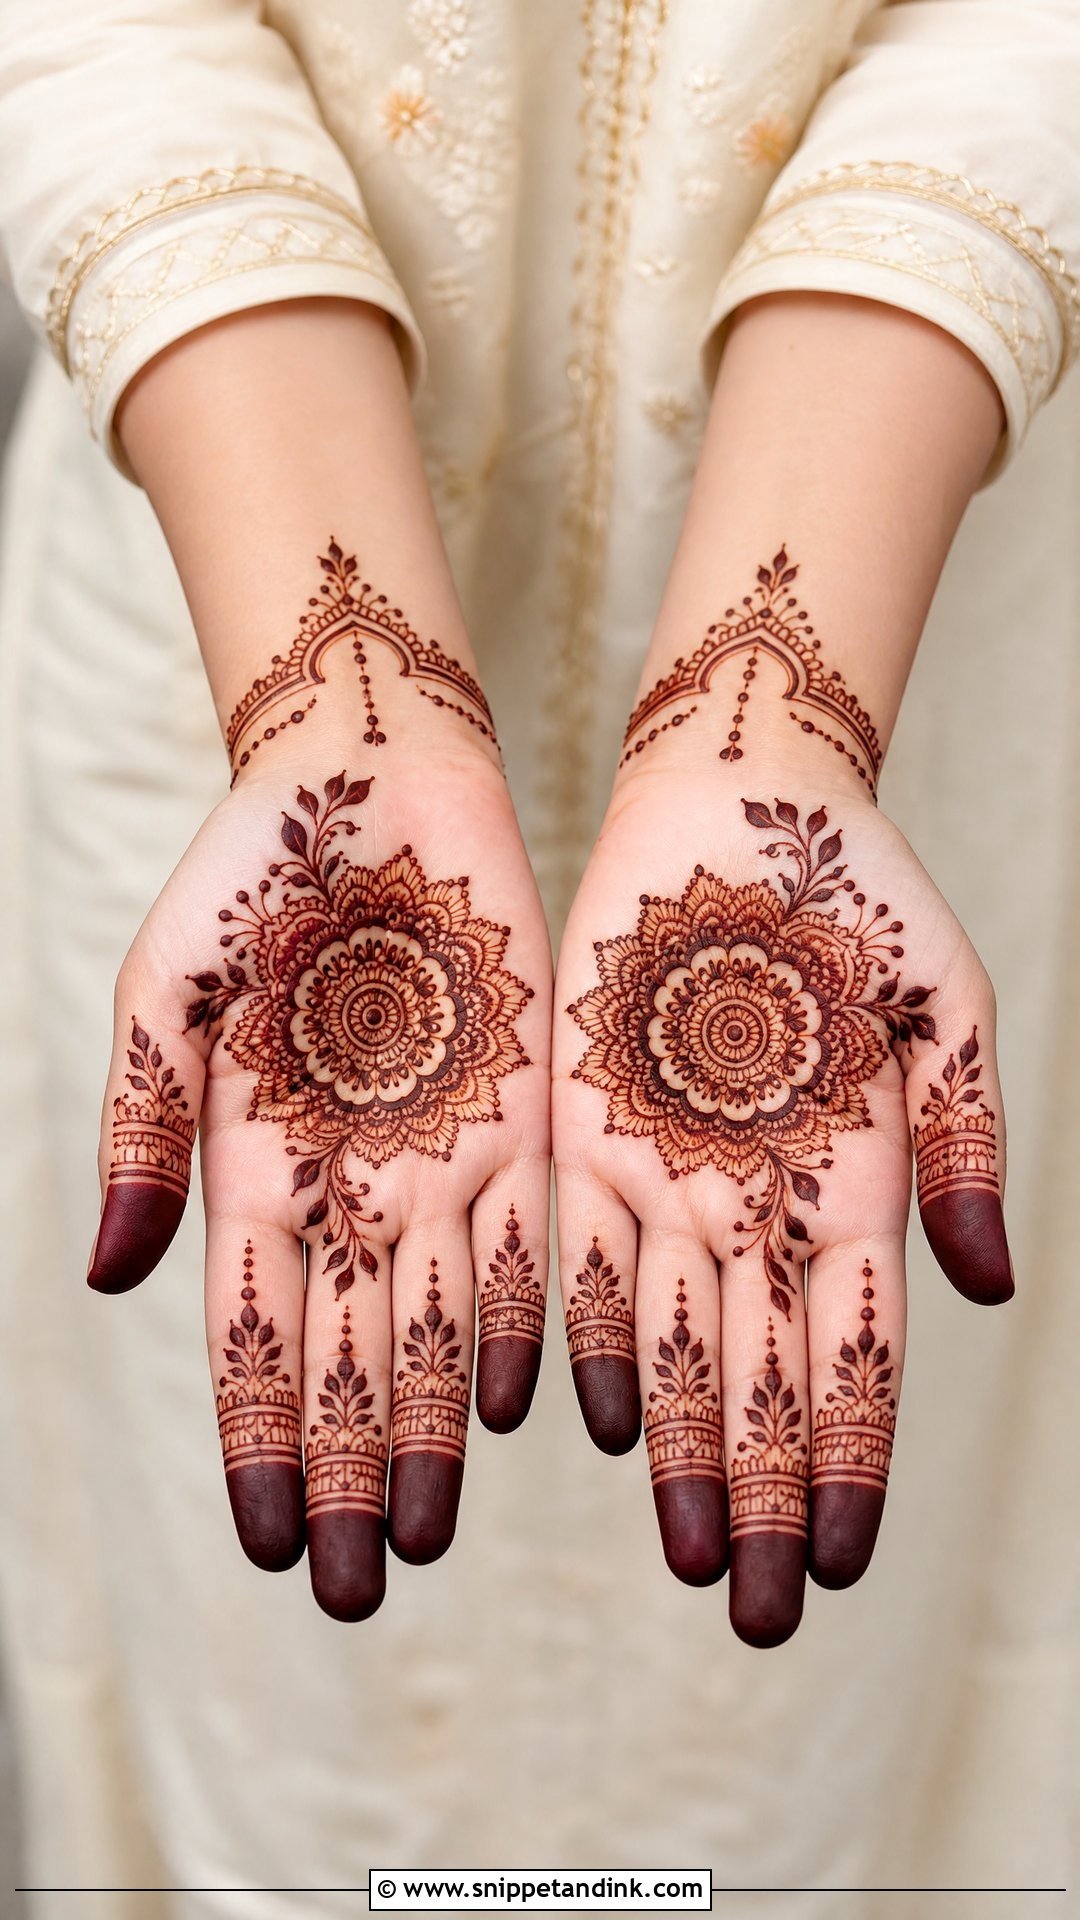
An Eid centre mehndi design has to be festive and quick, because Chand Raat queues are long. A round mandala, tikki, floral palm or Arabic centre all work, with small finger details, dots and a light wrist pattern. Eid outfits usually come with bangles and rings, so I keep the palm clean enough for jewelry to sit beside it. Bold outlines give a darker stain; fine patterns give a softer one. A balanced centre makes the hand look ready even if it took ten minutes.
19. Moroccan Centre Mehndi Design
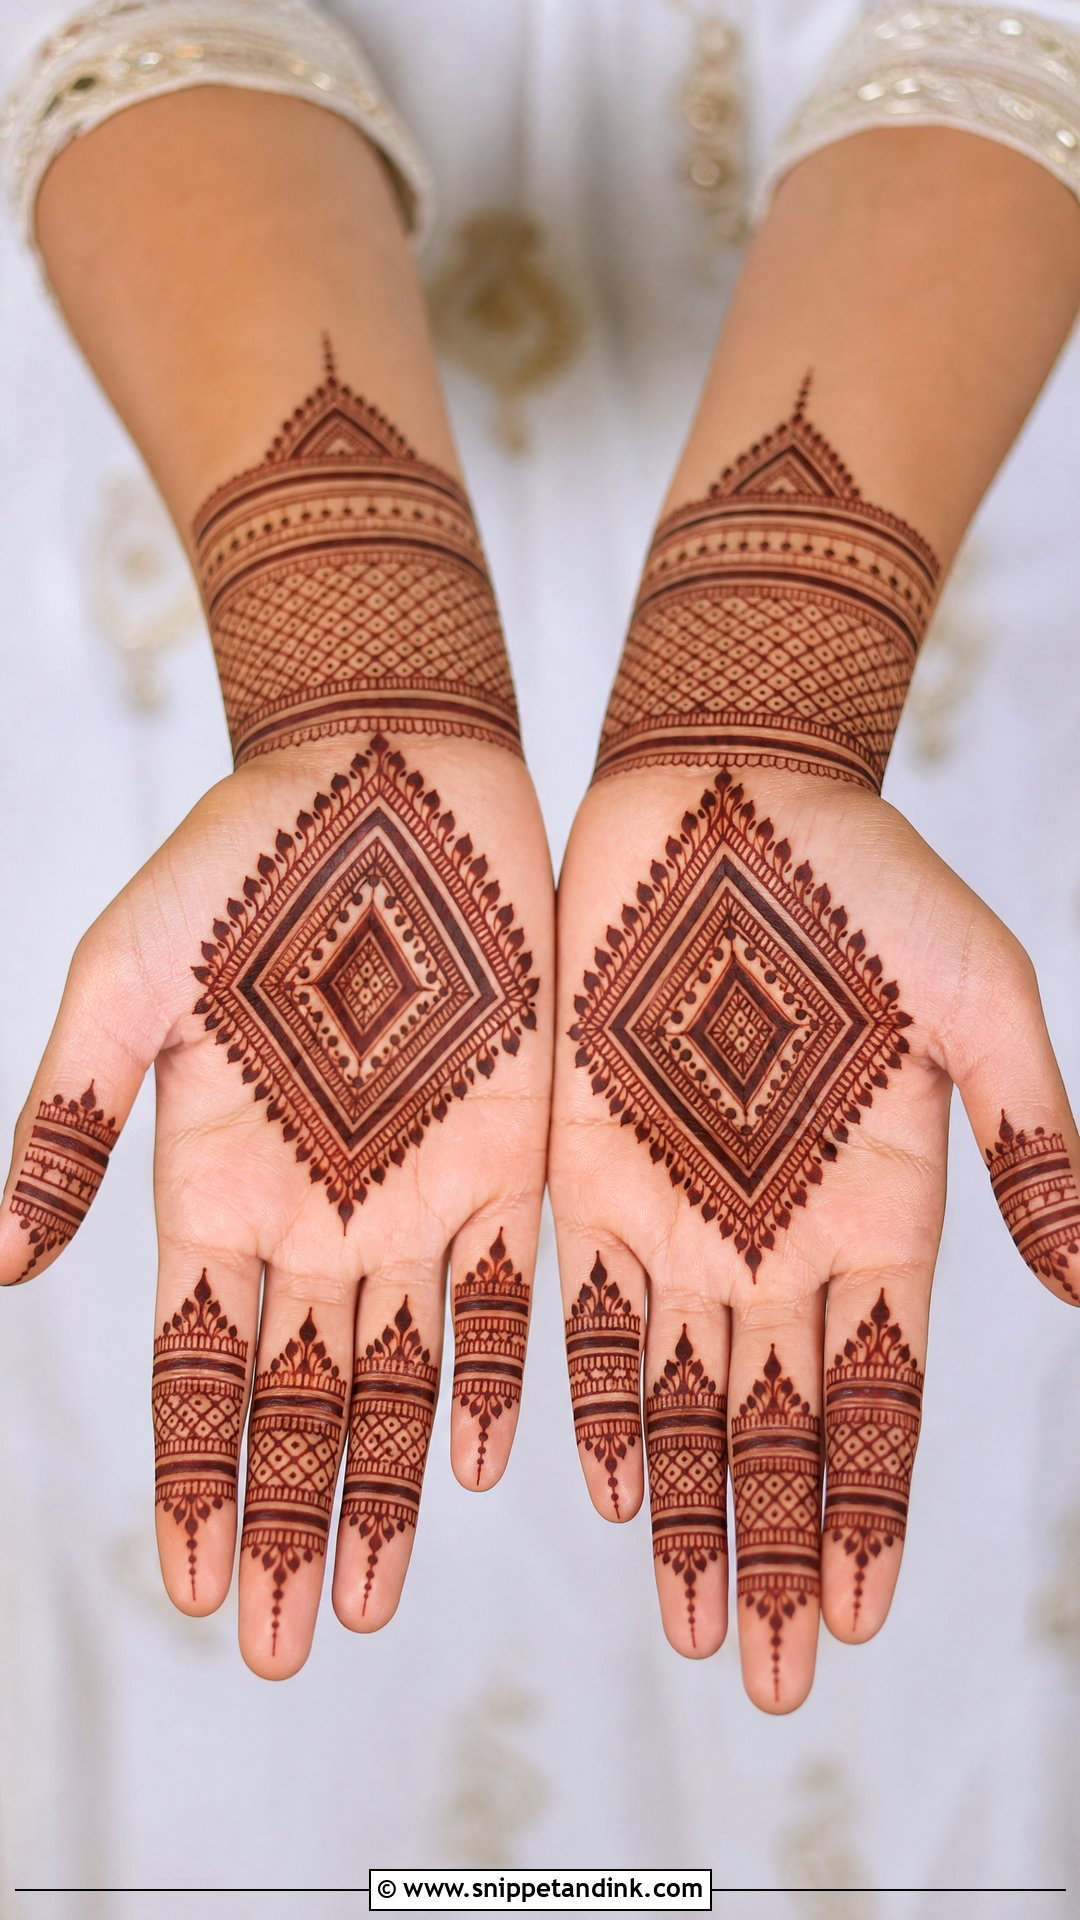
Moroccan centre work trades flowers and paisleys for diamonds, triangles, straight lines, grids and sharp borders. I place the main geometric motif in the palm or on the back hand, then repeat smaller versions toward the fingers and wrist. It suits people who don’t want florals at all. Even line weight and clean negative space are what make it work, and the paste consistency matters more here than for floral designs: I want it smooth enough that a long straight line doesn’t break. A deep reddish-brown stain shows the geometry best.
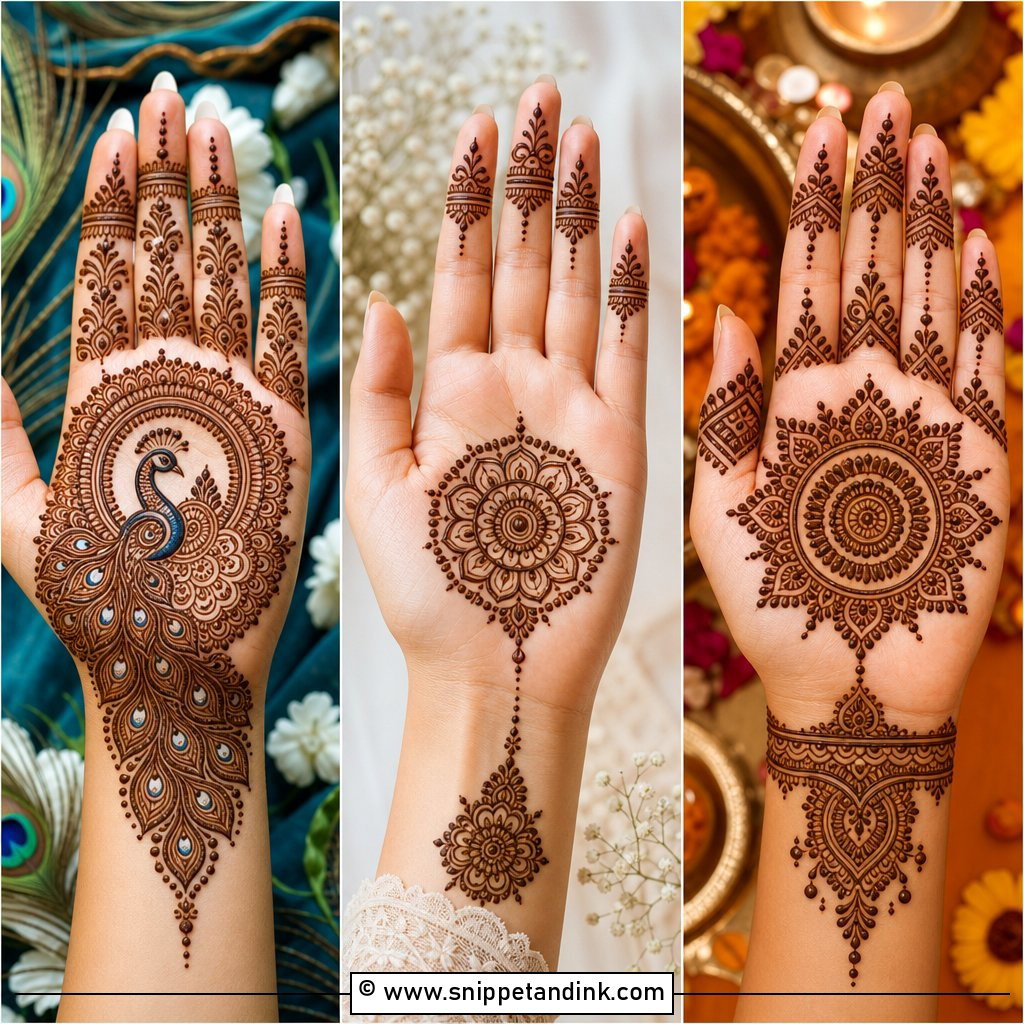
20. Gulf Centre Mehndi Design
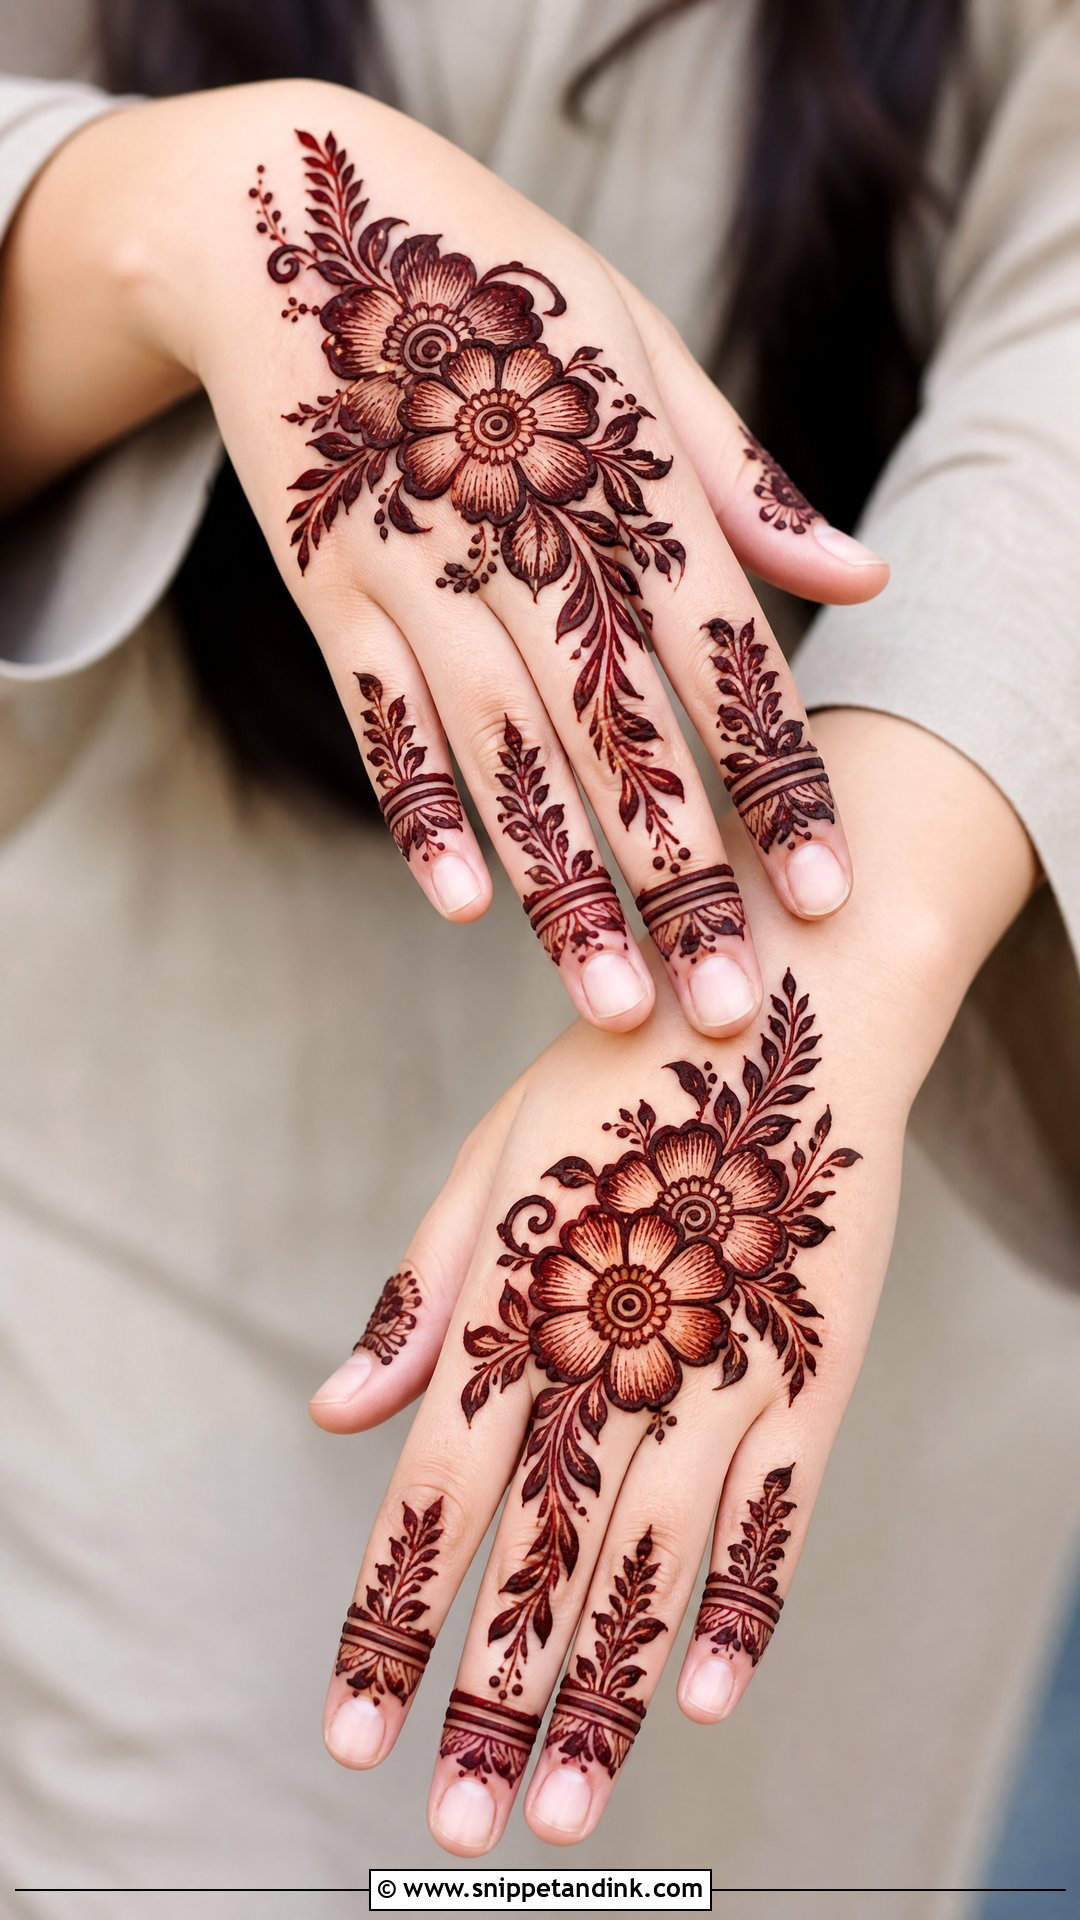
Gulf-style centre work is bold and flowing without being packed: a large flower, leafy cluster or curved Arabic motif with open skin around it, thick outlines, shaded petals and sweeping trails. I often run the pattern diagonally from wrist to fingers, keeping the centre motif as the anchor. It suits Eid, weddings and evening events and works on front hand and back hand placements. Thick outlines need paste that’s been strained well, or the line comes out lumpy.
Getting the Middle Motif to Stain Darkest
The palm centre is the best canvas on the body for colour, since the skin there is thick and warm. Most of what decides the final shade happens after I put the cone down.
- Keep the paste on as long as you can, ideally several hours or overnight. The longer it sits, the deeper the dye moves into the skin.
- Once it starts to dry, I dab on a little lemon and sugar mixture so the paste stays in contact with the skin and doesn’t crack off early.
- Scrape the dried paste off with a blunt edge or your fingers. Don’t wash it off with water.
- Keep the area away from water for as long as possible afterward, ideally the rest of the day. Warmth helps the stain develop, so stay somewhere warm rather than in a chilly, air-conditioned room.
- Expect orange at first. The colour deepens to reddish-brown or maroon over the next day or two, so time your application at least a day before the event.
What I’d Never Put on Your Palm
Natural henna stains reddish-brown, never jet black. Pastes sold as instant black henna can contain chemical dyes that cause serious skin reactions, so I only use paste I’ve mixed from henna powder, and I’d ask any artist directly what’s in theirs. If you have sensitive skin, a small patch on the inner arm a day or two ahead is a sensible check.
One Motif, Placed Well, Does Most of the Work
Every design here rests on the same idea: one clear focal point and a hand layout that supports it. A small mandala is enough for an ordinary festive day; paisley, peacock, jaal and bridal centres carry more ceremony. When you decide, think about your hand shape, your outfit and how long you can sit still. Then ask your artist to mark the centre before starting, keep the lines clean, and let the finger details echo the main motif.
You'll Like These Ideas:


Leave a Reply