
Arabic mehndi is the style I reach for when a bride wants her hands to look rich but still wants to see her own skin between the motifs. Instead of packing every millimetre, it moves in a diagonal trail: big shaded flowers, paisleys and vines, with open gaps that let the stain read cleanly from across a room. That structure scales well. I can keep it to a single trail for a modern bride or carry it from fingertips to elbow for a full bridal look. Below are the 25 layouts I get asked about most, with notes on how each one actually behaves on the hand and after the paste comes off.
Deciding How Far Up the Arm the Trail Should Travel
The first question I ask a bride isn’t about flowers. It’s about her sleeves. A full-sleeved lehenga blouse or a long-sleeved gown hides anything above the wrist, so forearm work that took an extra hour may never appear in a single photo. Short, sheer or cap sleeves change that completely, and that’s when I recommend carrying the trail toward the elbow.
Skin matters too. Palms and fingertips stain deepest, the back of the hand a little lighter and the forearm lighter again. If you want the arm to match the hand in colour, the forearm motifs need to be bolder, with thicker lines and more shading, or they will look faded beside the palm.
Time in the chair
Arabic work goes faster than dense Indian bridal mehndi because of the open spacing, but full hands, forearms and feet still take several hours. Book enough time, eat beforehand and wear a top you can push up past the elbow. A bride who is rushing and fidgeting smudges more lines than any artist does.
1. Full Hand Arabic Bridal Mehndi Design
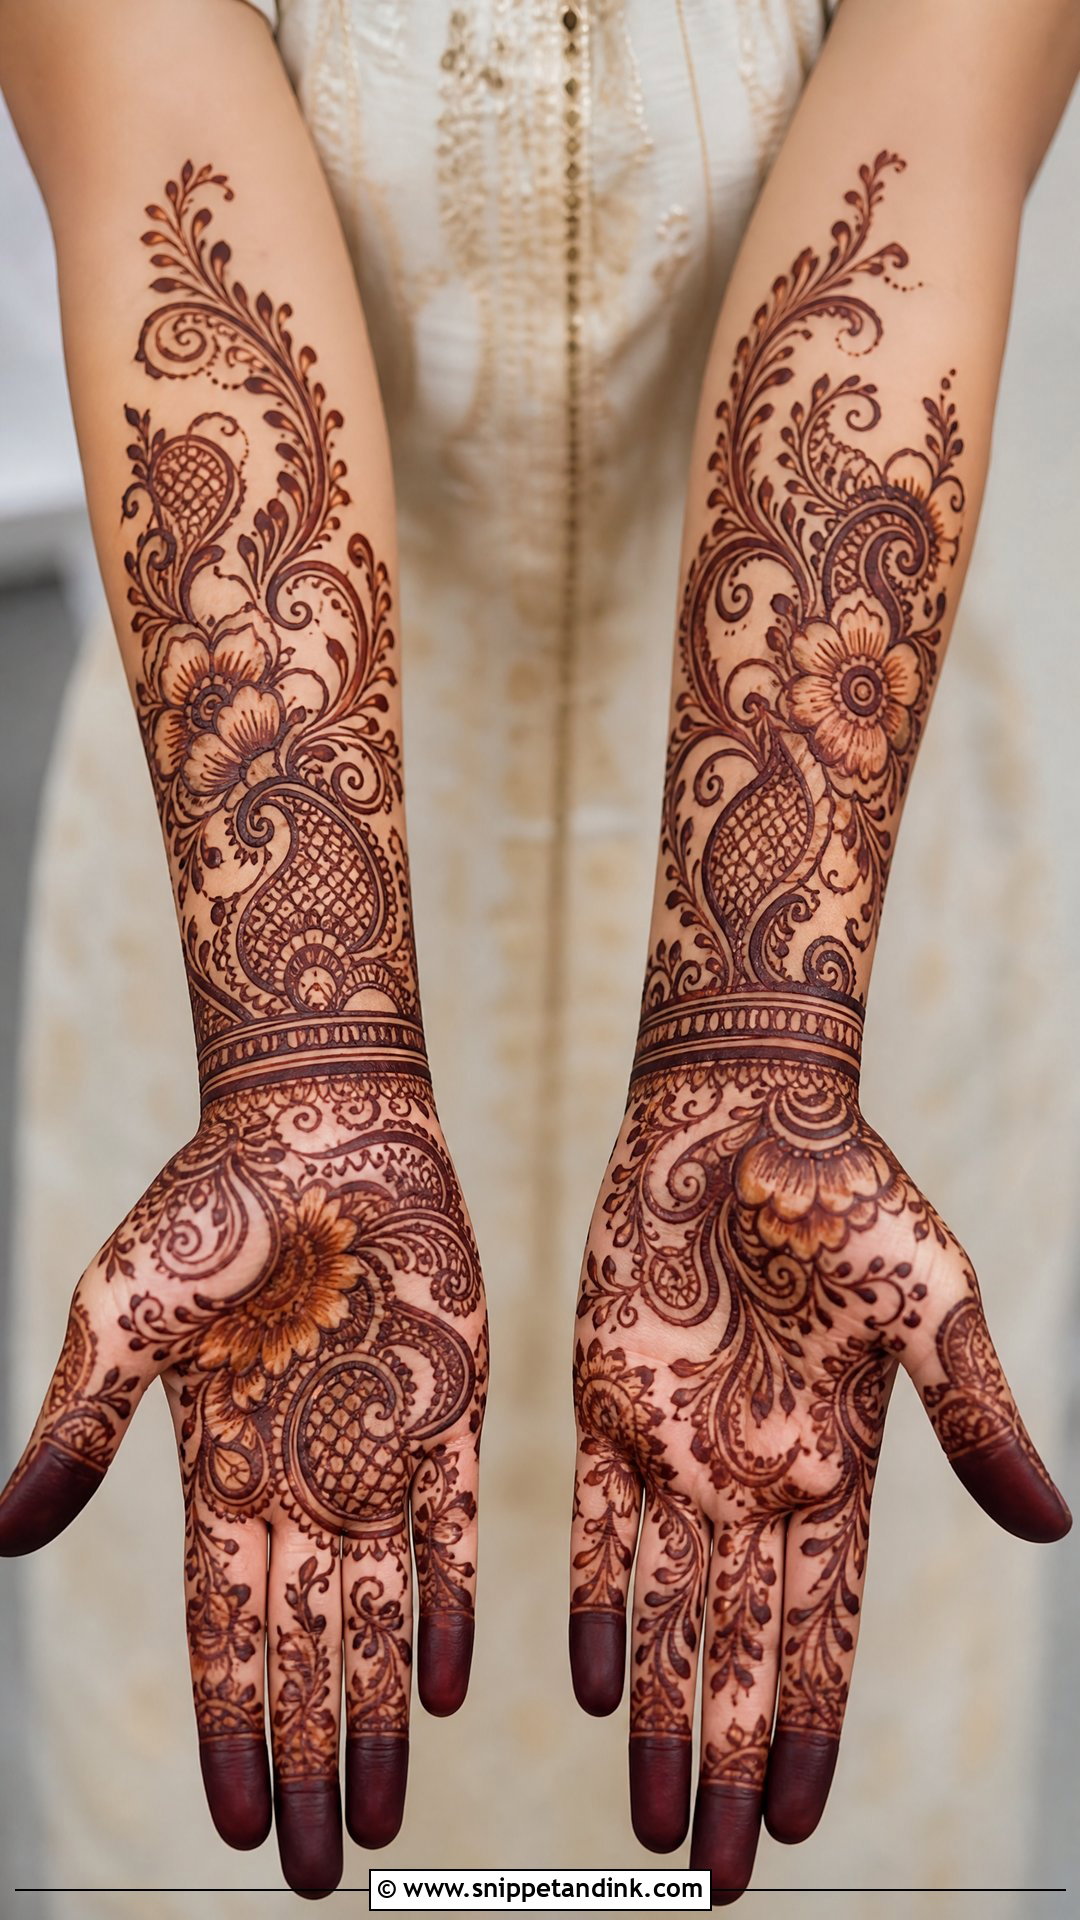
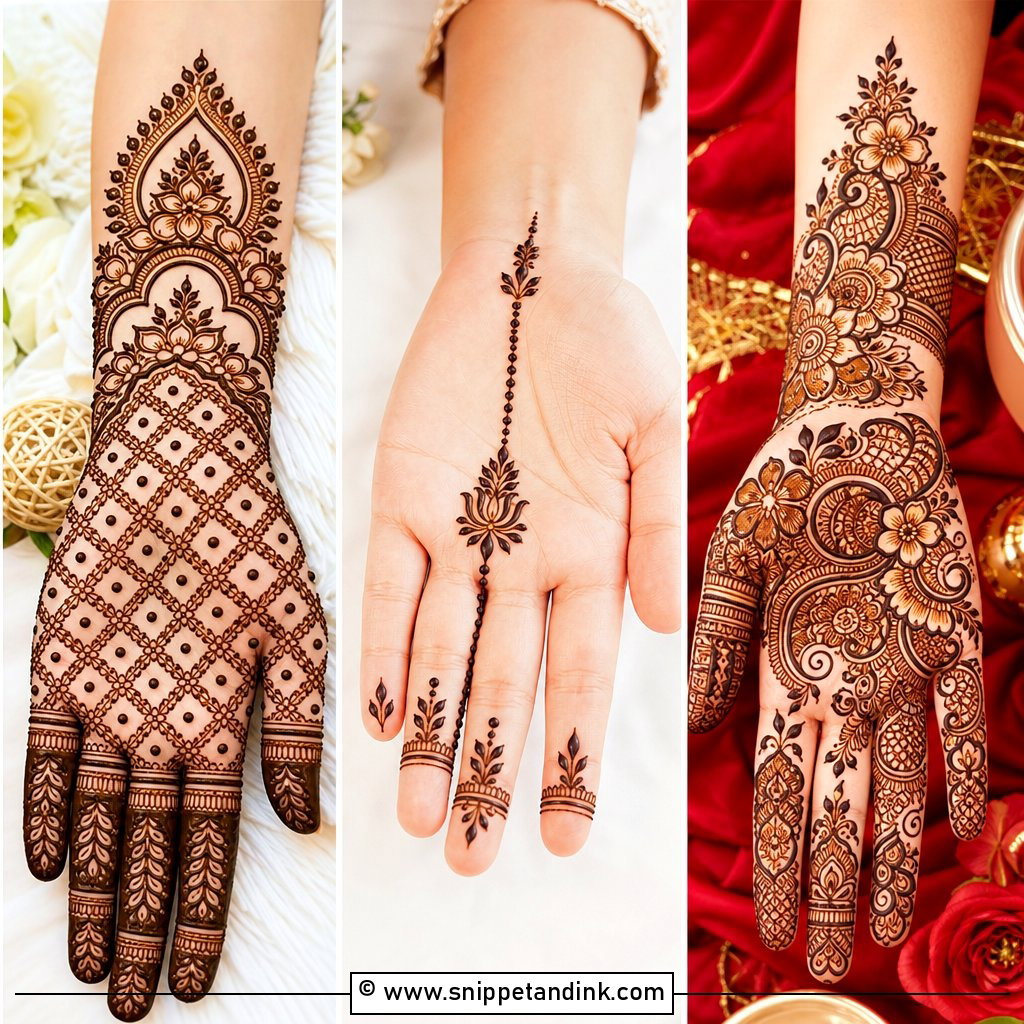
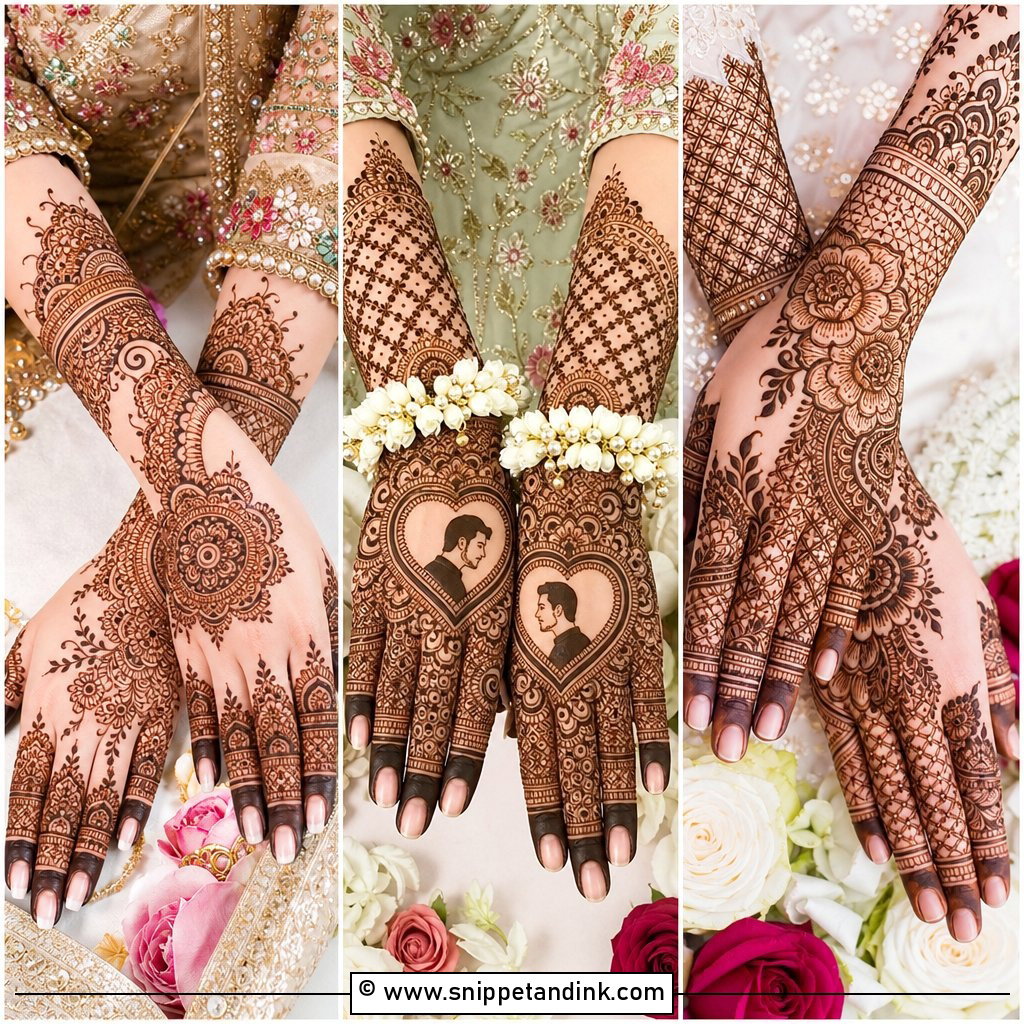
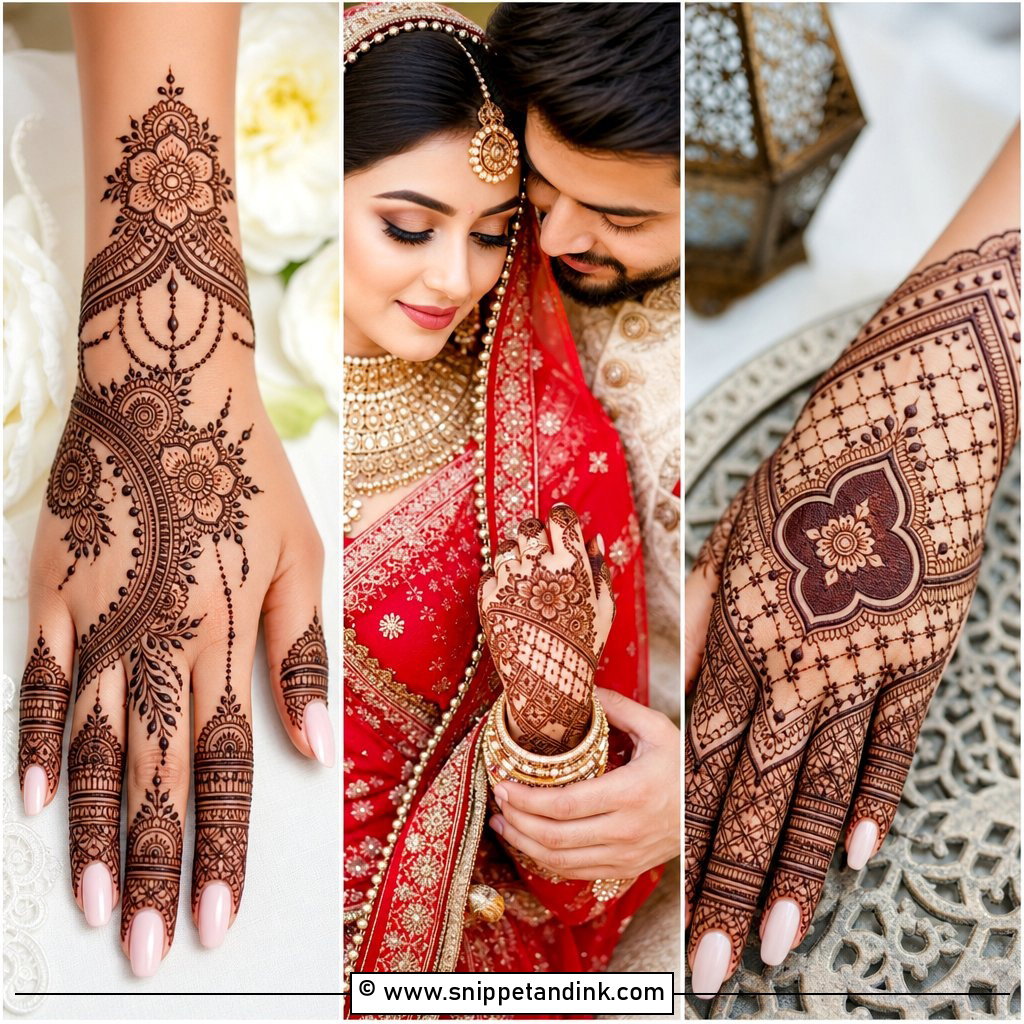
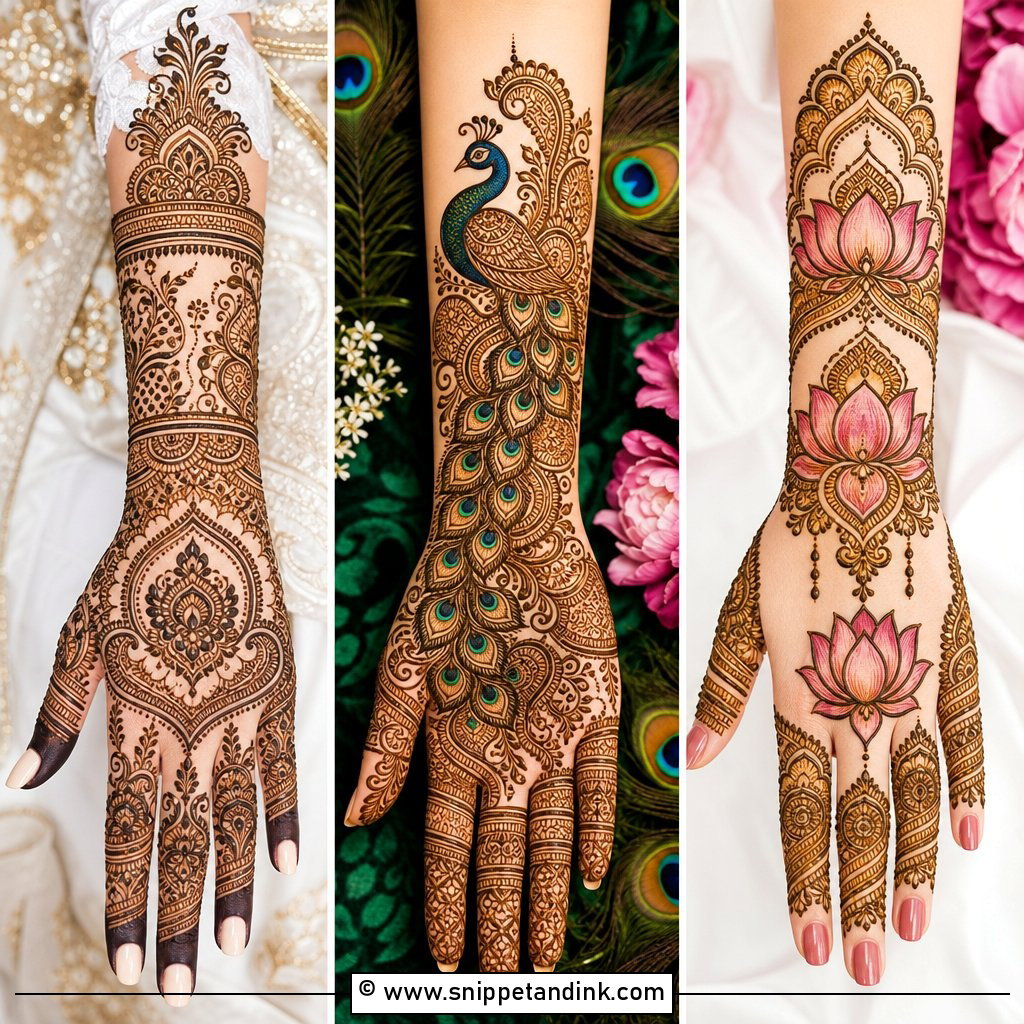
A full hand Arabic bridal layout gives you richness without the crowded feeling of a traditional packed design. I usually anchor it with one bold flower on the palm, then let paisleys, leafy vines and curved bands step up toward the wrist or forearm. The gaps between motifs are the whole point, so I protect them even when a bride asks me to “fill a little more.” Fingers get fine lines, small leaves and net work. Plan on more sitting time than the lighter designs here, because shading every petal properly on both sides of both hands takes a while.
2. Arabic Front Hand Mehndi Design
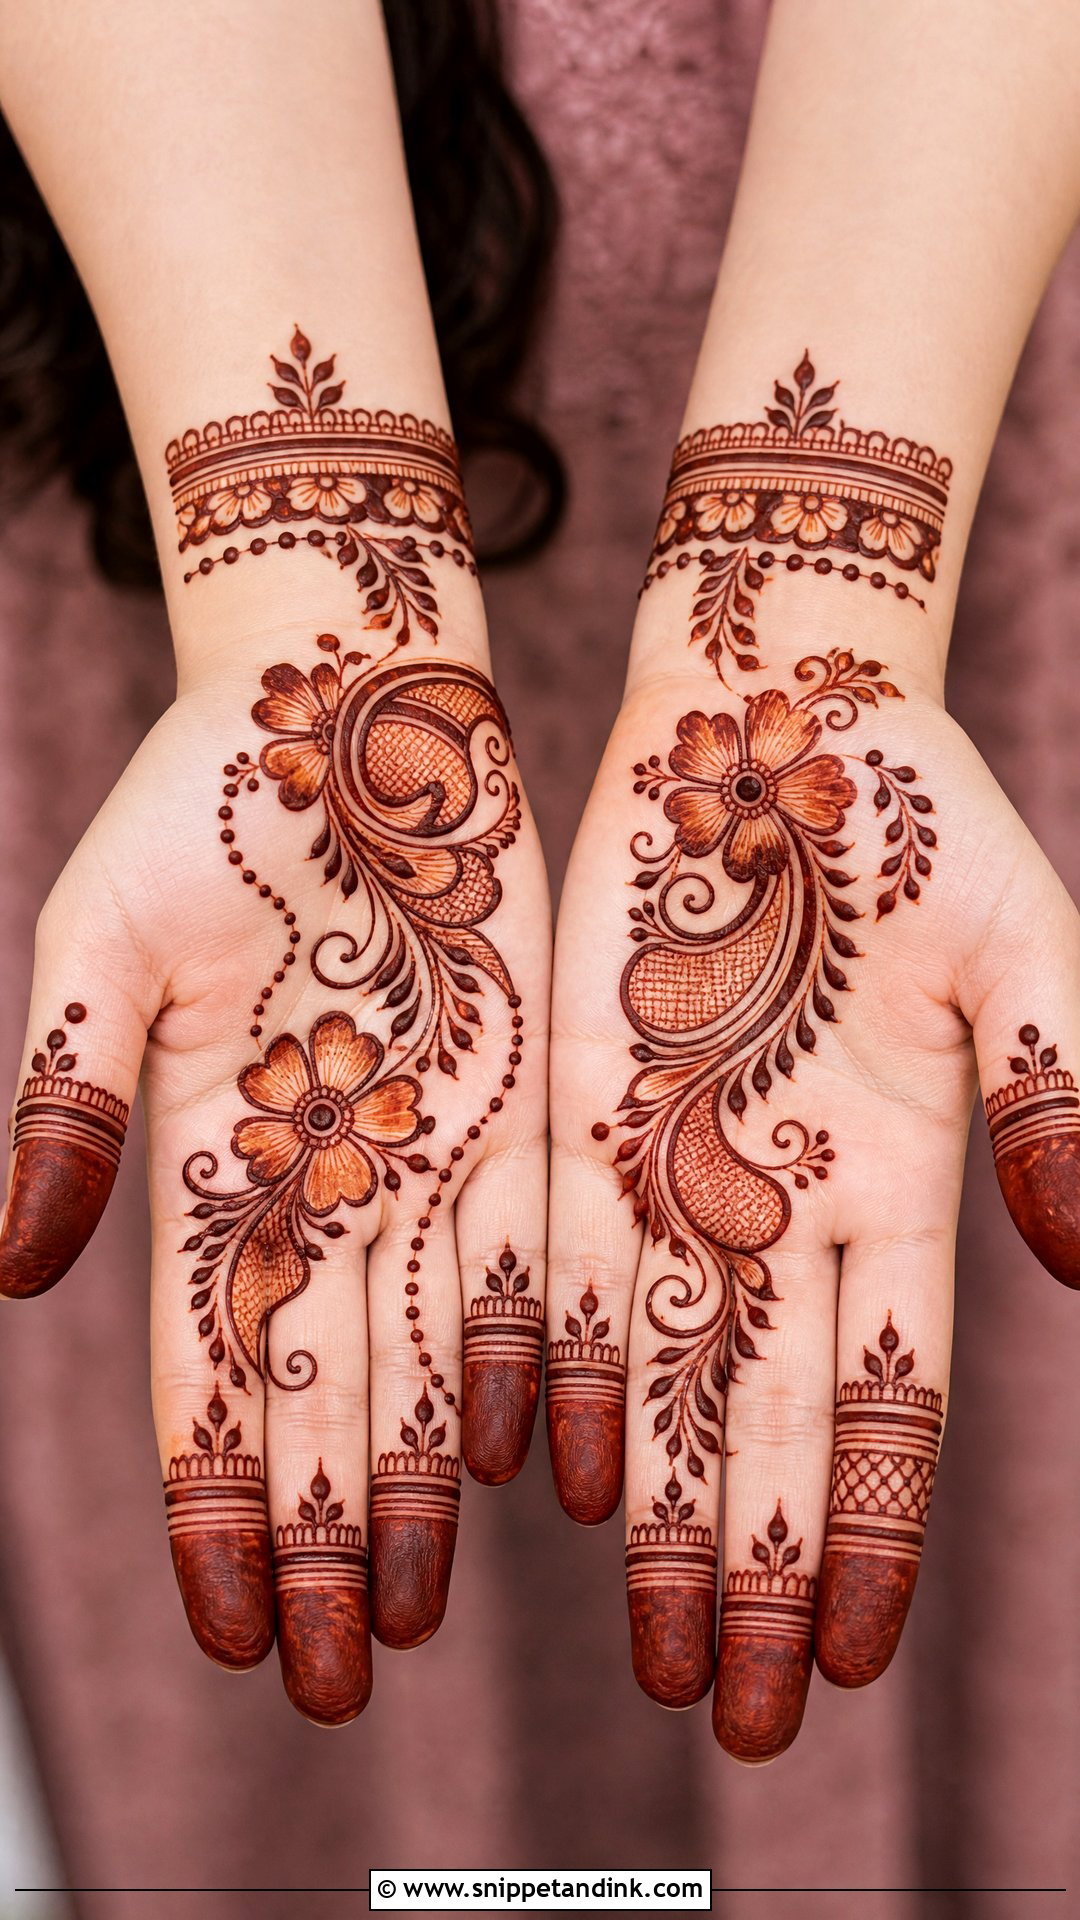
An Arabic front hand mehndi design puts the focal point right on the palm, which is where henna stains darkest. I start with a large flower or paisley on one side, then run a diagonal trail of vines and buds toward the wrist, leaving the opposite edge of the palm open. Fingers take half-filled tips, thin bands or a small floral chain. Because palm skin is thick and takes colour so well, even a modest trail here ends up looking deeper than the same pattern on the back of the hand. Ask for balanced spacing so the result reads as bridal rather than as a guest’s quick design.
3. Arabic Back Hand Mehndi Design
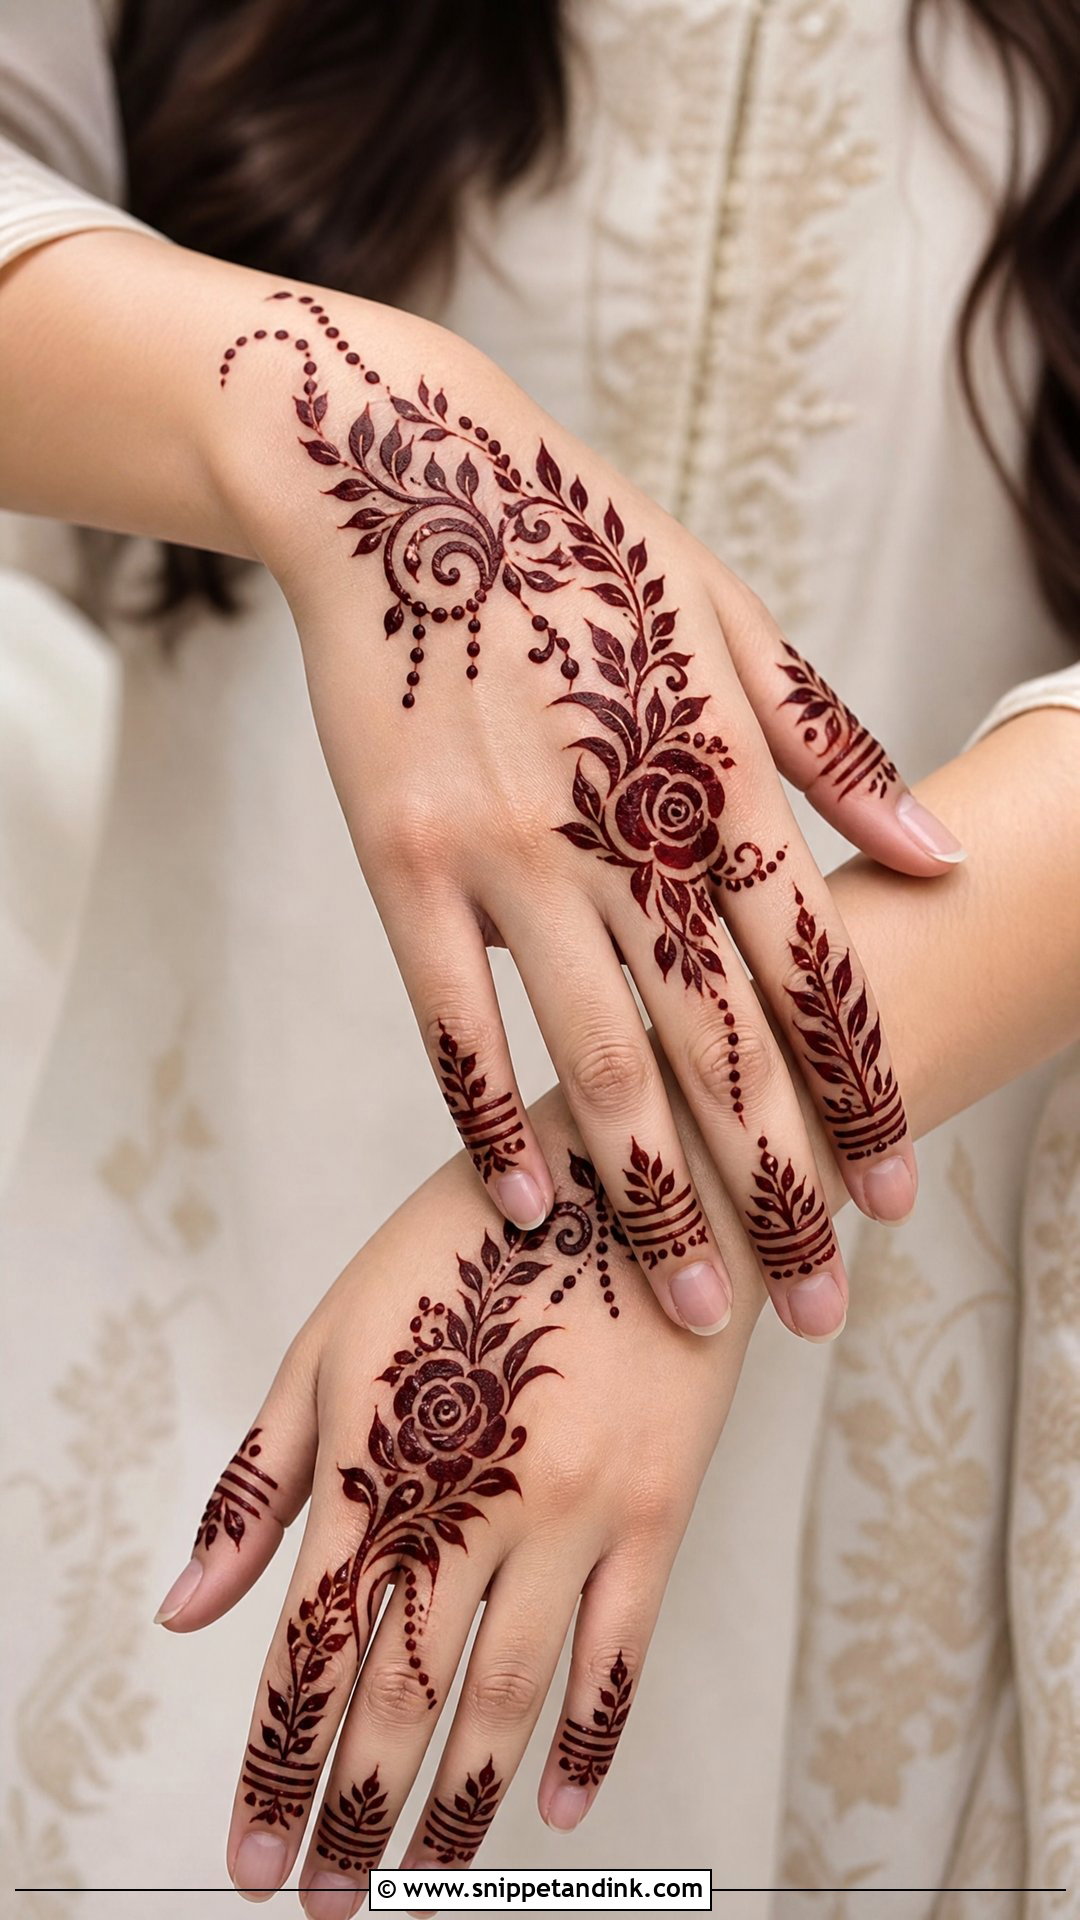
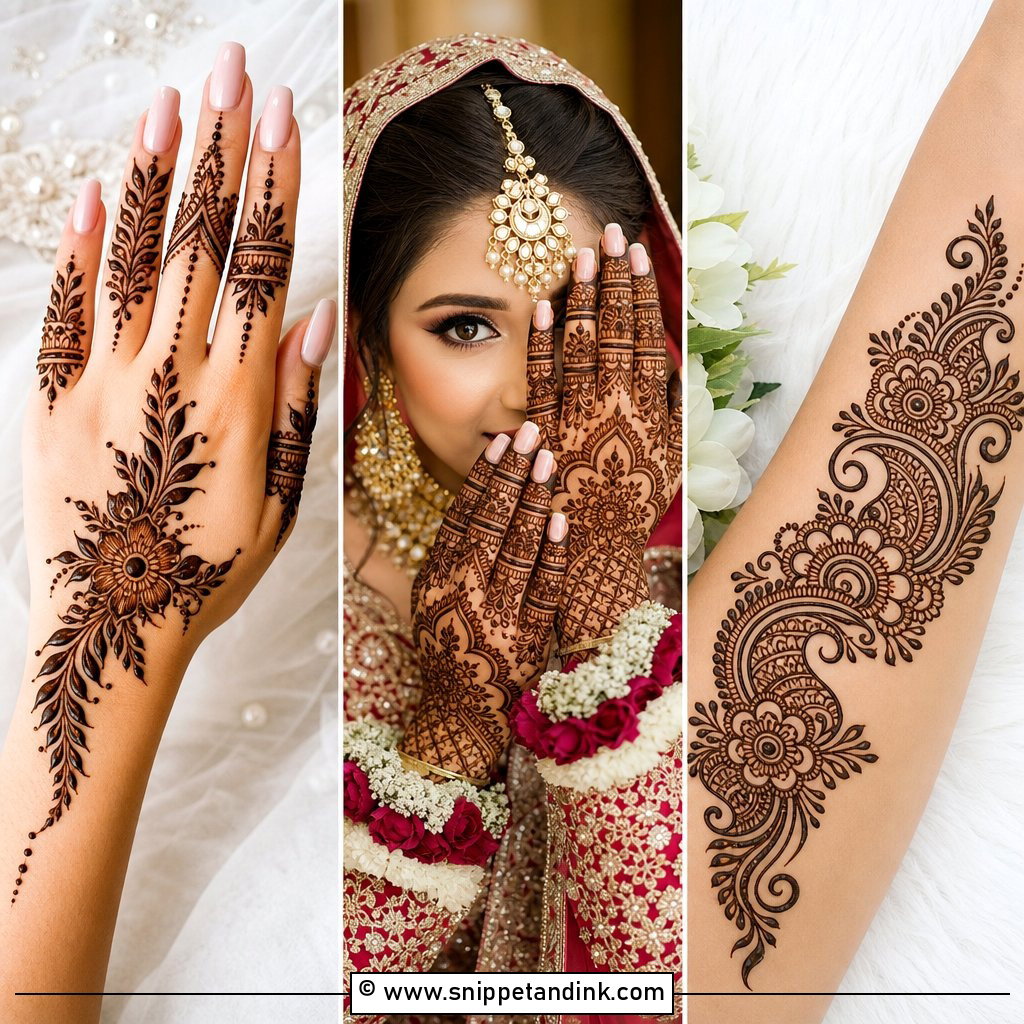
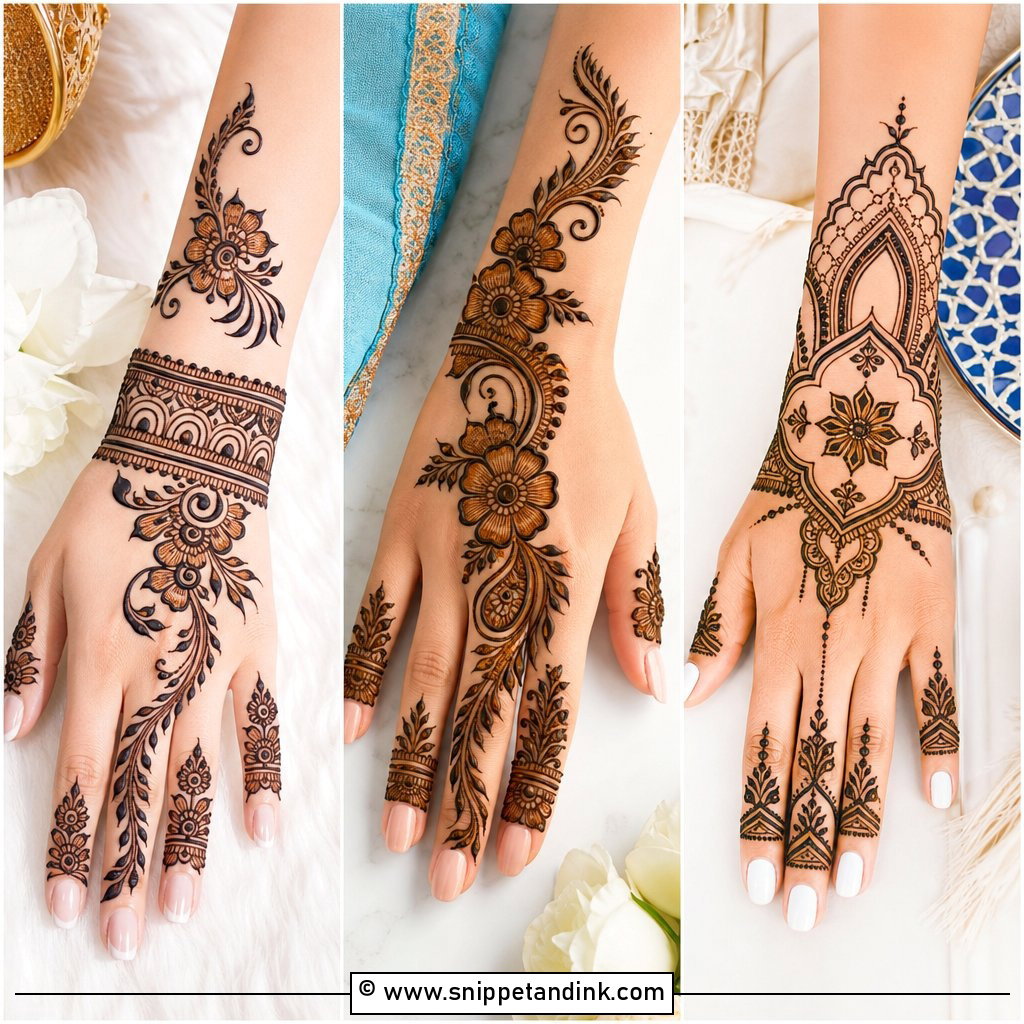
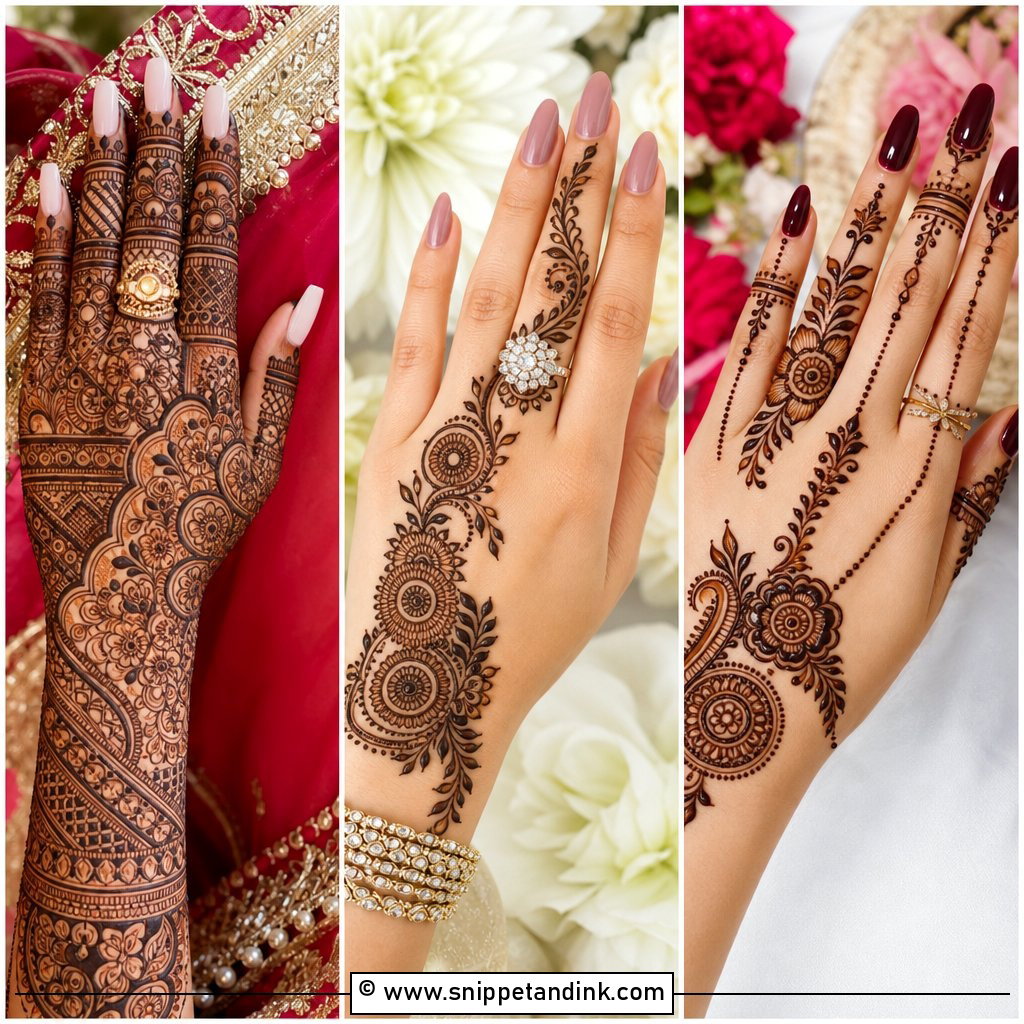
The back hand is where most ring and bangle photos are taken, so this is the side I fuss over most. The trail usually starts at the index or middle finger and sweeps diagonally to the wrist, built from roses, leaves and paisleys, with dots and fine filler strokes softening the edges. The rest of the hand stays partly open. Back-of-hand skin is thinner and stains a shade lighter than the palm, so I outline the main motifs a little bolder here to keep them readable. Brides pick it for engagement, nikah, walima or reception, and I often scale it down for bridesmaids too.
4. Simple Arabic Wedding Mehndi Design
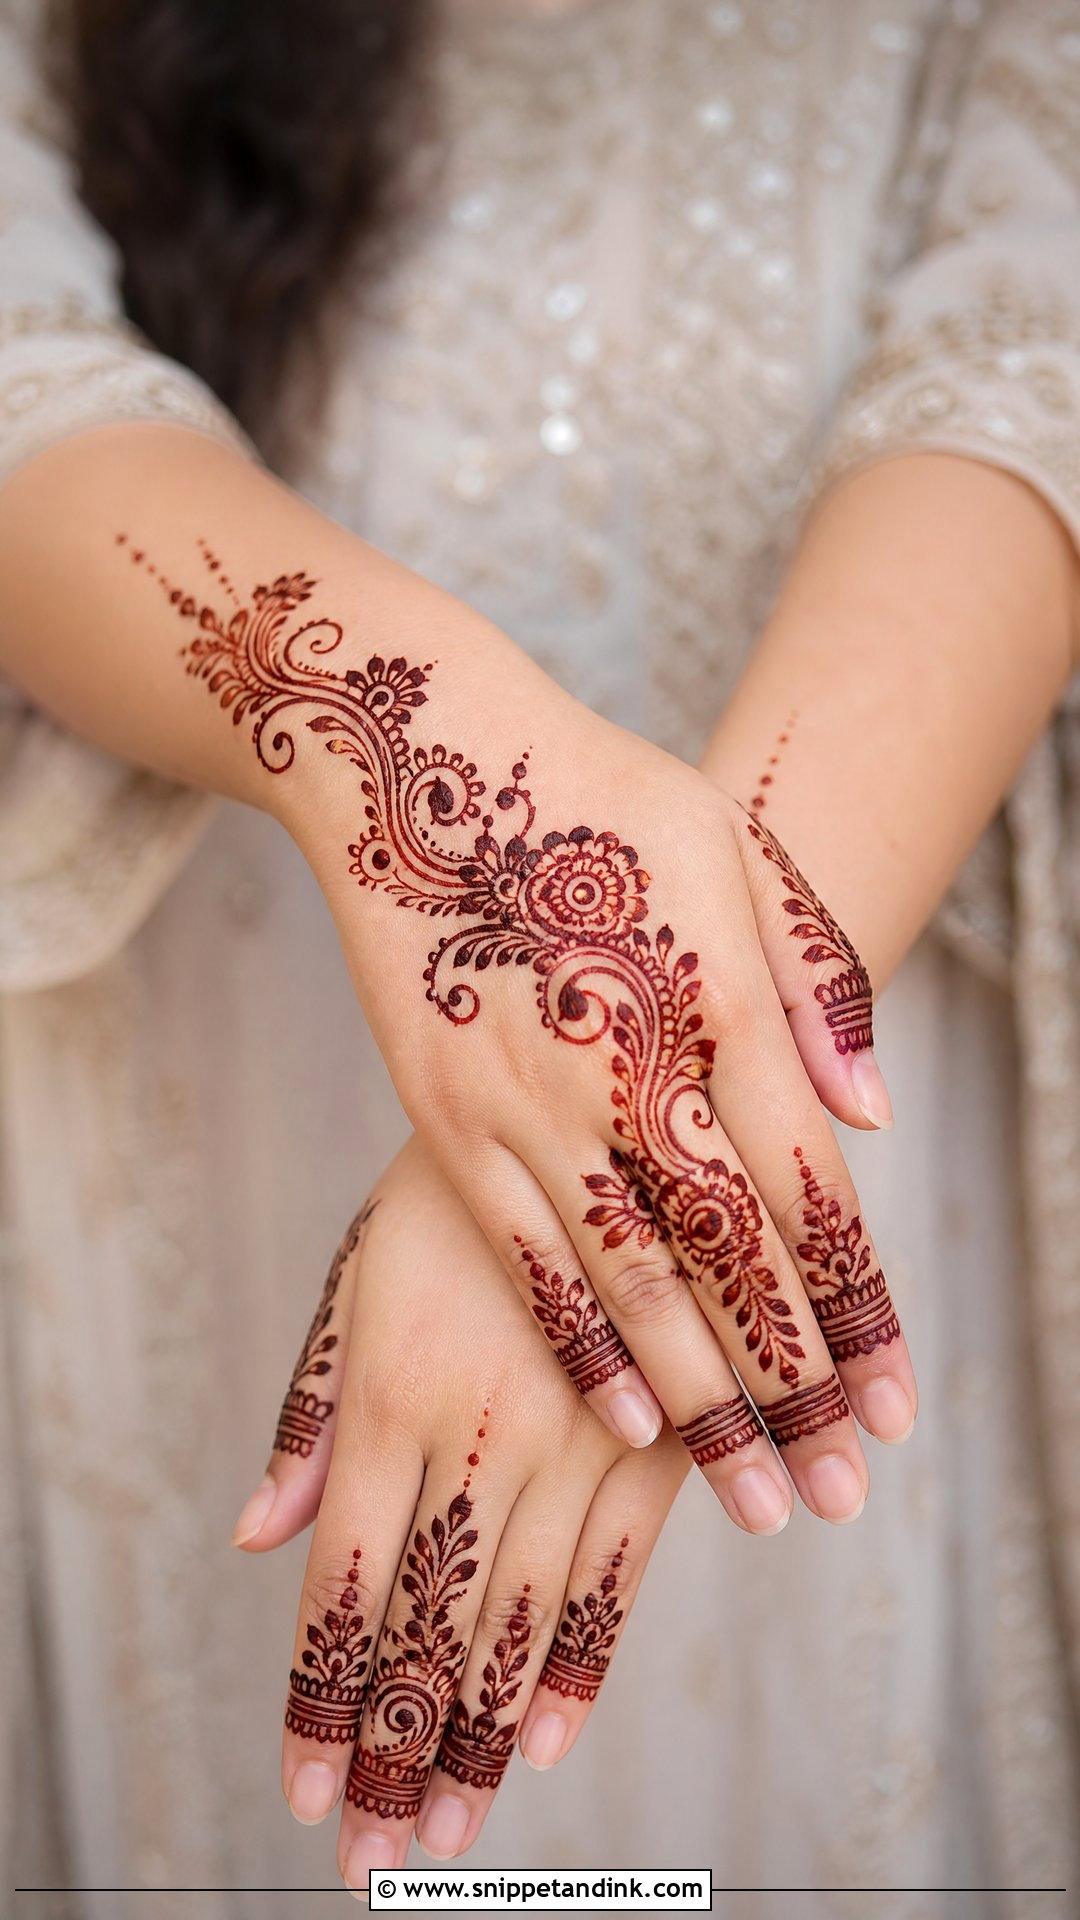
Short on time, or someone who finds sitting still for hours genuinely hard? The simple layout is where I’d start. One strong floral trail across the palm or back of the hand, a few leaves and dots, small paisleys and neat finger detailing. Its charm comes from clean placement and bold outlines, not coverage. To make it read as bridal, I extend the trail a little past the wrist and add tidy finger bands. On every skin tone, the open areas make the stain look sharper.
5. Heavy Arabic Bridal Mehndi Design
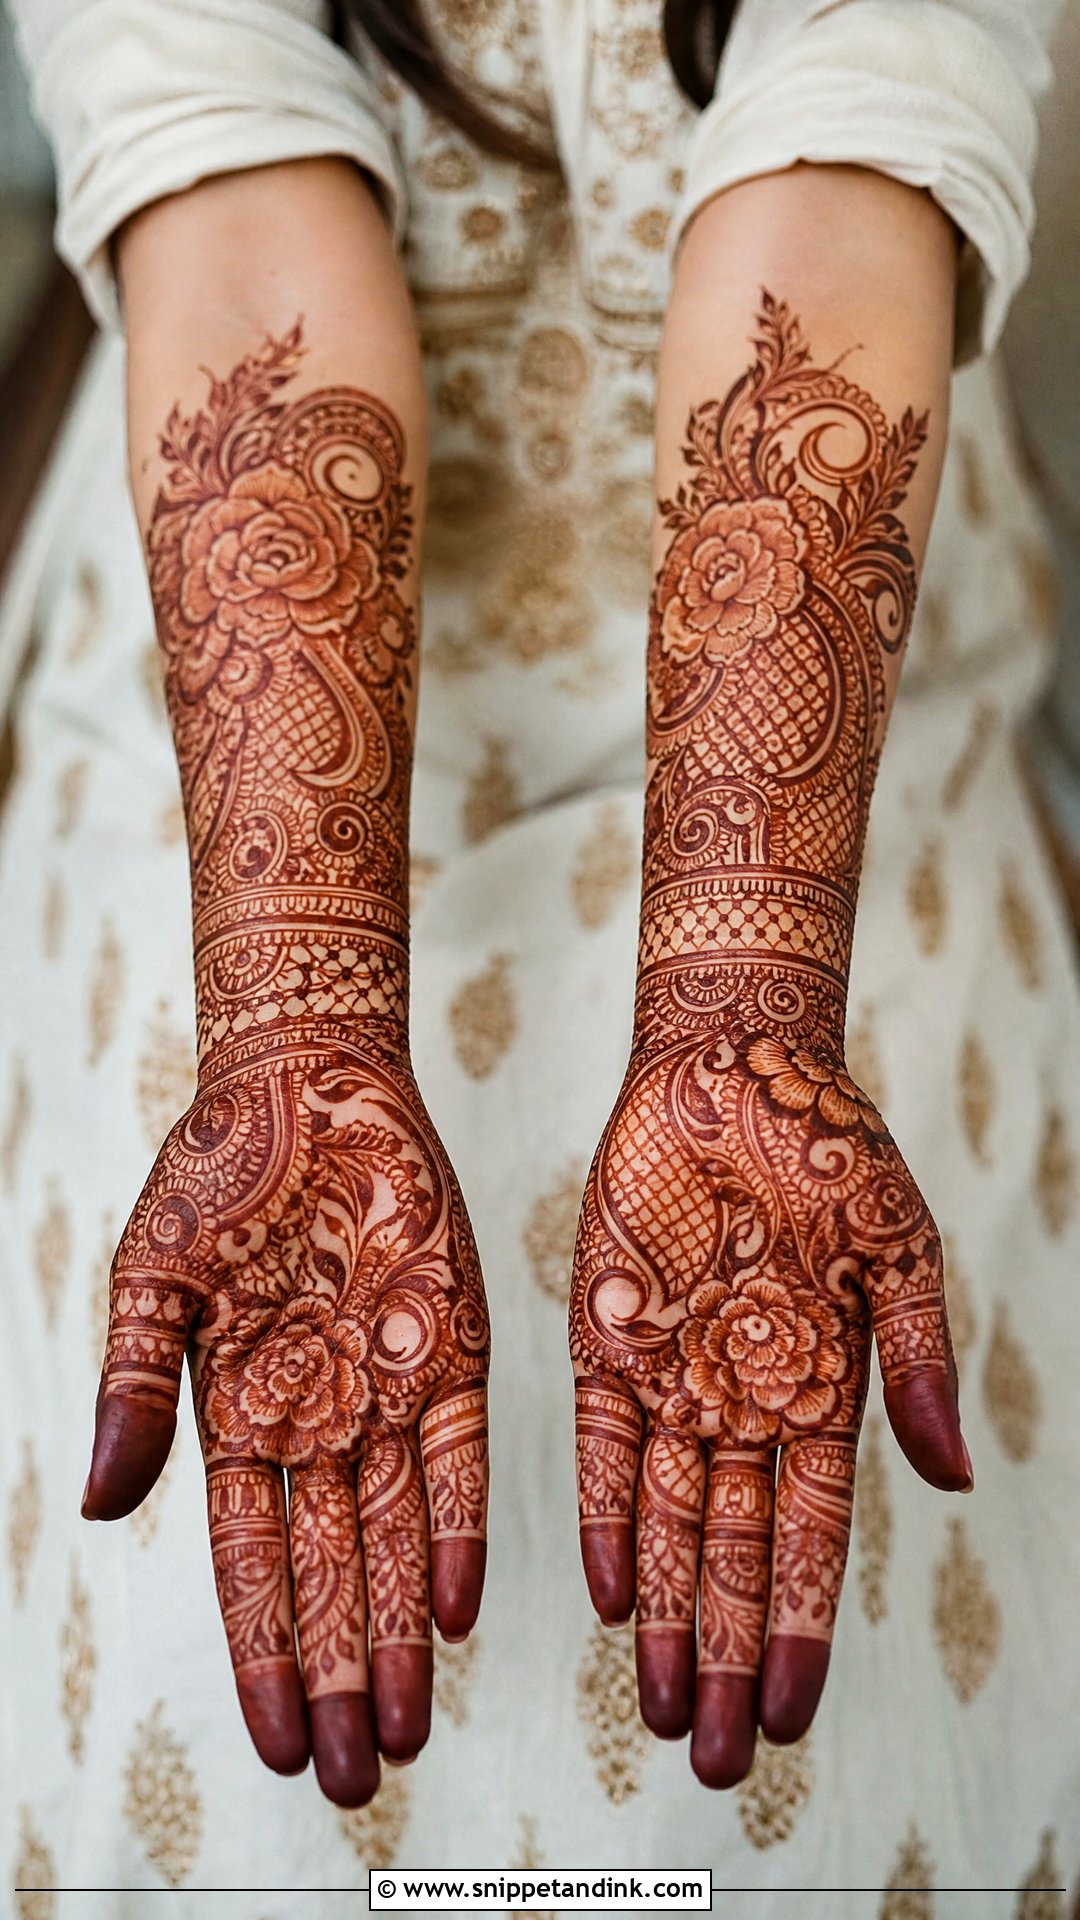
Heavy Arabic bridal work fills the hand with layered flowers, paisleys, jaali mesh, leafy vines and detailed wrist bands, often from fingertips to mid-forearm. What keeps it Arabic is the curved movement and the size of the main motifs, not tiny elements packed everywhere. The risk with heavy work is that lines bleed into each other as the paste dries and the hand loses its shape, so I keep the major flowers clearly separated by a sliver of skin. Pair it with heavily embroidered outfits and stacked bangles; on a plain gown it can overpower everything else.
6. Floral Arabic Bridal Mehndi Design
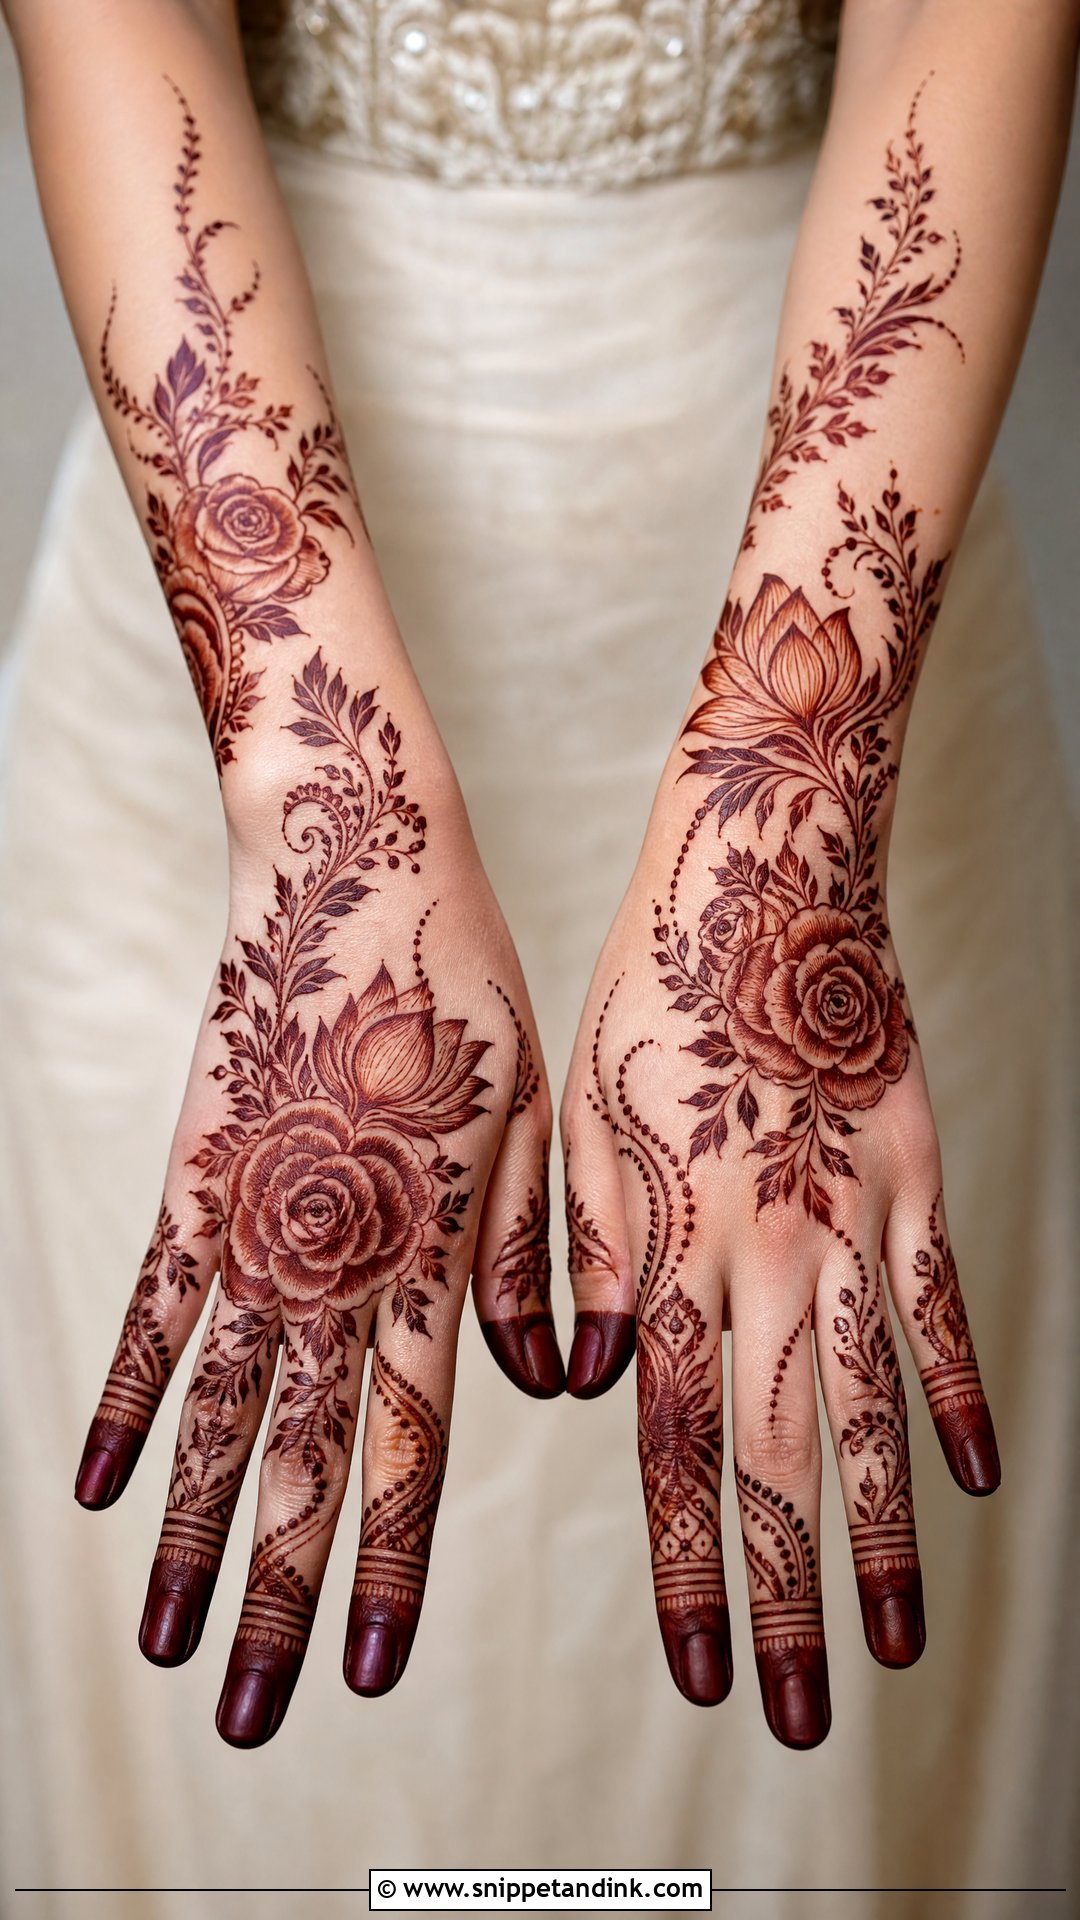
Floral Arabic work uses flowers that are noticeably larger than Indian-style fillers, which is exactly what gives it that open look. Roses, lotus shapes and shaded blooms form the main trail across the front hand, back hand or both, with clusters placed at the palm, wrist and arm and joined by dots and curved lines. Shading is where floral designs succeed or fail. I lay the shading in thin strokes from the petal base so it stains as a soft gradient rather than a solid brown blob. Done well, it holds up beautifully in close-up shots.
7. Arabic Paisley Bridal Mehndi Design
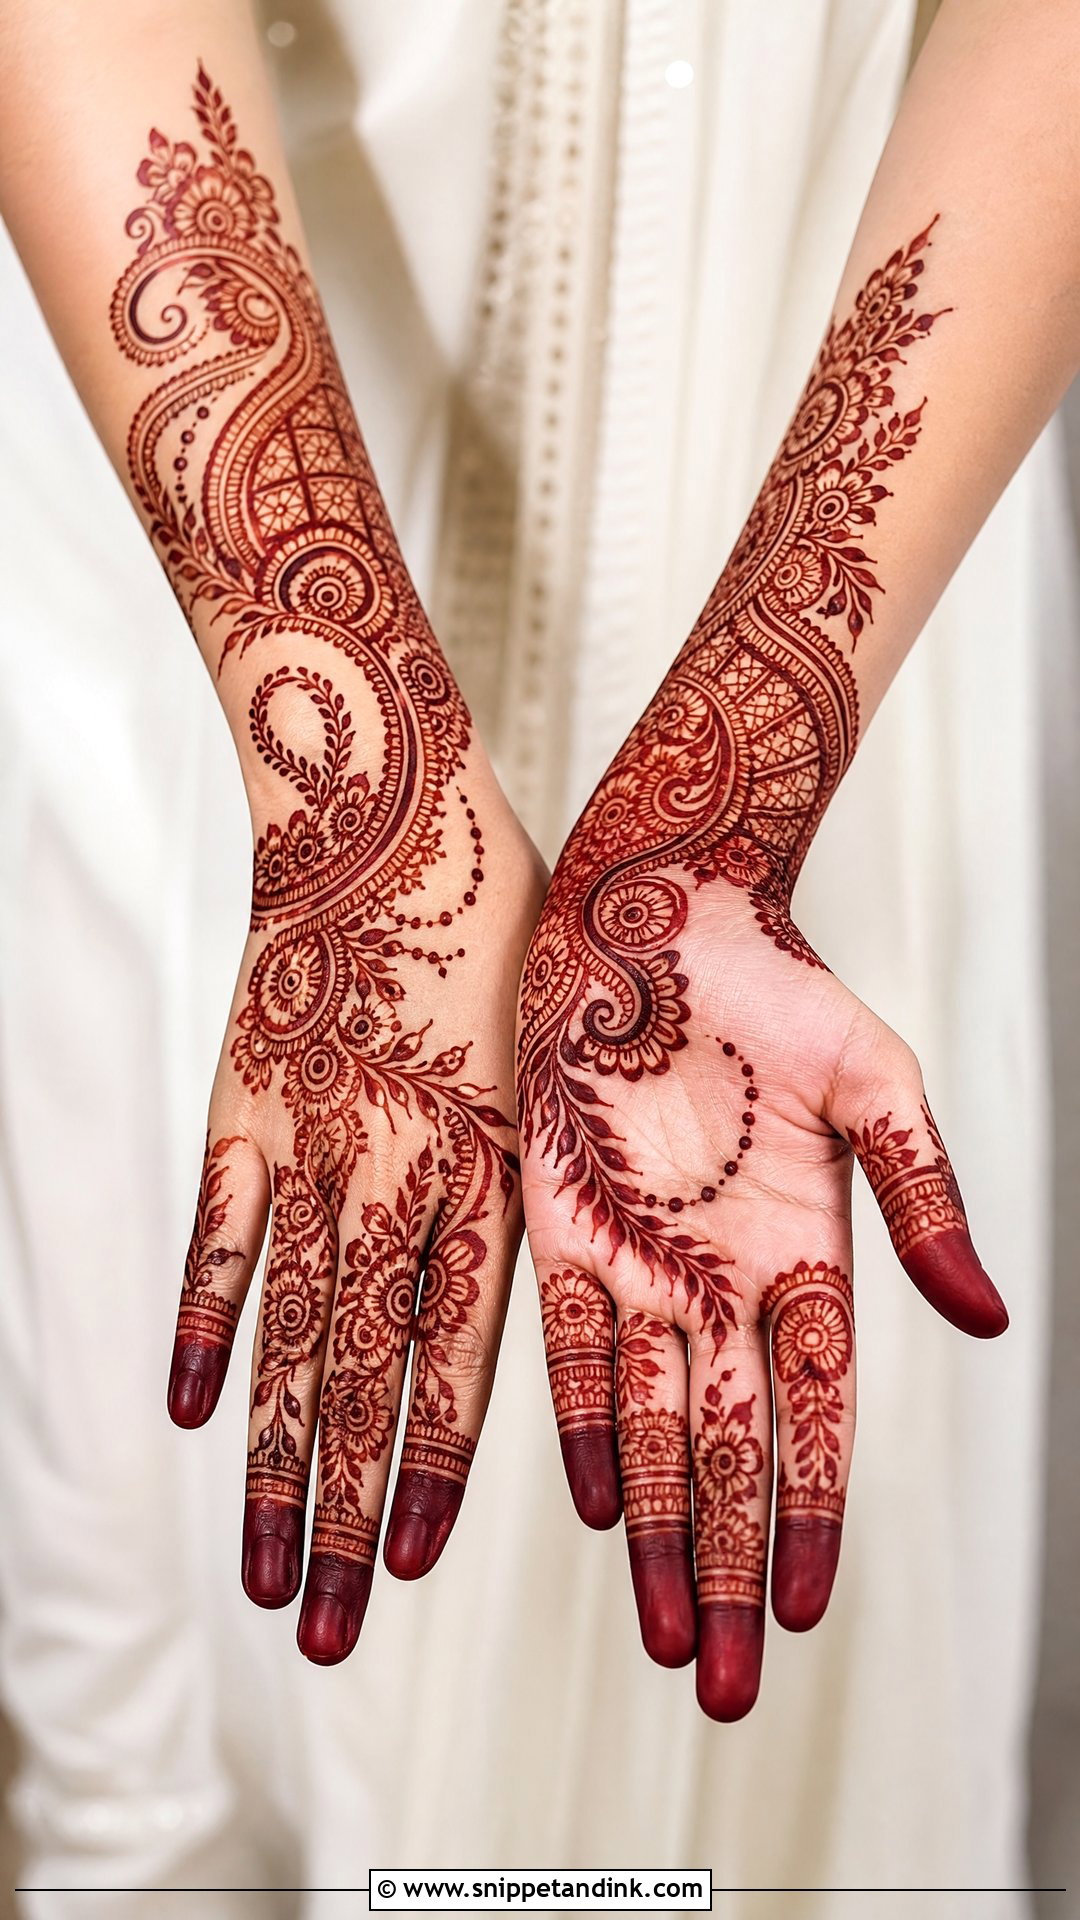
Paisleys are forgiving shapes, which is why I like them for hands of any length. On a long, narrow hand I stretch them; on a short, wide palm I shrink them and stack two. They can sit on the palm, curve around the wrist or travel diagonally across the back of the hand, paired with flowers, leaves, dotted chains and curved borders. Fingers can carry fine grids, leafy caps or small paisley tips. If you’re unsure what you want and need something classic with clear movement, this is a safe place to land.
8. Arabic Mandala Wedding Mehndi Design
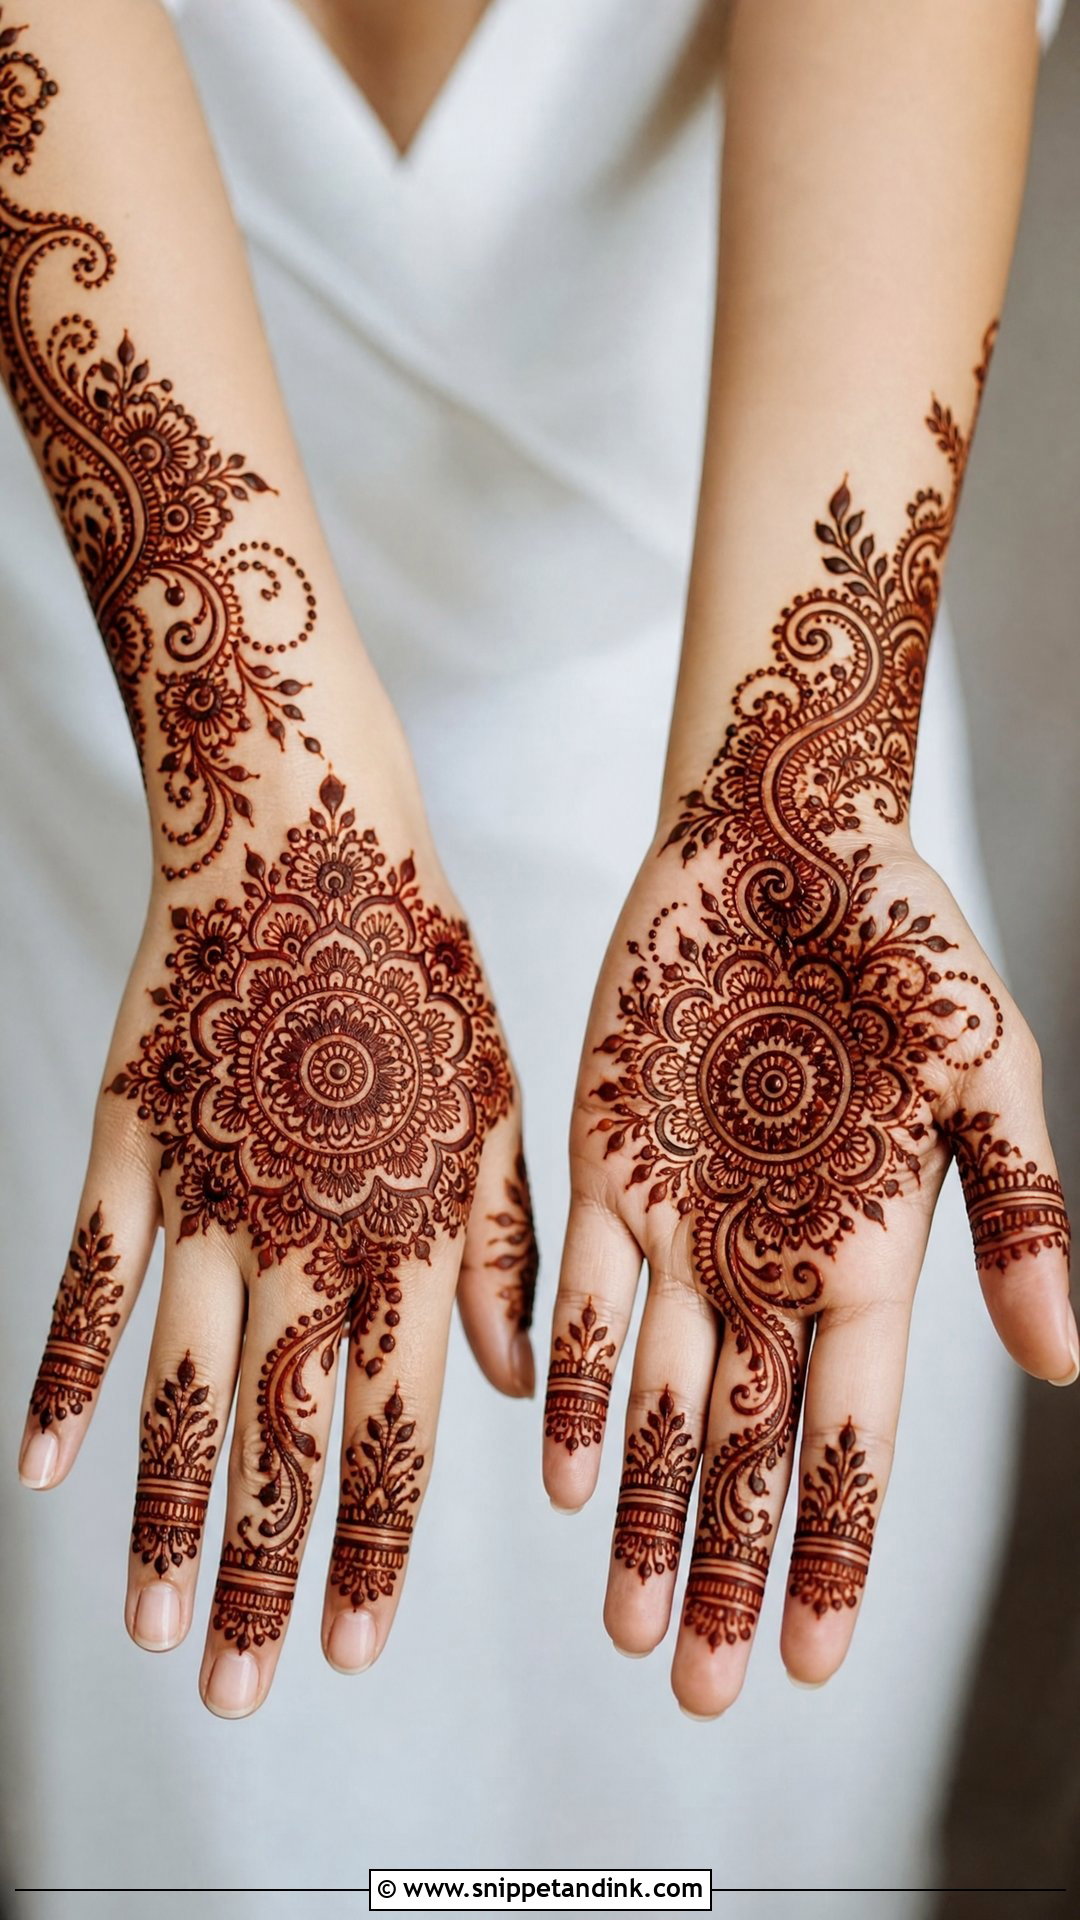
A mandala gives the design a centre of gravity. I place it on the palm or back of the hand and let floral vines and paisley trails spill out from it with open curved spaces in between. Unlike a fully traditional mandala layout, it doesn’t need perfect symmetry across the hand. One thing I check first on the back of the hand is where the knuckles fall, because a mandala centred too low creases and distorts every time the hand closes. Placed correctly, it acts like a centrepiece for your rings.
9. Indo Arabic Bridal Mehndi Design
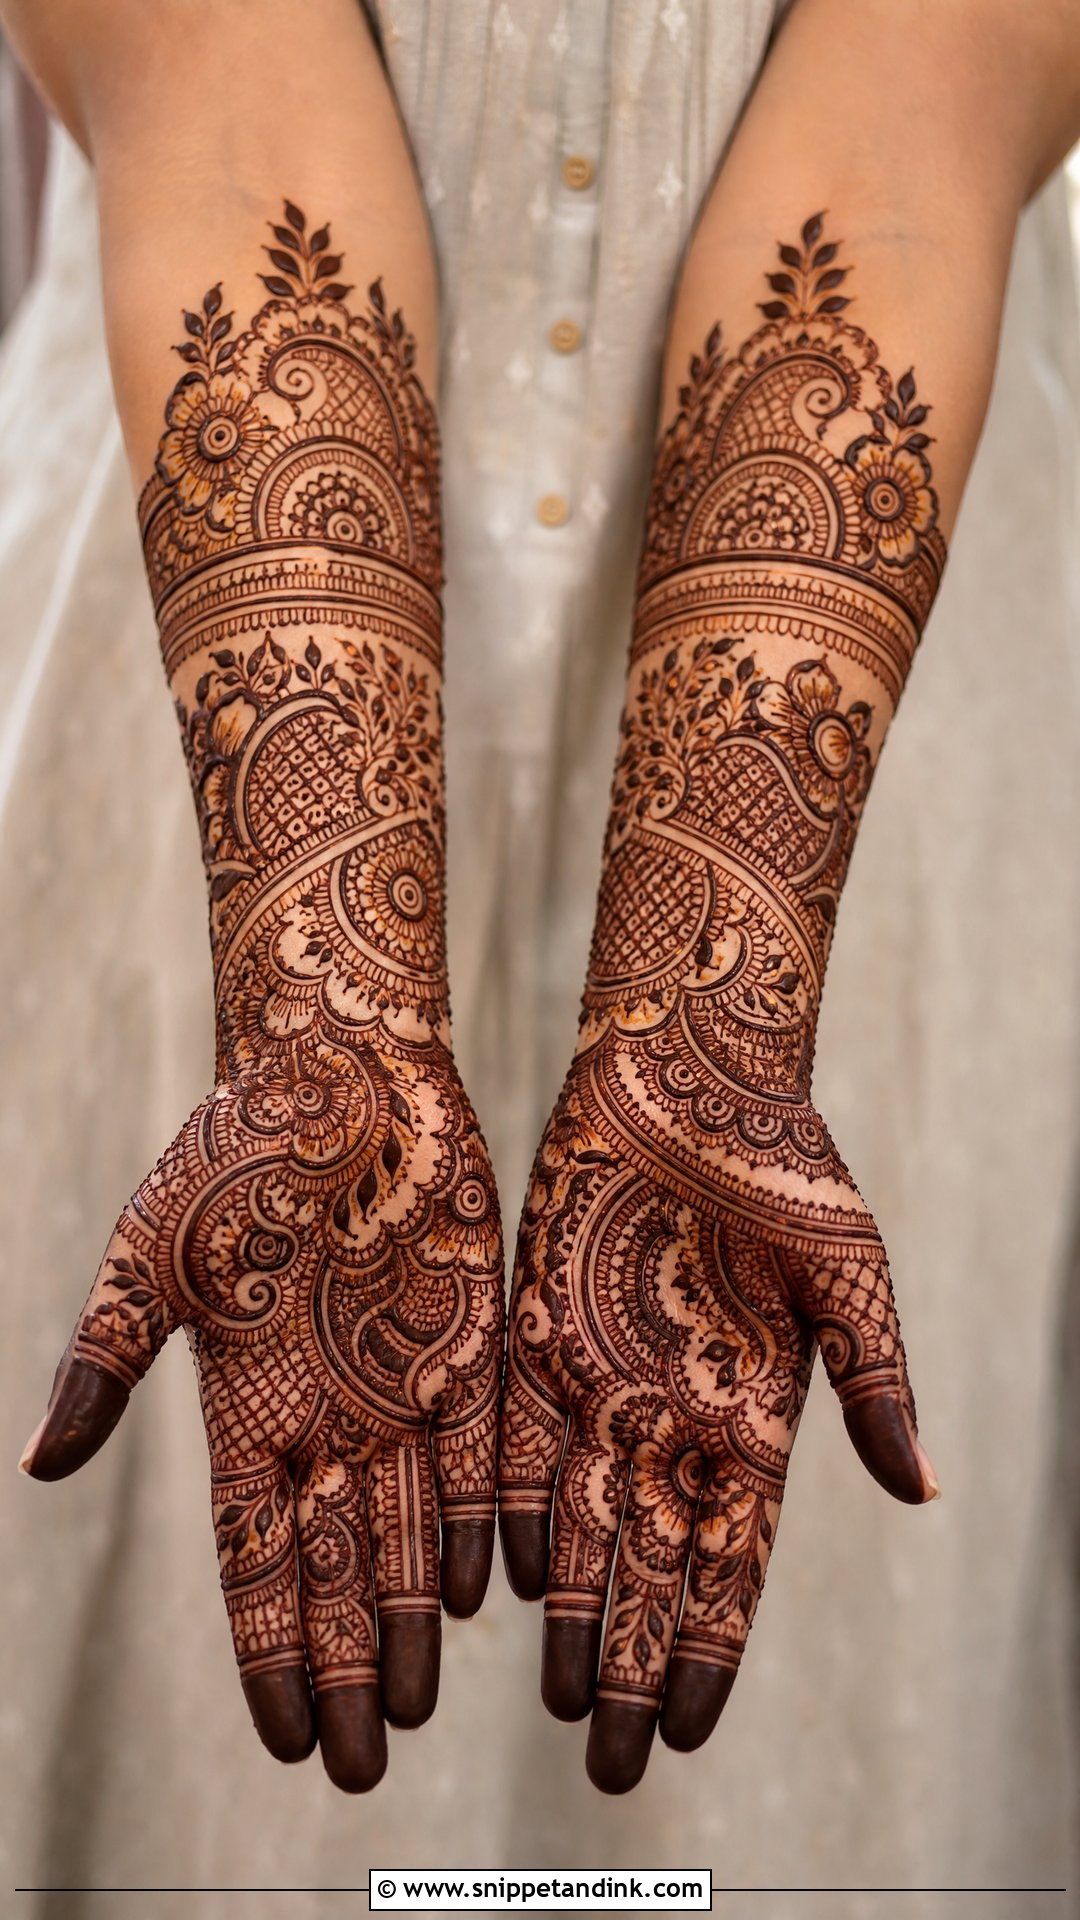
Indo Arabic is the compromise I’m asked for most often: Arabic flow for the main trail, Indian detail packed around it. You may see bold flowers, paisleys, mandalas, fine jaali, tiny leaves and filled fingertips in one layout running from palm to forearm, with selected gaps left for contrast. The order matters. I draw the Arabic trail first so it stays visible, then fit the Indian fillers around it. Do it the other way round and the trail disappears into the filler. It holds its shape well in photos and matches nicely across front and back hands.
10. Gulf Arabic Bridal Mehndi Design
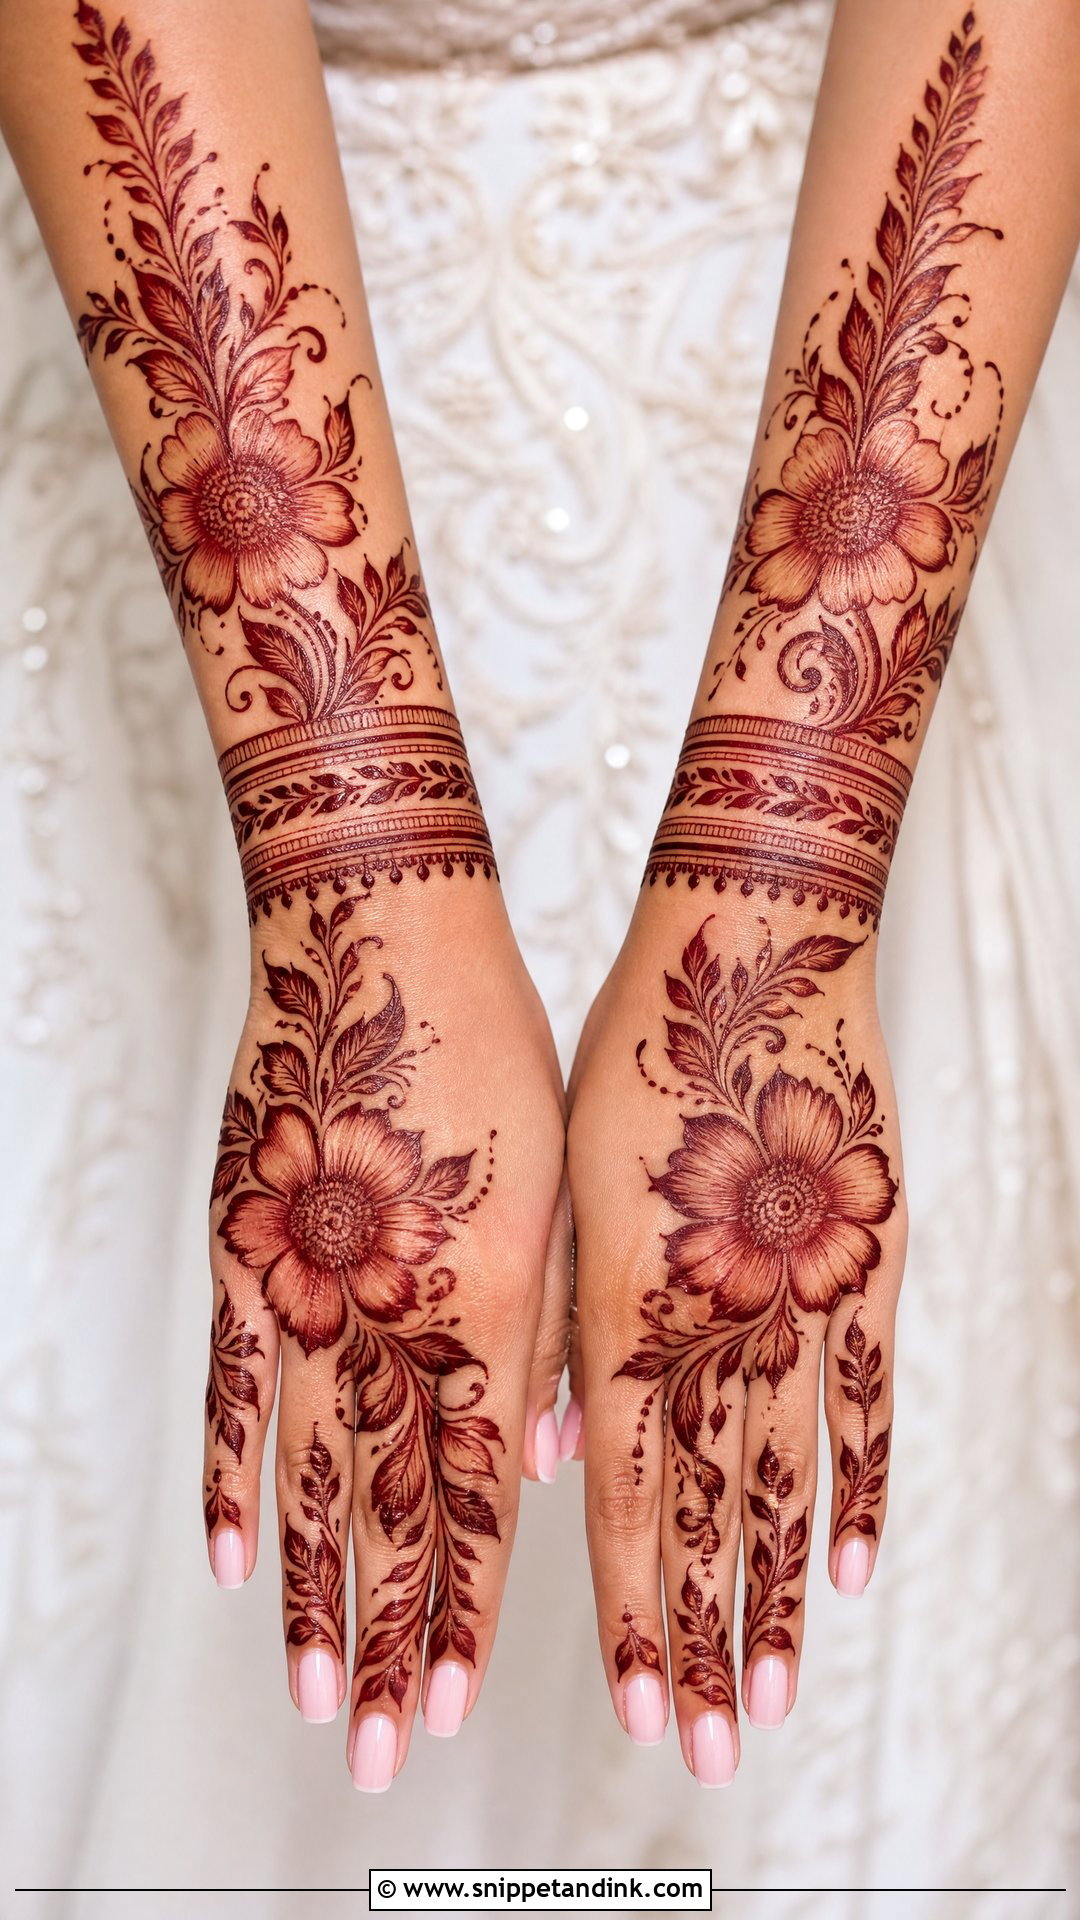
A Gulf Arabic layout, often inspired by Khaleeji henna, is all about confident spacing: oversized flowers, thick outlines and strong shading across the palm and fingers, then bands at the wrist and forearm. Thick lines need a slightly looser paste and a steadier hand, and they hold more henna on the skin, which is one reason this style tends to stain so boldly once it darkens. Compared with delicate minimal work, it feels dramatic. The back hand version shows each motif clearly against open skin when you’re wearing jewellery.
11. Khafif Arabic Wedding Mehndi Design
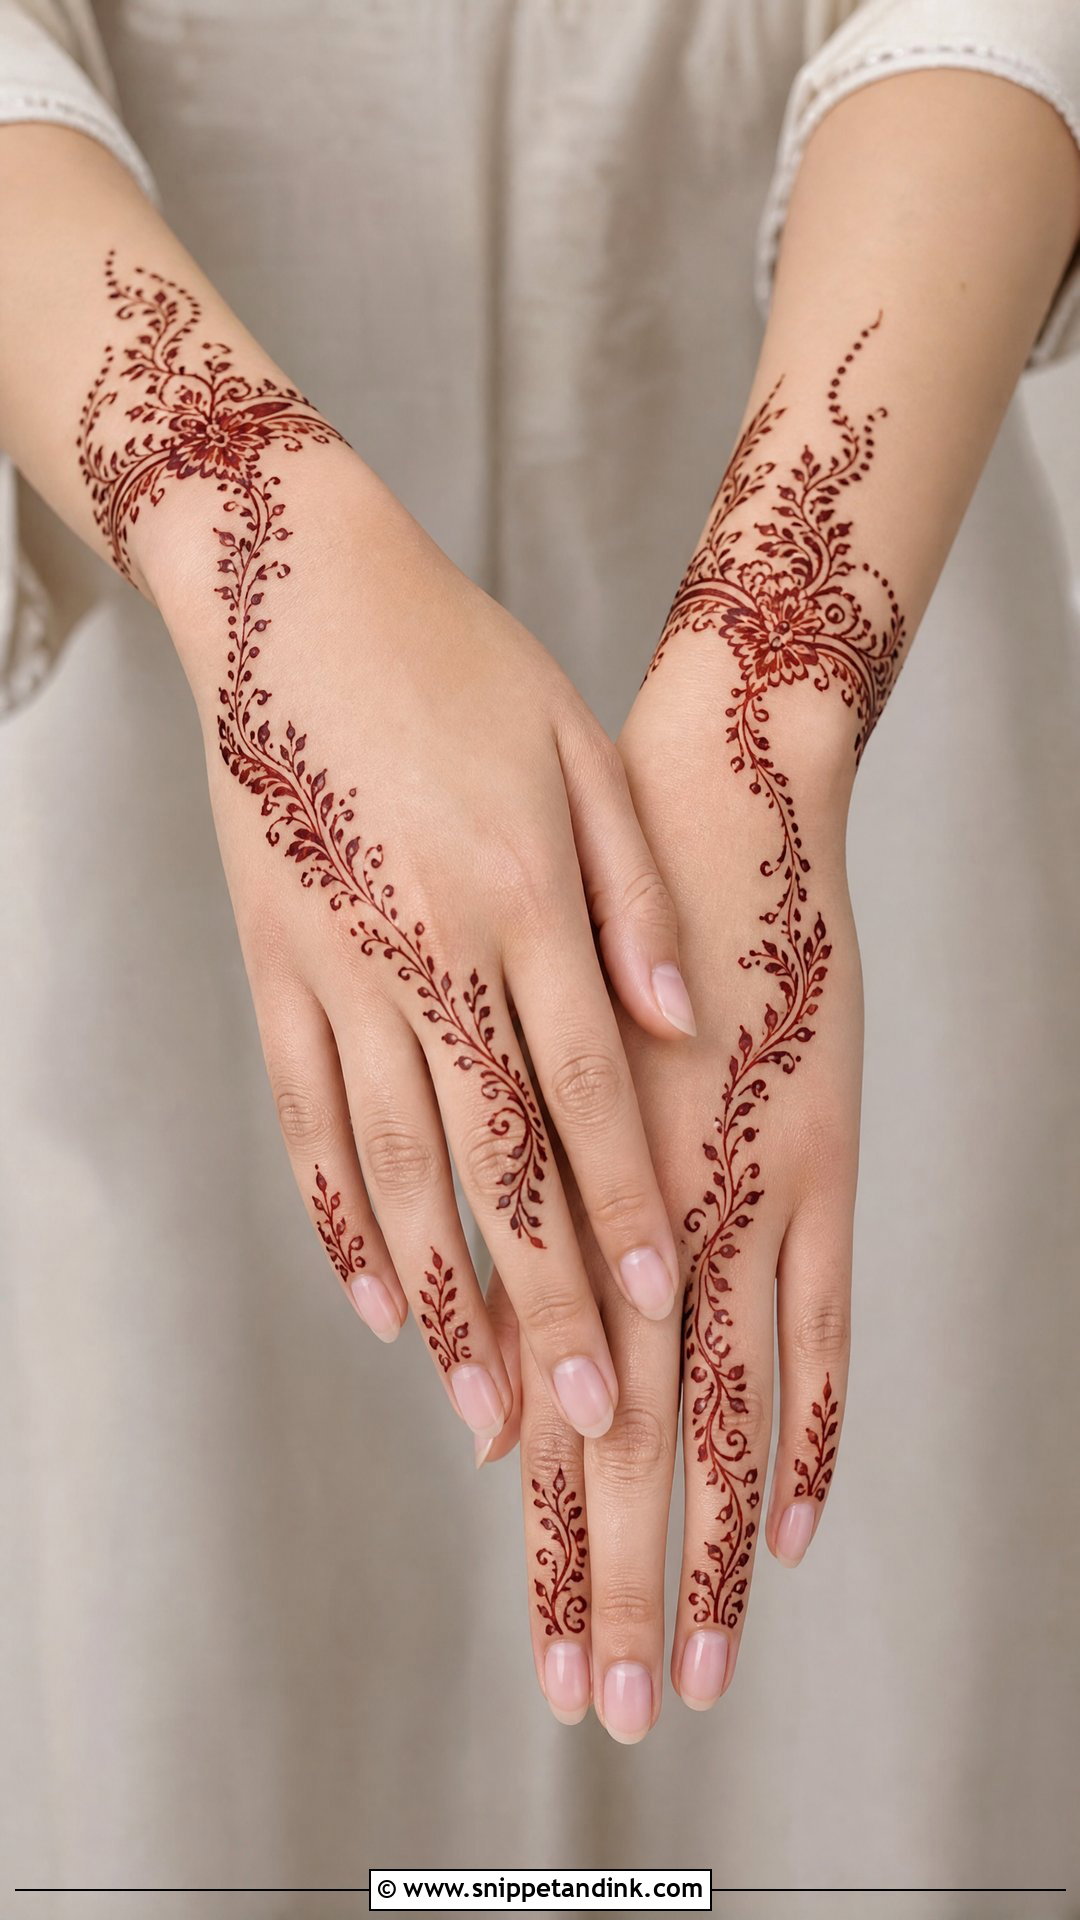
A khafif Arabic wedding mehndi design is the lightest thing on this list: thin vines, small flowers, dots, tiny leaves and open finger detailing, often from fingers to wrist with plenty of breathing room. Fine lines are thin layers of paste, and thin paste dries and flakes faster, so khafif work benefits most from a careful sealant and a long wait before scraping. For a wedding I add a wrist cuff or a soft diagonal across the palm. It sits well with pastel outfits and daytime ceremonies and never fights with jewellery.
12. Arabic Jaali Bridal Mehndi Design
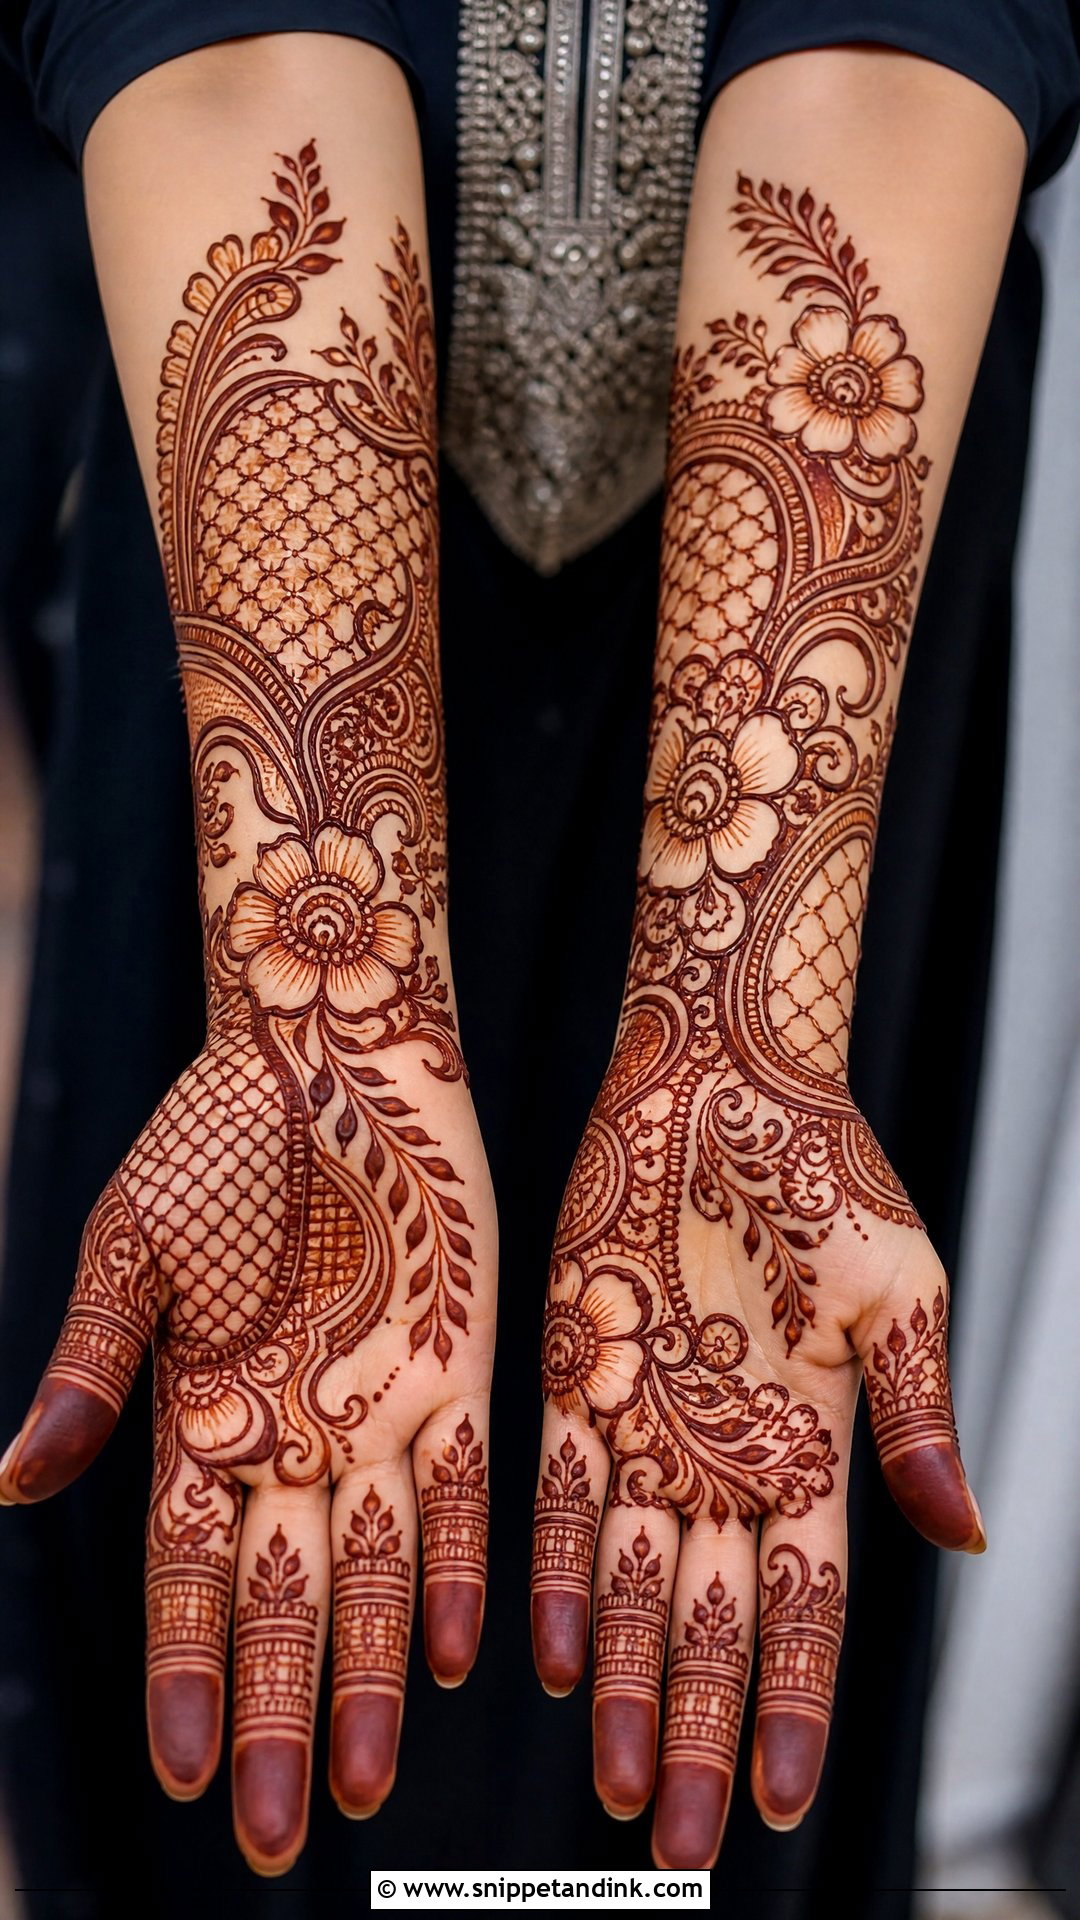
Jaali, or mesh work, adds texture to the fingers, palm corners, wrist bands or back of the hand. In a bridal layout I always set it against bold Arabic flowers and paisleys, because a hand covered only in mesh looks flat once stained. The contrast between open grid and filled motif is what gives it depth. Grids are unforgiving of wobbly lines, so this is one design where an experienced artist’s steadiness really shows. For a softer finish, I shade the flowers around the jaali; for a richer one, I add fine dots and small borders between sections.
13. Arabic Rose Bridal Mehndi Design
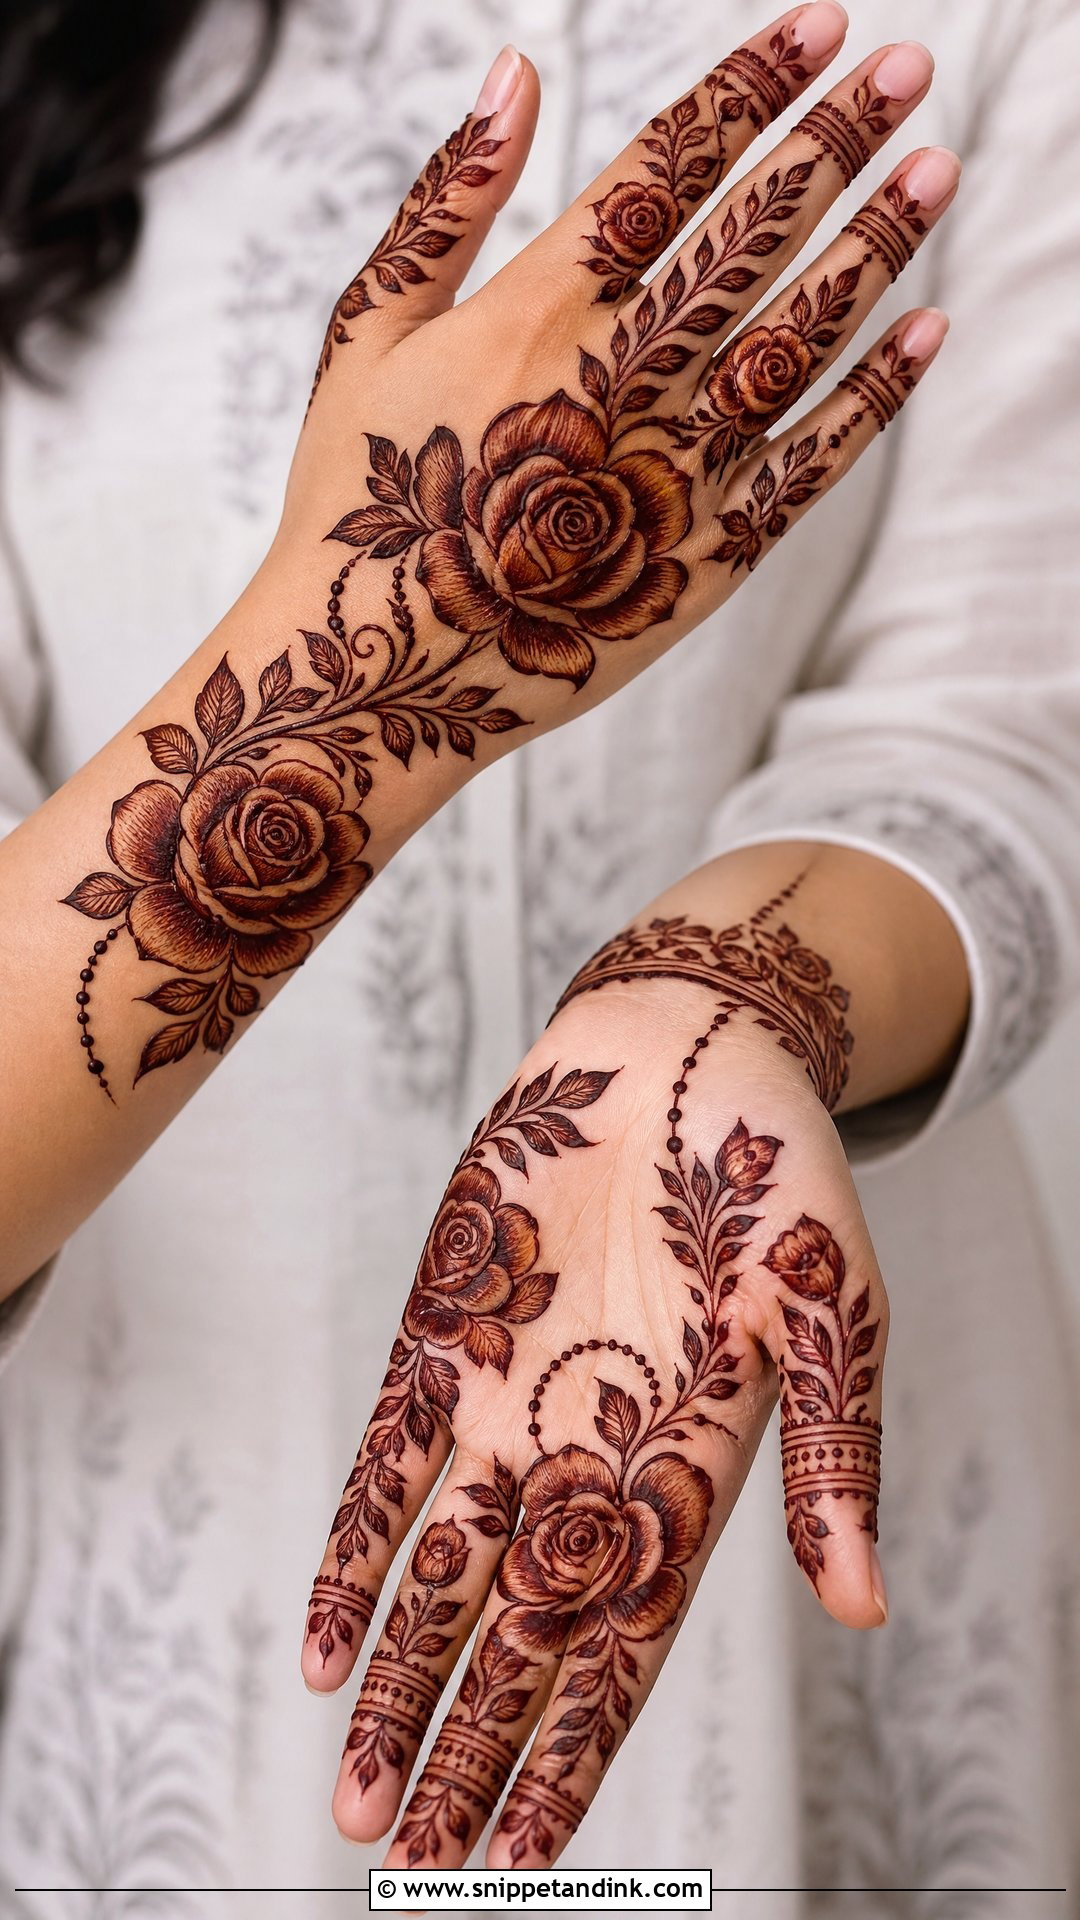
Roses are probably the most requested flower at my table. The layout starts with large rose blooms on the palm or back hand, then leafy vines travel toward the wrist and forearm. I build each rose from the centre outward in short curved petals, then shade the inner edge of each one so the bloom looks full once stained. Fingers carry small rosebuds, line bands and dotted trails. Repeat the rose on both hands in slightly different spots so the pair looks hand-drawn and natural rather than stamped.
14. Arabic Peacock Wedding Mehndi Design
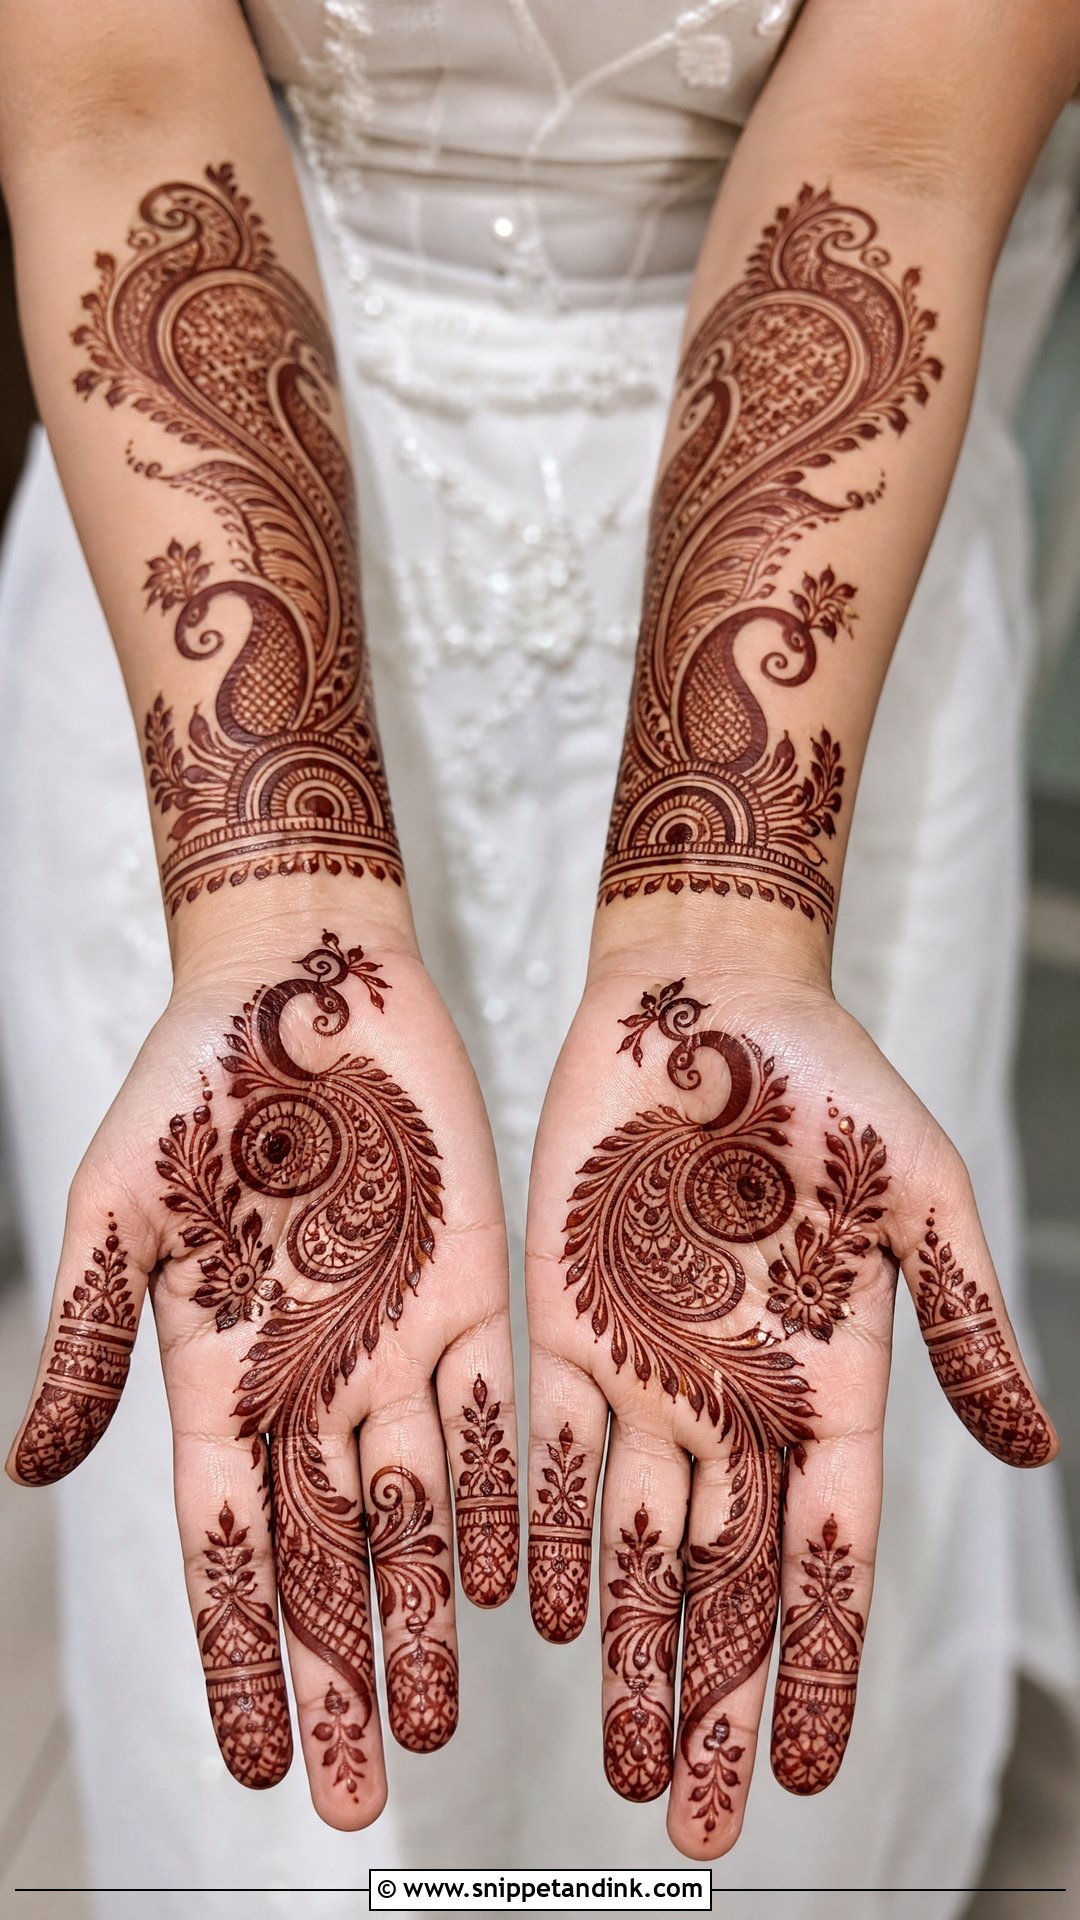
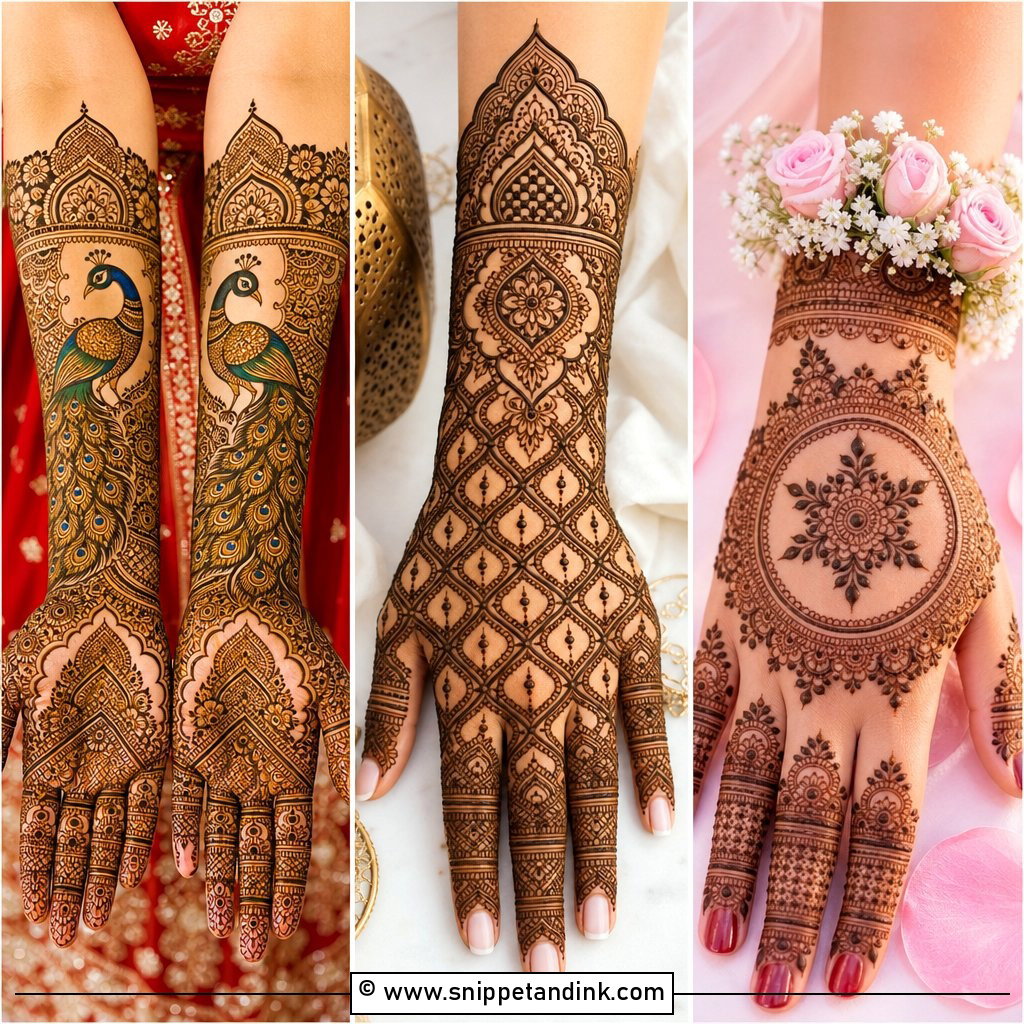
The peacock is a traditional bridal symbol, and in an Arabic layout it gets more room than it would in dense Indian work, so the outline stays readable. It can sit on the palm, wrist or forearm with flowers, paisleys and vines around it, and fingers pick up feather-style strokes, dotted chains and curved bands. My advice is to keep the peacock fairly large. Small birds with fine feather detail tend to blur into a brown smudge as the stain develops. Pair it with floral cuffs at the wrist and a soft trail up the forearm.
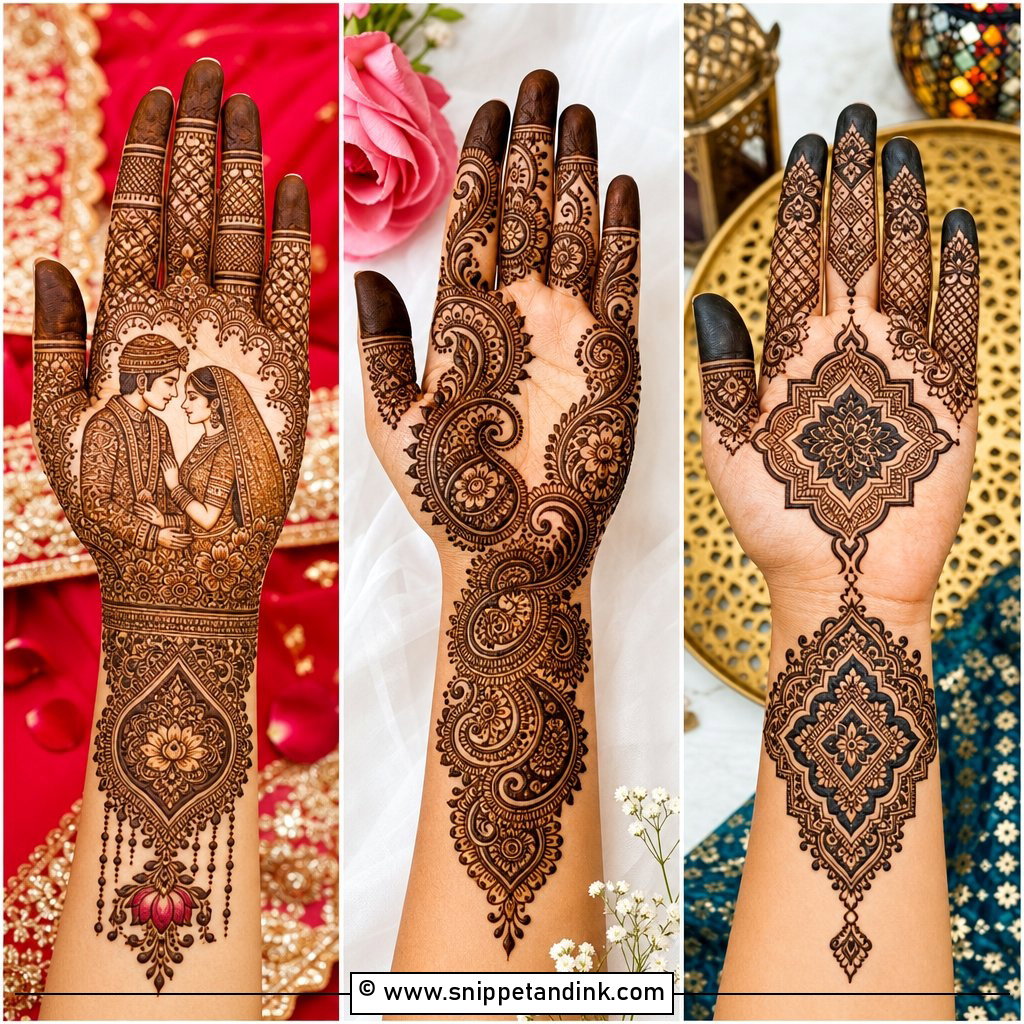
15. Arabic Lotus Bridal Mehndi Design
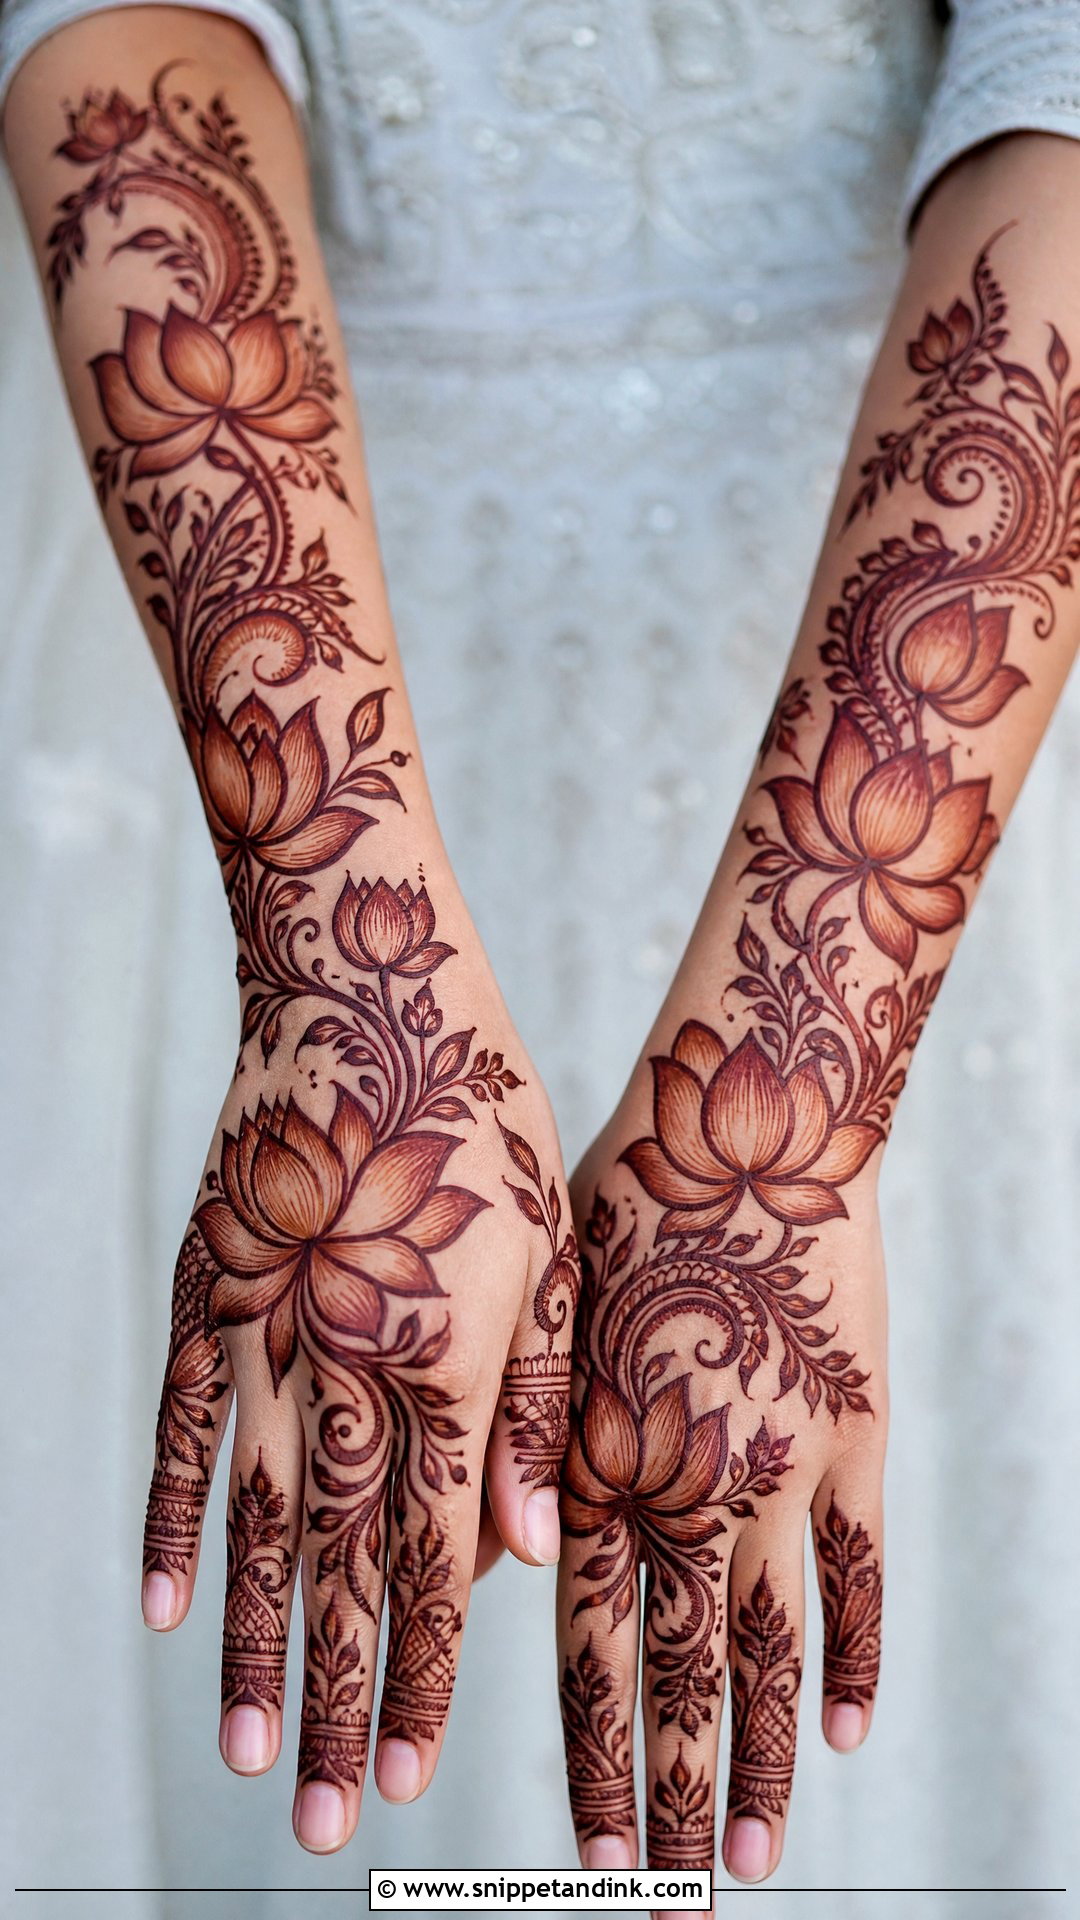
The lotus motif sits well in the centre of the palm, along the wrist or inside a diagonal back hand trail, and its layered petals pair naturally with Arabic vines, paisleys and dotted curves. Lotus petals are wide and pointed, so I outline them boldly and shade only the lower third of each petal. That keeps the flower calm instead of busy. Fingers can carry small buds, leafy bands and fine lines. Add a wrist-to-forearm extension for the main ceremony and leave it off for engagement or nikah.
16. Arabic Finger Bridal Mehndi Design
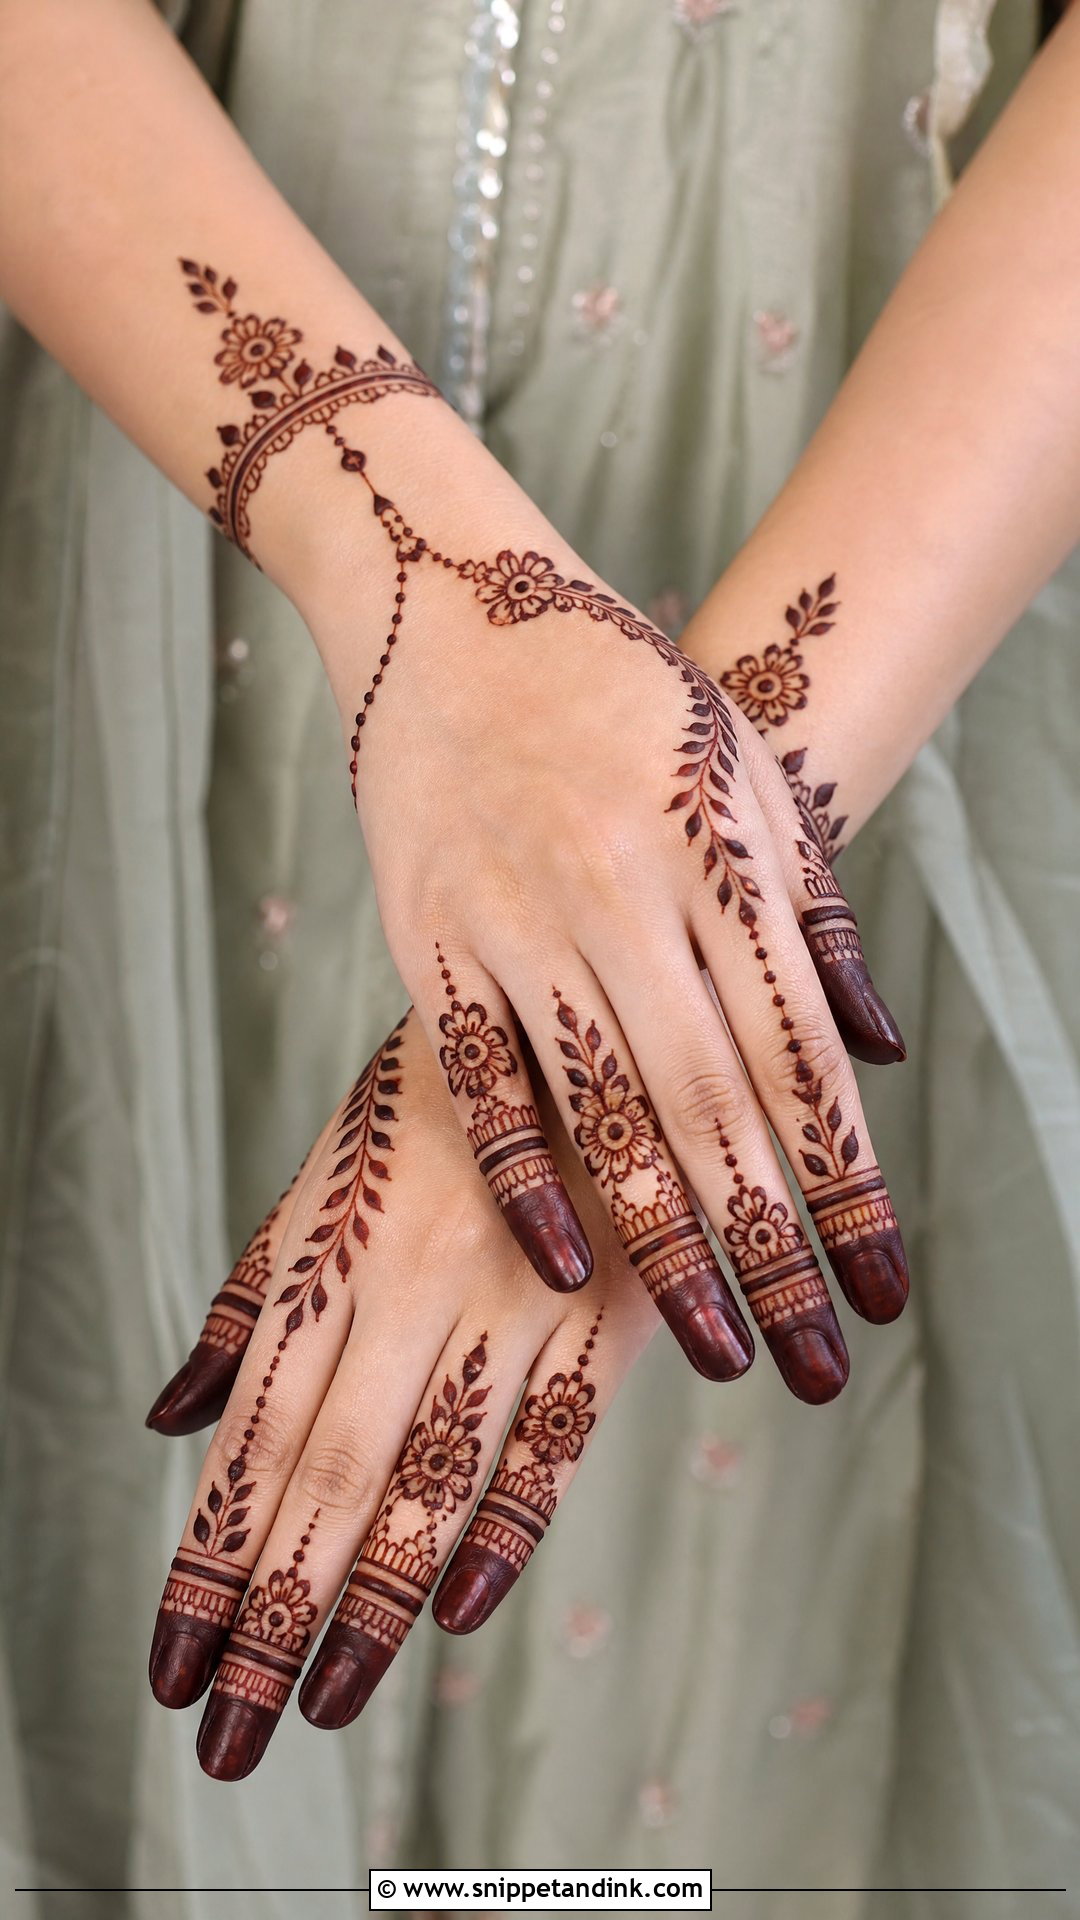
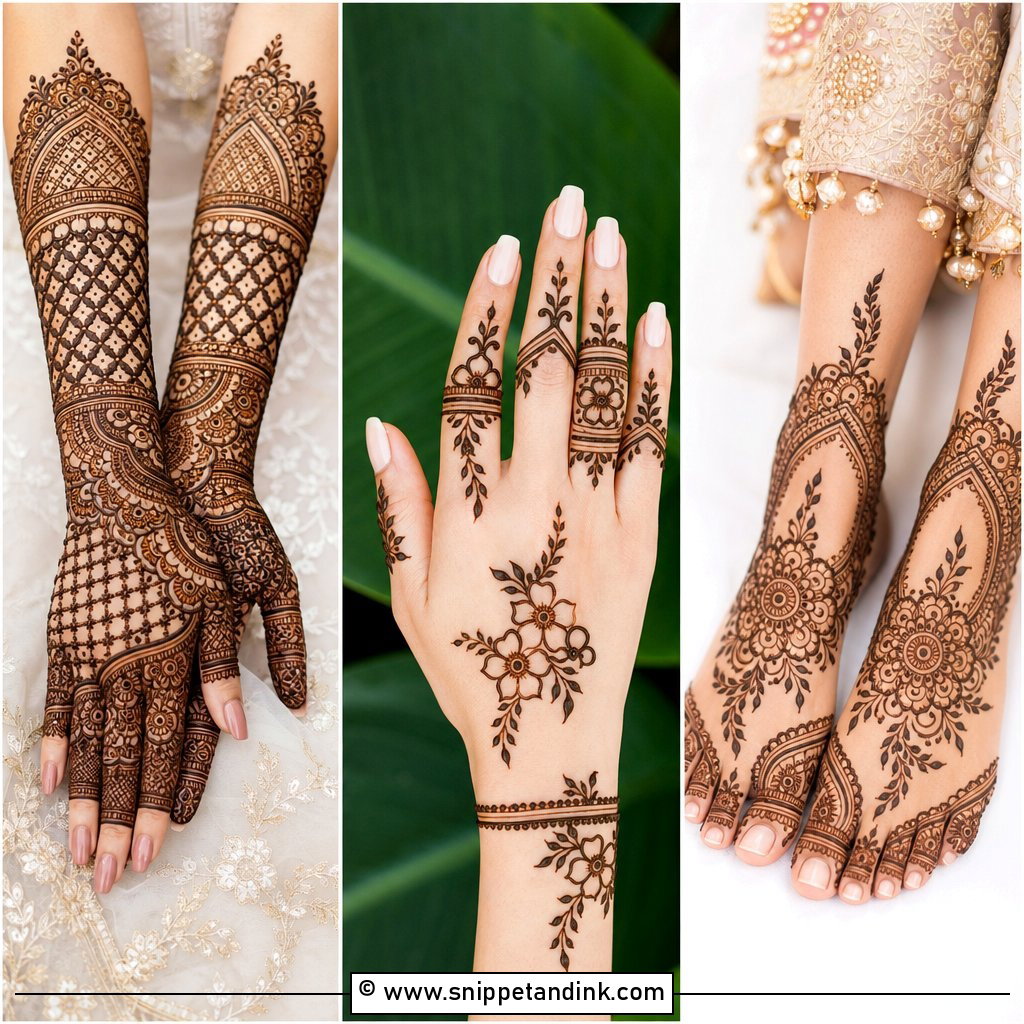
Finger-focused designs keep your rings and nails in the spotlight. The layout combines decorated fingers, a small palm motif and a wrist band linked by dotted chains or thin vines. Fingers take leafy caps, fine lines, mini flowers or half-and-half negative space. The mistake I see most is stopping the design abruptly at the knuckles, which makes the hand look unfinished in photos. A small trail across the hand or a bracelet-style wrist detail ties it together. Finger skin stains well, so even this lighter coverage shows up clearly.
17. Arabic Bracelet Mehndi Design
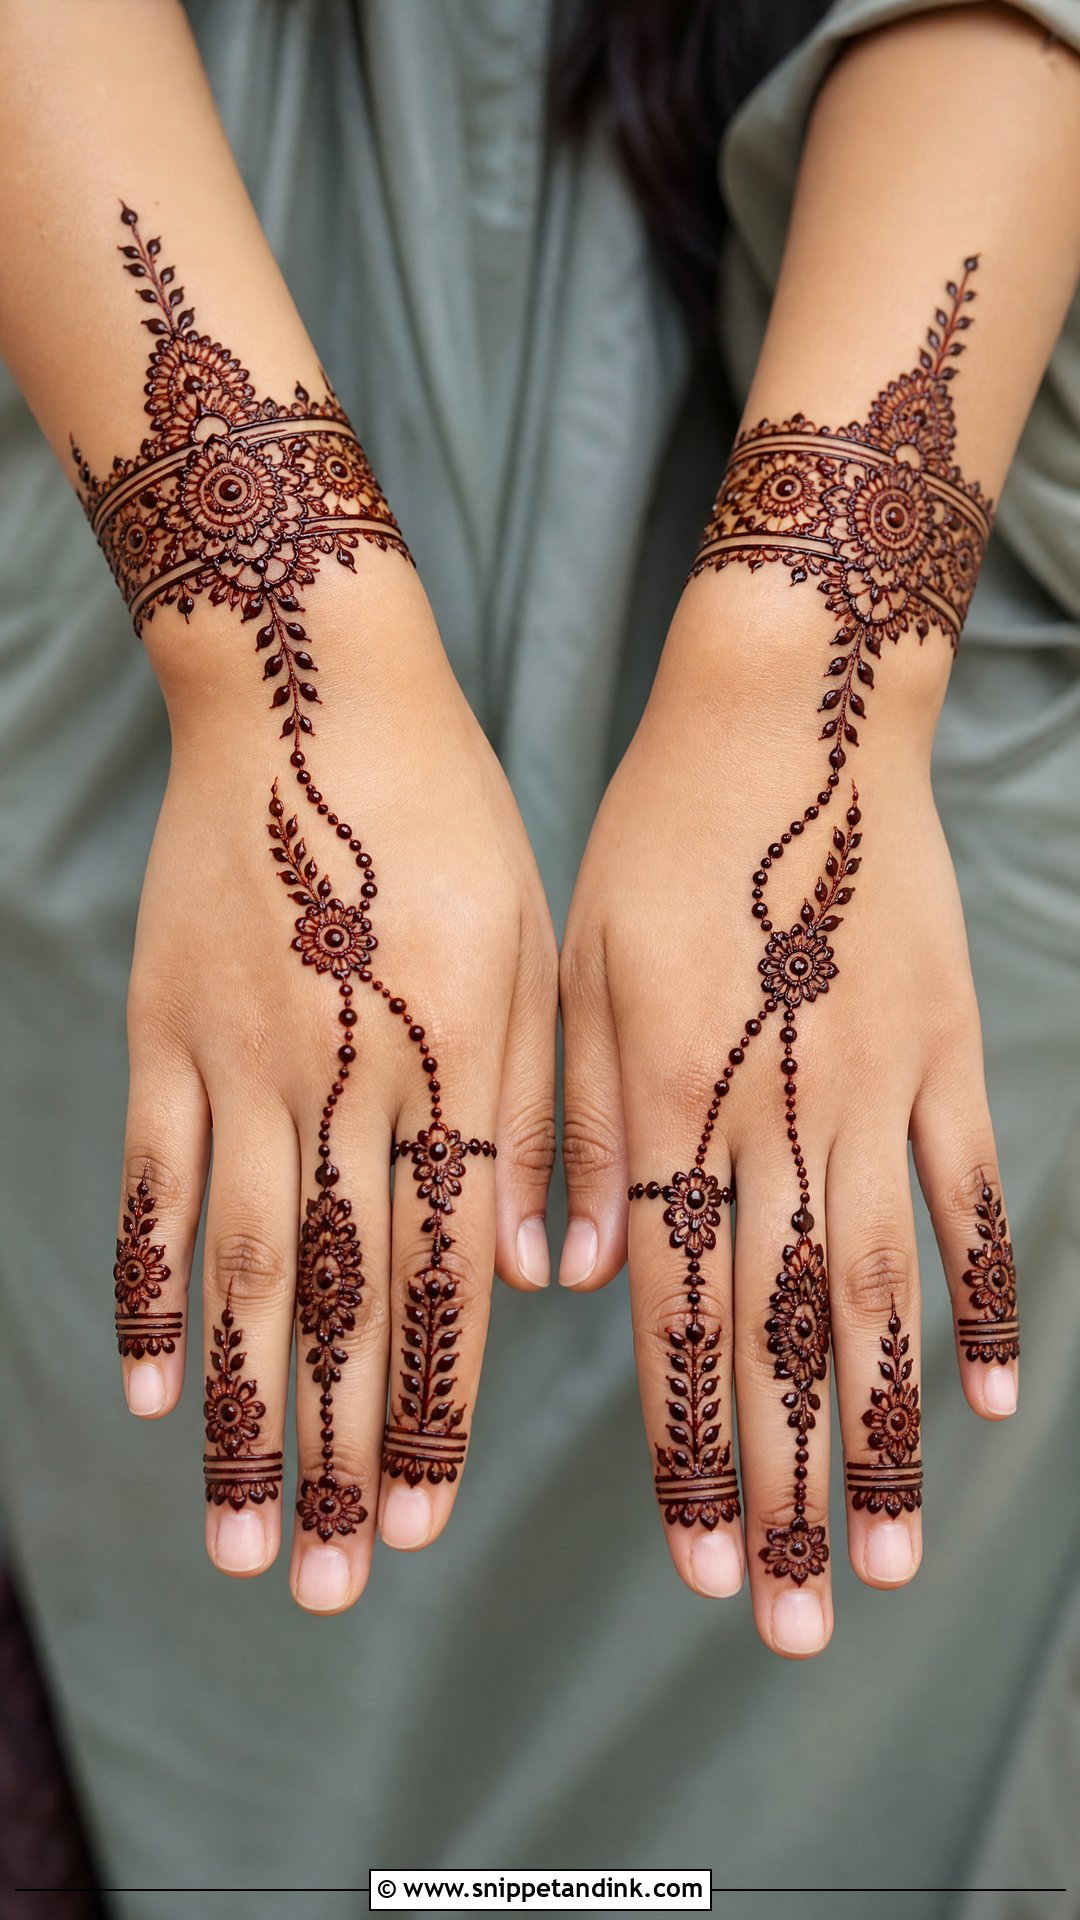
This one mimics jewellery in henna: a wrist cuff, connected finger chains, floral trails and ring-like bands on the fingers. I place it on the back of the hand, where the bracelet shape actually reads as a bracelet in photos. Arabic flowers and leaves around the wrist make it fuller. Line accuracy matters more here than almost anywhere else, because a chain that drifts off line looks like a mistake rather than a style choice. Worn under real rings and bangles, the henna echoes their shape quite neatly.
18. Arabic Wrist To Forearm Mehndi Design
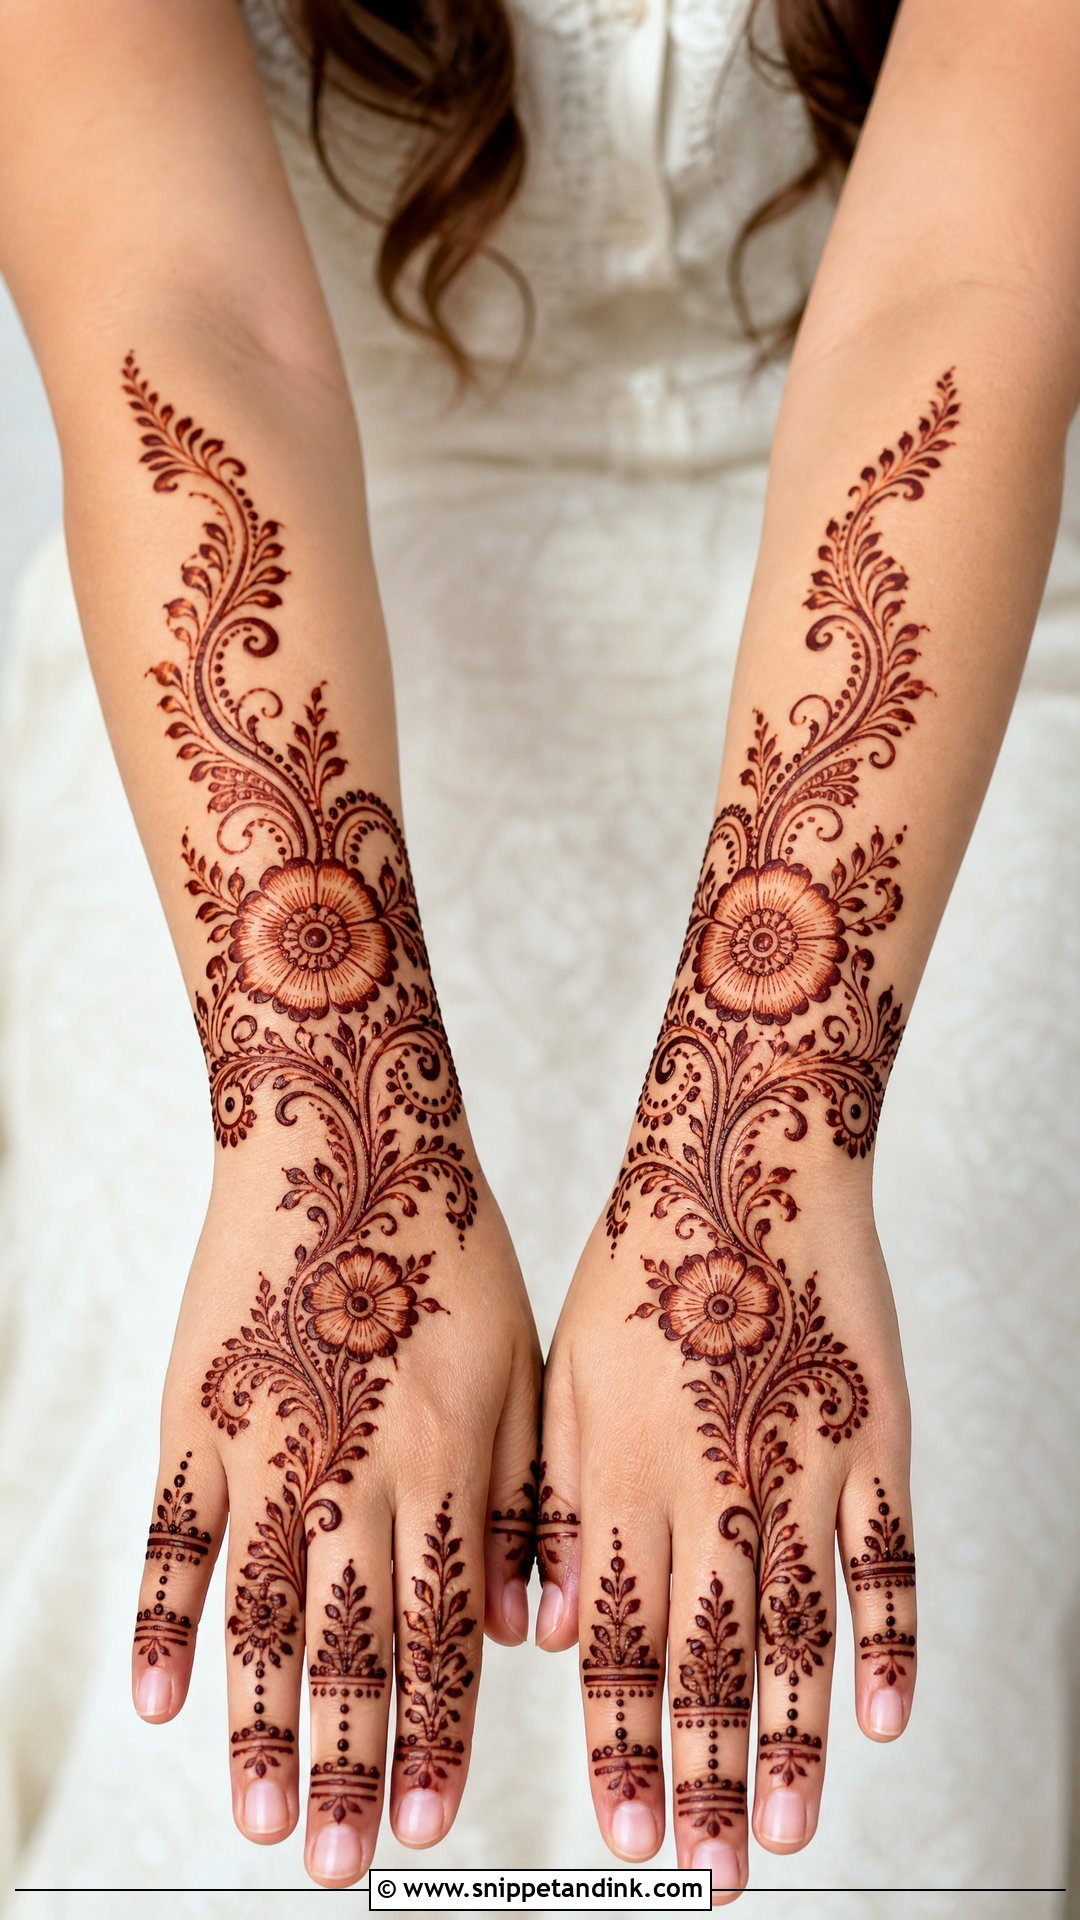
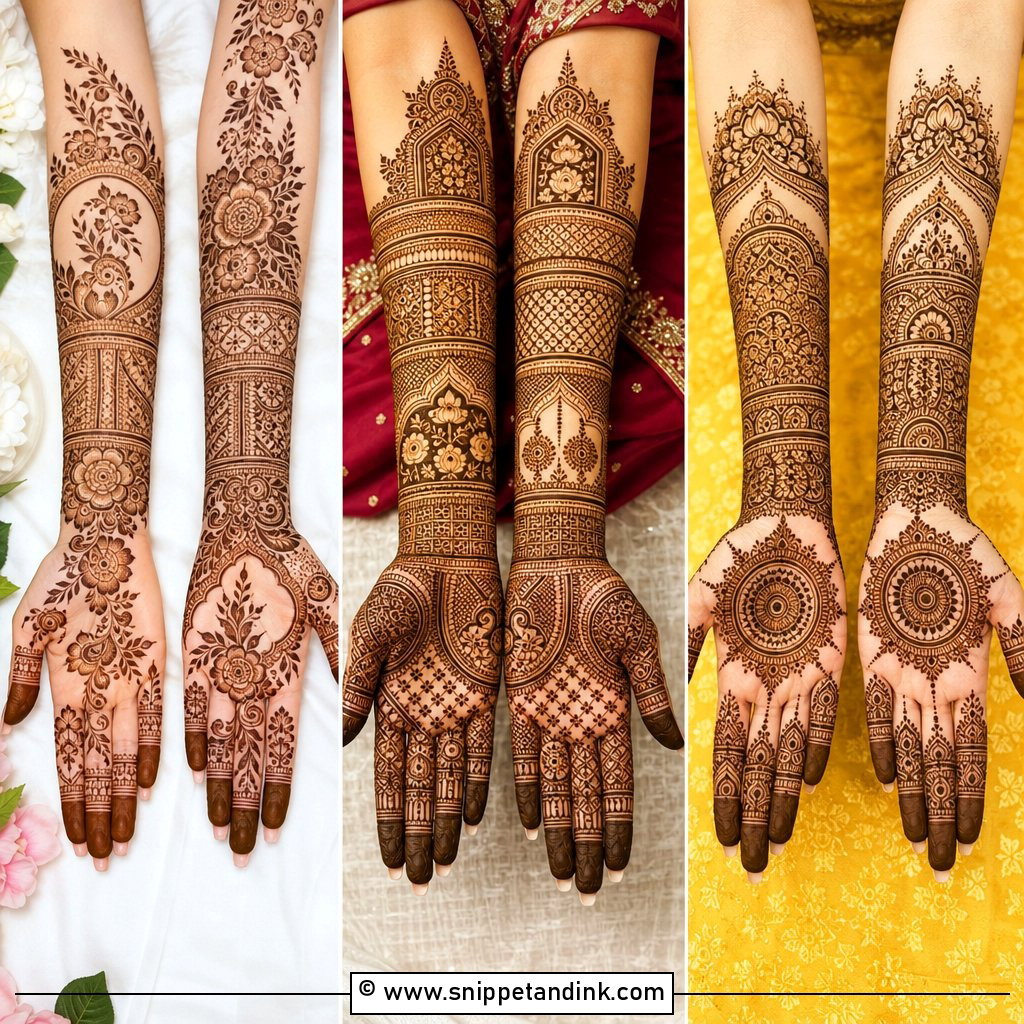
When you want visible arm coverage without a packed hand, move the drama to the forearm. The pattern starts with a floral cuff at the wrist, then climbs with vines, paisleys, leafy curves and shaded flowers, while the hand stays lighter with decorated fingers or a small palm motif. Expect the forearm to stain a shade or two lighter than your palm, since that skin is thinner and cooler; I outline those motifs a touch heavier to compensate. It balances sleeves and jewellery well and suits short or sheer sleeves at a reception or engagement. Ask for connected sections so it flows from hand to arm.
19. Arabic Minimal Bridal Mehndi Design
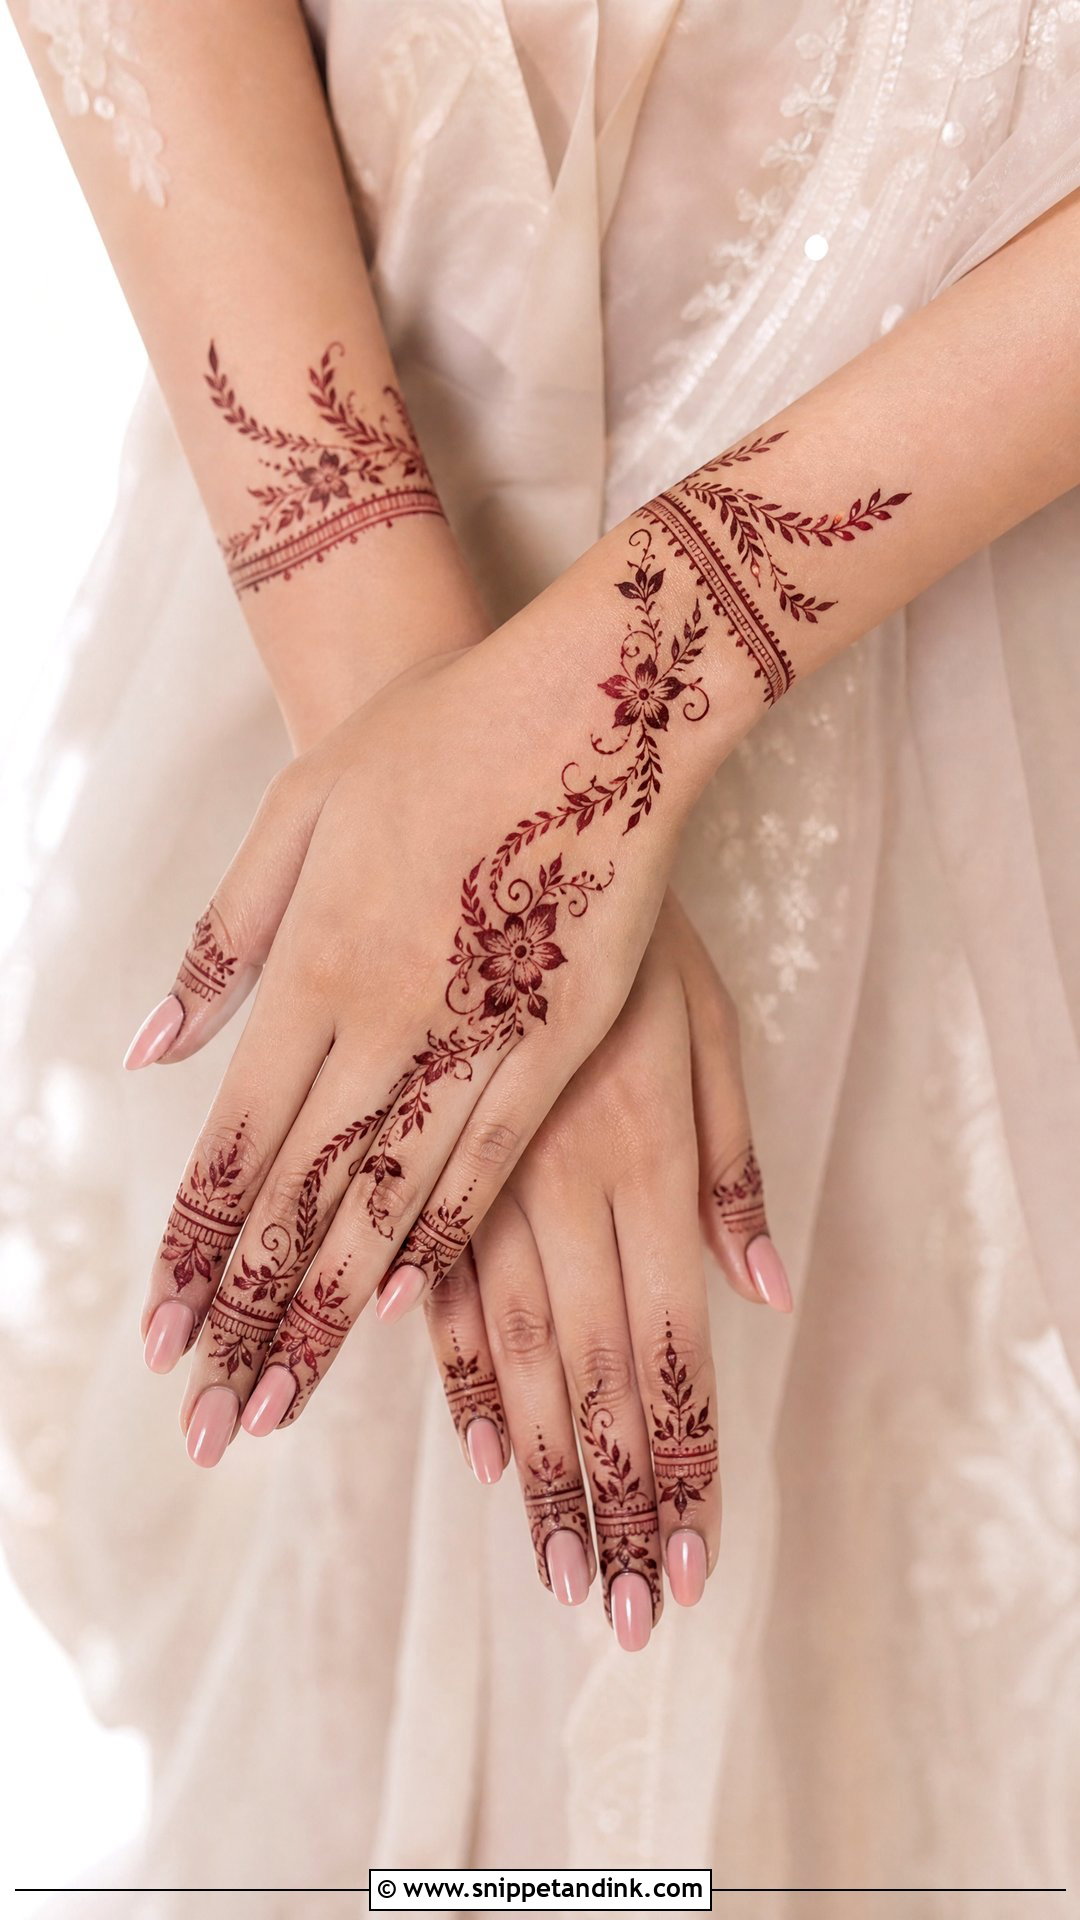
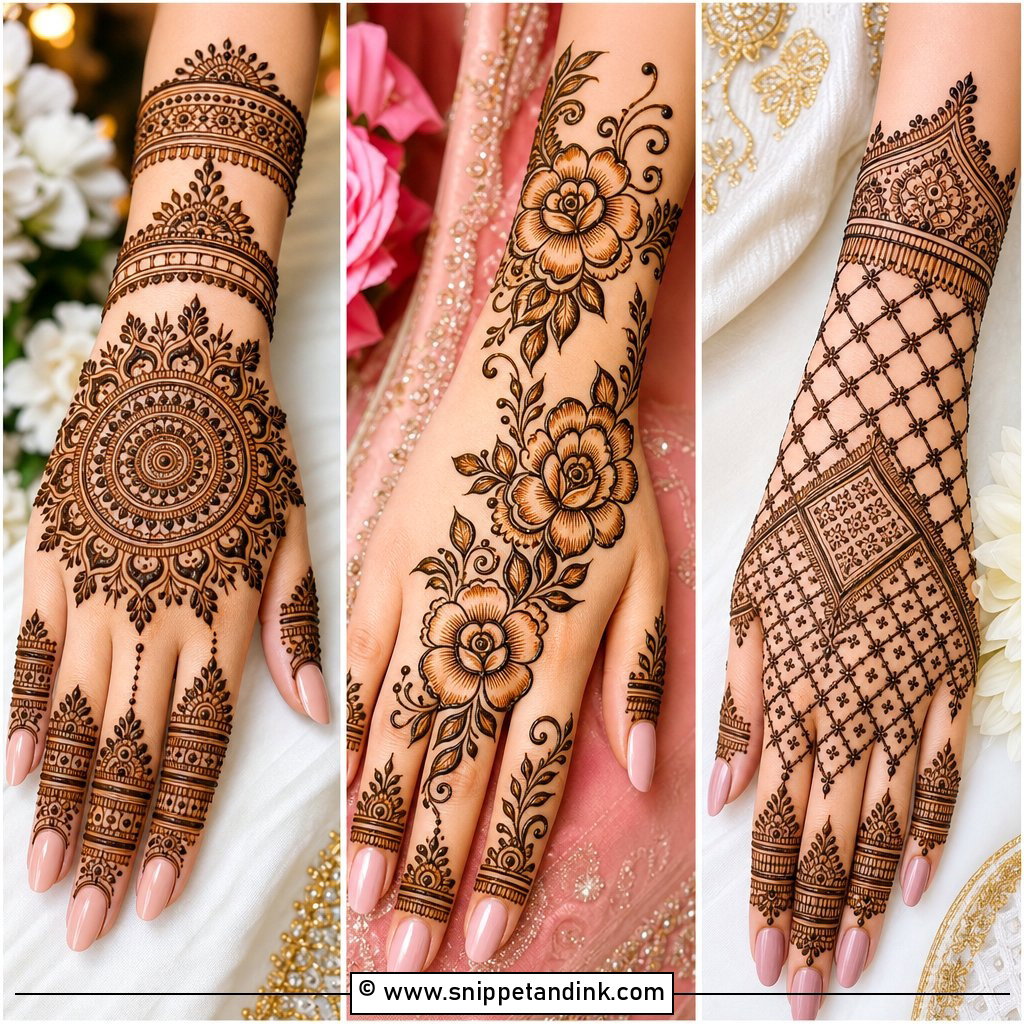
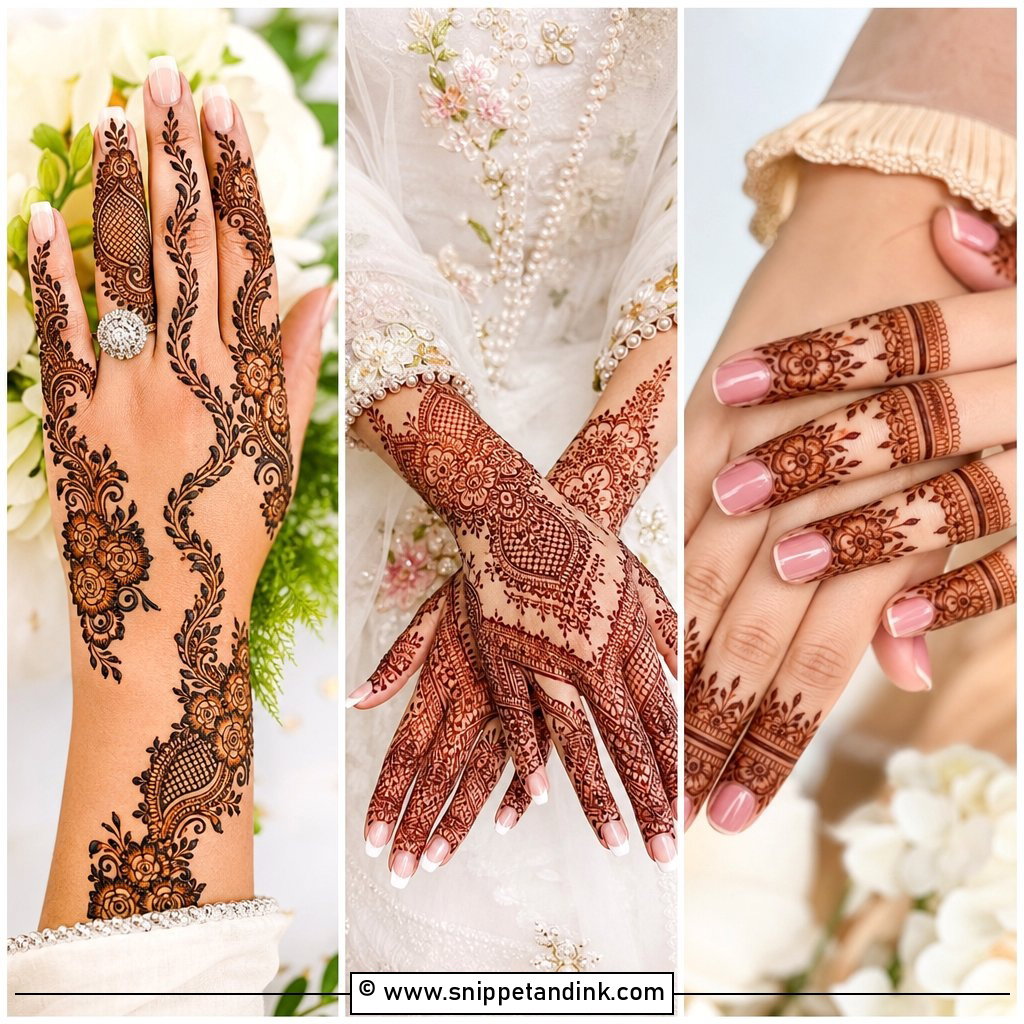
Minimal bridal work uses fewer motifs, so every one of them has to be placed with intent. A slim floral trail, a paisley curve, a delicate wrist band and decorated fingers are enough. It suits small weddings, civil ceremonies and brides who rarely wear mehndi and don’t want to feel weighed down. The trap is that minimal can read as unfinished. To avoid that, I pick one clear focal motif and repeat it on both hands, slightly varied, so the set looks planned.
20. Arabic Bridal Mehndi Design With Initials
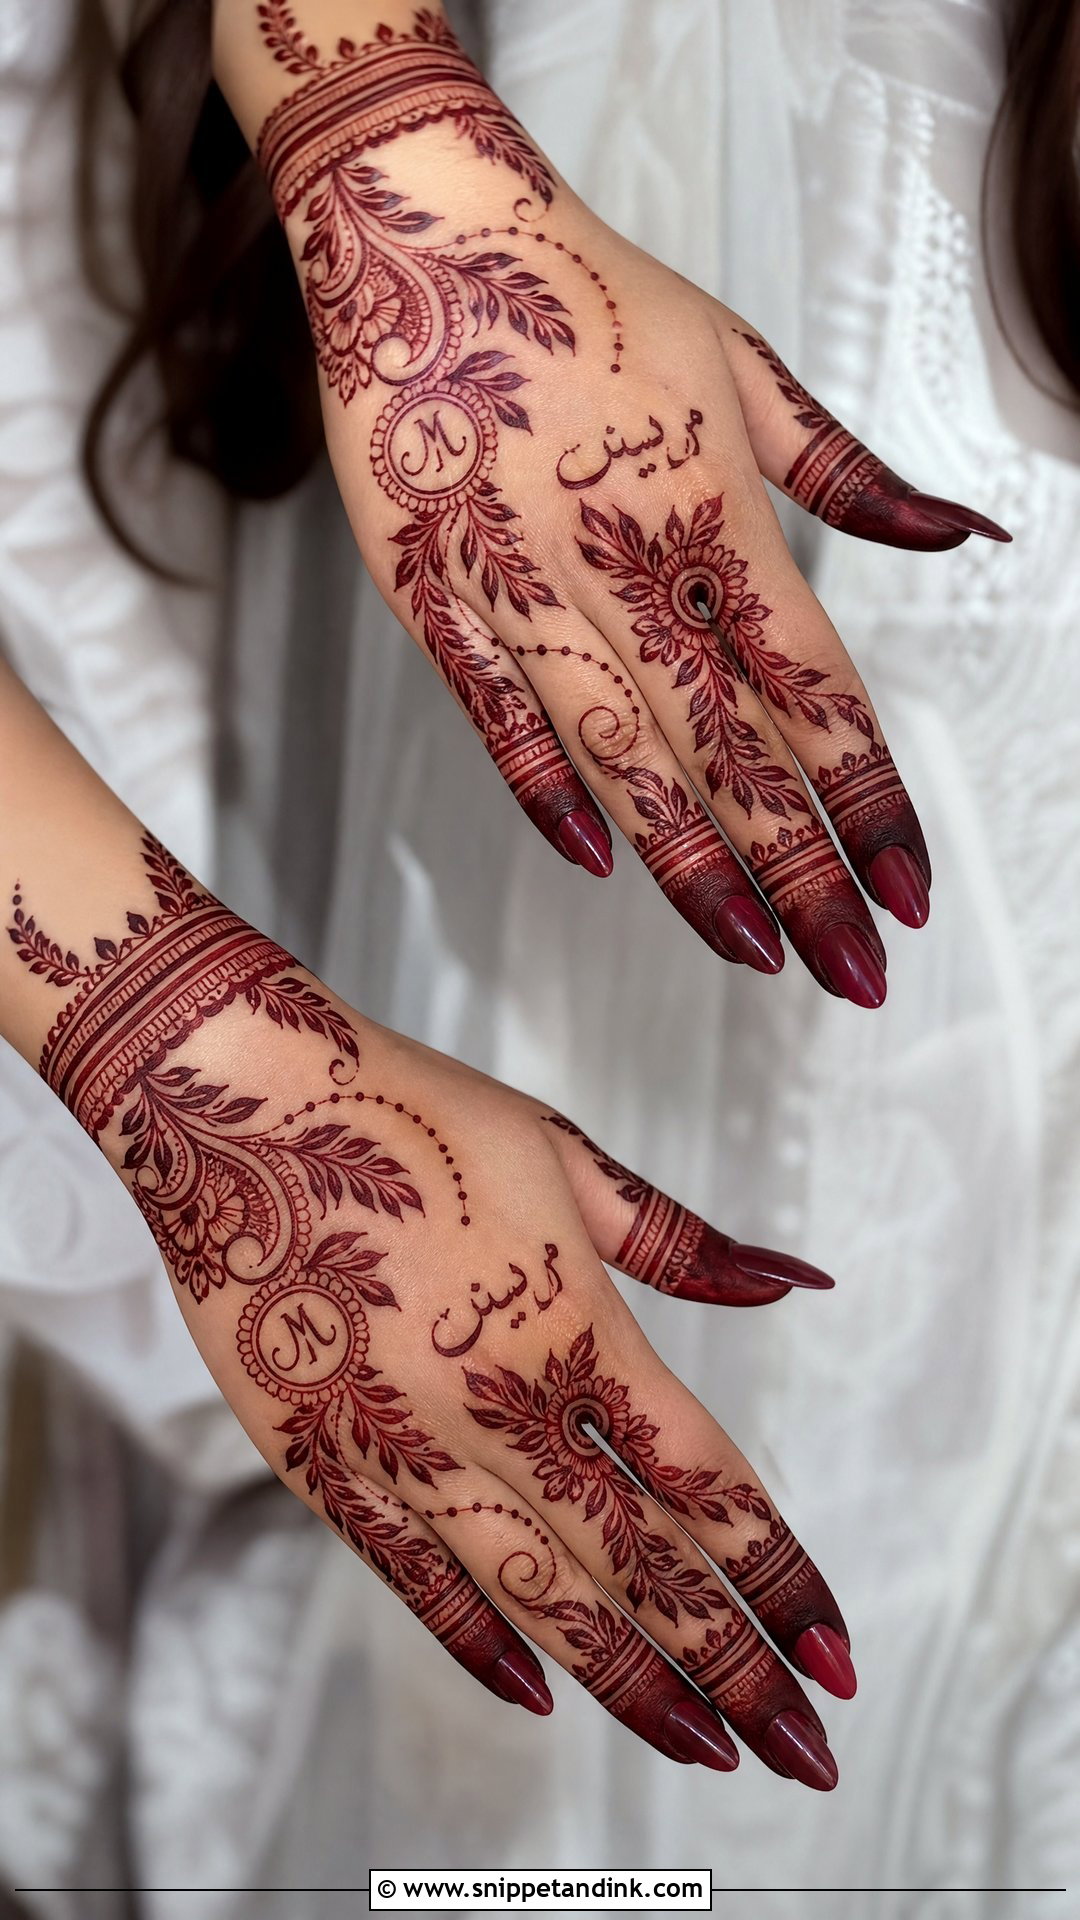
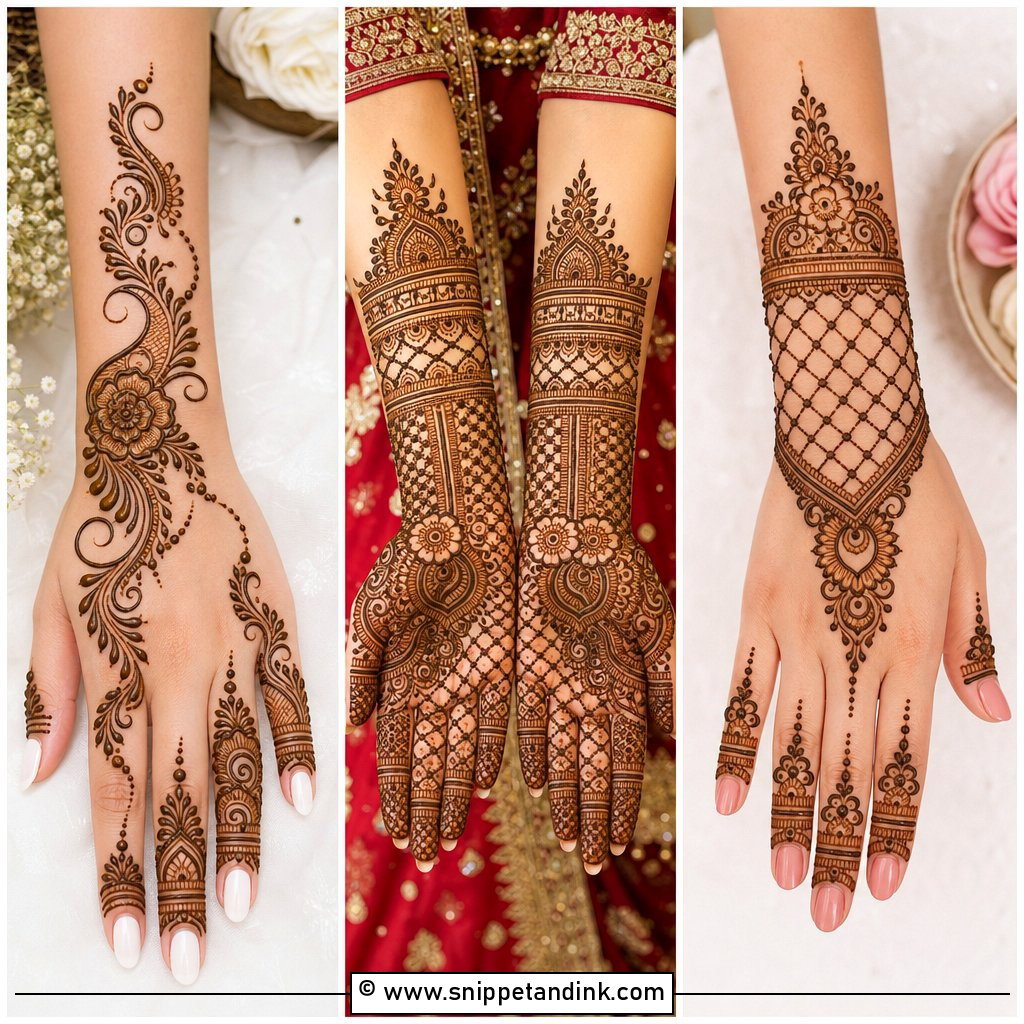
Initials are the hidden detail guests love to hunt for at the reception. I tuck them inside a flower, a paisley, a wrist band or along a vine, while the rest of the design stays true to Arabic style with bold floral trails and open spacing. The palm and inner wrist are the easiest places for the groom to find them. Letters need clean, fairly simple lettering; ornate script at a small size closes up as the stain darkens, so I keep the strokes open. Decide in advance whether you want them subtle or obvious, and tell your artist.
21. Arabic Bridal Mehndi Design With Wedding Date
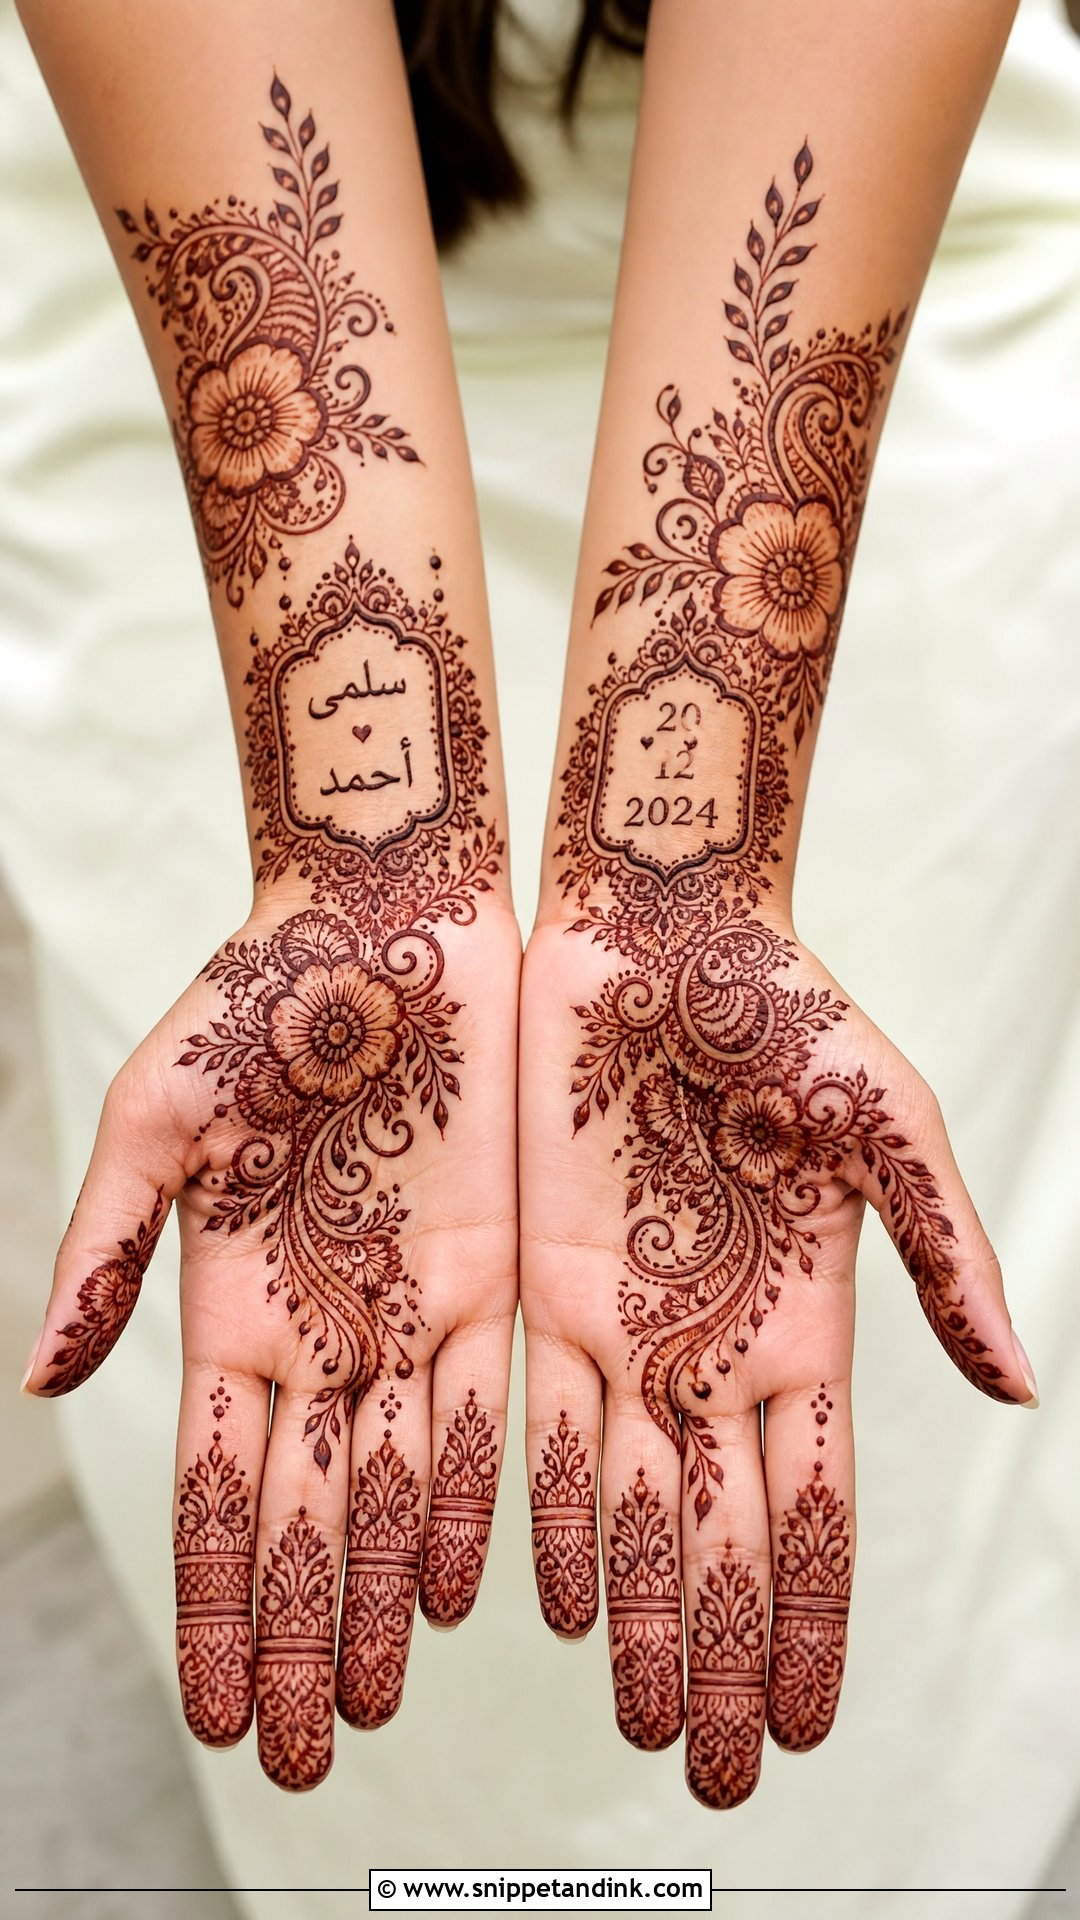
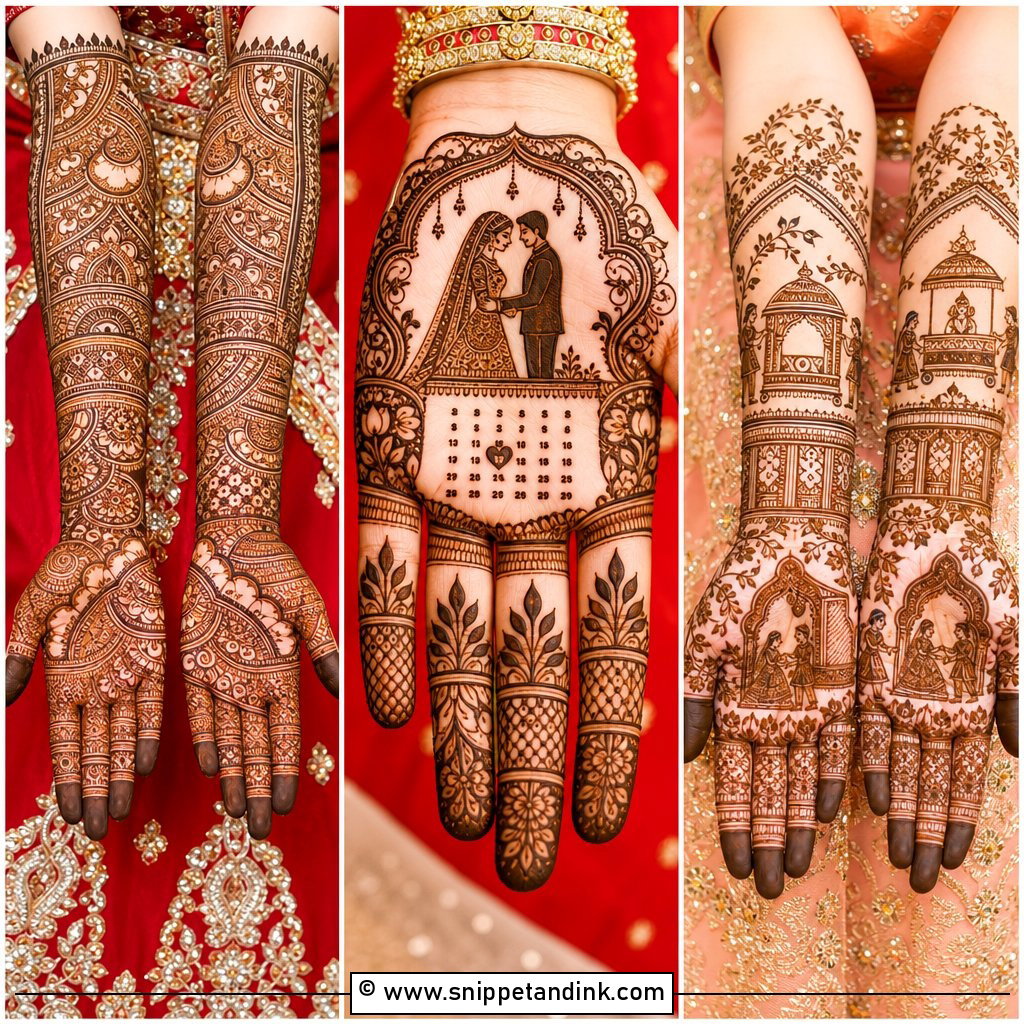
A wedding date gives the mehndi a quiet personal story. It can sit inside a small frame, along a wrist cuff, beside a flower trail or inside a paisley curve, with the usual Arabic vines and shaded blooms around it. Numbers are harder than letters at small sizes. A 6, 8 or 9 can fill in and turn into a dot, so I write the date clearly and slightly larger than you might expect, then blend it with the pattern. I usually put it on one hand and mirror the florals on the other so the pair still balances.
22. Arabic Bridal Feet Mehndi Design
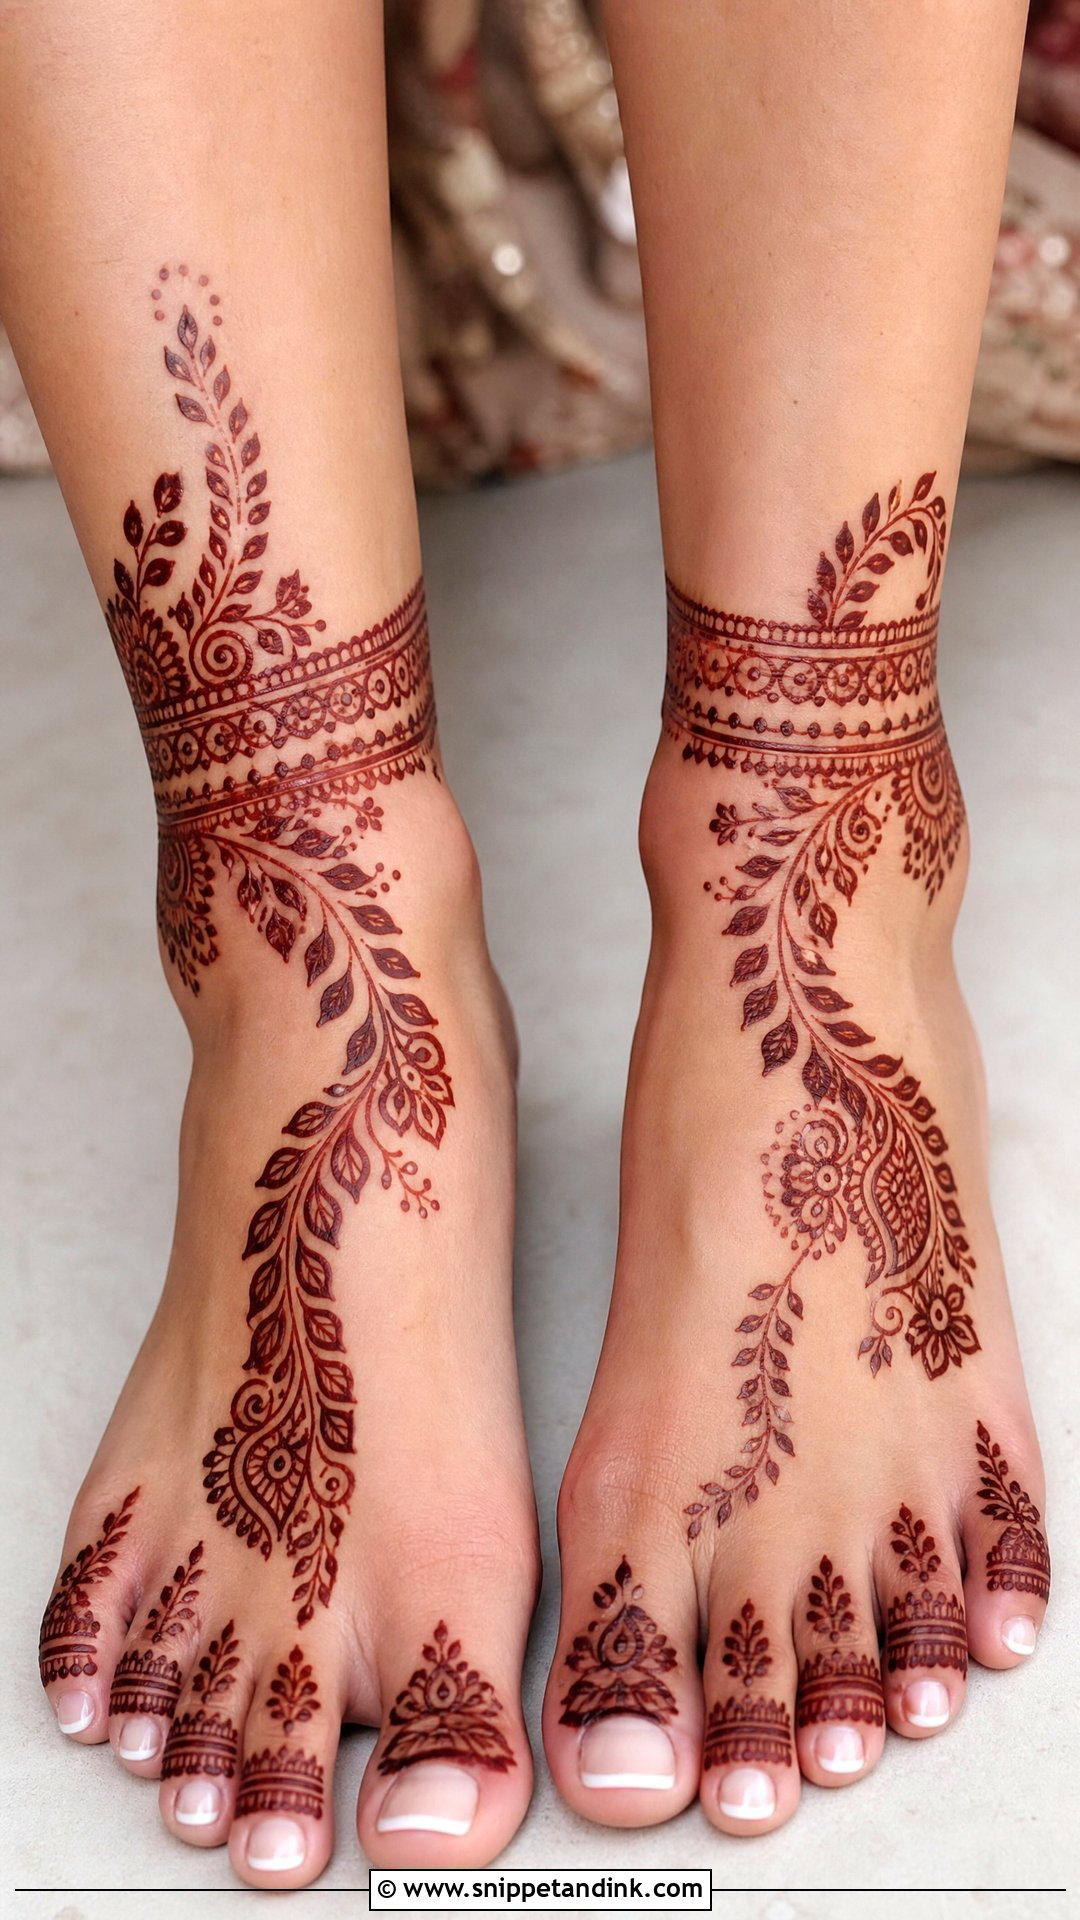
Feet complete the bridal look, and they stain differently from hands, usually darker on the soles and lighter on the tops. Arabic feet designs run floral trails across the top of the foot, anklet-style bands, paisleys near the toes and vines up toward the ankle, and they look cleanest when the foot isn’t overcrowded. Matching both feet is traditional; slightly different trails look more natural. I do feet after the hands are well on their way to dry, because a bride can’t walk safely with wet paste on her soles. For a heavier effect, I extend floral cuffs above the ankle.
23. Arabic Anklet Bridal Mehndi Design
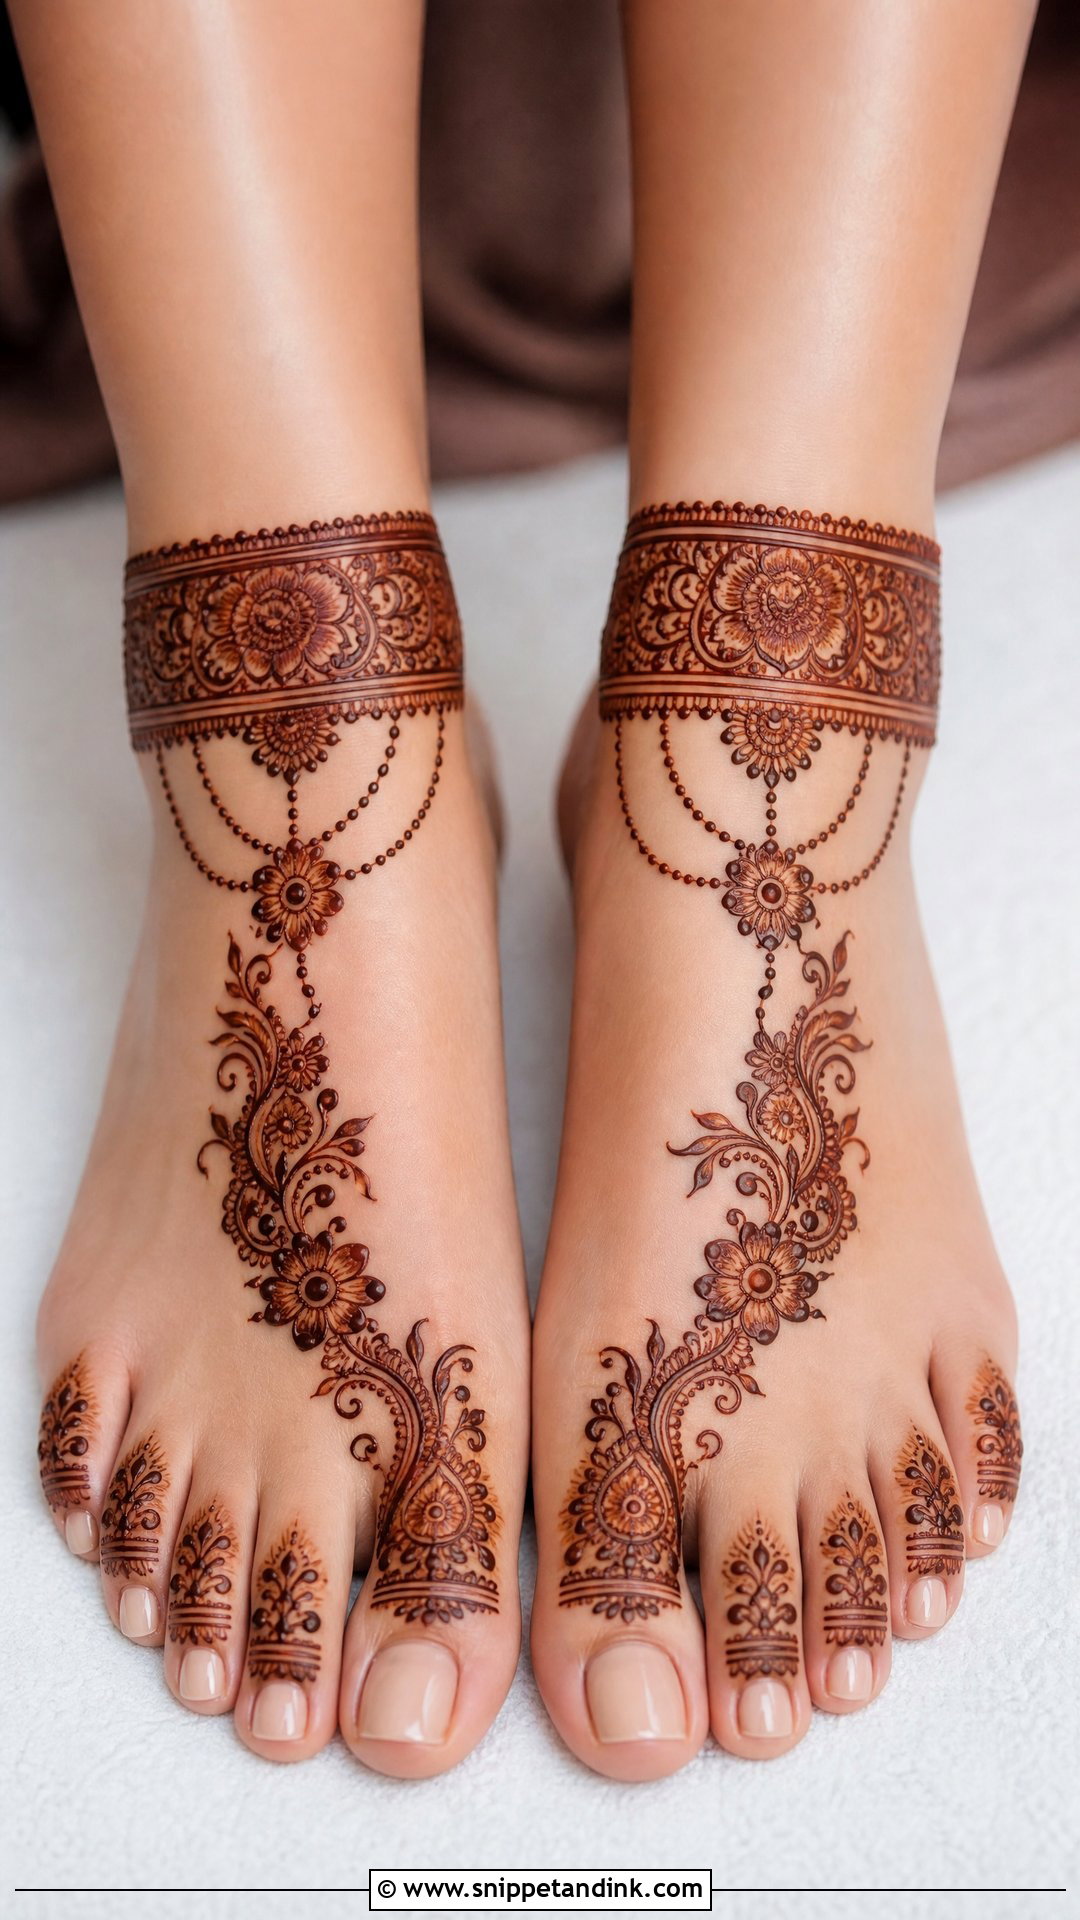
An anklet design treats henna like delicate jewellery at the ankle: a band, chain or cuff, with vines flowing down to the top of the foot and toes. It’s lighter than full feet mehndi but still reads as wedding work, and it looks right with heels, sandals or traditional footwear. Think about your shoe straps before your appointment. A strap that sits across the band will hide it in photos and can rub the paste off before it has stained. Small paisleys near the toes and dotted chains linking foot to ankle finish it off.
24. Arabic White Bridal Mehndi Design
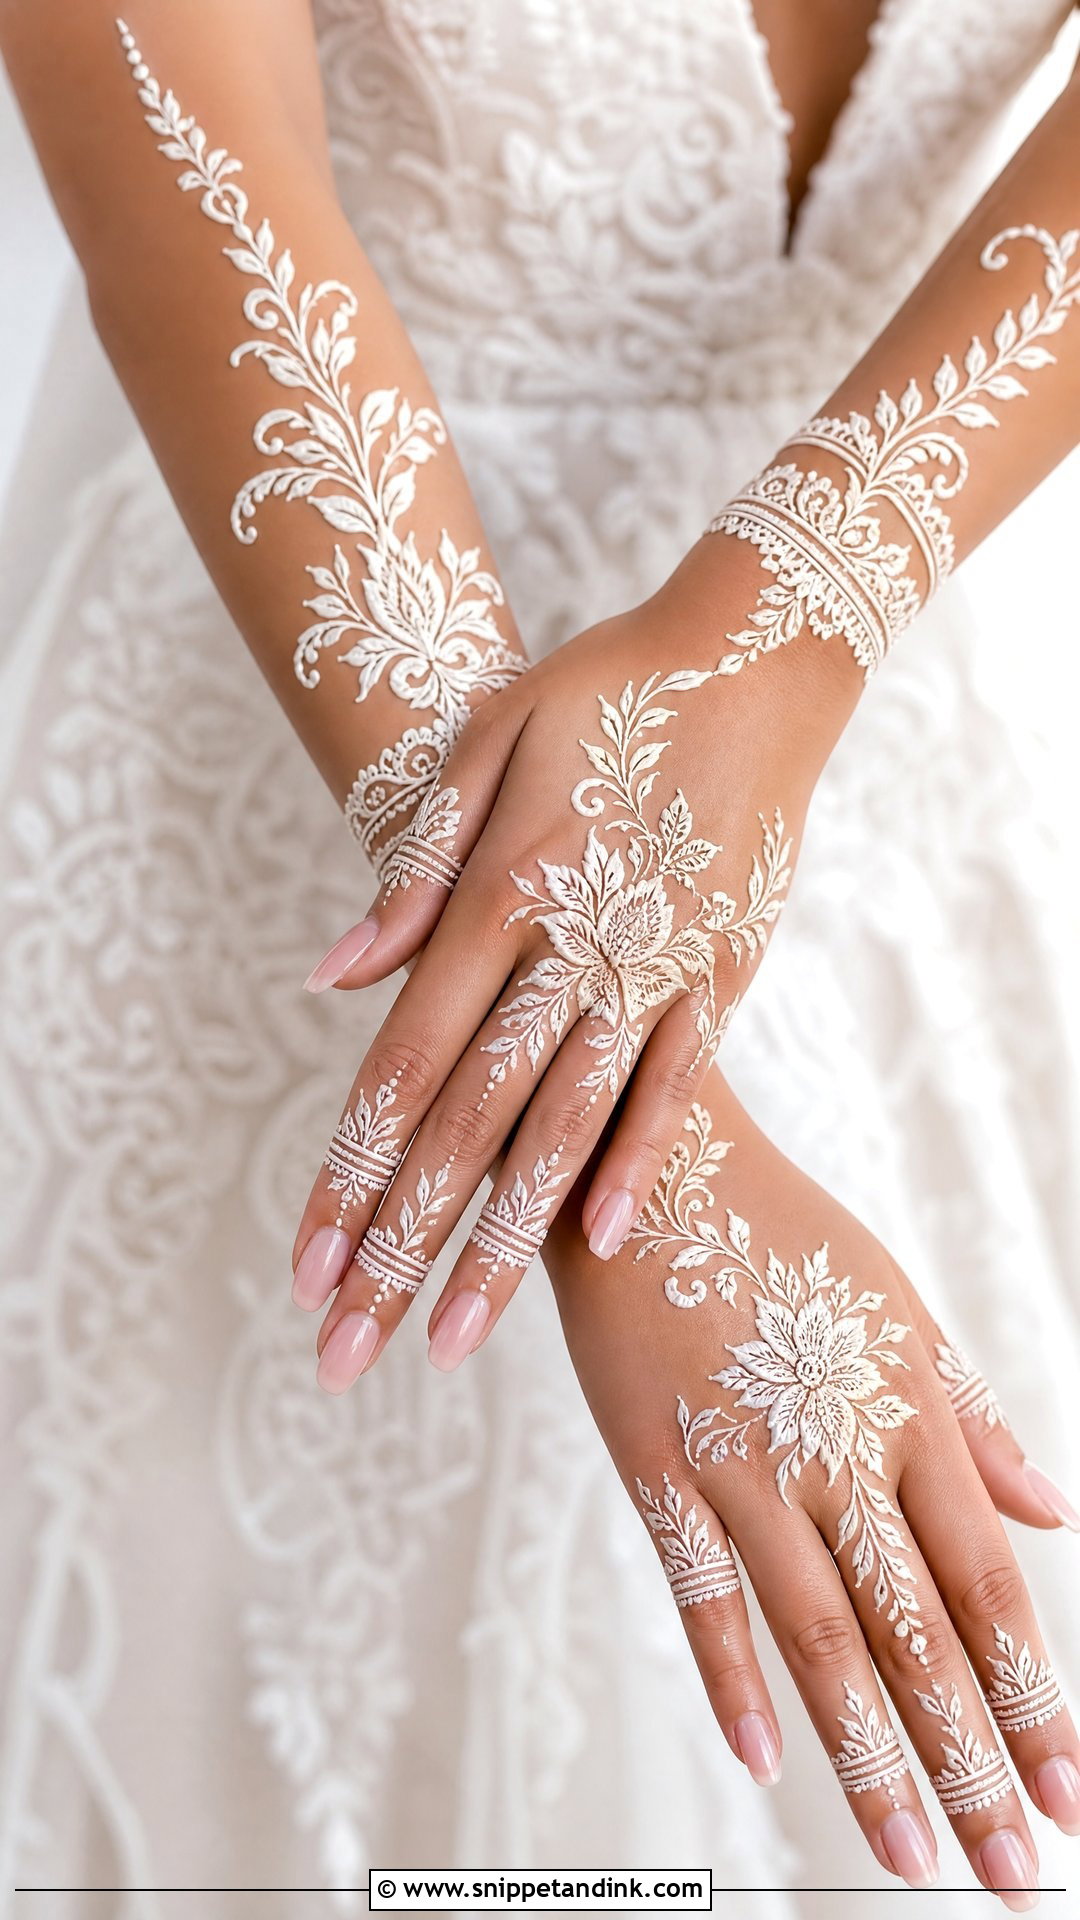
White bridal designs are not henna at all. It’s a cosmetic body paint or skin-safe adhesive applied on the surface, so it shows instantly and leaves no stain behind. That makes it handy for pre-wedding shoots and receptions, but expect it to last a day at most. The Arabic layout translates nicely: lace-like flowers, vines, wrist cuffs and open finger details, best on the back of the hand and forearm. I always ask what product is being used and suggest a patch test a few days before, since some adhesives irritate sensitive skin. It pairs well with light outfits and pearl details.
25. Arabic Glitter Bridal Mehndi Design
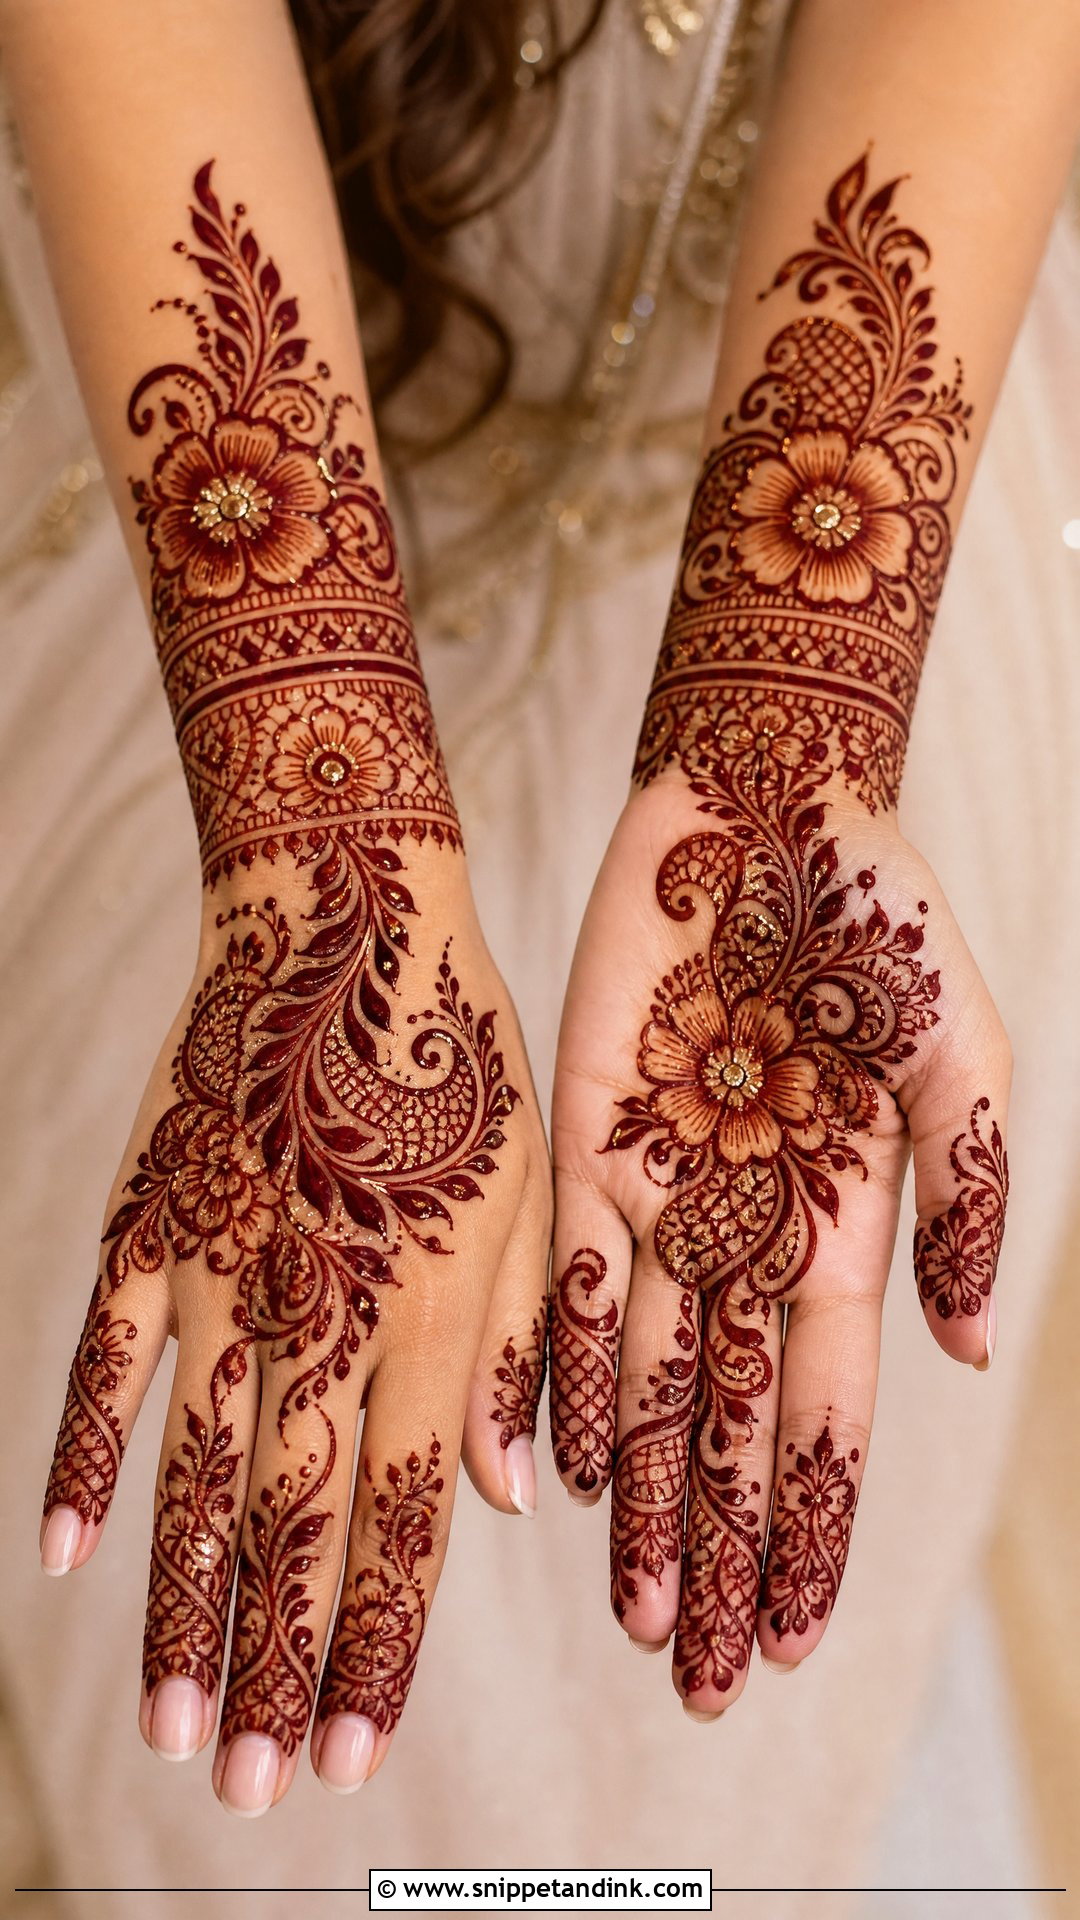
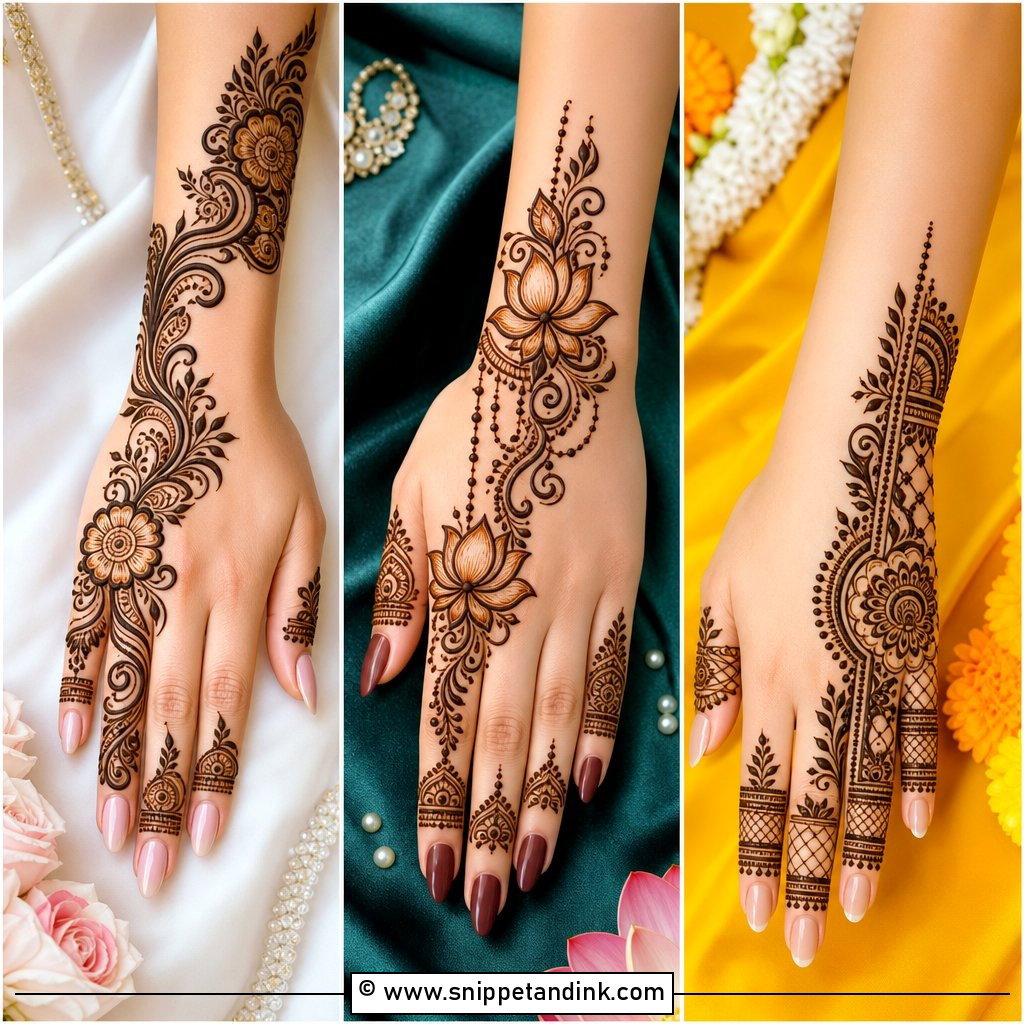
Glitter adds sparkle on top of a traditional pattern: bold flowers, paisleys, vines and wrist-to-forearm trails, with cosmetic glitter laid in after the henna is dry or as a highlight on selected areas. Gold, bronze and deep maroon sit well against natural henna tones. Use it sparingly. Glitter belongs on the main motifs, not across the whole hand, and Arabic spacing gives each sparkling section room to breathe. Keep it to the back hand, wrist cuffs and a few floral centres for evening events. Use cosmetic-grade glitter only, never craft glitter, near skin and eyes.
From Orange Paste Mark to Deep Bridal Stain
When the paste first comes off, the stain is bright orange. That’s normal, and it isn’t the colour you’ll get married in. Henna keeps oxidising for roughly 24 to 48 hours, moving through red to a deep reddish brown. That’s why I schedule bridal mehndi one to two days before the wedding, not the morning of.
- Leave the paste on as long as you comfortably can, ideally six hours or overnight. Seal it with a light dab of lemon and sugar so it stays stuck to the skin.
- Scrape the dried paste off with a blunt edge or your fingernail. Don’t wash it off.
- Keep water away from the design for the first 12 to 24 hours; even a quick rinse can stop the darkening early.
- Keep your hands warm. Cold hands stain weakly, which is why I hand out warm drinks and suggest sleeping in loose cotton gloves.
- Skip scrubs, chlorine and harsh hand soap until after the wedding. Exfoliation lifts the stained top layer first.
Safety Checks on Dark Cones, White Paint and Glitter
Real henna never stains black. A cone that promises jet-black colour in an hour may contain PPD, a hair-dye chemical that can cause serious skin reactions and leave scars. Ask your artist what’s in her paste. Natural henna is mixed from leaf powder, lemon or water, sugar and essential oil, and it smells earthy.
Even natural henna can irritate sensitive skin, and some essential oils bother some people. White designs and glitter add adhesives and cosmetic pigments to the mix. If you have reactive skin, ask for a small test patch on your inner arm a week before the wedding. It’s a two-minute job that rules out an itchy, swollen surprise on the day.
Sketch Your Layout With Your Sleeves and Rings in Mind
Arabic mehndi gives you a lot of range, from a single khafif vine to a full Gulf-style forearm, with initials, feet, white work and glitter in between. The right one comes down to your outfit, your jewellery, which events you’re wearing it for and how long you can sit still. Bring photos of your sleeves and the rings you’ll wear to your consultation. I’d much rather adjust placement and density for your actual hands than copy a photo that was drawn on someone else’s.
You'll Like These Ideas:


Leave a Reply