
Bridal hands get looked at more than almost anything else at a wedding: under the bangles, holding the ring, folded in the portraits. When I sit down with a bride to plan hers, the conversation is rarely about which picture she likes most. It’s about how many hours she can sit still, what she’s wearing, and how dark she needs the stain to be on the day itself. The twenty designs below run from packed Indian full-hand work to open Arabic trails, mandalas, portrait palms and modern back-hand layouts. Each one comes with notes on how it applies, how it stains and who it suits, so you can walk into your consultation knowing what to ask for.
The Two Days Between Your Mehndi and Your Wedding
Henna doesn’t look finished when the paste comes off. Natural henna leaves a bright orange stain at first, and it oxidises to reddish brown or maroon over the following 24 to 48 hours. That’s why I book bridal application one to two days before the wedding, never the morning of. Sit for it the evening before and you’ll walk down the aisle in orange.
The sitting is longer than most brides expect
A full bridal set on both hands and lower arms can take several hours, and feet add more on top. Eat beforehand, use the bathroom, and have someone ready to hold a drink with a straw. Arabic and minimal designs take far less time, which matters if your mehndi night is also a party you’d like to enjoy.
Before the cone touches your skin
- Wax, exfoliate and have any manicure done a day or two earlier. Scrubbing after application strips the stain.
- Arrive with clean, dry hands and no lotion, oil or sunscreen. Anything sitting on the skin acts as a barrier and the dye takes unevenly.
- Bring a photo of your outfit and bangles, not only design references. I set the cuff height around your jewelry and sleeve length.
- Ask whether the paste is natural henna, and do a small patch test if you’ve never worn it. A ‘black henna’ that stains dark within an hour usually contains PPD, a hair-dye chemical that can cause serious skin reactions.
1. Full Hand Bridal Mehndi Design
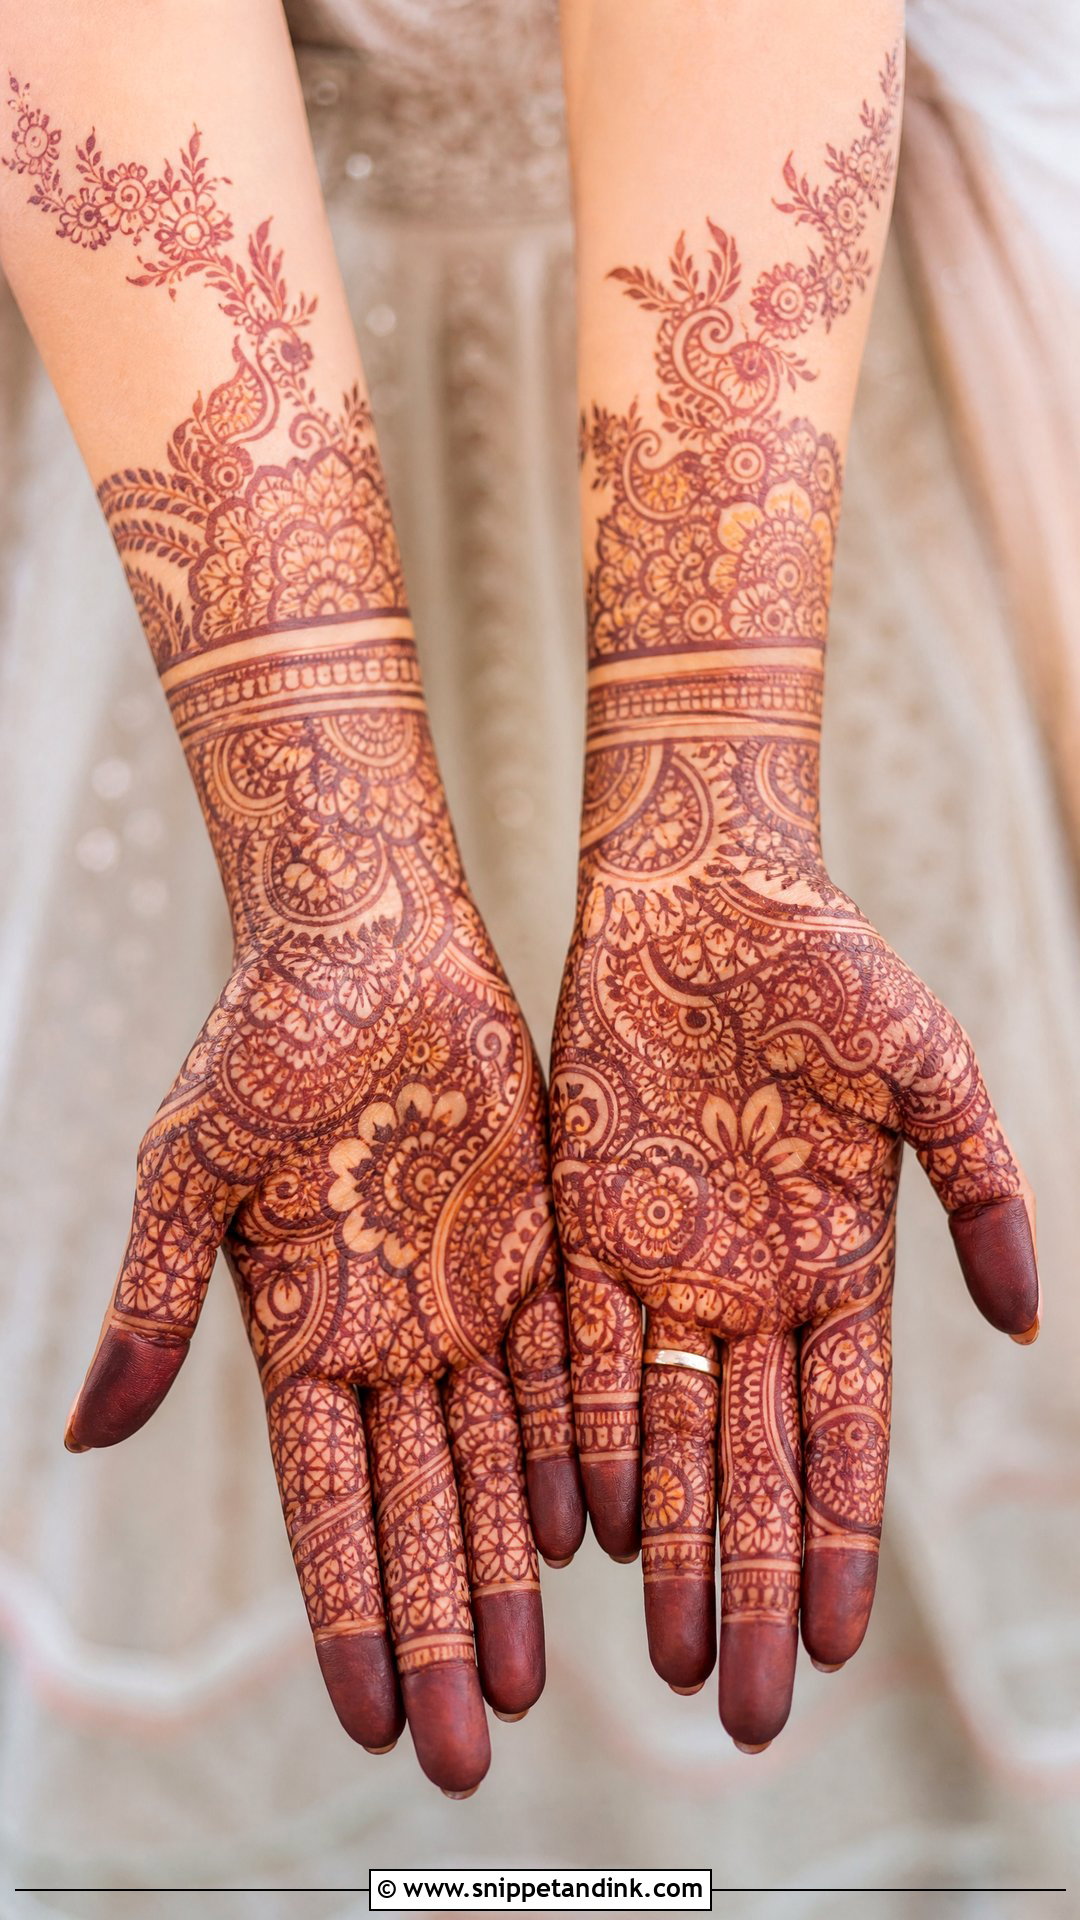
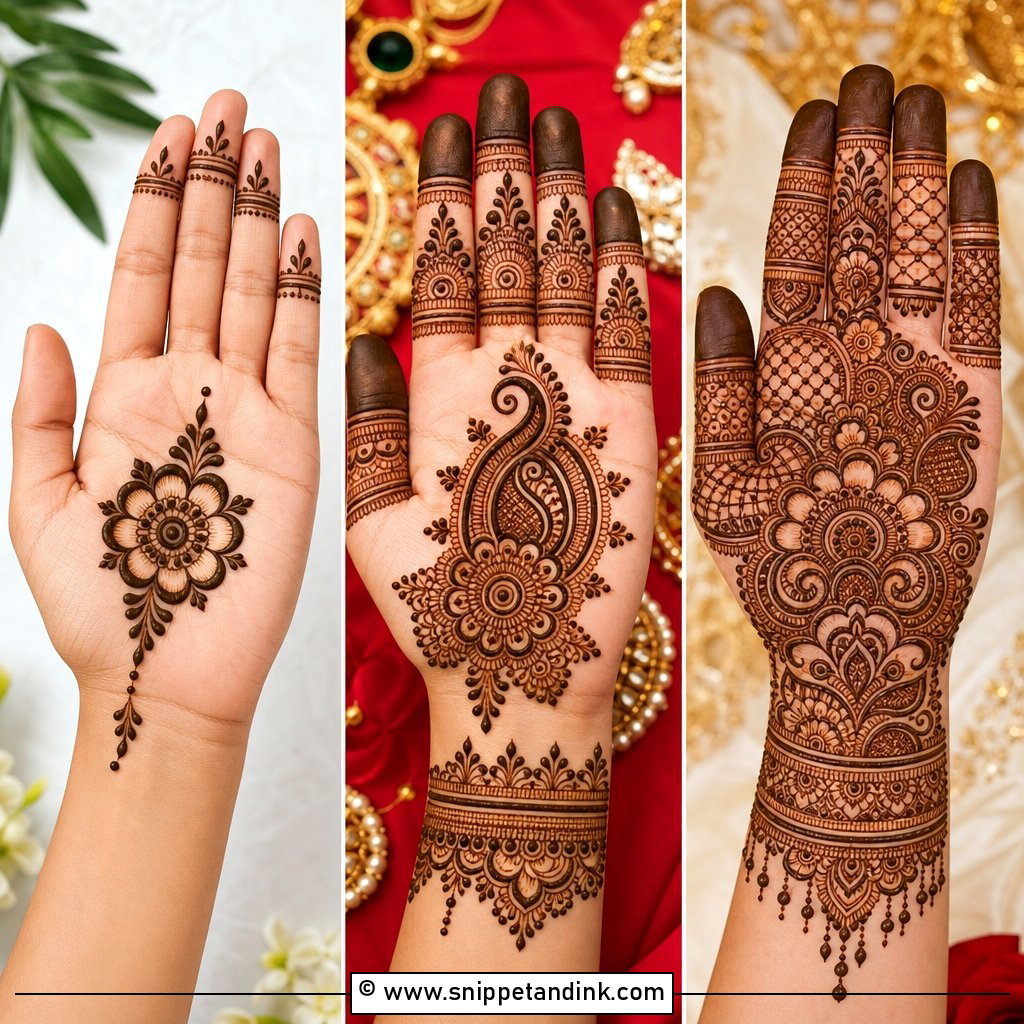
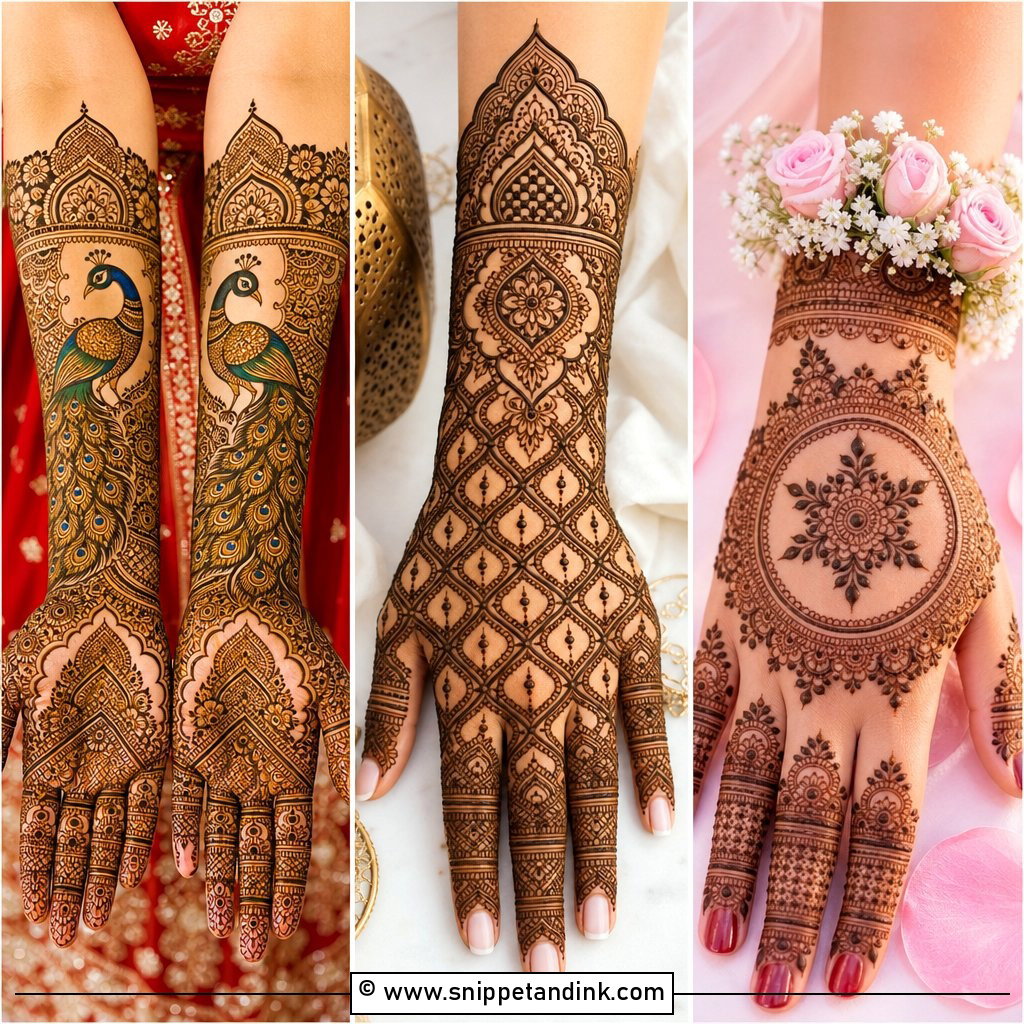
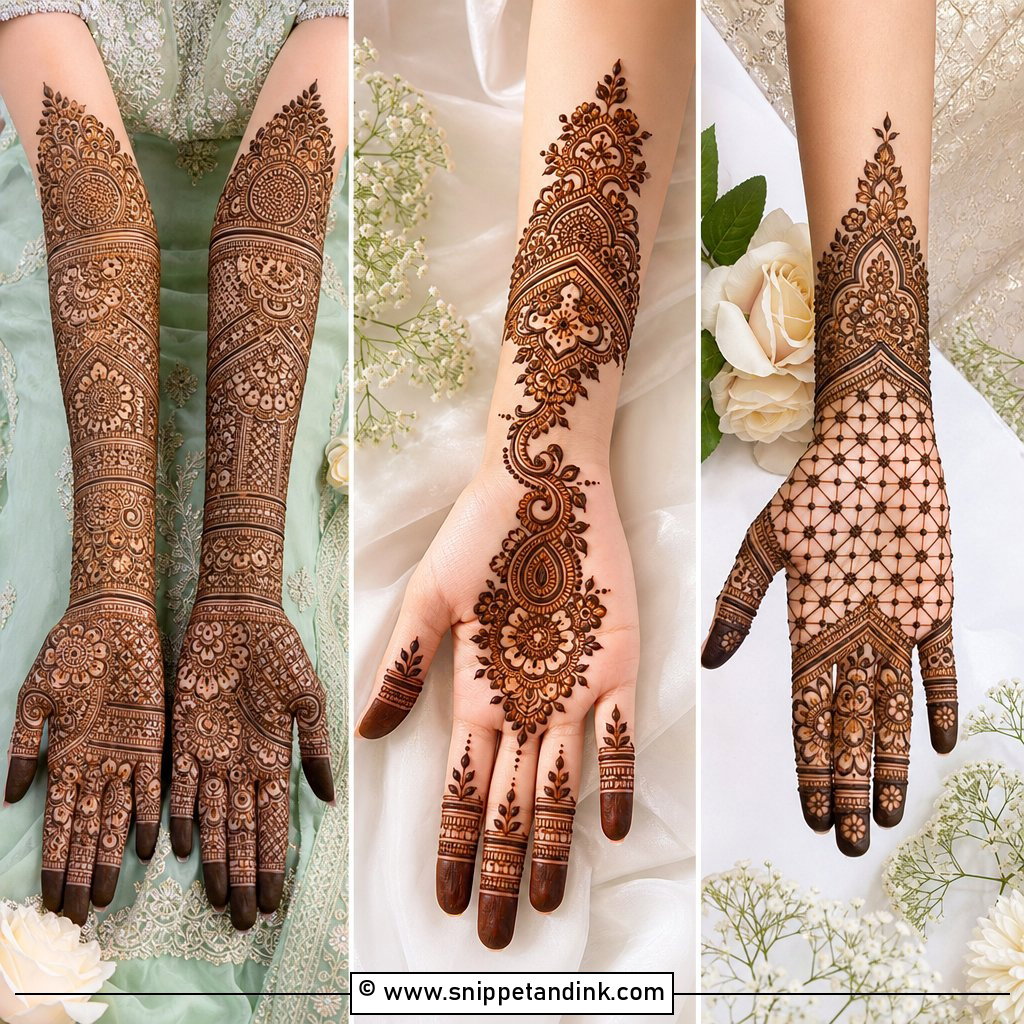
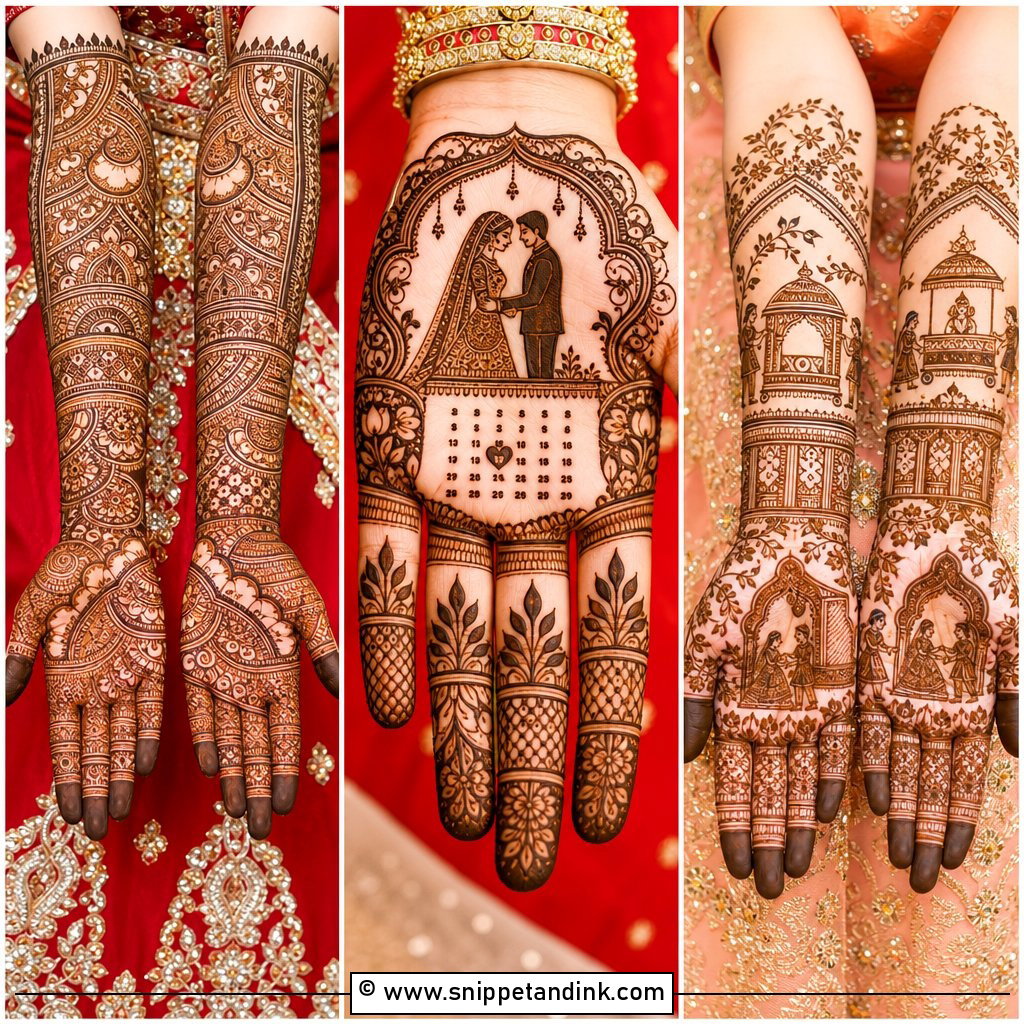
Coverage from fingertips to forearm is still what most traditional brides picture, and it needs the most planning of anything here. Palms, backs, wrists and lower arms fill with paisleys, florals, leaves, dots and fine filler lines, which means a long sitting and a long dry. I always place the palm centre first. If the main motif sits even slightly off-centre, everything built around it looks crooked in close-ups. The upside is that the decoration carries on past heavy bangles, so the arm never looks bare between jewelry and sleeve. Leave the paste on as long as you can bear for that deep reddish-brown finish.
2. Indian Bridal Mehndi Design
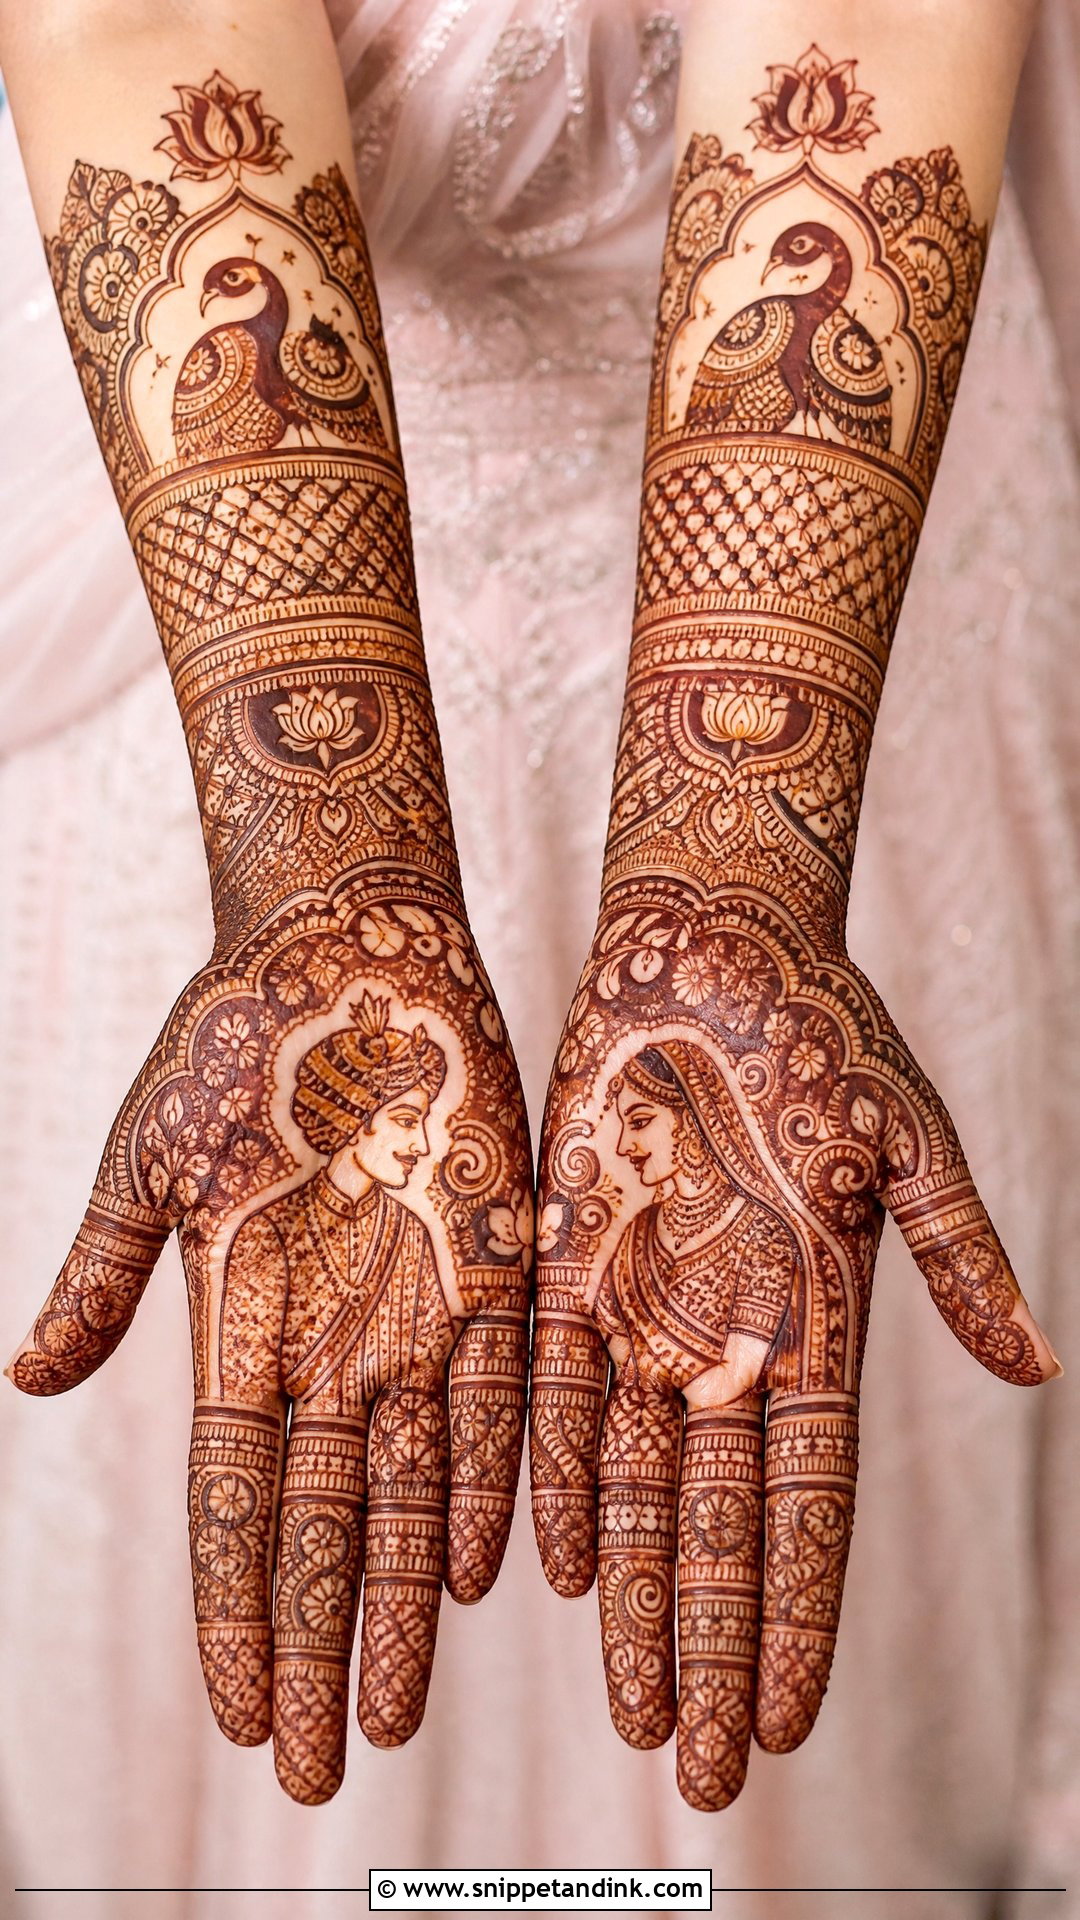
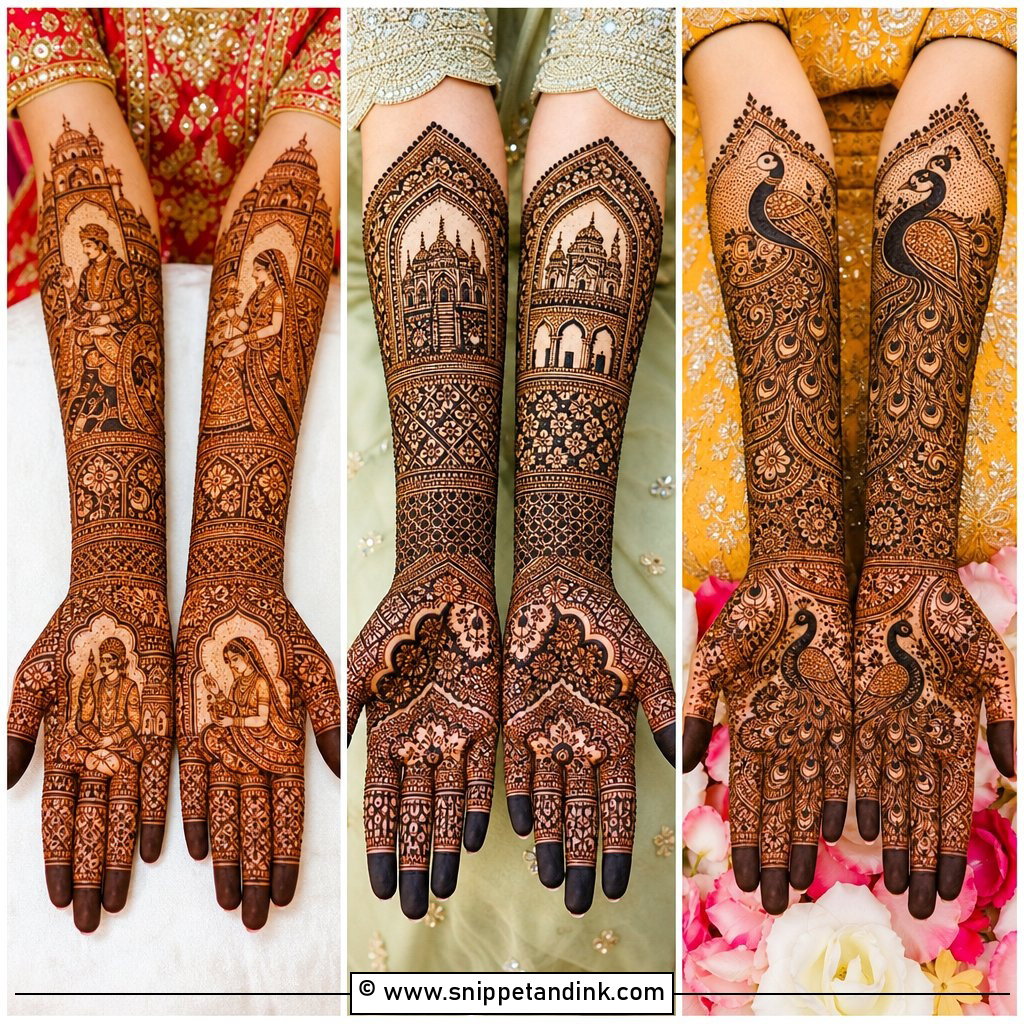
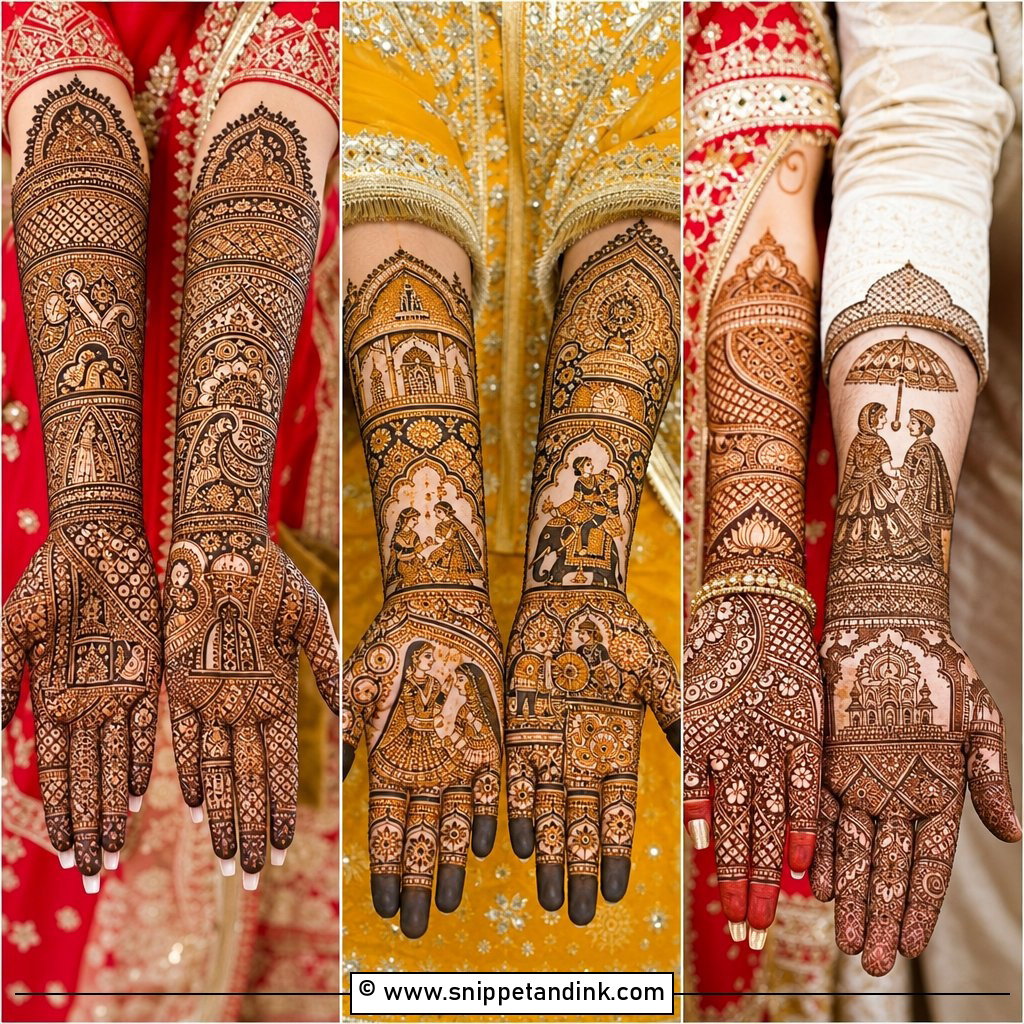
Indian bridal mehndi design is the storytelling style: peacocks, lotus flowers, bride and groom figures, paisley chains, jaali panels and tiny fills, all linked from fingertip to forearm. It sits naturally beside embroidered lehengas and heavy sarees because its density matches the richness of the outfit. The trap is a small hand. Pack the same number of motifs onto a narrow palm and it reads as a dark smudge from a few feet away, so on smaller hands I scale the central motifs up and leave a little more air between fills.
3. Arabic Bridal Mehndi Design
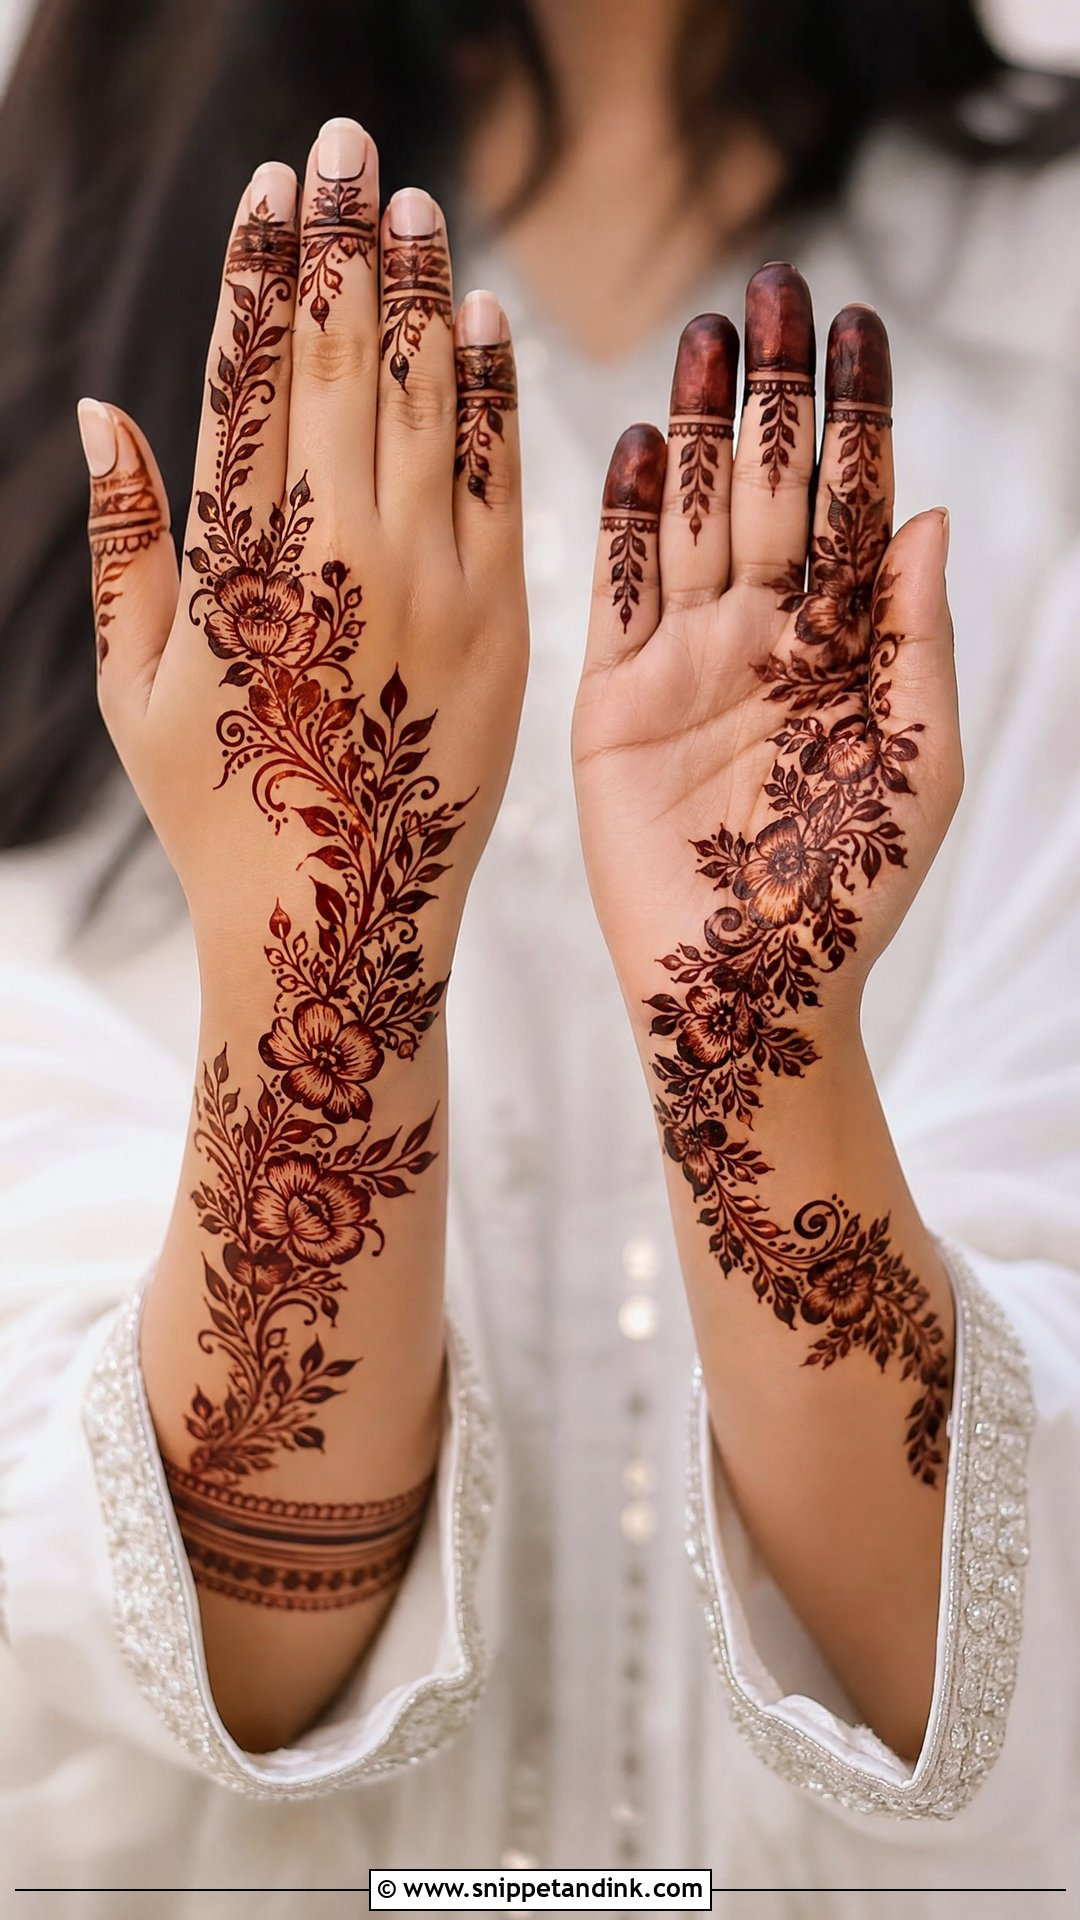
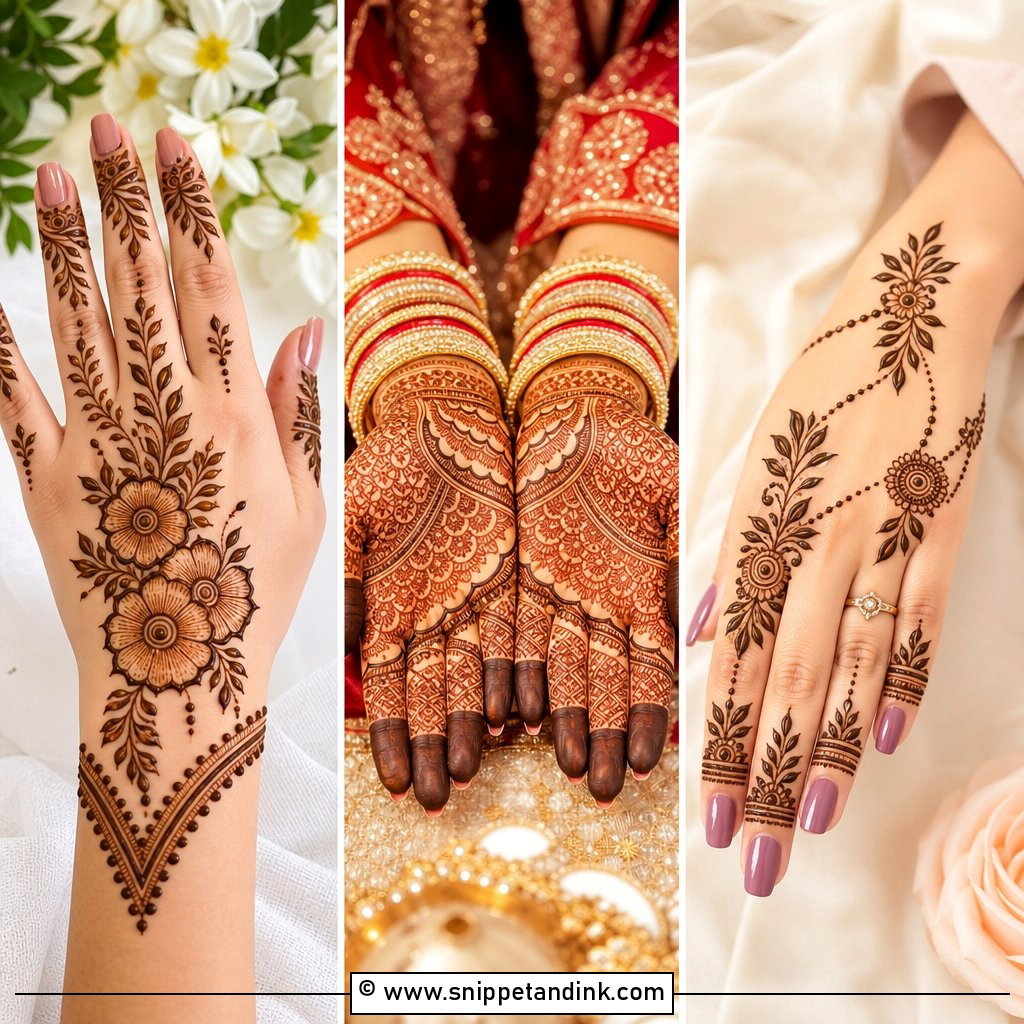
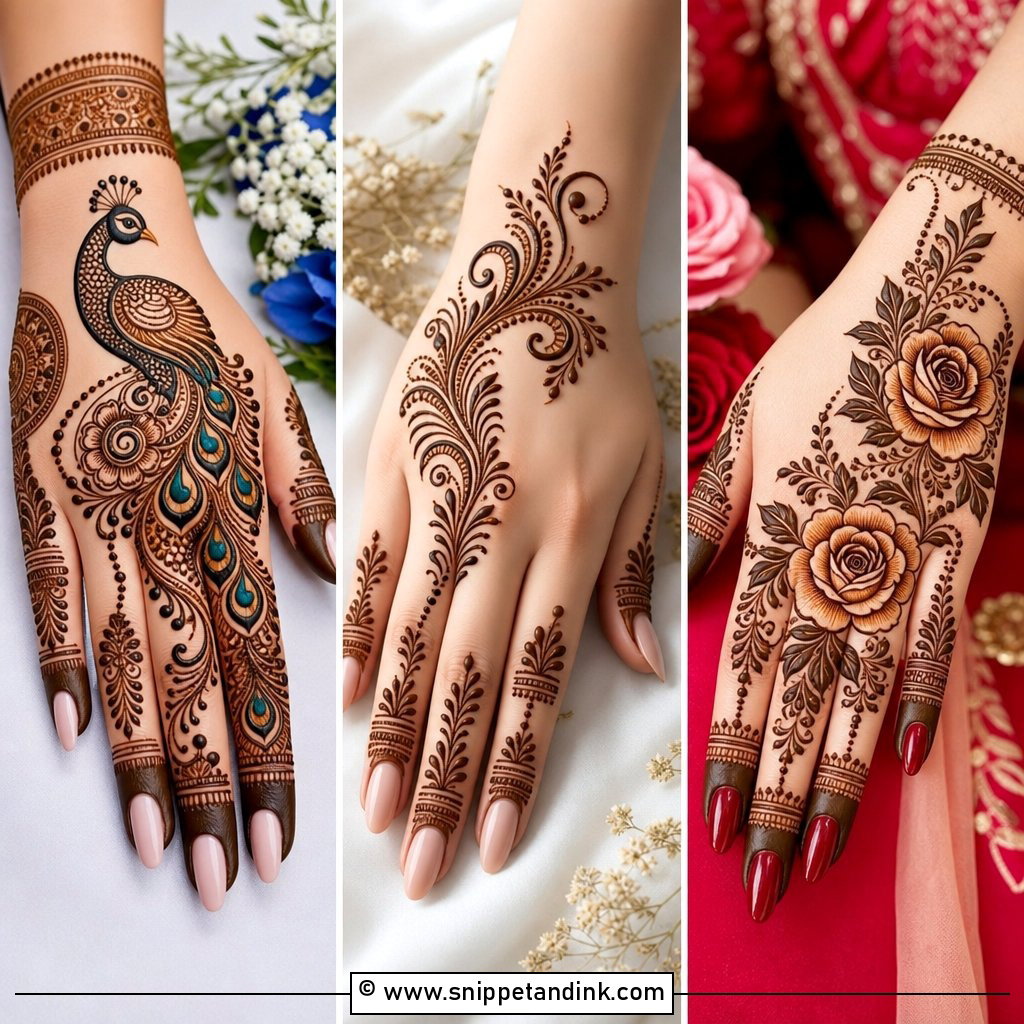
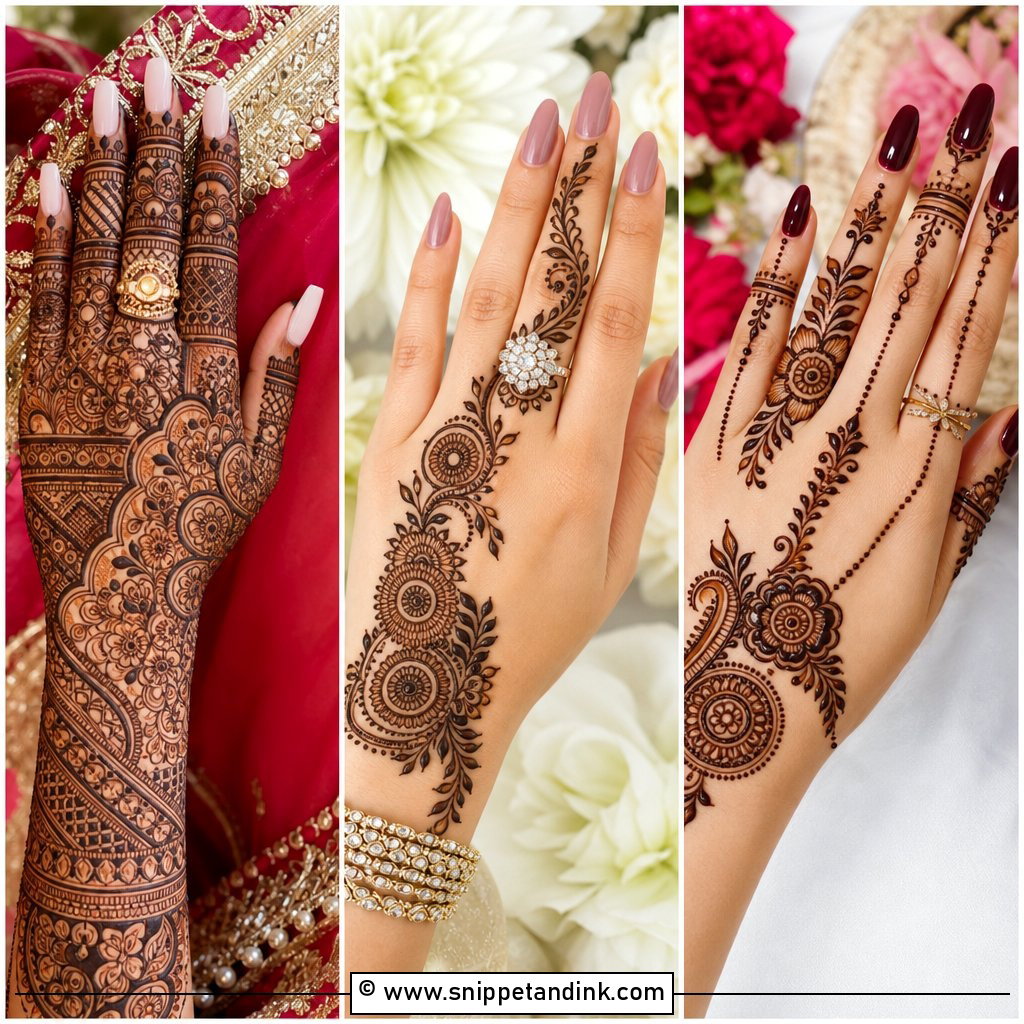
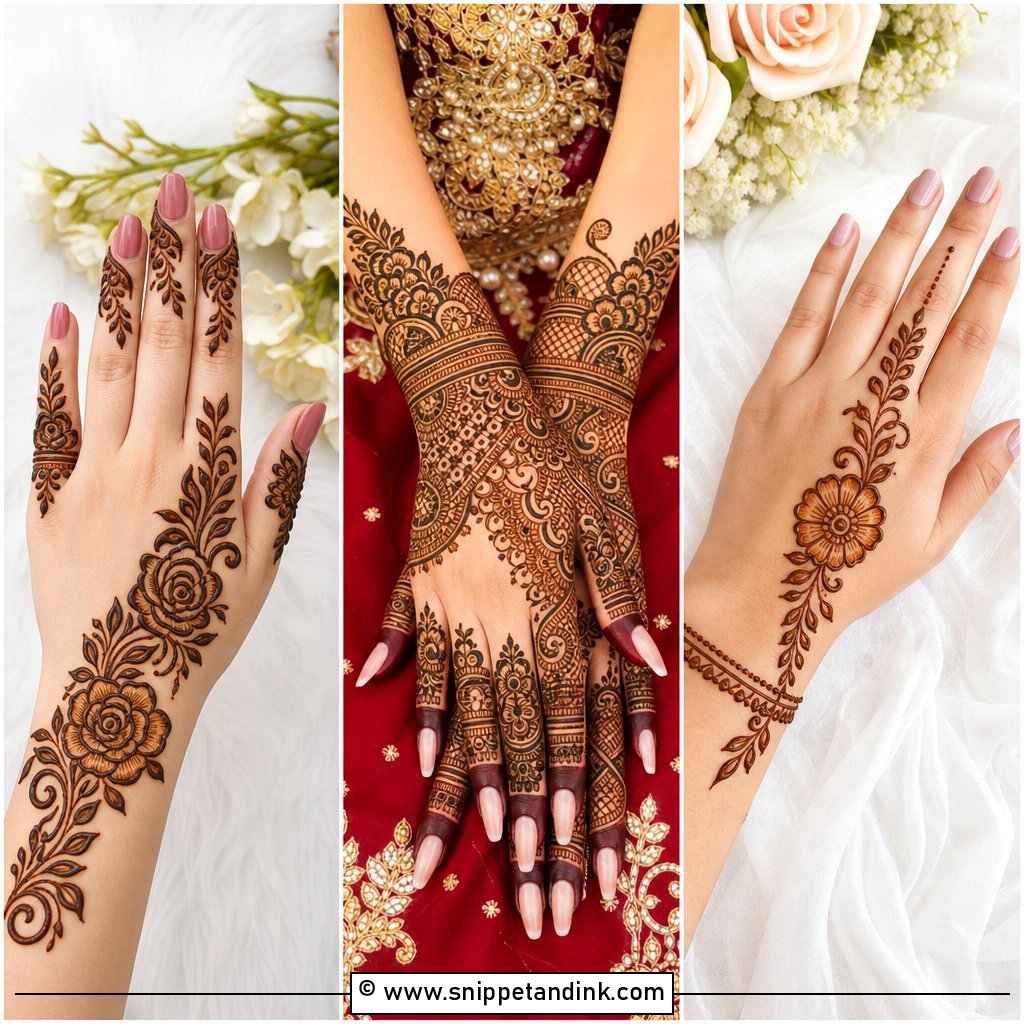
Arabic work is my usual answer when a bride has a short ceremony window or simply doesn’t want to sit for hours. The pattern runs diagonally across the hand in flowers, vines, leaves and curved bands, and the bare skin between them is part of the design rather than a gap. Bold outlines and big flowers matter here, since thin lines on open skin can look faint once the stain settles. I also suggest it for bridesmaids and close family, who get a wedding-ready hand in a fraction of the bride’s time.
4. Indo Arabic Bridal Mehndi Design
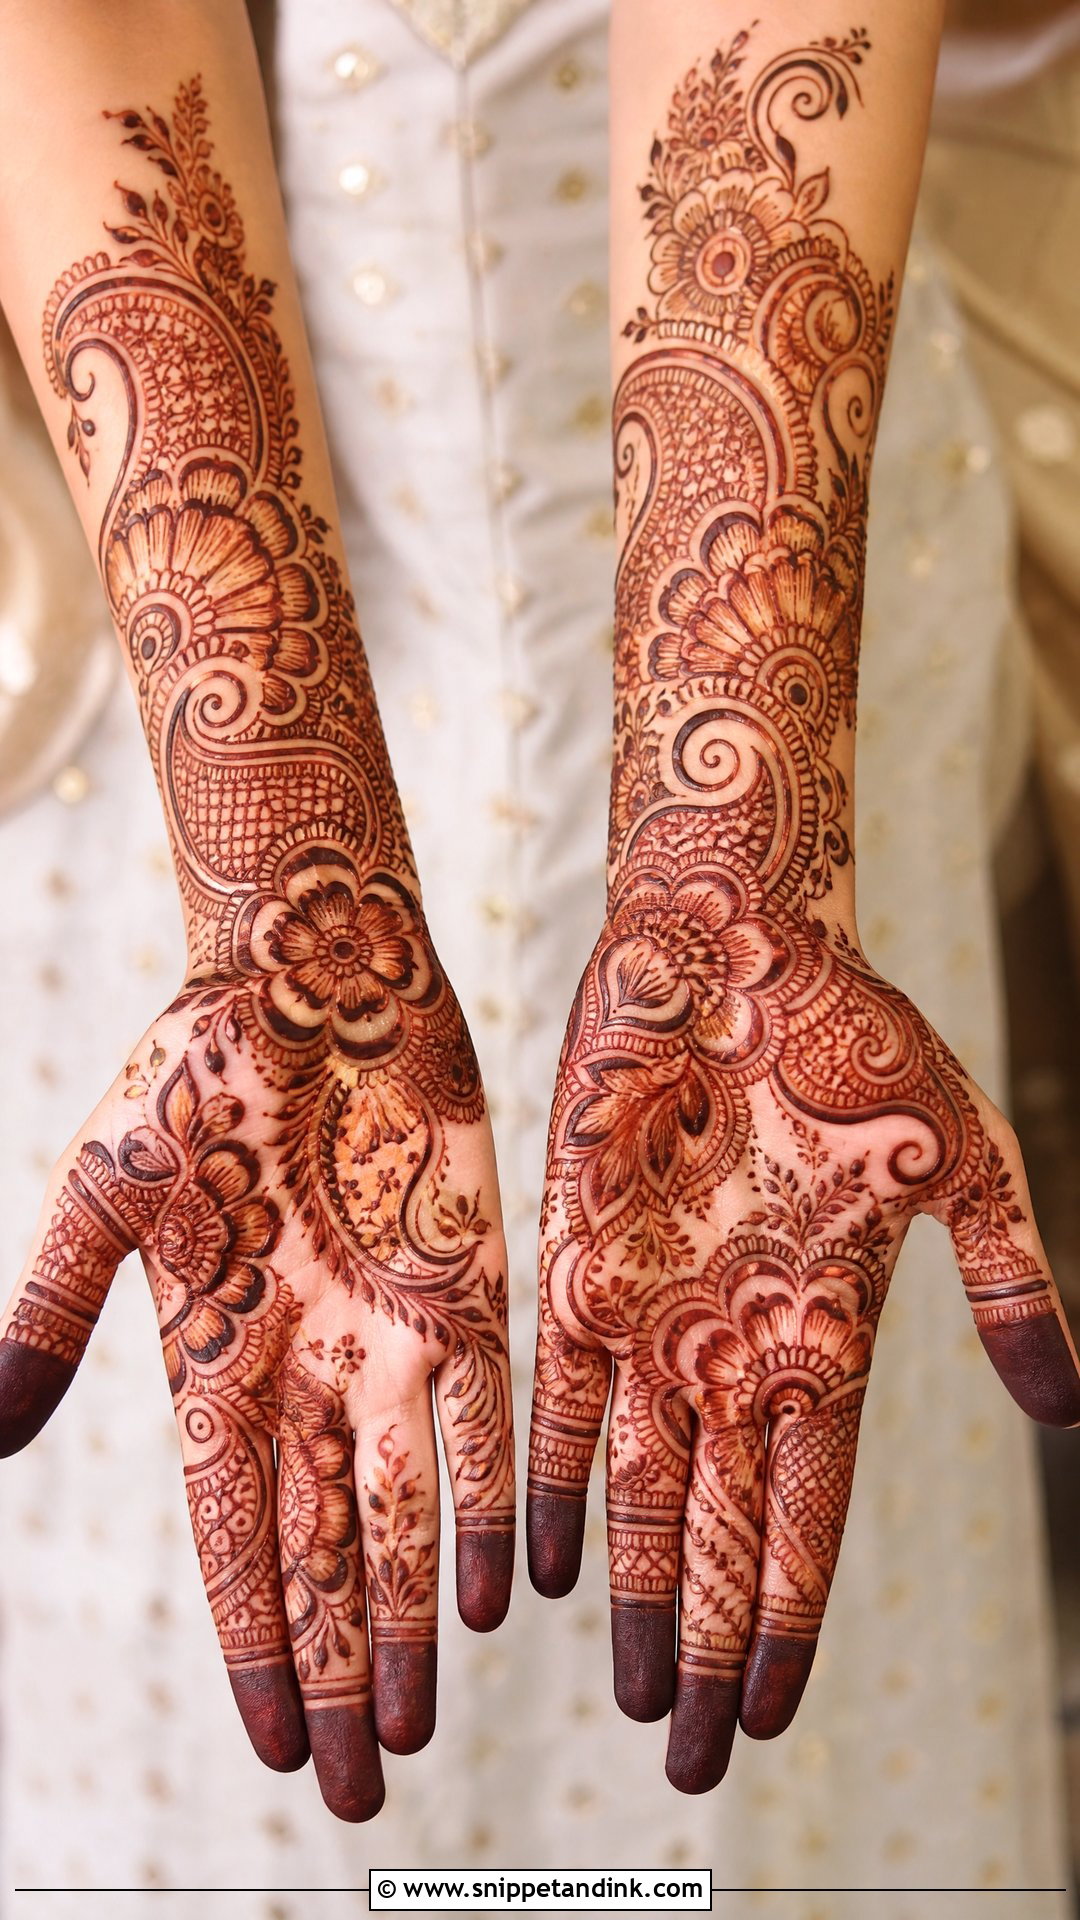
Picture an Arabic diagonal trail with Indian detailing poured into it: shaded petals, paisley clusters, a detailed wrist cuff and fine finger fills, with skin still showing between the main elements. It’s rich without the packed feel of a full Indian hand. The contrast is what makes it work, so I draw a heavier outline around each major motif and keep the filling inside it fine. Done the other way round, thin outlines with chunky fill, the motifs blur into each other. Mirror-work lehengas, pastel outfits and modern jewelry all sit well with it.
5. Back Hand Bridal Mehndi Design
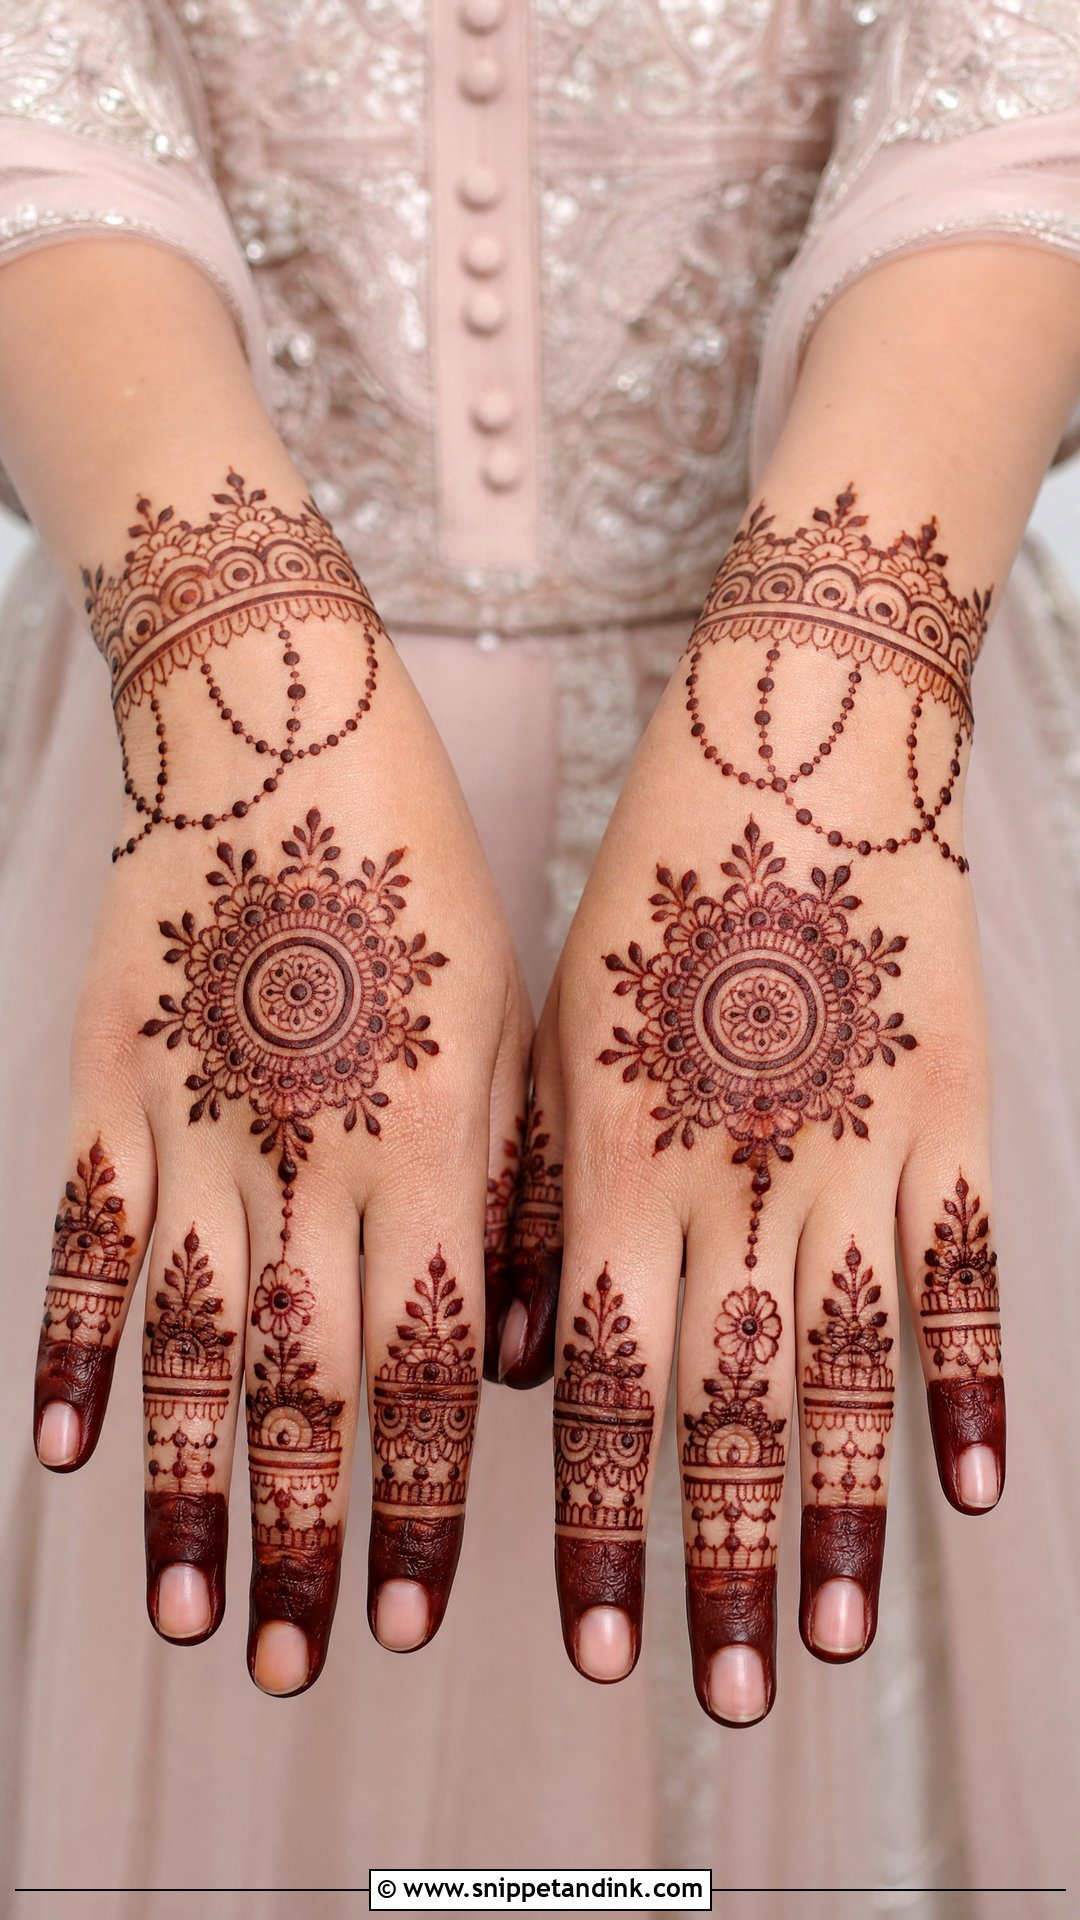
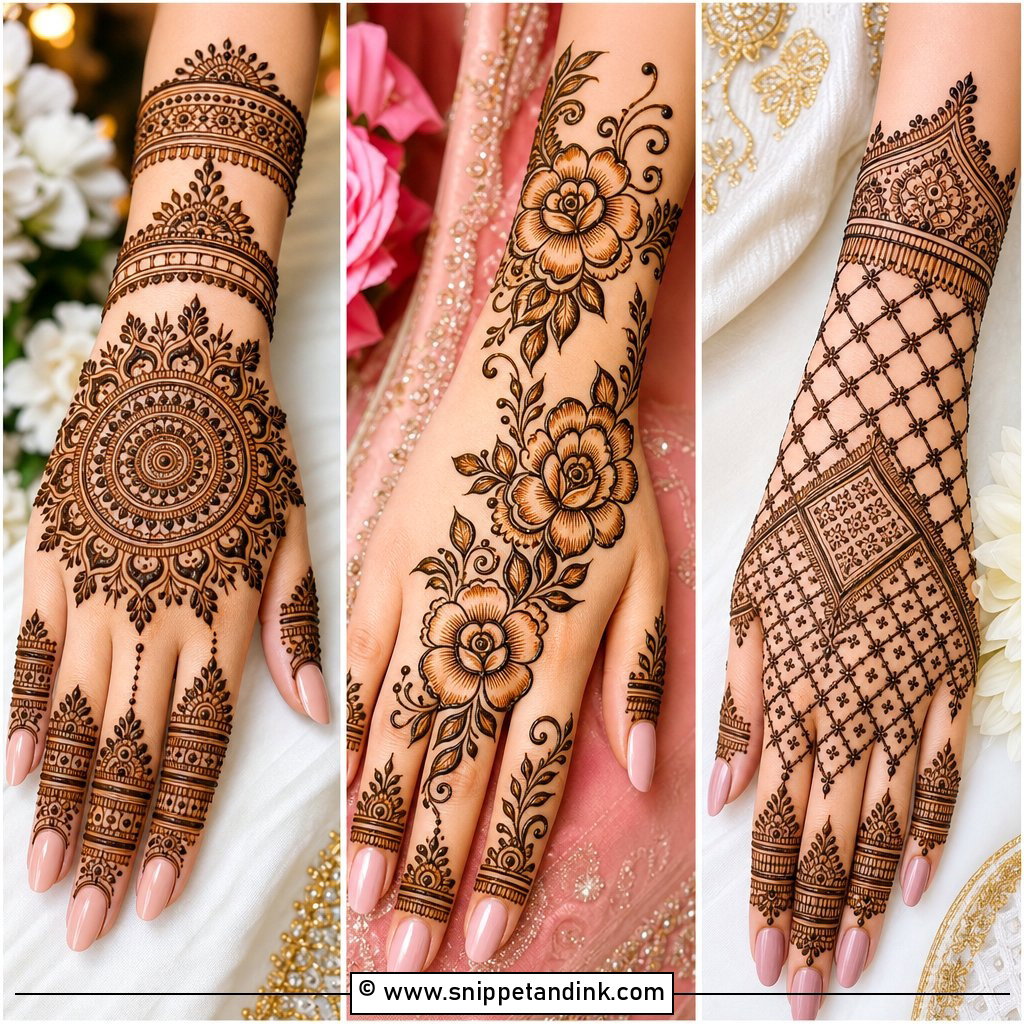
Back hand bridal mehndi design deserves as much thought as the palm, because the back of the hand is what shows in ring shots and bangle close-ups. A complete layout usually has a central mandala, a bracelet-style wrist band, decorated fingers and chains or vines tying them together. One honest caveat: the skin there is thinner than on the palm, so the stain comes up a shade or two lighter. I compensate with bolder lines and fewer hairline fills. Finger caps, leafy trails and small dots give a jewelry effect that suits statement rings and red, gold or pastel nails, and a back-hand design is easier to sit through because you can rest your hands palm-down while it dries.
6. Front Hand Bridal Mehndi Design
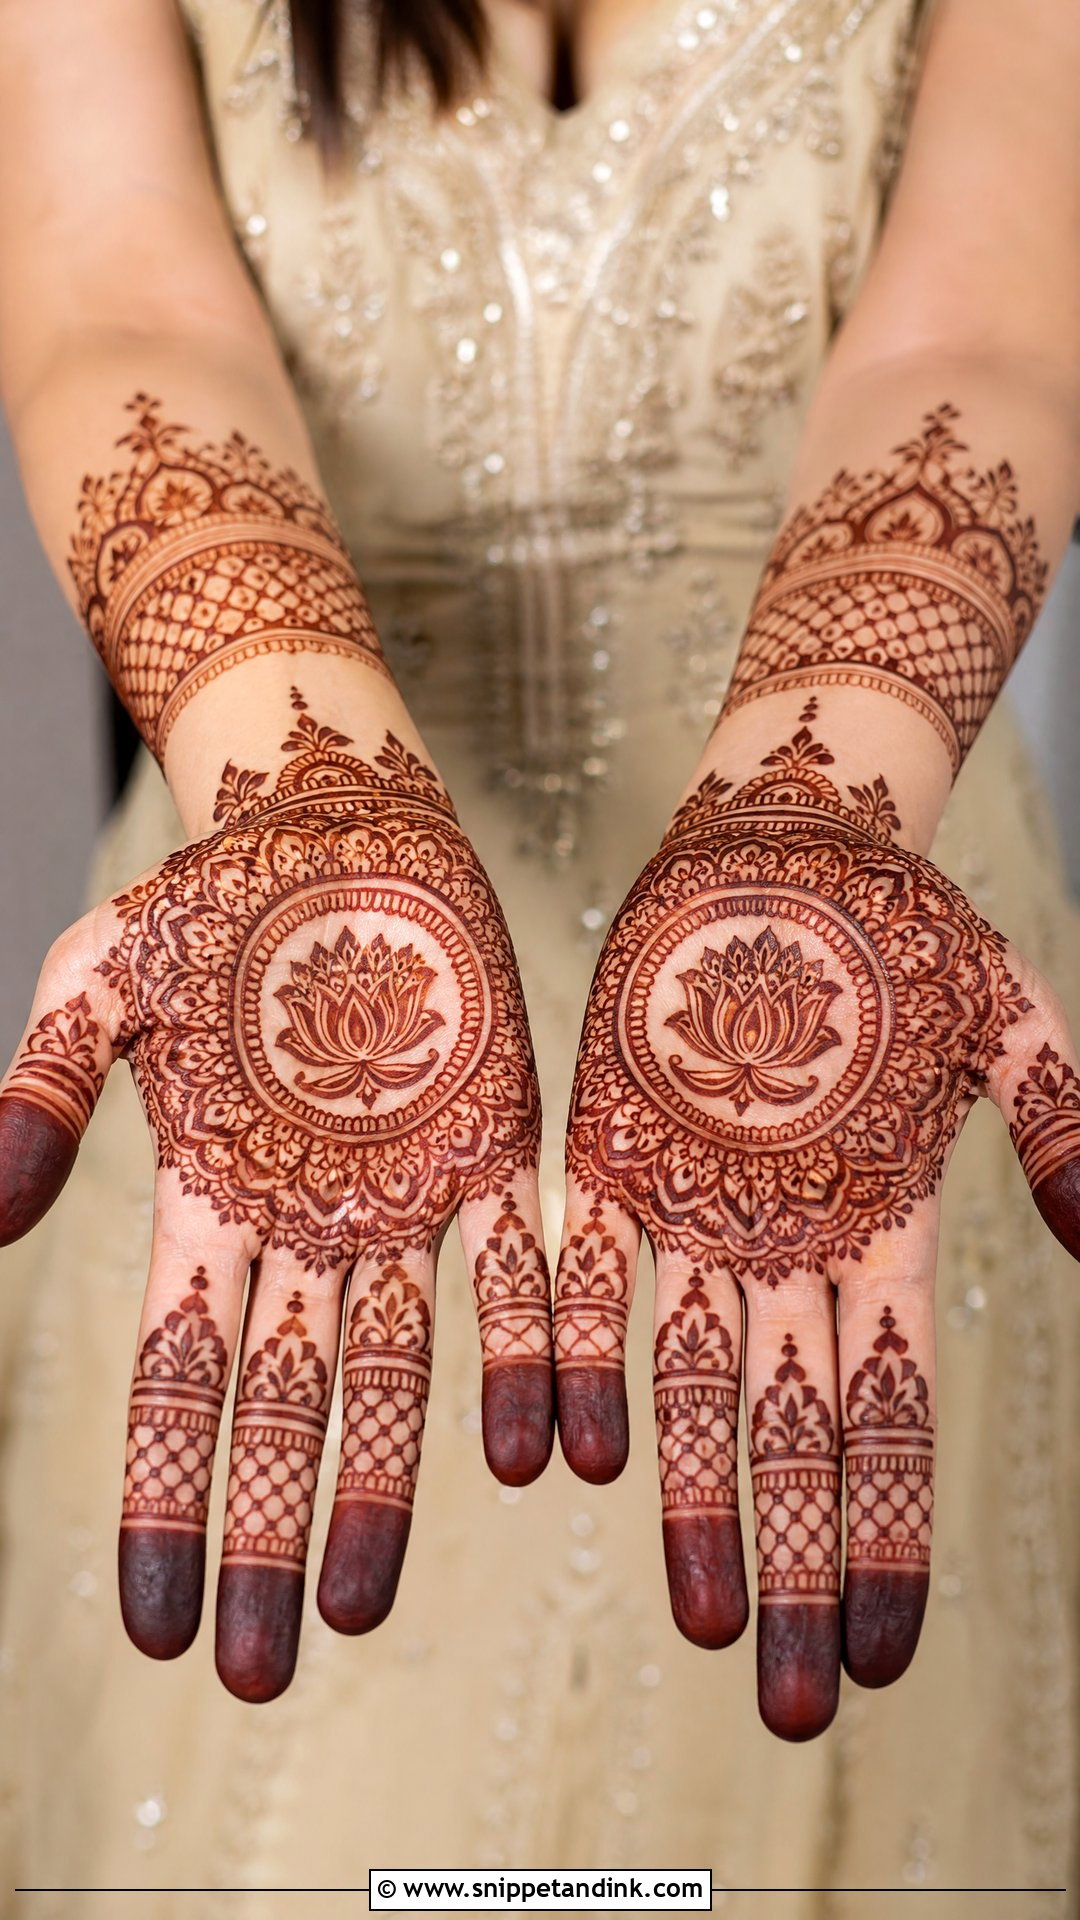
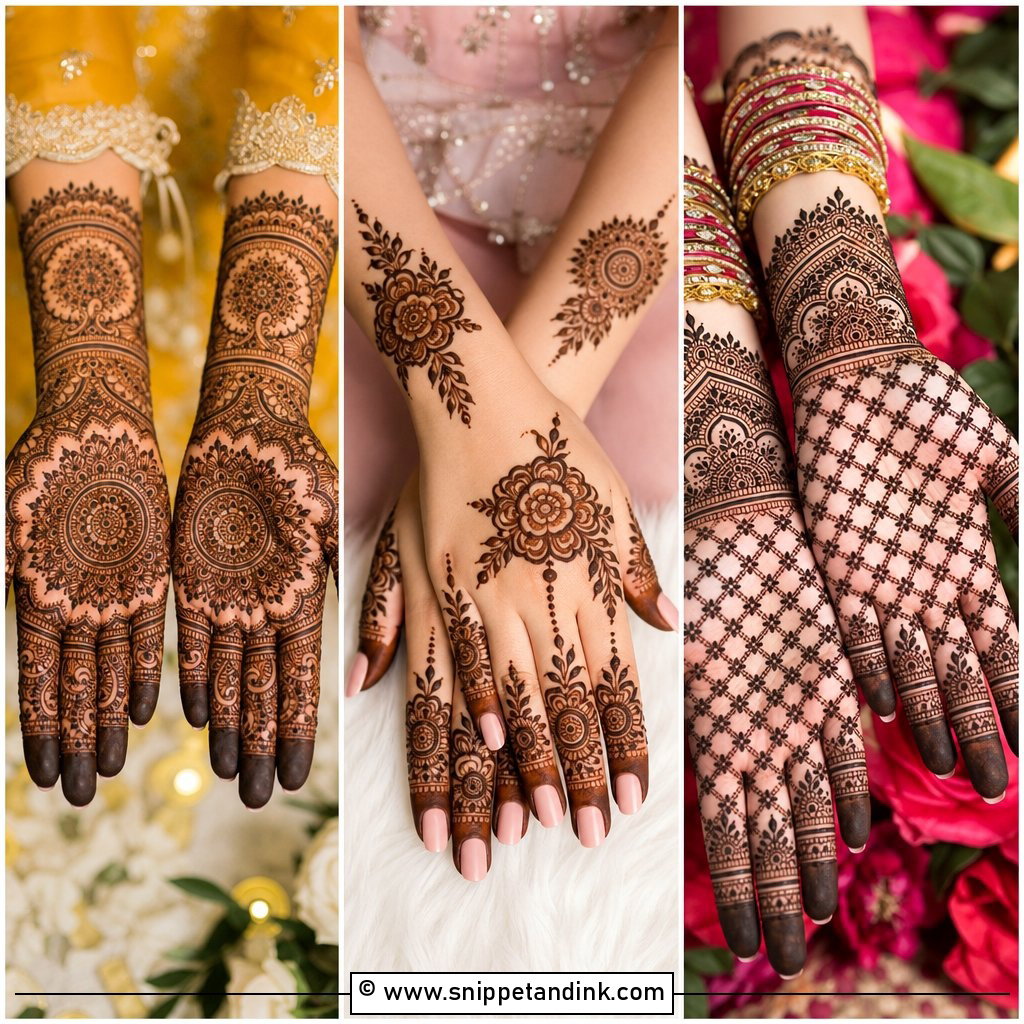
The palm is where henna stains darkest, which is why so many brides put their main artwork there. A round mandala, a lotus centre, bride and groom figures or a paisley frame usually takes the middle, with bands, leaves, mesh and small florals running up the fingers. What I watch for is disconnection: a dense palm with fingers that look like they came from a separate design. Flowing curves or a repeated motif linking palm, wrist and fingers make the hand read as one piece in blessing photos and ring ceremonies. If deep maroon colour is your priority, this is where you’ll get it.
7. Simple Bridal Mehndi Design
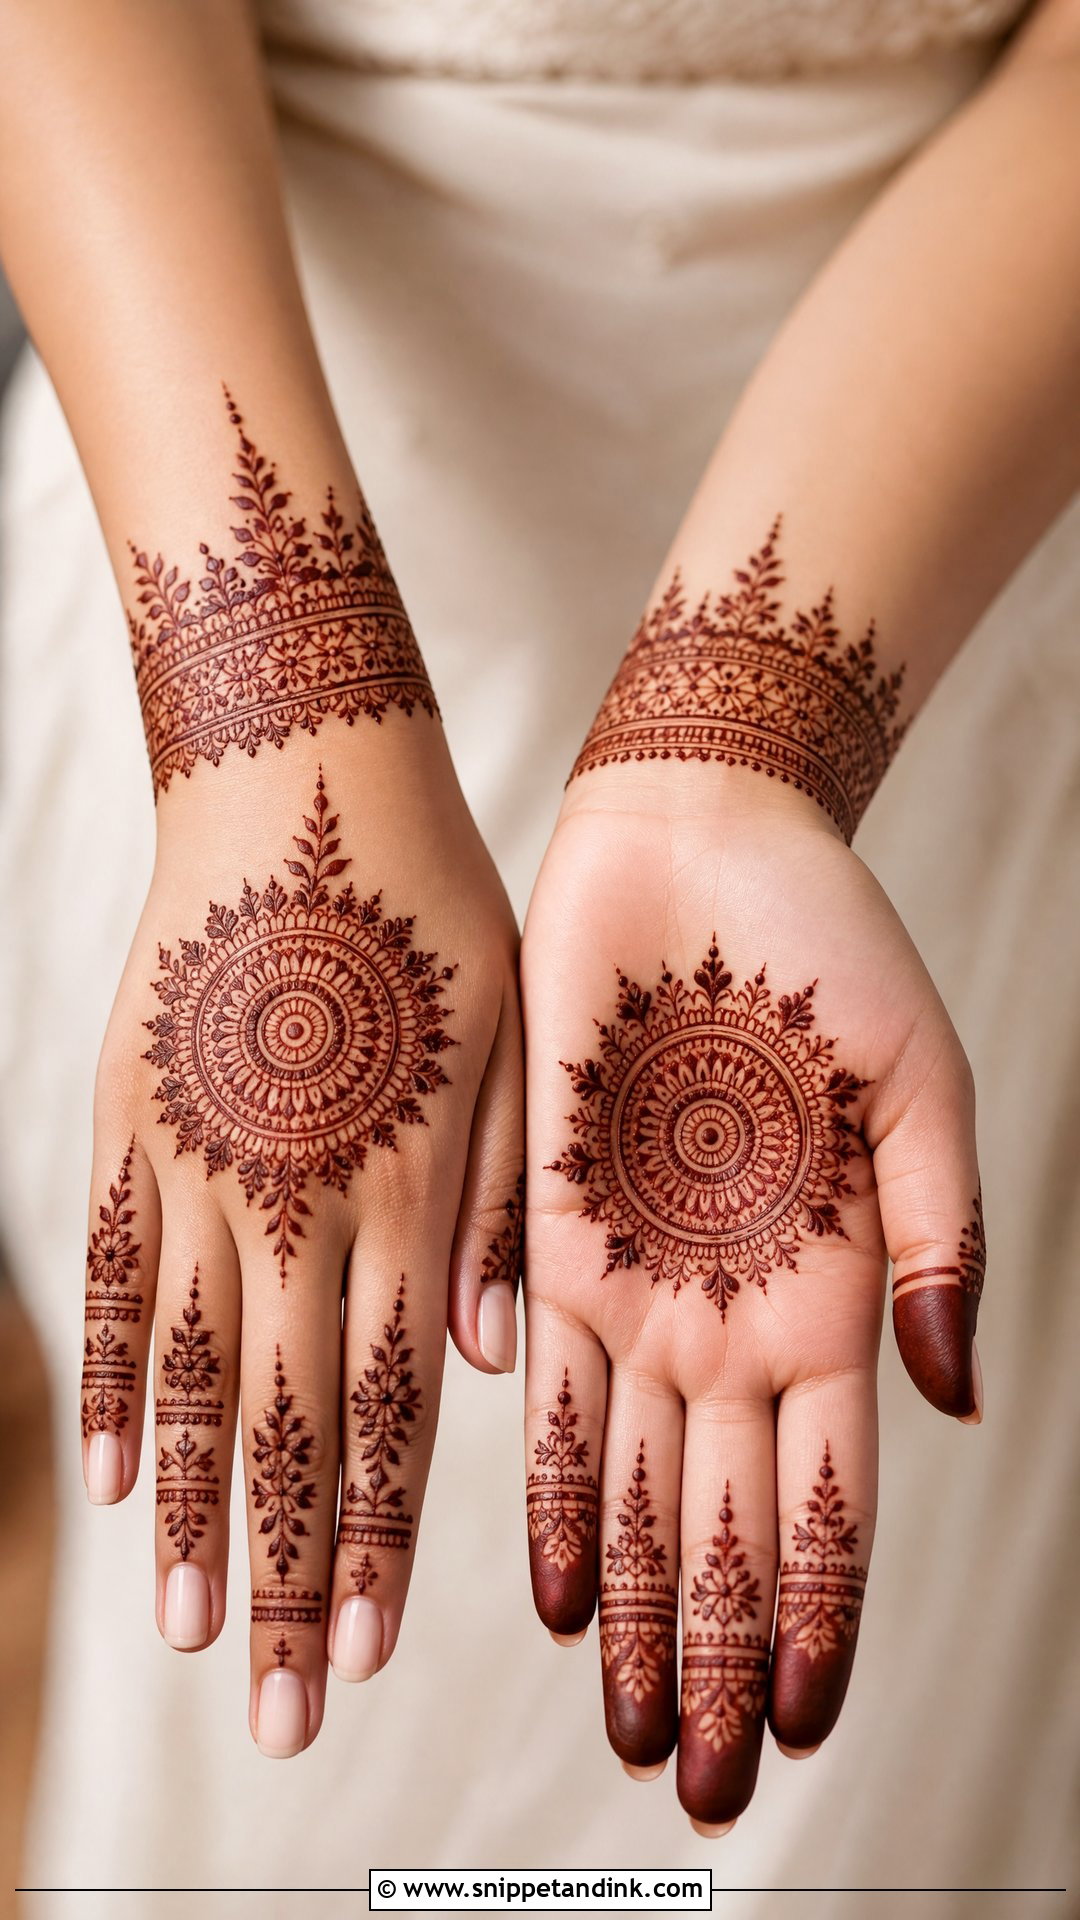
Simple doesn’t mean quick and careless. A neat palm mandala, a floral wrist band, leafy fingers and open space on the back of the hand still look bridal, and the sitting is far shorter. I’d suggest it for intimate weddings, civil ceremonies and destination trips where you travel soon after application. The one rule I hold to is a single strong focal point per hand. With so few elements there’s nowhere for an uneven line or a lopsided motif to hide, so symmetry and a smooth stain carry the whole look.
8. Modern Bridal Mehndi Design
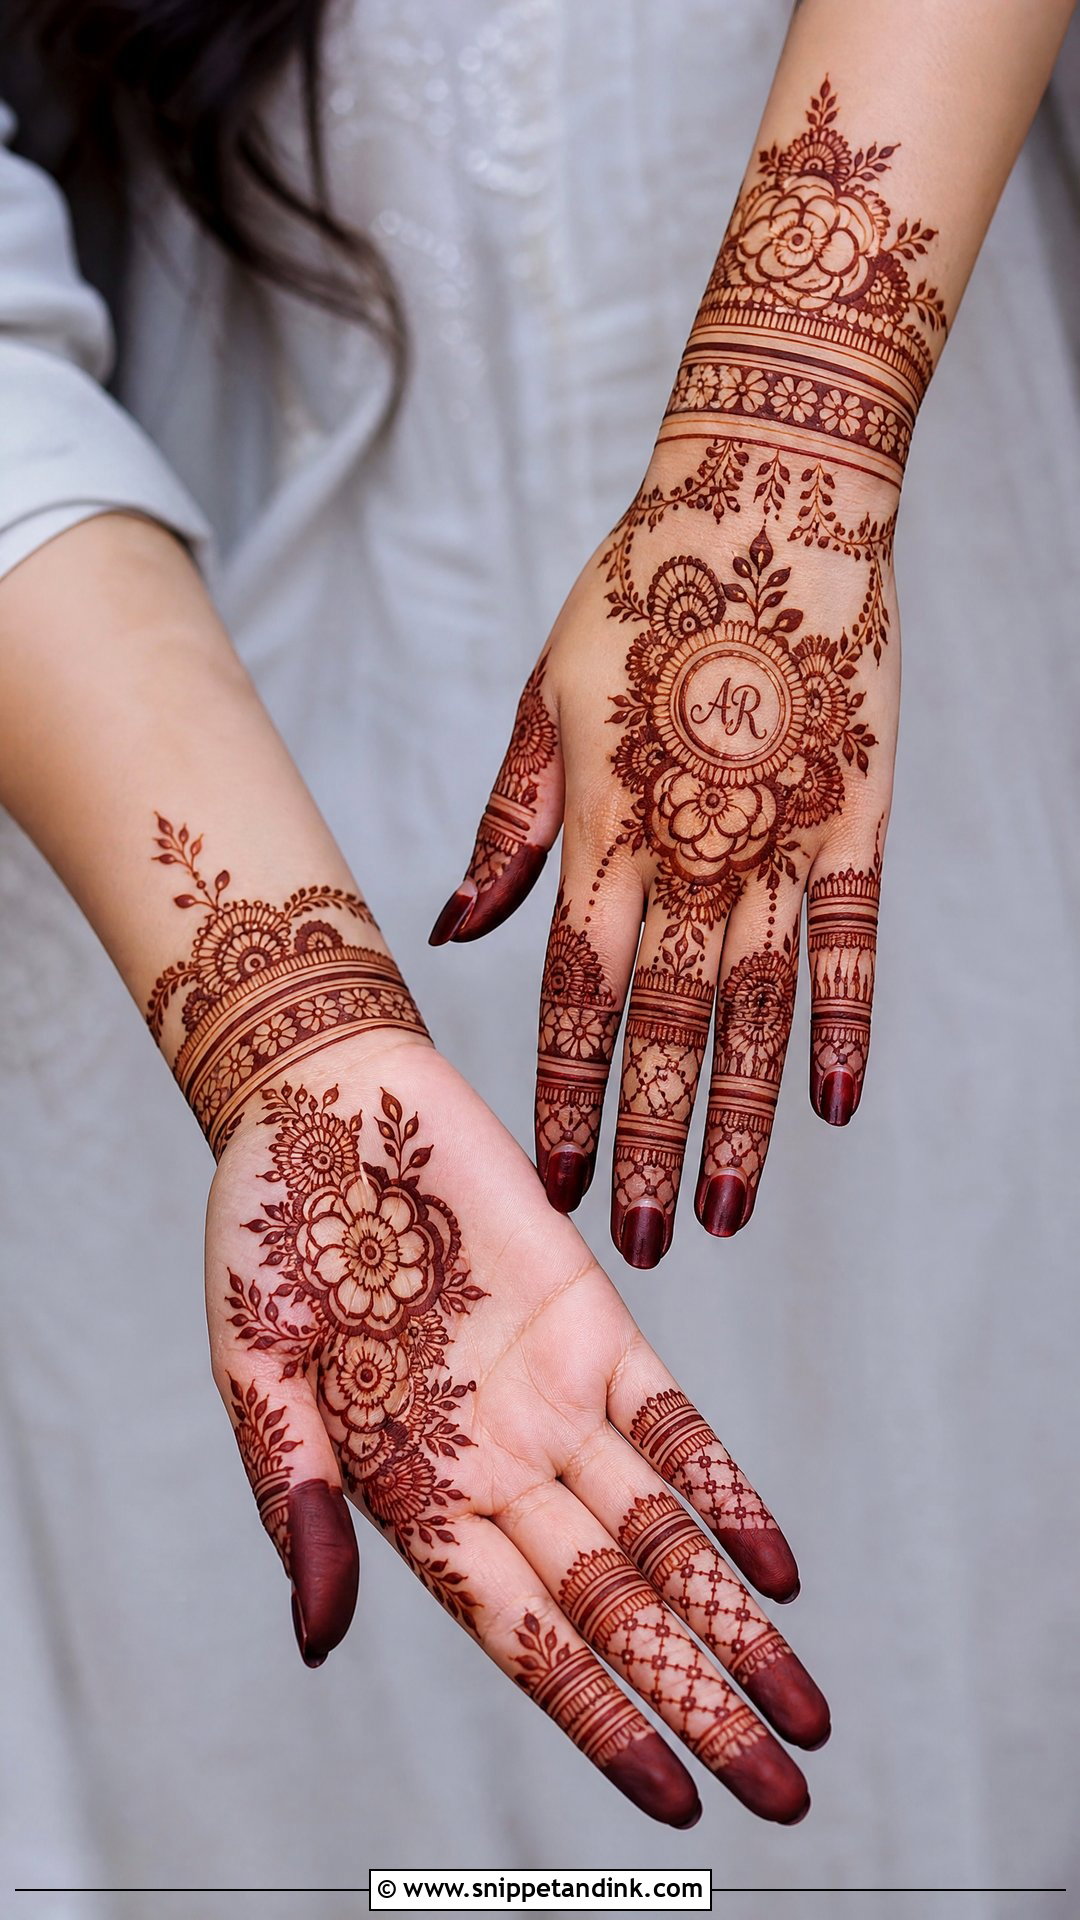
Modern bridal work moves the attention from filling to placement: open spacing, bold floral blocks, cuffs, half-hand layouts and sharp finger detailing. It suits contemporary lehengas, fusion outfits and soft pastel looks, and it’s the style where personal additions sit most comfortably, like initials, the wedding date or a small symbol. My caution is about randomness. Open layouts expose any element that has no reason to be there, so I sketch the whole hand first and check that it still reads as complete from fingertip to wrist.
9. Minimal Bridal Mehndi Design
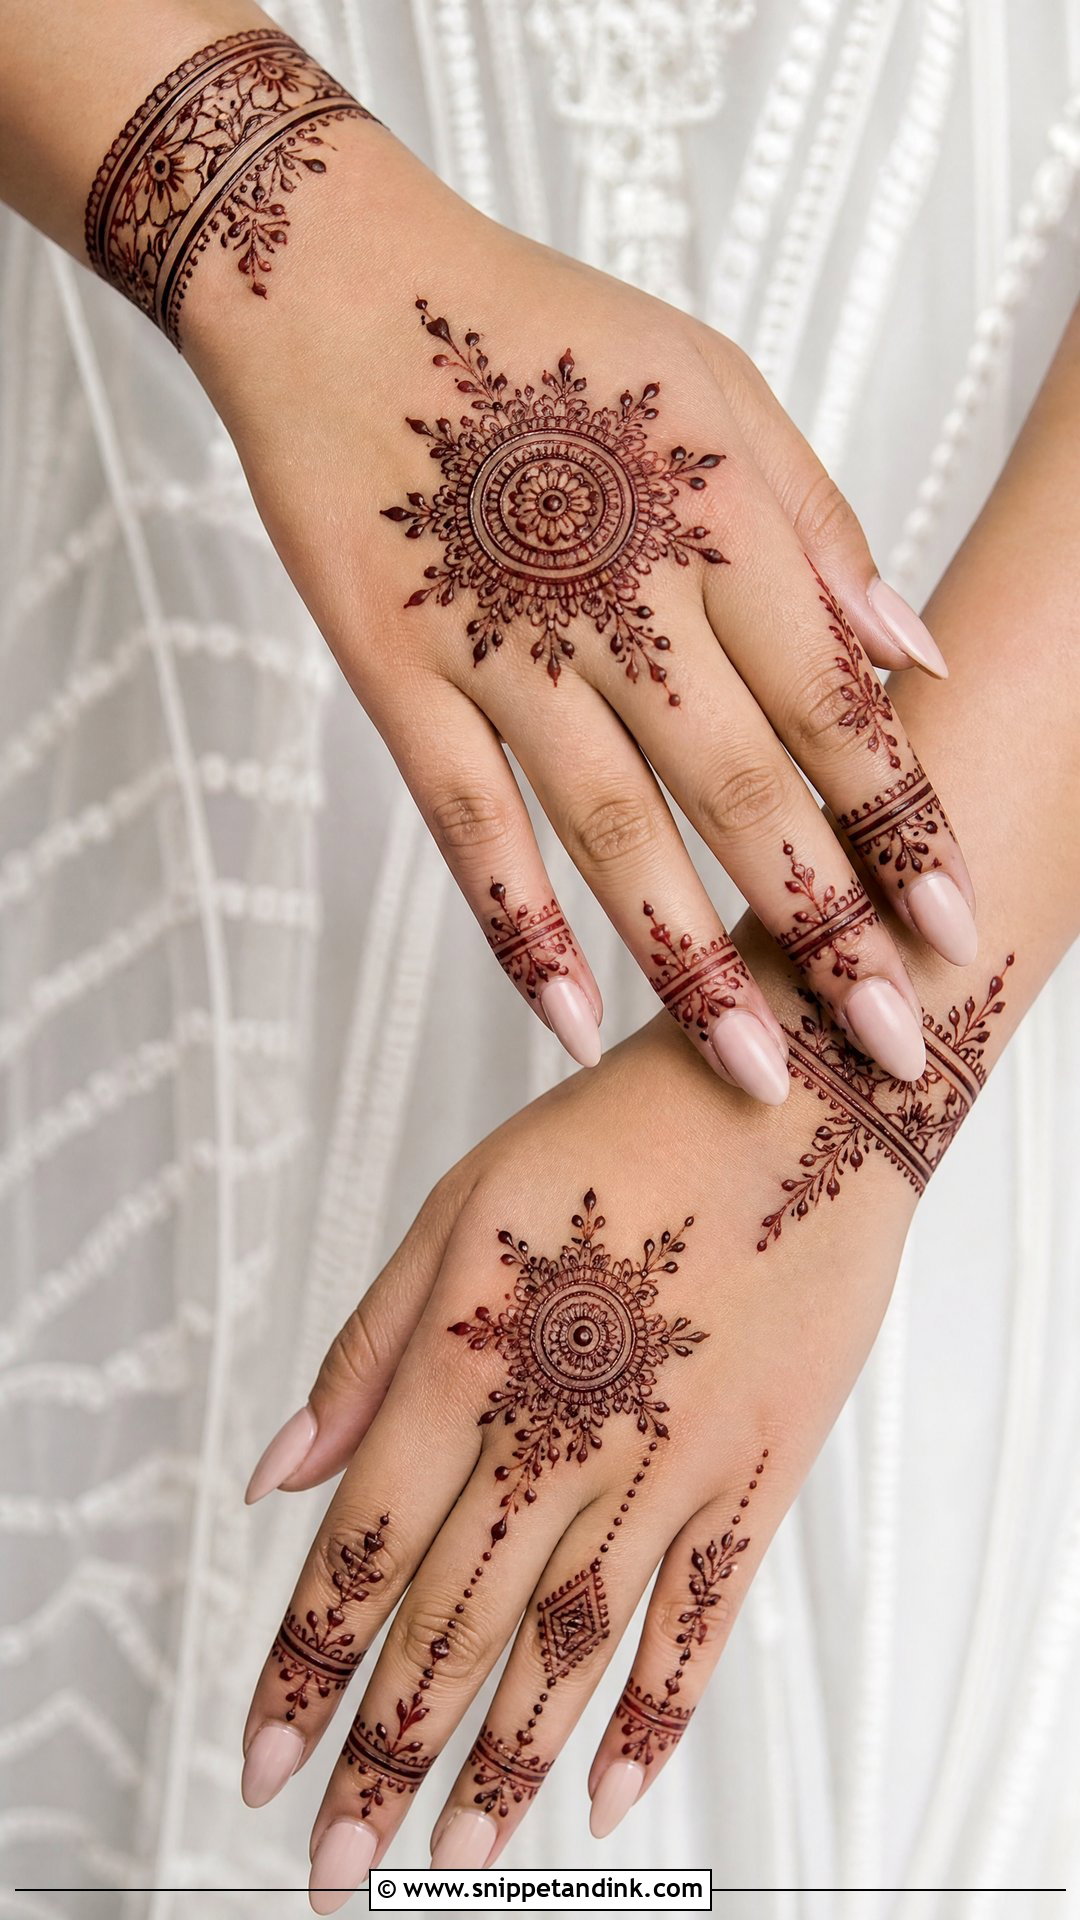
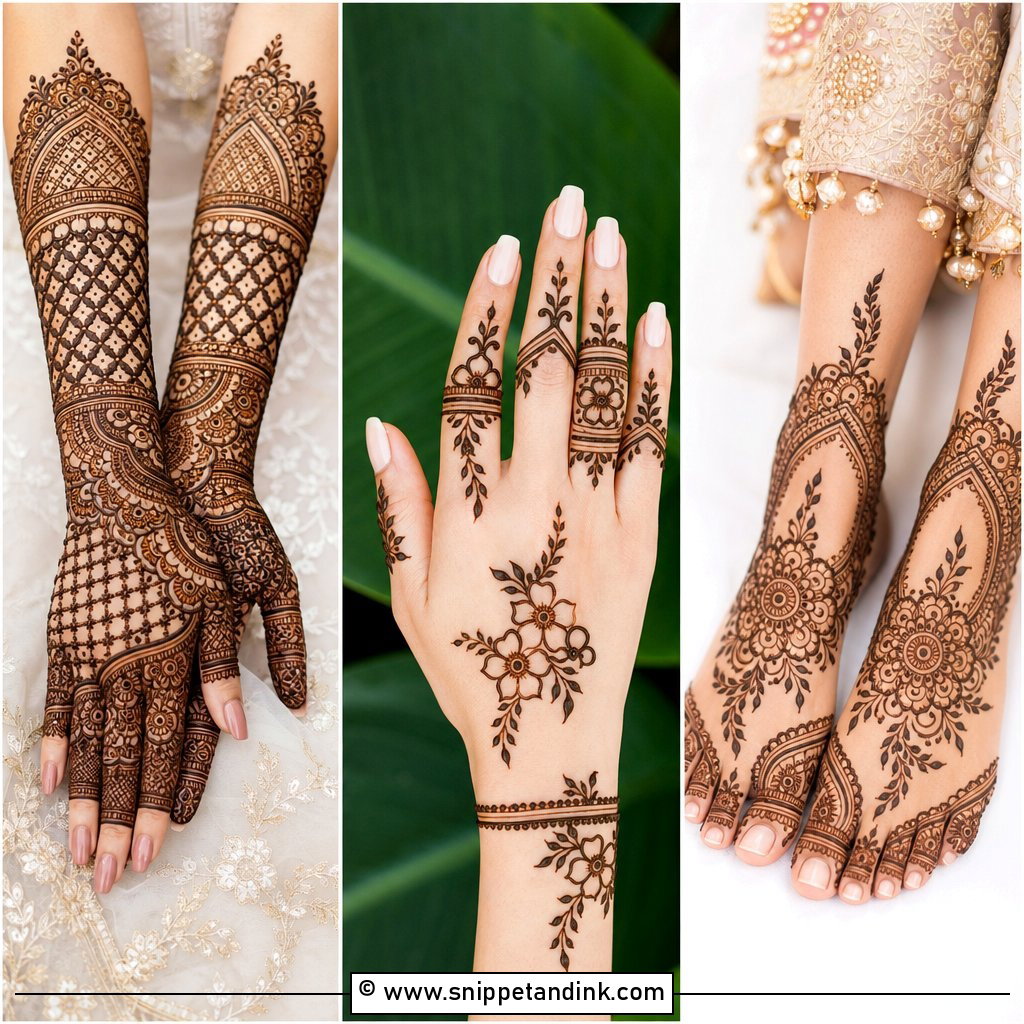
This is the precision test. With only a central motif, a slim wrist detail and delicate fingers on otherwise open skin, every wobble shows. Tiny florals, fine vines, small mandalas and clean geometric bands are the usual elements. I’d steer you away from going too fine, though: a hairline stroke carries very little paste, and on the back of the hand it can stain so faintly that it nearly vanishes. Kept crisp and slightly bolder, minimal mehndi leaves room for your rings, nail colour and jewelry to lead.
10. Mandala Bridal Mehndi Design
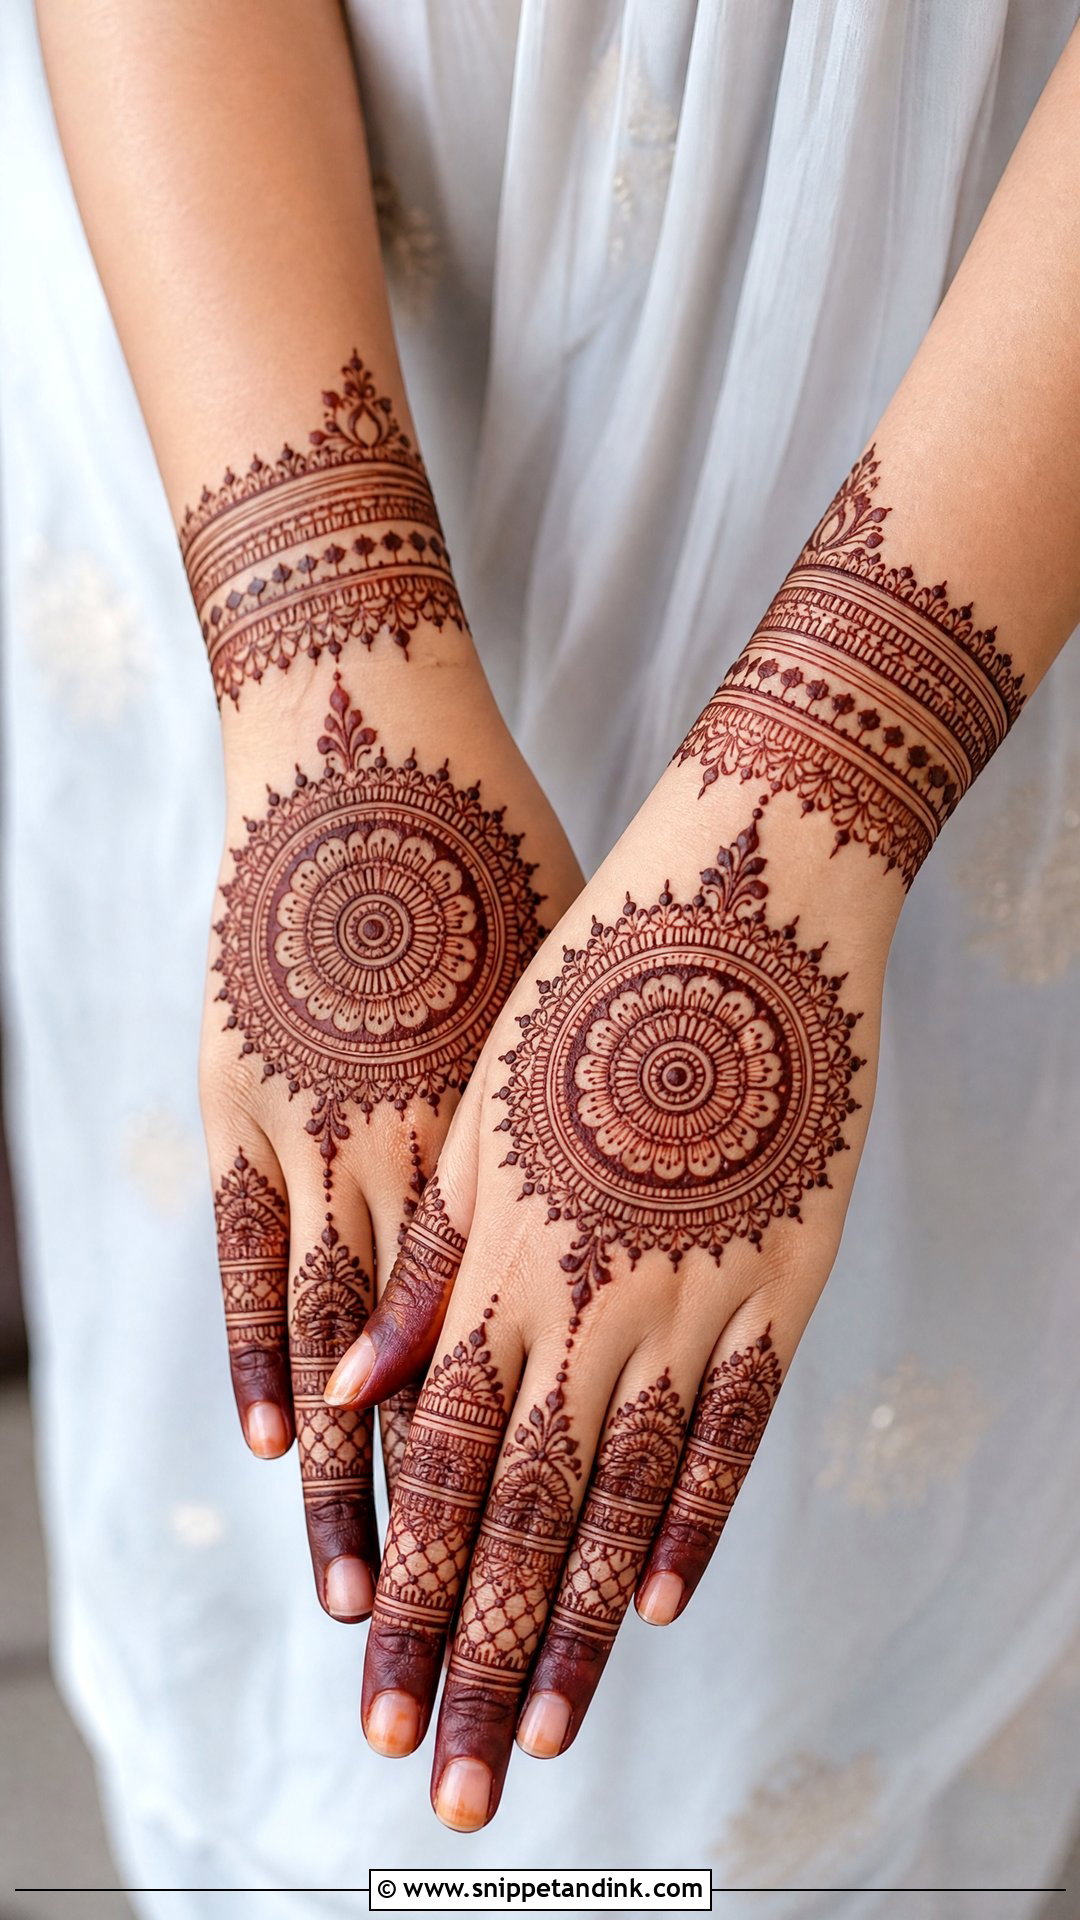
Few patterns forgive different hand shapes the way a mandala does. It starts as a round central motif on the palm or back of the hand and grows outward in rings, petals, dots and fine borders. For a wedding I add filled fingertips, wrist cuffs and matching side details so the circle doesn’t float on its own. The round form pulls the eye to the centre, which helps on long, narrow hands and short, wide ones alike. Leave the space around it open for a lighter look, or surround the circle with paisleys and jaali when you want full bridal weight.
11. Peacock Bridal Mehndi Design
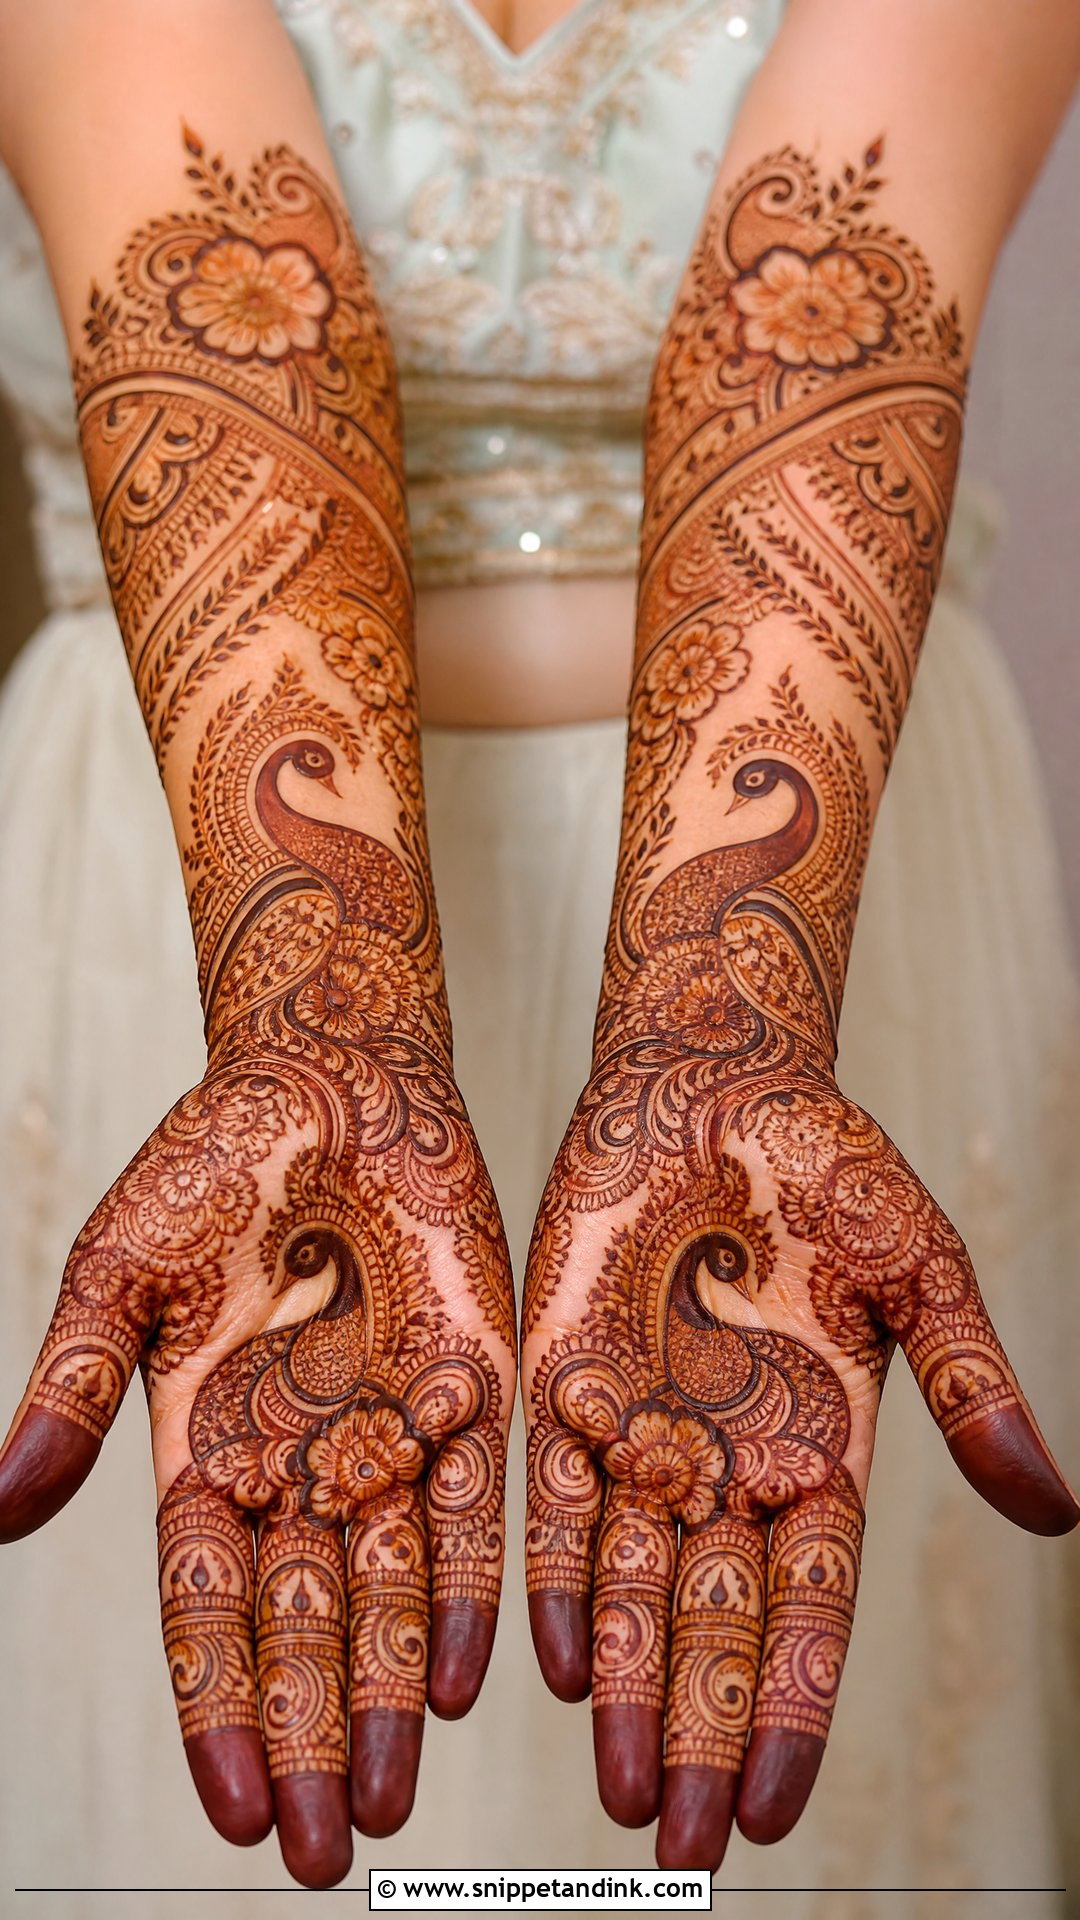
The most common failure with a peacock is the bird disappearing into filler, and then the whole point is lost. Whether it sits on the palm, wrist or forearm, I outline the body and neck clearly first, then build feathers, paisleys, flowers and fine curves around it. It pairs naturally with silk, zari, kundan jewelry and heavy bangles. To tie the hand together, I repeat feather-shaped curves on the fingers and wrist. A deep maroon stain gives the tail its drama, so this is a design where good aftercare really shows.
12. Paisley Bridal Mehndi Design
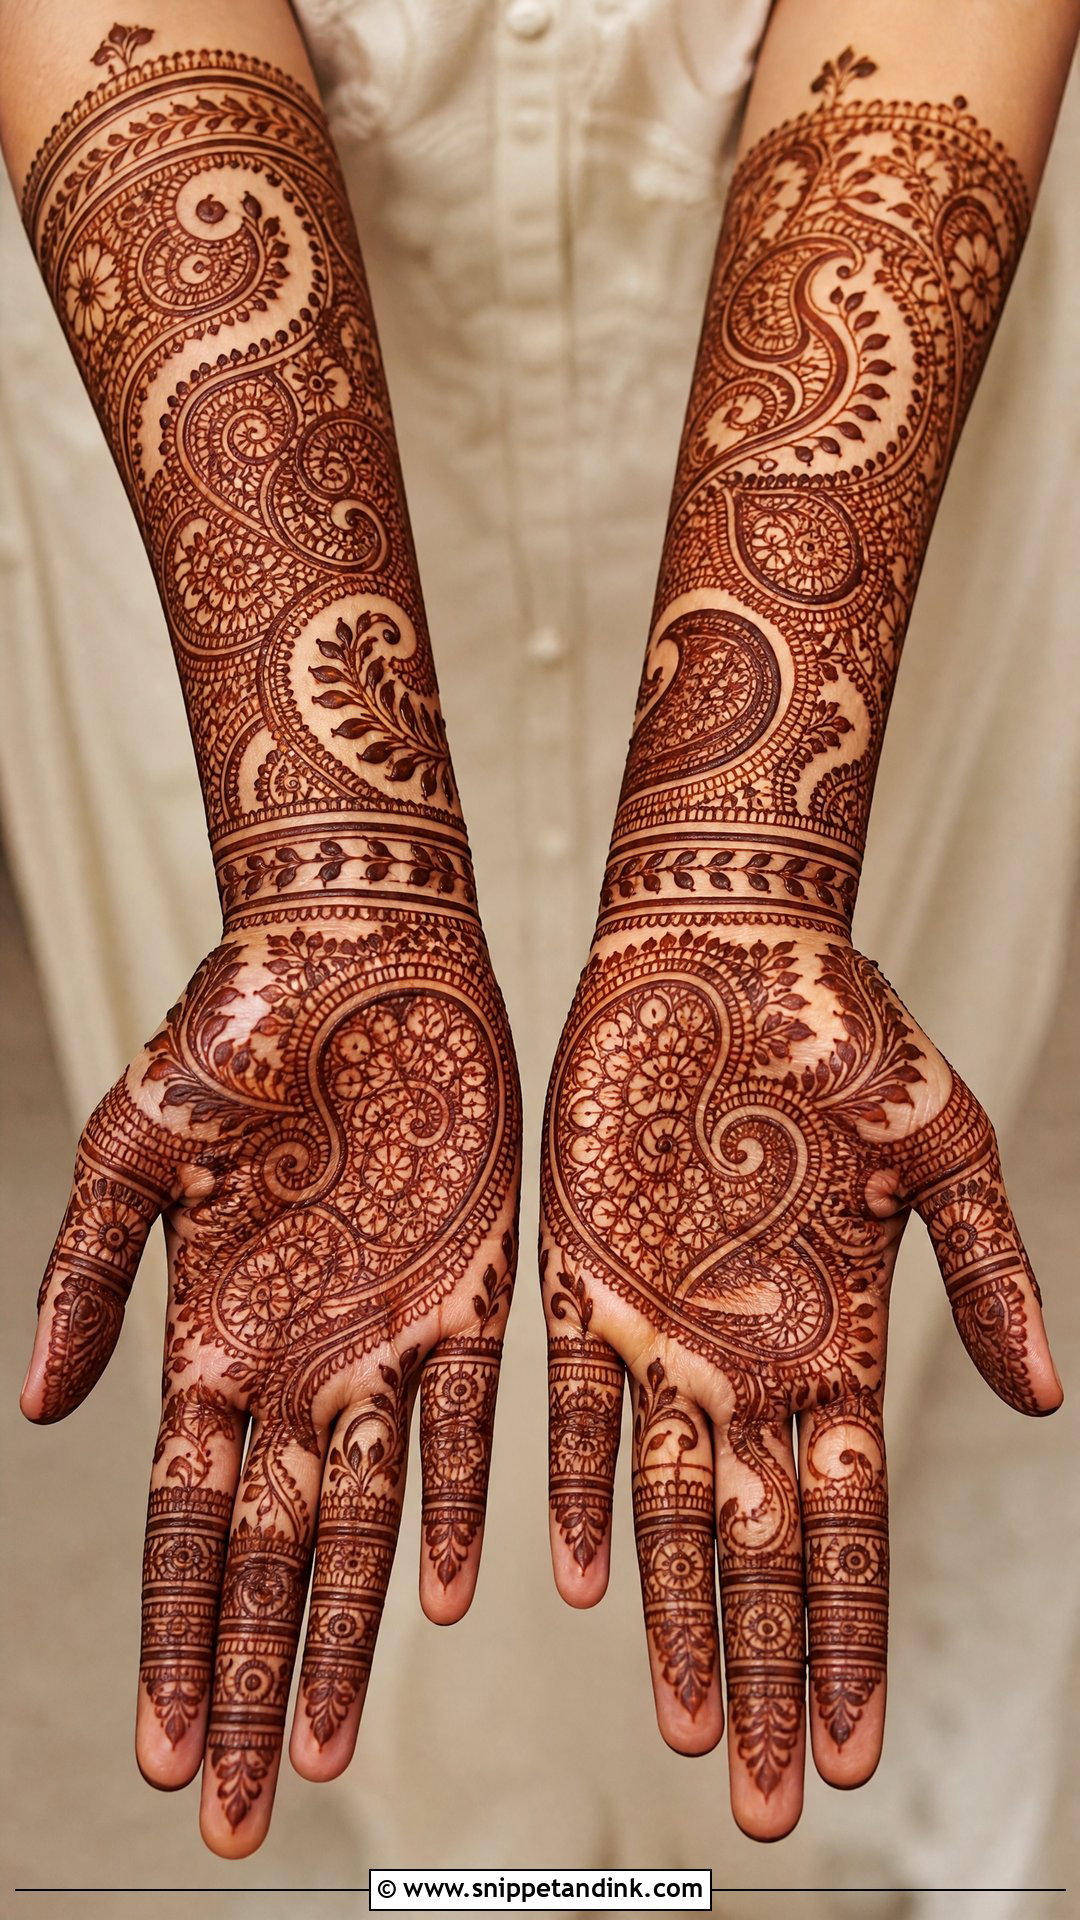
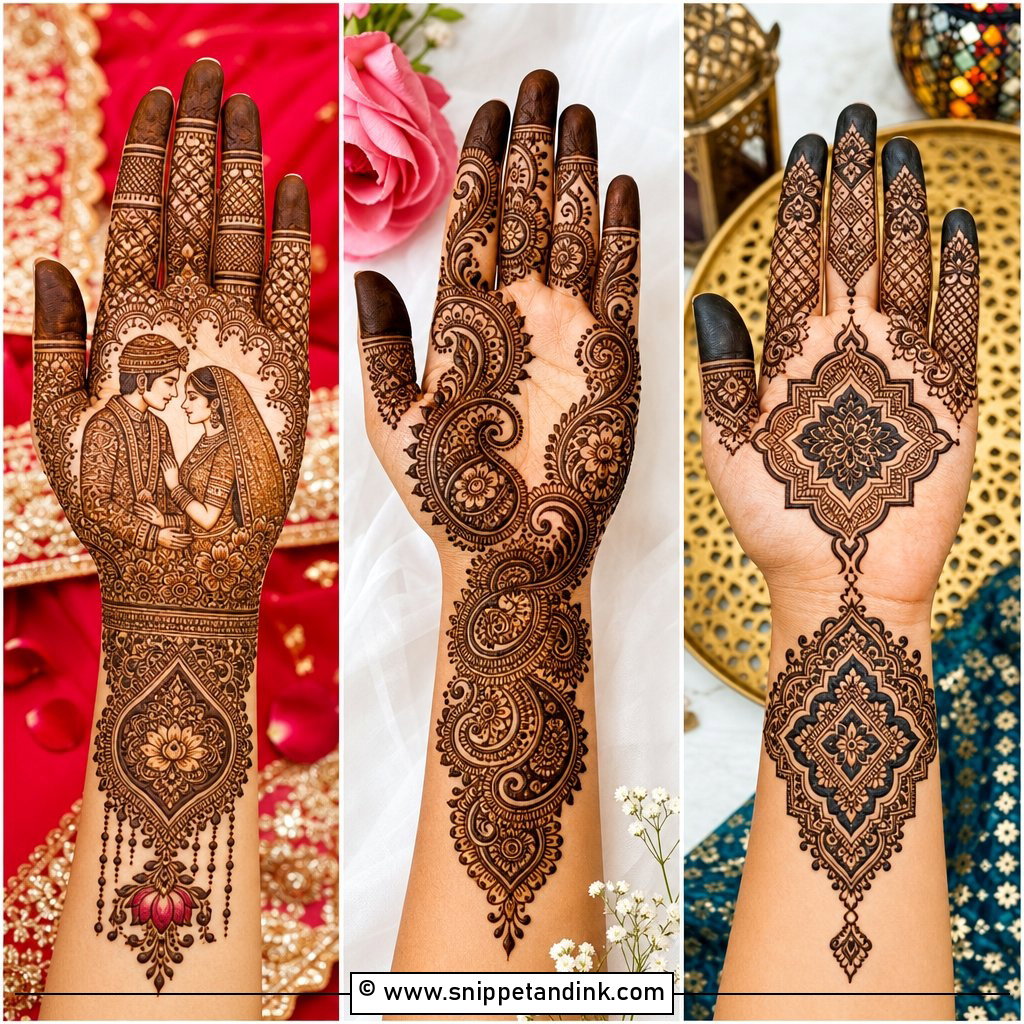
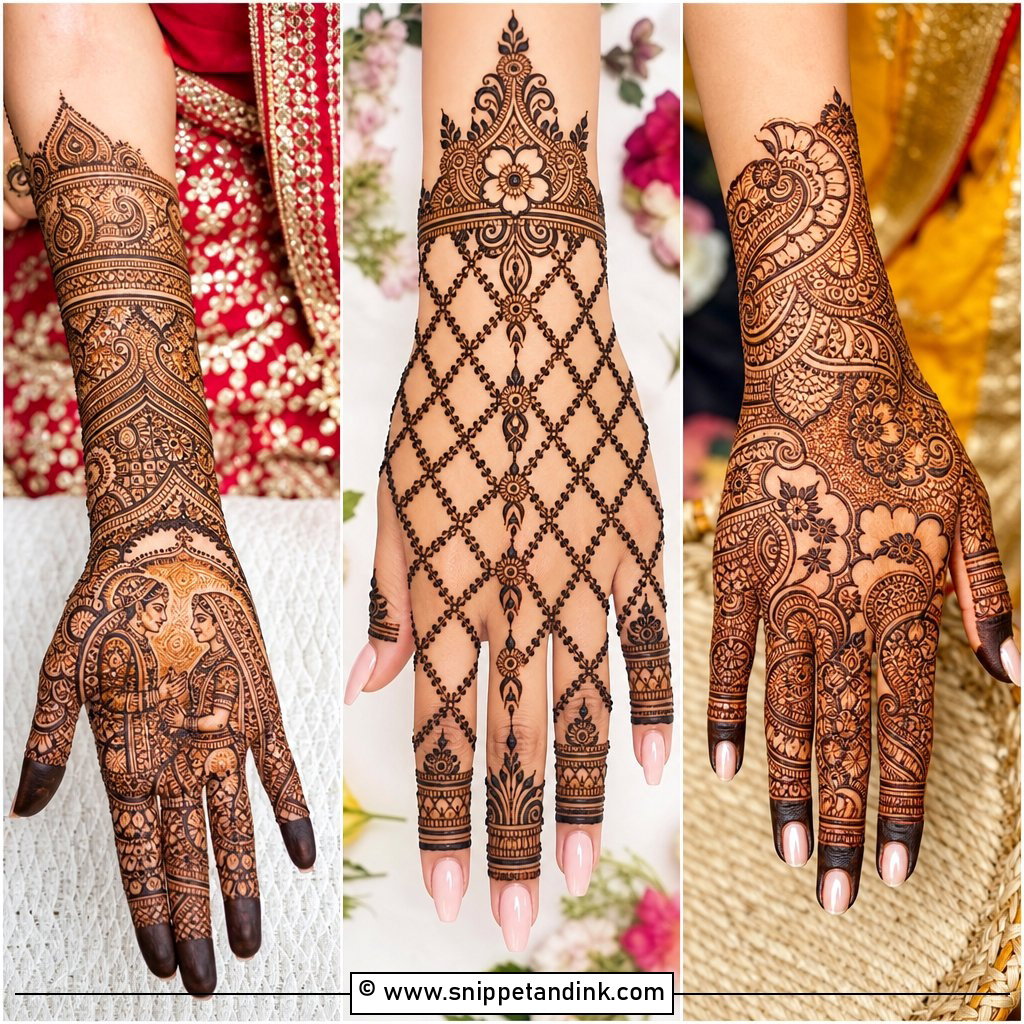
Paisleys follow the curve of a hand better than almost any other motif, which is why they turn up in nearly every traditional bridal set. A full paisley hand layers them over palm, fingers, wrist and forearm with tiny flowers, leaf vines and dotted borders, giving dense detail without portraits or modern elements. The mistake I see most often is every paisley drawn at the same size, which makes the hand look like printed fabric. Vary them, with large teardrops near the wrist and smaller ones curling onto the fingers, and the pattern starts to move.
13. Floral Bridal Mehndi Design
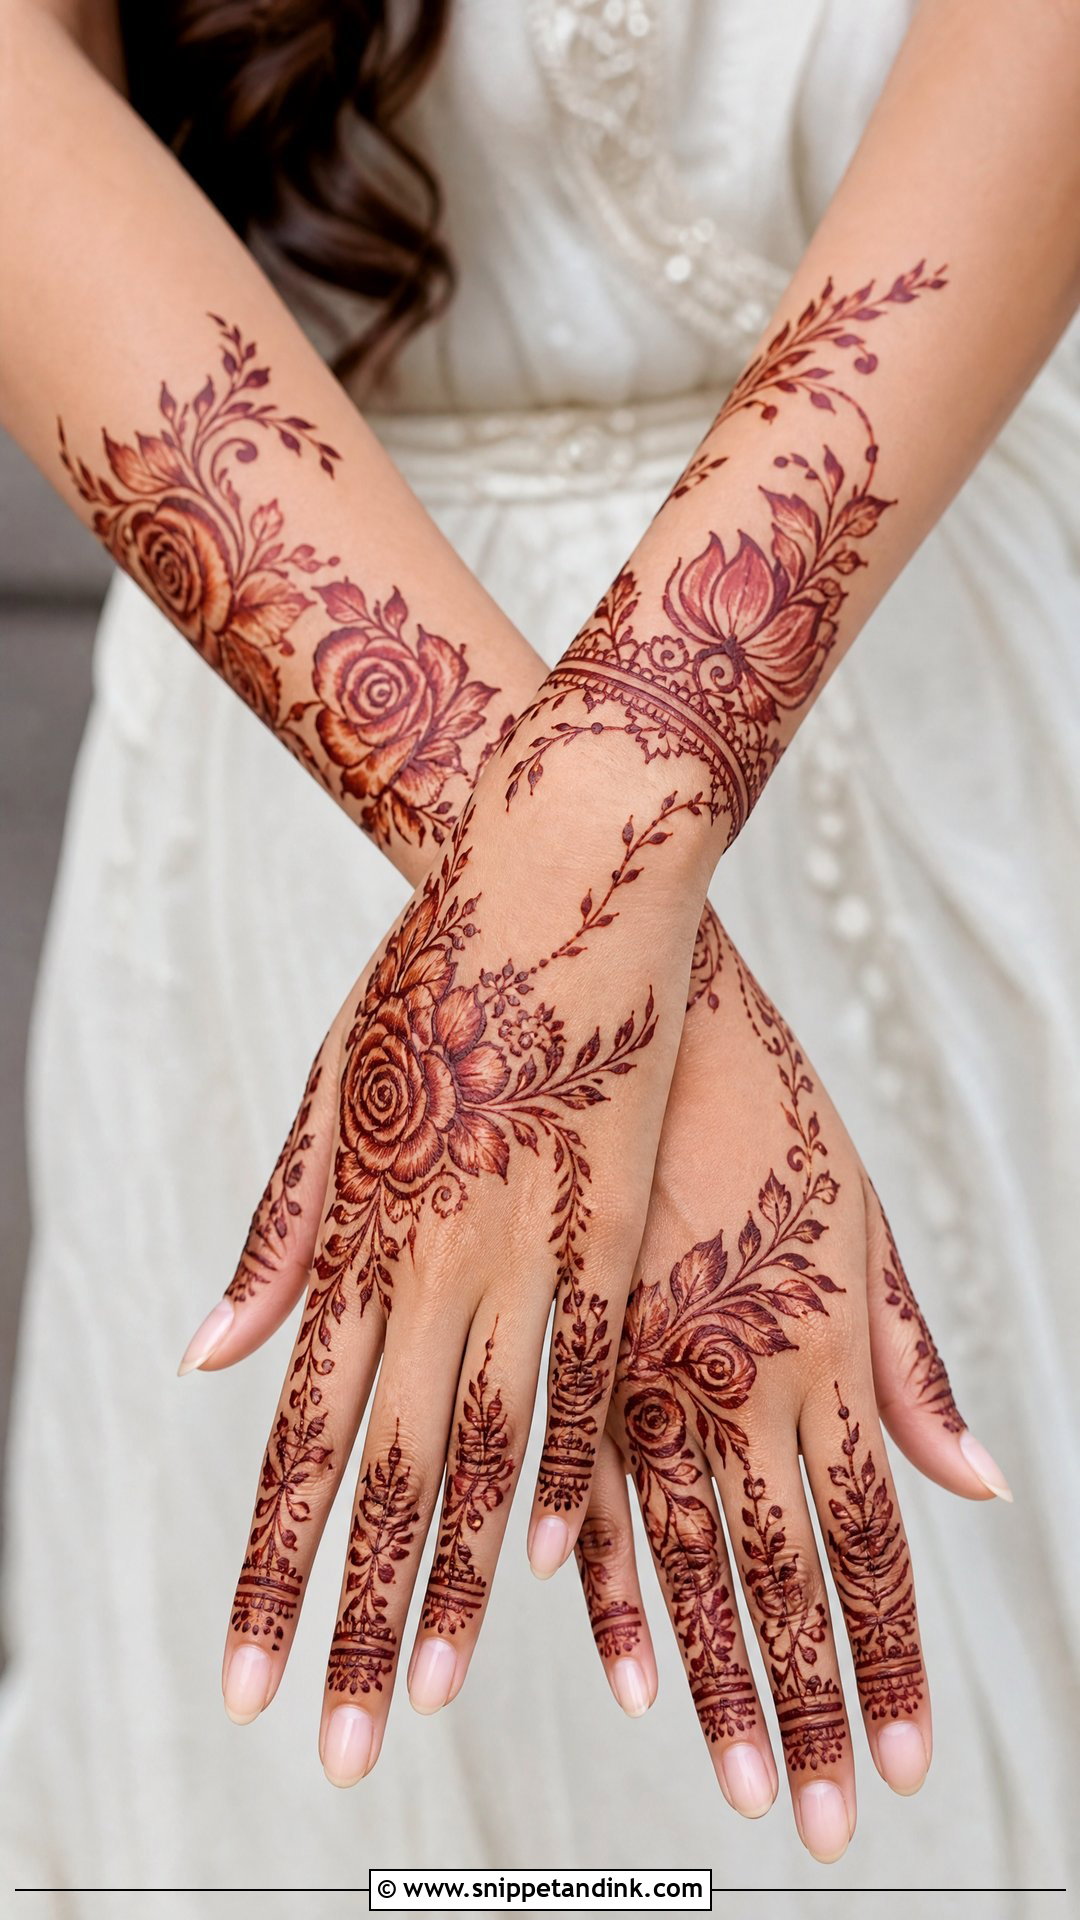
Florals adapt to nearly anything, from a full bridal hand to a light Arabic trail. Roses, lotus blooms, small five-petal flowers, leafy vines and shaded petals are the usual vocabulary, and they suit pastel lehengas, floral embroidery and soft glam makeup. Scattered flowers alone don’t make a bridal hand, though. I need a line of flow from the fingers to the wrist, with dots, vines and curved borders carrying the eye between blooms. Larger flowers with open space read modern; fine fillers packed around each bloom read traditional.
14. Jaali Bridal Mehndi Design
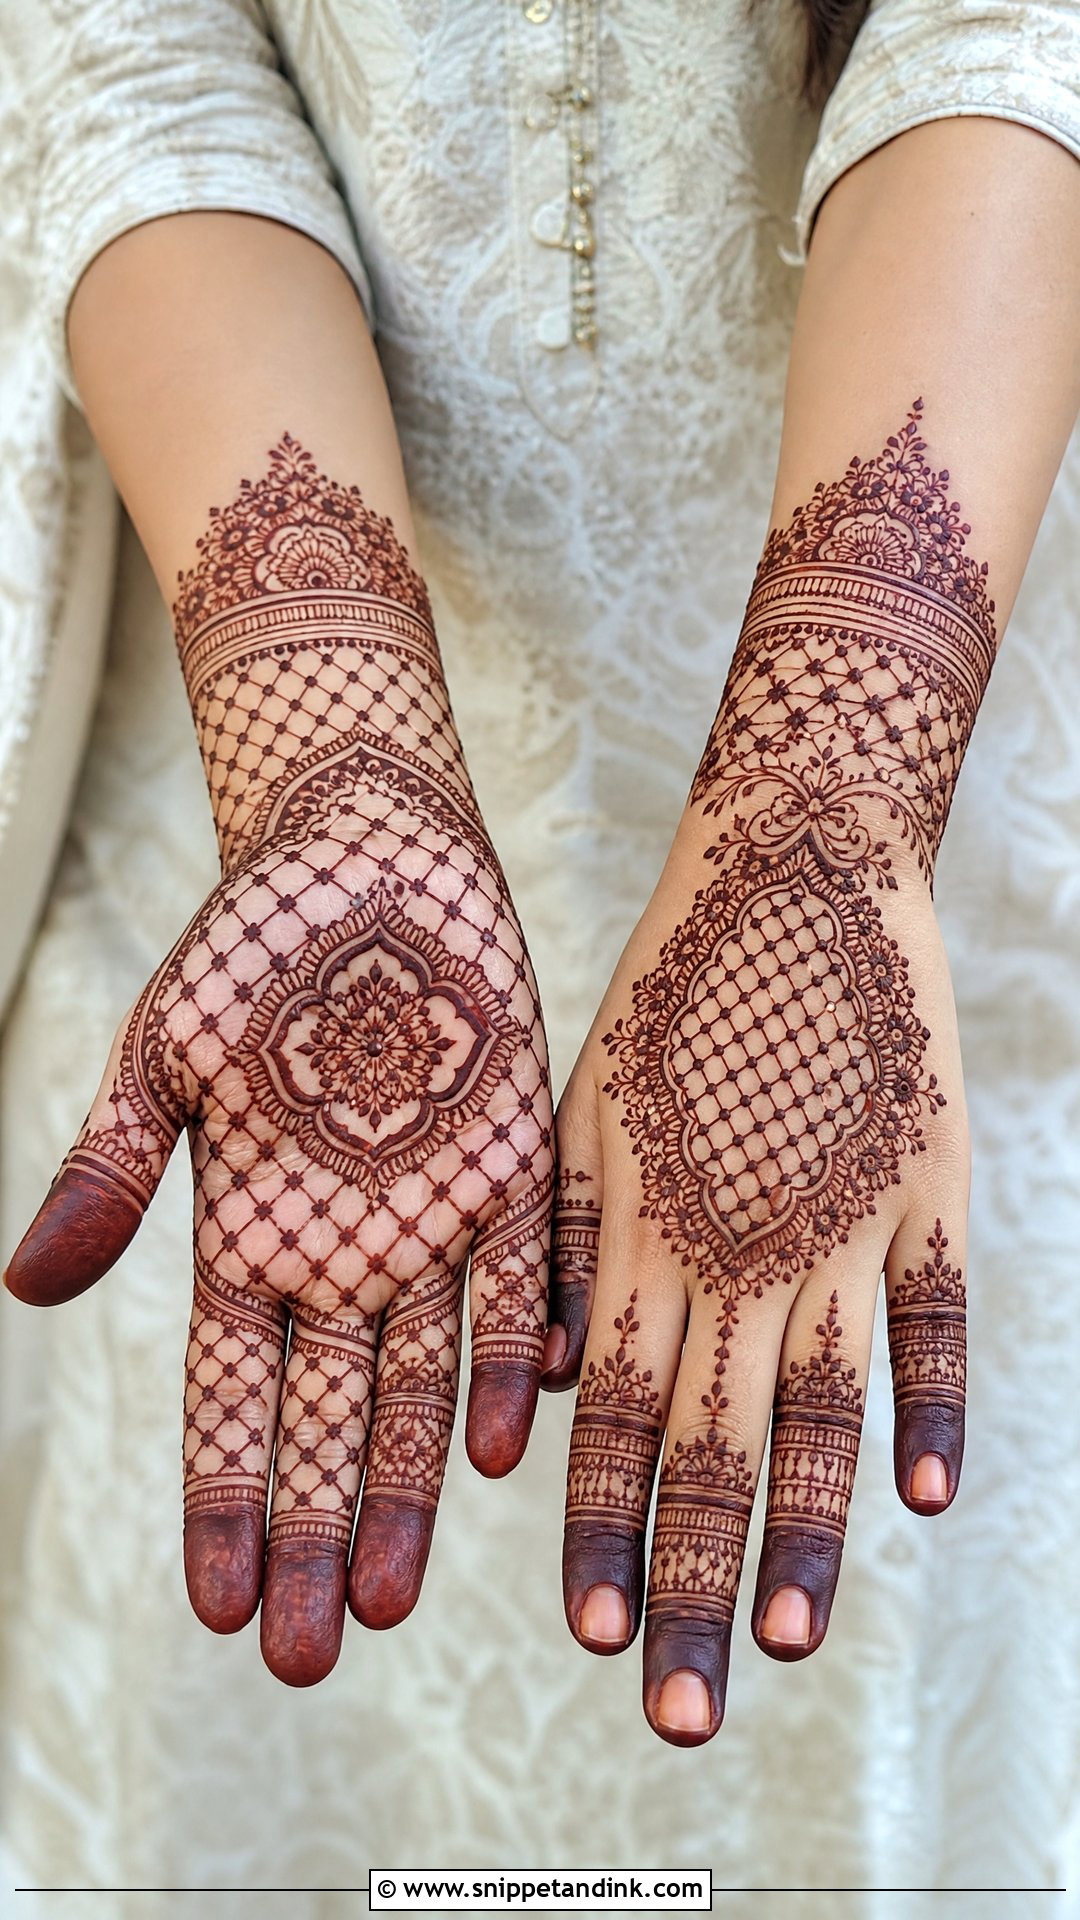
Jaali gives the hand a lace effect through mesh, crisscross lines, dots, borders and floral frames, and it’s at its best on the back of the hand, where it looks like an embroidered glove. The mesh is unforgiving. If cone pressure changes halfway through a grid, the lines thicken and thin and the lace effect falls apart. So I limit jaali to chosen panels, usually the back of the hand or a wrist band, and frame it with mandalas, paisleys or a bold cuff so it reads as structure rather than clutter.
15. Bride And Groom Mehndi Design
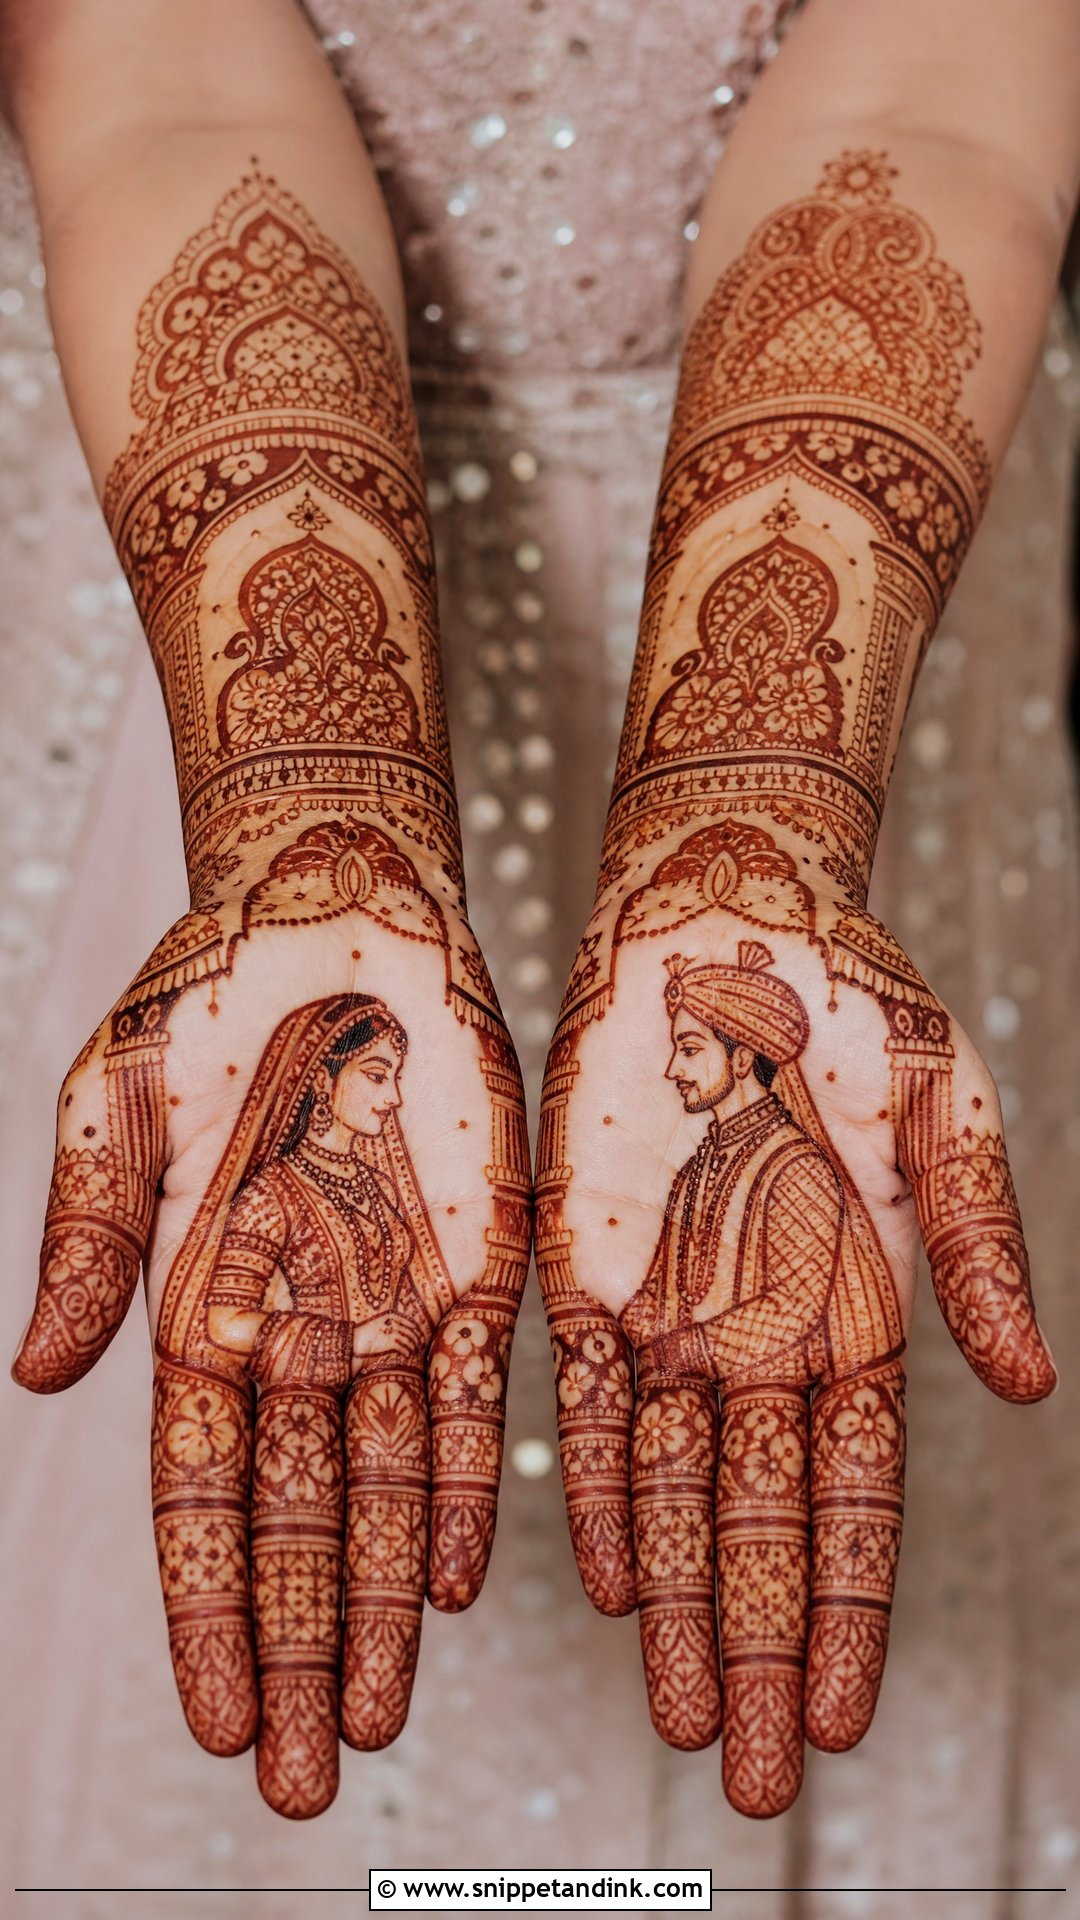
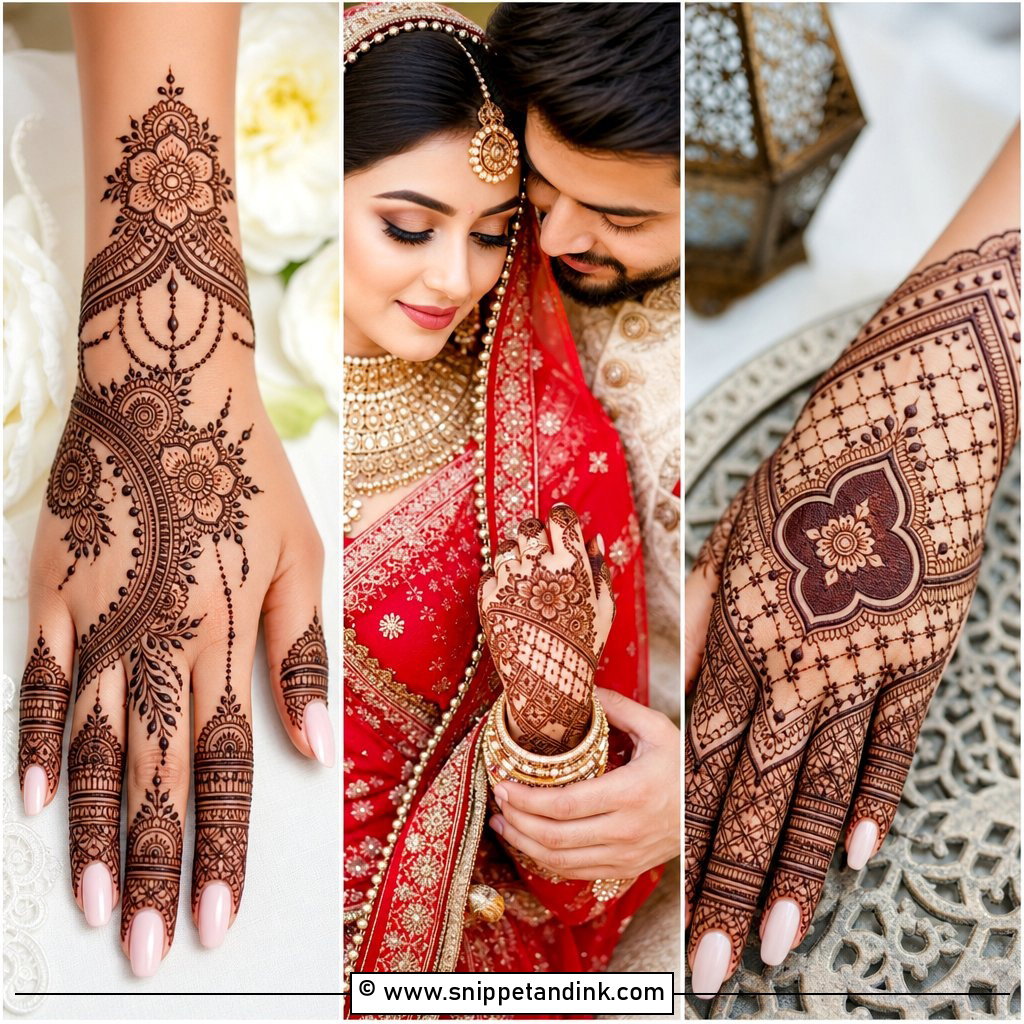
Portrait palms are the most personal design on this list and the most demanding to draw. The bride usually sits on one palm and the groom on the other, surrounded by mandaps, flowers, paisleys and borders, so it needs the space of a front-hand or full-hand layout. Keep the faces simple. A thumbnail-sized figure with eyelashes and earrings tends to close up into a brown blob once the stain develops, because fine details merge as the colour deepens. Fill the rest of the hand with traditional Indian patterns and the portraits become the reward in close-ups.
16. Bridal Mehndi Design With Names
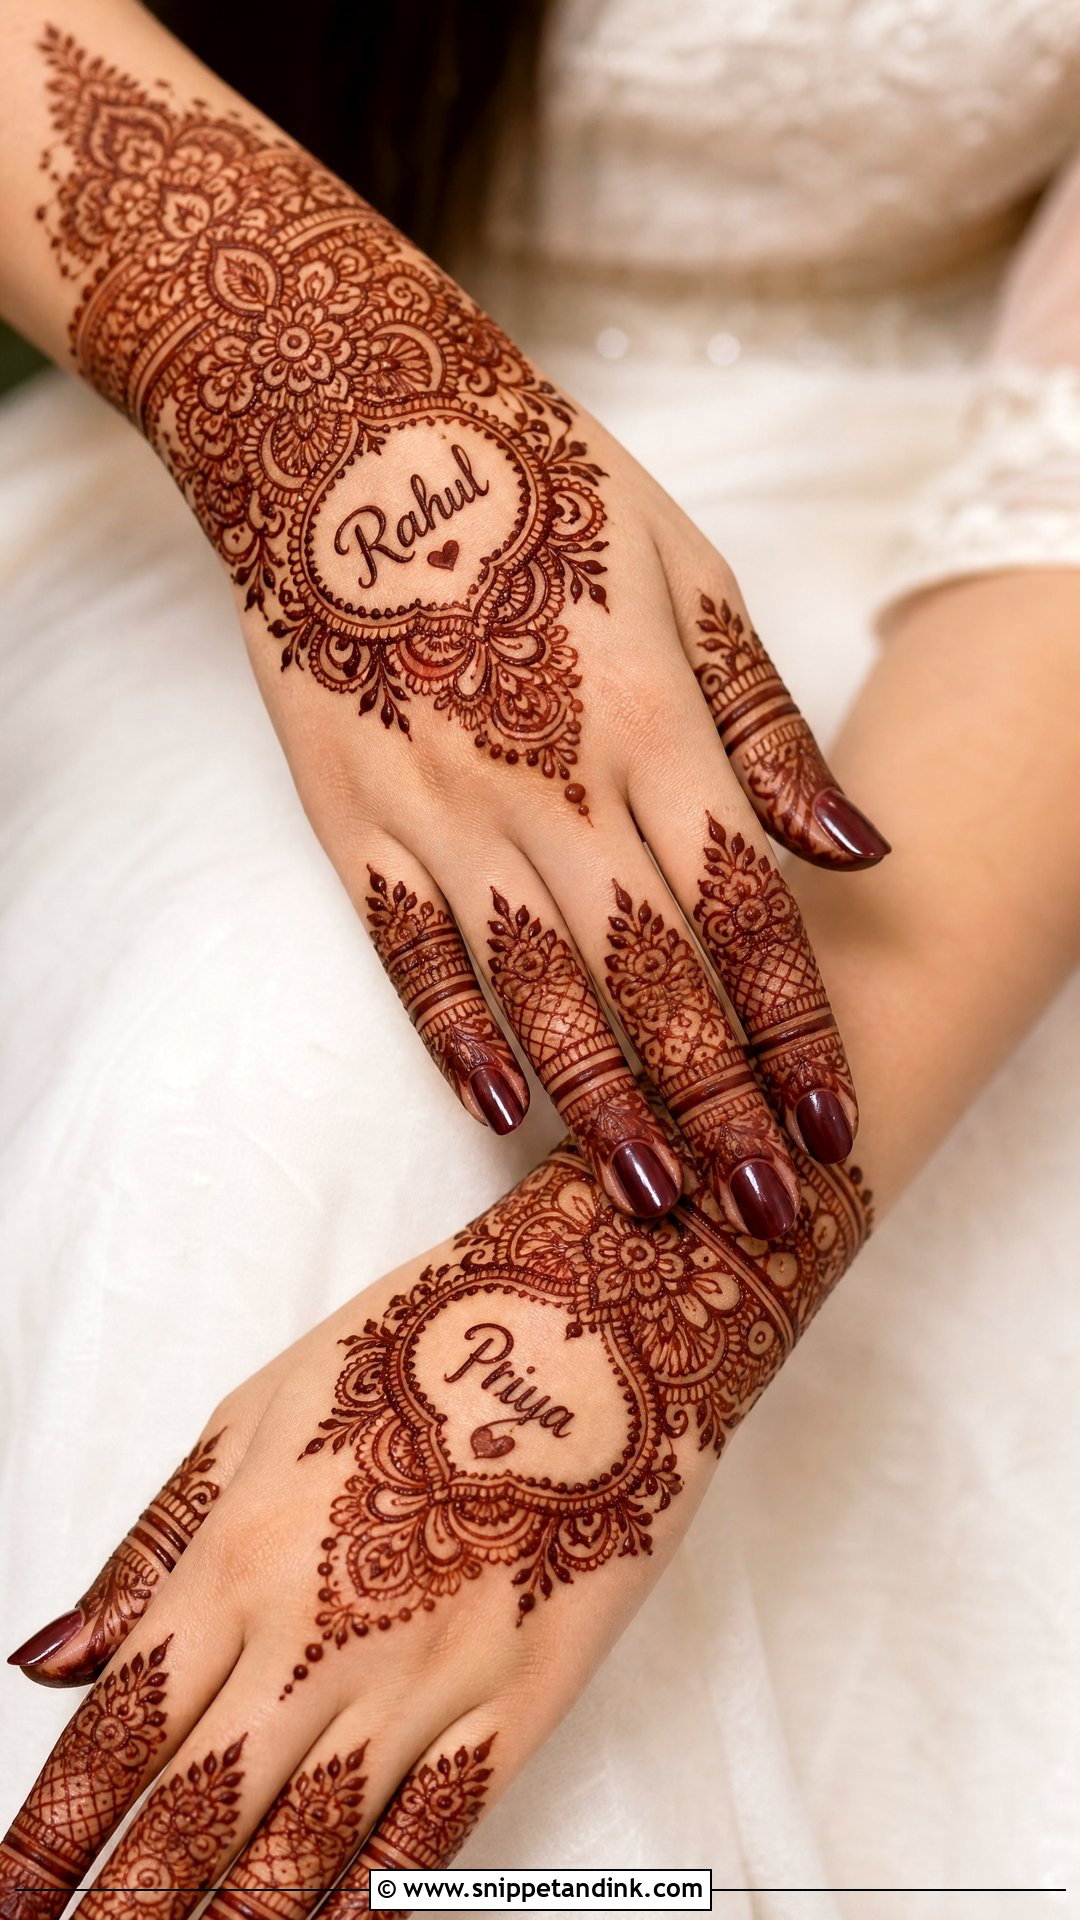
Bridal mehndi design with names carries a small tradition I enjoy, where the groom is asked to hunt for his name somewhere in the bride’s hands. Initials or a full name hide inside paisleys, flowers, wrist bands, mandalas or jaali, and some brides add the wedding date in a small panel. It fits Indian, Arabic and Indo-Arabic layouts. The lettering should follow curves already in the design rather than sit in a box. For a name you want visible in photos, I place it on the palm or inner wrist; for a playful hidden one, it goes inside a paisley or floral trail.
17. Bracelet Bridal Mehndi Design
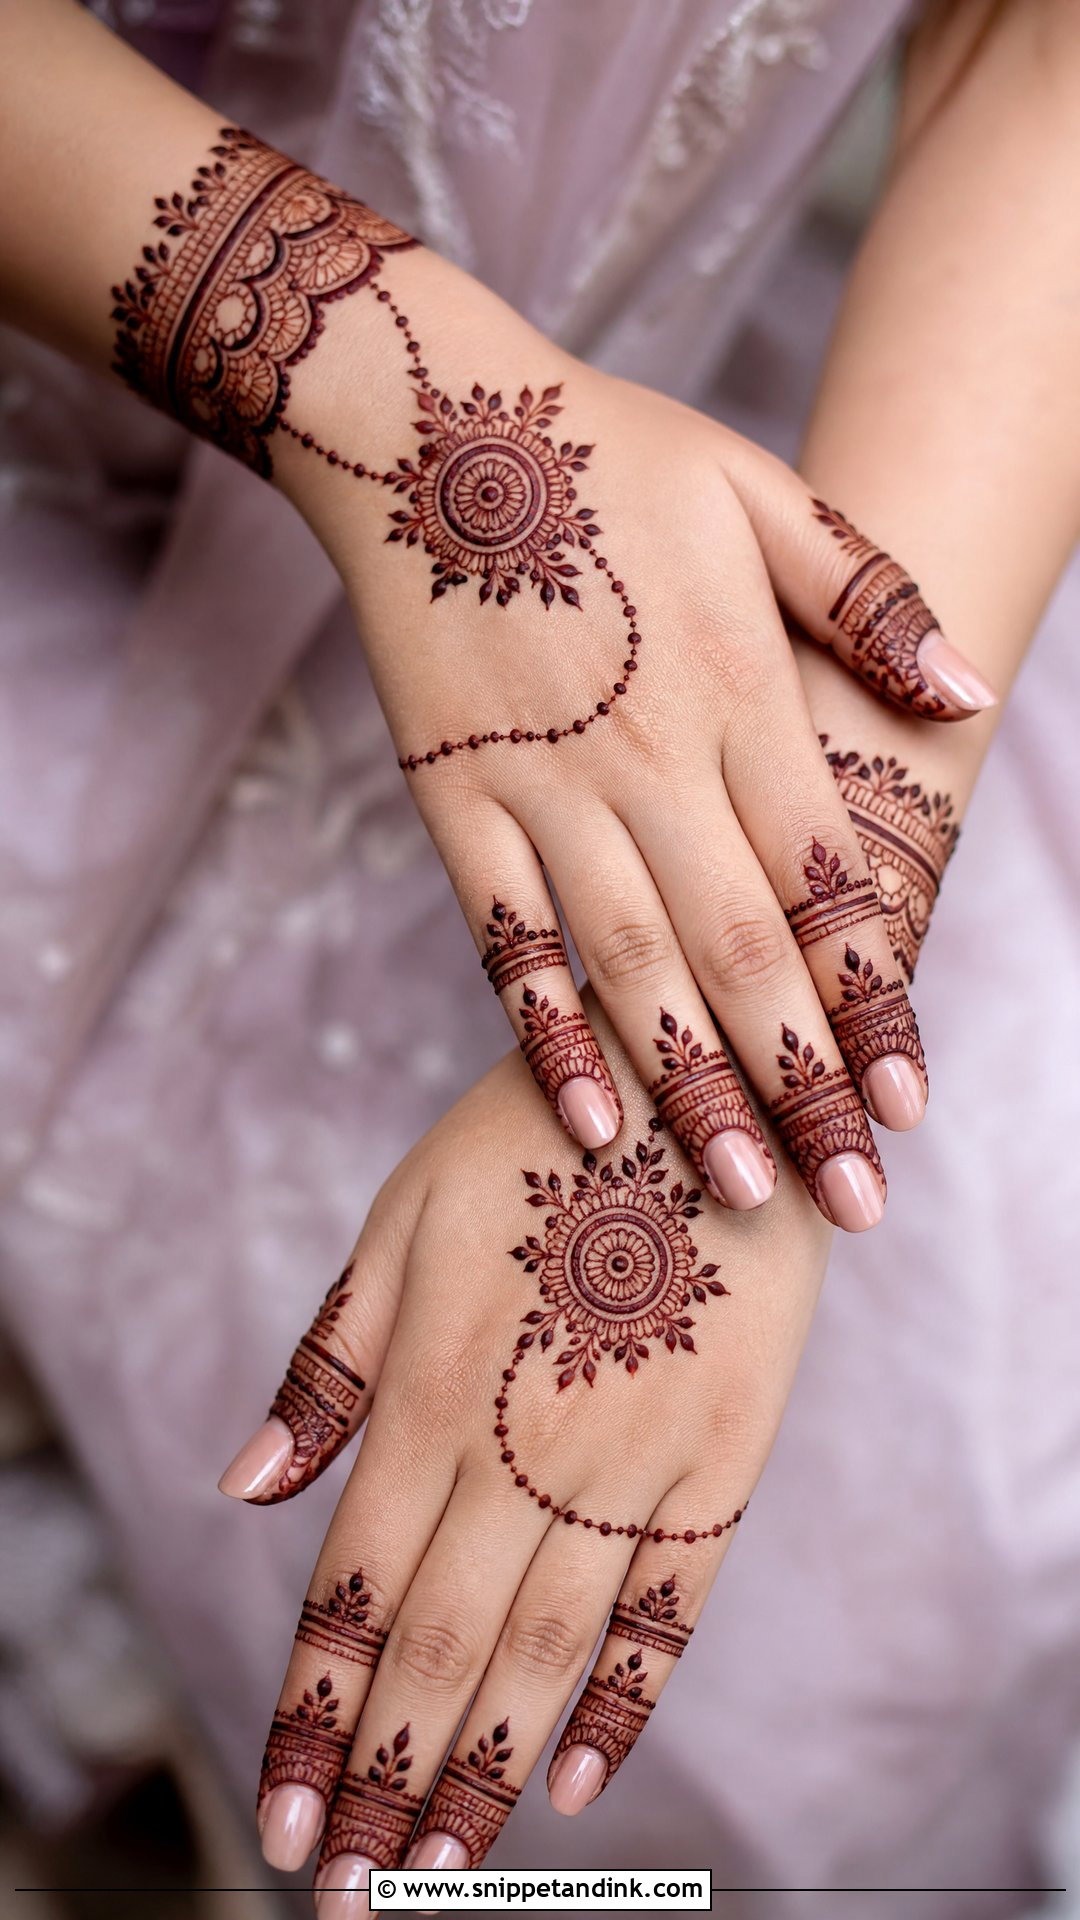
Here the henna imitates hand jewelry: a wrist cuff, chain-like lines, ring-style finger bands and a central motif on the back of the hand. It can stay minimal or be filled out to full bridal weight. Worn with real bangles, the henna cuff and the metal merge into one decorated wrist. I keep the cuff detailed and the chains light, because heavy chains plus heavy cuff crowd the hand quickly. Engagement ceremonies, nikah looks and modern portraits all suit it.
18. Finger Bridal Mehndi Design
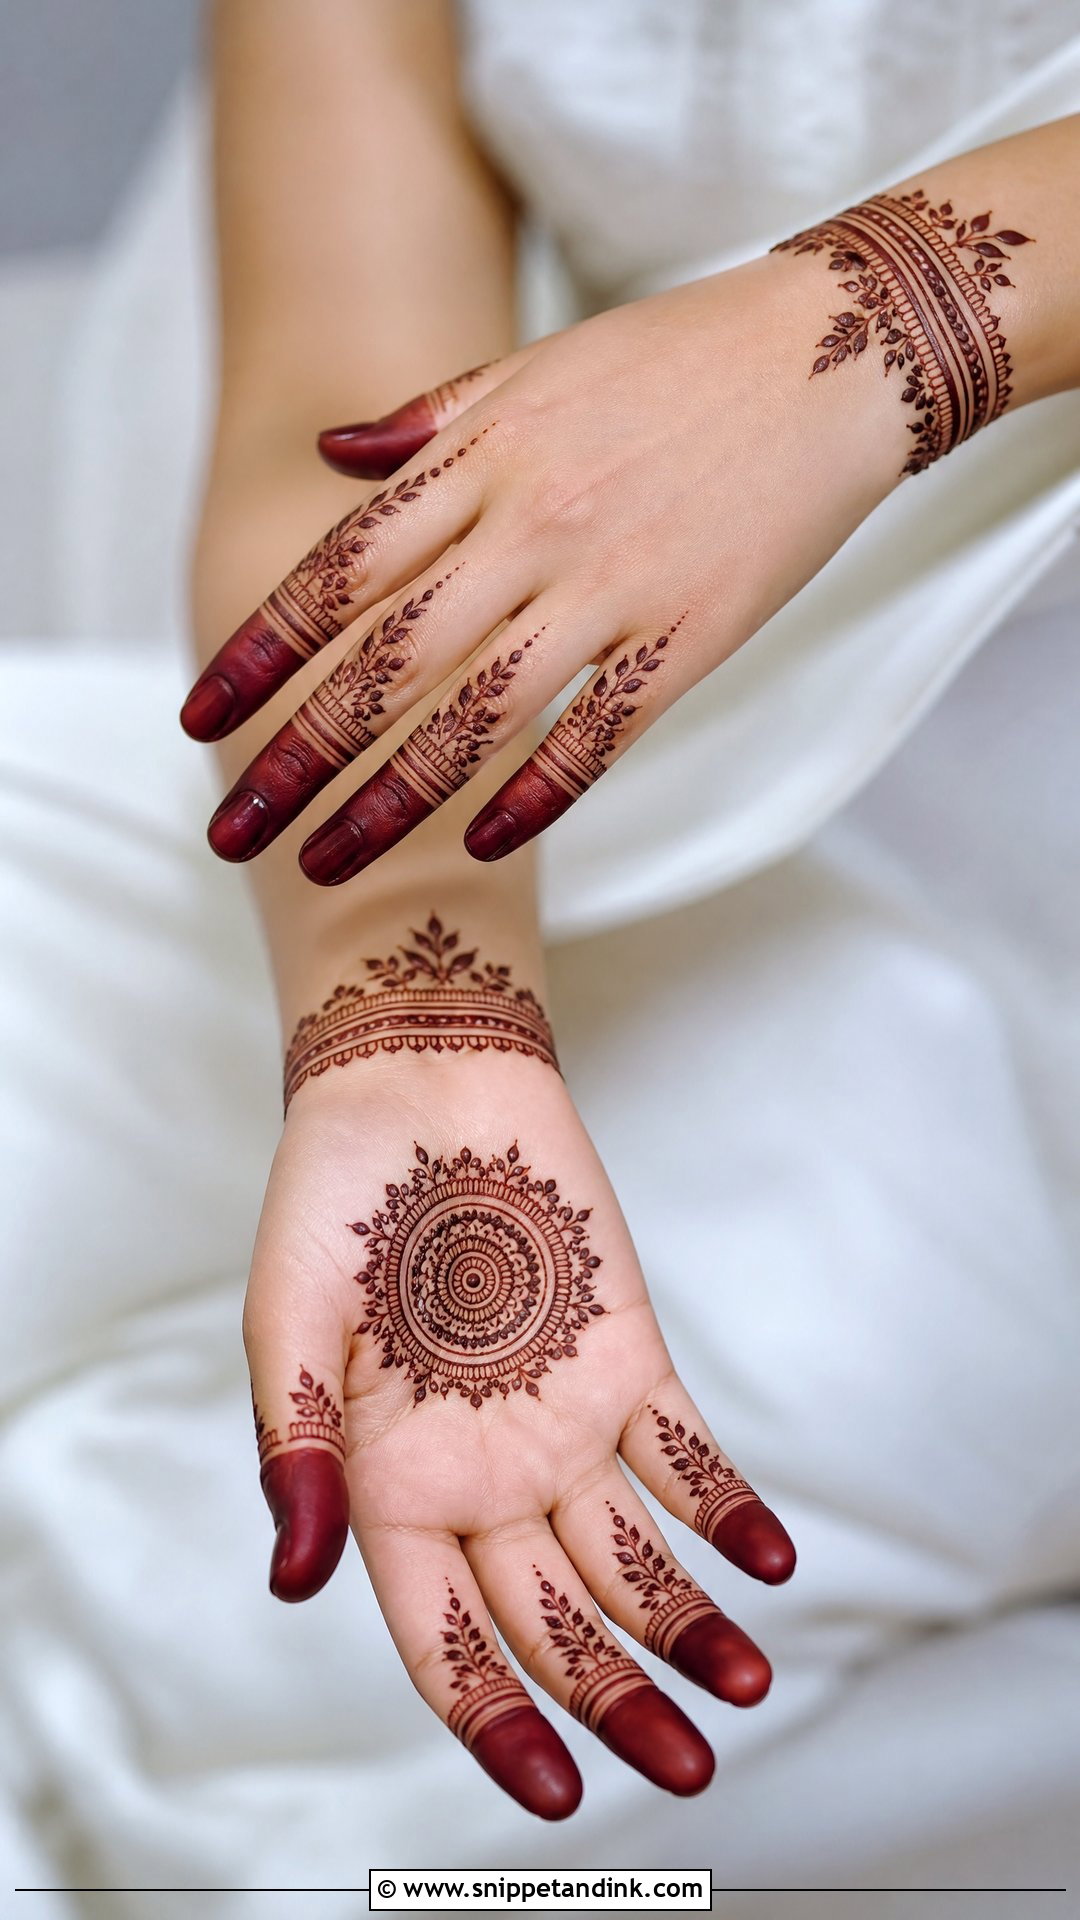
Finger bridal mehndi design puts the detail where your rings sit: filled tips, ring bands, leaf trails and slim florals, with a smaller palm or back-hand motif. It’s a good fit for a lighter function like an engagement party or reception. For a bridal version, don’t leave the palm or wrist completely bare, or the fingers look like they belong to another design. A small mandala, cuff or floral trail fixes that. Expect the filled tips to be the darkest part of your hand, since fingertips take henna more deeply than almost anywhere else.
19. Moroccan Bridal Mehndi Design
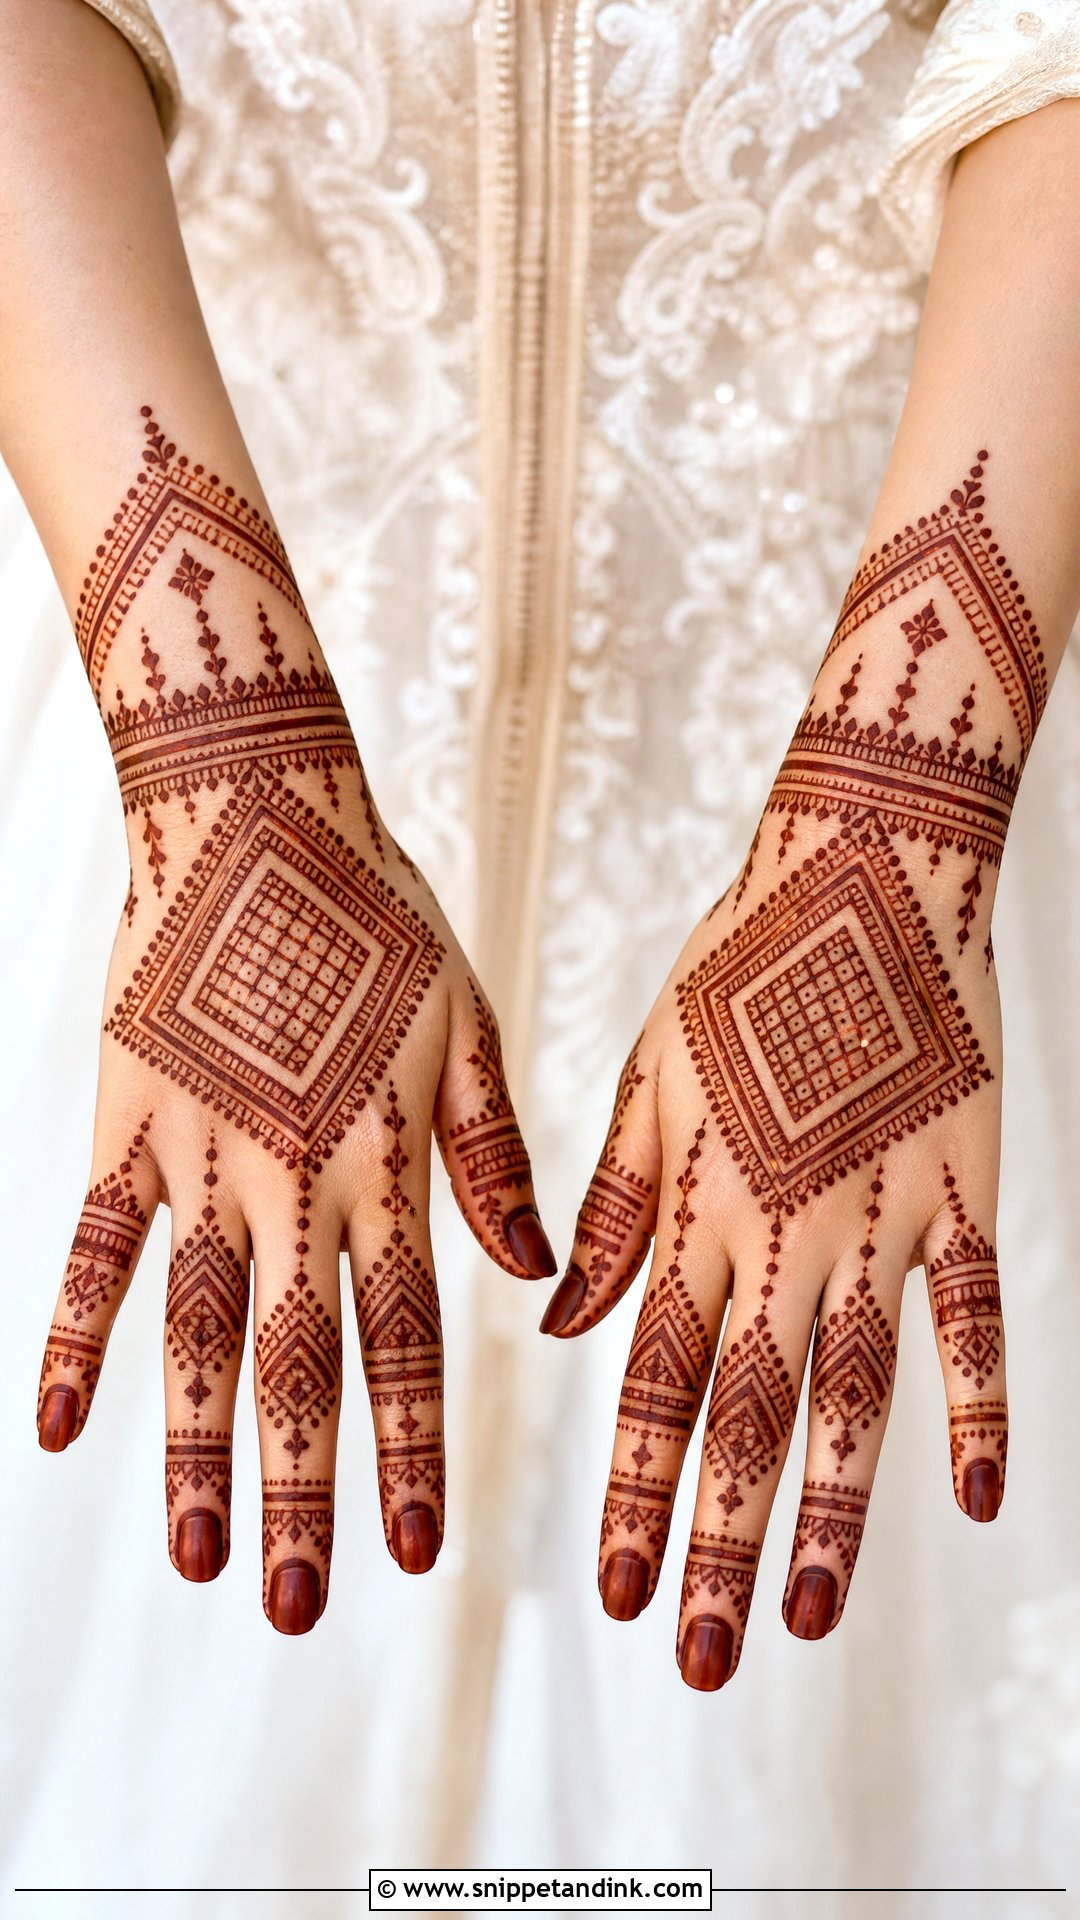
Moroccan work trades florals for geometry: diamonds, lines, grids, chevrons, dots and structured wrist bands. Next to traditional Indian mehndi it looks bold and modern. You can cover palms and back hands in strict symmetry or soften the grid with small floral accents. I switch to a finer cone tip and slower strokes for this style, because a straight line that drifts even slightly is obvious in a geometric pattern. It goes well with clean shapes, statement jewelry and contemporary outfits, and a deep stain keeps the angles crisp.
20. Gulf Bridal Mehndi Design
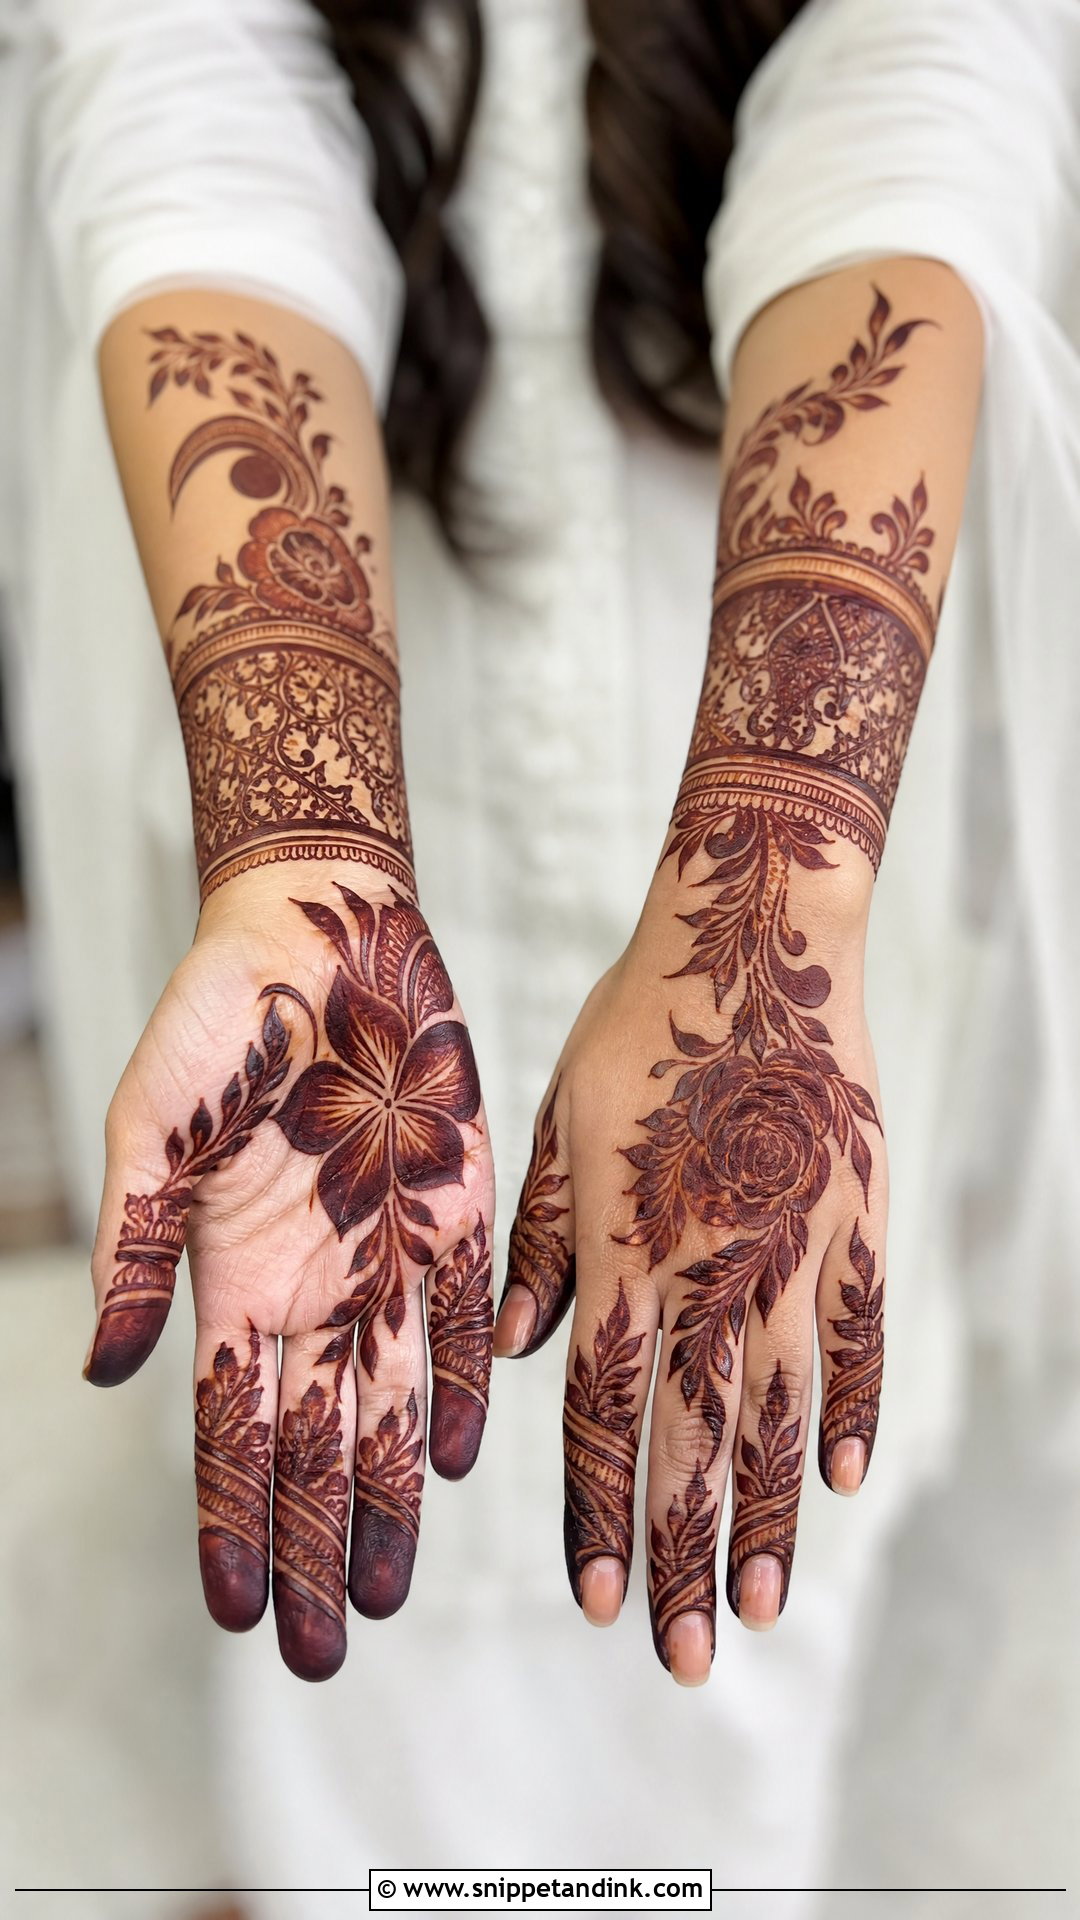
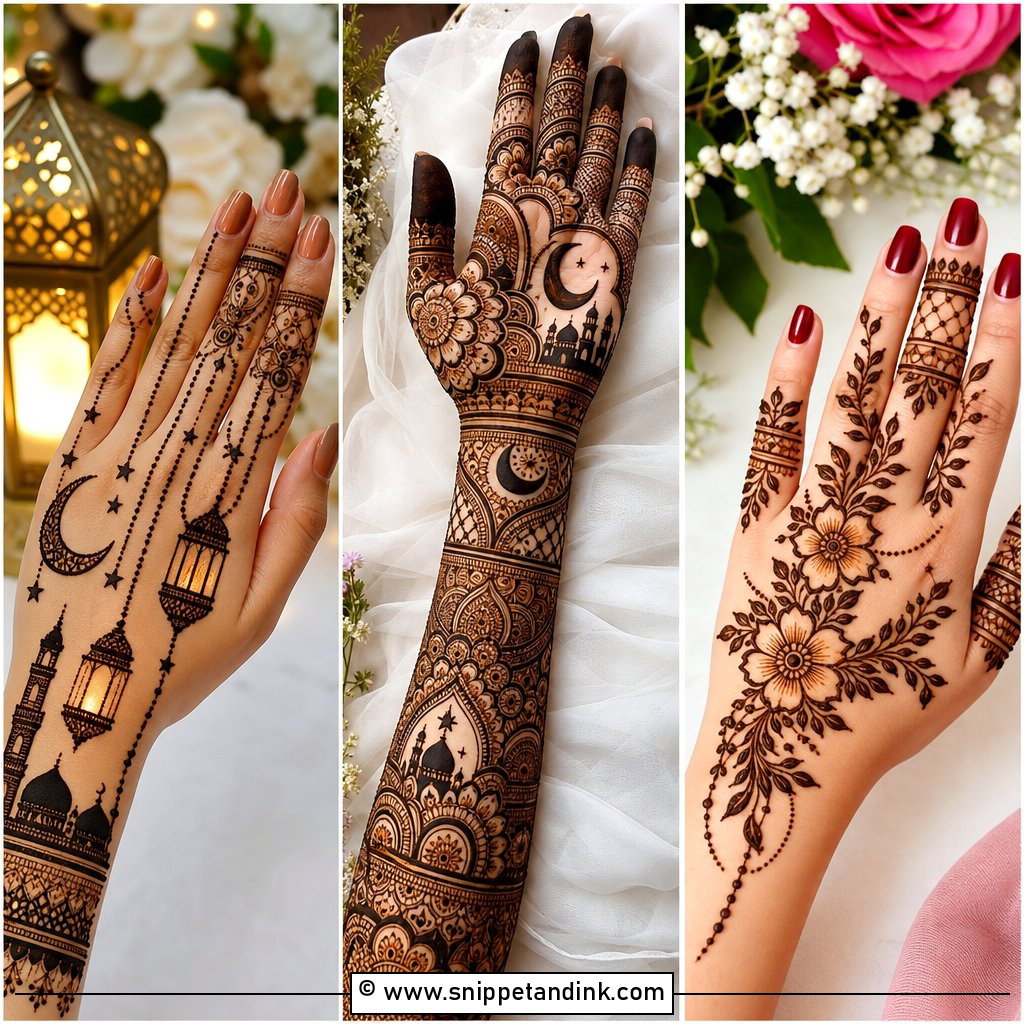
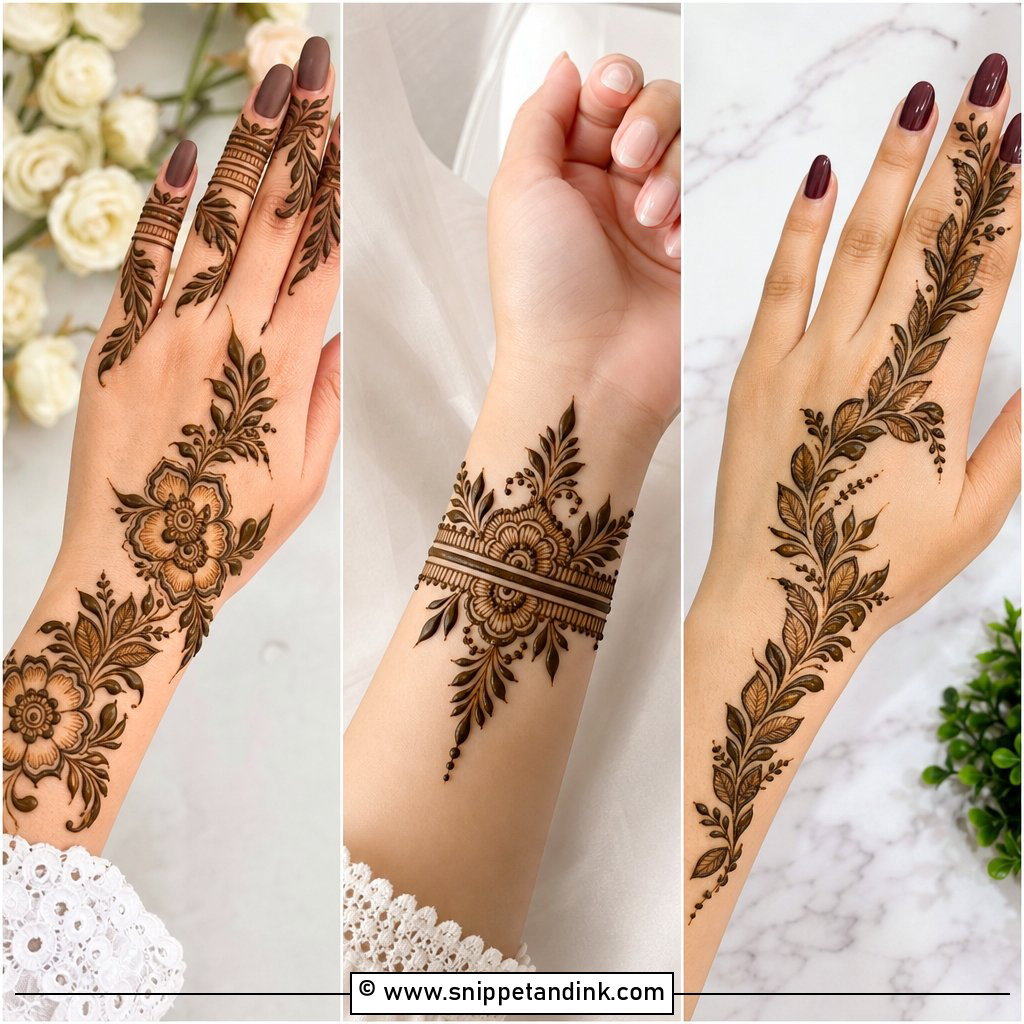
Gulf bridal design, often called Khaleeji-inspired mehndi, is built from bold florals, leafy vines, large motifs and generous open space. The pattern flows across the palm or back of the hand in a trail with strong outlines. Its shaded petals come from spreading a thinner layer of paste inside the outline, so they develop in two tones once the stain matures. Bridesmaids and guests like it because it looks polished and goes on quickly. For the bride, I extend the trail from fingers to wrist or forearm and build fuller detail near the cuff.
Coaxing the Darkest Stain Once the Paste Dries
Most of the colour is decided after I put the cone down. The longer paste stays against warm skin, the more dye moves into it, so I ask brides to keep it on for at least six to eight hours, or overnight if they can sleep with their hands loosely wrapped.
- Dab on lemon juice mixed with sugar once the paste is dry to the touch. It keeps the paste tacky and pressed against the skin. Go lightly, because soaked paste slides and smudges.
- Stay warm. Cold hands stain weaker, so wrap up rather than sitting under a fan or air conditioning.
- Scrape the dried paste off with a blunt edge or your fingernail instead of washing it away.
- Keep water off your hands for as long as you can, ideally the first 12 to 24 hours, and coat them with a little balm or coconut oil before you shower after that.
If the stain comes up lighter than you hoped
Backs of hands and forearms almost always stain lighter than palms and fingertips, because the skin there is thinner. That’s normal, not a failed application. Give it the full two days before you judge it. If it still looks pale on the wedding morning, keep harsh soap and hand sanitiser away until after the photos, since both fade colour. Skip any product sold to darken henna after the fact; once the paste is off, nothing safe adds more dye.
Deciding How Much of Your Hand to Cover
Start with coverage and time, then match the style to your outfit and the moments you’ll be photographed in. Full Indian hands feel grand and traditional, while Arabic, Gulf and minimal patterns give lighter coverage that goes on faster. Mandalas, paisleys, peacocks, jaali and florals each set a different mood, and names, dates or portraits add a personal layer as long as they’re kept clean. Whatever you pick, protect the sitting time, the drying time and the aftercare. The colour on your wedding morning is decided in those hours far more than by the pattern.
You'll Like These Ideas:


Leave a Reply