
Nearly every booking I take starts with a photo on someone’s phone. That’s a good thing: a picture shows coverage, spacing and mood far faster than any description. It also hides a lot, because the hand in the photo isn’t yours, and the image might show fresh paste rather than the stain you’ll actually wear. Below are thirty-five designs for hands and feet, from heavy bridal work and portrait mehndi to Arabic trails, mandalas, finger patterns and white henna. For each one I’ve added what I look at as the artist: where it stains, what goes wrong and who it suits.
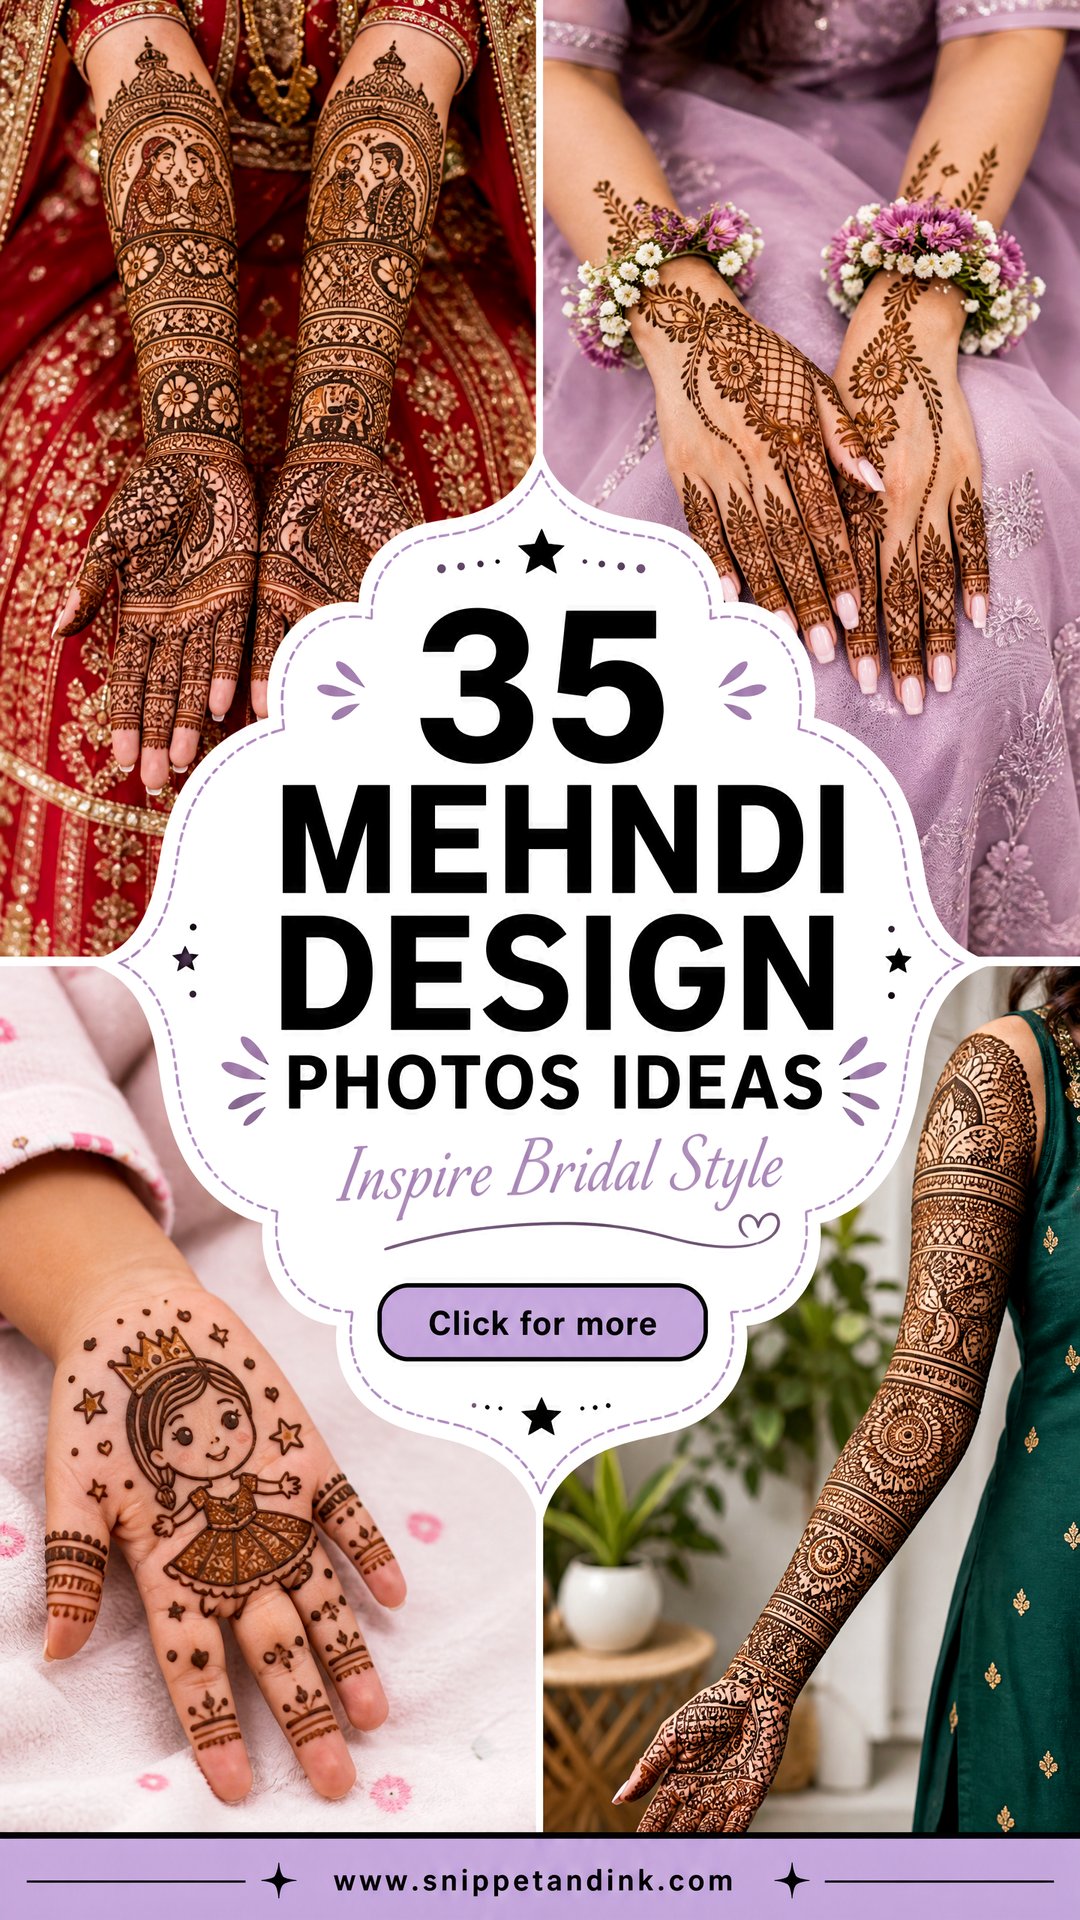
Reading a Reference Photo Like an Artist Does
When someone shows me a photo, I’m looking for three things the picture may not say out loud.
- Paste or stain? Many popular photos show the design with the dark paste still on. That looks sharper and blacker than the stain will ever be. If you want to know how it will really look, ask the artist for photos of her own work after the paste came off, ideally a day or two later.
- Whose hand? A design drawn on long, slim fingers won’t sit the same way on a short, broad hand. I’ll keep the layout and change the scale of the motifs.
- Edited color? Filters and warm lighting push stains toward deep red. A natural stain moves from orange to a reddish brown, and on the back of the hand it stays lighter than on the palm.
Send two or three photos rather than ten, and tell your artist what you like about each one: the spacing in this one, the fingers in that one. That gives her something to design from instead of a picture to copy.
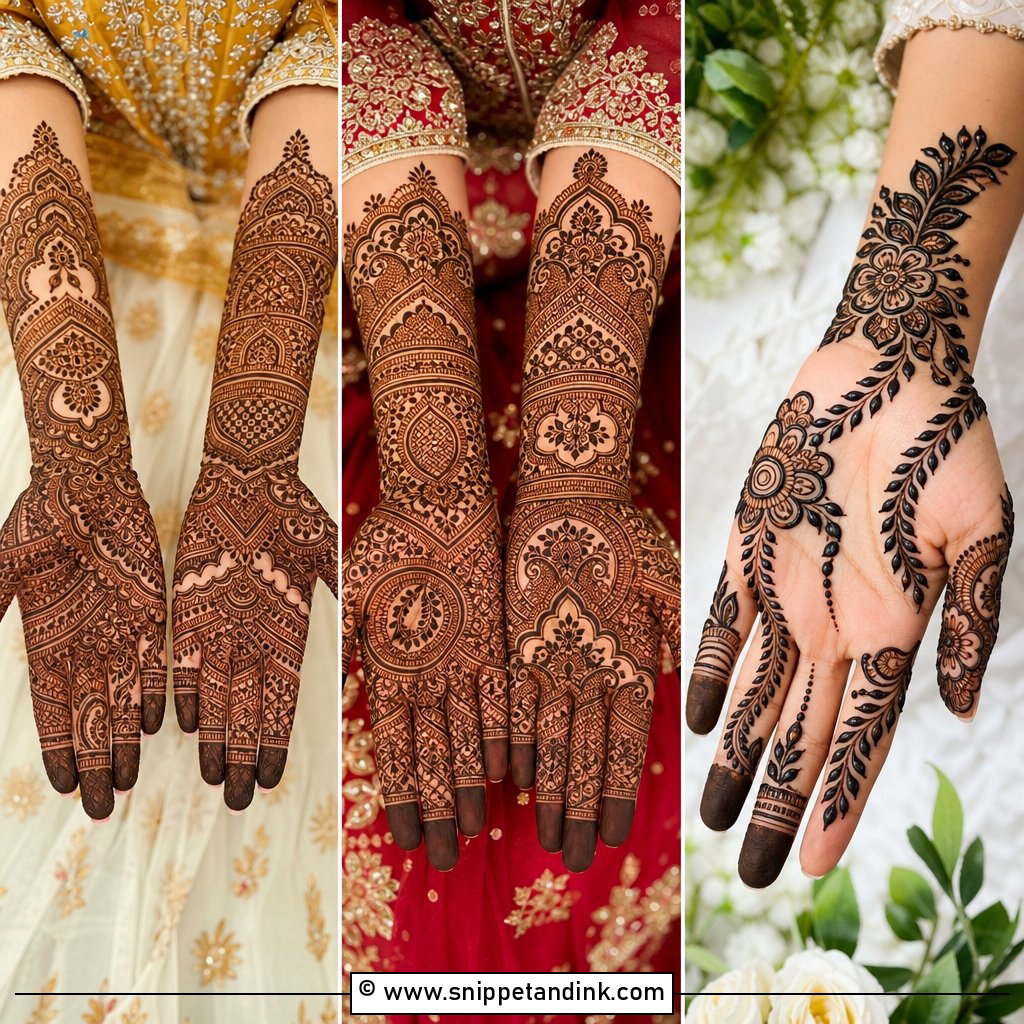
1. Full Hand Bridal Mehndi Design
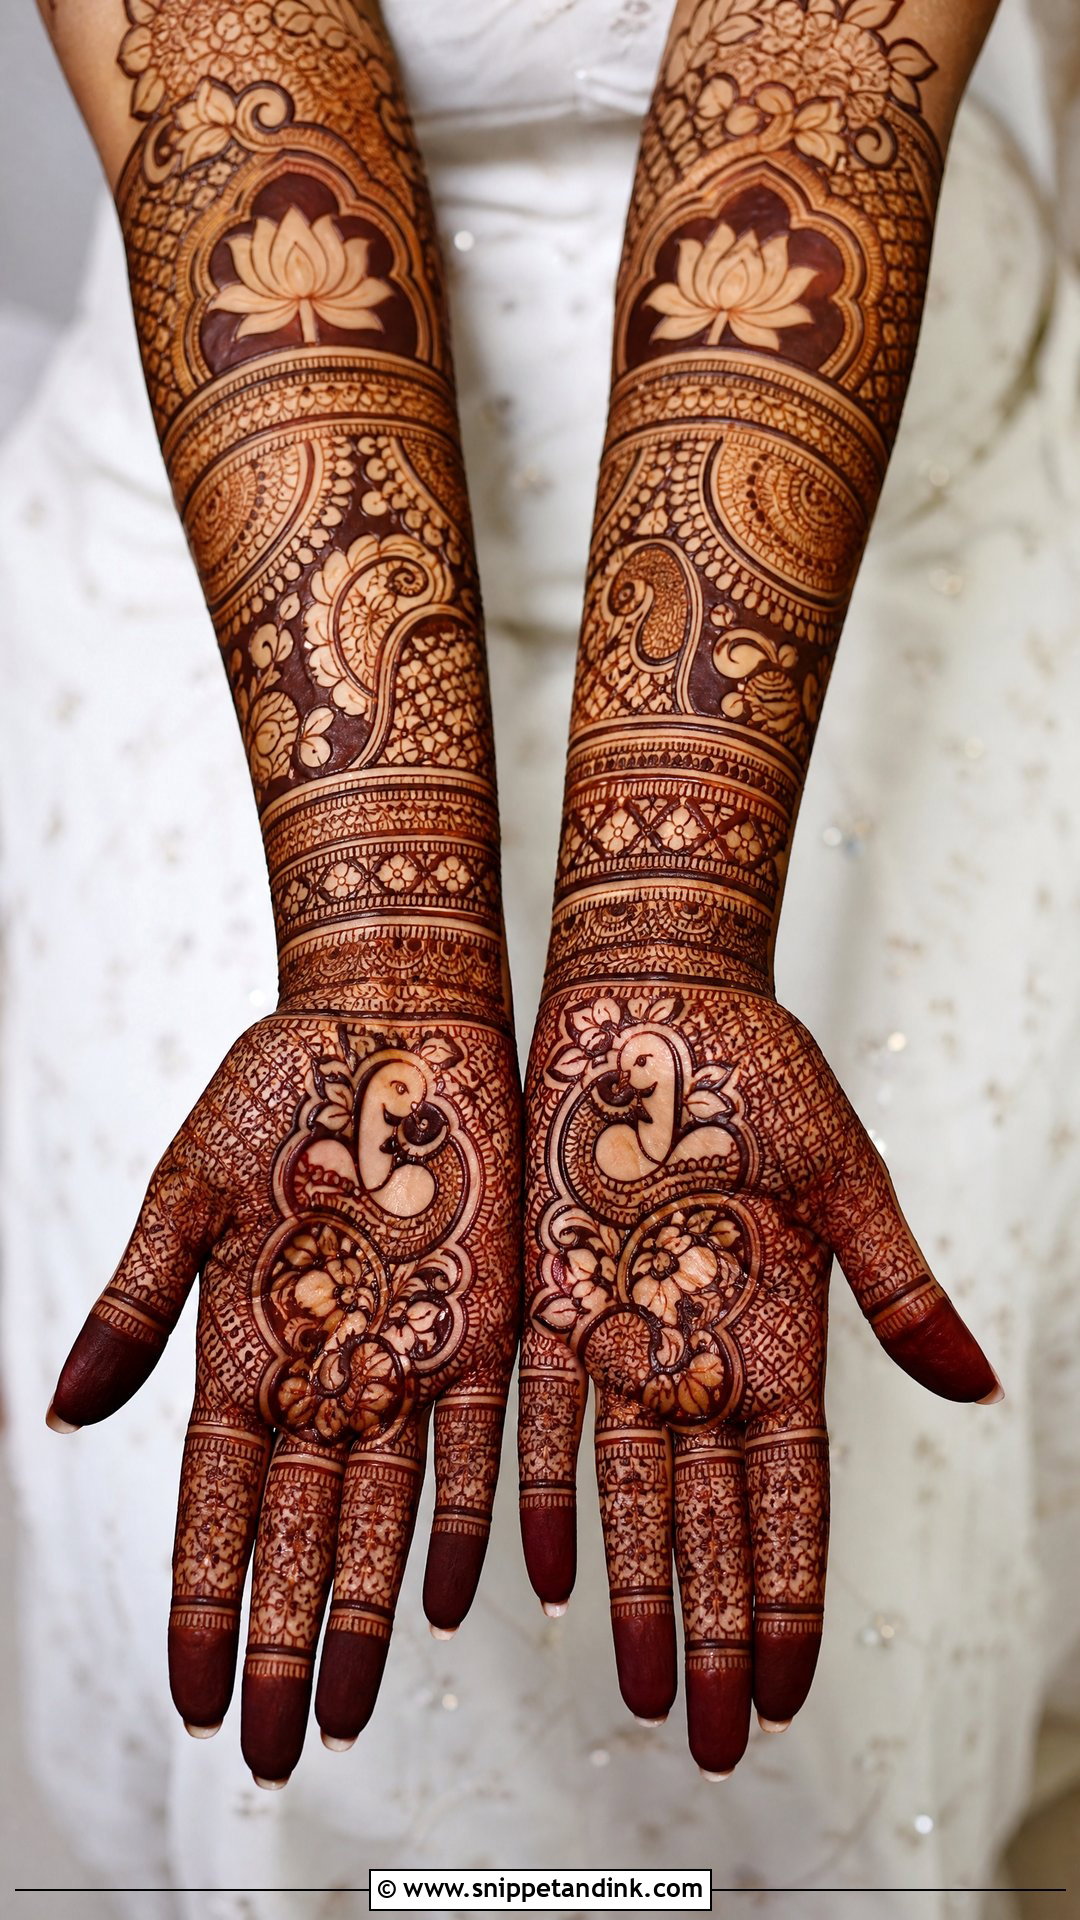
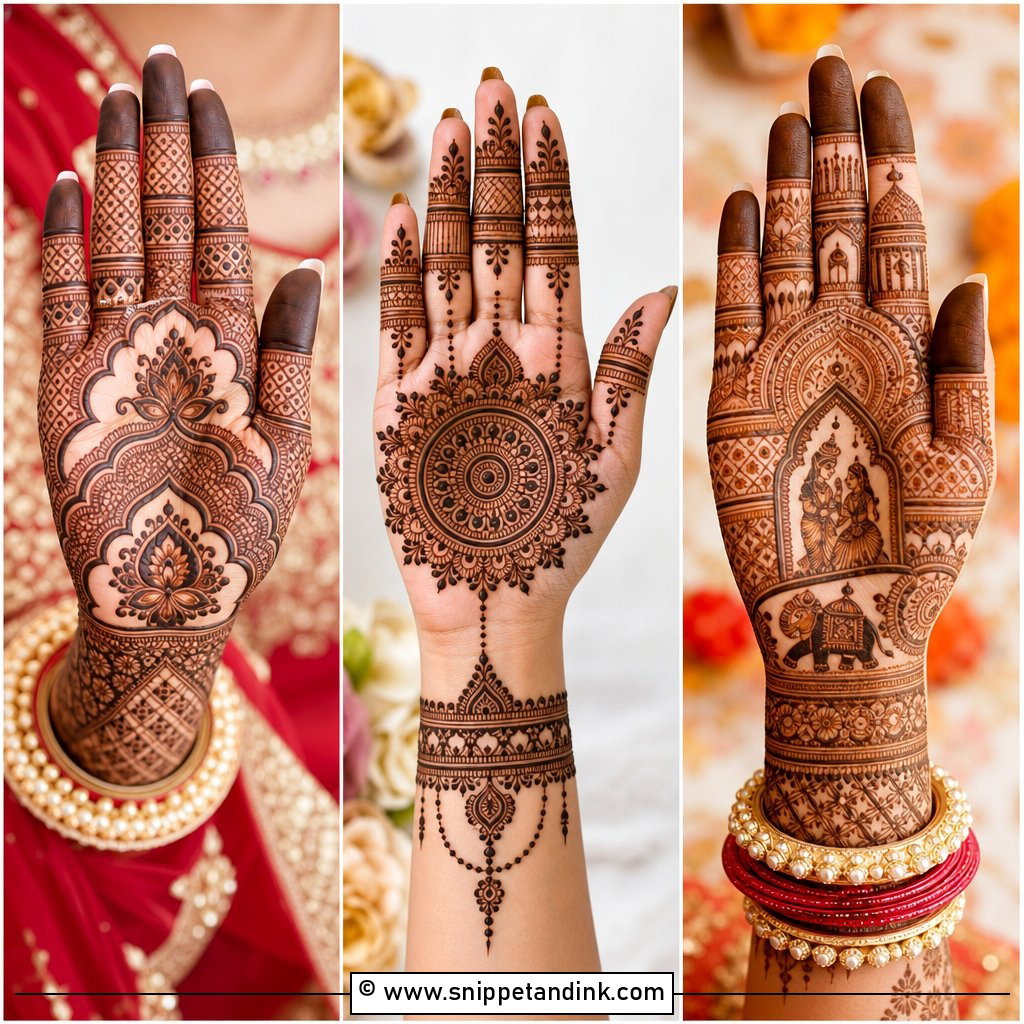
A full hand bridal mehndi design covers palm, fingers, wrist and forearm with paisleys, jaali, lotus, peacocks and small personal details like initials. I treat the palm as the main story panel and let the forearm flow out of it in bands, florals and vines. The join at the wrist is where many designs fall apart, so I draw a cuff there first and work outward from it in both directions. It pairs naturally with heavily embroidered lehengas and sarees. Fill the fingers fully or the hand looks unfinished next to the arm.
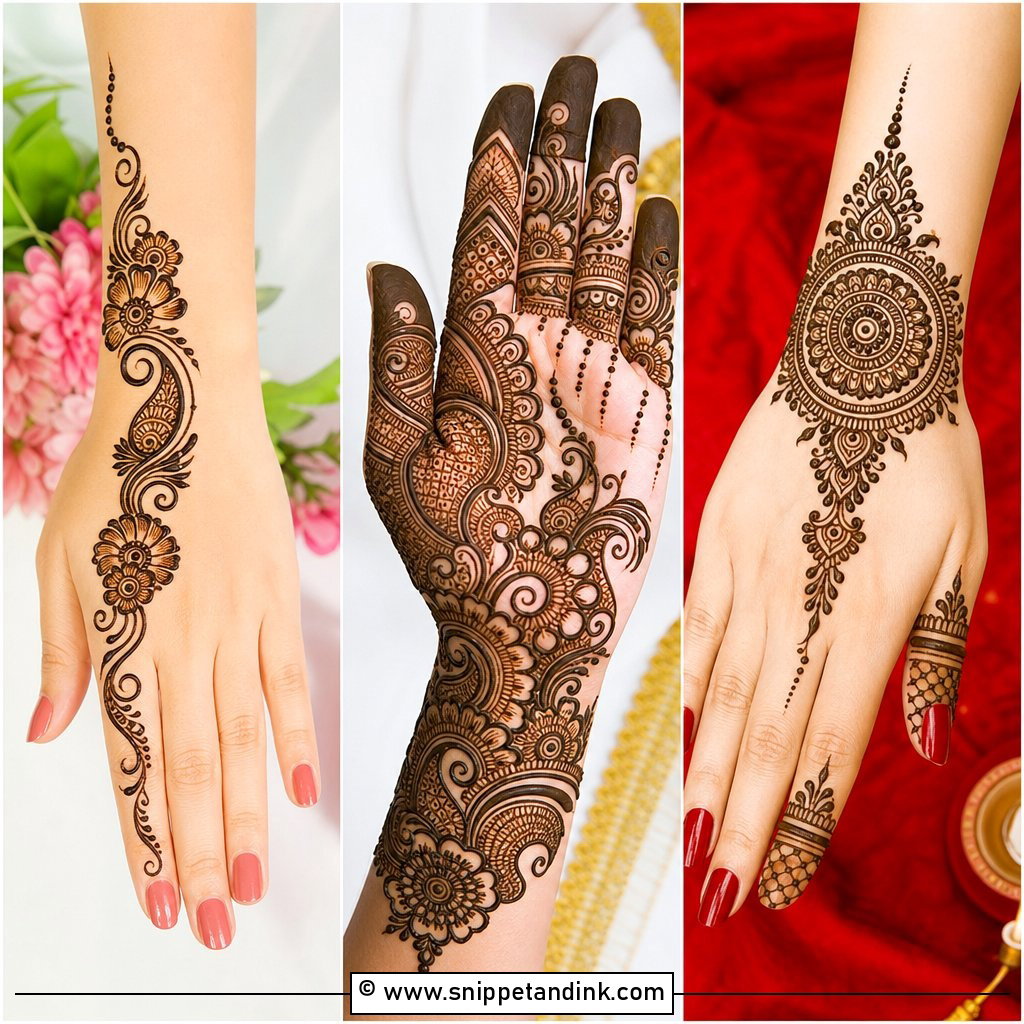
2. Arabic Mehndi Design Front Hand
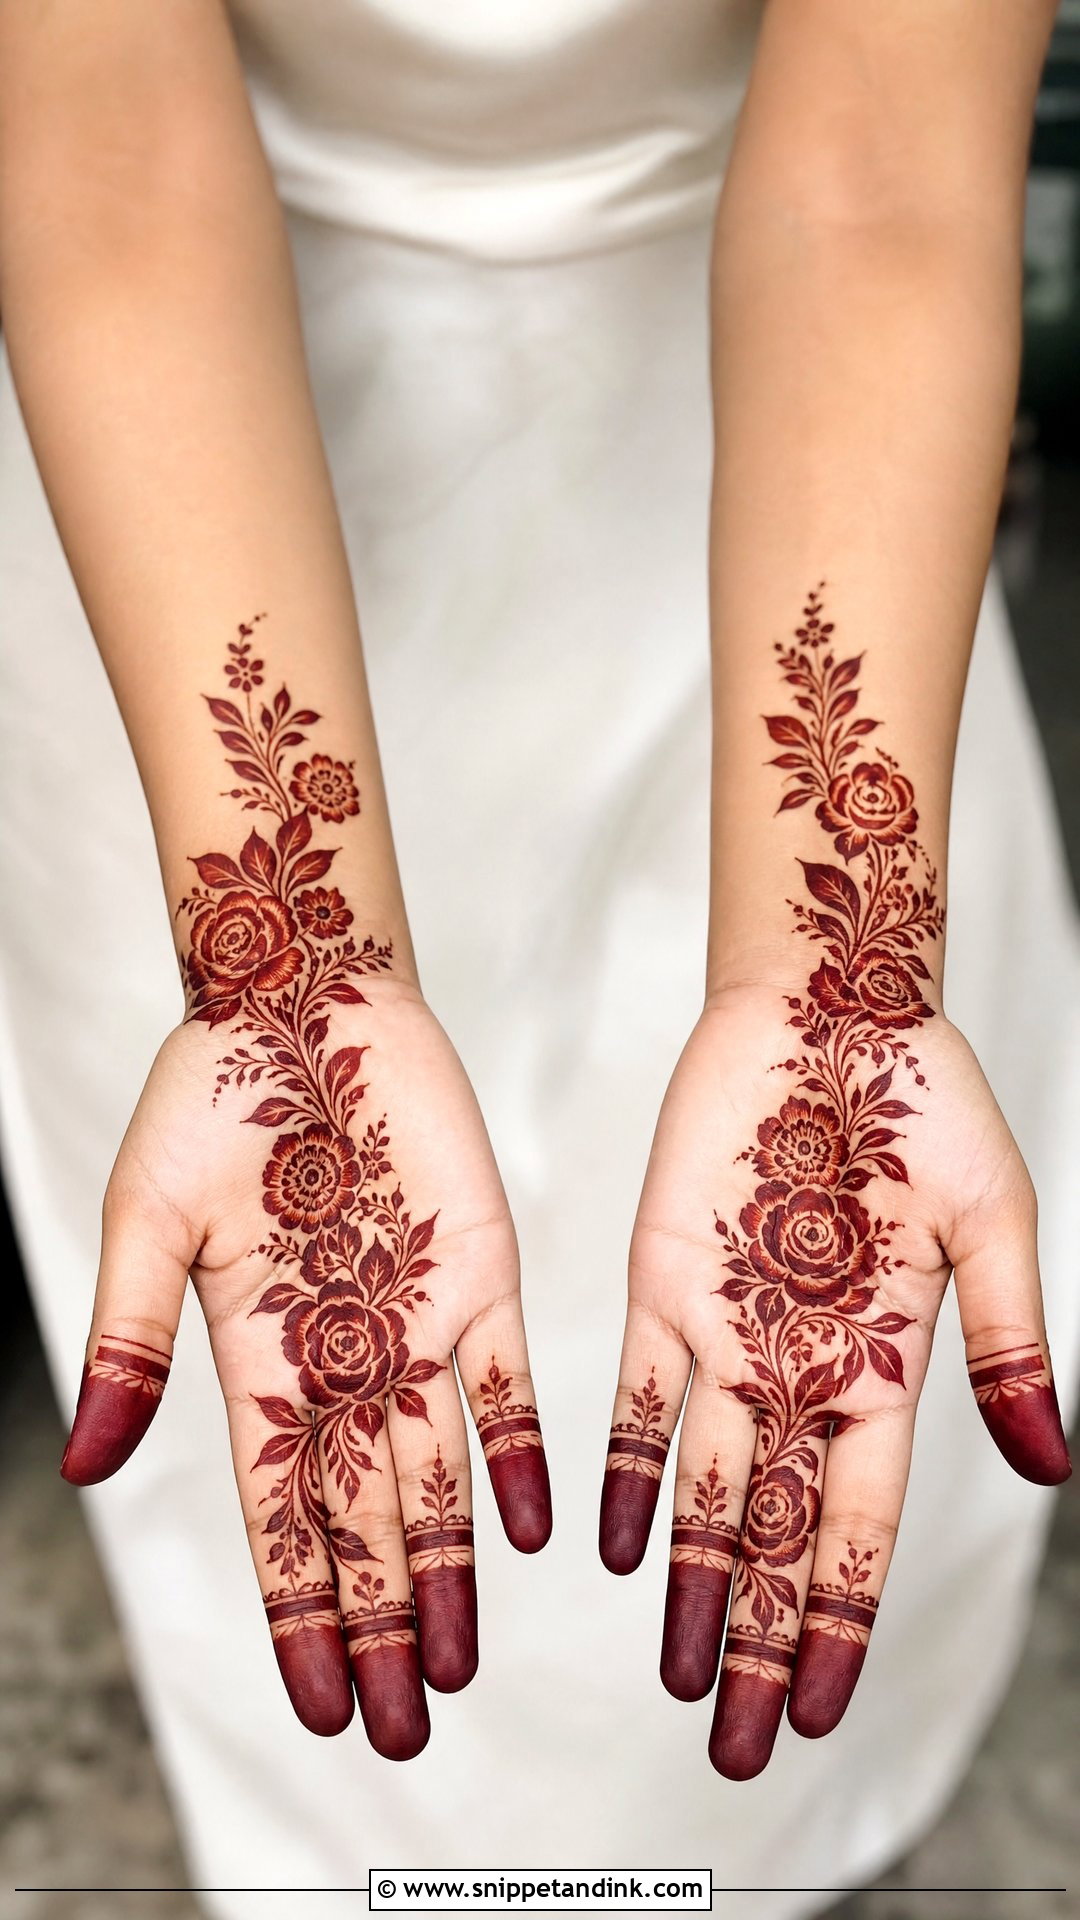
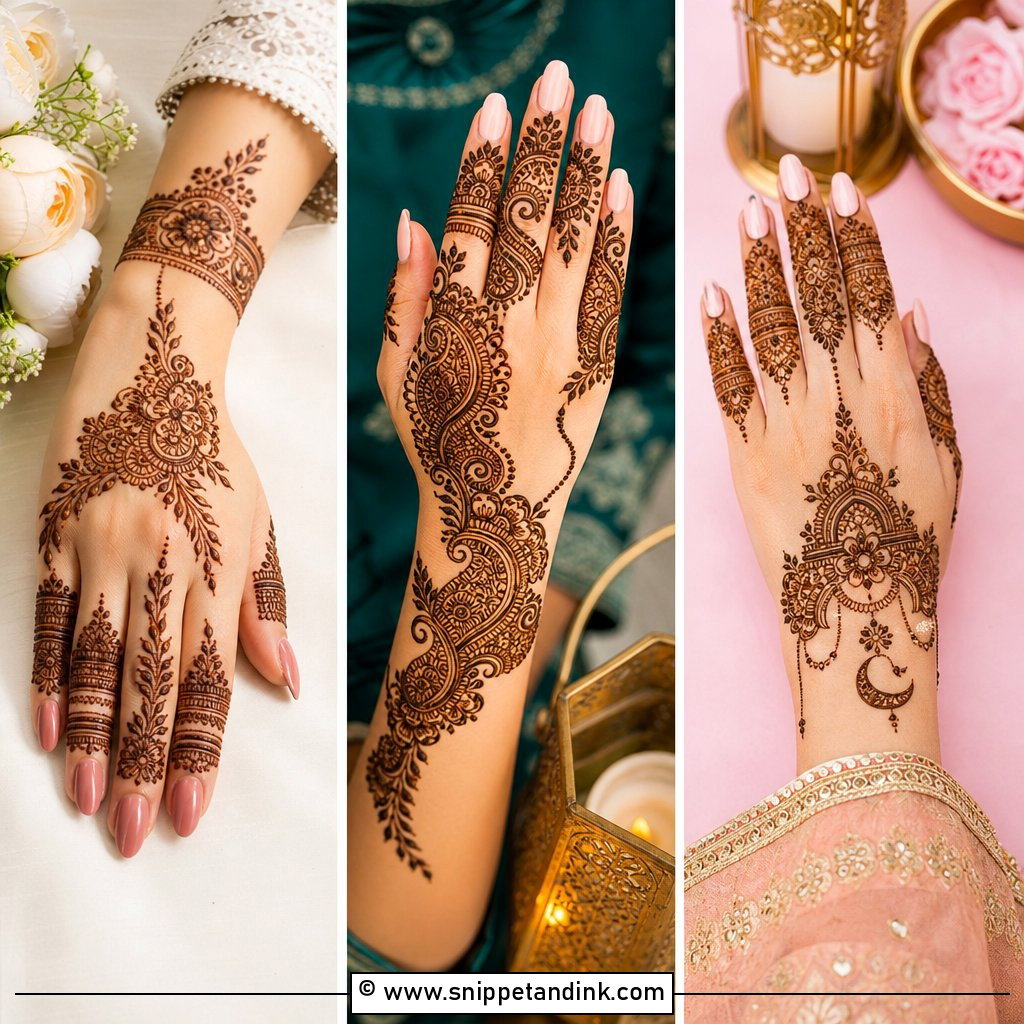
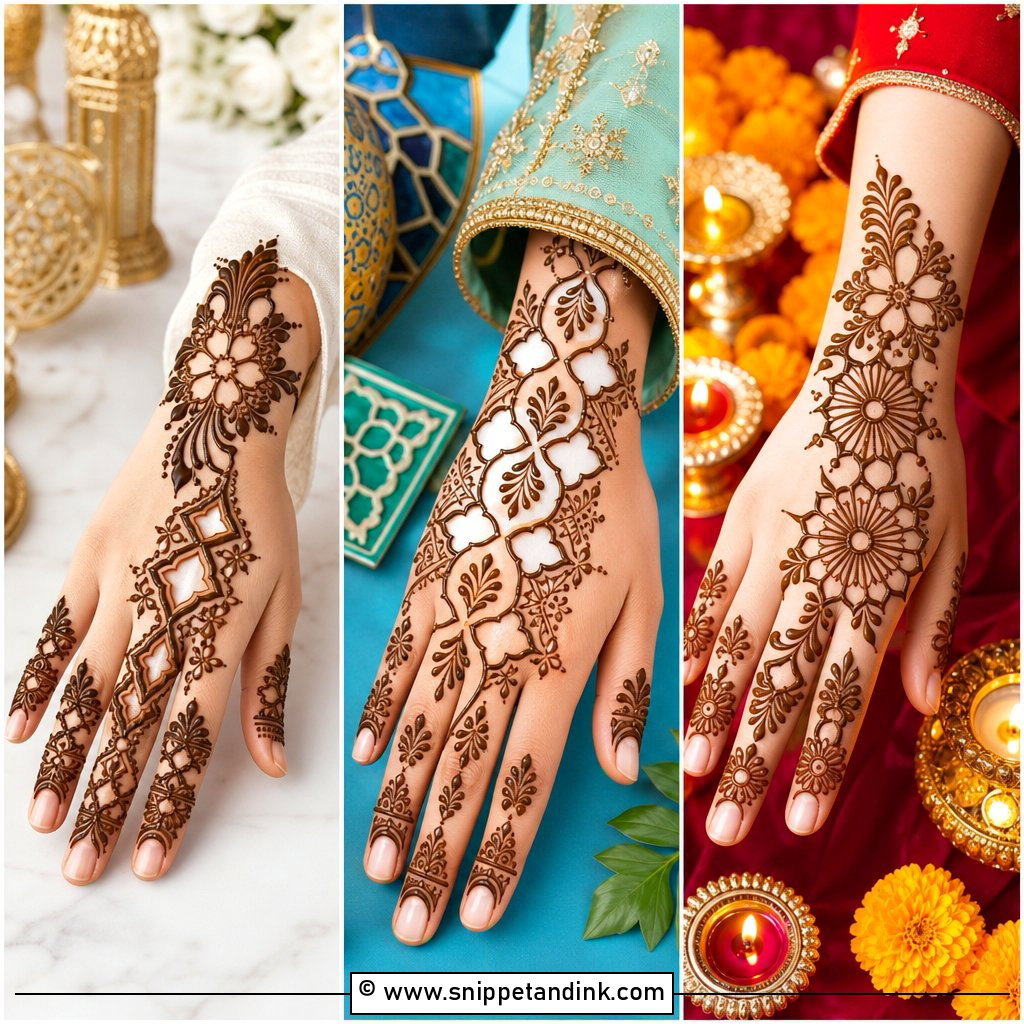
This one runs diagonally across the palm with bold flowers, leafy vines and open skin, usually starting at one side of the wrist and finishing on the index finger. Because the palm stains so deeply, front-hand Arabic gives strong color with relatively little sitting time. I keep the outlines bold and the inner shading light, since heavy shading on the palm can bleed into a dark patch. It’s a good fit for Eid, family functions and bridesmaids.
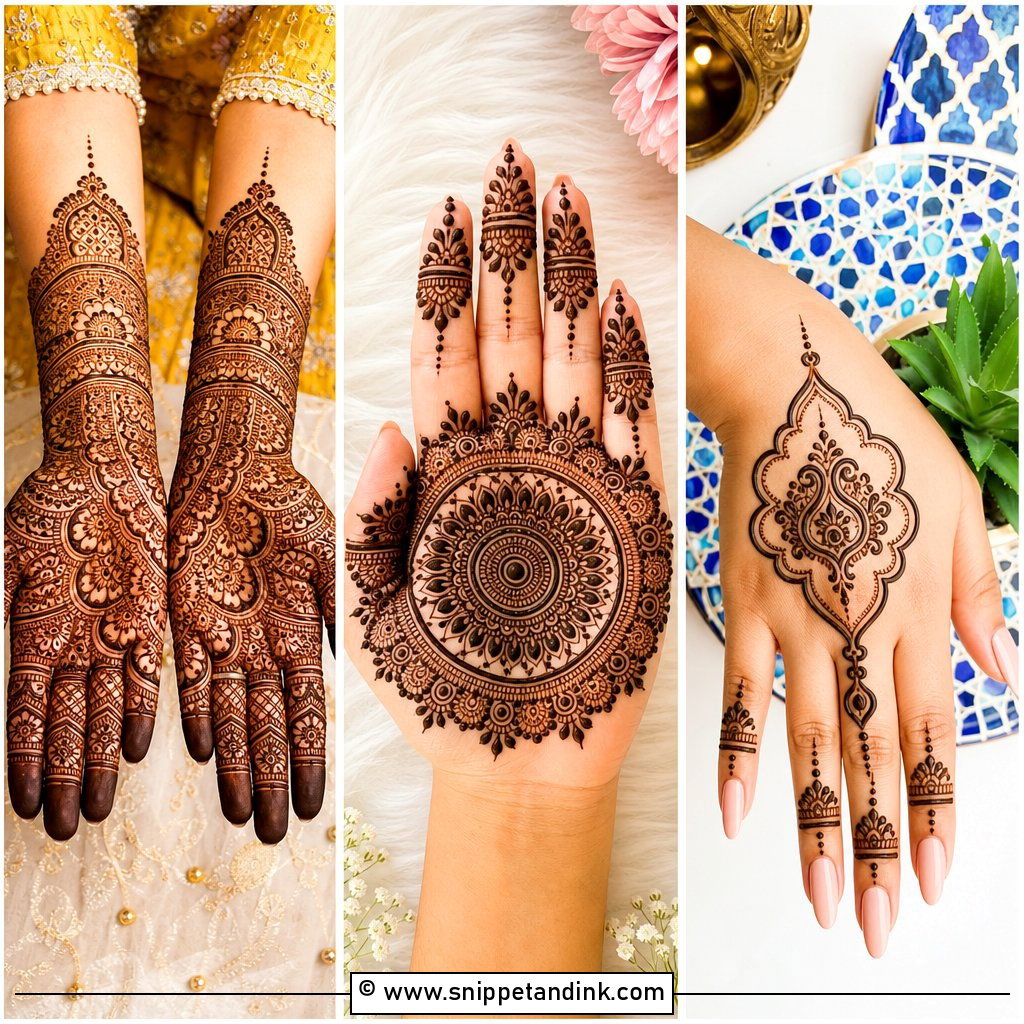
3. Simple Mehndi Design Back Hand
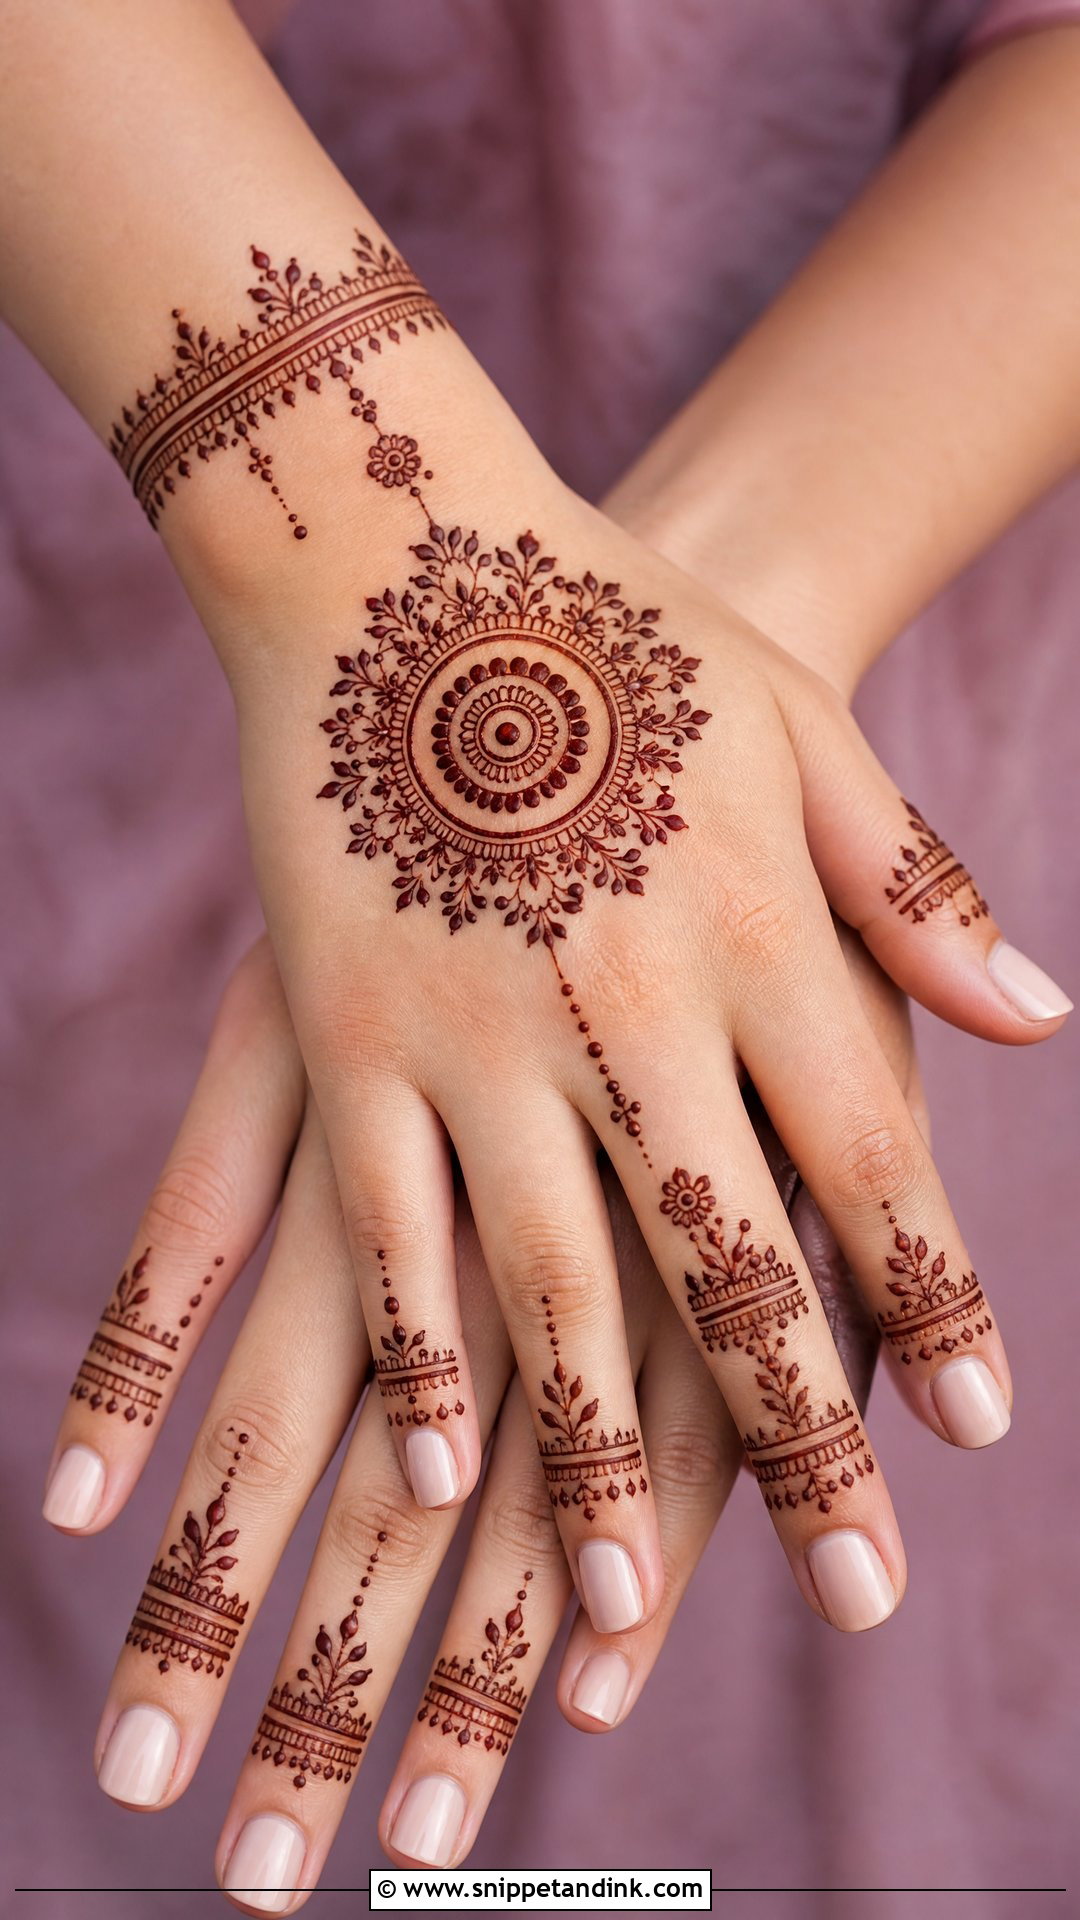
A central mandala, tidy finger details and a bracelet-style wrist band. That’s enough. The back of the hand is in almost every photo, so even small designs earn their place. Leave the middle open or add a few dots and leaves around the main motif. One thing to expect: the back of the hand stains lighter than the palm, so if you want a rich look here, ask for slightly bolder lines and keep the paste on longer.
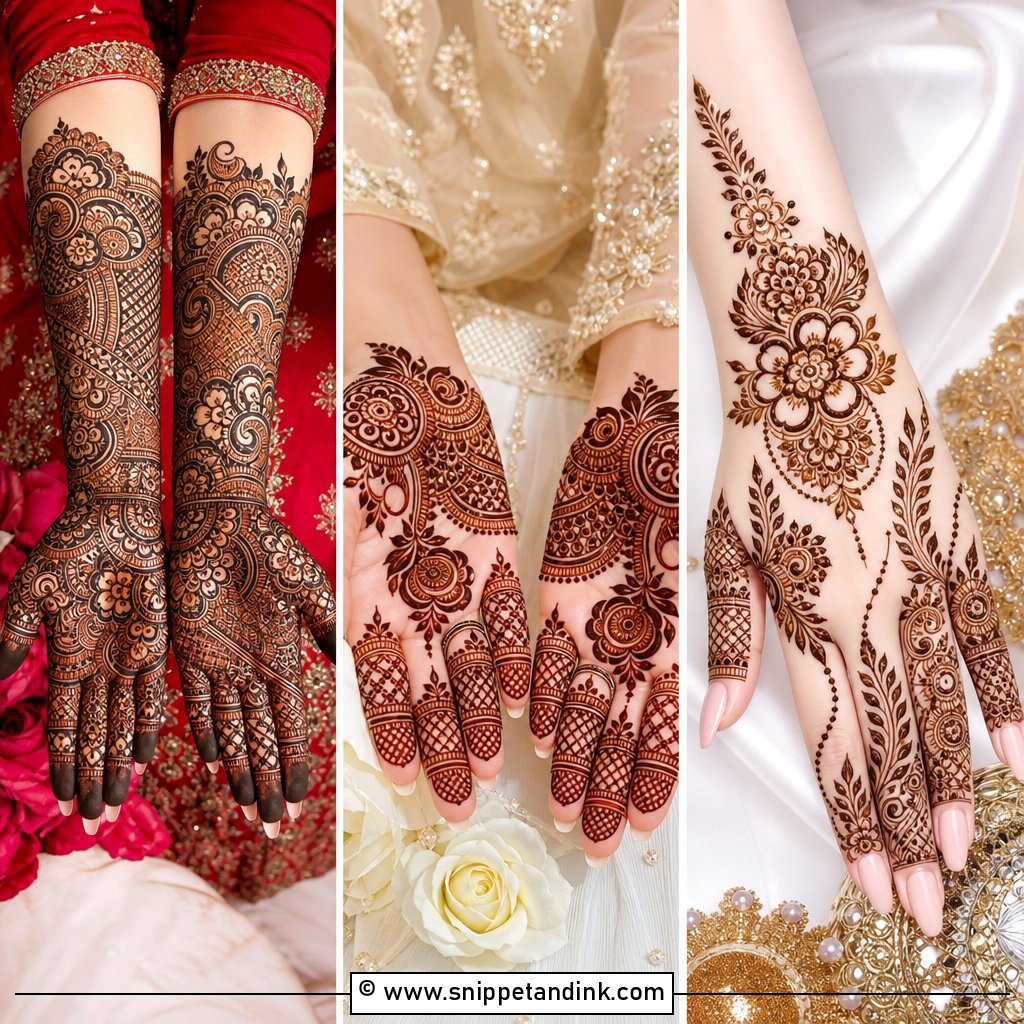
4. Indian Bridal Mehndi Design
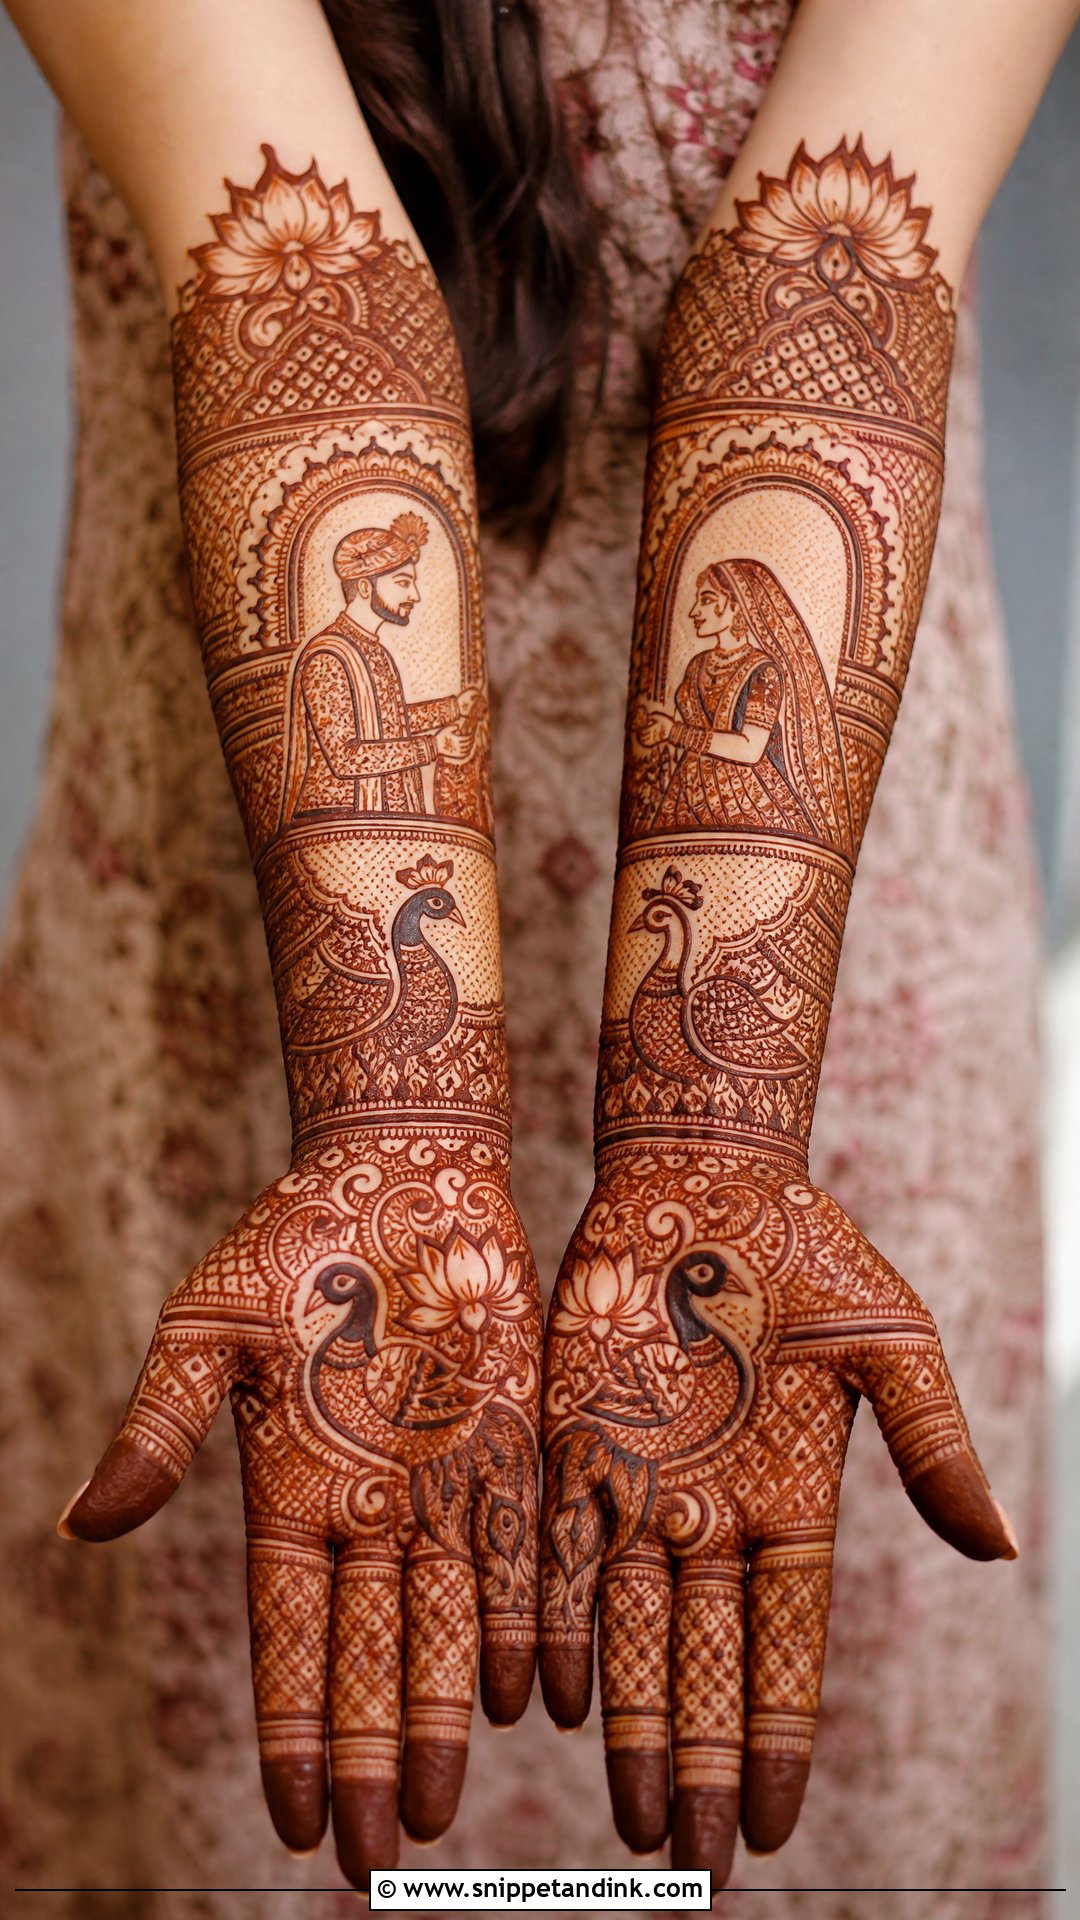
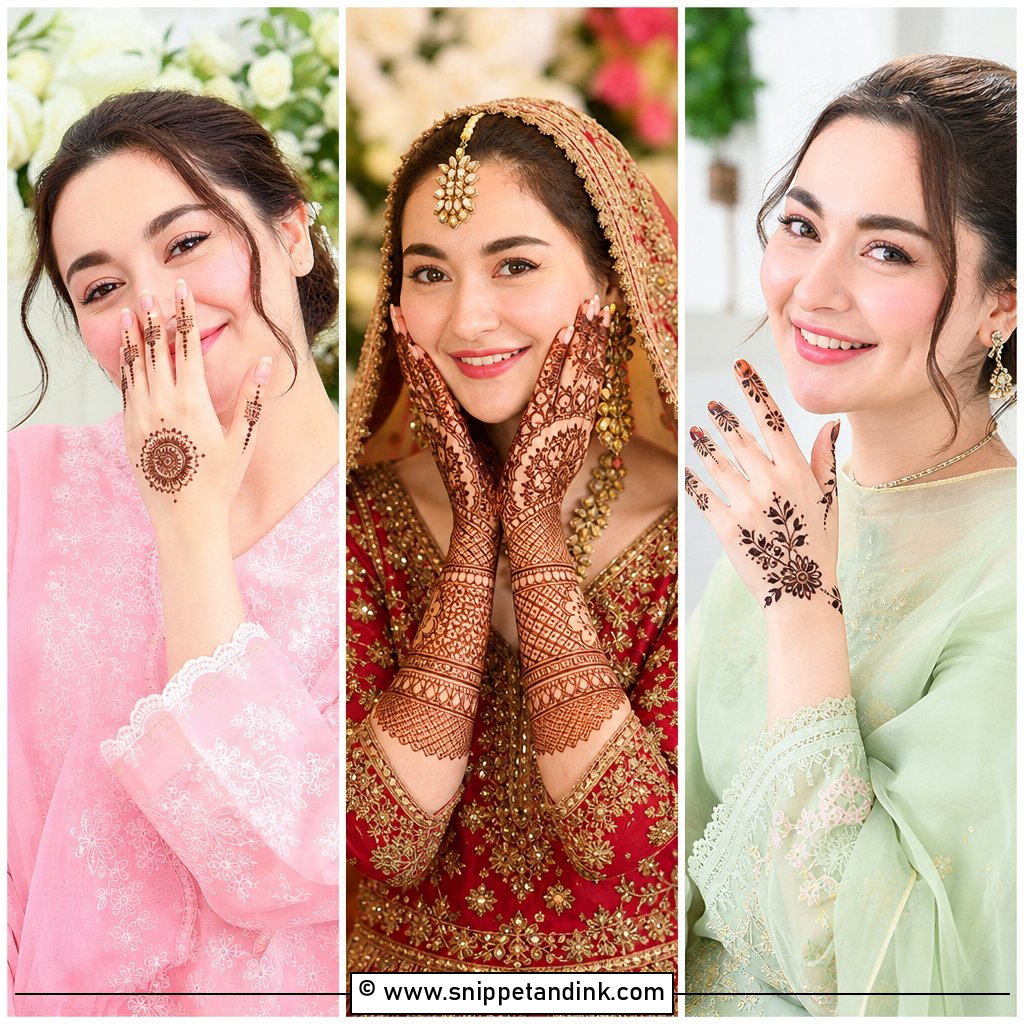
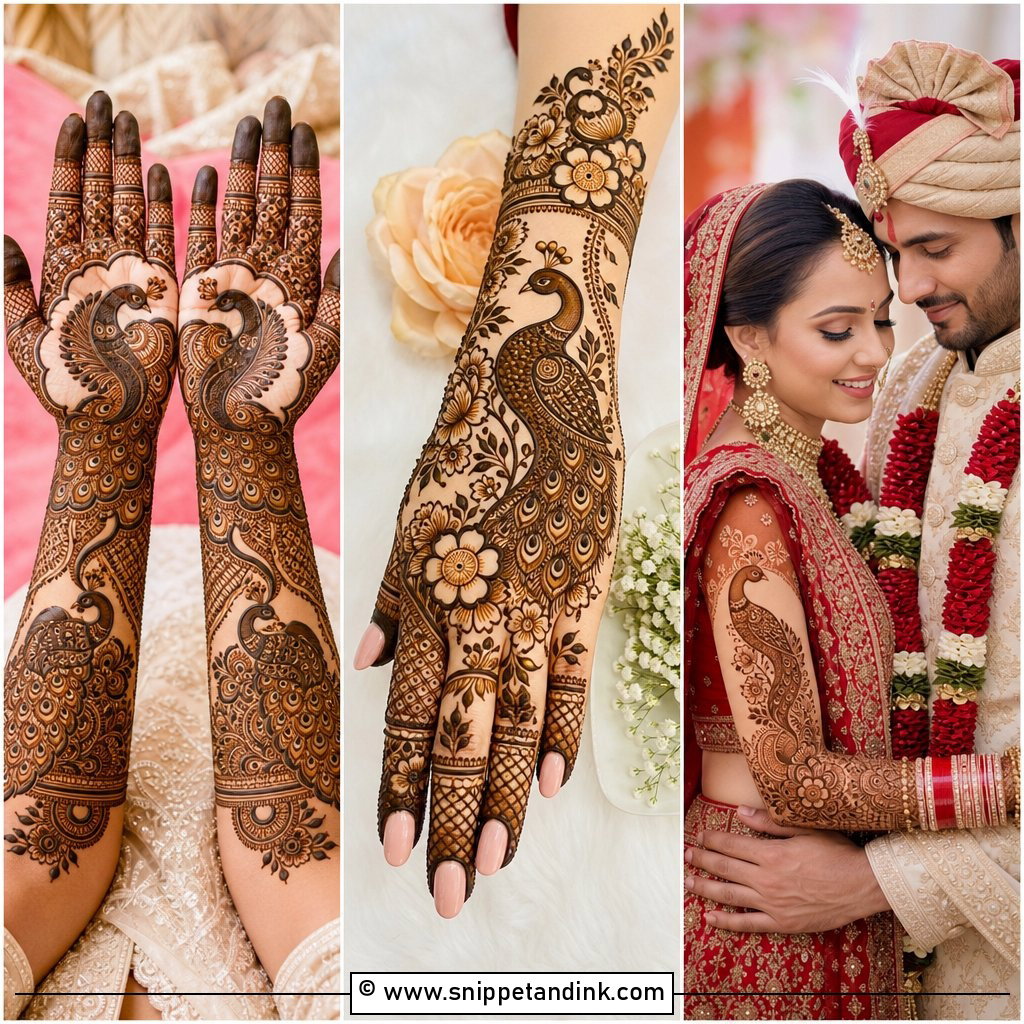
Indian bridal mehndi fills both hands from fingertips to forearms. Typical motifs include dulha-dulhan figures, peacocks, kalash, lotus, paisley and small wedding scenes. The palm carries the most detail and the arms take layered bands and borders. It’s a long sitting, and the result rewards close-up photography more than any other style. I keep a hair’s breadth more space between lines than looks necessary while drawing, because lines thicken slightly as the stain darkens, and packed detail can close up.
5. Indo Arabic Mehndi Design
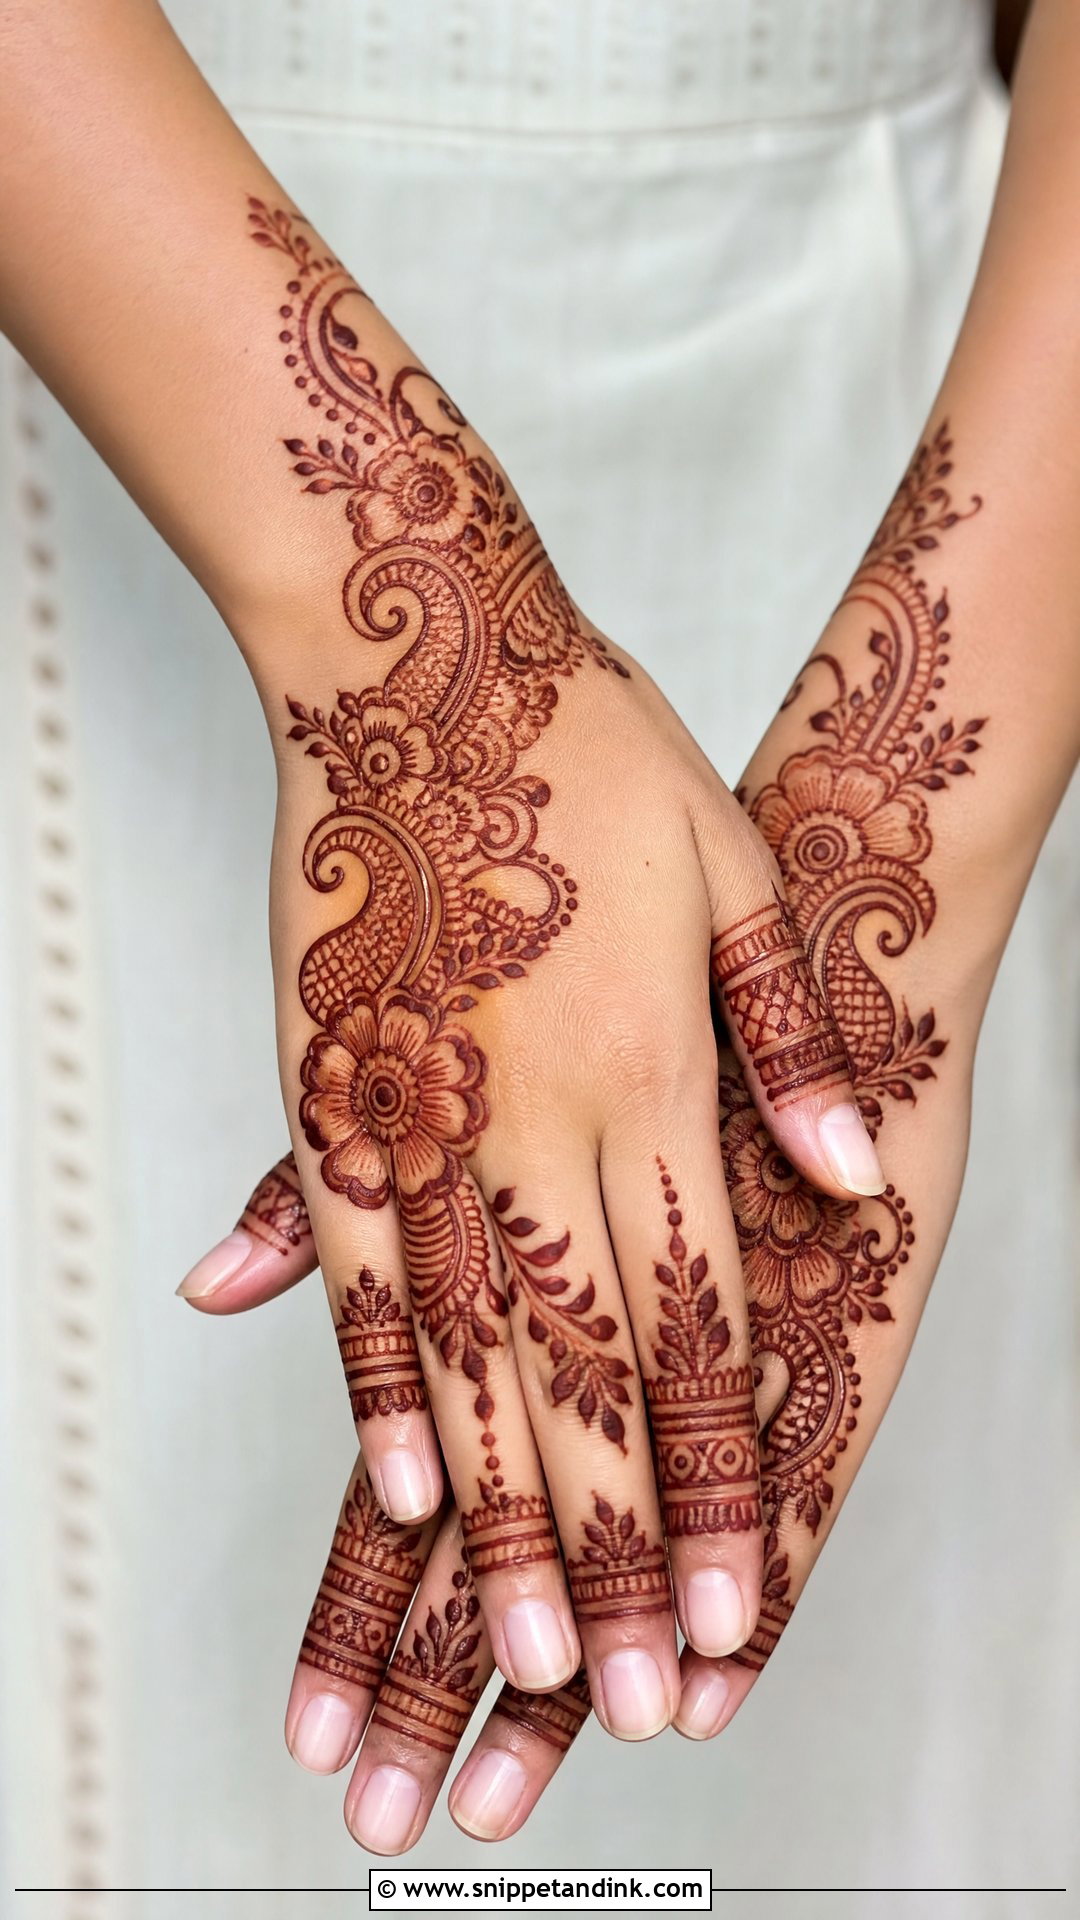
Indo-Arabic takes large Arabic flowers, paisleys and leafy trails and adds Indian-style filling inside selected motifs. It’s my go-to for bridesmaids and guests at a wedding, because it reads as rich without the time of full bridal coverage. The main trail can sit across the palm or back hand and extend to the wrist. It suits both traditional and fusion outfits, and the open skin stops it from competing with heavy embroidery.
6. Front Hand Mehndi Design
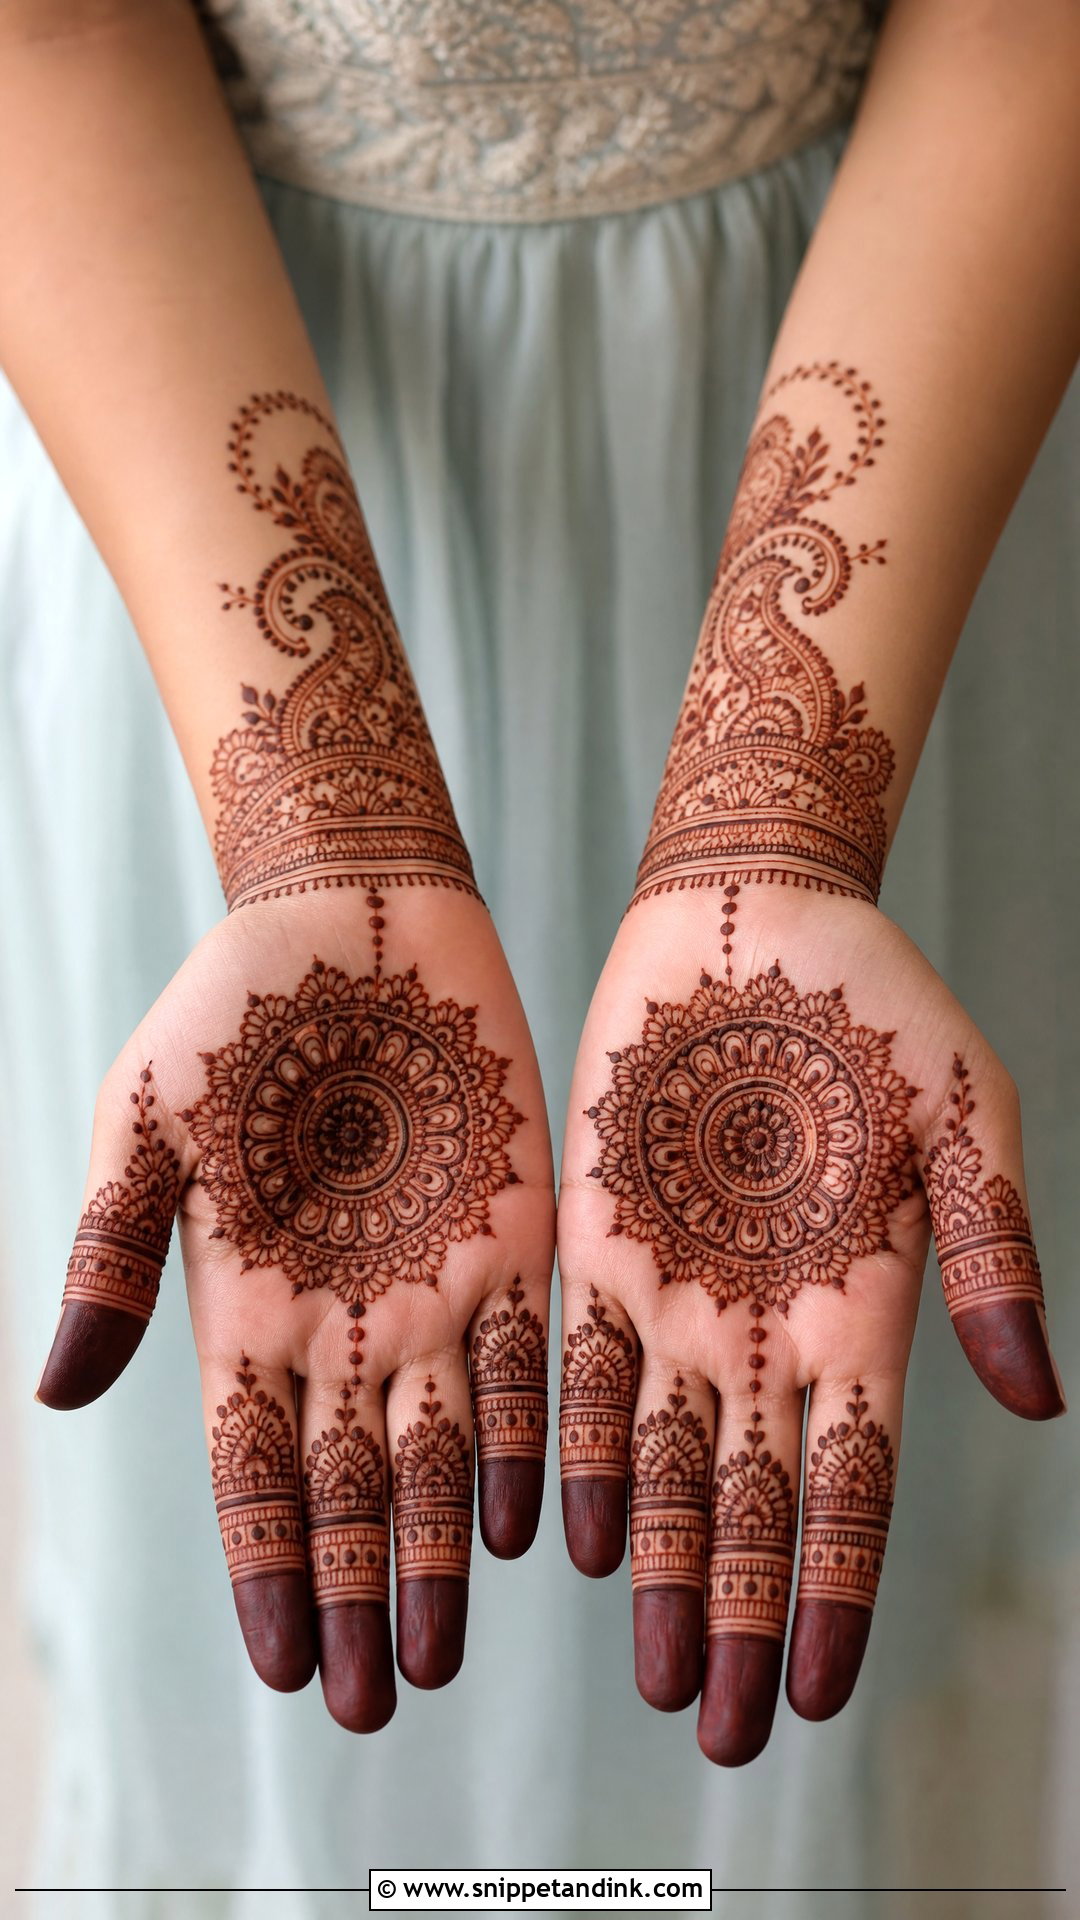
The test of a front-hand design is how it looks with the palm open and relaxed, not stretched flat. I ask people to rest their hand naturally before I plan, because the creases and the curve of the palm change where motifs sit. A balanced layout has one focal area, a mandala, a floral or a paisley panel, with smaller patterns around it, decorated fingers and a wrist border. Making every area equally busy is the most common mistake I see in reference photos.
7. Back Hand Mehndi Design
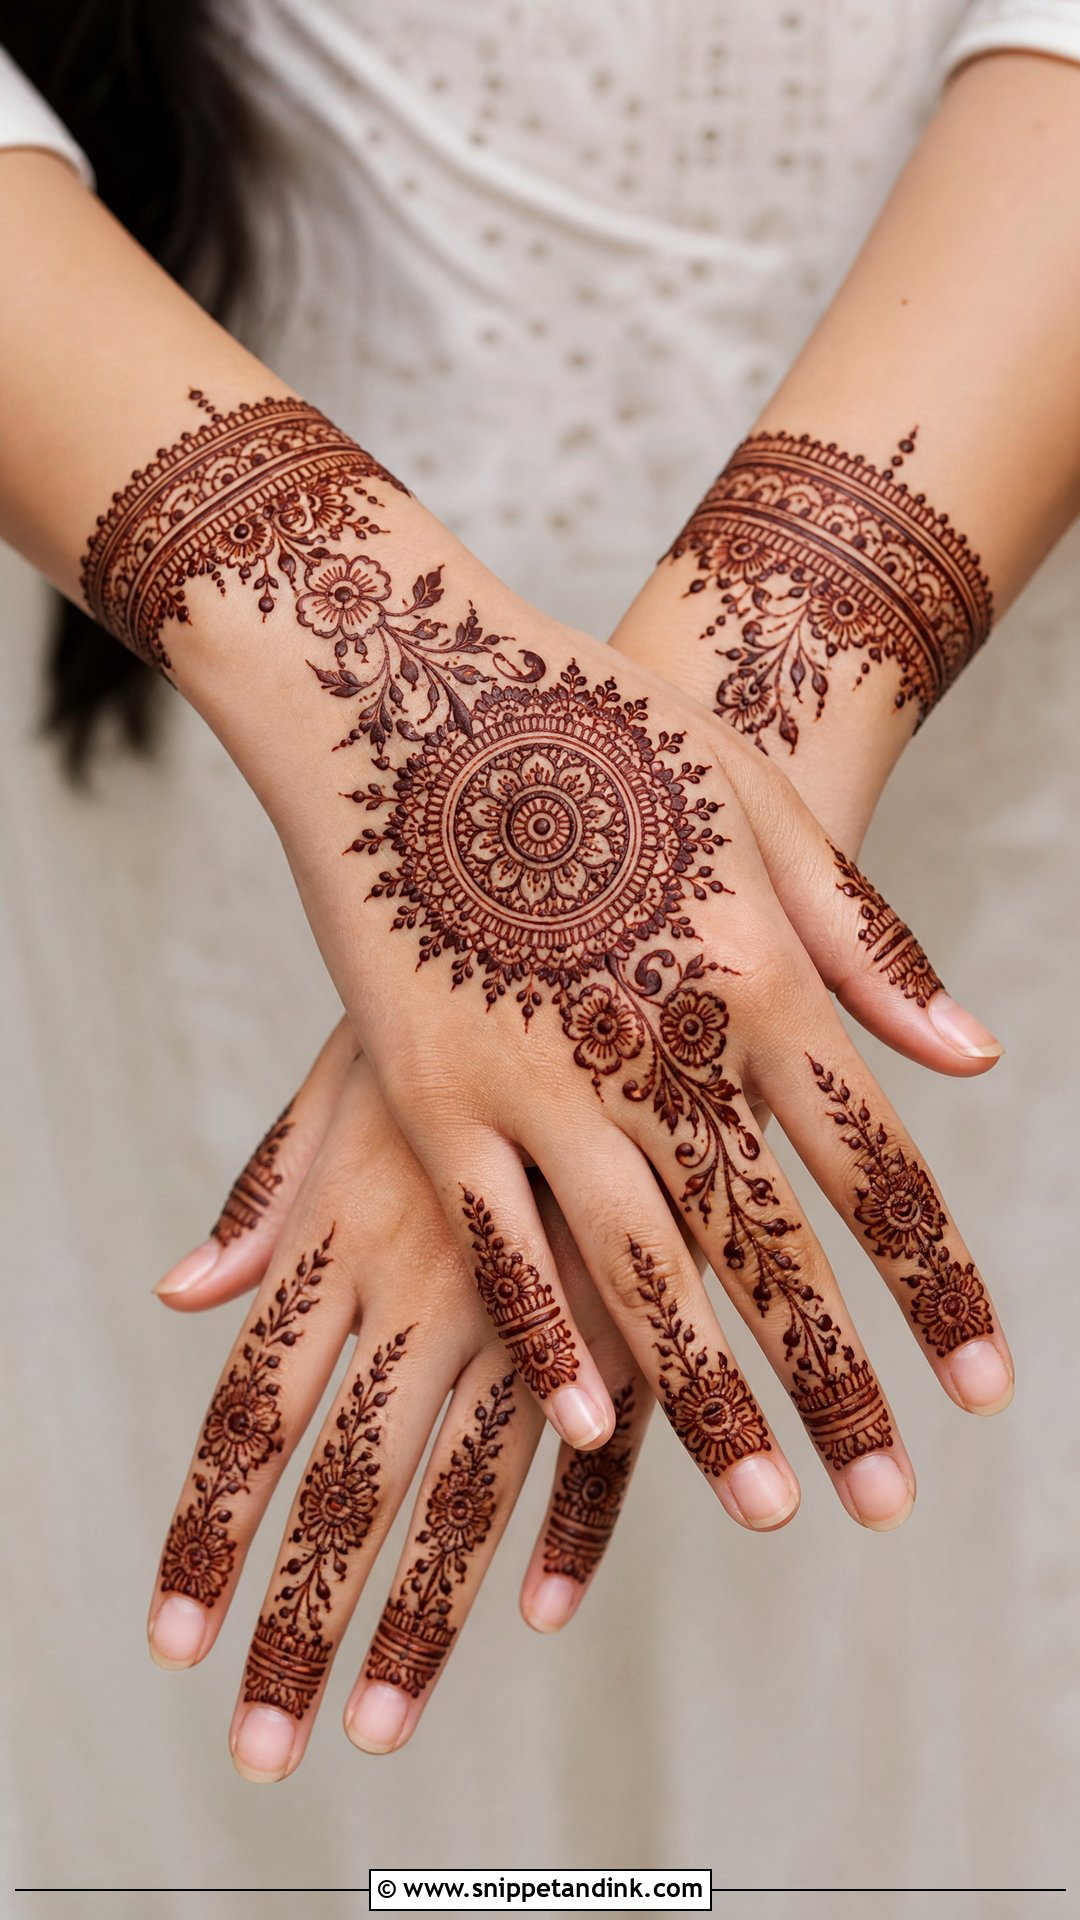
Back hand mehndi design shows in every gesture and every jewelry photo. A large center mandala, finger coverage and a bracelet at the wrist is the popular layout; diagonal florals or Arabic vines make it more modern. It’s a good choice for ring ceremonies, Eid, Karwa Chauth, Diwali and bridesmaids. Filled fingertips make it look finished. Open fingertips feel softer, but on the back of the hand they can make the whole design look faint.
8. Bridal Mehndi Design With Portrait
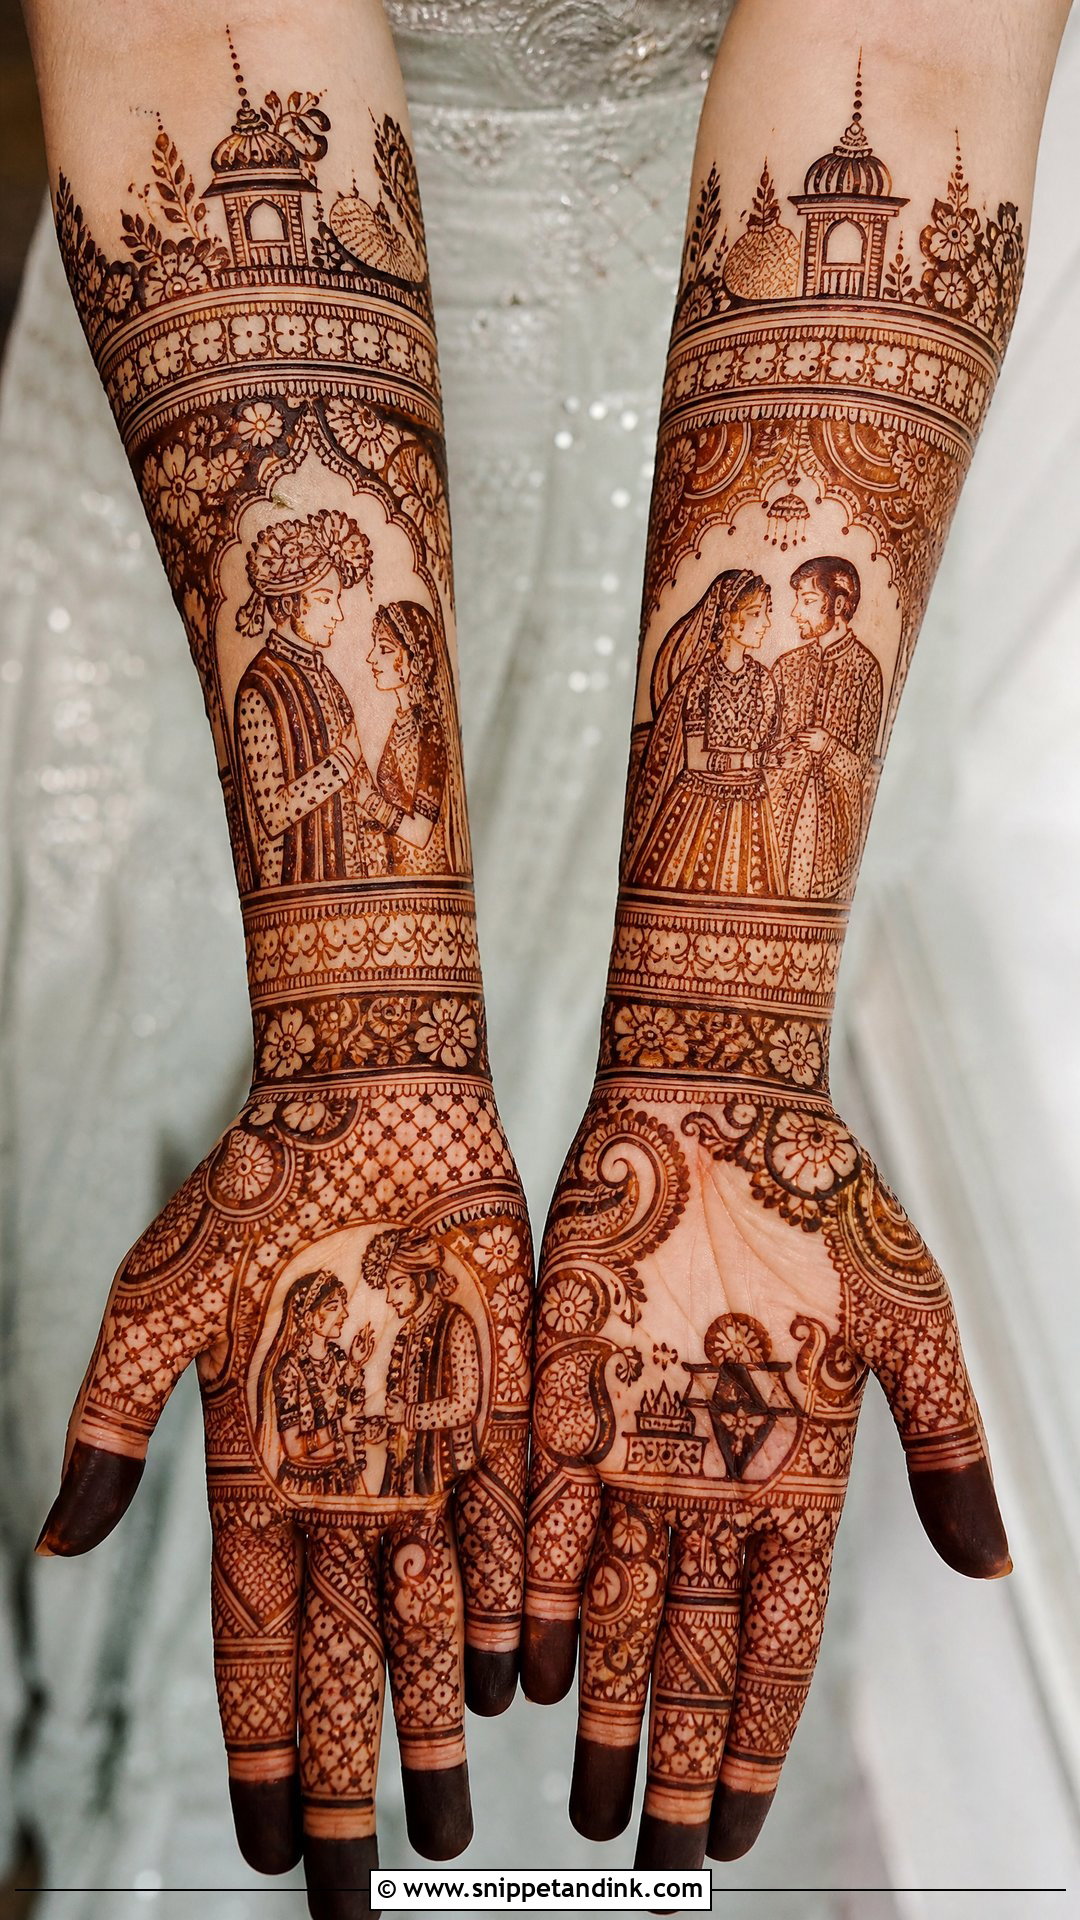
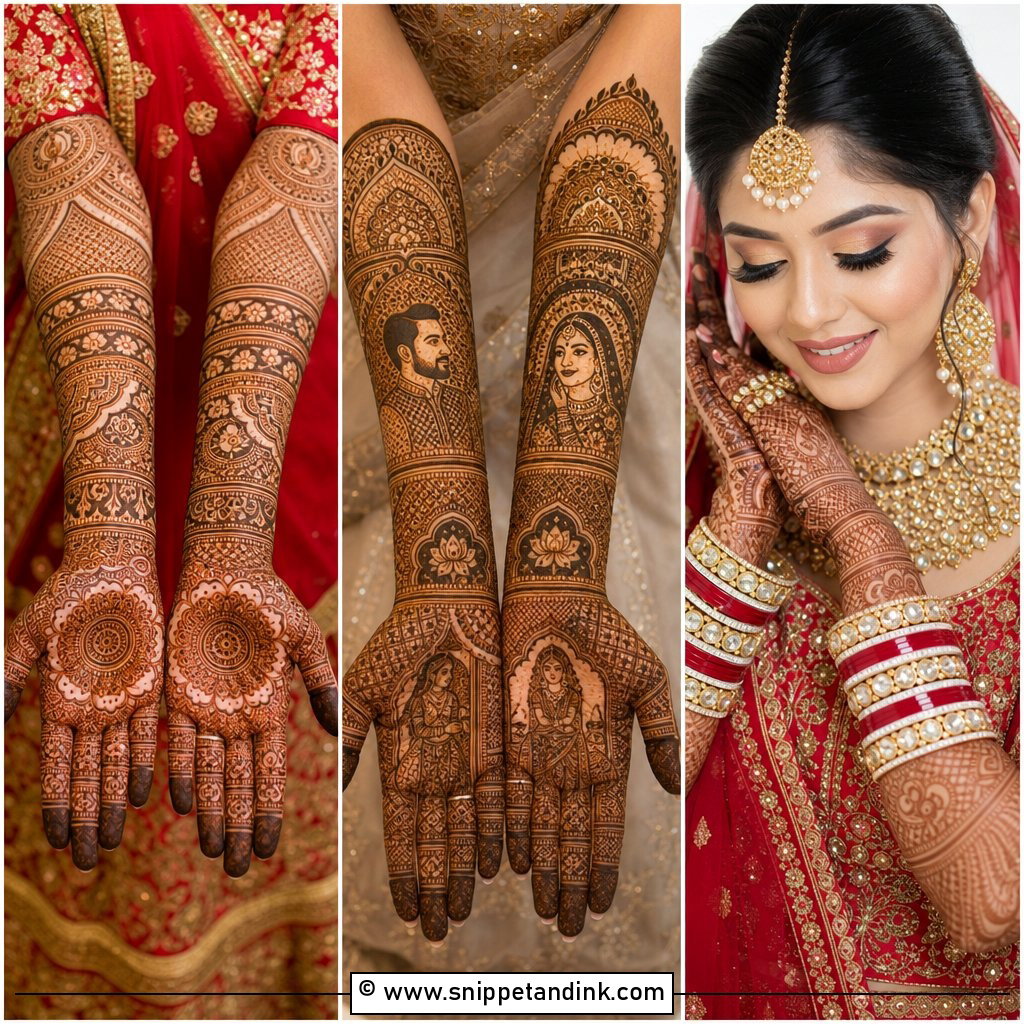
Portrait mehndi puts the bride and groom’s faces, a varmala moment or a small wedding scene onto the palms or forearms, the only places with enough flat space for that kind of detail. The rest of the hand is filled with paisleys, florals, mesh and borders. Faces are unforgiving. A single misplaced line on an eye or mouth changes the expression, so look at an artist’s previous portrait work before you book one. Hold the hands side by side for photos and the two halves of the scene come together.
9. Minimal Mehndi Design
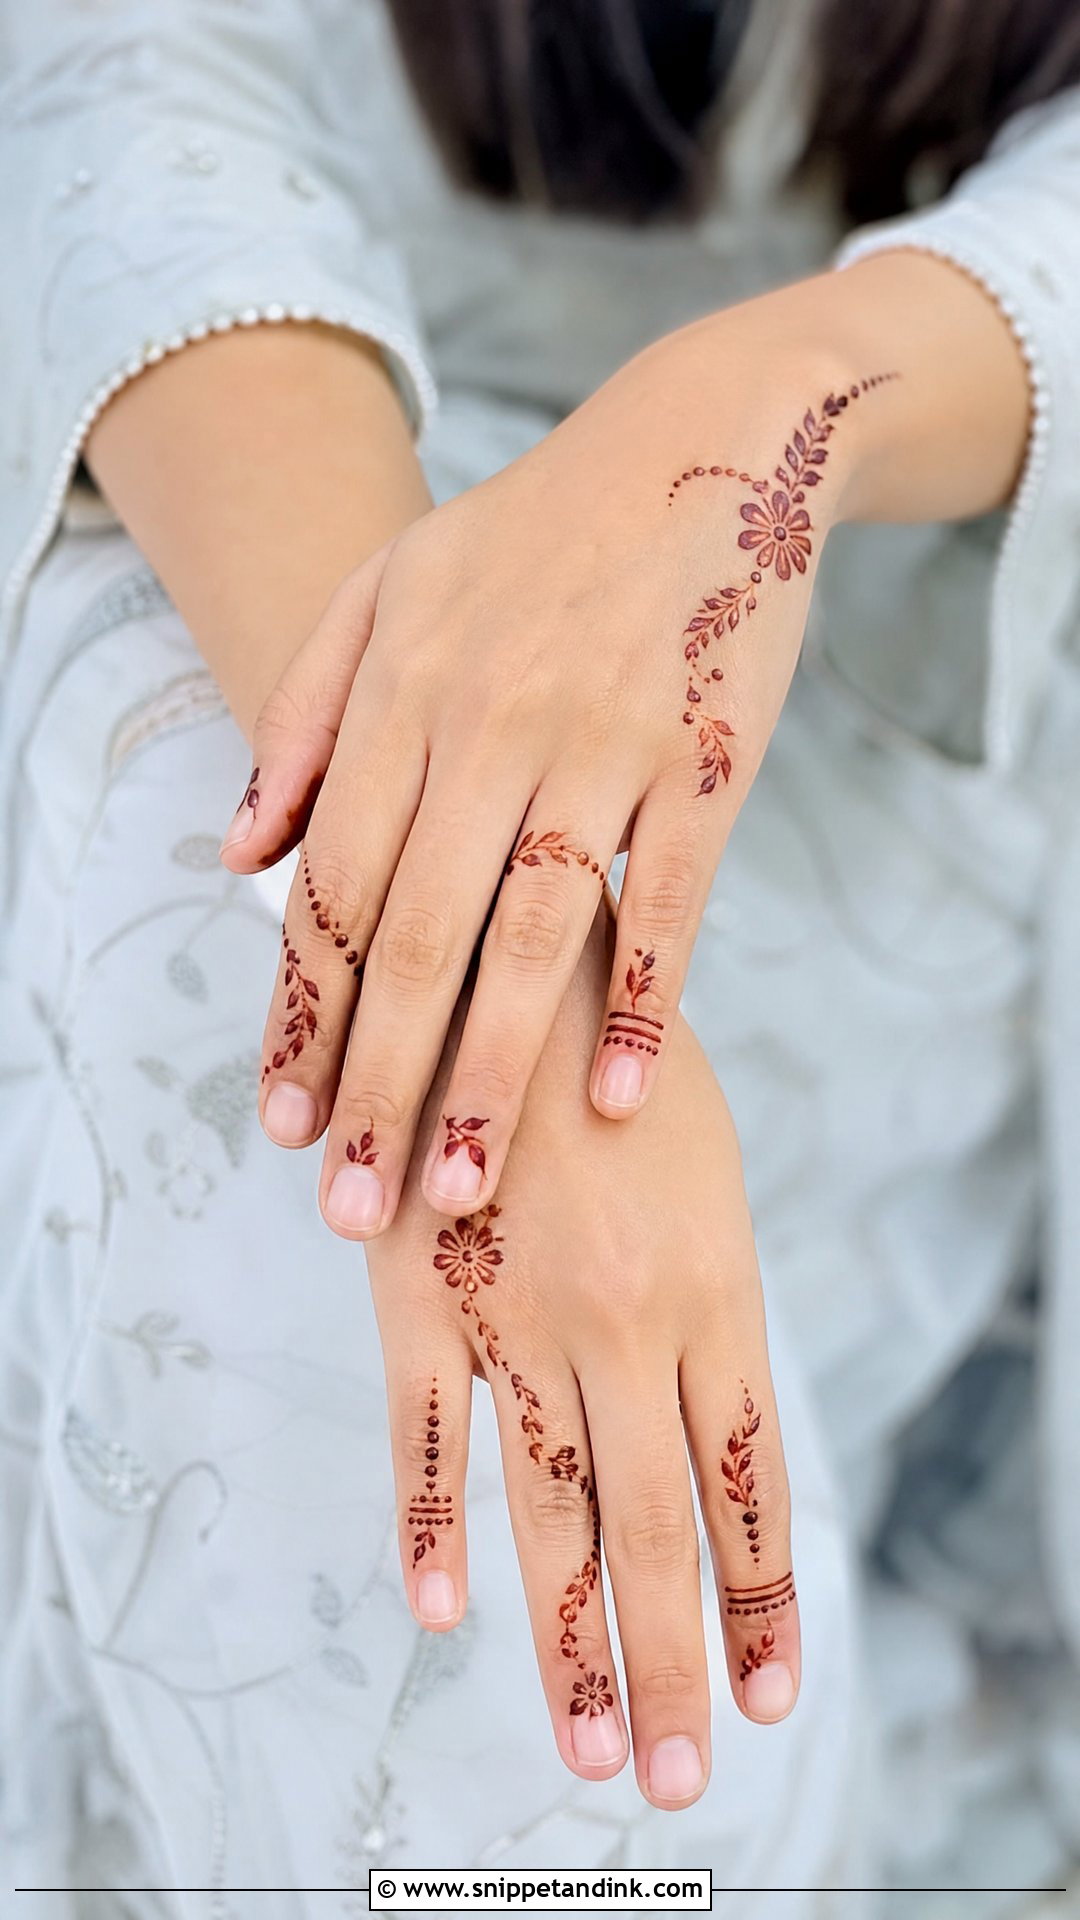
Minimal designs pick one or two areas, the fingers, the side of the palm or a small wrist trail, and leave the rest bare. Tiny florals, dots, leaves and fine lines are the vocabulary. It’s quick, it’s comfortable to wear and it suits engagement parties, travel and small festive gatherings. Fine lines fade first as the skin renews, so a minimal design won’t last as long as a dense one. Crisp lines and generous spacing are what make it read in photos.
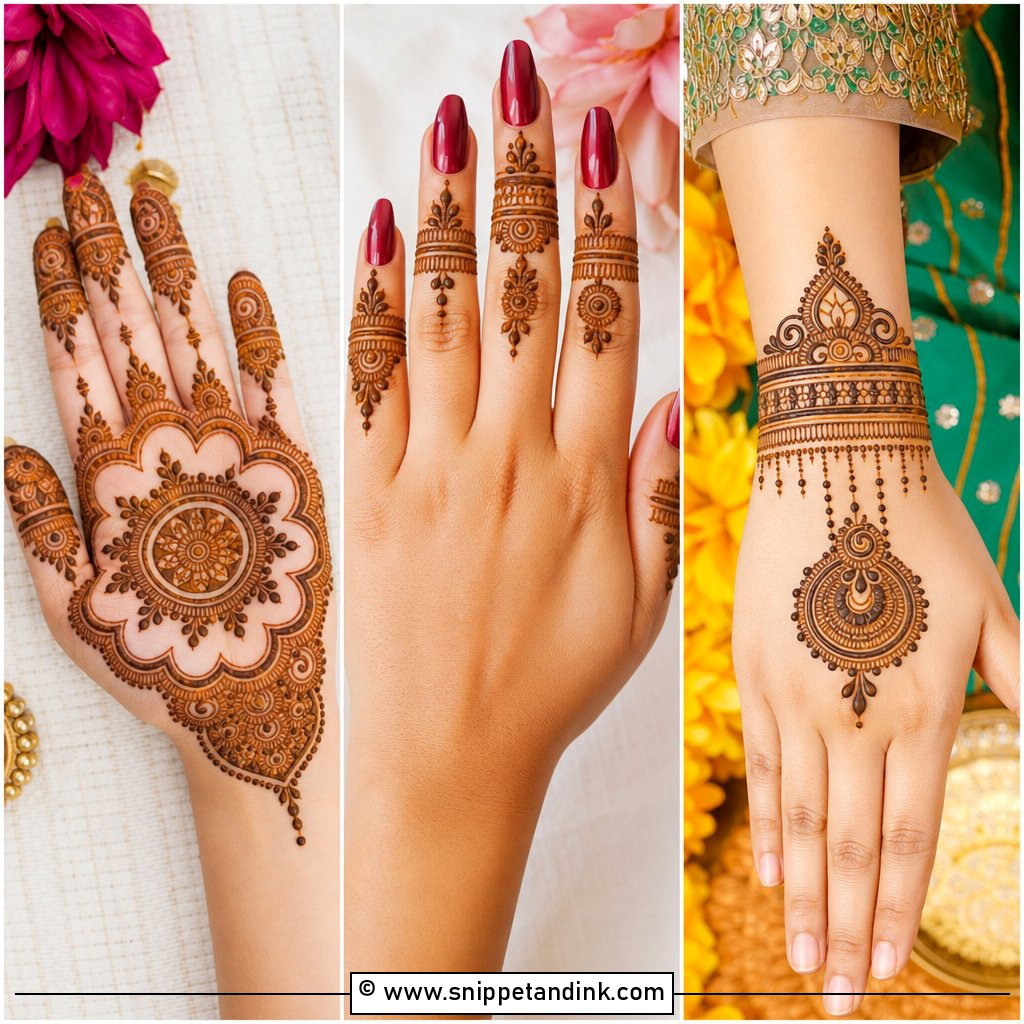
10. Mandala Mehndi Design
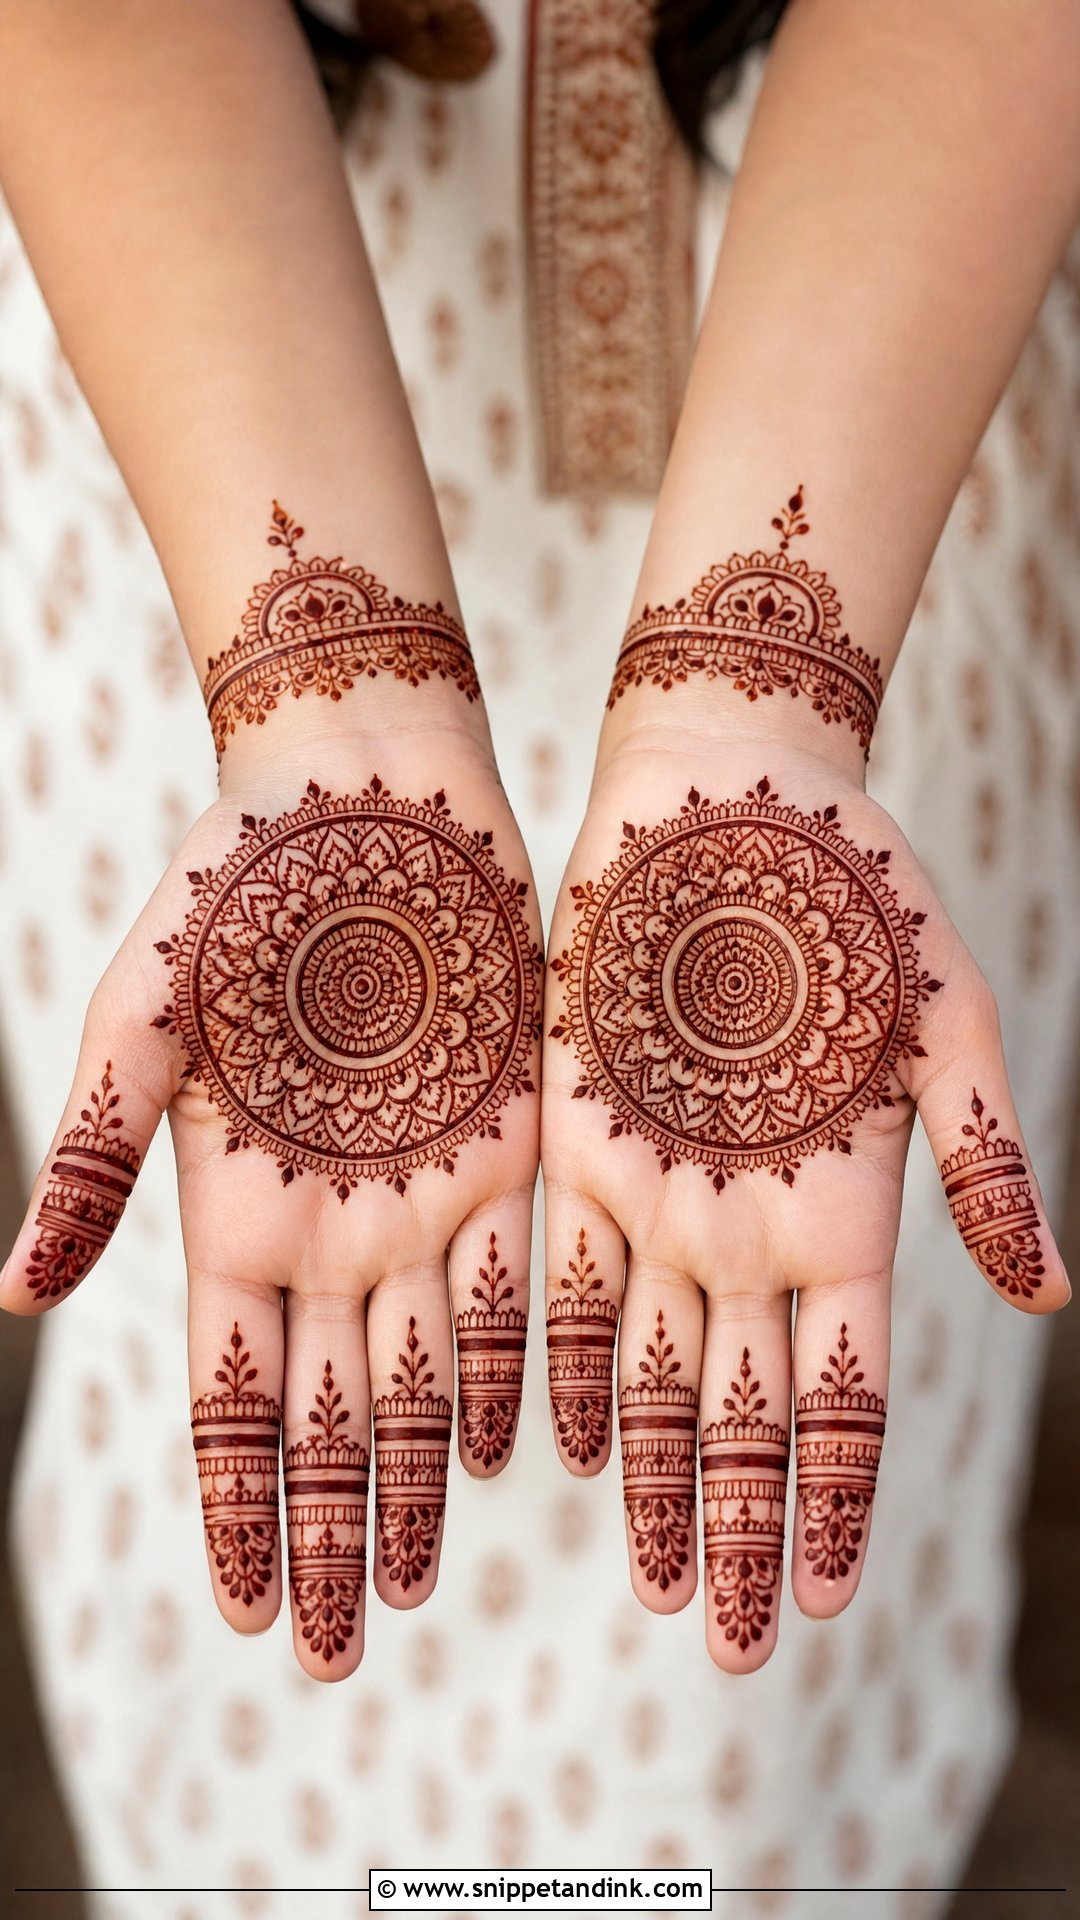
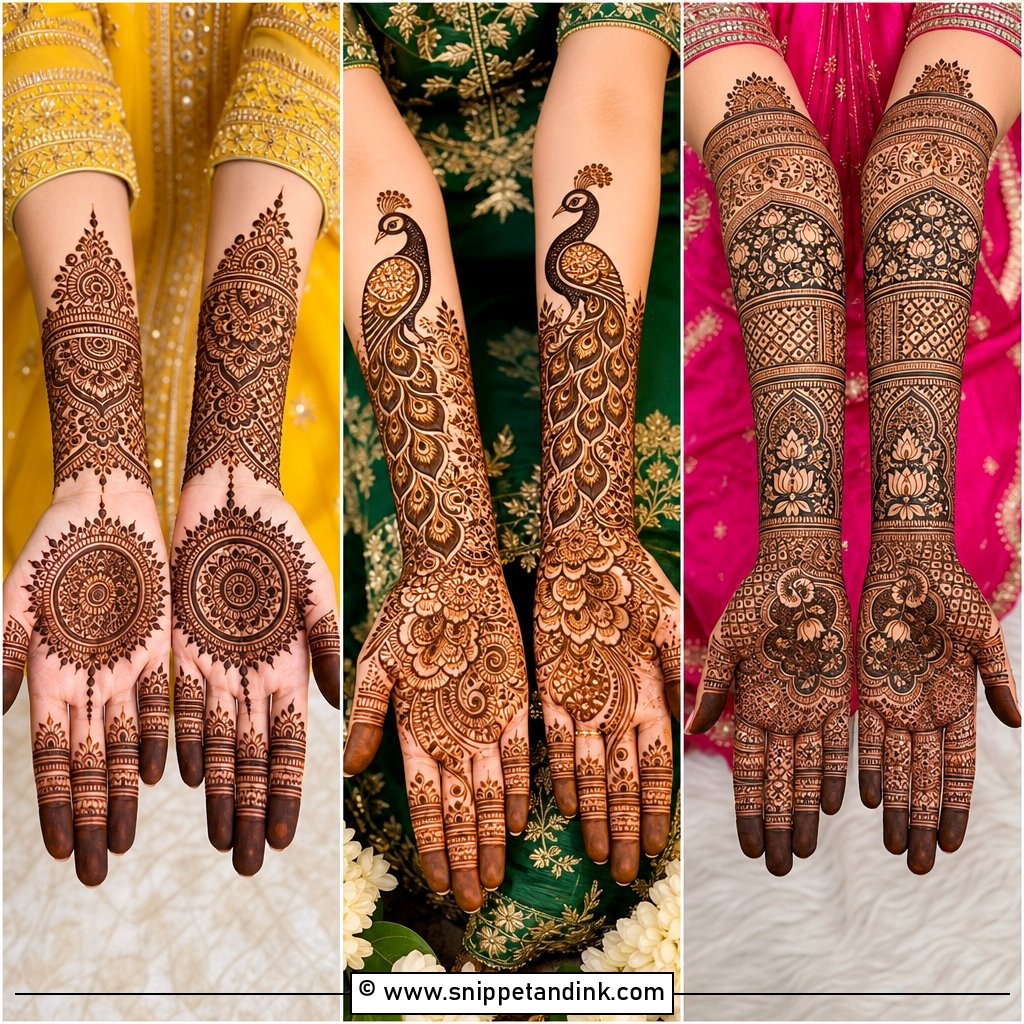
A mandala centers the hand: one circle in the middle of the palm or back hand, with matching patterns on the fingers. One bold mandala keeps it simple; surrounding dots, petals and wrist bands make it richer. It suits pujas, festive days and family weddings. Symmetry is everything here. I place a single dot at the center and build each ring outward from it, checking the spacing as I go.
11. Floral Mehndi Design
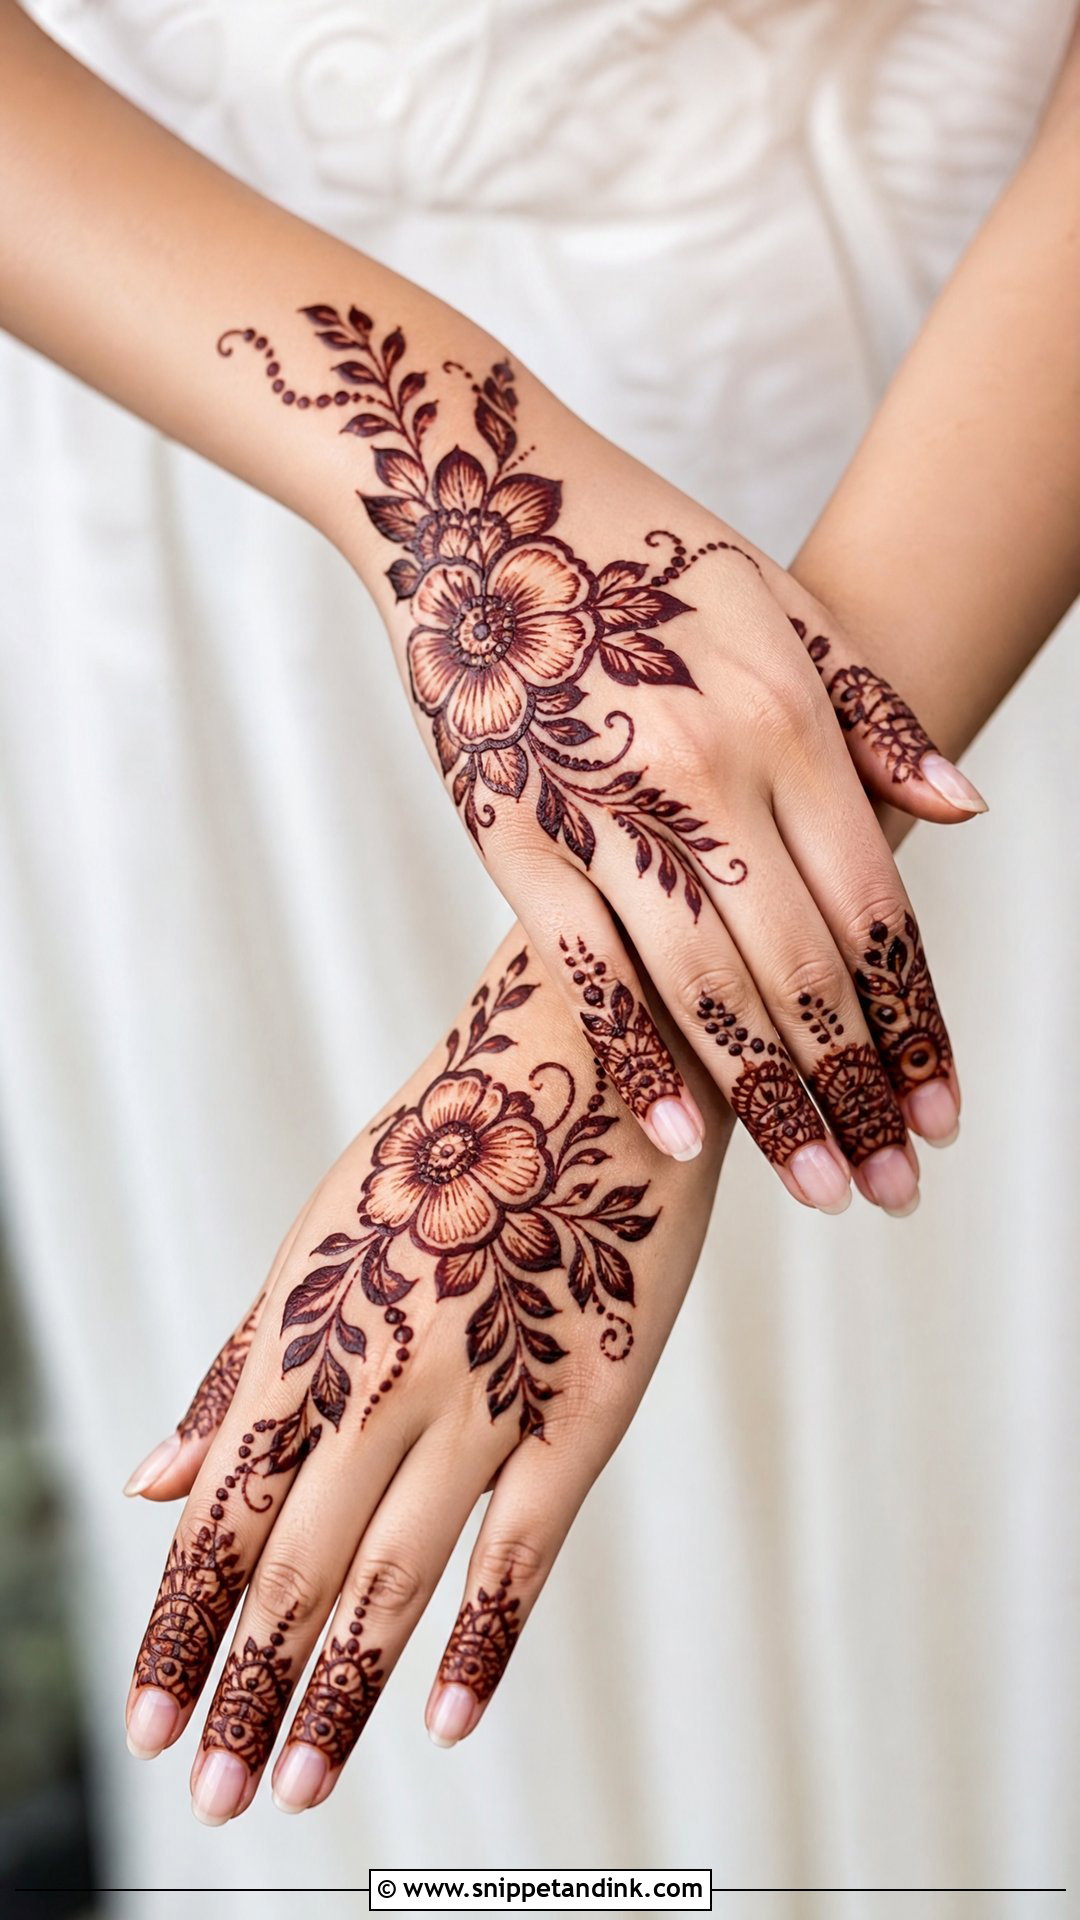
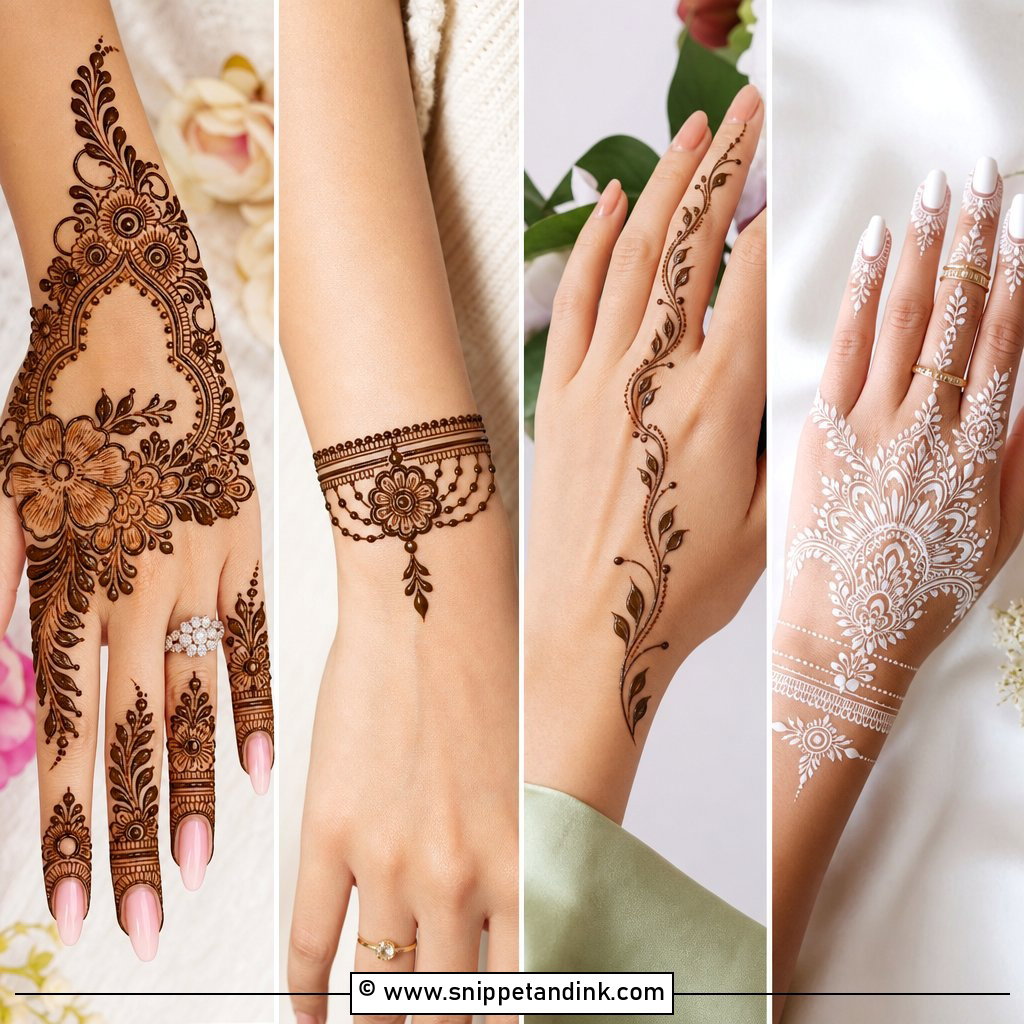
Flowers are easy to recognize even after the stain deepens, which is why floral designs hold up so well in photos. Large flowers and leaves keep it simple; layered petals with fine shading make it detailed. A floral trail usually flows from wrist to fingers or spreads across the palm. Vary the flower sizes and join them with curved vines. If every bloom is the same size, the design looks printed rather than drawn.
12. Rose Mehndi Design
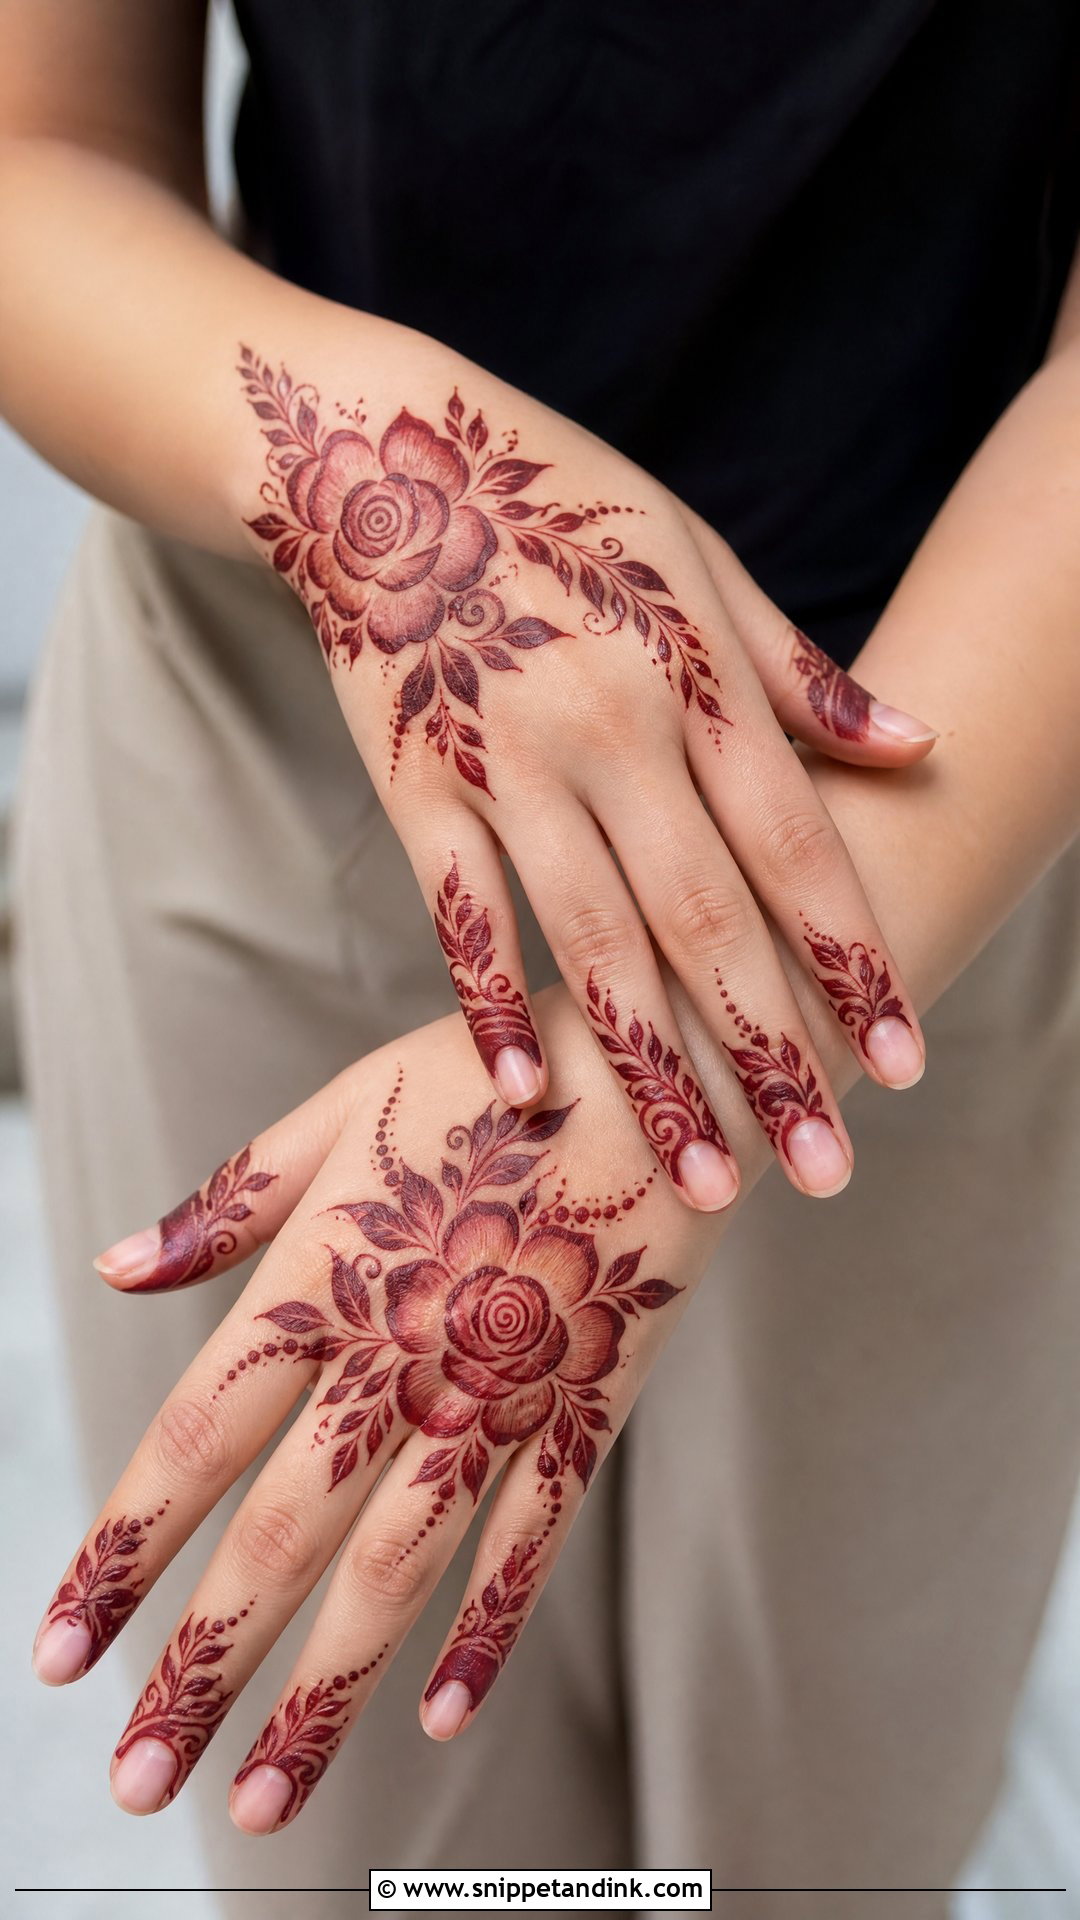
Roses can be bold blooms, shaded petals or part of an Arabic trail, and they stand out best on the back hand. I like one large rose near the wrist with leaves running toward the fingers; for fuller coverage, add smaller roses, mesh panels and paisleys. Ask for clean separation between the petals. Rose petals drawn too close together are the classic case of a design that looks crisp as paste and turns into a dark circle once it stains.
13. Peacock Mehndi Design
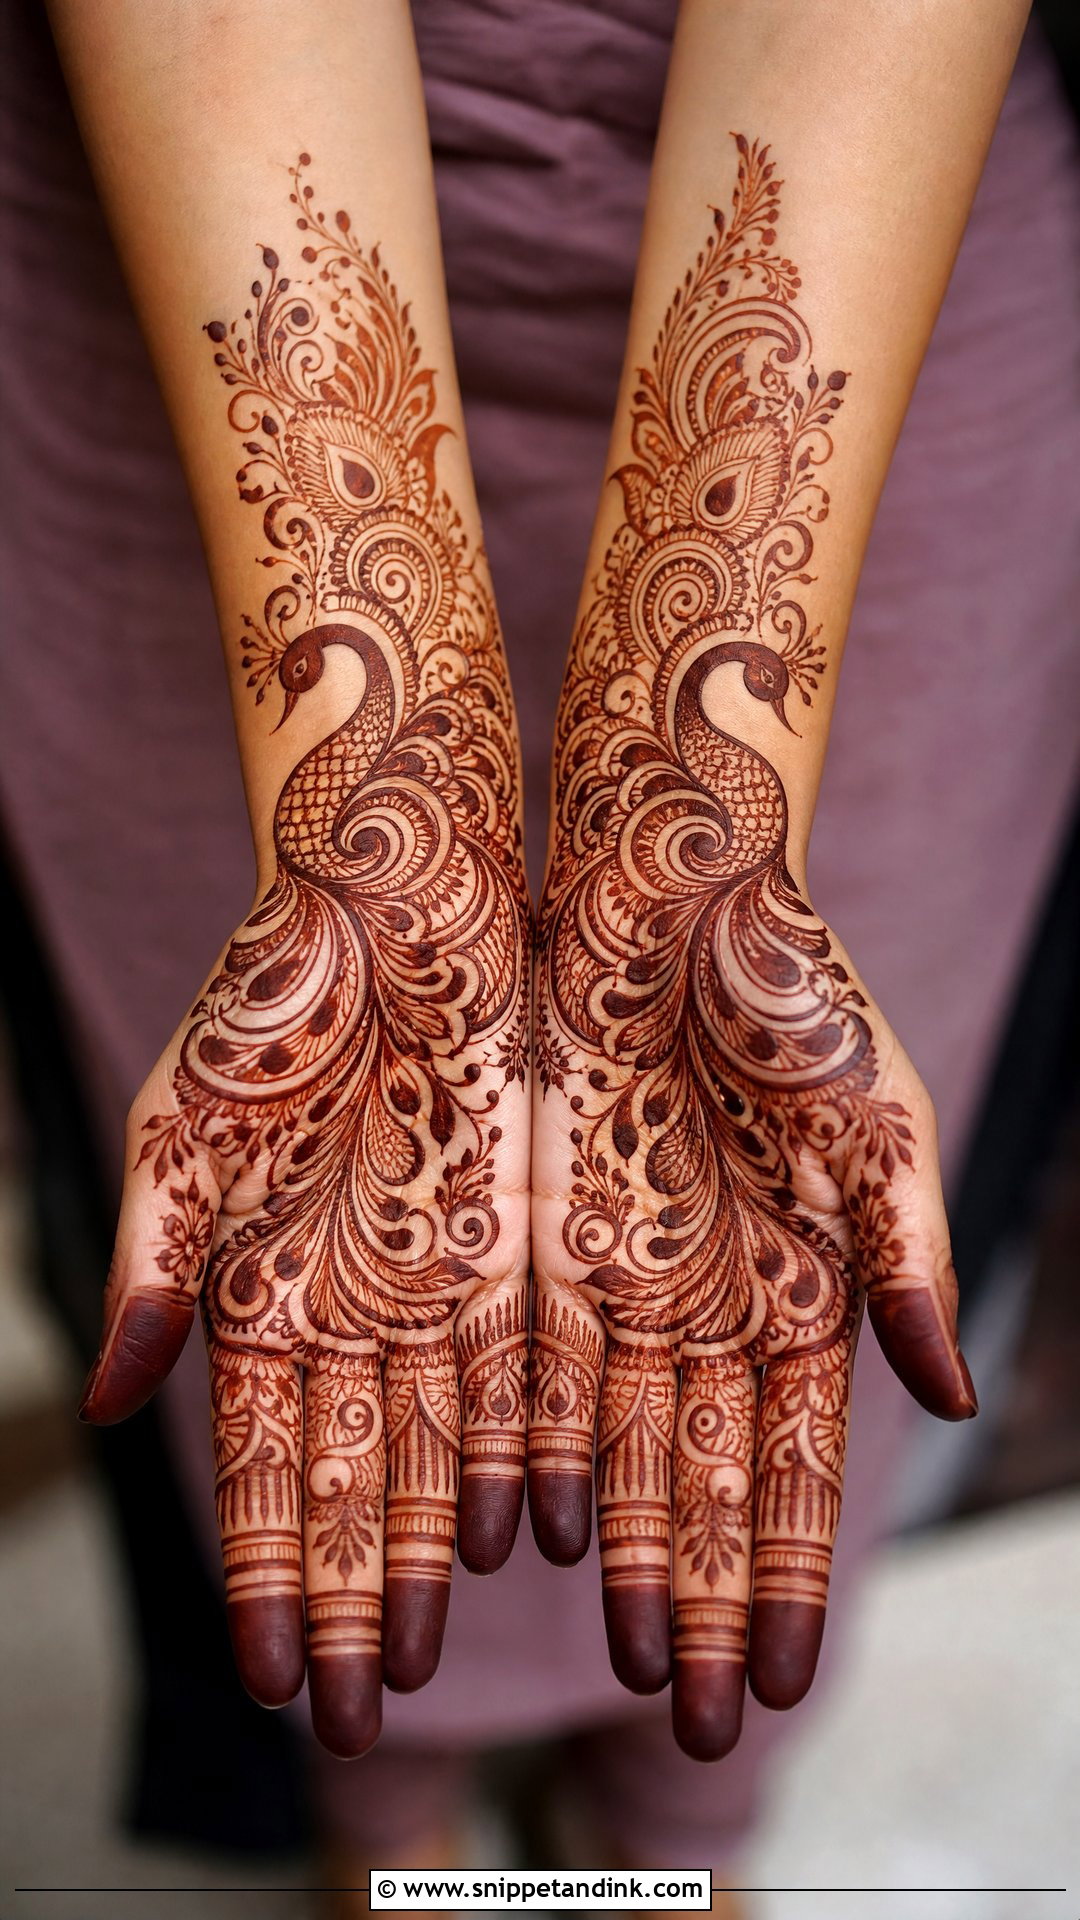
Peacocks sit on the palm, back hand or forearm surrounded by paisleys, flowers, feathers and vines, and they’re a staple of bridal work. The feathers give me room for movement and texture. My rule is a bold outline for the bird and fine detail only inside the feathers, which keeps it recognizable in photos taken from a few feet away. Pair it with filled fingers and an ornamental wrist band.
14. Paisley Mehndi Design
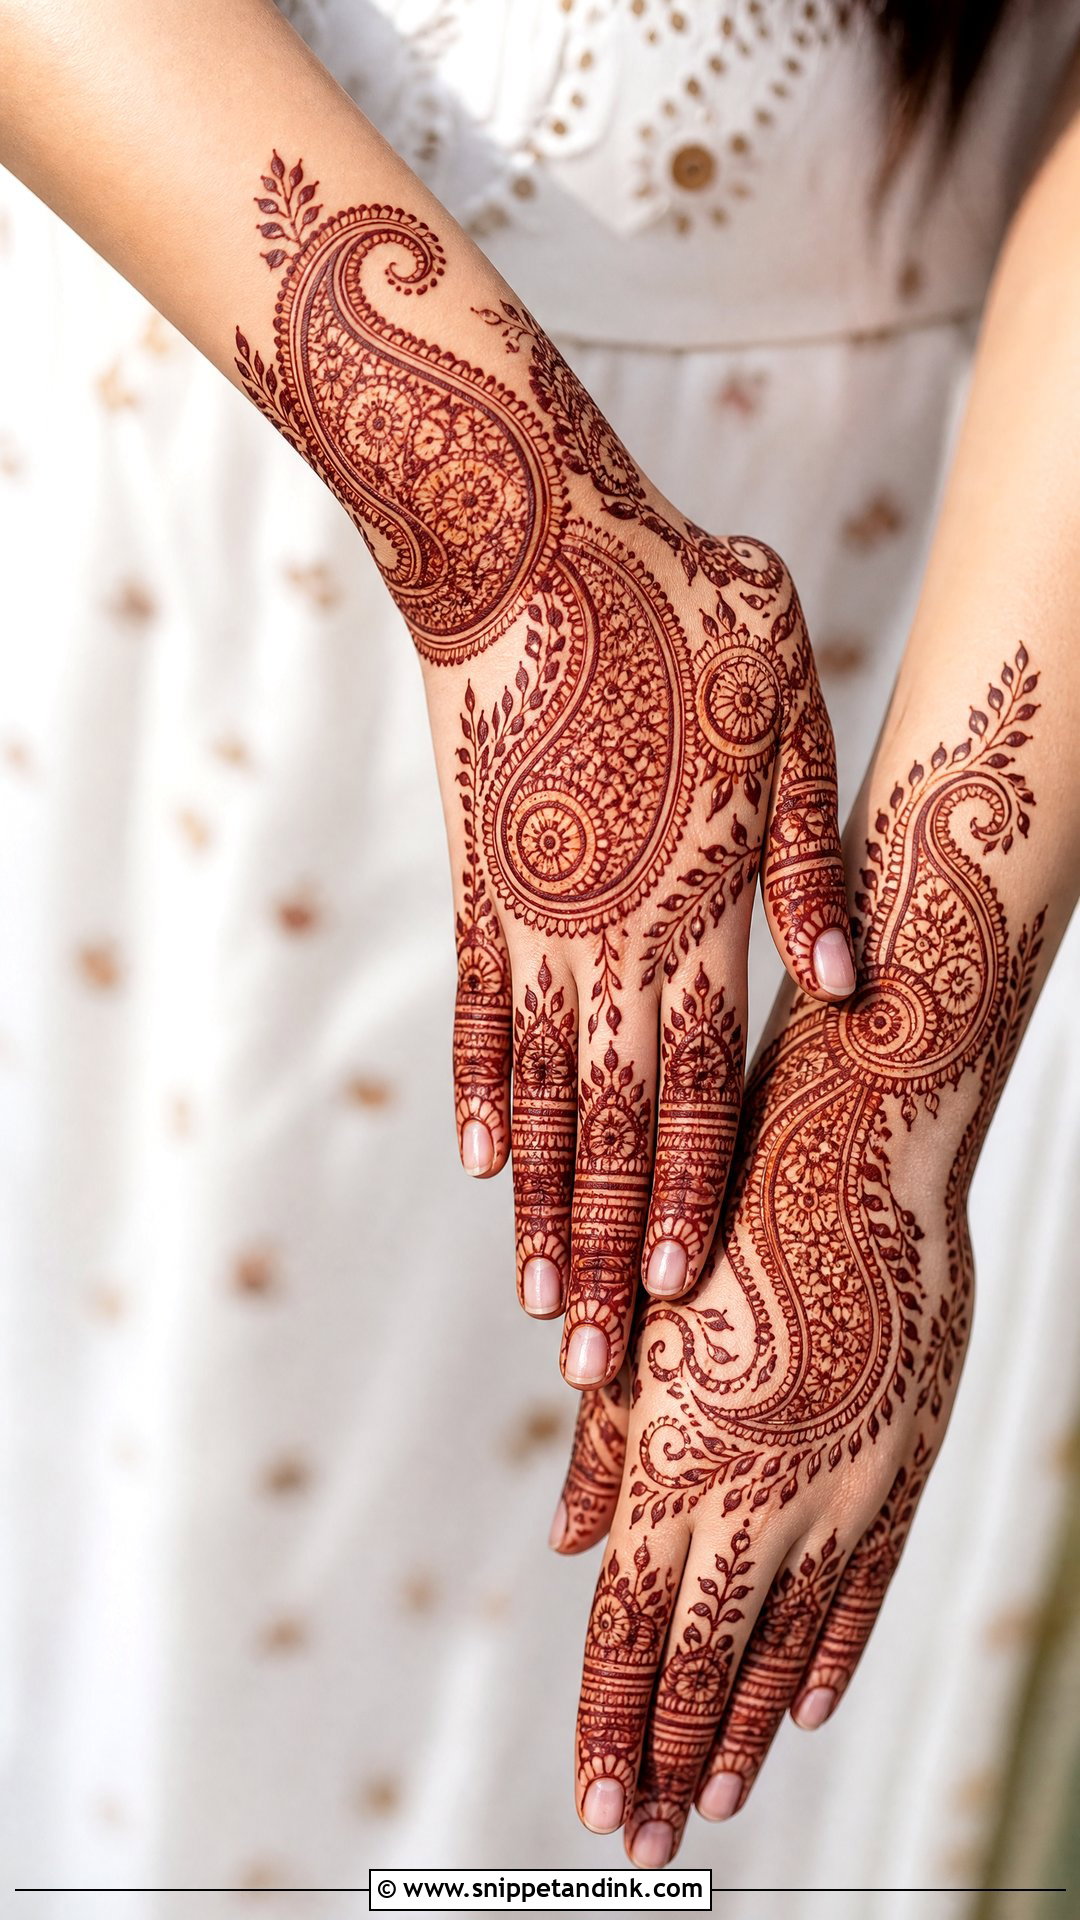
Paisleys are the middle ground for people who love traditional art but don’t want portraits or the densest bridal work. Small and large paisleys combine with flowers, dots, leaves and shaded spaces on the palm, fingers, wrist or forearm. Arranged diagonally, they feel Arabic; packed tight, they feel Indian. The curved shape follows the edge of the palm naturally, which is why it rarely looks awkward on any hand.
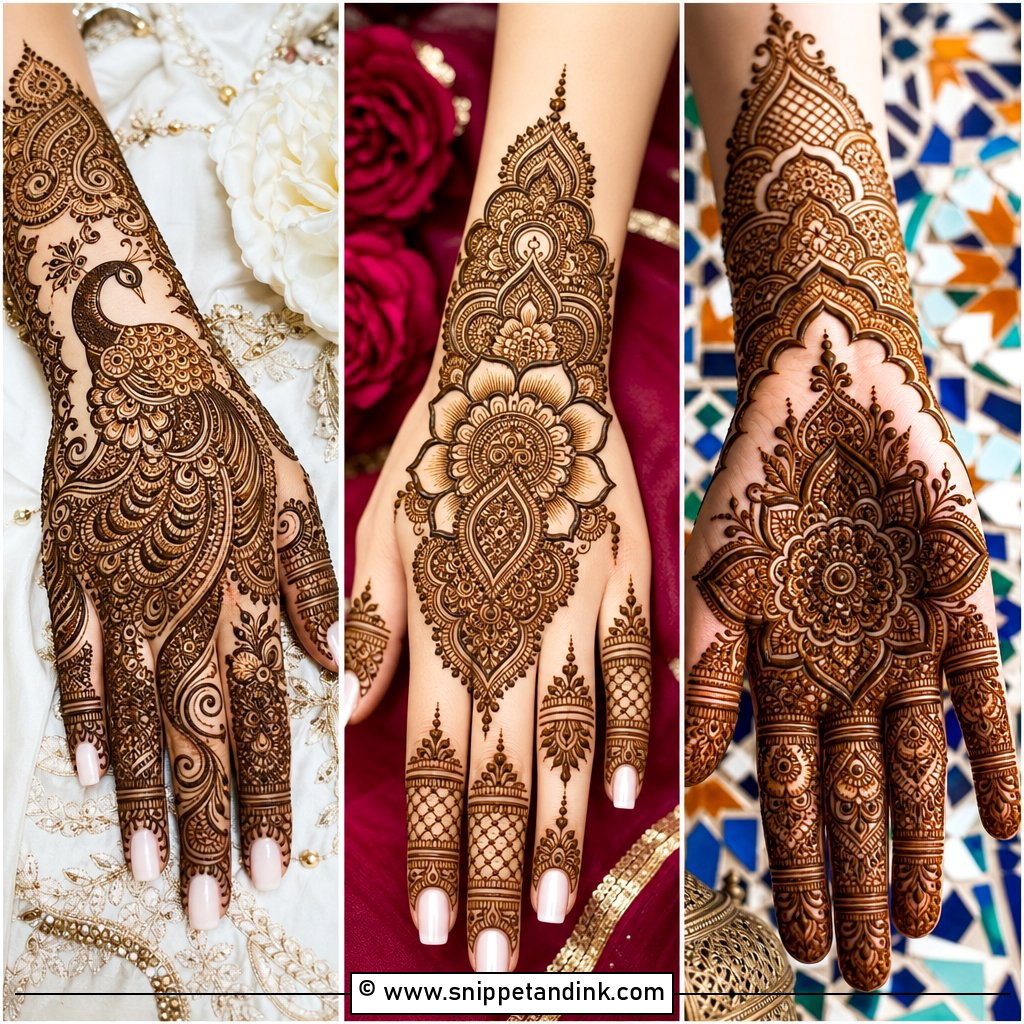
15. Jaali Mehndi Design
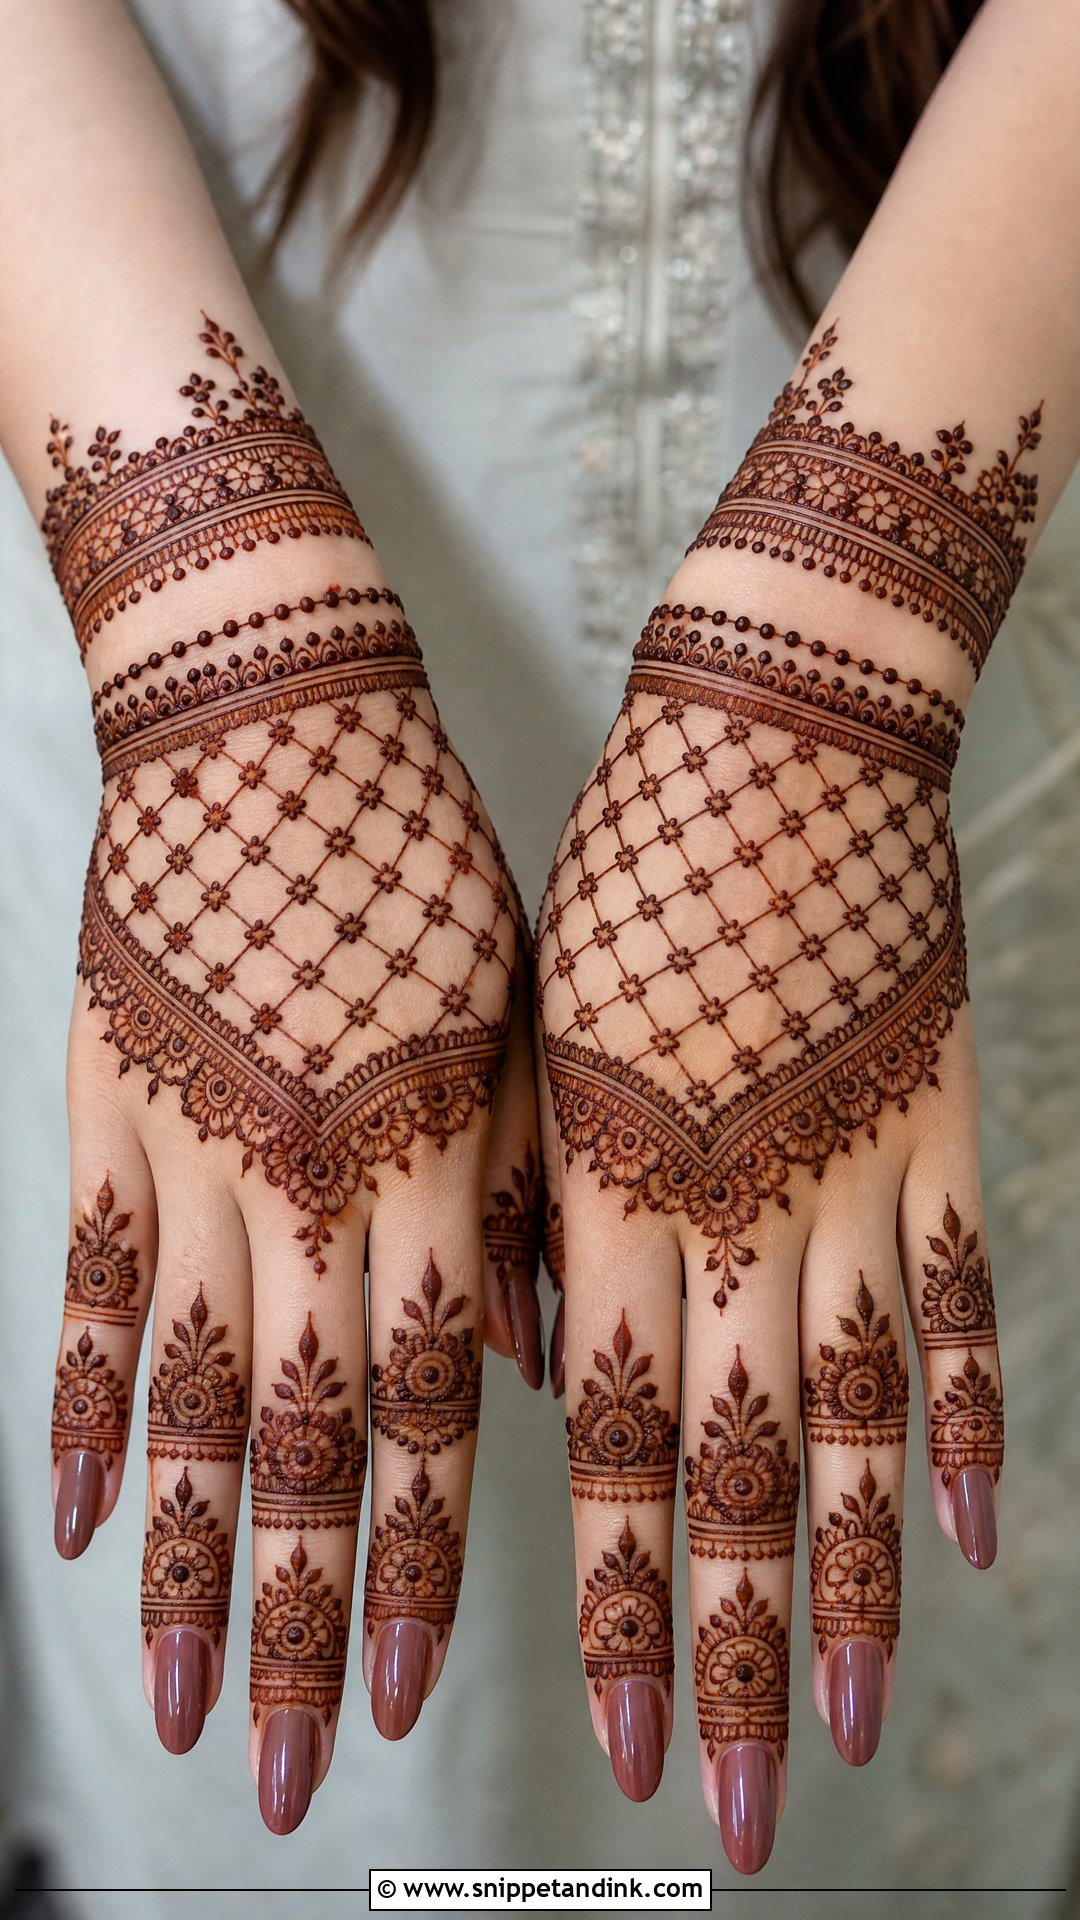
Jaali is a net of crossing lines that reads as lace, usually on the back hand, fingers and wrist, with floral borders, dots and bracelet bands. It photographs clearly only when the lines are even. I draw all lines one way first, then cross them, so the squares come out the same size. For modern work, use jaali in one section and balance it with flowers or paisleys; for bridal, extend the mesh across the hand and forearm.
16. Finger Mehndi Design
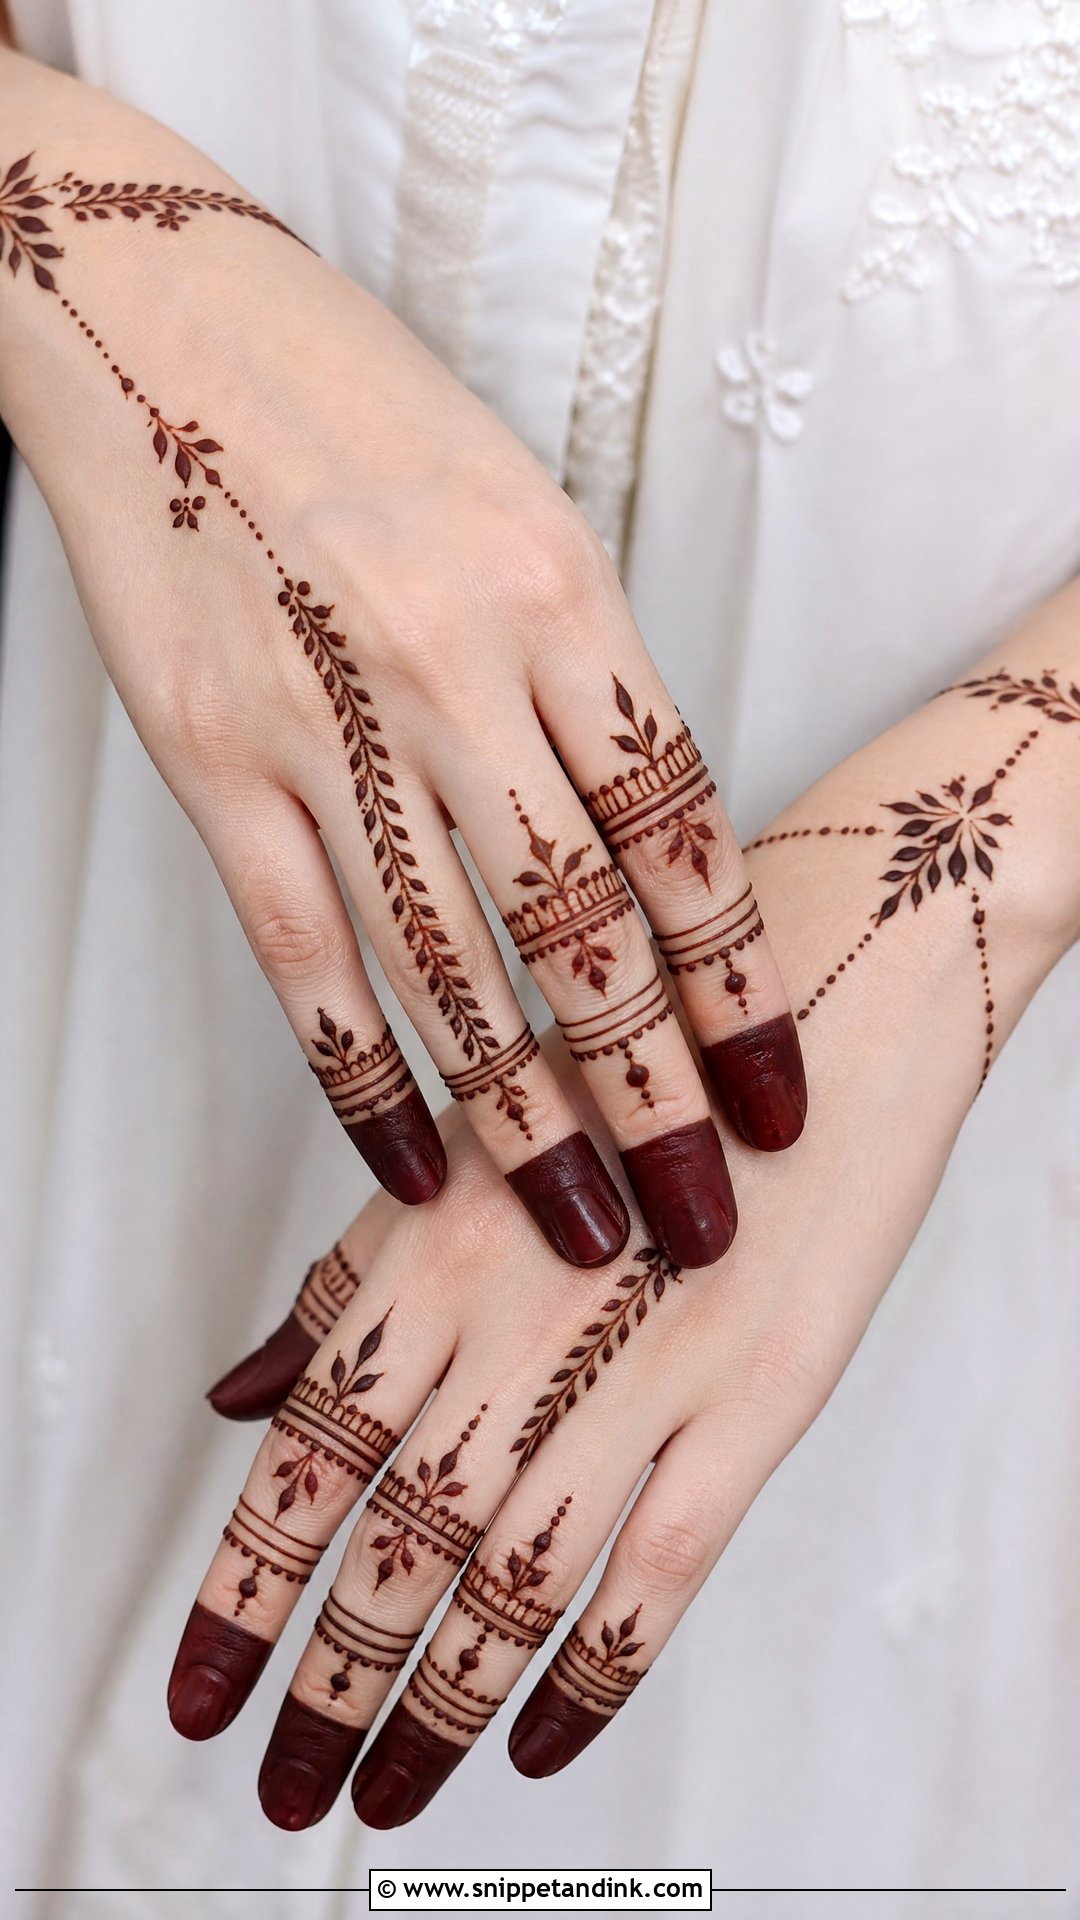
Finger designs put ring bands, leafy lines, dots, tiny flowers and filled tips on the fingers and keep the palm and back hand light. Matching all ten fingers looks neat; giving each finger its own pattern looks playful. If you wear rings, tell your artist which fingers and where, so the bands frame the jewelry instead of disappearing beneath it. Fingers stain well, so even a small design shows good color.
17. Bracelet Mehndi Design
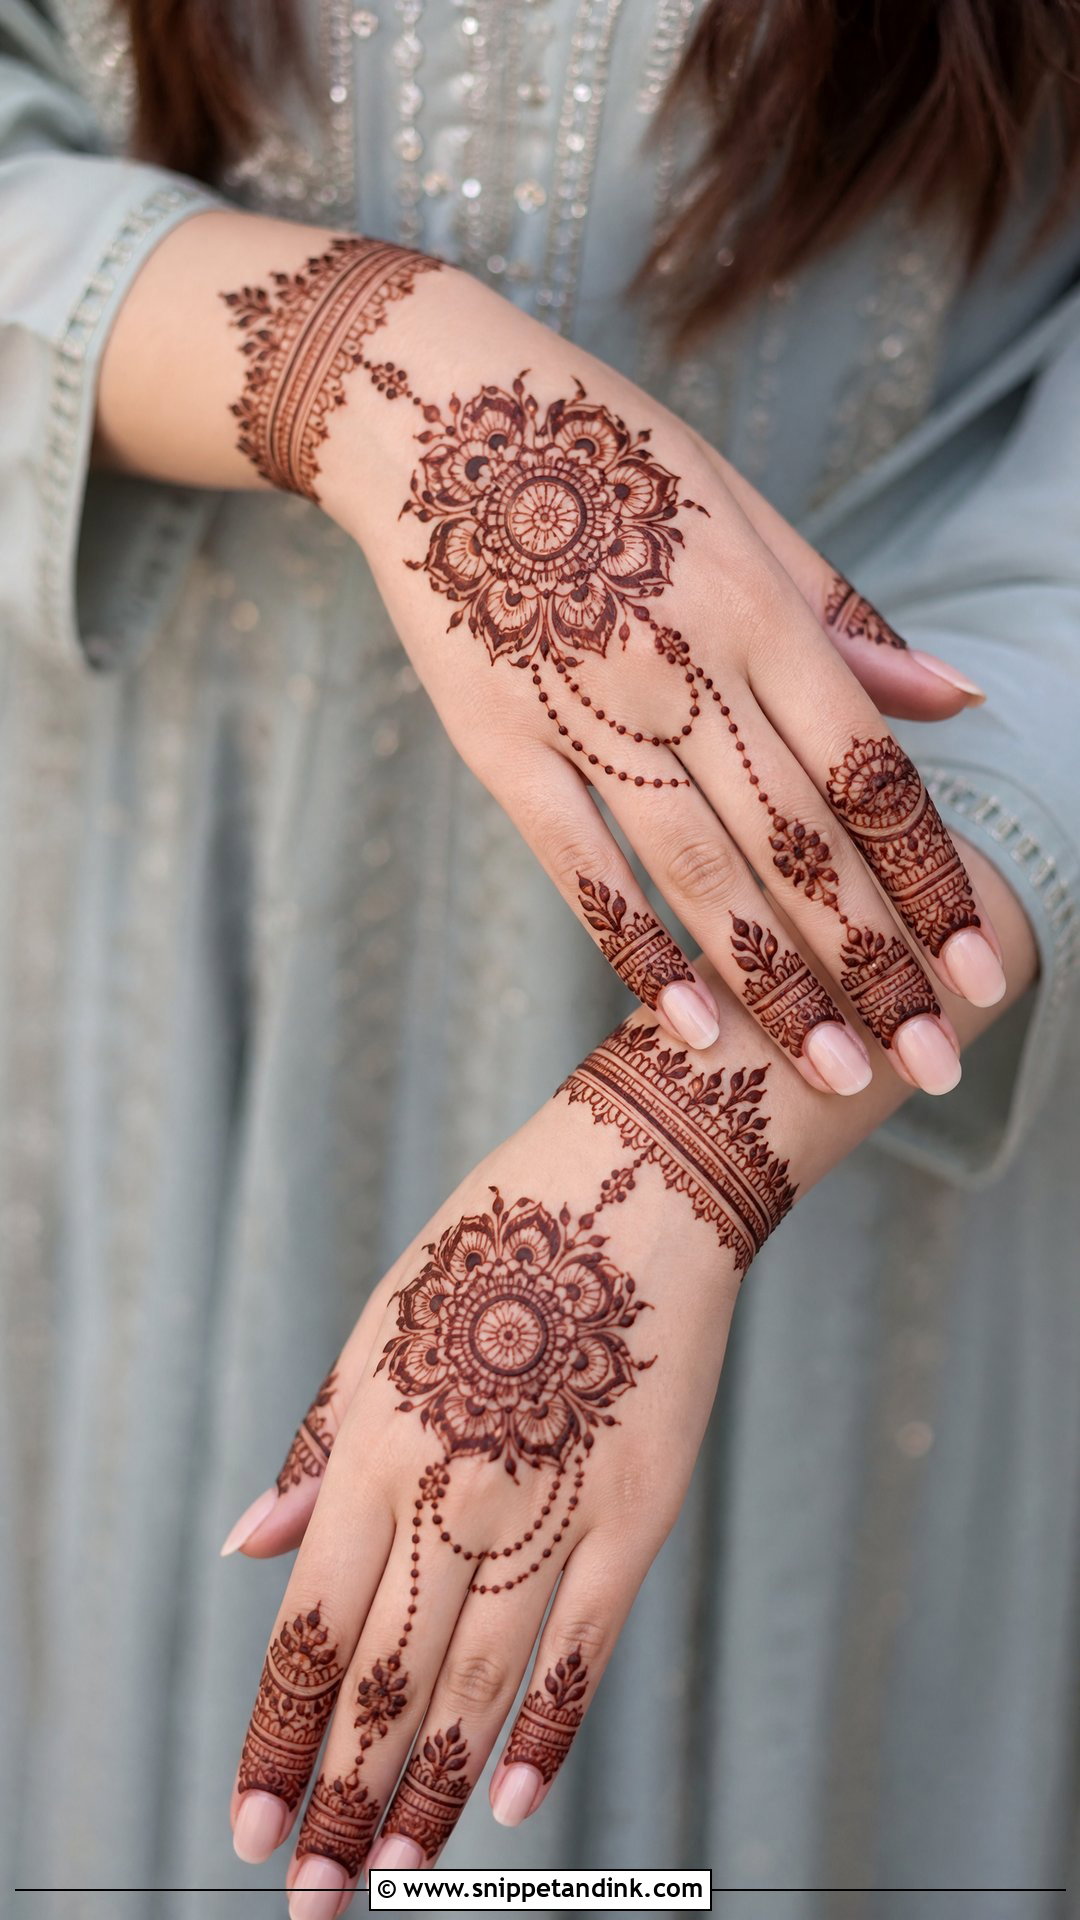
Bracelet mehndi design wraps the wrist and links to the fingers with chains, vines or small motifs, like a hand harness drawn in henna. Thin bands keep it simple; flowers, jaali and hanging dots make it richer. I set the wrist band slightly lower than people expect, below the wrist bone, so real bangles don’t cover it. It suits engagement photos, bridesmaids and Eid.
18. Modern Mehndi Design
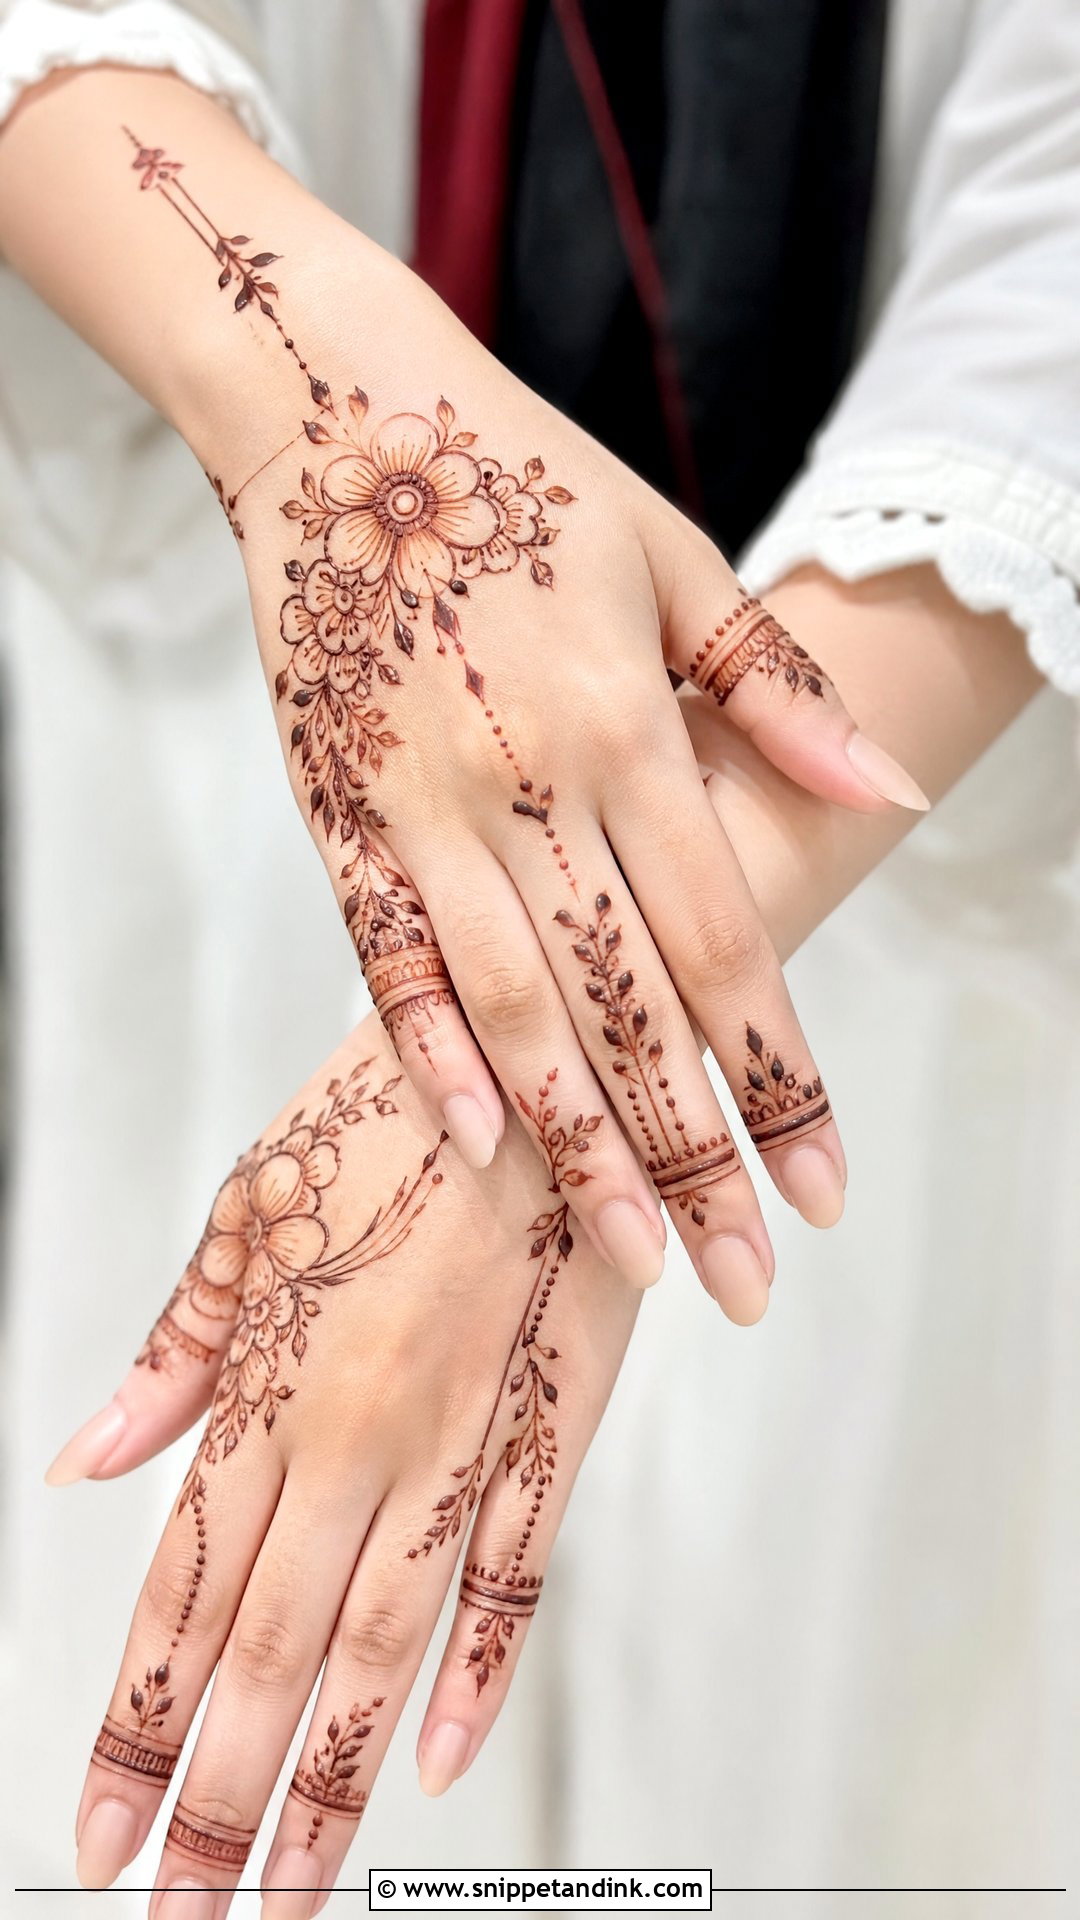
Modern designs break away from traditional layouts: asymmetrical trails, geometric lines, negative space, finger accents and fine florals, usually covering the back hand lightly and running toward the wrist. The empty space is part of the design, which means it can’t be fixed by adding filler later. I plan the main flow with a few guide dots first. It works well for parties, engagement events and college functions.
19. Moroccan Mehndi Design
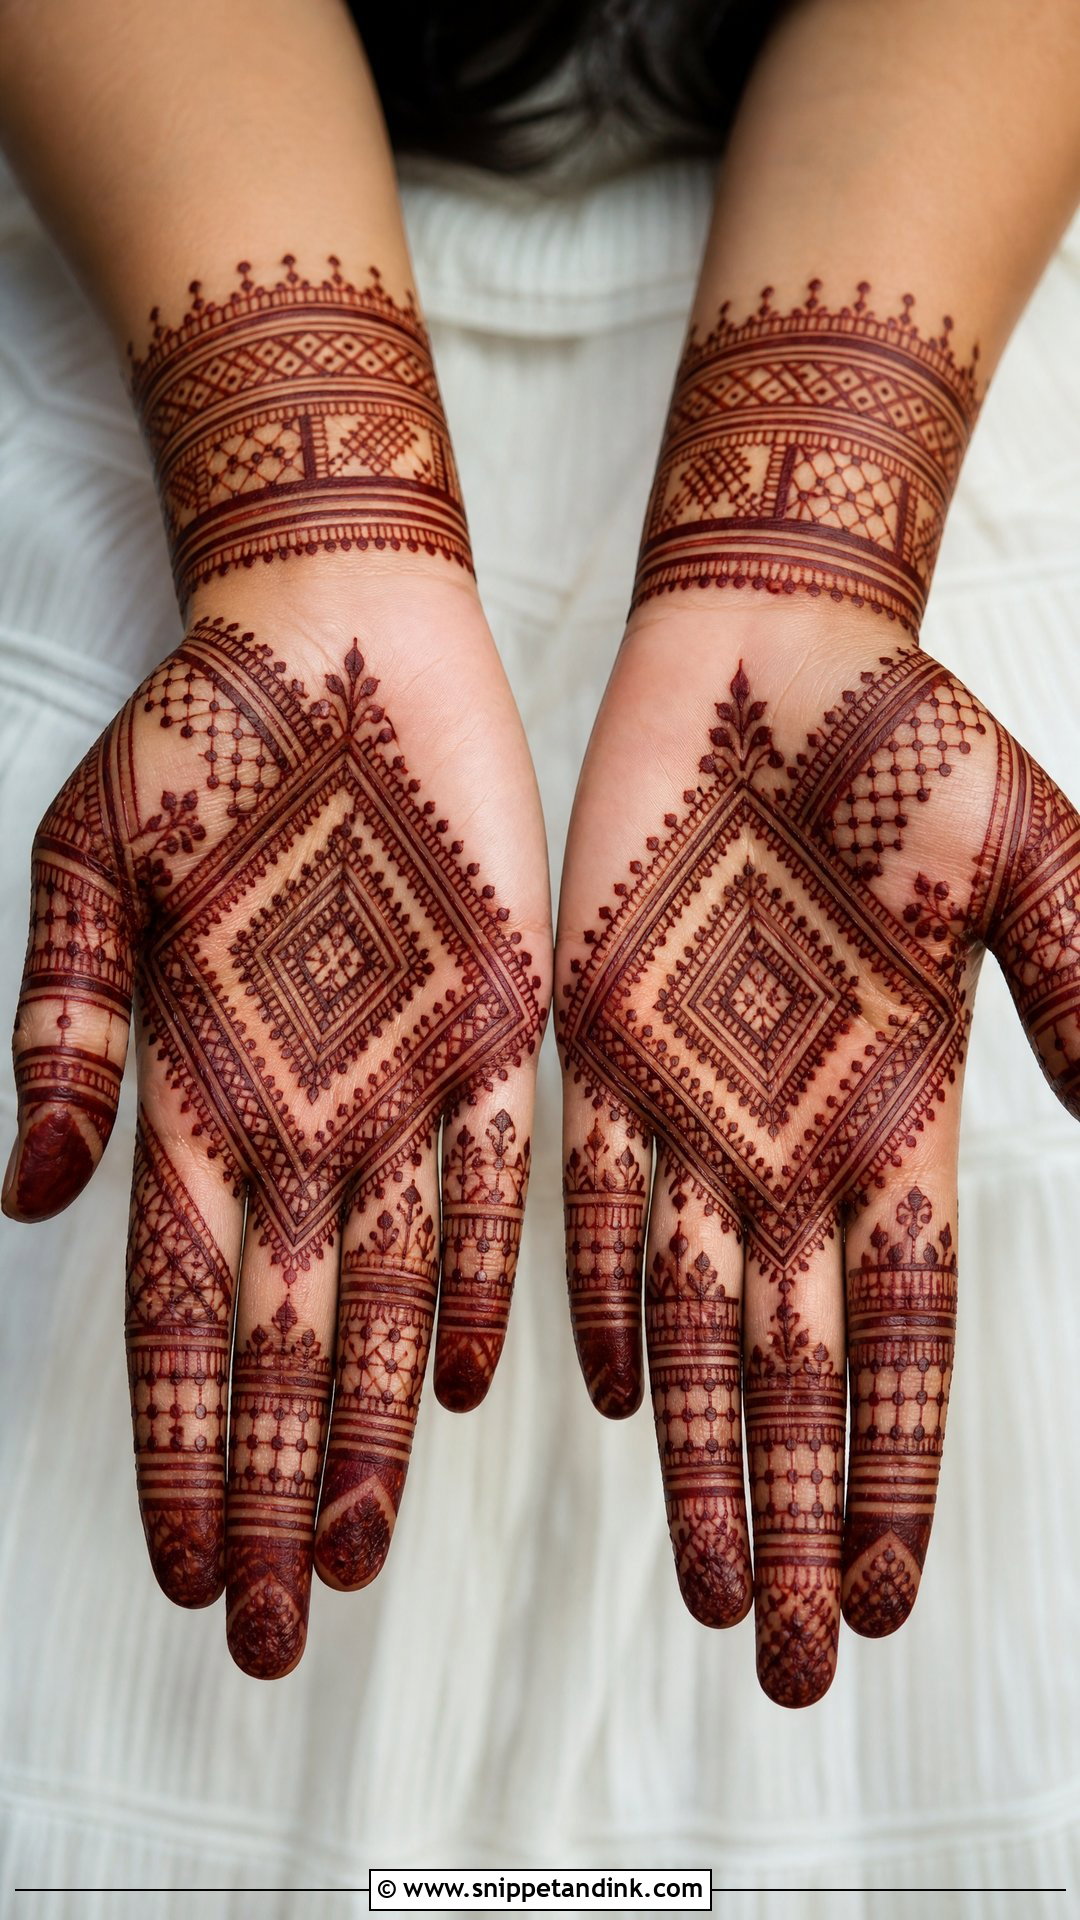
Moroccan work uses straight lines, diamonds, grids and bold symmetry instead of flowers, often covering the palm with repeated shapes and matching finger bands. It’s popular with men and with anyone who prefers sharp patterns to soft curves. Straight lines are harder to draw cleanly than curves, so I work in short sections and keep the spacing consistent. Uneven spacing is what makes geometry look accidental.
20. Gulf Khaleeji Mehndi Design
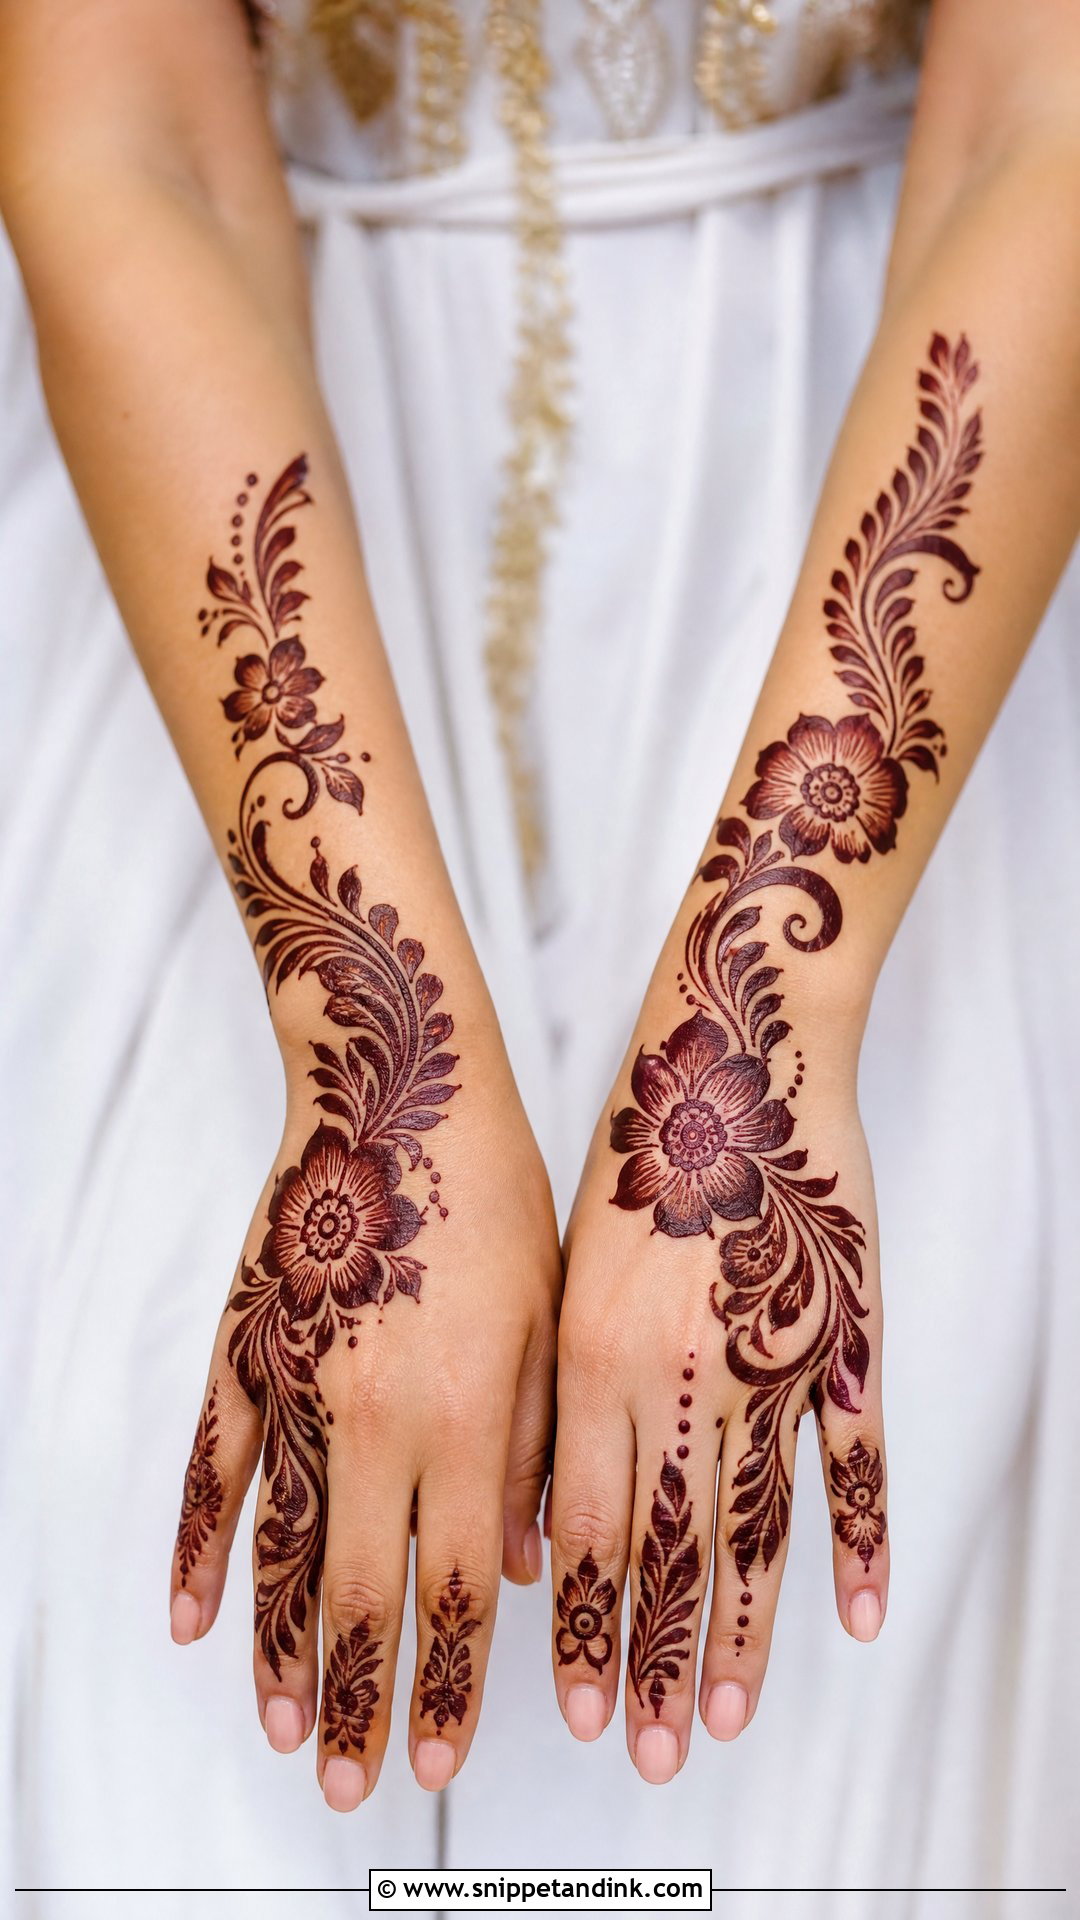
Gulf or Khaleeji designs use bold florals, thick leafy trails and open space, often starting at the wrist, crossing the back hand and finishing on decorated fingers. The motifs are larger than in Indian work, so they read clearly in photos and go on quickly. Good, fresh natural henna left on for several hours gives the deep maroon finish this style relies on. Let the floral trail follow a natural curve rather than a straight diagonal.
21. Eid Mehndi Design
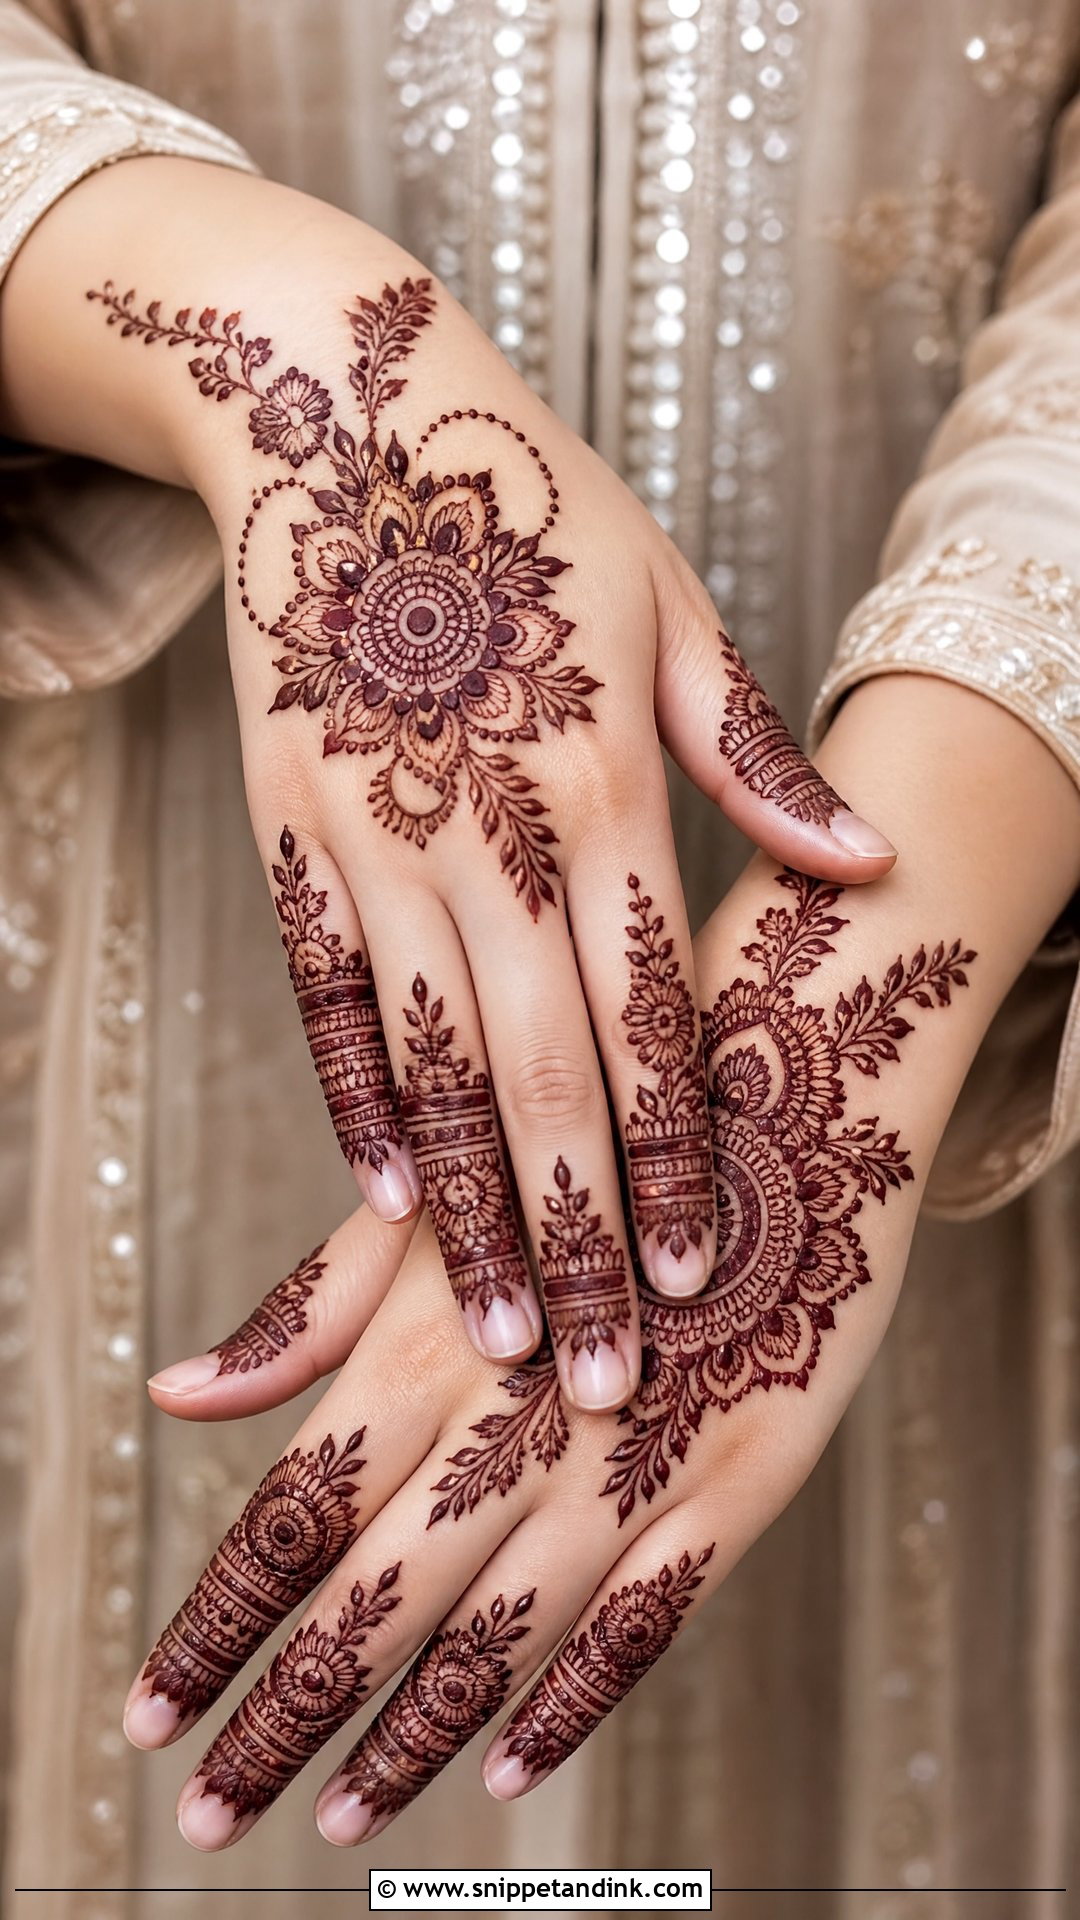
Eid henna needs to look festive and be comfortable from morning prayers to the evening visits. Arabic trails, back hand mandalas, floral vines, bracelet patterns and finger designs are the common choices. One bold motif on the back hand with matching fingers is enough for most people; extend it toward the wrist for a dressier look. It scales down easily for teens and young girls. Apply it the night before and sleep with the paste on for the best color by morning.
22. Diwali Mehndi Design
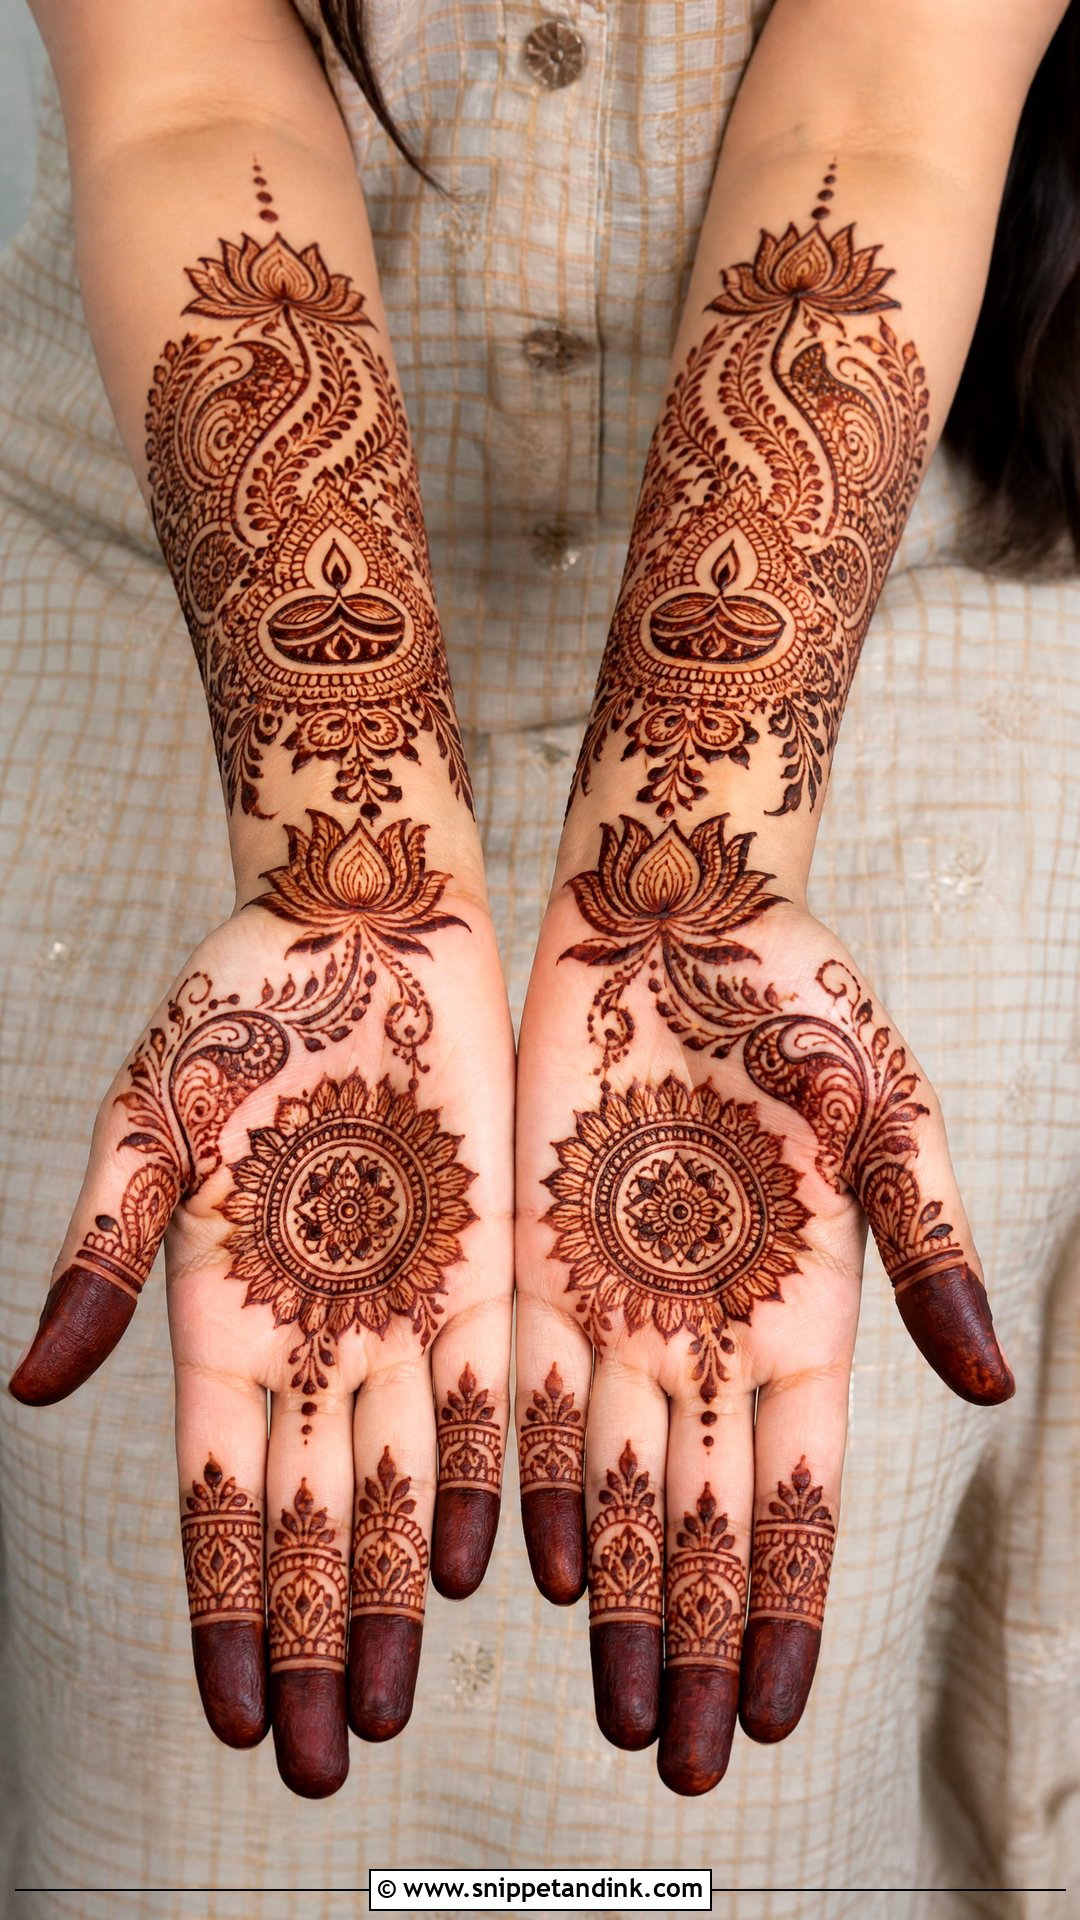
Mandalas, lotus flowers, paisleys, dotted borders and diya-inspired shapes make up most Diwali designs. A circular motif on the palm with small matching finger details is simple and effective; paisleys and floral bands around the palm make it fuller. Festive lighting is warm and often low, so I keep the pattern clean enough to read in candlelight and string lights. Dense filler tends to go muddy in those photos.
23. Karwa Chauth Mehndi Design
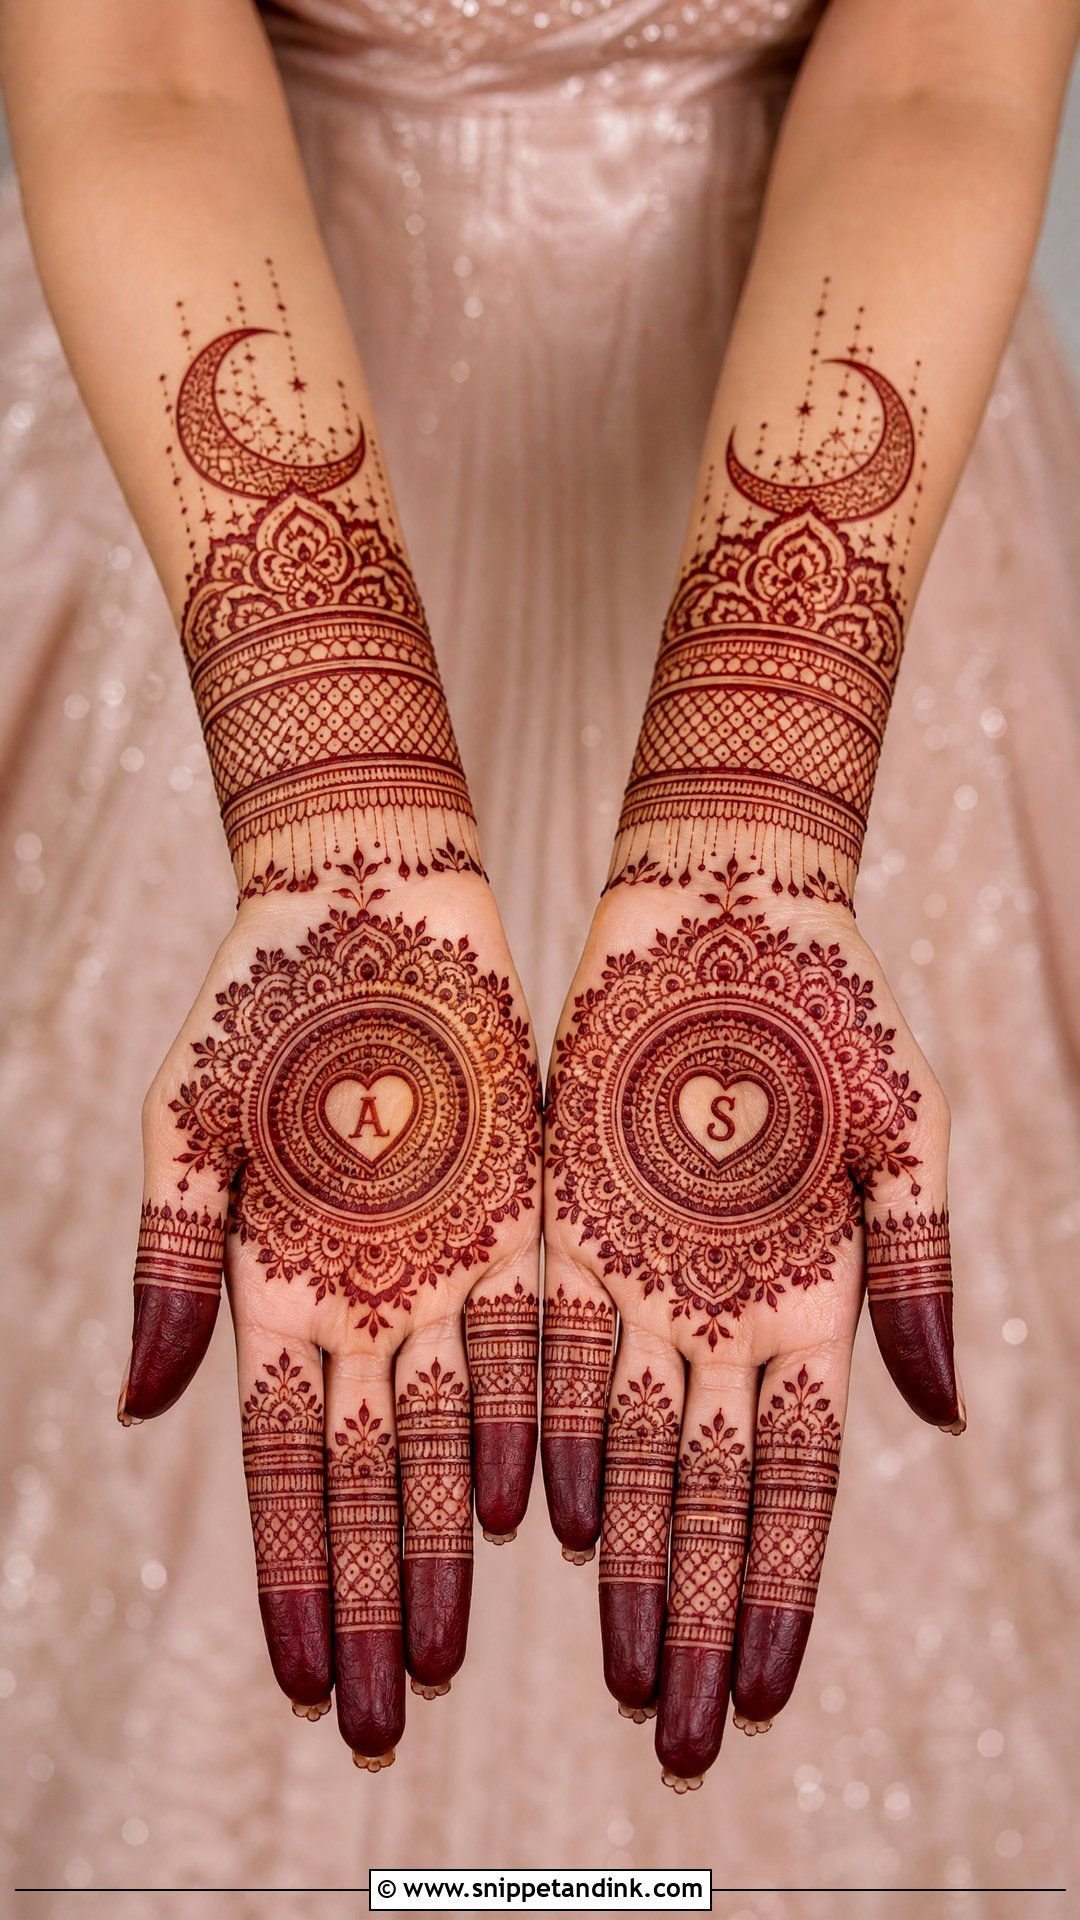
Karwa Chauth mehndi design leans traditional: bridal-style motifs, paisleys, mandalas, moon symbols and fine finger coverage, usually with fuller palms. Initials or a small couple detail make it personal, and the back hand can carry a bracelet layout or floral trail to match. It sits naturally with red, maroon and gold outfits. Apply a day before the fast and protect the paste while it dries, since fasting days are busy and smudges are common.
24. Engagement Mehndi Design
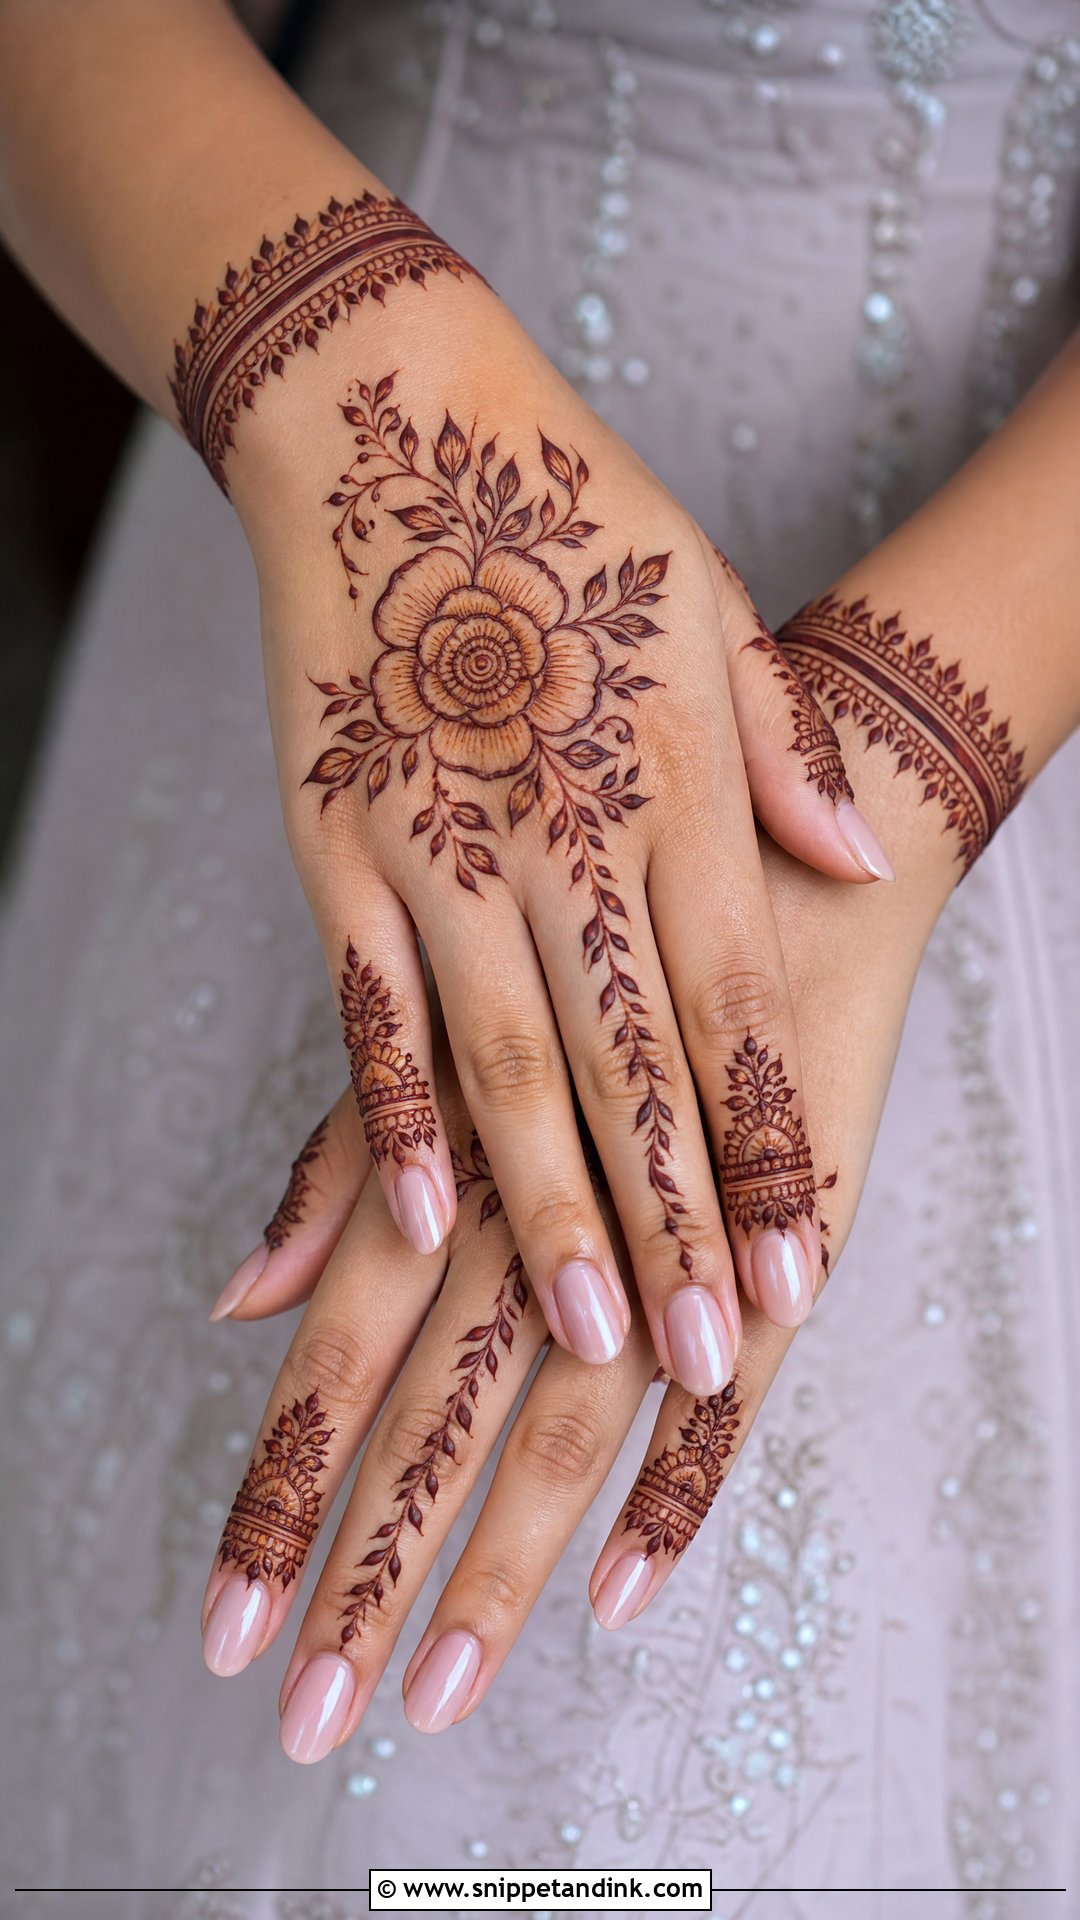
For an engagement, the back hand and fingers matter most because of the ring photos. A central floral motif, delicate finger bands and a bracelet-style wrist pattern are the usual elements, with initials, a ring motif or a small heart if you like. I leave negative space around the ring finger, especially at the base. That’s what lets the ring stand out in close-ups instead of blending into the henna.
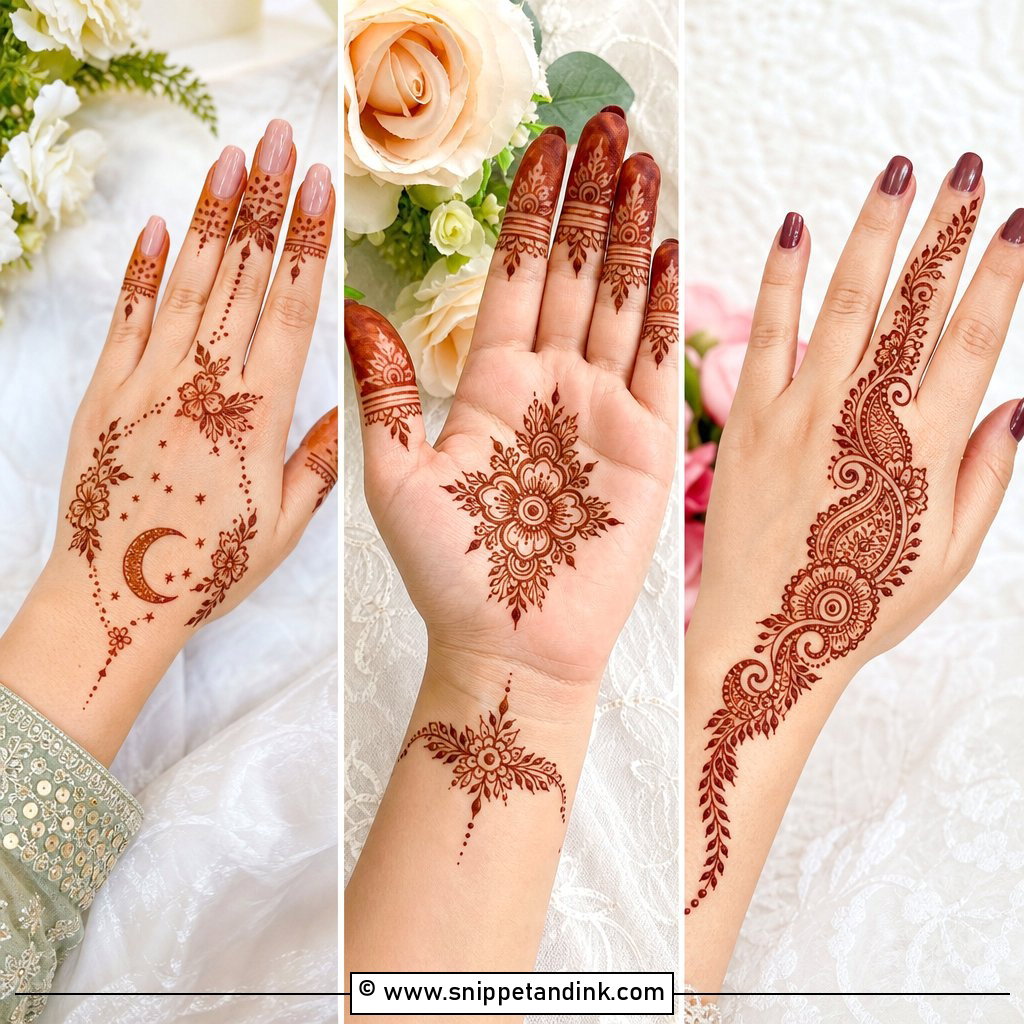
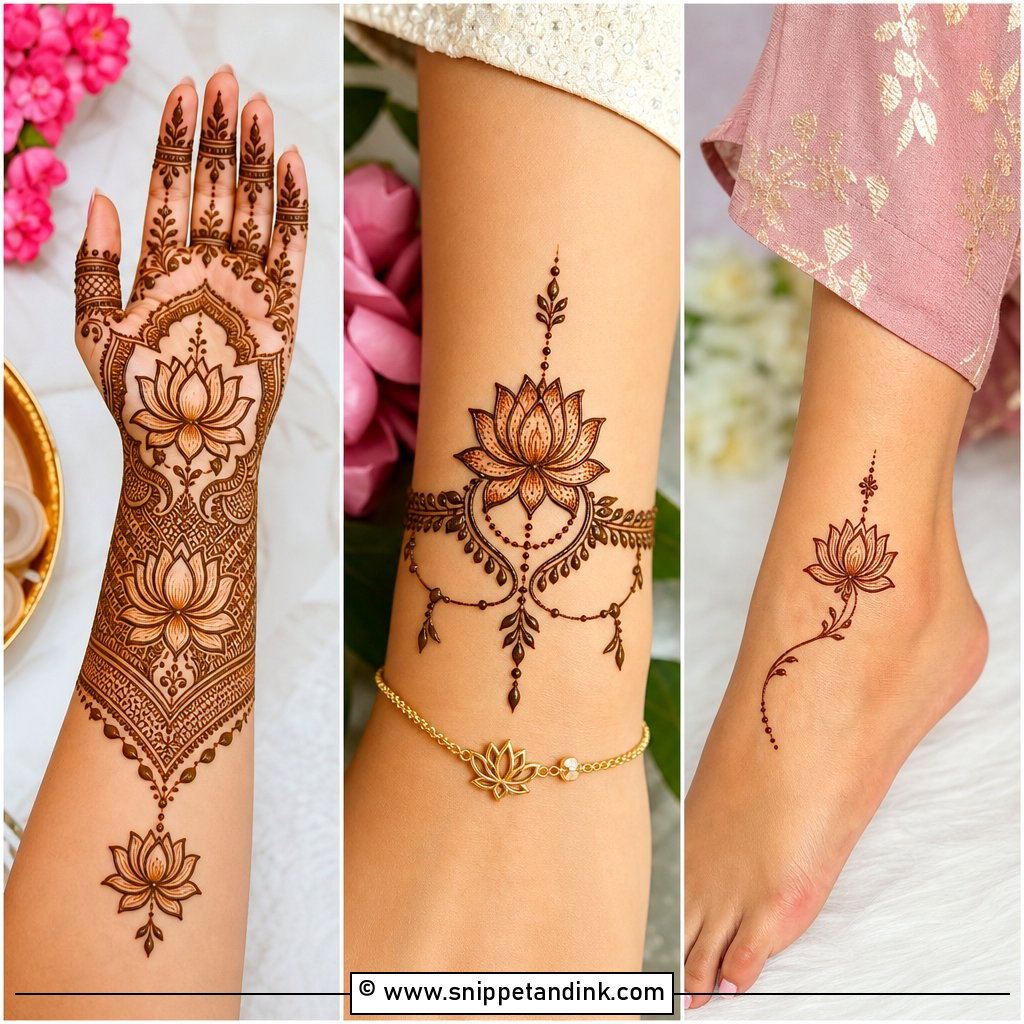
25. Wedding Guest Mehndi Design
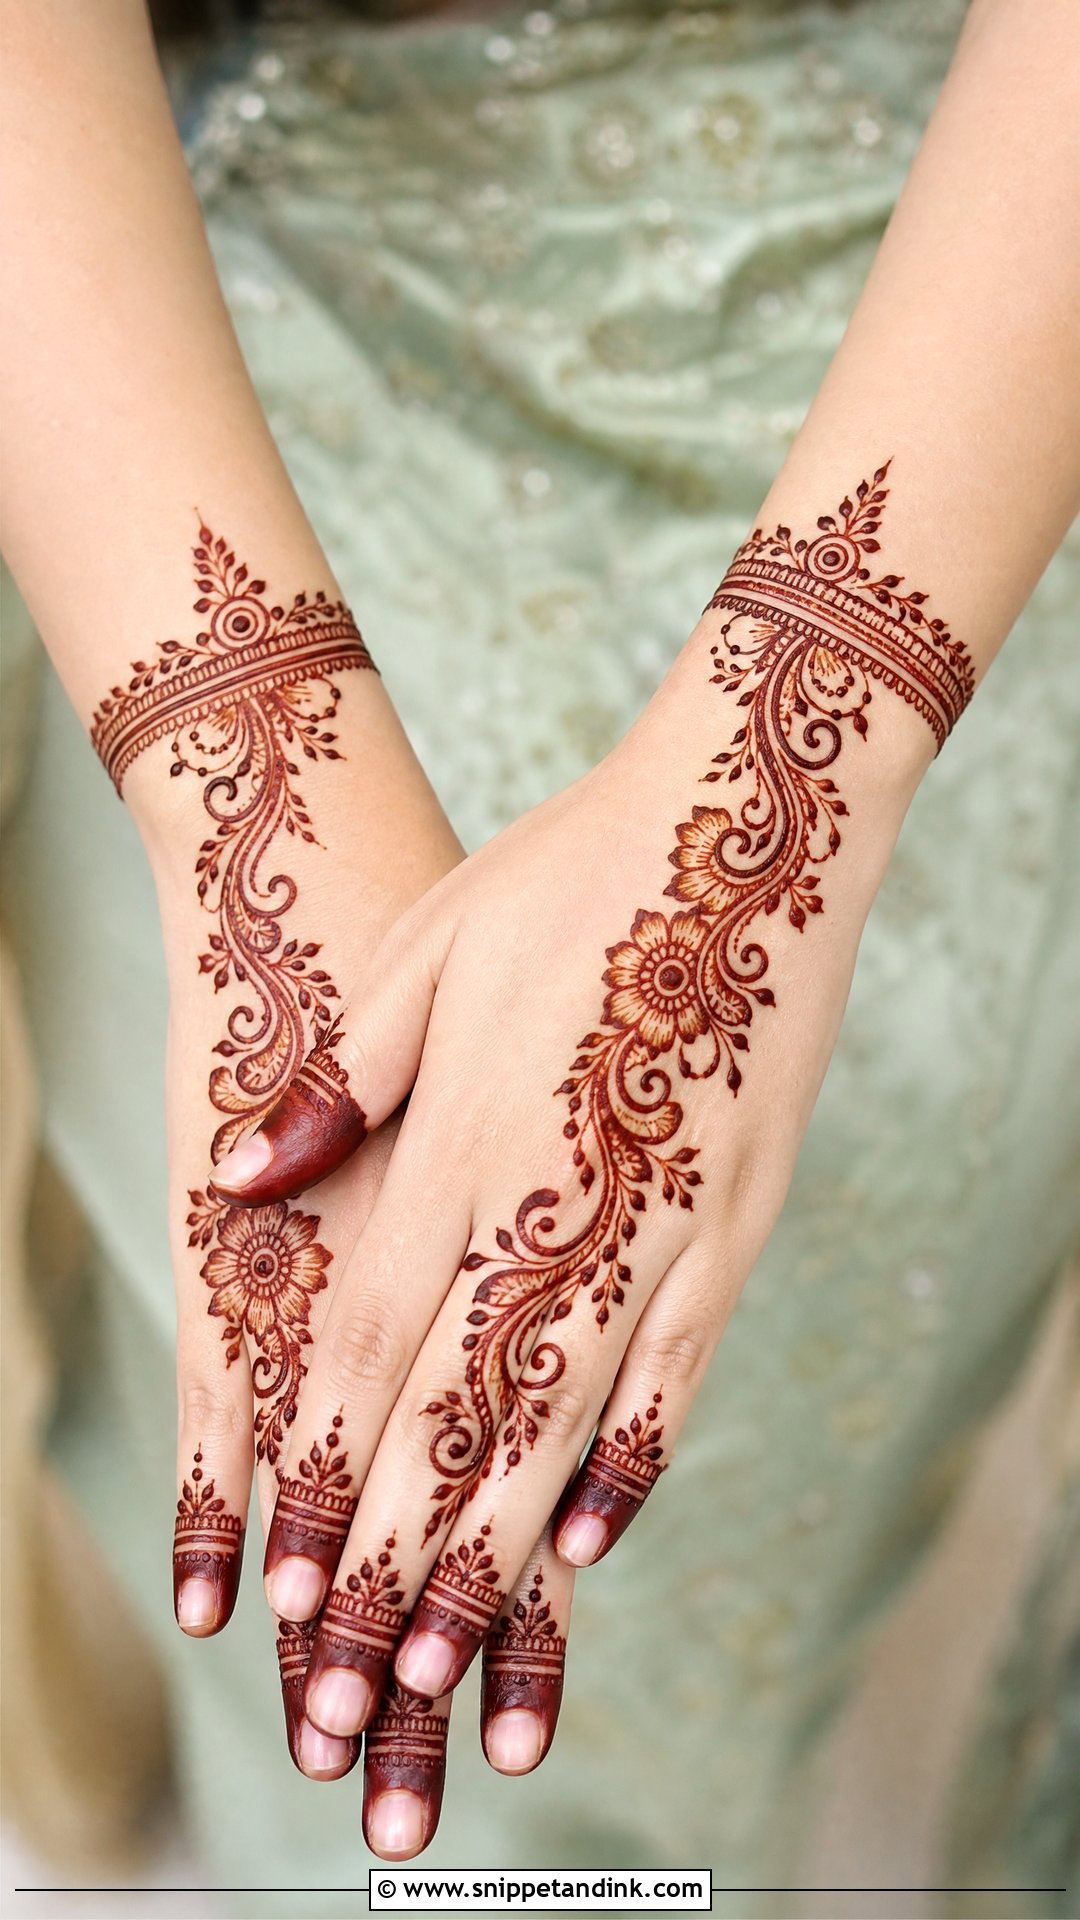
Guests should go lighter than the bride. An Arabic floral trail on the front hand, a mandala on the back hand or a bracelet design with decorated fingers all take a fraction of the time. Match it to your outfit: if the outfit is heavy, choose open-space mehndi; if it’s simple, a fuller floral or paisley layout won’t feel overdone. At a sangeet or mehndi night, one hand is often enough so you can still eat.
26. Bridesmaid Mehndi Design
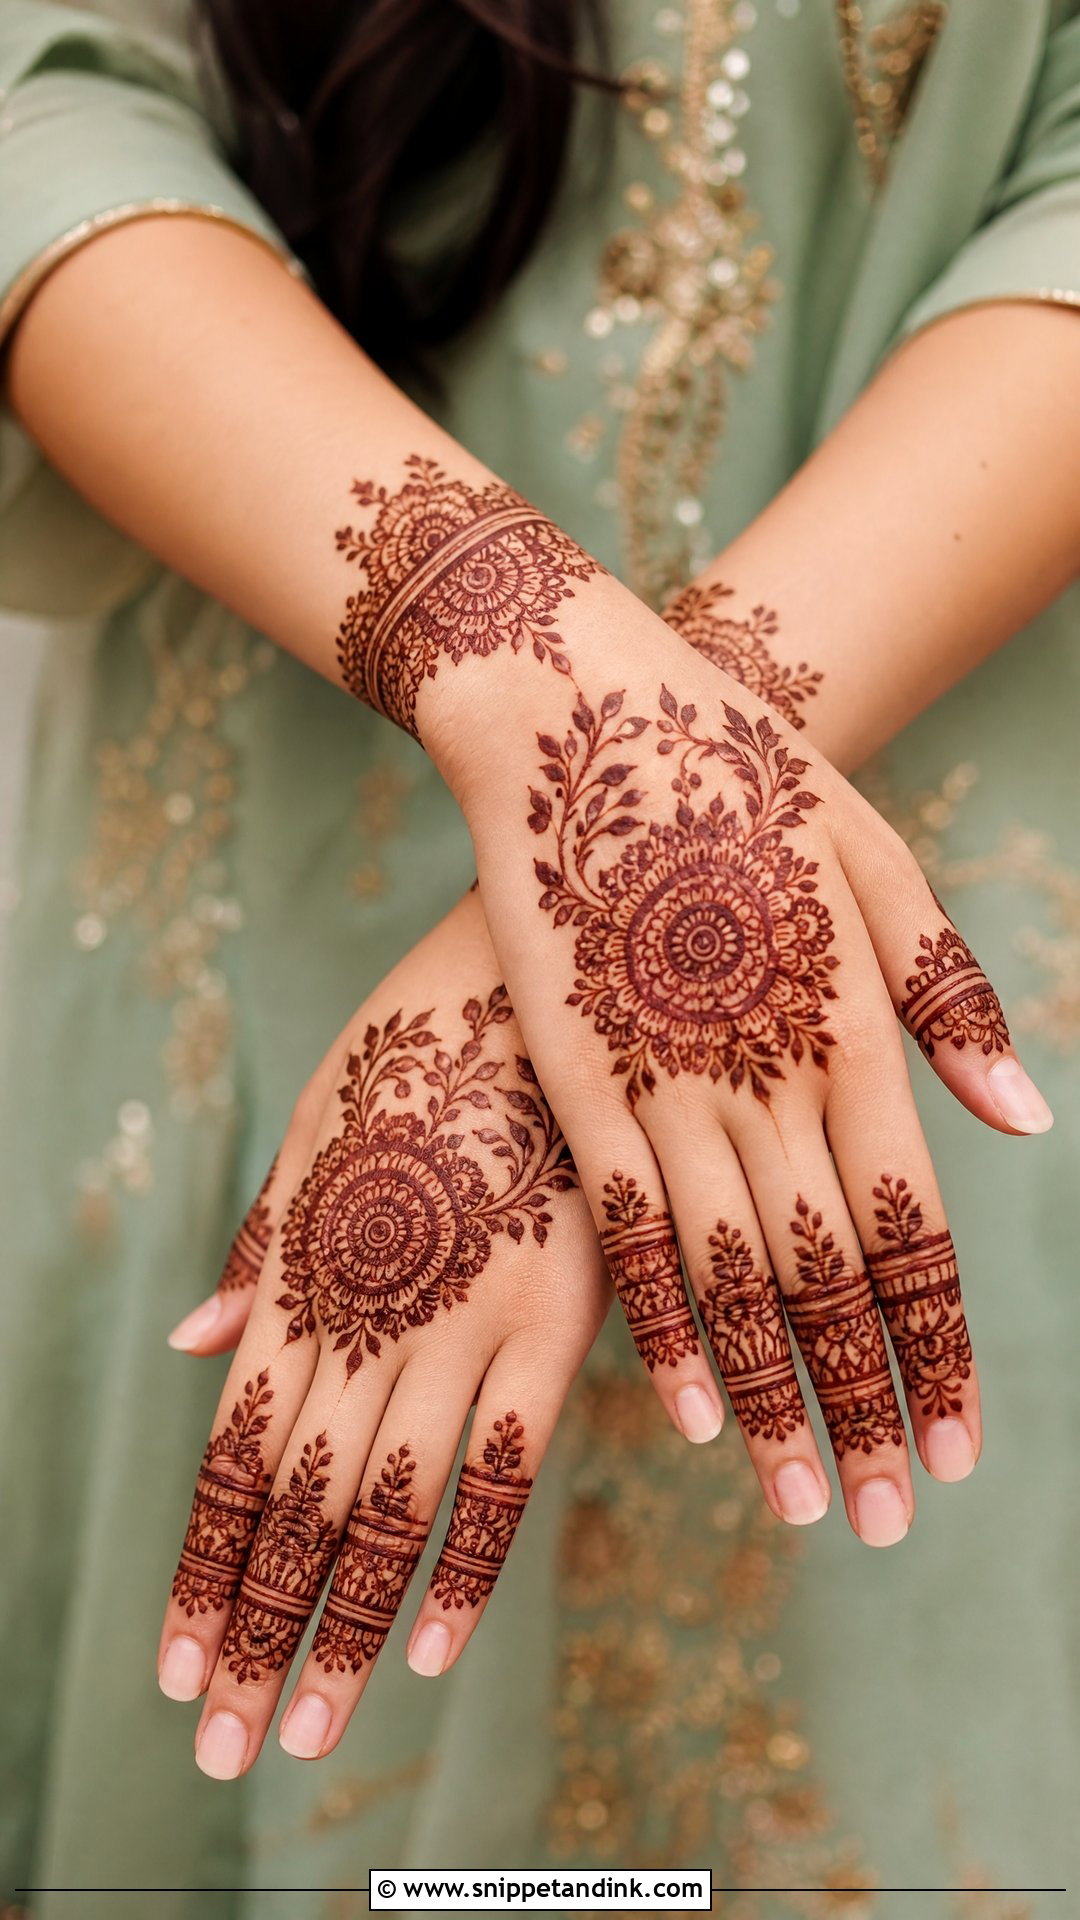
Bridesmaid designs need to survive a busy wedding schedule. Back hand florals, finger details, wrist bands and light palm accents can echo the bride’s design without competing with it. Arabic and Indo-Arabic styles are popular because they’re quicker. Matching designs look coordinated in group shots where hands are placed together; individual variations let each person’s taste show. I keep them a step lighter than the bride on purpose.
27. Baby Shower Mehndi Design
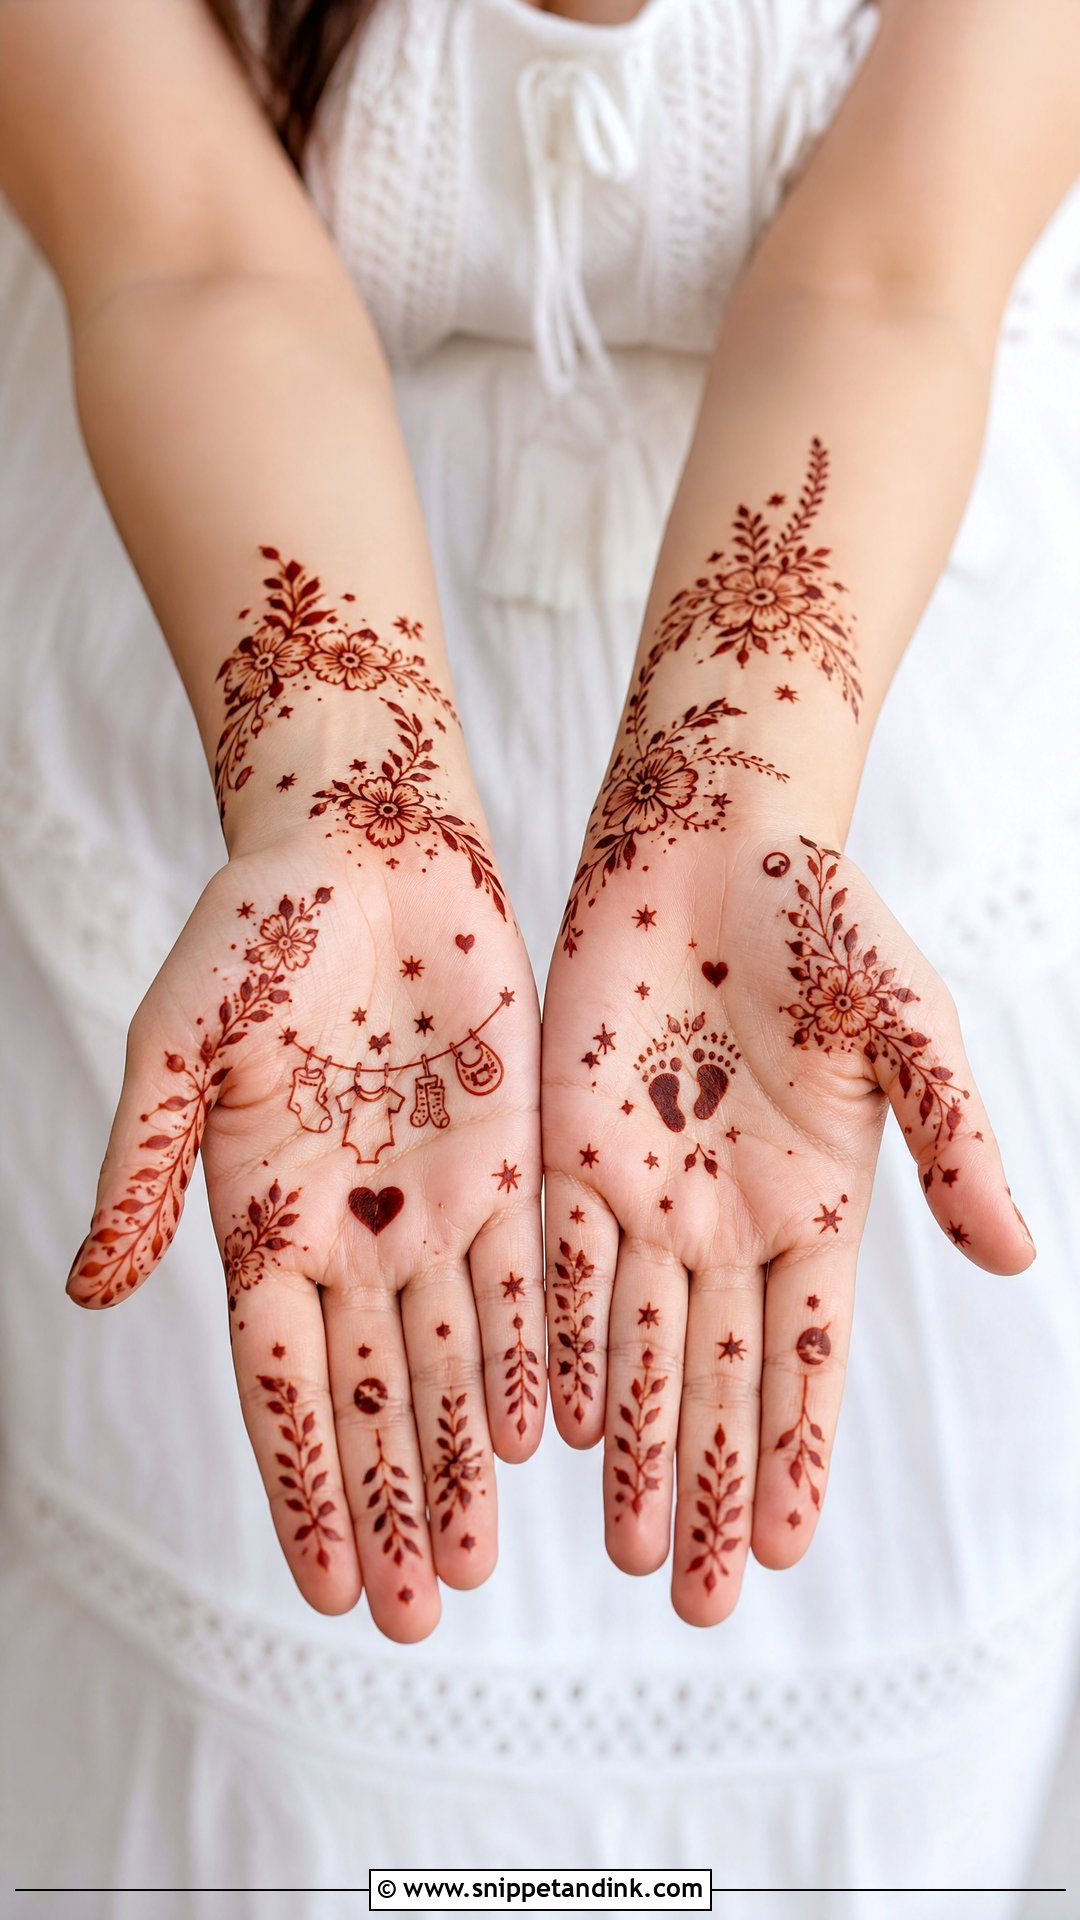
Baby shower designs are usually light: florals, vines, small baby-themed details, hearts, stars or a cradle motif, on the palm or back hand. A name initial or small symbol can be added. Comfort comes first for the mother-to-be, so I keep sitting time short and use paste without strong essential oils. A test dot a day or two beforehand is sensible, since skin can become more sensitive during pregnancy.
28. Kids Mehndi Design
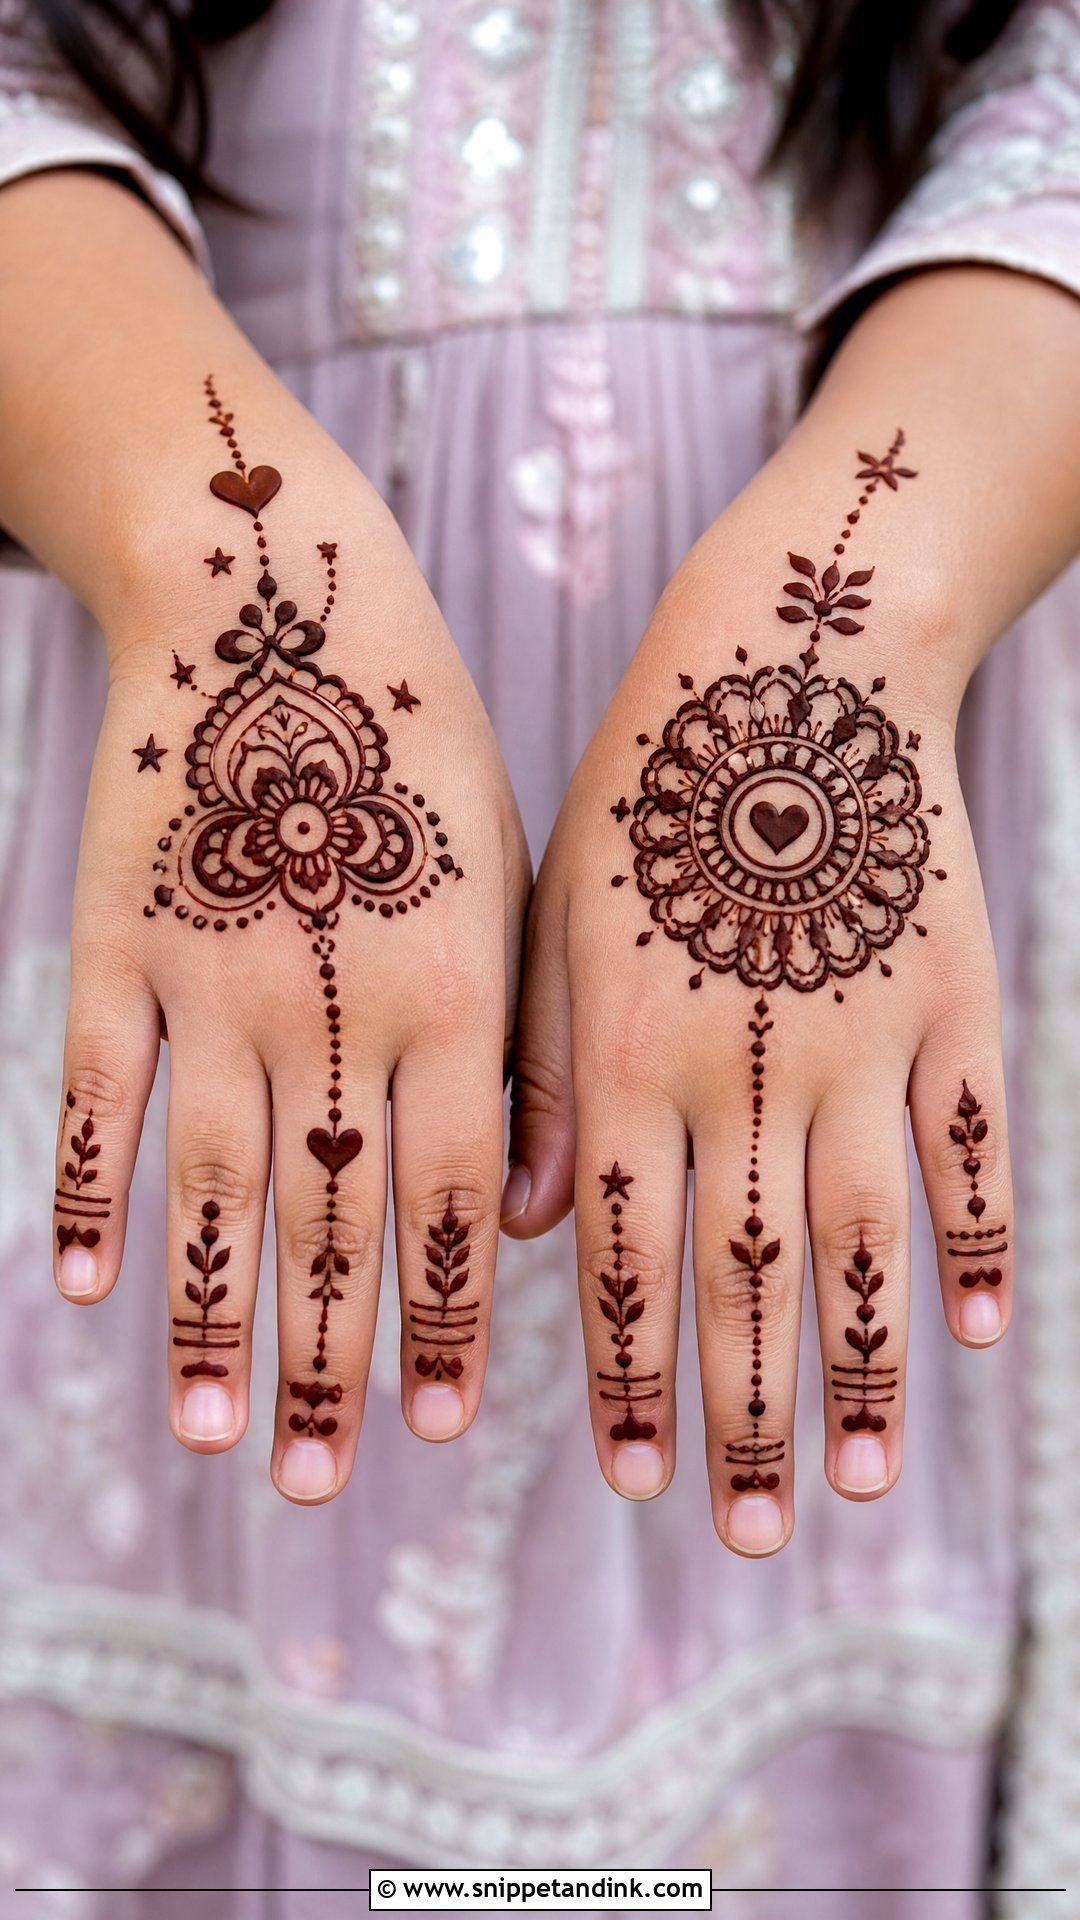
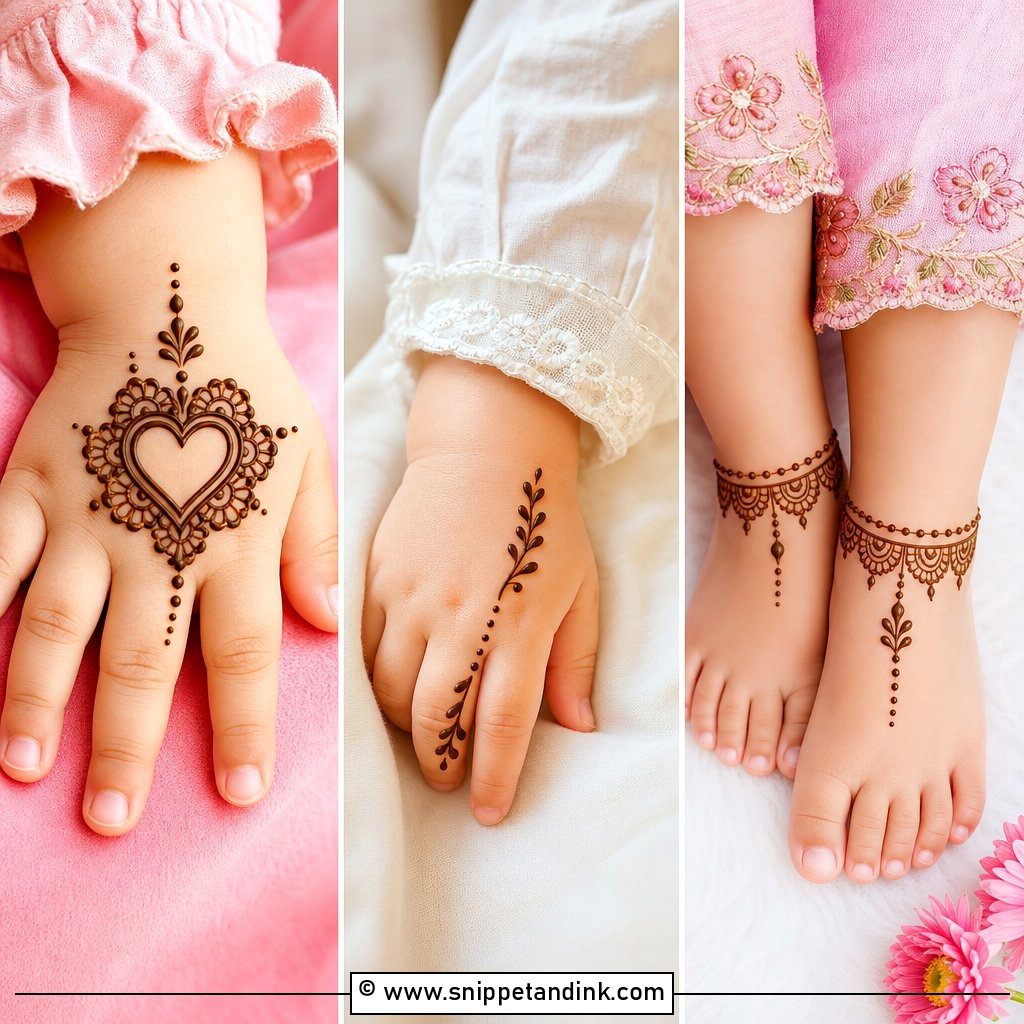
Children need small, quick designs: a mandala, flowers, hearts, stars, vines or a short finger pattern. Back hand layouts are less likely to smudge than palms, since kids touch everything with their palms. Bold lines and clear shapes hold up better than tiny detail. Use only natural henna on children, never anything sold as instant black henna.
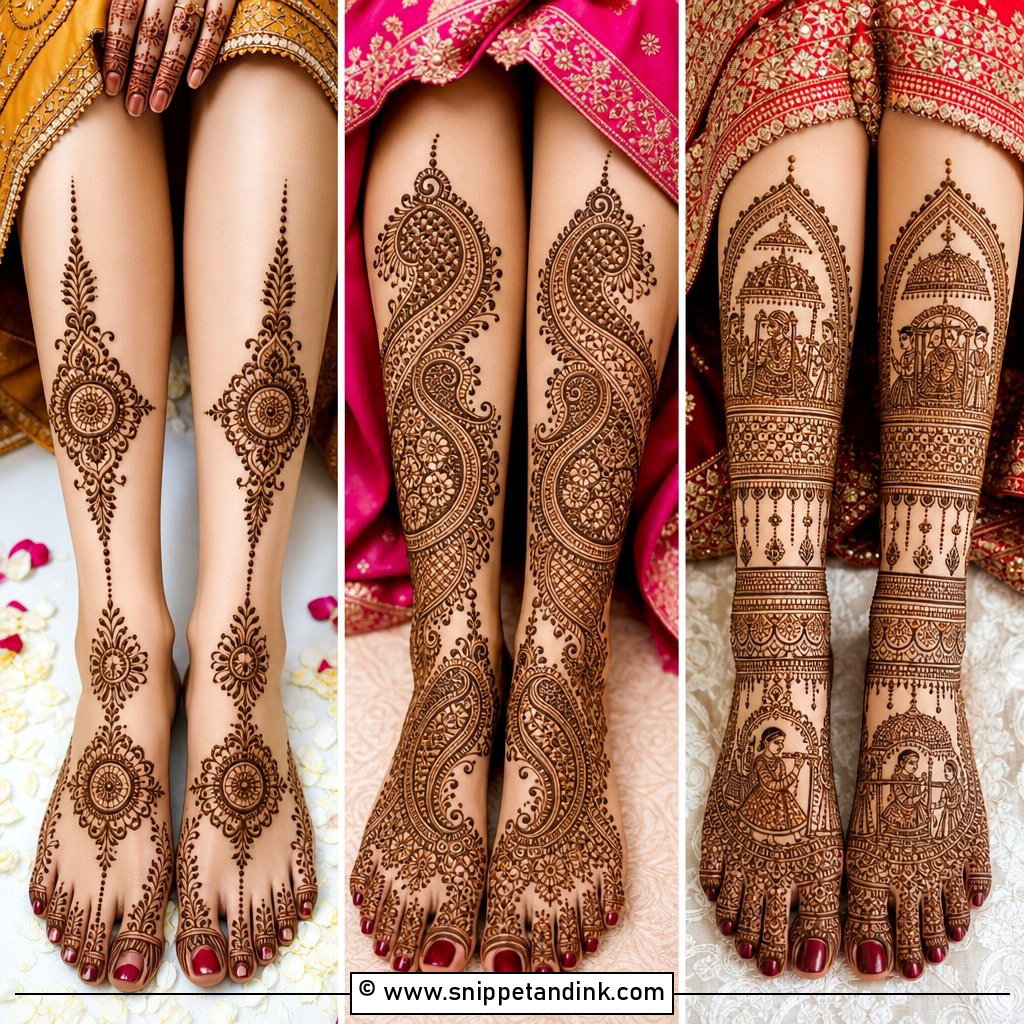
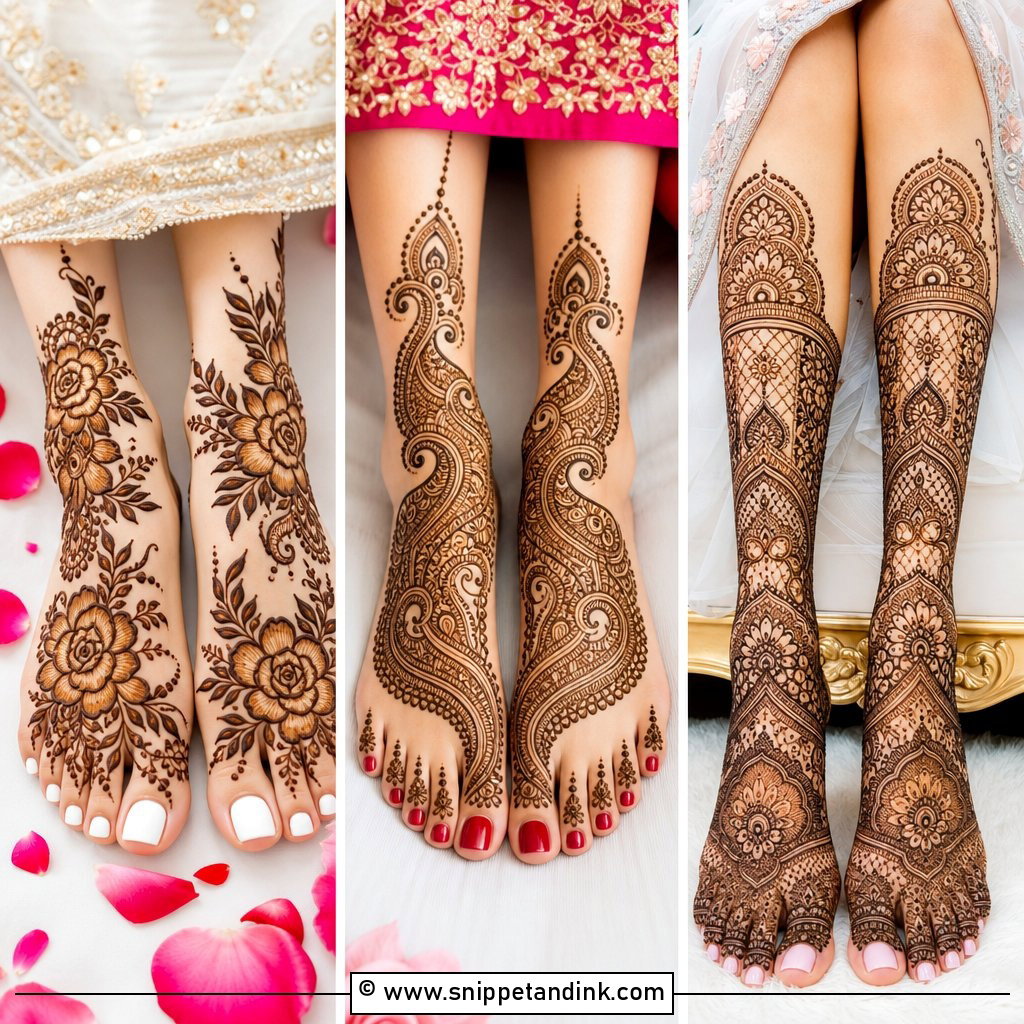
29. Foot Mehndi Design
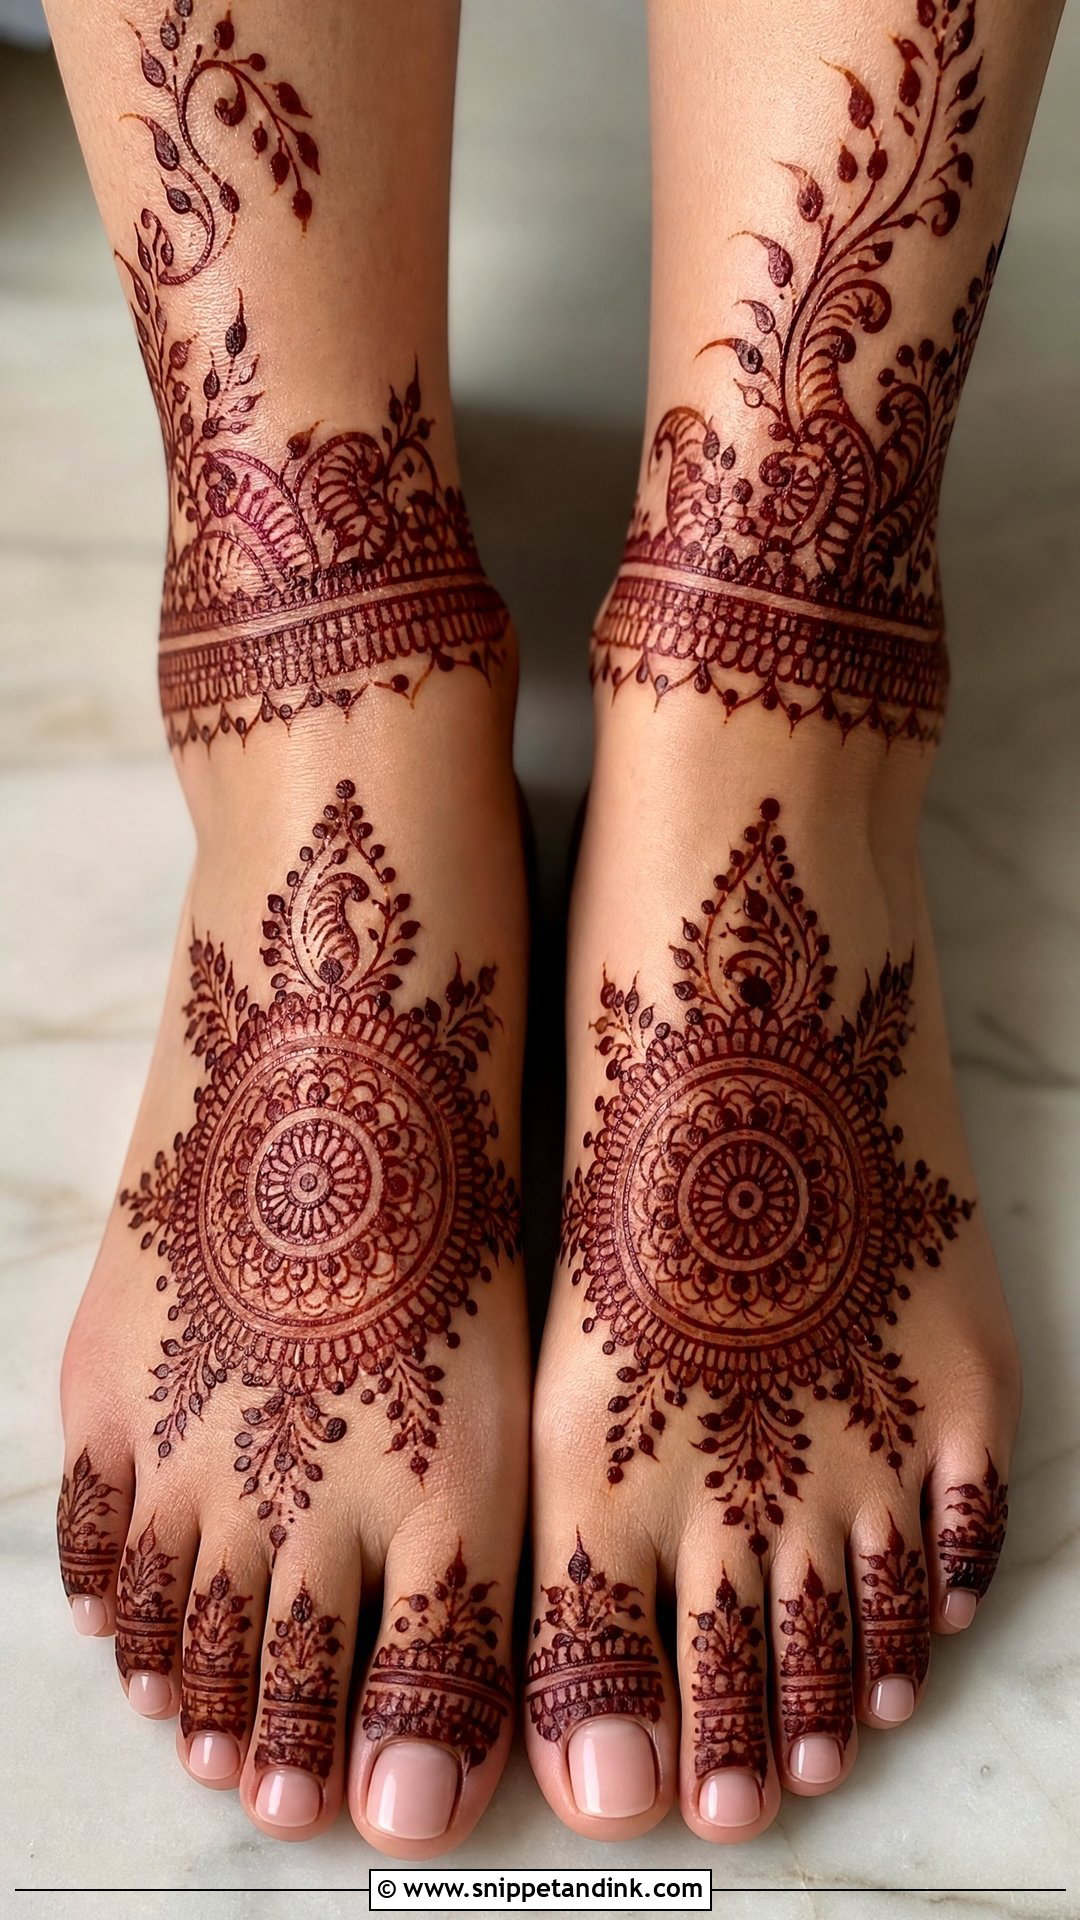
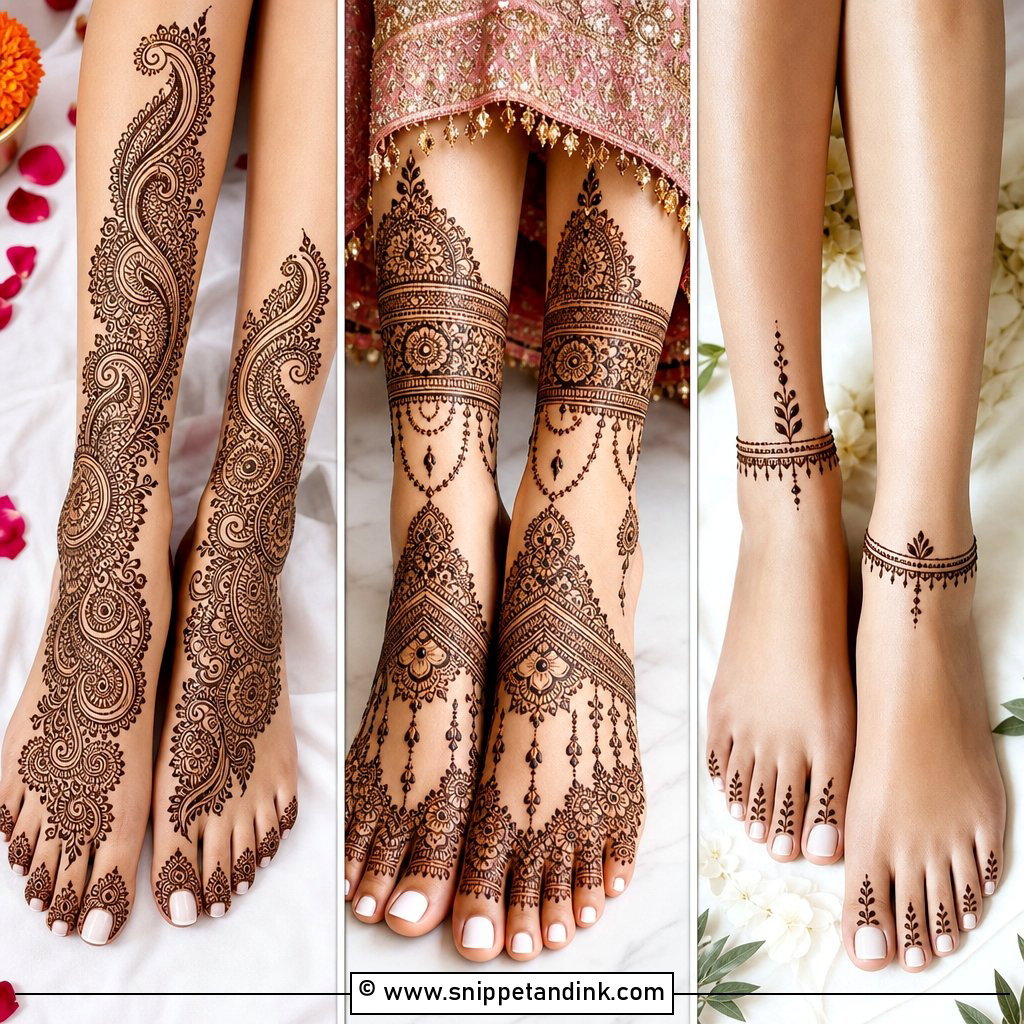
Foot designs cover the toes, the top of the foot, the ankle and sometimes the lower leg with anklet bands, florals, paisleys, mandalas and leafy trails. The soles and toes take a deep stain, often darker than the hands, while the top of the foot is lighter. The pattern has to follow the arch and the ankle bone, which is why I draw the anklet band first and work down from there. Neat toe details finish the whole design.
30. Bridal Foot Mehndi Design
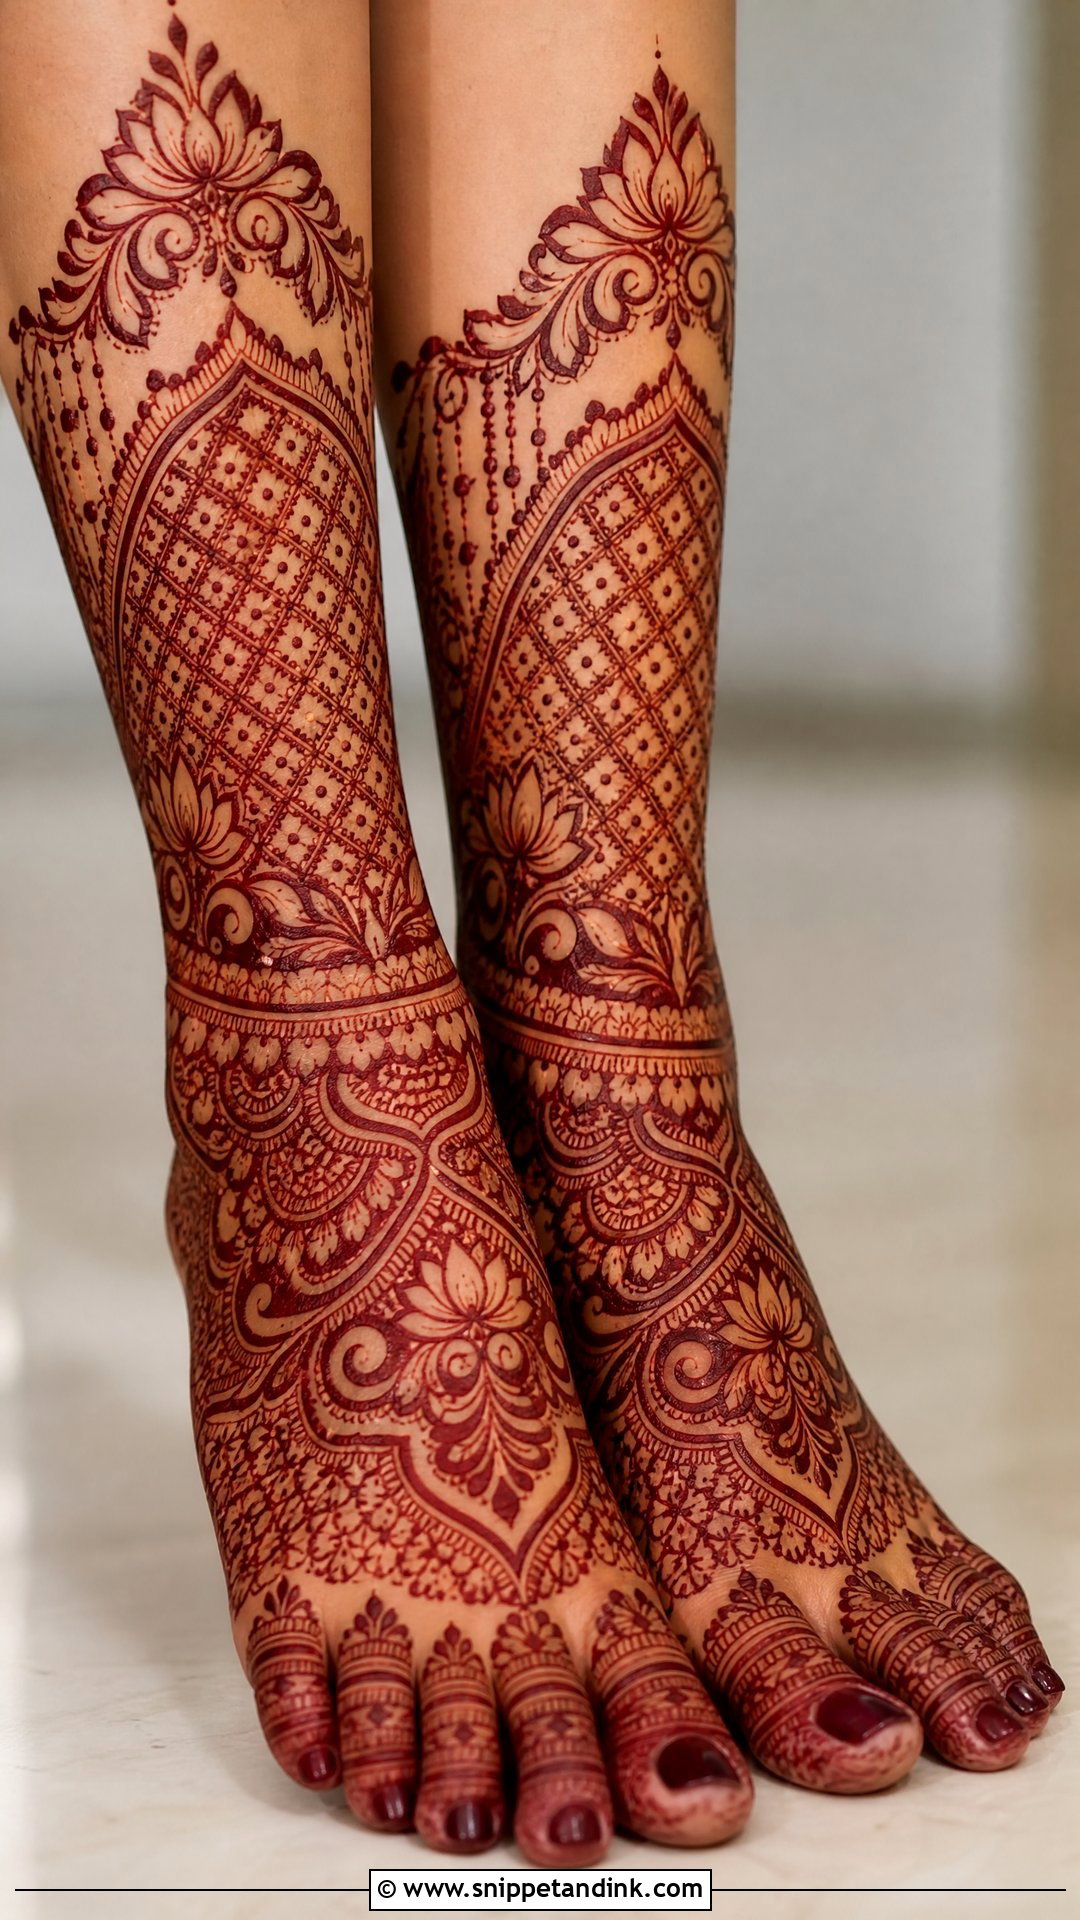
Bridal foot mehndi design is richer than casual foot henna: lotus motifs, paisleys, jaali panels, anklet borders and dense floral filling over toes, feet, ankles and lower legs. If the hand mehndi is heavy, the feet should match its level of detail, or the overall look feels unbalanced in full-length photos. The main problem is drying, since you can’t walk while it sets. Plan to stay seated for a good while afterward.
31. Full Arm Mehndi Design
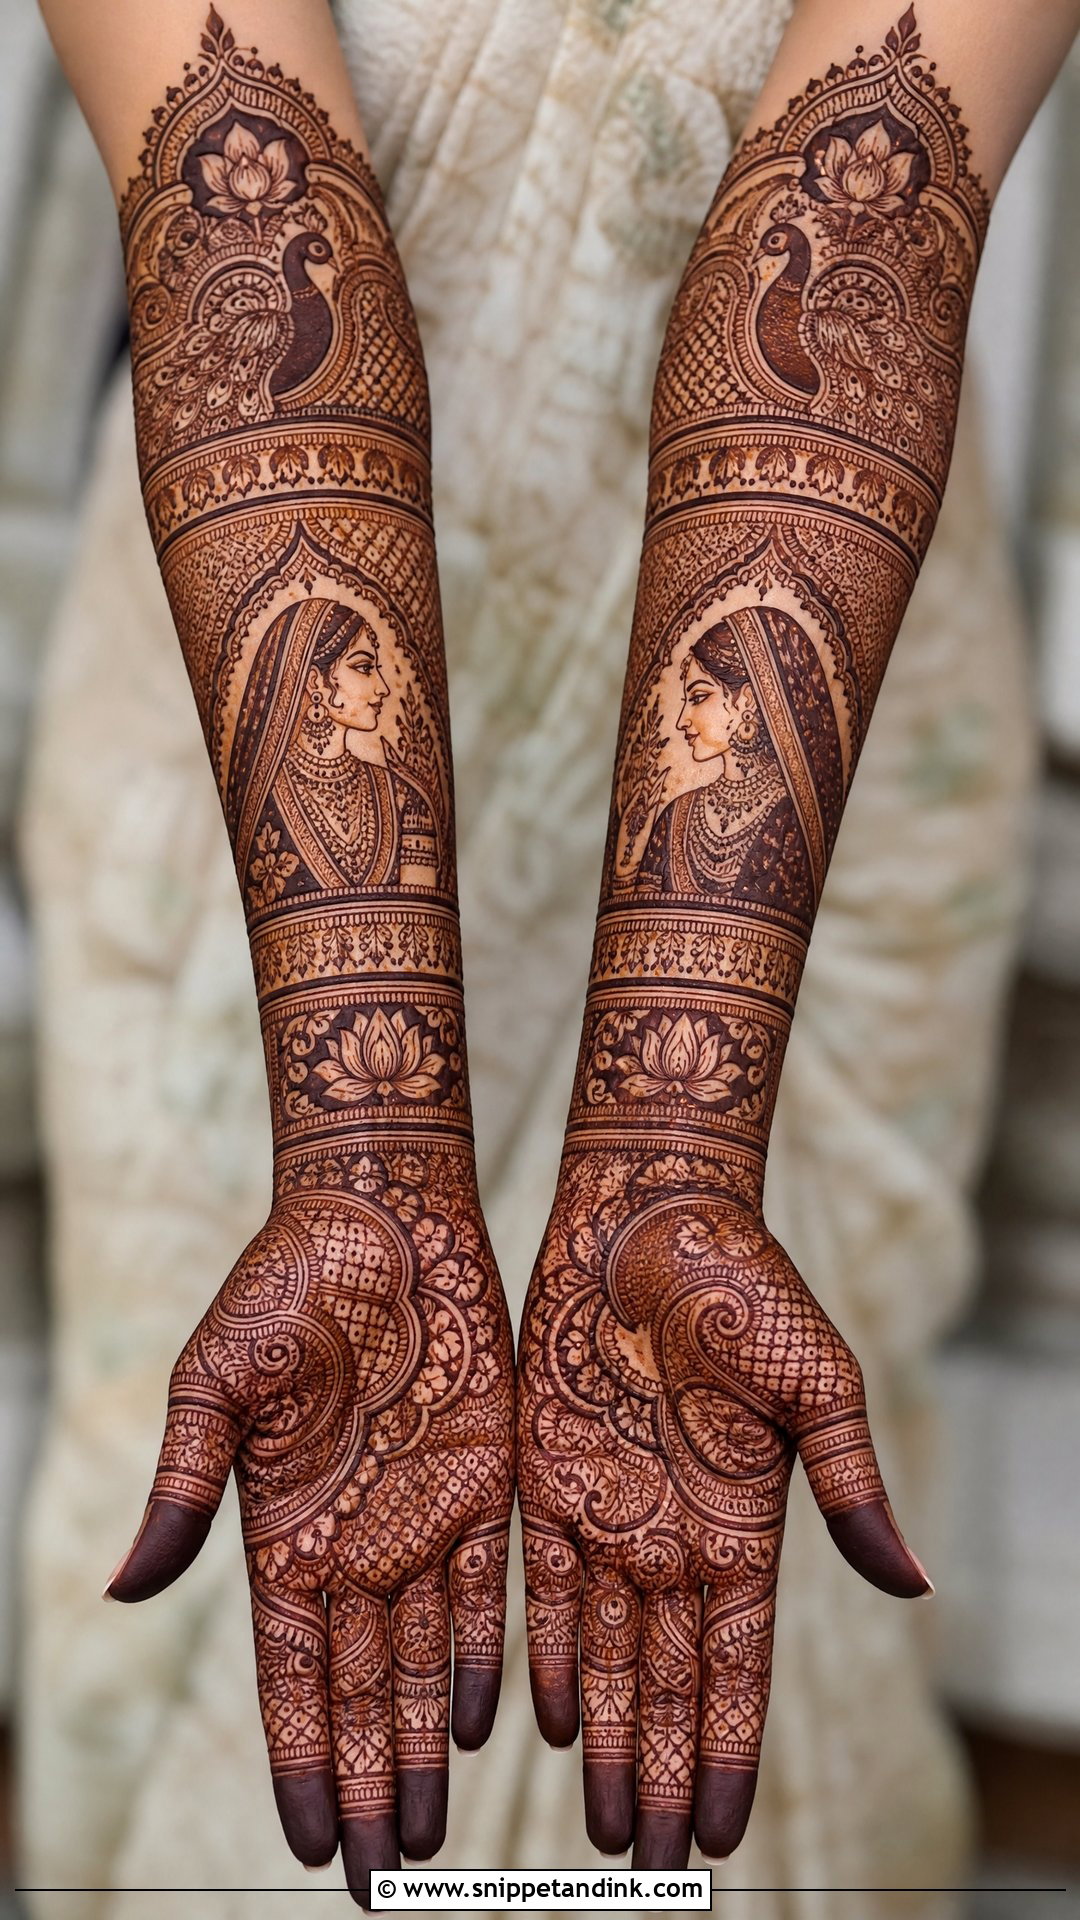
Full arm mehndi runs from fingertips to the elbow or beyond, with bridal portraits, peacocks, lotus, paisleys, mesh and layered borders. It takes a long time to apply and suits brides who want maximum coverage and room for storytelling. The palm has to connect smoothly to the wrist and forearm sections; a sudden gap at the wrist looks like the artist ran out of time. Be aware that the upper forearm stains noticeably lighter than the hand.
32. Half Hand Mehndi Design
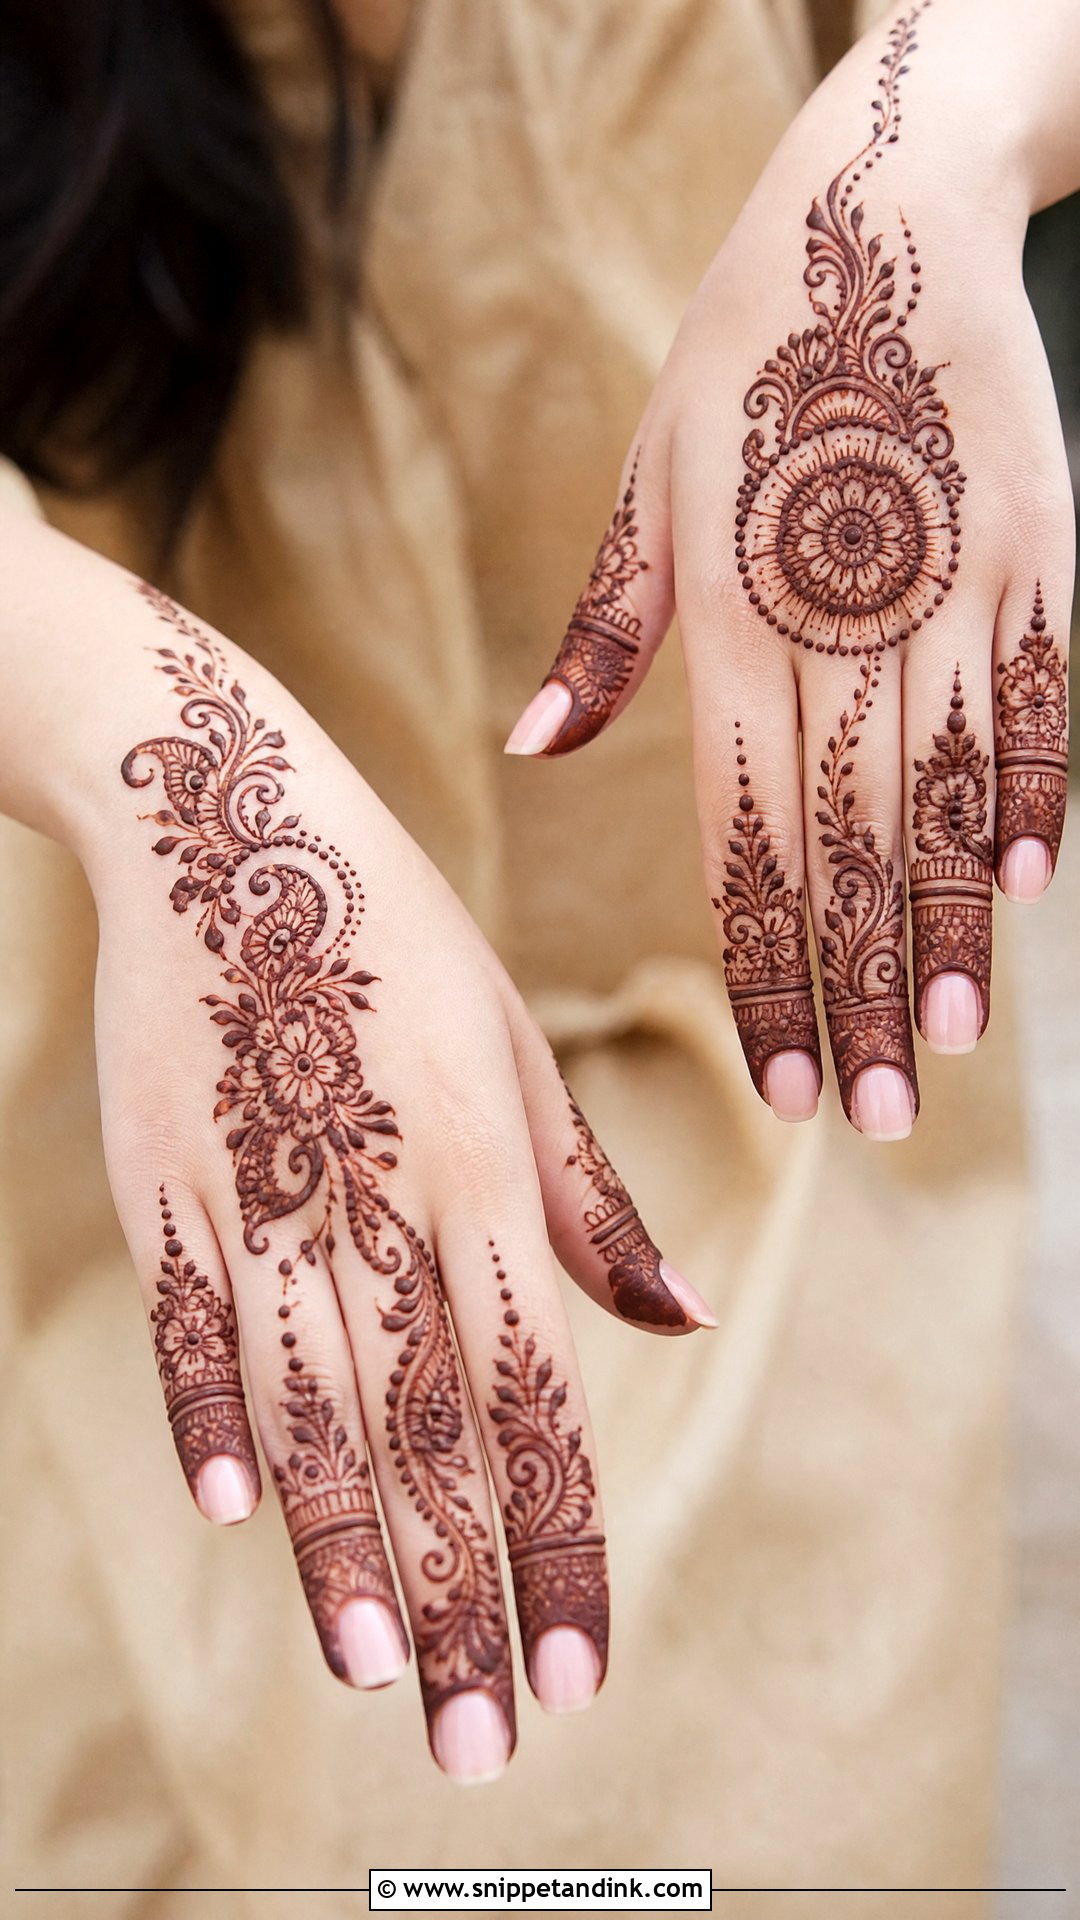
Half hand designs cover the fingers and part of the palm or back hand and stop before the wrist or mid-hand, using mandalas, flowers, paisleys or Arabic trails. They’re quicker to apply and suit guests and casual festivals. The design must end deliberately. I finish with a clear border or a light wrist touch so it looks complete rather than abandoned.
33. Beginner Mehndi Design
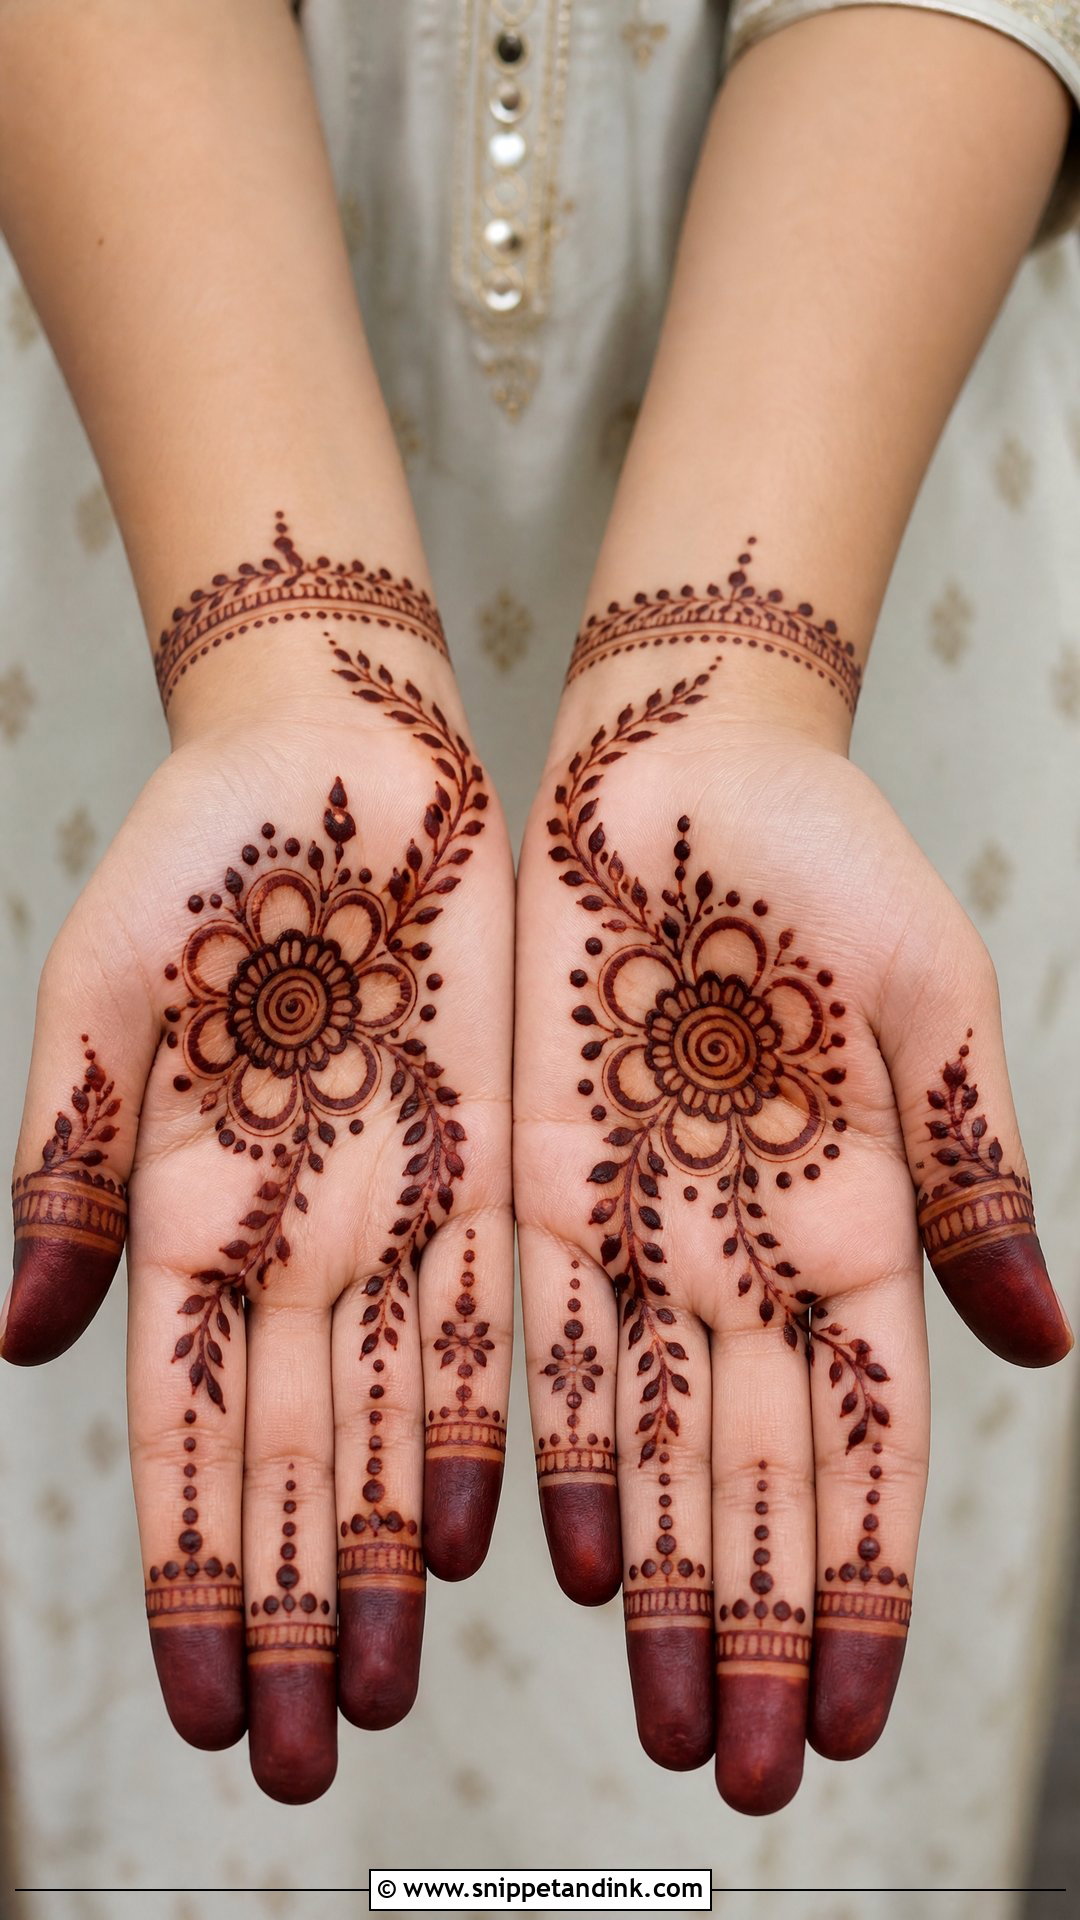
If you’re learning, use a central flower or mandala, simple leaves, dotted lines and basic finger patterns. Large motifs are easier to control than tiny filler. Start on the back hand or palm, then add the fingers and a small wrist border. Hold the cone like a pen, squeeze gently and let the paste fall onto the skin rather than pressing the tip down. Leave dense bridal patterns until your lines are steady.
34. Party Mehndi Design
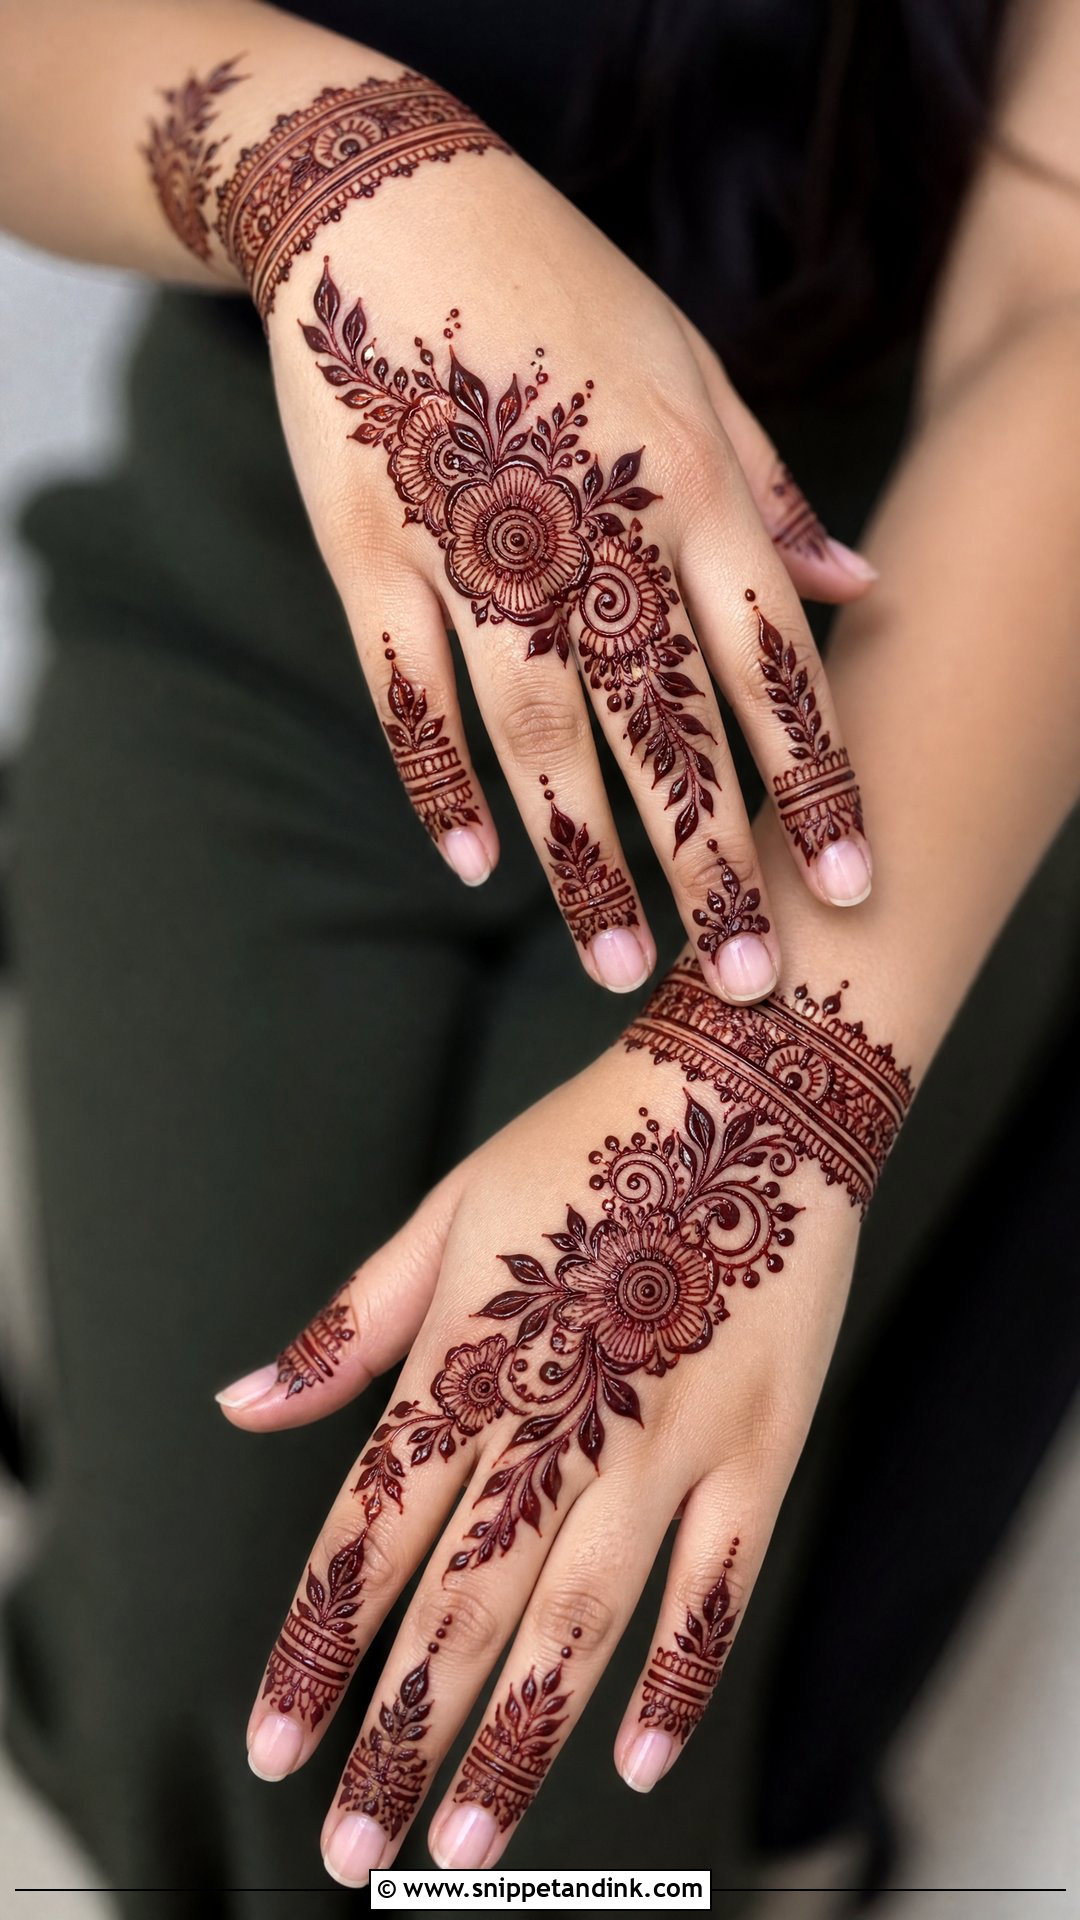
Party designs should be quick and readable: bold florals, modern finger details, diagonal trails and bracelet-style wrist accents. The back hand is the useful side, because it stays visible while you’re holding a clutch or posing with friends. A minimal palm design works if you’d rather keep it subtle. It suits fusion outfits, gowns, sarees and festive suits. Keep it sharp and slightly open.
35. White Mehndi Design
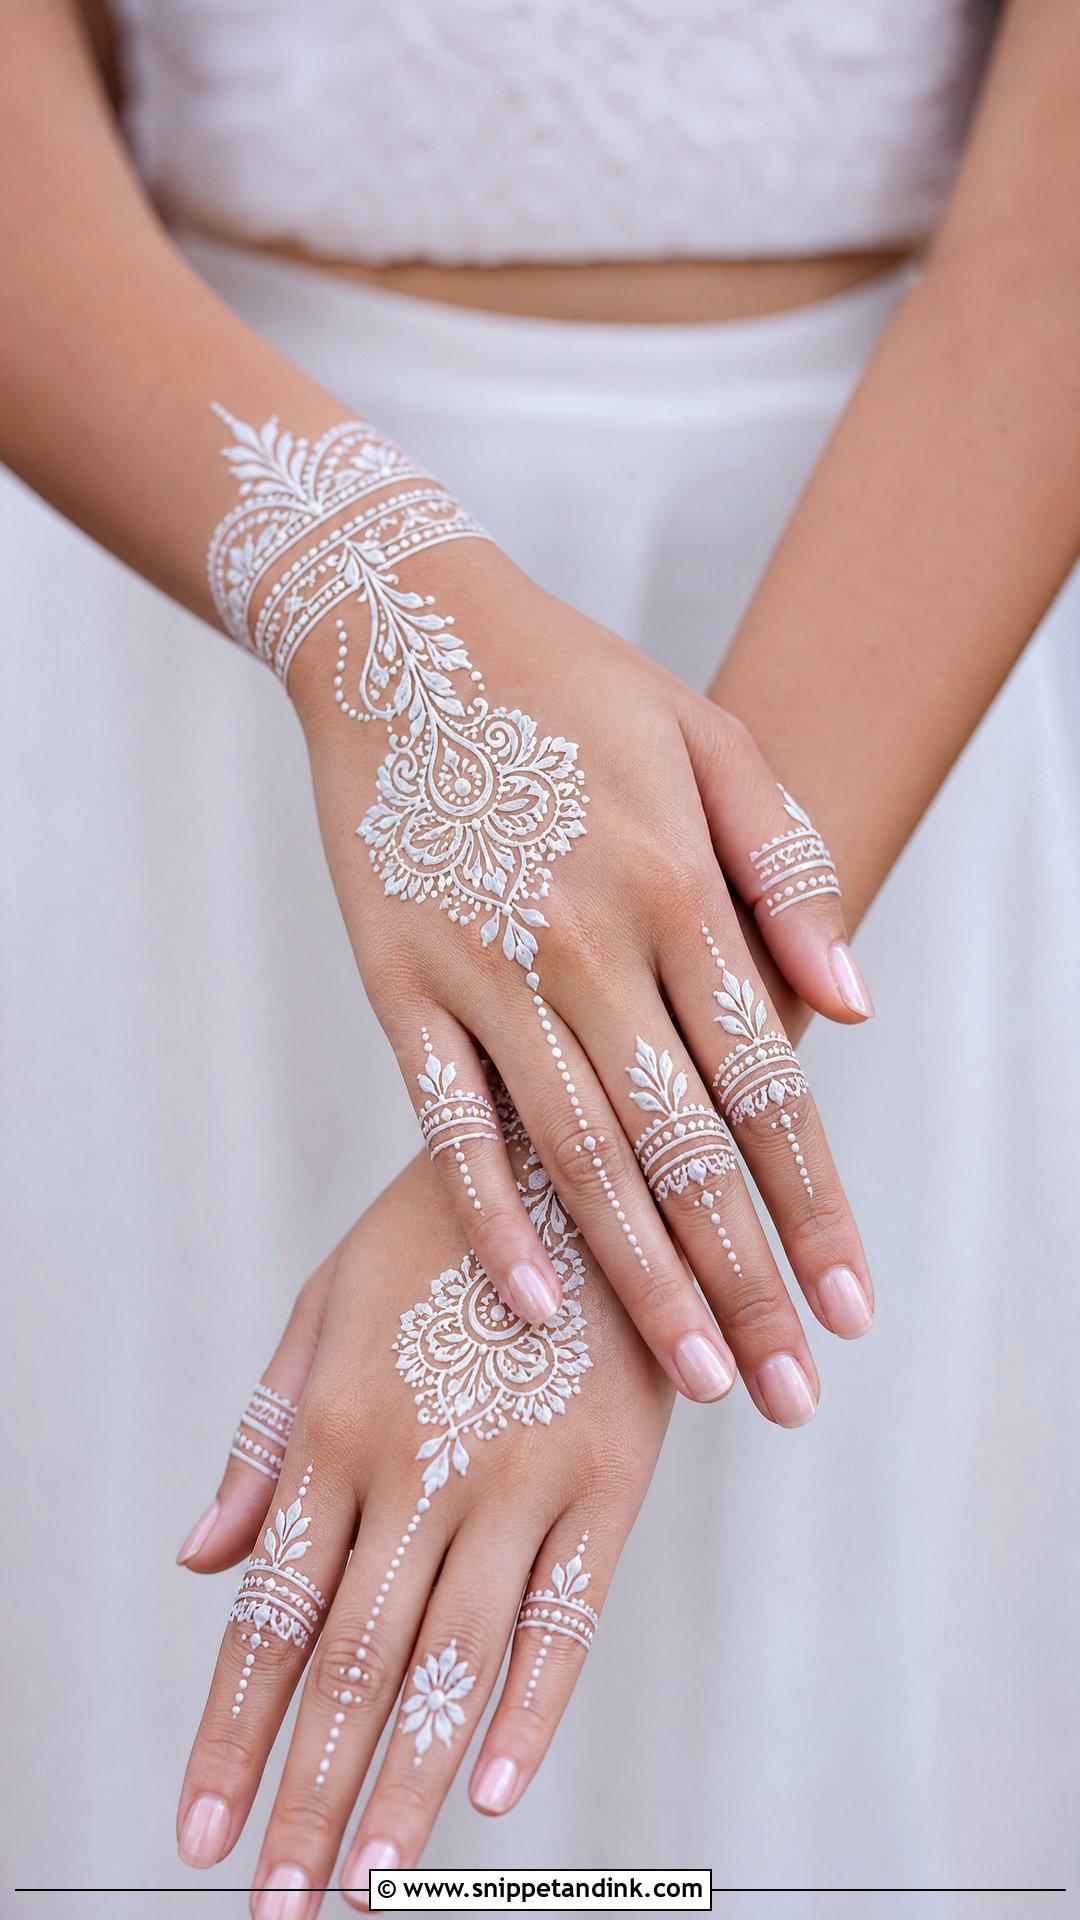
White mehndi is decorative body paint or adhesive that sits on top of the skin and doesn’t stain, so it’s for one evening rather than a lasting design. Lace-like florals, mandalas, finger bands and wrist details work best, with generous space so the white lines stand out. It shows clearly on deeper skin tones and in clean, even lighting. Expect it to rub off within a day or two, and ask about the ingredients if your skin reacts to cosmetics.
Getting Your Hands to Show Up in the Wedding Photos
Mehndi is drawn to be seen up close, and most wedding photos aren’t taken that way. A few things help the design actually appear in the album.
- Time the application so the stain is at its darkest on the day. That usually means one to two days before for natural henna, since color keeps deepening after the paste comes off.
- Ask your photographer for a dedicated detail shot of your hands in soft window light. Harsh direct sun flattens the contrast, and very warm indoor light can make the stain look orange.
- For the classic mehndi shot, hold your palms side by side and slightly cupped rather than stretched flat, so the creases look natural and the design reads as one piece.
- Keep nail color and rings in mind. A deep nail shade beside a deep stain can merge; a lighter or neutral nail gives the henna an edge to read against.
Feet Are a Different Job From Hands
Foot mehndi stains deeply because the soles and toes have thick skin, but it also wears faster, since every step rubs it. I usually suggest doing feet after the hands, once the bride can sit with her legs up for a few hours. Plan for someone to help you move around until the paste is dry, and keep socks loose and cotton overnight if you sleep with it on. A design that wraps the ankle needs the foot held still at a natural angle while I draw, or the band twists once you stand.
Take a Photo to Your Artist, Then Let Her Adapt It
From traditional bridal hands to back hand patterns, minimal layouts, Arabic trails, foot designs and white henna, the right design depends on the occasion, your outfit, your time and your comfort. Full hand, portrait or full arm mehndi gives a rich wedding look. Arabic, bracelet, finger or minimal designs are quicker. Bring the photo you love to your artist, then let her adjust the spacing and motifs to your hand shape and to the way henna really stains on your skin.
You'll Like These Ideas:


Leave a Reply