
The back of the hand is the part of your mehndi everyone actually sees. It’s what shows when you greet relatives, hold a cup, adjust a dupatta or pose for a ring shot, while the palm mostly stays hidden. It’s also a trickier canvas than the palm, because the skin is thinner, the knuckles move and bangles cover the wrist. The designs below run from a single flower to full bridal coverage, with mandalas, Arabic trails, jaali, bracelet cuffs and modern open layouts in between. With each one I’ve added what I watch for when I draw it, so you can pick a pattern that suits your hand and your occasion, not only the picture.
Planning Around Knuckles, the Wrist Bone and Your Bangles
Before I draw anything on the back of a hand, I ask the client to make a loose fist and then open it again. Every line that crosses a knuckle stretches when the hand closes, so I keep fine detail off the knuckle peaks and let bands sit in the creases between joints instead. The main motif goes in the flat area between the wrist bone and the knuckles, where the skin moves least.
Then I check the jewellery. If you’ll wear a stack of bangles or a kada, the wrist cuff needs to sit just above where they rest, or the best part of the design spends the day hidden. On the ring finger, I keep the band area a little lighter if a real ring is going on top. And for brides, both hands should mirror each other, because they’ll be photographed together far more often than apart.
Why this side stains lighter than the palm
The skin on the back of the hand is thinner than on the palm, so the same paste gives a lighter, more orange-brown result there. It’s normal, not a sign of bad henna. If deep colour matters to you, keep the paste on longer and choose bolder lines over very fine jaali, which can look faint on this side.
1. Simple Back Hand Mehndi Design
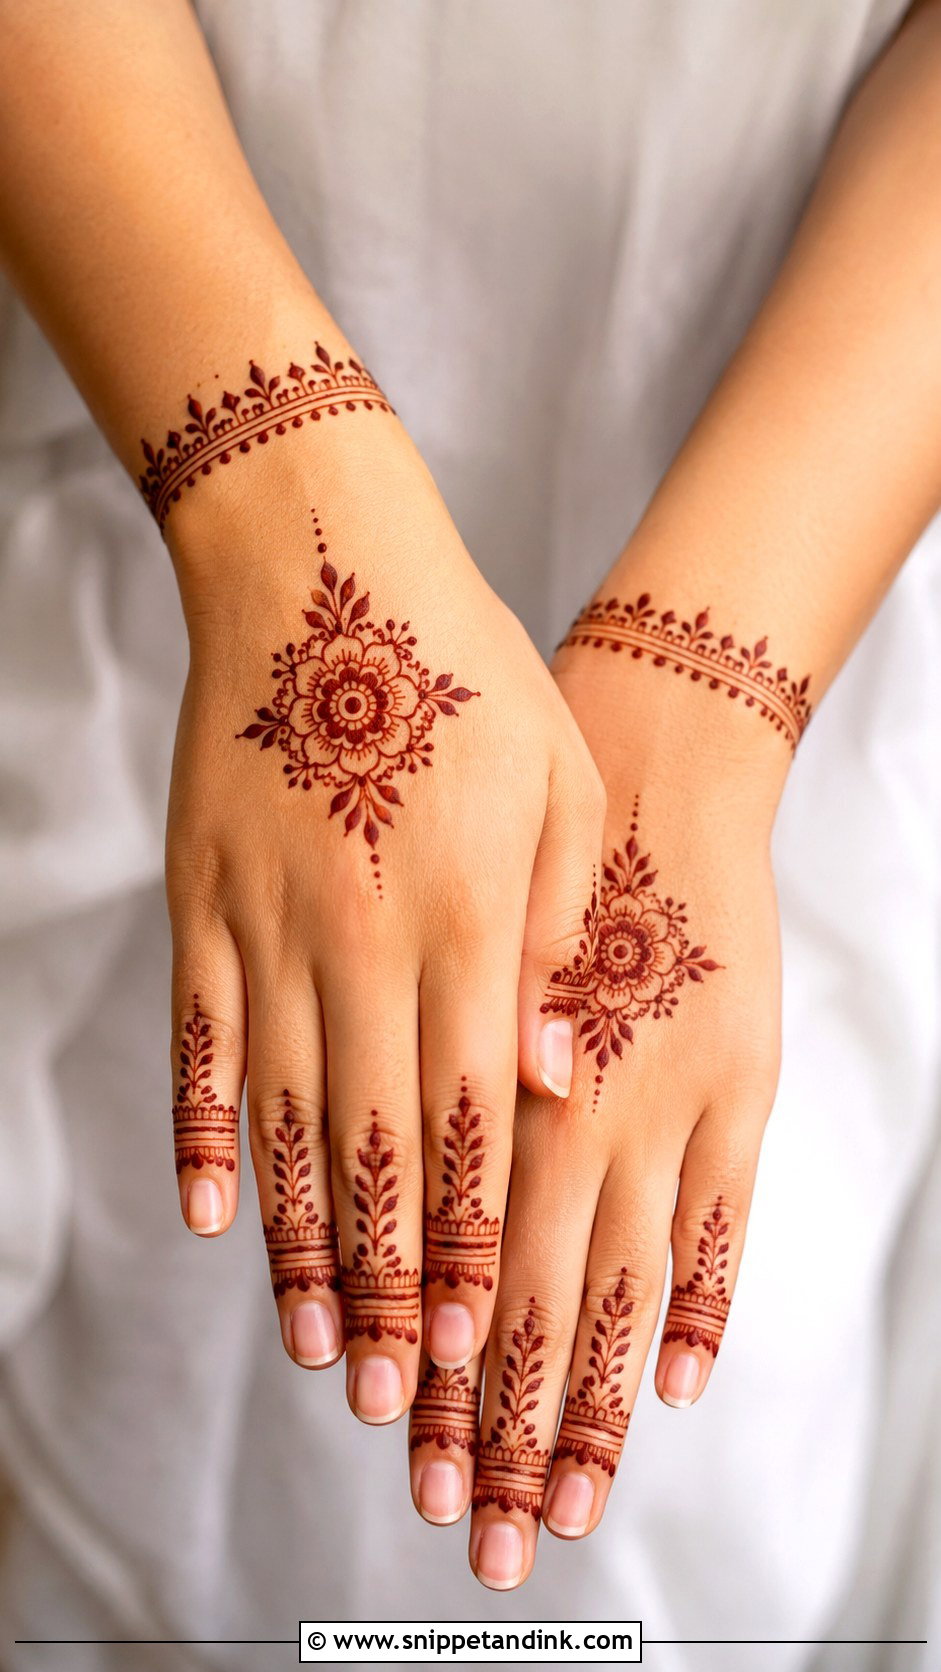
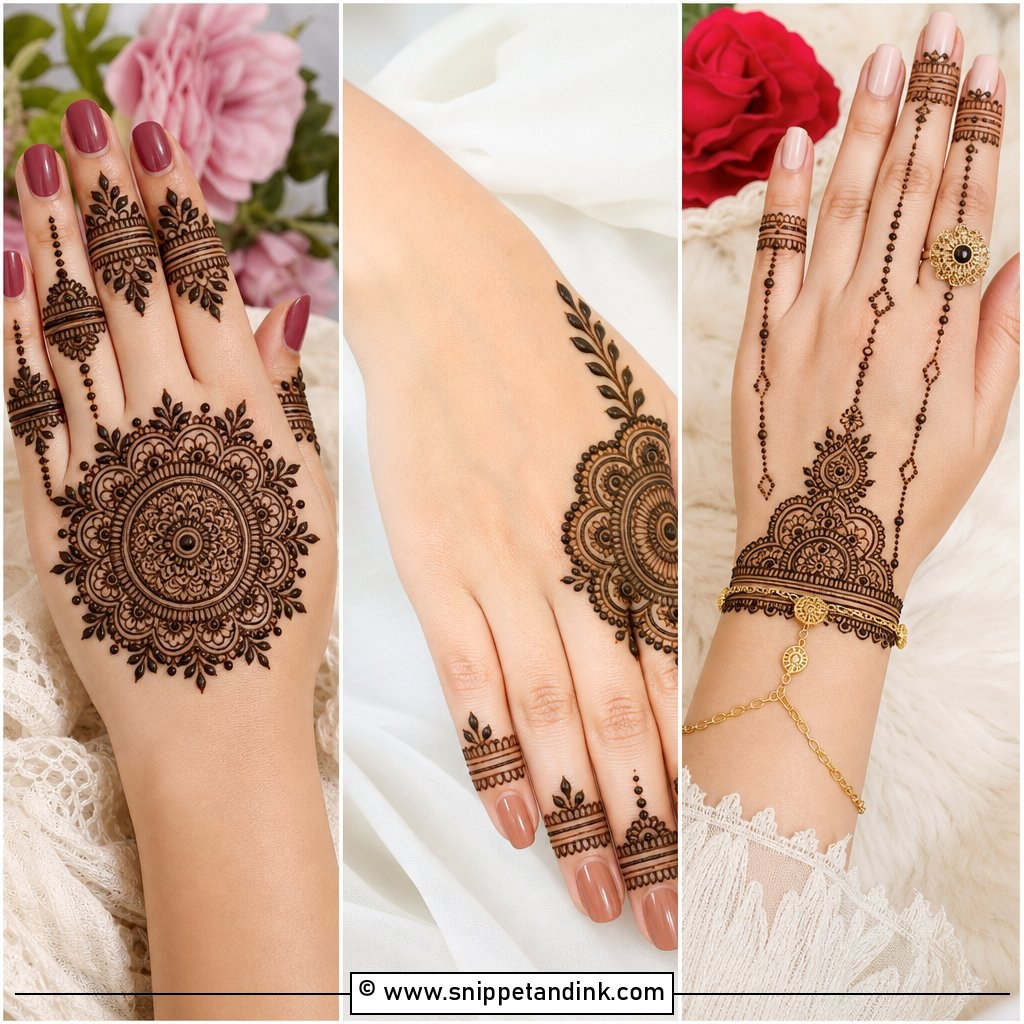
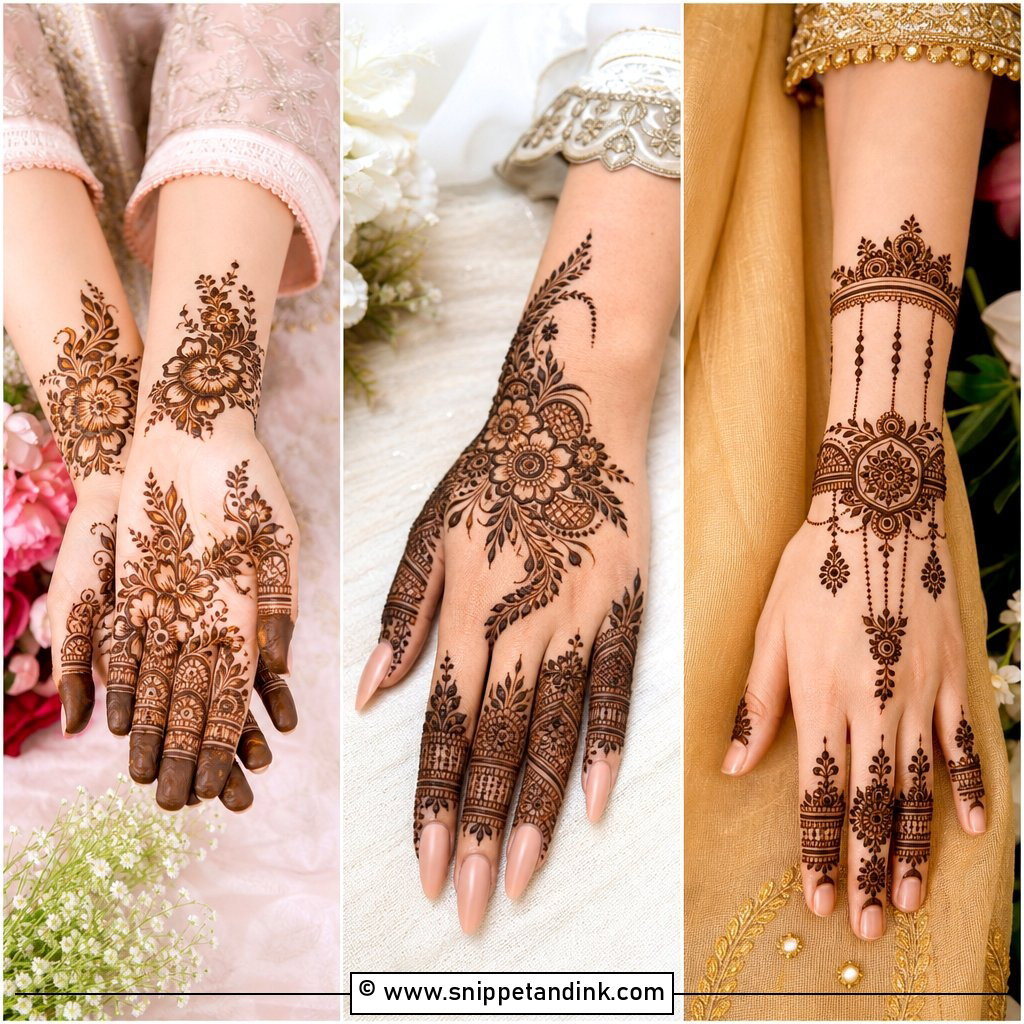
A small central flower or mandala, fine lines and tiny dots on the fingers, and a slim wrist border: that’s all this design needs. What makes it work is spacing. I leave at least a finger’s width of bare skin around the centre motif so it reads clearly once the stain darkens, and I resist adding fillers just because there’s room. It’s quick enough for a school event or a small gathering, and it’s the layout I’d give anyone trying a cone for the first time. It sits comfortably with both traditional and western outfits.
2. Arabic Back Hand Mehndi Design
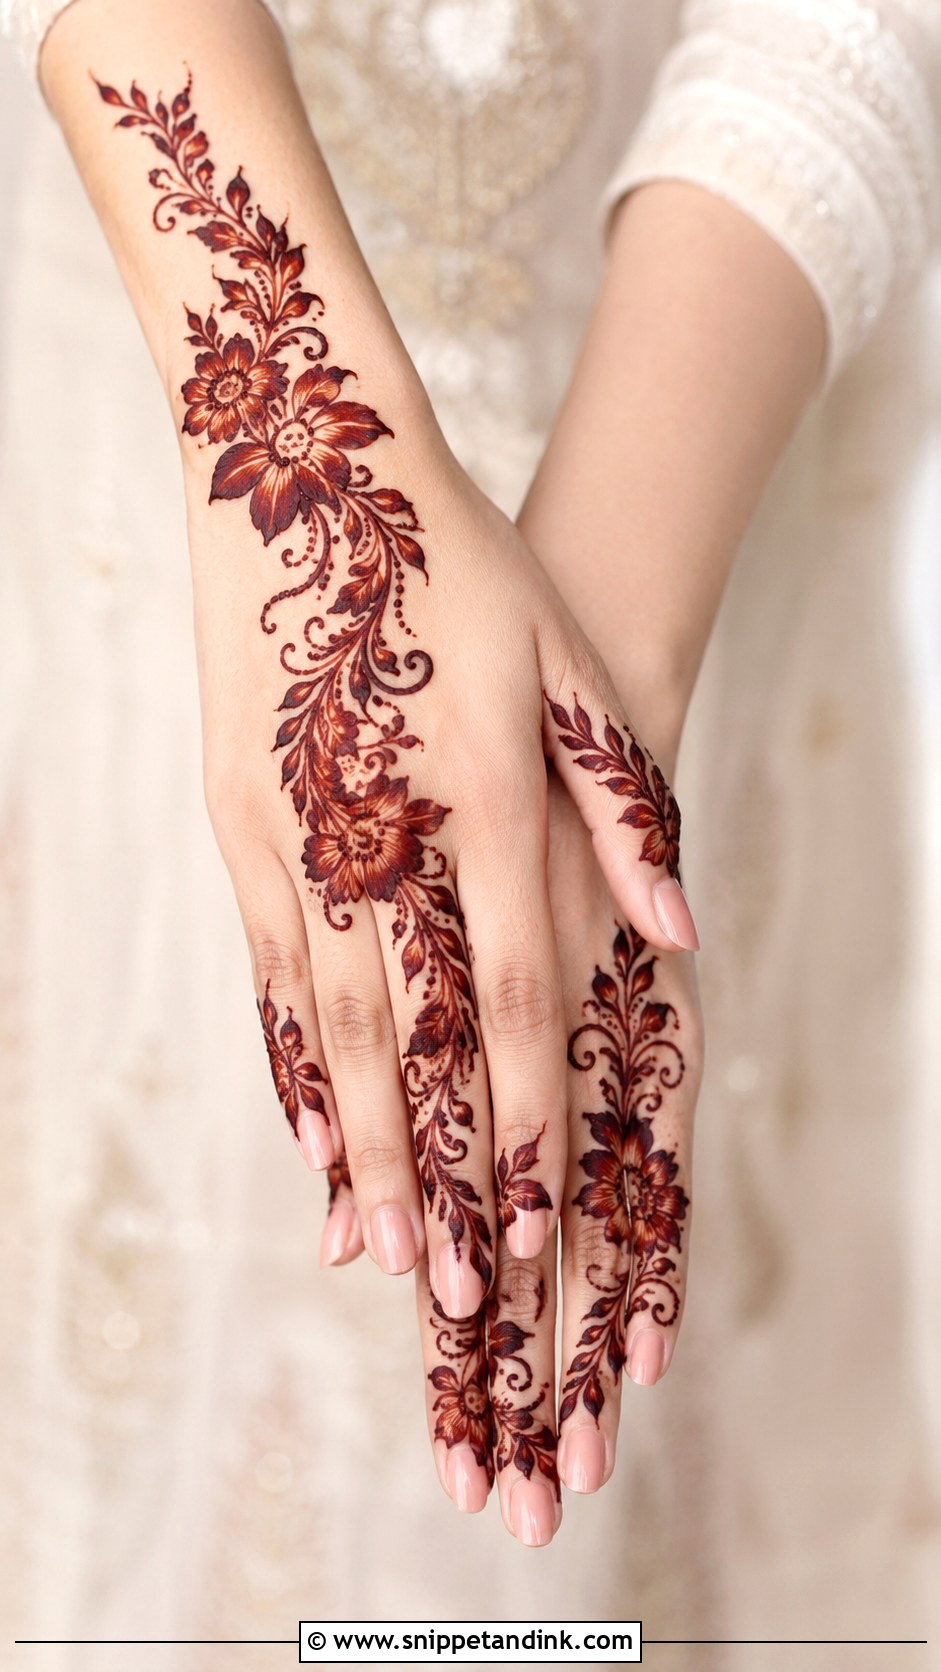
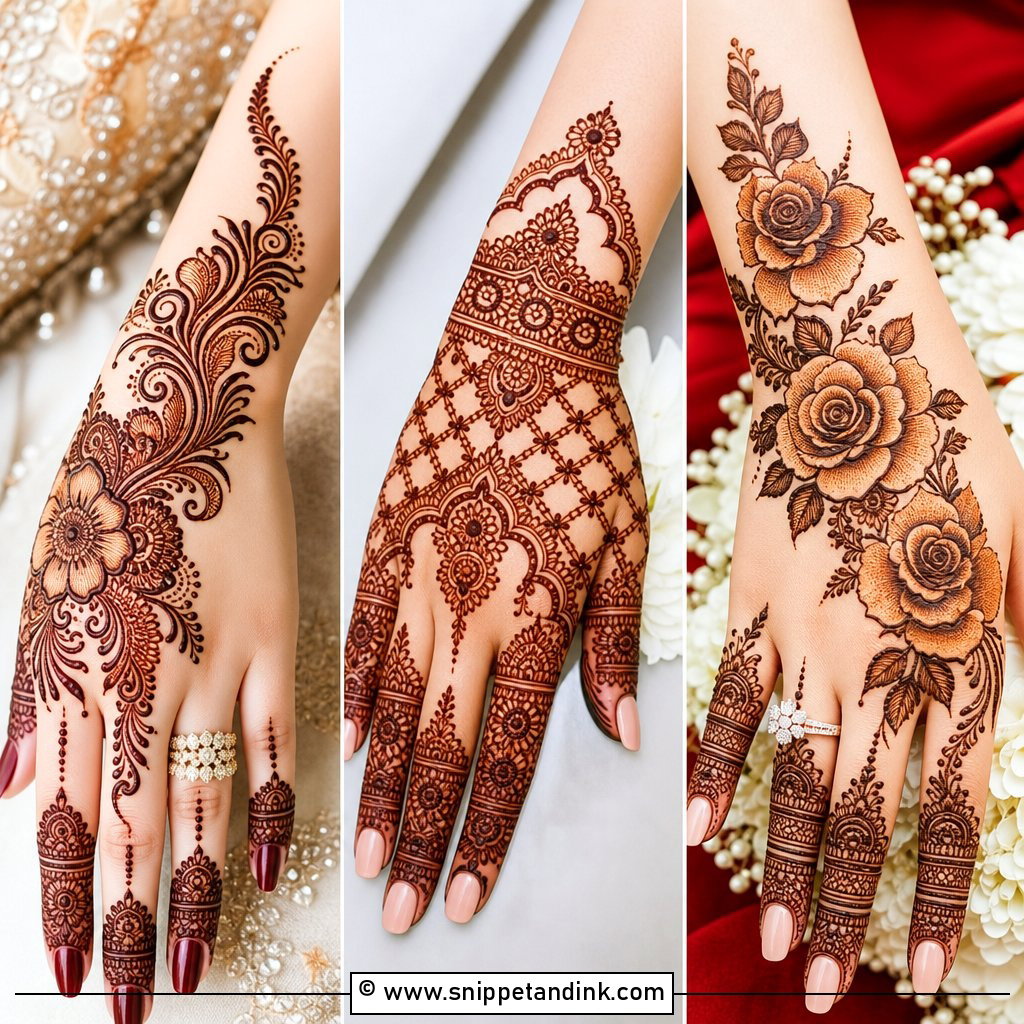
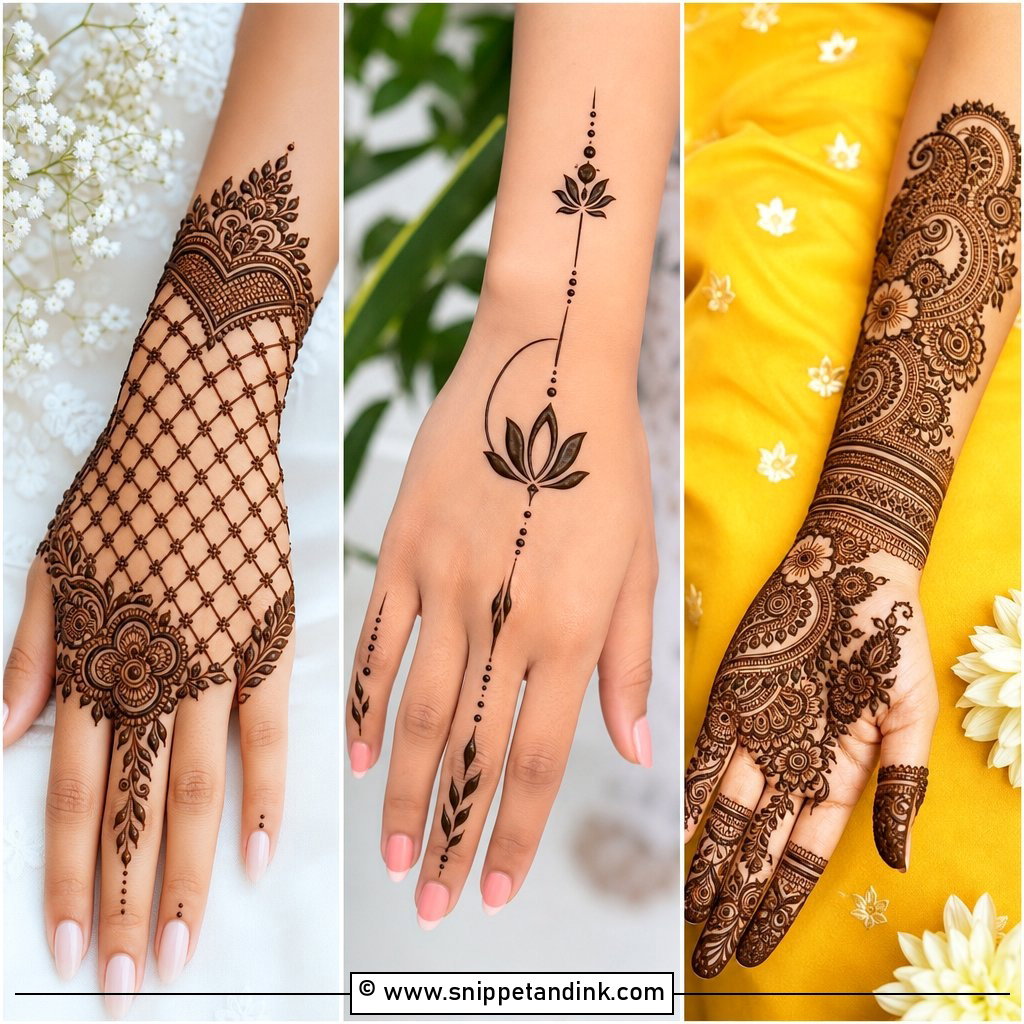
Arabic layouts are built on one diagonal. The trail usually starts at the outer wrist and climbs toward the index finger, with large flowers, shaded leaves and curved vines and plenty of bare skin between them. That open skin is the point: it makes bold motifs look bolder after the stain develops. I like to finish the trail into detailed fingertips so the pattern looks deliberate rather than cut off. A few tiny dots along the vine are enough decoration. For Eid, an engagement or a festive dinner, it gives a lot of presence for very little application time.
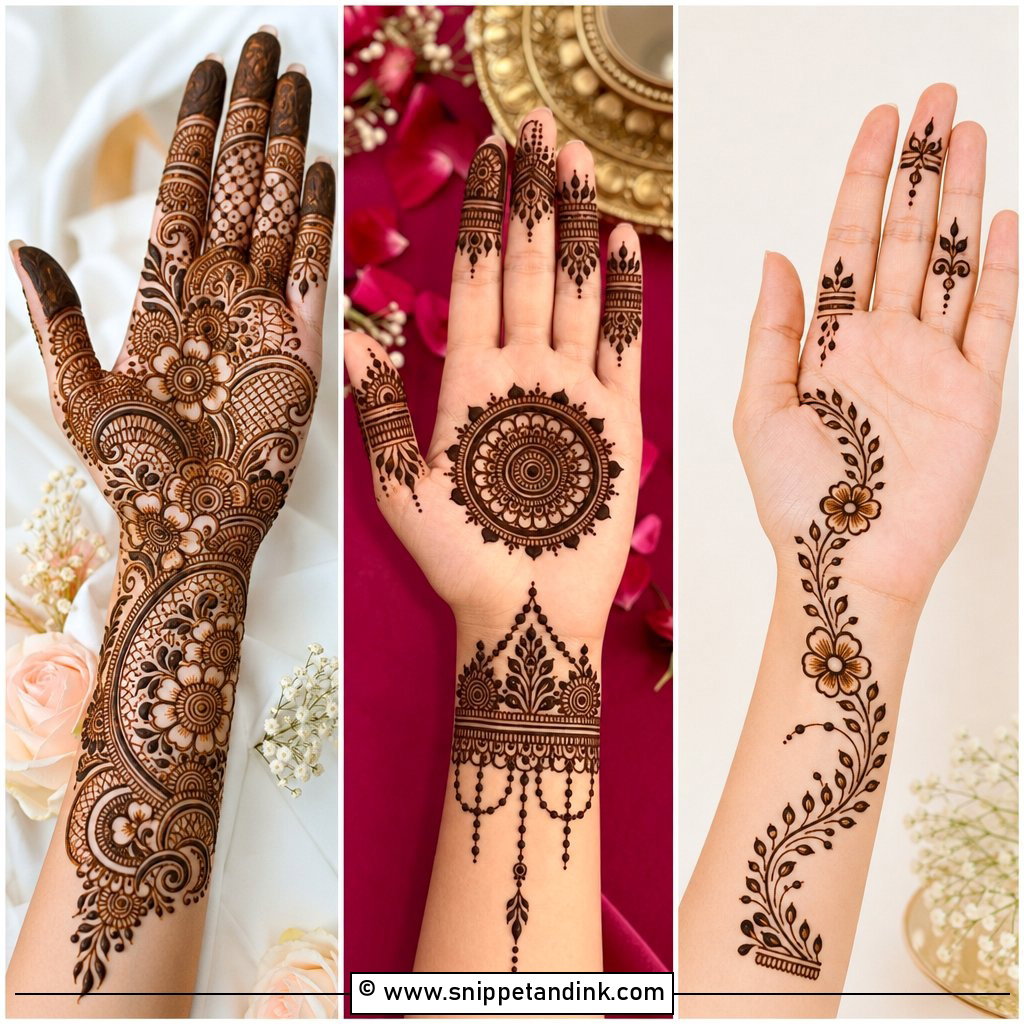
3. Mandala Back Hand Mehndi Design
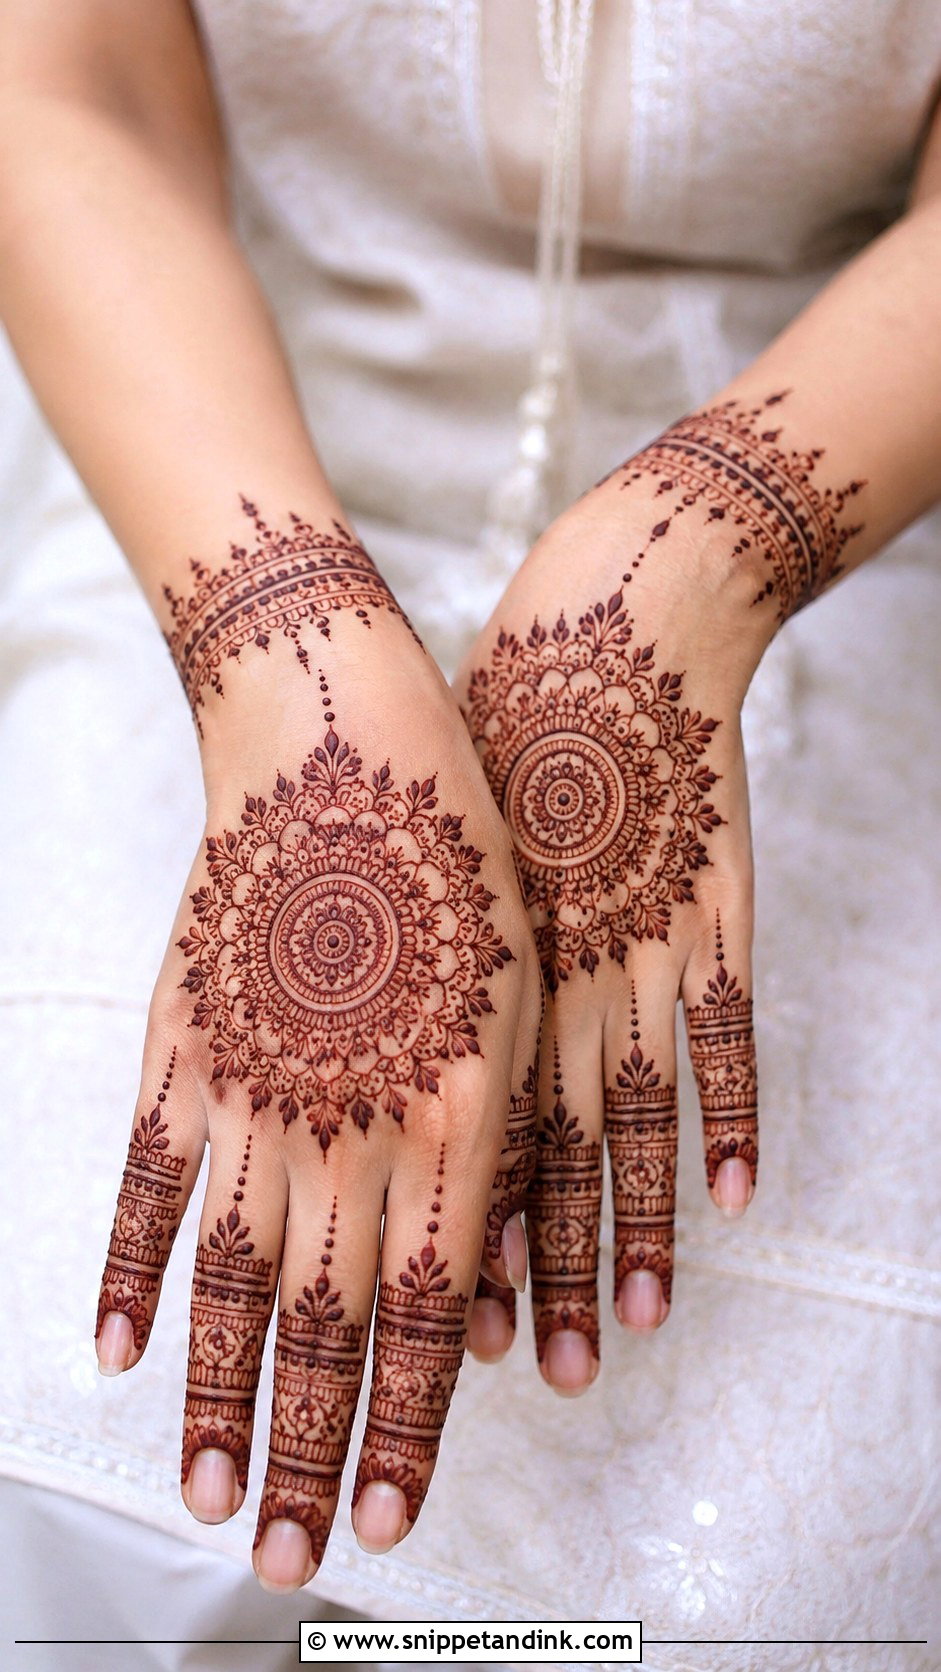
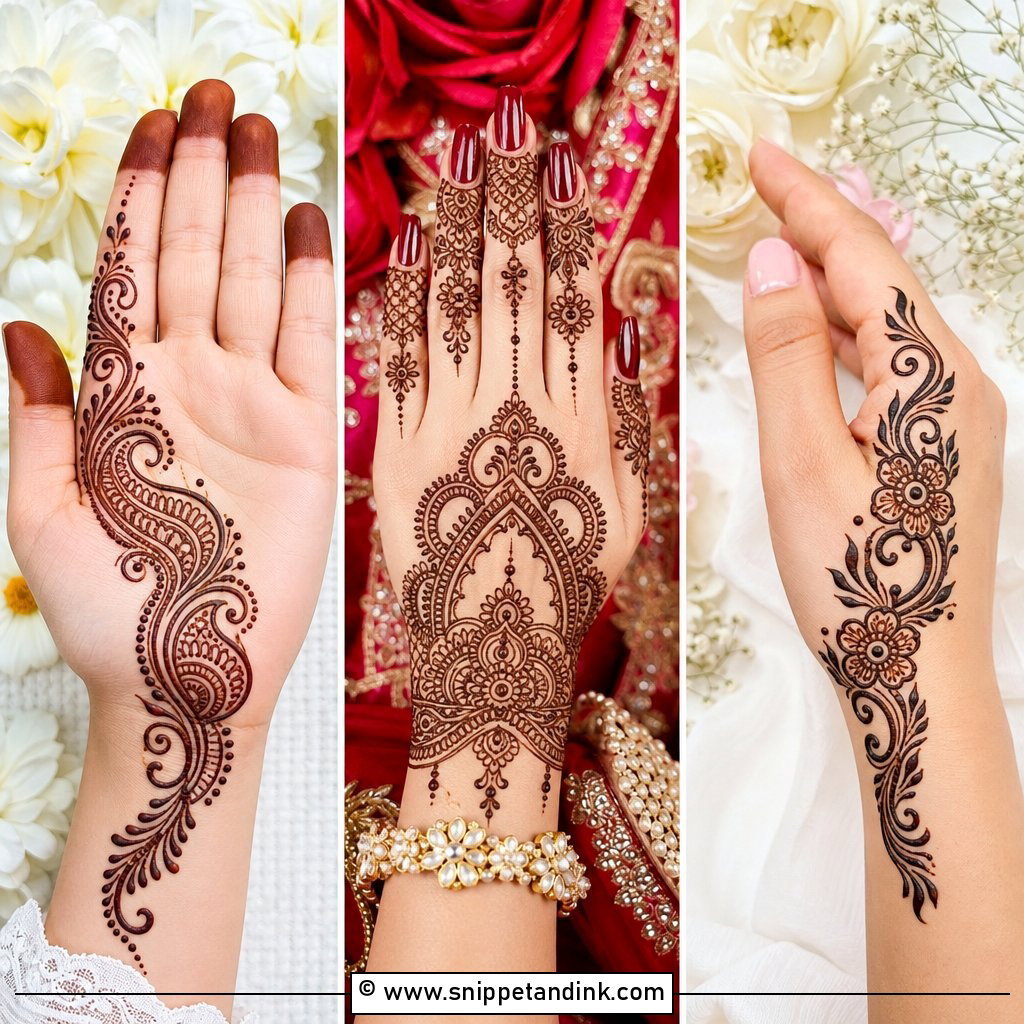
A mandala sits in the centre of the back hand, built outward from a small circle with rings of petals, dots and fine outlines. The hard part is keeping it round. The back of the hand isn’t flat, so I start the first circle with the hand resting palm-down and relaxed; drawn on a flexed hand, it turns oval once the fingers straighten. Matching bands or leafy tips on the fingers tie it together. Keep it medium-sized with open space around it for a lighter look, or connect it to a wrist cuff with dotted chains for a festival like Raksha Bandhan or a wedding.
4. Full Back Hand Mehndi Design
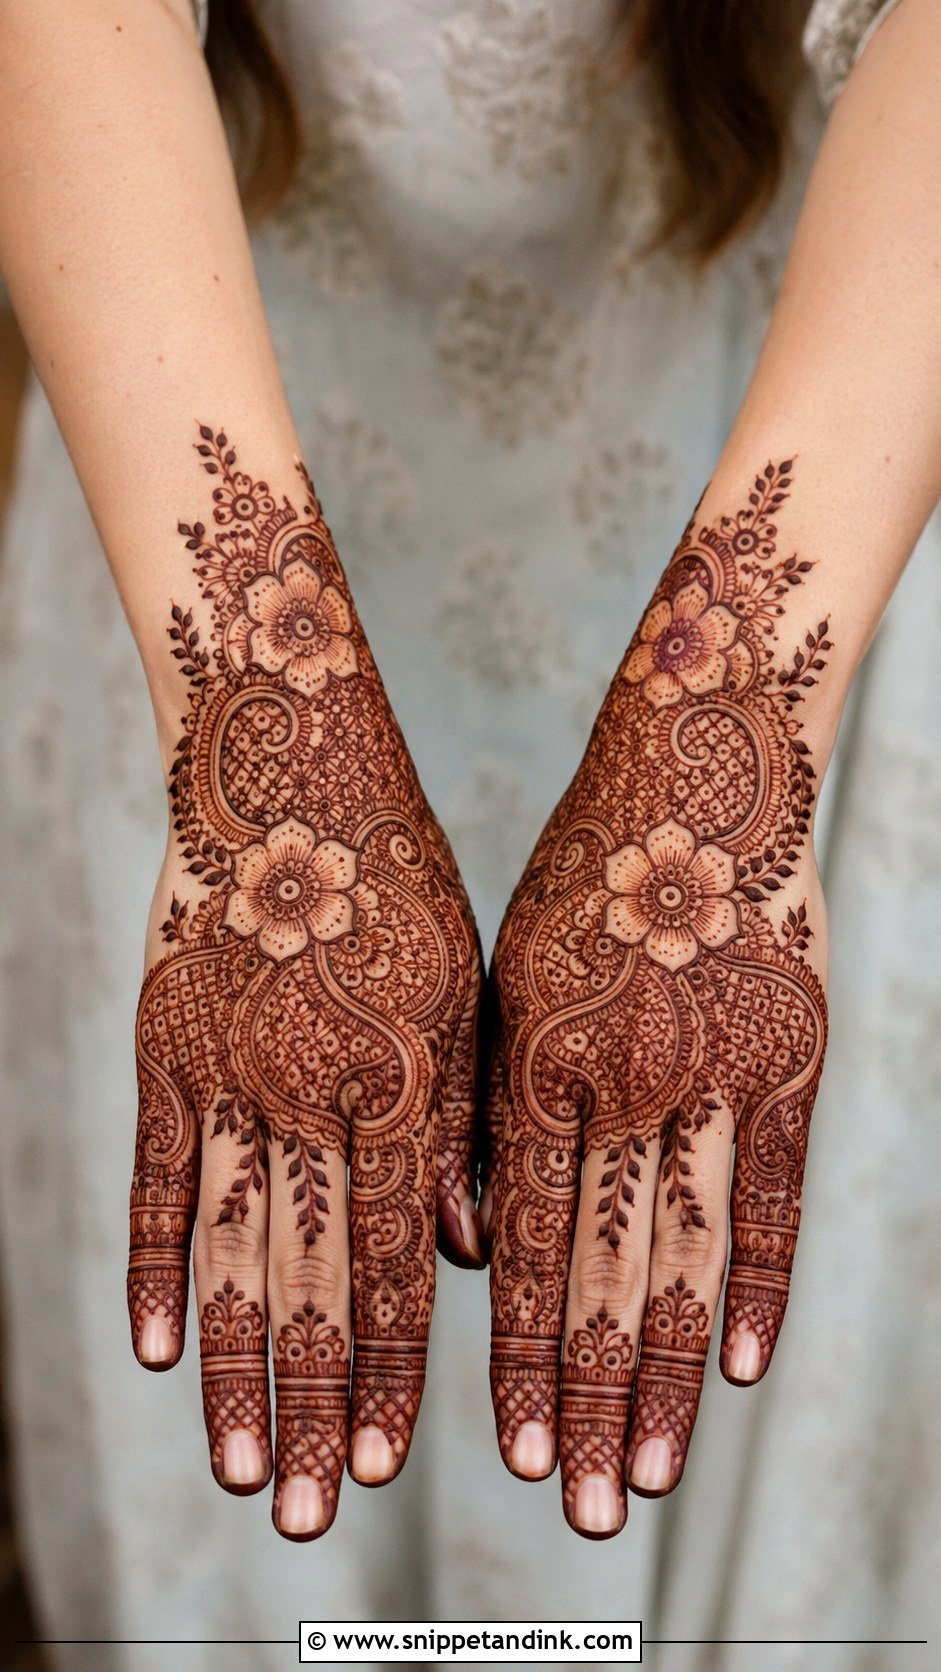
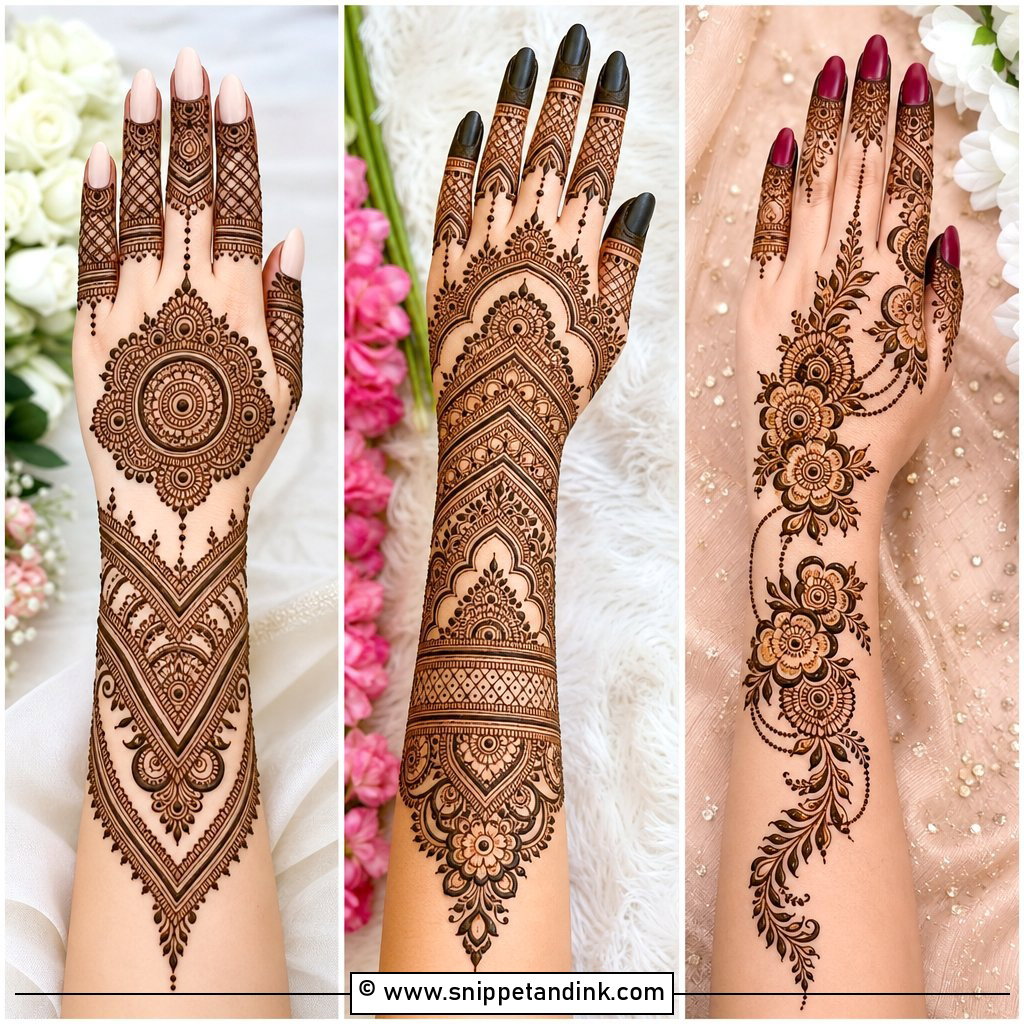
Full coverage runs from the fingertips to the wrist and usually combines florals, paisleys, vines, jaali and fine fillers. Without a plan it turns into a dark blur, so I sketch the structure first: a main motif near the centre, then sections divided by borders and curved lines, and only then the filling. The fingers should be detailed but not solid, or they overpower the rest of the hand. It’s a good fit for bridesmaids, family weddings, Karwa Chauth and Diwali, and it holds its own next to bangles, rings and heavy embroidery.
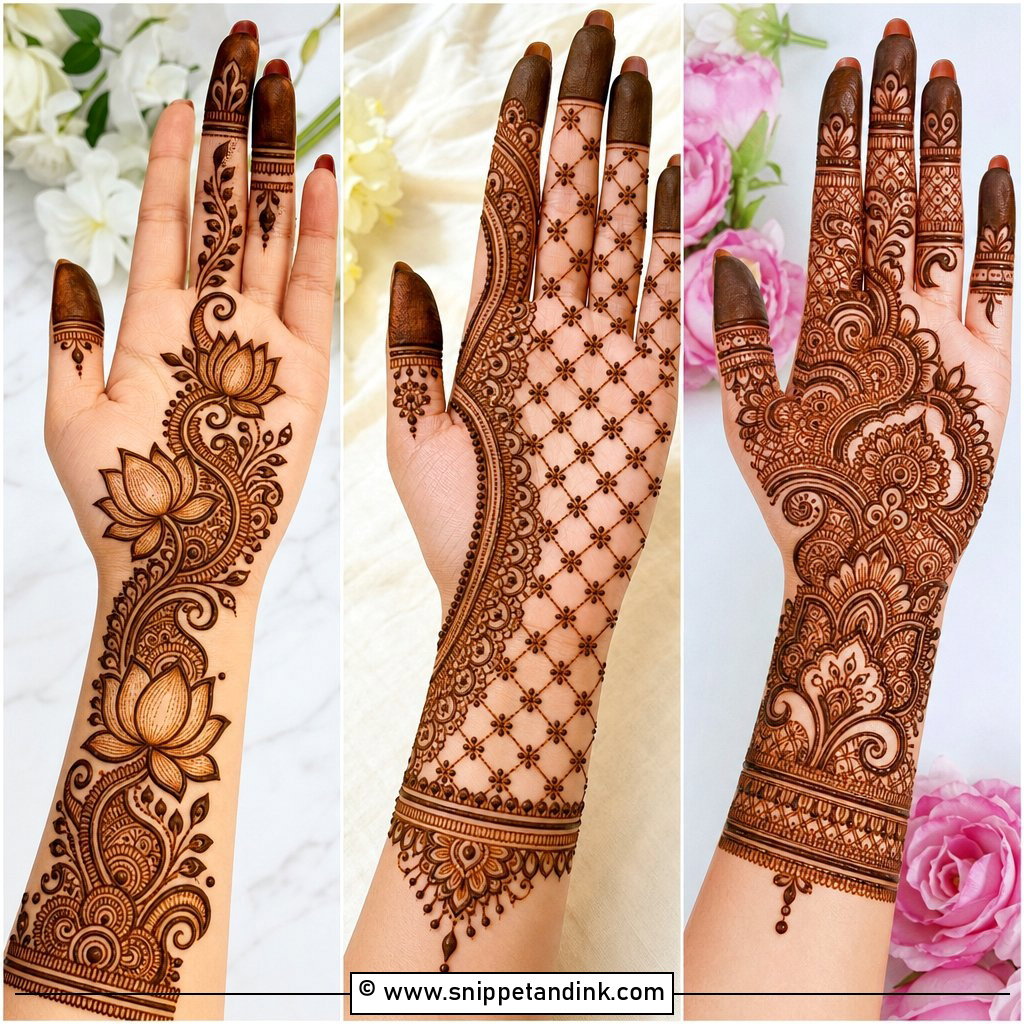
5. Bridal Back Hand Mehndi Design
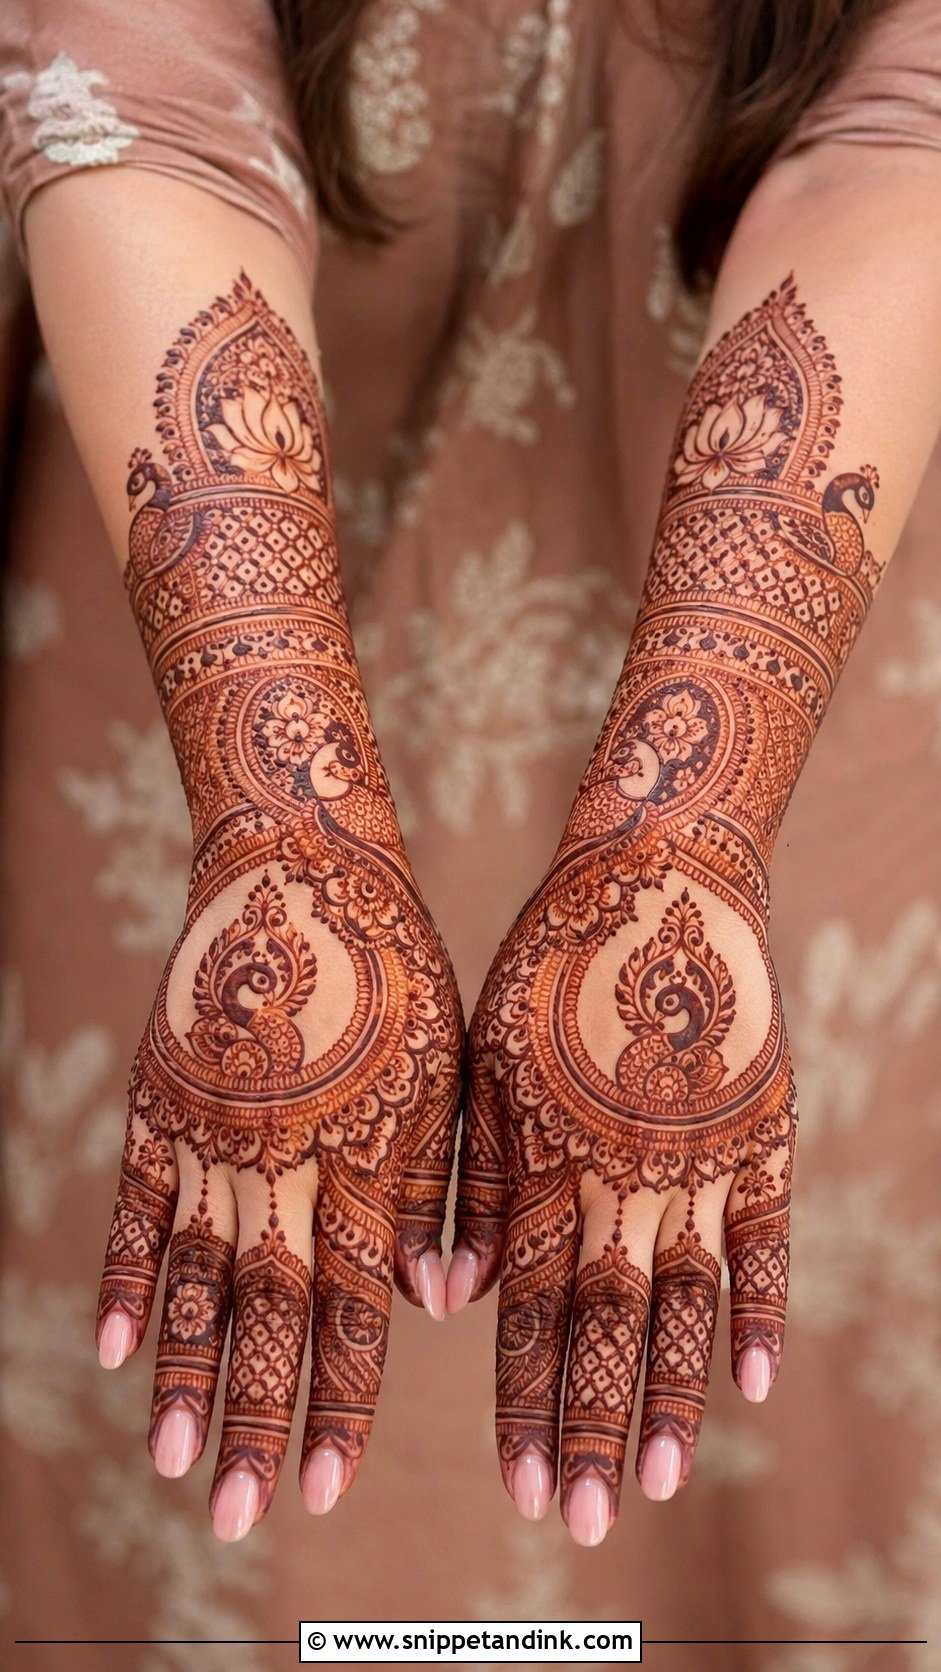
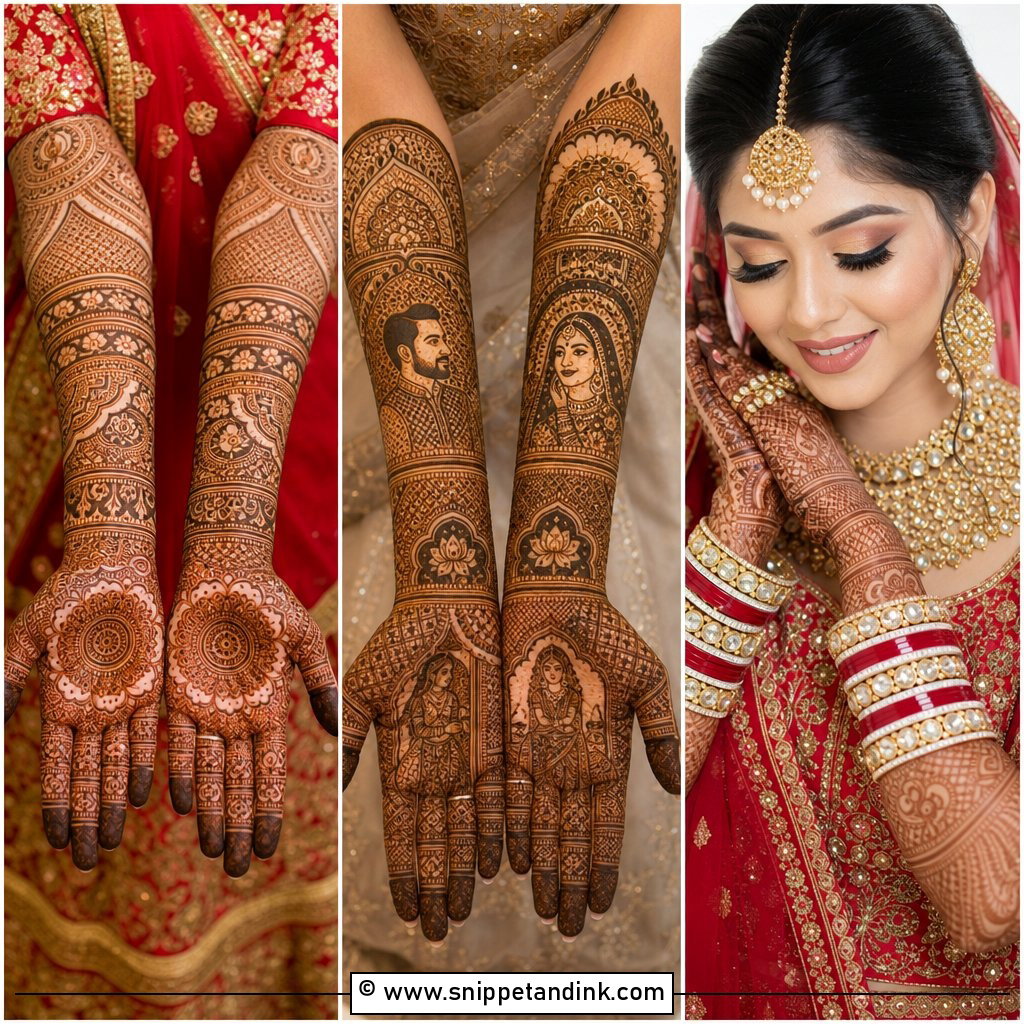
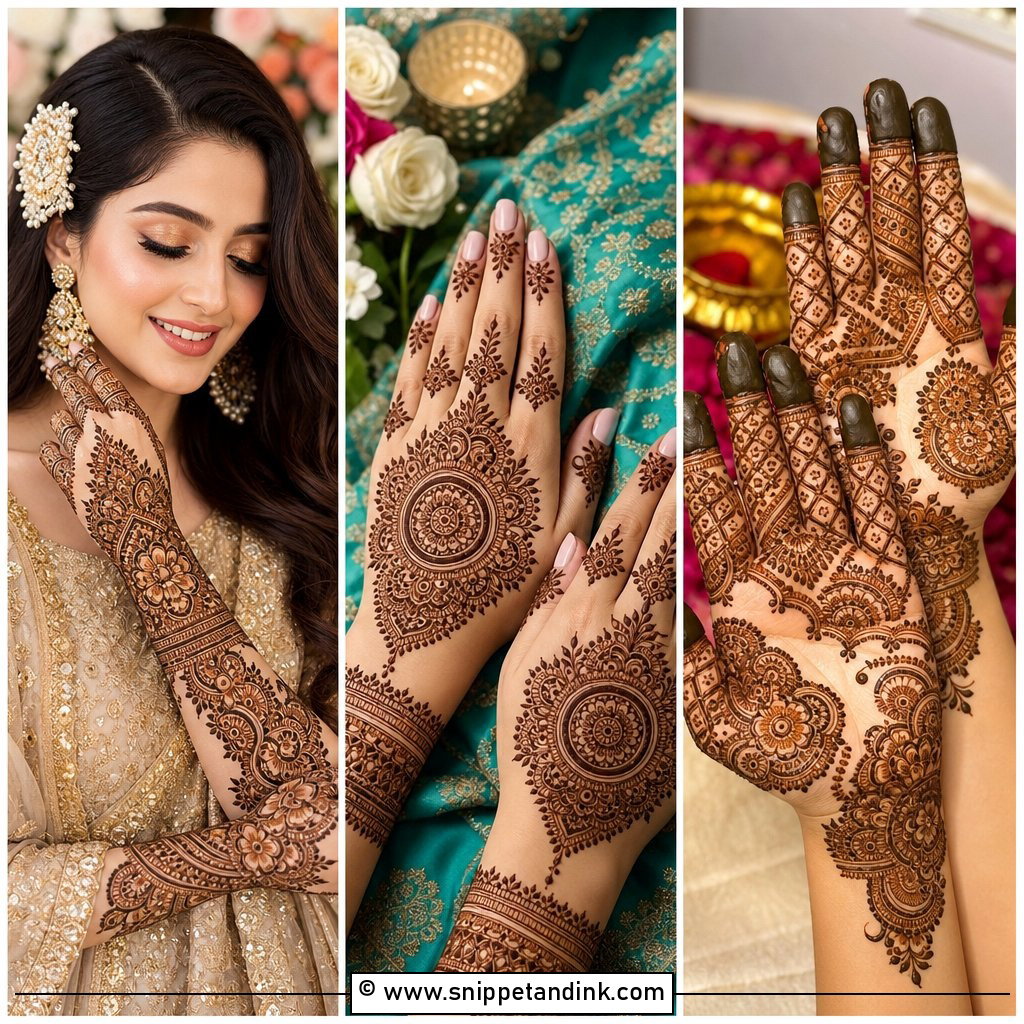
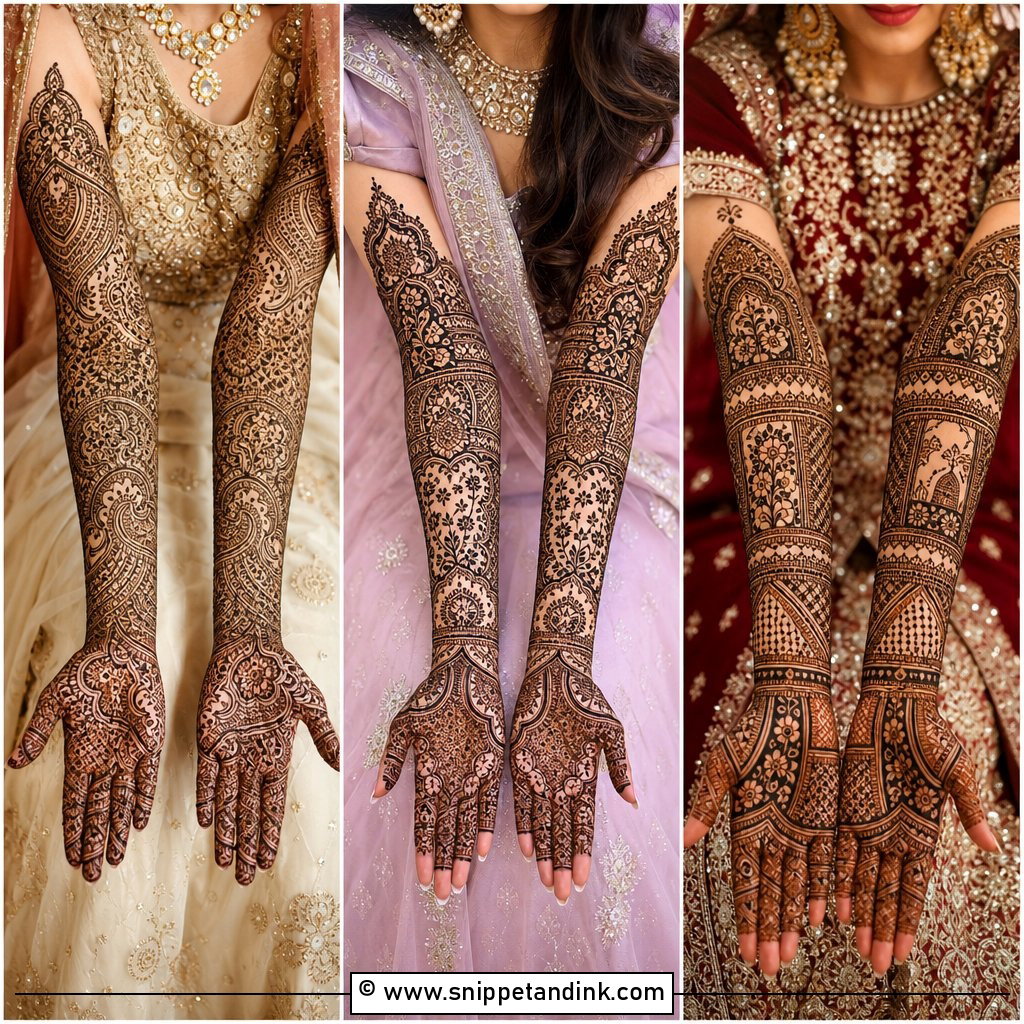
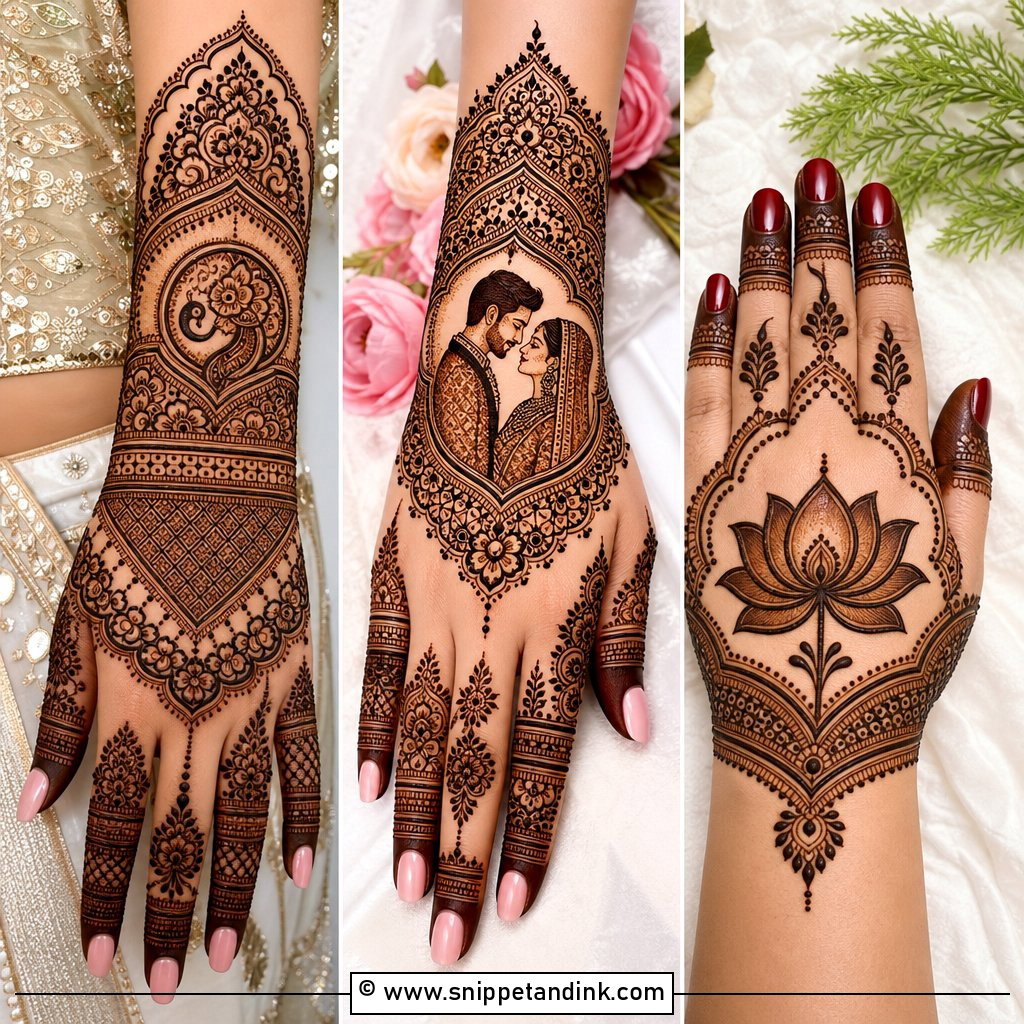
Bridal back hand mehndi design asks for more of everything: paisleys, peacocks, lotus motifs, jaali, bride and groom figures, jewellery chains and deep fingertip work, often running past the wrist up the forearm. I focus on symmetry between the two hands, because the bride’s hands are photographed side by side again and again, and any mismatch shows. A large central mandala, heavy cuffs and fine finger panels make the hand look dressed in jewellery. It takes hours to apply, so plan to sit still, and it suits the wedding itself, bridal portraits and the pre-wedding functions.
6. Modern Back Hand Mehndi Design
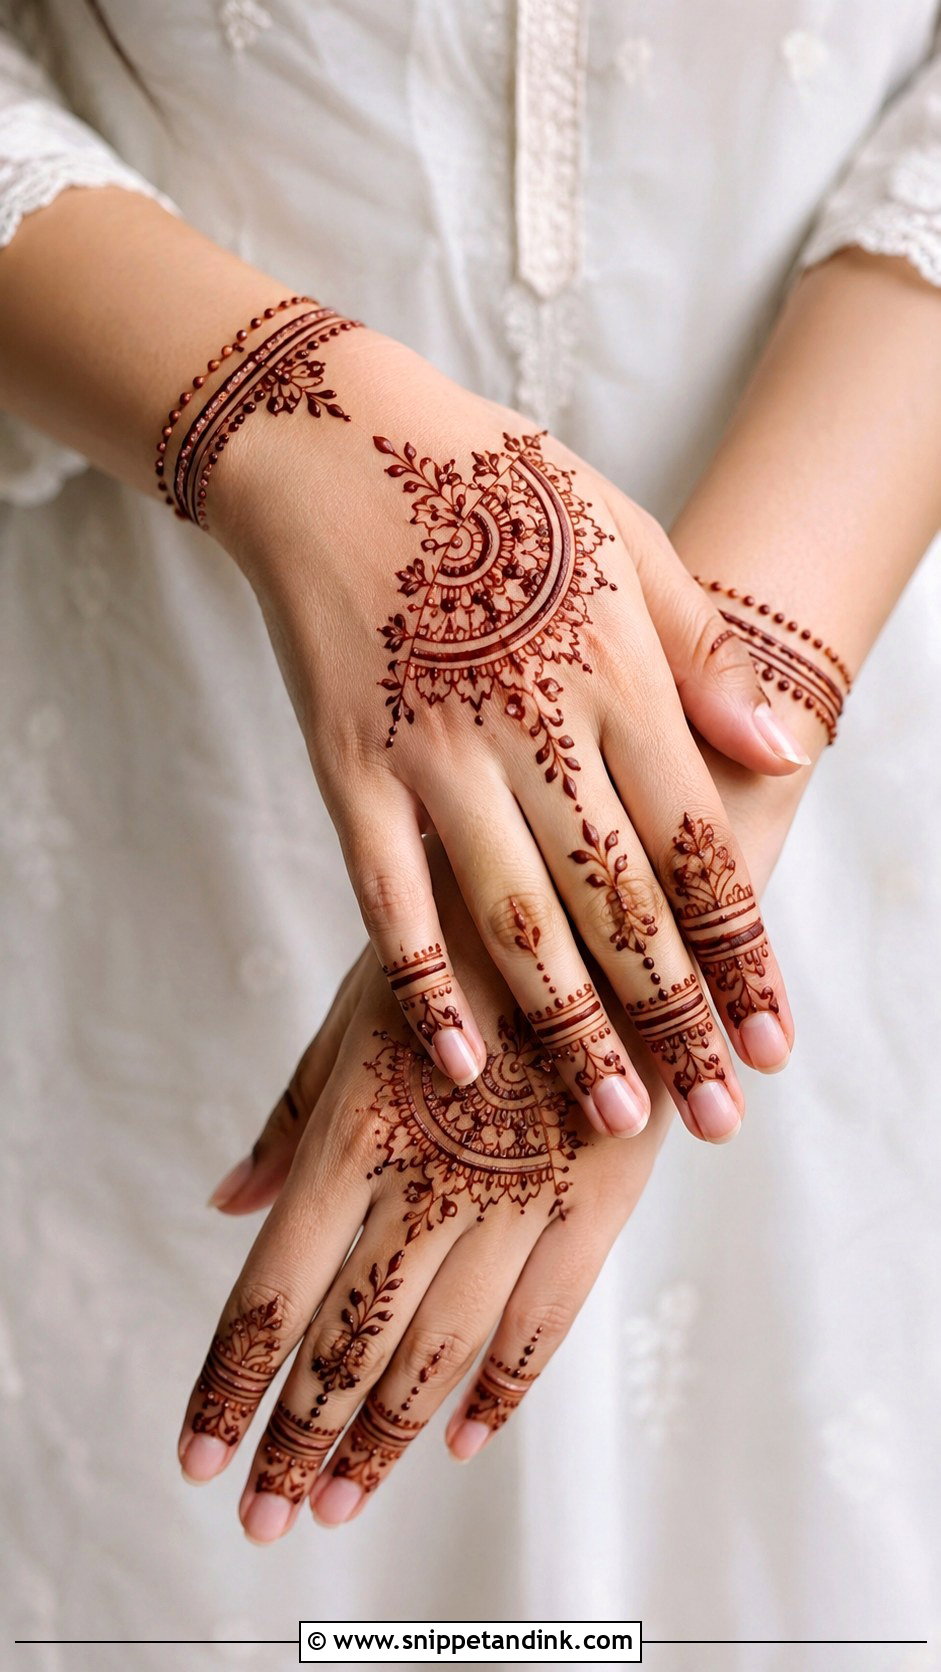
Modern designs pick a few areas and leave the rest bare. One statement motif on the back hand, detailed fingers and a slim wrist band is the most common version; geometric lines, half-mandalas and minimal floral trails are others. Because there’s less henna on the skin, every line is visible, so I use a finer cone tip and a smoother paste than I would for dense bridal work. It pairs well with fusion wear and simple jewellery, and suits parties and engagement functions.
7. Floral Back Hand Mehndi Design
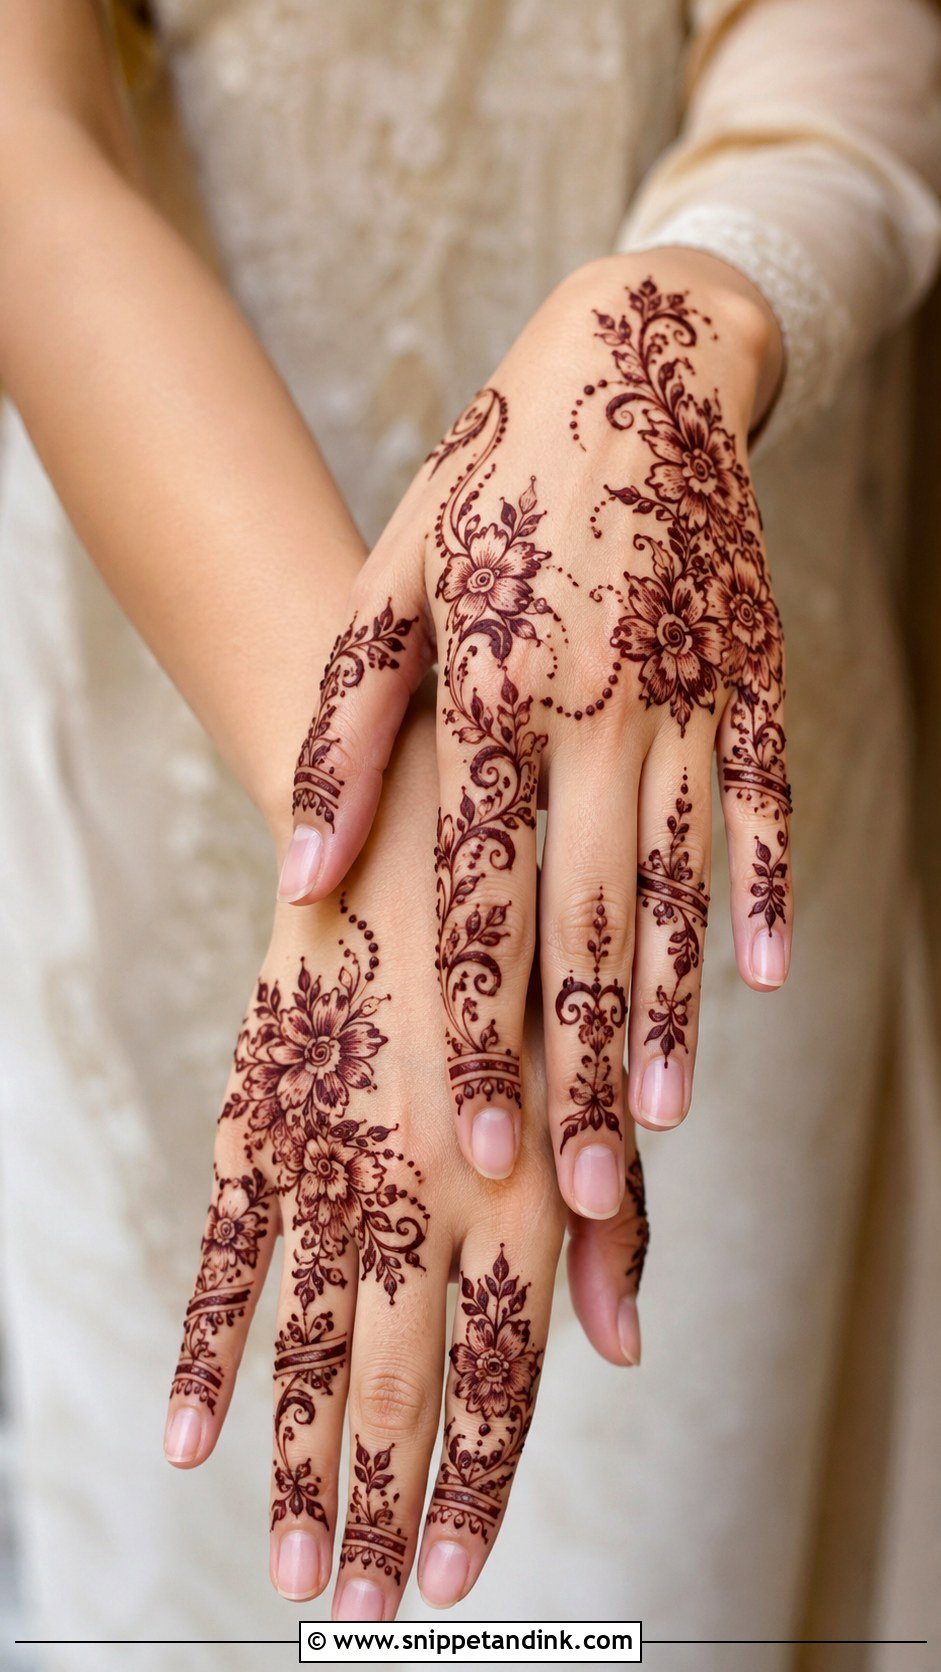
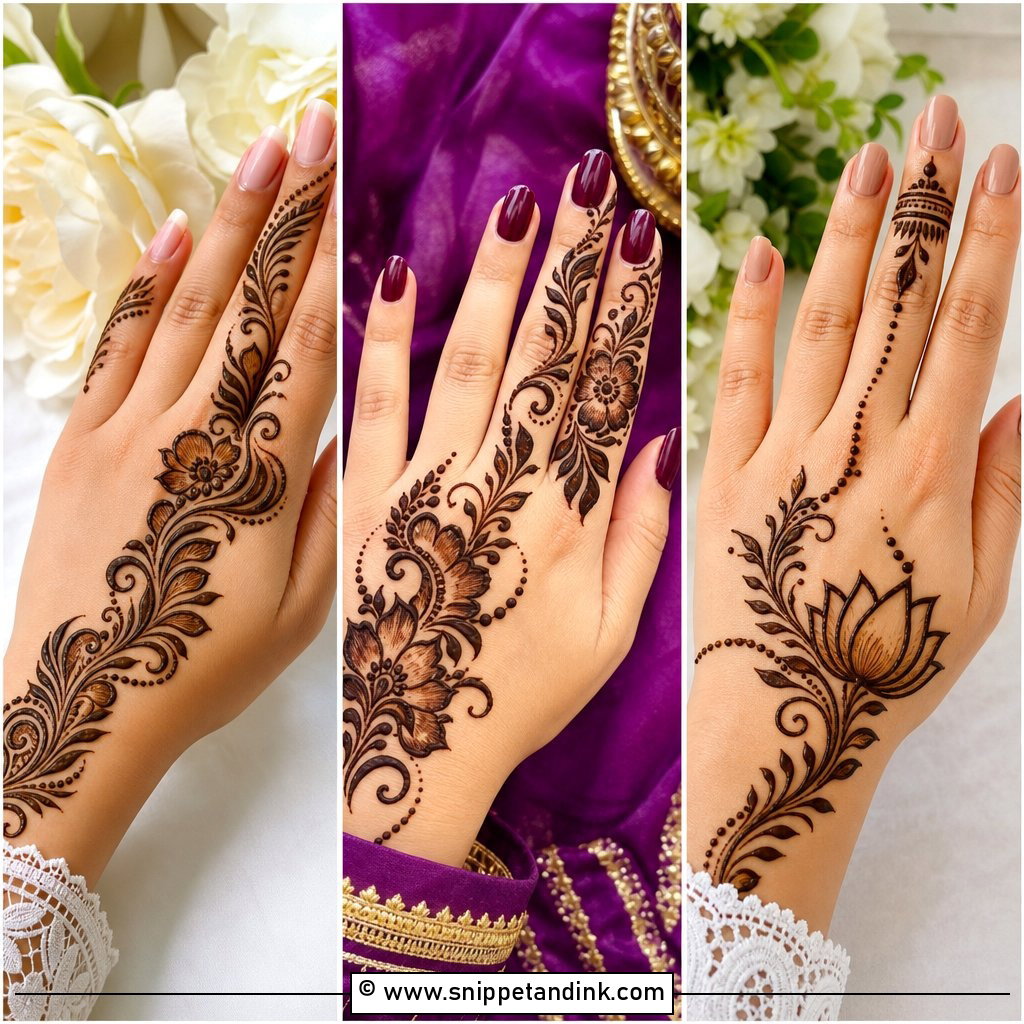
Flowers adapt to any hand, which is why I reach for them so often. Large open blooms on the back of the hand, small buds on the fingers and leafy vines toward the wrist make a complete floral layout. Leave the petals open, not filled in. Once the henna darkens, those bare petal centres are what give the design contrast. Keep it airy for casual events, or add shaded petals and dotted fillers when the occasion is bigger.
8. Finger Back Hand Mehndi Design
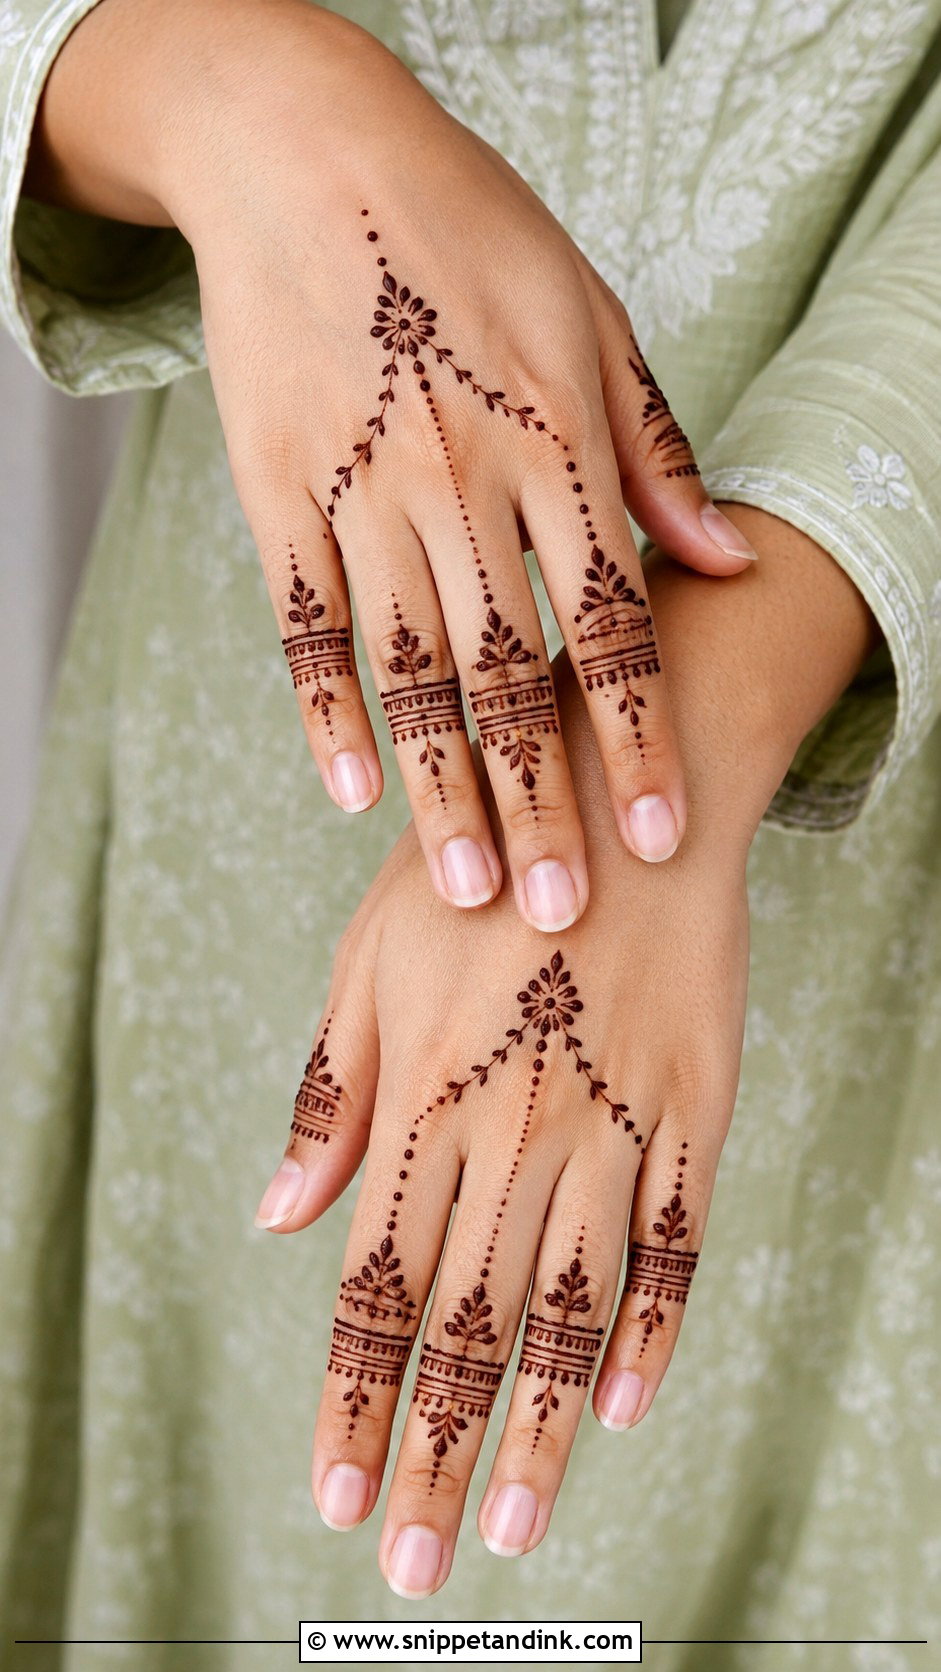
Here the fingers carry the design and the back of the hand stays quiet. Each finger gets bands, leaves, dots or a small floral panel, and a little centre motif or wrist bracelet ties them together. Vertical, well-spaced patterns make fingers look longer, while horizontal bands at every joint can make short fingers look shorter, so I adjust for the hand in front of me. It covers little skin, applies quickly and suits small parties or a festive day at work.
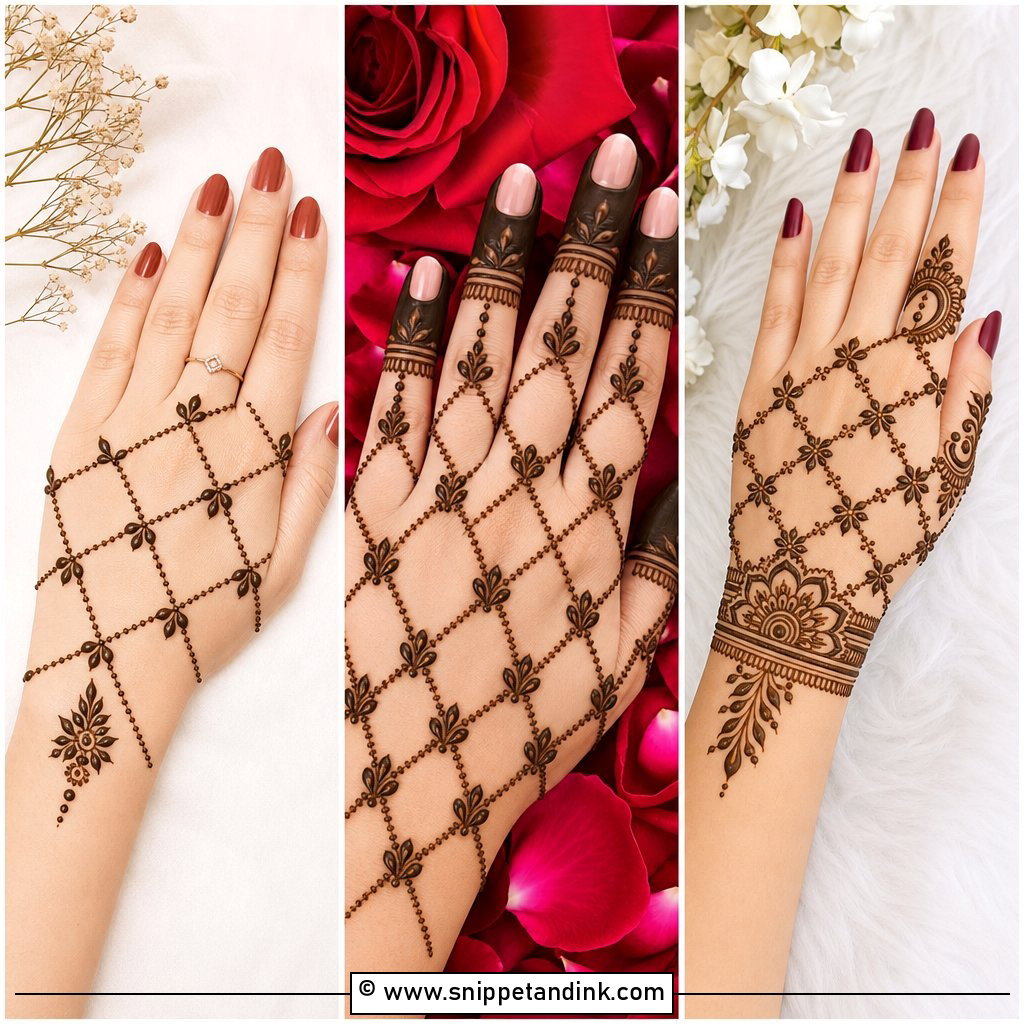
9. Bracelet Back Hand Mehndi Design
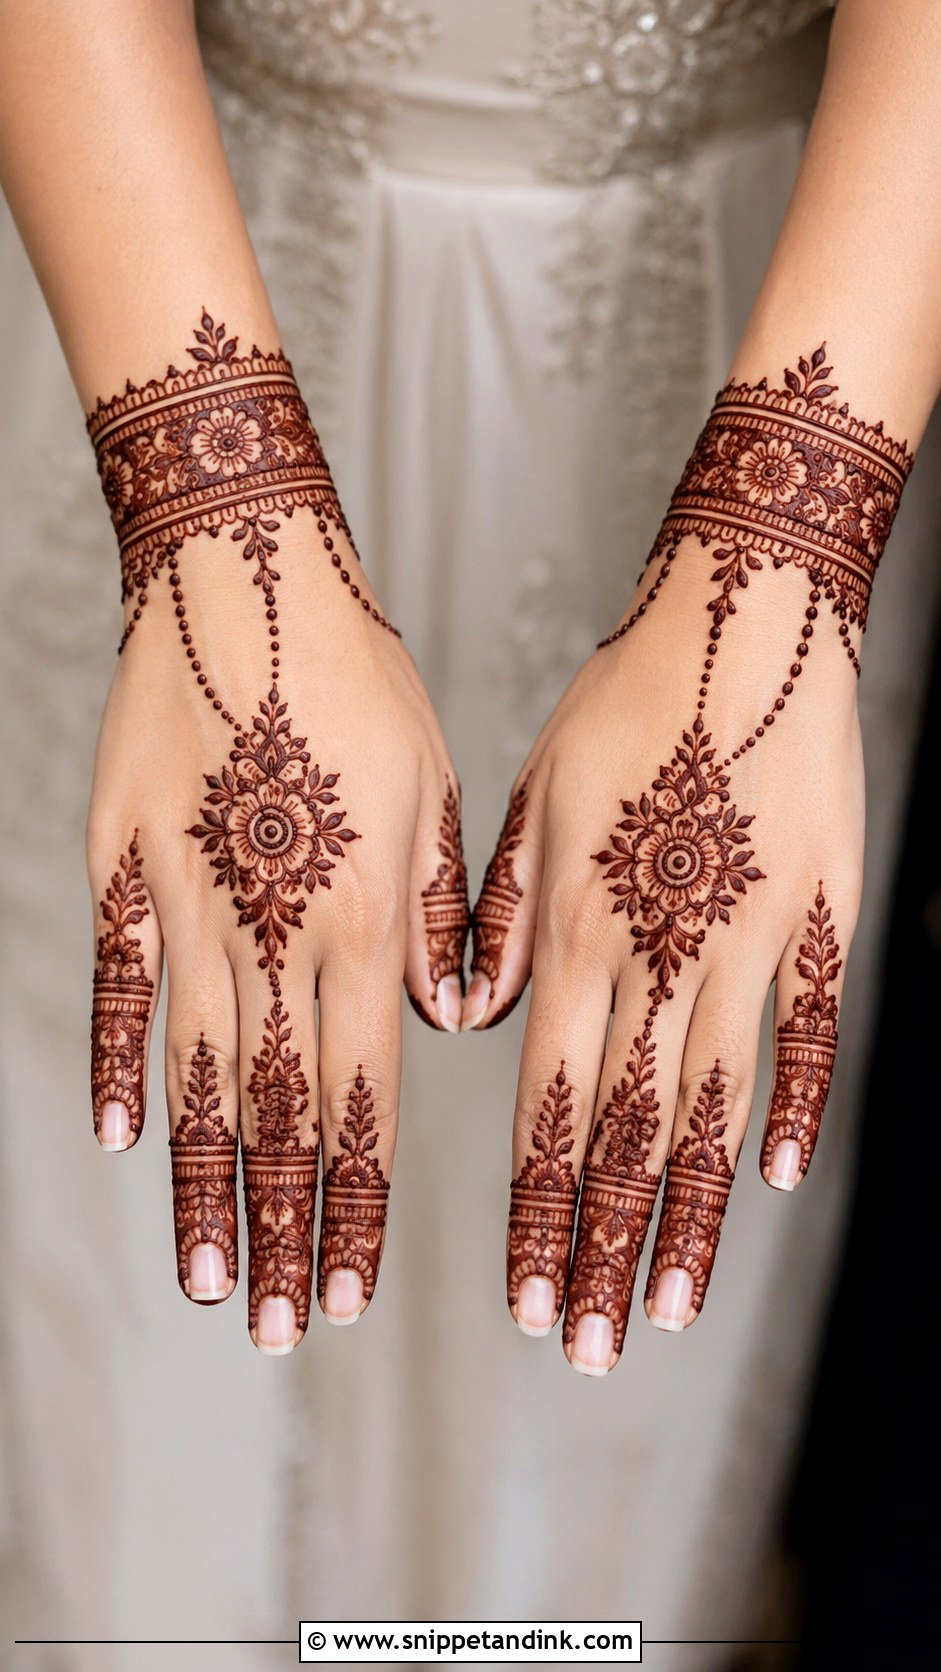
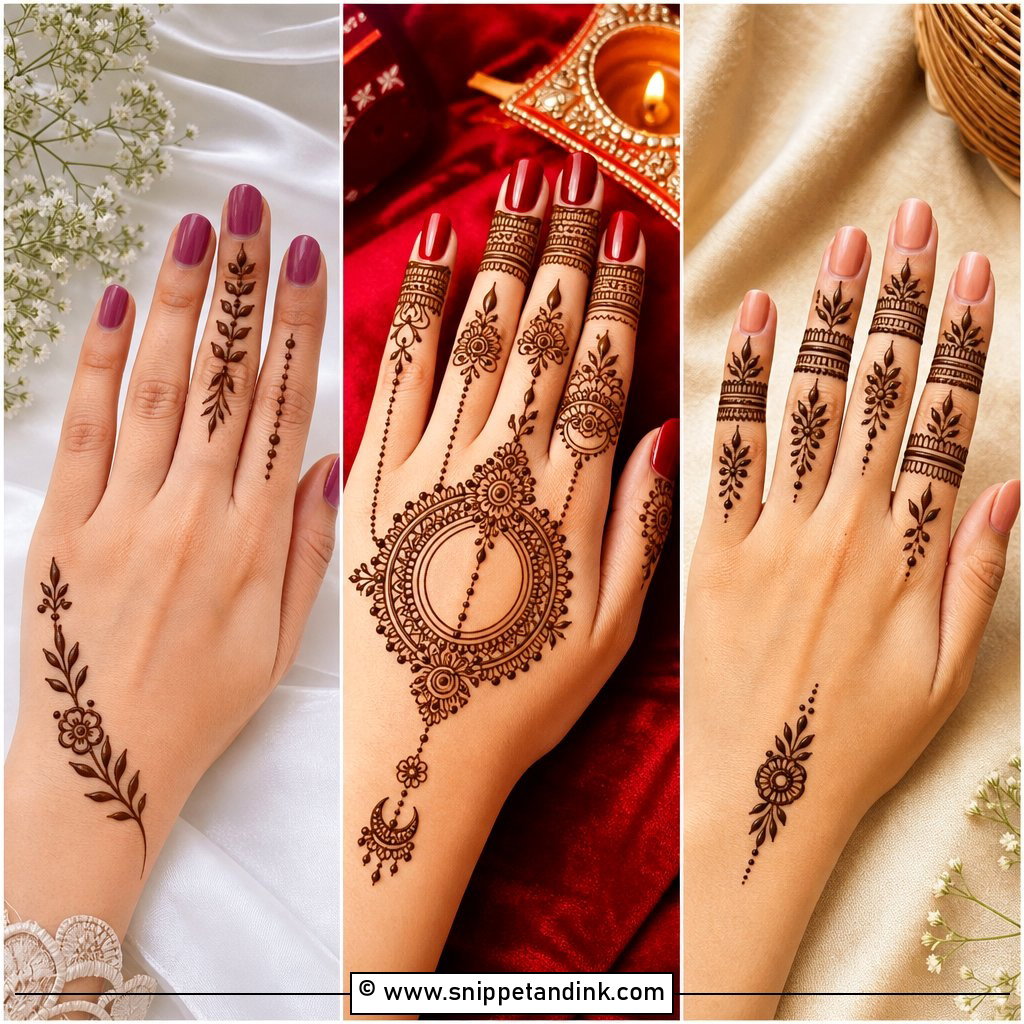
This layout draws the jewellery on: a bangle or cuff at the wrist, dotted chains or leafy strings running up to the fingers, and a small flower or paisley in the middle like the centre of a hathphool. I draw the cuff slightly bolder than the rest, because fine lines at the wrist rub against bangles and fade first. It works with real rings and bangles or on its own, and it’s an easy pick for engagement ceremonies and bridesmaids.
10. Jaali Back Hand Mehndi Design
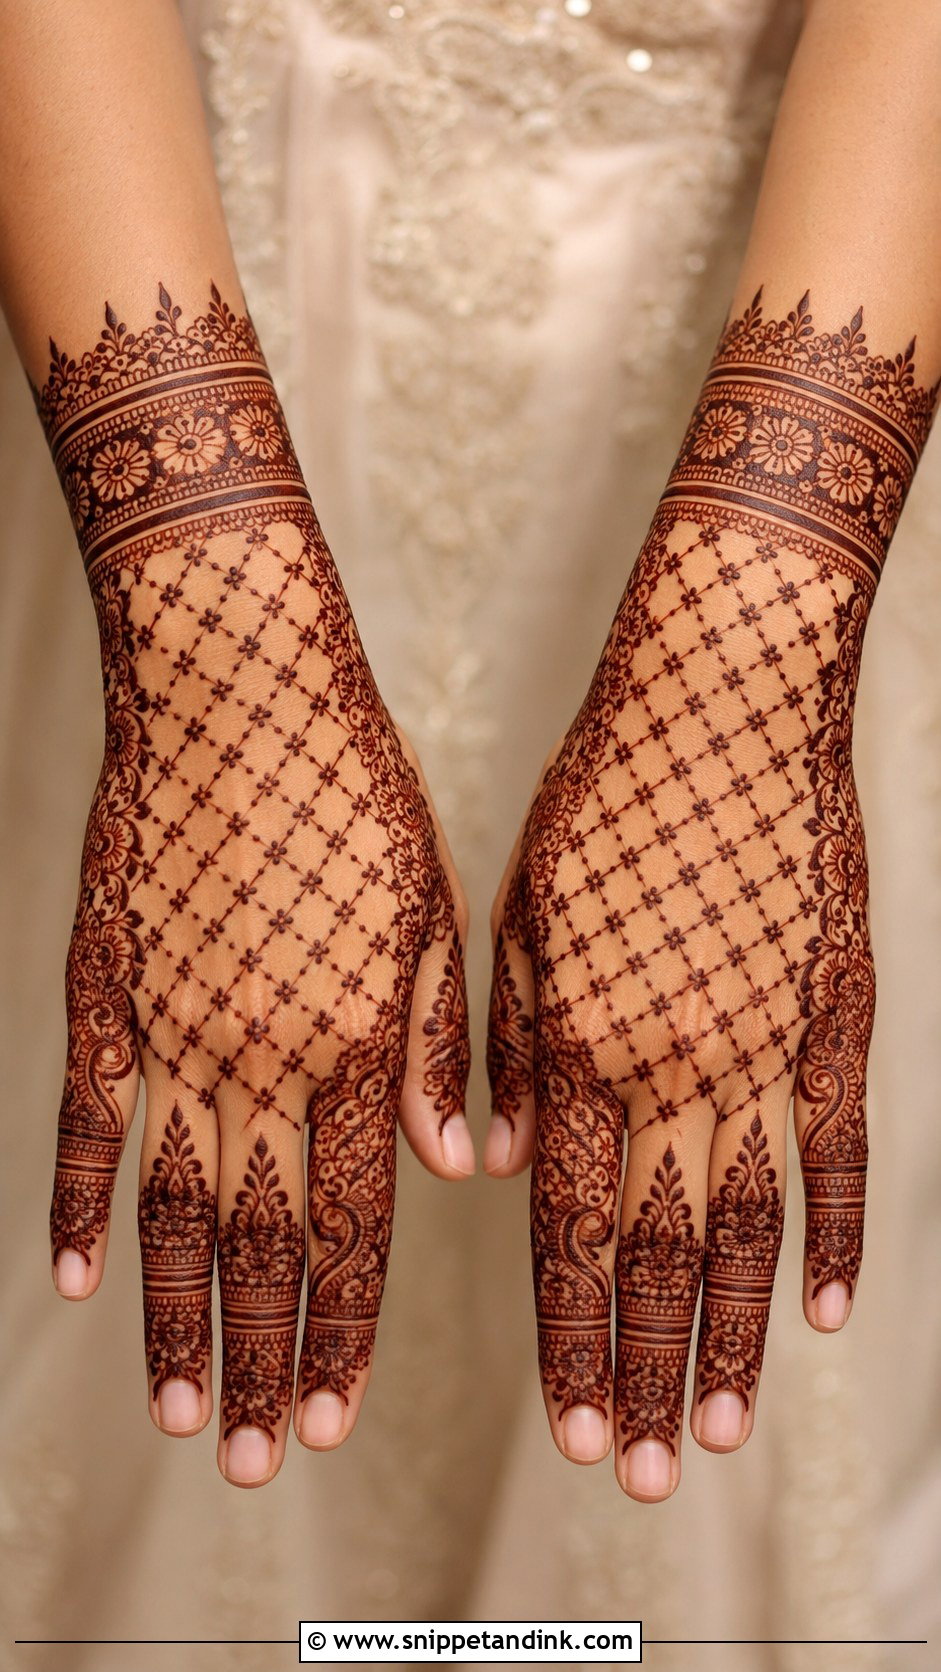
Jaali is the net pattern, and it reads like lace on the skin. It can cover the back of the hand, fill a large shape or frame a mandala, with tiny dots or flowers inside the grid. Even spacing is everything. If the crisscross lines drift closer together, the paste bleeds across the gaps as it sits and the net becomes a dark patch, so I keep a steady, slightly thicker paste for this work. Pair it with detailed fingers and a wrist cuff for a complete wedding look.
11. Indo Arabic Back Hand Mehndi Design
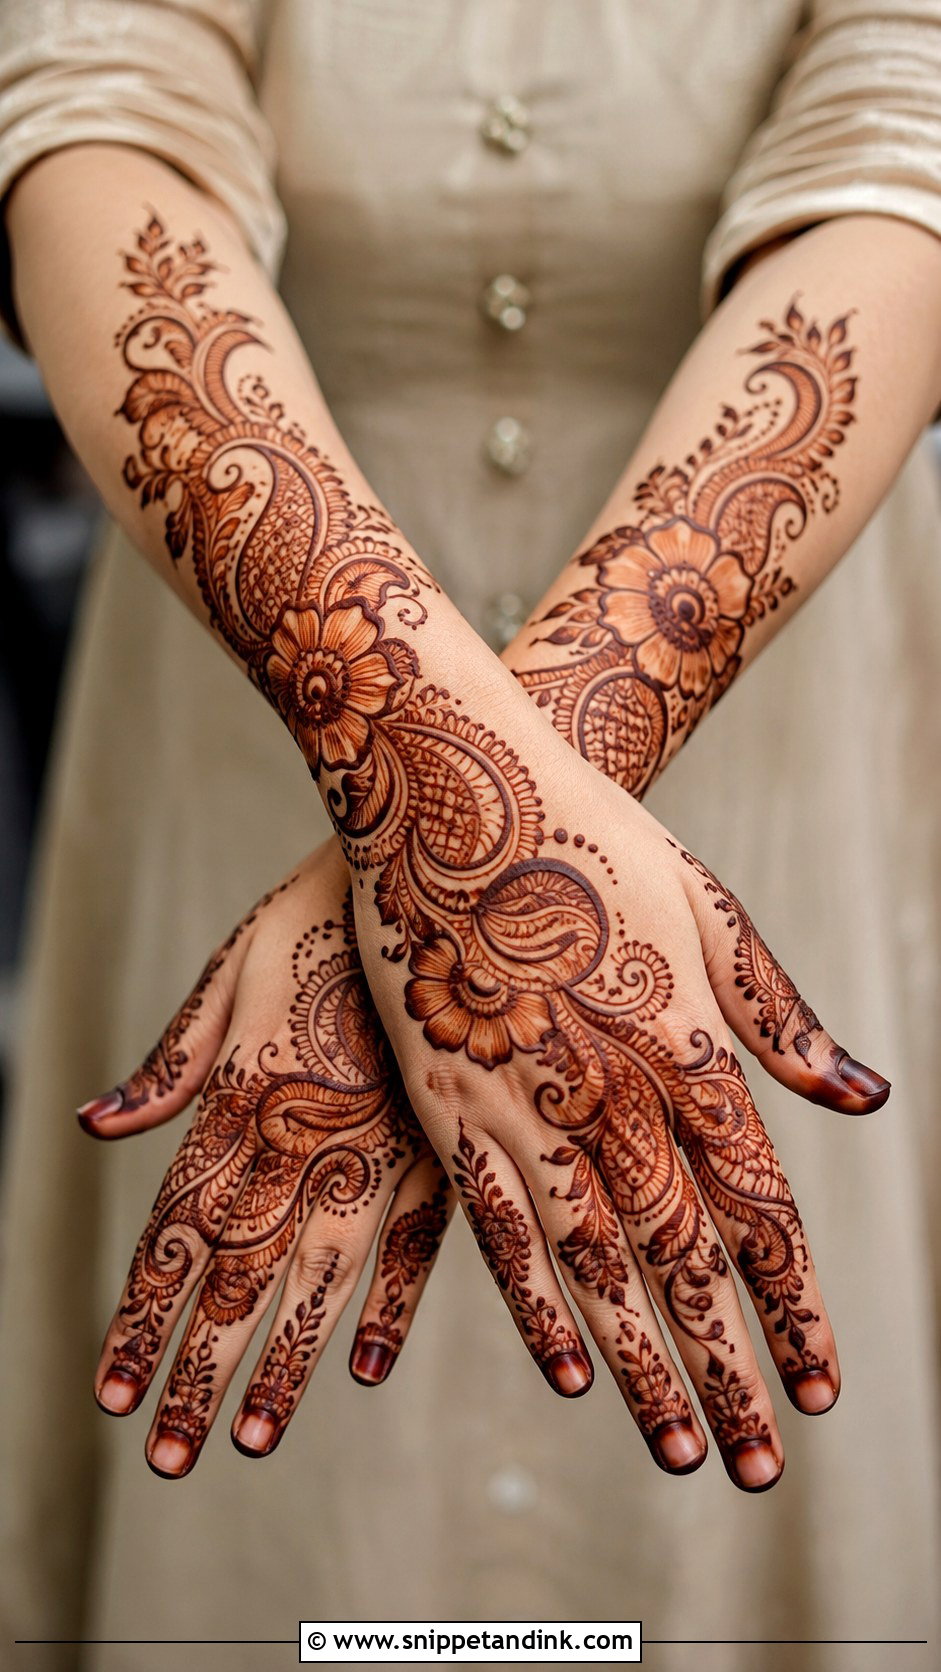
Indo-Arabic takes the open flow of Arabic mehndi and fills its shapes with Indian detail. A good one starts at the wrist, curves across the back of the hand and ends at the index or middle finger, with bold flowers left clean and the spaces around them filled with dots, mini leaves and fine lines. I’d suggest it when someone finds Arabic too sparse but traditional bridal too heavy. It sits well at weddings, Eid, Diwali and family celebrations.
12. Moroccan Back Hand Mehndi Design
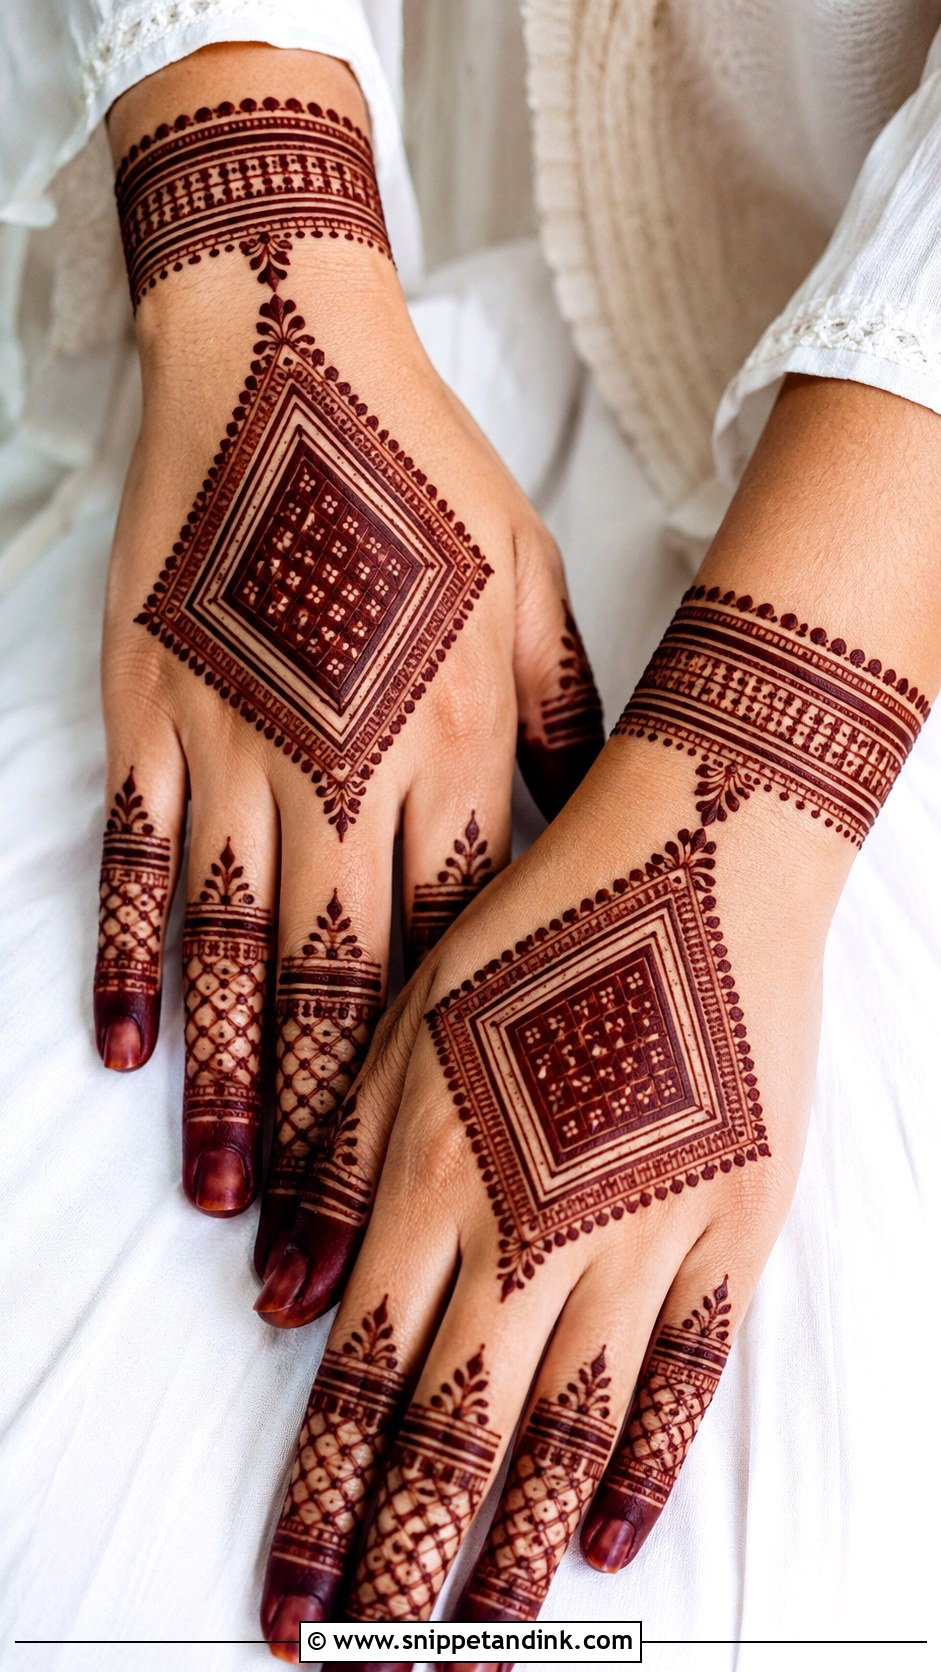
Moroccan-style mehndi swaps flowers for geometry: diamonds, triangles, grids and sharp borders. A central diamond panel, patterned fingers and a structured wrist band make a full layout. Straight lines are less forgiving than curves. A wobble in a vine looks natural; a wobble in a grid looks like a mistake, so I work slowly and use a fine tip. The clean lines suit both long and short hands and go well with plain outfits.
13. Gulf Back Hand Mehndi Design
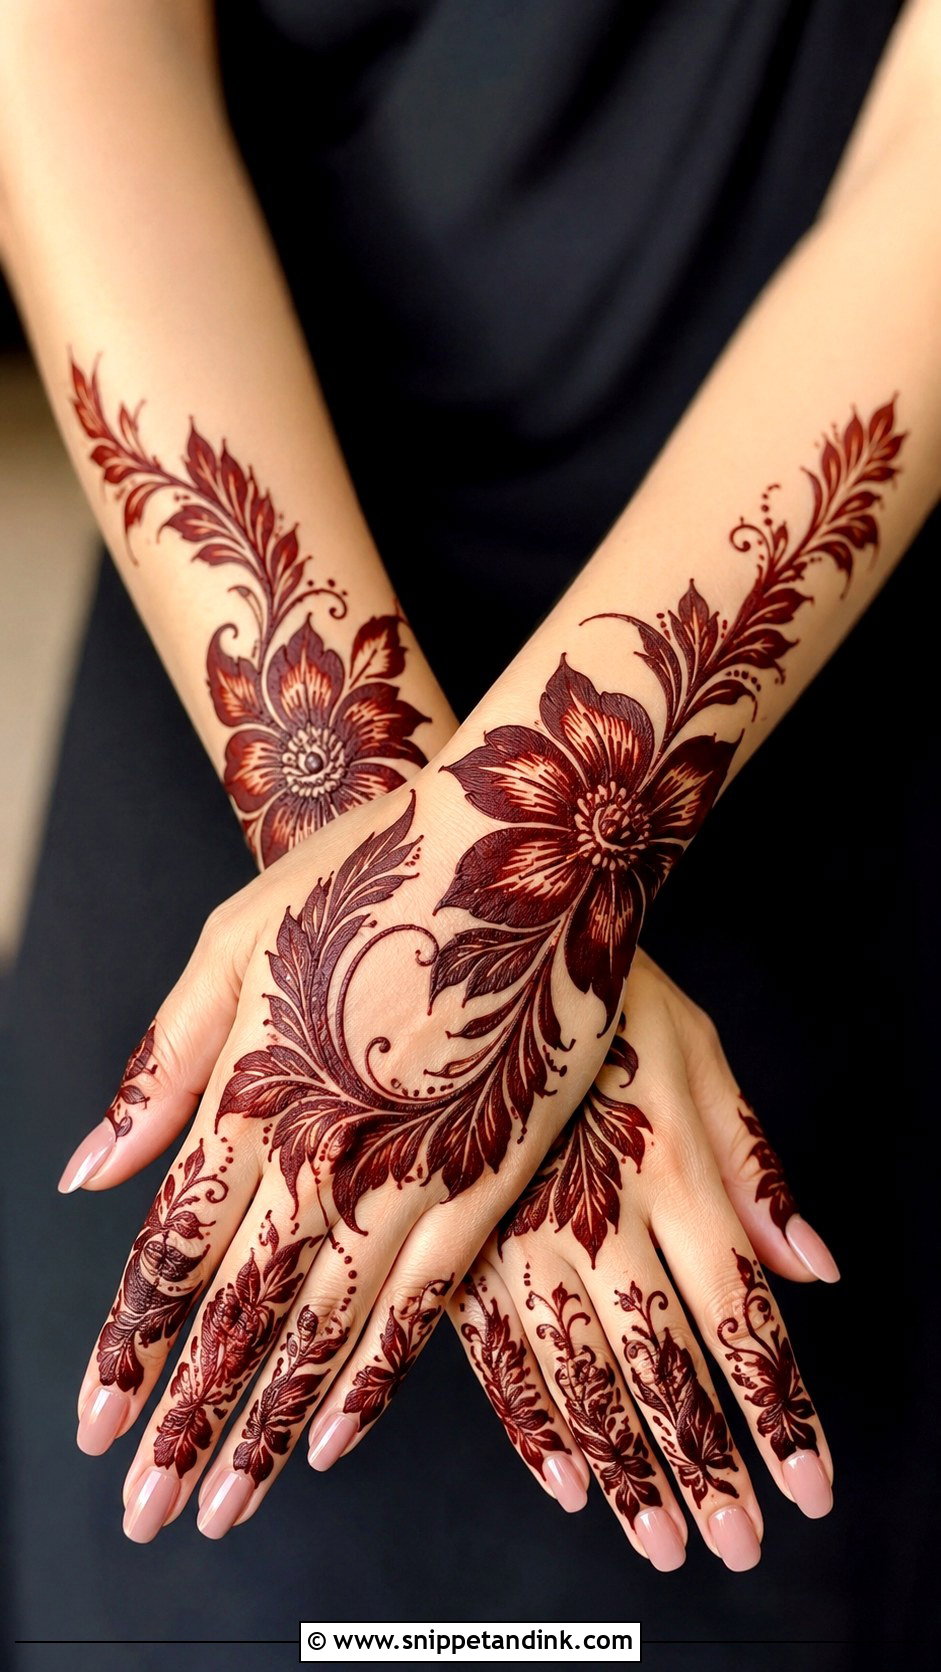
Gulf or Khaleeji mehndi is the bold one, with large flowers, thick leafy strokes, shading and strong curves, usually moving diagonally from wrist to fingers with plenty of bare skin left around each cluster. The shading is done by dragging the cone so the paste thins out, and getting that gradient smooth takes practice. Done well, it gives a rich hand without full coverage, which is why it’s so popular for Eid and weddings. The fingers can stay simple with leafy tips or carry heavier bands for a bigger event.
14. Minimal Back Hand Mehndi Design
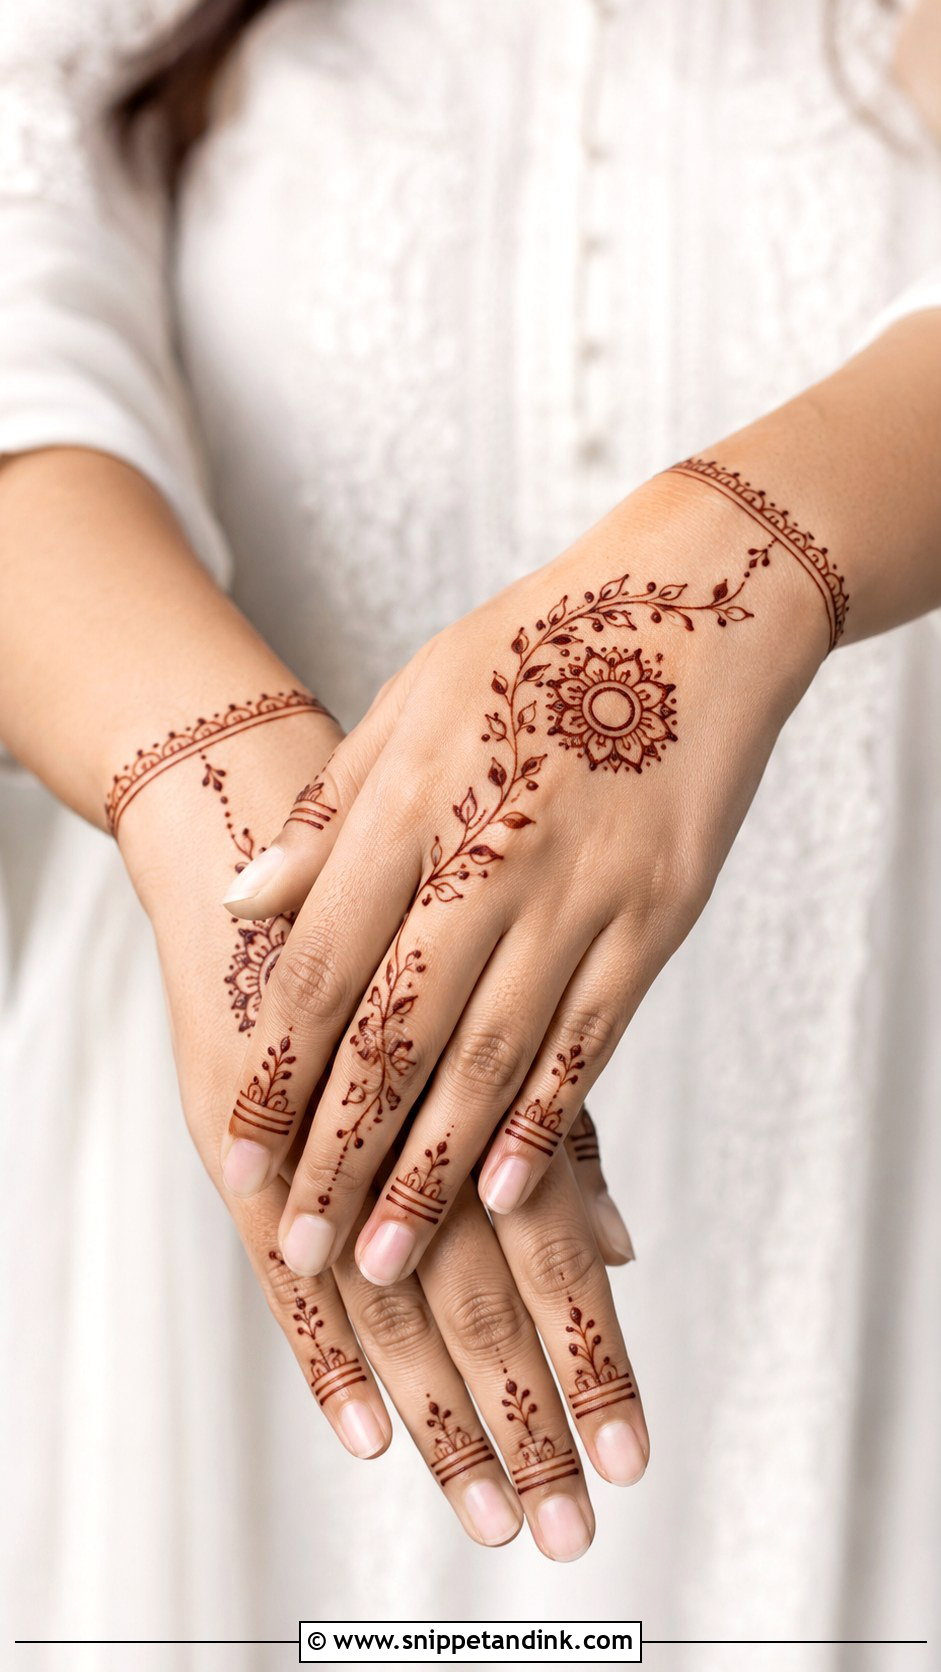
Minimal designs use few motifs and place them precisely: a tiny mandala, a slim floral vine, thin finger lines and a small wrist detail. It never looks empty because the spacing is planned. Minimal mehndi dries faster and takes far less time, which makes it practical for first-timers and small family functions. My one rule is no random fillers. If a dot or leaf doesn’t belong to the structure, I leave it out.
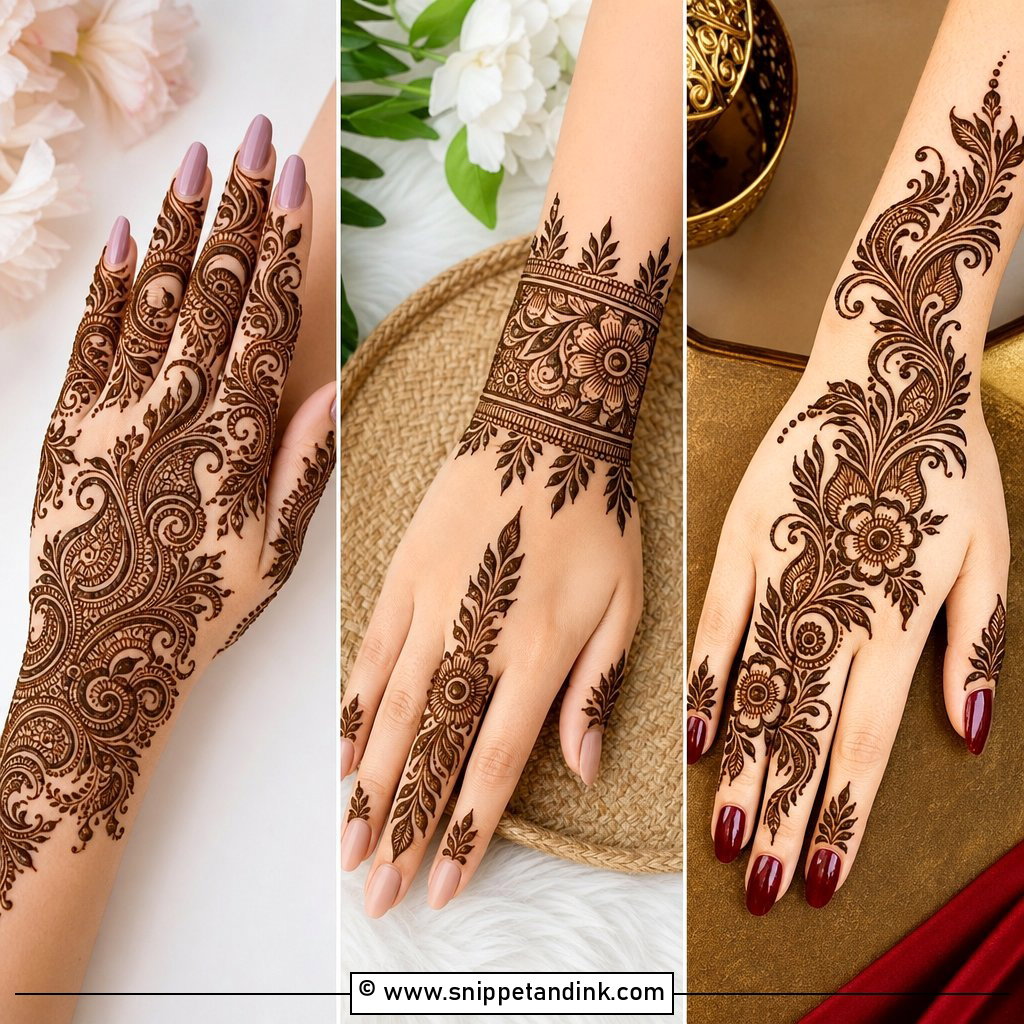
15. Heavy Back Hand Mehndi Design
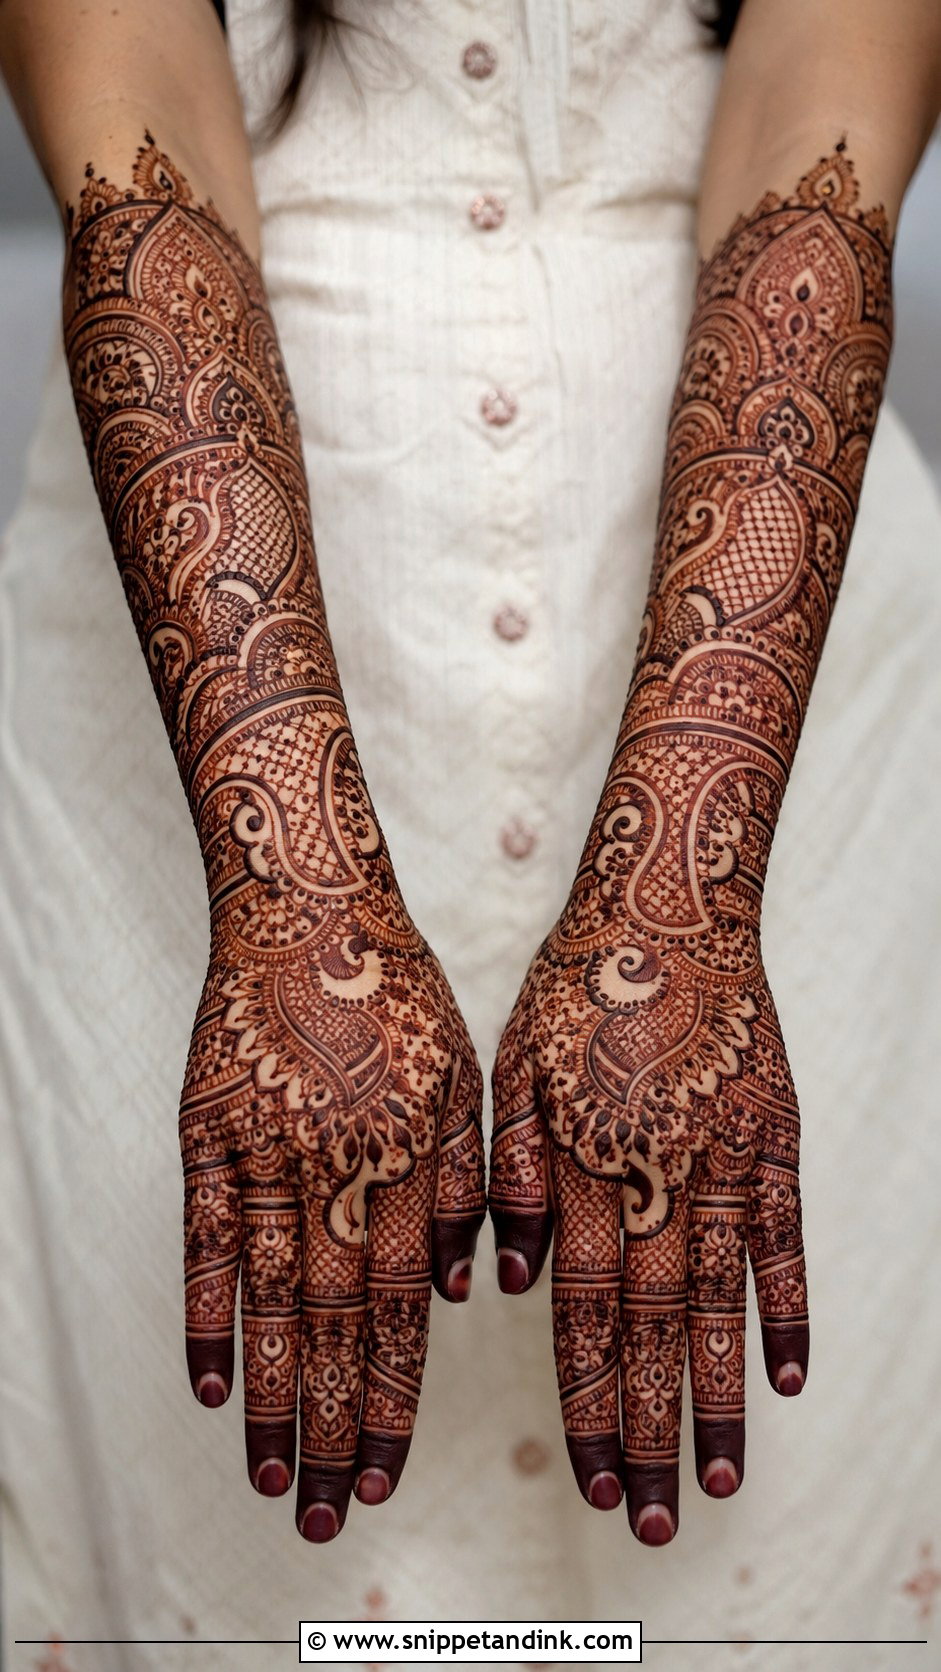
Heavy designs cover the fingers, back of the hand, wrist and sometimes the lower forearm, mixing paisleys, florals, peacocks, jaali and dense filling. The challenge is keeping it readable. I use large motifs as anchors and fill only the smaller spaces with dots, curves and leaves, so the hand doesn’t turn into one dark mass. It’s the choice for brides, sisters of the bride and festive shoots, and it holds up next to embellished outfits and statement jewellery.
16. Peacock Back Hand Mehndi Design
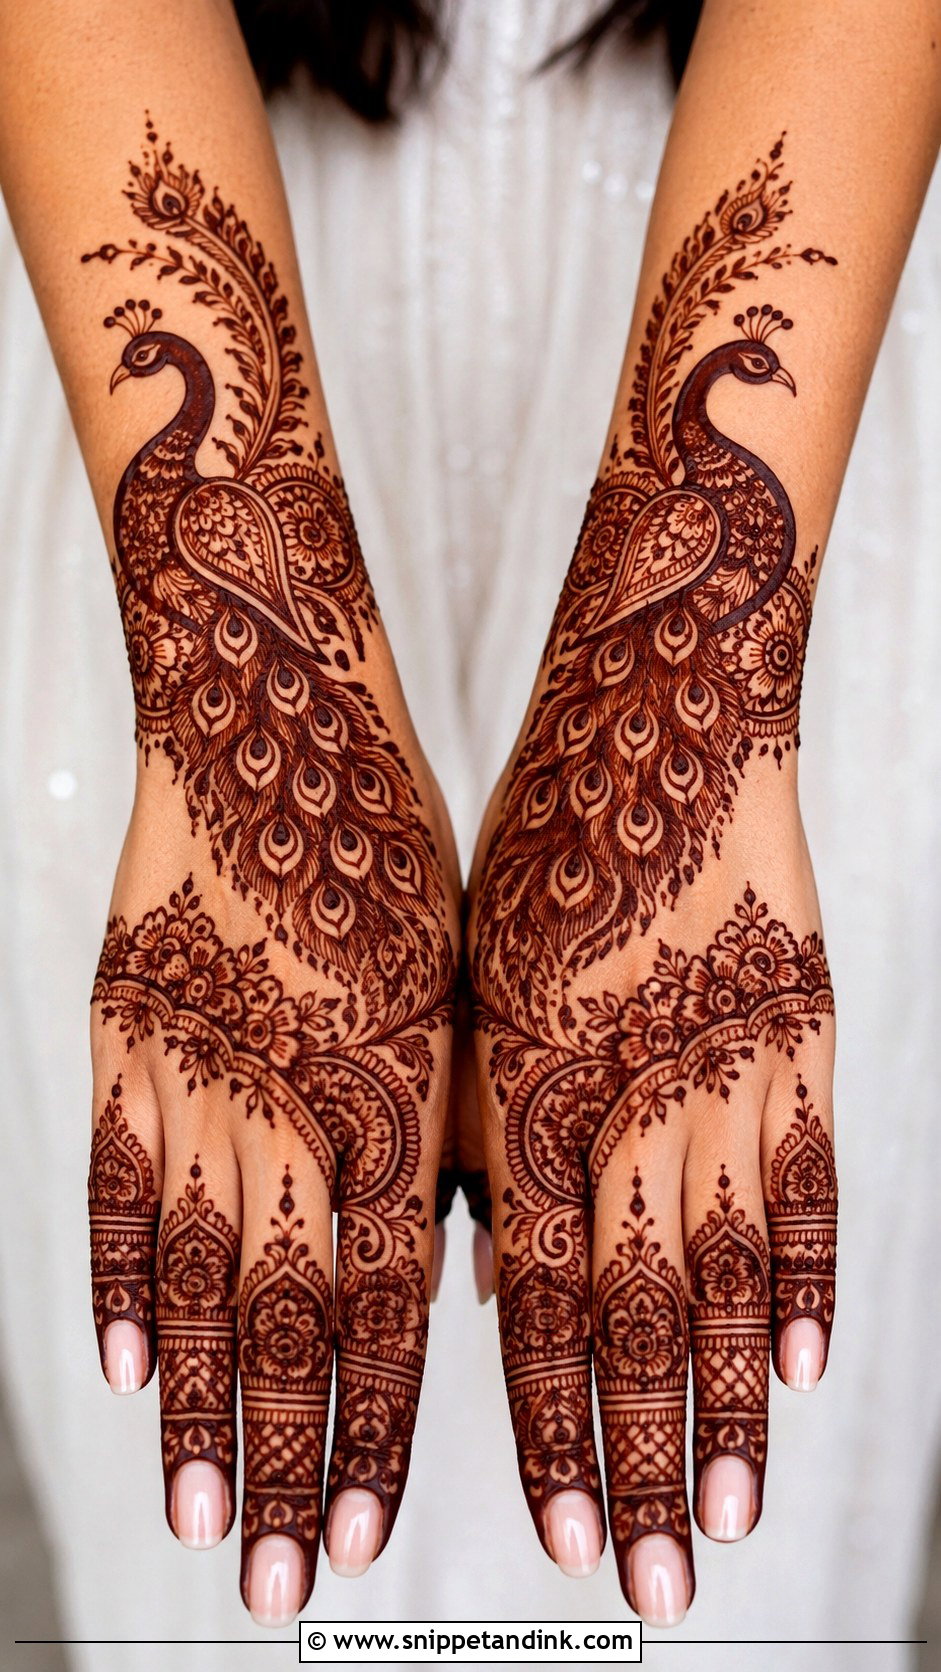
A peacock can sit in the centre, along the wrist or inside a diagonal trail, and its feathers give room for curves, dots, paisleys and fine lines. I always draw the bird’s outline and neck curve first and check the shape before adding any filler. Once feathers and dots go in, a lopsided body can’t be fixed. A small peacock keeps the hand light, while a large one reads as bridal. It belongs at weddings, sangeet nights and Diwali.
17. Paisley Back Hand Mehndi Design
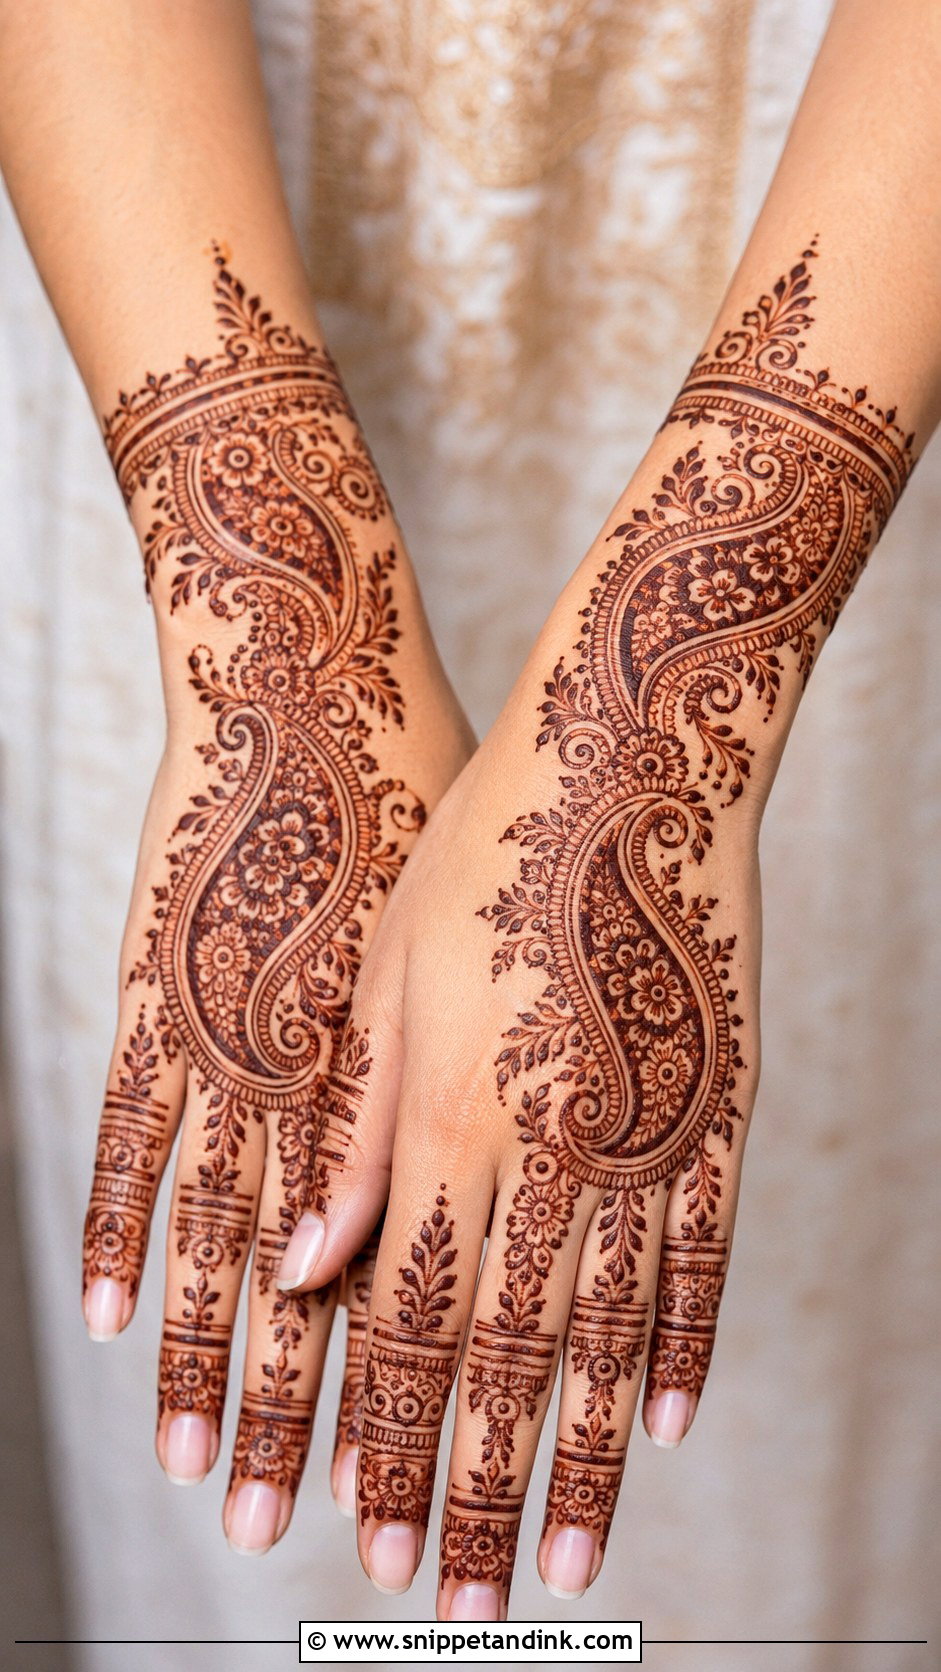
Paisleys have never gone out of use in mehndi, and their curve suits the shape of the hand. They can run in a trail, circle a mandala or fill the whole back of the hand, with tiny flowers, dots, leaf veins or shading inside each one. One large paisley with open space around it looks modern; many paisleys with jaali and finger work look bridal. They suit nearly every hand type, and their fine inner lines look richer as the stain deepens over the first day or two.
18. Lotus Back Hand Mehndi Design
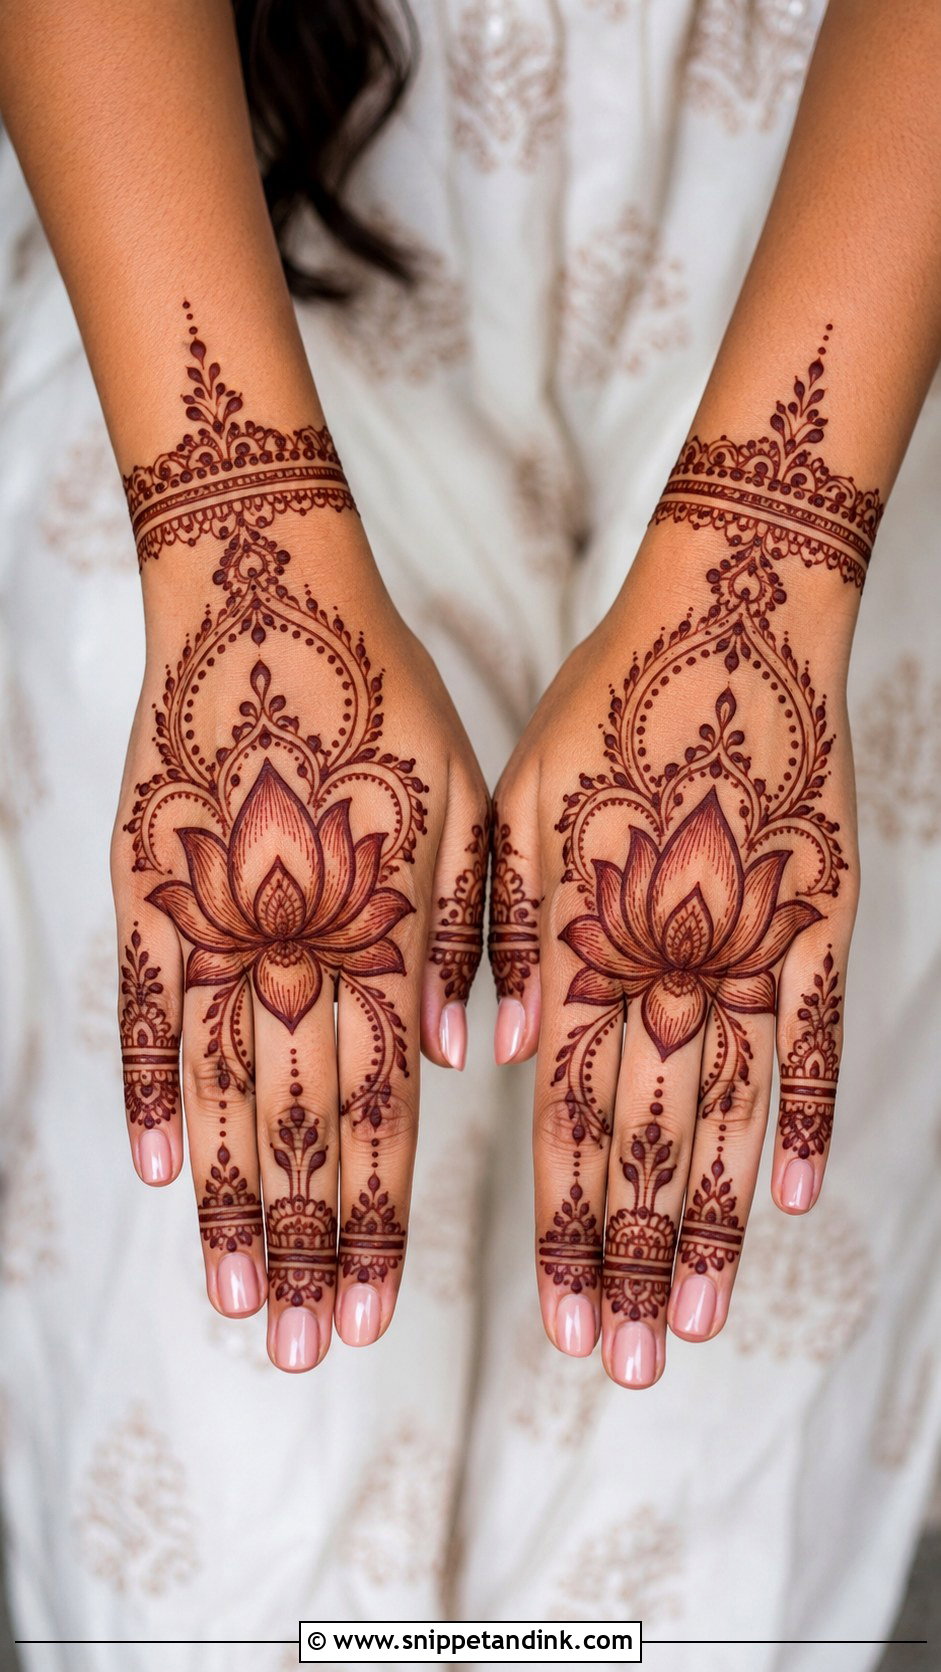
A lotus has layered petals that sit naturally in the centre of the back hand, near the wrist or within a floral trail. I draw the petals from the base outward and keep them open, so the stain shows each layer separately. A single lotus with a wrist cuff and detailed fingers is quietly traditional; repeated lotuses make a fuller wedding design. It photographs clearly because the shape is easy to read even from a distance.
19. Rose Back Hand Mehndi Design
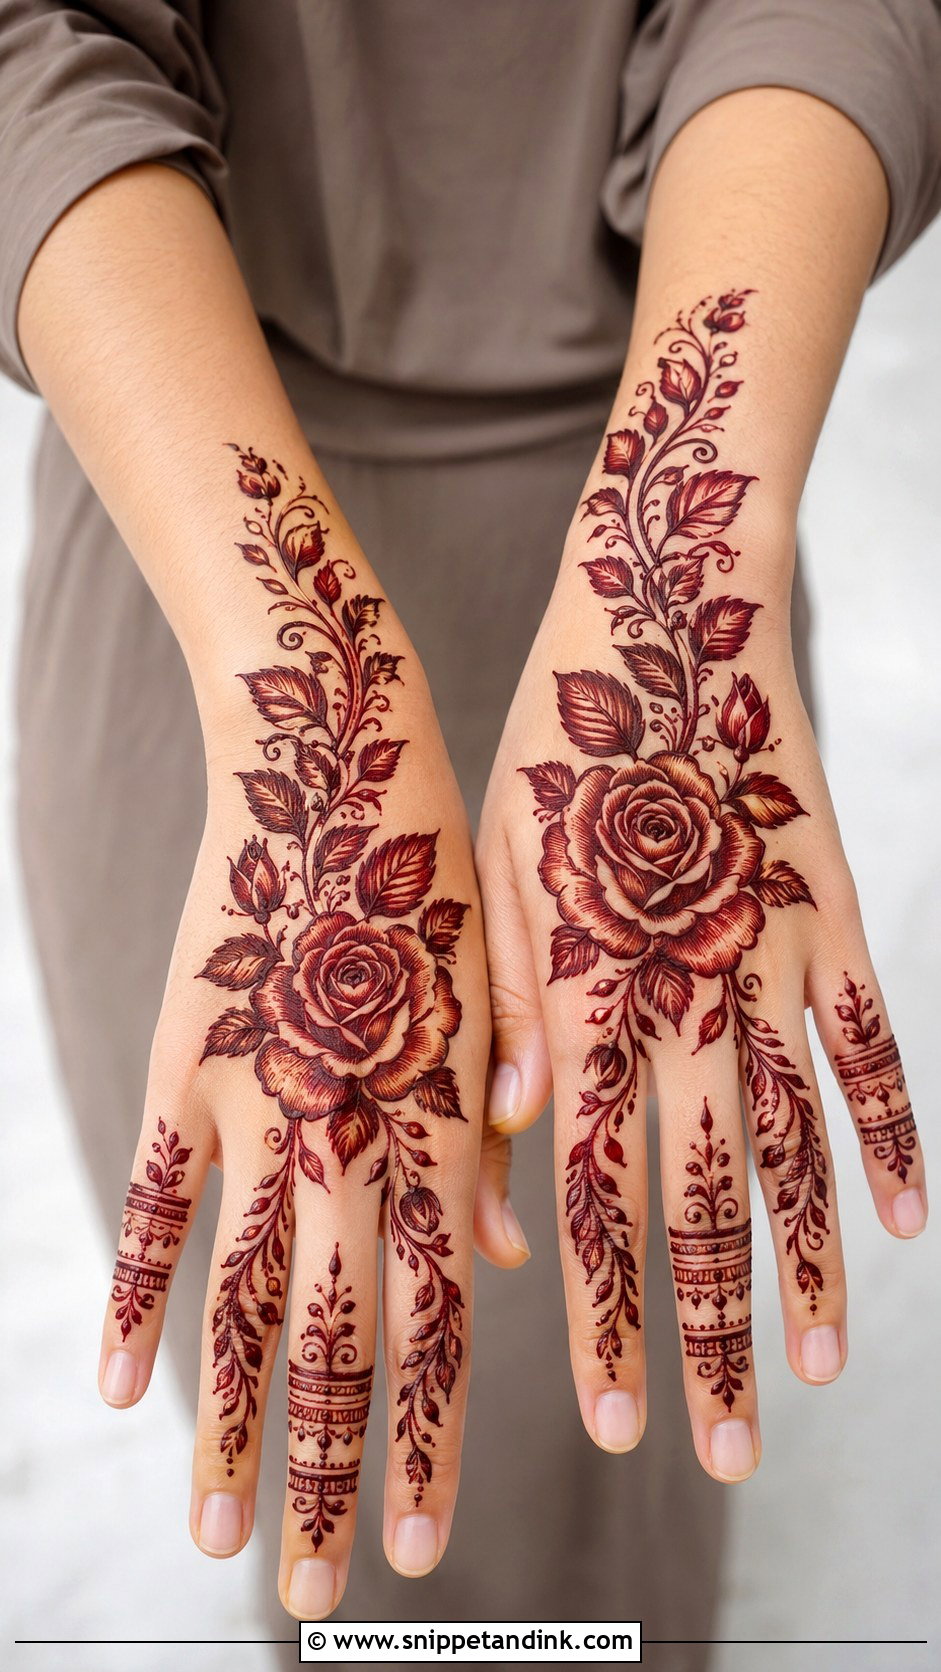
Roses give a romantic hand without much weight. A spiral centre, layered petals and leafy vines make the motif, usually one large rose on the back of the hand, smaller ones near the wrist and fine finger work. The mistake I see most is filler inside the petals: the spiral gets lost. I put the shading on the leaves instead and keep the rose itself clean. It suits engagements, anniversaries, Eid and parties, and it goes with western outfits more easily than most traditional motifs.
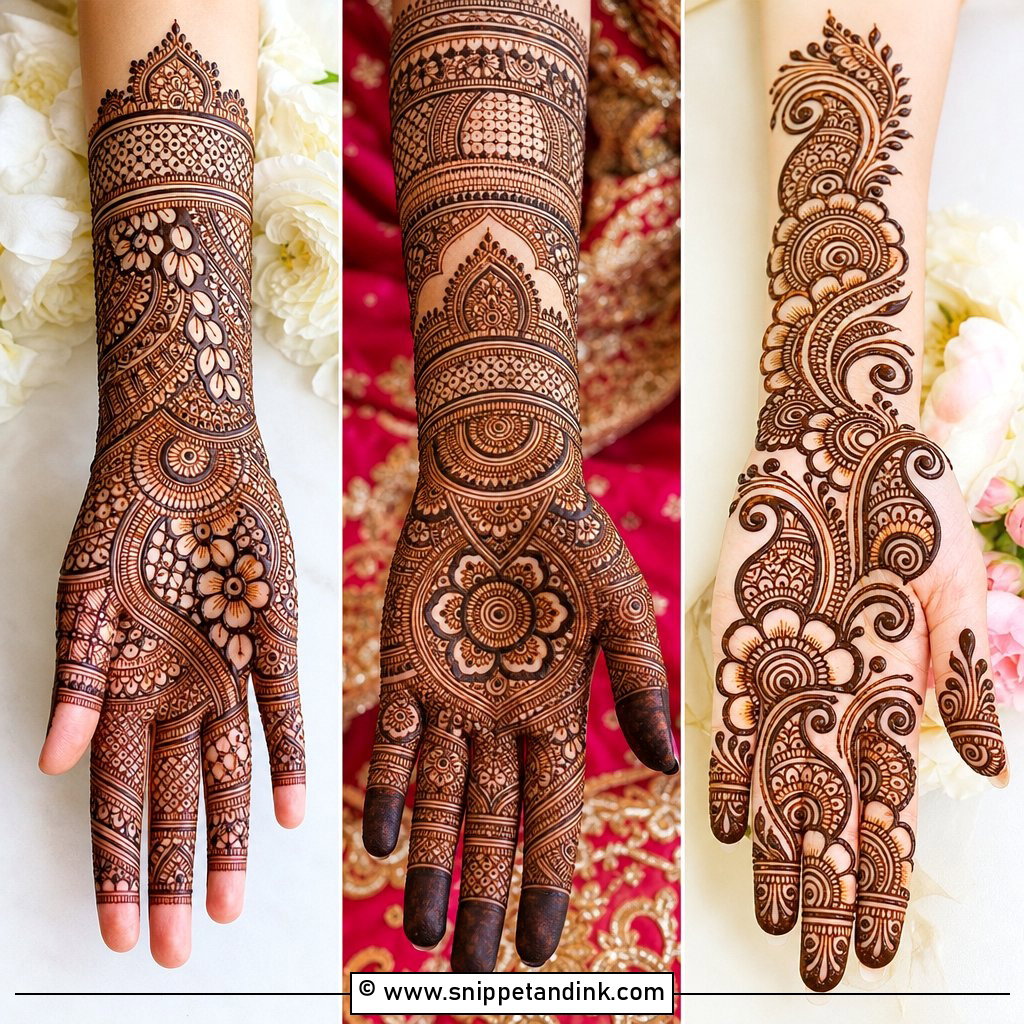
20. Vine Back Hand Mehndi Design
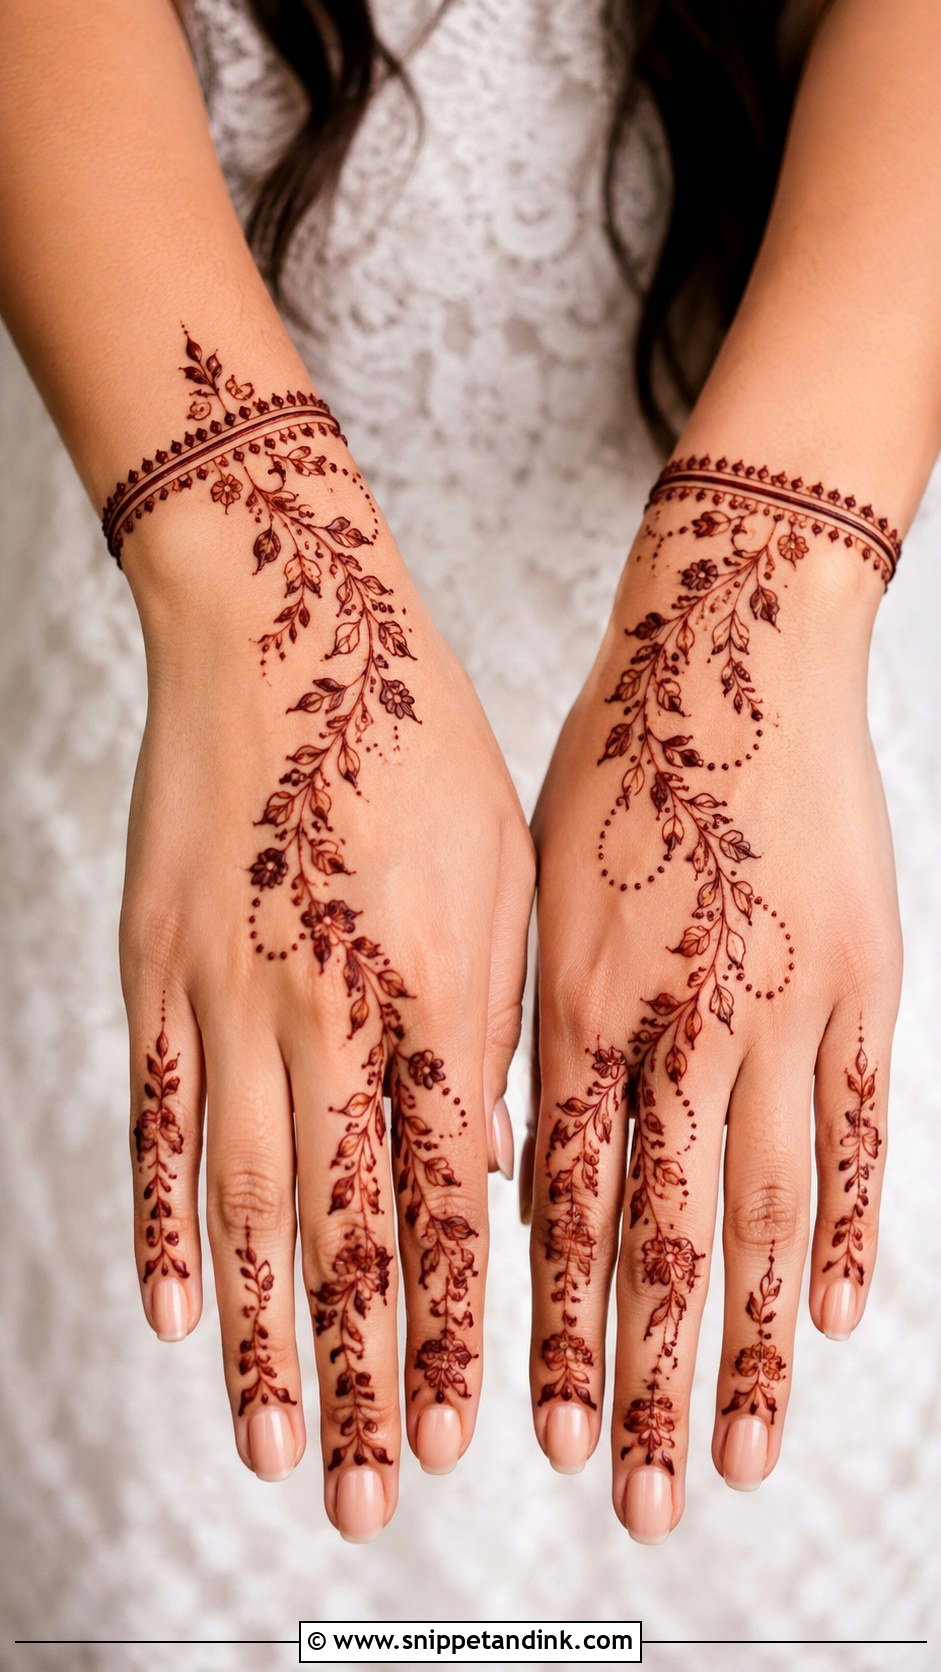
A vine starts at the wrist and travels toward the fingers, or curves around a central motif, with small leaves, dots and tiny flowers along it. Because it has direction, it lengthens the hand, which is useful on shorter fingers too, not only long ones. Add a wrist band and leafy finger details for a fuller look, or keep the vine thin and airy for a casual function. It’s one of the quickest designs I apply.
21. Back Hand Mehndi Design For Eid
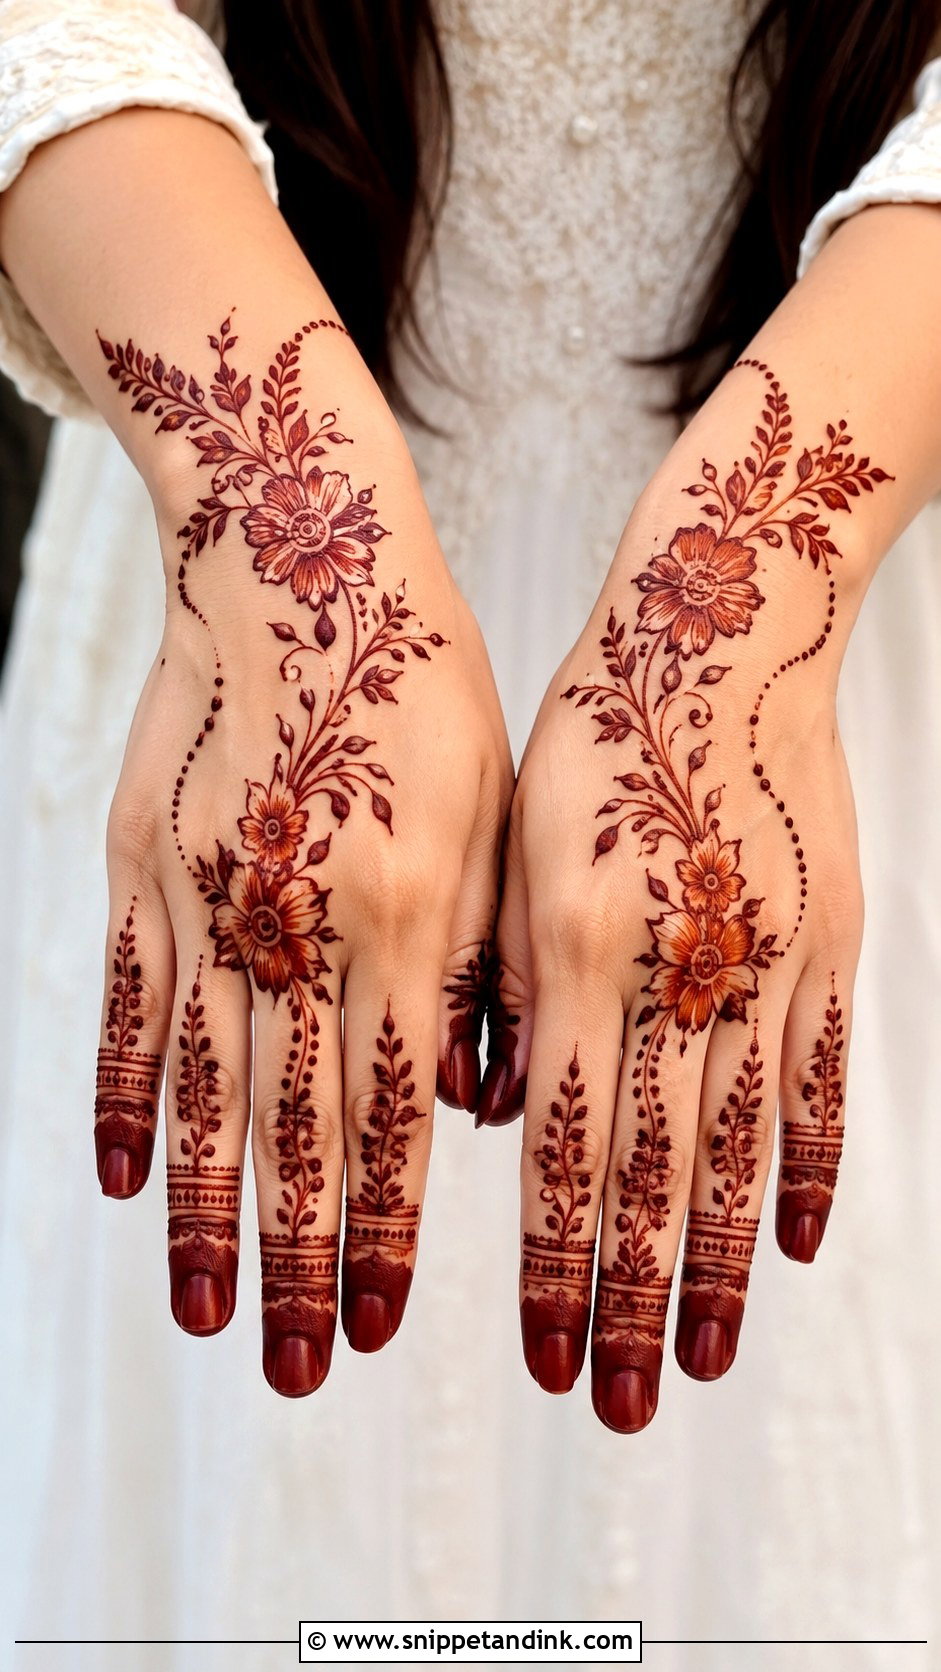
For Eid, most people want something festive that doesn’t take all evening: Arabic trails, floral vines, finger bands or a mandala. A bold flower on the back of the hand, leafy curves toward the wrist and clean fingertips make a balanced design that still leaves room to move. Match the motifs to the outfit’s embroidery, florals for soft fabrics and jaali for dressier ones. Apply it a day or two before Eid if you can, so the stain has reached its deep reddish-brown by the morning of the celebration.
22. Back Hand Mehndi Design For Diwali
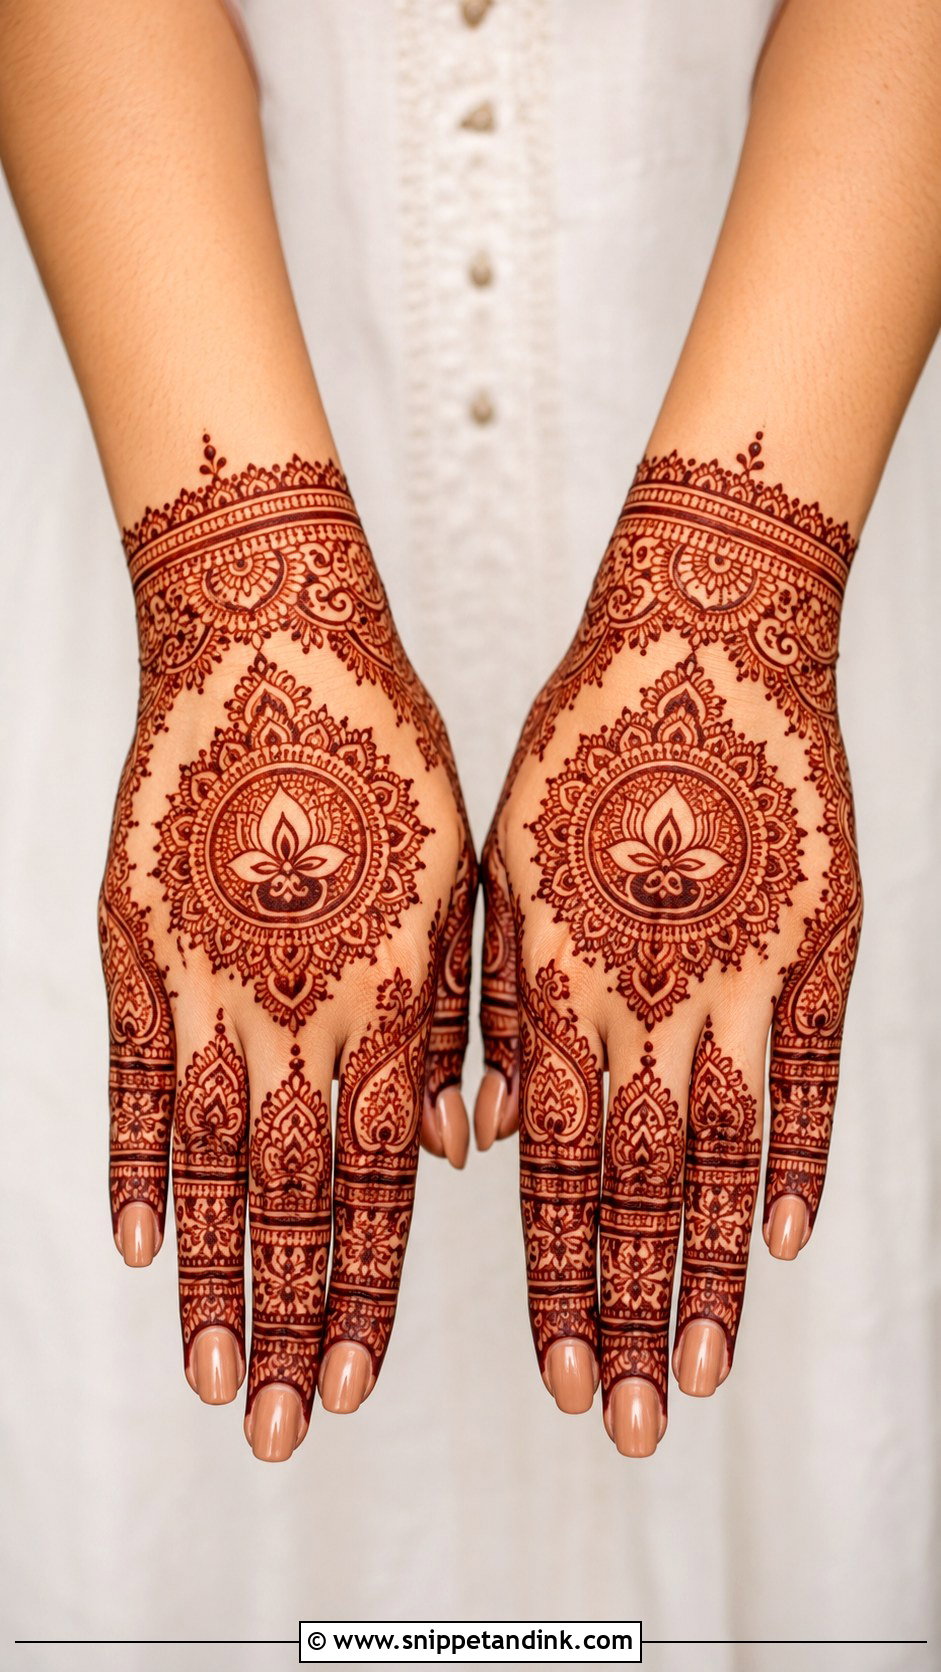
Back hand mehndi design for Diwali leans traditional: mandalas, lotus motifs, diya-shaped curves, paisleys and bracelet cuffs. A central mandala ringed with small lotus petals, decorated fingers and a neat wrist border is a complete Diwali hand. Keep the spacing clean, since Diwali outfits often carry shimmer and colour and a crowded hand competes with them. For a simple version, a small mandala with finger accents is enough; for a grand one, add jaali and paisley fillers. Remember you’ll be lighting diyas and handling sweets, so a design applied the day before is safer than fresh paste.
23. Back Hand Mehndi Design For Wedding
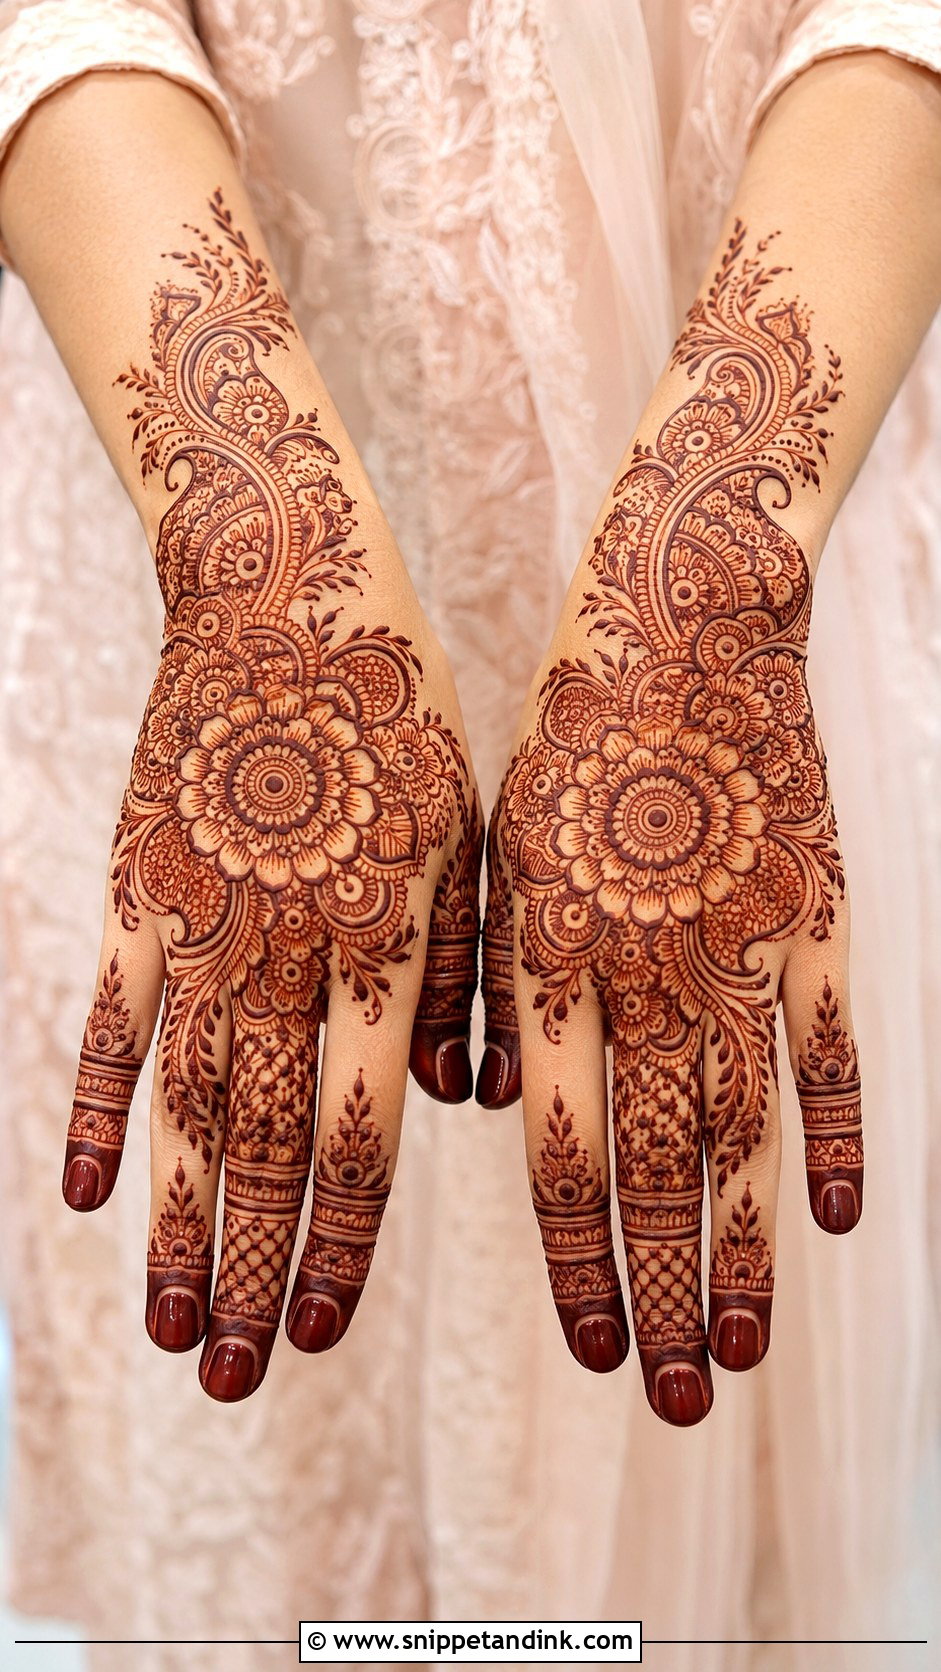
How much to cover at a wedding depends on your role. Guests usually suit Arabic trails or bracelet designs, while close family can go fuller with florals, paisleys and jaali. Whatever the level, I start with one clear main motif on the back of the hand, then connect it to the fingers and a wrist cuff so there are no random gaps. If you’ll wear heavy bangles, I keep the wrist border slimmer or move it slightly lower so it isn’t hidden under them.
24. Back Hand Mehndi Design For Bridesmaid
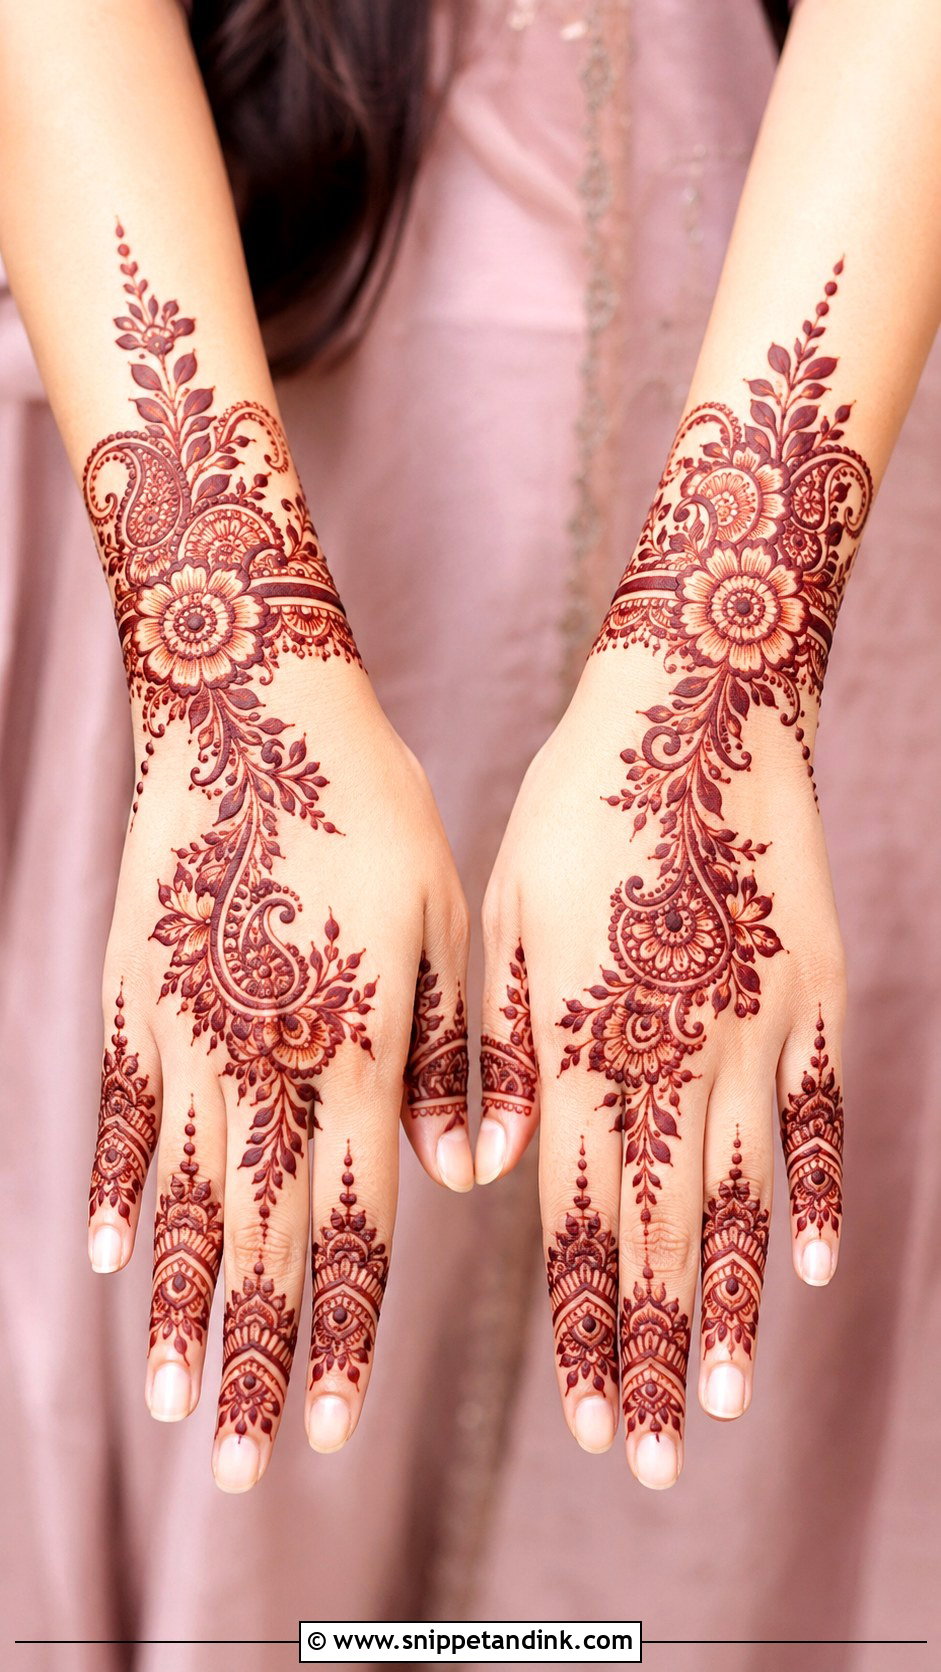
A bridesmaid’s mehndi should be festive but clearly lighter than the bride’s. An Indo-Arabic layout with flowers, paisleys, leafy trails and finger detail covers the back of the hand and wrist while leaving some open skin. Bracelet patterns also suit bridesmaids because they pair with rings and bangles. Remember that bridesmaids are dancing, hosting and helping all day, so I avoid paste on the palms for them when the bride needs their hands free soon after application. Pick motifs that match the outfit and jewellery, and let the bride stay the most decorated person in the room.
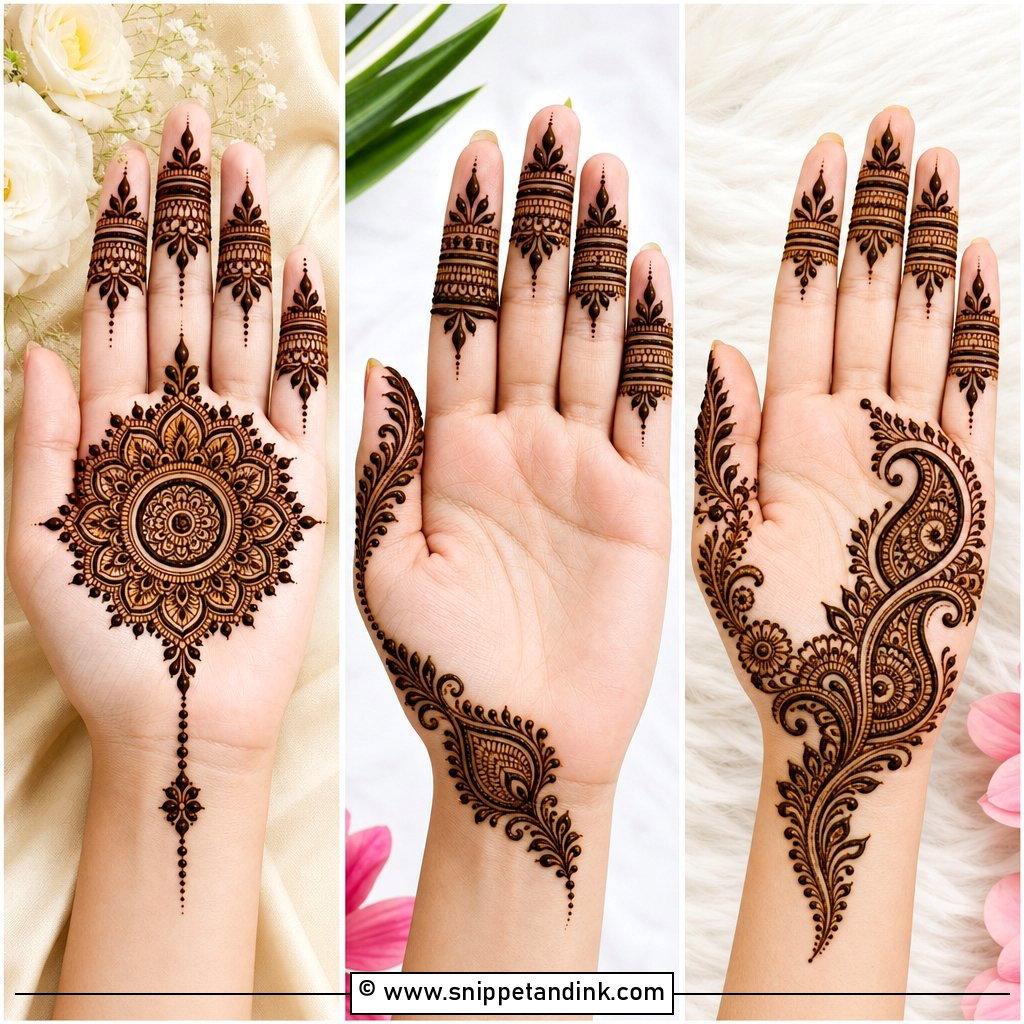
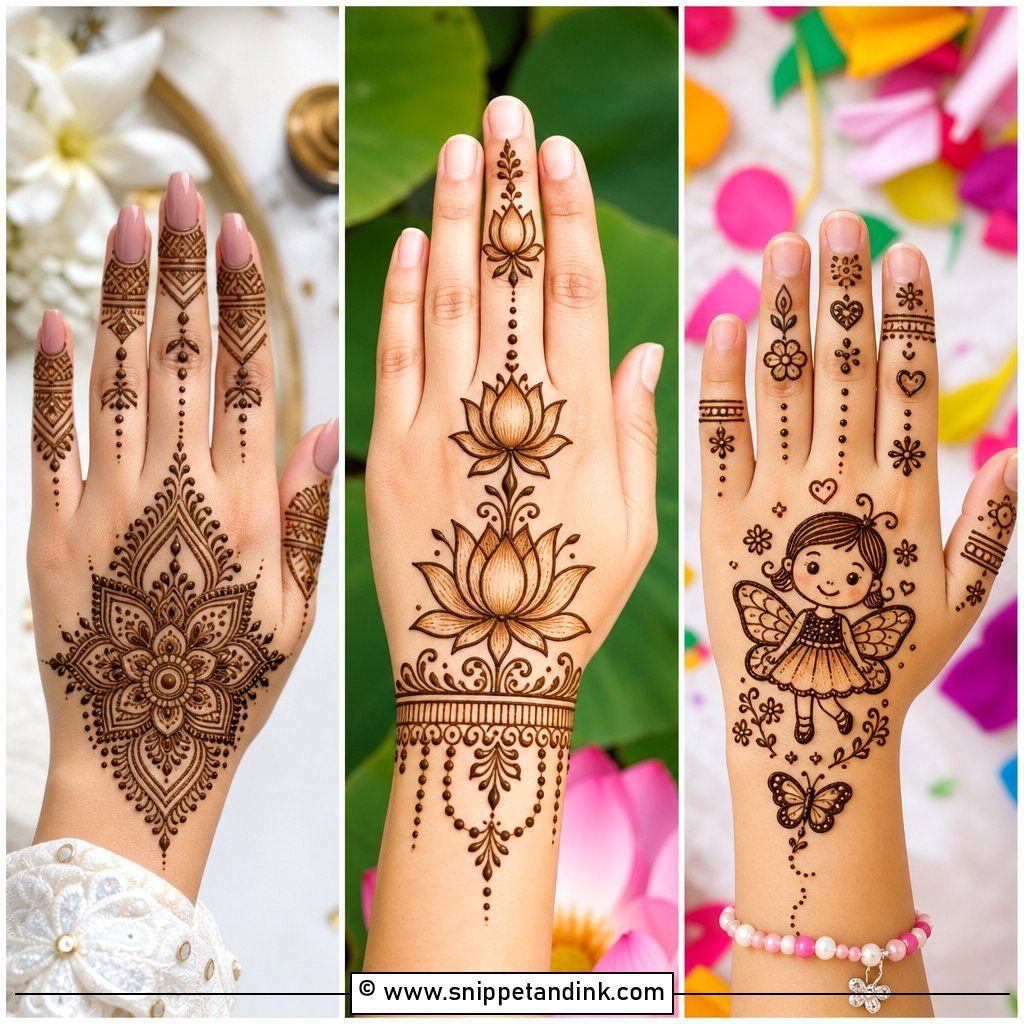
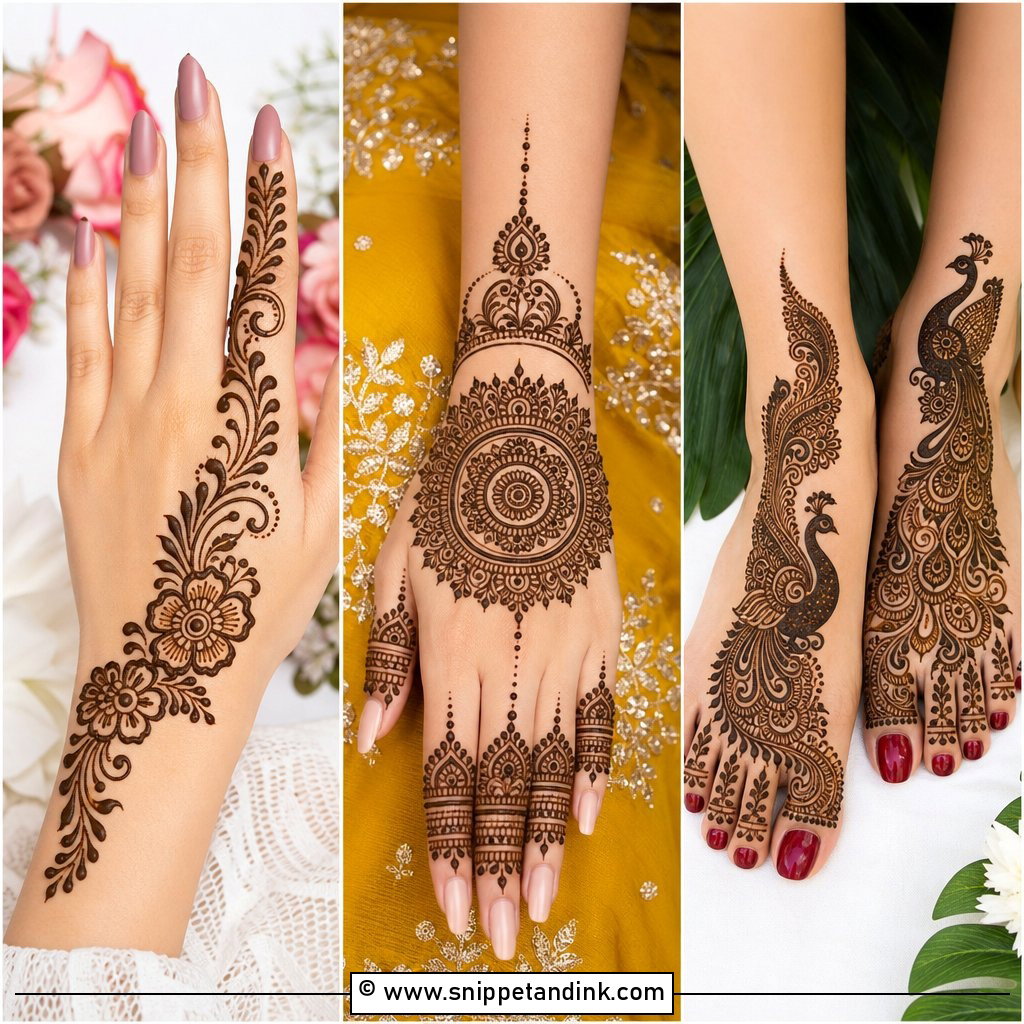
25. Back Hand Mehndi Design For Engagement
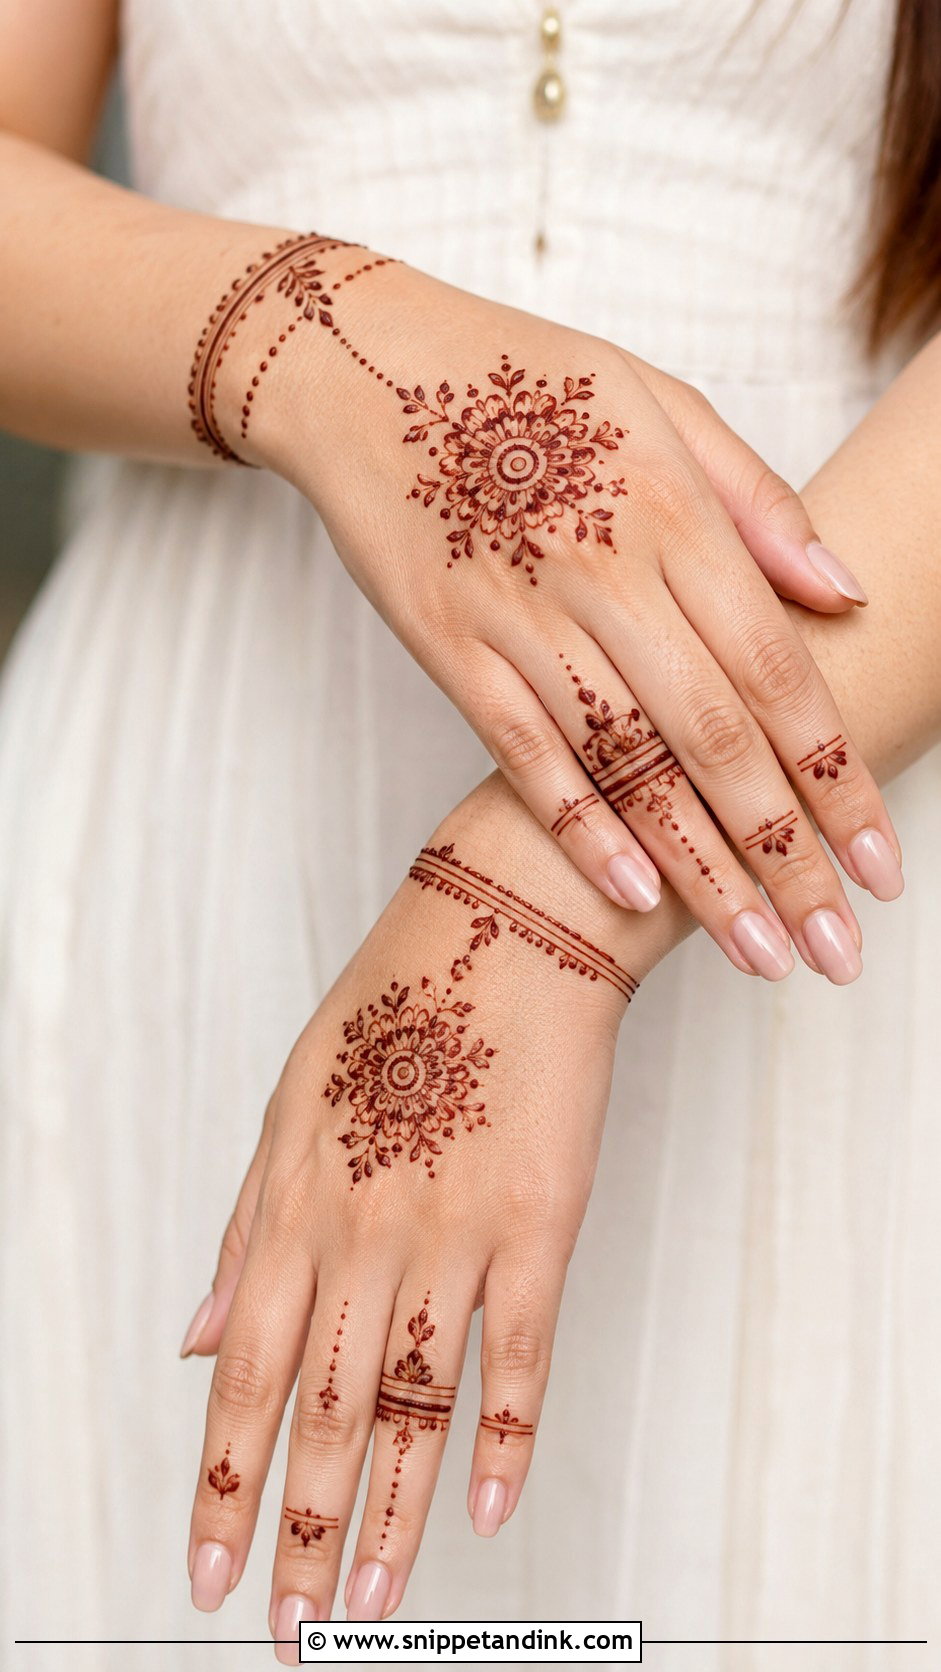
At an engagement the ring finger is the focus, so I keep the area where the ring sits slightly lighter and put the extra detail just above and below it. A bracelet design, a finger-focused pattern or a delicate floral mandala all work. A small central motif on the back of the hand completes the look without covering too much skin, and a neat wrist cuff or chain adds a jewellery touch. Avoid very heavy coverage here; it competes with the ring in close-up shots.
26. Back Hand Mehndi Design For Karwa Chauth
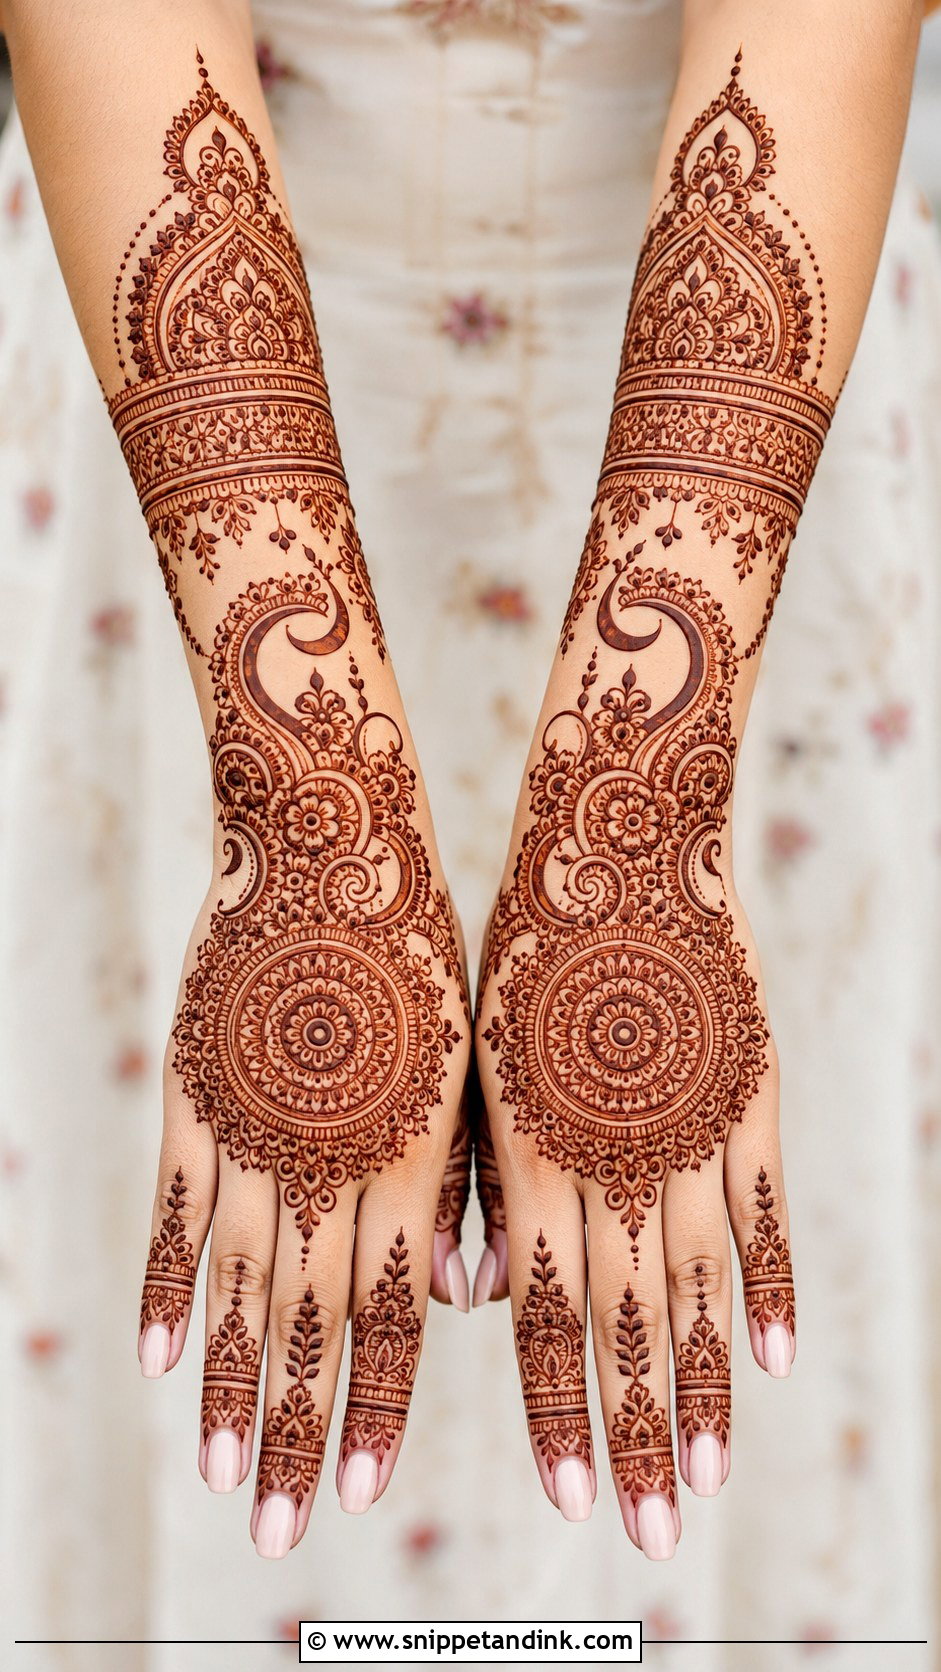
Karwa Chauth mehndi usually leans traditional and full: mandalas, paisleys, florals and bracelet cuffs, sometimes extending from wrist to forearm with leaves and dots. Some women like a subtle moon curve or round decorative shapes as a nod to the evening’s ritual. The back of the hand is on show with bangles all day, so it can carry rich detail. For a lighter version, a mandala with finger bands and a simple wrist border keeps the festive feel.
27. Back Hand Mehndi Design For Raksha Bandhan
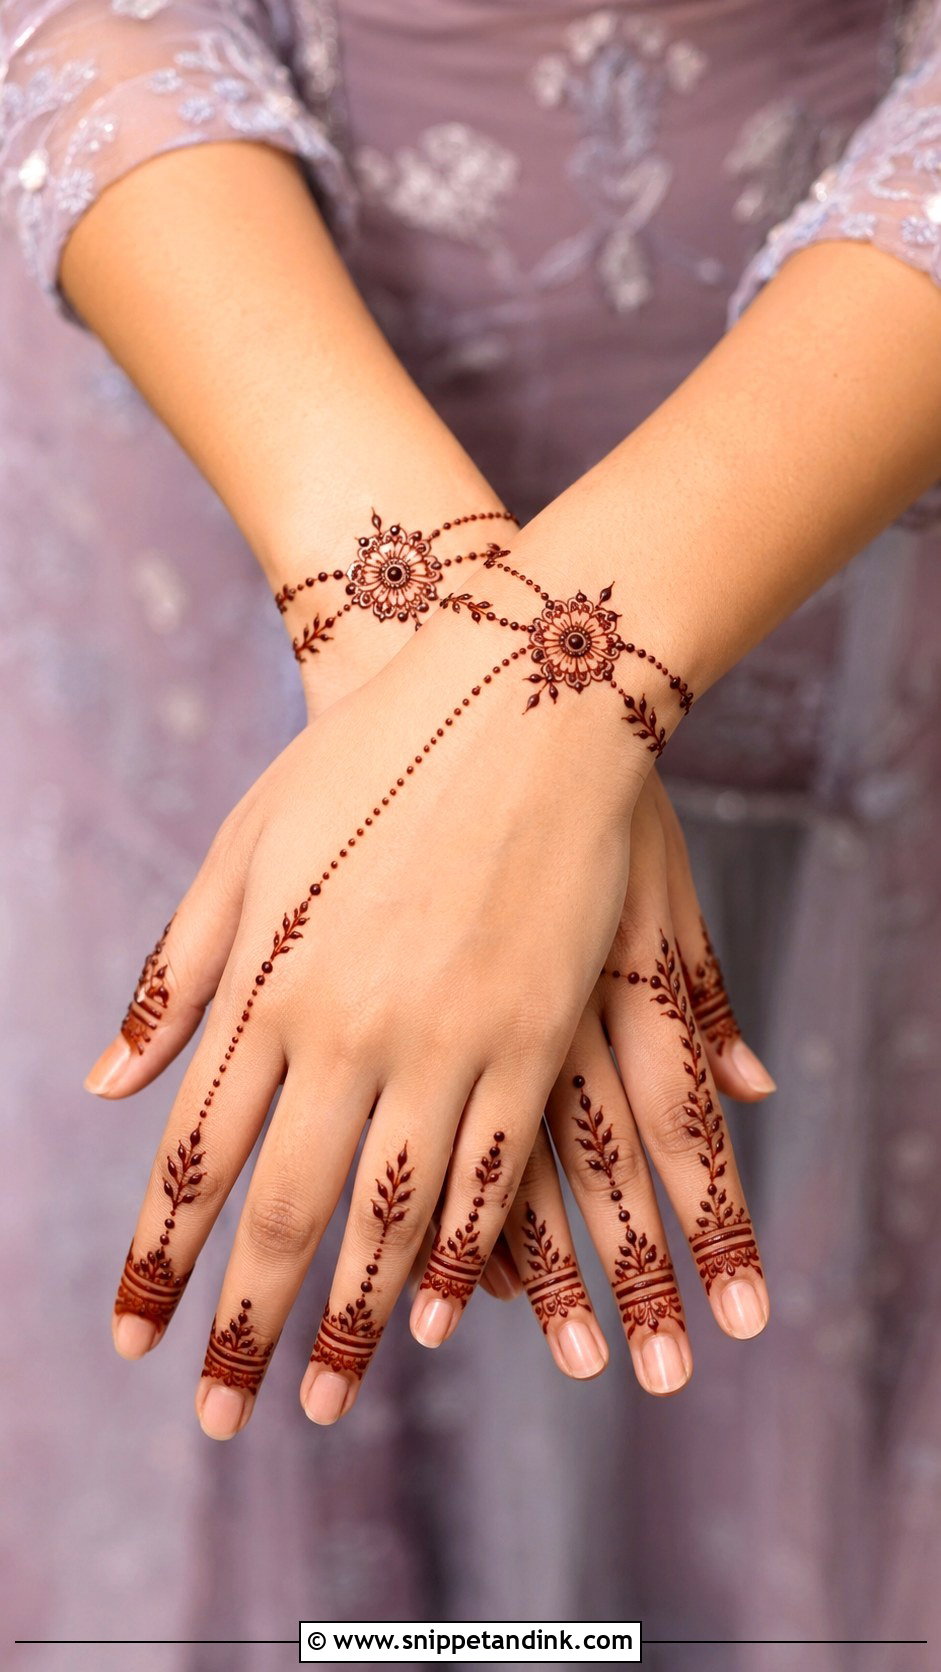
For Raksha Bandhan, the wrist matters most, because that’s where the rakhi is tied. A decorative cuff around the wrist, dotted chains and a small floral or mandala motif on the back of the hand make a sweet, light design. Keep finger details simple with dots, leaves and thin bands. I leave a little gap where the rakhi will sit so the thread doesn’t cover the best part of the cuff. Small flowers and open spaces suit younger sisters especially well.
28. Back Hand Mehndi Design For Kids
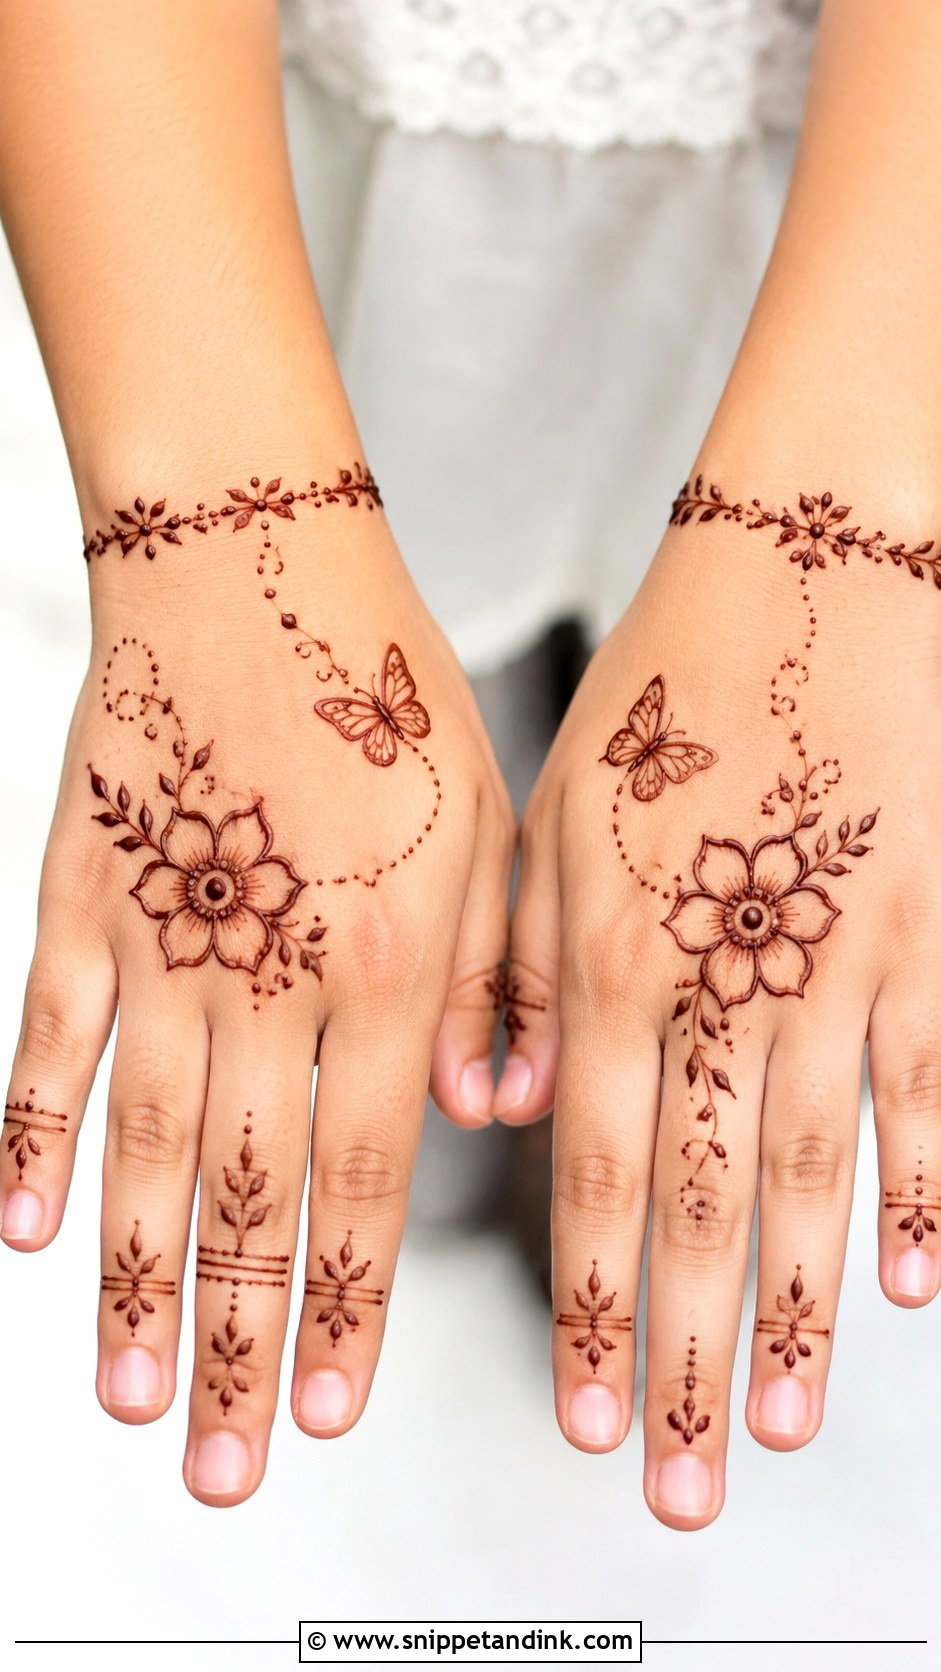
Back hand mehndi design for kids has to be fast, because children won’t sit still and will touch the paste before it dries. A tiny flower, a butterfly shape or a mini mandala on the back of the hand, with a few dots and leaves, is plenty. I avoid dense fillers that stay wet longer and smudge. Keep it centred and small enough for little hands. And only ever use natural henna on children; anything that stains black within minutes is not safe for their skin.
29. Back Hand Mehndi Design For Beginners
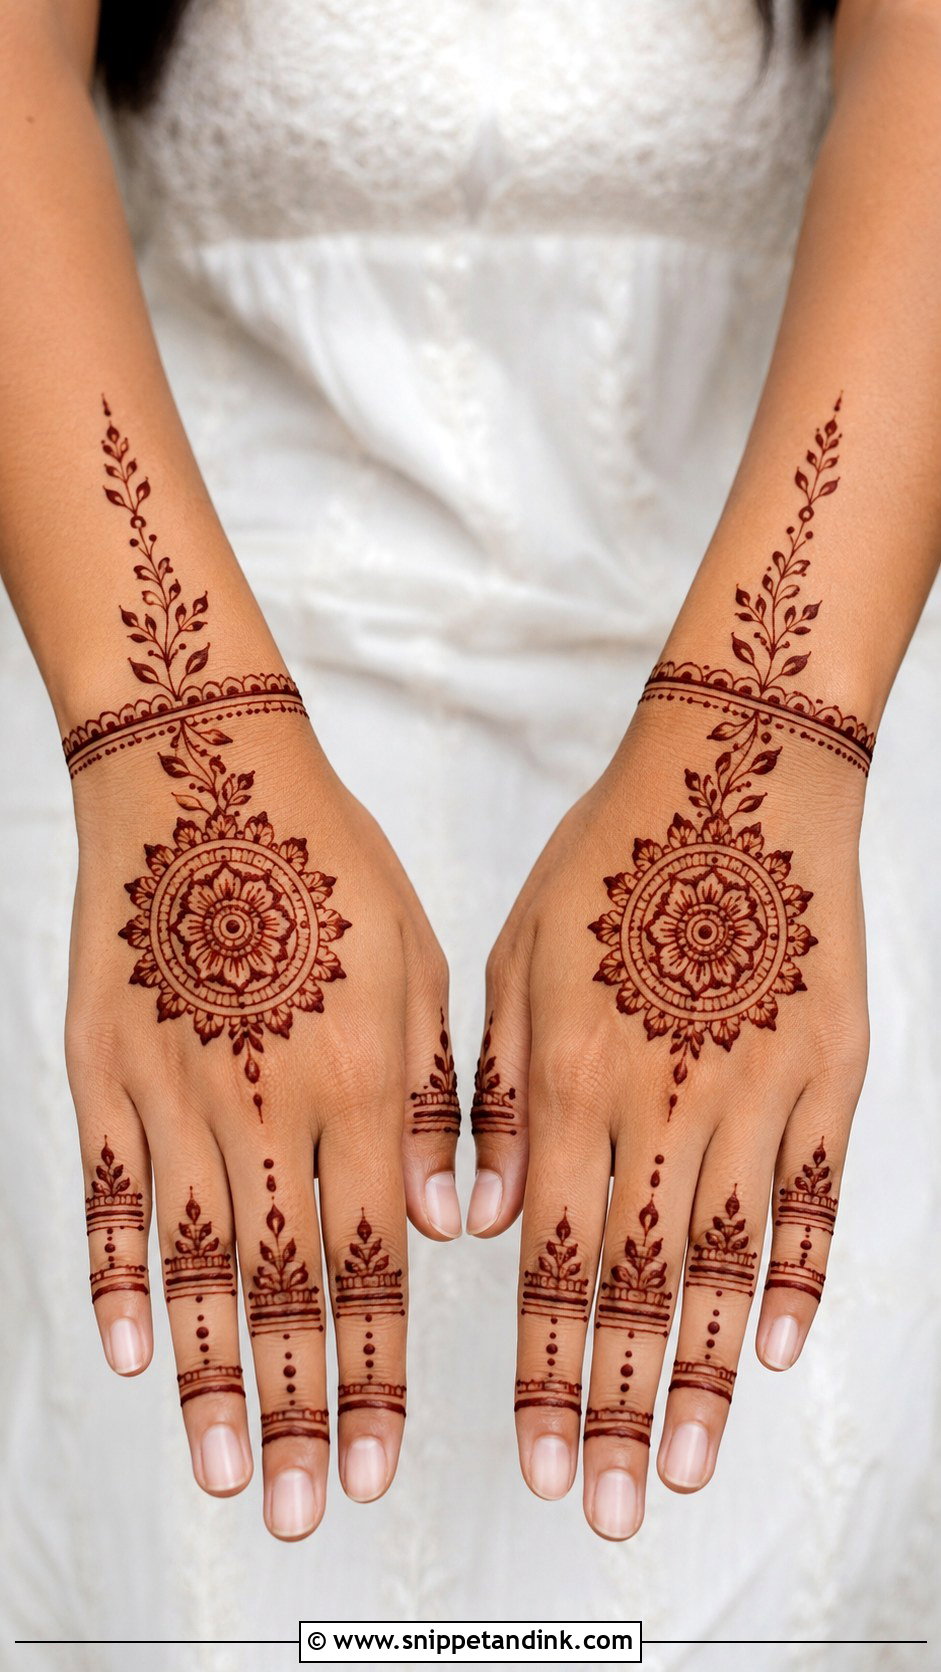
If you’re learning, start with a round mandala or a simple flower in the centre of the back of the hand, a leafy vine toward the wrist and basic finger bands. Dots are your friend: they fill space without needing advanced control. Leave tight jaali and tiny detailed motifs until your line pressure is steady. I always tell students to practise the main motif on paper first, then work slowly on the hand, holding the cone like a pen and letting the paste fall onto the skin rather than pressing it in.
30. Easy Back Hand Mehndi Design
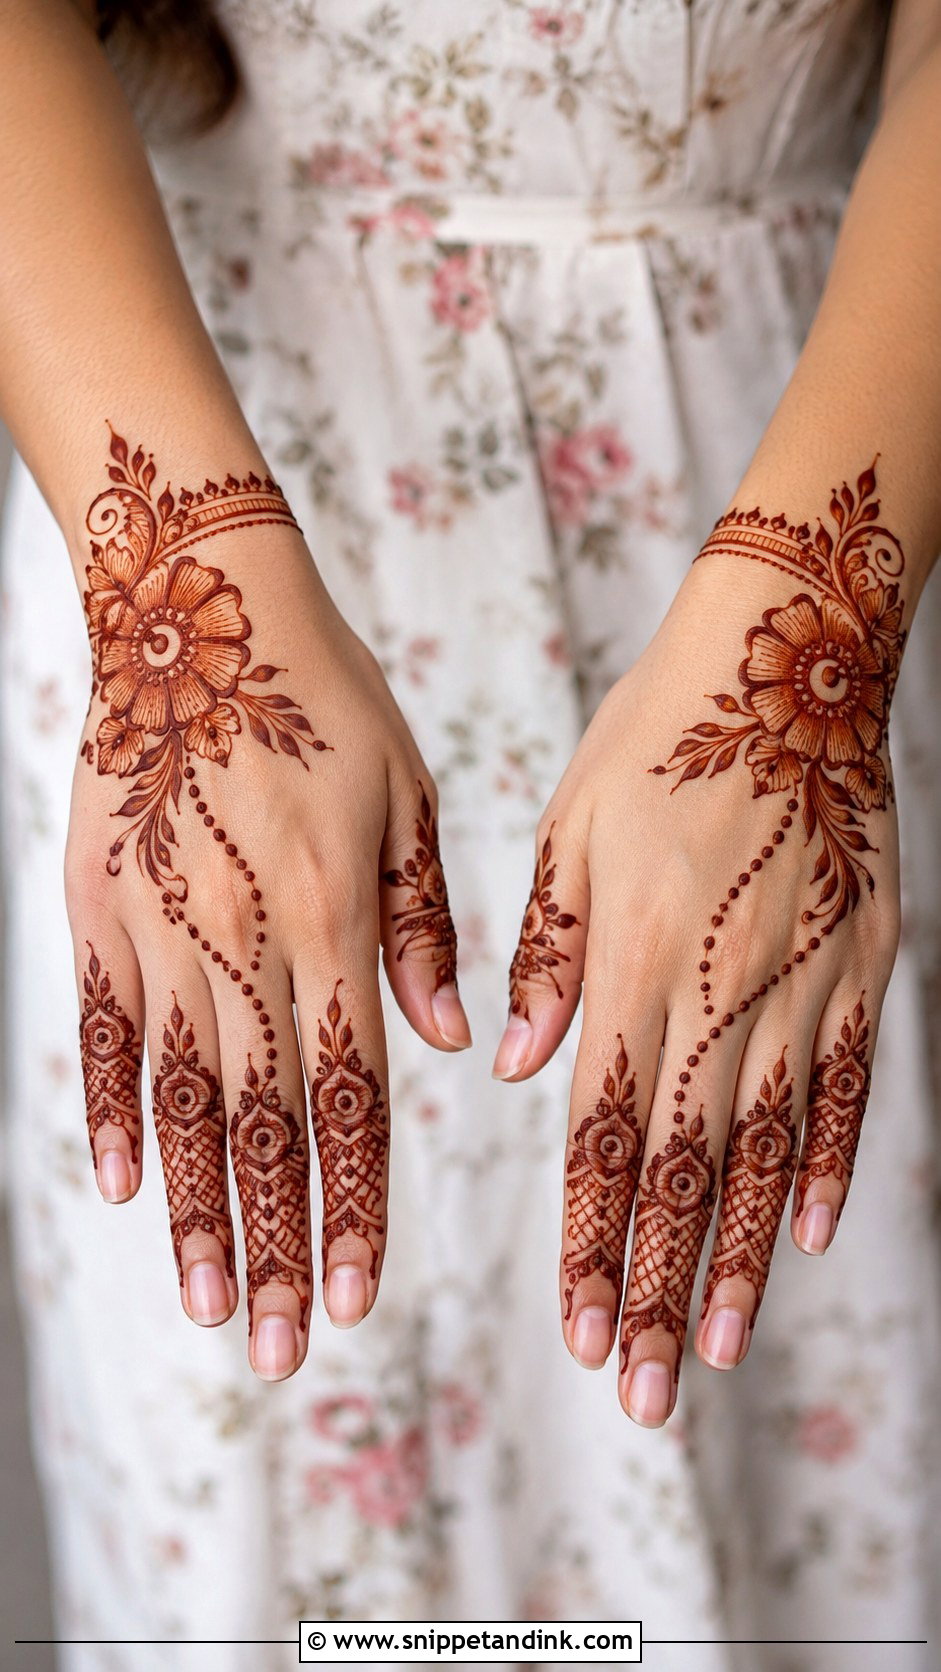
Easy designs rely on a few simple motifs arranged so the hand looks finished: one flower, a few leaves, dotted chains, decorated fingers and a slim wrist border. Larger shapes are easier to draw and less likely to smudge than tiny details, which matters when you’re applying it yourself the night before a function. Go diagonal or centred, whichever feels steadier in your hand. Neat and balanced beats ambitious and wobbly every time.
31. Stylish Back Hand Mehndi Design
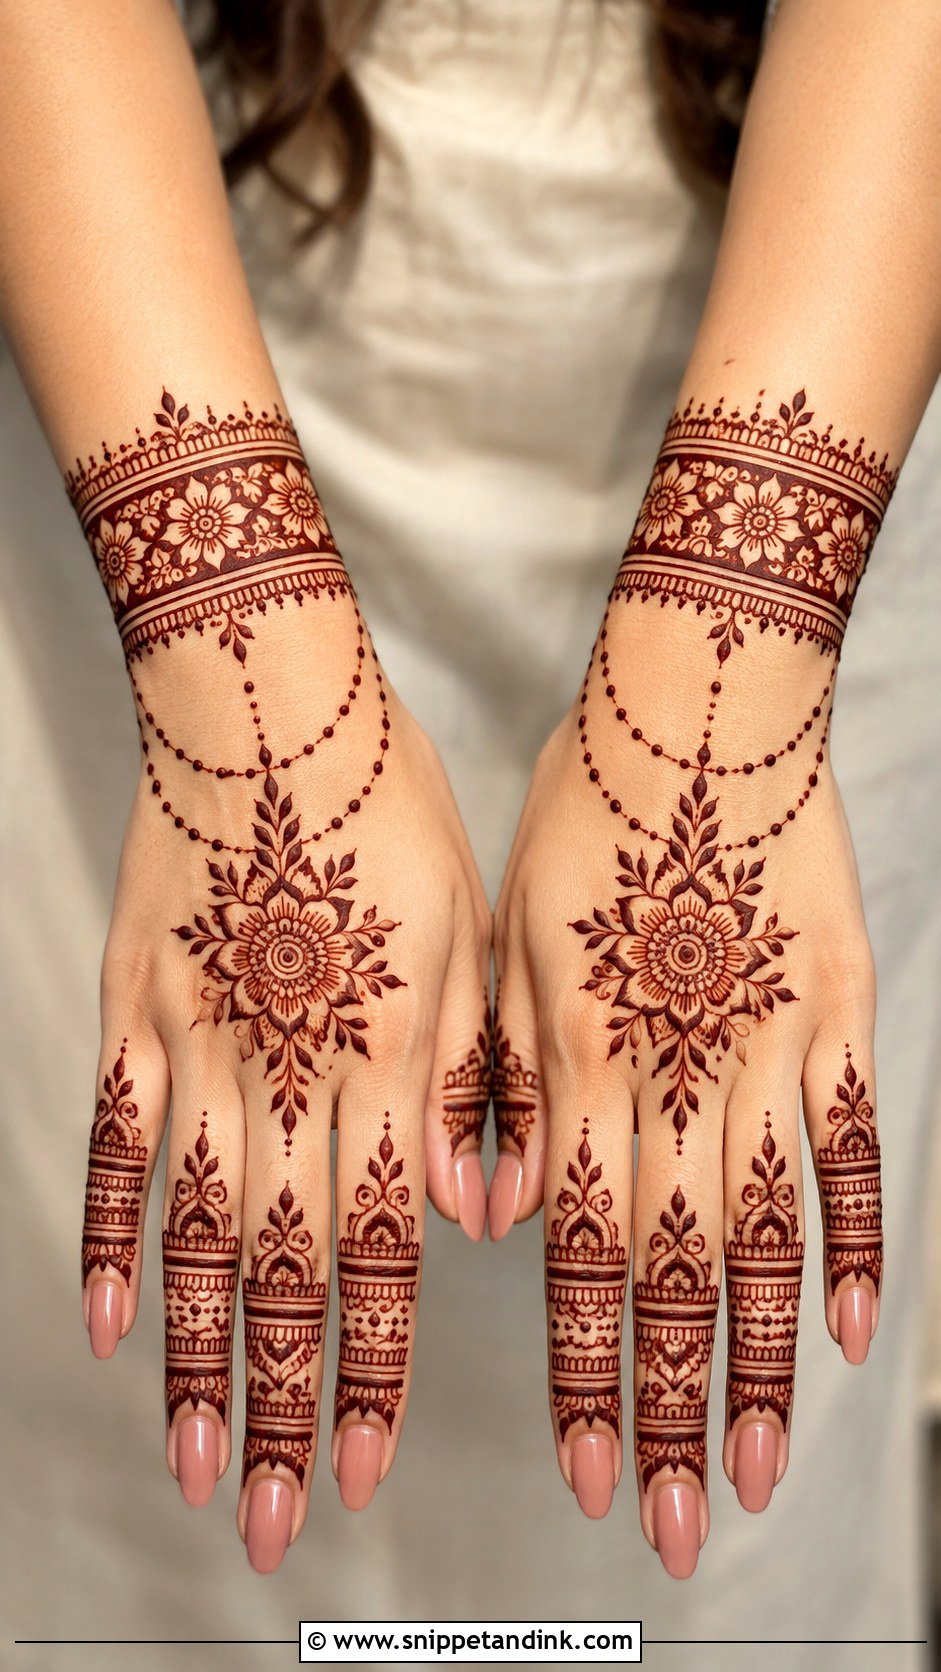
Stylish designs mix modern spacing with traditional motifs: a bold flower set in bare skin, a sleek bracelet cuff, detailed fingertips and clean dotted chains. It should look current but still unmistakably mehndi. Half-mandalas, geometric borders, leafy trails or jewellery details all fit. The fingers carry a lot of the look here, so I spend as much time on them as on the back of the hand. Sharp lines matter more than the number of motifs.
32. Aesthetic Back Hand Mehndi Design
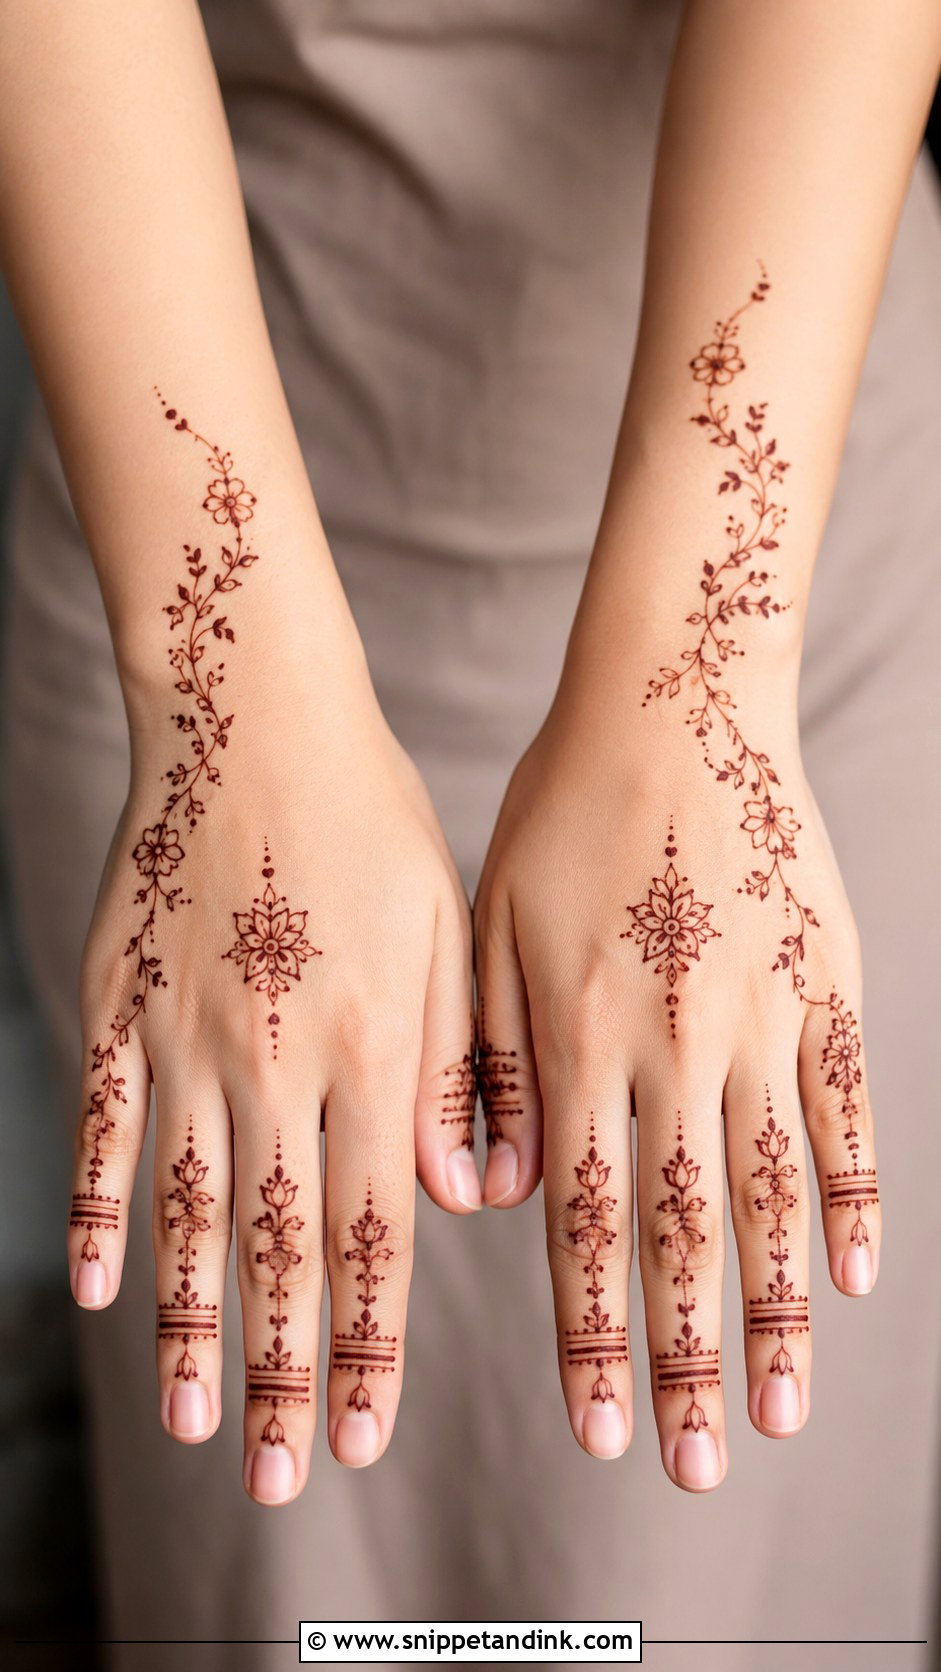
The soft, airy look you see on inspiration boards comes down to proportion: clean negative space, dainty florals, fine finger lines and a small wrist detail. A small central motif with delicate vines and minimal fingertip accents is the classic layout. Every motif needs breathing room, so I skip filler entirely and focus on smooth, even linework. It pairs well with neutral nails, simple rings and pastel or modern ethnic outfits.
33. Back Hand Mehndi Design With Name
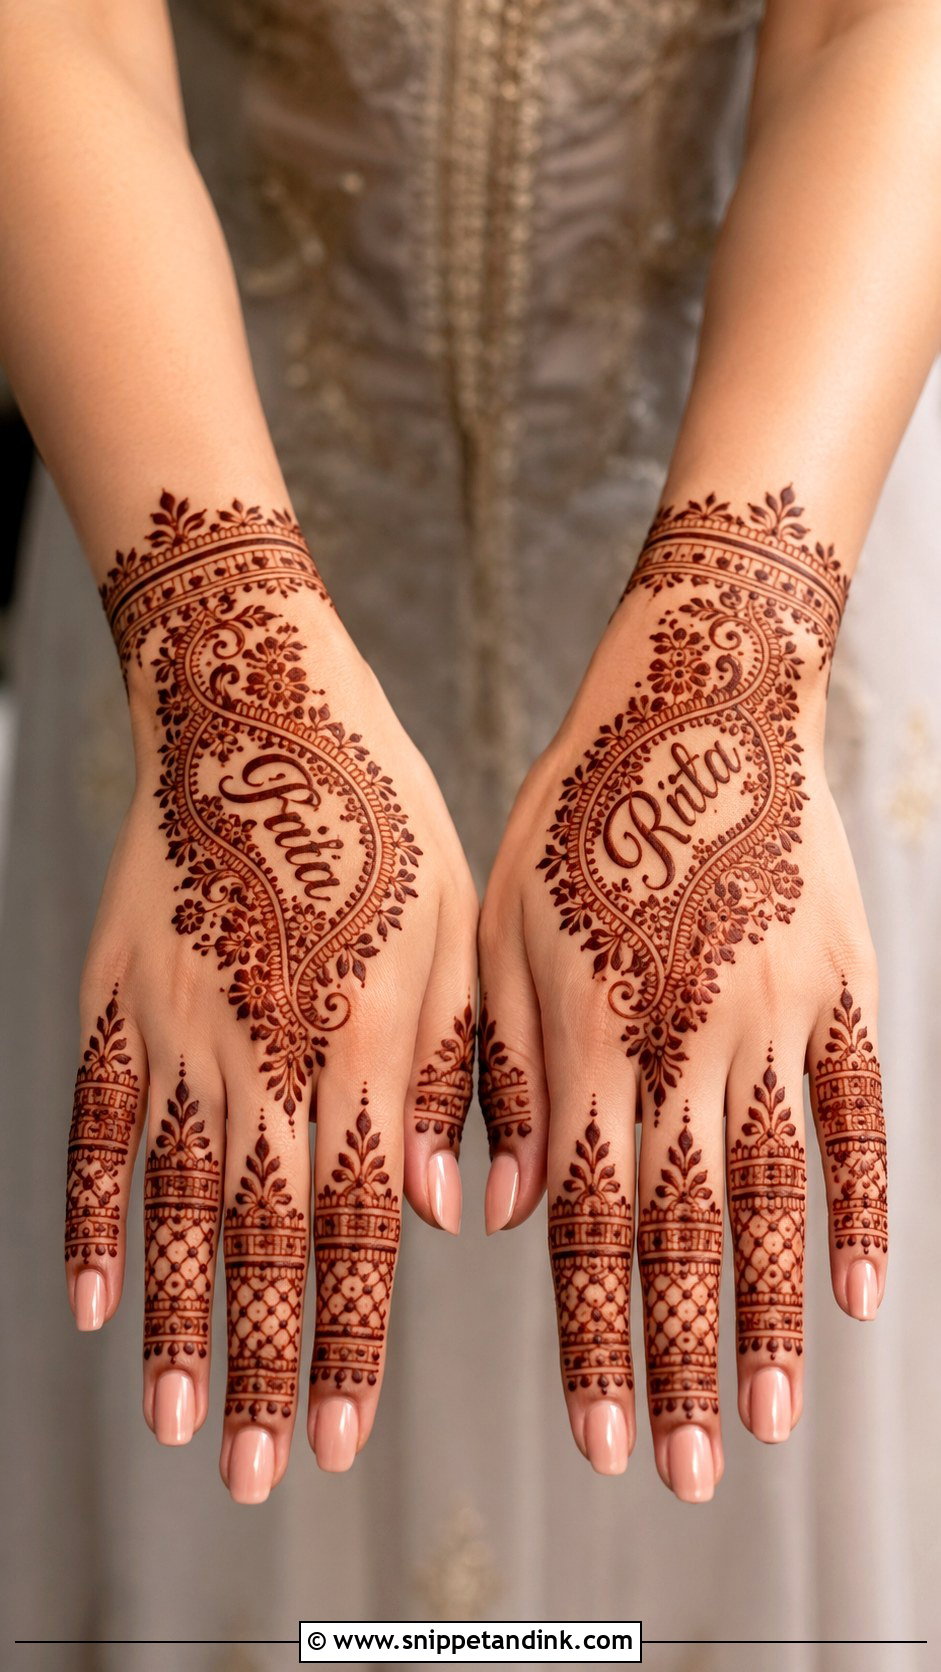
Back hand mehndi design with name makes the pattern personal. The name can hide inside a floral vine, sit near the wrist, or be written inside a heart or paisley frame; in bridal work, initials often get tucked into jaali or a mandala. I write the letters first, in simple strokes, and build the motifs around them, because squeezing a name into a finished design always looks forced. Soft leaves, dots and small flowers around the lettering keep it readable without dominating. It’s popular at weddings, engagements and anniversaries.
34. Back Hand Mehndi Design With Jewelry Pattern
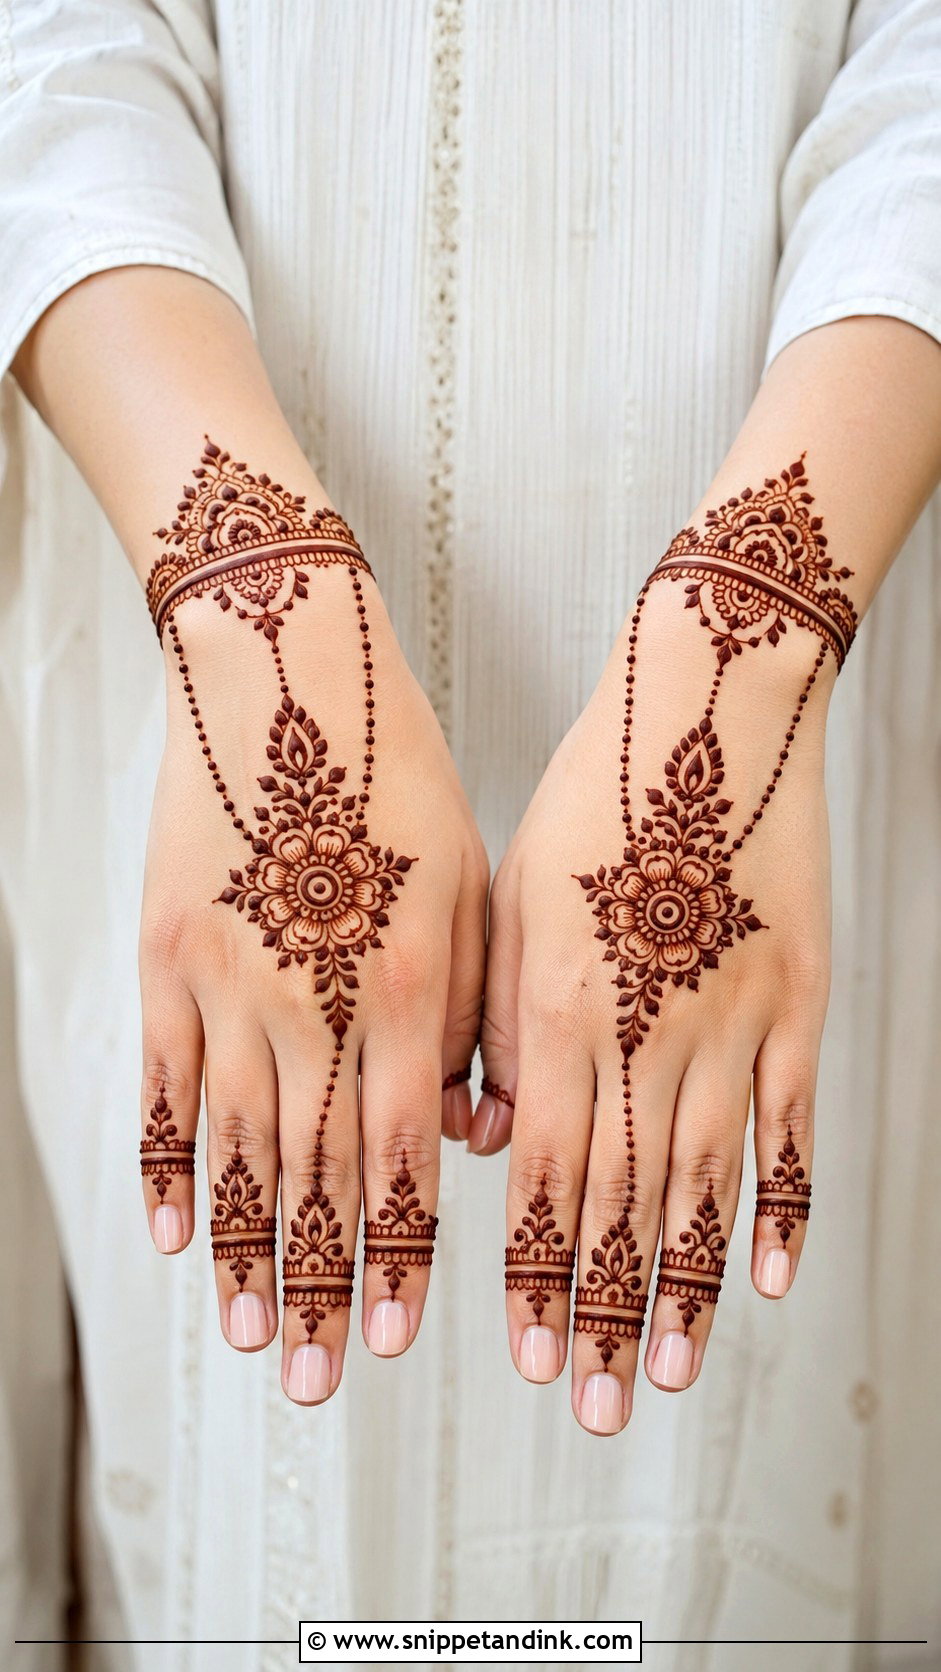
Jewellery-inspired mehndi borrows from hathphool, rings, chains and bracelets: a wrist cuff, dotted chains across the back of the hand, ring-like bands at the base of the fingers and a central flower or mandala as the main ornament. I line the chains up with the gaps between the knuckles so they stay straight when the hand moves. Thin chains keep it minimal; layered cuffs and detailed finger rings make it richer. It looks complete even without real jewellery, which makes it a favourite for engagement functions and bridesmaids.
35. Back Hand Mehndi Design With Negative Space
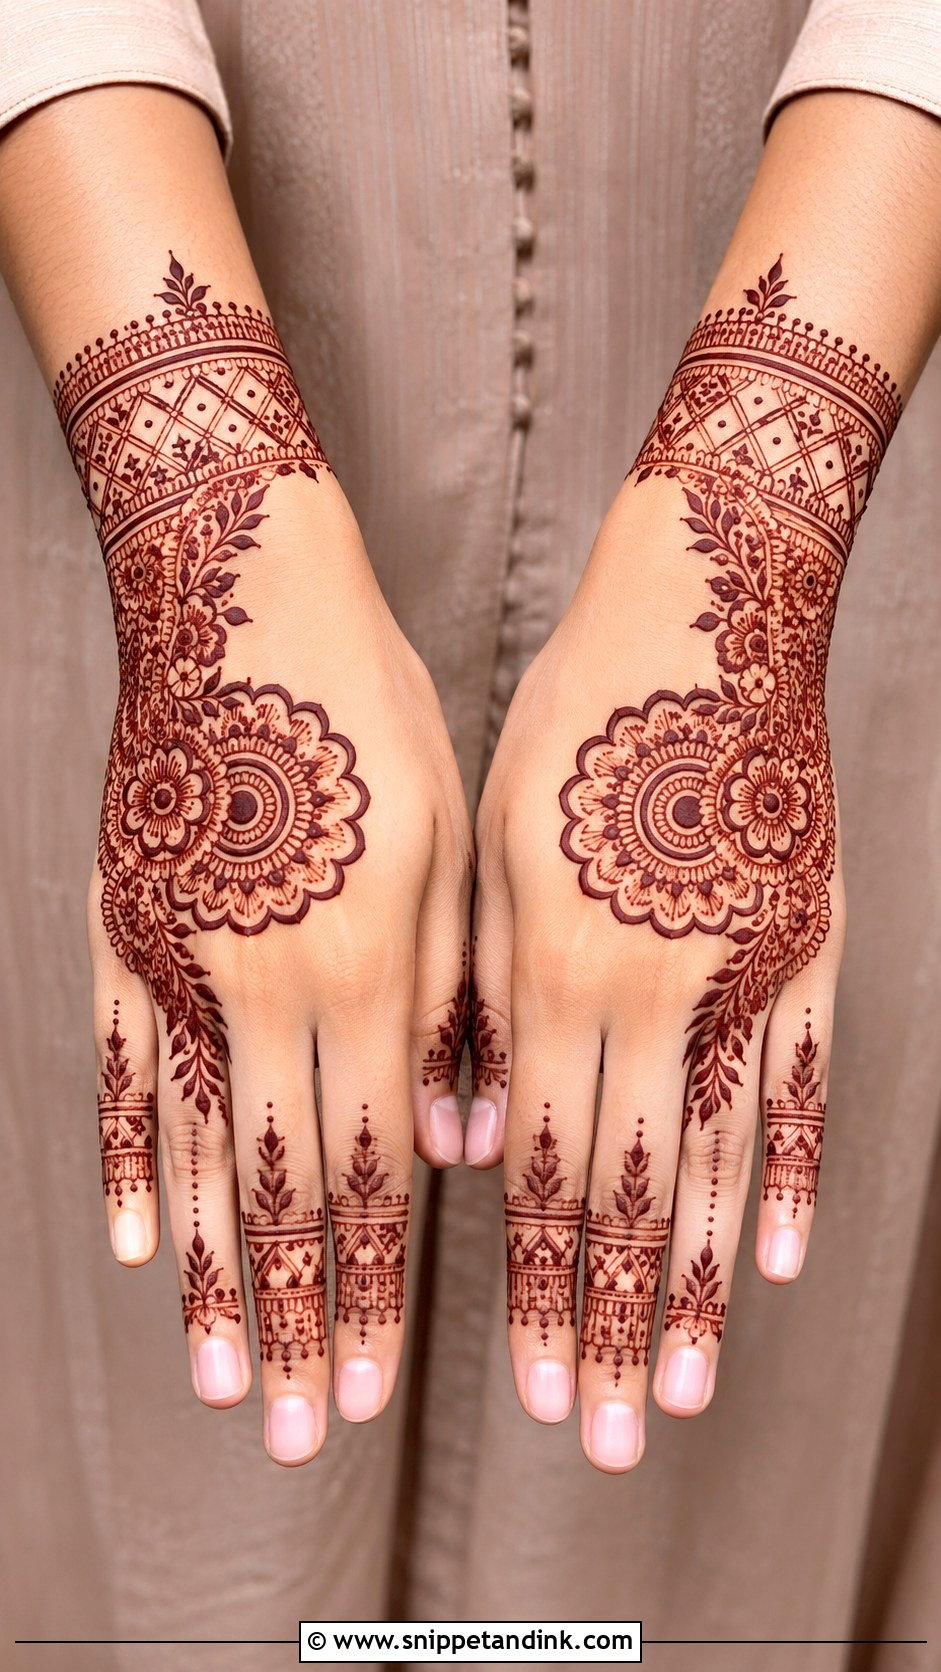
Negative-space designs use bare skin as part of the pattern, through open floral trails, half-mandalas, separated finger bands or bold shapes with clear gaps around them. Each motif stands out more and the hand never looks too dark. It feels lighter, which is welcome at summer events. The outlines must be crisp, because a smudge has nowhere to hide, so I let each section set slightly before working next to it.
Letting the Paste Sit, Then Leaving It Alone
Natural henna stains orange when the paste first comes off and darkens over the next day or two, so I always suggest applying it one to two days before the event. Leave the paste on for at least six hours, overnight if you can sleep with your hands wrapped loosely. A light dab of lemon and sugar once the paste has dried helps it stay pressed against the skin.
- Scrape the dried paste off with a blunt edge. Don’t wash it off.
- Keep water away for as long as you can, ideally twelve hours or more.
- Rub in a little balm or oil before showering or washing dishes in the days after.
- Hand sanitiser, scrubs and long hot baths fade the back of the hand first, so go easy on them before the event.
Natural Cones Only, Even for a Quick Design
If a cone promises a black stain in minutes, don’t put it on your skin. Instant dark colour comes from added chemical dyes, not henna, and they can cause serious skin reactions that last far longer than the design. Real henna goes on dark green or brown, smells earthy, and comes off orange. Ask your artist what’s in her paste; anyone mixing her own will tell you happily, and it’s worth a patch test the day before if you have sensitive skin.
Lighter for Eid, Fuller for the Wedding Week
From a single beginner flower to full bridal coverage, the right back hand design depends on the event, your outfit and how long you can sit. Mandala, paisley, peacock and bridal layouts suit traditional days; minimal, negative-space, jewellery and airy designs suit modern ones; Arabic trails, vines, cuffs and jaali sit comfortably at festivals. Whichever you choose, I’d ask for clean lines and generous spacing, then give the paste time on the skin and the stain a day to deepen. That patience does more for the final colour than any design choice.
You'll Like These Ideas:


Leave a Reply