
New simple bridal mehndi designs are what I’m asked for more and more, usually by brides who want their hands to look finished without sitting still for an entire afternoon. Lighter bridal henna is not the same as plain henna. The difference is in spacing: a few strong motifs, slim wrist cuffs and well-placed gaps can read as richer than a crowded hand. These layouts suit an intimate wedding, an engagement, a nikkah, a haldi or a sangeet, and they borrow from Indian, Arabic, Indo-Arabic, Moroccan and Gulf traditions as well as the newer minimal style. For each one I’ve noted where the detail should sit and what I’d watch for as the stain develops.
How Long a Lighter Bridal Design Takes, From Cone to Final Colour
Simple designs save time at the application, but the henna still needs its full development time, and that part can’t be rushed. Here is how I plan it with brides.
- Application: a lighter bridal design on both hands usually takes a couple of hours rather than most of the day. Full forearms or feet add time, and speed varies a lot between artists.
- Drying: the paste dries on the surface quickly, but it keeps staining for as long as it stays on the skin. I ask brides to keep it on for at least six hours, and overnight if they can.
- Darkening: when the paste comes off, the stain is bright orange. It deepens to reddish brown or maroon over the next 24 to 48 hours.
- Timing: that’s why I book bridal mehndi one or two days before the wedding, so the colour is at its deepest for the ceremony.
If you have several events, tell your artist which one matters most for photos. I’ll time the application so that day gets the peak colour.
1. Simple Full Hand Bridal Mehndi Design
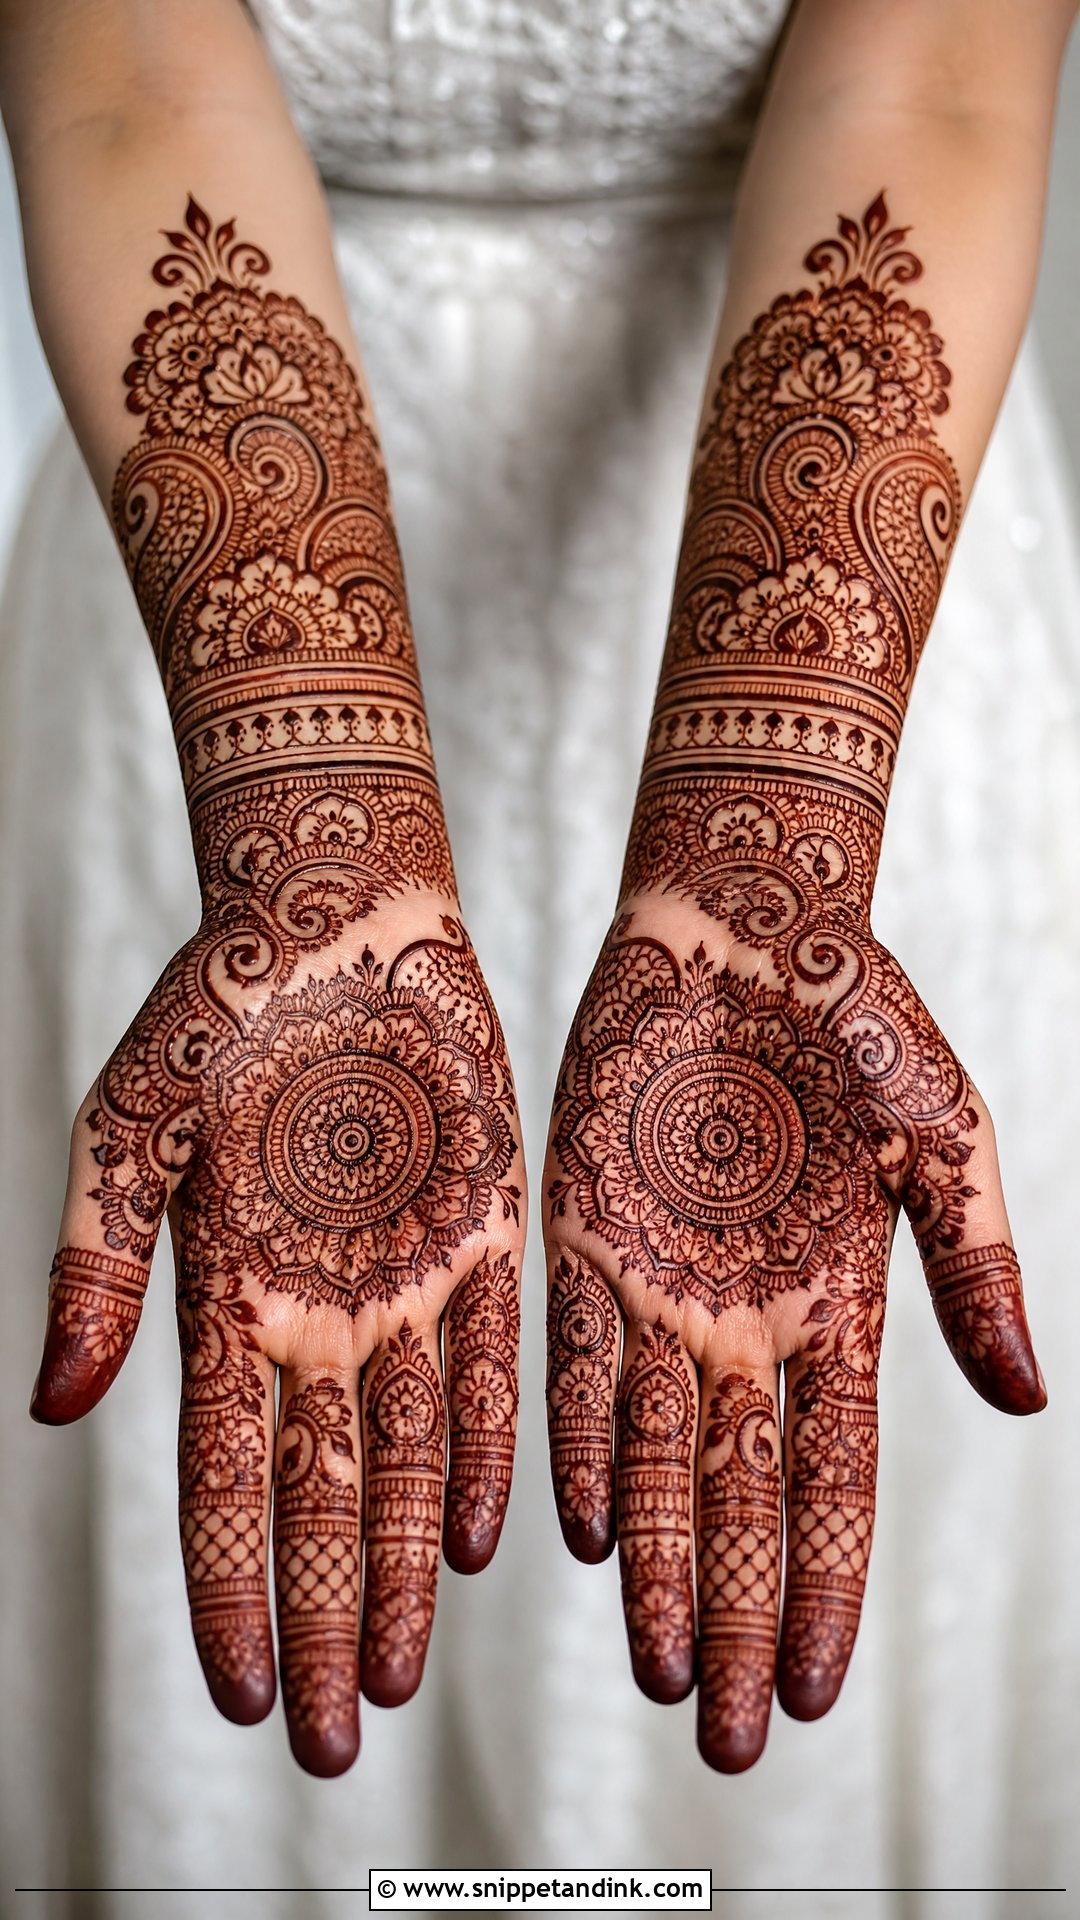
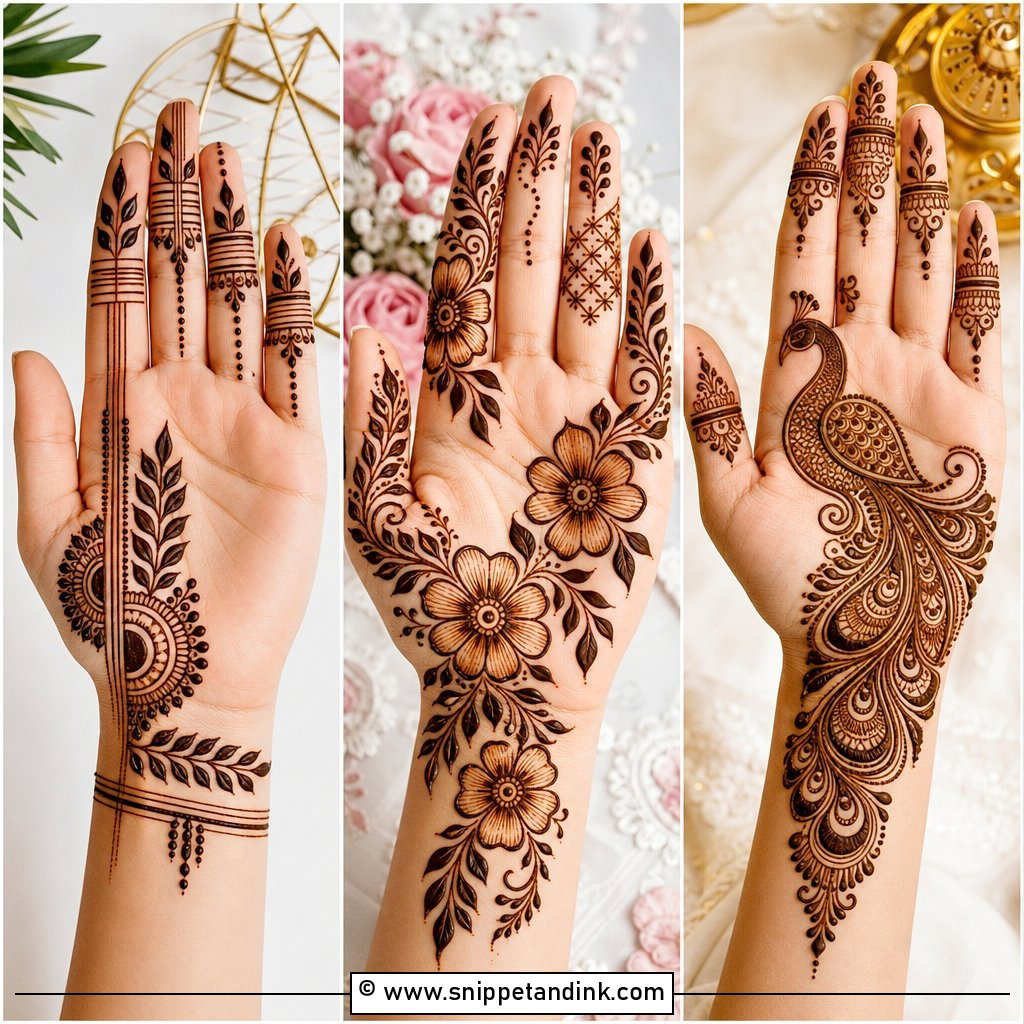
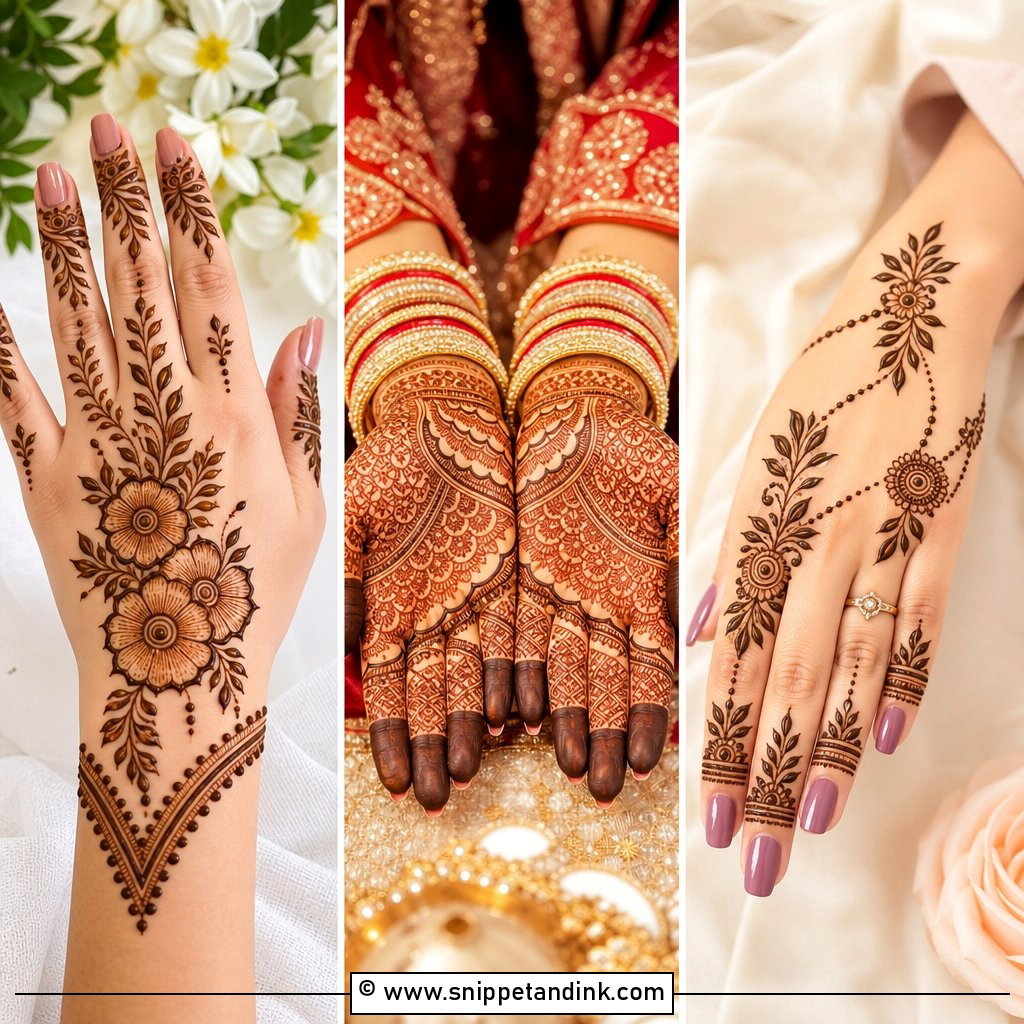
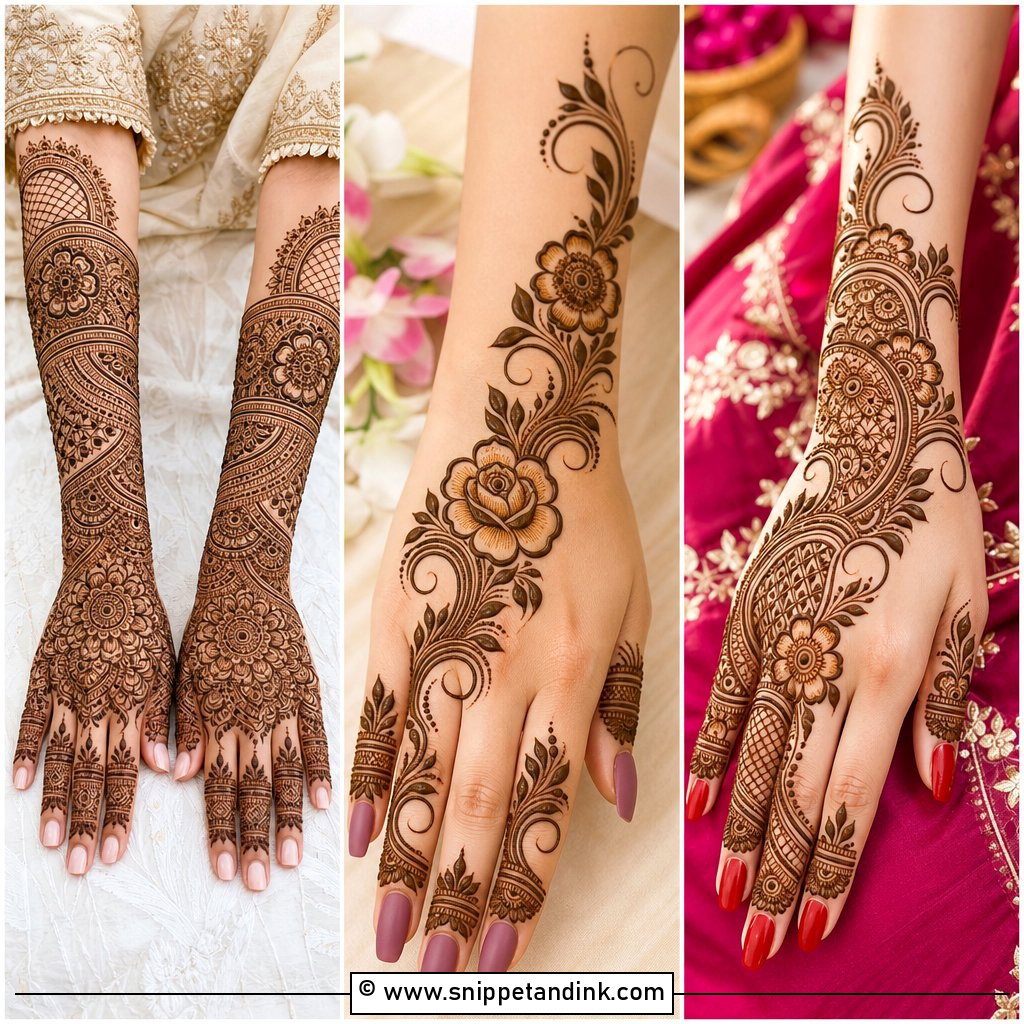
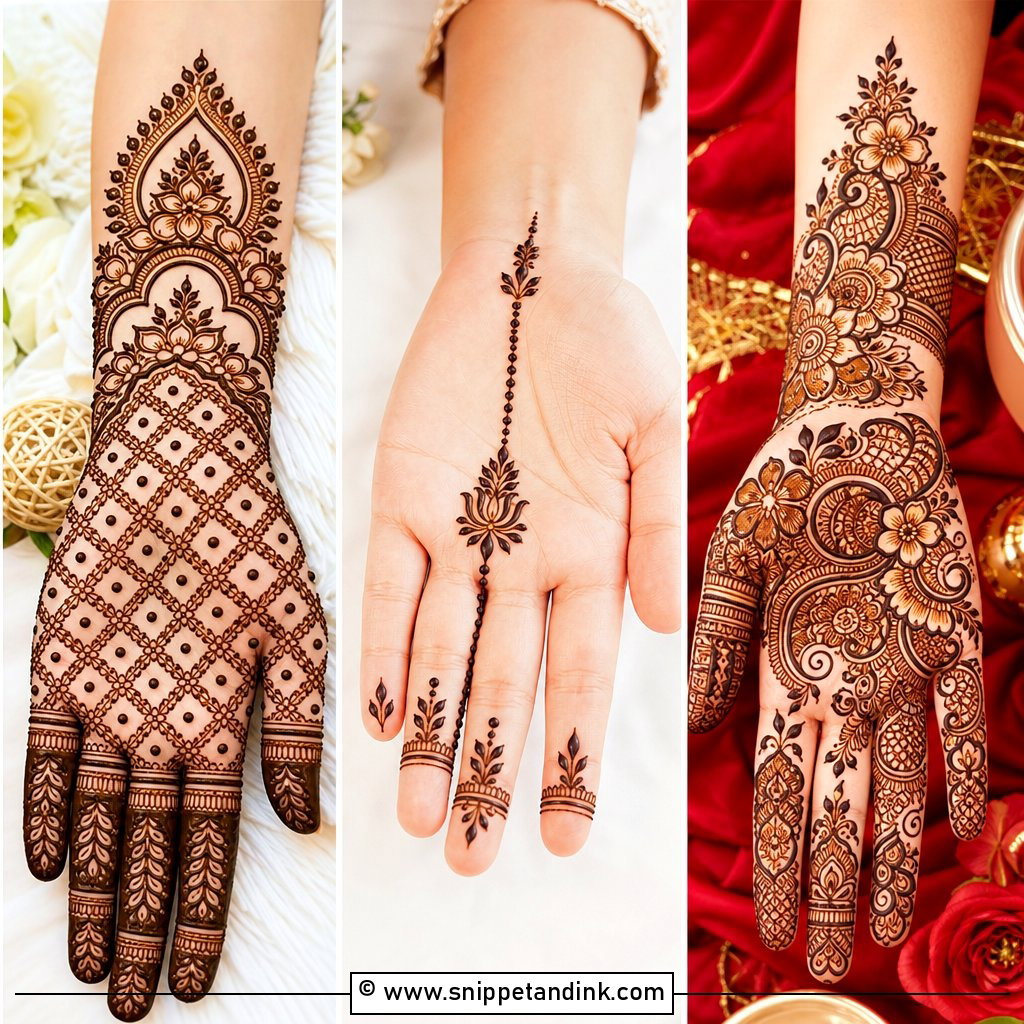
A simple full hand bridal mehndi design covers the whole hand but leaves the skin room to breathe. I usually start with a mandala or floral centre on the palm, because it gives me a fixed point to space everything else from, then run paisley vines outward toward the wrist and fingers. The fingers get slim bands and small floral tips rather than solid fill. On the back hand I repeat the idea at about half the density, with a bracelet cuff and a small centre motif. Where this layout goes wrong is the wrist: if the border is too thin, the design looks like it stopped early.
2. Simple Arabic Bridal Mehndi Design
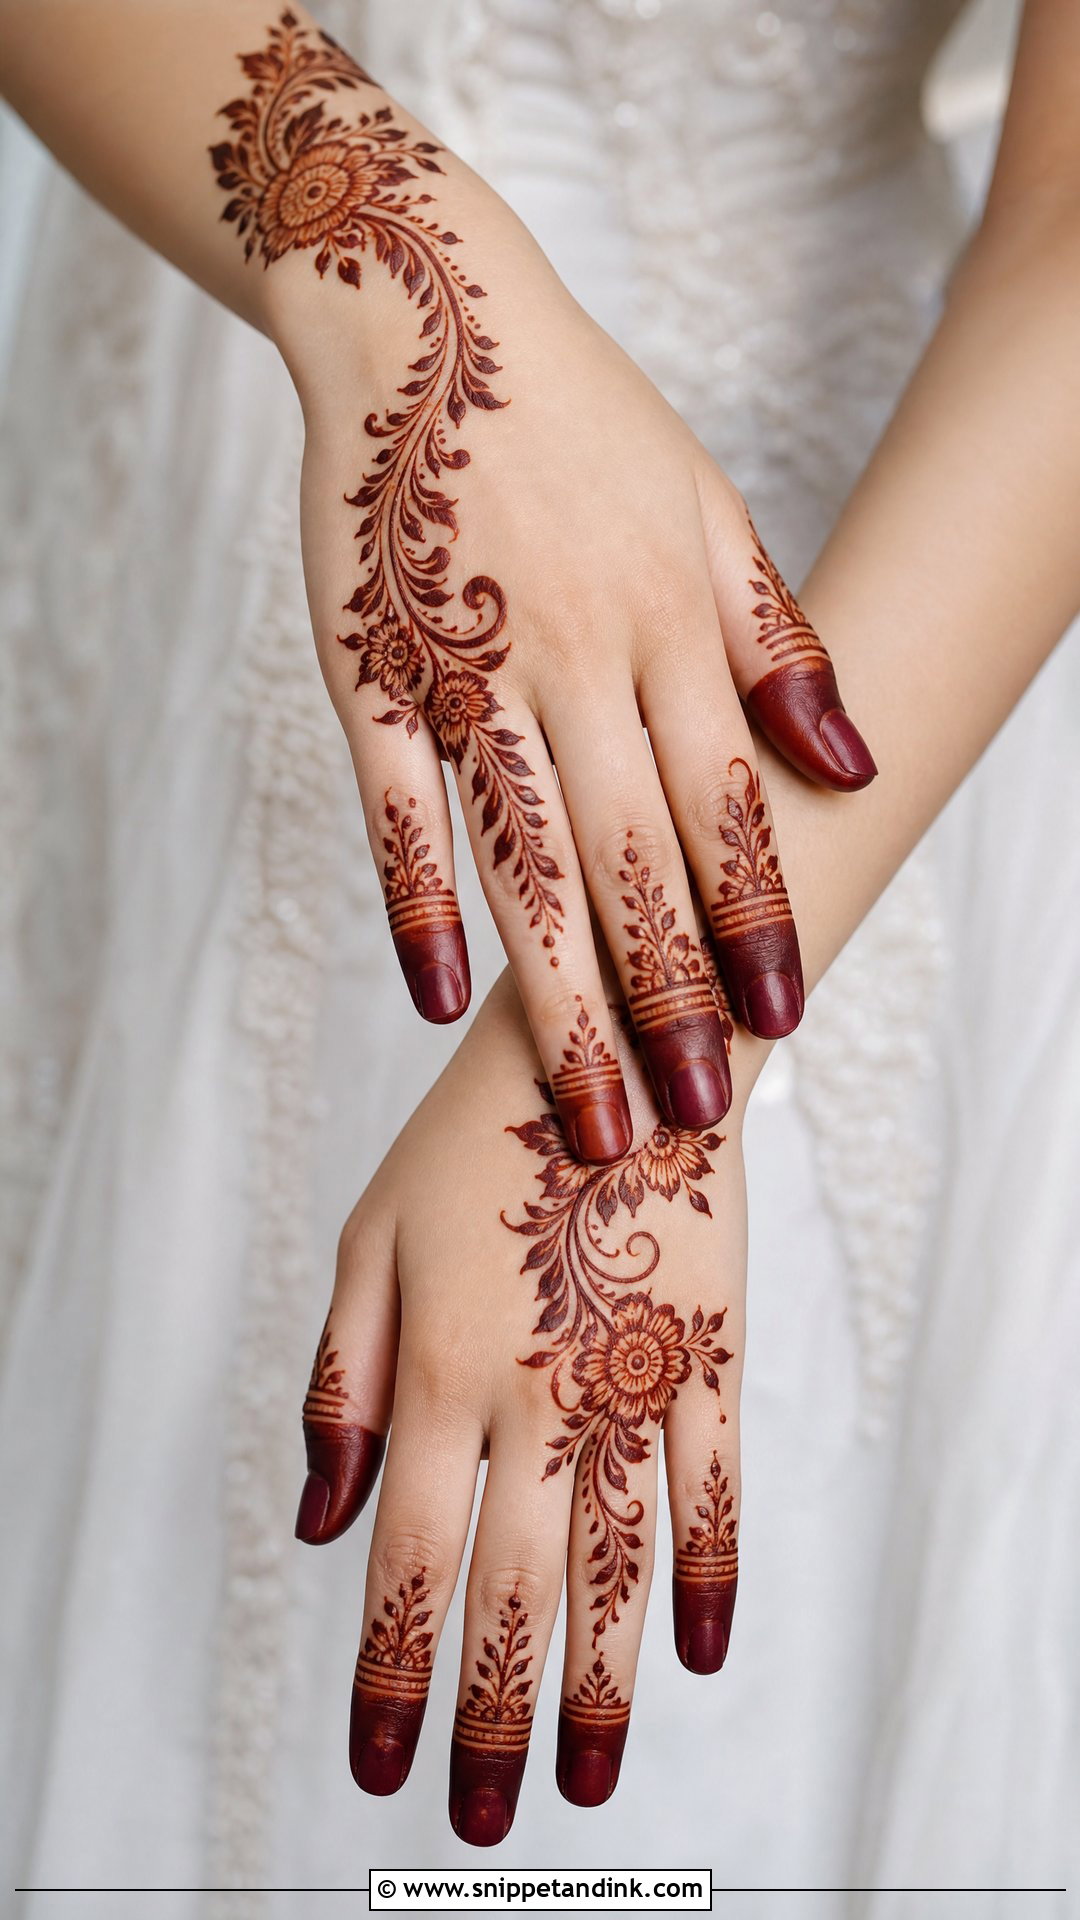
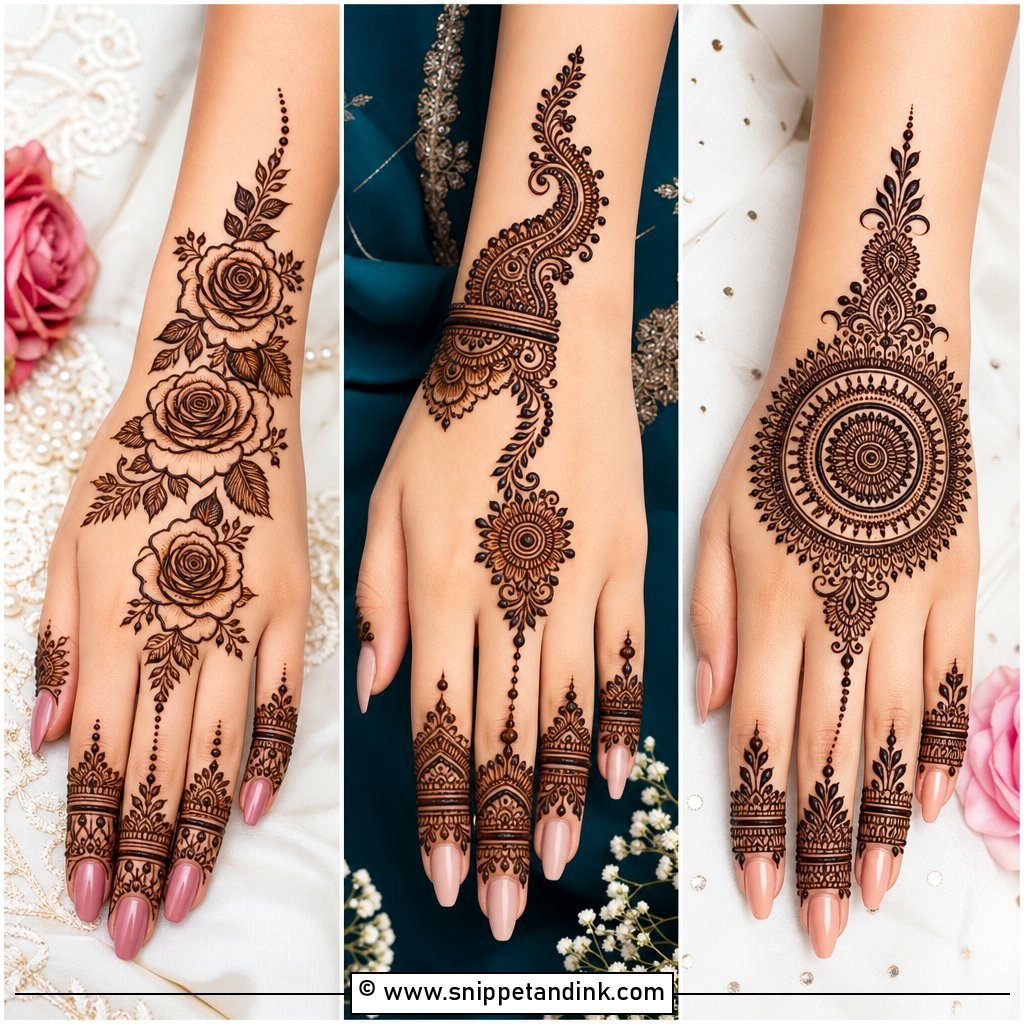
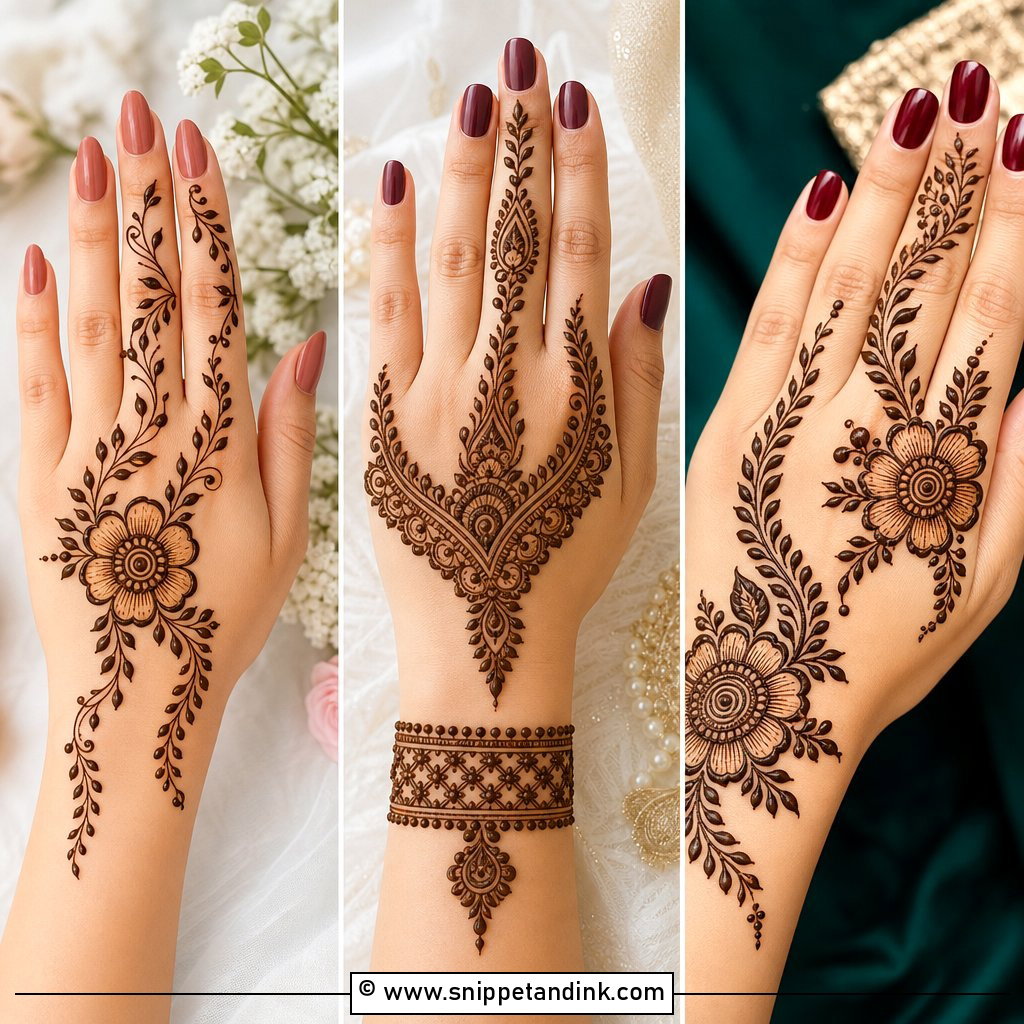
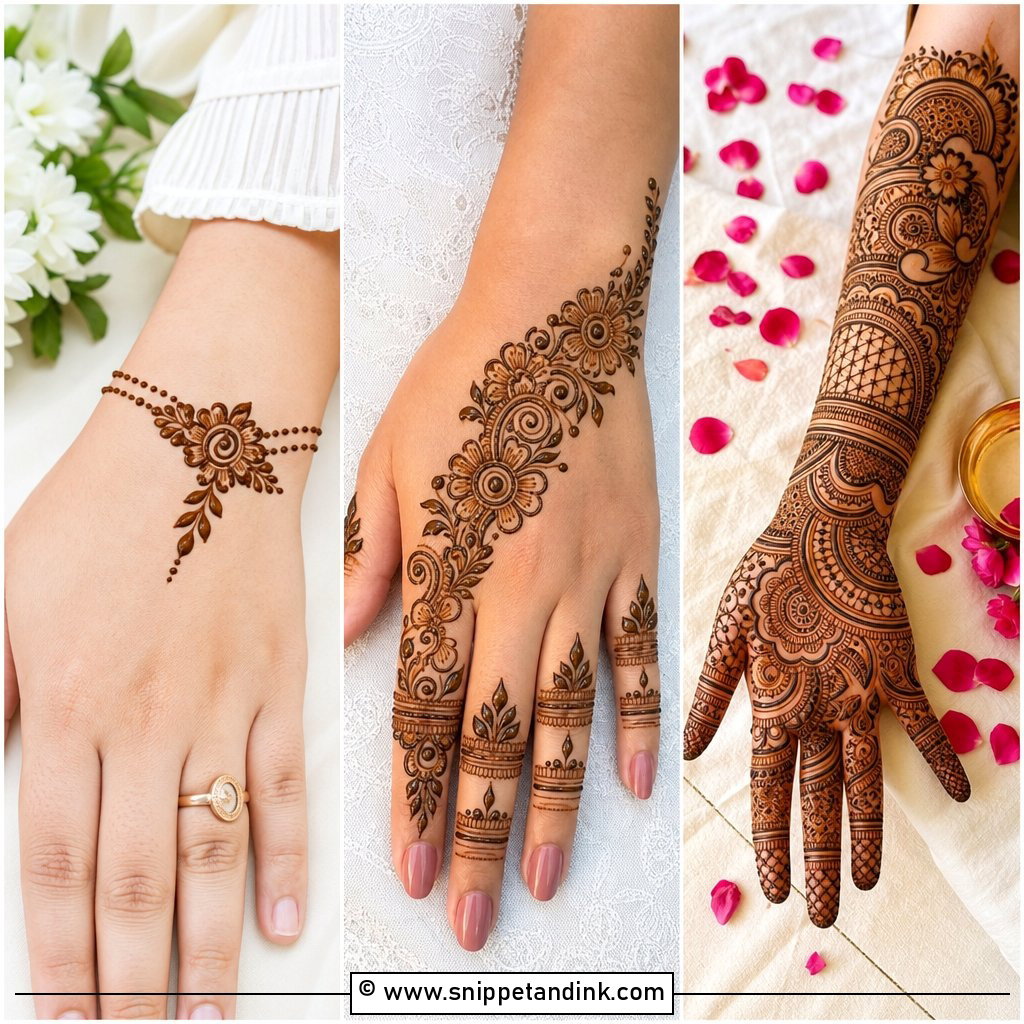
Arabic bridal mehndi is built on movement. Instead of filling the palm, I draw bold flowers and curved leaves in a diagonal trail from the wrist toward the index finger, and the open skin between them is part of the design. Because the lines are thicker, this style also stains more evenly than fine Indian filling, which makes it forgiving if your skin tends to take colour lightly. Brides often choose it for an engagement, a nikkah or portraits. Keep the fingertips outlined or lightly filled so it still looks bridal, and add a matching trail on the back hand to sit alongside bangles and rings.
3. Simple Indian Bridal Mehndi Design
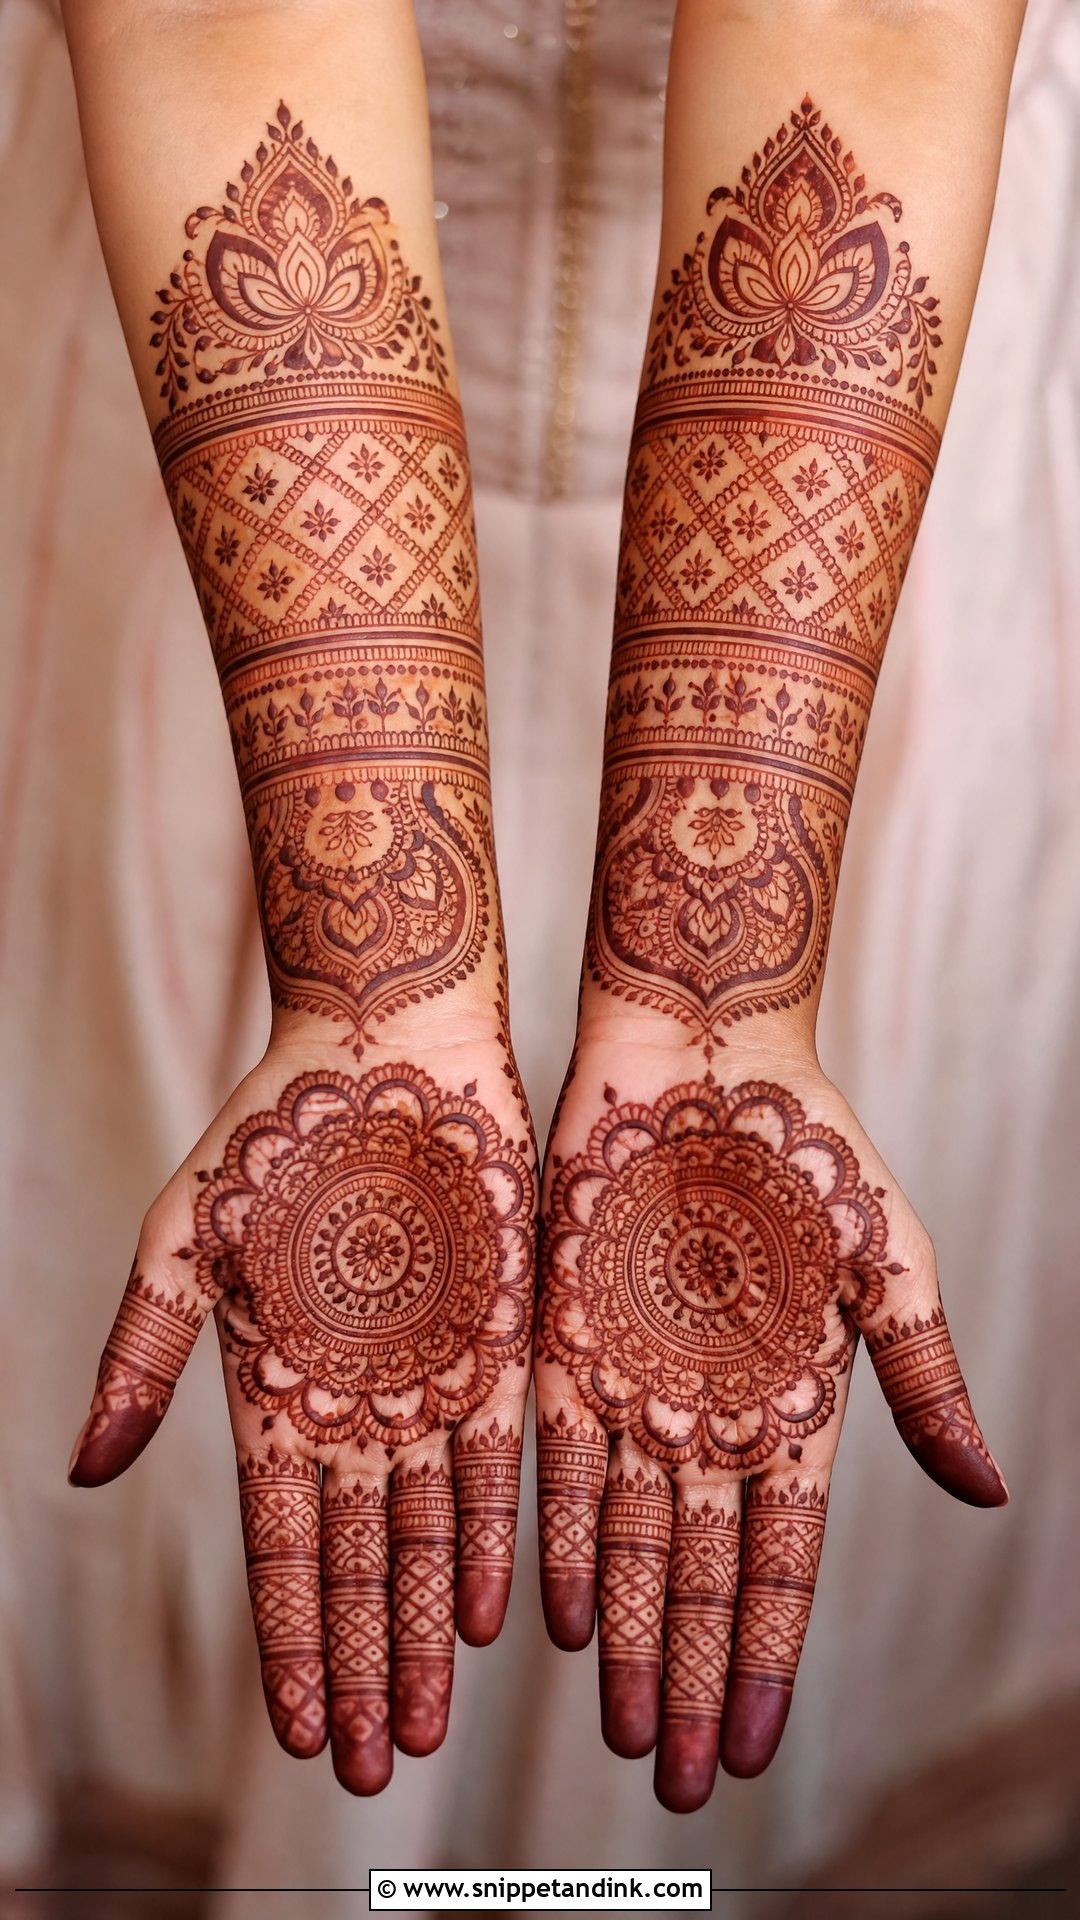
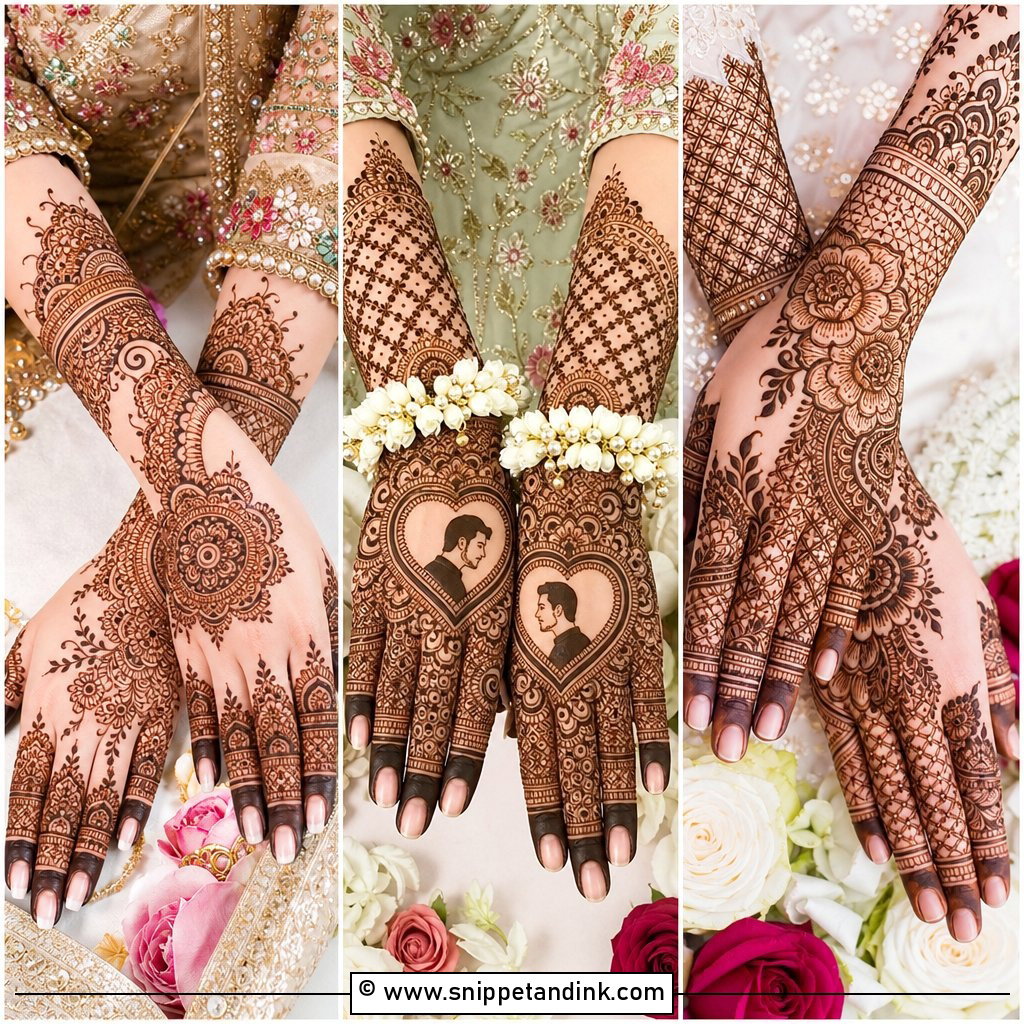
A lighter Indian bridal design keeps the classic vocabulary (paisleys, lotus motifs, small flowers, vines and checked jaali) and simply uses less of it. I place one round mandala on the palm and a plain border on the wrist and forearm, then repeat a few motifs with breathable gaps instead of tight filling. That repetition is what makes it quicker to apply without looking sparse. It suits lehengas, sarees and shararas. If you’d like a hidden initial, I tuck it inside a paisley near the wrist, where it’s easy to find in photos but doesn’t break the pattern.
4. Simple Indo Arabic Bridal Mehndi Design
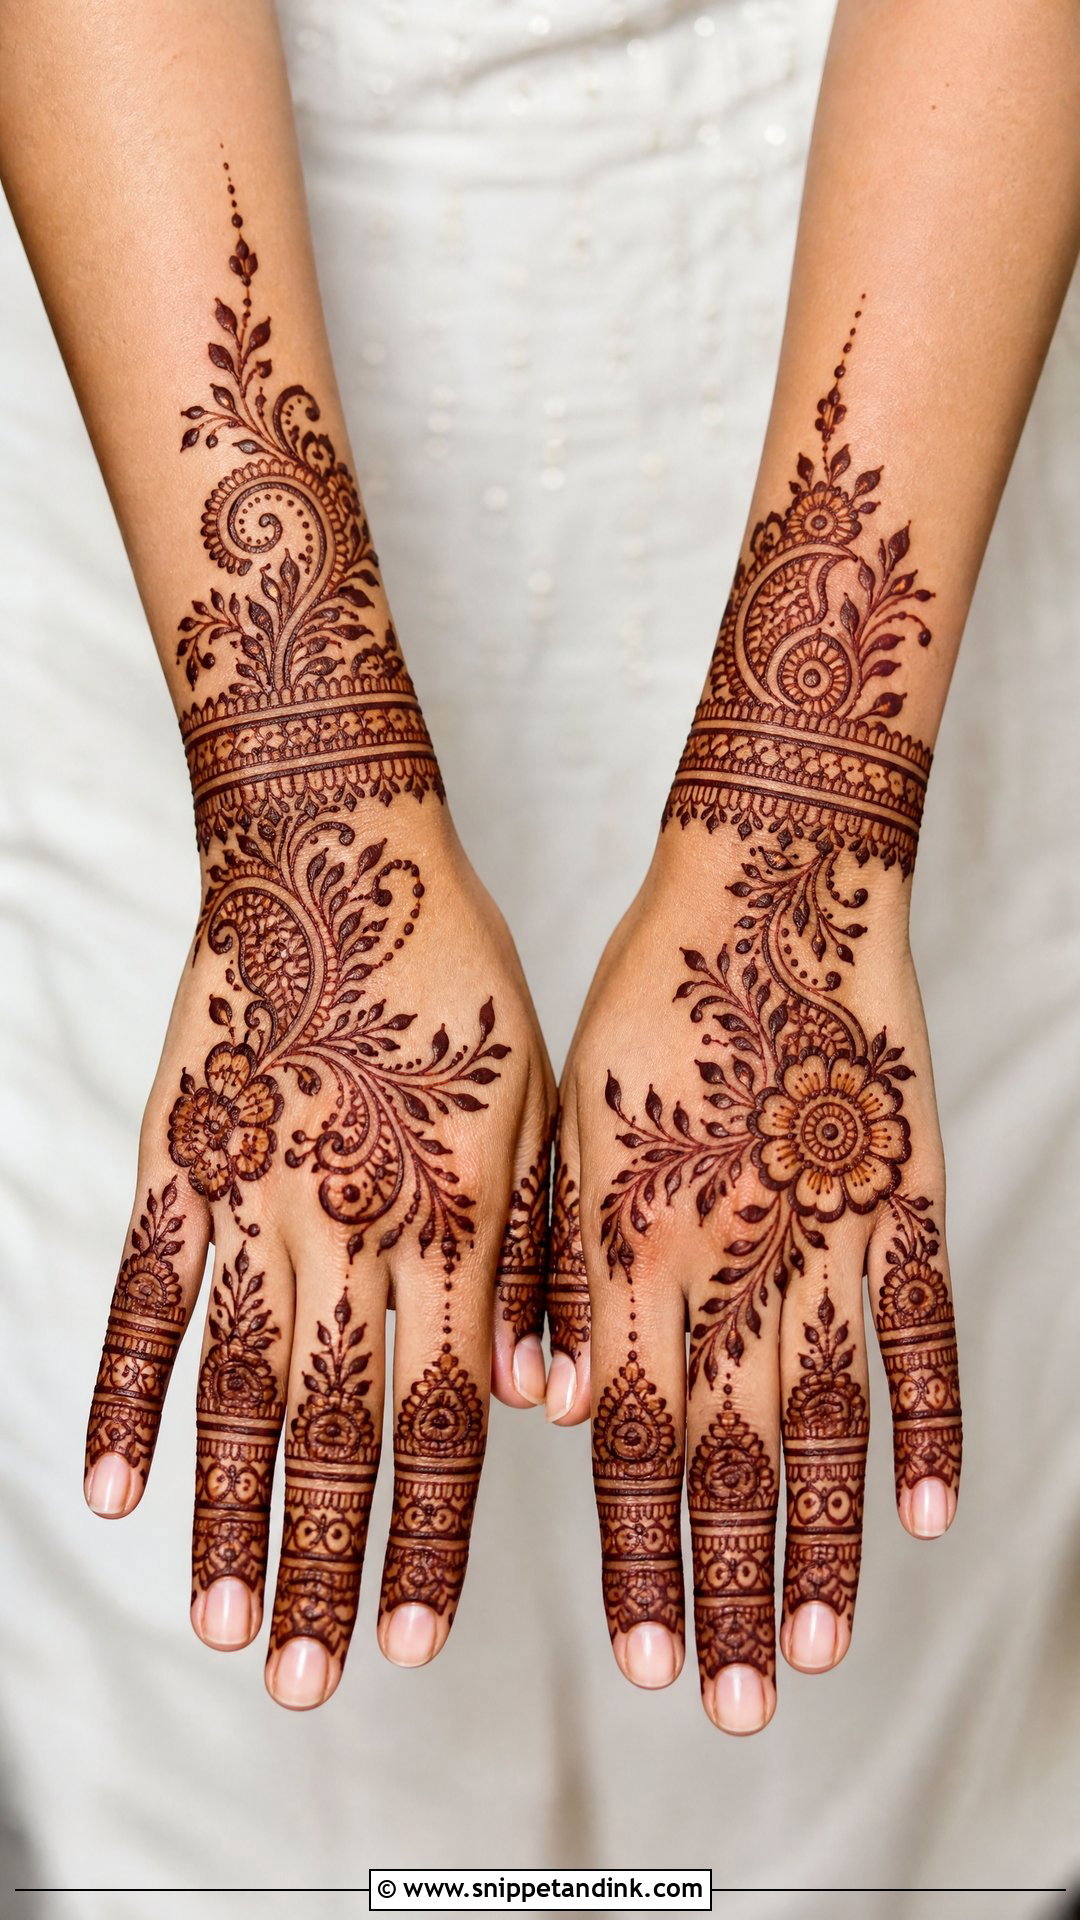
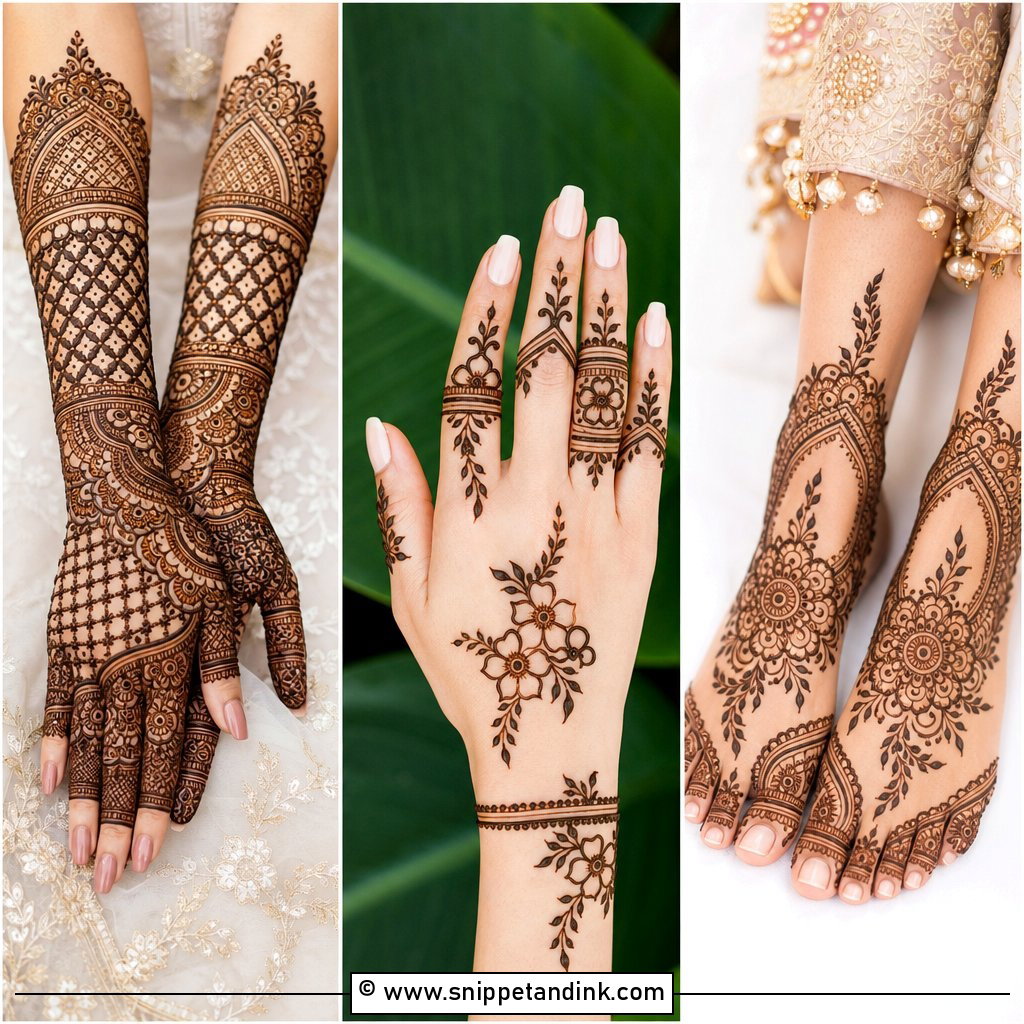
Indo-Arabic is the layout I suggest when a bride wants something modern and her family expects proper bridal coverage. It opens with a bold Arabic-style floral trail, then folds in Indian paisleys, dots, a small mandala and fine wrist bands. On the palm I keep the composition diagonal with detailed fingers; on the back hand I repeat the same floral direction and finish with a bracelet effect, so the two hands read as a pair when you hold them together. It pairs easily with heavier bridal jewelry because the open spaces stop the hands from looking busy next to gold.
5. Simple Mandala Bridal Mehndi Design
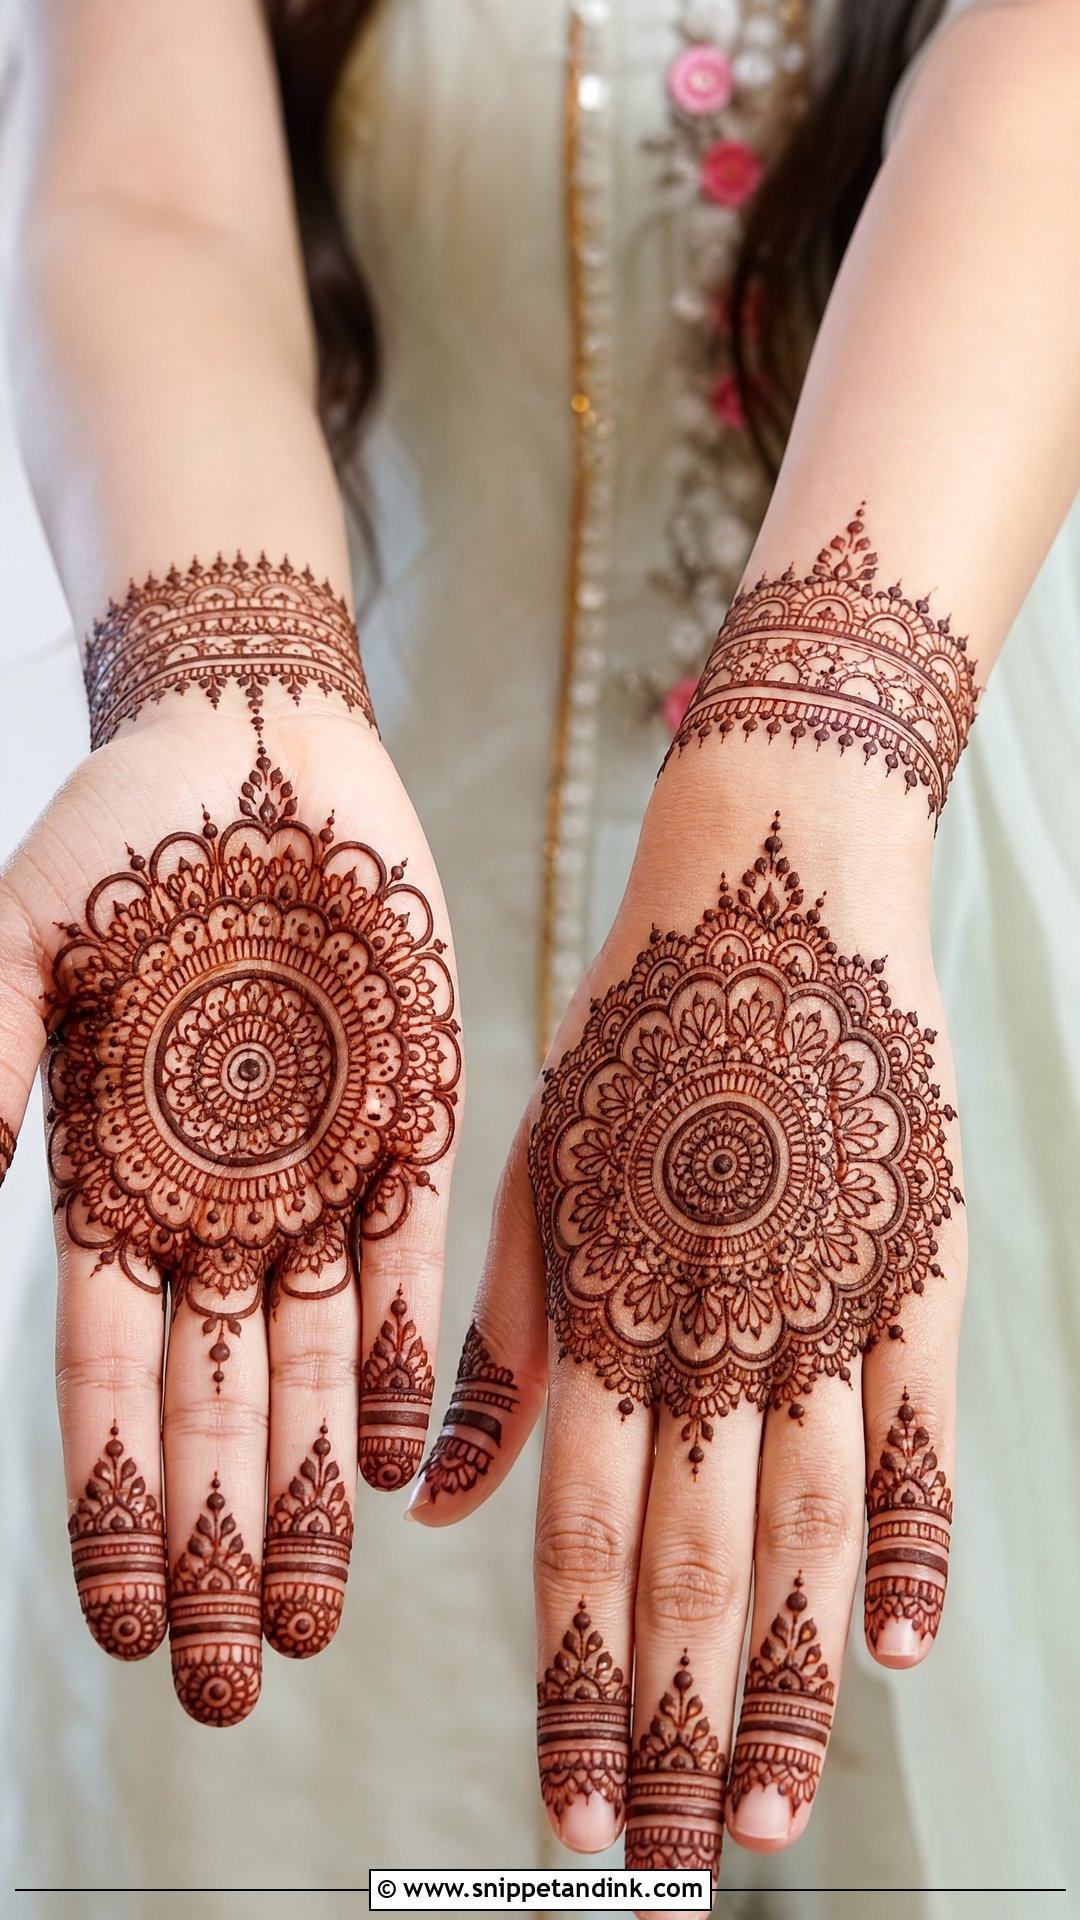
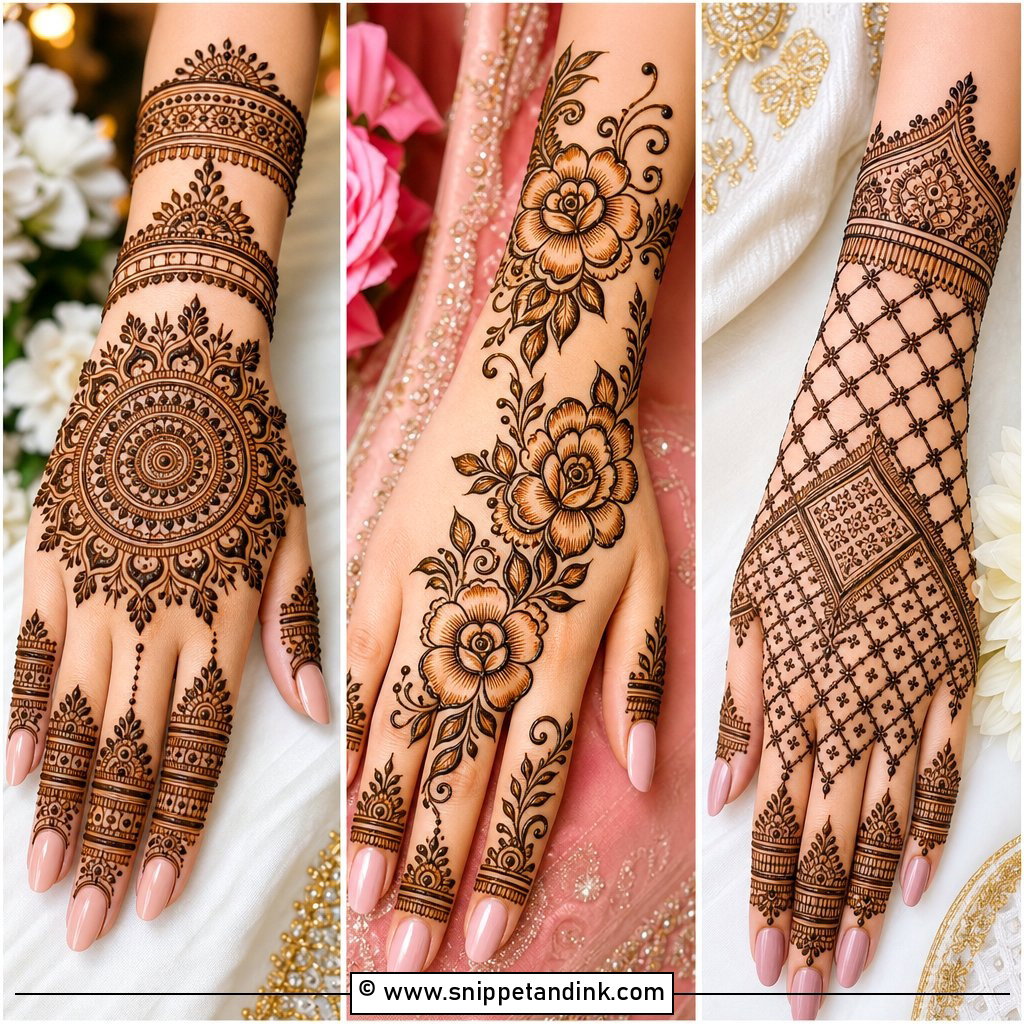
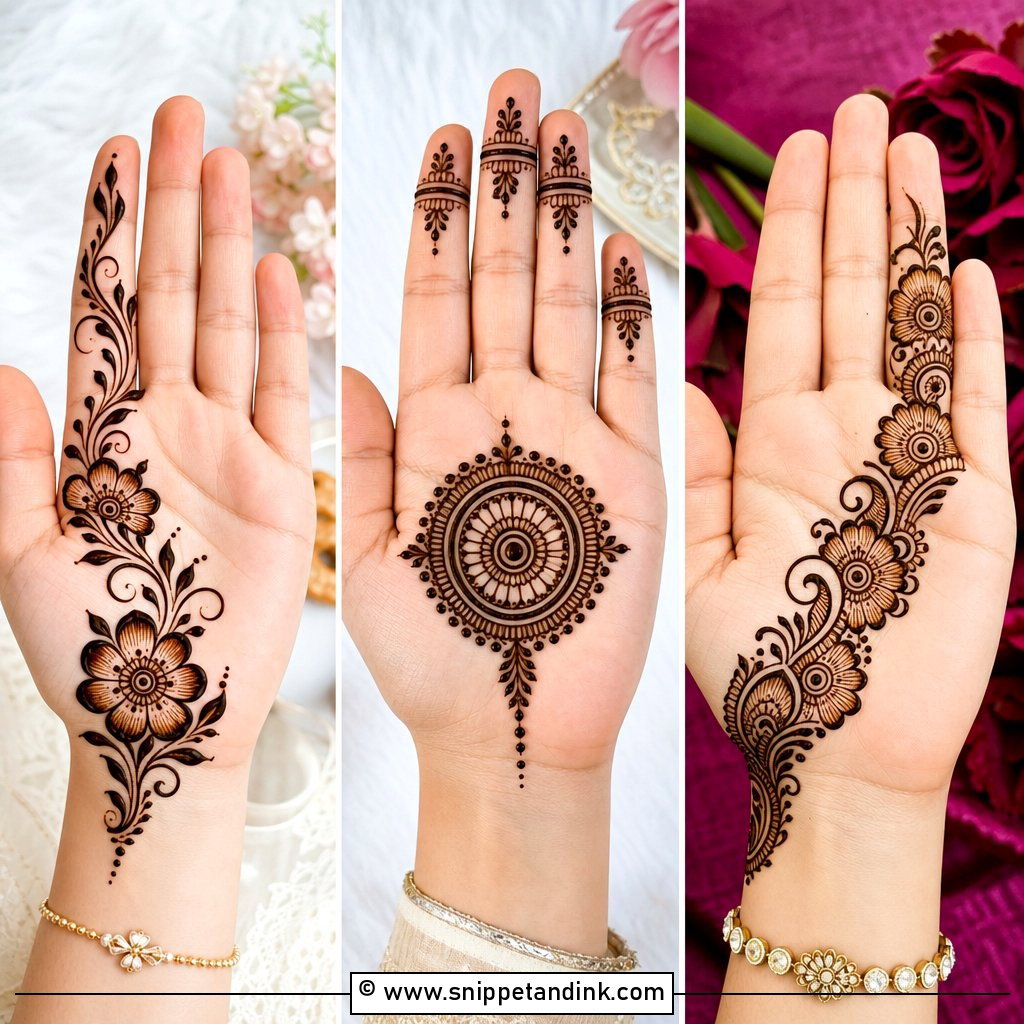
A mandala design is all about symmetry, which means it’s the least forgiving of any layout here. I mark the centre point first and build the rings outward in even steps: petals, fine circles, dots and a leafy edge. If the first ring is off-centre, every ring after it shows the error. The fingers get matching bands and small floral caps, and the wrist a slim cuff or half bracelet. It photographs clearly in ring shots because the eye goes straight to the middle of the palm. For a fuller version, add a smaller mandala on the back hand linked to the fingers with fine chains.
6. Simple Floral Bridal Mehndi Design
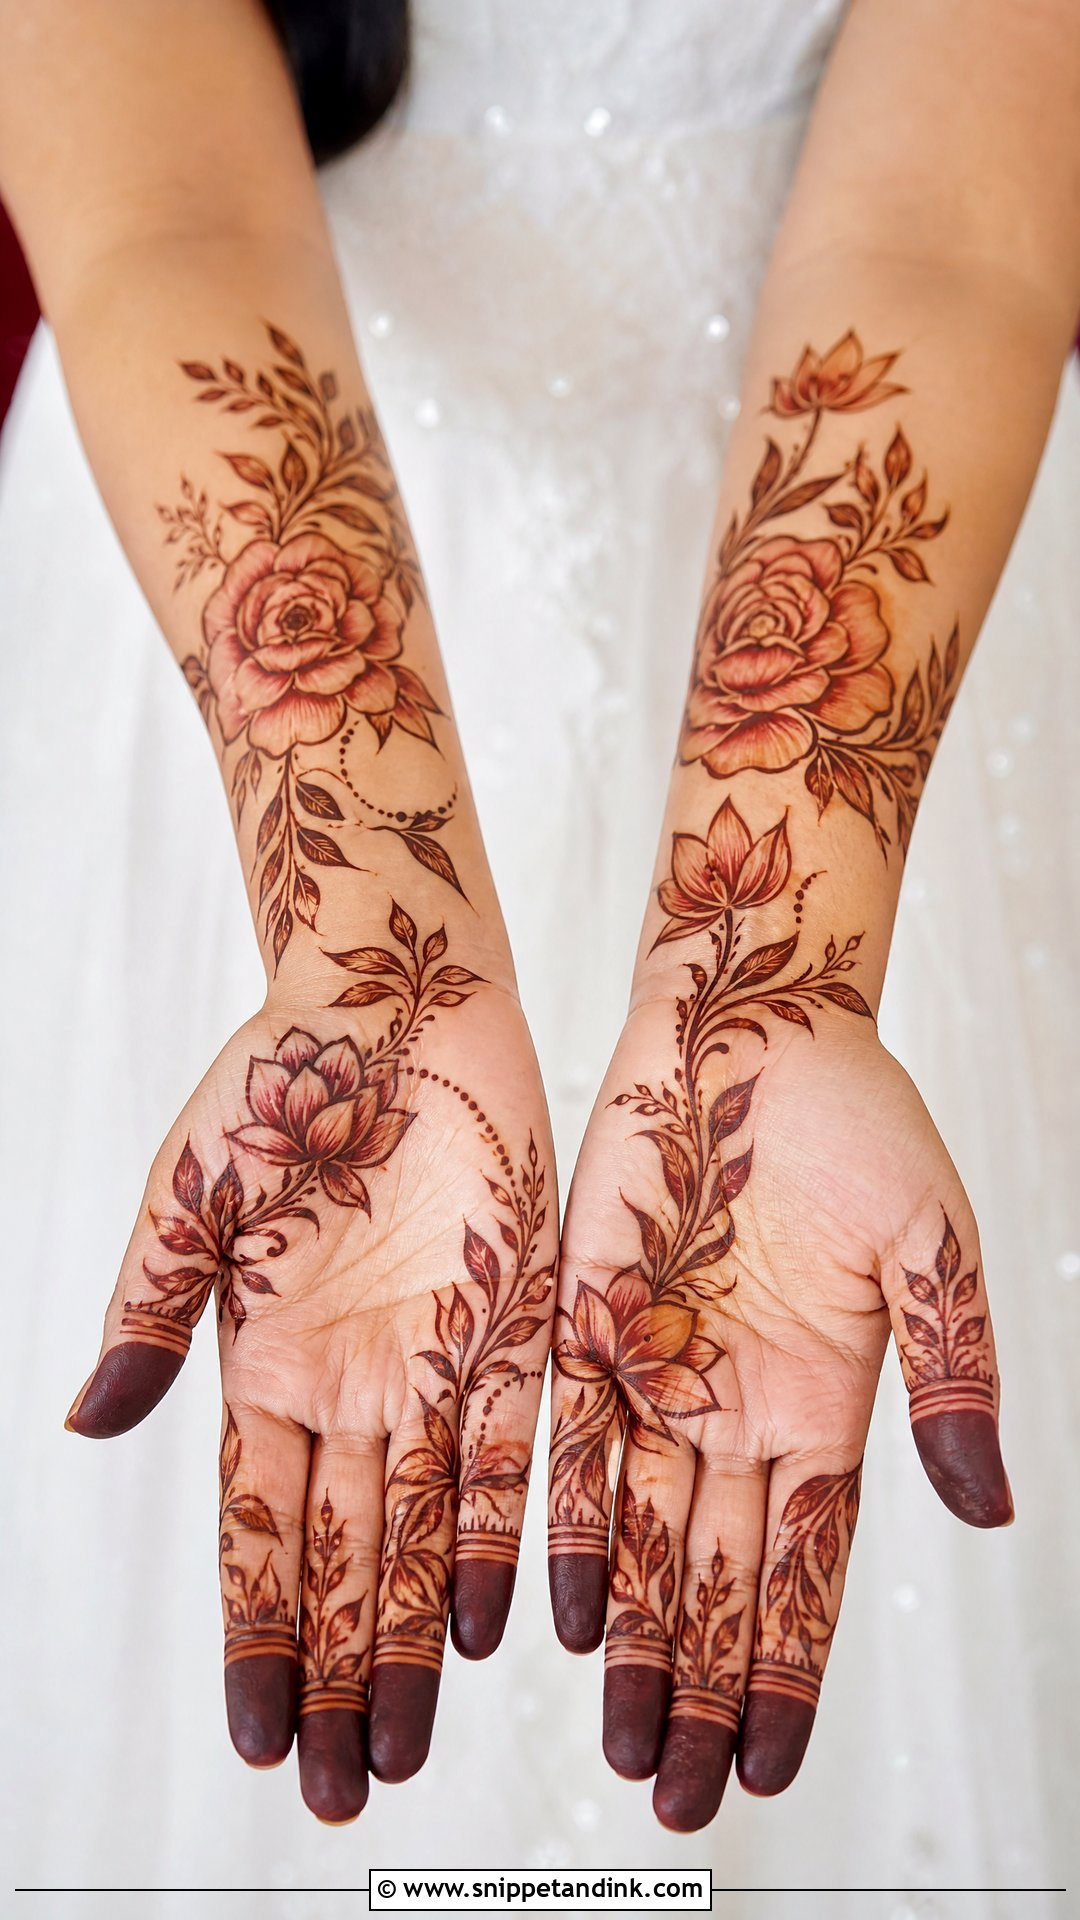
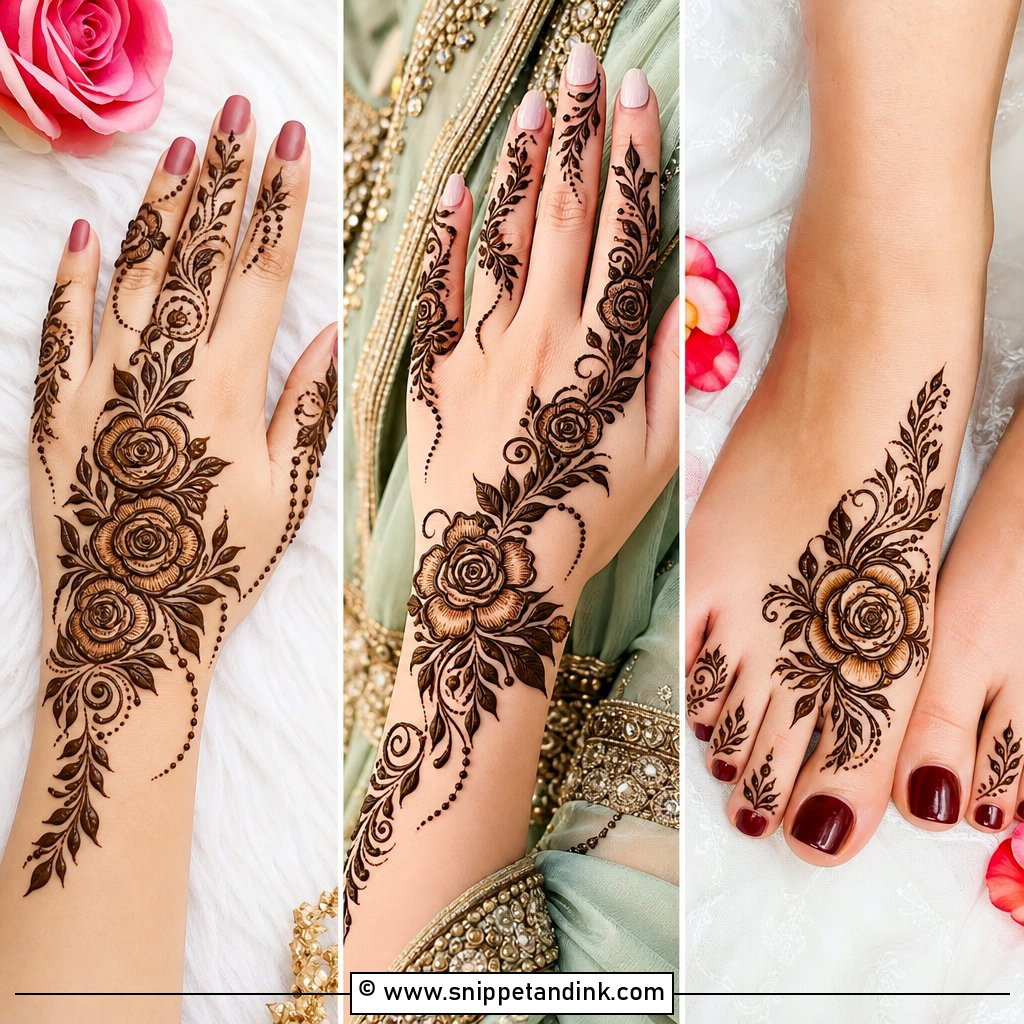
Floral mehndi looks light, but the petals need more space than people expect. Henna paste spreads slightly as it dries and the stain darkens over the next two days, so petals drawn too close together merge into a blot. I leave a clear gap between each rose, lotus or blossom and keep the outlines bold enough to hold after the colour deepens. The layout can run diagonally like Arabic mehndi or sit centred like Indian work. It’s especially pretty with pastel outfits at a daytime or garden wedding.
7. Simple Bridal Mehndi Design For Front Hand
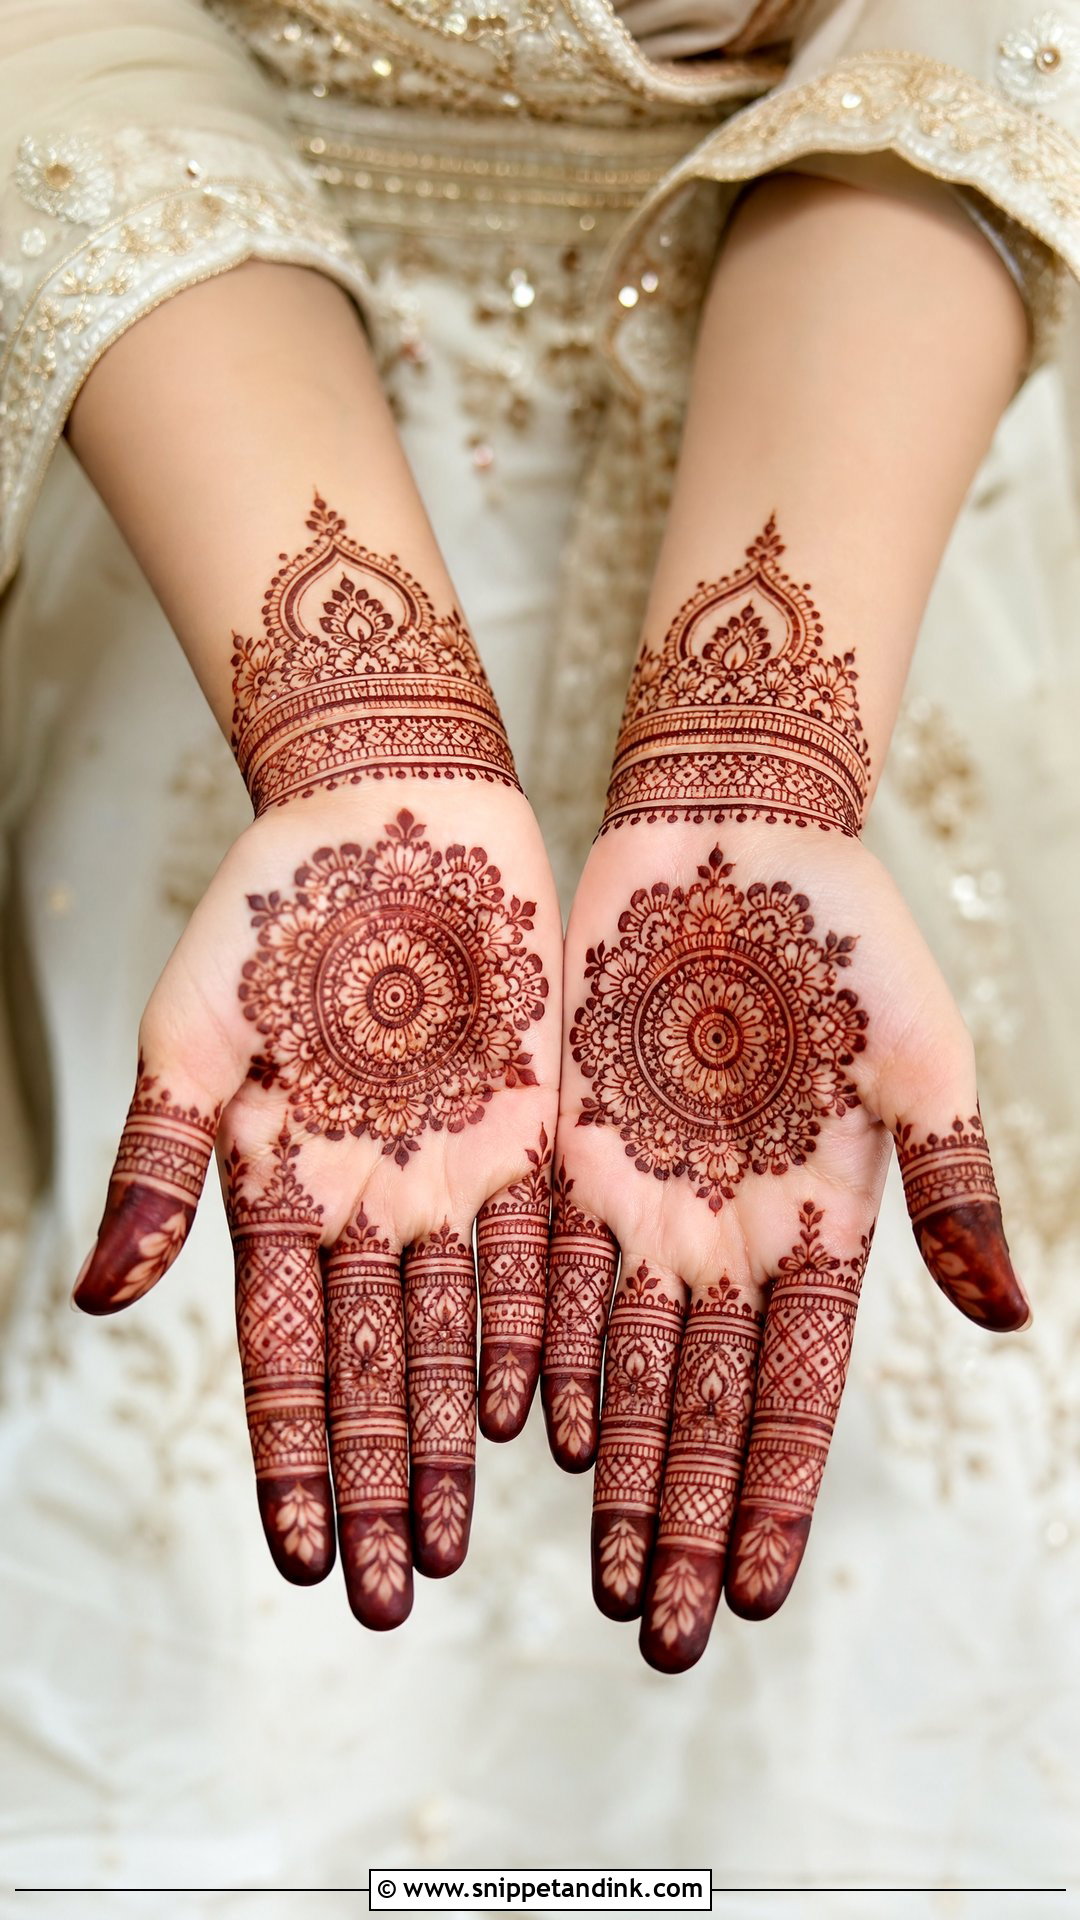
The palm is the hand guests and photographers see during rituals, so a front-hand design has to look complete on its own. I build it as a frame: a central mandala, floral corners, paisley borders and patterned fingers, with a bracelet band at the wrist to tie it together. For a lighter look, I keep the centre open and move the detail toward the fingers and wrist instead. The balance point is hard to describe but easy to see: the hand shouldn’t look empty, and it shouldn’t look packed. Palms also stain darker than any other part of the hand, so the front design will read strongest in photos.
8. Simple Bridal Mehndi Design For Back Hand
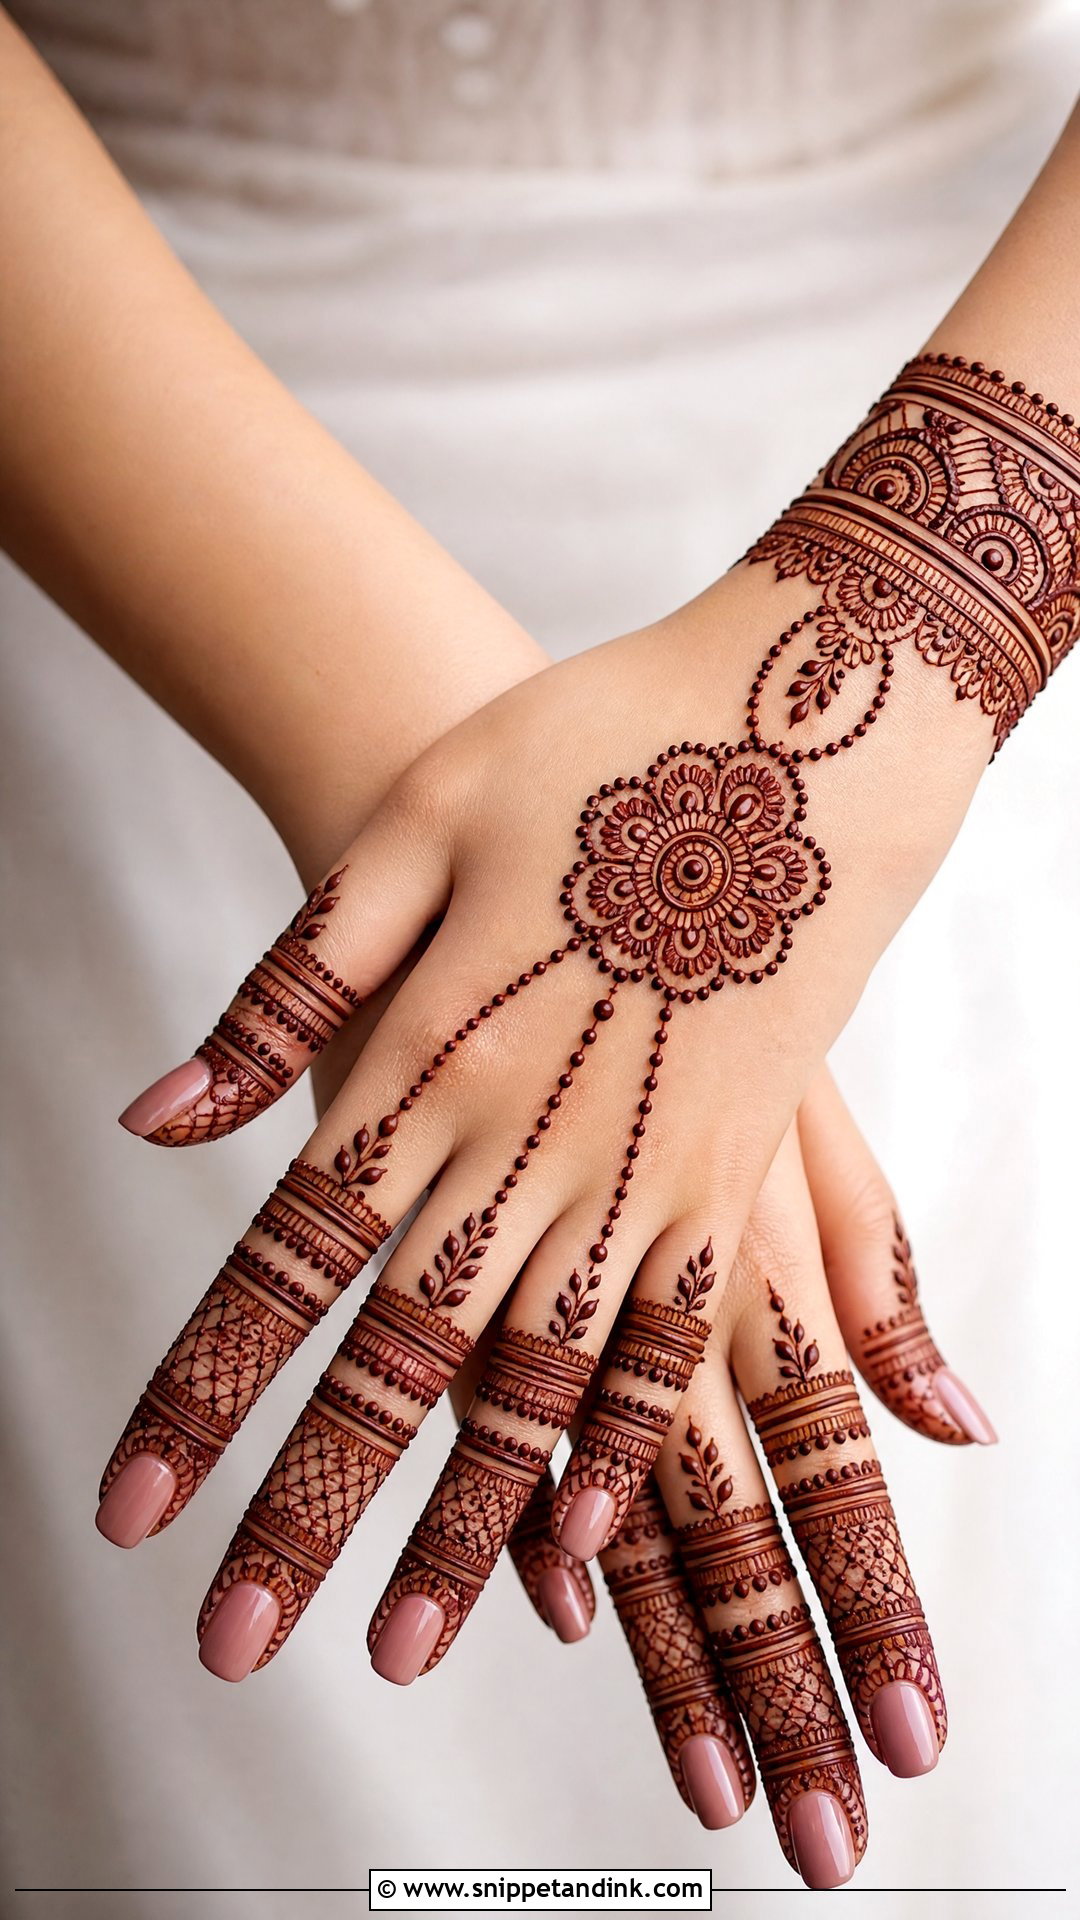
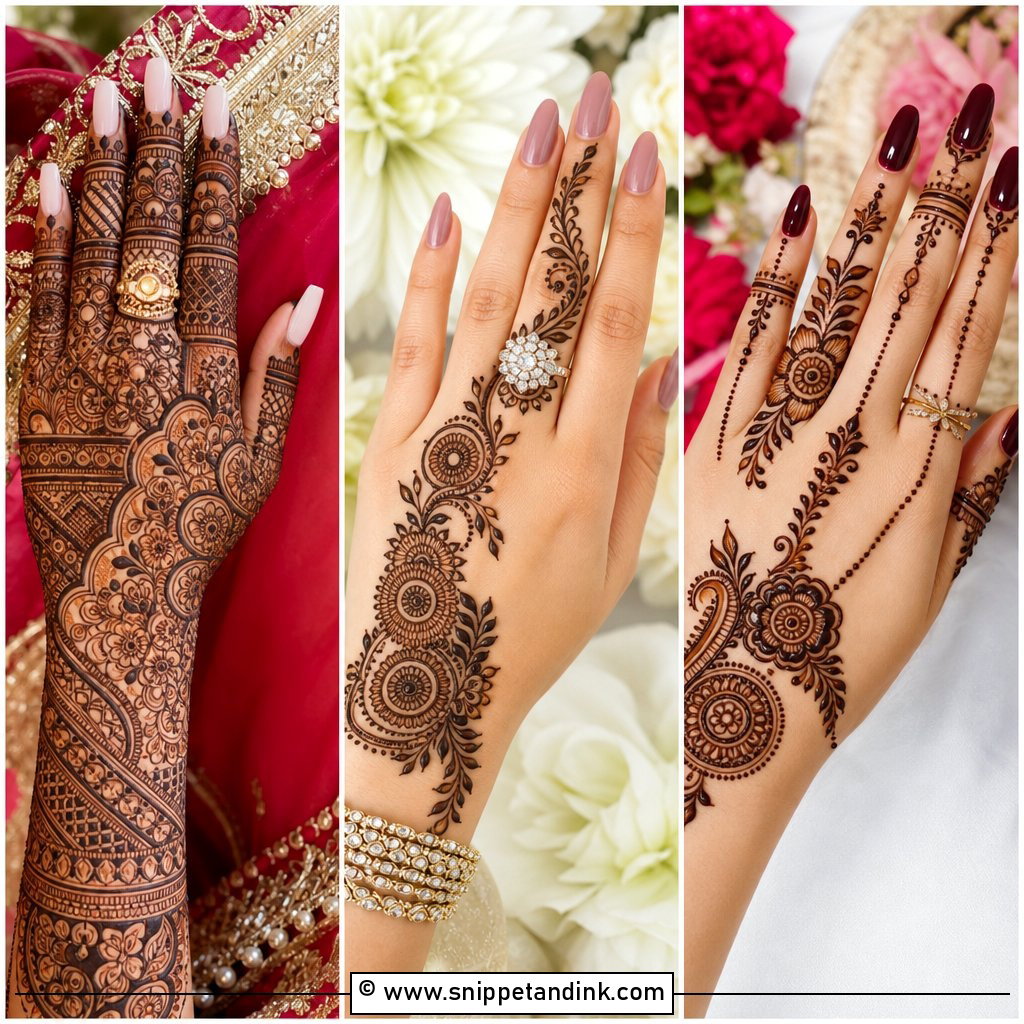
The back of the hand suits jewelry-inspired work. A simple bridal mehndi design for back hand can mimic a haath phool, with a floral centre linked by fine chains to rings on each finger and a bracelet at the wrist. Keep in mind that the back of the hand stains lighter than the palm, so I draw these lines slightly thicker than I would on the front. With bangles, the henna and the jewelry work together rather than competing. It’s the practical route if you’d rather keep your palms lighter during long events.
9. Simple Bridal Mehndi Design With Name
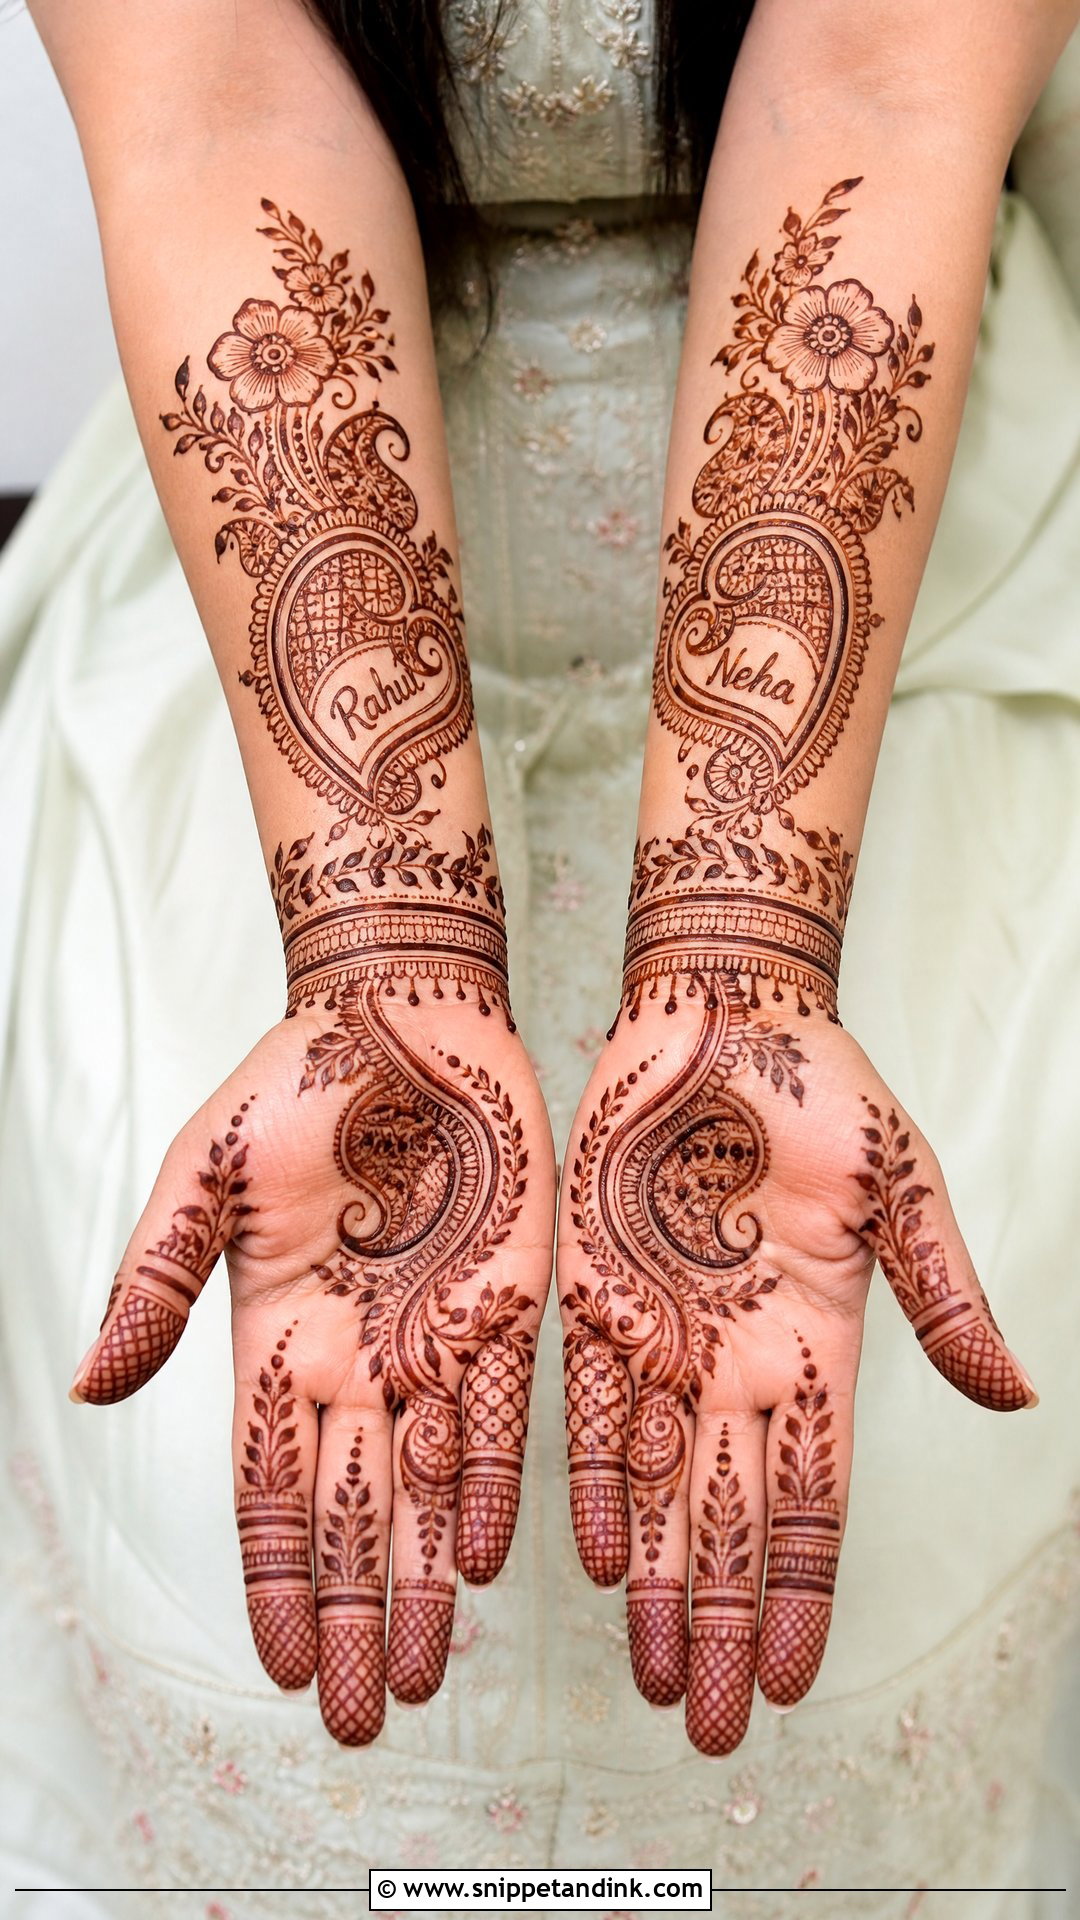
A name works best when it’s hidden in plain sight. I write the initials or the full name in small lettering, then blend it into the design: inside a paisley, along a wrist band, or tucked into a floral trail. Large script tends to look like a label. Around it I use soft flowers, dots and light shading so it reads as part of the pattern. One practical note: tell your artist the exact spelling in advance, especially for names with more than one spelling, because lettering can’t be corrected once the paste has stained. The groom hunting for his name afterward is still one of the best moments of the evening.
10. Simple Bridal Mehndi Design With Portrait
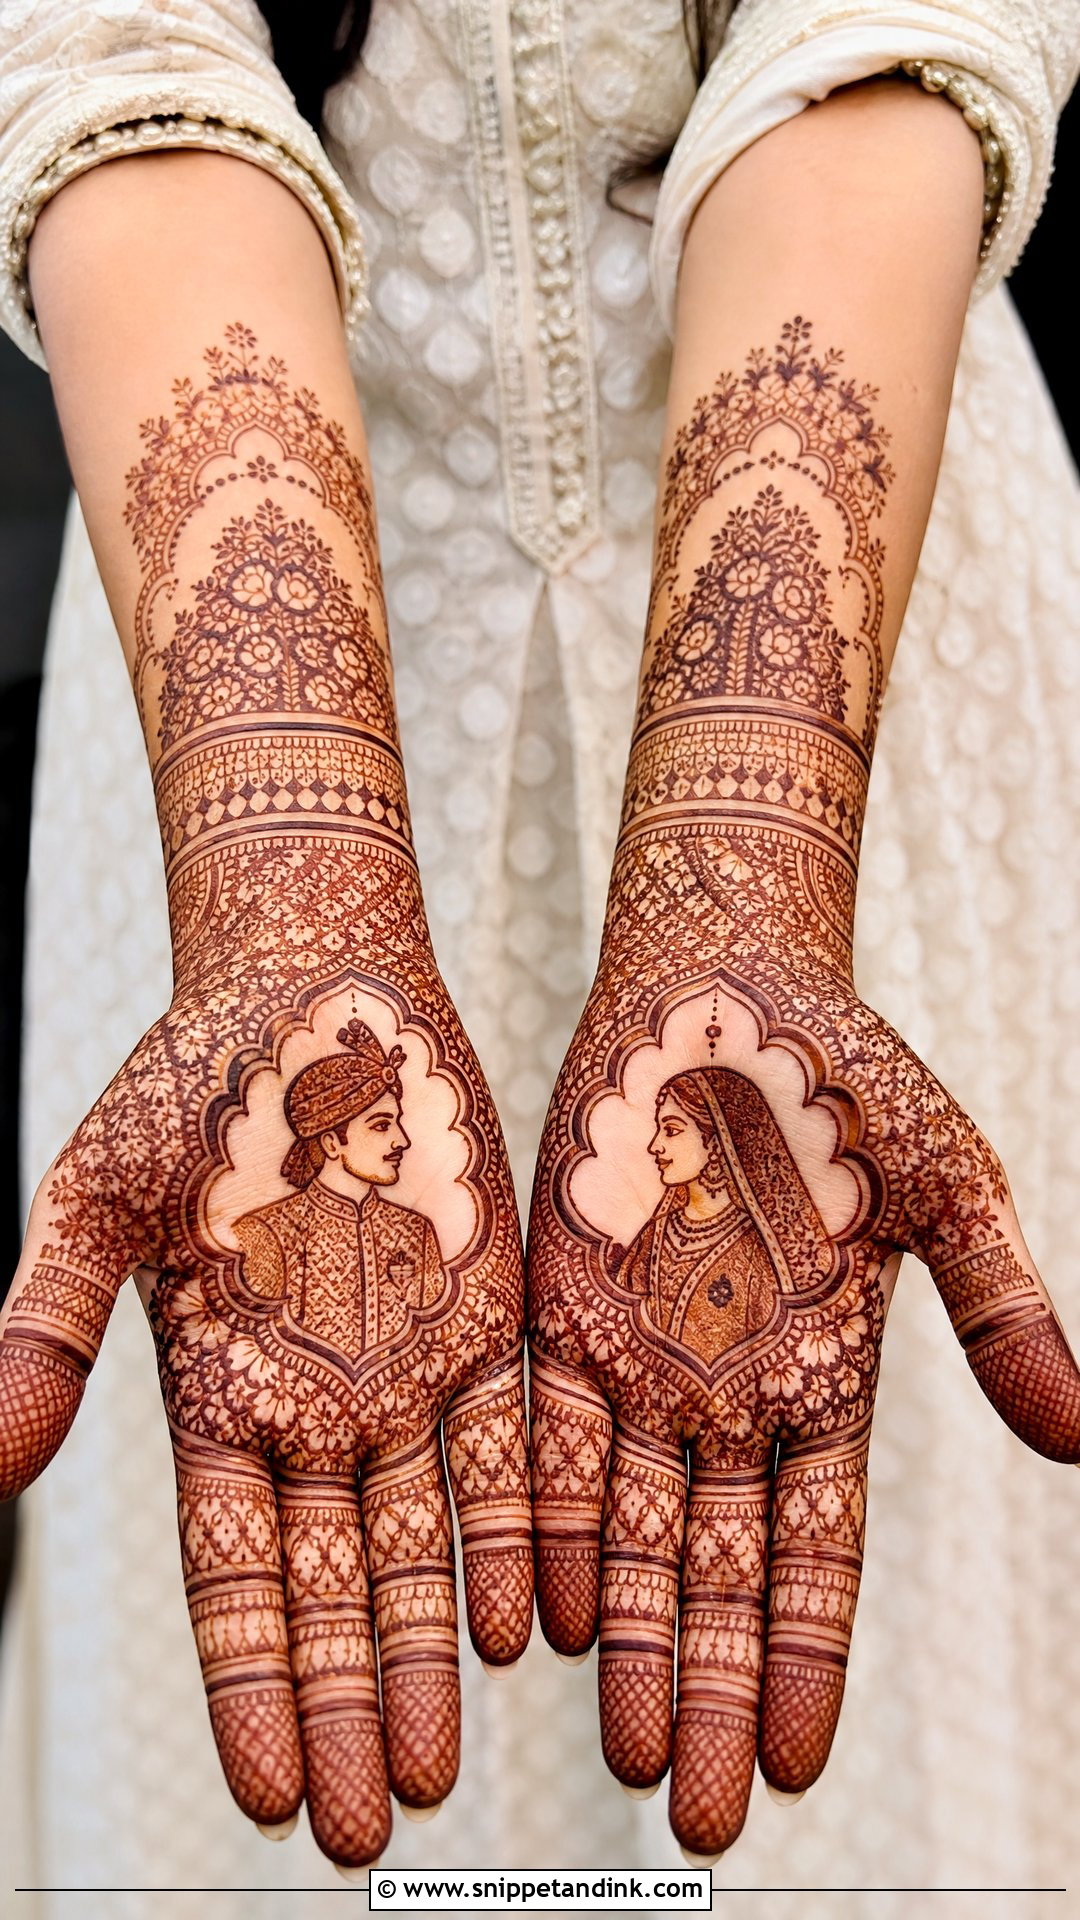
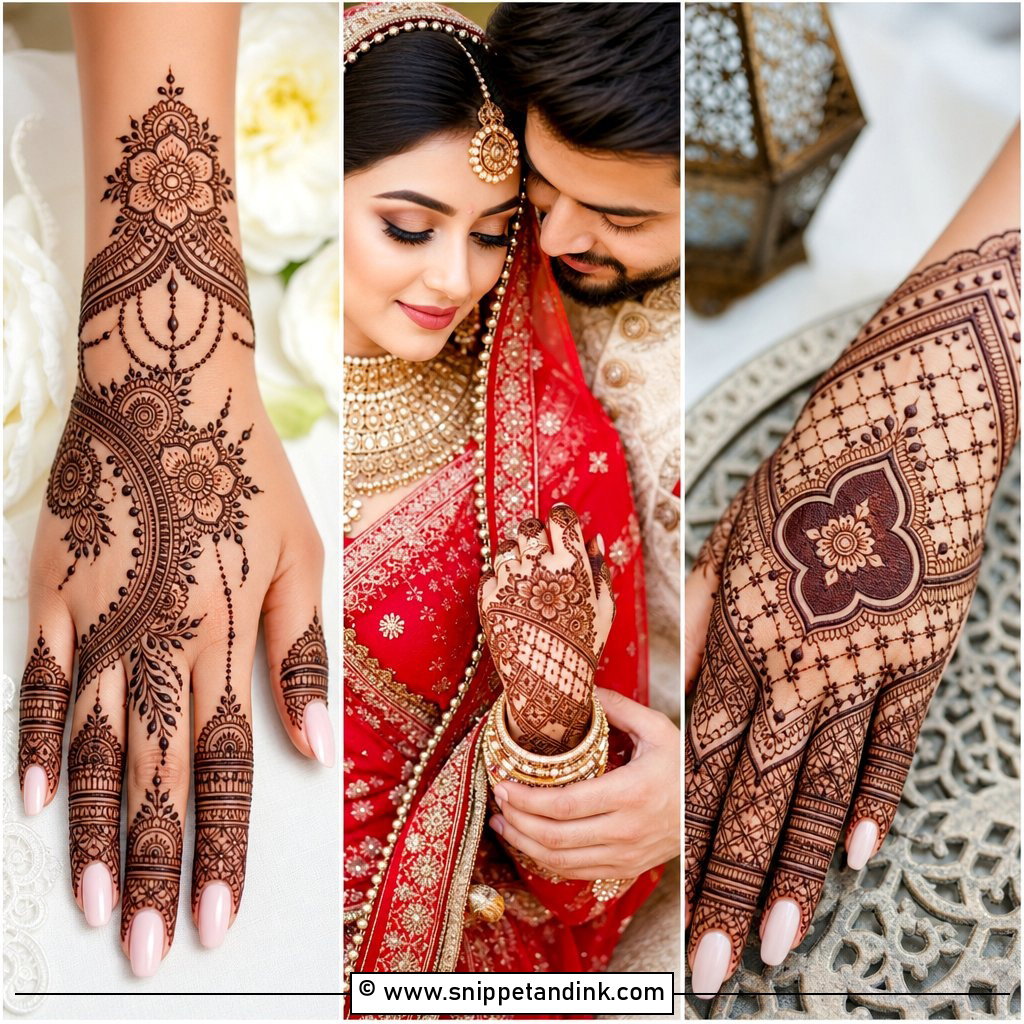
A portrait only works in a simple design if it stays small. I draw one neat couple illustration or a bride-and-groom outline on the palm or forearm, then surround it with flowers, arches, paisleys and fine dots so it belongs to the rest of the hand. Faces are the hardest detail to stain clearly, because fine lines can blur as the paste dries, so the simpler the drawing, the better it reads on the day. Keep the fingers simple with bands and leafy tips so the eye stays on the portrait. It’s a personal, storytelling option without a heavy layout.
11. Simple Bridal Mehndi Design With Lotus
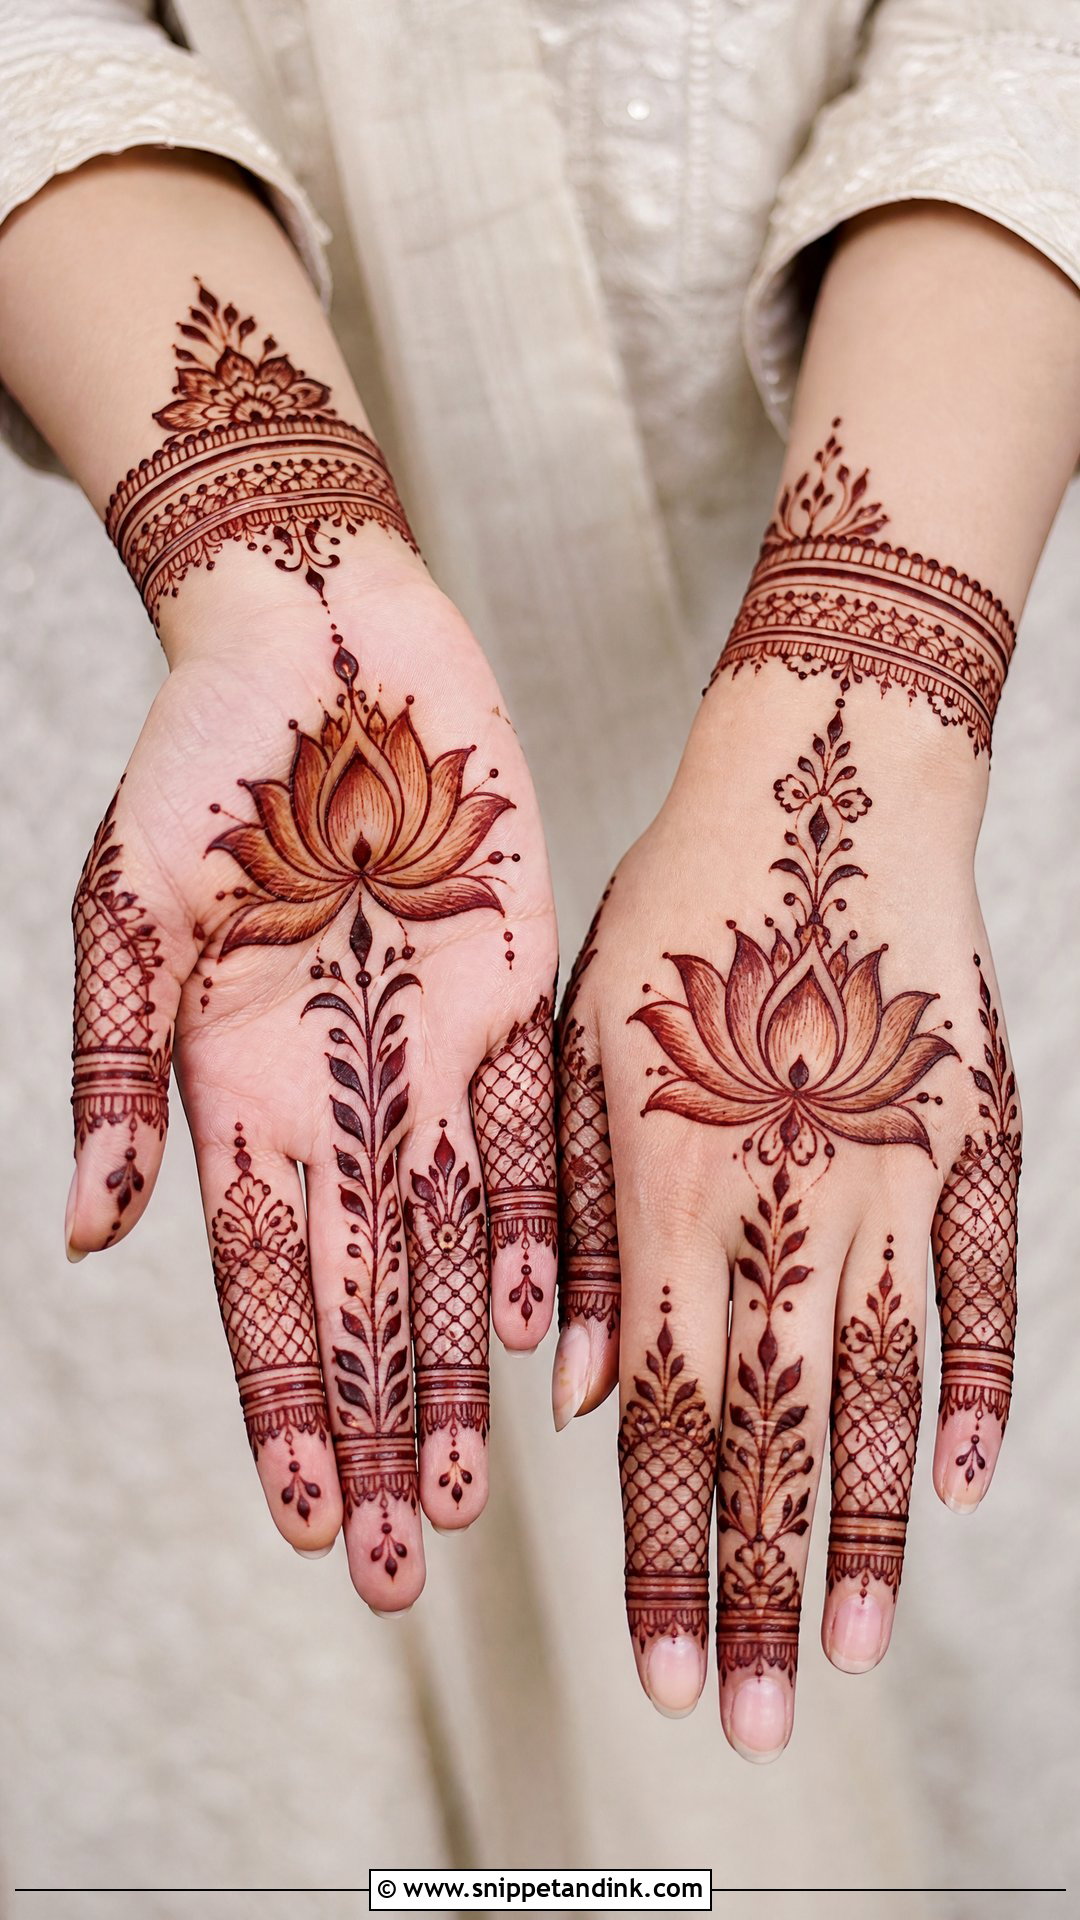
The lotus is one of the motifs I use most for bridal work, partly because its shape is easy to scale. It can sit in the centre of the palm, at the wrist, or along a vertical trail toward the fingers. I give the petals dotted edges and a few leaves so it looks full without dense filling, and pair it with clean jaali sections and thin finger bands. It sits naturally with Indian bridal outfits and temple jewelry. A smaller lotus on the back hand with a bracelet border completes the set.
12. Simple Bridal Mehndi Design With Peacock
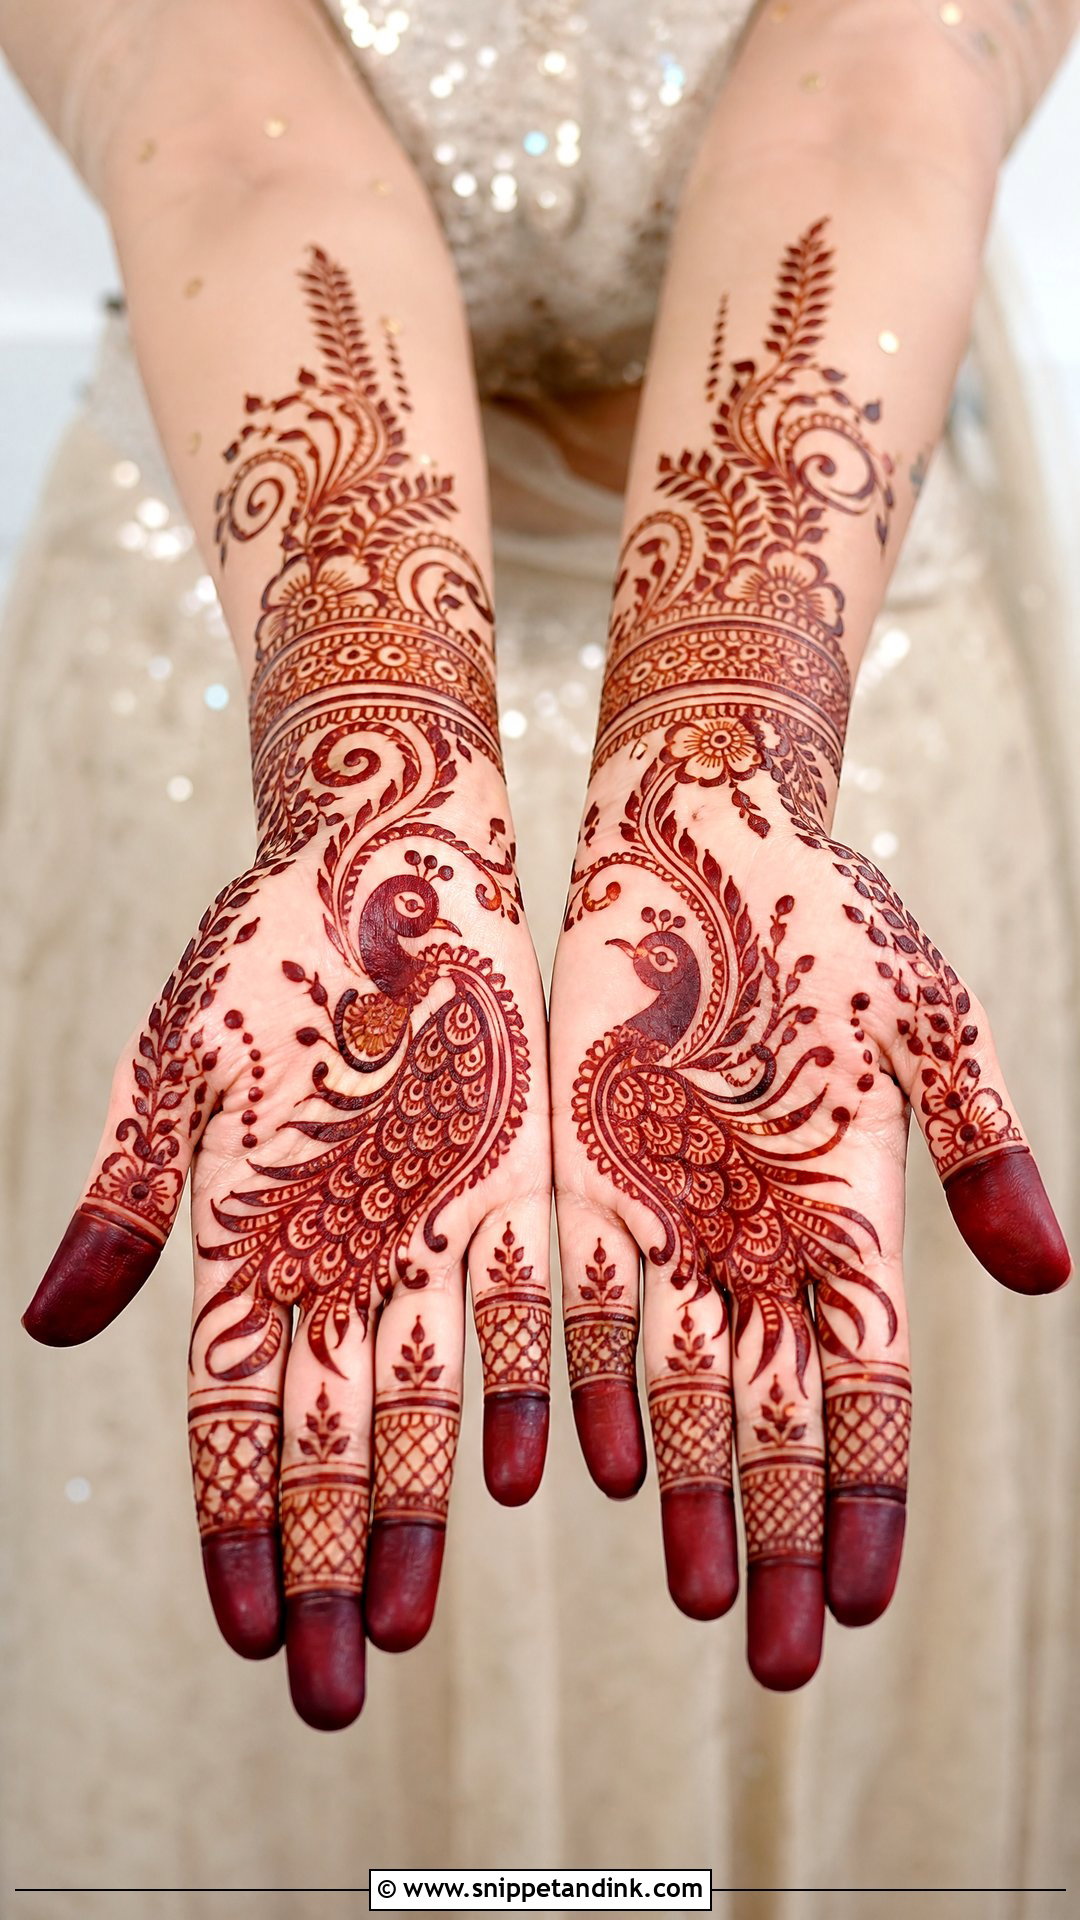
A peacock can make a simple design feel festive, but only if its outline stays clear. I place one peacock along the curve of the palm or near the wrist and let the feathers extend into floral vines, dots and paisleys. The common mistake is filling every feather with tiny patterns; the lines run together once the stain darkens, and the bird disappears. Diagonal lines and small petals on the fingers balance the main motif. It looks rich next to deep colours like red, maroon, emerald, royal blue or gold.
13. Simple Bridal Mehndi Design With Jaali
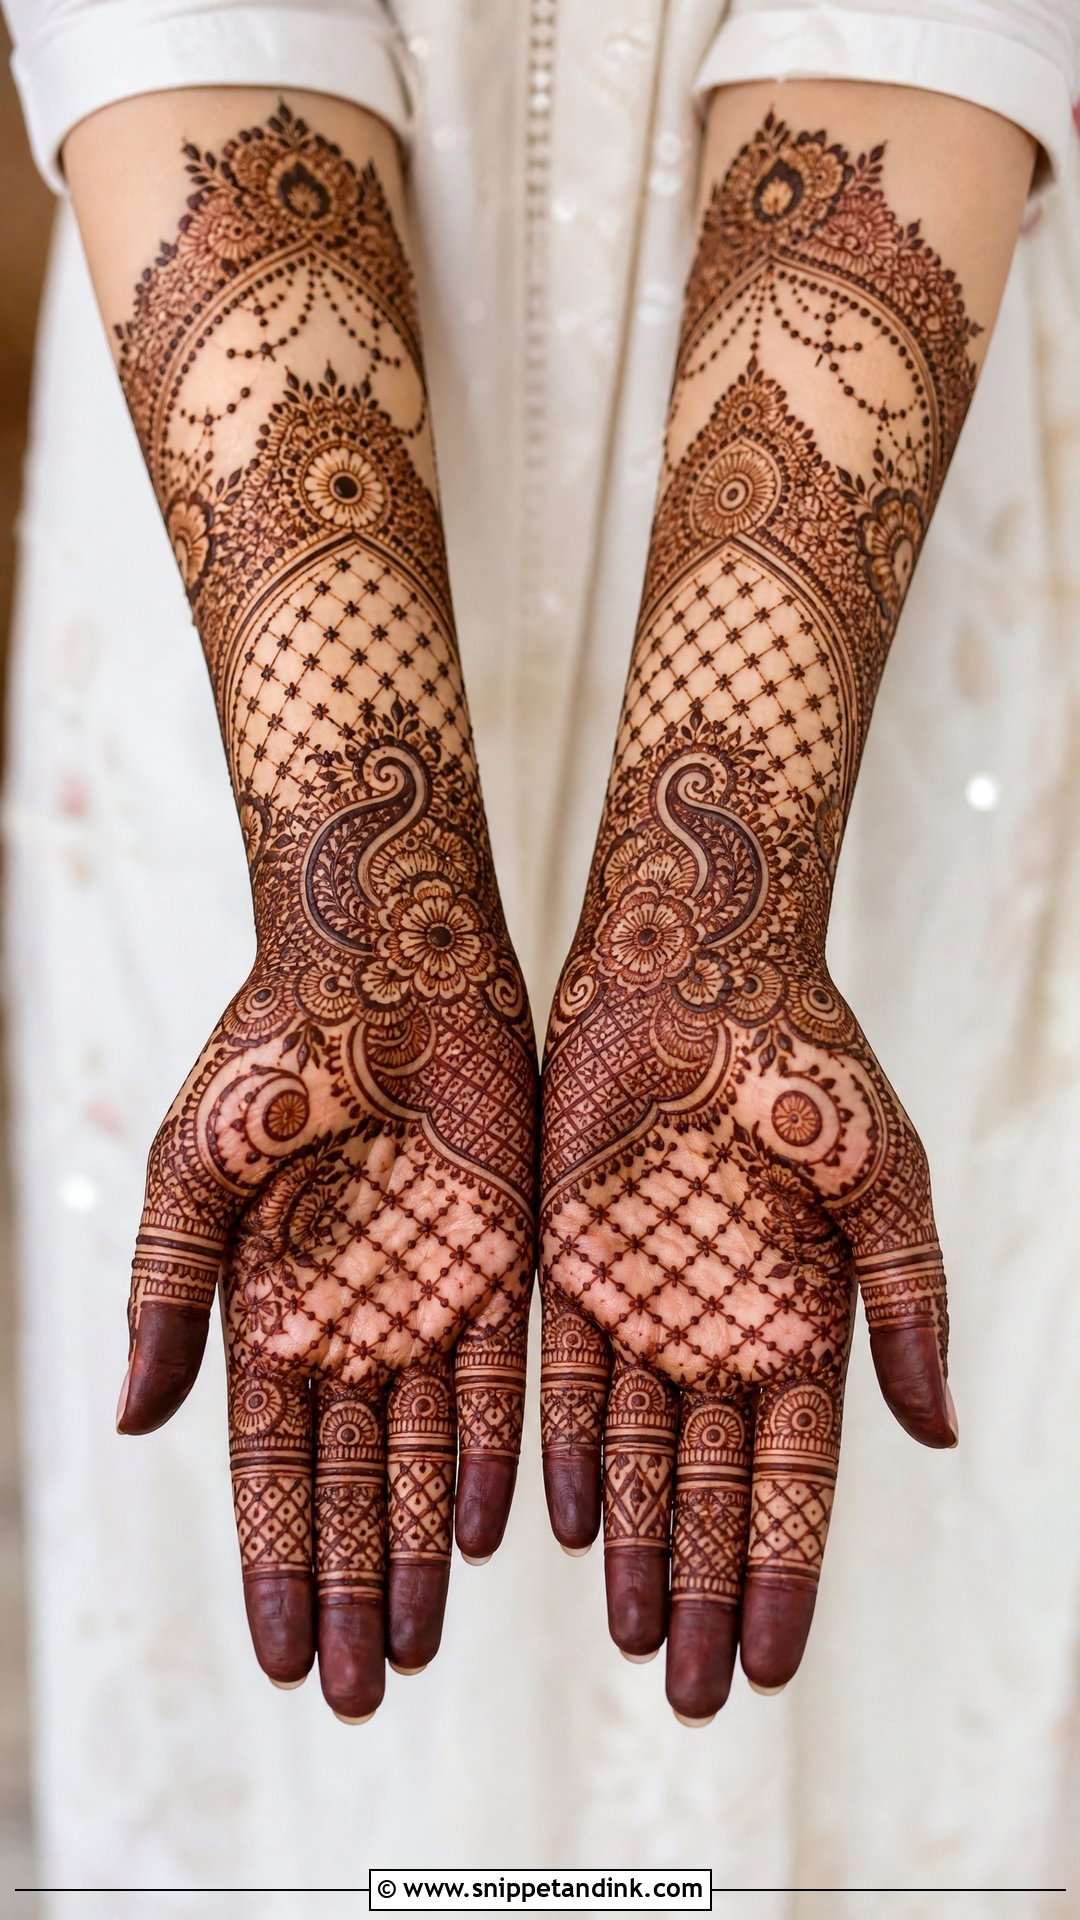
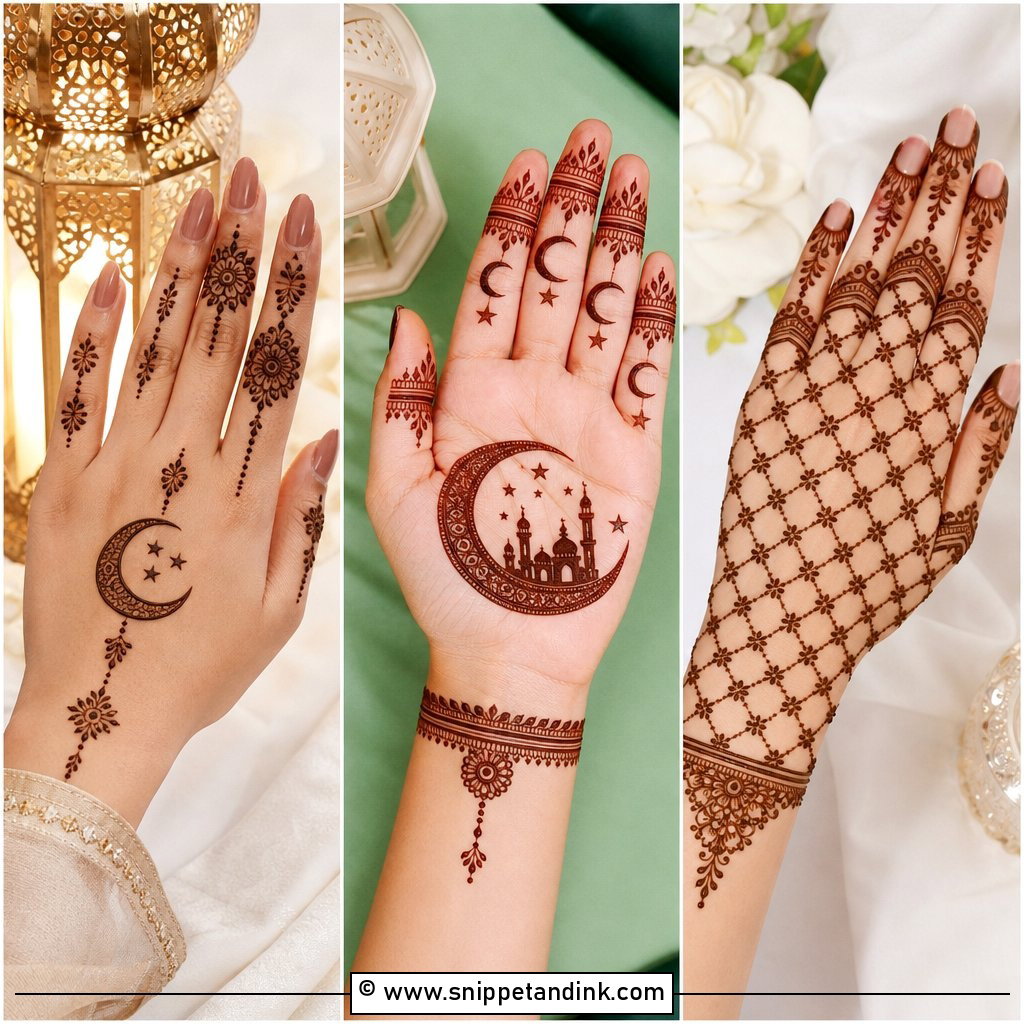
Jaali, the lace-like mesh, gives a refined, patterned look, but too much of it reads flat. I use it in one or two sections on the palm, back hand or wrist and border it with mandalas, paisleys or leaf trails. The grid lines need to be very even, which takes a steady cone and paste of the right consistency; paste that’s too runny bleeds and closes the gaps in the mesh. Matching grid details or slim stacked bands on the fingers keep it consistent. It suits brides who like neat geometry with a soft finish.
14. Simple Bracelet Bridal Mehndi Design
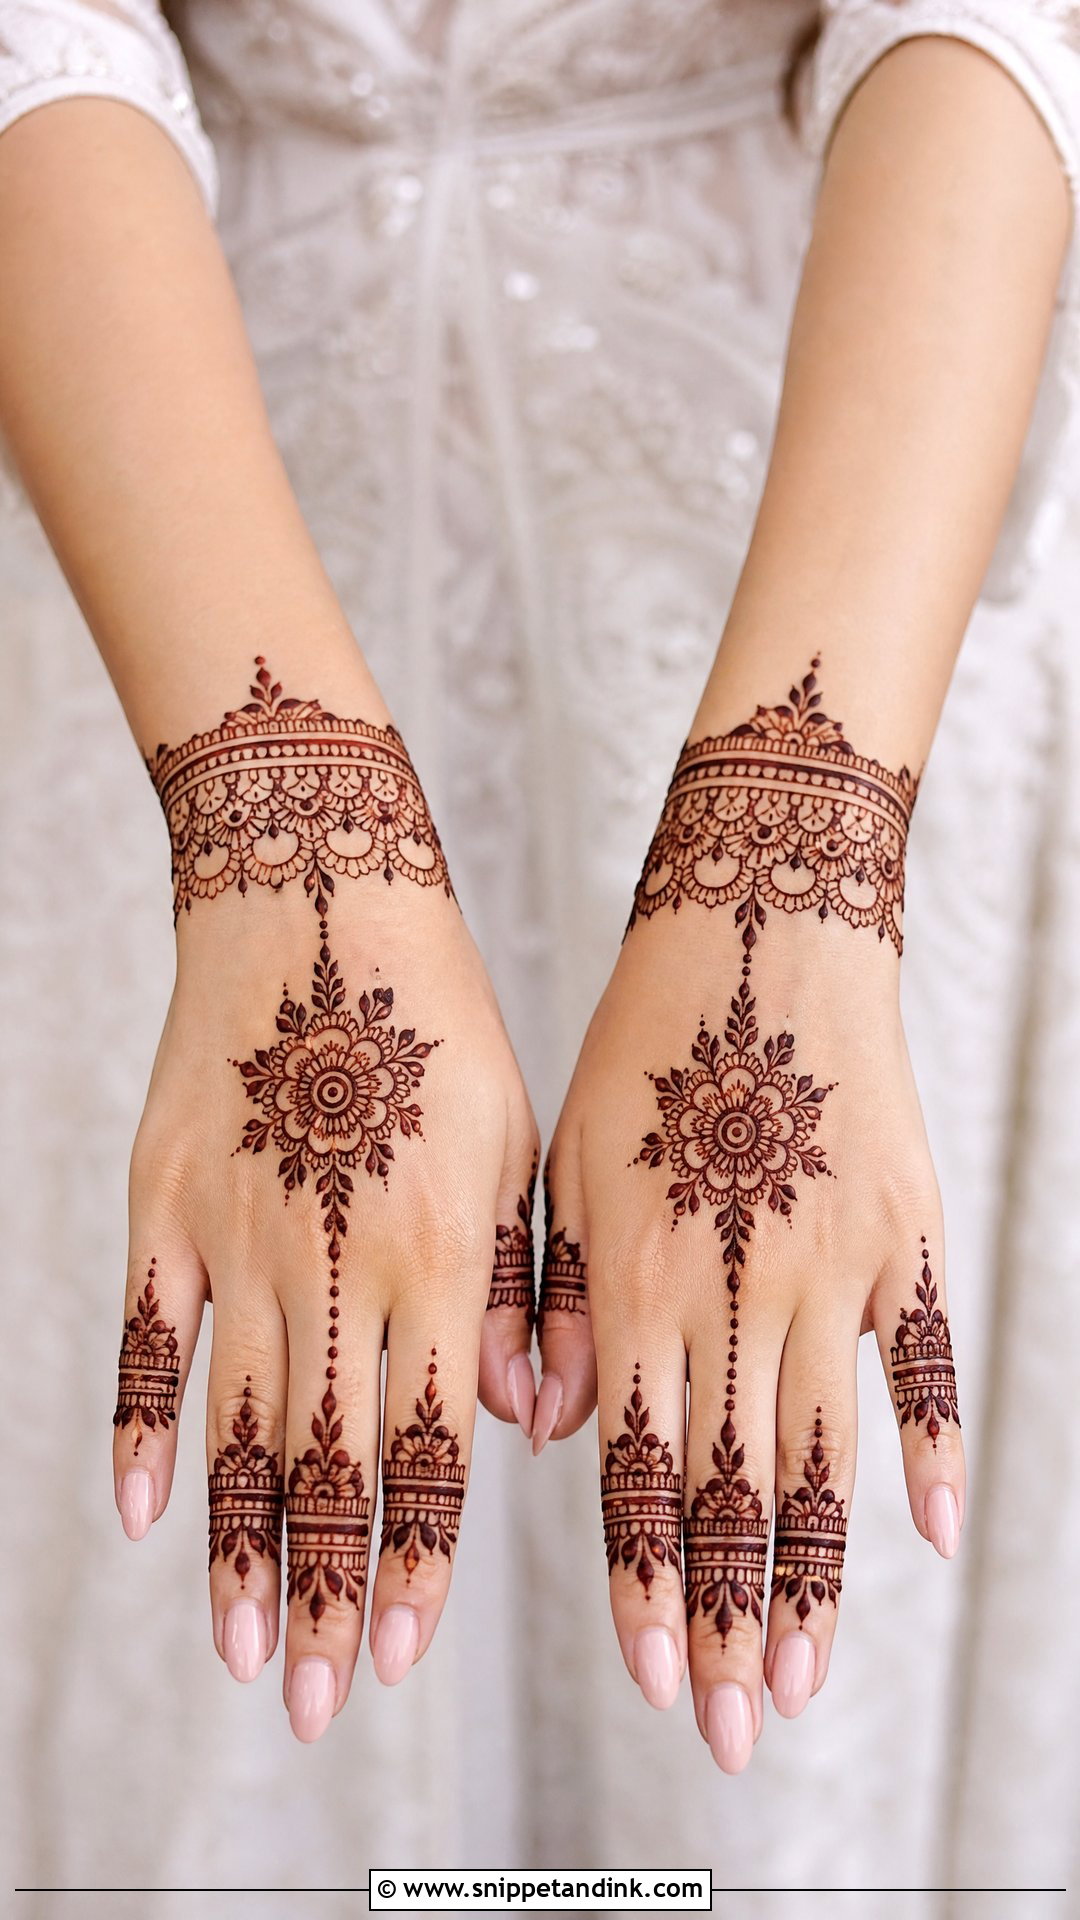
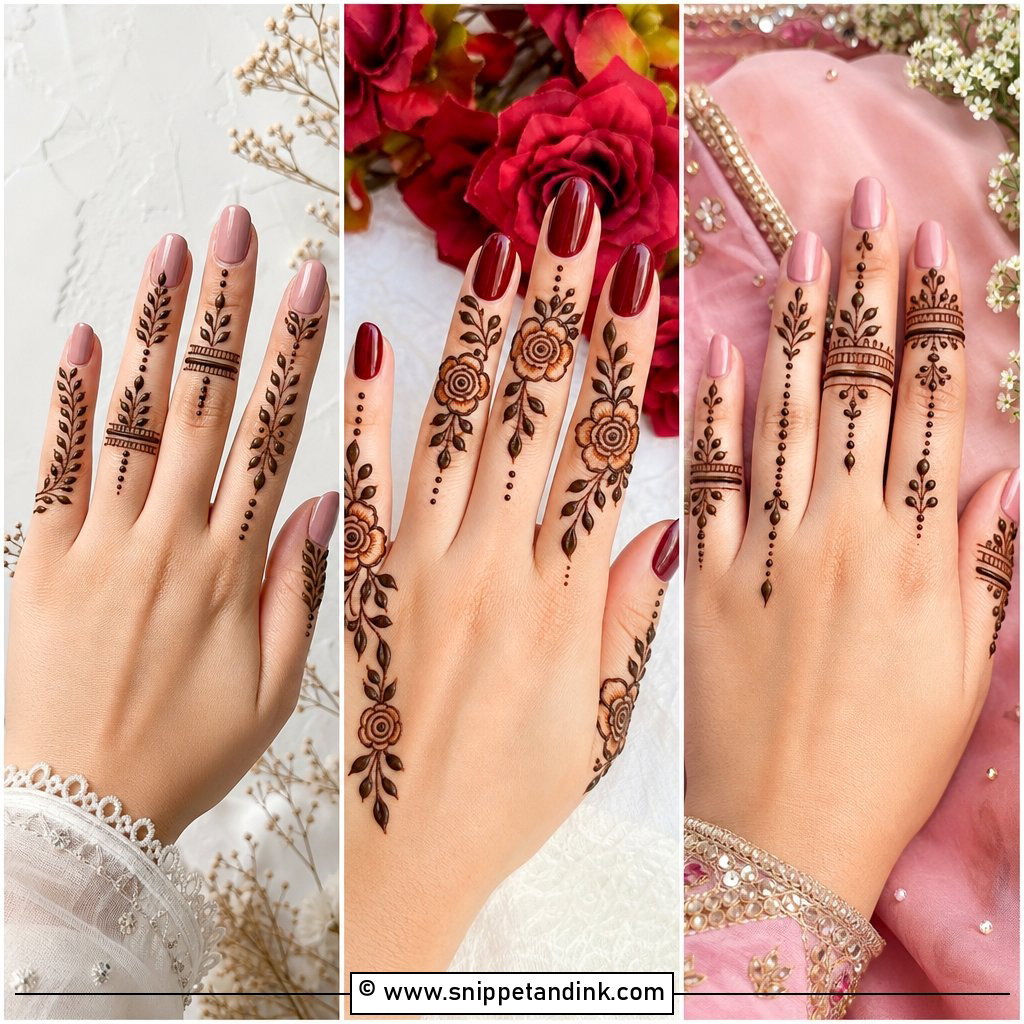
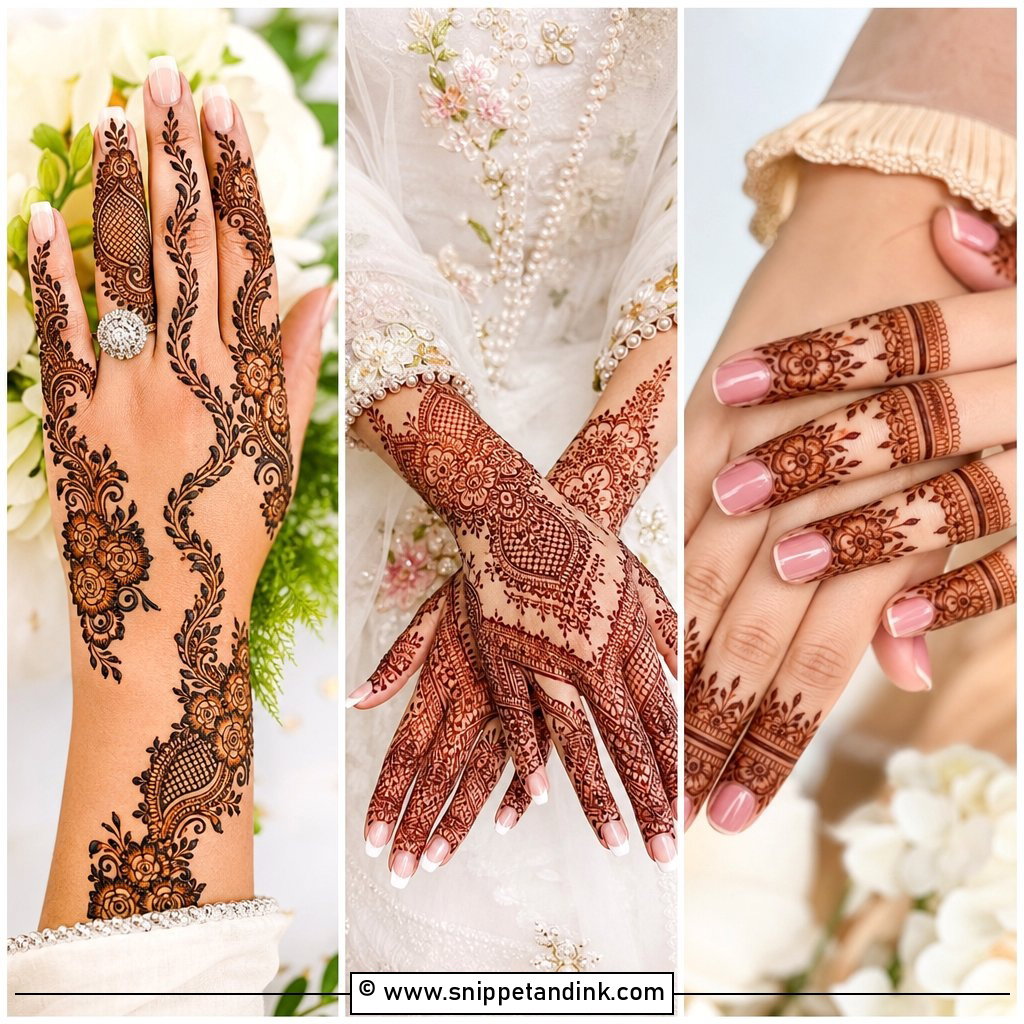
Simple bracelet bridal mehndi design puts the focus on the wrist. I build a cuff from florals, leaves, dots and fine lines, then run thin chains from it to a central hand motif and finger rings, so the hand looks dressed in henna jewelry. It’s quick to apply and comfortable to wear. It works well for an engagement or a minimalist bride, and it frames statement rings nicely. The palm can stay almost bare, or carry a small mandala if you’d like more balance.
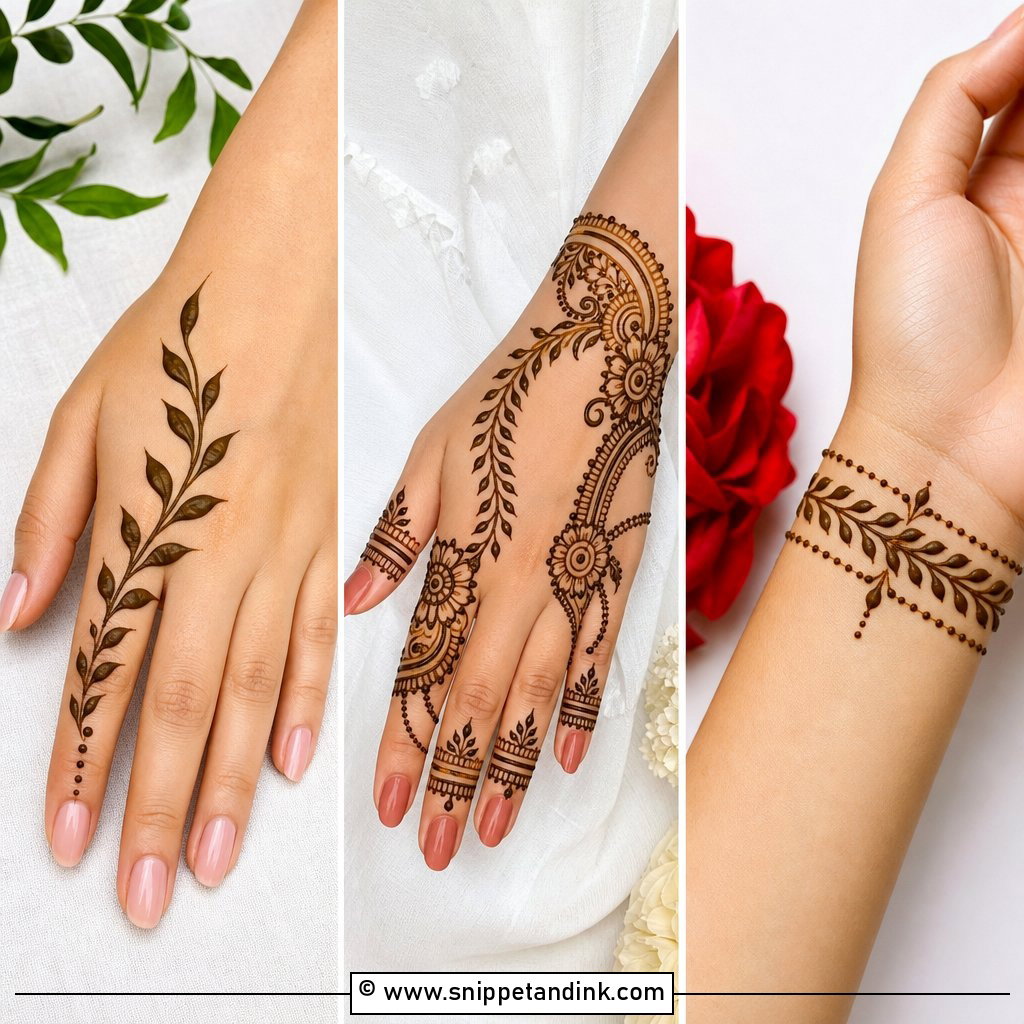
15. Simple Minimal Bridal Mehndi Design
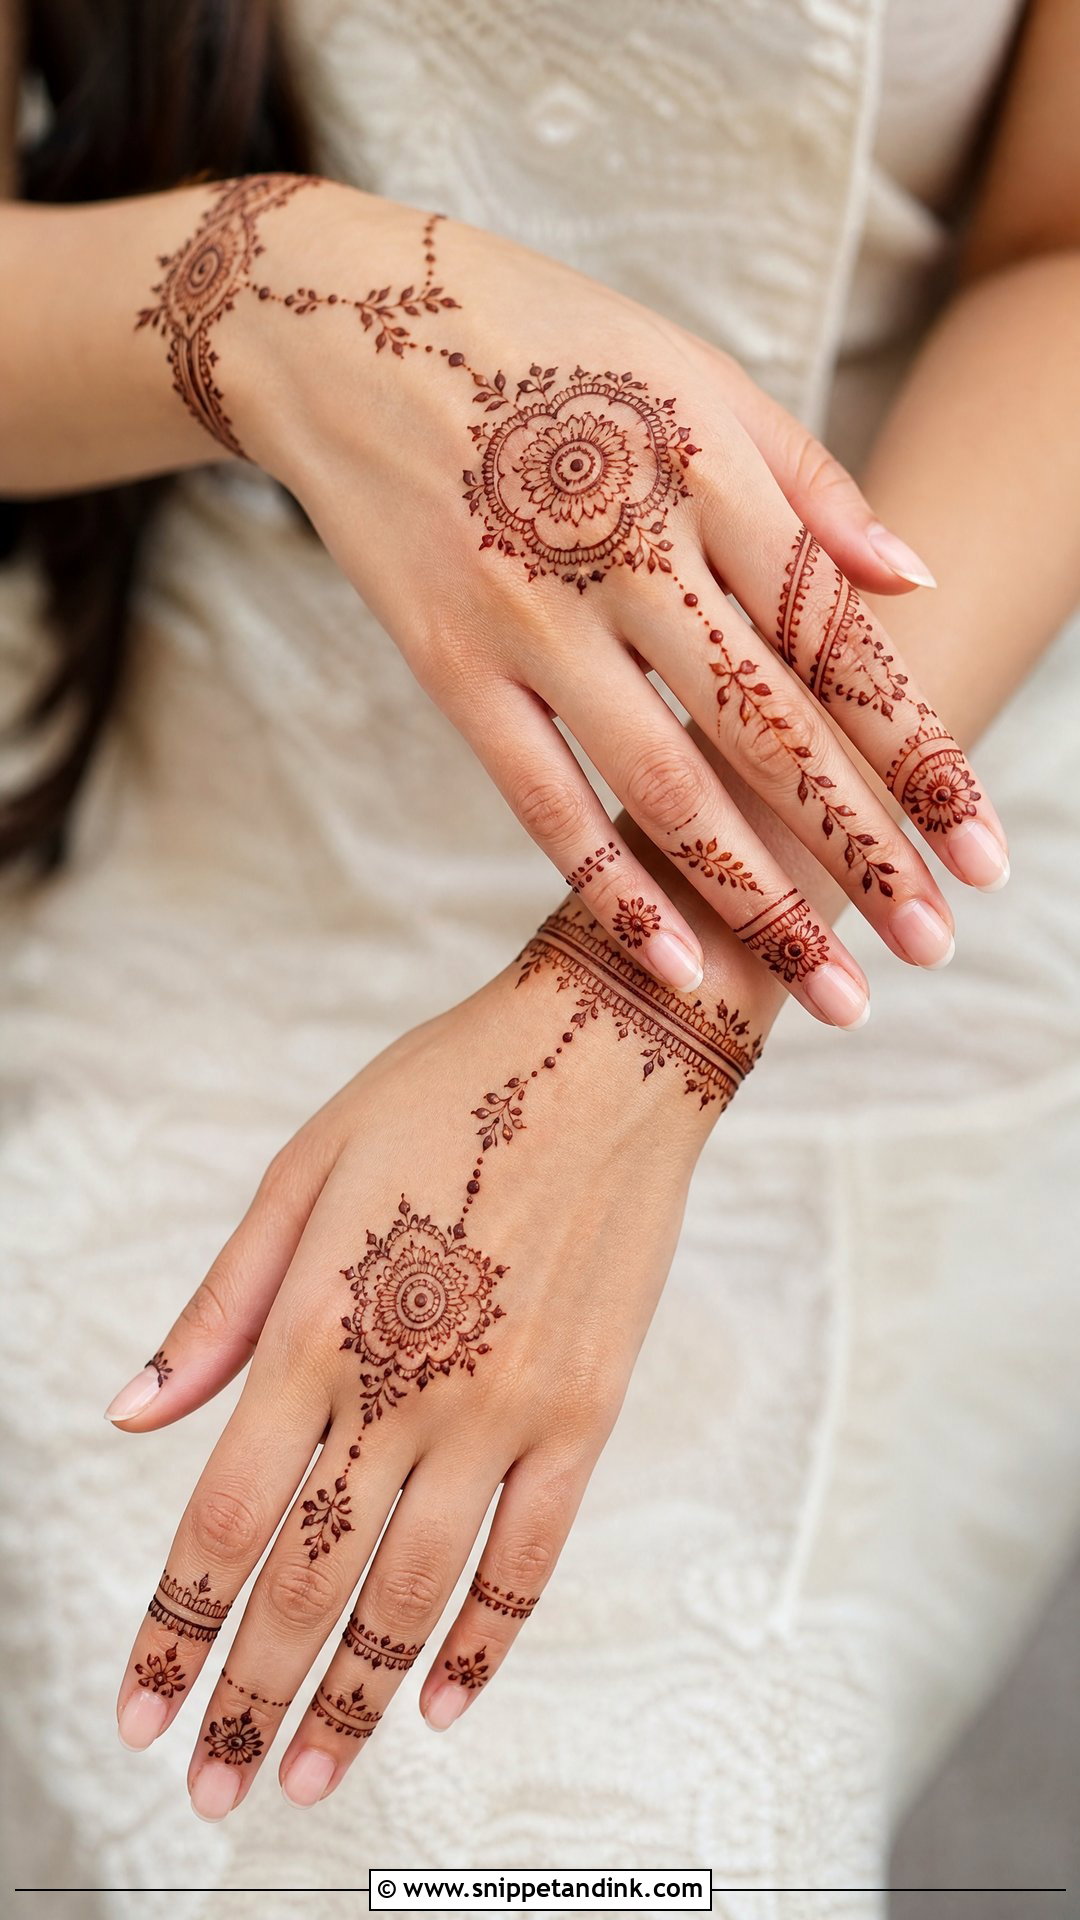
Minimal bridal mehndi uses open spacing, tiny florals, fine lines and small mandalas, and places them only where they’ll be seen: the palm centre, the fingertips, the wrist or a back-hand chain. To keep it from looking like everyday henna, I add one bridal marker, like a wrist cuff, a hidden initial or matching motifs on both hands. Fine-line work needs a good-quality cone with a very thin tip, so it’s worth asking your artist what she uses. It pairs well with sleek outfits and soft makeup, and it’s easy to live with across several days of events.
16. Simple Gulf Bridal Mehndi Design
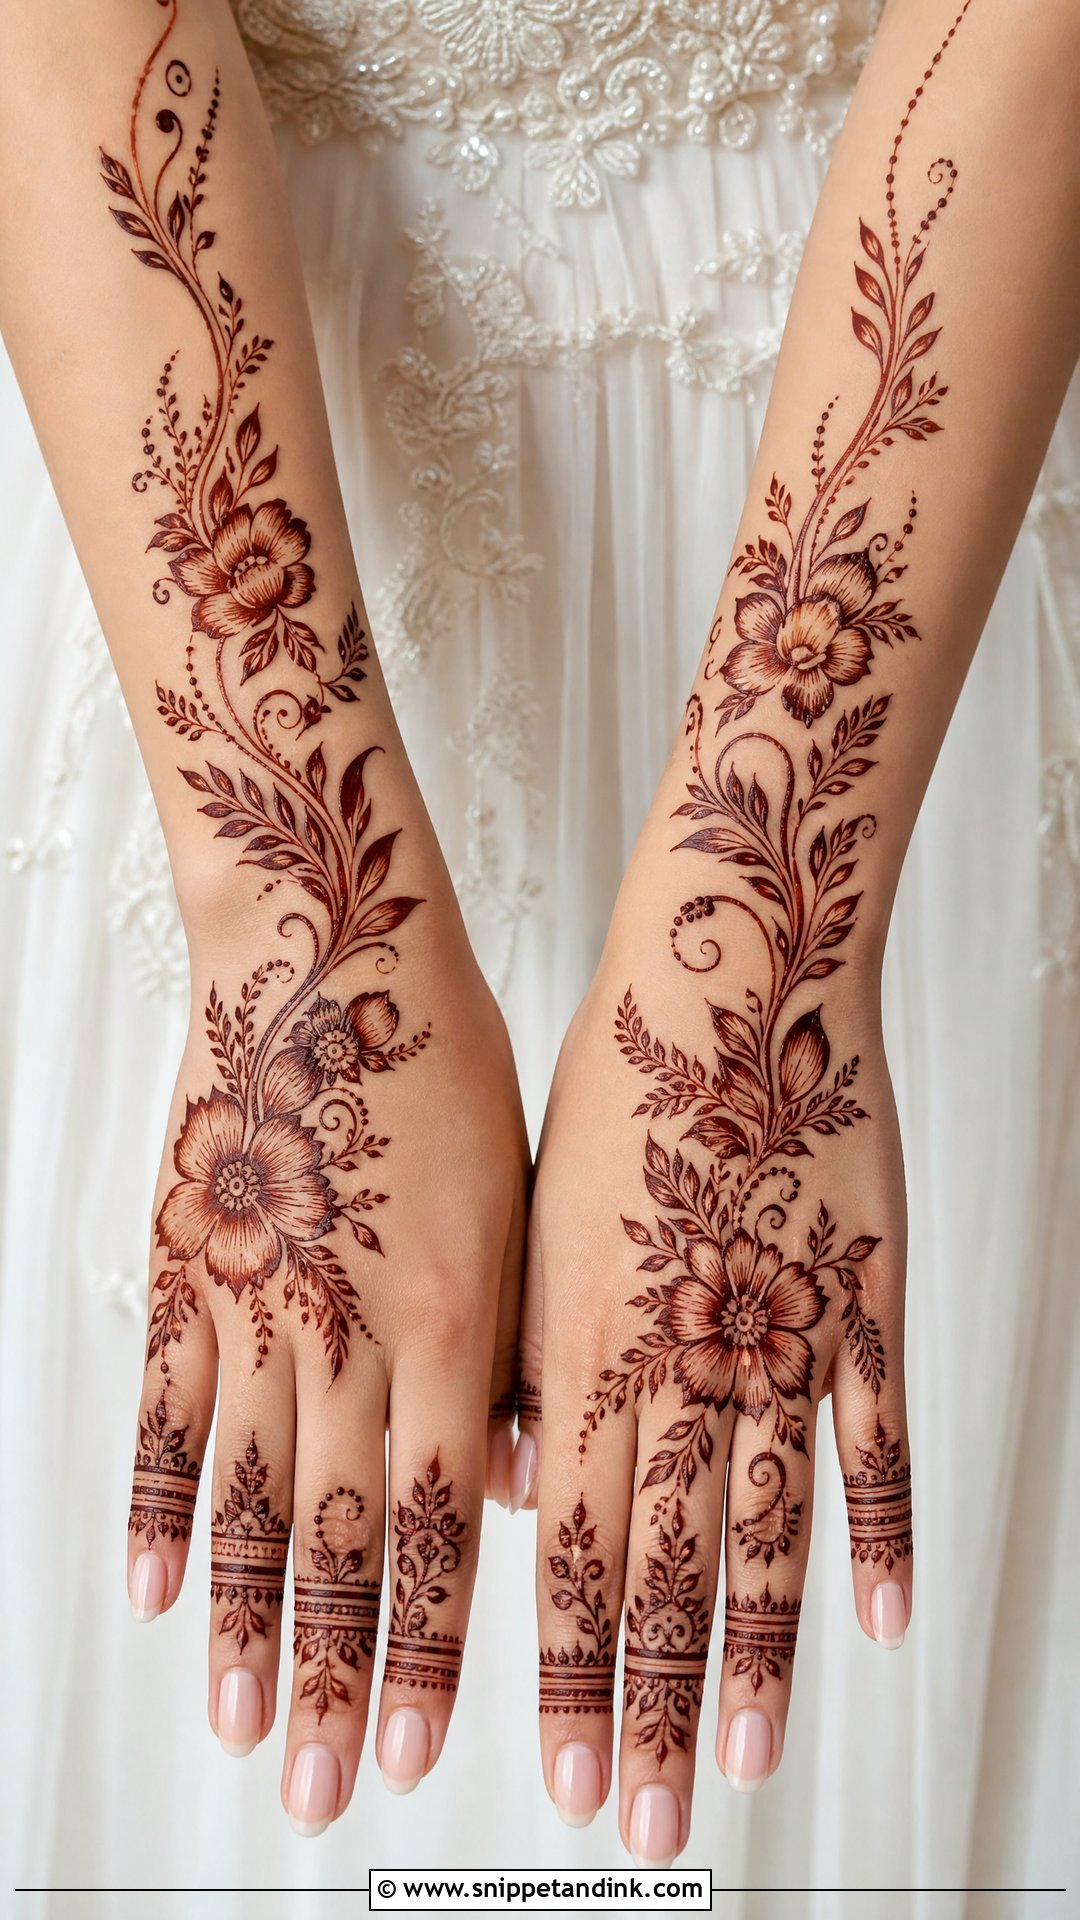
Gulf, or Khaleeji, henna is bold and airy at the same time: large flowers, leafy sprays and curved vines placed in flowing sections, with plenty of open skin between them. I outline the main flowers heavily and keep the detail inside the petals light, which gives the design weight from a distance. It suits brides who like the Arabic style but want a slightly fuller wedding effect. Stacked bands or soft floral tips on the fingers, and a wrist-to-forearm trail, add length without density. It’s a good match for a nikkah, a reception or an evening wedding.
17. Simple Moroccan Bridal Mehndi Design
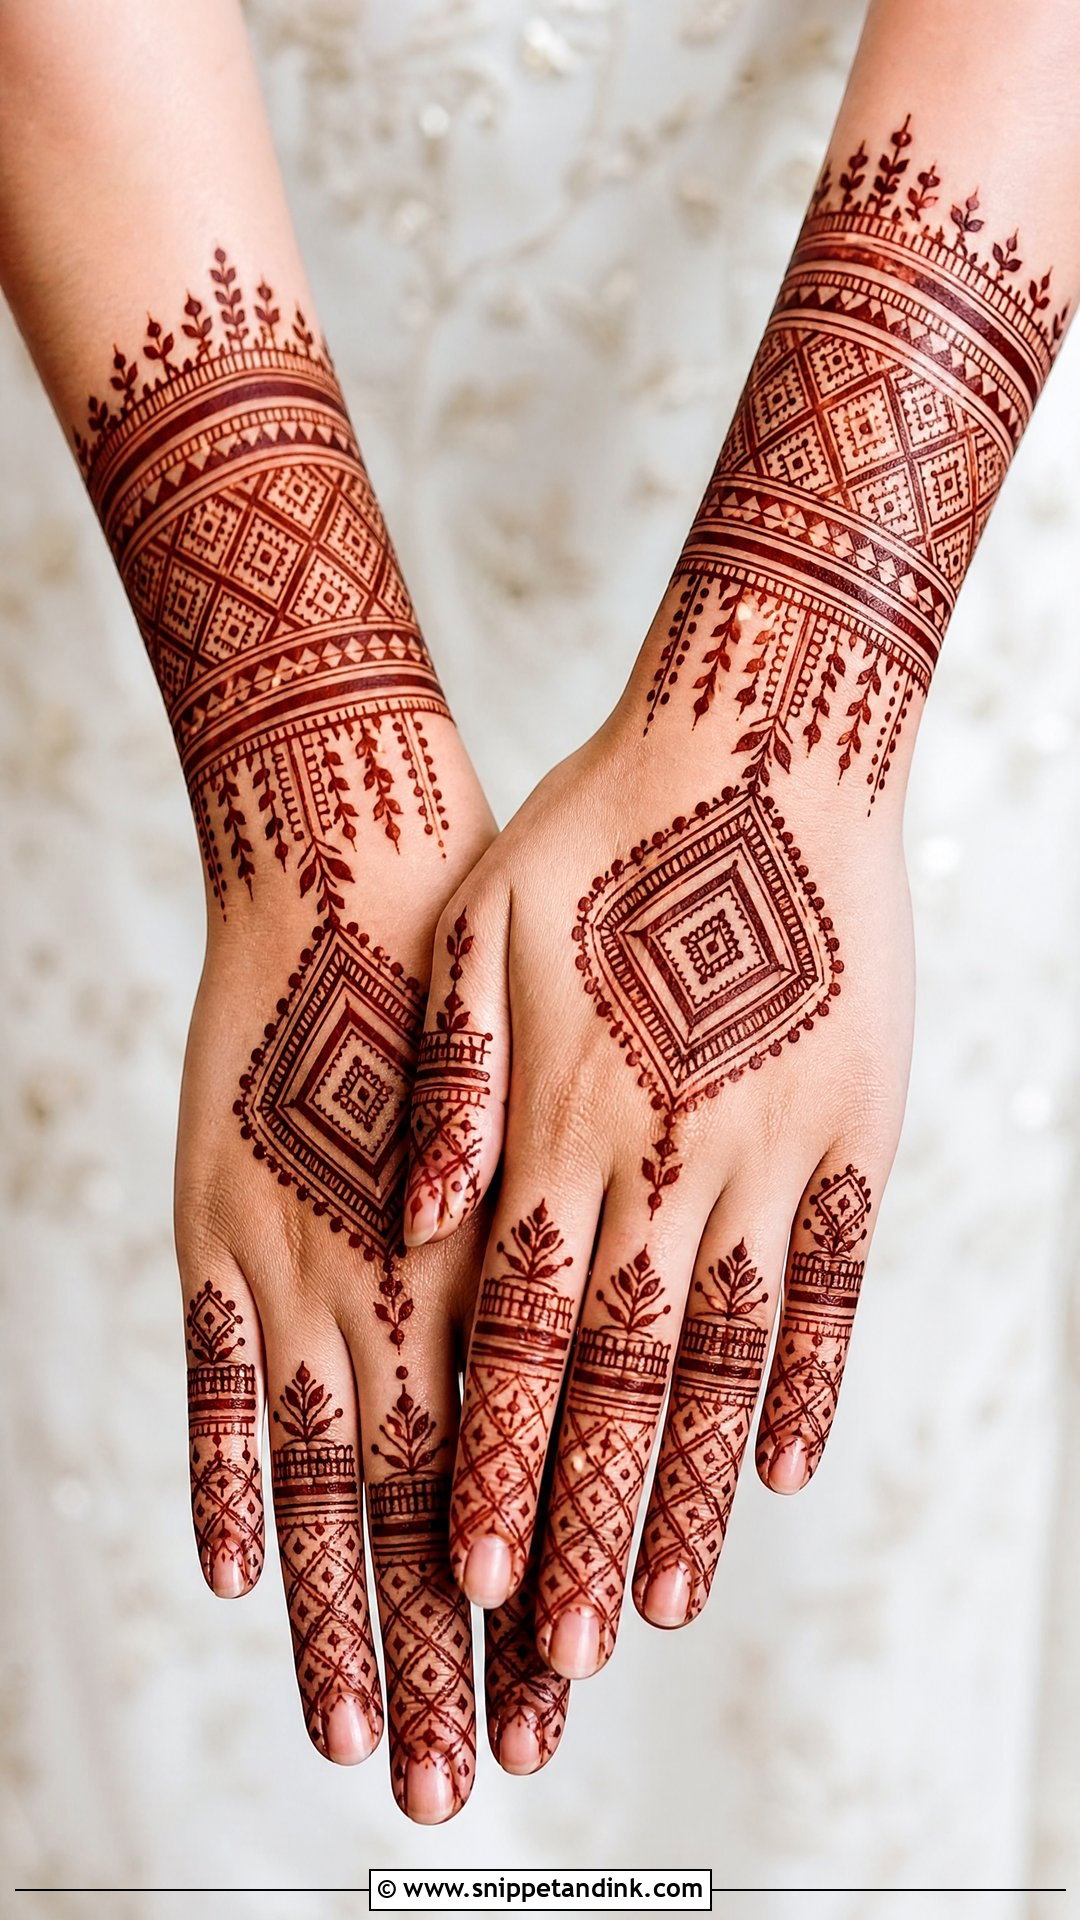
Moroccan henna swaps flowers for geometry: diamonds, triangles, straight lines, dots, grids and bracelet-like borders. I build a centred medallion on the palm, then carry matching line patterns down the fingers and a cuff of repeated diamonds at the wrist. Straight lines are harder than curves; any wobble shows, so this is a style where the artist’s hand really matters. Keep the spacing clean so the shapes stay sharp once stained. It’s a strong option if you want something different from the usual florals and paisleys.
18. Simple Bridal Mehndi Design For Engagement
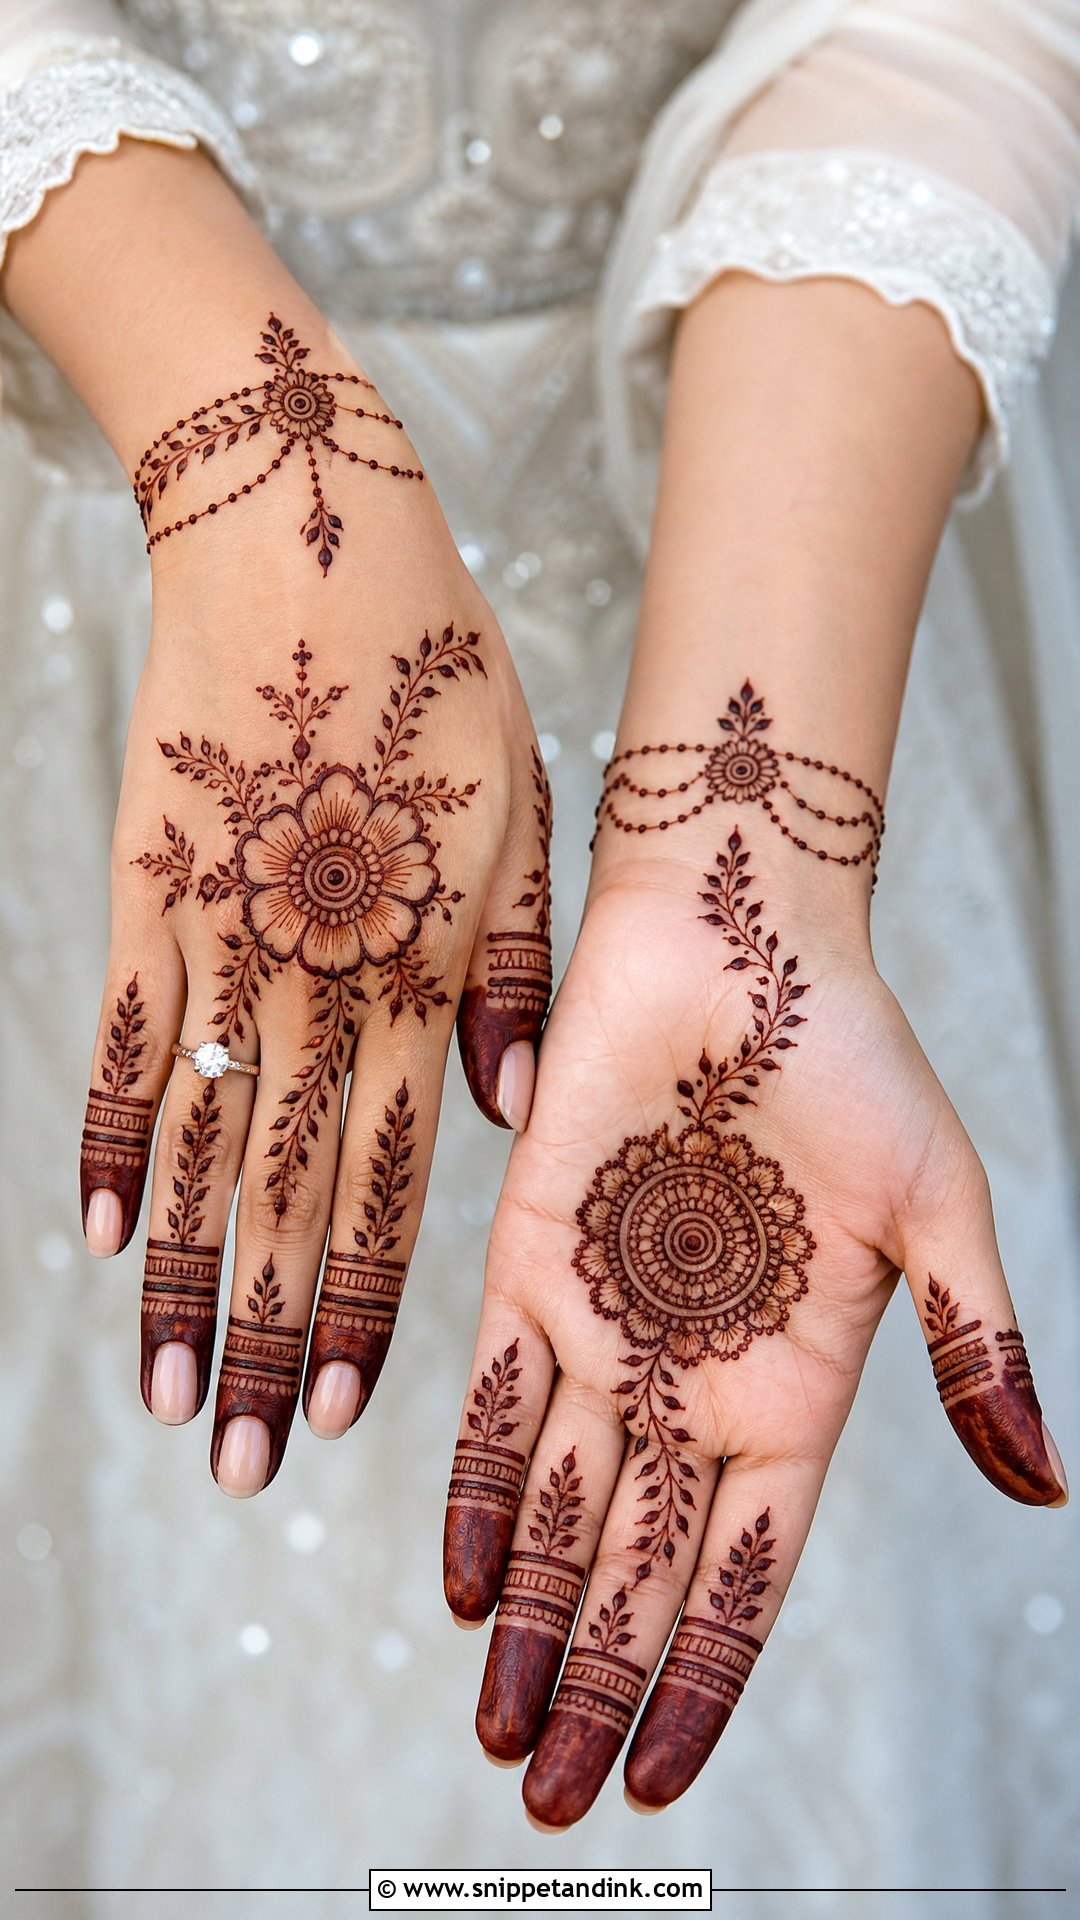
For an engagement, I keep the design lighter than the wedding-day pattern and plan it around the ring finger. A back-hand bracelet with a floral centre leaves the ring finger clear, so the ring is the focal point in close-ups. On the palm, a small mandala, a leafy trail or a half-hand floral layout is plenty. I avoid dark solid filling here, since it can look heavy in daylight photos. If you want a personal detail, add initials, a date, or a tiny heart near the wrist. It pairs with sarees, gowns, lehengas and shararas, and it saves time on a busy day.
19. Simple Bridal Mehndi Design For Nikkah
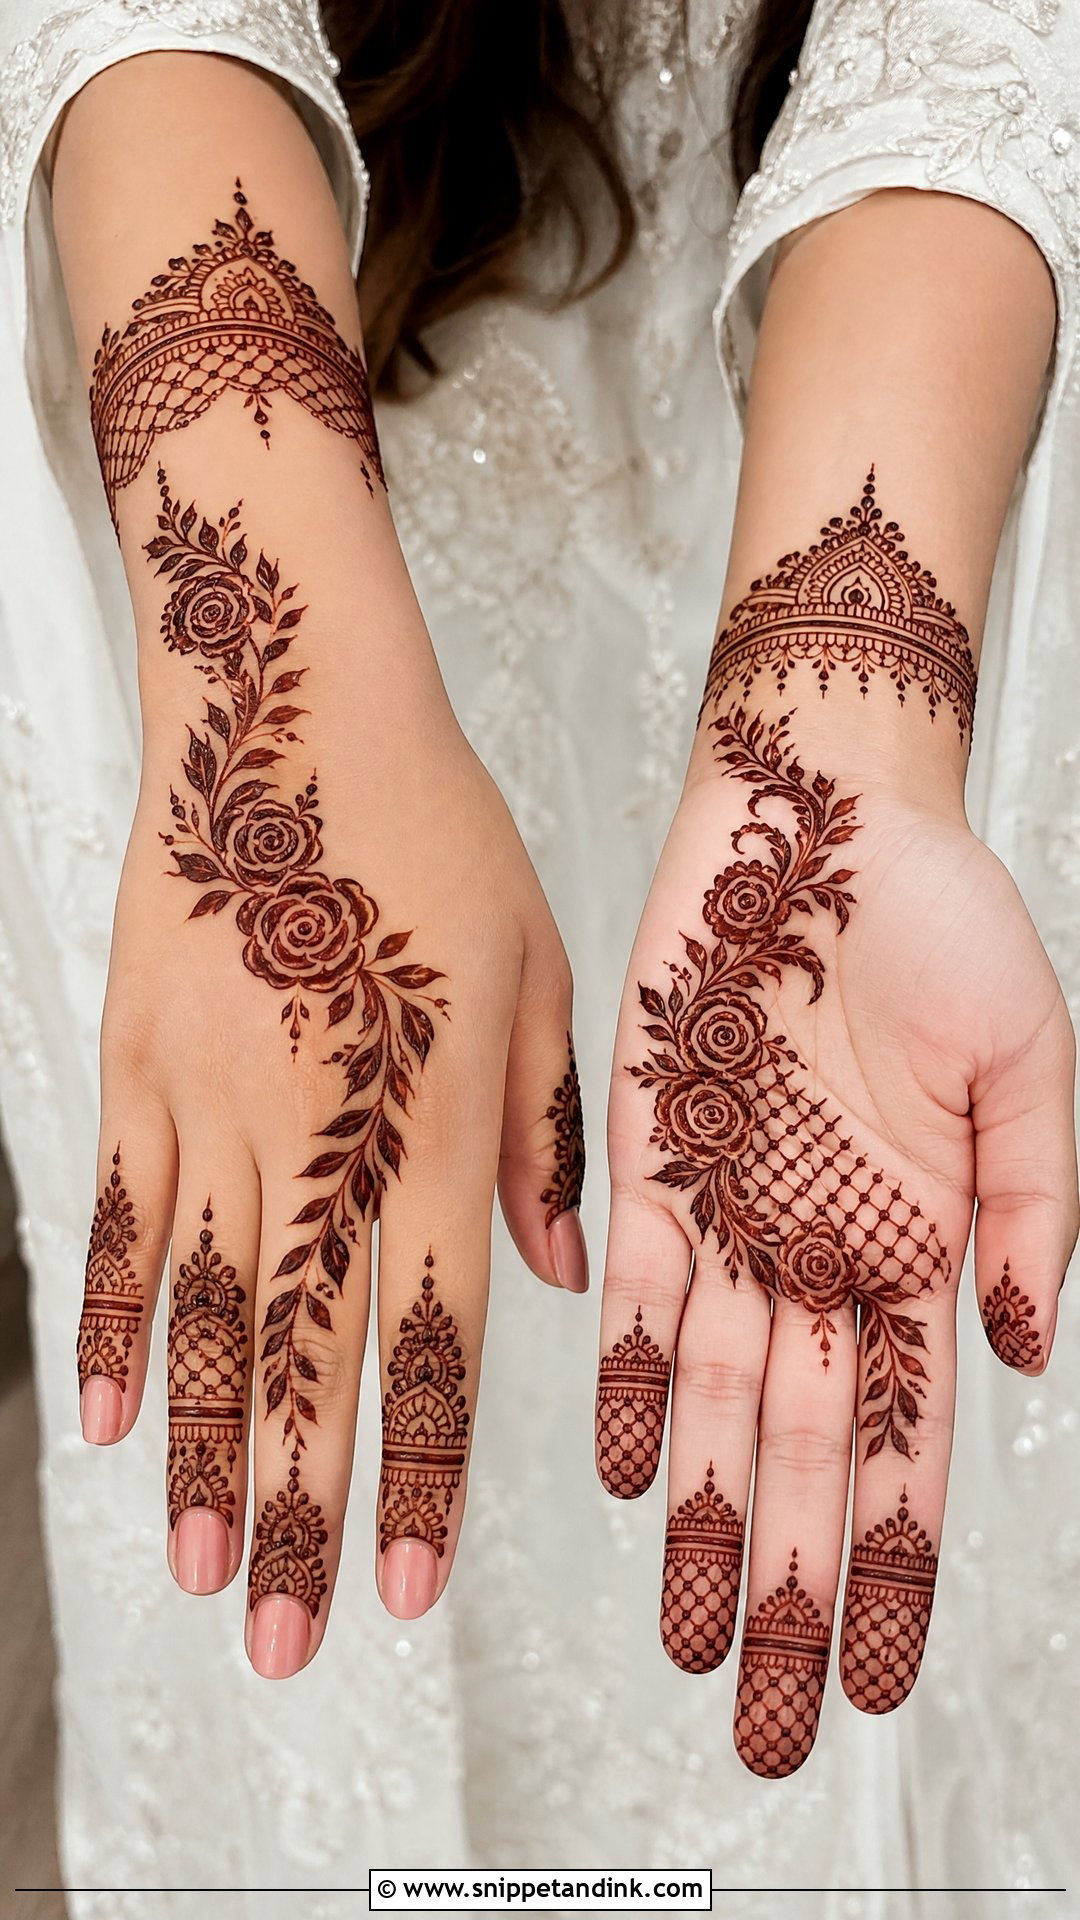
Simple bridal mehndi design for nikkah tends to lean modest and refined, which is why Arabic and Gulf layouts are popular for it. I’d draw a diagonal palm trail with rose motifs and soft leaves, then a bracelet-and-ring pattern on the back hand. Small domes, arches or a little jaali echo the setting of many nikkah ceremonies. Keep the lines crisp and the fingers detailed without crowding. These designs sit well with cream, ivory, pastel, gold or deep jewel-tone outfits, and they still look fresh in photos taken days later as the stain settles.
20. Simple Bridal Mehndi Design For Reception
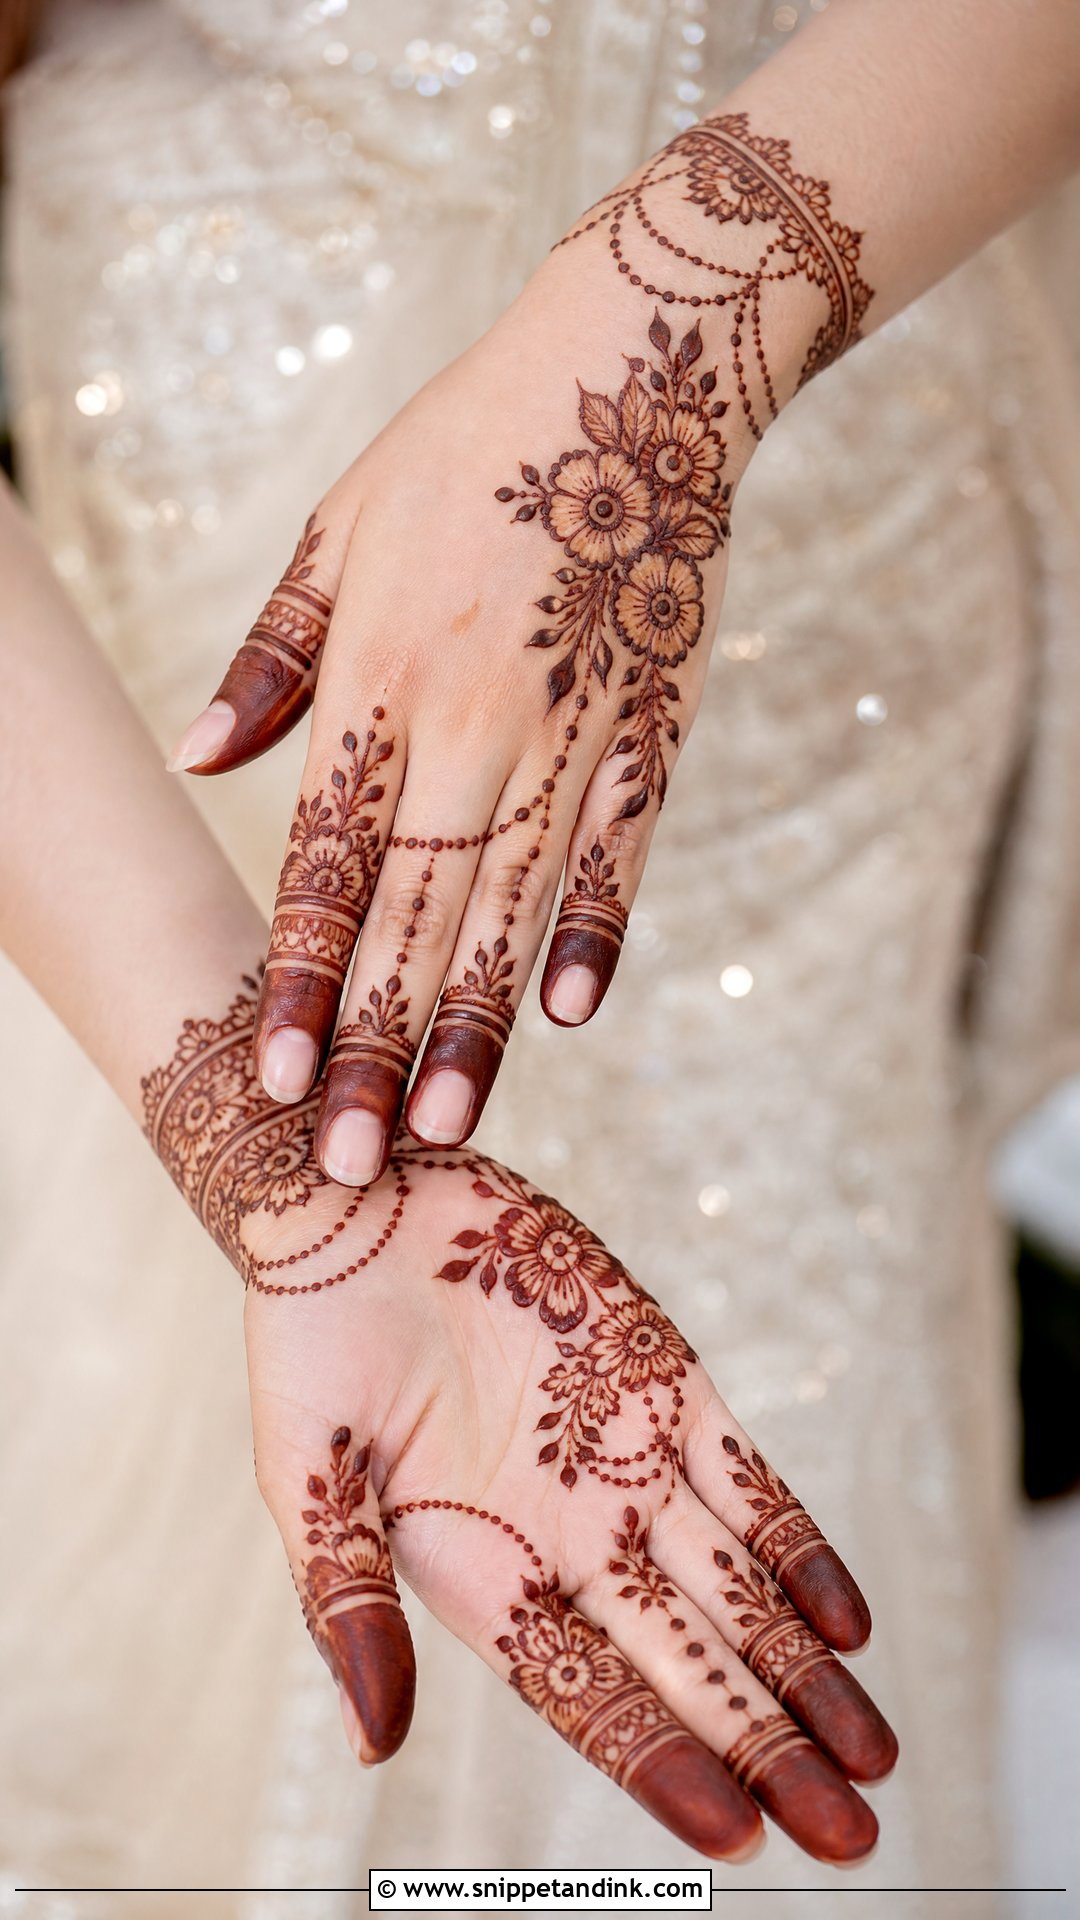
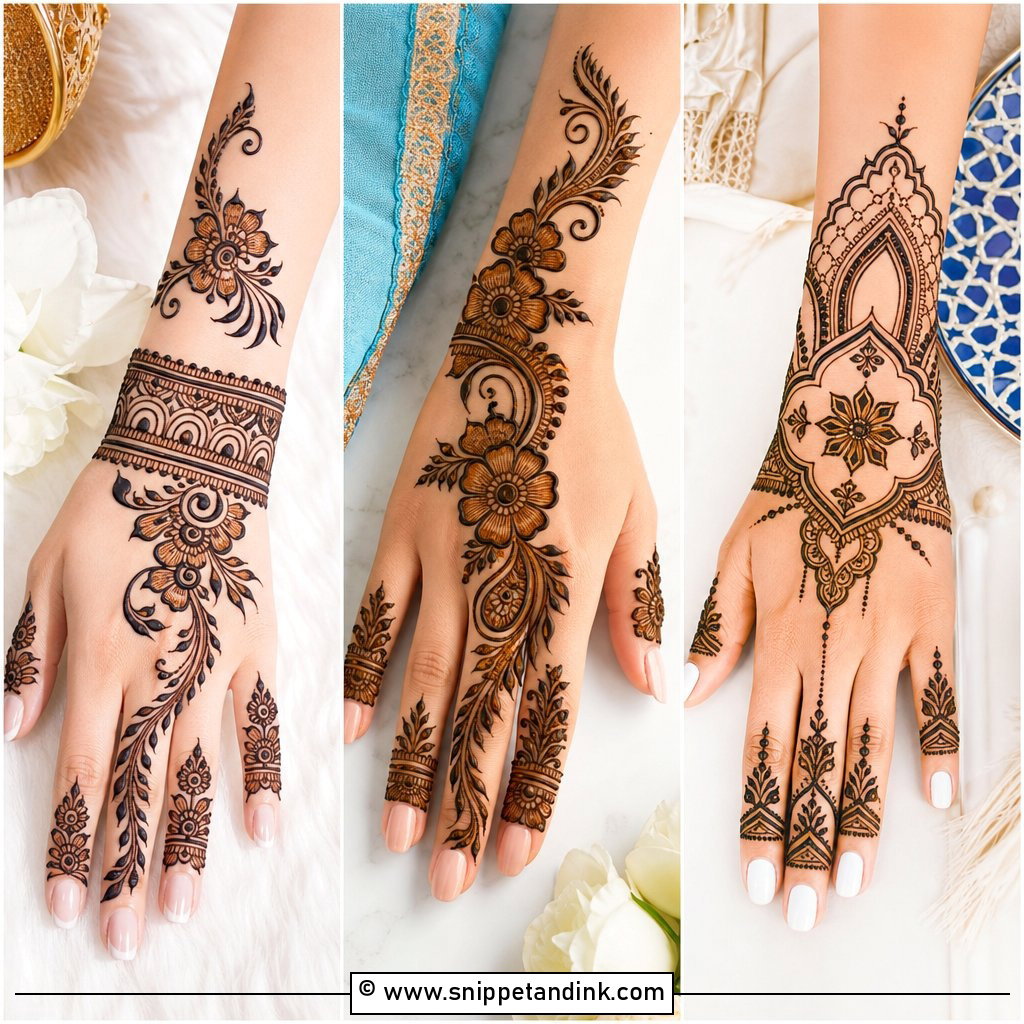
By the reception, the stain from the main wedding is usually at its deepest, so any new reception henna has to work with what’s already there. Many brides choose a lighter, jewelry-style back-hand design or a soft floral front-hand pattern that sits beside gowns, lehengas and statement accessories. A clean wrist cuff with finger chains makes the hand look dressed even without much jewelry. If the outfit is heavily embellished, I’d skip dense motifs; the hands and the dress end up competing. Fuller coverage can work as a half-hand floral layout with open spaces and fine shading.
Aftercare That Turns a Light Pattern Into a Dark Stain
On a simple design, the stain carries the whole look, because there’s less pattern to distract from a pale result. These are the habits I give every bride.
- Dab on a little lemon and sugar mix once the paste is dry. It keeps the paste stuck to the skin longer, which means more colour.
- Scrape the dried paste off with a blunt edge or your fingers. Don’t wash it off.
- Keep water away for as long as you can, ideally until the next morning. Rinse lightly when you do.
- Keep your hands warm. Henna stains darker on warm skin, which is also why palms and fingertips come out deeper than the back of the hand.
- Skip scrubs, chlorine and harsh cleaning products until after the wedding. They fade the top layer of stain.
Questions Worth Asking About the Paste Itself
Ask your artist whether her cones are freshly mixed natural henna and what’s in them. Natural henna never stains black; a cone promising instant dark or black colour may contain chemical dyes that can cause serious skin reactions. If you have sensitive skin, I’d do a small patch test on your inner arm a week or two before the wedding. It costs nothing and it settles the question before your hands are covered.
Bringing Your Outfit and Your Schedule to the Henna Consultation
A simple bridal design doesn’t need heavy coverage to look special. What makes it read as bridal is placement: a mandala that sits dead centre, an Arabic trail that follows the shape of the hand, a bracelet that frames the wrist. When you meet your artist, show her your outfit, tell her which events you’ll wear the henna to, and say how long you can comfortably sit. If tradition matters most, ask for Indian or Indo-Arabic details; if you lean modern, the minimal, bracelet, Gulf and Moroccan layouts give you a clean finish. I’d rather plan a design around your day than squeeze your day around a design.
You'll Like These Ideas:


Leave a Reply