
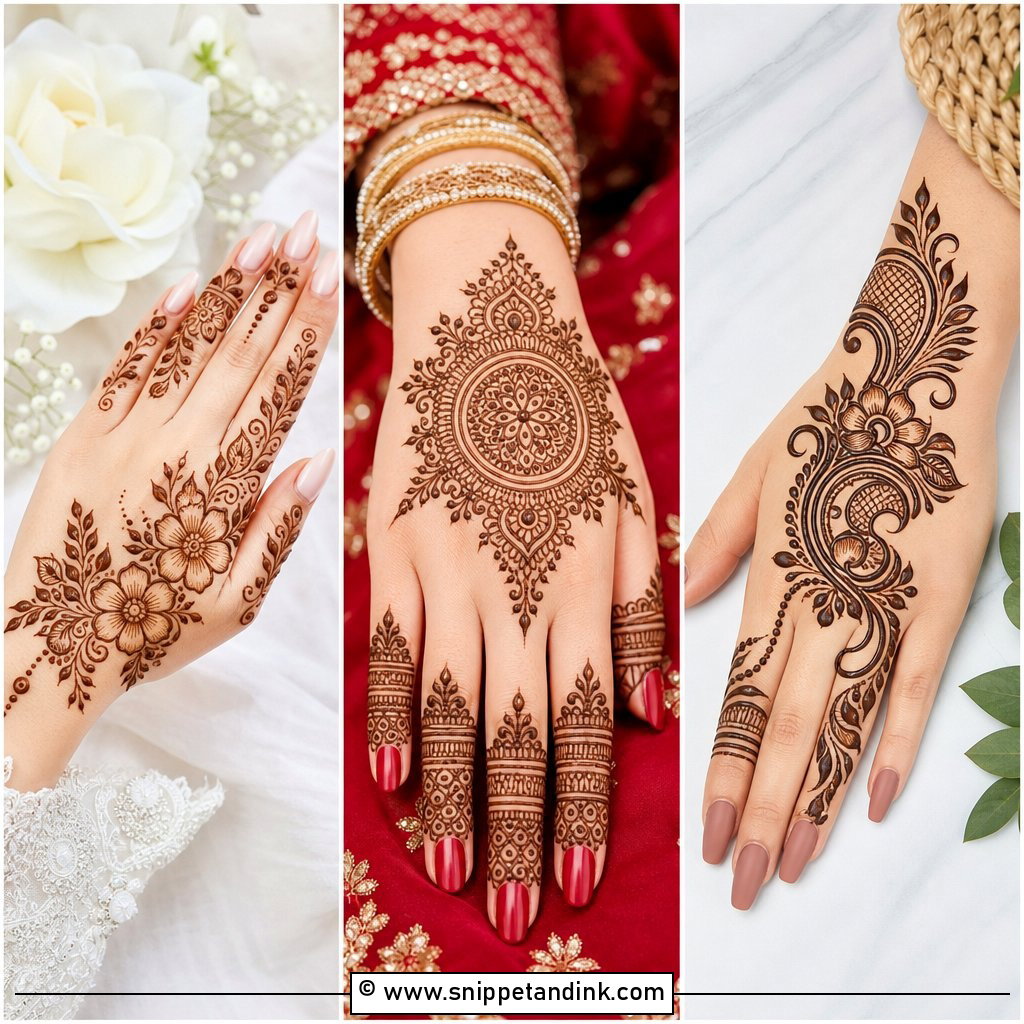
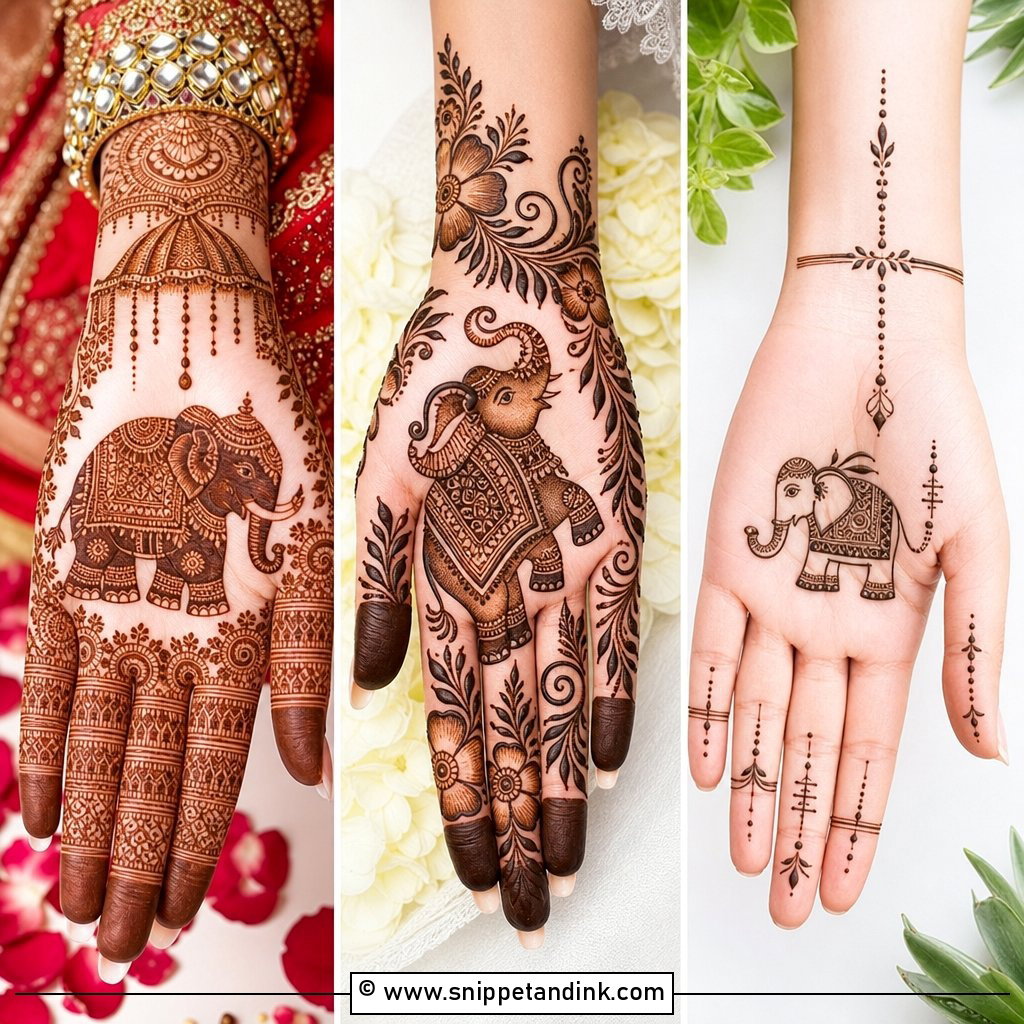
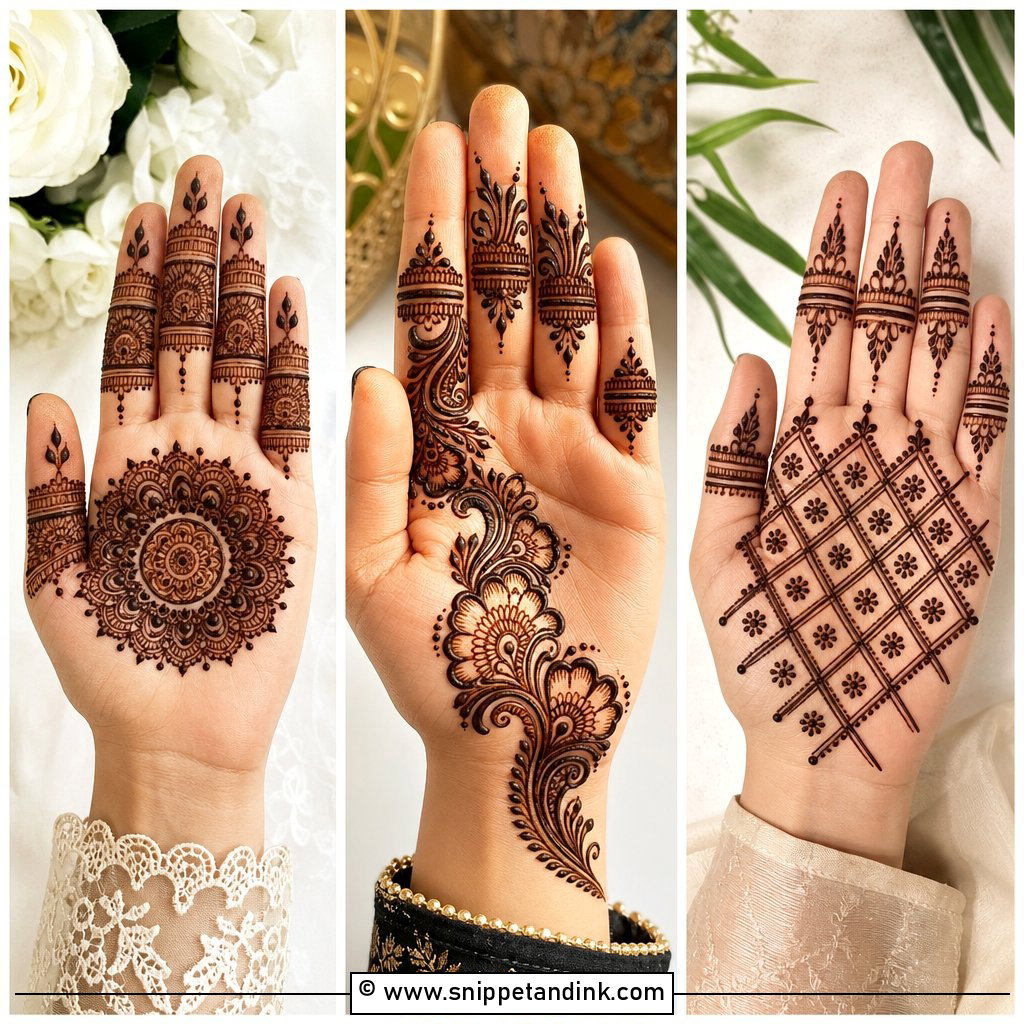
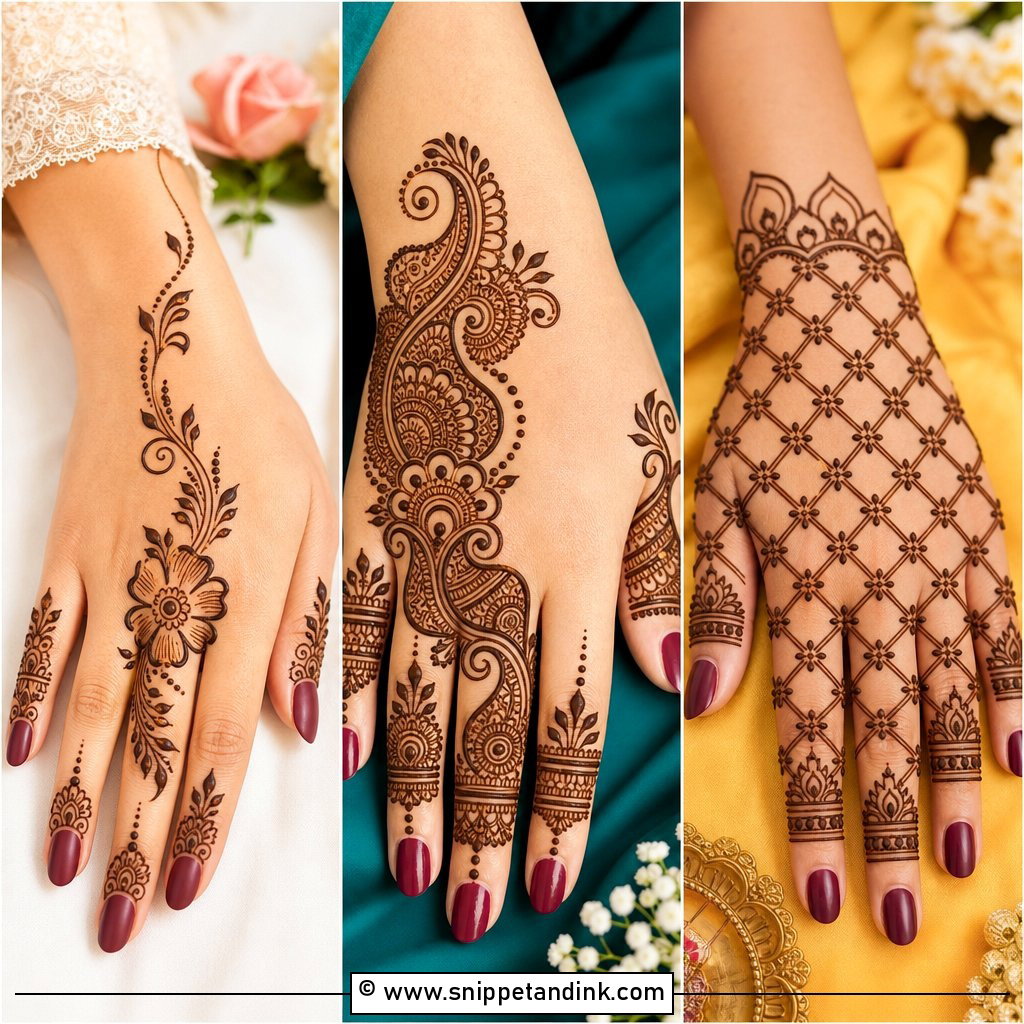
Simple bridal mehndi designs usually mean one of two things to the brides who ask me for them: less time in the chair, or more open skin between motifs. Both are possible without the hands looking unfinished. The layouts below run from full-hand florals and centered mandalas to Arabic trails, jaali and personal details, for engagements, nikah, haldi, sangeet and civil ceremonies alike. Open spacing has a practical side I see at every application, too: bold, well-spaced lines hold a darker stain and stay readable as the color deepens.
Timing Your Mehndi So the Stain Peaks on the Wedding Day
Natural henna doesn’t reach its final color when the paste comes off. It starts bright orange and deepens to reddish-brown over the next 24 to 48 hours. That’s why I schedule bridal application one to two days before the ceremony, never the morning of.
Planning the sitting
- Simple designs take far less time than dense bridal work, but allow extra for drying before you move around; the paste stays fragile for the first half hour or so.
- Arrive with clean, dry skin. Skip lotion and oil that day, since oil blocks the dye, and avoid waxing right before.
- Get manicures and pedicures done before mehndi, never after. Soaking and scrubbing fade a fresh stain.
- Wear loose sleeves that won’t brush your wrists, and have someone ready to handle your phone, food and water.
Warm skin stains better. If the room is heavily air-conditioned, I’ll ask you to sit somewhere warmer while the paste works.
1. Simple Full Hand Bridal Mehndi Design
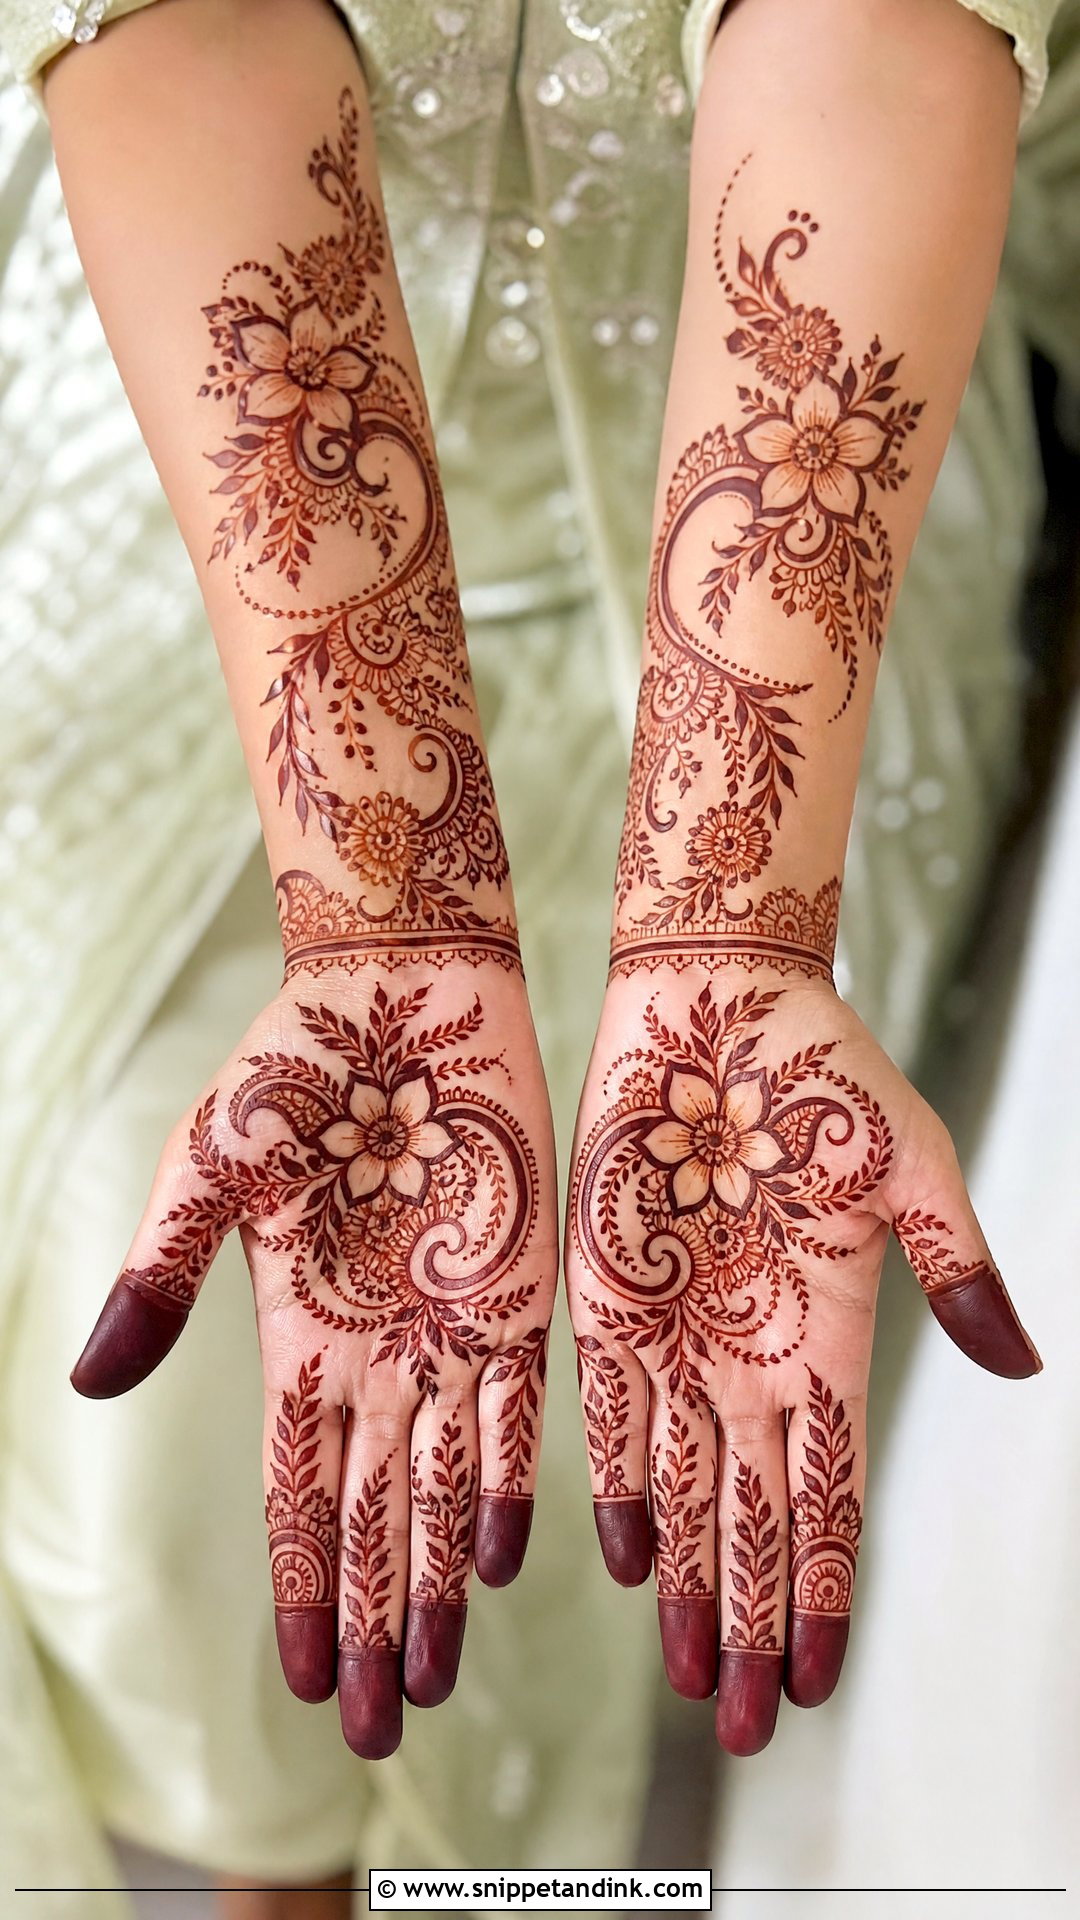
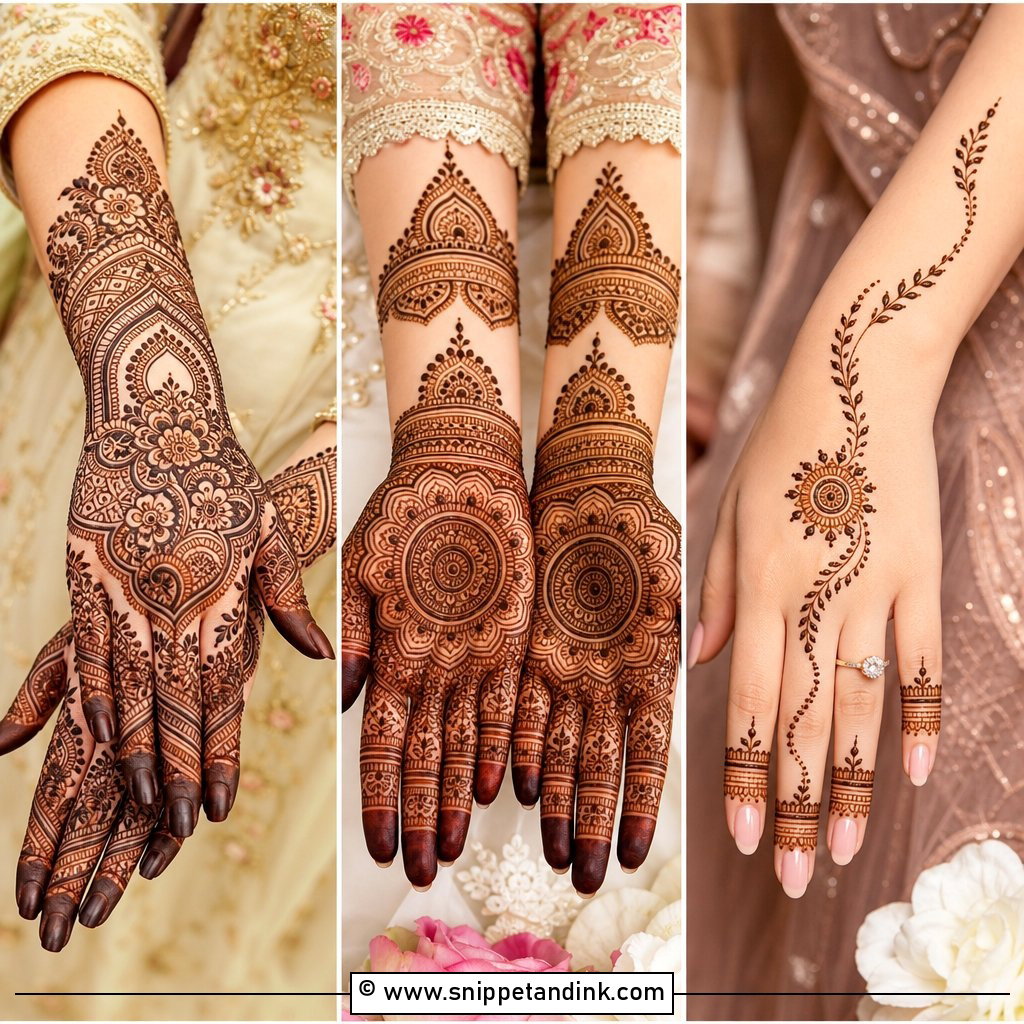
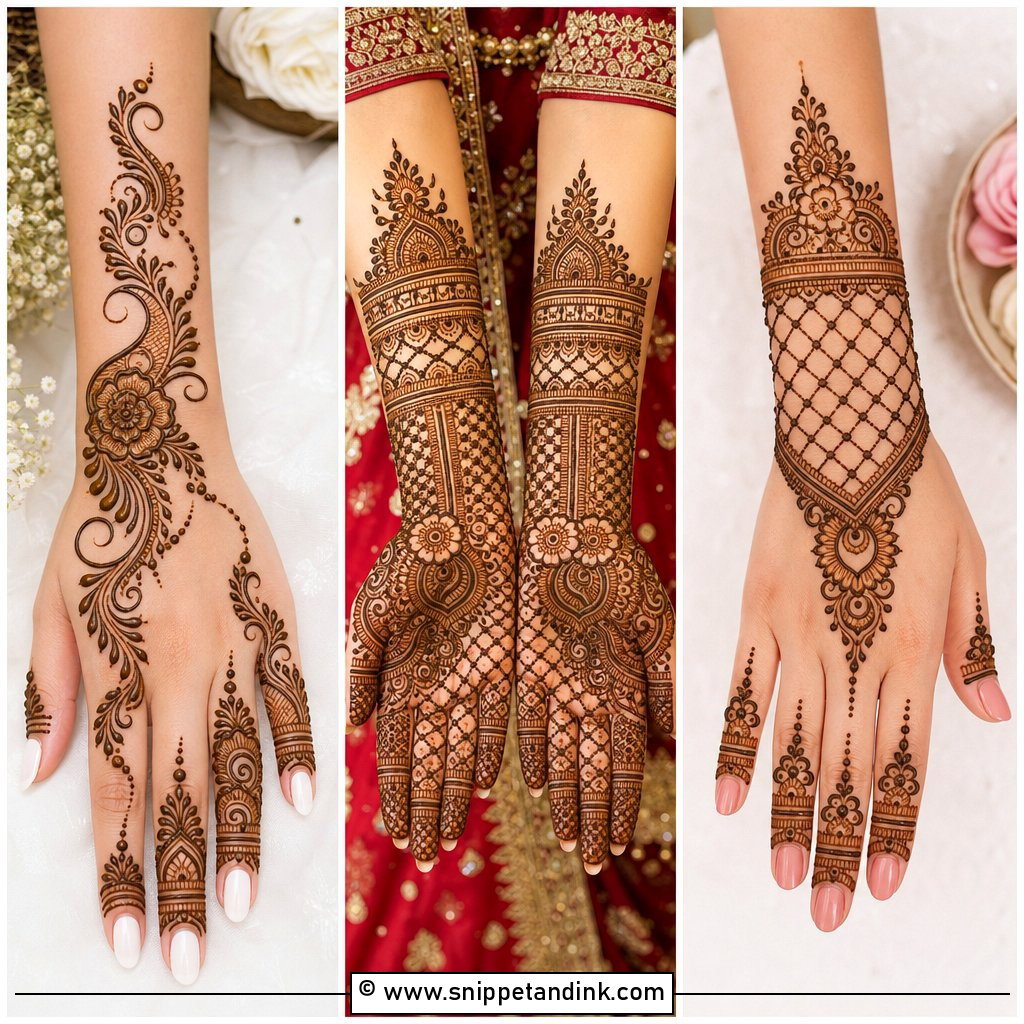
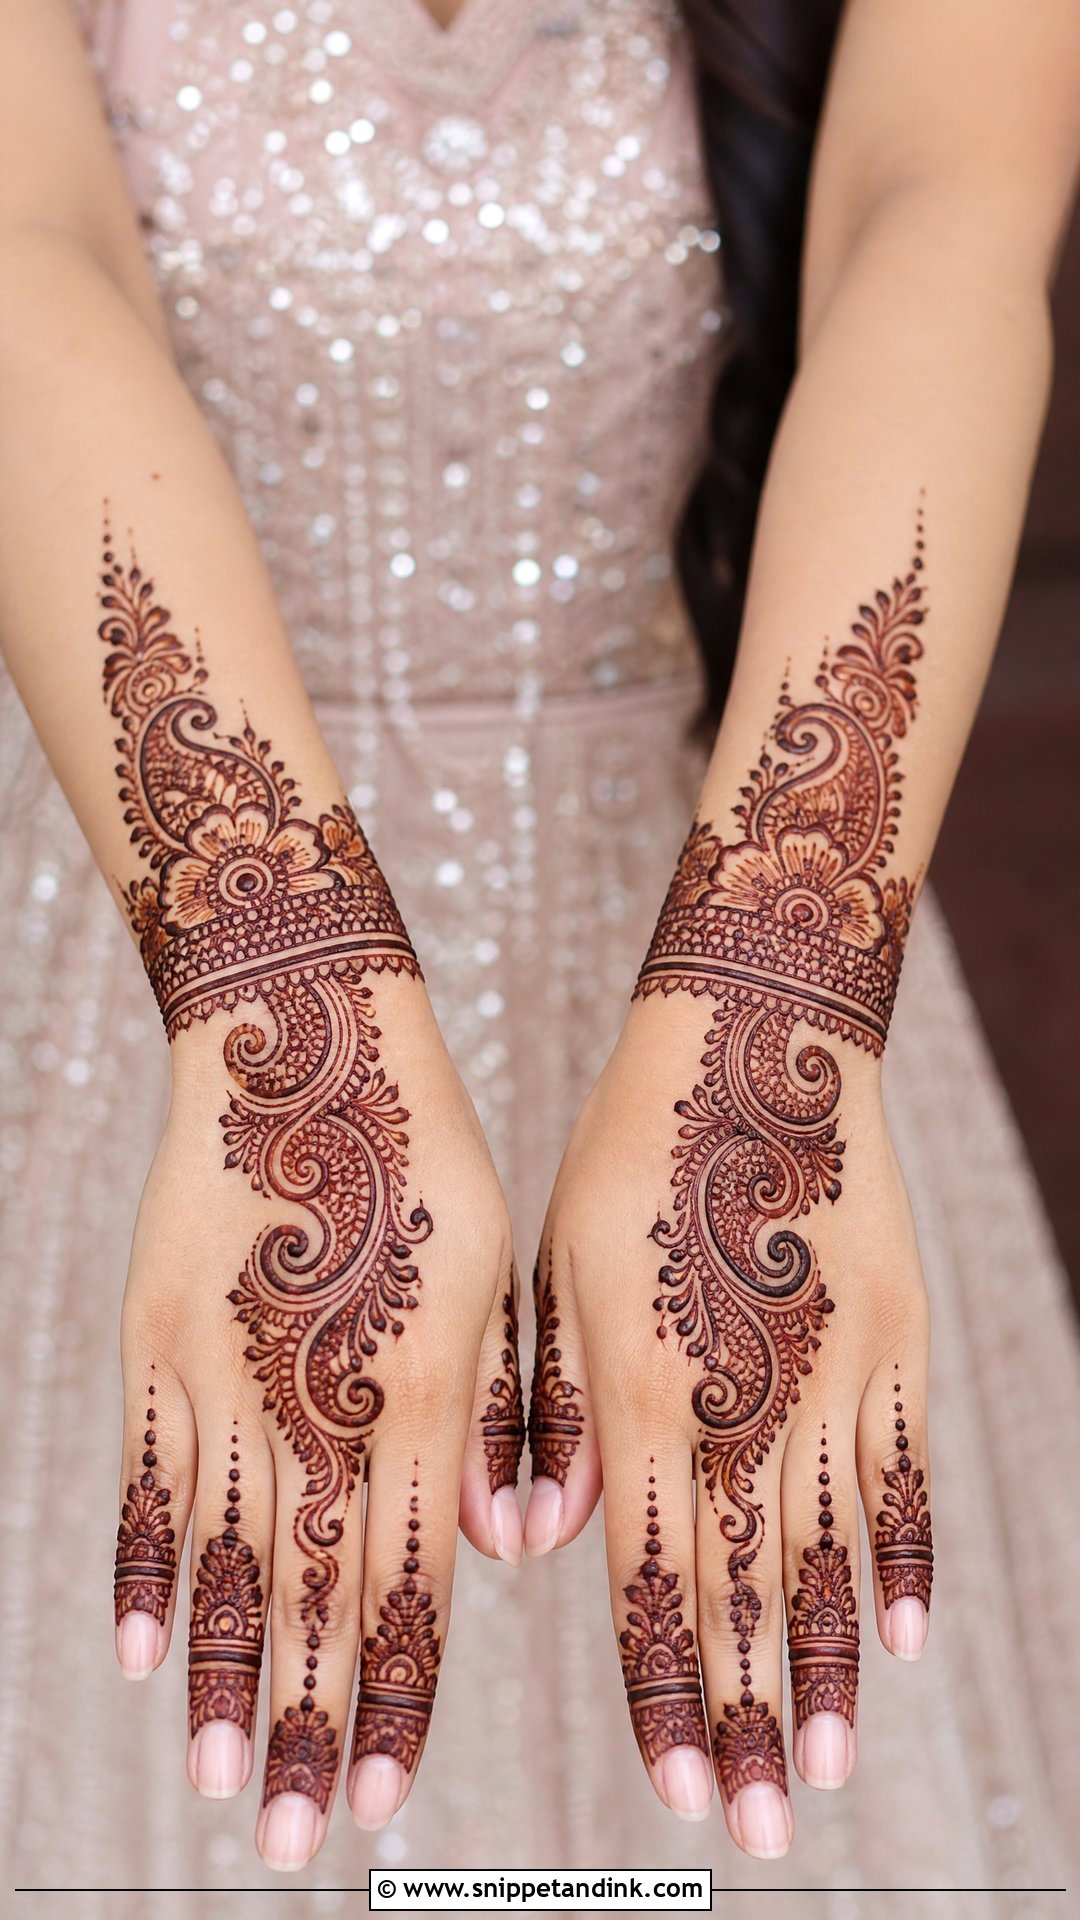
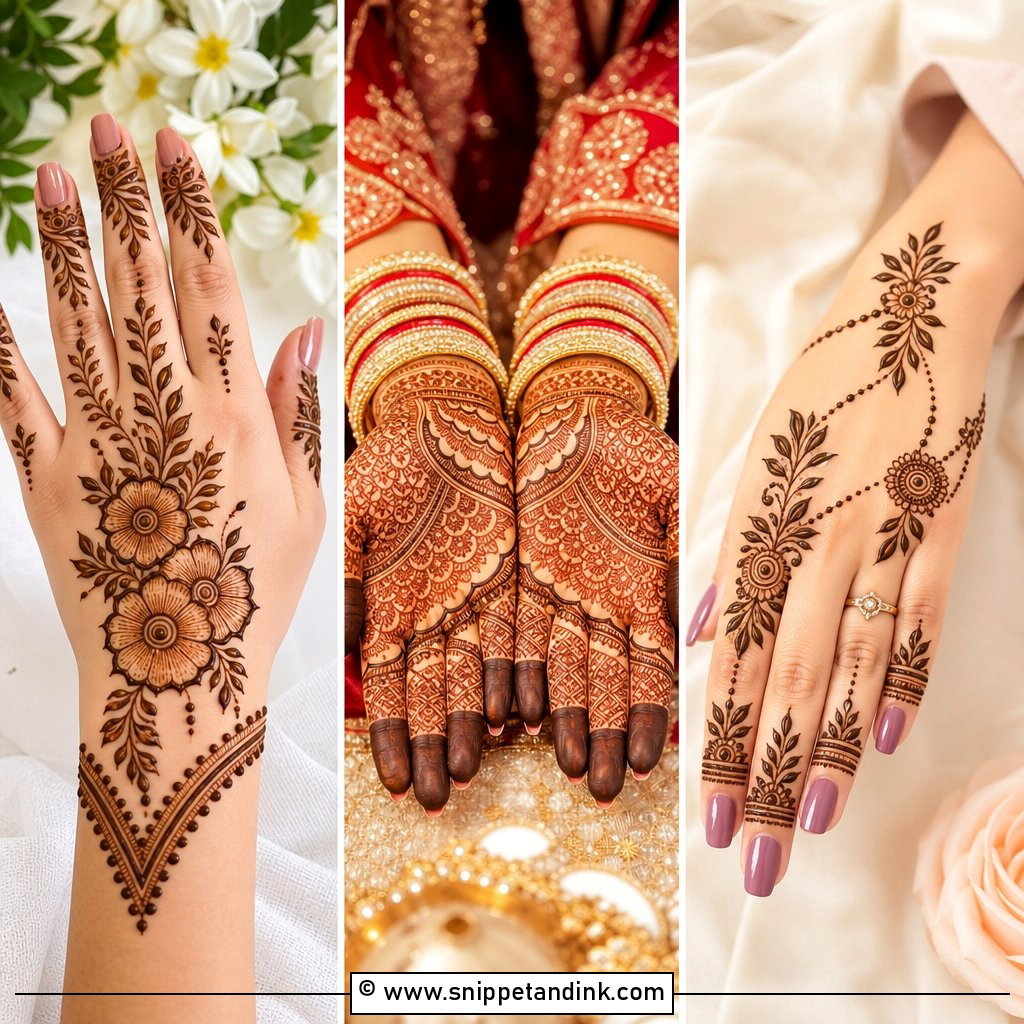
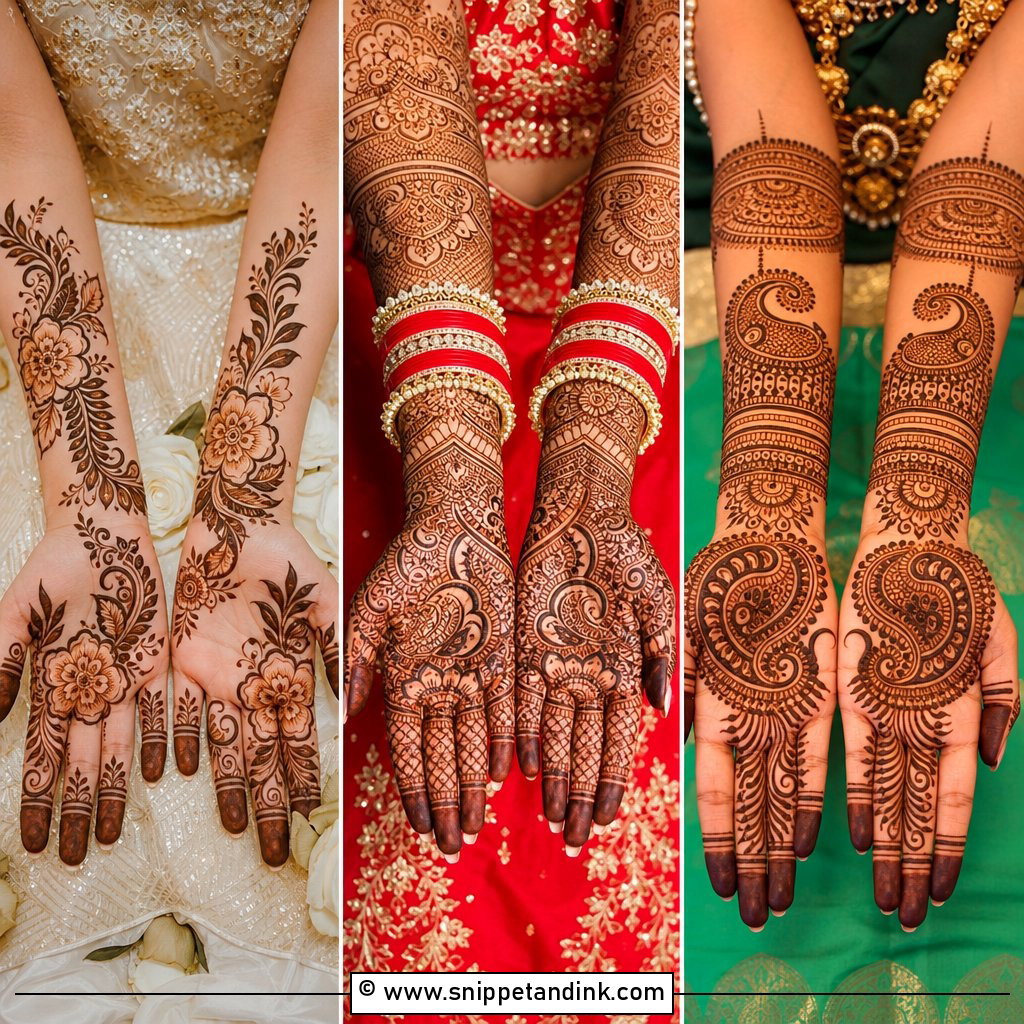
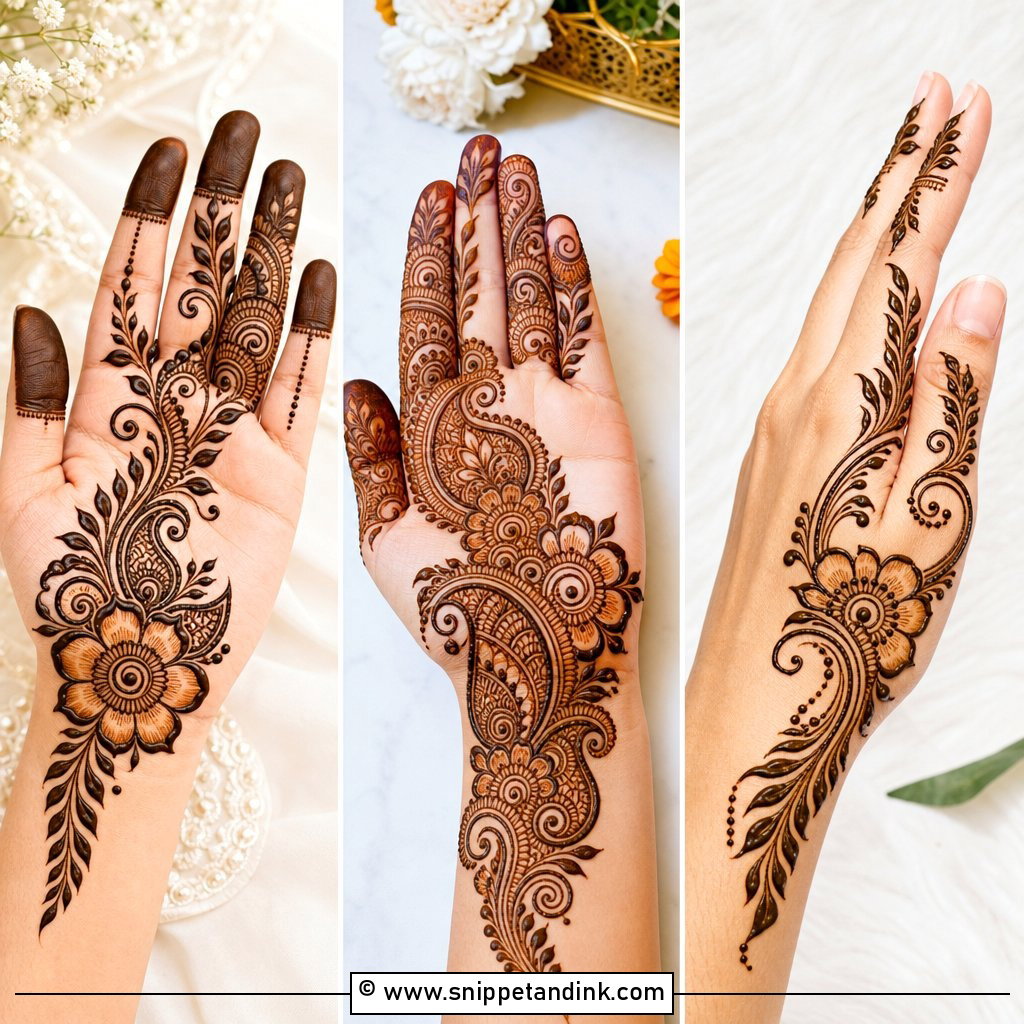
A full hand doesn’t have to mean a crowded one. I cover the palm, fingers, wrist and a little of the forearm, but keep the larger florals and paisleys in the center and save fine dots, leafy lines and small checks for the edges. What I watch most closely is gap width. If the gaps are uneven, the eye reads the finished stain as patchy, even when every individual line is clean. This layout sits well under lehenga and saree sleeves that stop at the forearm.
2. Simple Arabic Bridal Mehndi Design
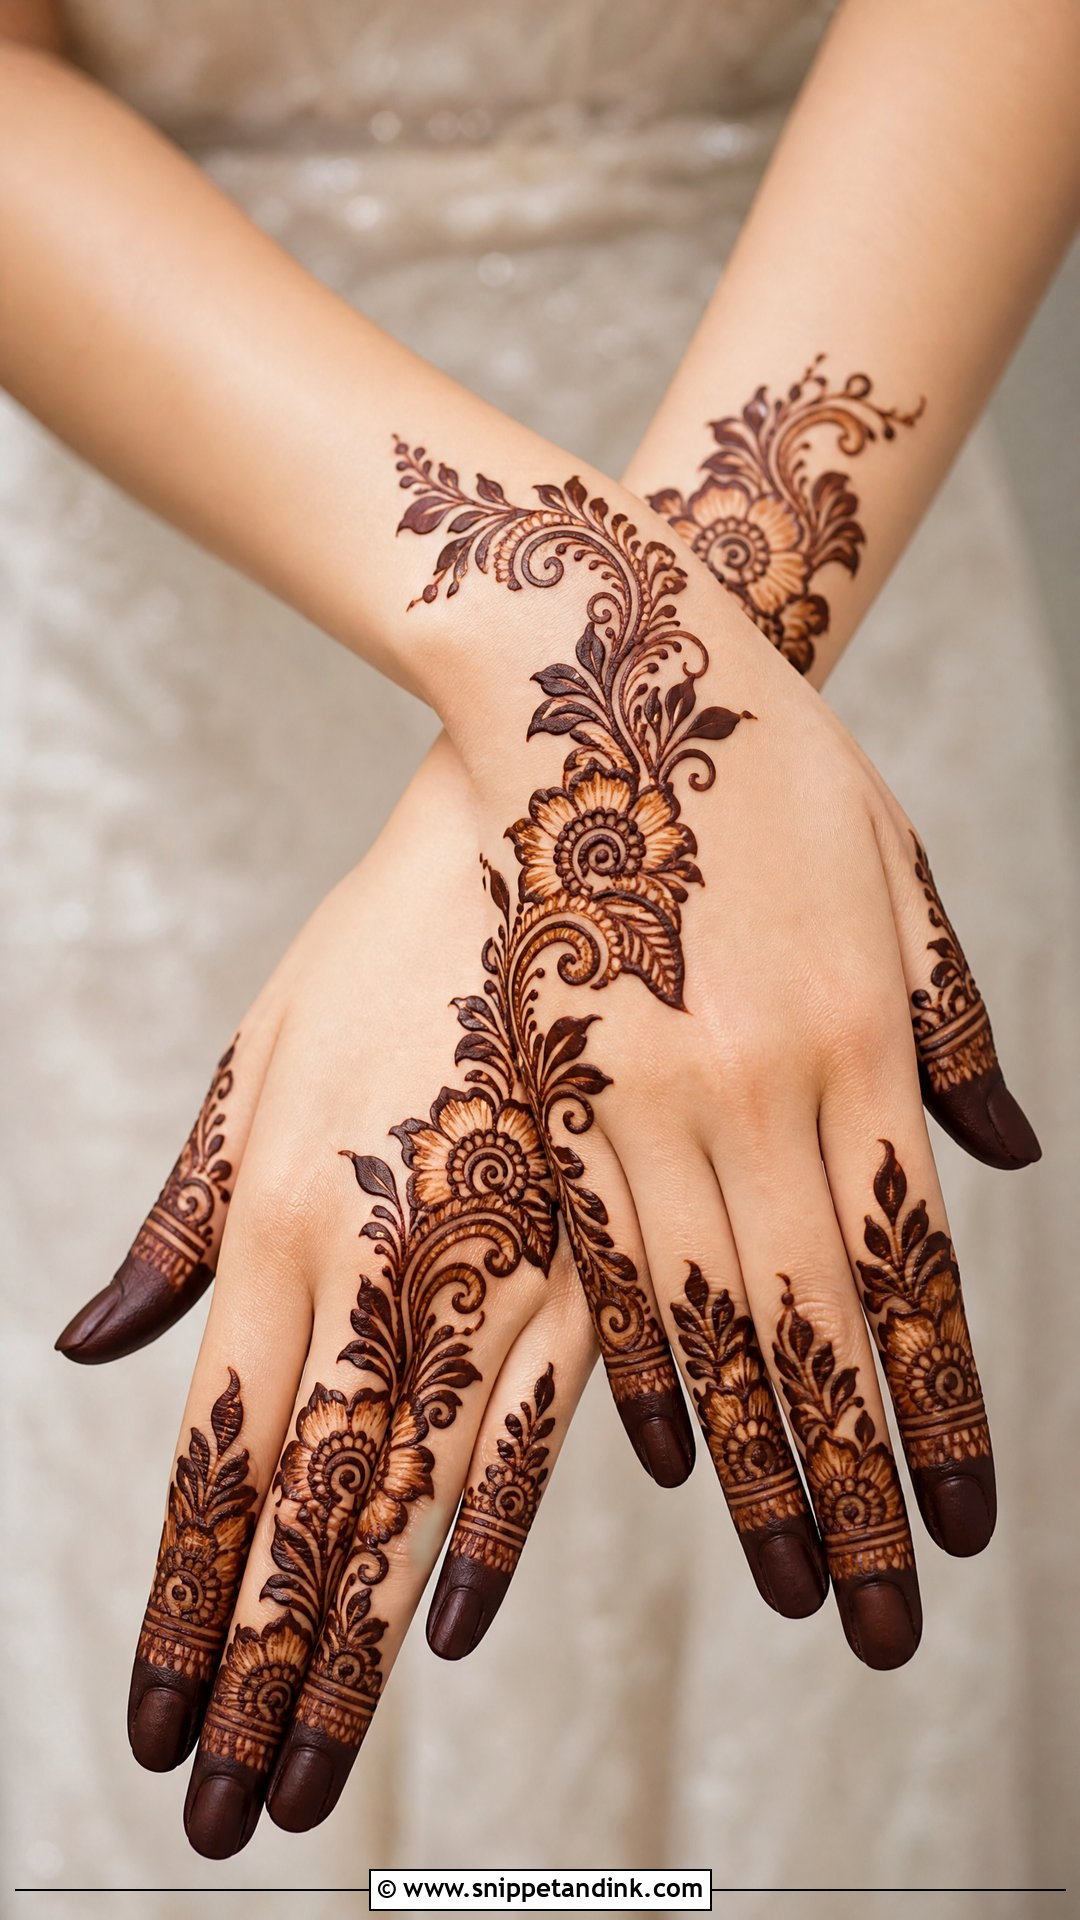
The diagonal trail of a simple Arabic bridal mehndi design runs from the wrist to the fingertips, leaving bare skin on either side. Large flowers, leaves and swirls carry the structure, so I use a slightly wider cone opening than I would for Indian fillers; bold lines are what make Arabic work readable from across a room. It goes on in a fraction of the time of dense work, which suits engagements and smaller ceremonies. For a more bridal finish, I add a wrist cuff and fully filled fingertips.
3. Simple Indian Bridal Mehndi Design
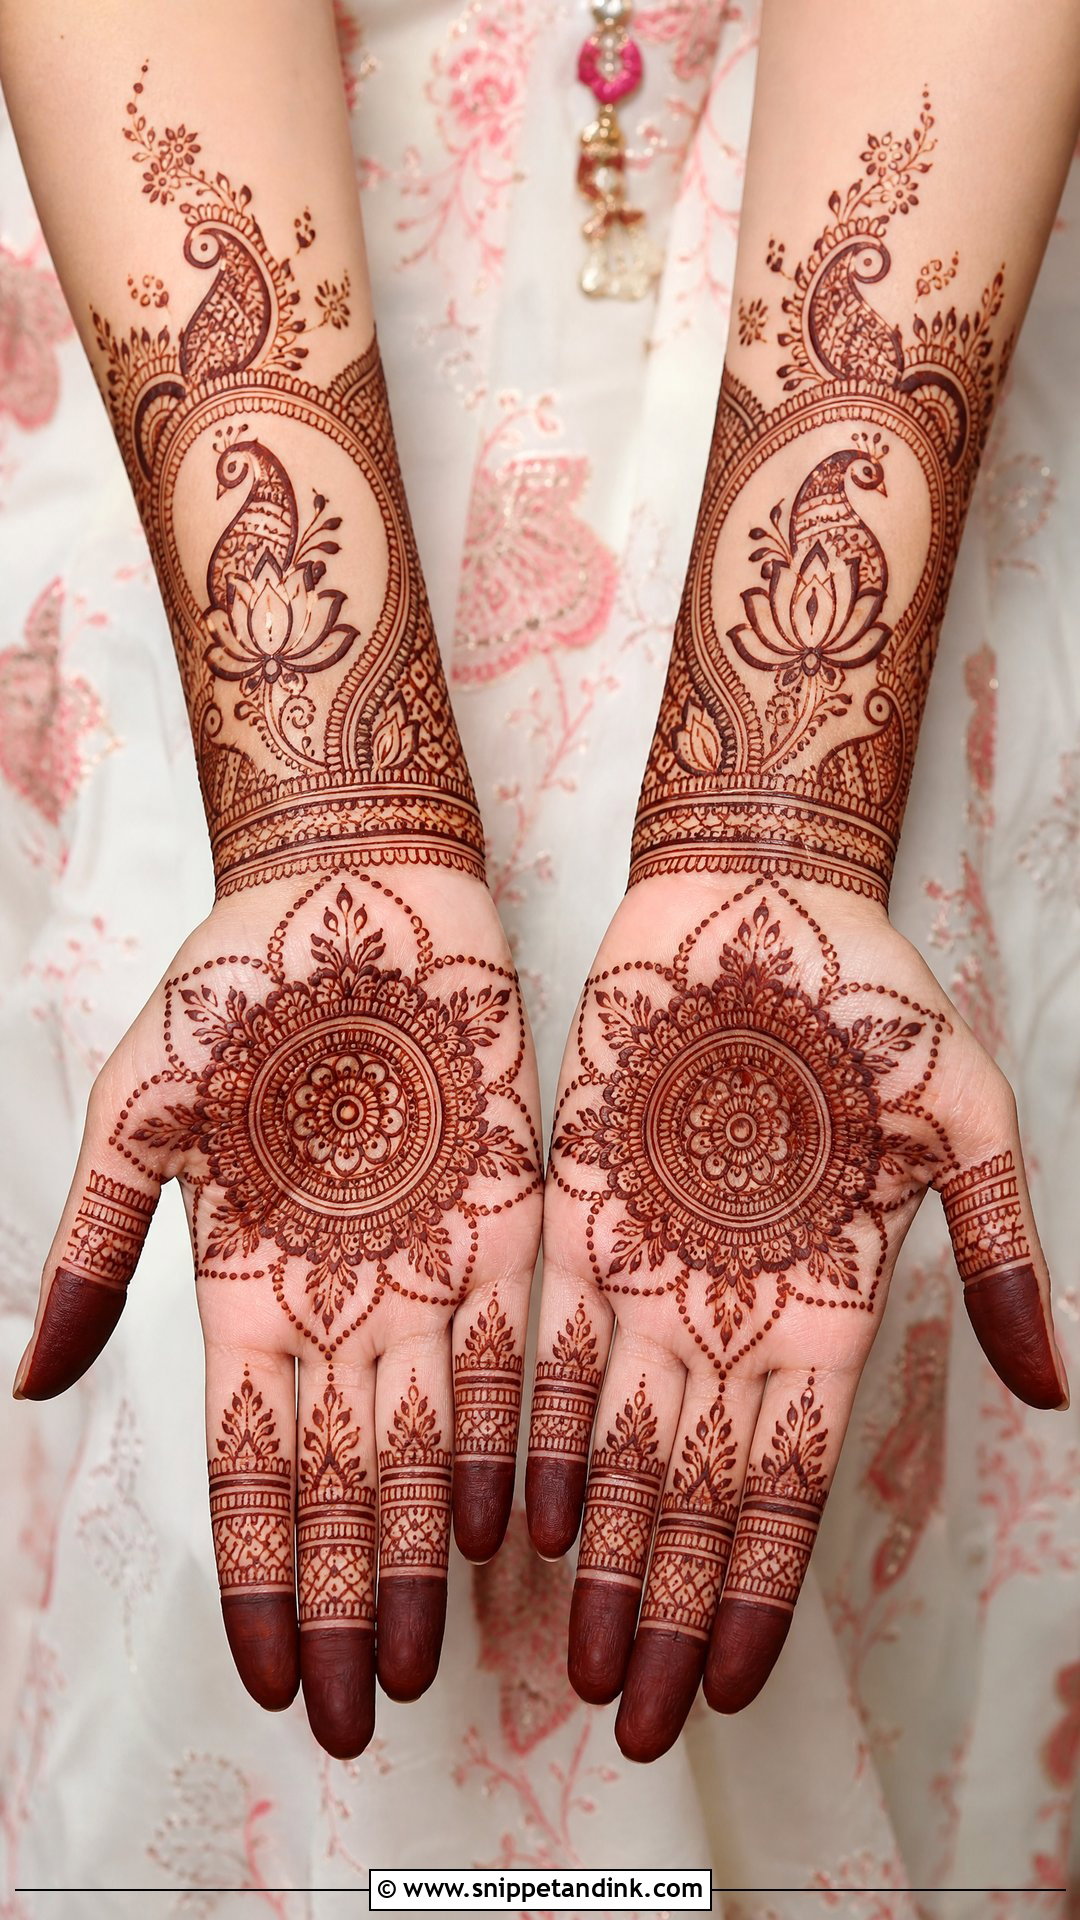
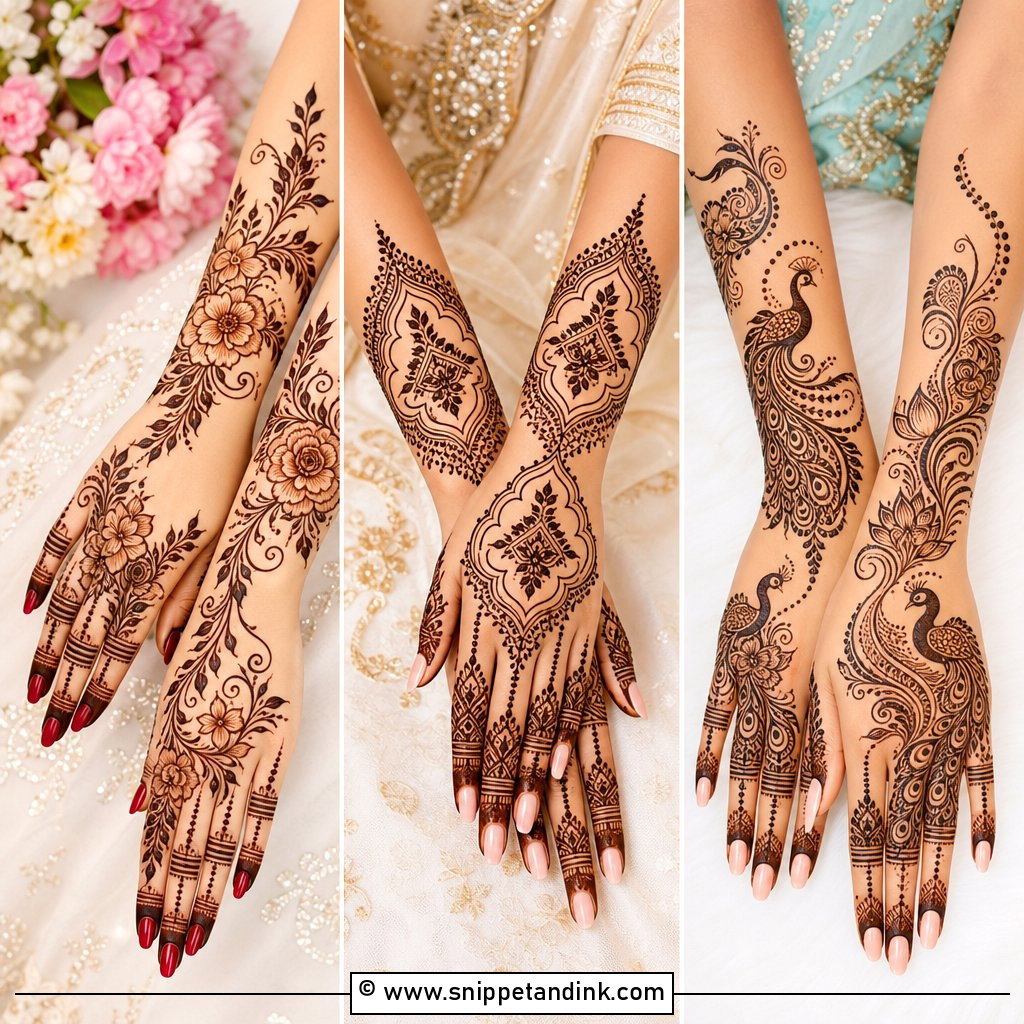
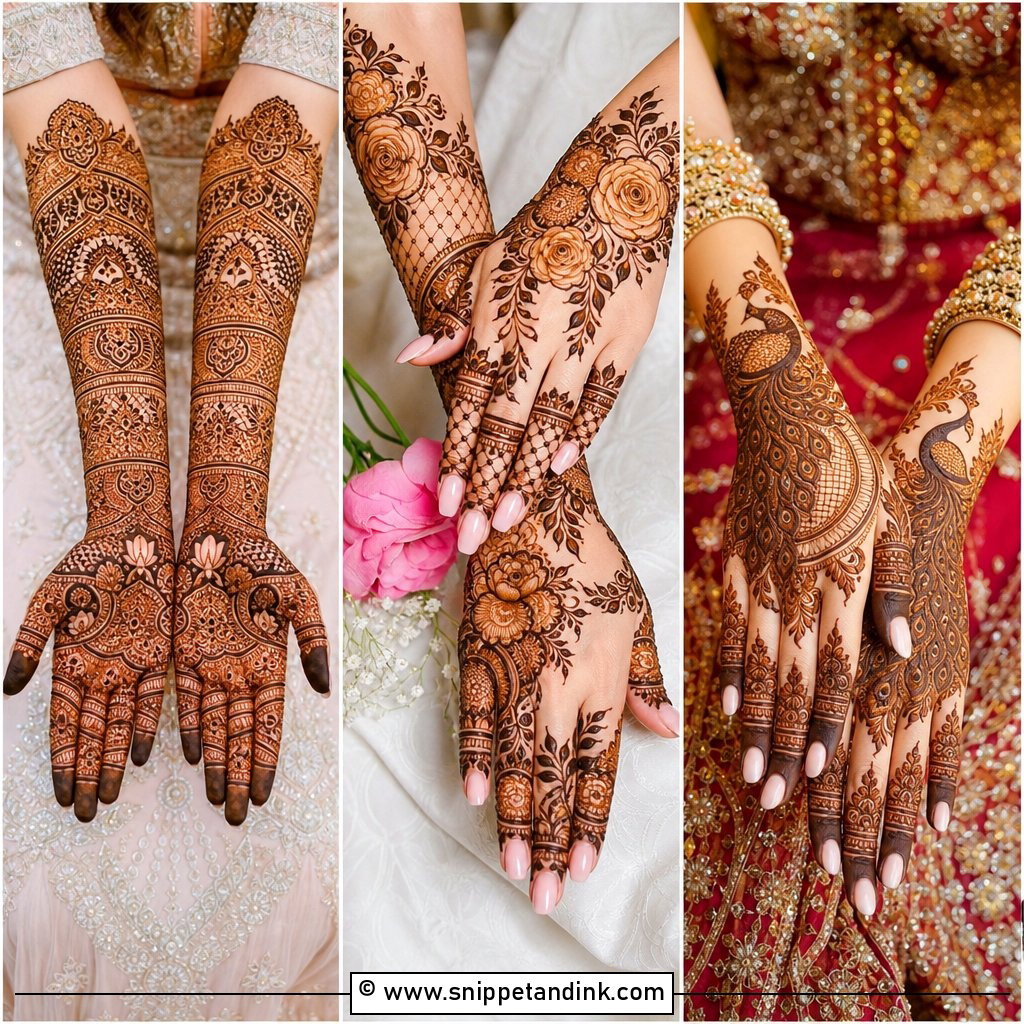
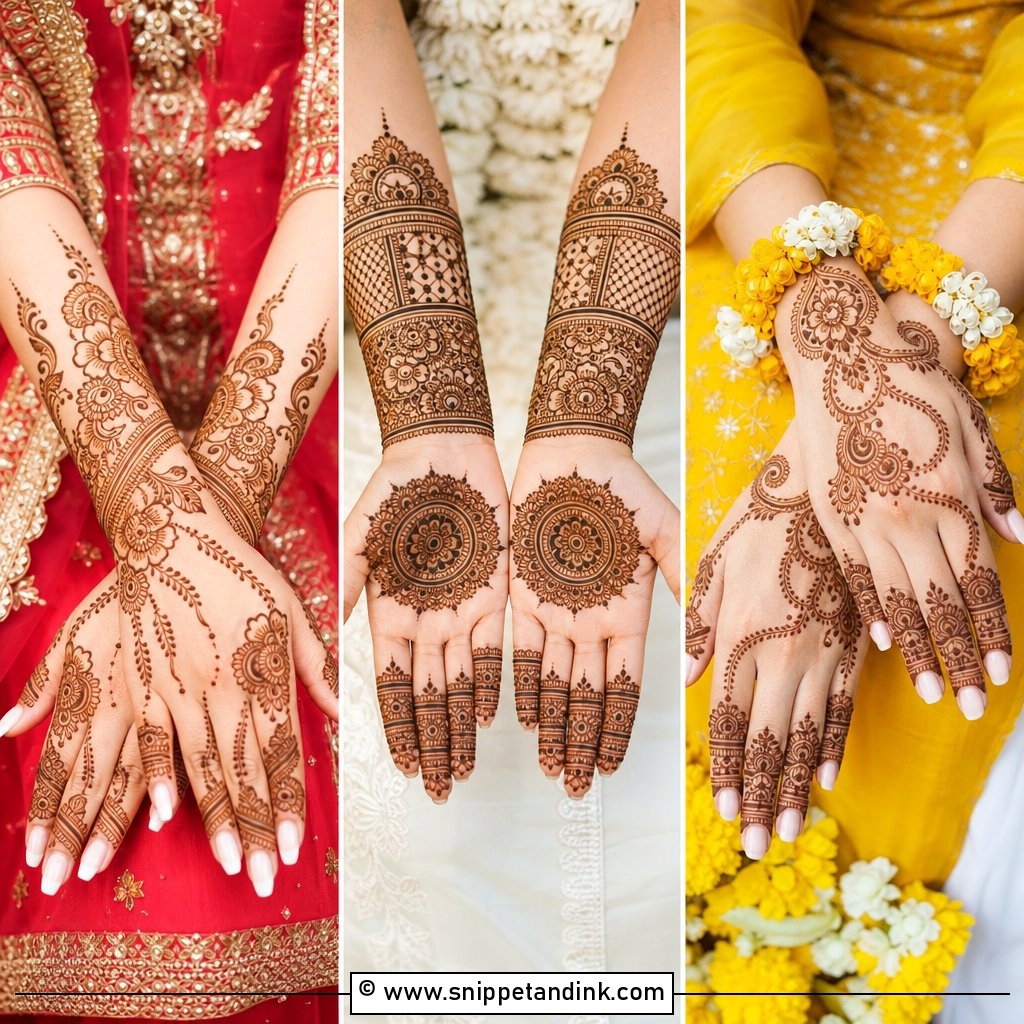
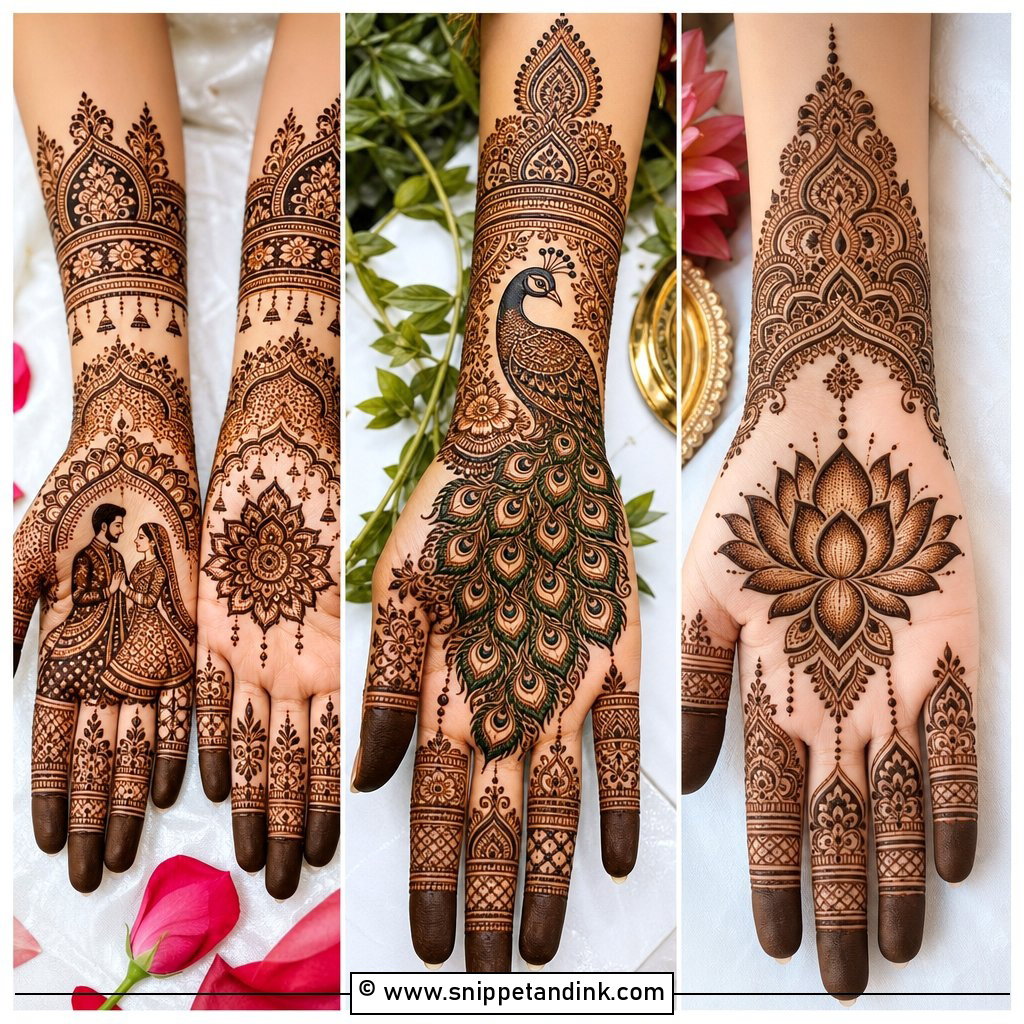
Traditional Indian bridal henna can be pared back without losing its vocabulary. I keep the paisleys, lotus flowers, a small peacock and the finger detailing, and simply drop the heavy filler between them, so a mandala or floral center sits on the palm with matching bands at the wrist and forearm. Families who expect classic elements usually accept this happily once they see it drawn. Initials or the wedding date can hide inside a paisley, though I’d keep it to one personal detail so the rest stays calm.
4. Simple Back Hand Bridal Mehndi Design
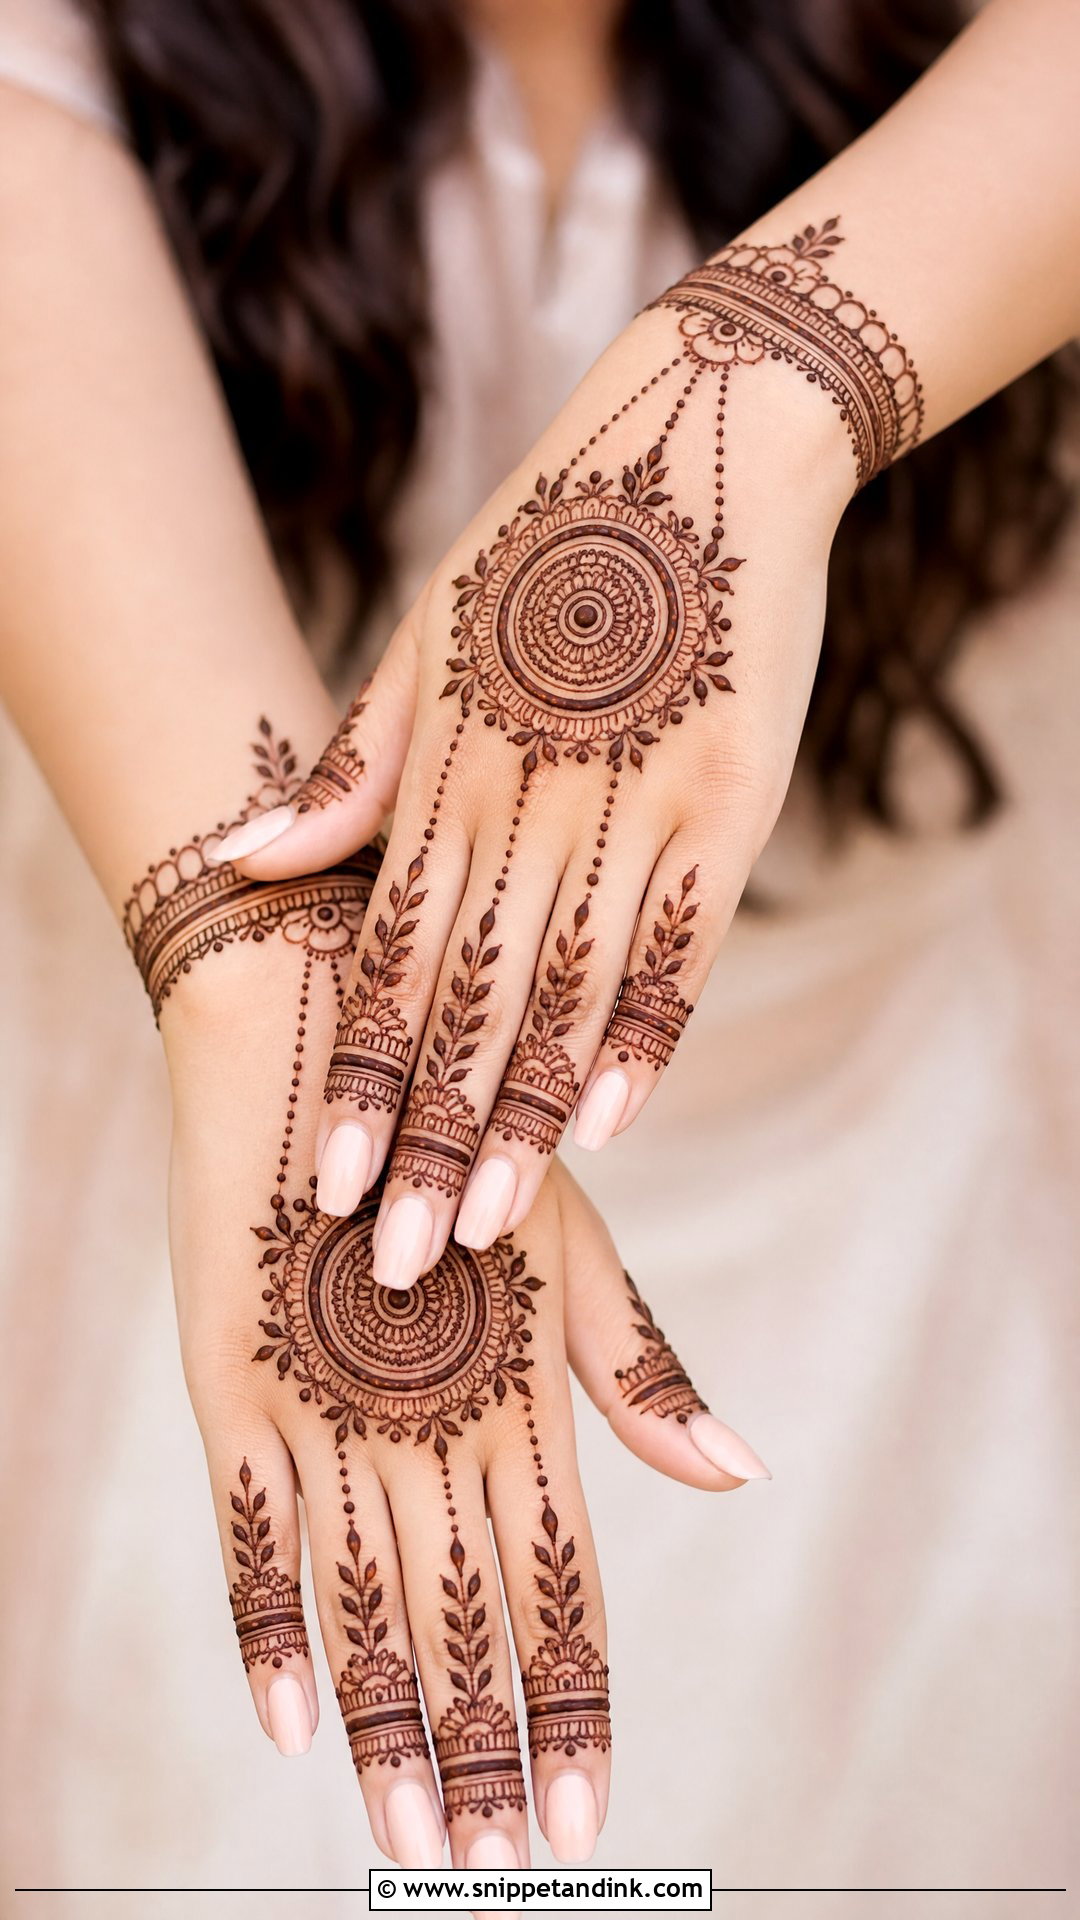
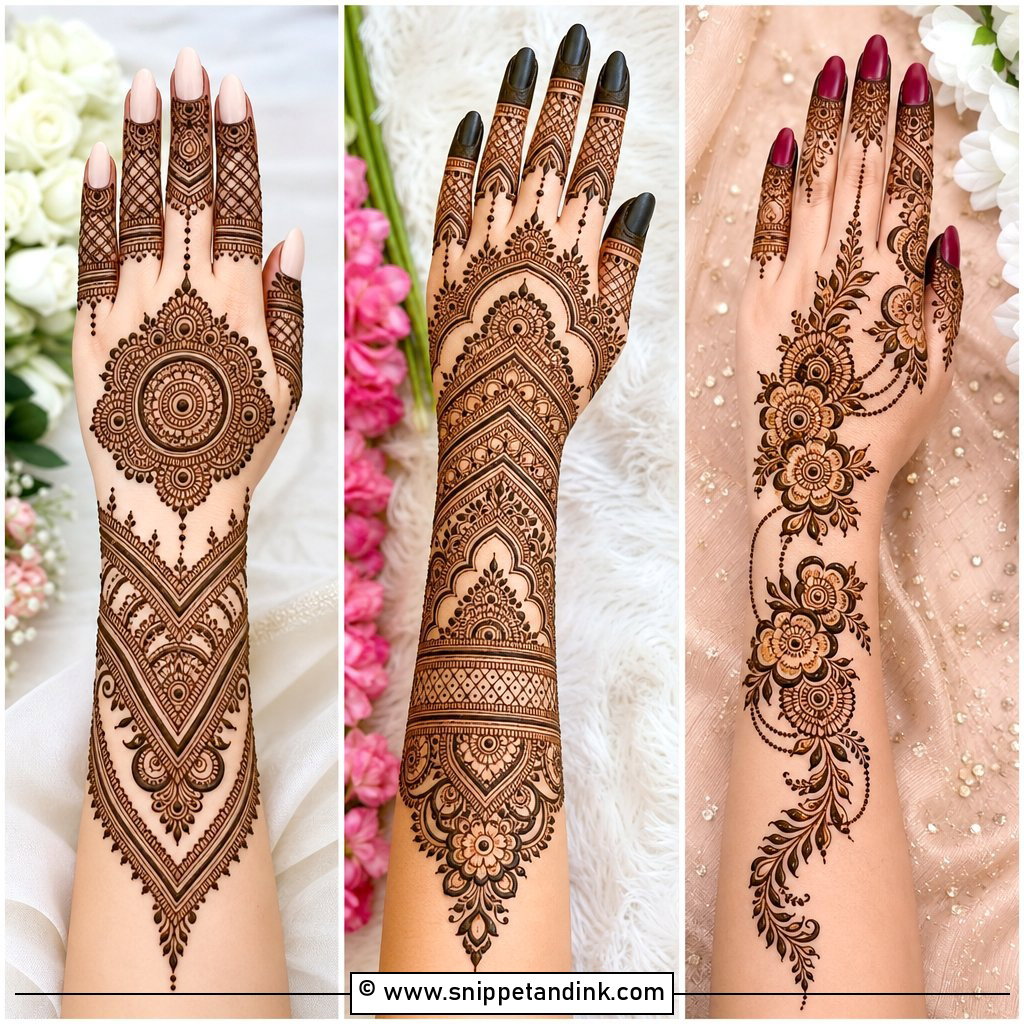
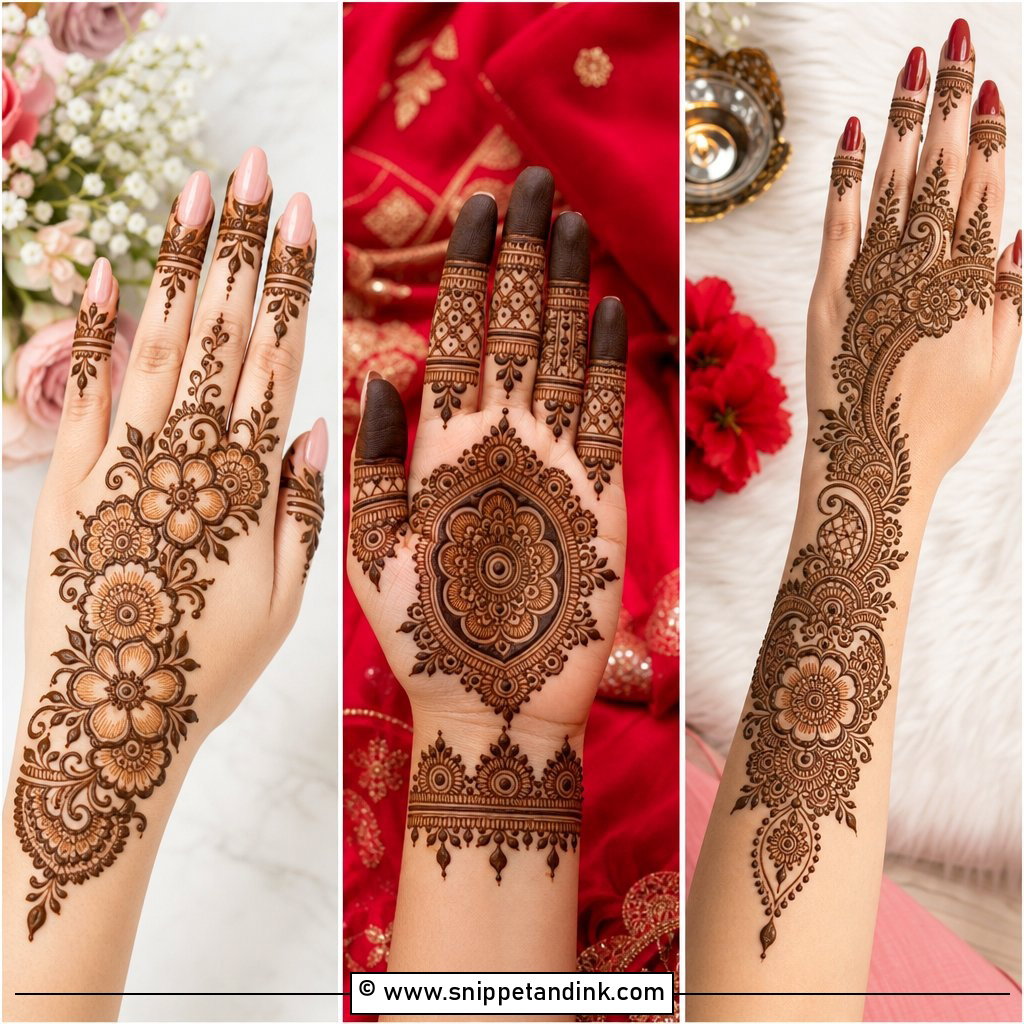
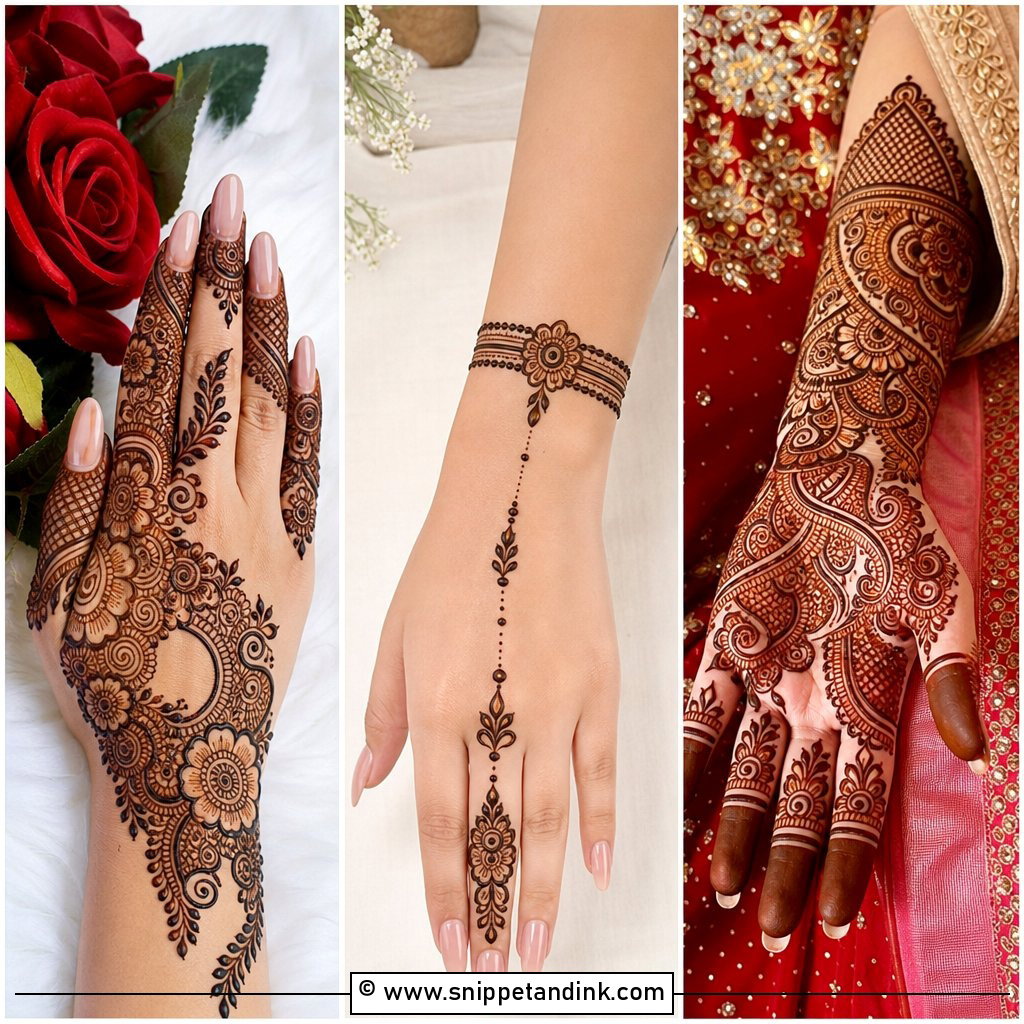
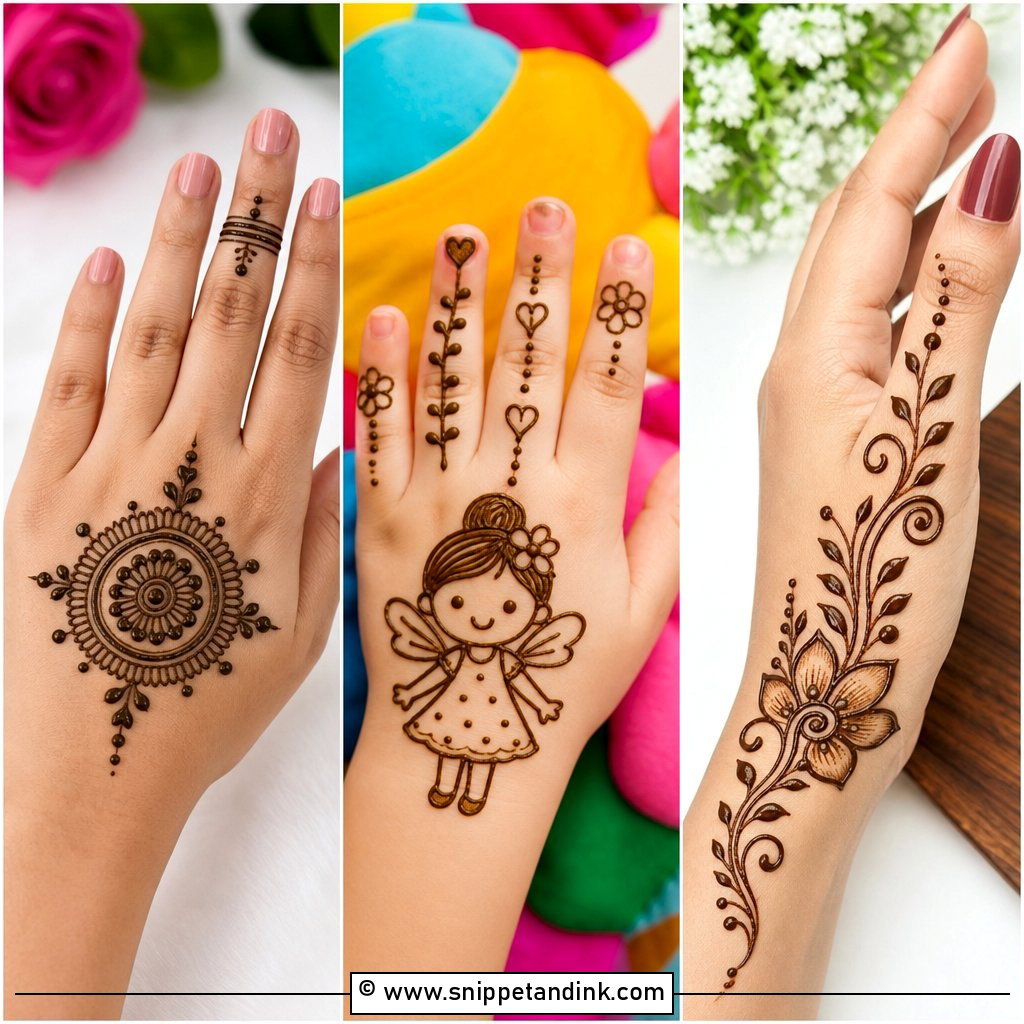
On the back of the hand, mehndi behaves like jewelry: a central mandala or floral cluster joined to the fingers by dotted chains and leafy lines. Something brides often don’t know is that the back of the hand stains lighter than the palm, because the skin there is thinner and drier, so I draw these lines a touch bolder to compensate. It shows well in ring photos and next to bangles. To make it read as bridal, I extend the wrist band slightly up the forearm and repeat the motif on the fingertips.
5. Simple Front Hand Bridal Mehndi Design
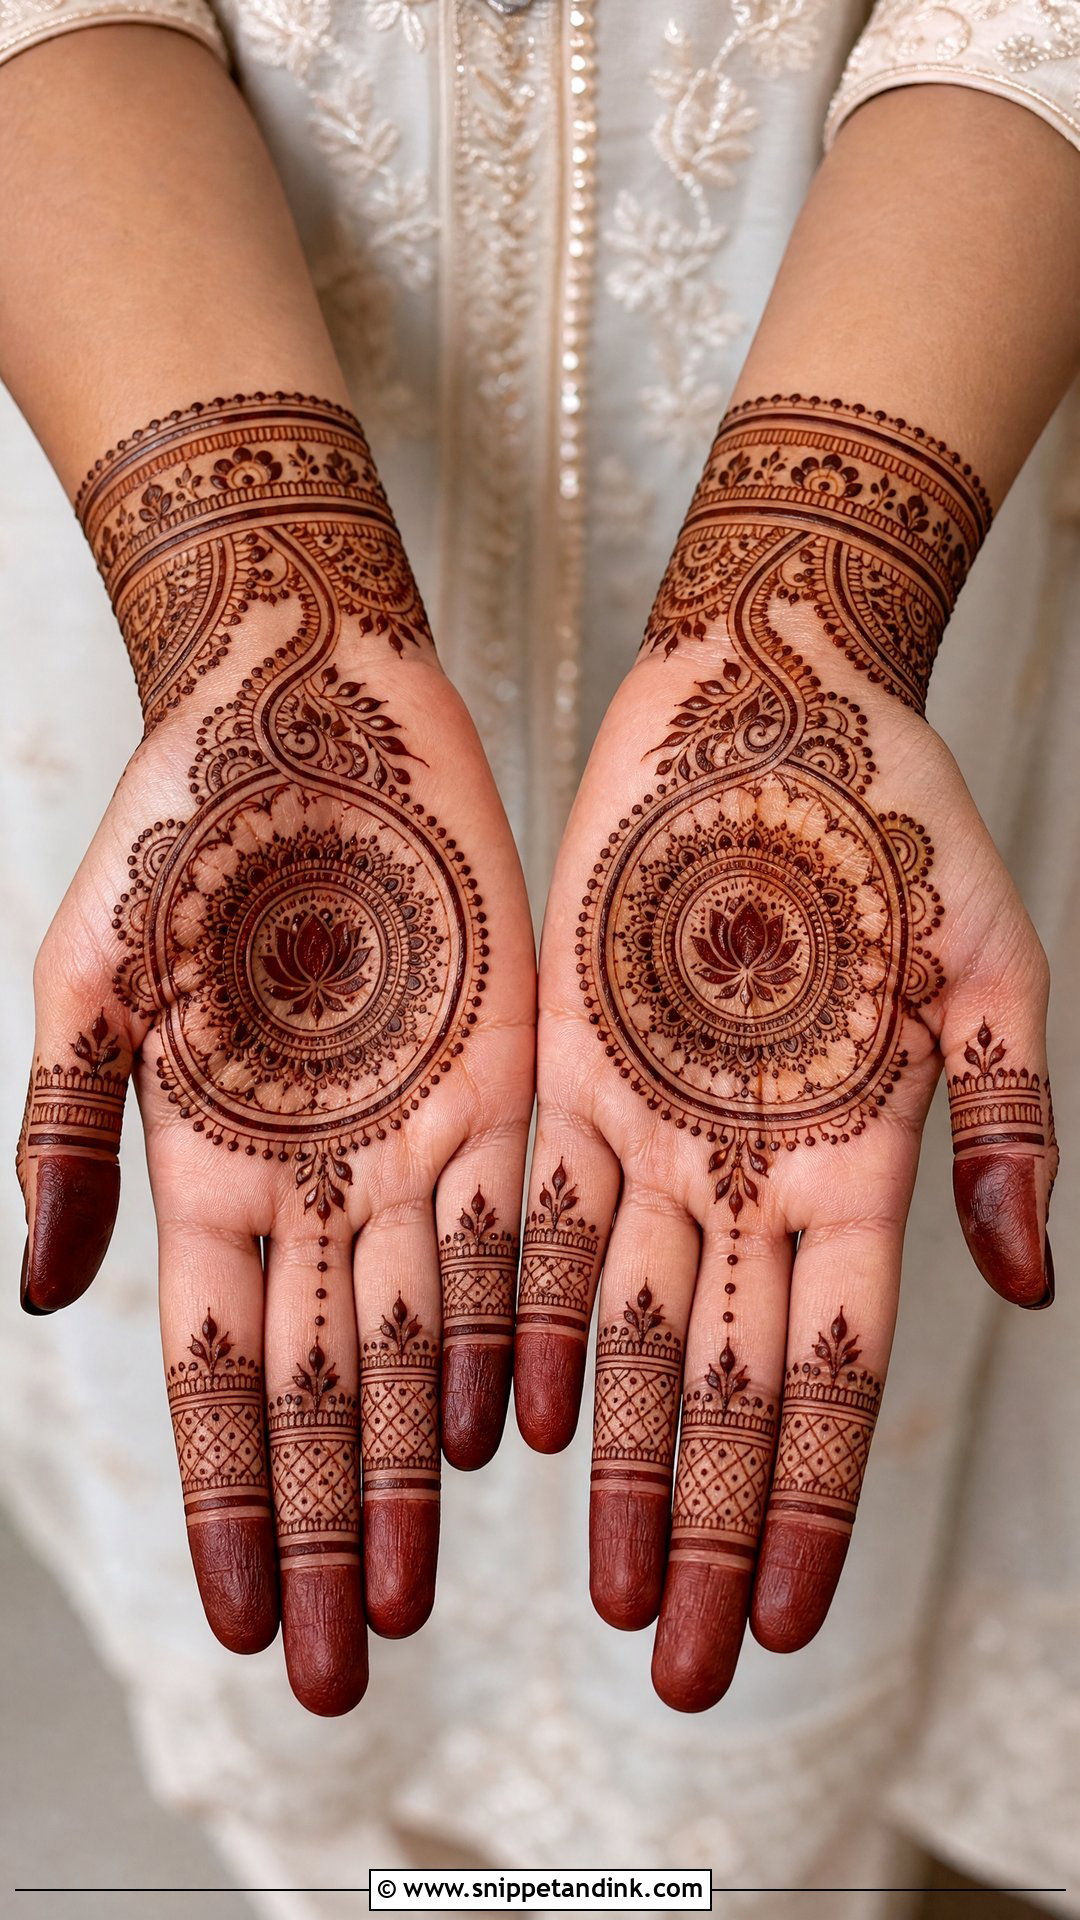
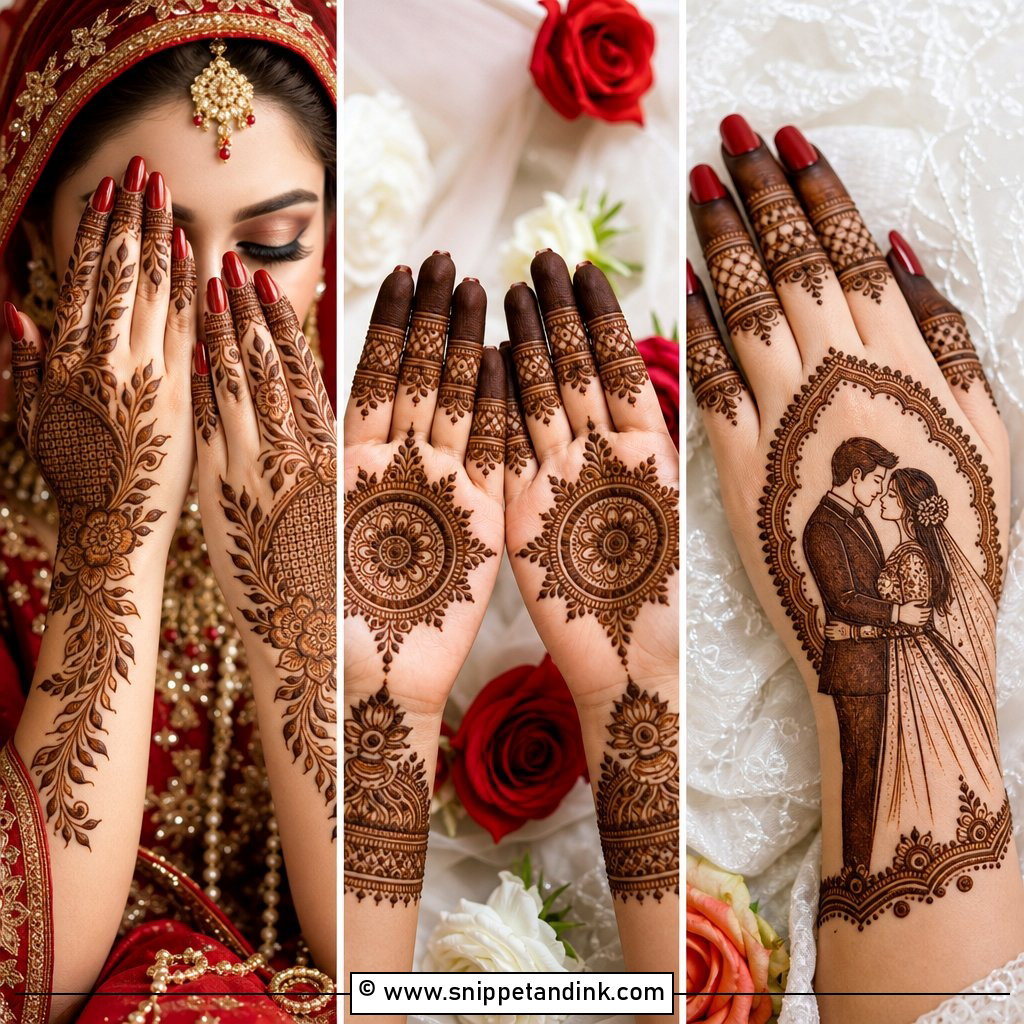
Palms take the darkest stain anywhere on the body, so front-hand designs reward clean, open motifs that stay crisp once the color comes up. I’ll put a mandala or lotus at the center, frame it with small leaves and dots, and fill the fingers halfway or with ring-like bands. Very fine fillers drawn into the palm creases tend to blur as the hand flexes, so I keep those lines out of the folds where I can. This is the side guests actually see during rituals and hand-holding photos.
6. Simple Mandala Bridal Mehndi Design
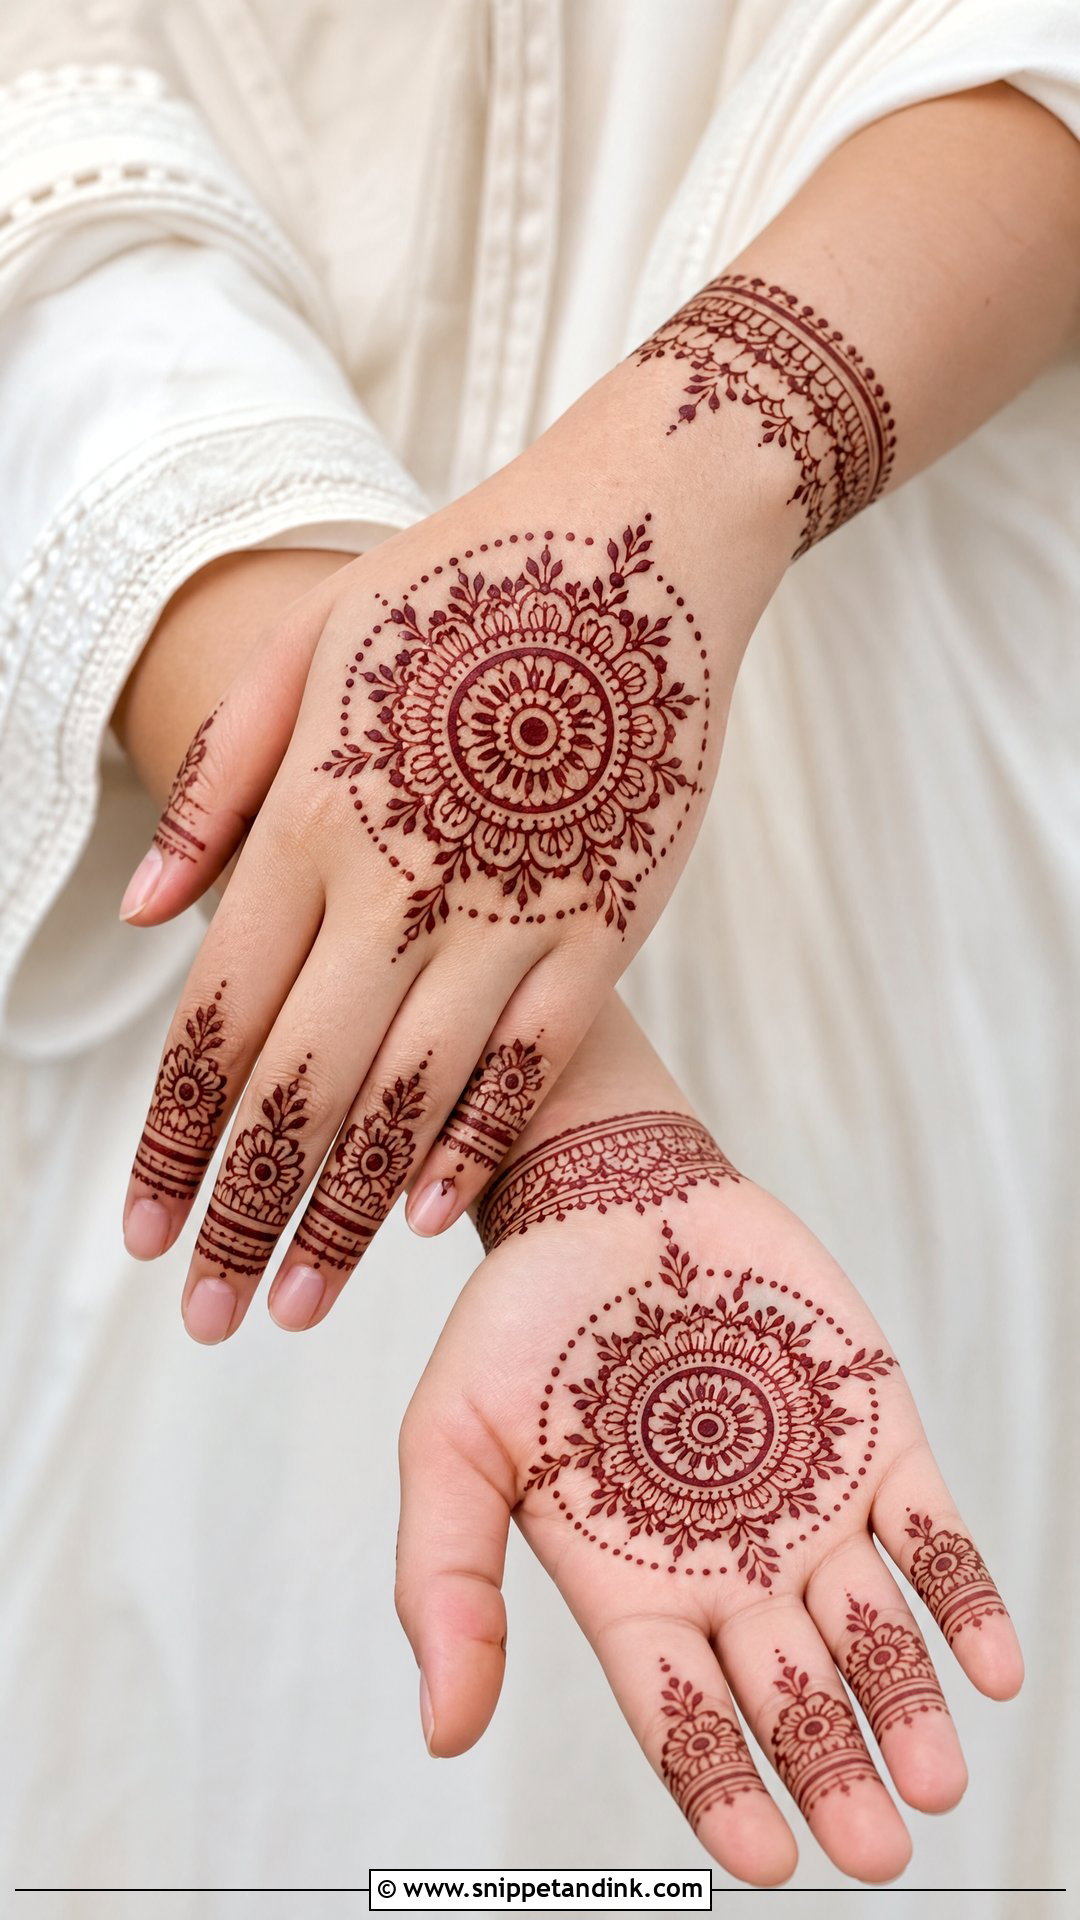
Symmetry is unforgiving. I draw a mandala from the center outward, ring by ring, and lean back to check the whole hand between rings, because a slightly oval circle is obvious once the stain darkens. Fine dots, half-circles and petal borders build it out, and the fingers stay minimal with bands or slim florals. On a narrow hand I size the mandala so it doesn’t touch the palm’s edges; otherwise it looks squeezed. A matching wrist bracelet finishes the set.
7. Simple Floral Bridal Mehndi Design
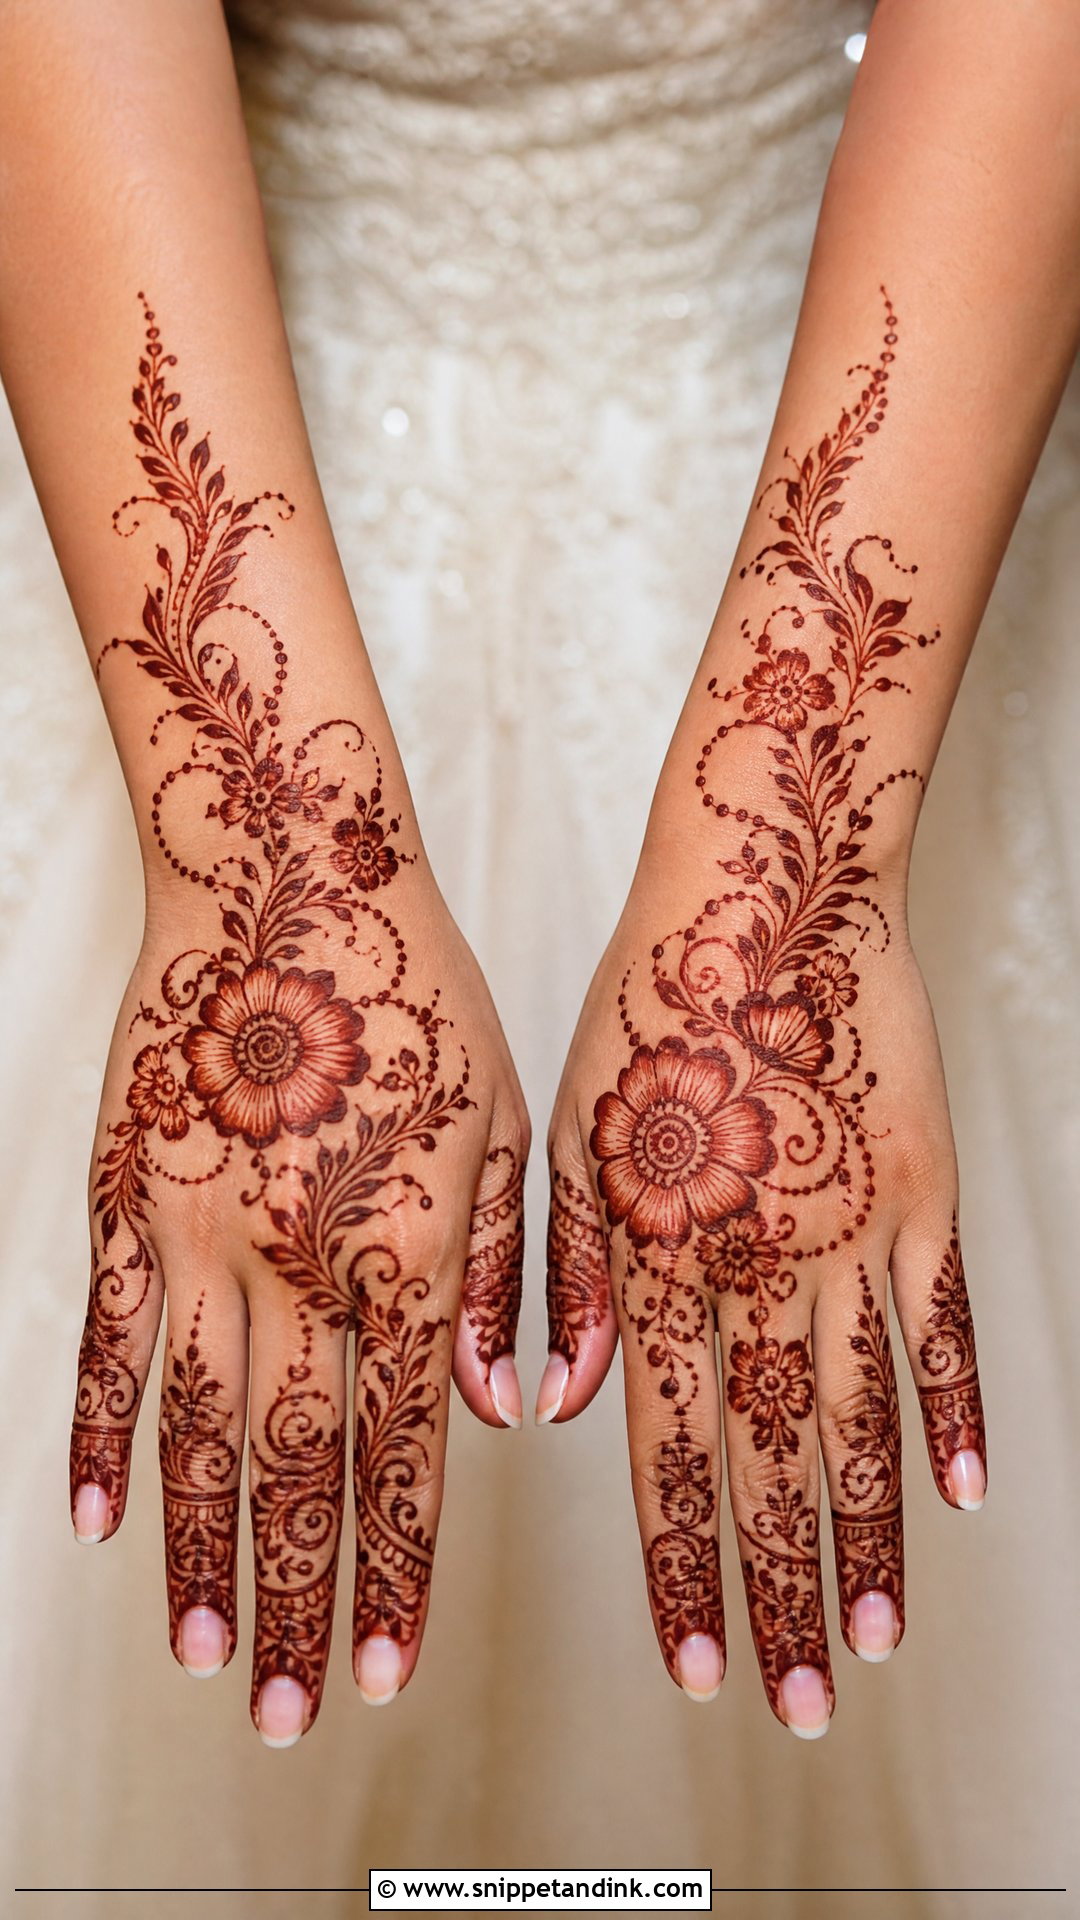
Florals are the easiest pattern to match with any outfit and the easiest to overcrowd. I place large flowers on the palm, smaller blossoms on the fingers and leafy vines running toward the wrist, then leave deliberate skin between petals and vines. Petals drawn too close merge into a solid patch as the stain develops over the next two days. The same approach works in Indian and Arabic layouts.
8. Simple Paisley Bridal Mehndi Design
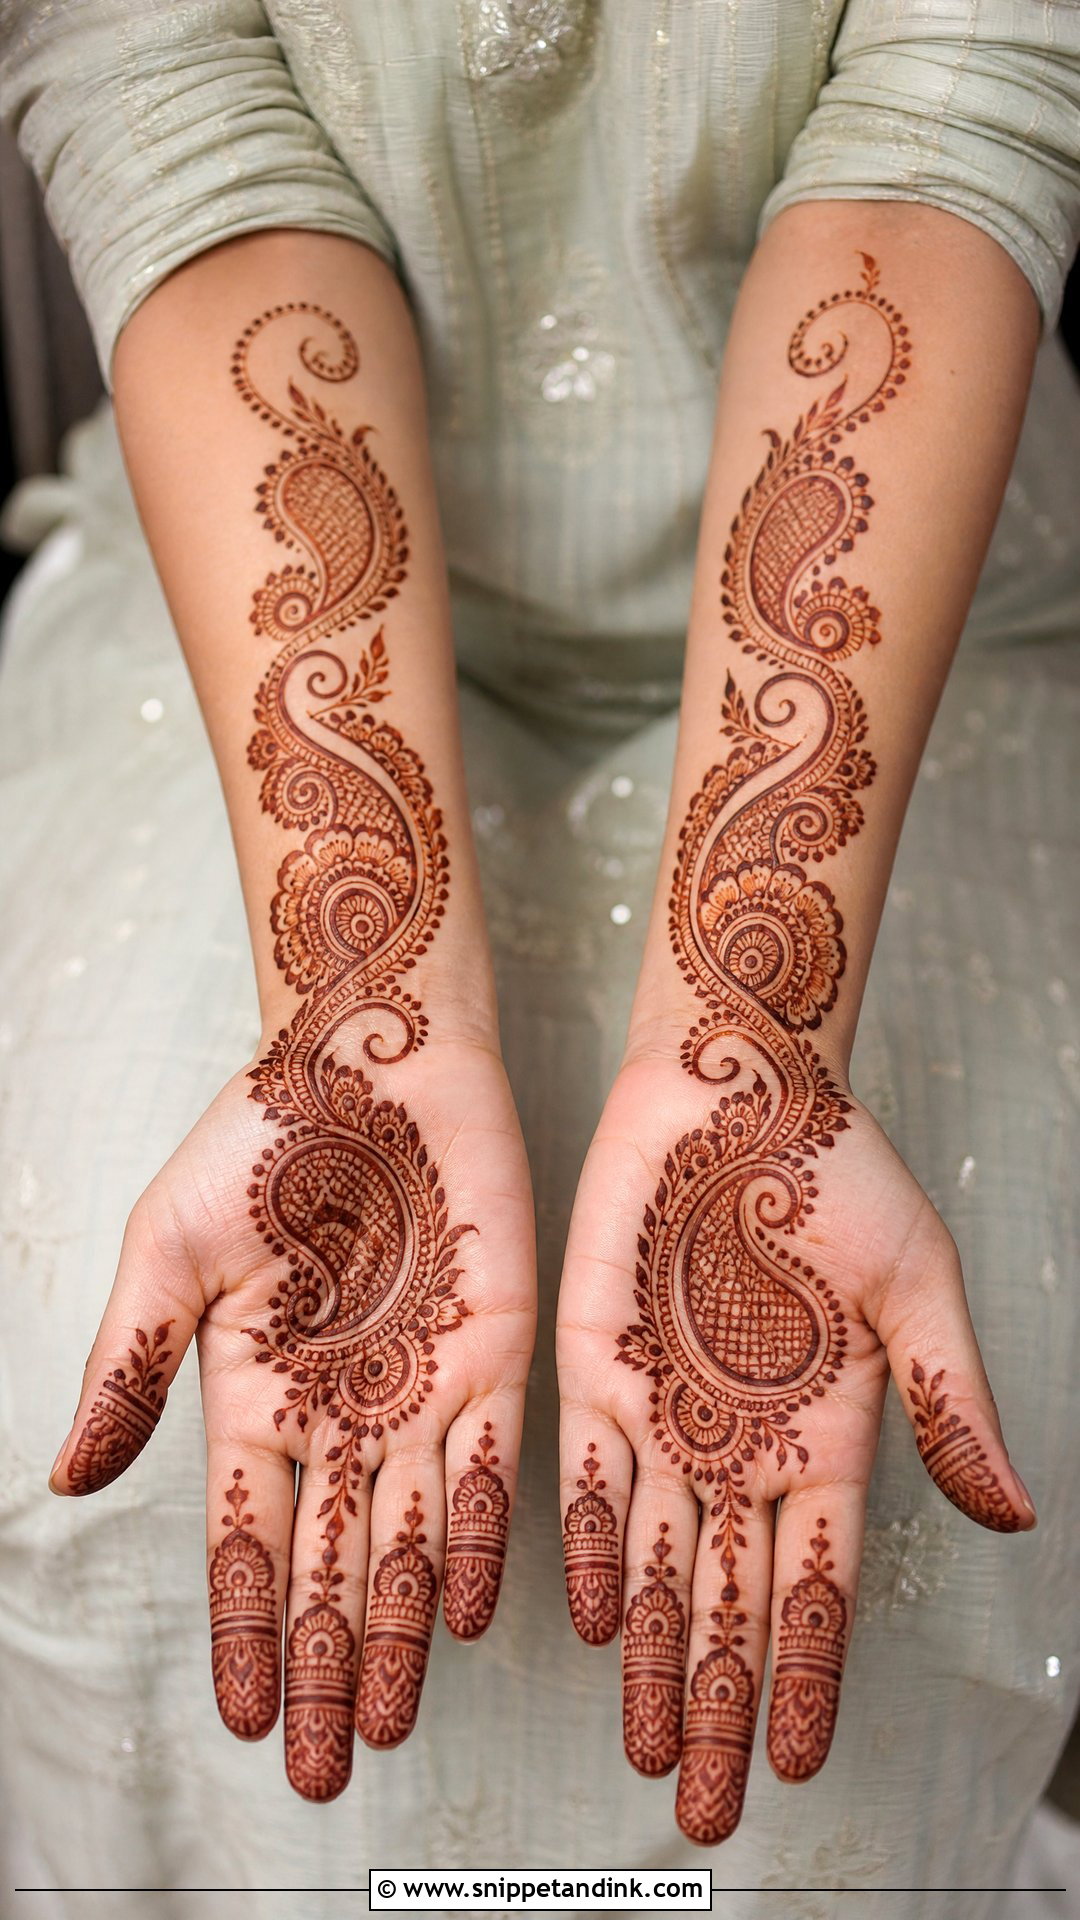
The paisley is the most adaptable shape I draw. Stretch it and it lengthens a short hand; round it out and it fills a wide one. I usually set one larger paisley as the centerpiece and repeat smaller ones along the wrist or in a curve across the back hand, with small flowers, dots and a little light shading between them. It keeps a traditional feel without every inch of skin filled.
9. Simple Bridal Mehndi Design With Rose
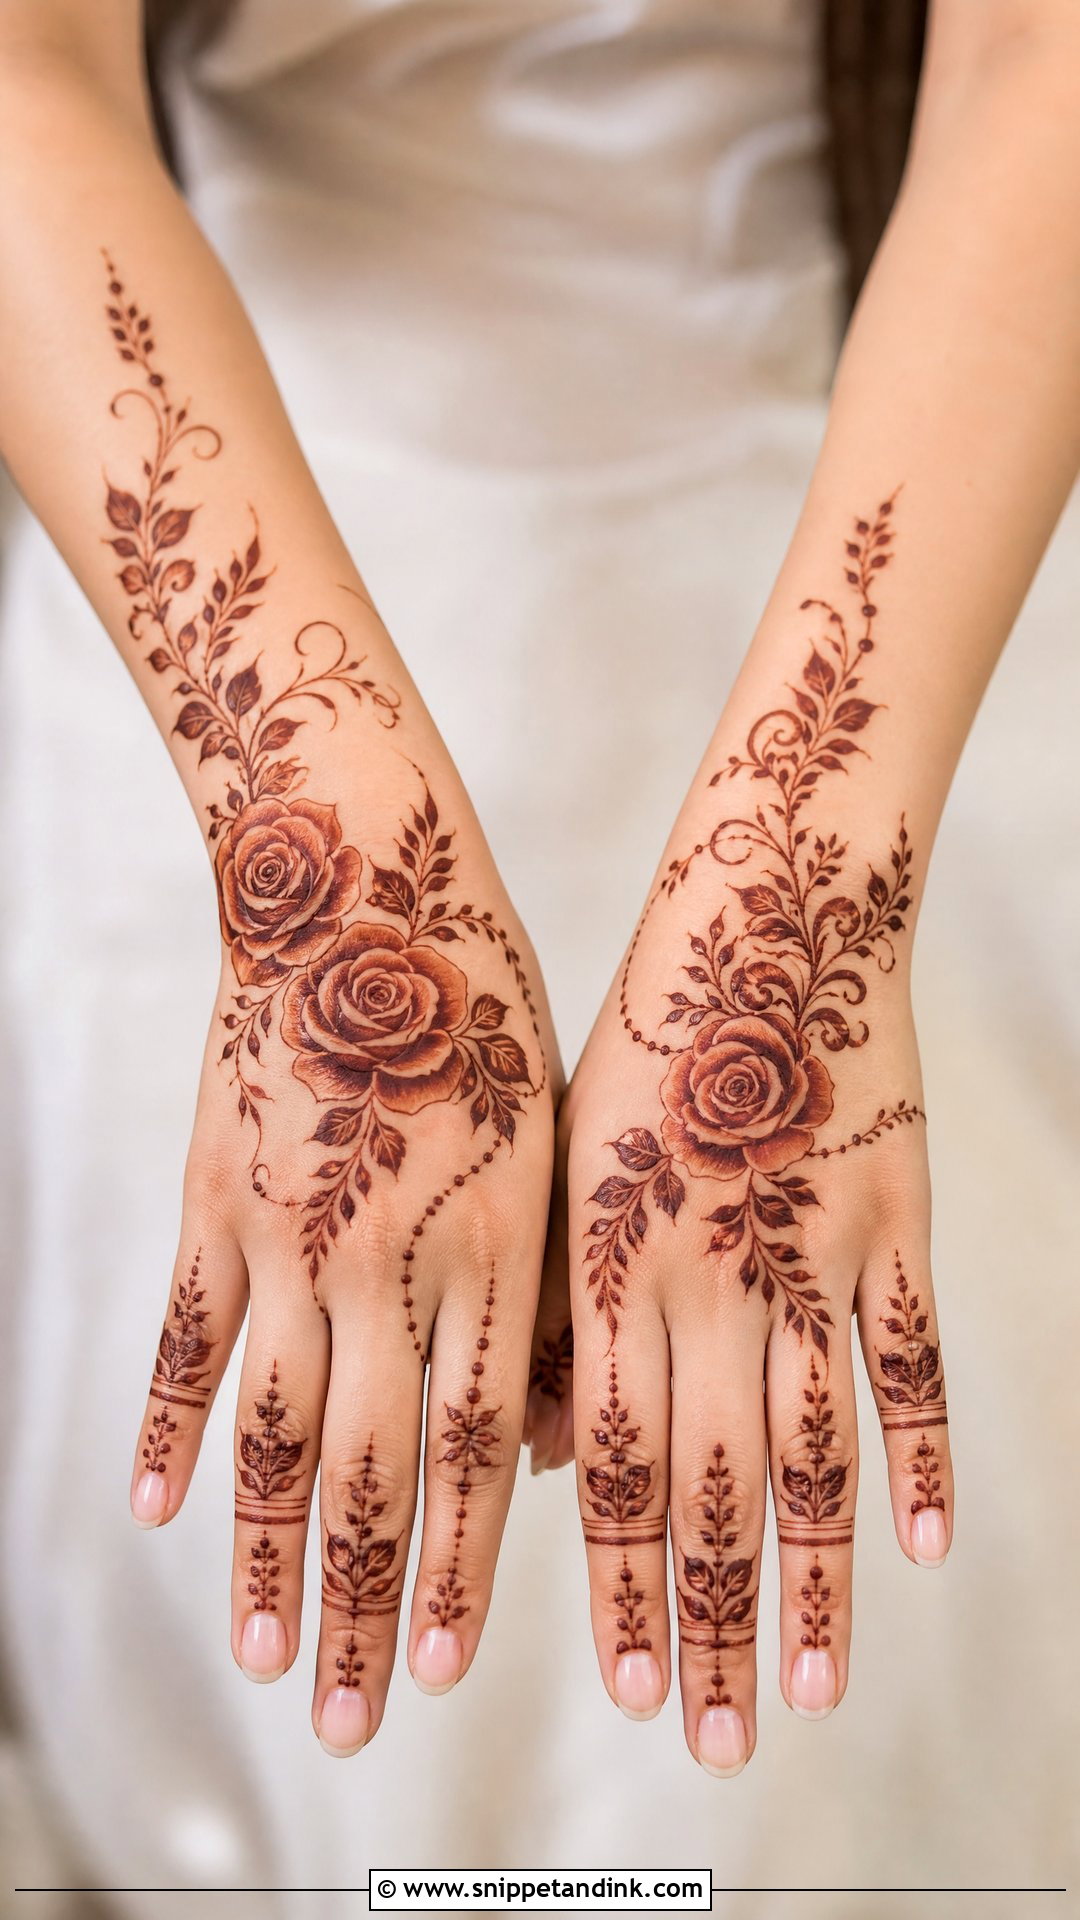
Roses read as modern because they’re drawn as open blooms rather than stylized motifs. The petals are the risk: if they overlap or sit too close, they fuse once the stain darkens and the rose loses its shape. I leave a hairline gap between each petal and connect the blooms to the fingers with thin vines. Pastel outfits and contemporary jewelry suit it, and a few small curls and finger bands complete the hand without weighing it down.
10. Simple Bridal Mehndi Design With Lotus
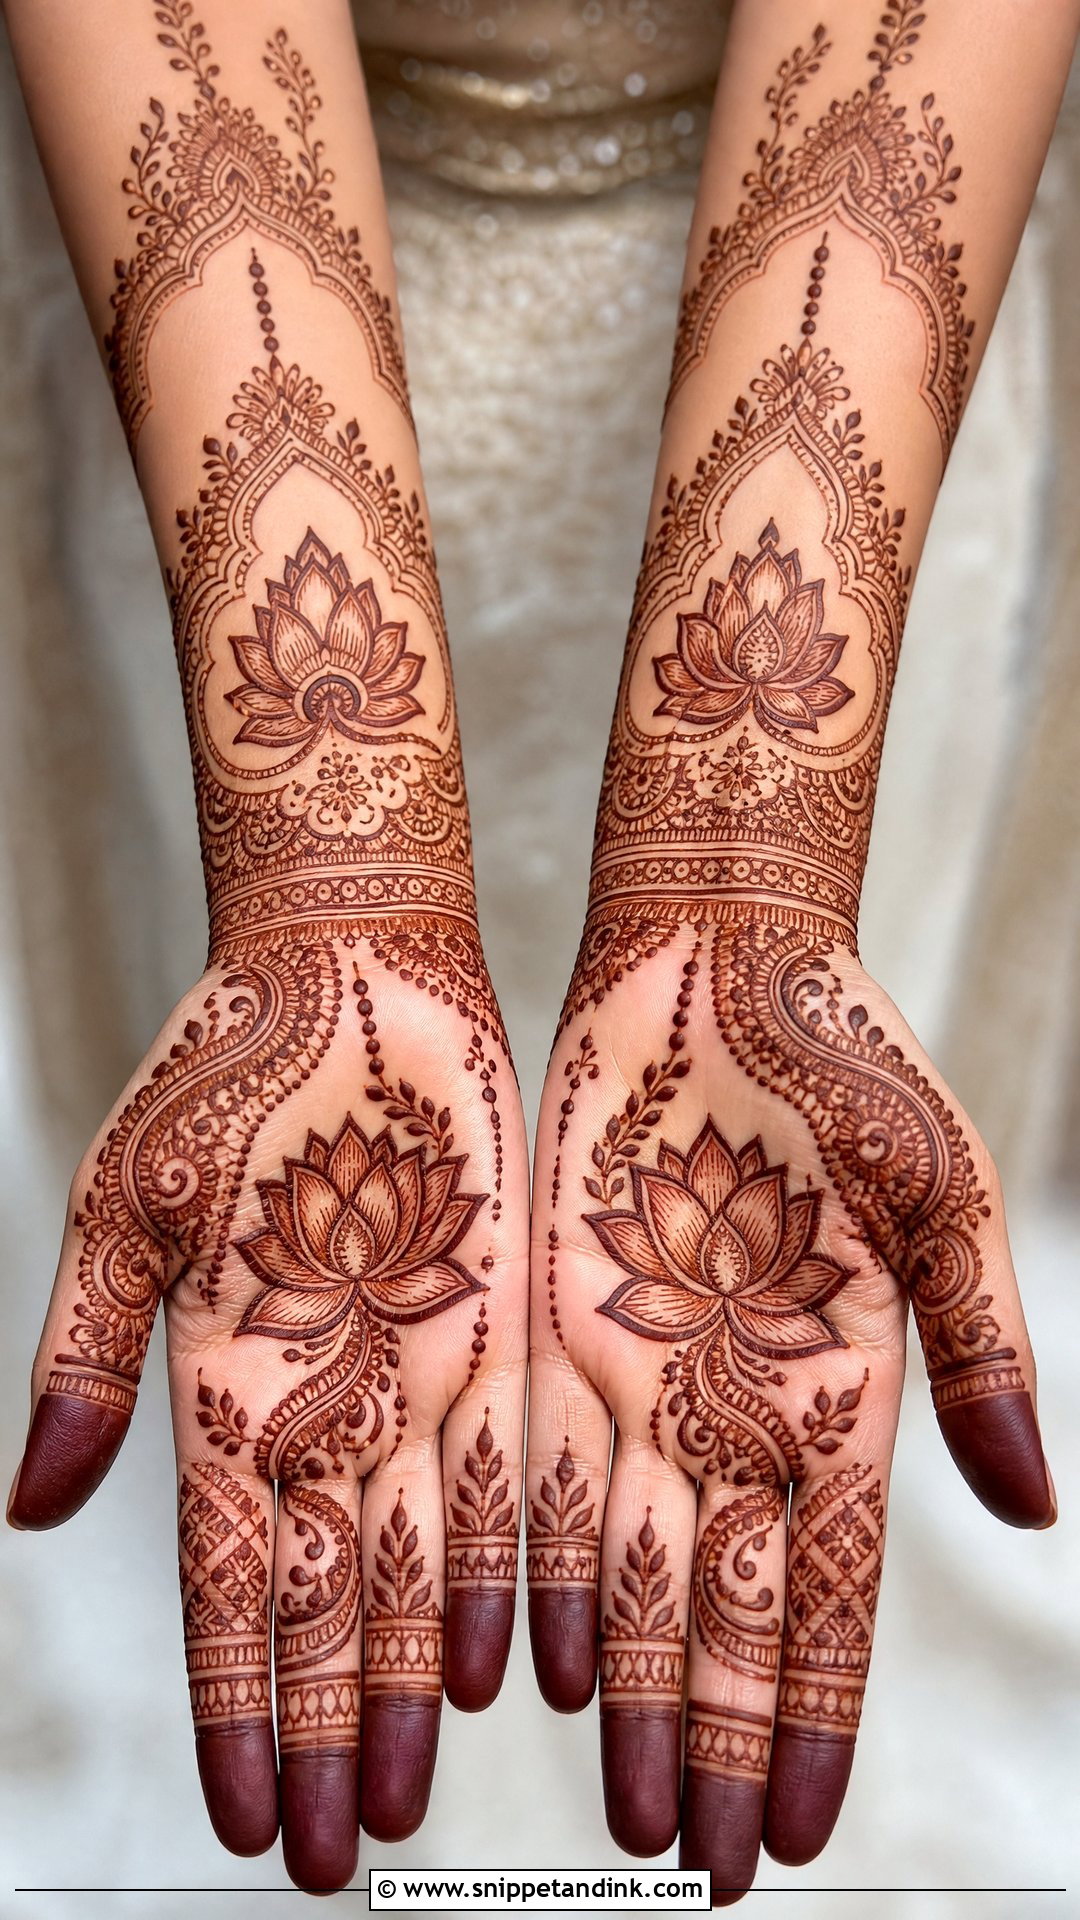
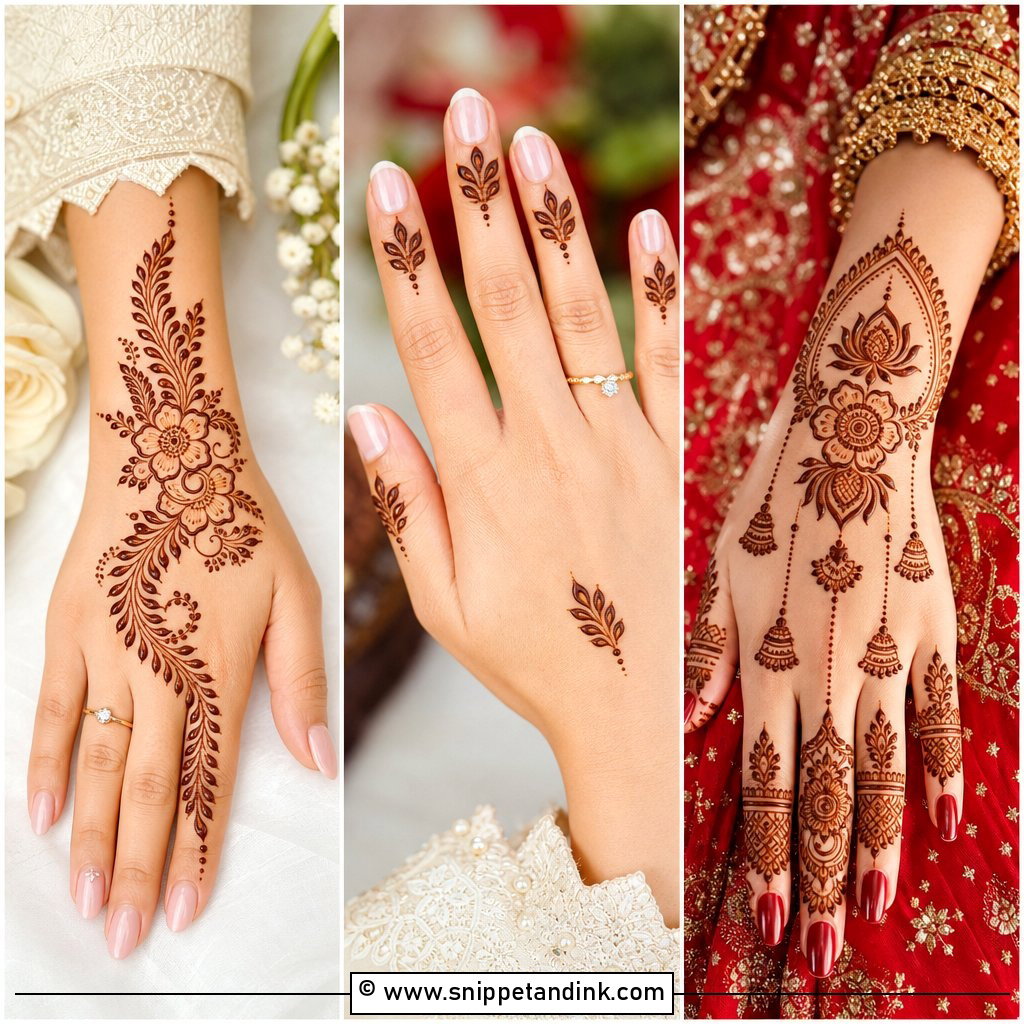
Layered petals give a lot of visual detail for very little paste, which is why the lotus is so useful in a lighter bridal design. I put it at the palm center, the wrist or inside a forearm band and keep everything around it thin: fine vines, dotted borders, a few small paisley fillers. It carries meaning in many Indian ceremonies and sits naturally beside temple-style jewelry. Keep the fingertips simple and let the lotus lead.
11. Simple Peacock Bridal Mehndi Design
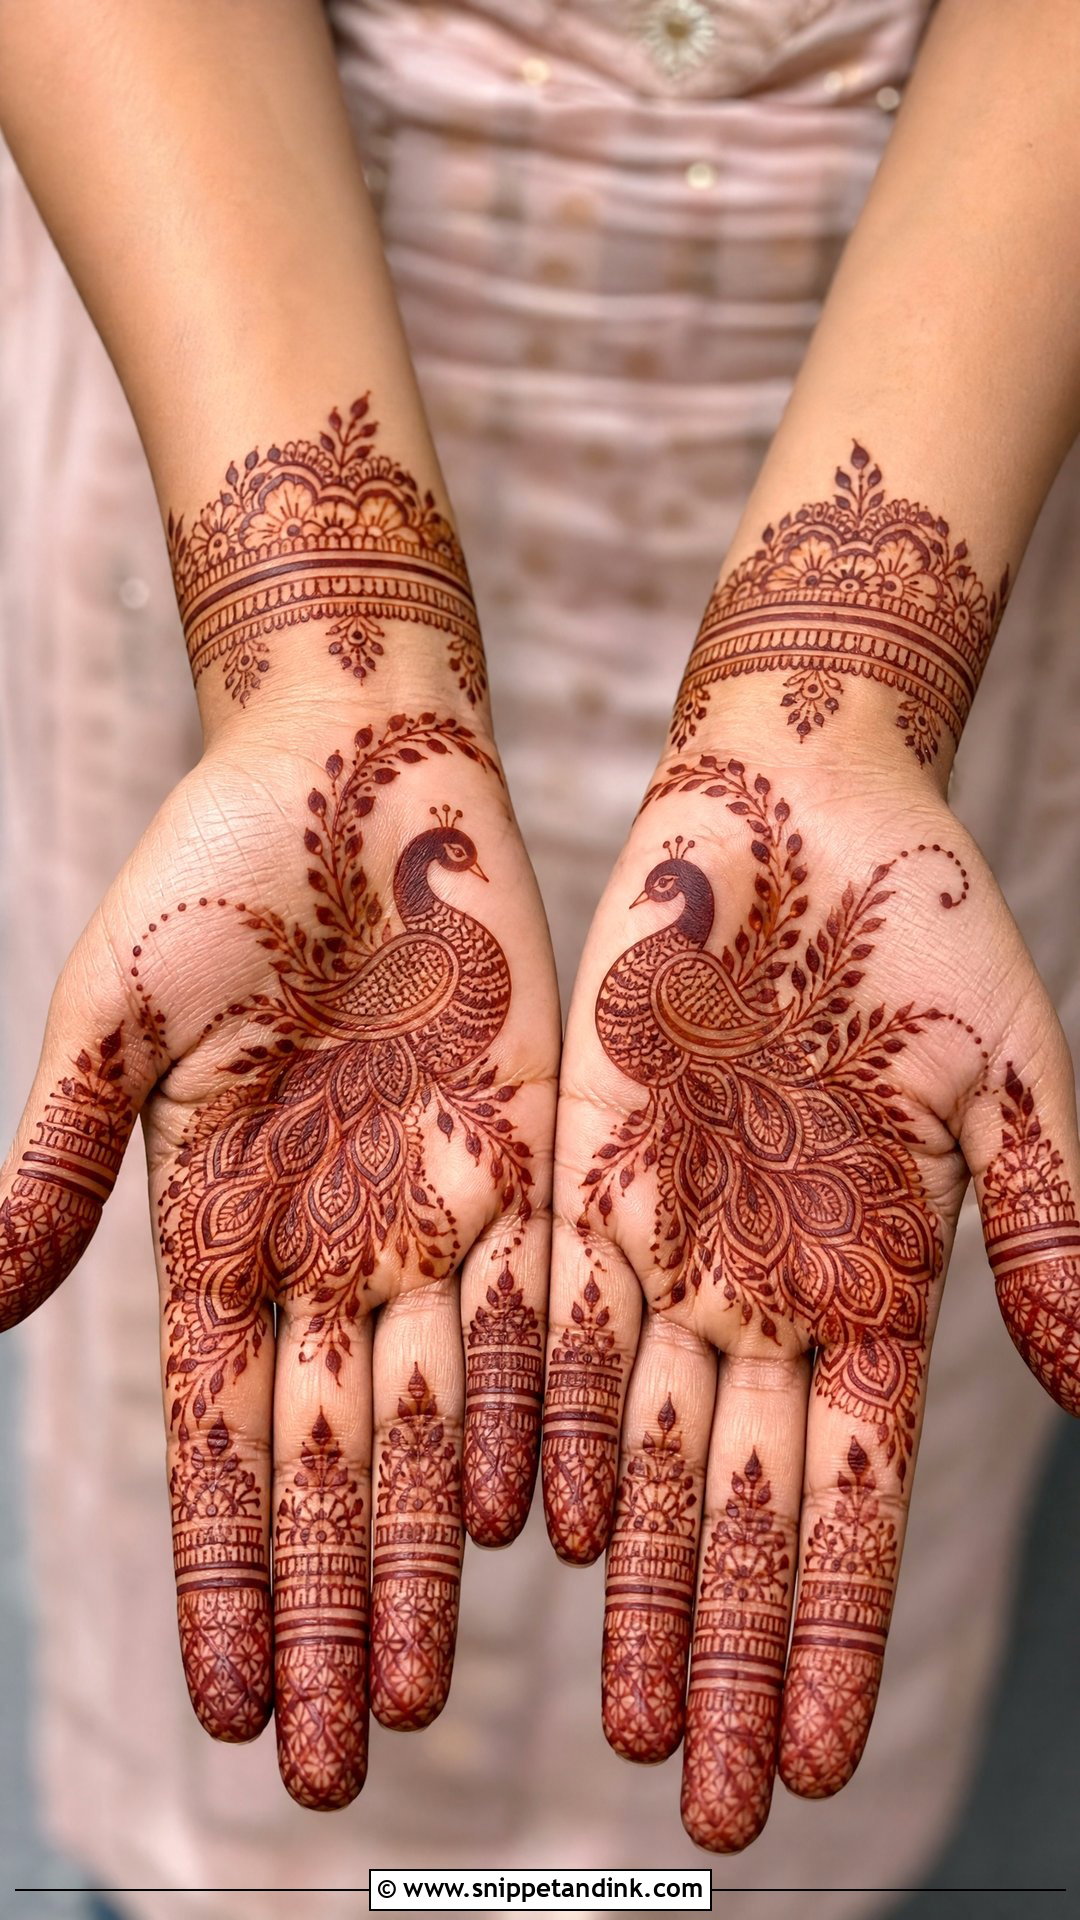
One peacock, not three. Multiple birds are what turns a peacock design dense and slow to apply. I draw a single bird on the palm, wrist or back hand with its feathers trailing into paisleys and leaves, keeping the outline bold while the feather work stays fine. That bold outline matters, because it’s the part still sharp when finer lines soften slightly over the following days. Colorful outfits and gold jewelry suit it well.
12. Simple Jaali Bridal Mehndi Design
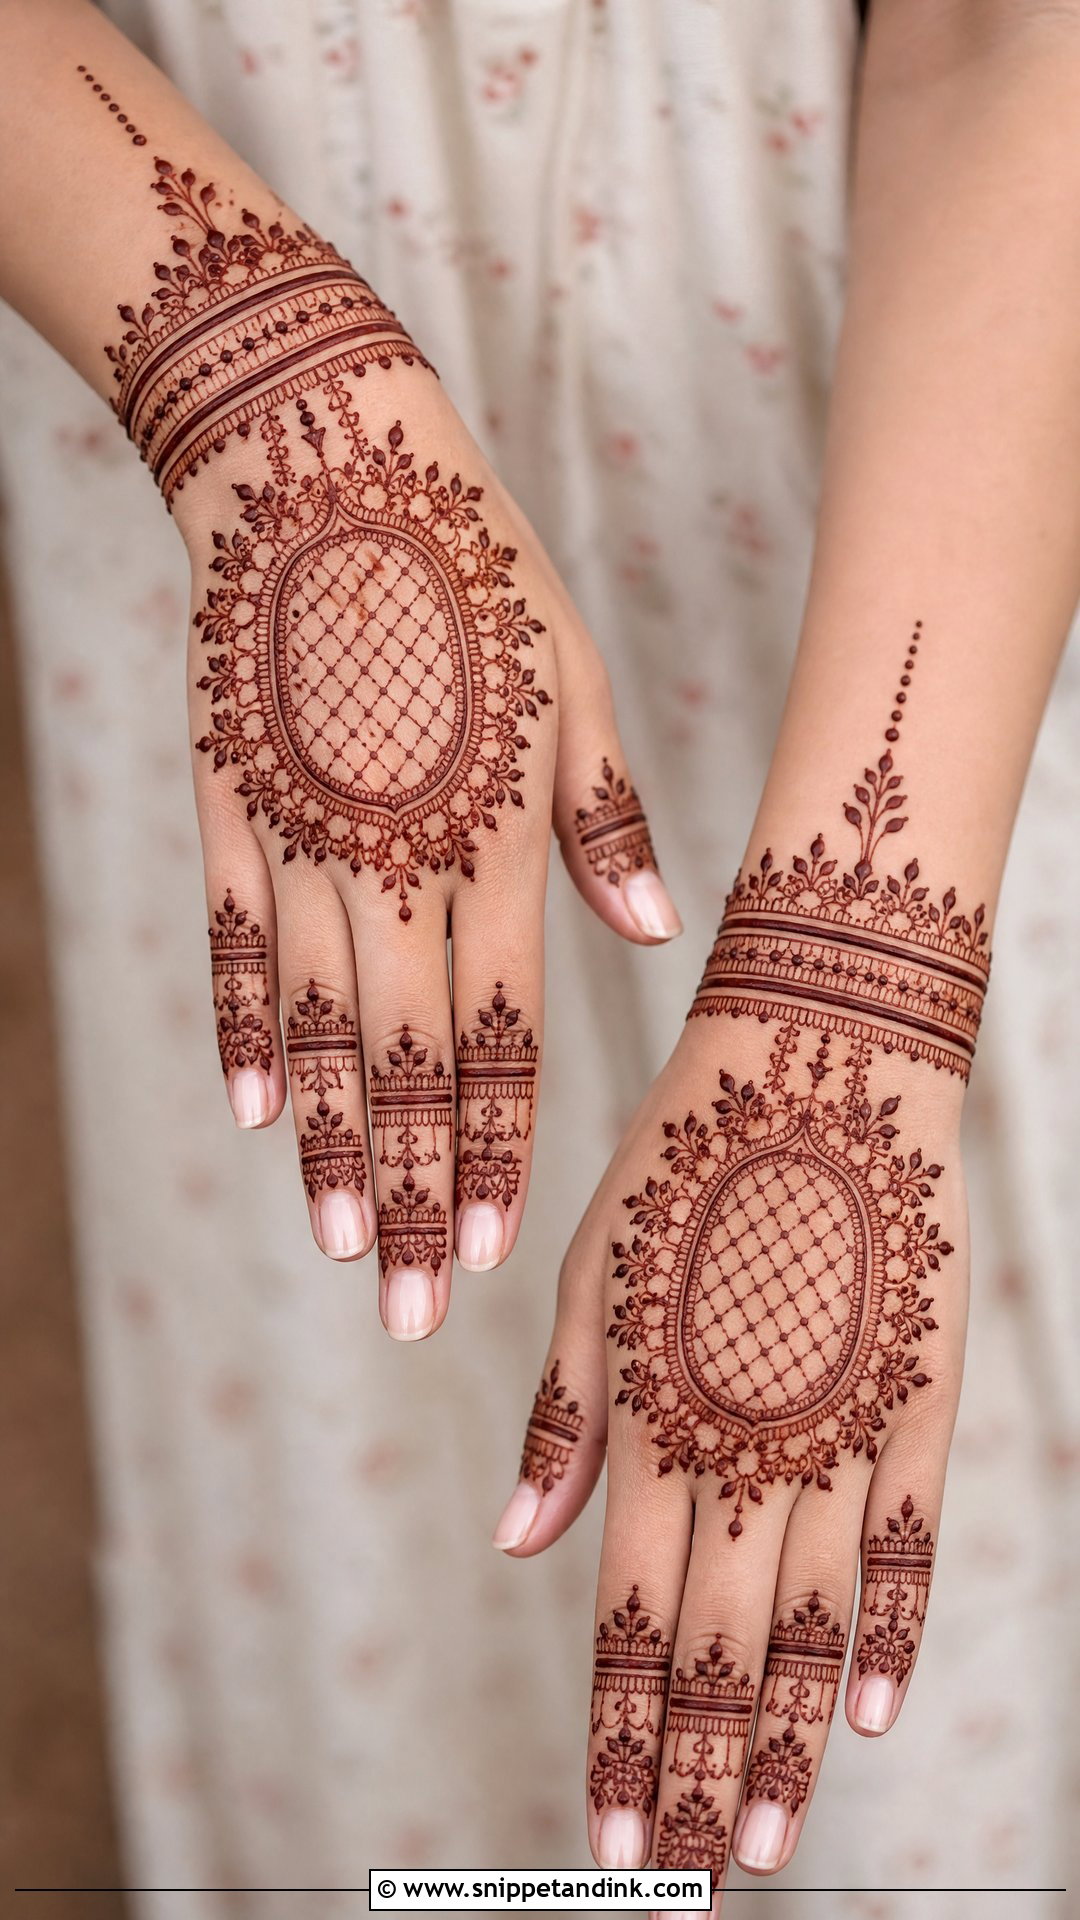
Jaali is a net of crossing lines, and everything depends on even spacing. Freehand grids tend to drift wider toward the edge of the hand, so I mark the outer lines first and work inward. Used on the fingers, wrist or palm corners and bordered with a flower or paisley, it gives a lace-like texture without a packed hand. Keep the cells generous. Very tight jaali can fill in and look like solid color once the paste softens in warm weather.
13. Simple Finger Bridal Mehndi Design
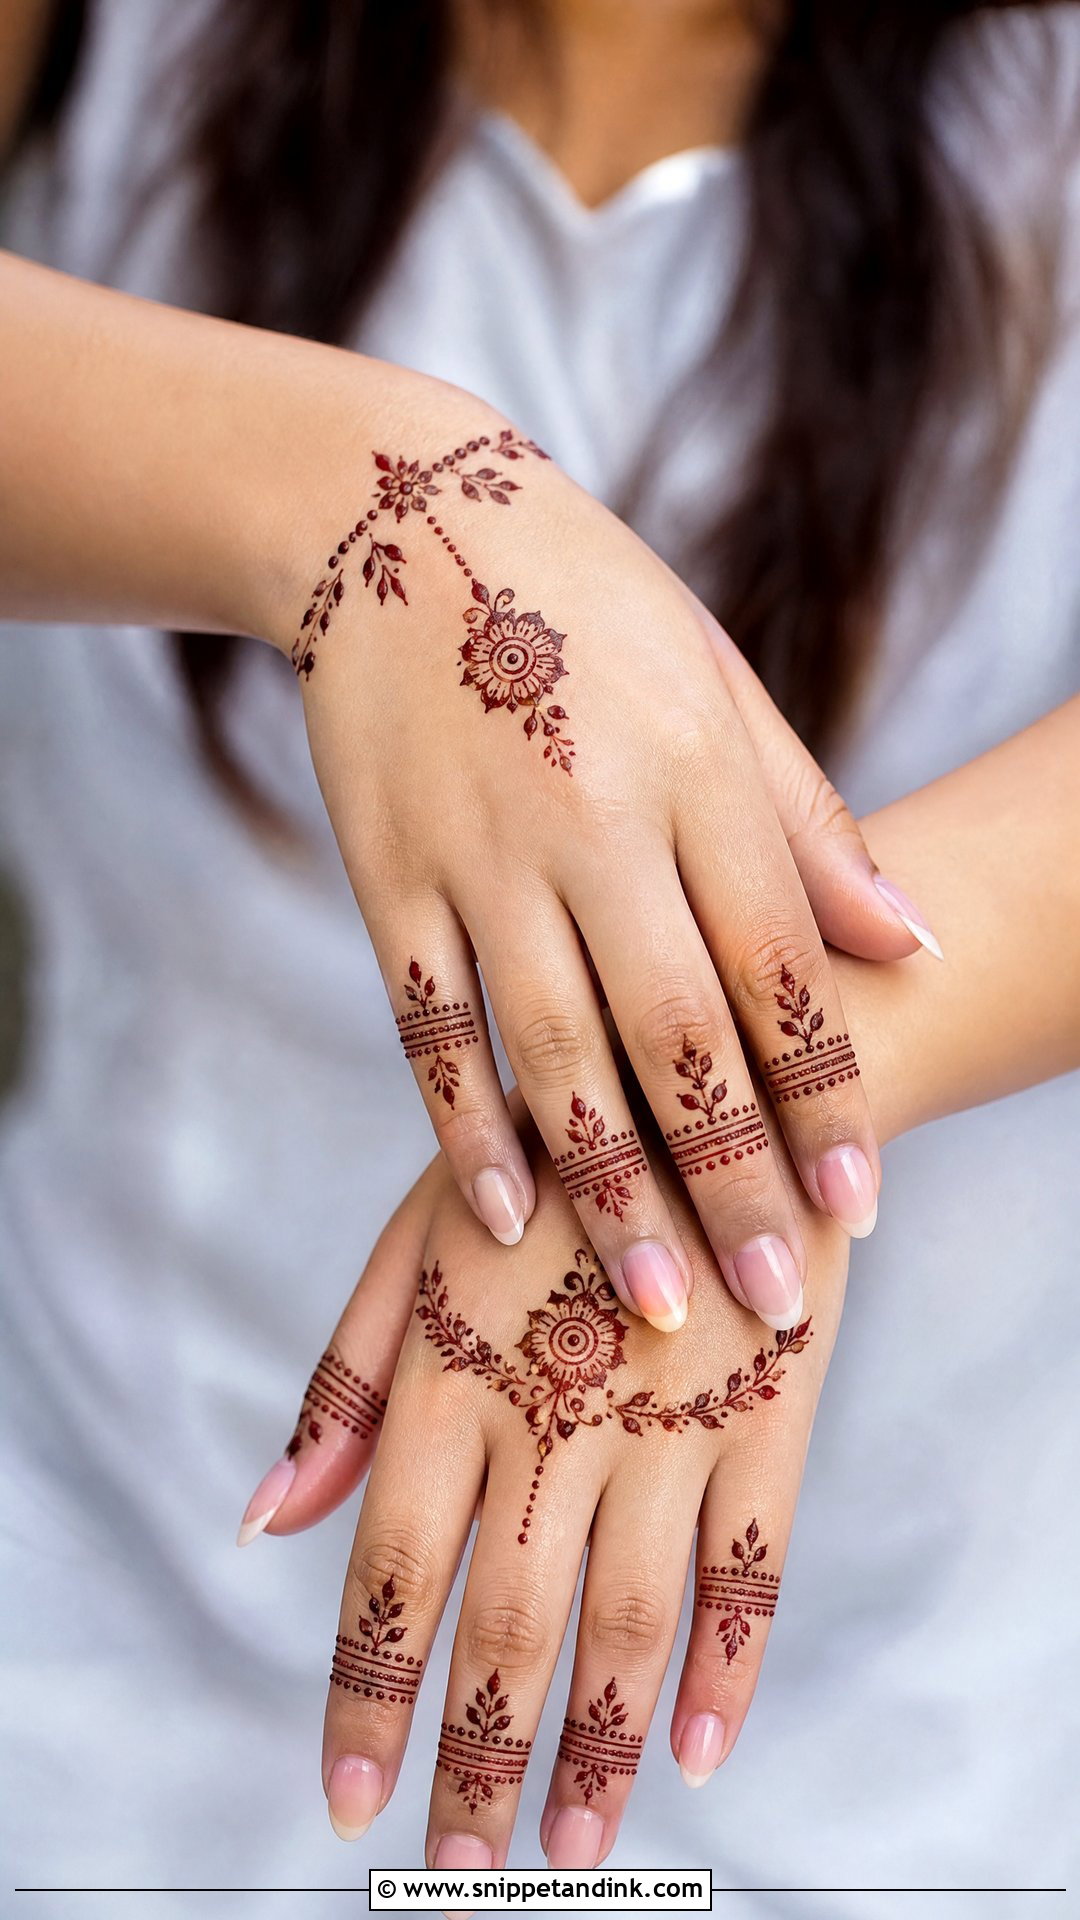
In a simple finger bridal mehndi design, the fingers carry the look and the palm or back hand stays mostly open. I give each finger matching bands, leaves or ring-style details, then tie it together with a bracelet at the wrist or a small motif on the back hand. Fingertips stain very dark, so even this light design shows strongly. With so little else on the hand, untidy line endings stand out, so I’d only book this with an artist whose finger work you’ve seen up close.
14. Simple Bracelet Bridal Mehndi Design
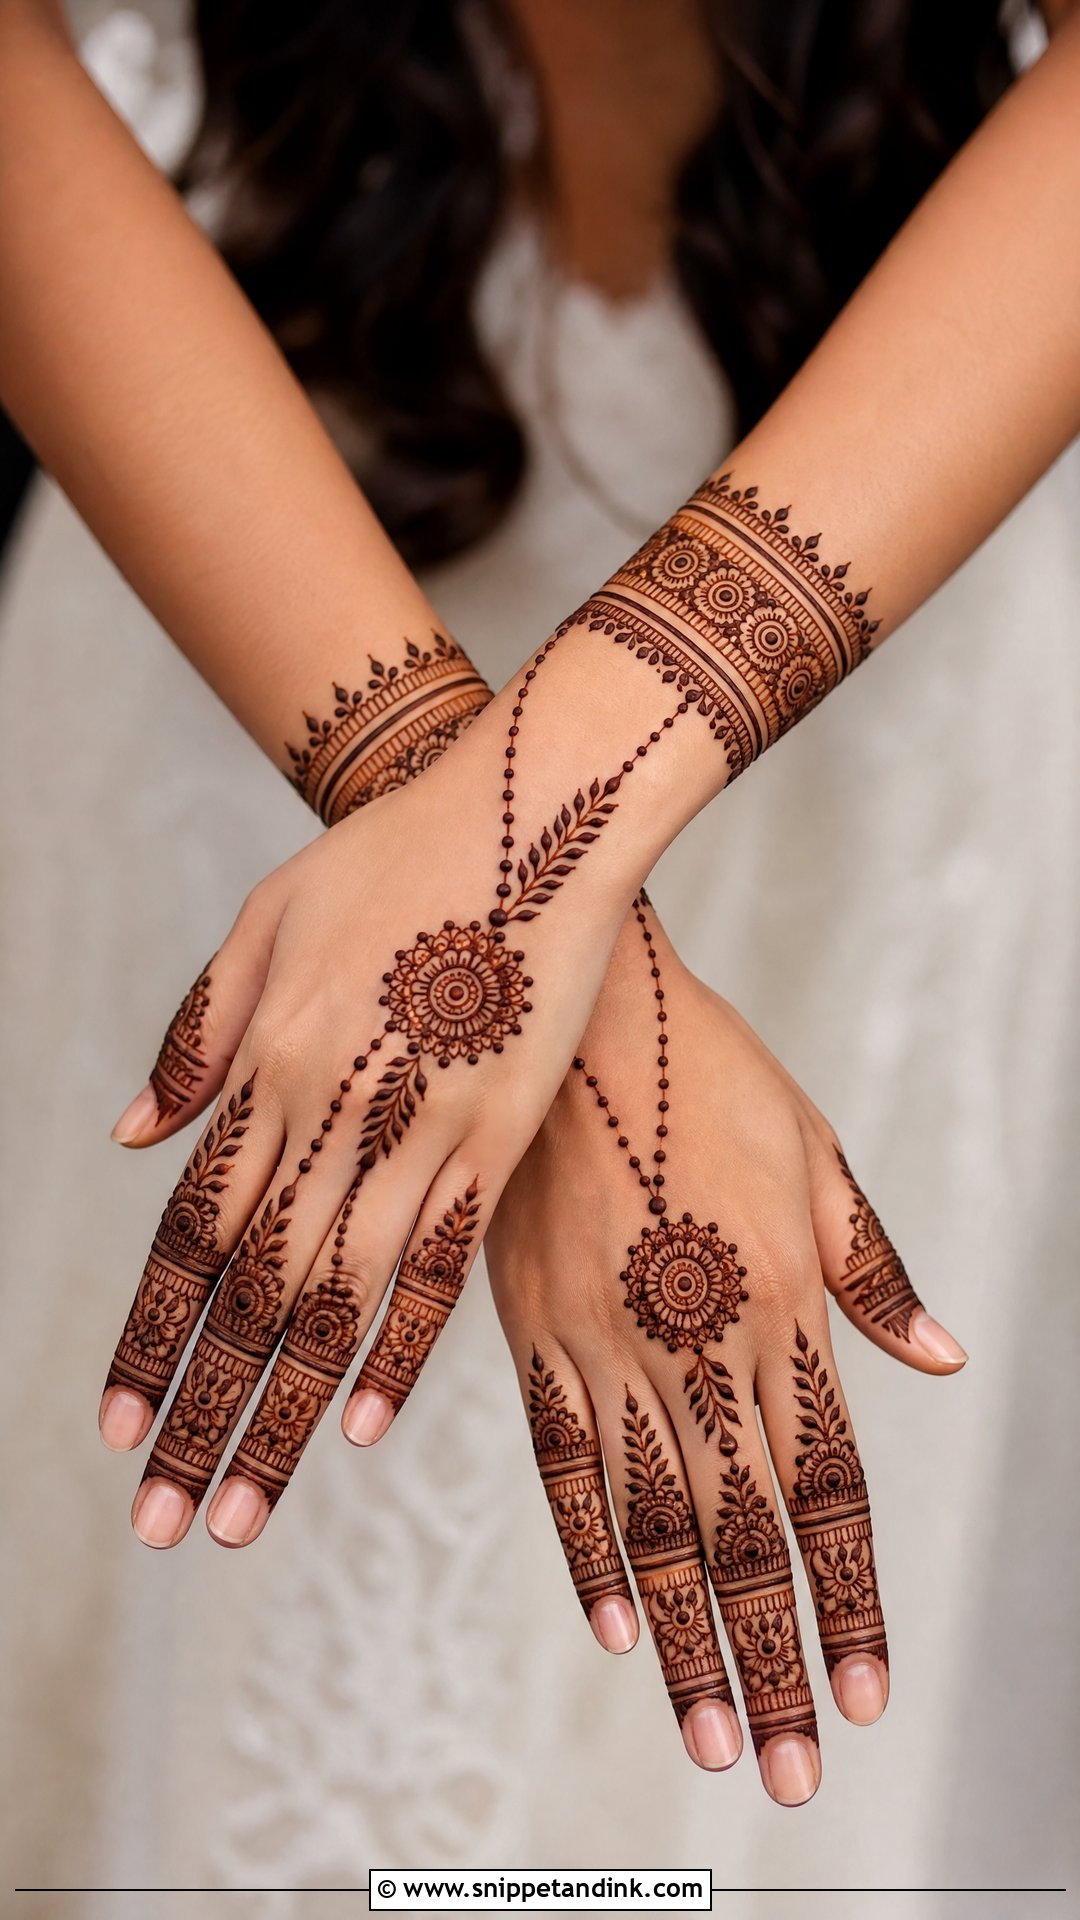
Bracelet mehndi should sit with your bangles, not under them. Before placing the wrist band, I check where the bride’s bangles actually rest; otherwise the best detail ends up hidden all day. Dotted chains or leafy strings run from the band toward the fingers, and the back hand stays open. For more bridal weight, I widen the cuff, give it a scalloped edge with tiny flowers and repeat a ring pattern on the fingers.
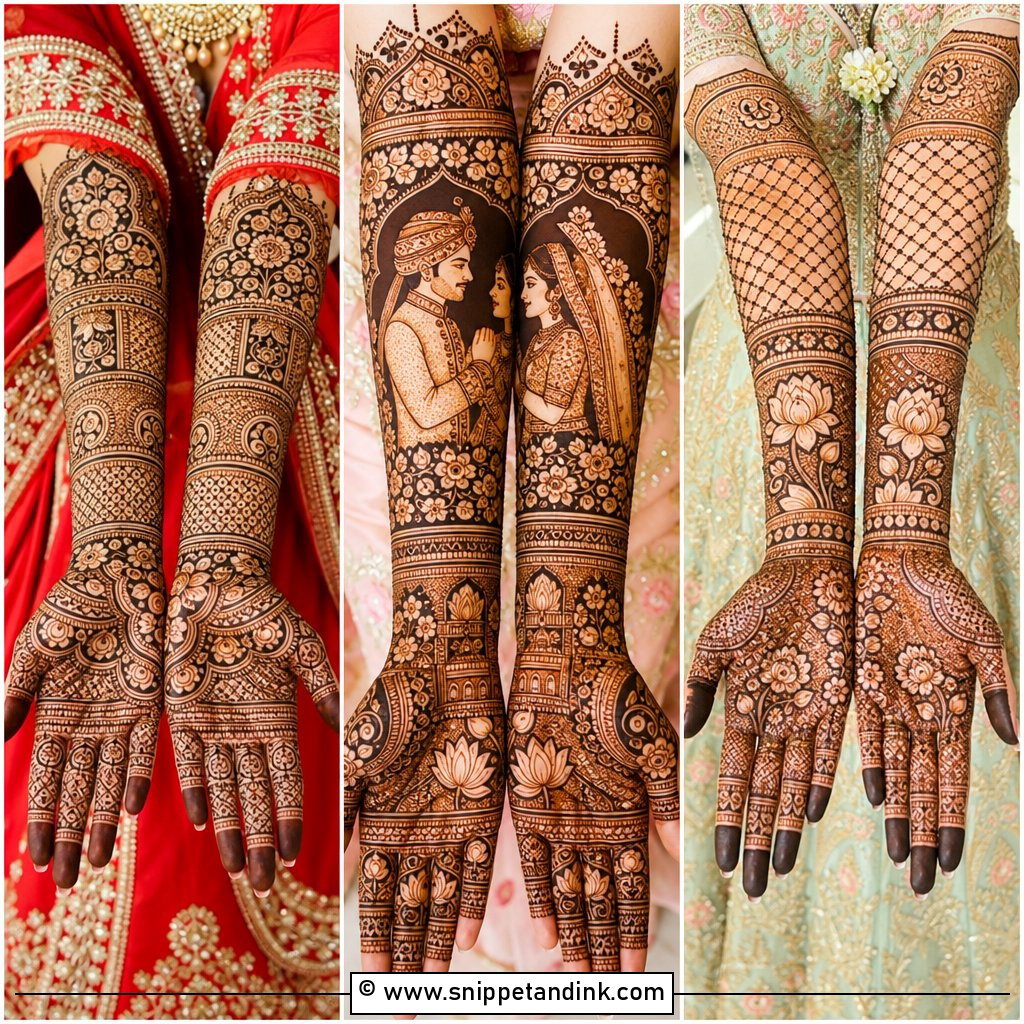
15. Simple Minimal Bridal Mehndi Design
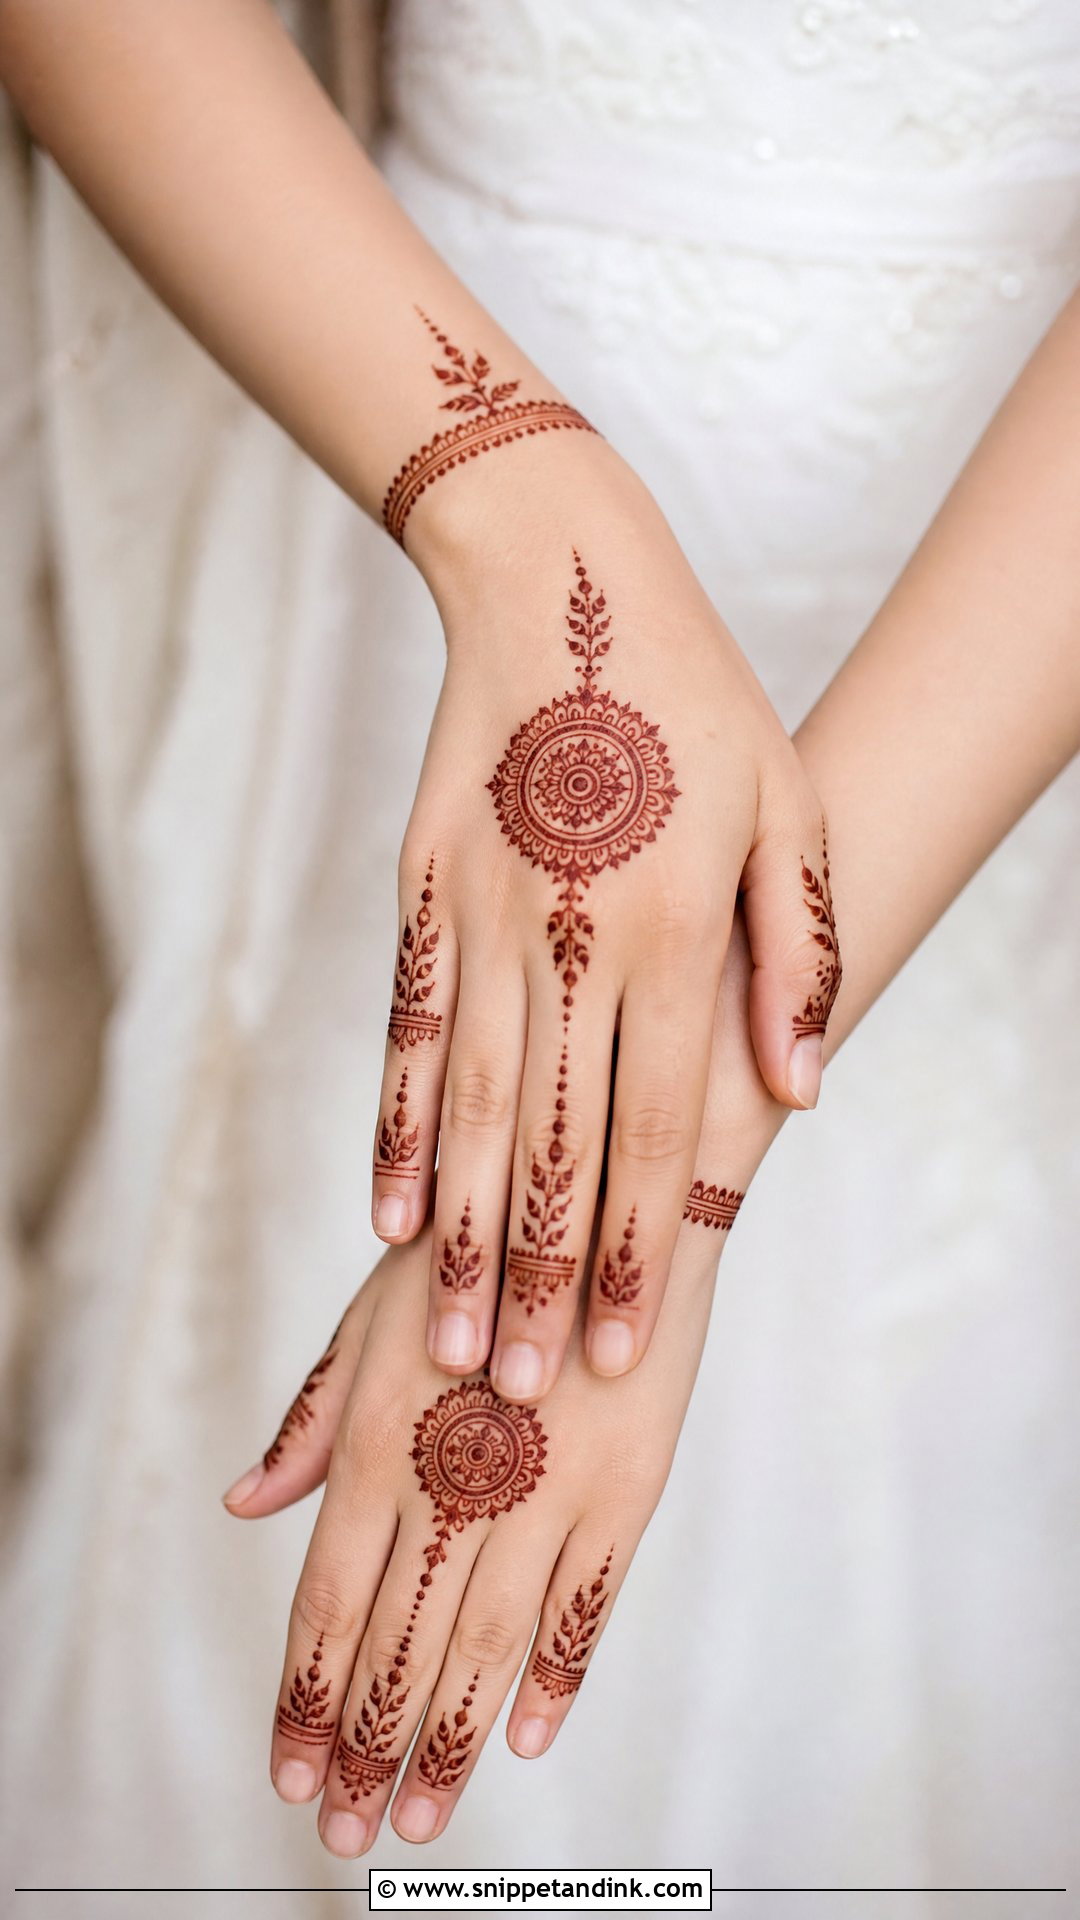
Minimal doesn’t mean random. With fewer motifs, placement carries the whole design, so I plan both hands together before the cone touches skin: a small mandala, a light floral trail, finger details and a wrist band, either mirrored or deliberately offset. It’s quick to apply and comfortable for brides who have never worn henna. The mistake I see most is two hands that look unrelated, so keep them coordinated.
16. Simple Indo Arabic Bridal Mehndi Design
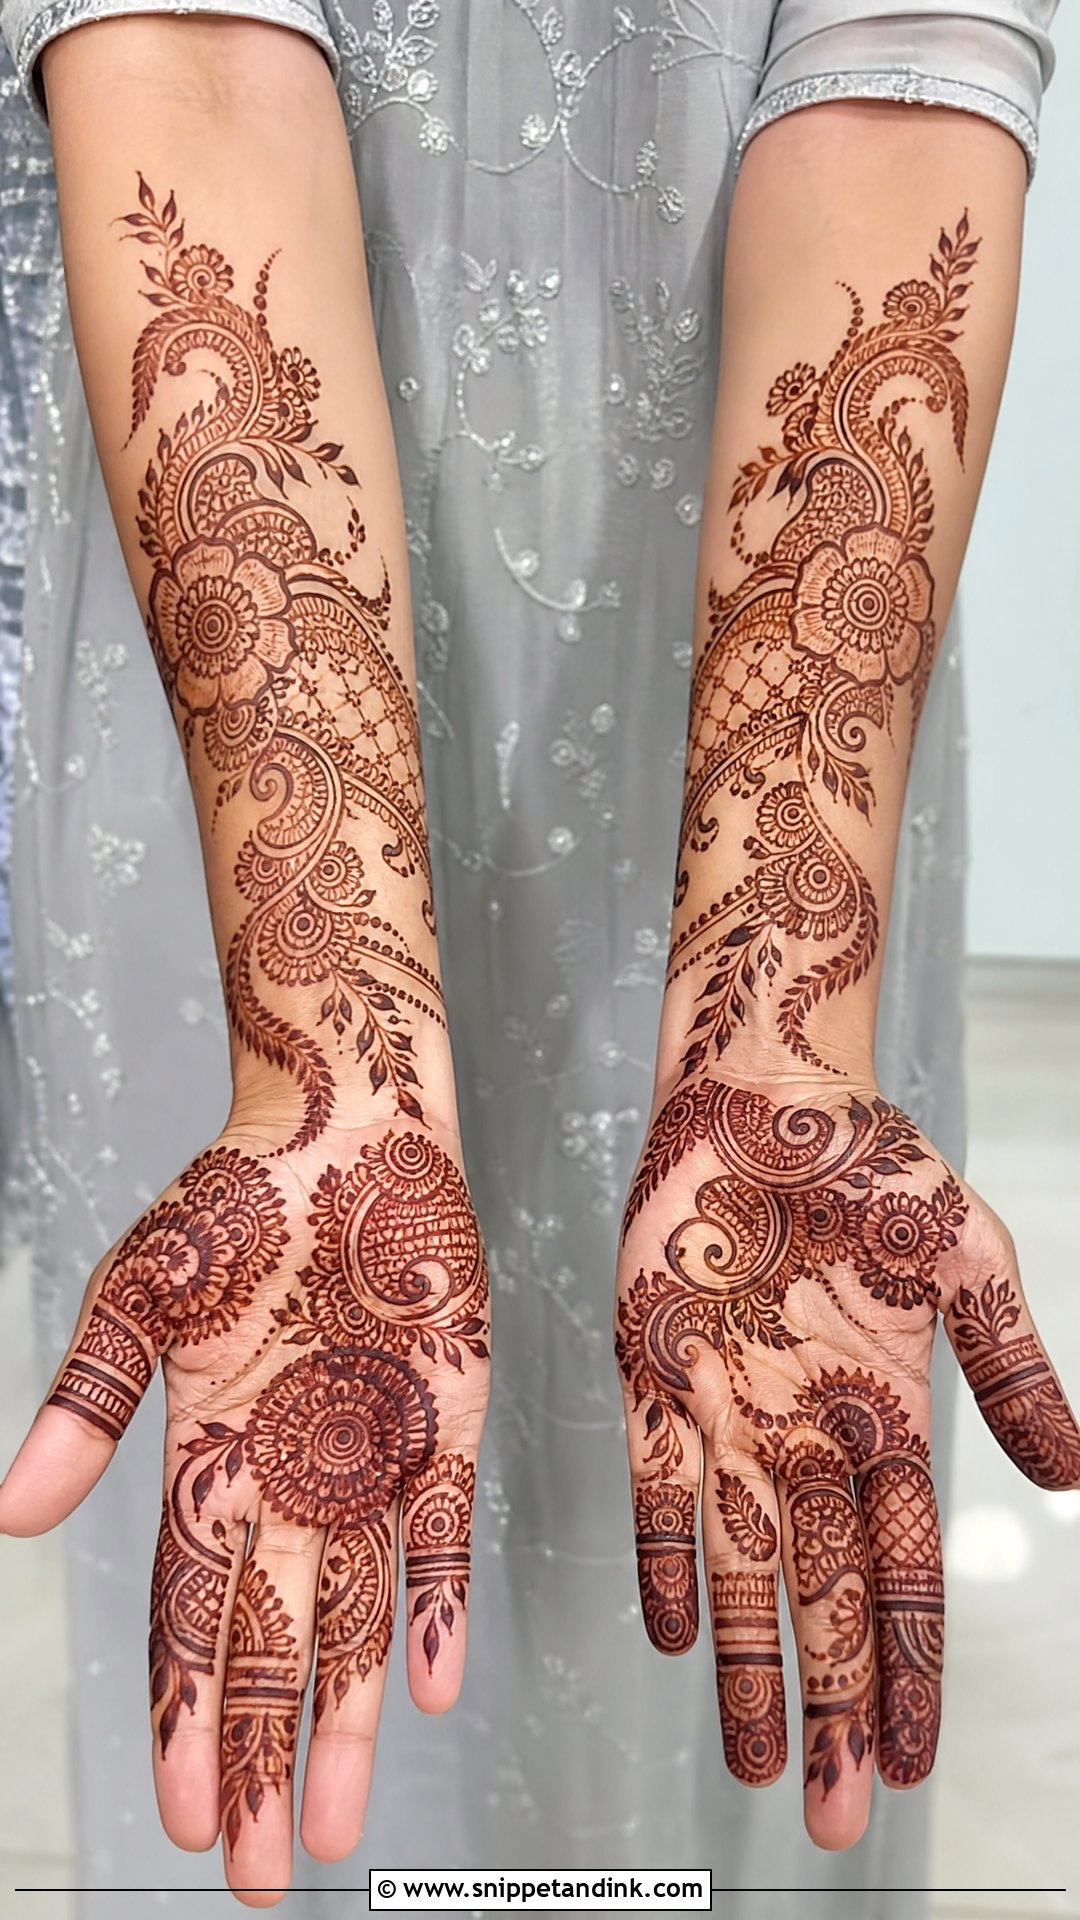
Indo-Arabic is the middle ground I suggest most often: Arabic spacing and diagonal flow, with Indian paisleys, mandalas and dots worked into it. You get more than a minimal design without the hours a full Indian bridal takes. The skill is restraint with filler. I leave clear space around each main motif and resist the tiny lines that tempt you into filling every gap.
17. Simple Gulf Bridal Mehndi Design
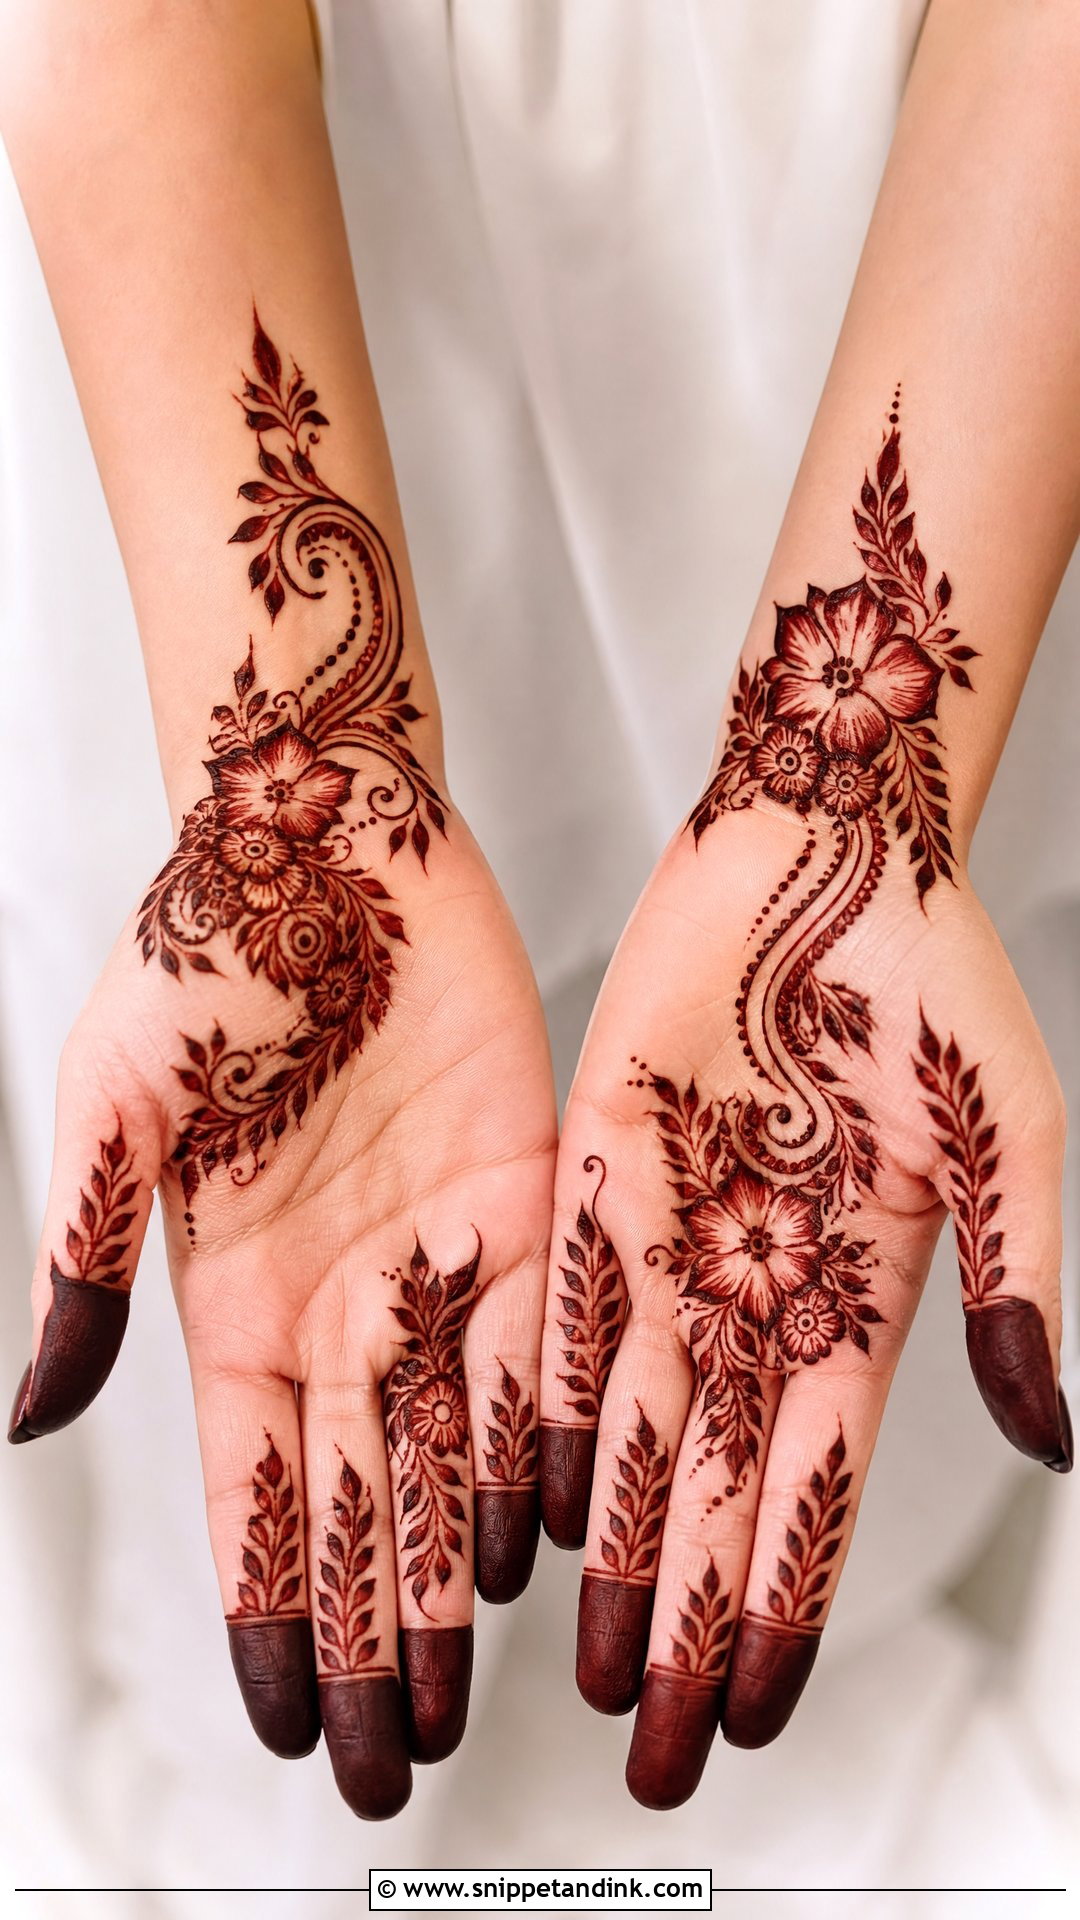
Gulf, or Khaleeji, henna uses big flowers, leafy trails and dark, fully filled fingertips, with plenty of empty skin around them. Lines are thick, and petals are often shaded so the color grades from dark to light within one flower. For a simpler version I keep forearm coverage short and leave many of the flowers unfilled. Large, clear motifs like these keep their shape in photos taken from across a room, where fine Indian work can turn to texture.
18. Simple Moroccan Bridal Mehndi Design
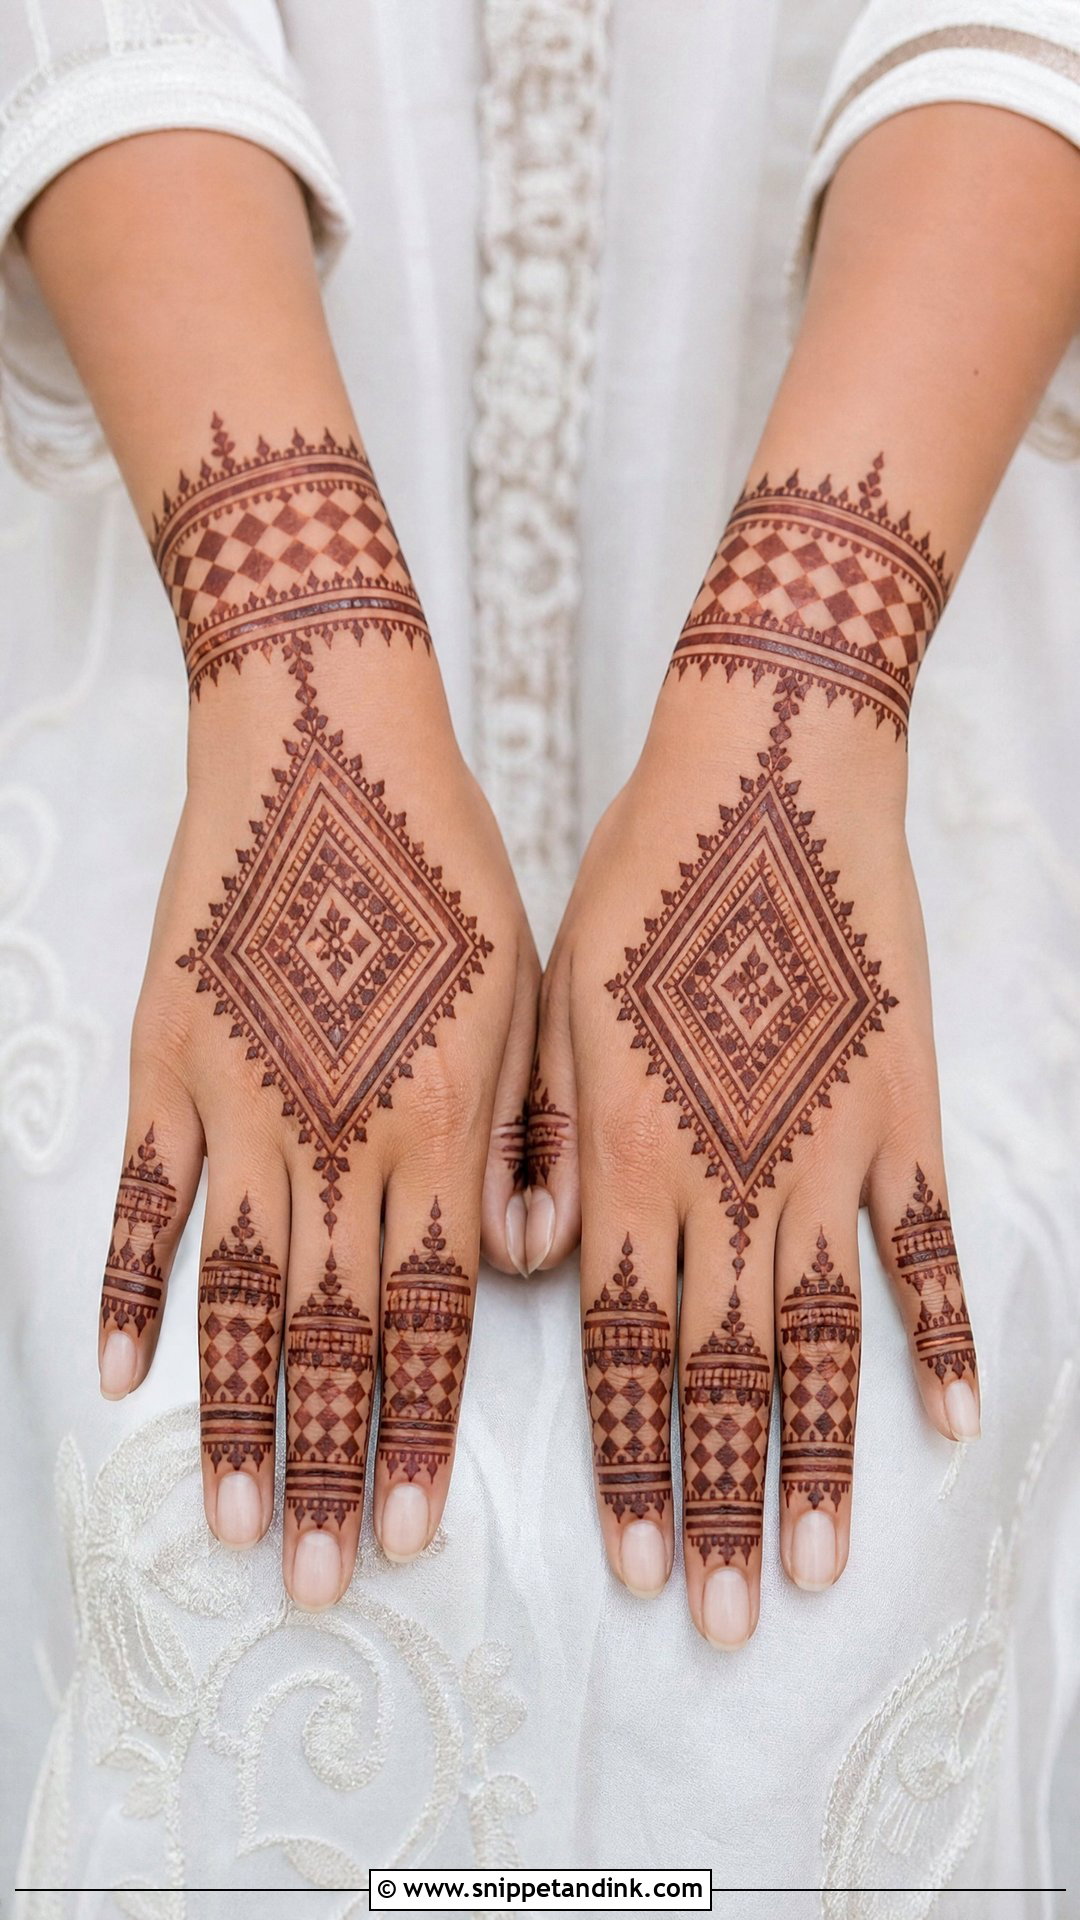
Moroccan-inspired designs swap florals for geometry: diamonds, triangles, small checks and symmetrical bands. I build from one main layout and repeat smaller shapes within it, because geometric work exposes a wobble or uneven gap far more than flowers do. It looks especially sharp on the back hand, where straight lines can follow the fingers down to the wrist. Brides who want something unlike the usual Indian or Arabic layouts tend to love it.
19. Simple Bridal Mehndi Design For Short Hands
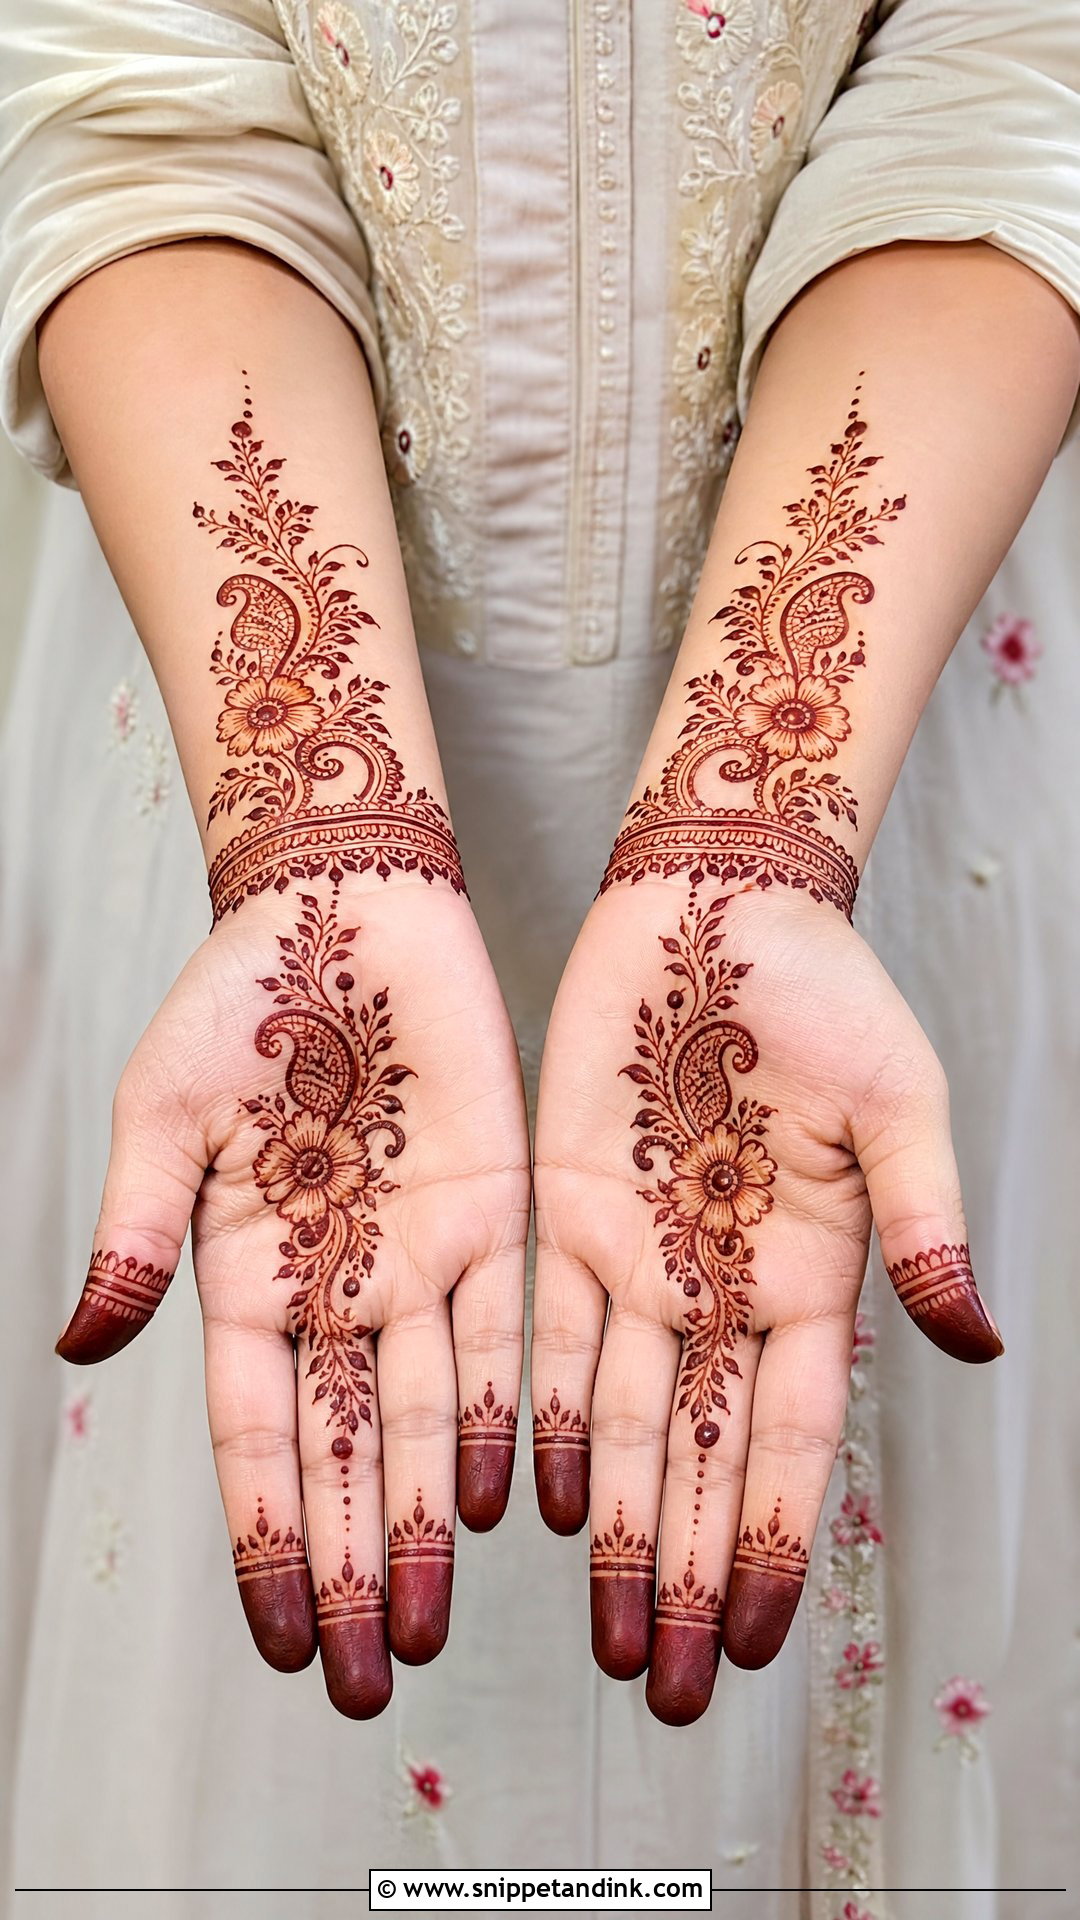
On shorter hands I design for length. Vertical trails, slim vines, narrow paisleys and finger-focused work all pull the eye upward, while wide horizontal bands across the palm cut the hand in half. A center mandala with slim extensions up each finger works well, and so does fingertip shading. At the wrist I’d pick a fine bracelet band over a thick cuff.
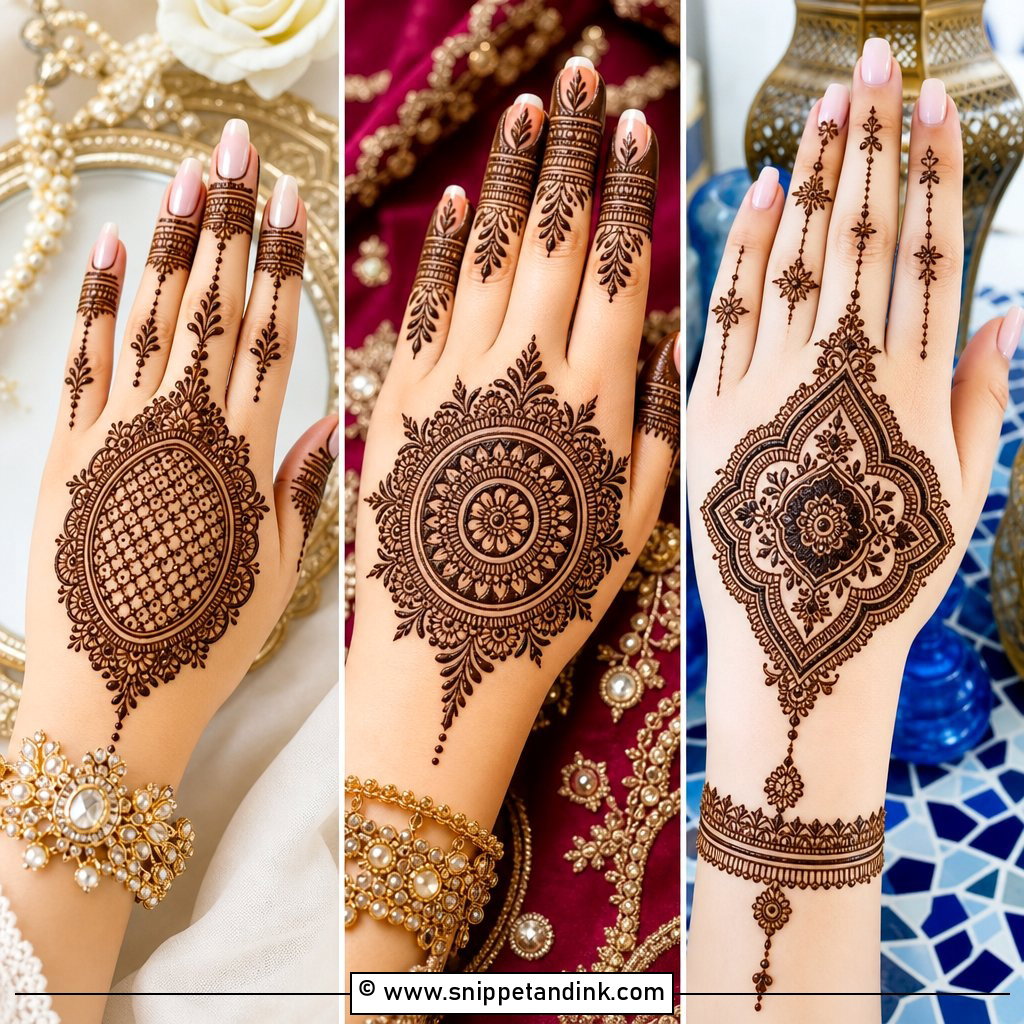
20. Simple Bridal Mehndi Design For Long Hands
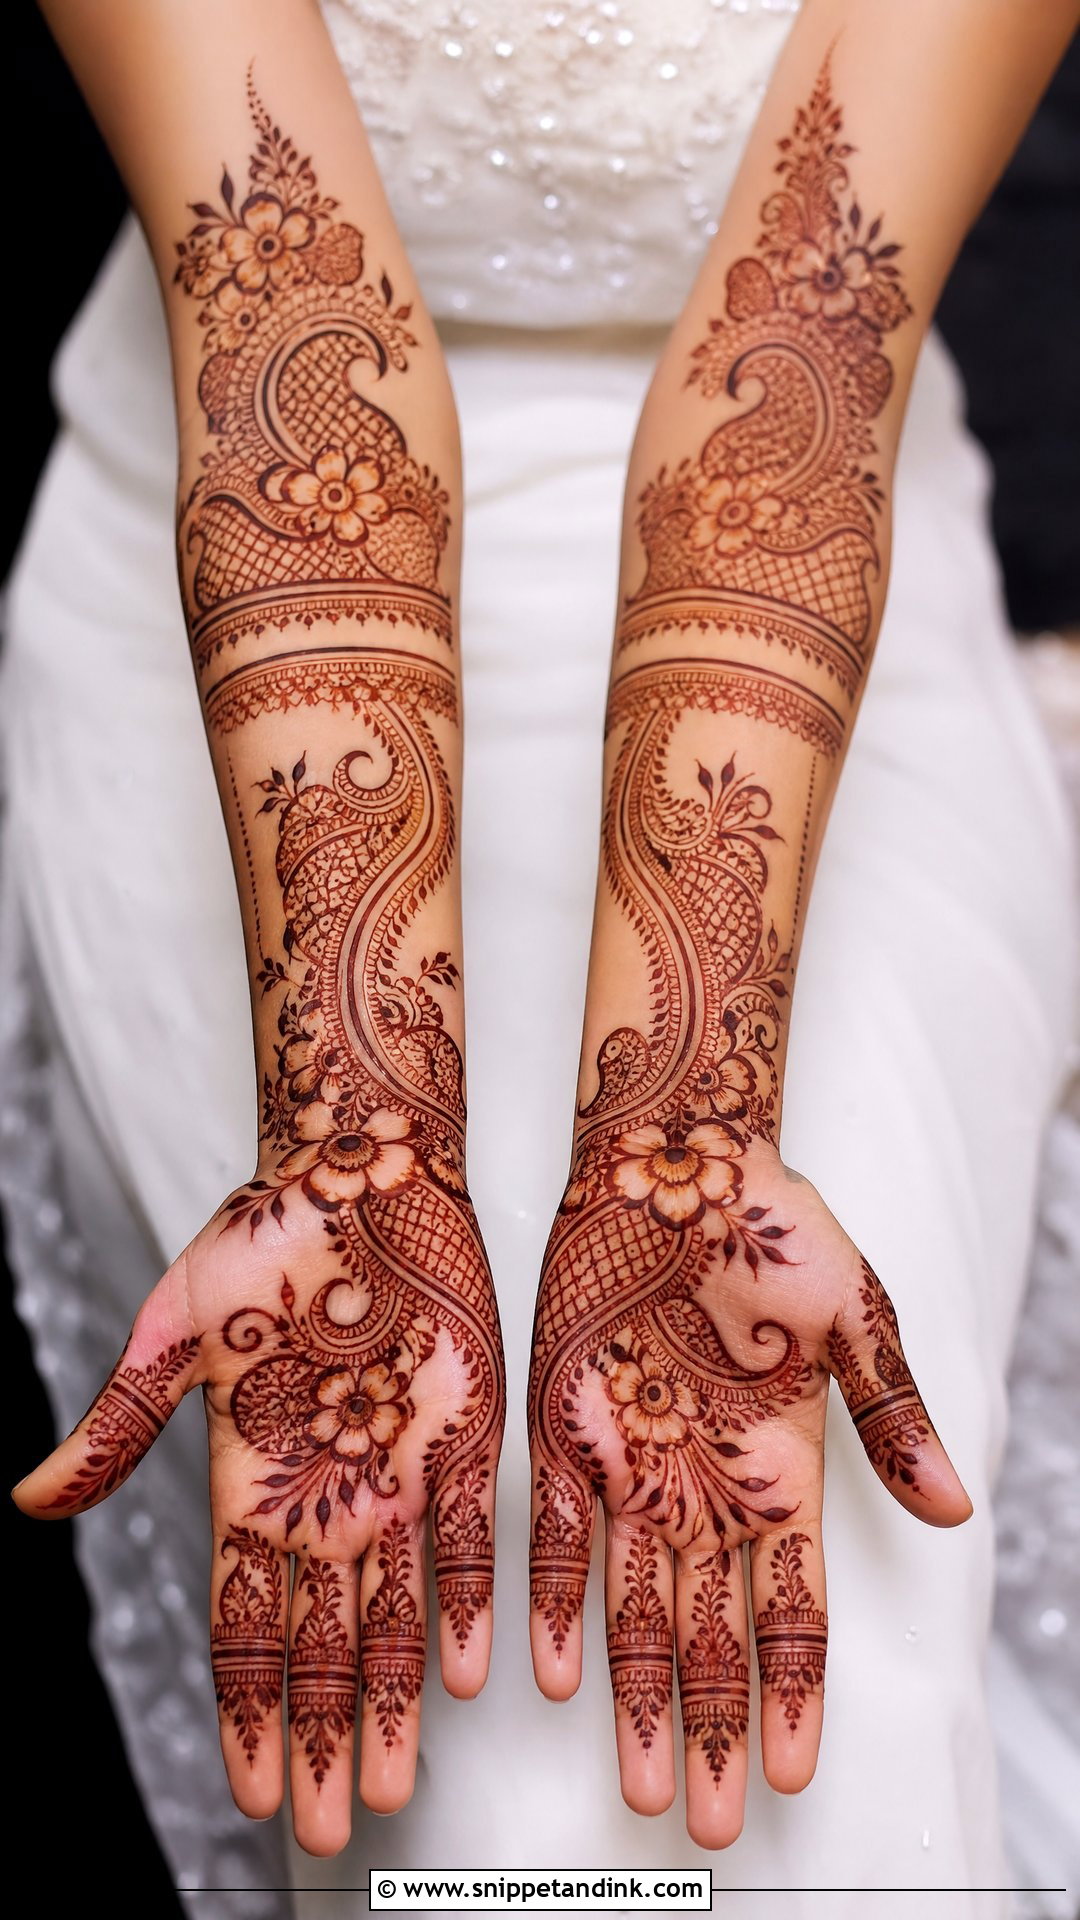
Long hands give me room, and the risk flips: too many thin lines and the design looks empty rather than light. I balance fine work with a few bold flowers, paisleys or a mandala, then let it continue into a soft forearm extension. Long fingers carry ring bands, shaded tips or small jaali sections easily. On the back hand, a connected jewelry-style layout follows the length of the fingers nicely.
21. Simple Bridal Mehndi Design For Engagement
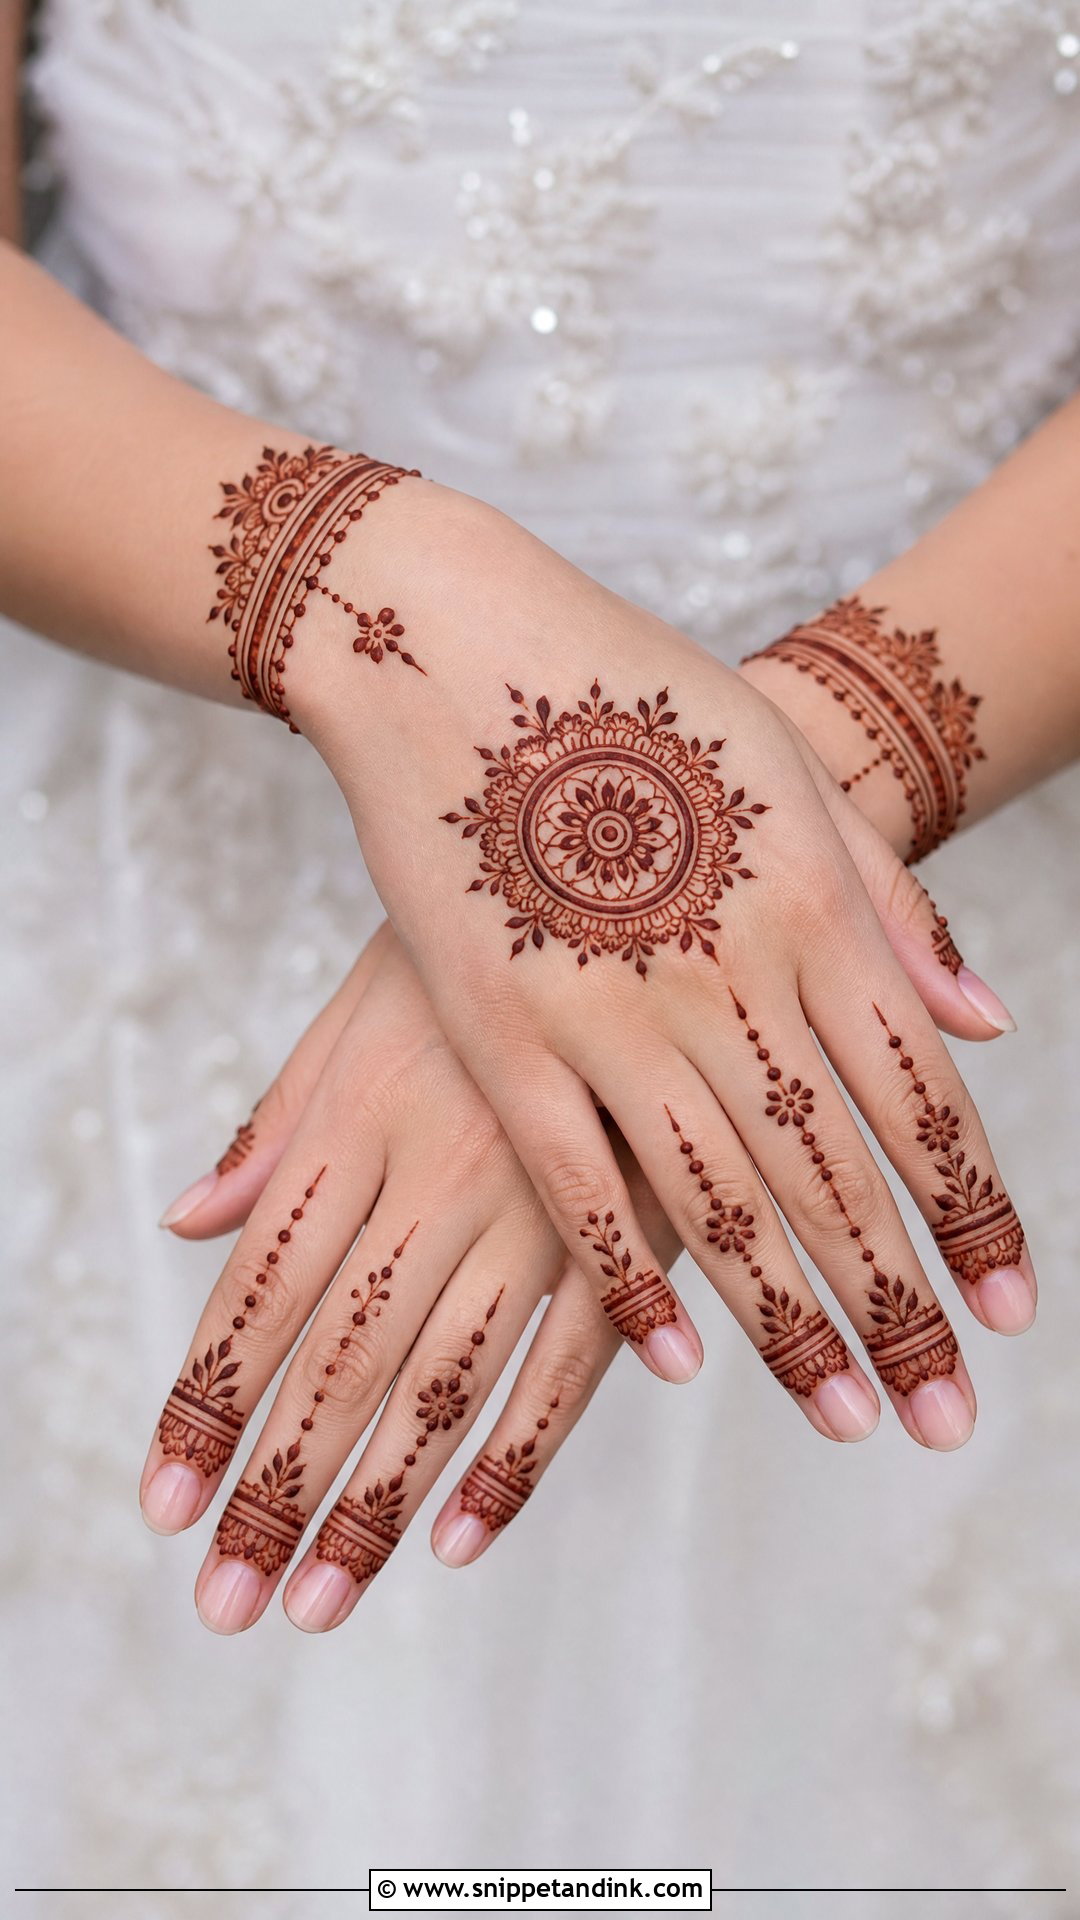
For an engagement I usually start on the back hand, since that’s the side in the ring photos: mandala center, bracelet band, finger chains. The palm stays light. If a more detailed wedding mehndi is coming later, I’d keep the engagement design clearly lighter so the bridal look still feels new. Bear in mind that a stain fades over one to three weeks, so a ring ceremony close to the wedding can leave a faded pattern under your fresh bridal work.
22. Simple Bridal Mehndi Design For Nikah
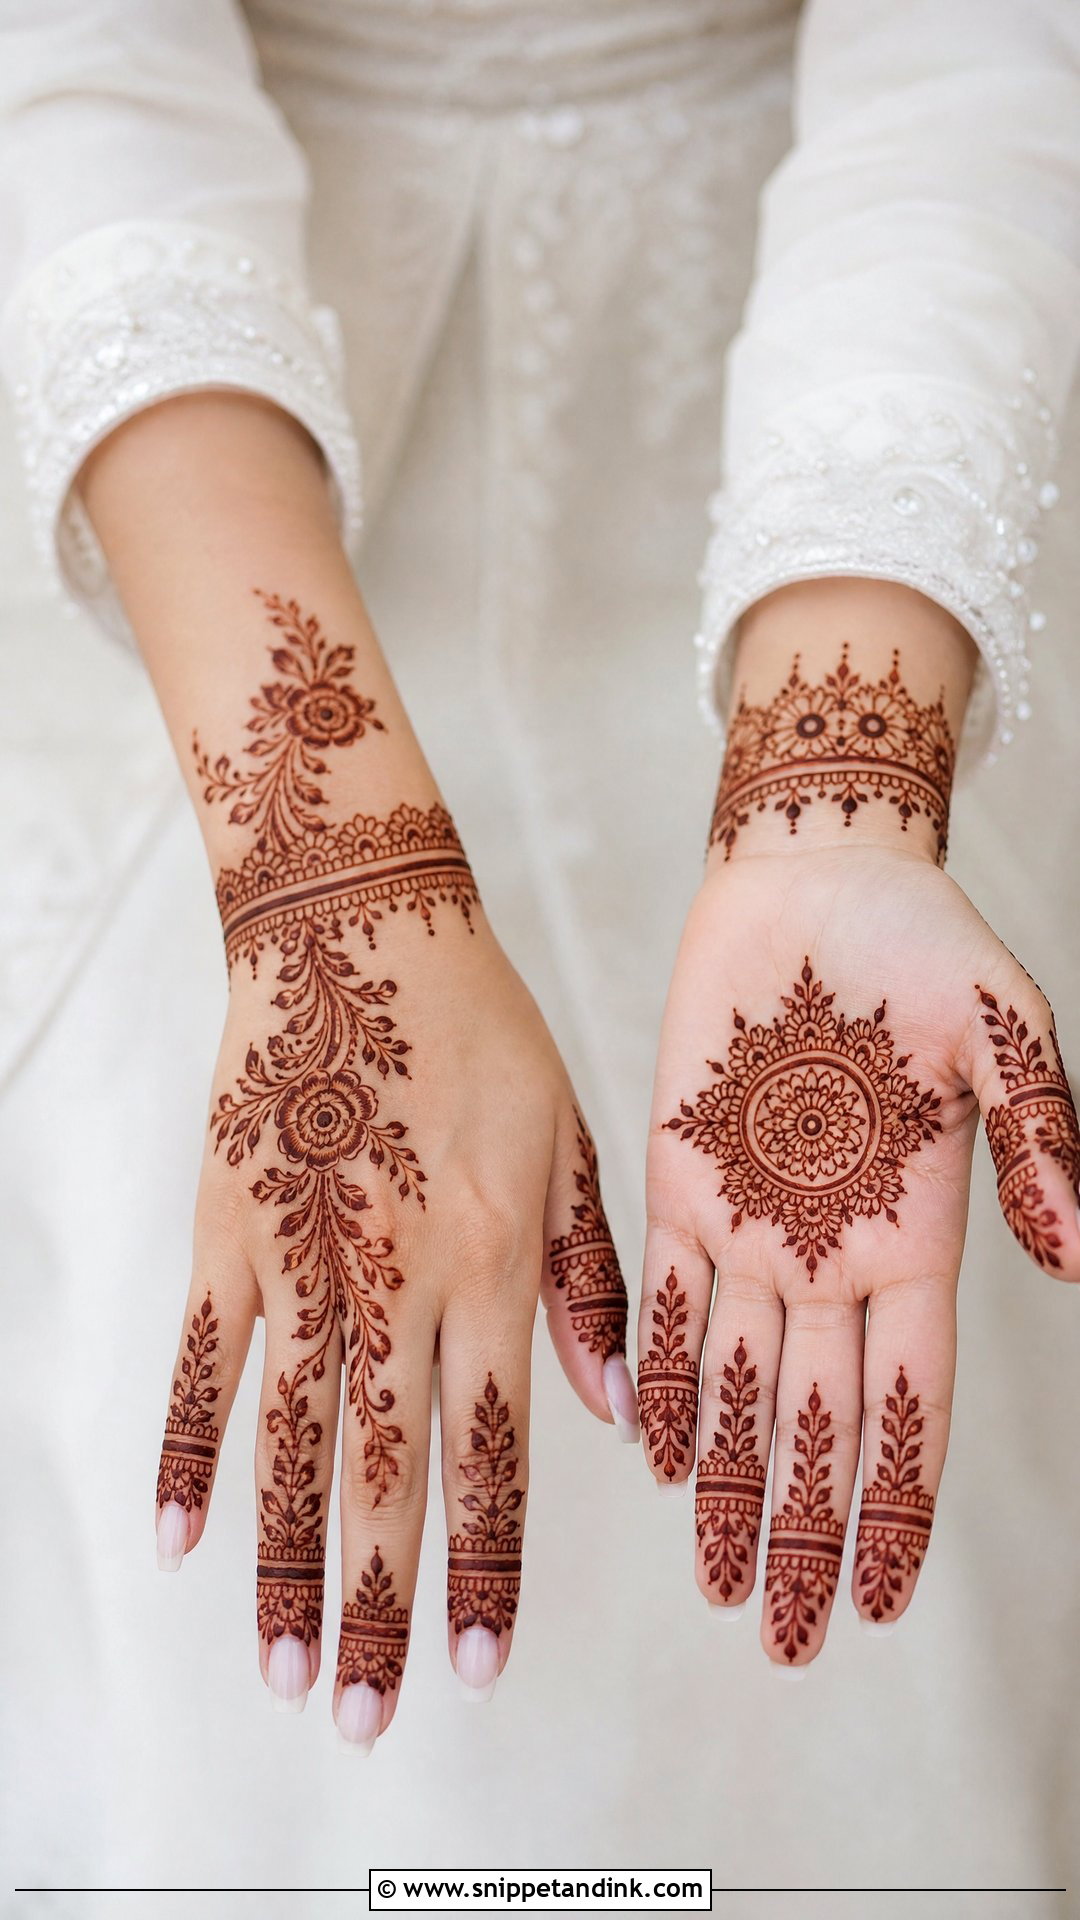
Nikah mehndi tends toward refined and modest, and Arabic or Indo-Arabic flow suits that well. Soft florals, leafy vines, a wrist cuff and fingertip details make the hand look complete without full coverage, and many brides prefer neat back-hand work that sits quietly beside rings and delicate jewelry. I’d use natural henna for the classic reddish-brown, and keep the palm to a single mandala or floral center.
23. Simple Bridal Mehndi Design For Haldi
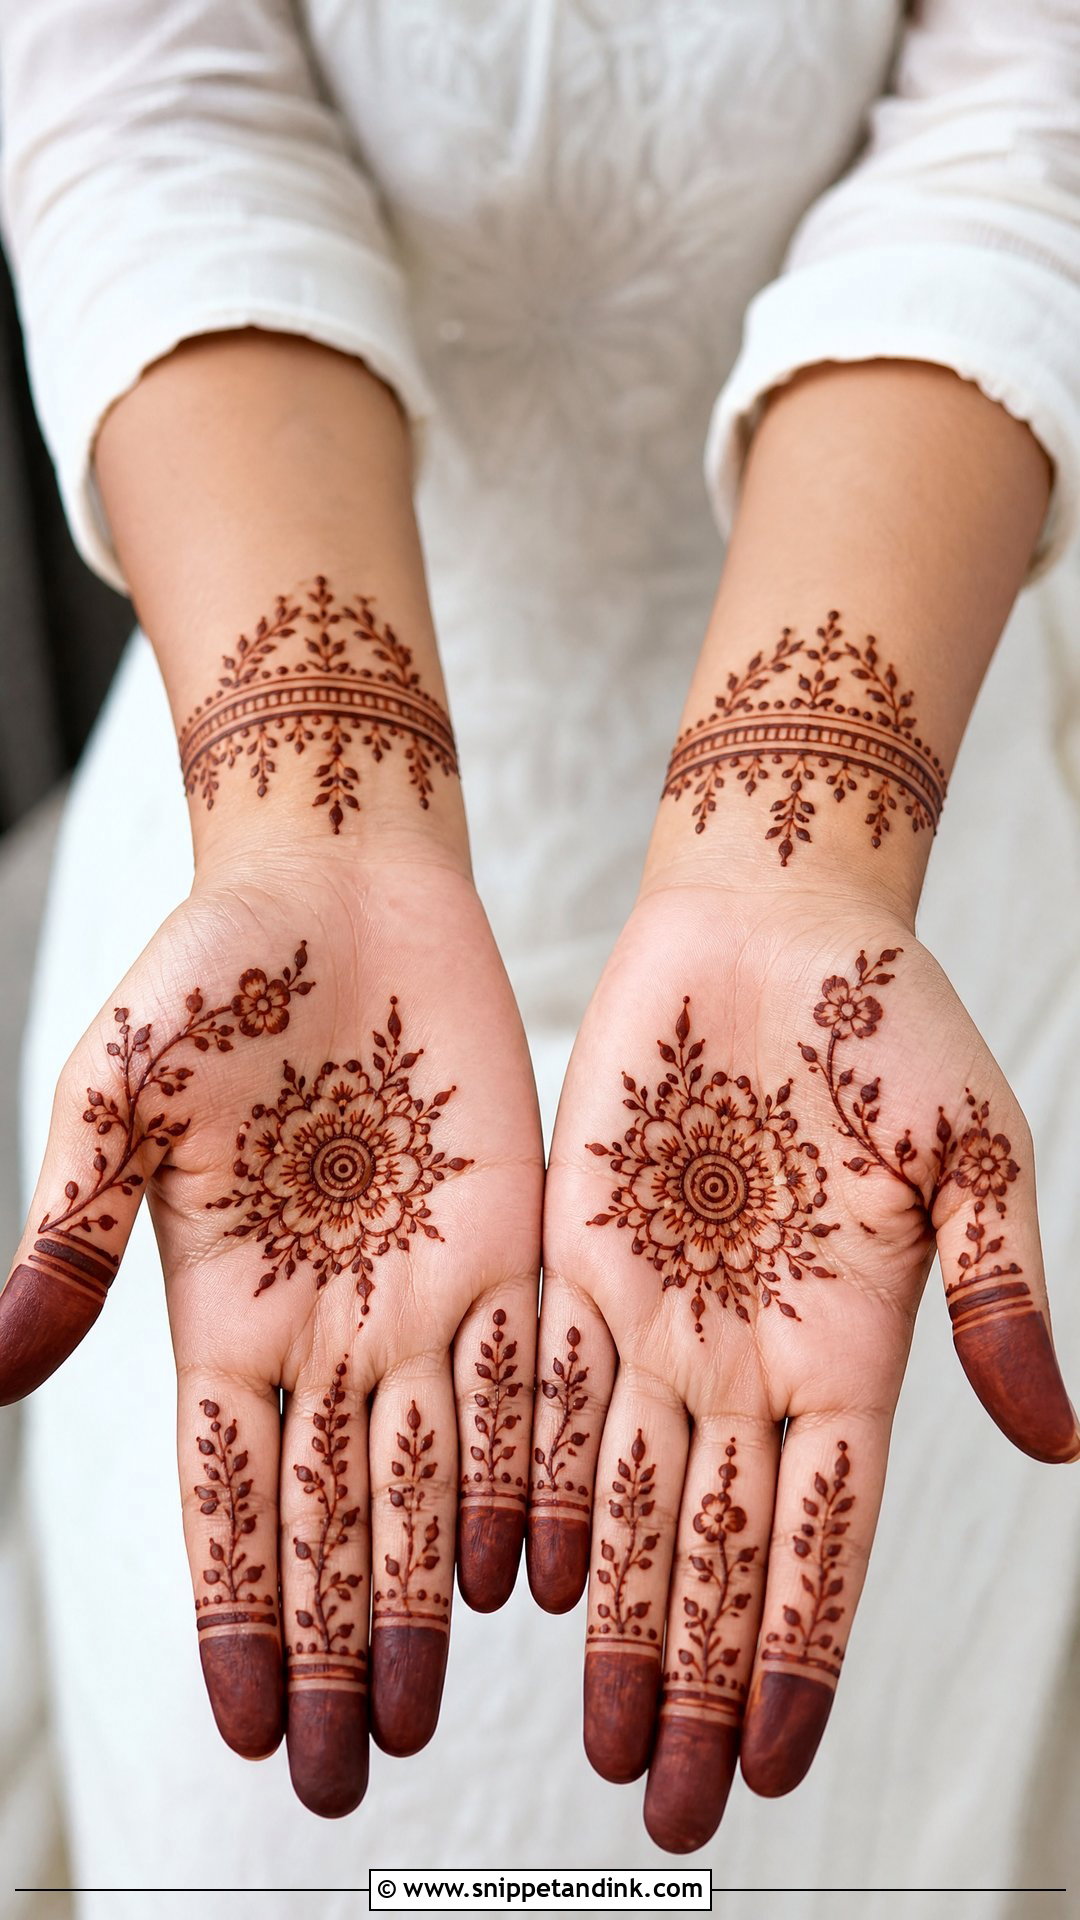
Haldi is messy by design, with turmeric paste, water and many hands involved. That matters if your mehndi is already on, because heavy water exposure in the first day weakens a fresh stain, and turmeric leaves its own yellow tint on skin. For a haldi-day design I keep things lighter, covering palm, fingers and wrist only with floral vines, small mandalas and simple bracelets. If your main bridal mehndi comes first, ask the family to keep the paste off your hands.
24. Simple Bridal Mehndi Design For Sangeet
Sangeet means dancing, so I keep designs off the upper arm and away from anywhere a sleeve will rub. A bold Arabic trail, floral back-hand pattern or bracelet-style design gives plenty of presence for less time in the chair. Fingers get bands and dots, and the wrist carries a slightly heavier cuff. Stage lighting flattens fine detail, so here I favor confident, clean lines and a few playful swirls over intricate fillers.
25. Simple Bridal Mehndi Design With Initials
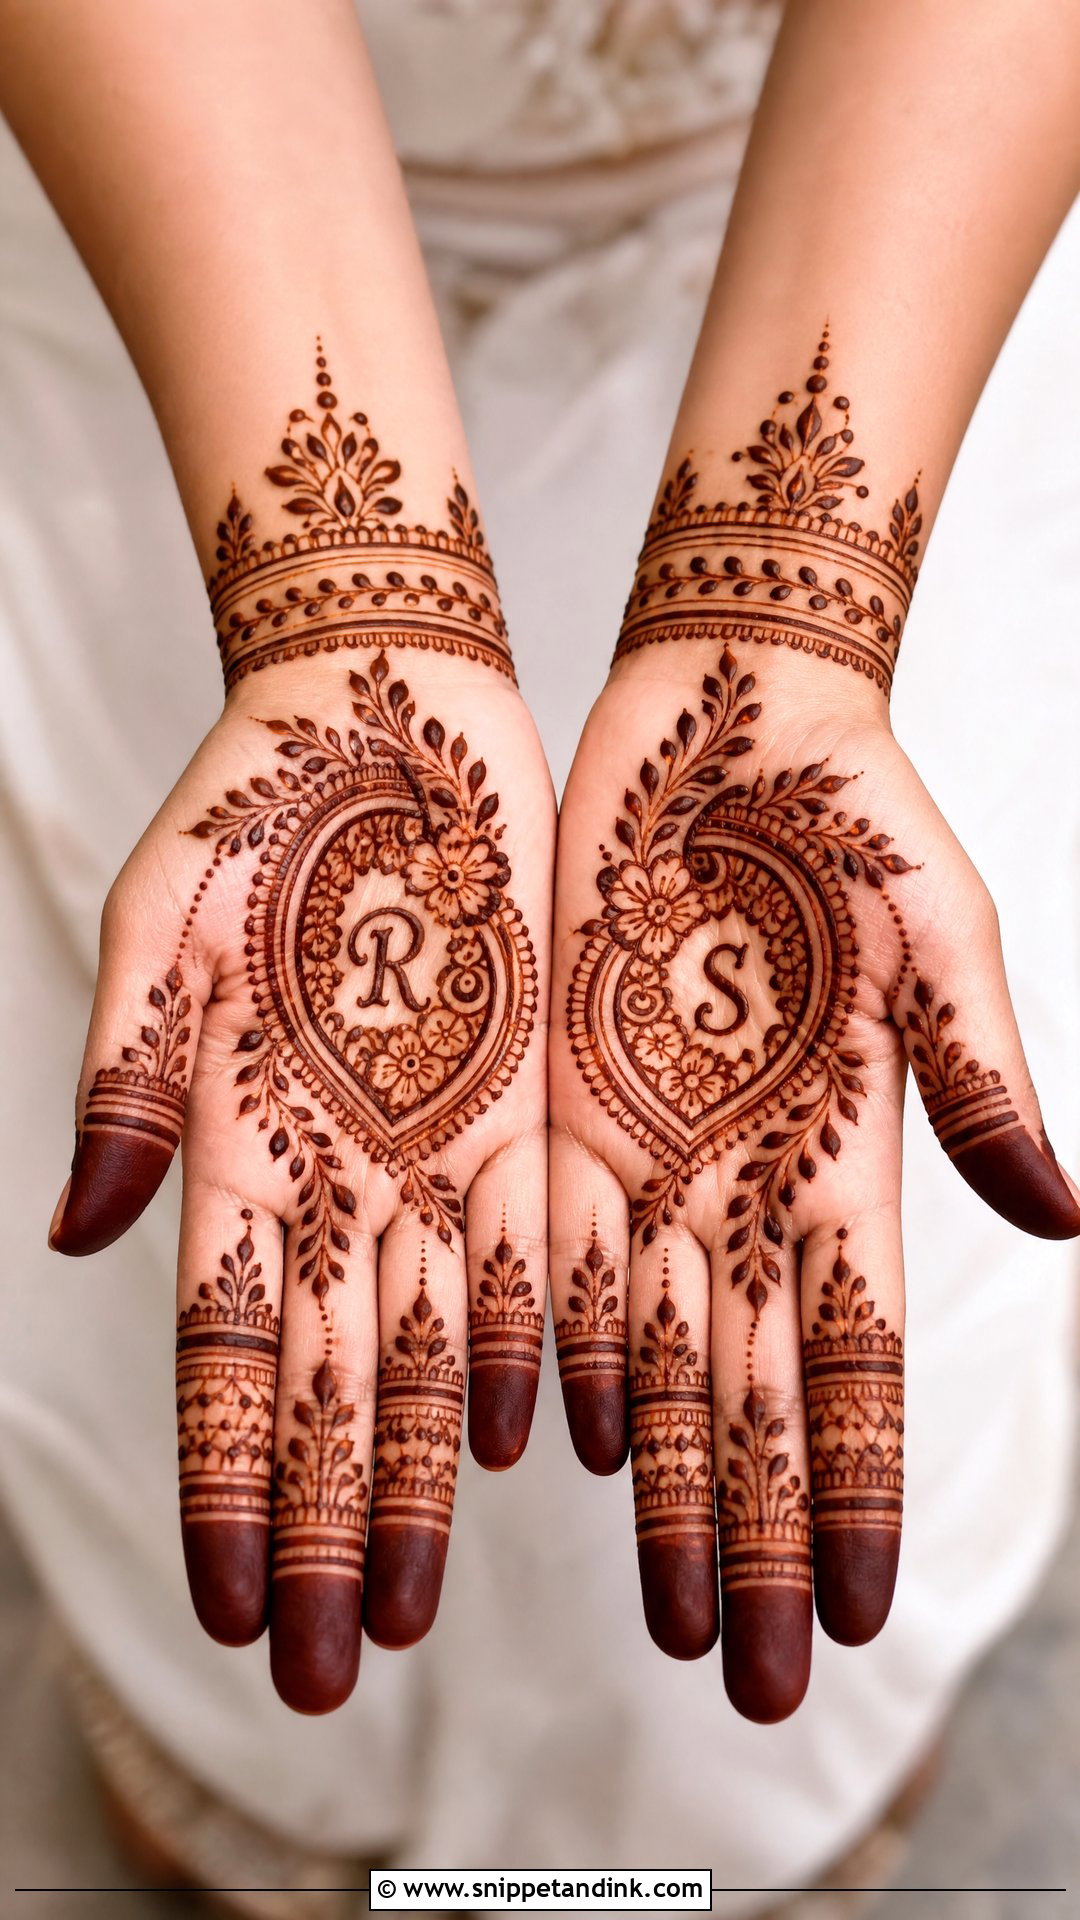
Initials need hiding places with enough room to stay legible. A simple bridal mehndi design with initials usually tucks them into a paisley, a mandala or the wrist band, and the palm is the favorite spot. I write letters slightly larger than brides expect, because thin strokes spread a little while the paste sits. One or two personal areas is plenty; frame them with floral vines and dotted borders and keep the rest clean. Hunting for the hidden letters still makes a fun moment later on.
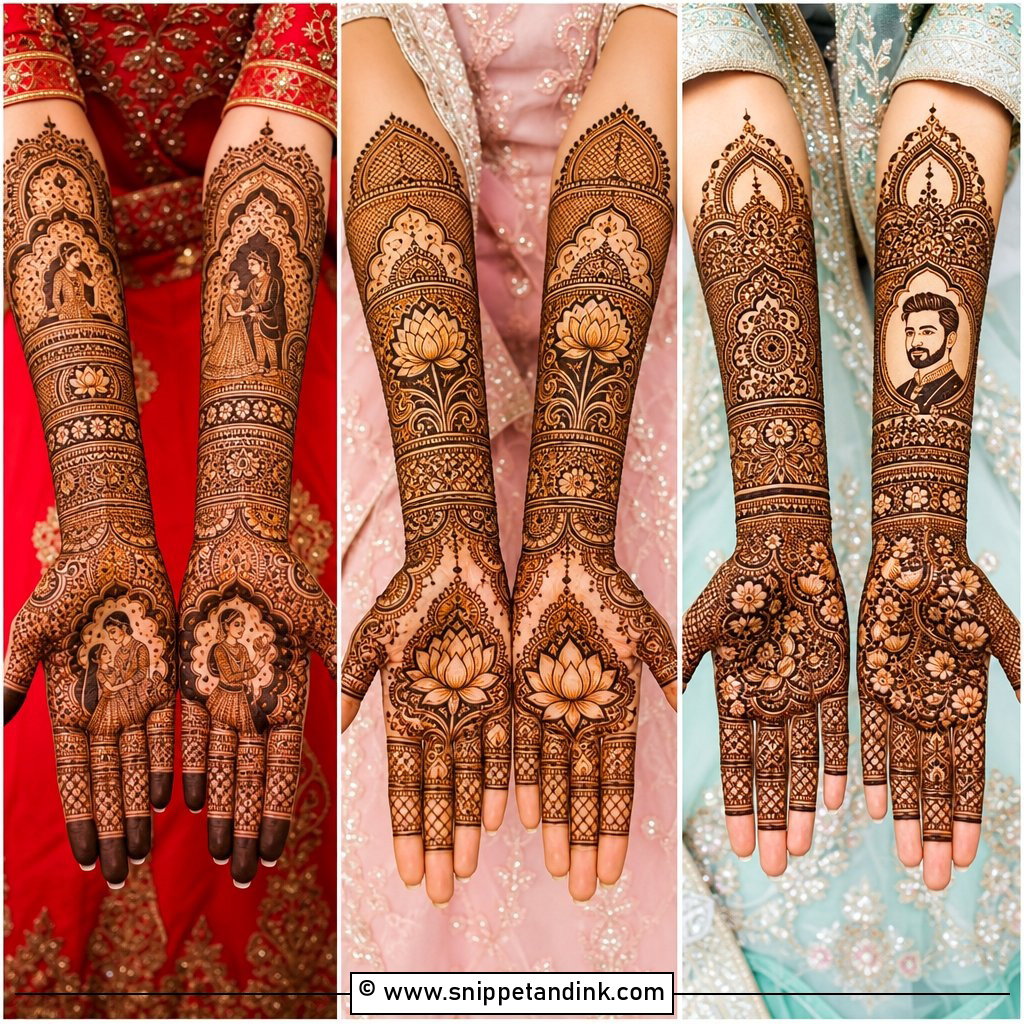
26. Simple Bridal Mehndi Design With Bride And Groom
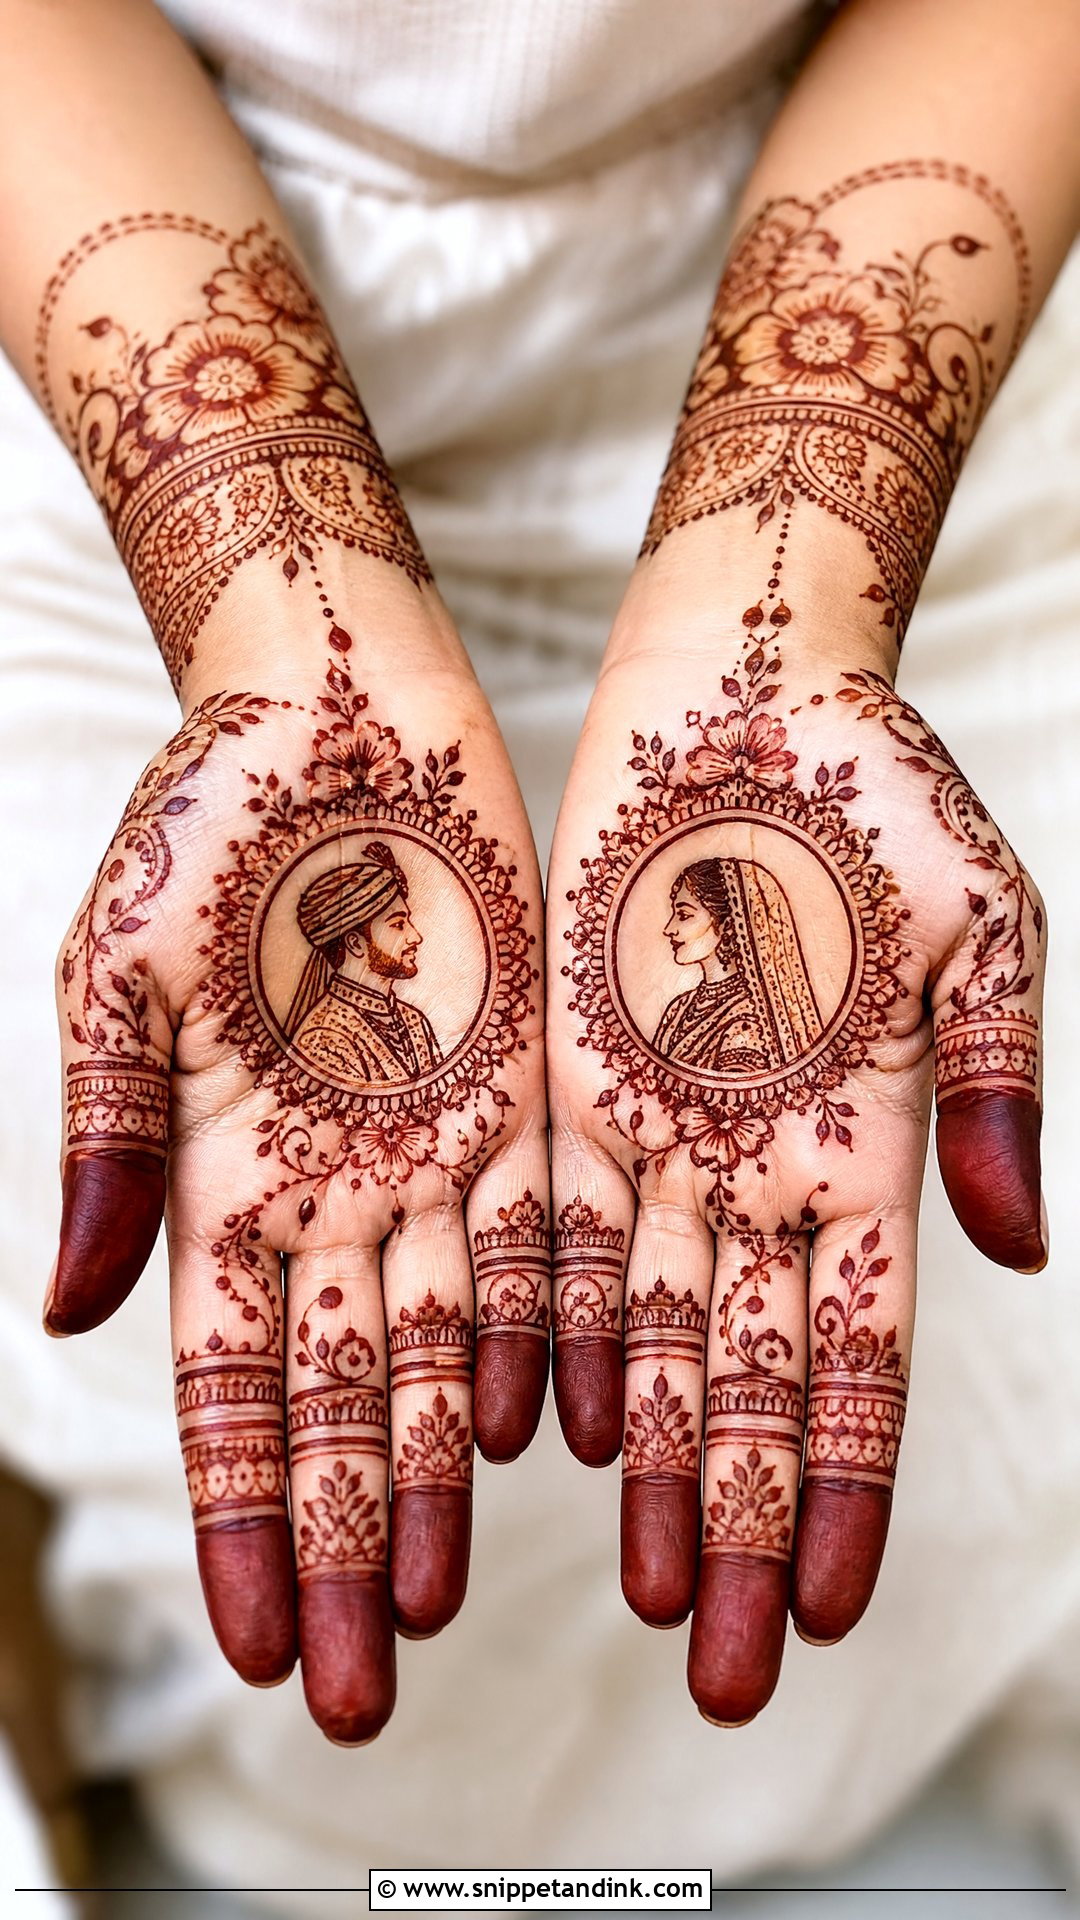
Portrait figures are skilled work, and in a simple design they have to stay small. I draw outline-only figures of the bride and groom inside round frames or paisley borders, with light flowers and dots around them, rather than filling both palms with scenes. Tiny faces lose detail as the stain darkens, so I keep features to a few strokes. The wrist and fingers stay simple. Look at an artist’s previous figure work before you book this one.
27. Simple Bridal Mehndi Design With Wedding Date
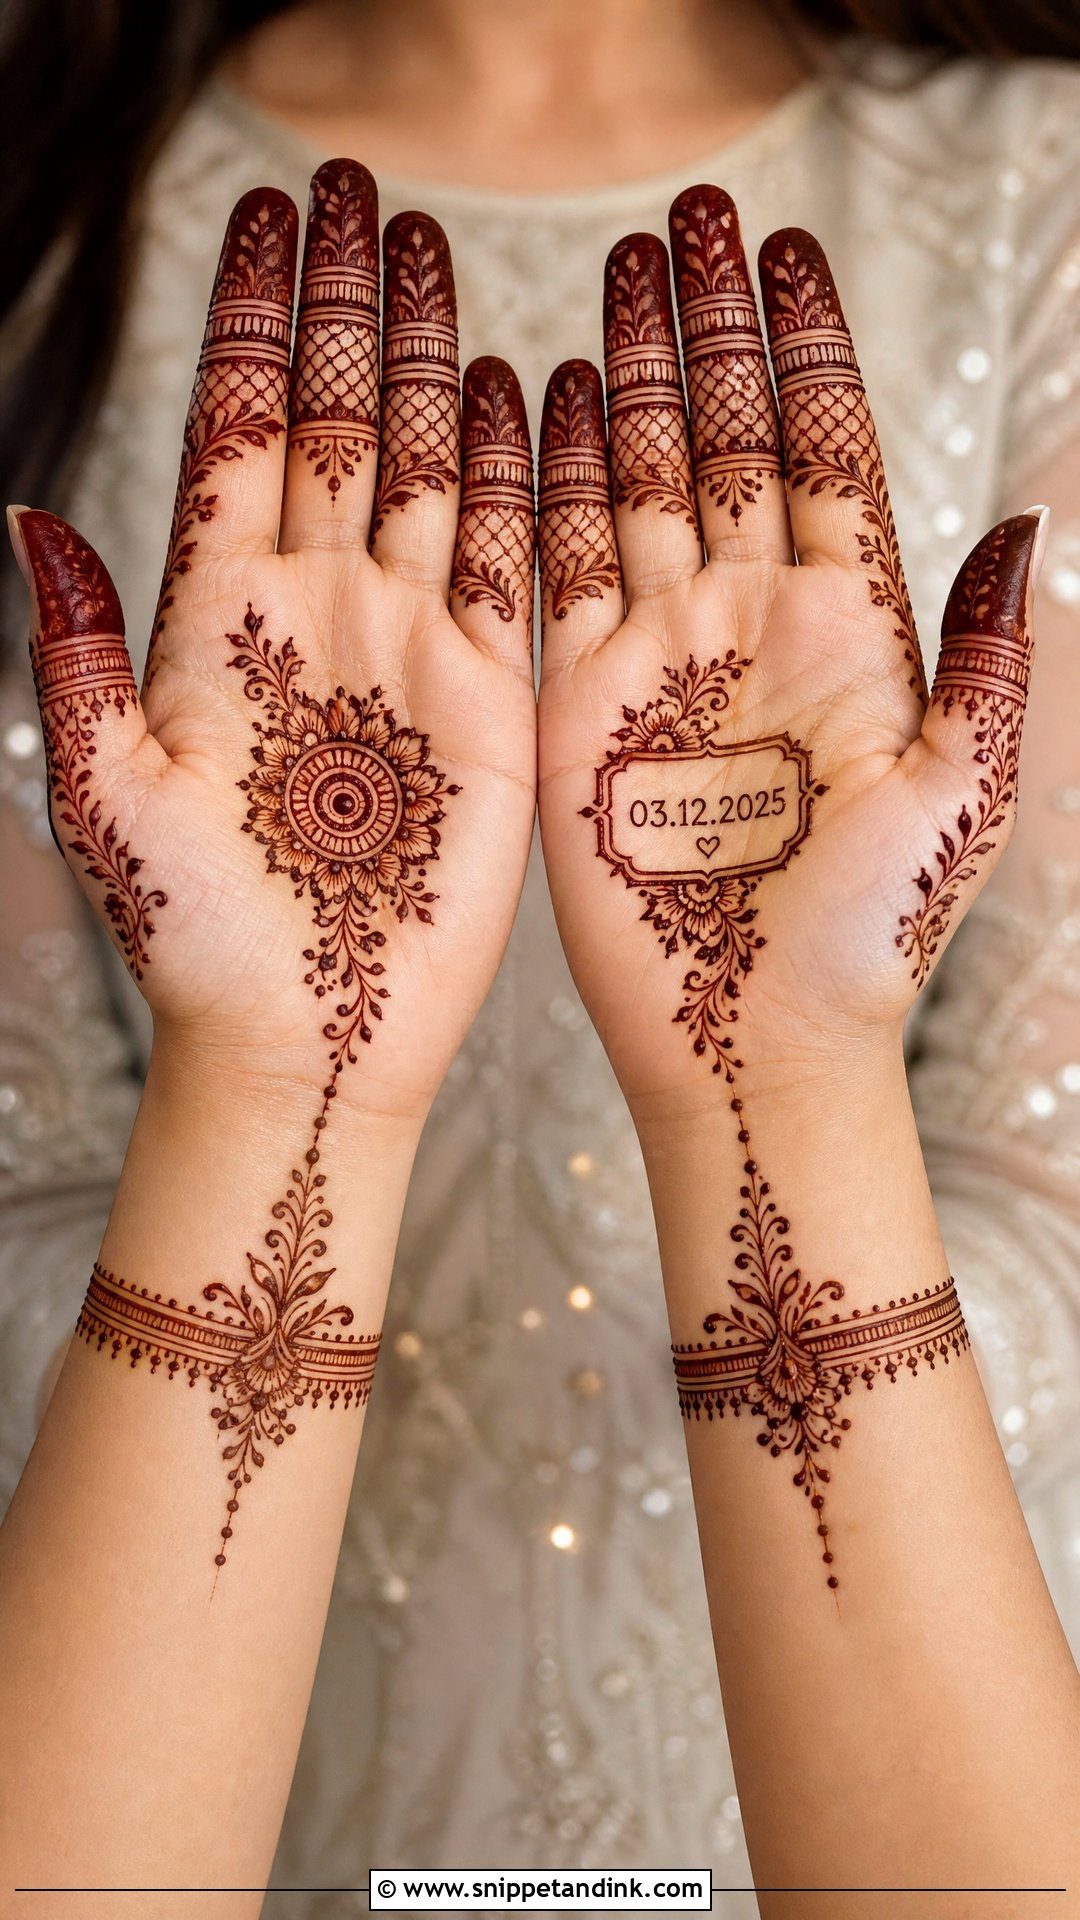
Dates are easy to personalize and easy to ruin with crowding. I place them in a wrist band, under a mandala or along a vine, and keep the filler around the numbers sparse, because dense lines next to digits make them unreadable once the stain deepens. A floral border or clean bracelet design around it finishes the hand, and it becomes a small keepsake in the photos.
28. Simple Bridal Mehndi Design For Feet
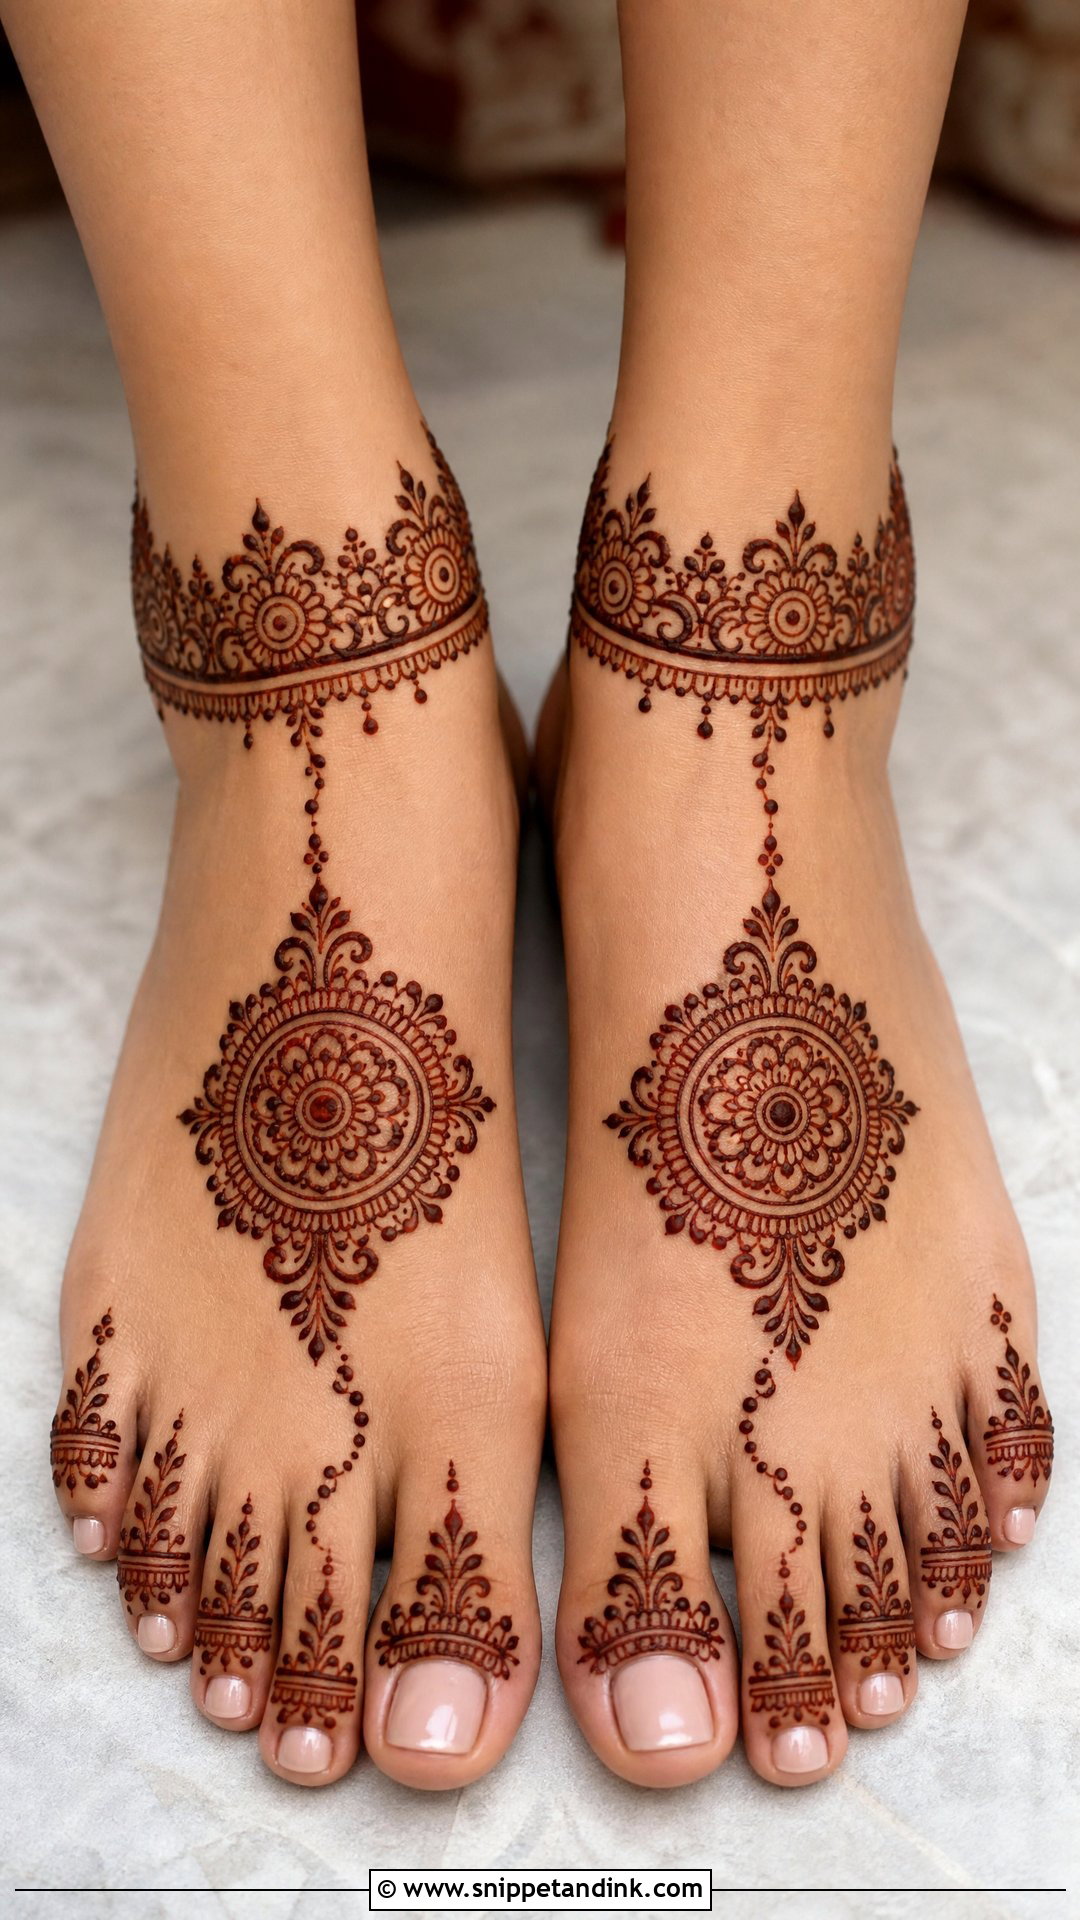
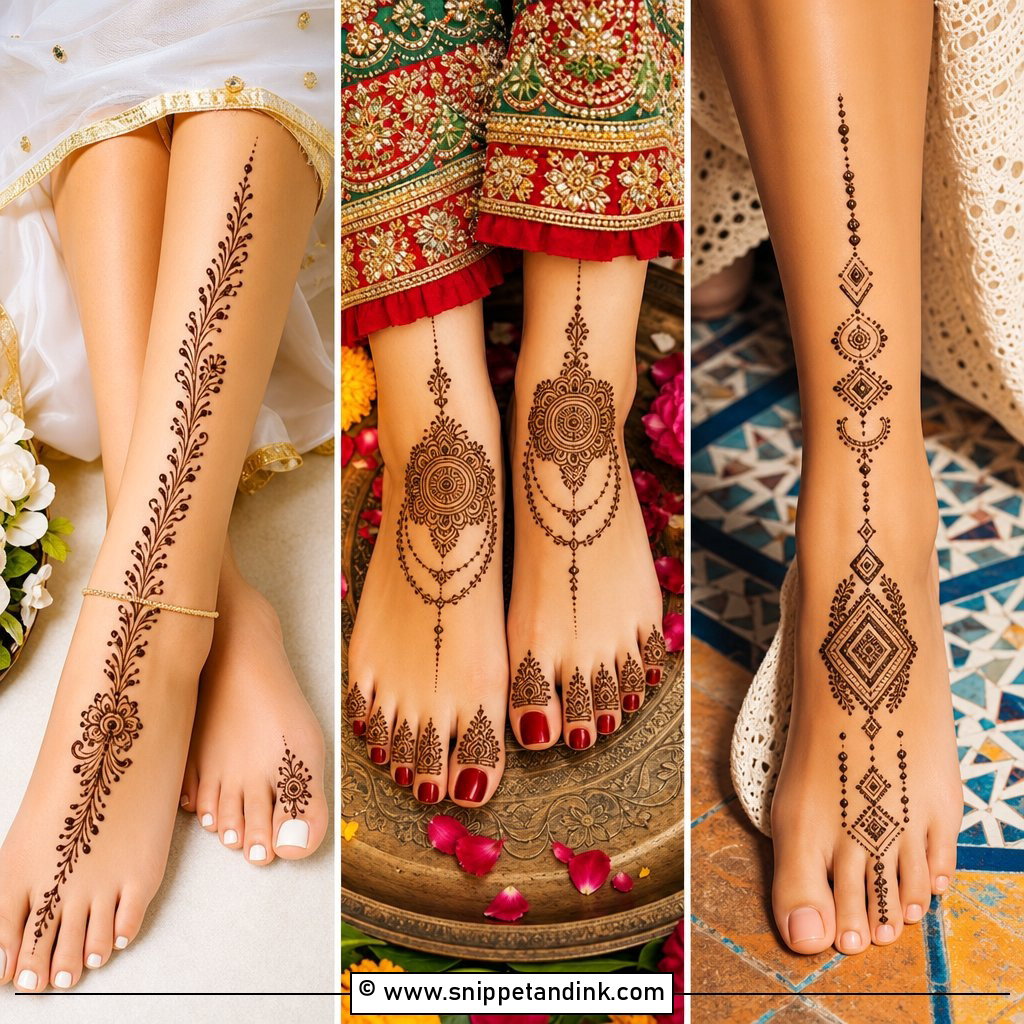
Feet need a different routine from hands. I cover the toes, top of the foot and ankle with a floral anklet, a mandala center or an Arabic trail, and keep the work around the toes especially clean so it doesn’t look smudged. The hardest part for brides is staying still: sit with your feet raised and off the floor until the paste has dried, because one step too soon smears the whole top of the foot. Simple foot mehndi is quicker to sit through and pairs well with open sandals and payal.
29. Simple Bridal Mehndi Design For Palm And Feet
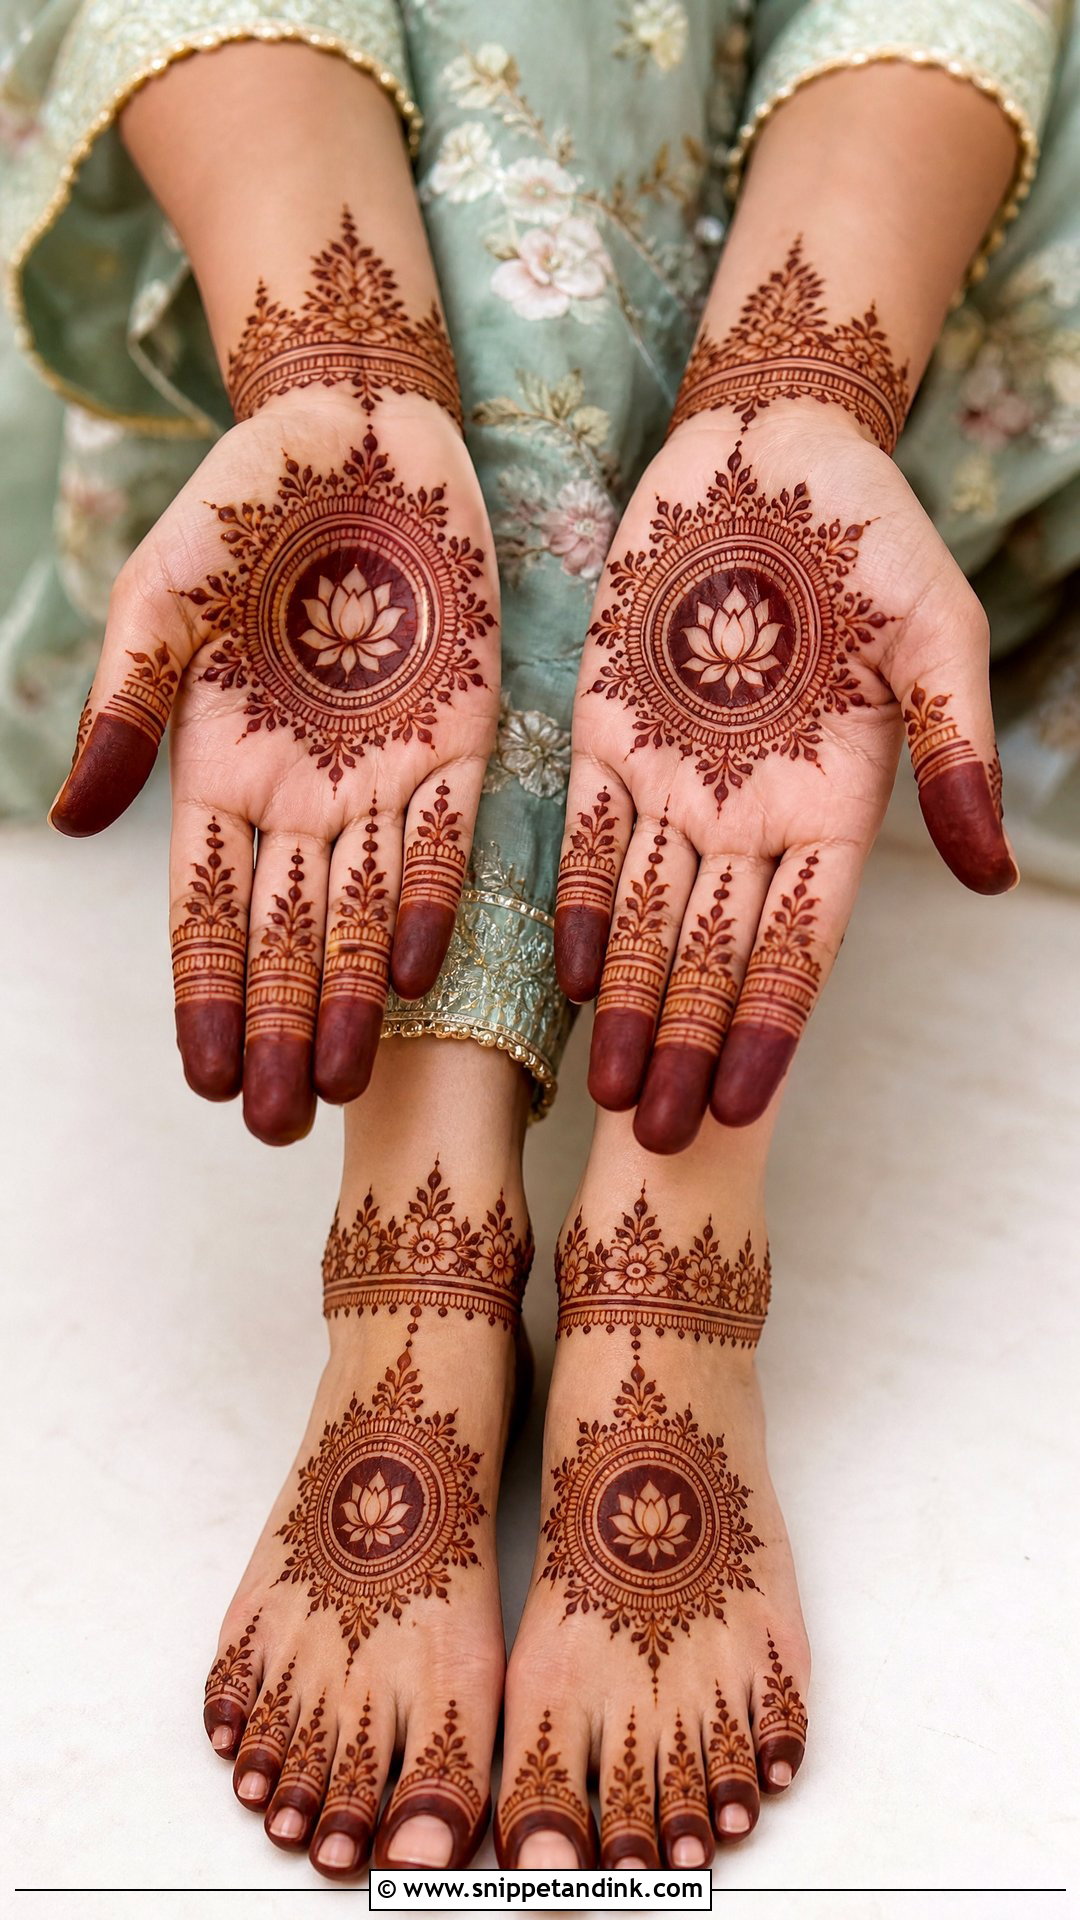
When I do palms and feet together, I repeat a few motifs so the set reads as one design. If the palm has lotus petals, smaller lotus details appear on the feet, and matching flowers and anklet bands carry the theme down. Keep the spacing open and the outlines neat. Doing both means a longer sitting, so plan the drying time before you need to stand or eat.
30. Simple Bridal Mehndi Design For Modern Bride
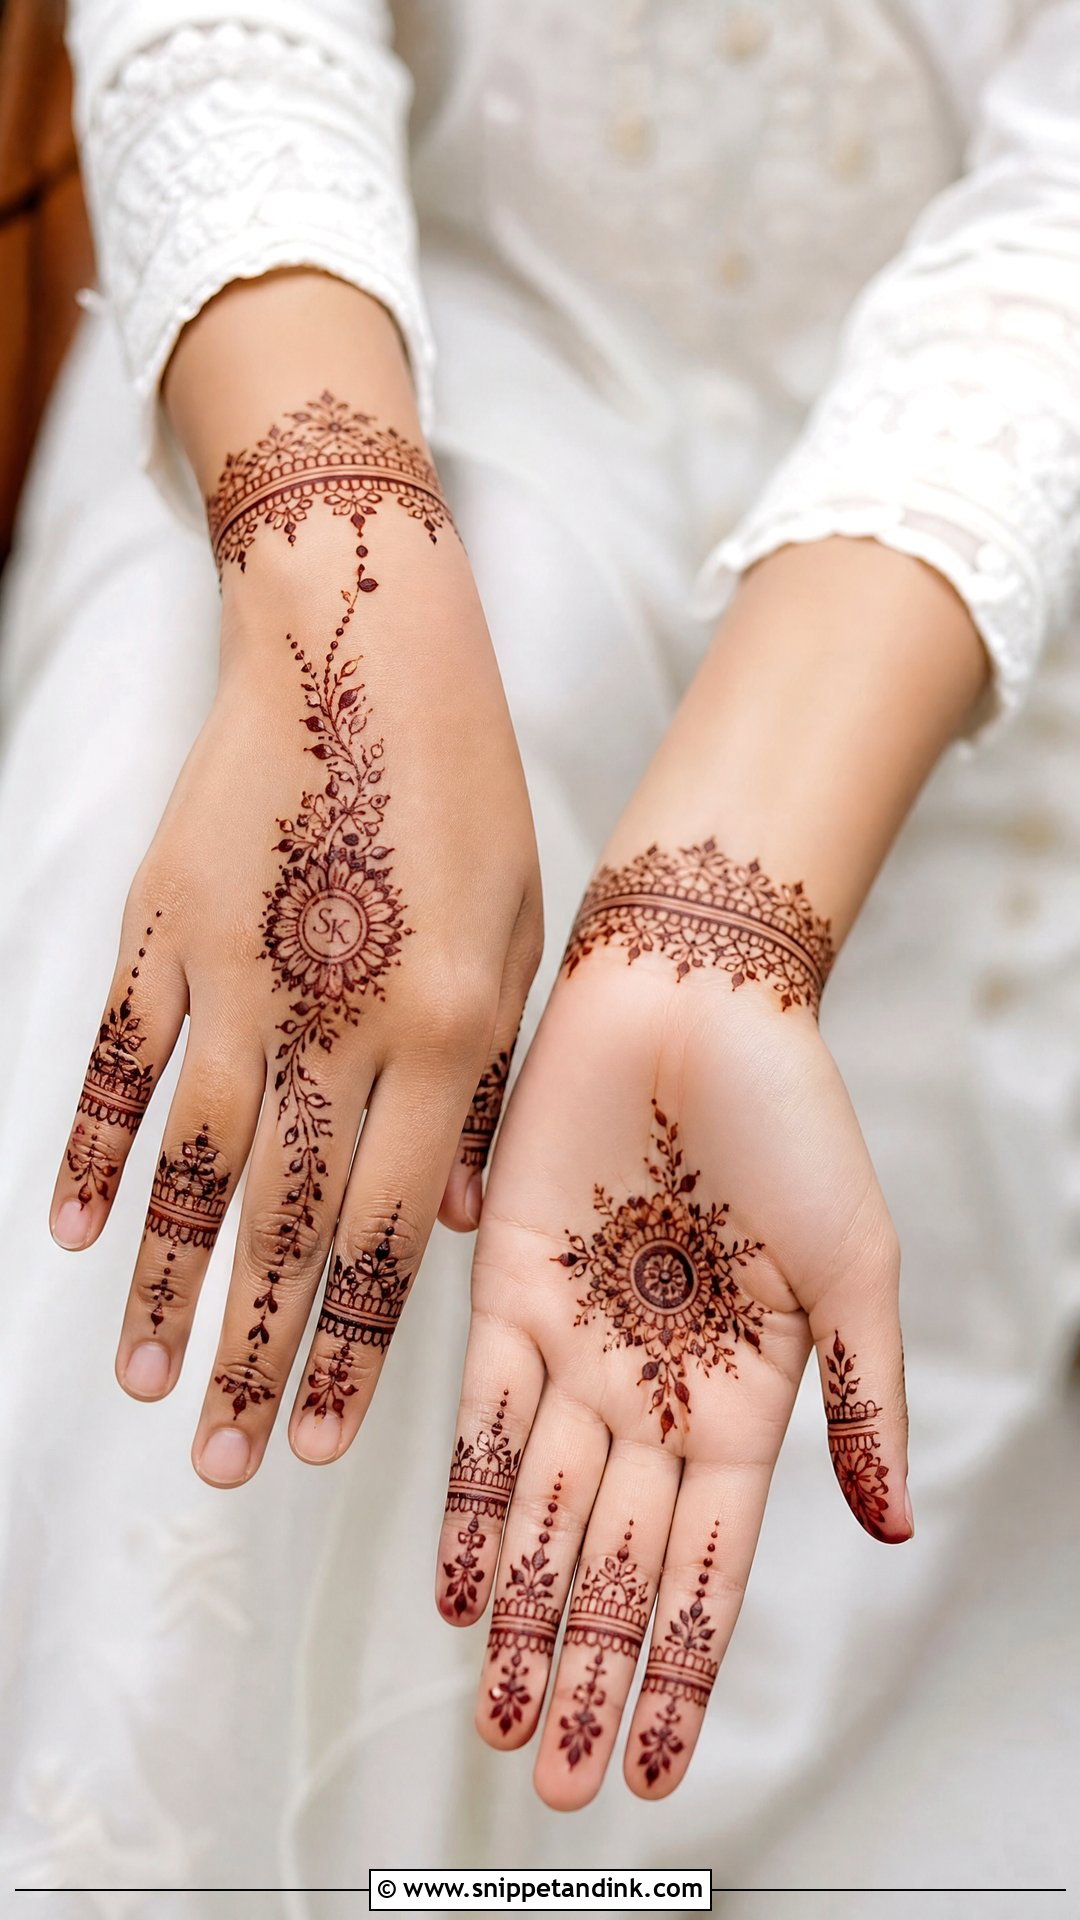
The modern brides I draw for usually want placement to do the talking: a minimal mandala, a fine floral trail, a bracelet wrist or initials, sometimes deliberately asymmetrical between the hands. It sits easily with pastel outfits and minimalist jewelry. My one caution is trend-chasing. Choose natural henna and a layout that doesn’t depend on this season’s motif, so the photos still feel right years from now.
Scraping, Not Washing: The First Two Days After Application
How you treat the paste afterwards decides as much of the color as the design does.
- Once the paste dries, I dab on a light lemon and sugar sealant so it stays stuck to the skin and keeps releasing dye.
- Leave it on as long as you can, ideally six to eight hours or overnight. Loosely wrapping your hands in tissue for sleep protects the bedding.
- Scrape it off with a blunt edge or your fingernail rather than rinsing it away; water at this stage stops the stain developing.
- Keep water off the design for the next 12 to 24 hours, and go easy on soap and hand sanitizer.
- Rub in a little balm or natural oil before showering on the following days to shield the stain.
Expect the palms and fingertips to come up darkest and the back of the hand and wrist a few shades lighter. That variation is normal, not a sign the paste failed.
The One Cone I Refuse to Use
So-called black henna and some instant-dark cones contain PPD, a hair-dye chemical that can cause blistering and lasting skin reactions. Real henna never stains black; it stains orange, then red-brown. If a cone promises a black result within the hour, I’d walk away. Ask your artist what’s in her paste, and if you’ve never worn henna, have a small patch done a week or so before the wedding to see how your skin takes the color.
Clean Lines Stain Better Than Crowded Ones
A simple design can feel completely bridal, and in my chair it often stains more clearly than a crowded one. Shape your choice around the ceremony, your outfit, your hand shape and how long you can comfortably sit. Look for clean lines, balanced spacing and motifs that will still read once the color deepens over two days. From the engagement to the reception, a lighter design leaves room for your jewelry and your hands themselves to show.
You'll Like These Ideas:


Leave a Reply