
Bunch-style mehndi is built from grouped flowers, petals, vines and paisleys with open skin left between them, instead of one dense pattern covering the hand. That open skin is the whole point: it lets each cluster read clearly once the stain develops. I use it for Eid, engagements, baby showers and bridesmaids as often as for brides, because the same layout can be light on the back hand or rich across a full hand. It suits beginners and professional artists alike, since a single cluster can be repeated at different sizes. Below are 25 bunch layouts, each with notes on how I’d place it and how it stains.
Why Open Space Shrinks Once the Paste Comes Off
Bunch designs depend on the gaps between flowers. What surprises people is that those gaps look bigger in wet paste than in the final stain. Henna spreads a tiny amount as it dries, and fine lines thicken slightly on warm skin. A gap that looks generous at application can almost close by the next morning.
- I leave roughly twice the space between clusters that I want to see in the finished stain.
- Fine fillers like jaali and checks go inside a bunch, never in the open skin between two bunches.
- On fingers, I keep lines further apart at the knuckles, where the skin folds and lines can merge.
- Paste consistency matters: too wet and it bleeds outward, too dry and the line cracks and breaks.
Hand size changes the layout too. On a small hand, three bunches can be plenty; on a long hand, the same three look sparse, so I add a trailing vine rather than another full cluster.
1. Simple Bunches Mehndi Design
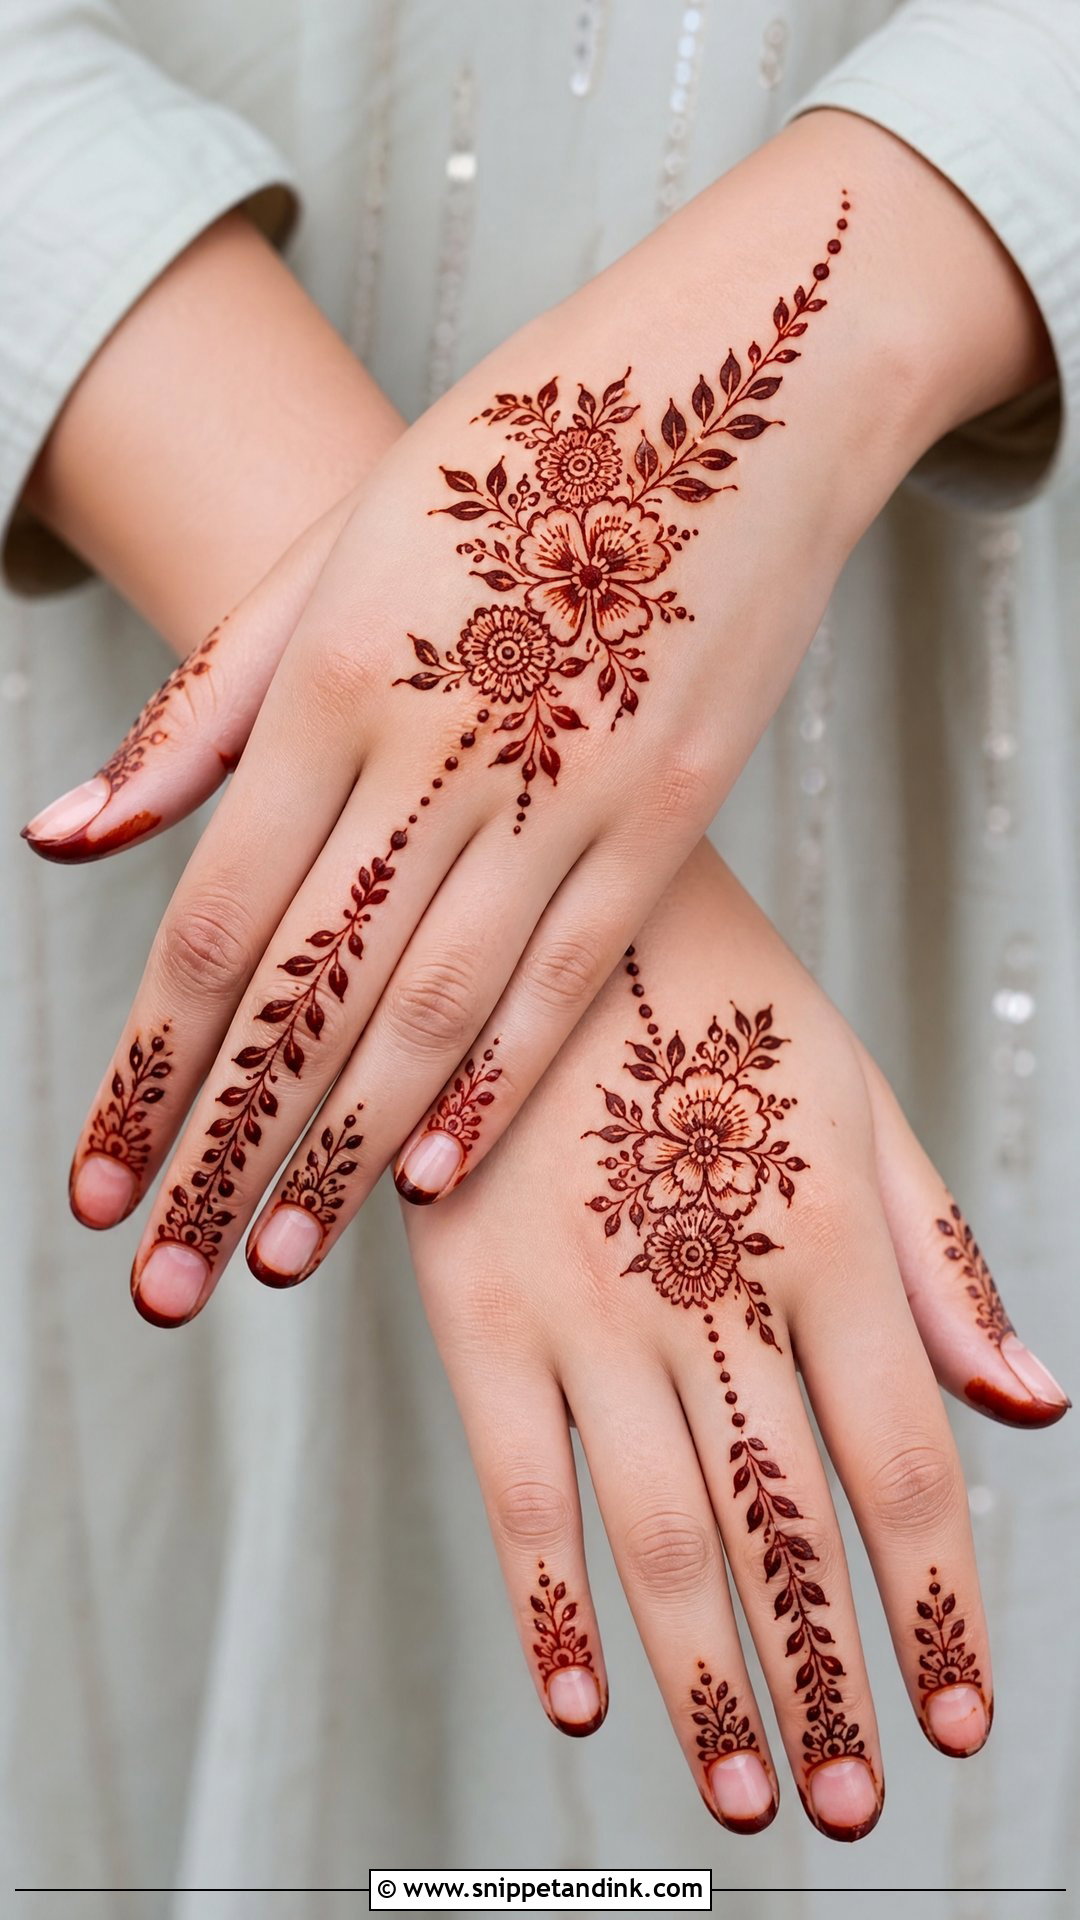
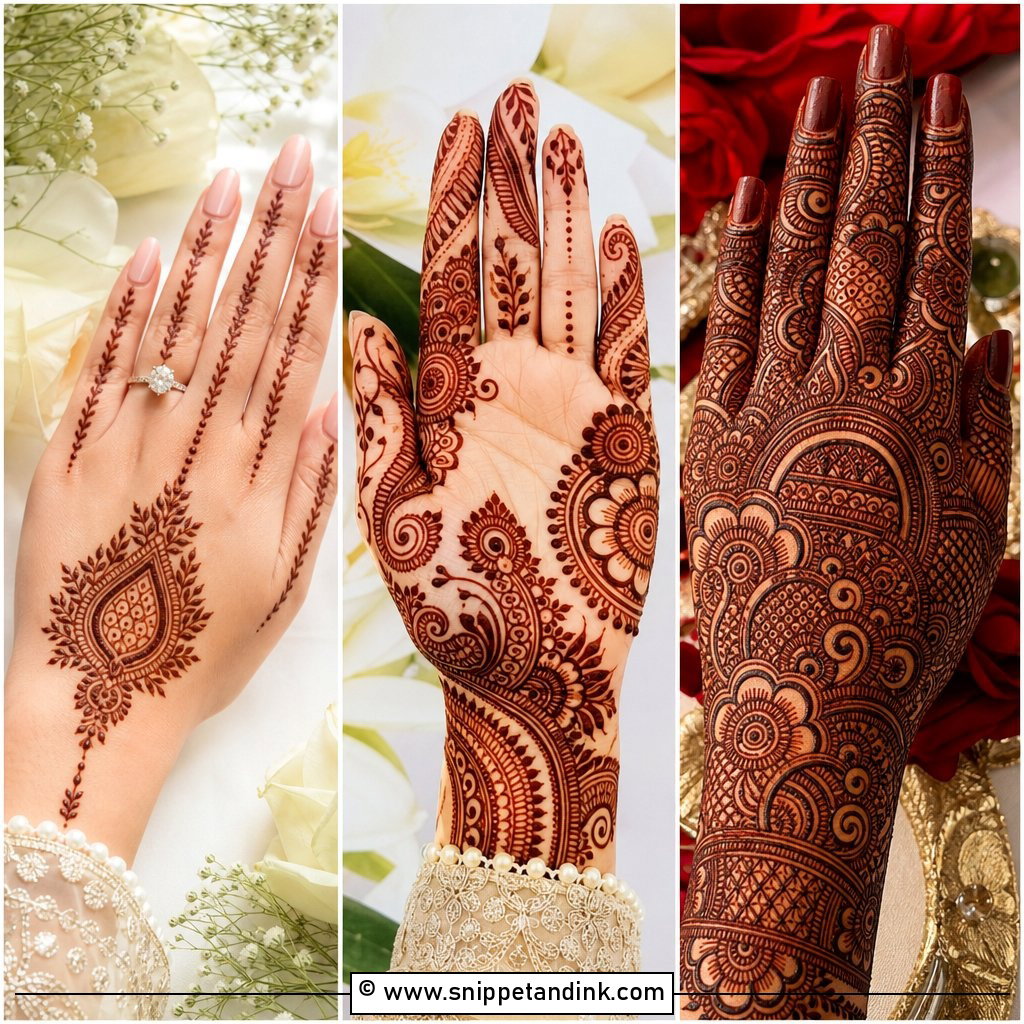
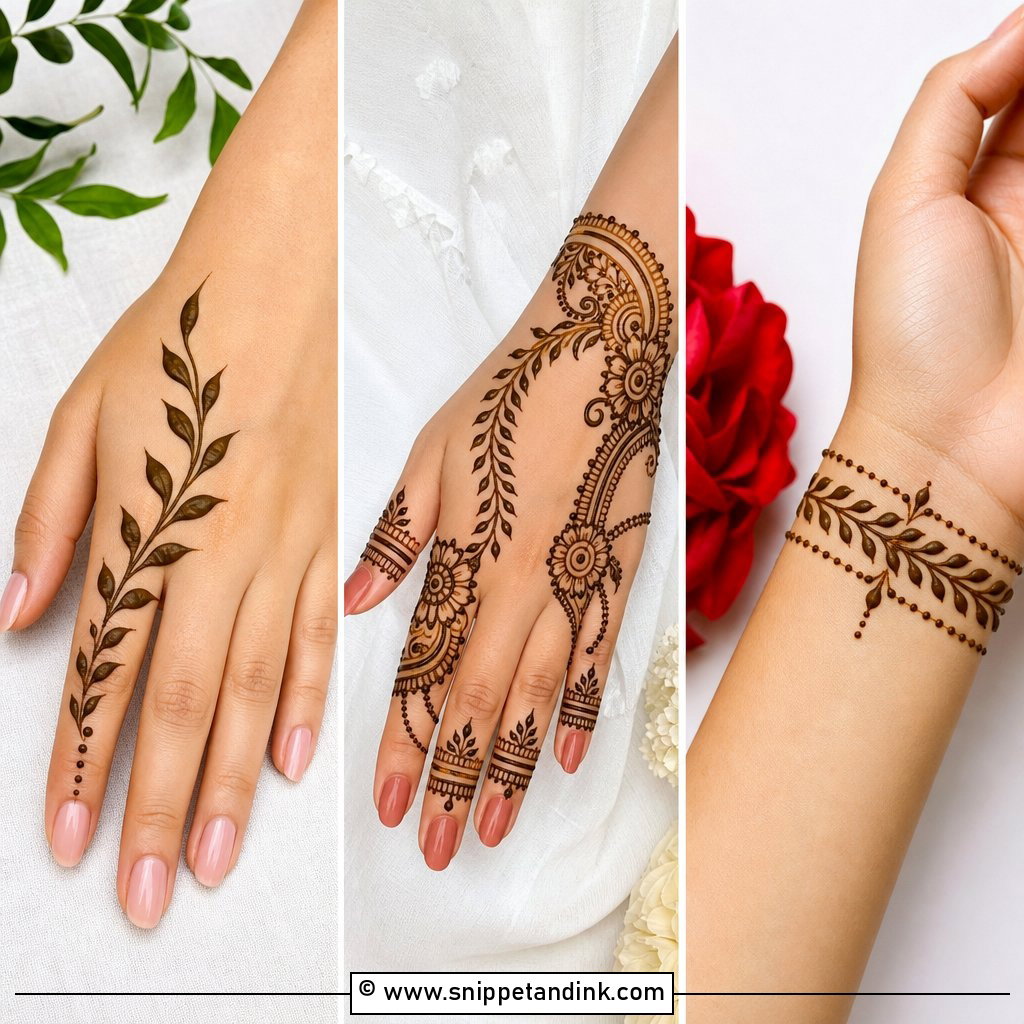
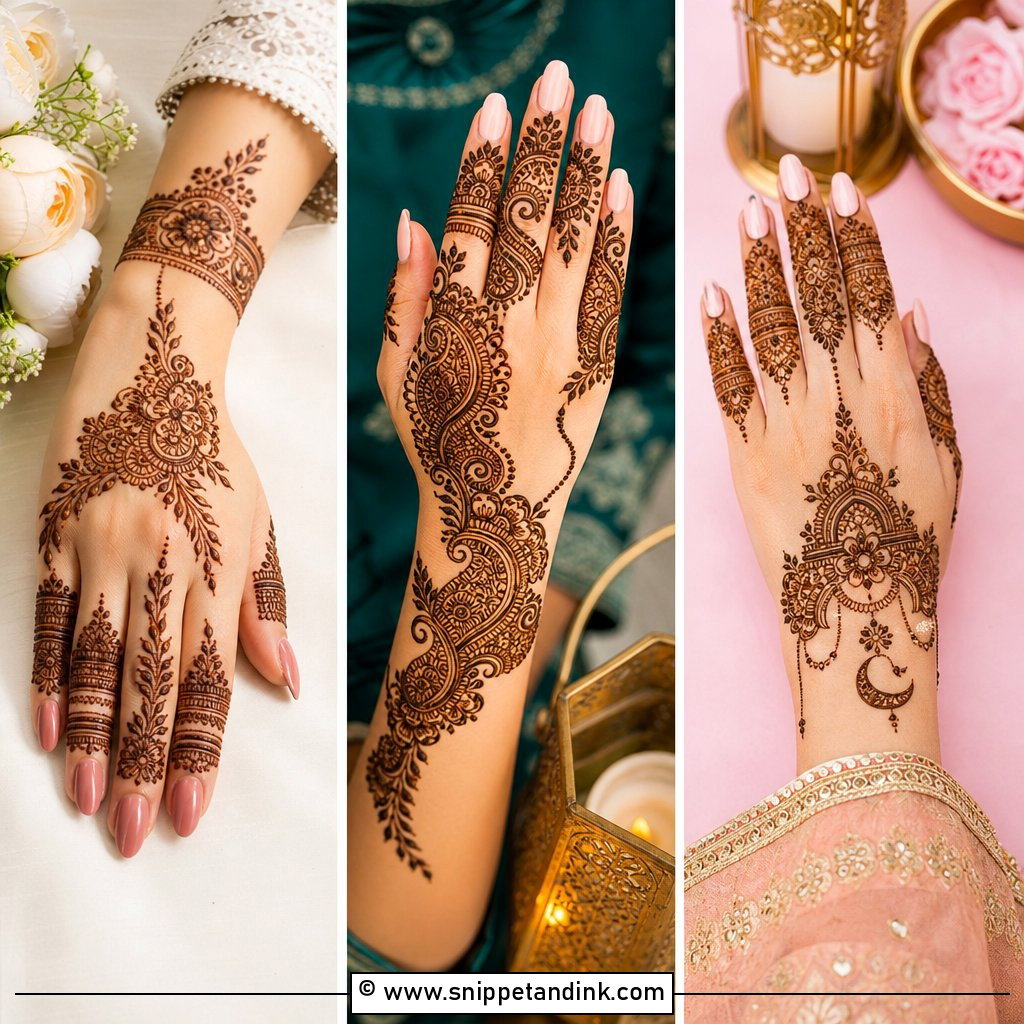
Two or three flower clusters on the back hand, linked to the fingers by thin leafy vines, make the simplest bunch layout. I keep the petals bold and the gaps generous, because henna spreads a little as it sits, and narrow gaps close up in the final stain. Dotted trails around each cluster finish it. Repeating one flower at different sizes is the easiest way for a beginner to get a balanced result.
2. Arabic Bunches Mehndi Design
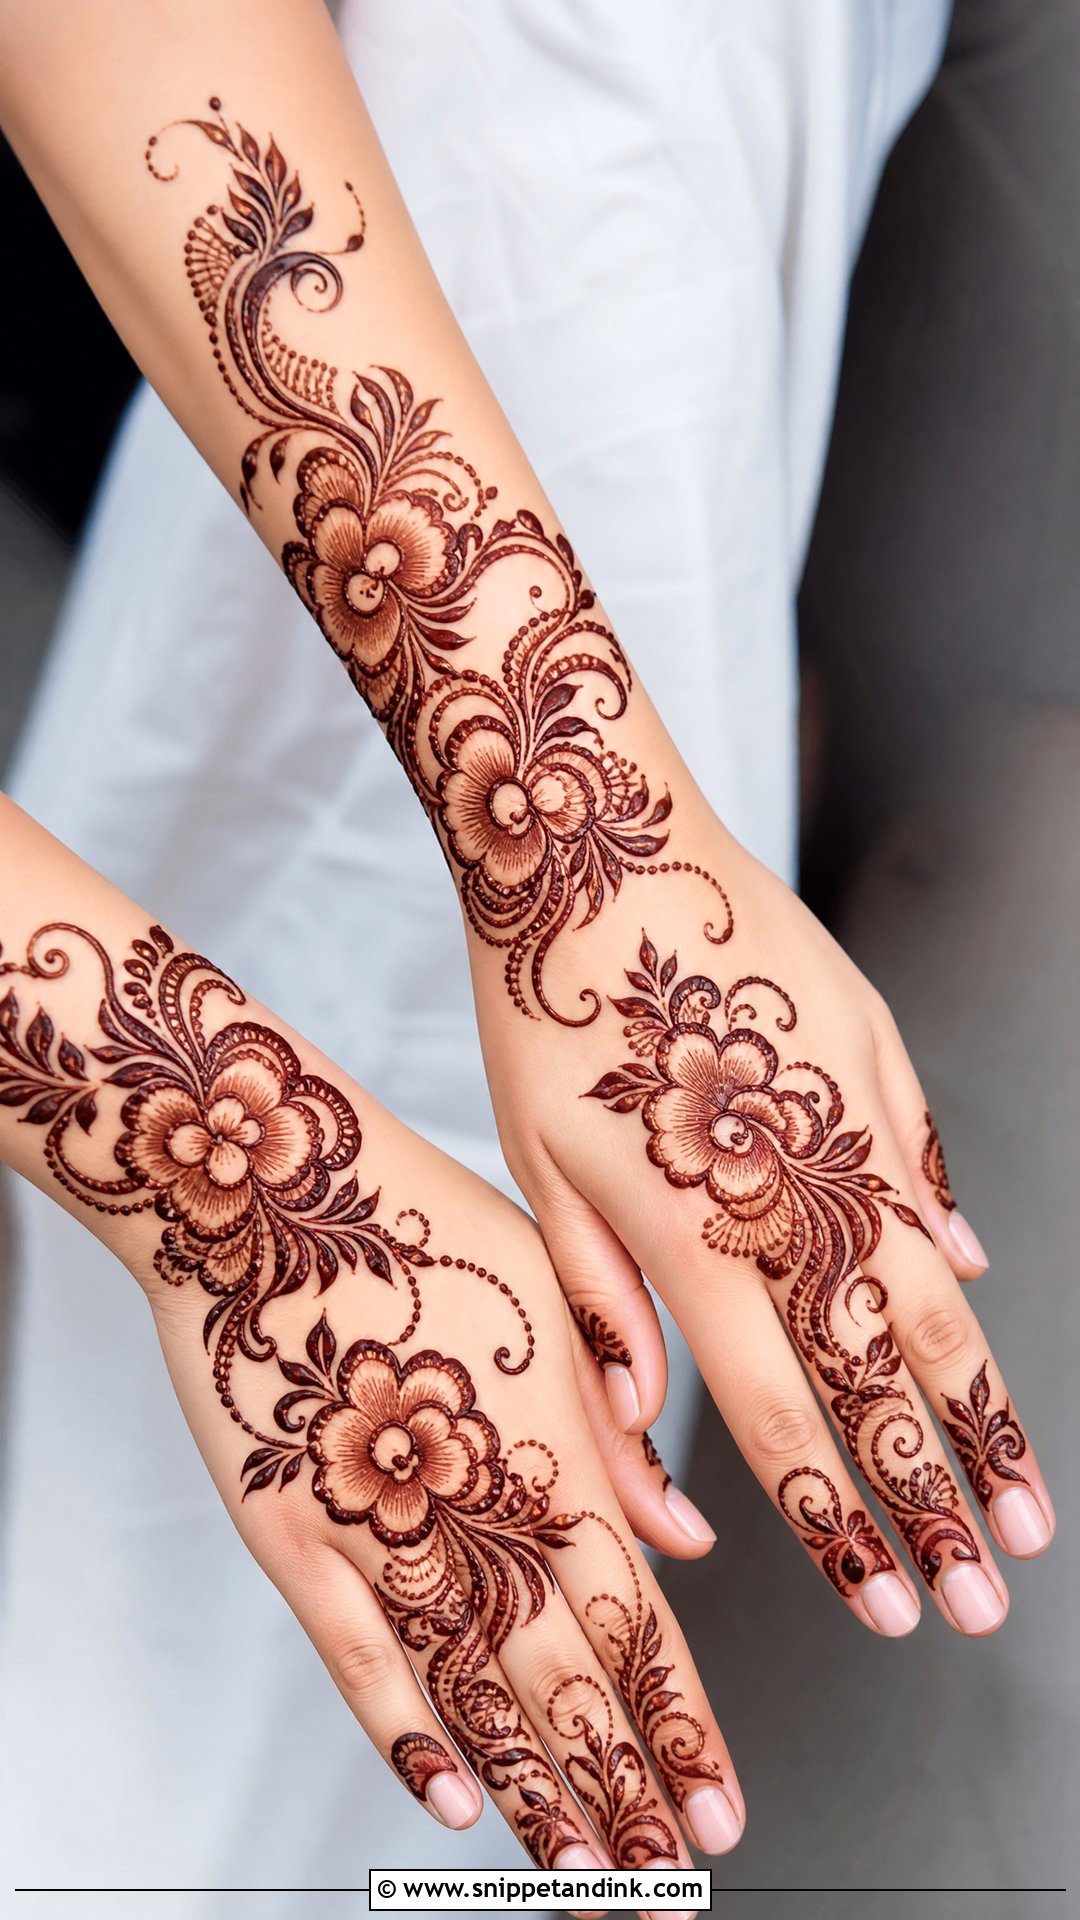
The Arabic version runs diagonally: a bunch near the wrist, a second across the middle, smaller flowers climbing to the index finger. I outline the flowers boldly and shade lightly inside the petals, then join the bunches with curved leaves and small paisleys. It takes far less time than full bridal work, which is why I often suggest it for guests on a busy wedding morning.
3. Back Hand Bunches Mehndi Design
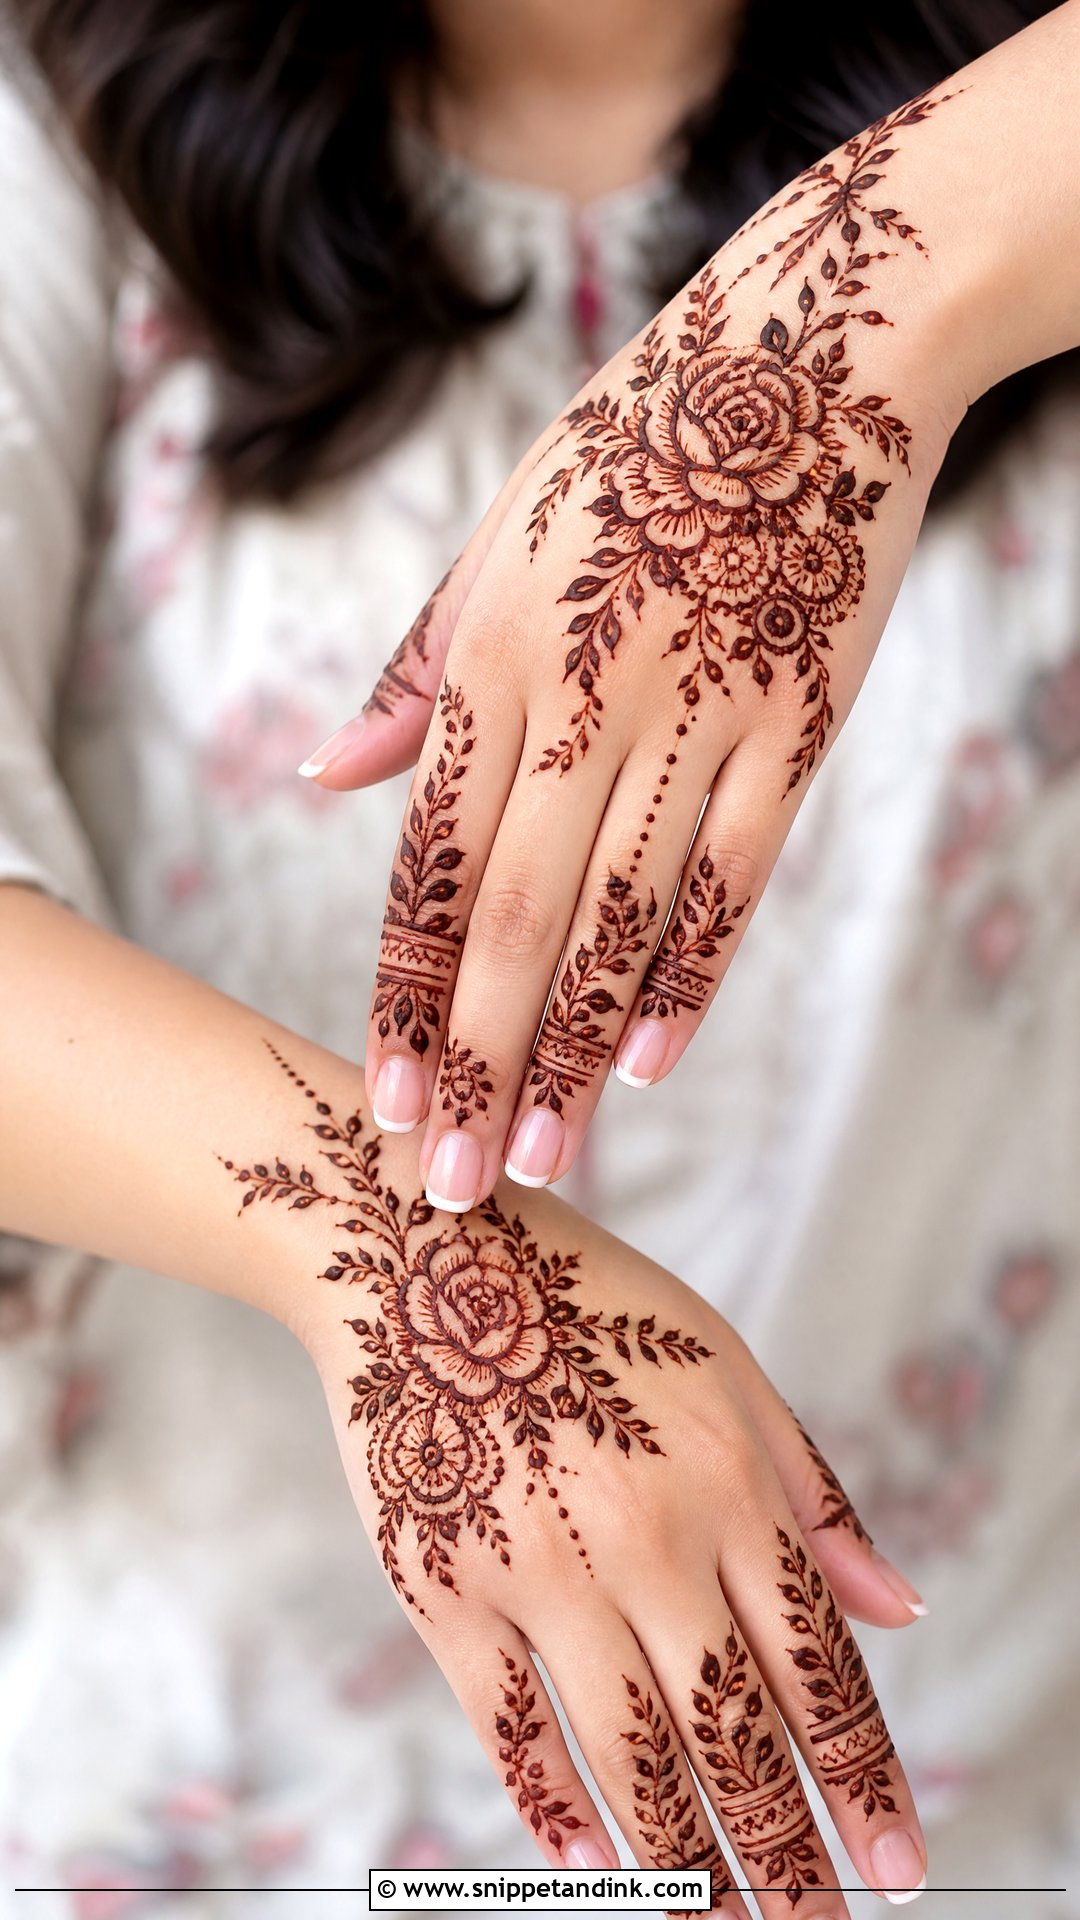
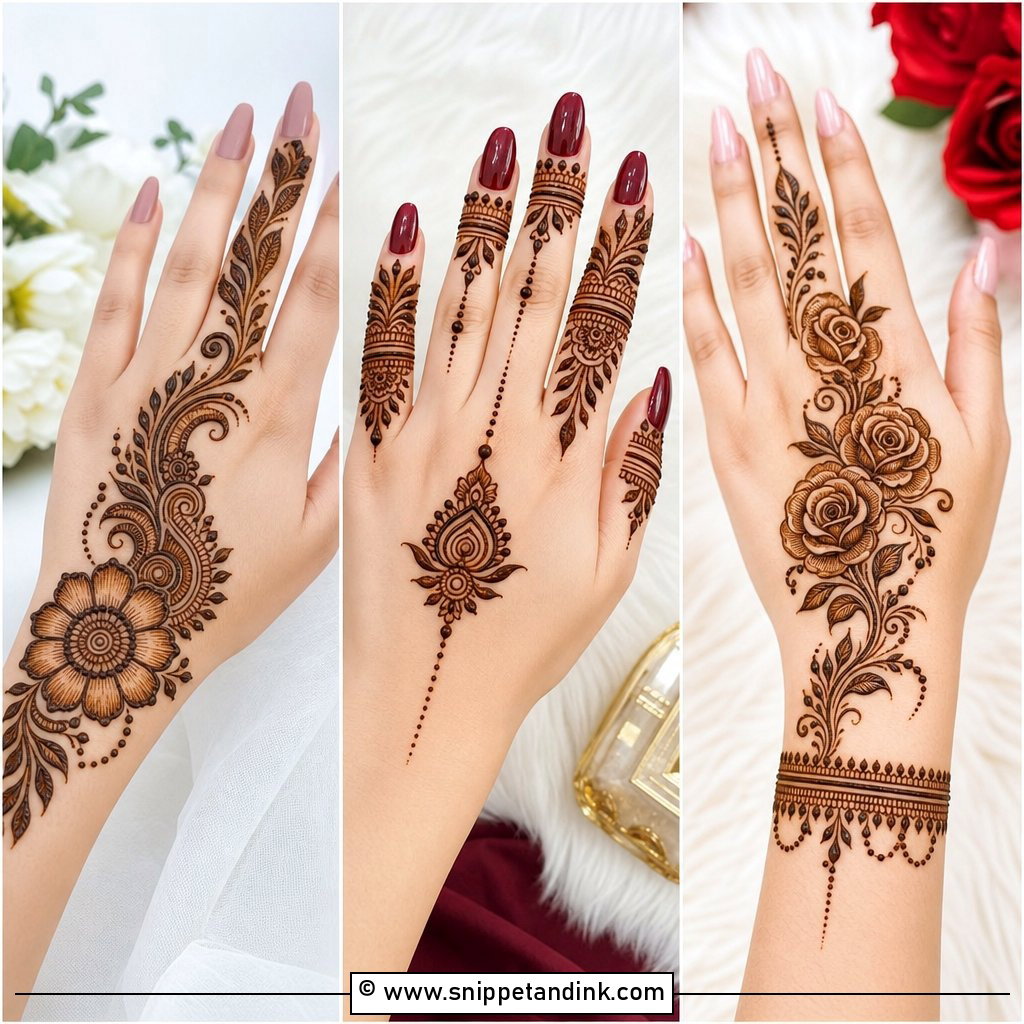
The back hand is where bunches show best, because that’s the side people see when you hold a glass or a bouquet. I start with one large cluster in the center, then pull slim vines toward the wrist and fingers, and keep the fingertips lightly detailed with small leaves and bands. Be aware that the back of the hand stains lighter than the palm, so I’d keep the paste on longer here. Clean negative space around the main bunch gives it a modern finish.
4. Front Hand Bunches Mehndi Design
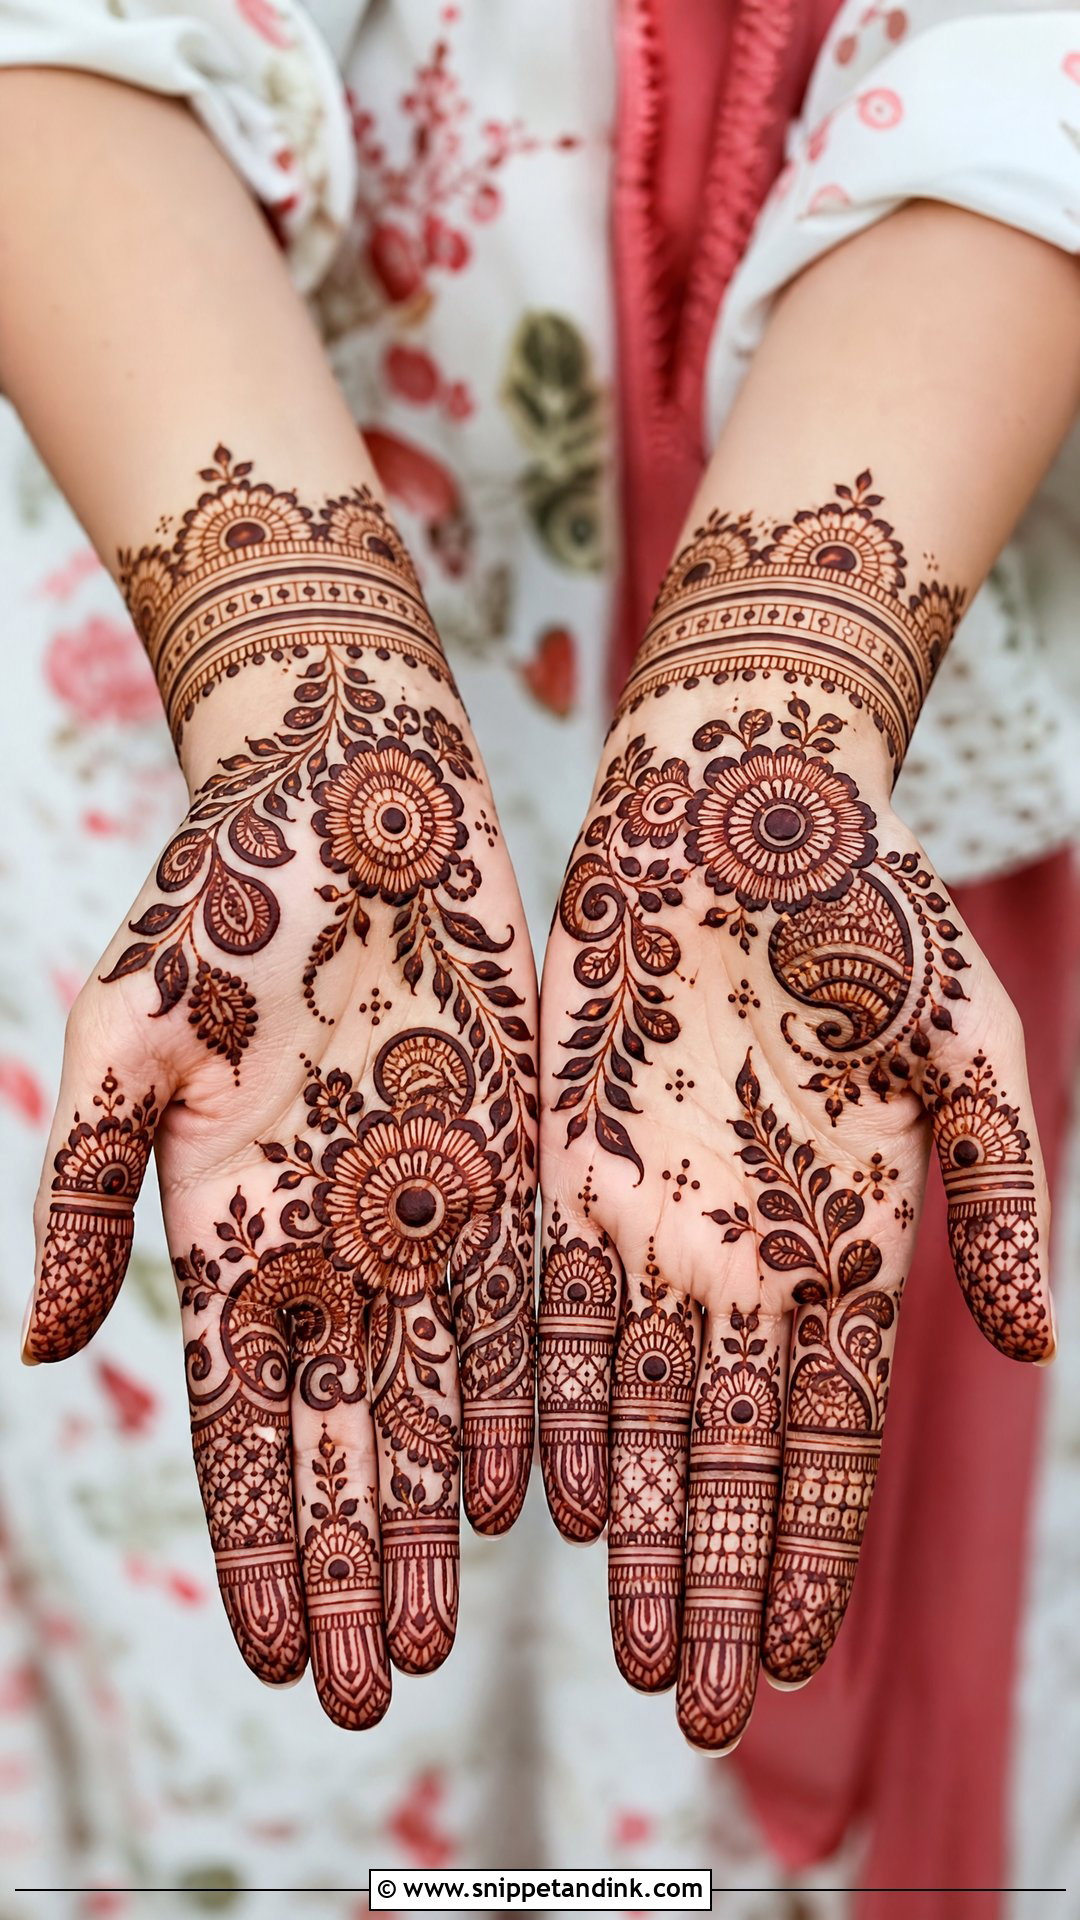
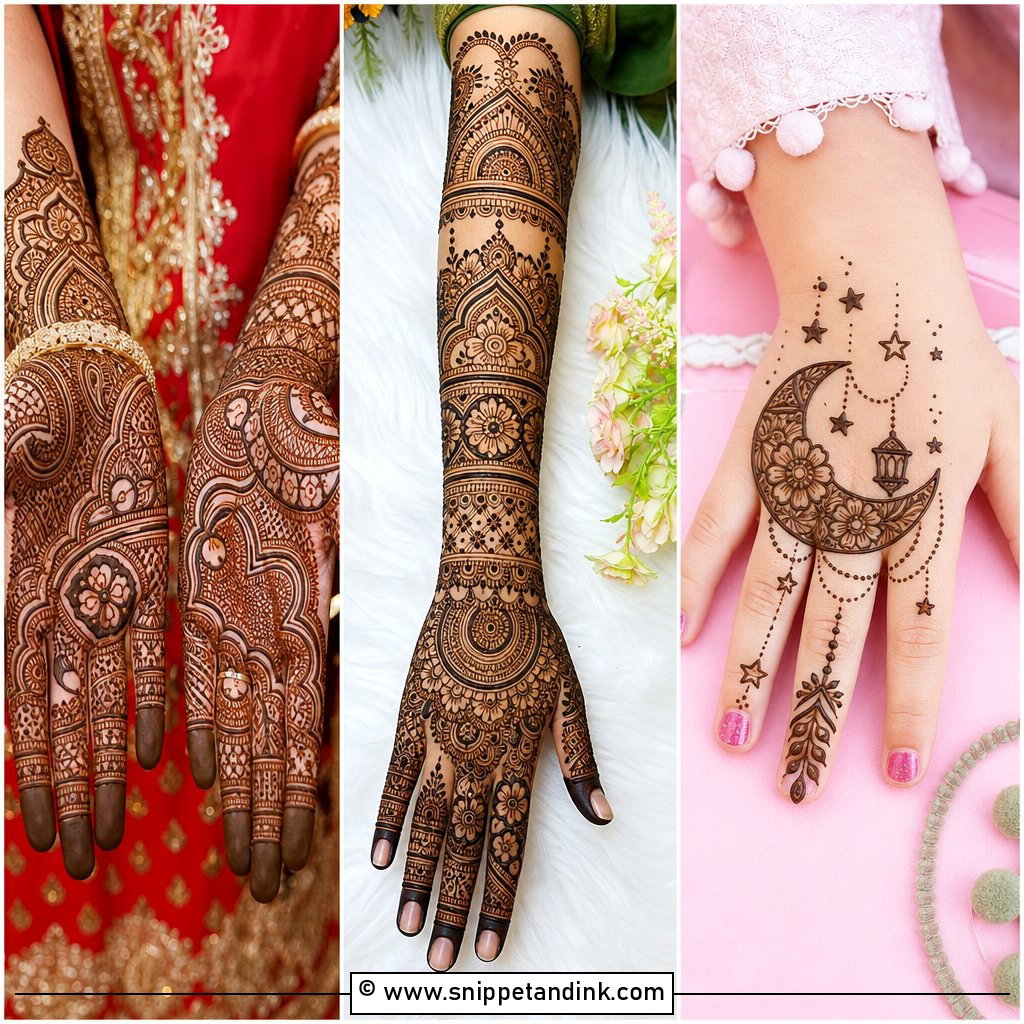
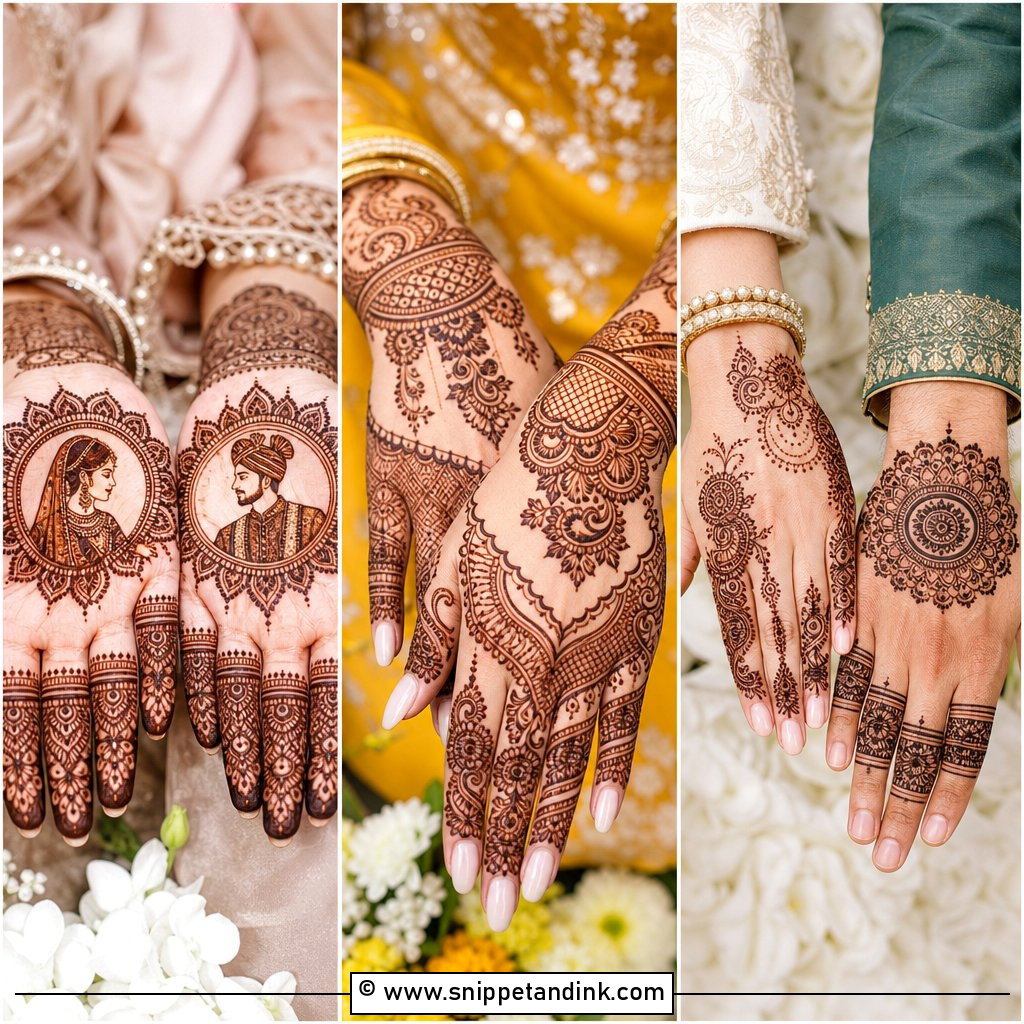
Palms stain darker than any other part of the hand because the skin is thicker, so a bunch layout on the front looks rich even when it isn’t heavy. A round cluster sits in the center, with vines curving toward the thumb and wrist, and small paisley bunches at the base of the fingers. I use fine lines inside the petals and bolder outlines on the main flowers. It suits family functions and smaller wedding events.
5. Full Hand Bunches Mehndi Design
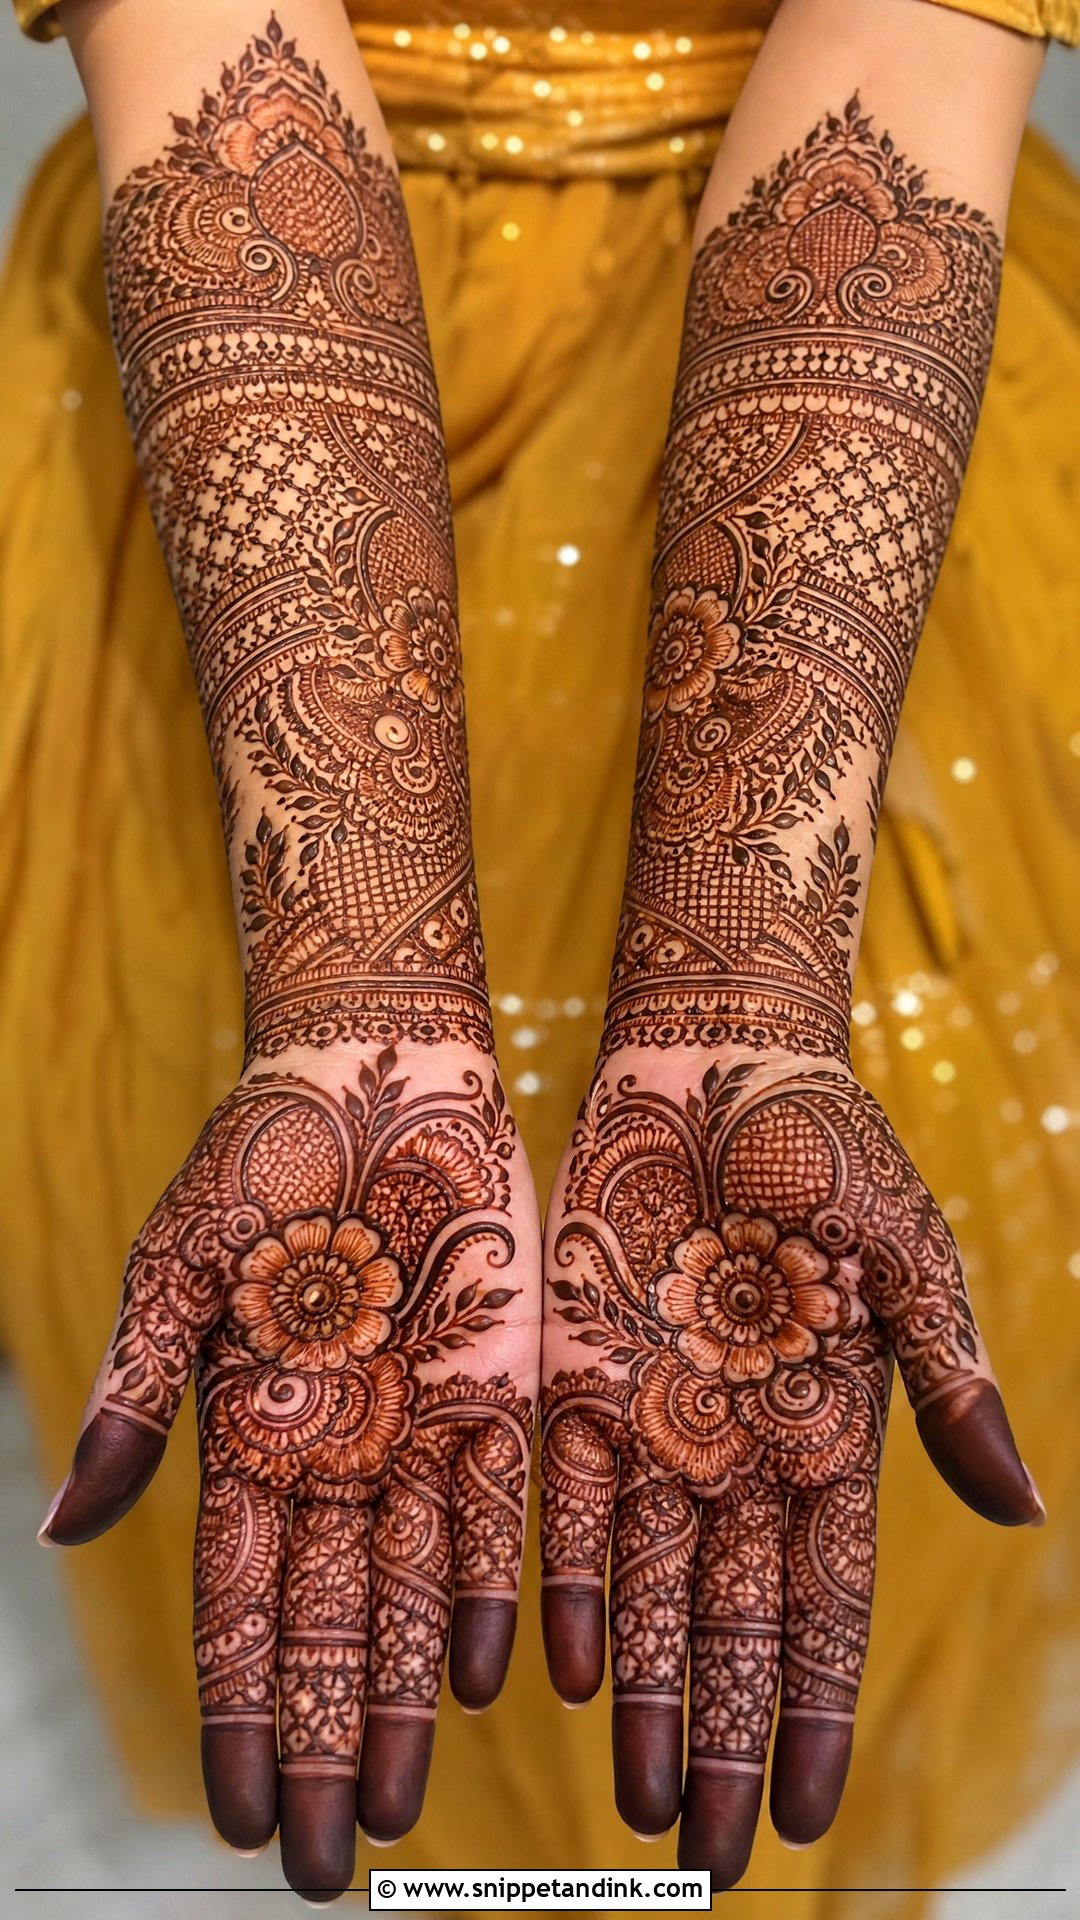
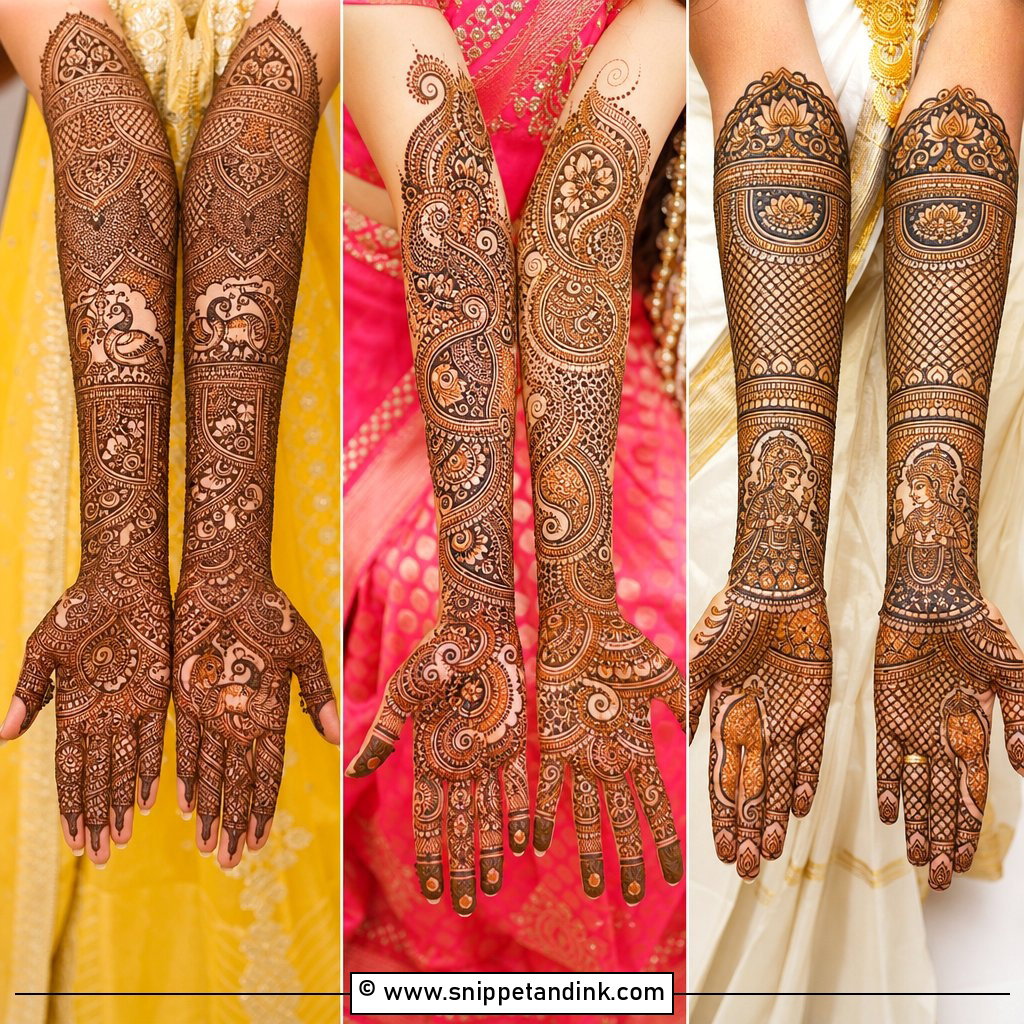
A Full hand bunches mehndi design runs from the fingertips across the palm or back hand to the wrist or forearm. The mistake I see most is filling every gap with the same texture. I divide the hand into flower bunches, leaf clusters, paisley sections and bracelet bands, then add jaali mesh only between them. That keeps the hand readable from a distance. It suits brides and sisters of the bride.
6. Bridal Bunches Mehndi Design
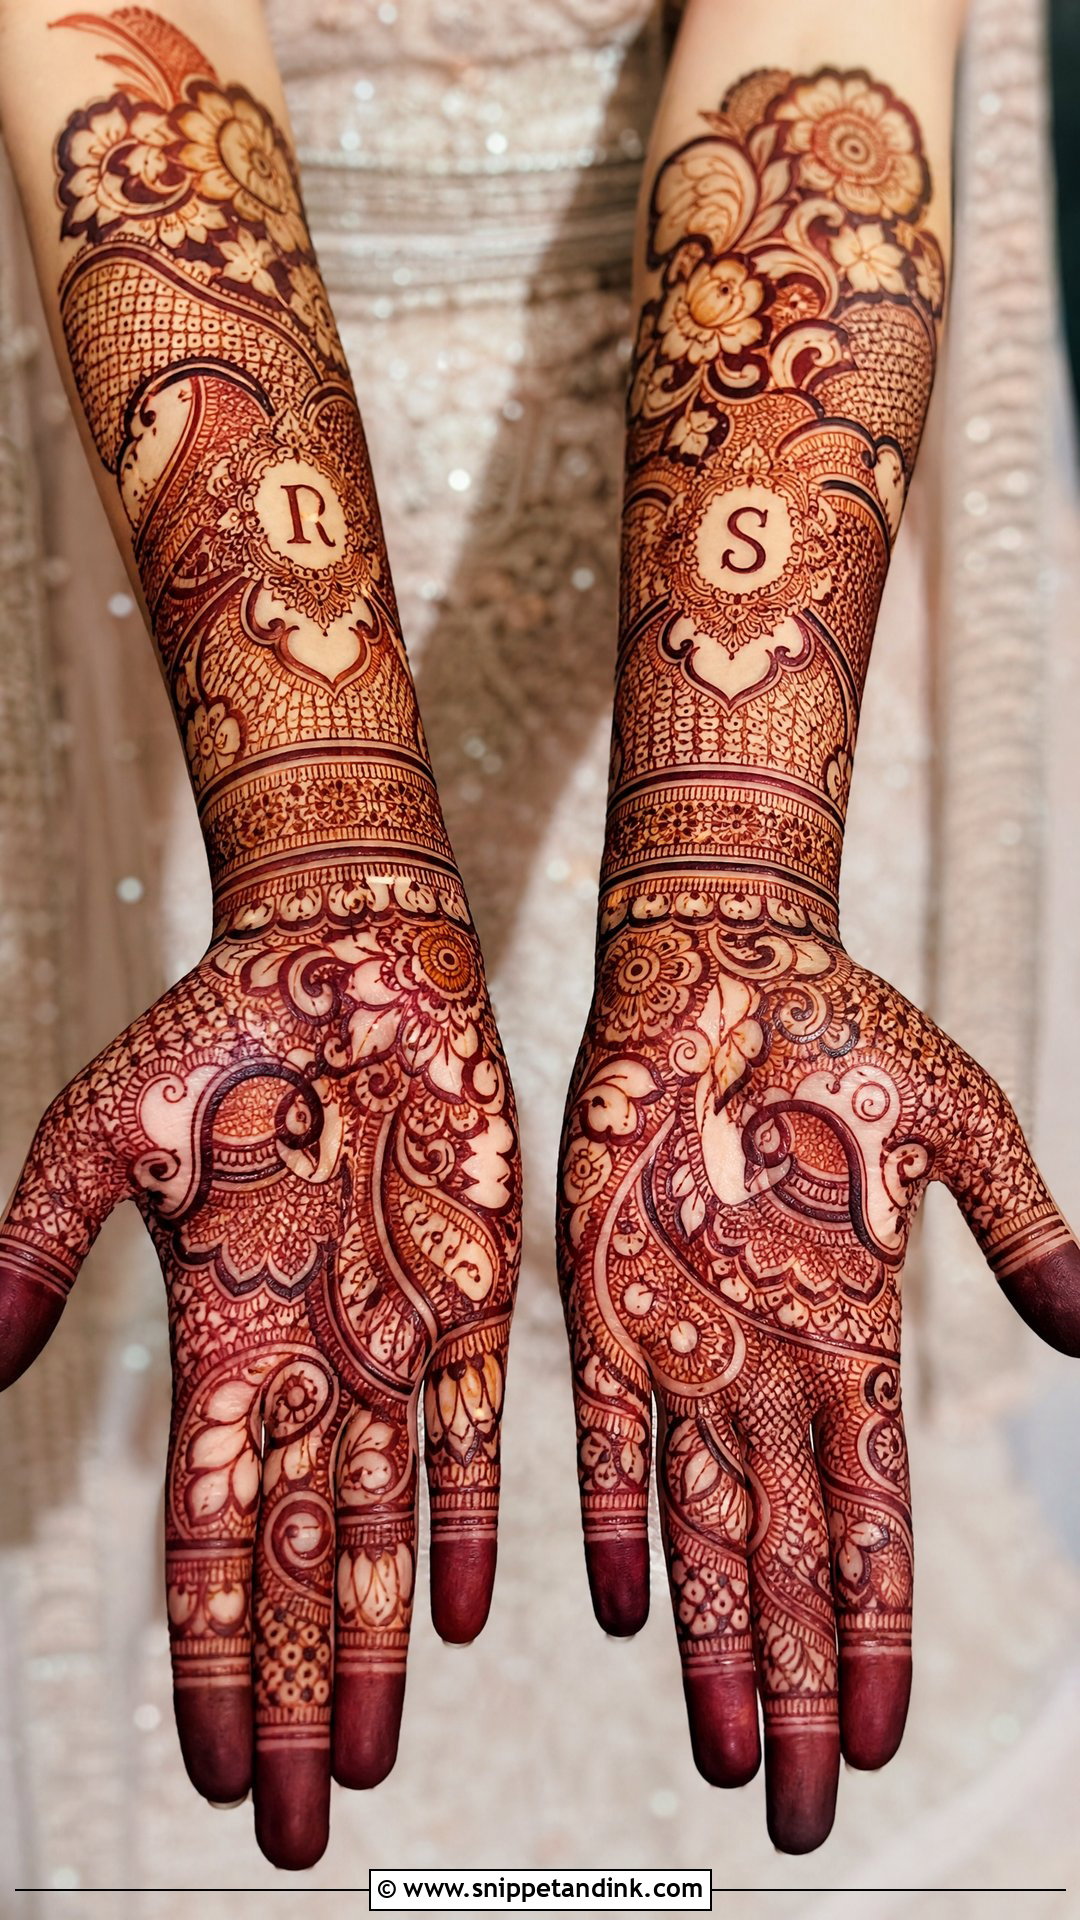
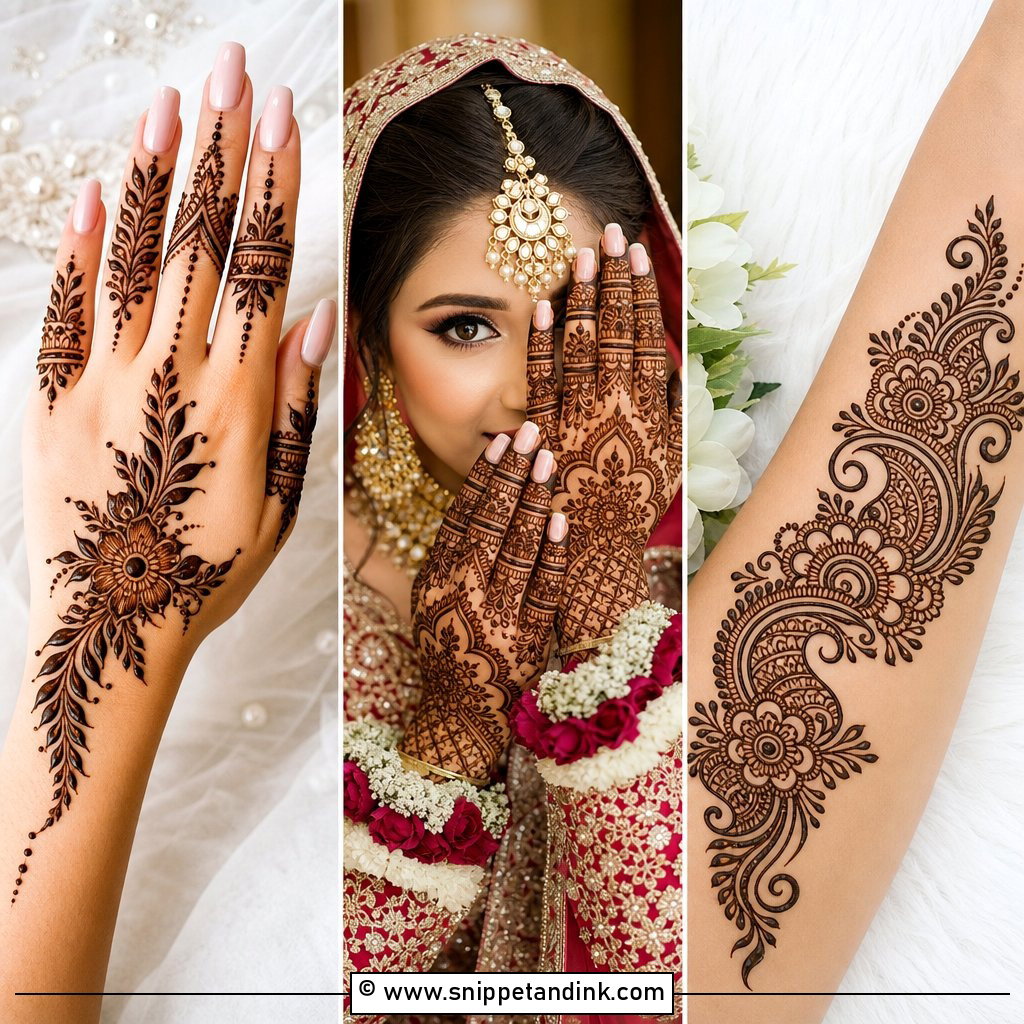
For bridal work, floral bunches sit among paisleys, peacocks, lotus details and fine jaali. On the back of the hand, I let the clusters flow like jewelry from wrist to fingertips. Initials or small wedding symbols can be hidden in the design if the couple likes that tradition. I vary petal sizes and shading so the design stays organized; a bride sits for several hours, and those hours are wasted if the stain looks like one dark mass.
7. Rose Bunches Mehndi Design
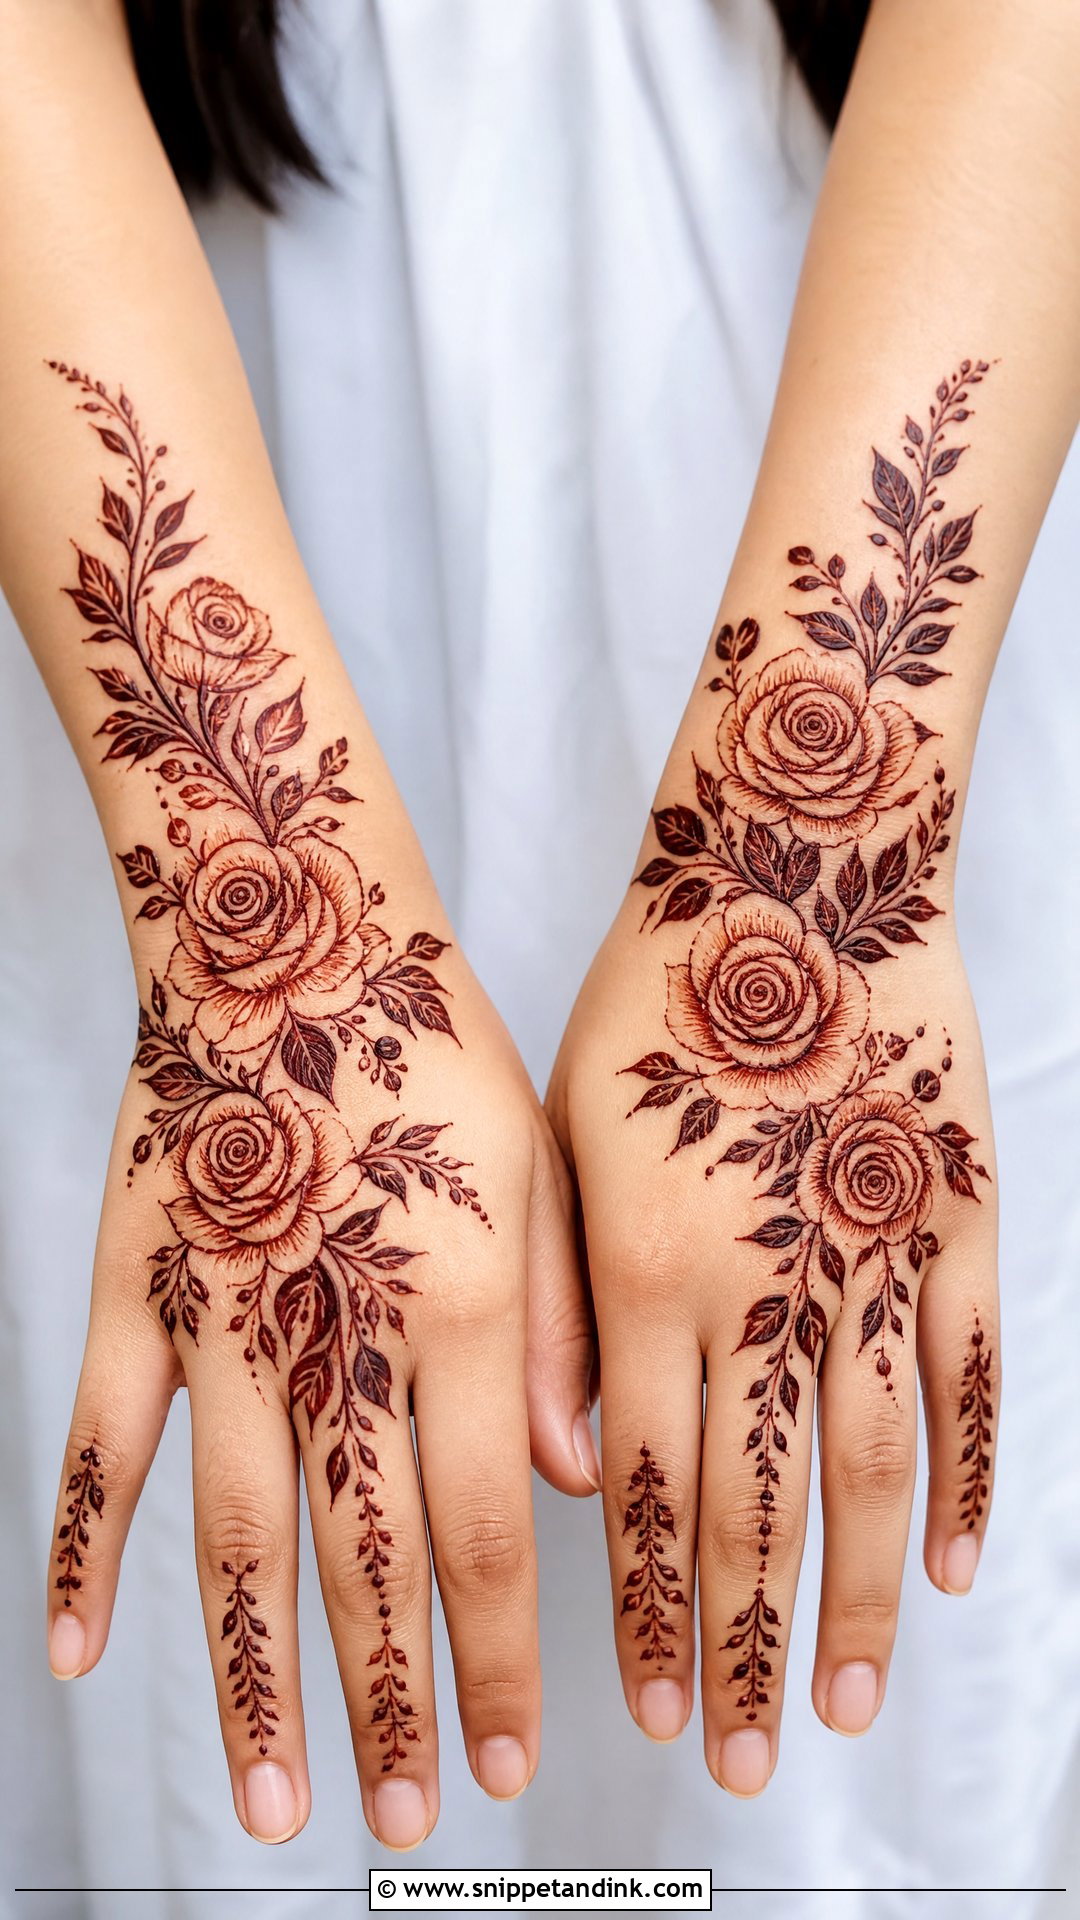
Roses need room. I draw a spiral center and layer curved petals around it, then place one large rose bunch at the wrist and another mid-hand, connected by flowing leaves. Tiny buds around the bigger roses make the cluster look natural. Arabic spacing suits roses because tight filling hides their shape. I keep the fingers simple with leafy trails.
8. Lotus Bunches Mehndi Design
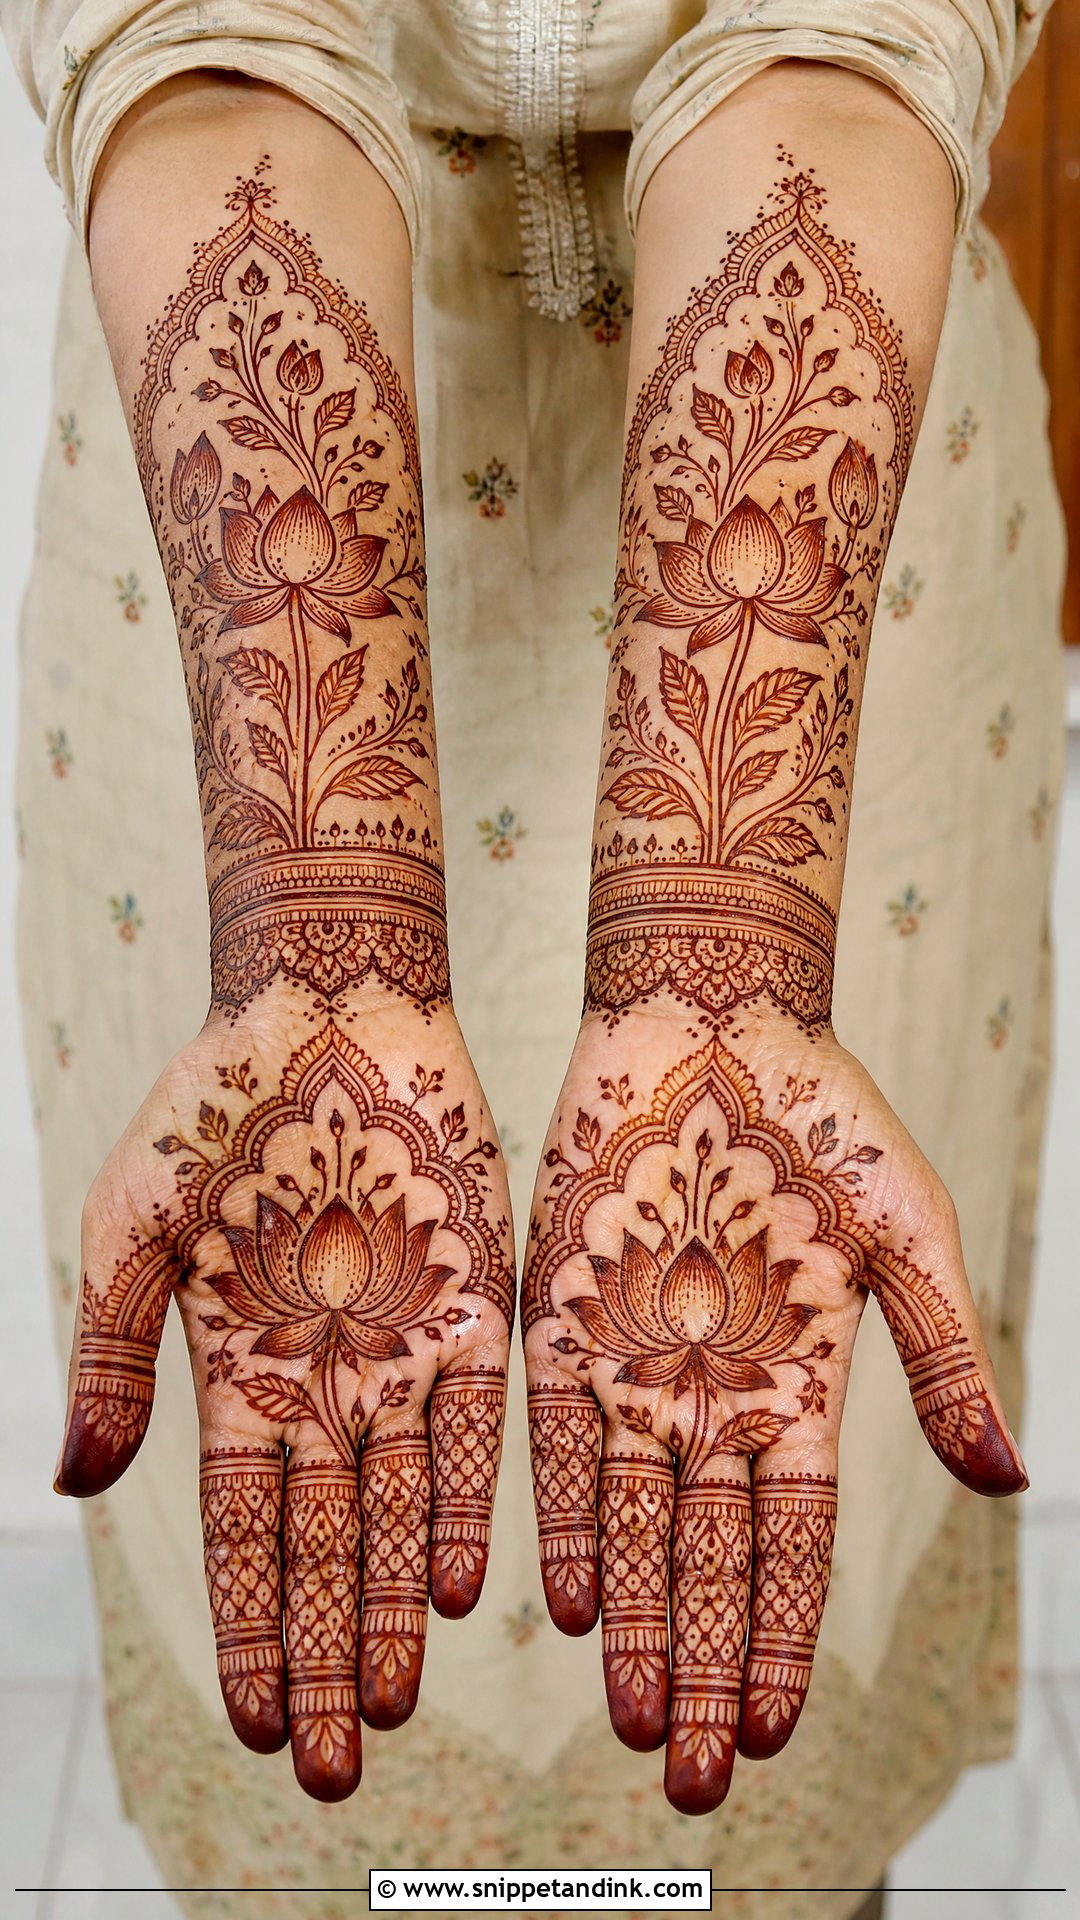
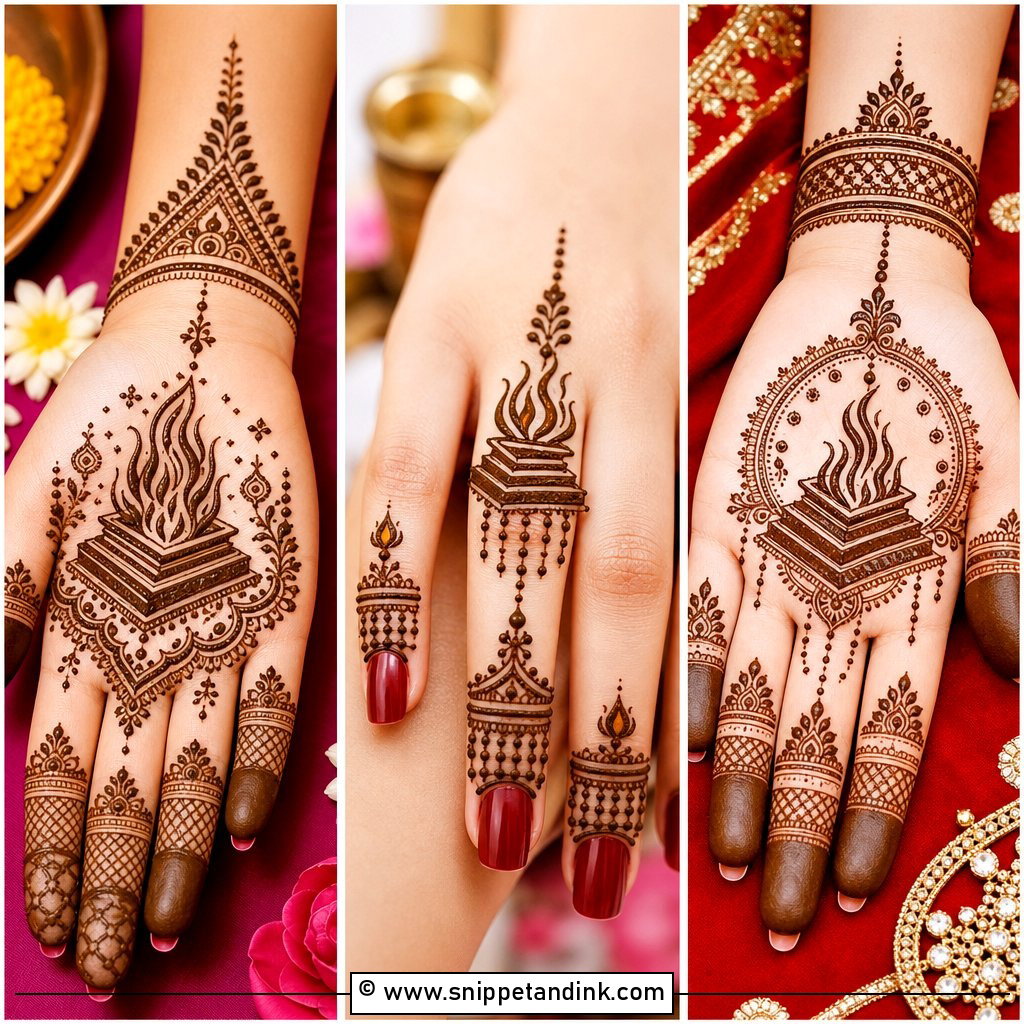
Lotus petals are pointed, so I draw them with a firm outline and fine parallel lines inside rather than heavy shading, which can blur a pointed tip. A single lotus bunch at the wrist with a vine rising to the middle finger is light; repeated lotus clusters around a central mandala make a heavier traditional design. It sits well beside temple-style borders and suits pujas and classic Indian outfits.
9. Paisley Bunches Mehndi Design
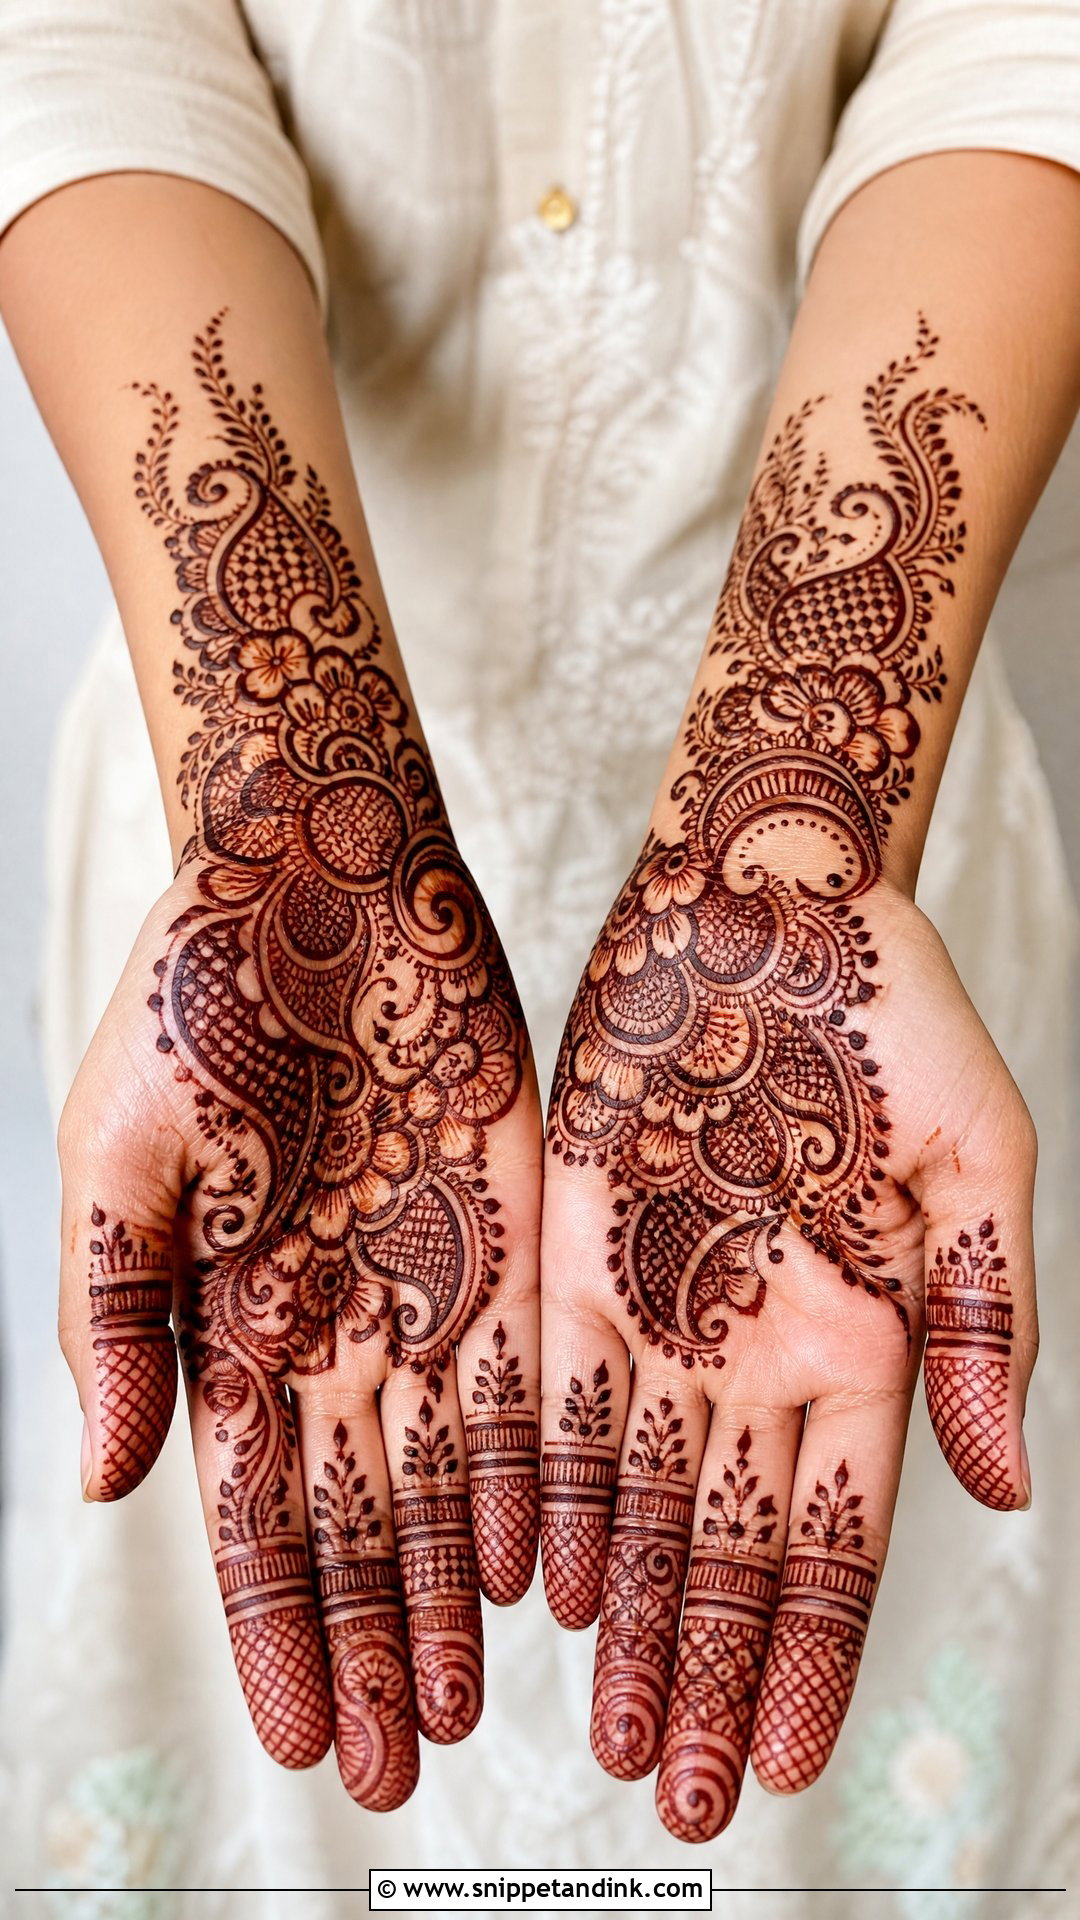
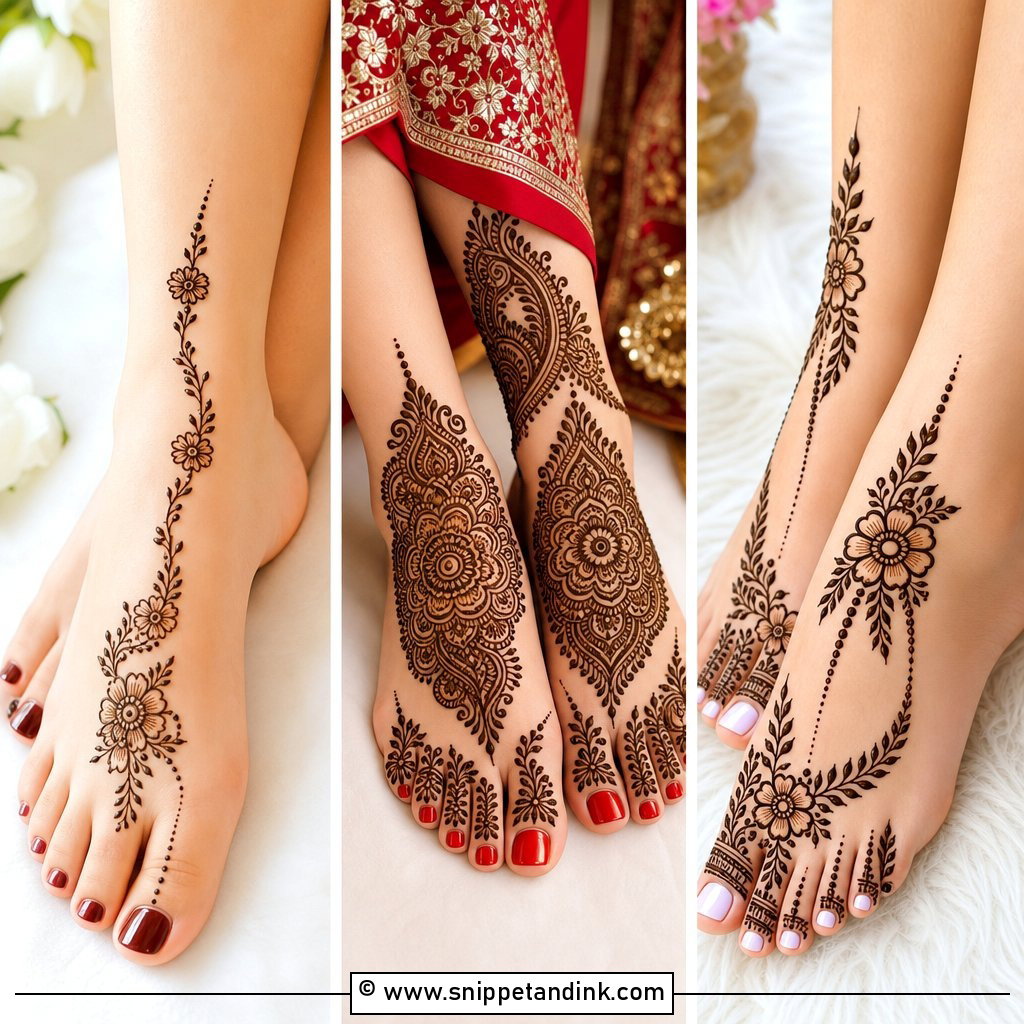
Paisleys follow the curve of the fingers and wrist naturally, which is why they work on front and back hands equally. I start with a large paisley bunch, then trail smaller paisleys and flowers diagonally. Inside each paisley go tiny petals, dots and checks. The filling is fine, so the cone needs a thin, even line; a paste that is too runny will blur it. Leave open space between bunches so the hand doesn’t look heavy.
10. Mandala Bunches Mehndi Design
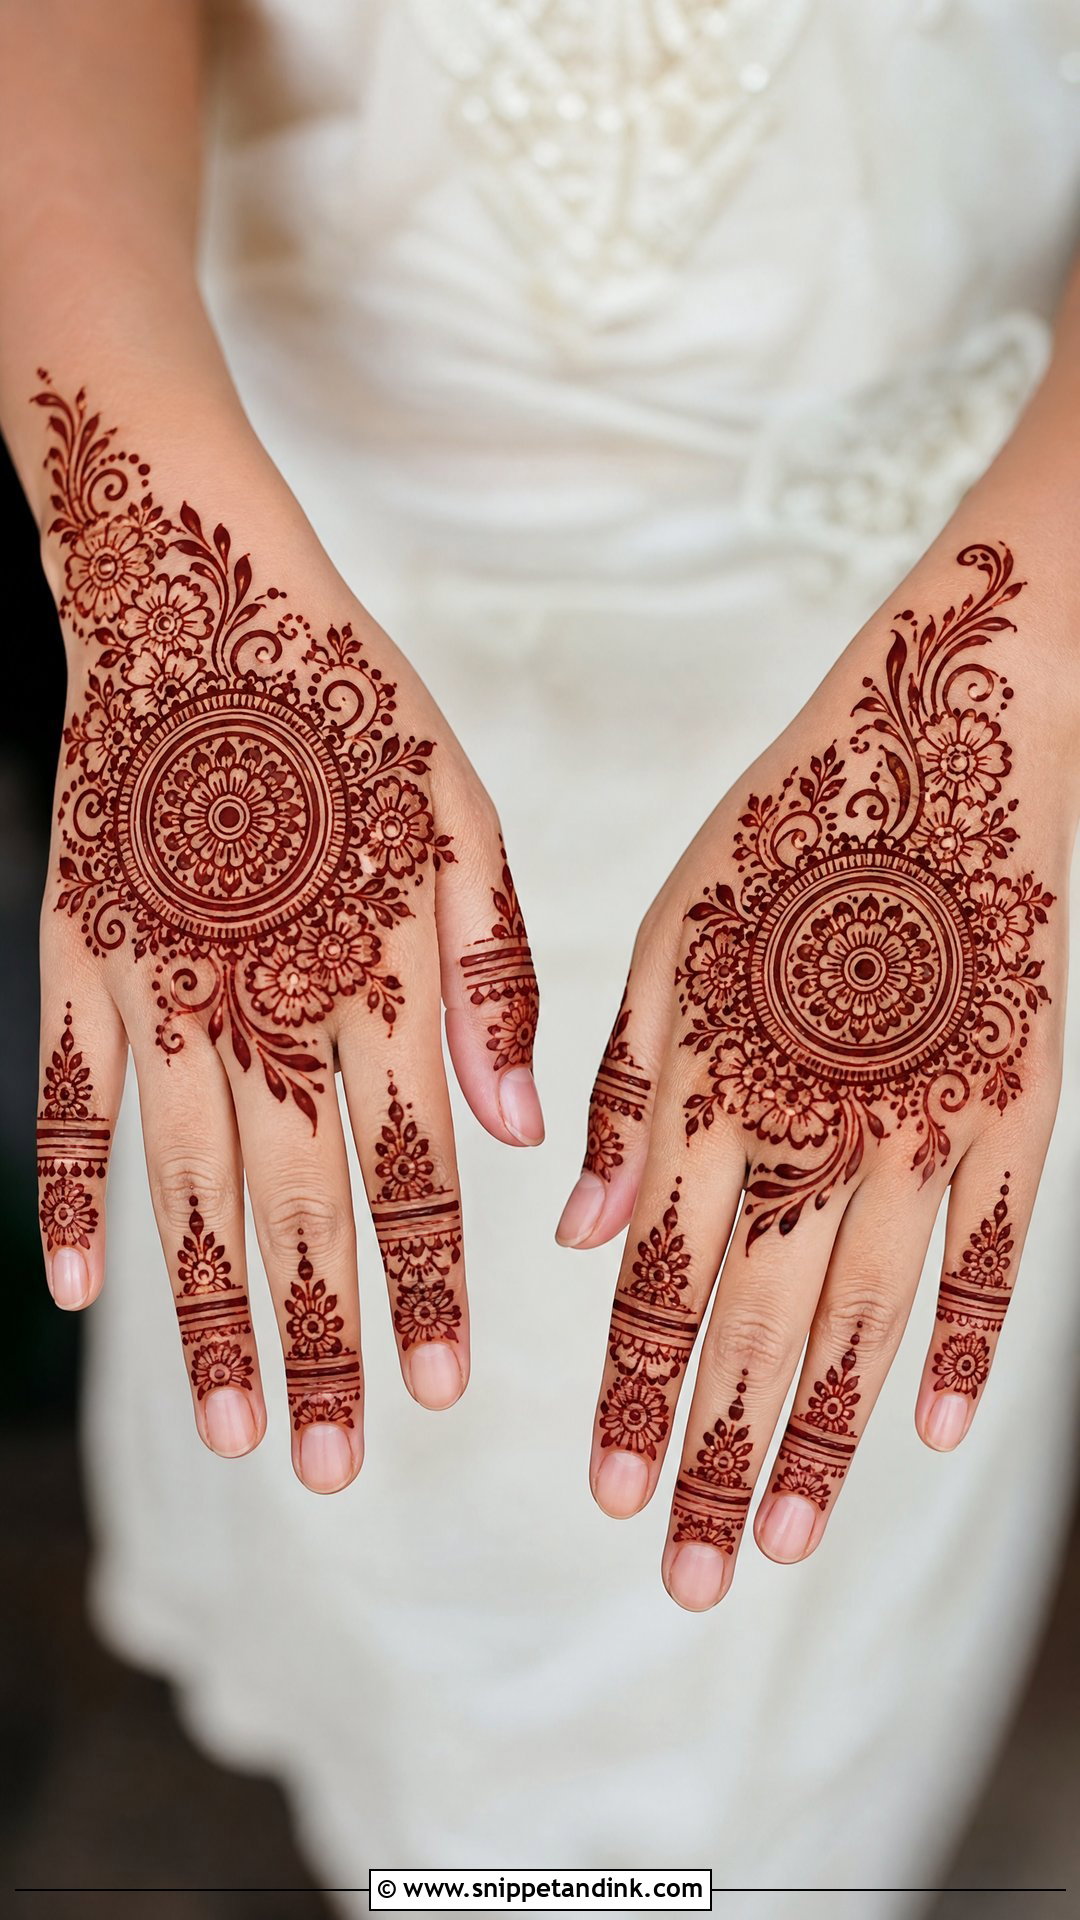
A round mandala in the center of the palm or back hand gives structure, and small floral bunches around it soften the circle. On the fingers, I use repeating mini flowers and simple bands. The center can be simple for a beginner or very detailed for a bride. The symmetry is the hard part, so I mark the center point lightly before I start.
11. Diagonal Bunches Mehndi Design
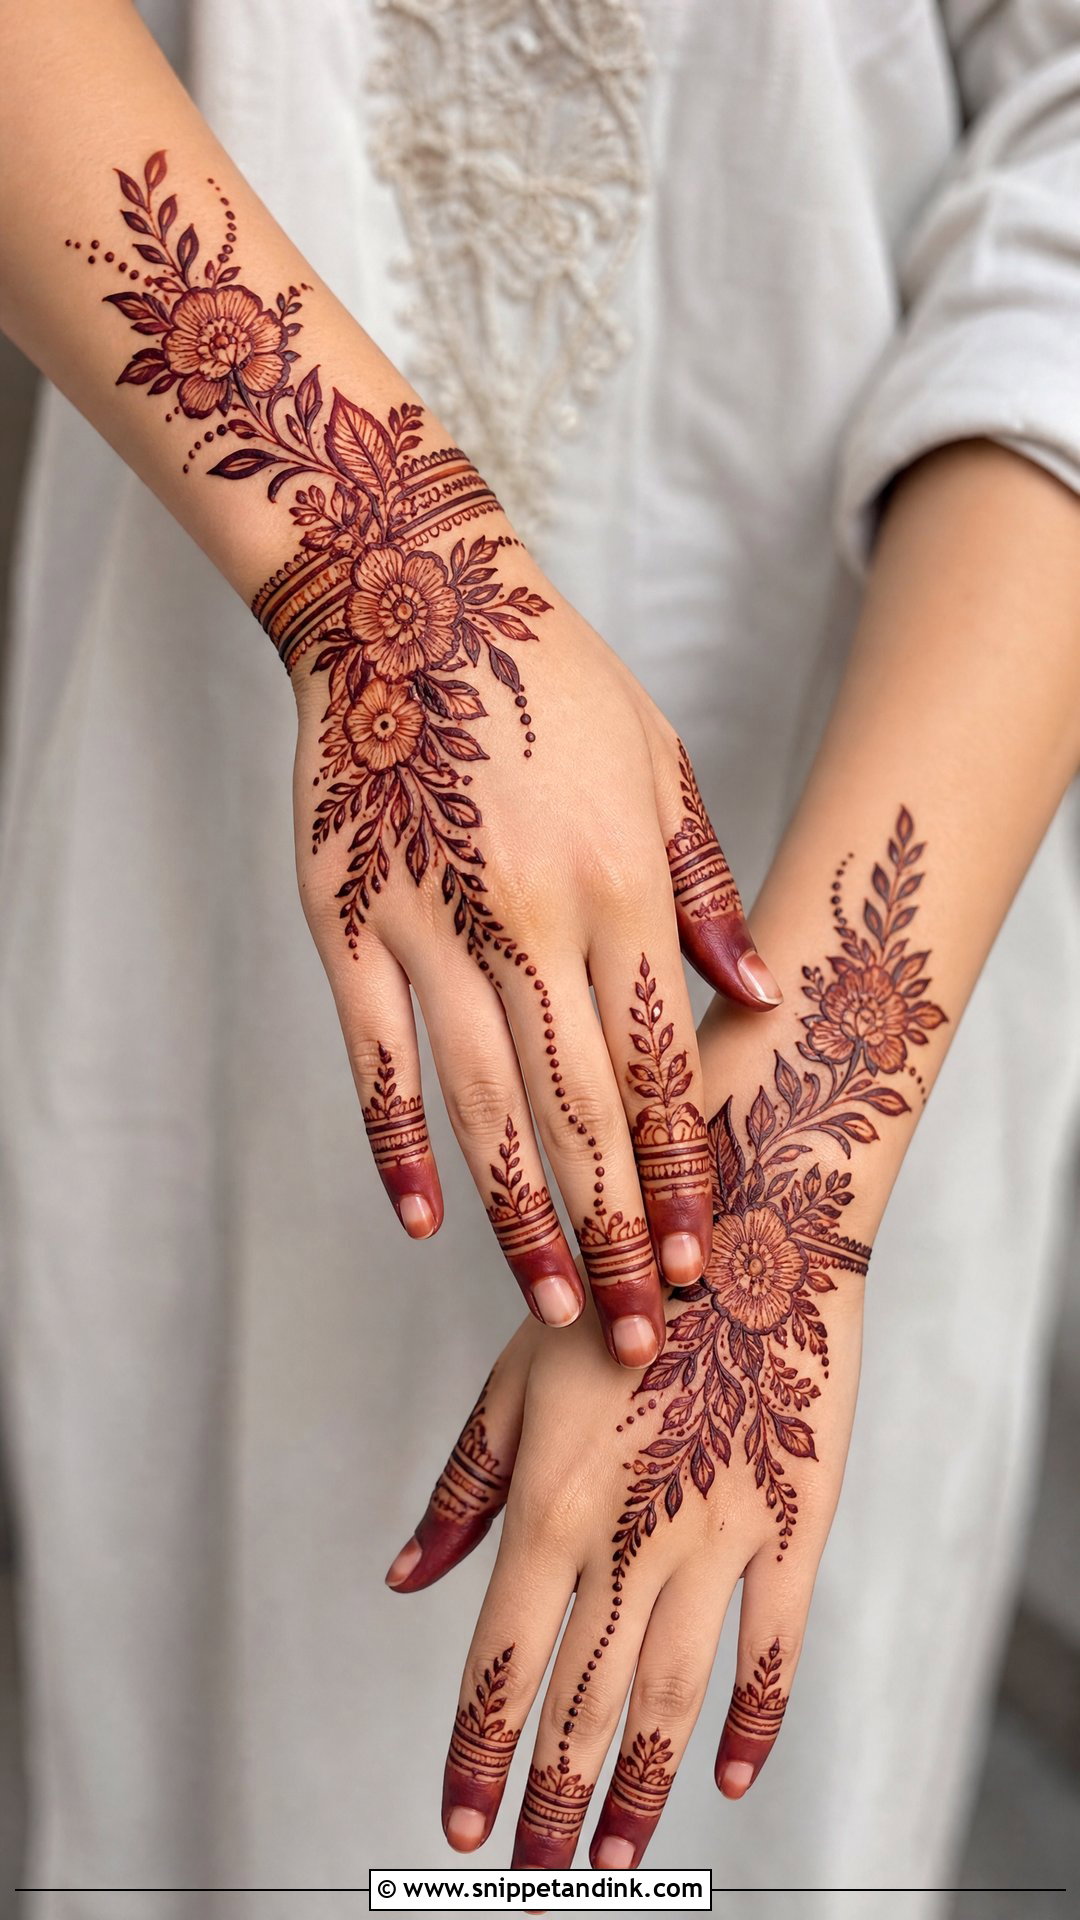
A diagonal flow from the wrist across the back of the hand to one finger makes the hand look longer and slimmer. Larger bunches sit at the wrist and center, and smaller leaves and buds trail upward. Dark fingertips give a traditional touch; open fingers feel modern. It’s the layout I use when I have many guests to cover, because it looks finished in a short time.
12. Finger Bunches Mehndi Design
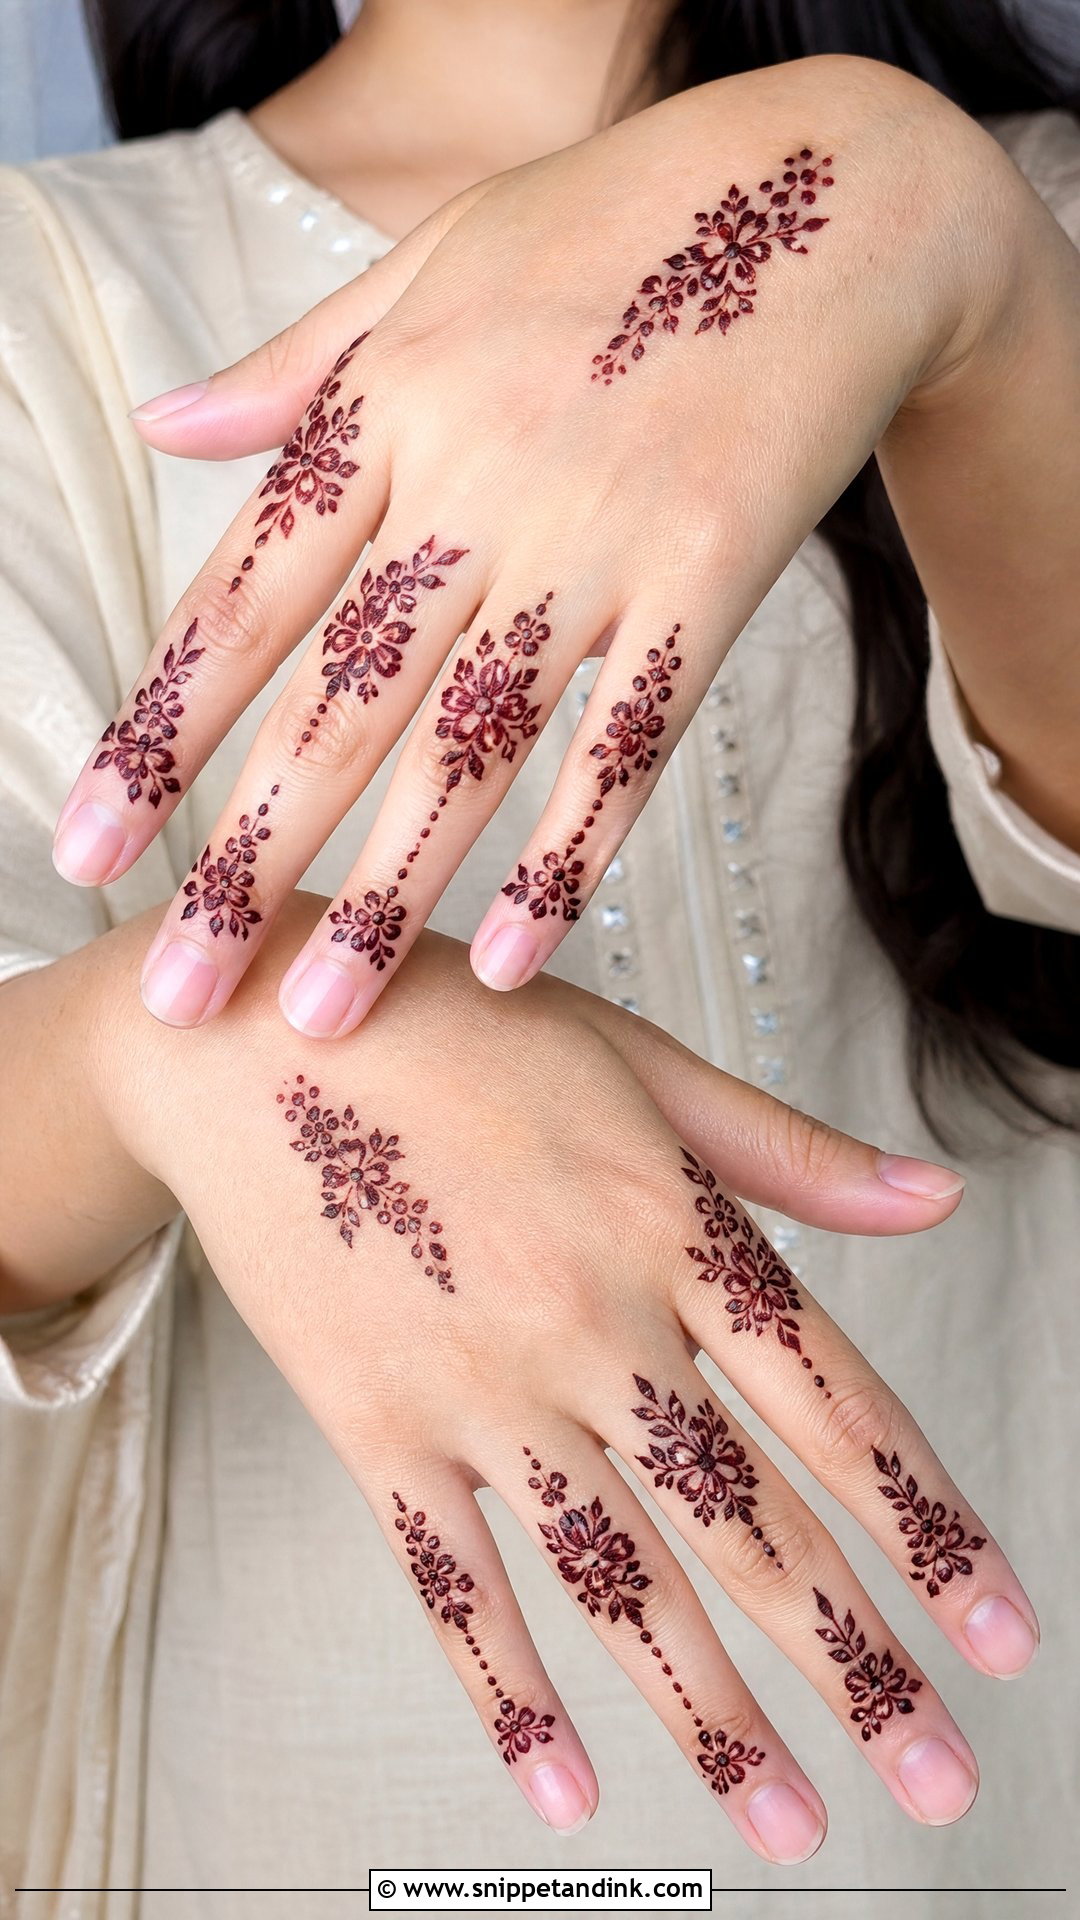
Here the fingers carry most of the design: a tiny flower bunch or leafy stem on each finger, with one matching cluster near the knuckles. It reads like rings without actual jewelry. Spacing matters most on fingers, because the skin creases and lines that are too close can merge. A small wrist band or a single bunch at the thumb balances it.
13. Wrist Bunches Mehndi Design
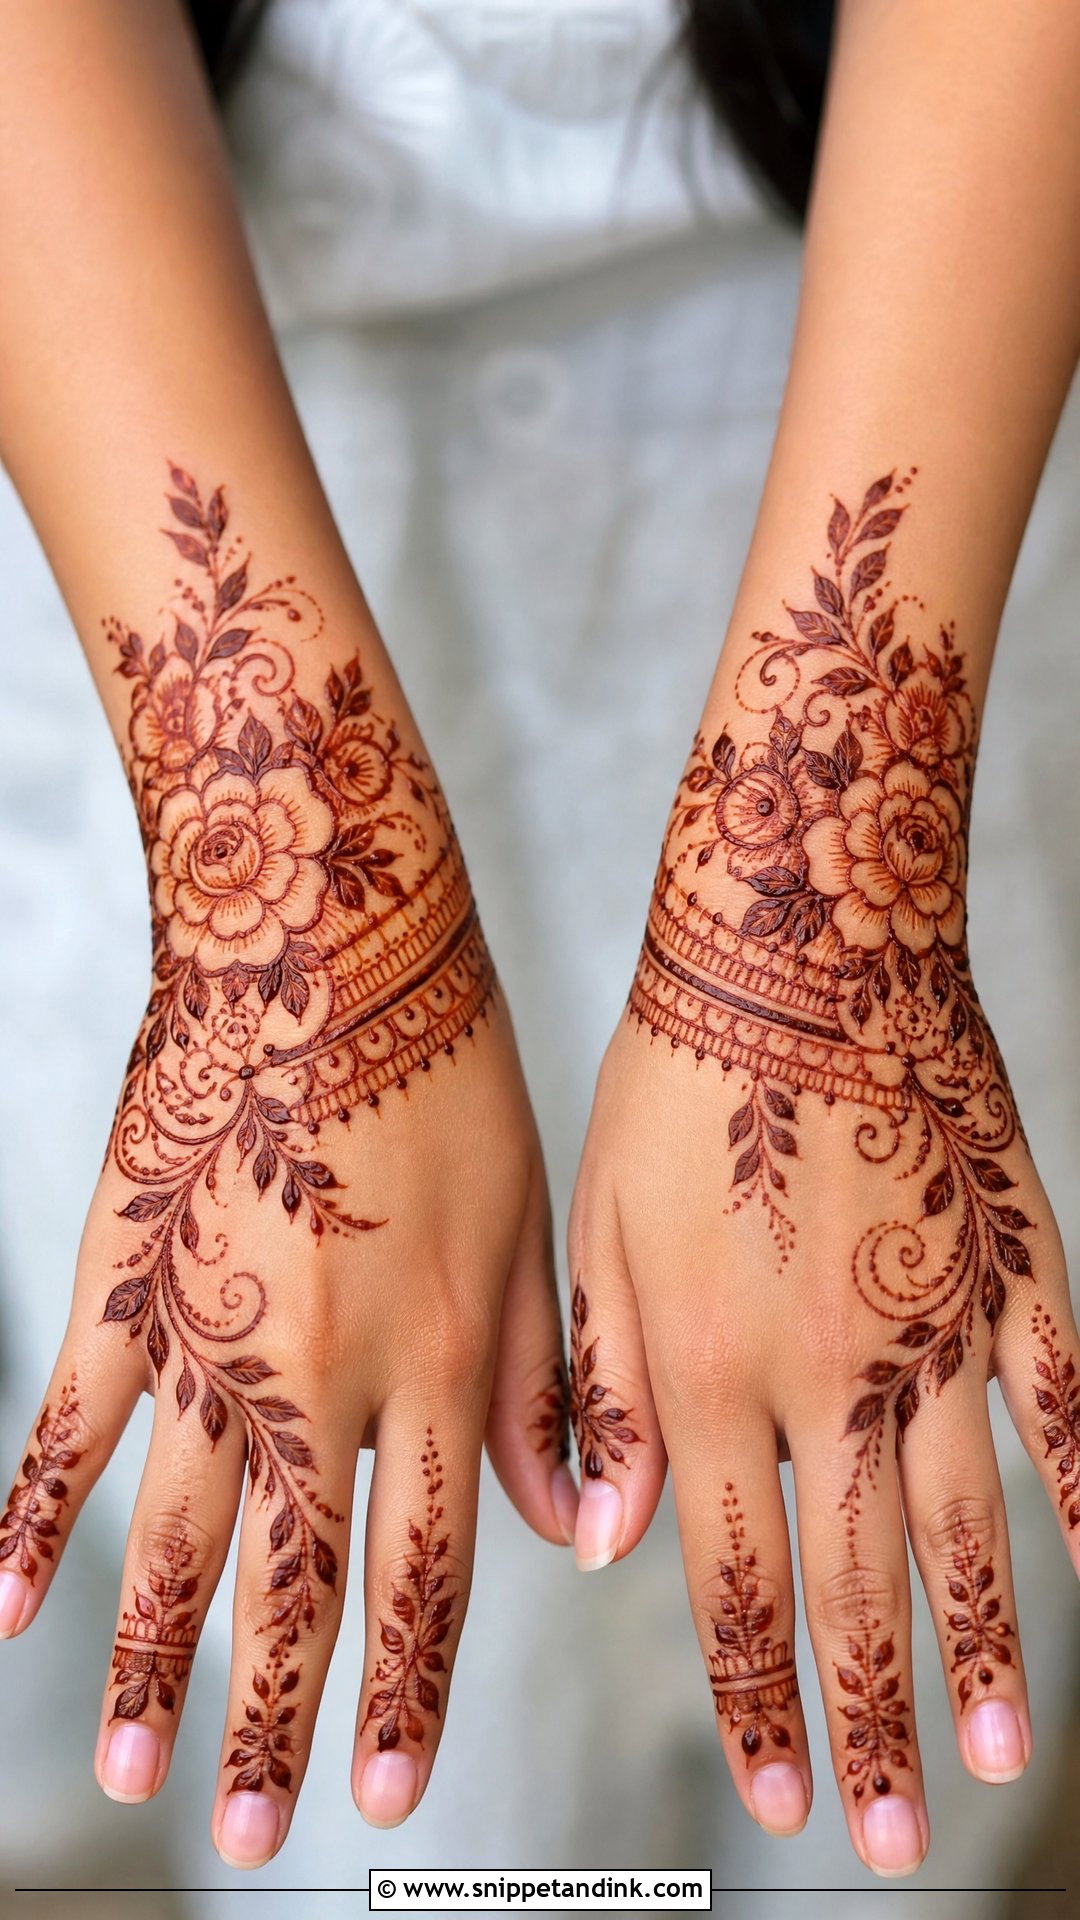
A wrist bunch looks like a henna bracelet of flowers and leaves, with small vines reaching toward the hand. I add thin bands, dots, scalloped edges and tiny paisleys around the wrist to finish the bracelet. Bangles sit over it and let the flowers peek through. One thing I tell clients: the wrist stains well, but bangles rubbing on fresh paste can smudge it, so leave them off until the paste is removed.
14. Bracelet Bunches Mehndi Design
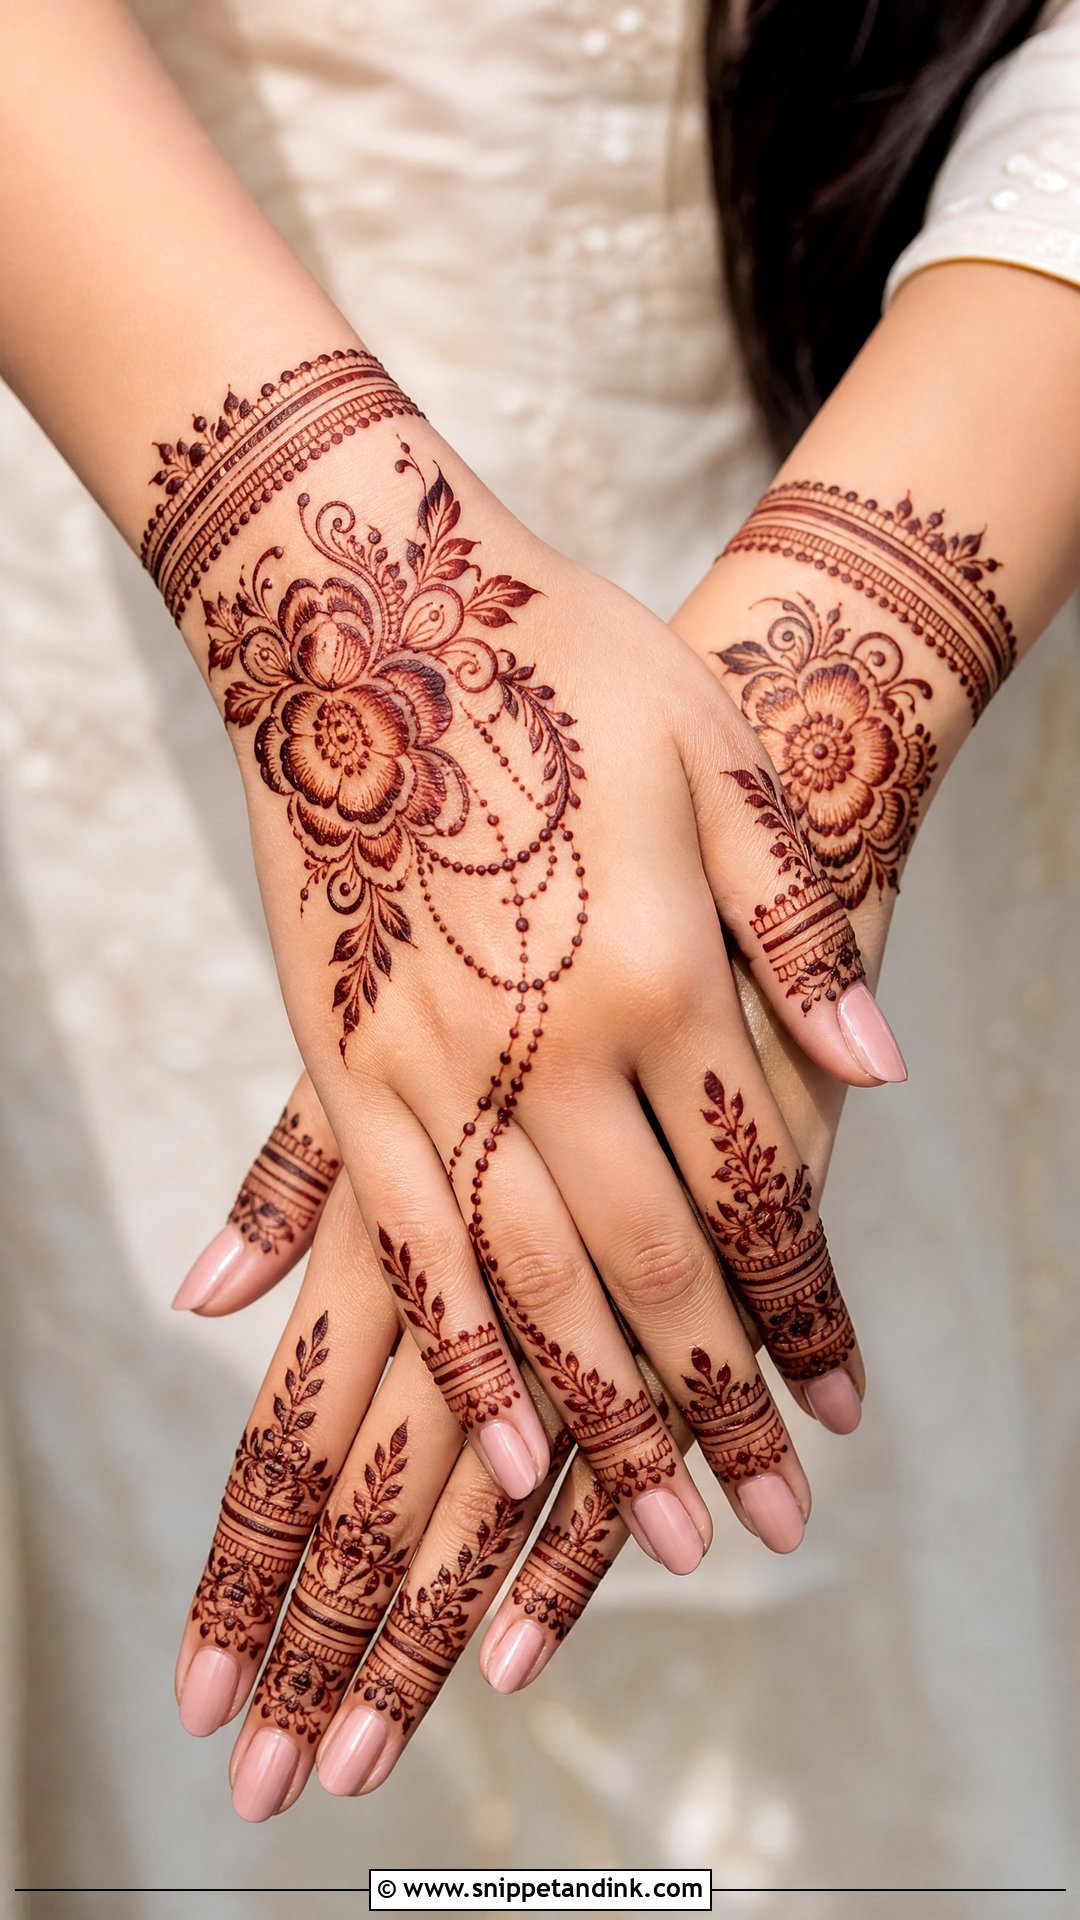
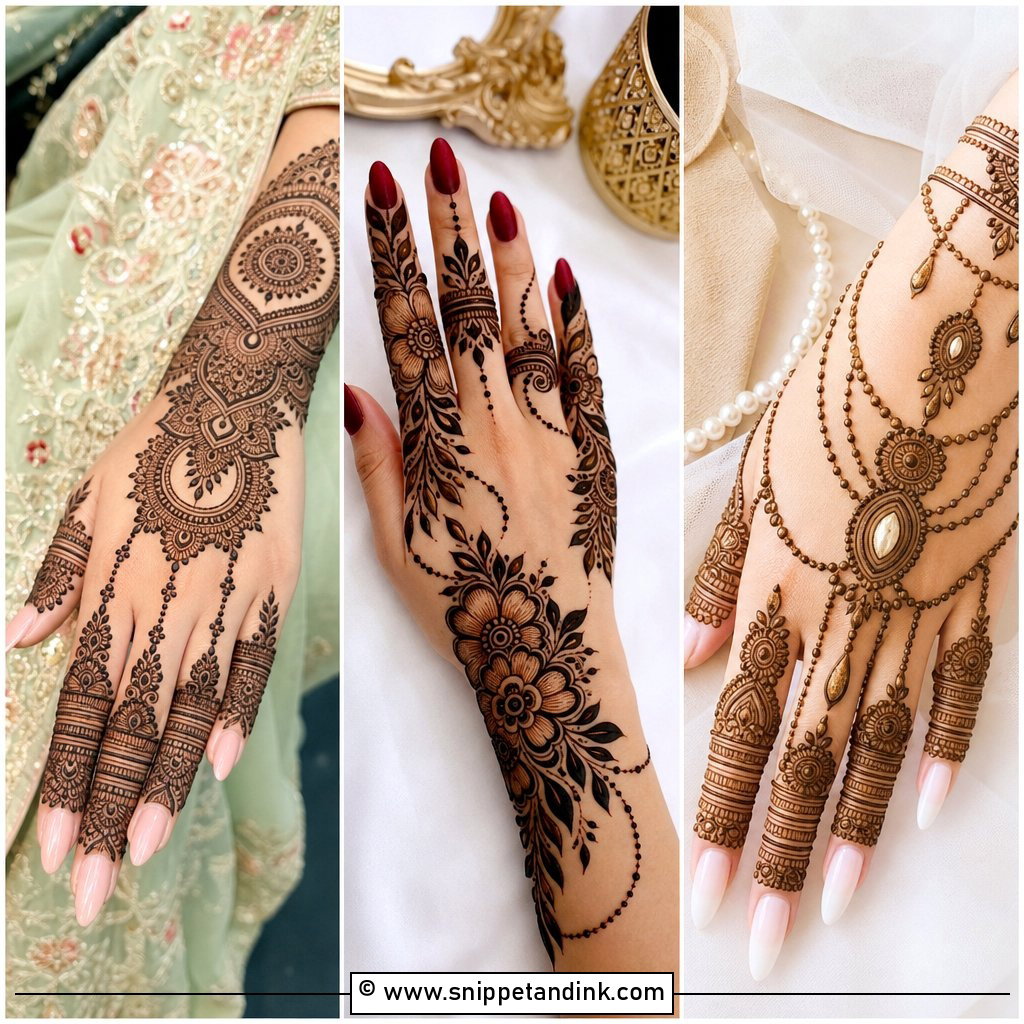
Bracelet bunches connect a flower cluster on the back of the hand to a band at the wrist with a chain line, dotted strings or leafy curves. It looks like a hand chain. I keep the central cluster bold, since it acts as the main ornament. Engagement guests and bridesmaids ask for it often, and it suits anyone who prefers back-hand mehndi to palm coverage.
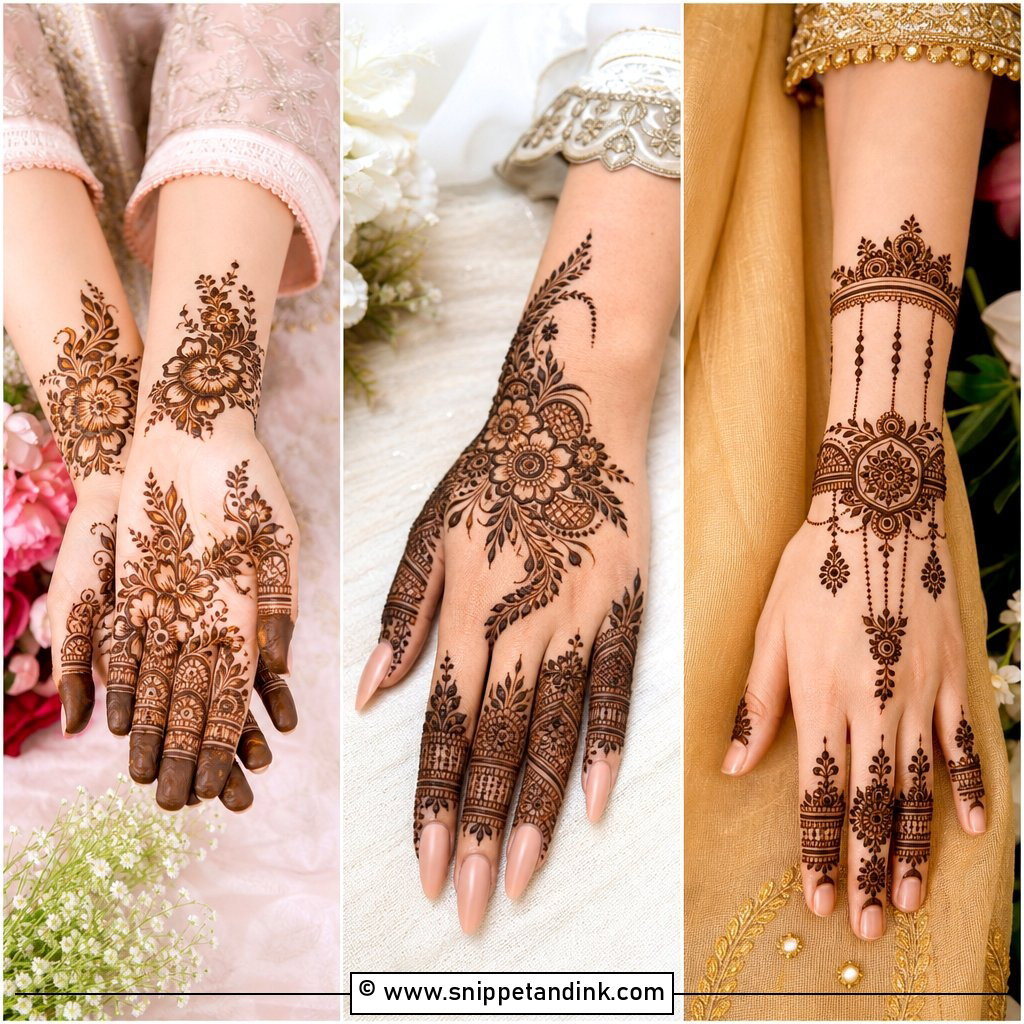
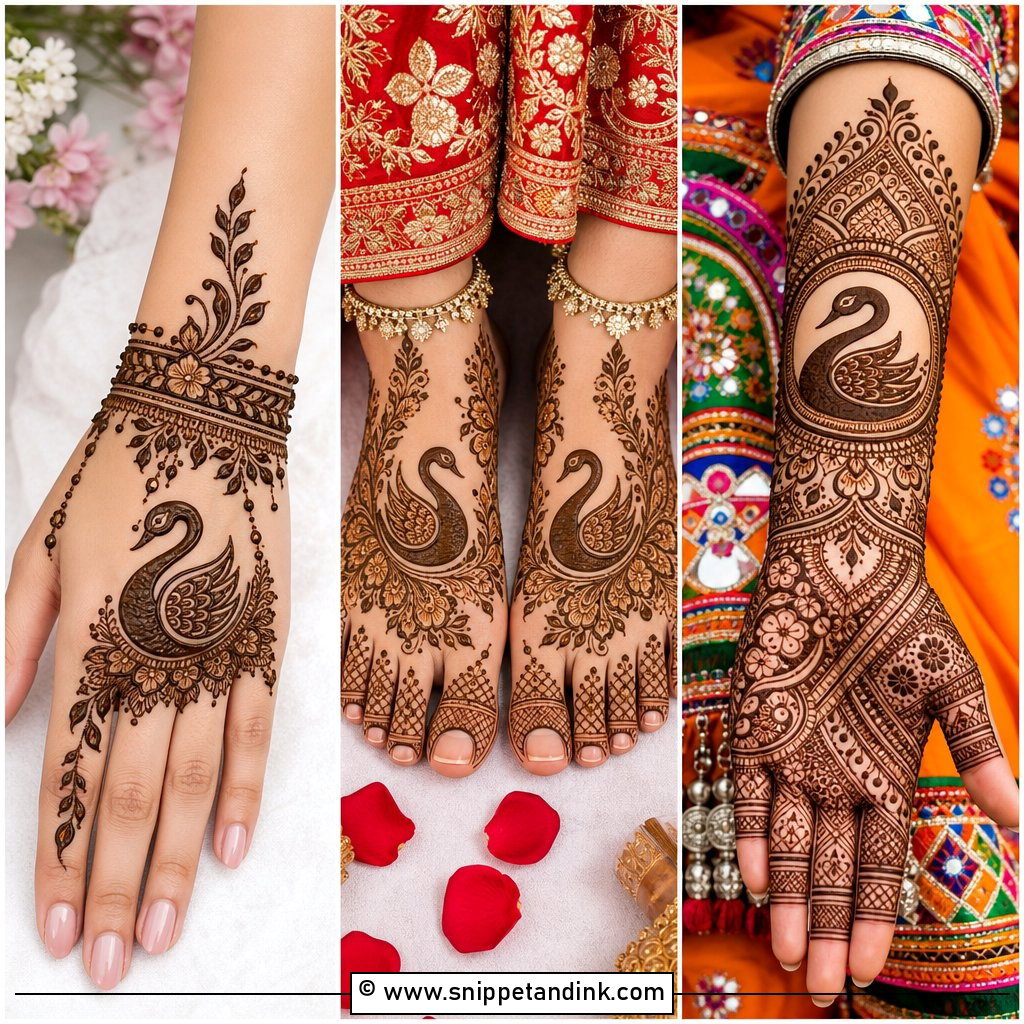
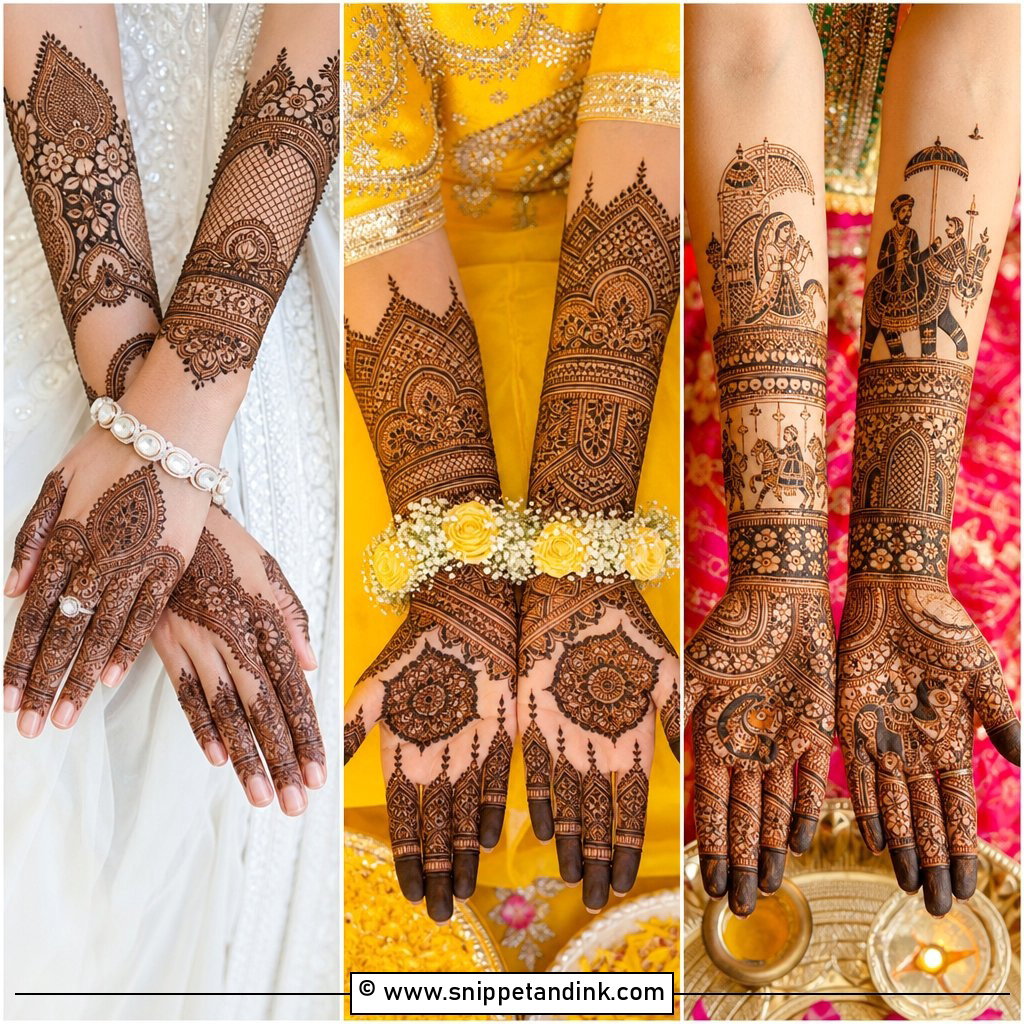
15. Jewellery Bunches Mehndi Design
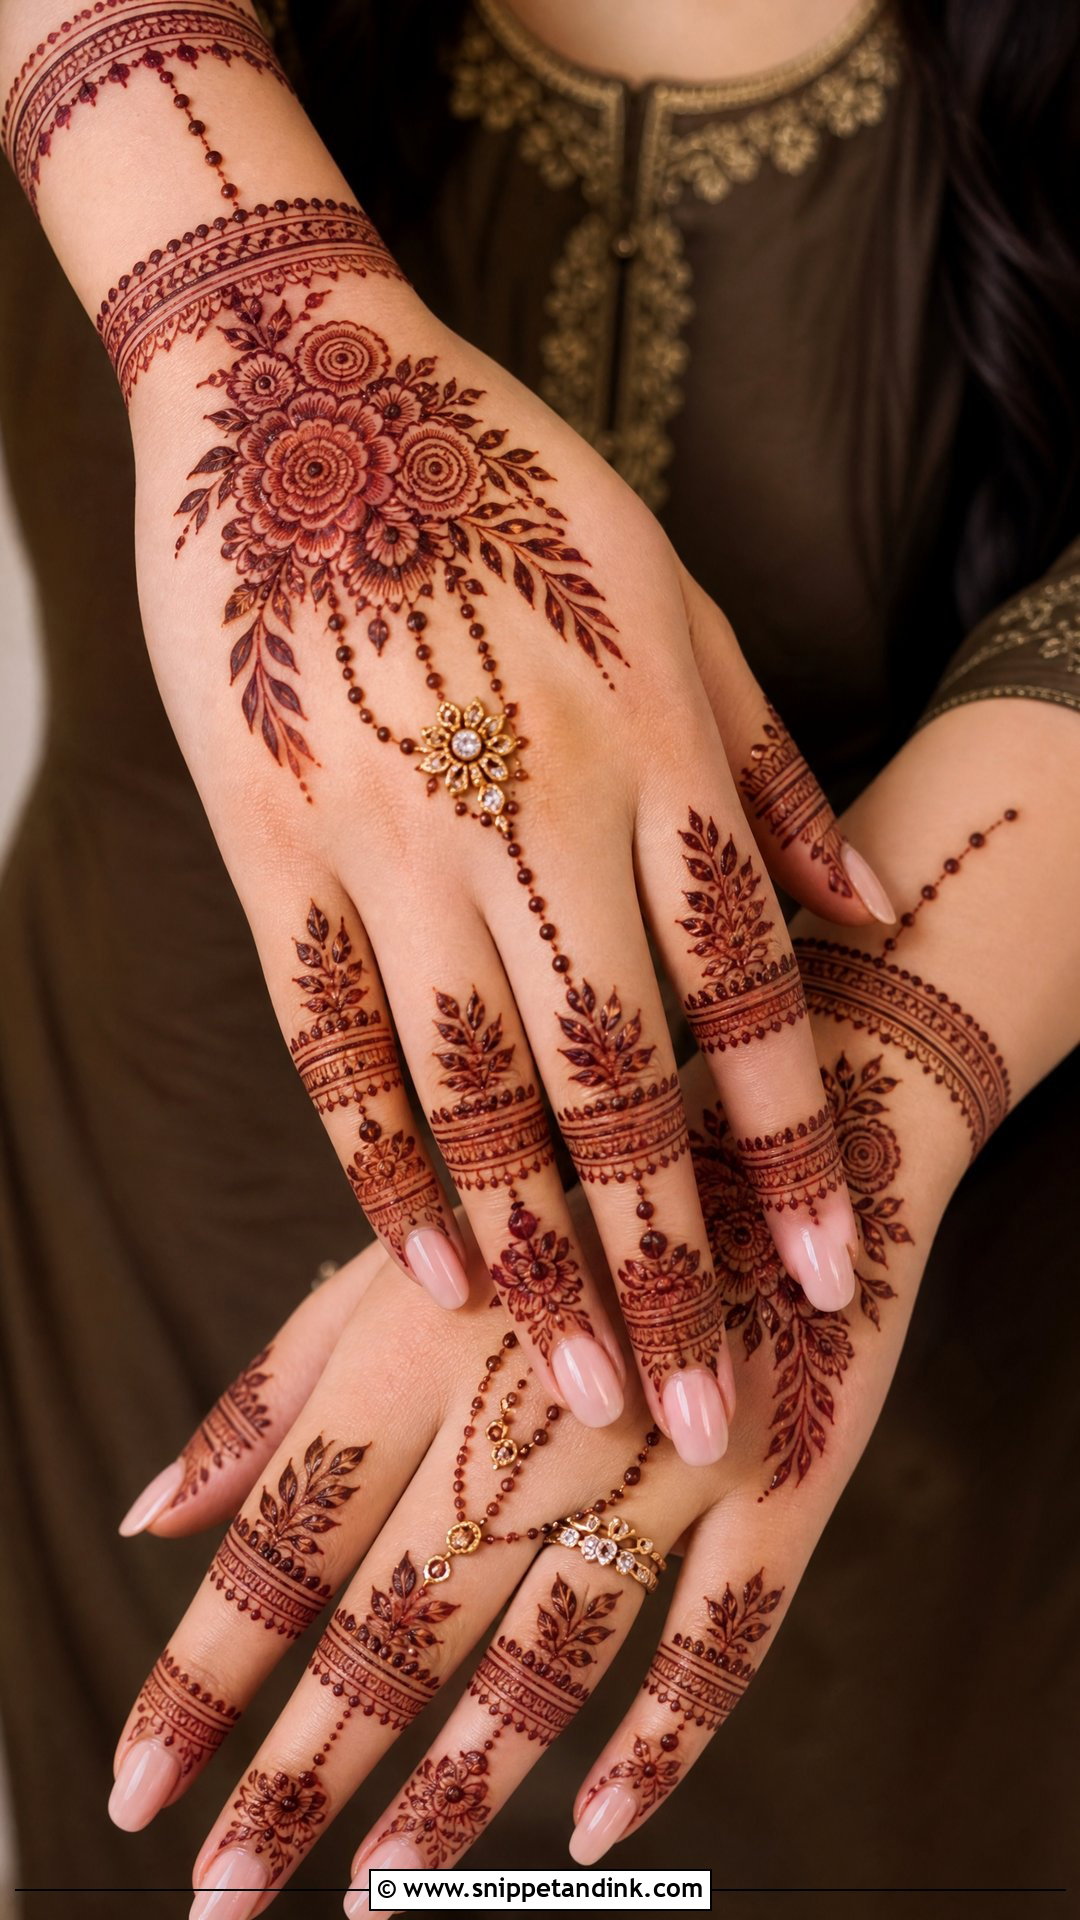
Jewellery bunches combine ring-style finger details, chain lines, wrist bands and a central flower bunch, much like haath phool jewelry drawn in henna. I use tiny dots to mimic beads and fine curves to link each part. The center cluster stays soft and rounded with leaves around it. The clear structure photographs well for an Eid or engagement look.
16. Minimal Bunches Mehndi Design
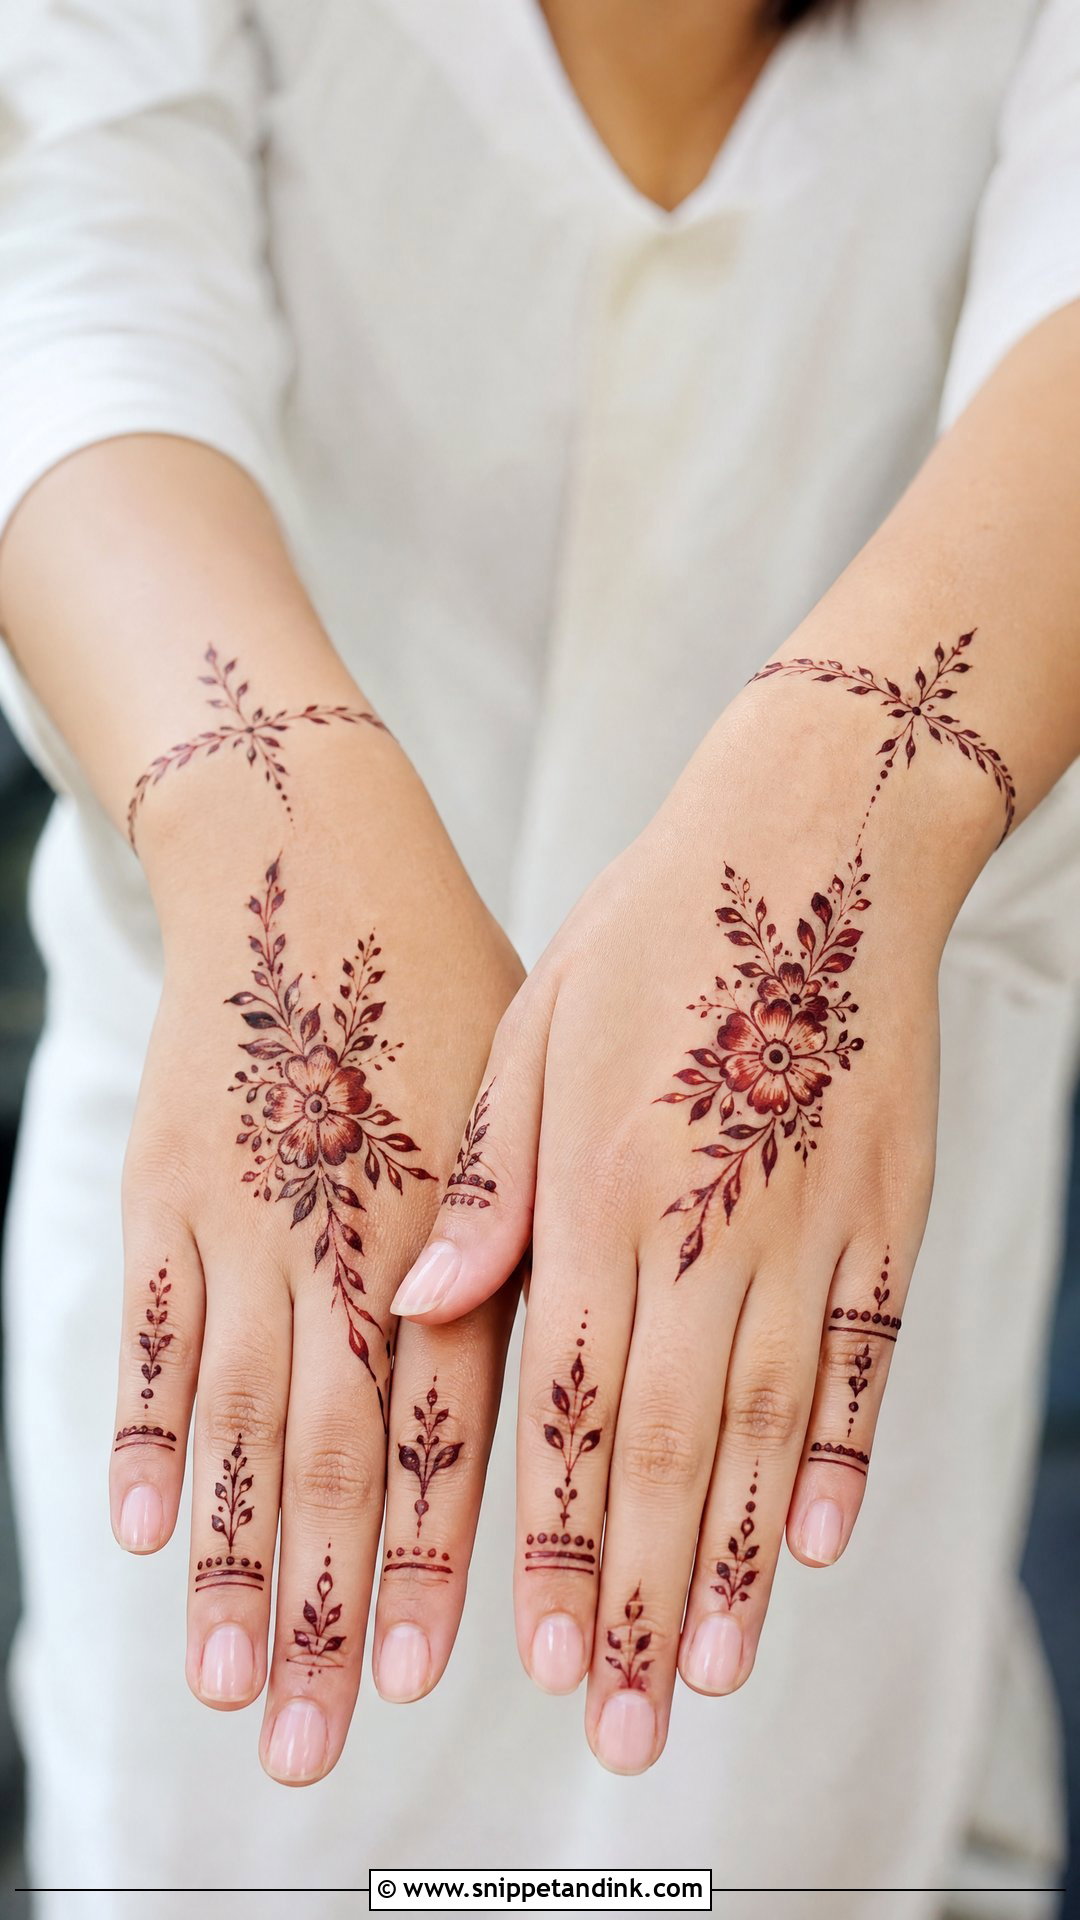
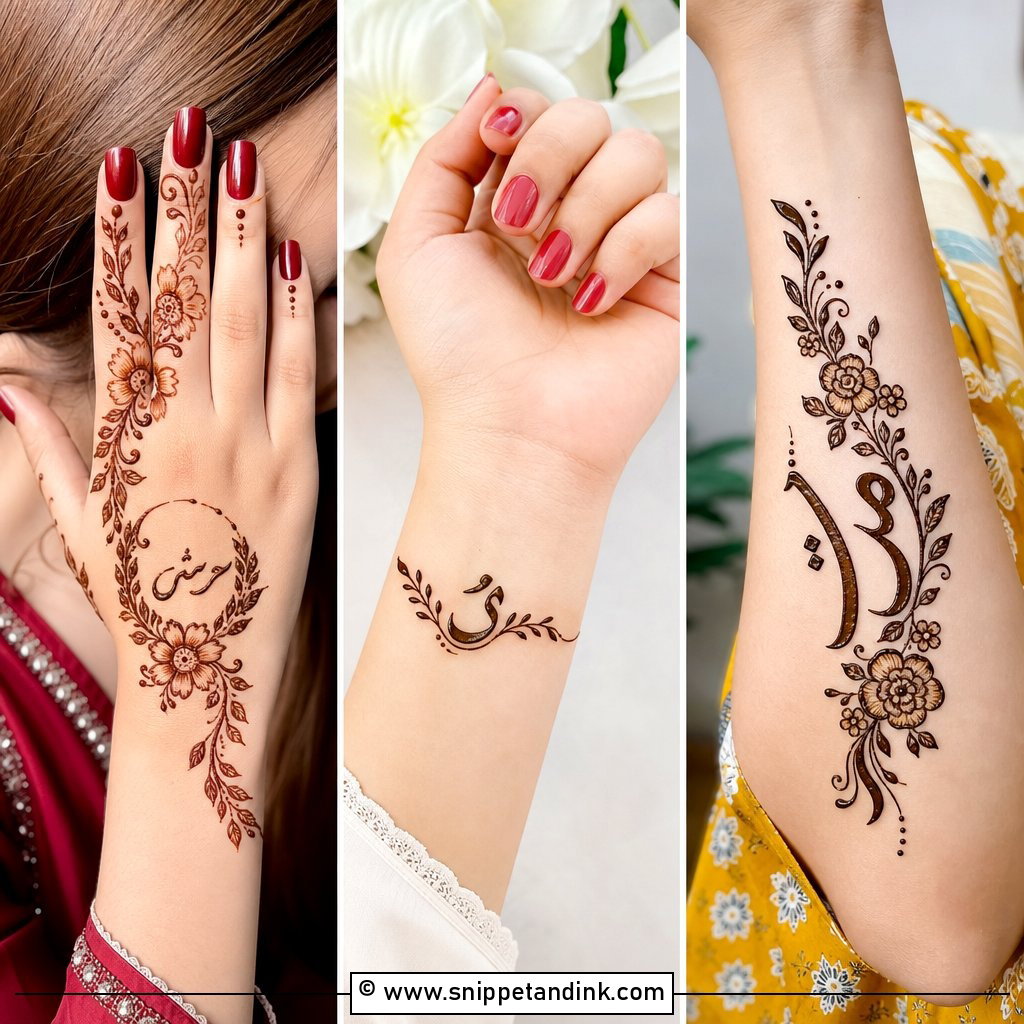
A minimal layout is one small bunch near the wrist, near the fingers or in the center of the back hand, with only a few leaves and stems. It’s comfortable for people who dislike heavy mehndi and still want a finished look. Thin lines and simple petals keep it neat. The fewer elements there are, the more each line shows, so I take extra care with the cone pressure here.
17. Easy Bunches Mehndi Design
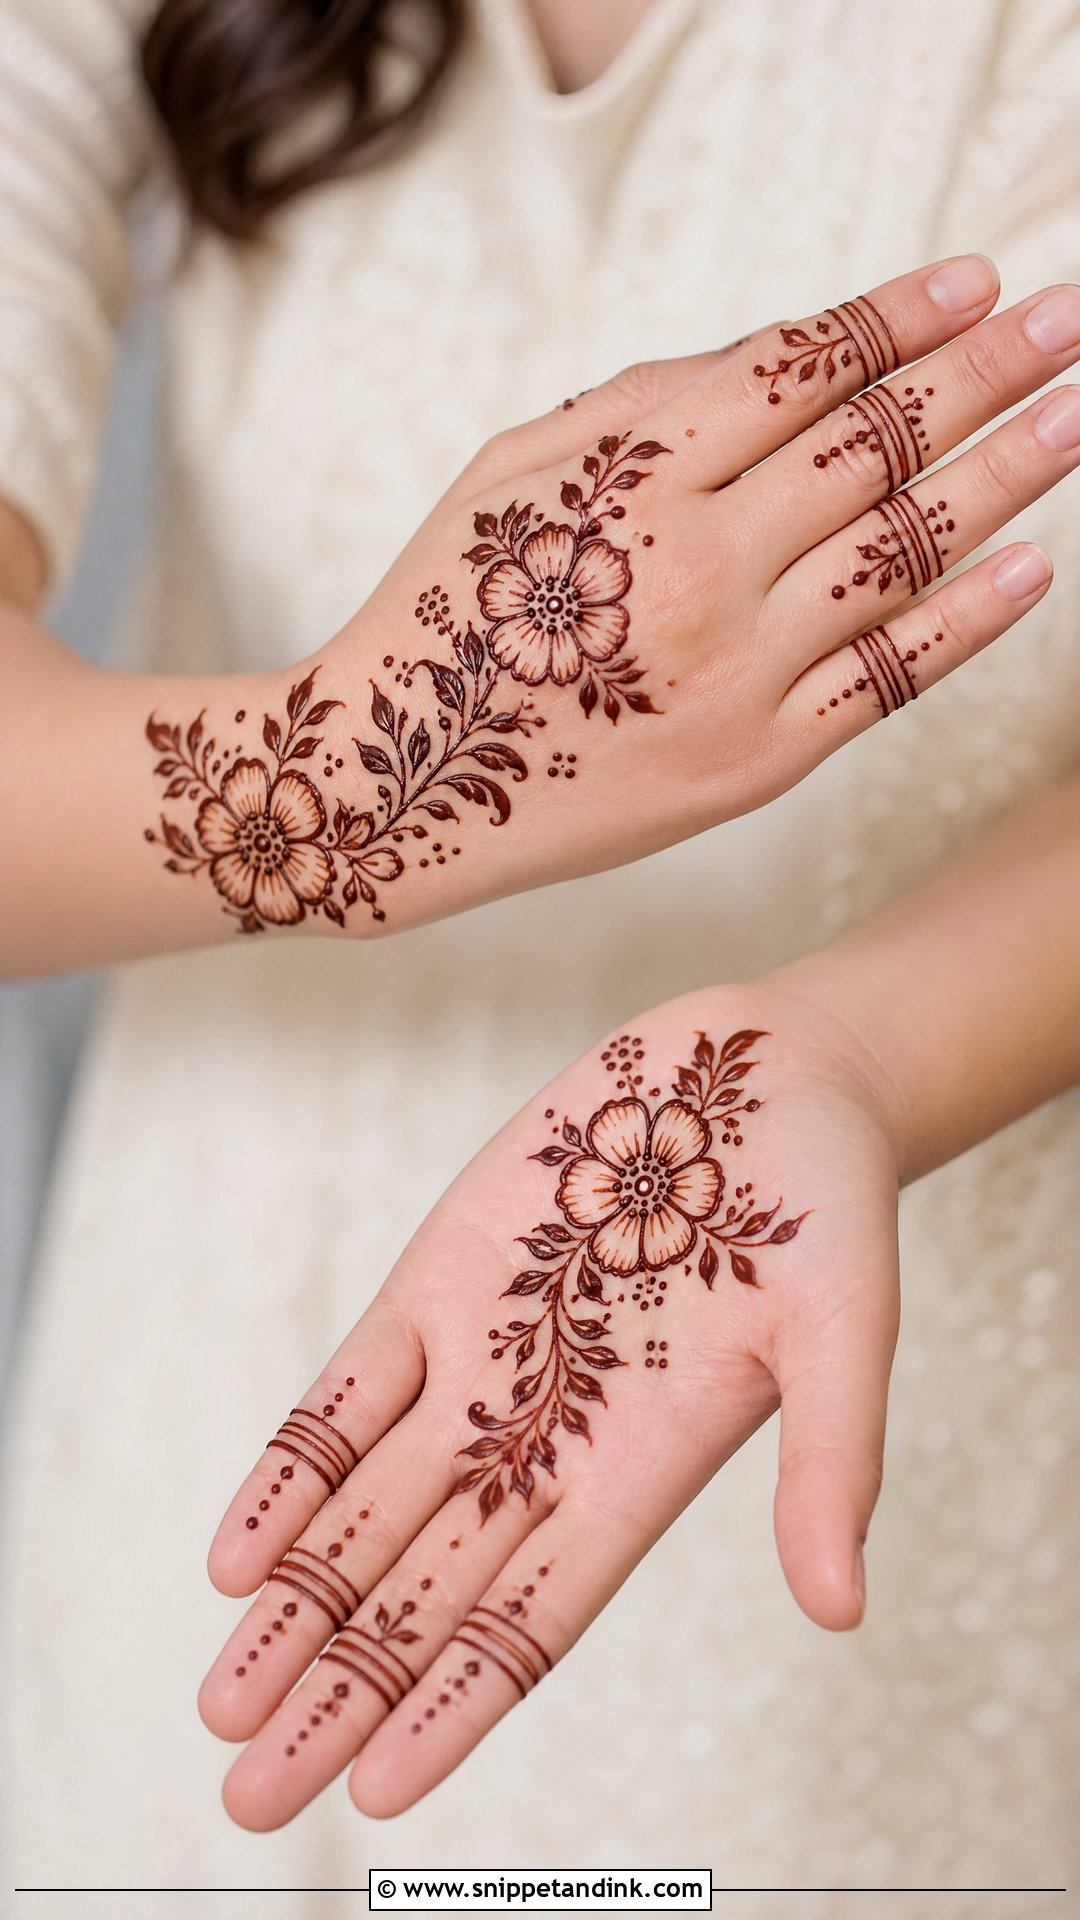
A simple five-petal flower, two smaller ones beside it, and leaves joining them is the bunch I teach first. Repeat it diagonally, as a bracelet or across the palm, and fill gaps with dots. If one flower isn’t perfect, the cluster still looks right as a whole. Fingers get small leaf trails or parallel lines. It’s quick to apply and easy to practice on paper first.
18. Modern Bunches Mehndi Design
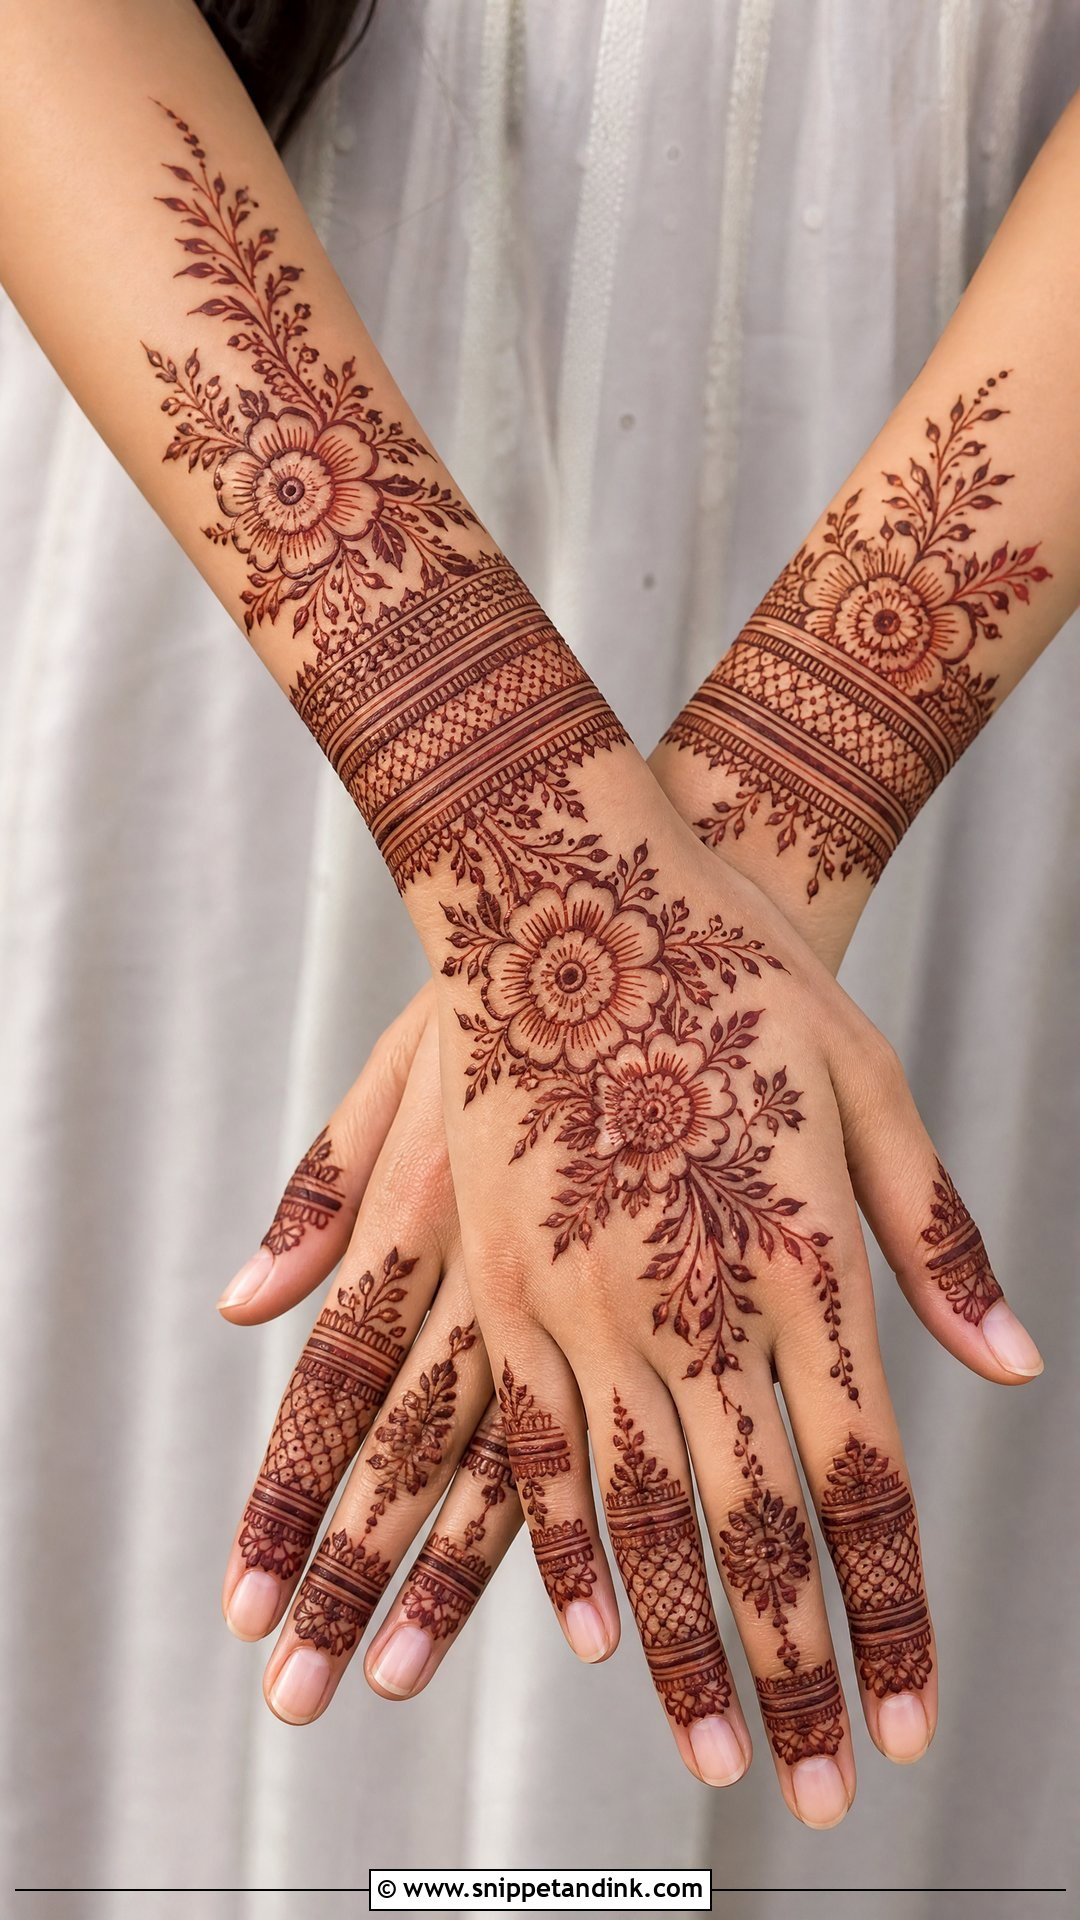
Modern bunches use open spacing, fine lines, half flowers and leafy outlines instead of traditional filling. One bold bunch on the back hand, with delicate branches spreading toward two fingers, and maybe a small geometric section or light jaali. It pairs with fusion outfits and contemporary ethnic wear. Fine lines need a fresh, smooth paste; old paste with grit breaks the line.
19. Indian Bunches Mehndi Design
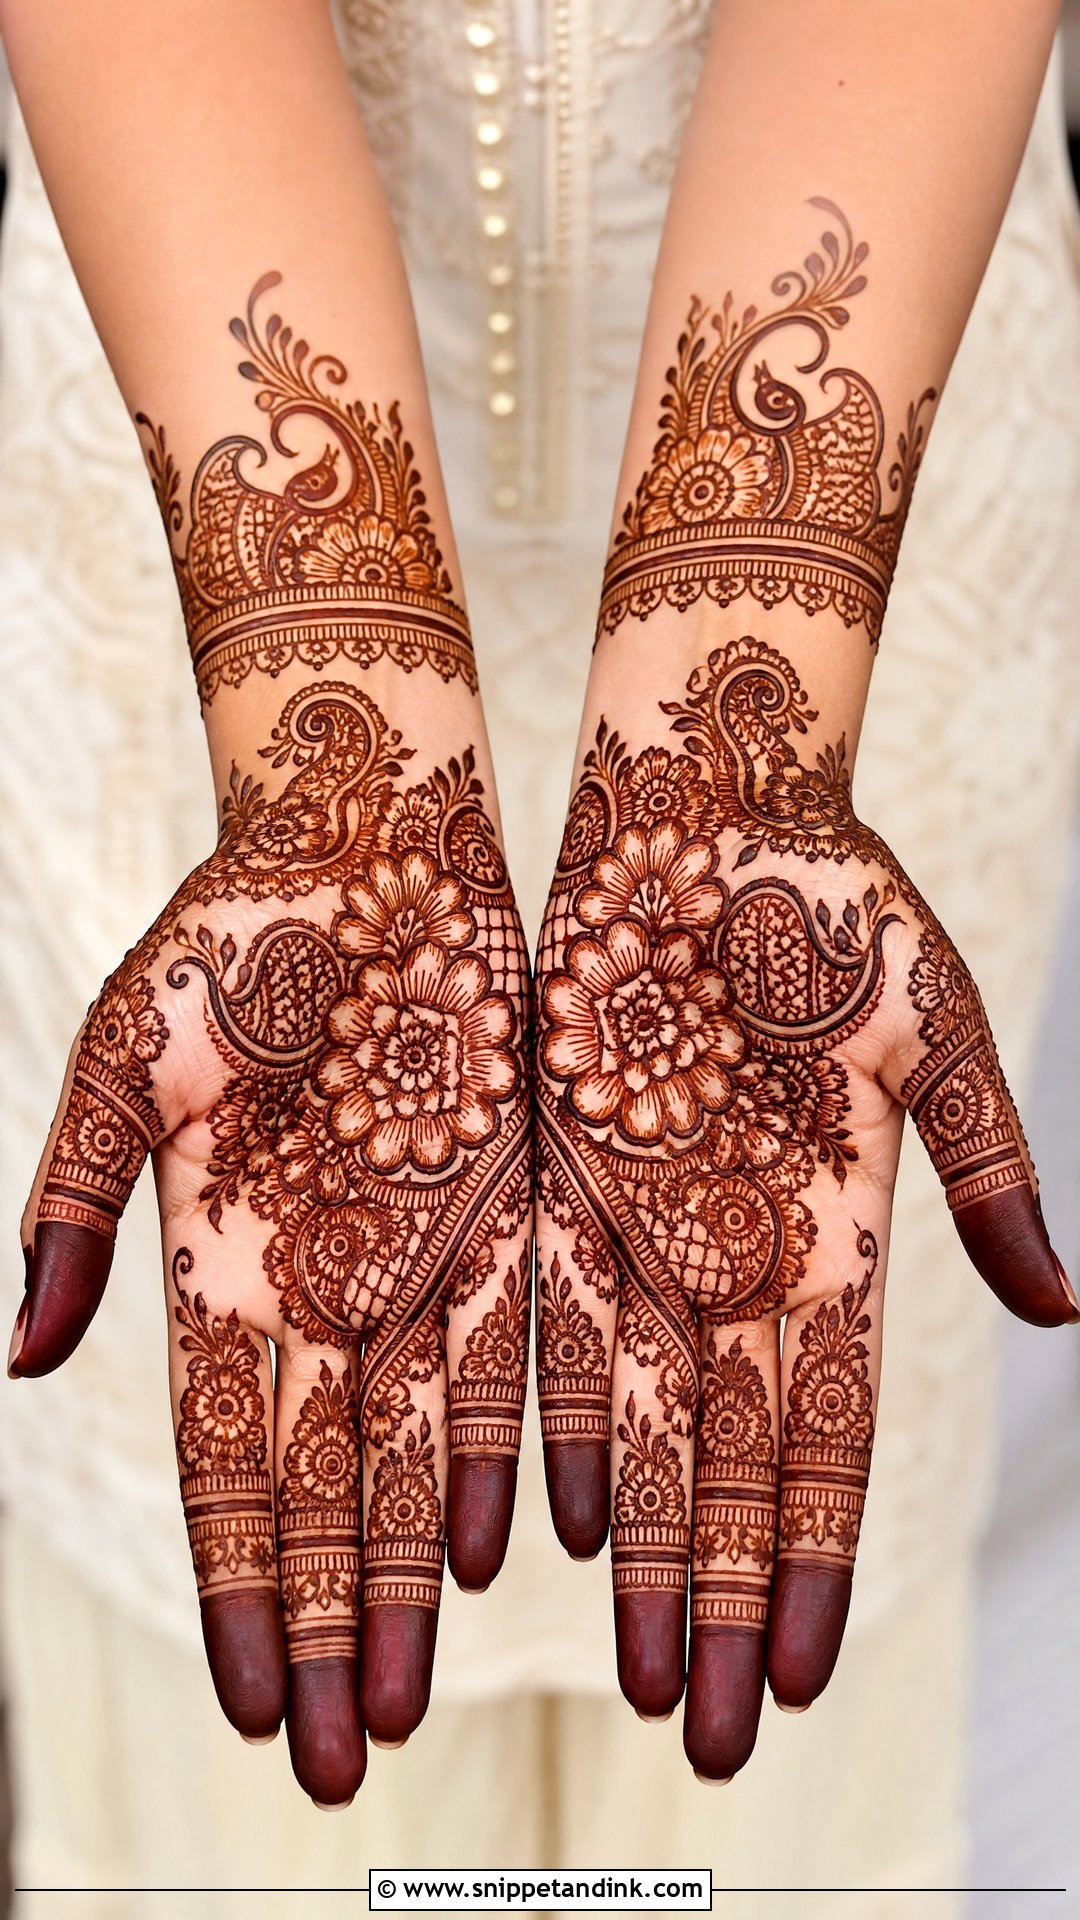
The Indian version is fuller: flower bunches with paisleys, mandalas, peacock accents, leafy borders and fine filling. Dense floral clusters fill the palm, with matching bands on the fingers. On the back of the hand, a central bunch sits among jaali and curved vines. I vary the bunch sizes and leave small spaces around the major motifs, otherwise the stain looks packed and the detail gets lost.
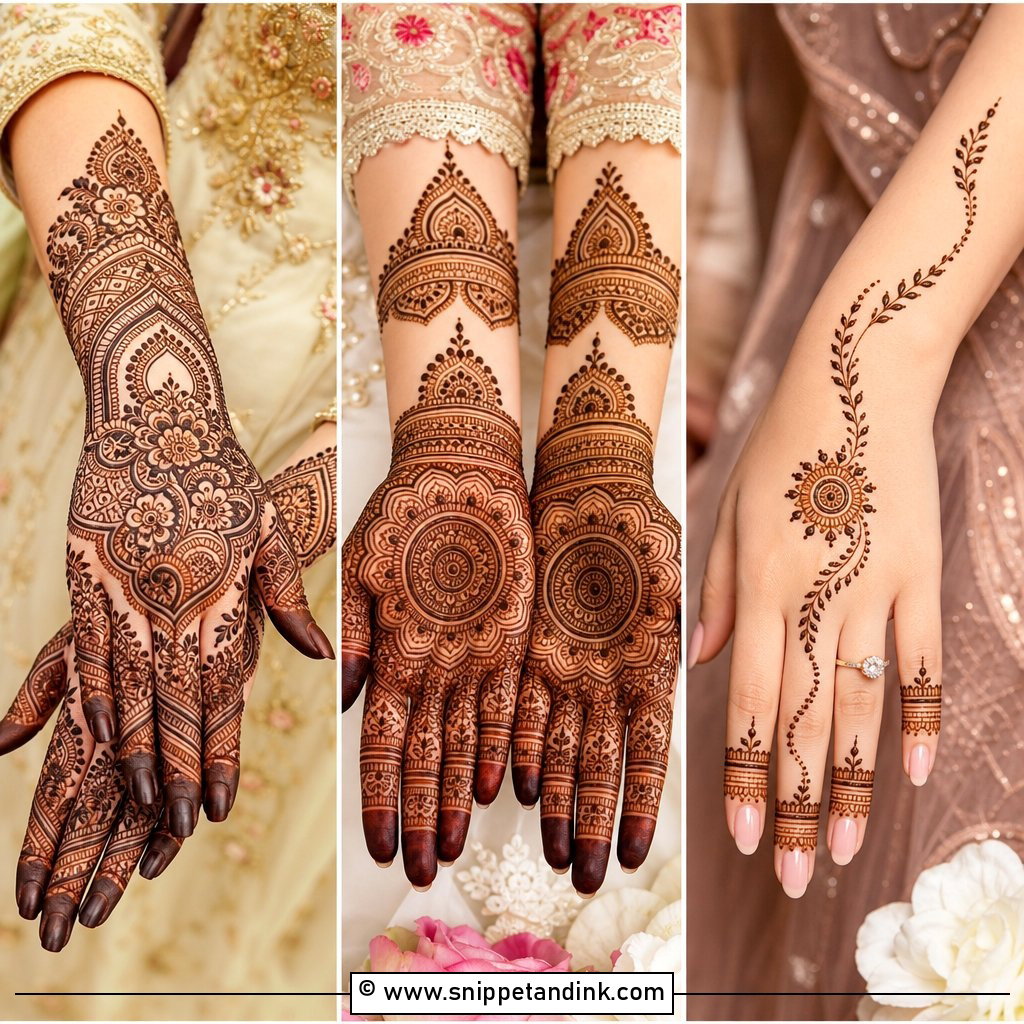
20. Indo Arabic Bunches Mehndi Design
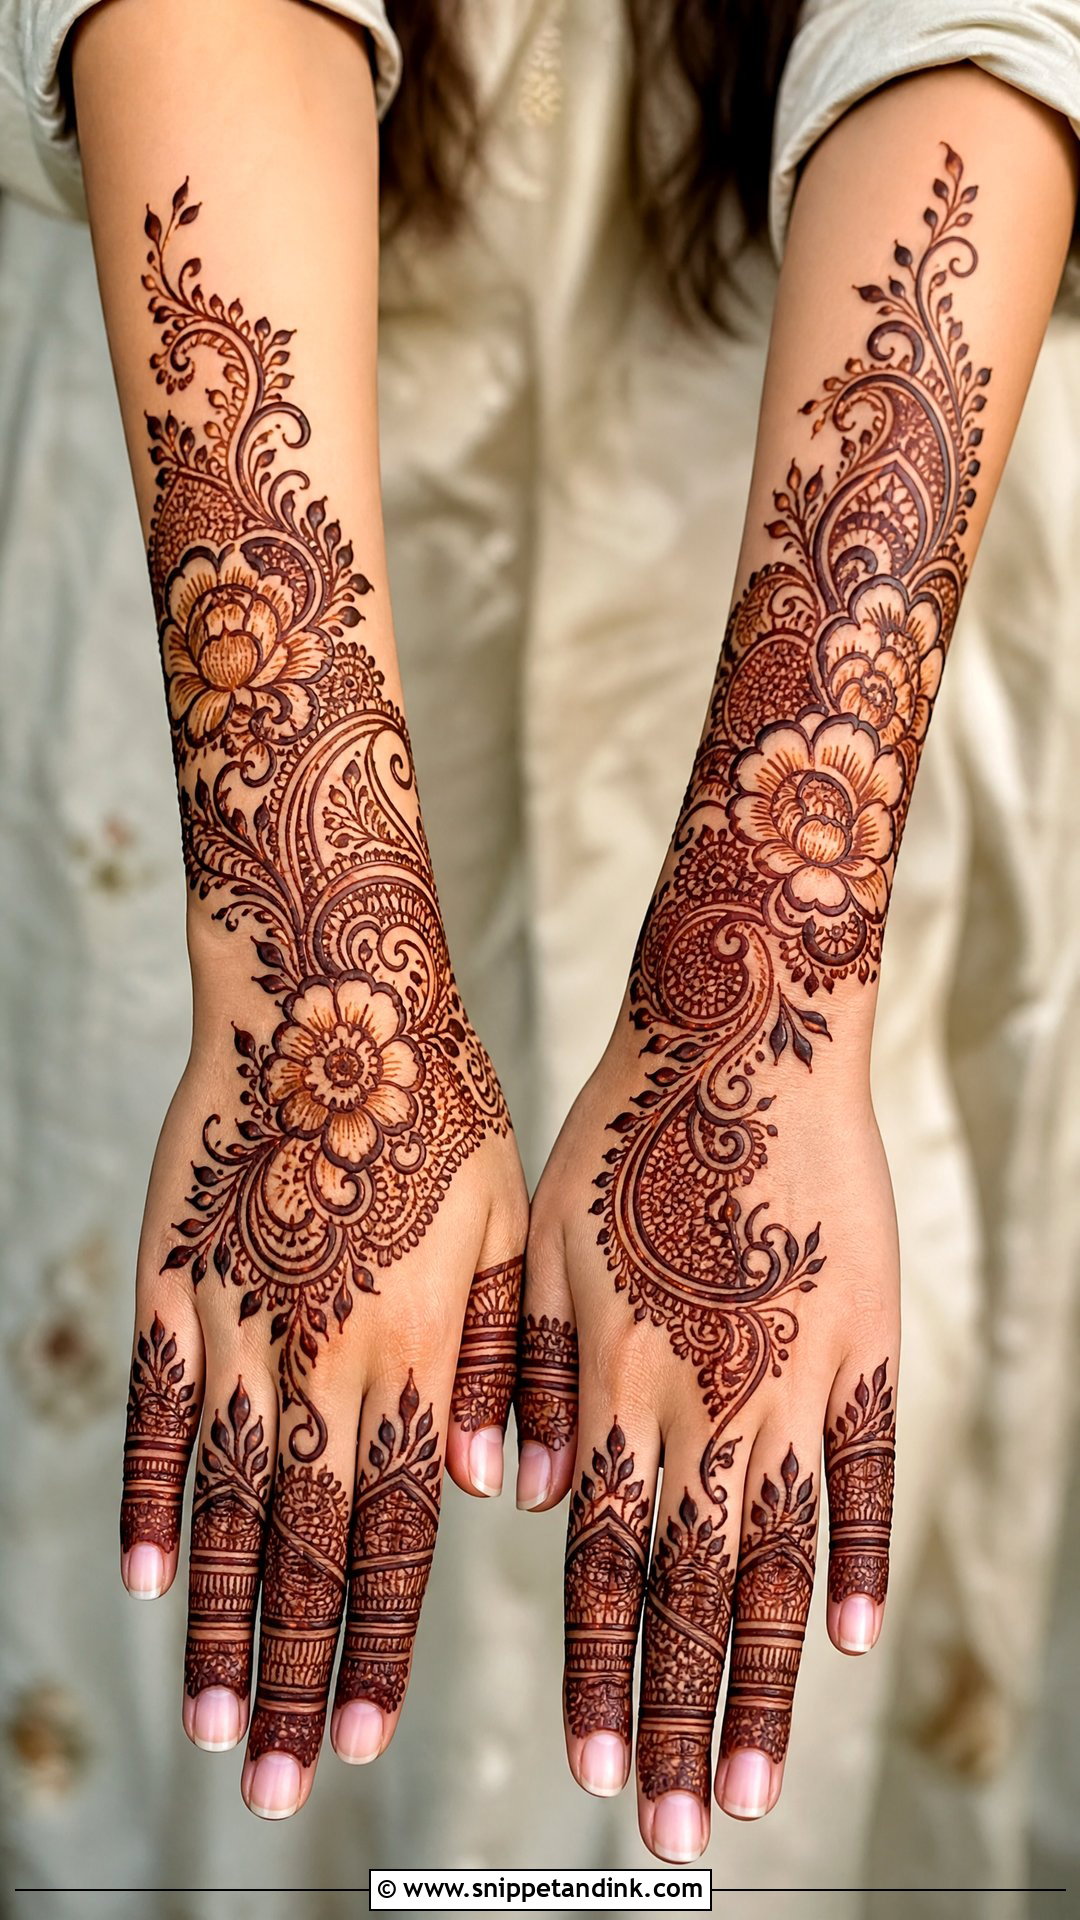
Indo-Arabic mixes the open diagonal flow of Arabic work with Indian-style filling inside each bunch: fine lines, dots, checks and tiny leaves. Paisleys sit between the bunches, and shaded petals add depth. Fingers are partly filled. It suits bridesmaids and pre-wedding functions well, because it’s traditional enough for a ceremony and light enough for a simpler outfit.
21. Gulf Bunches Mehndi Design
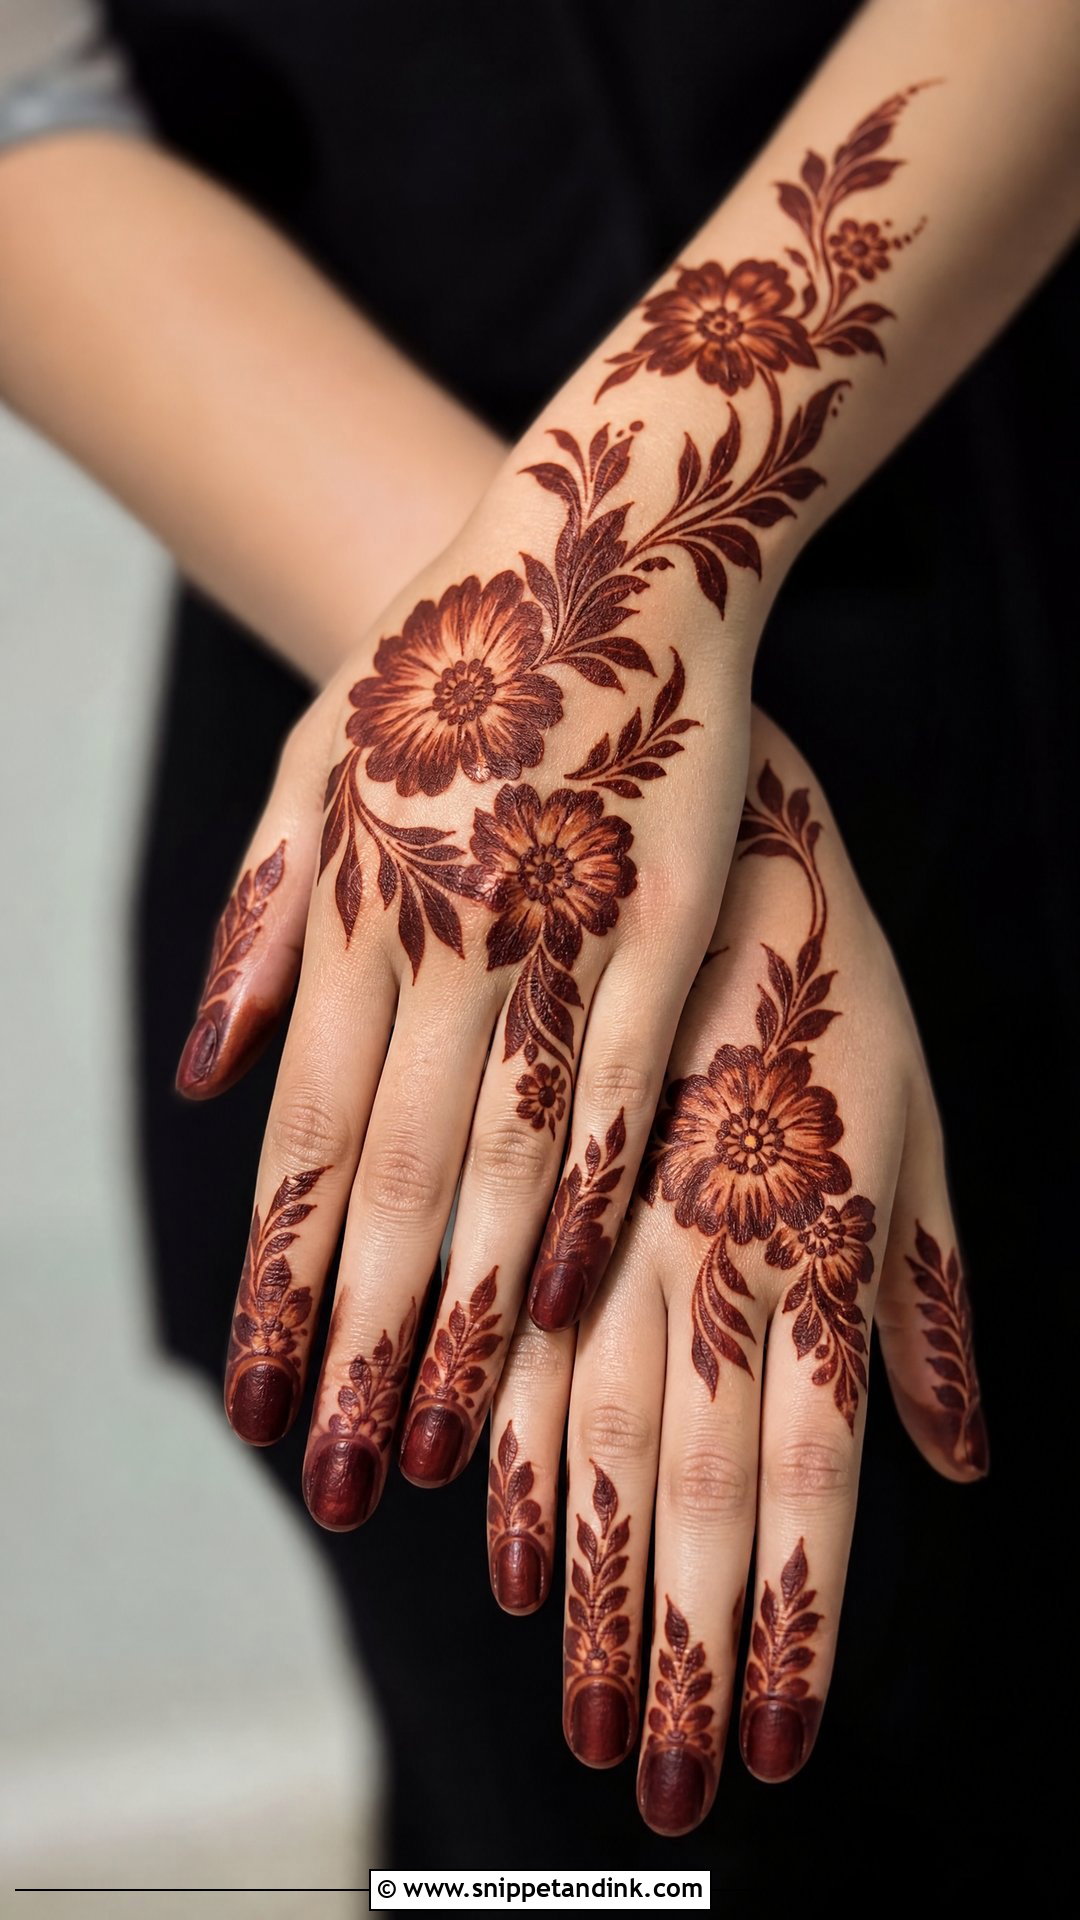
Gulf or Khaleeji-inspired bunches are larger and bolder, with strong outlines, smooth shading and thick leafy vines. A big floral bunch sits on the back of the hand with roomy spacing around it. Bold shapes like these show the deep maroon of a good stain clearly, which is why I like them for an evening event. They read from across a room.
22. Moroccan Bunches Mehndi Design
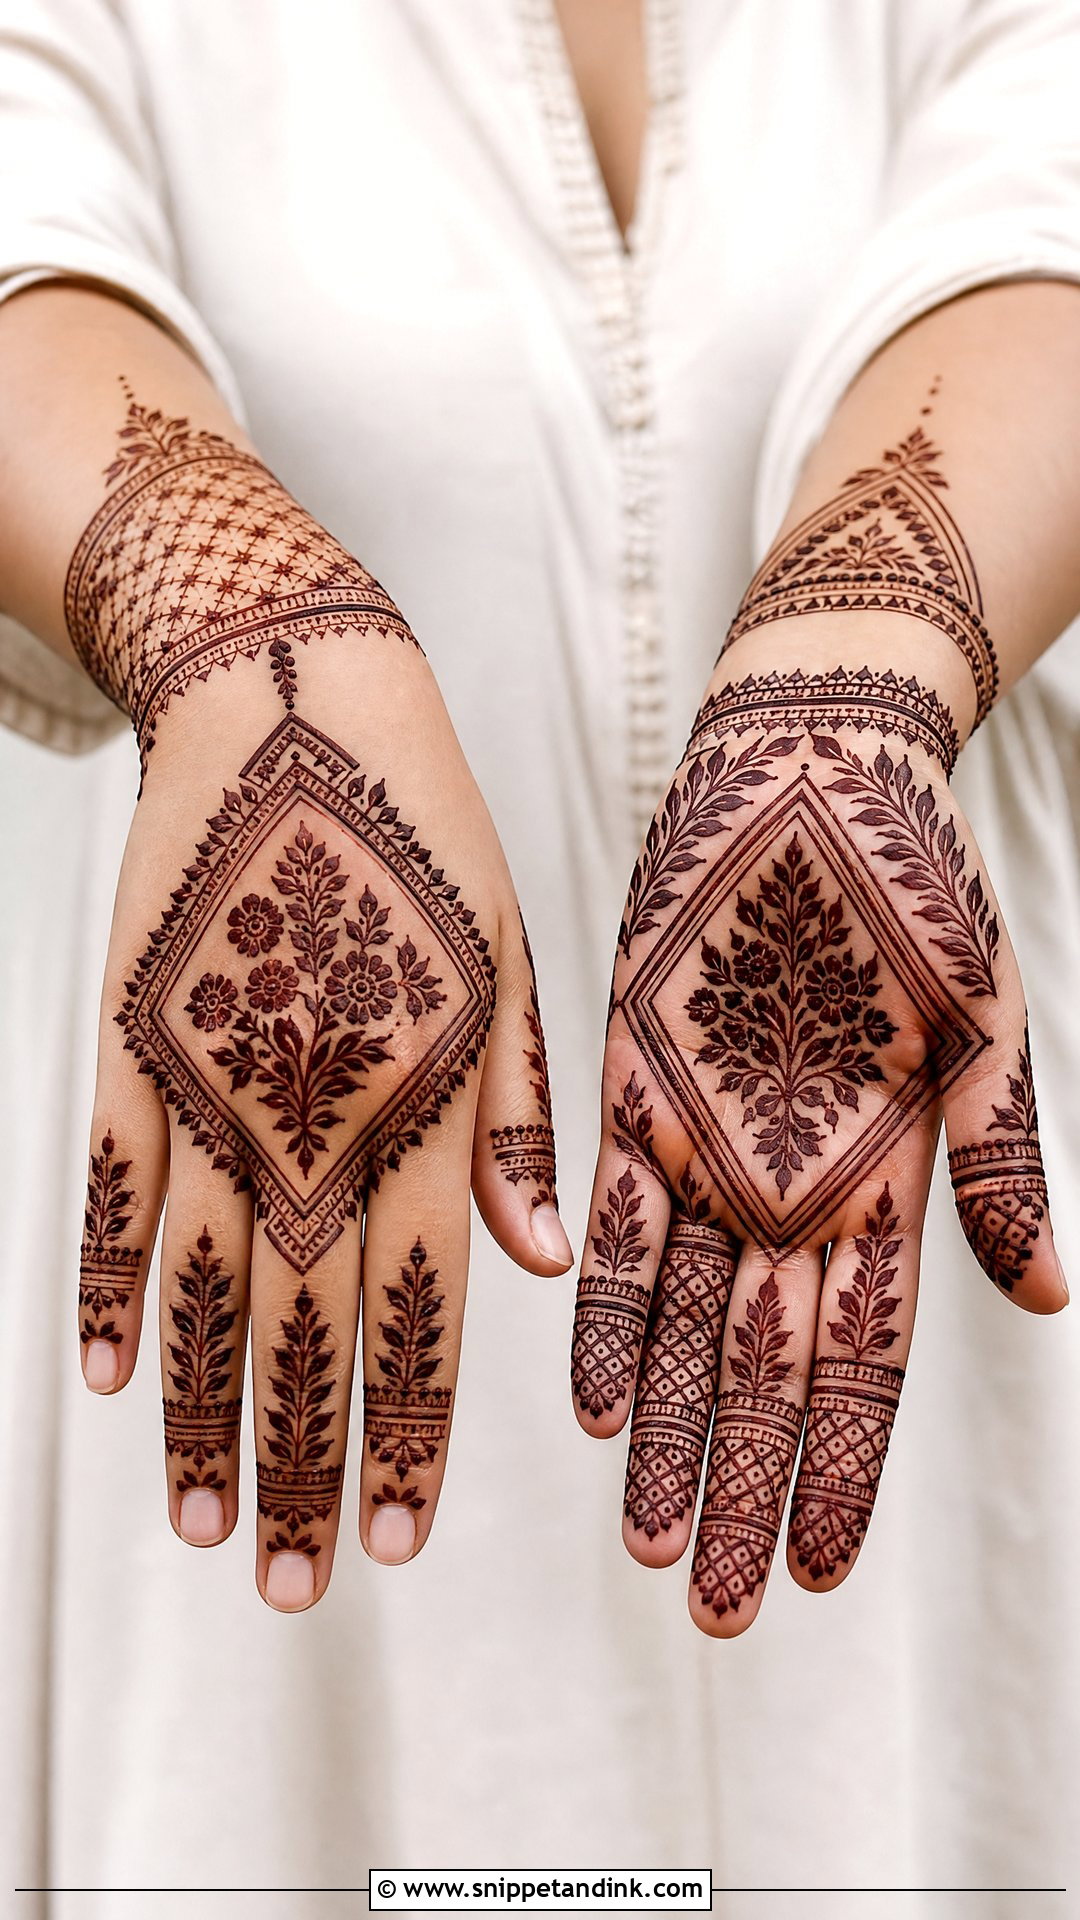
Moroccan-inspired bunches put flowers inside geometric frames: diamond grids, triangles, straight borders and angular leaves. Straight lines are less forgiving than curves, so I work slowly and keep the coverage medium so the shapes stay clear. Dots and fine linework soften the structure. It’s for someone who wants something different from regular floral trails.
23. Shaded Bunches Mehndi Design
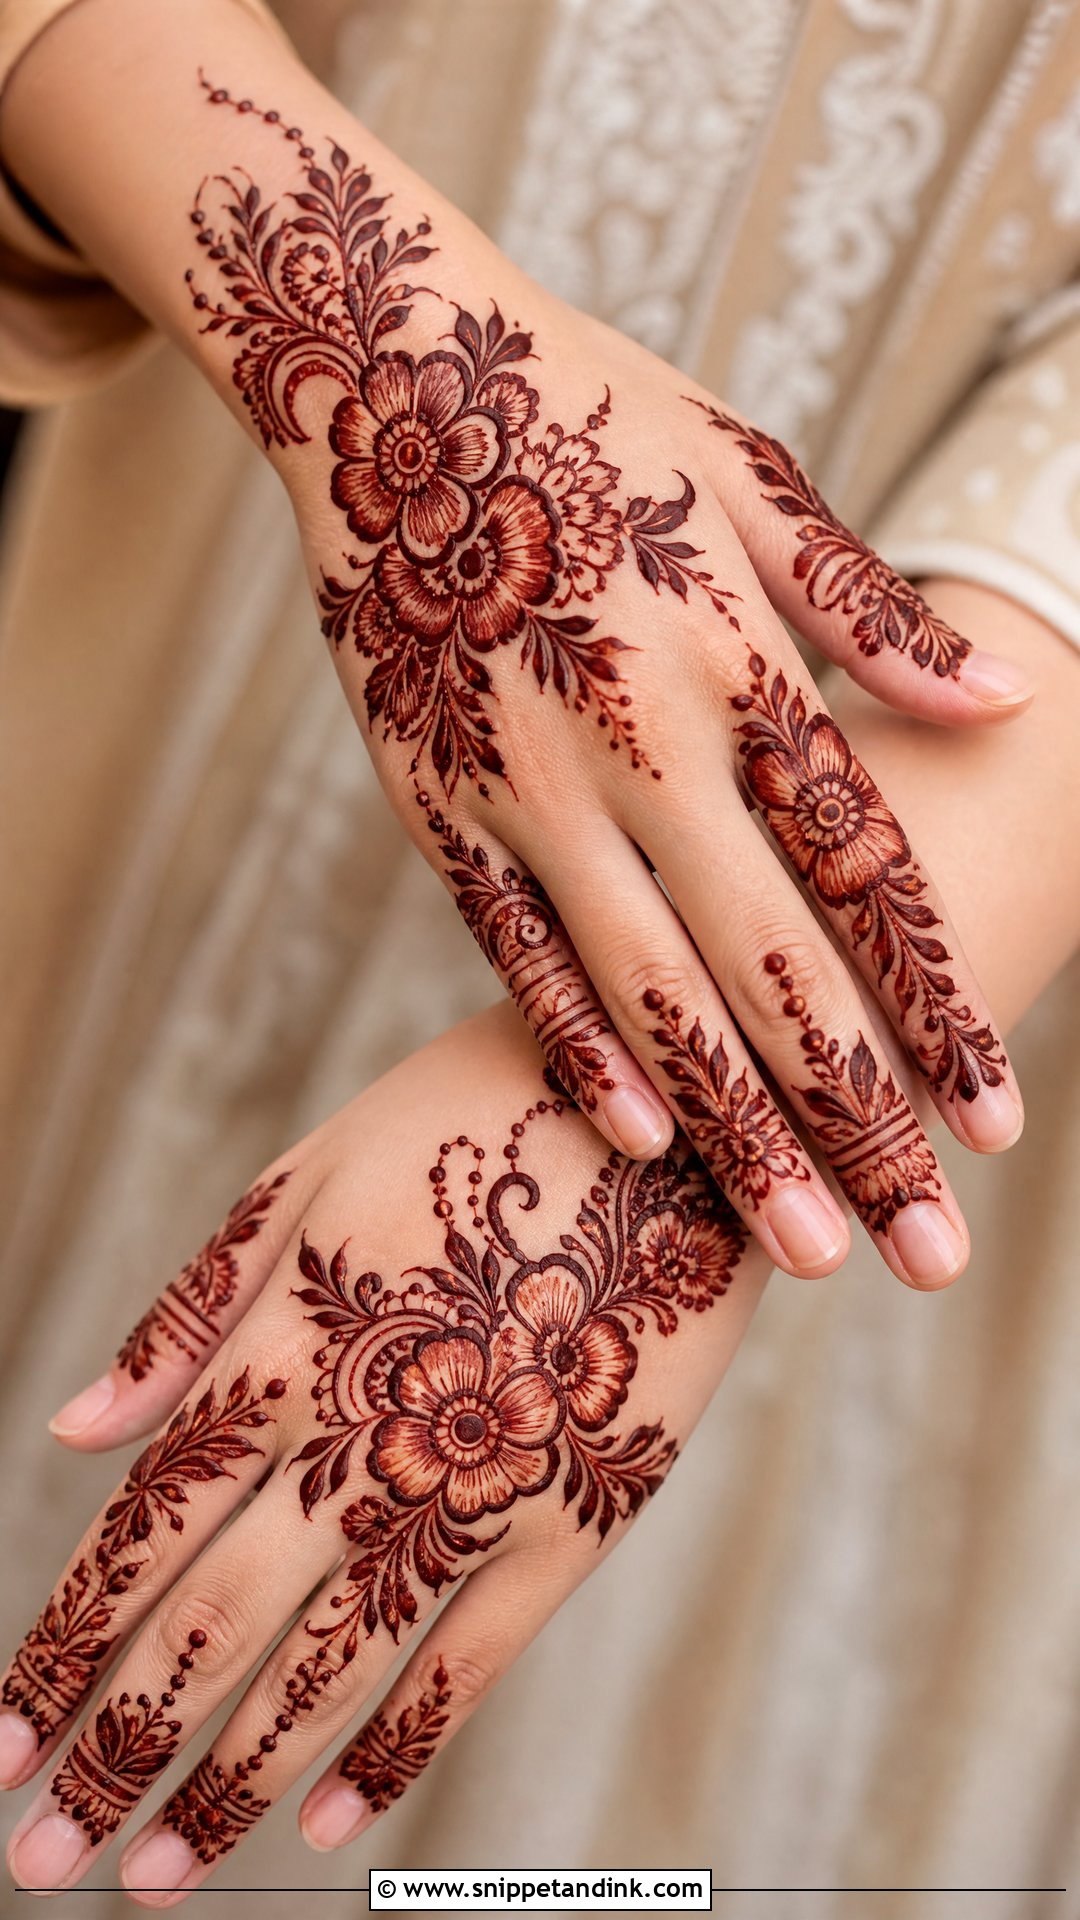
Shading gives each flower cluster depth. I outline the petals boldly, then shade one side with thin strokes, which makes the bunches look layered. Leaves get matching shading. The spaces around the bunches stay clean. Shading looks professional without full coverage. Be gentle with the cone, because heavy shading can merge into a solid patch once the stain darkens.
24. Jaali Bunches Mehndi Design
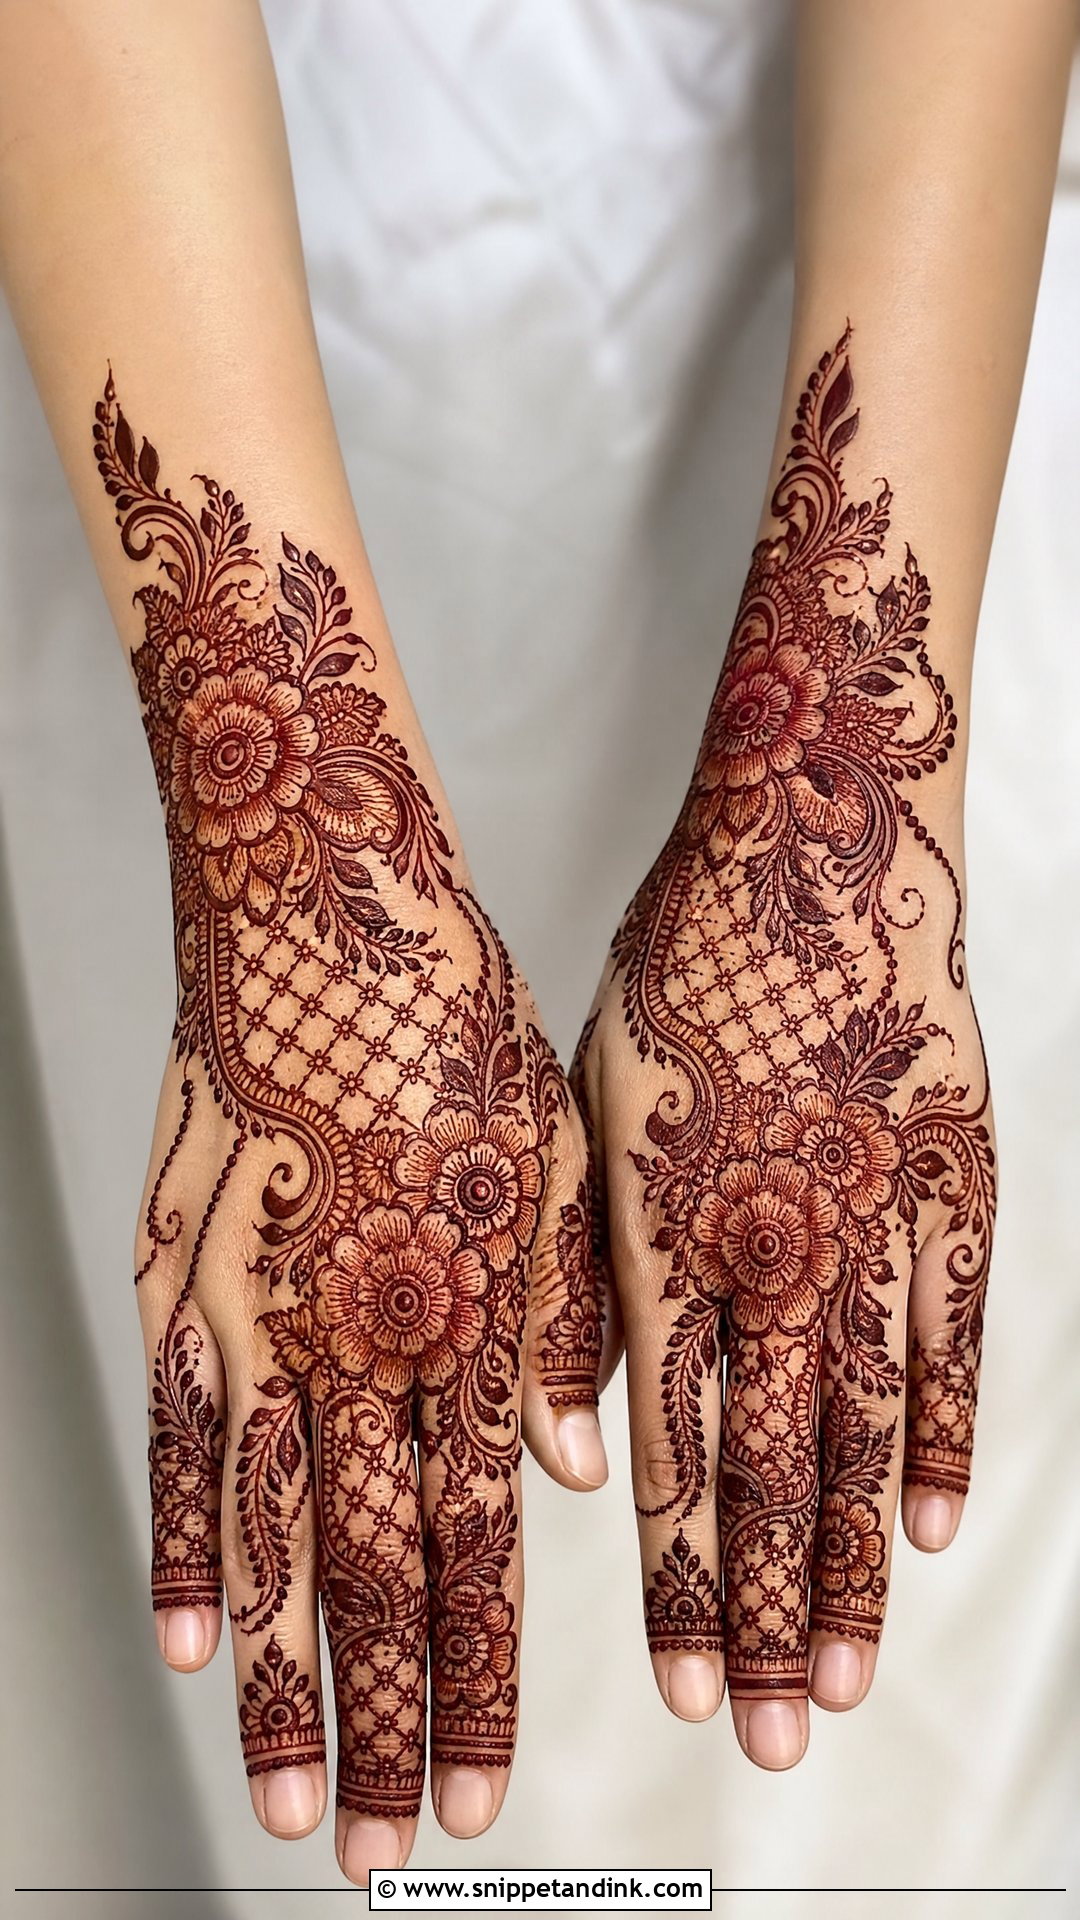
Jaali is fine net-like mesh that sits behind or between flower bunches, or across the fingers. I keep the mesh lines thin and evenly spaced, then place bold flowers on top. Dots at the intersections make it decorative. On a full hand it fills space without looking random, provided the mesh lines don’t touch; if they do, the stain turns into a dark block.
25. Festival Bunches Mehndi Design
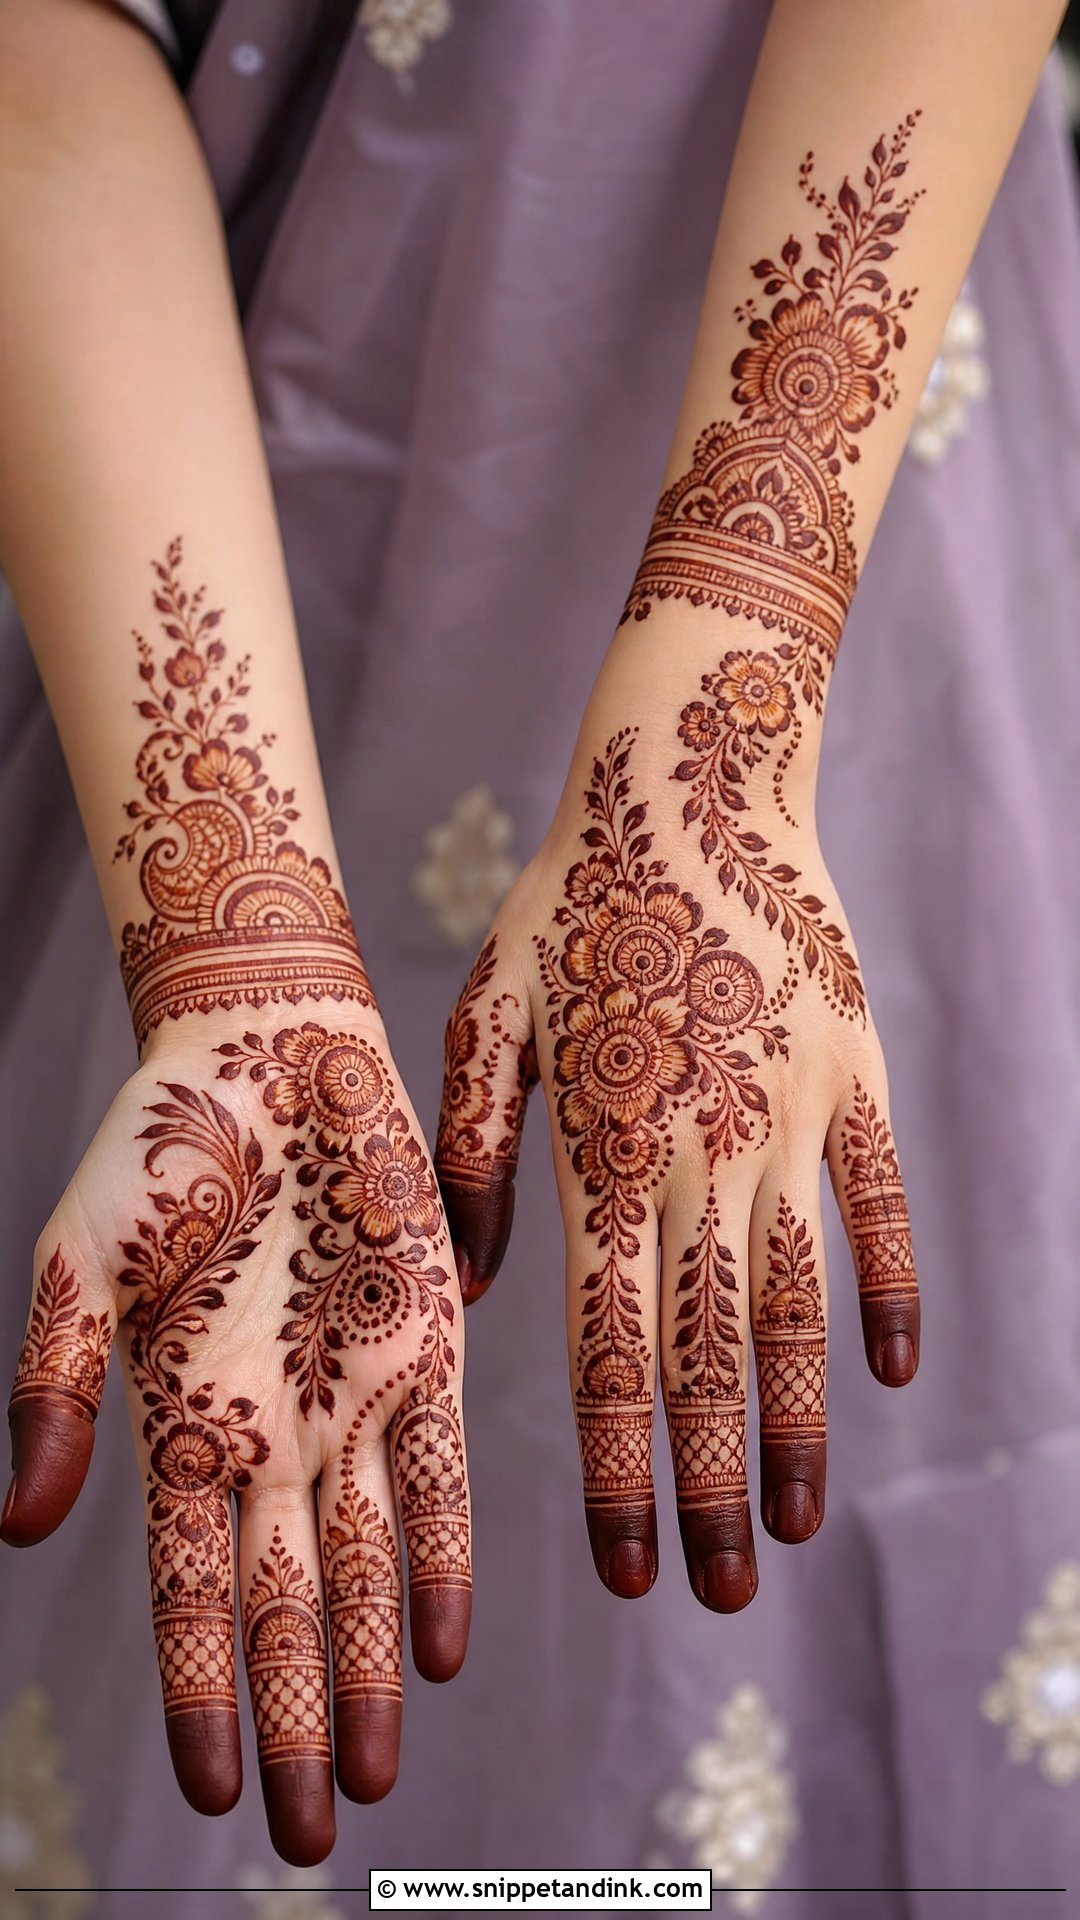
Festival bunches should be quick to dry and comfortable to wear for a long day. I use medium coverage: flower clusters, leafy trails, small paisleys, wrist bands and dots, with enough open space that the paste dries fast. For Eid, Diwali, Karwa Chauth or Teej, a diagonal floral layout is reliable. A small mandala or bracelet band gives a more traditional finish. It suits all ages.
Orange Today, Maroon by the Weekend
Fresh henna stain is bright orange when the paste comes off. It darkens to reddish-brown or deep maroon over the next one to two days as it oxidizes. That’s why I schedule bridal mehndi one or two days before the wedding, never the same morning.
- Leave the paste on for at least six hours, longer for a bride. Overnight gives the deepest stain.
- A light dab of lemon and sugar after the paste dries helps it stay on the skin.
- Scrape the dry paste off with a blunt edge or rub it away. Don’t wash it off.
- Keep the hands away from water for as many hours as you can afterward, ideally until the next day.
- Avoid soap, sanitizer, scrubs and swimming pools for the first couple of days. Warmth helps the color develop.
One safety point I always repeat
Natural henna never stains black, and it never develops in an hour. Ready-made cones that promise an instant dark black stain can contain chemical dyes that cause serious skin reactions. Ask your artist what is in the paste, and if you have sensitive skin, do a small patch test a few days before.
Does the Stain Match the Sketch? It Depends on the Next Two Days
Bunch mehndi can be minimal, modern, traditional or bridal, depending on how many flowers you group and how much space you leave. Back-hand layouts show off the pattern; palm layouts give the darkest stain; full-hand bunches suit the main event. Whatever layout you choose, plan the timing and aftercare as carefully as the design. The clusters only look clear if the stain has time to develop properly.
You'll Like These Ideas:


Leave a Reply