
Most brides who sit down with me for a consultation arrive with a phone full of screenshots: one palm from here, a finger pattern from there, a peacock they loved on someone else’s forearm. Stitched together, those pieces rarely make a design that flows. It’s much easier to start from complete looks and decide how dense you want the coverage, which style language feels like you, and how it will read in photos. Bridal henna right now ranges from classic Indian full-hand work and Arabic negative space to Indo-Arabic fusion, portrait palms, jaali grids, mandalas, lotus trails and personalized initials. Below are twenty starting points I’d show a new bride, with what each one asks of your time, your skin and your artist.
How Long You Can Sit Still Decides More Than the Pattern
The first question I ask isn’t about motifs. It’s about time. Henna can’t be rushed, and every design below carries a chair time that shapes your whole mehndi day.
- Arabic, bracelet or minimal designs on both hands: usually a couple of hours, sometimes less on the palms only.
- Indo-Arabic or floral work to the wrists: a half day is realistic once you count finger detail.
- Full Indian, Rajasthani or portrait work to the elbows, plus feet: plan on most of the day, with breaks.
These are rough ranges and every artist works at a different speed, so ask yours for an honest estimate for your exact design. I’d also ask whether she brings an assistant for the feet. Two people working at once can save hours, but only if both hands match in style.
Book a trial on a small patch
A small sample on the inside of your wrist a few weeks out tells you two things: whether you like the artist’s line work once it stains, and whether your skin reacts to her paste. Natural henna stains orange first and darkens to brown or maroon over a day or two, so judge the trial on day two, never on the first morning.
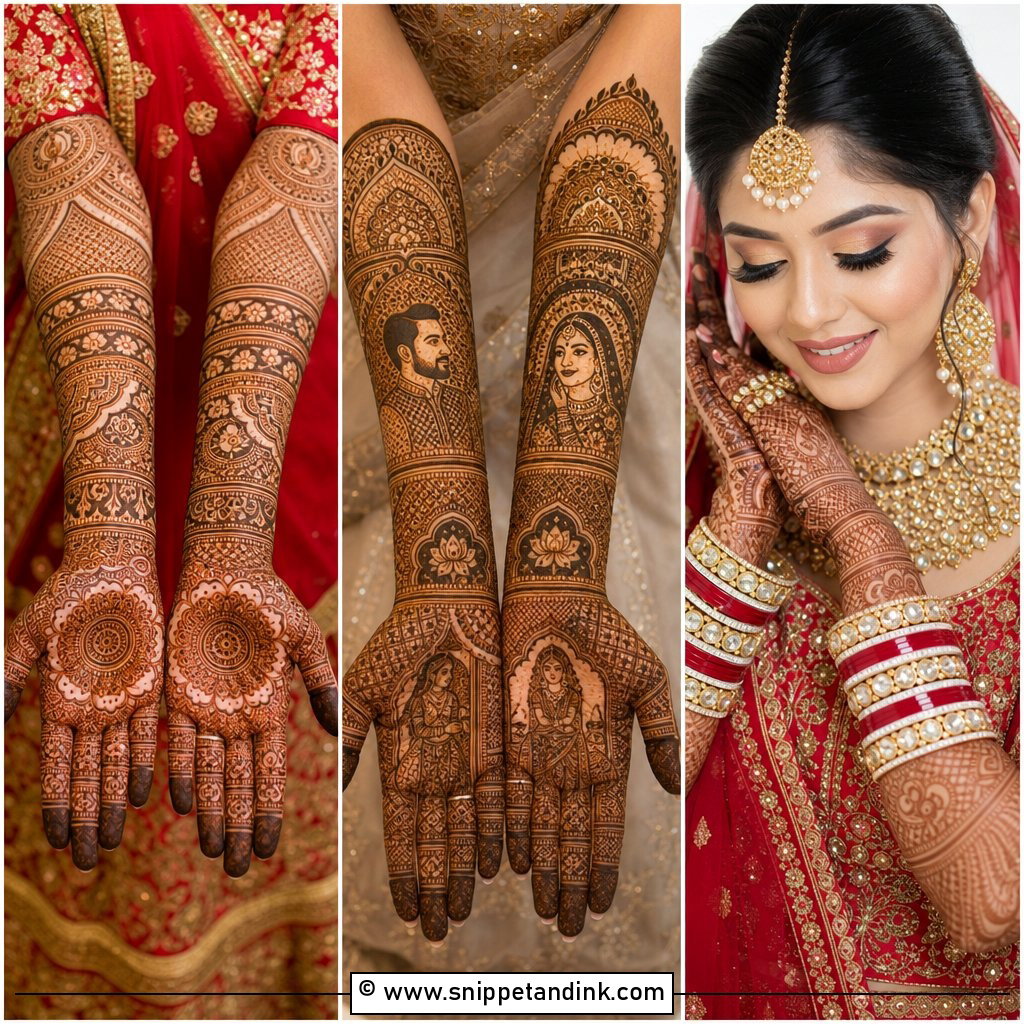
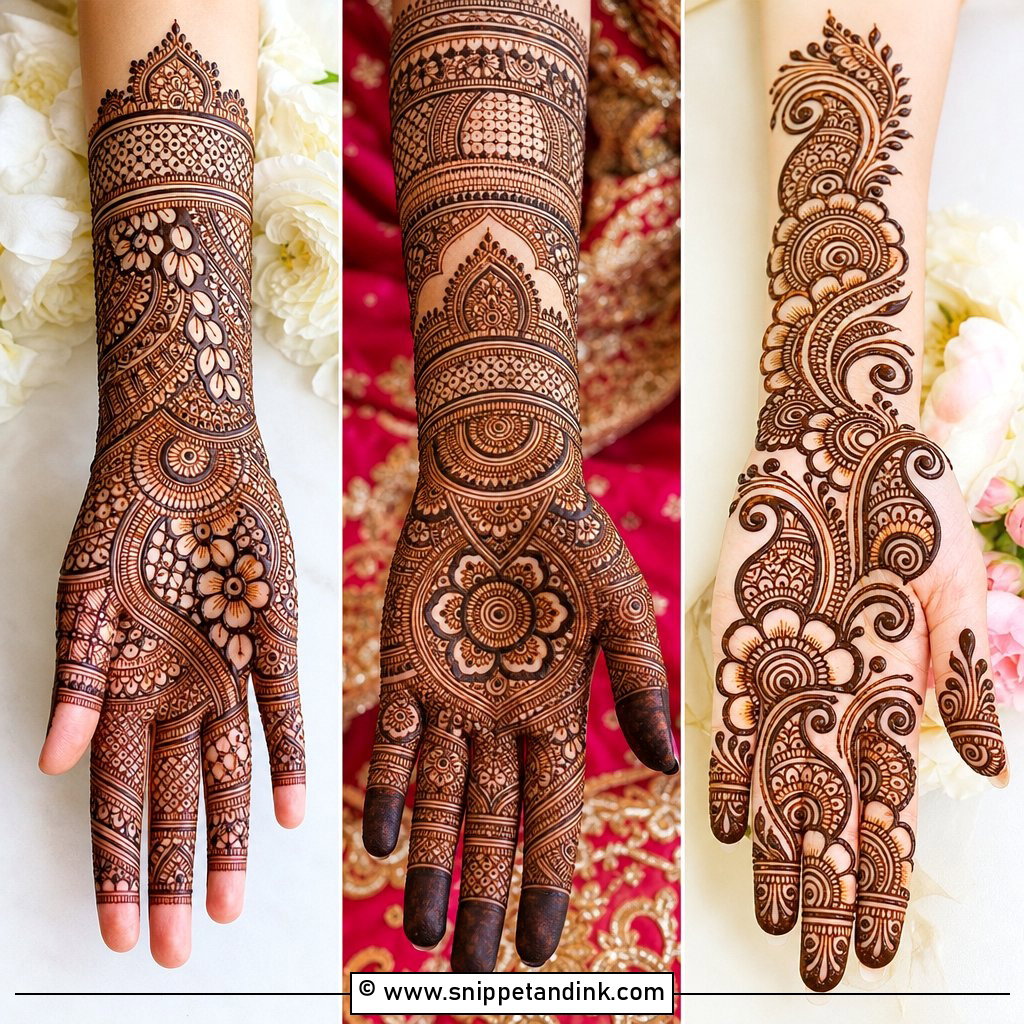
1. Full Hand Indian Bridal Mehndi Design
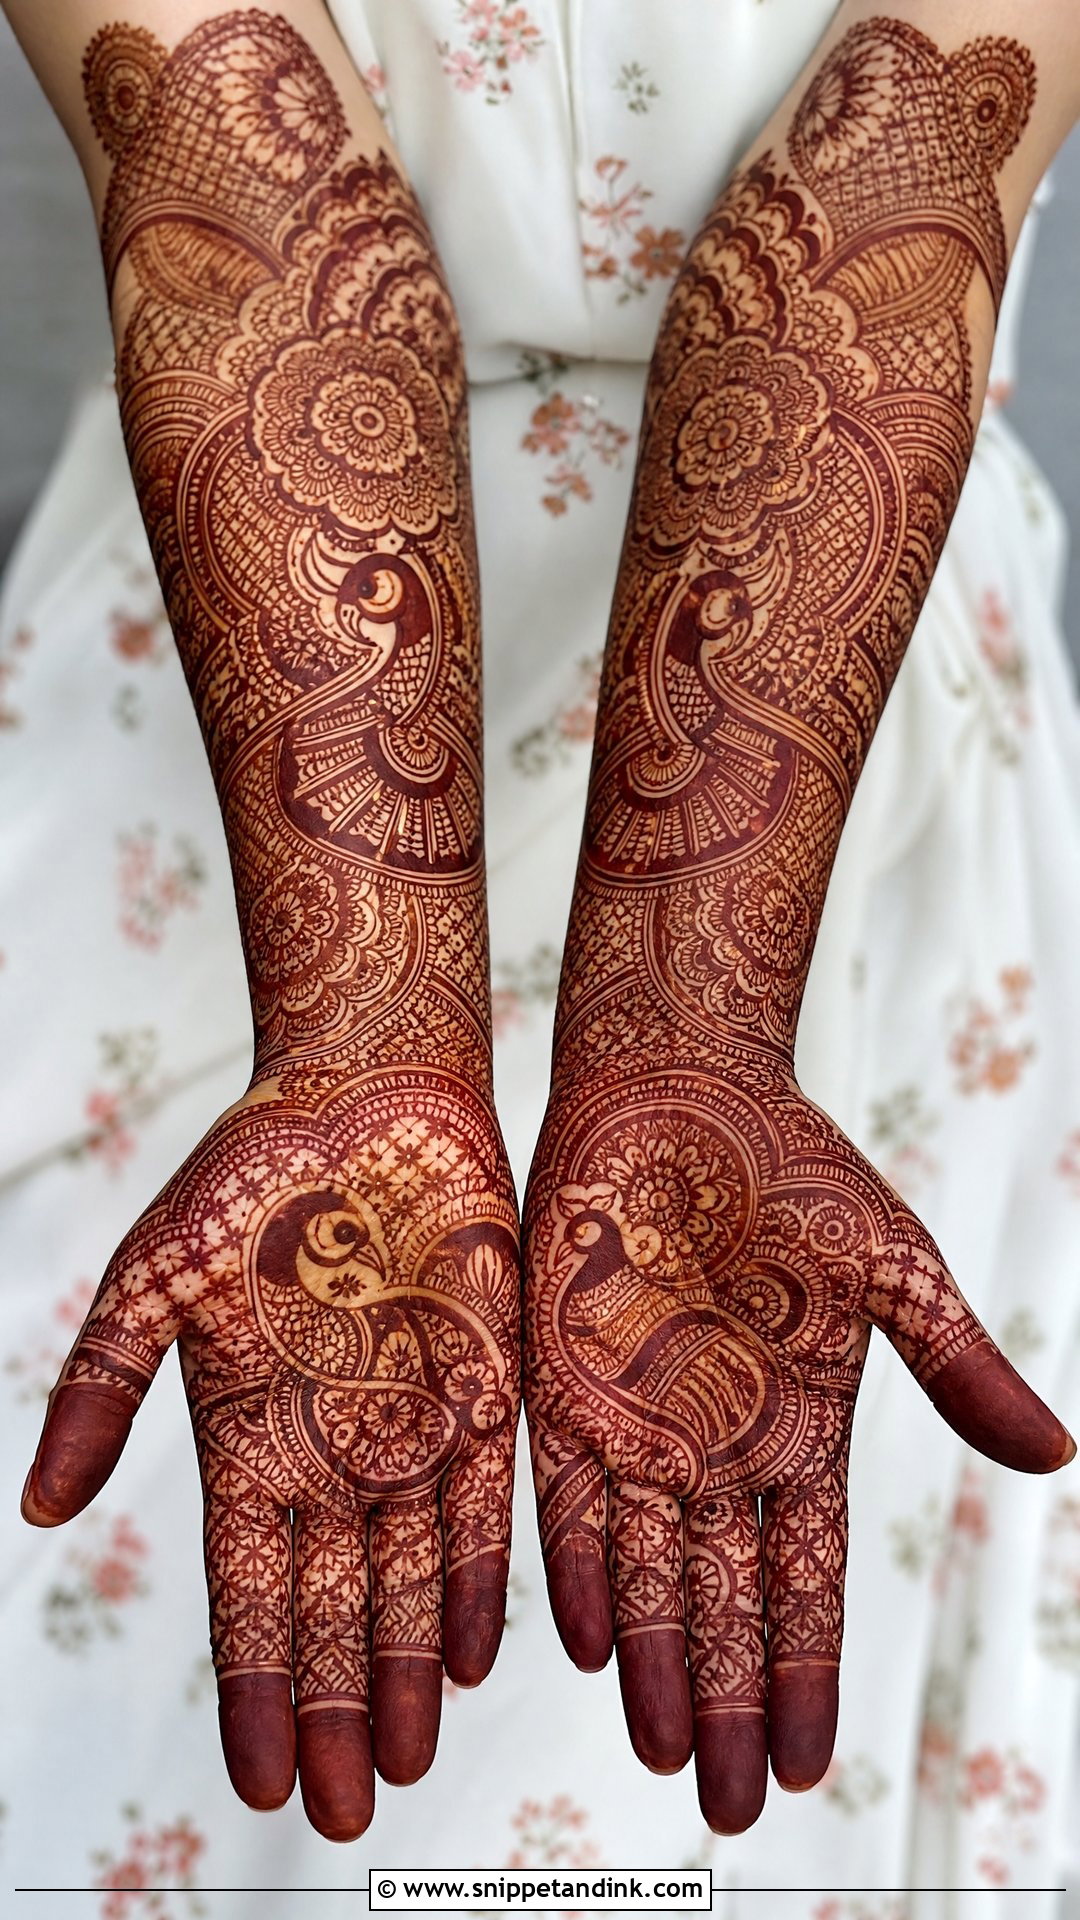
This is the layout most families picture when they hear the word bridal: palms, fingers, wrists and forearms packed with paisleys, florals, peacocks, tiny leaves, mandalas and fine filler lines. Dense doesn’t have to mean muddled, though. When I draw it, I block in the big motifs first and leave a hairline of bare skin around each one before any filler goes in, because henna spreads slightly as it dries and those gaps are what keep the stain readable on day two. It sits naturally with lehengas, sarees and heavy bridal jewelry. Budget a long session for it, and ask your artist how they handle spacing around the key motifs.
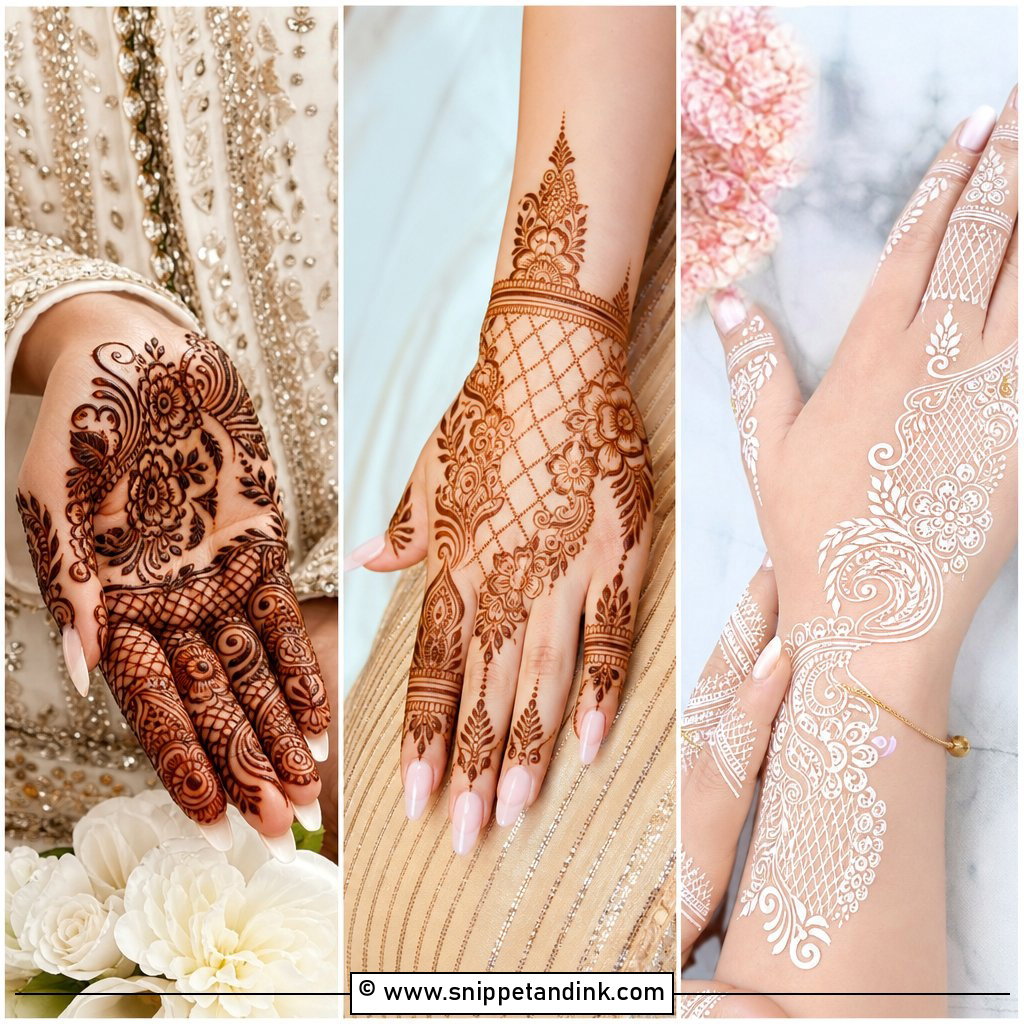
2. Arabic Bridal Mehndi Design Full Hand
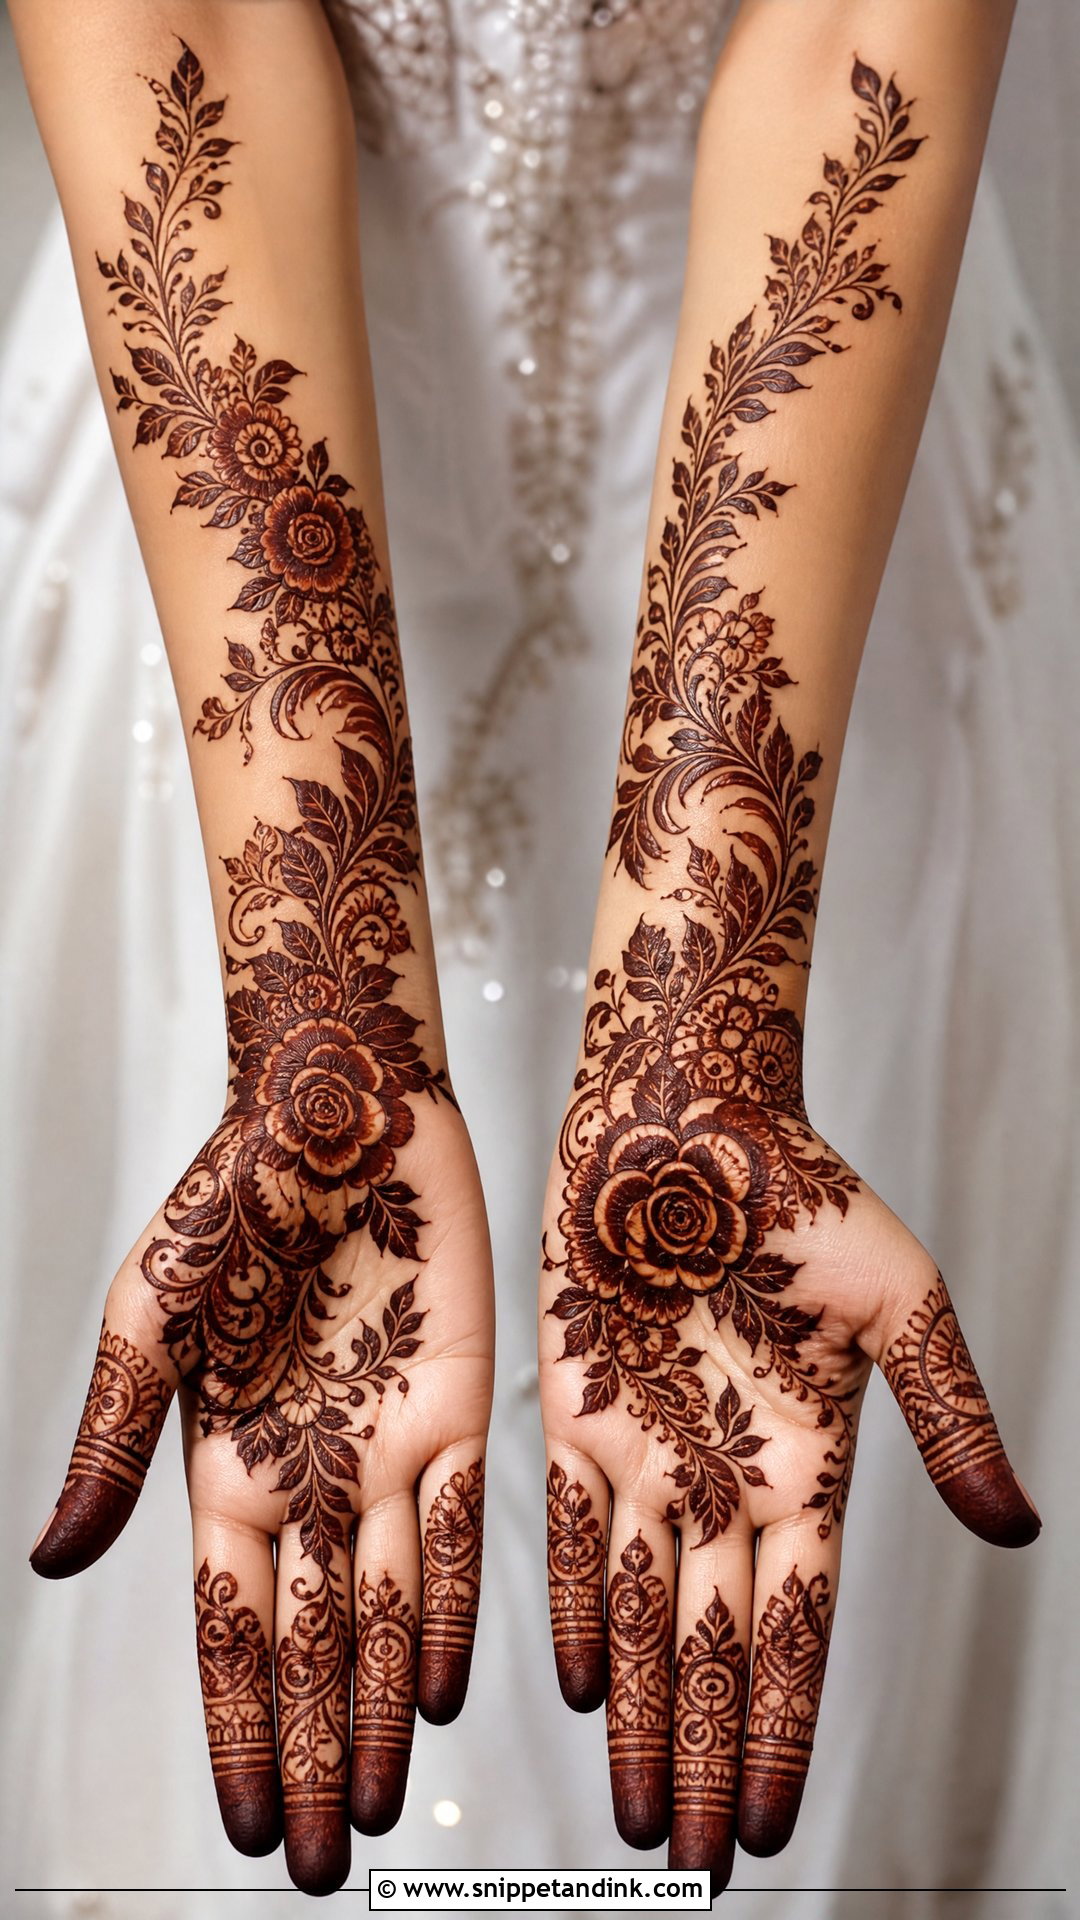
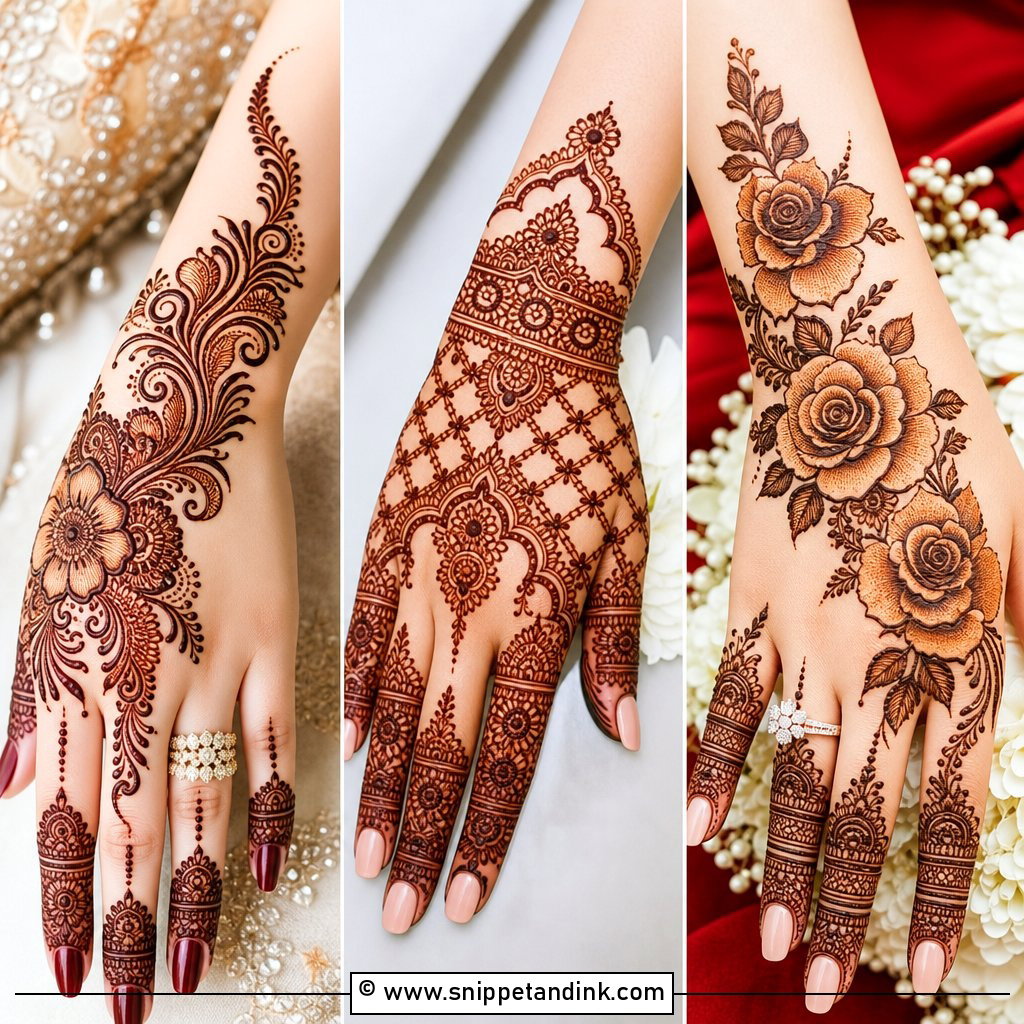
Arabic layouts usually run on a diagonal, sweeping across the palm and back of the hand toward the wrist and forearm in bold floral trails. The bare skin is doing half the work here; it’s what lets each rose, leaf and vine stand out. I shade the petals with a thinner line of paste so they stain a shade lighter than the outline, which gives that soft gradient you see in close-ups. It takes noticeably less chair time than a dense Indian layout, so it’s kind to brides with a packed pre-wedding schedule. Ask for larger roses and proper finger detailing so it still reads as bridal rather than party henna.
3. Indo Arabic Bridal Mehndi Design
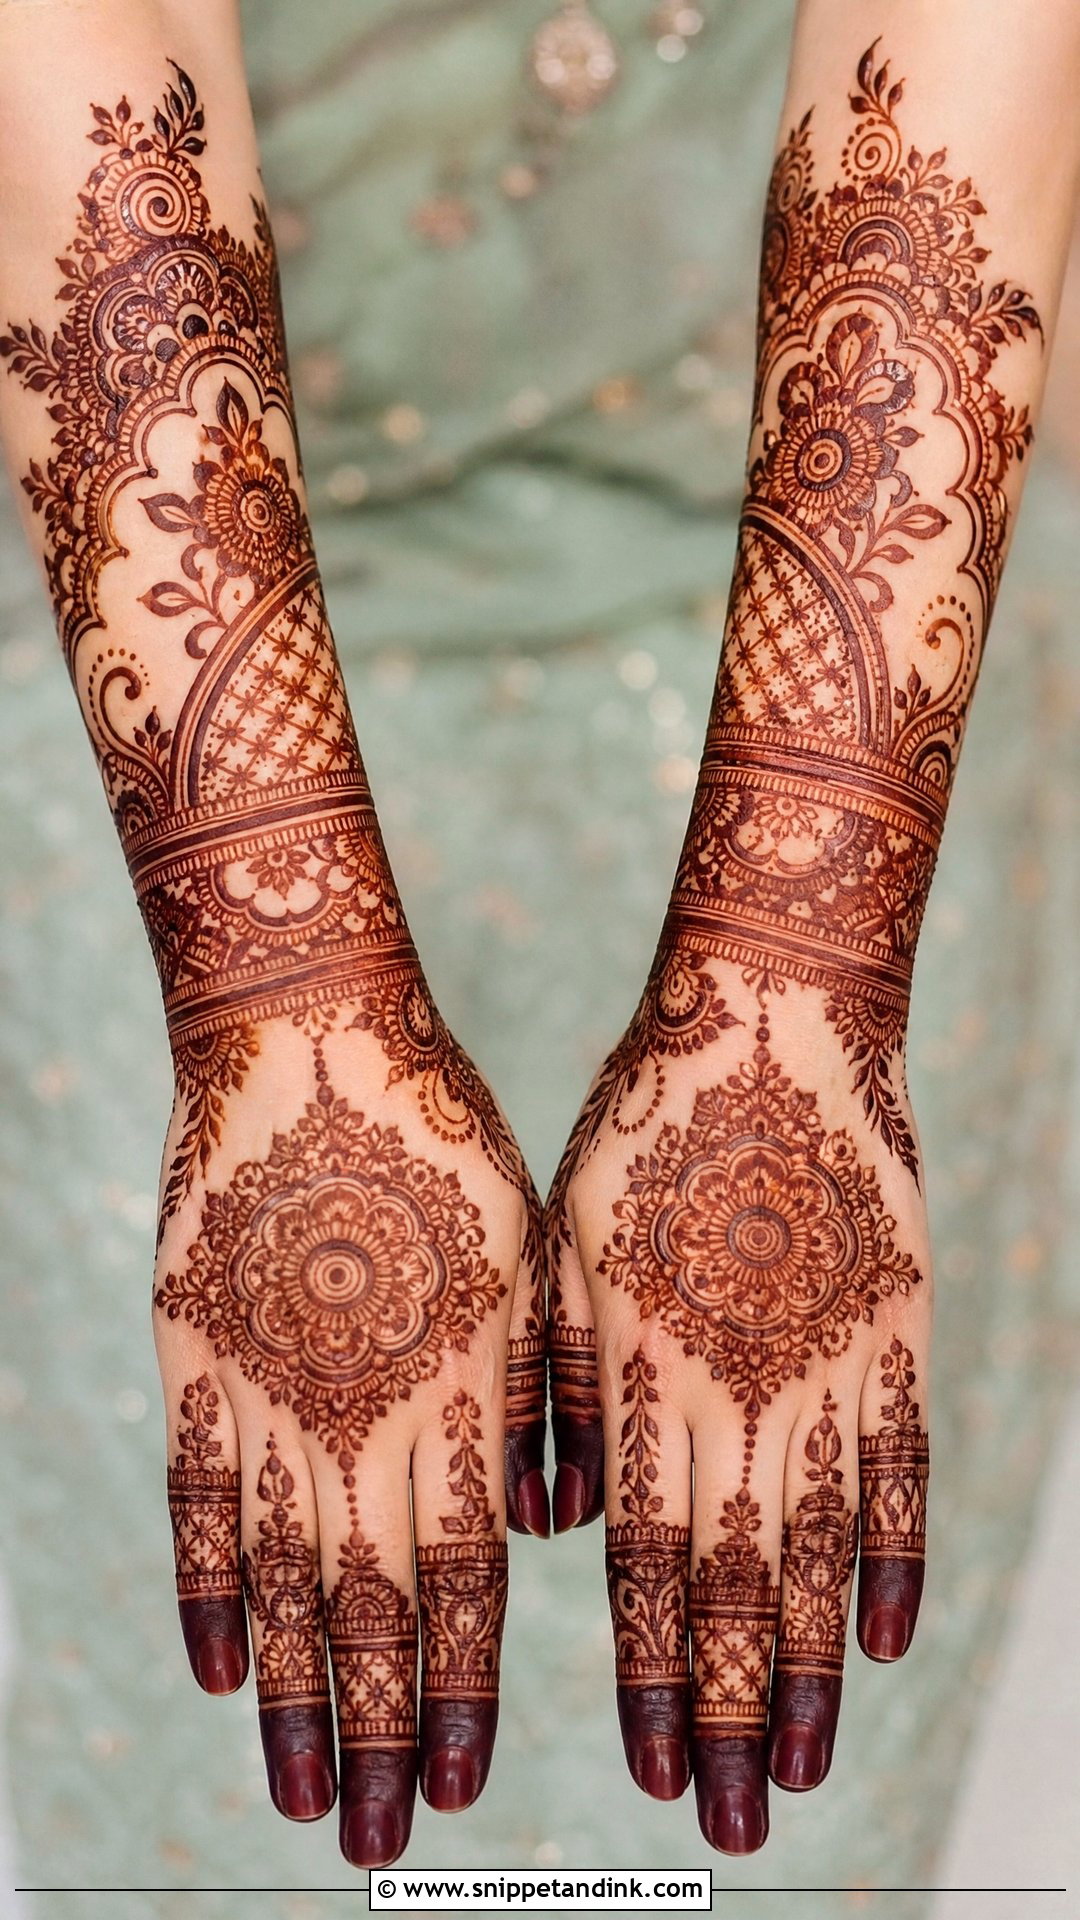
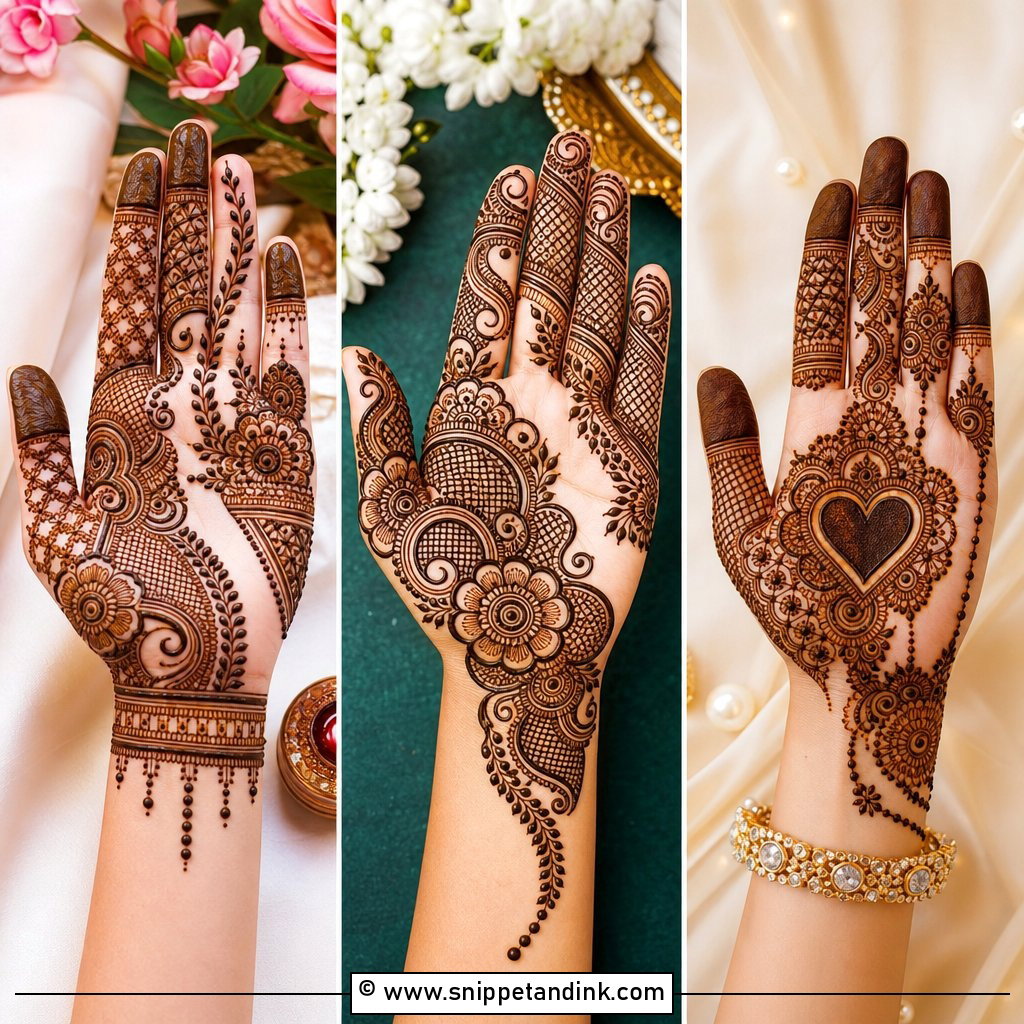
Fusion is where a lot of my brides land after the first consultation. I’ll keep the palm denser with mandalas, paisleys and jaali, then switch to bold Arabic flowers and vines on the back of the hand, where rings and bangles would hide fine filler anyway. The contrast is what makes it work in pictures: big motifs give shape, small Indian fillers give richness. The risk is a design that looks like two artists drew it. To avoid that, I repeat one element, usually a specific leaf or petal shape, across both styles and both hands so the whole thing reads as one plan.
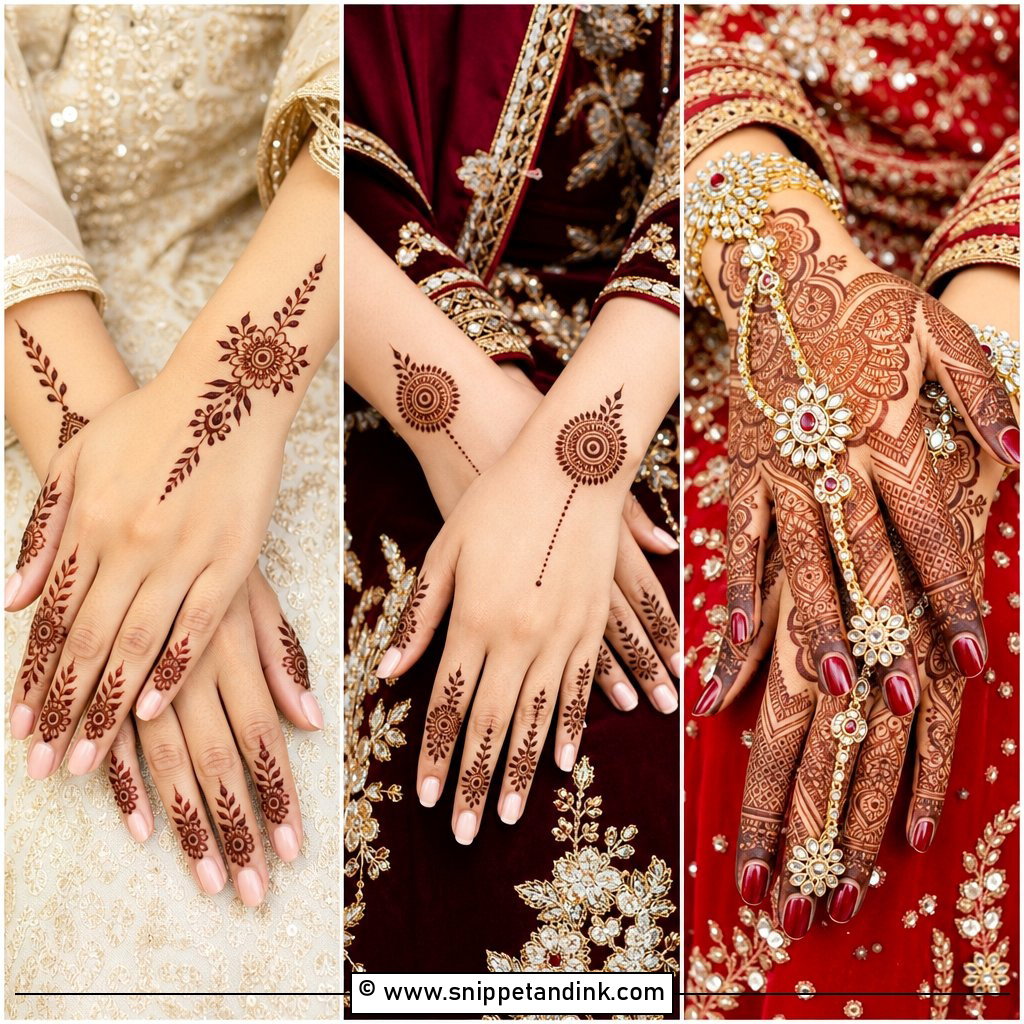
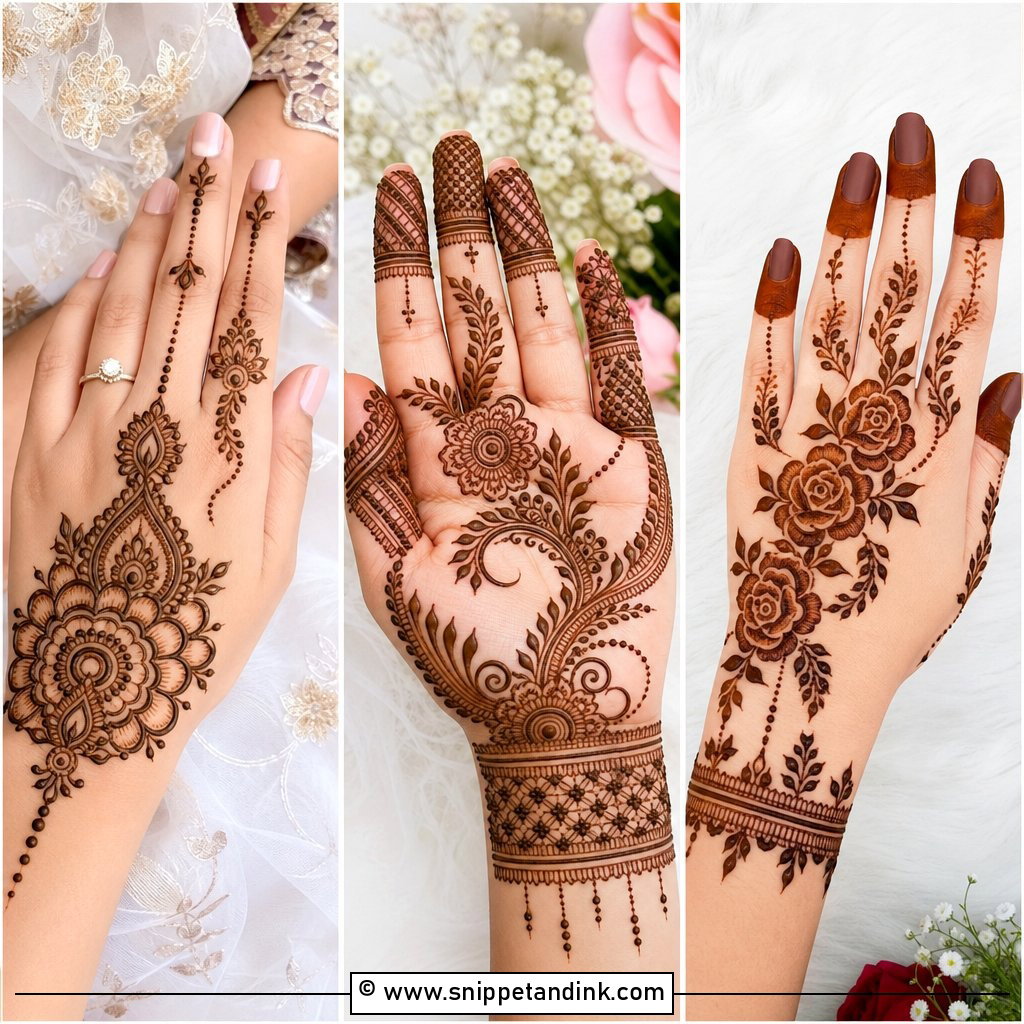
4. Simple Bridal Mehndi Design For Hands
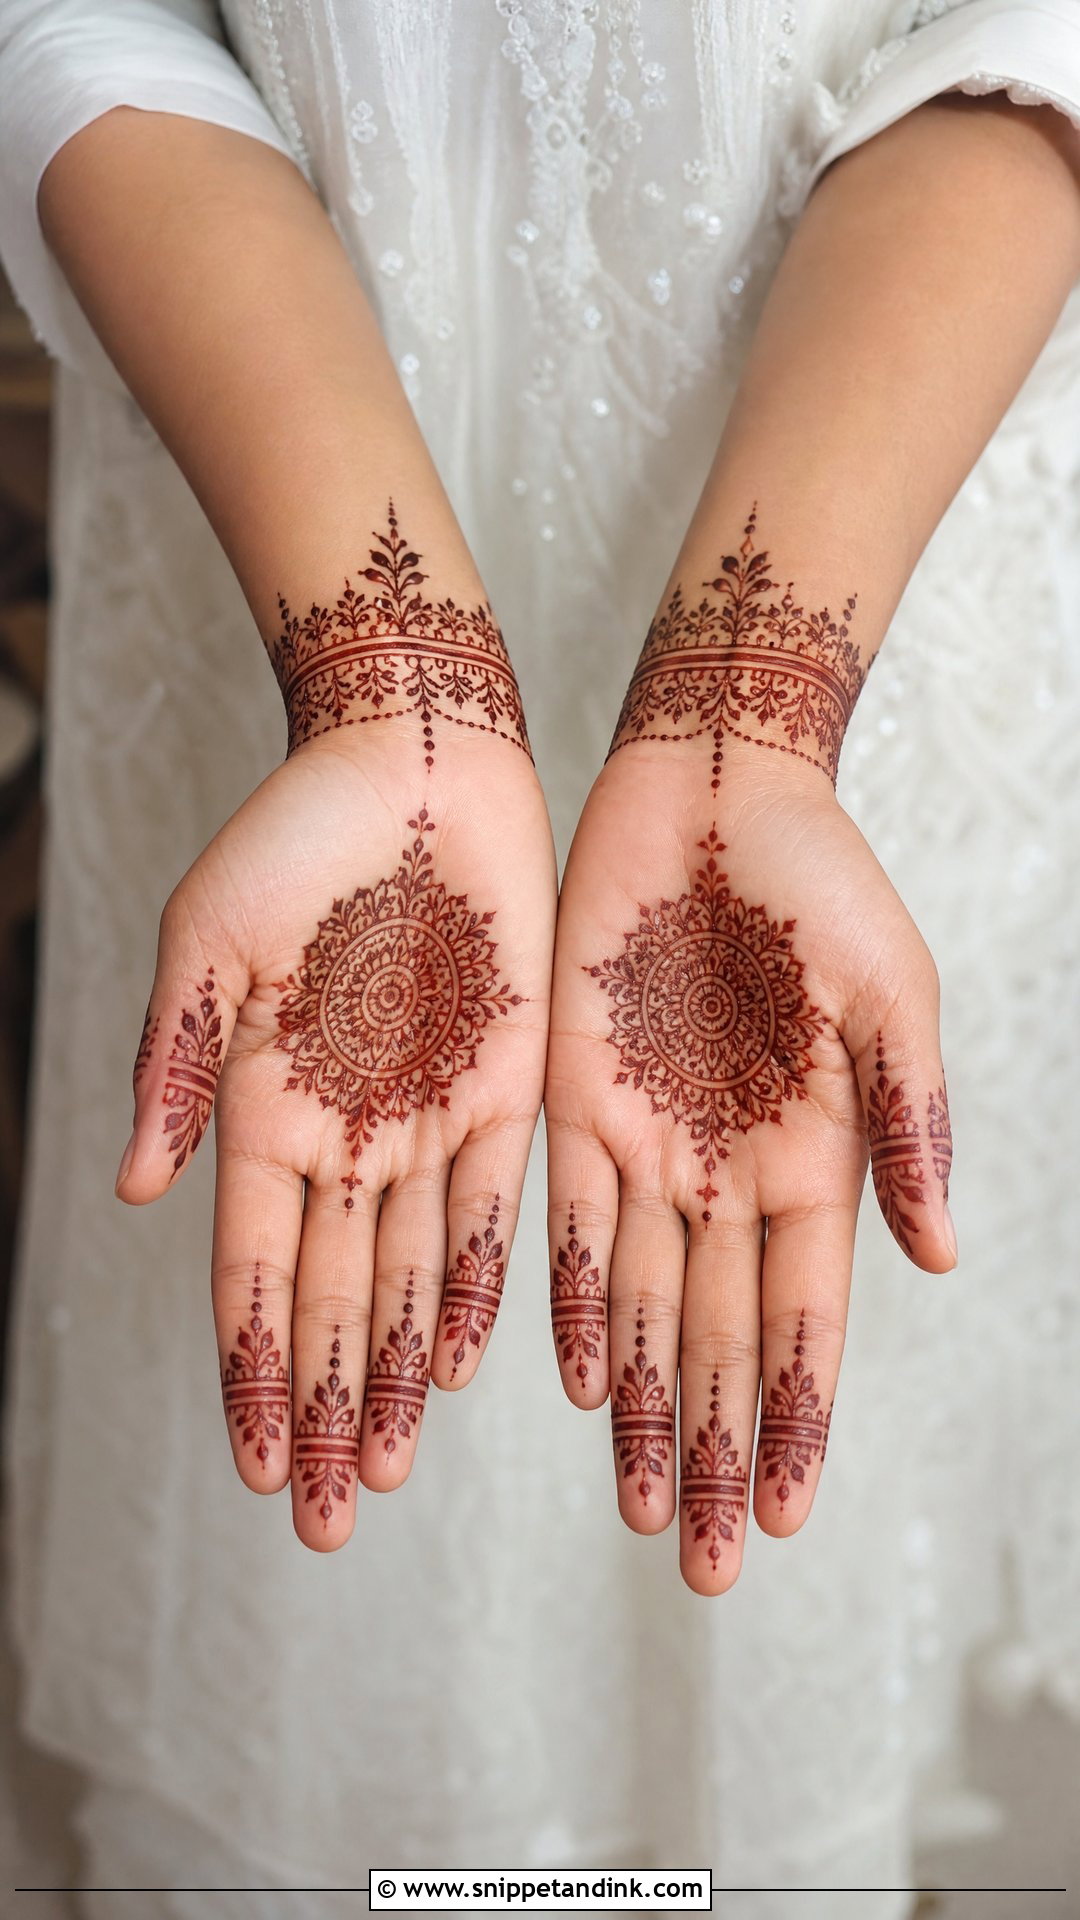
Not every bride wants six hours of paste, and a lighter design can still look clearly bridal. The trick is choosing fewer motifs and drawing them larger, with clean spacing: a central mandala on the palm, neat fingertips, bracelet-style wrists and a short floral trail. It suits intimate weddings, civil ceremonies and destination trips where you can’t spare a full day. What I watch for is the casual look; a simple design with sloppy fingertips reads like festival henna. Small details such as initials, fine dots or a slim forearm extension are what keep it feeling deliberate.
5. Front Hand Bridal Mehndi Design
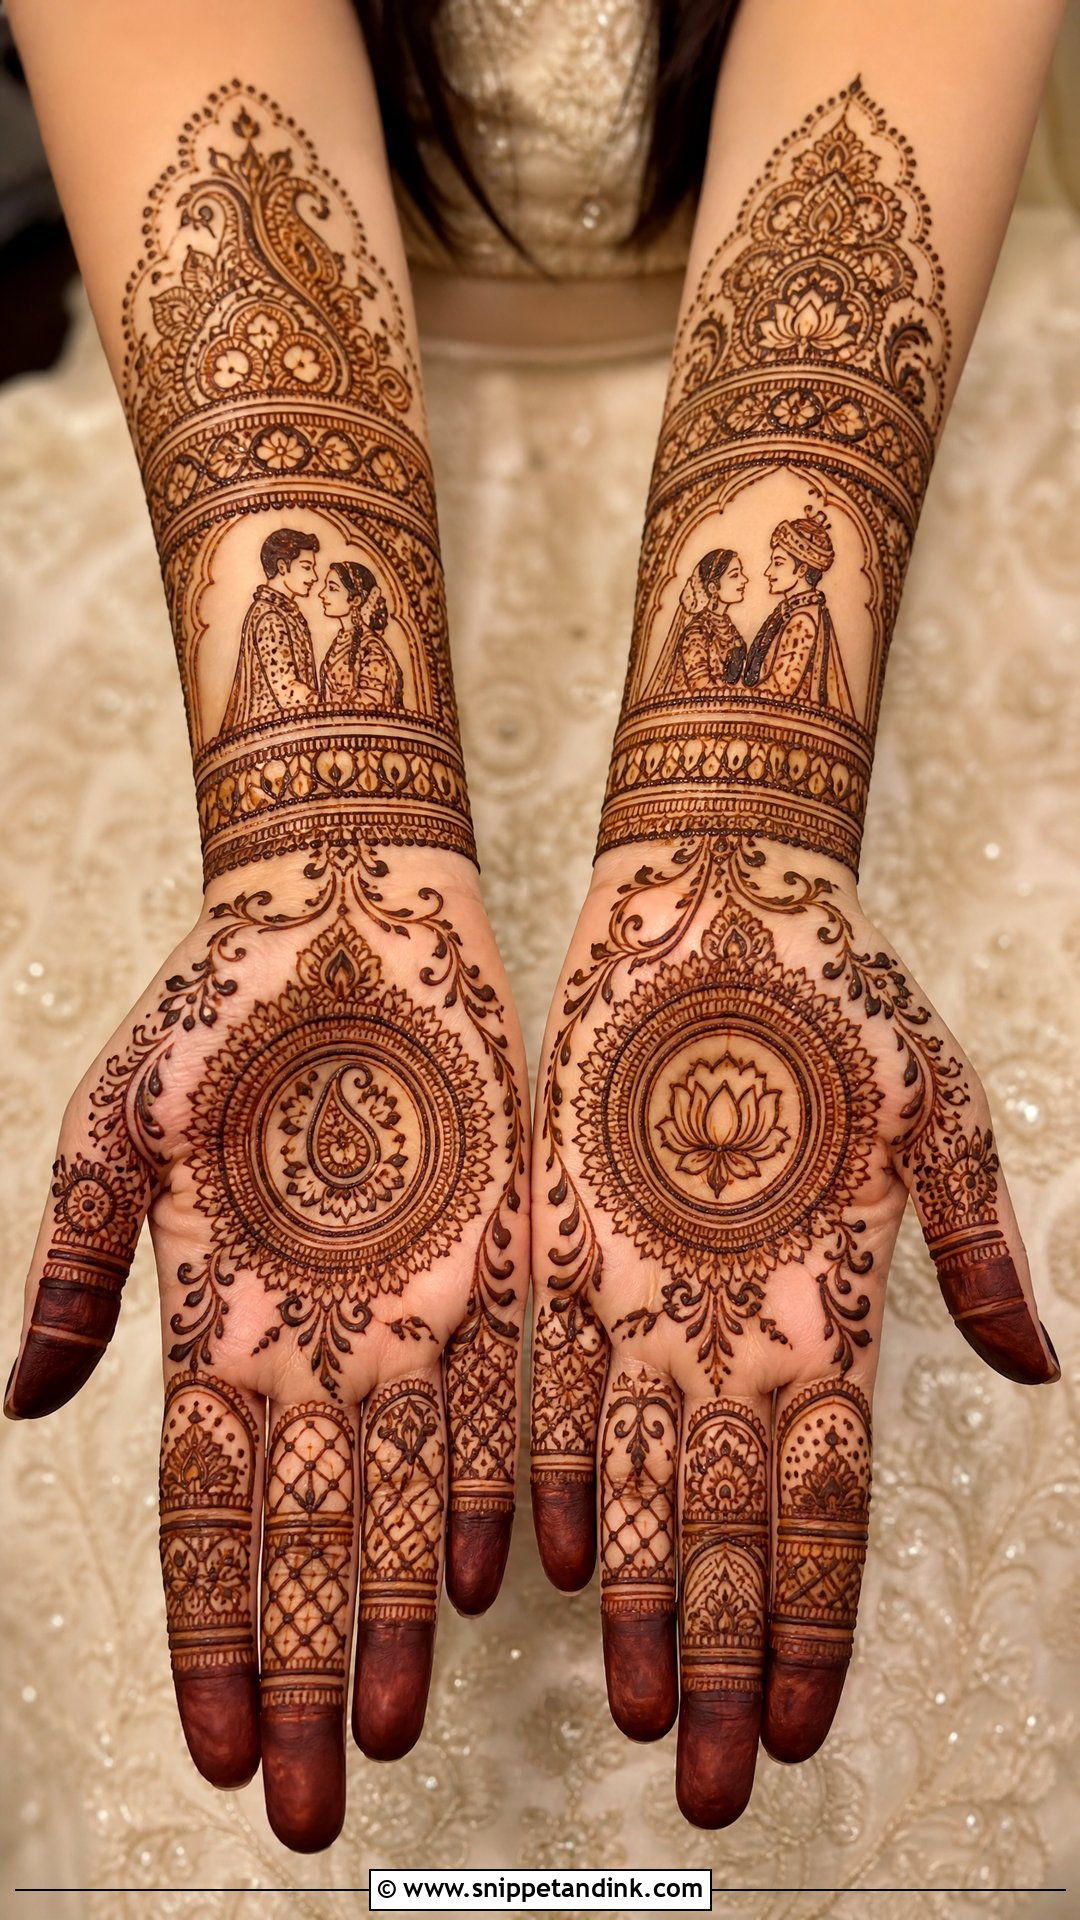
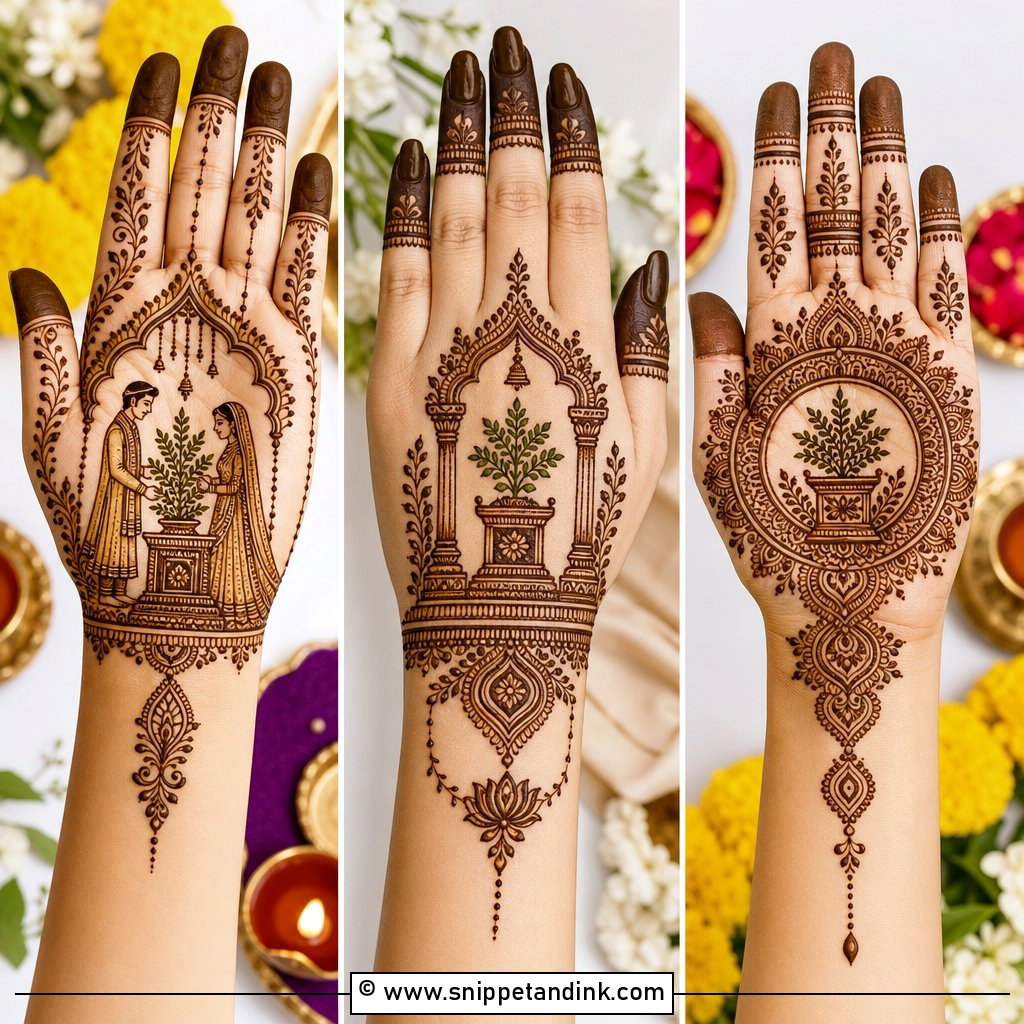
Palms are what everyone sees during the rituals, and they’re also where henna stains deepest because the skin there is thick and warm. Round mandalas, paisley chains, bride and groom figures, lotus patterns and detailed wrist cuffs all sit well on that flat surface, which is why storytelling work lives here. Before I start, I ask the bride to put her hands together, palms up, the way she’ll hold them for photos. Then I draw so the two halves meet in the middle. A traditional palm can be filled densely; a modern one can keep some open skin around the central motif.
6. Back Hand Bridal Mehndi Design
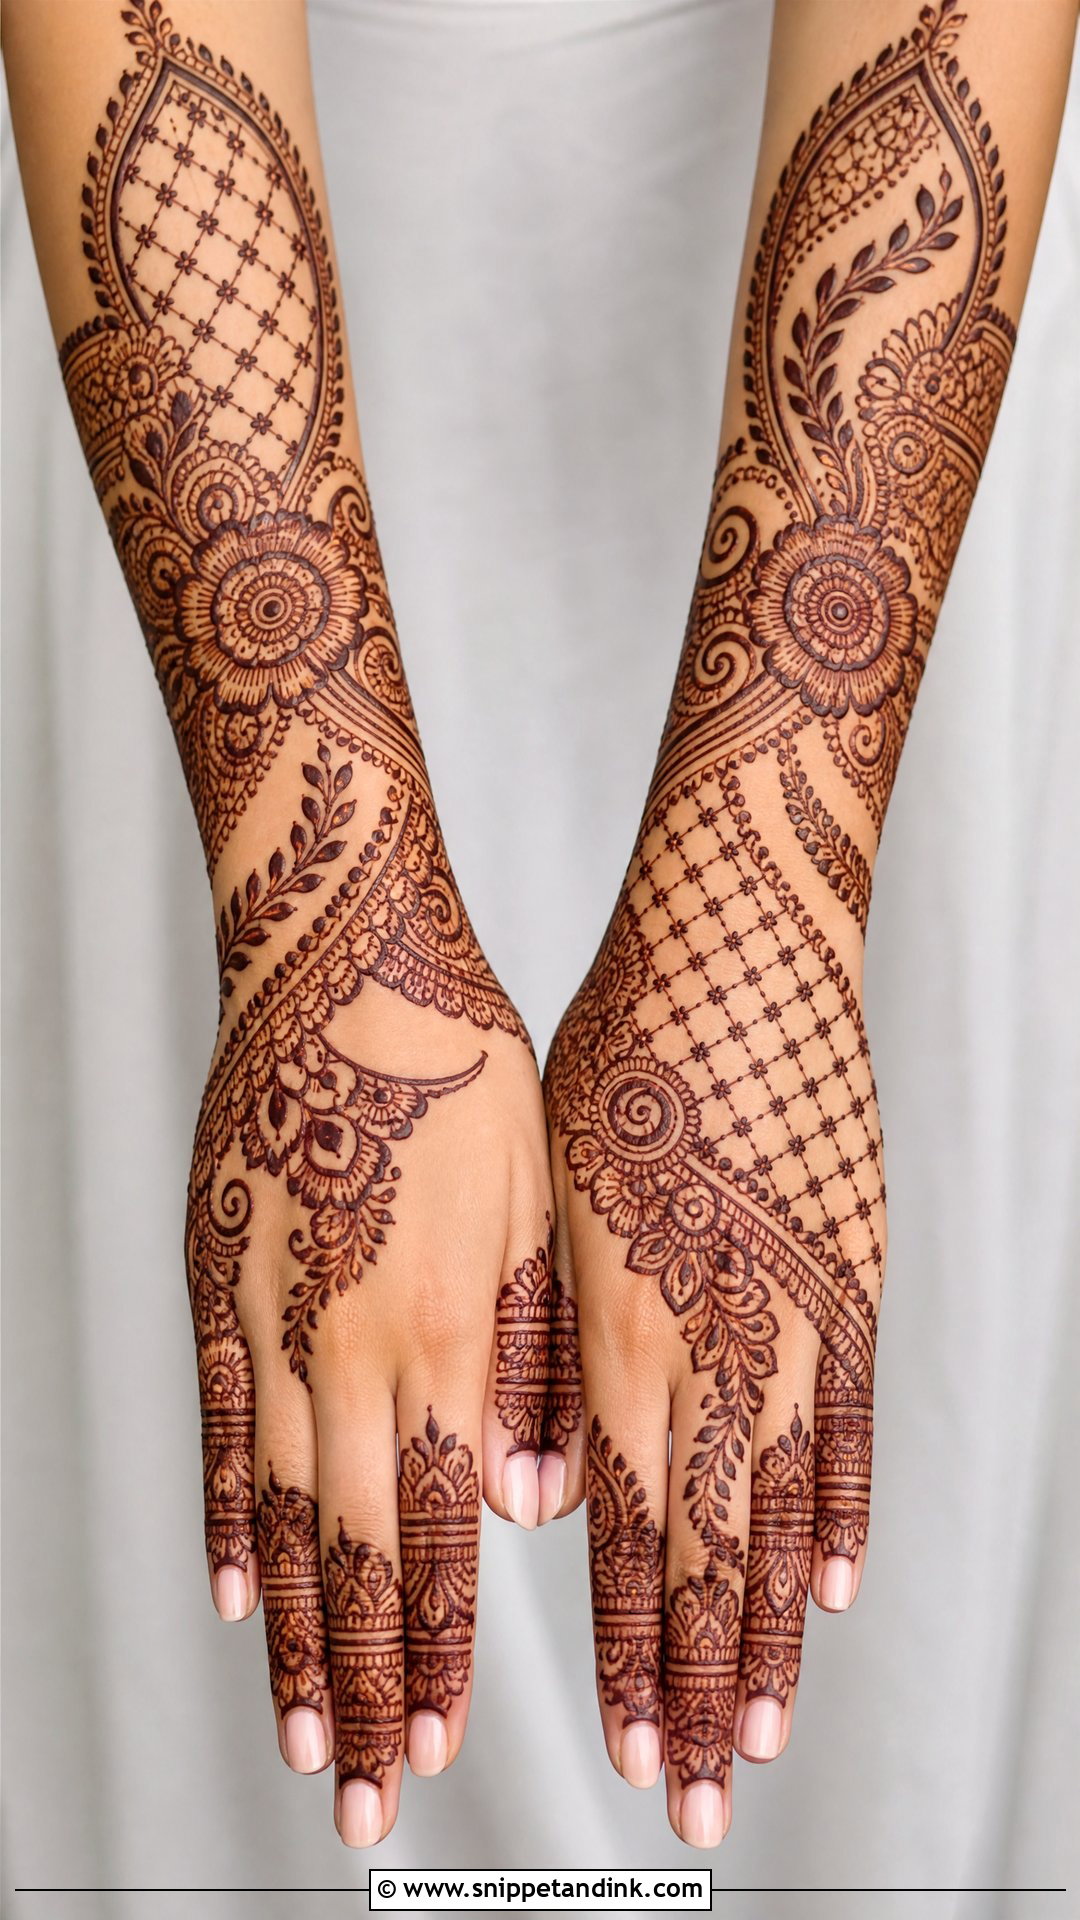
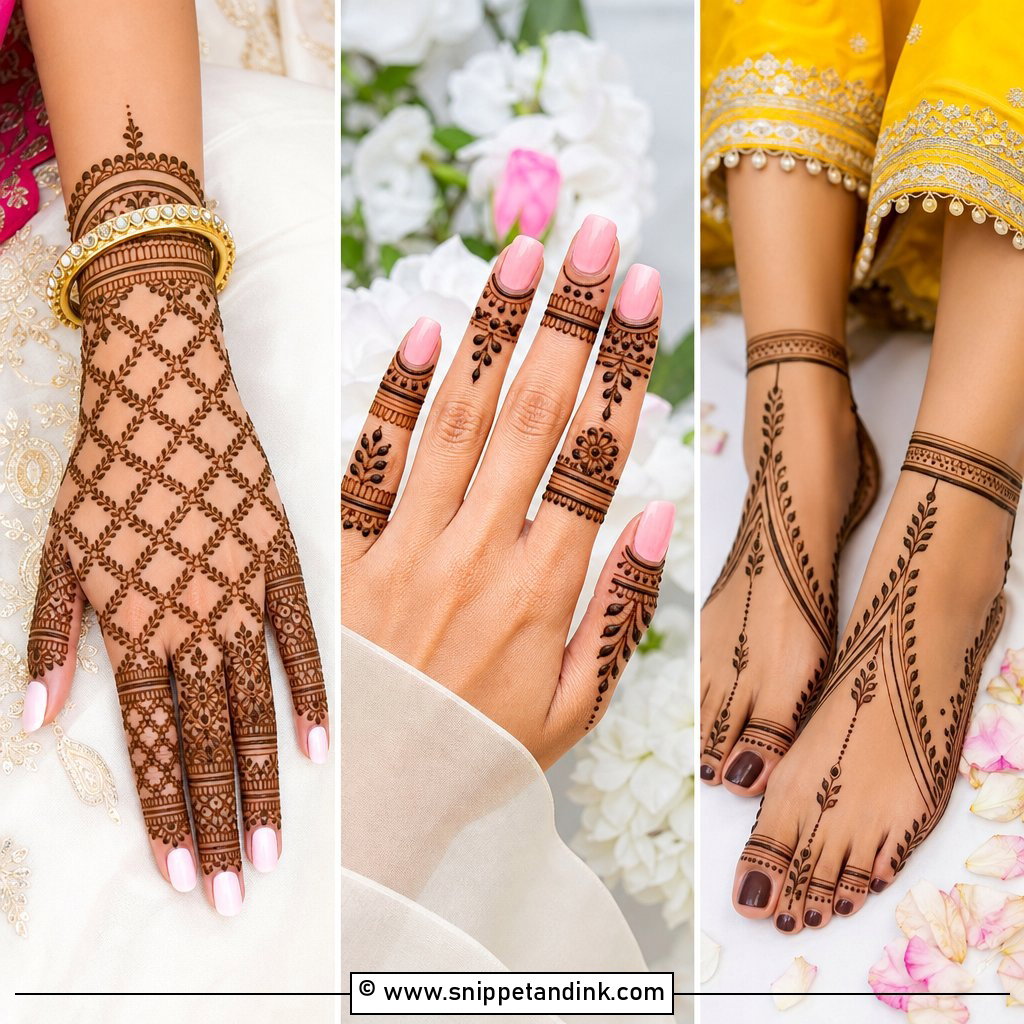
The back of the hand competes with rings, bangles and kalire, so I usually keep a back hand bridal mehndi design a little more open than the palm. Leafy trails, lace-like jaali, floral cuffs and detailed fingers all work here. A diagonal Arabic trail is the lightest option; a central mandala with bracelet chains to the fingers is the fullest. One thing I’m careful about is the knuckles. Skin there folds every time you make a fist, so tiny filler blurs and cracks, and I’d rather place a simple band or leave it bare than lose detail on the day. Paisleys and peacock accents near the wrist add a royal touch if you want it.
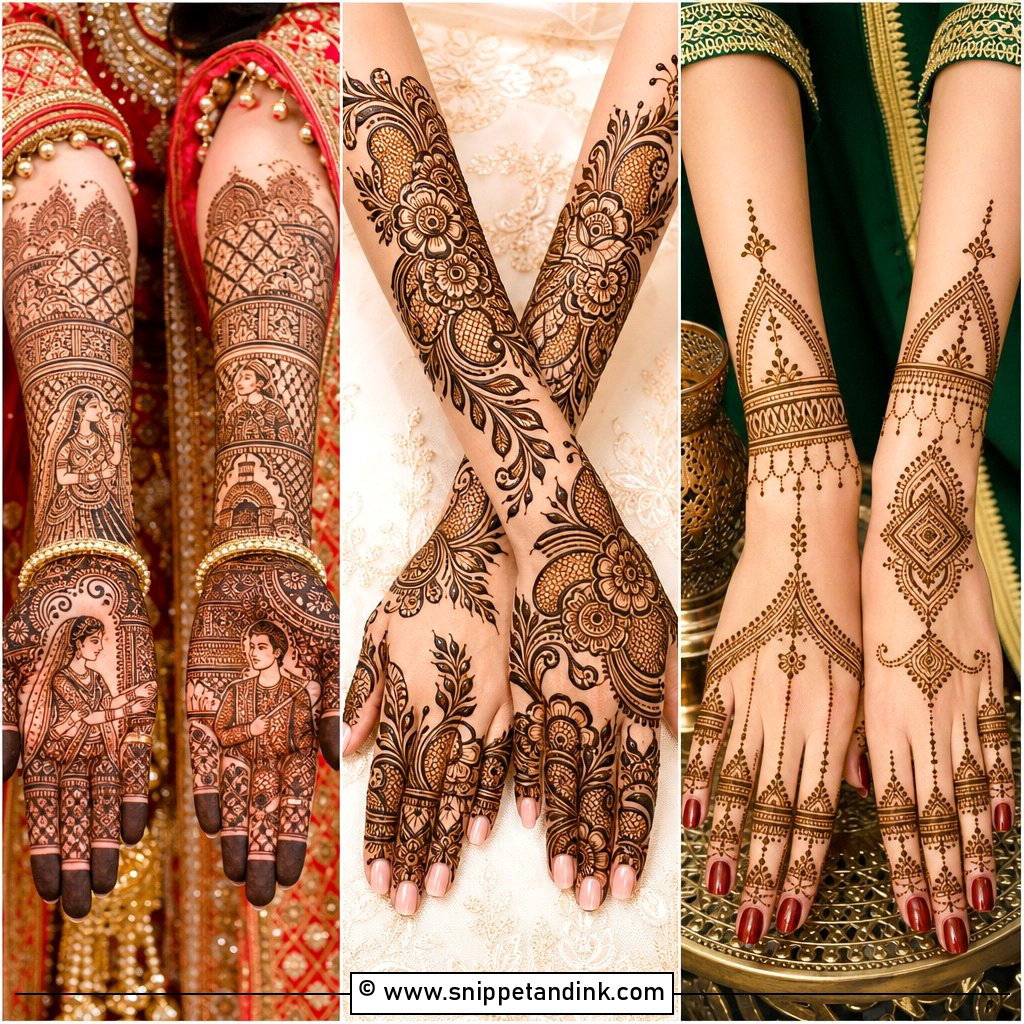
7. Bridal Mehndi Design With Bride And Groom
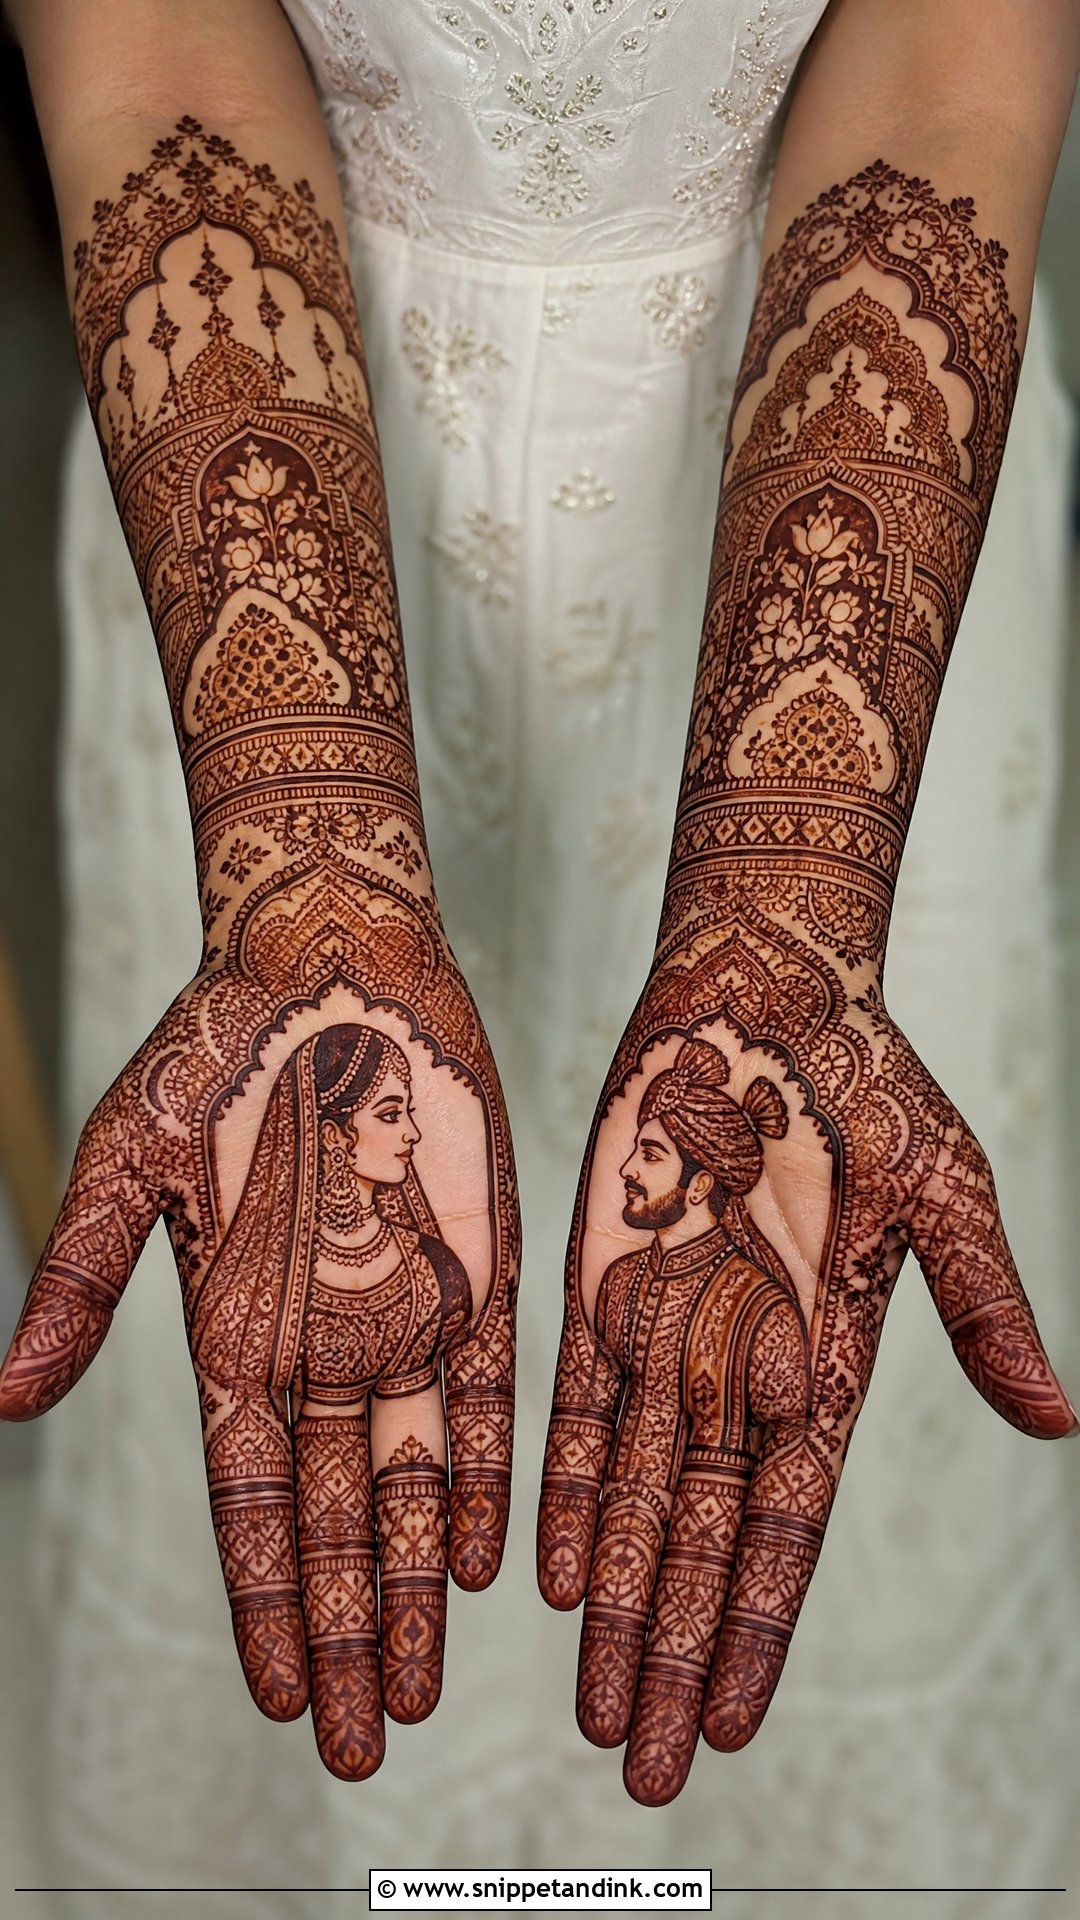
Portrait palms put the bride on one hand and the groom on the other, framed by mandalas, curtains, florals or little palace arches. They’re the most personal design on this list and the most technically demanding, because a face drawn with a cone has very little room for error. Please look at an artist’s healed stain photos of faces, not just fresh paste. I always leave a margin of bare skin around the figures; once the stain darkens, crowded faces merge into the background. Wedding dates, initials and tiny ceremony symbols can fill the cuffs.
8. Bridal Mehndi Design With Name
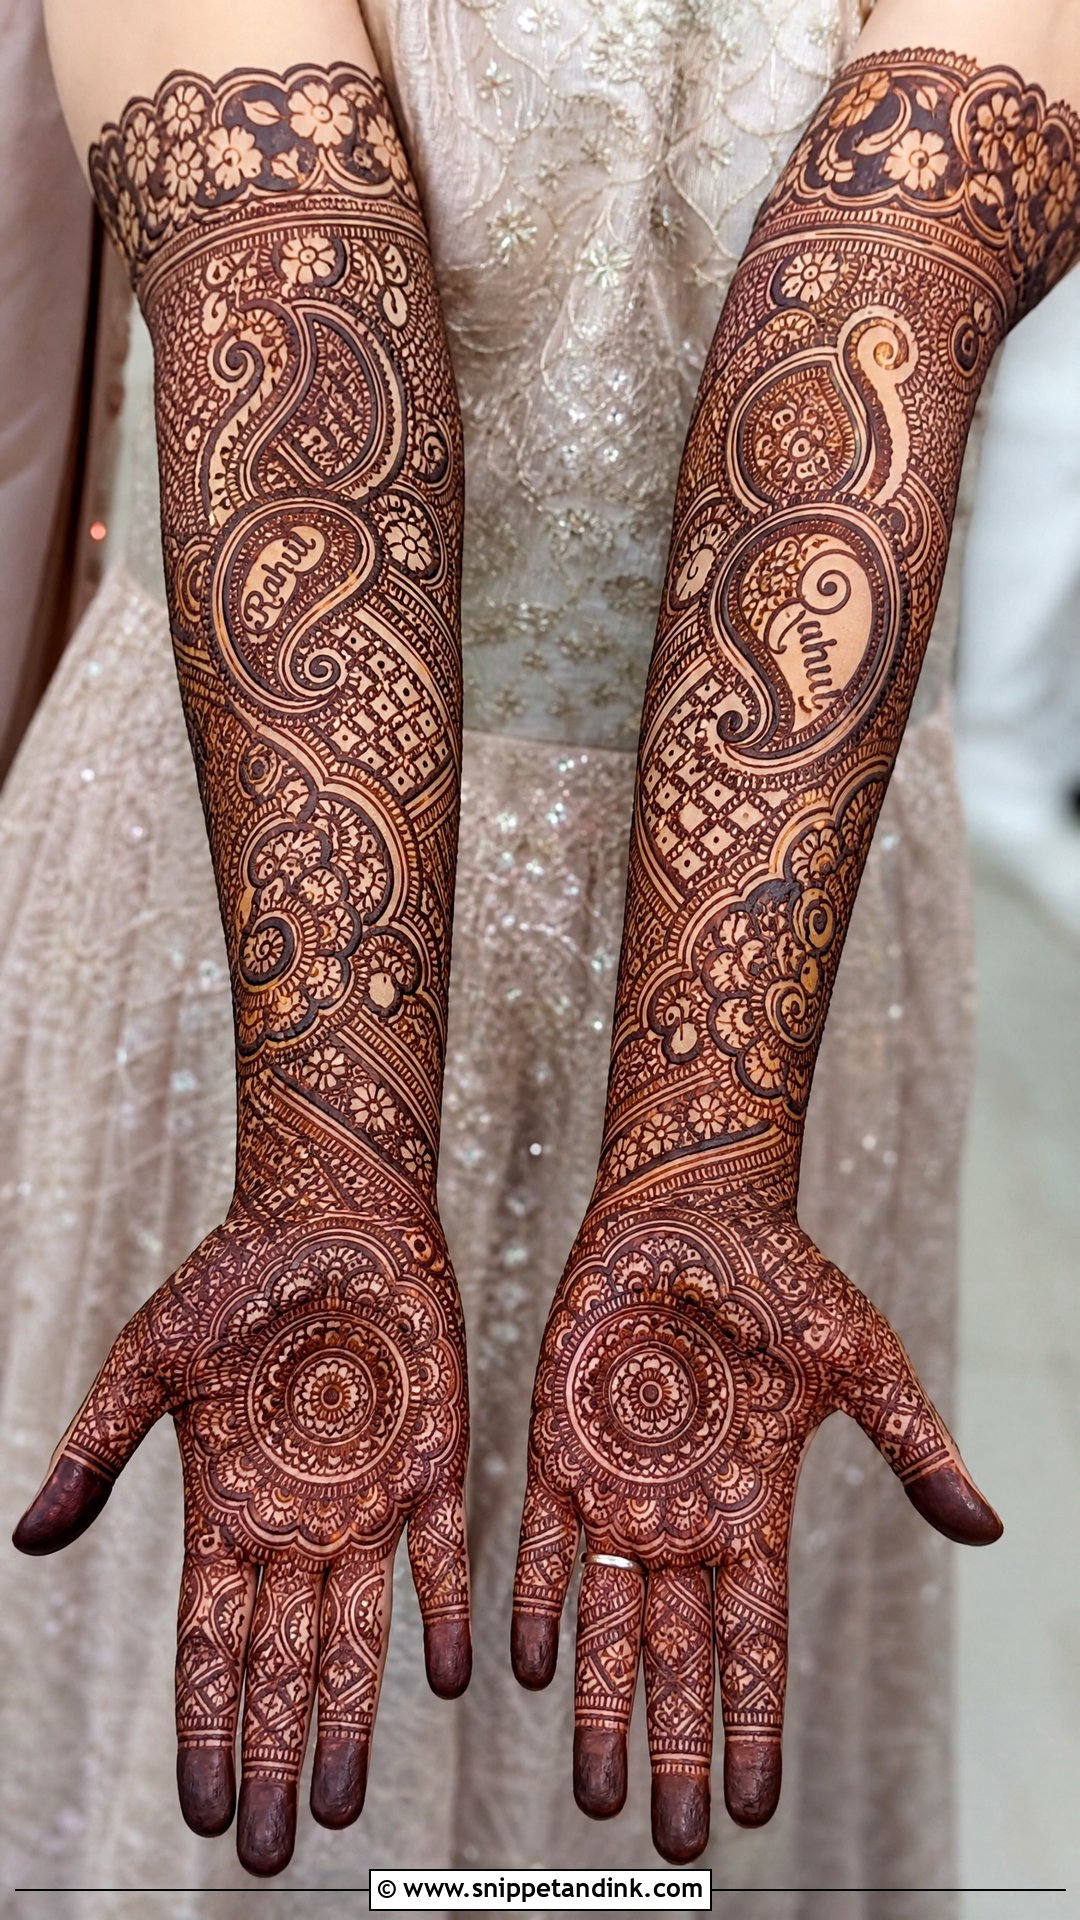
The hidden name is a game the whole family plays, with the groom hunting for it after the ceremony. Letters can sit inside a paisley, along a vine, in a mandala border or between jaali lines, and the style of the rest of the design doesn’t matter much. My one rule: hidden is fine, illegible is not. If I bury a name in dense filler it disappears once the stain develops, so I tuck it near the wrist, the palm edge or the forearm, where there’s room to form the letters properly. Initials are an easy swap if your partner’s name is long.
9. Peacock Bridal Mehndi Design
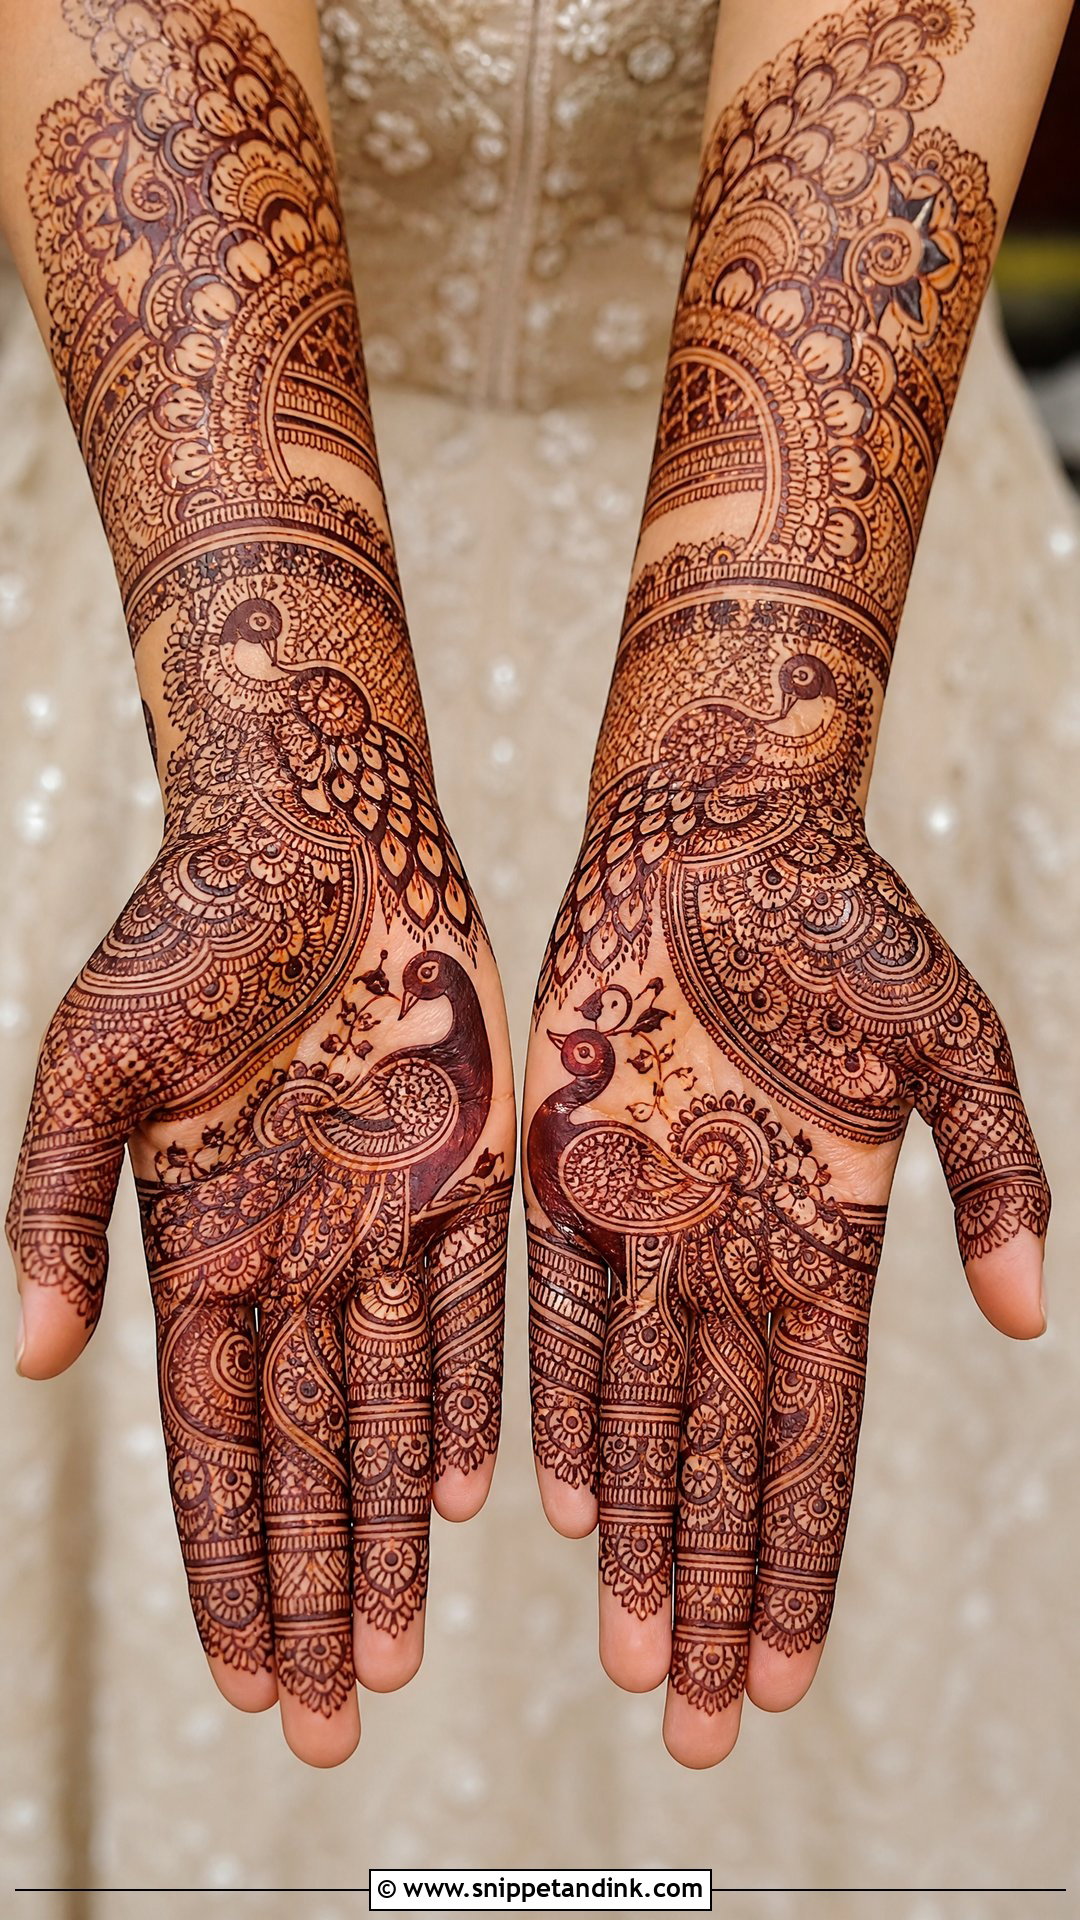
Peacocks have been part of Indian bridal henna for generations, and they’re more forgiving than portraits because the shape is mostly curves and feather strokes. I place one large bird on the palm, back hand or forearm and surround it with florals, leaves and fine fillers. The feathers are where it lives or dies: each eye needs a clear ring of bare skin, otherwise the tail becomes a dark smudge. Mirrored peacocks on both hands make a dramatic pair. One peacock as the hero with a floral supporting cast gives you a calmer version.
10. Mandala Bridal Mehndi Design
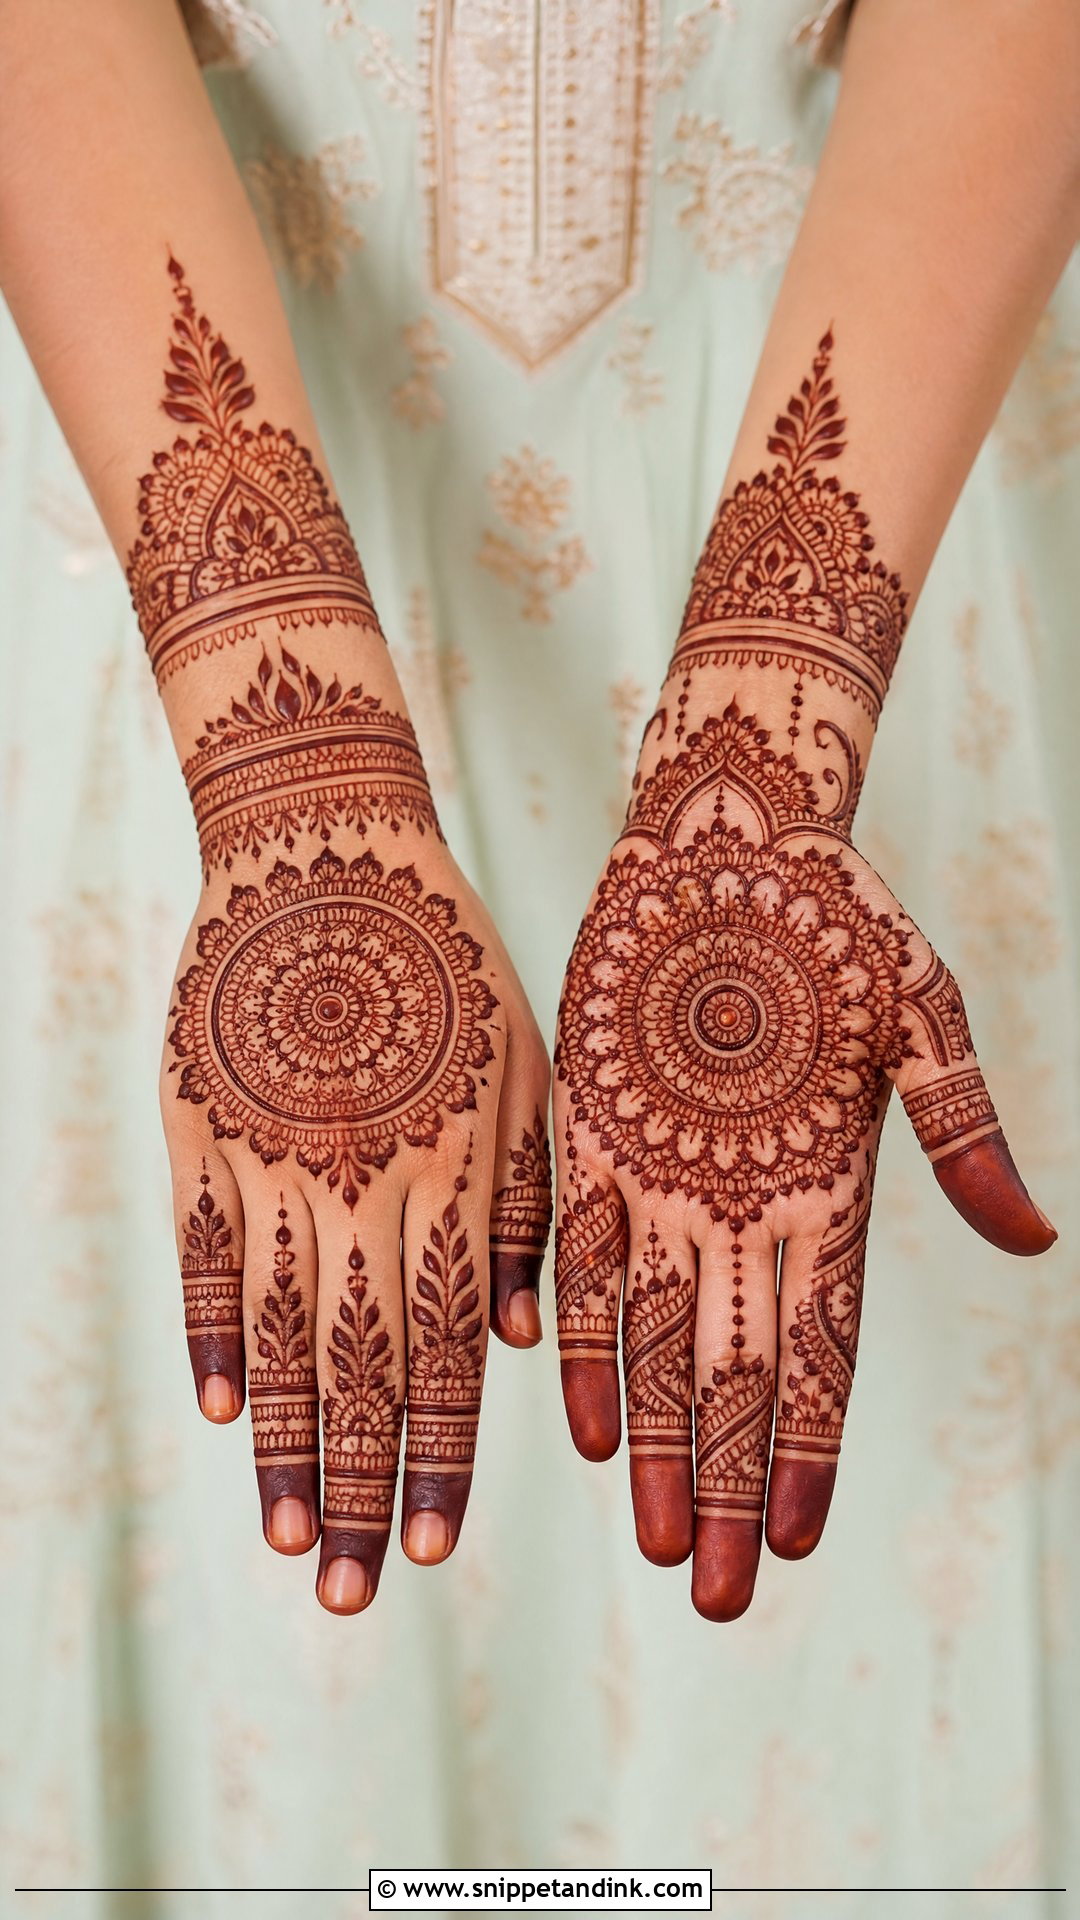
A mandala gives the eye a place to land, usually the center of the palm or the middle of the back hand. I build it from the center out, ring by ring, which is why a good one looks perfectly balanced even without heavy coverage. Around it you can add fine dots, lotus petals, small paisleys and bracelet bands; on the back hand, delicate chains carry it up to decorated fingers. Brides who want symmetry without covering every inch tend to love this. It suits a minimal outfit and a heavily embroidered one equally well.
11. Jaali Bridal Mehndi Design
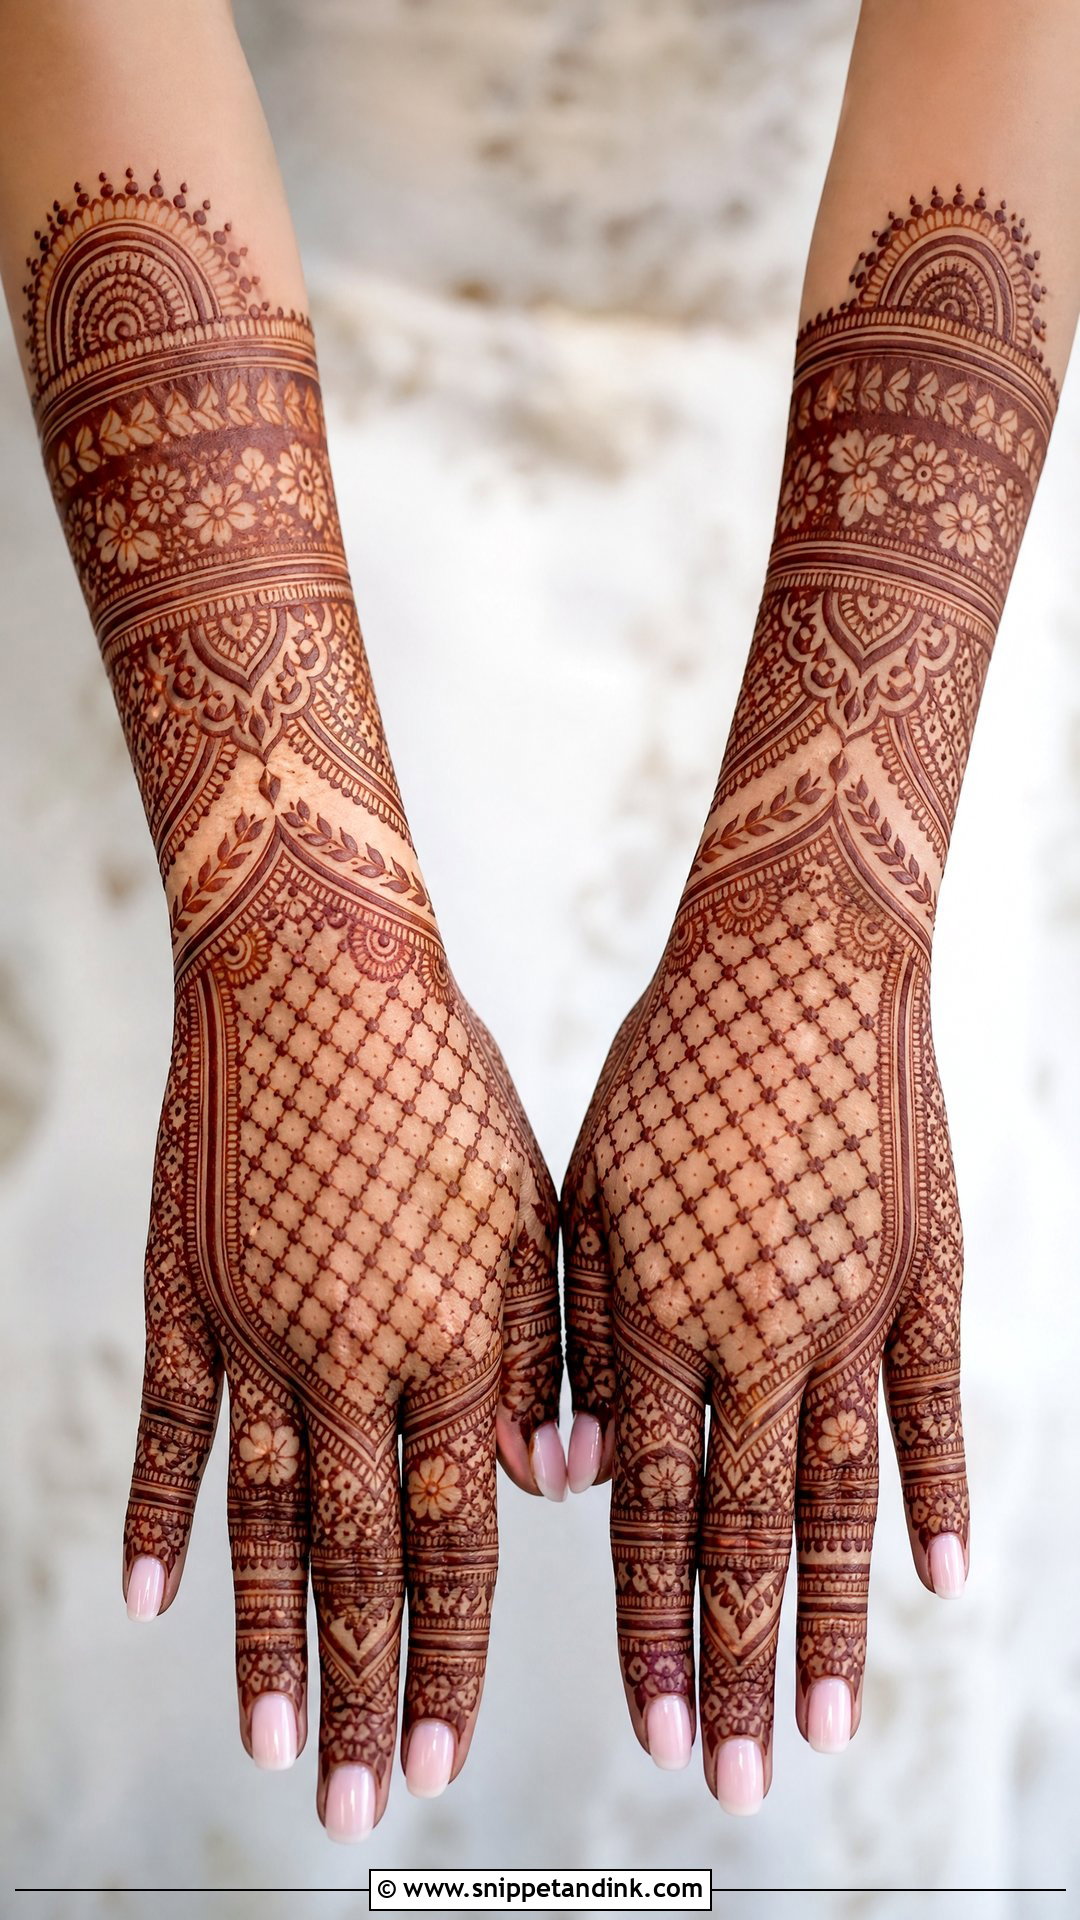
Jaali is the netting pattern that makes henna look like lace: grids, tiny dots, leaf fills and fine borders. I use it on the back of the hand, the wrist and the forearm, either as the whole background or as a panel inside a larger floral or Mughal-arch design. It looks refined next to bangles and rings. It’s also the least forgiving pattern I draw. Uneven grid lines are invisible in wet paste and painfully obvious in the stain, so I pull every line in one steady stroke and check spacing before moving on. Ask to see an artist’s jaali close up.
12. Lotus Bridal Mehndi Design
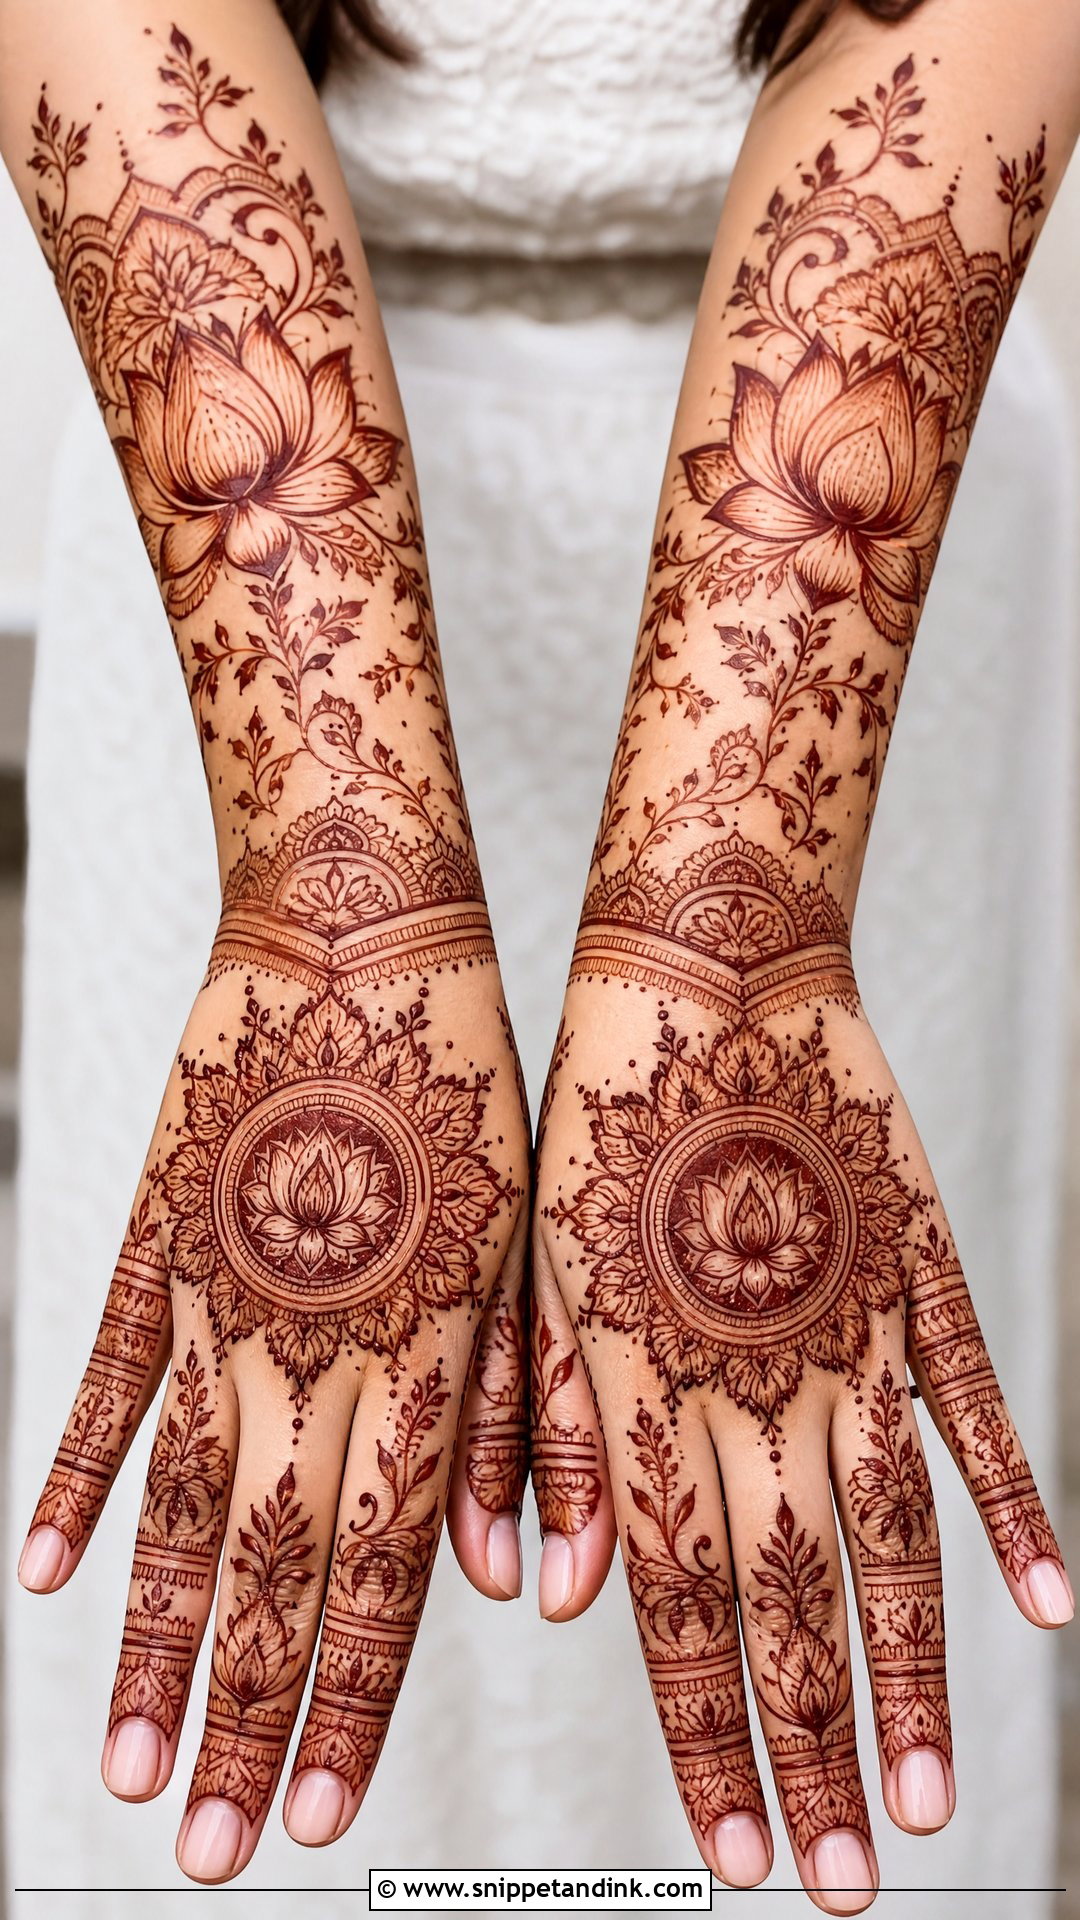
Lotus motifs scale beautifully, which makes them one of my most useful shapes. A single large lotus can anchor a palm, while small lotus petals can run around a cuff or border. I like them trailing from the fingertips to the wrist with mandalas, vines and shaded leaves in between, leaving pockets of open skin. Keep the petals rounded and drawn with a clear outline; pointed, overlapping petals tend to blur together once the stain deepens to maroon.
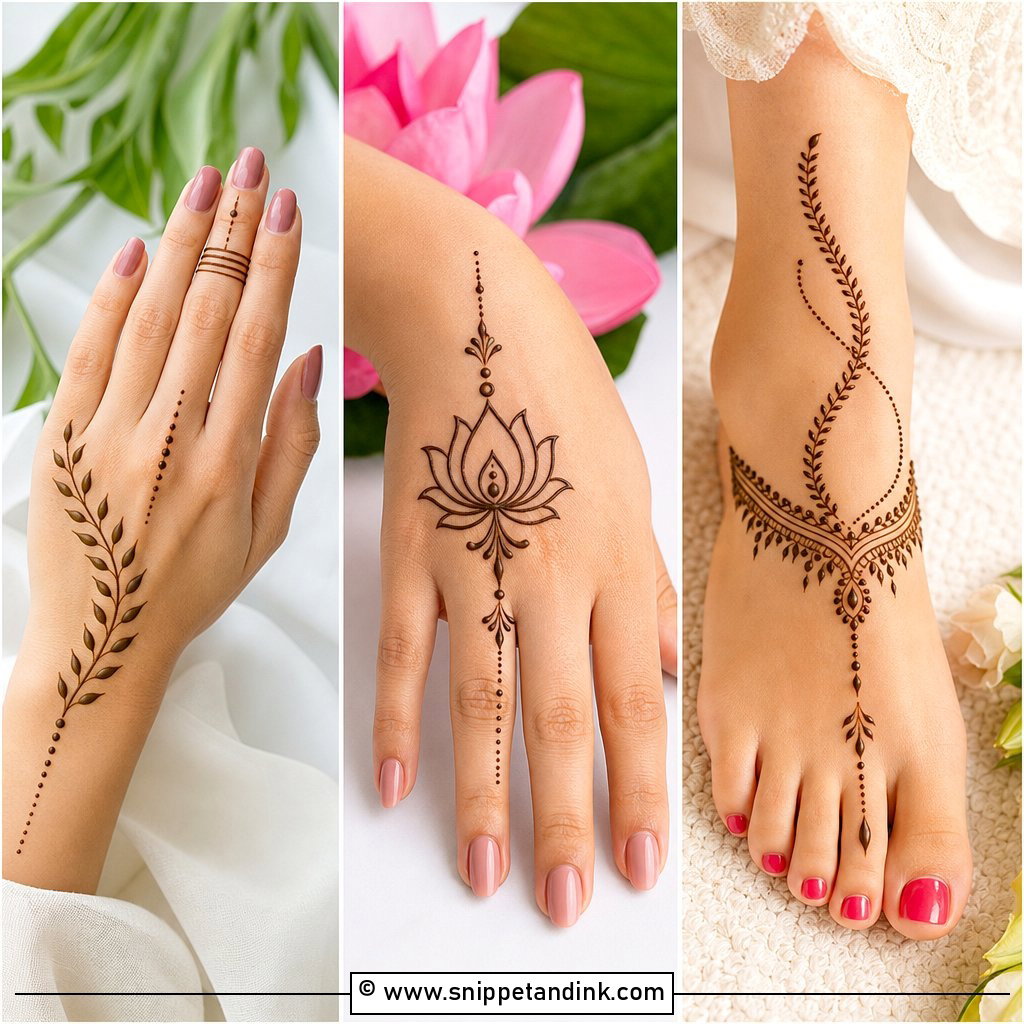
13. Minimal Bridal Mehndi Design
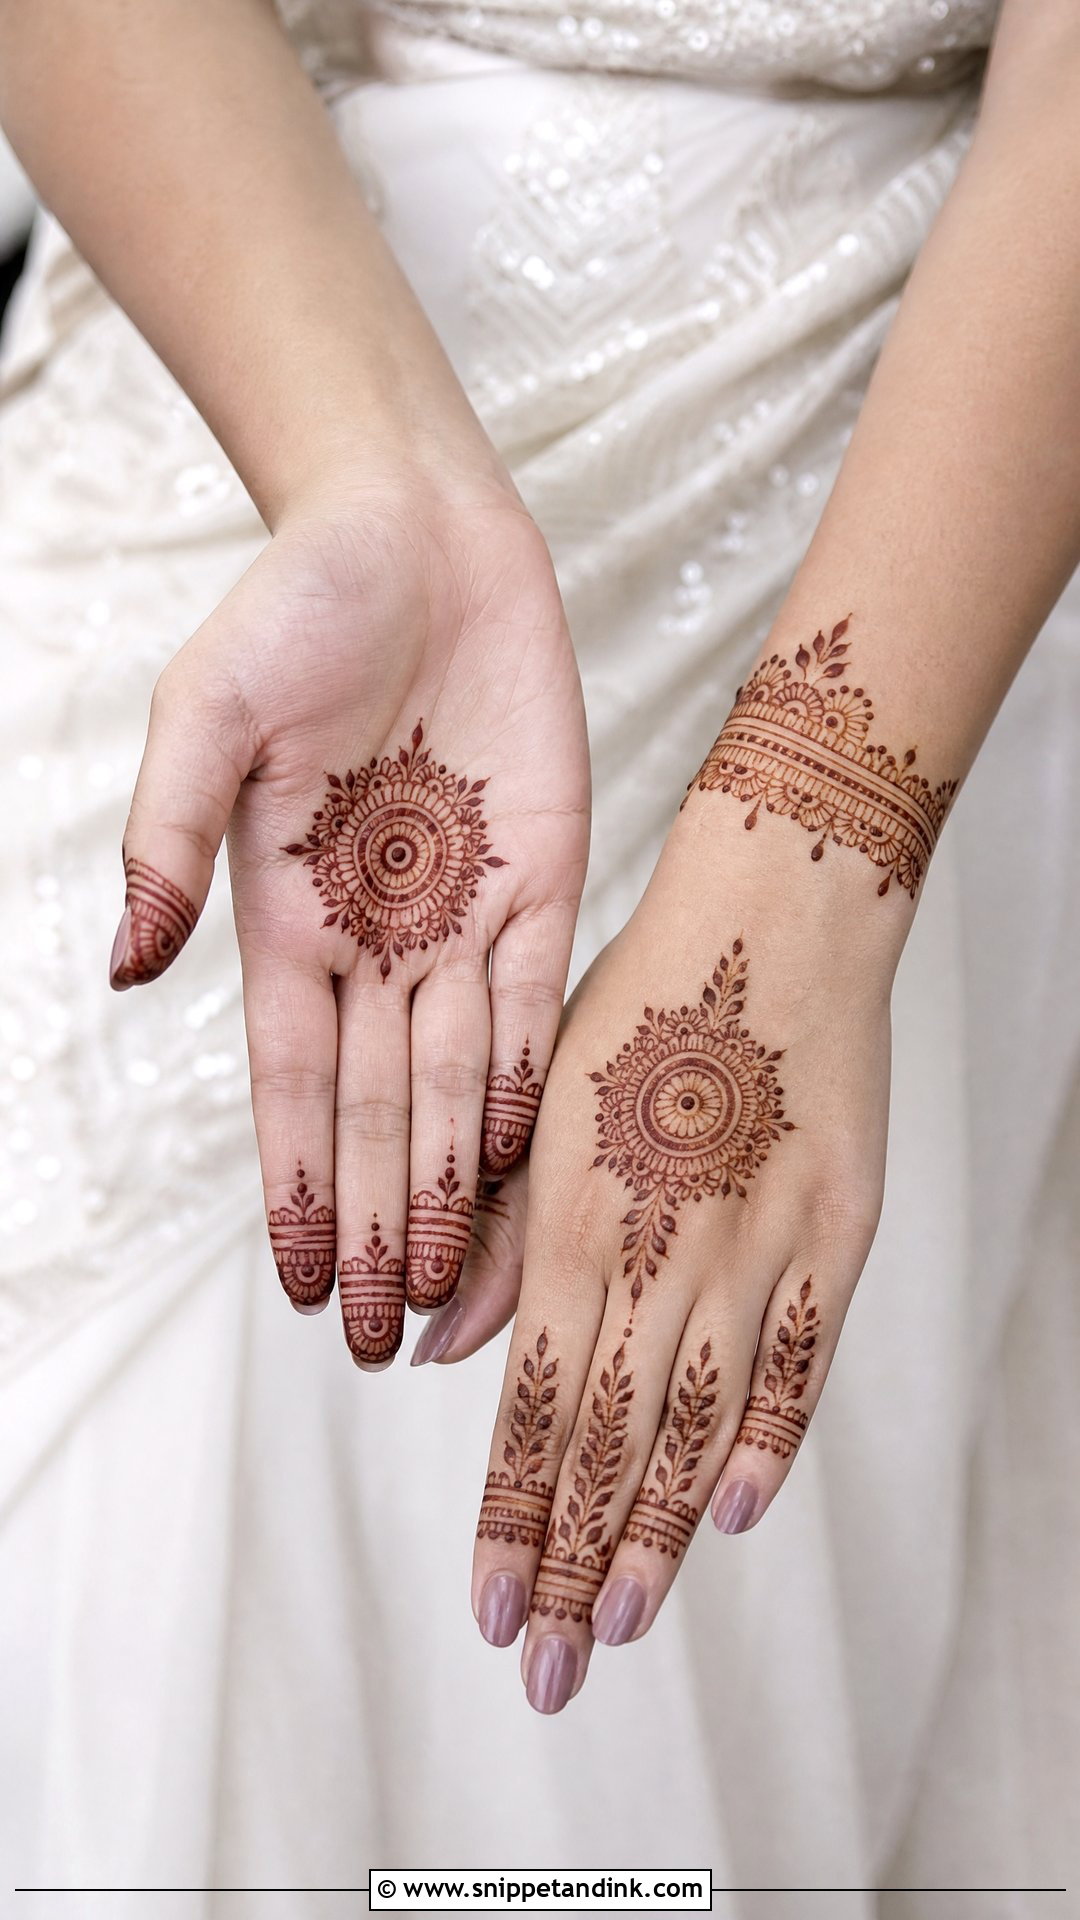
Minimal bridal henna can look intentional or unfinished, and the difference is planning. I pick one main feature, such as a palm mandala or a back hand floral trail, then support it with neat finger and wrist details and clean negative space. Fine-line florals and leafy finger patterns keep it light. It’s a good fit for small ceremonies and for brides who genuinely dislike sitting still for hours. Thin lines, even spacing and repeated motifs are what stop it looking sparse next to statement rings and a sleek outfit.
14. Heavy Bridal Mehndi Design
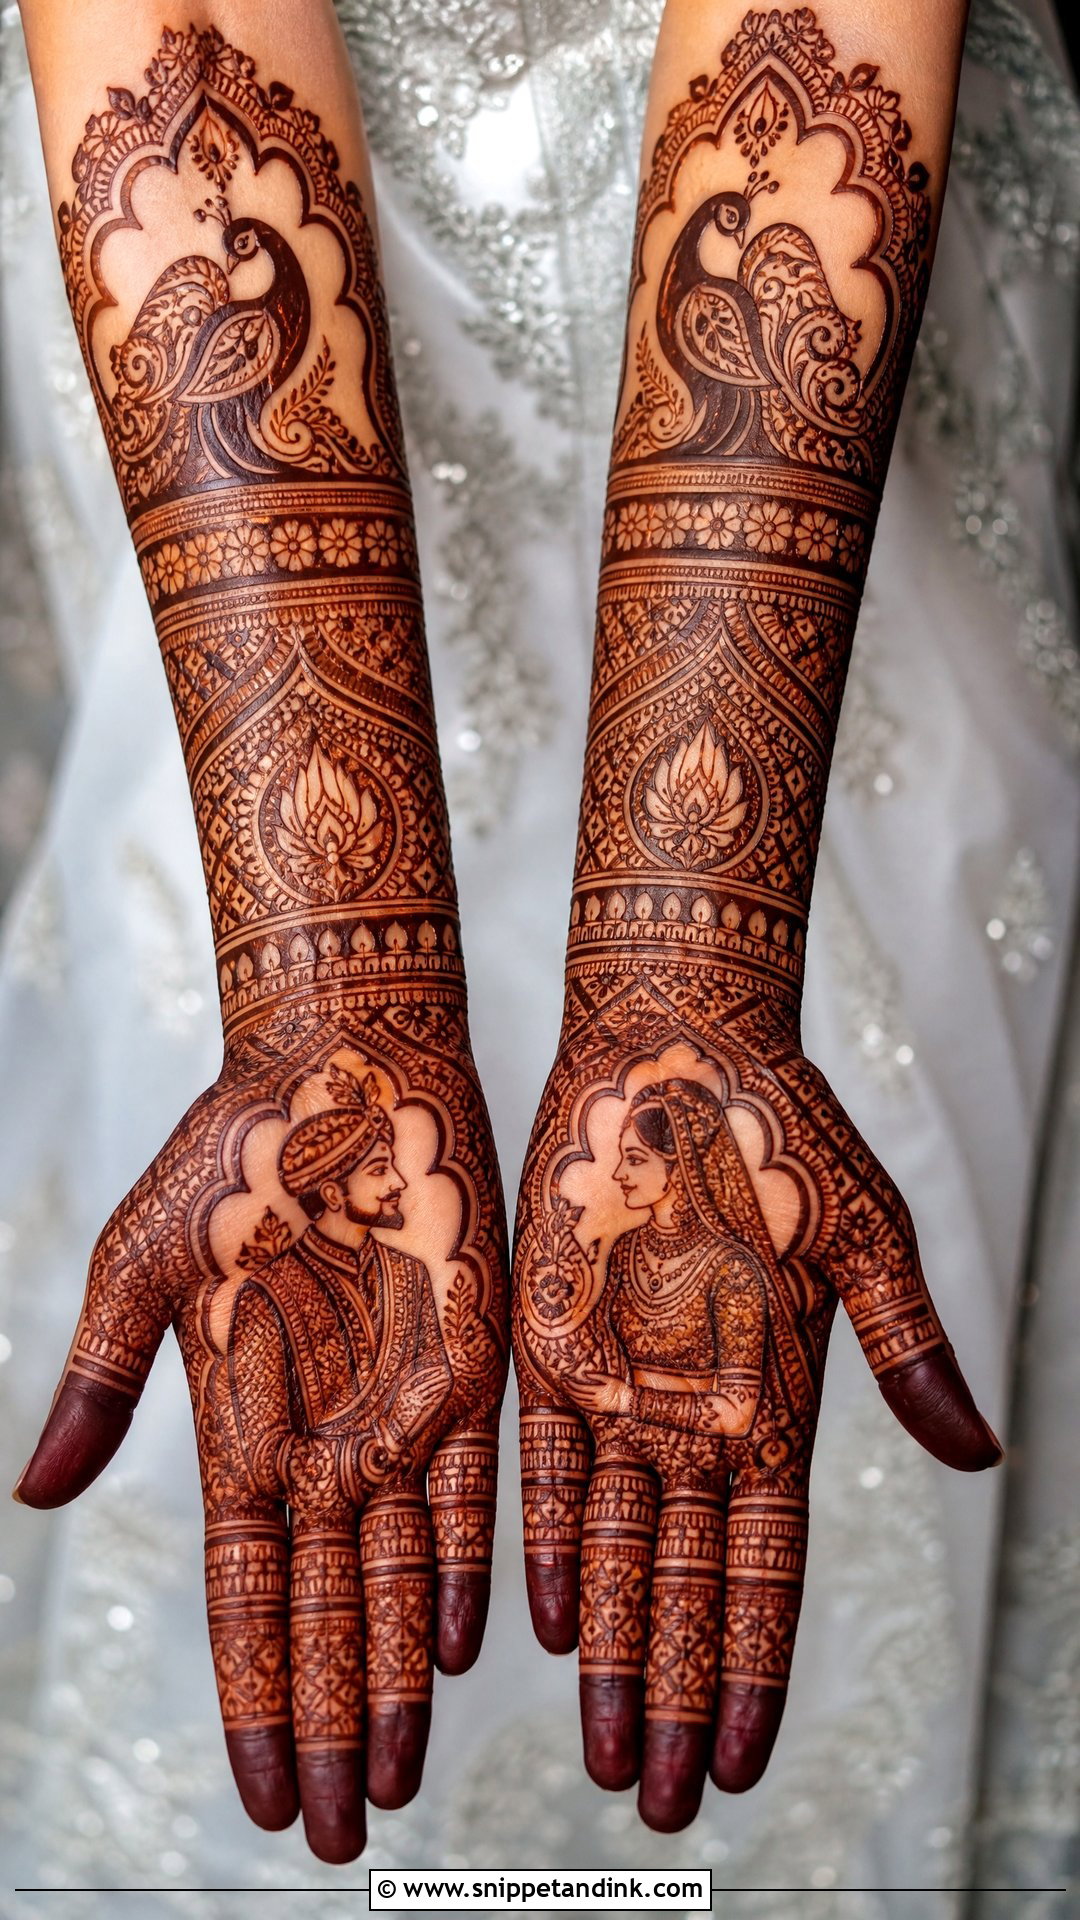
Heavy coverage runs from fingertips to forearms and can hold every motif on this list: paisleys, florals, peacocks, jaali, mandalas, bride-groom figures and initials. It’s the most dramatic option, and also the one that most needs pacing. A full set on both arms can take the better part of a day, so I plan breaks, keep the bride well fed and ask her to relax her hands, because tense fingers make me fight the skin. Good heavy work uses three or four motif sizes. Large shapes give it structure, small fillers add depth, and a design built only from tiny fillers looks flat from more than a meter away.
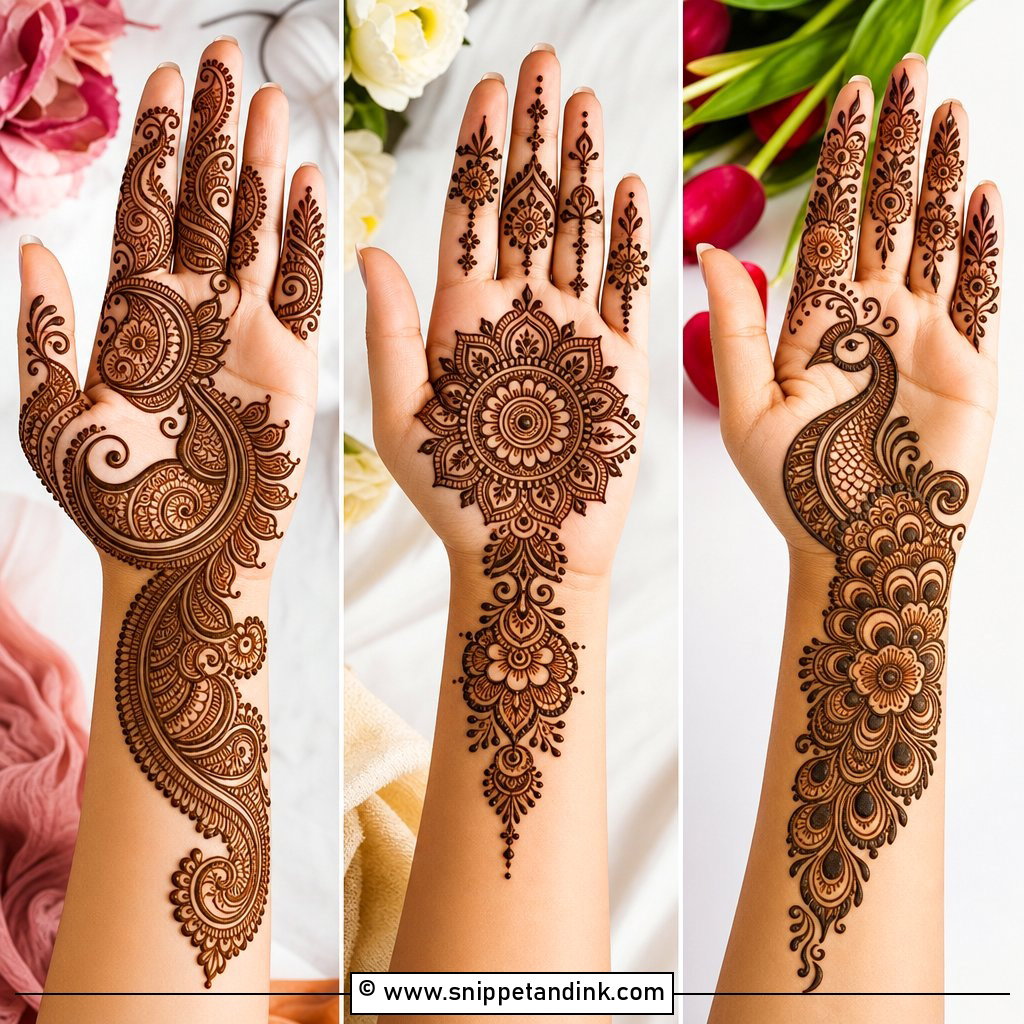
15. Rajasthani Bridal Mehndi Design
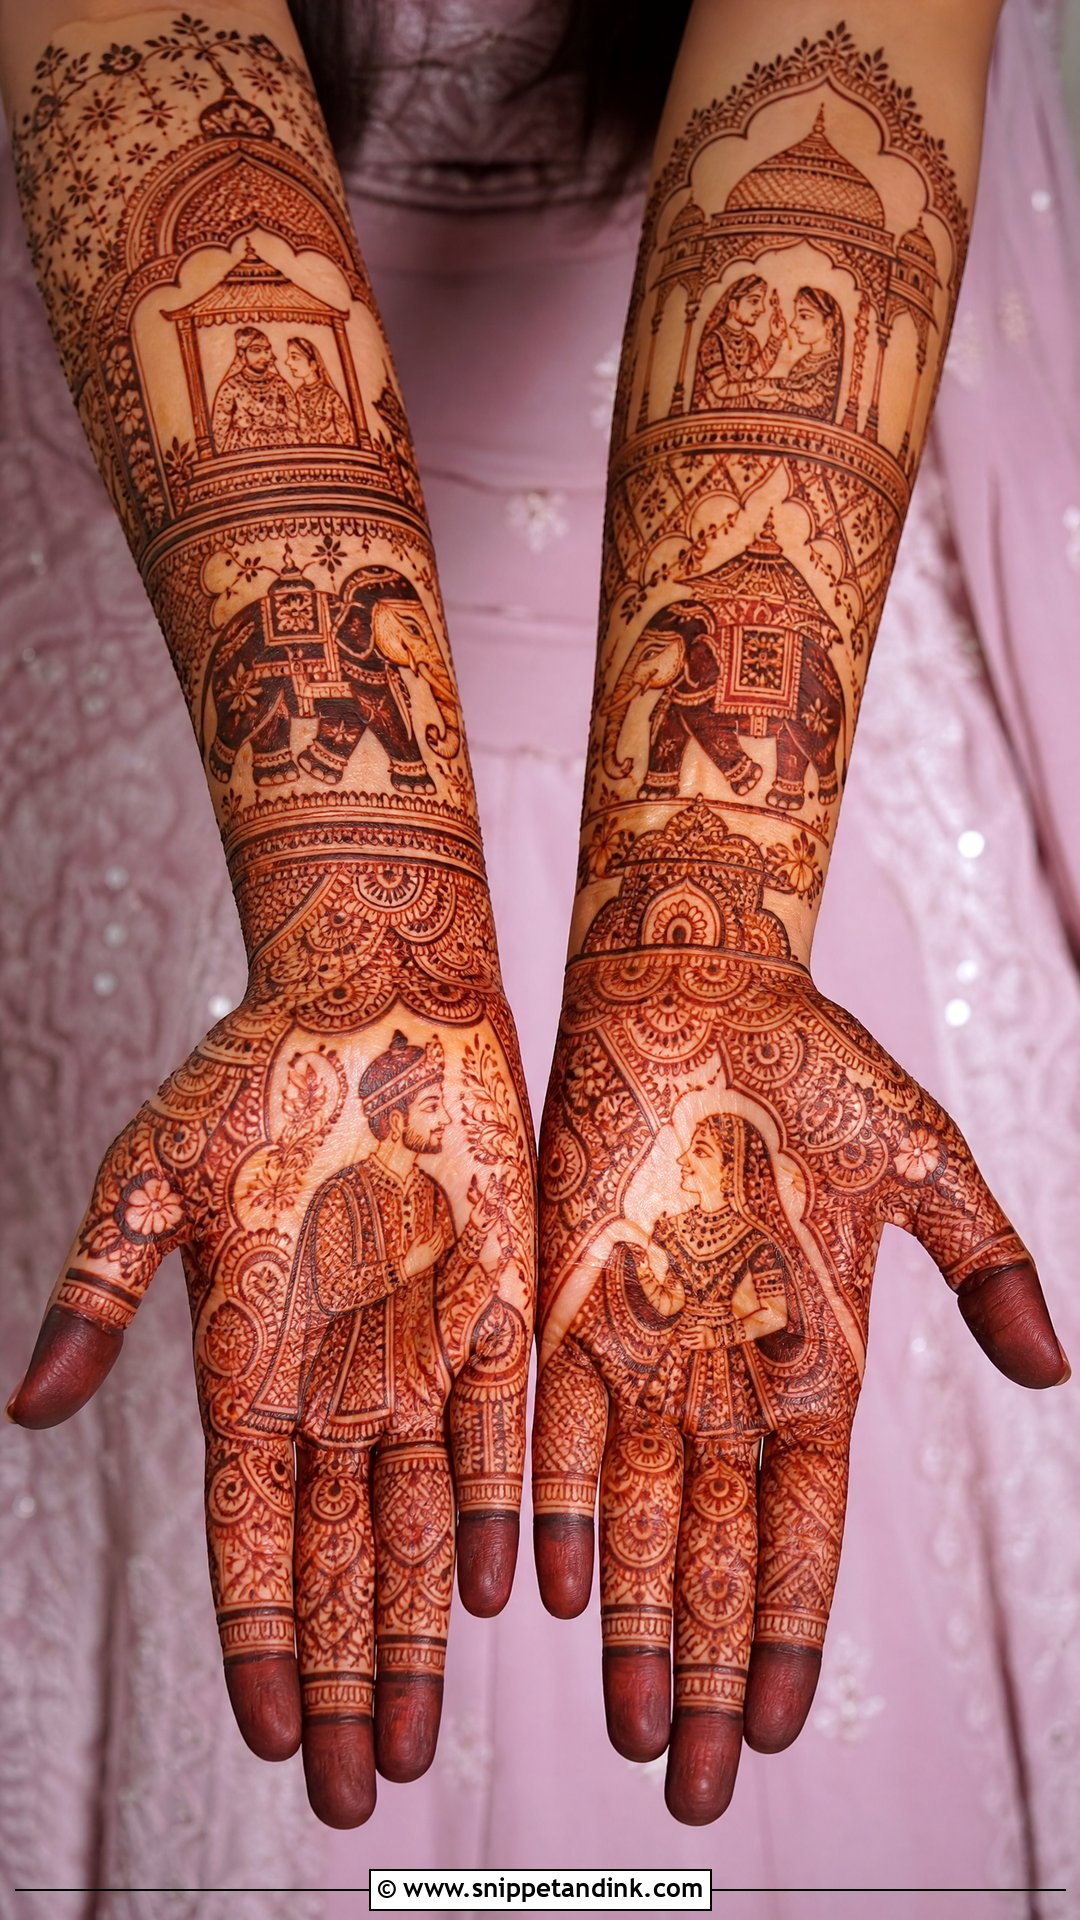
Rajasthani work is storytelling: bride and groom figures, elephants, palaces, doli scenes, peacocks and paisleys, all framed with symmetrical bands. The palms carry the scenes; the forearms take ornamental bands, jharokha arches and floral fillers. This style needs an experienced hand because the figures are tiny and layered, and it can’t be rushed. If your timeline is tight, I’d suggest a lighter scene on the palms rather than a hurried full version. Done patiently, it sits naturally alongside heavy lehengas and traditional jewelry.
16. Moroccan Bridal Mehndi Design
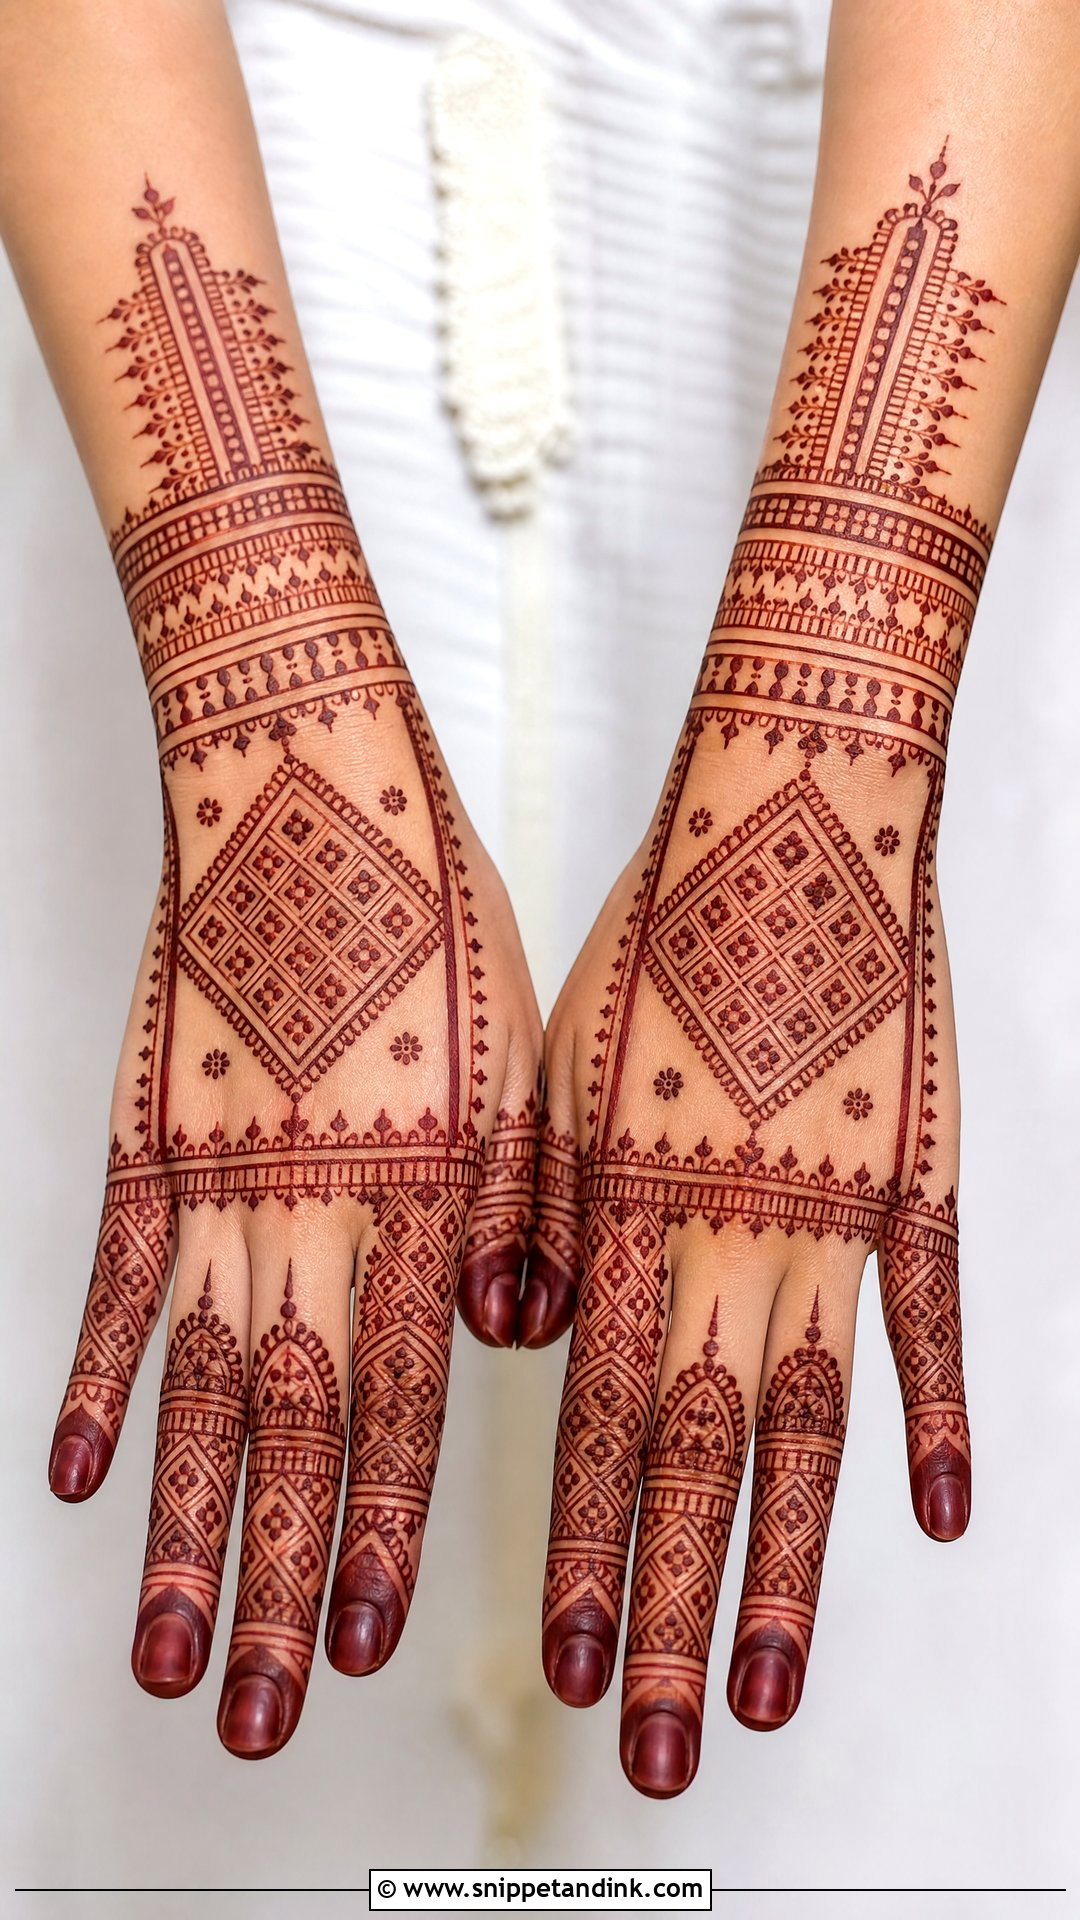
Moroccan henna swaps florals for geometry: diamonds, lines, grids, triangles and strict symmetry. On a bride it can cover palms, fingers, wrists and forearms in a clean, architectural way that looks quite different from the other designs here. It suits contemporary outfits and fusion weddings especially well. Because the eye spots a wobbly straight line instantly, I mark a few guide dots before pulling long lines. Small florals can soften it if pure geometry feels too severe.
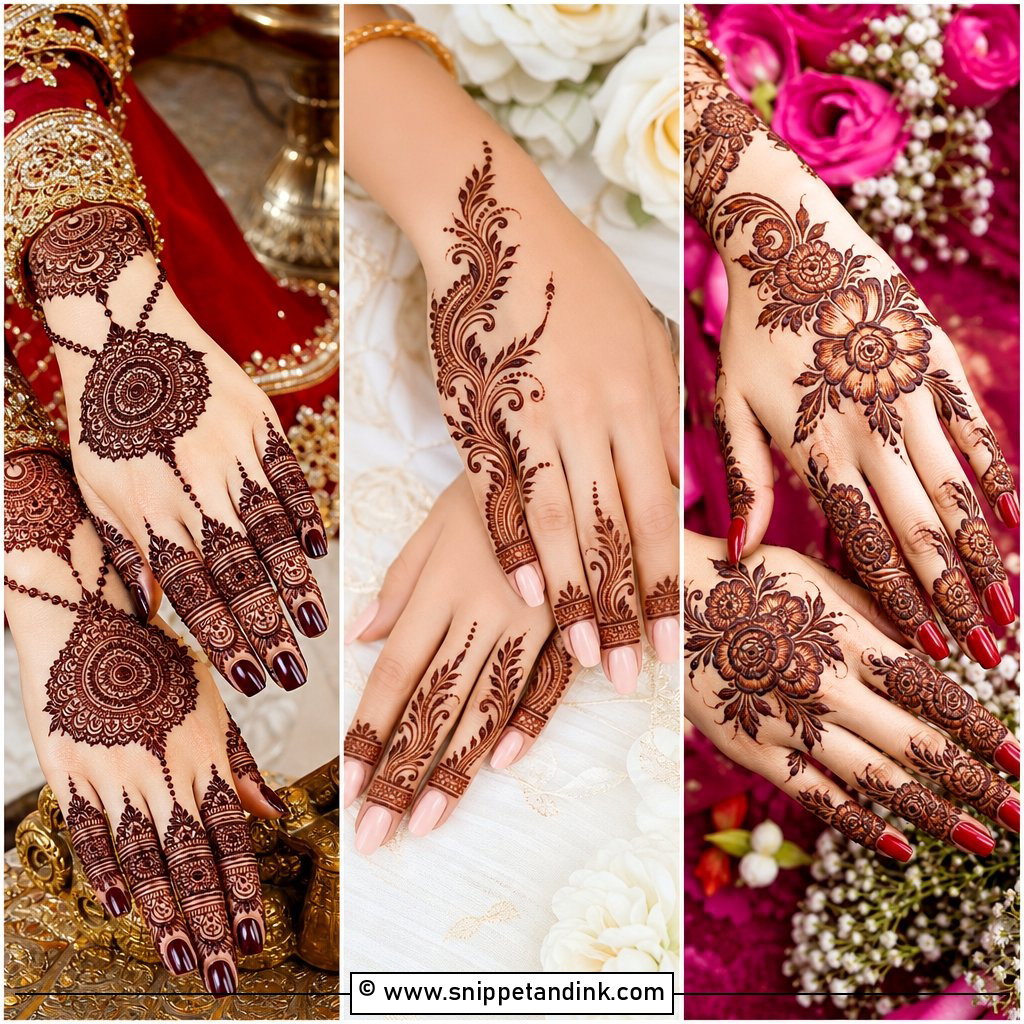
17. Gulf Bridal Mehndi Design
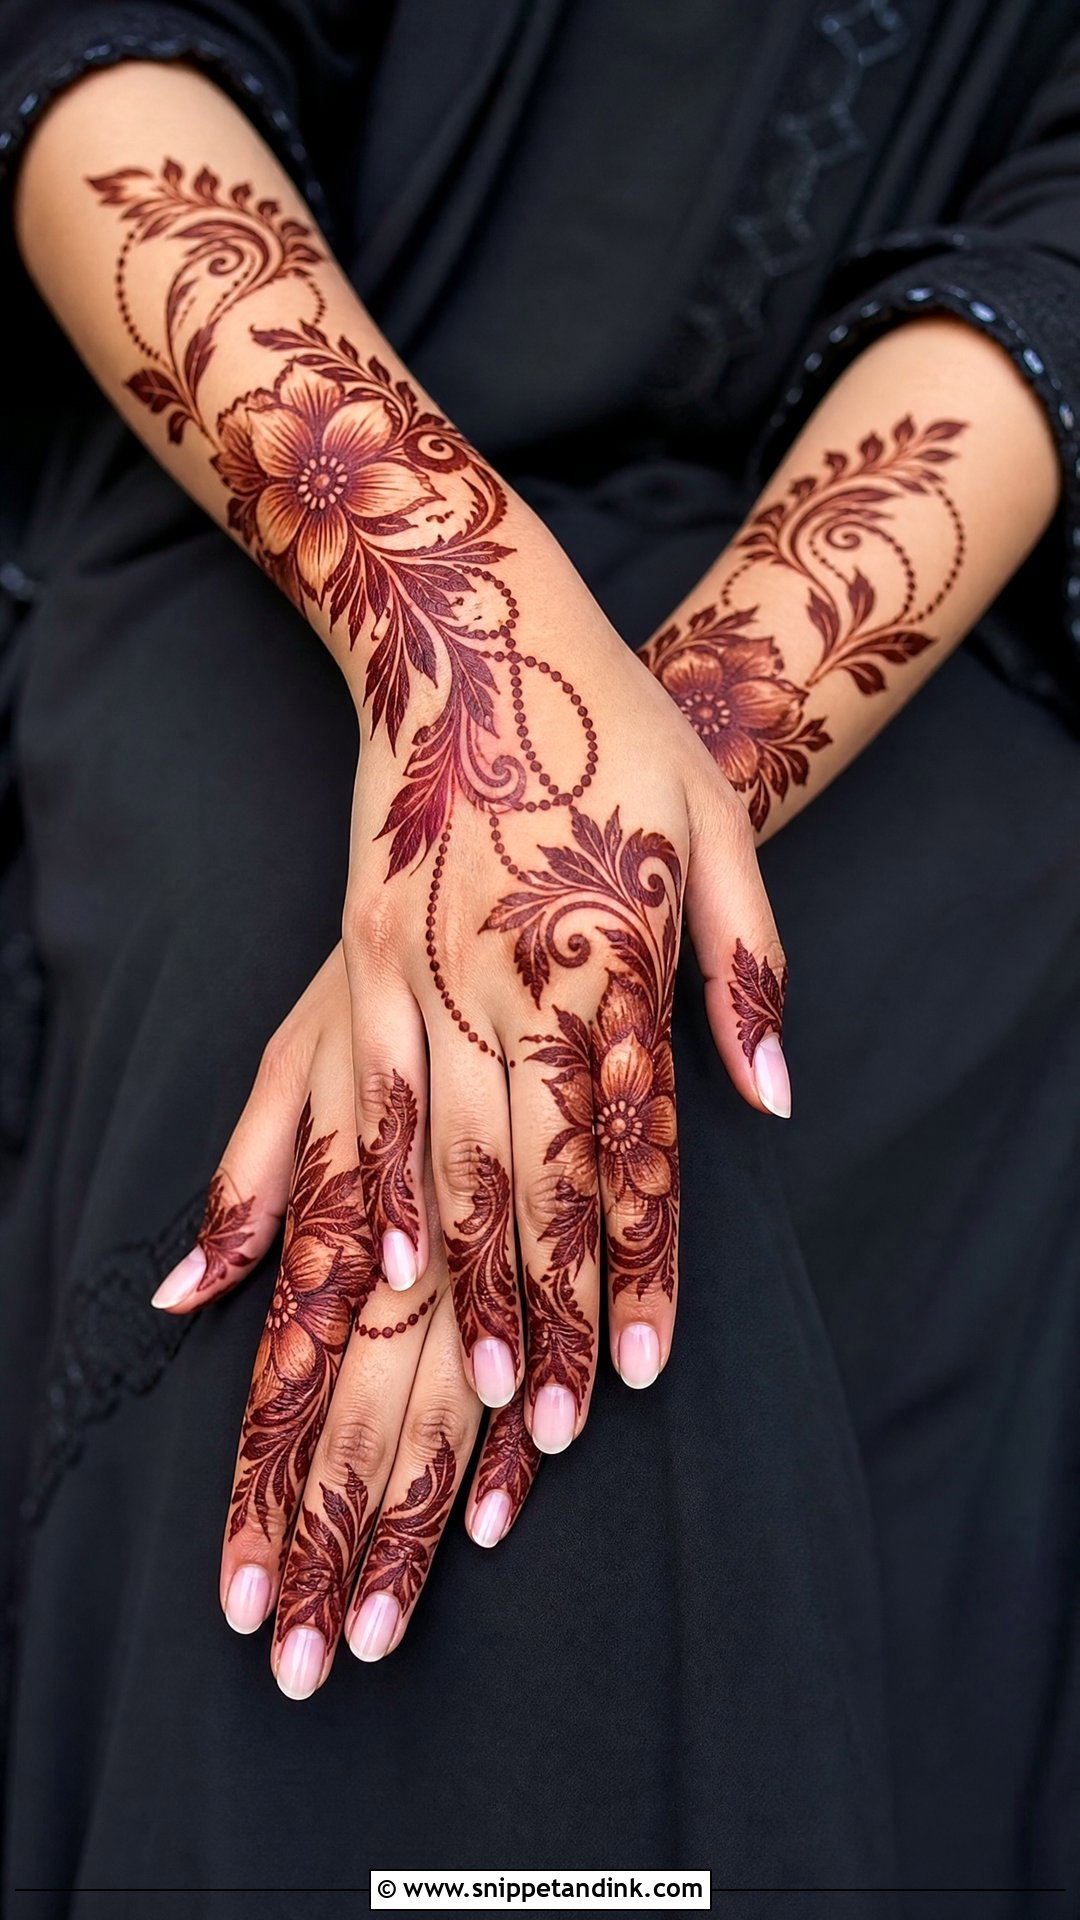
Gulf, or Khaleeji, henna is built on big flowers with shaded petals, leafy curves and generous open skin, so it looks rich without being packed. The back hand is its natural home, with blooms flowing from the fingers toward the wrist; the palm can stay lighter or echo the same flowers. Shading is the key technique. I thin the paste inside each petal so the stain grades from deep outline to softer fill. Large motifs like these show off a deep maroon stain better than any fine filler can. Wrist cuffs, finger detailing and dotted borders bring it up to bridal weight.
18. Bracelet Bridal Mehndi Design
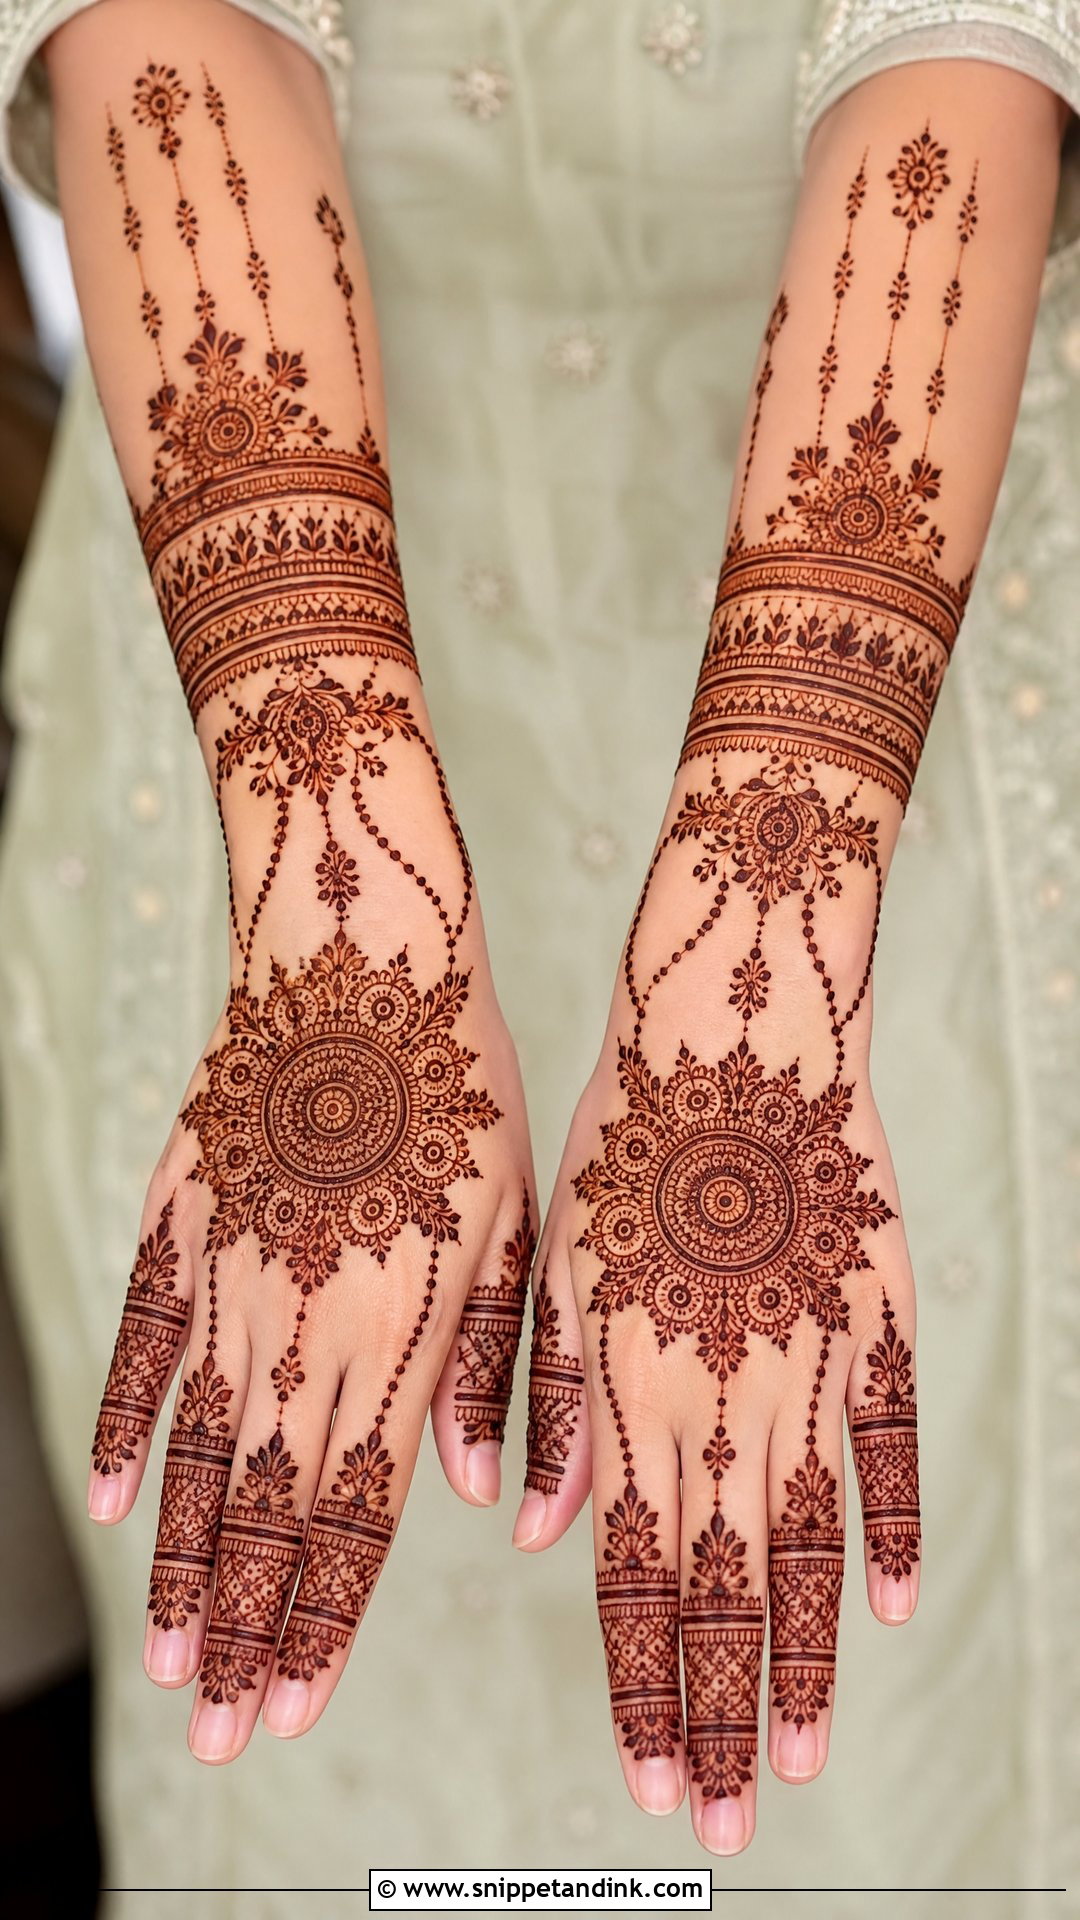
This layout turns henna into jewelry: wrist bands, chain patterns, ring-like finger details and sometimes a back hand medallion joined by fine lines. It reads clearly in close-ups even before you add real rings. For a bride I extend it a little onto the forearm and fill the fingers more fully, mixing in mandalas, florals, jaali or Arabic vines. It also adapts well for engagement brides and bridesmaids; strip back the finger work and it becomes a guest design. Keep the bands evenly spaced, or the bracelet effect gets lost.
19. Floral Bridal Mehndi Design
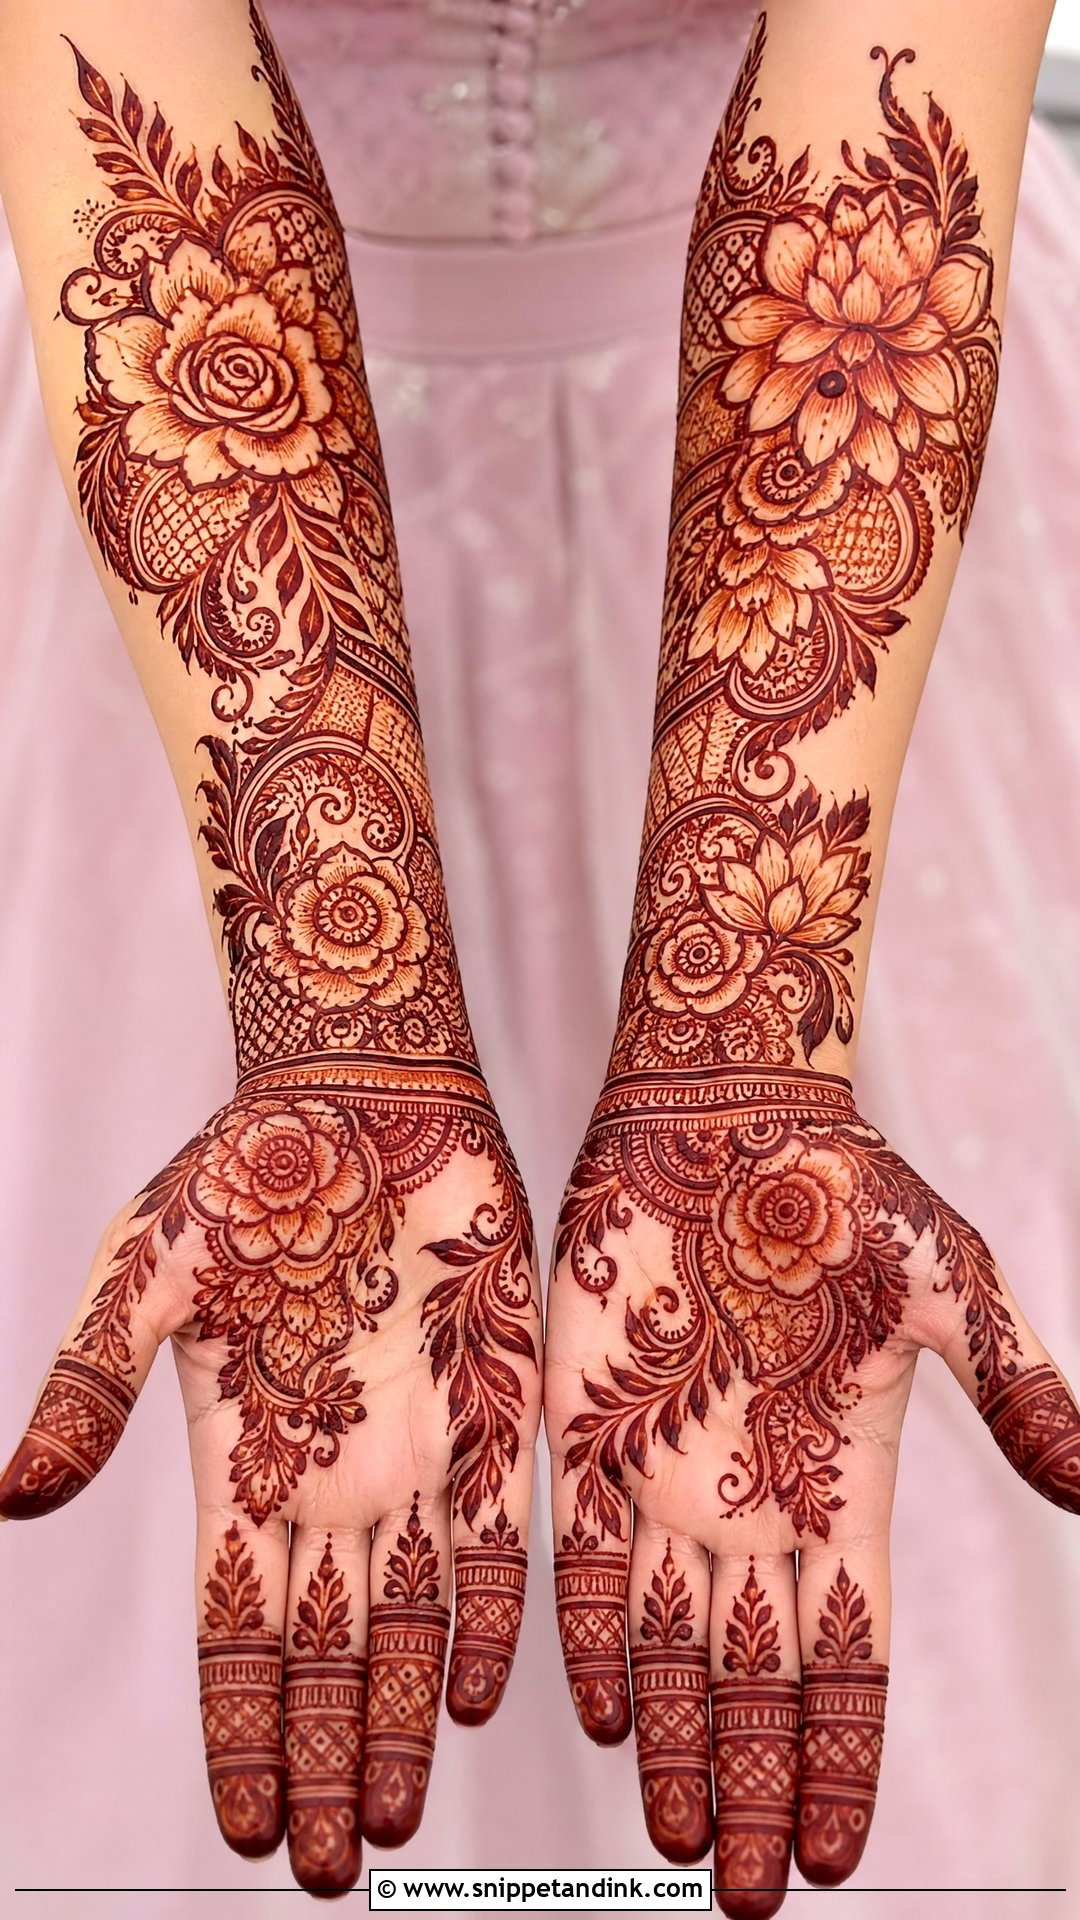
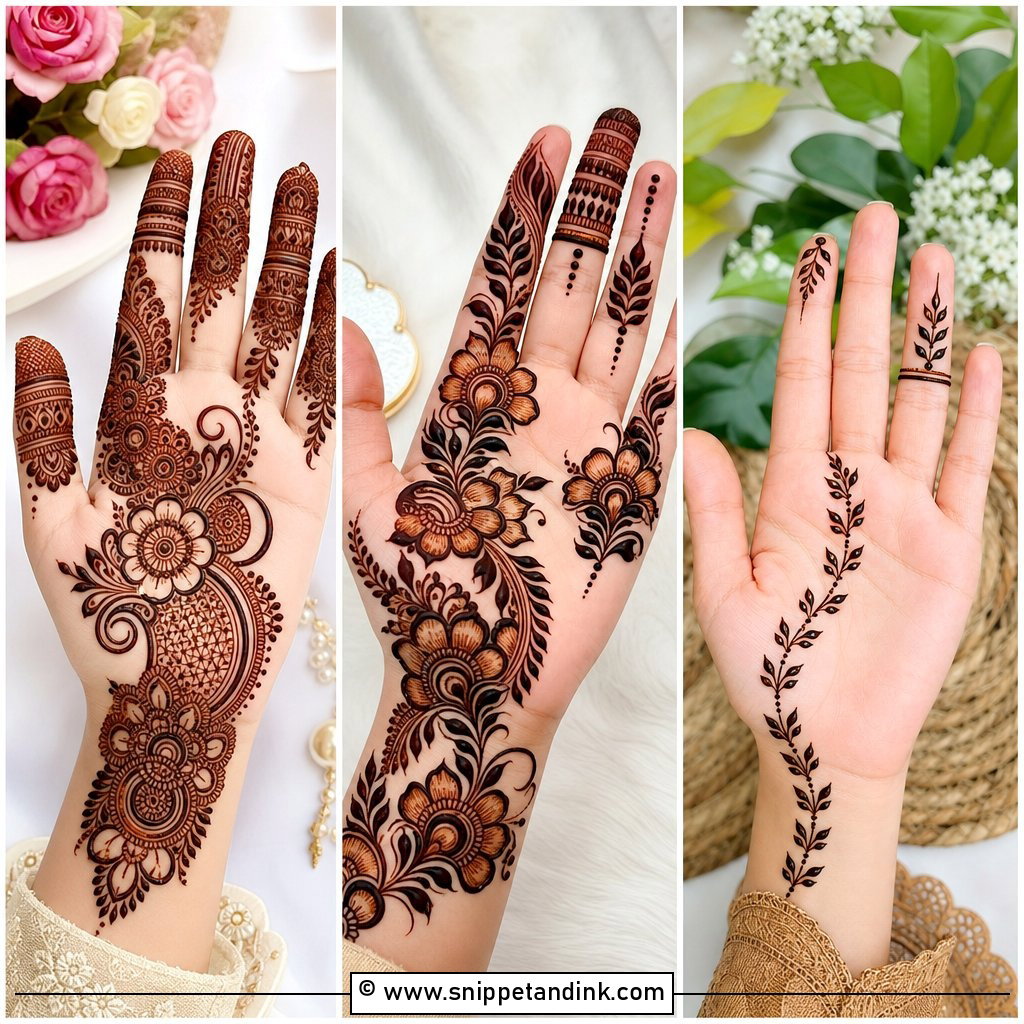
Florals are the most adaptable motif I draw, because petals and vines naturally follow the curve of a hand. Bold Arabic roses, small Indian blooms, lotus petals and leafy trails all work on palms and back hands. The variable is density: open spacing reads soft, while dense fillers around each flower read rich. Whichever way you go, ask for flowers in at least three sizes. Same-size flowers repeated across a hand look like wallpaper rather than a design. Florals sit happily with pastel outfits as much as with classic red bridal wear.
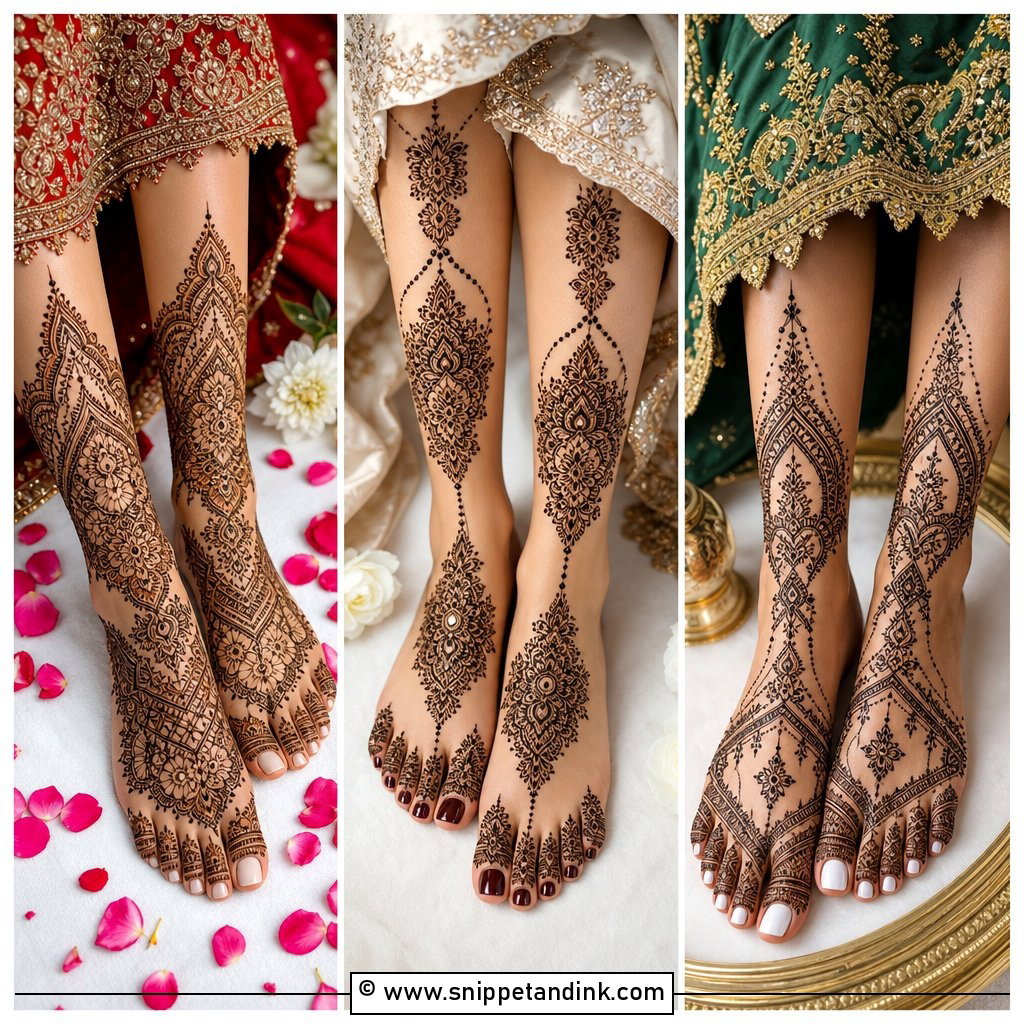
20. Bridal Foot Mehndi Design
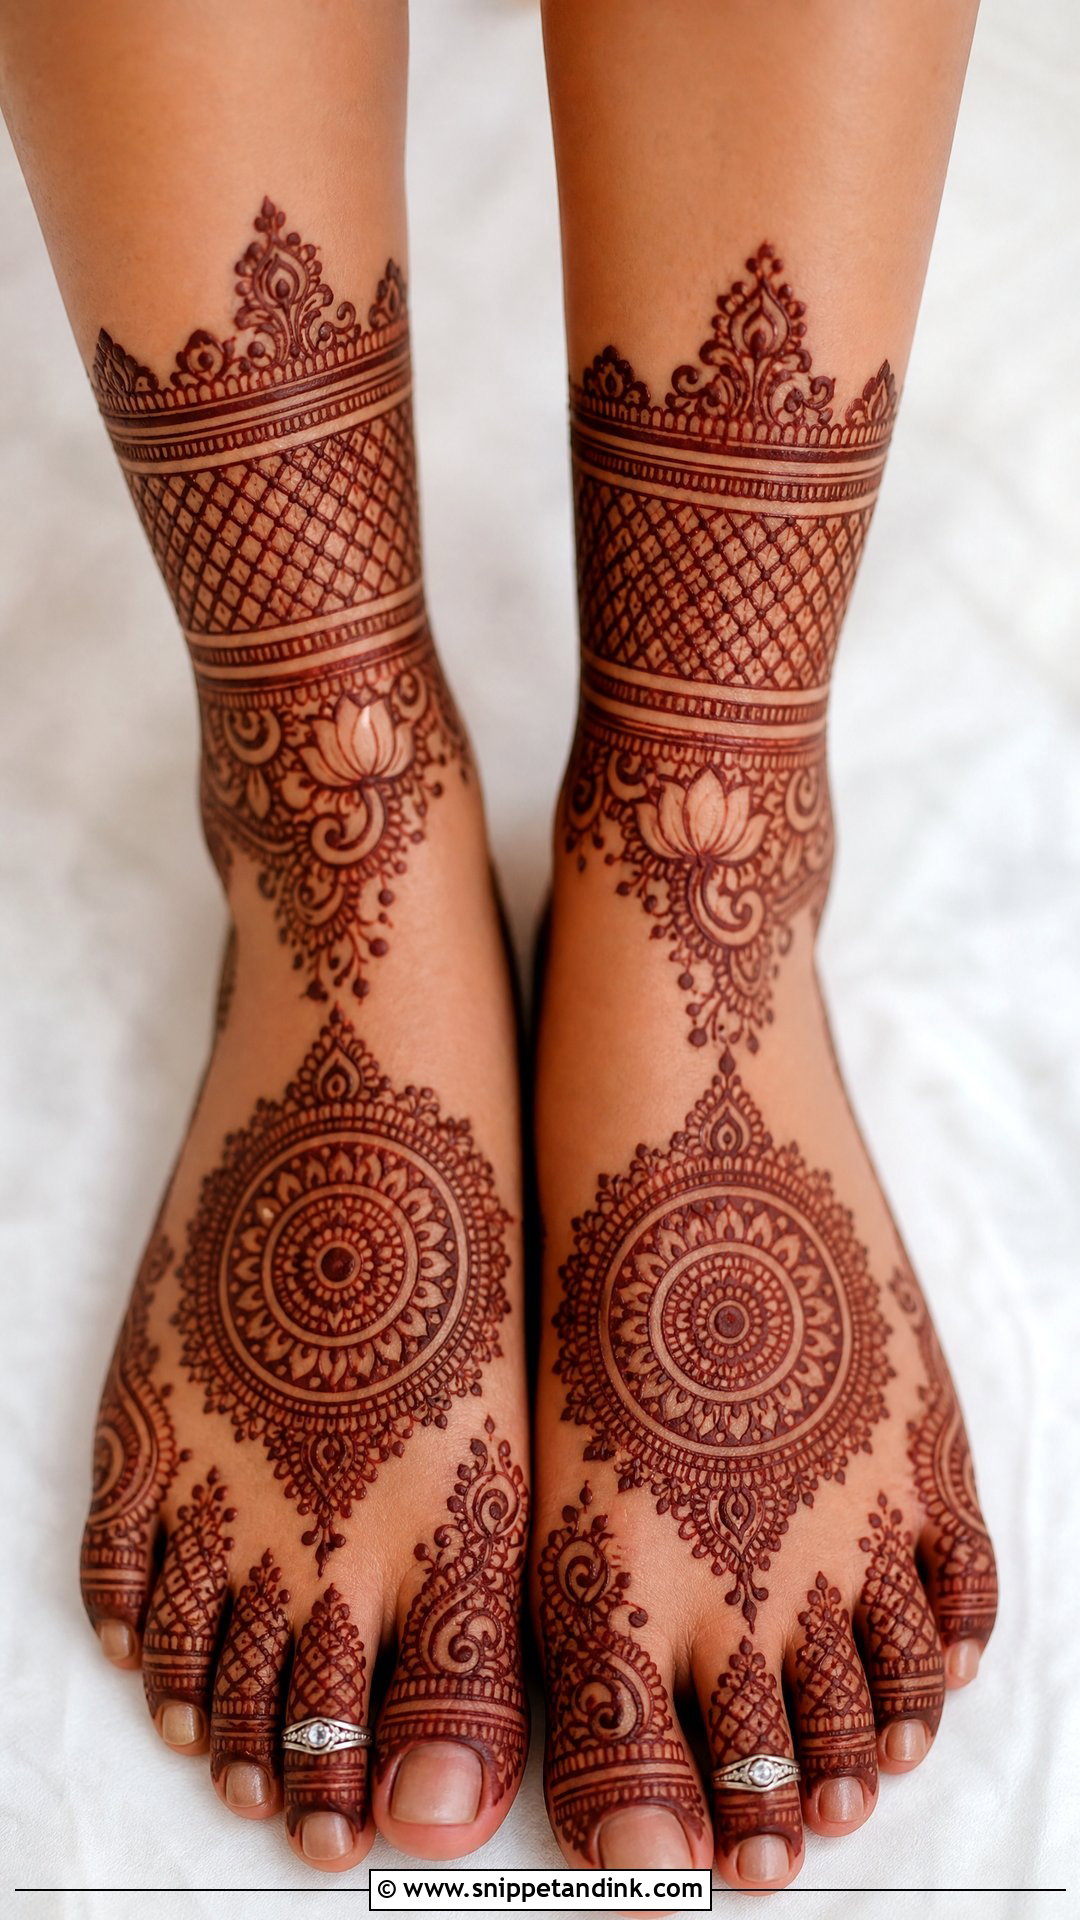
Feet are often an afterthought, but at ceremonies where they show, foot mehndi finishes the look. It can cover the toes, the top of the foot and the ankles, sometimes reaching up the shin. Mandalas, anklet borders, lotus trails, paisleys, jaali panels and henna toe rings are the usual choices. Feet stain very dark because the skin is thick, which also means fine detail between the toes tends to blur, so I keep that area simple. Think about your footwear: if your sandals have a wide strap, plan the design to sit around it, not under it.
Getting the Deepest Stain on Your Wedding Day
Even a flawless design looks disappointing if the stain comes out pale. Most of a dark result happens after I’ve put the cone down, and it’s in your hands, literally.
- Schedule the session one to two days before the wedding. The color keeps deepening for around 48 hours, so mehndi done the night before may still be orange at the ceremony.
- Arrive with clean, dry skin. No lotion, oil or scrub that morning; anything on the surface blocks the dye.
- Leave the paste on as long as you can bear, ideally overnight. My brides usually sleep with their hands loosely wrapped in tissue and an old cotton sheet.
- Scrape the dried paste off rather than washing it, then keep water away for as many hours as possible. A little balm or natural oil over the design afterward helps protect it.
- Stay warm. Henna loves body heat, which is why palms and feet go darkest and cold hands stay lighter.
One firm warning: avoid any paste sold as black henna or promising an instant jet-black result. Those often contain a hair-dye chemical that can cause blistering and lasting skin reactions. Real henna is never black on day one, and a good artist will happily tell you what’s in her cones.
Pairing Coverage With Your Jewelry and Sleeves
Before I map the design, I ask the bride to bring her bangles and describe her sleeves. A heavy chooda or stack of kangan can hide the whole wrist band, so I shift the detail just above or below it. Three-quarter sleeves cut off forearm work halfway, which makes a crisp finishing border at the sleeve line more useful than a design that fades out under fabric. If you’ll wear haath phool, leave the back of the hand a little lighter so the chains don’t sit on top of busy filler. Ten minutes on this saves you a design that’s half covered in every photo.
Where Your Mehndi Design Starts
Comparing complete designs is far easier than piecing together random motifs. Start with coverage, because it decides your session length, then pick the style language that suits your outfit. Brides who love tradition usually gravitate to full hand, Rajasthani, peacock, or portrait mehndi. Those wanting something lighter tend to land on Arabic, minimal, bracelet or floral work. Bring two or three of these to your artist, tell her where you’ll wear rings and bangles, and let her draw a quick sample on your hand. The design that still feels like you in the mirror at the end of the night is the right one.
You'll Like These Ideas:


Leave a Reply