
The gathbandhan is the moment the bride’s chunri is knotted to the groom’s stole, and putting that knot on her hands gives the mehndi a reason to exist beyond decoration. I draw it differently for almost every bride, because the knot has to work with how she holds her hands, how much time she can sit, and whether she wants faces or only symbols. Below are 25 layouts I’d actually offer, from full-hand portrait scenes and palm-centered knots to Indo-Arabic trails, mandala frames and open, modern work. A heavy version suits the wedding itself, and a lighter one is easier to wear for a roka, an engagement or a pre-wedding shoot. Each idea is a complete hand, not a single motif dropped onto bare skin.
Where on Your Hands the Knot Should Go
Before I pick up a cone, I ask the bride to put her palms together the way she’ll hold them for photos. A knot that’s meant to join across two palms only lines up if I mark the meeting point with her hands actually touching. Drawn on each hand separately, the halves almost always miss by a few millimeters, and the camera finds it.
Then I look at the creases. The heart line and the head line run straight across the upper palm, and anything delicate drawn over them, especially a face, gets broken up when the hand bends. So I usually place the knot in the hollow below the creases and move portraits to the lower palm, the wrist or the forearm, where the skin stays flatter.
What to bring to your consultation
- Two or three reference photos, and a note on which detail you love in each, not just the whole picture.
- A photo of your outfit sleeve and bangles, so the forearm border ends where the chooda begins rather than under it.
- The exact spelling of both names or initials, and the date written out.
- Your realistic sitting time. Portrait work on both hands can take many hours; a minimal knot can be done in well under one.
Ask for a patch test if you’ve never worn natural henna before, and check that your artist mixes her own paste or uses a fresh, body-art-quality brand. Any so-called black henna that stains in minutes often contains a chemical dye that can burn the skin. Real henna starts orange and darkens; it never goes on black.
1. Gathbandhan Mehndi Design For Full Hands
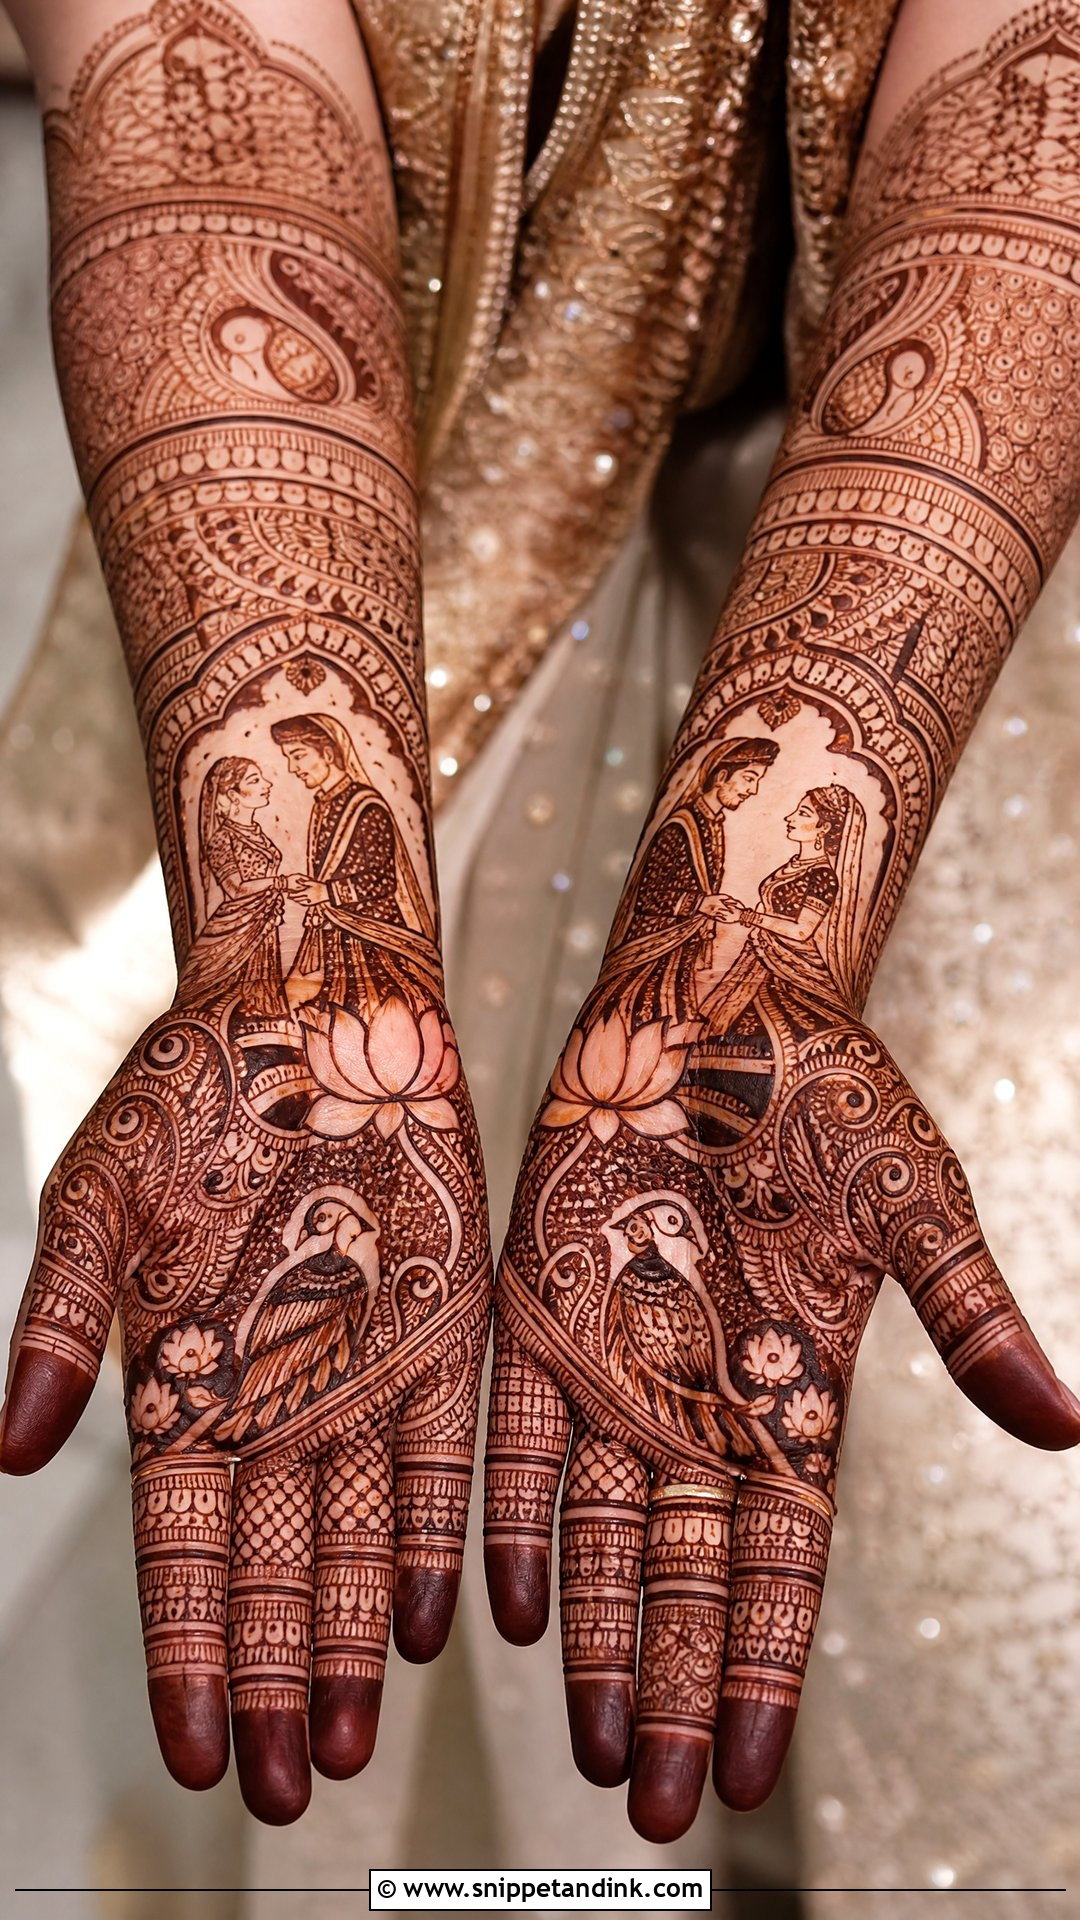
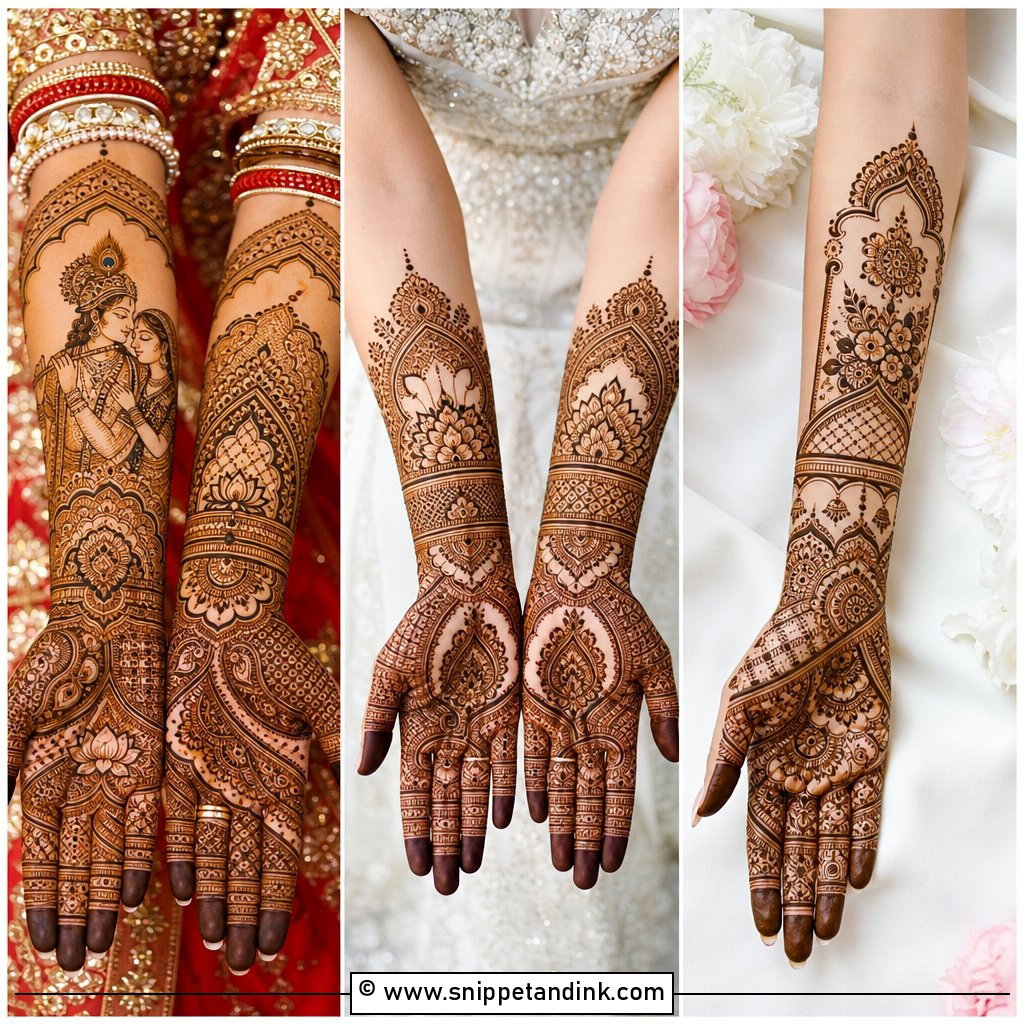
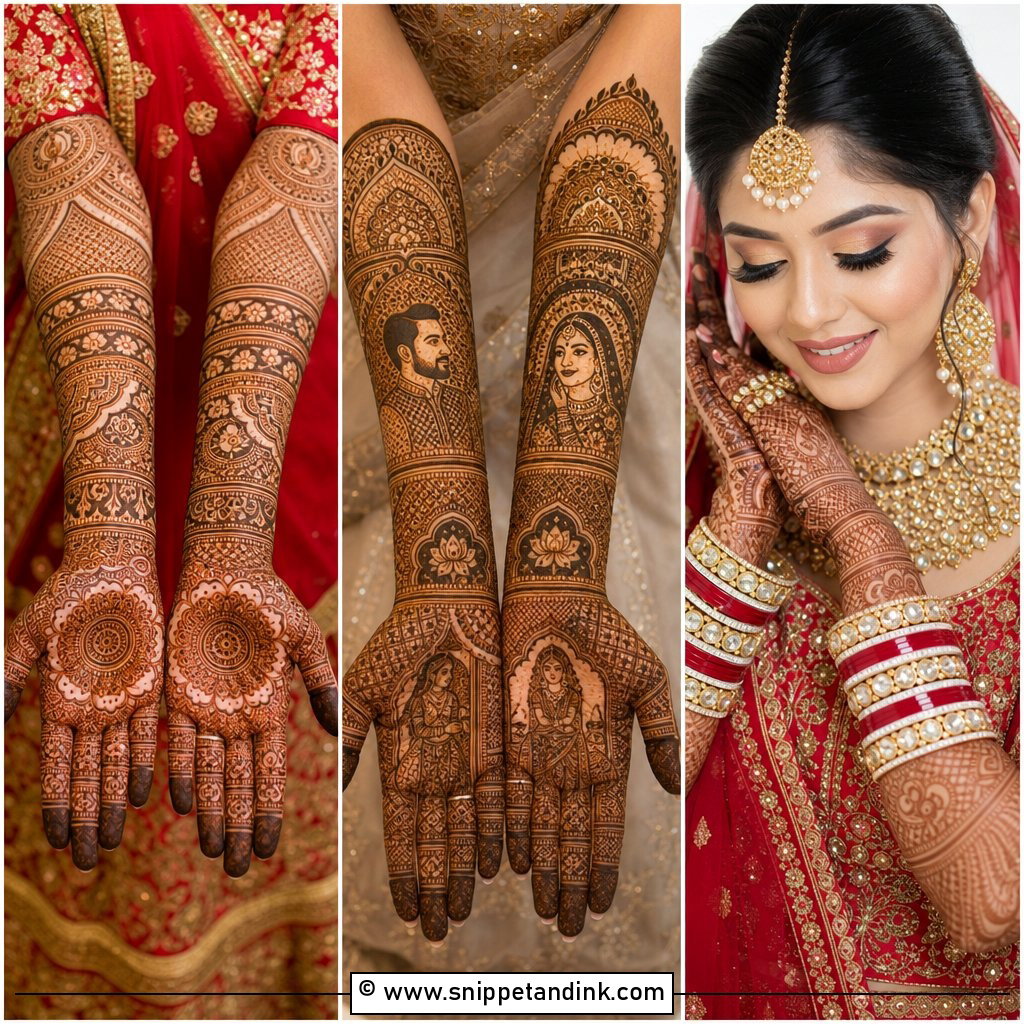
Full coverage is where the knot gets room to breathe, and it’s the layout I recommend most to brides who love detailed Indian henna. The couple stands across the center of the palms with the knot joining their clothes, and paisleys, lotus, peacock feathers and jaali fill outward from there. Fingers take dense leafy vines; wrists and forearms carry temple borders that read like stacked bangles. The trap is filling so tightly that the knot disappears. I outline the central scene first, then fill around it, never the other way round. Plan on a long sitting for this one, often most of an afternoon.
2. Simple Gathbandhan Mehndi Design
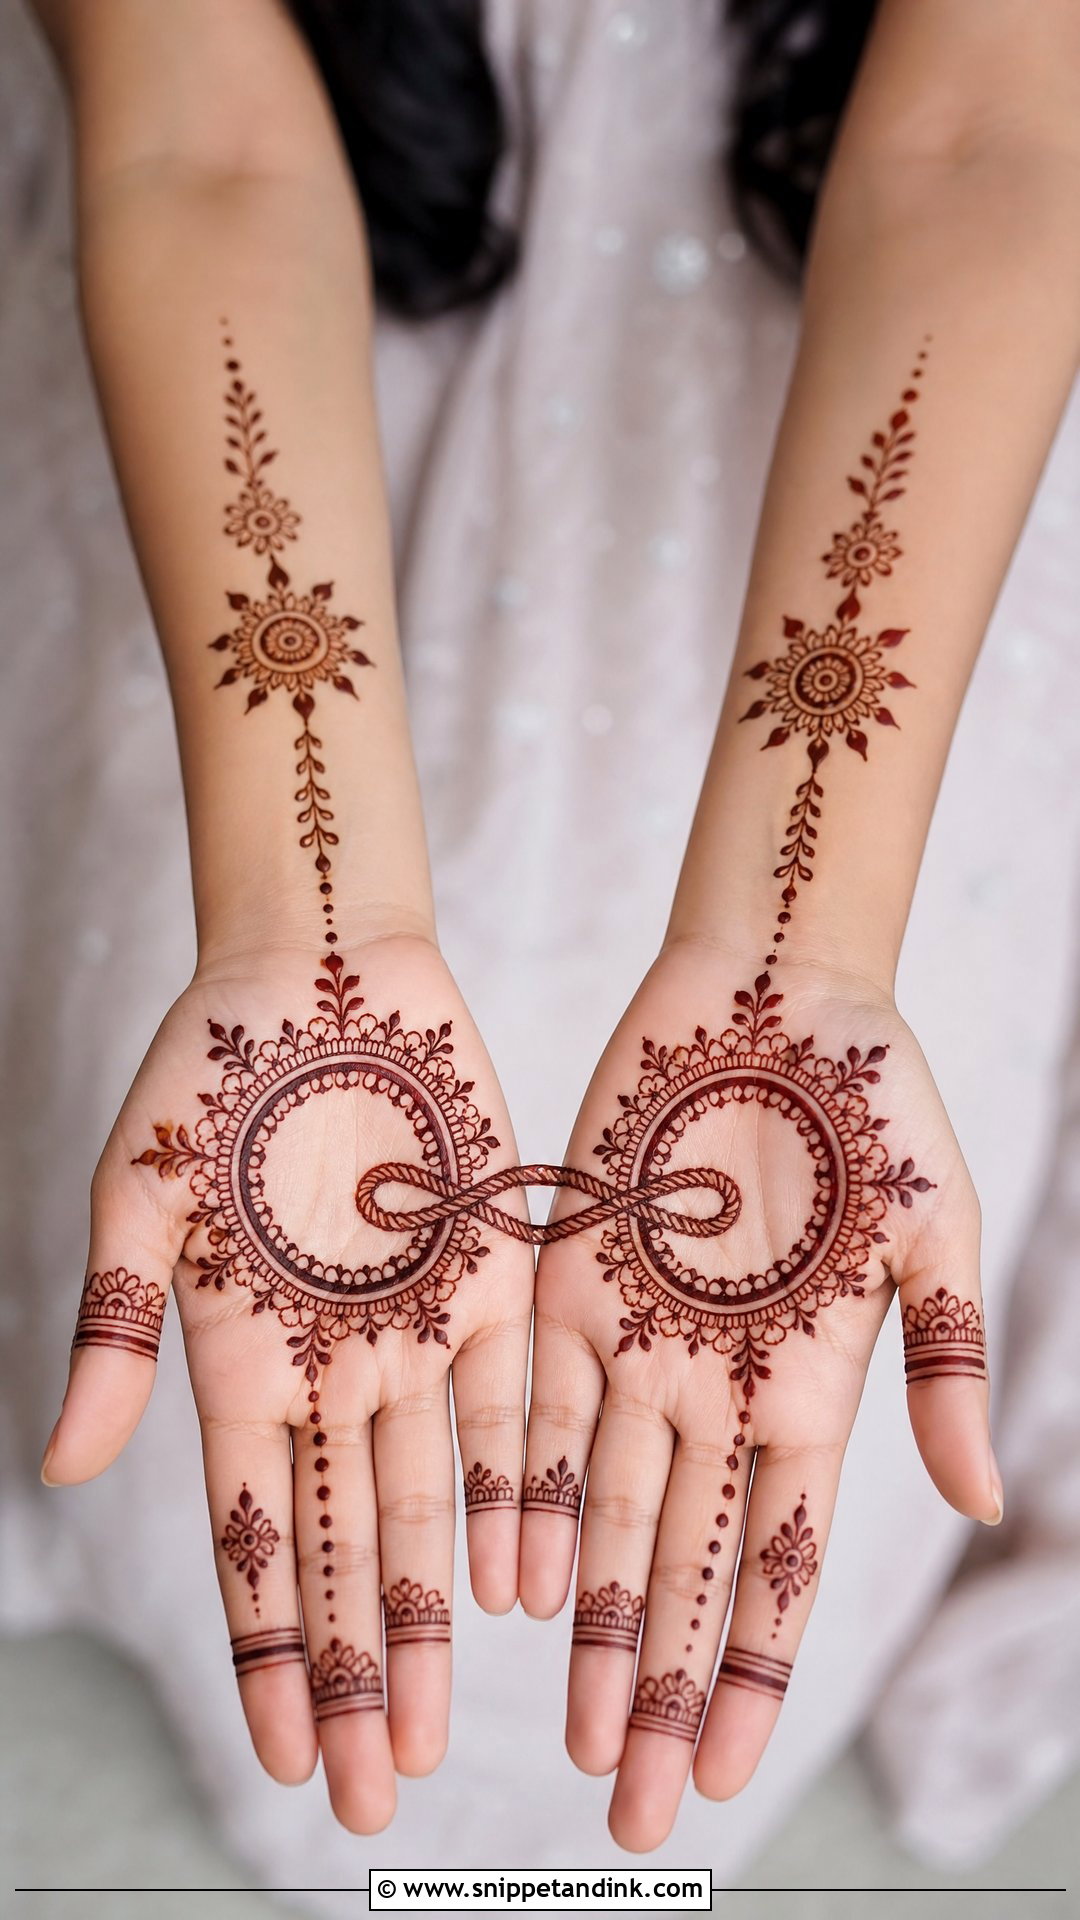
A small knot split across both palms only looks finished when the hands meet, so I always draw it with the bride holding her palms together for the first few lines. One round mandala frames it, a thin floral trail runs near the thumb, and the fingers get dots, leaves and slim bands. The wrist can stay bare or take a single bracelet line. This is the design I suggest for an engagement or a small ceremony, and for anyone who finds heavy paste uncomfortable to sit with overnight. It reads clearly because there’s space around the symbol.
3. Bridal Gathbandhan Mehndi Design
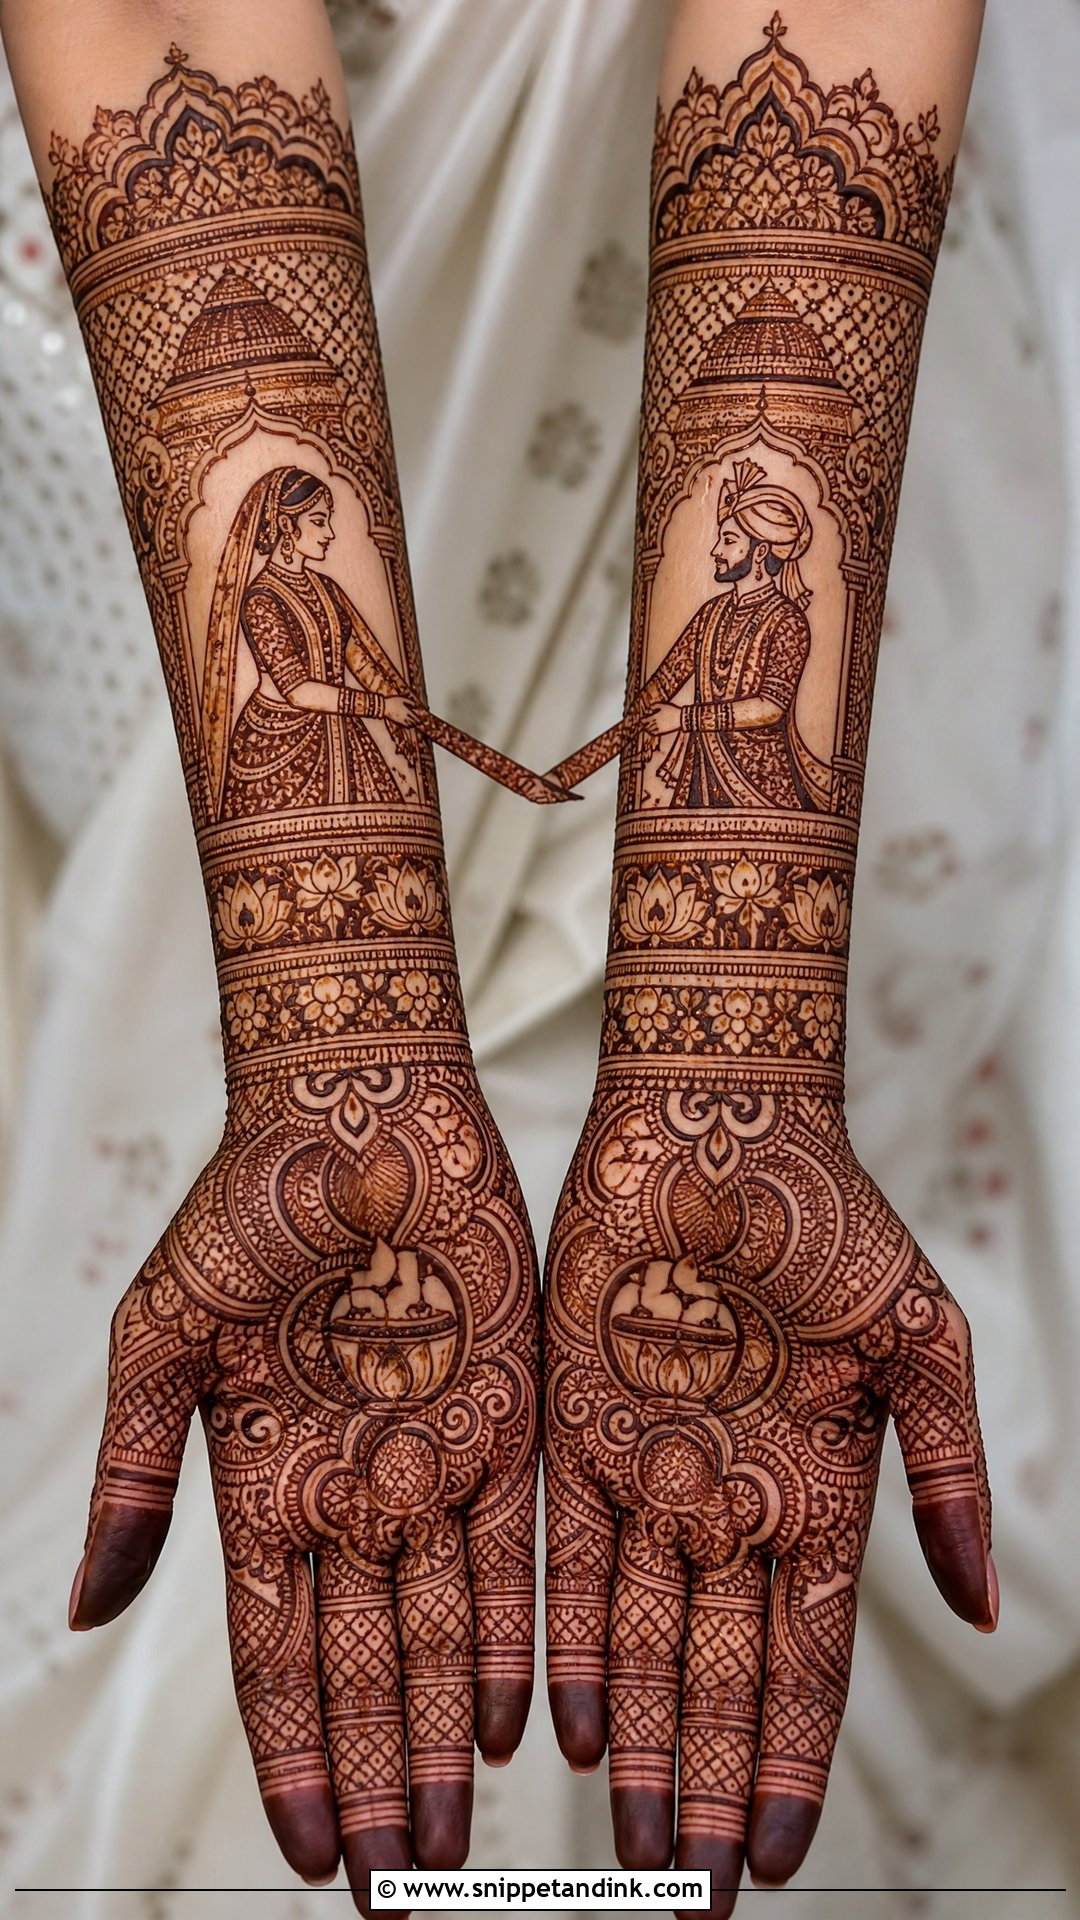
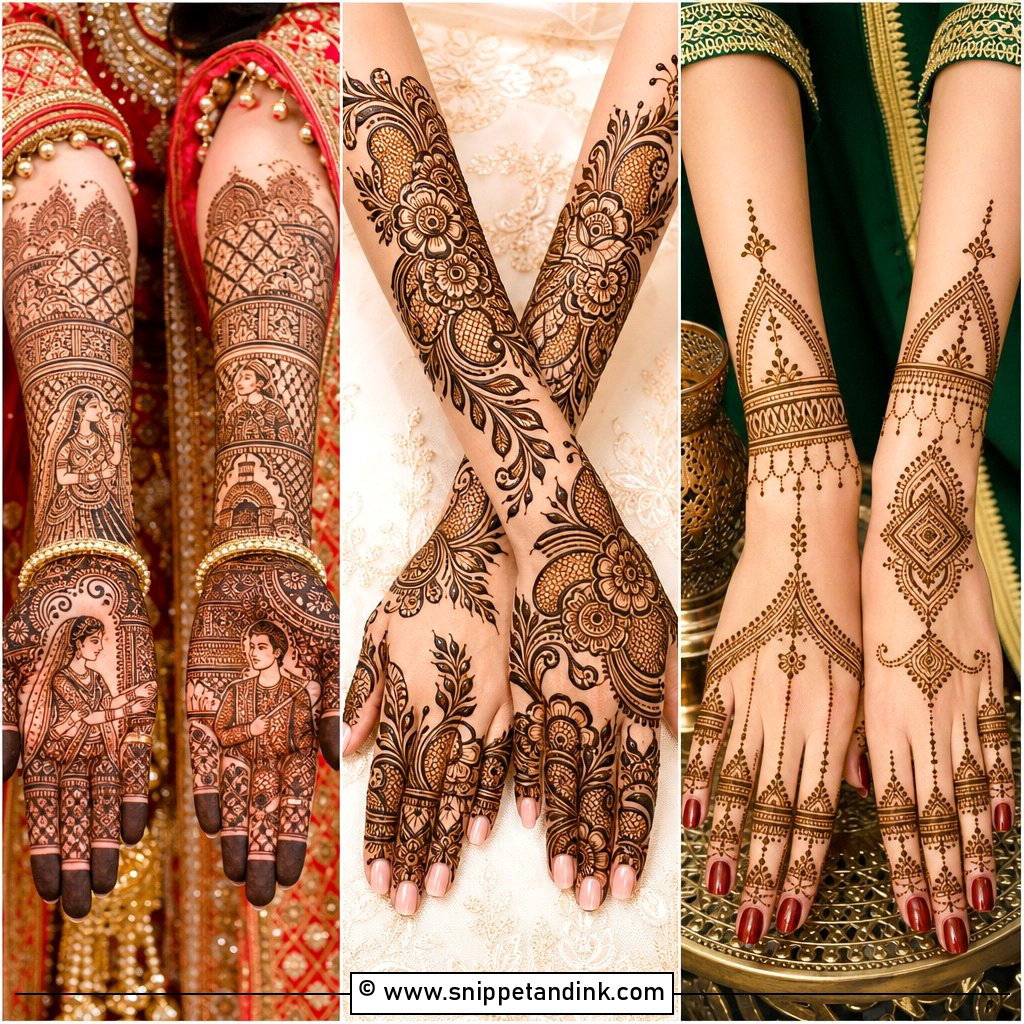
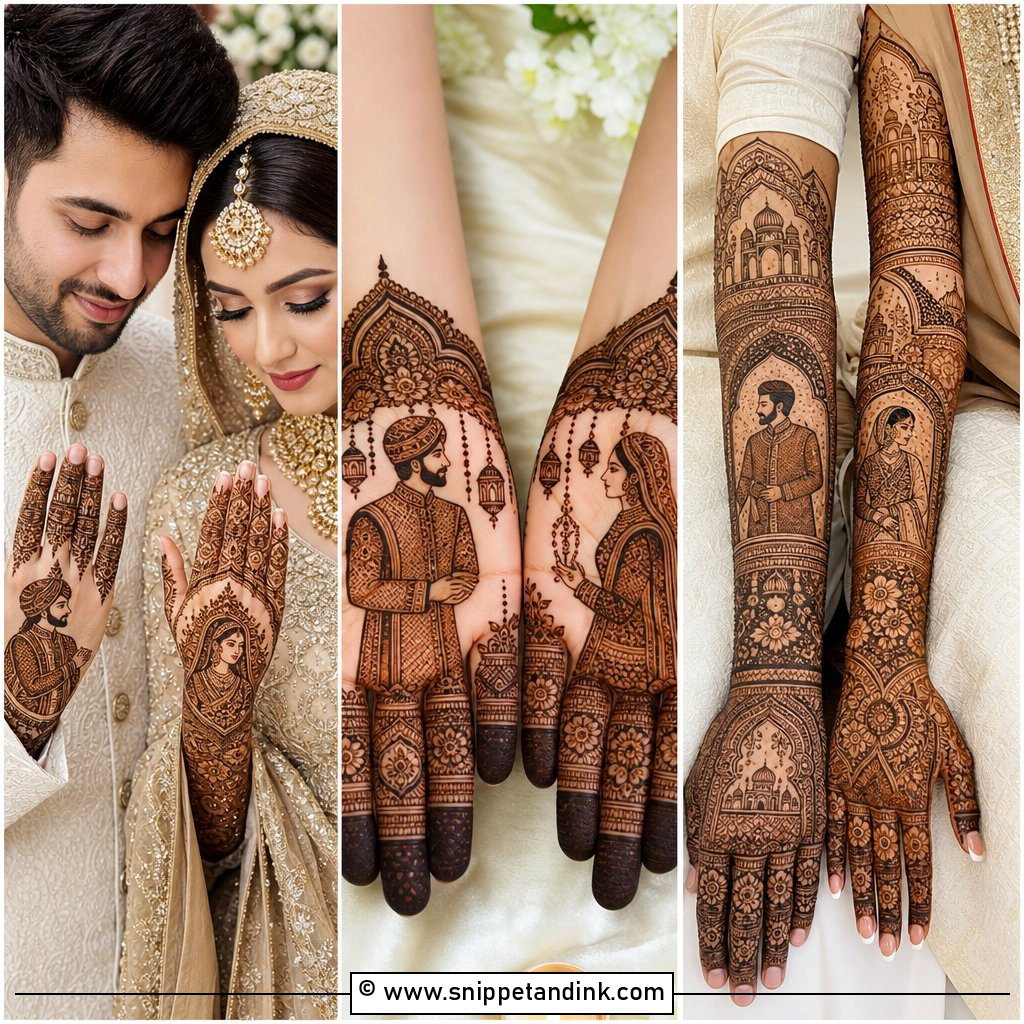
For the wedding-day version, the dulha-dulhan scene goes on the palms with the groom’s stole and the bride’s dupatta tied in a knot you can actually see. Lotus petals, paisley vines, bells, kalash shapes and fine filler build around it, and the backs of the hands continue with mandalas and floral cuffs. Initials or the date can hide in the forearm borders. When I work this one I size the faces and the knot slightly larger than feels natural on the skin, because once the stain develops, fine lines inside small faces tend to merge in photos.
4. Gathbandhan Mehndi Design On Palm
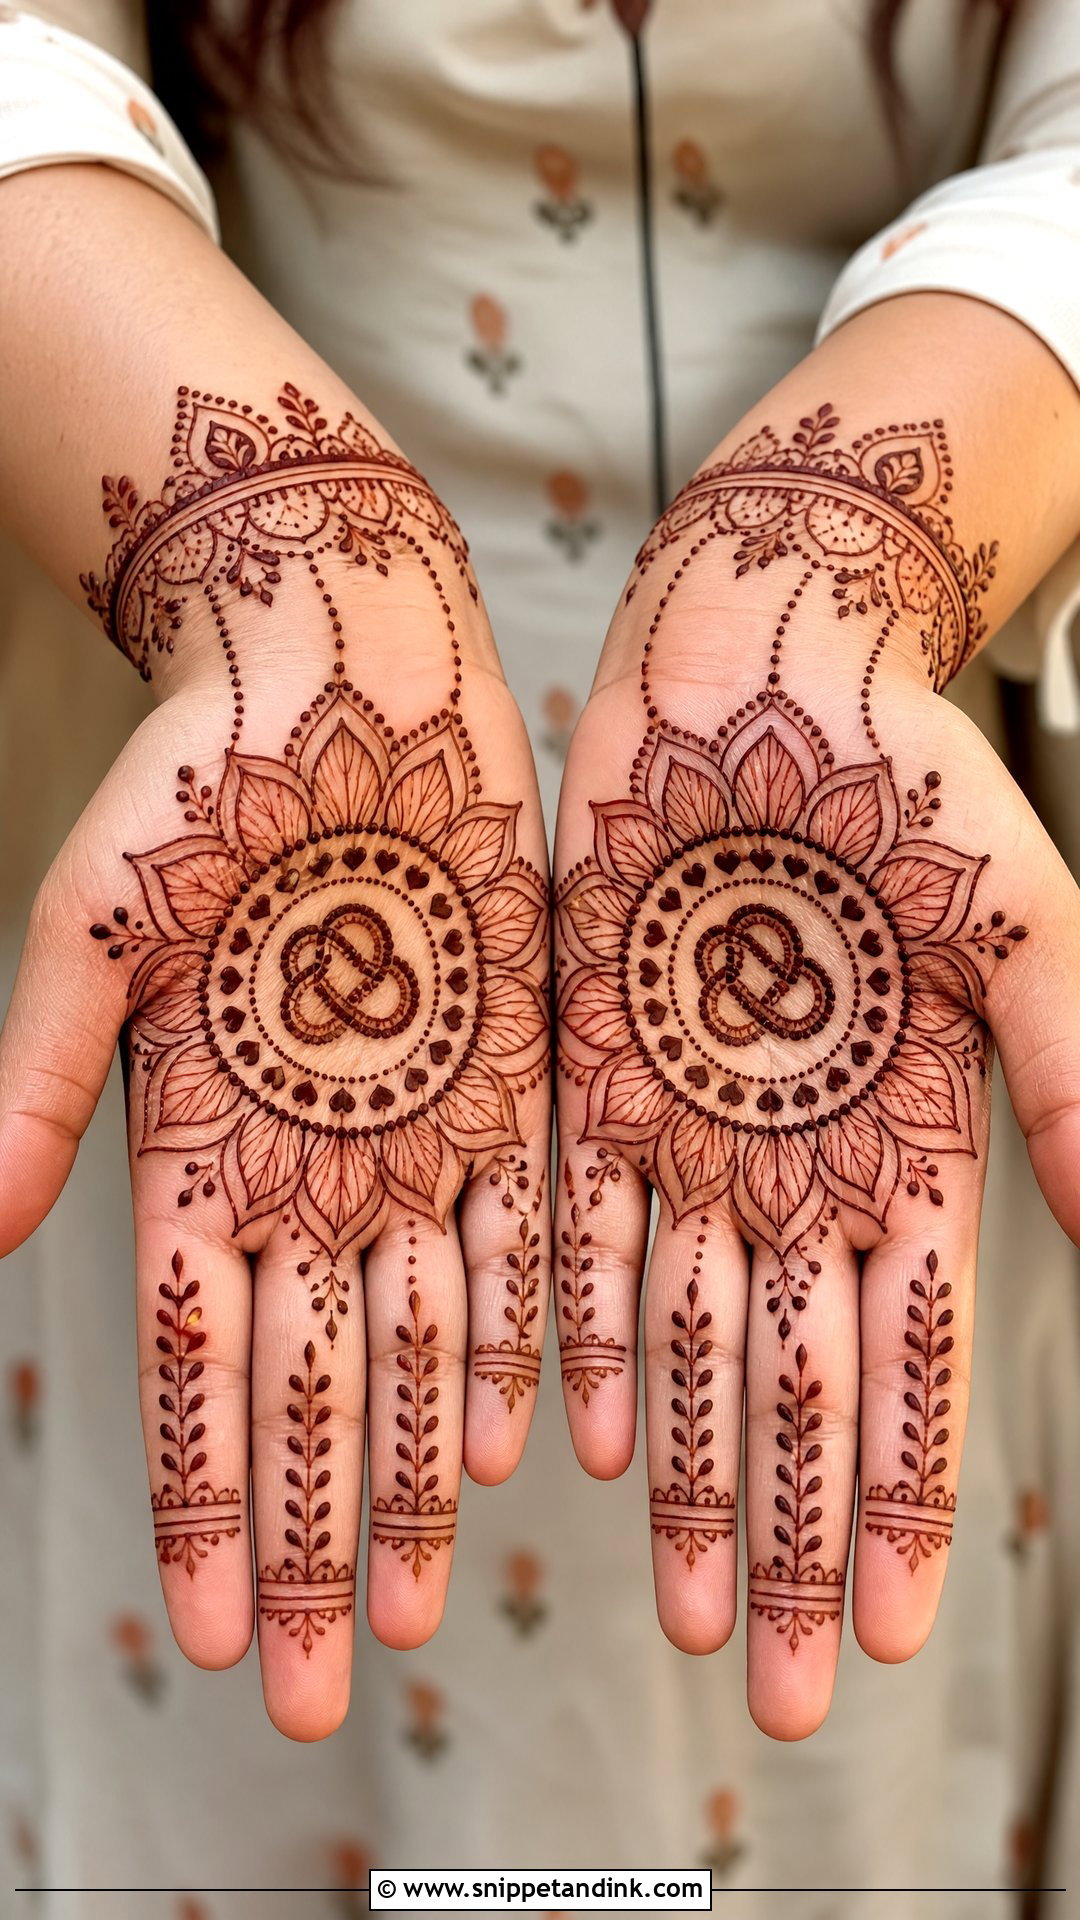
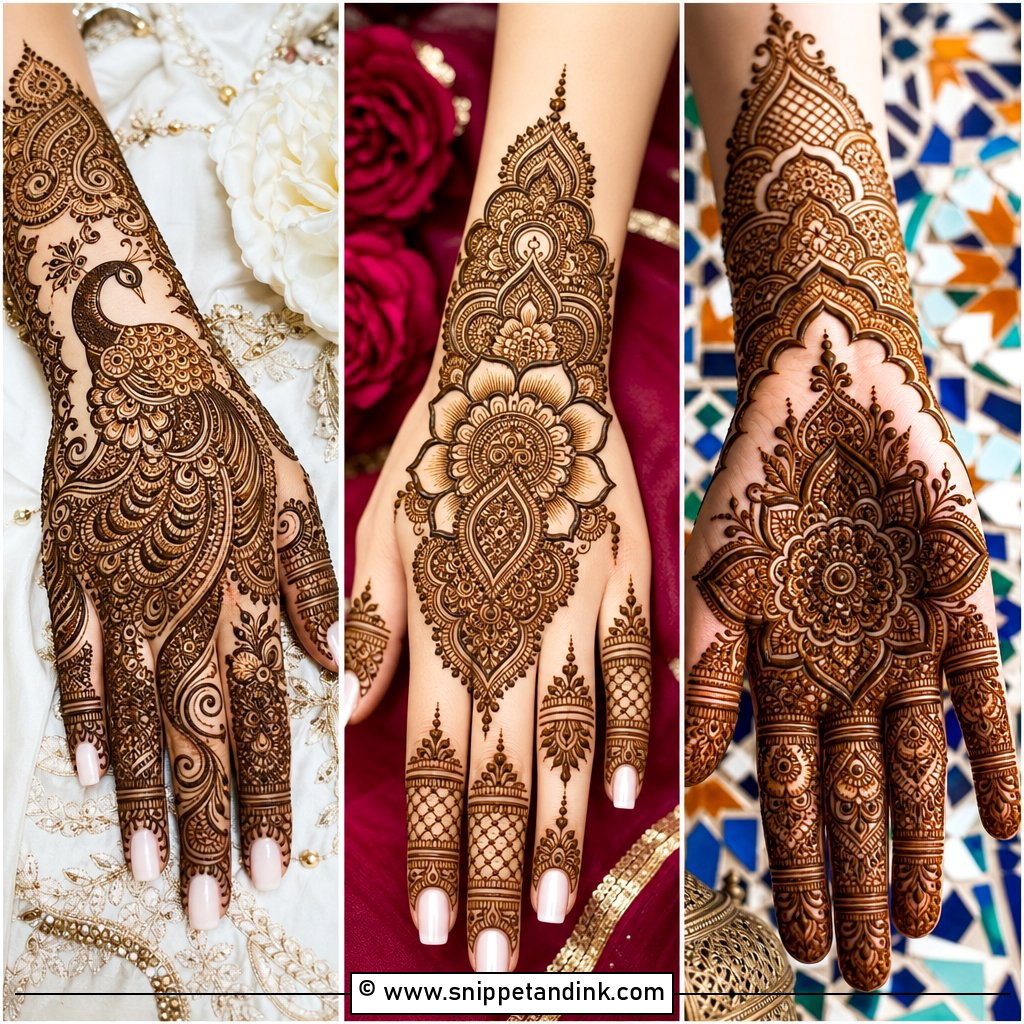
Guests look at palms first, so a knot placed in the middle of one palm, or split across both, lands right where attention goes. I frame it with a circular mandala, a lotus or a heart border and keep the fingers to slim trails, dotted chains and tiny paisleys, with one cuff at the wrist. Palms also give the deepest stain of anywhere on the hand, which is exactly where you want your darkest, sharpest knot. It photographs cleanly in close-ups because nothing competes with the center.
5. Gathbandhan Mehndi Design For Back Hand
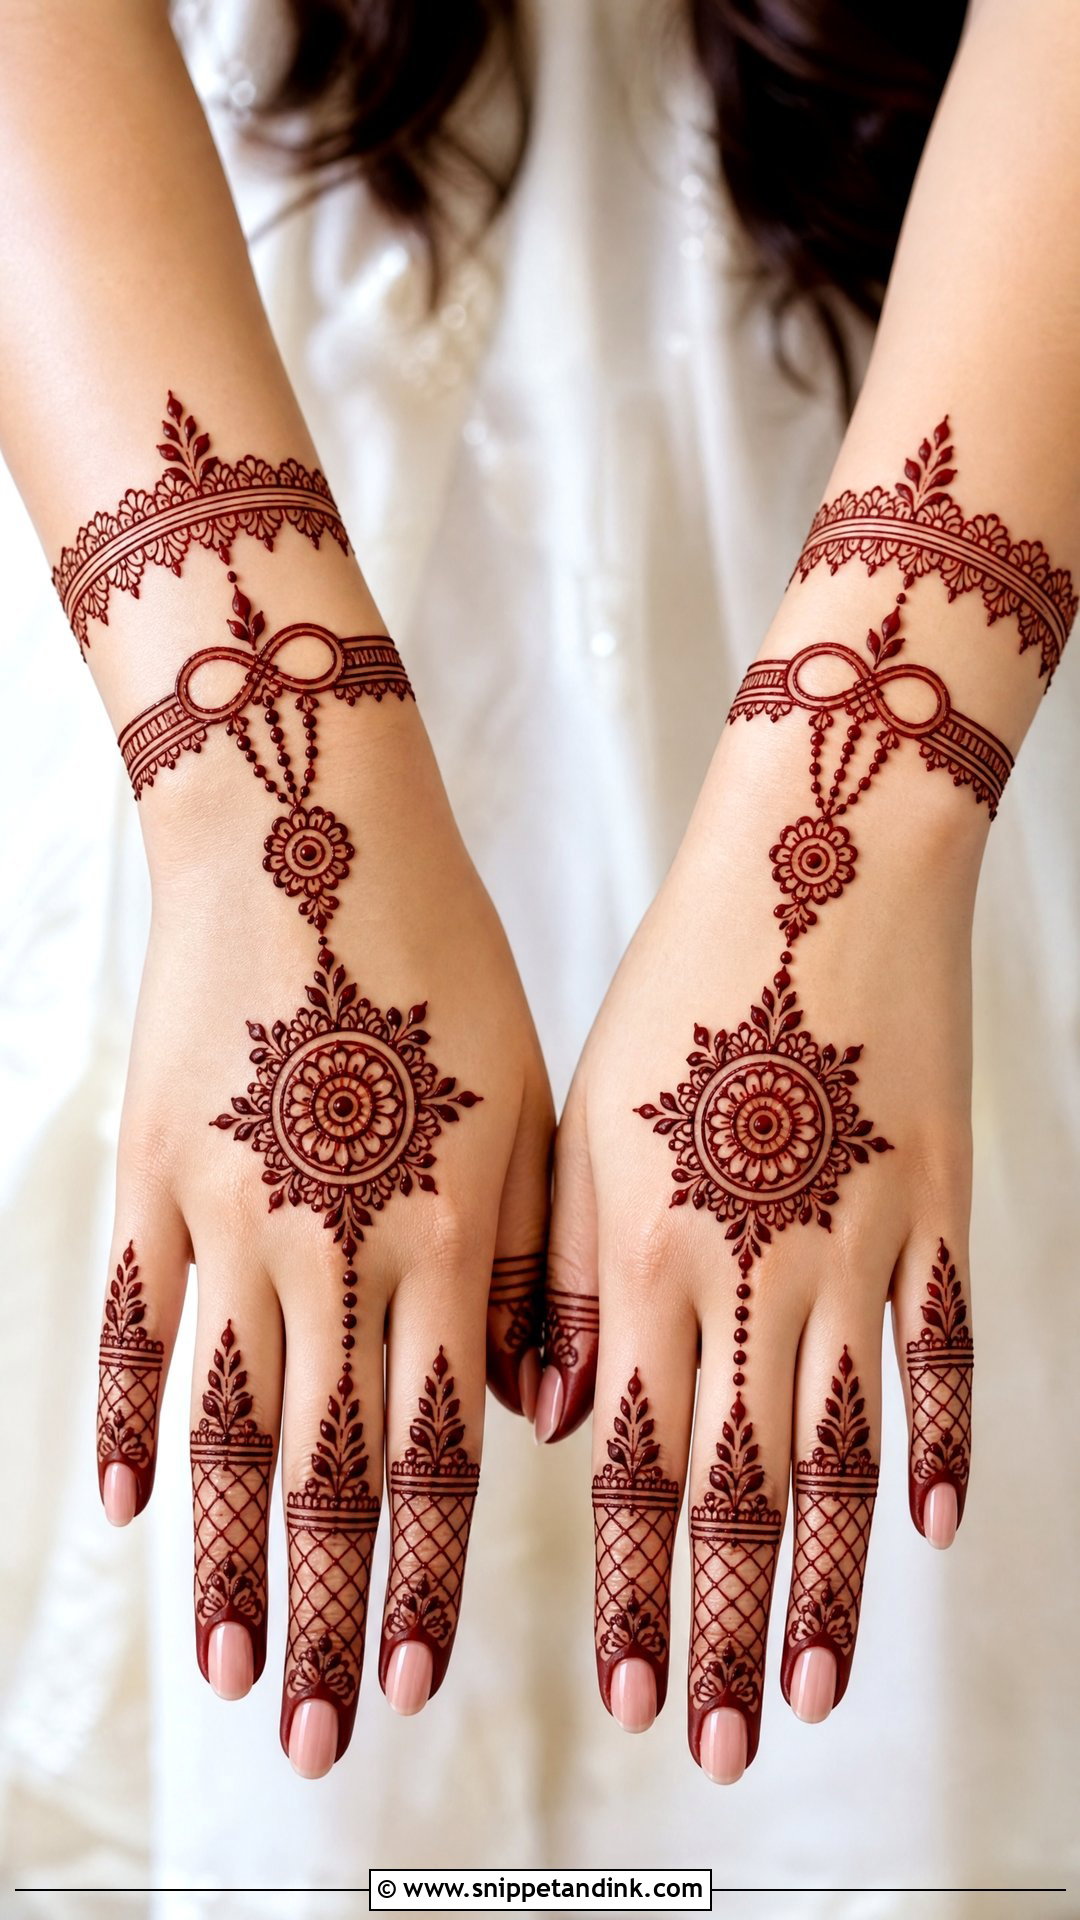
The back of the hand is where the design behaves like jewelry. I put a small knot near the center of each hand and link it to the wrist with floral chains or mandala rings, then dress the fingers with leafy tips, tiny checks and slim bands, leaving some bare skin between them. This is the side everyone sees while you hold the dupatta or a bouquet. One honest warning: skin on the back of the hand is thinner and stains lighter than the palm, so I draw the knot with a bolder outline there, otherwise it fades into an orange blur on camera.
6. Gathbandhan Mehndi Design With Bride And Groom
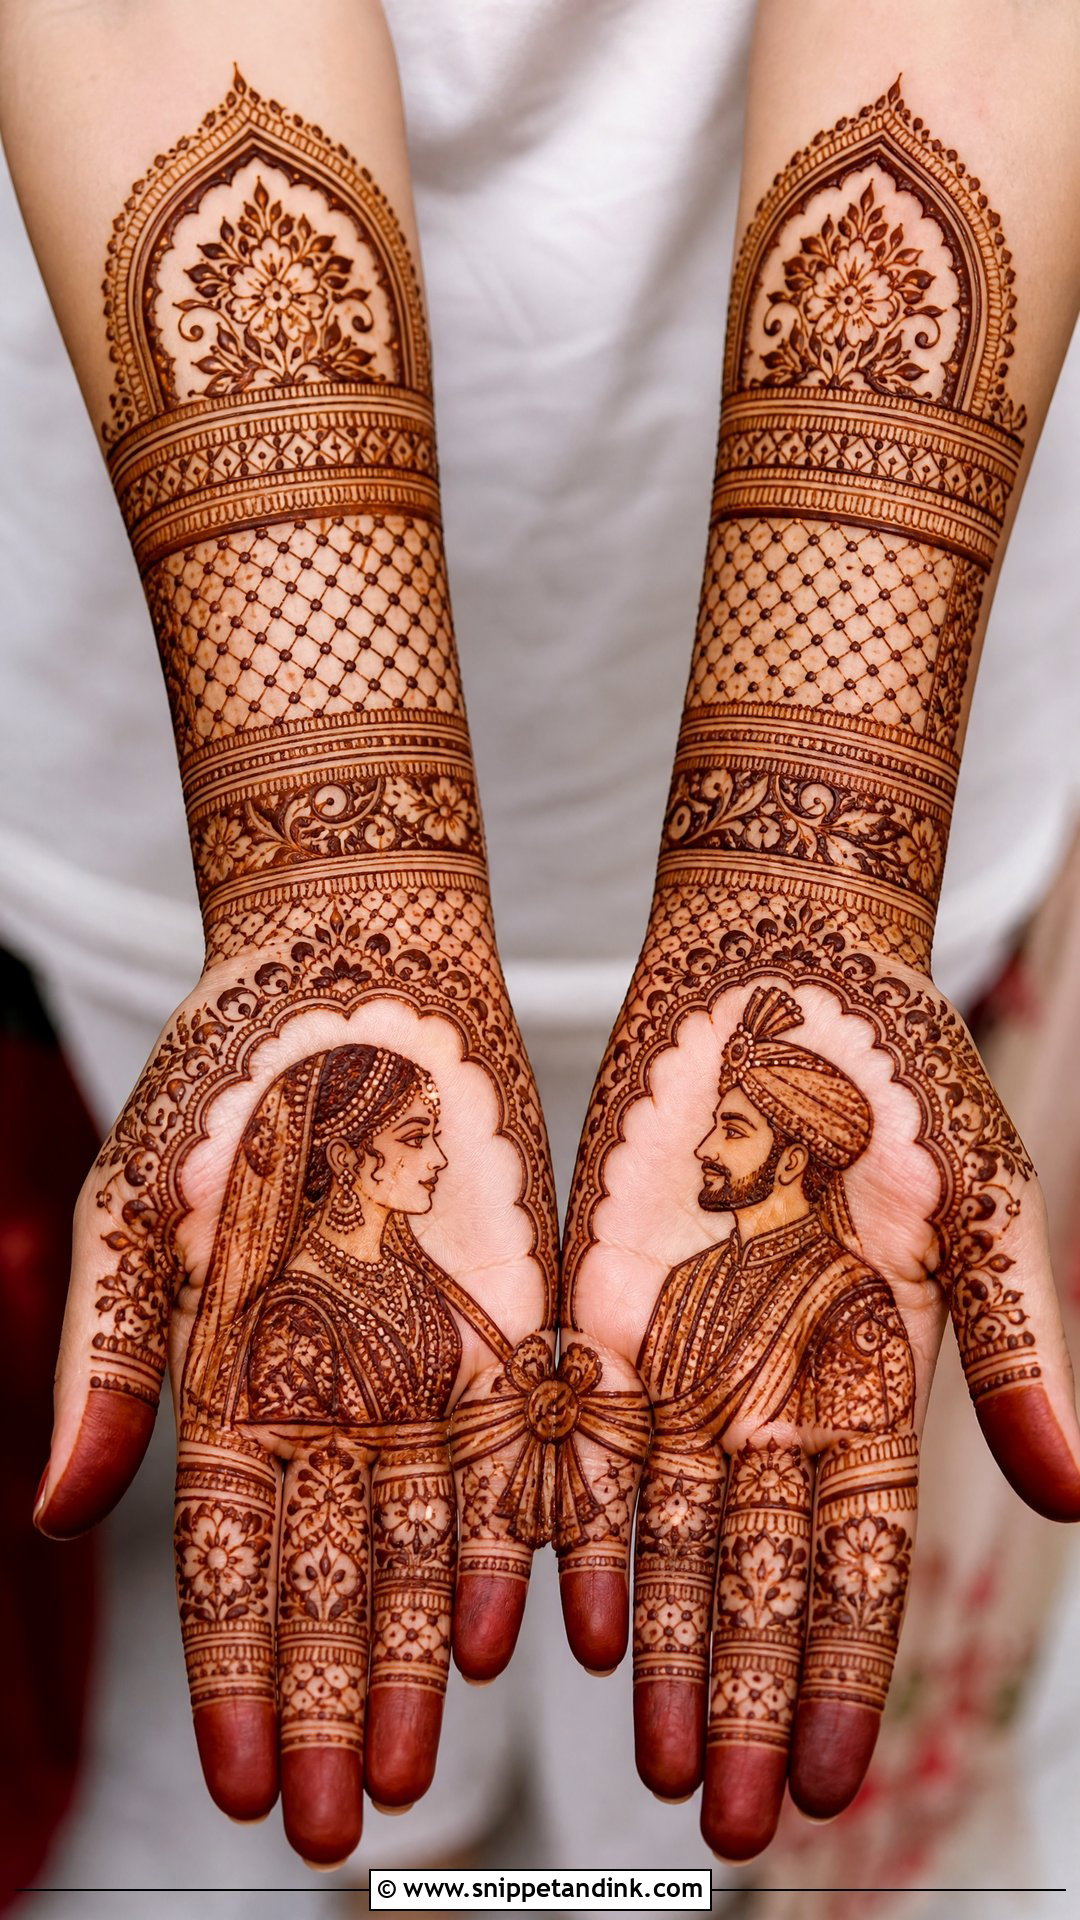
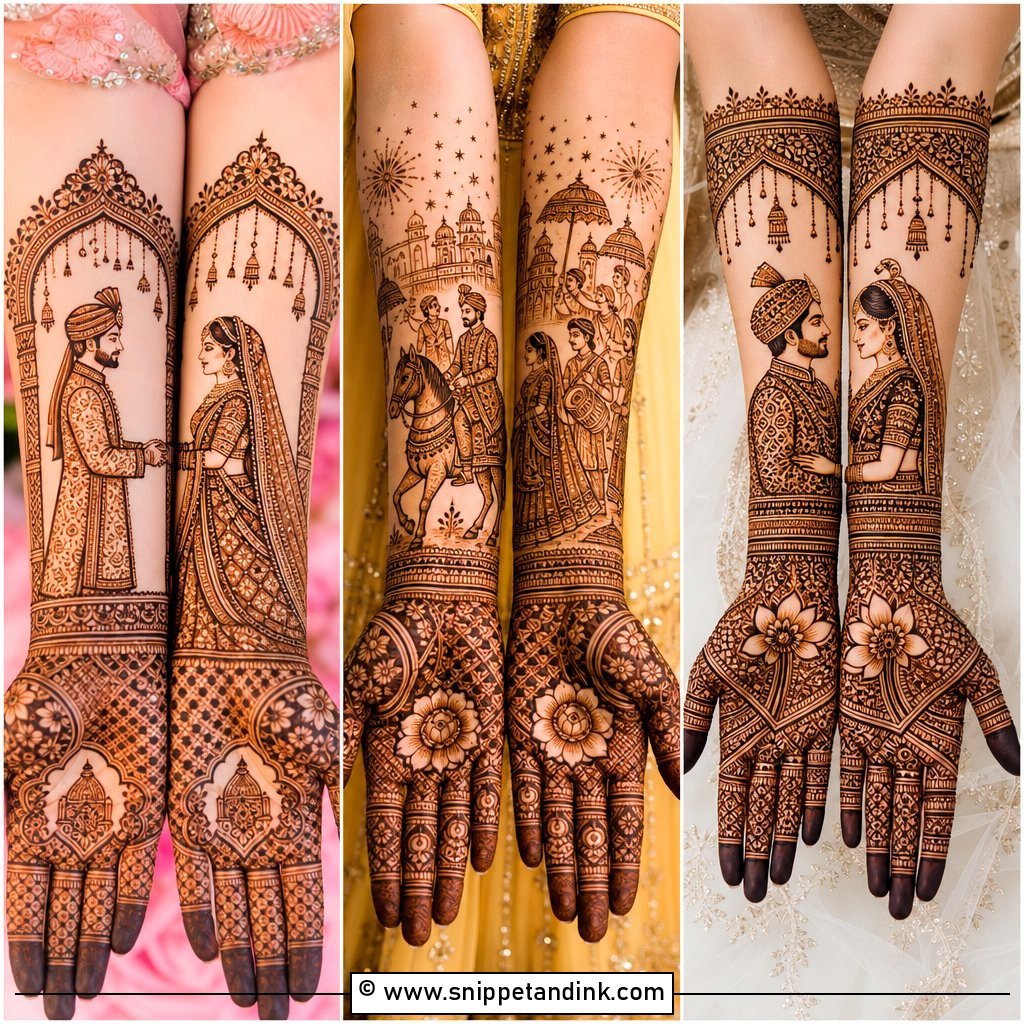
Portrait work splits the story: the bride in her veil on one palm, the groom in his sherwani or safa on the other, and the gathbandhan cloth crossing between them when the palms meet. Floral arches, paisley corners, mandala frames and jaali fill around the figures, with bells or diyas at the wrists. I’m direct with brides about this one. Faces are the hardest thing in henna, and the palm creases run straight through them, so look at an artist’s healed stain photos of faces, not just fresh paste pictures, before you book.
7. Gathbandhan Mehndi Design With Initials
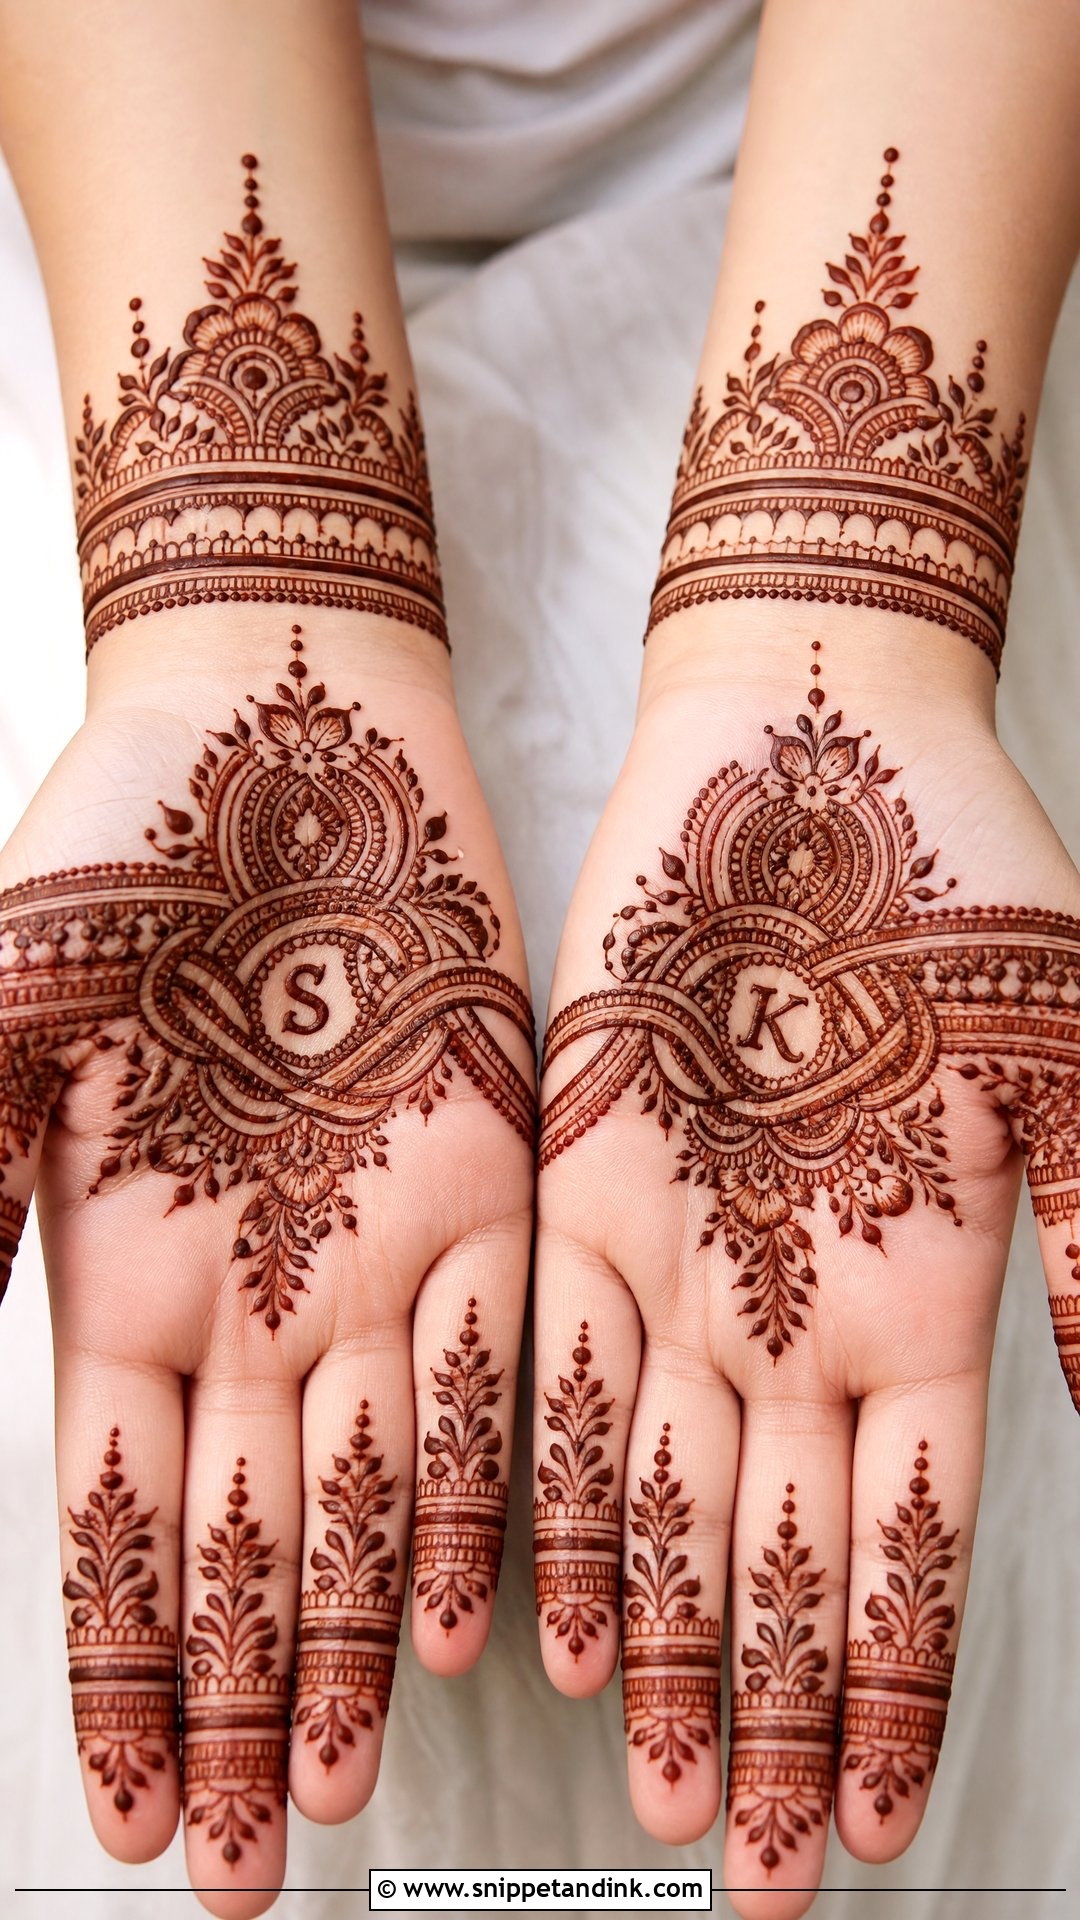
Hiding initials is a small detail with a big payoff. I tuck them beside the knot, into the folds of the cloth, inside mandala petals or along a wrist band, then surround the area with paisleys, florals and scalloped borders. It sits equally well on palms, back hands or full coverage. Keep the letters small but legible; if I make them too thin they bleed into the filler as the stain darkens, and the groom’s search game at the reception stops being fun.
8. Gathbandhan Mehndi Design With Wedding Date
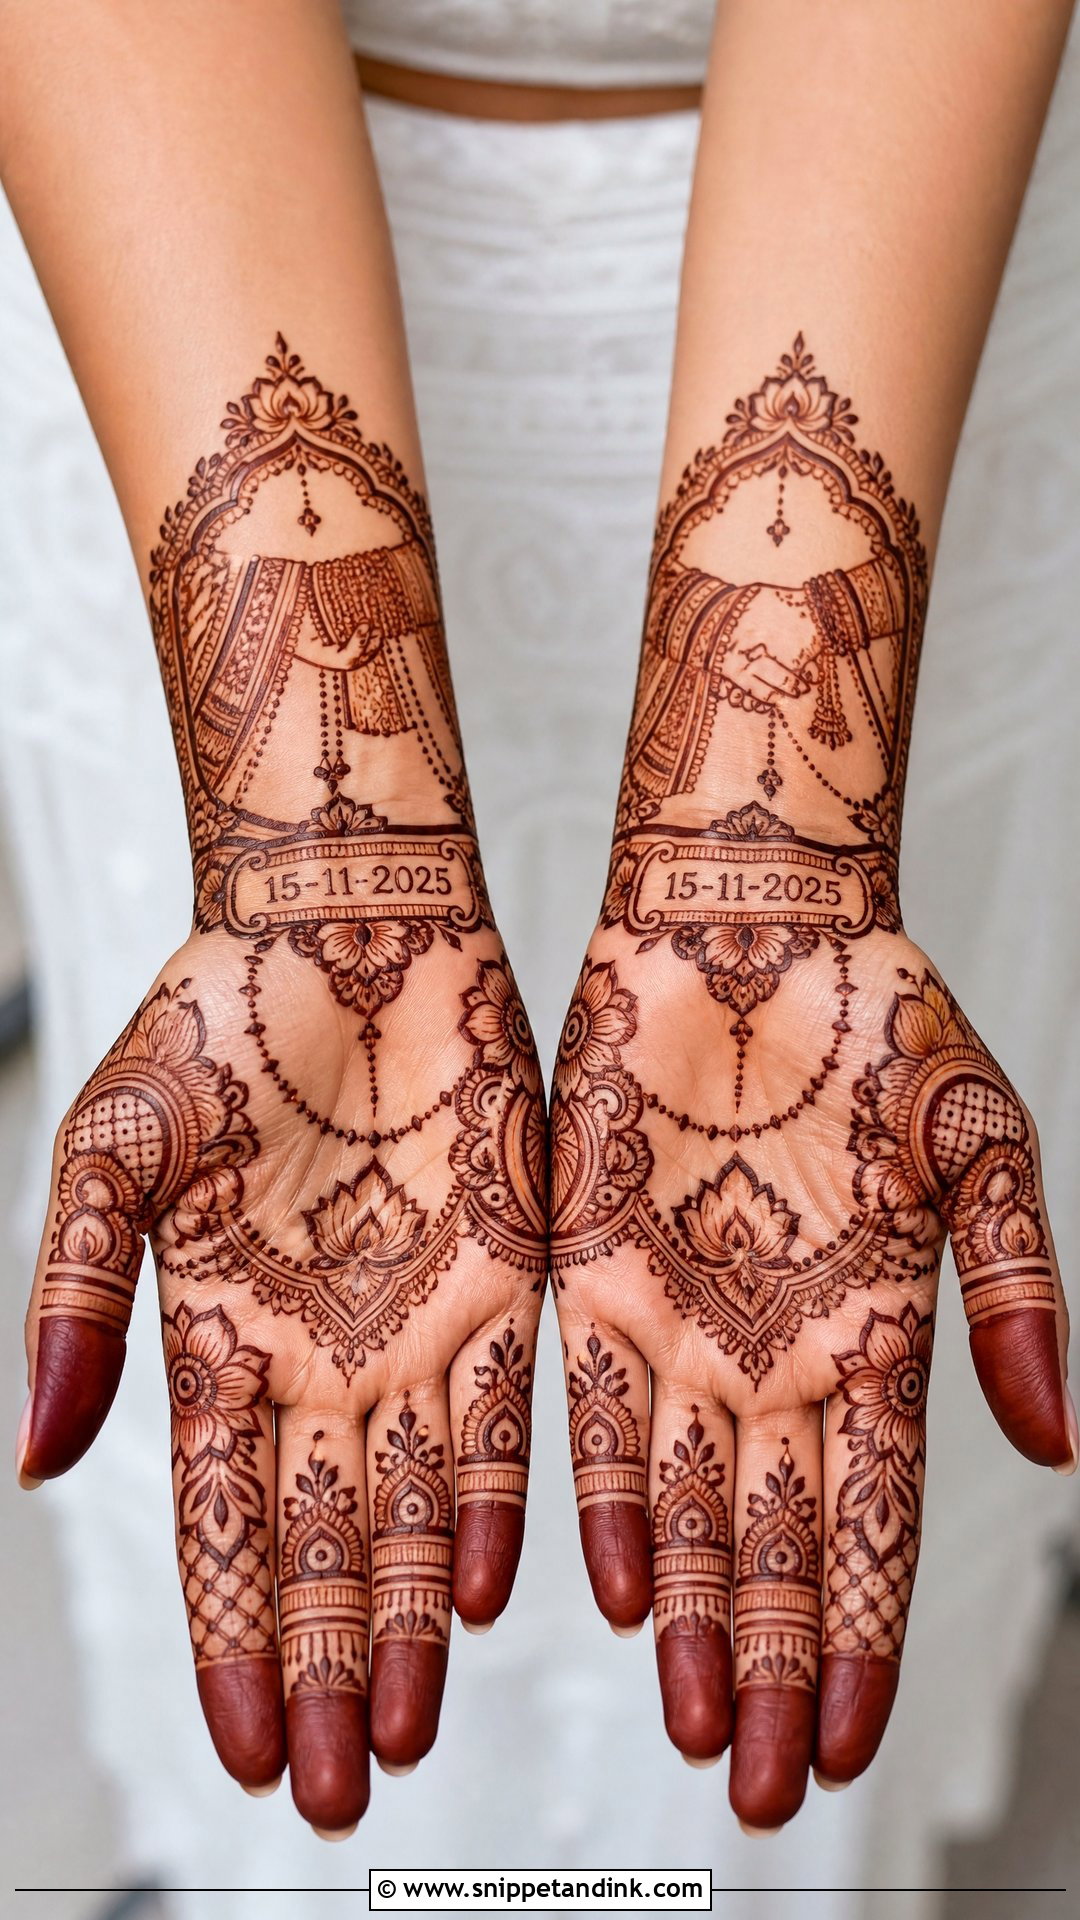
Writing the wedding date into the design turns the mehndi into a keepsake you’ll photograph more than once. I place it under the knot, inside a scroll border, or around the wrist like an engraved bracelet. On a modern layout I leave open skin around the numbers; on a traditional one I ring them with lotus petals and dotted chains. Numbers are less forgiving than motifs. A 6 and an 8 can close up and look identical once the paste spreads slightly, so I write them a touch larger with clear gaps, and I double-check the date with the bride before the cone touches skin.
9. Gathbandhan Mehndi Design With Mandala
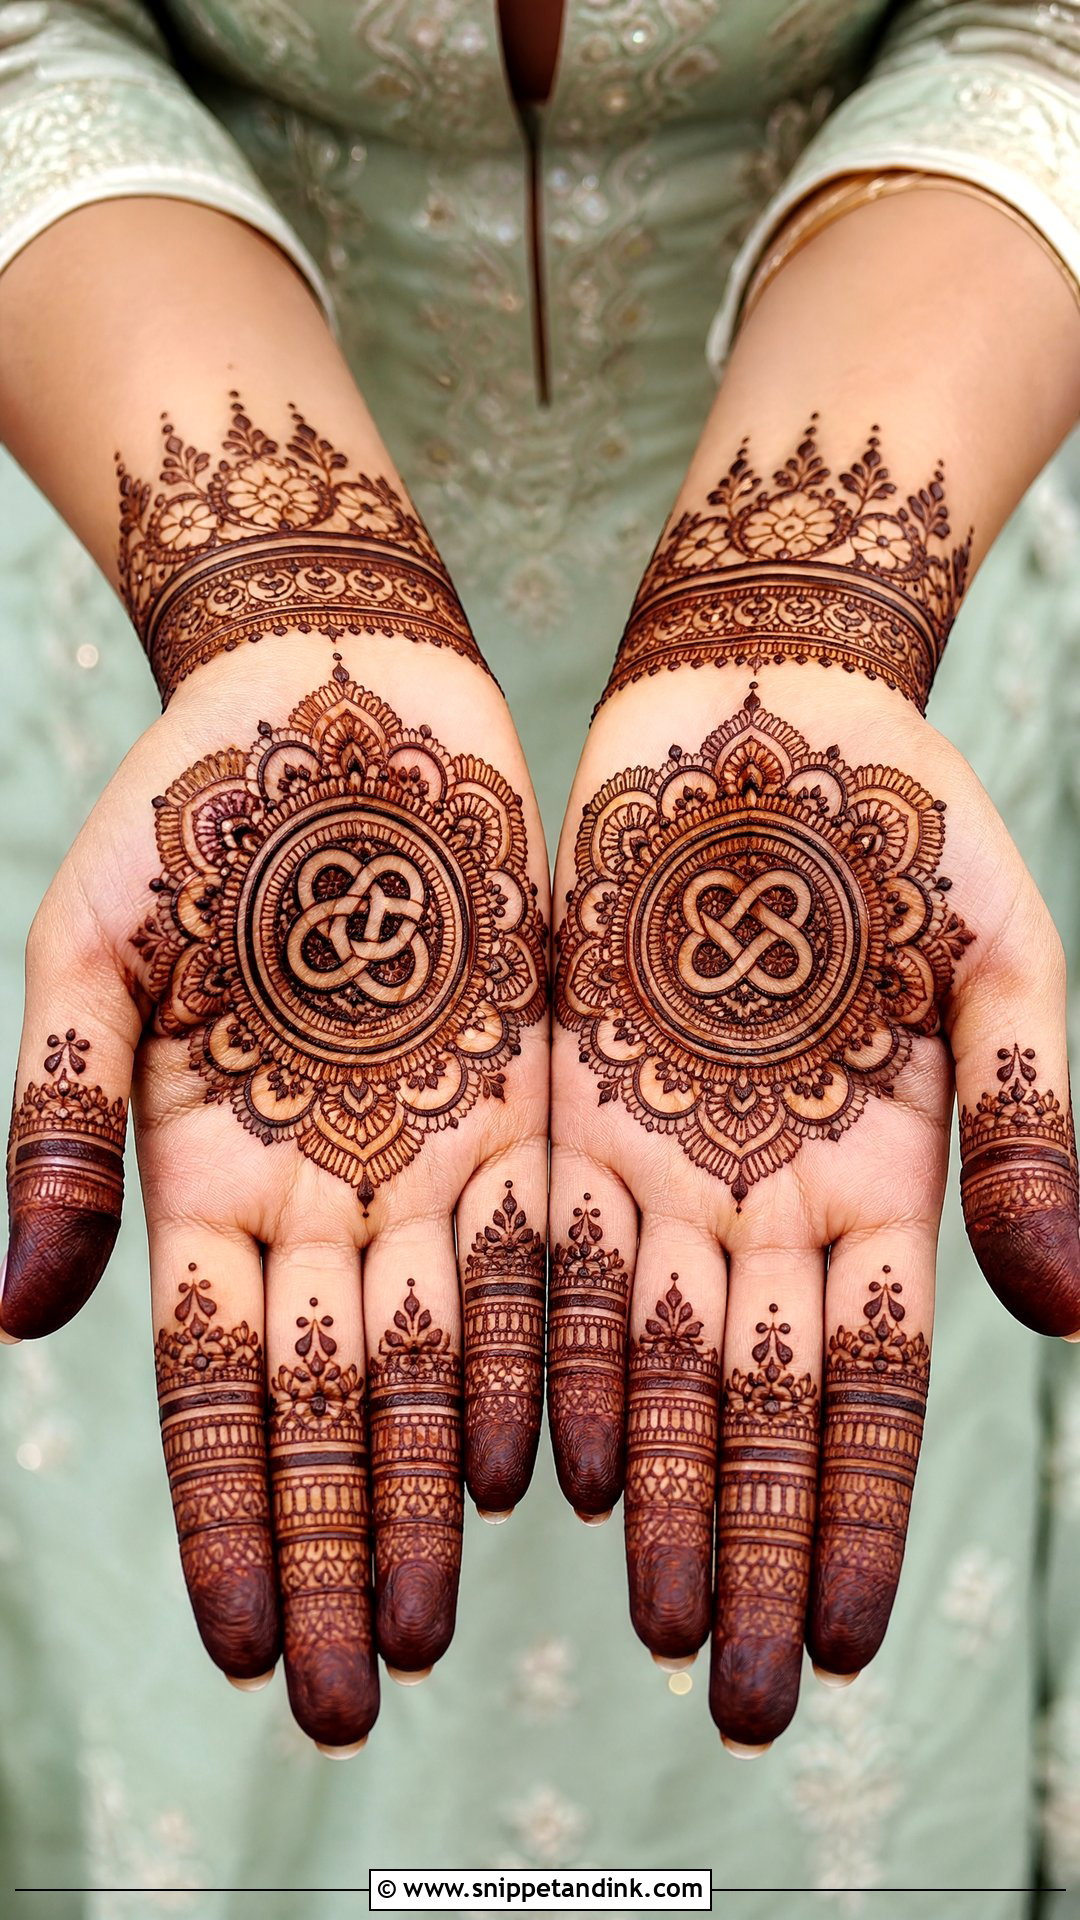
A mandala gives the knot a calm, symmetrical frame. I set the gathbandhan in the palm center and build rings outward with petals, dots and scallops, then echo the pattern in the finger bands and close with a floral bracelet. On smaller hands this is my default, because a circle holds its shape where a long scene would get cramped. The one rule I follow: the knot’s outline is drawn thicker than every ring around it, or the eye goes to the mandala instead of the meaning.
10. Arabic Gathbandhan Mehndi Design
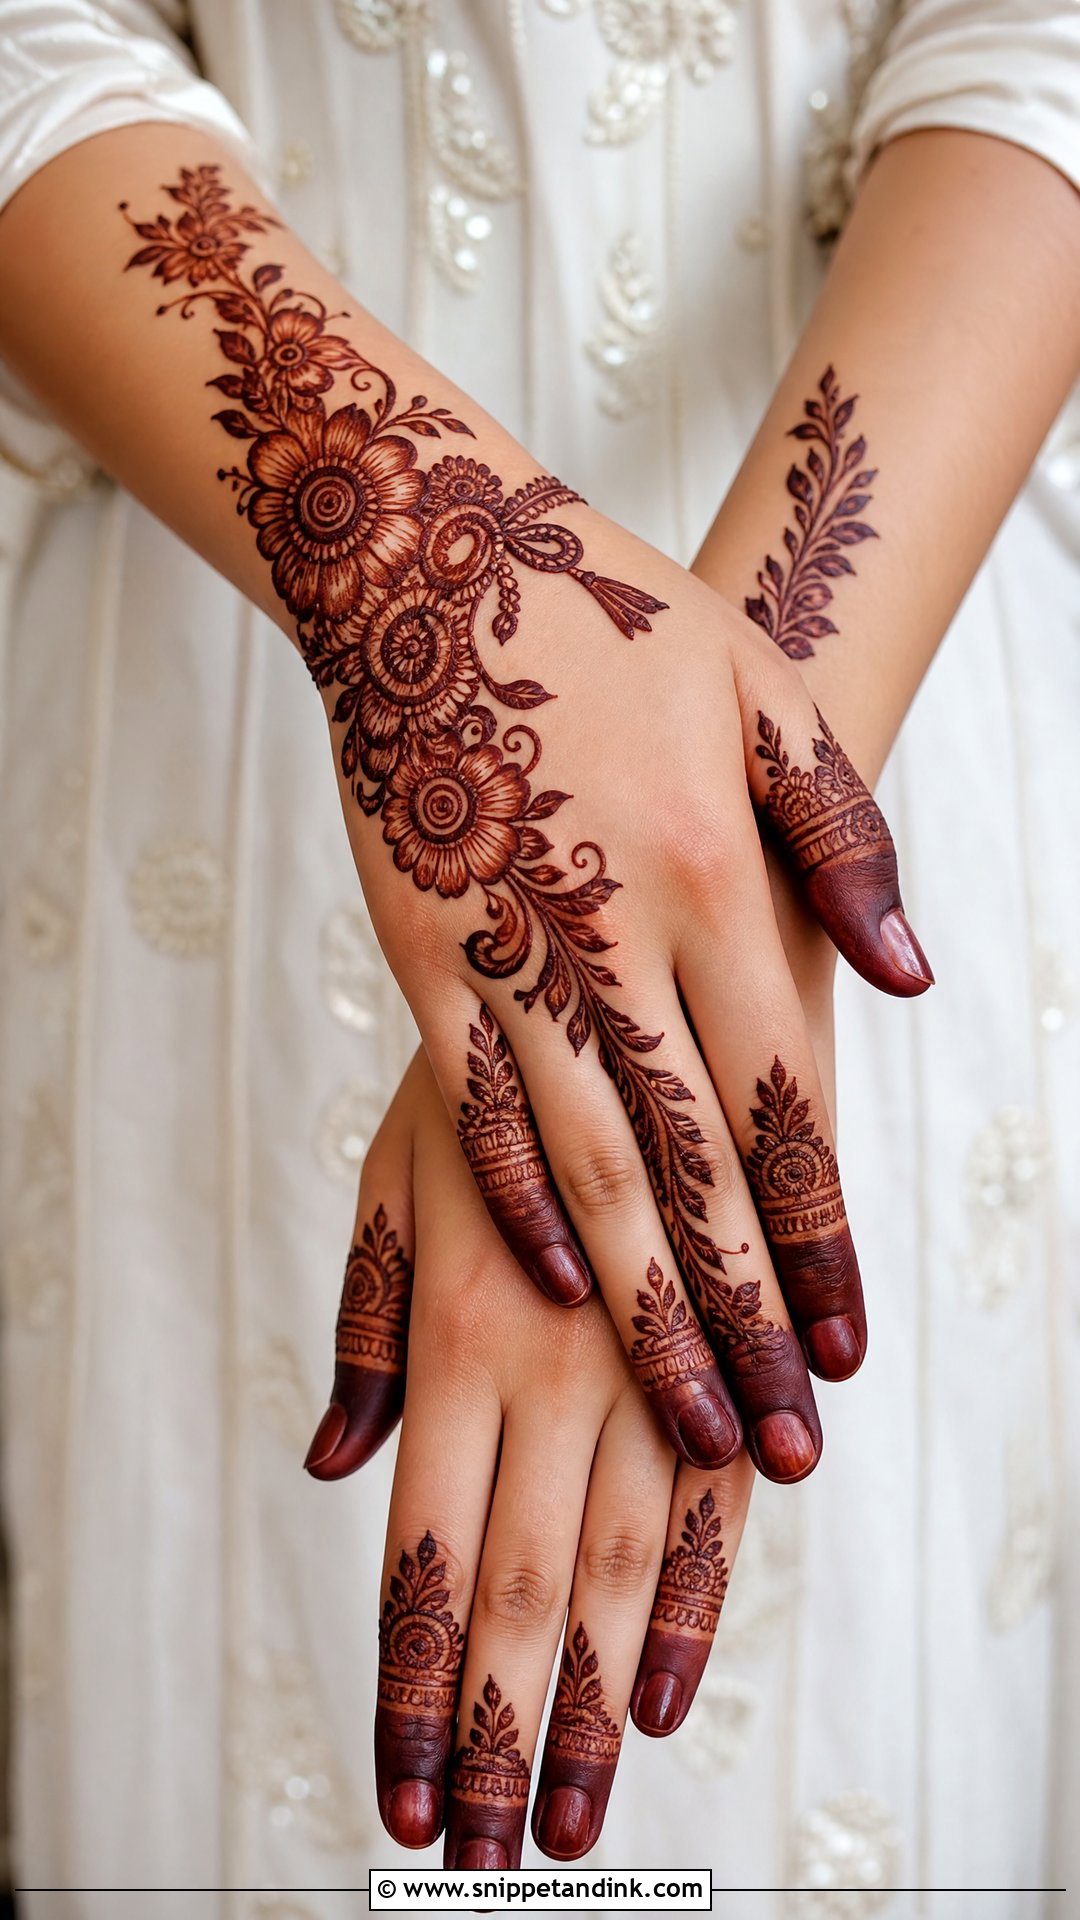
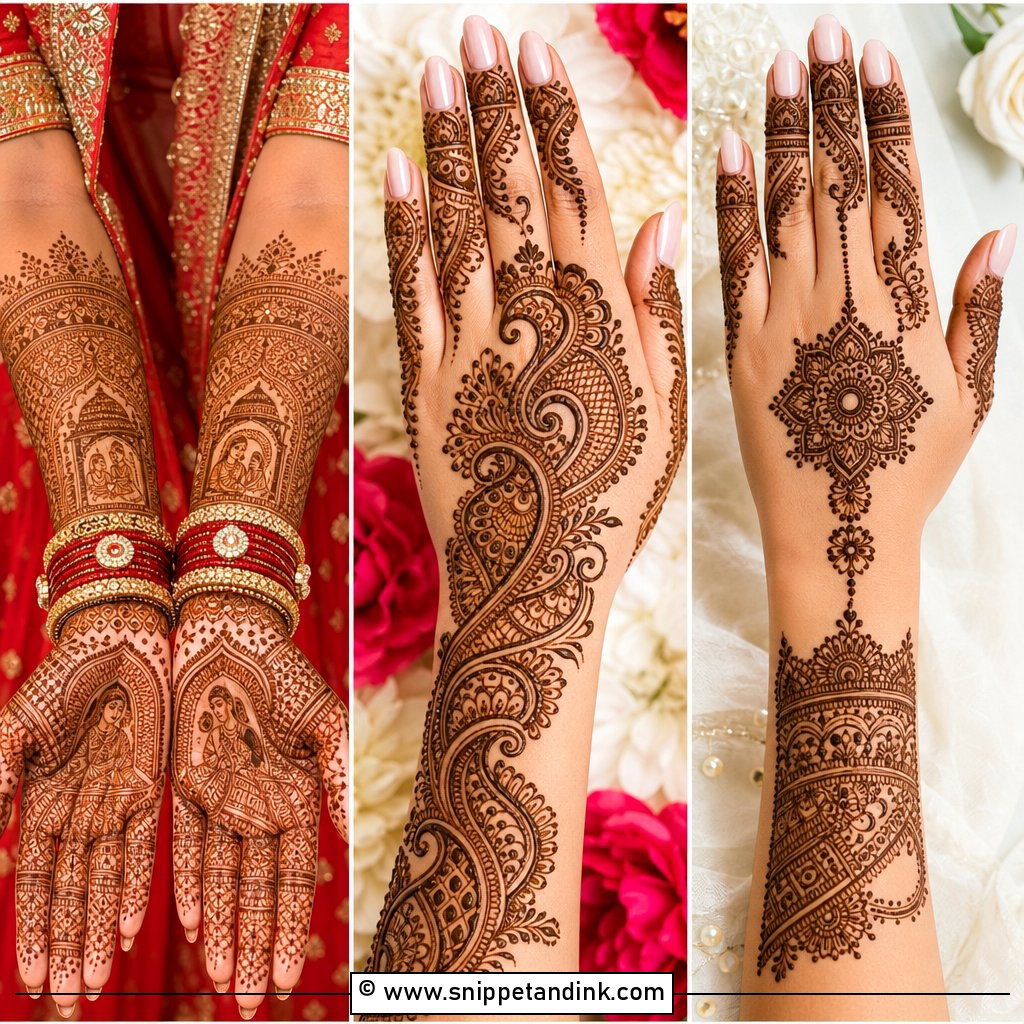
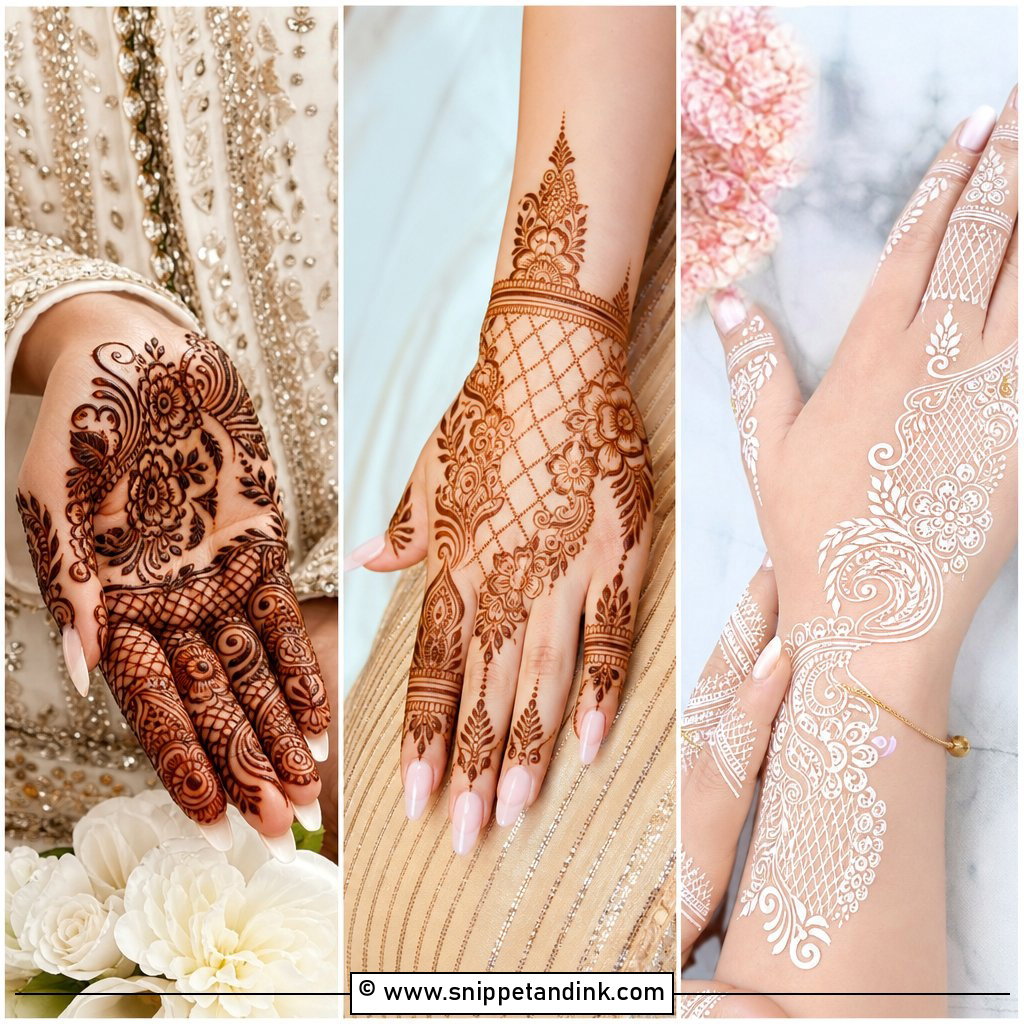
In an Arabic gathbandhan mehndi design the knot rides inside a diagonal floral trail running from the wrist toward the fingers, framed by bold shaded flowers and leafy vines. The bare skin around the trail does the work that filler does in Indian styles. Bold Arabic outlines tend to stain crisply because more paste sits on the skin, which is why I like this for bridesmaids or for engagement brides who don’t want the full sitting. Go easy on the fingers; two or three accents are plenty.
11. Indo Arabic Gathbandhan Mehndi Design
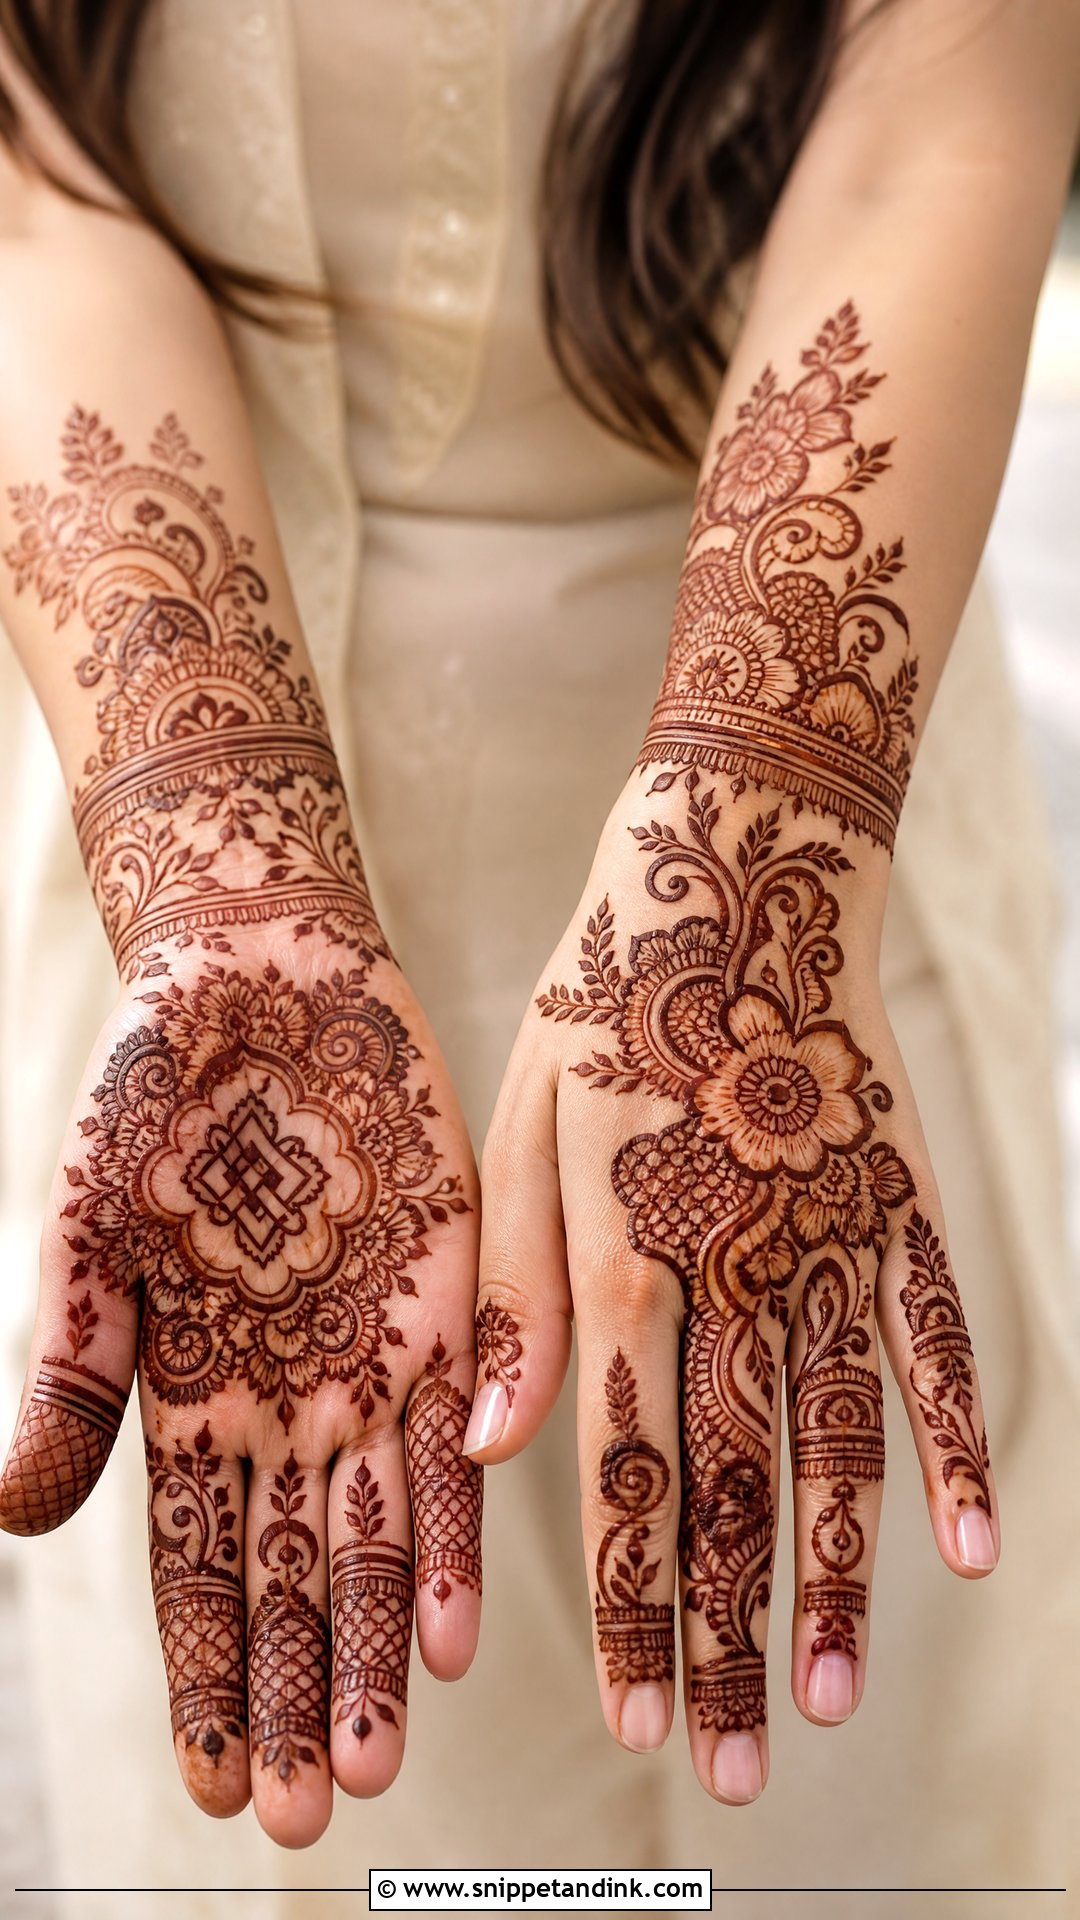
Indo-Arabic is the middle road: Arabic outlines and flow, with Indian jaali and fine vines filling selected pockets. On the palms I stretch the gathbandhan cloth across both hands; on the backs it becomes a central charm linked to wrist bands and finger trails. It suits brides who want bridal richness but still want some skin showing. In practice it’s also quicker to apply than full Indian coverage, which matters when the mehndi night has twenty other people waiting for their turn.
12. Rajasthani Gathbandhan Mehndi Design
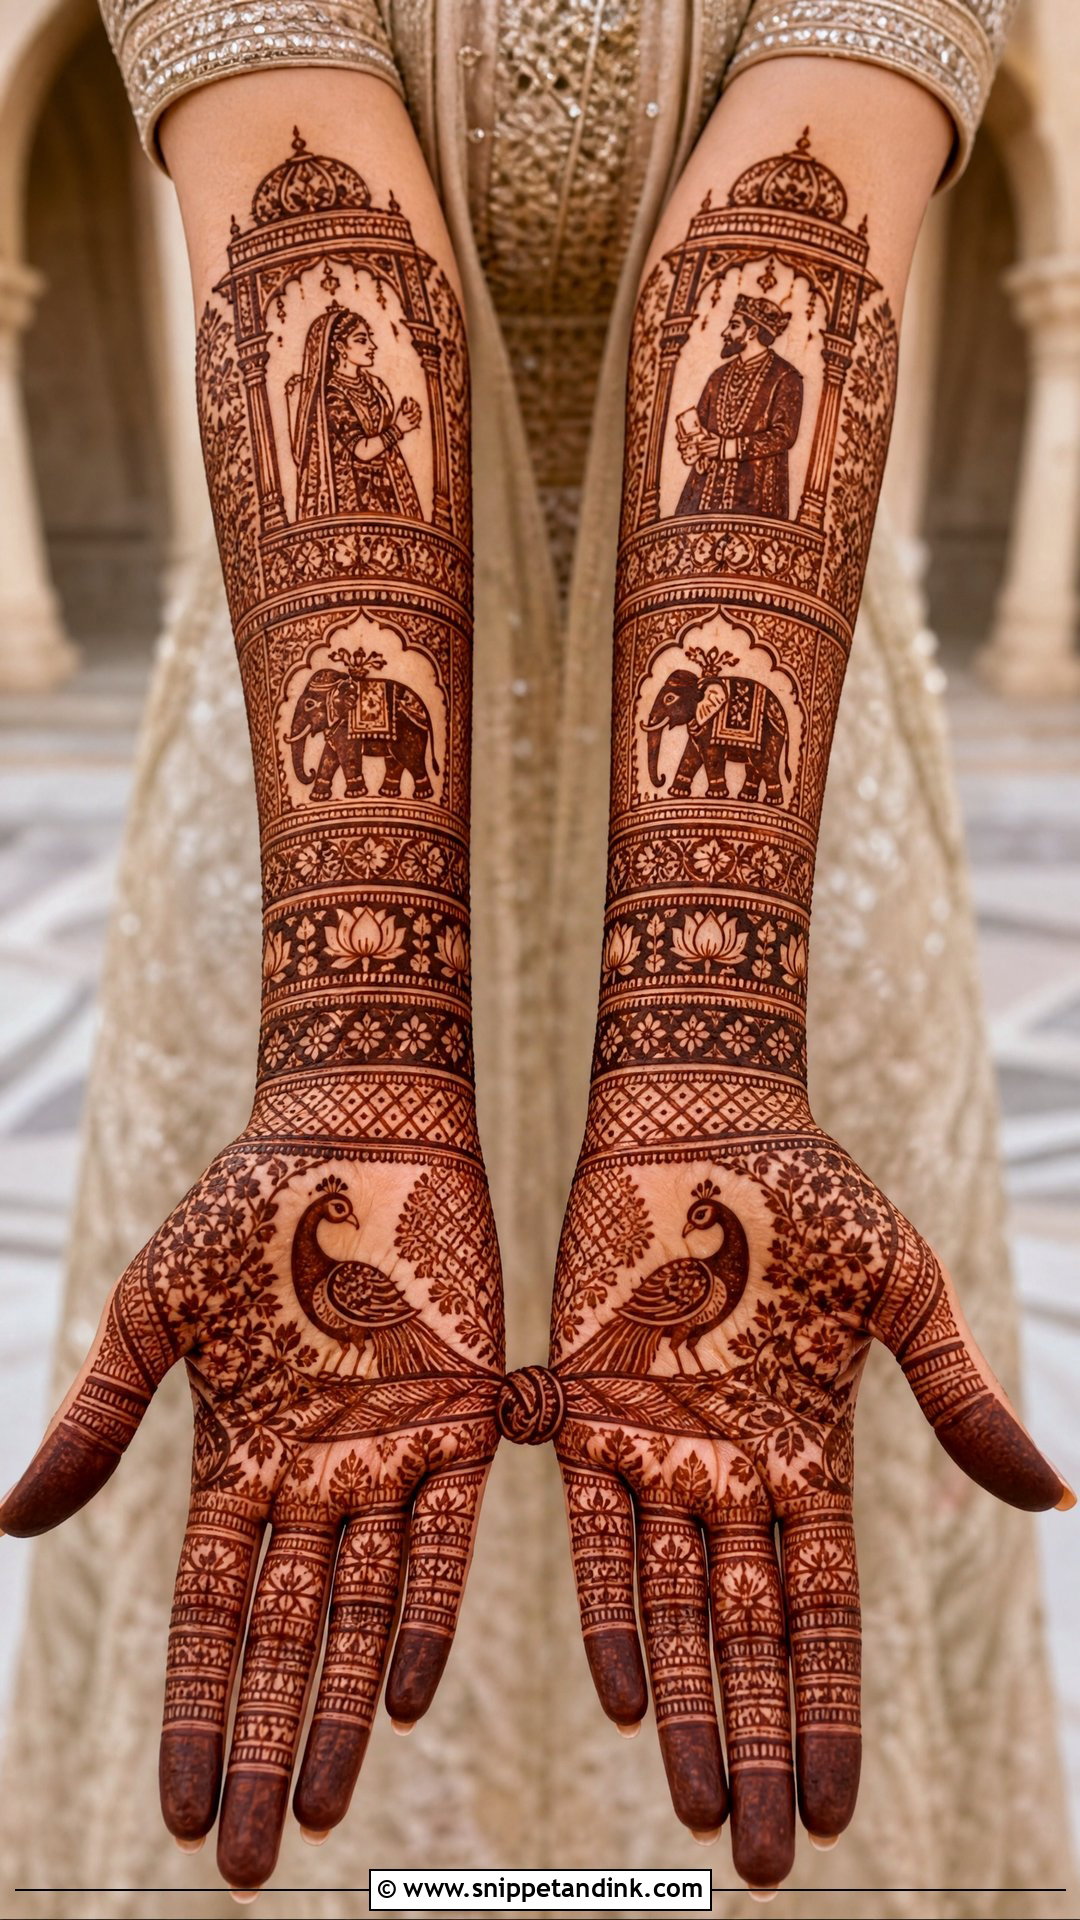
Rajasthani work places the couple under a palace arch with the knot between them, then fills every corner with elephants, peacocks, lotus borders and fine ornamental grids, carrying broad bangle-like bands up the forearms. It sits naturally beside lehenga, bandhani, gota patti and heavy kundan jewelry. Because the style is dense, I deliberately leave a hairline of bare skin around the faces and the knot. Without it, the story sinks into the pattern the moment the stain turns dark.
13. Traditional Indian Gathbandhan Mehndi Design
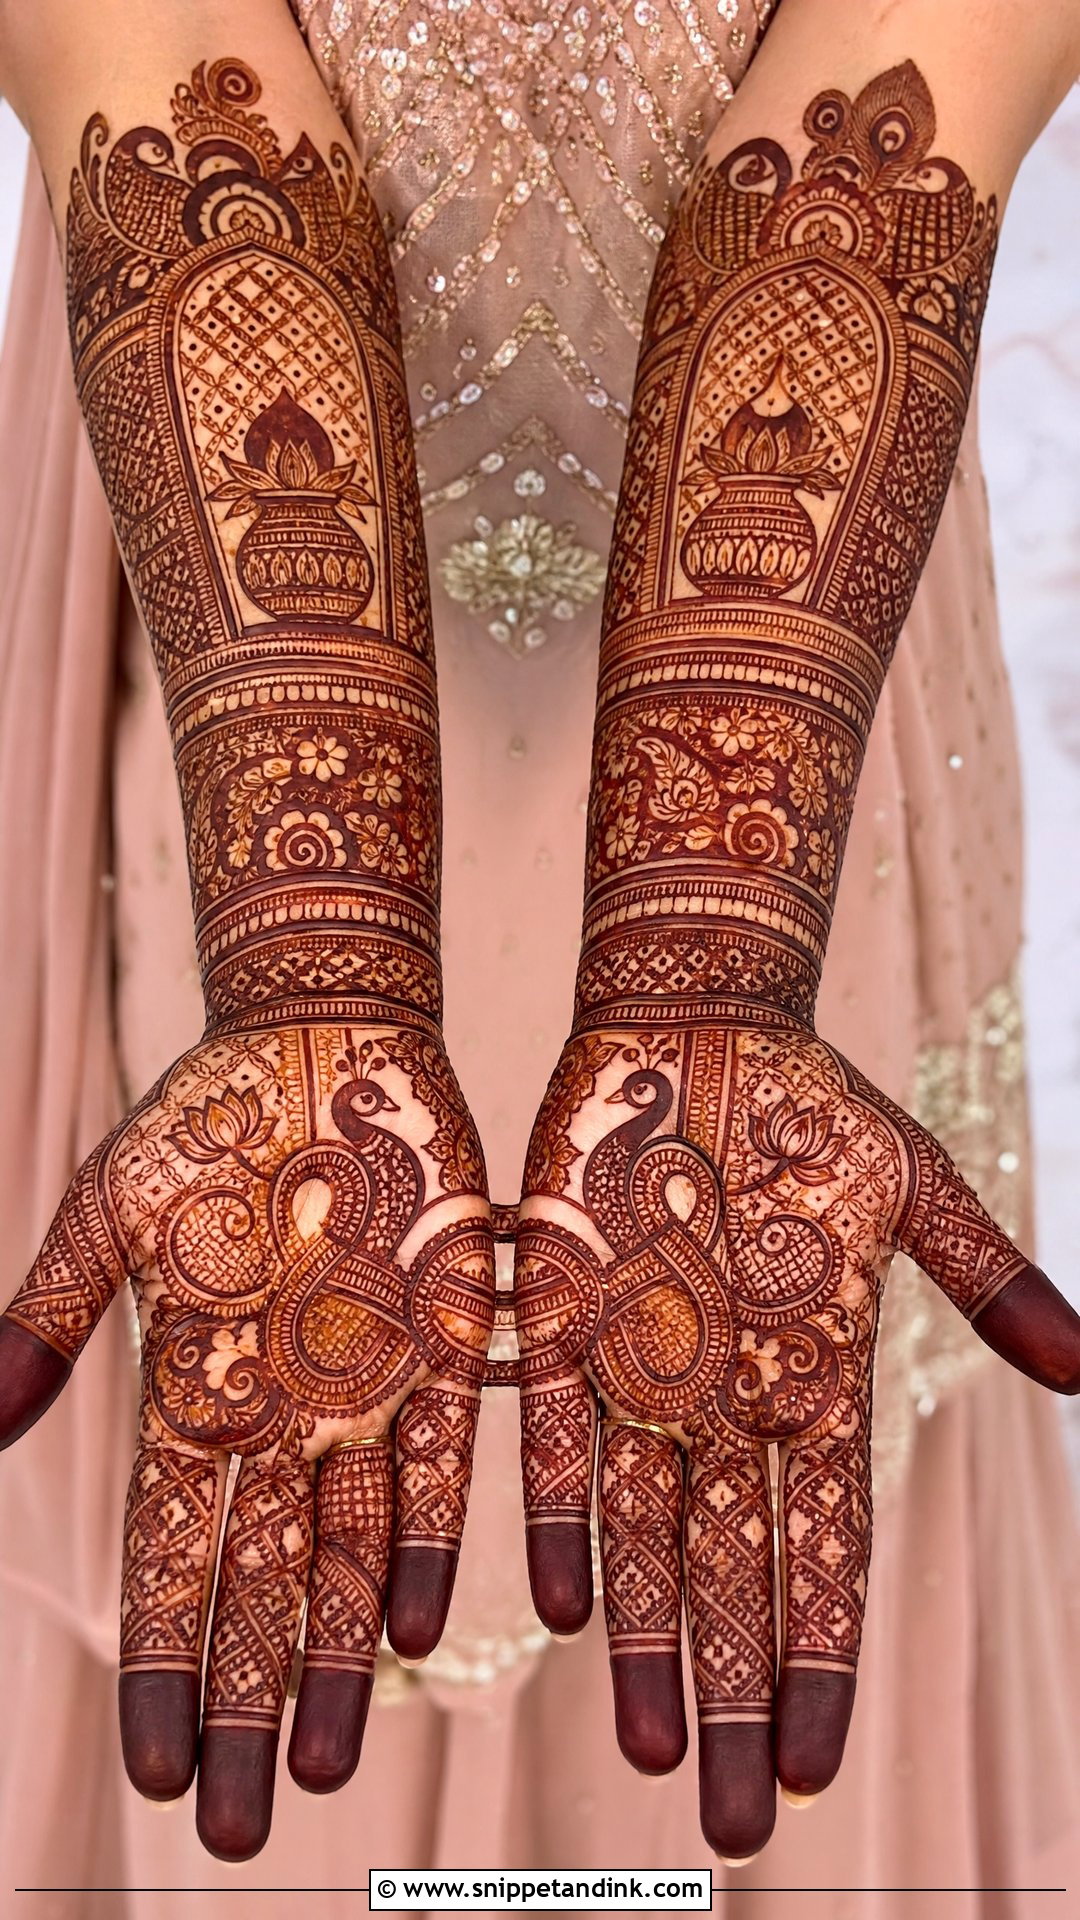
The traditional Indian layout is about structure more than motifs. The knot goes in the palms; peacocks, paisleys, lotus, kalash and filler surround it, and stacked borders run from wrist to forearm like bangles. It pairs with red, maroon and gold, and with pastels too. When I plan this one I draw the borders first to divide the hand into zones, which keeps the knot central and stops the filler from drifting into one shapeless mass.
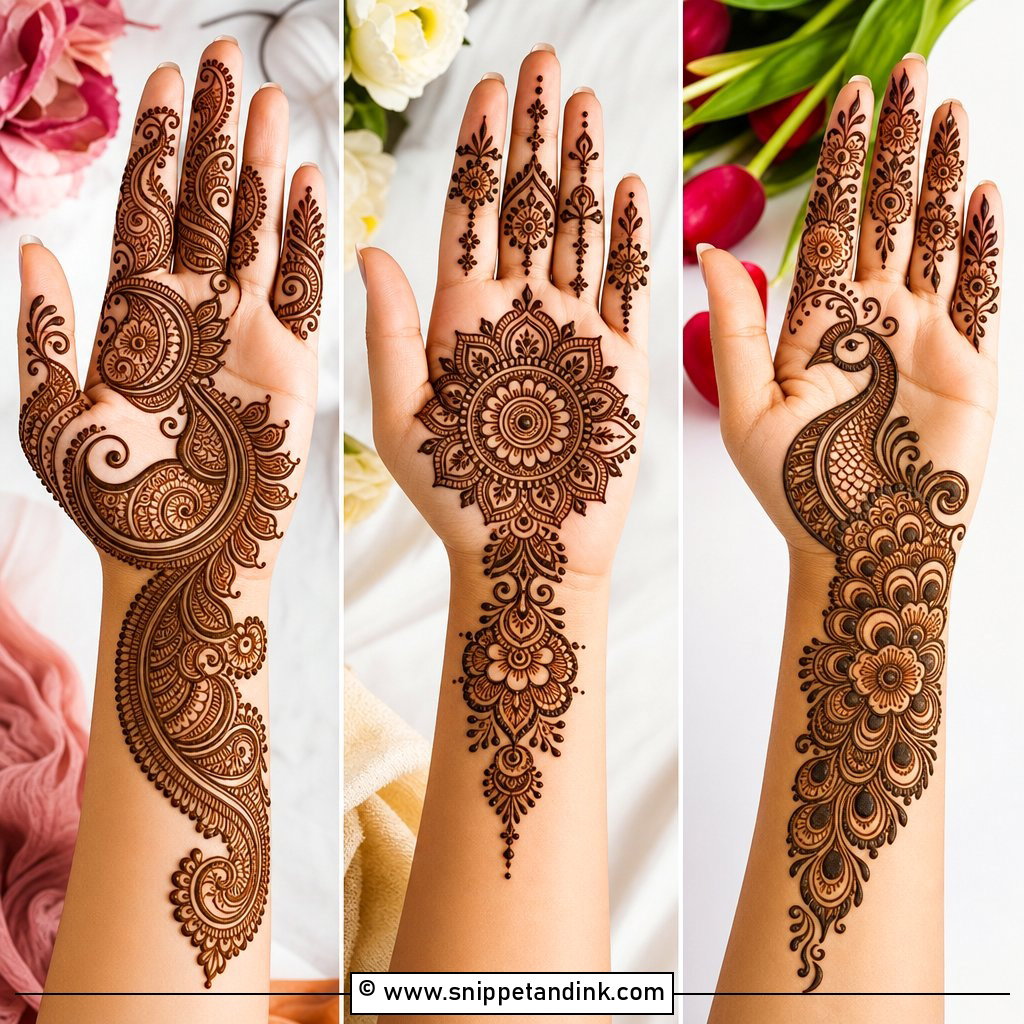
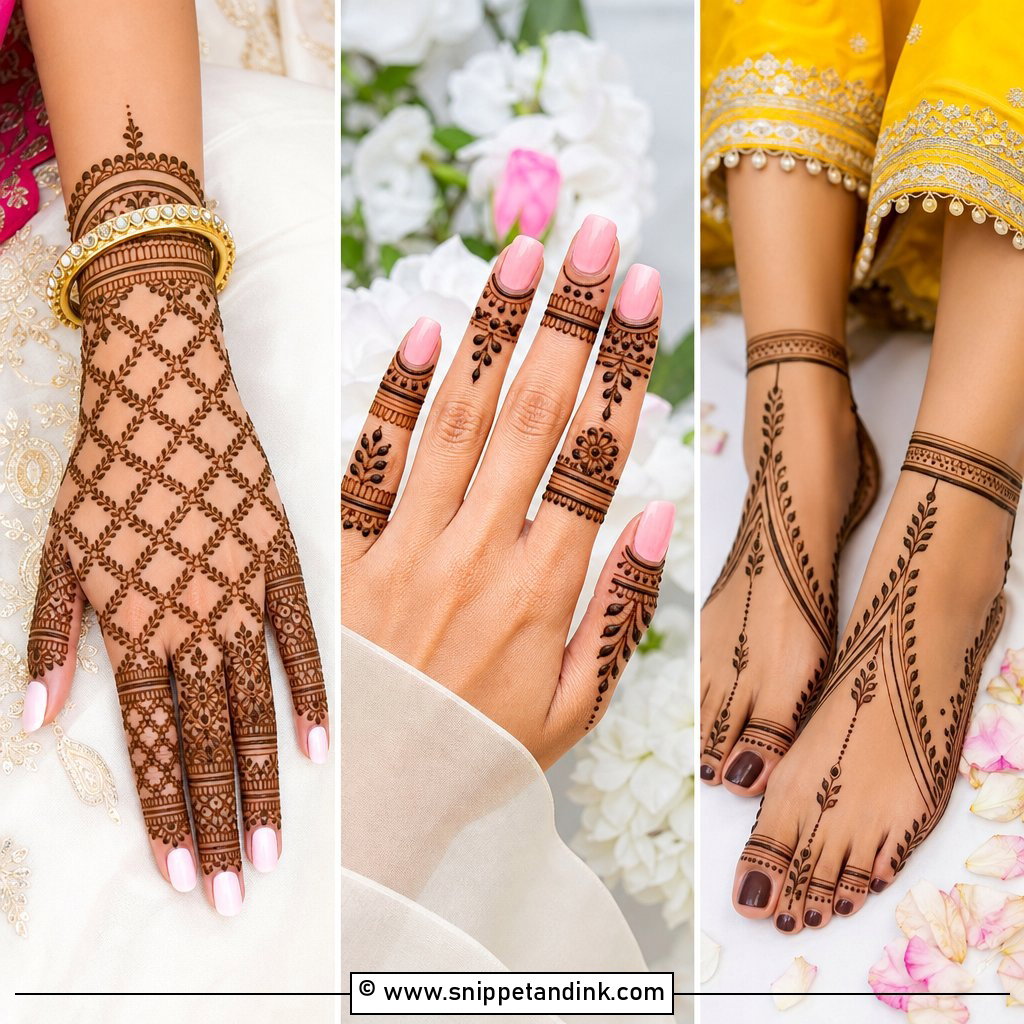
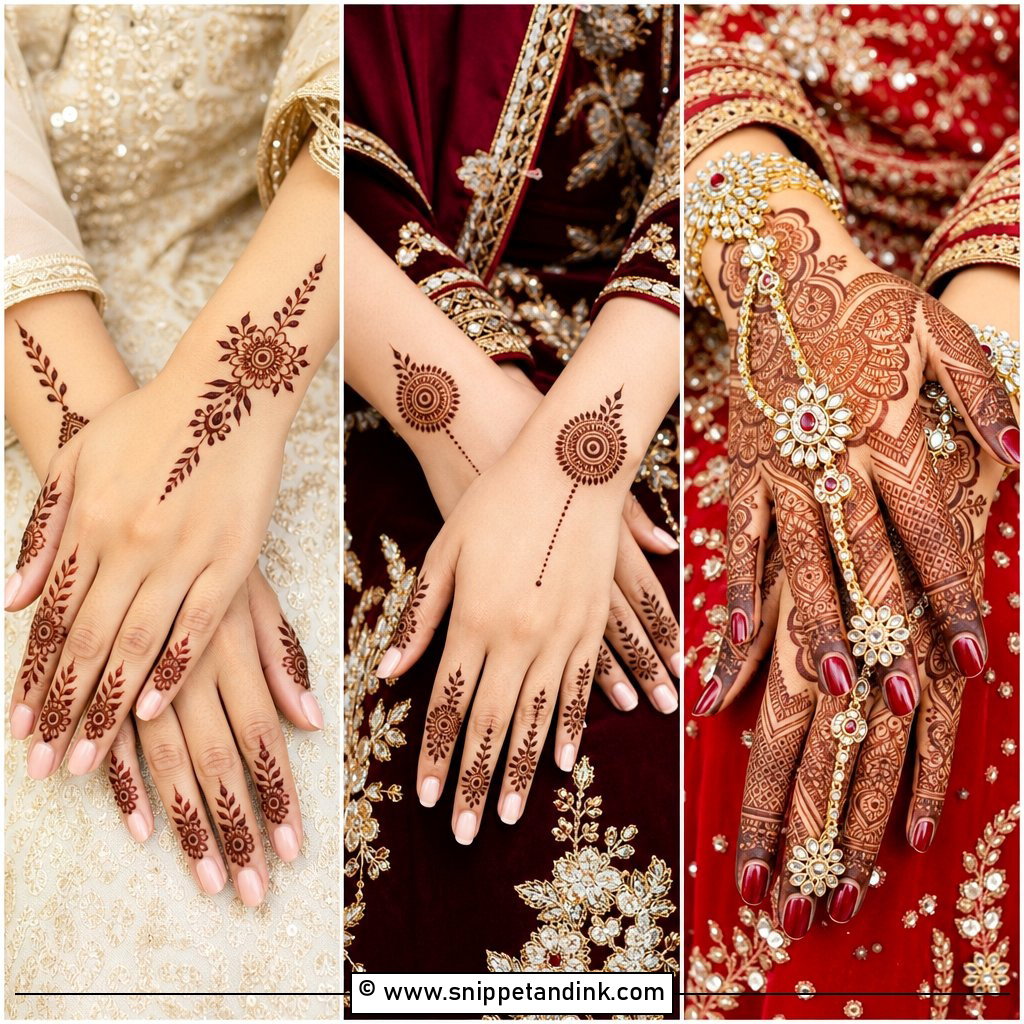
14. Minimal Gathbandhan Mehndi Design
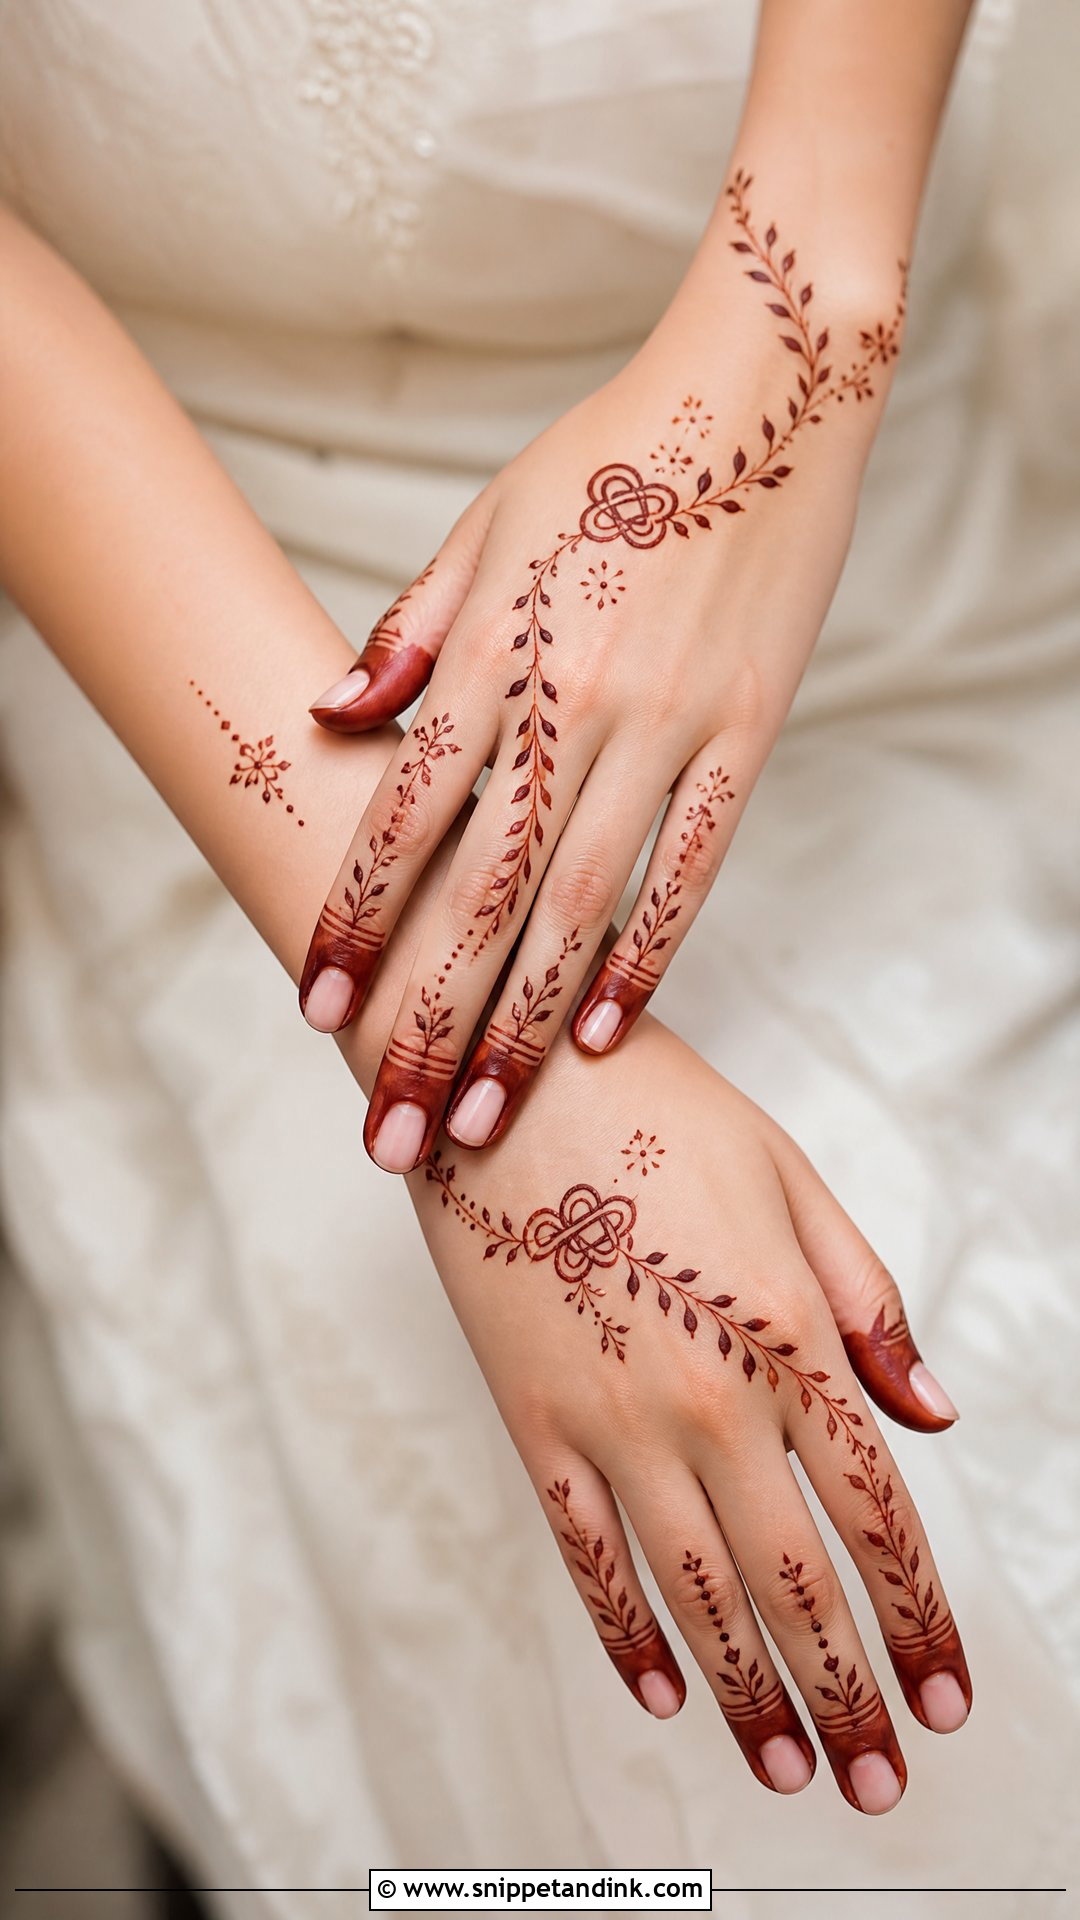
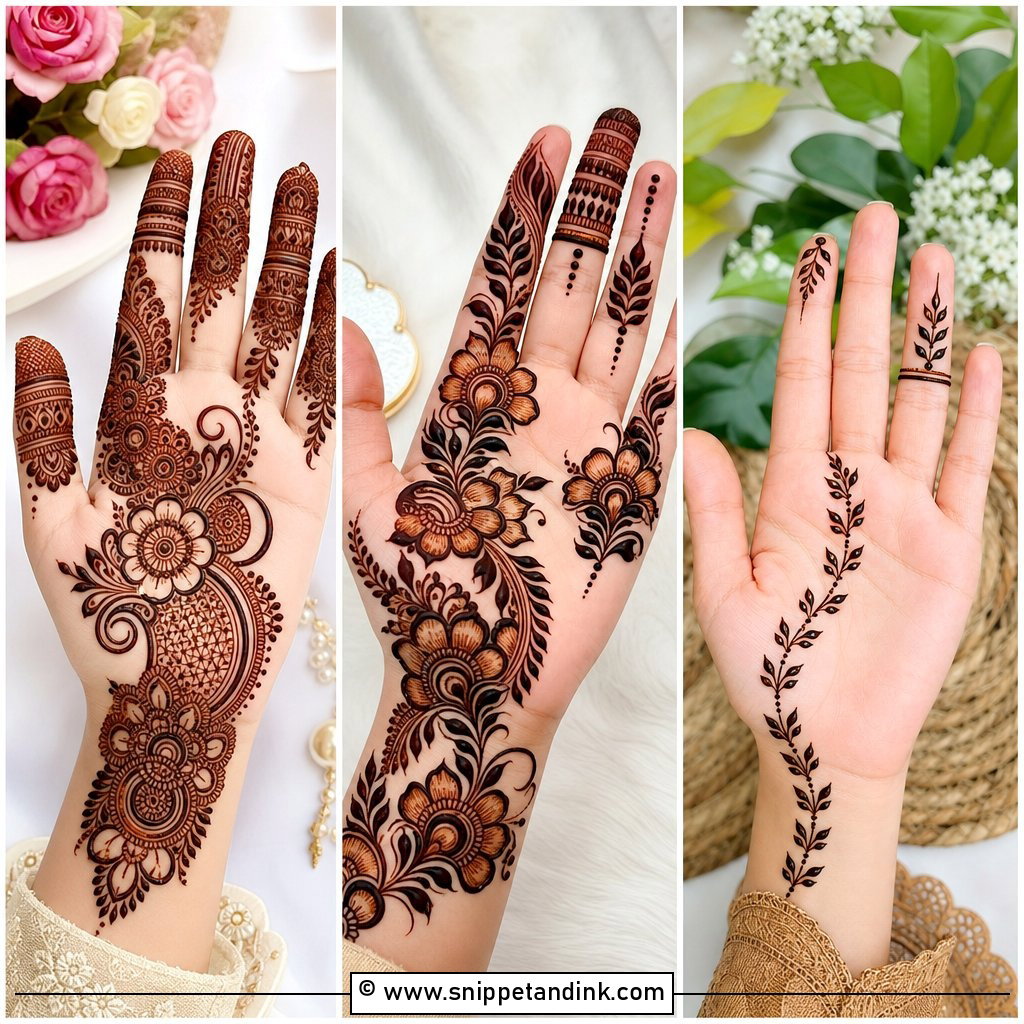
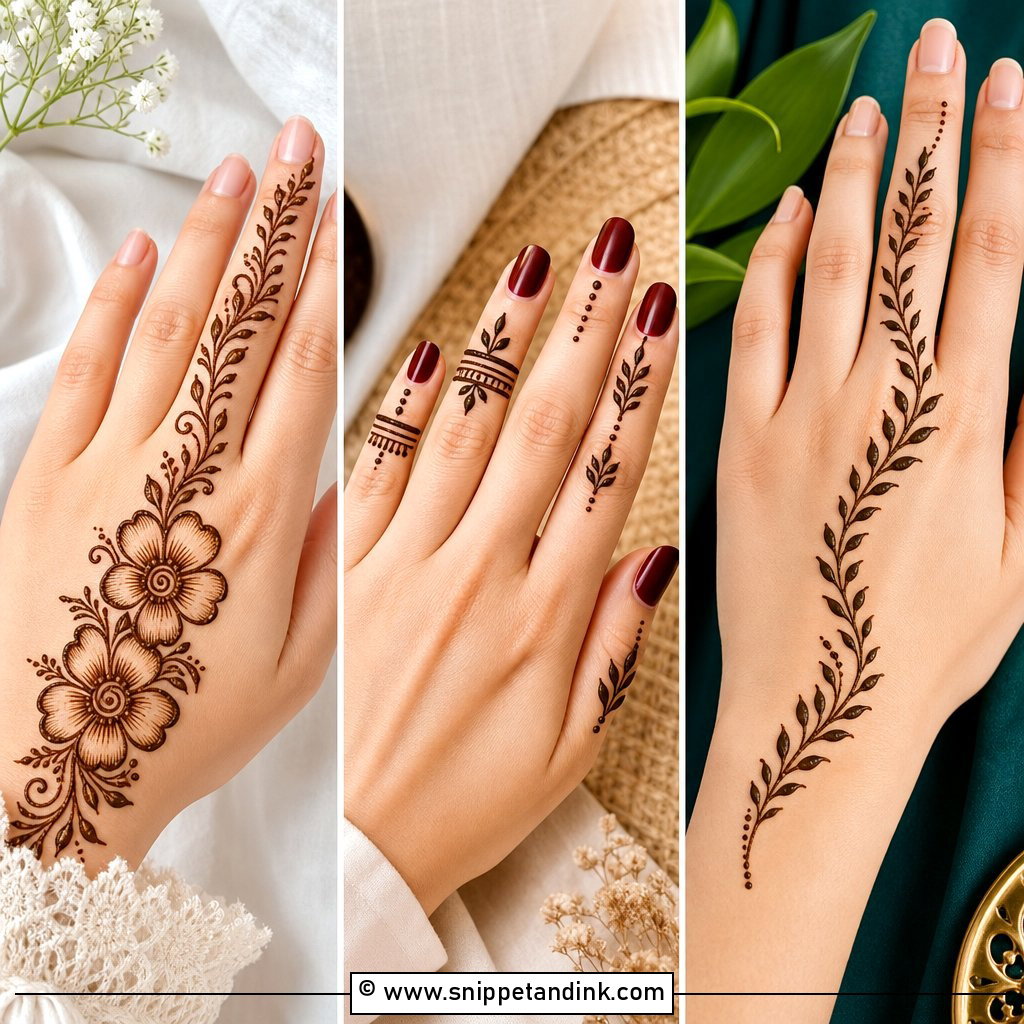
Minimal gathbandhan work keeps the knot and drops almost everything else: a small symbol on the palm or back of the hand, a few dots, two or three fine leaves and lots of bare skin. Fingers get tiny rings or tip accents. I like it for court weddings, roka mornings and intimate ceremonies, and it’s the version I suggest to sisters and close friends who want to share the theme. With so little on the hand, a wobbly line has nowhere to hide, so this needs a steady artist, not a quick one.
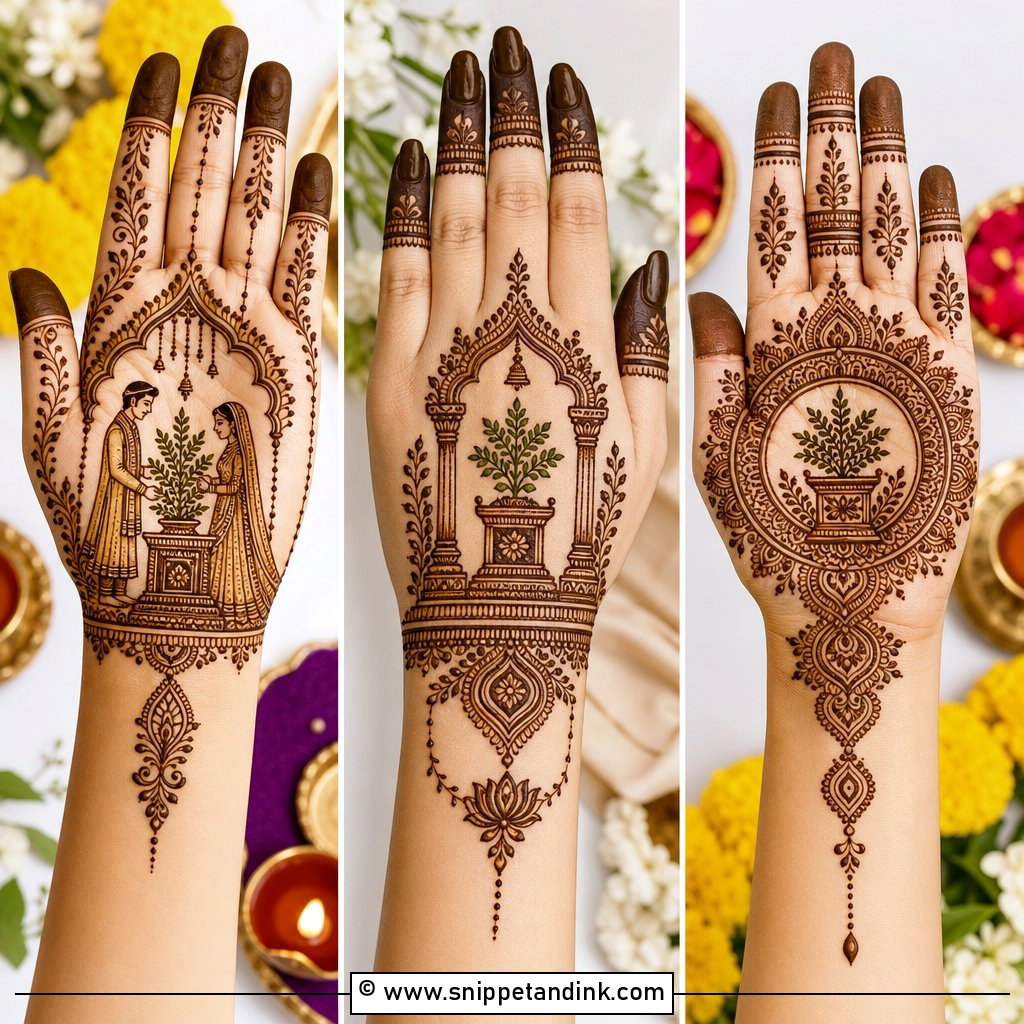
15. Modern Gathbandhan Mehndi Design
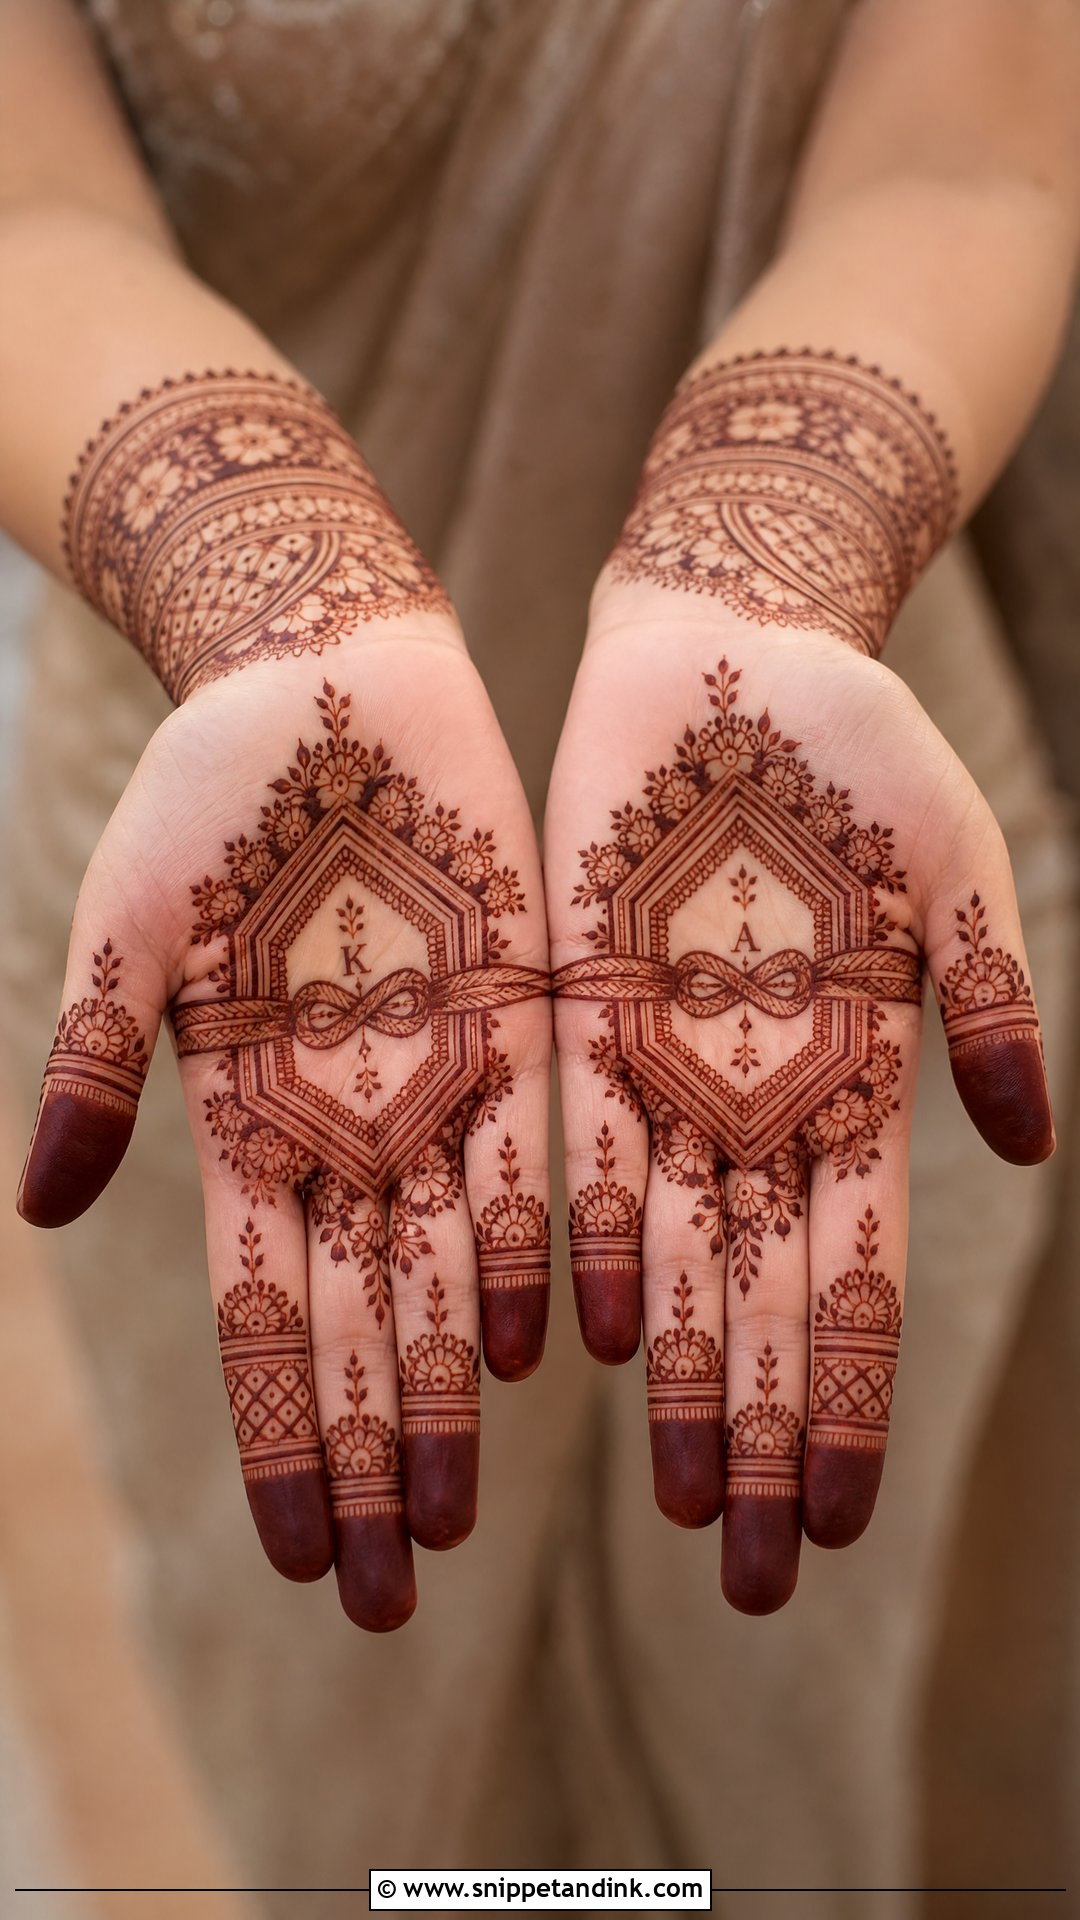
Modern layouts swap dense filling for geometry: a central knot inside half-mandalas, fine florals and clean open space, with linear finger details and a slim cuff that reads as henna jewelry. Initials or a small date can sit next to the knot. Symmetry looks polished; a diagonal flow feels softer and suits a long, narrow hand. I’d pick between the two by holding your hand flat and seeing which direction the fingers naturally lead the eye.
16. Gathbandhan Mehndi Design For Engagement
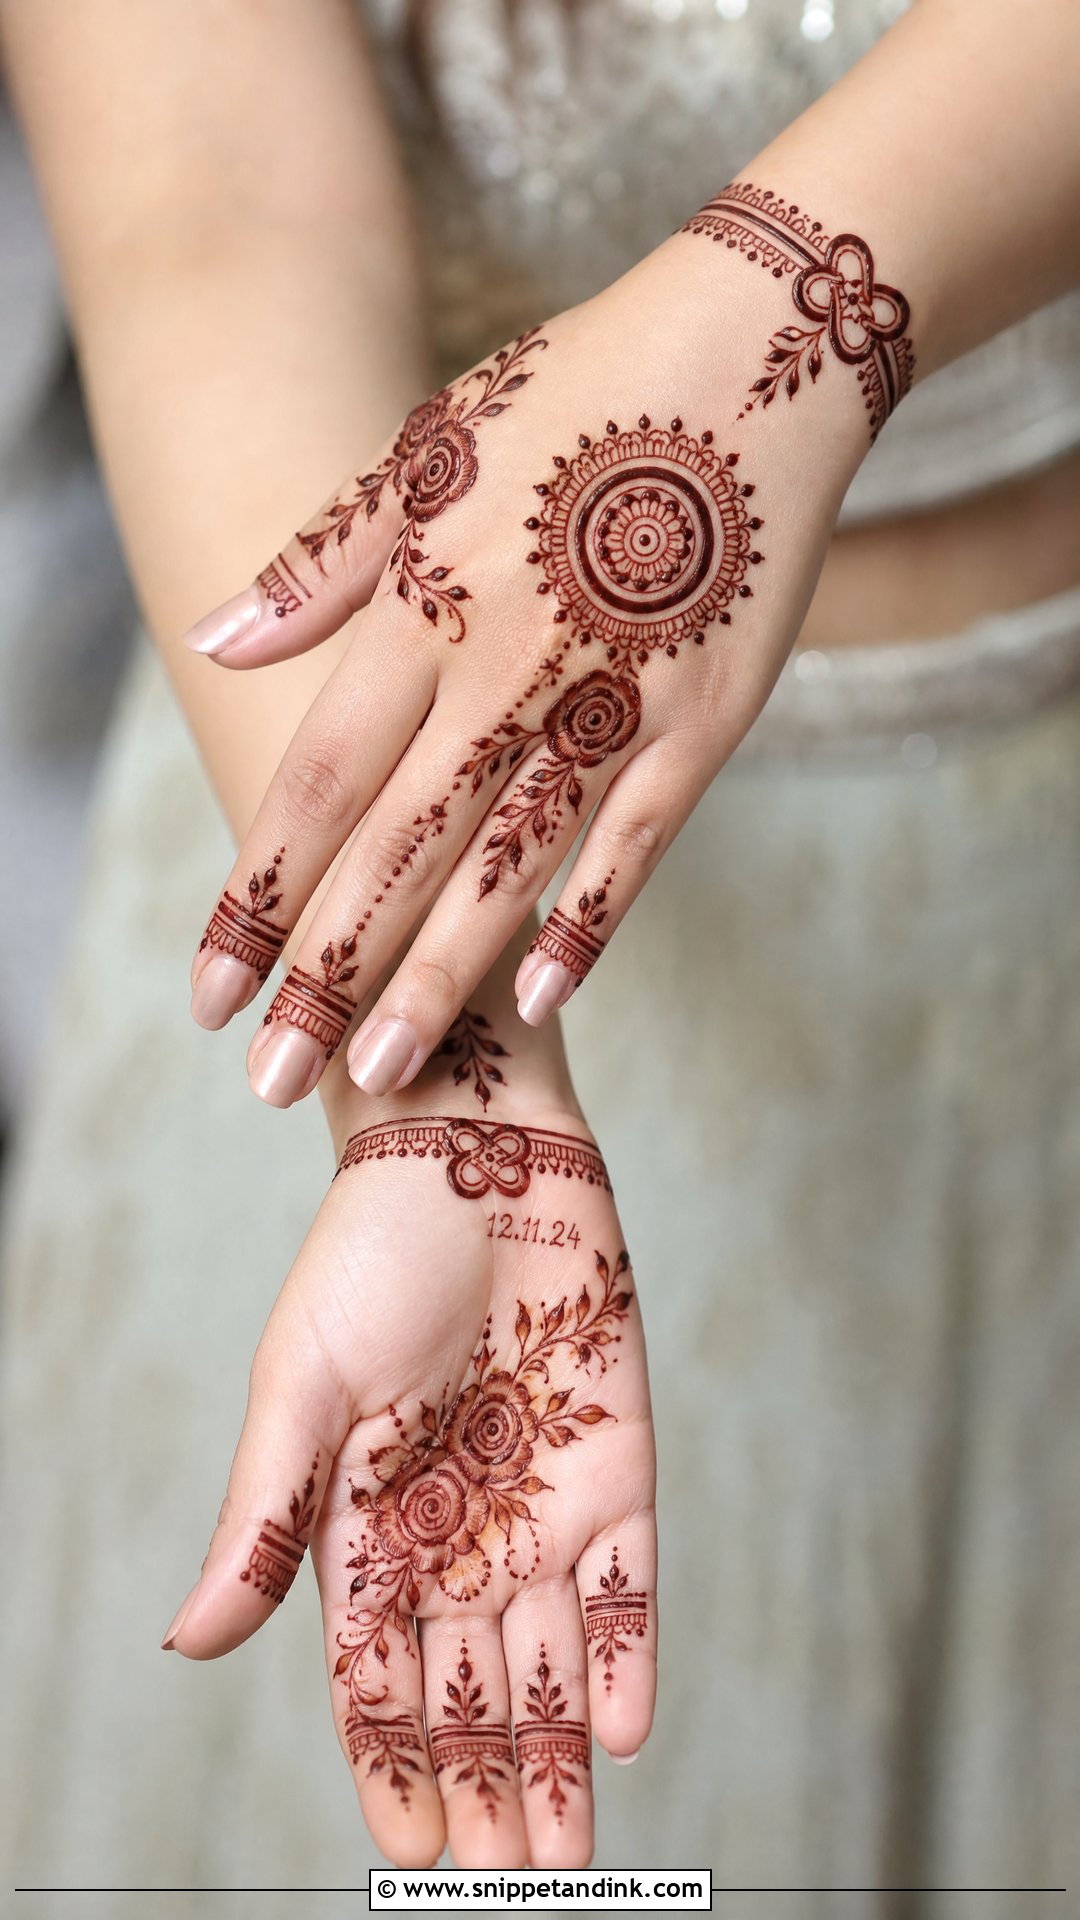
An engagement gathbandhan mehndi design should stay light, since the full bridal set usually comes later and old stain underneath can muddy the new one. A small knot on the back hand or palm, framed with roses and a soft mandala, a ring-style band around the finger that will carry the ring, and a light bracelet border is plenty. Pastel outfits and close-up ring shots suit it. If the gap between engagement and wedding is short, keep this one on the back of the hand so your palms are clean for the bridal design.
17. Gathbandhan Mehndi Design For Bride And Groom Hands
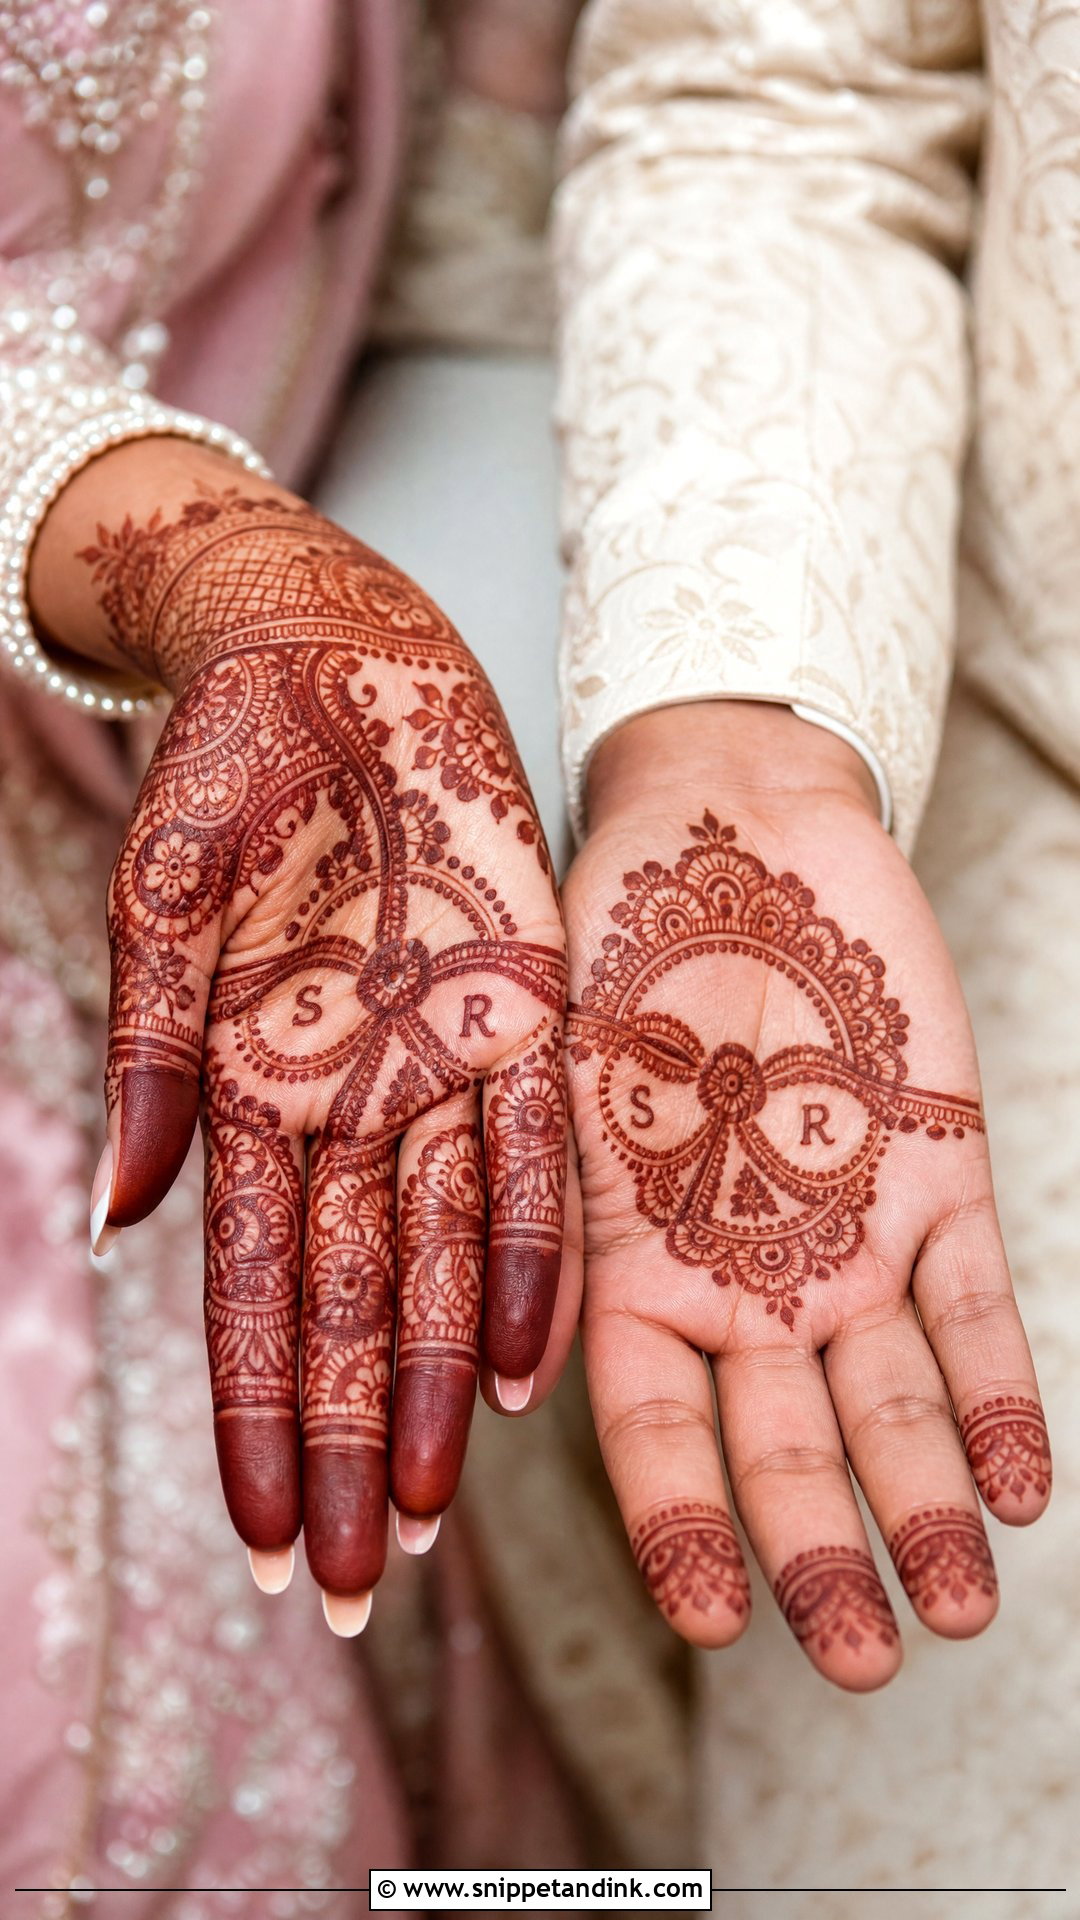
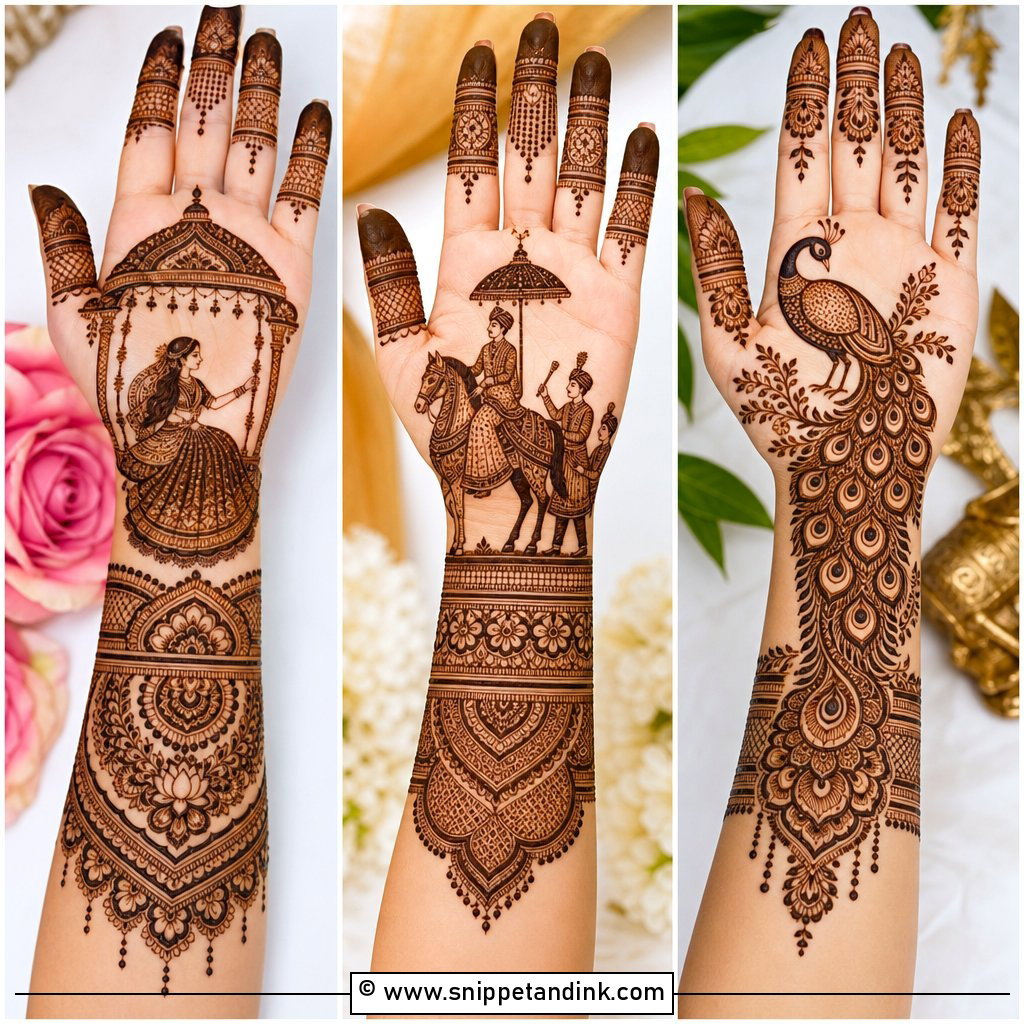
Matching hands work when the bride carries the detailed scene and the groom gets a simpler echo of it: the same knot, initials or a small mandala with the same border. Put together, the two should read as one design that continues across two people. Many grooms only want a dot of henna on the palm for the ritual, so I keep his piece small and neat and let the shared border carry the link. It shows up best in couple photos at the mehndi, the haldi or on the wedding morning.
18. Gathbandhan Mehndi Design With Peacock
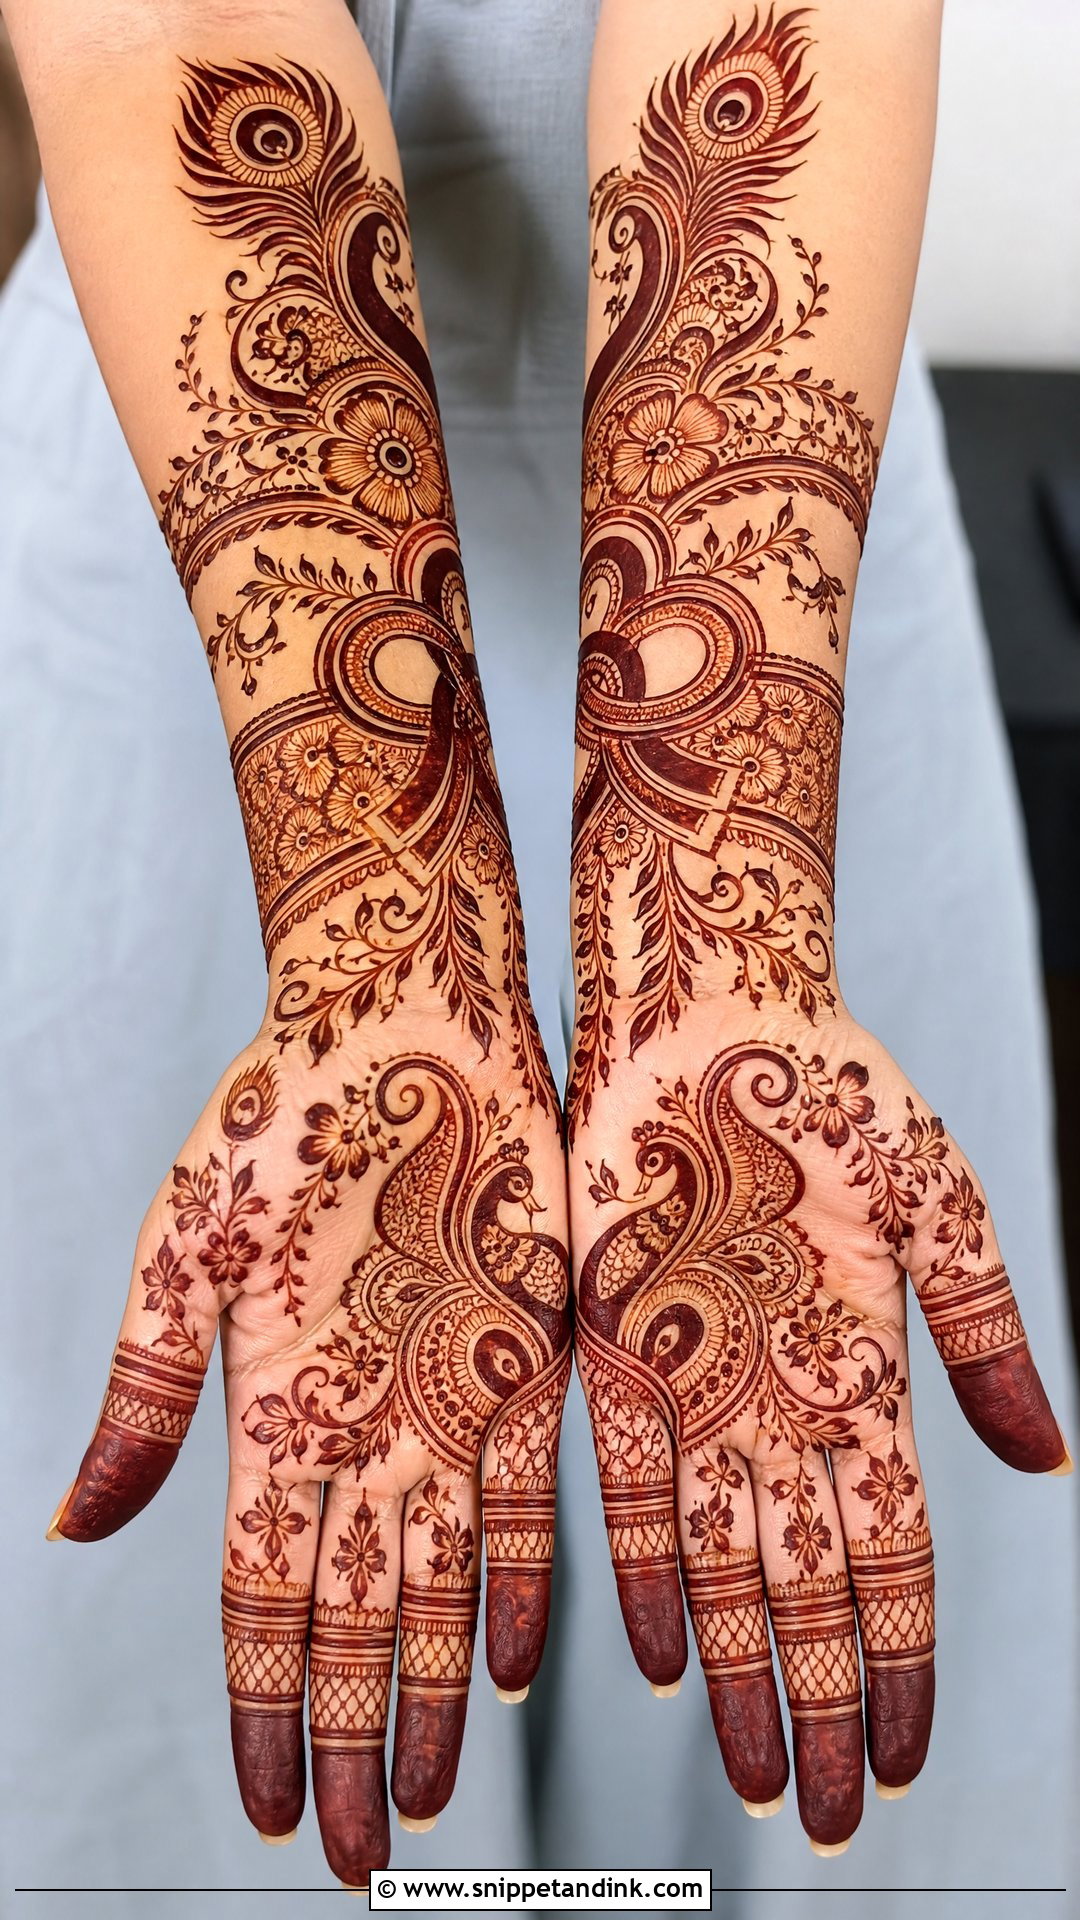
Peacock feathers curve naturally, which makes them a good frame for a knot in the palm center. I let the feathers sweep toward the wrist and fill the fingers and side spaces with paisleys and small flowers. On full hands the peacock’s line pulls the eye from palm to forearm, so the design feels like it moves. I shade the feathers with fine lines and dots but keep their outer edge bold. Feather fillers are where crowding happens most, and an over-shaded peacock will swallow the knot it was meant to hold.
19. Gathbandhan Mehndi Design With Lotus
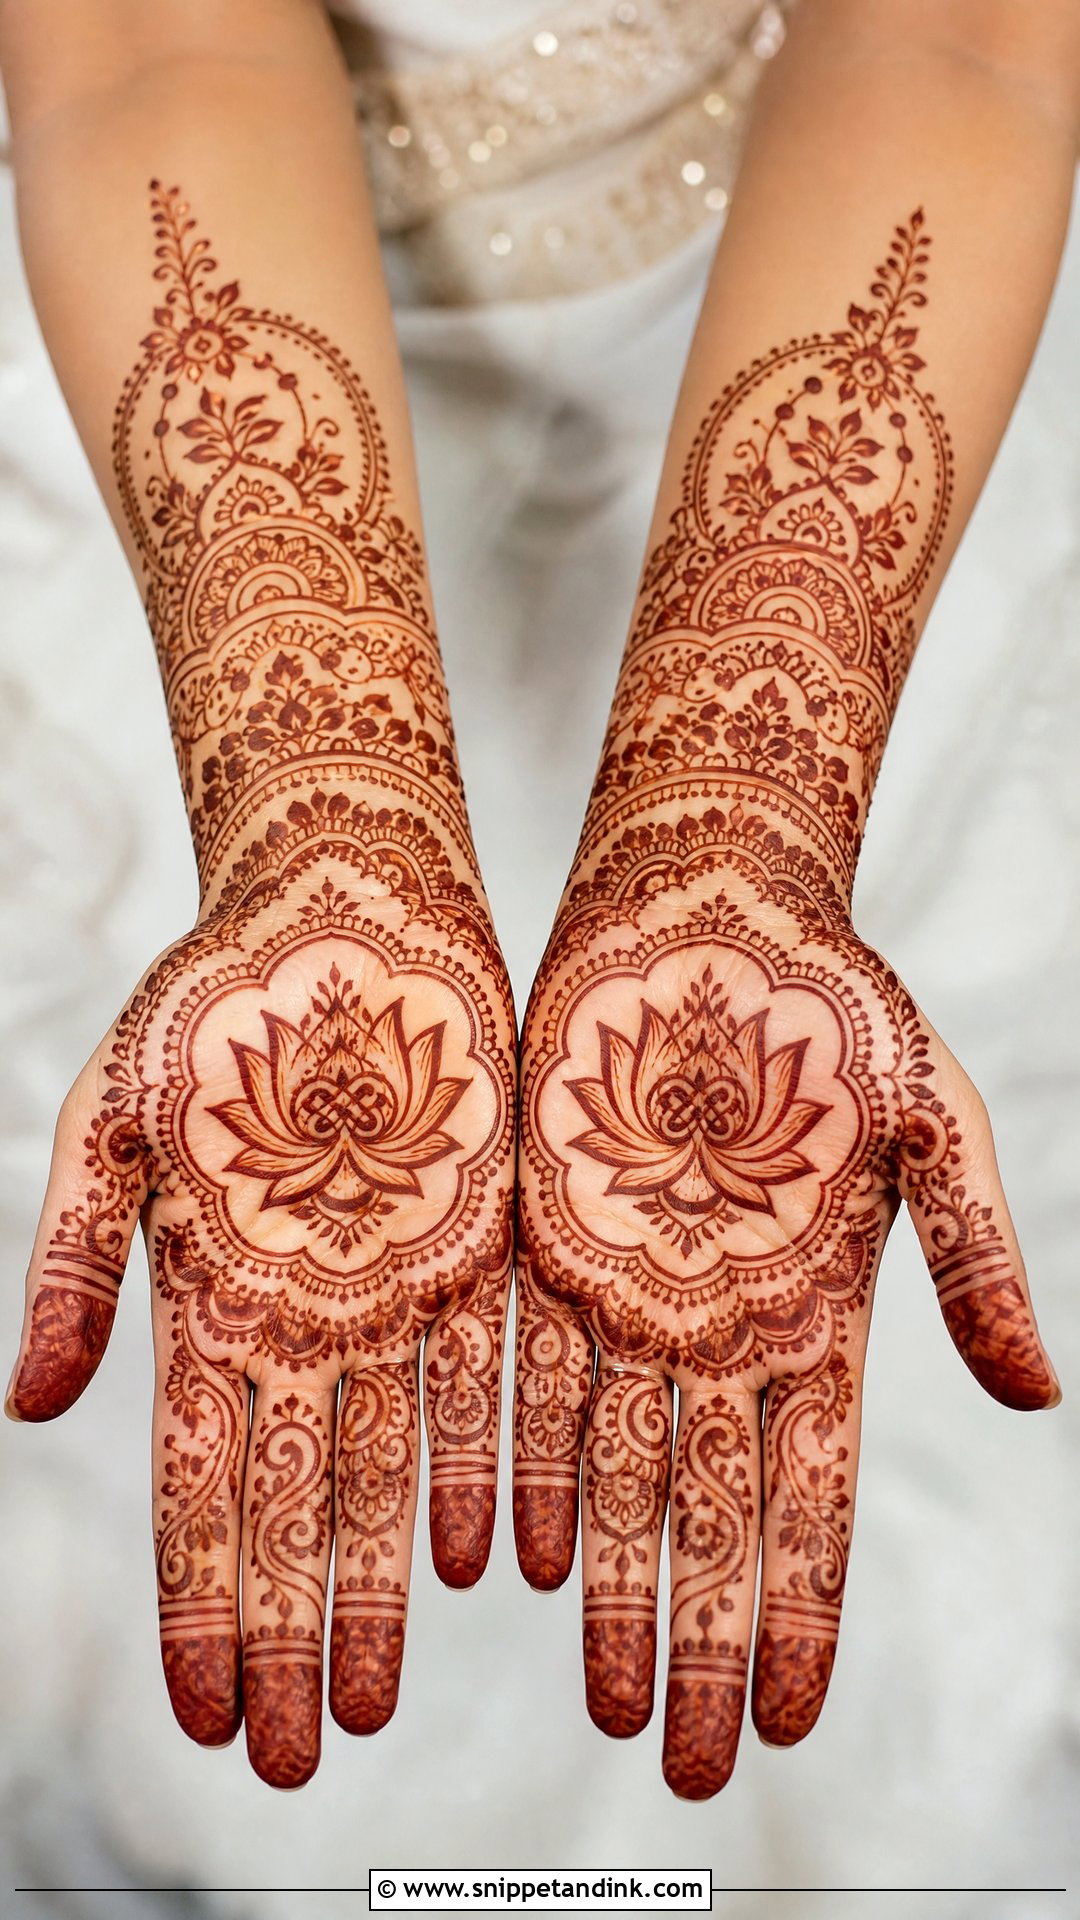
A lotus-based gathbandhan mehndi design puts the knot inside an opening bloom, with petals spreading around it and vines and dotted rings running to the fingers and wrist. The lotus carries an auspicious meaning of its own, and it gives you the traditional feel without the hours that portrait work needs. It works front or back. For the wedding I add jaali and paisley borders around the flower; for a lighter function I simply leave space between the petals.
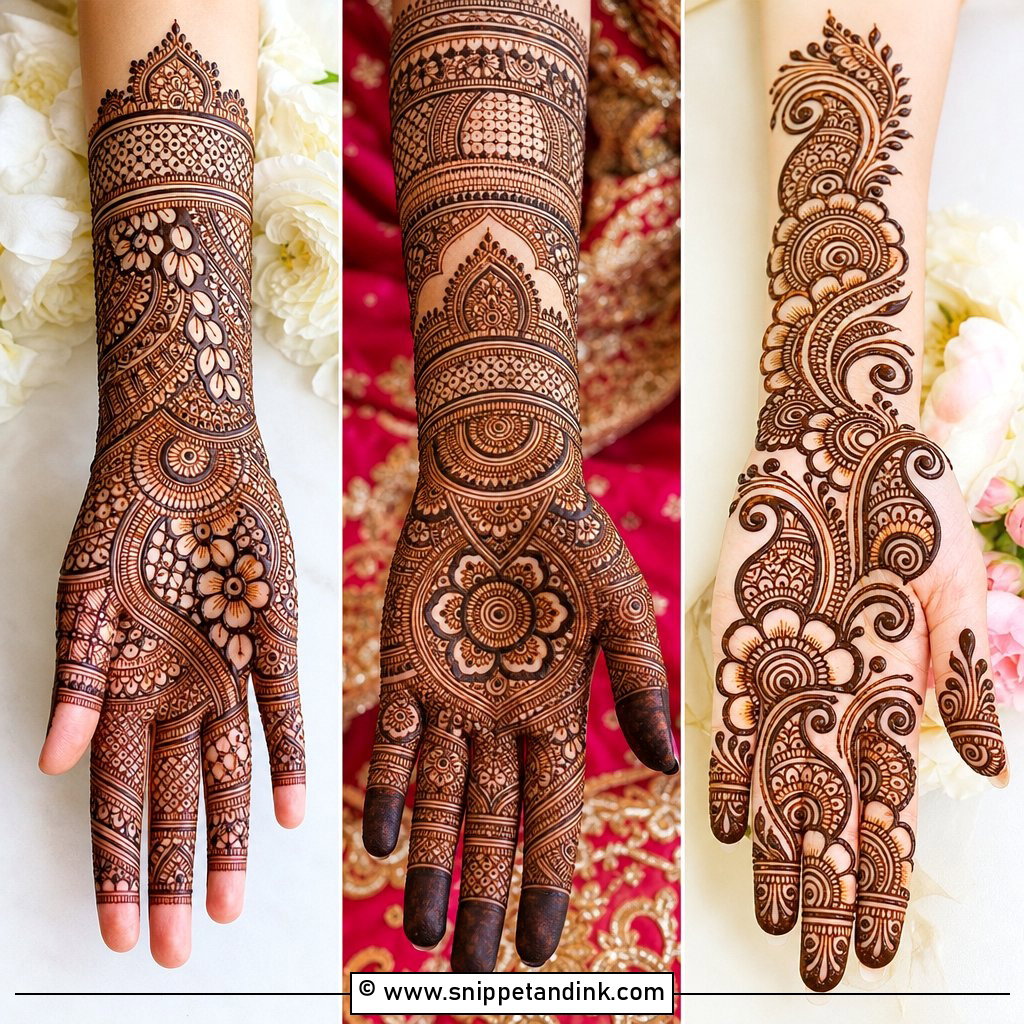
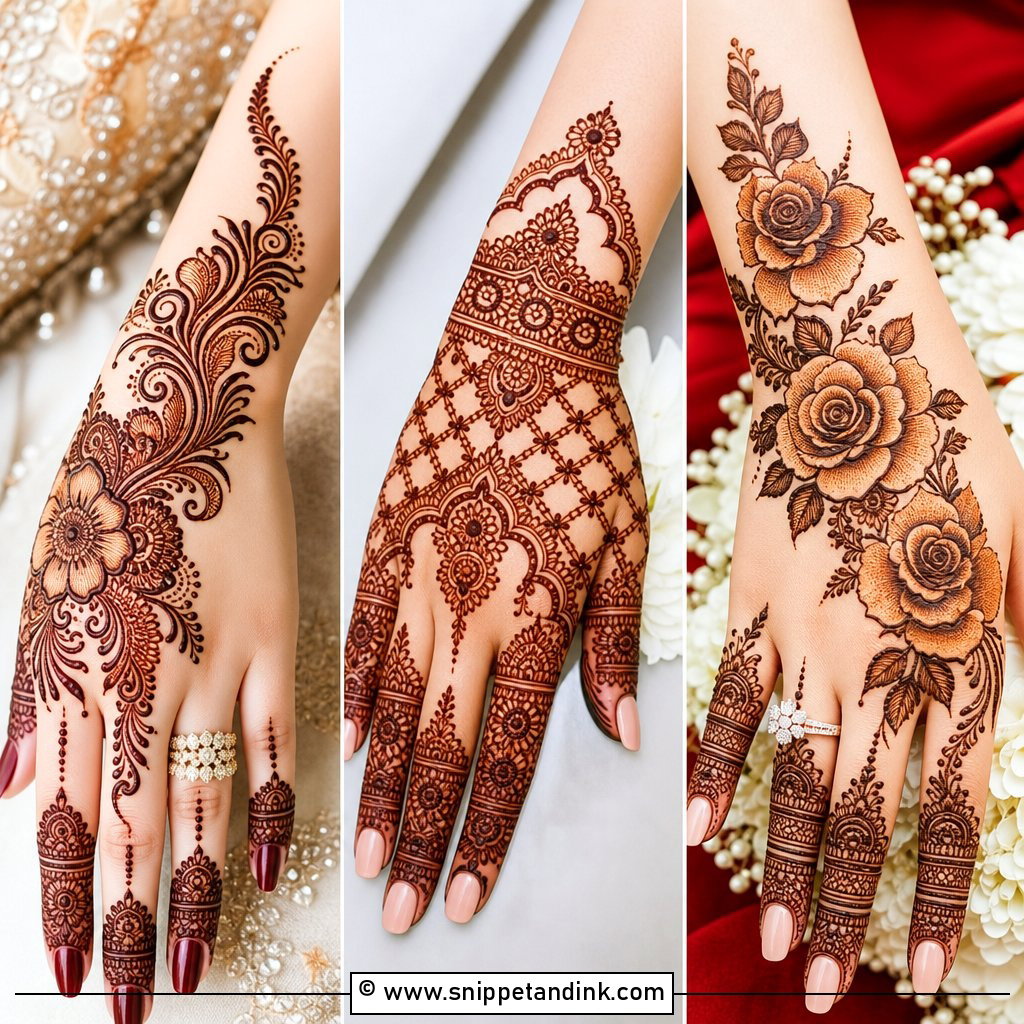
20. Gathbandhan Mehndi Design With Jaali
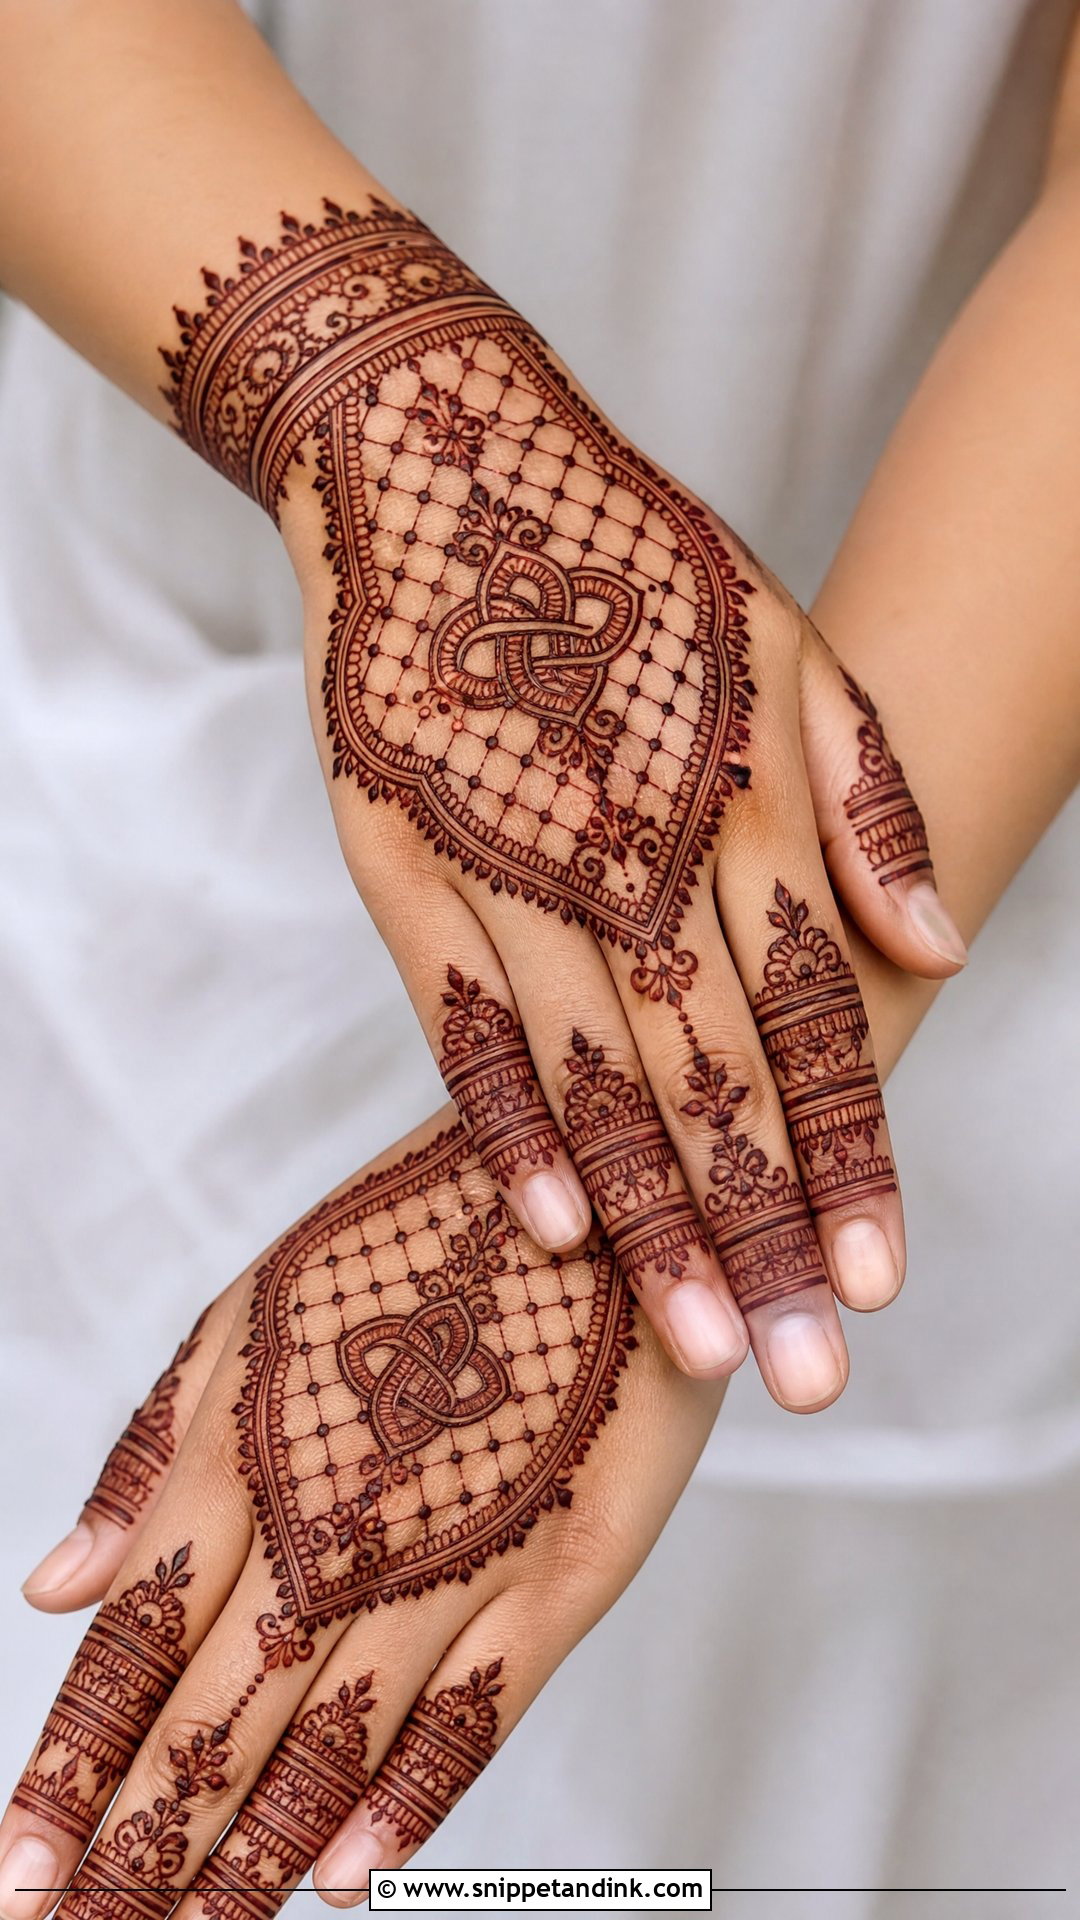
Jaali turns the hand into something that looks like lace or net fabric, with the knot as its centerpiece. I fill the mesh with tiny dots, flowers or diamonds and keep the fingers to slim bands and leafy trails. This is fine, slow work, and it’s the style where I’m most careful with paste consistency, because a cone that’s even slightly too runny closes up the little holes and the net turns into a solid patch. Leave a clean outline around the knot so the symbol still reads from a few feet away.
21. Gathbandhan Mehndi Design With Heart
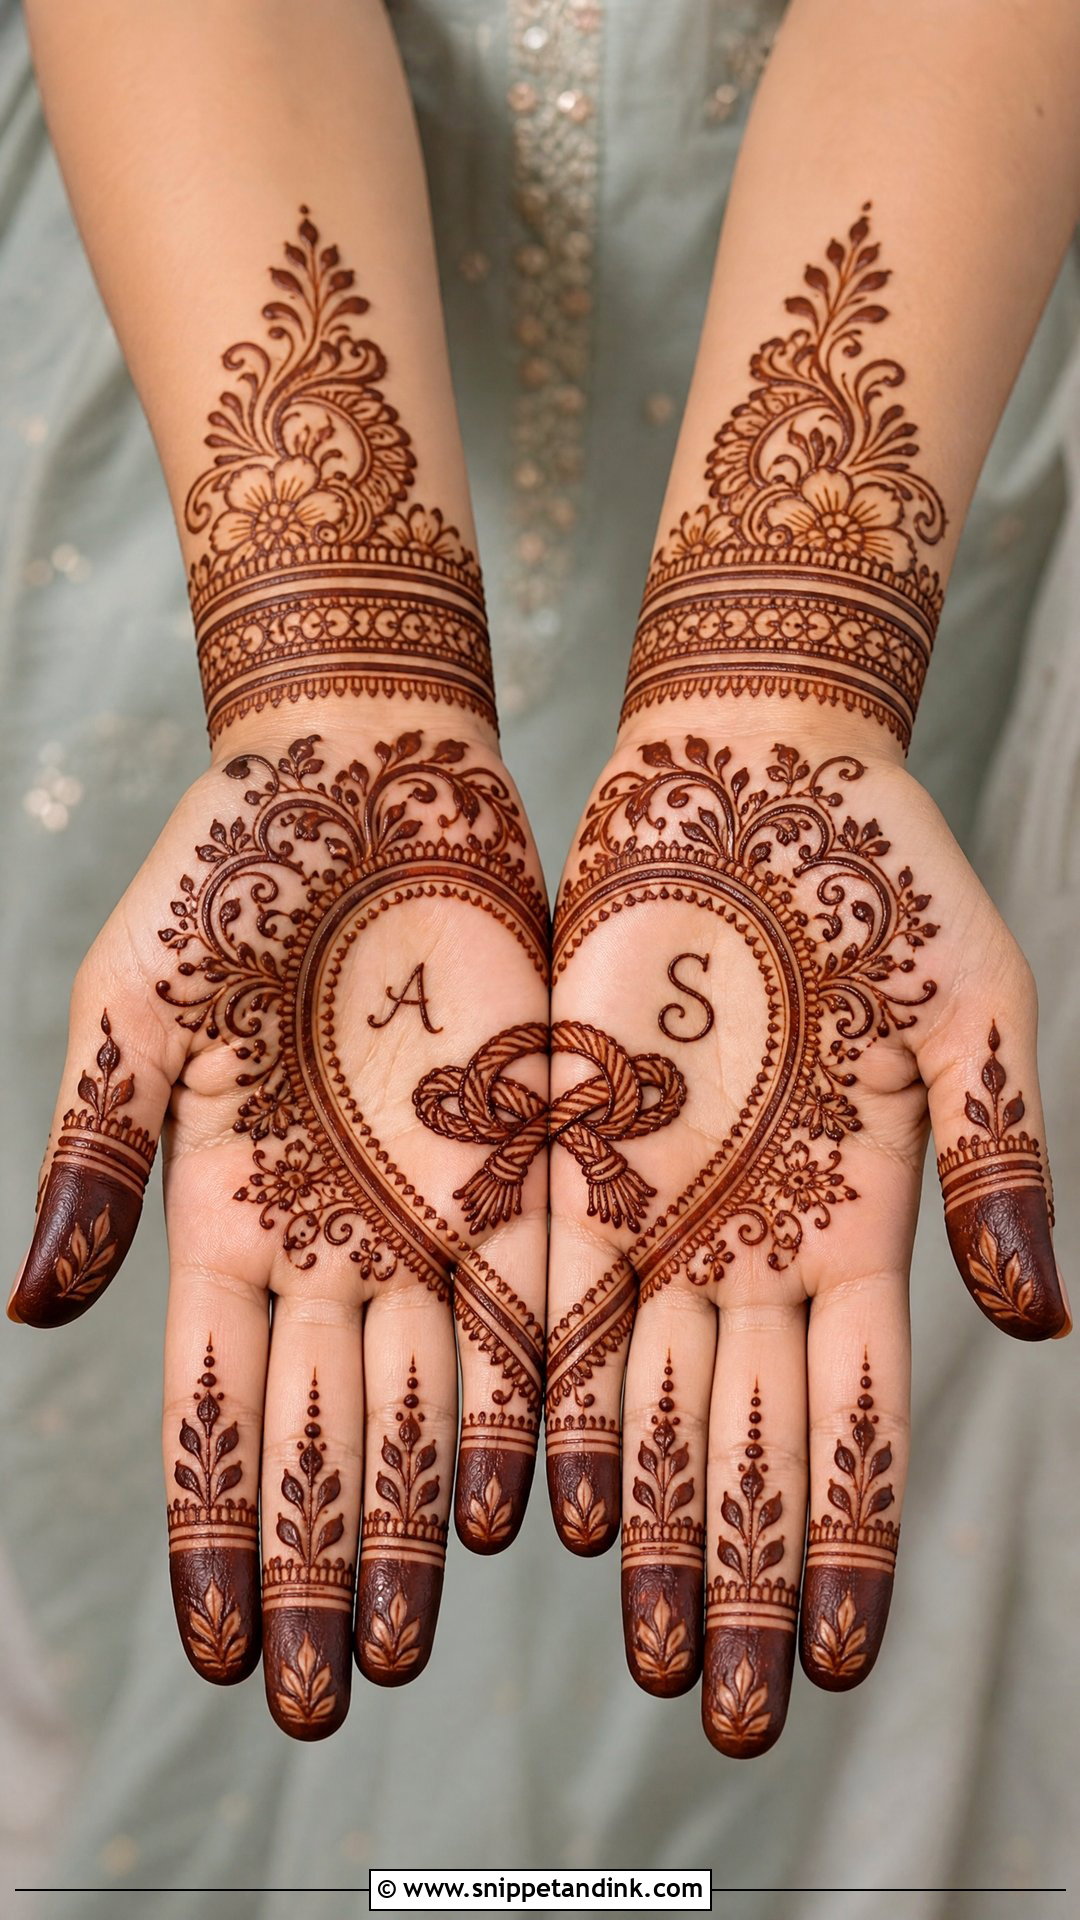
A heart frame is the simplest way to put romance around the knot, either as one heart on the palm or two halves that meet when the hands close. Floral vines, small paisleys, dotted borders and initials keep it bridal rather than casual, and a clean wrist band finishes the hand. I’d use it for an engagement or anniversary-style shoot more than for the main bridal set, unless you surround the heart with fine Indian detailing so it holds its own next to heavy jewelry.
22. Gathbandhan Mehndi Design With Dulha Dulhan
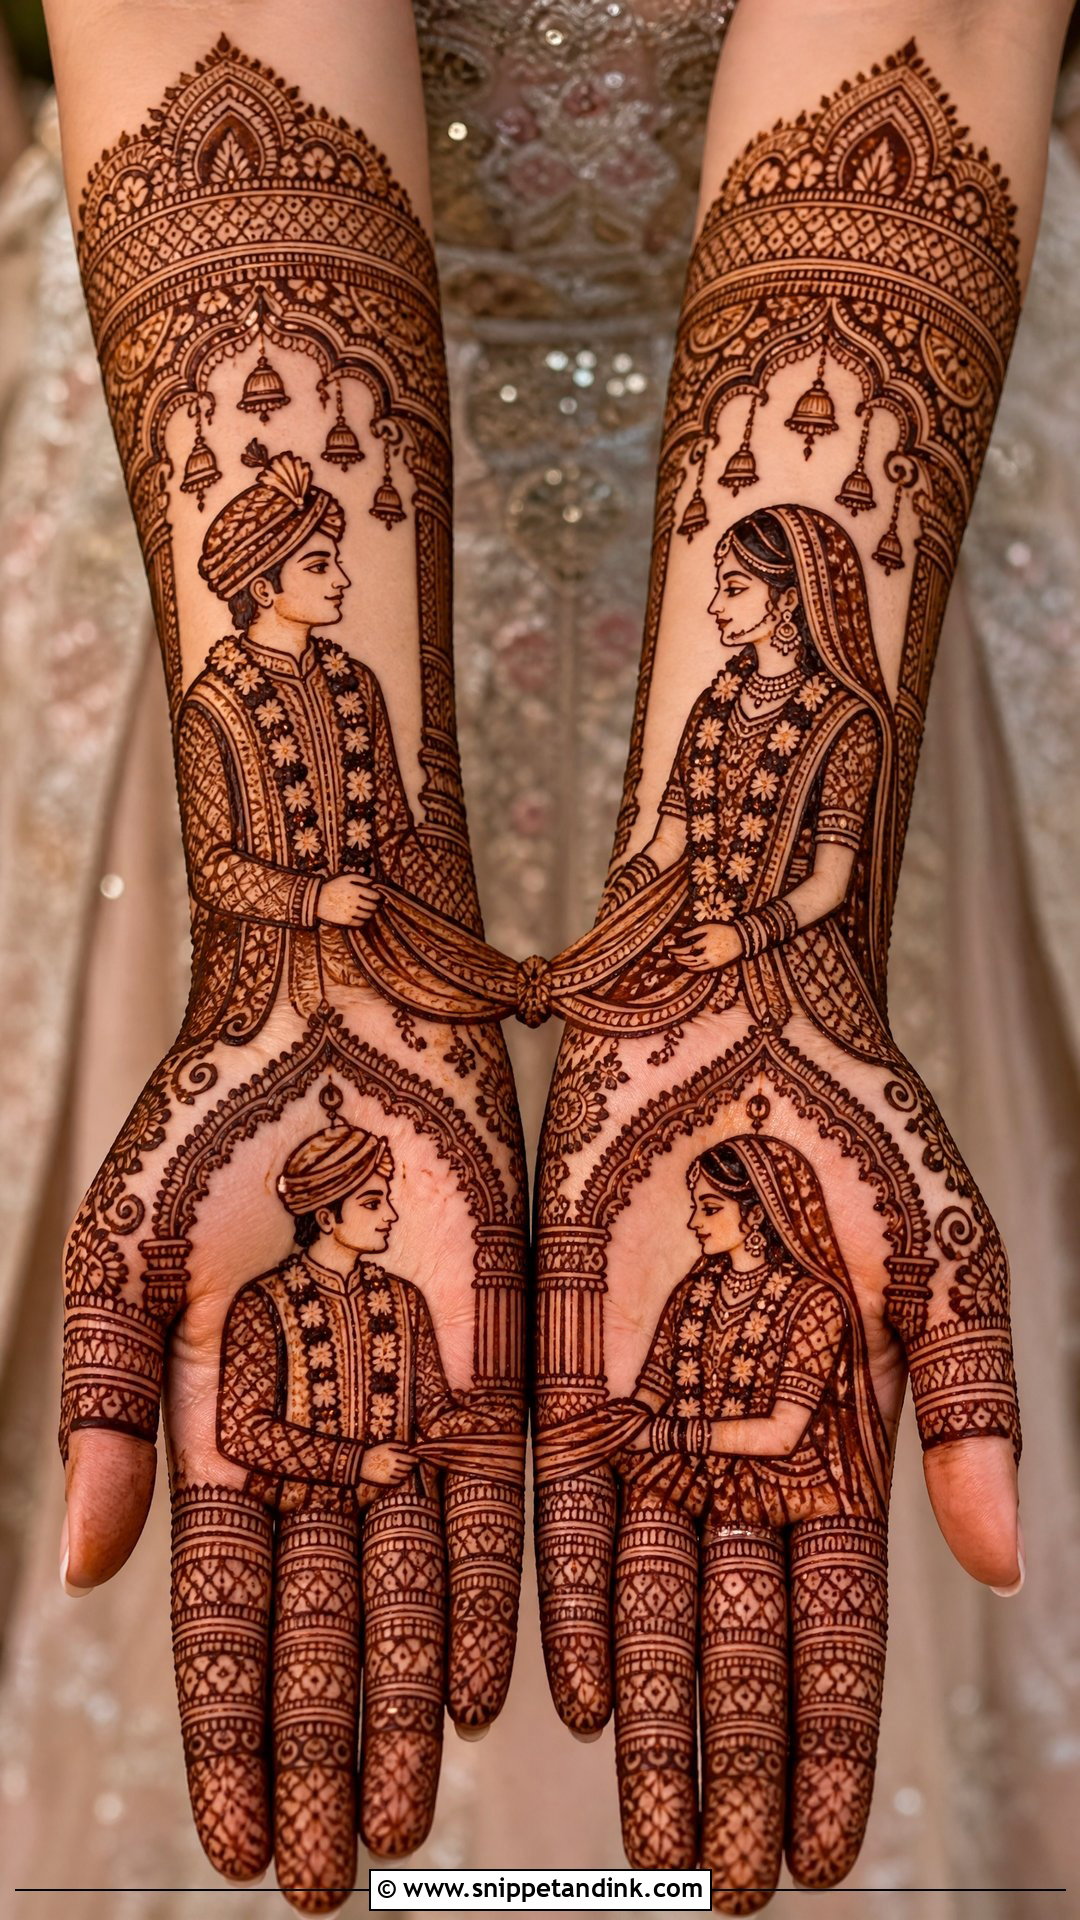
The dulha-dulhan layout is popular because it puts the couple as the center of the story. The bride takes one palm, the groom the other, and the gathbandhan cloth joins them across both hands, surrounded by mandap arches, garlands, bells and paisleys. Wrists and forearms carry dense borders. Book someone with real portrait experience: faces need clean, separated lines for the eyes and nose, and those are the first details to blur if the paste is thick or the hand moves before it sets.
23. Gathbandhan Mehndi Design For Forearm
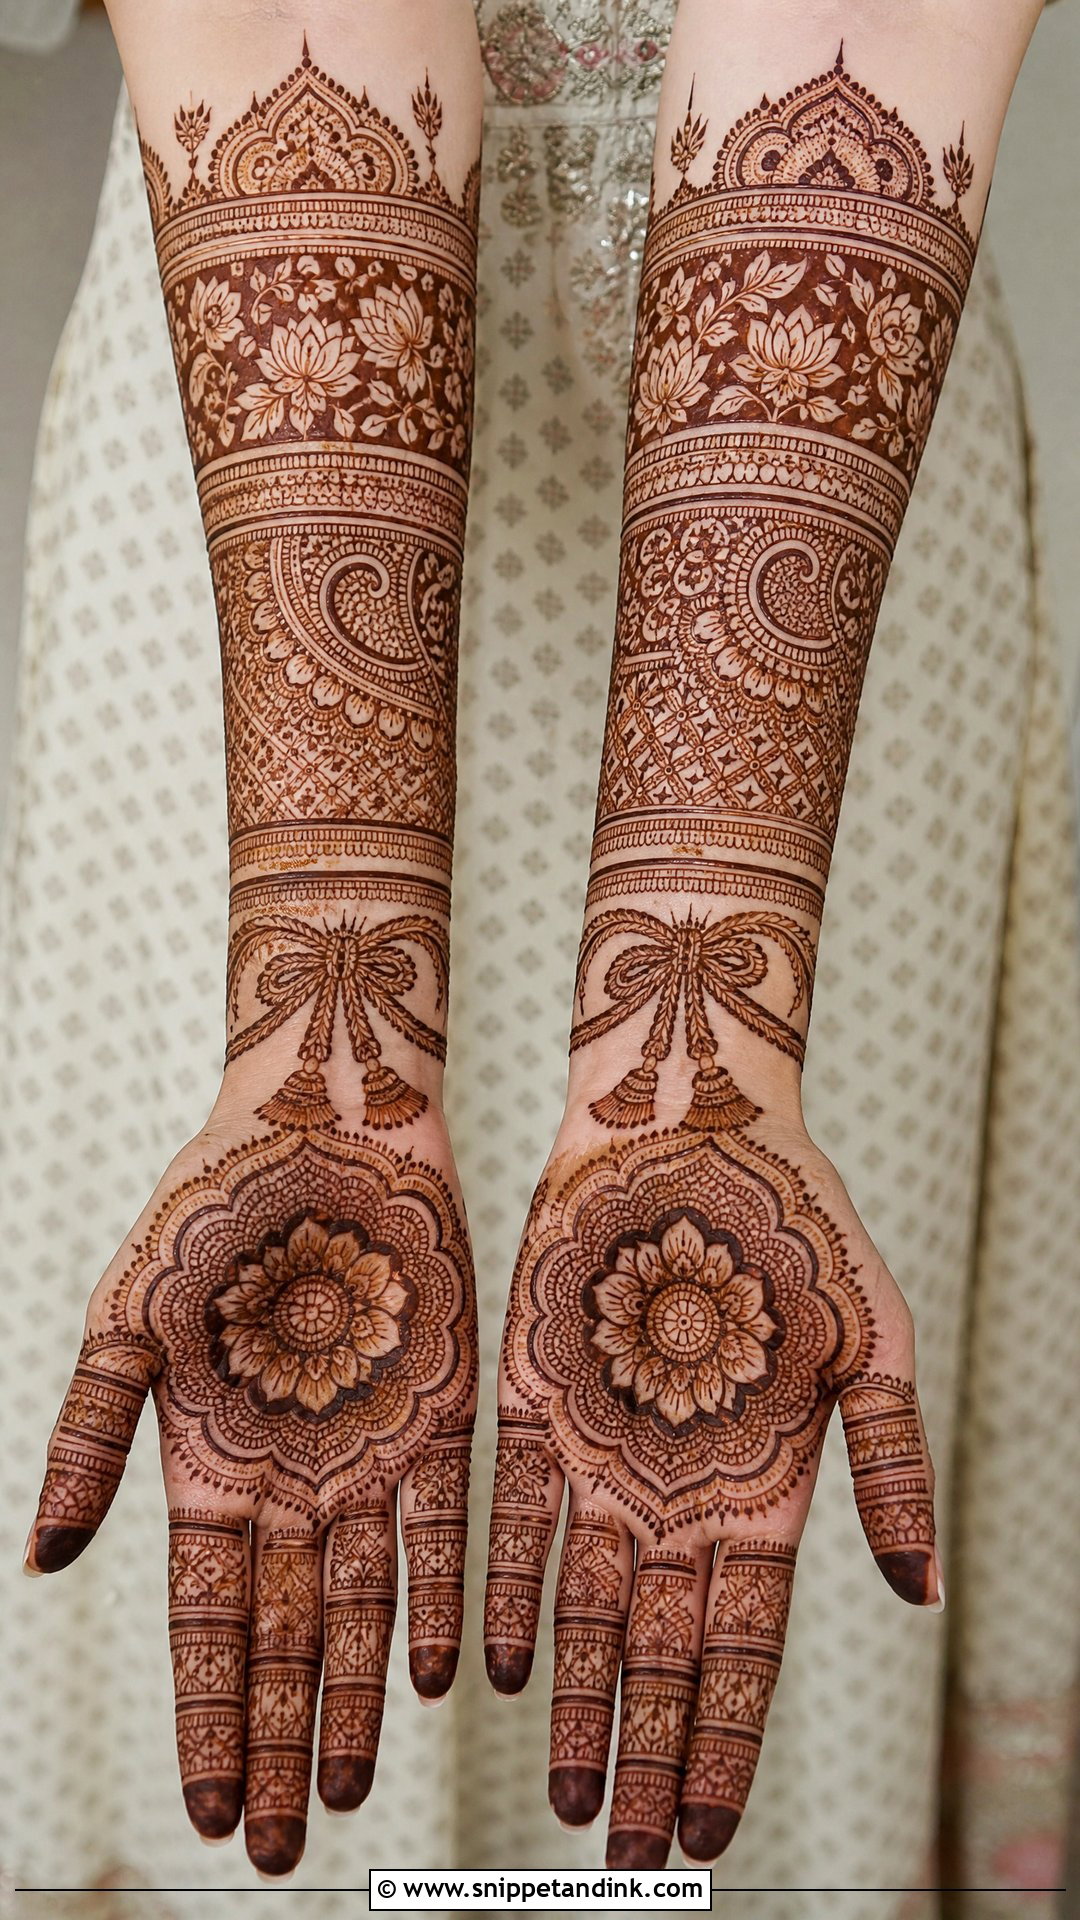
Moving the knot scene up to the wrist or lower forearm frees the palm for a mandala or portraits, and the pattern can climb toward the elbow with vines, paisley bands, temple borders and jaali. It should still connect to the hand rather than float as a separate sleeve. I draw forearm motifs a size larger than the palm fillers, partly so they read from across a room and partly because forearm skin stains lighter, and fine filler there tends to look faint once the chooda and bangles are on.
24. Gathbandhan Mehndi Design For Wedding Photos
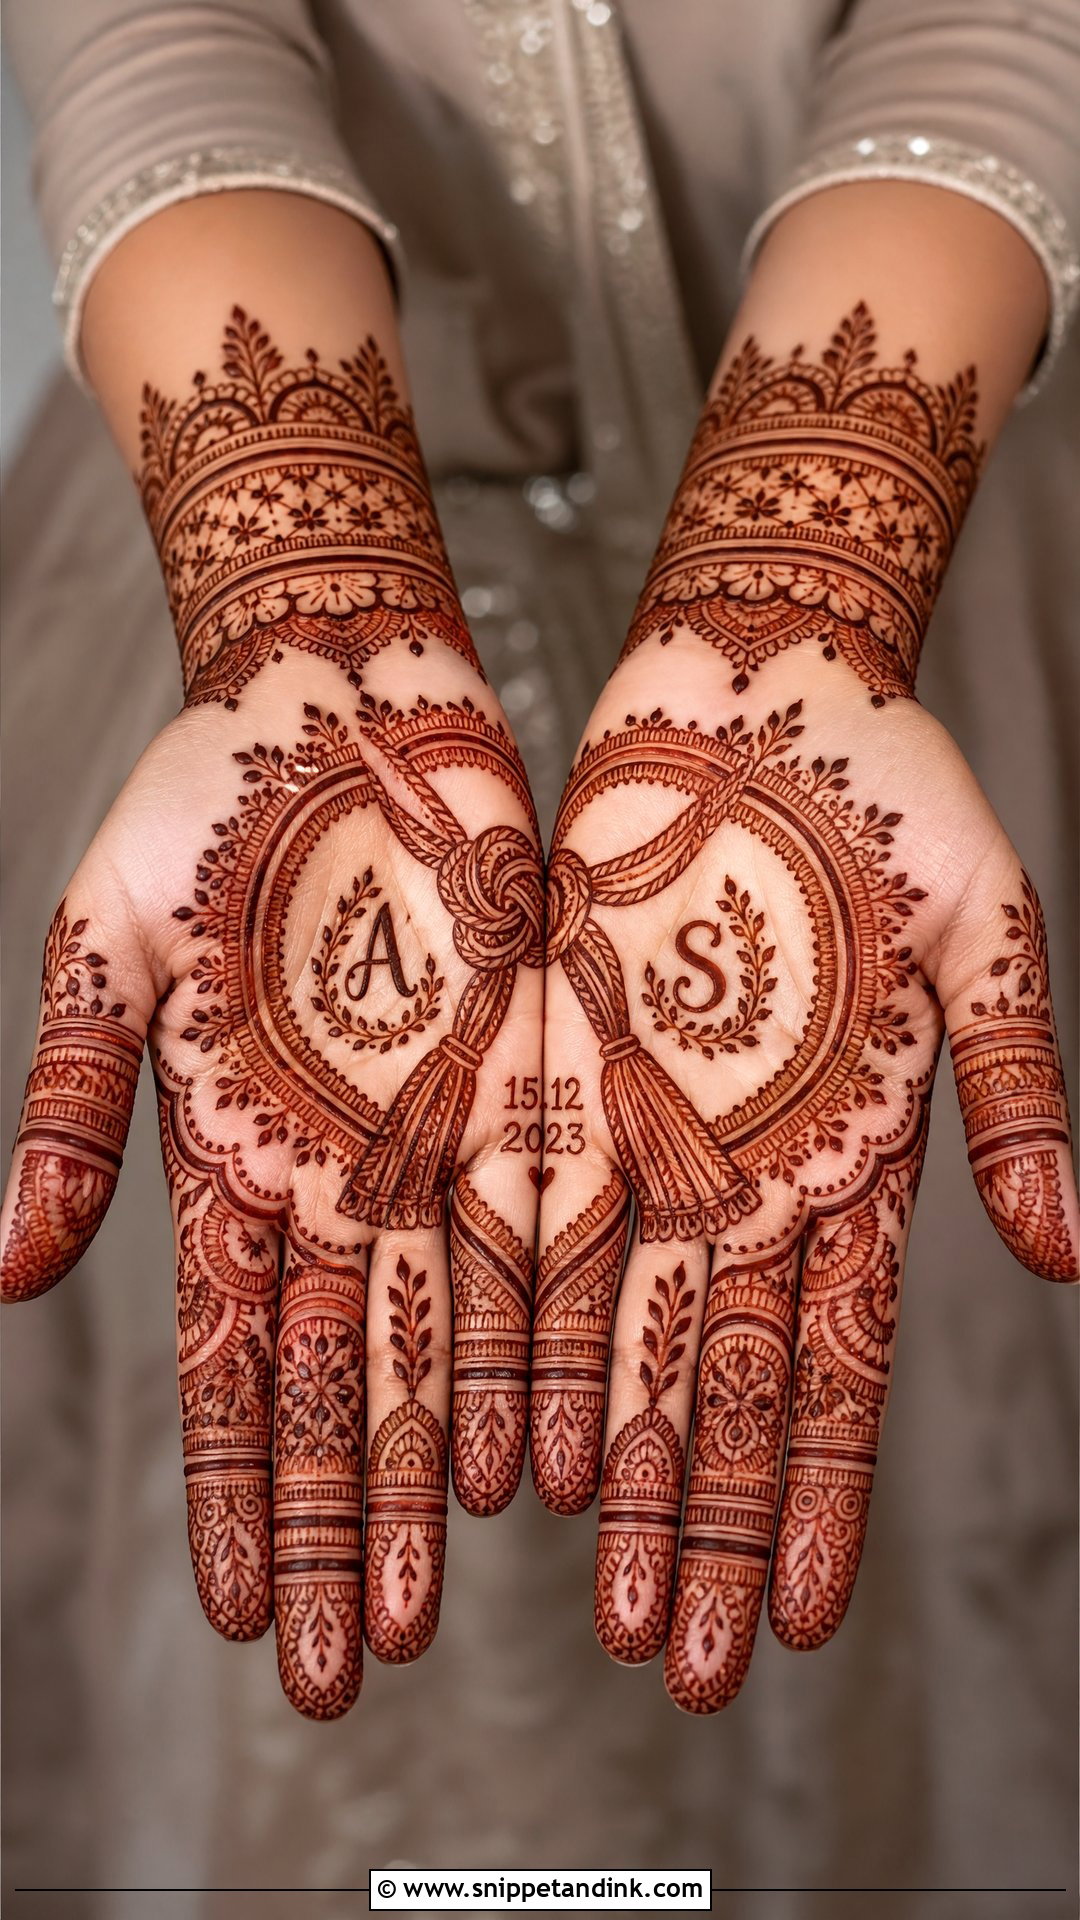
If the photos matter most to you, design for the lens. A bold central knot, clear initials or a date, and surrounding motifs that don’t blur into one another will survive any angle. Split designs across both palms are especially good on camera, because the full picture only appears when you join your hands, and photographers love that shot. Don’t let the knot shrink to fit more filler; a phone or a long lens at the mandap simply won’t pick up a tiny one.
25. Gathbandhan Mehndi Design With Negative Space
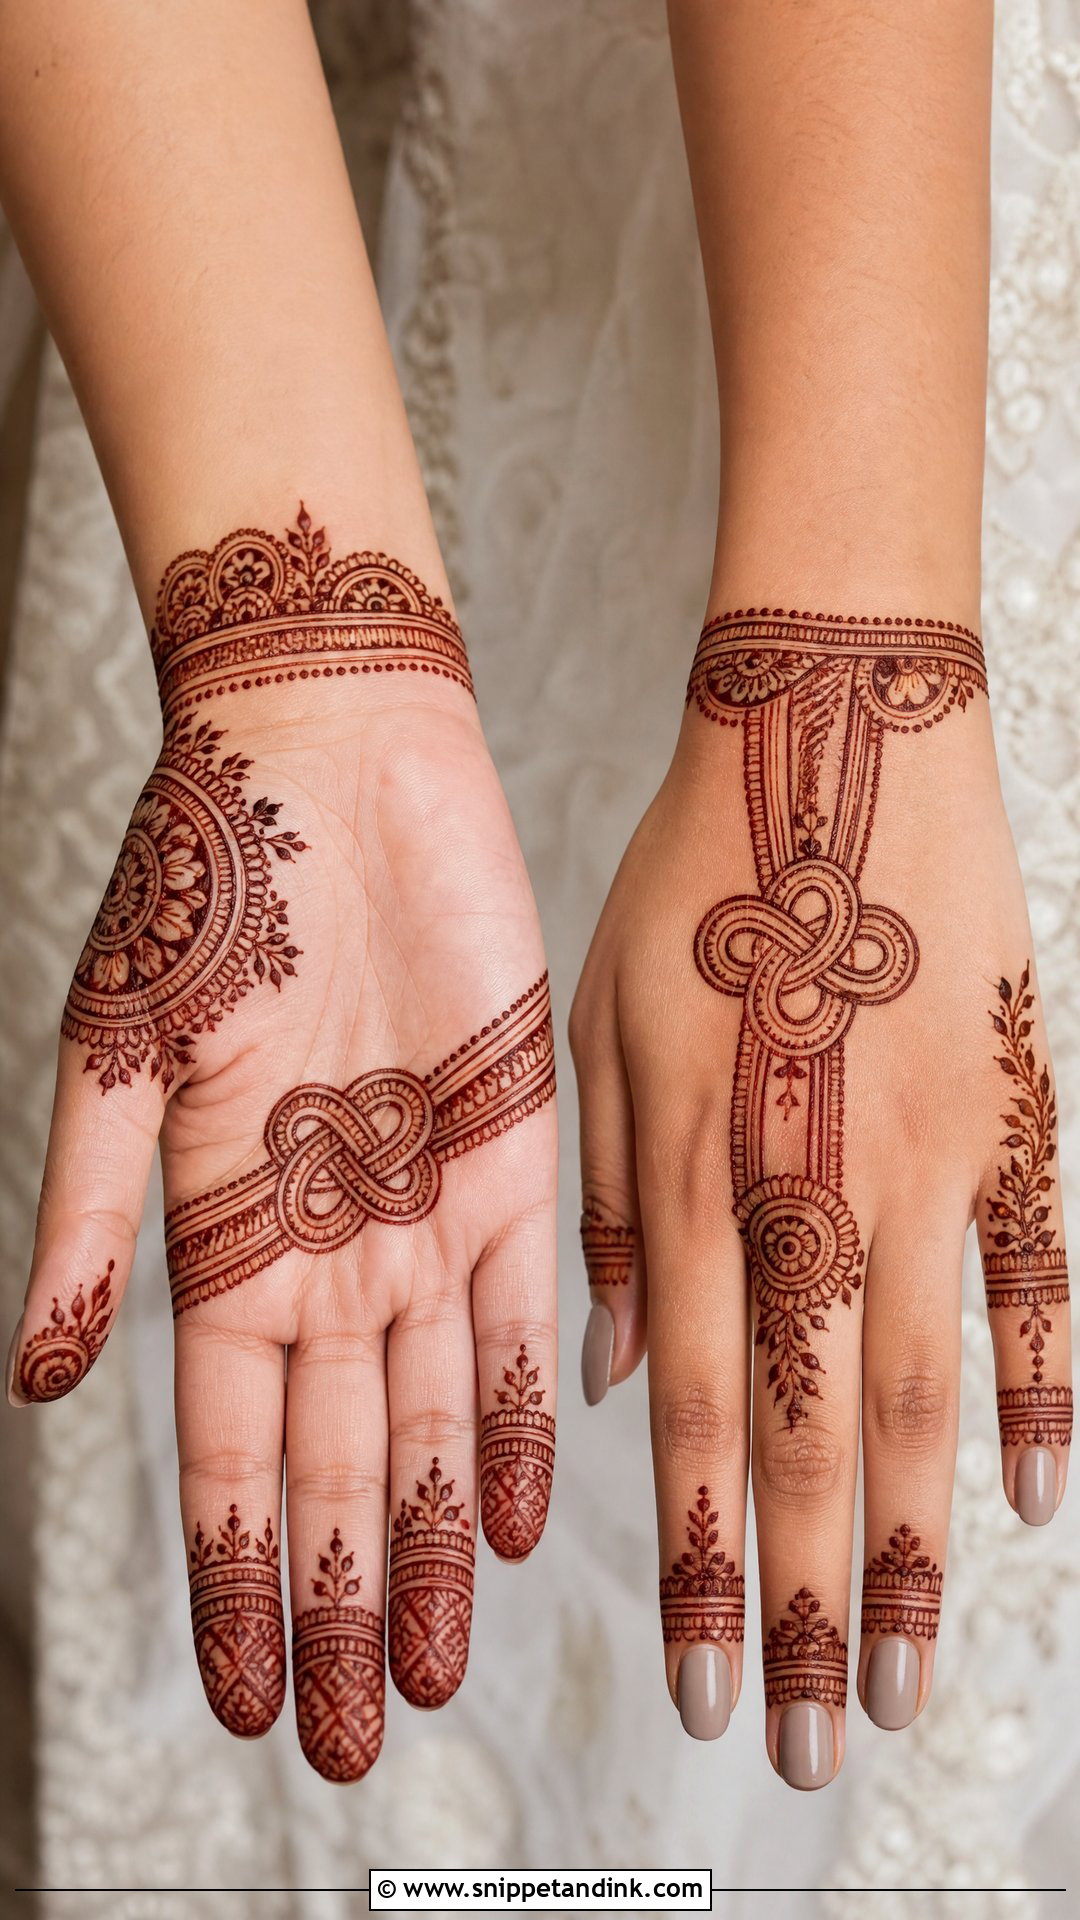
A negative-space gathbandhan mehndi design leaves most of the skin open and lets a boldly outlined knot carry the hand. Partial mandalas, half-floral trails, geometric bands and light finger details complete it without filling. Open spacing helps on deeper skin tones in particular, because a stain sitting next to bare skin shows its contrast better than one packed into dense work. Add a wrist cuff or a small paisley border if you want it to feel more bridal on the day.
Getting a Dark Knot in Time for the Pheras
A henna stain isn’t finished when the paste comes off. It starts bright orange and deepens over the next day or two, so I book bridal mehndi roughly two days before the ceremony. Applied the night before, you’ll take your vows with orange hands and the deepest color will show up at the reception or after.
The first 24 hours
- Leave the paste on as long as you comfortably can. Overnight is ideal; I’d aim for at least six hours.
- Dab a lemon and sugar mix over the dried paste so it stays stuck to the skin instead of cracking off.
- Keep your hands warm. Cold hands stain weakly, so a heater in the room or a warm drink helps.
- Scrape the paste off with the back of a butter knife or your fingers. Don’t wash it off.
- Avoid water on your hands for as long as you can that first day, and skip soap and sanitizer.
Palms and fingertips will always stain darker than the back of the hand and the forearm, so the knot you want deepest belongs on the palm. Haldi tends to fall close to the mehndi, and turmeric paste plus heavy scrubbing can fade a new stain. Ask whoever is applying haldi to go lightly over your hands, and rinse rather than scrub.
If a line smudges while it’s wet
Tell your artist straight away. Fresh paste can be lifted with a cotton bud and redrawn within a minute or two, before it stains. Once it has sat for a while, the mark is permanent for the week, and the honest fix is to turn it into a leaf or a dot rather than try to rub it away.
Keep the Knot Readable and the Rest Will Follow
The knot is the reason this mehndi exists, so every decision should protect it: its size, its outline, and the space around it. Heavy Indian work, open Arabic trails, portraits, mandalas or bare modern layouts can all carry it, as long as the symbol still reads once the stain has darkened. Save the two or three designs you keep returning to, bring them to your artist, and ask her to sketch the knot on your actual palm before she commits. Initials or a date are the easiest way to make the final hand unmistakably yours.
You'll Like These Ideas:


Leave a Reply