
Most of the hands I decorate outside bridal bookings want something light: a design that dries before the guest needs to eat, and still reads clearly in a group photo. From clean Arabic trails to small palm mandalas, the latest designs lean on open skin, balanced fingers and a handful of motifs rather than packed filling. That suits Eid, Diwali, sangeet guests, bridesmaids and first-timers alike. The catch nobody mentions is that open space hides nothing, so a wobbly line or a patchy stain shows more on a sparse hand than on a full one. Below are 35 complete hand layouts, each with what I watch for when I draw it.
Why Sparse Designs Need a Darker Stain Than Full Ones
On a fully covered hand, a pale patch disappears among all the other lines. On a simple design with lots of bare skin, every faint petal stands out. So the less you draw, the more the stain matters, and most of a good stain happens before and after the cone touches skin.
- Start with clean, dry skin. I ask people to wash with plain soap and skip hand cream, oil and sunscreen that day, since any film stops the dye reaching the skin.
- Use fresh, natural paste. Freshly mixed henna is a muddy green and smells earthy. A cone that smells of chemicals or stains dark within minutes is not natural henna, and I would not use it.
- Leave the paste on for as long as you can, ideally six to eight hours or overnight. Simple designs dry fast, which tempts people to scrape them off after an hour. That gives you orange.
- Seal it once it is touch-dry. I dab on a little lemon and sugar mixture with cotton so the paste stays on the skin instead of flaking off.
- Scrape, don’t wash. When it is time, I rub the dried paste off with a blunt edge or my fingers, then keep the hands away from water for as long as possible, ideally until the next day.
Expect the stain to look bright orange when the paste first comes off. That is normal. It oxidises over the next 24 to 48 hours into reddish-brown or maroon, and warmth helps, so keep your hands cosy rather than cold. Palms and fingertips go darkest; the backs of the hands and wrists usually stay a shade lighter.
1. Simple Front Hand Mehndi Design
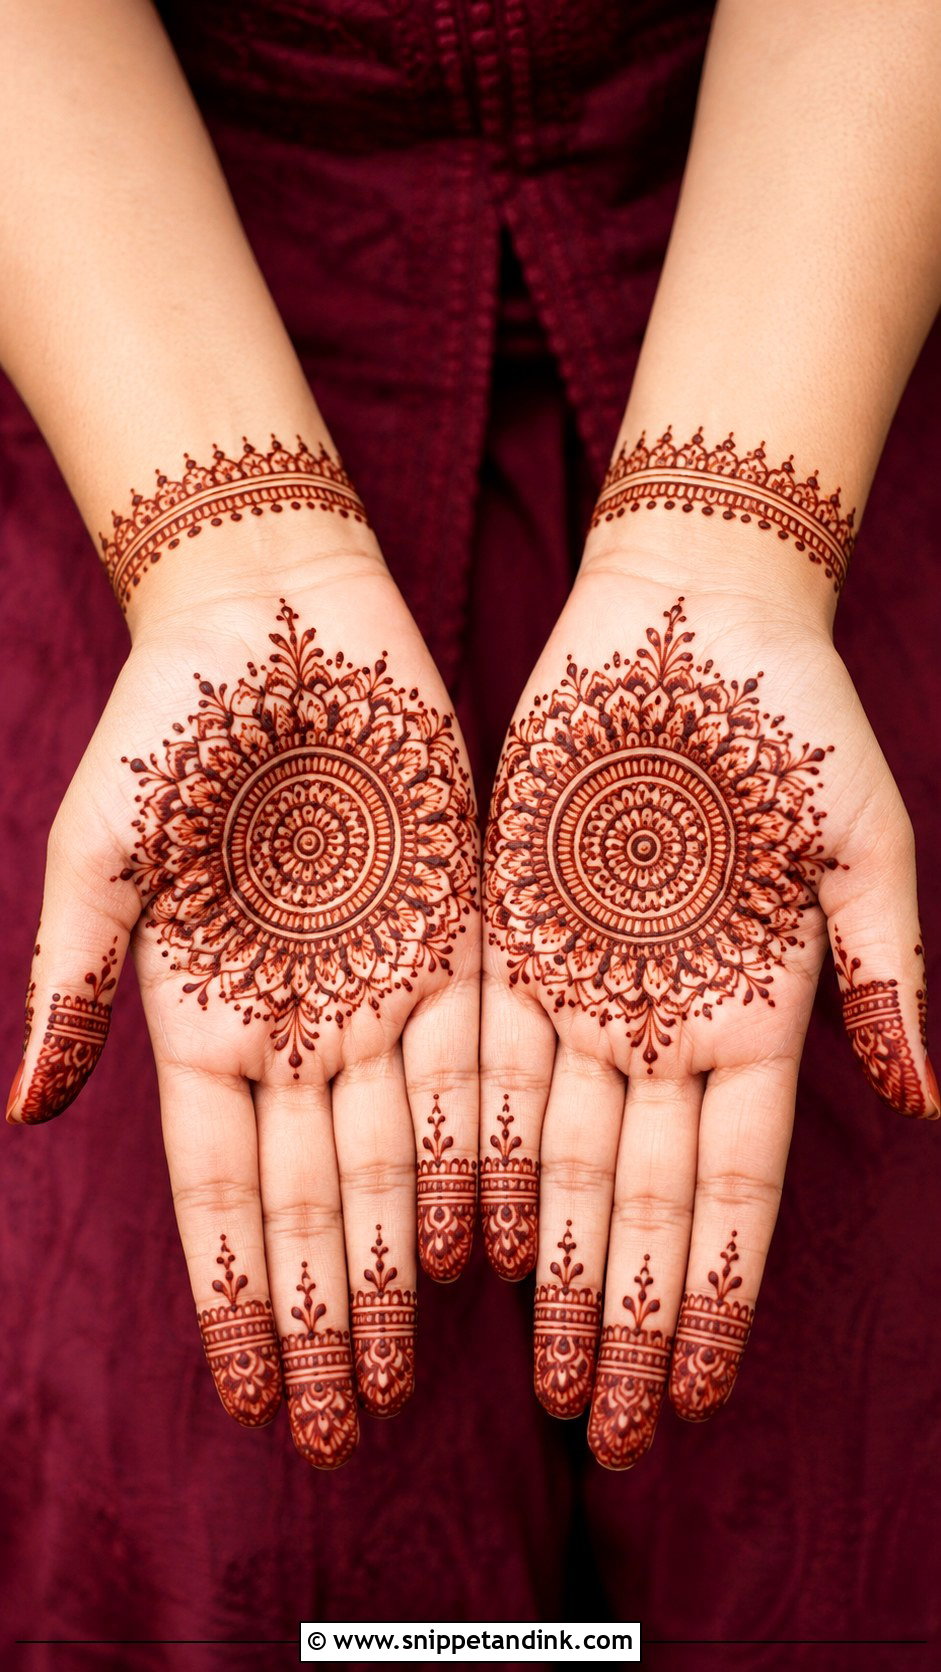
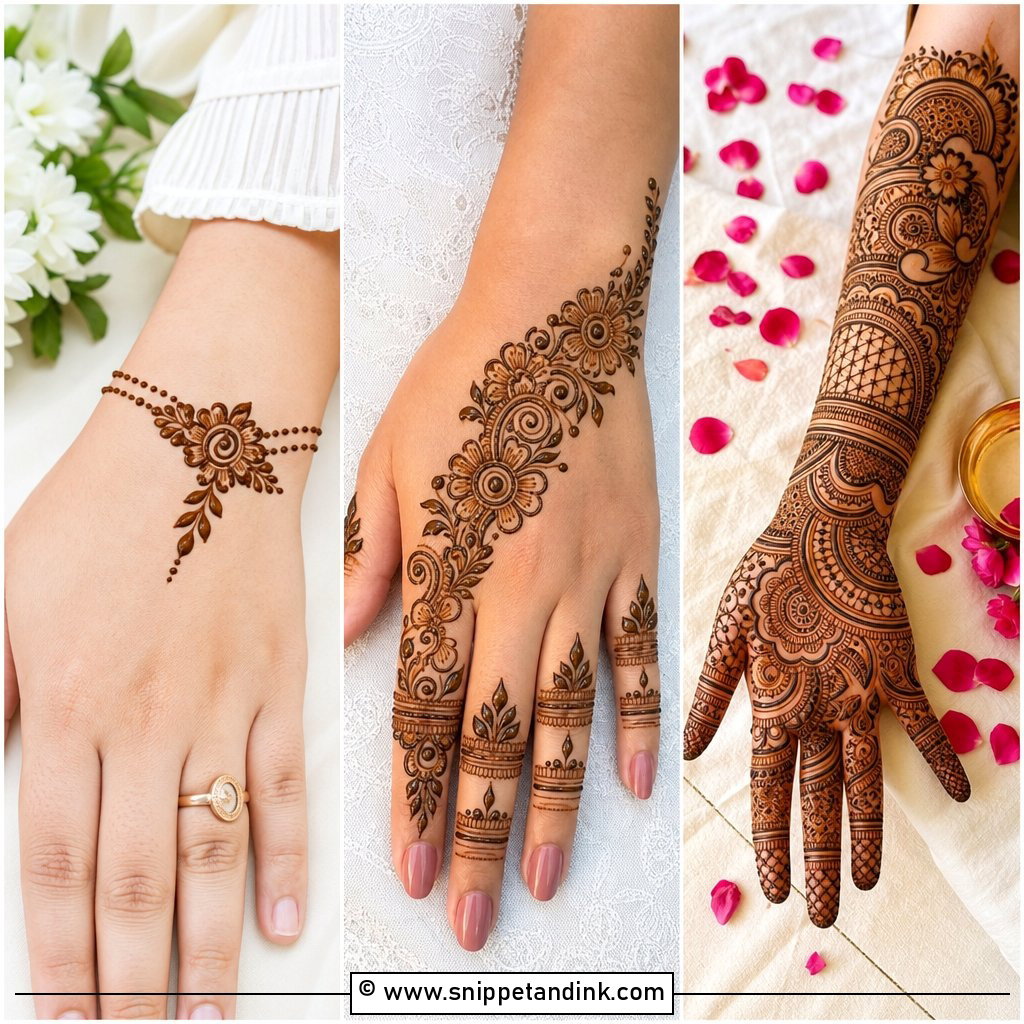
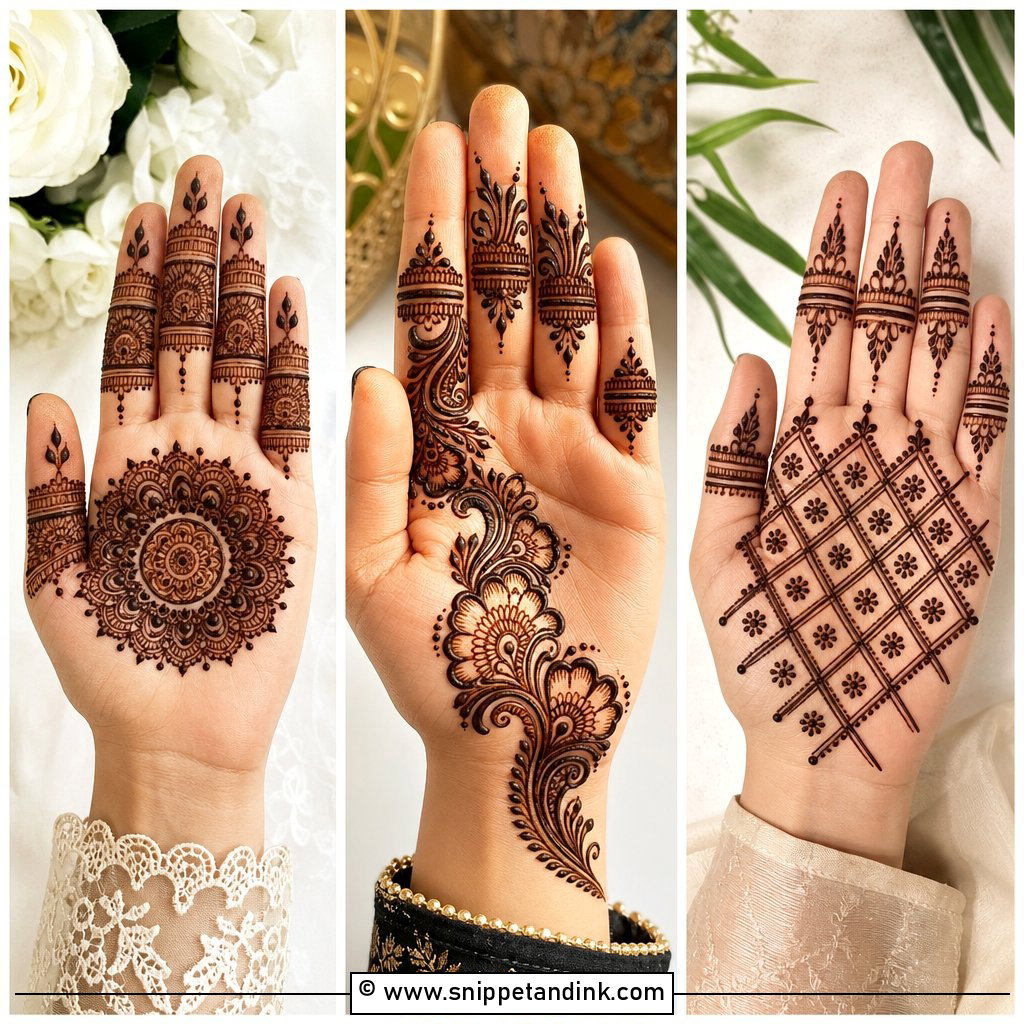
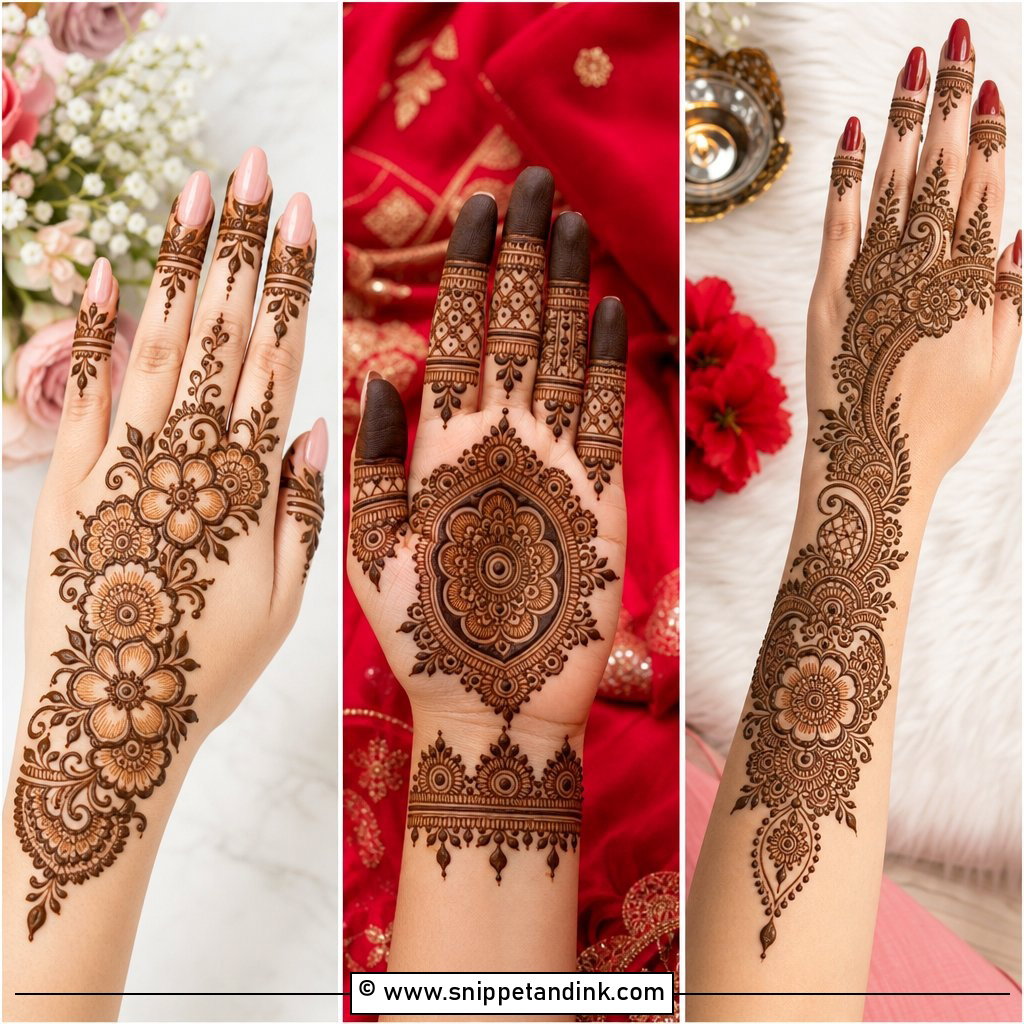
This is the layout I reach for when someone sits down and says, “just something nice.” One round mandala goes in the centre of the palm, with petals and curved lines running up toward the fingers and a thin bracelet band at the wrist. The palm takes stain better than almost anywhere else on the body, so even a fine outline here turns a rich colour. I leave a small ring of bare skin around the mandala and only tip the fingers lightly, which keeps it from reading like a half-finished bridal hand.
2. Simple Back Hand Mehndi Design
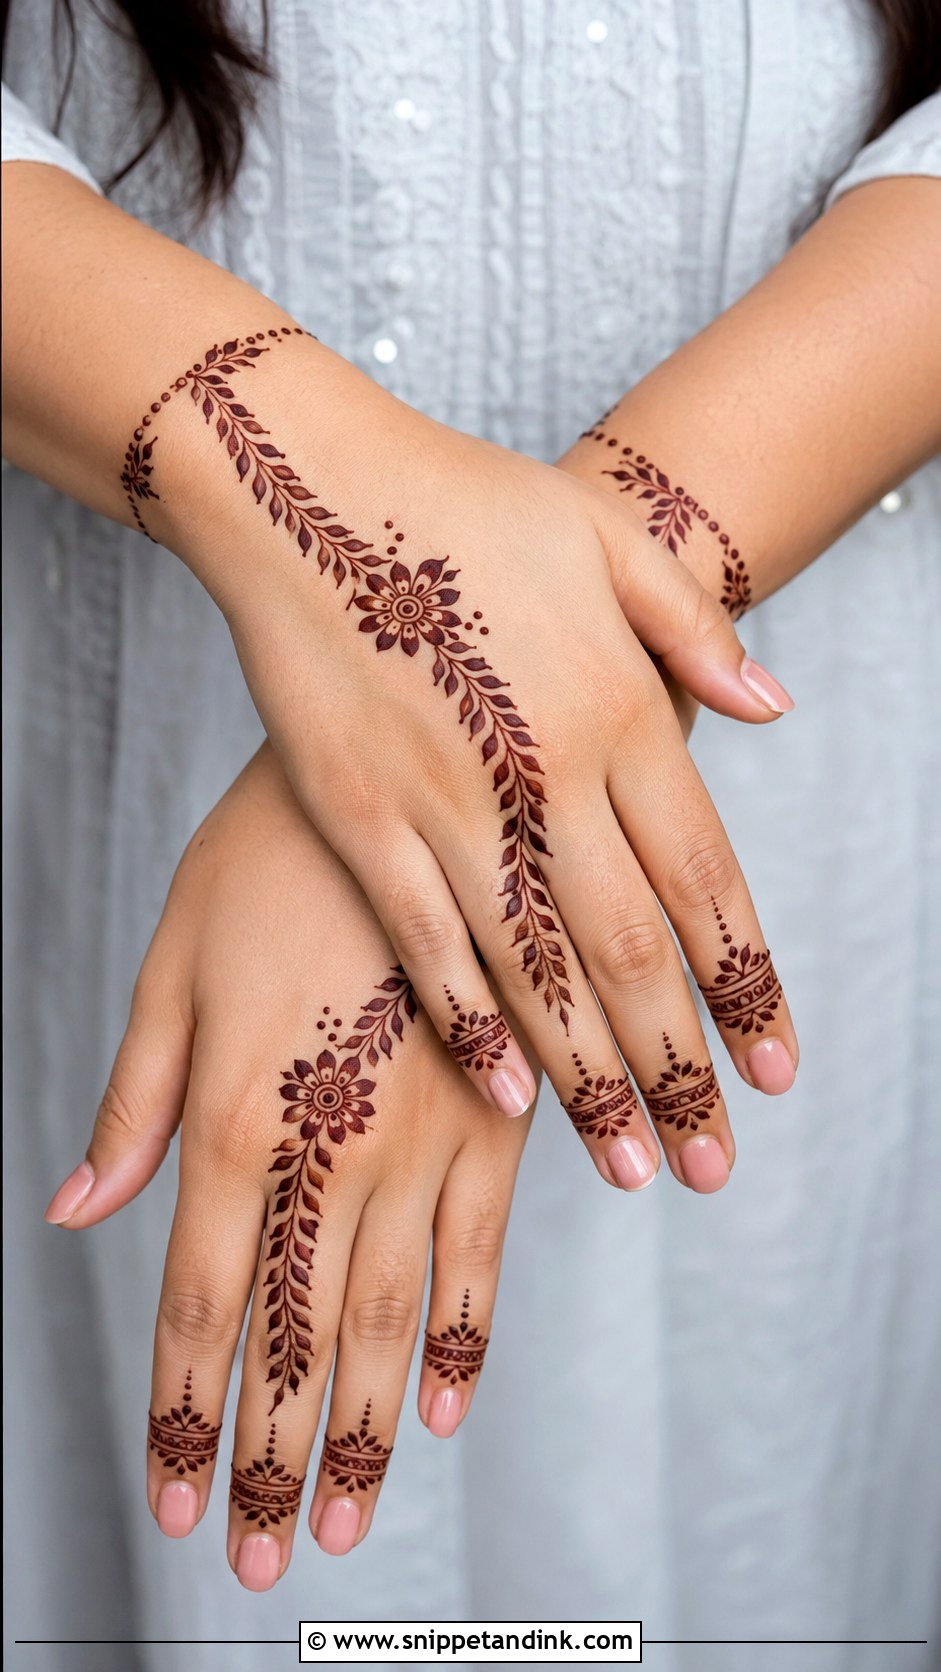
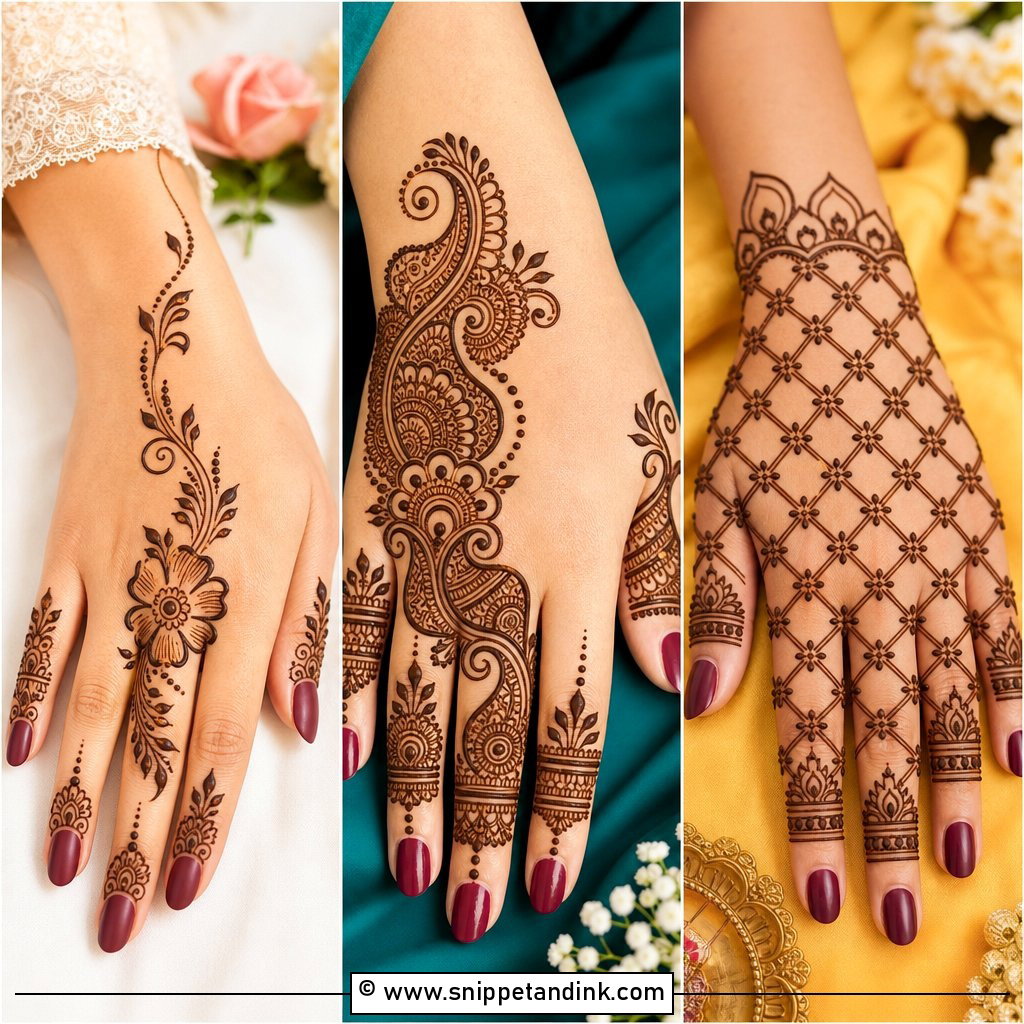
Back-of-hand skin is thinner and drier than the palm, so expect the stain to land a shade or two lighter here. I start with a small flower slightly off-centre, then pull leafy vines diagonally toward the index finger and the wrist. That diagonal is what makes the hand look longer. Fingers get dots, short lines and half flowers rather than solid filling, because solid blocks on knuckles crack as the paste dries and you bend your hand. Guests and teens tend to love this one, and it suits anyone who will be shaking hands all evening.
3. Simple Arabic Mehndi Design
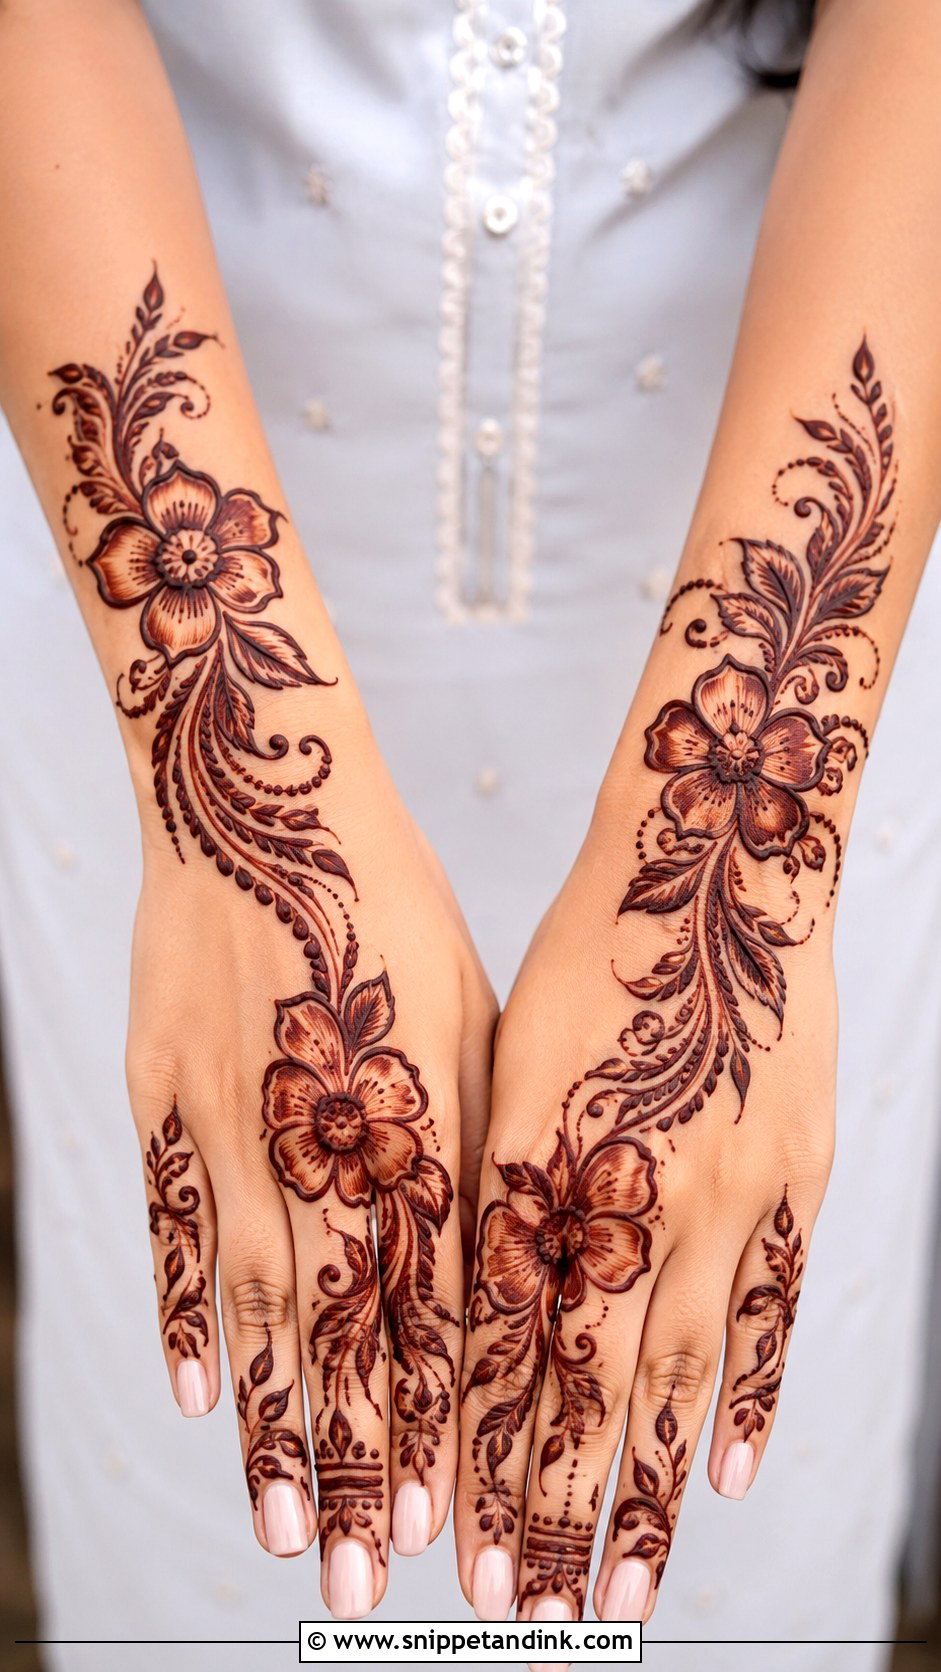
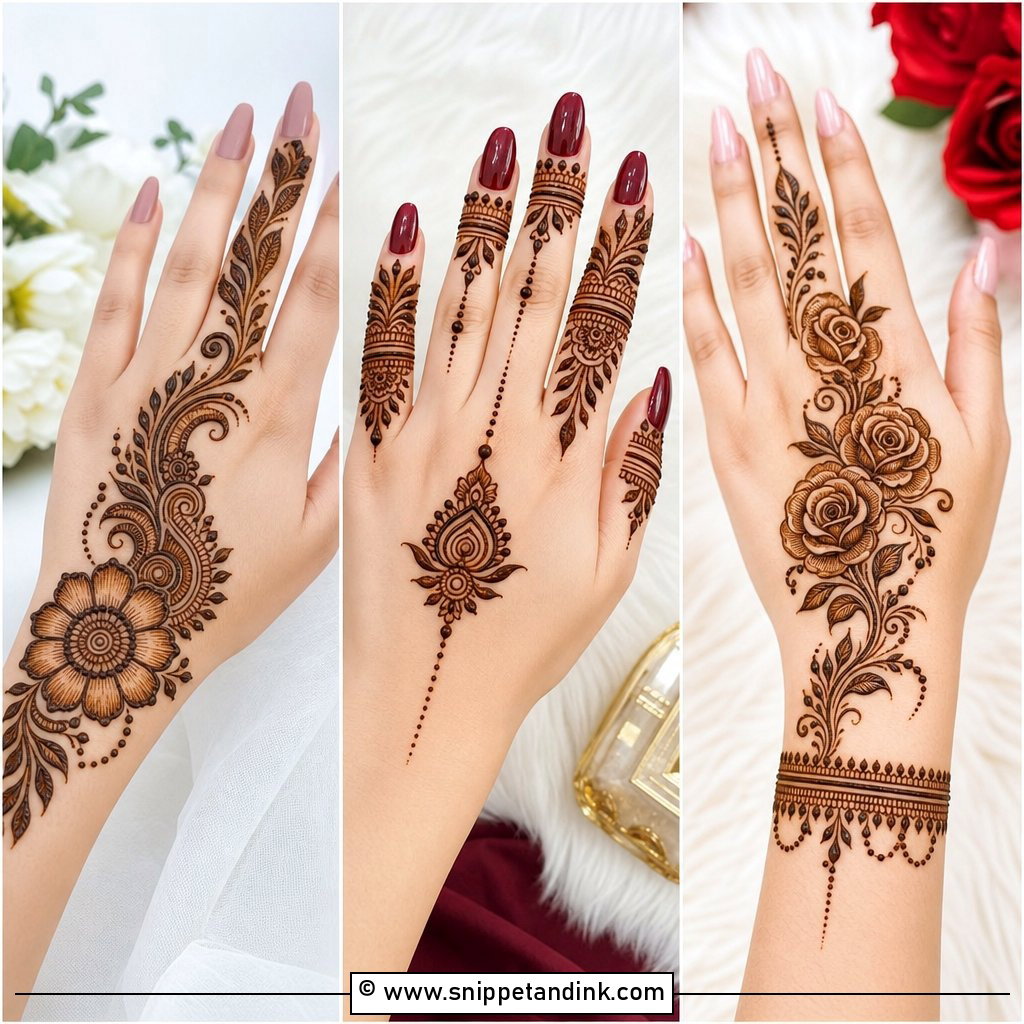
Arabic work is all about weight and air: big flowers, sweeping vines, and generous gaps between them. The pattern usually runs from the wrist to one finger in a soft diagonal trail, which is why I can finish a hand far faster than a full Indian design. I build depth with shaded petals, filling half of each petal with fine lines rather than flooding it with paste. A thick blob of paste does not stain darker than a thin line, it just takes longer to dry and smudges more easily. Eid evenings and festive dinners are where I draw this most.
4. Simple Indian Mehndi Design
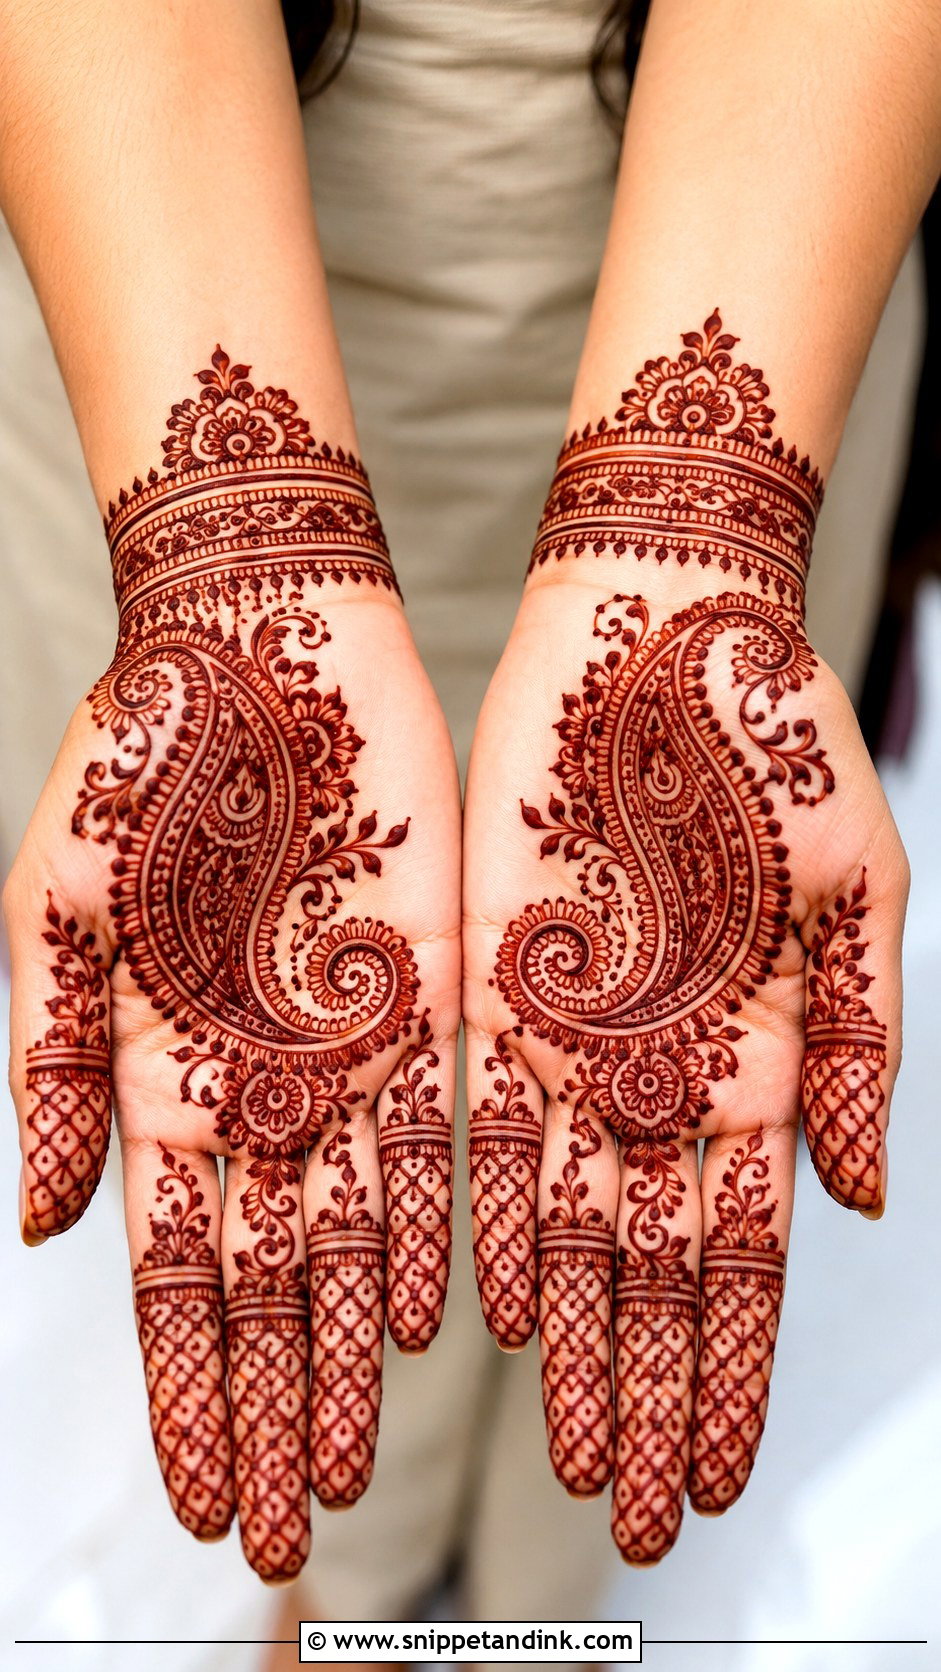
Traditional does not have to mean crowded. I place one central paisley on the palm, add a few small floral circles and curved vines, then close the hand with a neat wrist border. Fingers get checks, dots and petal bands. If you want it to feel richer, I repeat the same tiny motif on every finger instead of adding more to the palm; repetition reads as intentional, extra filling reads as busy. Pujas, engagement functions and family festivals are the natural home for this one.
5. Simple Mandala Mehndi Design
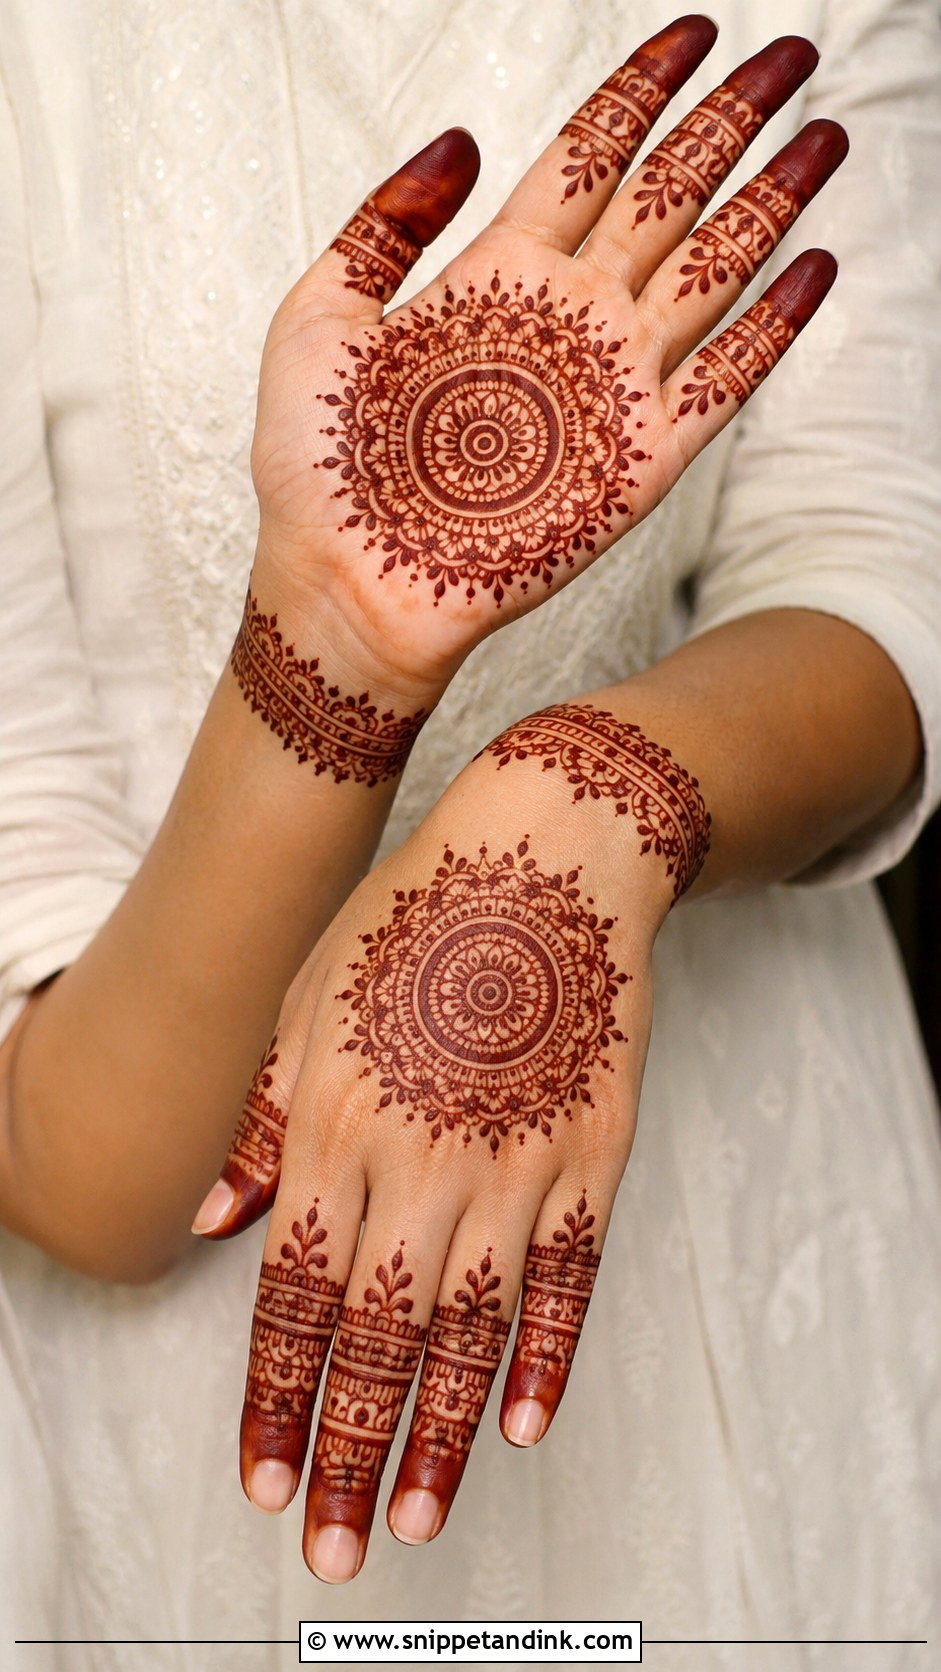
A single mandala gives the hand one clear focal point, and that is exactly why the spacing has to be honest. I draw the centre circle first, then build outward ring by ring: petals, dots, tiny arches. If the circle is even slightly oval, every ring after it exaggerates the error, so I take my time on that first line. Matching finger bands and a slim wrist cuff finish it. Kids sit well for this design because I can complete it in a few minutes per hand.
6. Simple Finger Mehndi Design
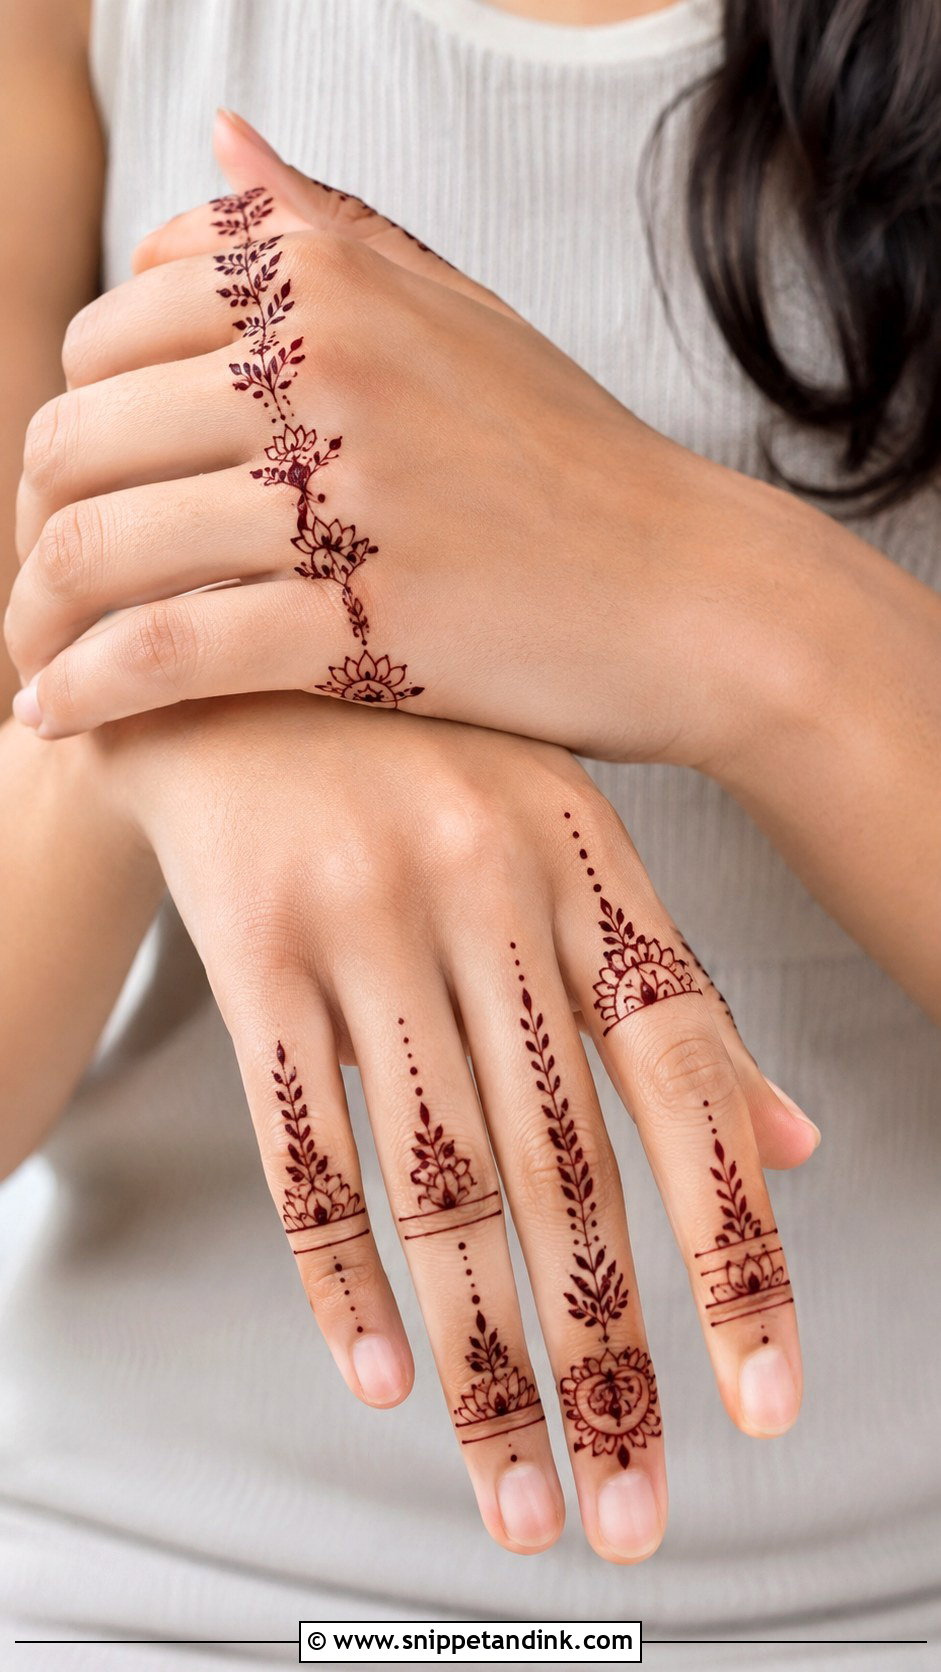
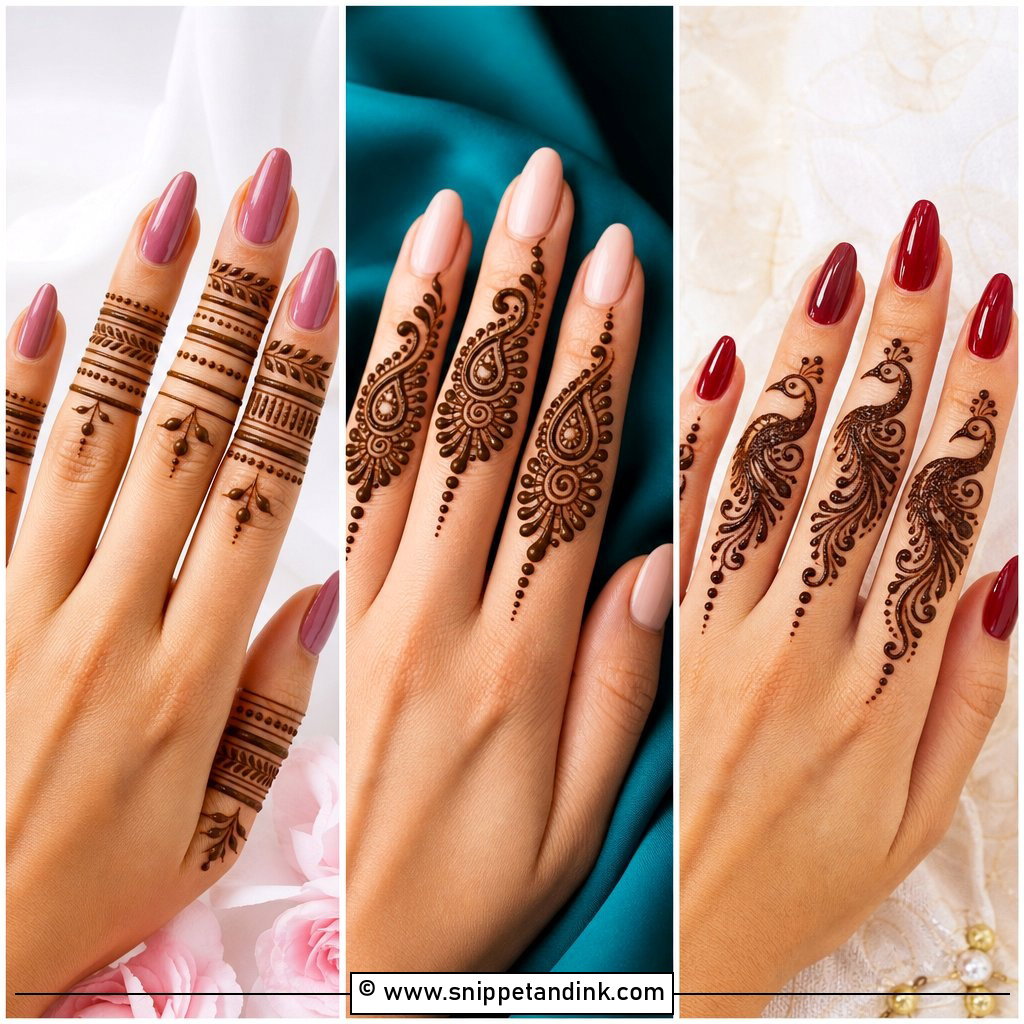
Finger-only work is my answer for anyone who wants mehndi but has to type, cook or hold a toddler the next morning. Each finger gets matching bands, small leaves, dots and fine lines, while the palm stays almost bare or carries one small flower at the base of the fingers. Fingertips and the sides of fingers stain darkest, so even delicate lines come out strong here. It is also my go-to for last-minute requests, since paste on fingers dries quickly and you are free to move sooner.
7. Simple Floral Mehndi Design
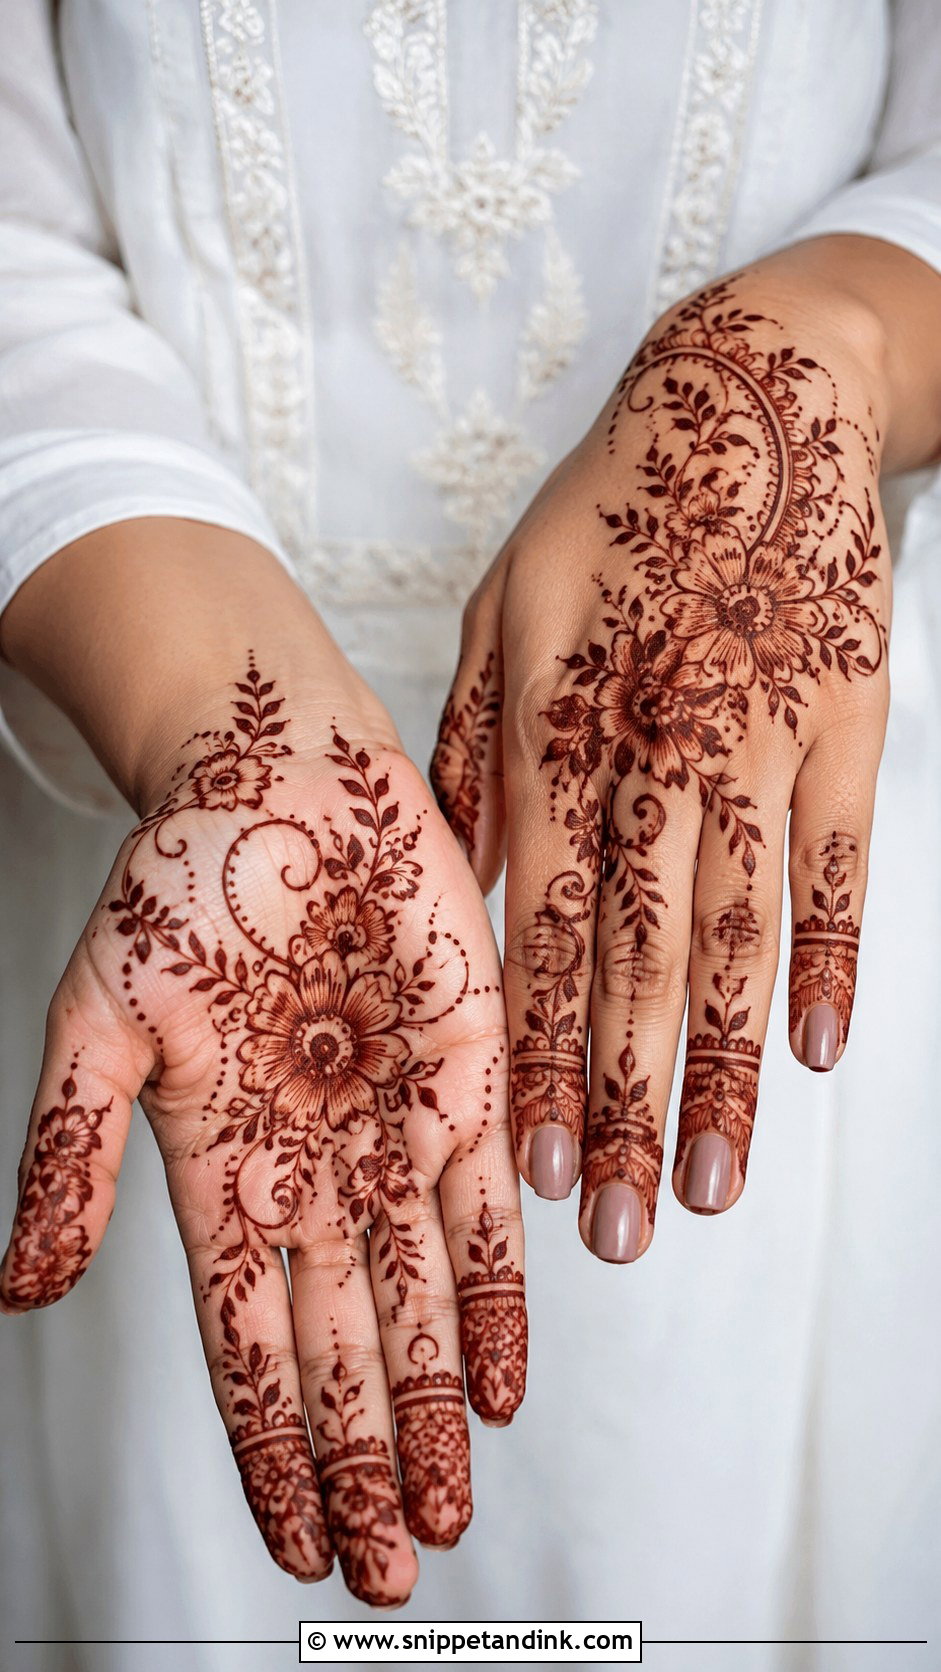
Flowers forgive a shaky hand more than any other motif, which is why I teach them first. One large bloom sits on the palm or back of the hand, with smaller ones around it and leafy vines linking them. I keep petals rounded and fairly bold, because very thin petal outlines can blur into each other as the stain oxidises. Dotted trails fill gaps without adding weight. Leave visible skin between each flower and the whole hand looks cleaner and more current.
8. Simple Rose Mehndi Design
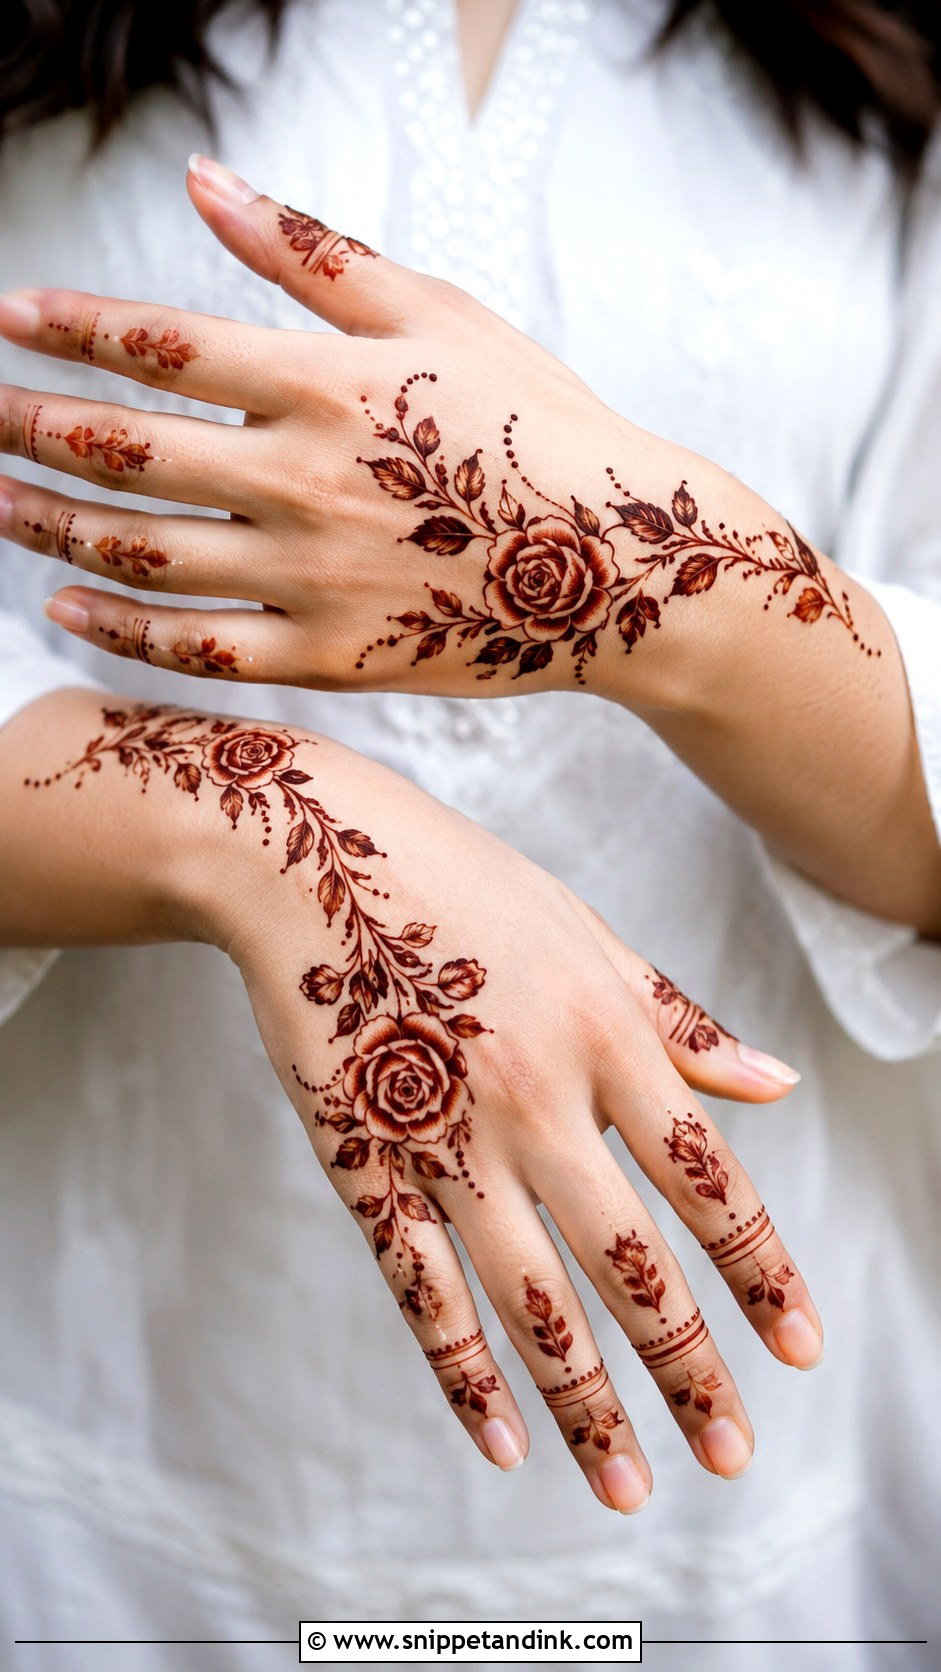
A rose looks hard and isn’t. I draw it as a small spiral centre with three or four cupped petals wrapped around it, placed near the middle of the back hand or palm, then add curved leaves and a couple of buds. Fingers get thin leafy bands and petal tips, and the wrist takes either one curved vine or a bracelet border. Resist heavy shading inside the rose; a bold outline stains more clearly and survives a slightly uneven application far better than fine hatching does. Engagement guests and festive outfits suit it well.
9. Simple Paisley Mehndi Design
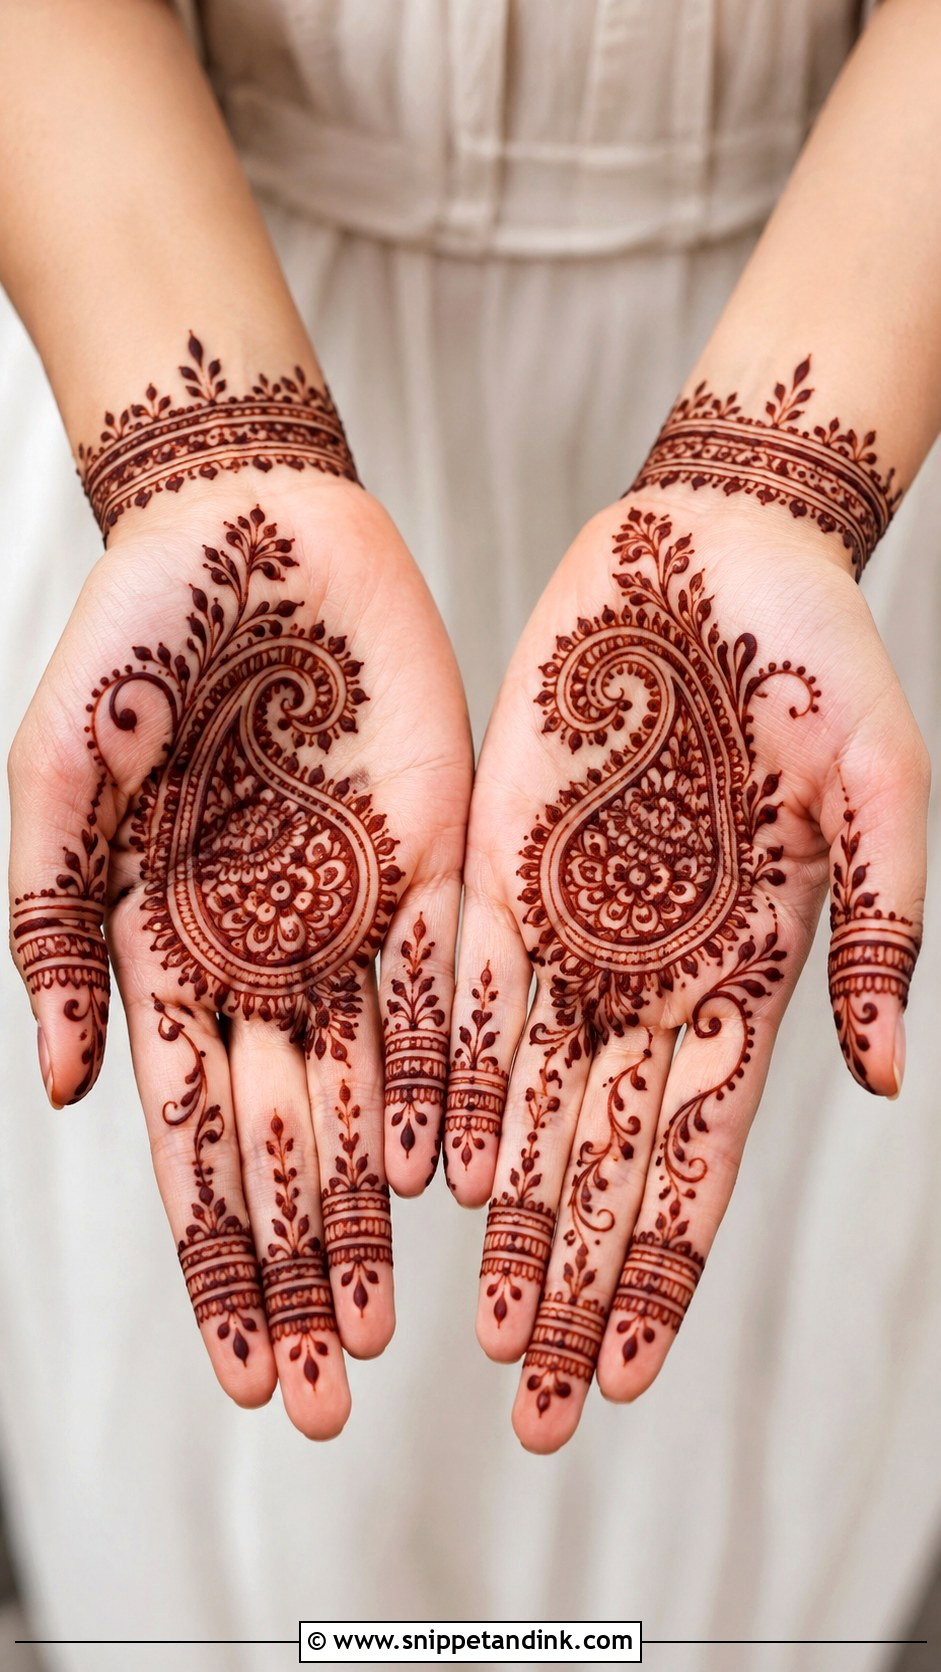
Paisley carries a traditional feel even when the rest of the hand is sparse. I use one or two on the palm, filled with dots, petals and curved lines, and let a leafy vine run from the tip of the paisley toward the wrist or fingers. That tail is what gives the hand movement. The mistake I see most is filling every gap around the paisley; it stops looking simple the moment you do. Pre-wedding functions and Indian festivals are where this shape feels most at home.
10. Simple Full Hand Mehndi Design
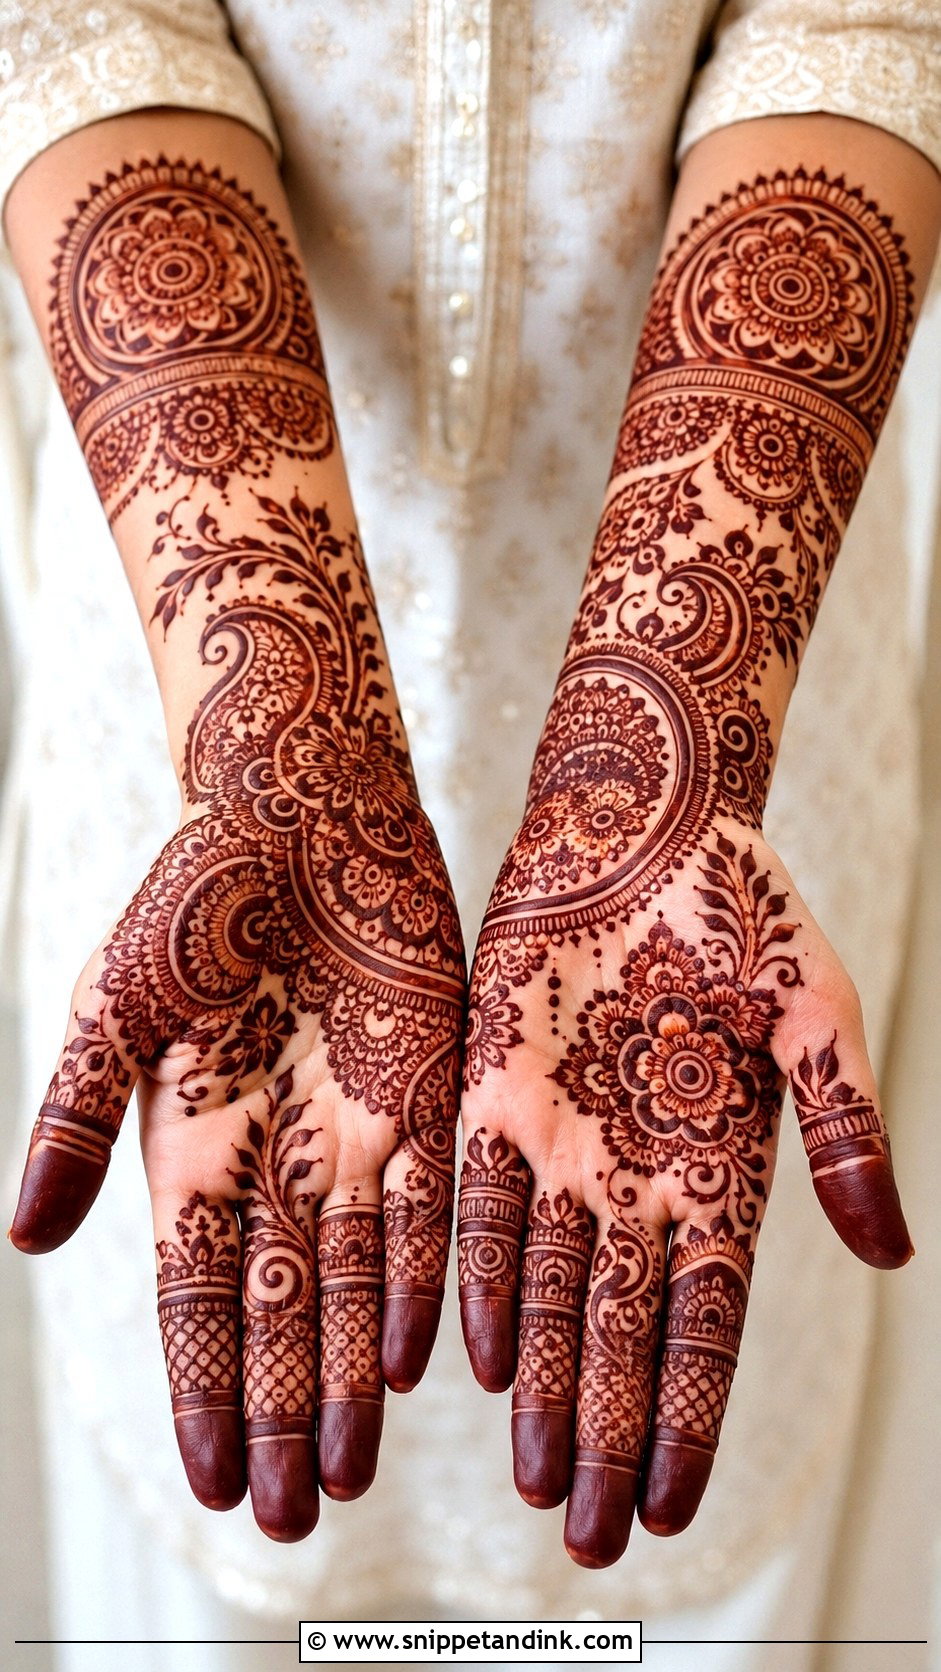
Full coverage and simple can coexist if the motifs get bigger, not more numerous. I divide the hand into sections with soft borders and place one complete flower, paisley or mandala in each, which fills the hand quickly and keeps it readable from across a room. Fingers alternate between bands and leaf patterns. Plan for drying time here: a full hand needs to stay still far longer than a finger design, so I usually suggest the guest eats before we start. Keep the forearm border slim or the whole thing starts to look bridal.
11. Simple Half Hand Mehndi Design
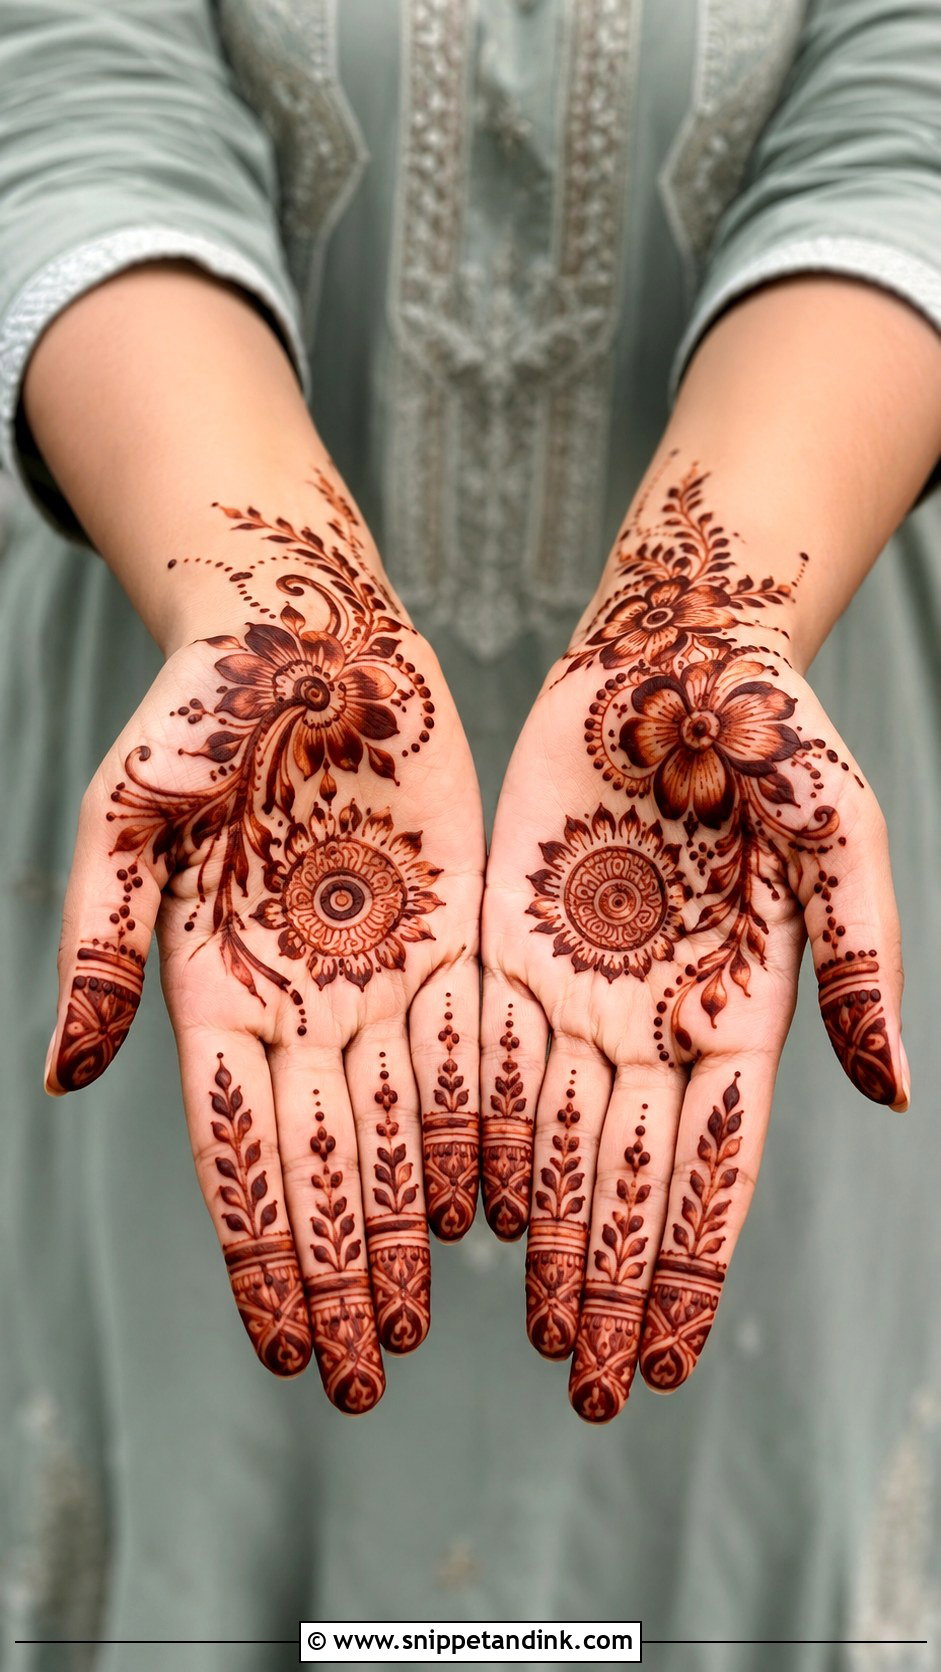
Half-hand coverage is my most requested middle ground. It covers either the palm and fingers or the back hand plus part of the wrist, anchored by one bold floral or mandala motif and extended with leafy curves and dotted fillers. The bare lower palm or wrist keeps it relaxed. Because the area is smaller, it is a sensible first full layout for anyone practising at home. I always echo the main motif on the fingers so the two parts look like one design.
12. Simple Bracelet Mehndi Design
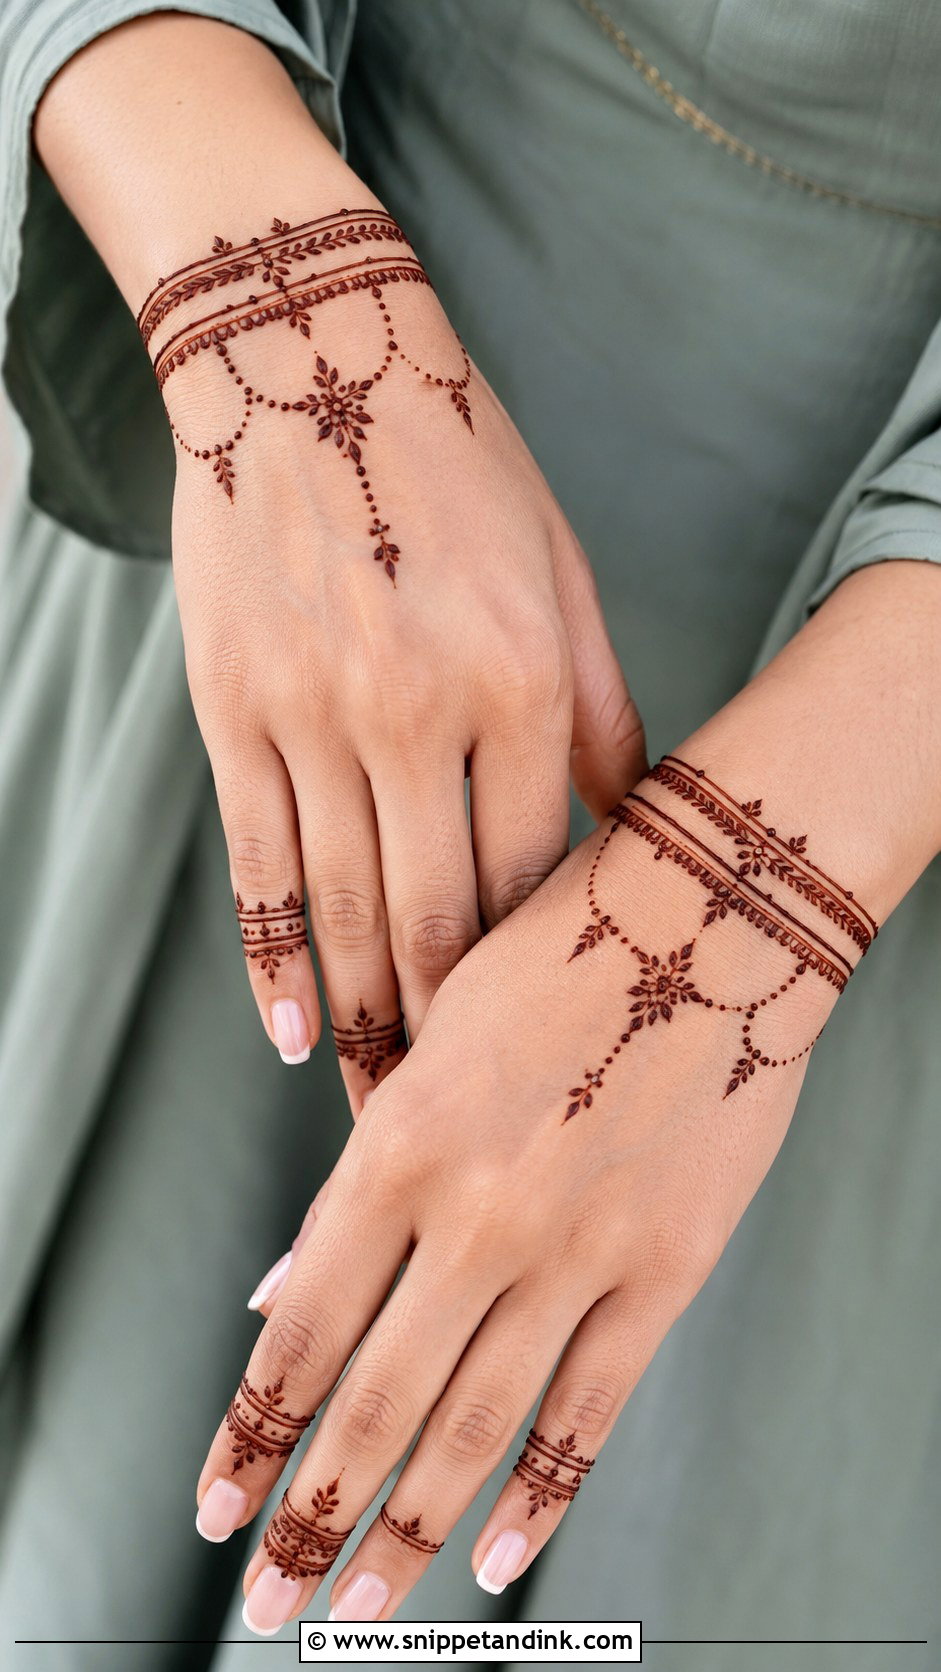
Think of this as jewellery drawn on skin. The work sits around the wrist in thin bands, dots, leaves and small hanging drops, with a fine chain running toward one finger and ending in a flower or ring shape. The wrist bends constantly, so I keep the bands slightly apart; lines drawn too close together tend to merge into a single smear as you move. Modern outfits and light festive looks suit it, and the palm stays free for anyone who works with their hands.
13. Simple Ring Mehndi Design
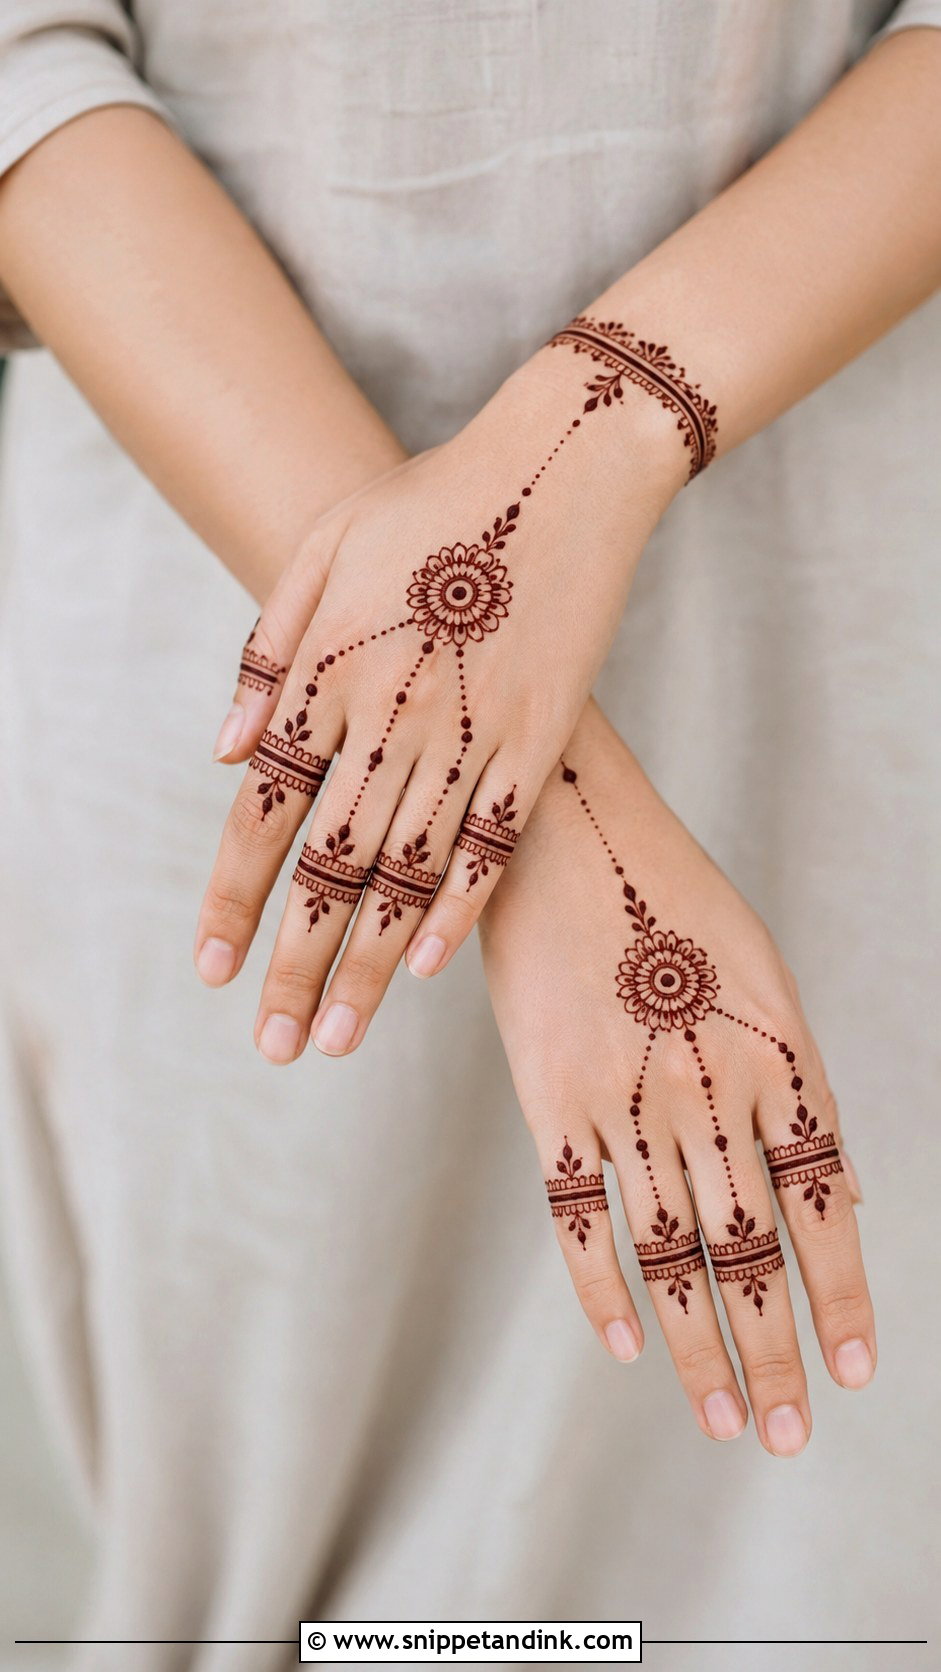
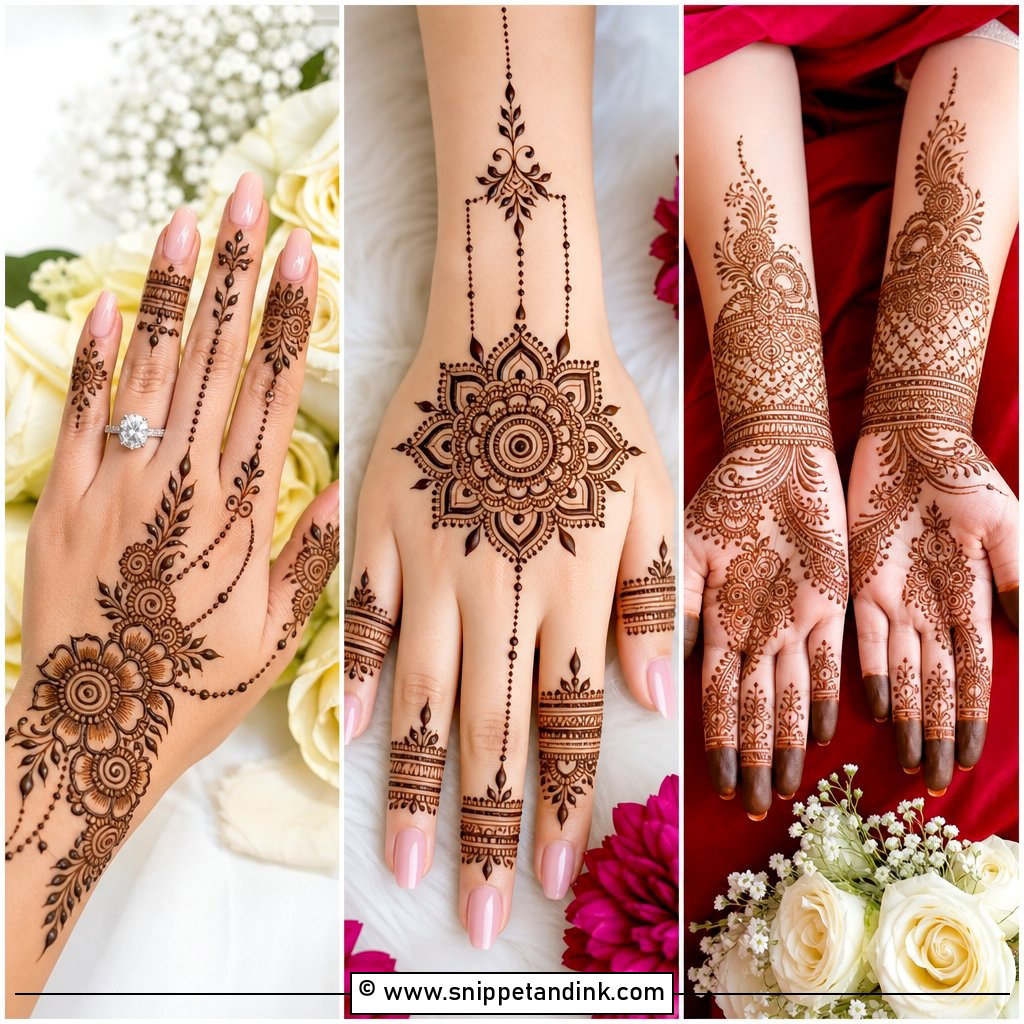
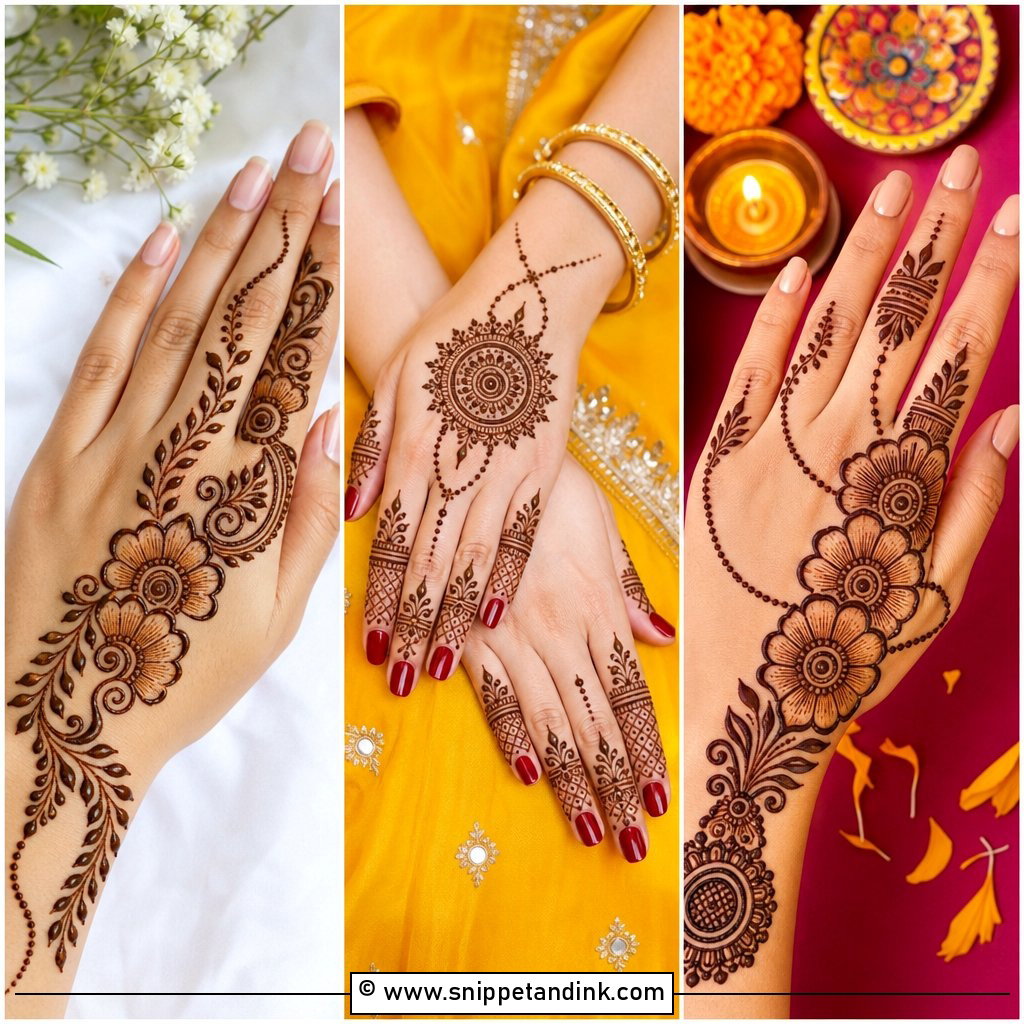
Ring designs connect finger art with a small motif on the back of the hand. I draw a band around one or more fingers, then link it with dotted chains to a floral circle or mini mandala. A slim wrist band is optional. The dots in those chains need even spacing and even size, or the jewellery effect falls apart, so this is a design where I slow down. Engagement guests choose it often, especially those wearing an actual ring they want to show off.
14. Simple Bel Mehndi Design
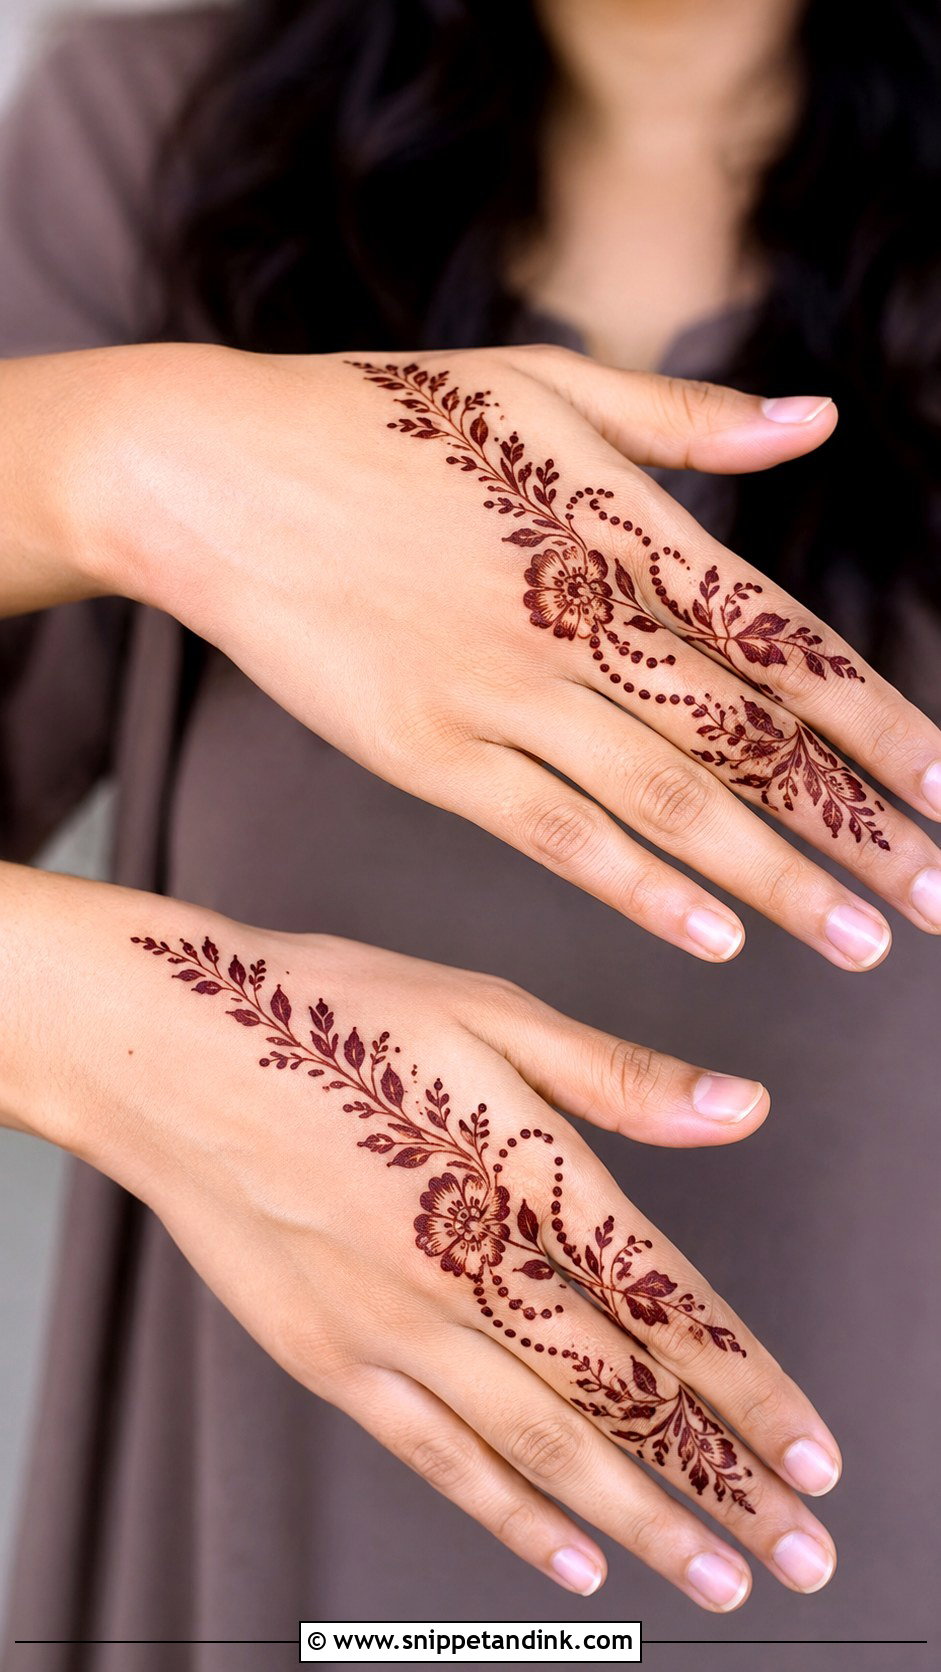
Bel means vine, and the whole design follows one path: from the wrist, diagonally across the palm or back hand toward the index finger, decorated with leaves, flowers and dots along the way. Because it is a single line of travel, it is one of the fastest layouts I draw. A second, smaller vine along the side of the hand fills it out if you want more. My one rule is that every leaf points the same way along the flow; leaves facing in random directions are what make a bel look amateur.
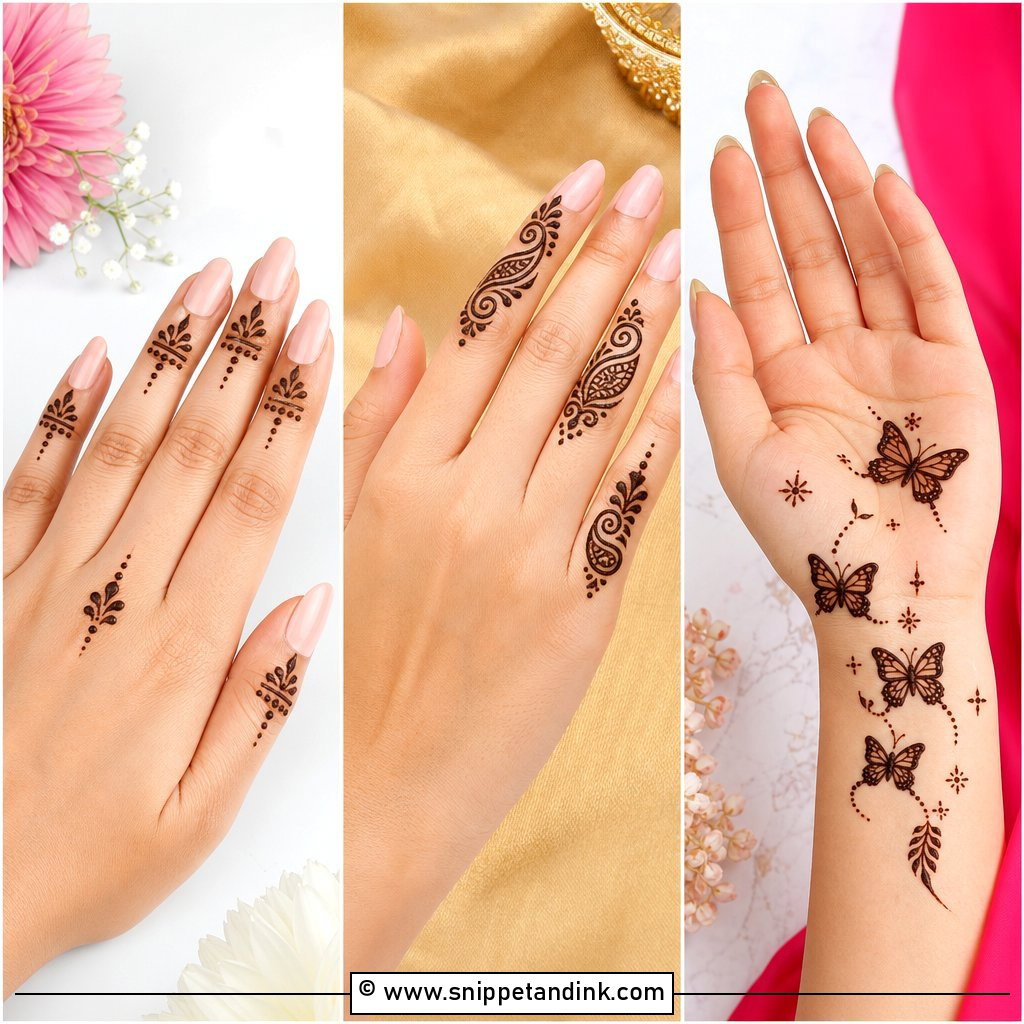
15. Simple Tikki Mehndi Design
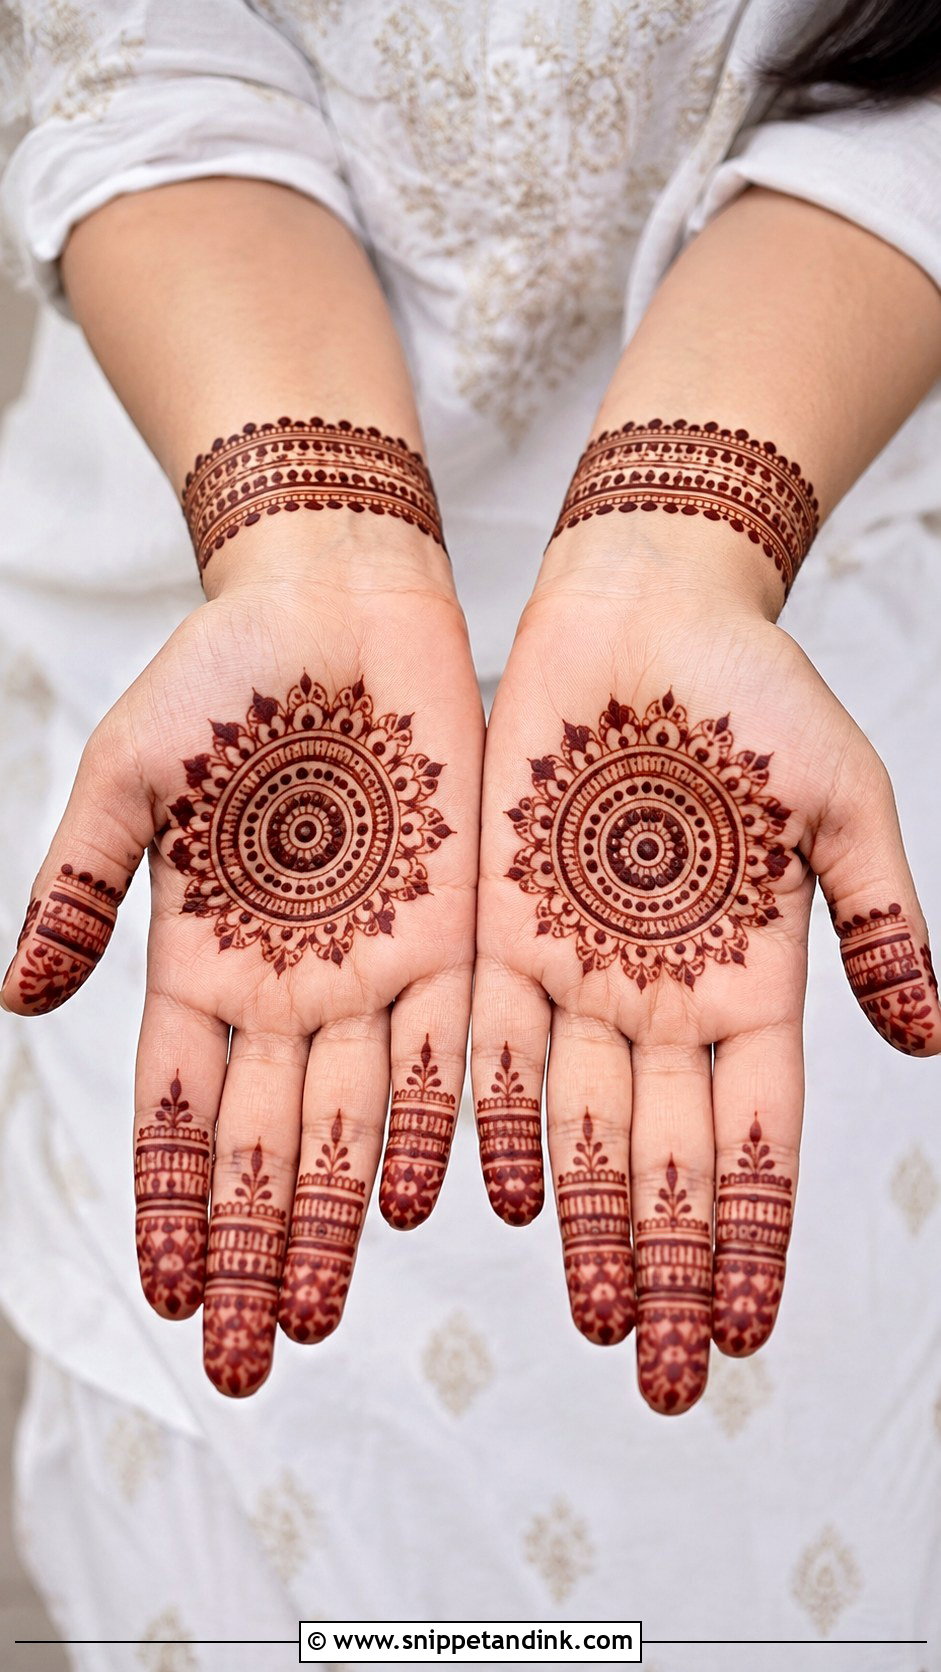
The tikki is the round centre motif of a classic palm, and its success depends on paste thickness. Too thin and the circle stains blotchy; too thick and it cracks off early before the colour has transferred. I aim for an even, raised line, then surround the tikki with petals, dots and small circular borders. Fingers get matching bands and tiny leaves, and a simple wrist cuff closes the hand. Leaving clear skin between the tikki and the fingers is what keeps this old favourite looking fresh.
16. Simple Jaali Mehndi Design
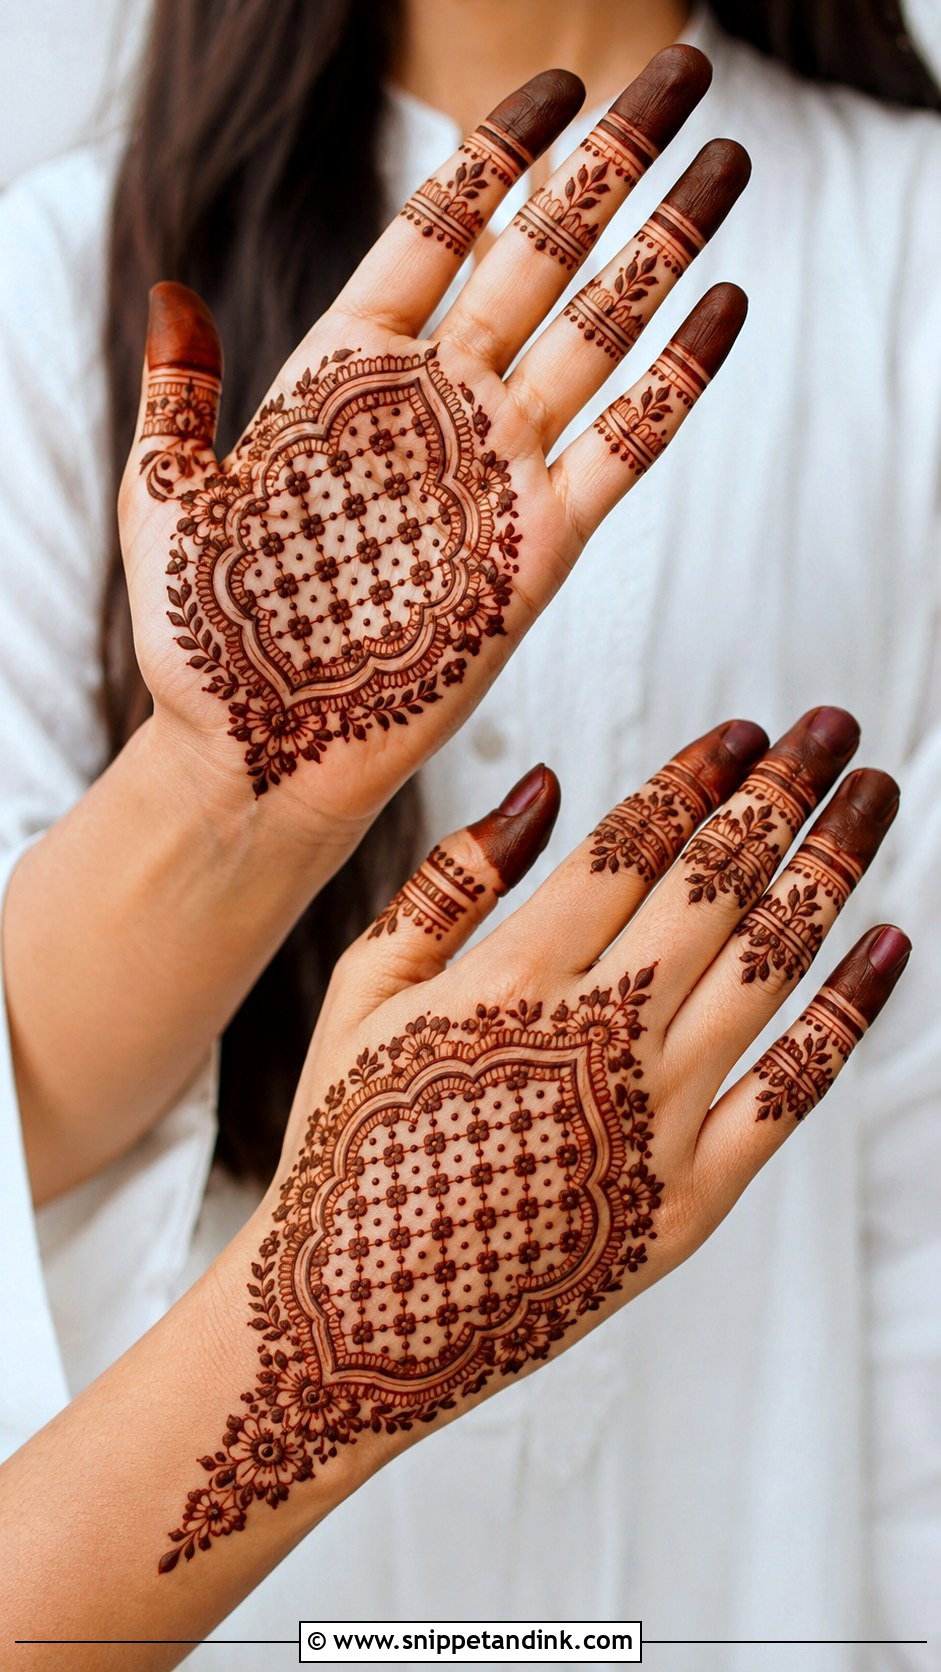
Jaali is a net pattern, and the grid spacing makes or breaks it. I keep the squares wider than feels natural, because henna lines spread a little as they stain and a tight grid closes up into a dark patch. A small jaali panel on the palm or back hand gets framed with flowers or curved borders, with a dot inside some squares for detail. Fingers get bands that match the grid spacing. Leave one side of the hand open to balance it out.
17. Simple Peacock Mehndi Design
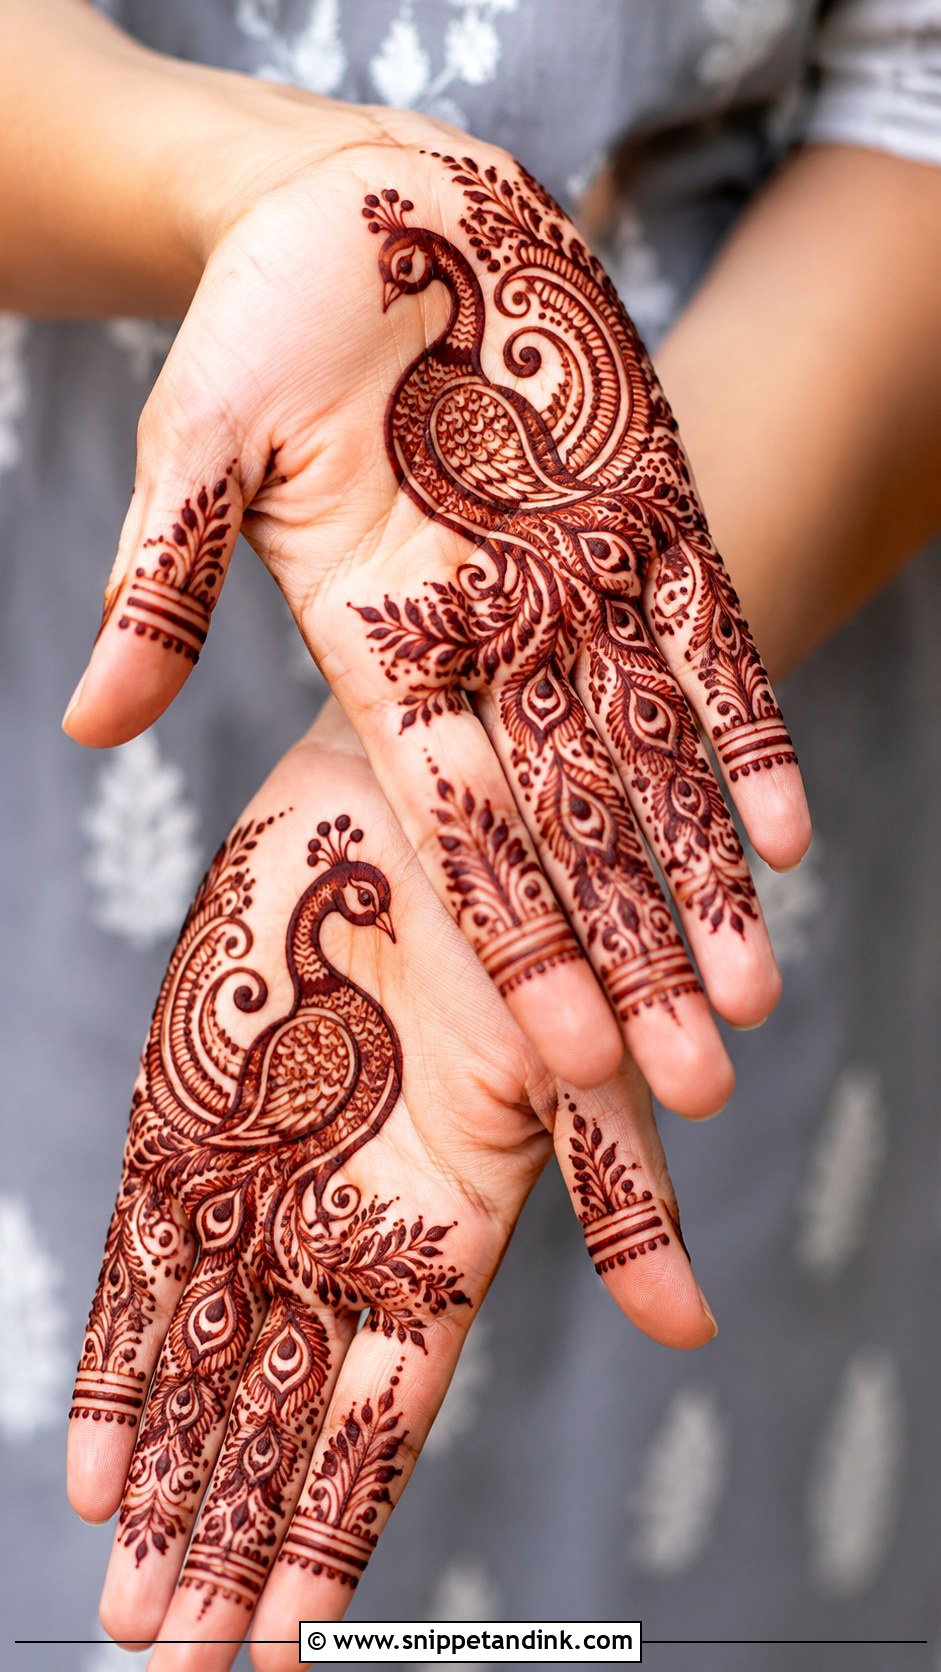
Clients often ask for a peacock and then worry it will be too busy. It doesn’t have to be. I draw one clean body with a curved neck and a single flowing tail, then add small paisleys, dots and leaves inside the tail feathers. The peacock is the whole story, so the fingers stay simple with bands and tiny motifs. The neck curve is where a hesitant line shows, so I draw it in one confident stroke rather than in short dabs.
18. Simple Indo Arabic Mehndi Design
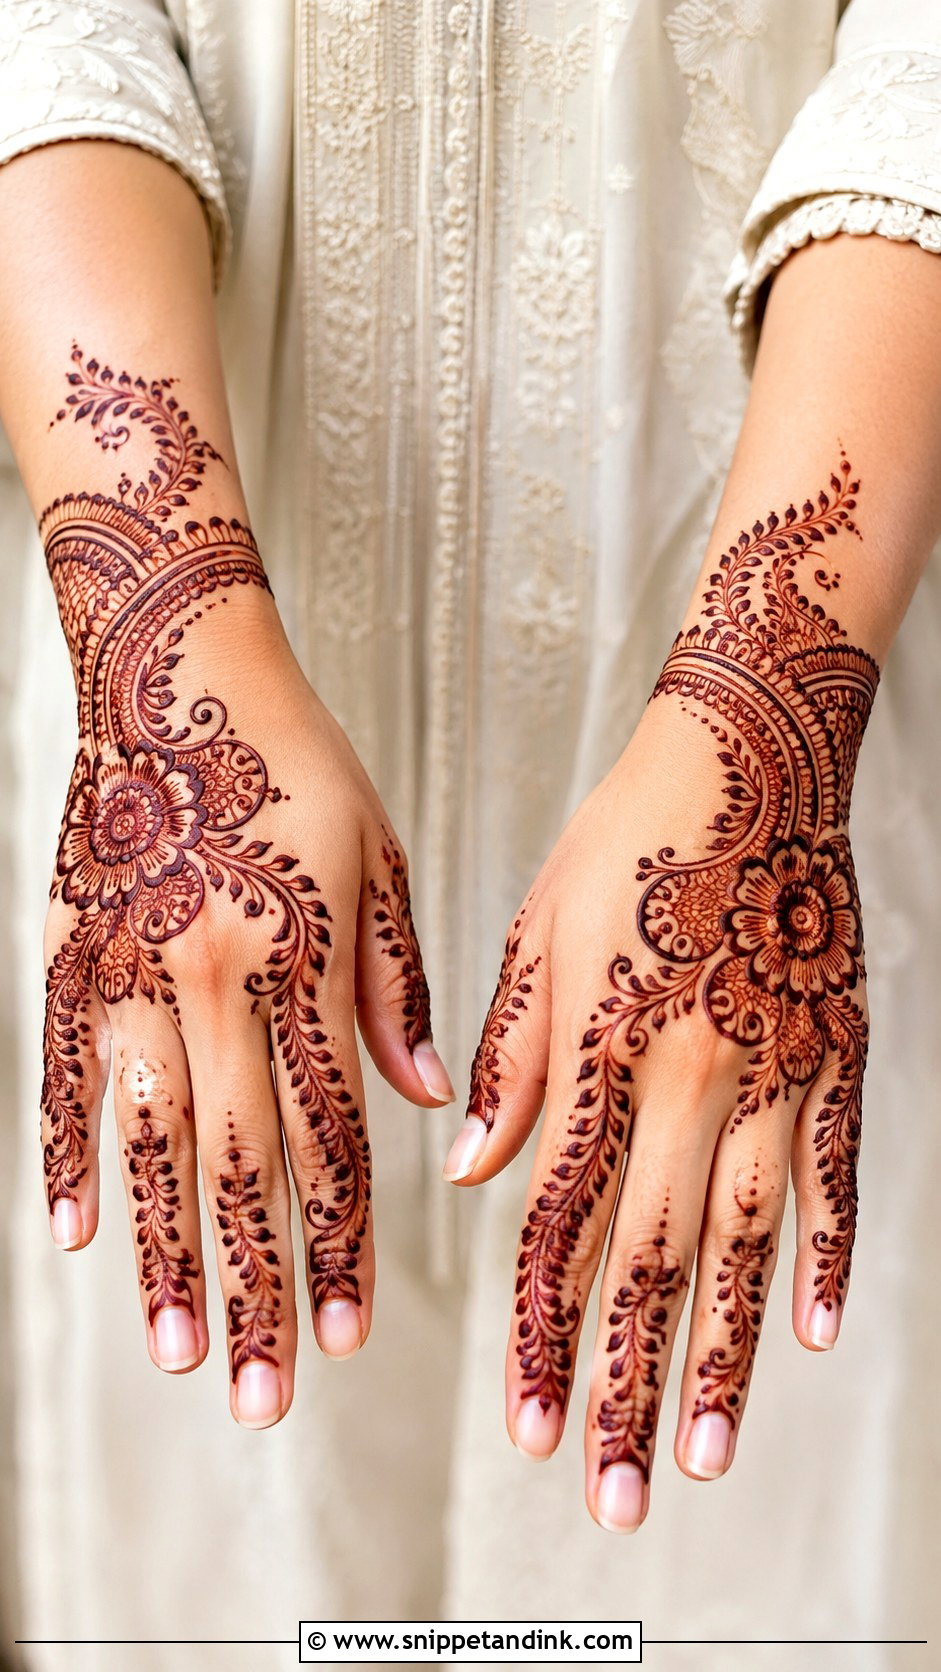
Indo-Arabic takes Indian detail and gives it Arabic breathing room. Bold flowers, paisleys and leafy trails sit on a mostly bare background, starting with a curved floral band at the wrist and travelling toward one finger. I tuck small Indian-style fillers inside the larger shapes rather than around them, so the background stays open. It works on the front or back of the hand and on any skin tone. When a guest can’t decide between the two styles, this is usually where we land.
19. Simple Modern Mehndi Design
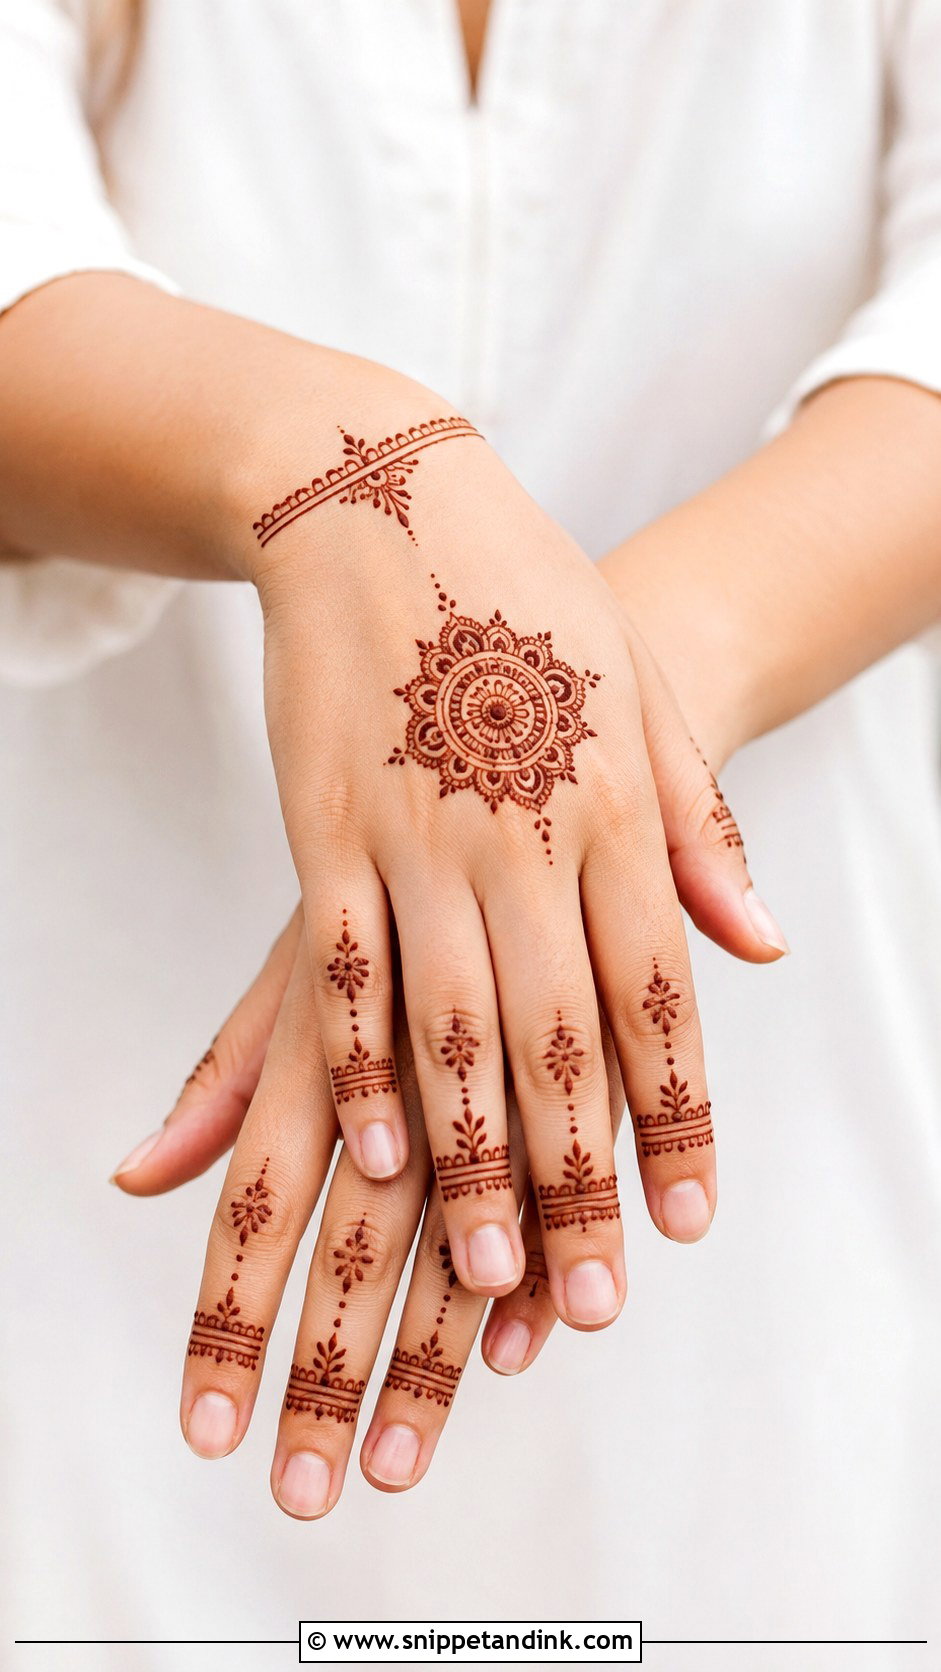
Modern mehndi lives on placement. A small mandala, a thin wrist band and decorated fingers on the back of the hand; or tiny florals spaced across the palm like a print on fabric. The difference between intentional and empty is consistency: equal gaps, repeated motif sizes, lines of the same weight. I use a finer cone tip for this style. It pairs well with contemporary outfits, and the less you draw, the more the natural stain colour becomes part of the look.
20. Simple Minimal Mehndi Design
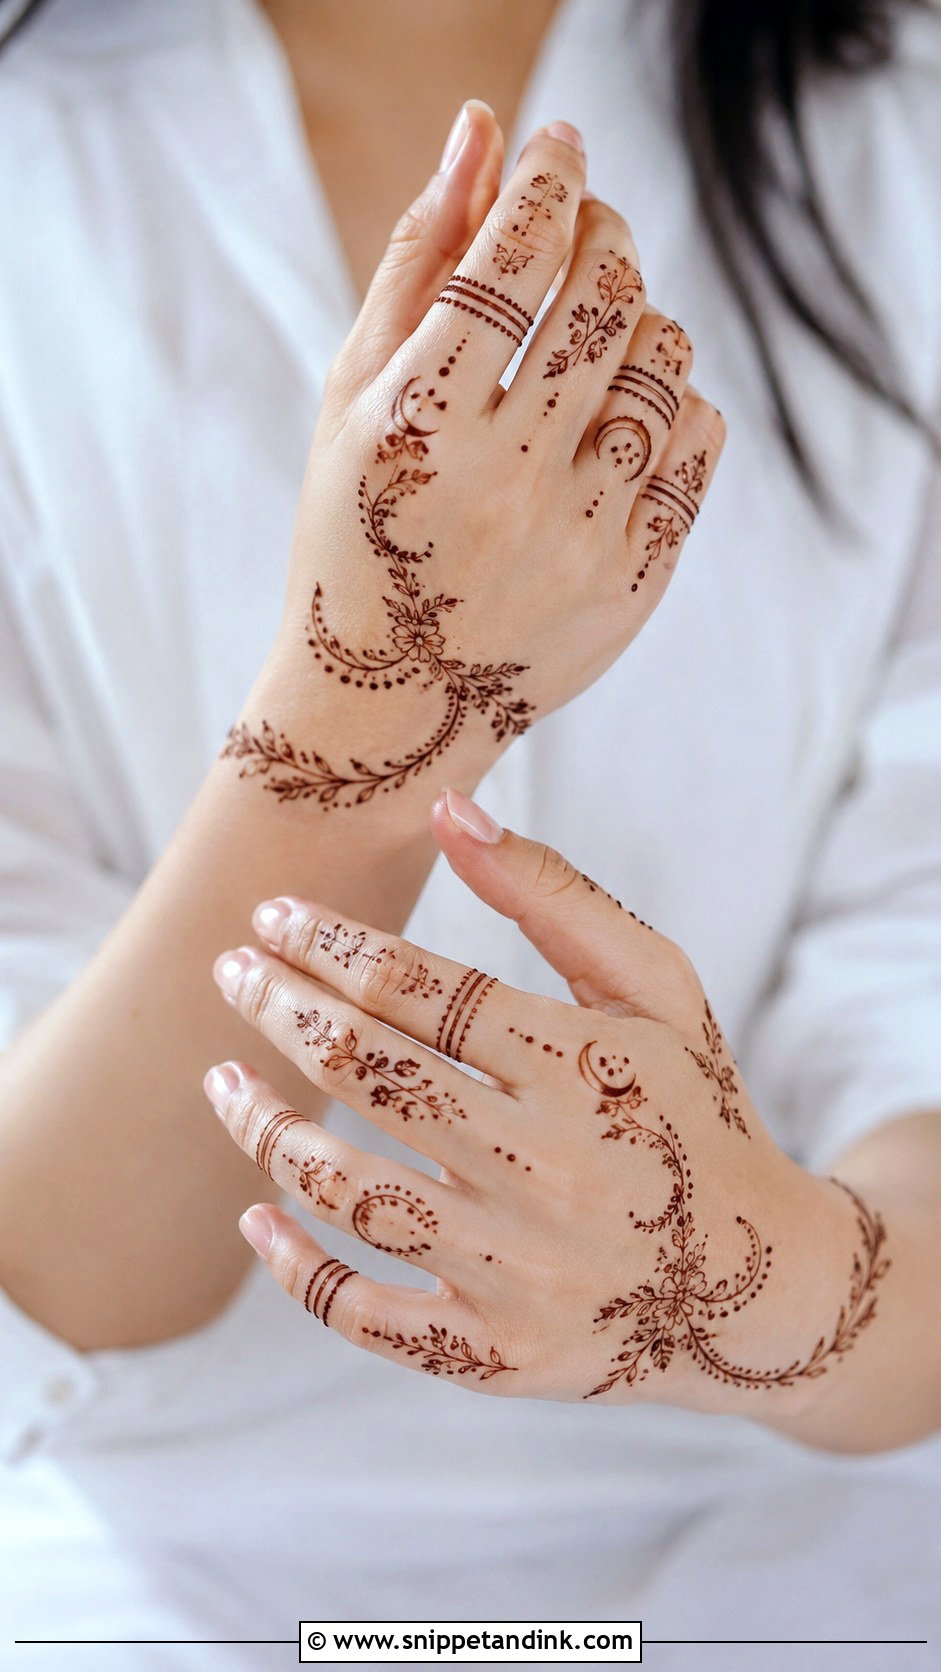
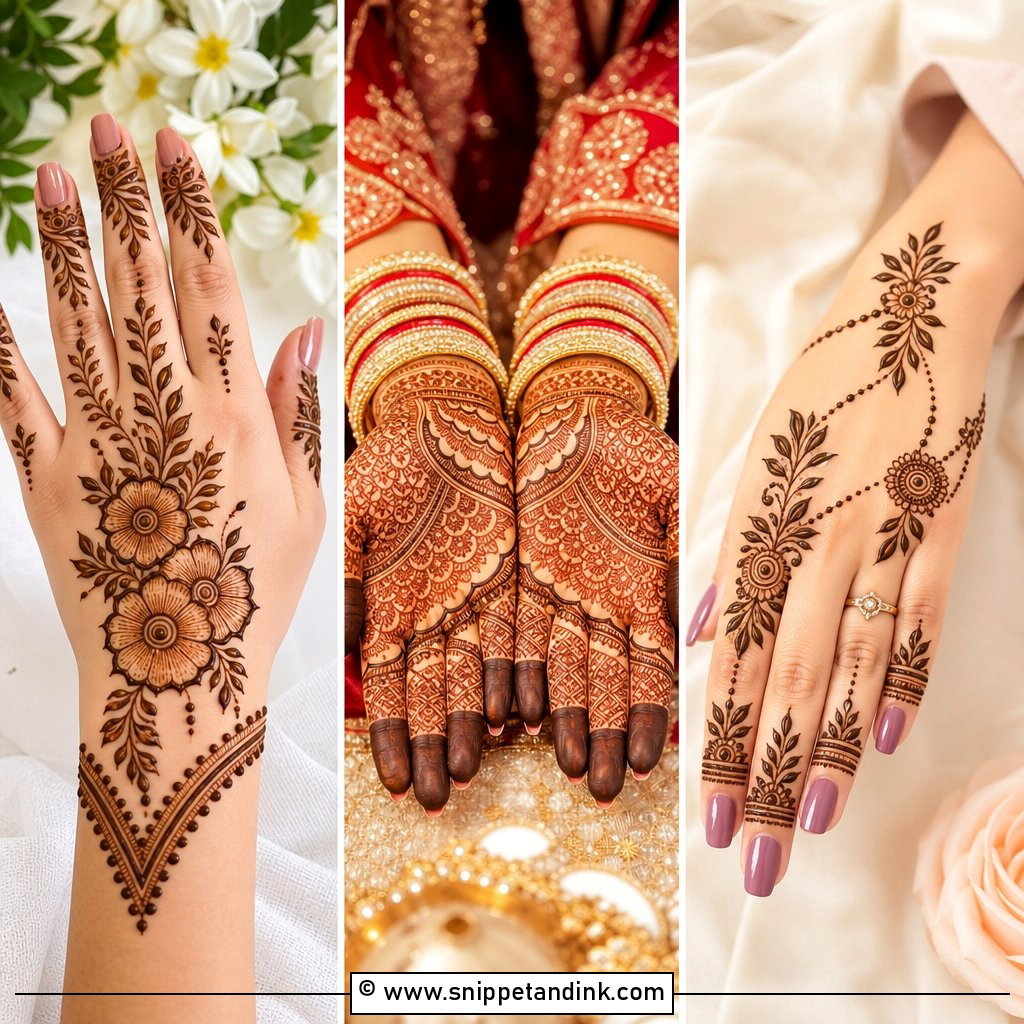
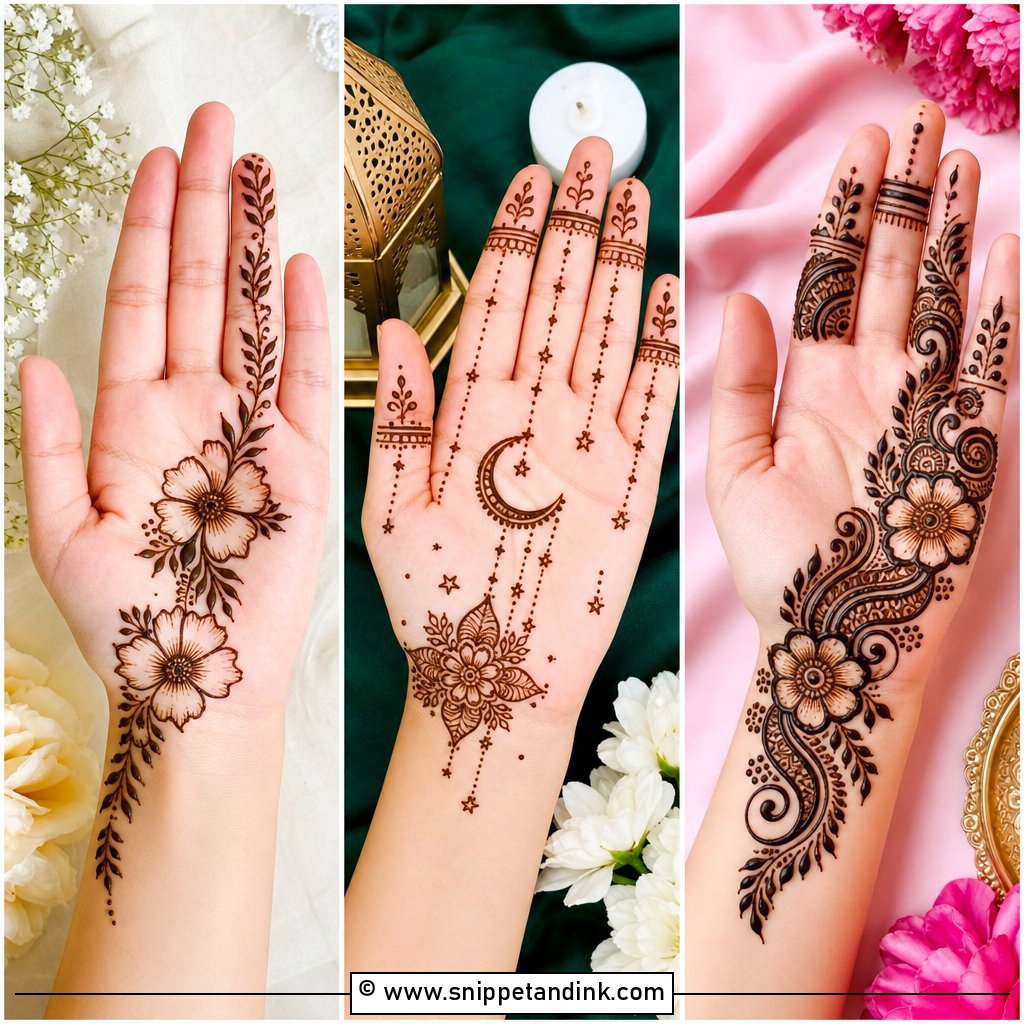
Minimal means picking one zone and doing it well: the fingers, the wrist or the centre of the palm. Small flowers, dots, crescent moons, thin bands and tiny leaves are enough. Most of the skin stays bare. It suits office events, casual gatherings and anyone who dislikes heavy coverage, and it is realistic to apply at home. With so little on the hand, a single shaky line is obvious, so practise the main motif on paper first.
21. Simple Bridal Mehndi Design
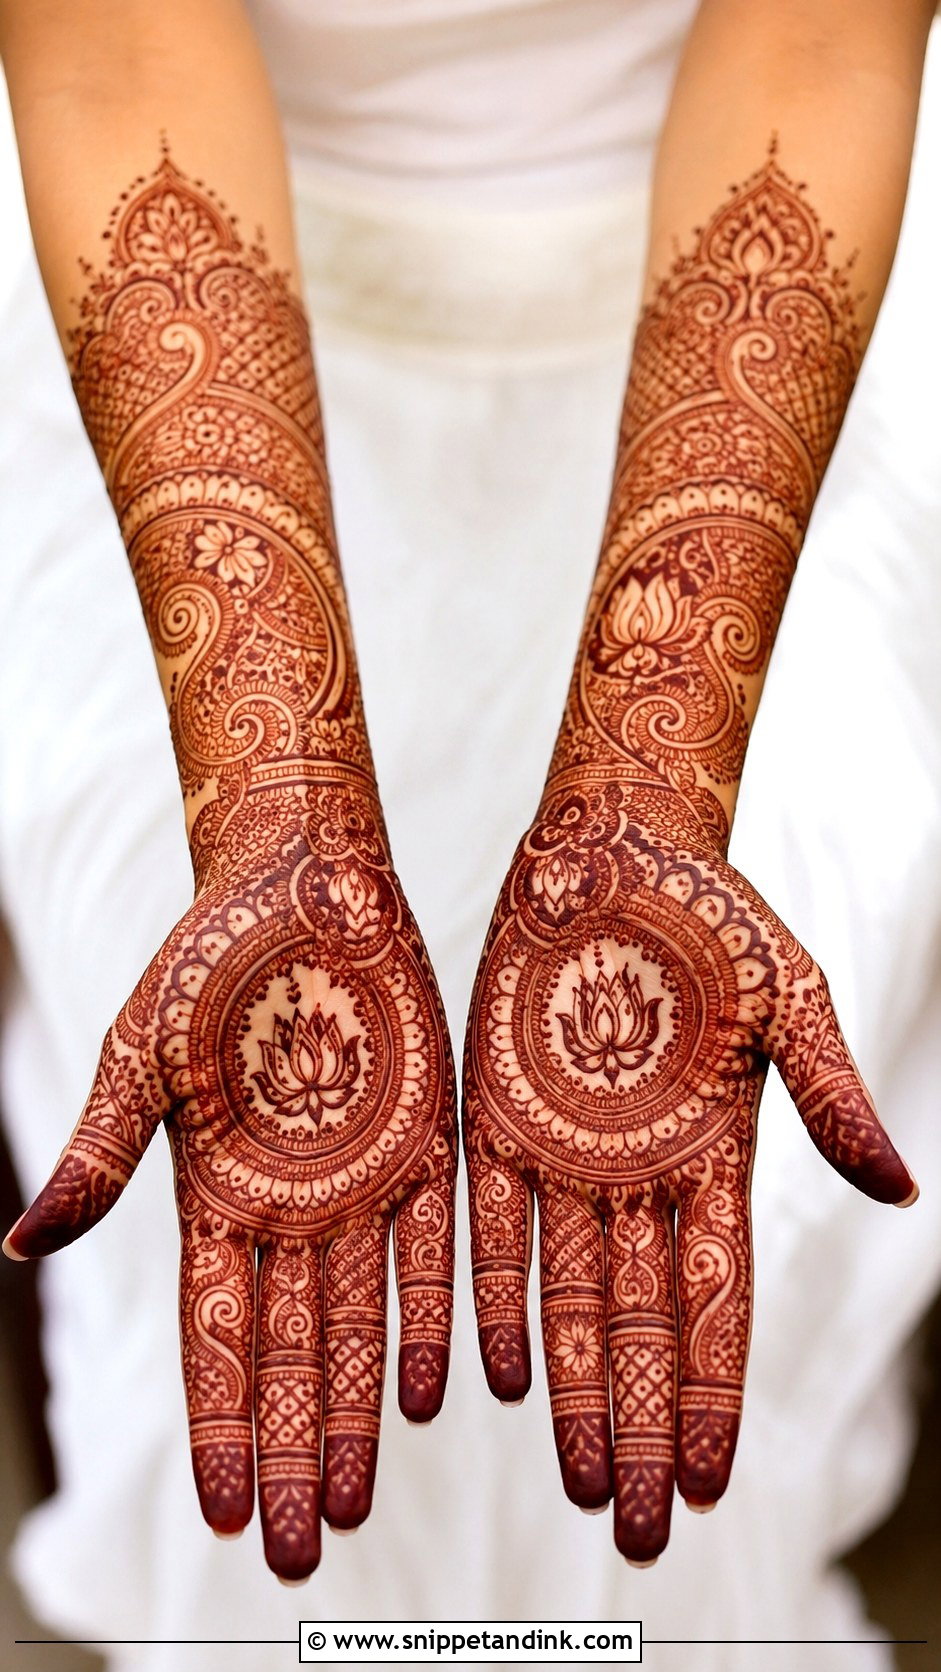
Not every bride wants elbow-length density. For a lighter bridal hand I scale up the motifs, using lotus flowers, paisleys, mandalas and jaali panels to cover more skin with fewer strokes, then add a clean floral vine from wrist to forearm so it still reads as bridal. Fingers stay detailed but never packed. Initials or a small meaningful symbol can hide inside one of the larger motifs. This is the design where I insist on a trial patch with the actual paste a few weeks before, because a bride’s stain has no second chance.
22. Simple Eid Mehndi Design
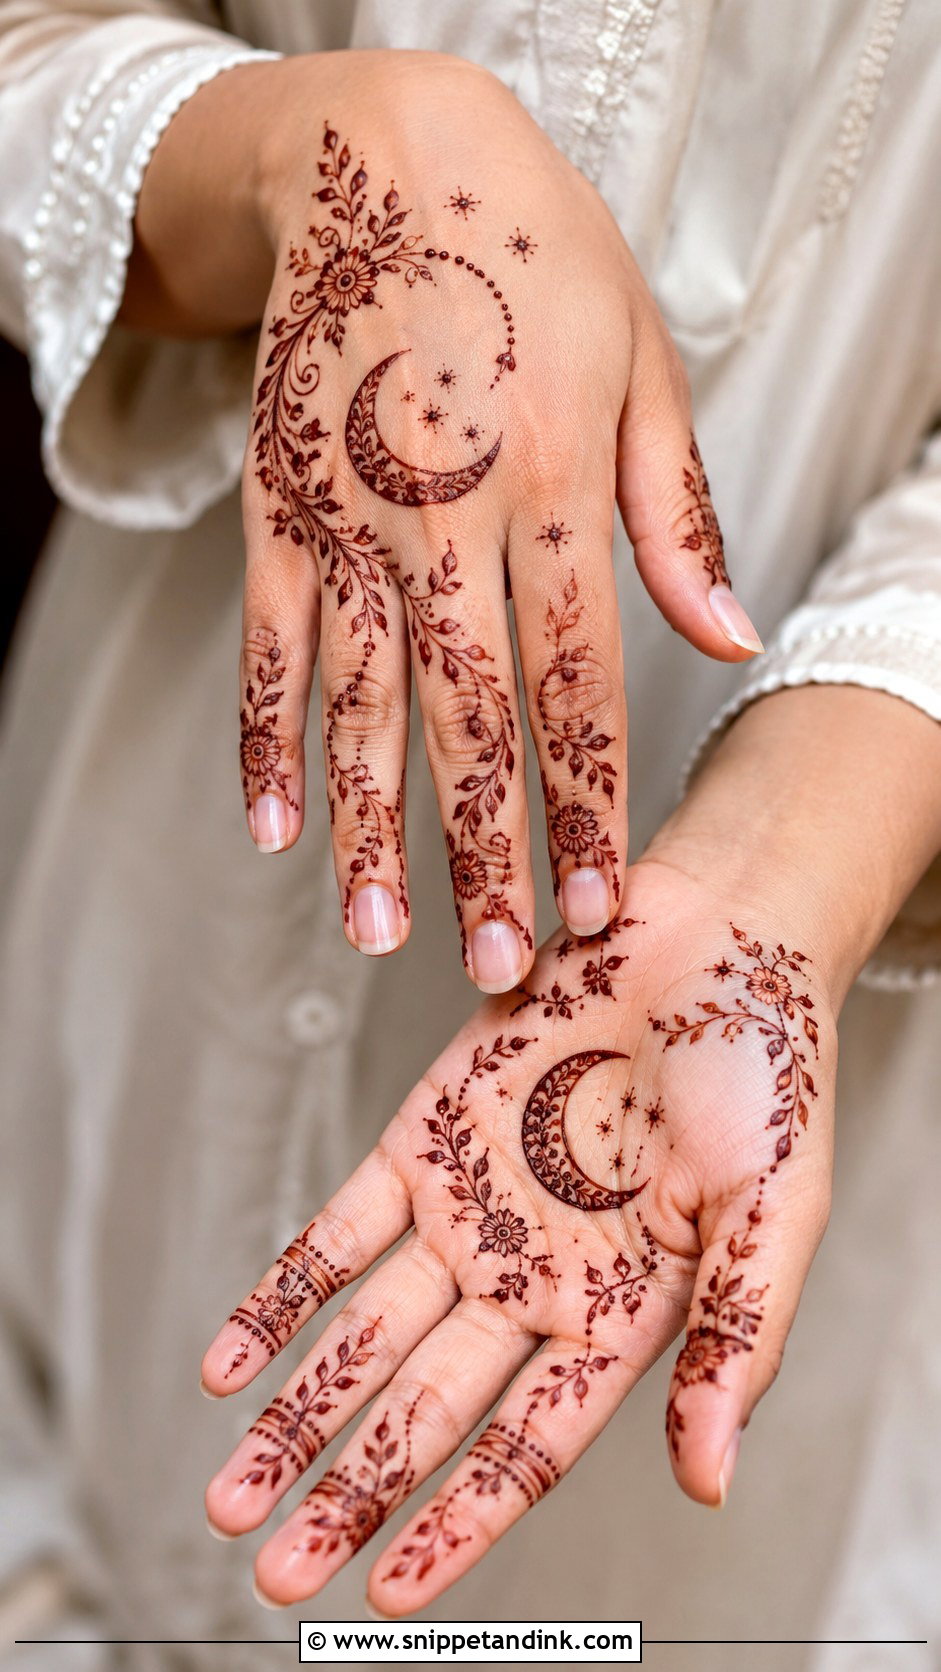
A simple Eid mehndi design has to be quick, because I am usually doing a whole family the night before Chand Raat. Crescent curves, tiny stars, flowers and leafy trails are the vocabulary. A diagonal Arabic vine on the back of the hand with decorated fingers is the classic; a palm mandala with a small crescent border is the alternative. Apply it the evening before and the stain will have deepened to maroon by Eid morning. Keep it open so it sits well with bangles.
23. Simple Diwali Mehndi Design
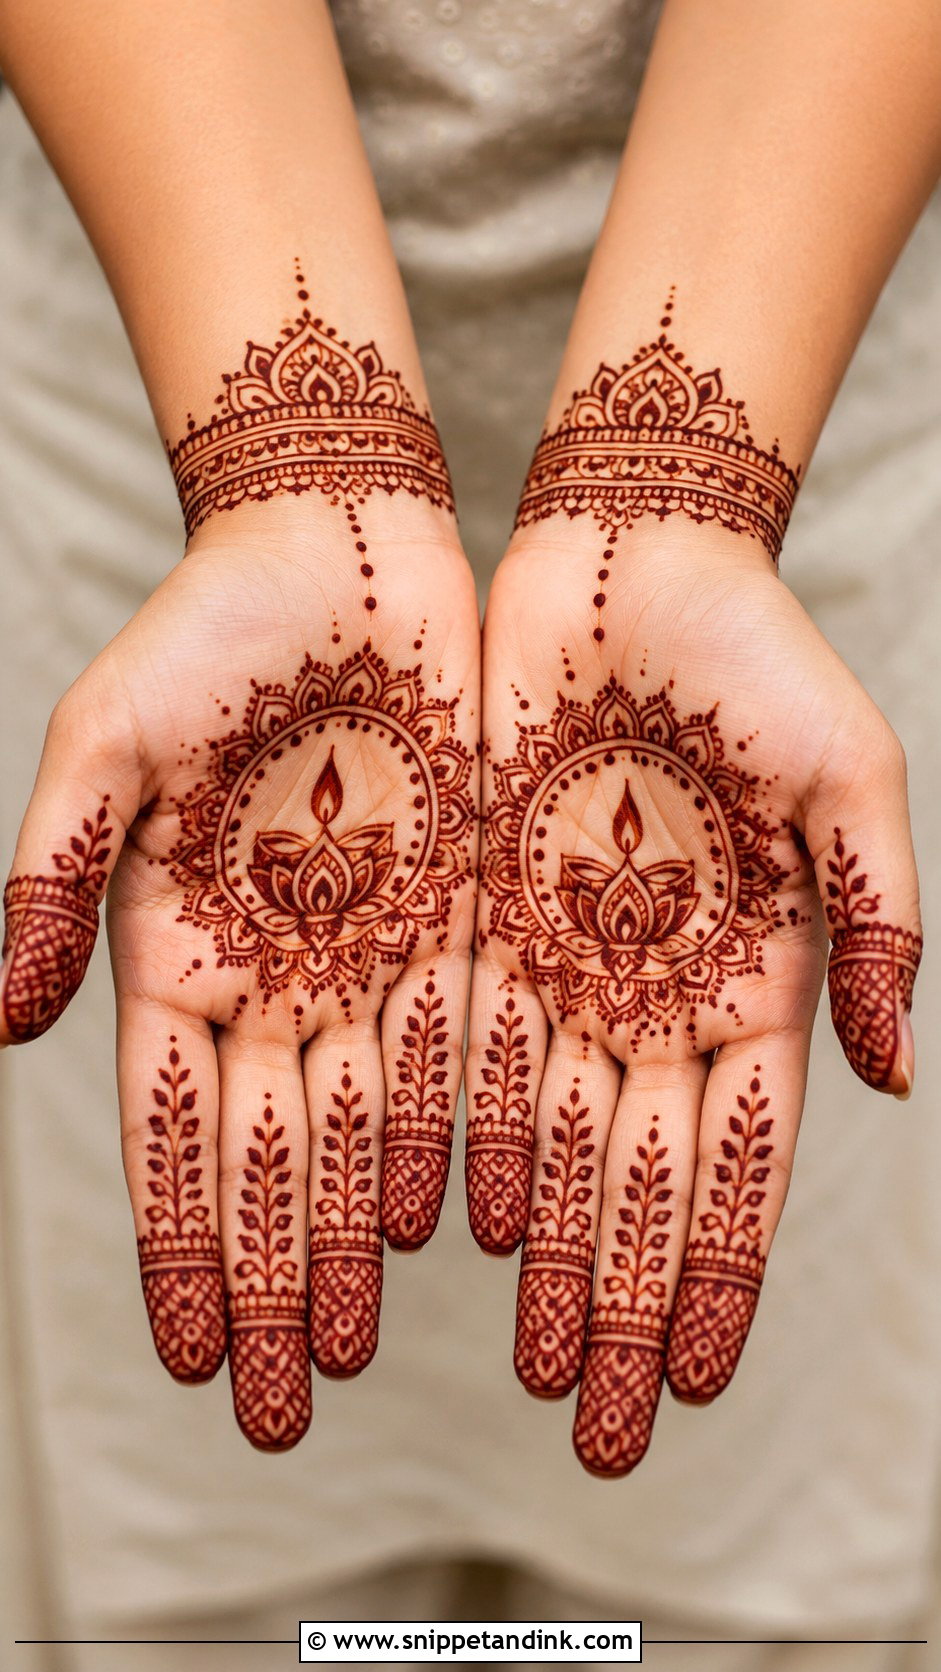
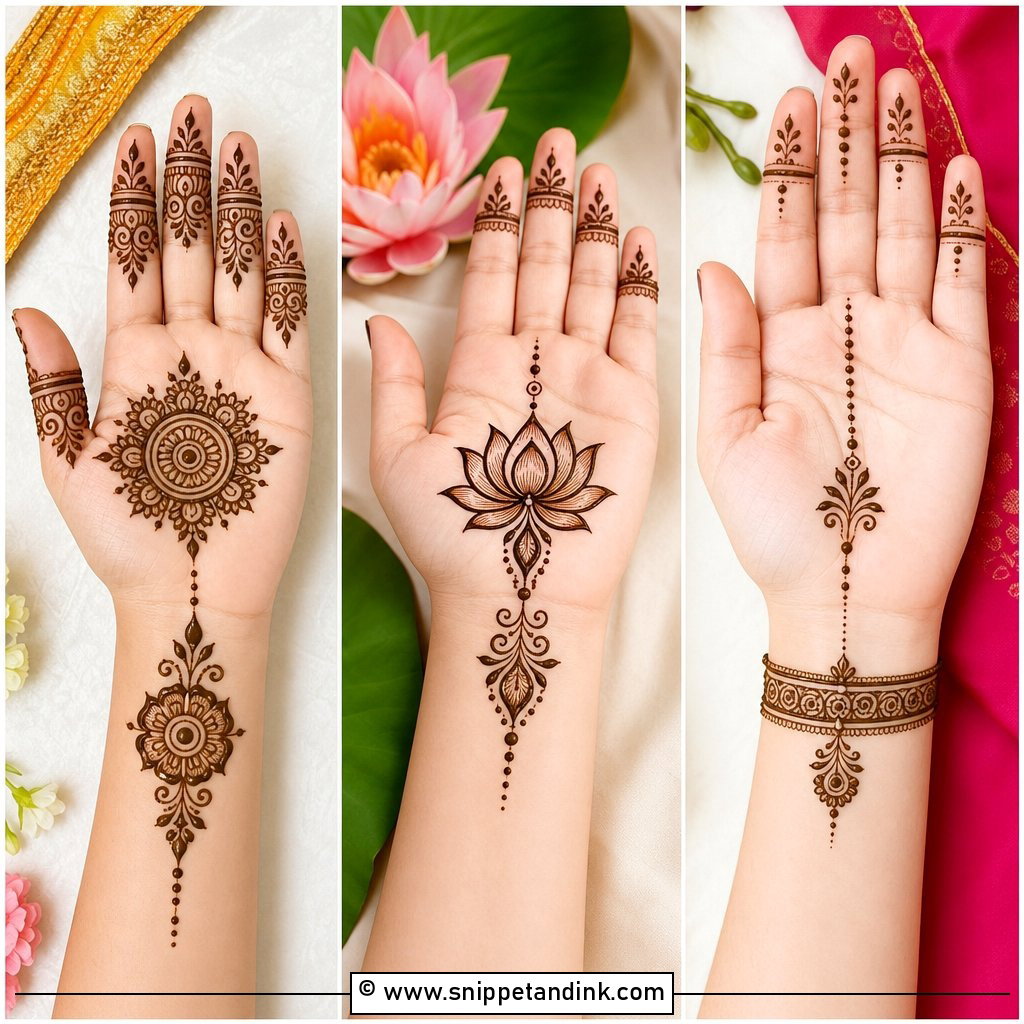
Diwali means busy hands: lighting diyas, serving food, washing up. That is why I keep this one centred on the palm with lotus flowers, small diya shapes, dots and a curved mandala border, extended to the wrist with a simple band. Fingers get petal lines and dotted tips. Apply it a day or two before so you are not guarding wet paste while cooking. Open spaces keep each motif defined once the colour turns deep reddish-brown.
24. Simple Karwa Chauth Mehndi Design
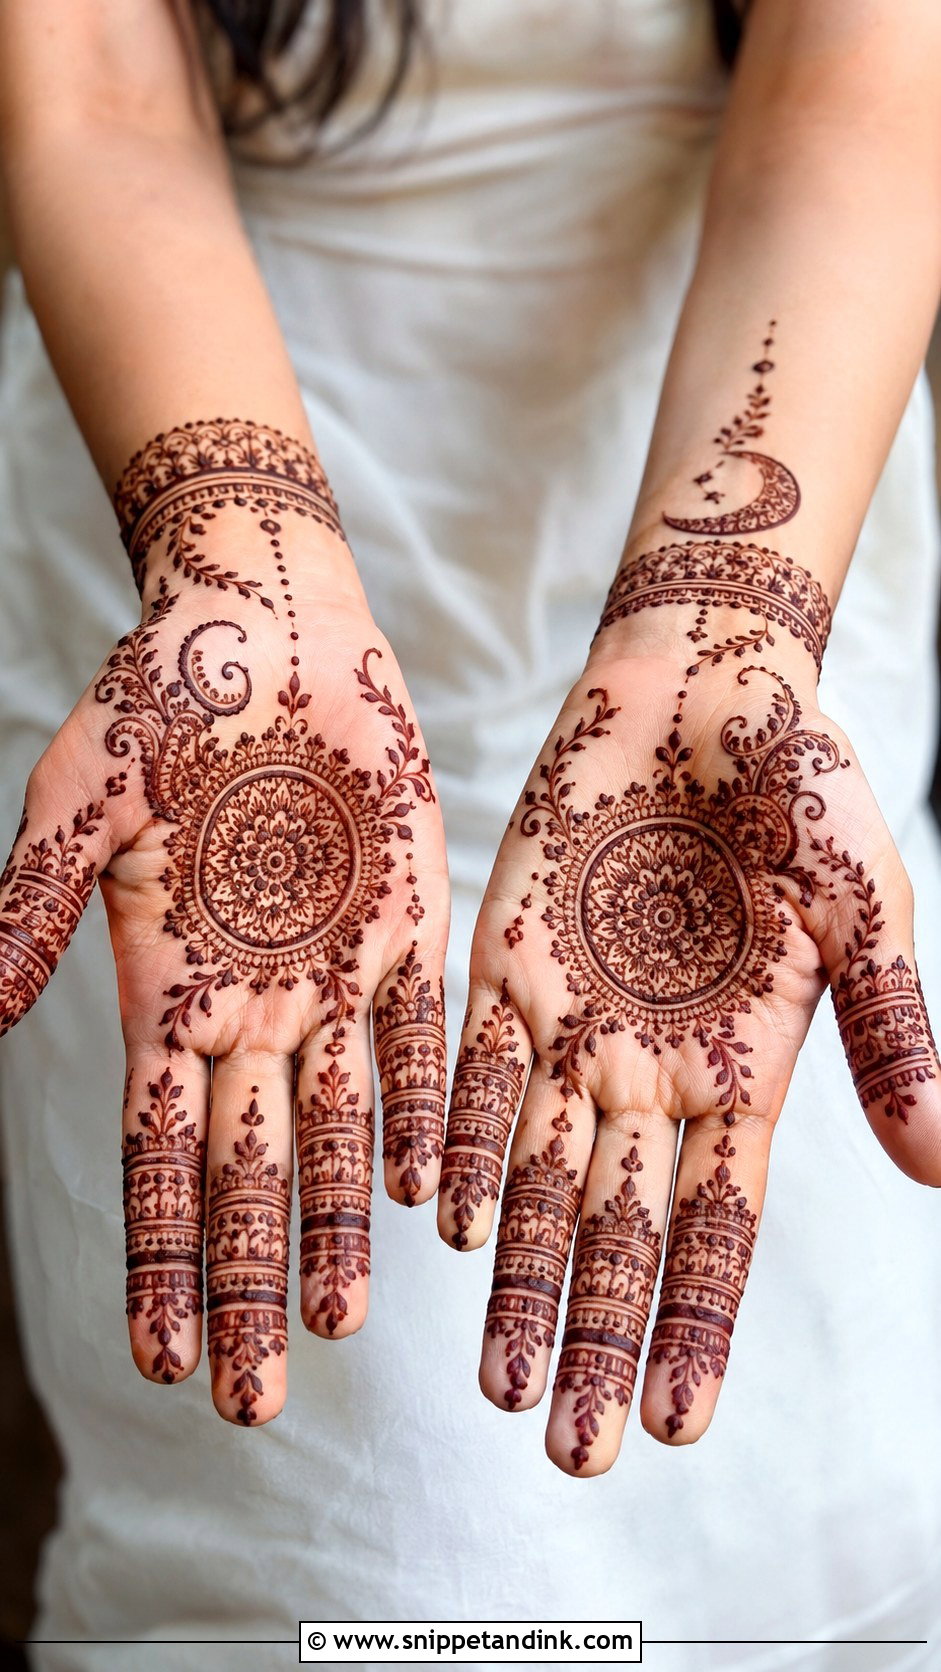
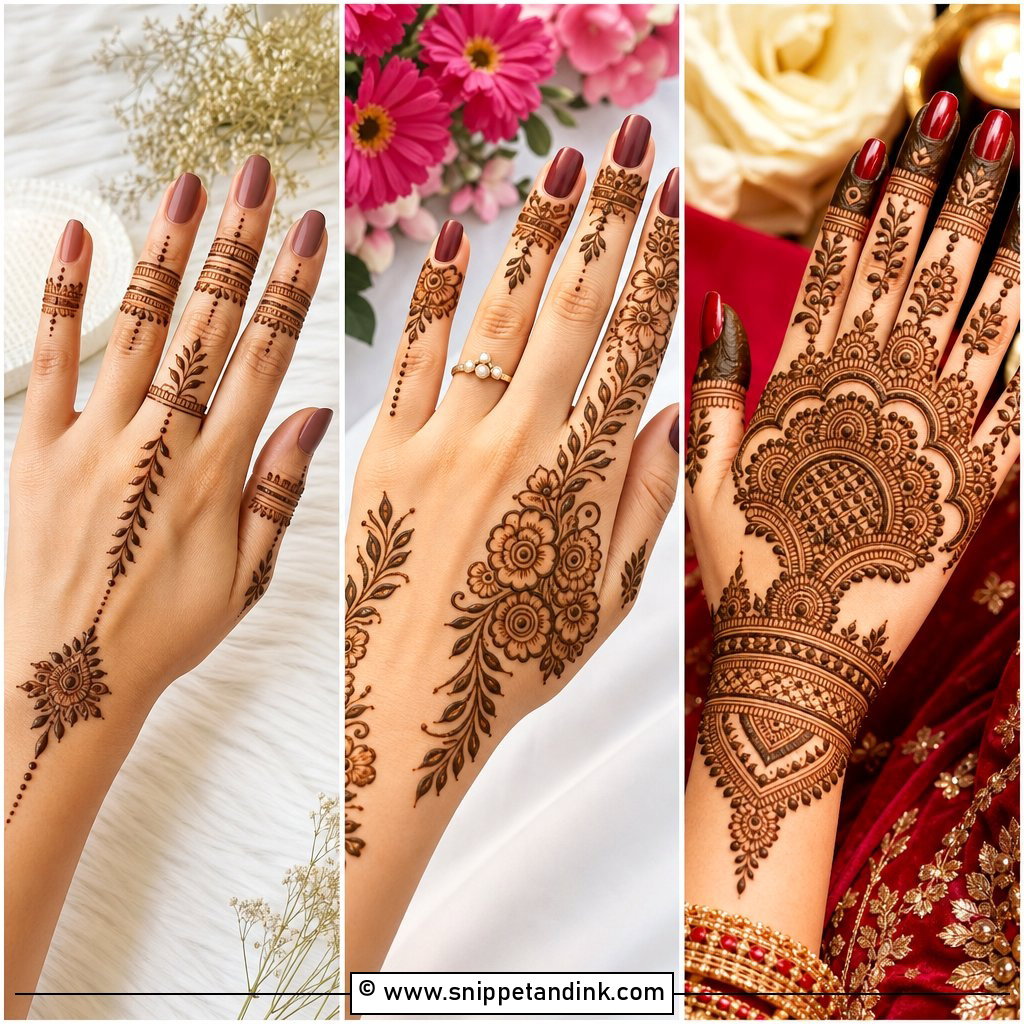
For Karwa Chauth, most of the women I draw for want something traditional they can finish quickly before the fast. A simple Karwa Chauth mehndi design for me means a palm mandala, a few small paisleys and fine leafy vines, closed with a neat wrist band. A small moon curve or decorative circle in the pattern adds the symbolic touch. Fingers get bands and dots. I keep both hands matched, because they will be photographed together, holding the thali.
25. Simple Wedding Guest Mehndi Design
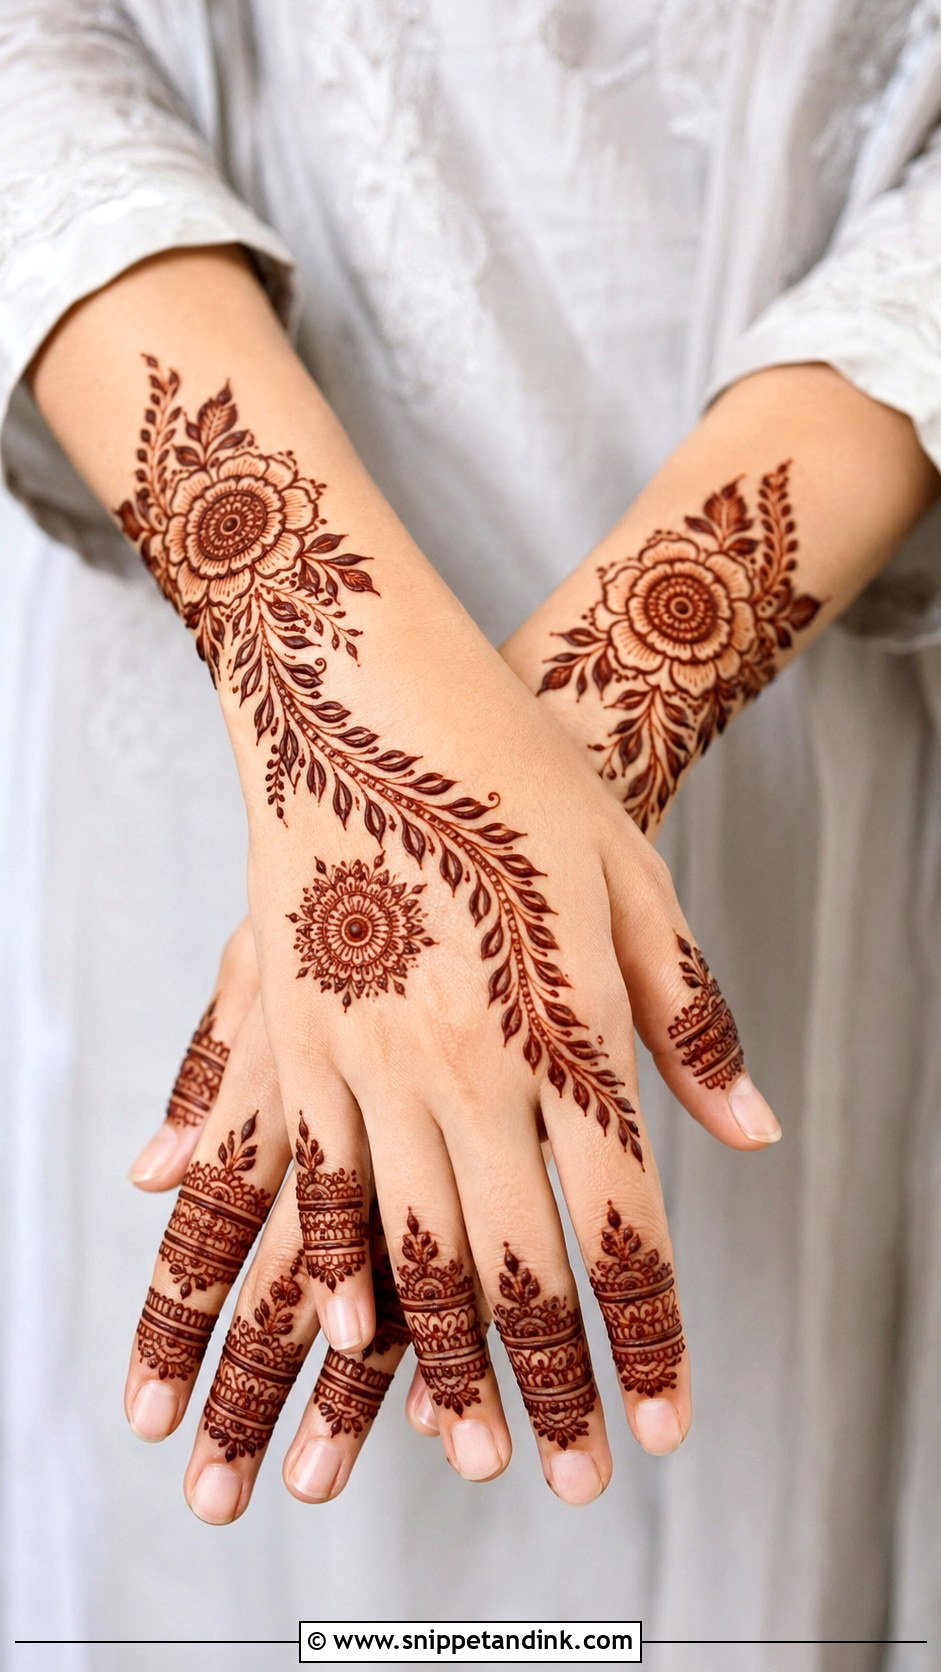
Guests should look festive without competing with the bride, so I keep coverage to the hand and stop at the wrist or one slim border. My default is a back-hand Arabic trail: a large flower near the wrist, a leafy vine across the hand and finger bands that echo it, sometimes with a small mandala in the centre. It gives enough colour for photos at the sangeet or reception and still looks right with a guest outfit rather than bridal wear.
26. Simple Kids Mehndi Design
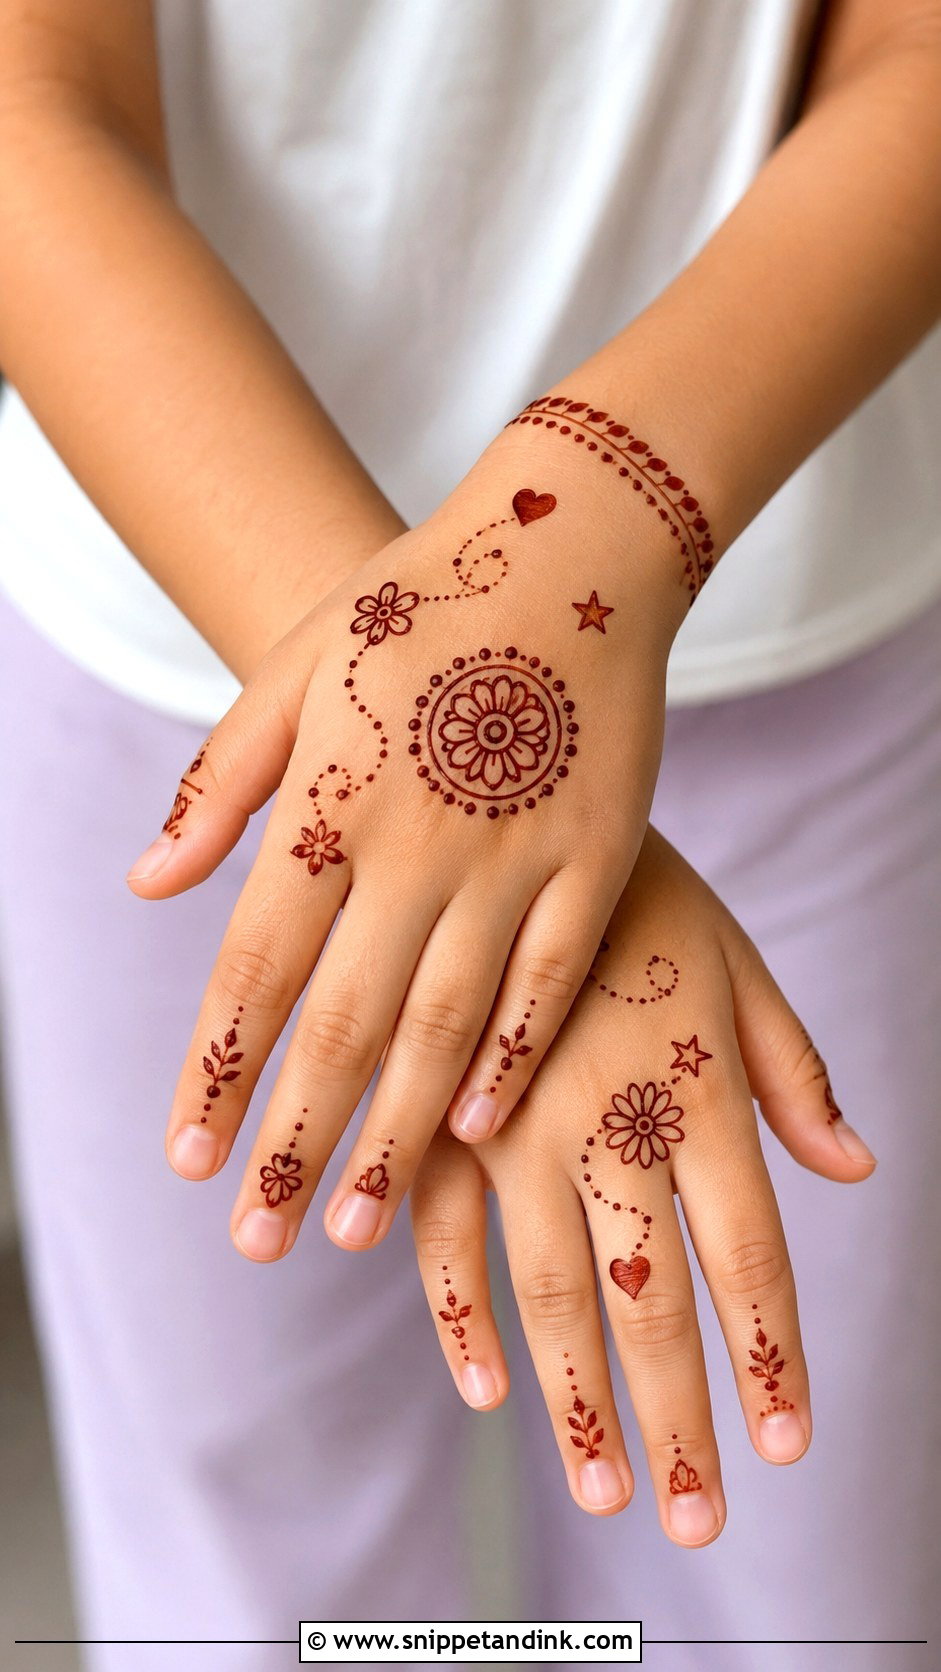
With children I design for the attention span, not the photo. A simple kids mehndi design means small flowers, hearts, stars, butterflies or a tiny mandala on the back of the hand, finished with a bracelet band or short leafy trail. I keep fingers mostly clear so they can move while it dries, and use bold outlines rather than fine detail because little ones rarely sit still. Natural henna only, always; I won’t use anything on a child that I can’t vouch for.
27. Simple Mehndi Design For Beginners
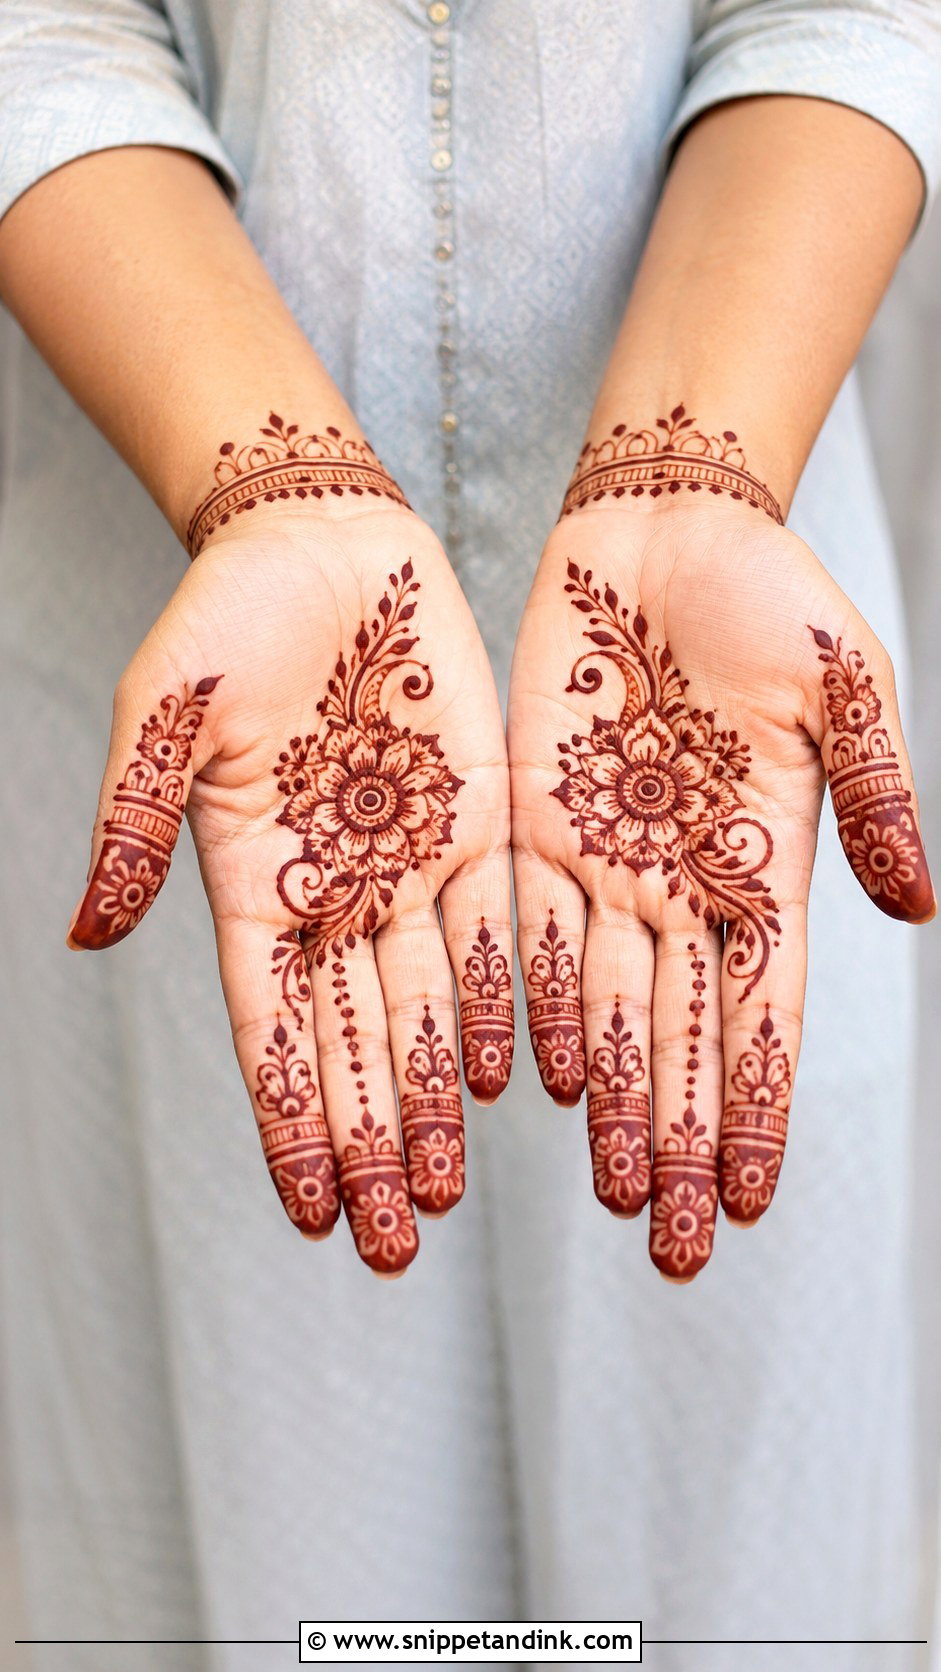
If you are learning, start with control, not complexity. One small flower in the centre of the palm, leaves and dots around it, then finger bands. Skip tiny filling for now, since it smudges as soon as your wrist brushes it. A diagonal vine on the back hand is the other good starter because it covers a lot with few elements. The skill that matters most is steady, even pressure on the cone: squeeze from the top and let the line fall onto the skin rather than dragging the tip.
28. Simple Mehndi Design For Short Fingers
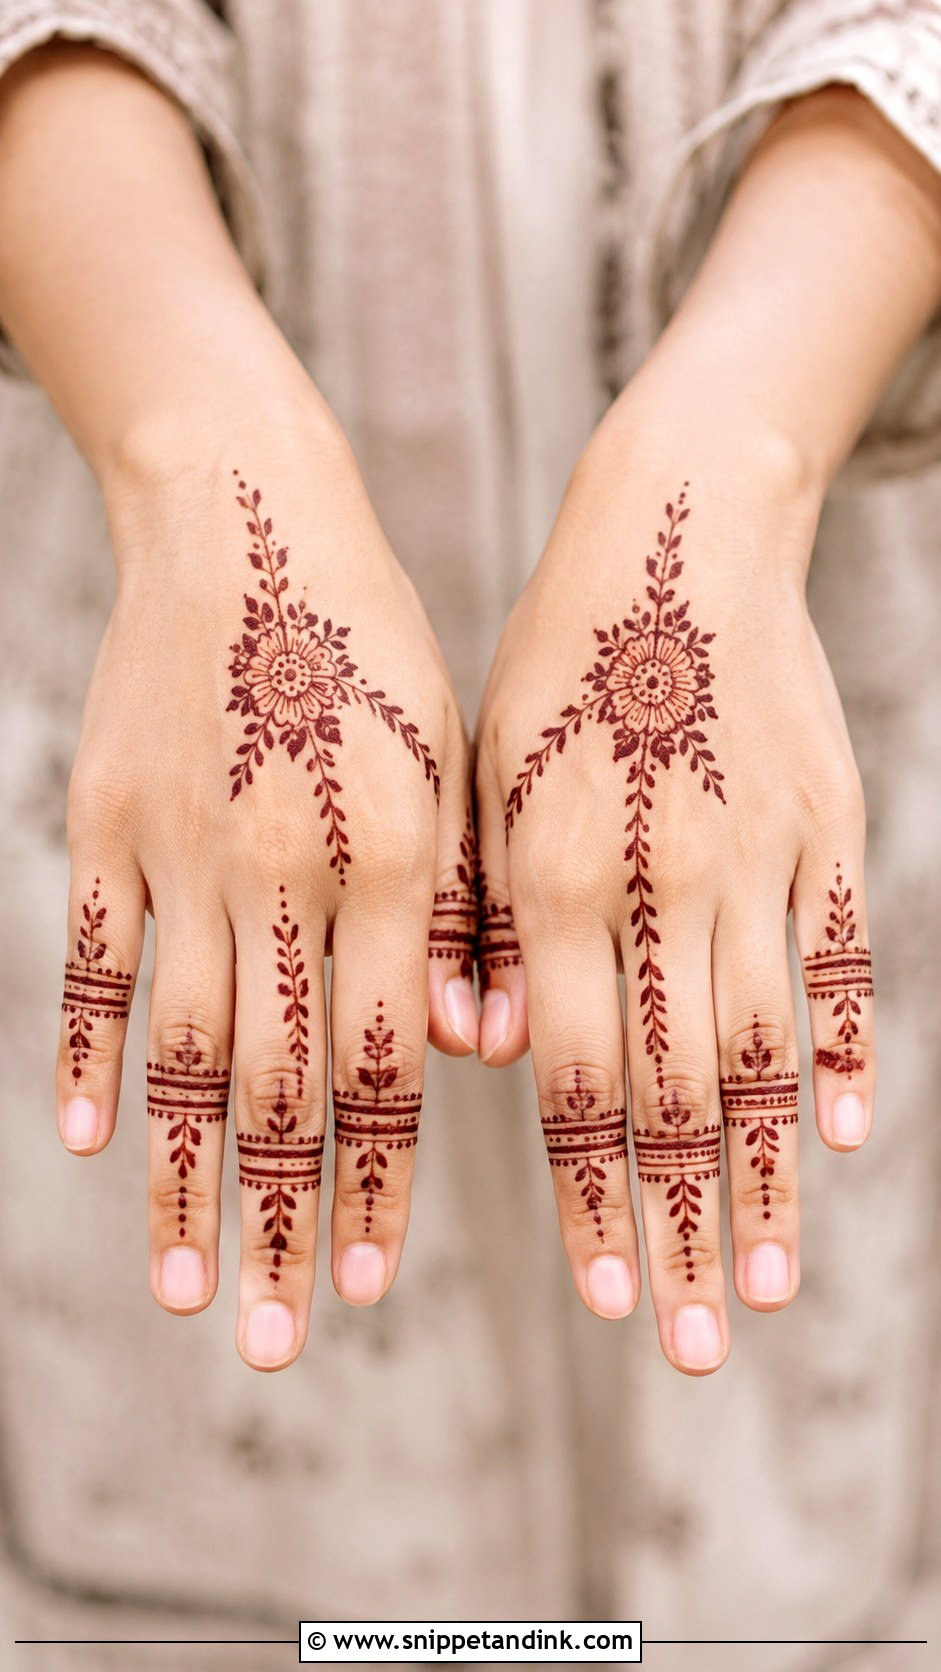
Short fingers look longer when everything points upward. I use vertical lines, slim leafy trails and narrow bands rather than wide blocks, and I keep fingertip filling light, because fully coloured tips visibly shorten a finger. On the back of the hand the main motif sits lower, near the wrist, with thin details running up toward the fingertips. A diagonal Arabic trail helps too. What I avoid is a heavy round motif on every finger.
29. Simple Mehndi Design For Long Hands
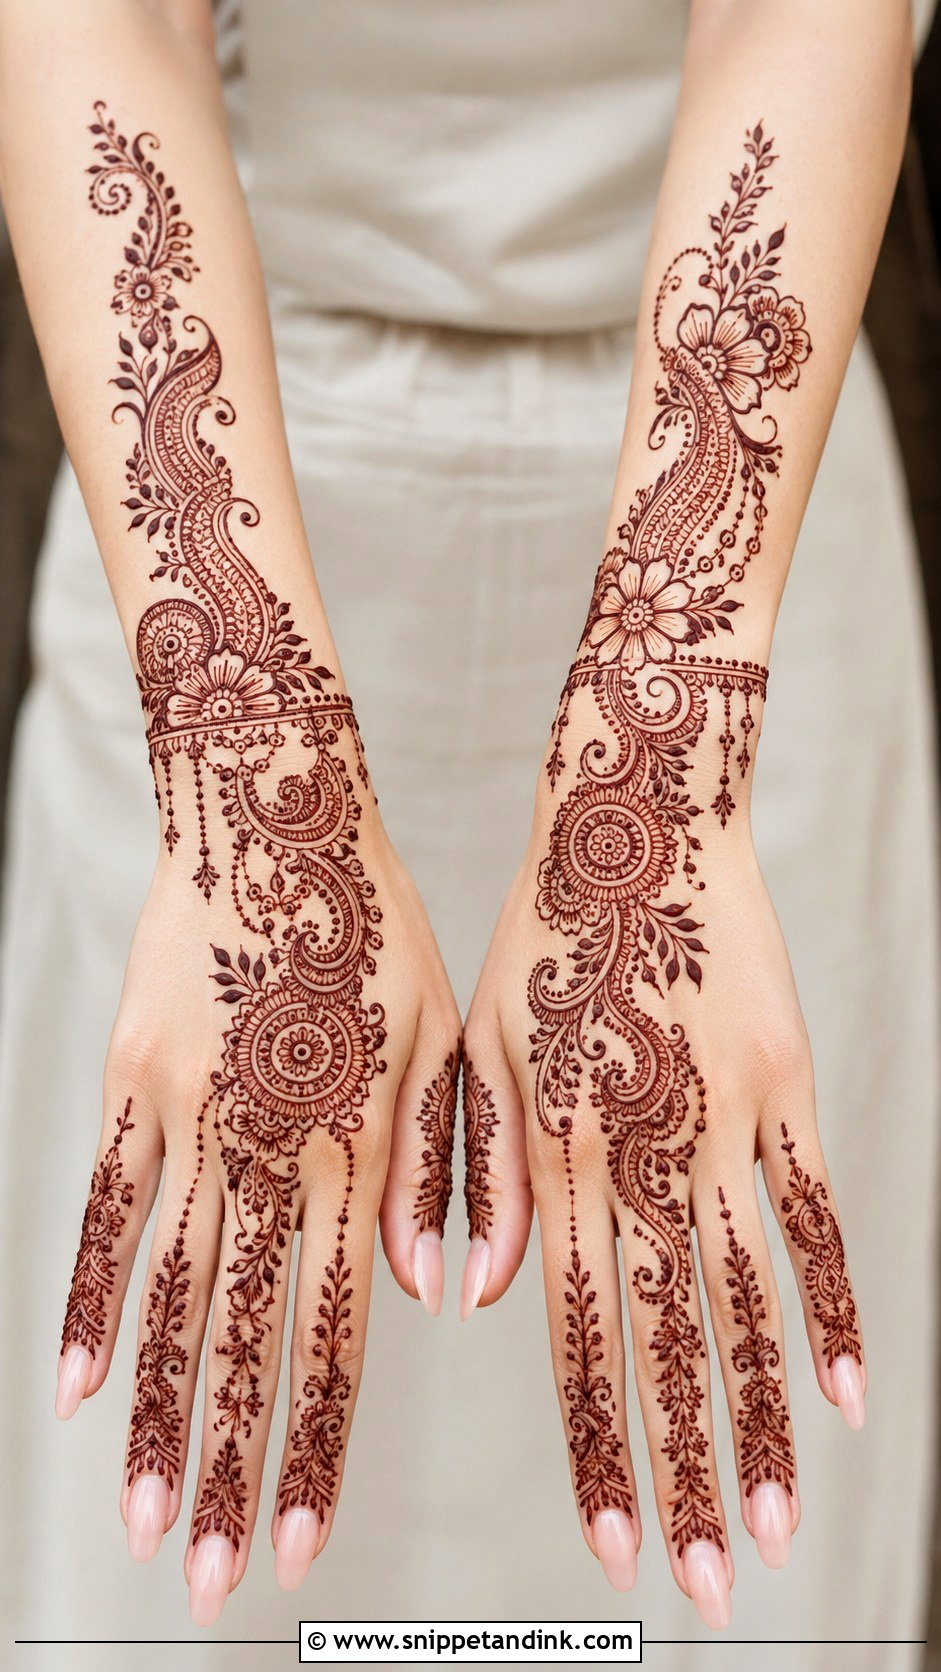
Long hands can carry scale. Tall floral vines, slim paisleys or a long mandala trail from wrist to finger all fill the length without looking stretched. On the palm I centre the design and add soft extensions on both sides; on the back, a bracelet with finger chains suits the proportions. I size motifs up slightly here, since small ones get lost on a large hand. Leave open space too; long hands look elegant with room around each element.
30. Simple Moroccan Mehndi Design
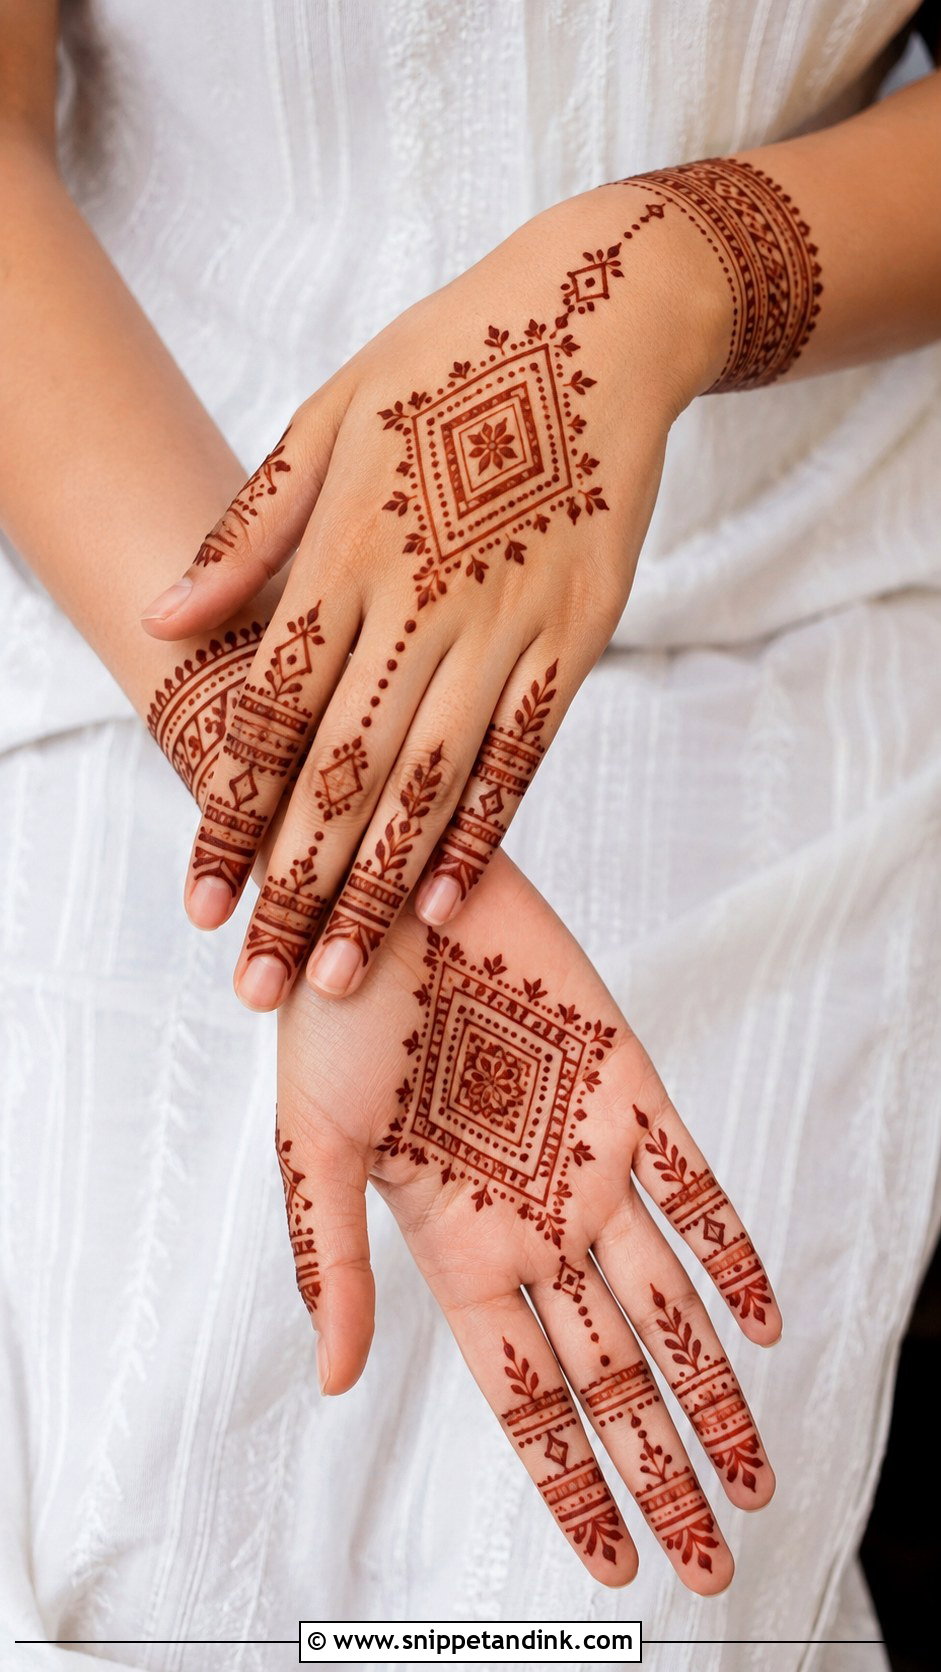
Moroccan work swaps flowers for geometry: clean lines, diamonds, triangles, dots and block borders, laid out symmetrically around a central shape with matching finger details. It looks unlike any floral Indian or Arabic hand. This is the least forgiving style in the list, because a straight line that drifts is obvious, so I anchor each line at both ends with a dot and connect them. Keep the wrist structured with one or two neat bands.
31. Simple Gulf Mehndi Design
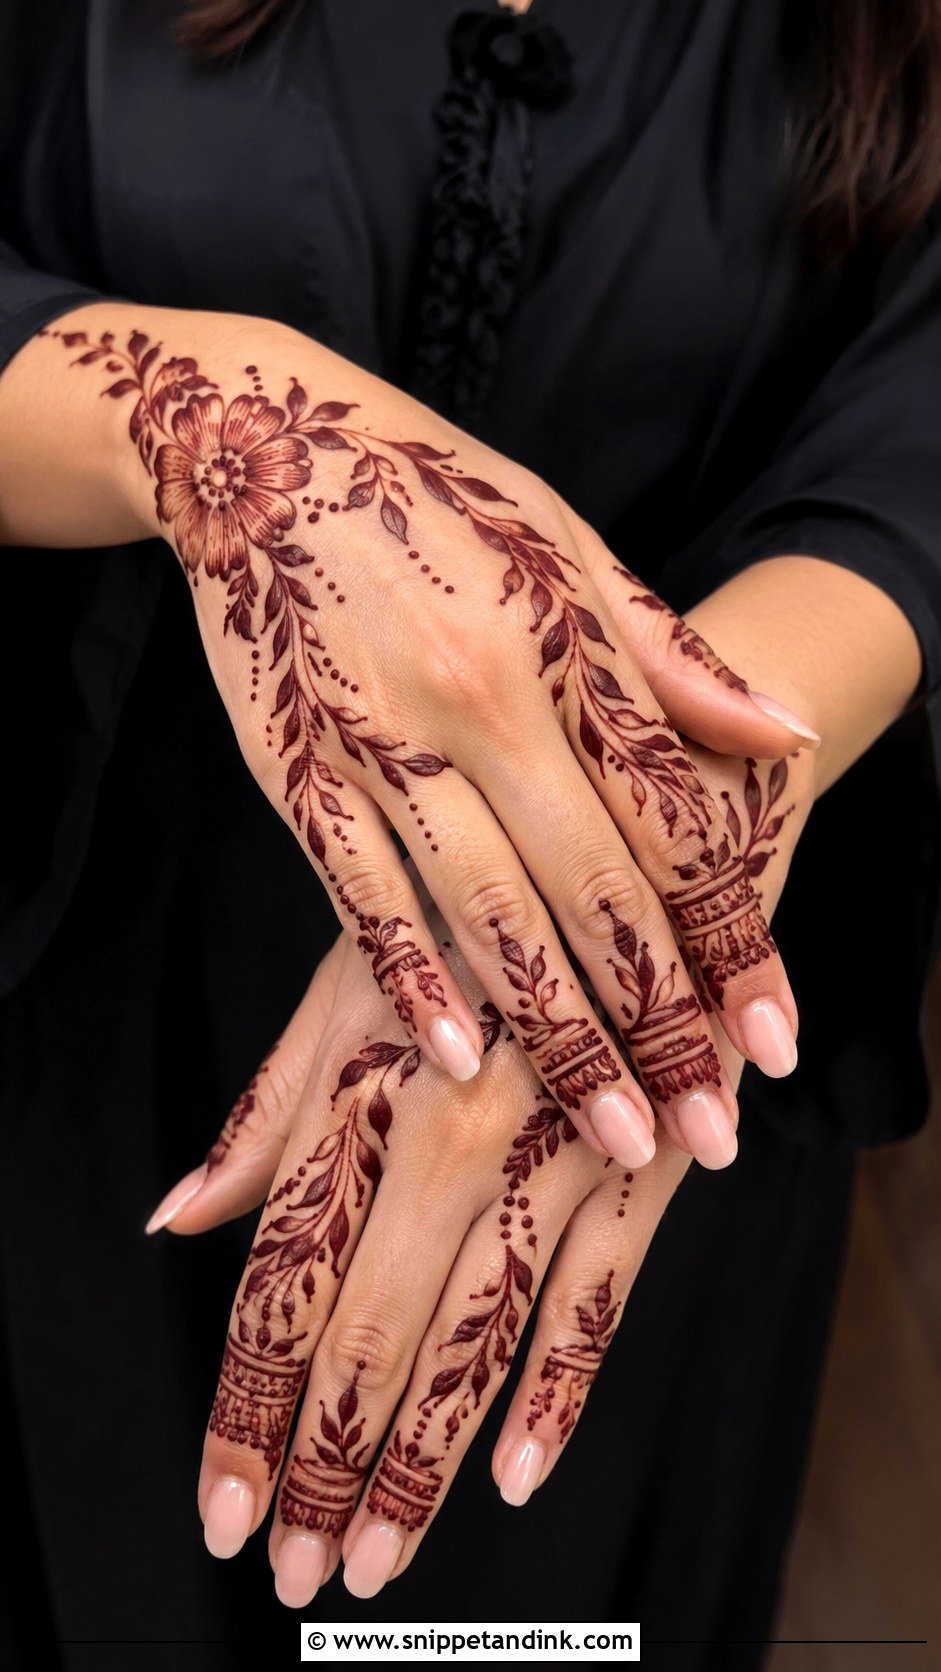
A simple Gulf mehndi design is bolder than standard Arabic, with heavier outlines and wider gaps. I put large flowers near the wrist and run a vine toward the middle finger, adding small dots and shaded petals for depth without overfilling. Those thick outlines hold up well as the stain develops, which is why this style reads richly from a distance at evening events. Anyone who already likes Arabic work and wants something a bit stronger usually ends up here.
32. Simple Lotus Mehndi Design
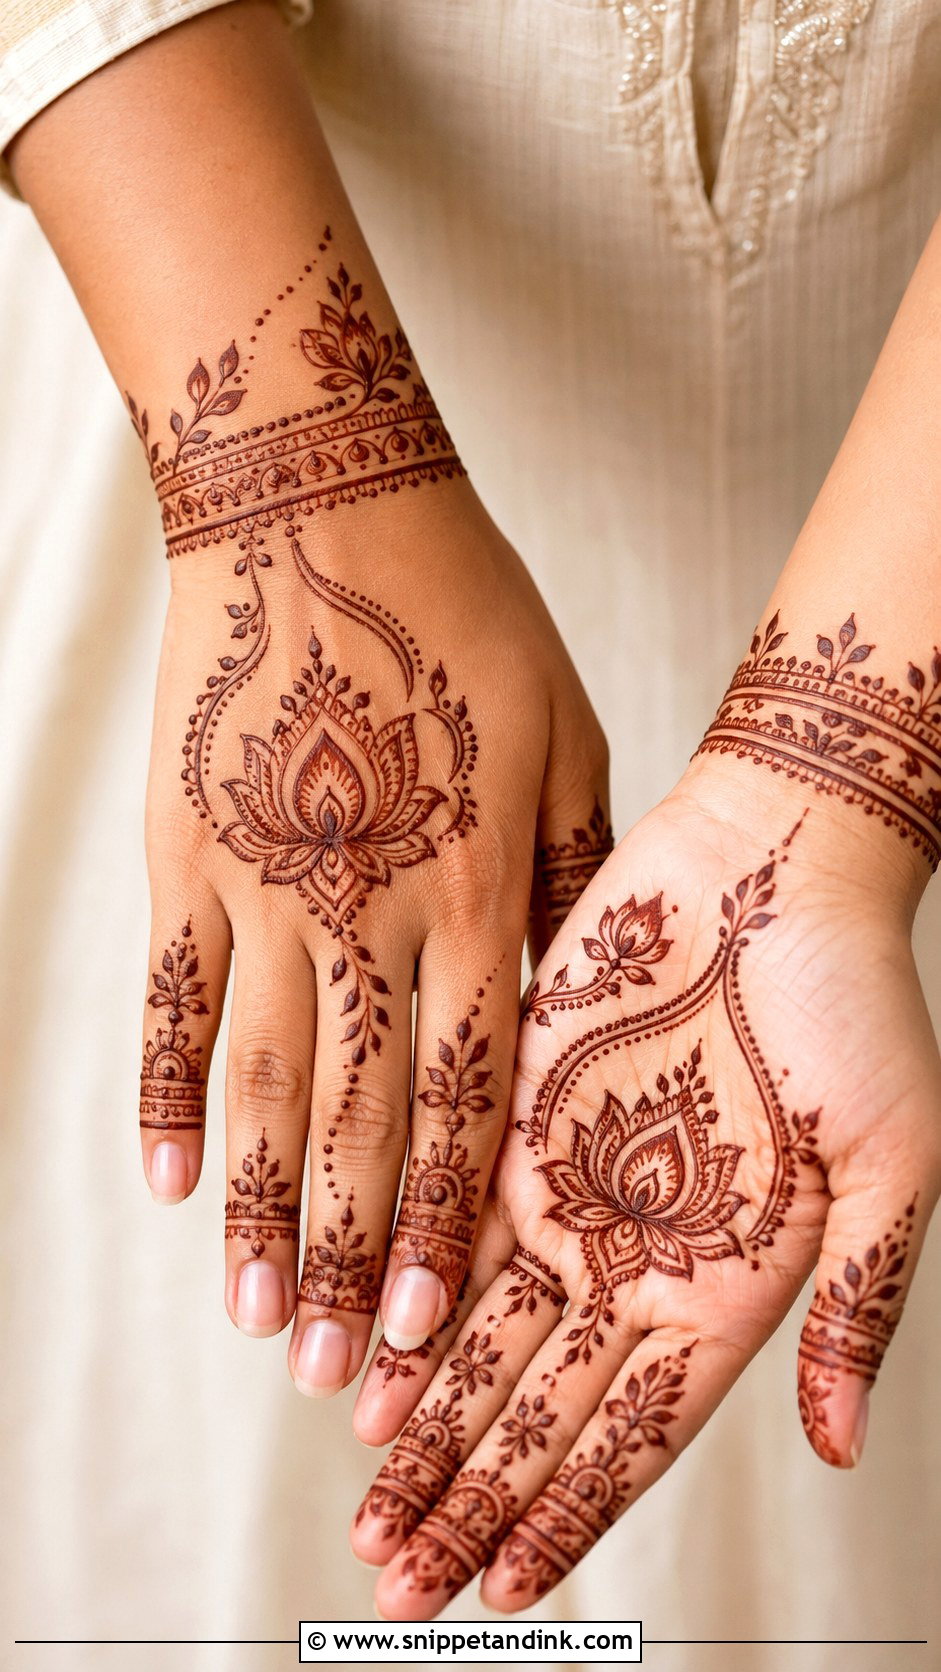
Lotus motifs carry meaning for many of the families I draw for, so this one comes up a lot around pujas and wedding functions. A lotus sits in the centre, surrounded by dots, small leaves and curved borders, with slim petal bands on the fingers and a simple cuff of tiny lotus buds at the wrist. I draw the petals bold and slightly open at the tips, which keeps them distinct after staining. A little empty skin around the flower is what keeps the design refined.
33. Simple Leaf Mehndi Design
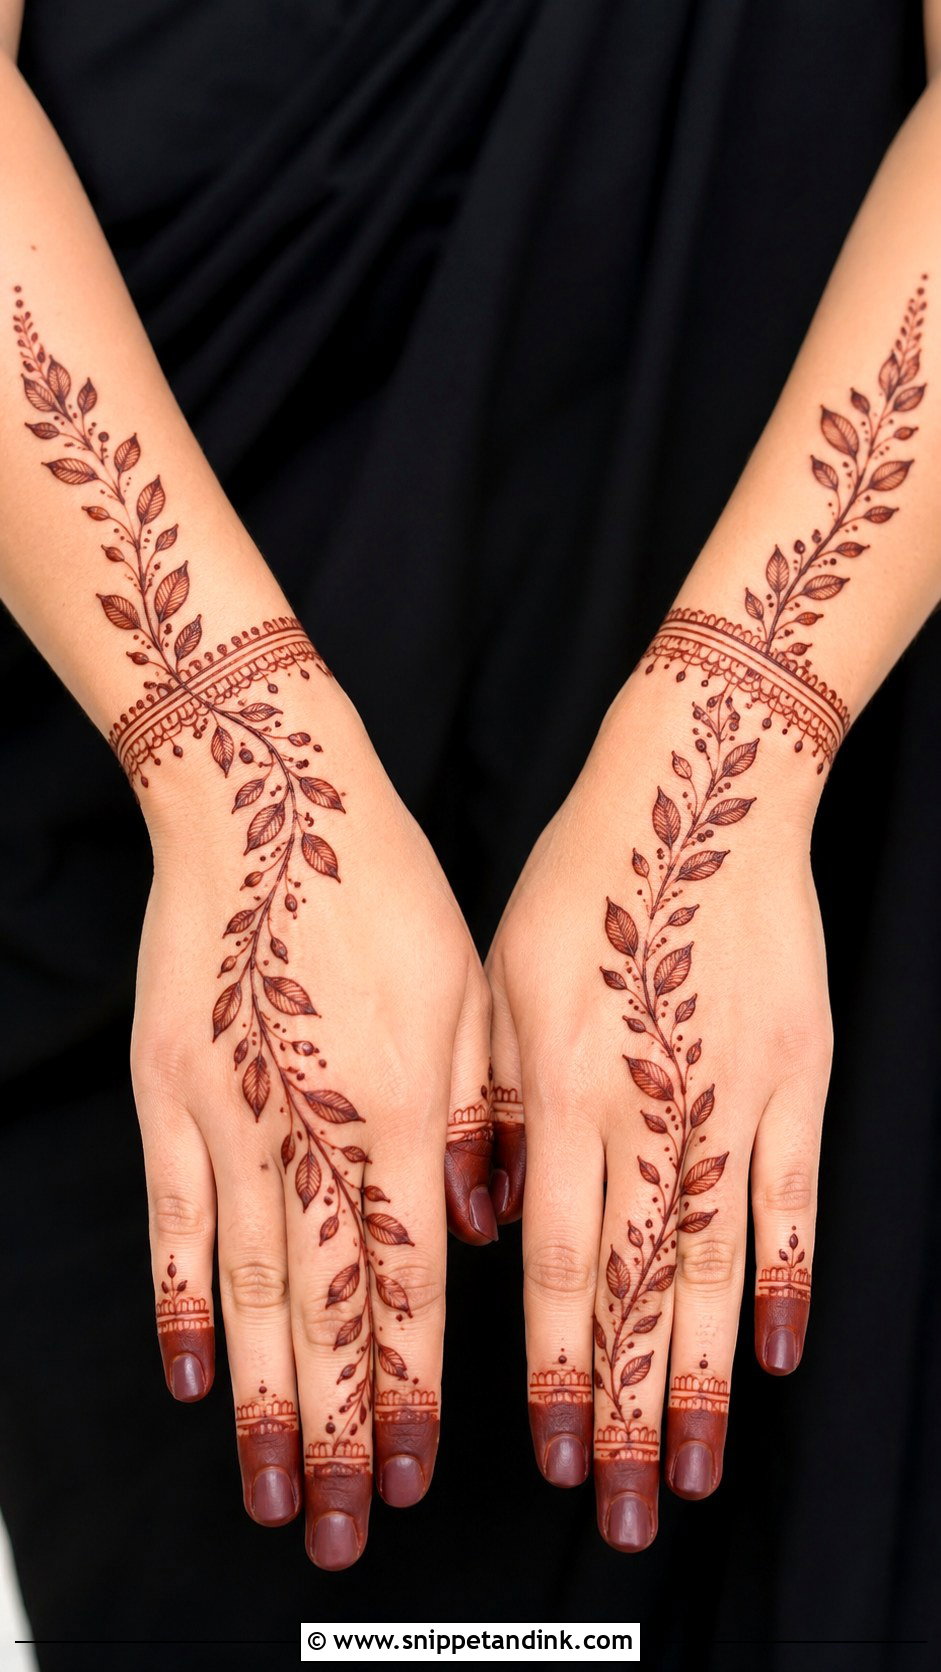
Leaves are the most forgiving shape in henna; one slightly bigger than its neighbour just looks natural. A main vine runs from the wrist to a finger with leaves on both sides, either all small and even or mixed sizes with tiny dots for texture. The back of the hand suits it best, because the vine can follow the line of the tendons. I recommend it to beginners more than any other design here. A small wrist band finishes the hand.
34. Simple Glitter Mehndi Design
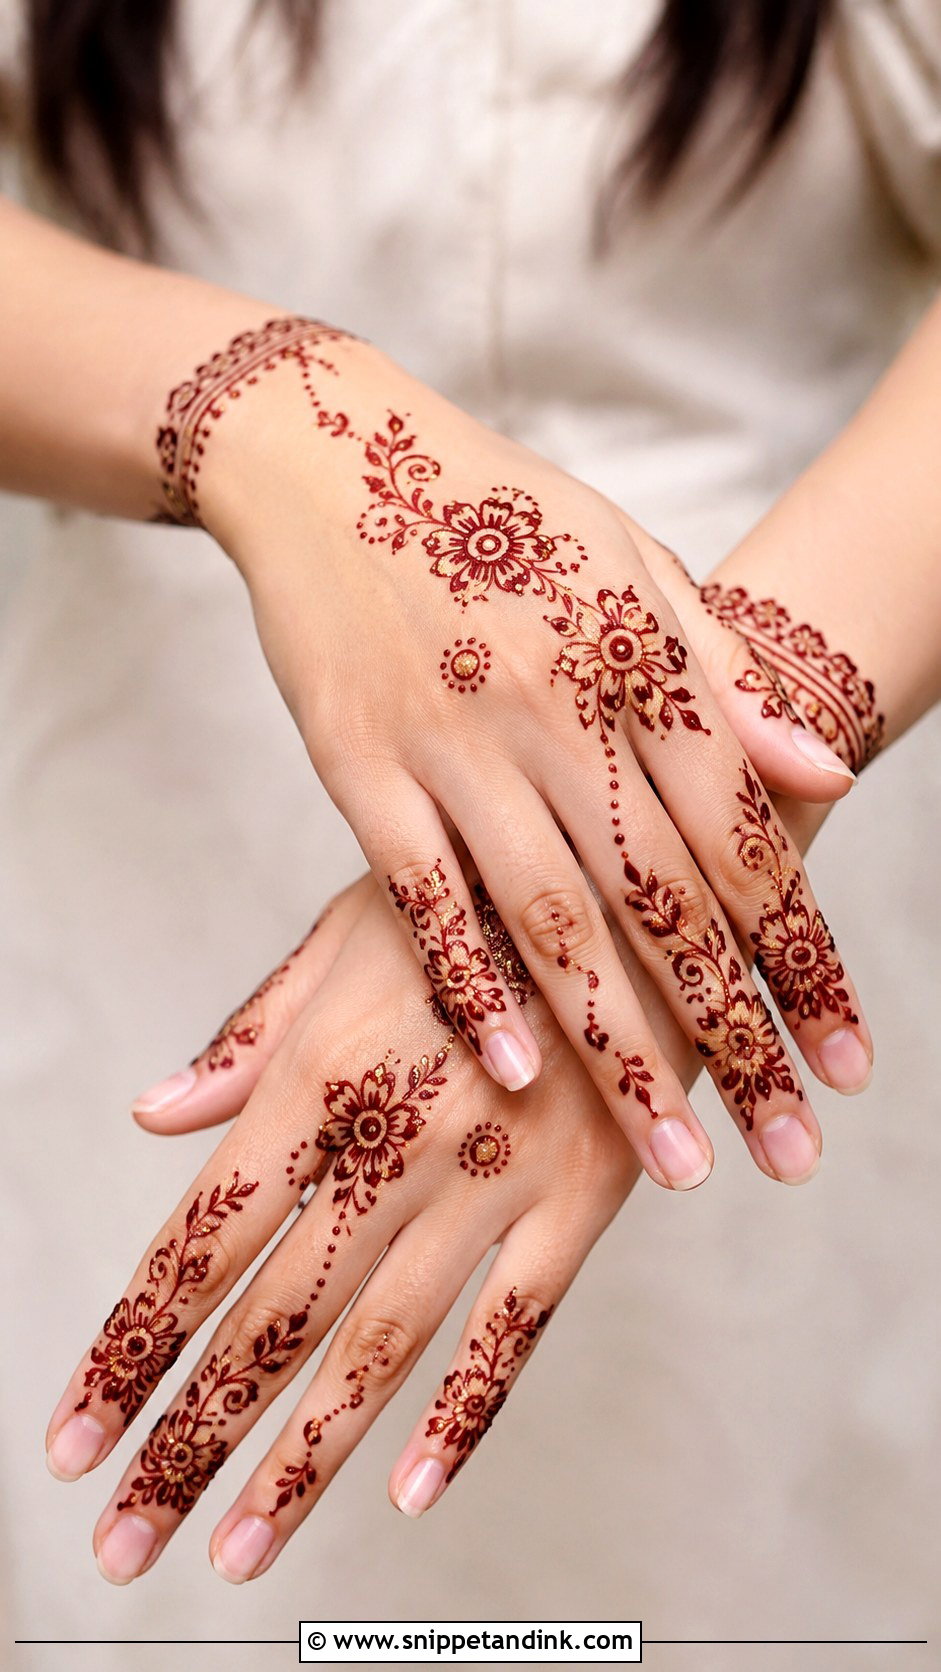
Glitter is a finishing layer, not a design. I apply a clean henna base first, such as a floral back-hand trail or a palm mandala, and only after the paste is dry and removed do I add a little cosmetic-grade glitter gel to selected dots, petals or borders. Covering the whole design kills the simplicity and hides the stain you waited for. Gold, bronze and maroon sit nicely against natural henna colour. Expect the glitter to wear off within a day or two while the stain stays.
35. Simple White Mehndi Design
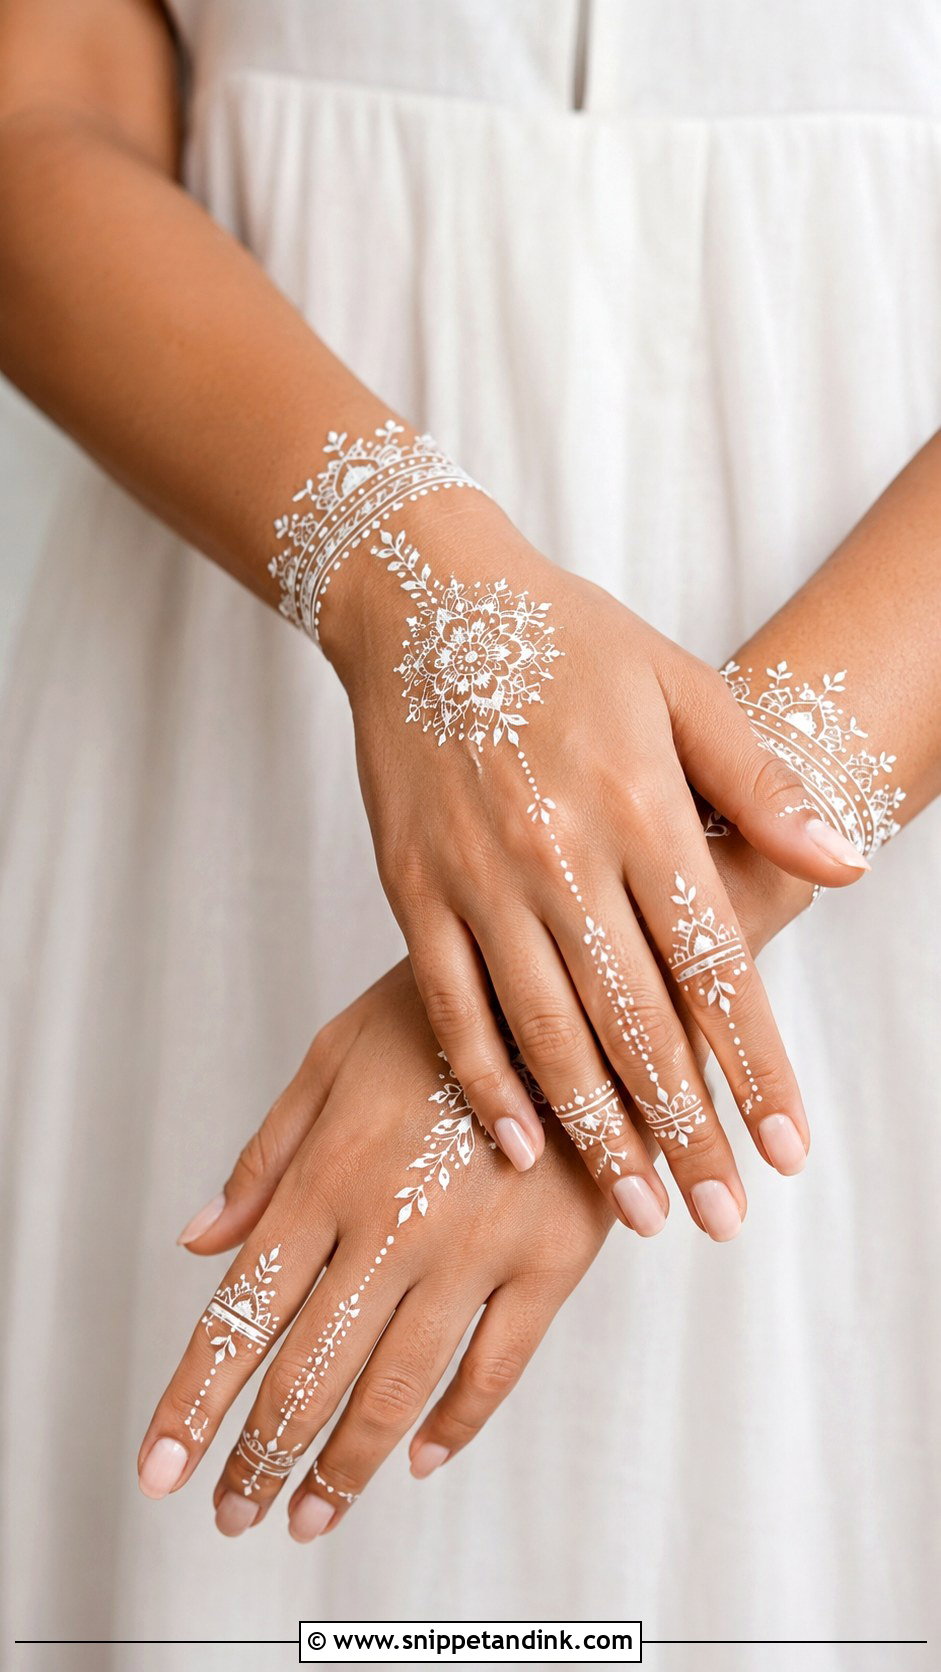
White mehndi is not henna at all. It is usually a body-safe adhesive paint that sits on the surface of the skin, so it lasts a day or so and rubs off rather than staining. I treat it as an accessory for photos and engagement shoots: a back-hand bracelet, finger bands or a delicate dotted mandala, kept minimal because white detail gets busy fast. The contrast reads especially clearly on deeper skin tones. Always patch test it on the inner arm first, as some formulas irritate sensitive skin.
Ten Minutes or an Hour: How Long Each Layout Really Takes
Guests always underestimate drying time and overestimate drawing time. These are rough per-hand timings from a confident hand; a beginner will need longer, and everyone needs to stay still afterwards.
- Finger designs, rings and bracelets: around ten to fifteen minutes per hand, dry enough to move gently within twenty or thirty minutes.
- Back-hand Arabic or bel trails: roughly fifteen to twenty-five minutes per hand.
- Palm mandalas, tikki and half-hand layouts: around twenty to thirty-five minutes.
- Simple full hand or light bridal: closer to forty-five minutes to an hour for one side, more with forearm work.
Because the colour peaks one to two days after application, I book festival and wedding-guest mehndi for the evening before or two days before the event, not the morning of. If several relatives want designs at a sangeet, give the artist a headcount and design level in advance; ten finger designs and ten full hands are very different evenings.
Black Henna and Instant Cones I Refuse to Use
Natural henna only ever stains in shades of orange, red and brown. Anything sold as black henna is typically boosted with PPD, a hair-dye chemical that can cause blistering, scarring and lifelong sensitivity. Instant-stain cones that turn dark within minutes often contain similar additives. I would never put either on a client, least of all on children.
If you are buying ready-made cones, check the ingredients and look for henna, a liquid such as water or lemon juice, sugar and an essential oil, and very little else. Patch test a small dot on the inner arm a day before your event if you have sensitive skin or have never worn henna. Itching or redness under the paste is a reason to scrape it off immediately.
One Motif, Clean Spacing, and Paste Left Alone Overnight
Simple mehndi stays popular because it fits real life: you can draw it in minutes, wear it to work afterwards and still have something festive in photos. A palm mandala, a back-hand Arabic trail, a bracelet or a few decorated fingers will all look finished if the lines are steady and the spacing is even. Pick the design that suits your hand shape and how much time you have, then give the stain its full two days to darken before you judge it.
You'll Like These Ideas:


Leave a Reply