
Light bridal henna is harder to draw than a packed one, not easier. When half the skin stays bare, every wobble in a line shows, and the motifs you do place have to carry the whole hand. I get more requests now for open layouts: shorter sittings, room for bangles and rings, and a stain that reads clearly in photographs instead of turning into a brown blur. The designs below run from full-hand patterns with breathing room to Arabic trails, mandala palms and back-hand pieces that sit like jewelry. Your outfit, how long you can sit still and how far up the arm you want the color to travel will decide which one suits you.
What Changes When You Ask for Less Henna
A sparse design shortens your sitting, but it puts more pressure on line quality and on the stain itself. With dense bridal work, a faint patch hides among the fillers. With open layouts, every motif is visible on its own, so I plan these designs a little differently.
- I draw thicker outlines than I would on a packed hand, because a thin line on bare skin can fade to a faint orange trace by the second week.
- I sketch the anchor motif first and check its size against the palm before adding anything else. Once the paste is down, moving it isn’t an option.
- Fingertips get fuller coverage, since they stain darkest and give a light design its bridal weight.
- I always ask what sleeves, bangles and rings you’ll wear, so the open spaces fall where jewelry sits rather than where I’d put a motif.
Bring two or three photos of what you like and one of what you don’t. The second photo tells me more about how much bare skin you’re comfortable with than any description.
1. Simple Bridal Mehndi Design Full Hand
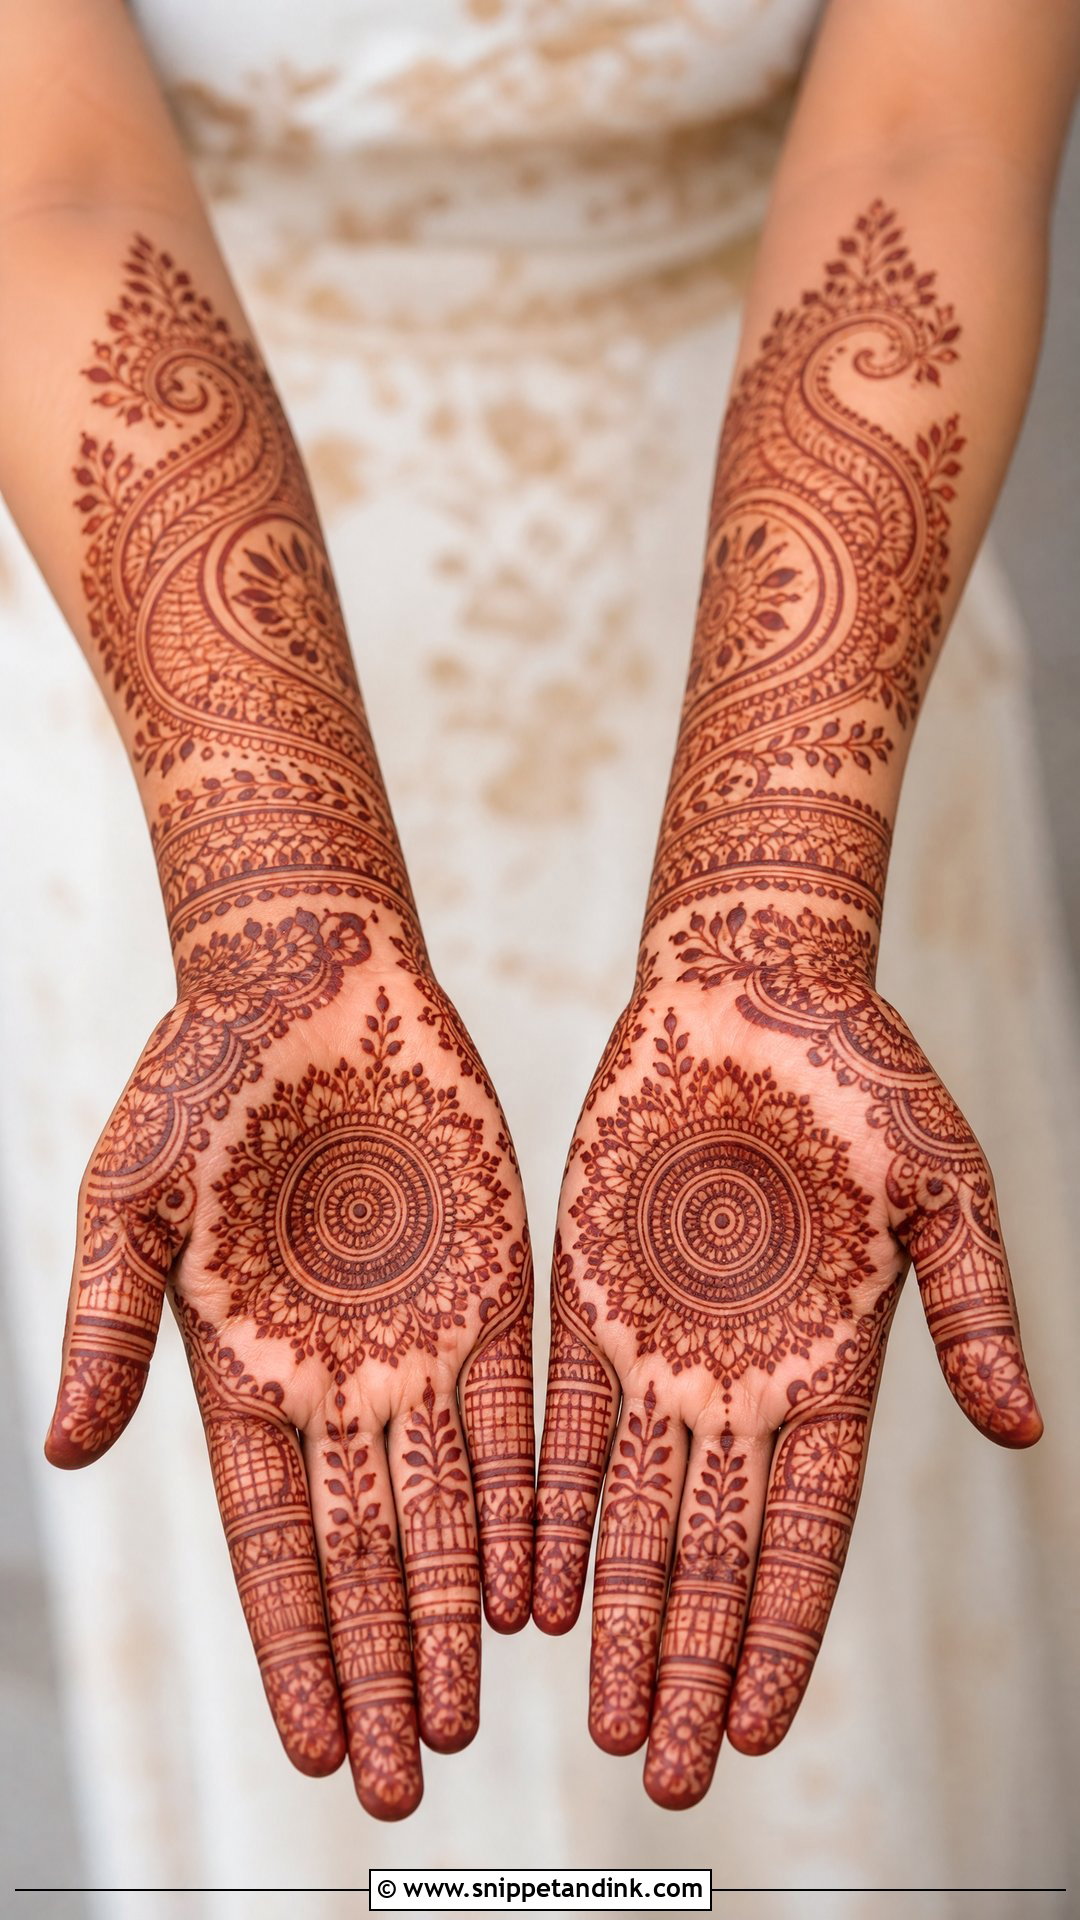
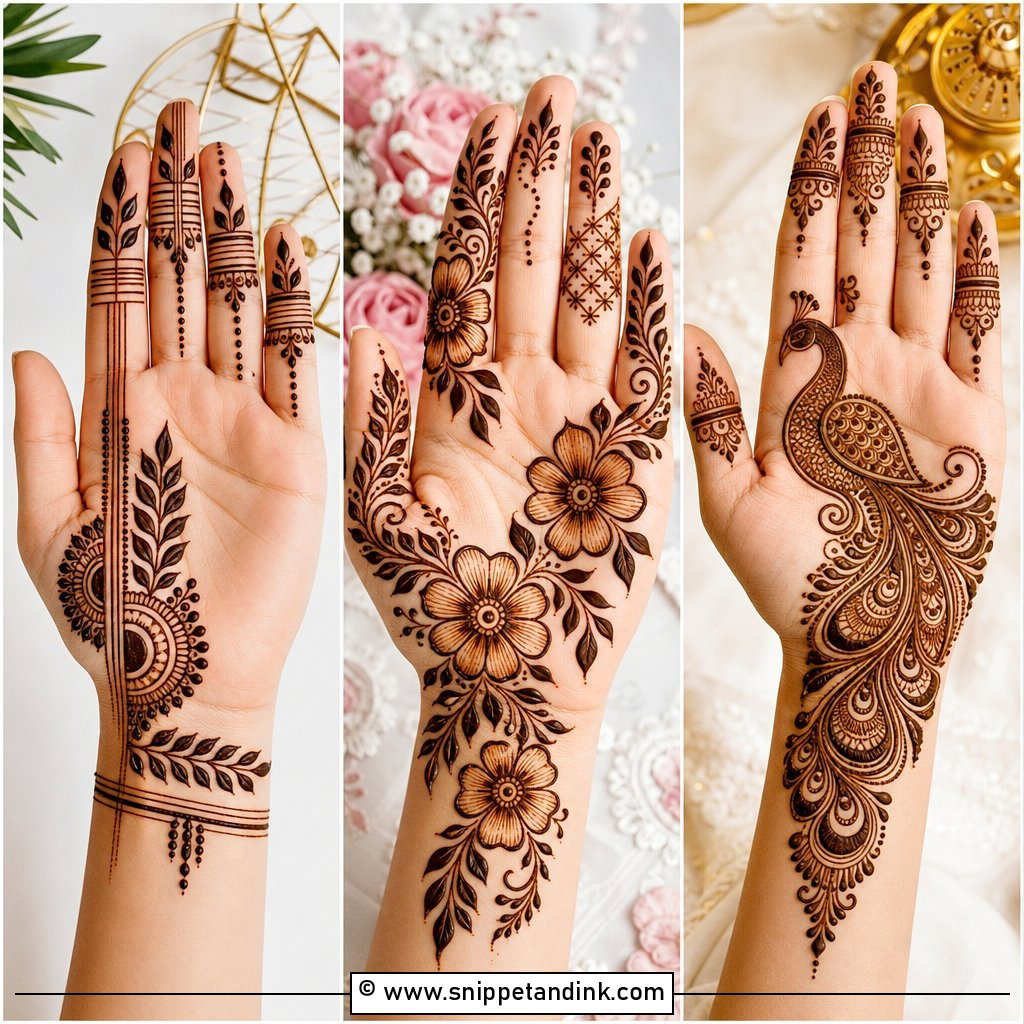
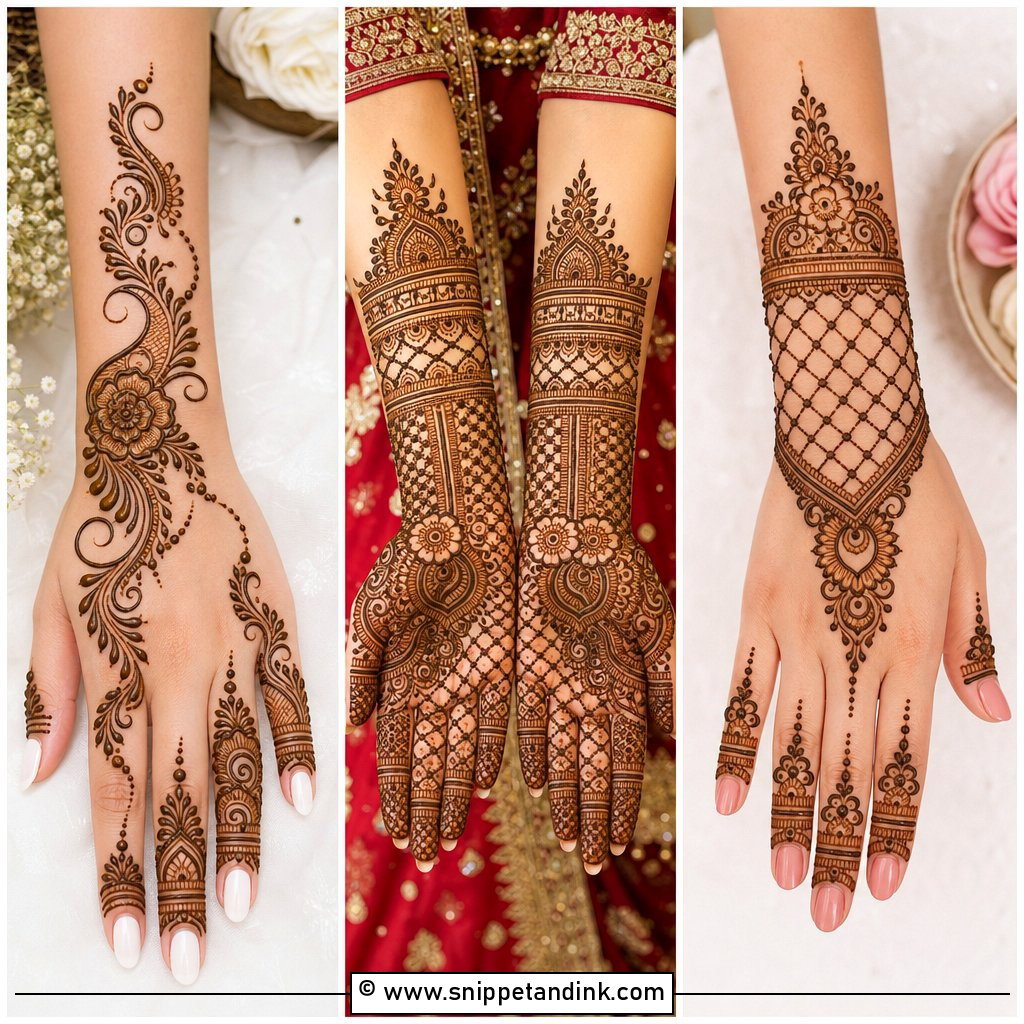
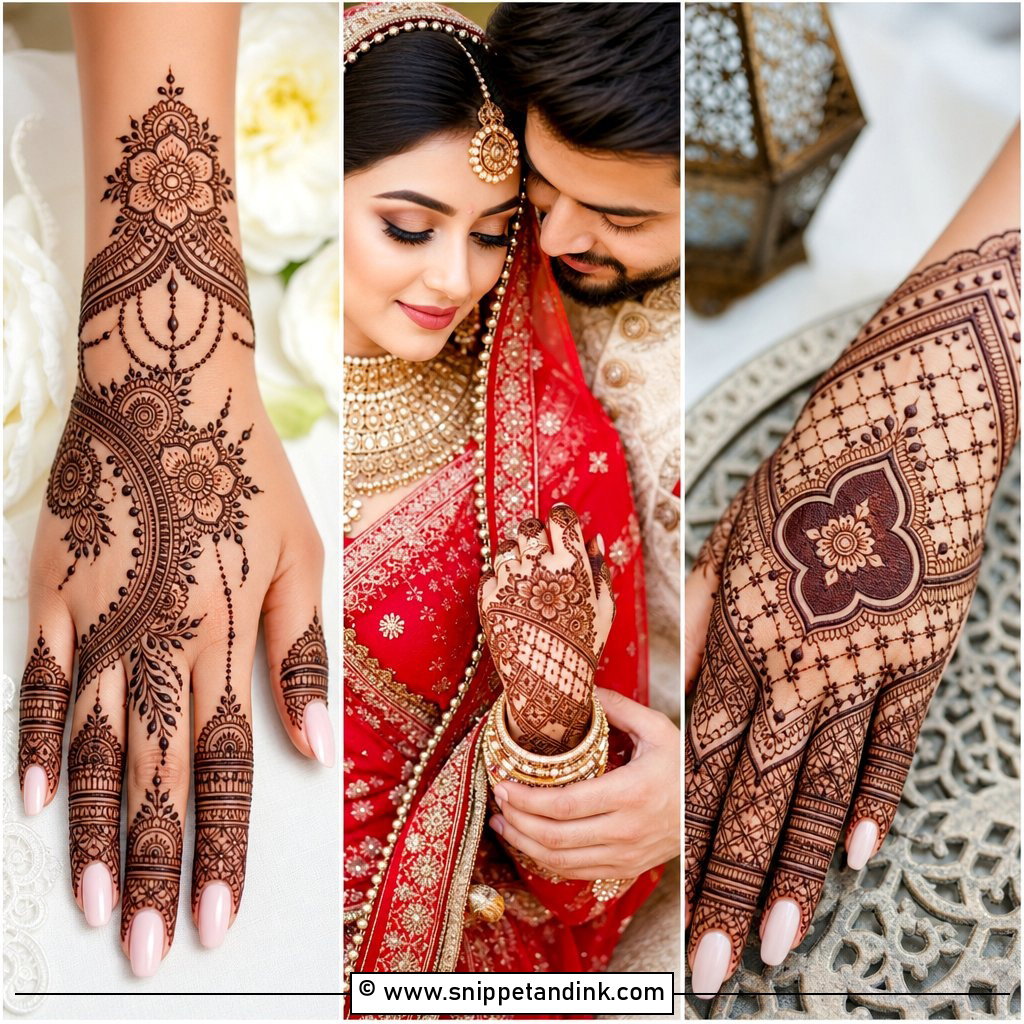
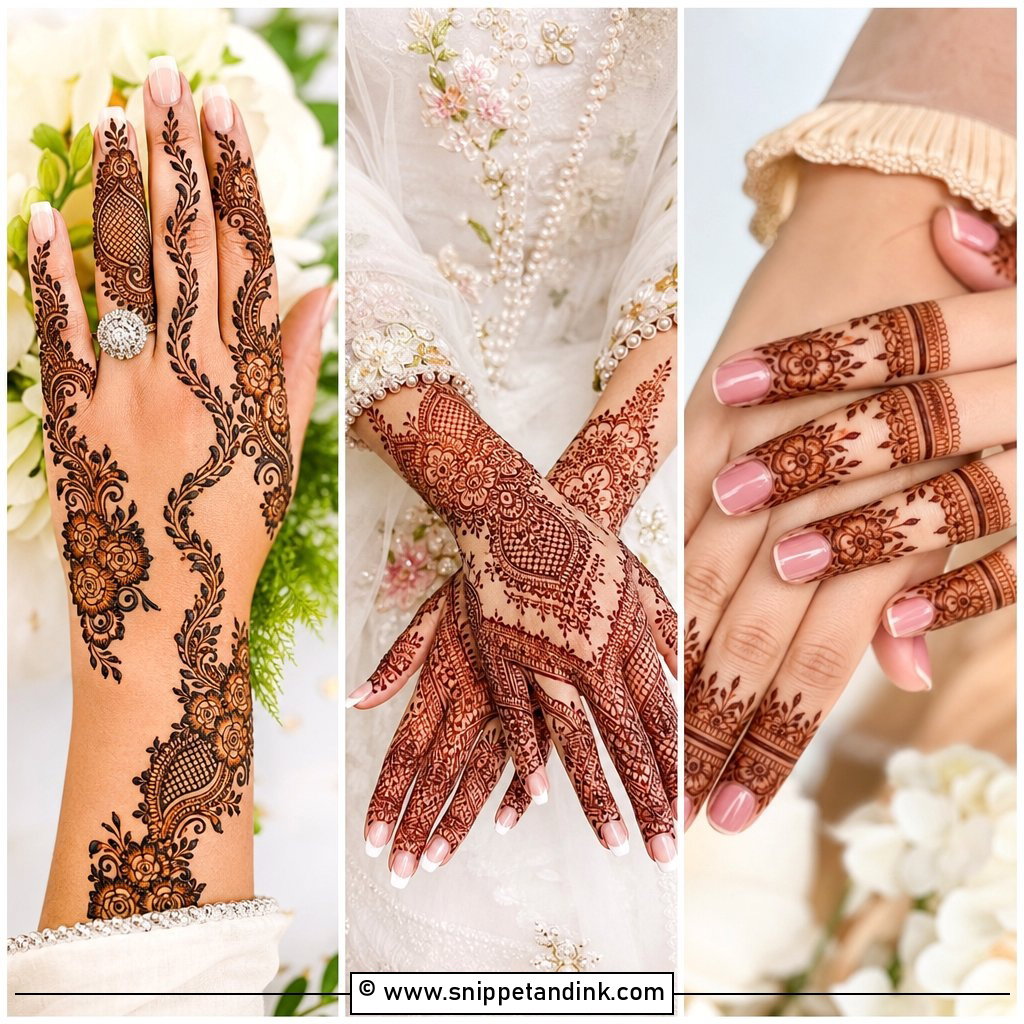
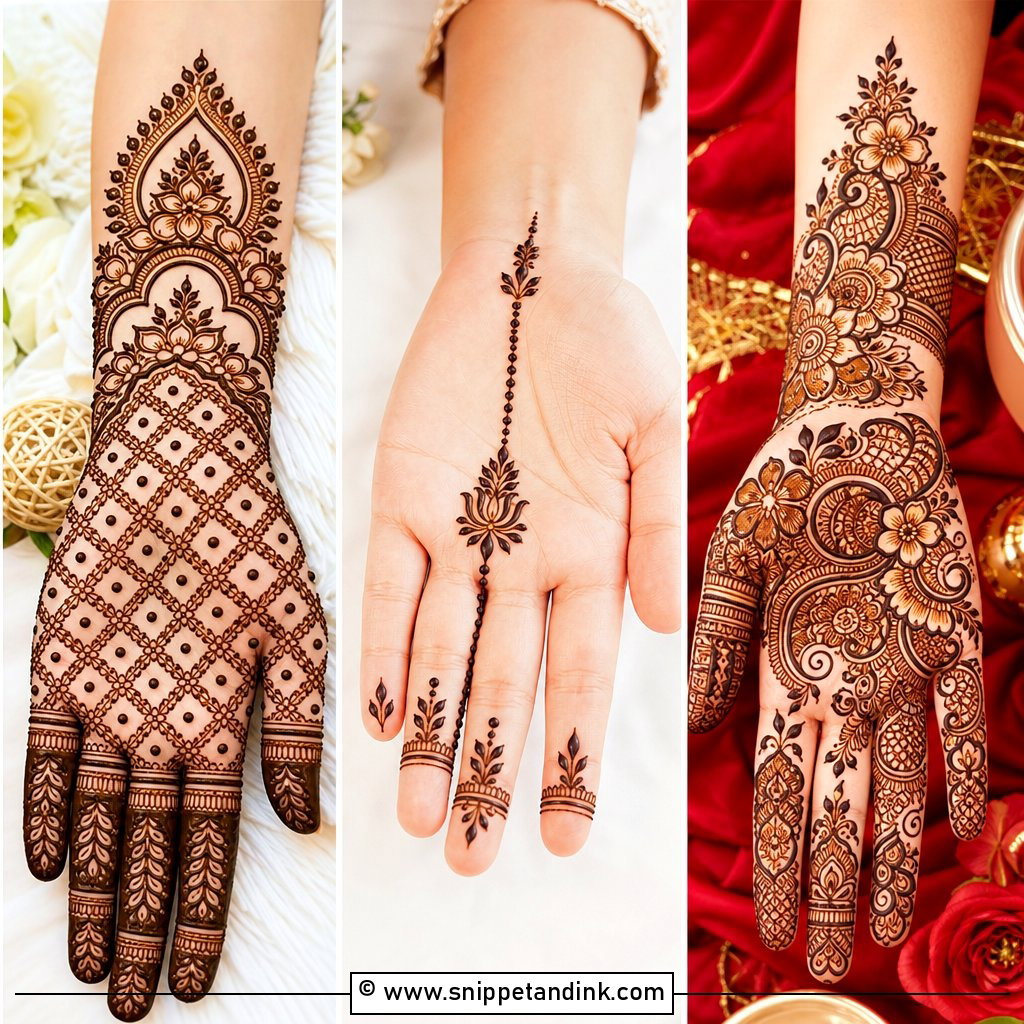
This is the layout I suggest when a bride wants the traditional full-hand effect but dreads a six-hour sitting. I start with one anchor in the palm, a mandala, lotus or paisley cluster, then fill the rest with soft vines, dots, small leaves and loose jaali instead of solid shading. Fingers get detail at the tips and a band or two, never top-to-bottom fill. The part I watch most is spacing: if two motifs sit closer than a few millimetres, the paste can bleed together as it dries and the stain loses its outline. A slim bracelet at the wrist closes the design so it doesn’t look abandoned halfway.
2. Simple Arabic Bridal Mehndi Design
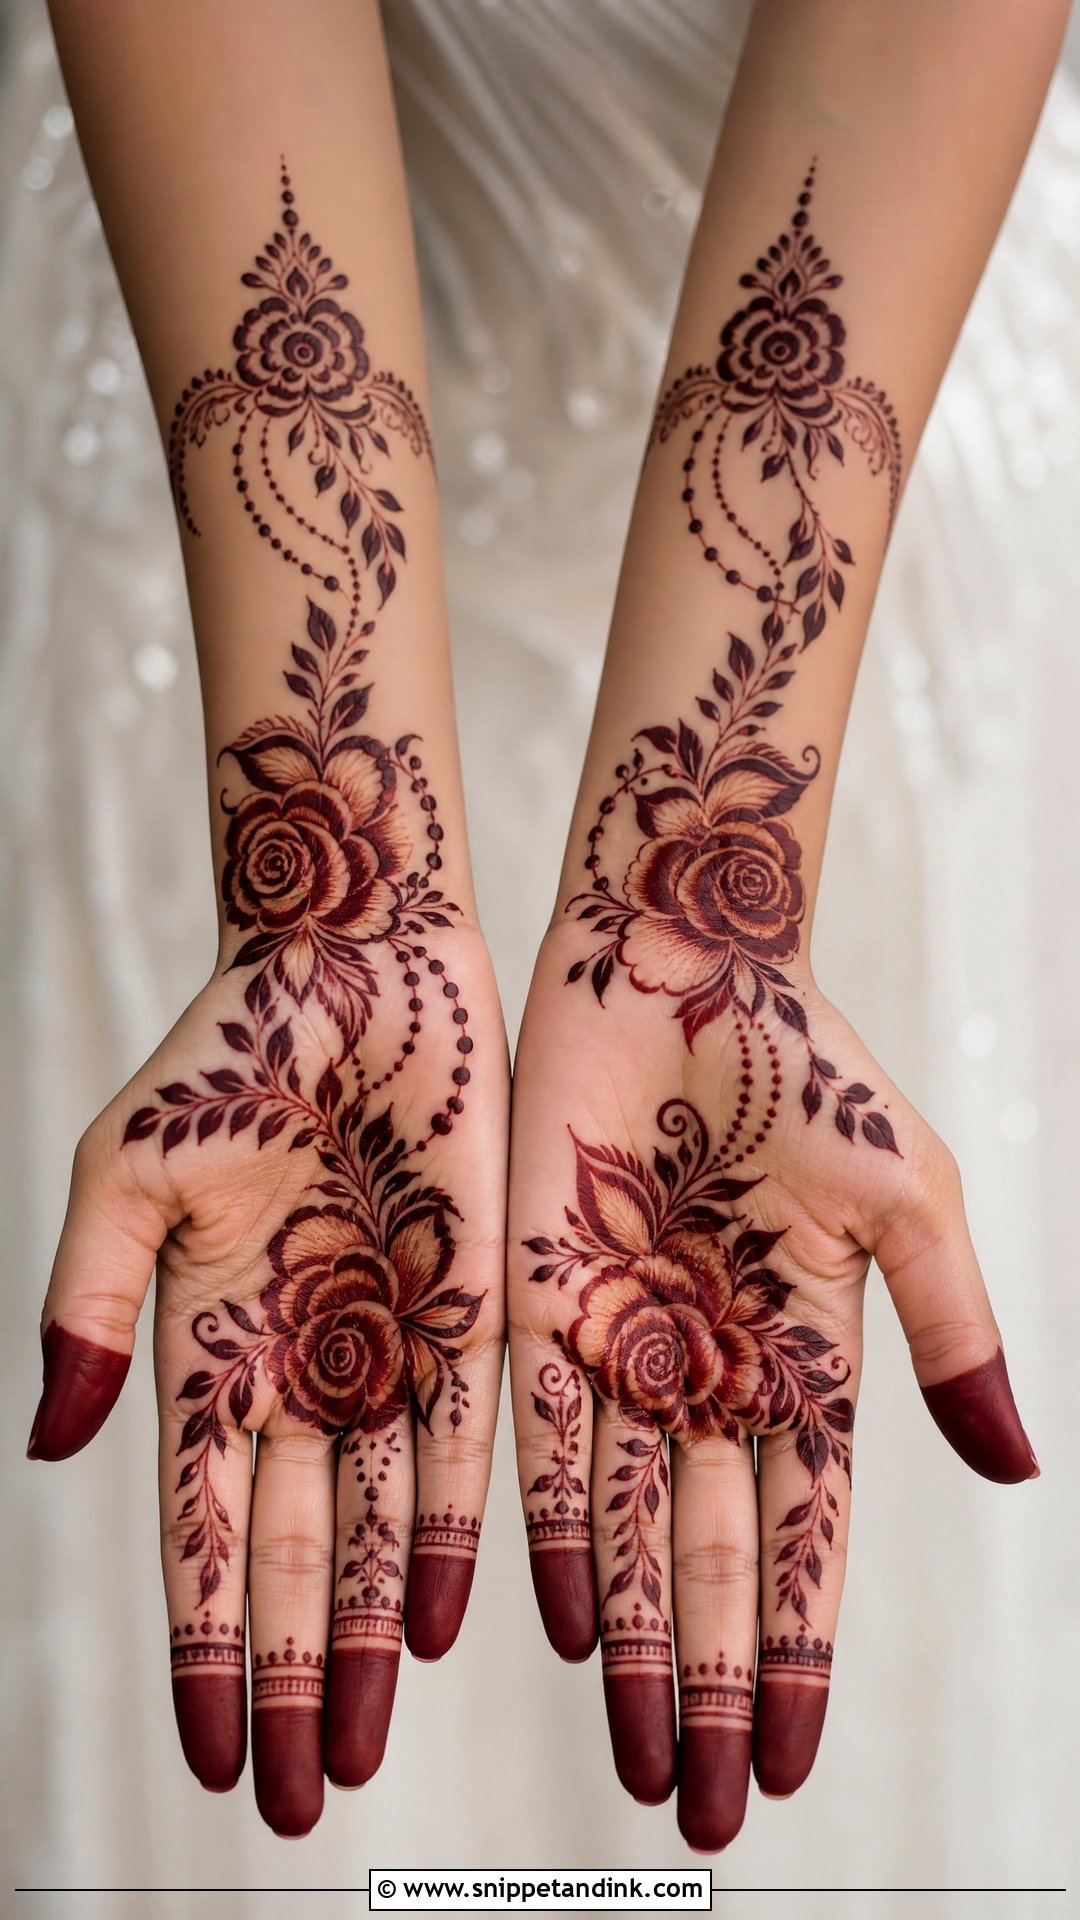
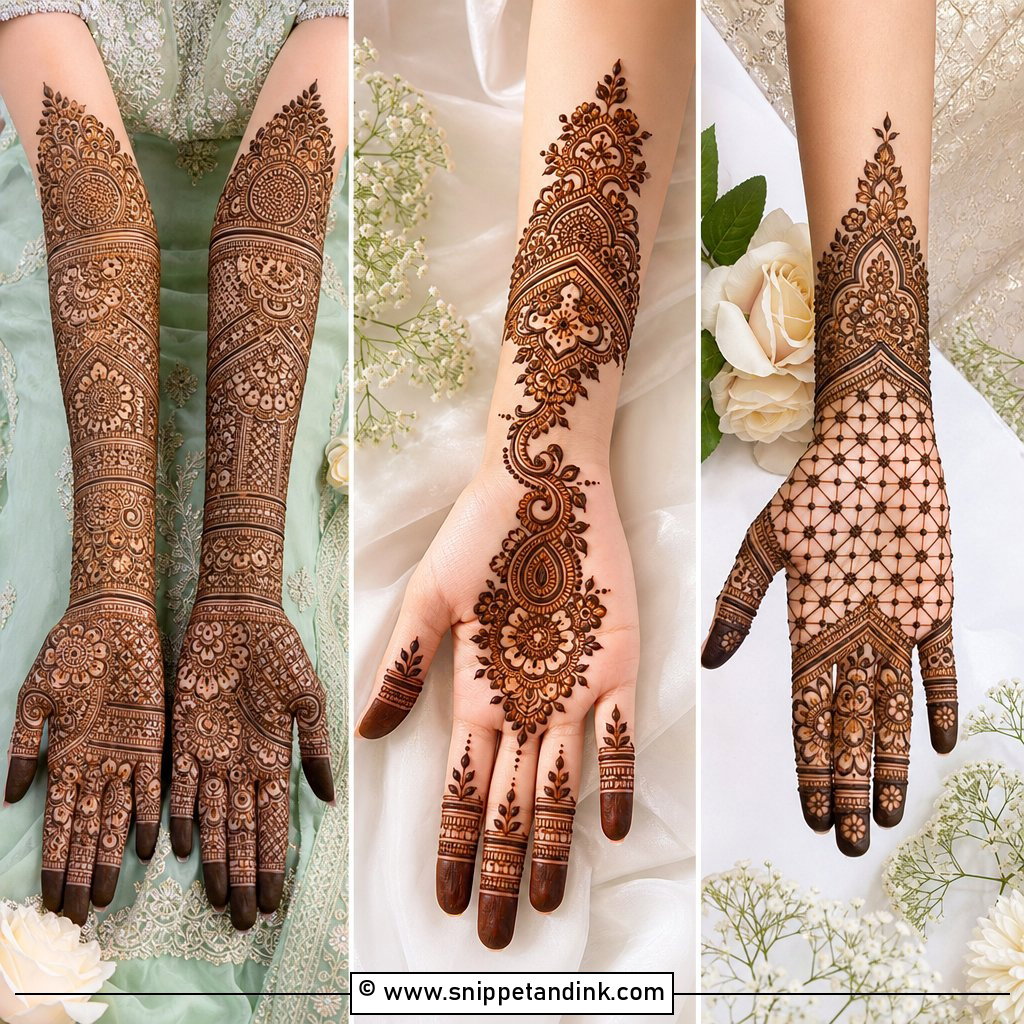
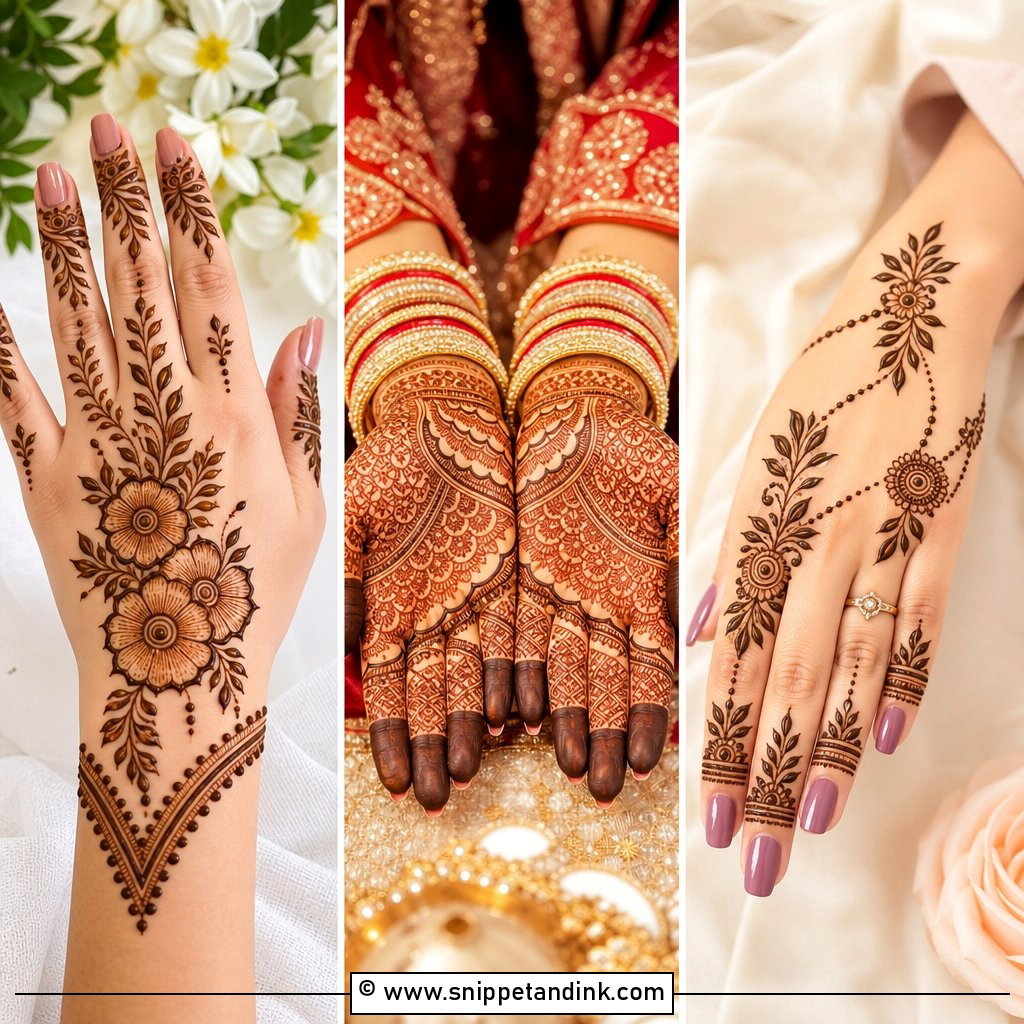
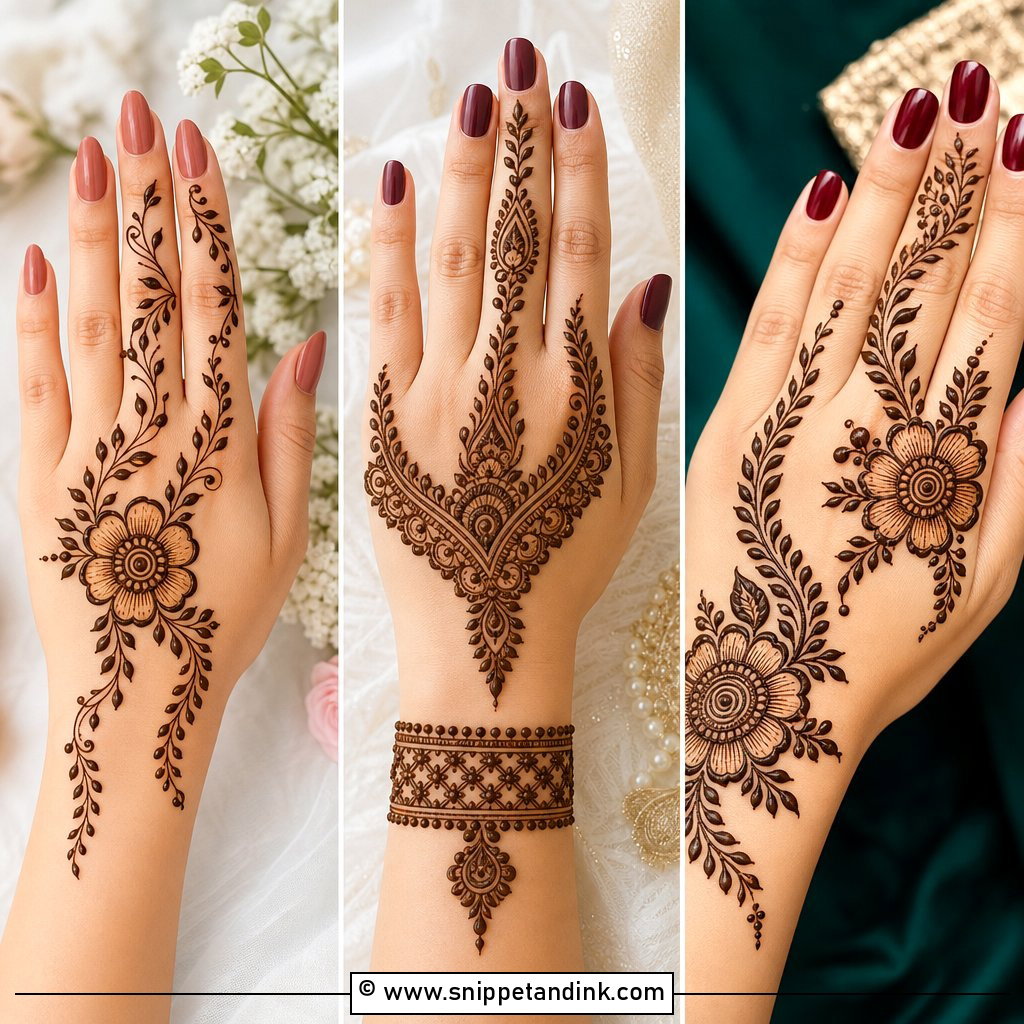
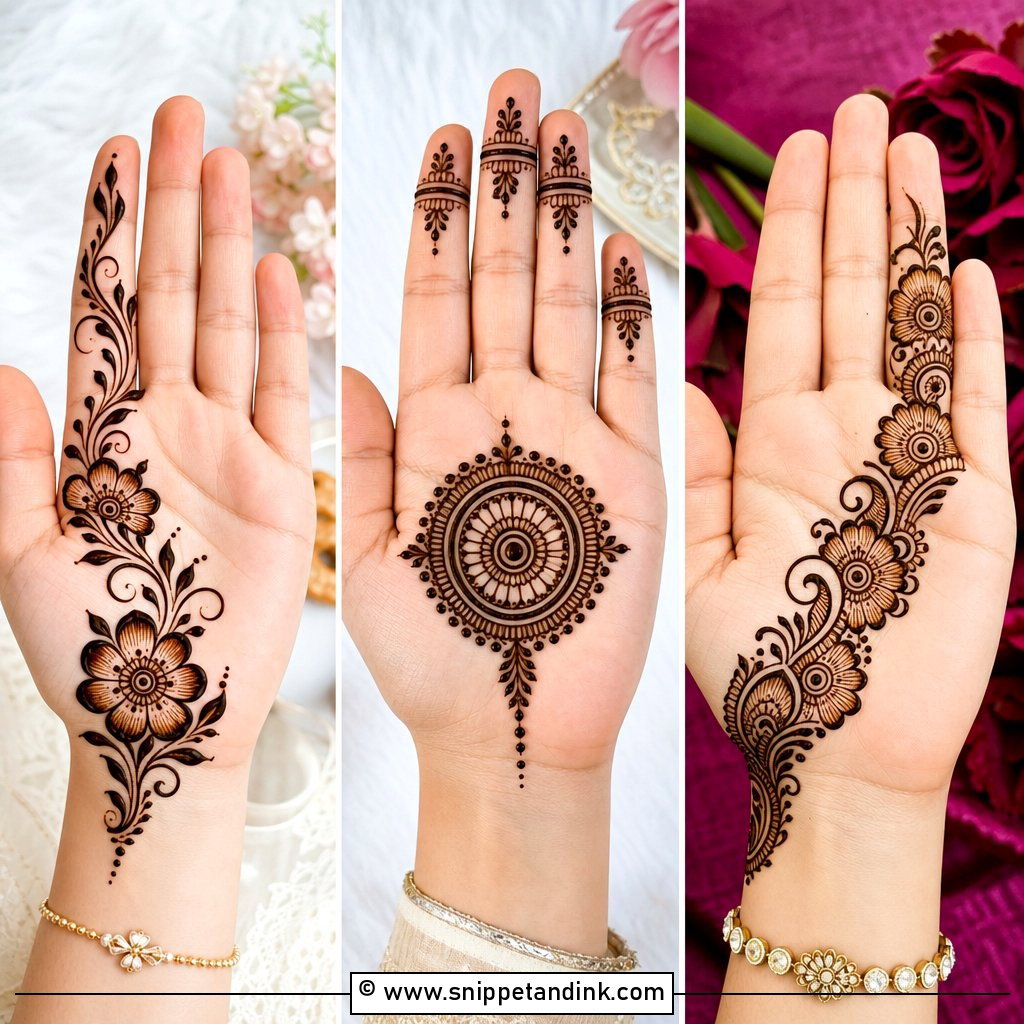
Arabic layouts are quick to draw because the pattern runs diagonally from one side of the palm toward the wrist and leaves everything else open. Big flowers, leafy vines and shaded petals do the work, so I use a slightly thicker line here; bold strokes deposit more paste and stain deeper. Fingers get matching bands and a dotted chain. Where this design struggles is on a bride who wants symmetry, because the diagonal deliberately leaves one corner empty. For a fuller bridal version I add a wrist cuff and heavier fingertips, and the same pattern scaled down suits sisters and bridesmaids.
3. Simple Indian Bridal Mehndi Design
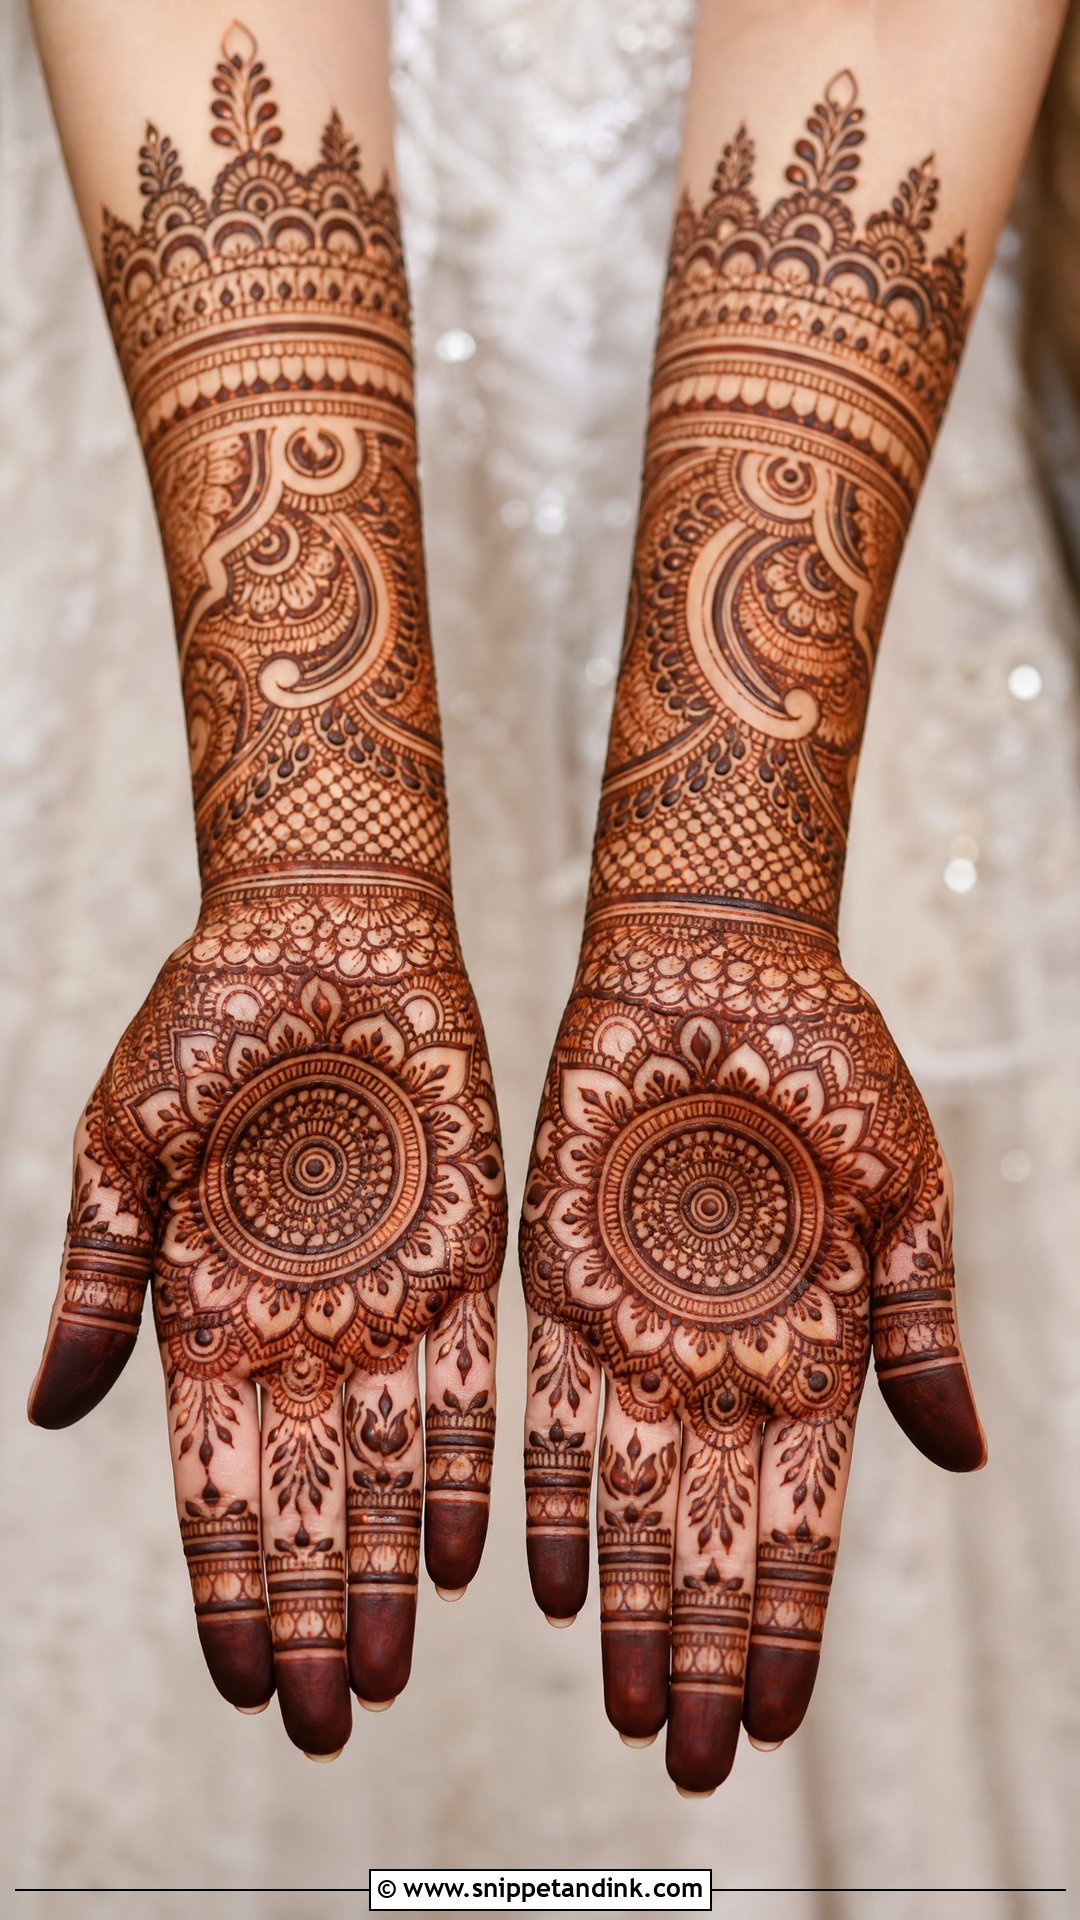
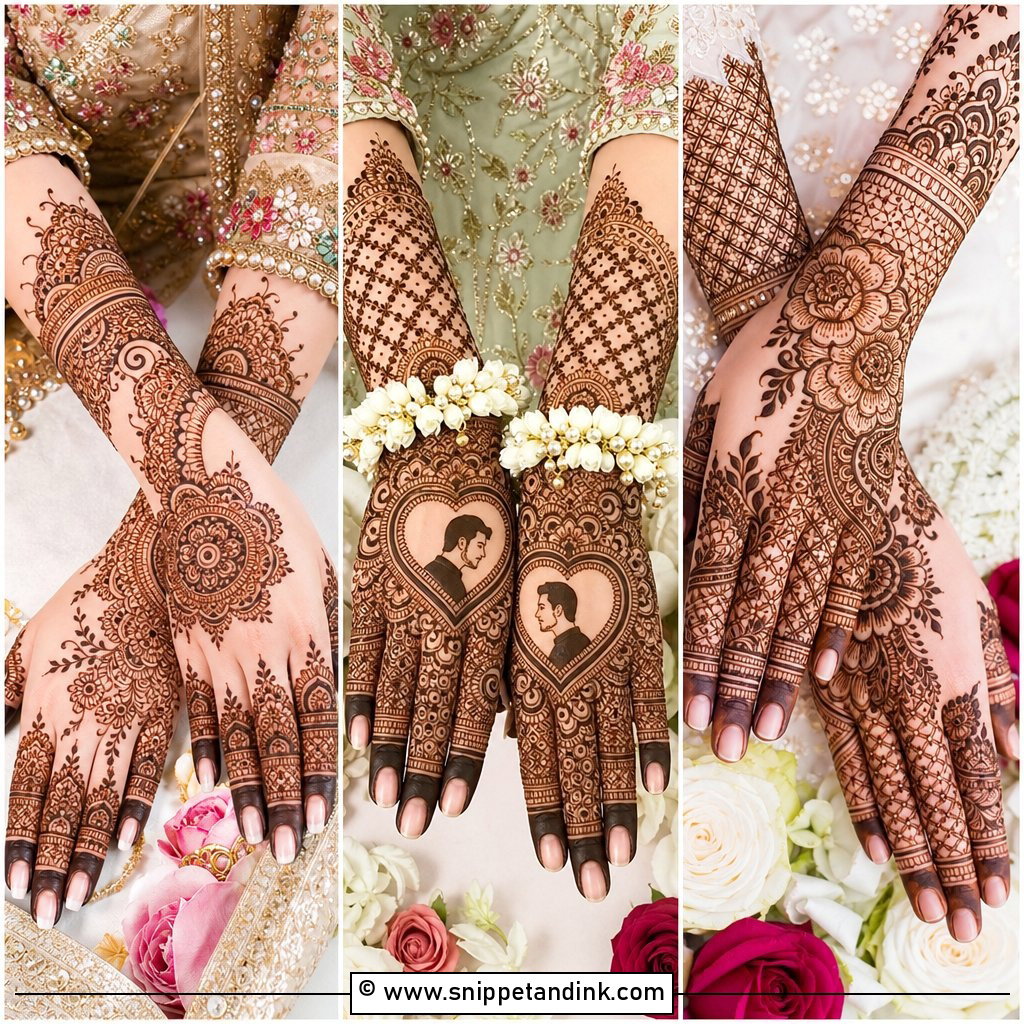
Classic Indian bridal henna keeps its richness even with fewer fillers, as long as the centre has meaning. I usually place a round mandala, a paisley border or lotus petals in the palm, and if a bride asks for a small bride-and-groom figure I draw it here, where it stays readable. Around it go vines, fine checks and scalloped bands with gaps between them. It sits well next to heavily embroidered lehengas and sarees because the hands don’t compete with the fabric. I end the forearm just below the elbow or at mid-forearm; going higher on a light design tends to look stretched.
4. Simple Back Hand Bridal Mehndi Design
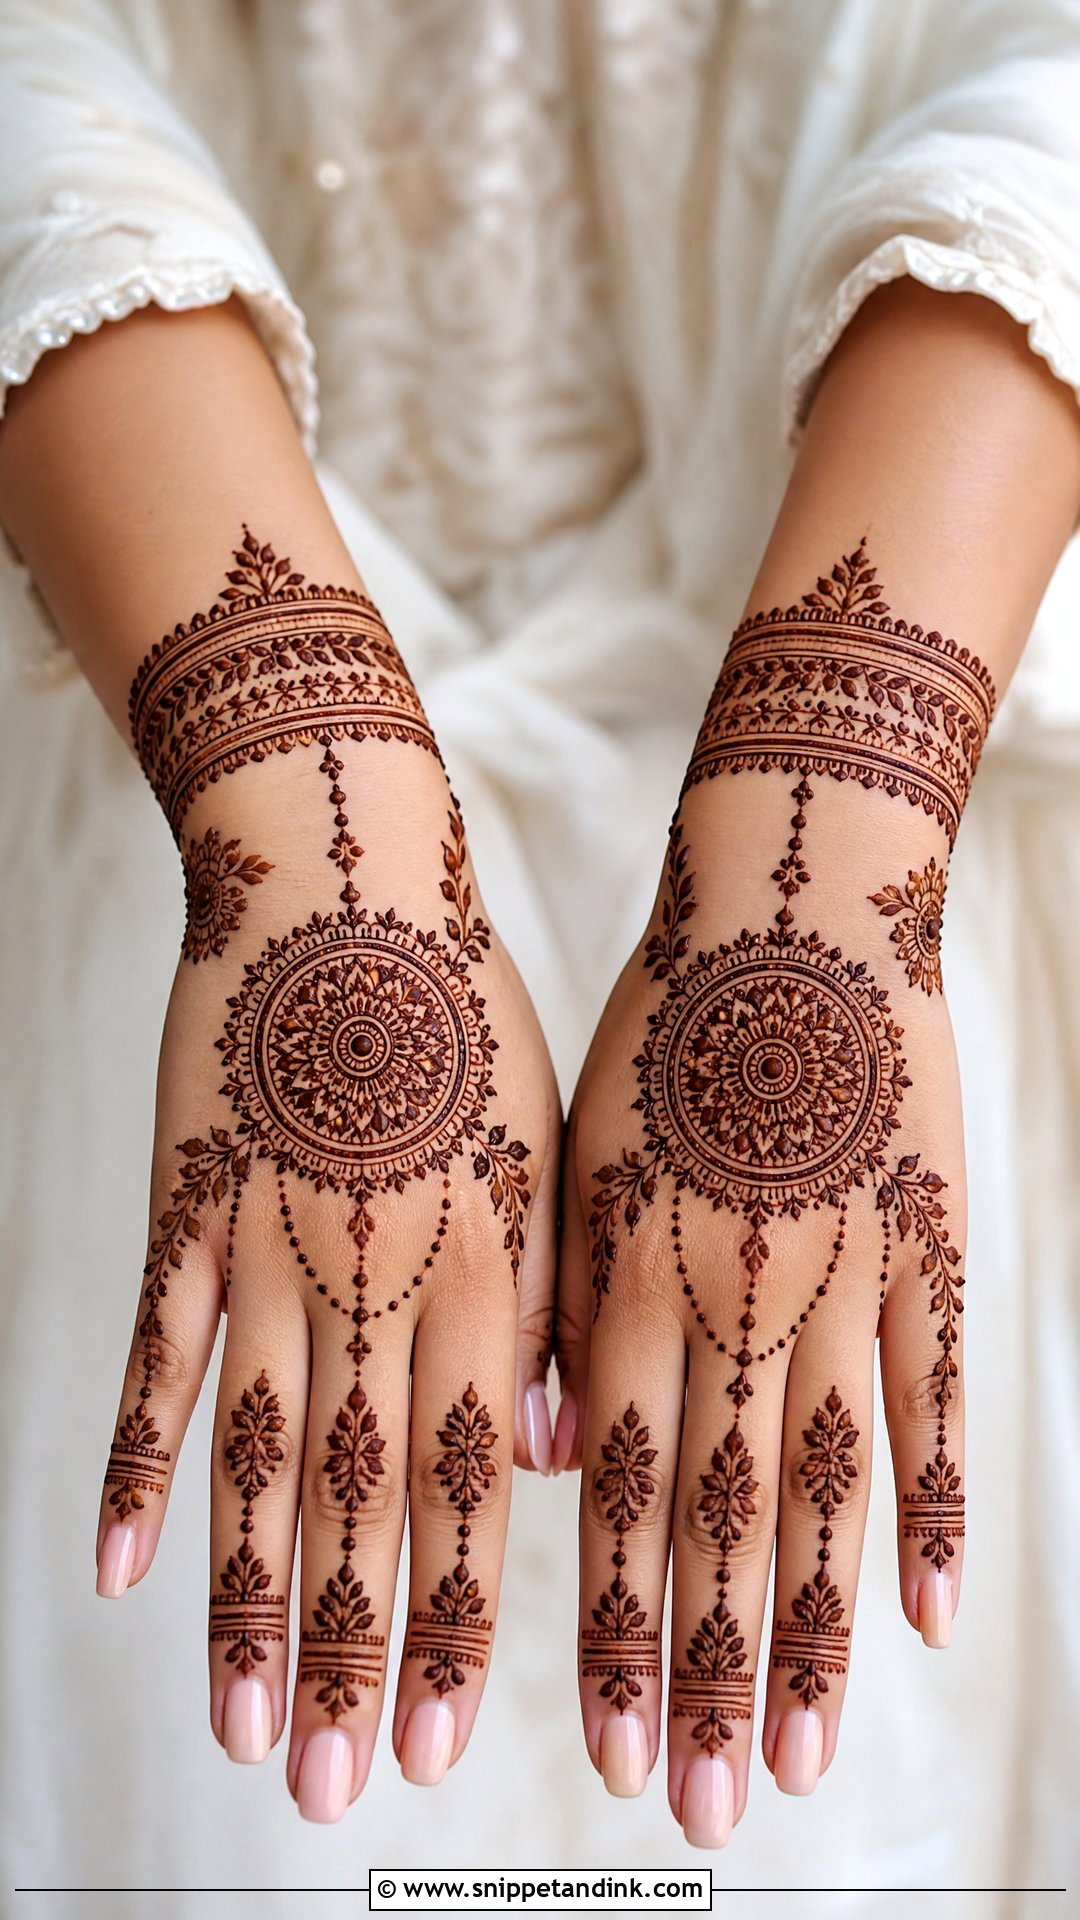
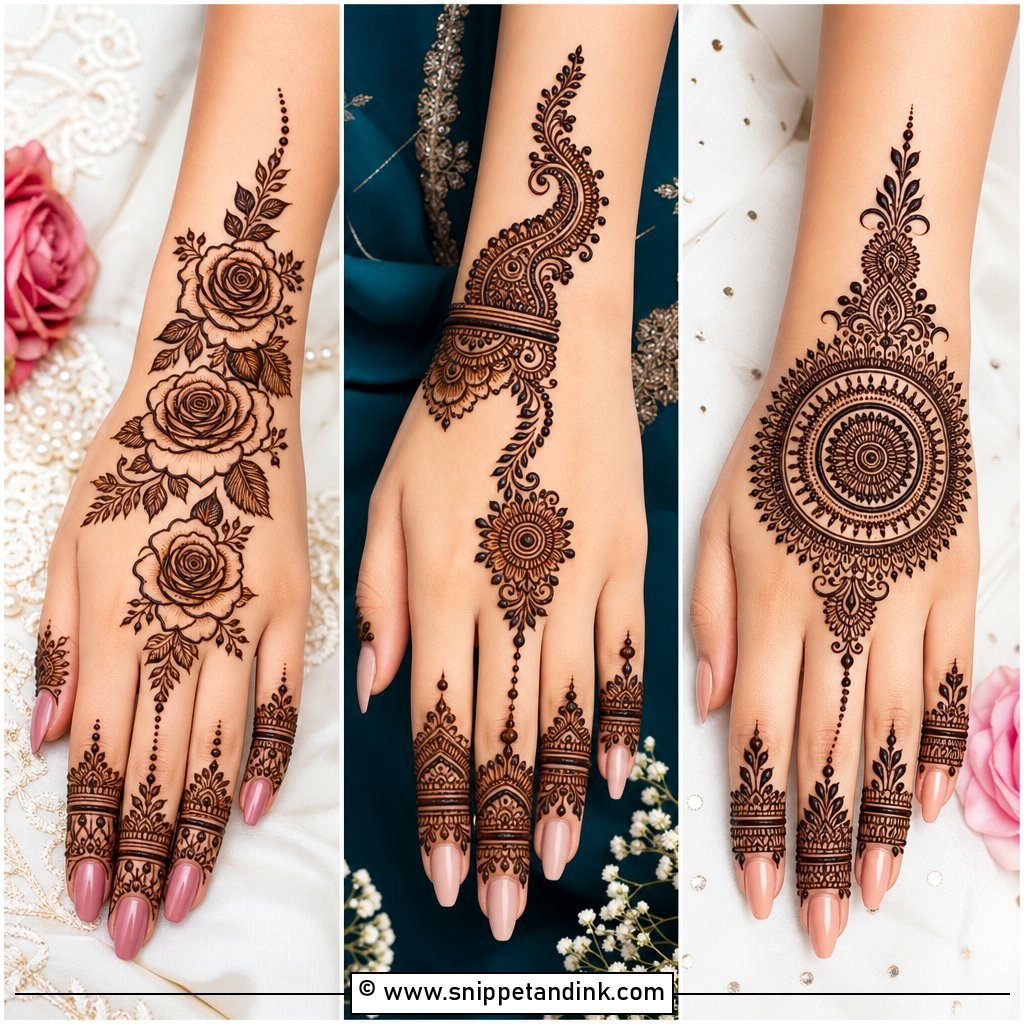
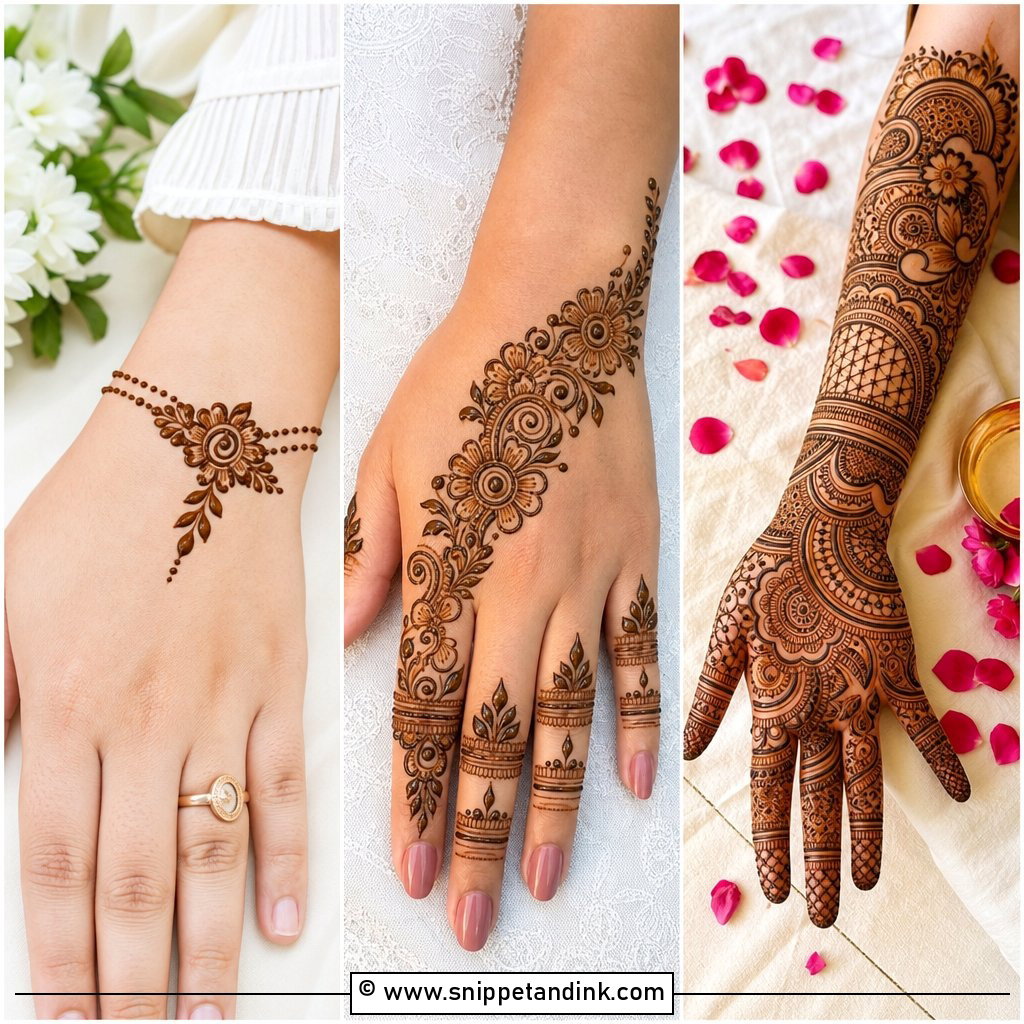
Ring shots, bouquet poses and close-ups all show the back of the hand, so this side gets judged more than brides expect. Skin there is thinner than the palm and stains lighter, which is why I draw back-hand work with a firmer line. A central mandala, a floral bracelet, connecting chains and decorated fingers can make the pattern read like hand jewelry, with a line of dots running from the wrist to the middle finger. I follow the hand’s own shape and keep the knuckles clean, since paste on a knuckle cracks every time you bend. Light palm coverage pairs well with this if you want the back to do the talking.
5. Simple Front Hand Bridal Mehndi Design
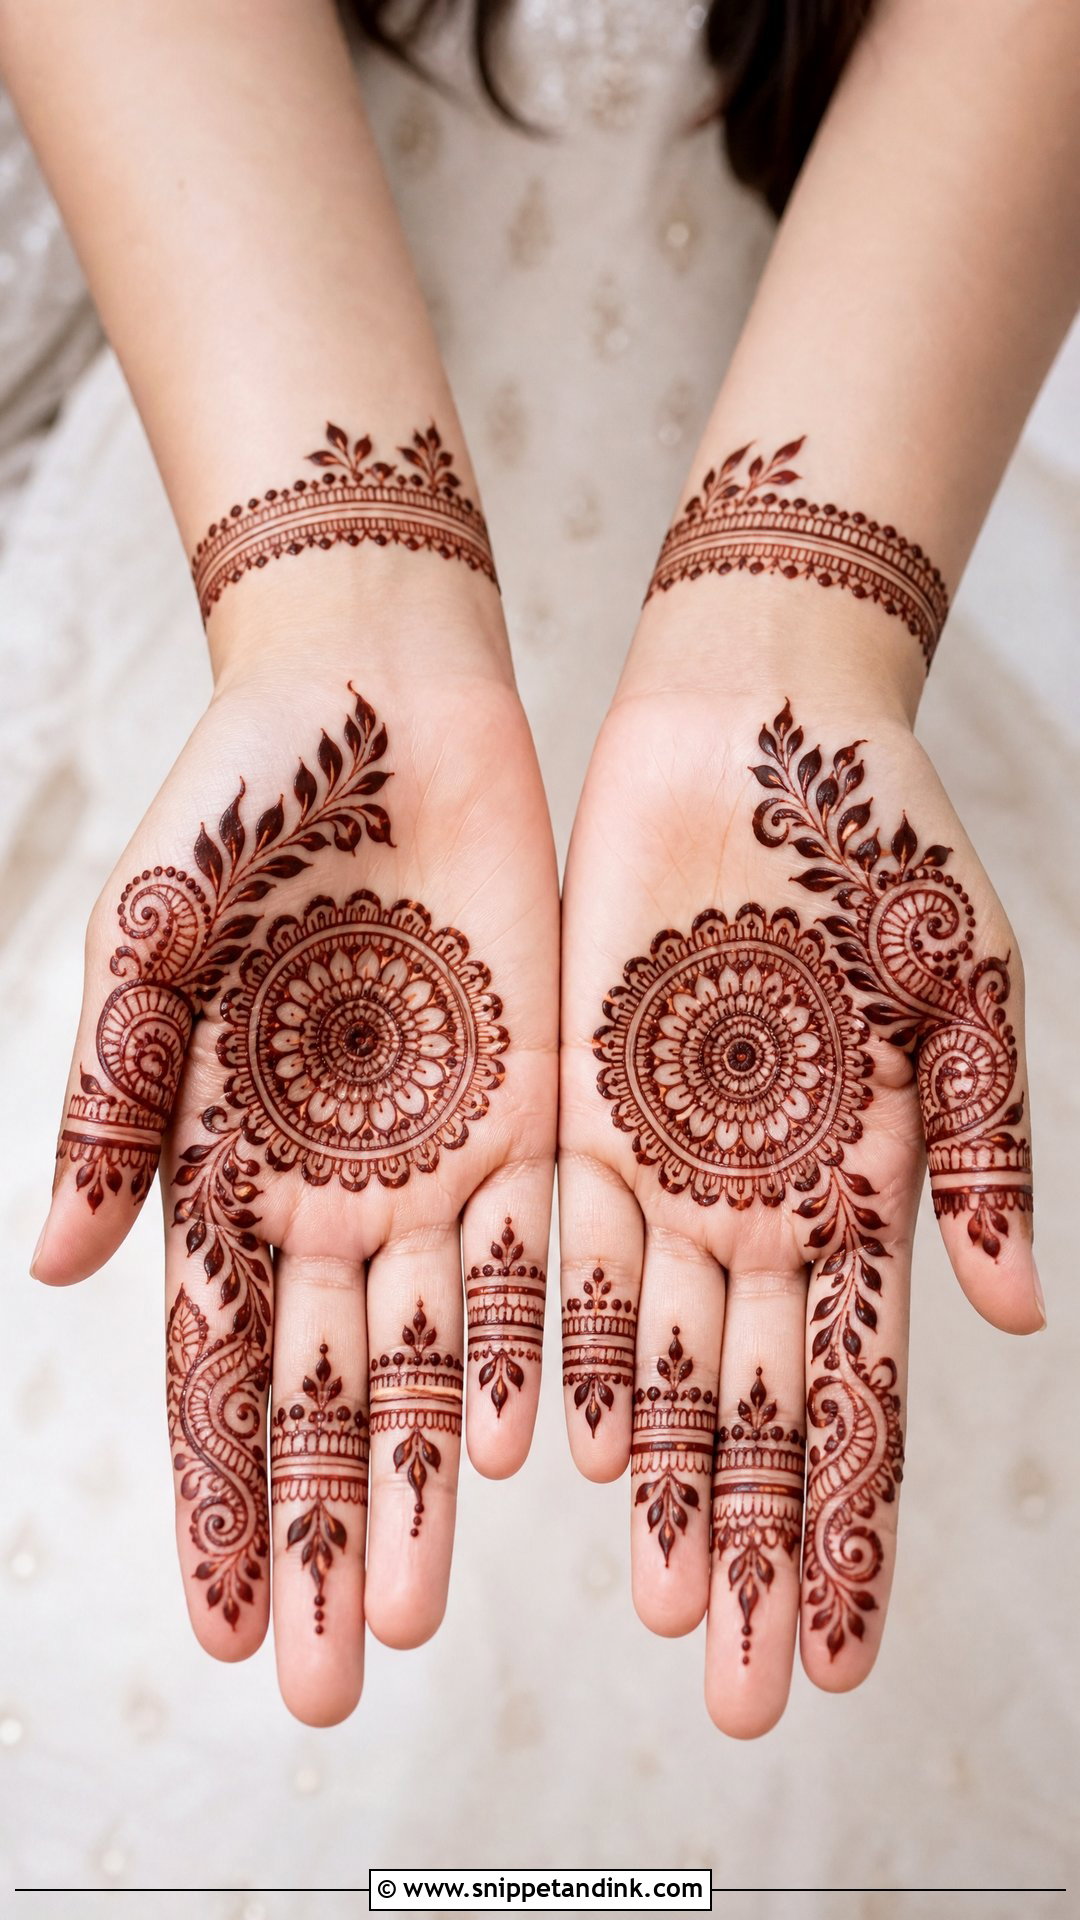
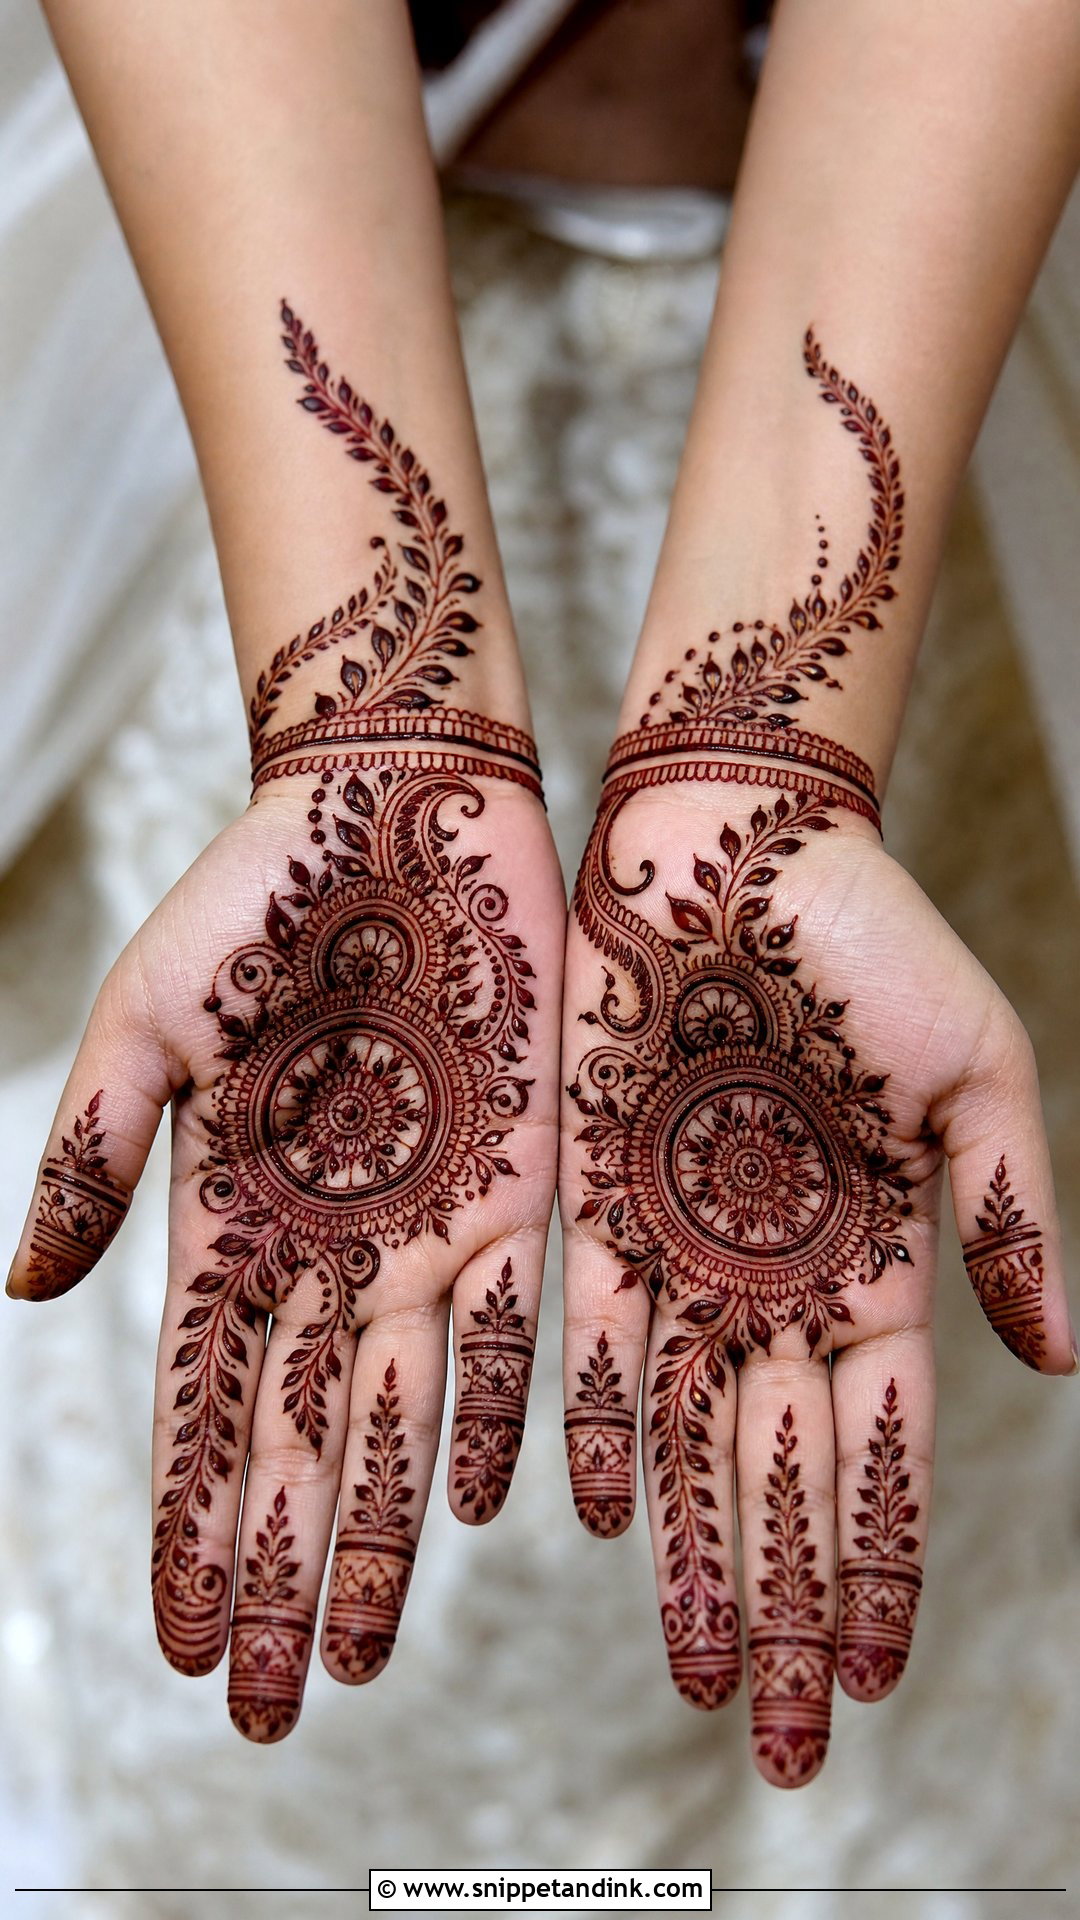
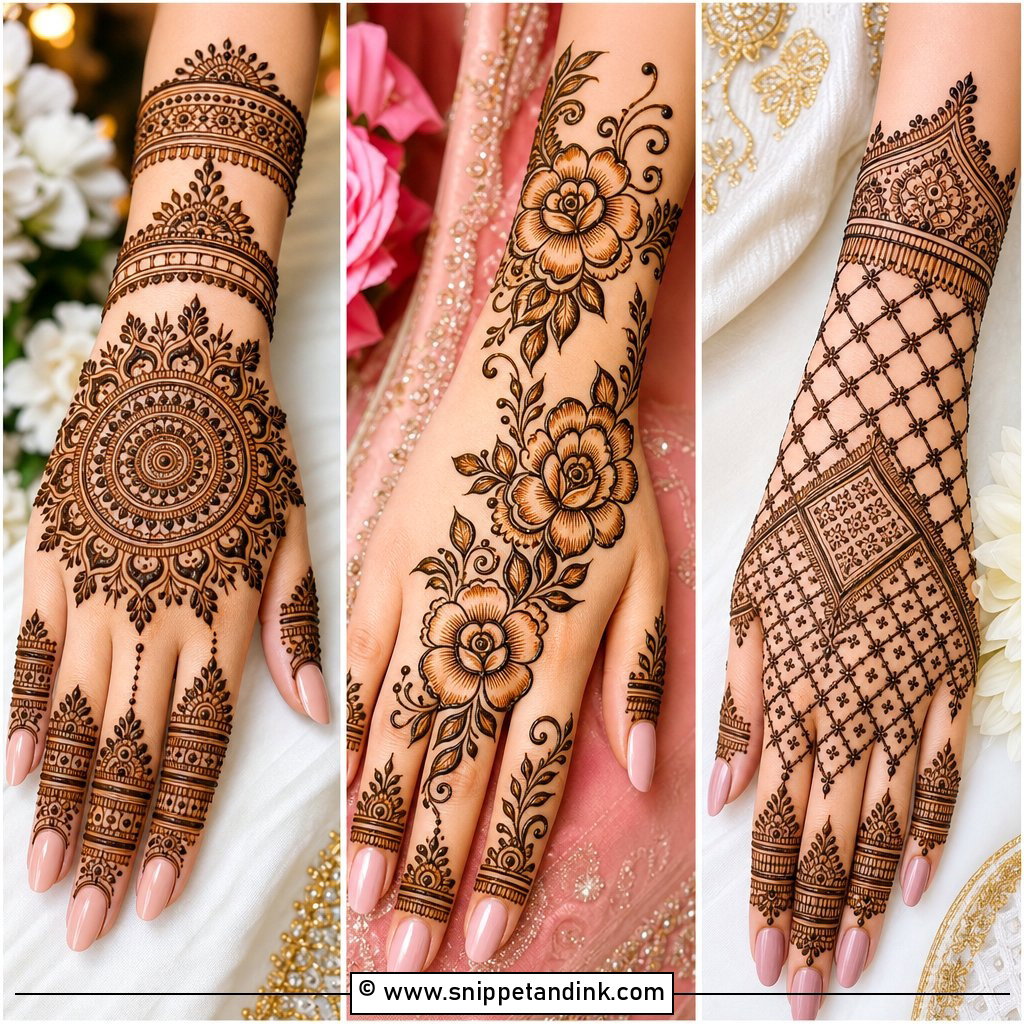
The palm is what everyone sees during rituals, and it is also where henna stains darkest because the skin is thicker. That makes a front-hand design with open gaps very forgiving. I put a large mandala in the centre, add leafy corners and frame the palm with finger detail, or swap the mandala for a paisley-and-flower arrangement. A thin cuff or floral band finishes the wrist. Application is short, often under an hour per hand for a layout like this, and because the main shapes are large they stay sharp in photos.
6. Simple Mandala Bridal Mehndi Design
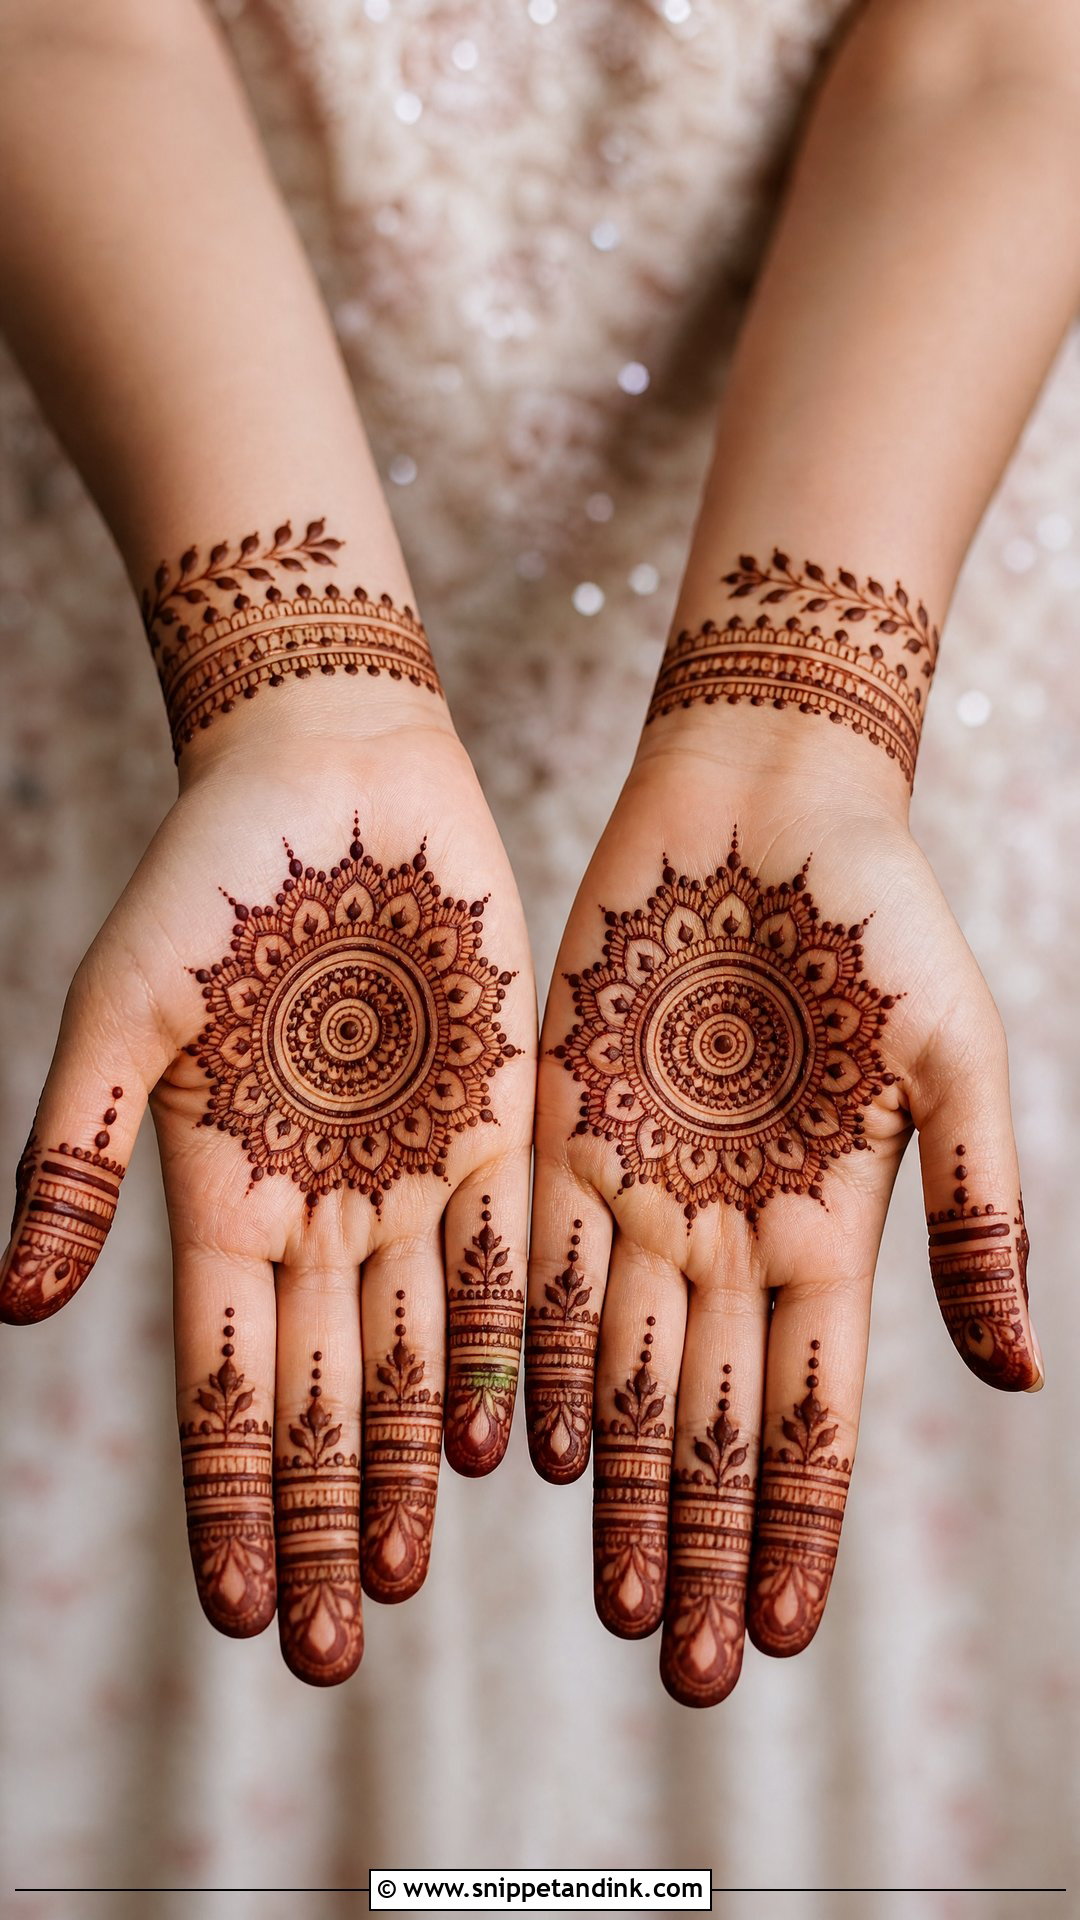
A mandala makes a hand look finished even when everything around it is sparse, which is why I reach for it so often on small hands. I draw the circle first and build outward, petals, dots, then a leafy border, checking symmetry from the bride’s side of the table, not mine. Fingers get coordinated bands and fine lines, and a wrist bracelet or half-cuff completes it. The one risk is a mandala drawn too small for the palm: it looks like a stamp. I size it so the outer ring nearly touches the base of the fingers.
7. Simple Floral Bridal Mehndi Design
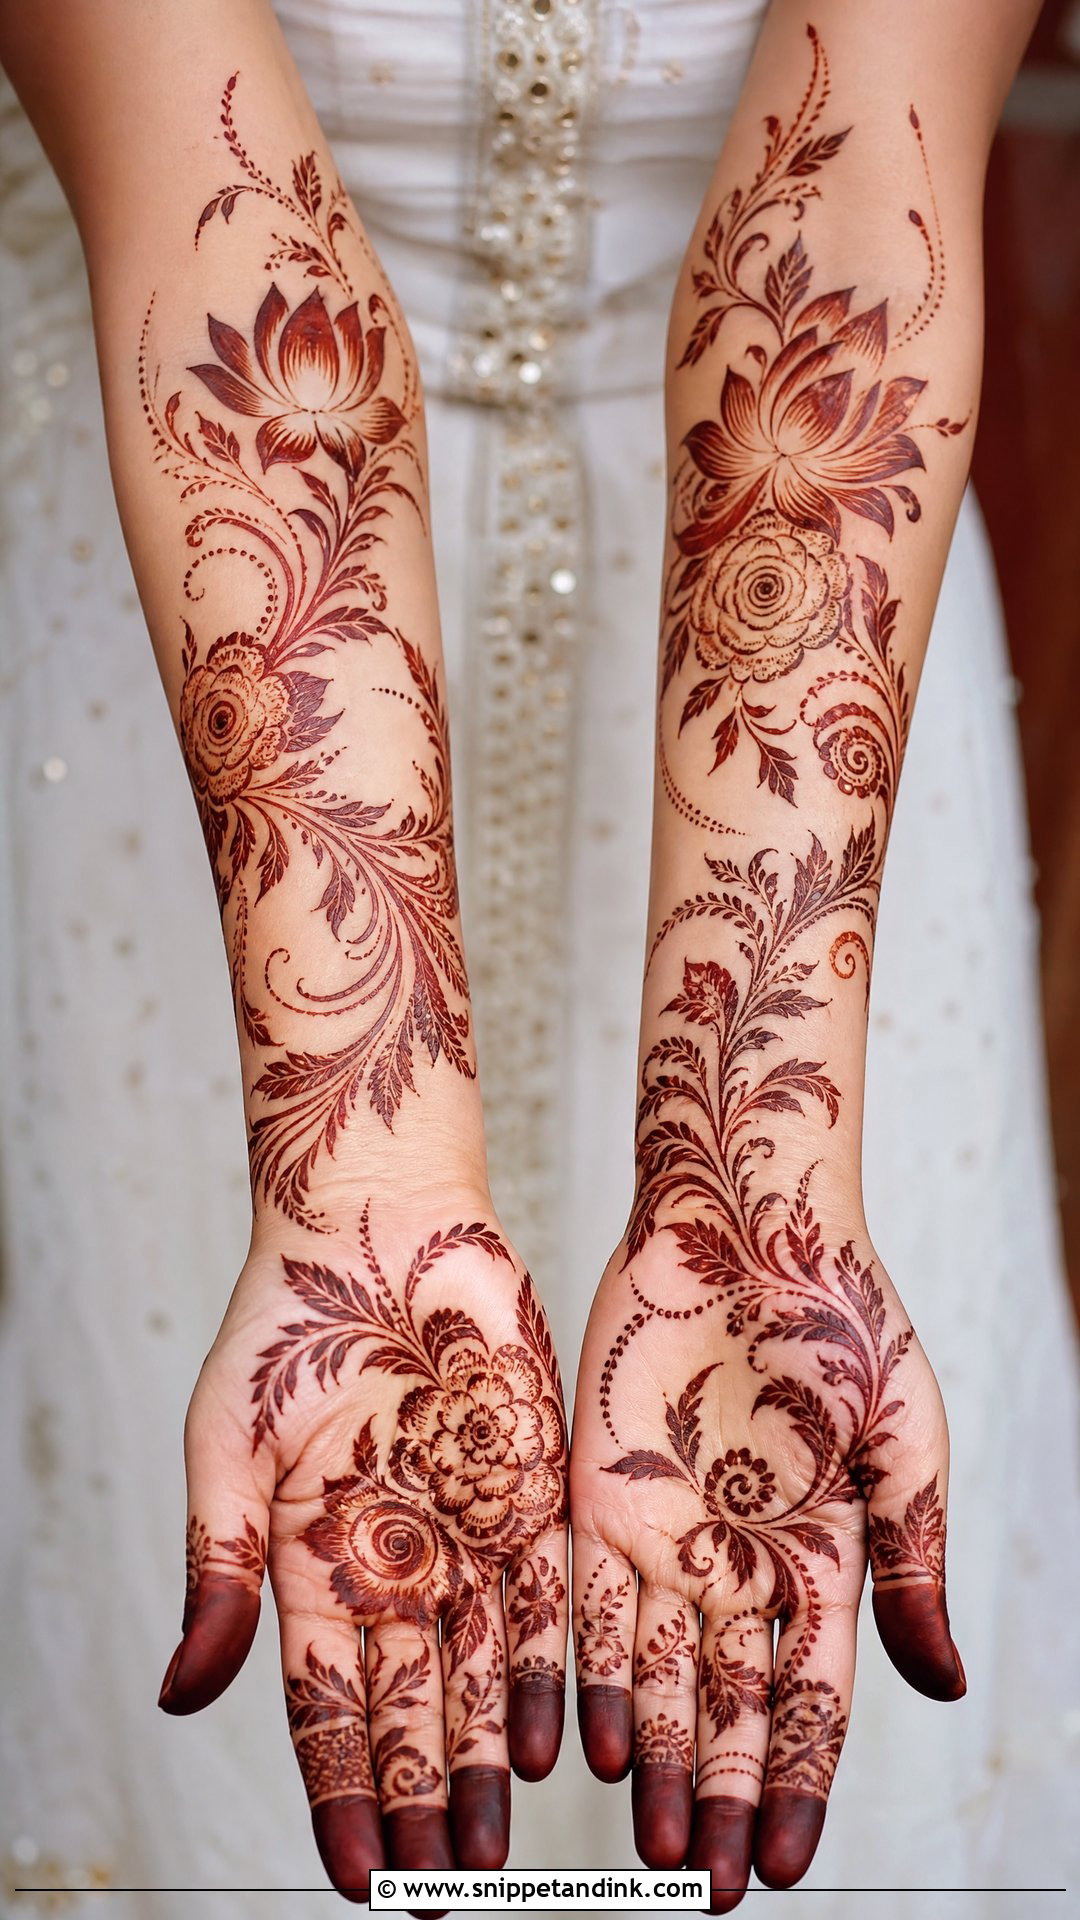
Florals stain clearly when the flowers are big and the gaps are honest. Rose-style blooms, lotus petals, buds and leafy vines spread across the palm and wrist, and I avoid tiny packed fillers between them because they merge into a dark patch by day two. I like this style for daytime and garden ceremonies, and with pastel outfits the open spacing keeps the hands from feeling heavy. To push it toward bridal, I add a wrist cuff, detailed fingertips or a light forearm trail.
8. Simple Paisley Bridal Mehndi Design
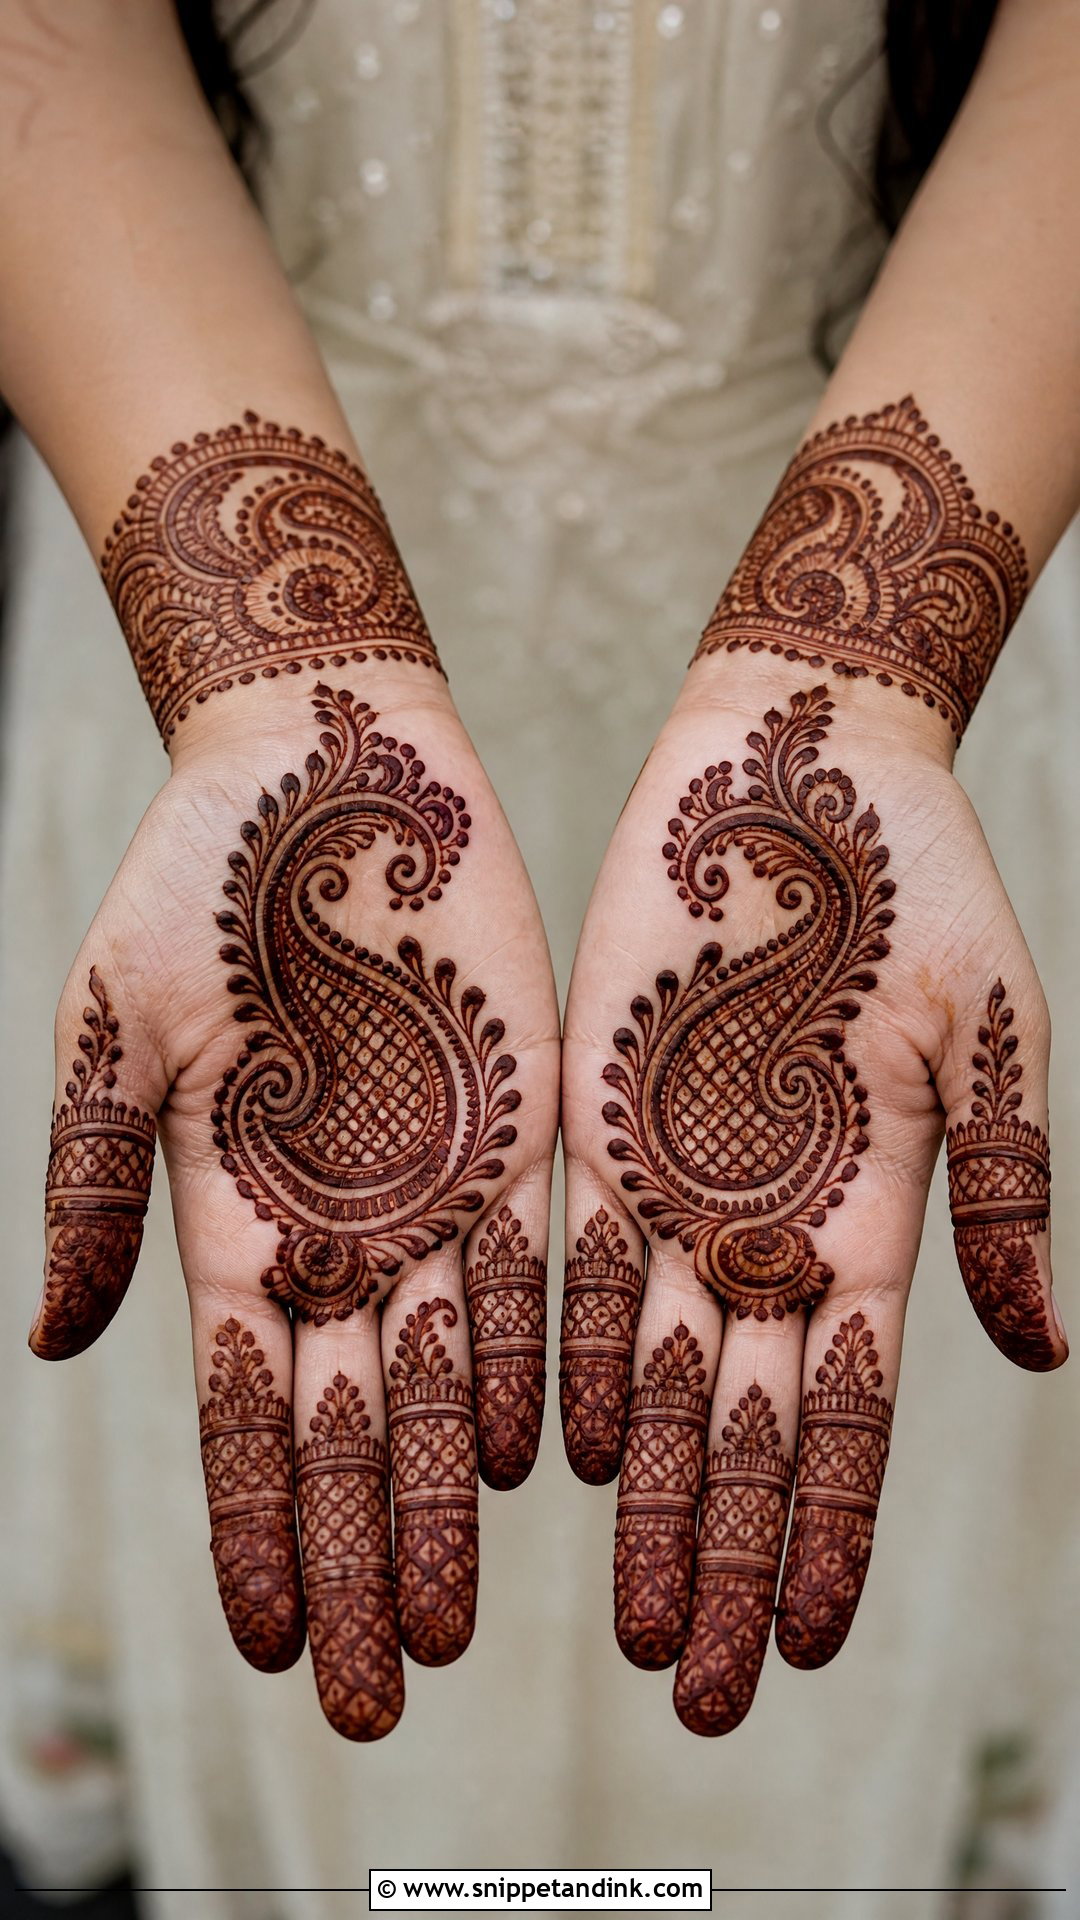
Paisley is the motif I trust most in light layouts because its curve already follows the hand. A simple paisley bridal design can place one large paisley on the palm with smaller ones, leaves, dots and curved borders around it. Finger bands and a slim wrist pattern echo those curves. It fits Indian, Pakistani and Indo-Arabic bridal looks equally. My rule is medium spacing between paisleys; packed tight, the inner shading floods and you lose the shape you paid for.
9. Simple Indo-Arabic Bridal Mehndi Design
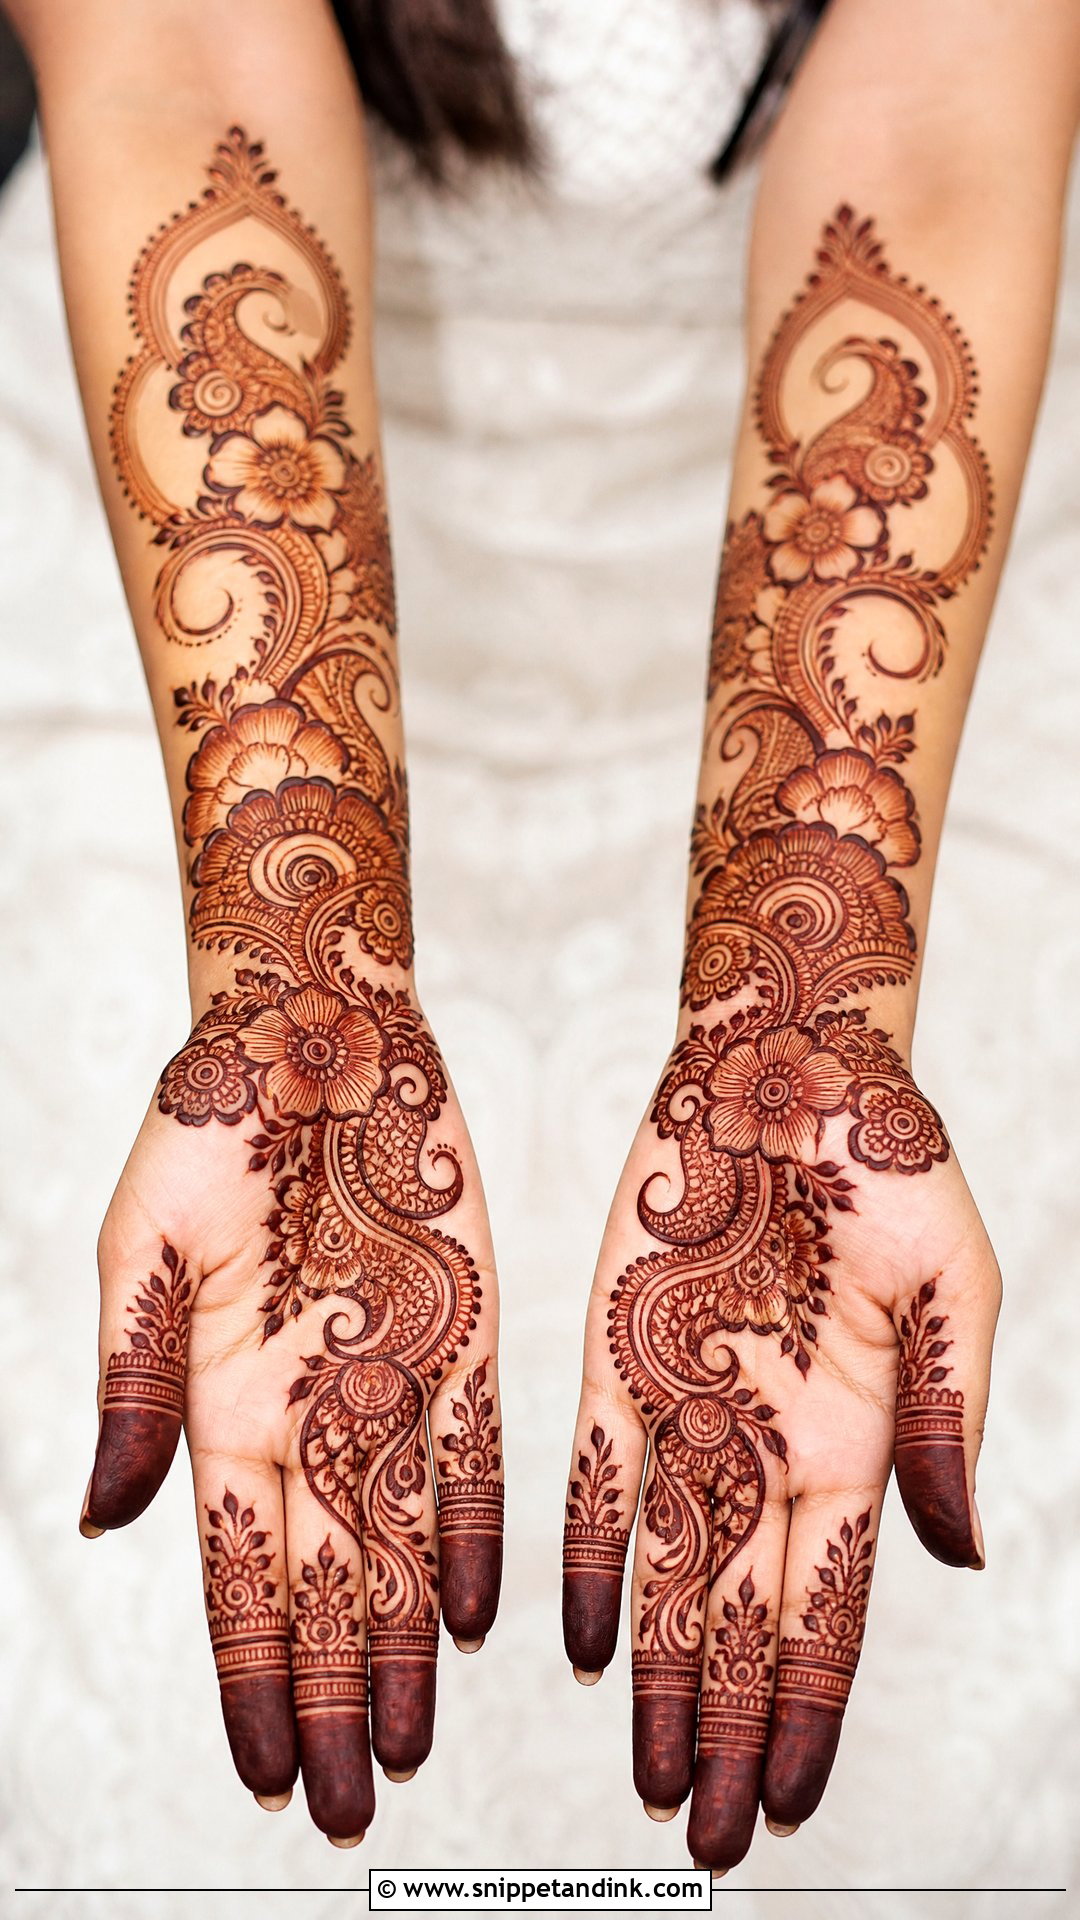
Indo-Arabic bridal mehndi borrows Indian detail and Arabic flow, and it is the most adjustable design on this list. Bold flowers, paisleys and shaded leaves sit inside fine Indian-style borders, with open skin left around the main motifs. I put the extra detail on the fingers, which is where a light design starts to feel bridal. Because the structure is modular, I can drop a border for an engagement and add a forearm section for the wedding without redrawing the whole idea.
10. Simple Minimal Bridal Mehndi Design
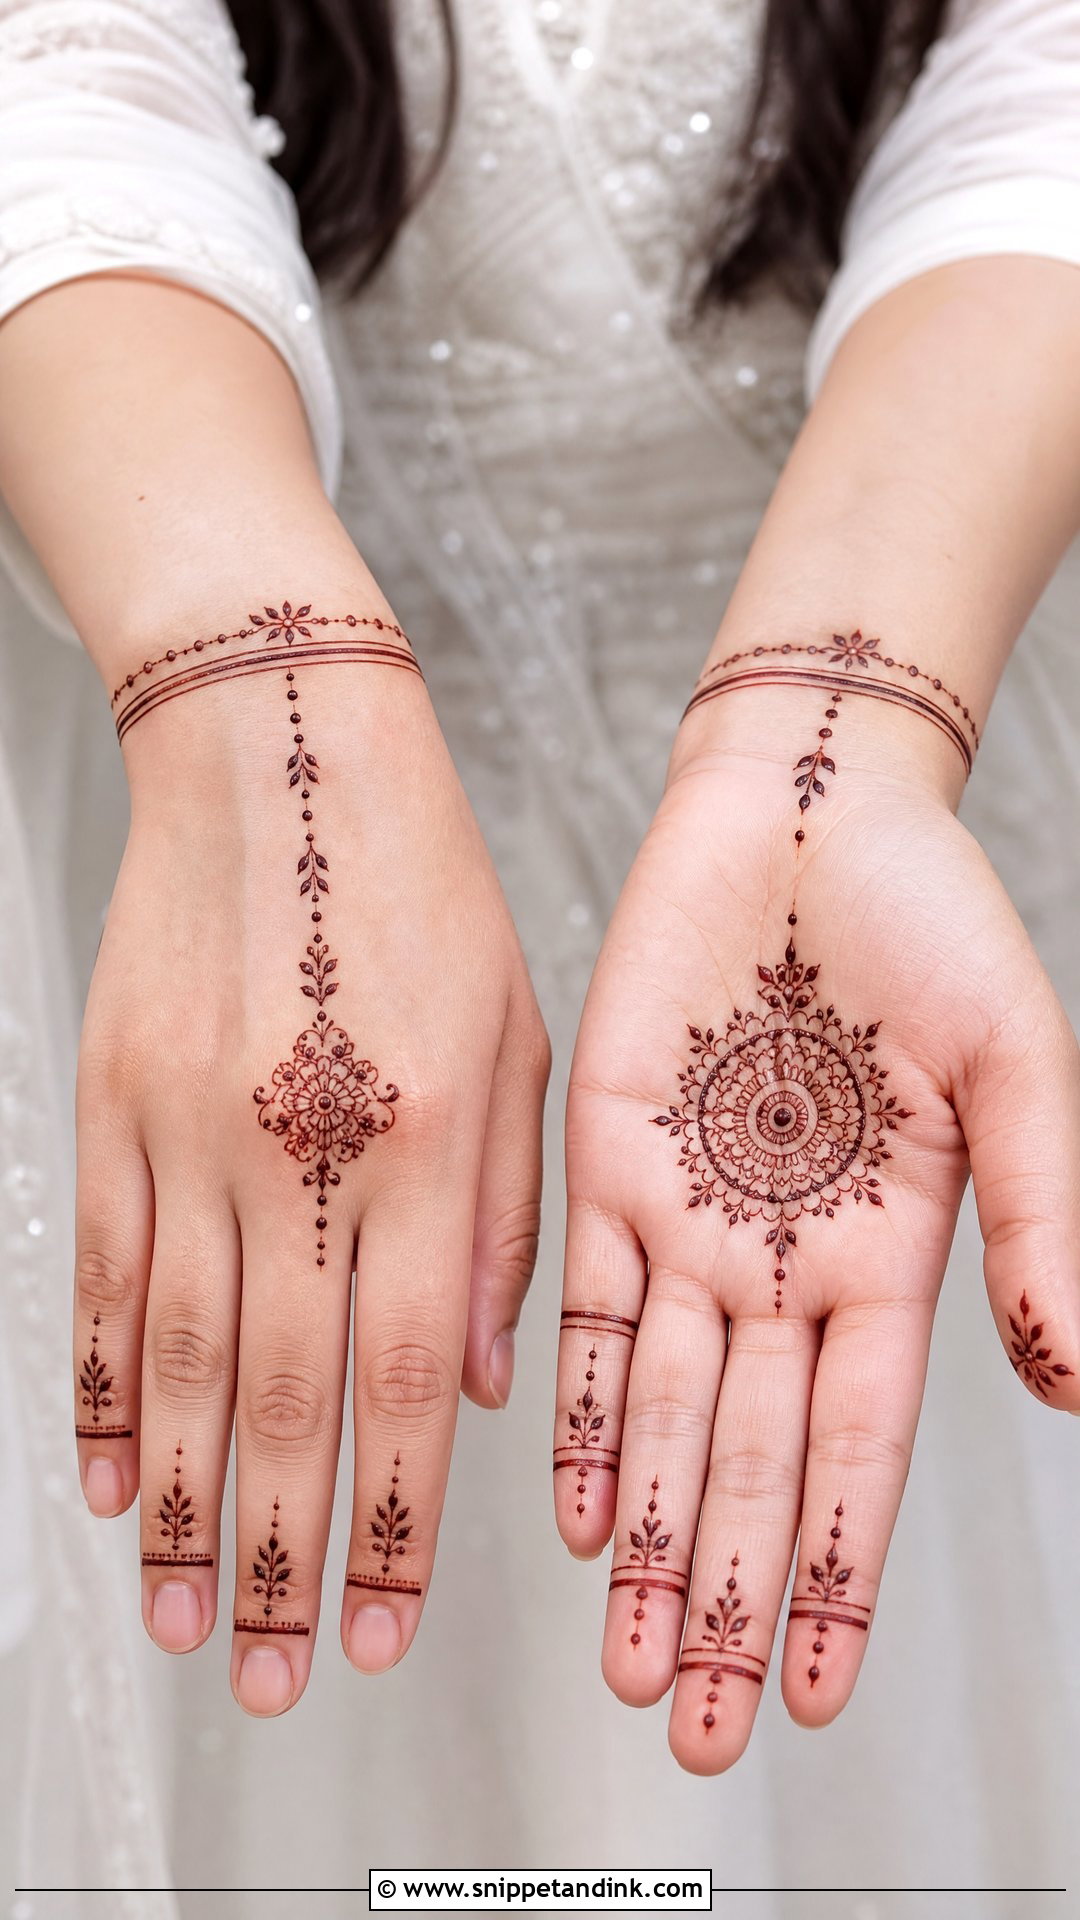
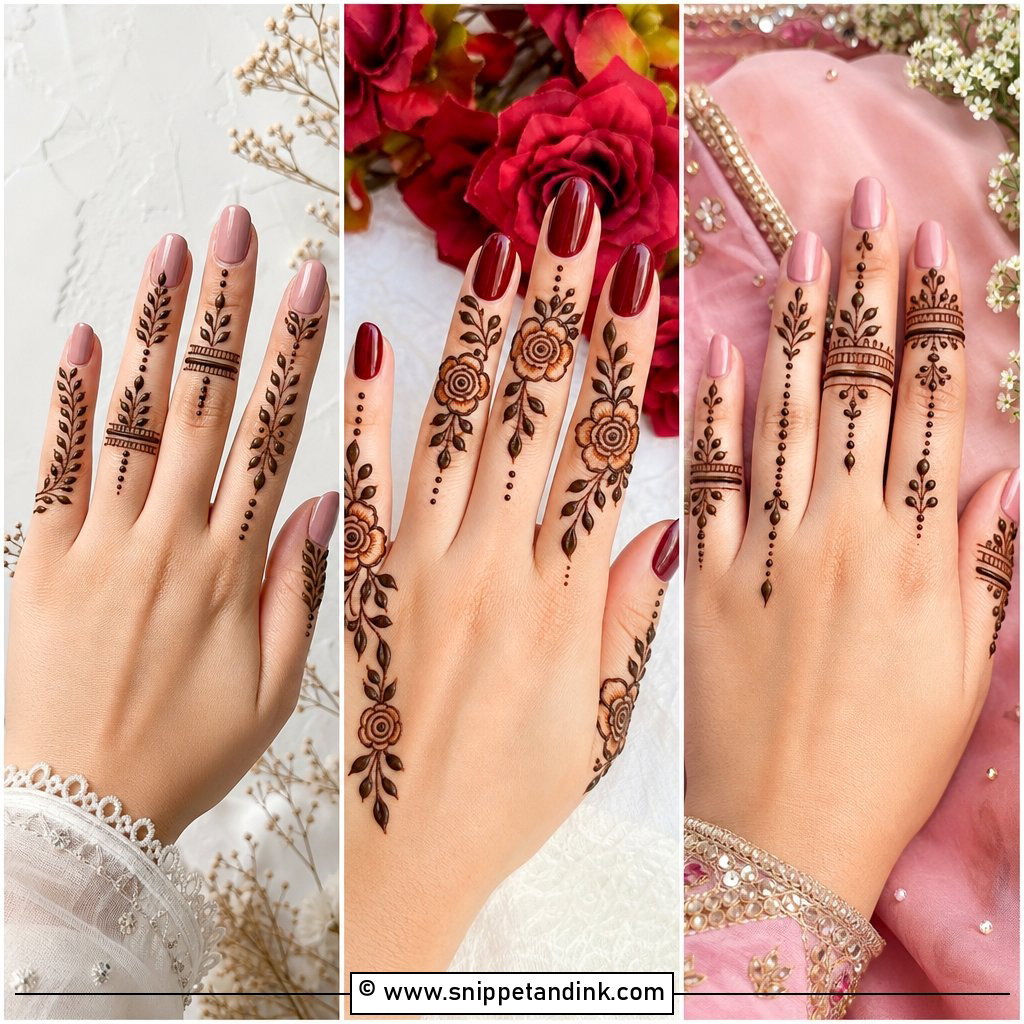
Minimal bridal henna leaves more skin bare than it covers, so the few elements you keep have to be drawn cleanly. A small palm mandala, finger accents, fine dots and a slim wrist bracelet are usually enough. It suits civil ceremonies, intimate weddings and destination trips where you’ll be in water or sun soon after. I keep it bridal with strict symmetry and slightly darker fingertips, and if a bride wants initials or a tiny heart I tuck it near the wrist where it doesn’t crowd the centre. Be honest with yourself: if you’ll feel underdressed next to a heavily decorated family, go one step fuller.
11. Simple Bridal Mehndi Design With Names
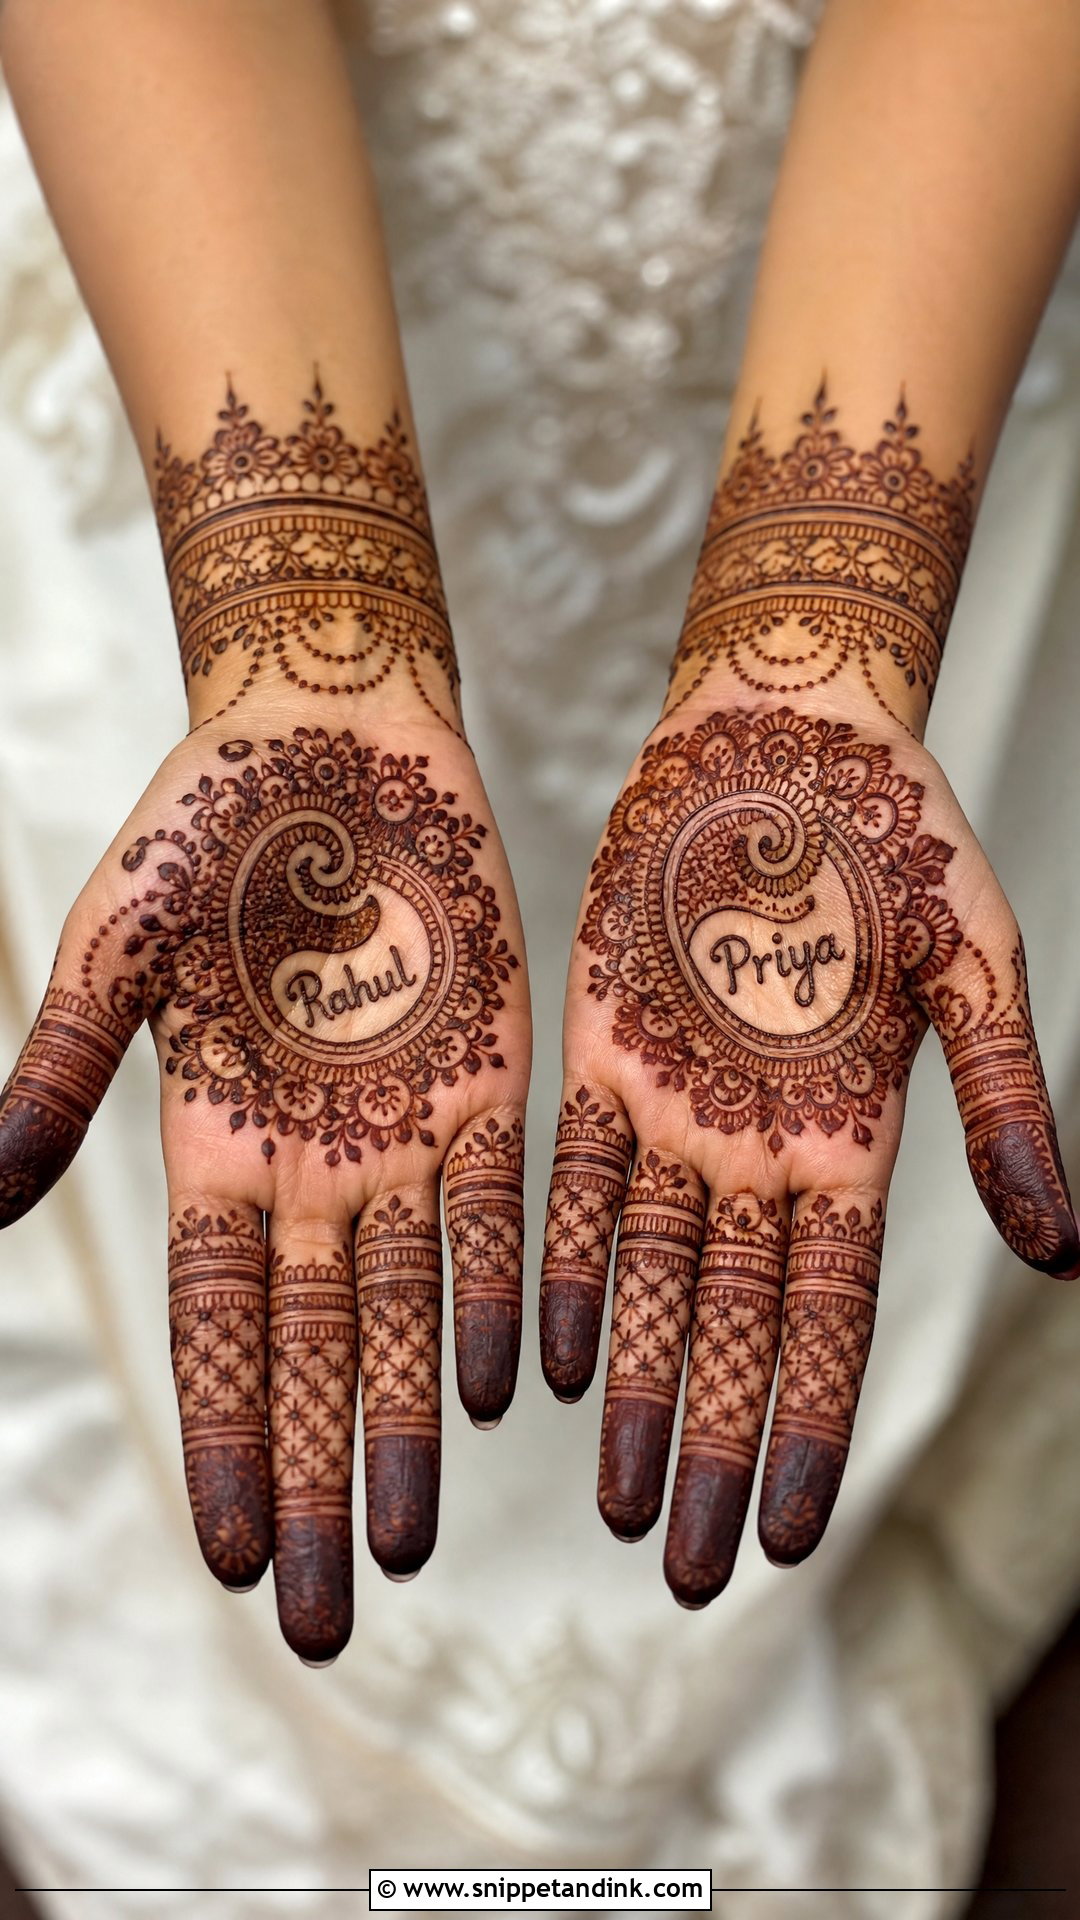
Names are the detail guests hunt for, so I make them findable. I hide them inside a paisley, along a mandala border or within a vine, and keep the area around the letters clear of fillers. Lettering under about half a centimetre tall tends to close up as the stain darkens, so I write it larger than brides expect. A palm centrepiece, decorated fingers and a light cuff are all the design needs around it. If the names are in a script with tight loops, tell your artist in advance so she can practise the letterforms.
12. Simple Bridal Mehndi Design With Peacock
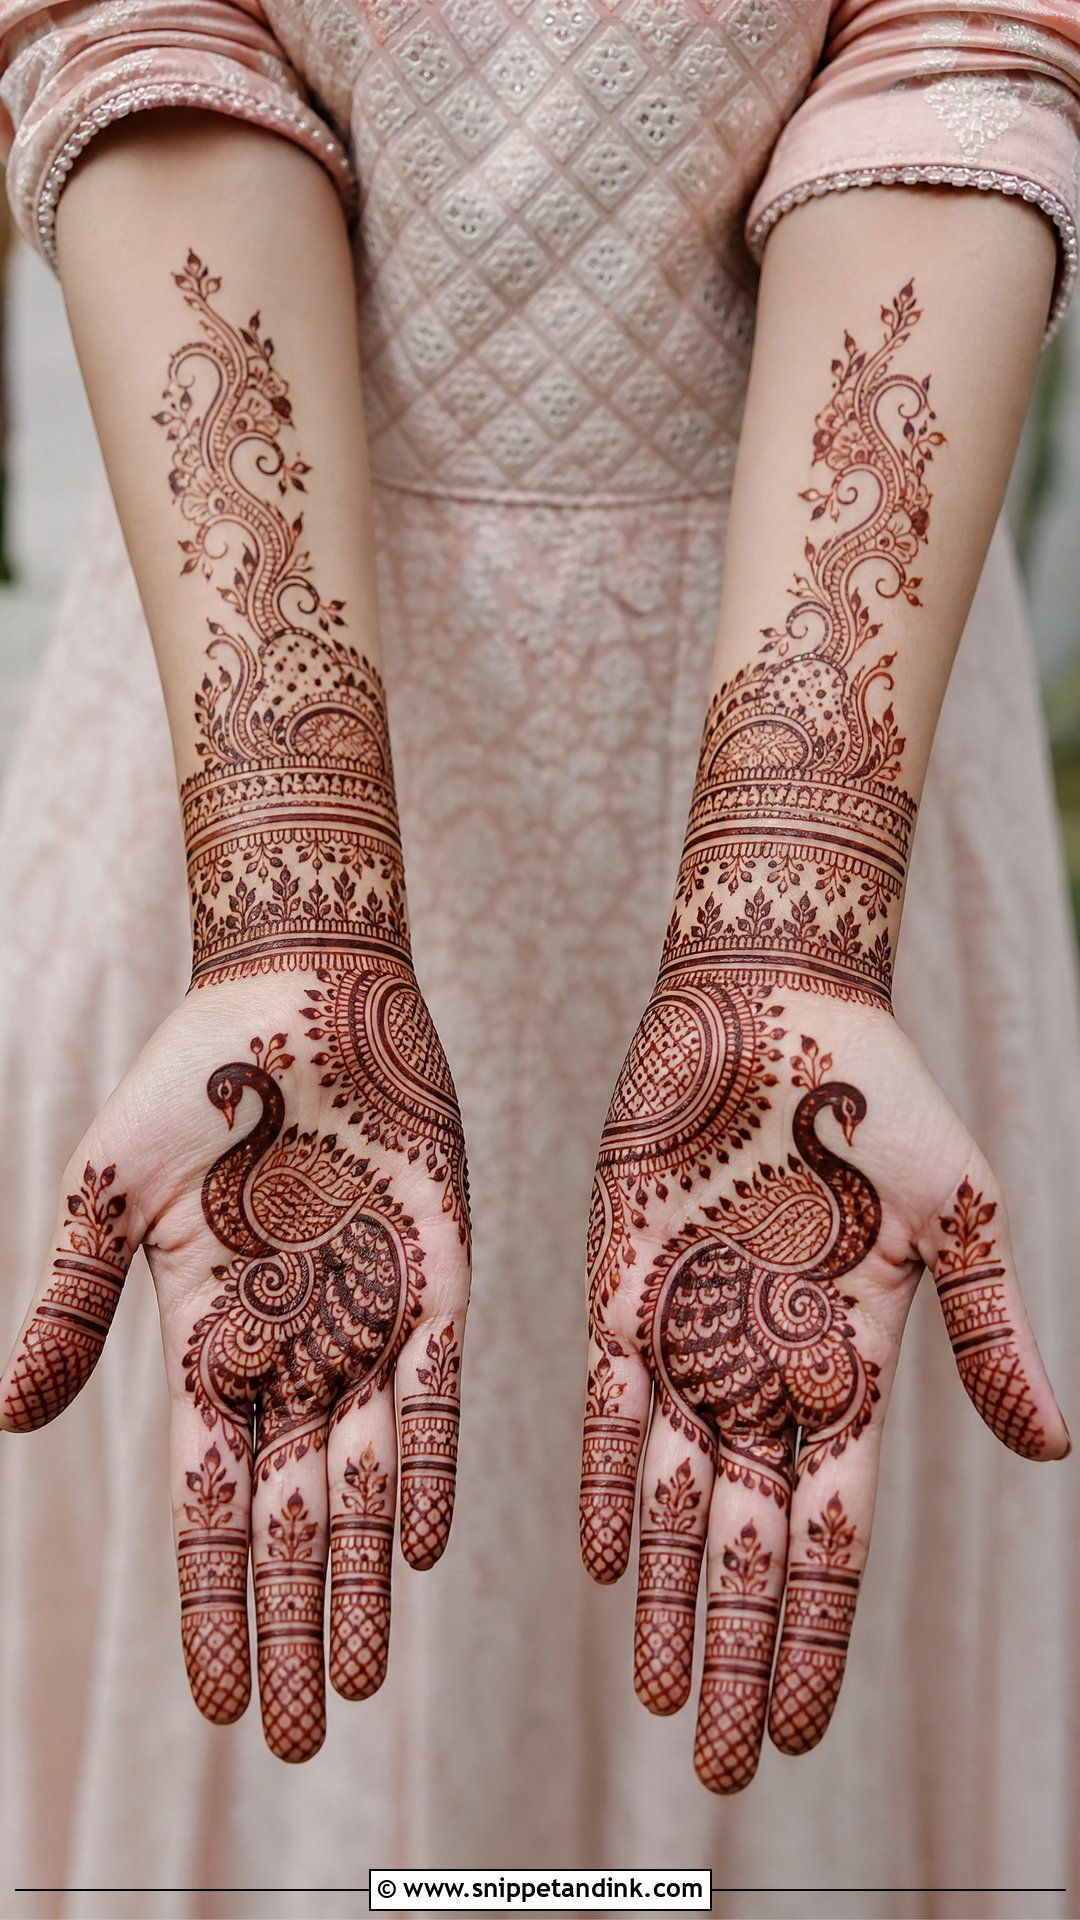
One clean peacock does more than a flock of small ones. I place it on the palm or the back of the hand, outline it boldly and keep the feathers, paisley curves and vines around it light, because fine feather lines lose definition once the stain deepens to maroon. Fingers stay neat with bands and leaf trails. It pairs naturally with silk sarees, lehengas and embroidered dupattas. If your hand is small, I’d draw the peacock on the back where there is a flatter surface to work with.
13. Simple Bridal Mehndi Design With Jaali
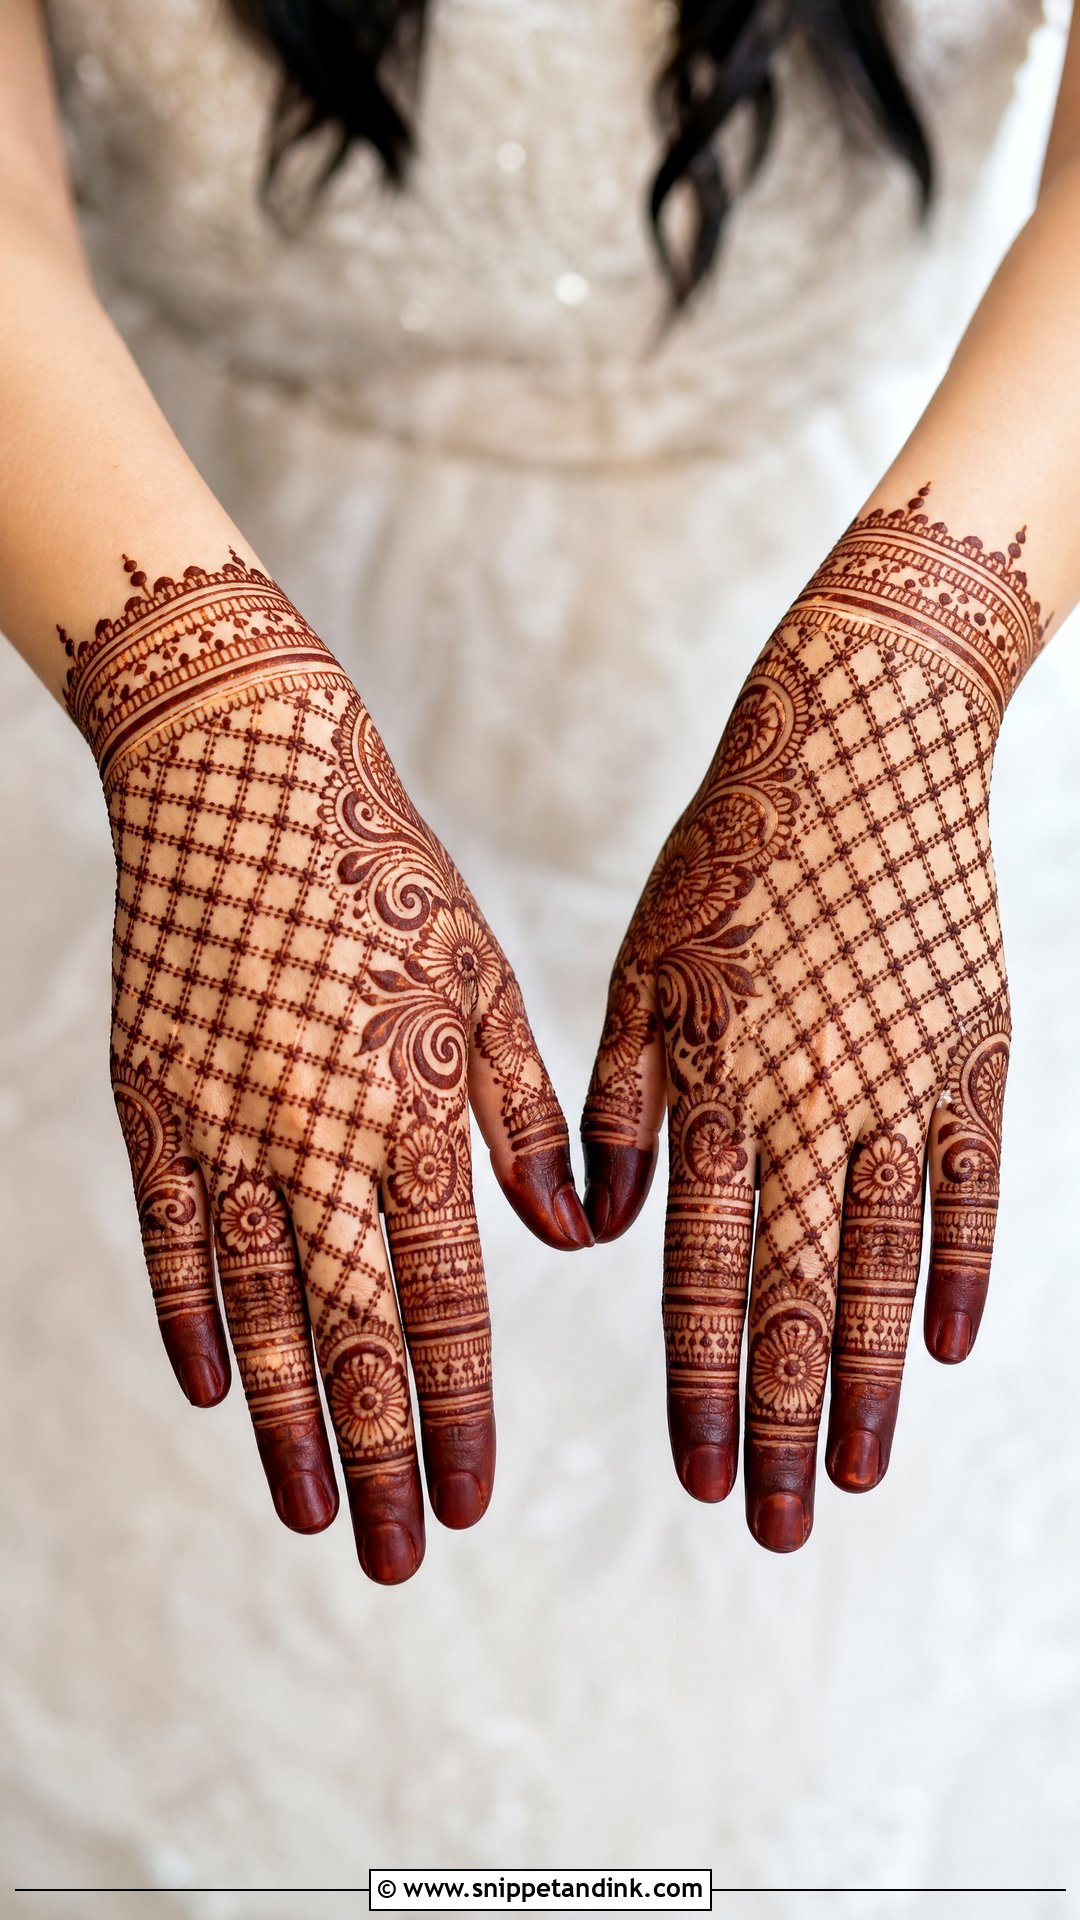
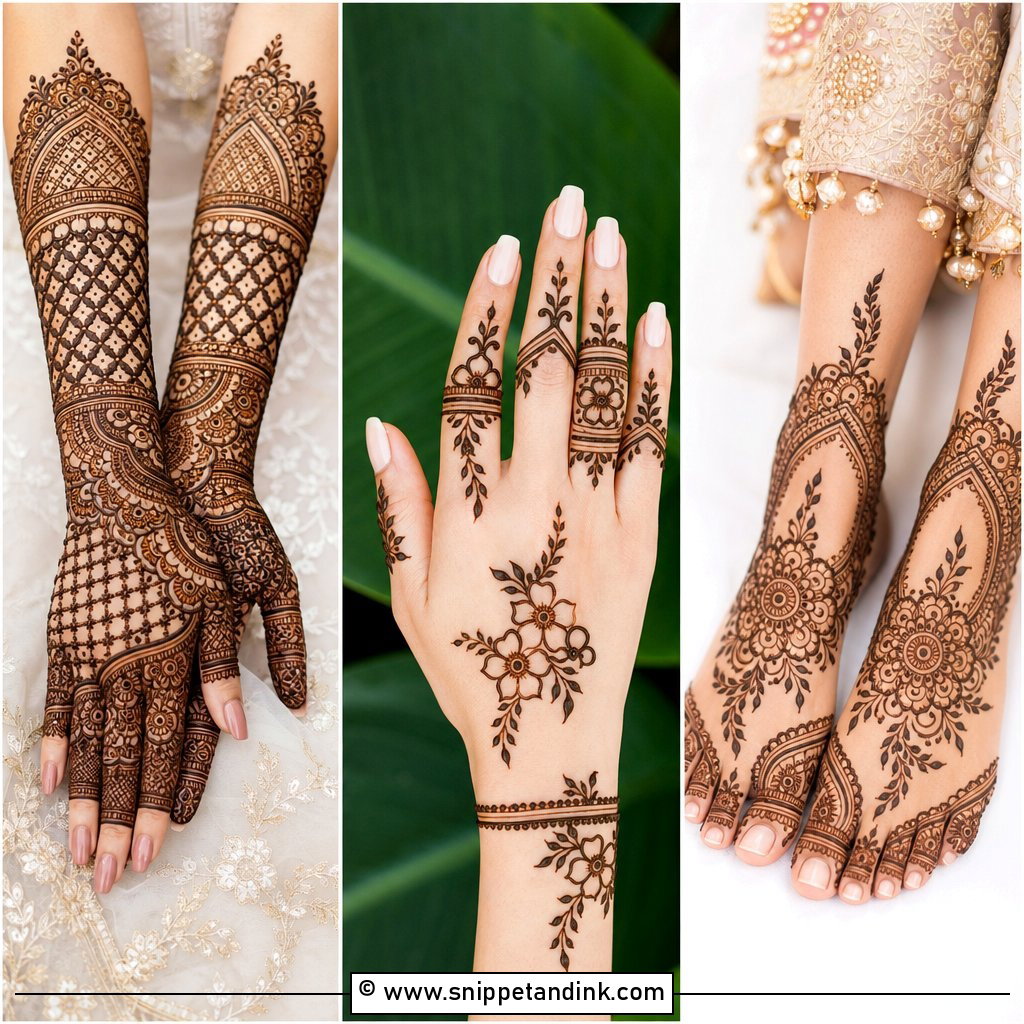
Jaali gives a lace-glove effect, but mesh is the fastest way to make a light design look busy. I confine it to one or two zones, a wrist band and a section of the back hand, and balance it with open flowers and paisleys. The grid lines have to be fine and evenly spaced; uneven squares are obvious once they stain. Bold fingertips and a slim wrist cuff give contrast. On the palm I use less jaali, because thick palm skin darkens the mesh so much that the gaps can fill in.
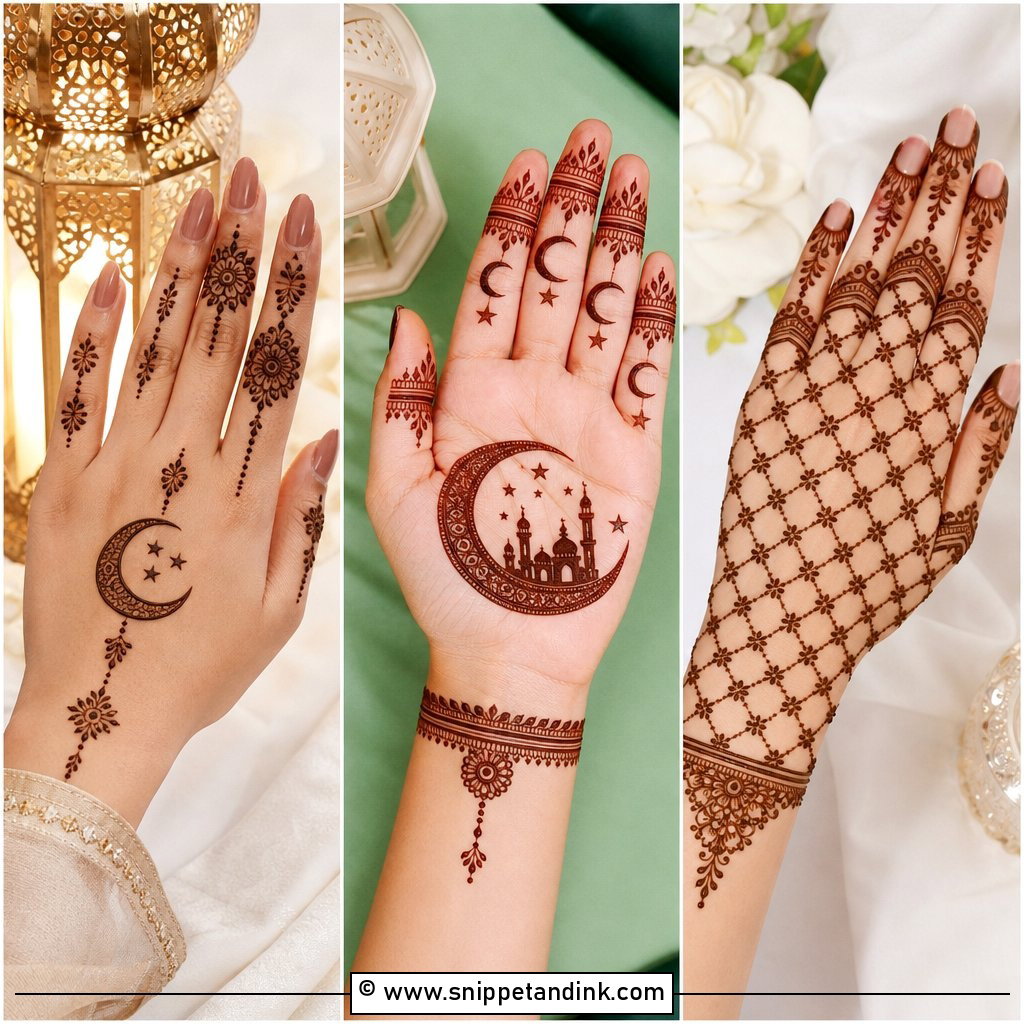
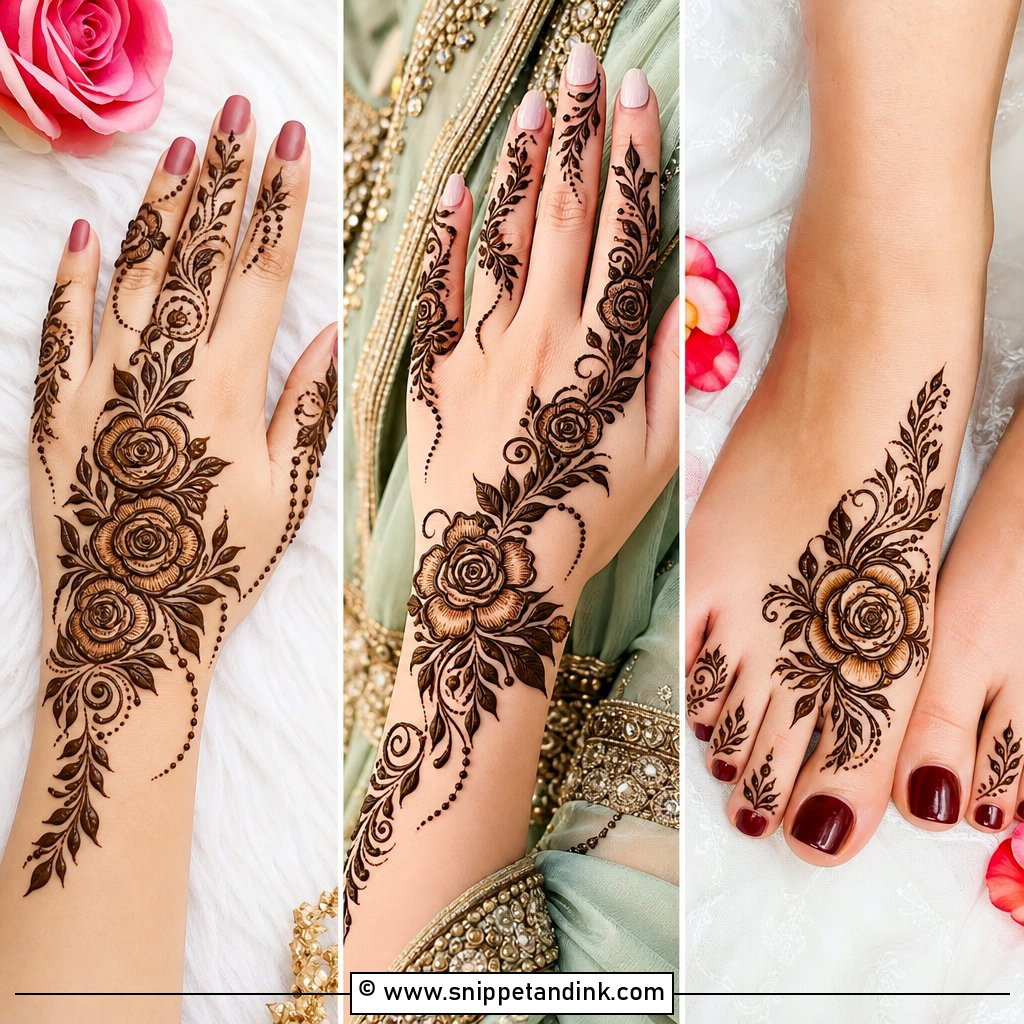
14. Simple Bridal Mehndi Design For Short Hands
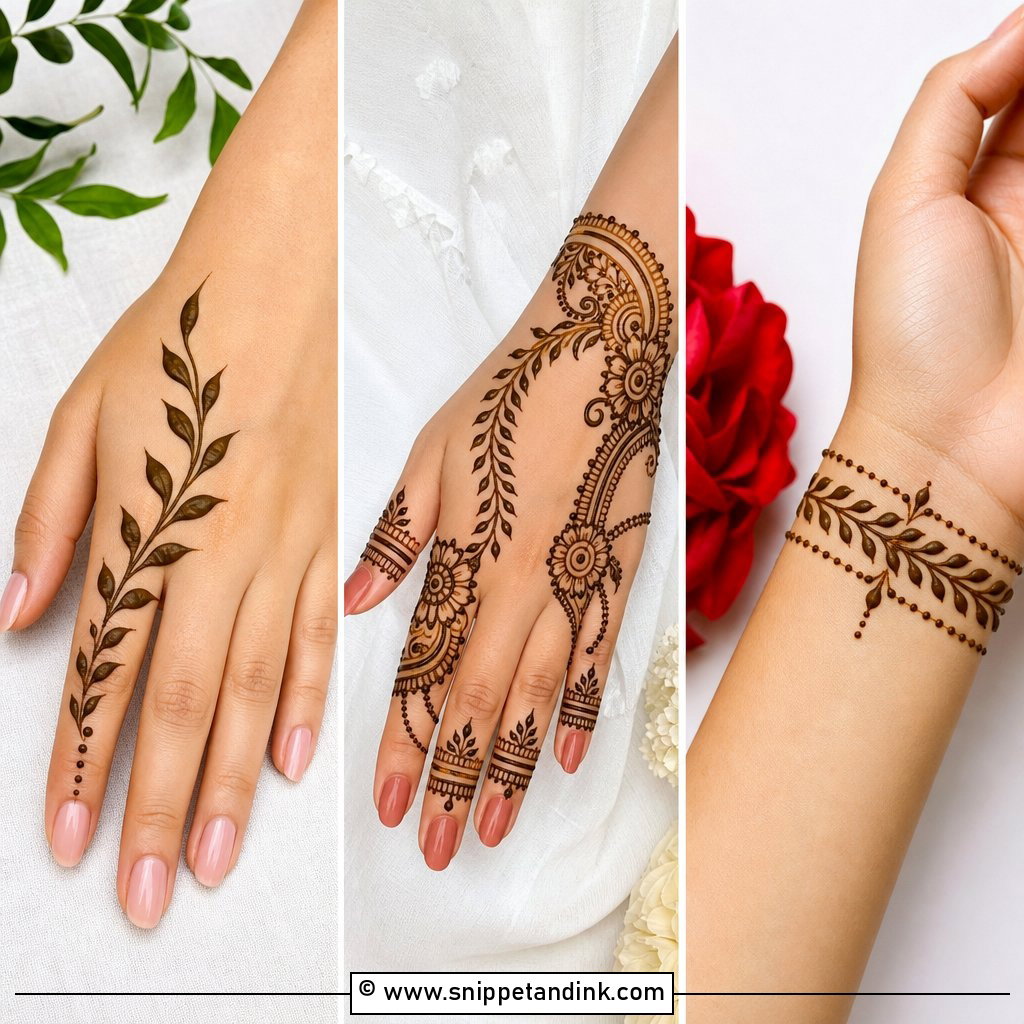
On short hands, I design for length. Vertical vines, a diagonal Arabic flow, slim paisleys and narrow finger patterns all pull the eye upward, while a huge palm motif makes the hand look smaller. A medium mandala or a soft floral trail works better. I keep the wrist band thin and leave a gap before any forearm work, and I extend finger details slightly toward the second knuckle to add visual reach. Fine outlines matter more here than anywhere else.
15. Simple Bridal Mehndi Design For Long Hands
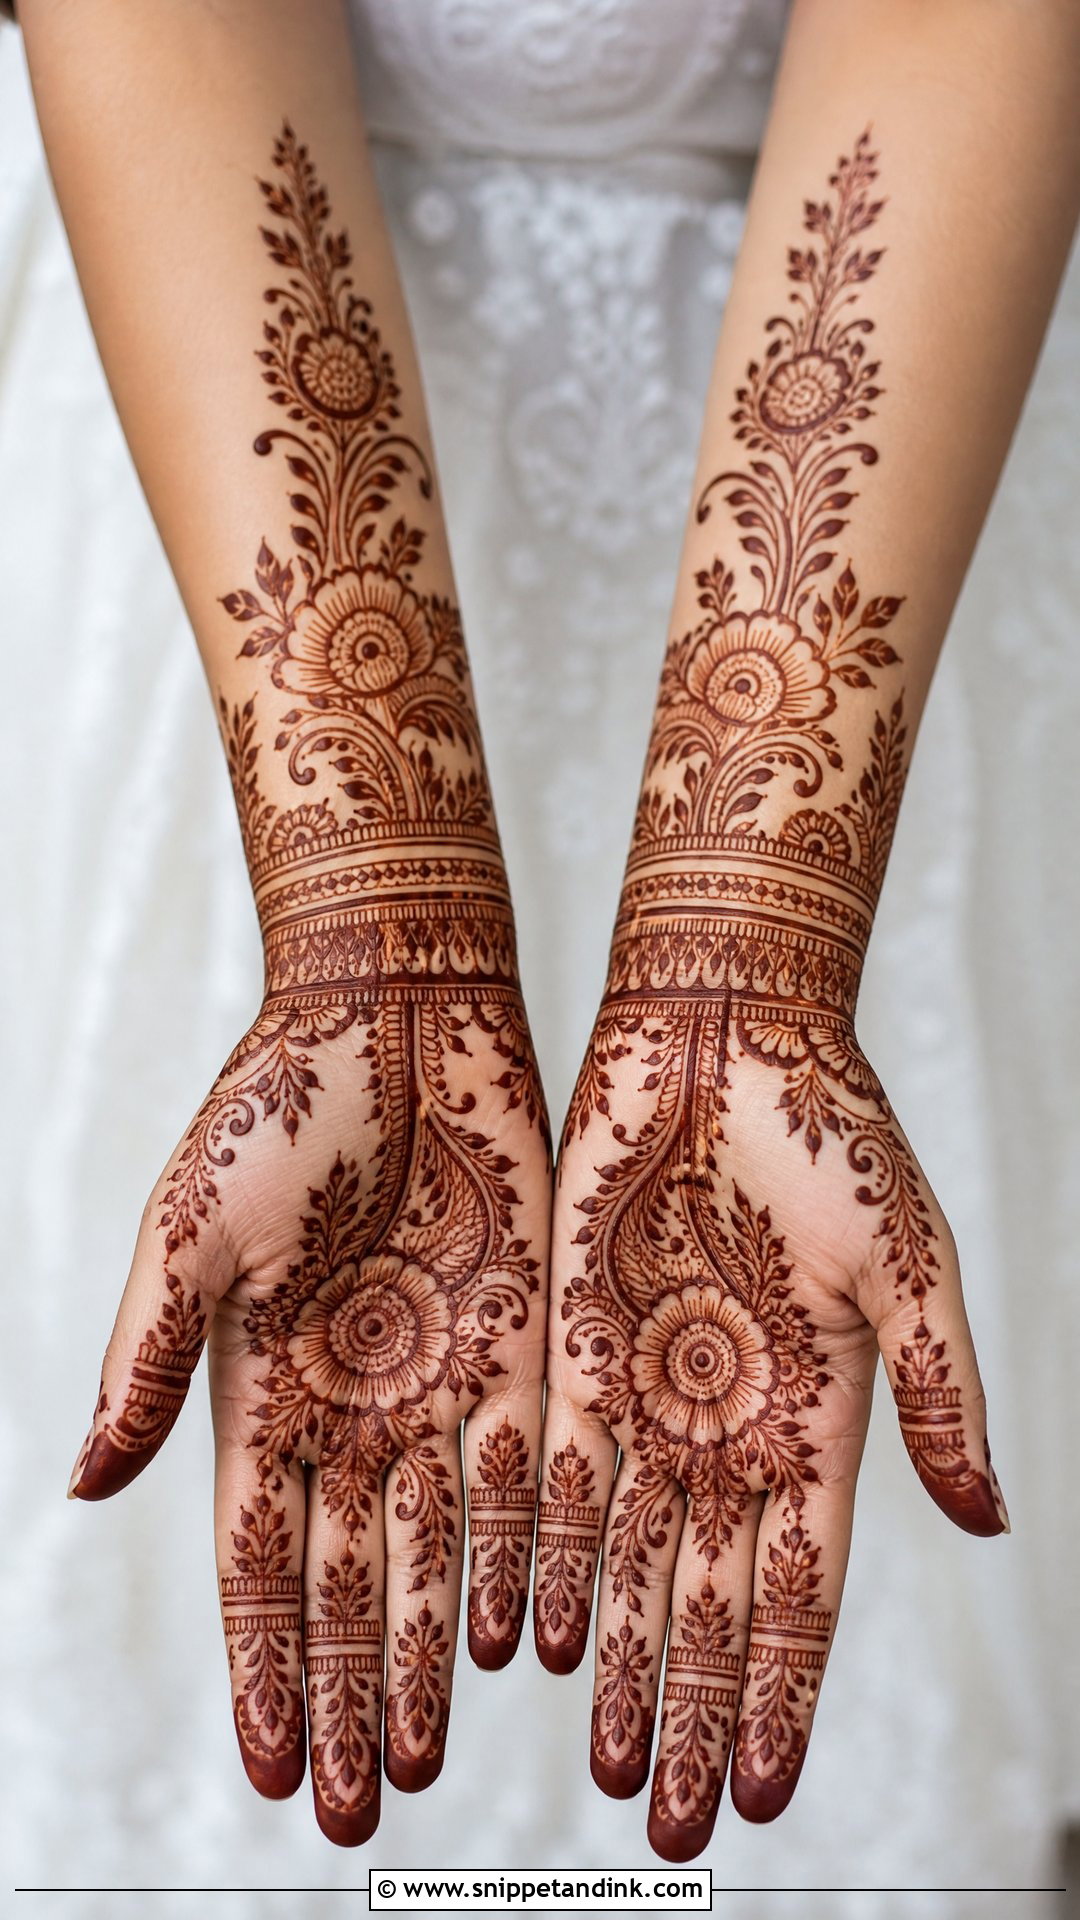
Long hands give me room, and the trap is leaving too much of it empty. I’ll run a central palm motif into long leafy trails, or draw an Arabic diagonal from the index finger down onto the forearm. Paisleys and mandalas with light fillers keep it traditional; floral chains with open space read more modern. What makes long hands look complete is wrist-to-forearm coverage that connects, so I avoid a design that stops abruptly at the wrist bone.
16. Simple Bridal Mehndi Design For Engagement
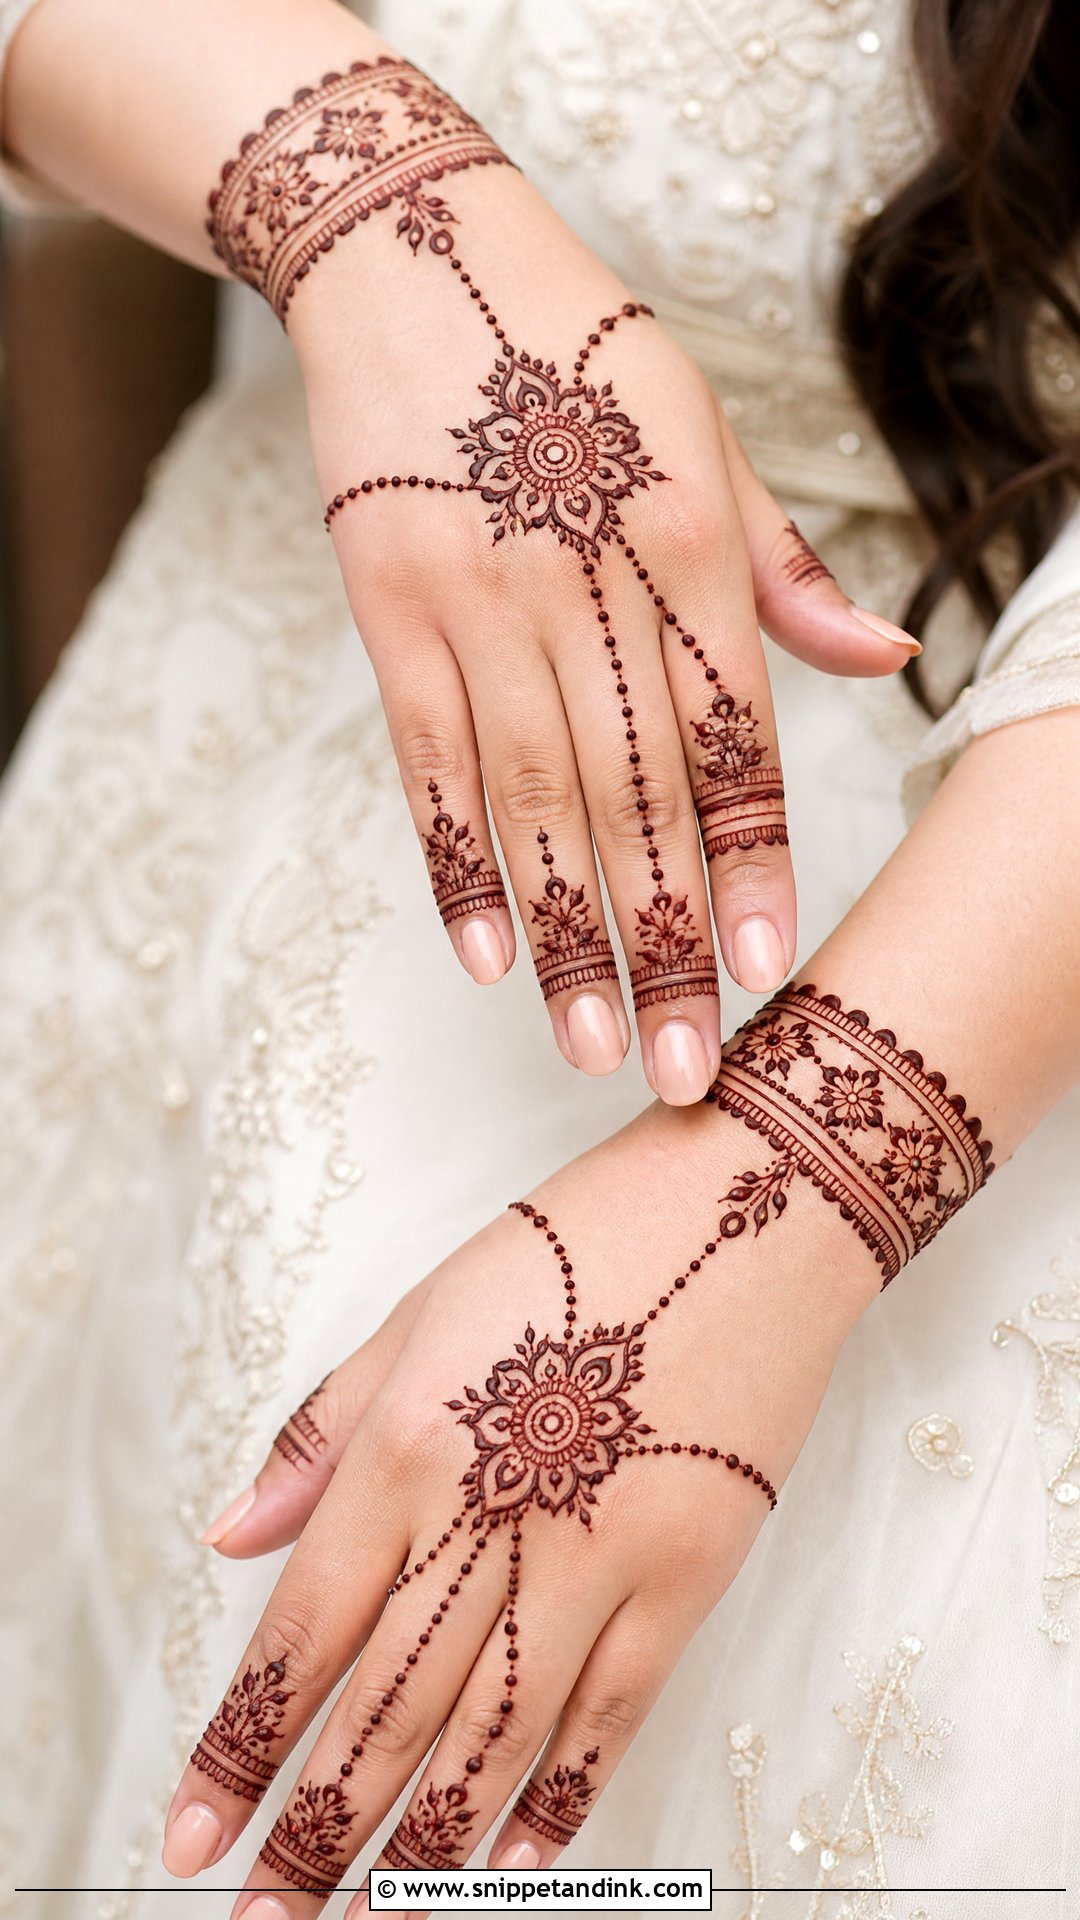
For an engagement I lighten everything and move the weight to where the ring is. The back of the hand, fingers and wrist carry the design, usually a jewelry-style layout with chains, floral cuffs and a centre motif, and a small palm design is optional. It sits comfortably with gowns, sarees, lehengas or fusion outfits. Apply it a day or two before the event, not the morning of; a fresh stain is bright orange, and the deeper brown you see in close-up ring photos needs time to develop.
17. Simple Bridal Mehndi Design For Nikkah
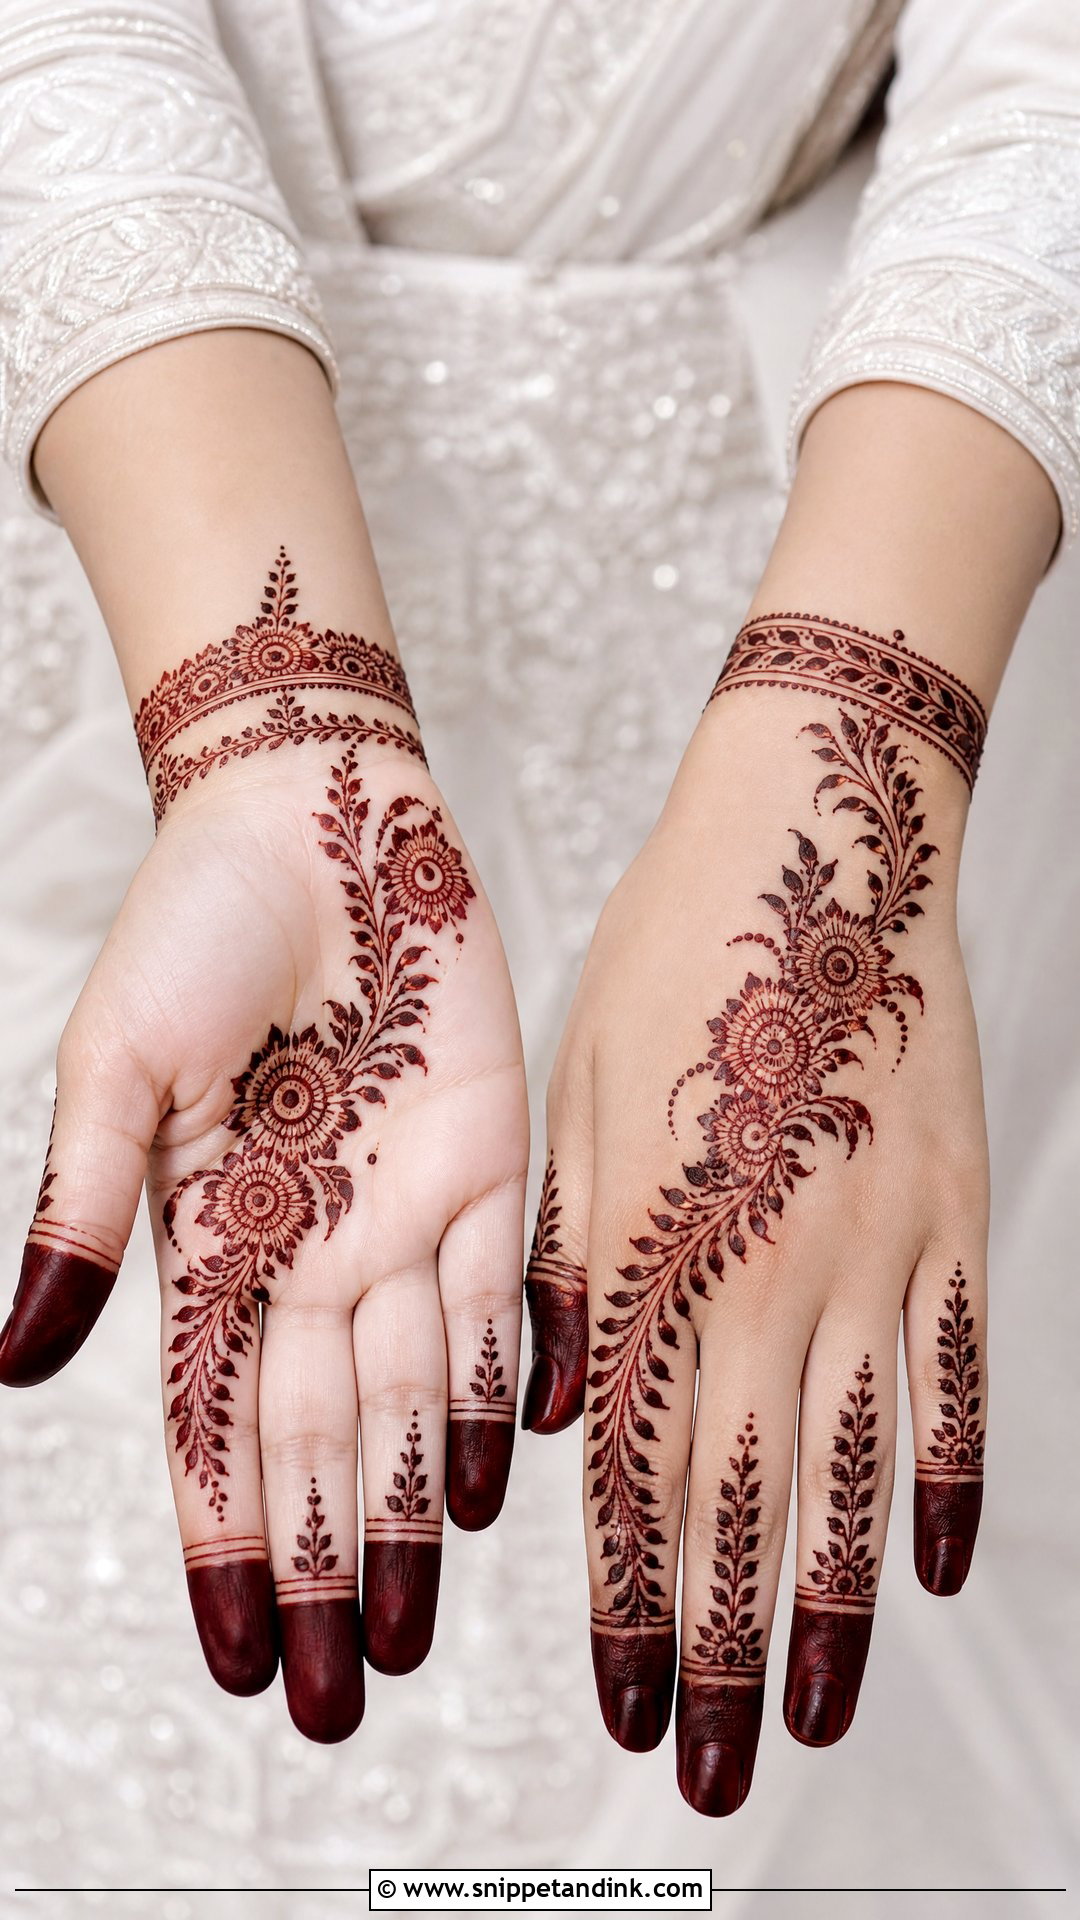
Nikkah henna is usually softer and more modest. Arabic trails, floral back-hand patterns or a palm mandala with light wrist detail all fit, especially with a delicate or pastel outfit where heavy hands would overpower the fabric. I like a diagonal floral vine with bold fingertips, a few dots and leafy curves, and a slim cuff. It sits well beside pearls and soft bangles. Open spacing also helps on a practical level: you’ll be signing papers and greeting family, and a light design is comfortable to move in.
18. Simple Bridal Mehndi Design For Haldi
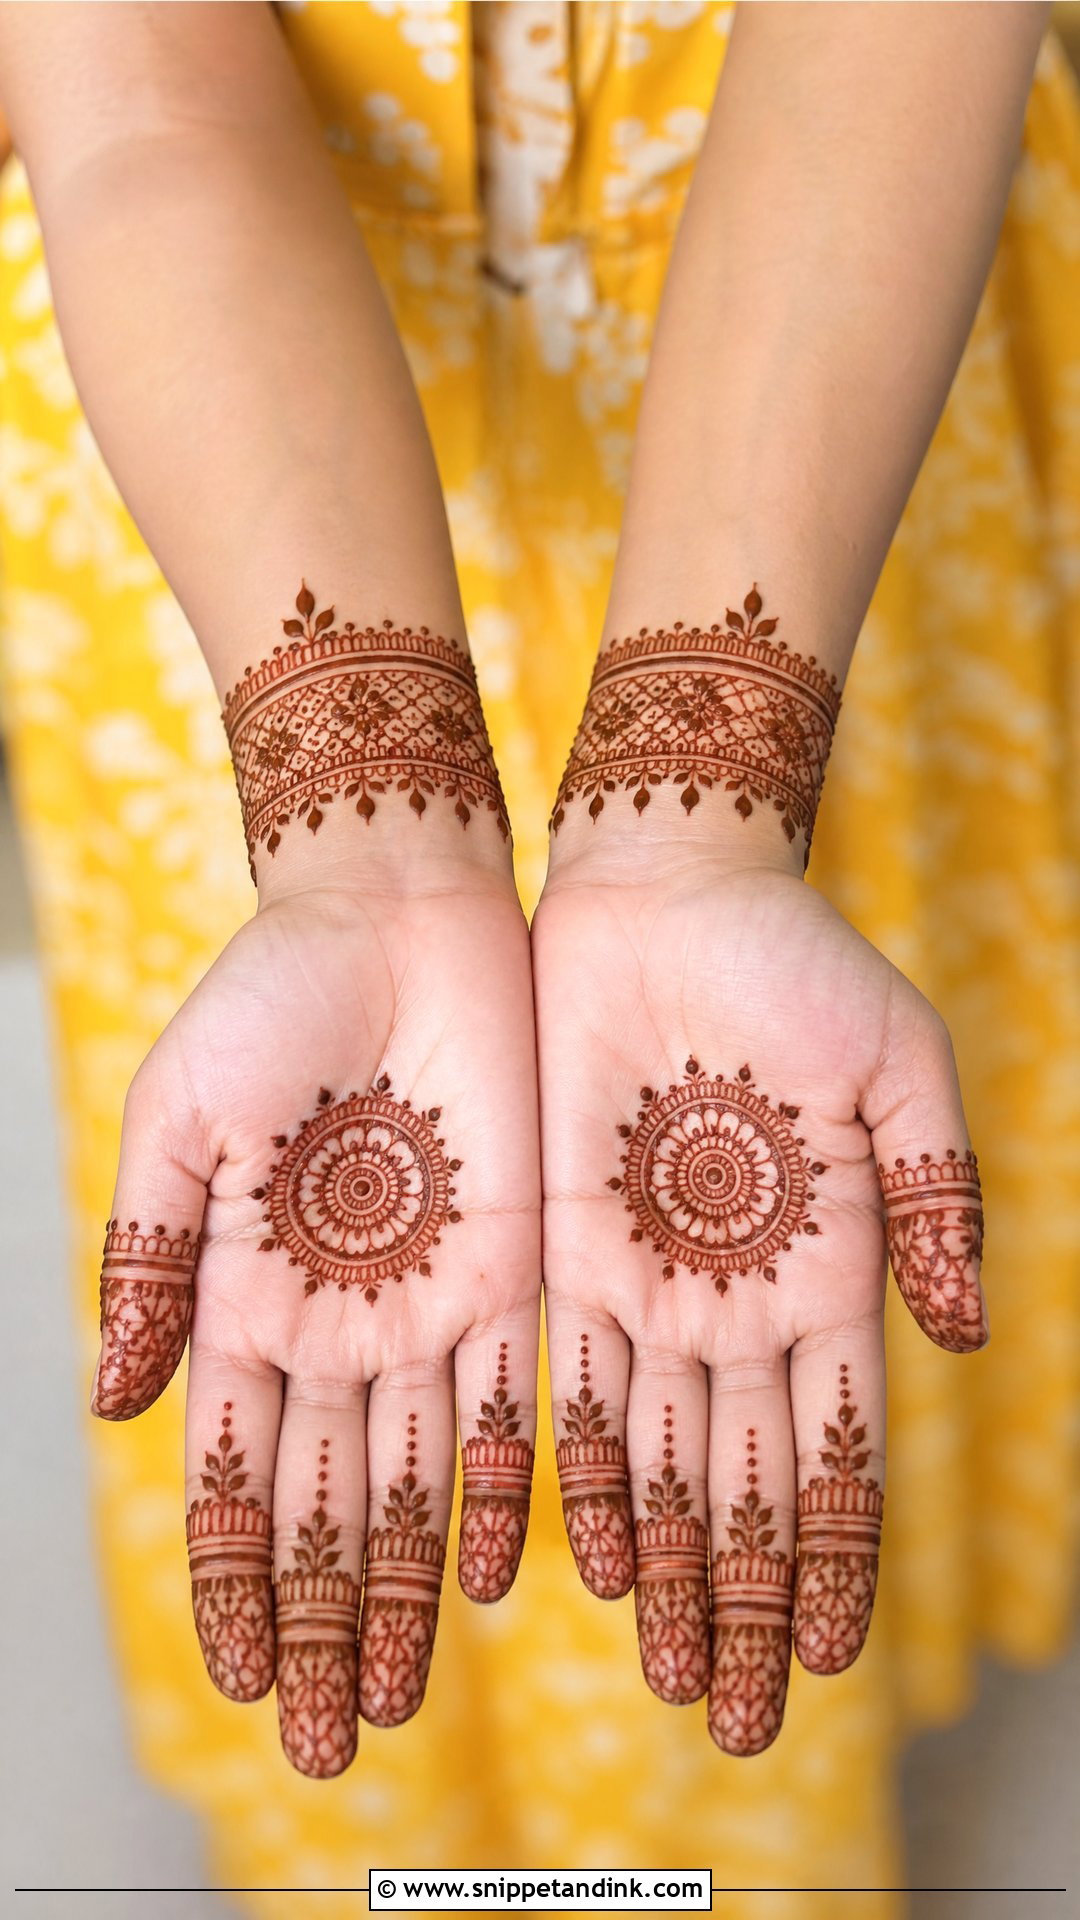
Turmeric paste and fresh henna don’t mix well, so I plan haldi hands carefully. If the mehndi goes on before haldi, the stain needs to be set and the paste scraped off first; wet turmeric on fresh henna can blotch the color. I keep the design short: a palm mandala with finger bands, a floral back-hand trail or a small wrist pattern, nothing dense up the forearm that could smudge while you’re greeted, hugged and photographed. Florals and leafy borders suit the mood, and this light version works well if your main bridal henna is booked for later.
19. Simple Bridal Mehndi Design For Feet
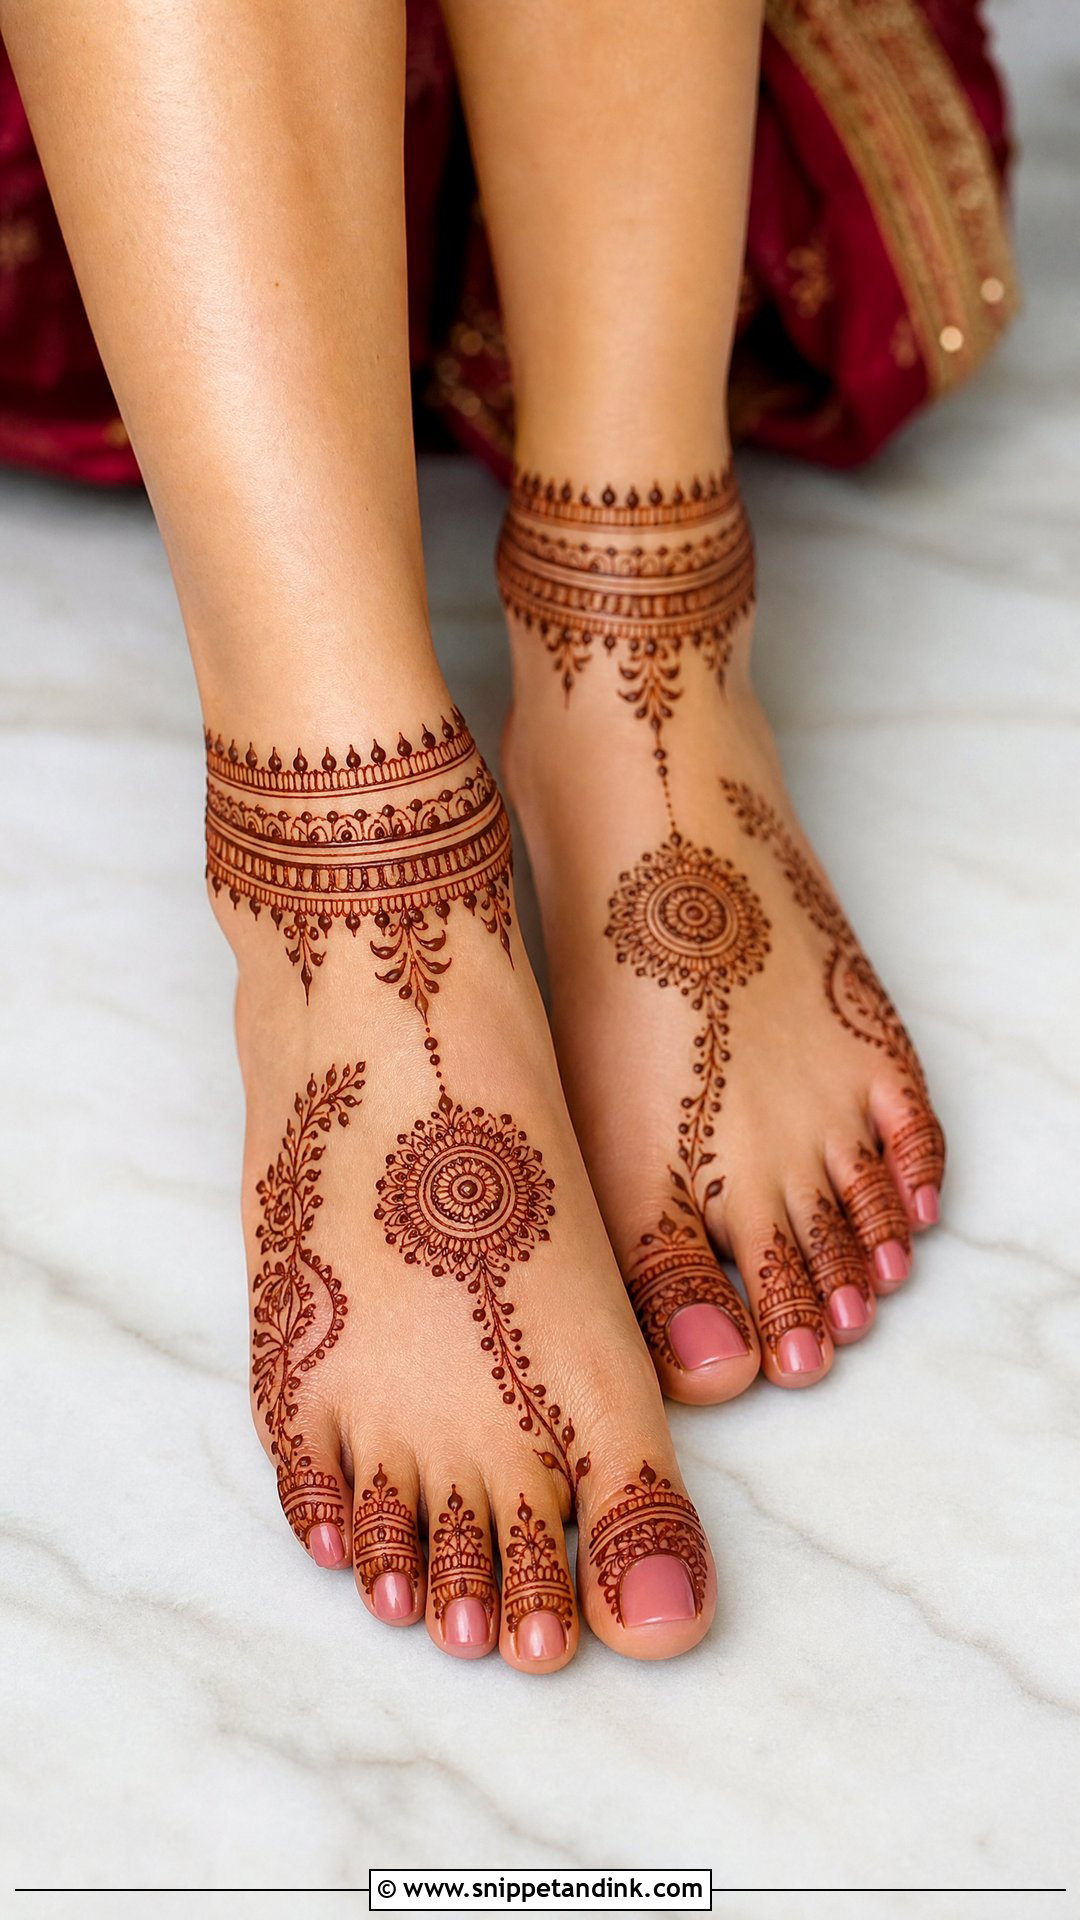
Feet take henna very well because the skin on the soles and sides is thick, so even a sparse pattern stains deep. Anklet-style bands, toe details, small mandalas, floral vines and paisleys near the toes are all you need. If you’ll wear open sandals, the top of the foot and ankle are what the camera sees, so I put the detail there and keep the soles light. Both feet should match. Expect to sit still longer with feet than hands, because walking on drying paste smears it; I usually do feet first so they can dry while I work on the hands.
20. Simple Bridal Mehndi Design For Forearm
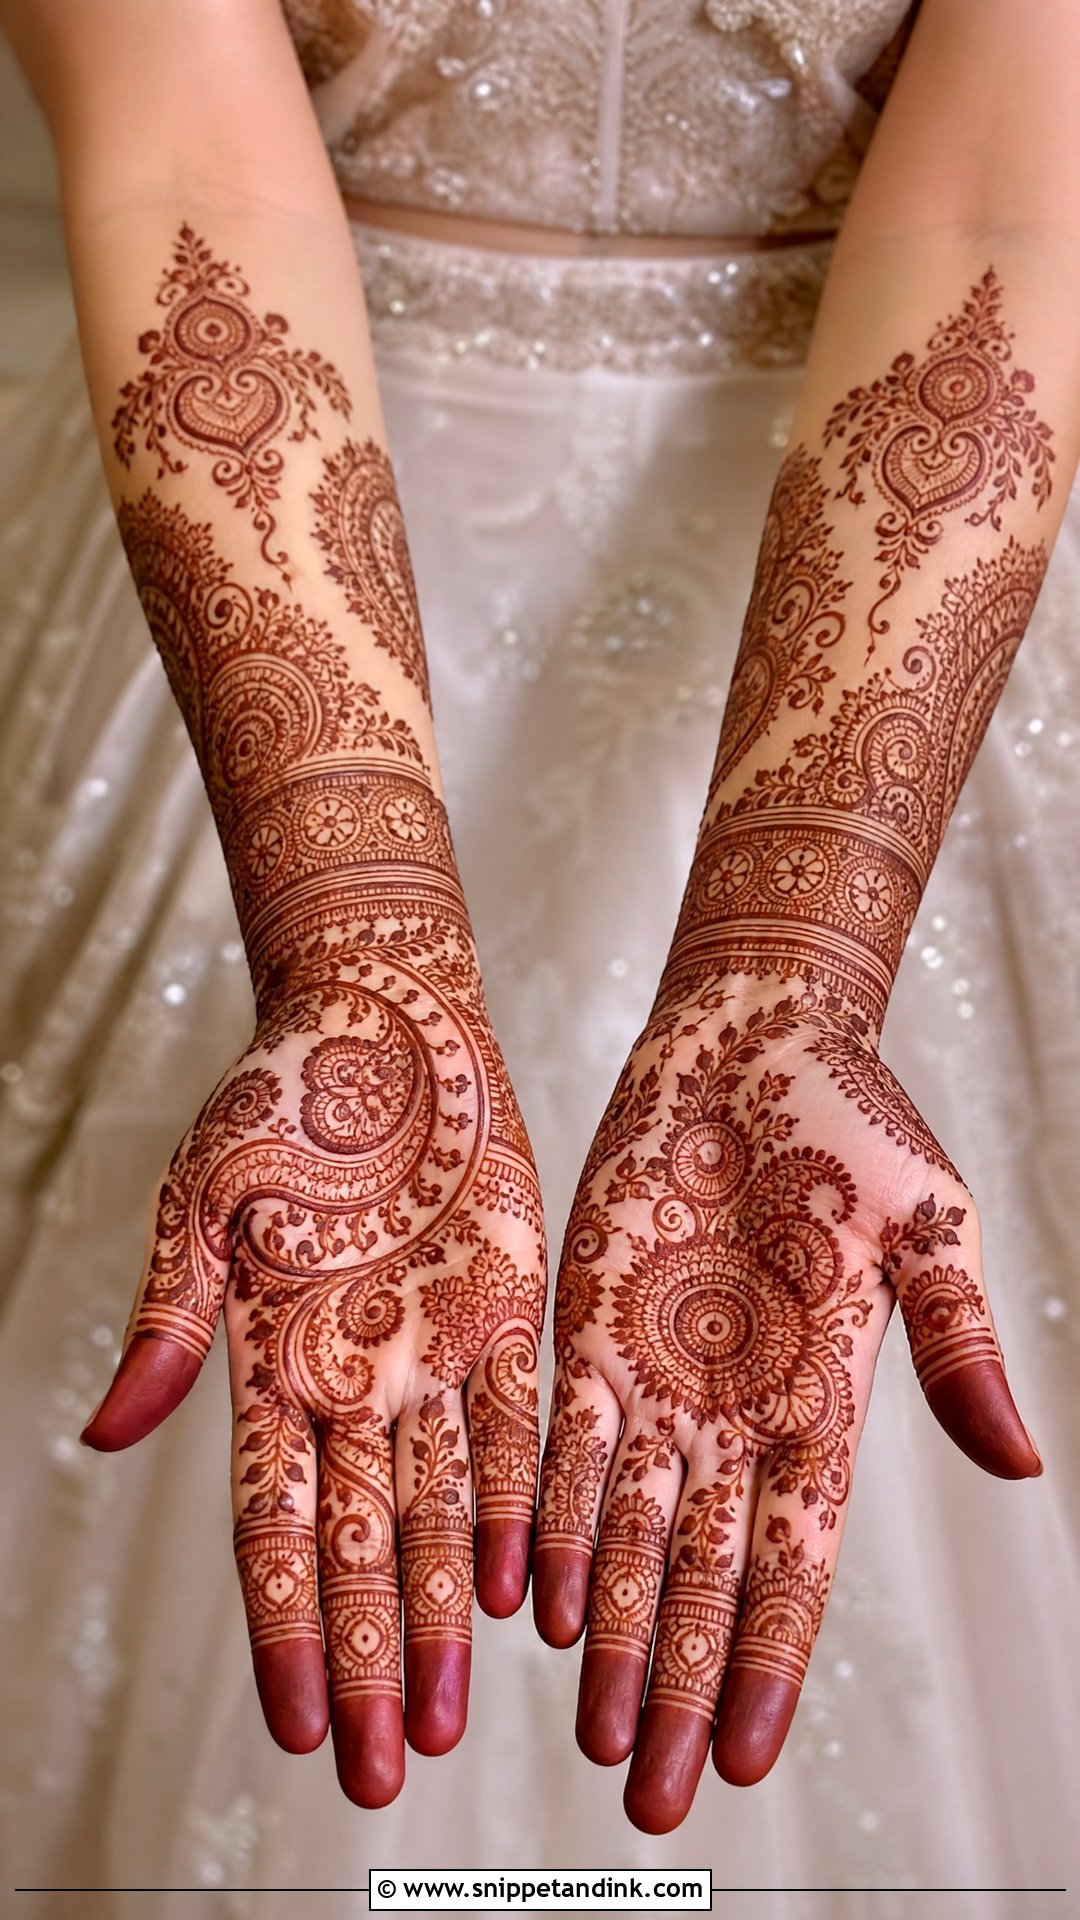
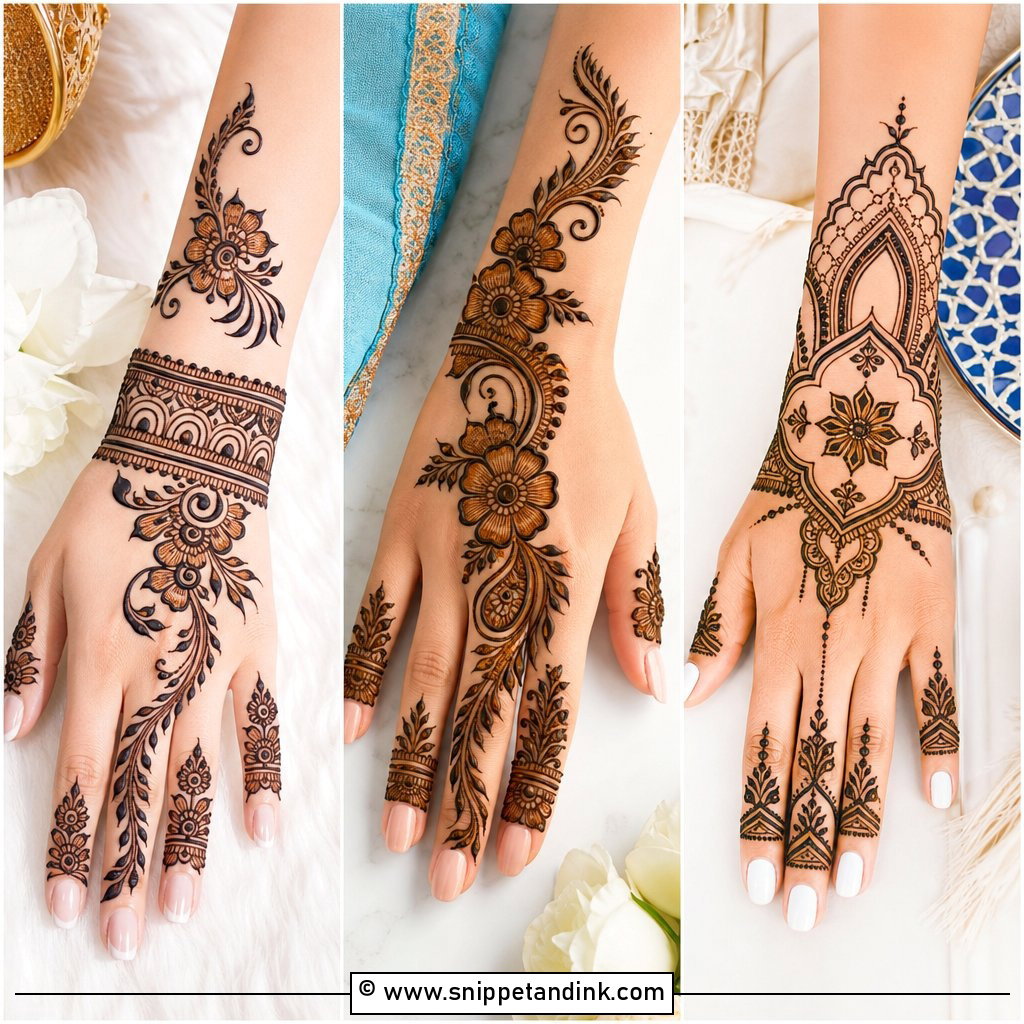
A forearm design starts at a wrist cuff and climbs through floral vines, paisleys, mandalas or leafy trails. I repeat motifs with clean gaps so the pattern looks planned rather than unfinished, and I connect the palm and wrist with a smooth border so the hand and arm read as one piece. It is the right choice if your sleeves are short or sheer, or you’ll wear stacks of bangles that would hide a wrist-only design. Skin on the upper forearm stains paler than the hand, so I stop at mid-forearm on light designs; going further just adds faint color.
Getting a Deep Stain From a Sparse Pattern
Natural henna comes off the skin bright orange and darkens to reddish brown over the next 24 to 48 hours. That timing matters more for light designs, because there’s no dense shading to make up for a weak result. I schedule bridal henna about two days before the wedding so the stain peaks for the ceremony.
The first twelve hours
- Keep the paste on for at least six to eight hours, overnight if you can sleep with your hands wrapped loosely.
- Dab on a little lemon and sugar once it has dried; it keeps the paste in contact with the skin instead of flaking off early.
- Scrape the dried paste off with a blunt edge or your fingernail. Don’t wash it off.
- Keep water away for as long as you can, ideally until the next morning, and skip scrubs and hot showers for a day.
Warmth helps the color develop, so cold hands on a chilly evening will stain slower. I’d also avoid any cone that promises a black stain within an hour. Those often contain PPD, a hair dye chemical that can blister skin and leave scars, and no bridal design is worth that. Ask your artist what’s in her paste; a good one will tell you without hesitating.
Spacing Your Hands Across Several Events
If you have an engagement, a haldi and a wedding within a couple of weeks, plan the henna as one schedule rather than three separate bookings. A stain from a week earlier will still be visible, patchy on the palms where skin sheds fastest, under the new design. I usually keep the earlier events to the back of the hand and fingers, leave the palm clean for the bridal application, and make sure the final design is drawn when the previous stain has faded enough not to fight with it.
Light Henna That Still Looks Bridal on the Day
A light design is not an unfinished one. Clean spacing, motifs sized to your hand and a strong outline let even sparse henna look rich. Arabic trails, mandala palms, back-hand jewelry and simple foot work can all be adjusted to your ceremony and outfit. When you brief your artist, ask for bold outlines, neat fingers and deliberate open space, and give the stain two days before the main event so it reaches its deepest color.
You'll Like These Ideas:


Leave a Reply