
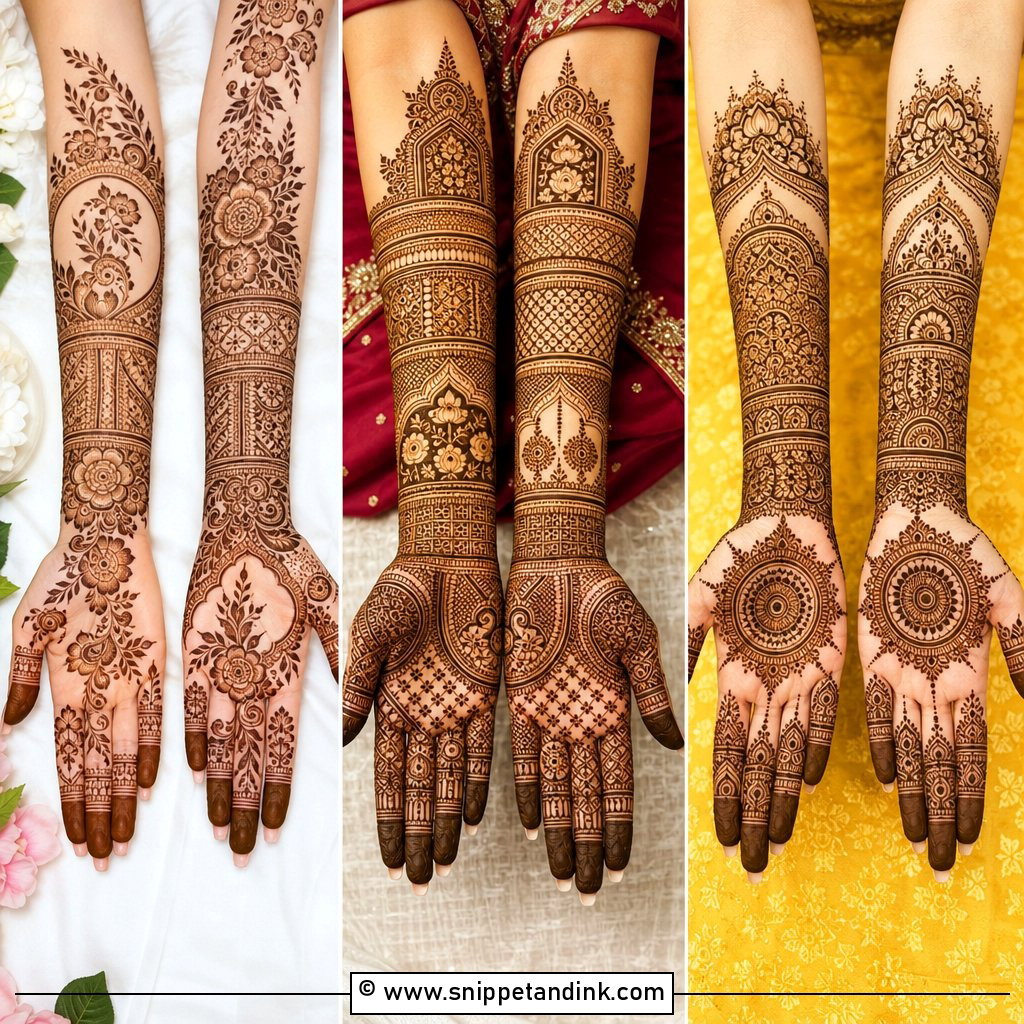
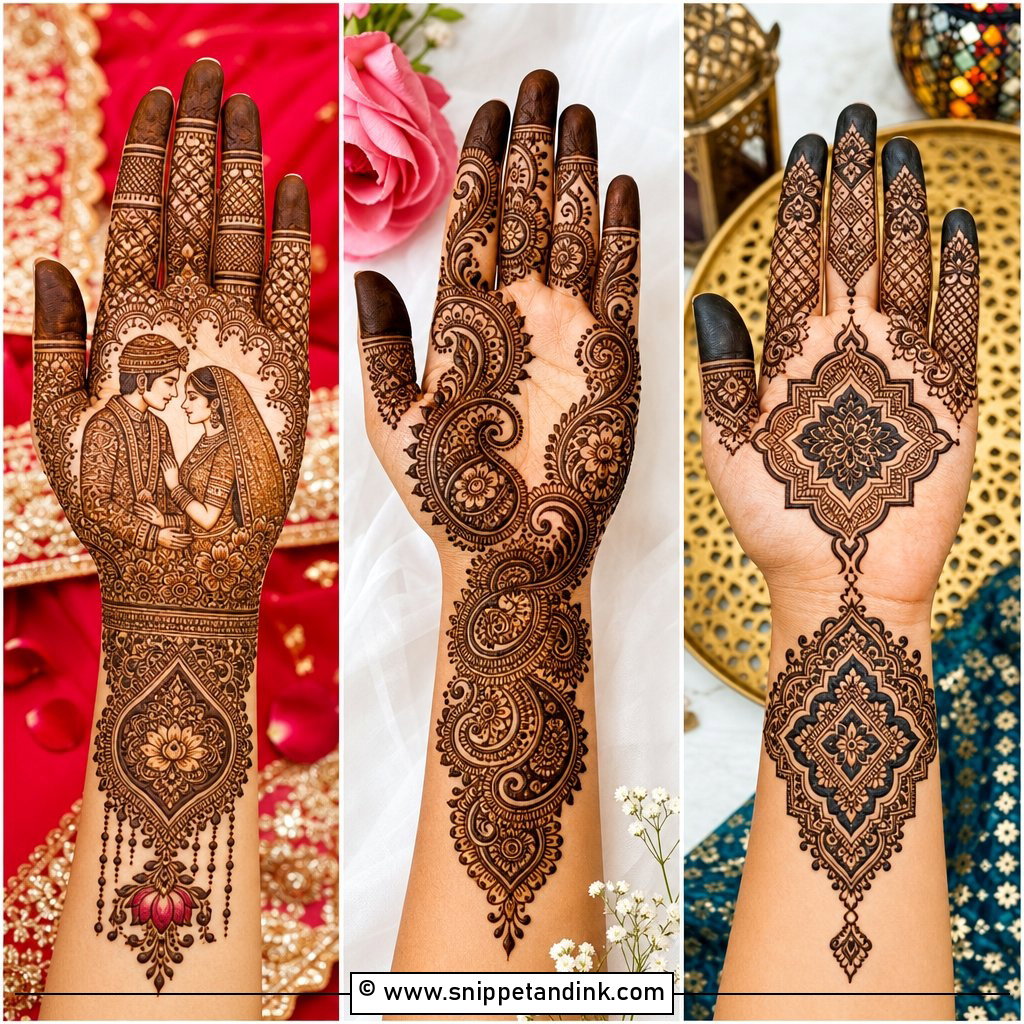
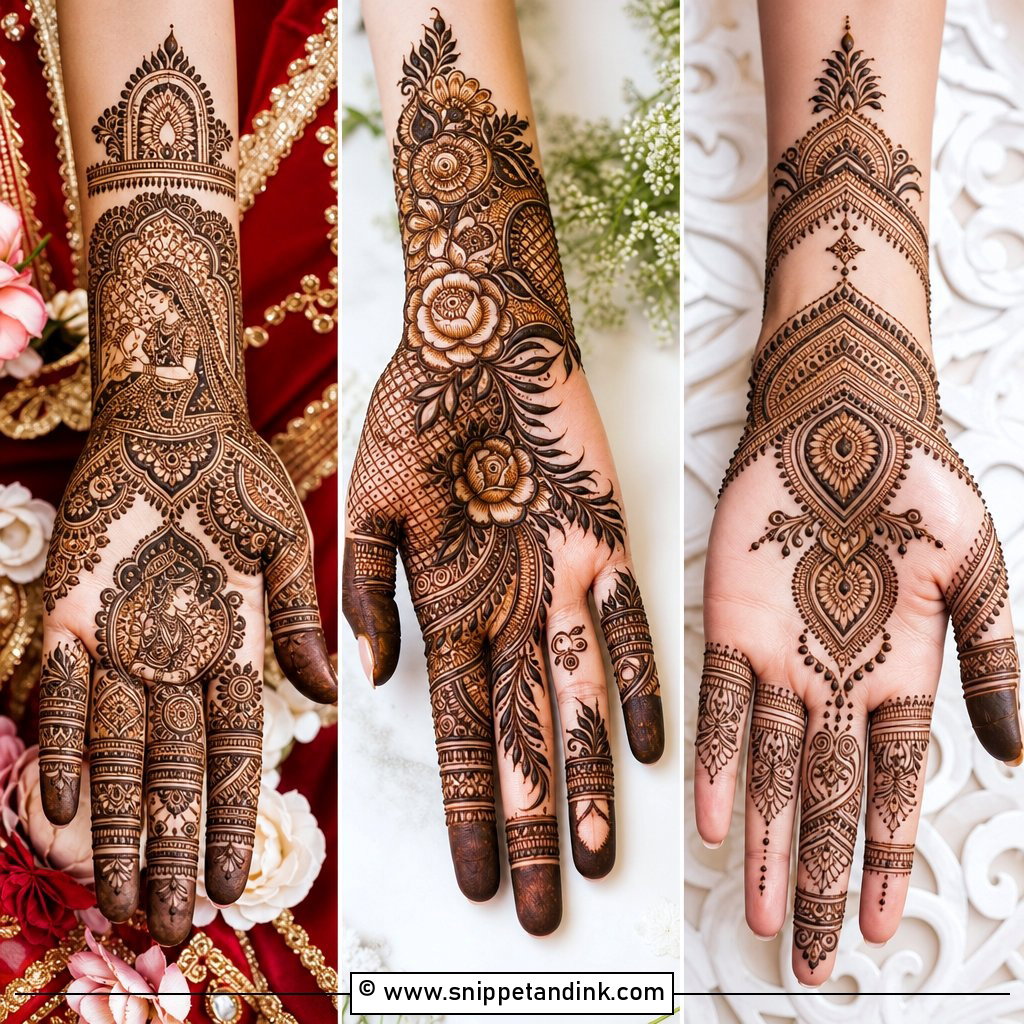
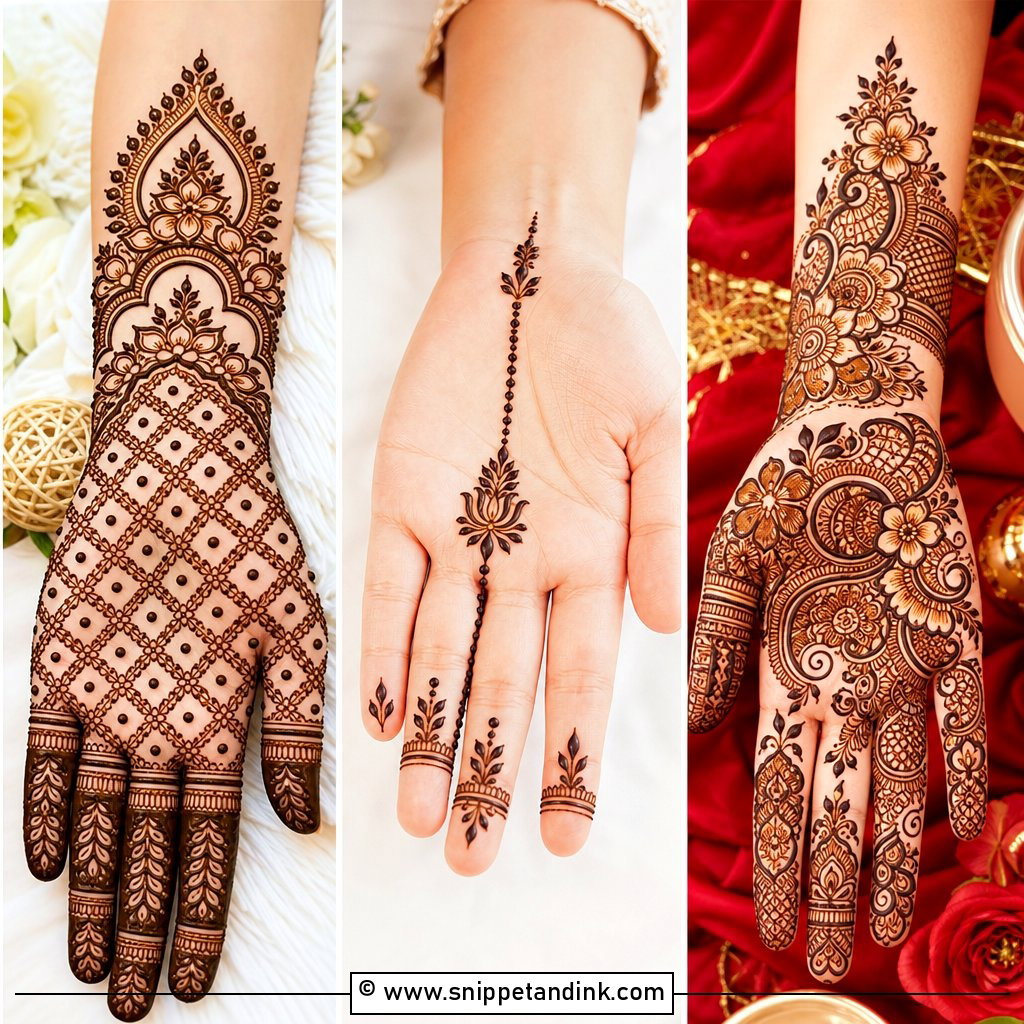
Palm designs are the quickest way I know to get a rich stain, because palm skin takes henna more deeply than almost anywhere else. Simple front palm mehndi designs start with the palm and then balance the fingers and wrist around it. A mandala, a floral trail, a paisley, some jaali or a bracelet finish: change the spacing and a little shading, and the same layout can go from casual to festive. Below are the layouts I return to, with what I’d check before piping each one.
One Night or Two Ahead: Fitting Palm Henna Around the Festival
Palm henna is at its best on the second day, not the first. When the paste comes off, the stain is bright orange; over the next 24 to 48 hours it oxidises into reddish brown or deep maroon. So I always work backwards from the day you want it to look darkest.
- Eid, Diwali, Teej and Karwa Chauth: apply the evening before at the latest, and two evenings before if you want the darkest colour on the day itself.
- Weddings and engagements: guests and bridesmaids do well with henna one or two days ahead. Brides usually sit two days before.
- Sitting time: a minimal palm takes minutes, a full palm with fingers takes considerably longer. Add drying time on top before you can use your hands freely.
- Paste time: the longer the paste stays on, the deeper the stain. Overnight is ideal for palms, and gloves or wrap over dry paste help keep it in place while you sleep.
Arrive with clean, dry hands: no lotion, oil or sunscreen on the palms, since any barrier on the skin keeps the dye from absorbing evenly.
1. Simple Mandala Front Palm Mehndi Design
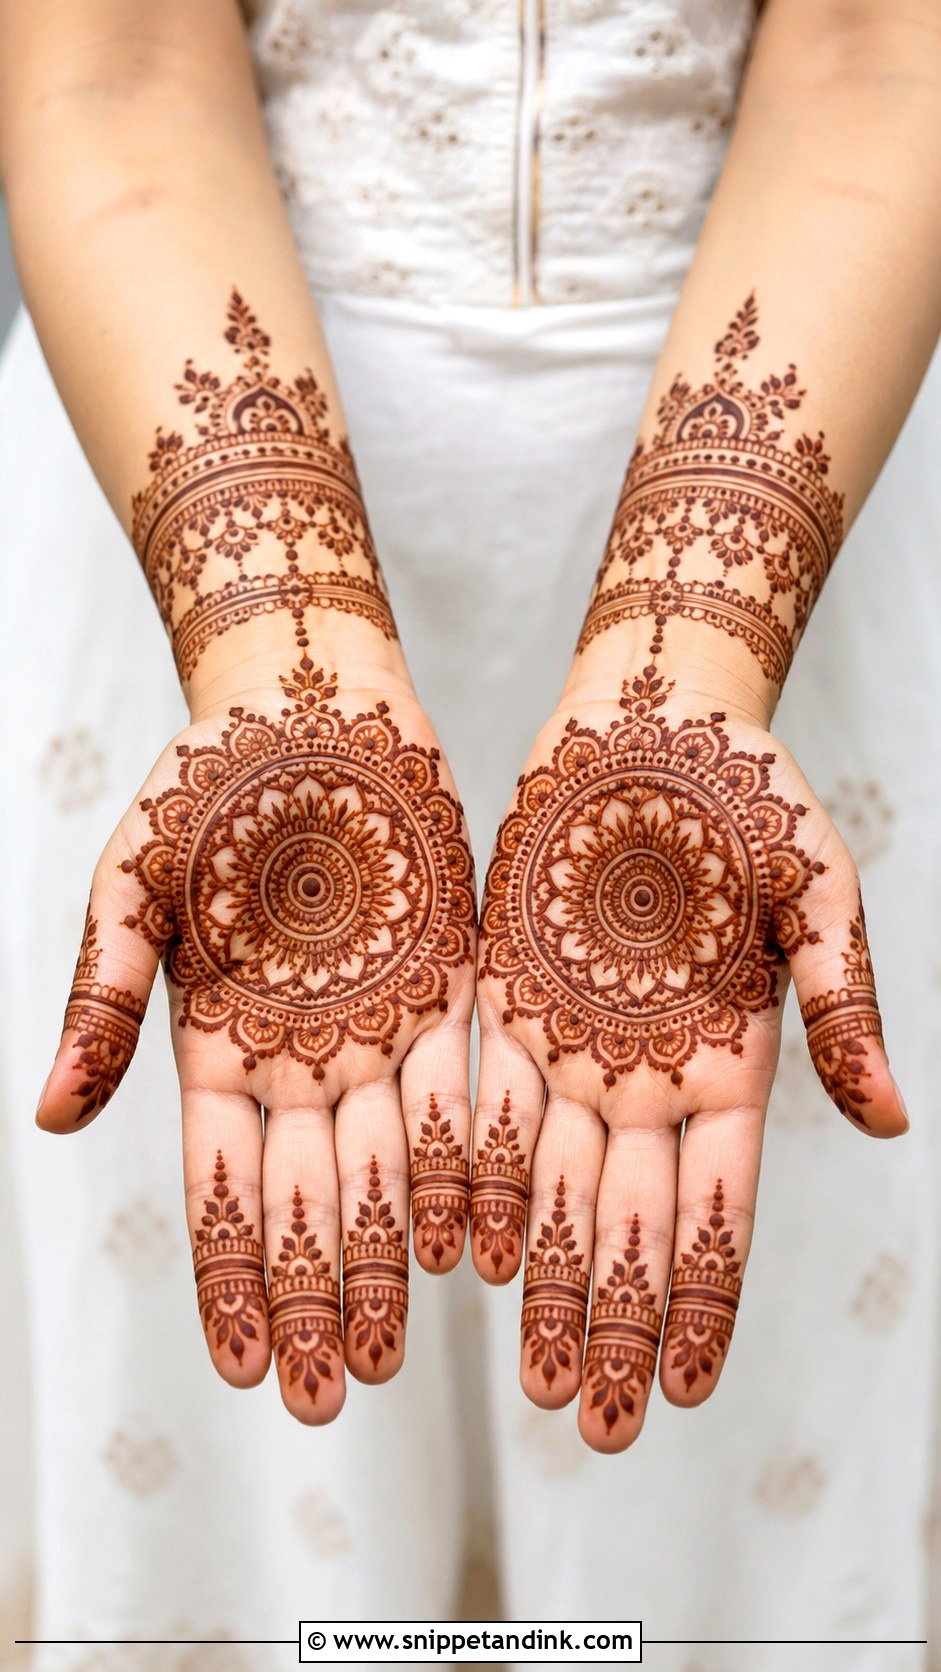
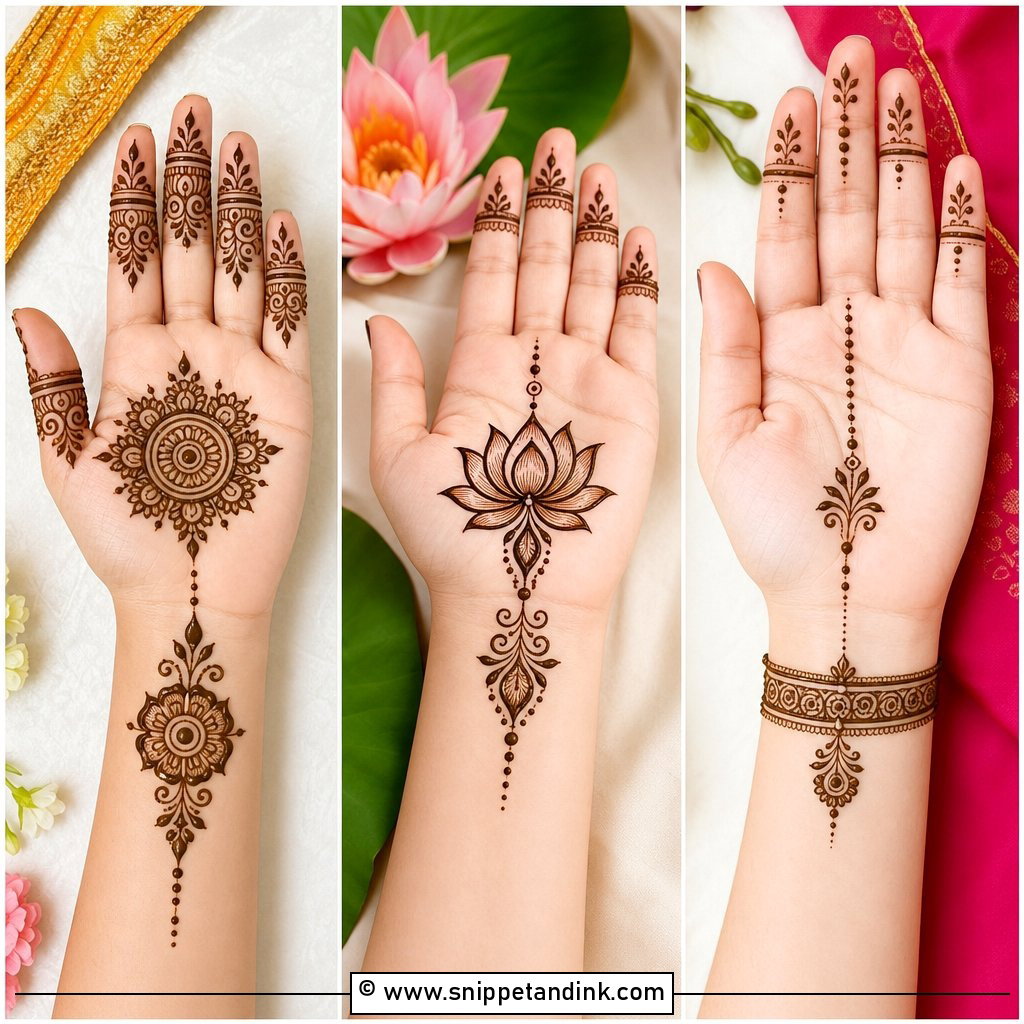
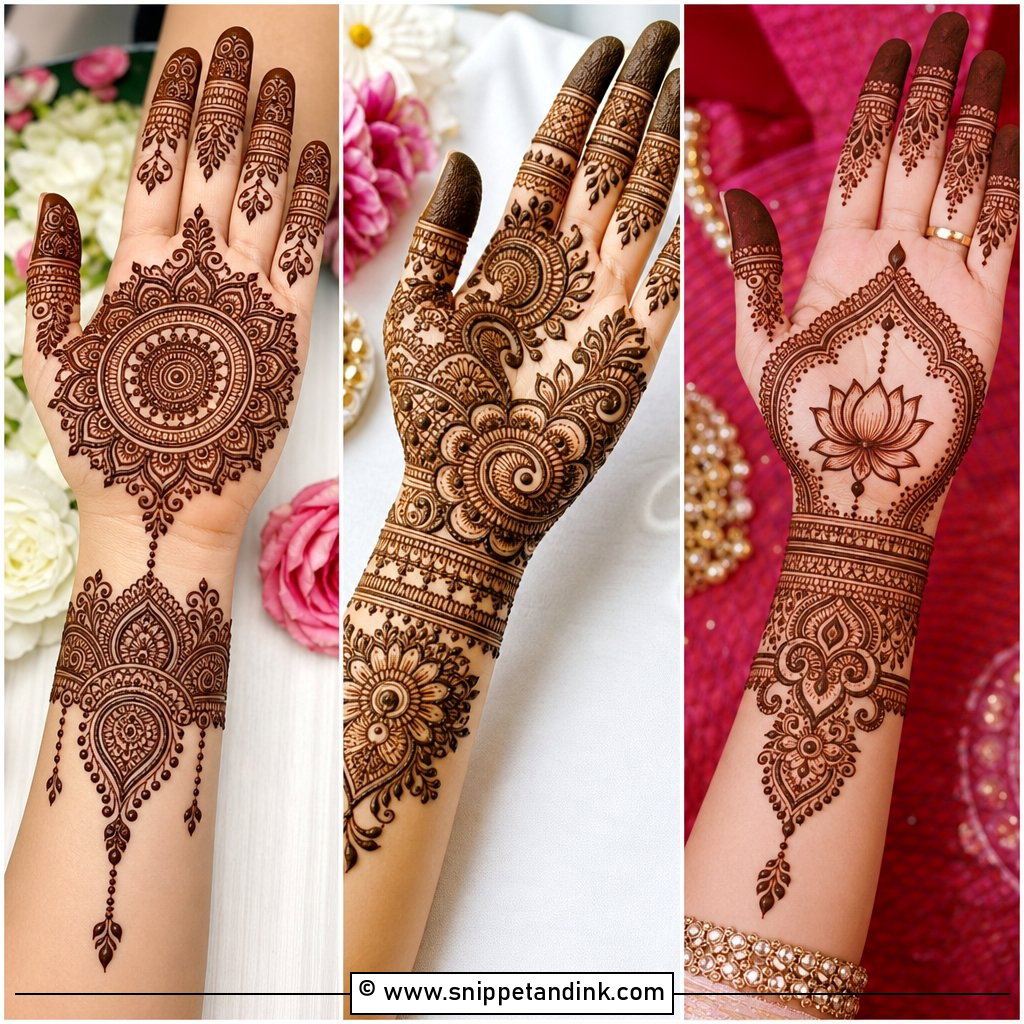
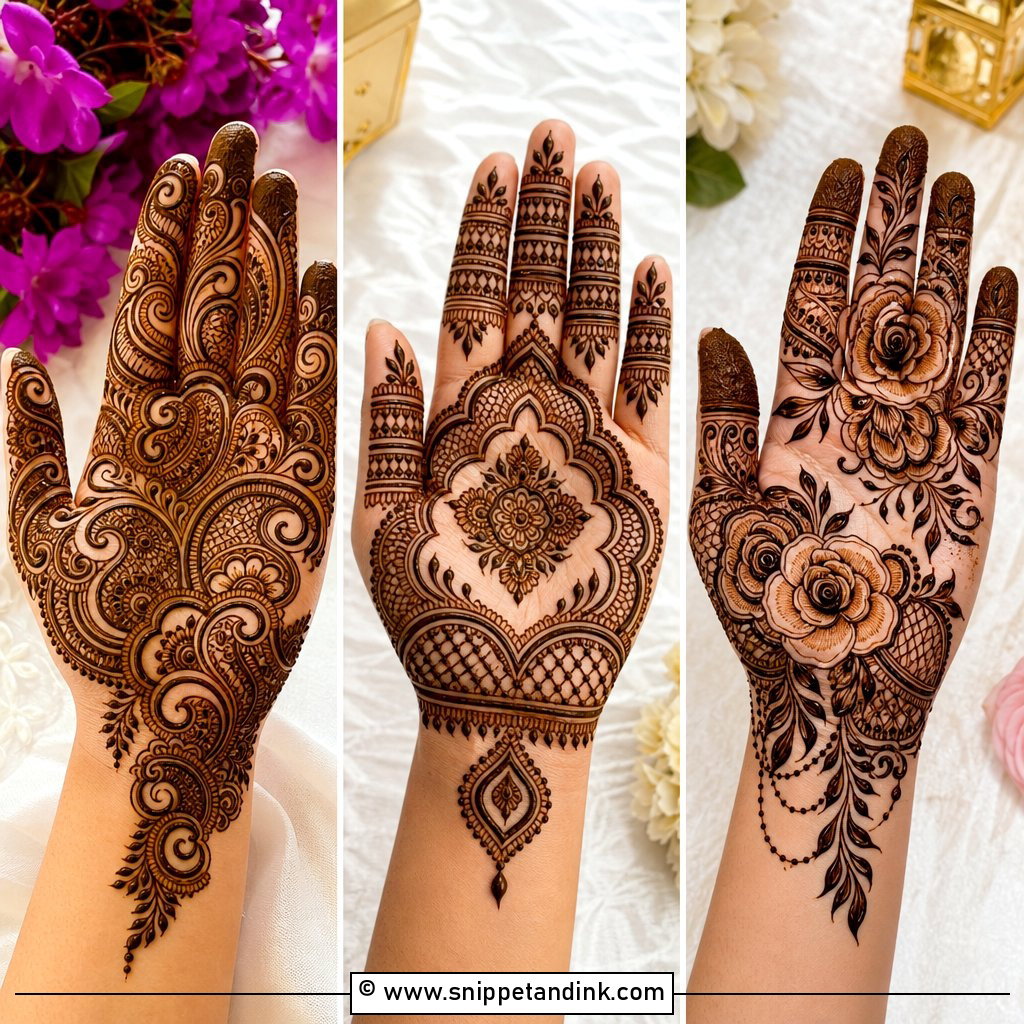
Most first-time clients point to this one. A single circle in the centre of the palm, built from petals, dots, tiny leaves and curved lines, with ring bands or fingertip caps keeping the fingers light. The mandala is symmetrical, so it’s easy to plan, but I always build it ring by ring from the middle outward. Draw the outer edge first and you’ll run out of room for the last row of petals.
2. Simple Floral Front Palm Mehndi Design
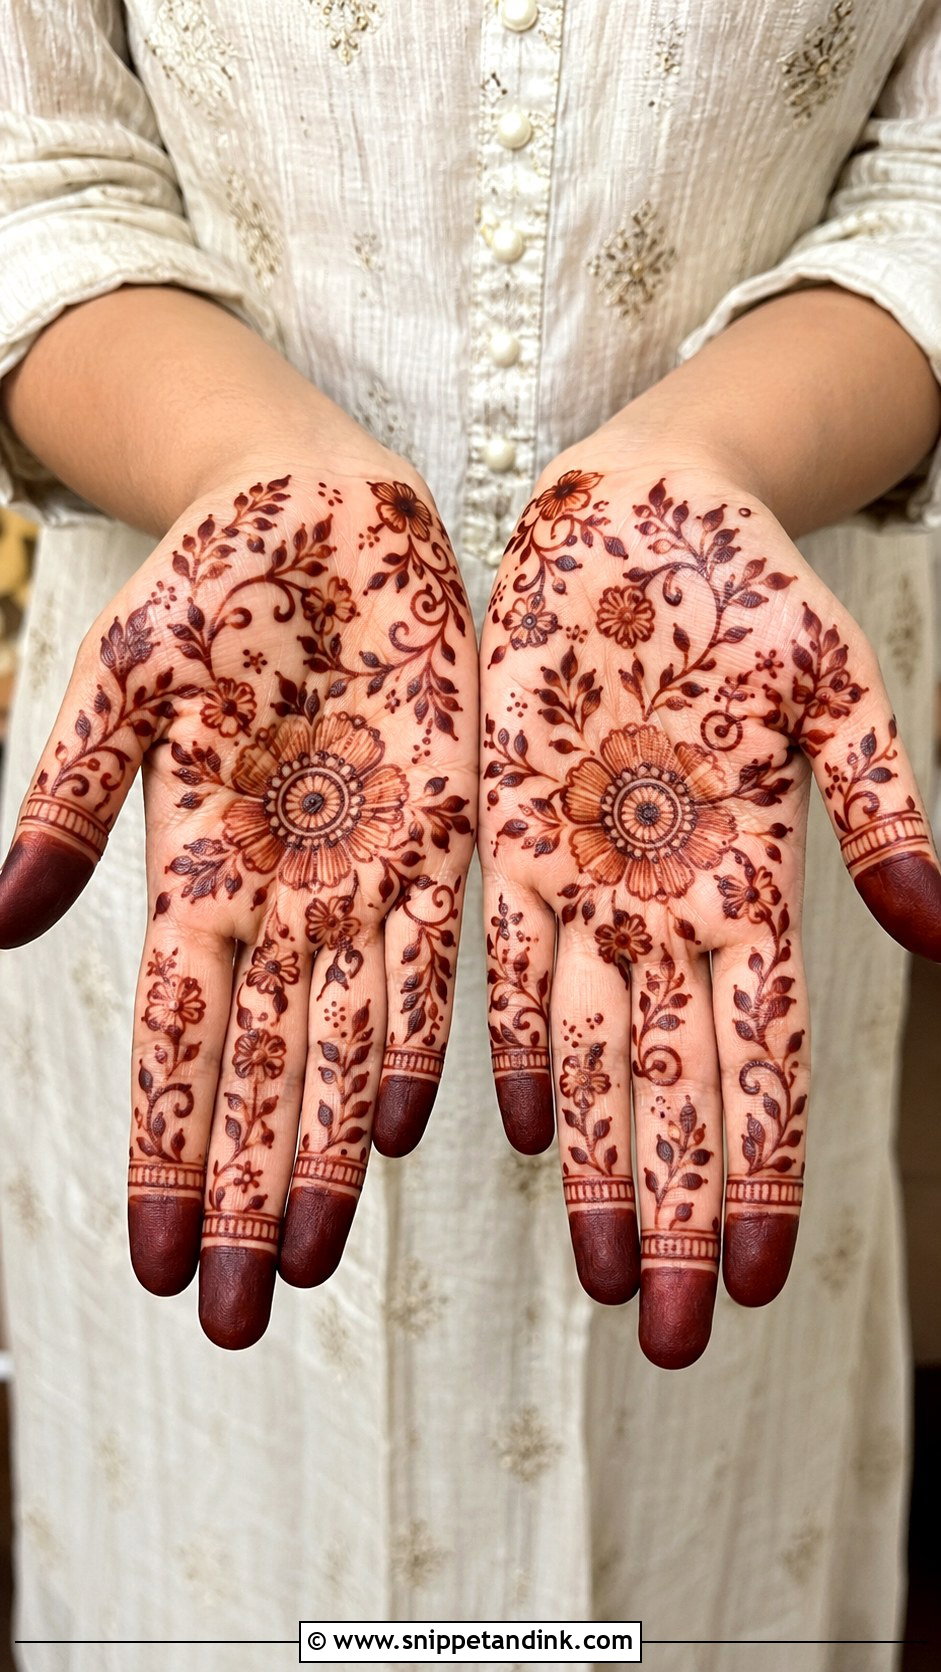
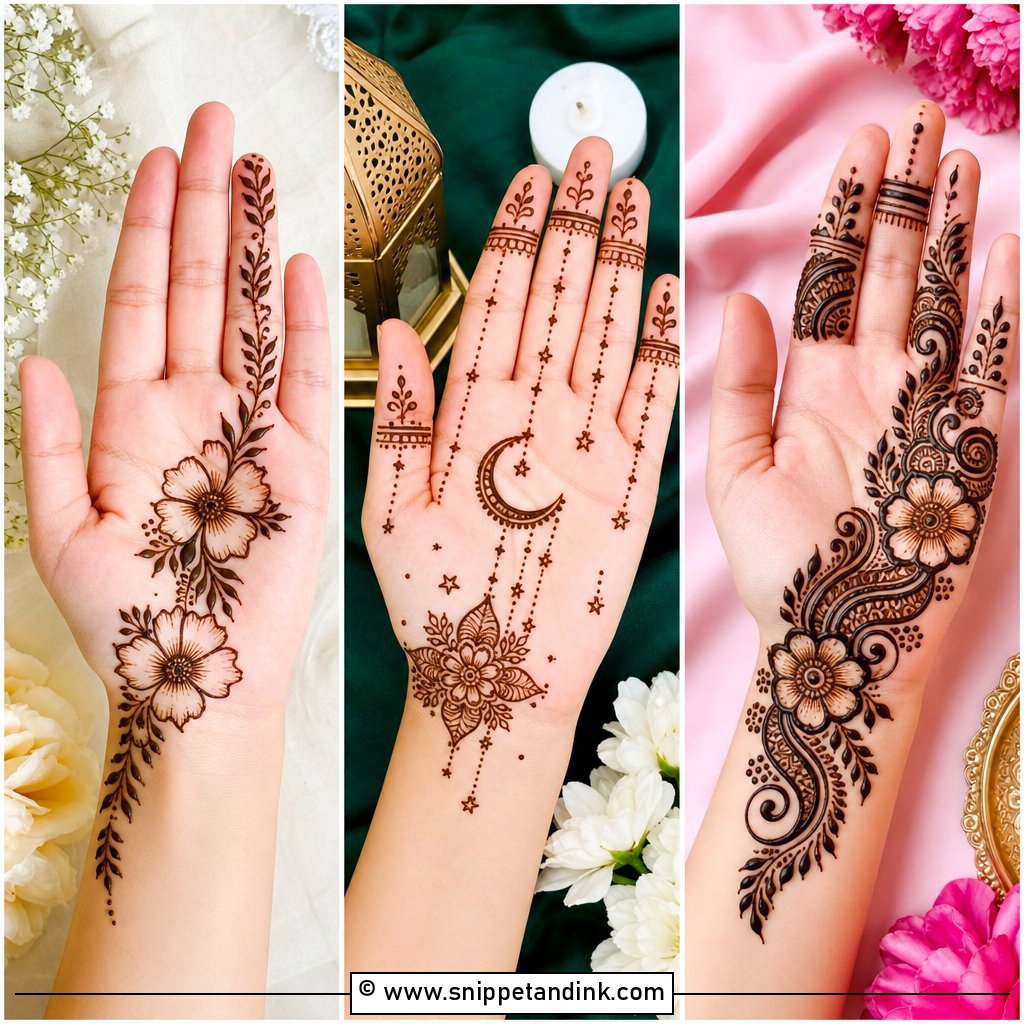
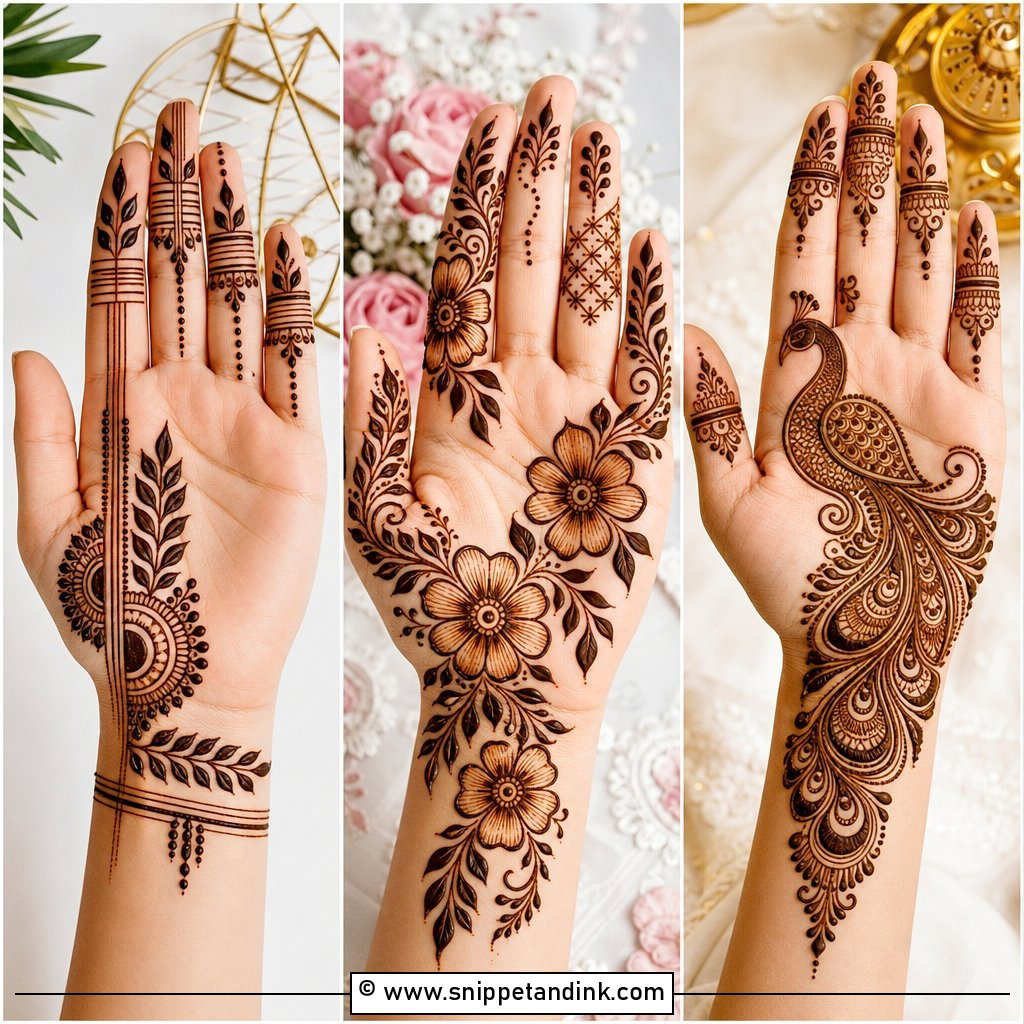
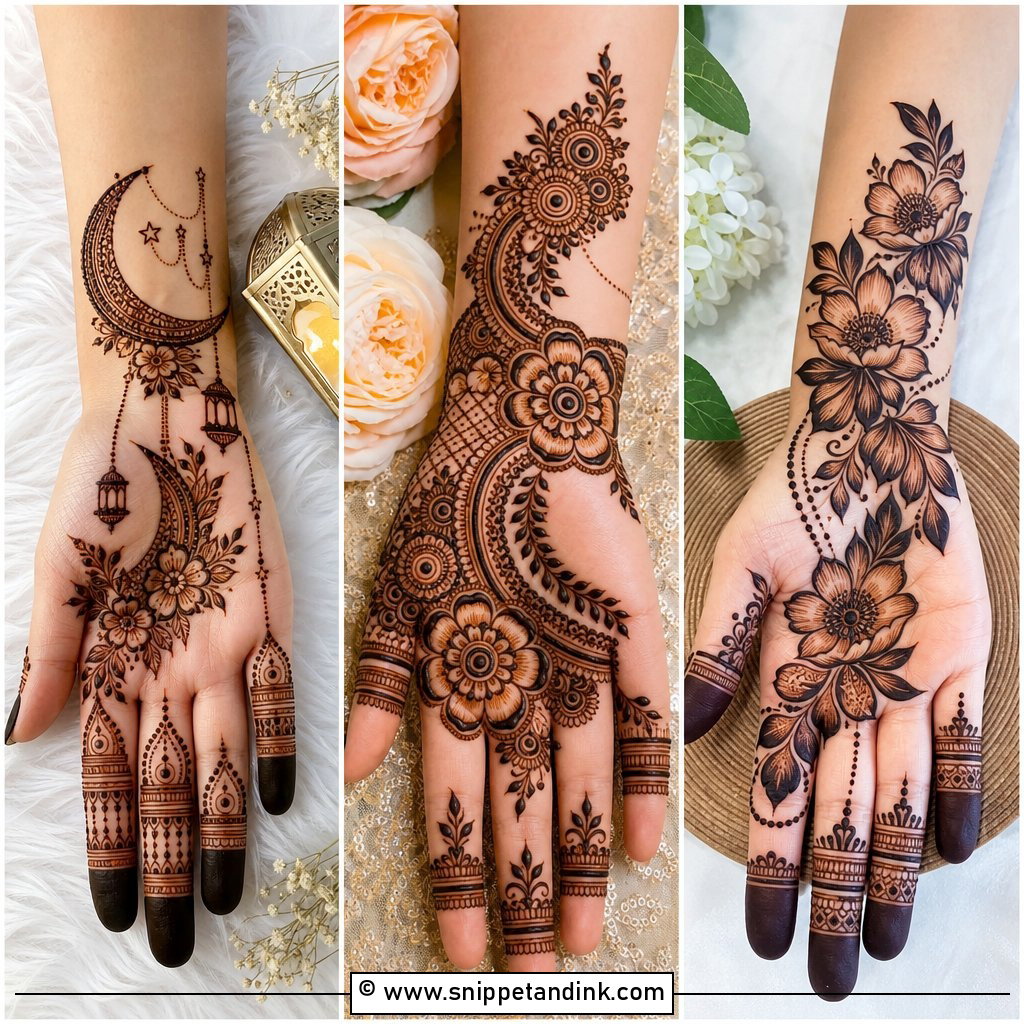
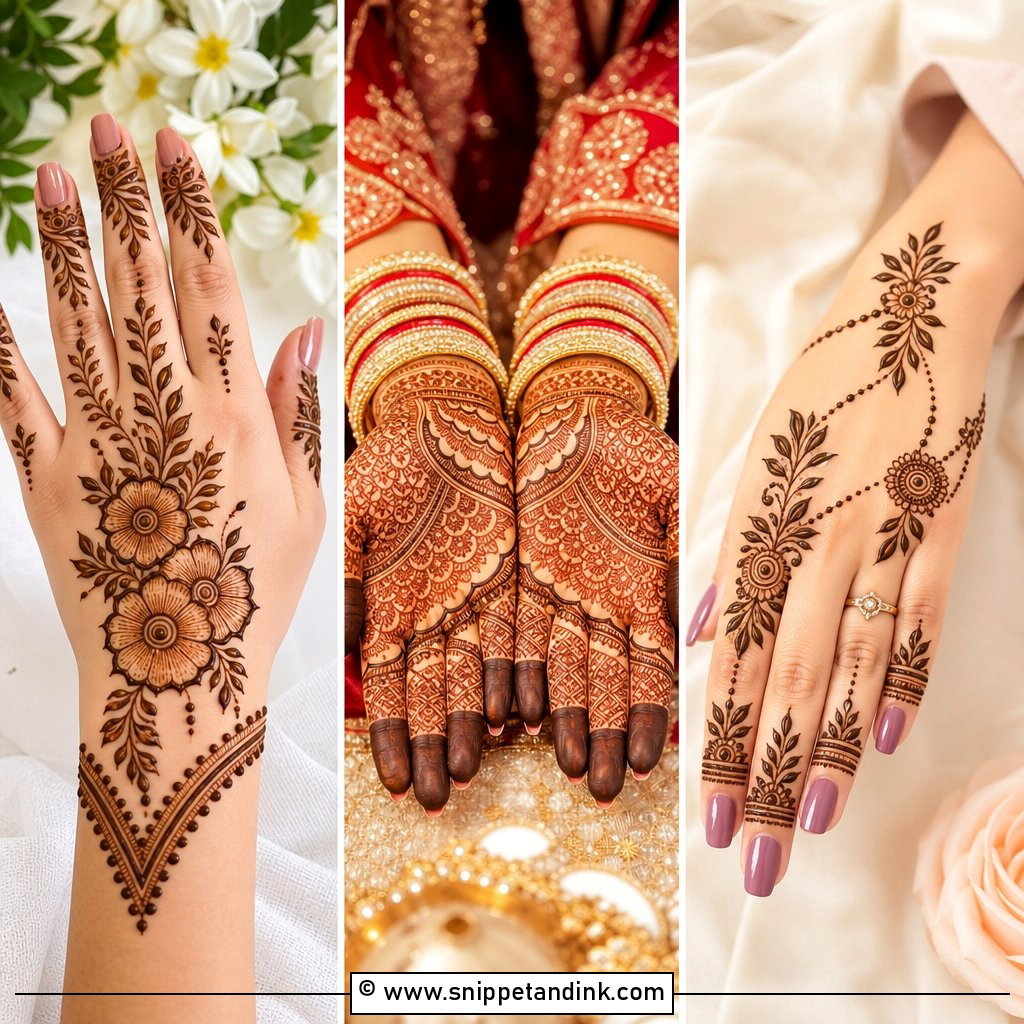
One medium flower near the centre, smaller blooms reaching toward the fingers and wrist, leaves and vines filling the gaps. That’s the whole design. I outline the petals boldly and keep any inner shading light, because a fully filled flower stains as one dark patch and loses its shape. Mini flowers or leafy bands on the fingers tie it together for Eid, Teej or Diwali.
3. Simple Arabic Front Palm Mehndi Design
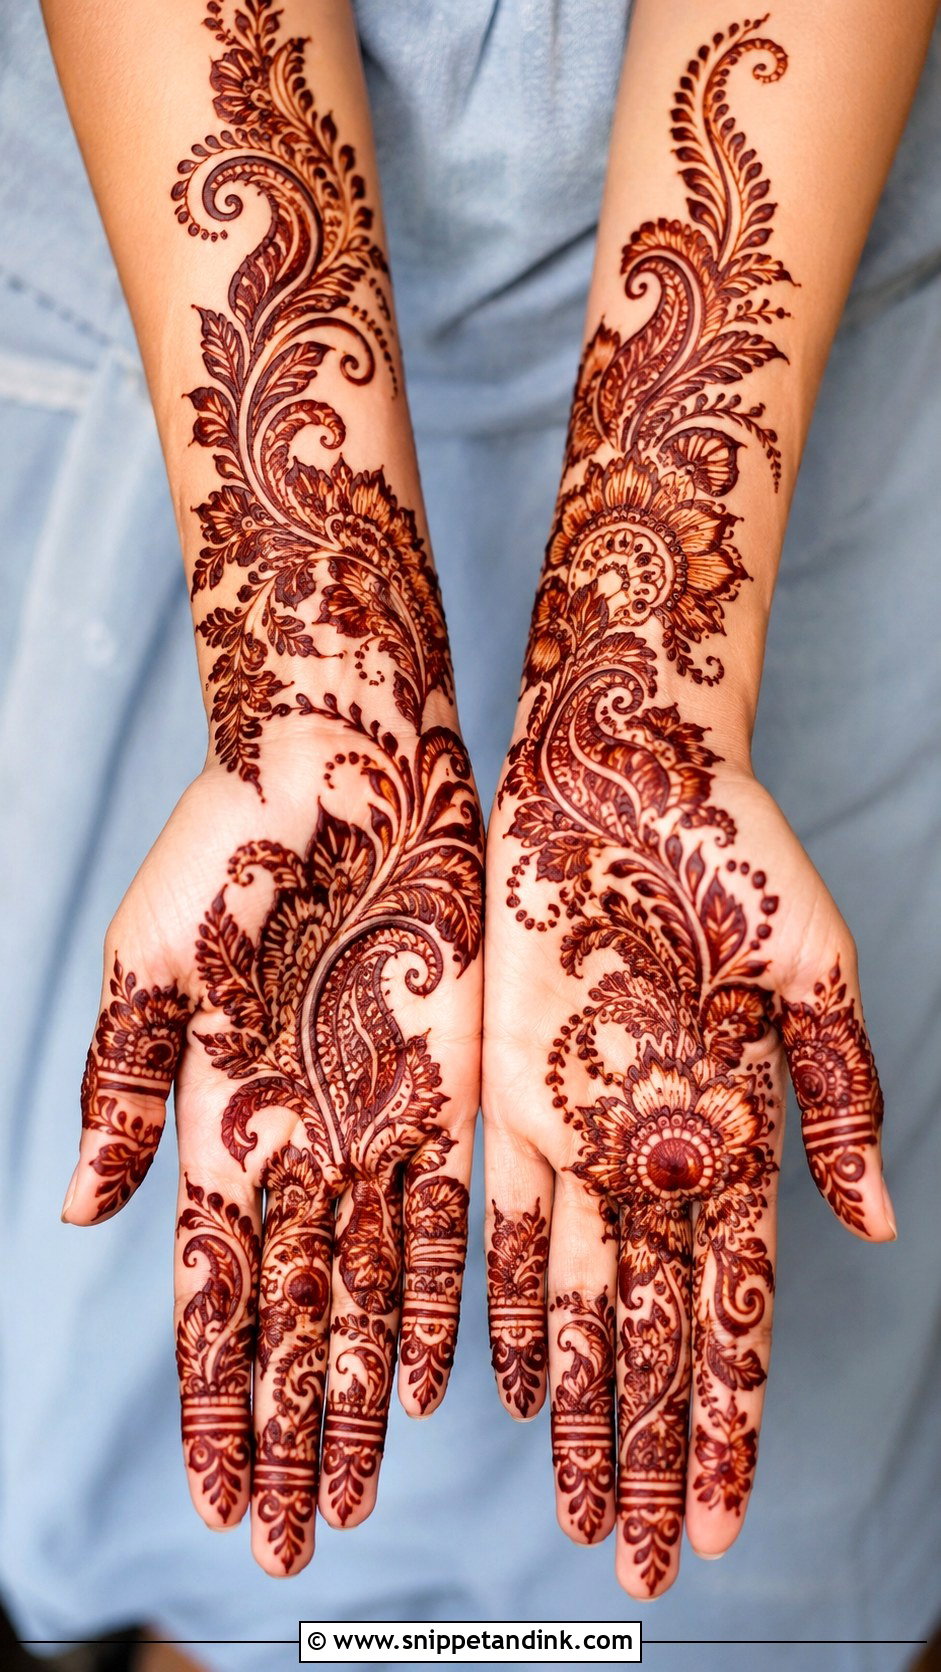
Arabic palm work moves diagonally from one side of the wrist toward the fingers instead of filling the hand. Bold flowers, curved leaves, paisleys and dotted vines create the movement, and the empty skin around them keeps it modern. Beginners find it easier than a mandala because nothing needs to mirror perfectly. I start the diagonal at the outer edge of the wrist so it follows the hand’s natural line when the palm opens.
4. Simple Paisley Front Palm Mehndi Design
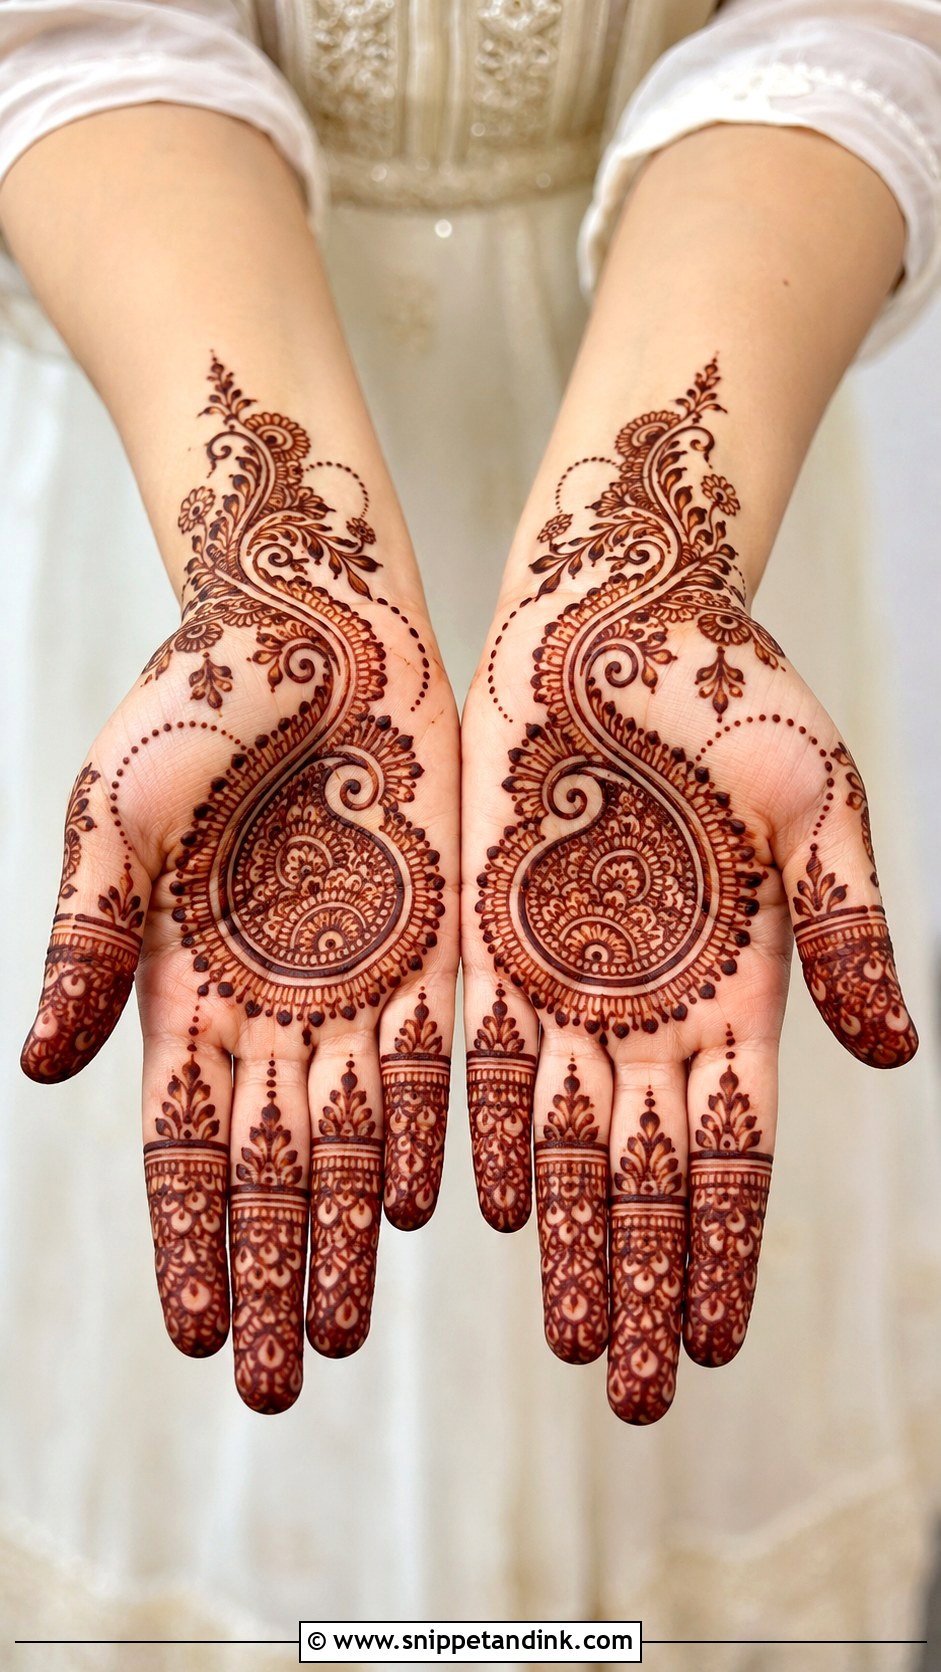
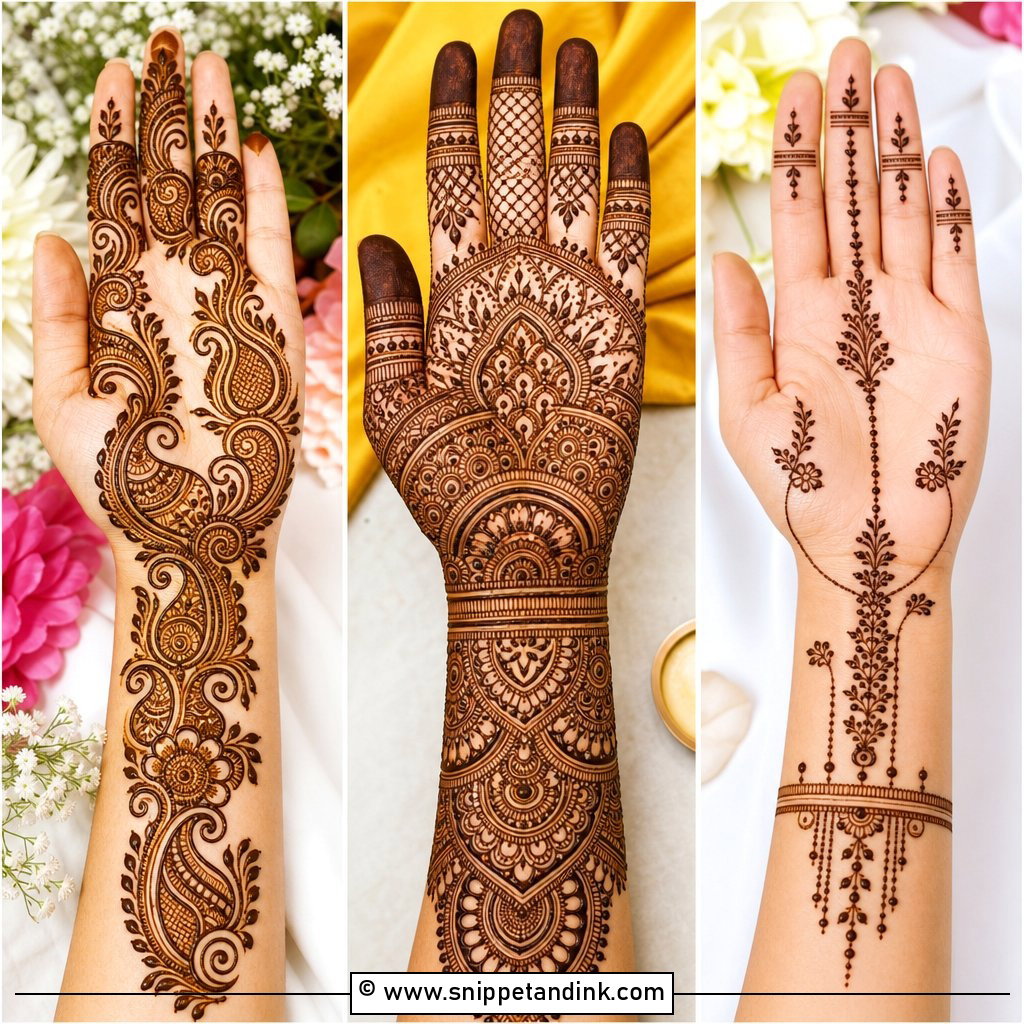
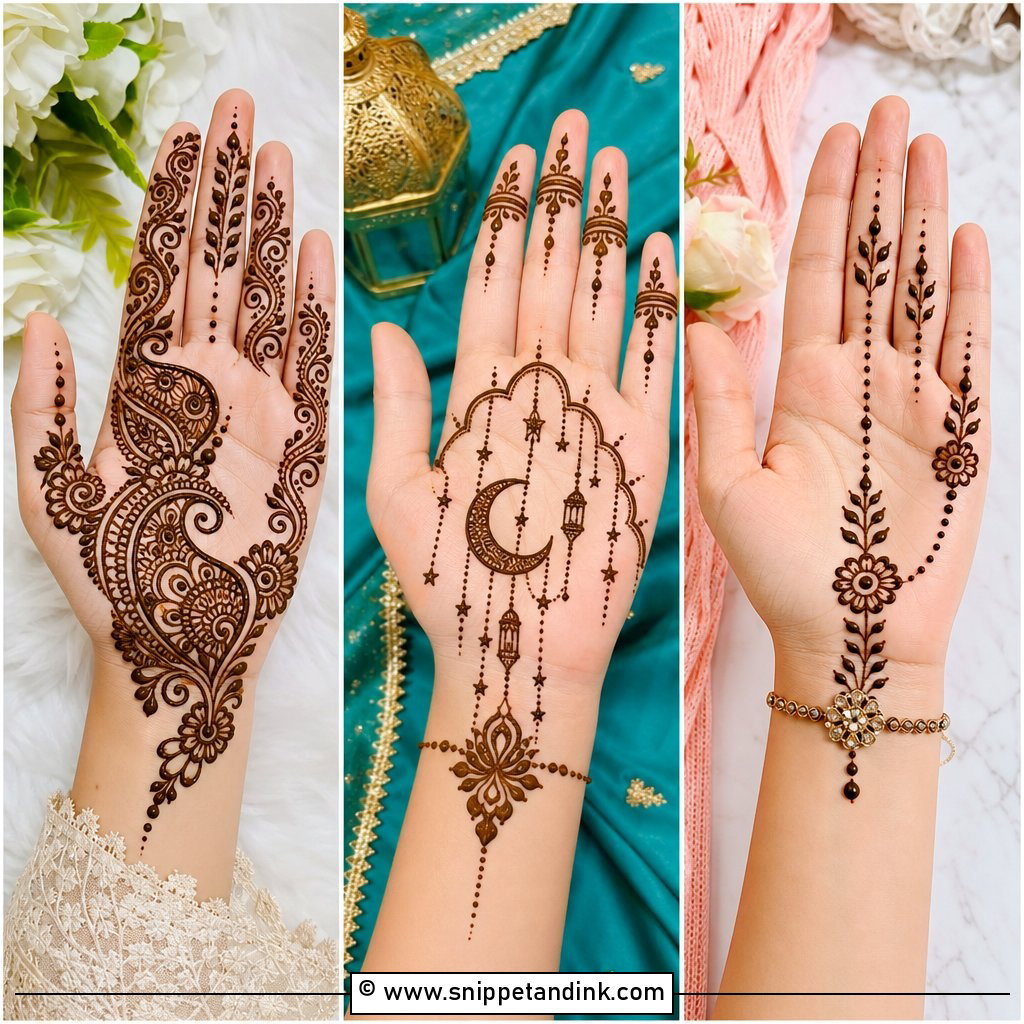
The paisley shape fits a palm almost naturally, which is why it has been used for generations. I place one large paisley in the middle or slightly to the side, fill it with tiny petals, dots and curved lines, then run a slim vine toward the wrist and small paisley tips toward the fingers. A thicker outline with lighter inner work gives contrast. On a narrow palm, tilt the paisley a little so its tail doesn’t run into the wrist crease.
5. Simple Front Palm Mehndi Design With Fingers
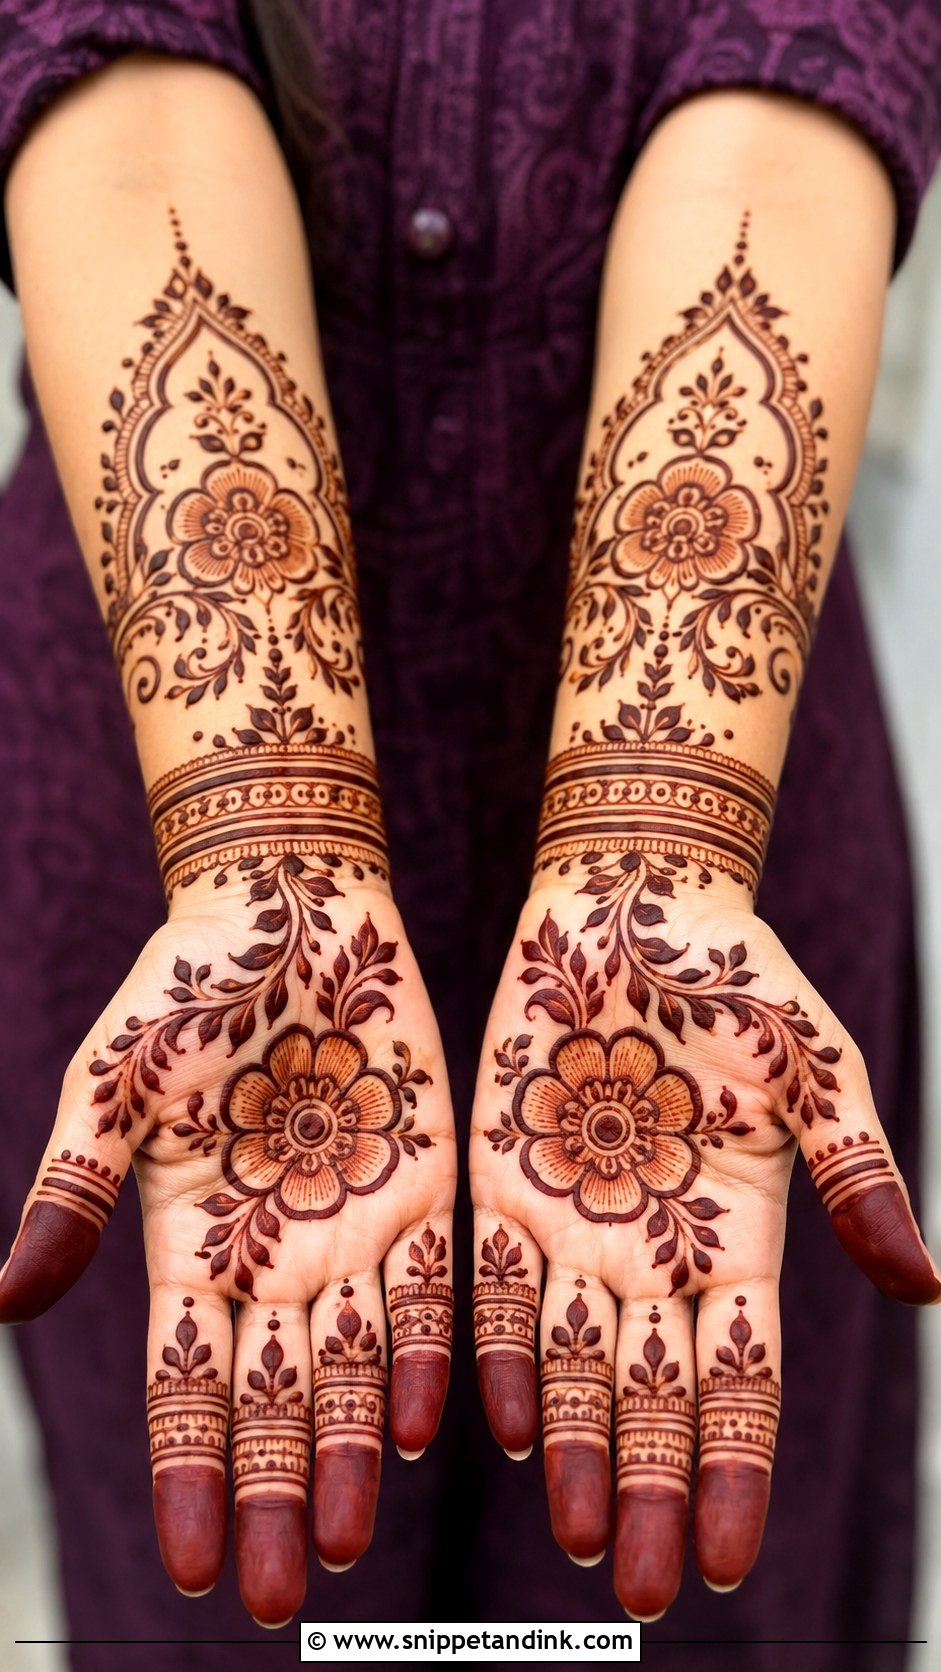
To connect the palm and fingers, I start with a small central flower, mandala or paisley and run fine lines up toward each finger. Bands, dots, mini leaves and fingertip shading follow. The hand looks complete without heavy coverage. Keep the wrist minimal, maybe one thin bracelet line, or the design loses its upward direction.
6. Simple Round Tikki Front Palm Mehndi Design
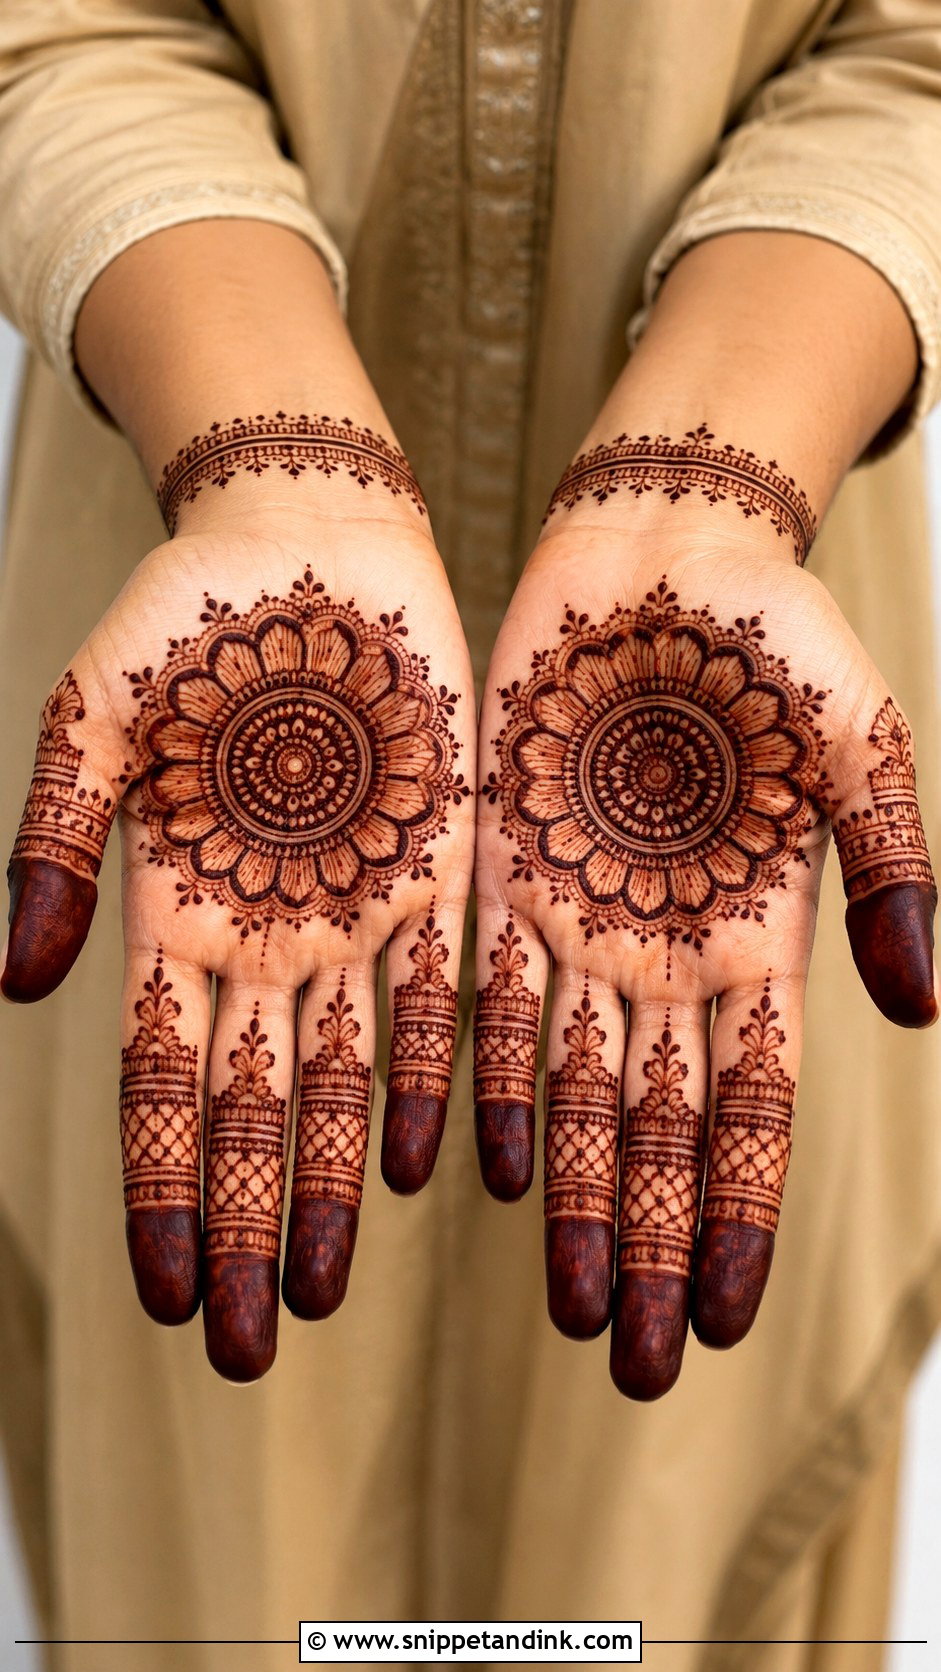
The tikki is a bold circle in the centre of the palm, decorated with petals, dots, lace edges and tiny curves. It’s one of the oldest palm layouts and it stains strongly, since the centre is often filled solid. The filled area needs an even layer of paste; I go over it once more after the first layer sets slightly, because thin patches show up lighter. Caps and thin lines on the fingers, maybe a small wrist band, and it’s done quickly.
7. Simple Lotus Front Palm Mehndi Design
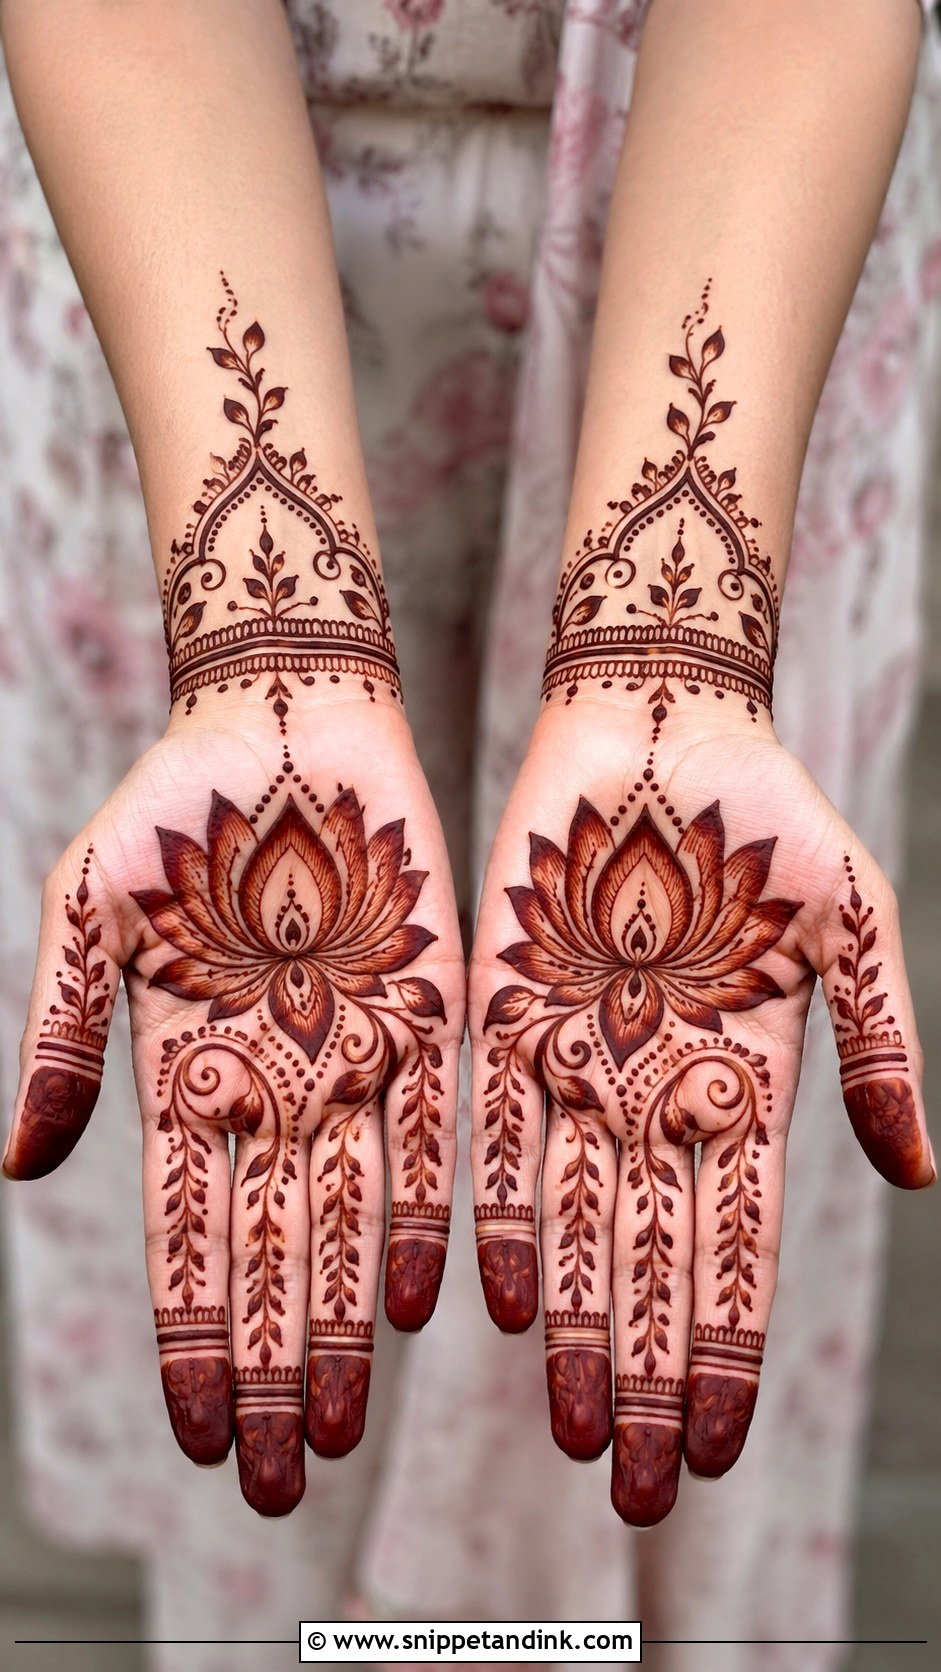
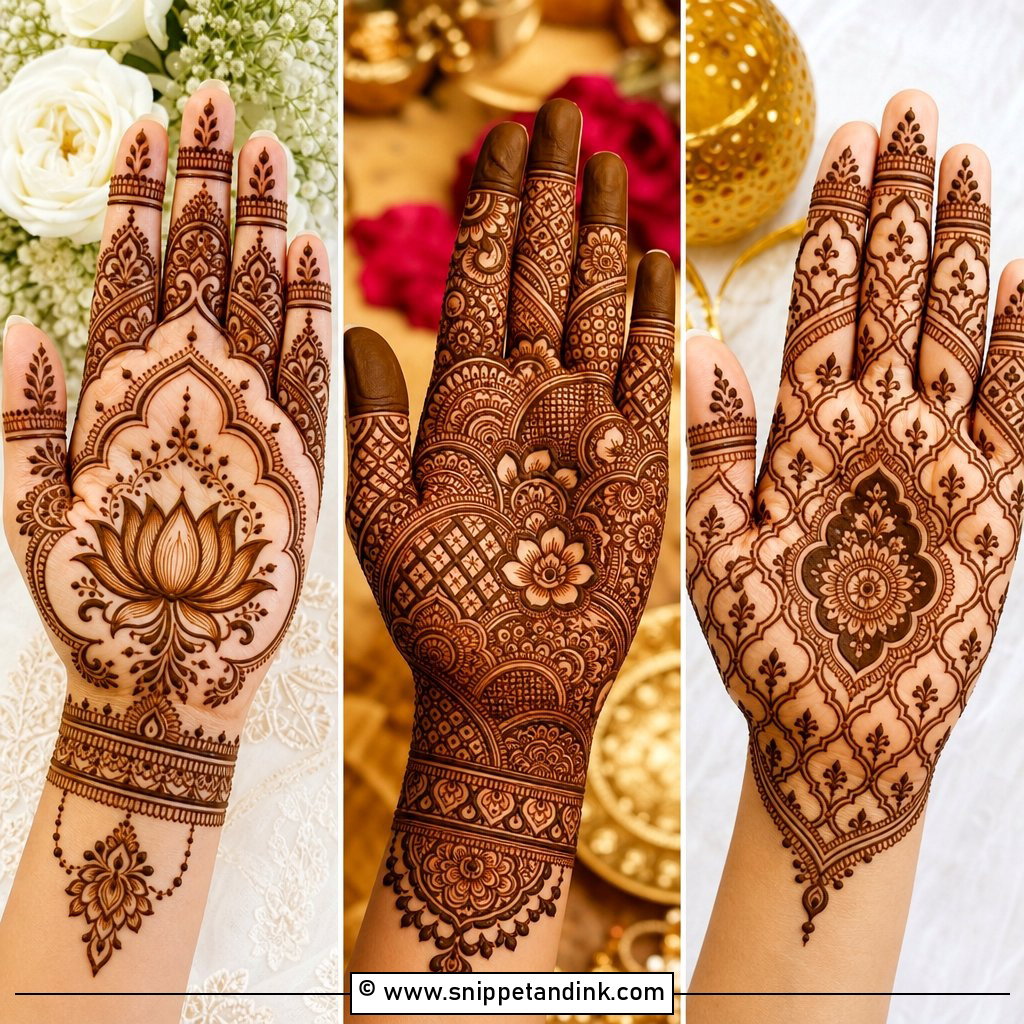
A lotus front palm mehndi design puts a lotus in the centre of the palm with curved leaves and dots around it. Broad, simple petals make it approachable for beginners. I extend slim vines up to the fingers and a light bracelet shape at the wrist. It’s a natural choice for puja and engagement functions, and petal bands on the fingers keep the focus on the palm.
8. Simple Peacock Front Palm Mehndi Design
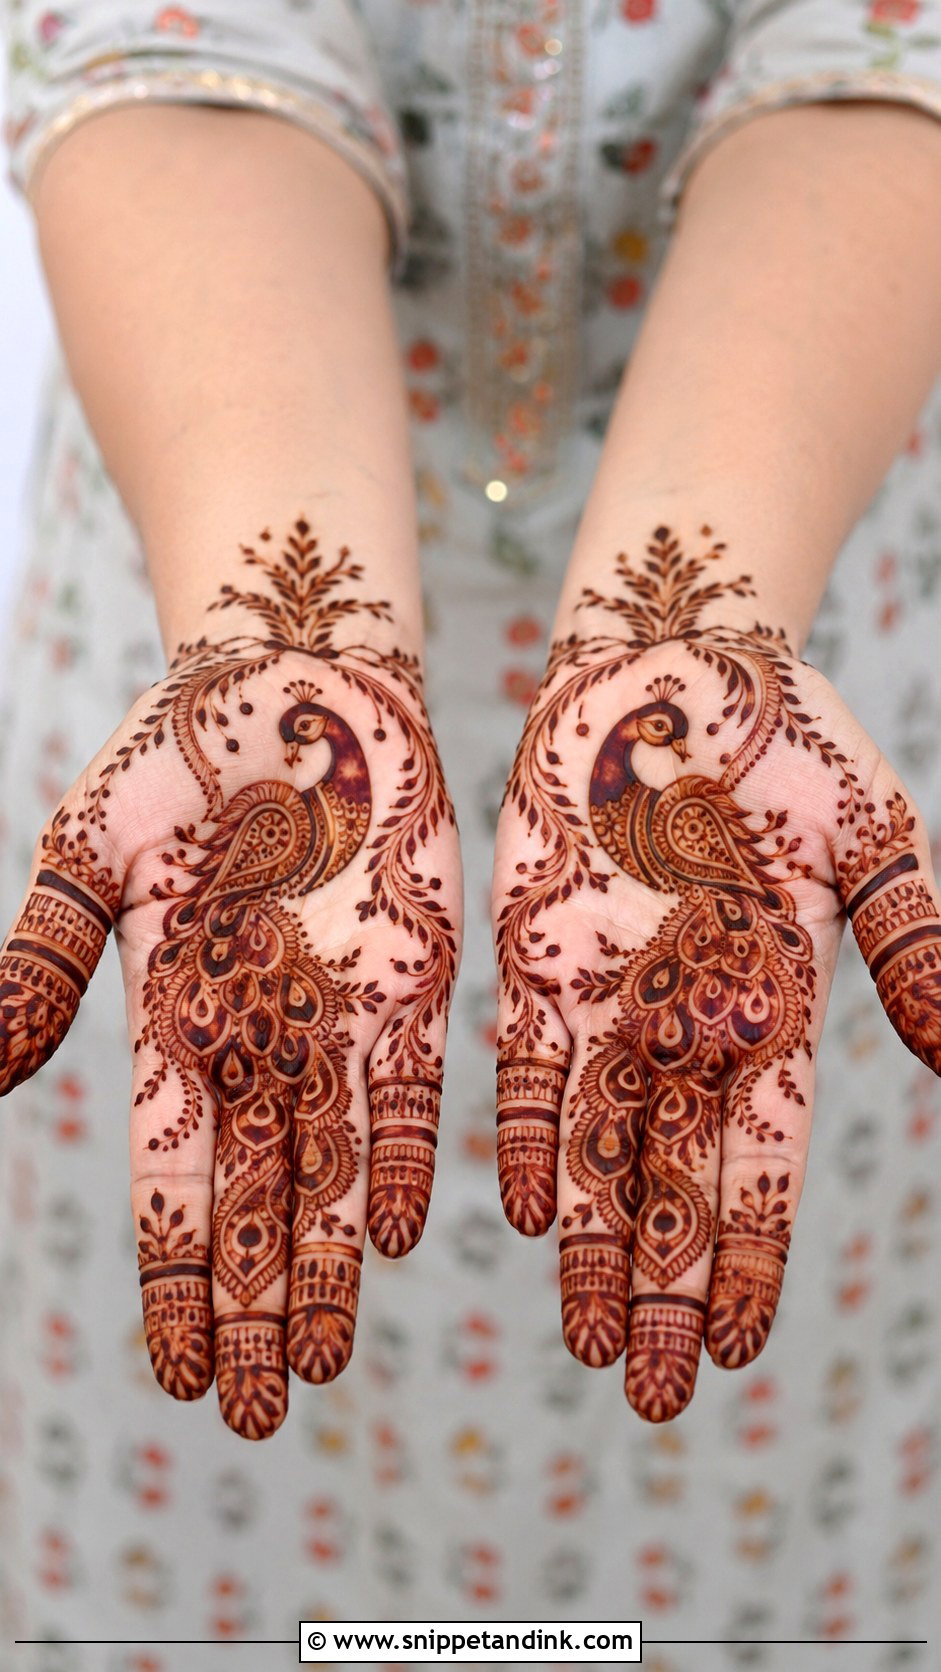
A small peacock body on one side of the palm, with its feathers flowing toward the centre. Curved feather lines, dots and leaf shapes give texture, and the fingers echo the tail with feather tips or thin vines. I’d suggest this only if you have a little more time; even a simplified peacock needs a steady hand at the neck curve, where most wobbles show. Keep it open and avoid overfilling.
9. Simple Jaali Front Palm Mehndi Design
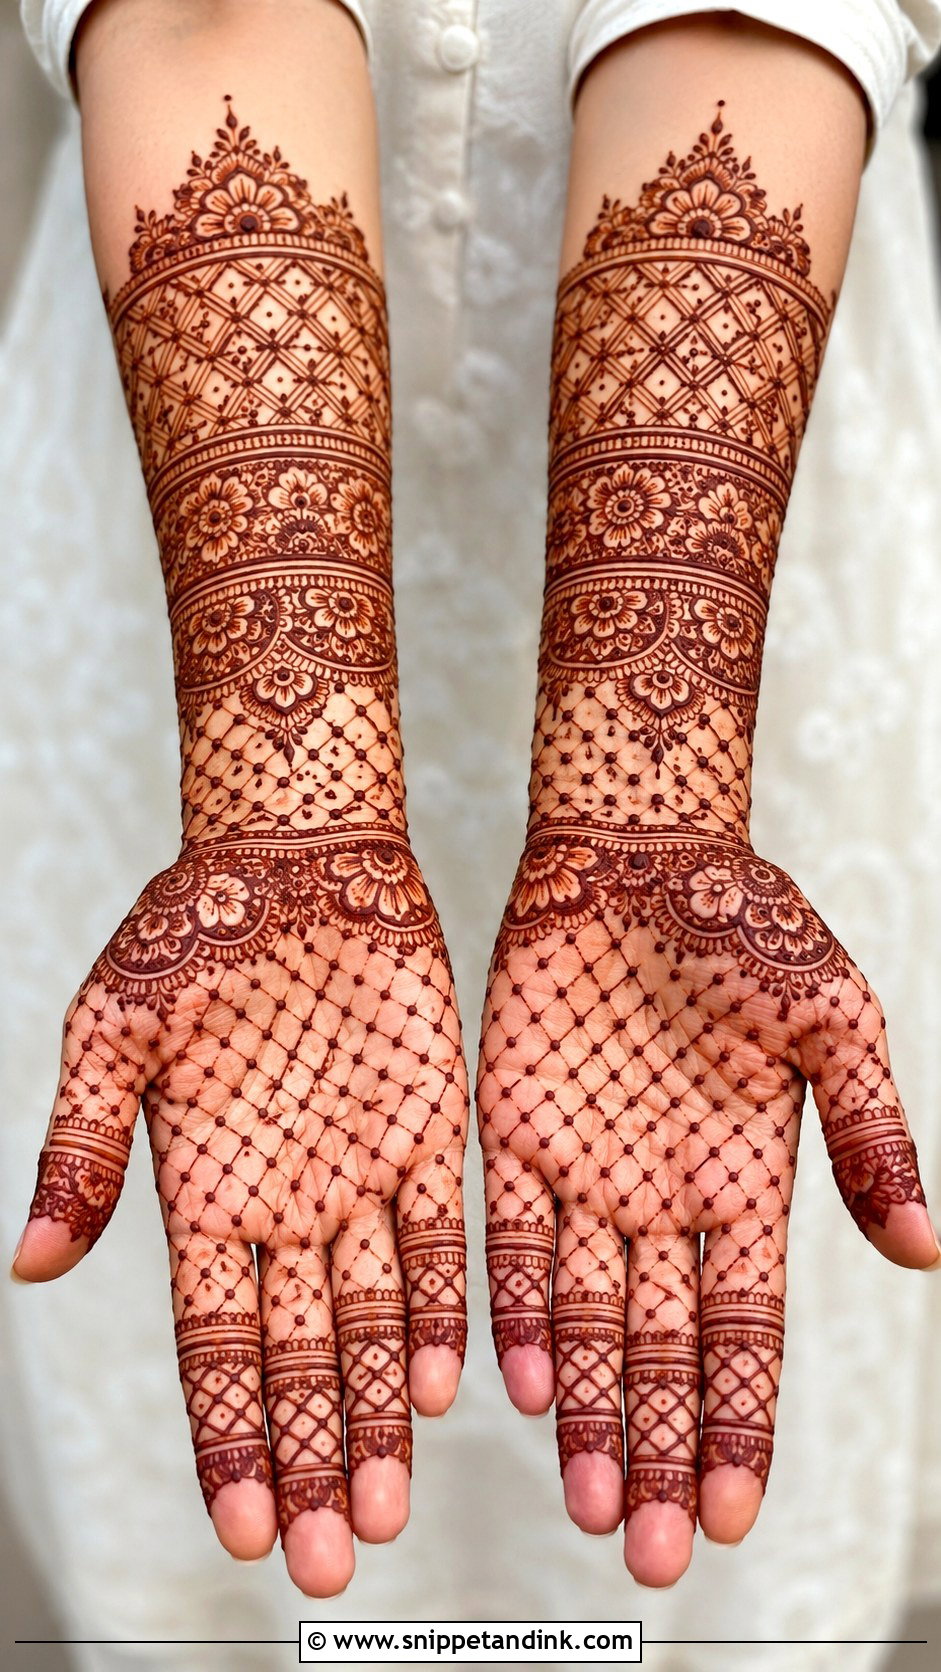
Jaali looks detailed but is really just repetition. I draw a small mesh section on one side or the centre of the palm, then surround it with flowers, leaves or curved borders. Dots at the crossing points finish it. The spacing has to stay generous: tight crisscross lines bleed into each other while the paste is wet. Matching mesh bands or thin lines on the fingers, and it adapts easily to small or wide palms.
10. Simple Leafy Front Palm Mehndi Design
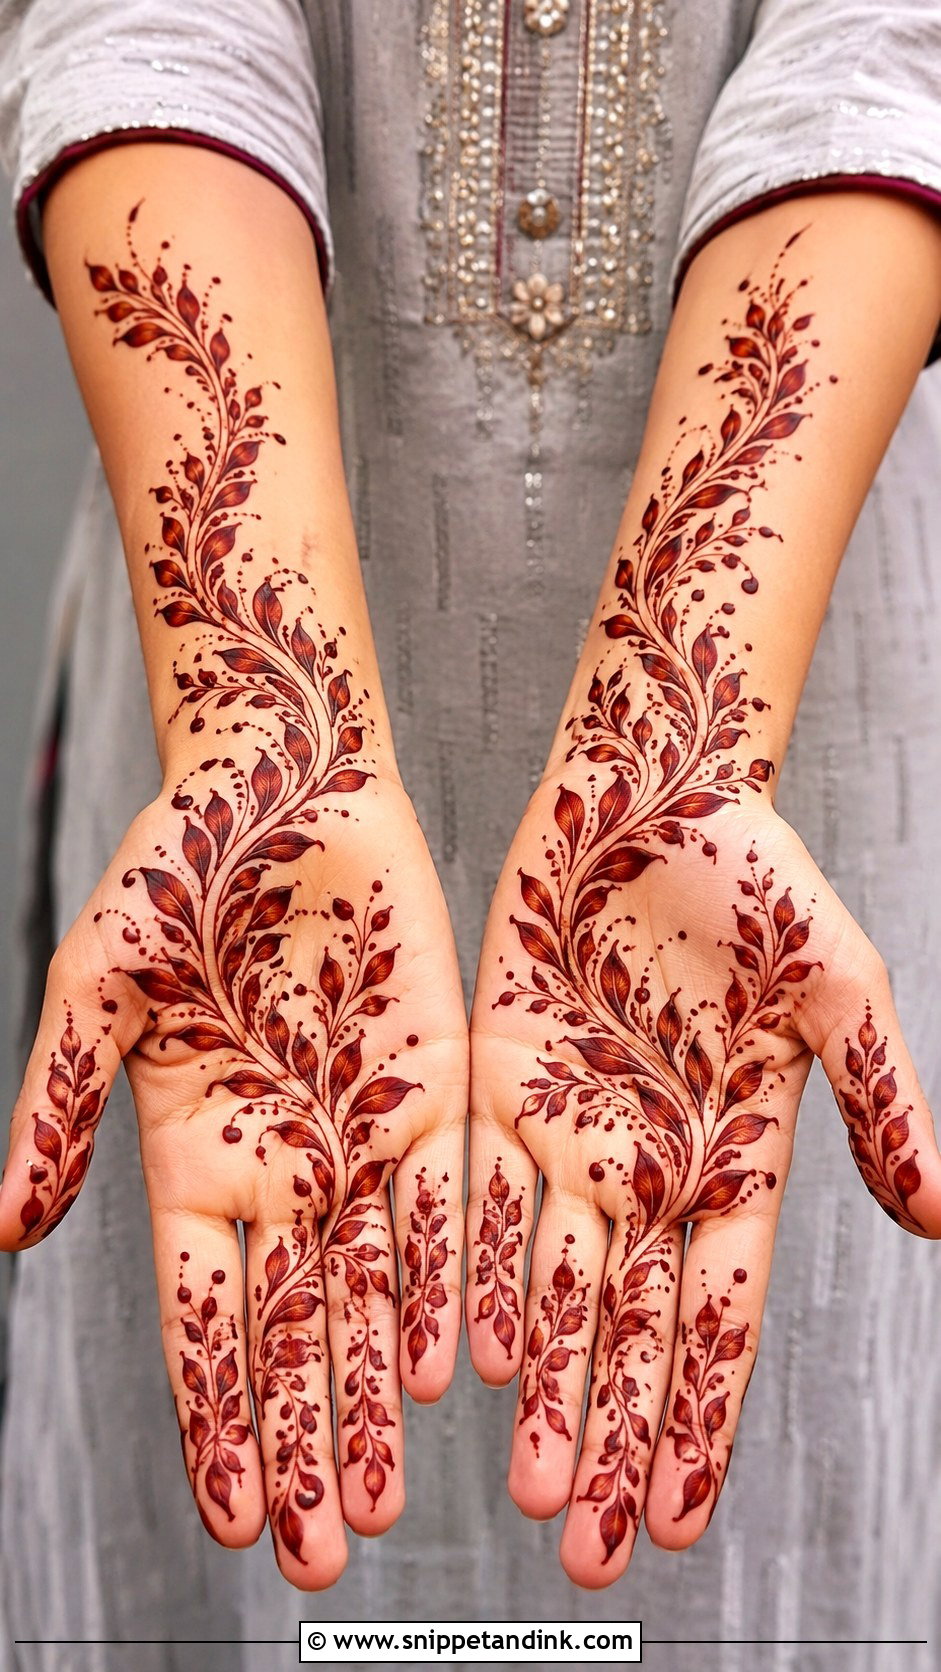
A curved vine starts at the wrist and travels across the palm toward the index or middle finger, with small leaves on both sides. Tiny dots or a mini flower add interest. It’s fast and very forgiving, which is why I use it for quick daytime appointments. The common mistake is crowding the leaves; leave a gap about the width of one leaf between each and the vine stays readable once stained.
11. Simple Bracelet Front Palm Mehndi Design
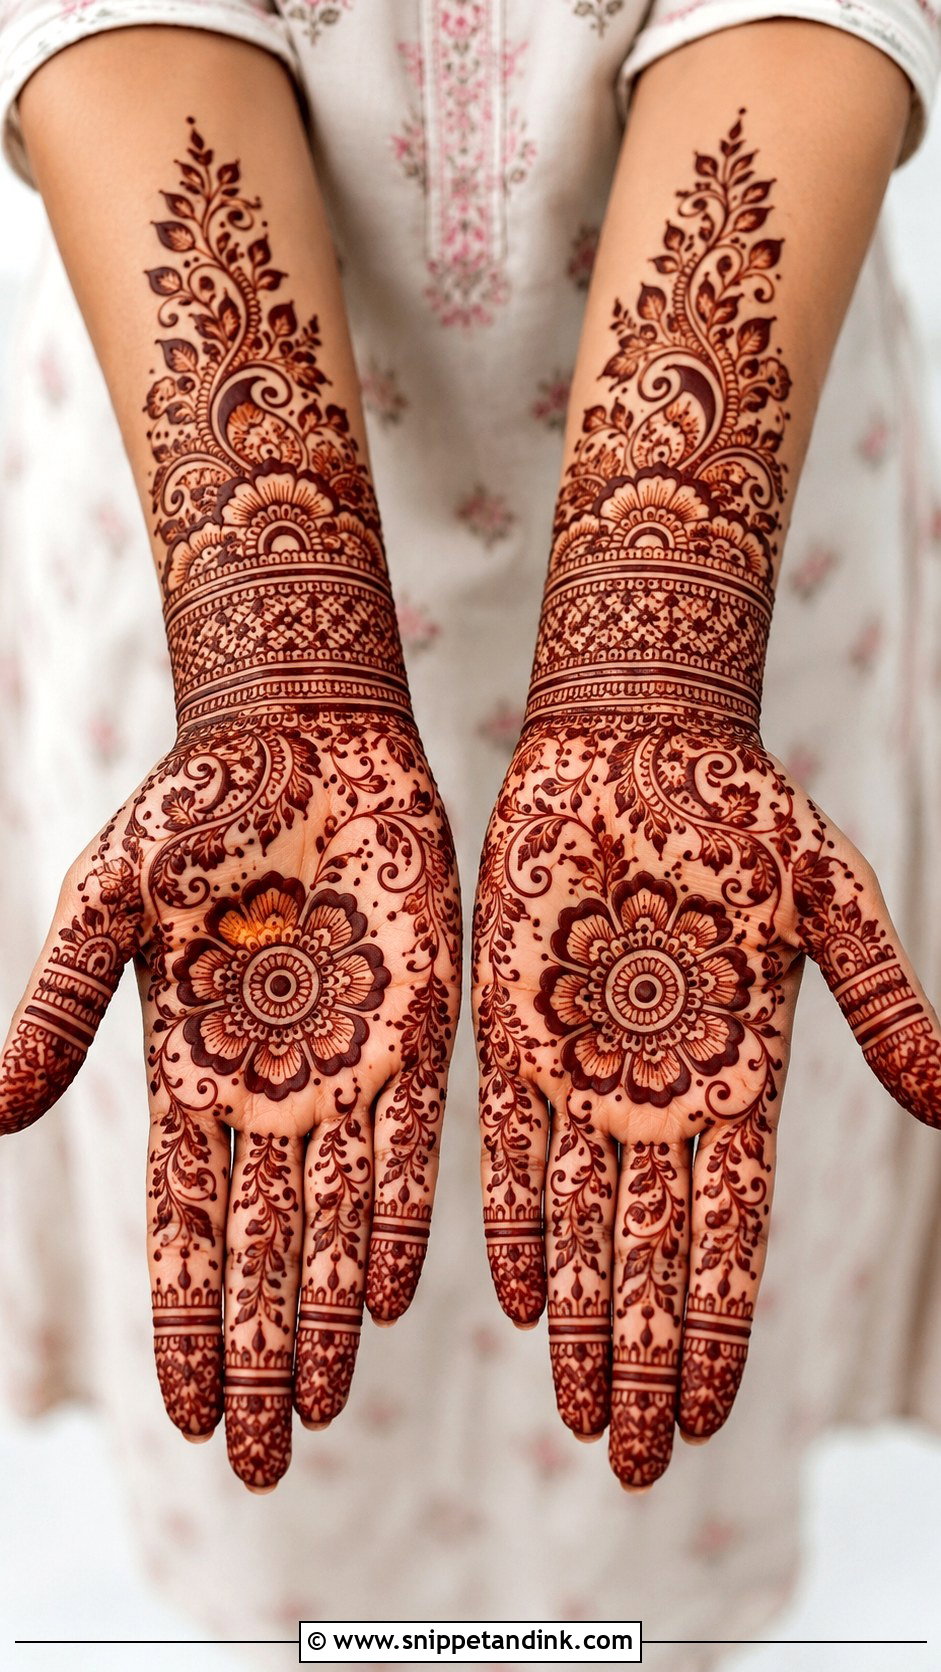
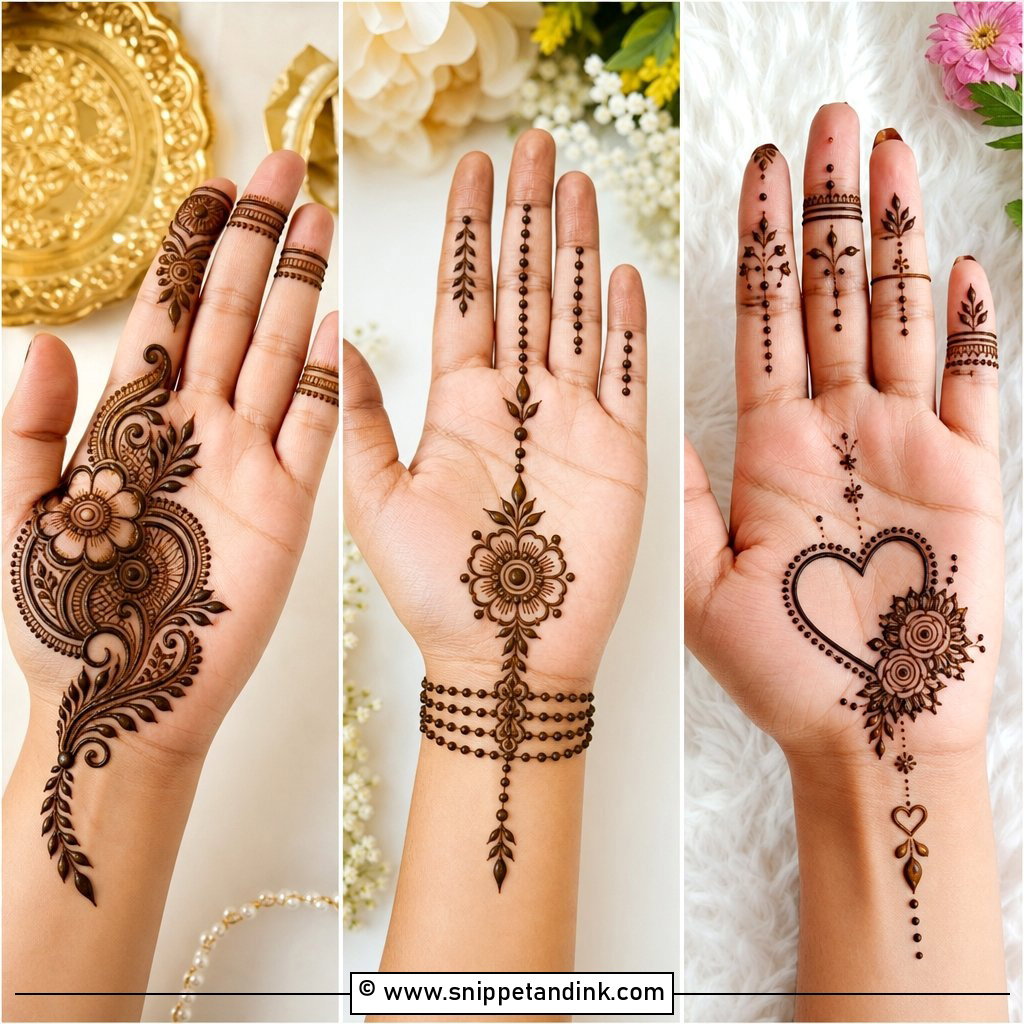
A small flower or mandala sits in the palm and a bracelet-style band of dots, chains, petals or thin lines wraps the wrist, joined by a delicate vine or dotted trail. It reads like hand jewellery. I draw the bracelet a finger’s width below the wrist crease; on the crease itself it cracks while drying. Small rings or fingertip lines on the fingers complete it.
12. Simple Finger Trail Front Palm Mehndi Design
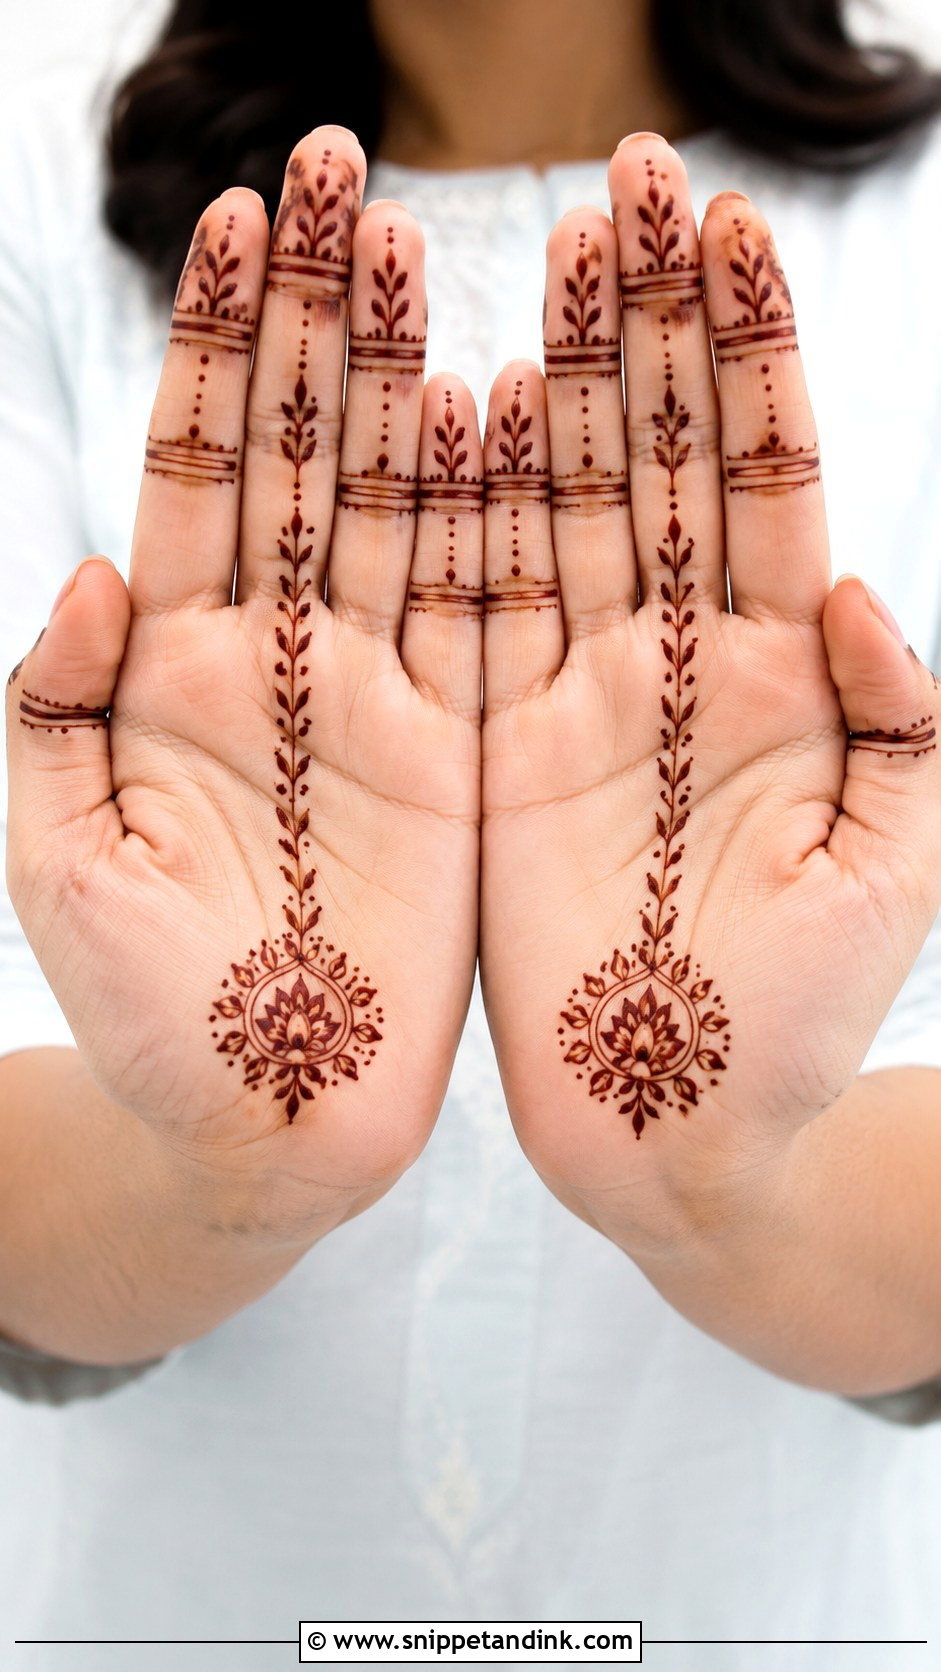
Here the eye travels from palm to fingertip. A small flower, tikki or paisley in the palm, then one main trail up to the middle finger, with leaves, dots and small curves along it. The other fingers get simple bands so the main one stands out. The vertical movement lengthens a narrow palm, so it’s my first suggestion for slender hands.
13. Simple Diagonal Front Palm Mehndi Design
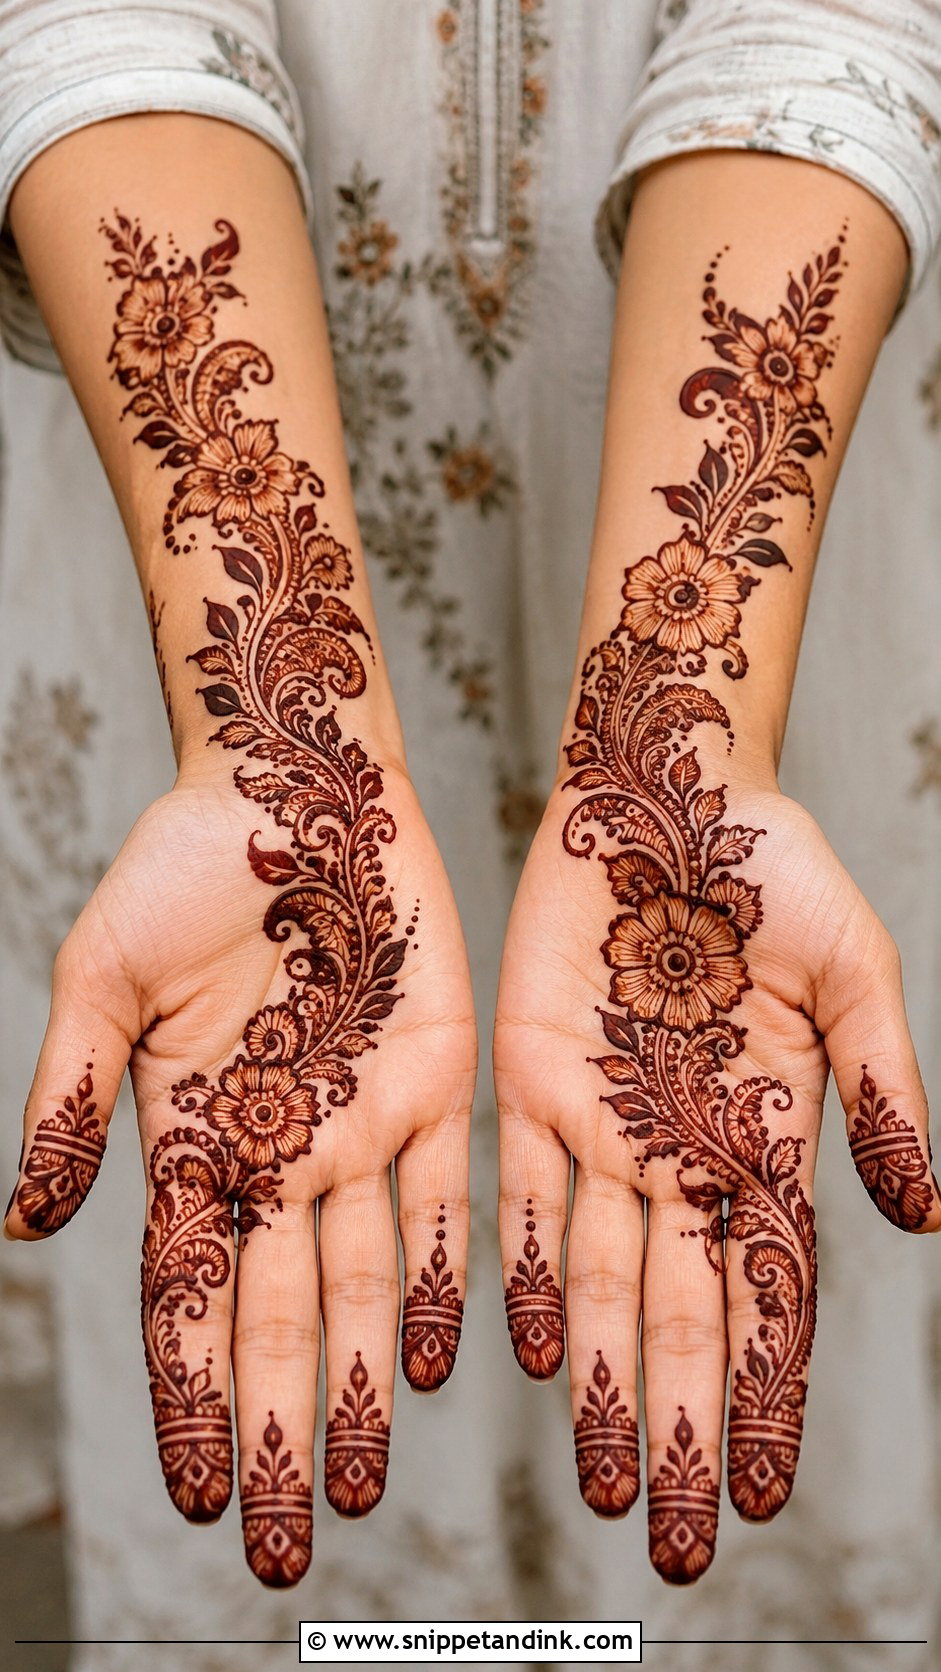
The diagonal runs from one side of the wrist across the palm to the opposite fingers, built from flowers, paisleys, leaves and dotted lines. Open skin on both sides keeps it clean. I decorate the fingers on the same side as the diagonal so the design feels finished rather than cut off. Bold strokes matter here, because thin lines on a diagonal can look scratchy after drying.
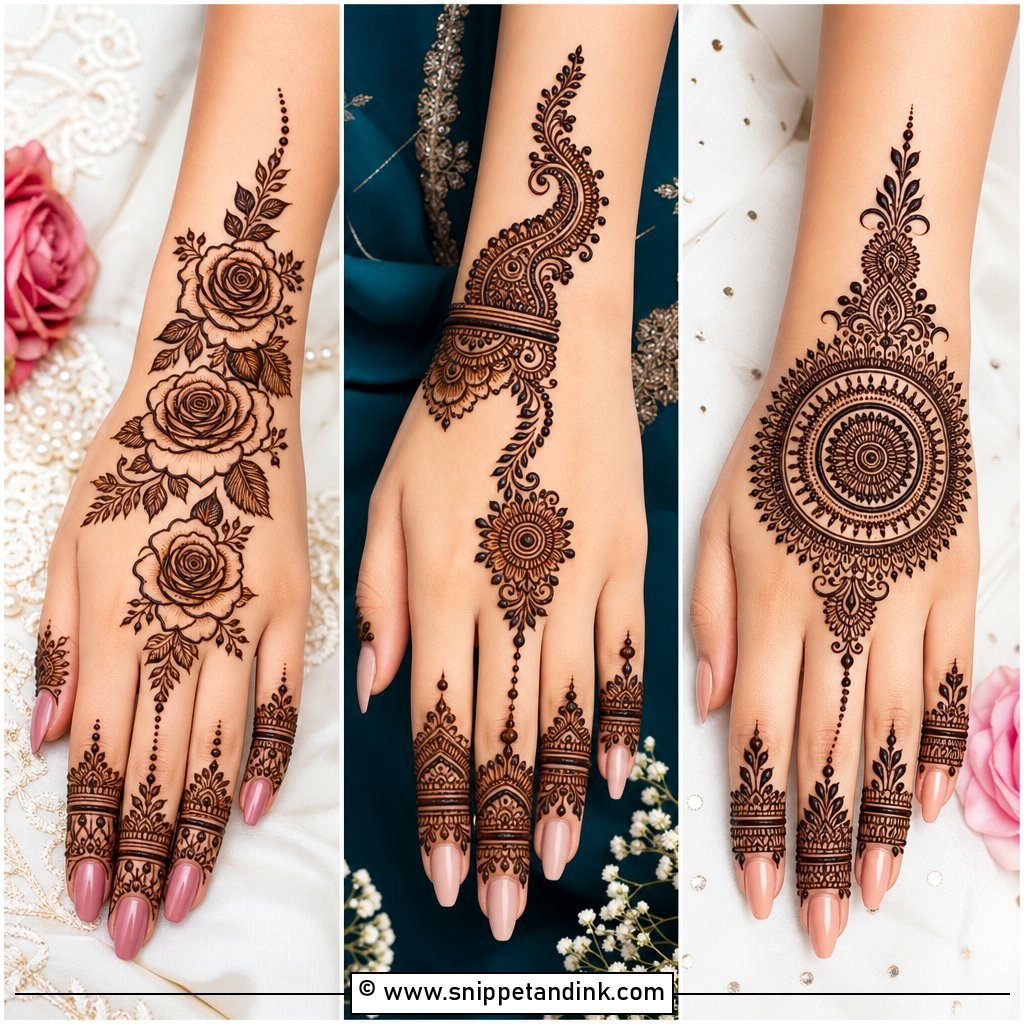
14. Simple Full Palm Mehndi Design
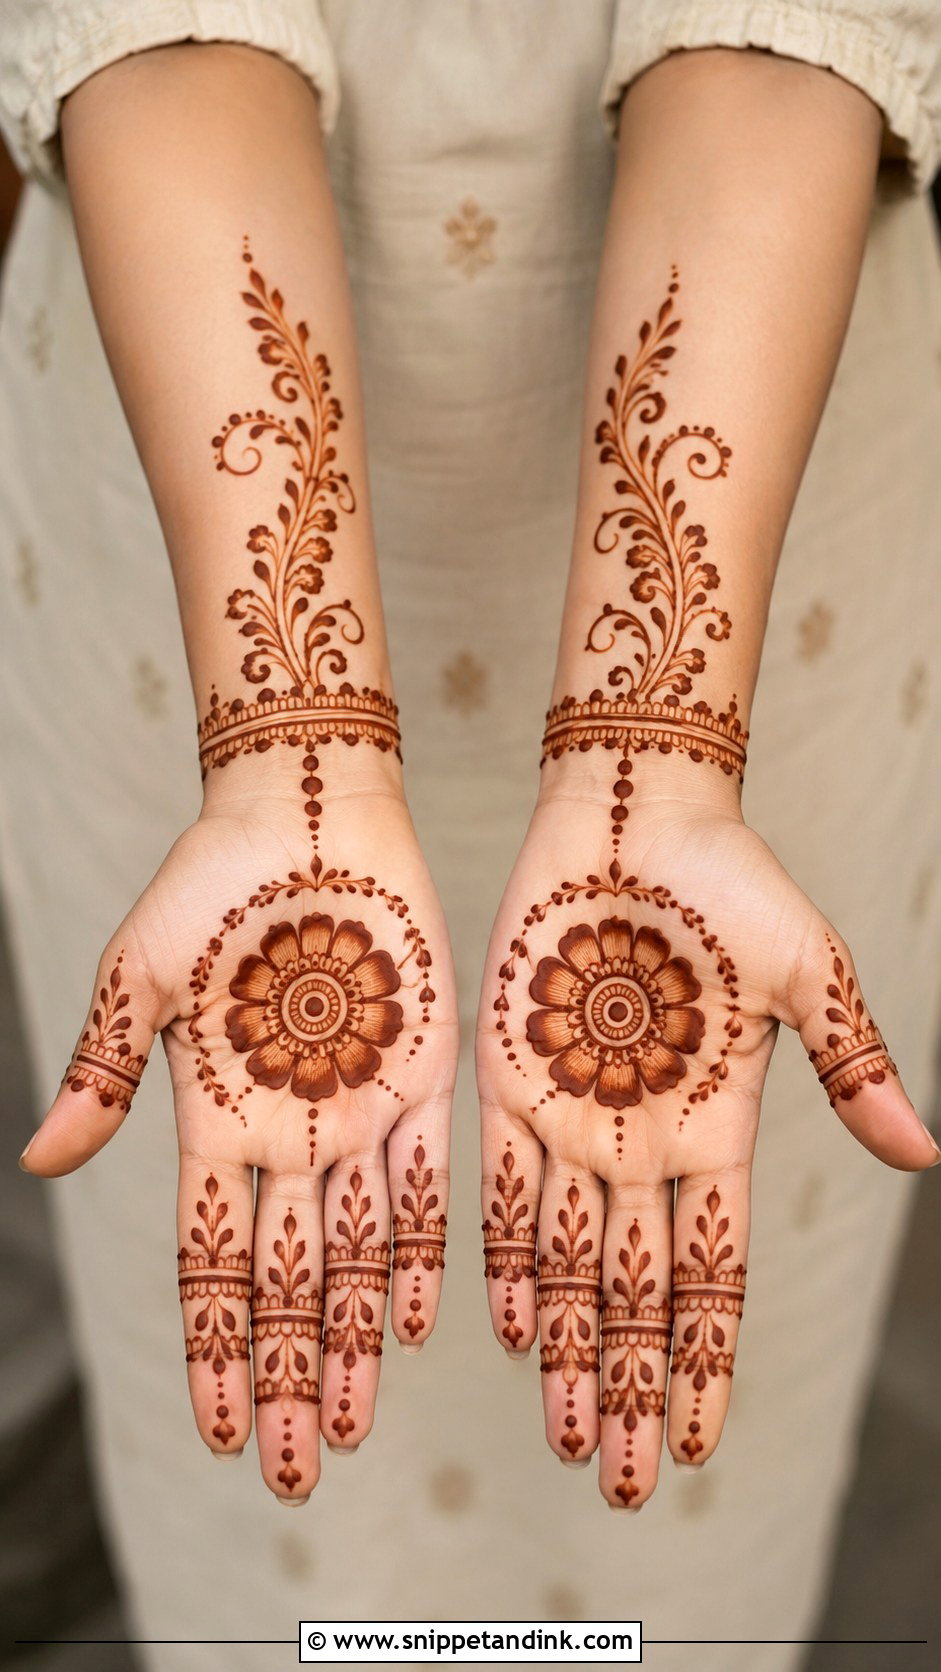
Full palm coverage stays simple if the shapes are medium-sized. One central motif, surrounded by repeating flowers, leaves, dots and curves, light finger detail and a slim wrist border. Tiny shapes are what make full-palm work look messy, especially for home artists. Allow time for it to dry fully before you touch anything; a full palm is the easiest design to smudge on a door handle.
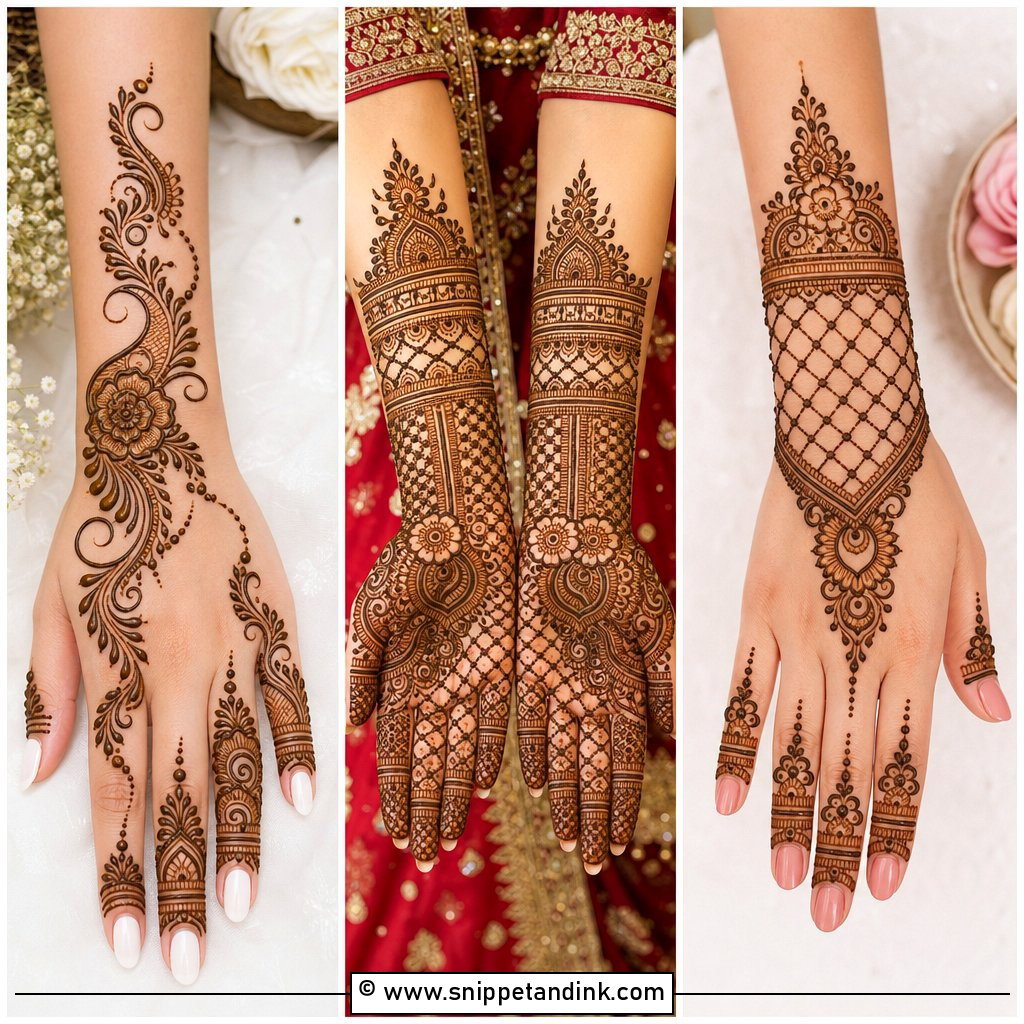
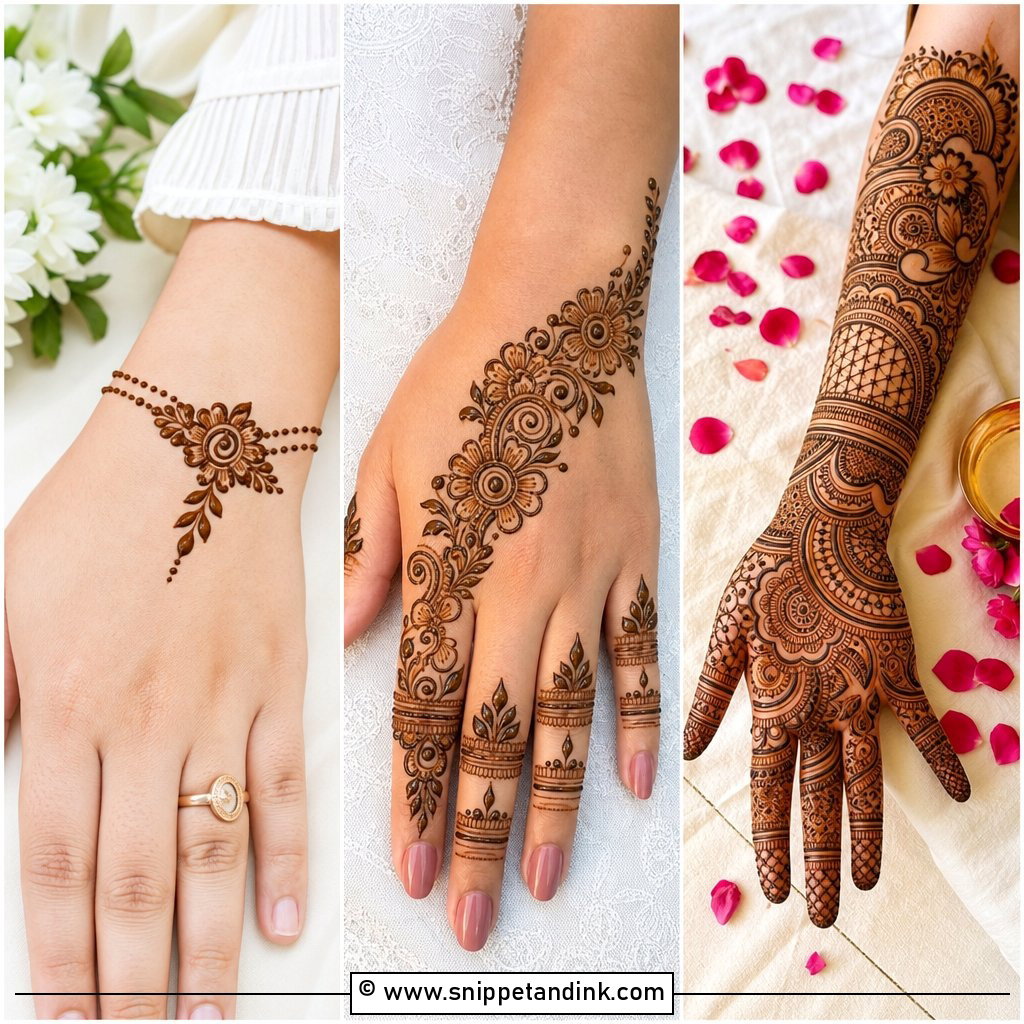
15. Simple Half Palm Mehndi Design
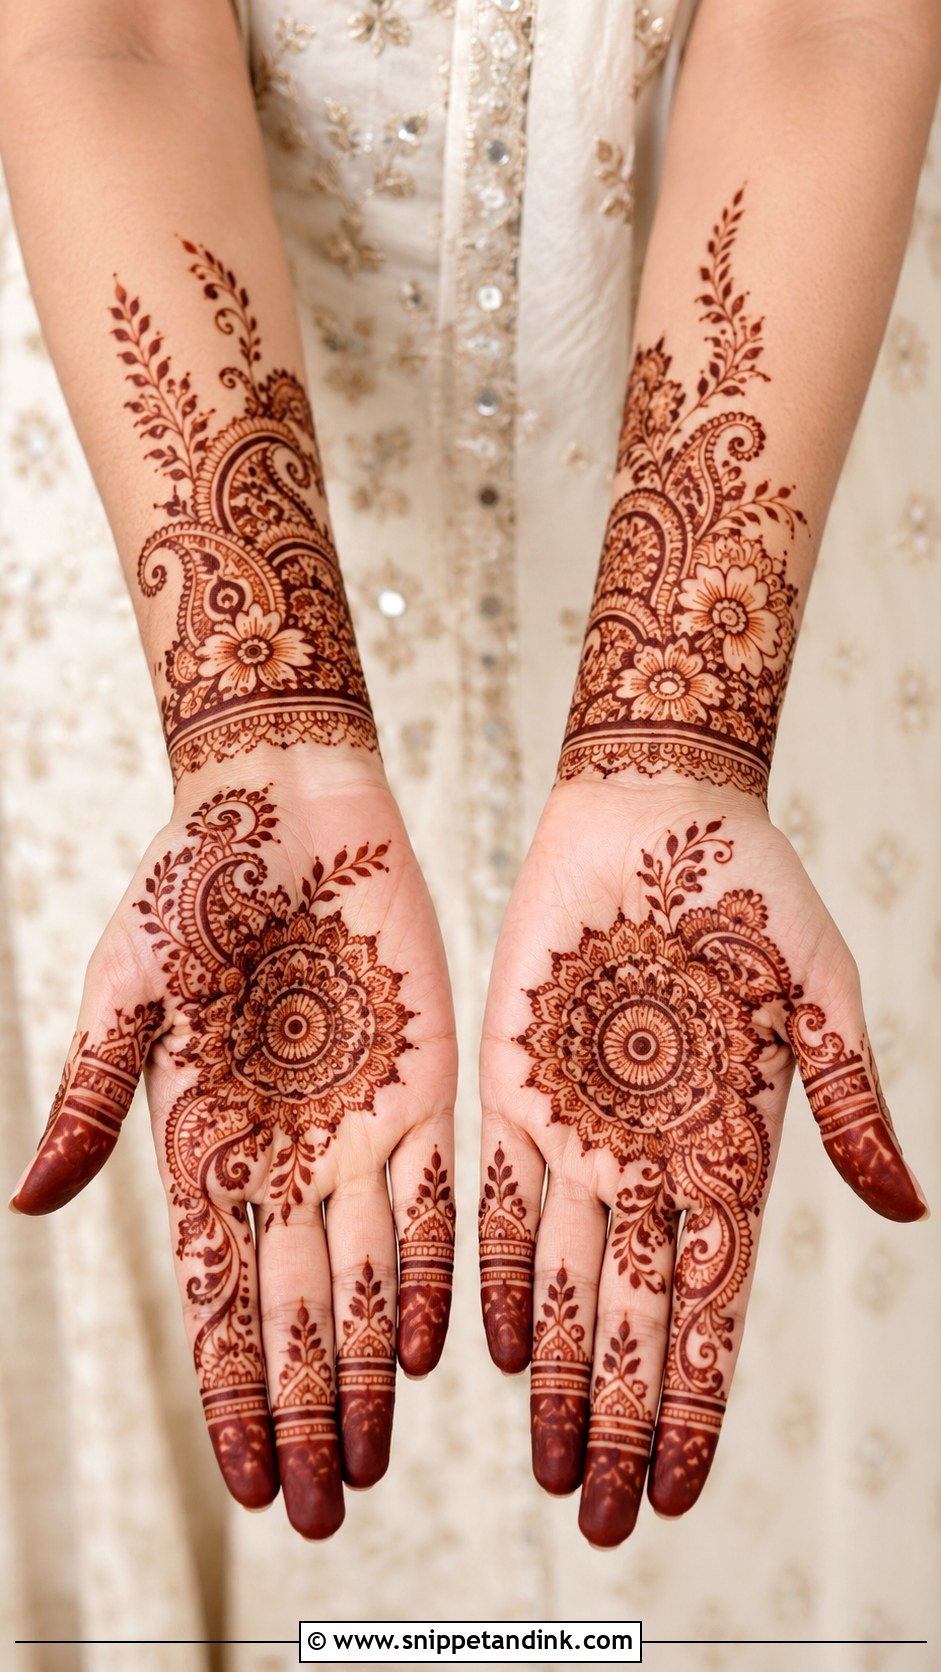
Half palm designs cover one side or the lower half near the wrist, using a floral trail, paisley cluster or leafy curve, and leave the rest open. Finger bands on the same side keep it connected. It’s quick to apply and practical if you need one side of your palm free for work. I usually put it on the thumb side, which is the side people see when you hold a cup or a phone.
16. Simple Minimal Front Palm Mehndi Design
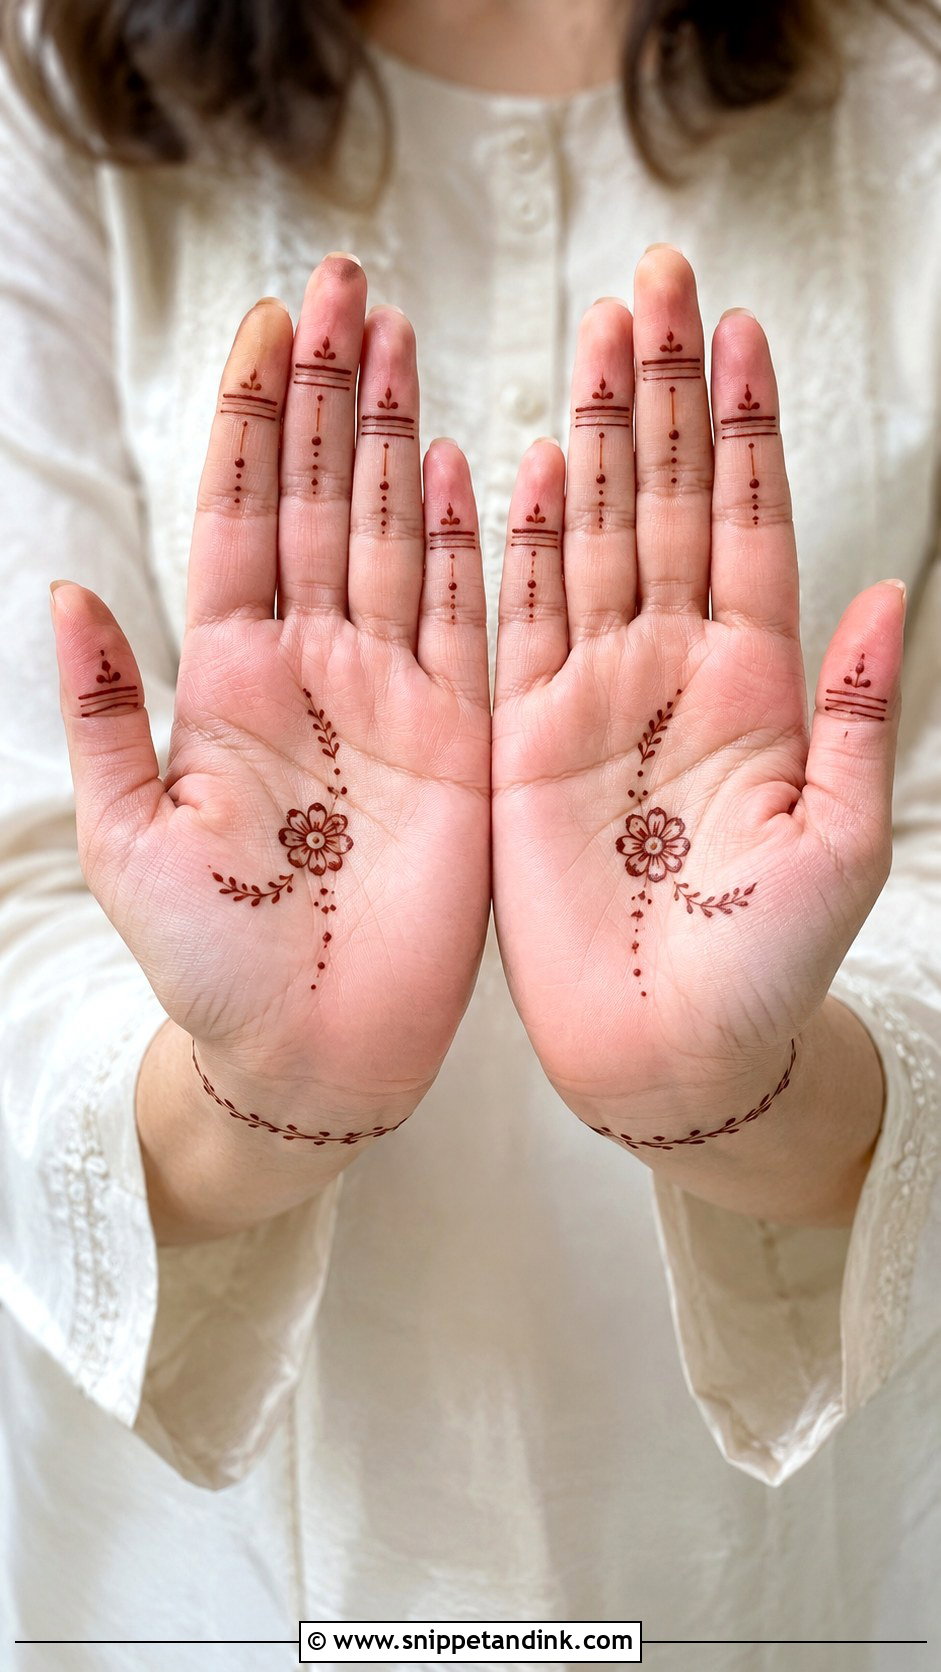
Minimal palm henna means fewer elements placed with care. A small centre flower, tiny mandala or single paisley; light dots, short vines, very slim finger lines; the wrist bare or with one fine line. I agree on the exact number of elements before starting, because the urge to add a little more is how minimal designs stop being minimal. It suits first-timers, school events and office celebrations.
17. Simple Front Palm Mehndi Design For Beginners
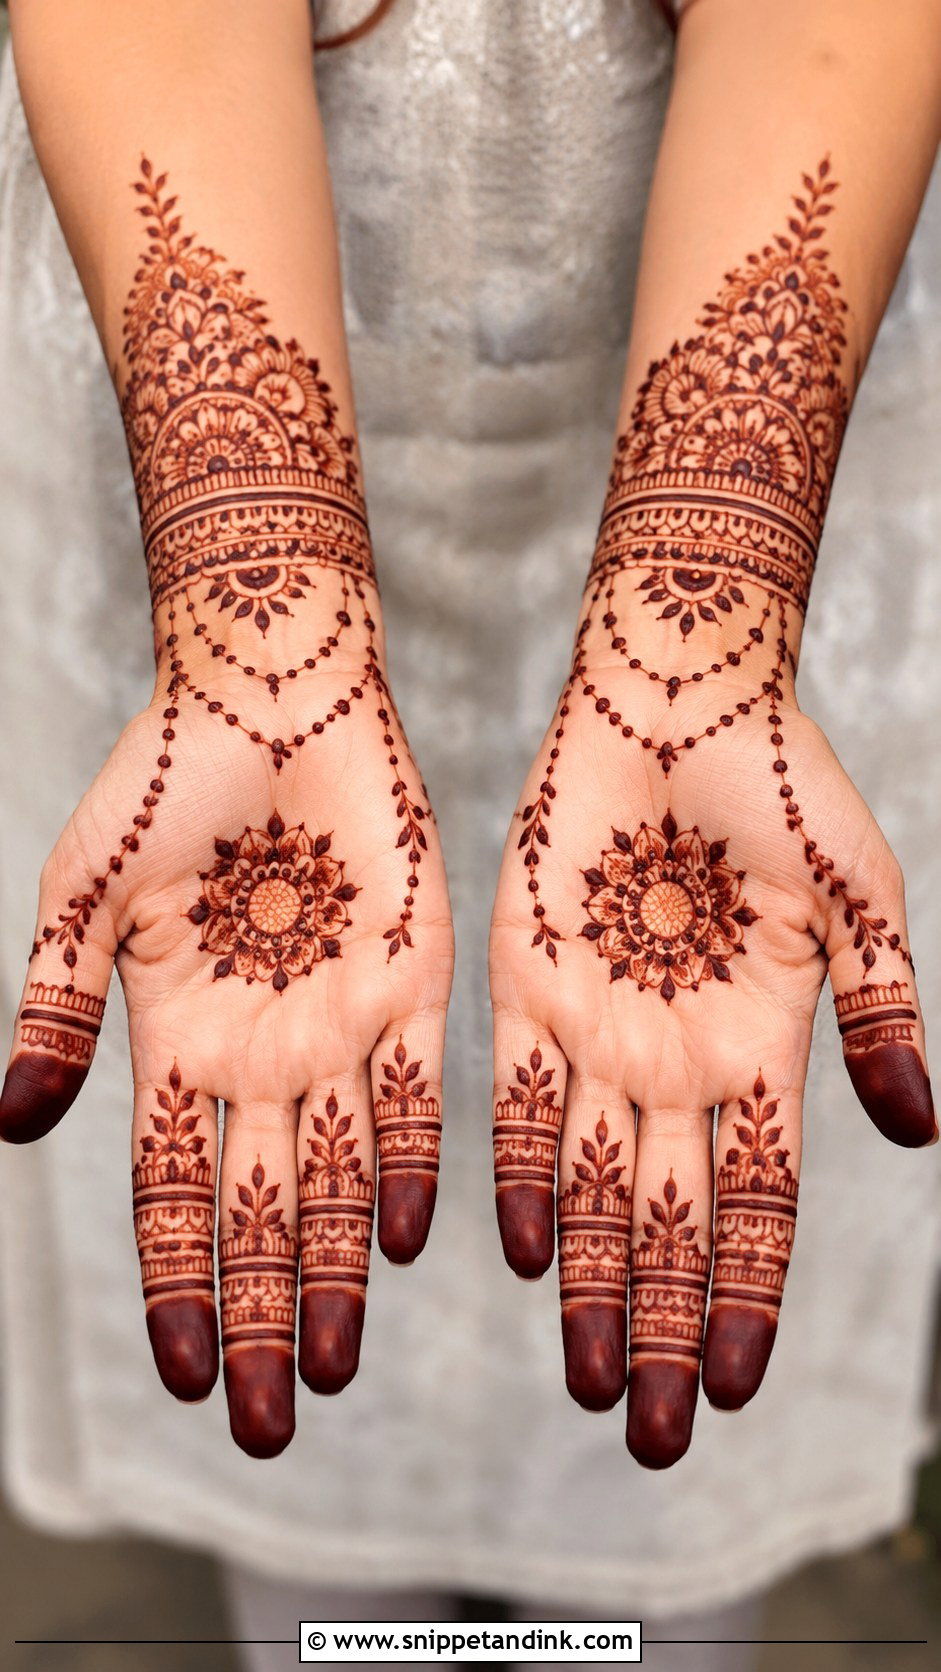
A beginner-friendly front palm mehndi design uses shapes you can repeat: a small round tikki or flower in the centre, dots around it, simple leaves and curved lines toward the fingers. Two or three bands per finger instead of fill. A thin chain or small petal border at the wrist. I tell learners to keep outlines bold, since a confident thick line hides small mistakes far better than a hesitant thin one.
18. Simple Front Palm Mehndi Design For Eid
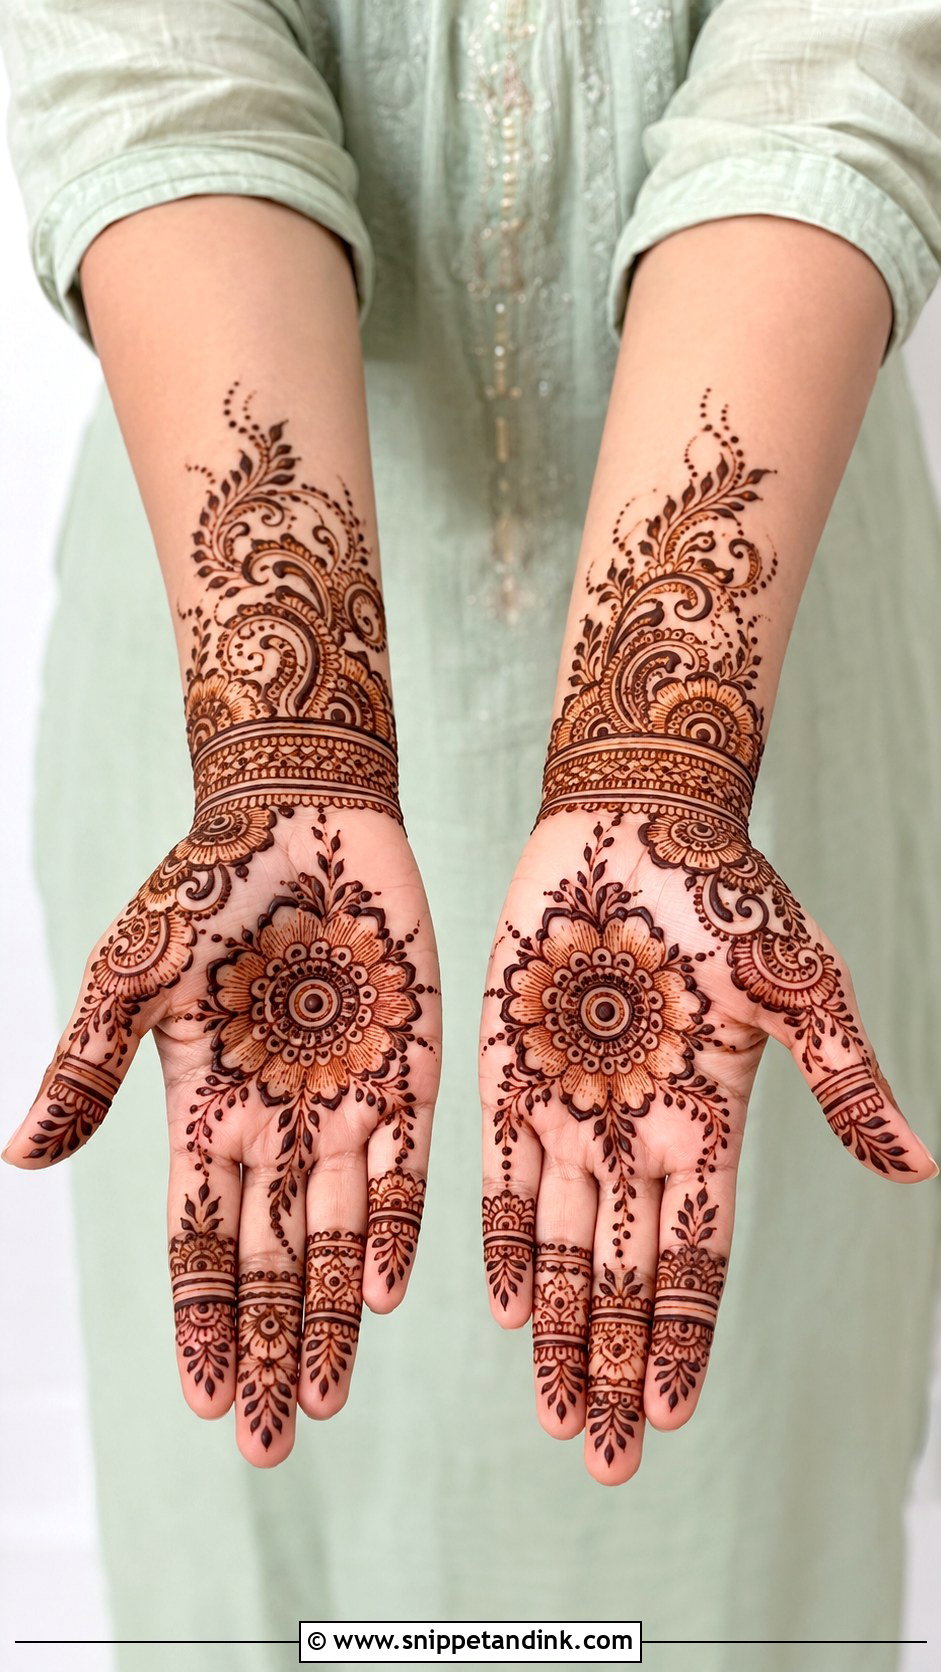
For Eid I like a floral mandala at the centre of the palm with Arabic vines, leafy trails and dots around it, ring bands and fingertip details on the fingers, and a bracelet at the wrist if you want it dressier. Embroidered sleeves and bangles will cover some of the wrist, so I keep the main detail on the palm. Apply it the evening before so the stain has darkened by morning.
19. Simple Front Palm Mehndi Design For Wedding Guest
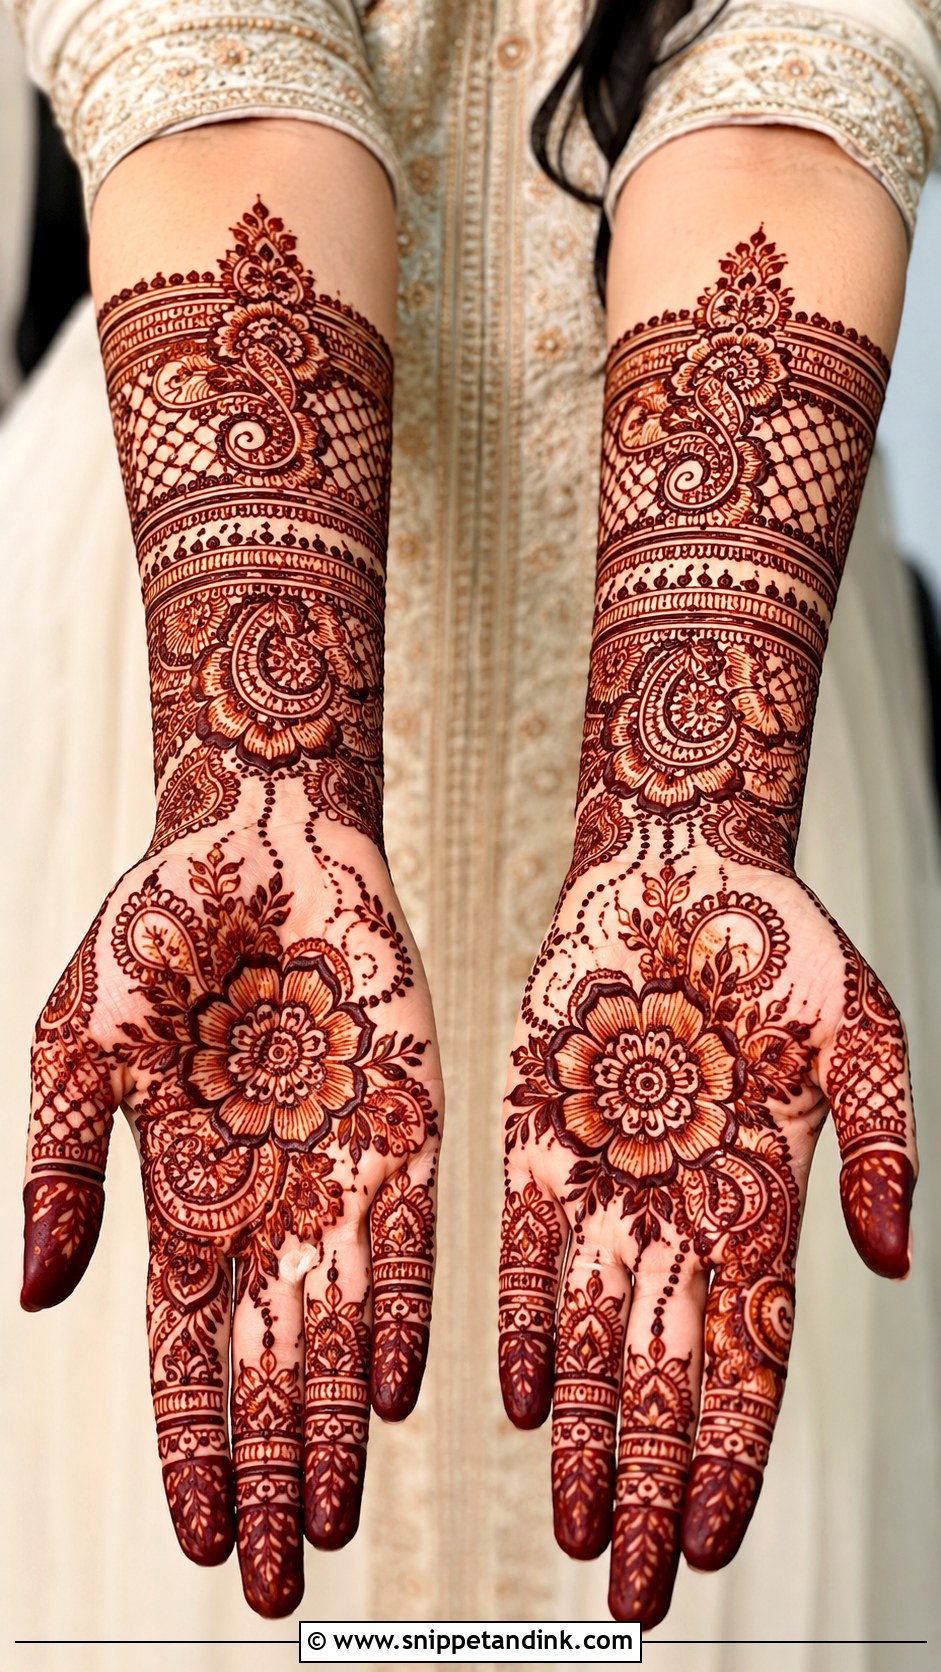
As a wedding guest, aim for festive but not bridal. A medium mandala, floral trail or paisley cluster in the palm, elegant finger bands, a light wrist border. Arabic and Indo-Arabic layouts suit guests best because they pair bold motifs with open space and go on fast. I’d avoid filling the whole palm with tiny detail; at a wedding, that density usually belongs to the bride.
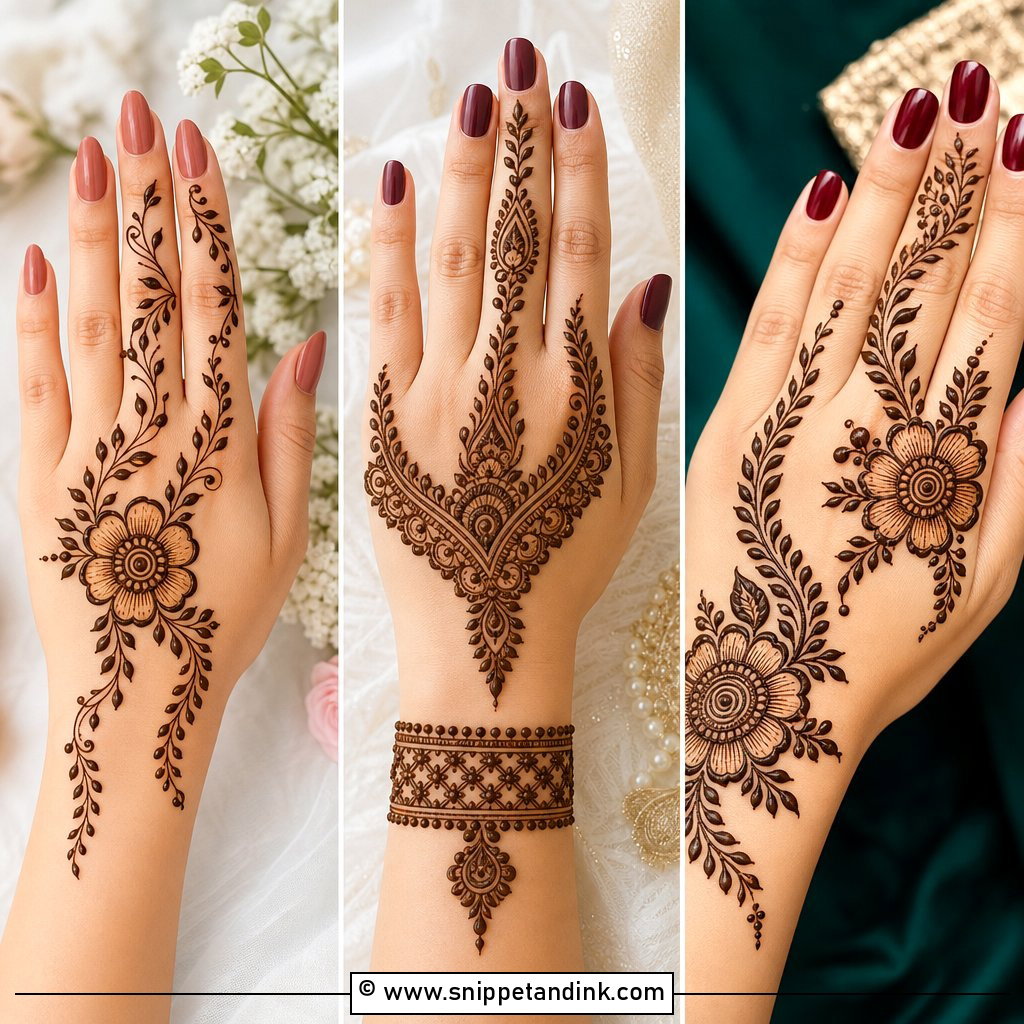
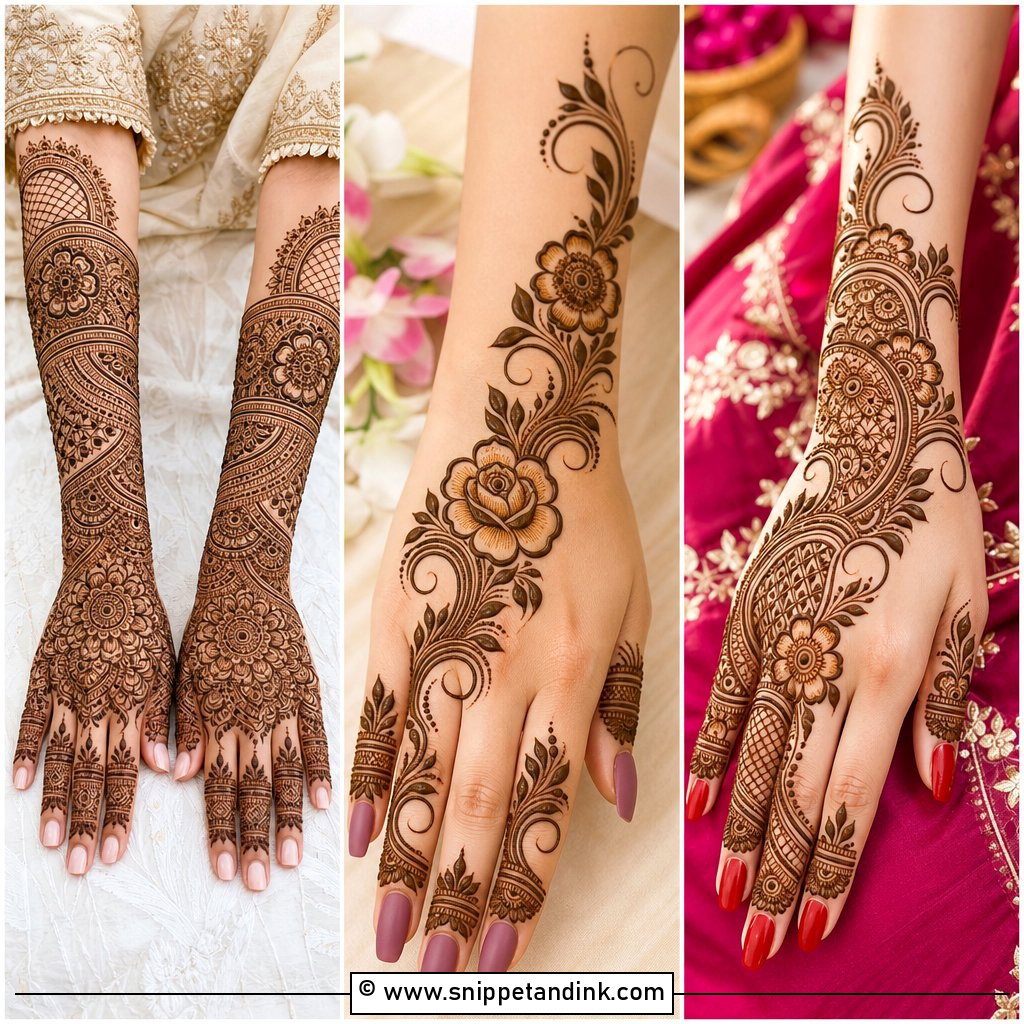
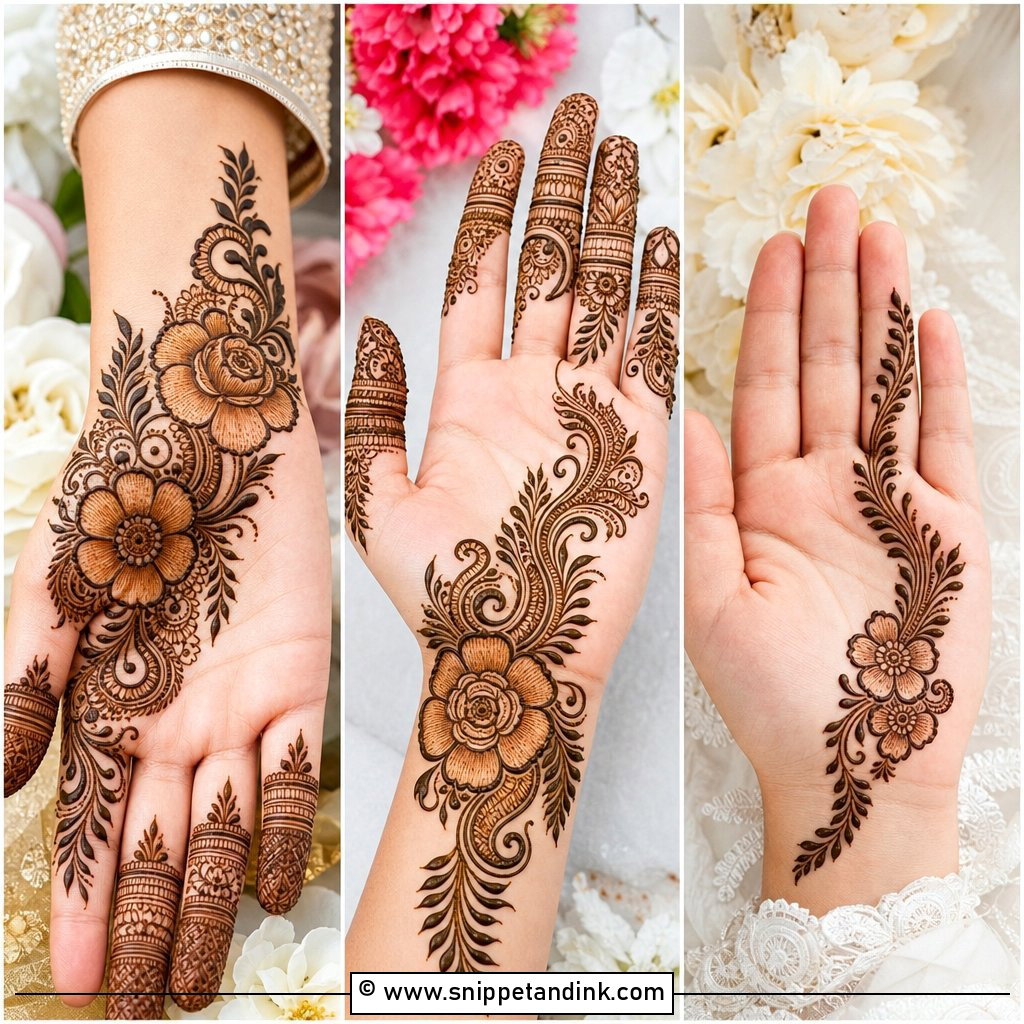
20. Simple Front Palm Mehndi Design For Bridesmaid
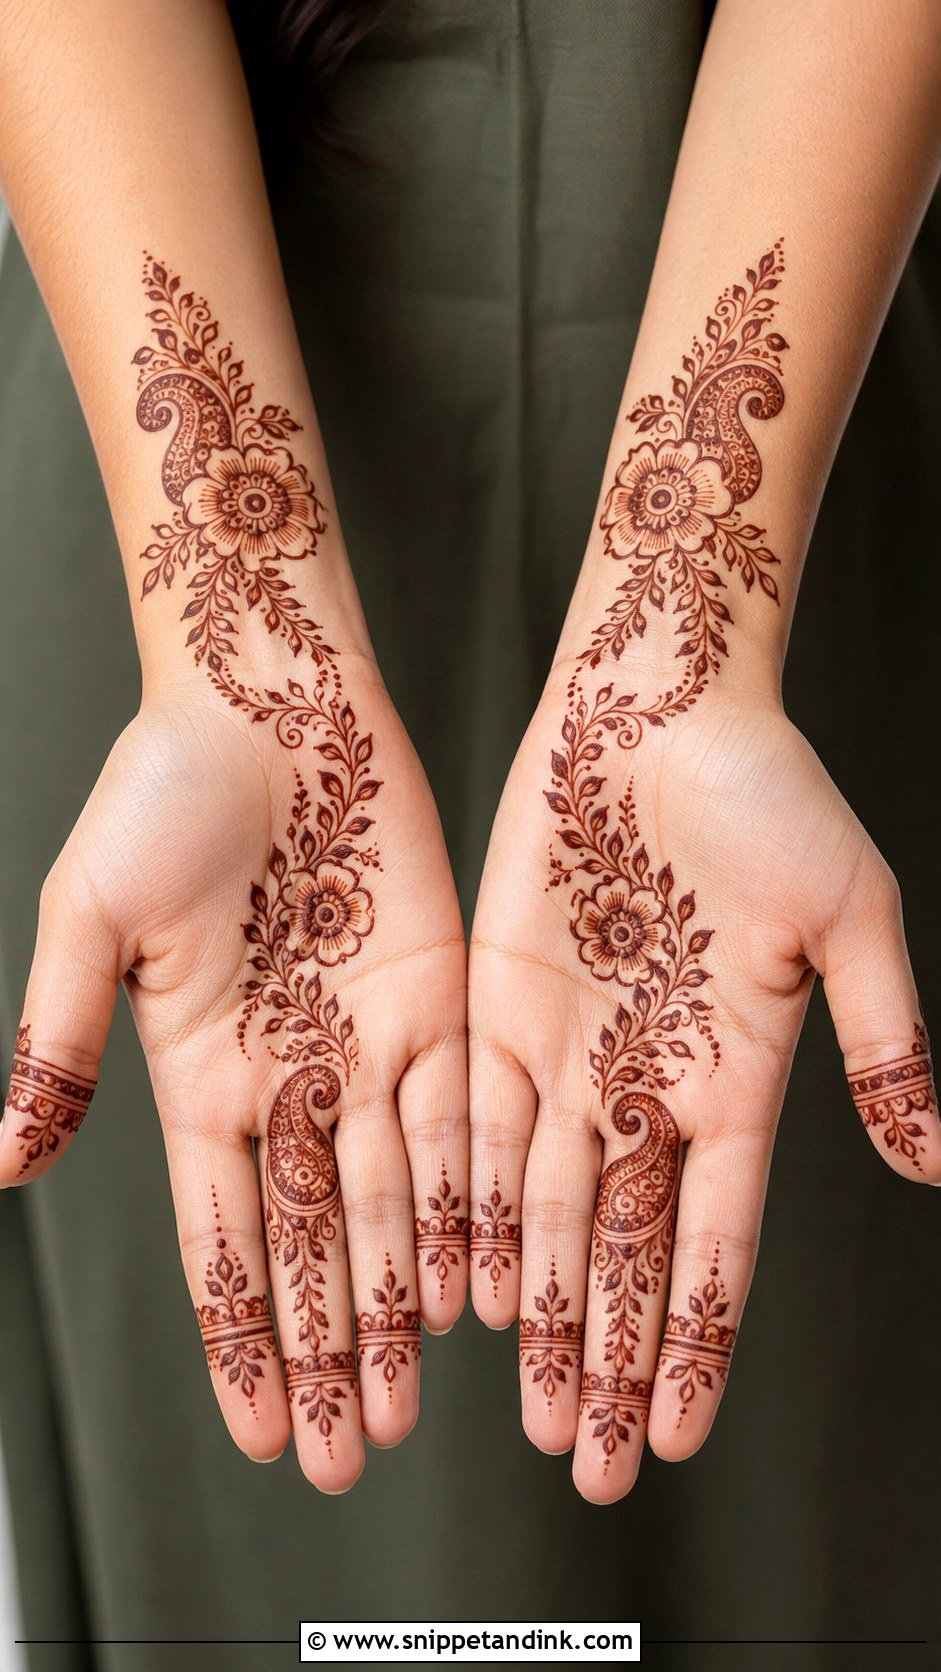
Bridesmaids can go a step further than guests. A bold floral or mandala centre with matching vines to the fingers and wrist, plus small jaali sections, paisley details and dotted chains. Coverage stays medium so it doesn’t compete with the bride’s heavy mehndi. When I’m doing a group of bridesmaids, I repeat the same wrist band on everyone; it ties the group photos together without everyone wearing an identical design.
21. Simple Front Palm Mehndi Design For Kids
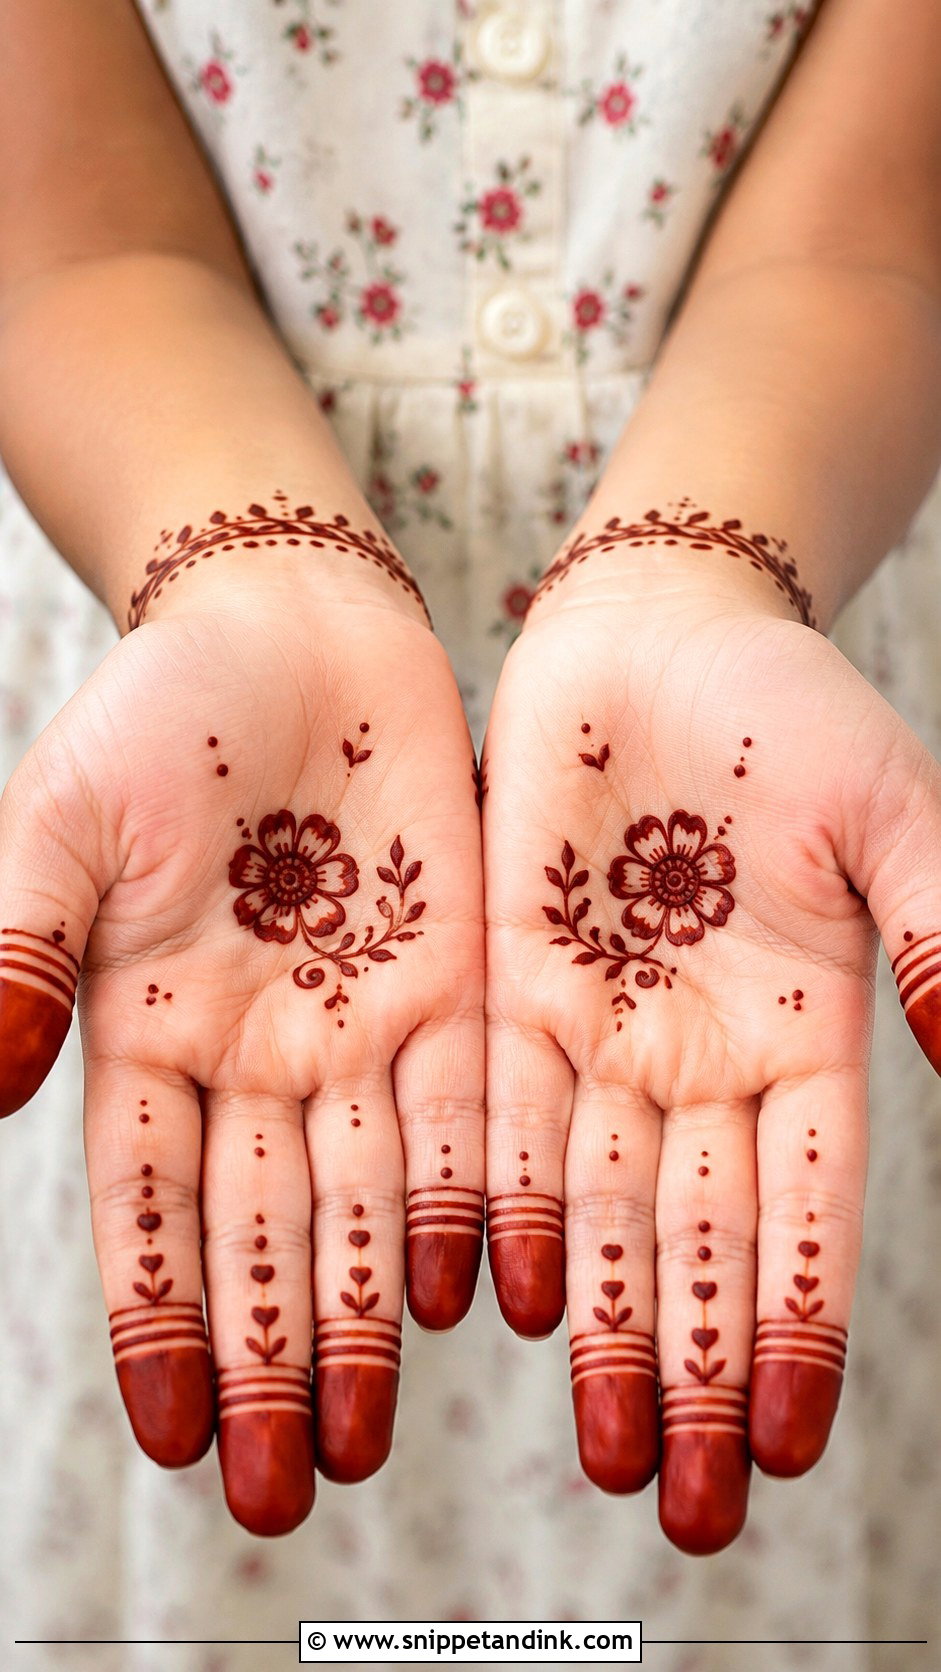
Children need designs that go on in minutes. A small flower, heart-shaped floral motif, round tikki or butterfly layout, with dots, little leaves and simple finger bands. I skip fine detail because kids move before it’s dry, and skip the wrist entirely for little ones. Bold, clear shapes stain well and are recognisable. Use only natural henna on children.
22. Simple Front Palm Mehndi Design For Small Hands
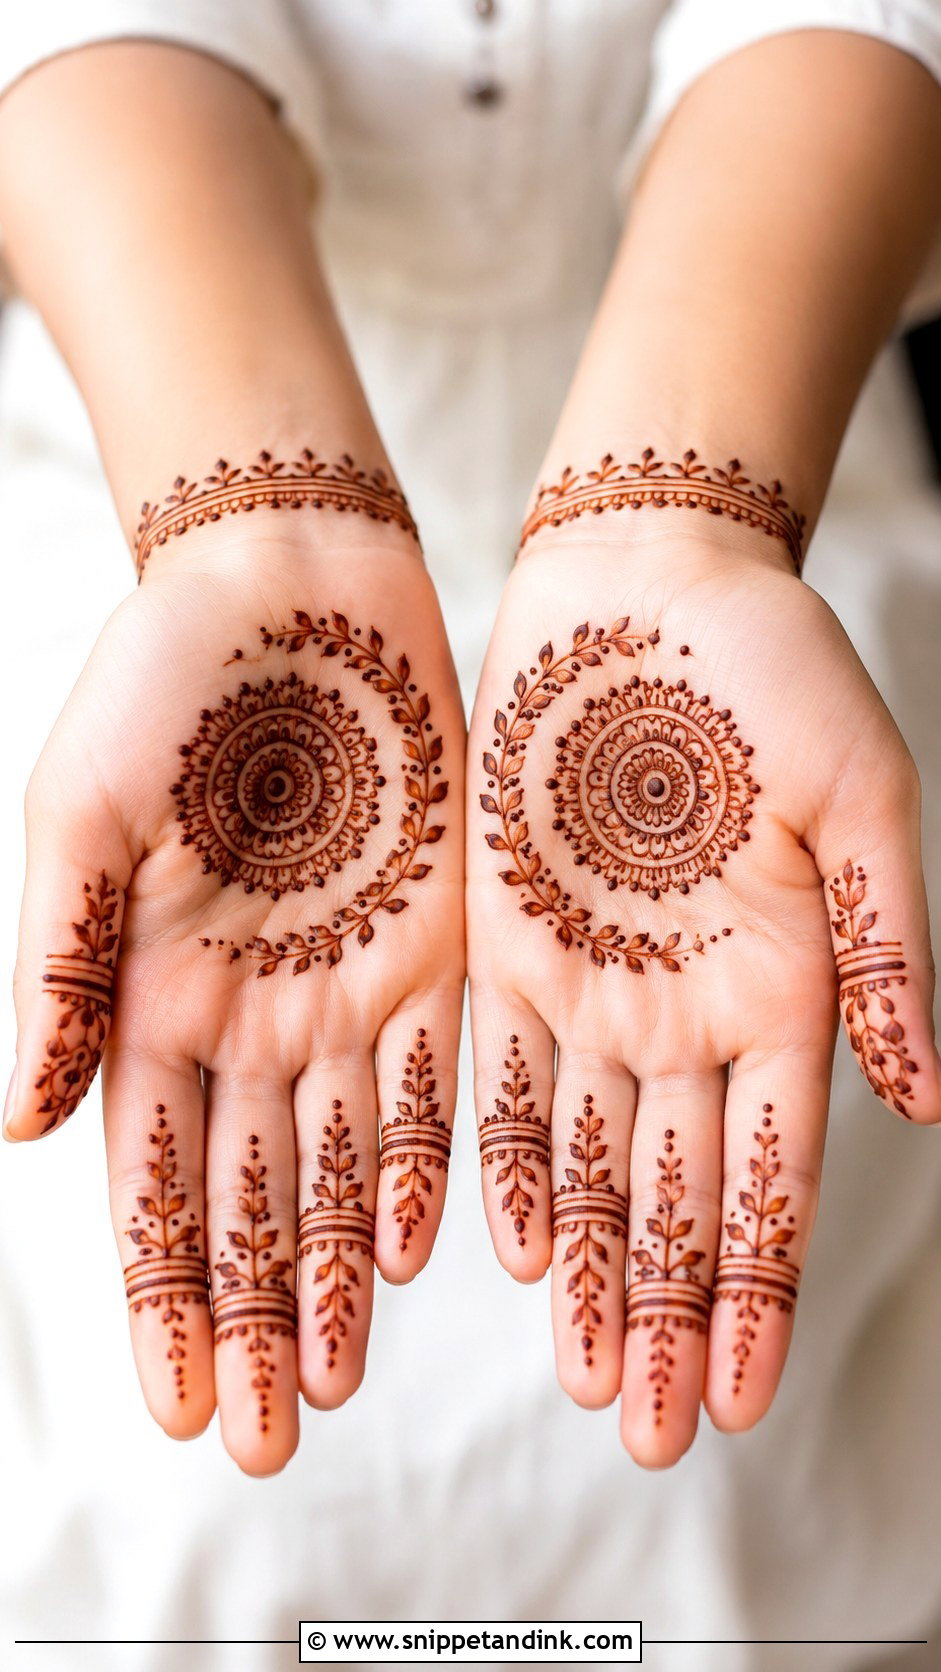
Small palms get overwhelmed easily. A compact mandala, small lotus or slim diagonal vine works better than a big centrepiece. I scale motifs down but keep them simple, because shrinking a detailed motif just turns it into a blur. Thin bands, dots and short leafy trails on the fingers, and a narrow wrist bracelet. Leave open space around the palm motif.
23. Simple Front Palm Mehndi Design For Long Fingers
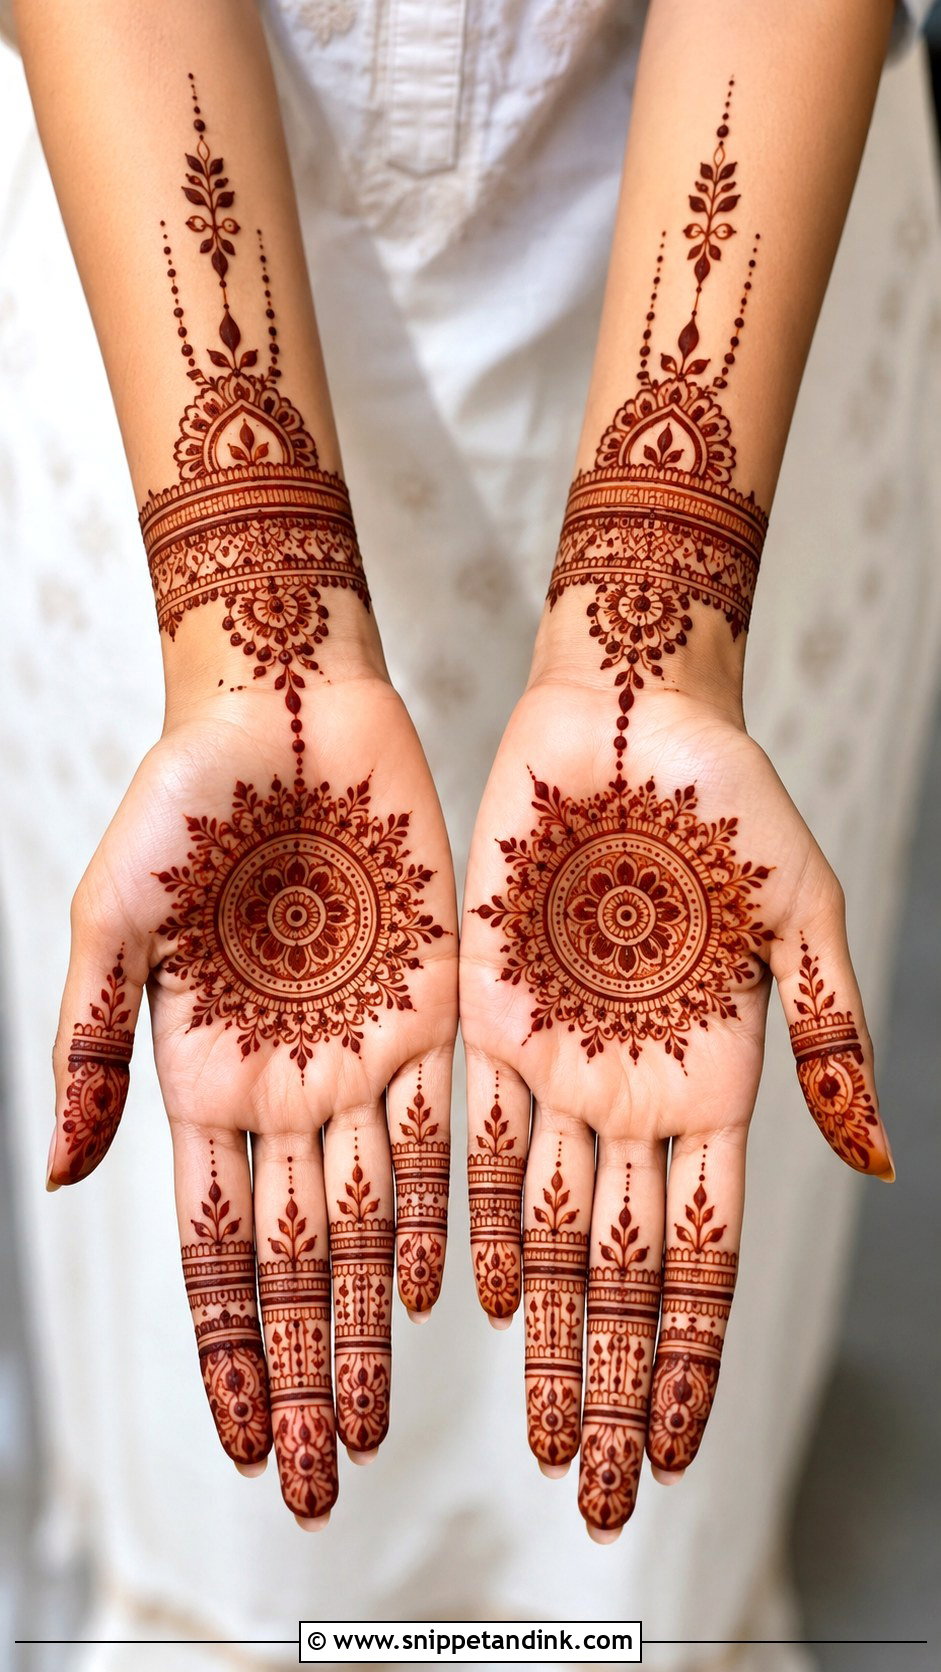
Long fingers give you room. A simple palm motif, a mandala or floral cluster, then extended finger bands with leaves, dots and slim line work. Leaving the palm slightly open lets the fingers lead. Shaded fingertips look traditional; open tips look modern. The wrist can take one fine border.
24. Simple Front Palm Mehndi Design With Wrist Band
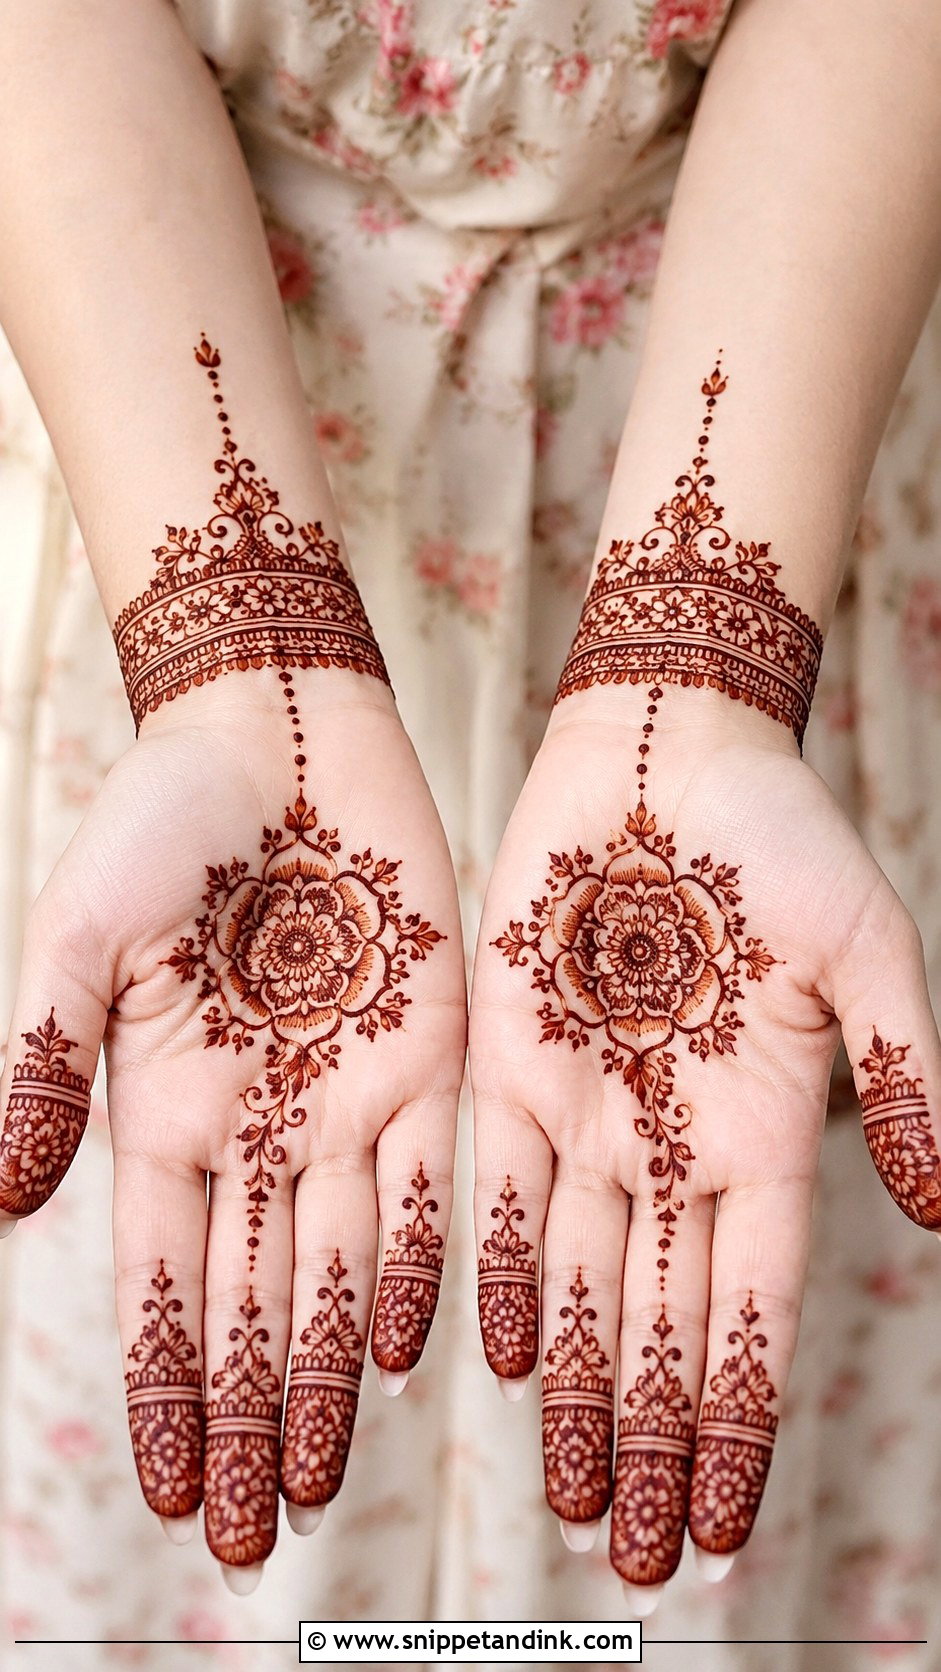
A wrist band with flowers, dots, chains, lace edges or small paisleys gives the palm design a jewellery finish, joined to the palm motif with a thin vine or dotted string. The width has to suit the palm: a heavy band under a light palm looks like a separate design. I keep it slim and neat unless the palm is full.
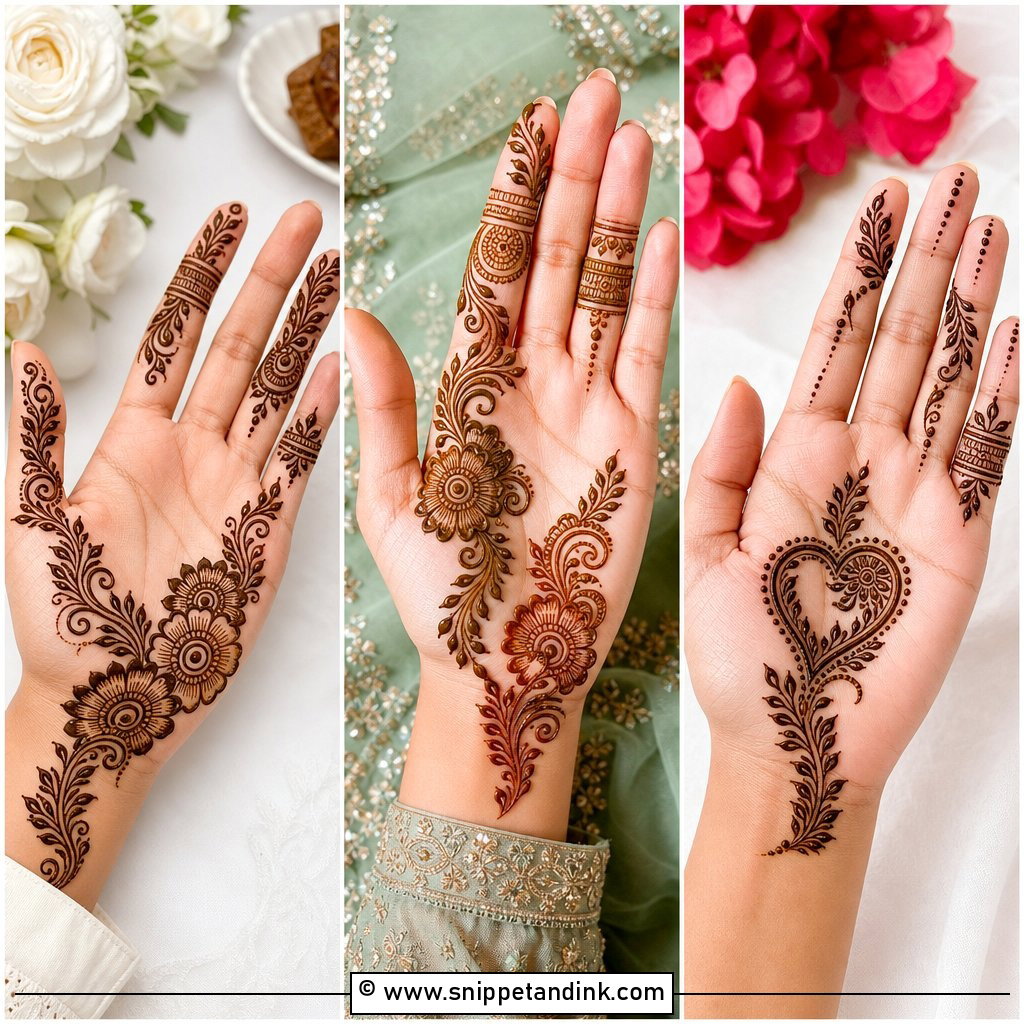
25. Simple Front Palm Mehndi Design With Dots
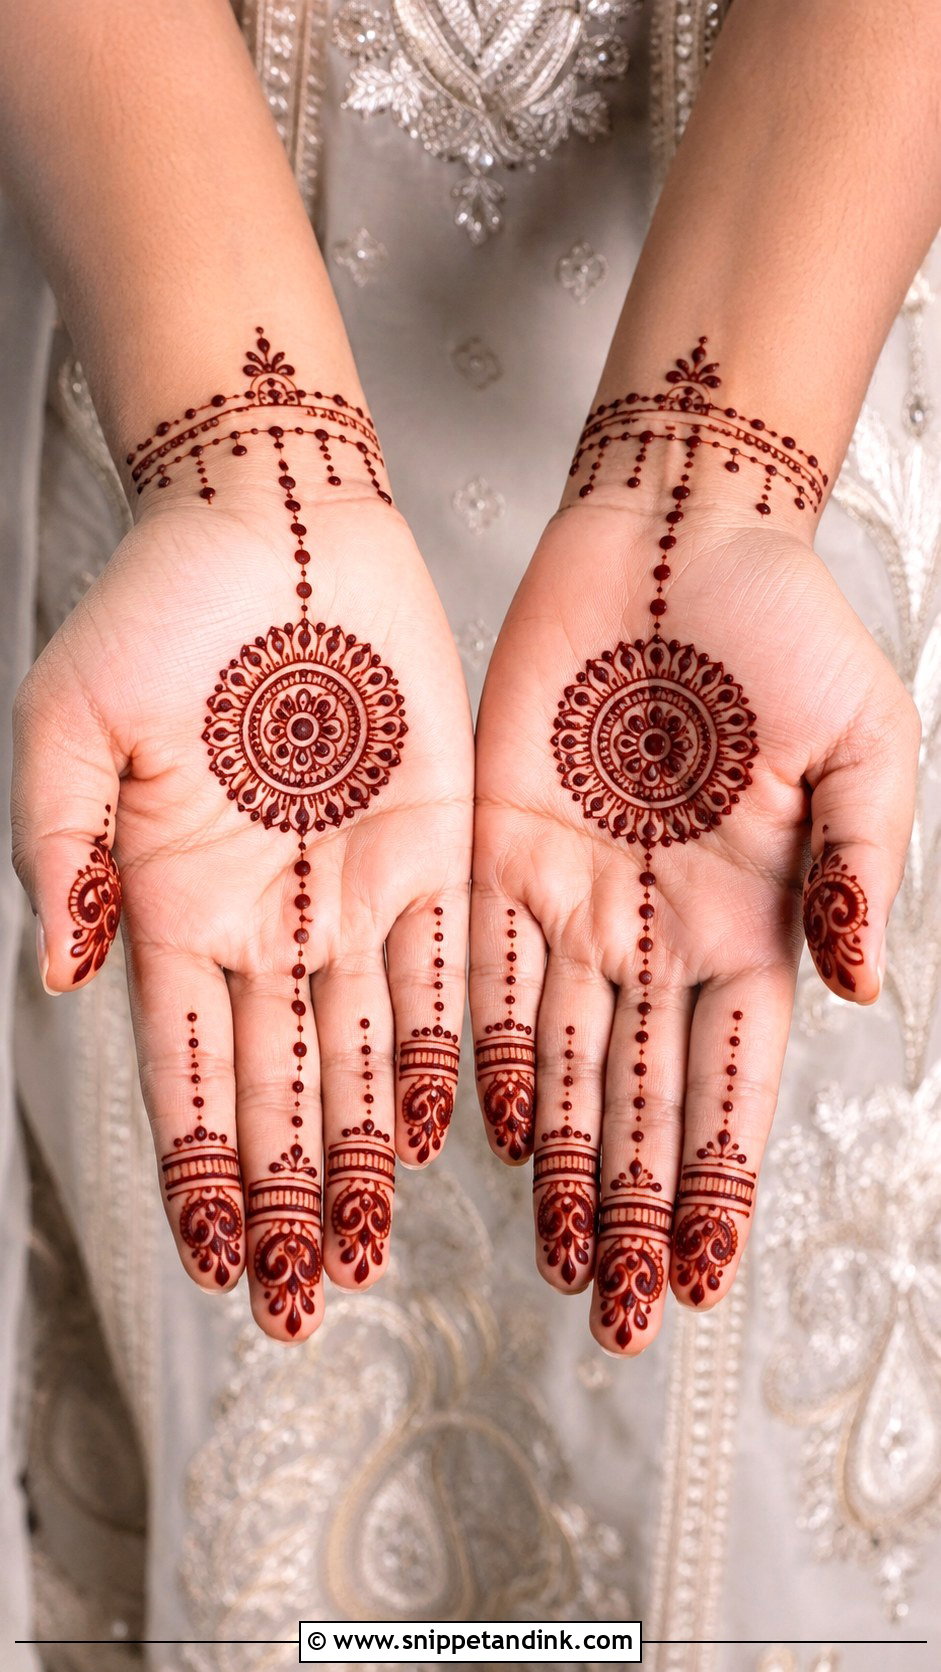
Dots make a plain palm look finished. A central flower, tikki or paisley, then dot chains linking palm to fingers and wrist, with dotted rings on the fingers and a dotted bracelet. Dots also fill awkward gaps without adding weight. I use two or three dot sizes and keep each one separate; touching dots merge into a line when the paste settles.
26. Simple Front Palm Mehndi Design With Shading
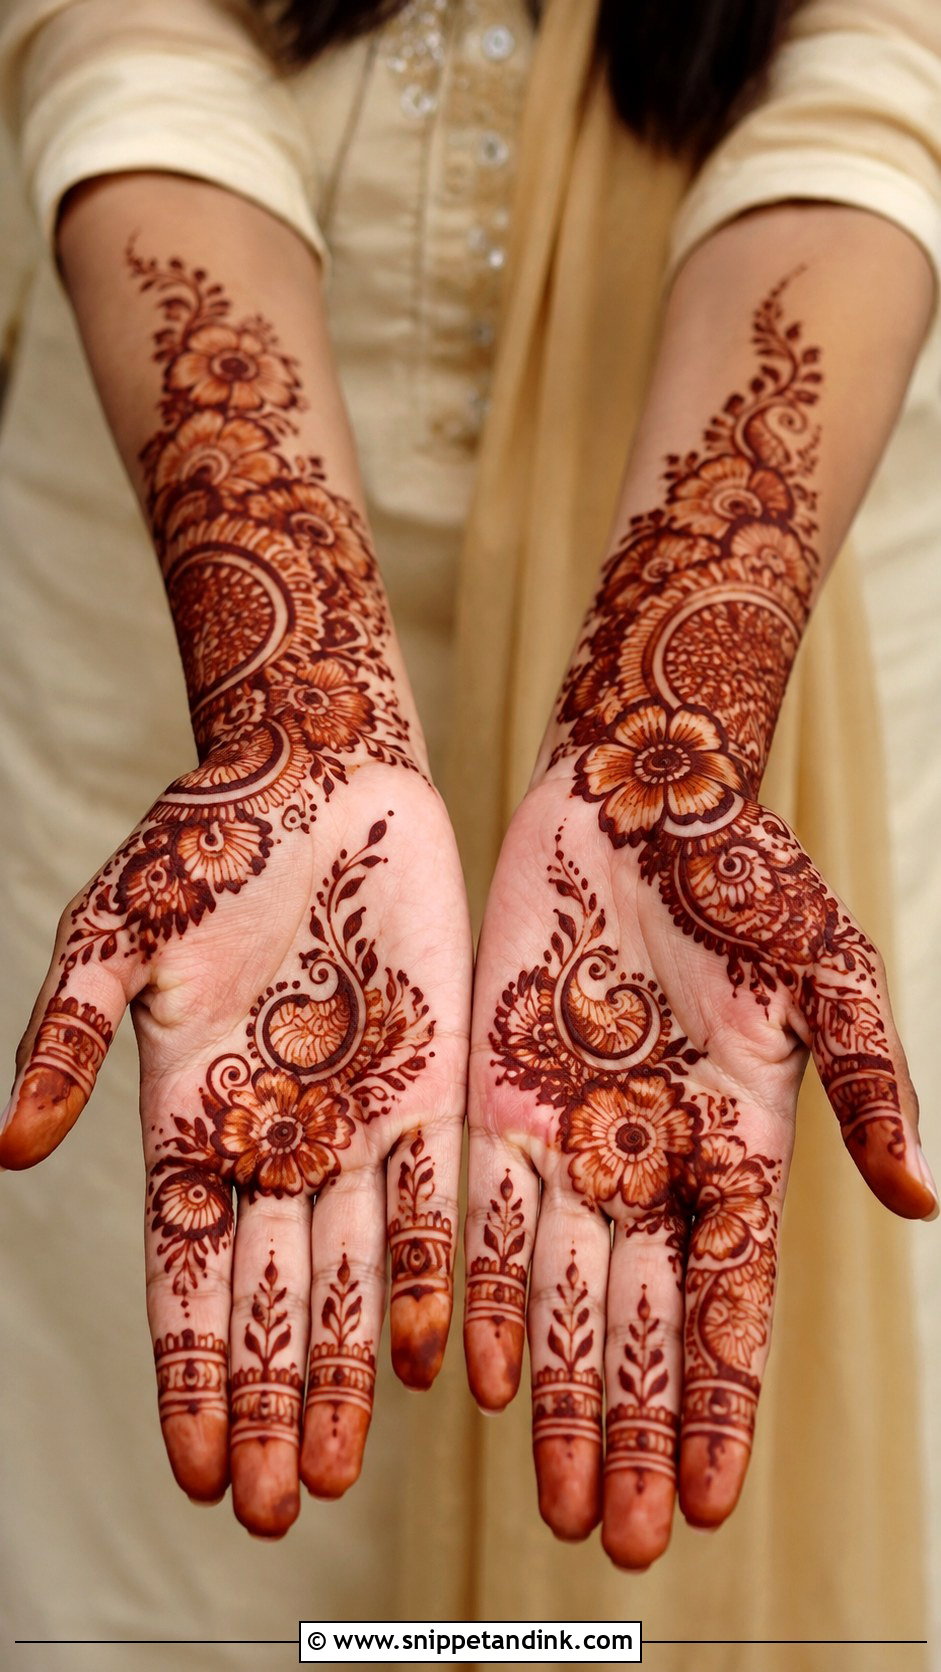
Light shading makes a simple palm look more detailed than it is. A flower, lotus, or paisley as the main motif, petals shaded with thin strokes or softly filled edges, outlines kept bold. I shade with fine parallel lines rather than a thin smear of paste, because a thin smear stains faintly and patchily. Two or three shaded sections are enough; shade everything and you lose the effect.
27. Simple Front Palm Mehndi Design With Negative Space
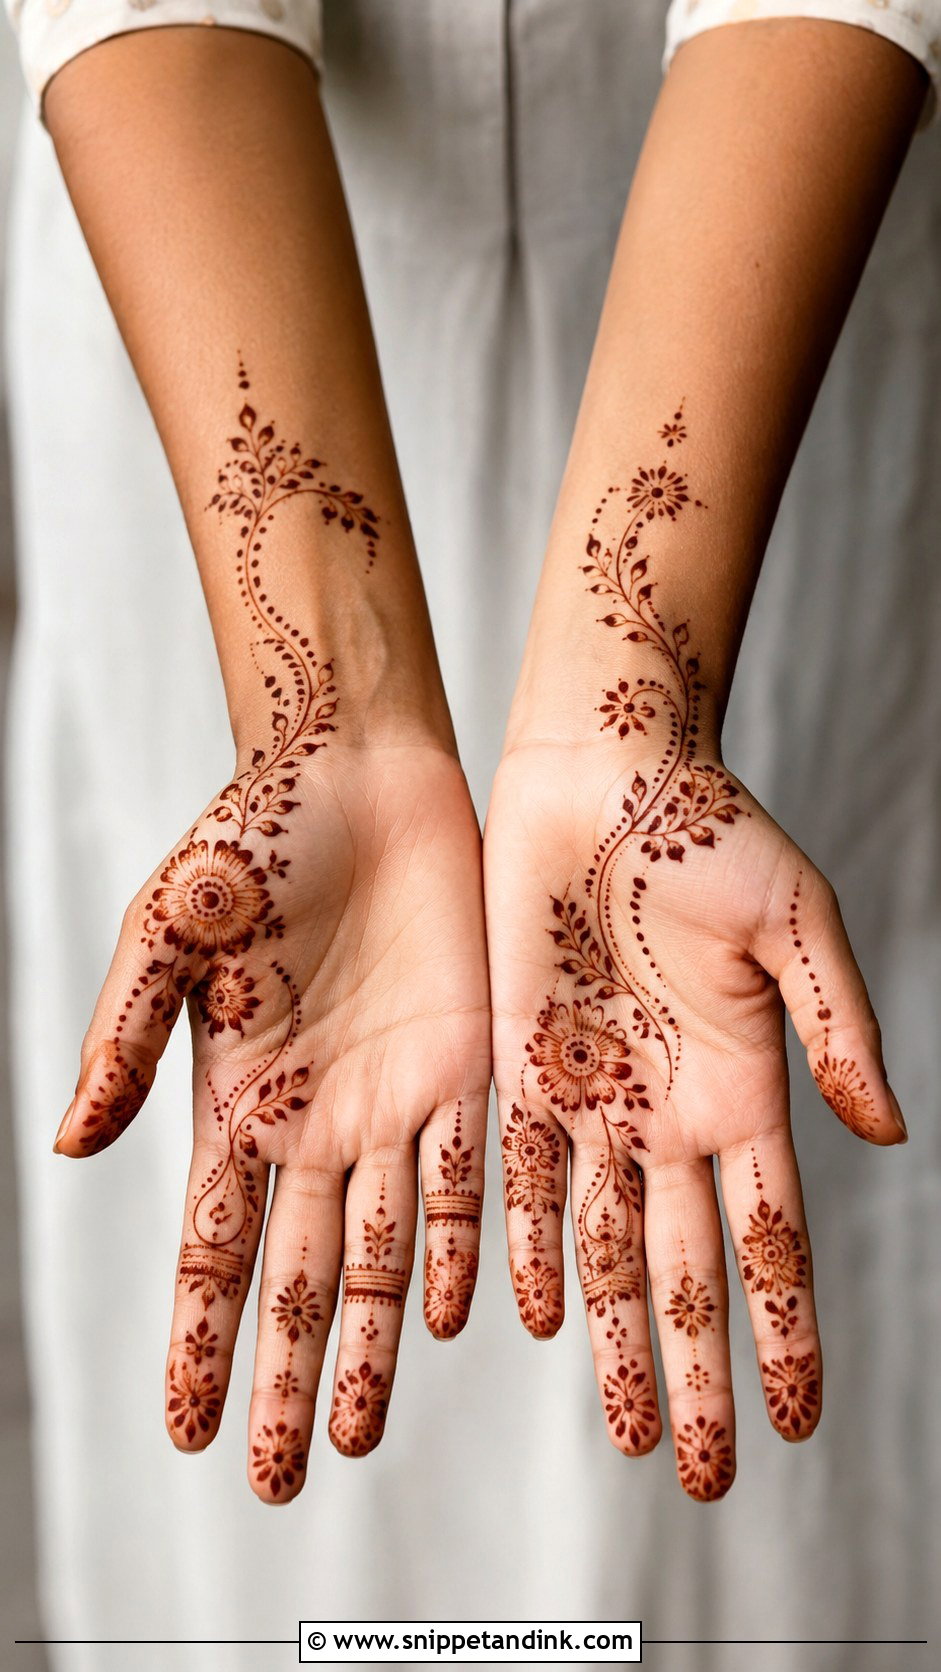
Open gaps between flowers, vines and paisleys are what make this modern. A mandala in the centre with a clear border of bare skin around it, or a diagonal trail with empty skin on both sides. Thin lines and dots on the fingers, a light chain at the wrist. Planning the empty shapes is as important as the filled ones.
28. Simple Indo Arabic Front Palm Mehndi Design
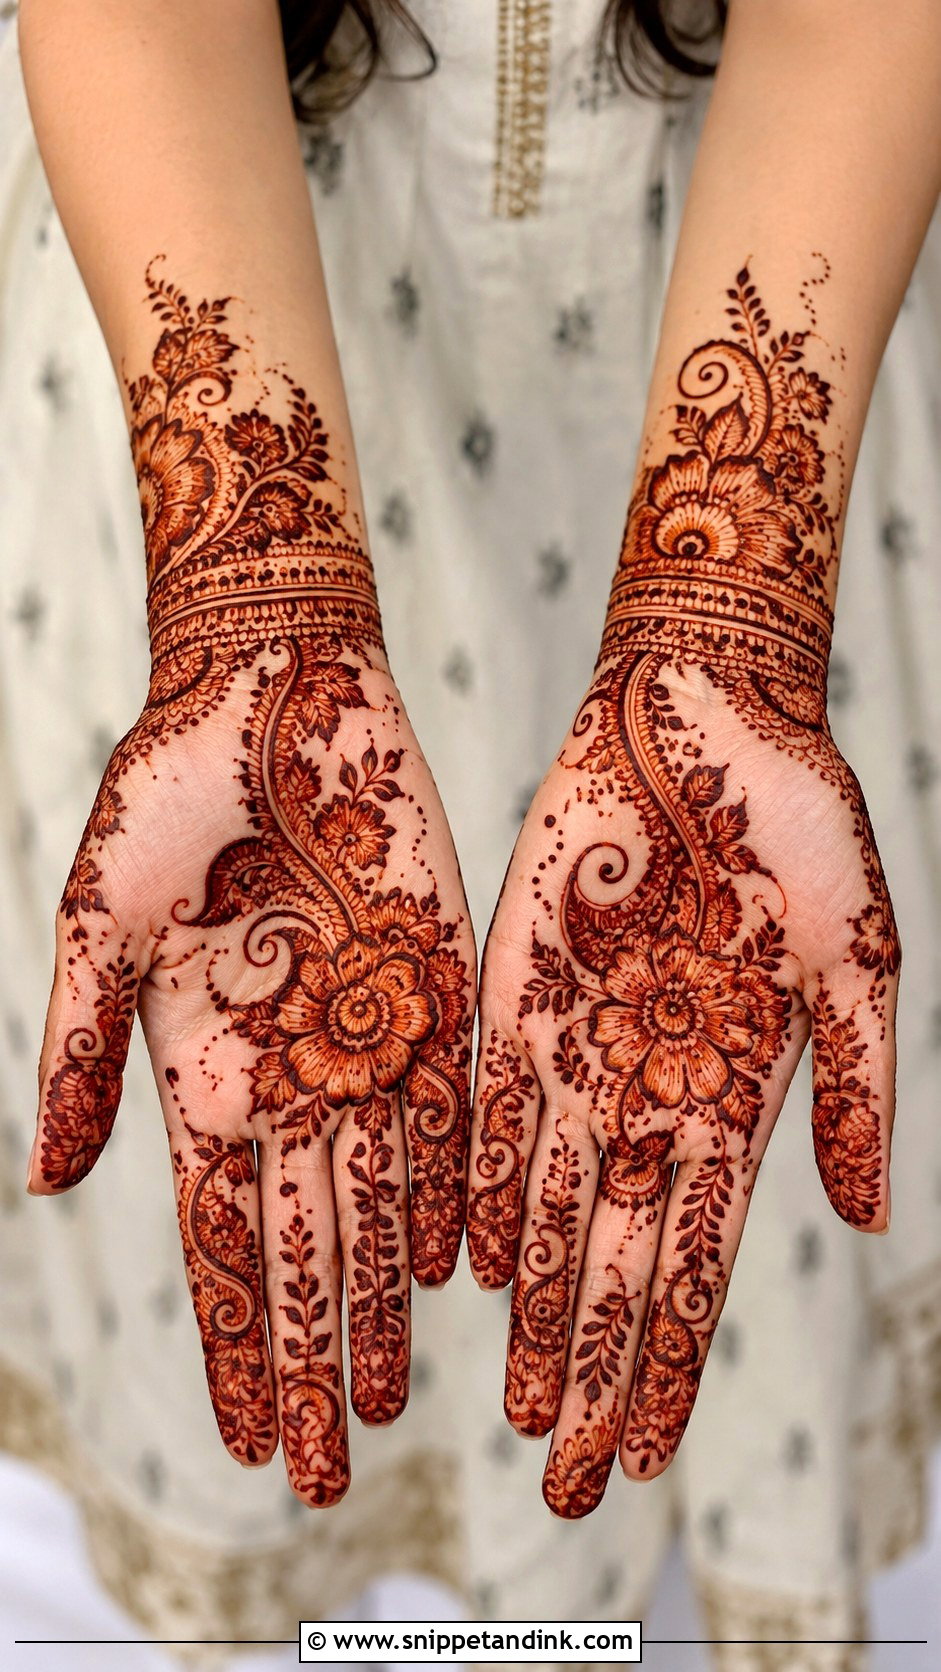
Indo-Arabic blends Indian detail with Arabic flow. I start with a bold flower or paisley on the palm, add Indian-style dots, small petals and fine fillers, and let the layout run diagonally with some open space. Fingers get a mix of bands, vines and fingertip accents. It scales well: light for a casual day, more fillers for a big function.
29. Simple Moroccan Front Palm Mehndi Design
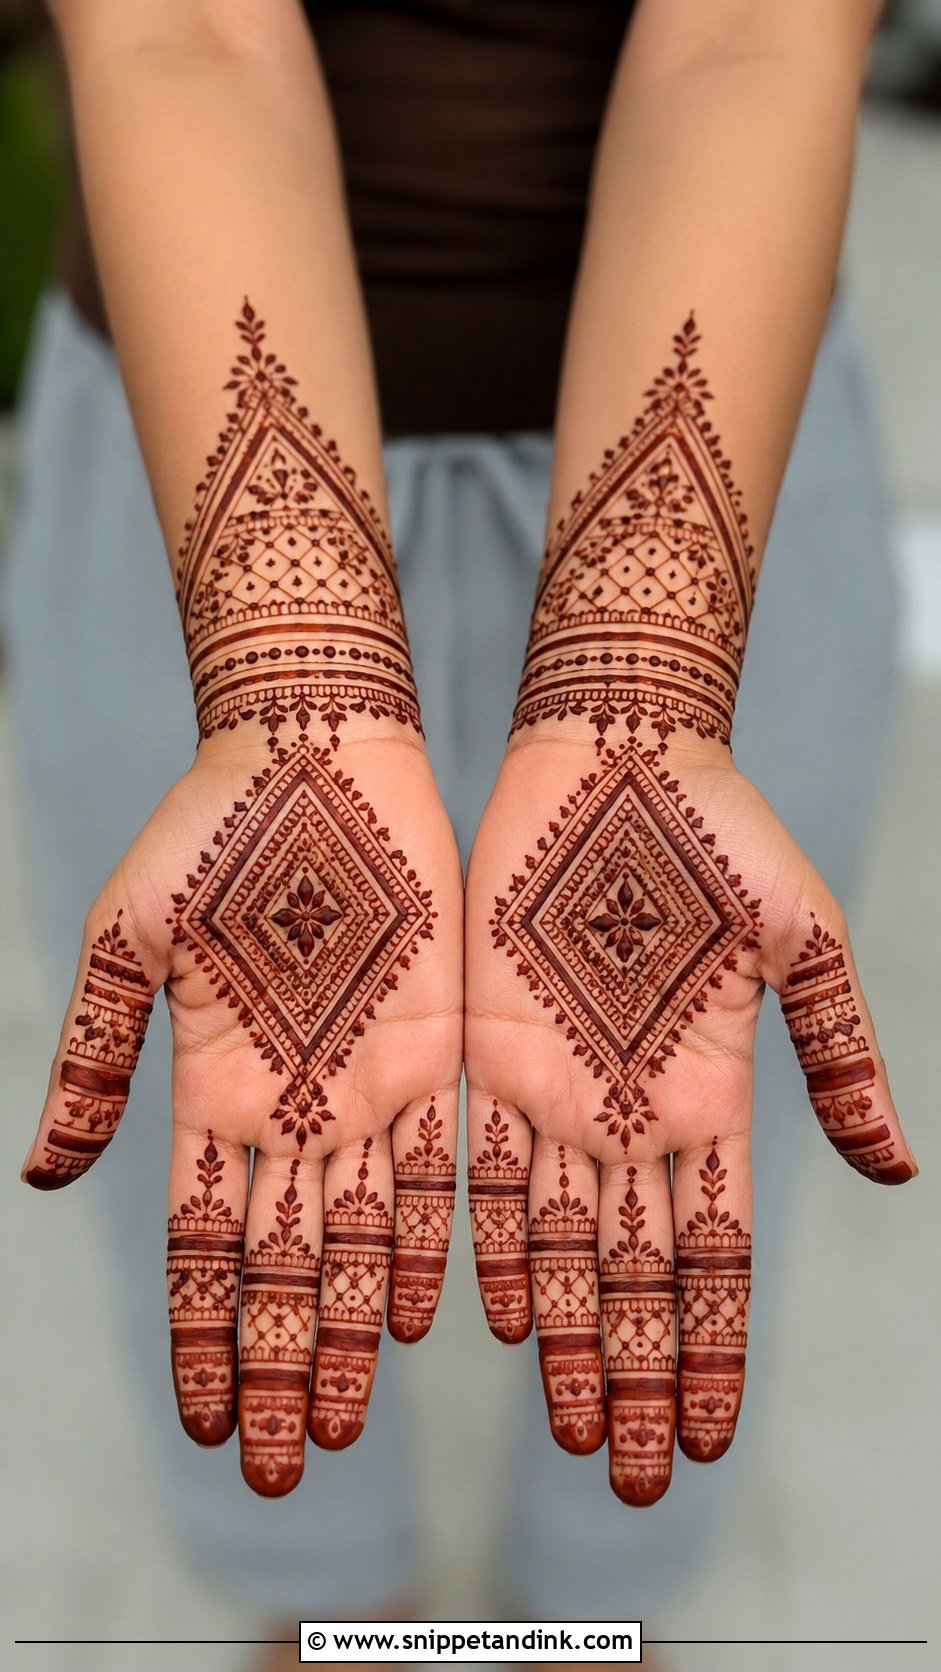
Moroccan designs swap flowers for diamonds, triangles, straight lines, dots and small grids, usually around a geometric medallion in the palm centre. Matching line bands and dot rows on the fingers, a thin border at the wrist. Straight lines look easy but are the hardest to keep steady, so I brace my piping hand on my other wrist and pull each line in one go. Careful spacing stops it looking stiff.
30. Simple Gulf Front Palm Mehndi Design
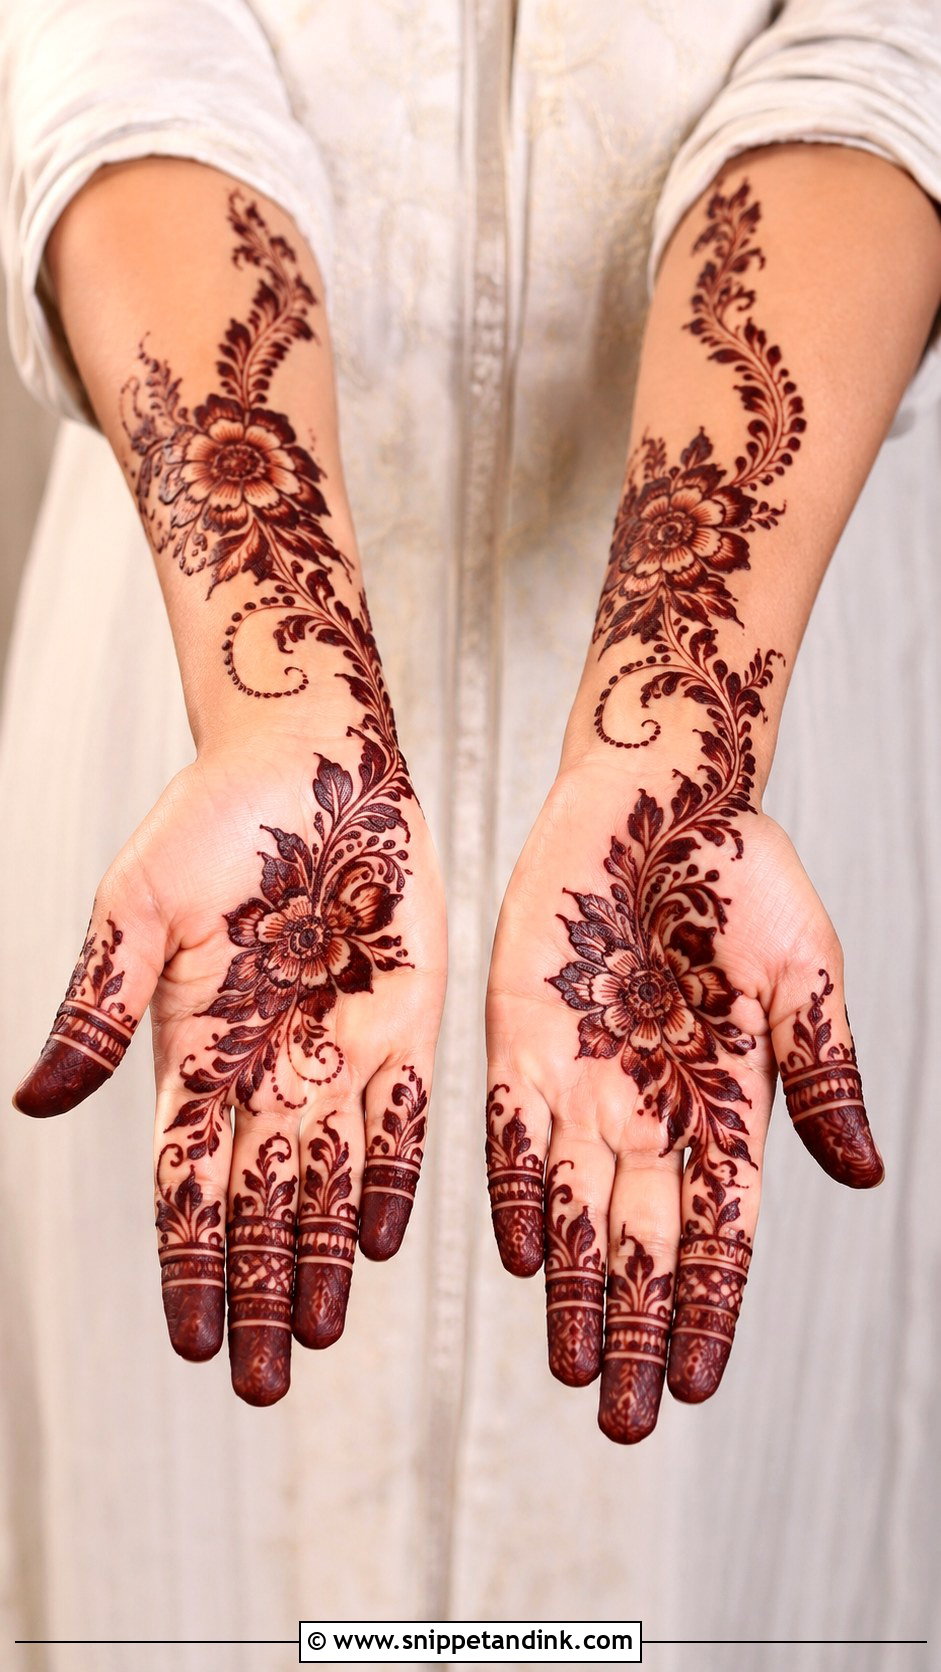
Gulf-style palms use large flowers, leafy vines and flowing strokes rather than tiny detail. A bold floral cluster on one side of the palm, a vine moving toward the fingers, shaded petals for depth, and the opposite side left open. Bold bands or leafy tips on the fingers. Confident strokes are everything in this style; hesitation shows as a kink in the line.
31. Simple Front Palm Mehndi Design For Teej
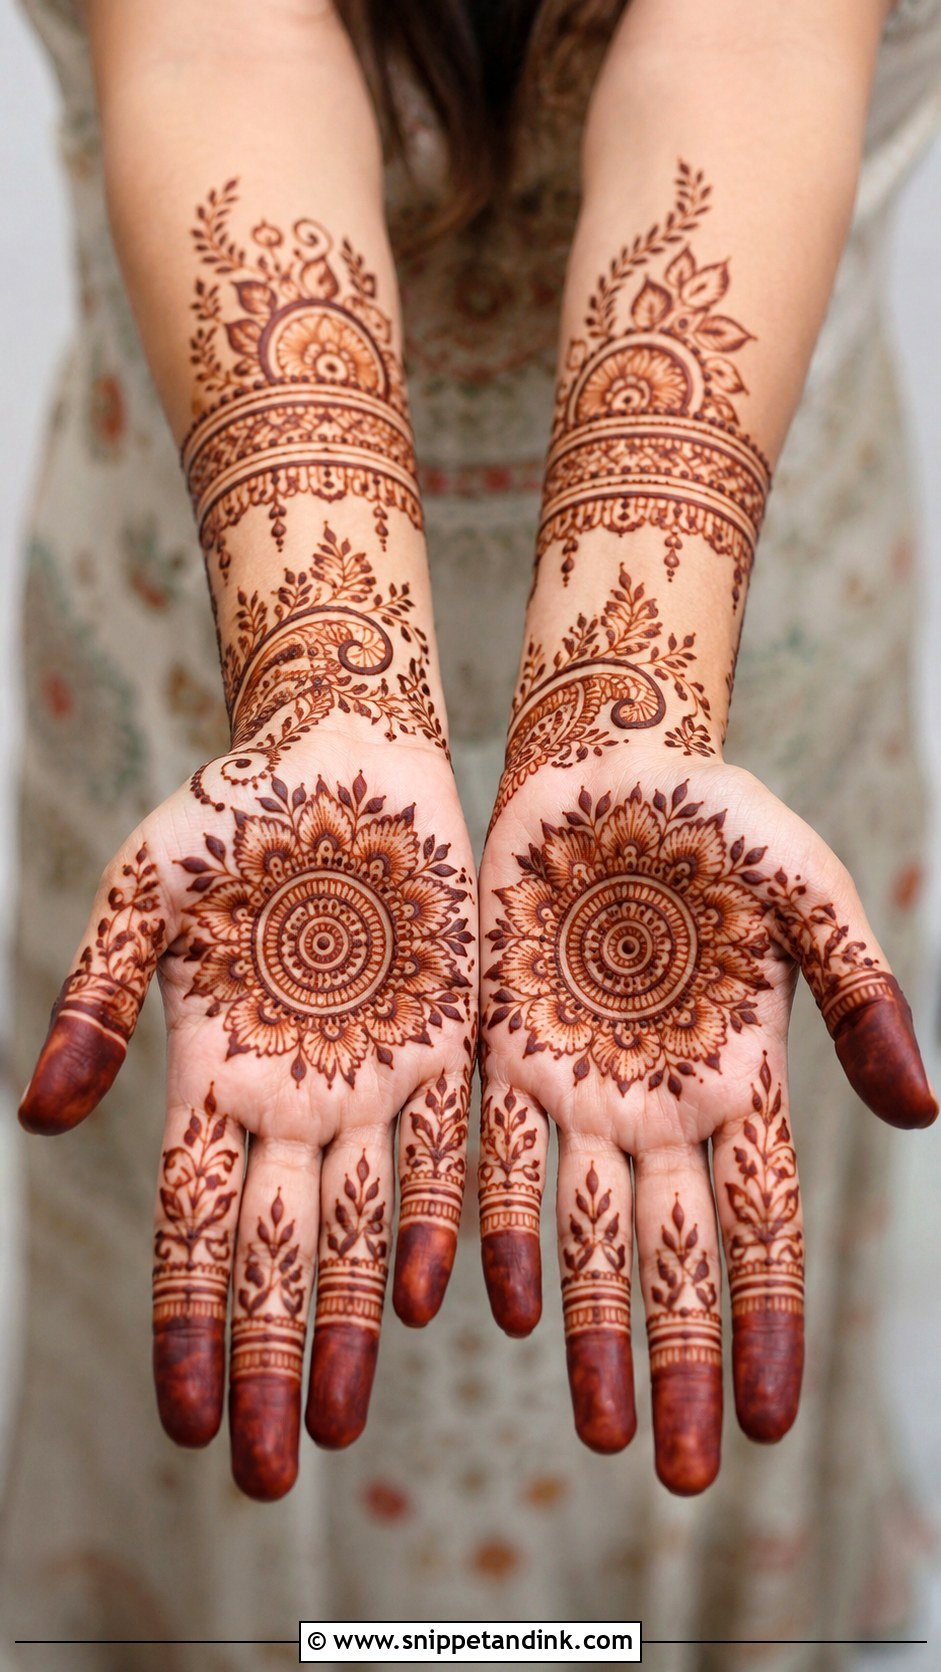
Teej mehndi is traditional and joyful. A round mandala, lotus or leafy floral pattern on the palm, delicate vines to the fingers, a small bracelet detail at the wrist, with paisleys, dots and petal borders. Fingertip shading adds a stronger traditional feel. Many women apply Teej henna at home in a group, so I’d keep it medium-light and easy to repeat.
32. Simple Front Palm Mehndi Design For Diwali
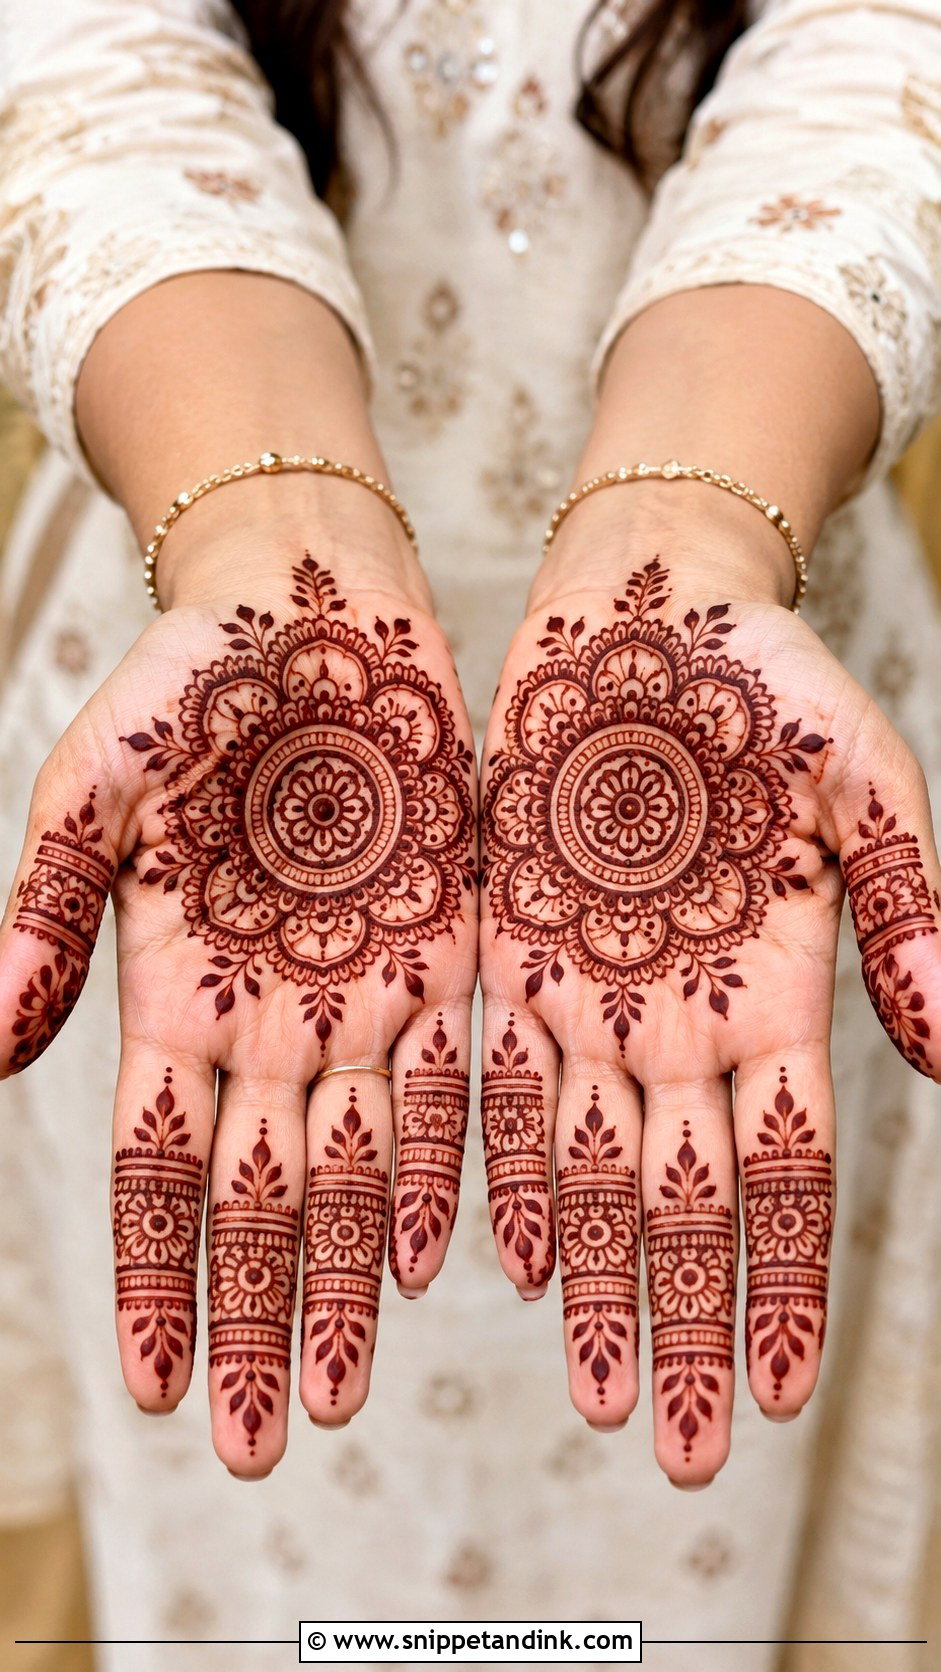
For Diwali, a central mandala with small floral edges has the feel of a rangoli. Dots, curved lines and tiny leaves around the palm, bands and petal details on the fingers, a thin wrist bracelet. Open space around the centre gives a modern version; light shading inside the petals gives a richer one. Bangles in bright colours sit well against either.
33. Simple Front Palm Mehndi Design For Engagement
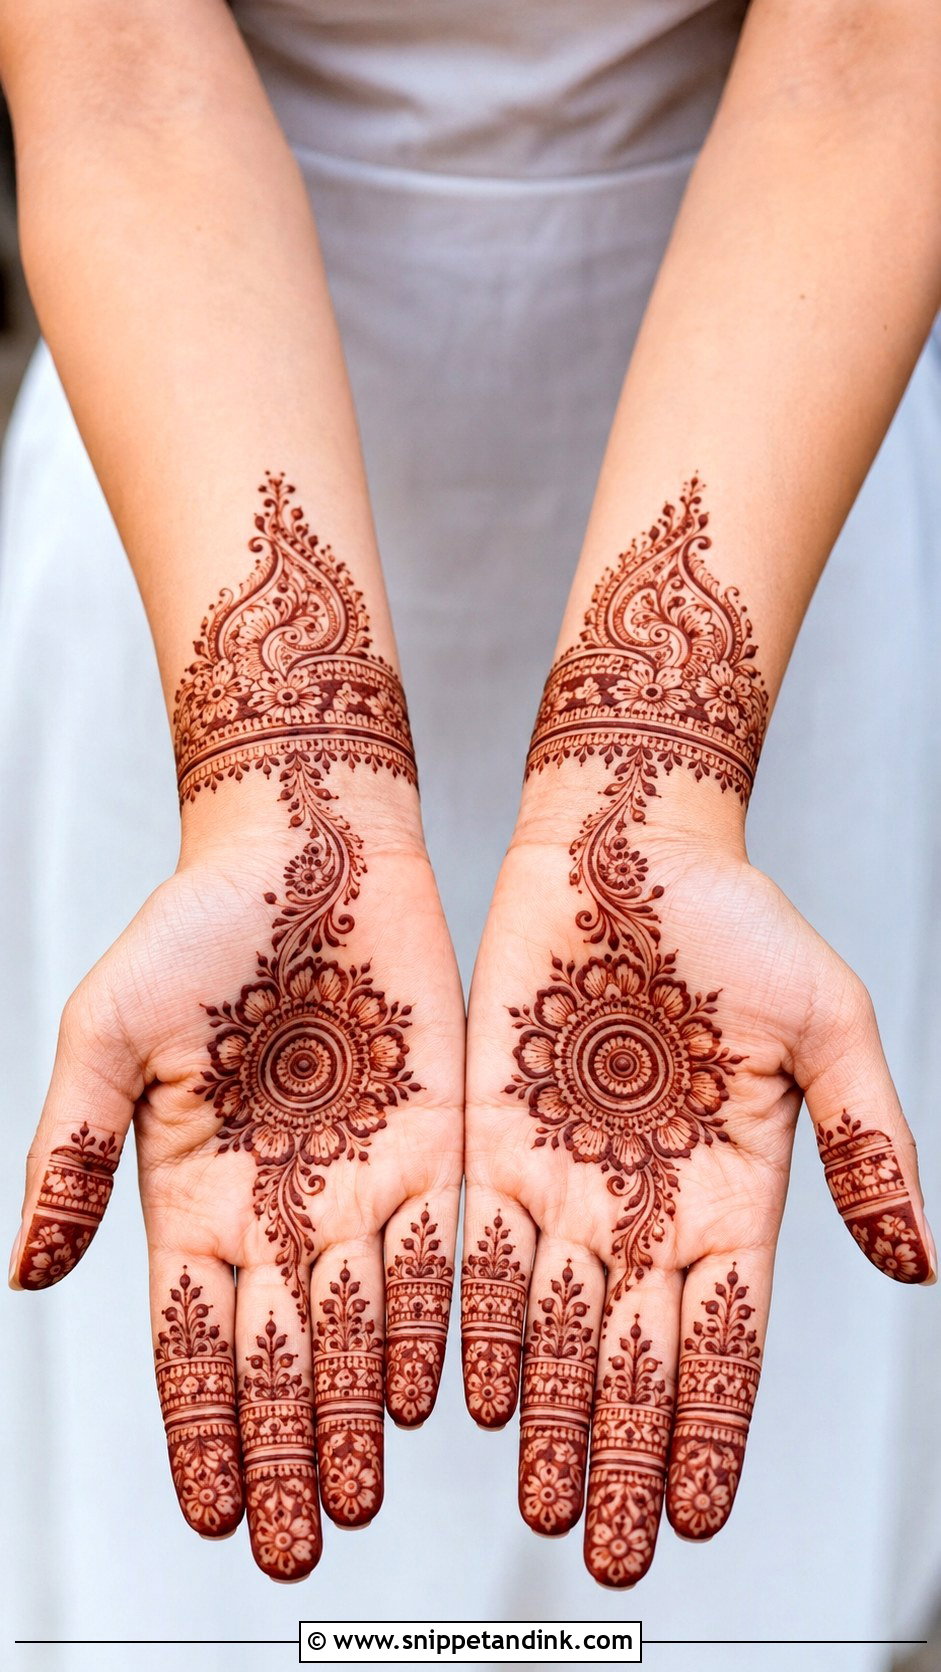
An engagement palm should be refined rather than heavy. A floral mandala or paisley bloom in the palm, a soft vine to the wrist, delicate finger bands, dots and light shading. I keep the ring finger fairly open so the ring is the star. A slightly more detailed wrist band dresses it up for the ceremony.
34. Simple Front Palm Mehndi Design For Karwa Chauth
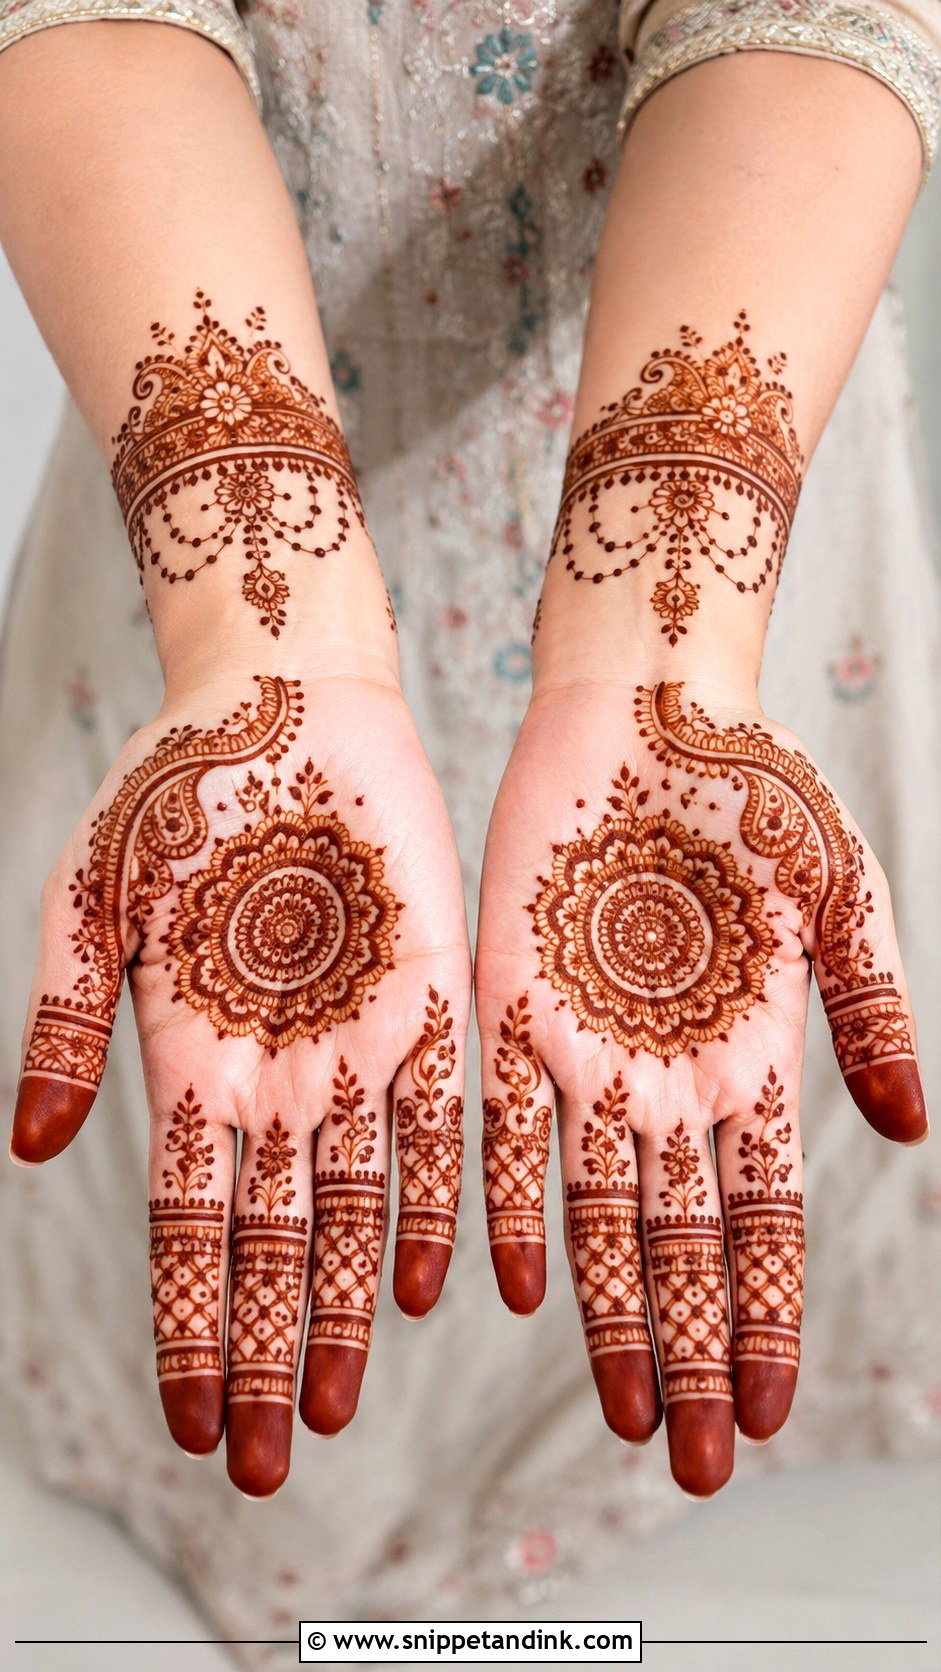
Karwa Chauth henna is traditional, but it doesn’t need bridal density. A round tikki or mandala at the centre of the palm, paisley curves, floral borders and dotted chains around it, fine bands and fingertip accents on the fingers, and a small wrist bracelet. Since the day itself is spent fasting, I suggest applying it a day or two before so you aren’t sitting through a long appointment on the fast.
35. Simple Modern Front Palm Mehndi Design
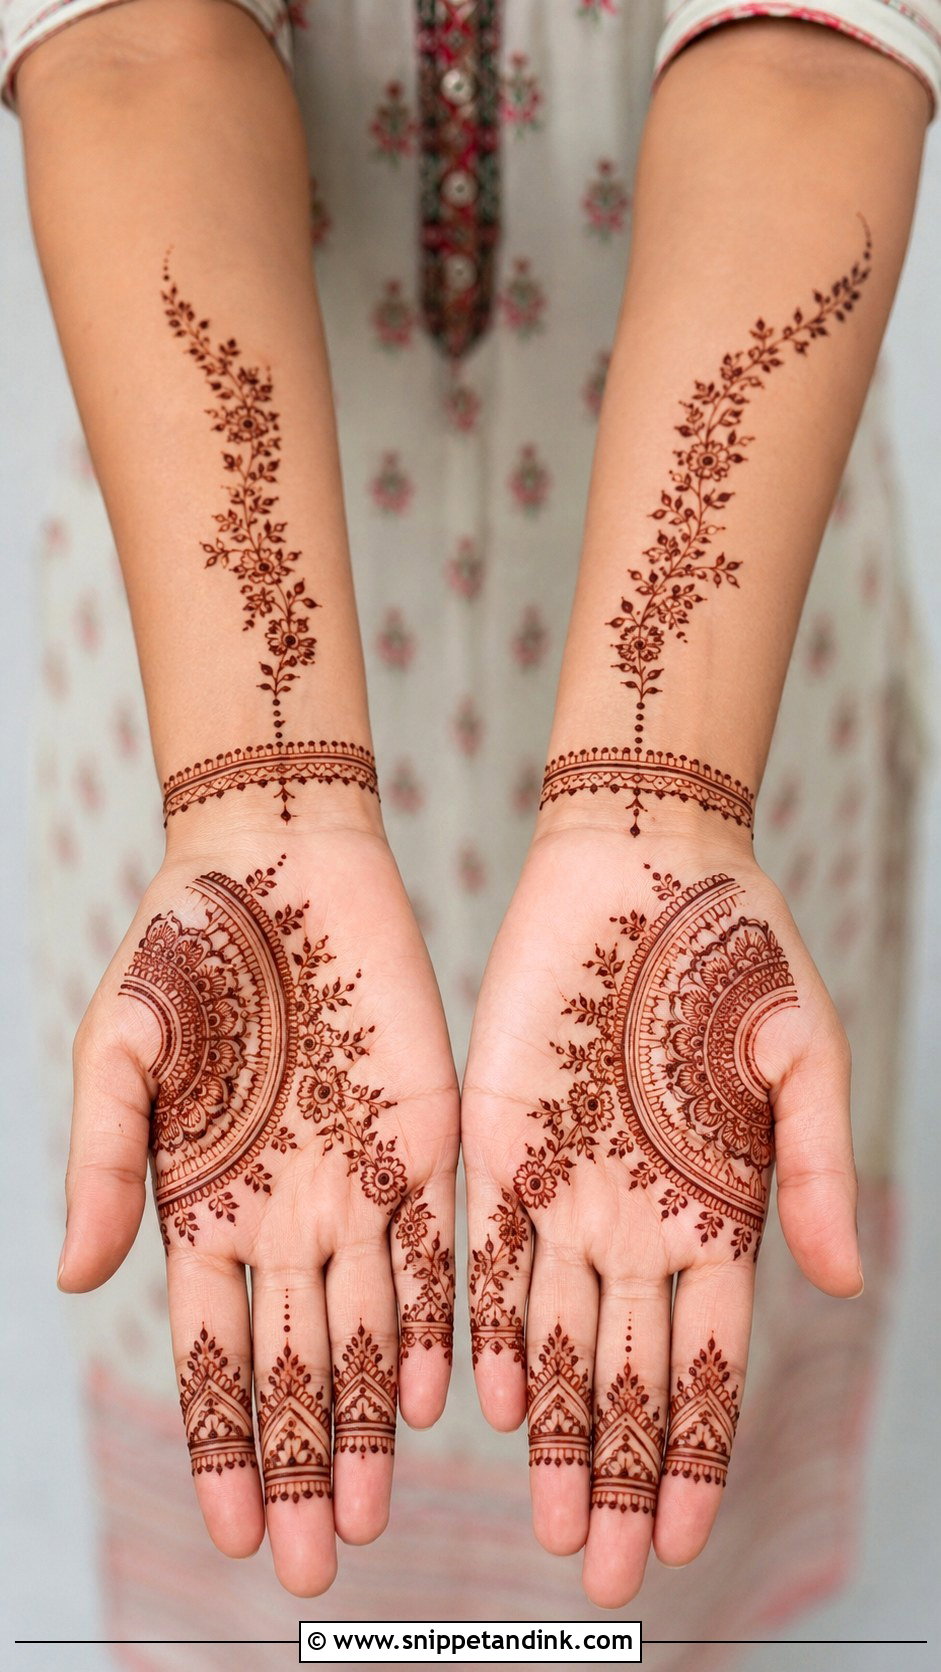
Modern palm henna is one bold motif and a few well-placed accents: a half mandala, diagonal floral trail, geometric palm shape or minimal vine. Thin rings, dot chains or open fingertip patterns on the fingers, the wrist bare or with one slim line. It’s lighter and suits people who love henna but don’t want a traditional full palm.
Pale, Patchy or Smudged? Fixing Common Palm Henna Problems
I smudged it while it was wet
Act straight away. Lift the smeared paste with a cotton bud or toothpick, then wipe the spot with a barely damp cotton bud. A faint mark may stay, but it is much lighter than a full smudge. I usually turn small marks into a dot or leaf so they belong to the design.
My stain is pale
The usual causes are paste removed too early, washing with water in the first hours, cold hands, or old paste. Pale henna will still darken for up to two days, so wait before judging it. Keeping hands warm and dry helps it reach its full colour.
Some parts are darker than others
Palm skin is thicker in the centre and on the mounds, so it stains darker there than in the creases. Patches can also happen when paste flakes off early. Sealing dry paste with a little lemon and sugar keeps it in contact with the skin longer.
It’s fading unevenly
Palms fade where they rub and get washed most. Rubbing a little oil or balm into your hands before washing up and avoiding scrubs or chlorinated pools helps the design wear down more evenly. Once it starts to look patchy, there isn’t a reliable way to remove henna fast; gentle exfoliation is all I’d suggest.
Start With One Clear Motif in the Centre of the Palm
A good palm design depends less on how much you add and more on where you put it. Tikki circles, paisleys, lotus and mandalas keep it traditional; diagonal trails, negative space and geometry make it modern. Start from your hand shape, the occasion and how much time you have. Beginners can stay with flowers, dots and leafy vines, and more confident artists can bring in shading, jaali and wrist bands. Keep the lines neat and the centre motif clear.
You'll Like These Ideas:


Leave a Reply