
Not every bride wants to sit for hours with her arms propped on cushions, and I don’t think she should have to. A short design stops at the wrist, keeps the fingers and the palm or back hand detailed, and still reads as wedding henna because it carries the classic motifs: mandalas, paisleys, florals, jaali, bracelet bands, initials and Arabic trails. It suits a court ceremony, an engagement, a destination wedding, or a bride whose jewellery and outfit should stay the focus. Here are twenty layouts I draw often, with what I look for in each one.
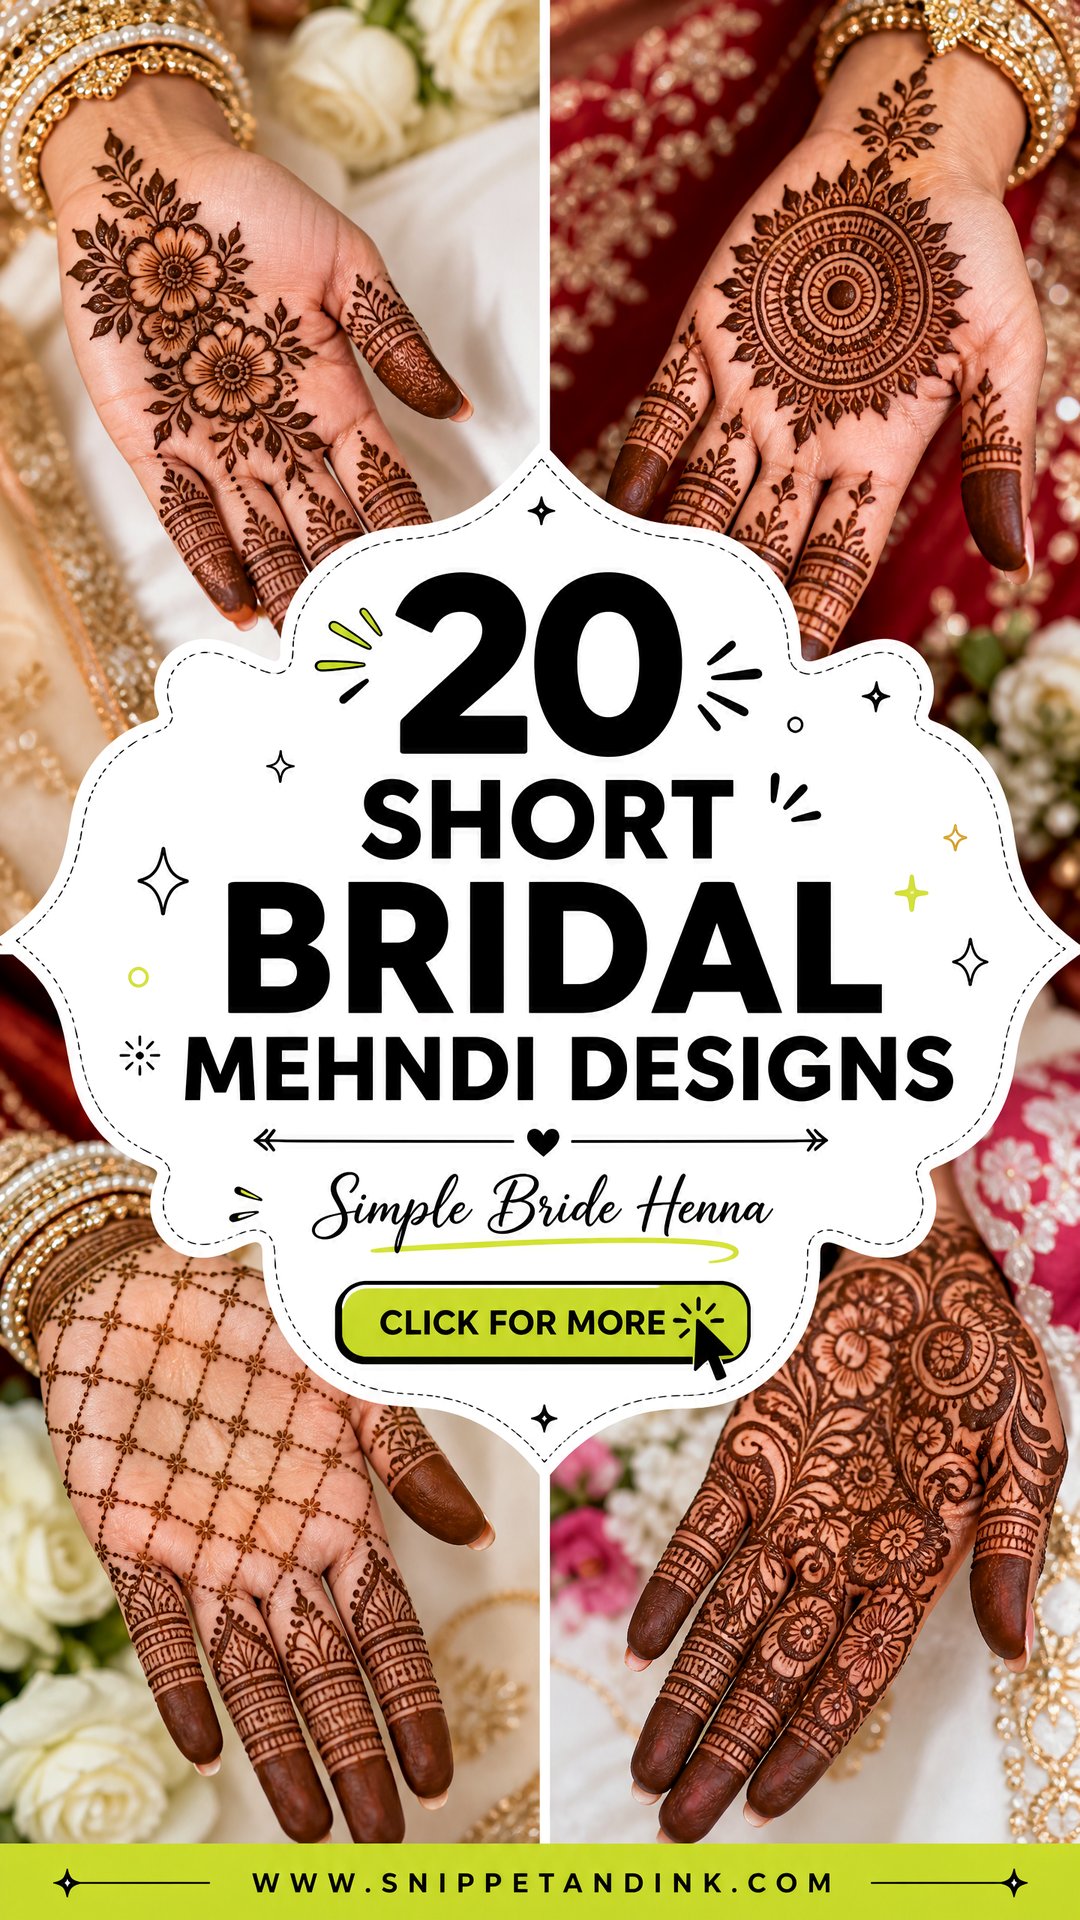
Palms Stain Darker Than Backs, and That Shapes the Layout
Henna stains thicker skin more deeply, so the same paste gives very different colour across one hand. Palms and fingertips go darkest, the back of the hand a little lighter, and the forearm lighter still. On a short design that works in your favour, because nearly all the coverage sits where the stain is strongest.
It also changes how I draw. On the back of the hand I use slightly bolder outlines and fewer hairline fillers, since faint lines on lighter-staining skin can look patchy. On the palm I can go much finer.
When to book the application
Natural henna comes off orange and deepens over the next day or two, reaching its darkest around the 48-hour mark. So I apply one to two days before the wedding, never on the morning itself. A short design needs far less sitting time than full bridal coverage, but the paste still needs at least six hours on the skin, and overnight is better.
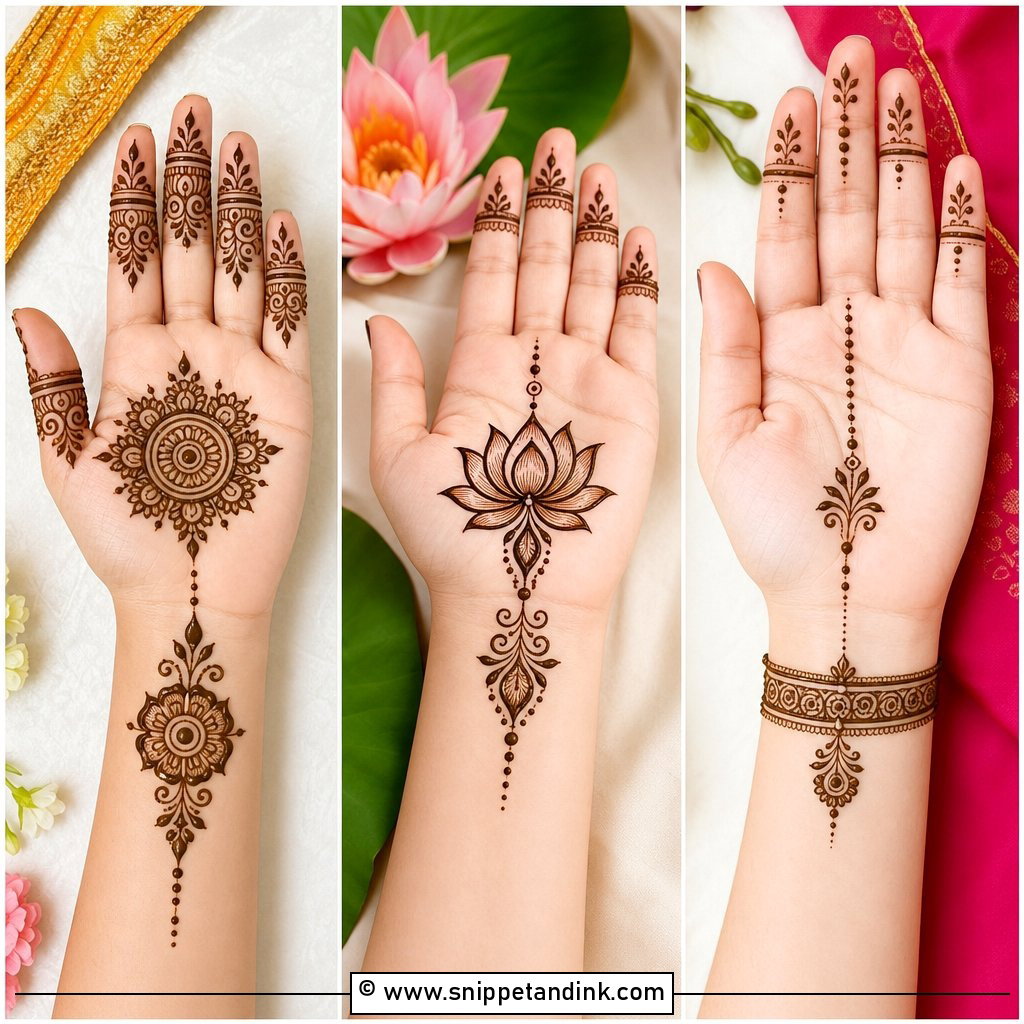
1. Short Bridal Mehndi Design For Front Hand
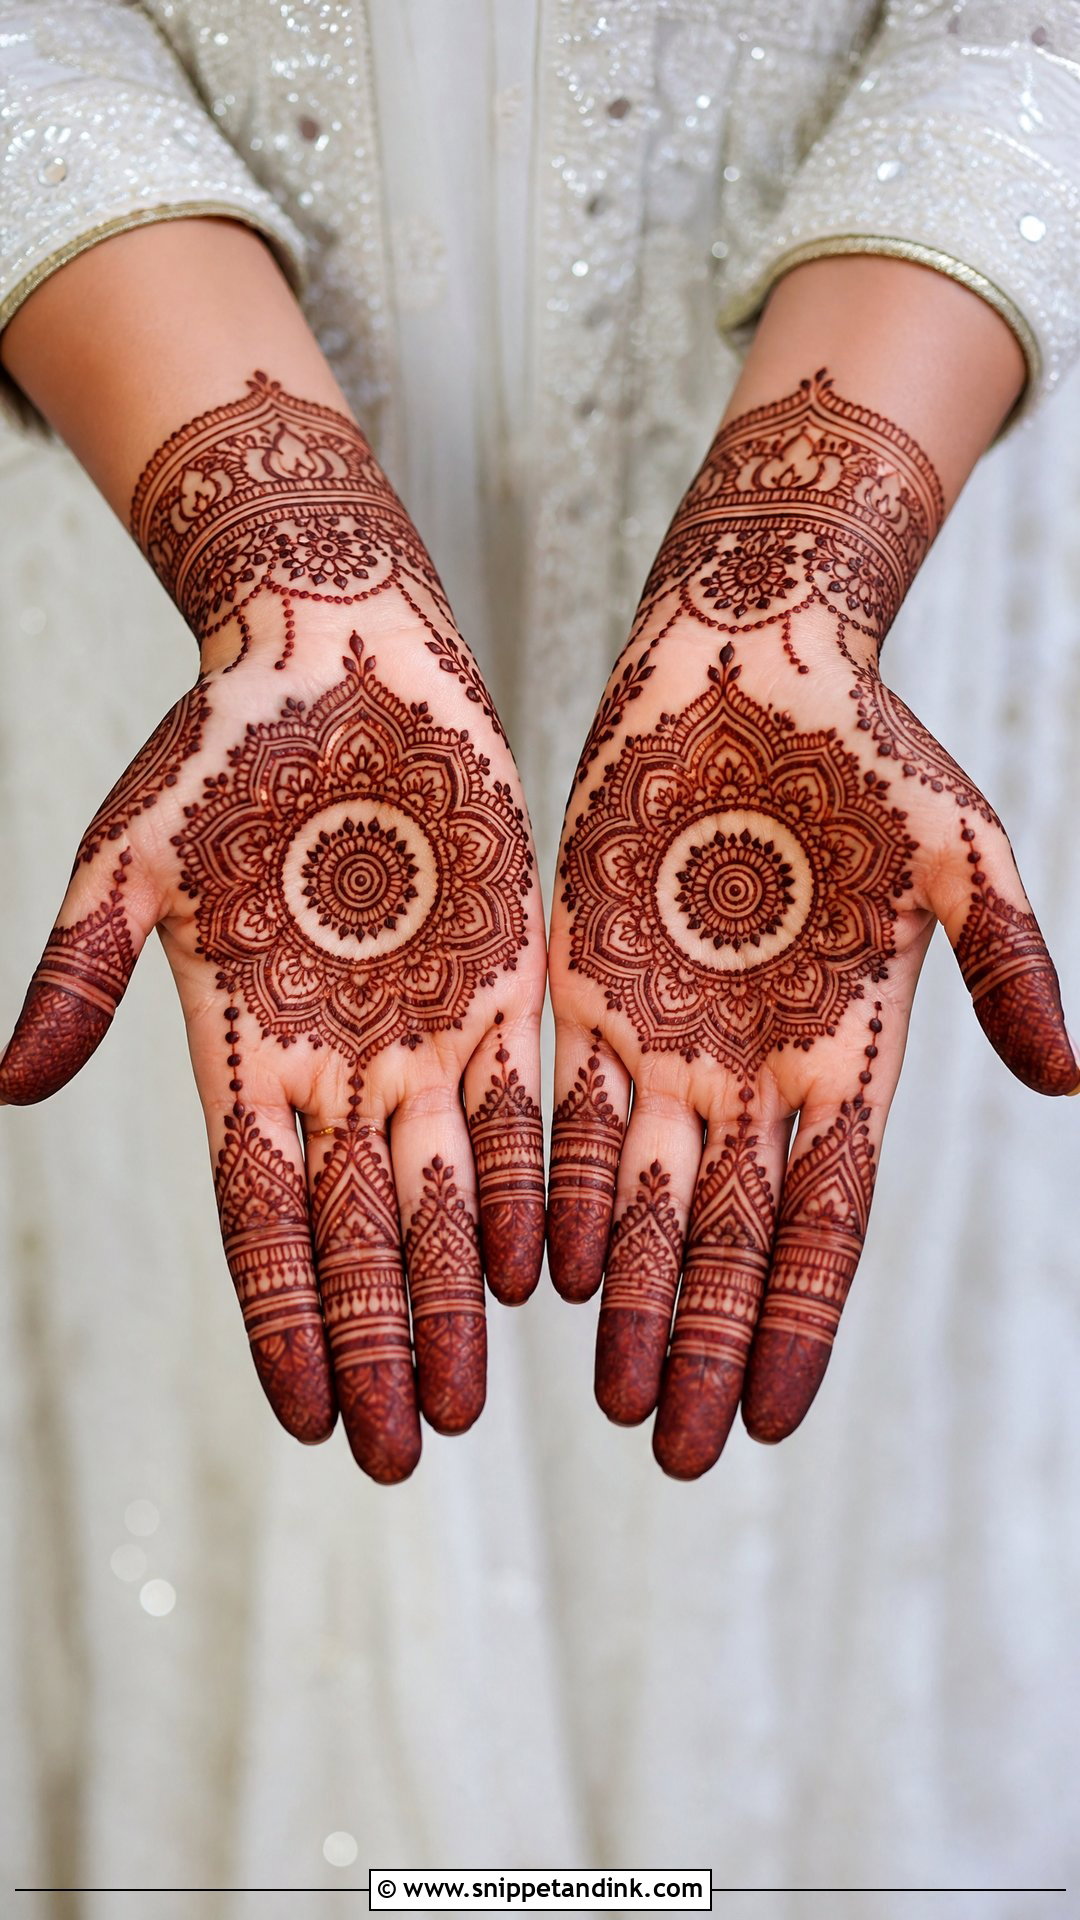
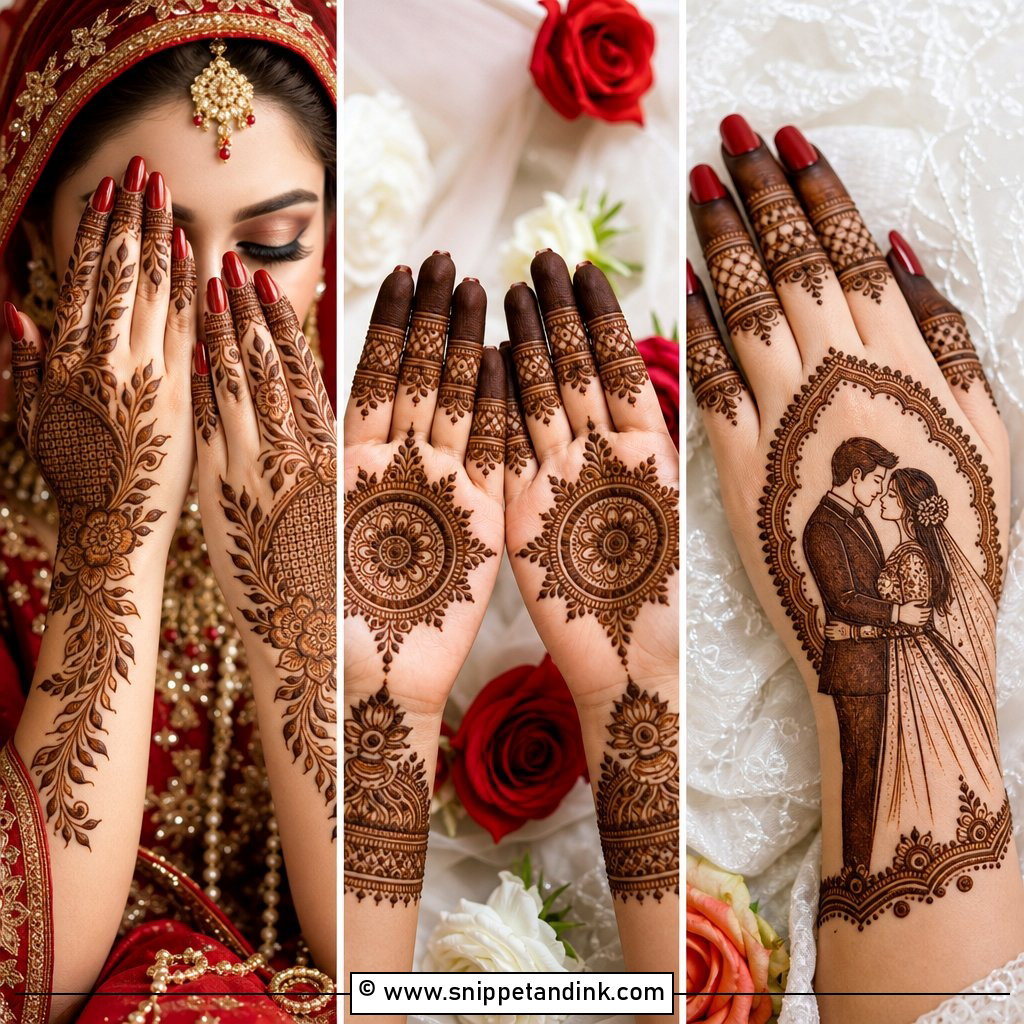
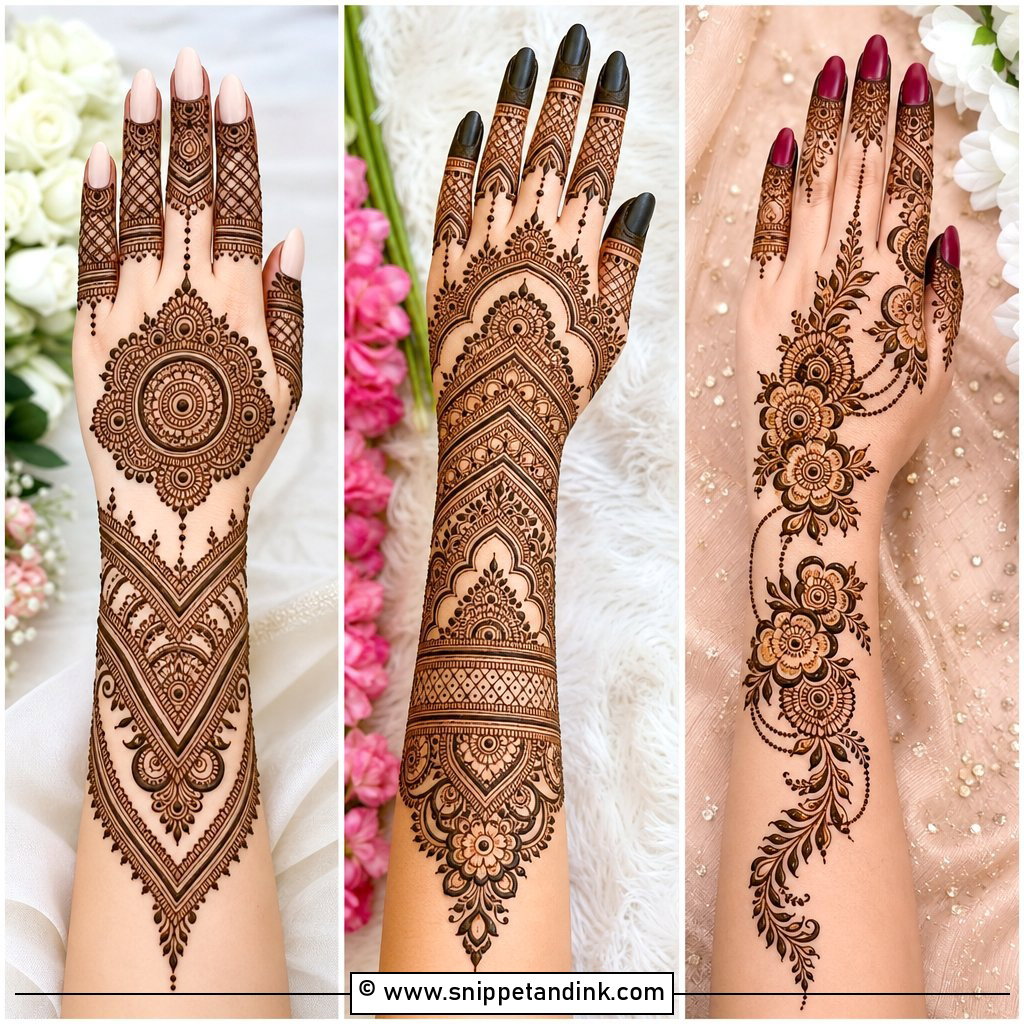
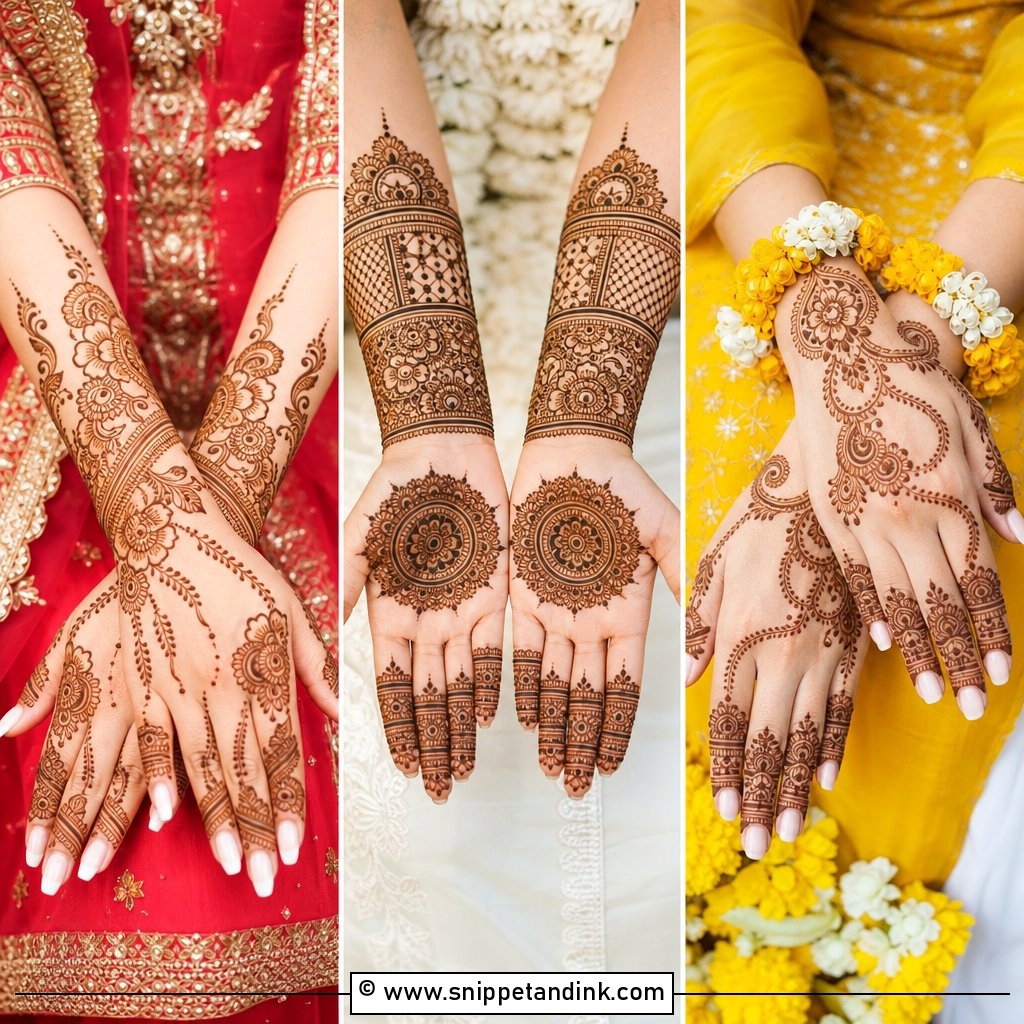
On the palm, the centre motif sets everything else. I draw the mandala or lotus first, sized so its edge sits just inside the palm creases, then build the fingers outward. Palms take the darkest stain on the body, so even thin leafy bands and dots on the fingers come out rich. I finish with a simple wrist cuff so the design ends deliberately rather than fading out. Leaving a ring of bare skin around the centre motif is what keeps it clean in close-ups, and the whole layout sits happily with red or gold outfits and plenty of rings.
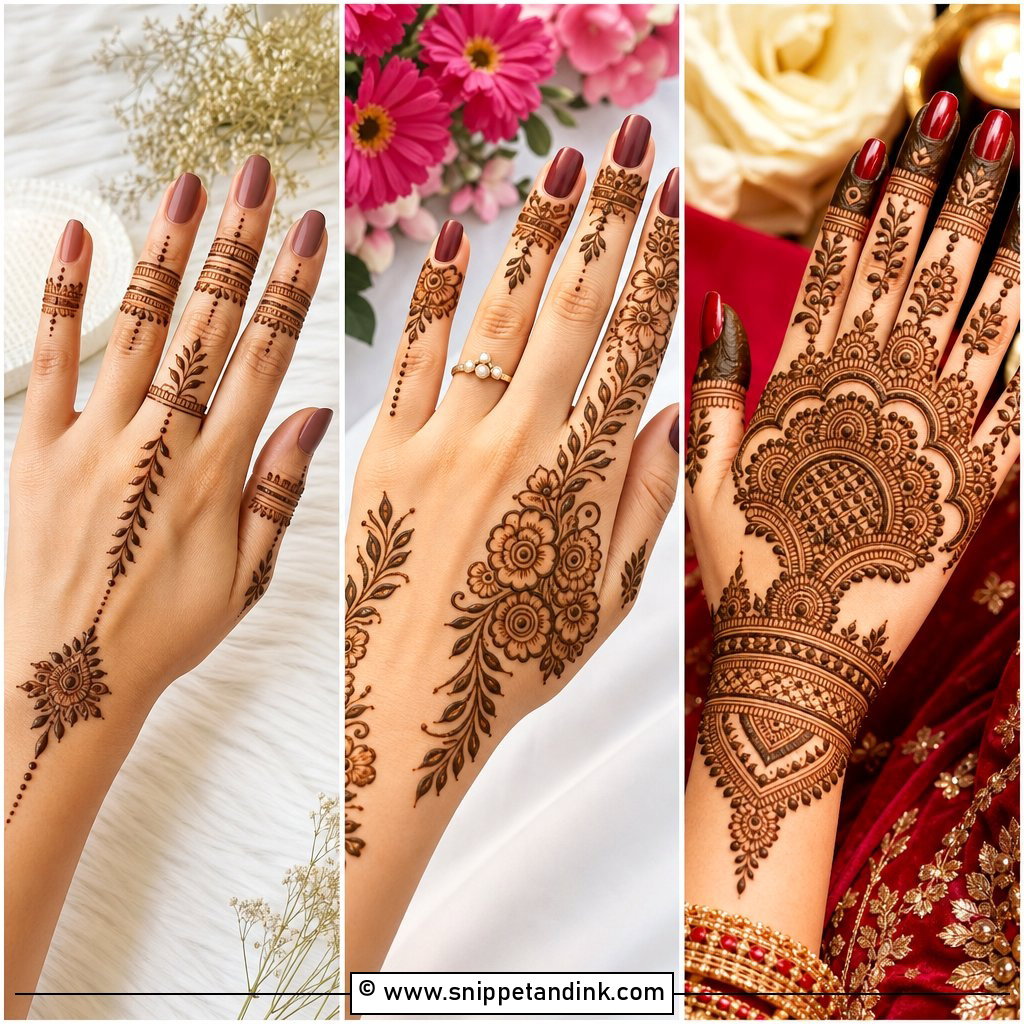
2. Short Bridal Mehndi Design For Back Hand
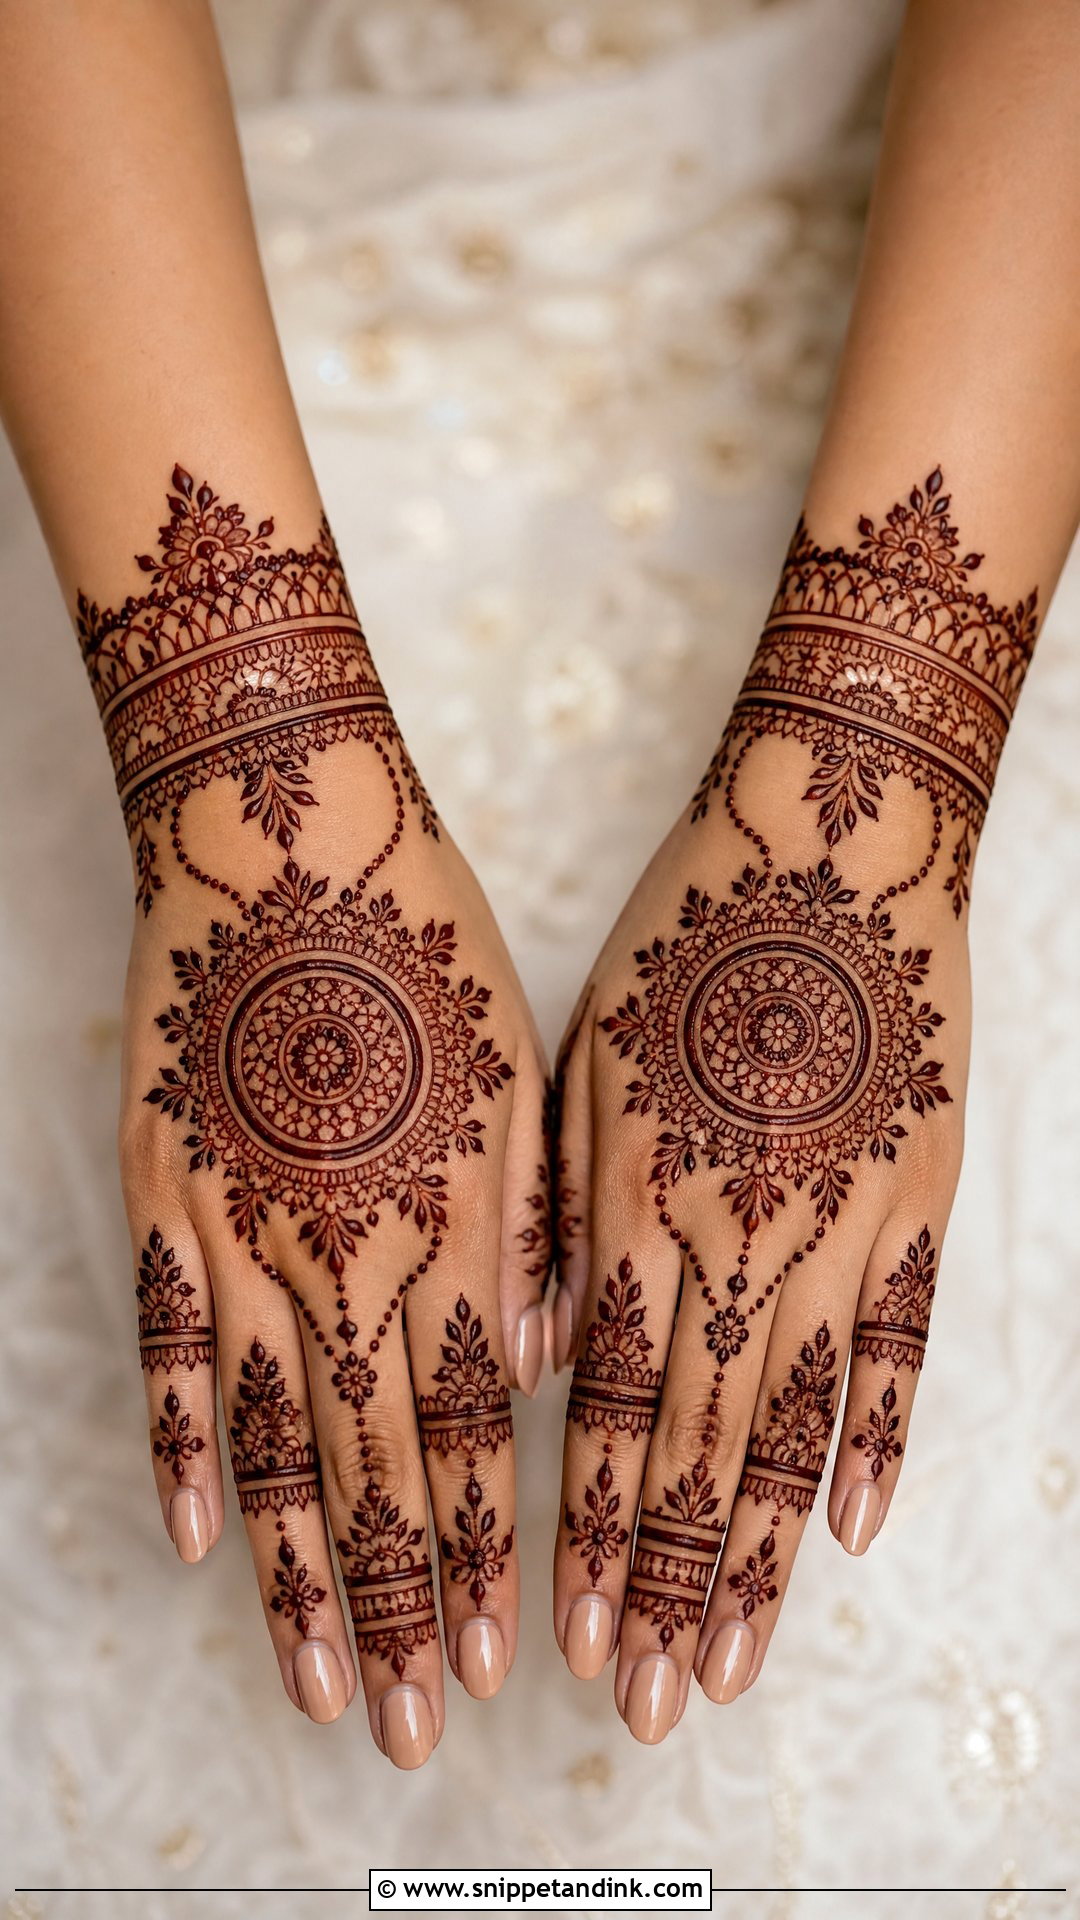
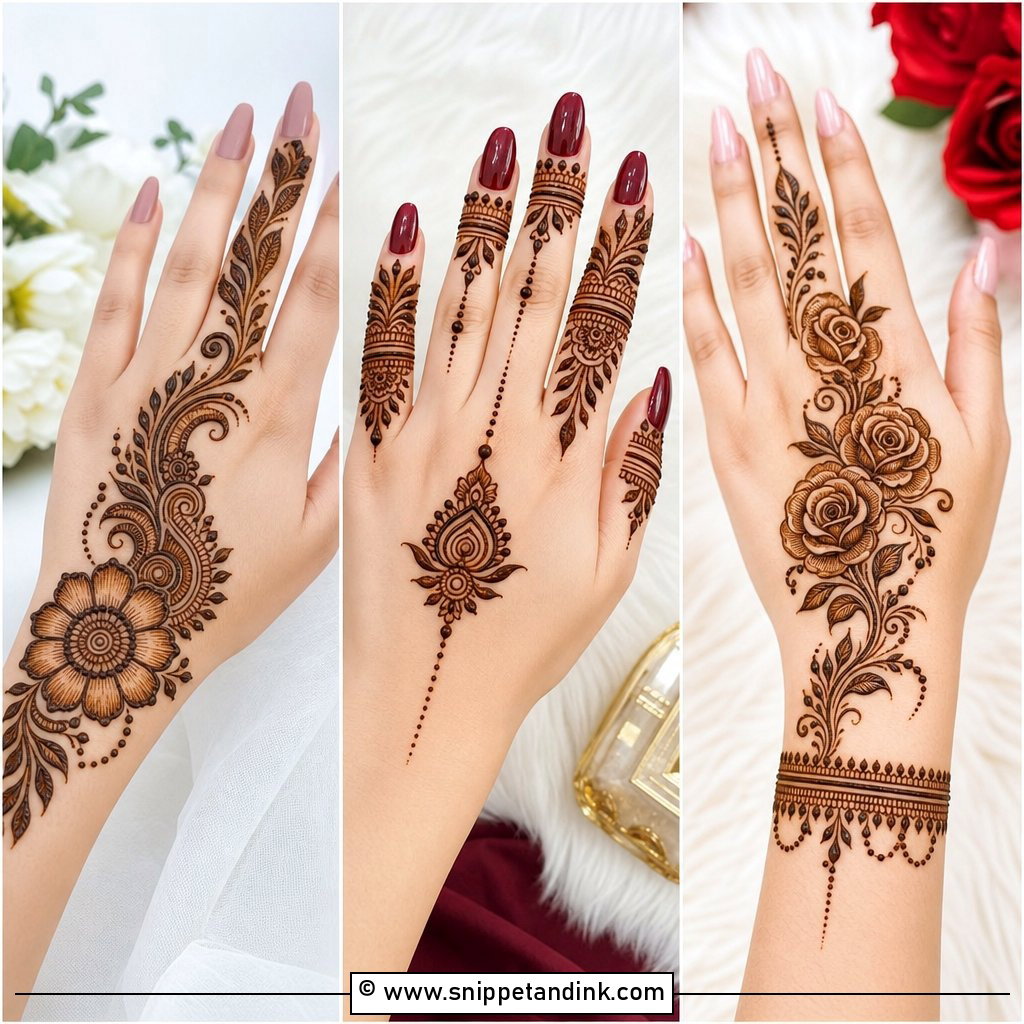
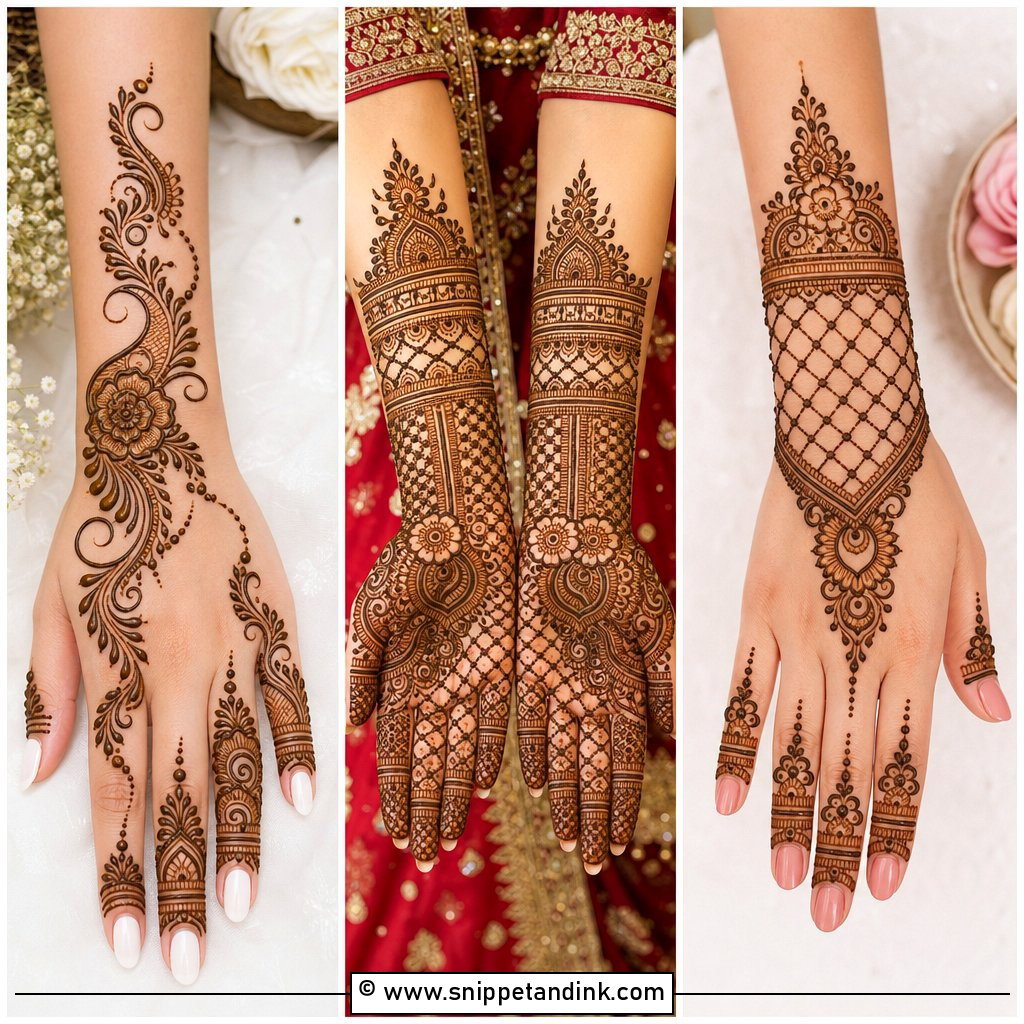
The back hand is where I plan around jewellery. Fingers, knuckles, the back of the hand and the wrist get covered, while the forearm stays bare so chooda or bangles sit on clean skin. A round mandala in the centre is the traditional layout; a floral vine flowing toward the index finger gives it an Arabic feel. The back of the hand stains a shade lighter than the palm, so I use slightly bolder outlines here. Symmetry looks formal, and a diagonal trail looks softer and more modern.
3. Short Arabic Bridal Mehndi Design
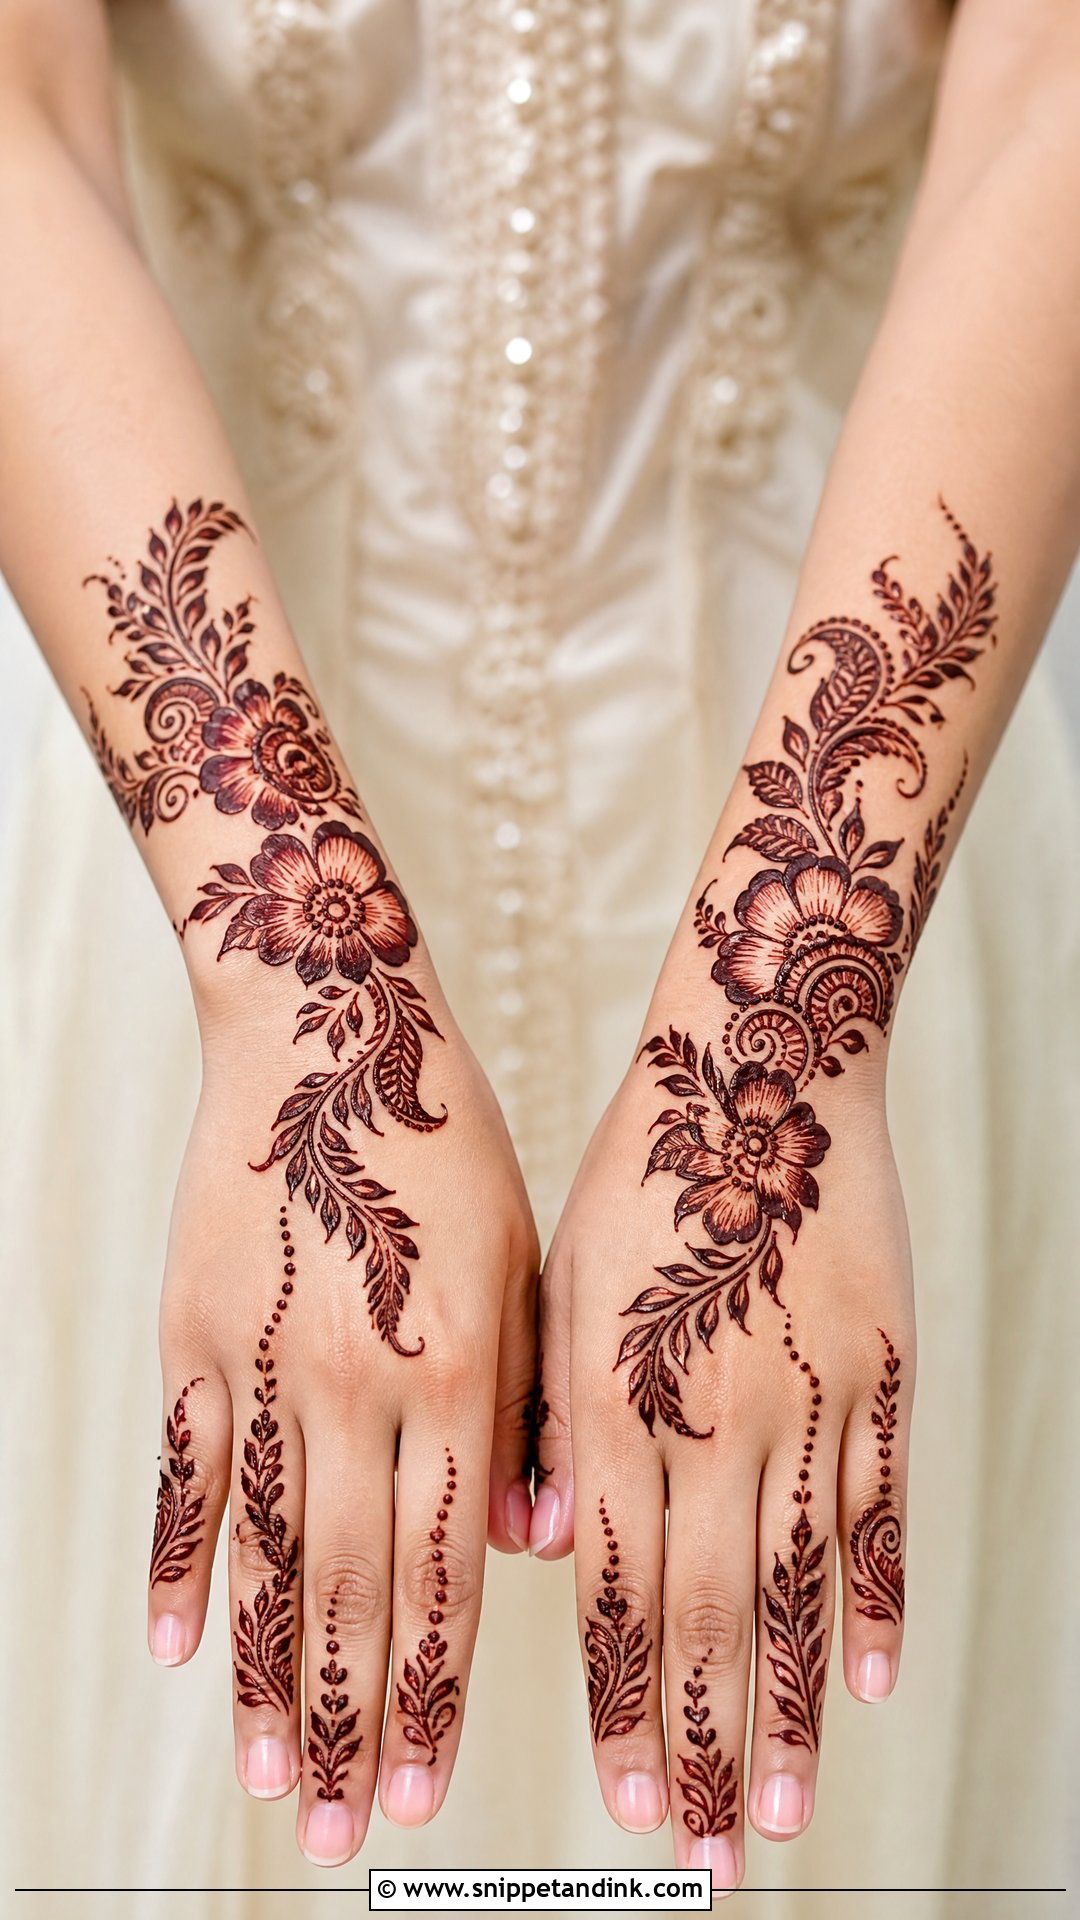
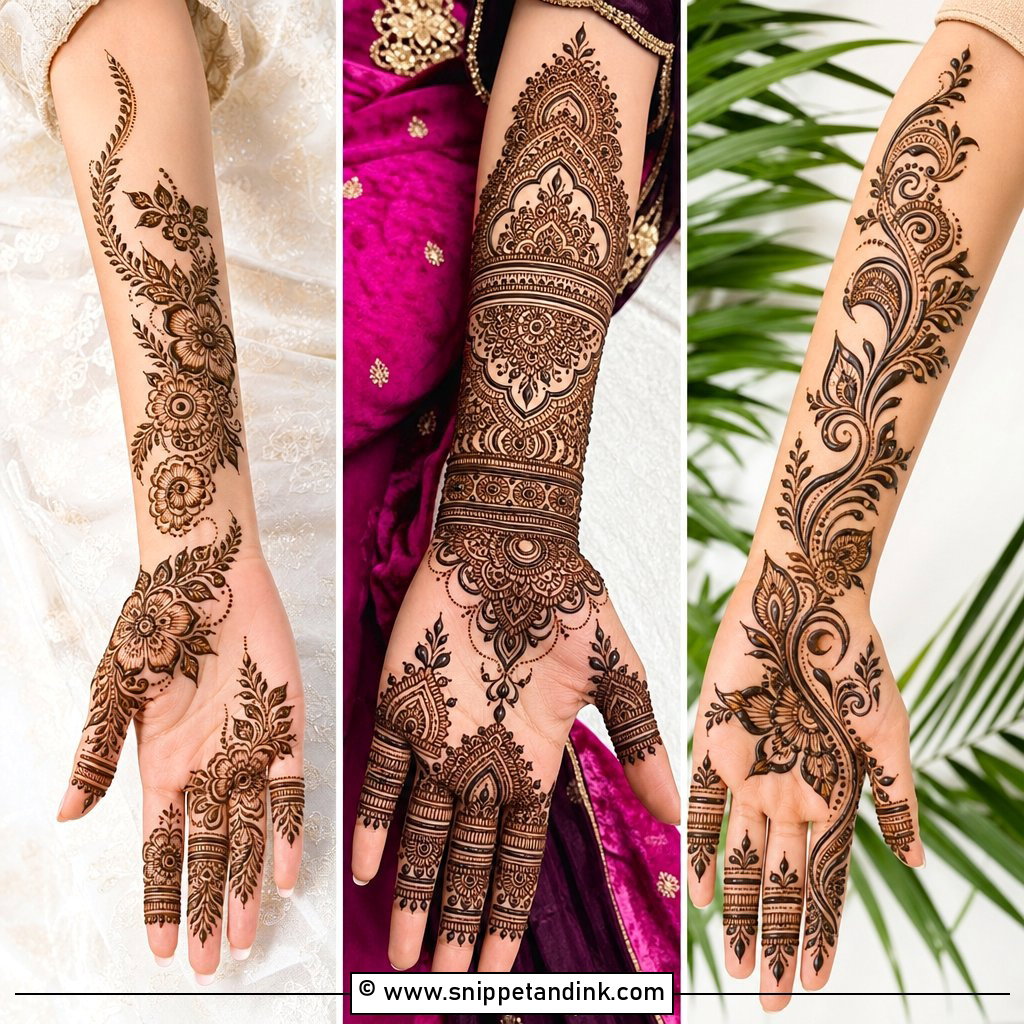
Arabic work is about flow and empty space. I draw bold flowers, leaves and paisleys in a diagonal from the wrist across the back hand and finish with detailed fingertips, then echo it on the palm with a matching floral trail or a small mandala. The shading inside each petal comes from thinning the paste line as I draw, which is where good cone consistency shows. It’s far quicker to apply than dense Indian bridal work and still festive. The deep maroon stain against bare skin is the whole effect, so I resist filling the gaps.
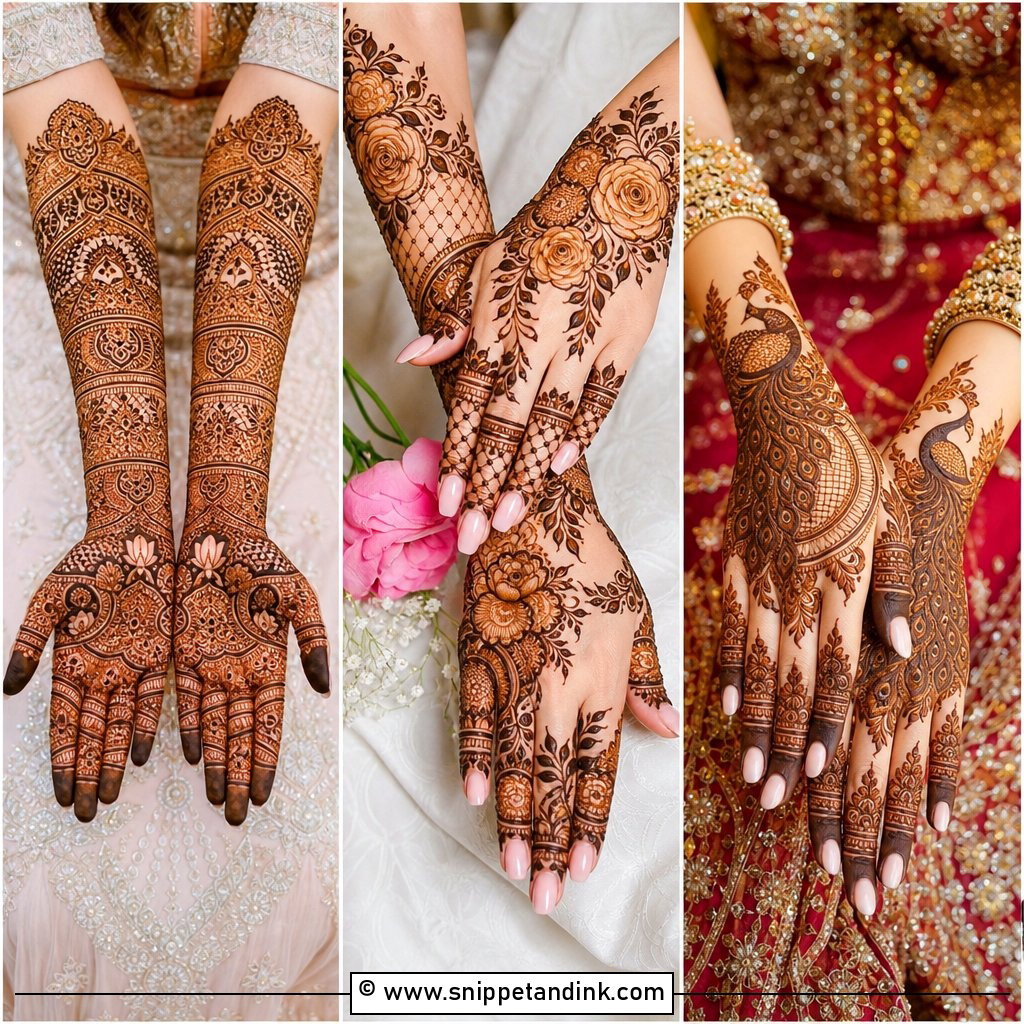
4. Short Indian Bridal Mehndi Design
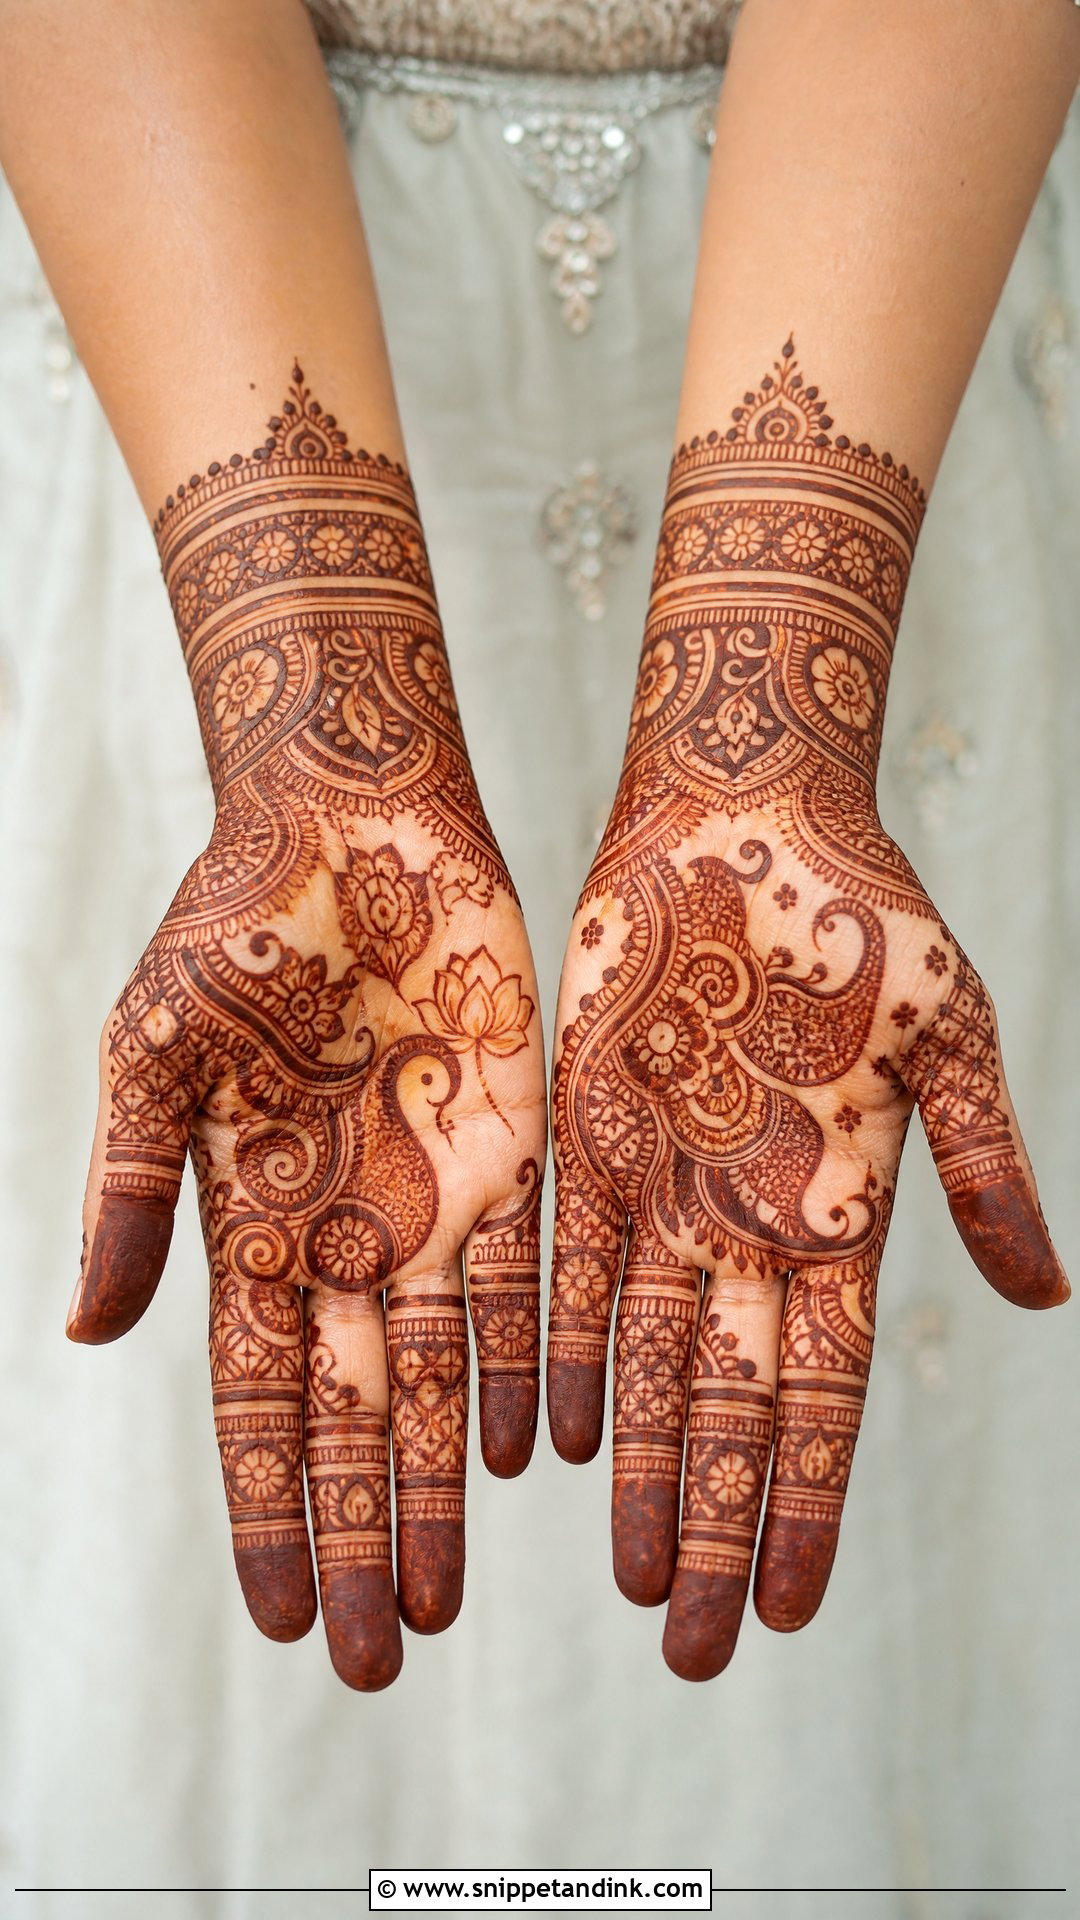
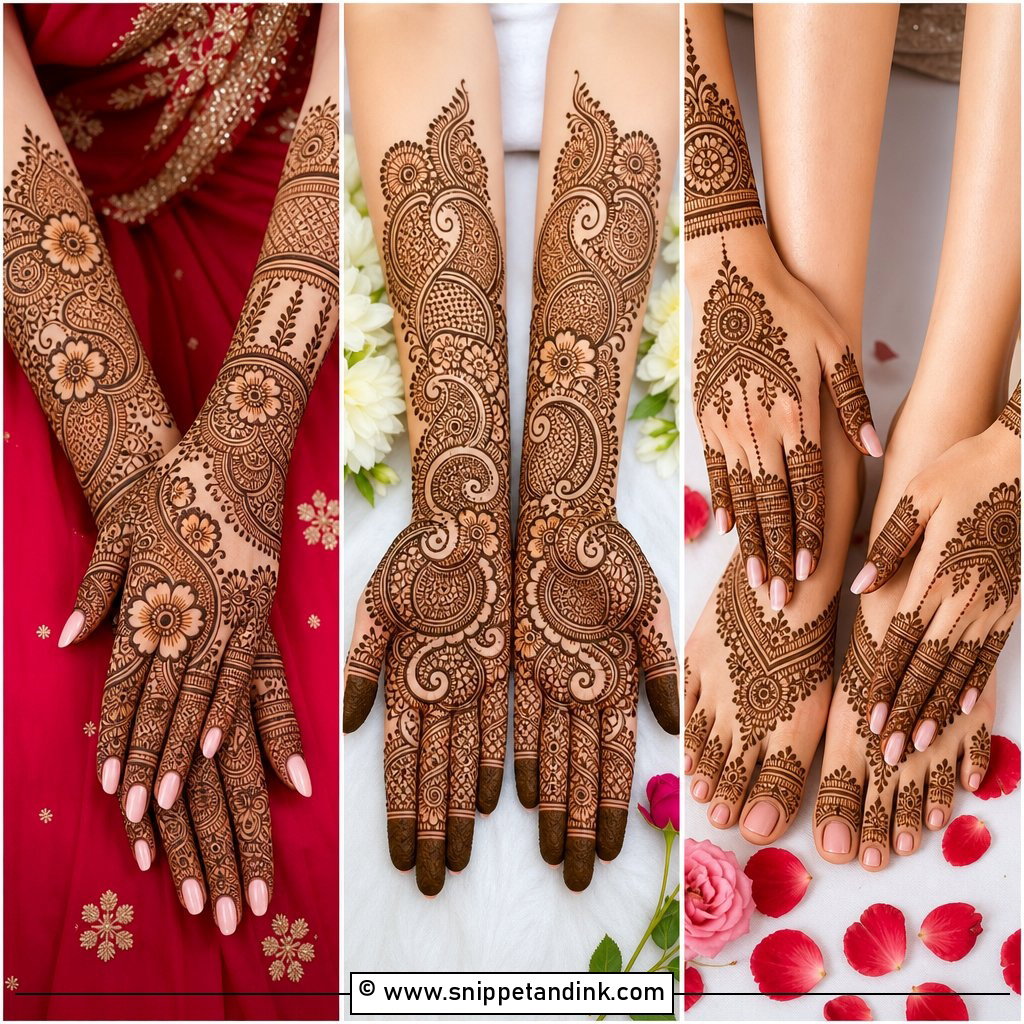
Families who expect traditional mehndi are usually happy with this compromise. I keep the classic Indian vocabulary of paisleys, lotus petals, small peacocks or a simplified bride-and-groom detail, and condense it into a palm-to-wrist layout. Fingers get thin lines, vines and tiny checks, and the wrist gets a bangle-like border. The risk with short Indian work is overcrowding. Tiny fillers packed tightly blur together as the stain darkens, so I leave hairline gaps between elements. It takes a fraction of the sitting time of a full dulhan design.
5. Short Indo-Arabic Bridal Mehndi Design
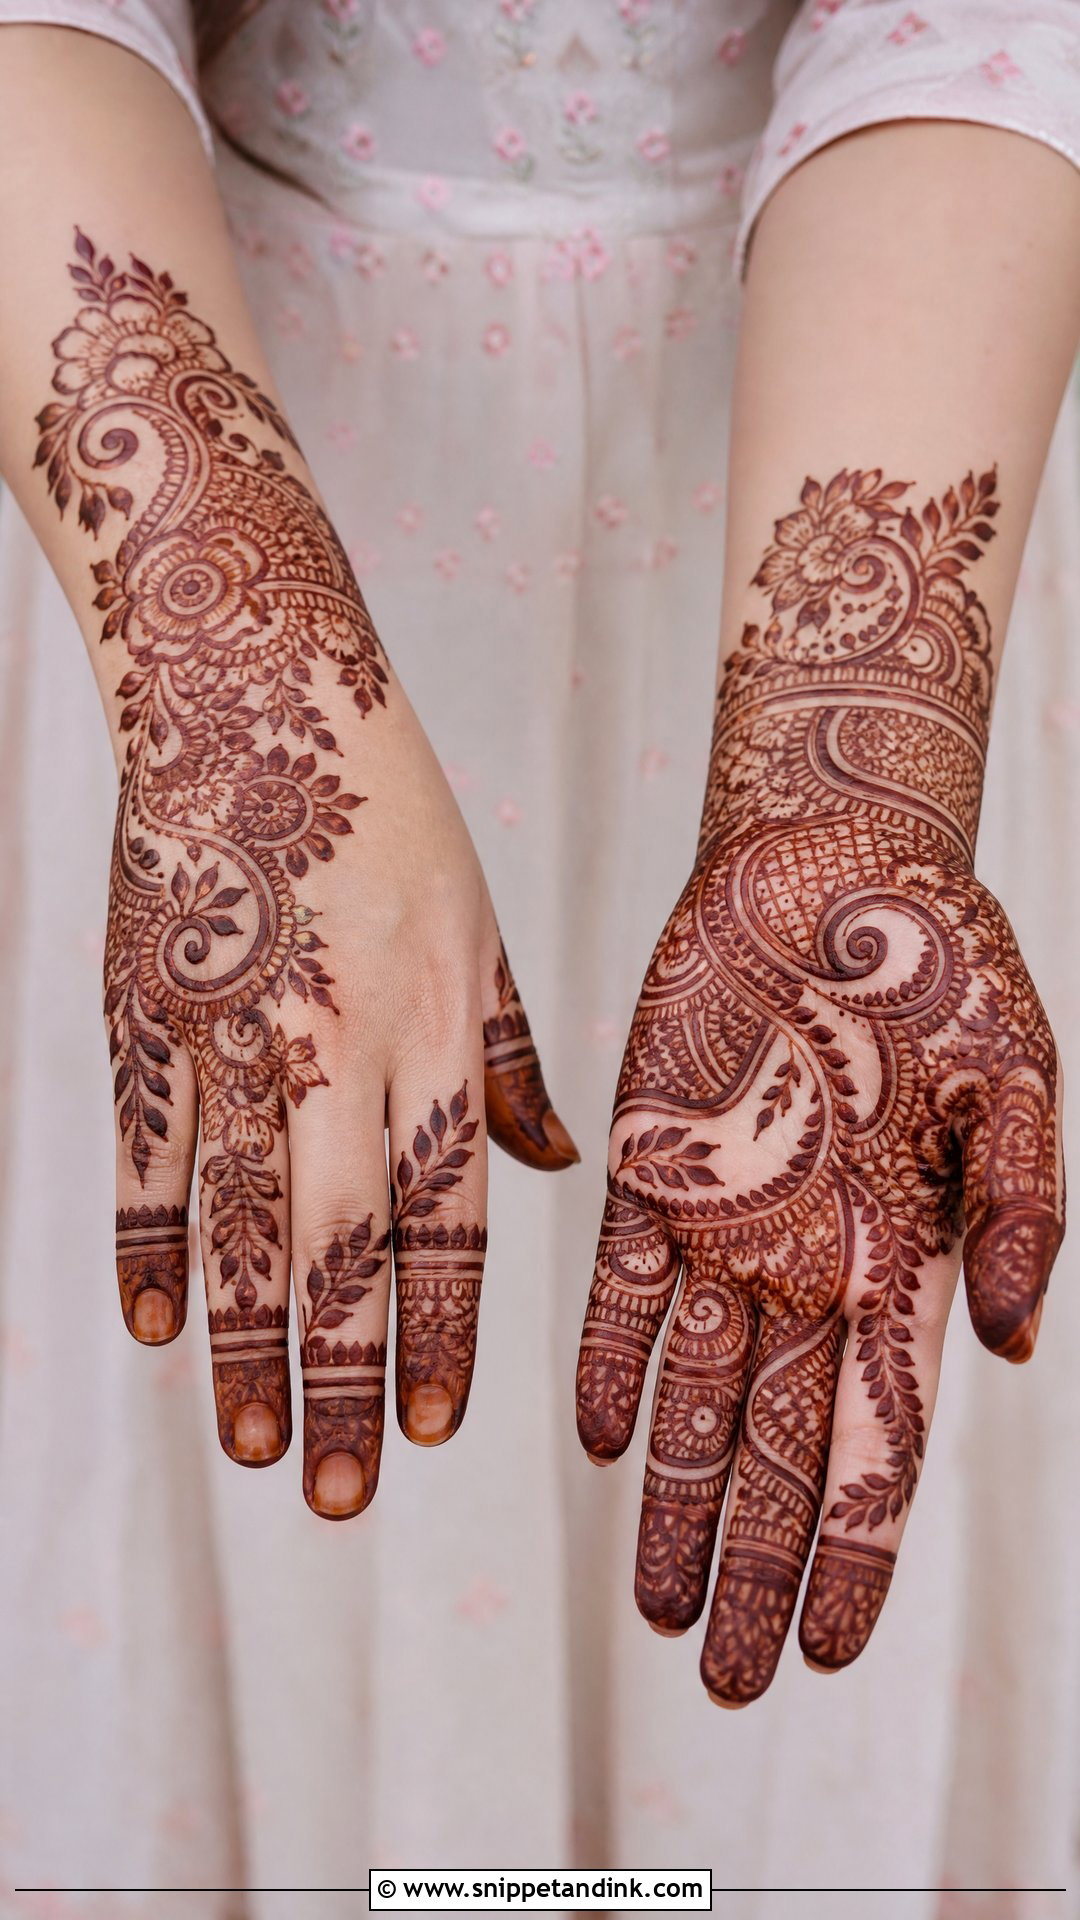
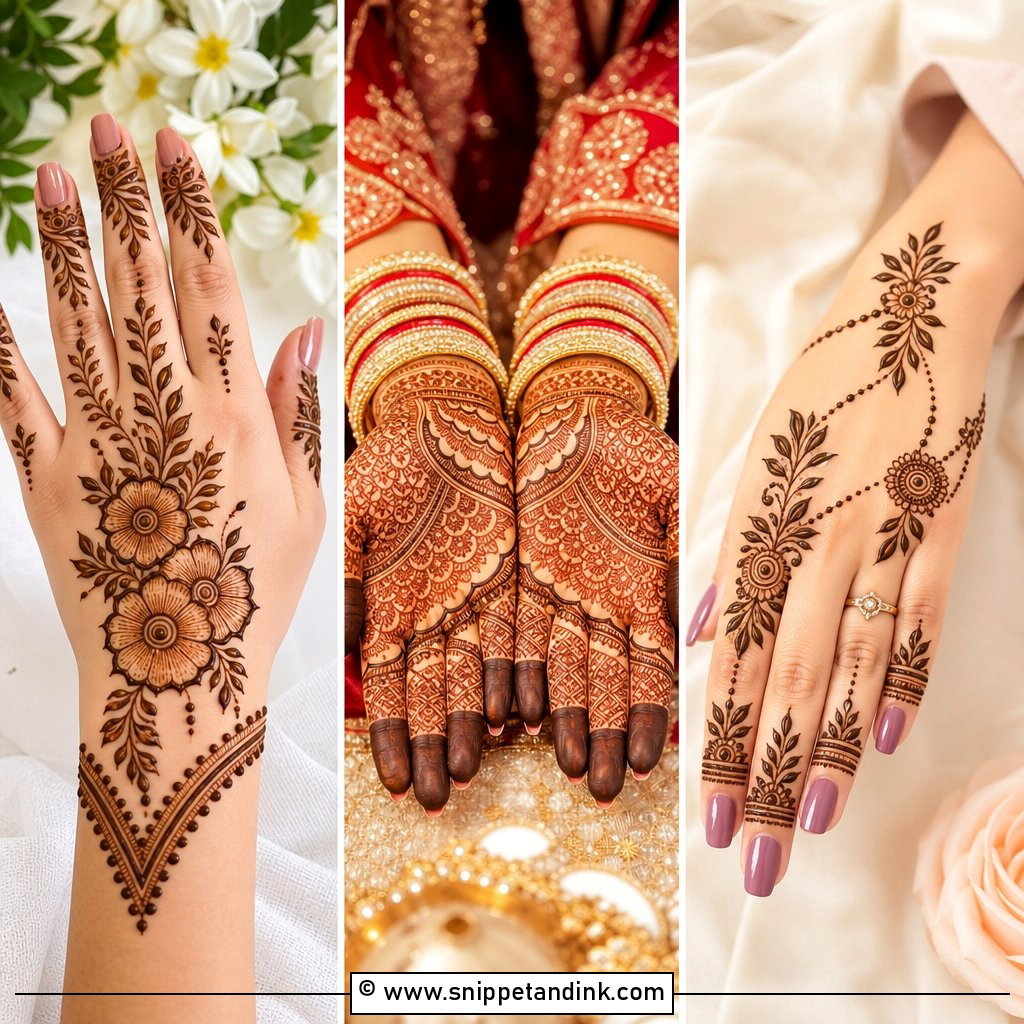
Indo-Arabic takes the trail layout of Arabic work and fills it with Indian detail: shaded petals, paisley clusters and fine filler. The design runs from the wrist along one side of the palm or back hand, with plenty of bare skin around it. It’s my usual suggestion for an engagement, a reception, or anyone after a semi-bridal look. I fill the fingers more heavily to balance the open space. Keep the main trail broad, and let the fine work sit around it rather than inside every gap.
6. Short Bridal Mandala Mehndi Design
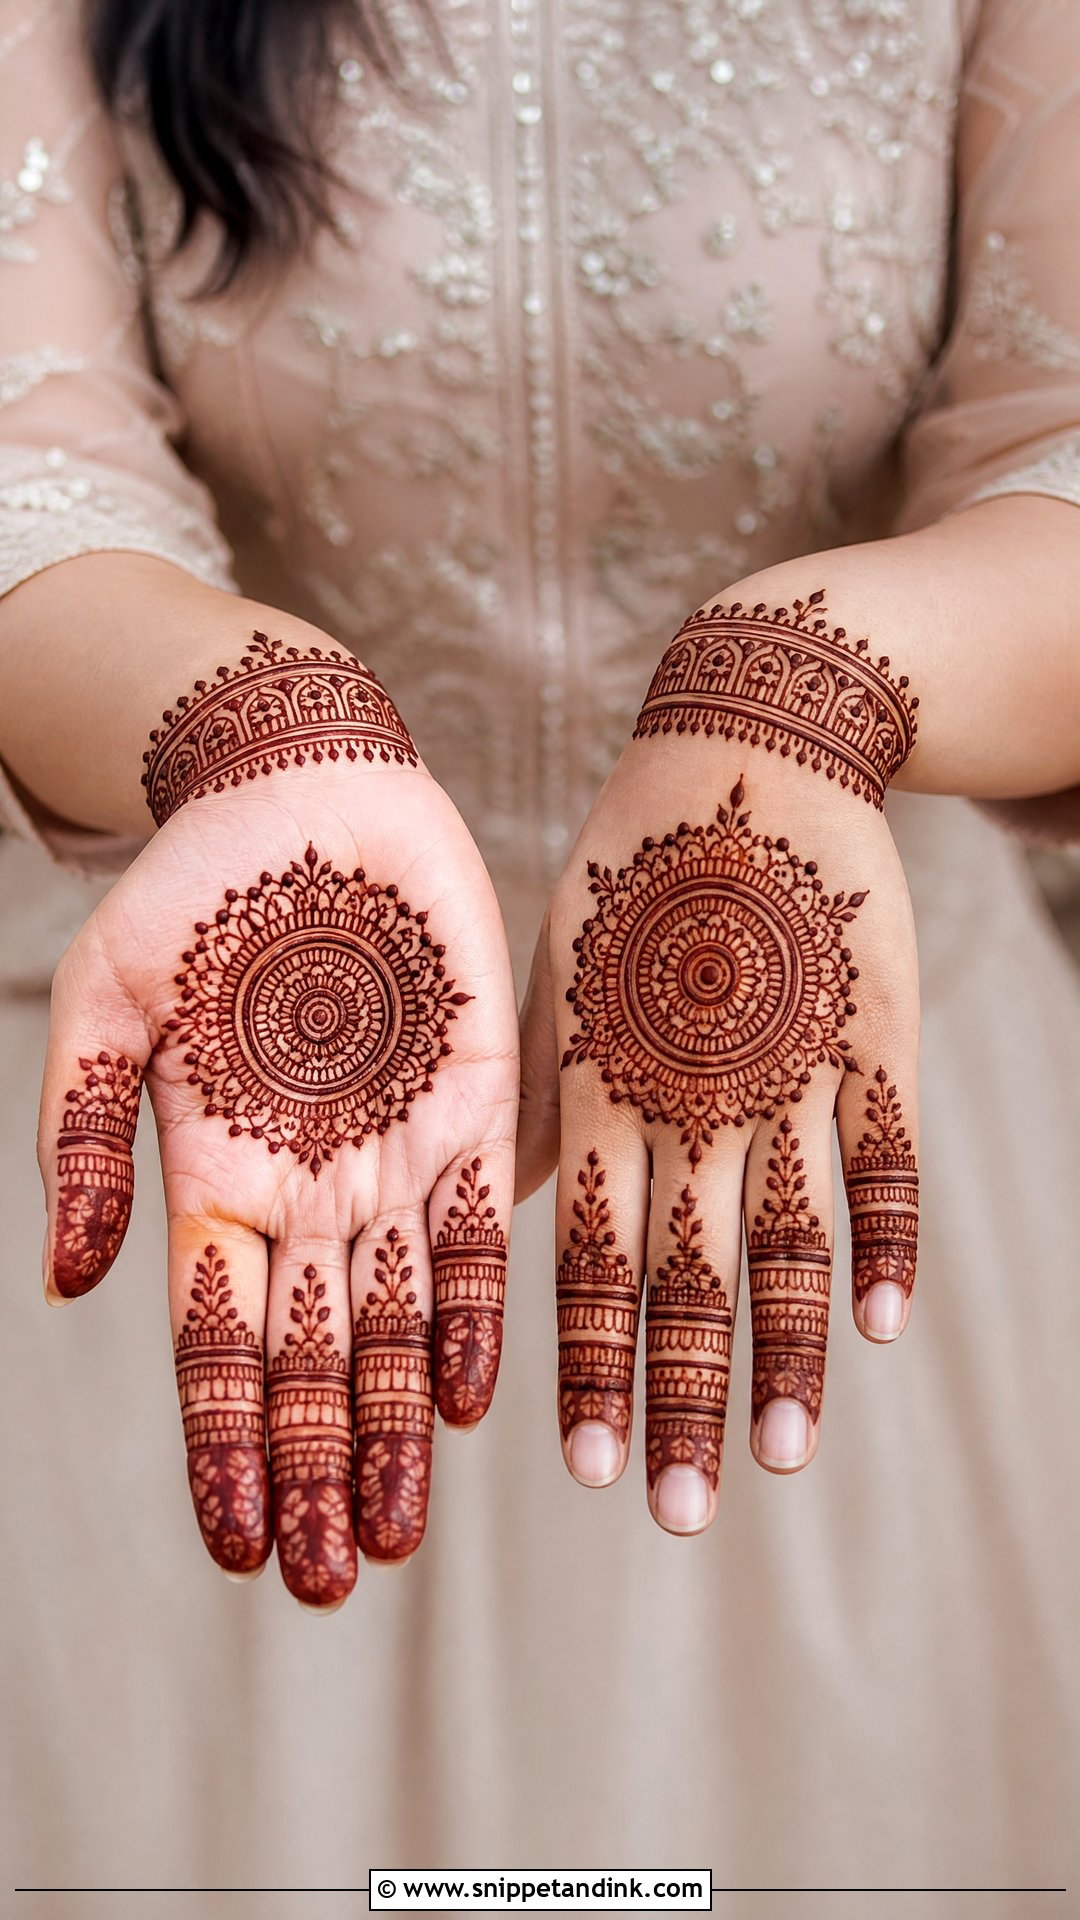
A mandala is the hardest motif to draw well and the easiest to judge, because any wobble in the circle shows. I mark the centre point, build the rings outward evenly, then add petals, dots and leafy borders. A narrow bracelet band at the wrist stops the hand looking unfinished. Brides who like symmetry love it, and it sits easily beside bold rings. Leave a little bare skin around the outer ring; that gap makes the circle look sharper once it stains.
7. Short Bridal Floral Mehndi Design
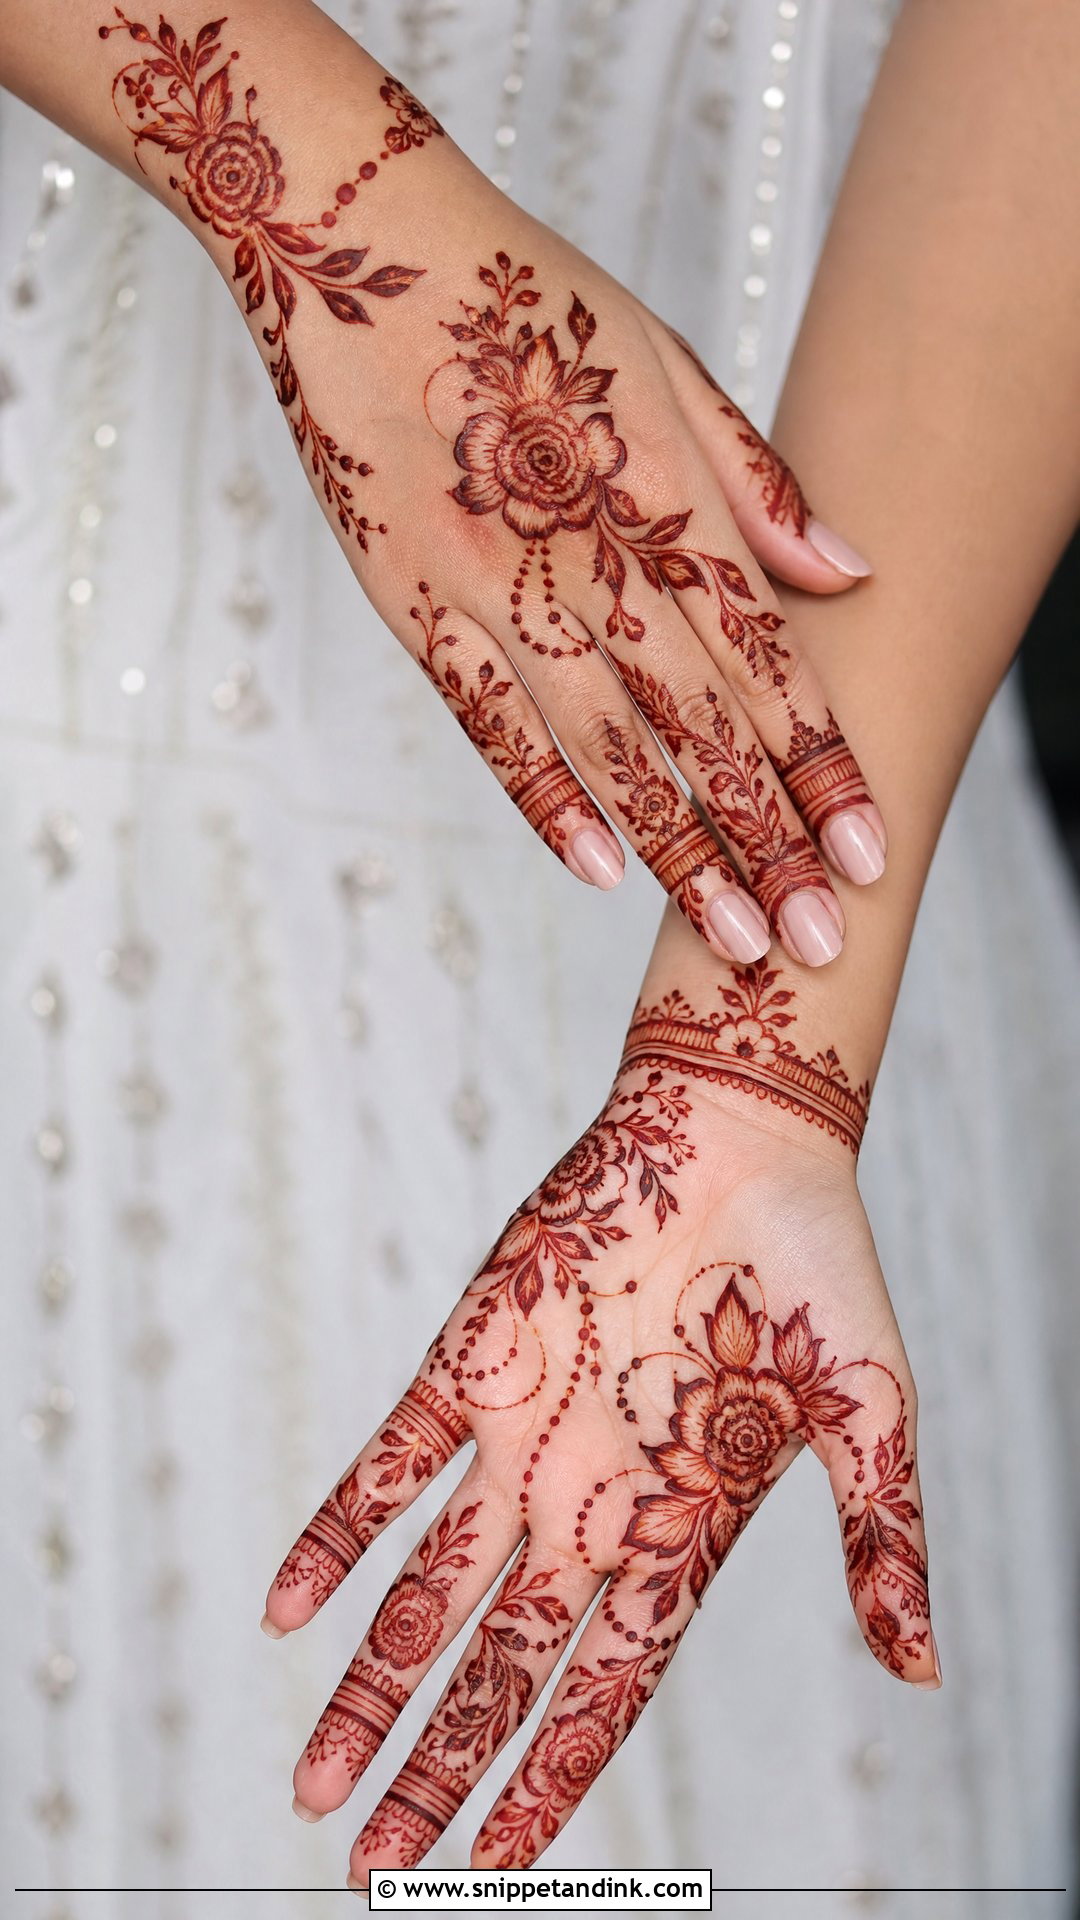
Florals give me the most freedom. On the palm, roses, lotus petals and small blossoms run in a curve from the wrist to the fingertips; on the back they become a diagonal garden with gaps between blooms. The fingers need small leaves and fine lines, or the flowers float disconnected. Shaded petals add depth, while plain outline flowers stay lighter and more modern. Pastel lehengas and floral jewellery suit it.
8. Short Bridal Paisley Mehndi Design
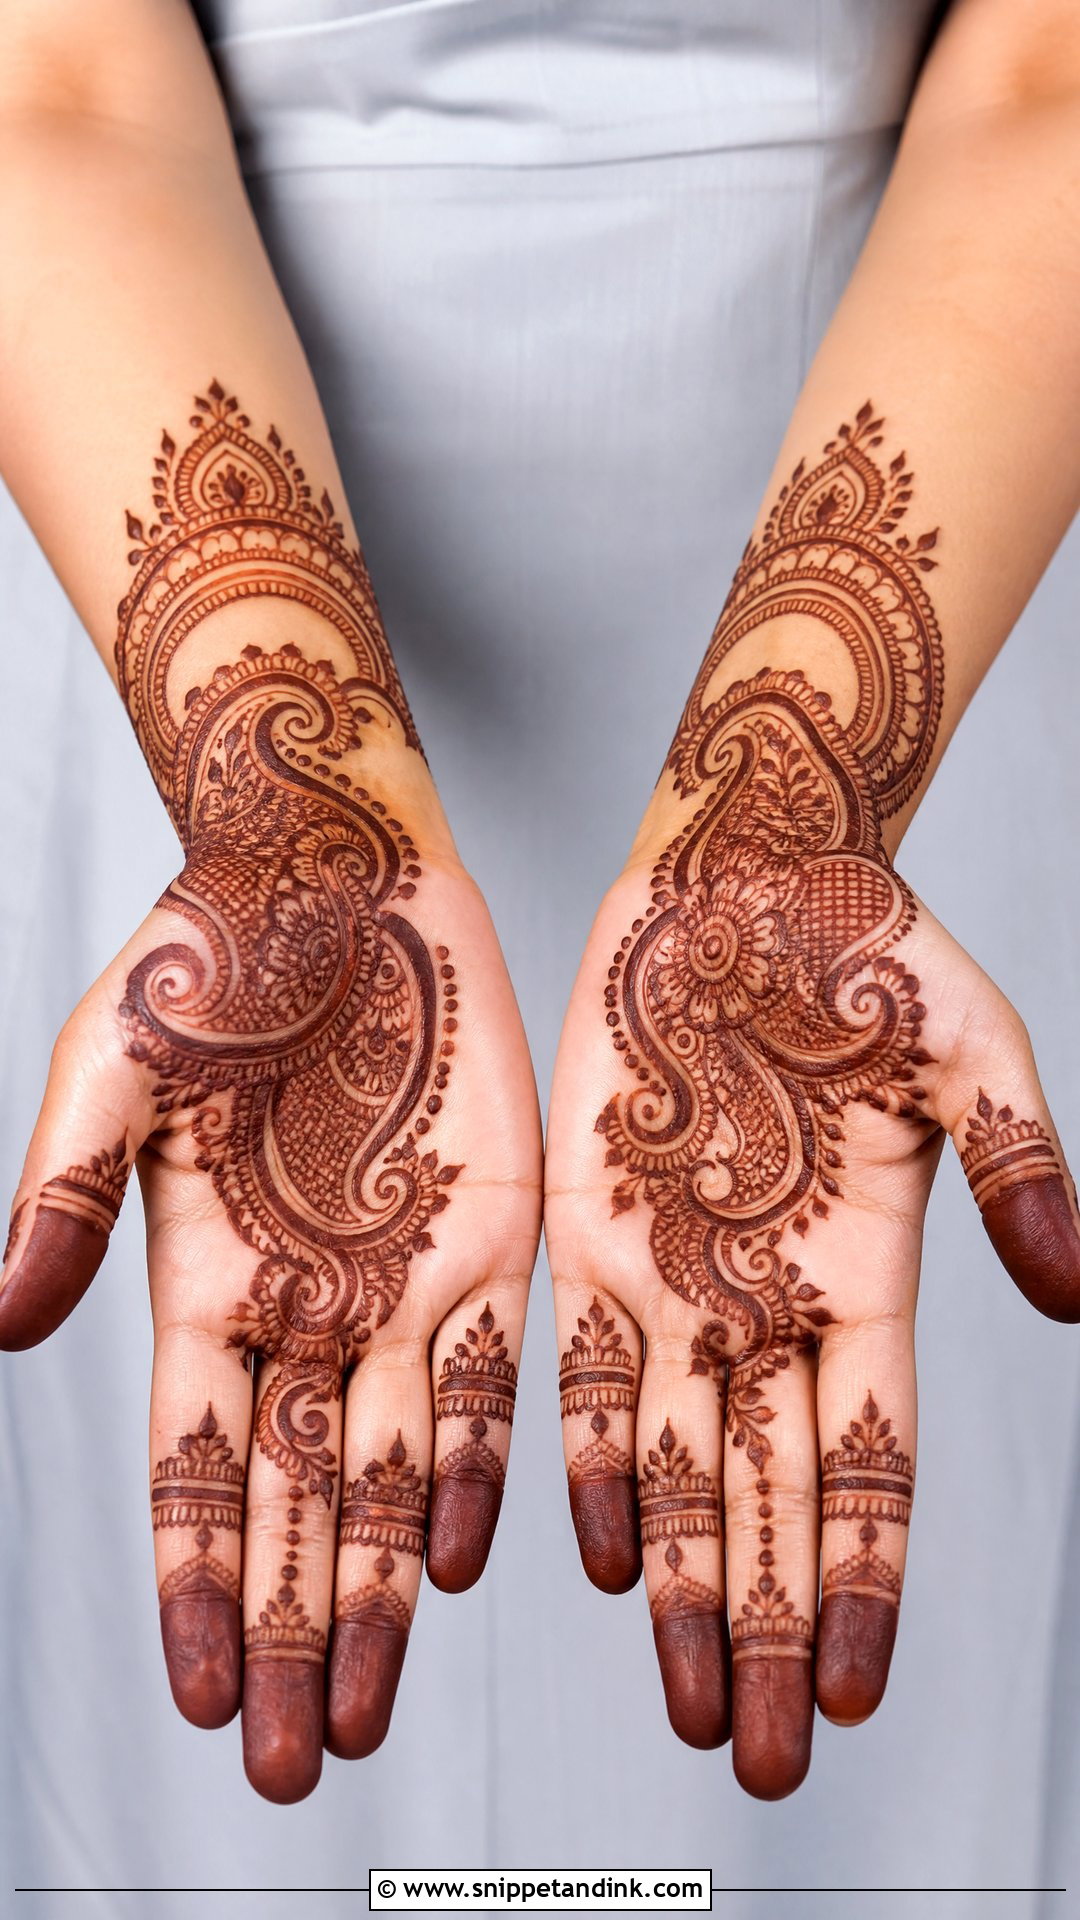
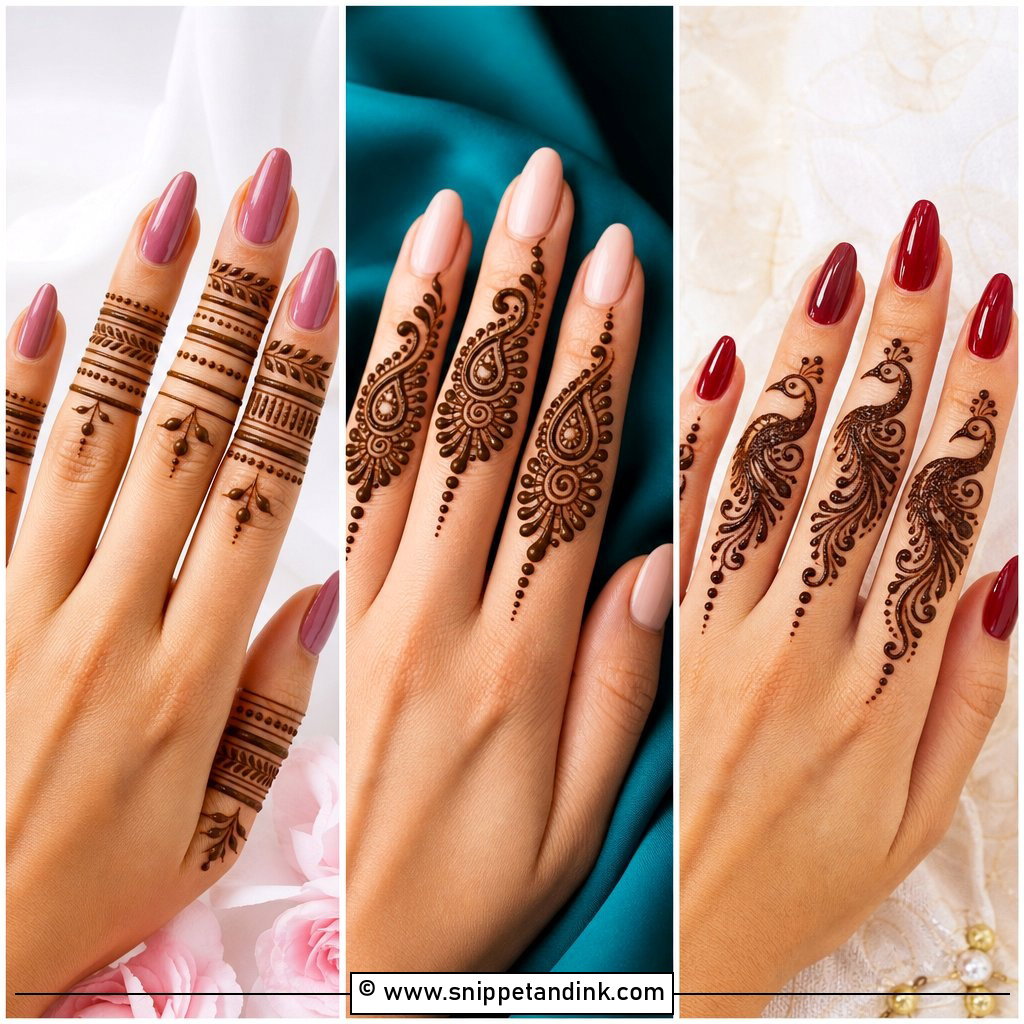
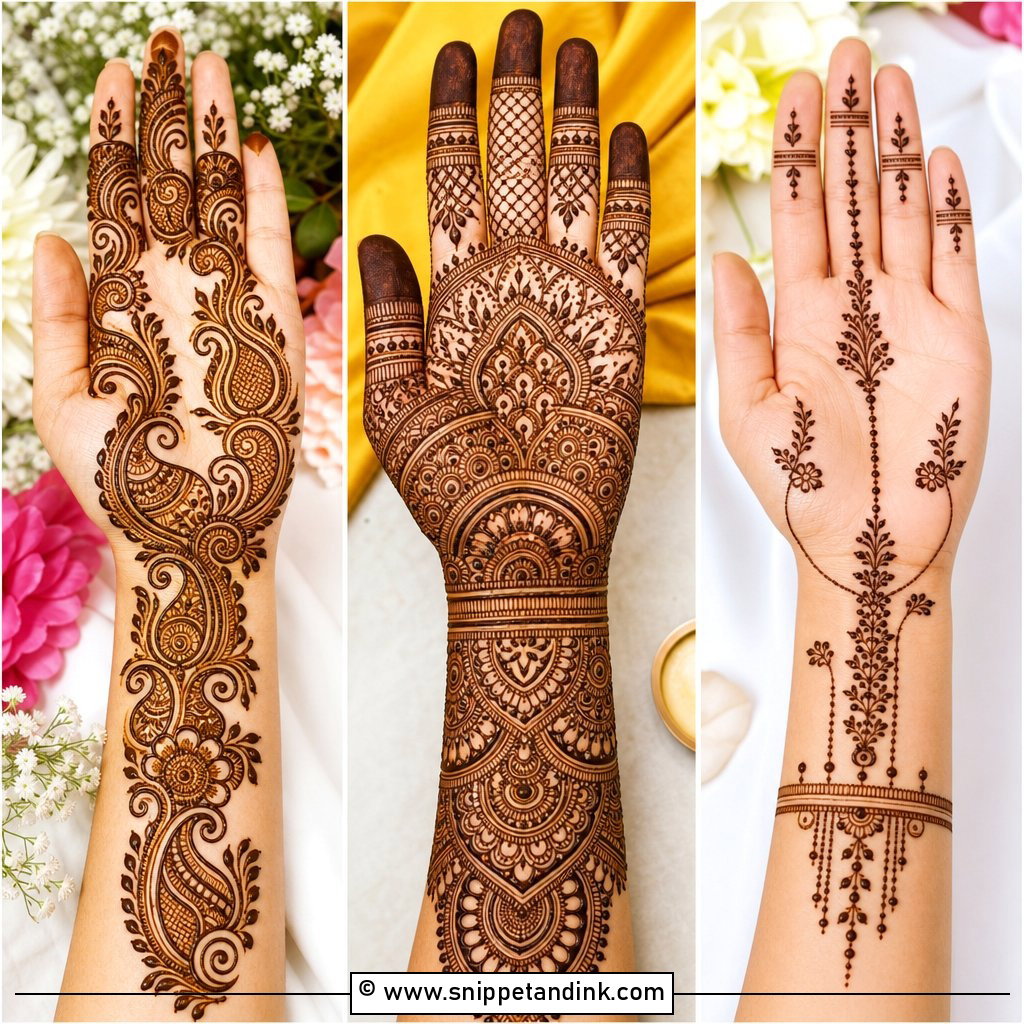
Paisley is the motif I trust most on short coverage, because its bold outline survives everything: a lighter stain on the back hand, slight bleeding, a fading day three. One or two large paisleys go on the palm, back hand or wrist, filled with small flowers, curves, dots or mesh. The rest of the hand stays light with slim finger patterns. A small wrist cuff and matching fingertips make it feel bridal. Traditional, and still far from dense.
9. Short Bridal Jaali Mehndi Design
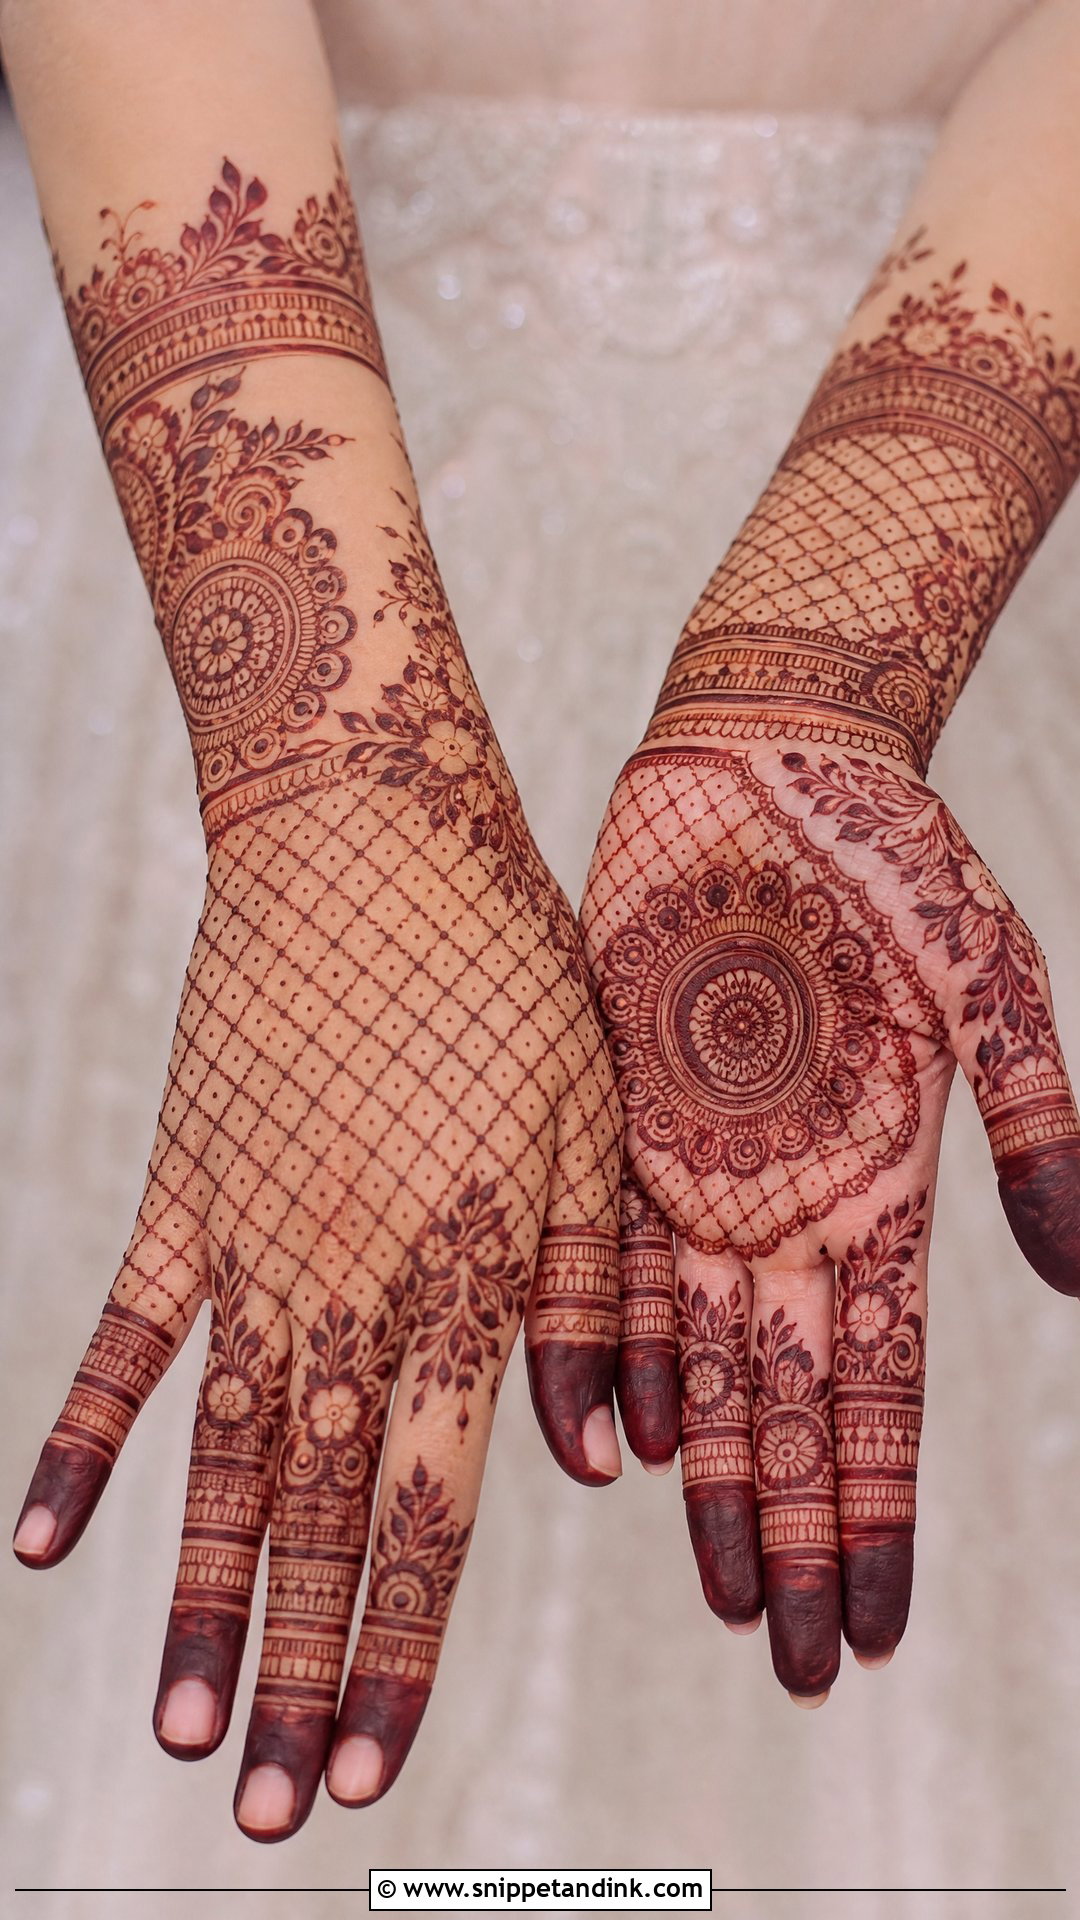
Jaali is a mesh of crossing lines, and it only looks like lace if those lines are thin and evenly spaced. That comes down to cone consistency: paste that’s too runny spreads and closes the gaps, so I test the flow on paper before I touch skin. I place the jaali on part of the palm, the back hand or a side section near the wrist, and pair it with florals, paisleys or a mandala so it doesn’t read as plain netting. The mesh echoes the texture of bridal rings. Don’t cover every inch; open space keeps it modern.
10. Short Bridal Finger Mehndi Design
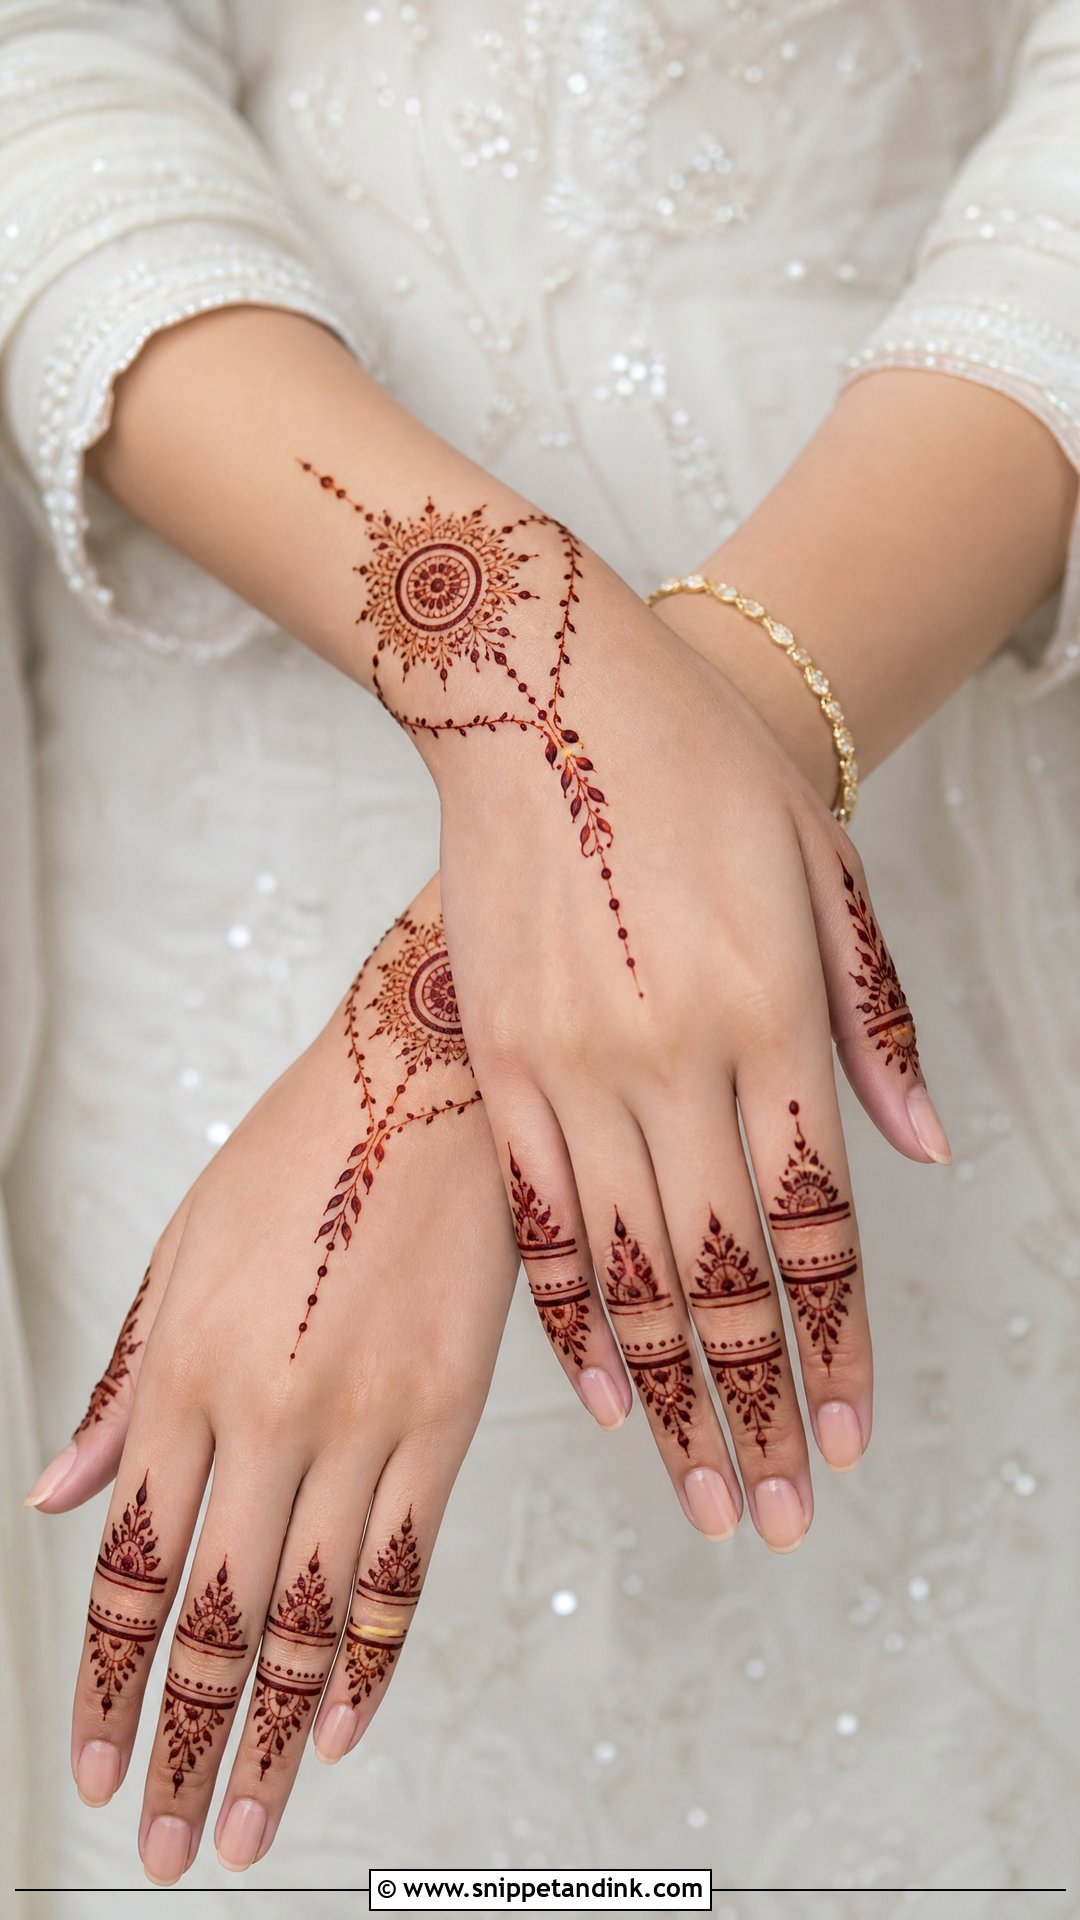
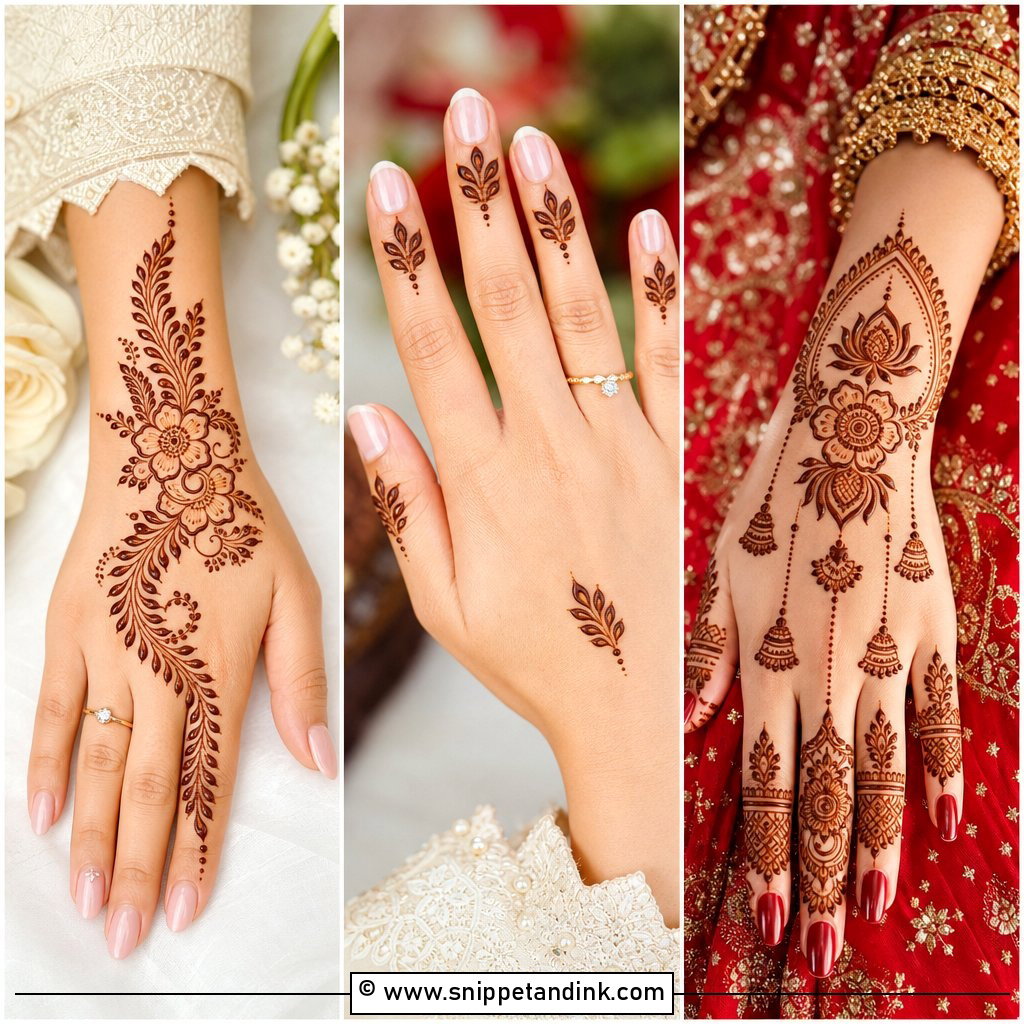
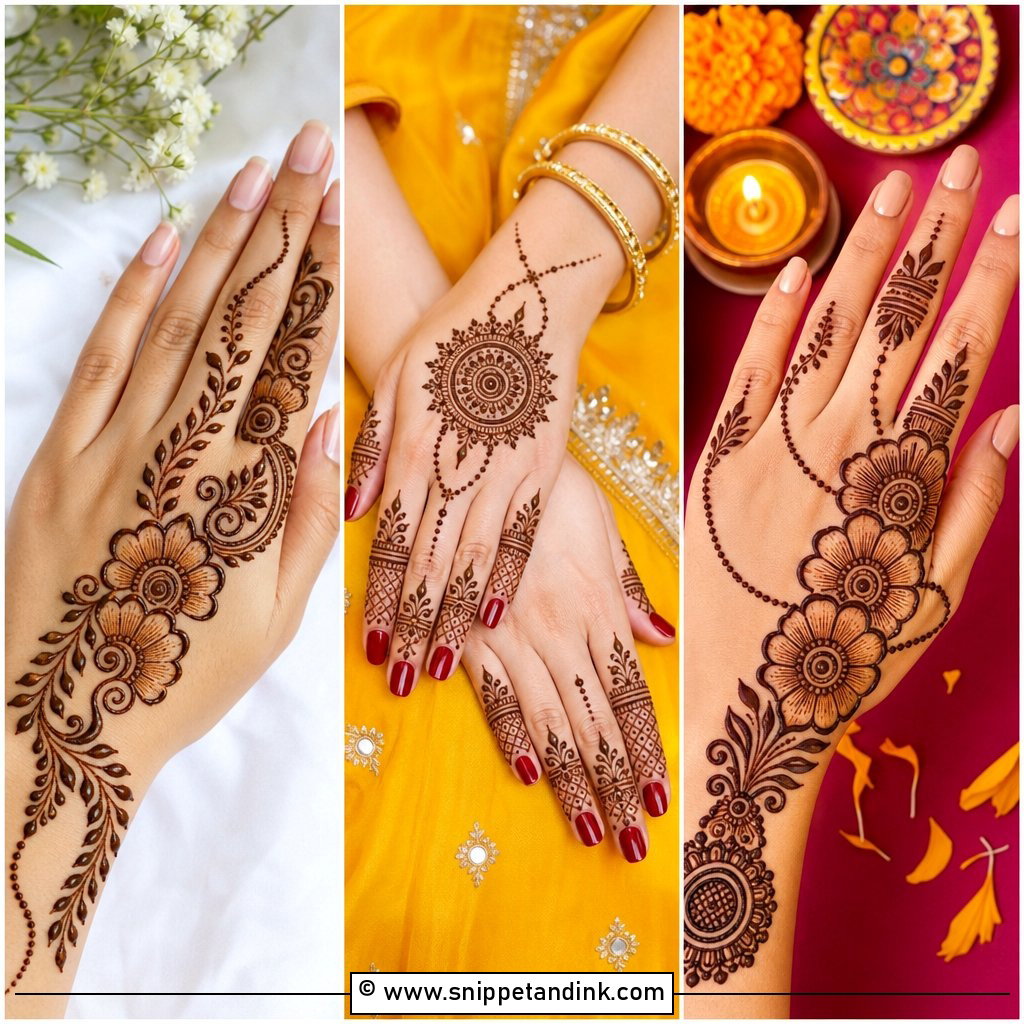
Finger-focused henna leaves the hand light and puts the rings in charge. I decorate each finger with leafy bands, small florals, fine lines or dotted chains, and shade the fingertips, which stain darkest of all. Without something at the wrist, though, it reads as casual party henna, so I always add a small mandala, lotus or bracelet band as an anchor. Keep both hands balanced even if each finger differs a little. A civil ceremony or a small wedding is its natural setting.
11. Short Bridal Bracelet Mehndi Design
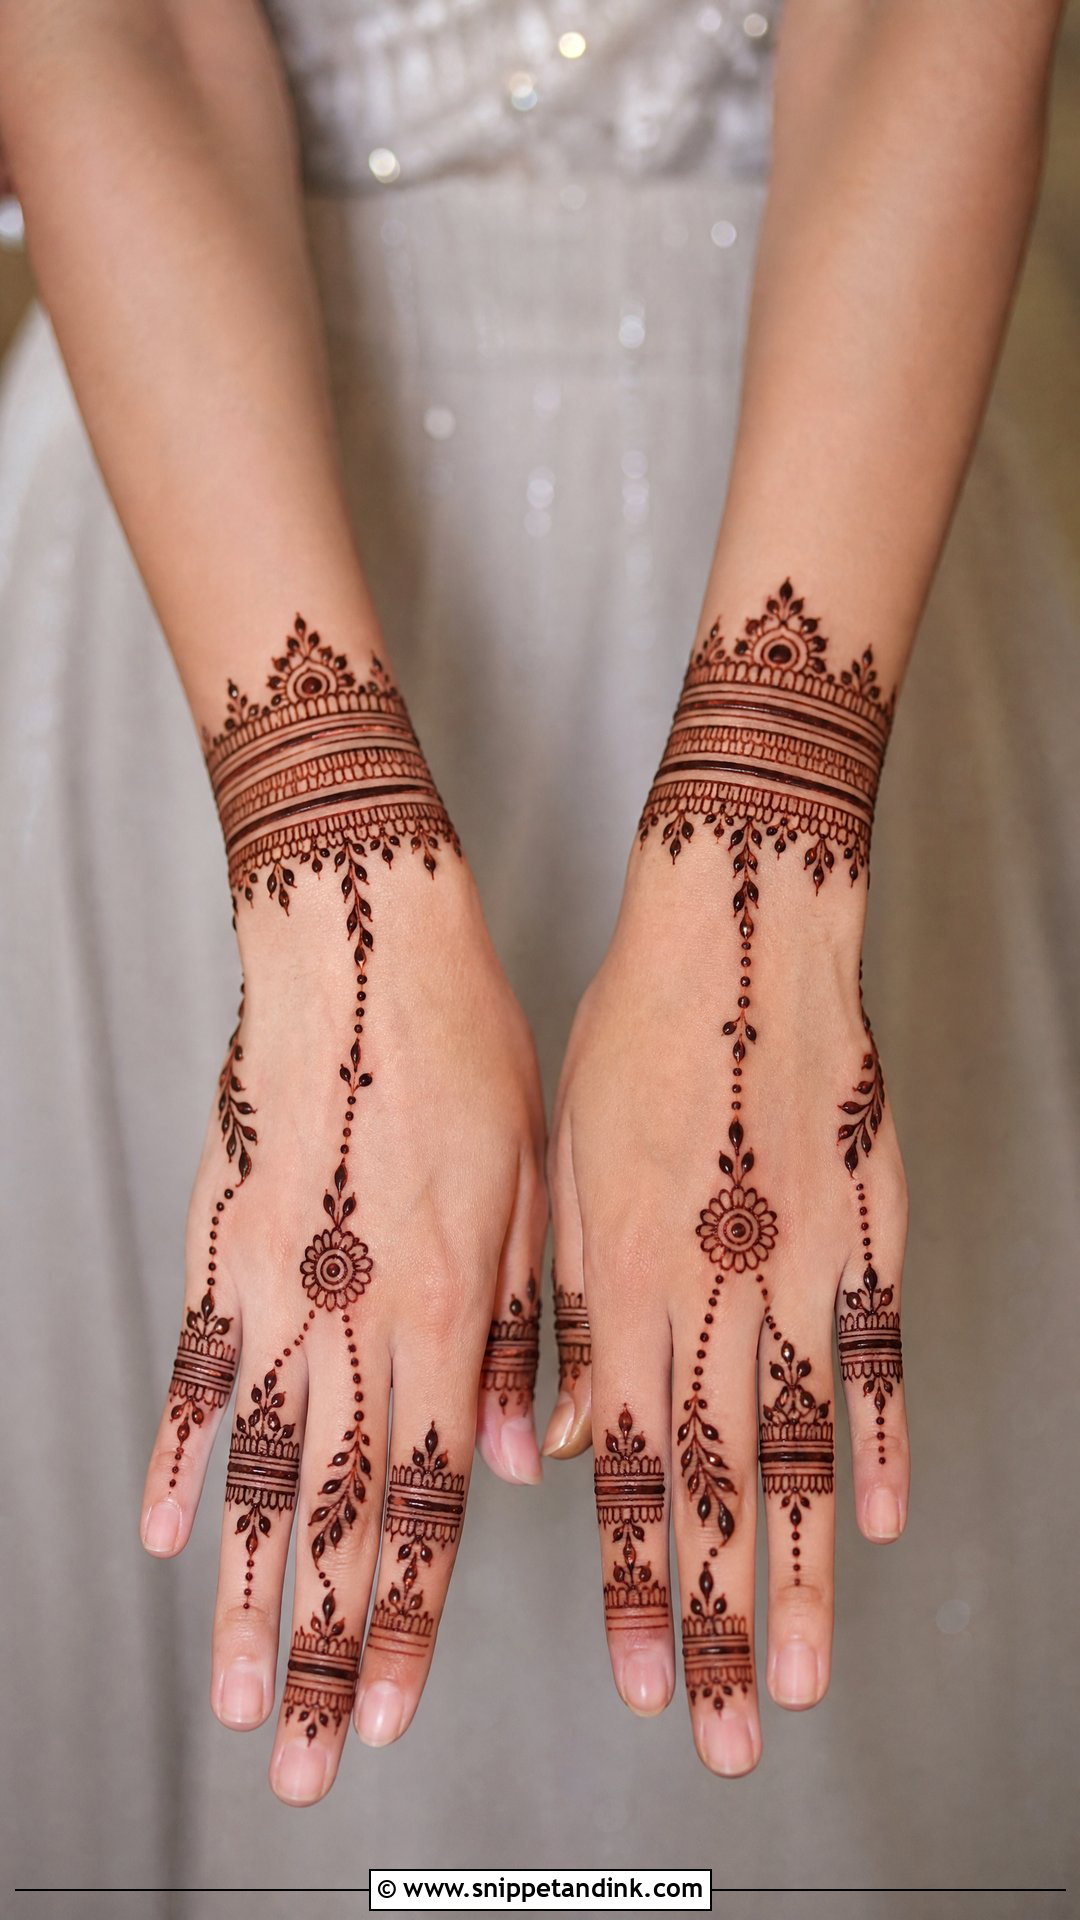
A bracelet design works like jewellery drawn on skin. The main pattern circles the wrist like a bangle, then thin chains, dots or floral strings run up to the fingers; on the back hand it echoes a haath phool, which is why it’s so loved. The palm version is usually a small central flower with a wrist cuff. If you’re wearing heavy bangles, I place the cuff a little lower so it shows beneath them. The border has to be perfectly even, since a wavering cuff is the first thing the eye catches.
12. Short Bridal Initial Mehndi Design
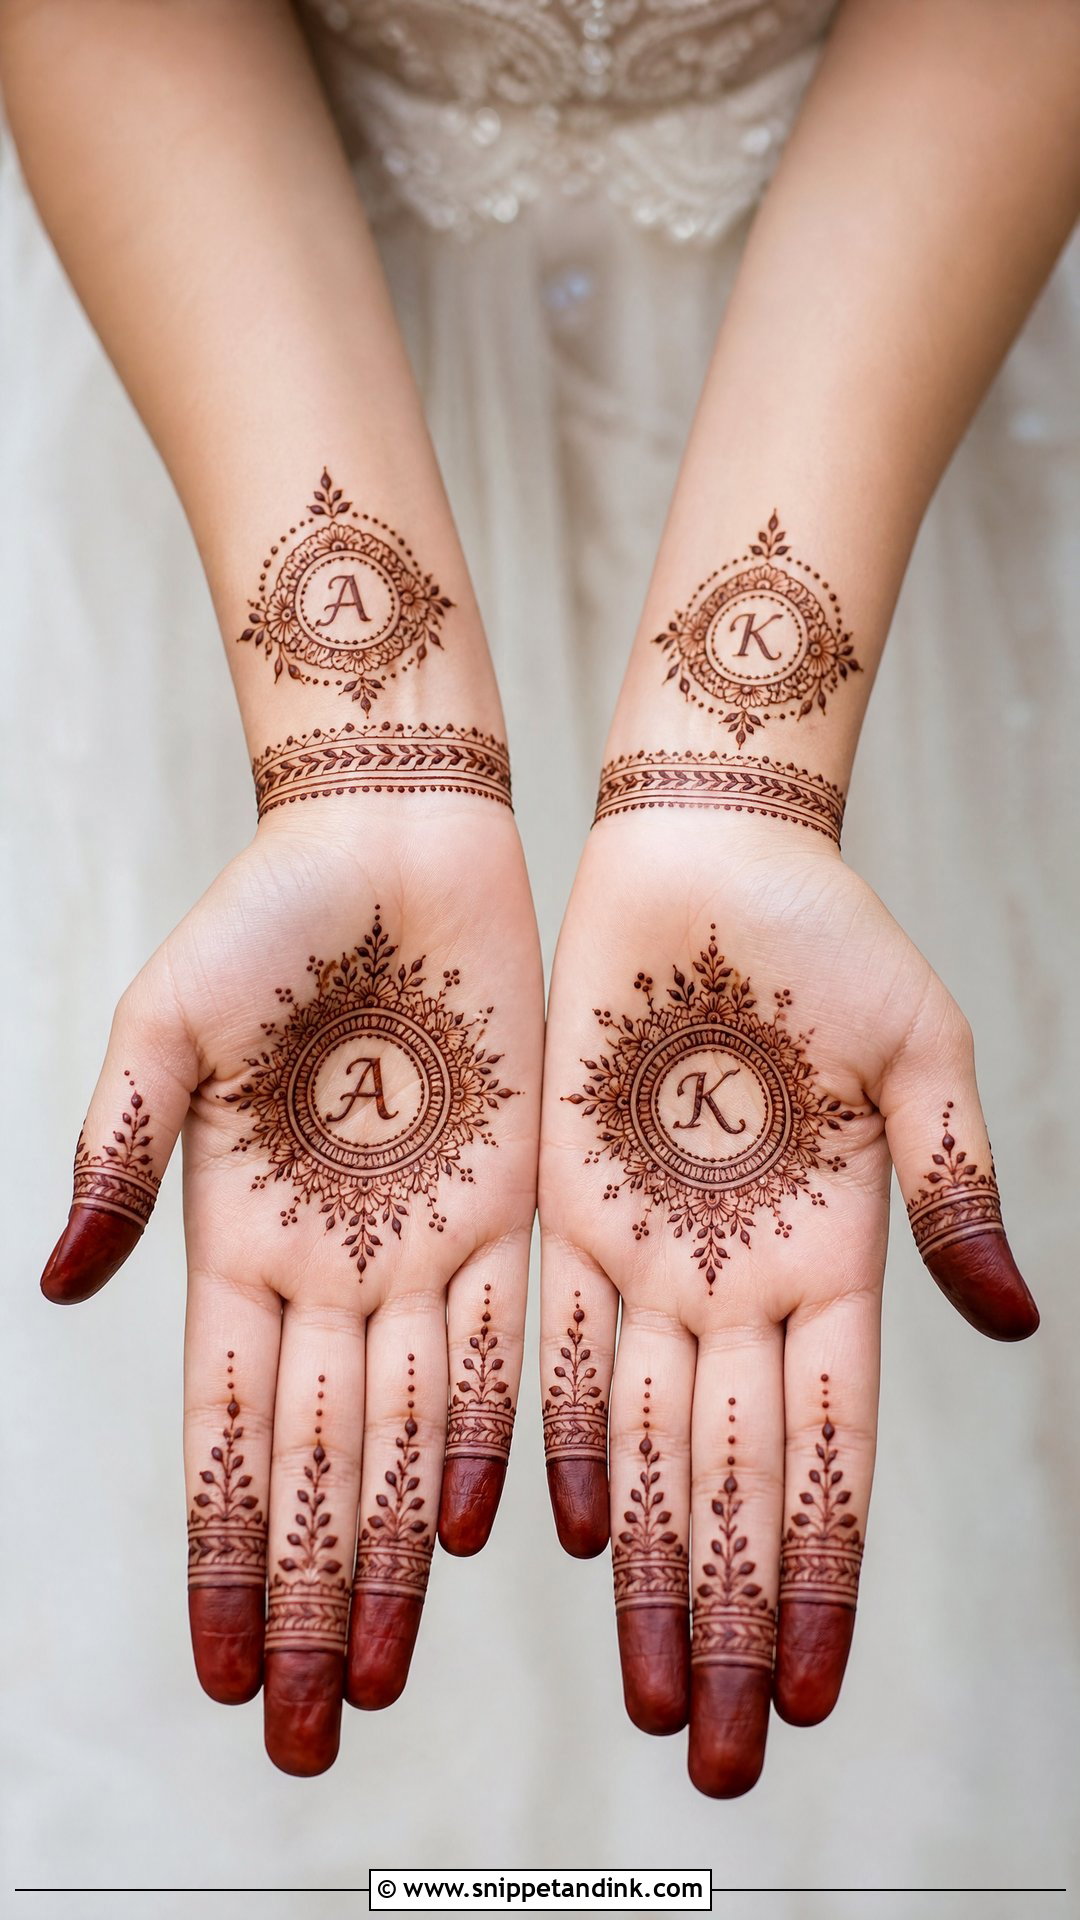
Hiding the partner’s initial is a tradition I always enjoy. The letter can sit inside a floral cluster, within a mandala, or in a small heart or paisley frame near the wrist. On a short design I draw it a little larger than I would on full bridal work, because tiny letters blur as the stain develops and then nobody can find them. Keep the space around it uncluttered, with clean fingers, a few vines and a wrist band elsewhere. It’s personal without the hours that portrait work needs.
13. Short Bridal Lotus Mehndi Design
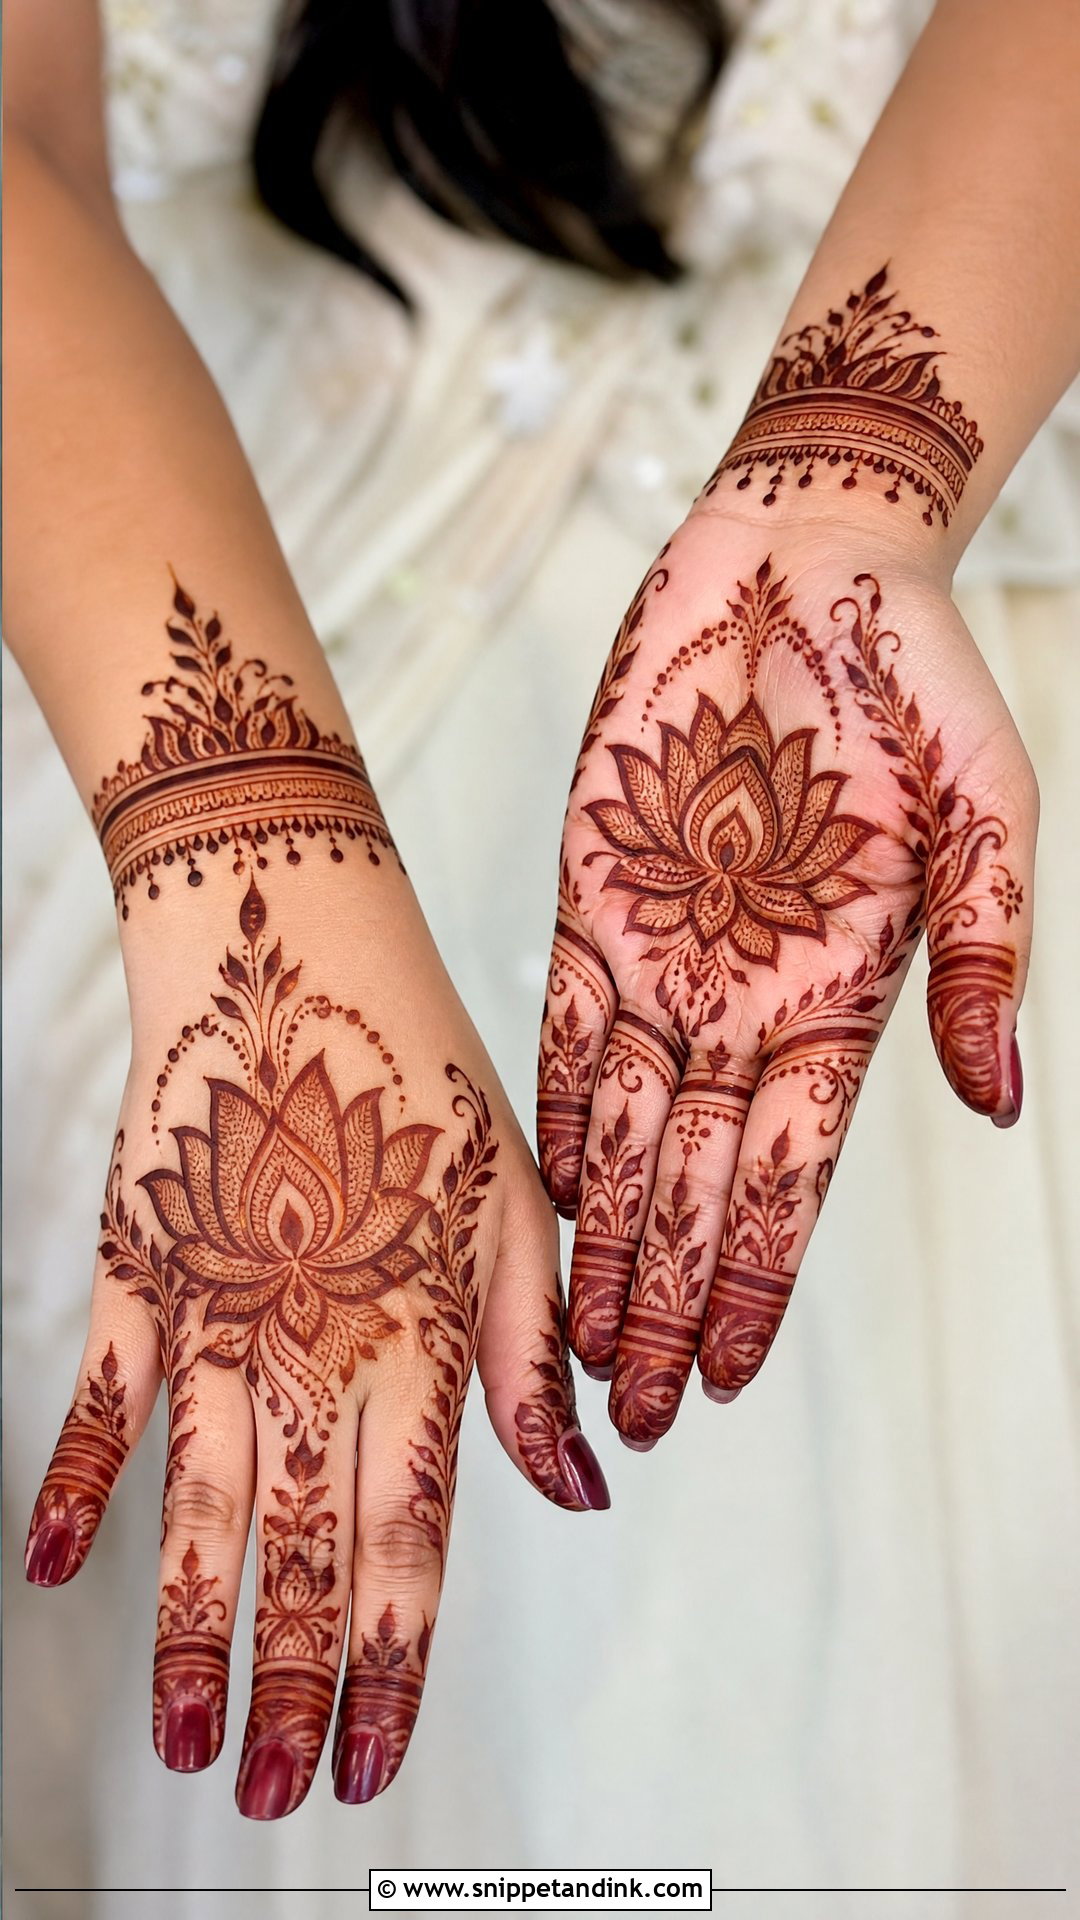
The lotus carries meaning in many traditions, and in a lotus bridal mehndi design on a short layout it becomes the single focus. I place it at the centre of the palm, near the wrist or across the back hand, with petals outlined simply or shaded for fullness. Tiny leaves, dotted borders and finger extensions surround it, but nothing large, so the flower stays the hero. Silk sarees, lehengas and temple jewellery all sit well beside it.
14. Short Bridal Peacock Mehndi Design
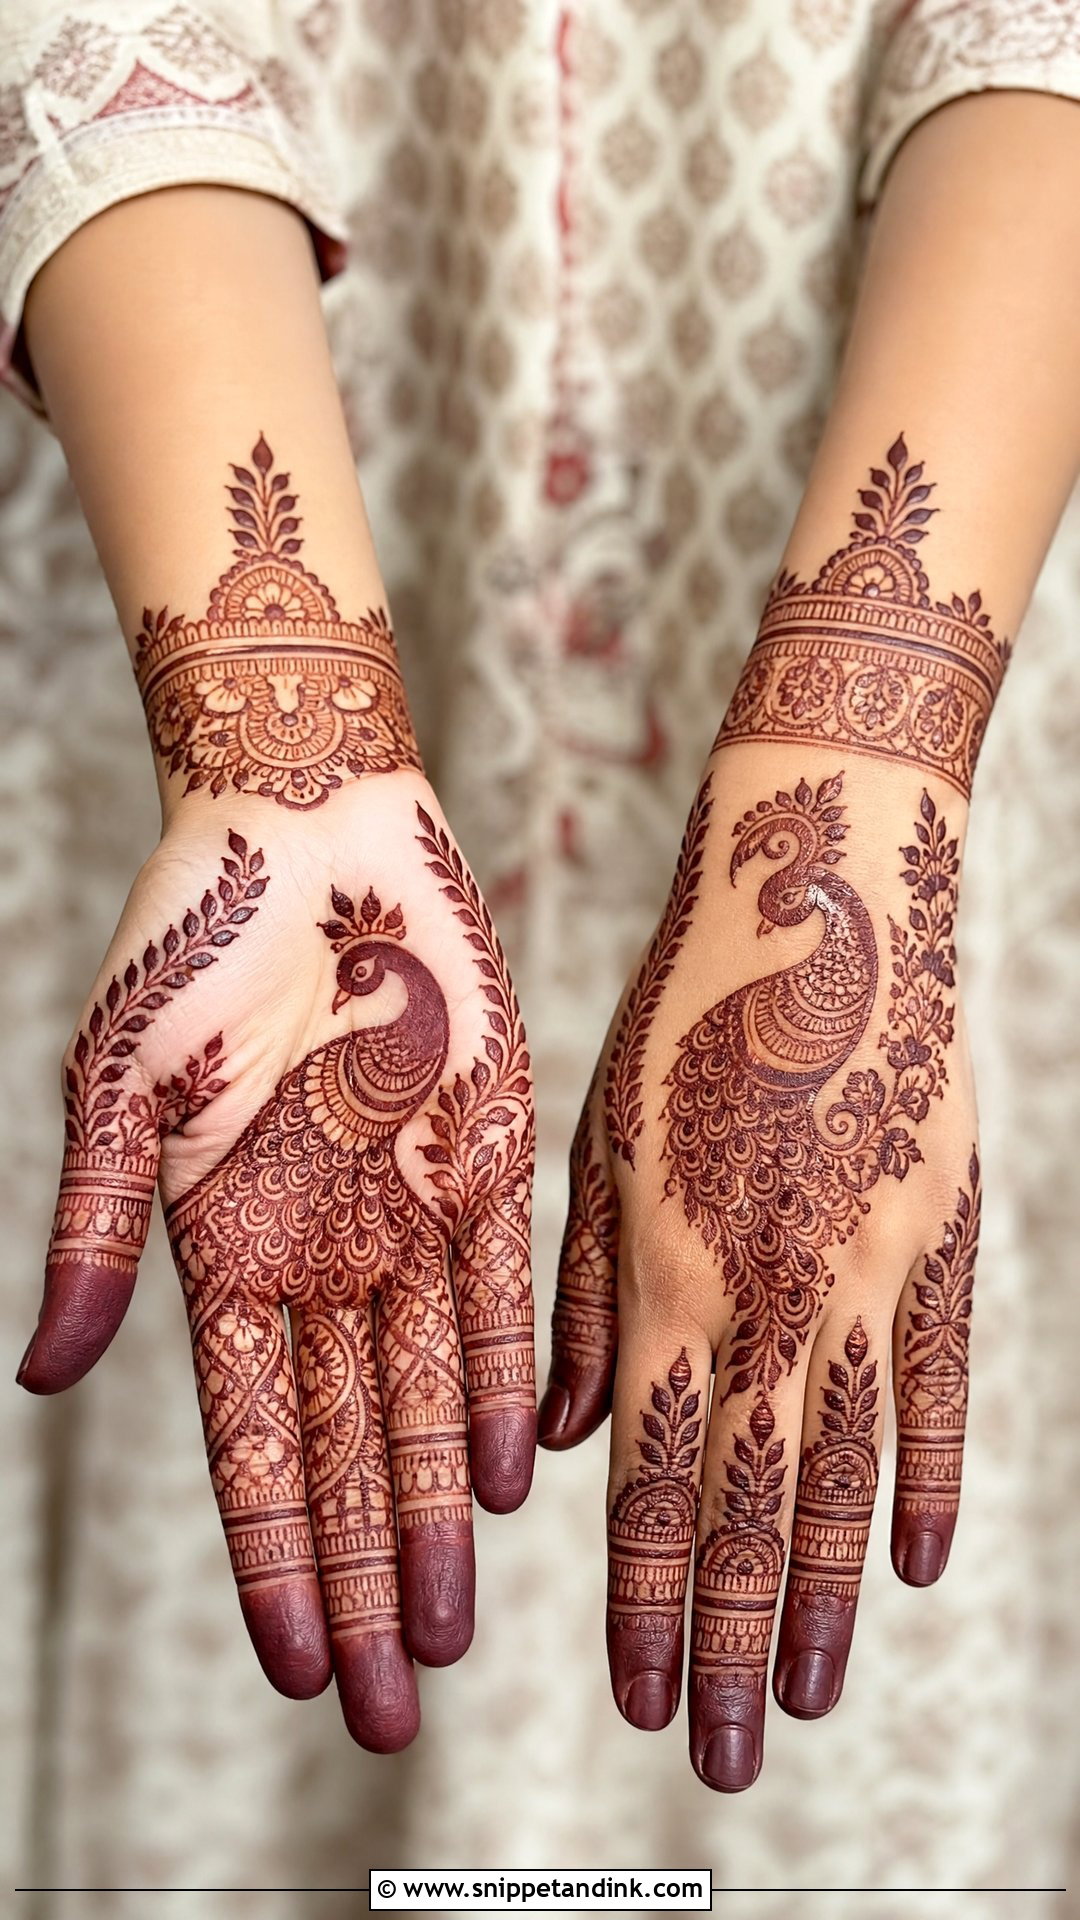
A peacock on a short design has to be compact: one bird on the palm or the back hand rather than a full-arm scene. The feathers flow into paisleys, leaves or curved bands toward the fingers, and a small wrist border closes the design. My main caution is scale. If the body is drawn too tiny, the neck and beak merge into a blob once the stain darkens, so I keep the outline clear and the neck generous. A deep maroon stain brings out every feather curve.
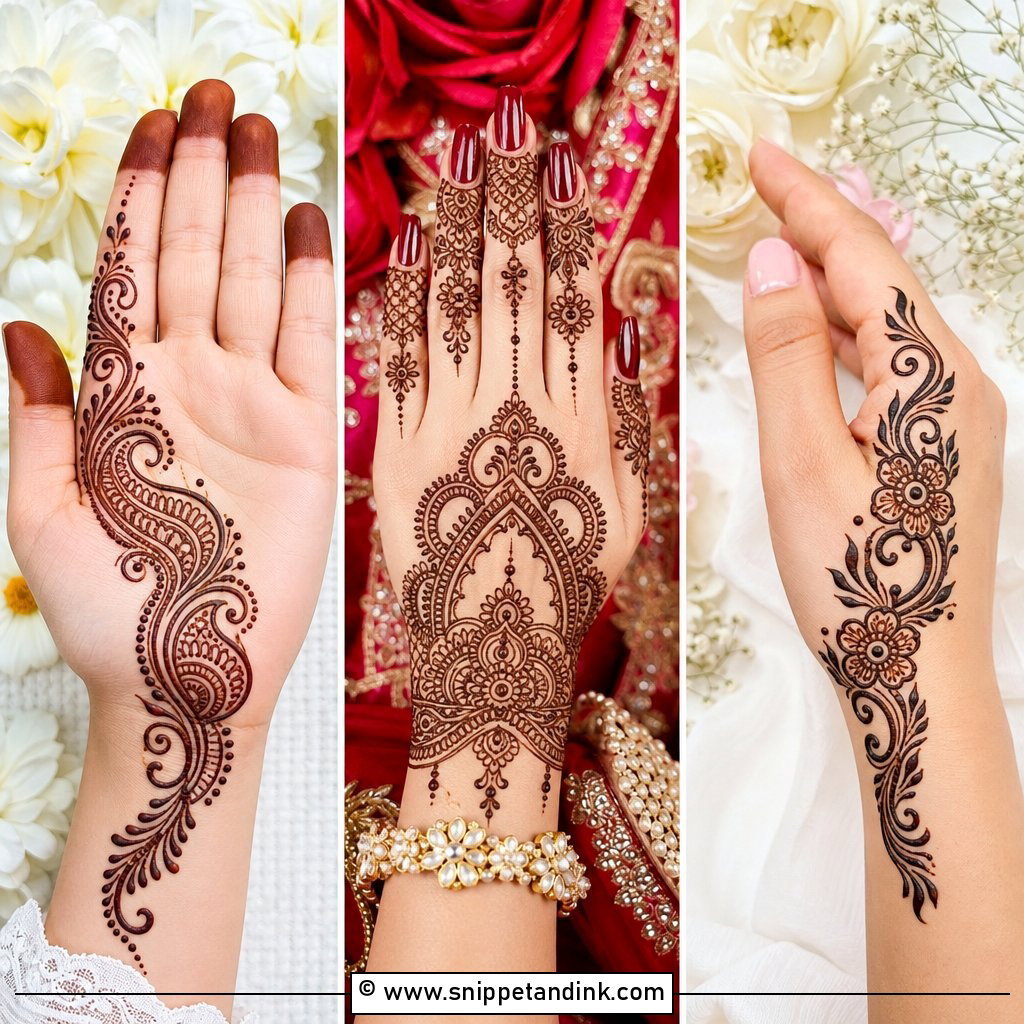
15. Short Bridal Rose Mehndi Design
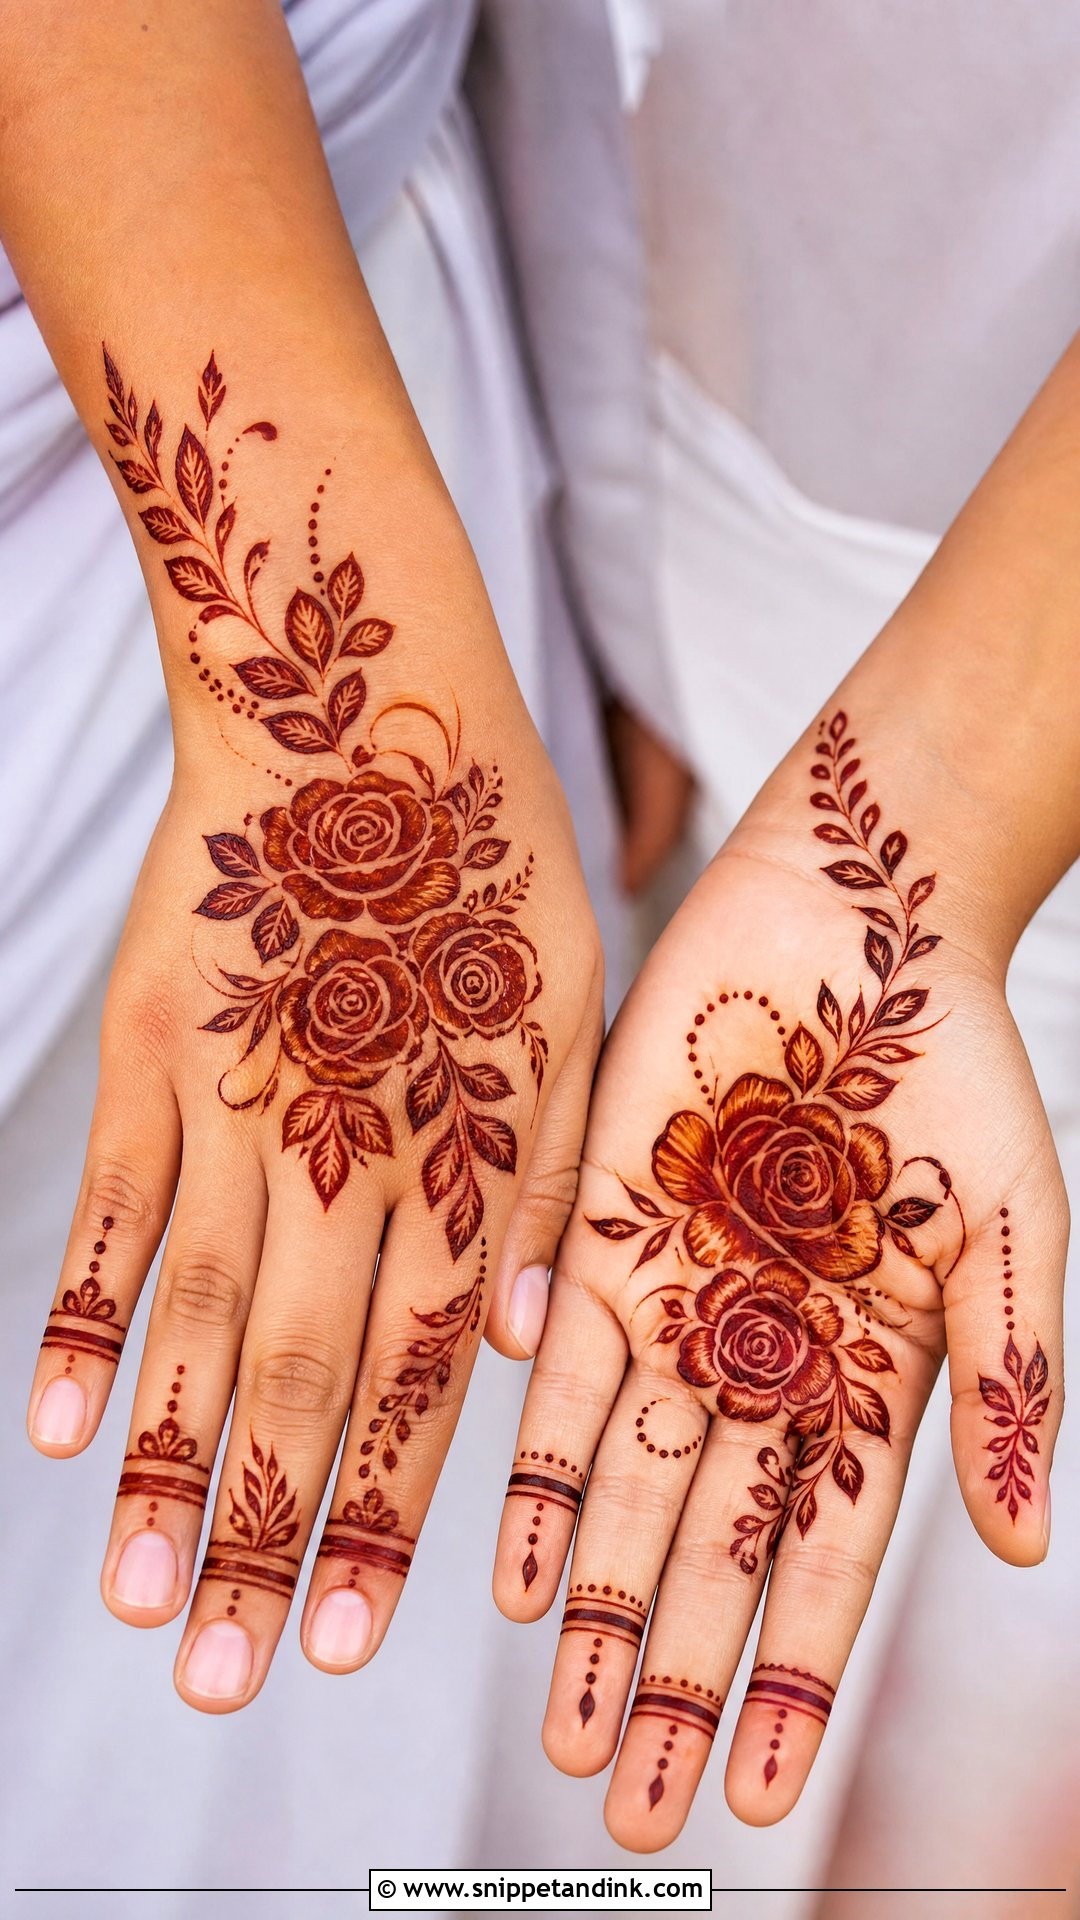
Roses do best on the back hand, where the petals can spread diagonally from wrist to fingers. On the palm I frame a rose cluster with vines, dots and a small circle. I draw bold outer outlines and very fine inner petal lines, because the inner lines are the first to blur if the paste is too wet. Fingers get slim leafy bands or half-filled tips. Roses suit blush, ivory, peach or champagne outfits, and pearl or kundan jewellery.
16. Short Bridal Minimal Mehndi Design
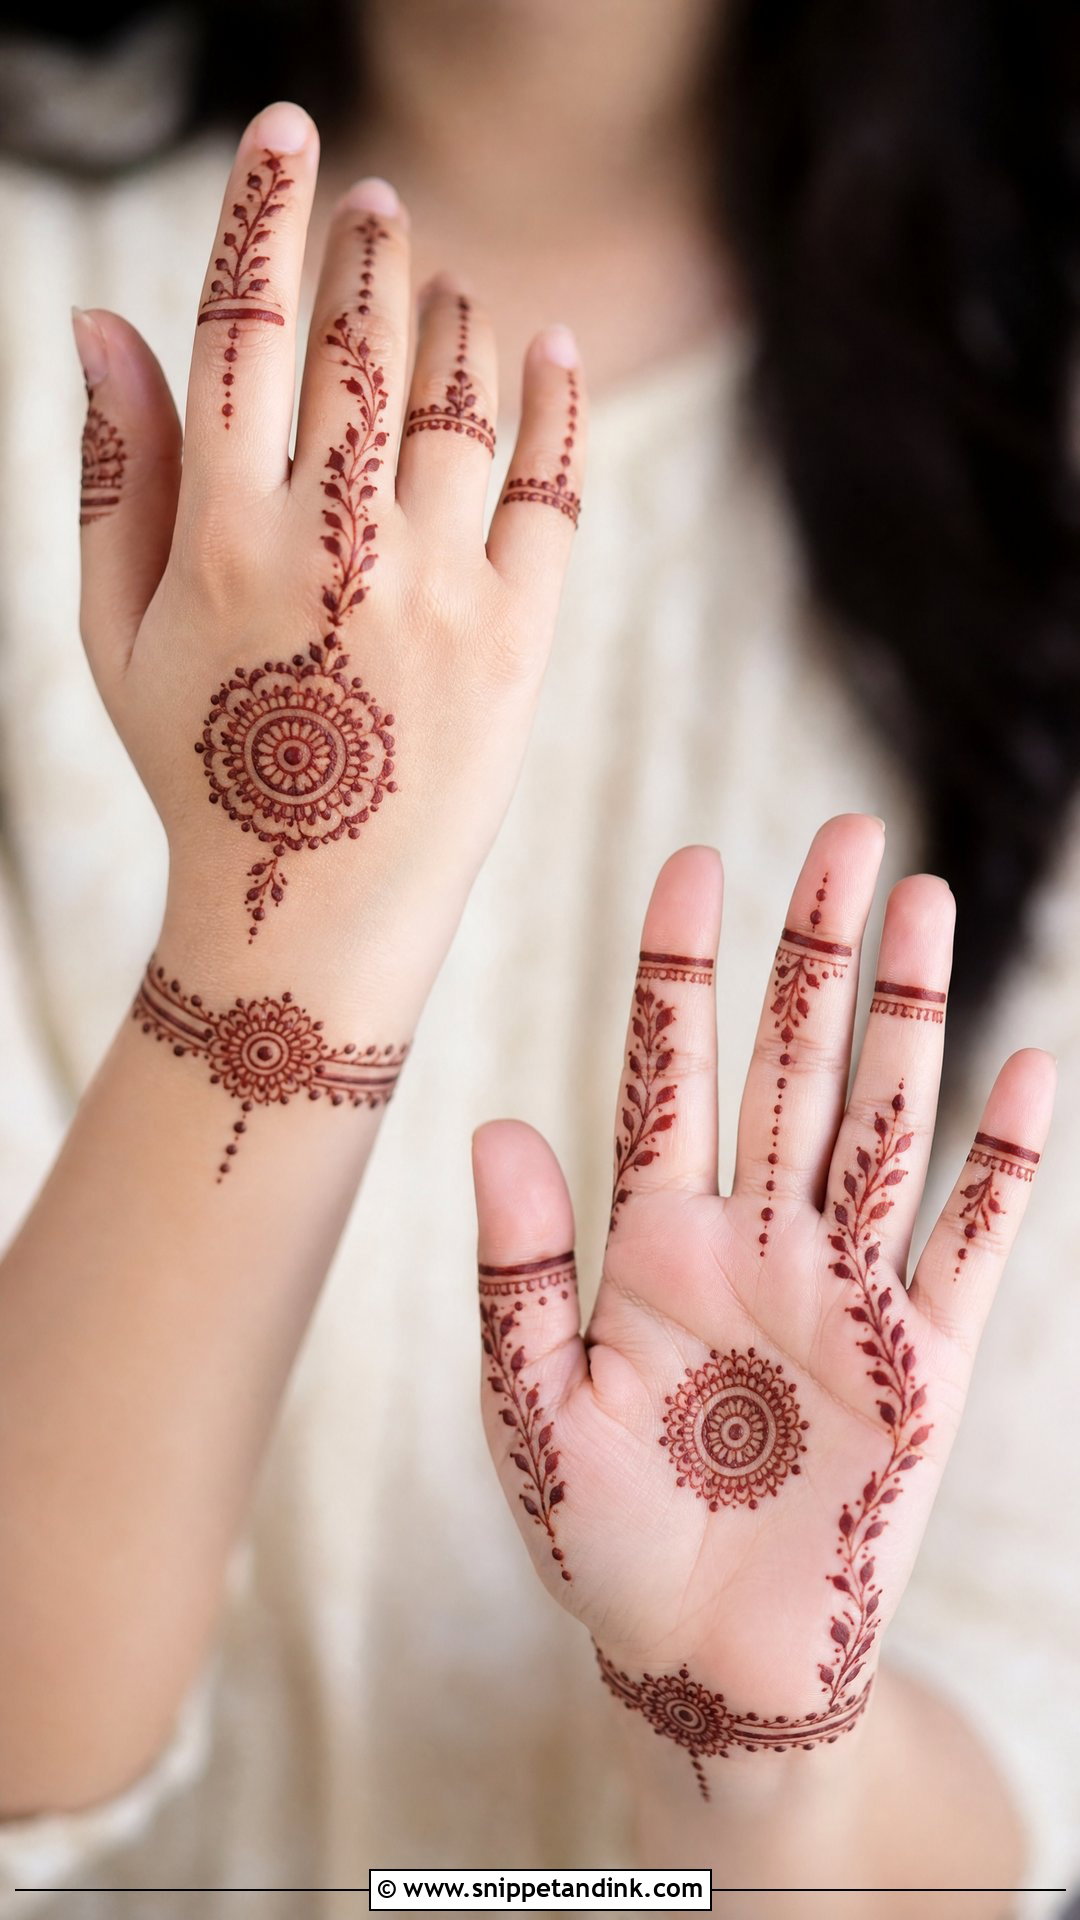
Minimal mehndi is unforgiving. With so few elements, every line and every gap is visible, so cone control matters even more than on a dense design. A tiny mandala, a wrist bracelet, decorated fingers and a few floral vines can be enough, as long as each part has a reason to be there. It works well for a destination wedding, or with a heavily embroidered outfit that shouldn’t have to compete. A dark stain on a simple layout looks quietly refined.
17. Short Bridal Full Palm Mehndi Design
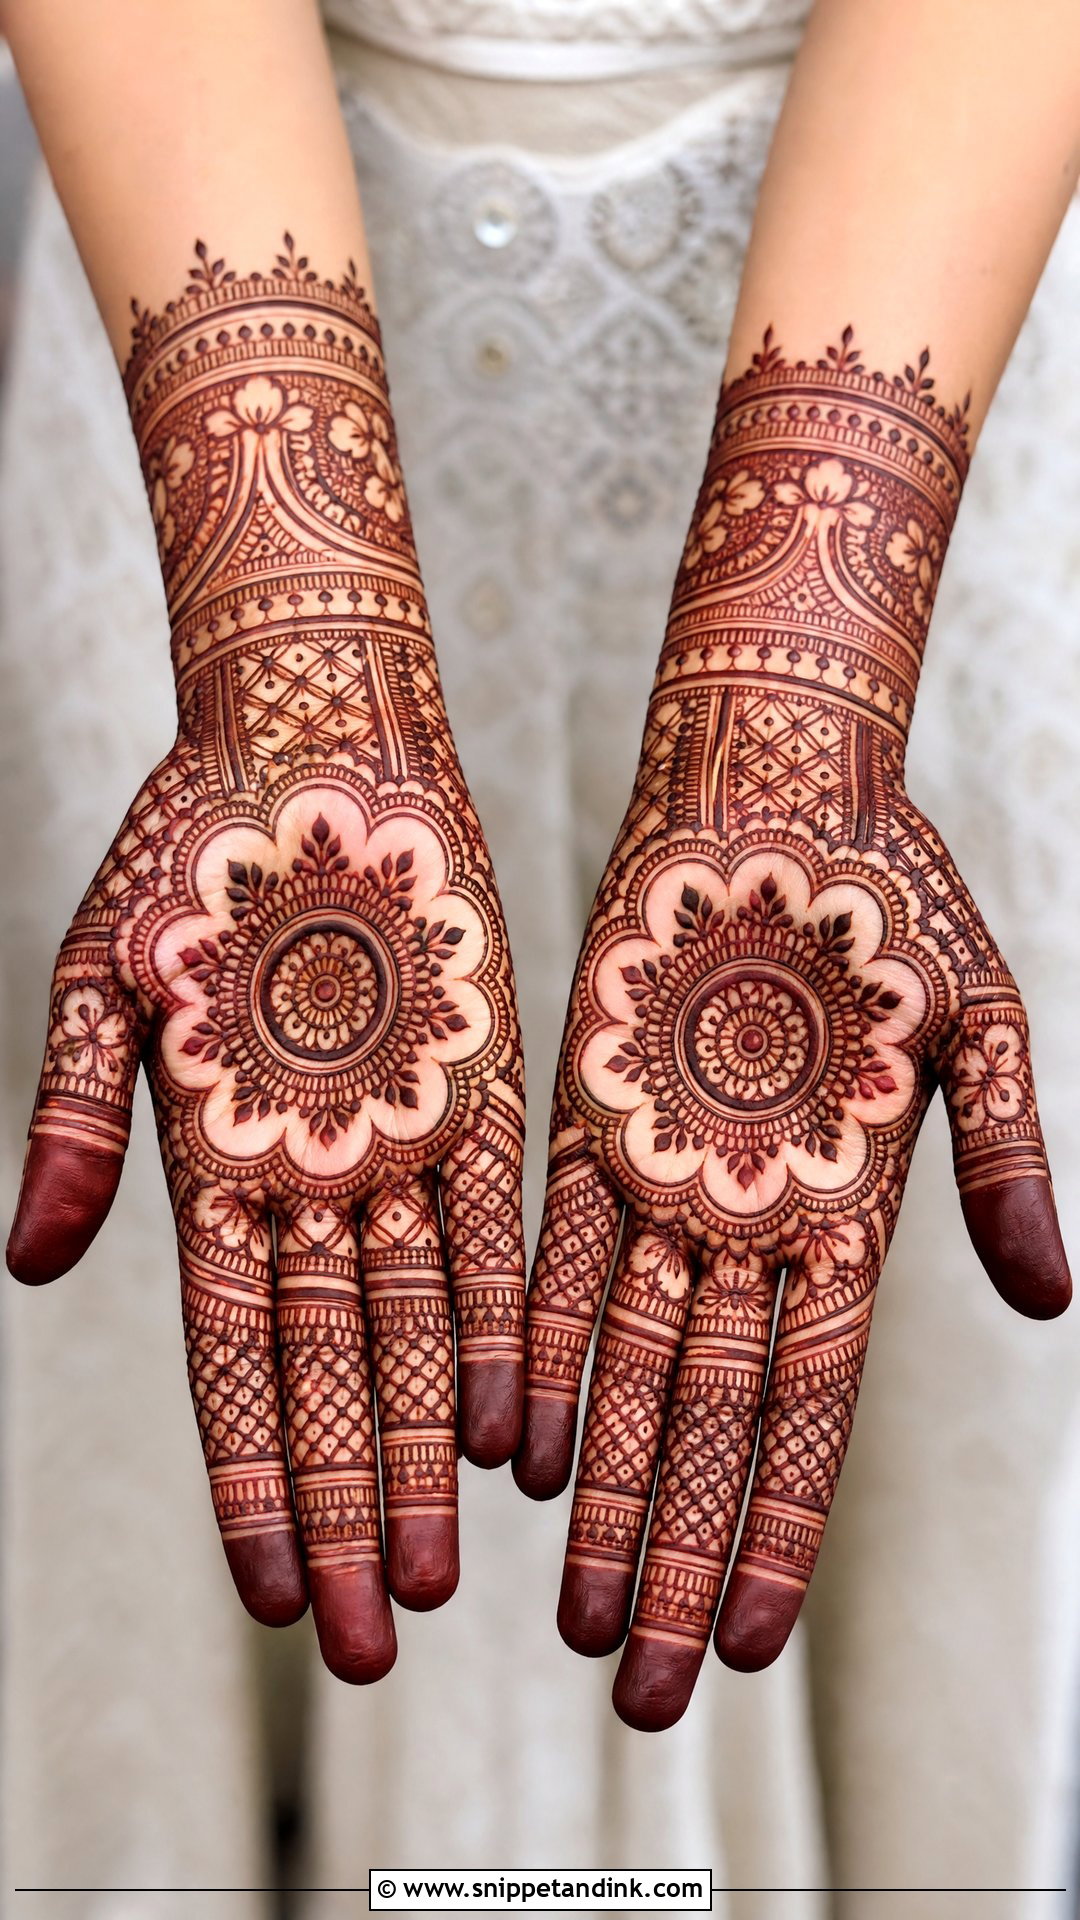
A full palm can still count as short if it stops at the wrist. I fill the palm with a central mandala, paisley borders, florals, jaali sections and filled fingertips, and keep the back hand lighter for balance. Palms stain darkest, so this layout gives the deepest colour for the least sitting time. The trap is flatness. I vary the fills, mixing mesh, shading and solid areas, and leave small gaps between motifs so each one reads.
18. Short Bridal Back Hand Trail Mehndi Design
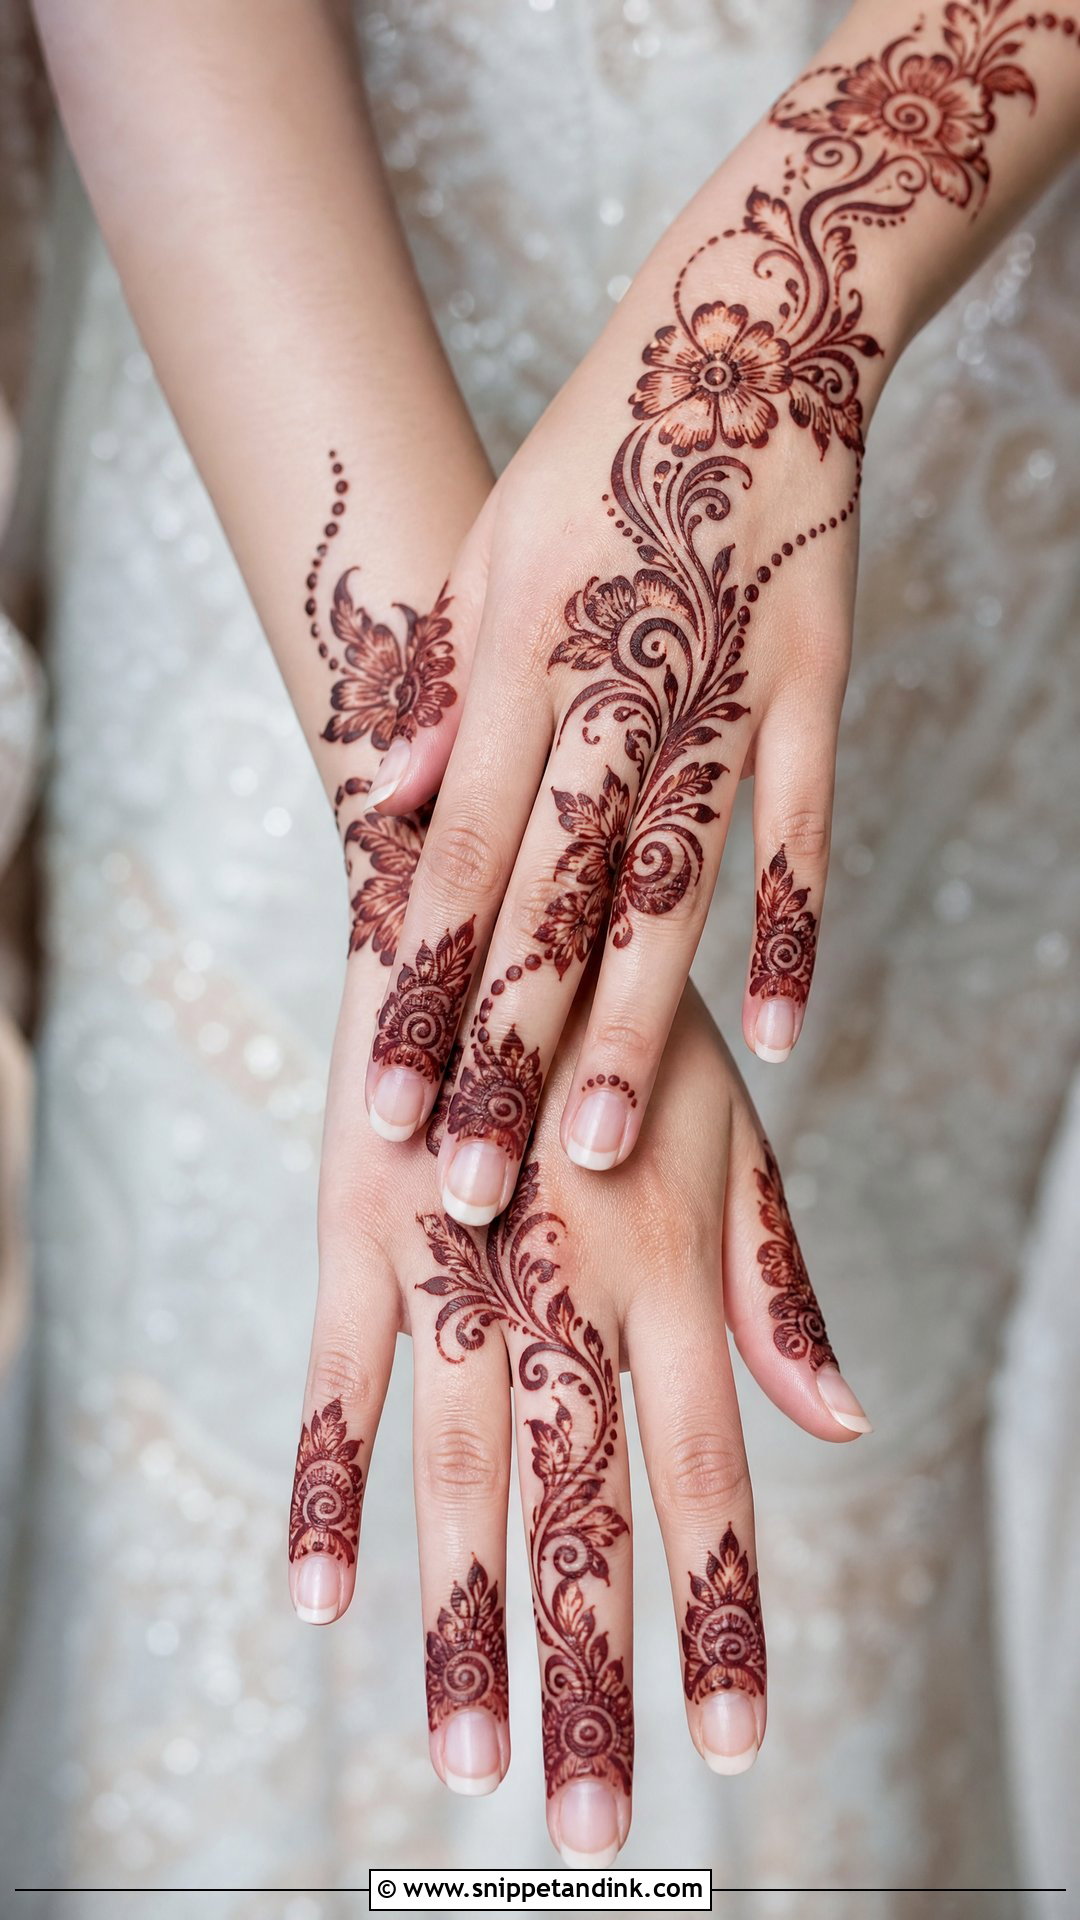
A trail needs a clear beginning and a clear end. I start at the wrist and run the pattern diagonally toward one or two fingers, with flowers, paisleys, leaves and curved vines, then give the remaining fingers matching tips or thin bands. A scattered trail looks unfinished; a flowing one makes the hand look longer. It leaves open skin for rings, nail art and hand jewellery, and suits a lighter Arabic or Indo-Arabic look.
19. Short Bridal Wedding Date Mehndi Design
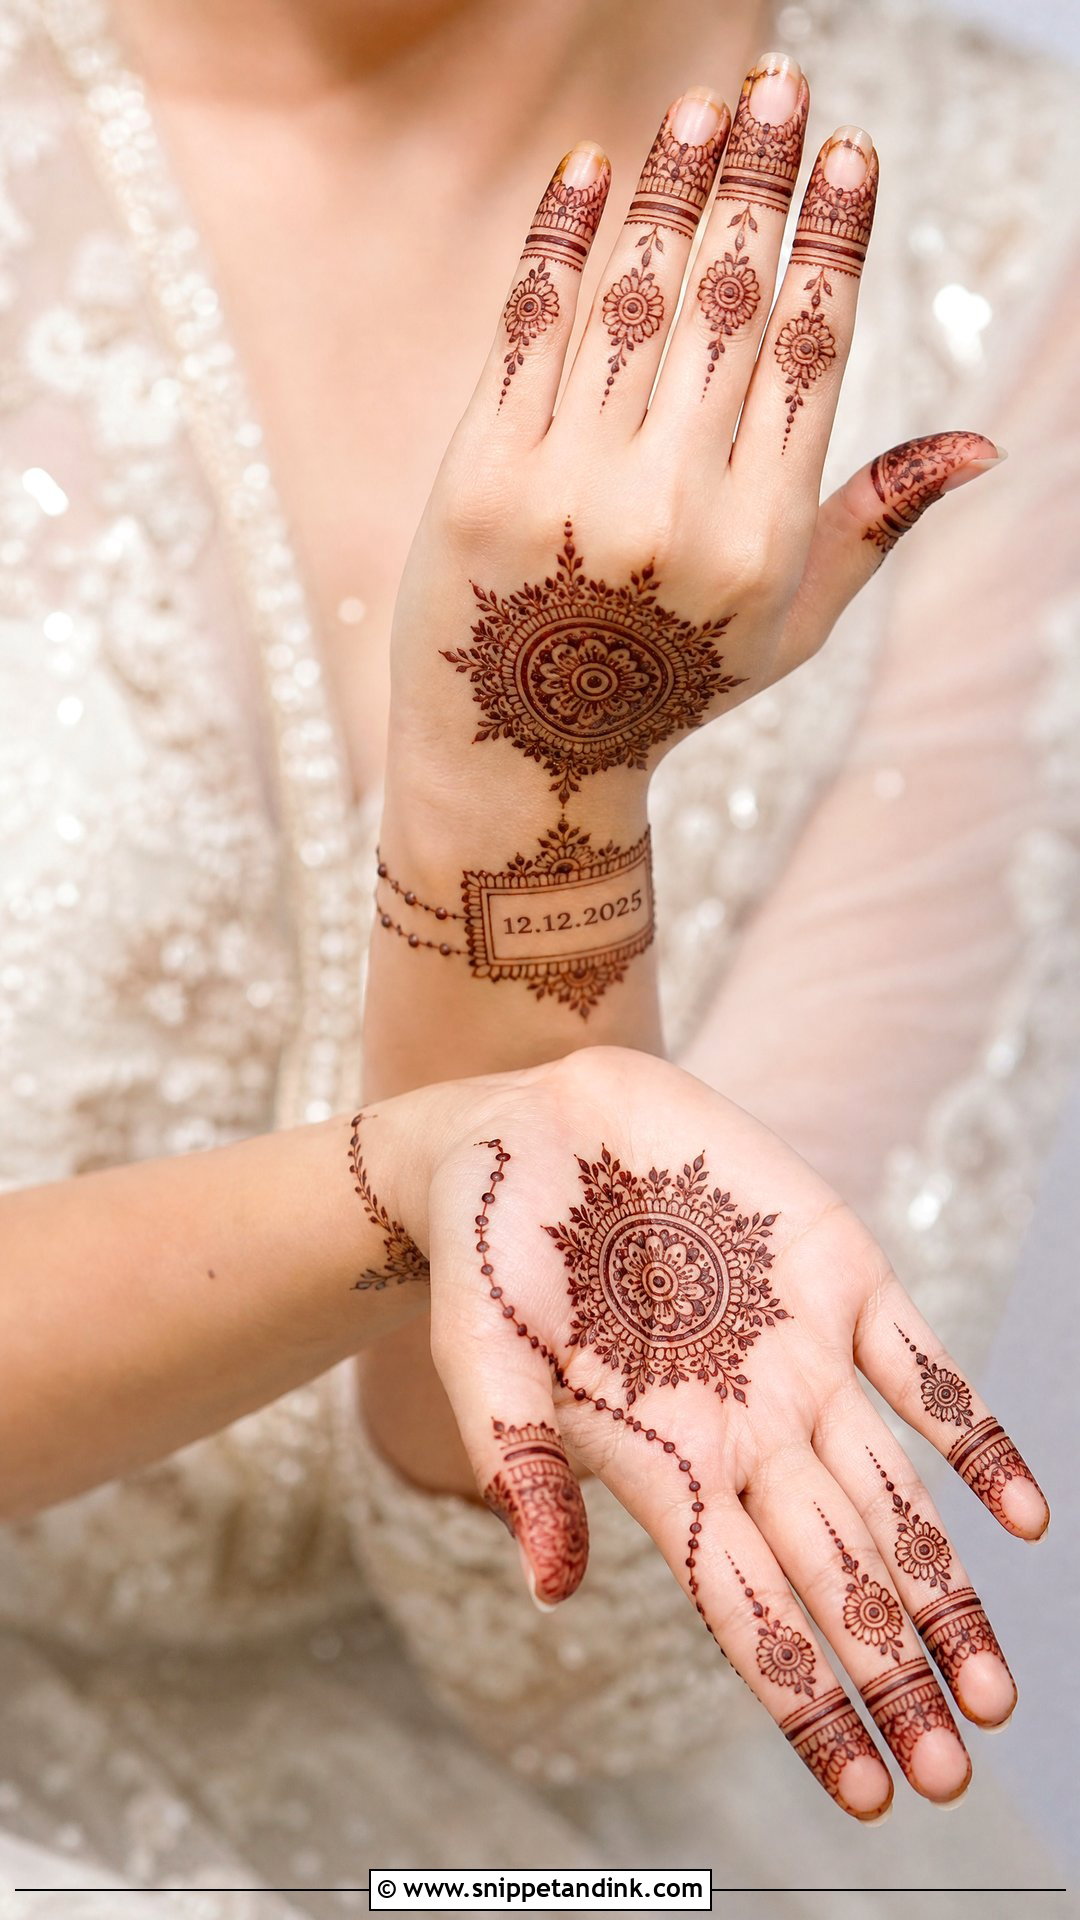
Dates are the detail I draw most carefully, because numbers are small and a mistake is hard to hide once the paste dries. I confirm the date and its format with the bride before I start, since day and month order differs between families and countries. The date can sit in a wrist band, under a small mandala or in a floral frame on the palm, with a simple pattern around it. I write the digits larger than feels natural, because fine numerals blur as the stain settles. It works for an engagement, a nikah, a court wedding or a reception.
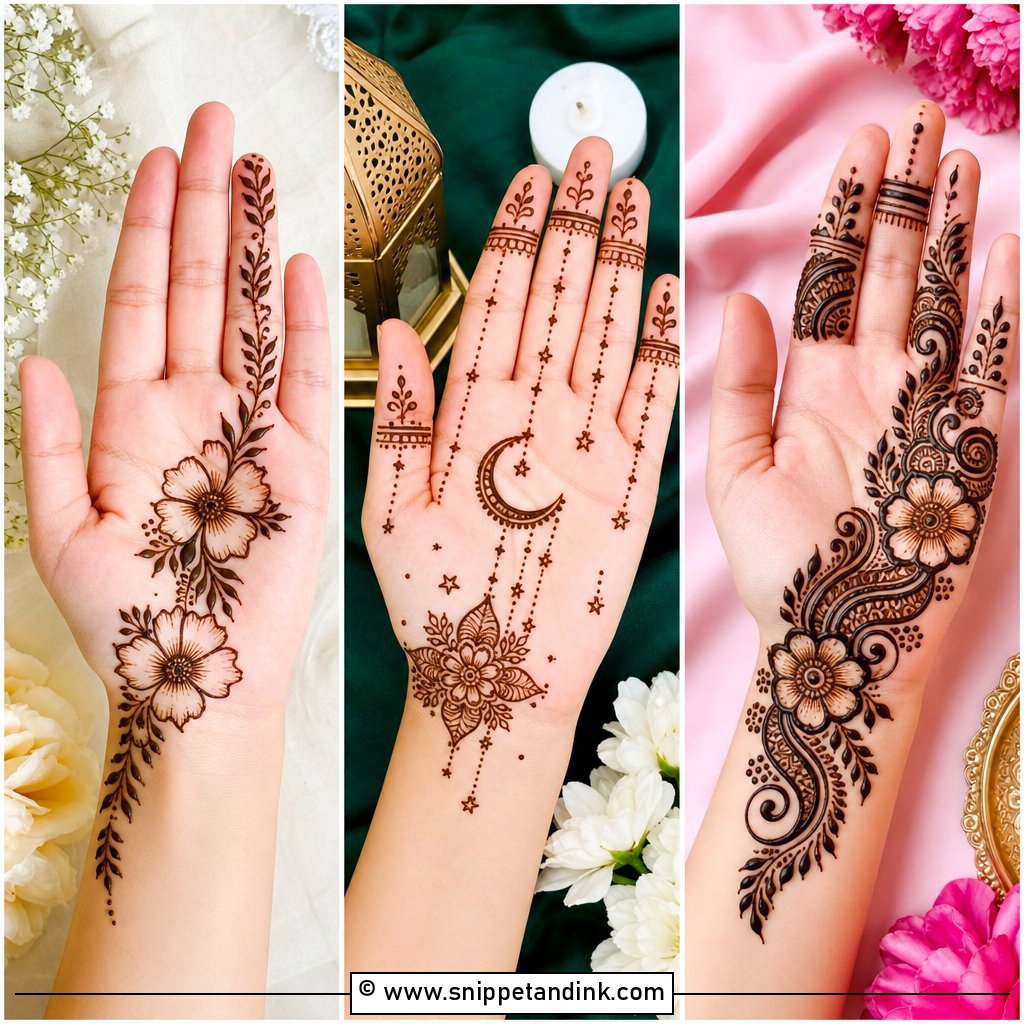
20. Short Bridal Feet Mehndi Design
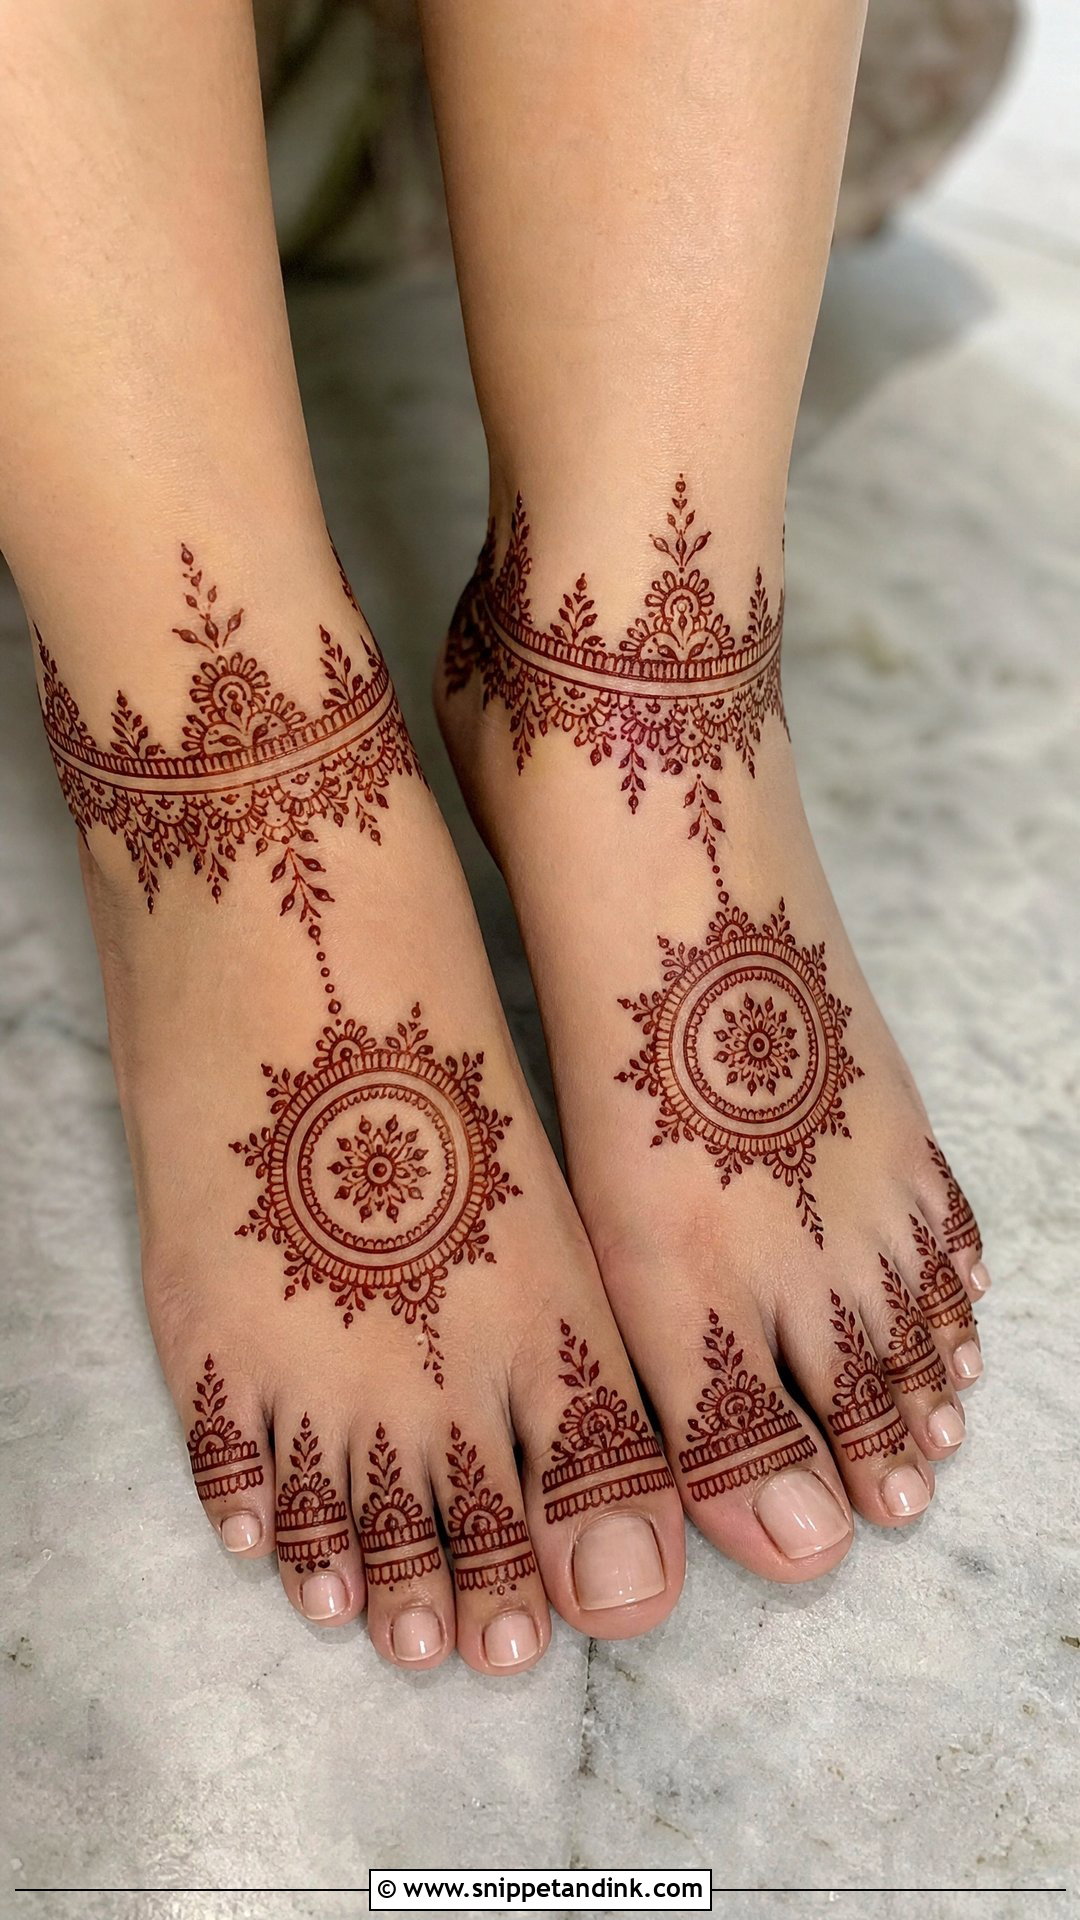
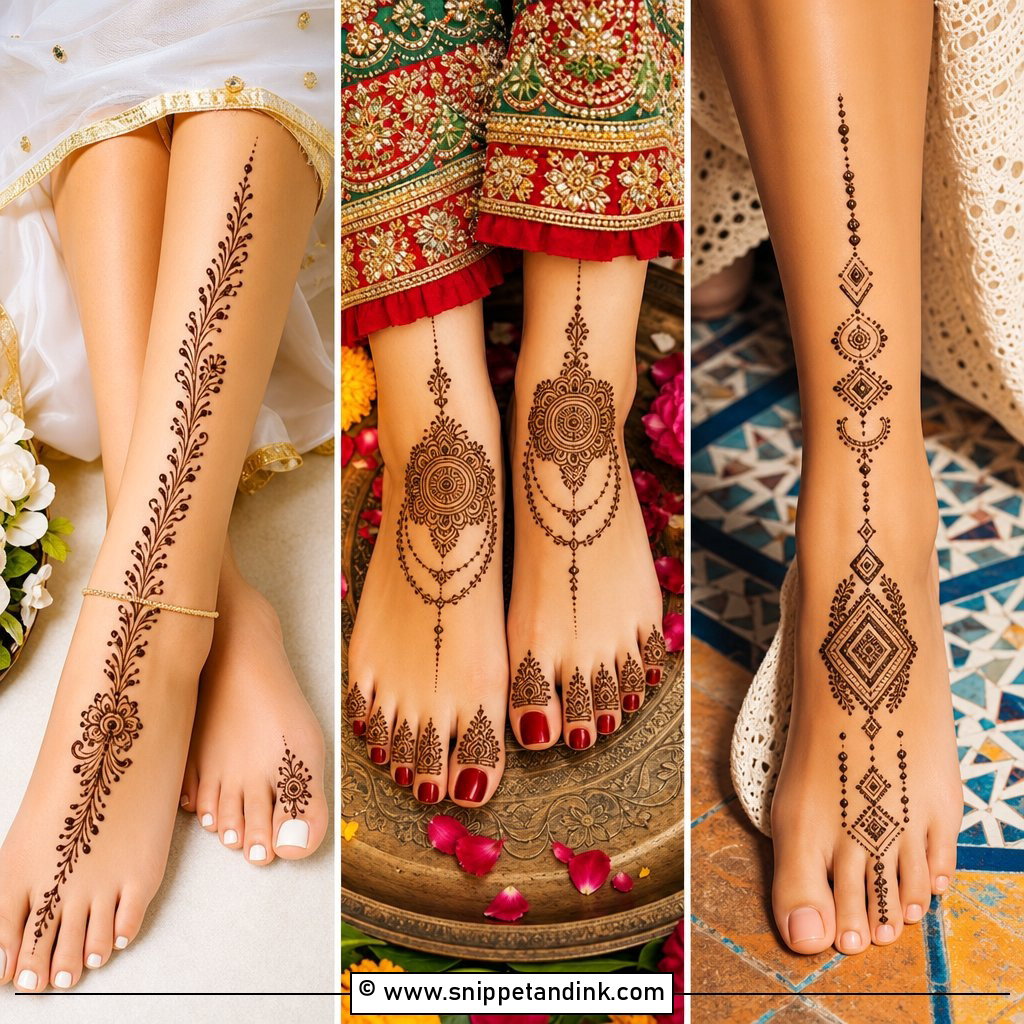
For feet, I usually suggest a short bridal feet mehndi design that covers the tops of the feet, the toes and the ankle like an anklet. Florals, paisleys, mandalas and leafy curves follow the foot’s shape best. Feet stain well but smudge easily, so plan to sit with your feet up while the paste dries, and wear open sandals afterward. Keep the toes neat and don’t crowd the ankle, where the payal will sit. Repeating a motif from your hands ties the look together.
The First Two Days After the Paste Comes Off
Most of the colour is decided after I’ve packed up my cones. This is what I tell every bride:
- Leave the paste on as long as you can. A light dab of lemon and sugar keeps it stuck to the skin while it dries.
- Scrape it off, don’t wash it off. Use a blunt edge, or rub your palms together over a bin.
- Keep water away for the first 12 to 24 hours. If you must wash, be quick and pat dry.
- Keep your hands warm. Warmth helps the stain develop, and cold air slows it.
- Once it has darkened, a balm or a little natural oil over the design protects it from soap and water.
Chlorine, scrubs and hand sanitiser all fade a stain quickly, so avoid them before the photos. And get your manicure done before the mehndi, not after.
Ask What Is in the Cone Before It Touches Your Skin
Real henna paste is made from dried henna leaf, a liquid such as lemon juice or water, sugar and an essential oil, and it stains reddish brown, never jet black. Be wary of any cone promising an instant black result. So-called black henna often contains PPD, a hair-dye chemical that can cause severe skin reactions and lasting scars, and some ready-made cones contain undisclosed dyes.
I’m always happy to tell a bride exactly what’s in my paste, and you should expect the same from any artist. If you have sensitive skin or are pregnant, say so, since many artists will change or leave out the essential oil. A small patch test a week or two before the event costs nothing and removes the worry.
Small Coverage, Deep Colour
Short mehndi saves hours, feels lighter on the hands and still carries every traditional motif, from mandalas and paisleys to jaali, initials, bracelets and dates. If your family expects classic work, Indian, paisley and peacock layouts honour that. If you want something lighter, minimal, Arabic and bracelet designs fit better. Whichever way you go, placement, clean cone work and patient aftercare do more for the final look than the amount of coverage. Done well, with a deep stain, a short design holds its own beside any full bridal set.
You'll Like These Ideas:


Leave a Reply