
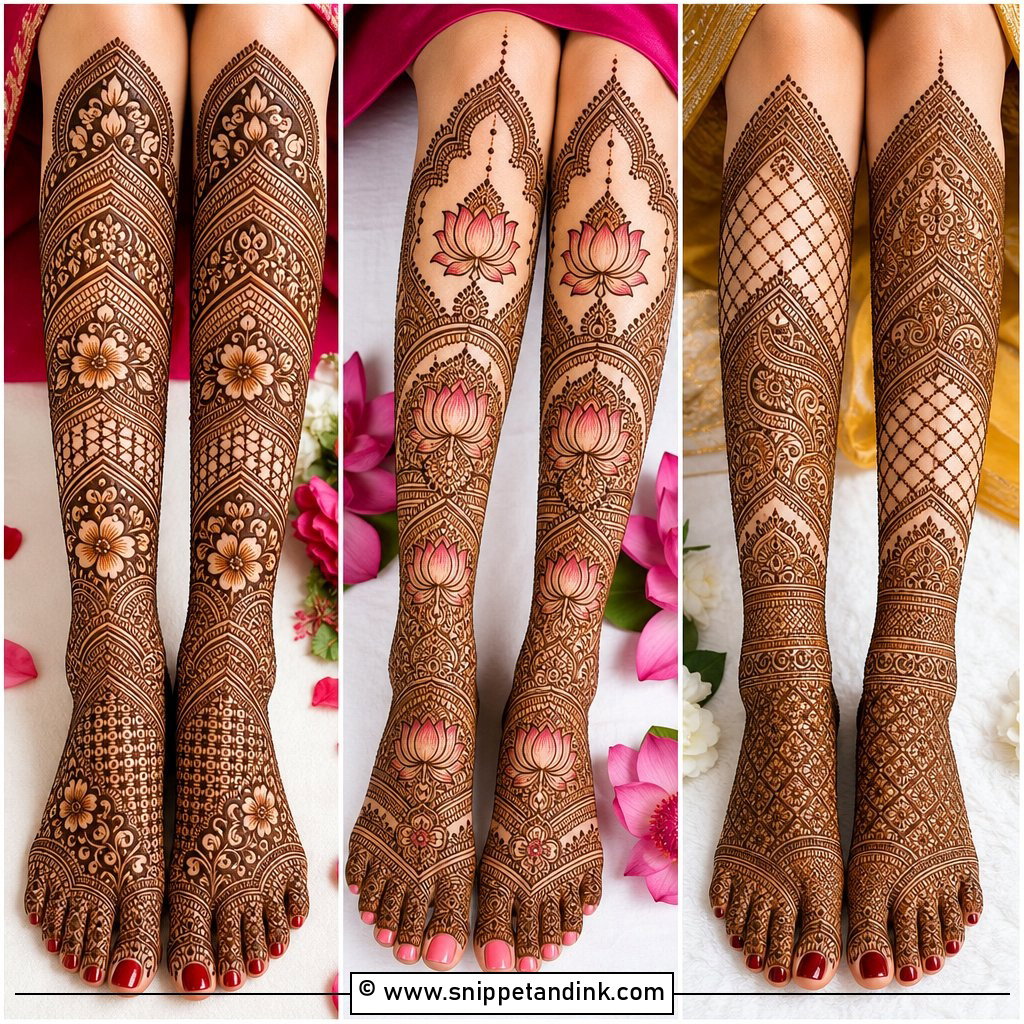
A light bridal design is harder to draw than a dense one. With full coverage, a wobbly line gets lost in the filling; with open space, every stroke shows. That’s why I plan simple bridal henna around flow and spacing first, motifs second. Many brides now lean toward the open look in current wedding mehndi trends: clean Arabic trails, small mandalas, fine florals, a single jaali panel, bracelet patterns. They suit small ceremonies, destination weddings and brides whose outfits already carry a lot of detail. Below are 25 designs I’d draw for a bride, a bridesmaid or a guest, with notes on how each one is laid out and where it can go wrong.
When to Schedule Henna So the Stain Peaks on the Day
Natural henna comes off the skin orange and darkens over the next day or two as it oxidizes. It’s usually at its deepest around 48 hours after the paste is removed. So I book brides one or two days before the ceremony, never the morning of.
Simple designs are faster than dense ones, but they’re not instant. A light half-hand design on both hands takes far less time than full bridal coverage, which can run several hours. Ask your artist how long your chosen design will take, then add time for the paste to dry before you eat, change or sleep.
- Exfoliate gently the day before, then skip lotion or oil on your hands that morning. Product on the skin blocks the stain.
- Wear something loose and easy to change out of, with sleeves that roll up well past the elbow.
- If the stain needs to last through several events, schedule henna closer to the main ceremony rather than the first function.
1. Simple Bridal Mehndi Design
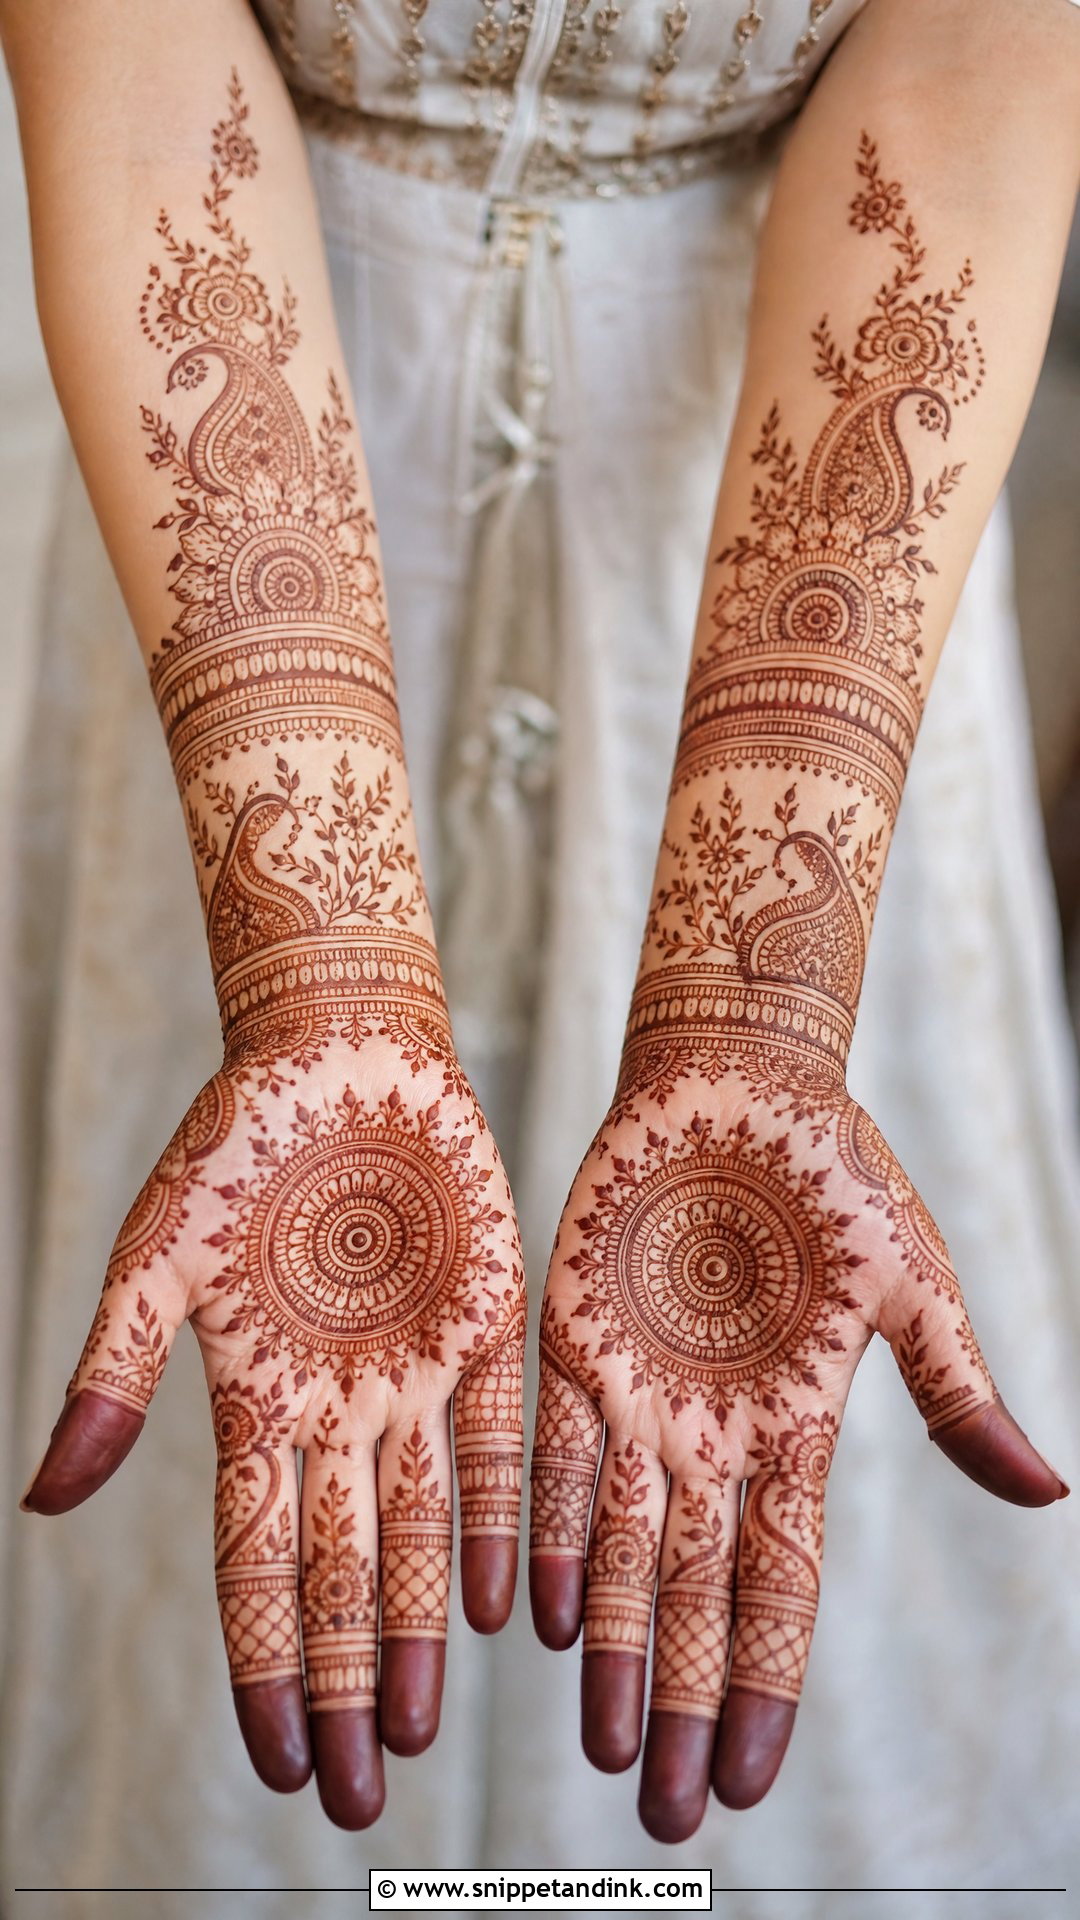
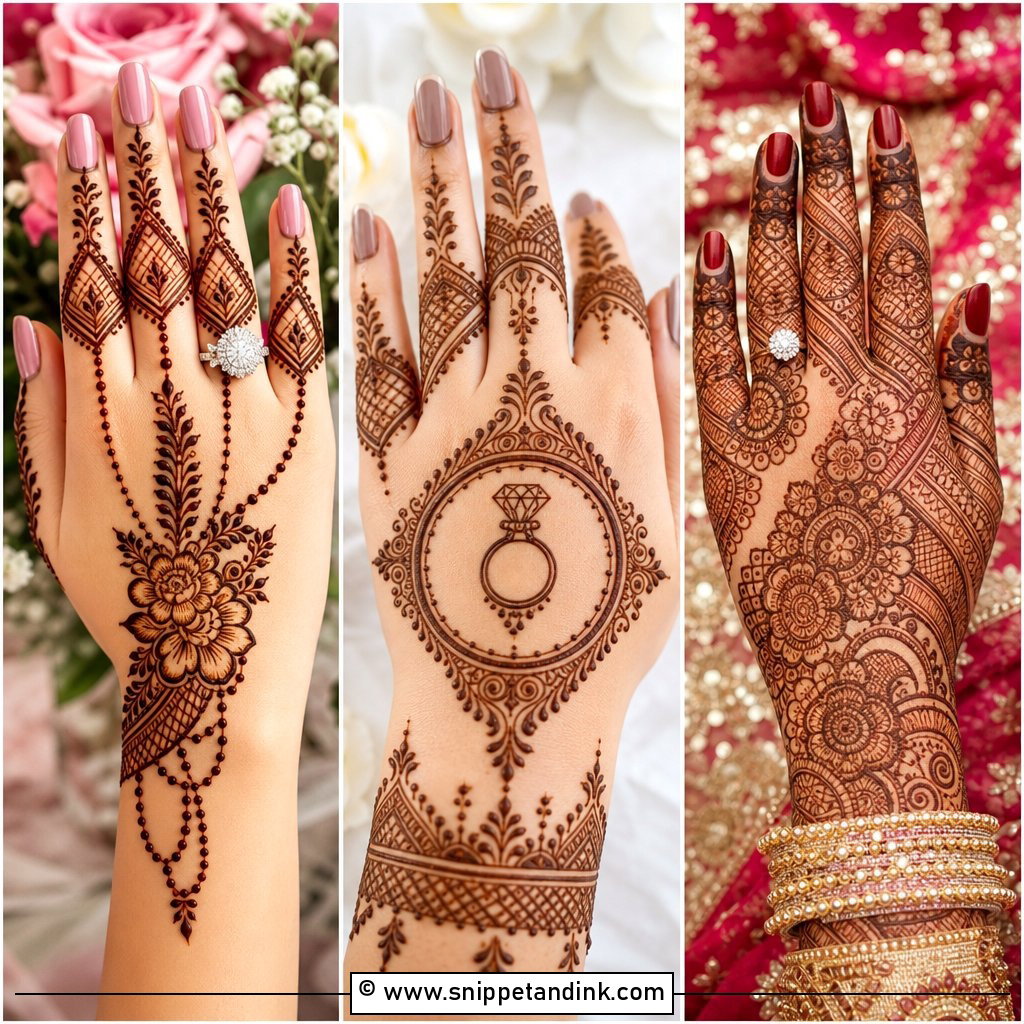
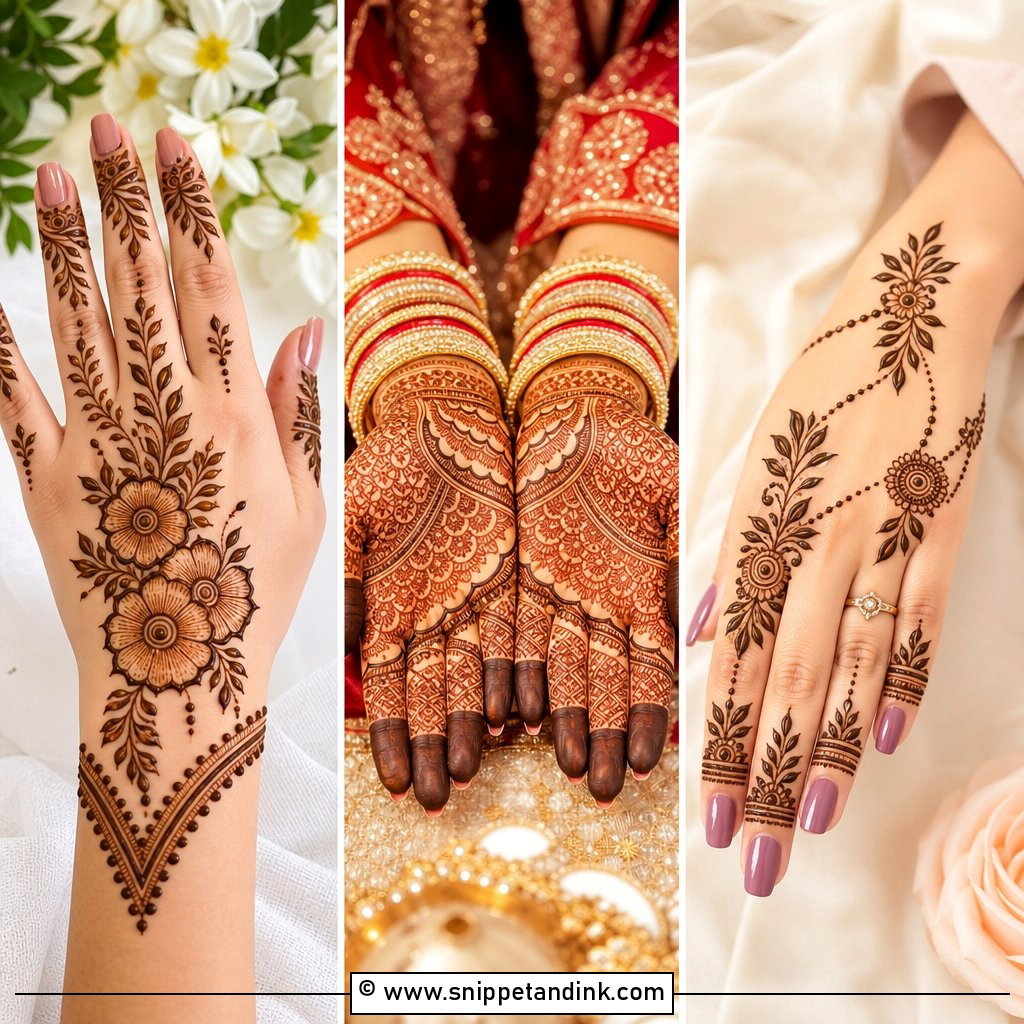
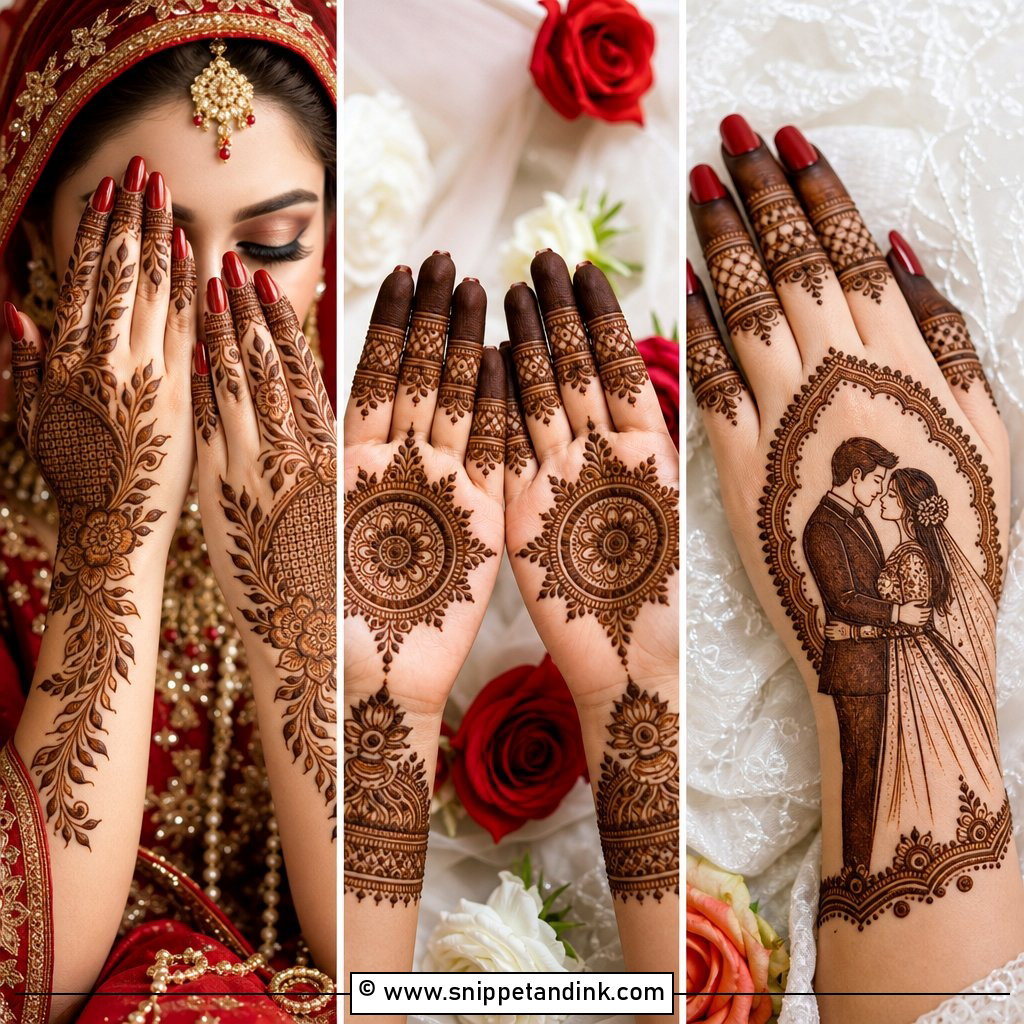
This is the layout I start most consultations with. A neat mandala or floral center on the palm, paisleys and leafy lines moving out from it, finger details, and a bracelet border at the wrist so the hand looks finished before jewelry goes on. The spacing is what makes it read as simple. I keep at least a few millimeters of bare skin around each motif, because once the stain darkens, lines that were drawn close together tend to merge.
2. Simple Arabic Wedding Mehndi Design
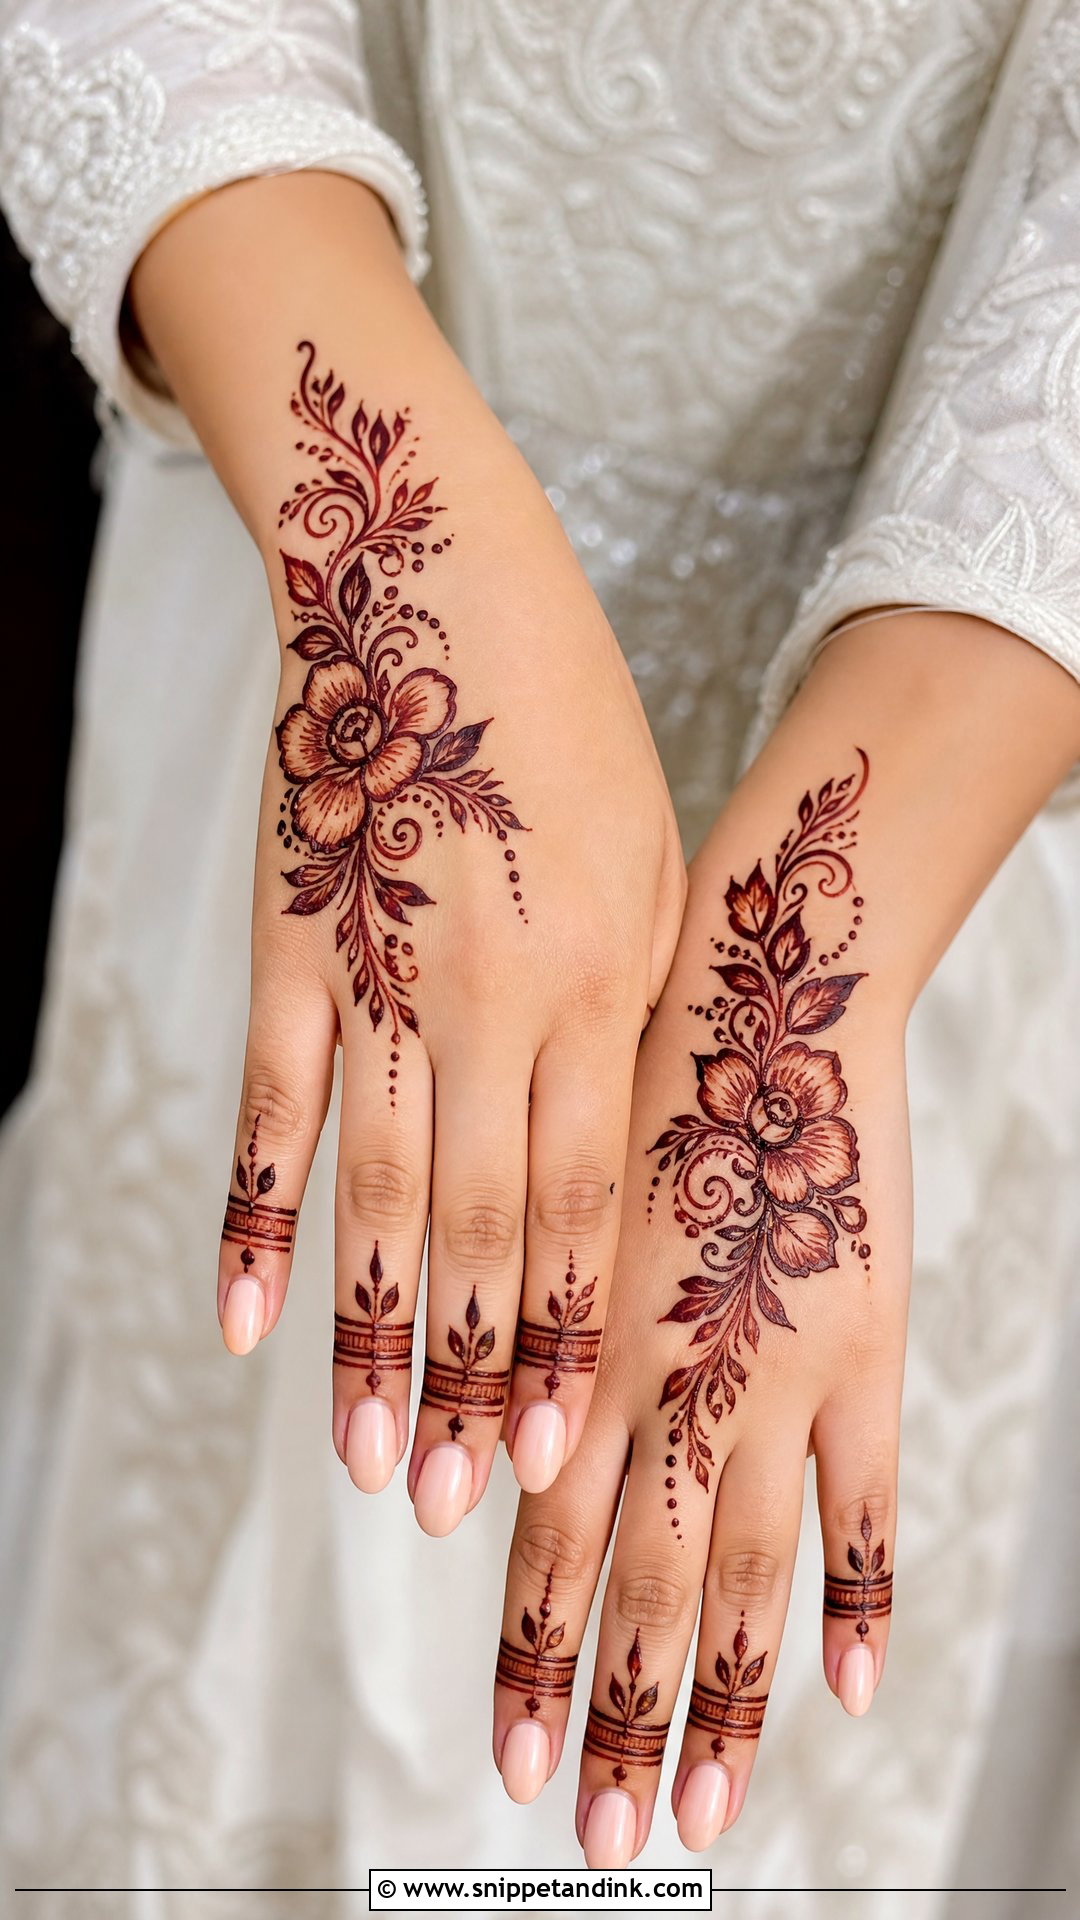
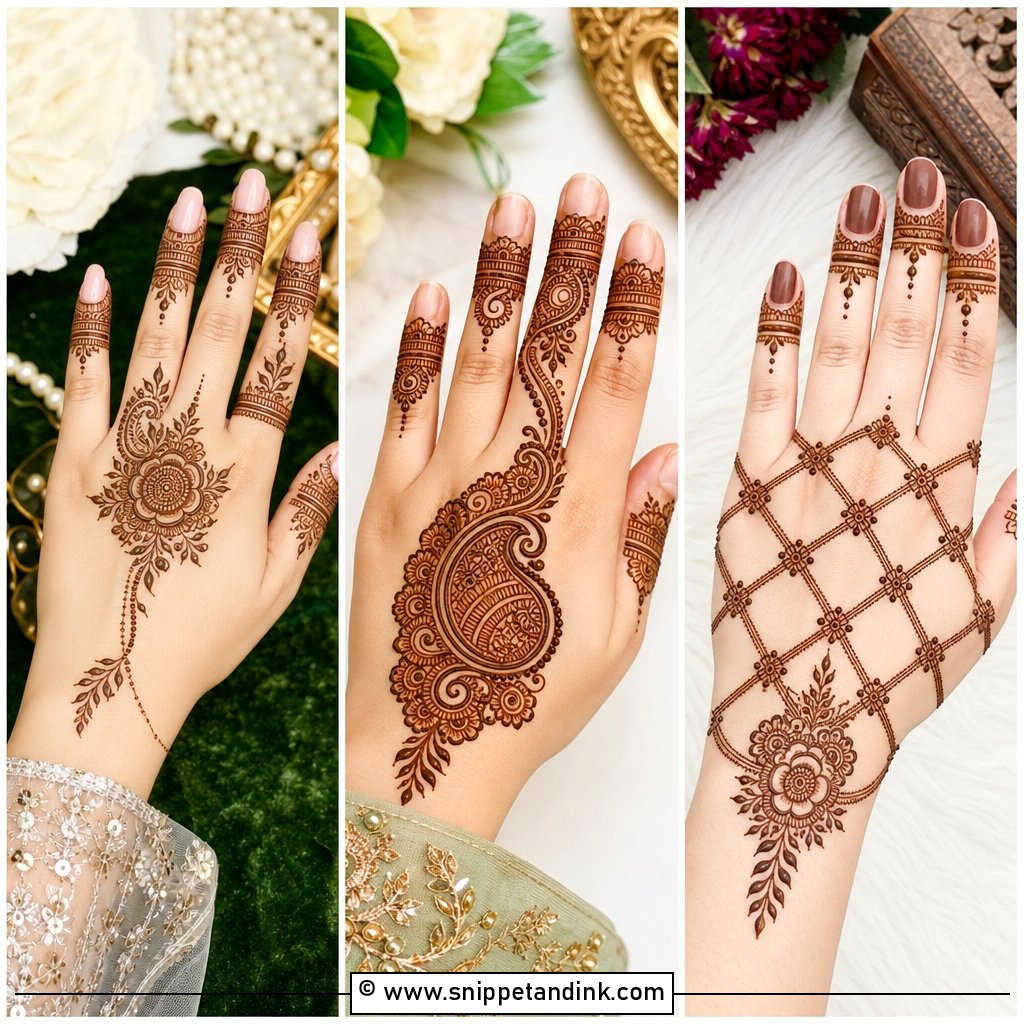
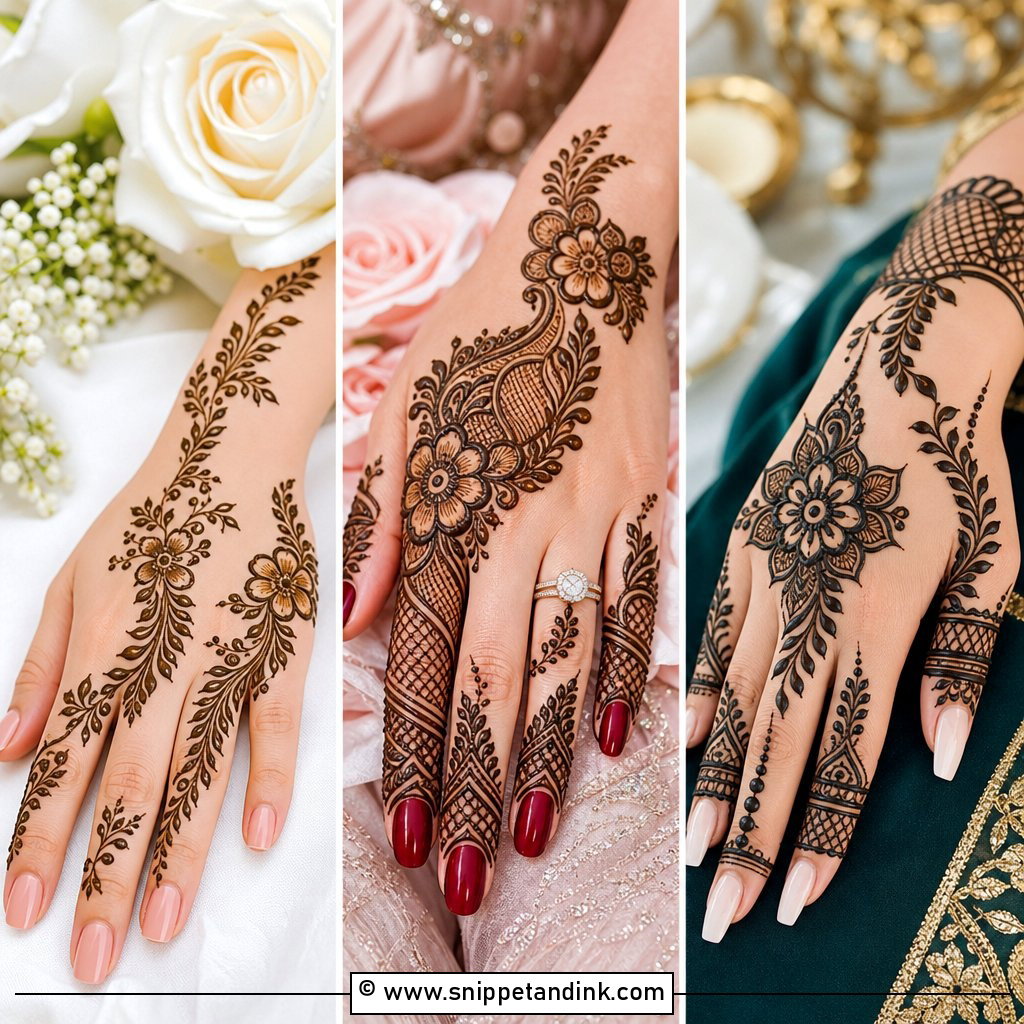
Arabic designs move diagonally, usually from one side of the wrist toward the index or ring finger. Large flowers, curved leaves and shaded petals carry the look, and the empty skin around them makes the hand look longer. It’s quicker to apply than full bridal work, which matters when I’m also doing sisters and bridesmaids the same evening. I add small dots and a thin vine at the wrist to tie it to bangles.
3. Simple Front Hand Wedding Mehndi Design
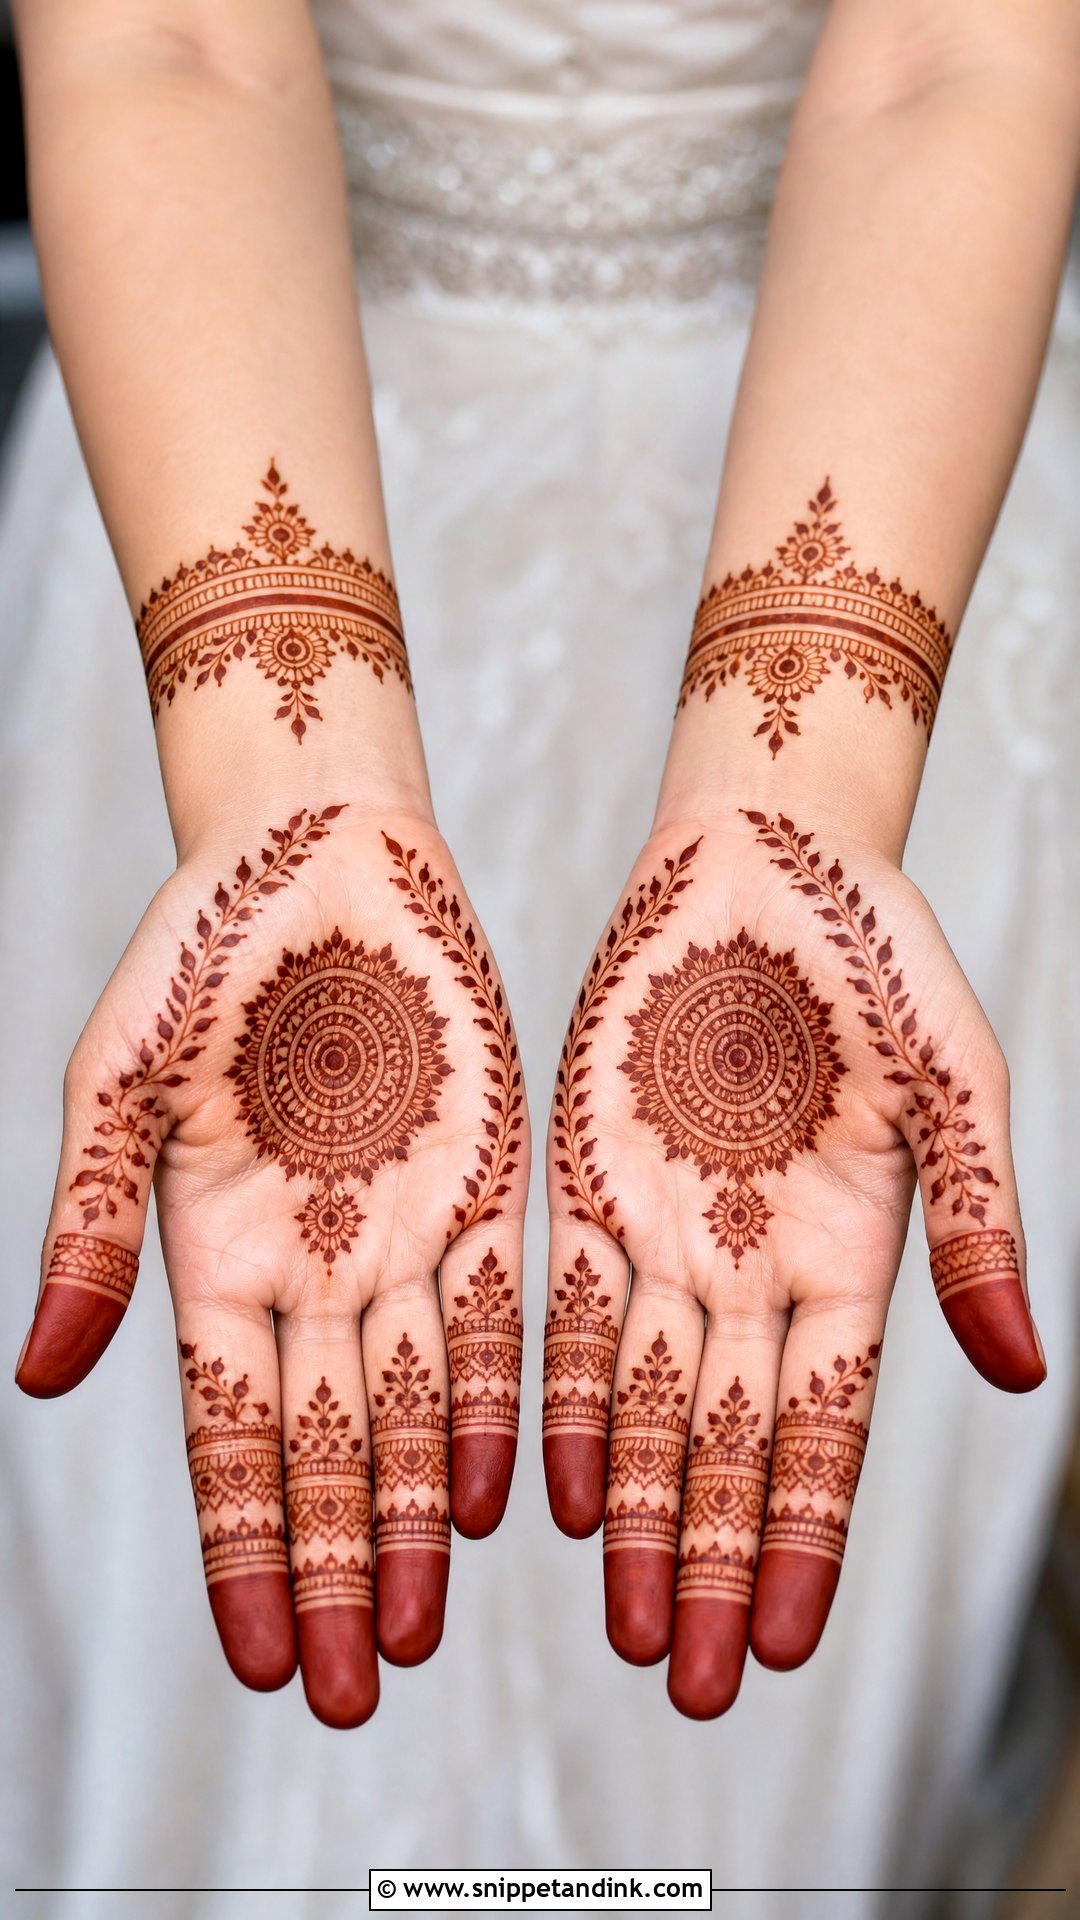
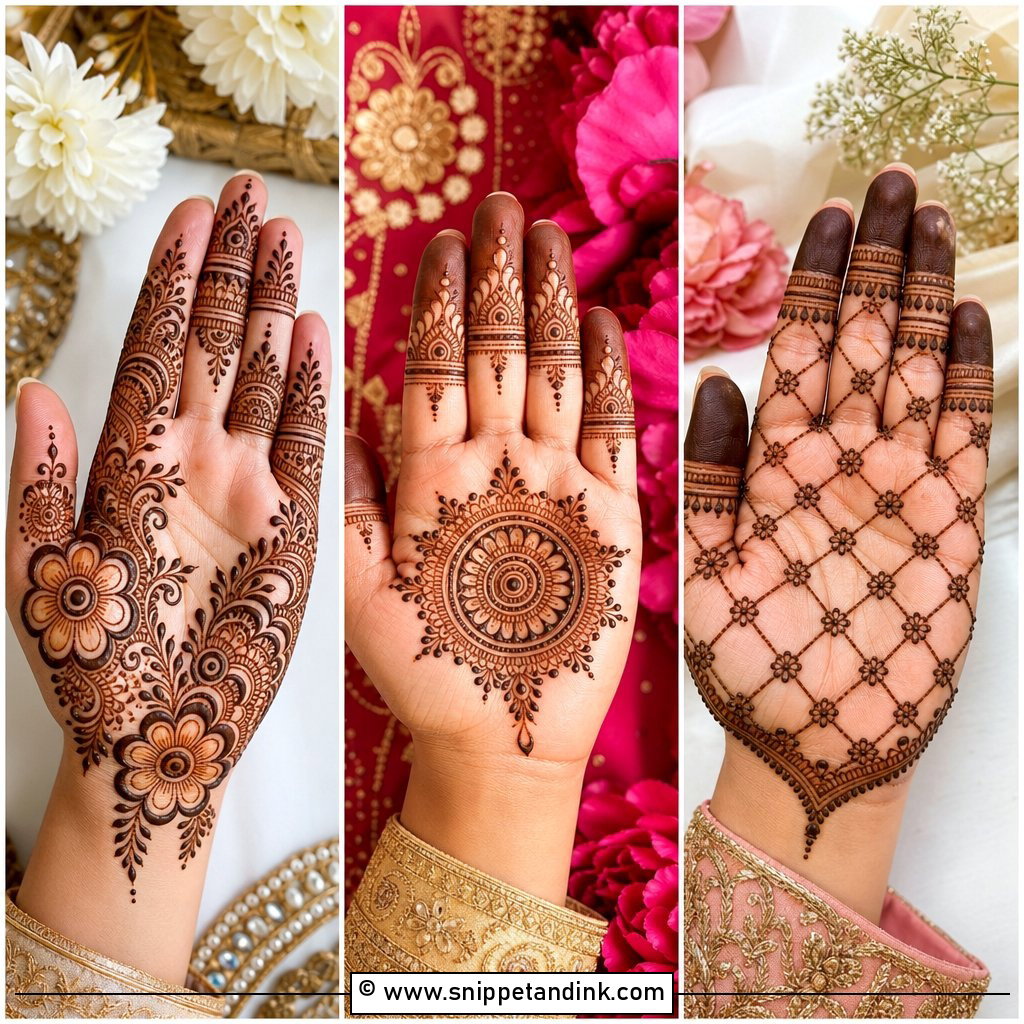
The palm takes the darkest stain on the body because the skin there is thick, so a front-hand design is where the color shows best. I place a round mandala in the center and connect it to the wrist with slim vines. On the fingers, I alternate leaf chains with thin bands so they don’t all look identical. Brides who want clear motifs rather than dense net filling usually prefer this, and guests can take a lighter version.
4. Simple Back Hand Wedding Mehndi Design
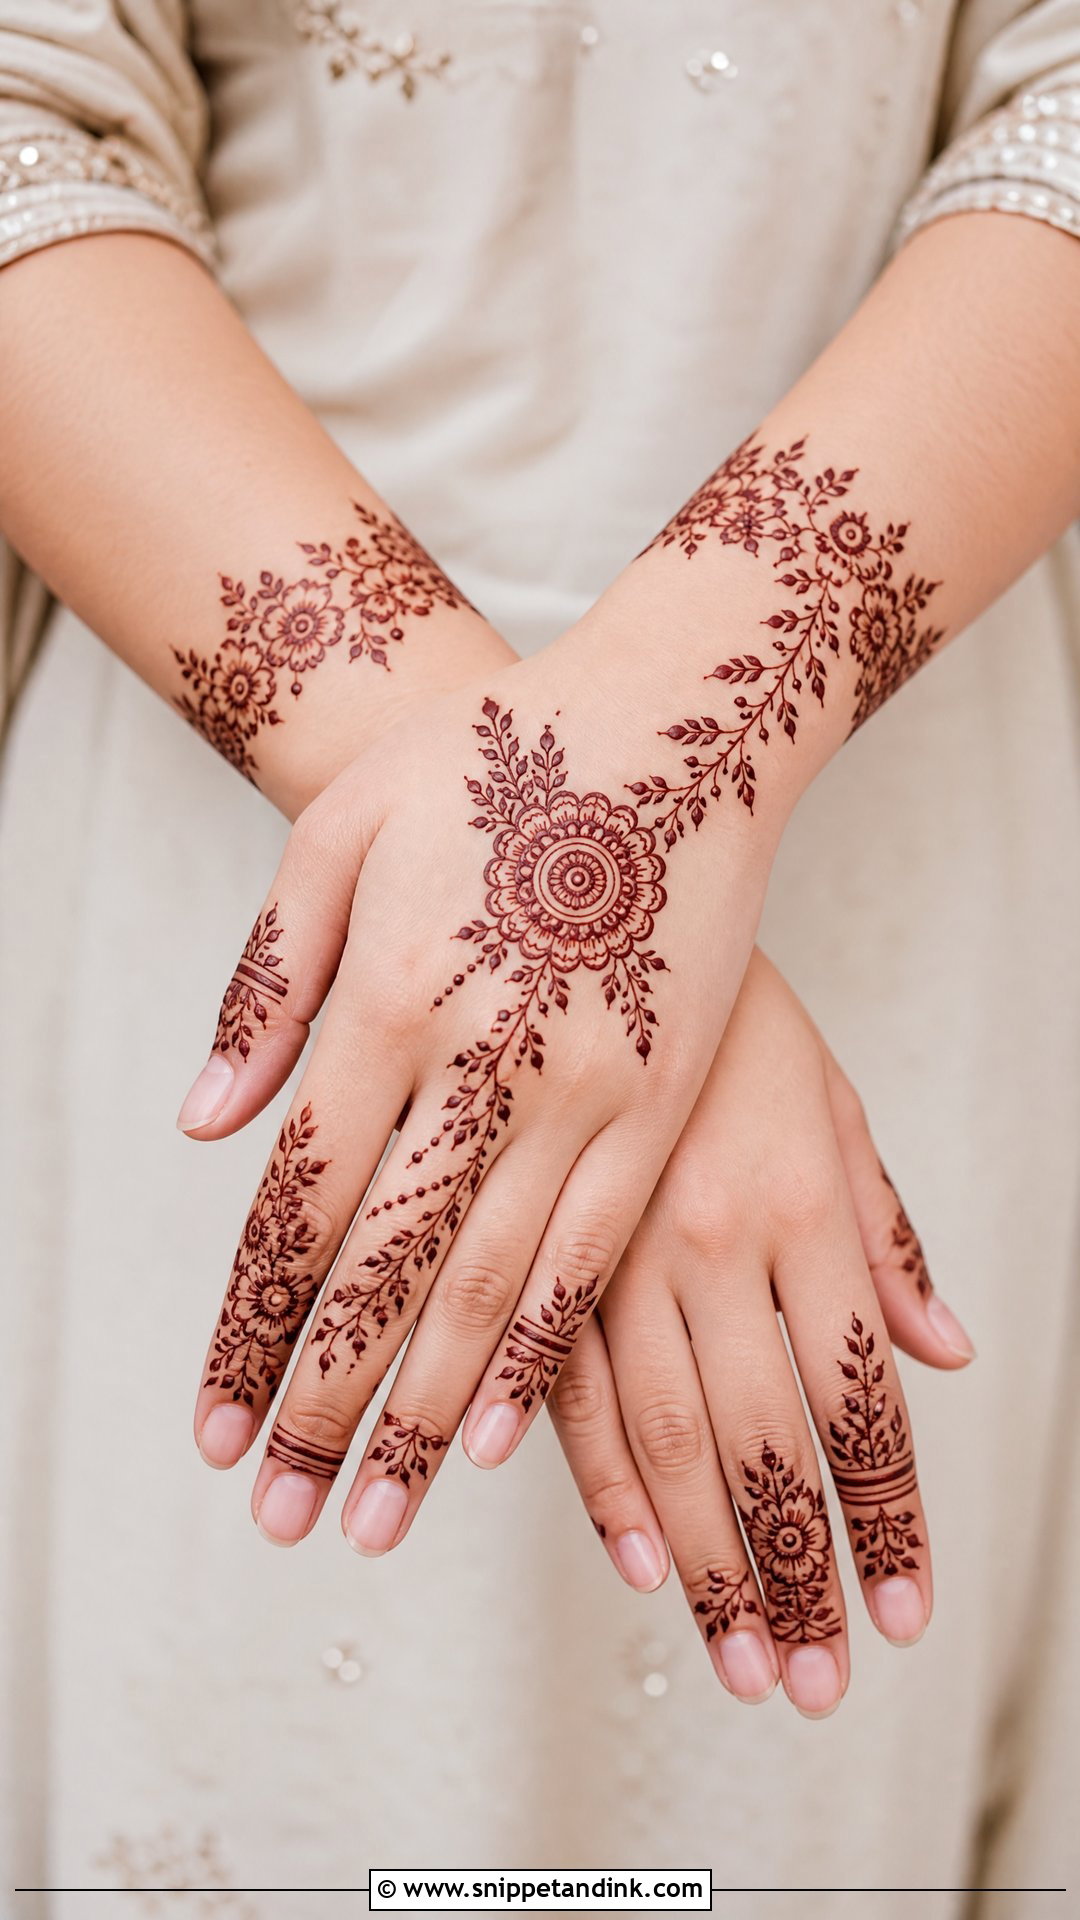
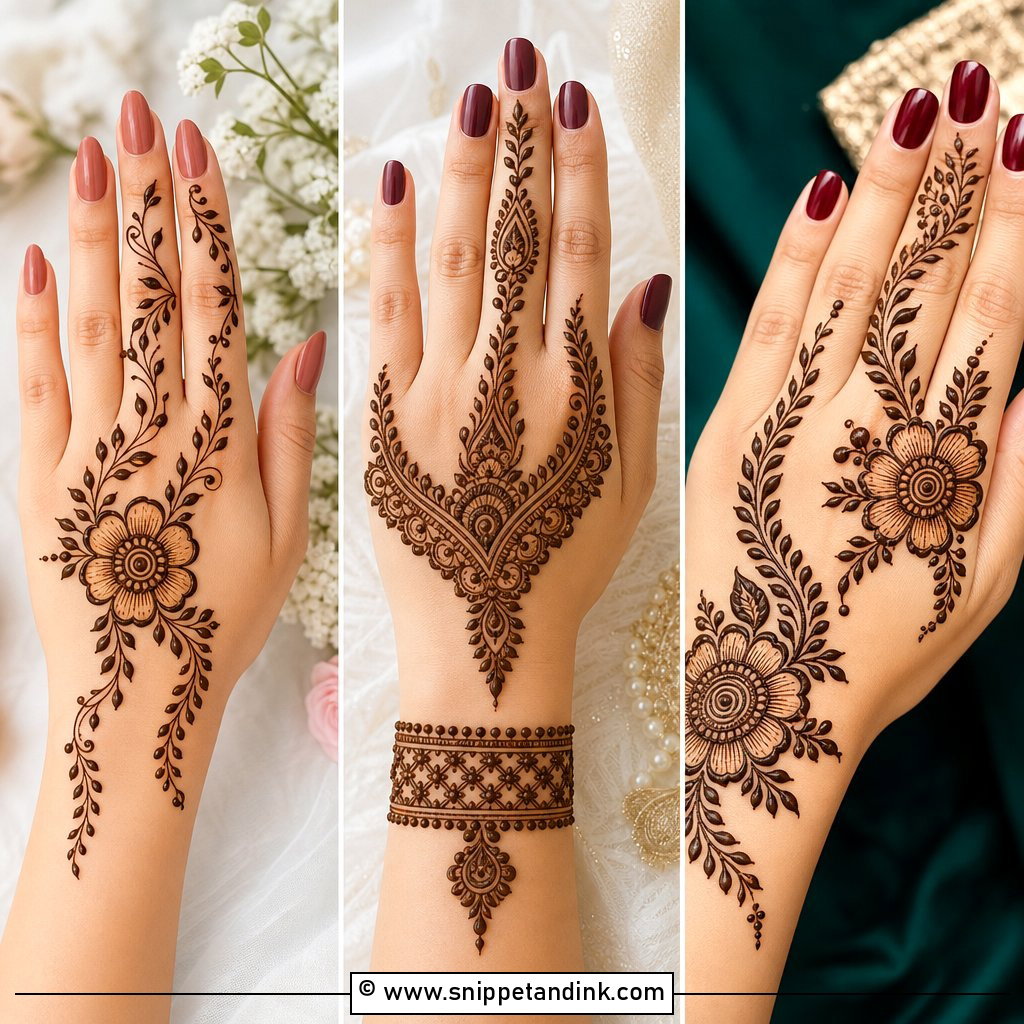
The back of the hand stains lighter than the palm, so a back hand wedding mehndi design needs bolder outlines to show up in ring photos. I usually start with a floral bracelet at the wrist, then run a vine or a diagonal trail toward the fingers. Avoid too many solid blocks; on the back of the hand, filled areas can stain unevenly and look patchy. It’s the side everyone sees during greetings, so spacing matters more here than anywhere.
5. Simple Full Hand Wedding Mehndi Design
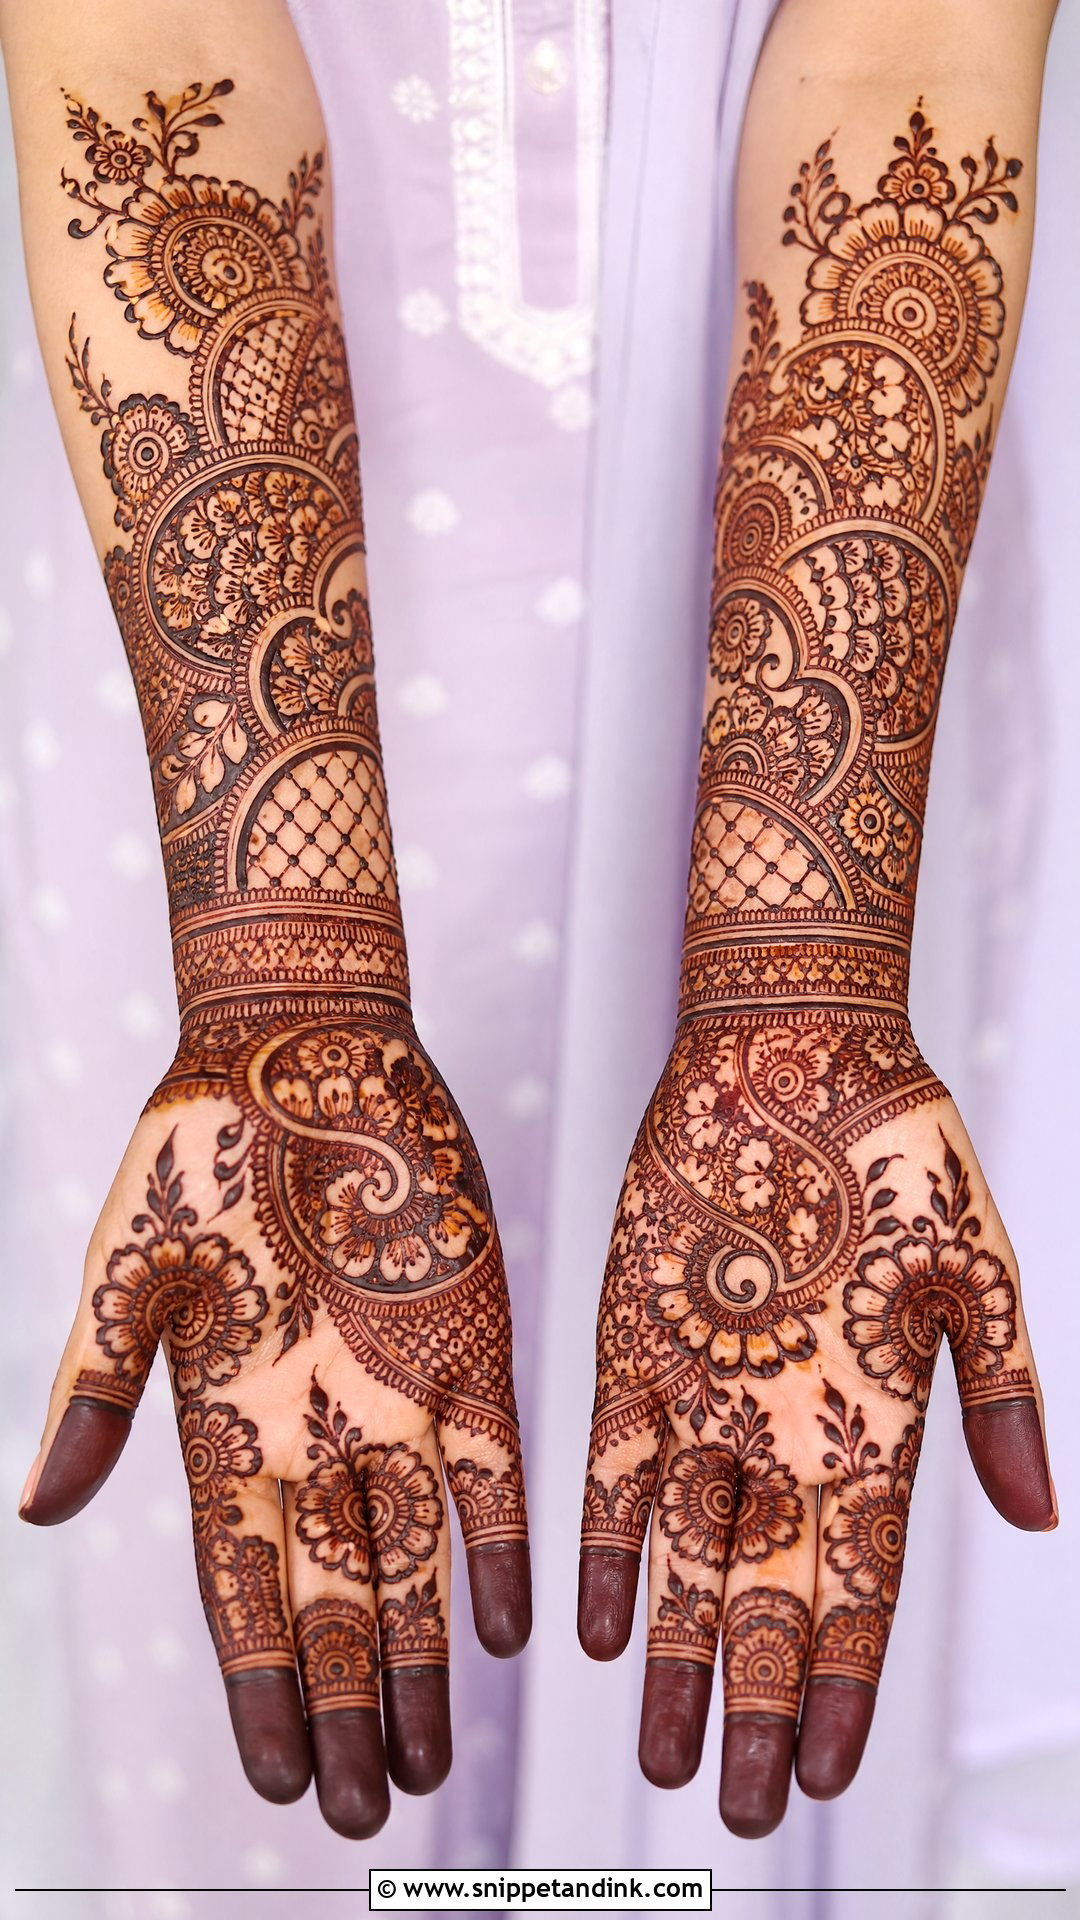
Full coverage doesn’t have to mean dense. I fill fingertips to wrist, sometimes to the lower forearm, with spaced florals, a few paisleys and open jaali panels. The trick is repeating three or four motifs instead of mixing ten. Leaving small gaps of skin between elements keeps the stain readable. Expect a full-hand design to take noticeably longer than a half-hand one, so plan your evening around it.
6. Simple Mandala Wedding Mehndi Design
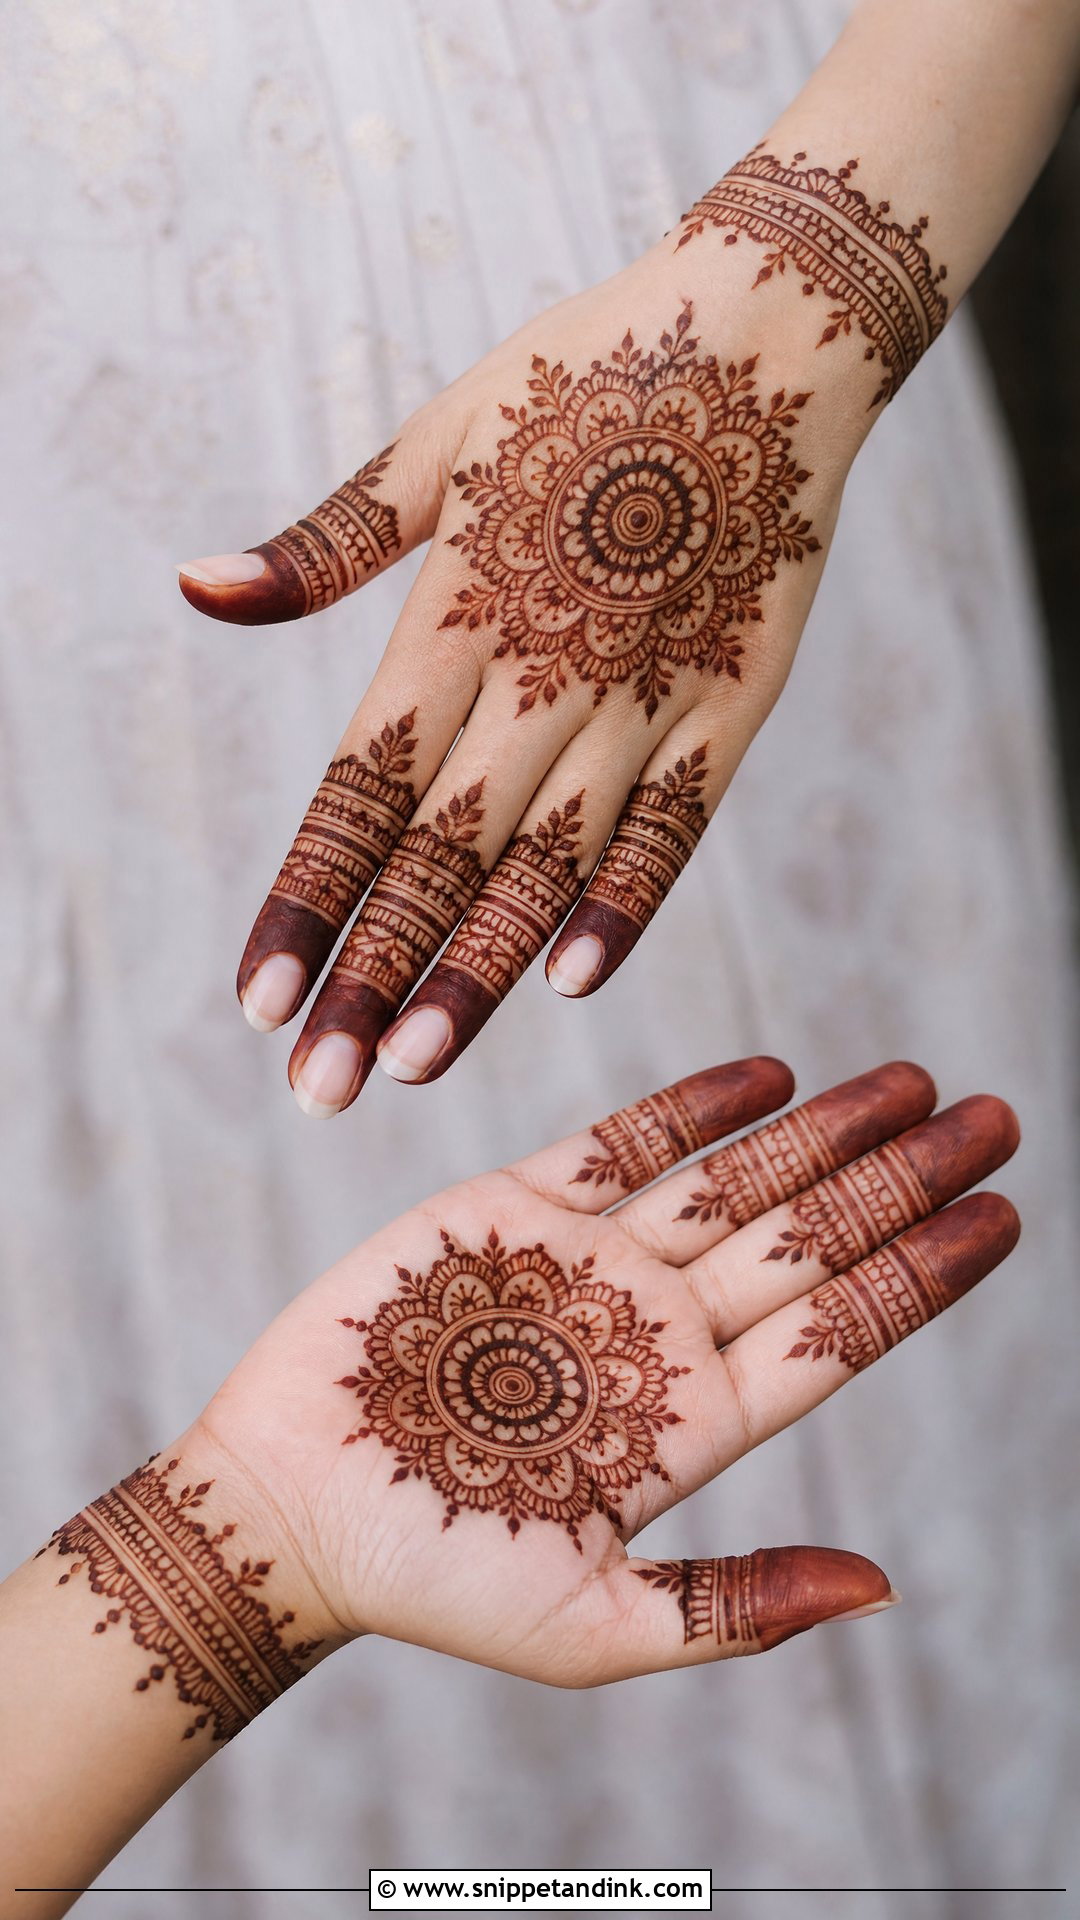
A mandala gives a design structure, which is why I suggest it for brides who like symmetry. I draw the center circle first and build out ring by ring, checking from a distance that it isn’t drifting oval. On smaller hands, I keep the mandala modest so it doesn’t swallow the palm. A slim wrist bracelet and light finger tips finish it without crowding the circle.
7. Simple Floral Wedding Mehndi Design
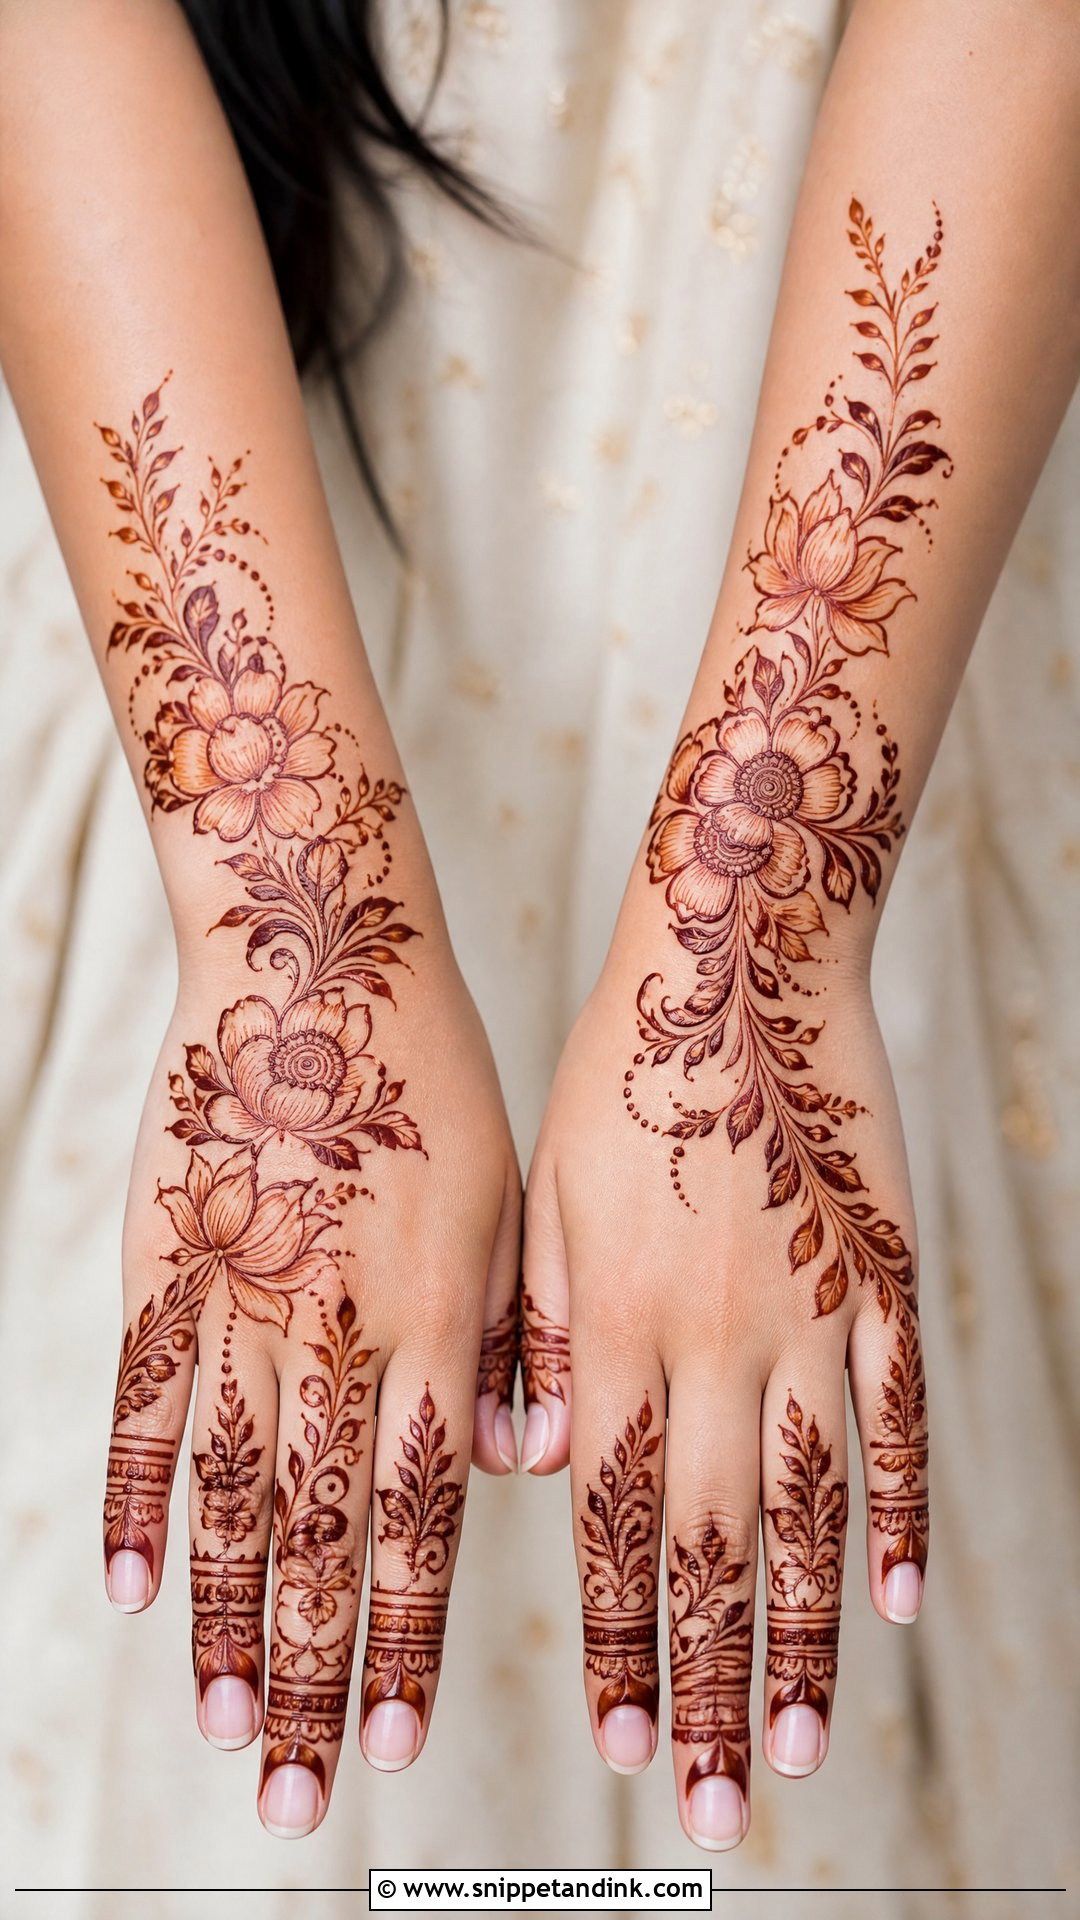
Flowers are the most forgiving motif for a beginner client’s nerves, because they look good at any size on any hand. I place roses or lotus petals with light shading inside, then connect them with leafy vines. A diagonal trail, a half-hand layout or a light full-hand pattern all work. I keep the outlines clean and the shading sparse; heavy shading inside petals fills in as the stain darkens.
8. Simple Paisley Wedding Mehndi Design
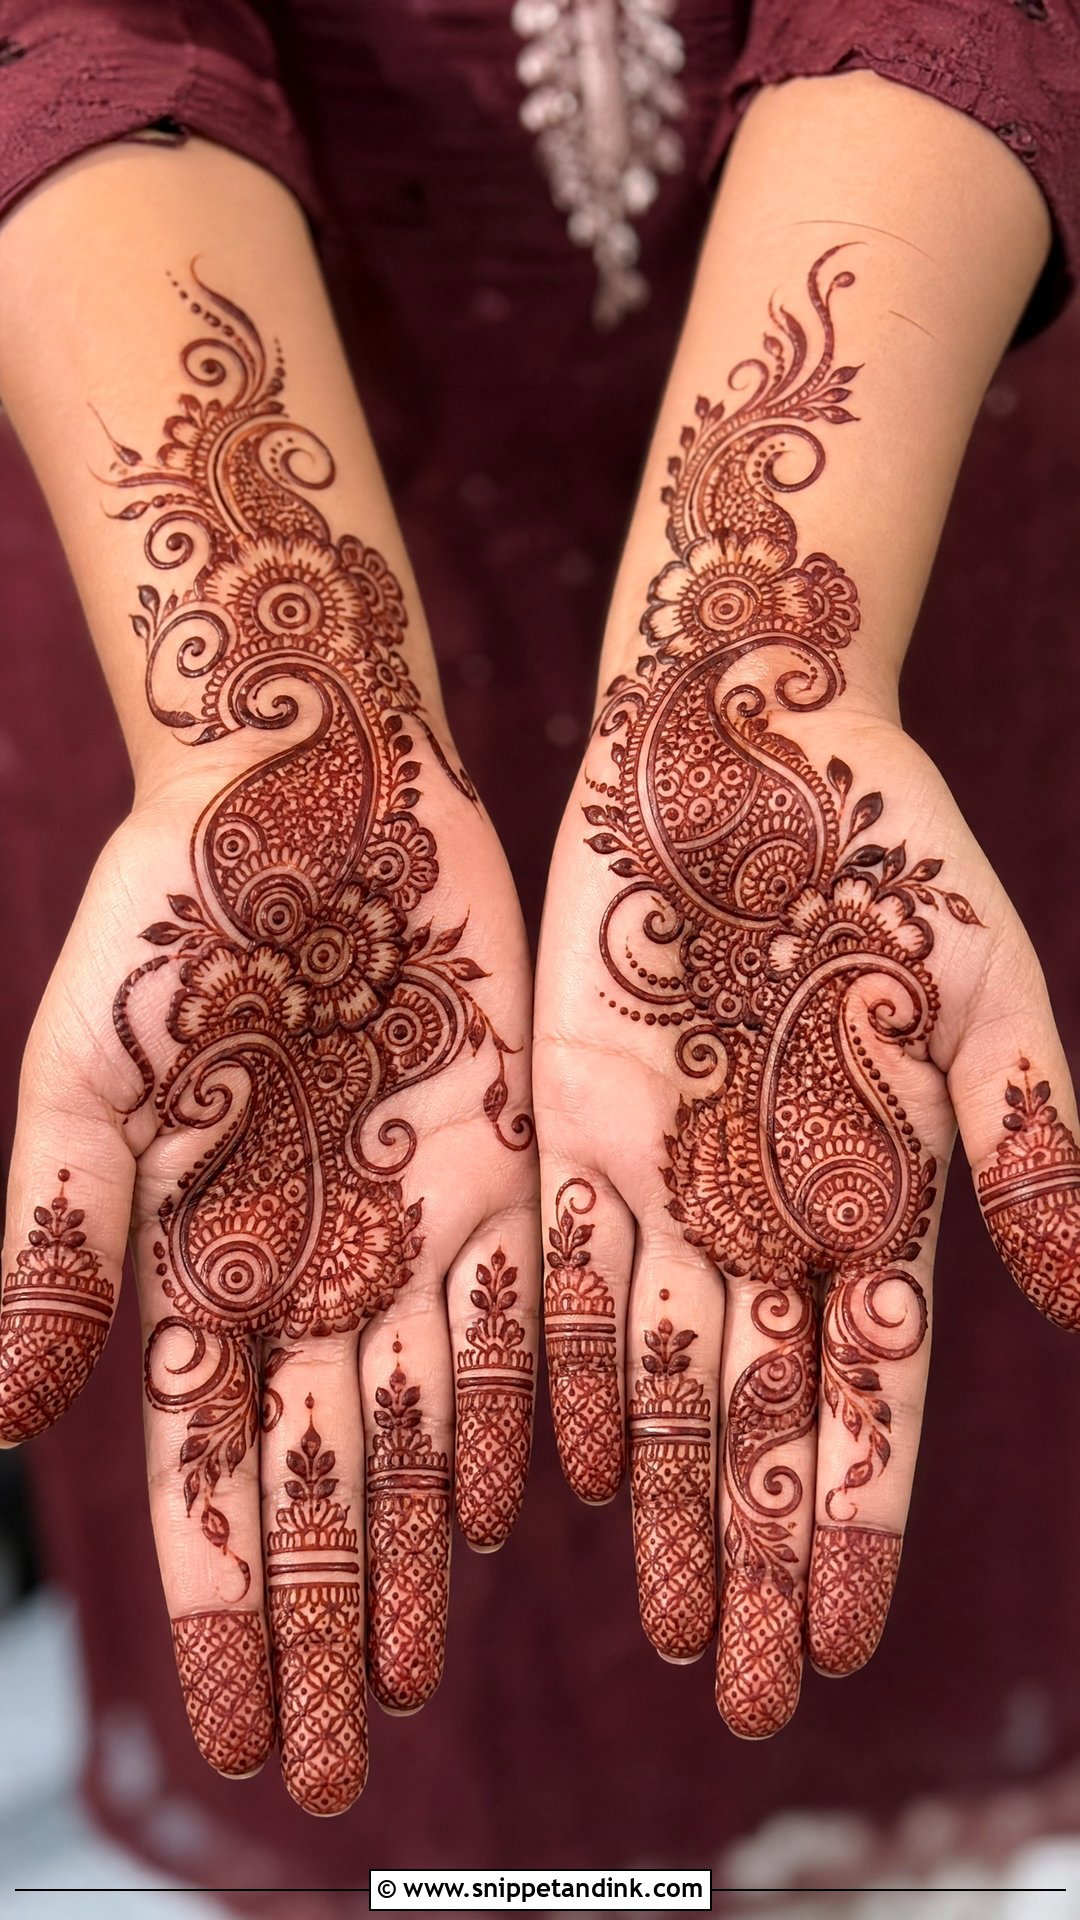
Two or three large paisleys on the palm instantly read as traditional. I connect them with flowers and curved lines, then echo smaller paisleys on the fingers. Filling every paisley makes the design heavy, so I fill one or two sections inside each with dots or lines and leave the rest open. The empty space is what lets the curve show.
9. Simple Jaali Wedding Mehndi Design
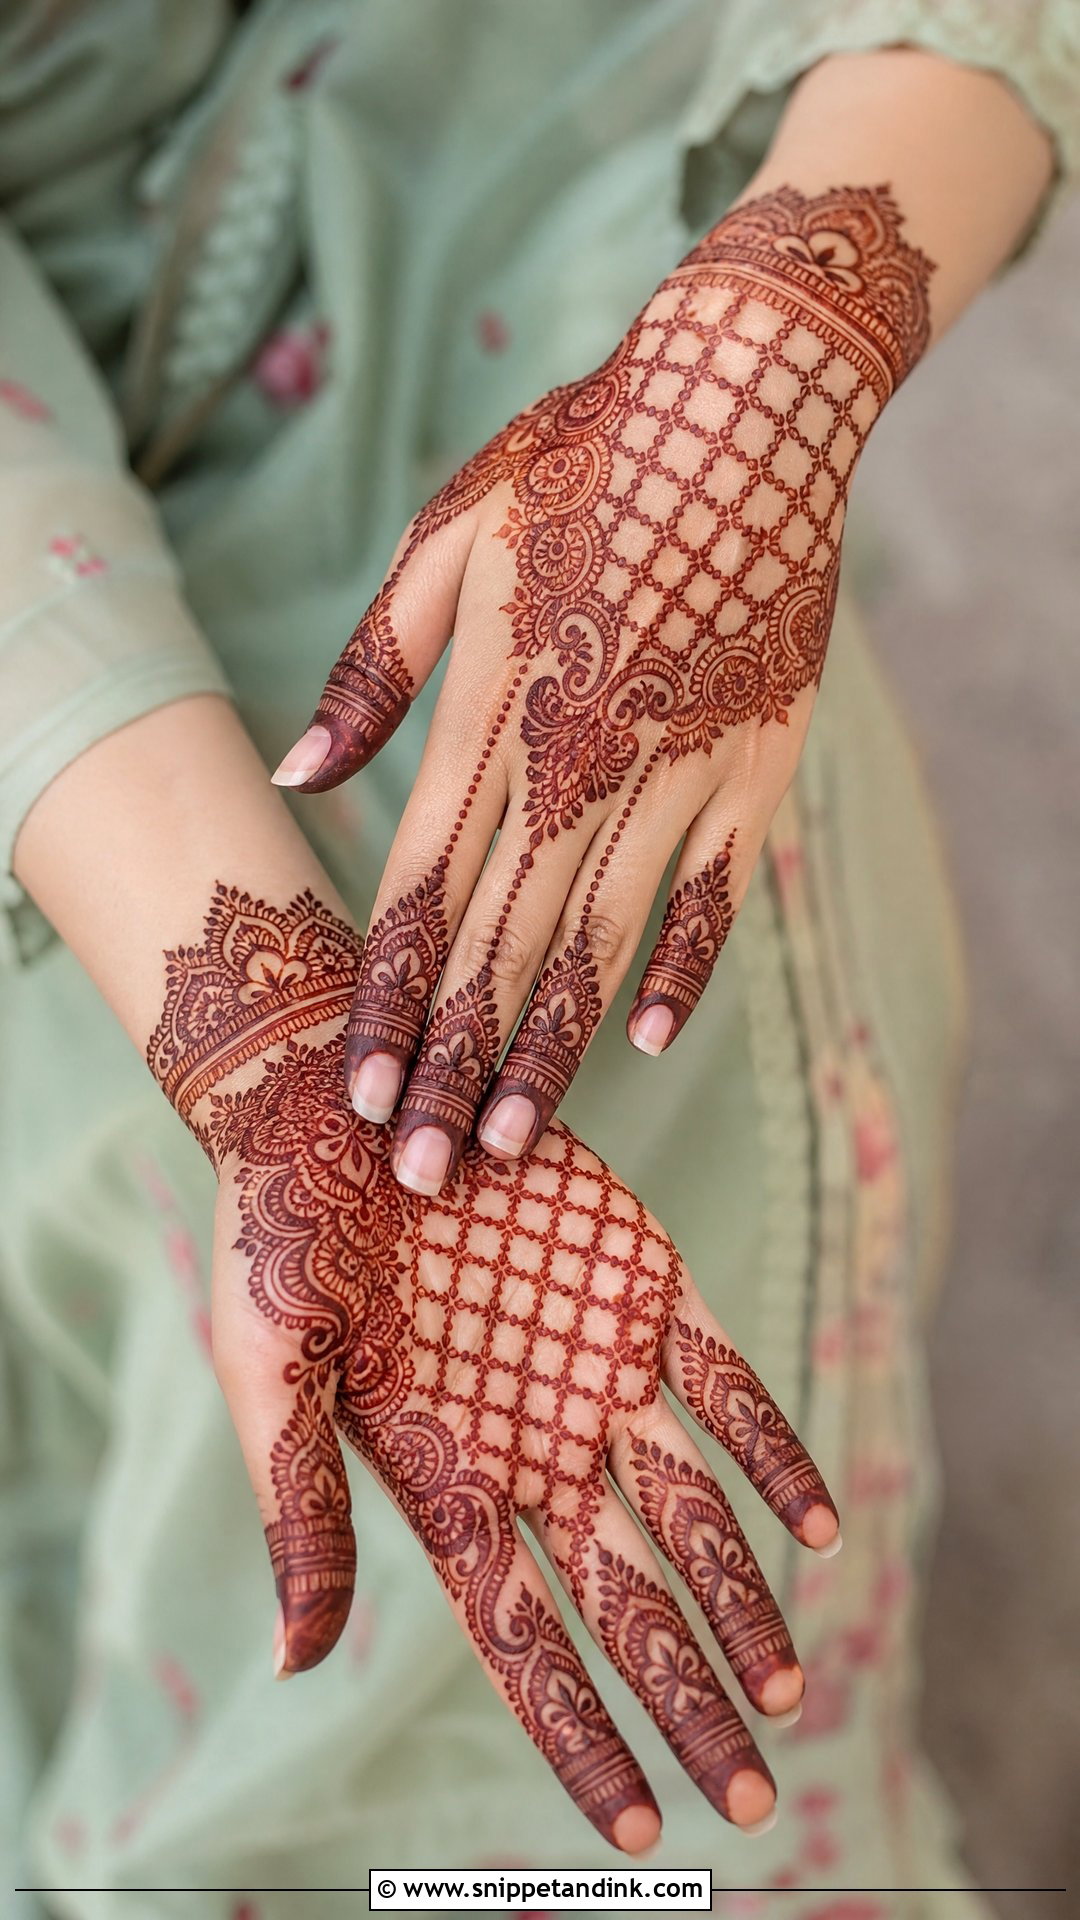
Jaali is mesh work, and it’s the motif that most often goes wrong when overused. One clean panel on the back of the hand, the wrist or one side of the palm is usually enough. I draw the grid with a fine cone tip and keep the lines evenly spaced, adding tiny dots where they cross. If the paste is too runny, the grid squares fill in and you lose the lace effect, so I test the cone consistency on paper first.
10. Simple Minimal Bridal Mehndi Design
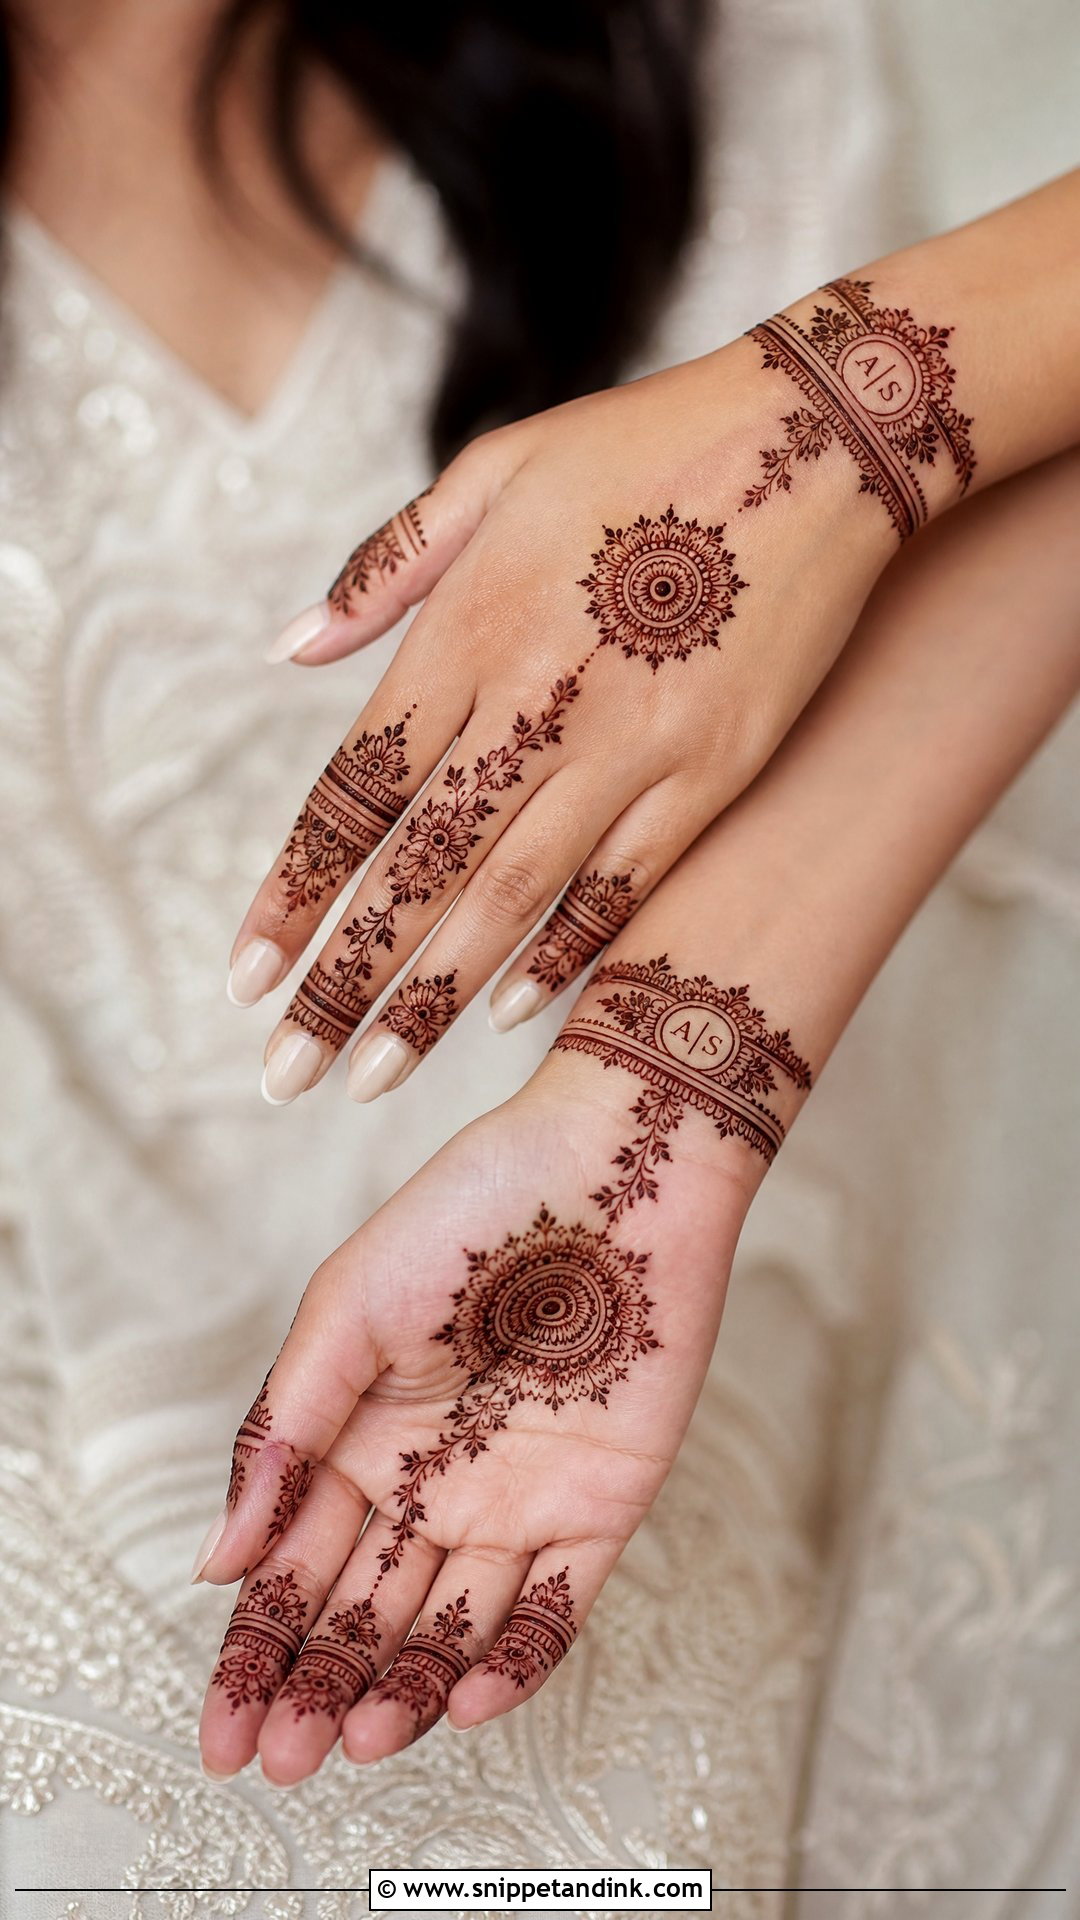
Minimal bridal mehndi is about restraint. A small palm mandala, fine finger details, a slim wrist cuff and maybe initials or a small wedding date worked into the pattern. Every line needs to look deliberate, which means a steady hand and paste that flows without blobbing. It suits destination weddings and outfits with detailed sleeves. I’d still include one stronger element, a floral trail or a bracelet, so it reads as bridal rather than casual.
11. Simple Indo-Arabic Wedding Mehndi Design
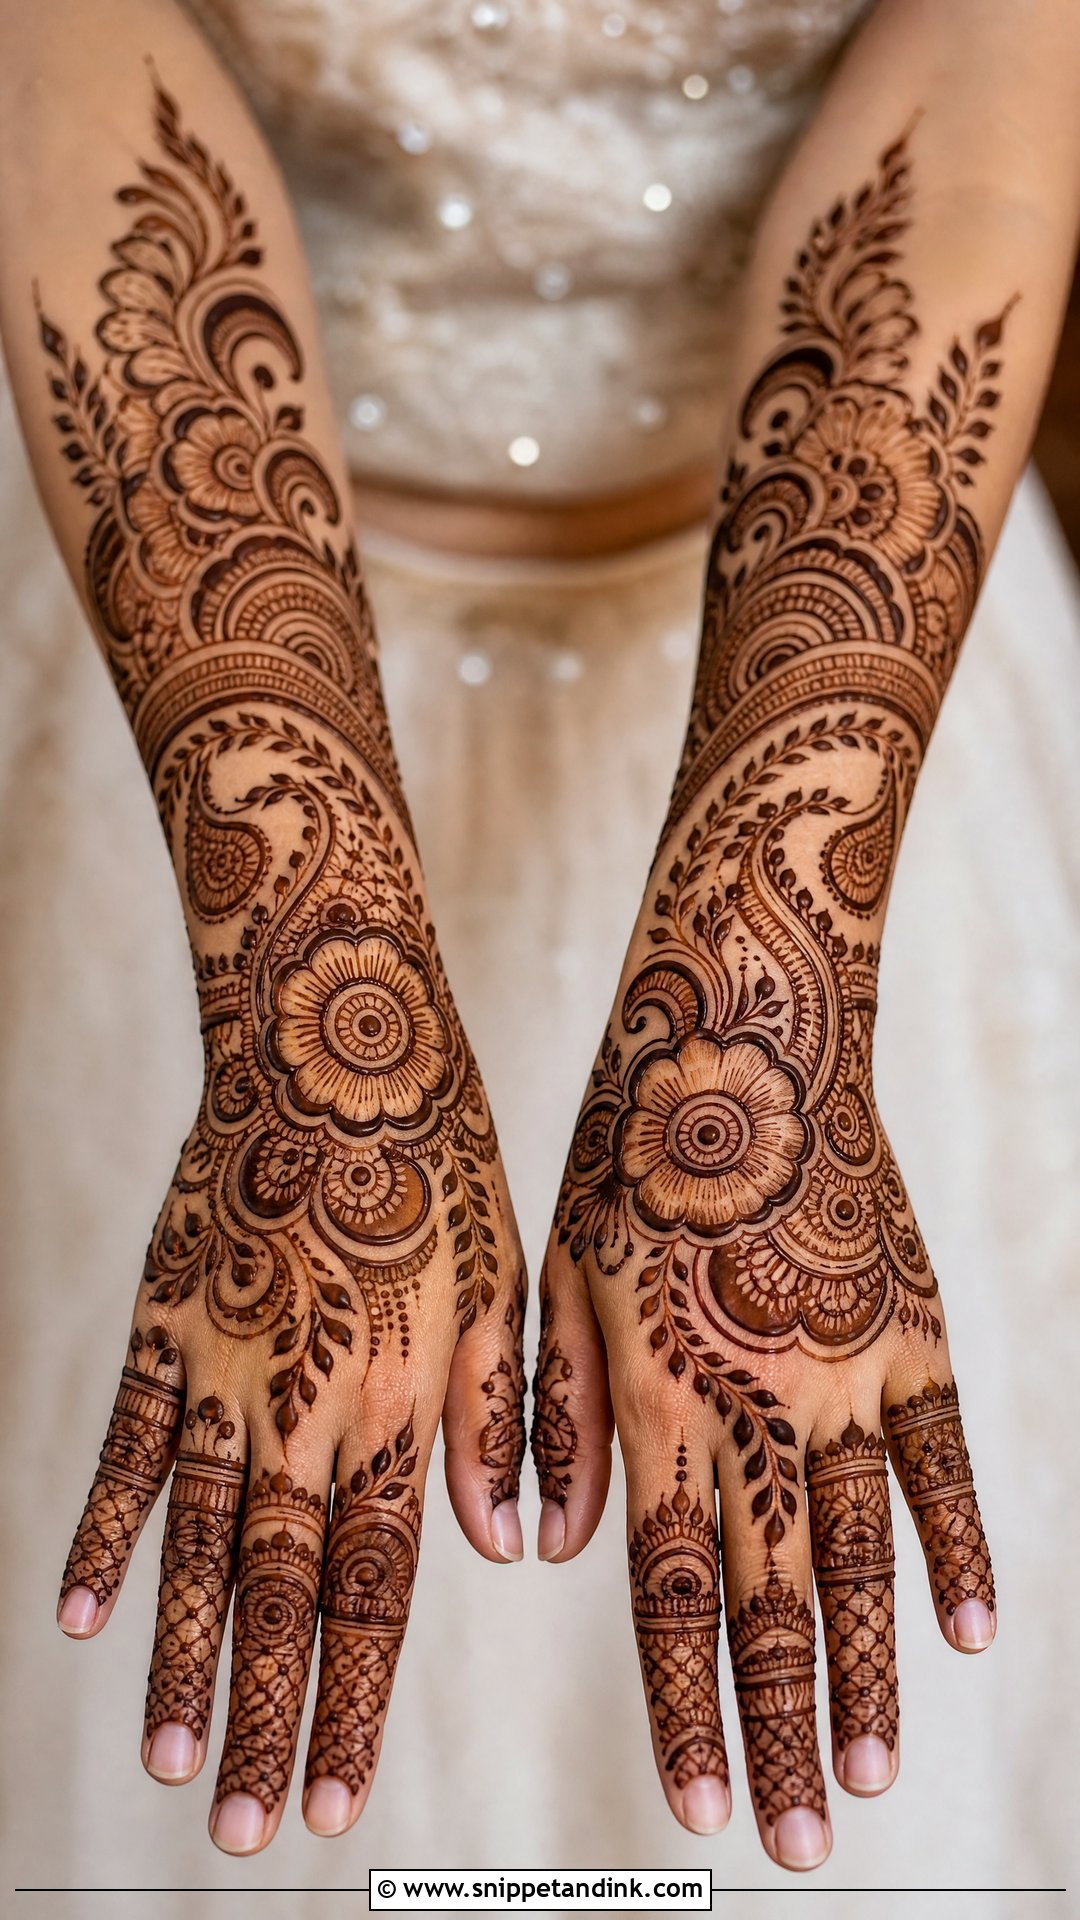
Indo-Arabic designs take the bold flow of Arabic work and add Indian detail in selected spots: paisleys, leafy vines, small filled sections. The layout stays open. A diagonal trail across the palm or back hand suits it, with half-mandala corners and finger bands for balance. Because the motifs are big, it reads well from across a room, which helps in group photos.
12. Simple Indian Wedding Mehndi Design
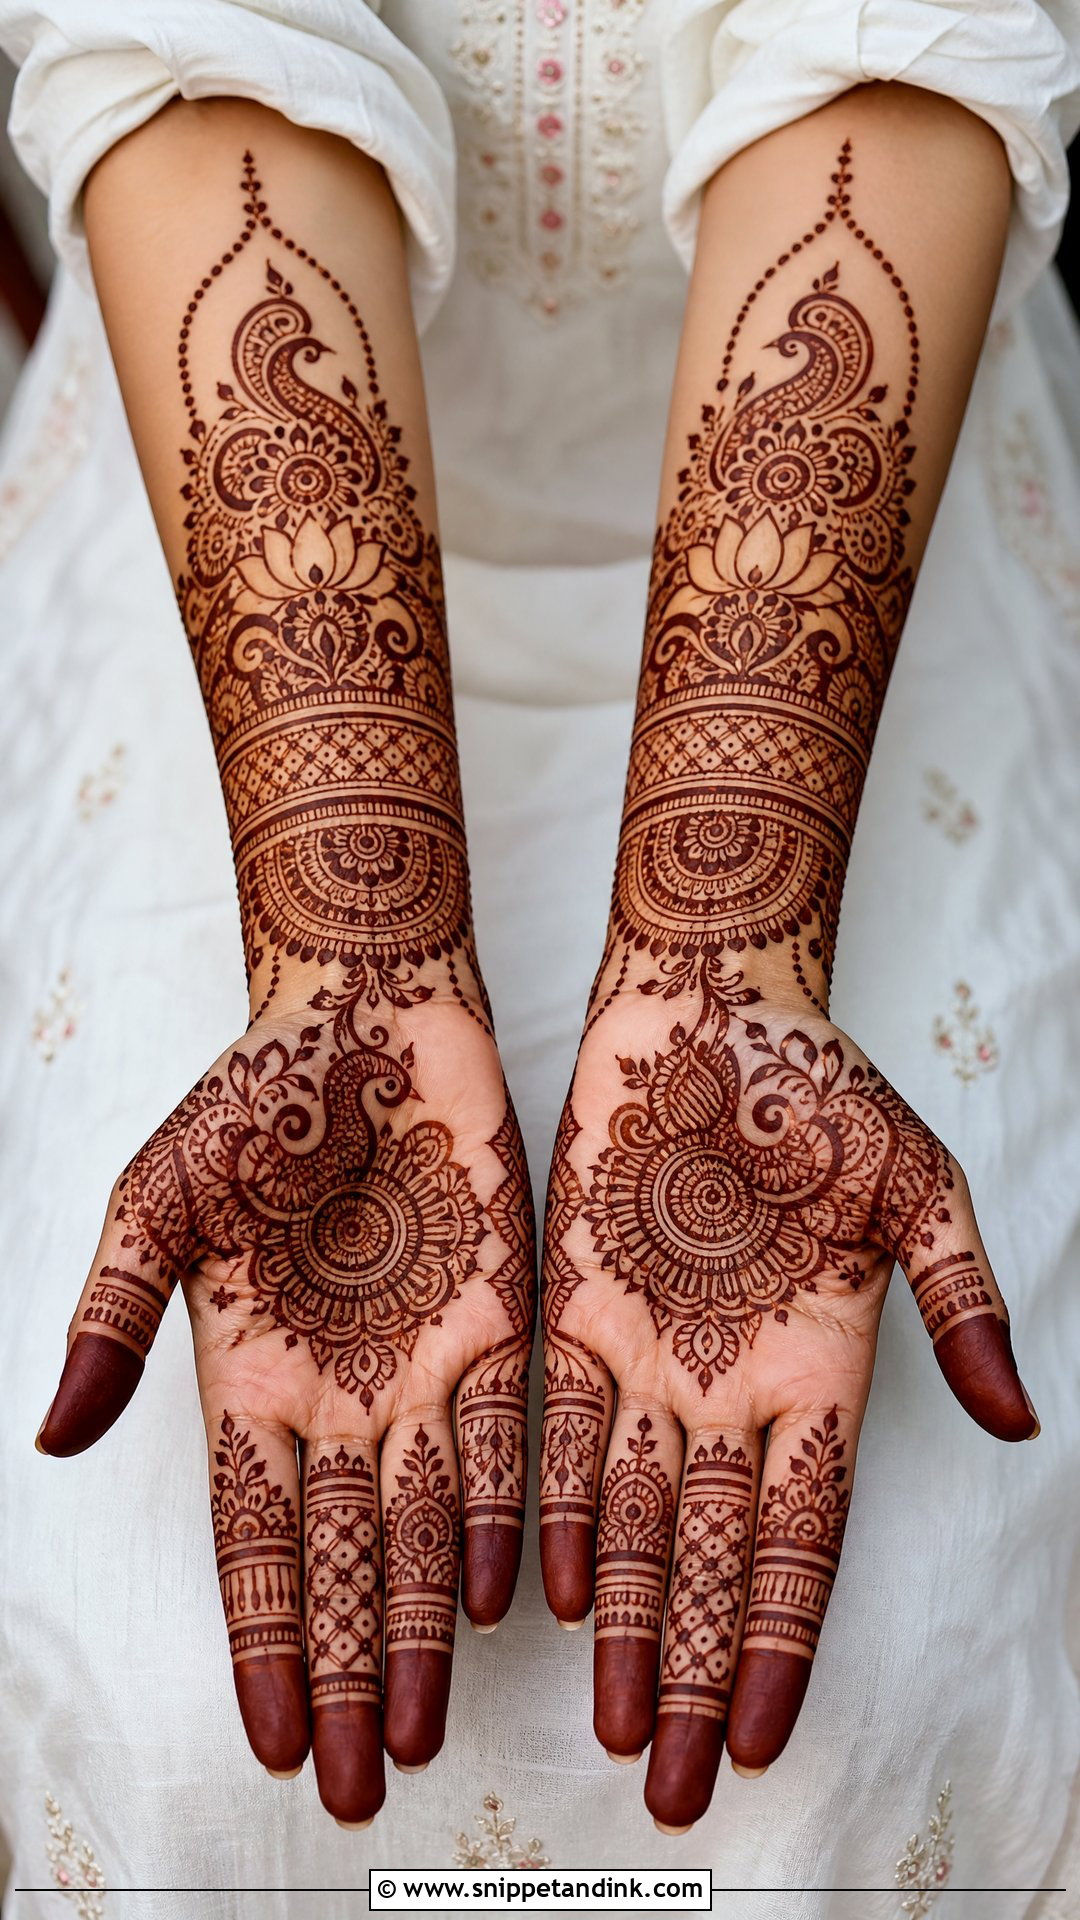
A simple Indian bridal design keeps the cultural motifs, paisleys, lotus, peacocks and mandalas, but repeats them with spacing rather than packing every inch. It’s quicker to apply and easier to sit through. Brides who want to hide the groom’s initials often like this layout, as a paisley or flower makes a natural hiding spot. Ask your artist to keep the initials small and turned with the pattern, so they really are hidden.
13. Simple Moroccan Wedding Mehndi Design
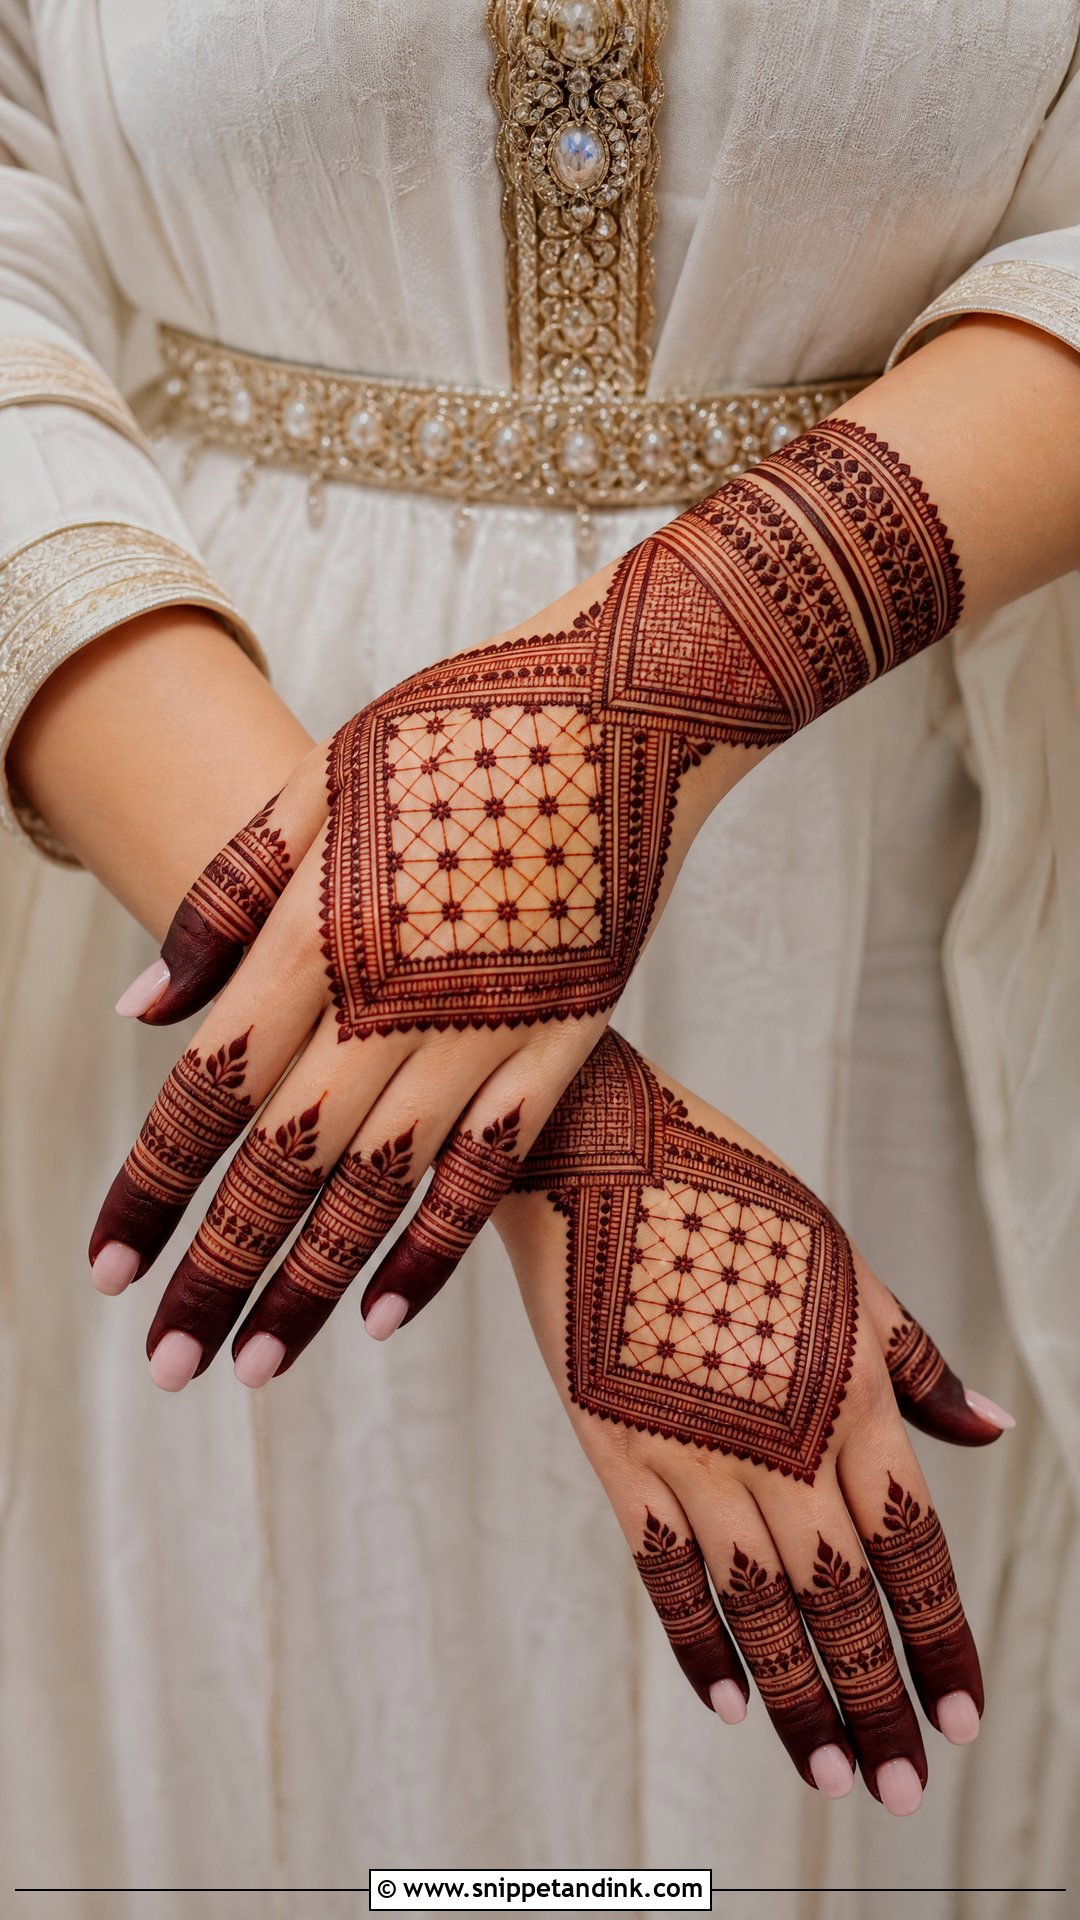
Moroccan patterns are geometric: diamonds, grids, triangles, bold borders. They rely on symmetry, so I mark the center of the hand with a dot before starting and work outward from it. Crisp lines matter more than detail here, and mixing in curves tends to break the look. It’s a good fit for a bride who wants something artistic and different from common florals.
14. Simple Gulf Wedding Mehndi Design
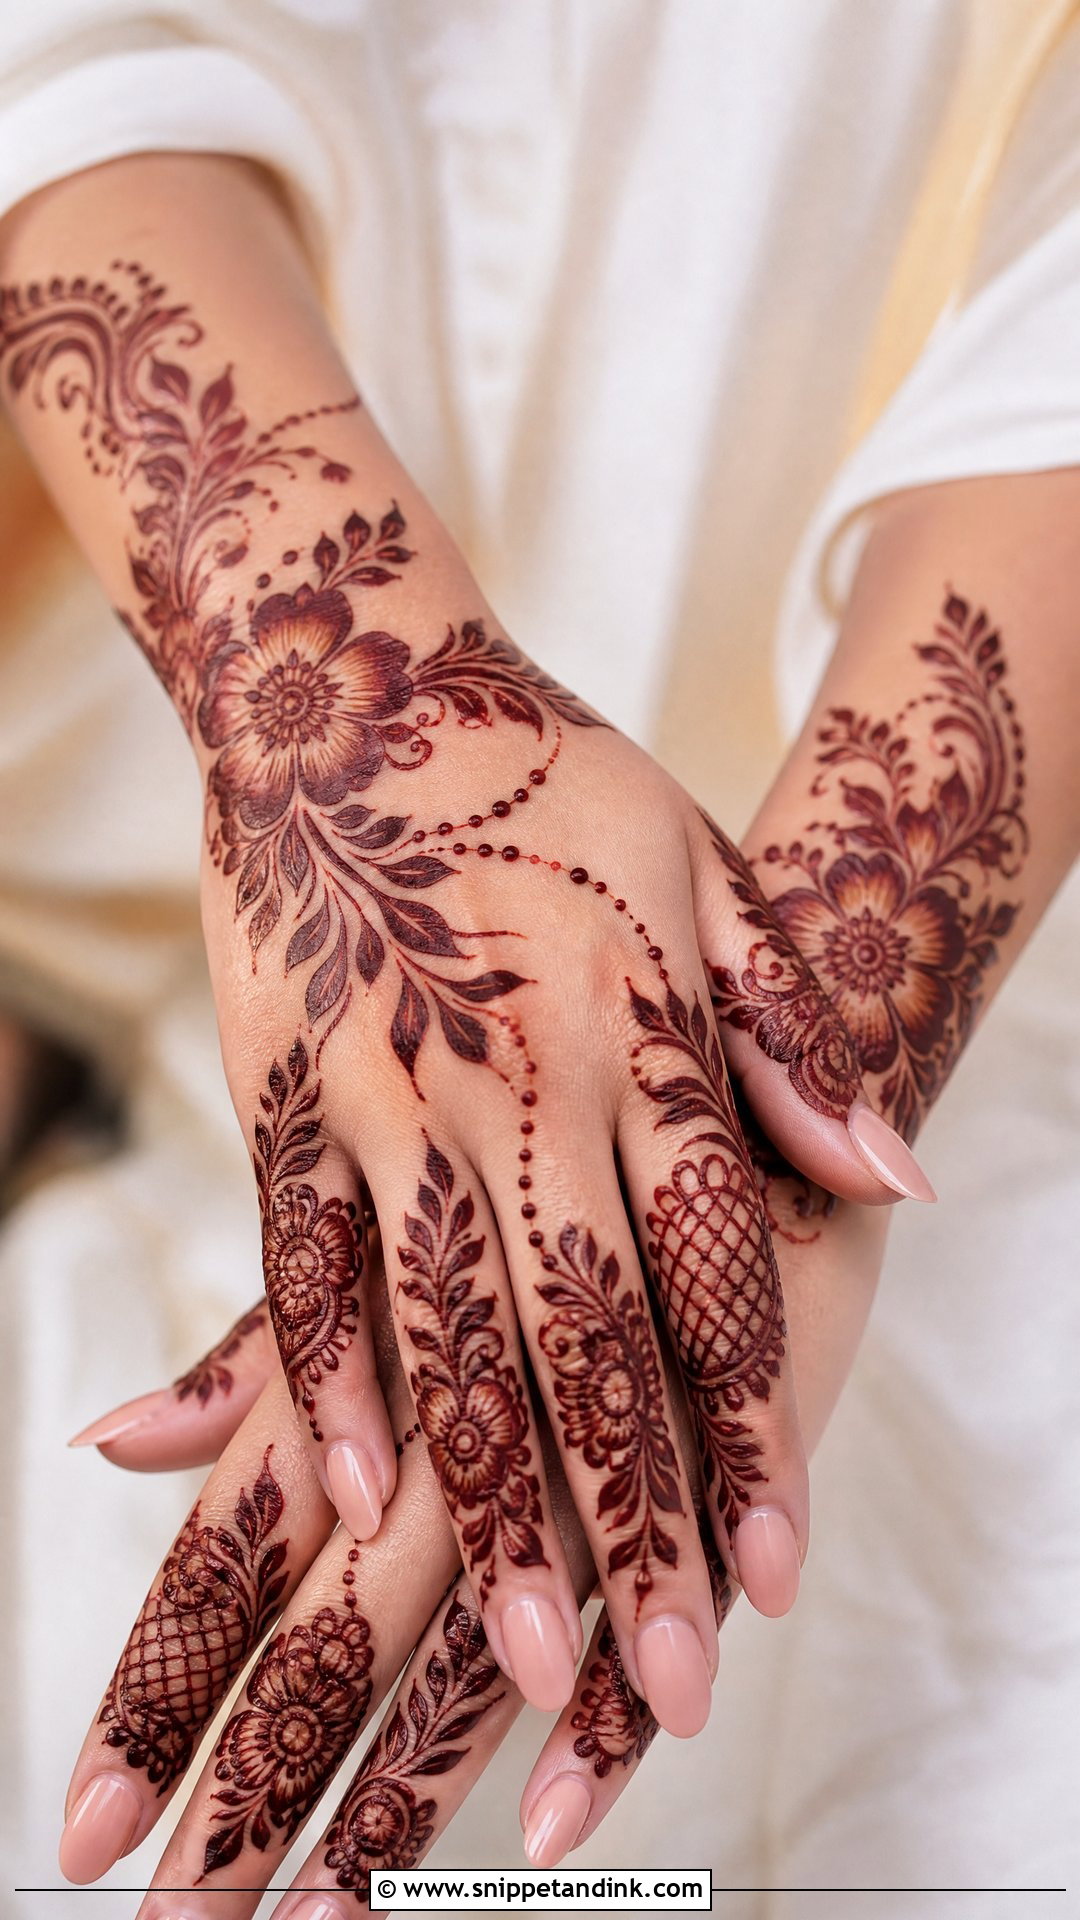
Gulf, or Khaleeji, mehndi uses bold floral clusters with lots of open skin around them. It’s usually drawn on the back of the hand, running from wrist to fingers. Because the flowers are large and lightly shaded, the design looks rich without dense filling. The outlines are thick, so I use a slightly wider cone tip. It pairs well with gold jewelry and heavily embroidered outfits.
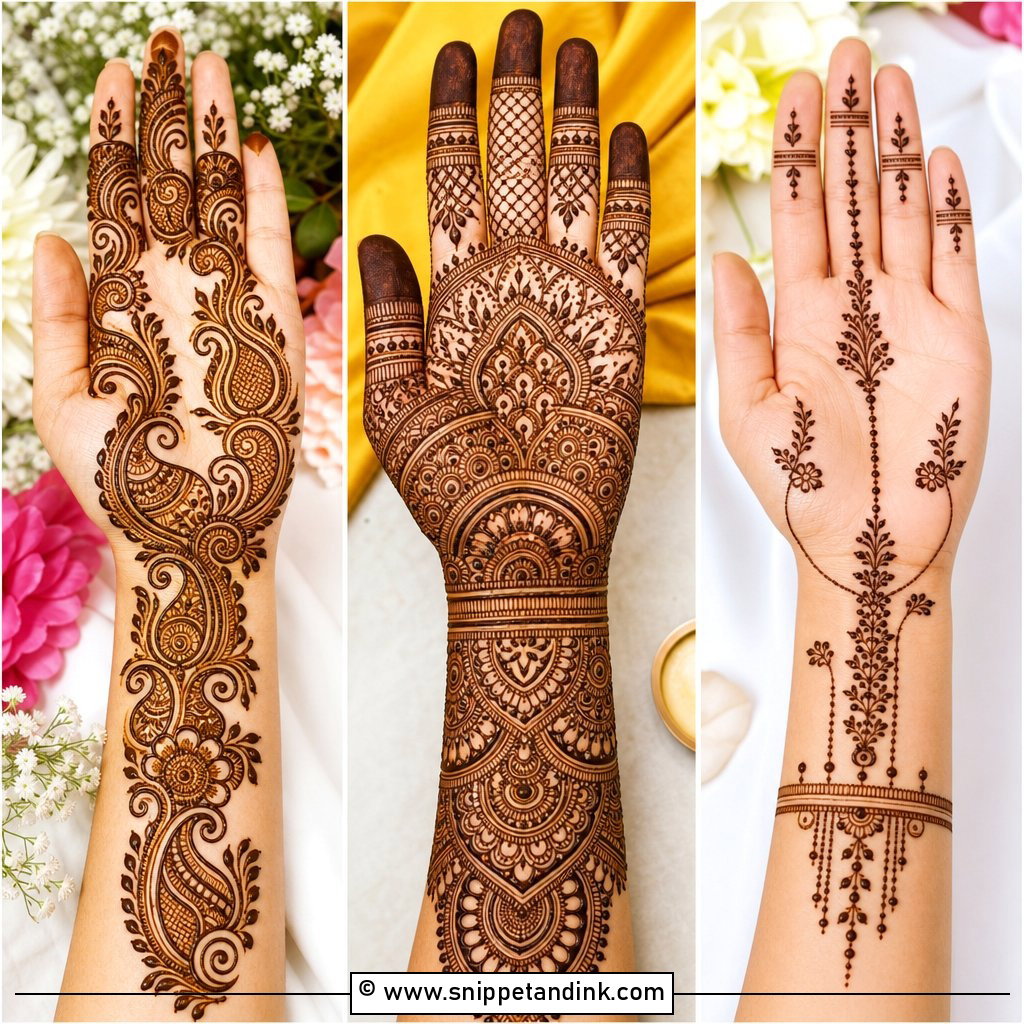
15. Simple Bracelet Wedding Mehndi Design
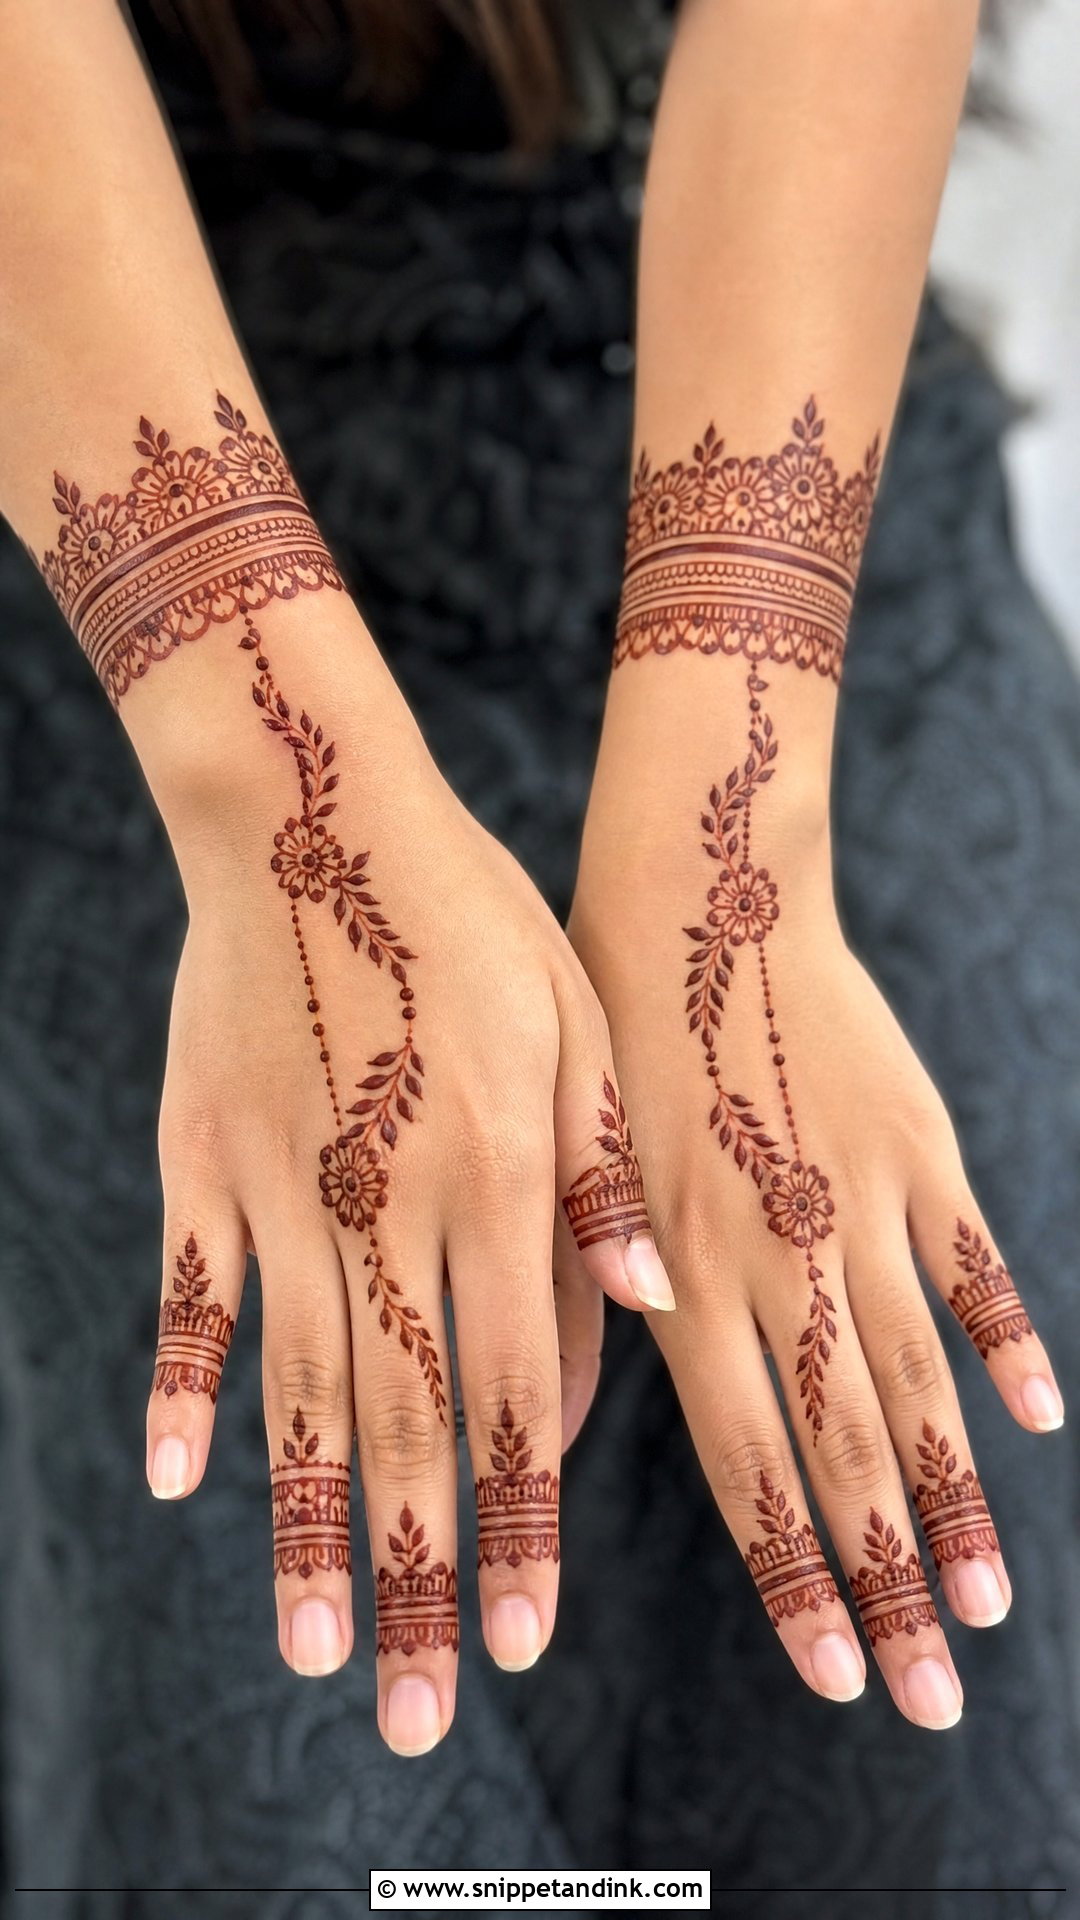
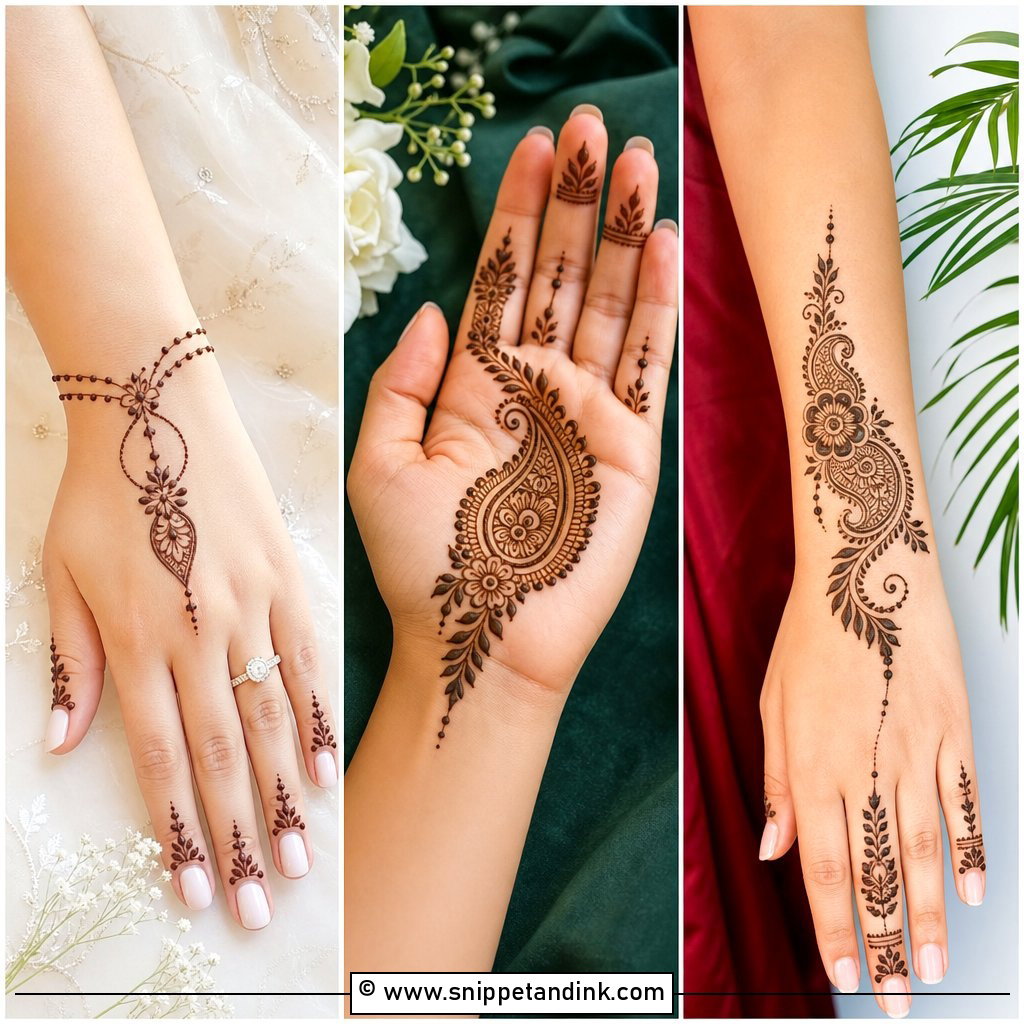
A bracelet design puts the focus on the wrist, where the henna forms a cuff or chain-like band, with a delicate trail running toward the middle or ring finger. It looks good with real bangles stacked above it. On the wrist, the skin moves more than on the palm, so I keep the bracelet a little above the wrist crease; a line drawn right in the crease cracks as the paste dries.
16. Simple Finger Wedding Mehndi Design
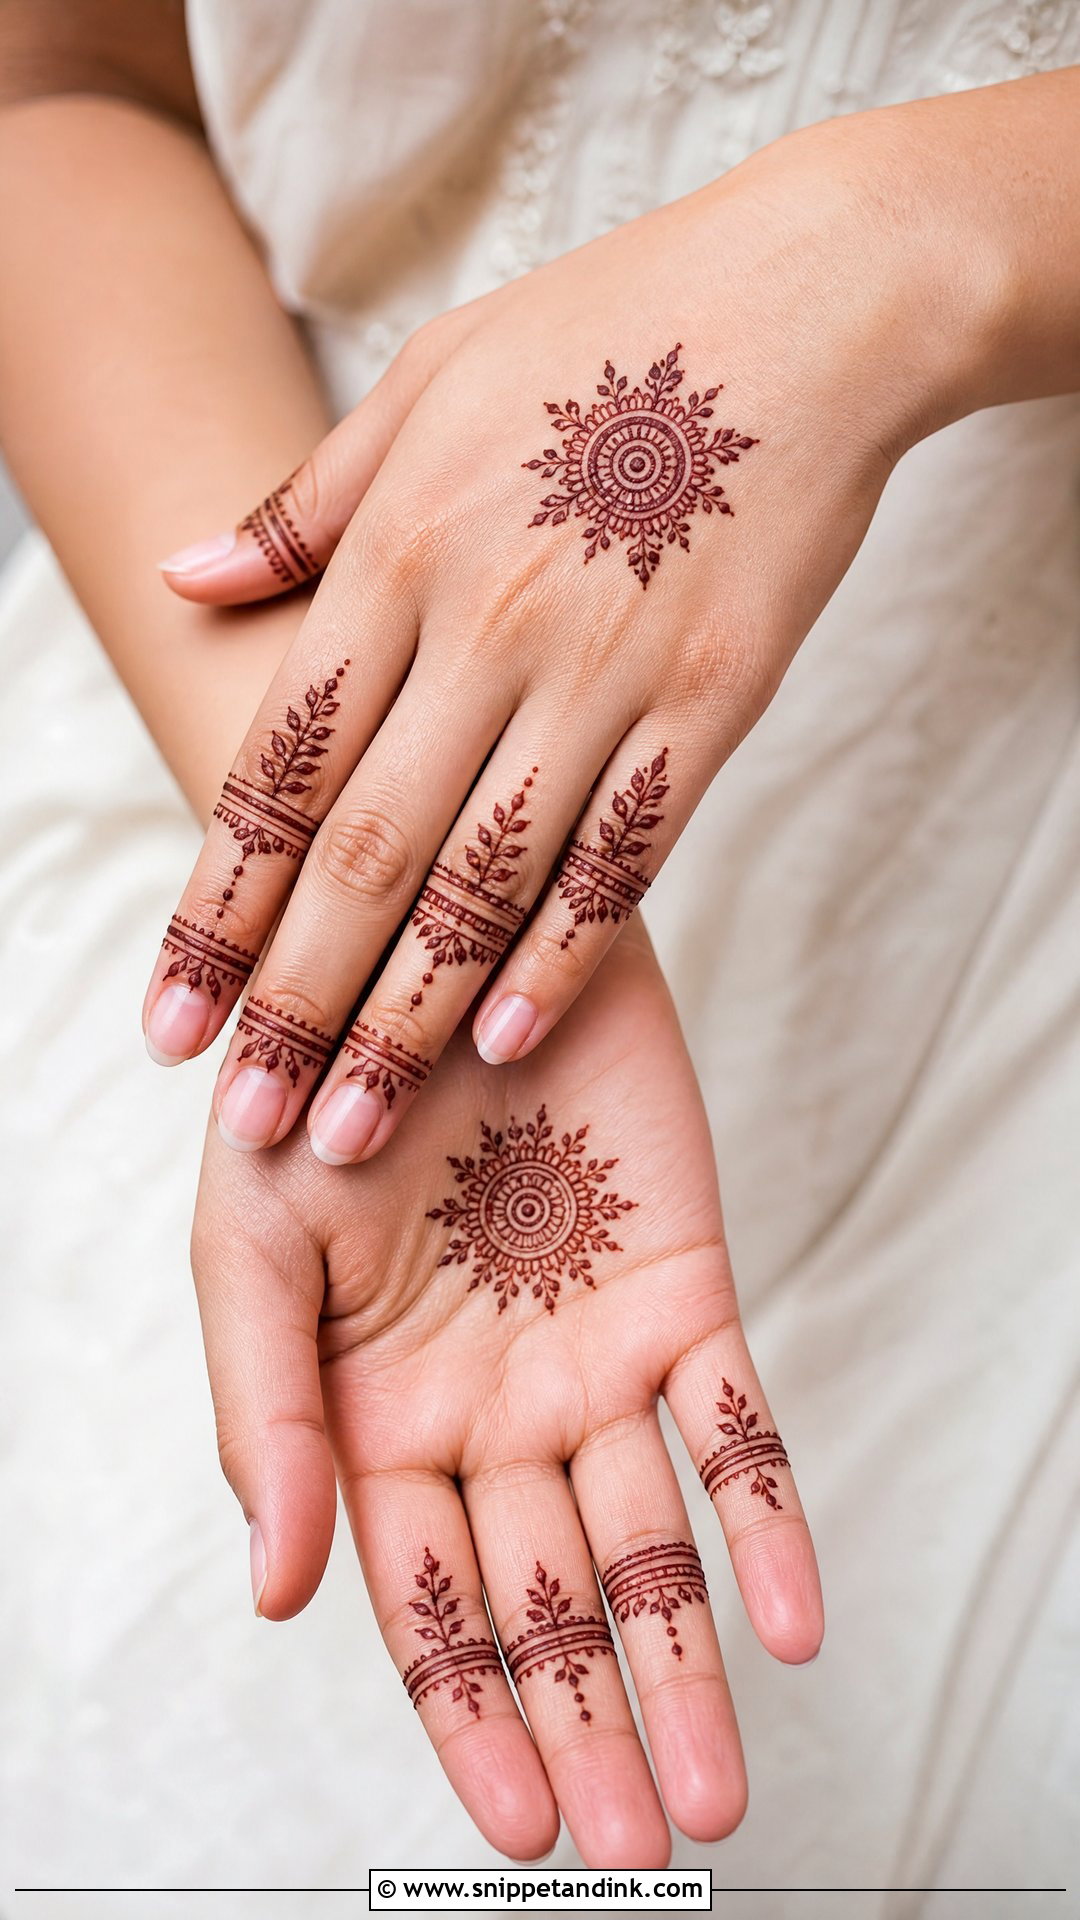
Finger designs work when each finger is slightly different but clearly part of the same set. I use leafy bands, tiny florals and fine lines, then add a small floral cluster near the center of the hand to connect them. This leaves room for nail color and rings to show. Fingertips stain dark, so I keep any filled tips small if the bride is wearing light nail polish.
17. Simple Half Hand Wedding Mehndi Design
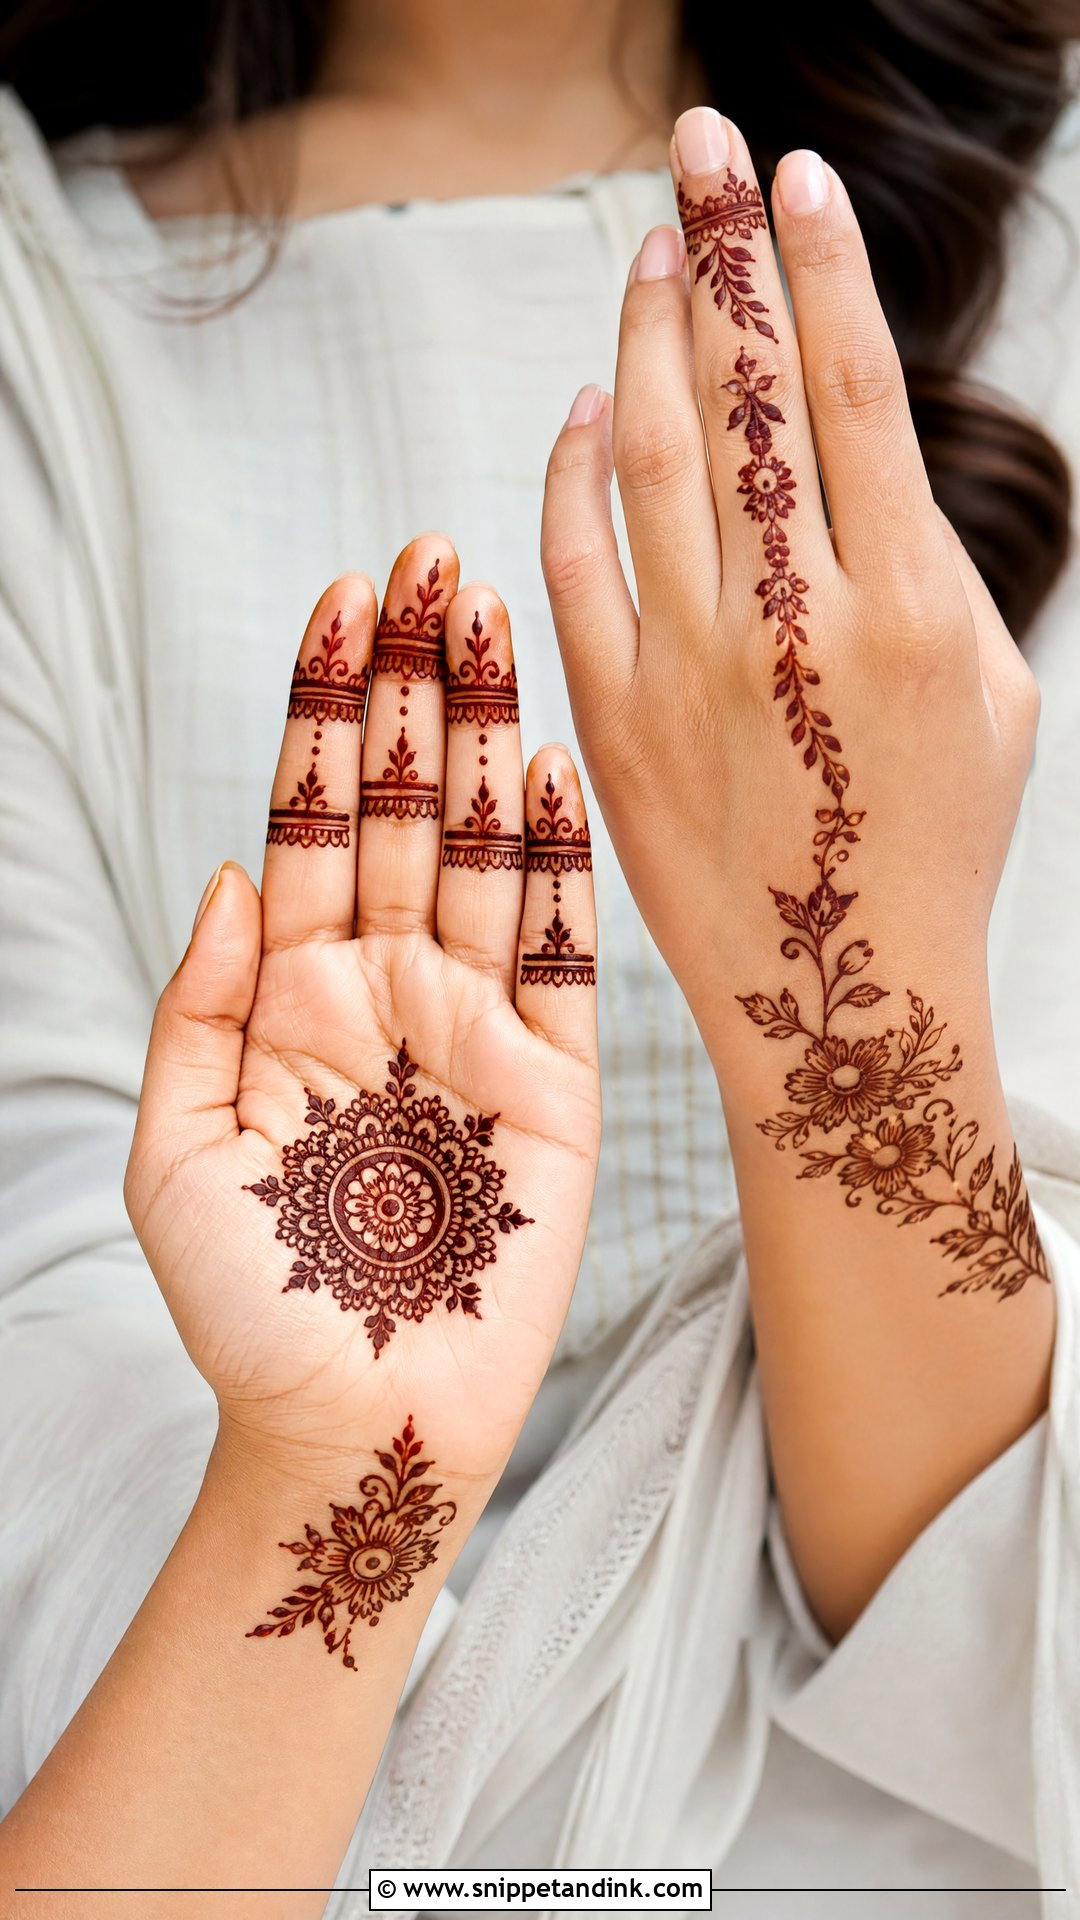
A half-hand design covers either the palm to mid-hand or the wrist to mid-forearm. One version uses a mandala on the palm and flowers near the wrist; another uses a diagonal Arabic trail across the back of the hand. It’s fuller than finger-only work but leaves plenty of skin visible. Close family members often ask for this one because it’s festive without competing with the bride.
18. Simple Ring Ceremony Mehndi Design
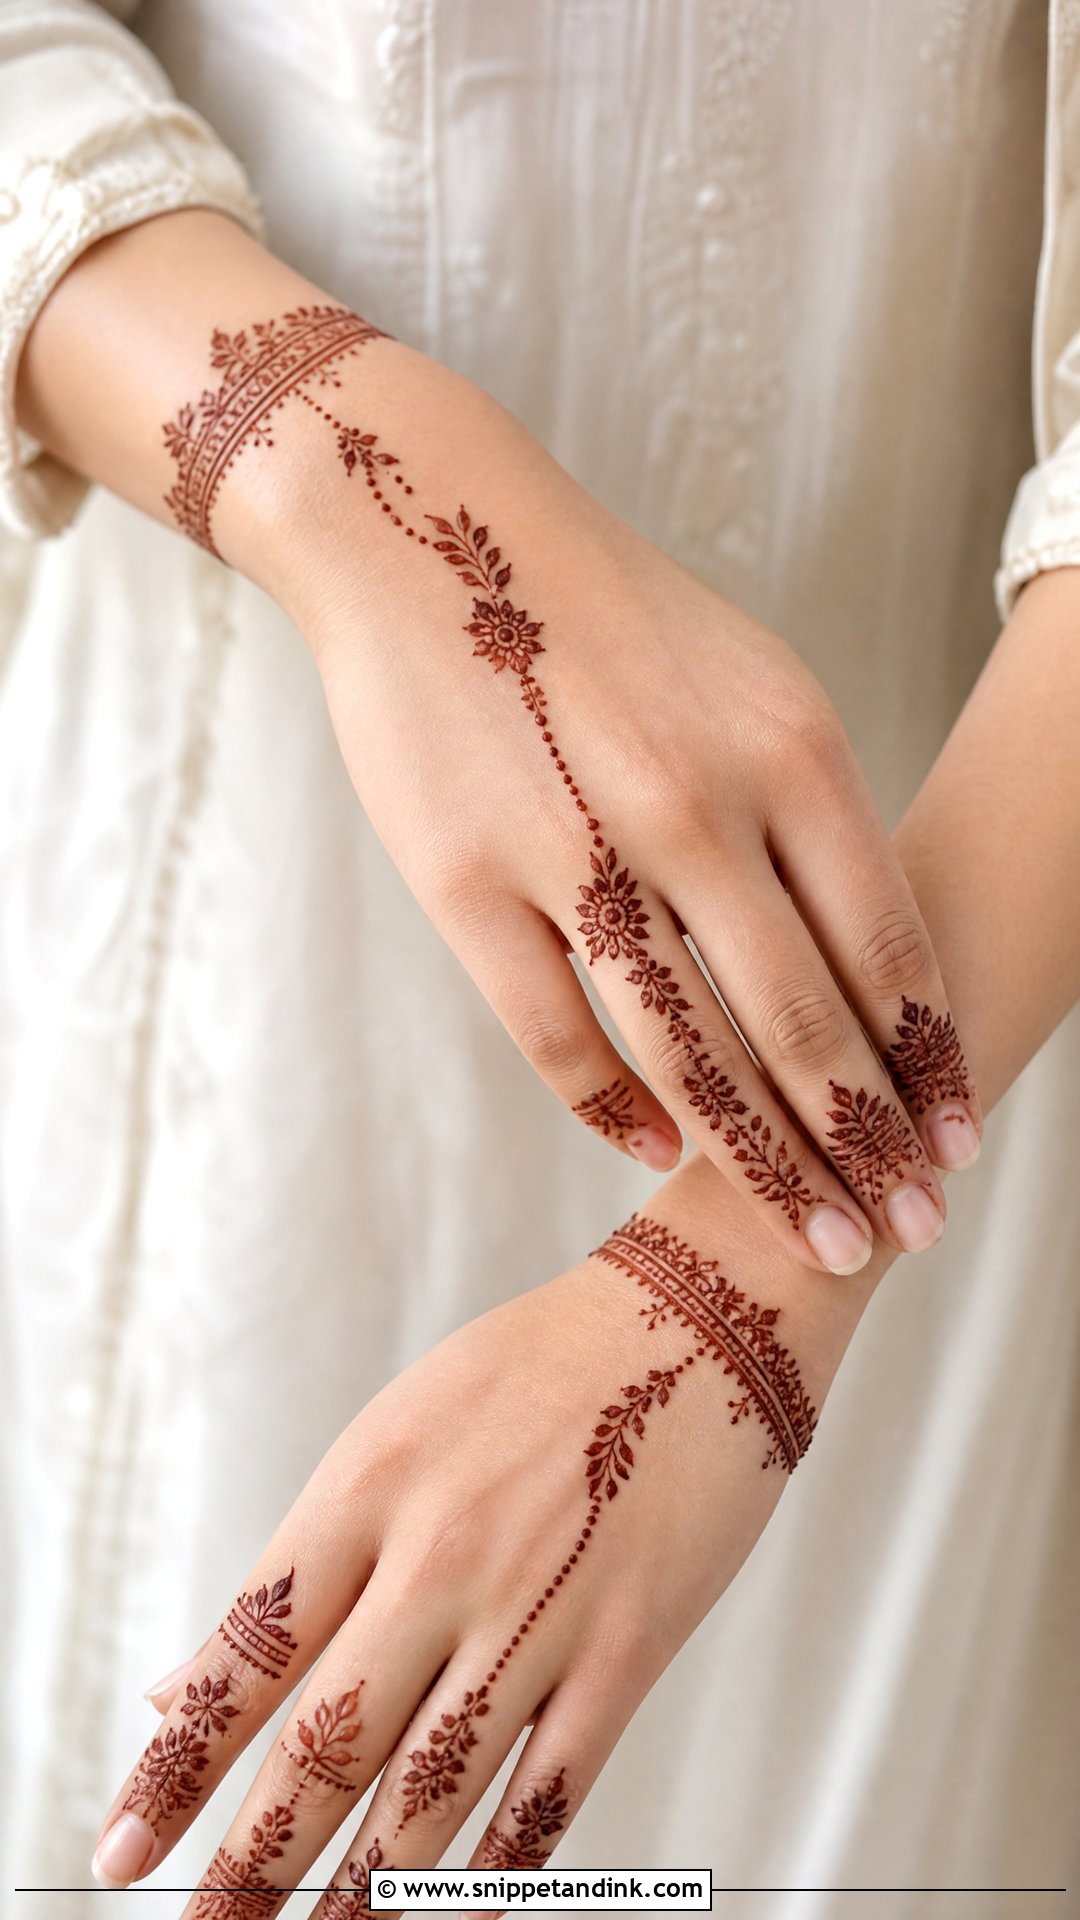
At a ring ceremony, the ring finger is the point of the photo, so the design should frame it, not hide it. I draw a slim wrist bracelet with a fine chain running to the ring finger and leave the base of that finger bare so the ring sits on clean skin. Thin lines and soft leaves keep it light. The palm can stay plain or lightly decorated.
19. Simple Wedding Guest Mehndi Design
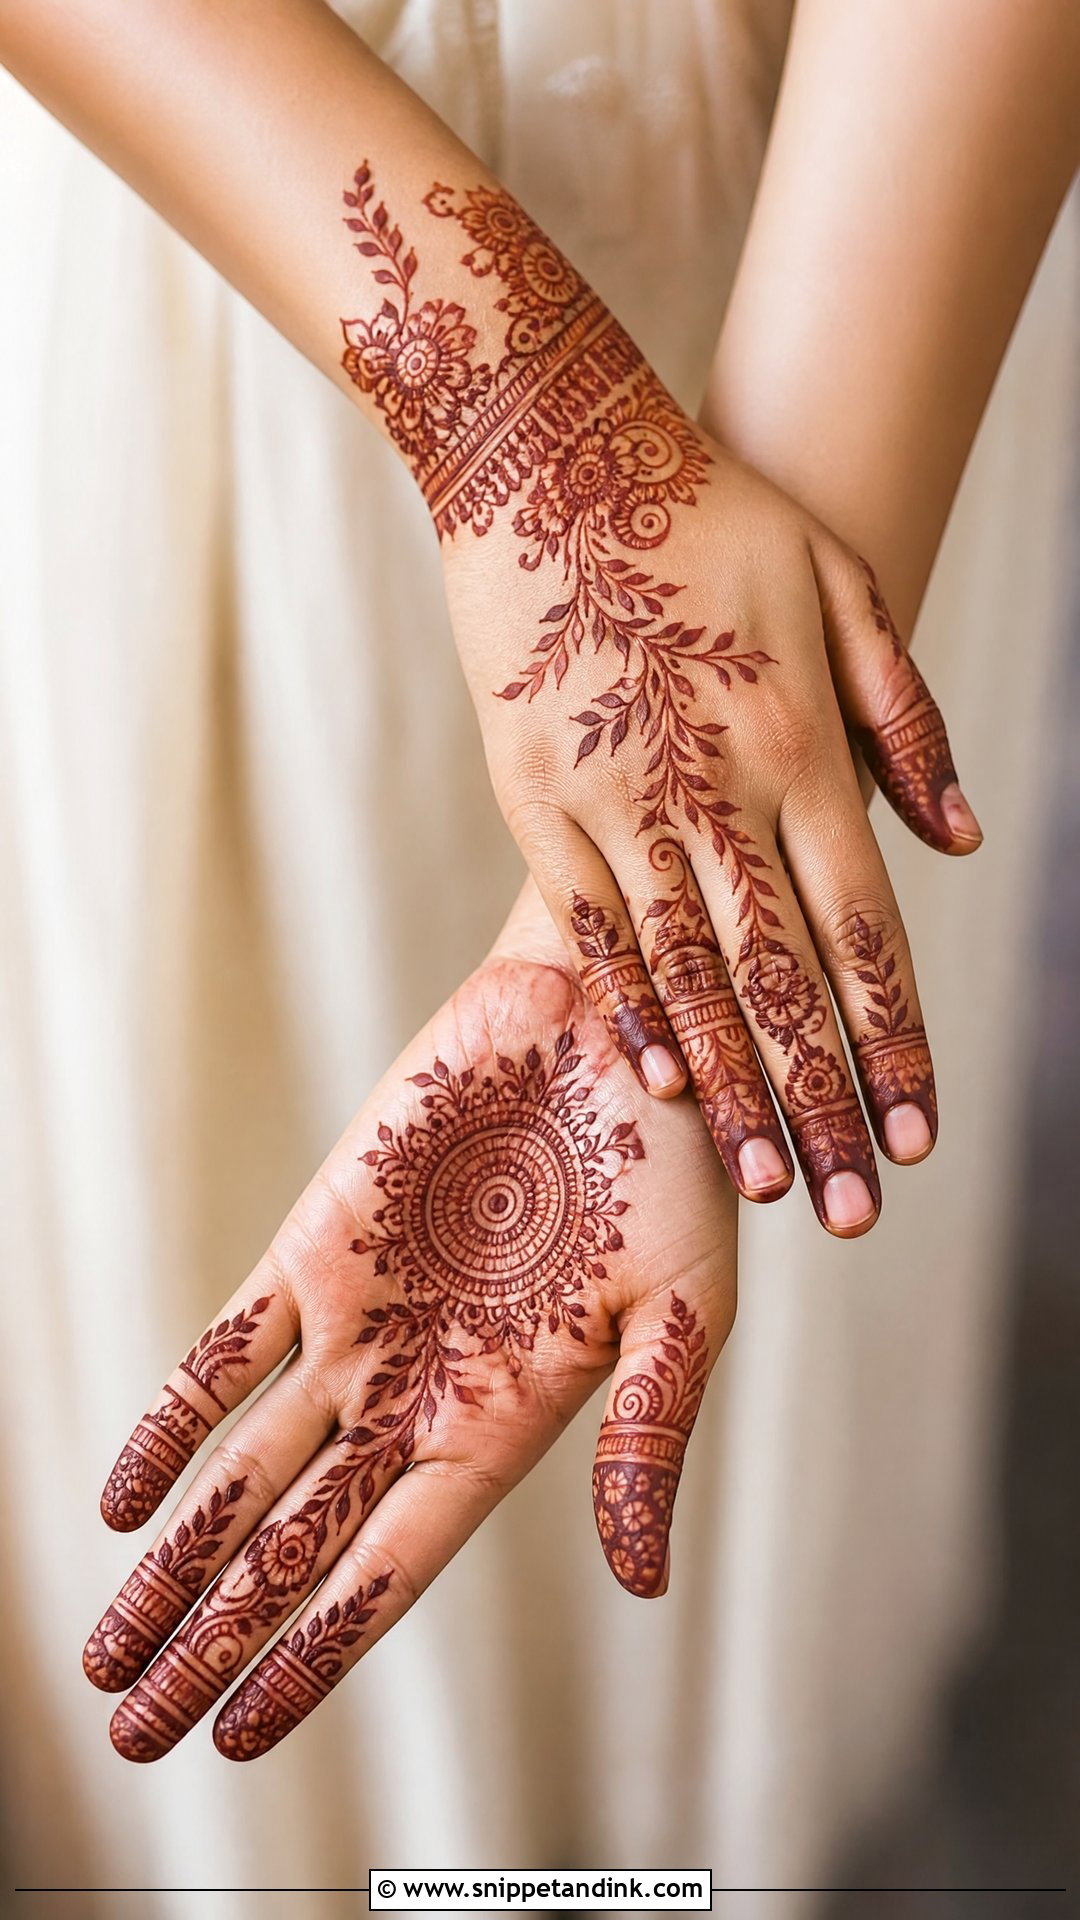
Guest mehndi should be festive without looking bridal. A back-hand floral trail, a small palm mandala or a bracelet pattern is enough. I keep guest designs quick so the line moves, and I avoid motifs that carry bridal meaning, such as couple figures or very dense full-hand work. Guests attending several functions often ask for something that will still look good as it fades over the week.
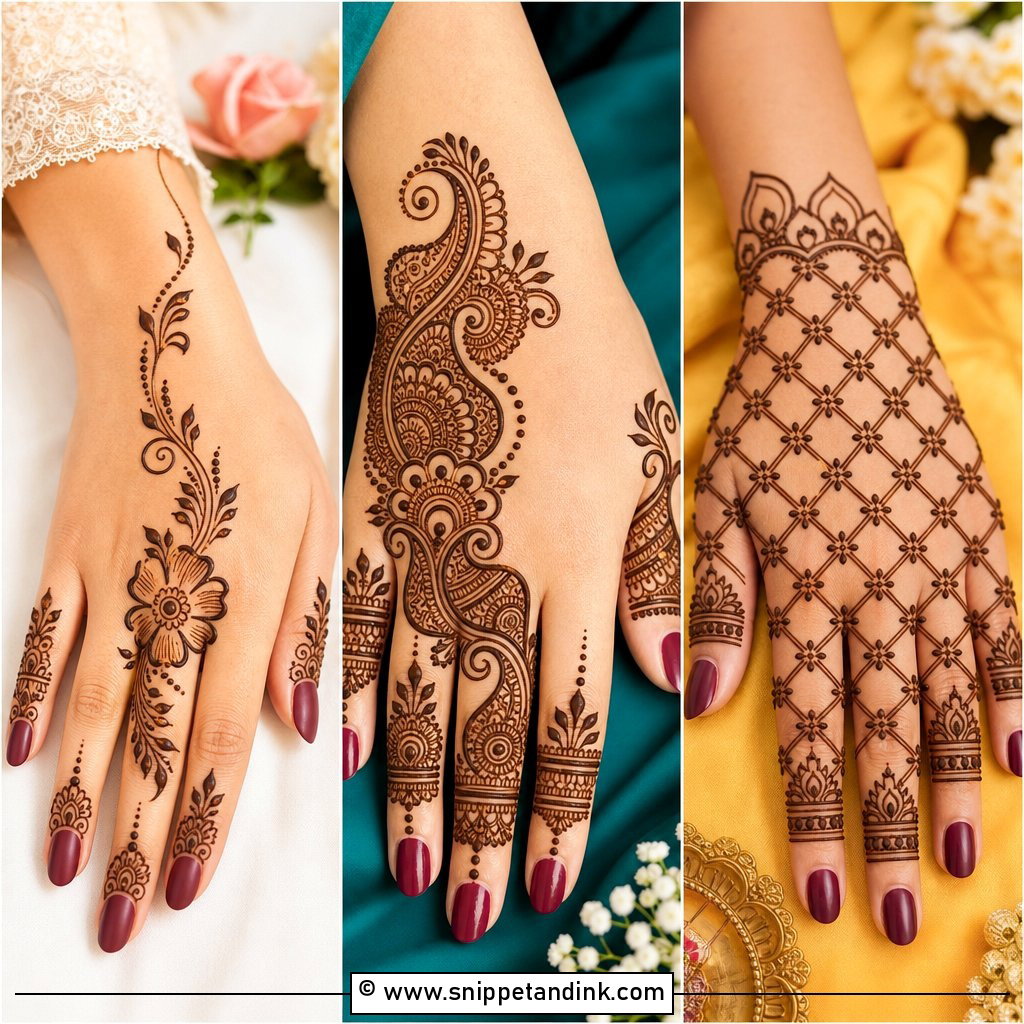
20. Simple Bridesmaid Mehndi Design
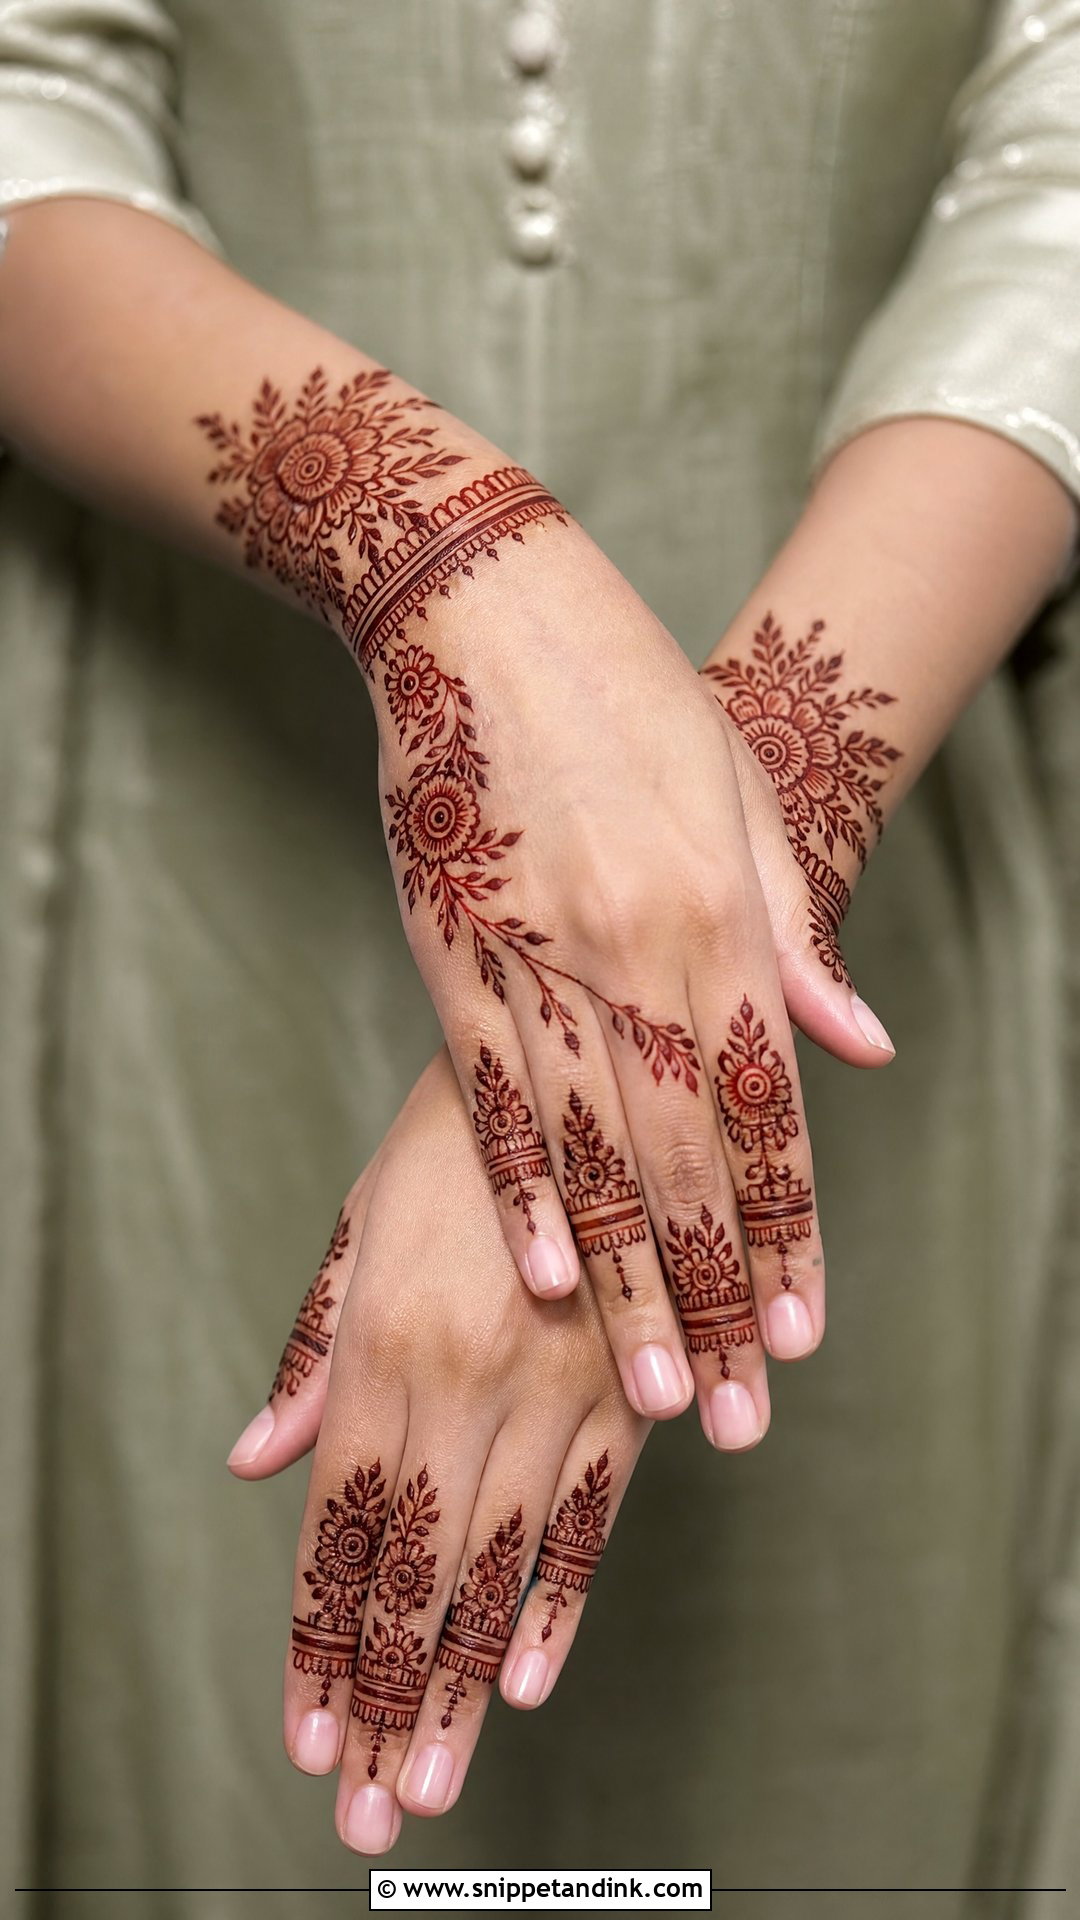
For a bridesmaid group, I usually agree on one layout, often a wrist-to-finger Arabic trail, and vary small details between each person. That way the hands look coordinated in group shots without being identical. Medium-sized motifs show up better in group photos than fine-line work. Plan for each bridesmaid to have time to let the paste dry before they need their hands.
21. Simple Dulhan Mehndi Design
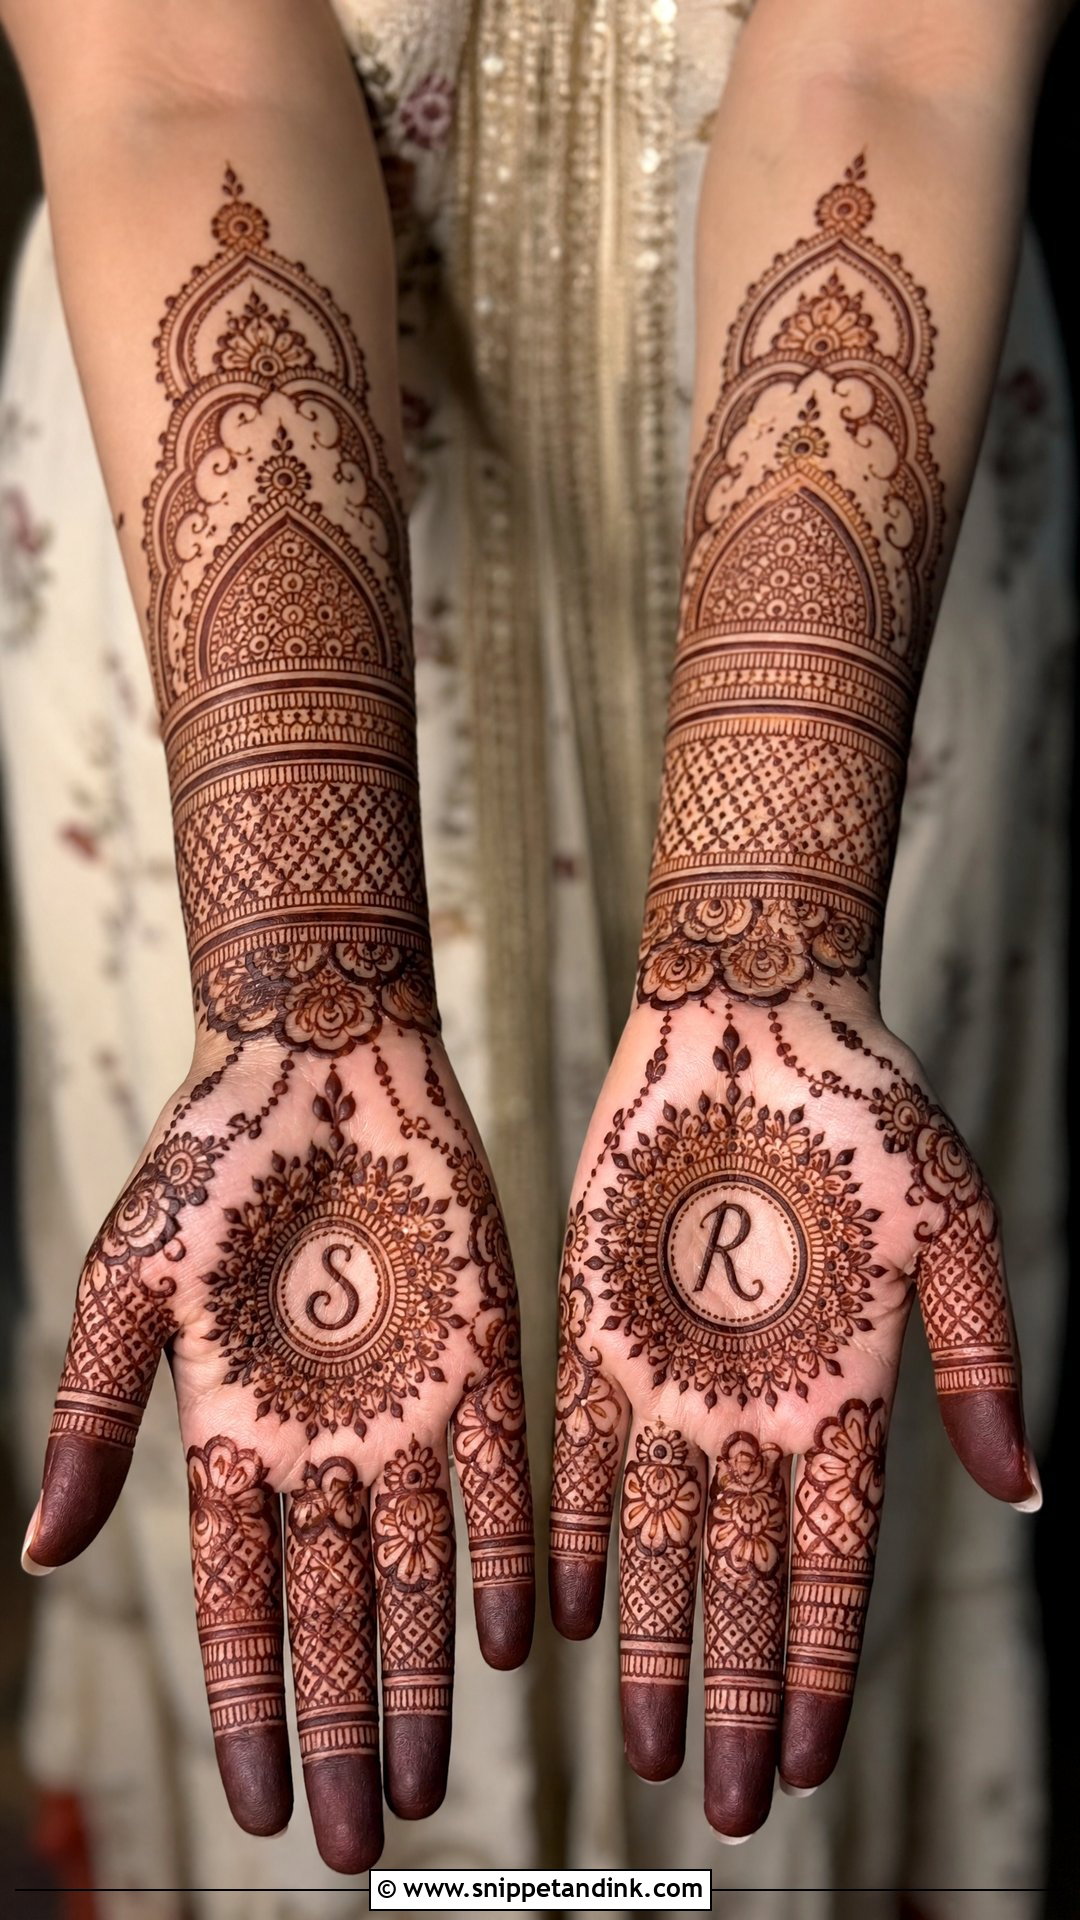
A dulhan design is the full traditional bridal look, kept readable. Palm, fingers, wrist and part of the forearm, with mandalas, paisleys and flowers, plus a wrist border and fingertip finishing. I use bold outlines and selective shading instead of tiny filling everywhere, so the design is visible from a distance and doesn’t take all night. A small couple motif or hidden initials can be added if the bride wants them.
22. Simple Modern Wedding Mehndi Design
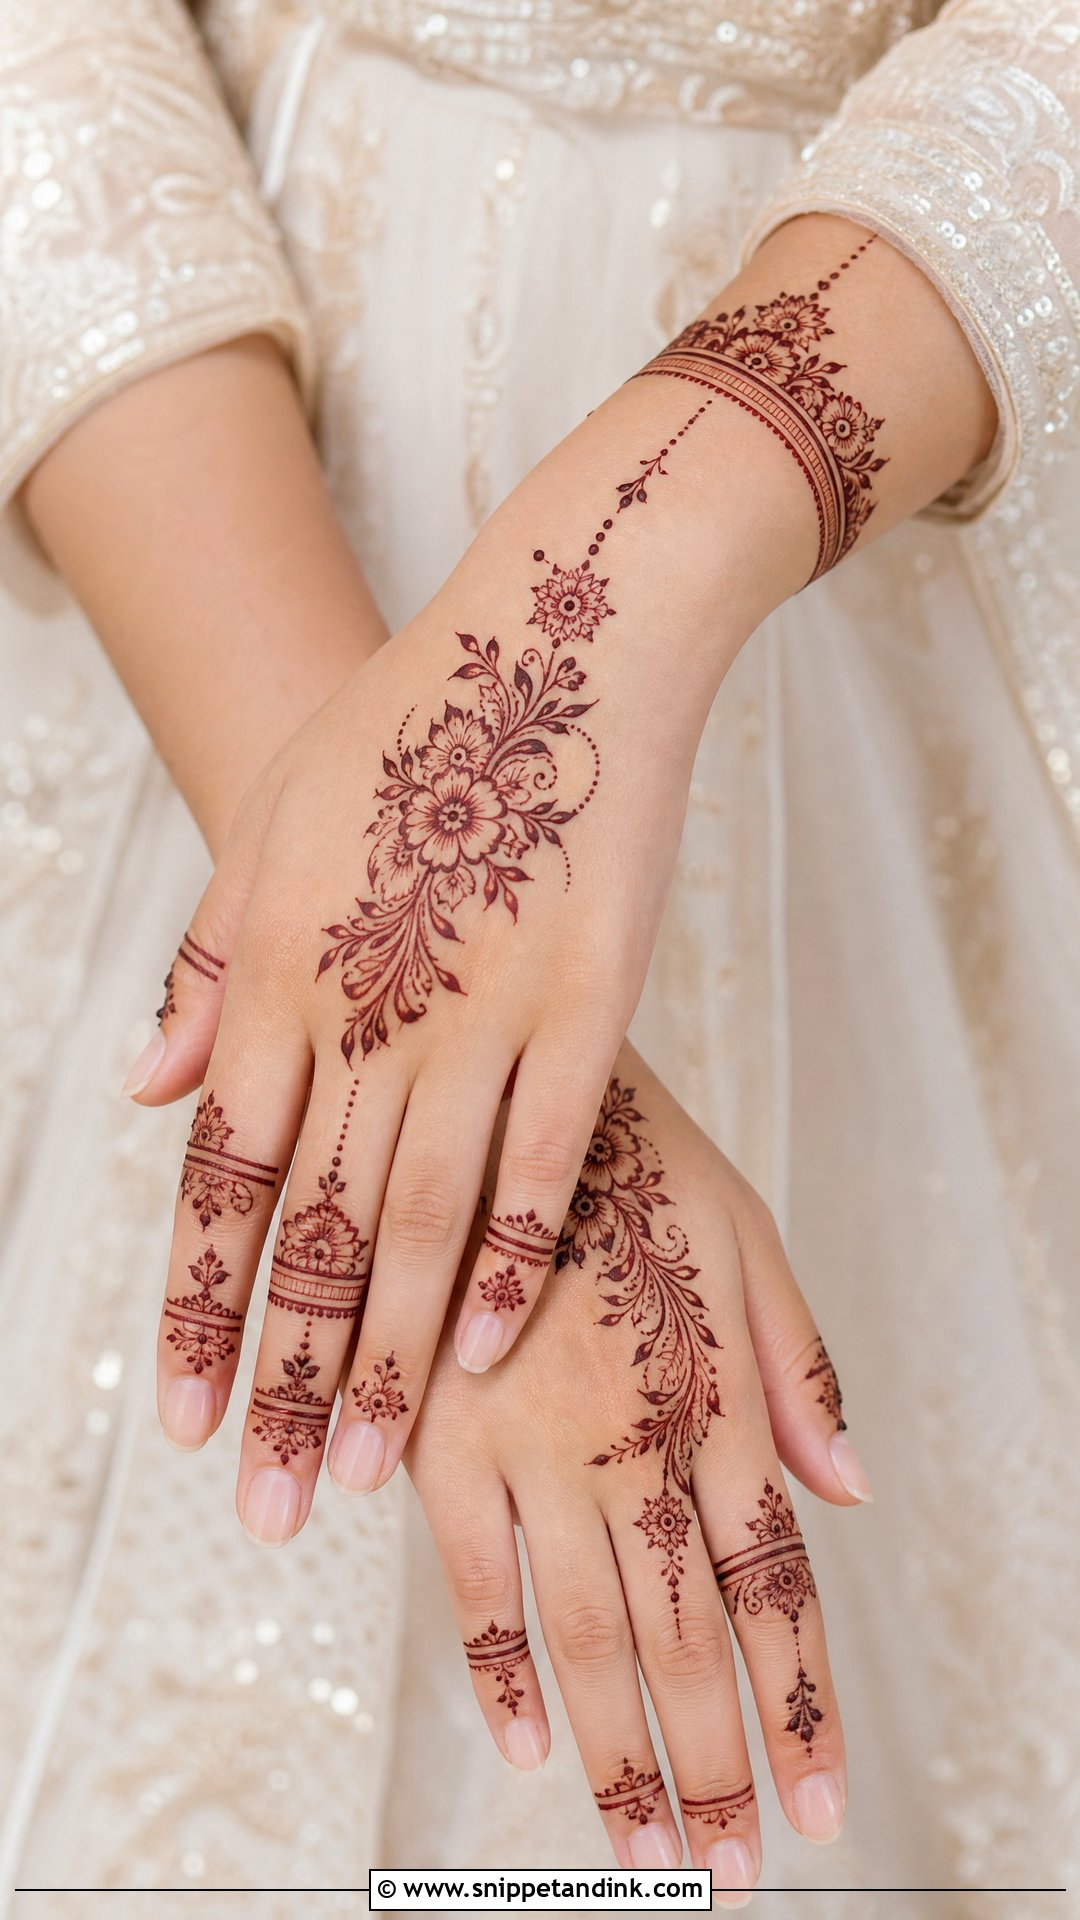
Modern bridal designs lean on fine-line florals, open space, wrist cuffs and small geometric accents. I often use asymmetry, with one side of the hand carrying most of the detail. A back-hand layout with a central floral vine suits it well. With so much open skin, the quality of the stain matters a lot, so I’m strict about aftercare for brides choosing this style.
23. Simple Peacock Wedding Mehndi Design
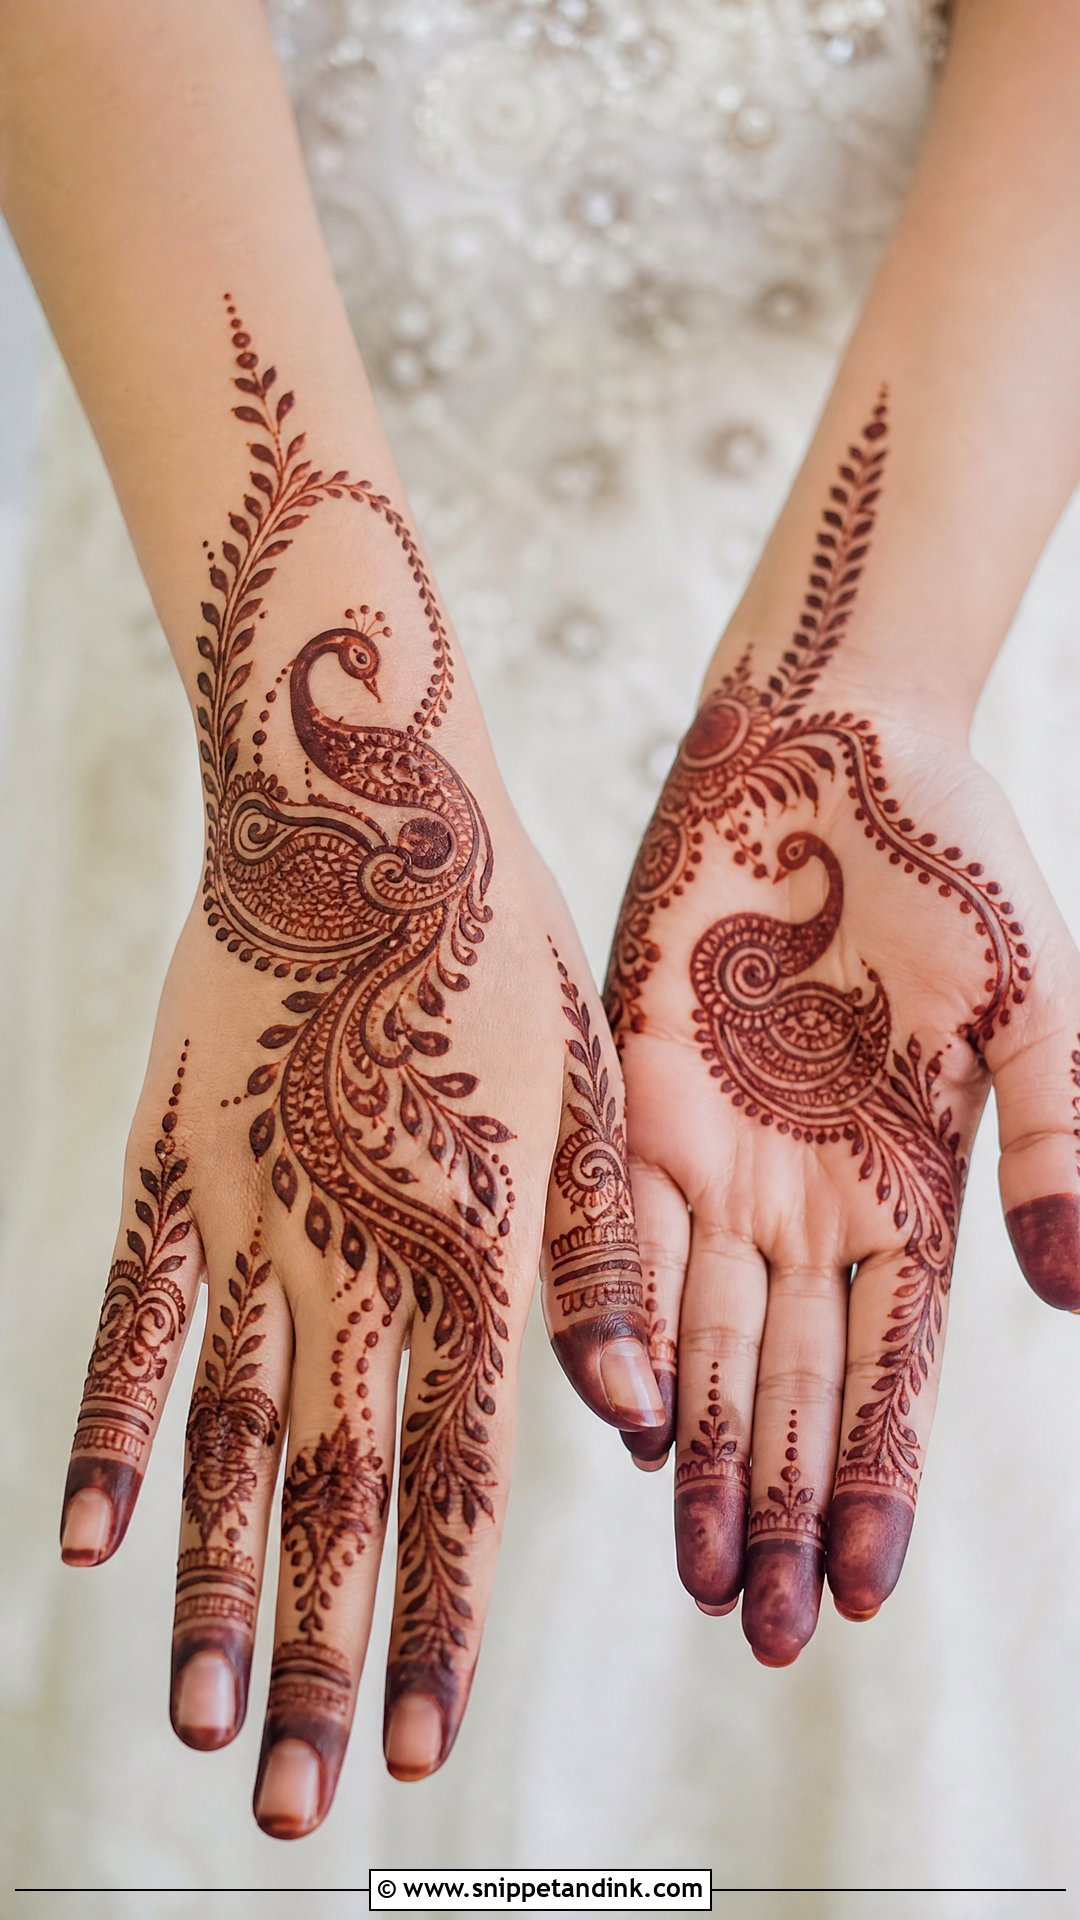
A peacock is a single statement motif, so I keep everything around it light. The body stays clear and fairly bold; the feathers get fine detail but only a few rows, or the shape becomes muddy as the stain deepens. I place it on the palm, the wrist or the back of the hand and surround it with small paisleys and vines. It suits a bride who wants one meaningful element rather than many.
24. Simple Lotus Wedding Mehndi Design
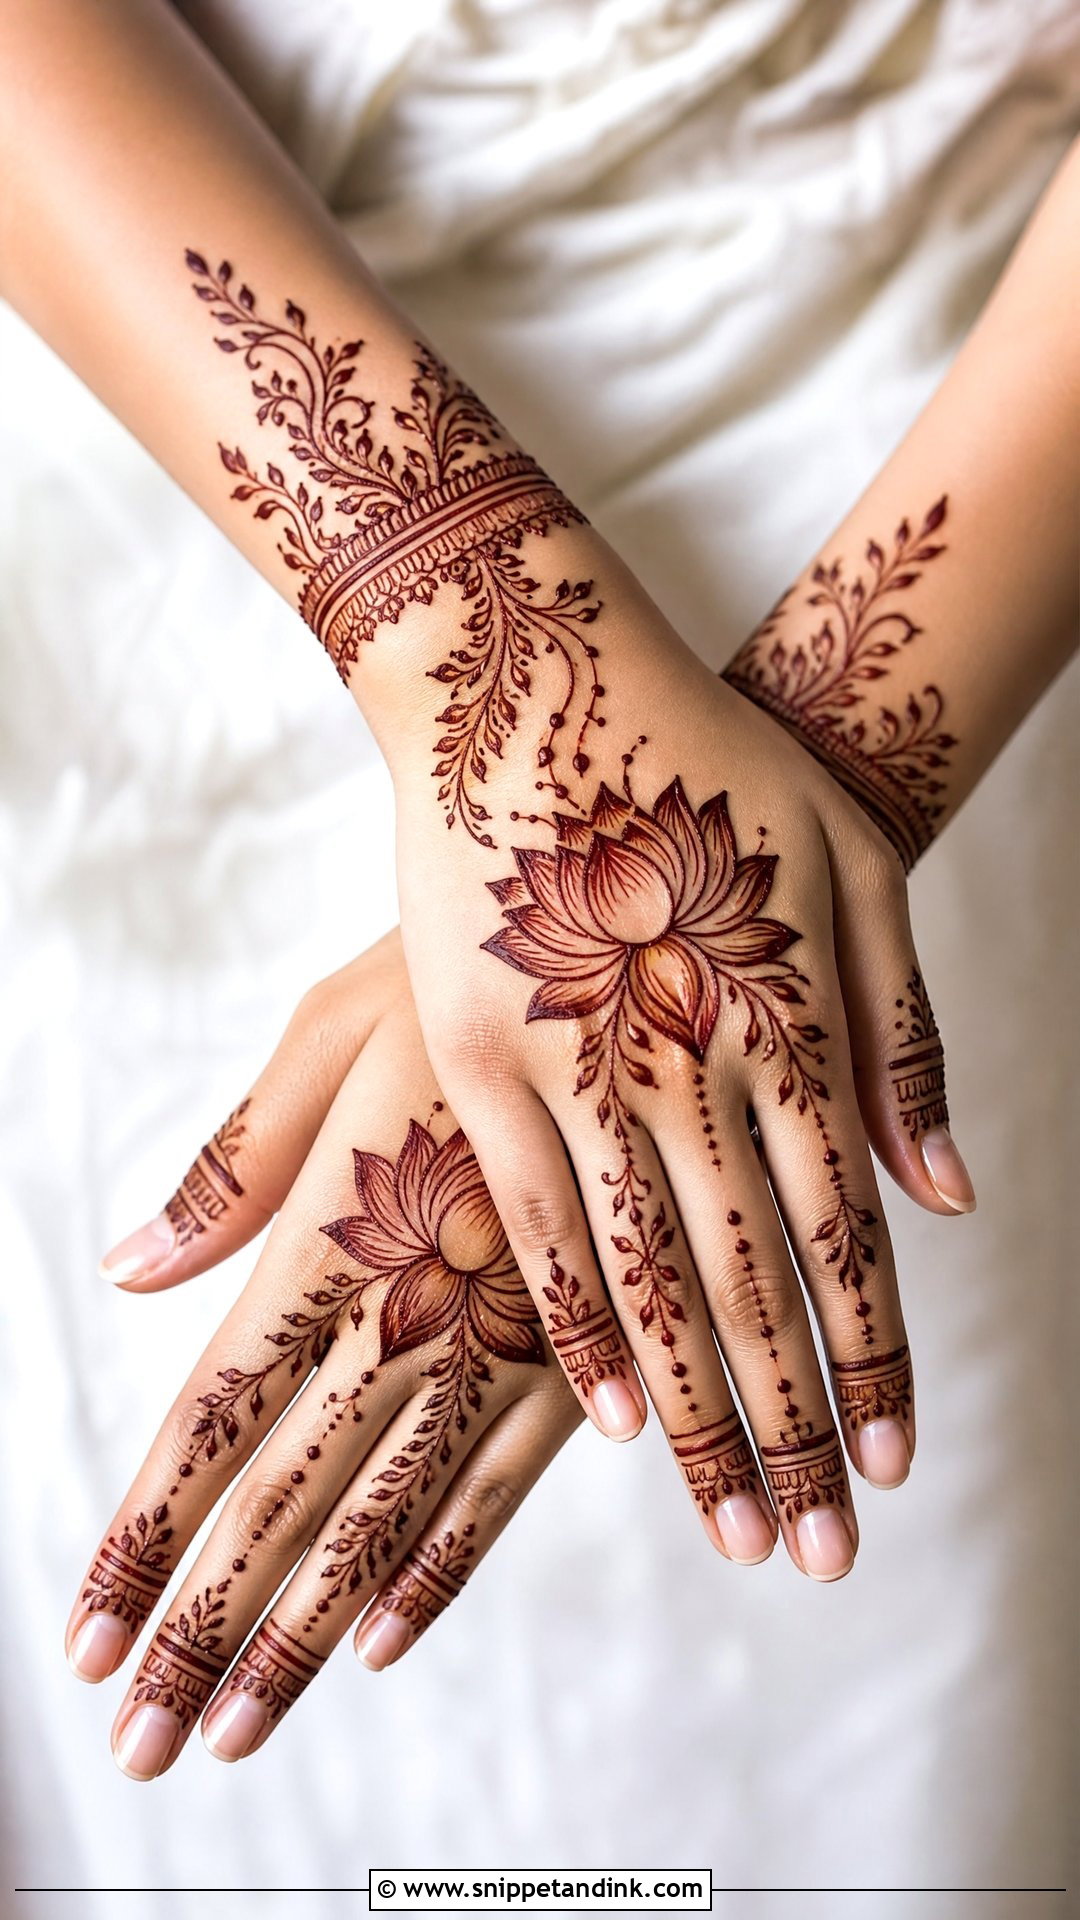
The lotus is easy to recognize even at a distance, which helps in photos. I draw the petals open, with a little shading at the base of each, and leave the tips clear. It can sit in the center of the palm, near the wrist or within a back-hand trail. Fine leaves, dots and a bracelet border finish the hand without crowding the flower.
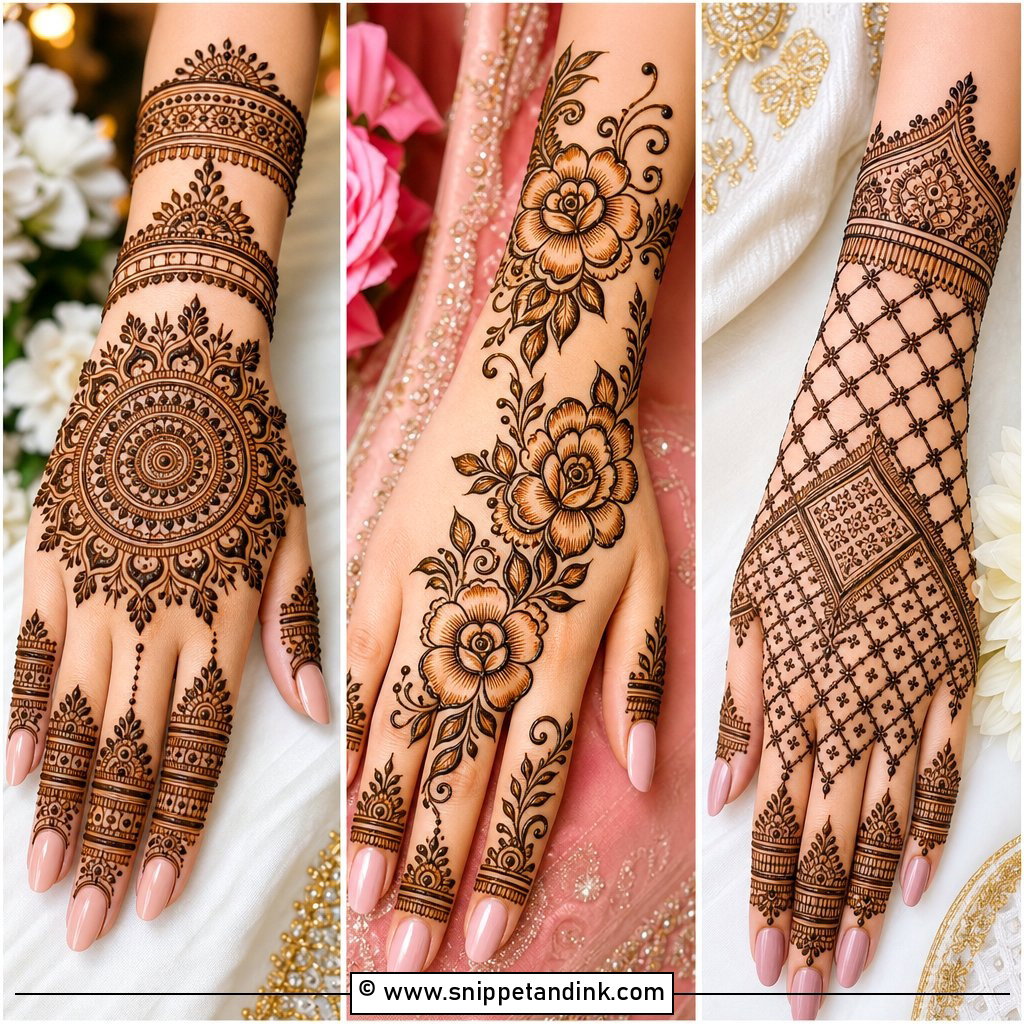
25. Simple Personalized Wedding Mehndi Design
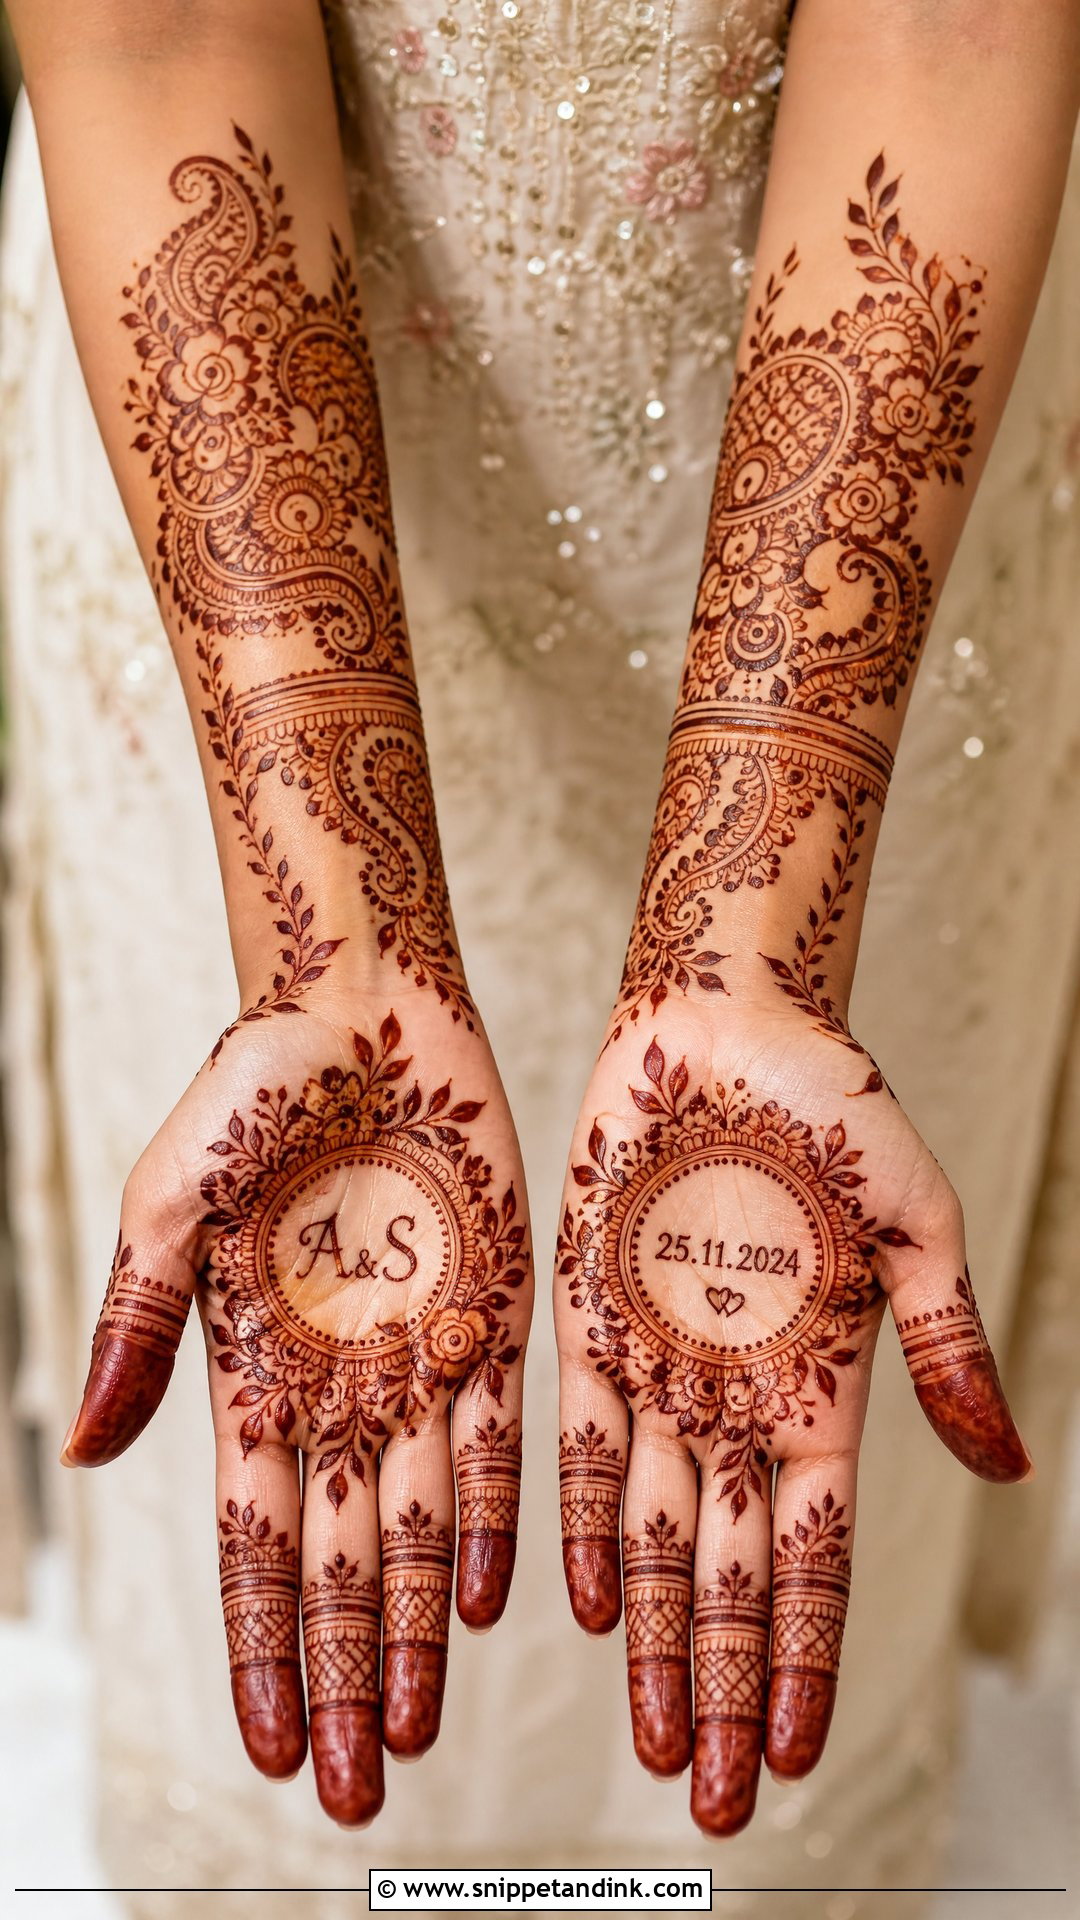
Personal details work best when they’re small and placed inside the pattern rather than on top of it. Initials, a wedding date, a tiny couple symbol: I place one or two inside a flower, a paisley or the wrist border. The surrounding pattern stays simple so the personal elements can be found. Too many personal details turn the hand into a collage, so I’d limit it to two.
Getting a Dark Stain From a Light Design
With fine lines and open space, a weak stain is obvious. Leave the paste on as long as you can manage, ideally overnight, since longer contact gives deeper color. Once it’s dry, I dab on a lemon and sugar mix so the paste stays stuck to the skin.
When it’s time to remove it, scrape it off with a blunt edge or your fingernail rather than washing it. Then keep your hands away from water for as long as you can, ideally the rest of the day. Keeping your hands warm helps the color develop; cold hands slow it down. Soap, chlorine and hand sanitizer all fade it faster in the days after.
Natural Henna Versus Black Henna
Natural henna is never black. On the skin it stains from orange to a deep reddish brown. Paste sold as black henna often contains PPD, a hair dye chemical that can cause serious skin reactions, blistering and scarring.
Ask your artist what’s in the paste. A good one mixes her own or uses fresh natural henna that smells earthy or of essential oils, not chemicals, and keeps it refrigerated or frozen. If you’ve never had henna before, a small patch test on the inner arm a few days ahead is worth doing.
Open Space Is the Design
Simple henna can still be bridal. Whether you pick a soft Arabic trail, a mandala, a bracelet pattern or a light full-hand design, the things that make it work are the same: clear motifs, enough bare skin between them and a layout that suits your hand and your outfit. Bring photos of your outfit and jewelry to the consultation, and leave time for the stain to develop before the ceremony.
You'll Like These Ideas:


Leave a Reply