
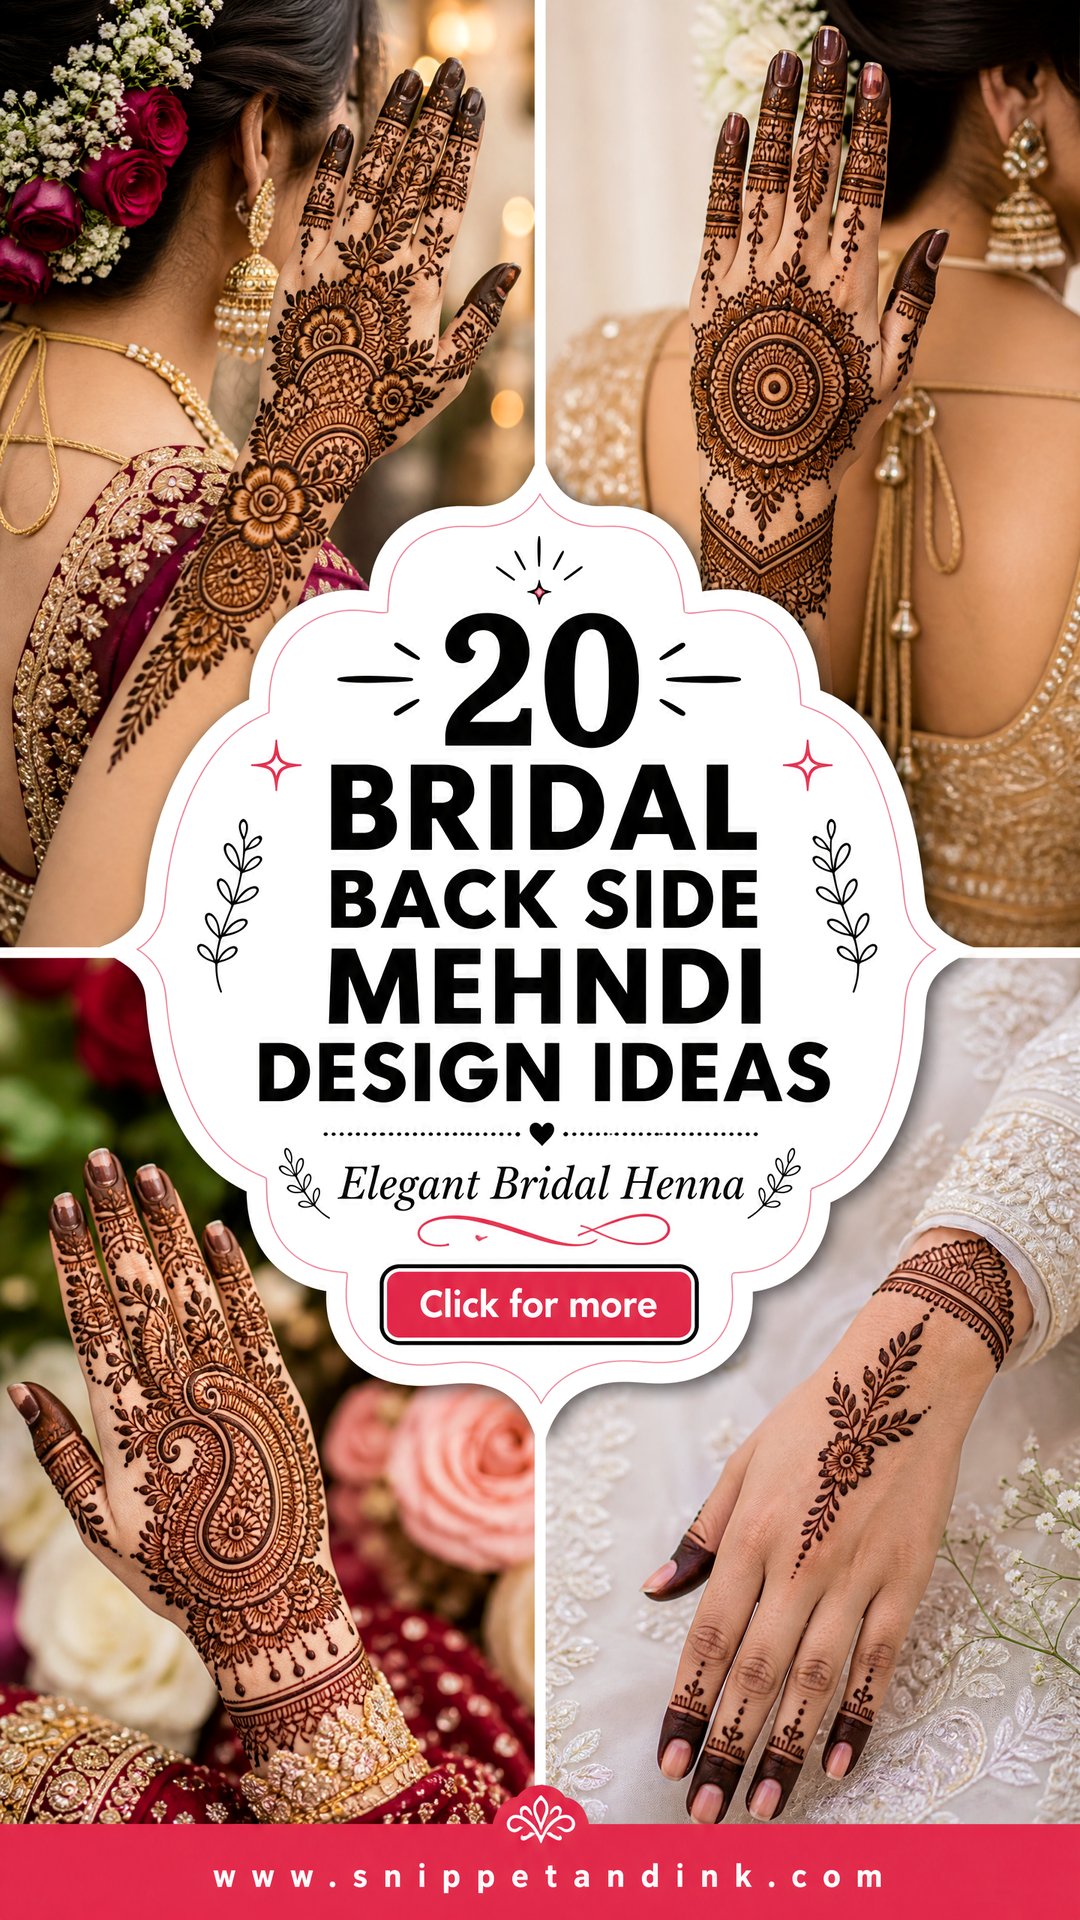
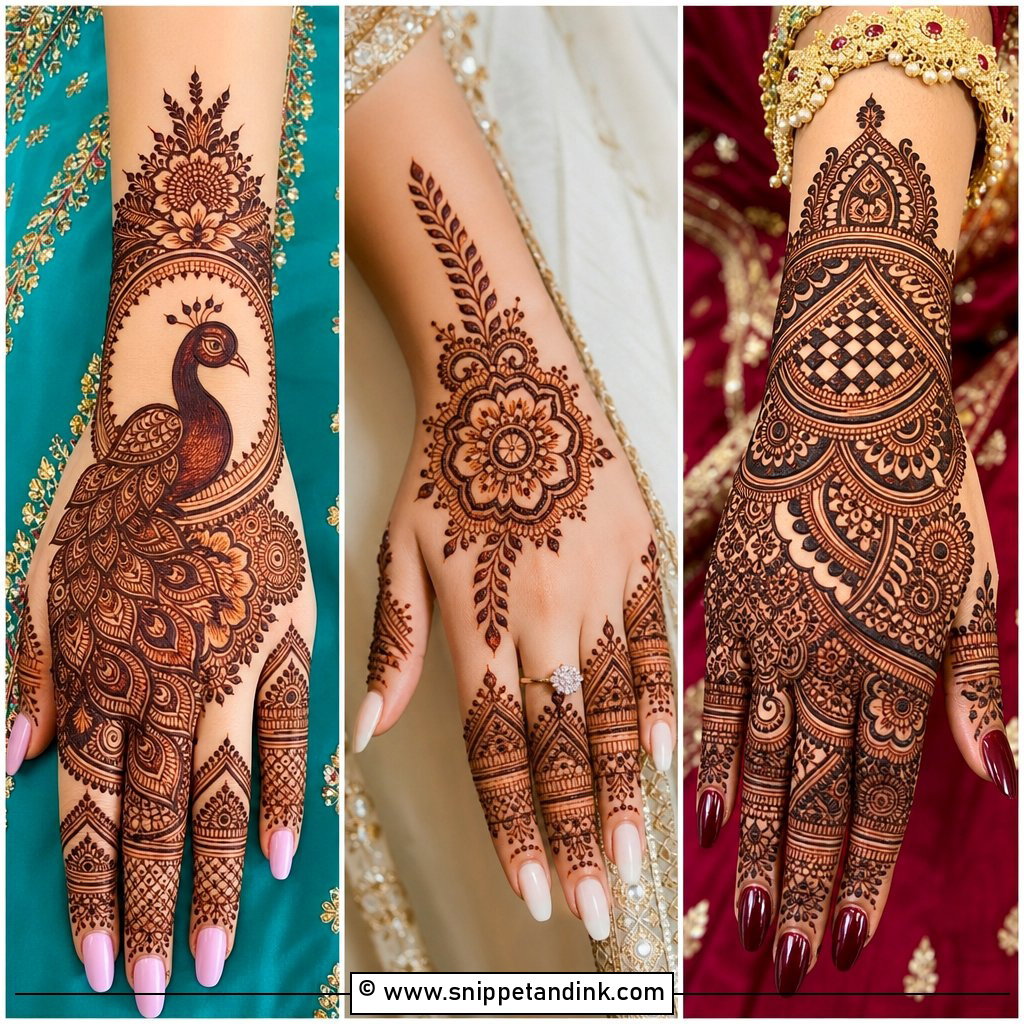
The back of the hand is the side everyone actually sees. It is on show in the ring exchange, in every jewelry close-up and each time you lift your hands during the rituals, while the palm mostly faces you. That makes it the part of a bridal design I spend the most time planning. The back hand has room for bracelet bands, finger work, a central mandala or jaali panel, and it can carry a lot of detail without looking heavy if the spacing is right. Some brides want dense Indian work running up the forearm; others want an Arabic trail or a modern layout with plenty of bare skin. Your outfit, your jewelry and how dark you want the stain all push the decision one way or the other, so here are 20 back-hand layouts with notes on what each one asks of you and of your artist.
Why the Back of Your Hand Stains Lighter Than the Palm
Brides are often surprised when the palm turns a deep brown and the back of the hand stays a shade or two lighter. That is normal. Henna stains the outer layer of skin, and the palm has a thicker outer layer than the back of the hand, so it holds more dye. The back hand is also cooler and drier, and the skin there flexes over knuckles and tendons, which all slow the stain down.
I plan the design around this rather than fighting it. On the back hand I use slightly bolder lines for the outline and leave a little more space between fine fillers, so the pattern stays legible if the stain is medium rather than dark. I also check the paste: fresh, natural henna with a smooth, toothpaste-like texture, no chemical darkeners. Anything sold as instant black henna can contain PPD, which can cause serious skin reactions, so I never use it and I would ask any artist directly what is in their cones.
- Do a small patch on the back of your wrist a few weeks before, to see your own stain color and rule out irritation.
- Skip lotion, oil and scrubs on the day of application; a clean, dry hand takes the stain best.
- Book the bridal application one to two days before the wedding, since the color keeps deepening for about 48 hours.
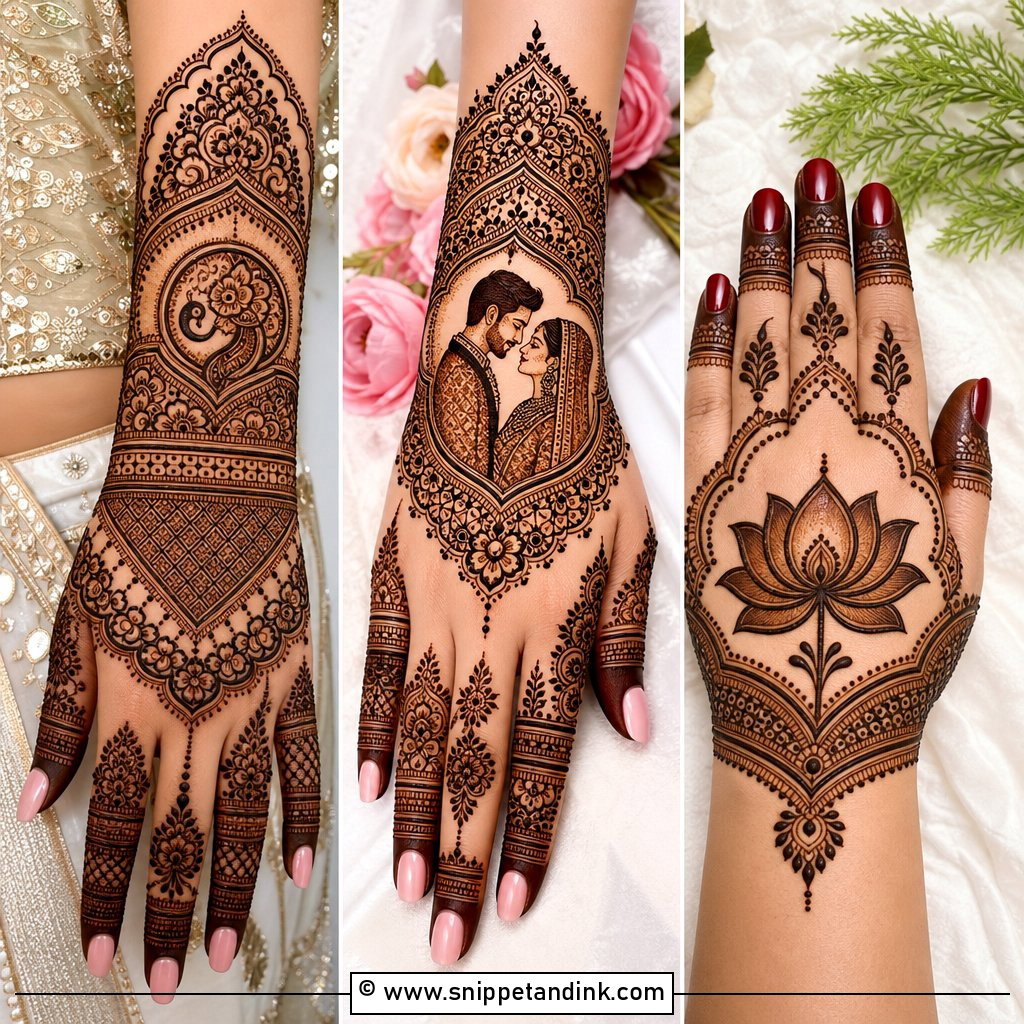
1. Full Hand Bridal Back Side Mehndi Design
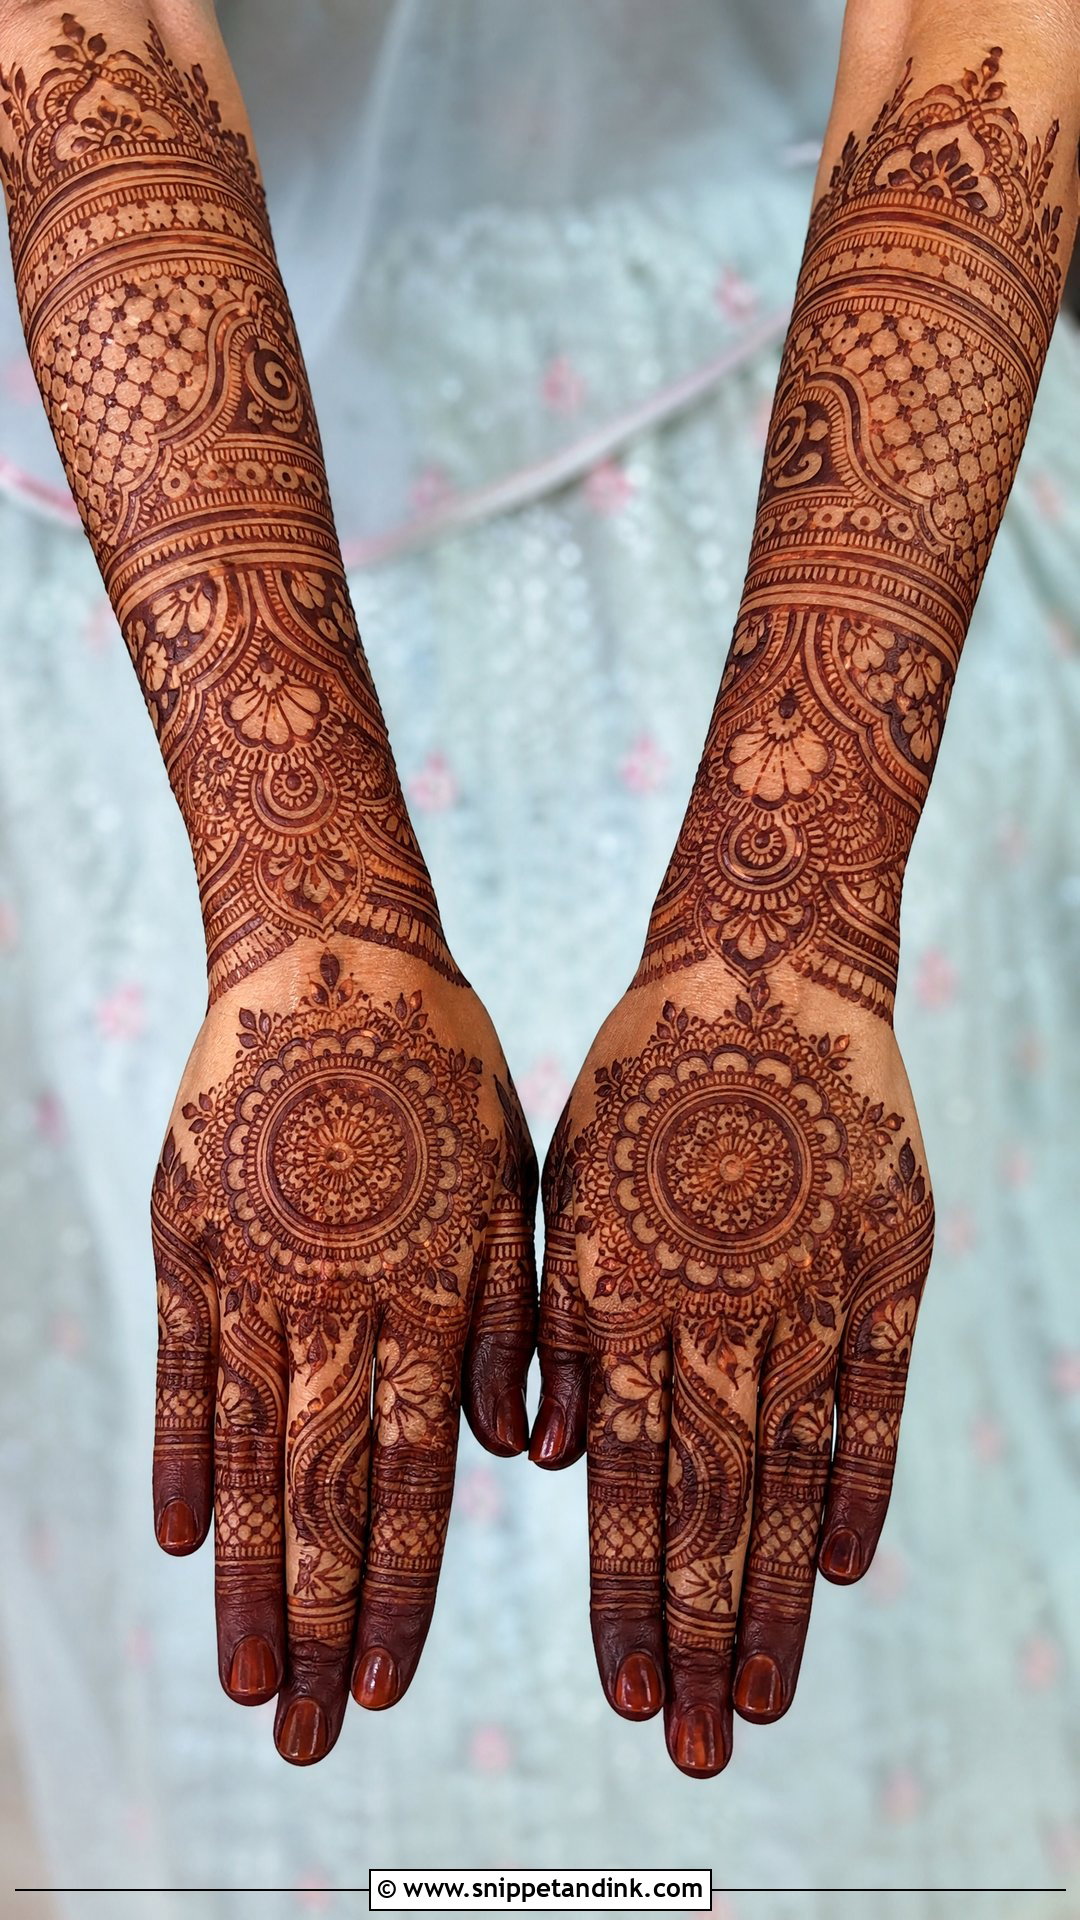
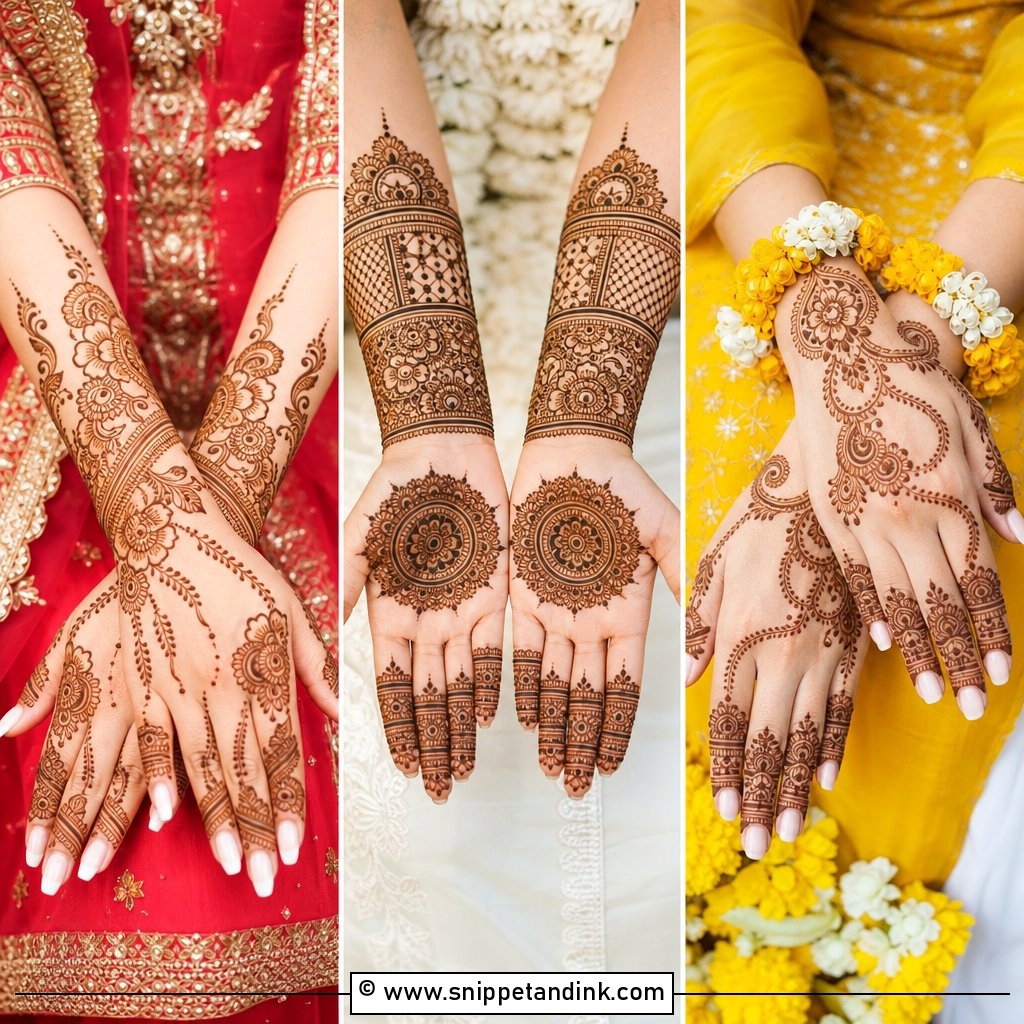
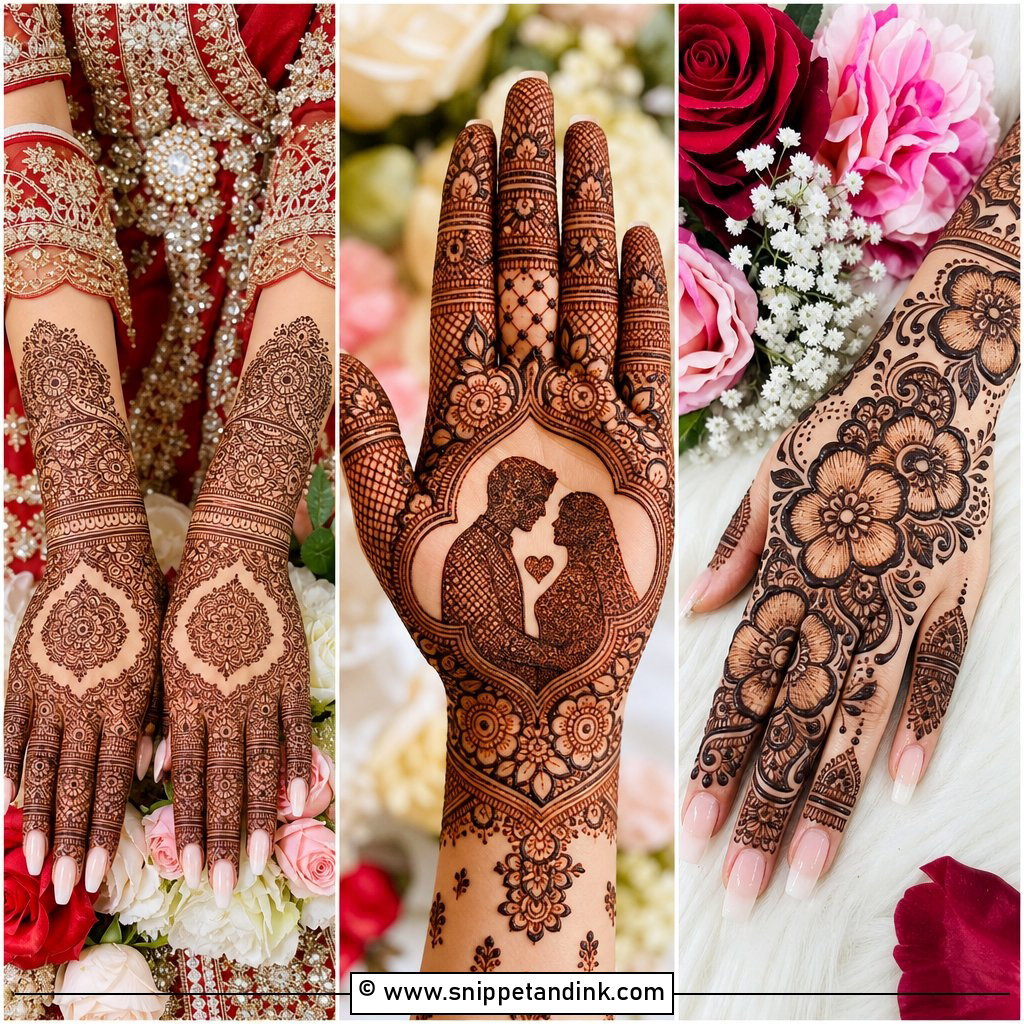
Full coverage from fingertips to forearm is the traditional bridal default, and it is the most demanding layout on both of us. I build it in zones: a central motif first, then the cuff at the wrist, then the fingers, and only then the fillers of paisleys, leaves, dots and jaali that tie everything together. Doing it in that order stops the fillers from swallowing the main motif. Expect three to five hours for both hands at this density, and plan to sit still afterward while the paste dries, because a smudge on a fully covered hand is very hard to hide. Under bangles, kaleeras and sleeves, every visible inch is connected, which is exactly why traditional Indian brides keep asking for it.
2. Arabic Bridal Back Side Mehndi Design
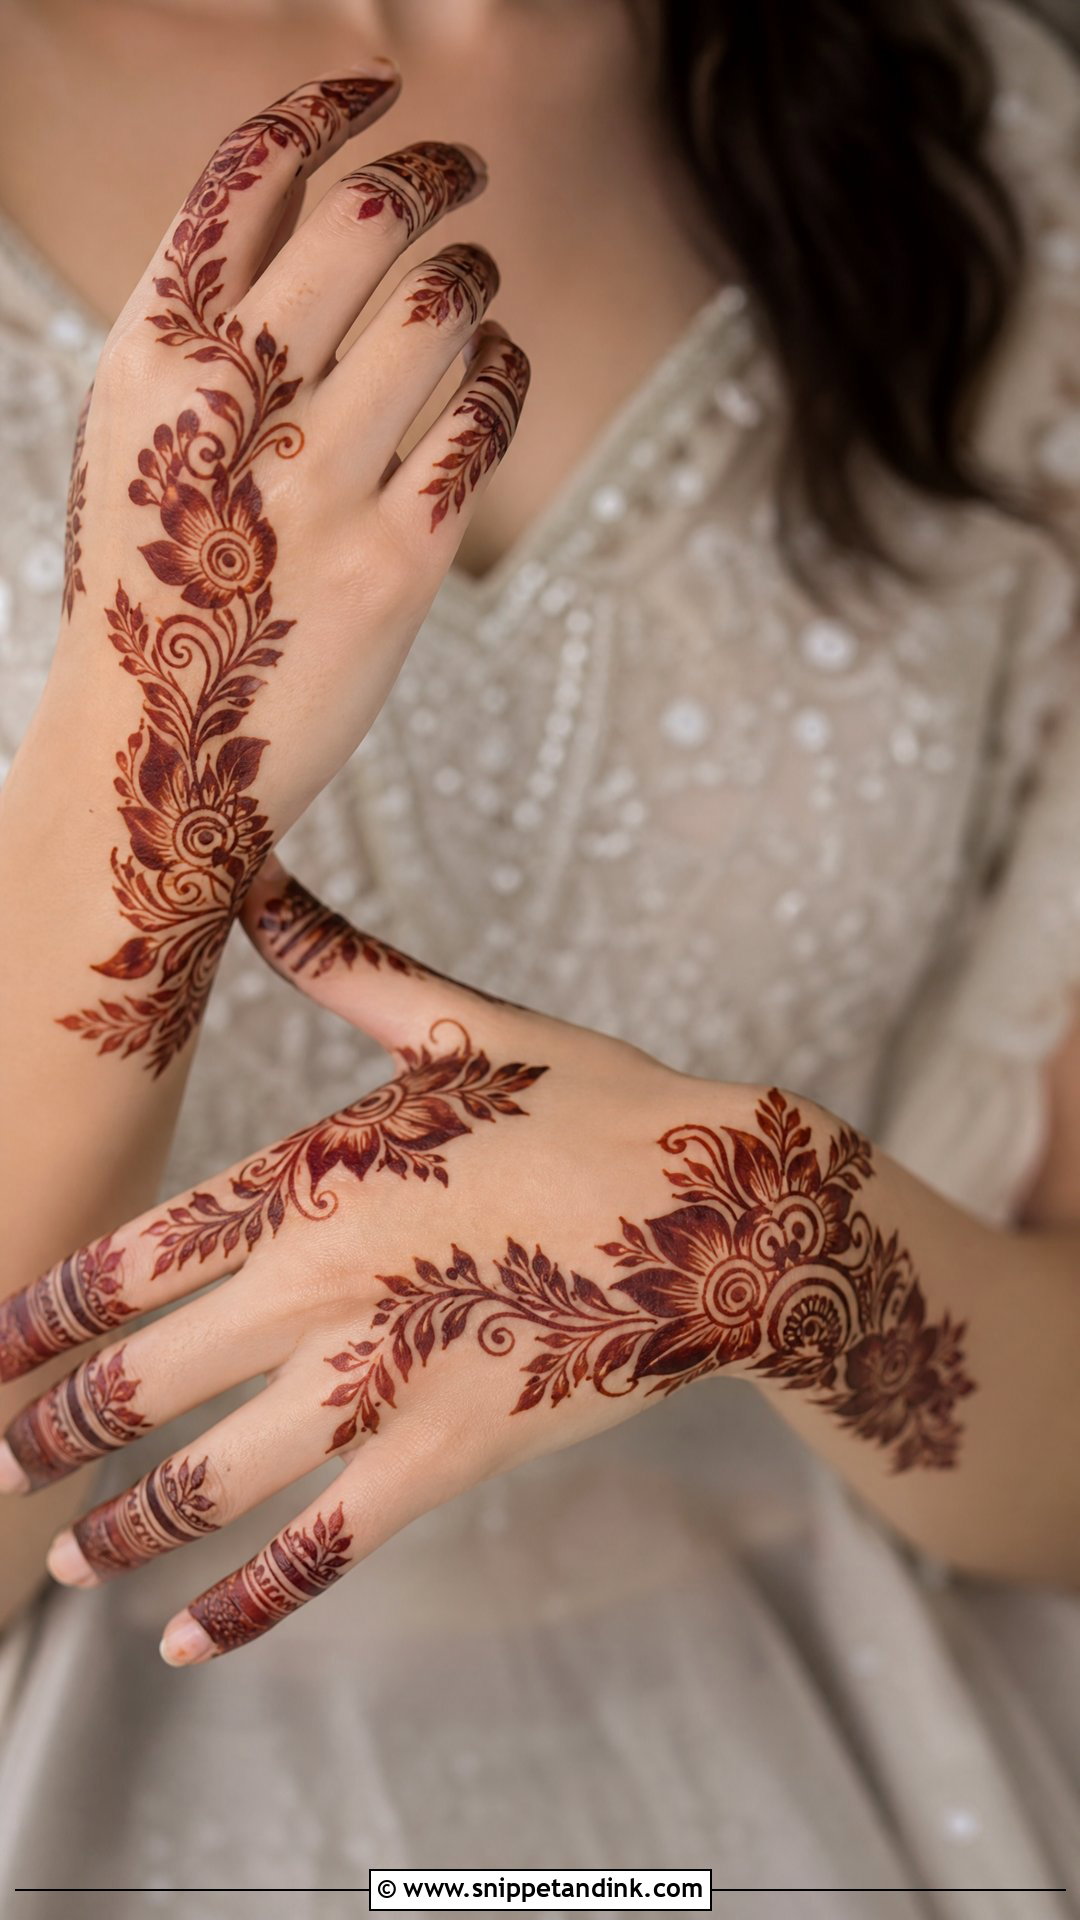
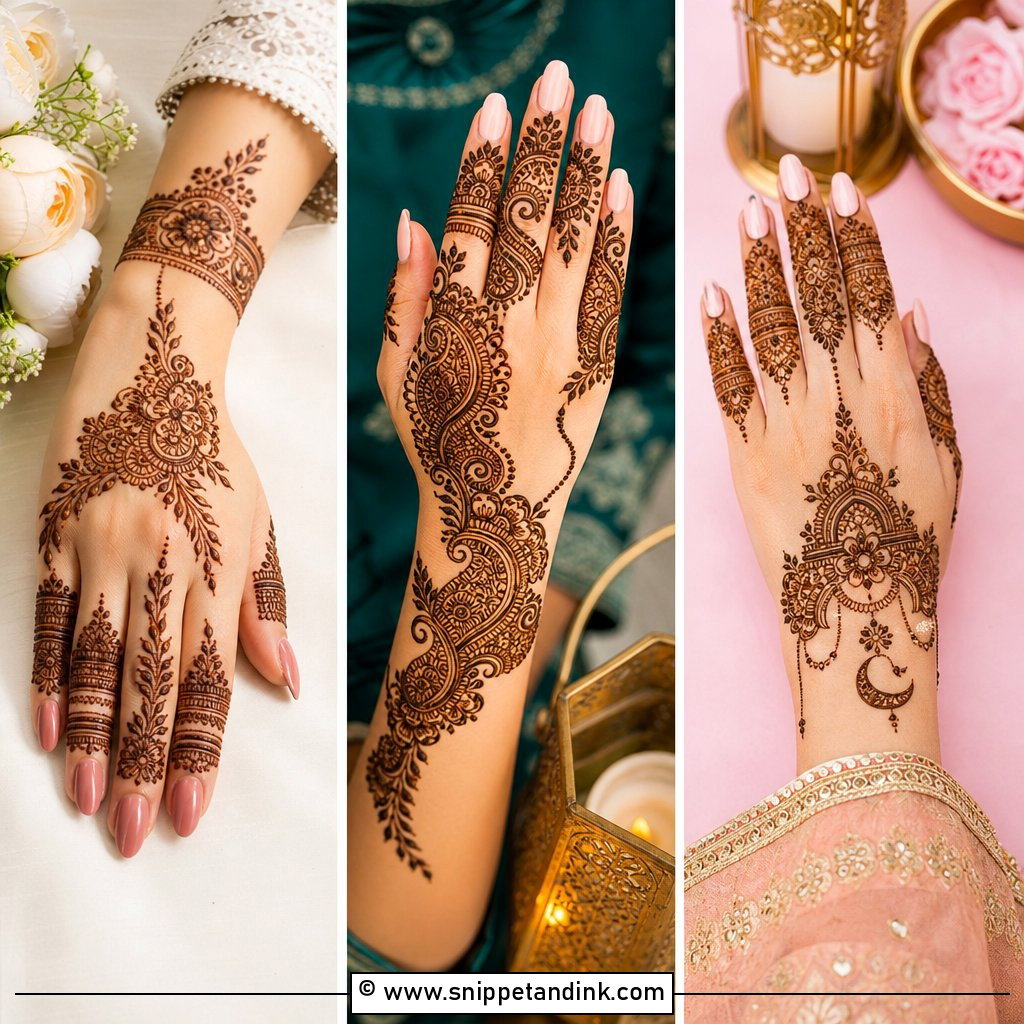
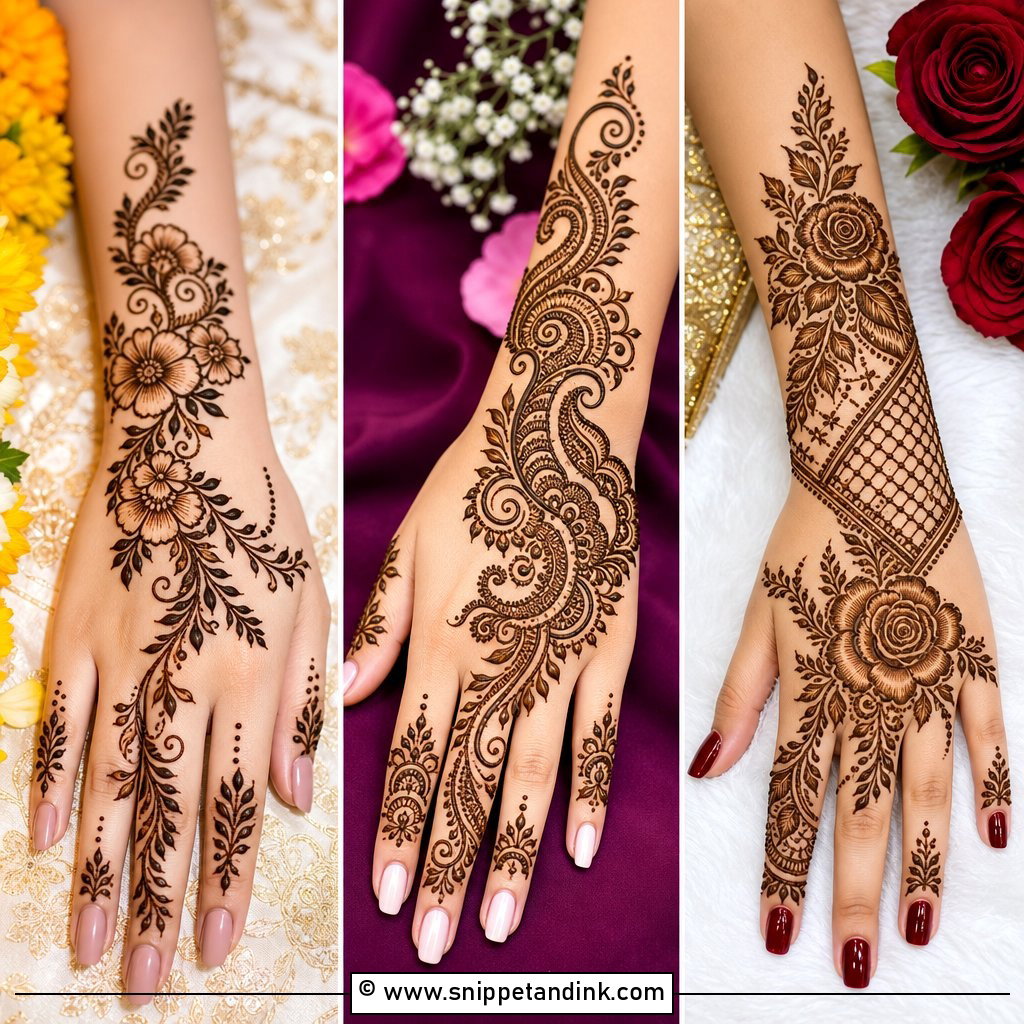
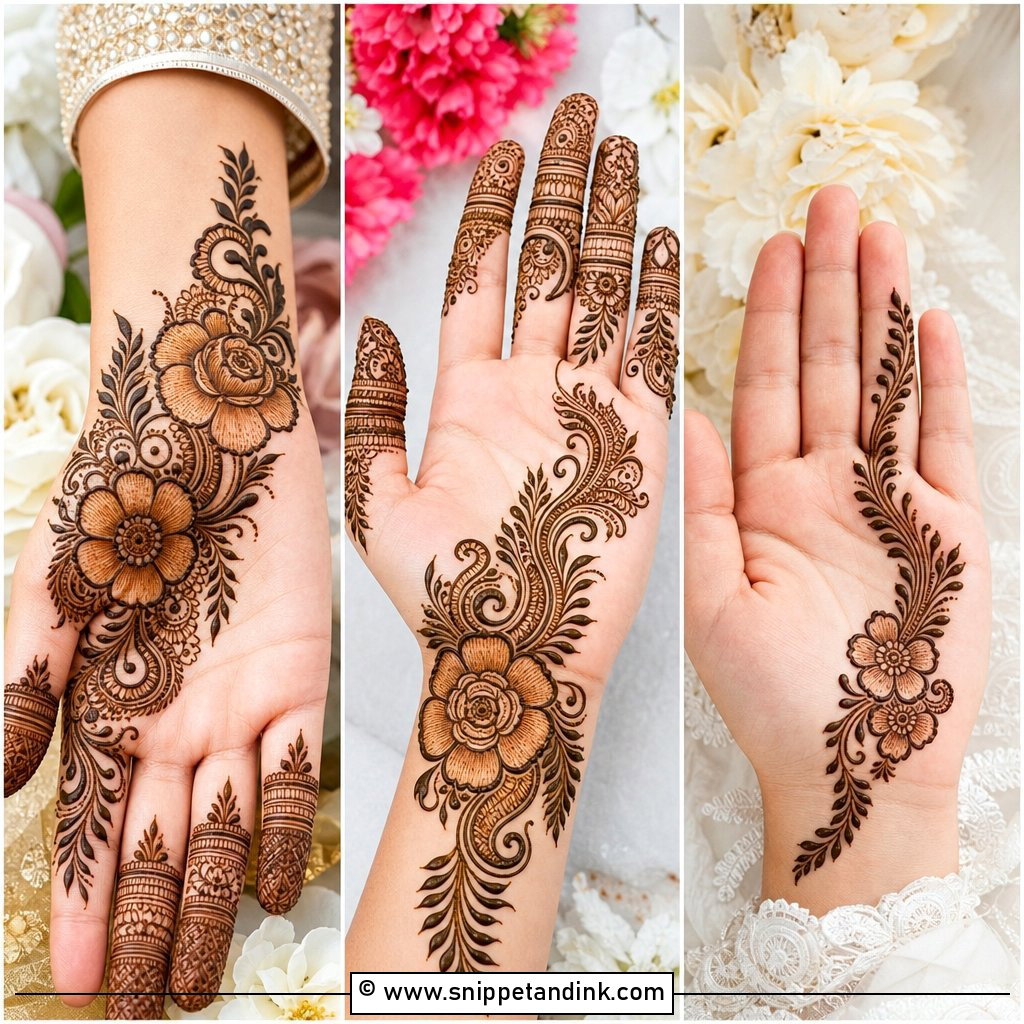
Arabic work reads from across a room because it relies on open skin as much as on the henna itself. I usually start the vine near the wrist and pull it diagonally toward the index or middle finger, which visually lengthens the hand. The bold leaves and shaded petals have to be thicker than Indian line work, so the paste needs to come out of the cone a little heavier. The trade-off is that an Arabic trail leaves gaps, and gaps show any unevenness in the stain. It suits engagement parties, destination weddings and brides who want their rings and bangles to stay the focus.
3. Indo Arabic Bridal Back Side Mehndi Design
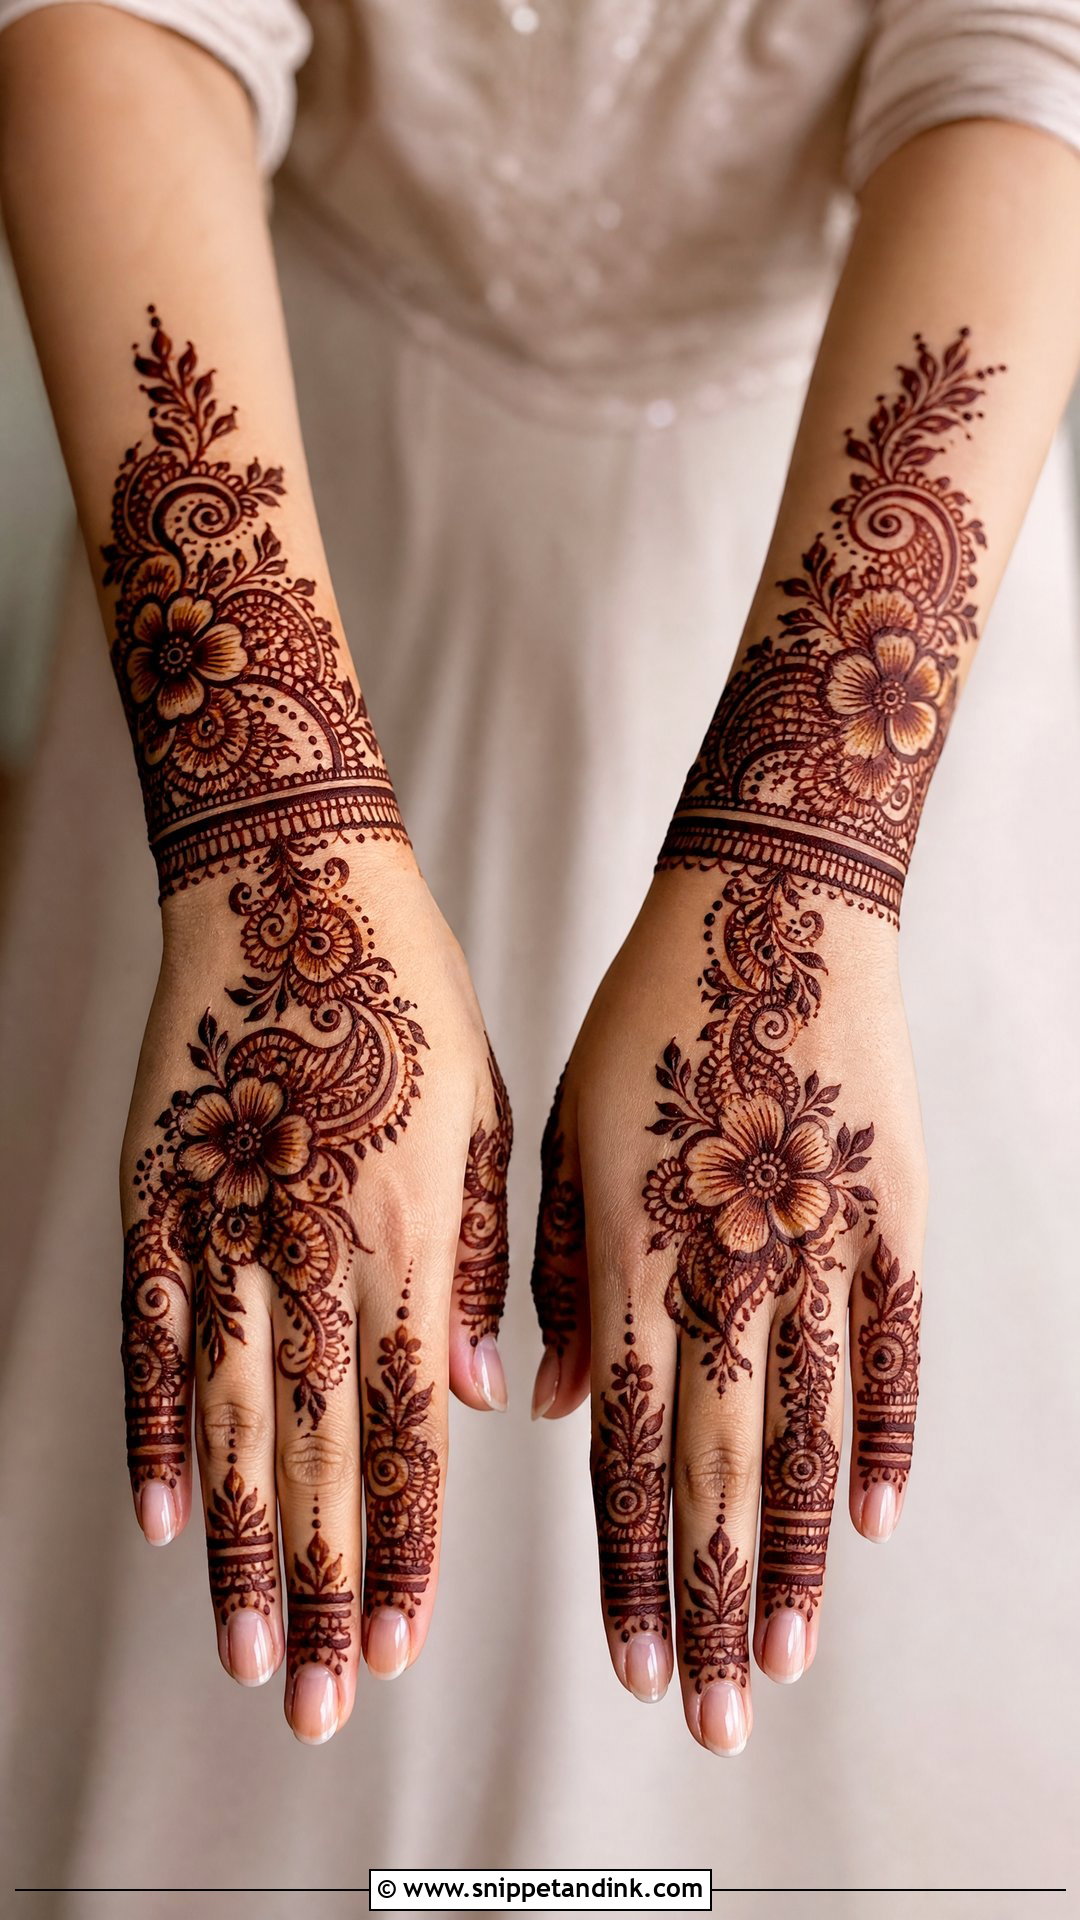
Indo Arabic is my usual suggestion when a bride says she wants detail but is worried about looking crowded. It borrows the dense filling and fine lace texture of Indian work and sets it inside the open flow of Arabic patterns. In practice I keep the wrist as a full bracelet, run one floral trail across the back hand, and give the fingers proper detail so the eye travels from cuff to fingertip. The blank channels between sections are what make it work in pictures, so I protect them and resist adding fillers late in the session. It sits comfortably with lehengas, shararas, anarkalis and fusion outfits alike.
4. Mandala Bridal Back Side Mehndi Design
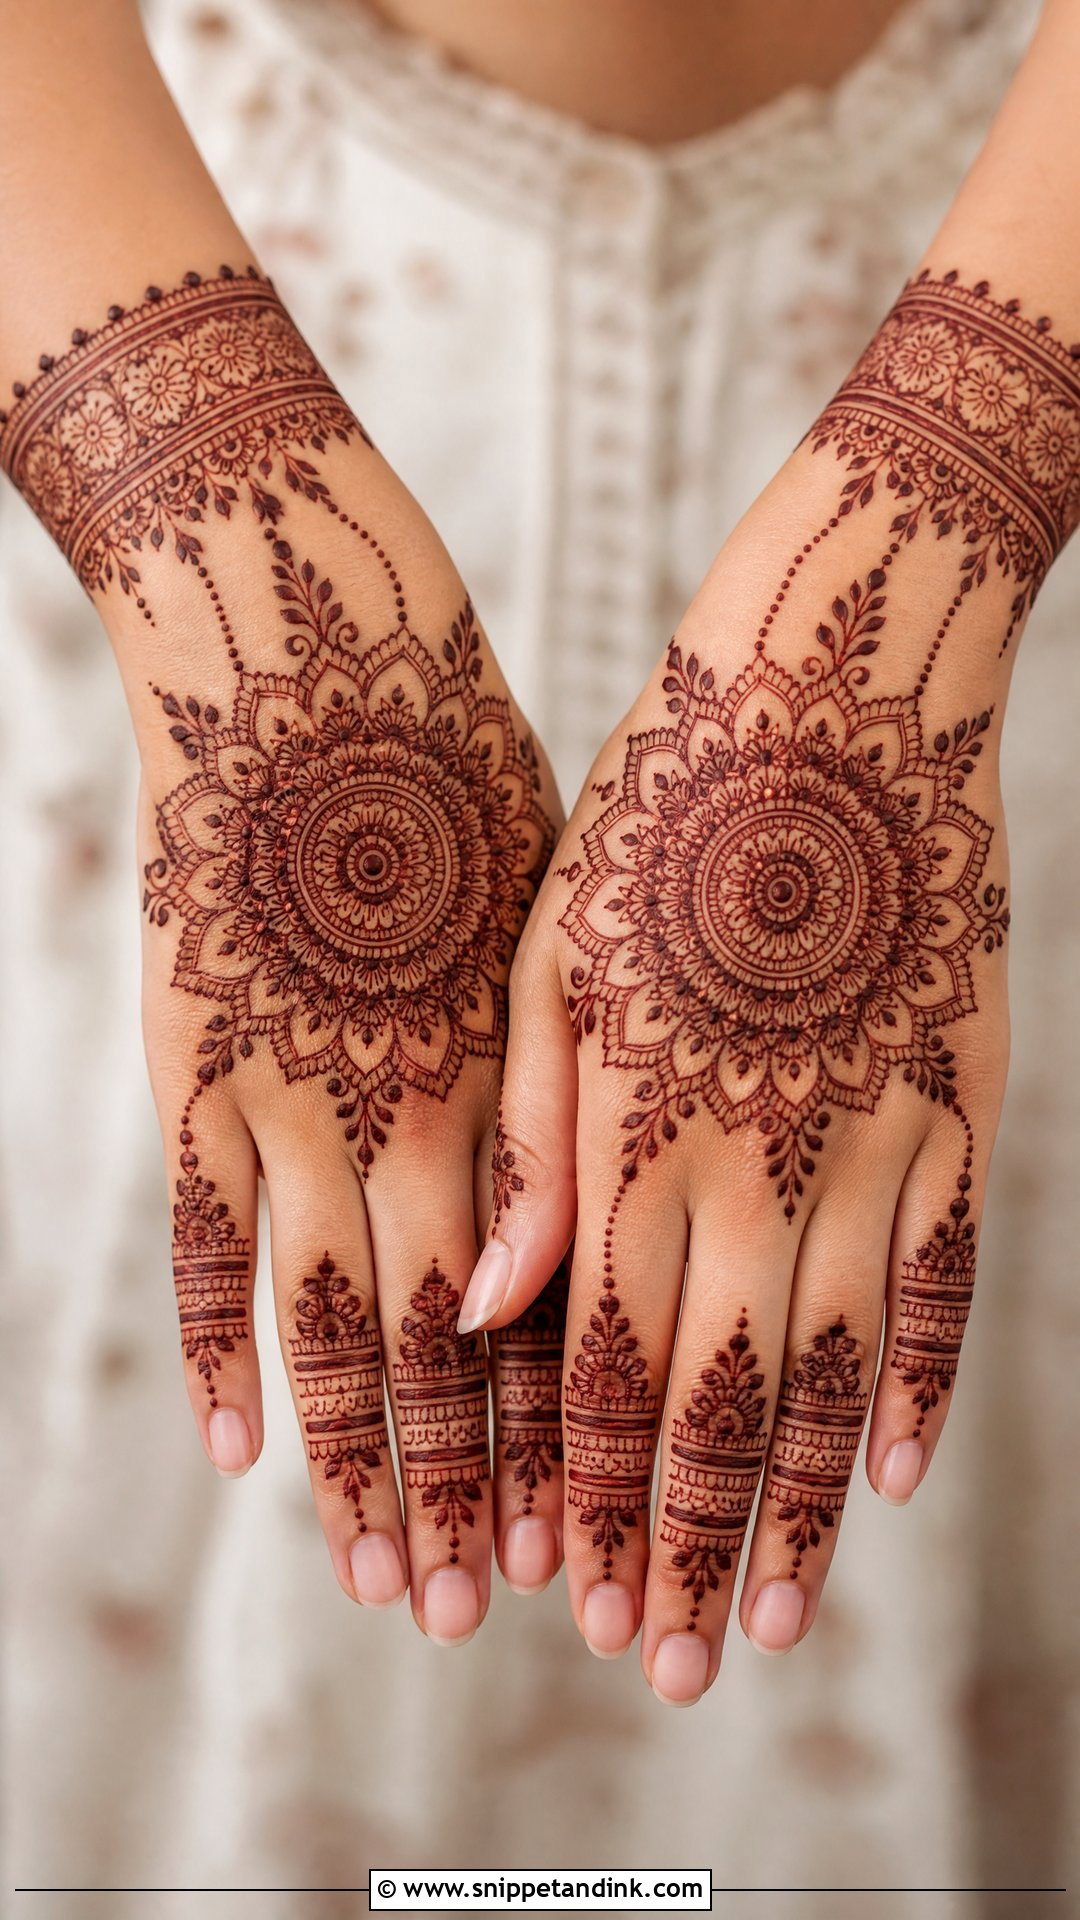
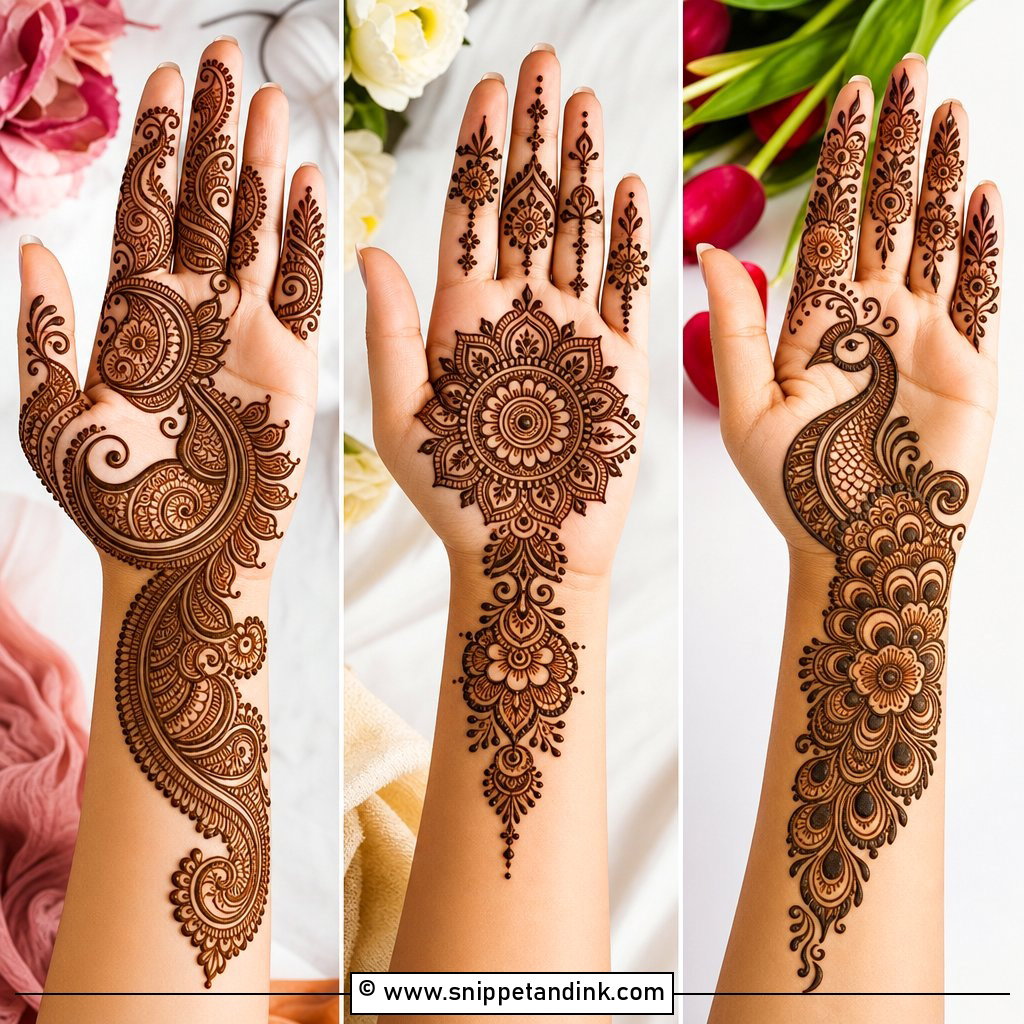
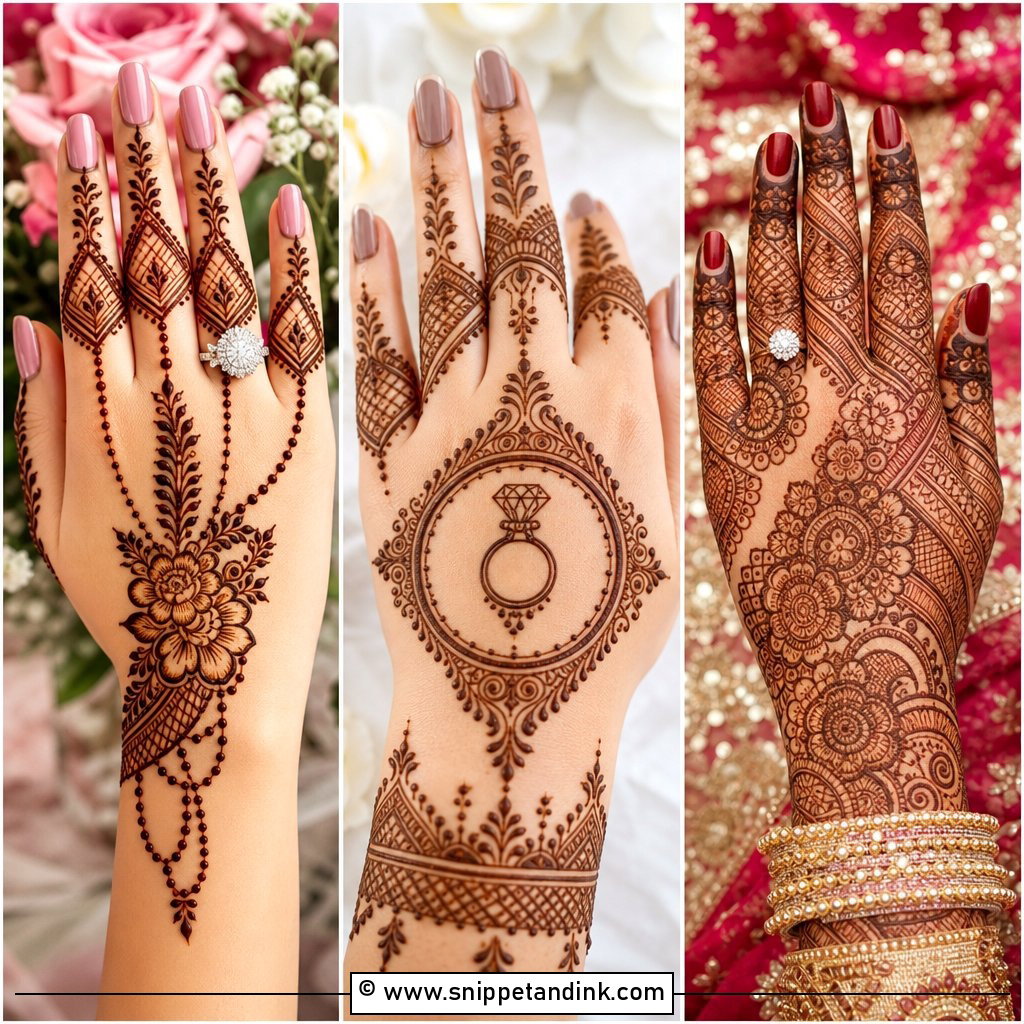
A mandala lives or dies on its symmetry. Before I draw anything, I find the true center of the back hand with the fingers relaxed, not spread, because a circle placed with spread fingers drifts off center once the hand is at rest. Around it go petal rings, dots and leaf curves, then a cuff at the wrist and fine lines or netting on the fingers. It looks simple, but a wobbly outer ring is obvious, so this is a design to give an artist with a steady hand. A central mandala also frames a statement ring well, since the eye is drawn to the middle of the hand.
5. Hathphool Bridal Back Side Mehndi Design
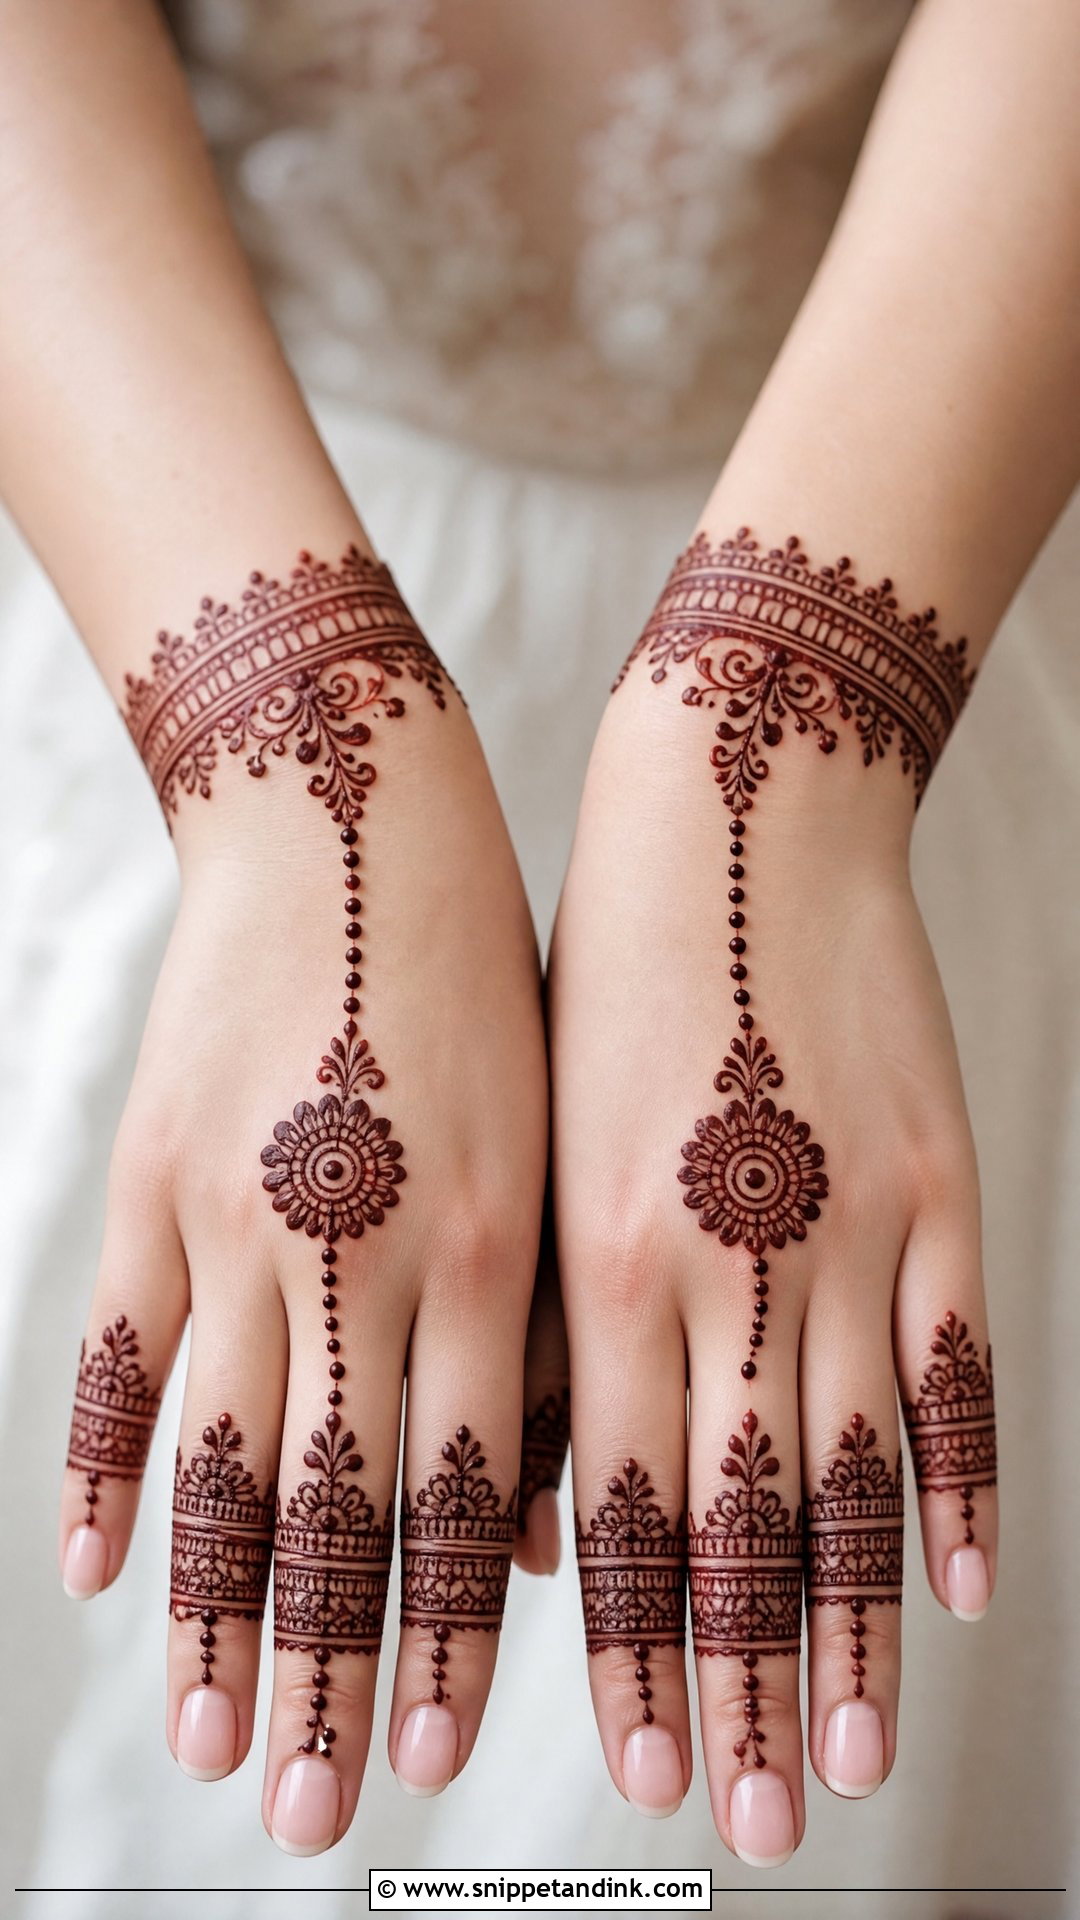
Hathphool mehndi draws the hand ornament in henna: a central flower or mandala, thin chains running to finger rings, and a bracelet band at the wrist. I keep the chains very fine, a single line with tiny dots, because thick chains spread slightly as the paste settles and start to look like stripes. If you are also wearing a real hathphool, tell your artist in advance so the henna chains sit beside the metal ones rather than hidden under them. Layered that way, it holds up well in close portraits and ring ceremony frames.
6. Jaali Bridal Back Side Mehndi Design
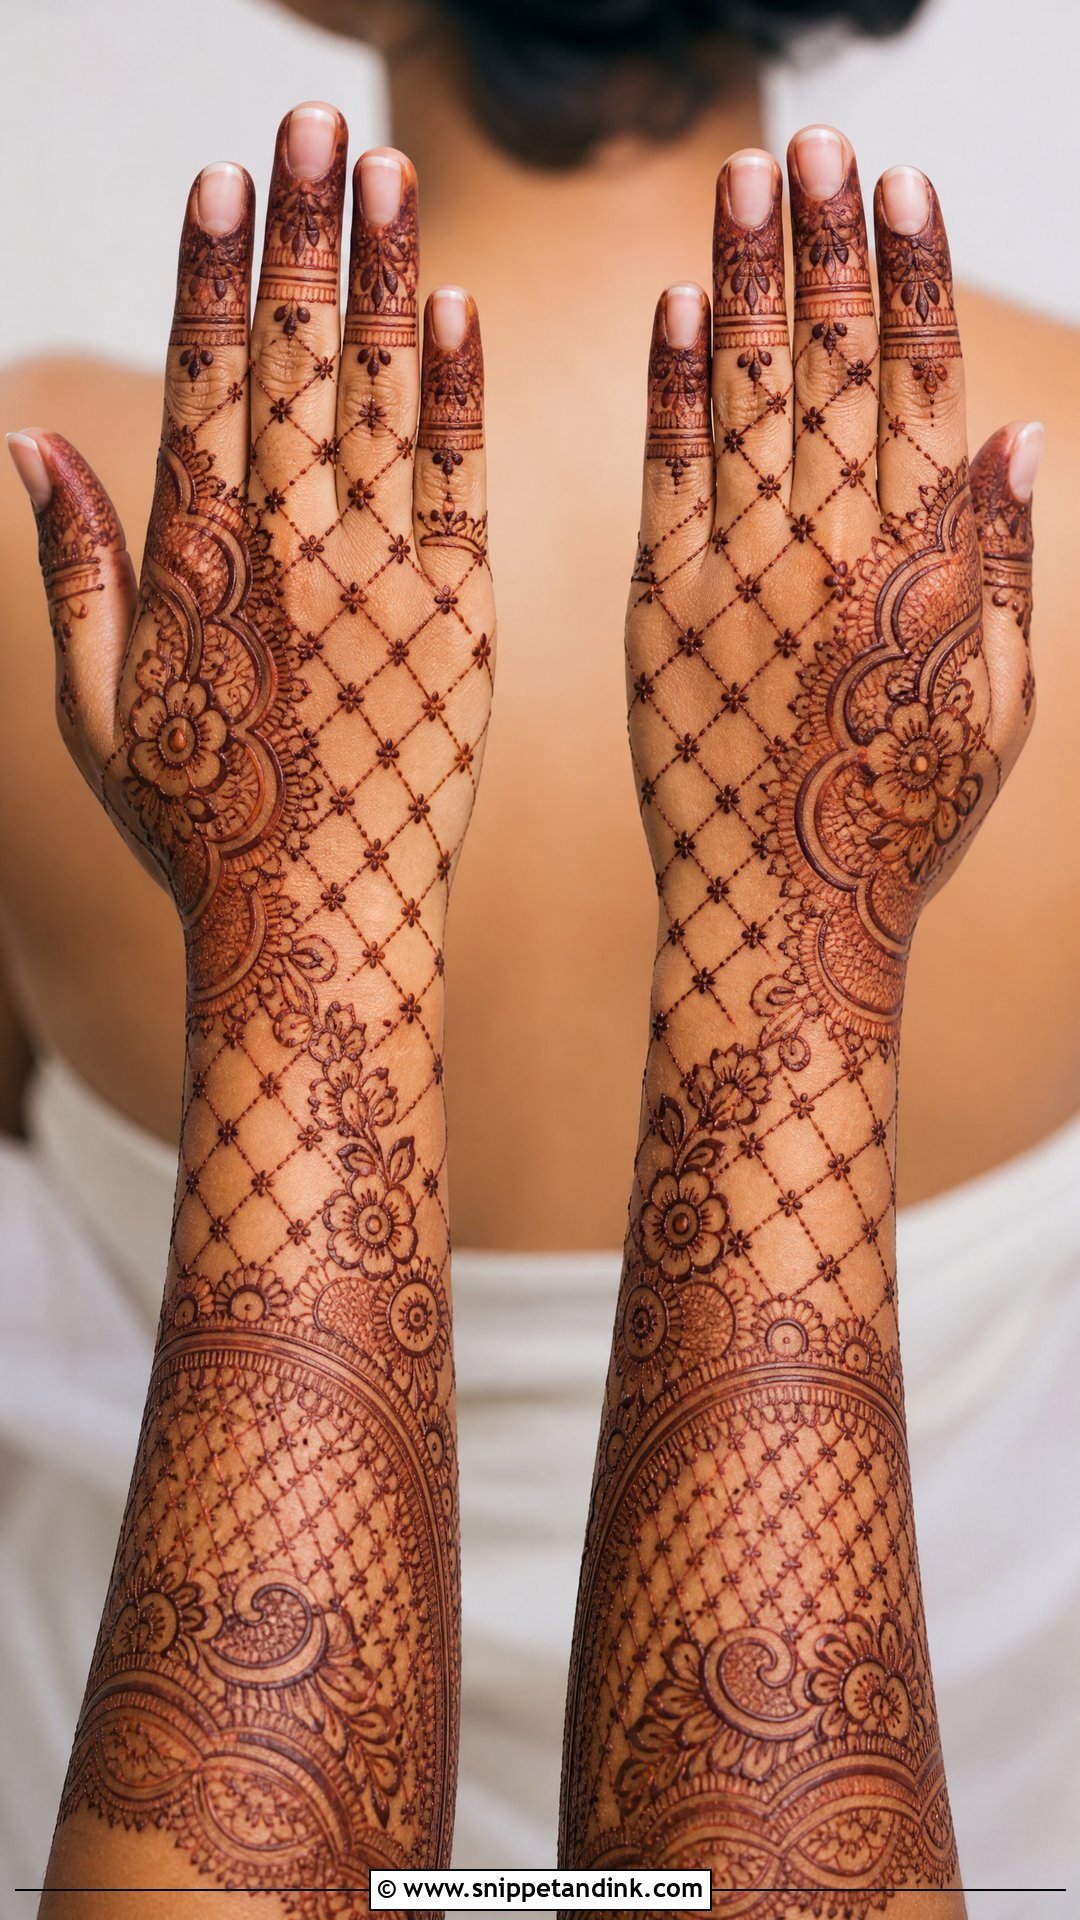
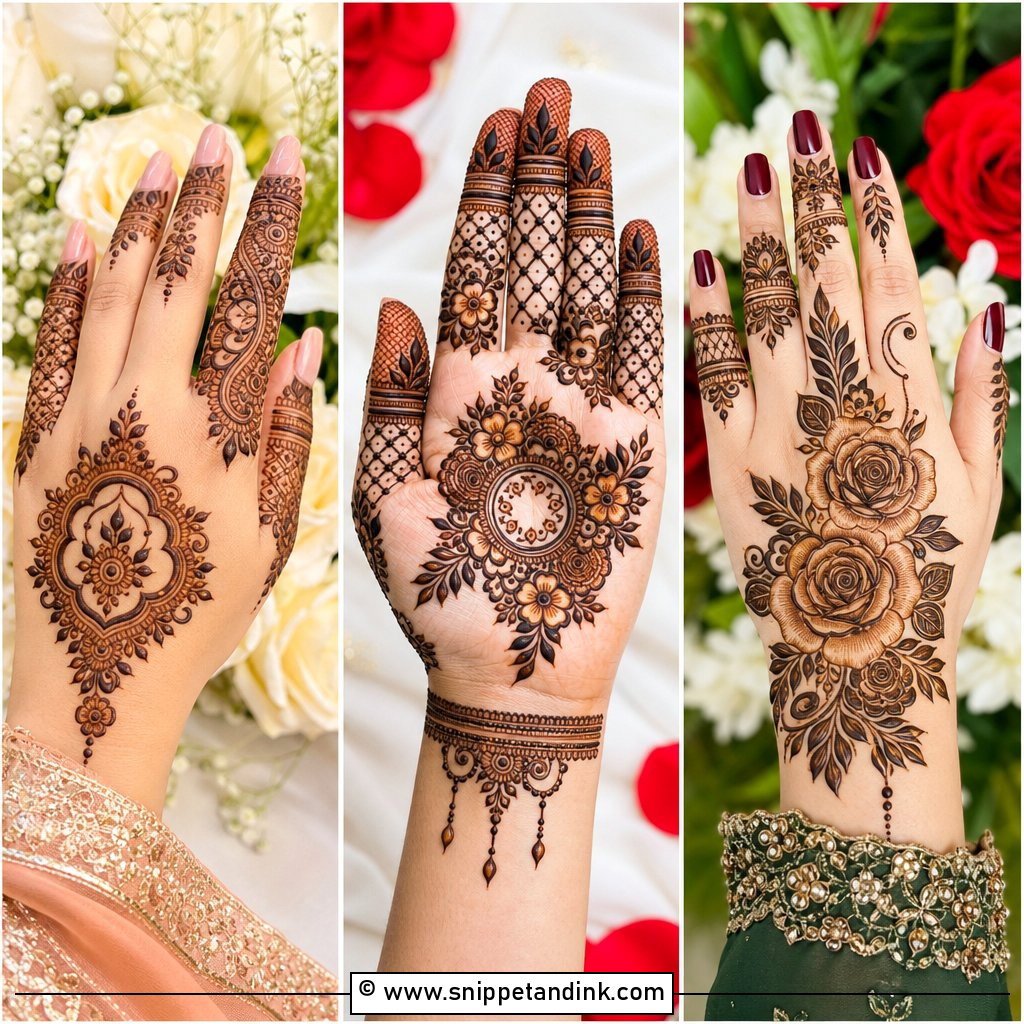
Jaali is the mesh work that gives henna its lace look, and it is the most time-consuming filler I draw because each grid line has to stay even. It can sit in the center of the hand, on the wrist, along the fingers or up the forearm. I break it up with florals, paisleys and leafy borders so a large panel does not turn into a flat brown patch once it stains. One honest warning: very tight jaali on a hand that stains lightly can blur, so if your skin tends to stain orange rather than deep brown, ask for a slightly wider grid. It pairs naturally with lace sleeves and embroidered bridal wear.
7. Peacock Bridal Back Side Mehndi Design
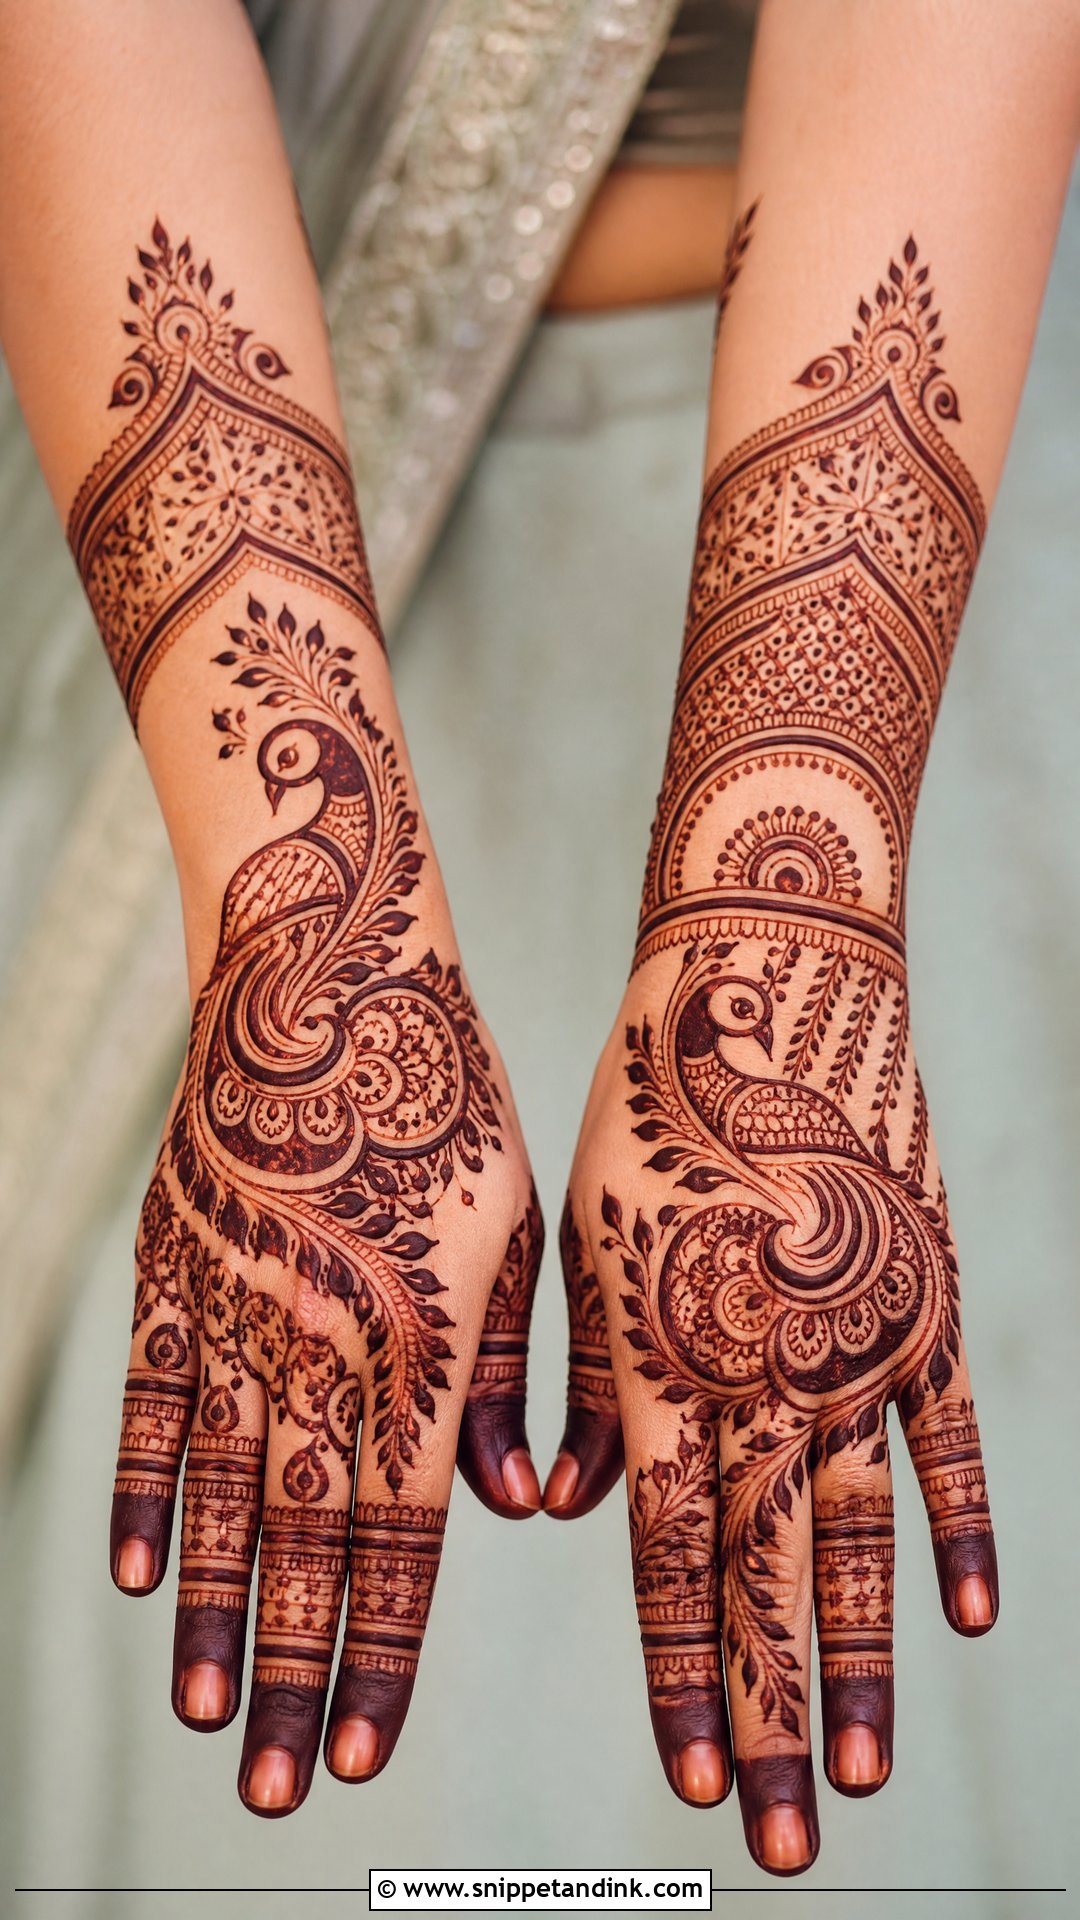
A peacock bridal back side mehndi design gives the hand a royal, traditional feel. I place the bird where it will be seen: near the wrist if you are wearing long sleeves, or across the center if your bangles will sit low. The feathers are where skill shows, built from fine eye-shaped loops with a shaded core, then flowing into paisleys, vines and borders. Ask your artist how they shade, because heavy shading on a peacock can make the feathers merge into one dark shape after the stain deepens. Heavy bridal outfits suit this motif, especially when it stretches into the fingers and wrist.
8. Floral Bridal Back Side Mehndi Design
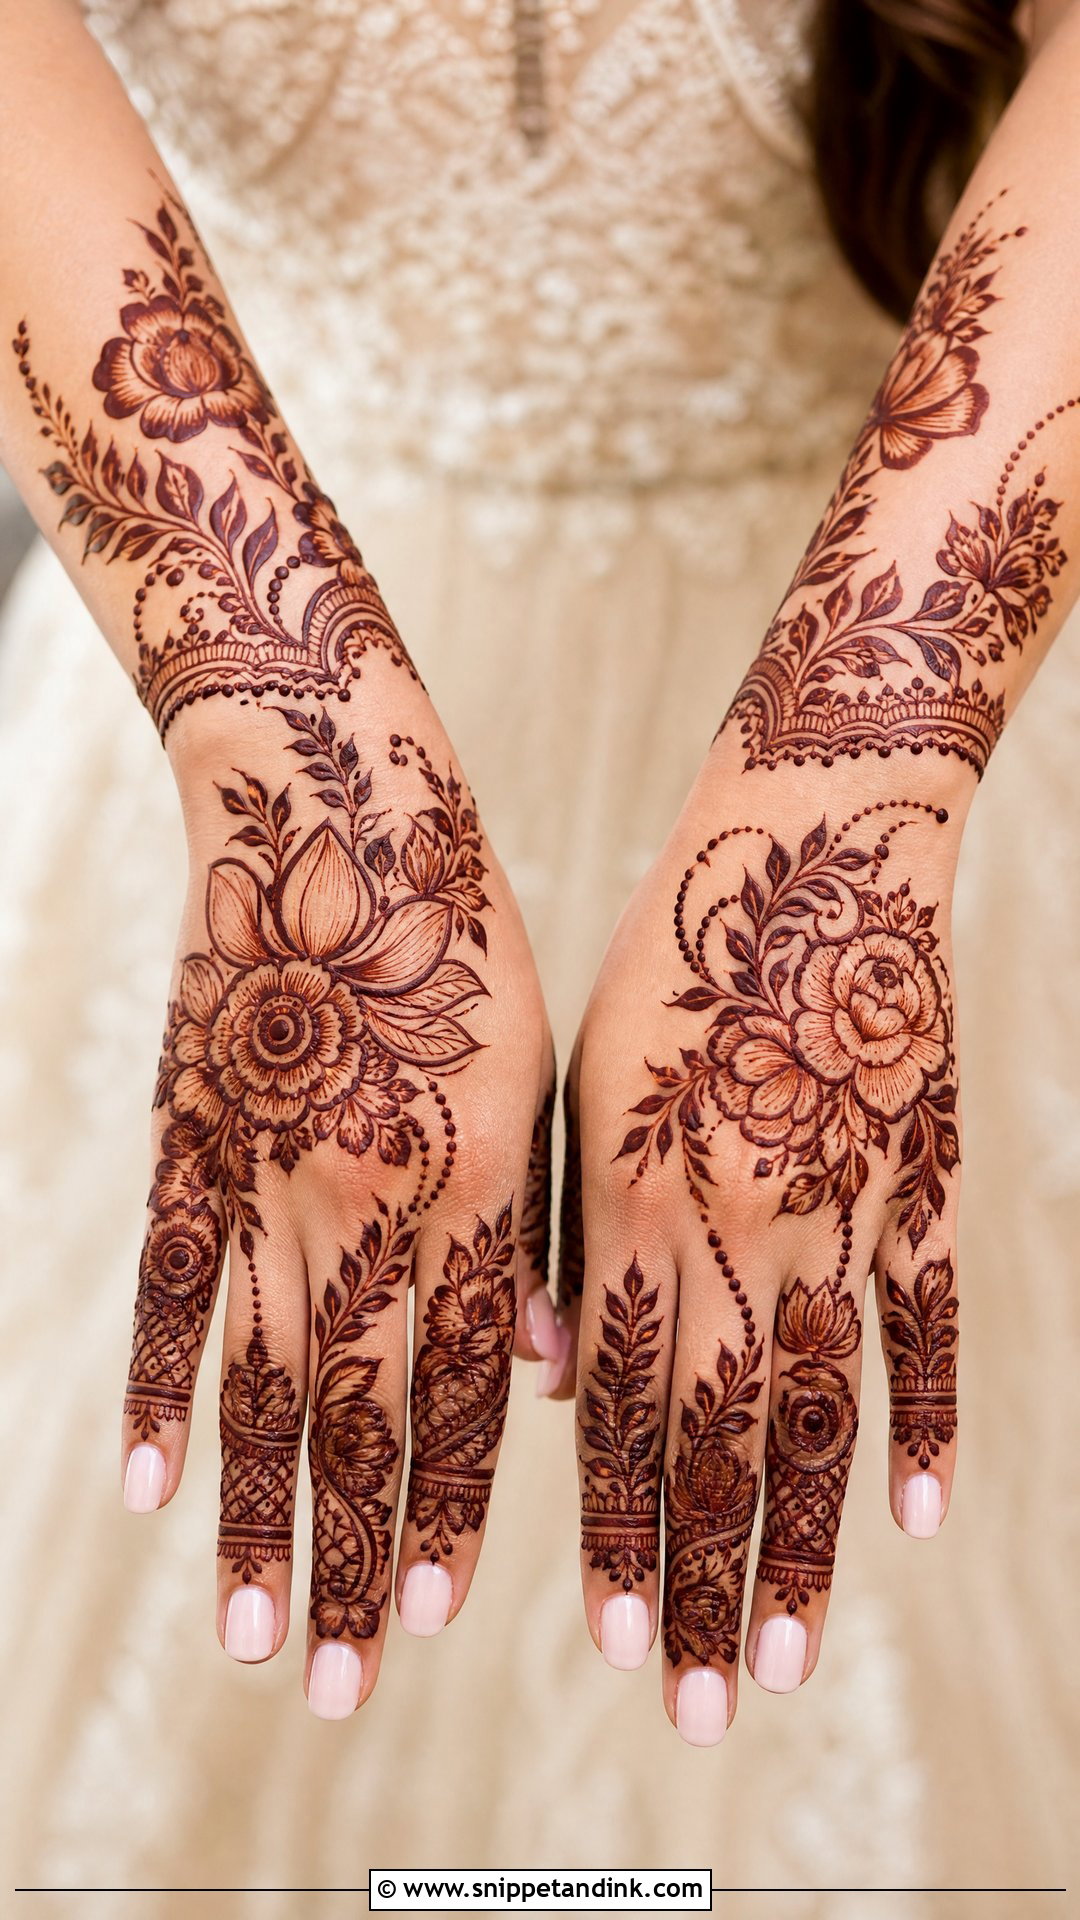
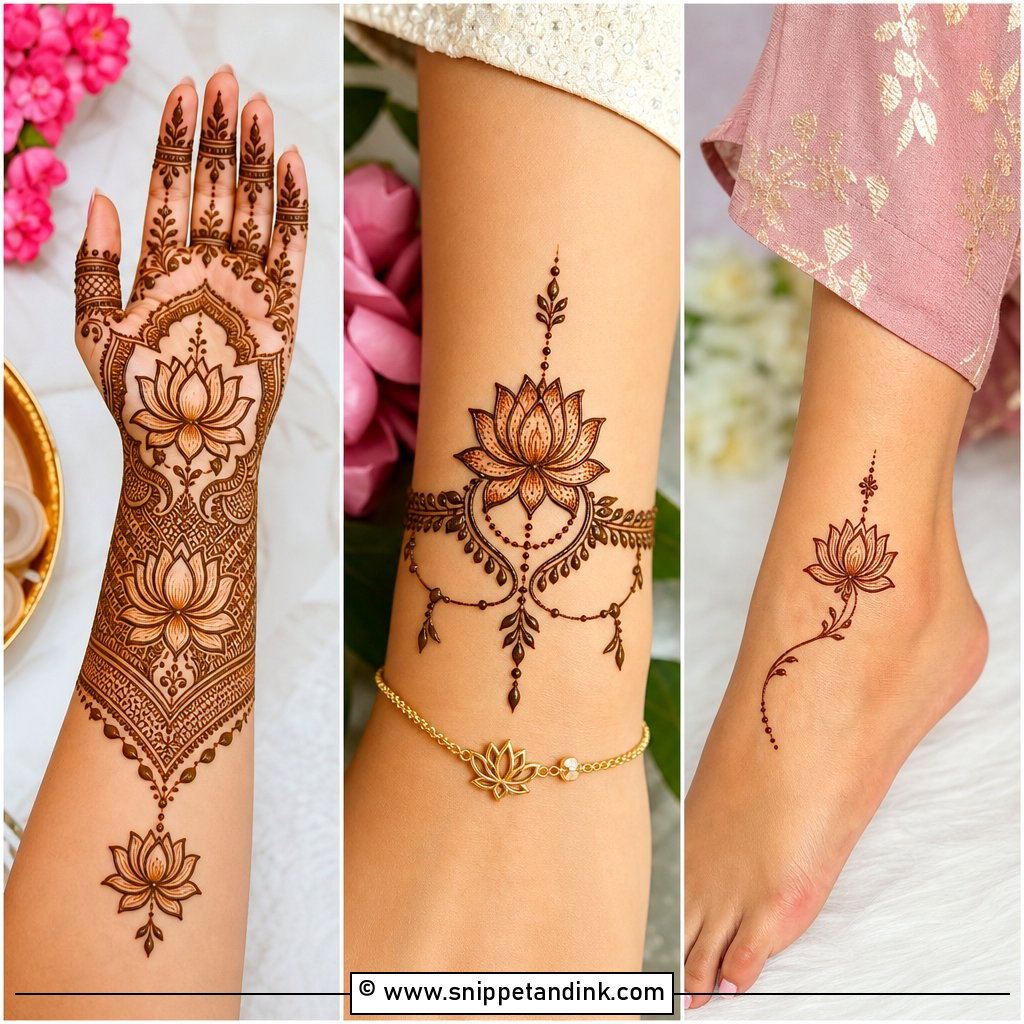
Floral work is the most forgiving style on unusual hand shapes, because I can scale roses or lotus blooms up on a broad hand and down on a narrow one without breaking the pattern. The layout can fill the back hand or follow a single diagonal trail, with leaves and small blossoms on the fingers. Shaded petals are the detail to watch: a soft shade gives depth, but if the paste is laid too thick inside a petal, it can stain as a solid blot. With pastel outfits and fresh-flower jewelry, florals feel easy and unforced.
9. Paisley Bridal Back Side Mehndi Design
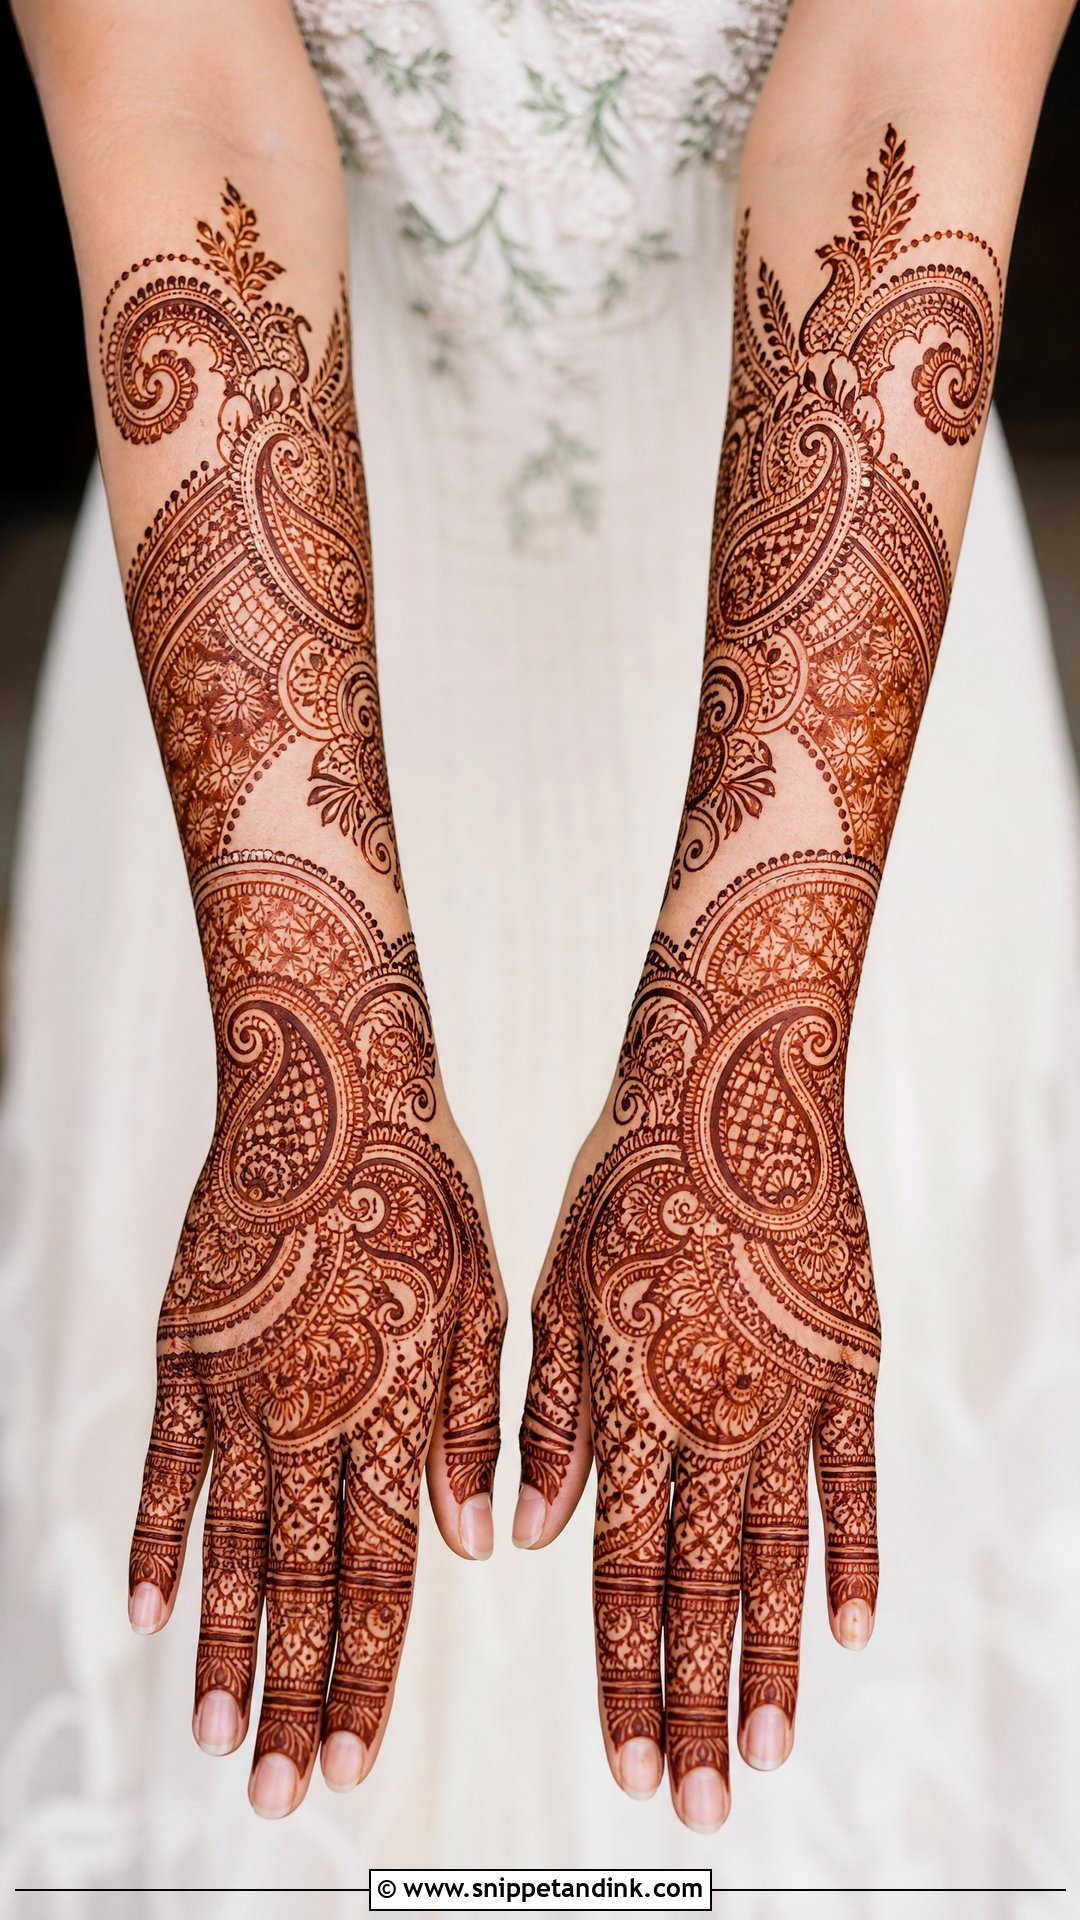
Paisleys are the oldest shape in my kit and still one of the most useful. They can run in rows, curve around the wrist or stack in layered trails, and each one can be filled differently with leaves, checks, dots or petals. That variation inside the outline is what makes paisley work look rich instead of repetitive. These designs reward a dark stain, because the filled sections contrast against the open ones. Classic embroidery and heritage-style outfits echo the shape, so the hand and the dupatta end up speaking the same language.
10. Minimal Bridal Back Side Mehndi Design
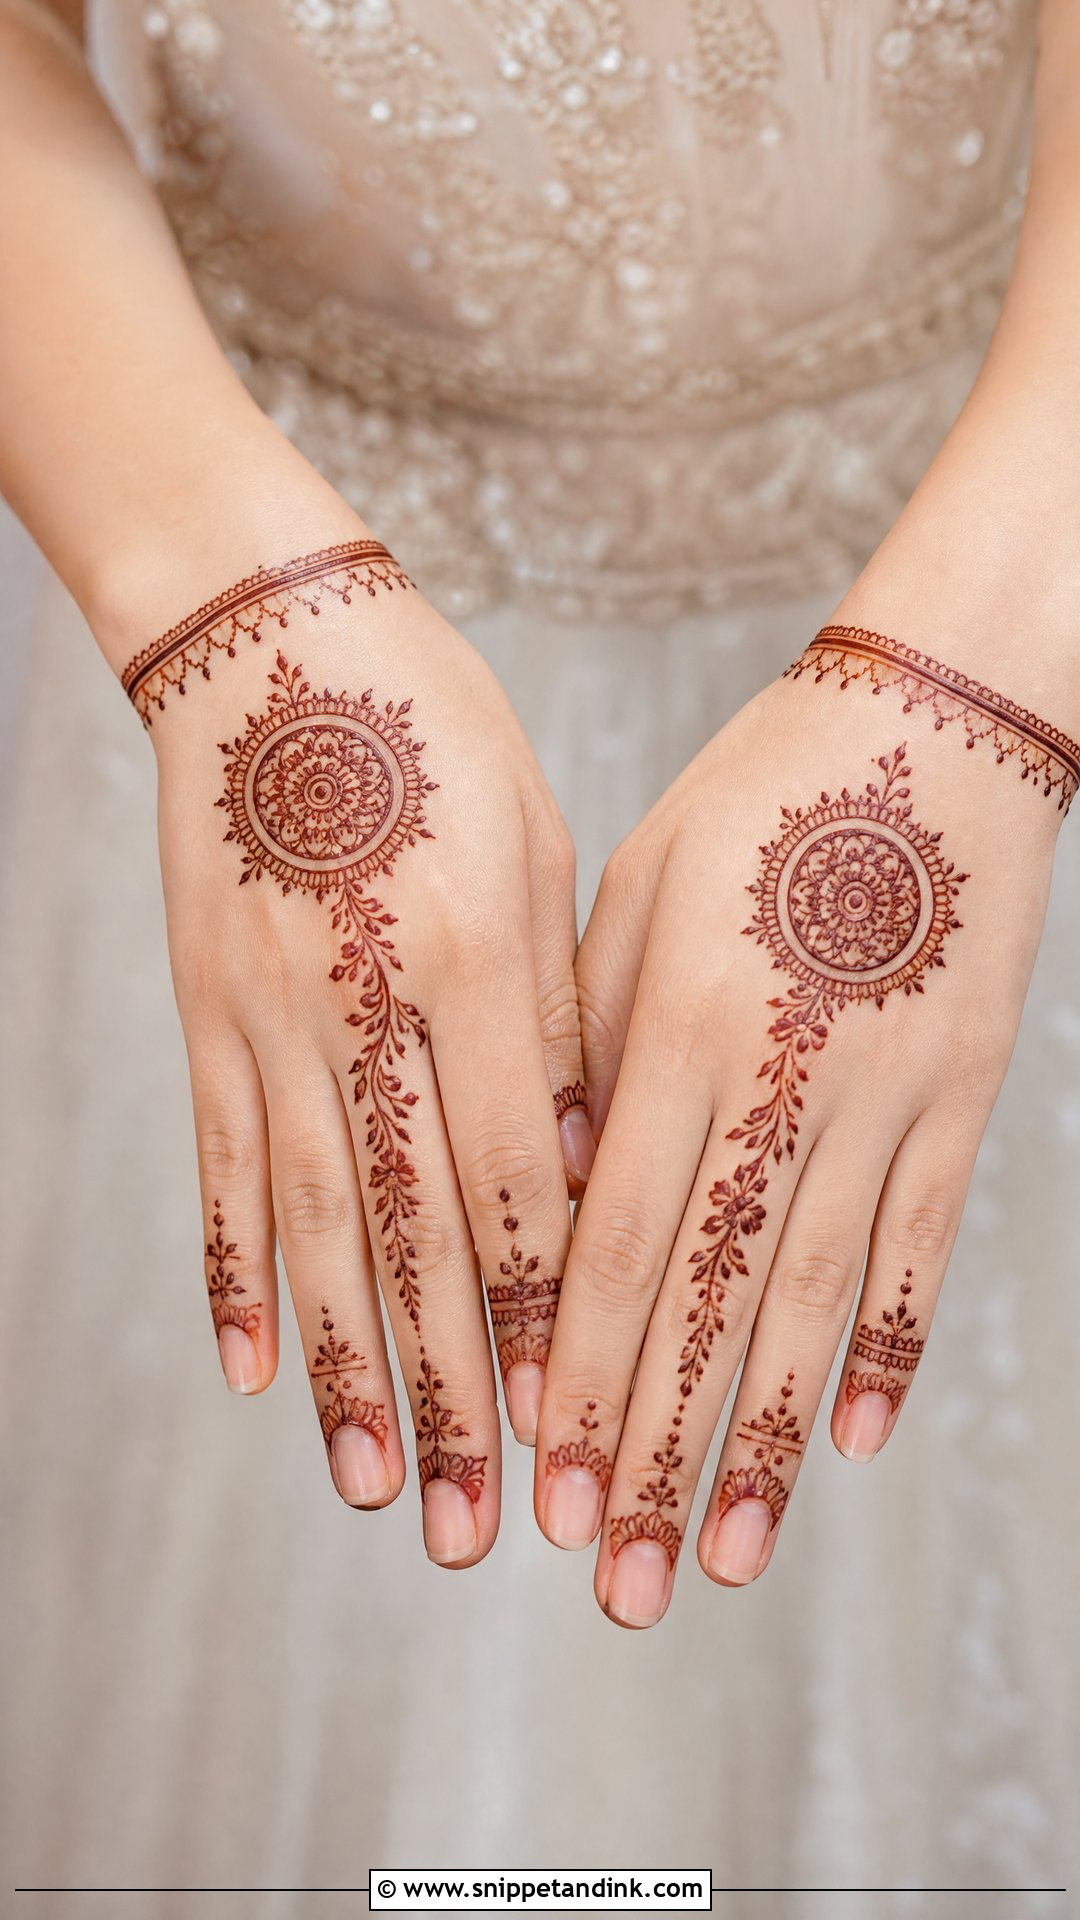
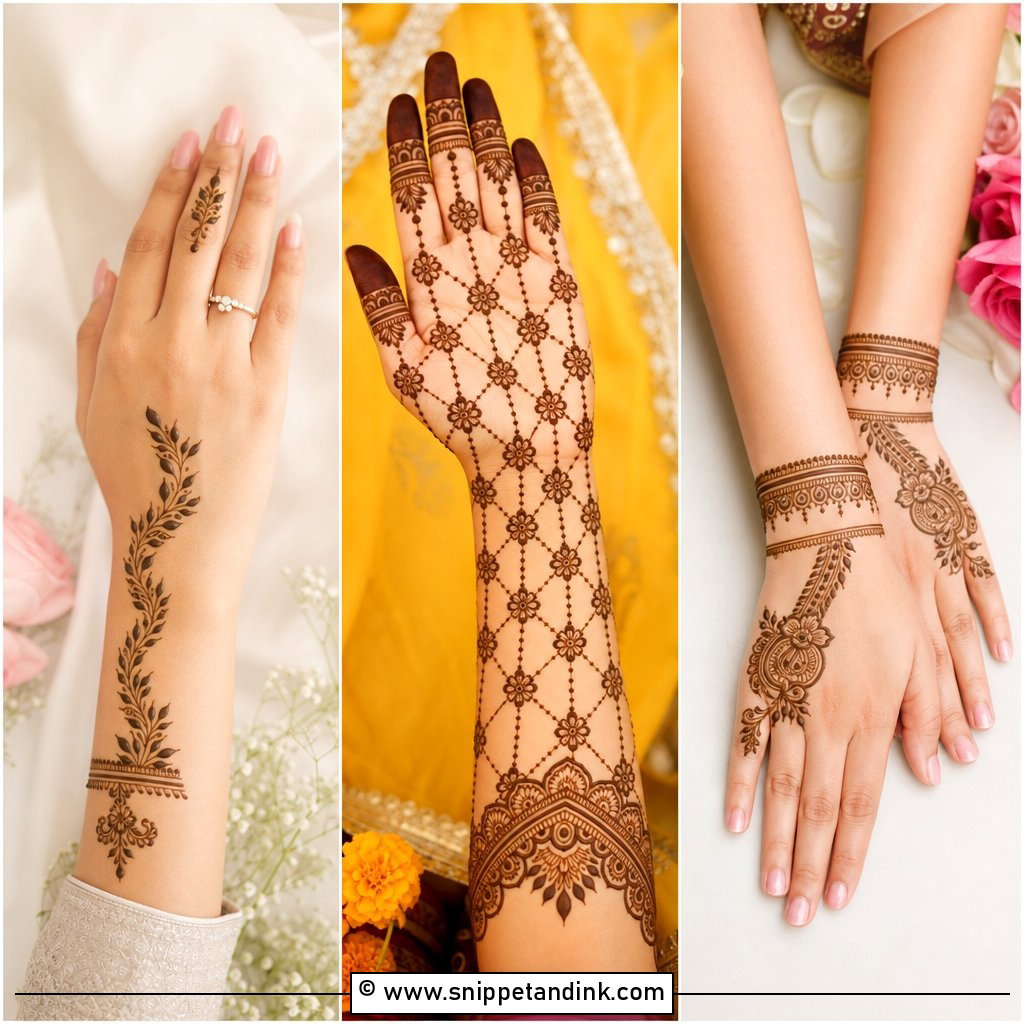
Minimal does not mean quick. With so much bare skin, every line is on display, and a shaky trail has nowhere to hide. A typical layout is a small mandala, a light floral trail, a bracelet band and fine finger details. I suggest it for civil ceremonies, intimate weddings and engagement events, and for brides who do not want henna past the wrist. The placement does the bridal work here, so spend your consultation time on exactly where the motif sits rather than on how much to add.
11. Bracelet Bridal Back Side Mehndi Design
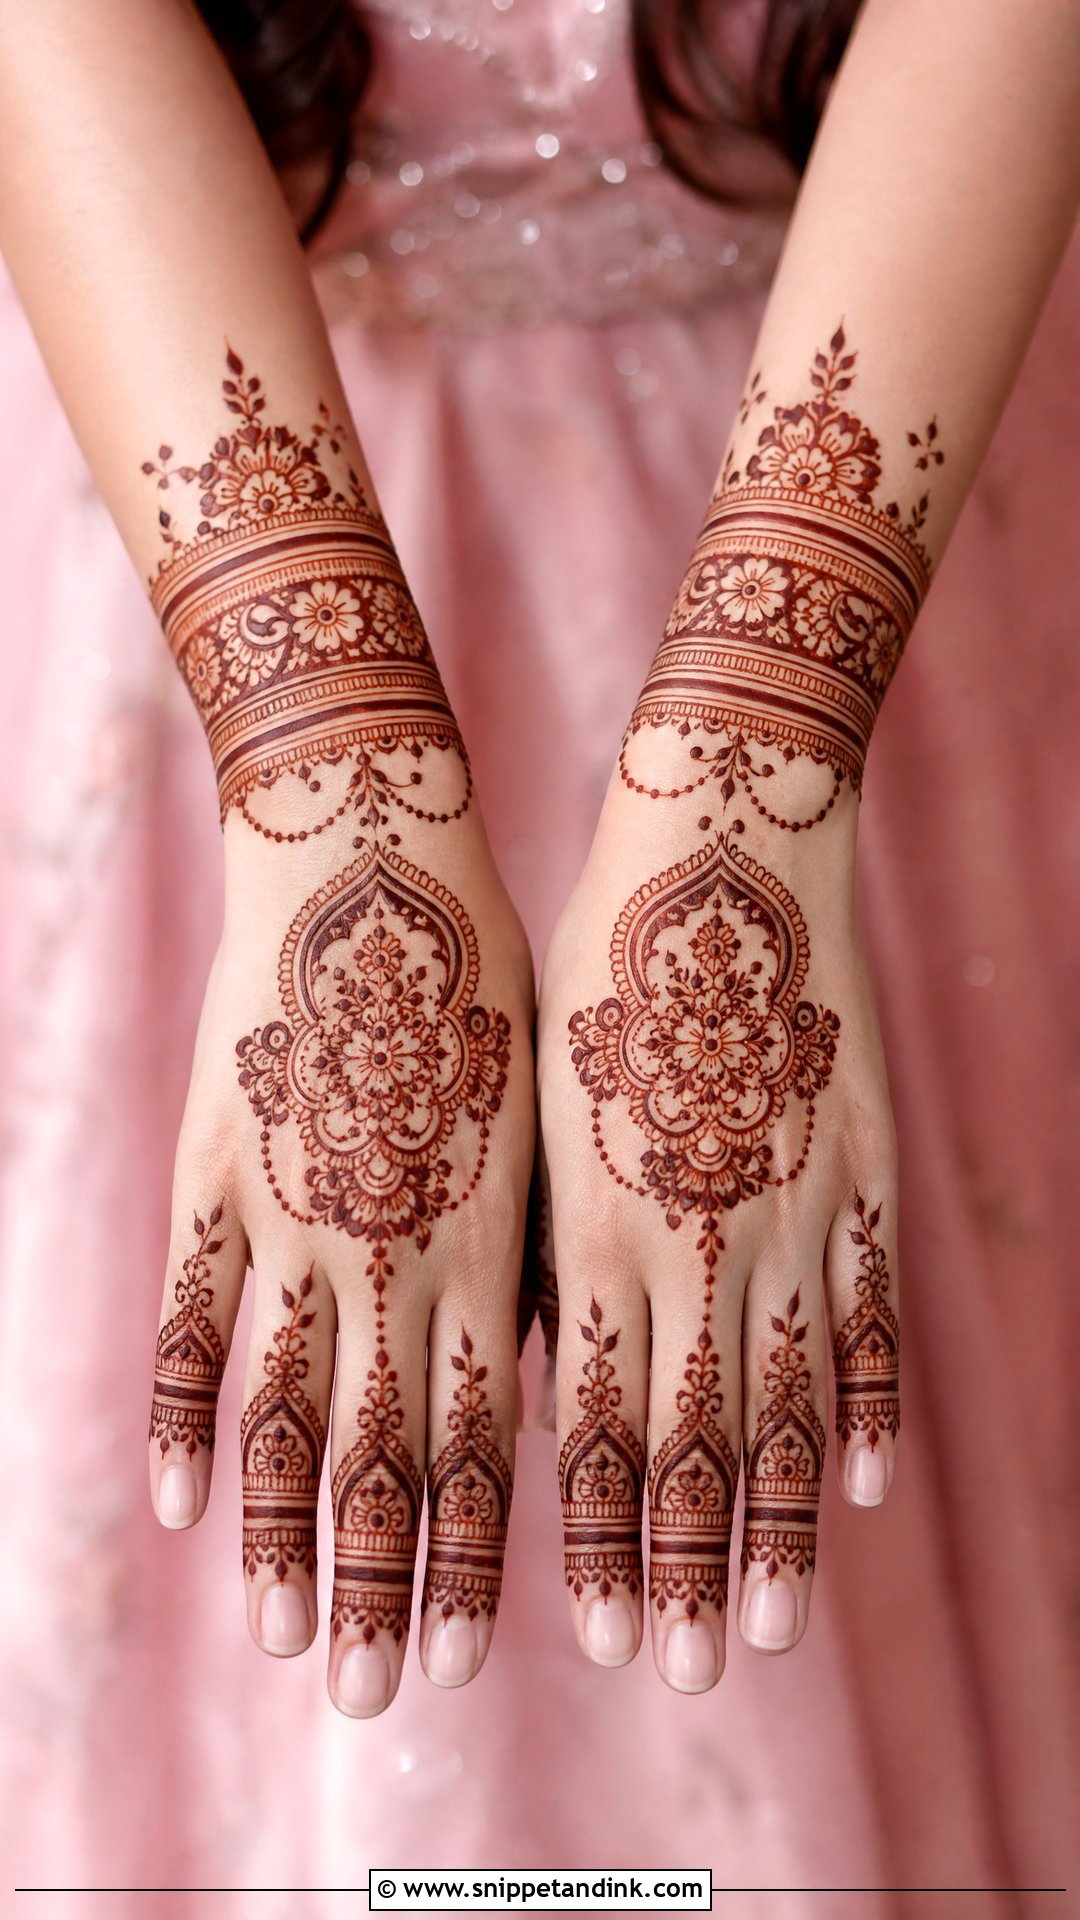
Bracelet designs put most of the weight at the wrist: stacked bands, scalloped edges, floral strips, dots and fine mesh, then thinner chains or vines leading to the fingers. My rule is to keep the cuff bold and the hand lighter, otherwise the design looks top-heavy. Do check where your chooda or bangles will actually sit before the artist starts. If the henna cuff is hidden under ten bangles, it is worth moving it a little higher up the forearm so both show in kalire and ring shots.
12. Finger Bridal Back Side Mehndi Design
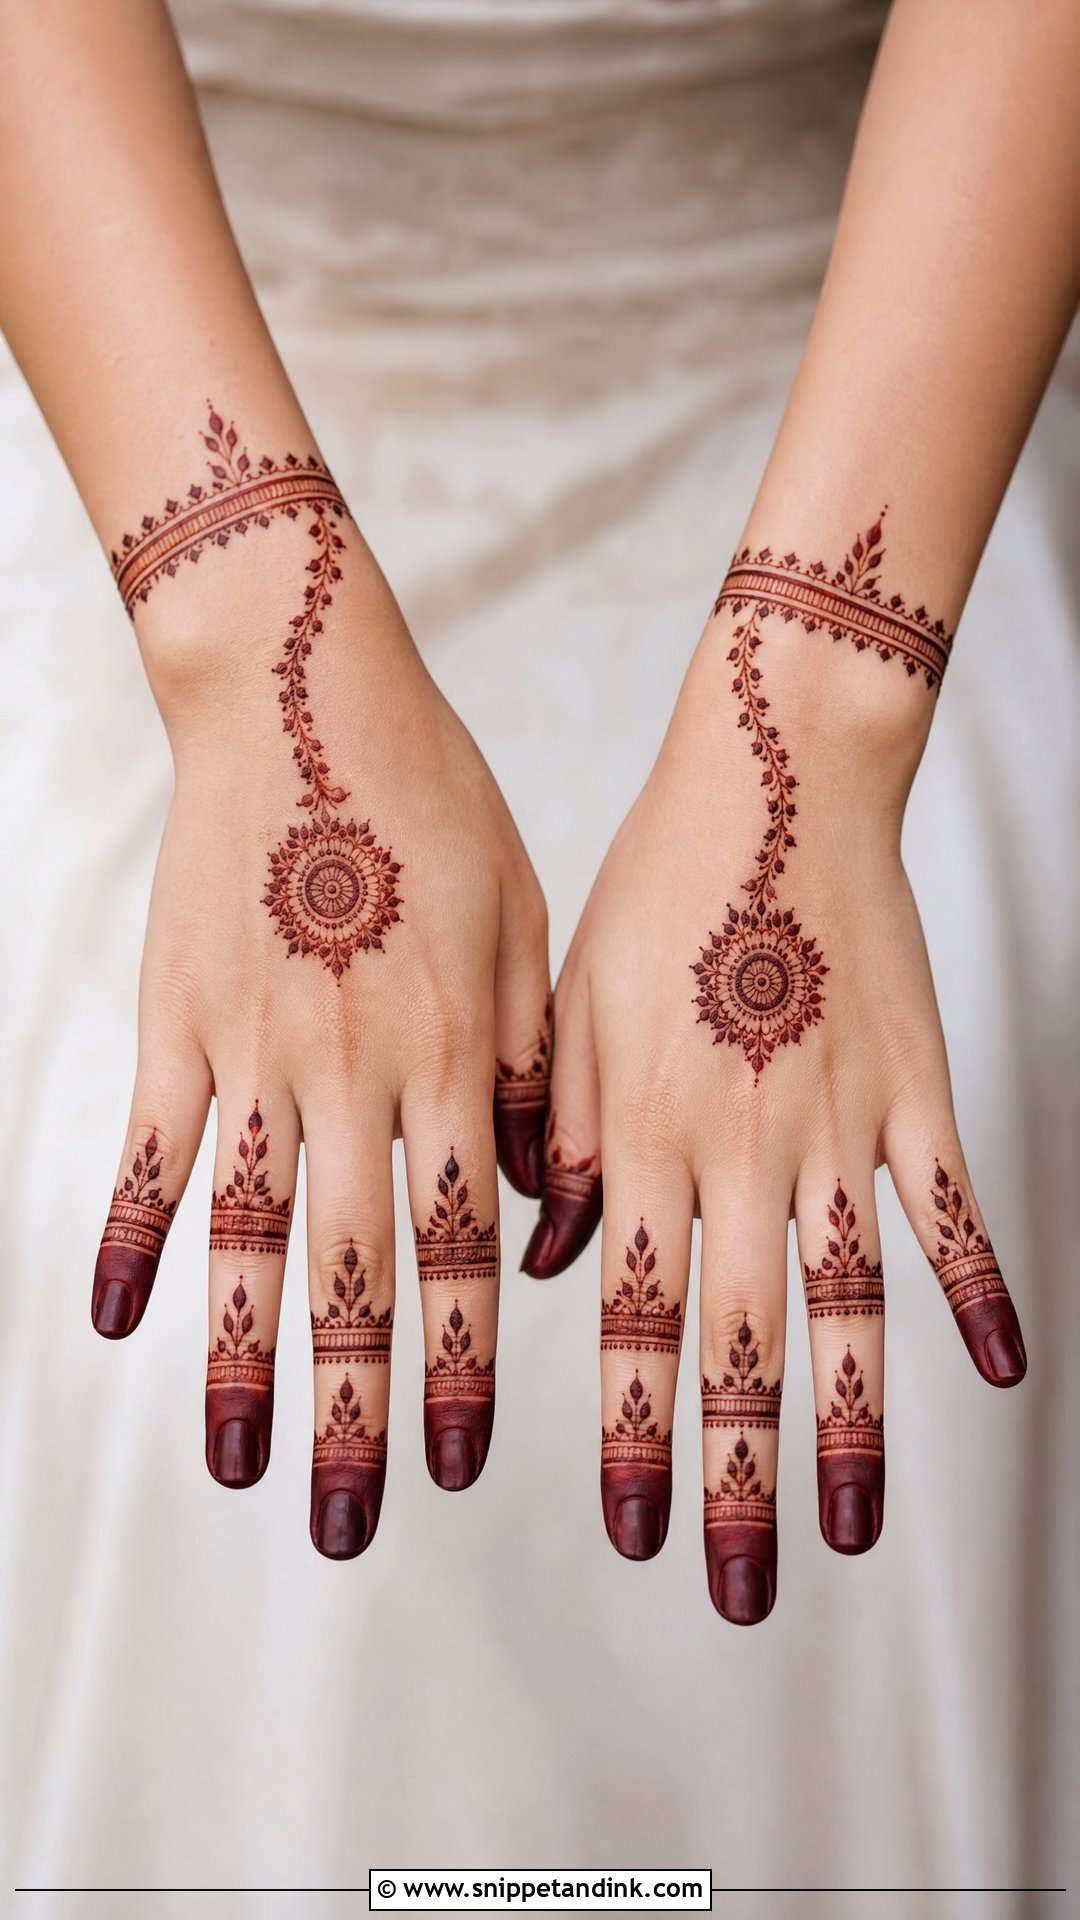
Finger-led designs keep the back hand fairly open and pour detail into the fingers with bands, leafy lines, mini mandalas, checks and shaded tips. I like this layout for brides with nail art or a striking ring, because the detail runs straight to them. Fingers are also where henna wears off first, since you wash and use them constantly, so I tell brides to be gentle with hand washing for the first day. Done neatly, it lengthens the fingers and still reads as bridal in close-ups.
13. Simple Bridal Back Side Mehndi Design
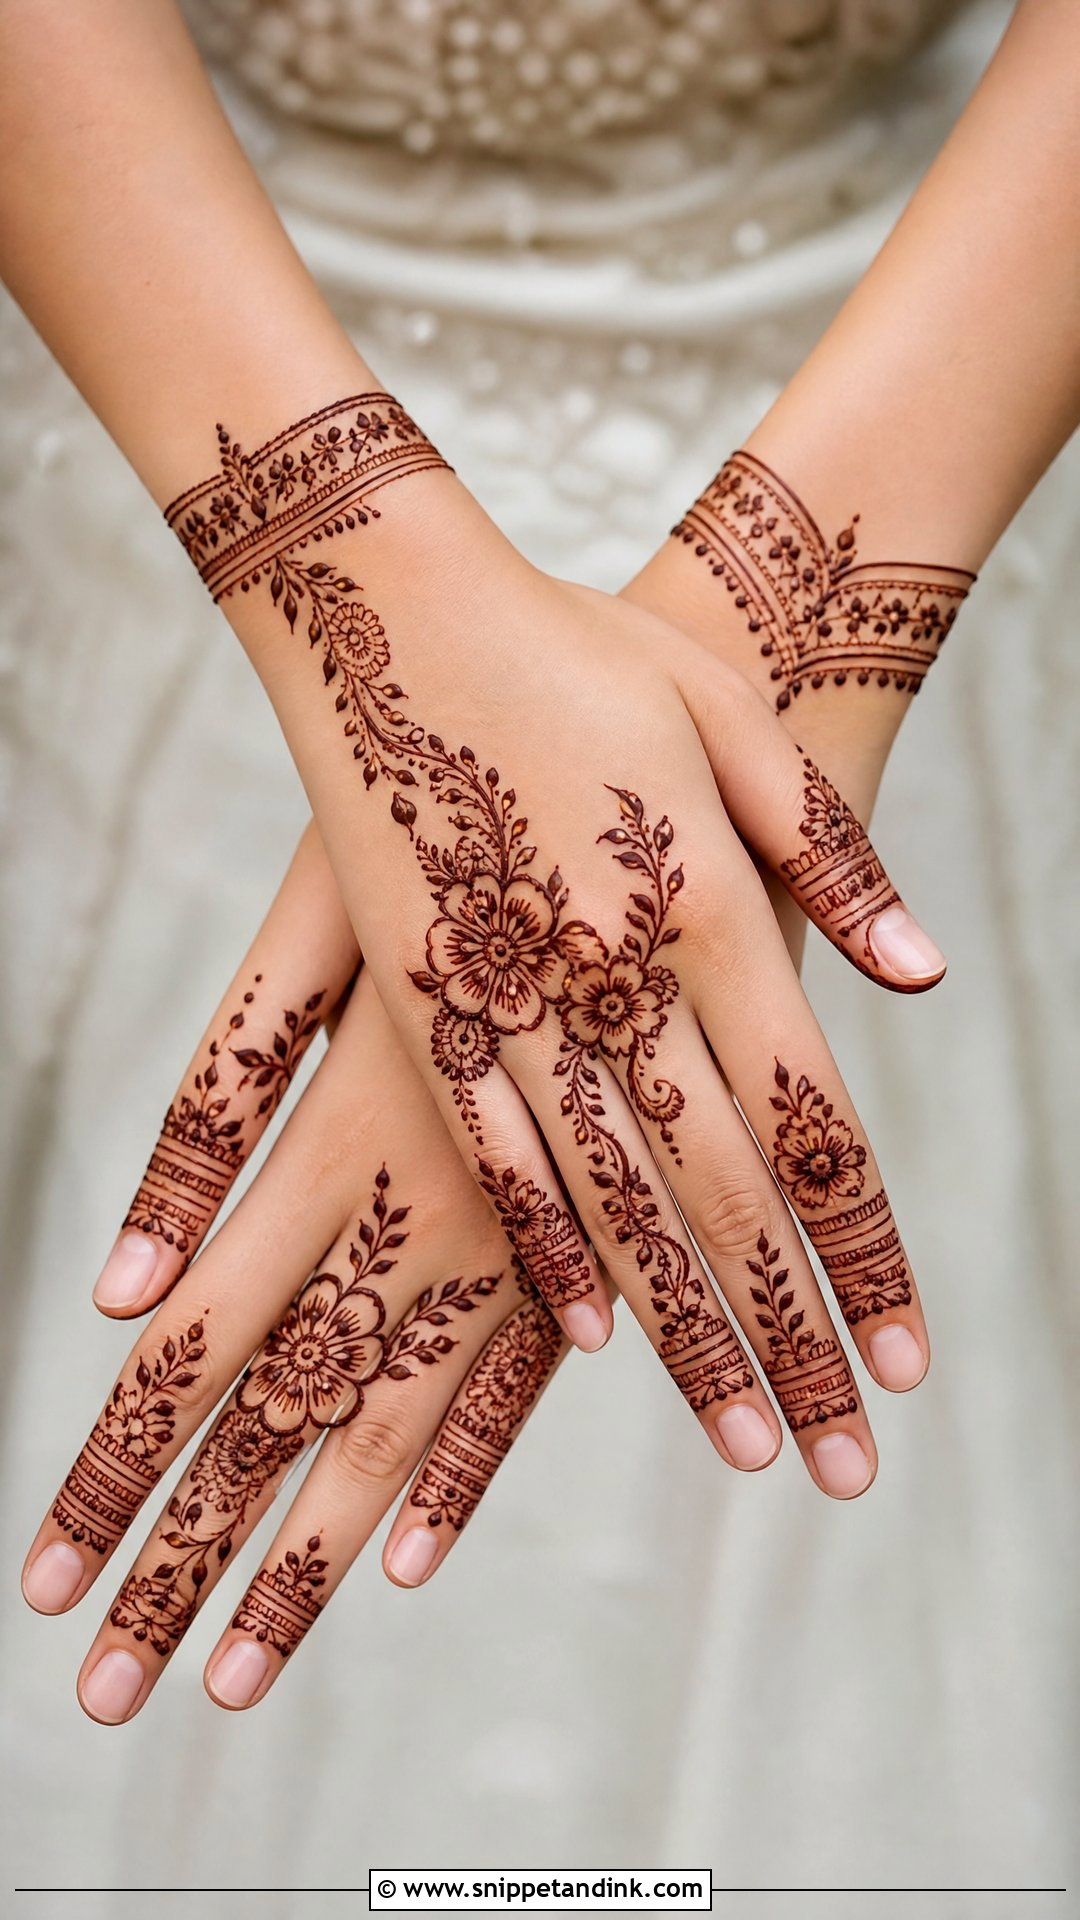
A simple layout usually means a medium floral motif, a few vines, a clean wrist border and neat fingers. Spacing is everything here; give each element room and the design stays readable even when the stain is lighter than hoped. It is a practical answer if you only have an hour or so to sit, or if you want something lighter for a pre-wedding event. Sisters and bridesmaids often choose it too. For the bride herself, I add a fuller wrist cuff and more detailed fingers so it still feels like the bridal hand.
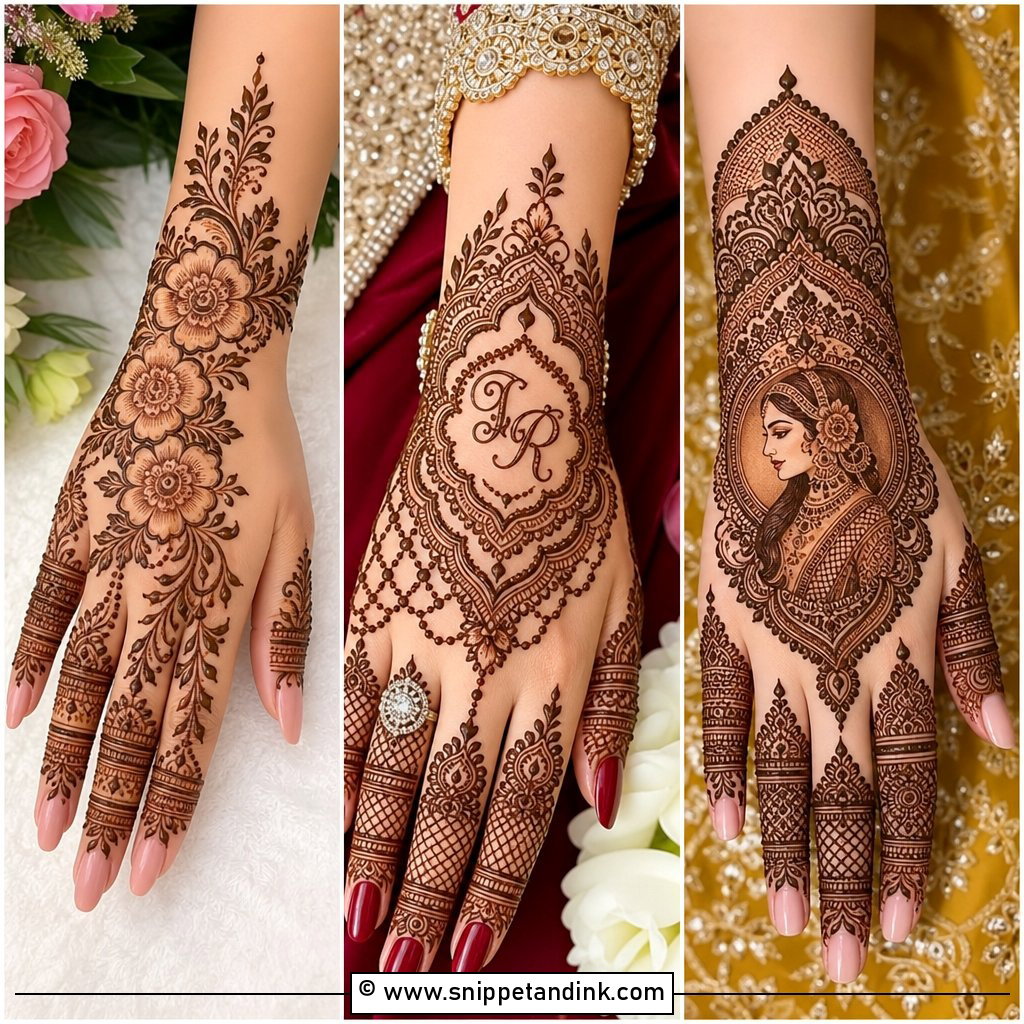
14. Royal Bridal Back Side Mehndi Design
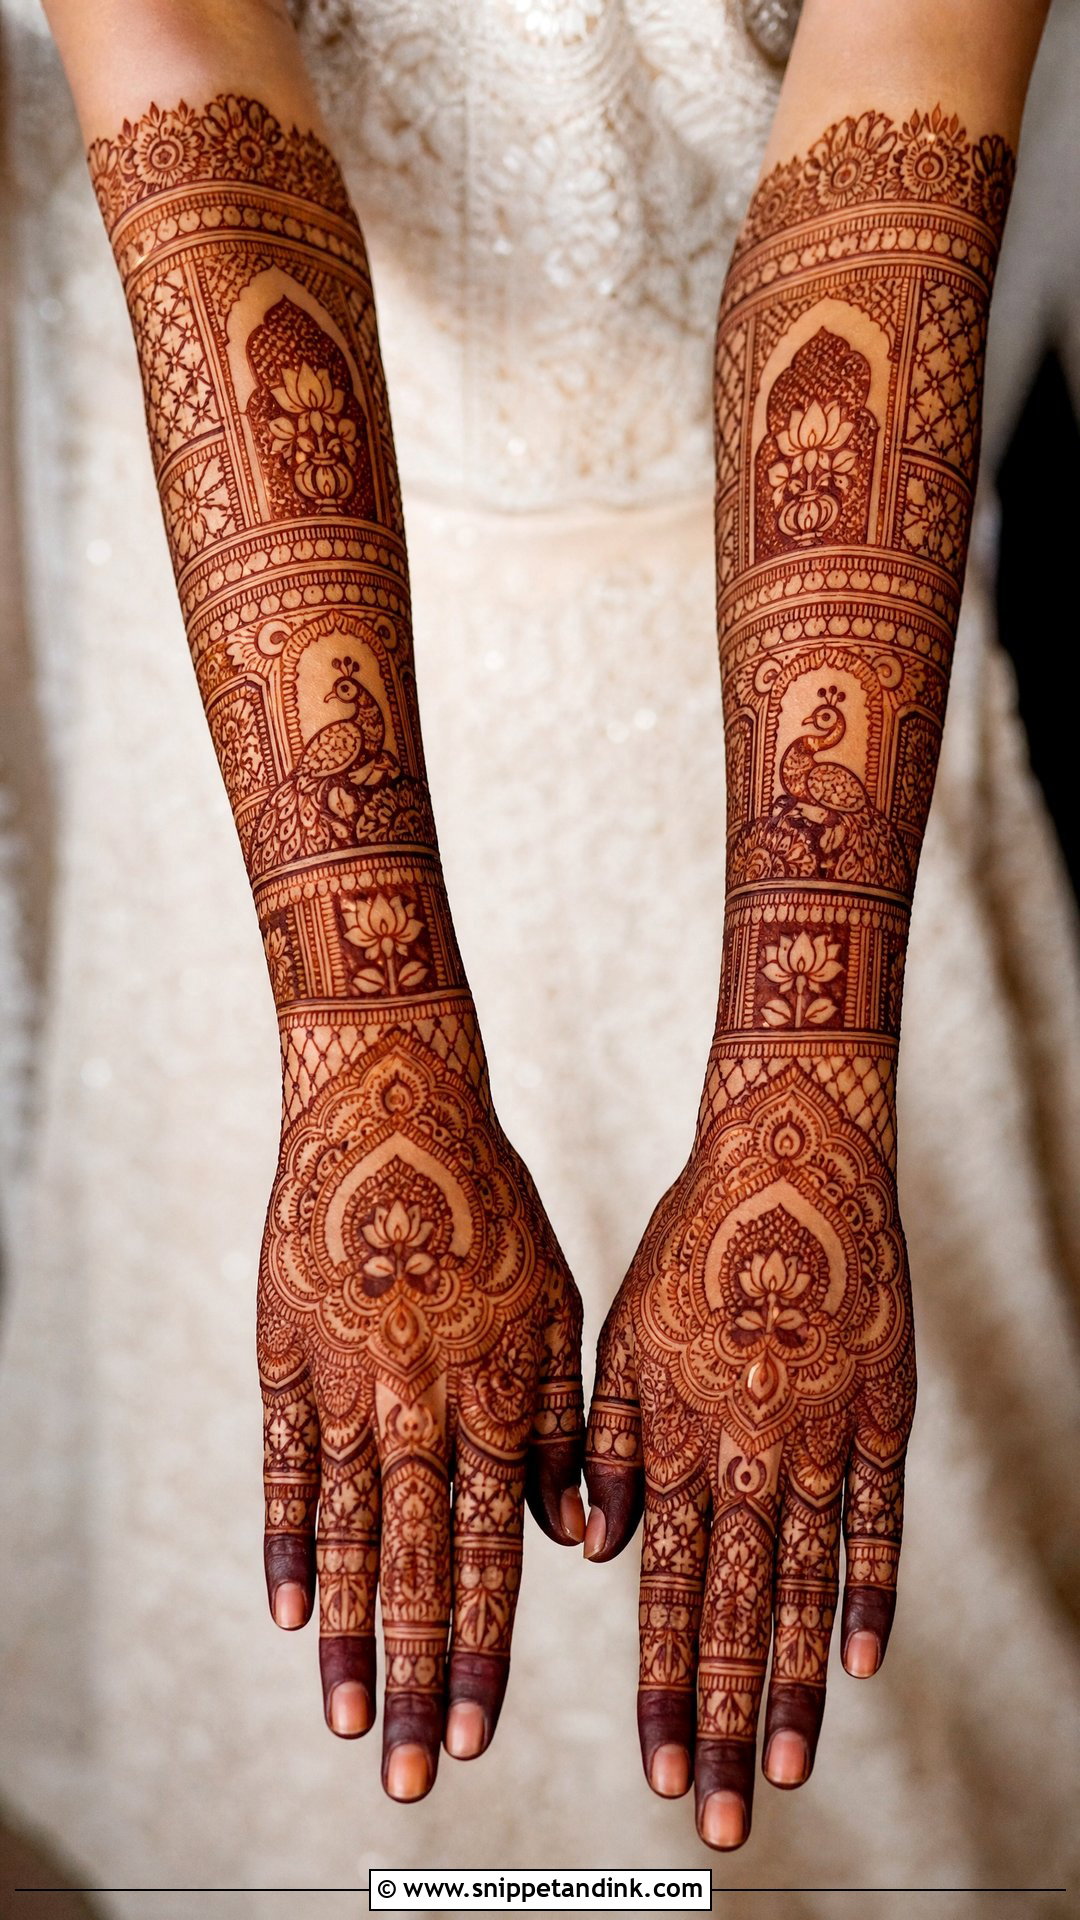
Royal designs borrow from palace architecture: jharokha arches, lotus motifs, paisley borders, peacocks, jaali windows and ornate cuffs, usually running from fingers to forearm. What separates a good one from a muddled one is structure. I divide the hand into clear sections, an arch here, a panel there, rather than packing every gap. Initials or small wedding symbols can hide inside an arch without crowding it. Heavily embroidered lehengas and traditional jewelry in red, maroon, emerald or gold are where this layout makes most sense.
15. Modern Bridal Back Side Mehndi Design
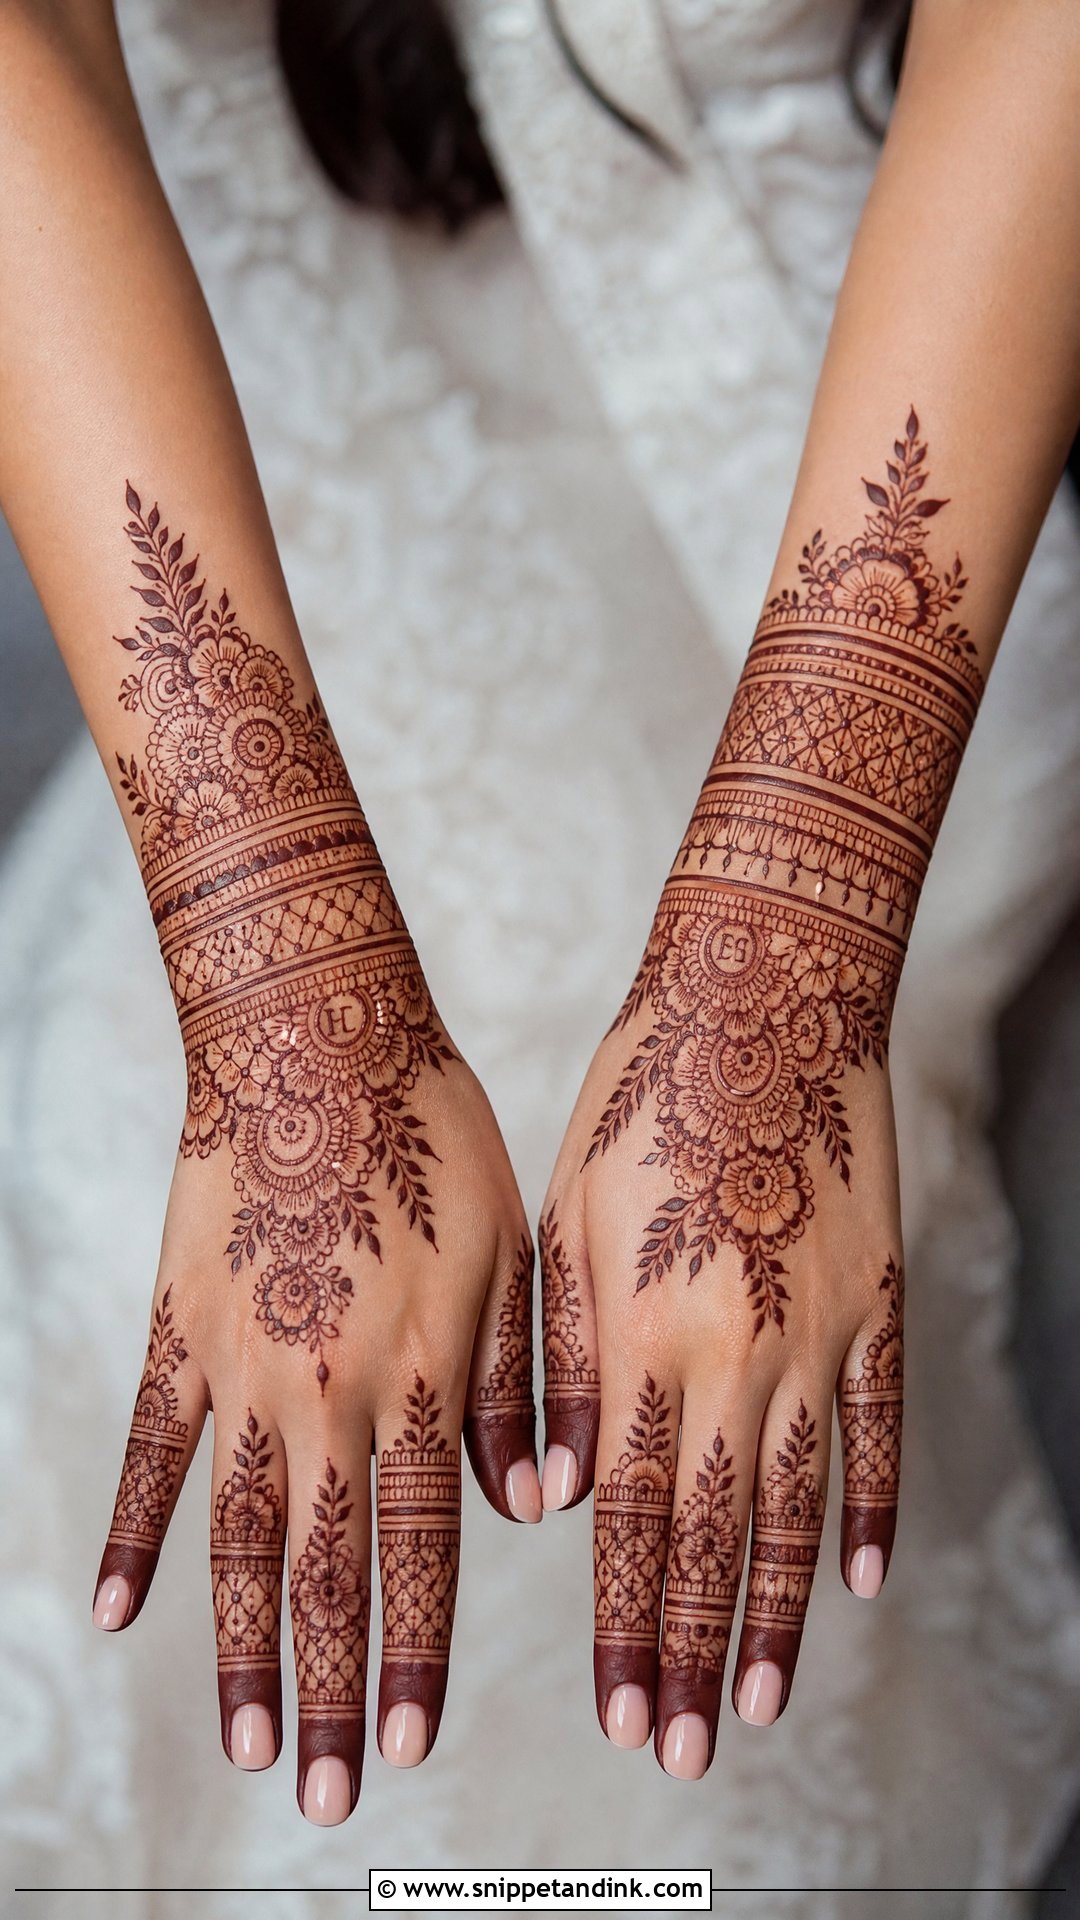
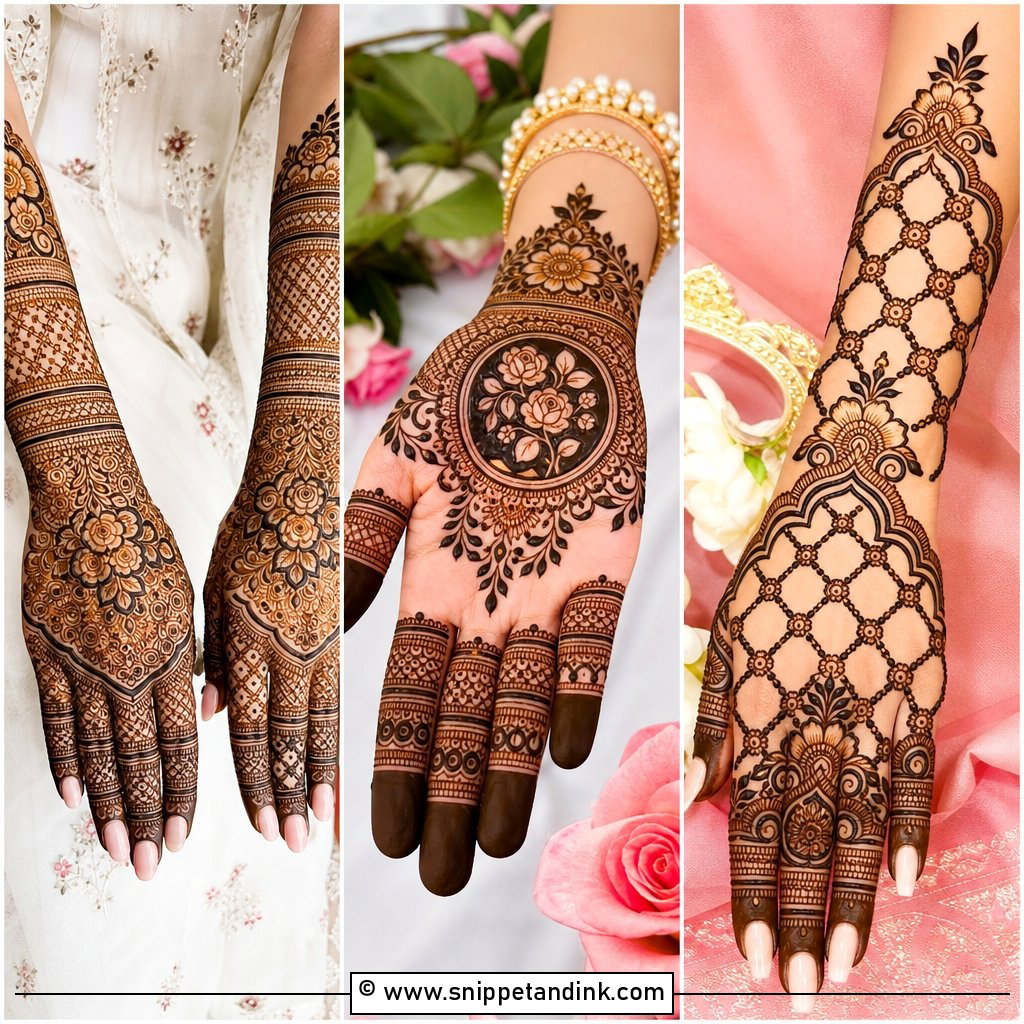
Modern layouts rely on placement over density: fine-line florals, geometric sections, bracelet bands and controlled finger work, with plenty of negative space. Some brides tuck initials, a date or a small personal symbol into the pattern. Because the lines are thin, the paste has to be smooth and the cone tip fine, otherwise the lines thicken and the clean look disappears. I find this style sits naturally with contemporary lehengas, fusion outfits and minimal jewelry, and it carries well across several events.
16. Moroccan Bridal Back Side Mehndi Design
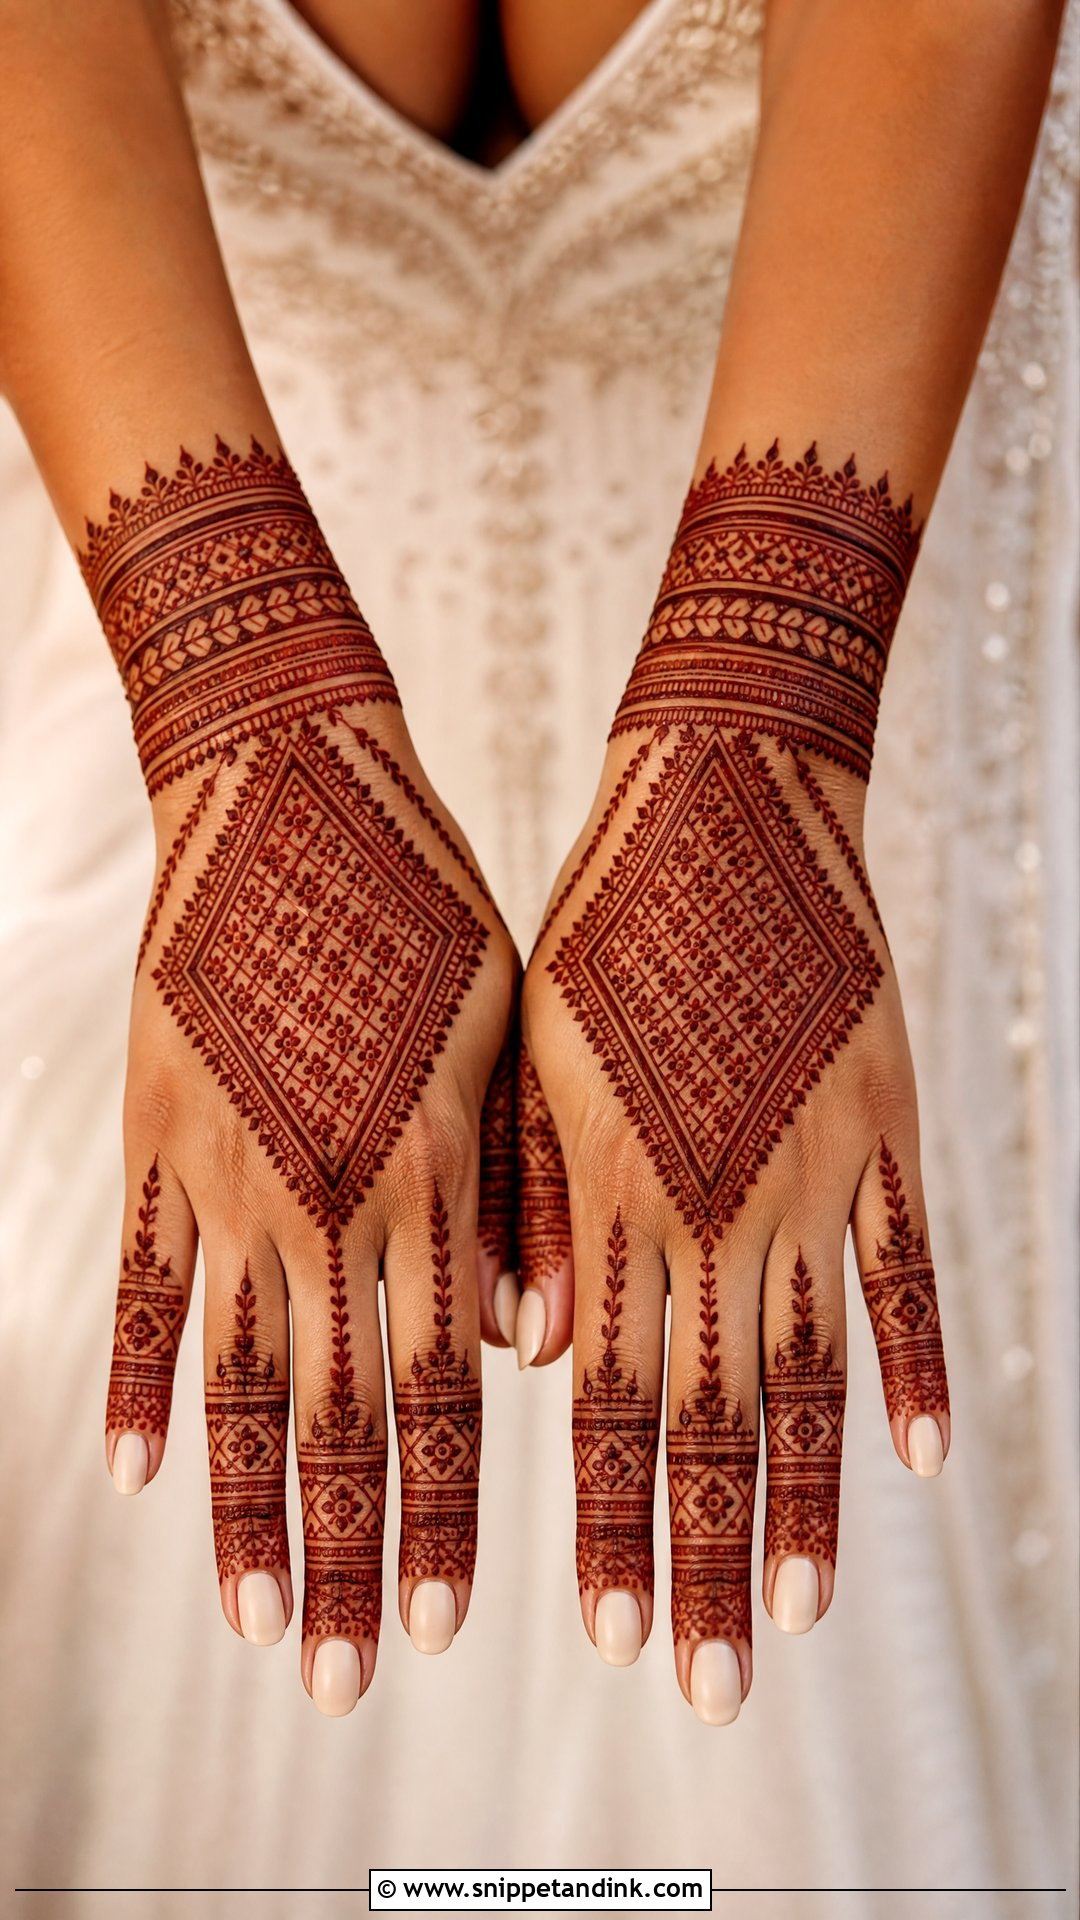
Moroccan work is geometric: diamond grids, straight lines, dots and strict symmetry, very different from the curves of Indian or Arabic henna. I usually build a strong central panel on the back hand, then finger bands and a matching wrist cuff. Straight lines are harder than curves to keep even over a moving knuckle, so I ask brides to rest the hand flat on a cushion while I work. If your outfit has geometric embroidery or you wear minimalist jewelry, this is the layout that will feel the most like you.
17. Gulf Bridal Back Side Mehndi Design
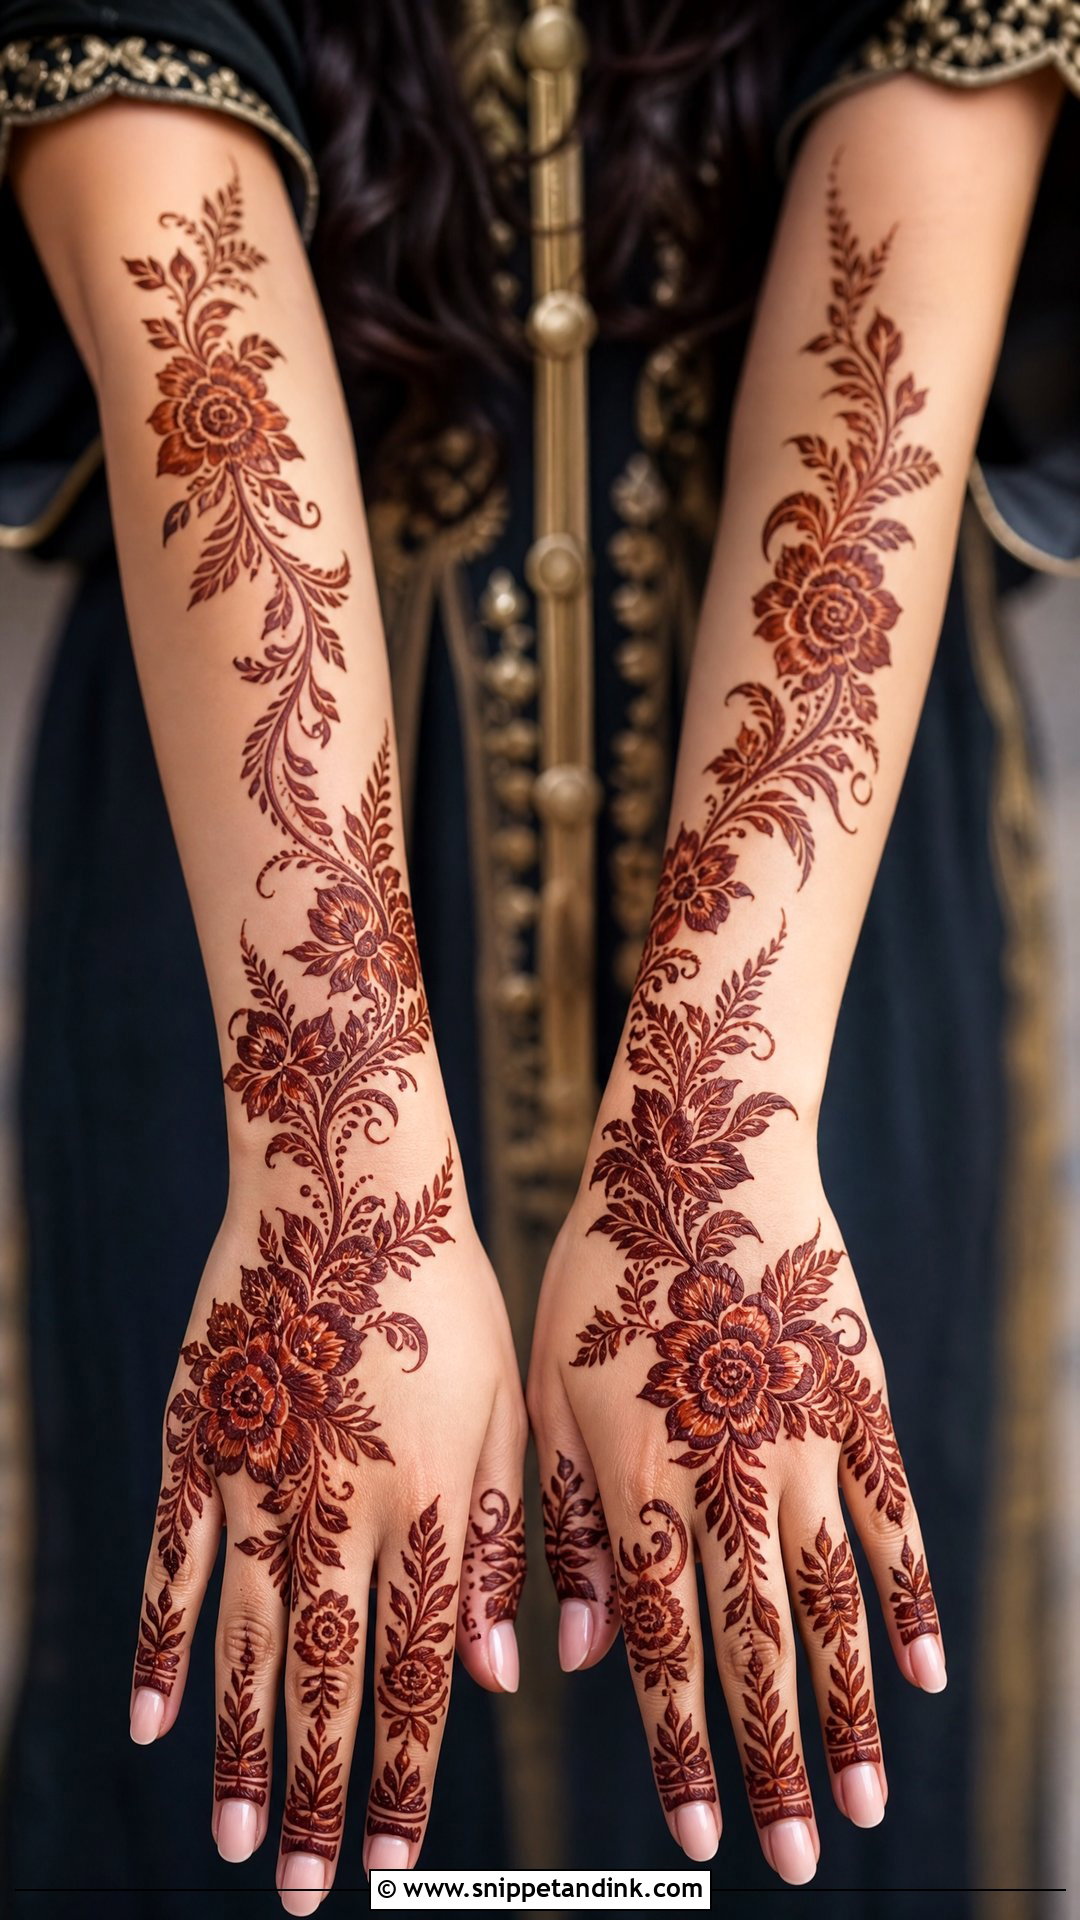
Gulf or Khaleeji-inspired henna uses big flowers, bold outlines, leafy trails and dramatic curves. It looks fuller than a plain Arabic trail but keeps enough bare skin to breathe. The large blooms usually sit on the back hand with vines running to the wrist and fingers. The thick outlines and shaded petals show clearly even from the back of a hall, which is why I suggest it to brides who want impact without full coverage. It needs a slightly thicker paste than fine Indian work, so mention it when you book.
18. Lotus Bridal Back Side Mehndi Design
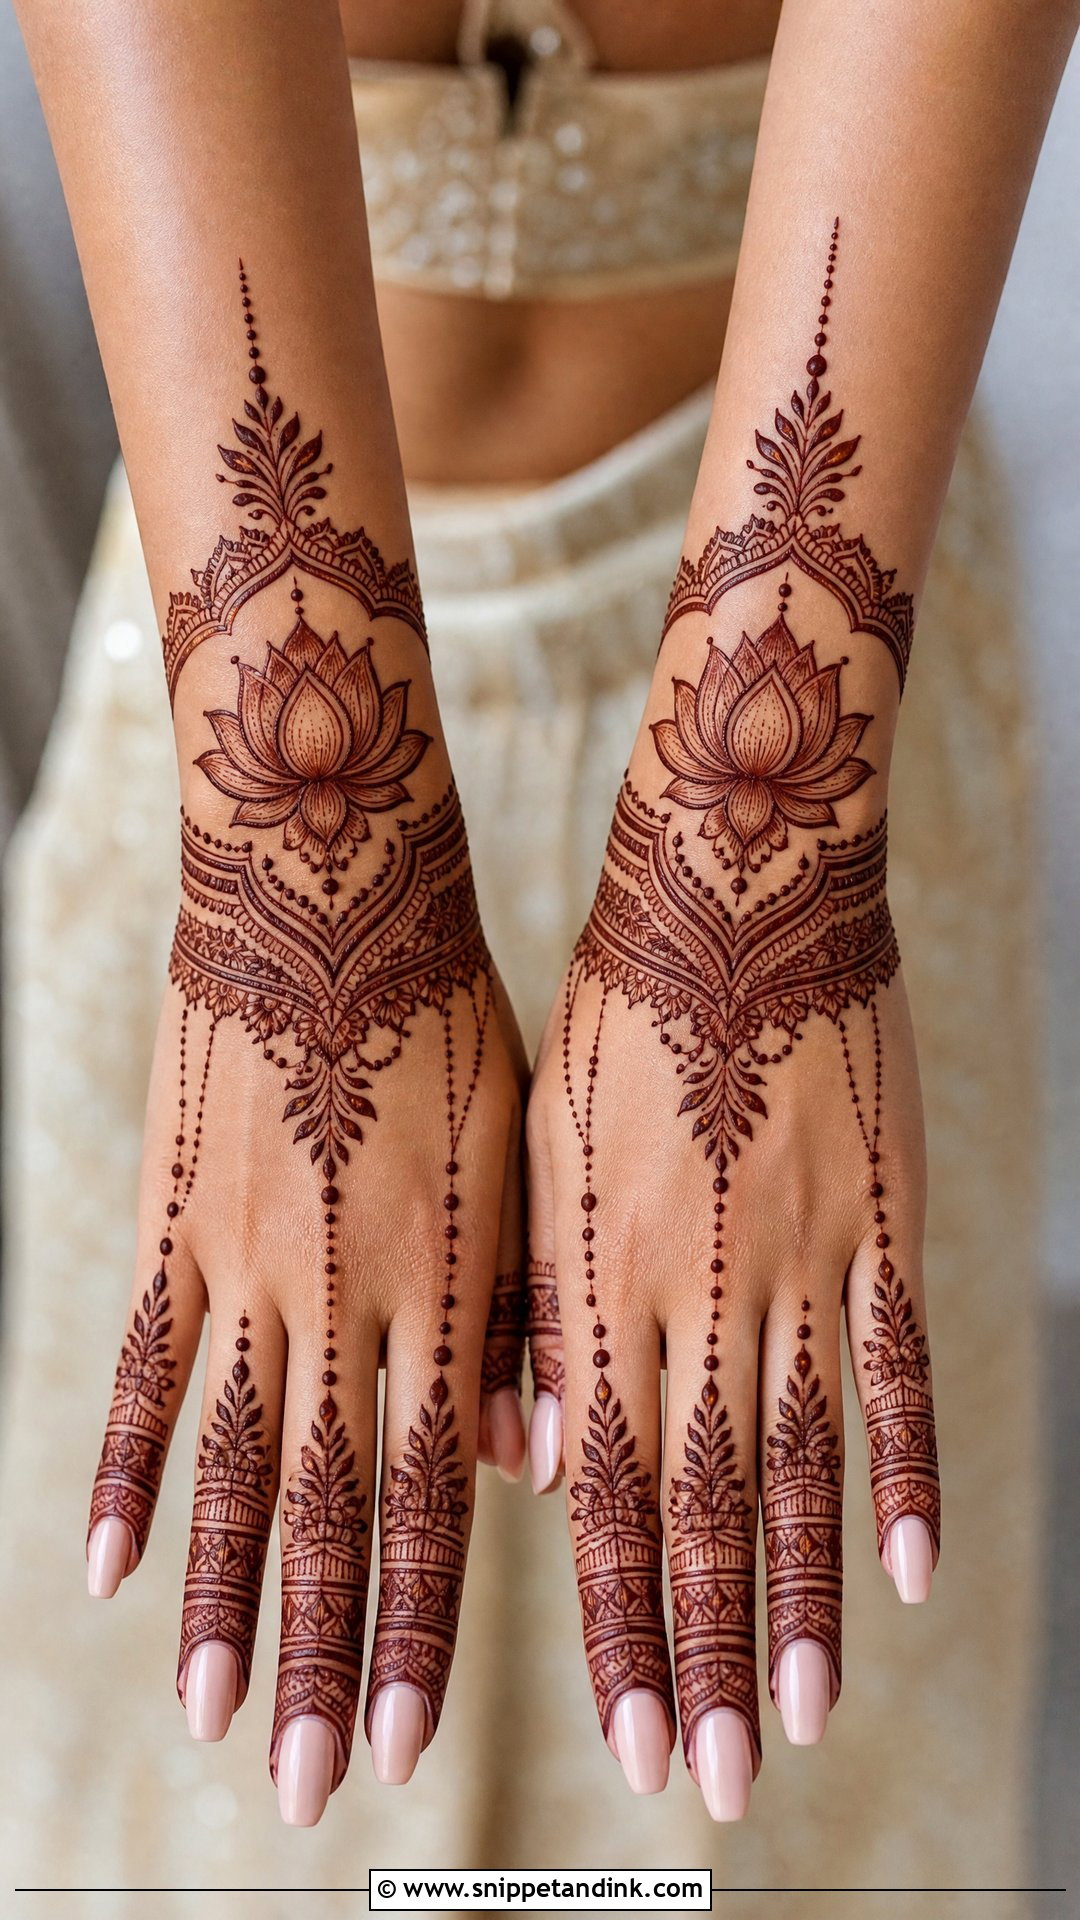
The lotus is one of the motifs I scale most easily: a single large bloom in the center of the hand, a smaller one at the wrist, or a repeating row up the forearm. It pairs well with mandalas, paisleys, dotted chains and leafy borders. Petal tips are where I slow down, because a lotus with uneven points looks lopsided once it stains dark. Silk sarees, lehengas and temple jewelry all suit it, and the shape adapts to small and large hands alike.
19. Personalized Bridal Back Side Mehndi Design
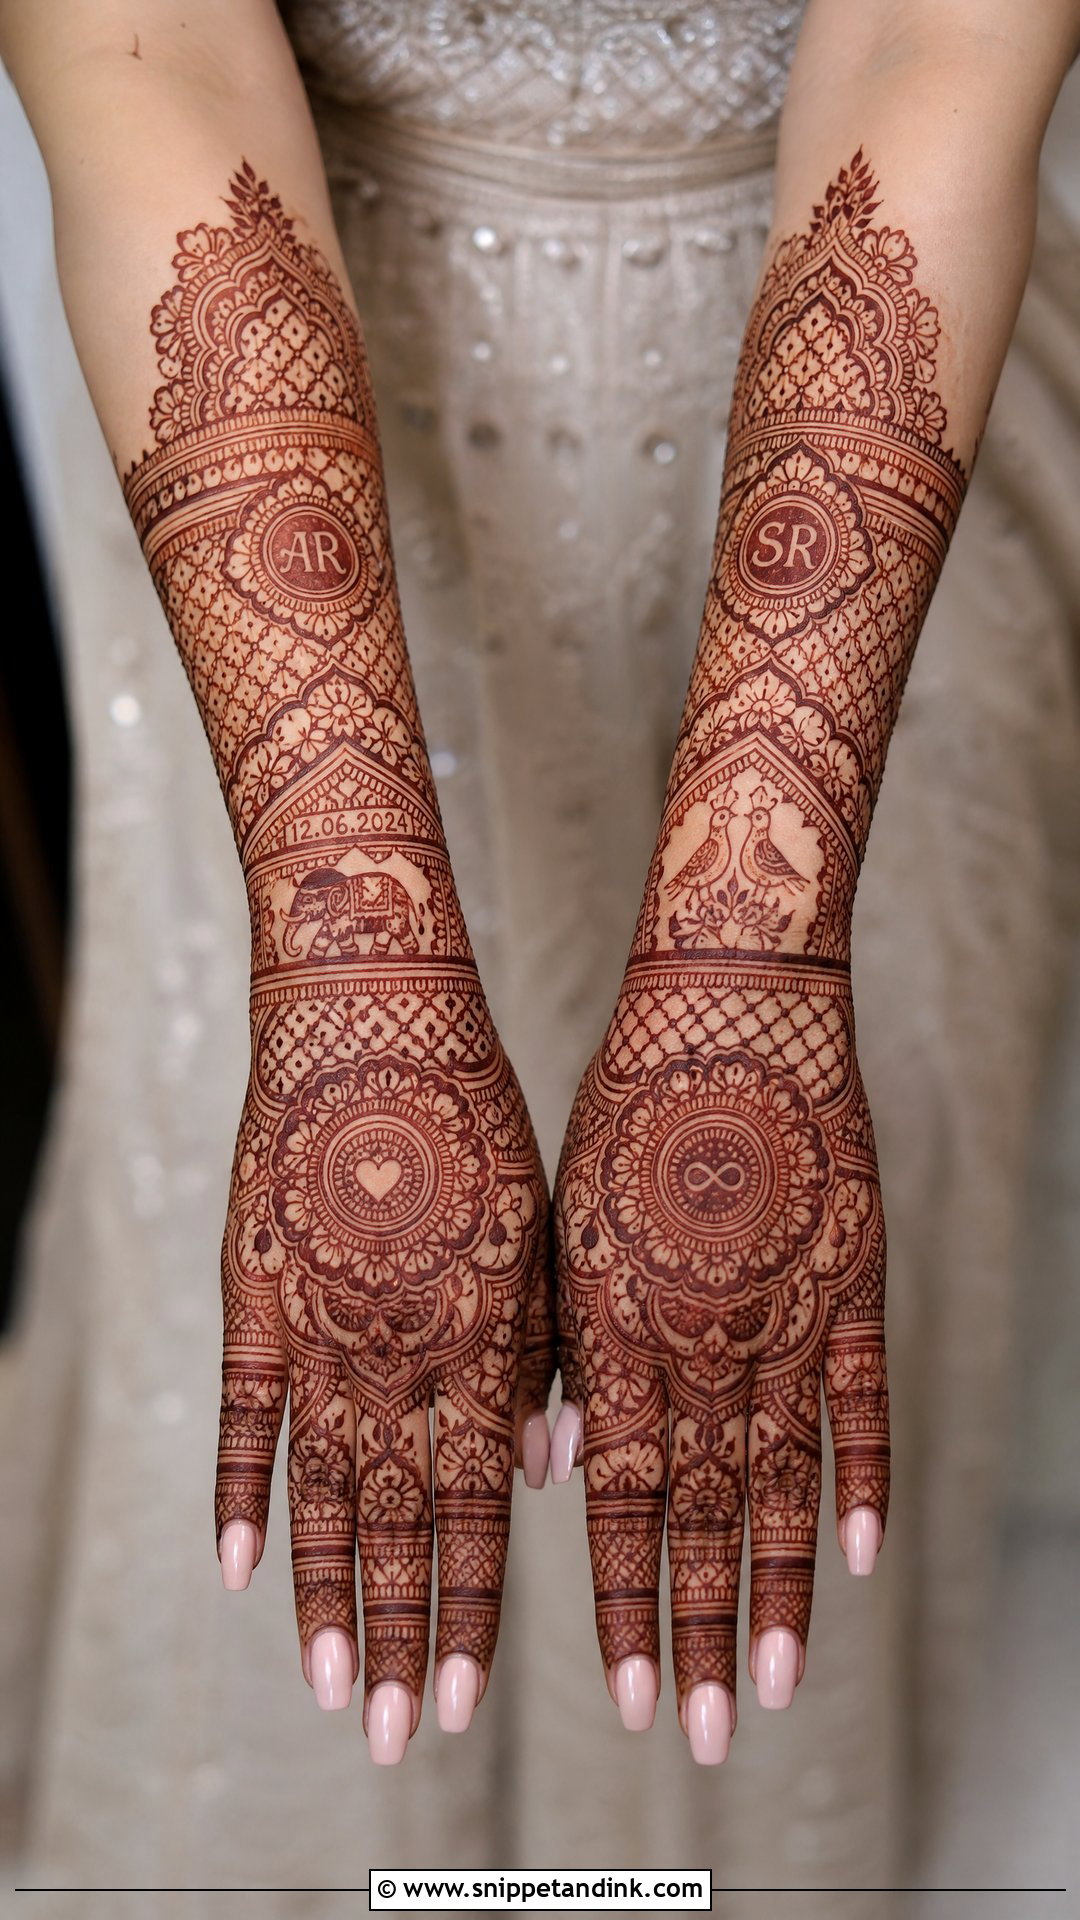
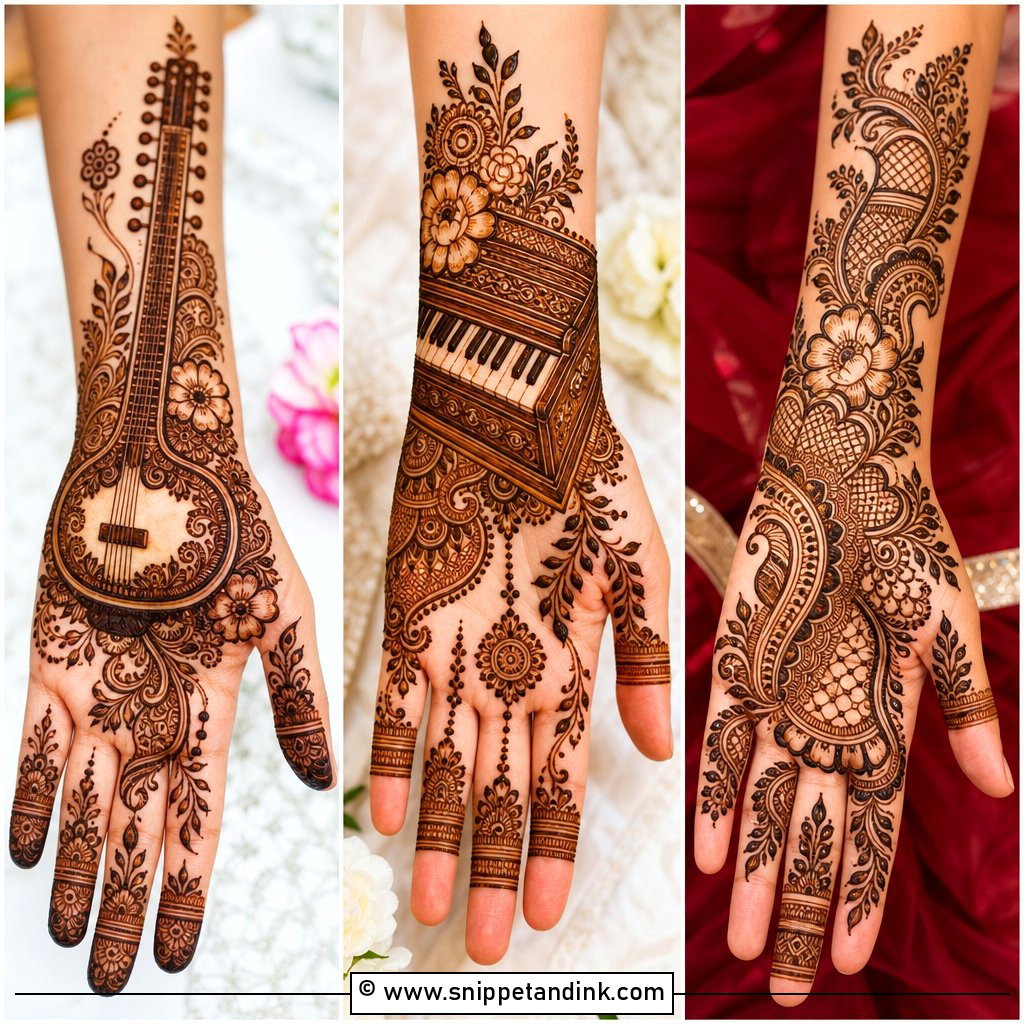
Personal details turn the hand into something only you could wear. Your artist can hide initials, a wedding date, small portraits, favorite symbols or a hint of the venue inside florals, mandalas, jaali or bracelet bands. I always sketch these on paper first and agree on the spelling and date before the cone touches skin, because a mistake in a name cannot be erased. Keep it subtle; two or three hidden details work better than a hand full of them. Close-up photos are where these details get noticed.
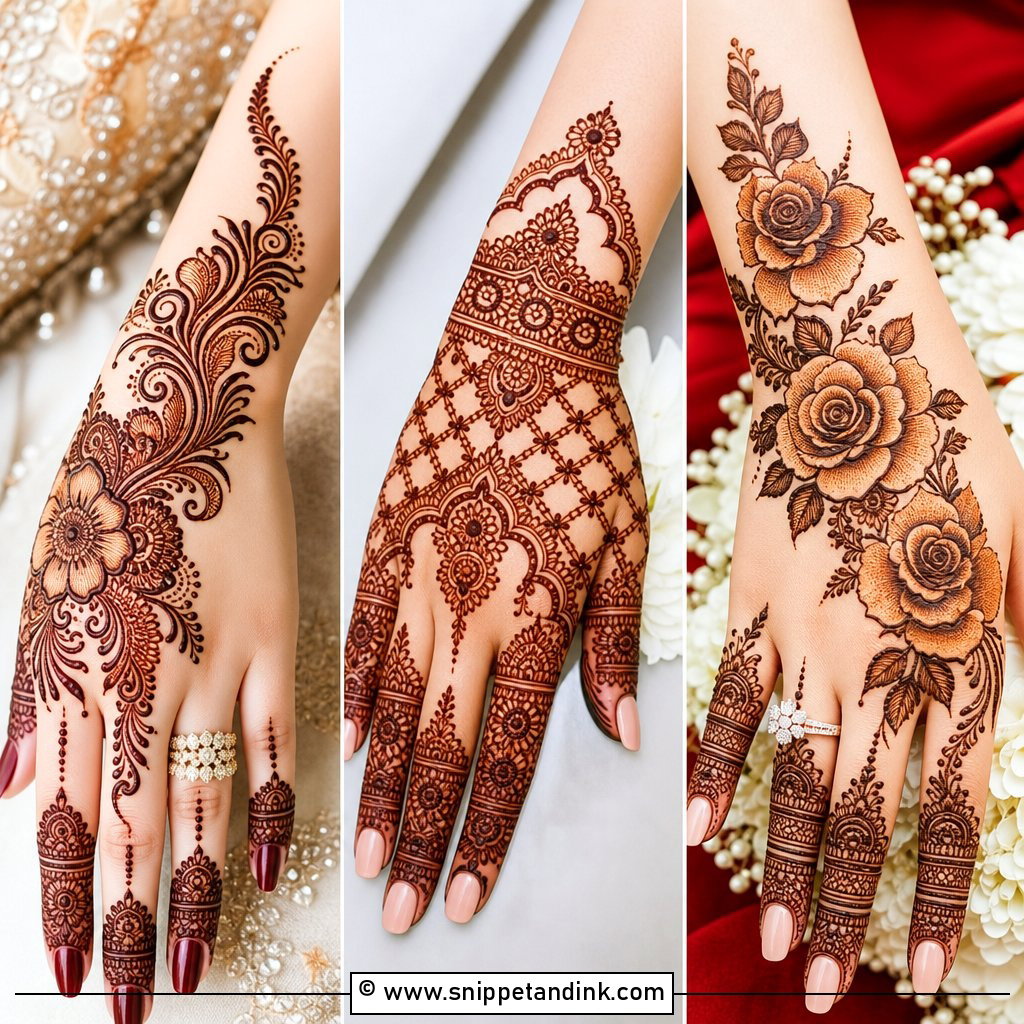
20. Back Side Bridal Mehndi With Forearm Design
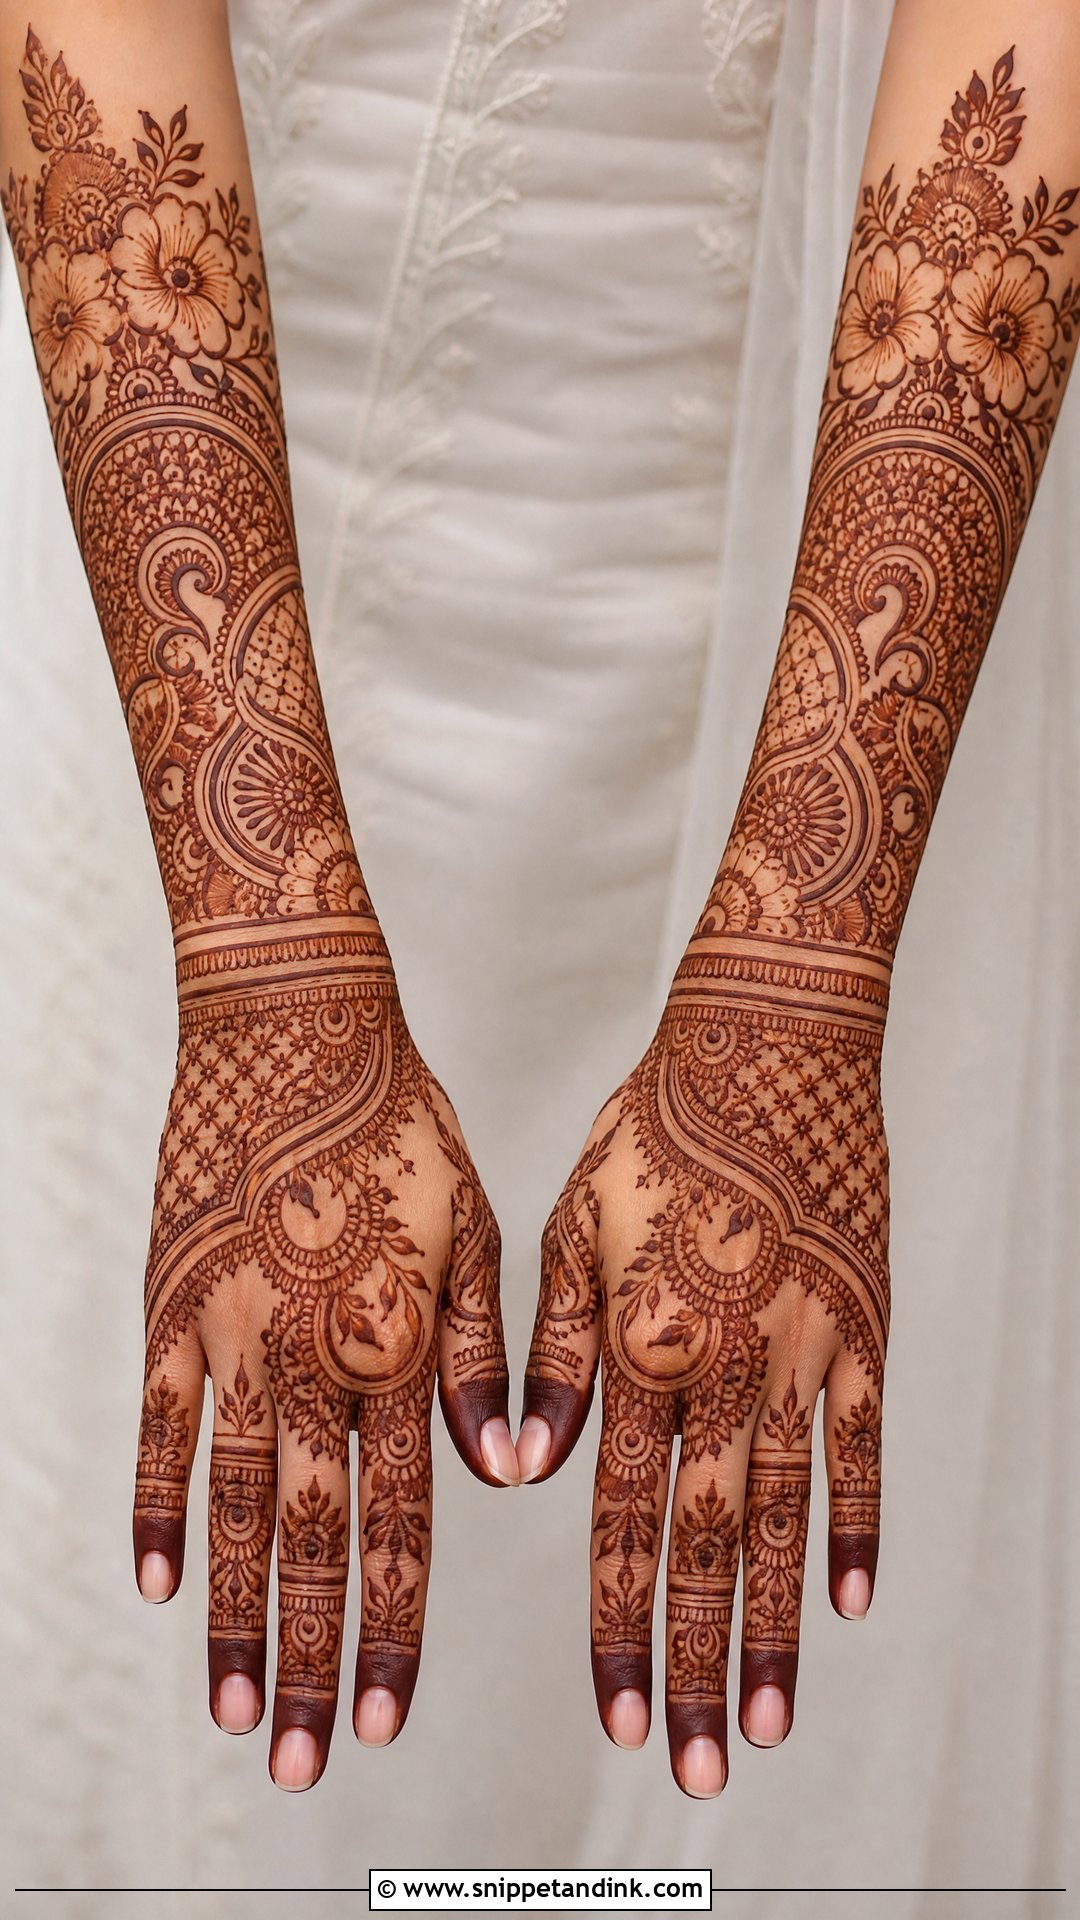
Extending onto the forearm gives a back-hand design its full bridal length: fingers, back hand, then cuffs, panels, florals, paisleys, mandalas or jaali up the arm. I plan the forearm like a piece of jewelry, with a clear end point, rather than letting the pattern fade out at random. This is the longest sitting of the lot, often four hours or more for both arms, so eat beforehand and have someone on hand to help with drinks. With bangles and sheer sleeves, the extra length is what makes the hand look finished.
The 24 Hours After the Cone Comes Off
Most of the stain is decided after I have packed up my cones. The longer the paste stays on, the deeper the color, so I ask brides to keep it on for at least six hours and ideally overnight. Once it is touch-dry, I dab a light lemon and sugar mix over it to help it stick and stay moist. A loose cotton wrap at night keeps it from flaking onto the sheets.
When it is time to remove it, scrape the dried paste off with a blunt edge or rub it away with a little oil. Do not wash it off. Keep water away from the hands for as long as you can, ideally the first 12 to 24 hours, because water at this stage stops the color from deepening. Warmth helps, so holding your hands near a warm cup or a heater for a few minutes is fine.
If the stain comes up patchy
The first color is orange. That is expected, and it darkens to reddish brown over the next day or two. If one section is clearly lighter, it is usually where the paste cracked off early or got wet, not a sign the henna was bad. Avoid chlorine pools, harsh soaps and hand sanitizer in the days before the wedding, and wear gloves for any cleaning, because the fingertips fade first.
Matching the Back Hand to Your Outfit, Jewelry and Stain
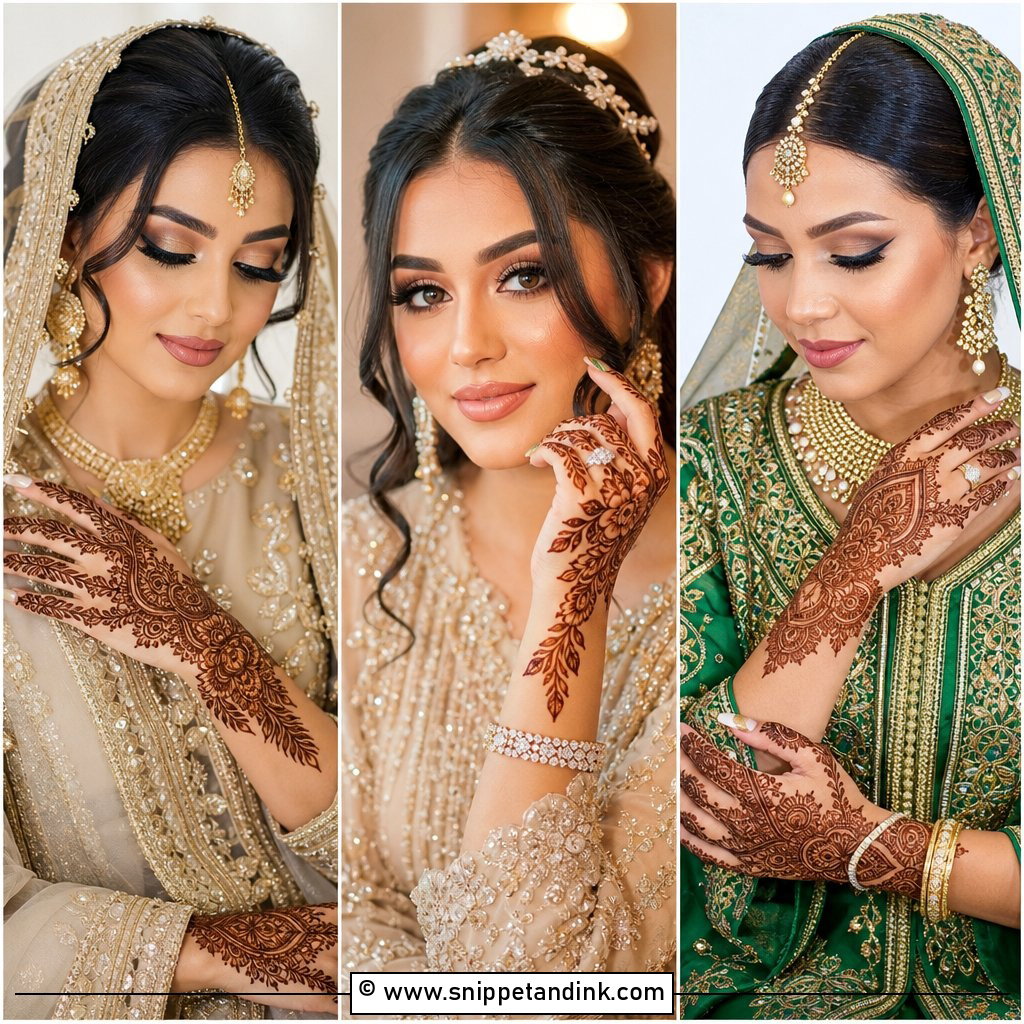
Start with what will cover your hands on the day. Sleeves, bangles and rings decide which parts of the back hand stay visible, and that tells you where the detail is worth putting. Full Indian work feels traditional and rich; Arabic and Gulf trails stay open; mandala, hathphool, jaali and bracelet designs come alive in close-up hand shots; minimal and modern layouts keep things clean; personal details and forearm extensions add meaning and length. Then be honest about sitting time and how dark your skin usually stains. A design that suits your hands and your schedule will always stain better than an ambitious one rushed in the last hour.
You'll Like These Ideas:


Leave a Reply