
Bridal mehndi is the one part of the wedding look that is drawn straight onto you, and it keeps changing for two days after the cone lifts. That is why I plan it around the outfit, the jewelry and the ceremony schedule rather than around a single saved photo. The brides I sit with ask for everything from dense Indian full-hand patterns to airy Arabic trails, portrait work, mandala backs and tiny hidden initials. Below are 25 directions I’d happily draw for a bride, with what each one needs from the skin, the artist and the timeline so it still reads clearly once the stain deepens.
Sleeves, Bangles and Sitting Time Shape the Design First
Before I draw a single line, I ask a few practical questions. They stop a bride from paying for detail nobody will see, and from choosing a design she doesn’t have the hours to sit for.
Where does your sleeve end?
Full-arm mehndi vanishes under a three-quarter or full sleeve. I ask for a photo of the blouse or kurta and finish the design just past the hem line, so it peeks out instead of stopping awkwardly halfway under the fabric.
What will sit on your wrists?
A chooda, kaleere or a stack of glass bangles can cover the wrist completely for days. I keep the busiest work on the palm and fingers and put a clean band where the bangles will rest, rather than wasting hours of jaali underneath them.
How long can you sit still?
A simple bridal design might take an hour or two for both hands; full hands and feet with fine filler can take most of a day. Ask your artist for her honest estimate, then add time for the paste to dry before you move around.
Bring these to the consultation and we can settle the design in one sitting:
- A photo of the outfit, especially the sleeves and neckline
- Your bangles, chooda or hathphool, or pictures of them
- The ceremony schedule, so we know which rituals show the palms
- Two or three reference designs you like, plus one you definitely don’t
1. Full Hand Bridal Mehndi
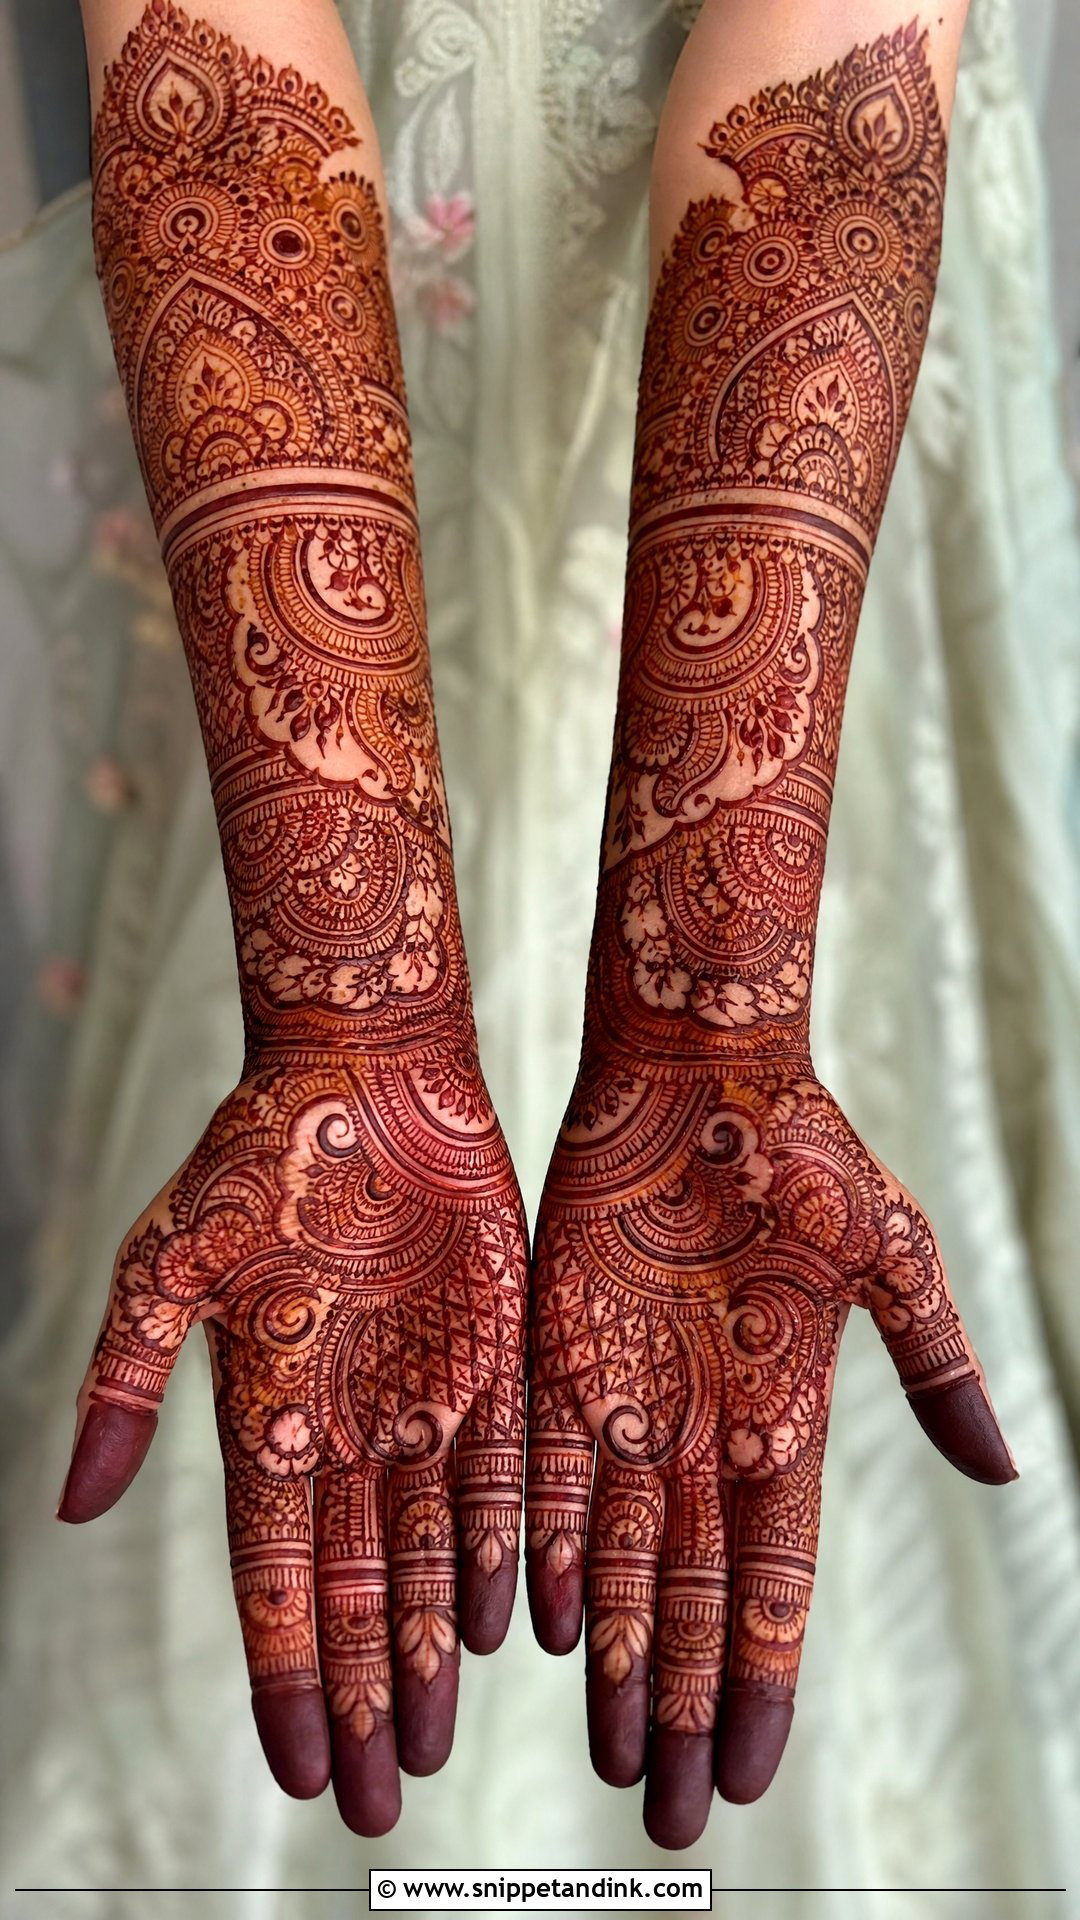
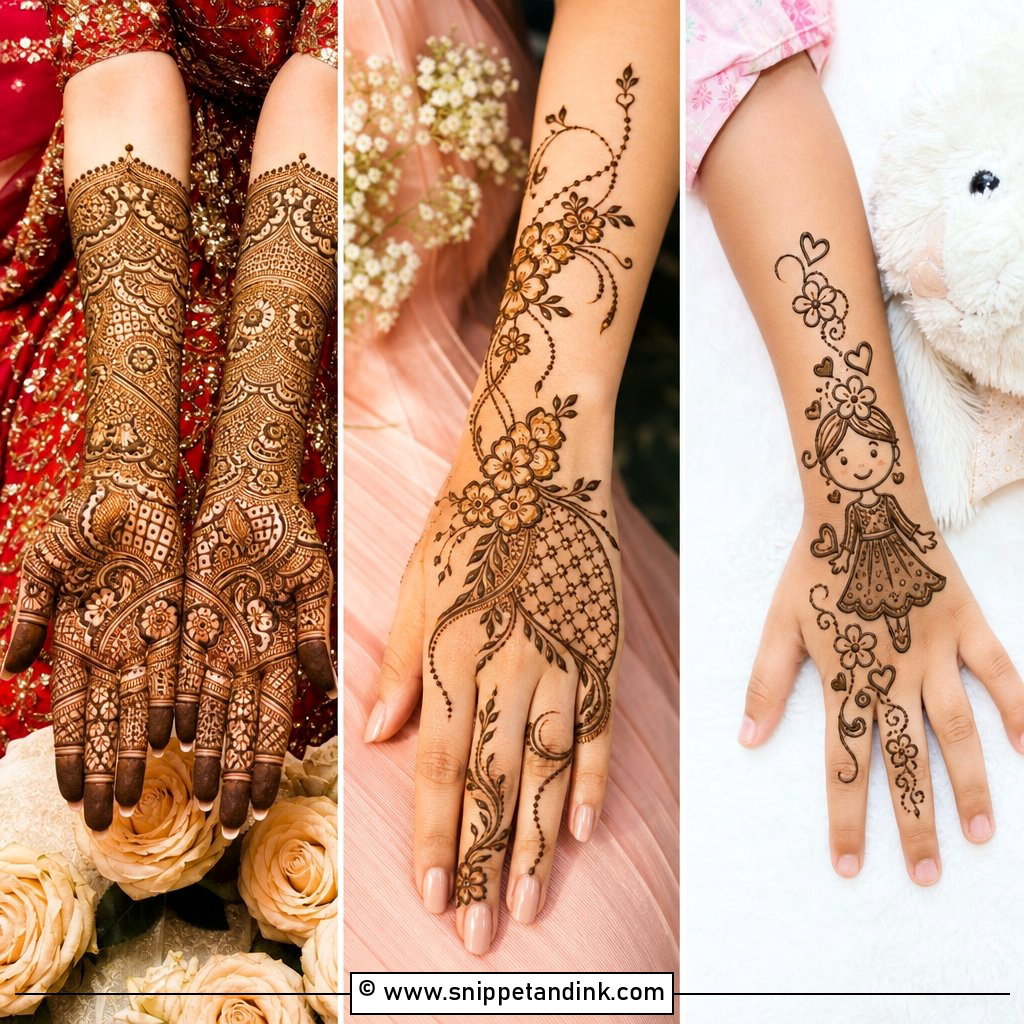
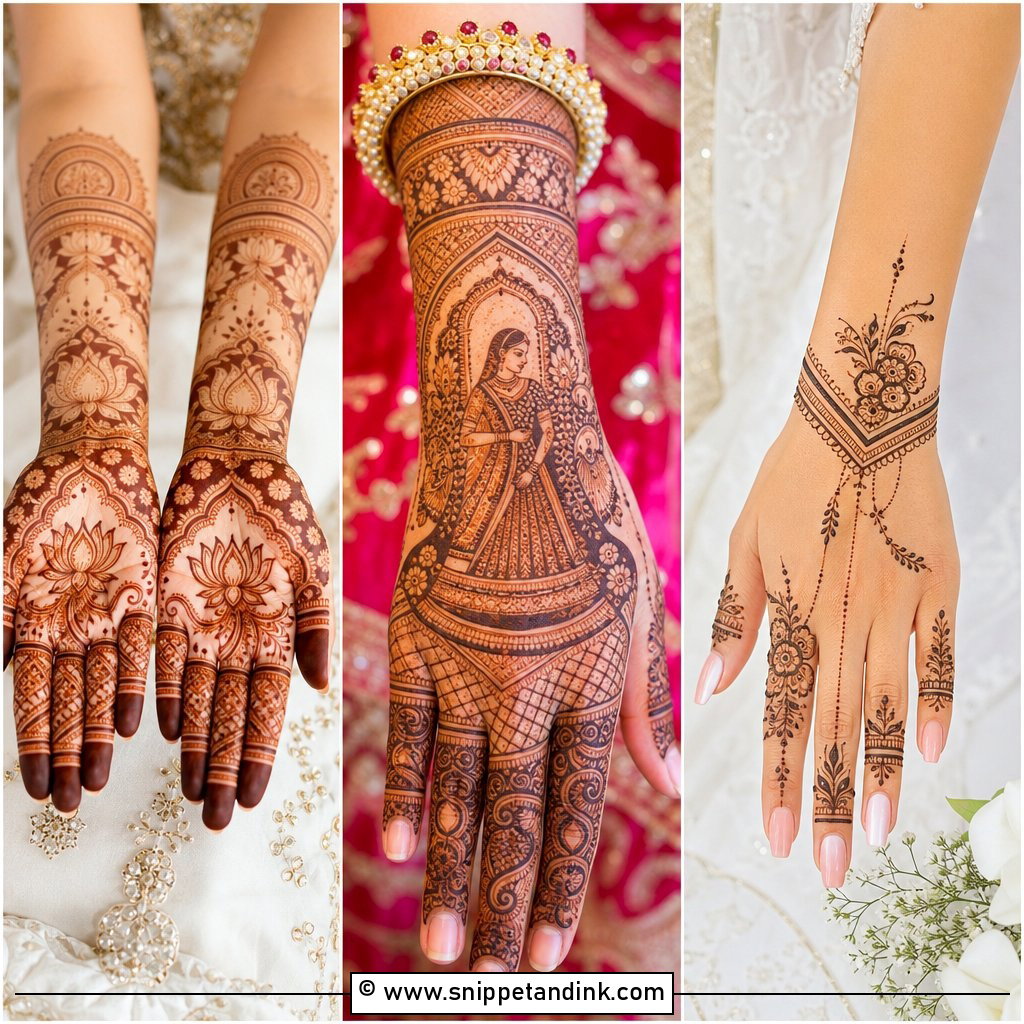
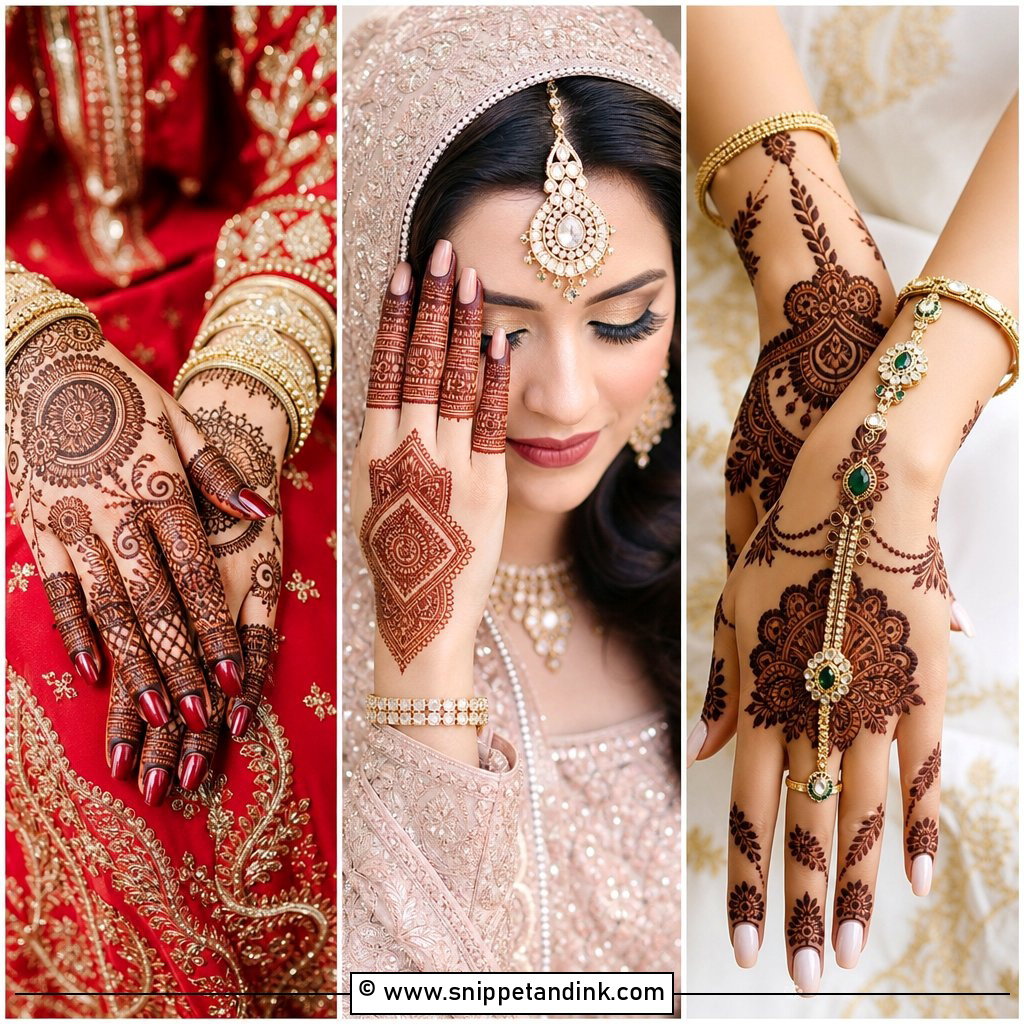
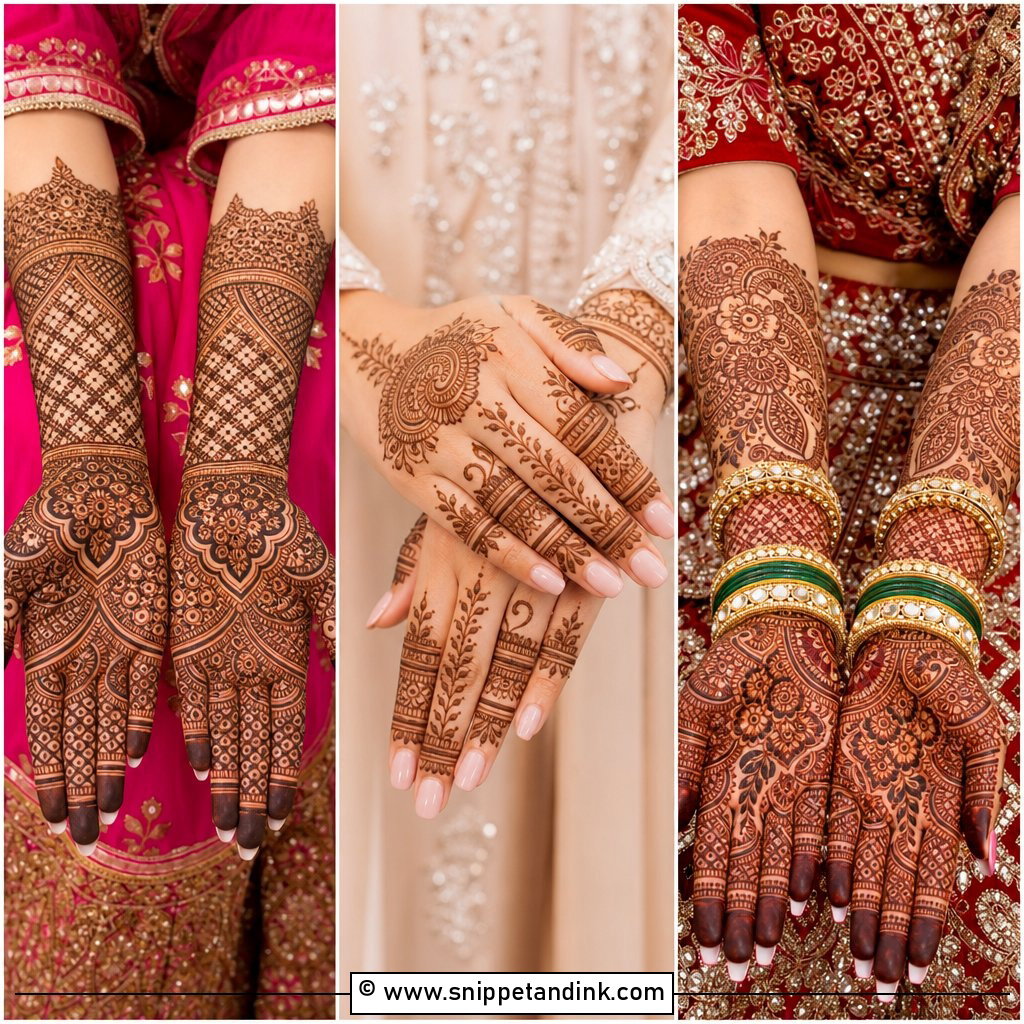
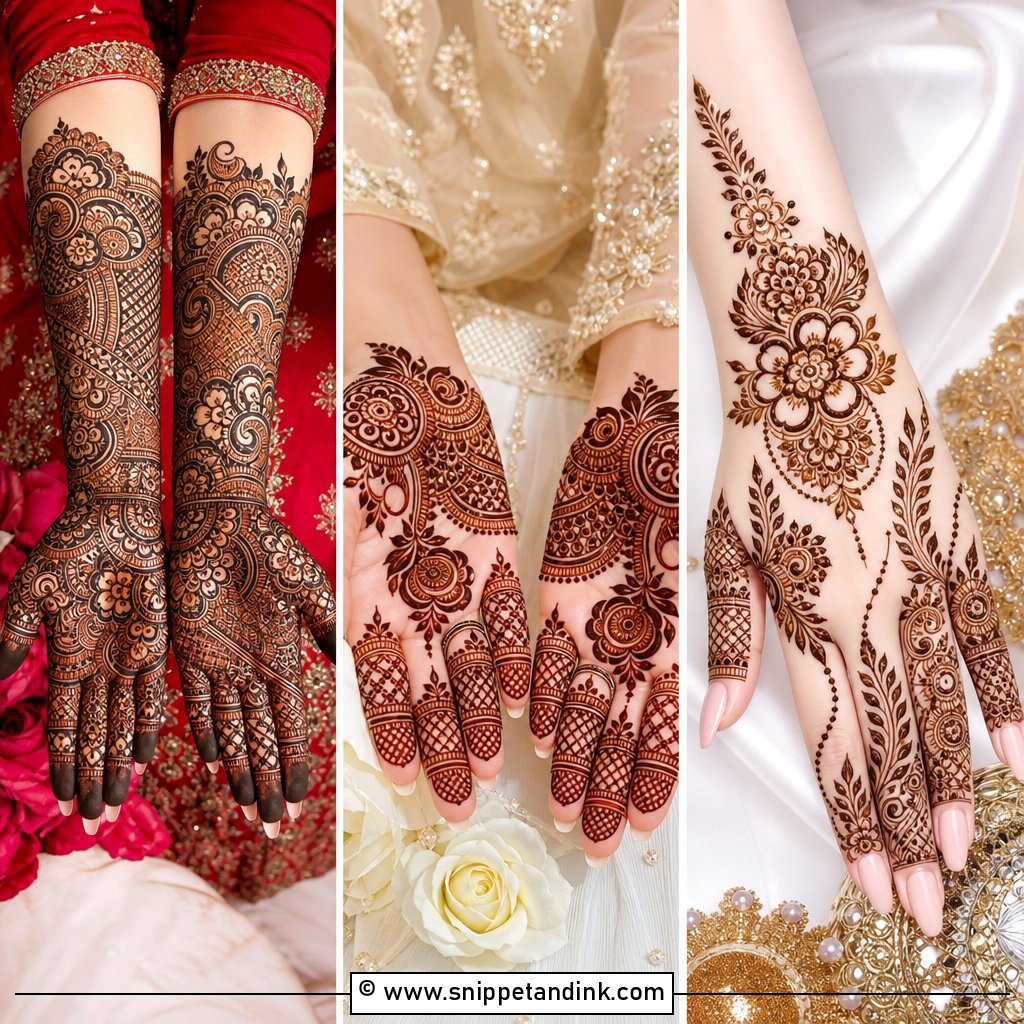
Coverage from fingertips to forearm is the most demanding thing I draw, for both of us. Palm, back hand, fingers, wrists and lower arms all carry coordinated paisleys, florals, peacocks, vines and mandalas, with fine filler holding them together. The risk is crowding. If the major motifs touch, the stain fills the gaps and the hand reads as one brown patch in photos, so I leave a hairline of bare skin around each big shape. Initials or the wedding date can hide inside the filler. Plan for a long sitting, and wear it with a heavily embroidered lehenga, saree or gharara that can match its weight.
2. Indian Bridal Mehndi
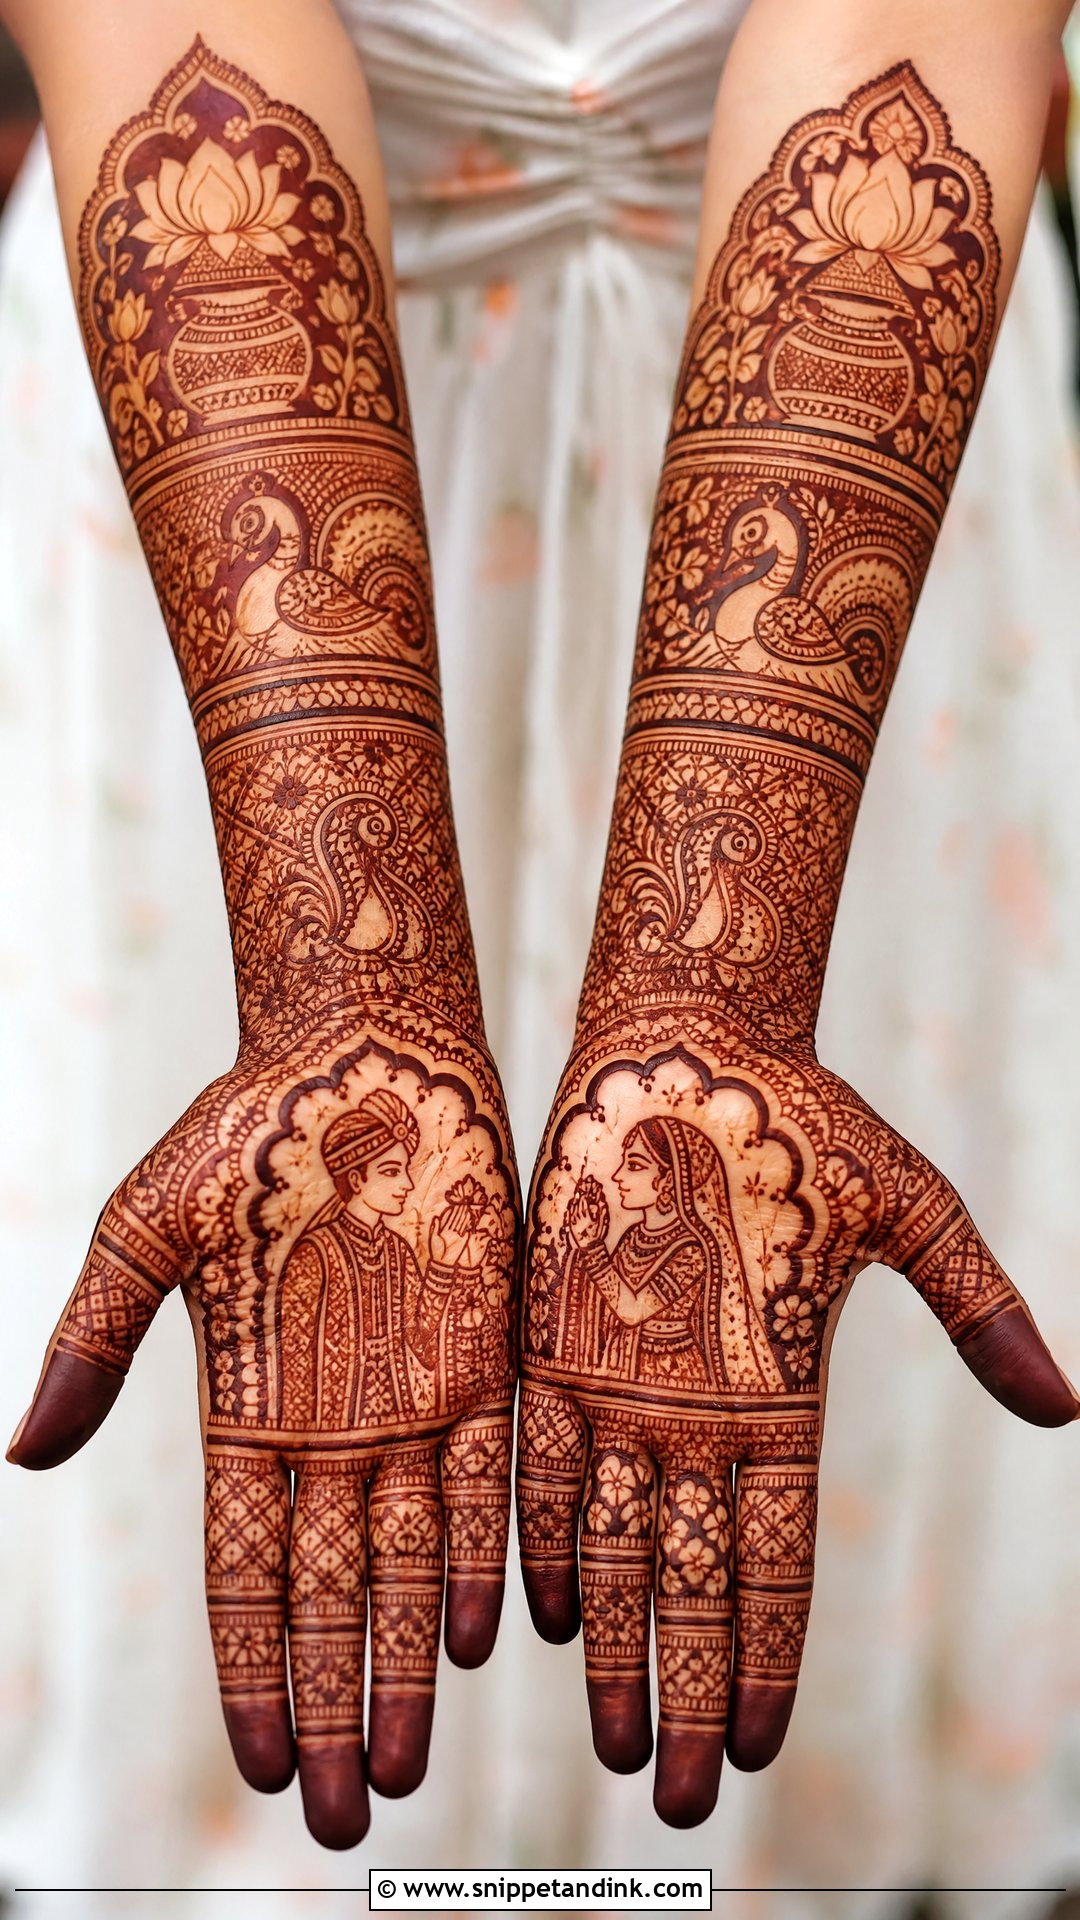
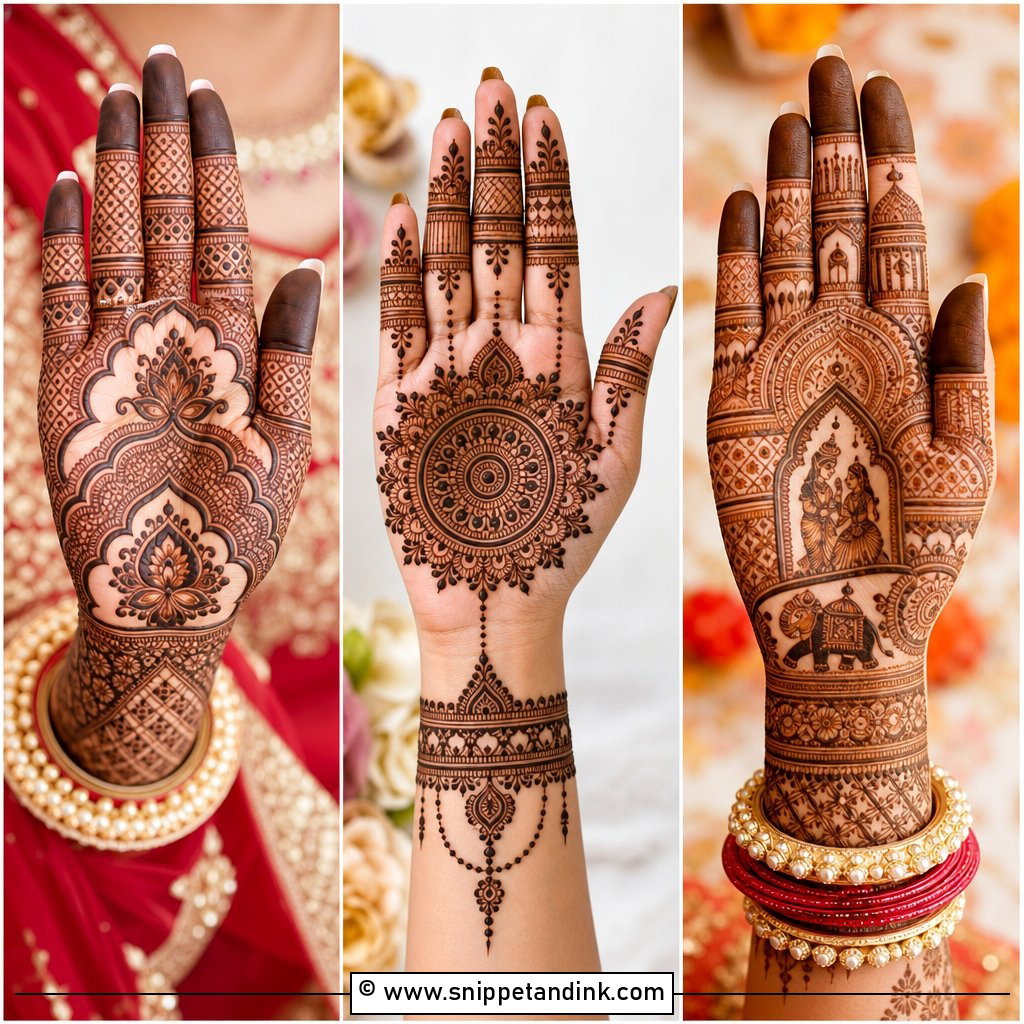
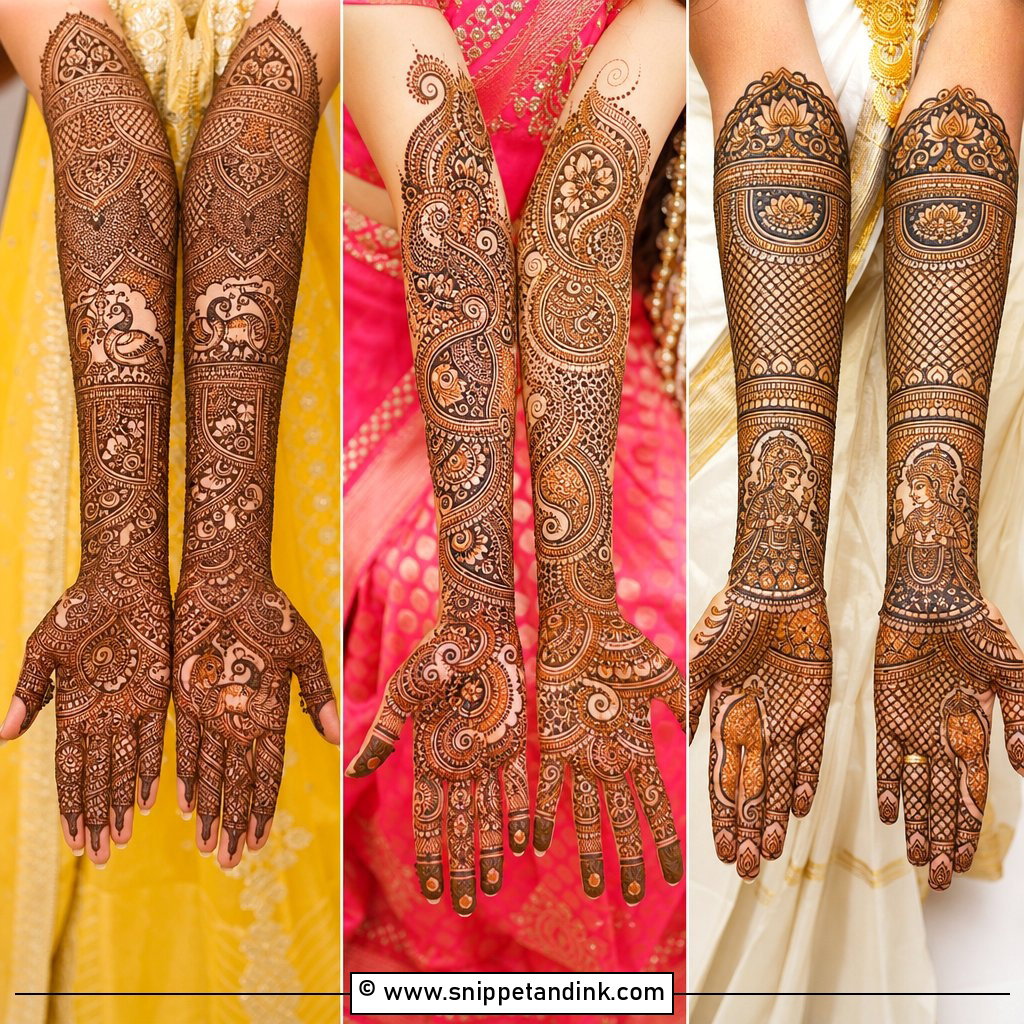
Dulha-dulhan figures, lotus flowers, kalash, elephants, peacocks and layered border bands are the vocabulary of traditional Indian bridal work. I build it from a strong palm centerpiece outward into filled fingers and forearm panels. Palms take henna darkest, so the centerpiece becomes the richest part of the stain, and that is where I put the most meaningful symbol. Disappointment usually comes from over-filling: henna lines swell slightly while the paste sits, so a design with no open space can lose its detail by day two. Ask your artist where the breathing room is before she starts.
3. Arabic Bridal Mehndi
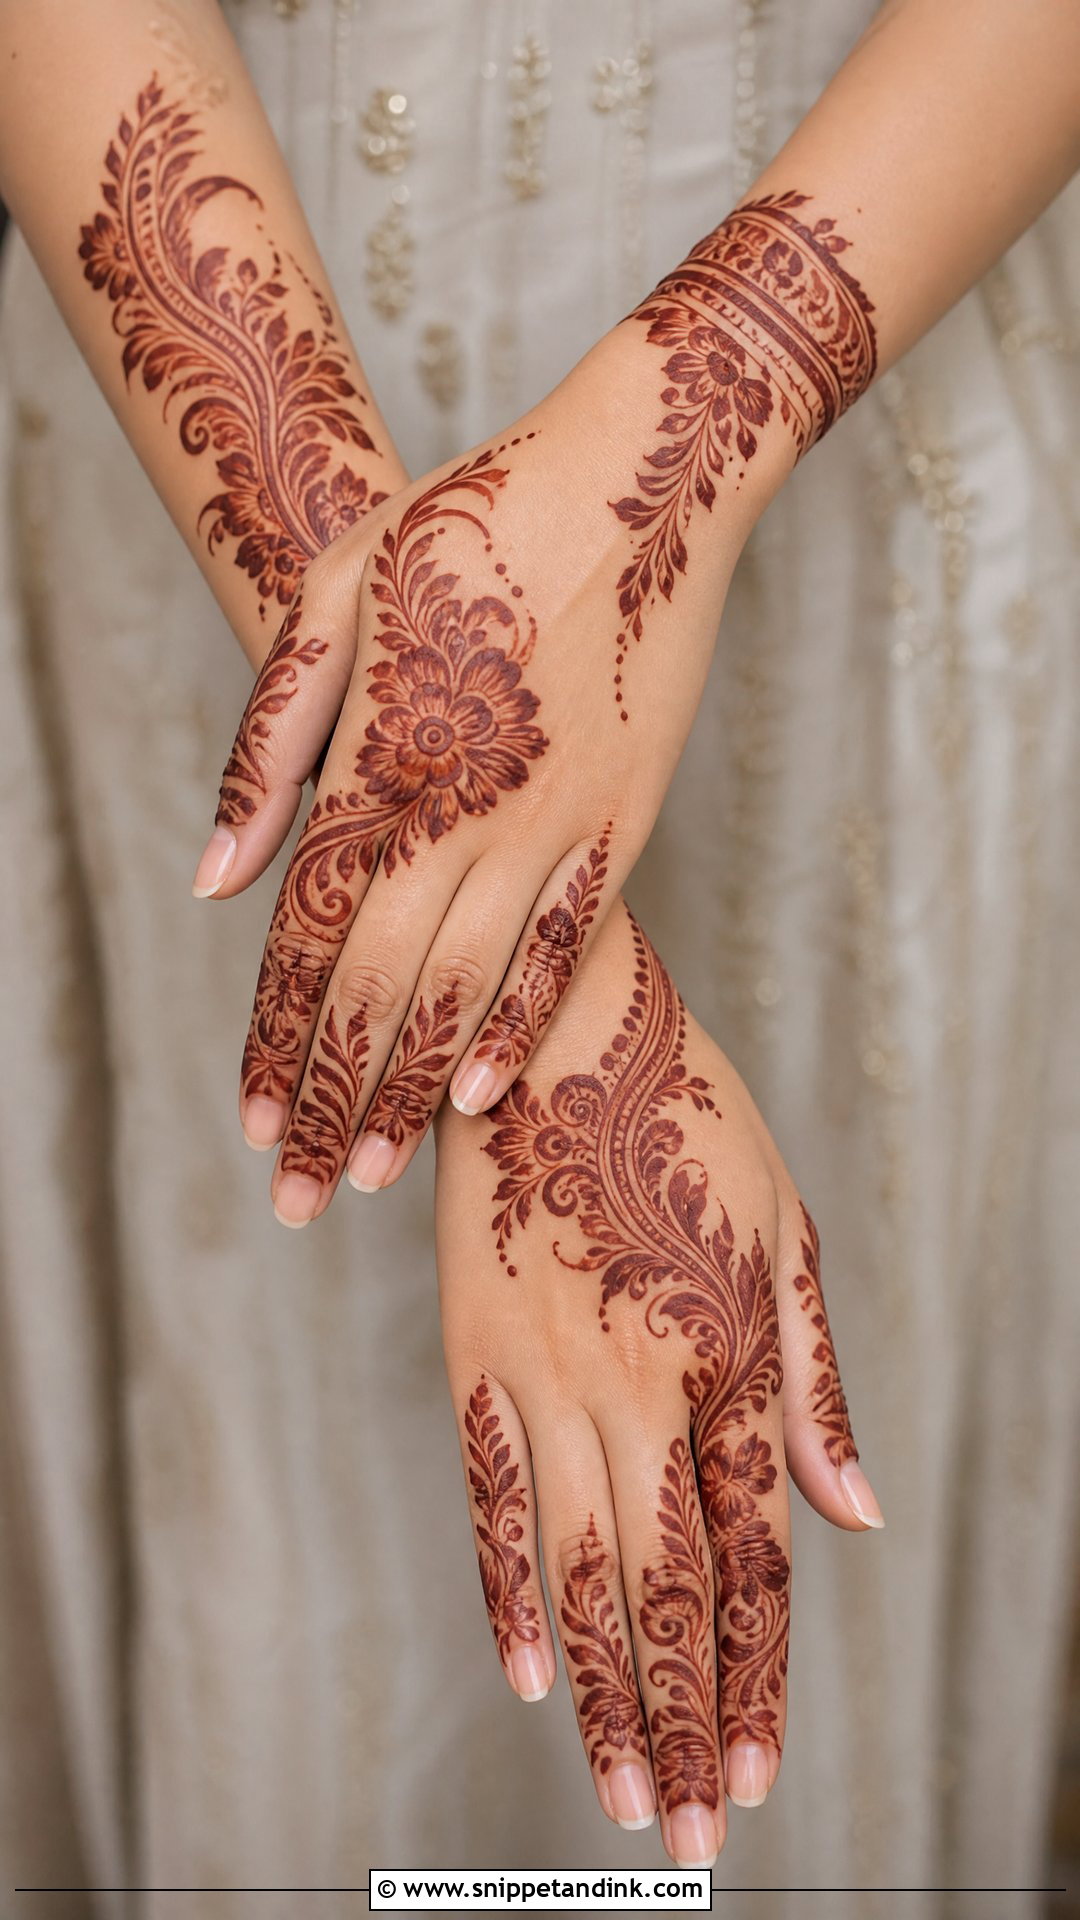
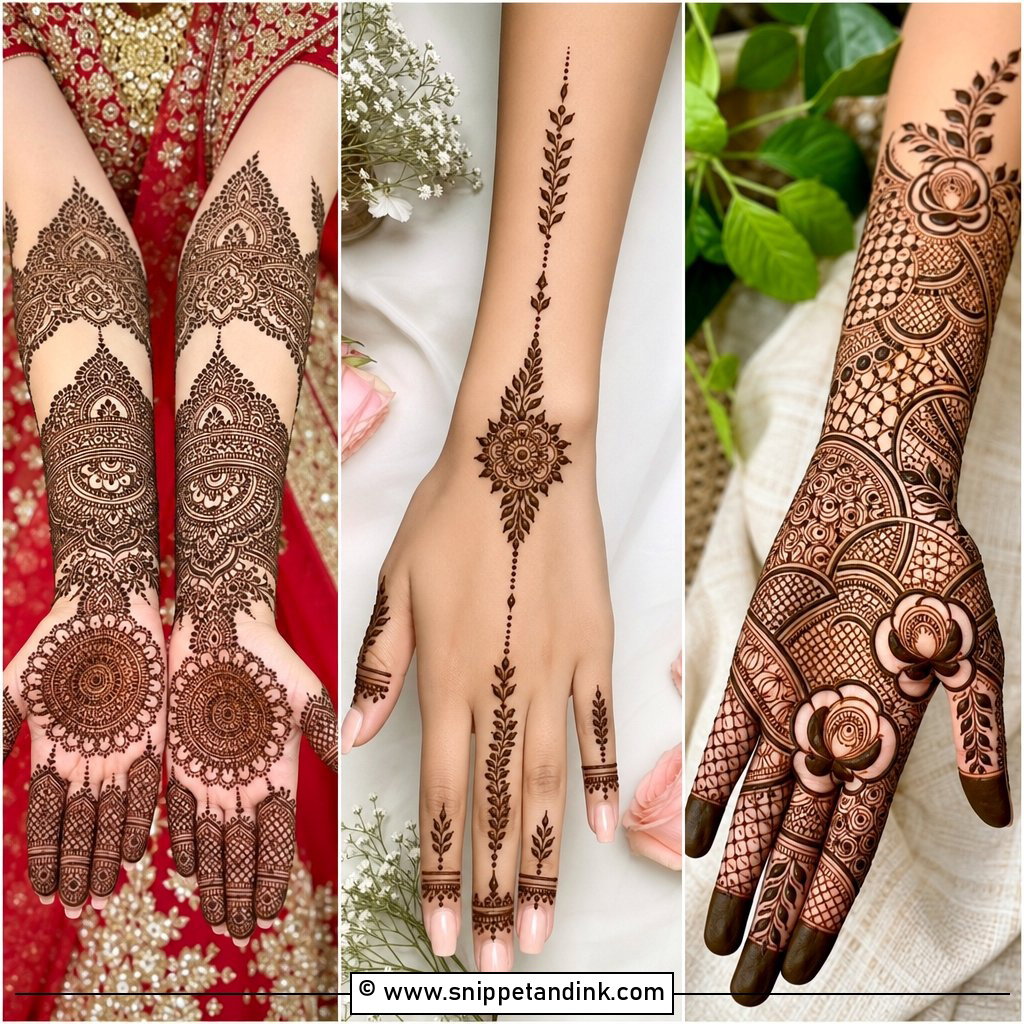
Arabic work moves diagonally across the palm and back hand, then trails toward the wrist, leaving bare skin between the flowers. I draw the large blooms and leafy vines with a thicker line and shade inside the petals, which is what gives it that high-contrast look on camera. A plain Arabic trail can look like party henna. For a bride, I fill the fingers properly and close the wrist with a bracelet band. It sits lighter on the hand and takes far less time than full Indian coverage, which matters if your mehndi night is also a dance night.
4. Indo Arabic Bridal Mehndi
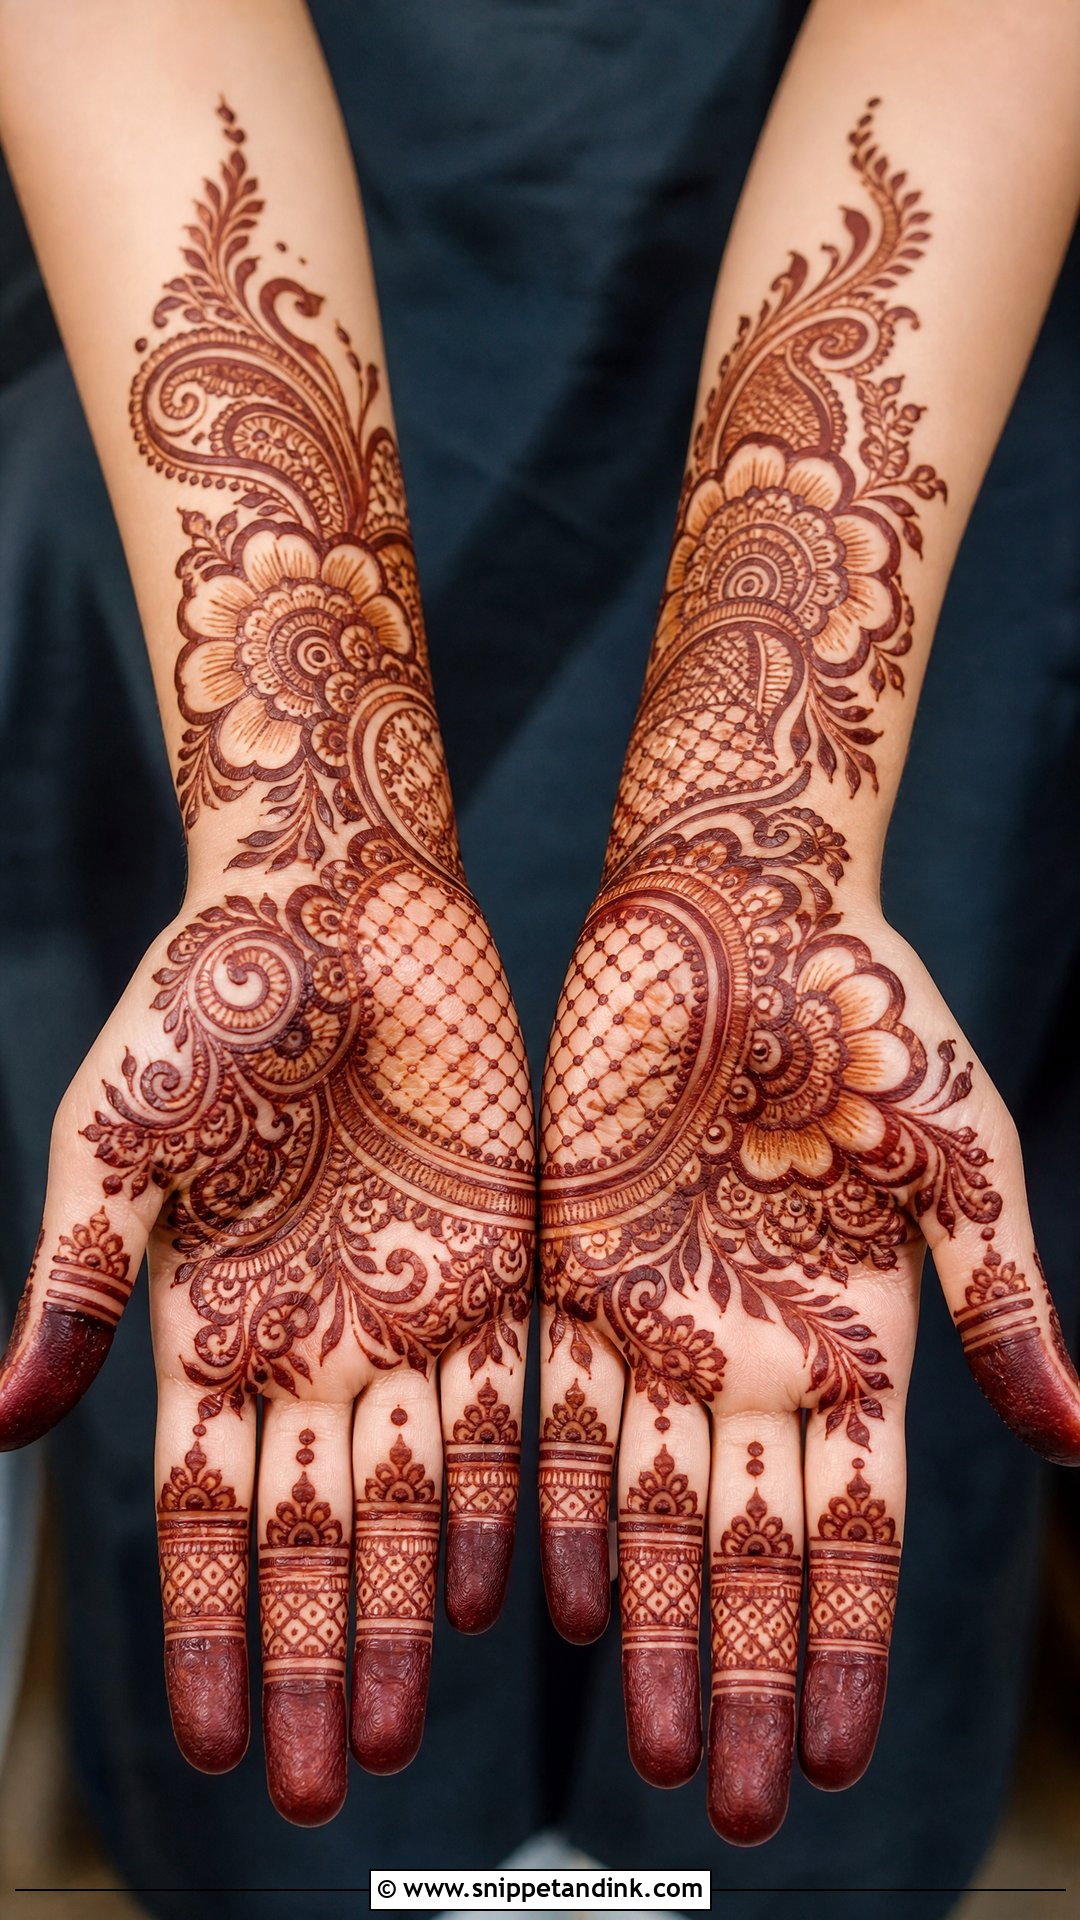
Indo Arabic bridal mehndi borrows the flowing diagonal of Arabic work and fills parts of it with Indian detail: tiny jaali, paisley fillers, a mandala center, dense fingertips. Most of my brides who can’t decide between the two styles end up here. The trick is to give each style a job. One strong diagonal carries the palm, and the fine work stays inside clearly framed sections so it doesn’t spill everywhere. Because of that open skin, it sits comfortably next to a red bridal outfit, a pastel lehenga or a fusion look without fighting the embroidery.
5. Back Hand Bridal Mehndi
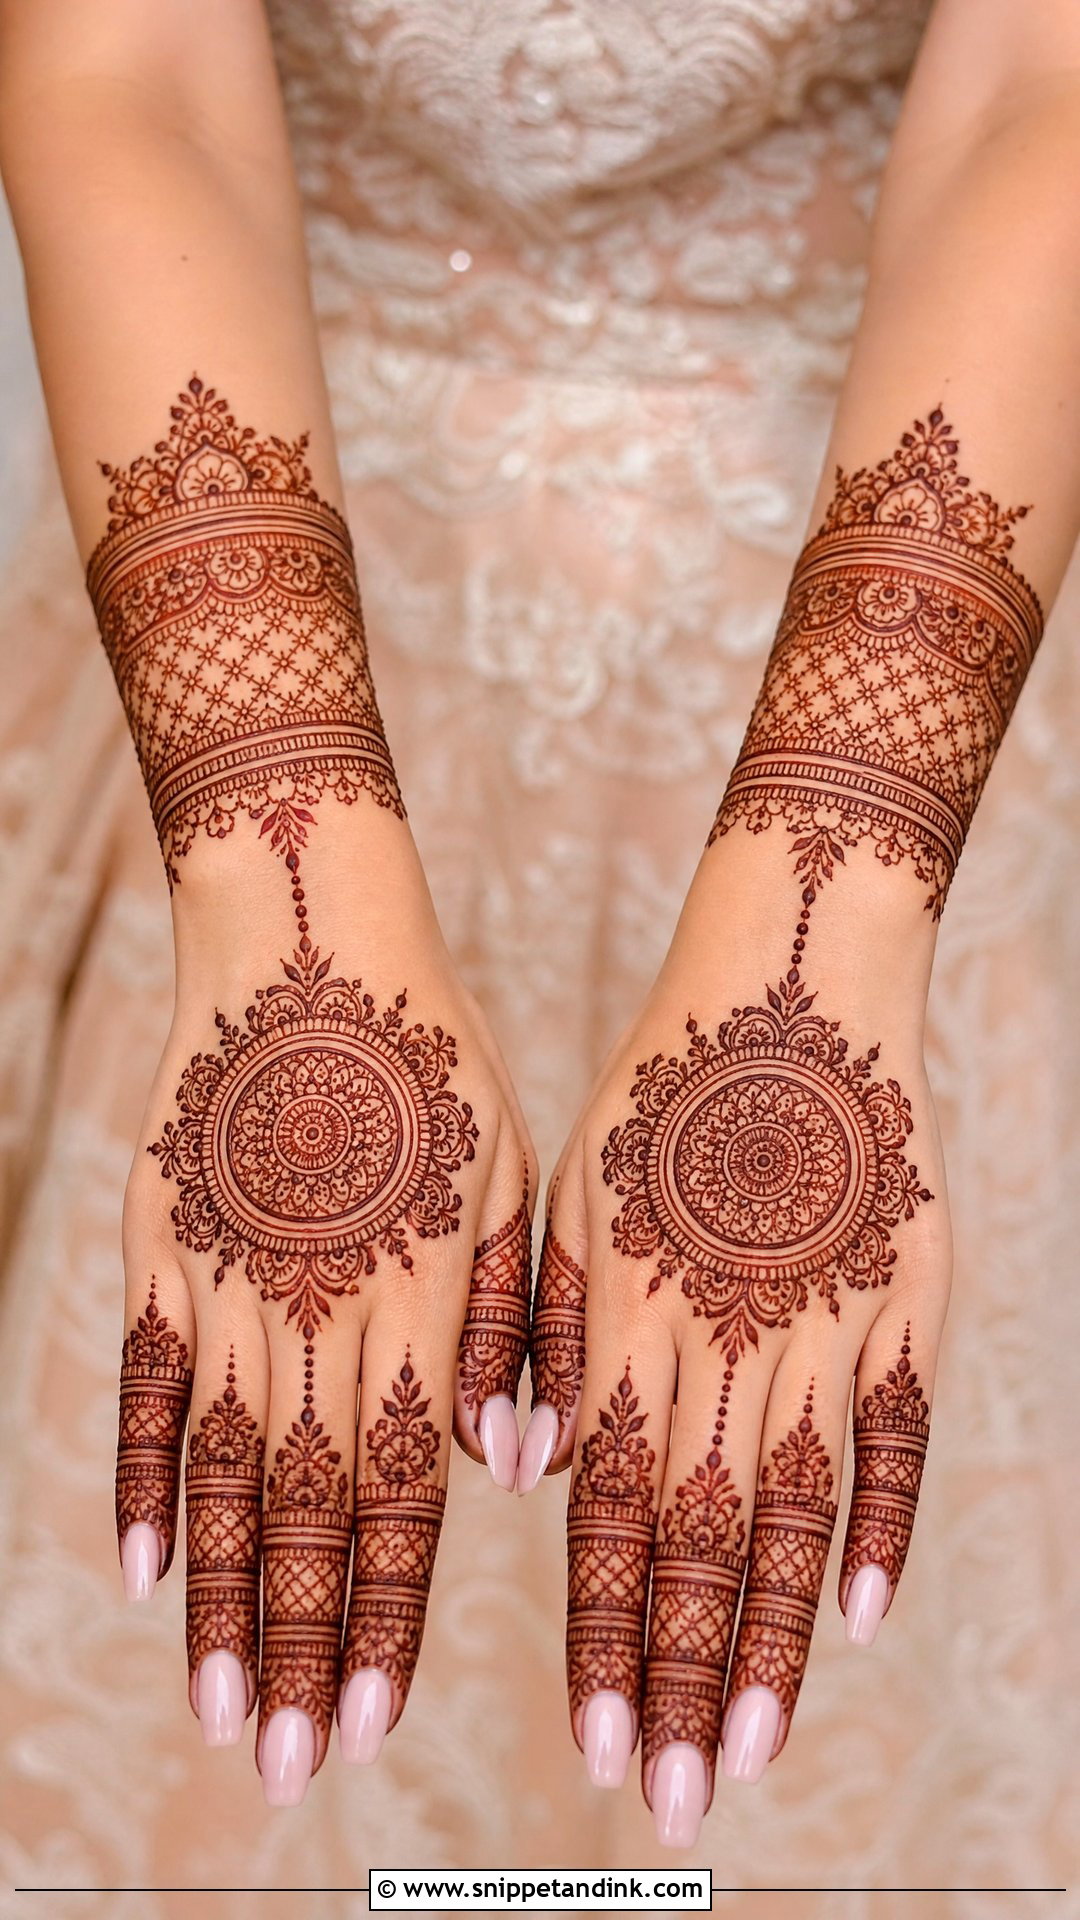
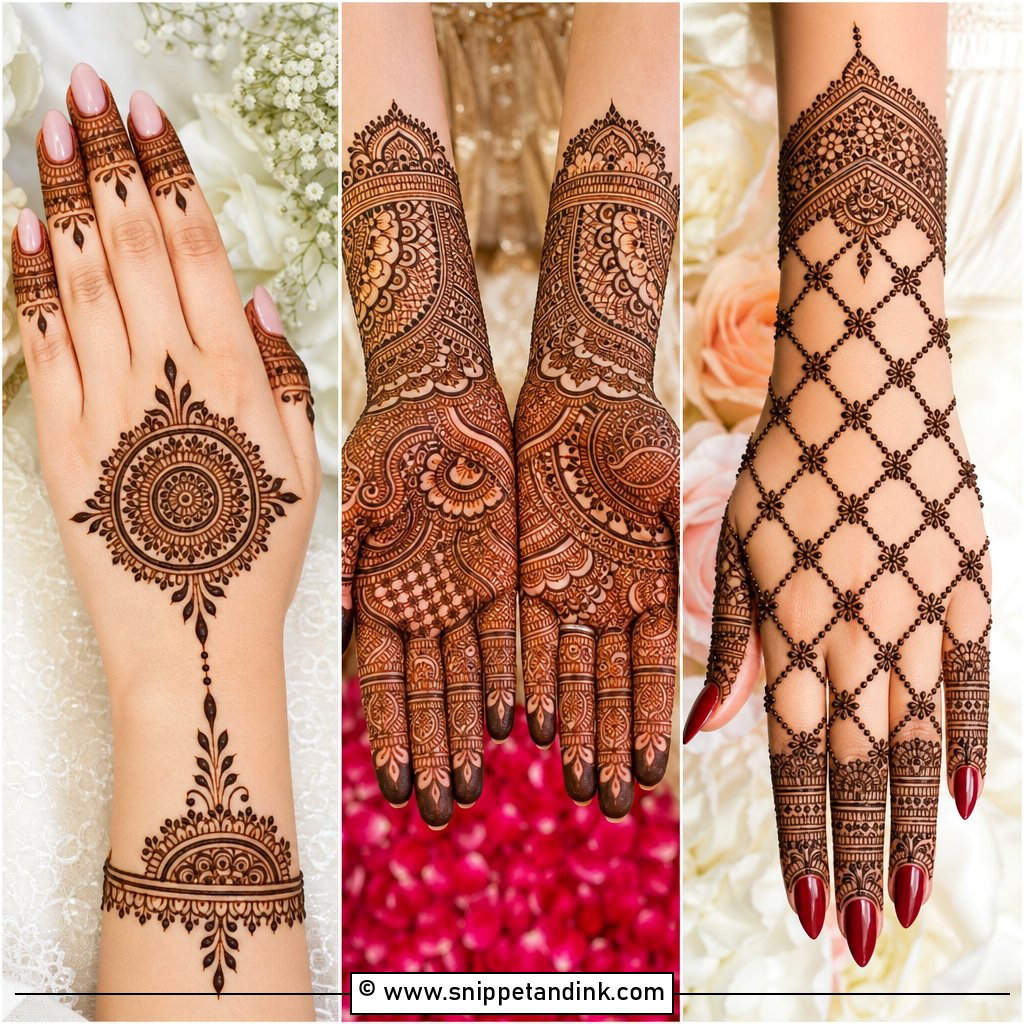
Ring shots, bangle shots, bouquet shots: the back of the hand is what the camera sees most, yet it stains lighter than the palm because the skin there is thinner and drier. I compensate with bolder outlines and a longer paste time rather than relying on faint filler. A complete back-hand design usually has a central mandala, a floral frame, a bracelet band and decorated fingers, flowing into the wrist the way a hathphool chain would. Jaali, tiny dots or lotus petals add detail, but check first how much of that area your bangles will cover.
6. Front Hand Bridal Mehndi
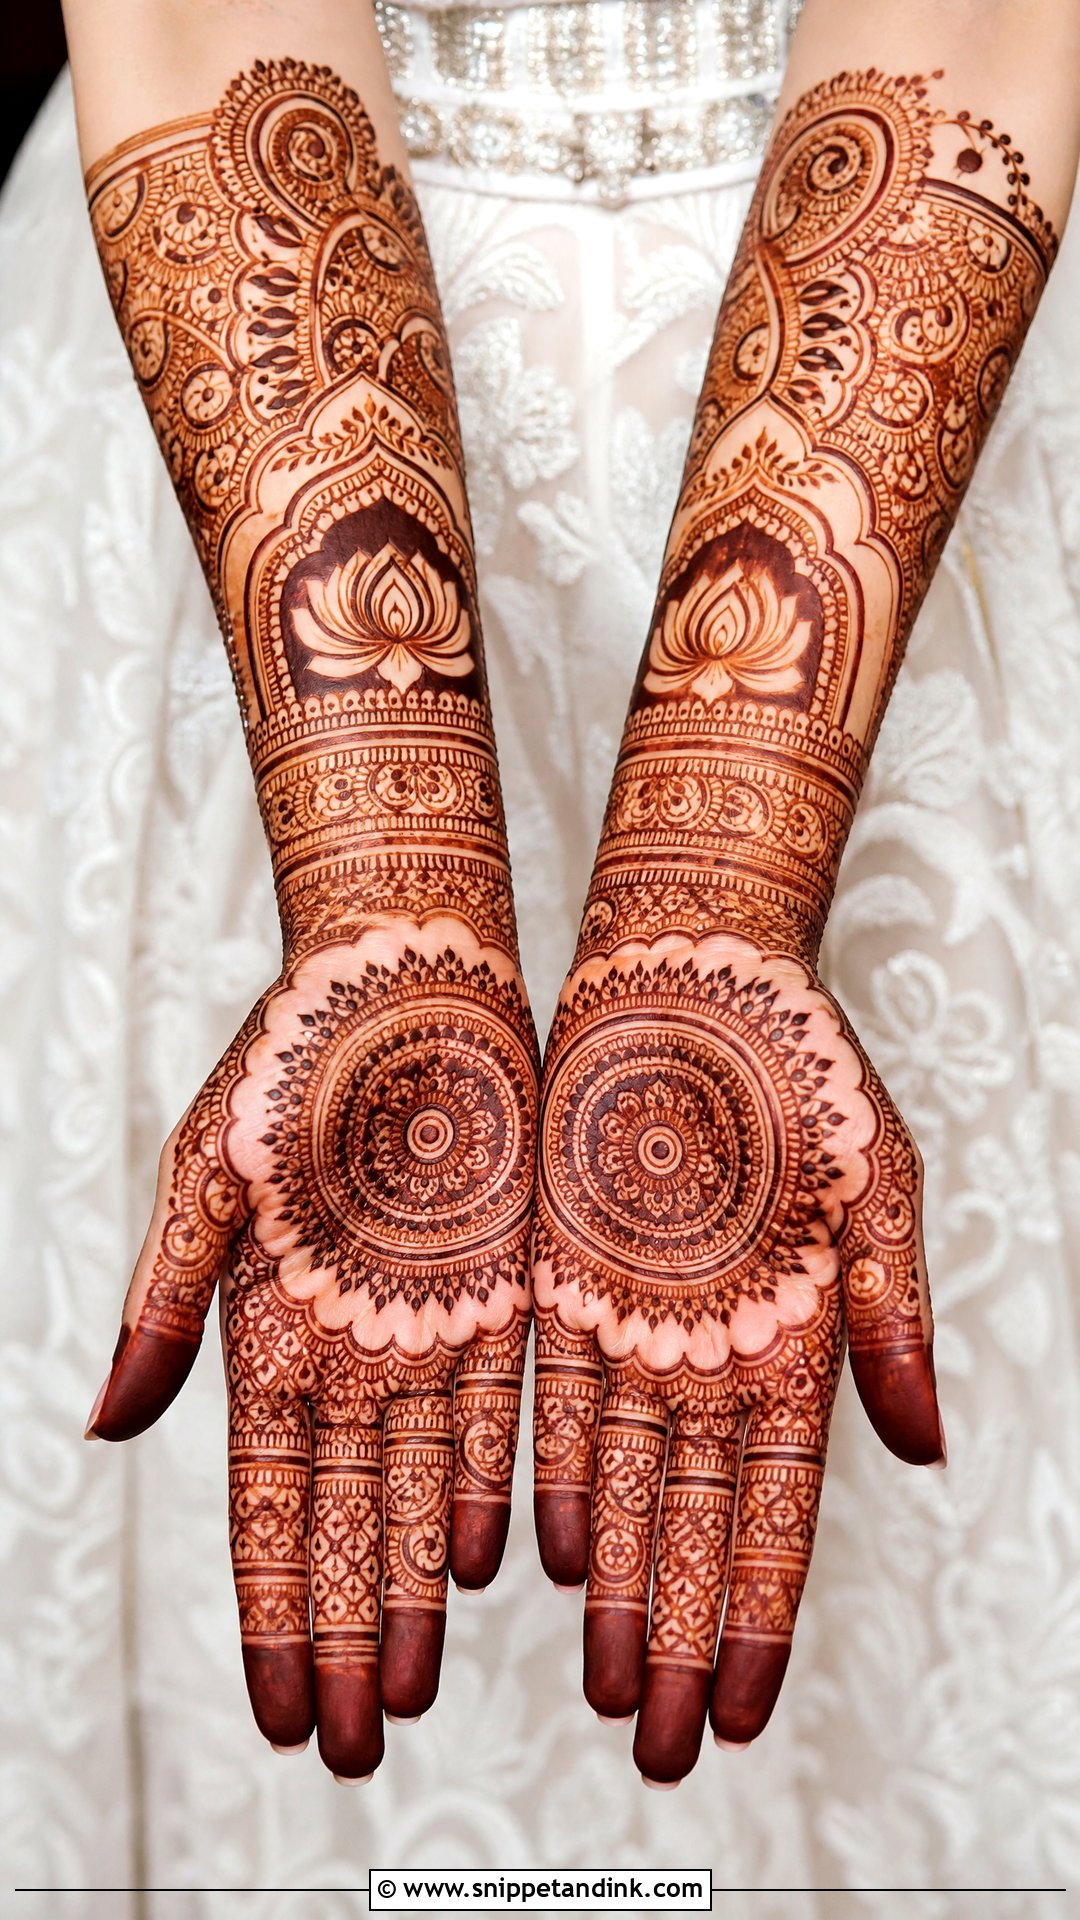
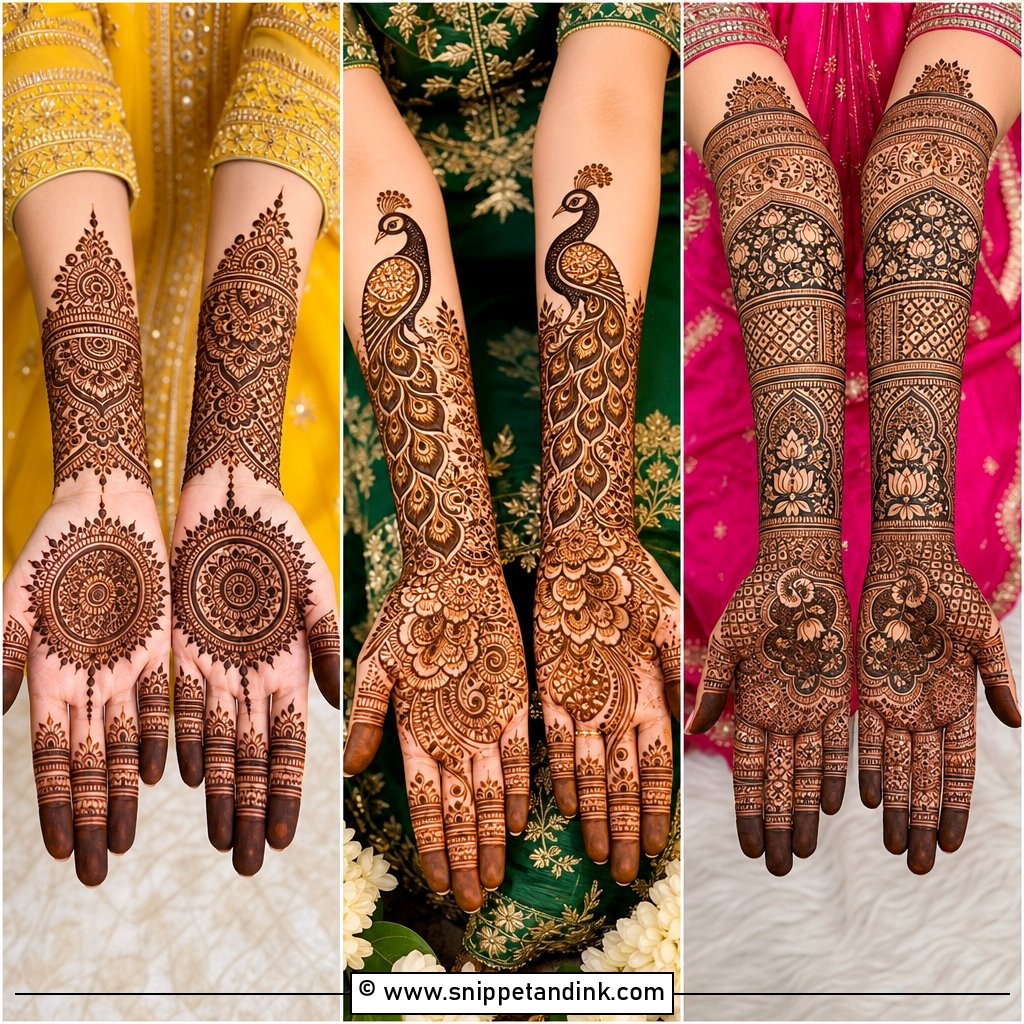
Most rituals happen palm-up, so this is where I put the main story. A bold centerpiece such as a mandala, a bride and groom portrait, a lotus medallion or a circular floral layout anchors the palm, while the fingers get fine lines, leafy tips and dots. I always check how the design looks with the hand relaxed, not stretched flat on a cushion. Palm creases fold into the pattern when you hold a coconut or a diya, so I keep tiny faces and lettering off the main crease lines. Dense paisley and peacock work gives the traditional finish; a cleaner center framed by open skin gives the modern one.
7. Simple Bridal Mehndi
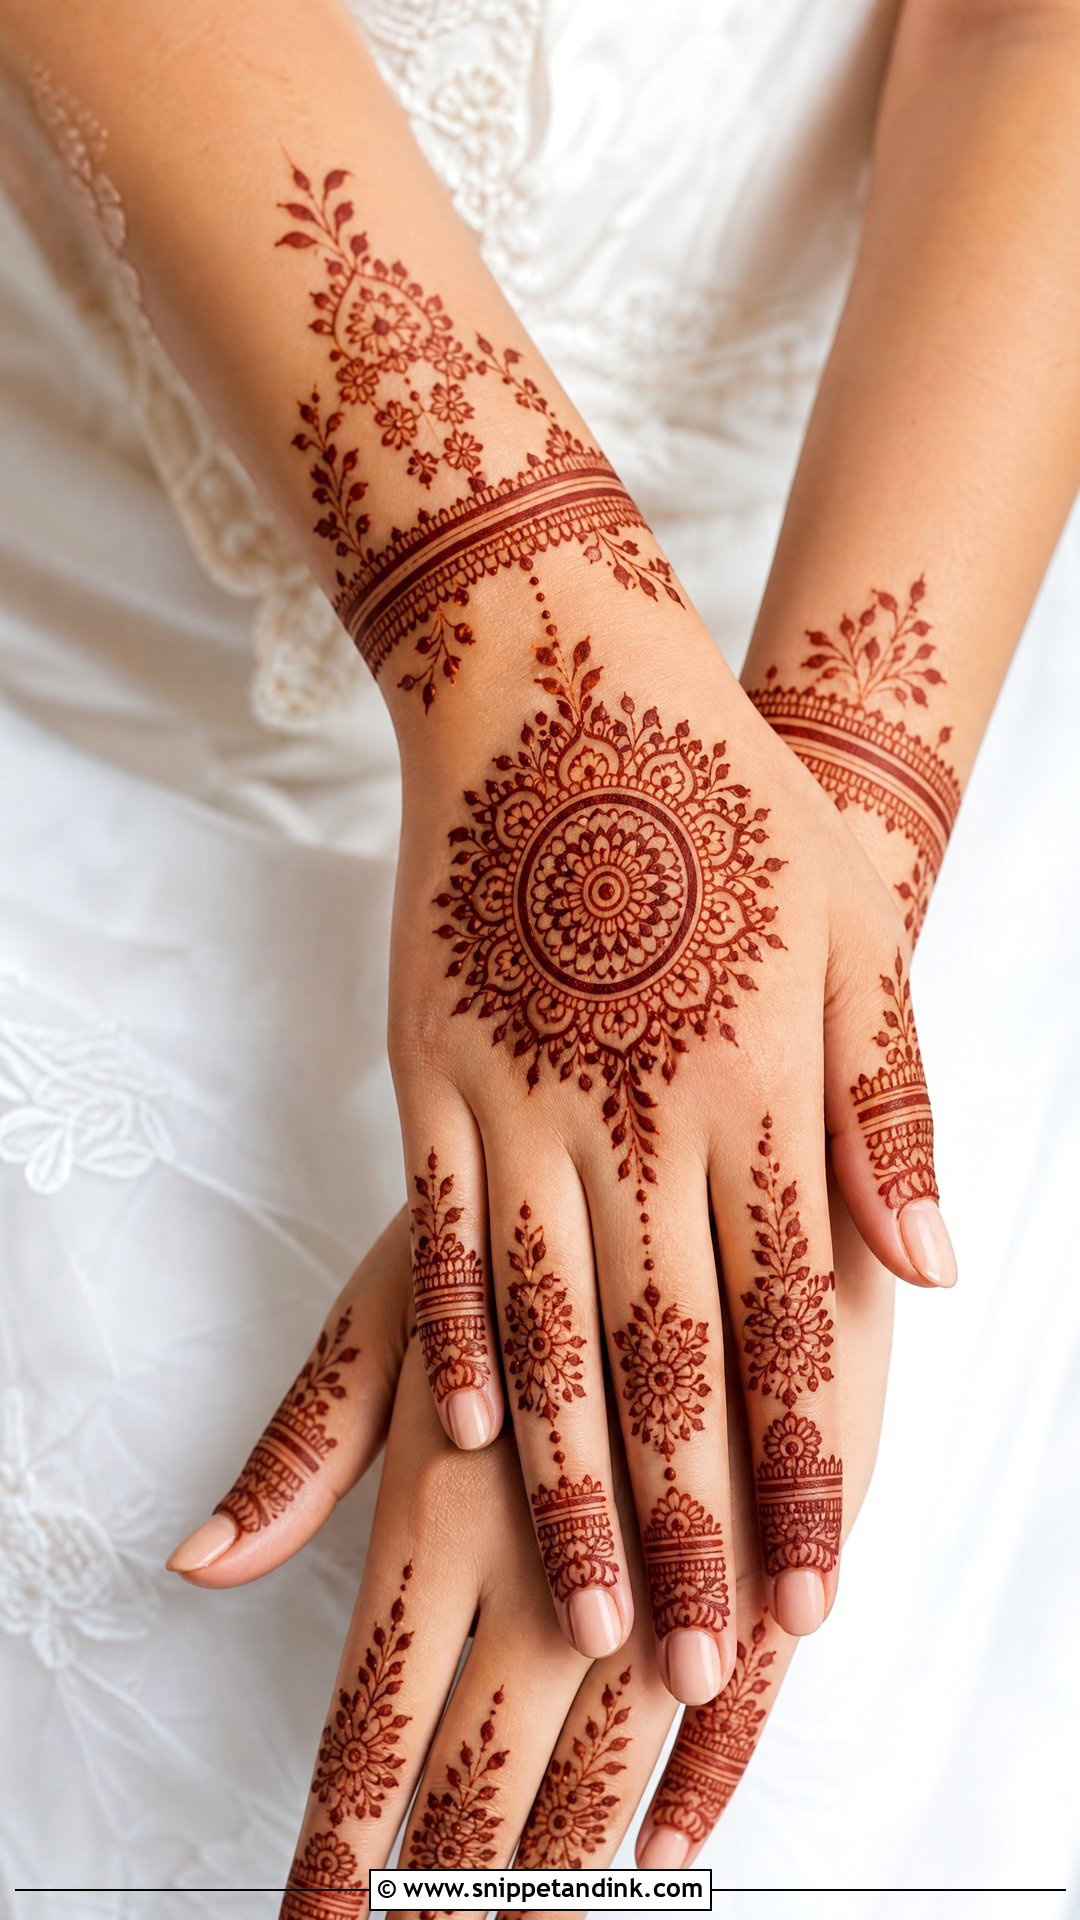
Simple does not mean small. A neat palm mandala, a few floral vines, careful finger work and a clean wrist band is still a complete bridal design, just without the crowded fillers. Simple layouts actually expose the artist more, because a shaky line has nowhere to hide, so study her single-line work before booking. It suits intimate weddings, civil ceremonies and destination trips, and it’s kind to brides who go back to work soon after. Three or four confident paisleys often look richer than forty tiny ones.
8. Modern Bridal Mehndi
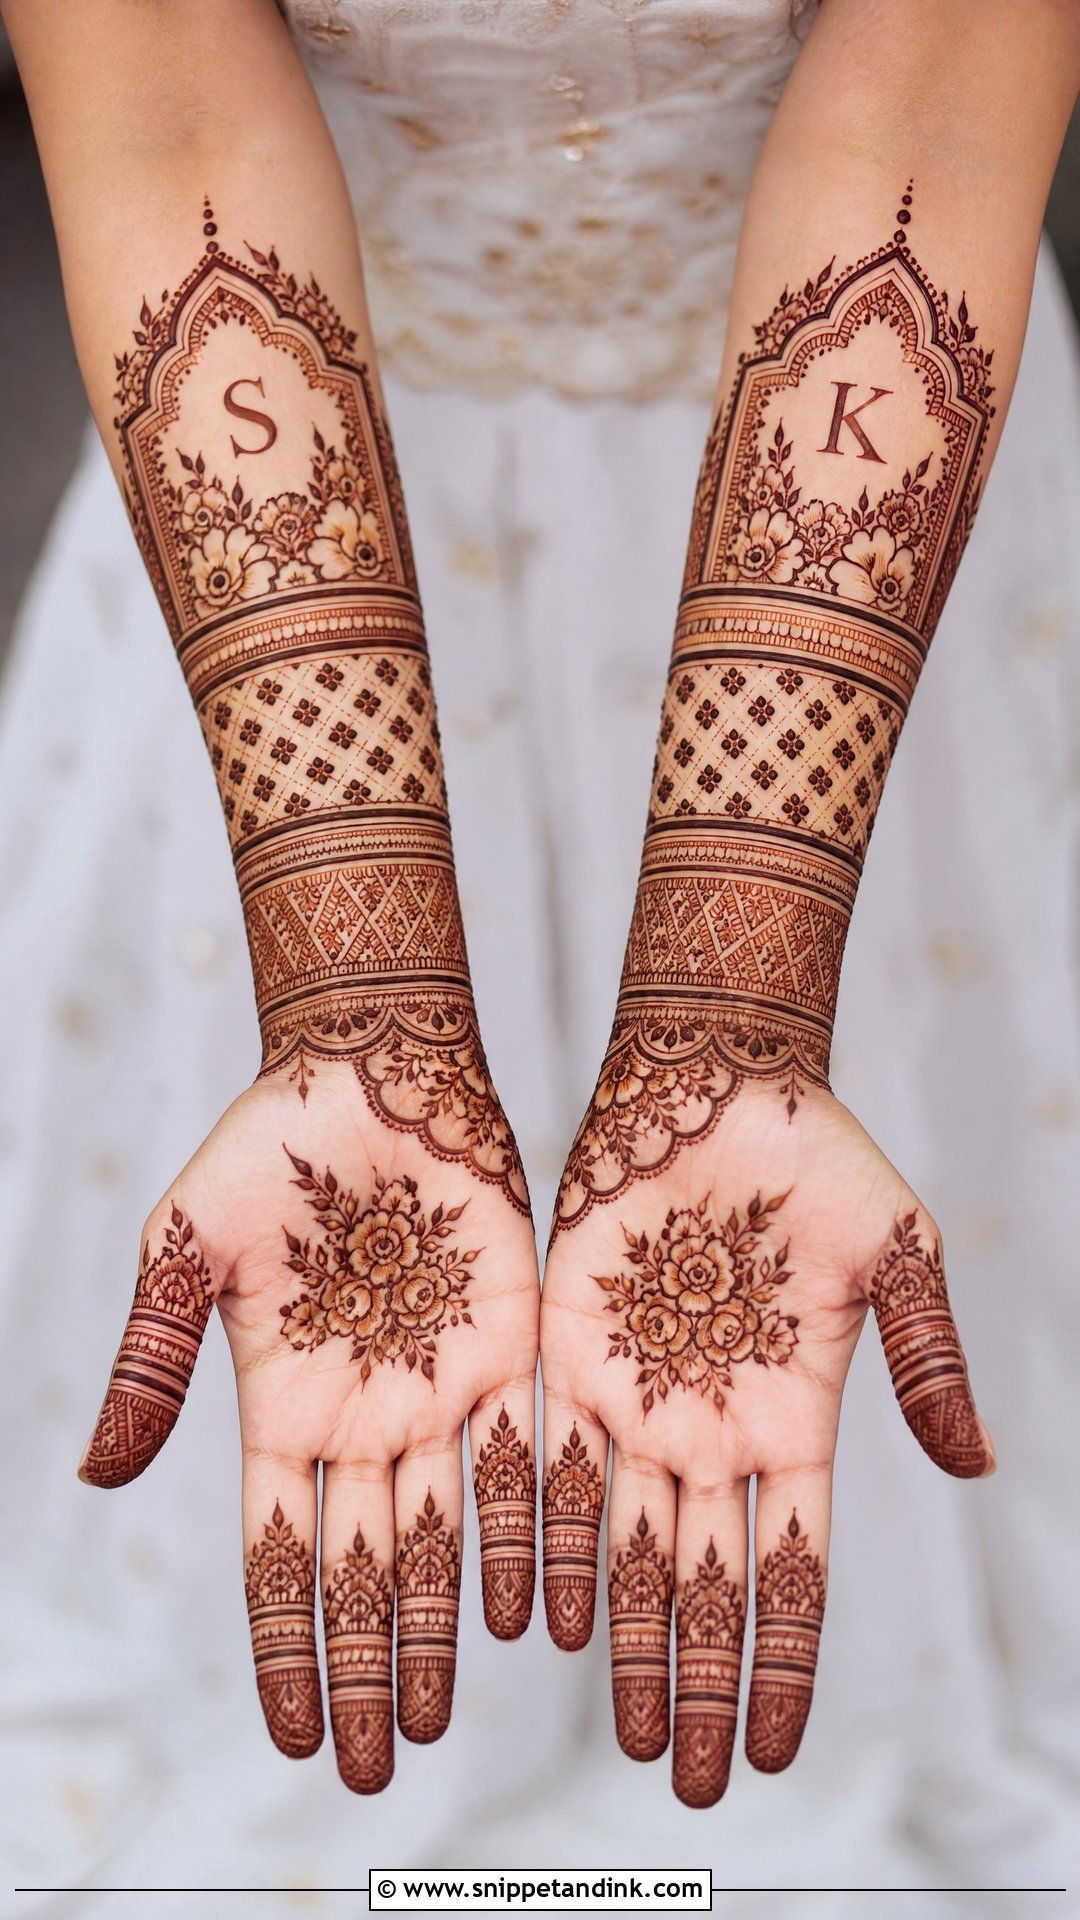
Modern bridal designs trade even coverage for contrast: sleek bands, geometric accents, half-and-half layouts, initials and clean floral clusters with open skin between them. I plan these by deciding where the eye should land first, then leaving the areas around it quiet on purpose. Contemporary lehengas, minimal sarees, gowns and fusion outfits all sit well beside it. Keep the fingers polished with repeated lines or small motifs so the hand still looks finished. A set of initials or the wedding date tucks easily into a band, and guests enjoy hunting for it.
9. Minimal Bridal Mehndi
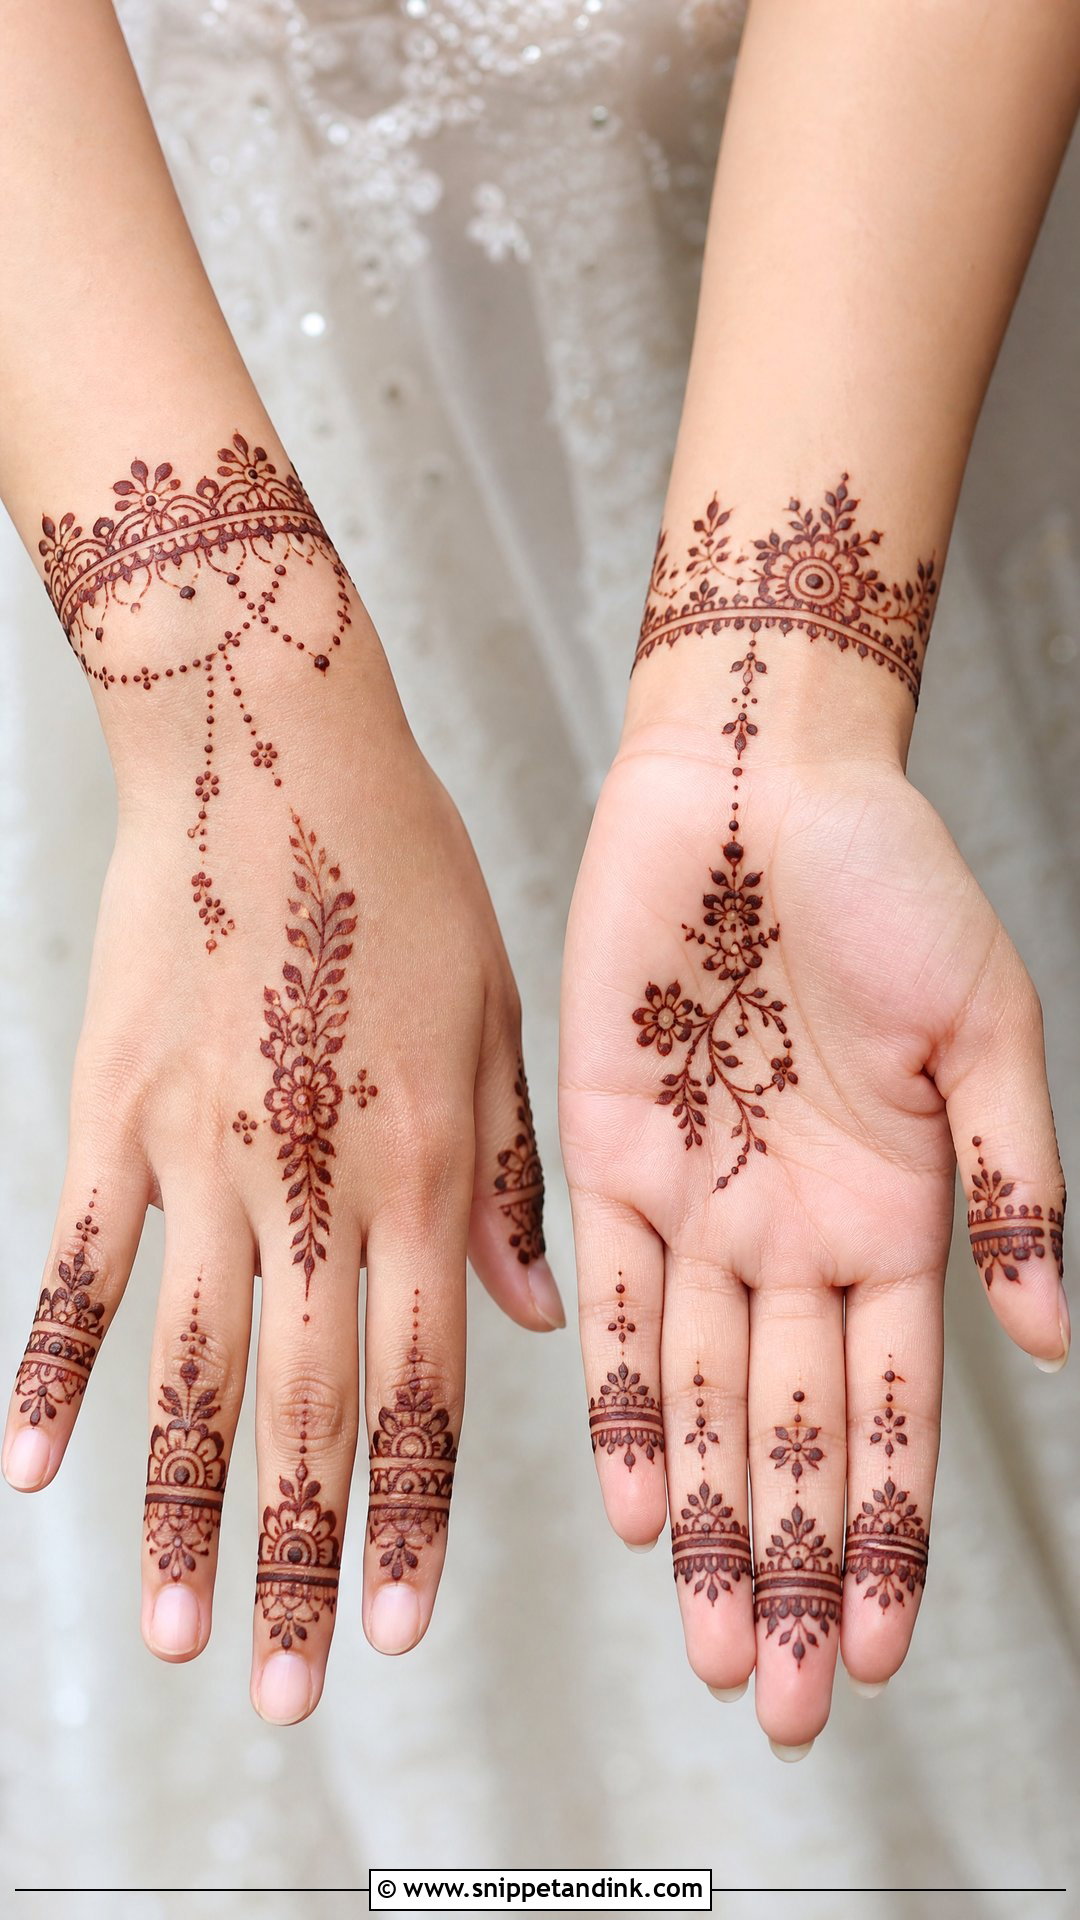
A good minimal bridal design is finished, not half-done. Fine finger patterns, a small palm motif, a wrist detail and a soft back-hand trail cover the hand thoughtfully while letting rings and bangles do some of the talking. Precision decides everything here. I switch to a finer cone tip and slow down, because every dot is visible and uneven spacing shows at once. Beach weddings, small ceremonies and pastel outfits suit it. I’d steer you elsewhere if your family expects traditional full coverage, since minimal work can read as unfinished to older relatives sitting close to the mandap.
10. Bridal Mandala Mehndi
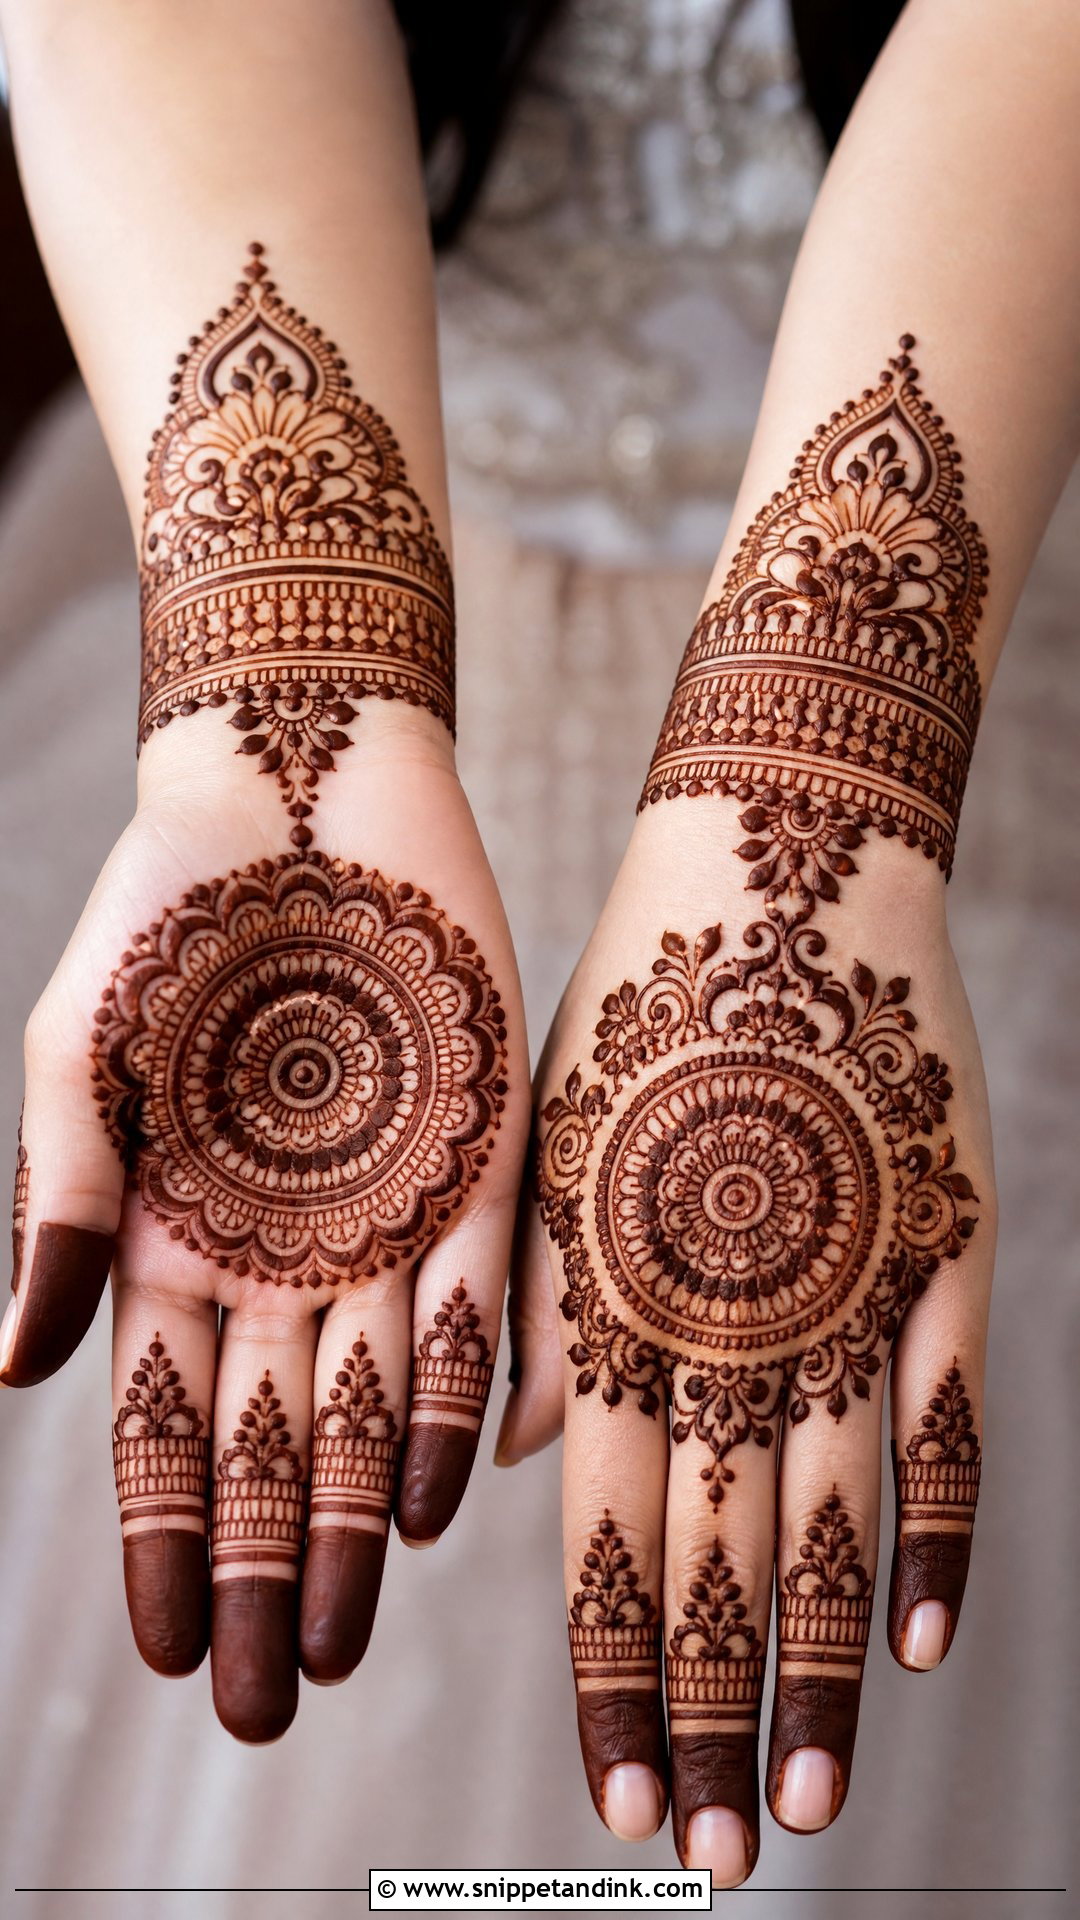
A large, centered mandala gives the hand a calm, symmetrical anchor on the palm, the back hand or both, with fingers filled in lines, dots, leaves and small flowers. For a bride it needs to be bigger and more layered than a casual one, otherwise it looks like a guest’s design. Getting it truly round on a curved palm is harder than it looks. I mark the center point first and build the rings outward from there, checking symmetry every few rings. Bracelet bands at the wrist and a little filler around the edges finish it, and brides who prefer neat structure over storytelling tend to choose it.
11. Bridal Peacock Mehndi
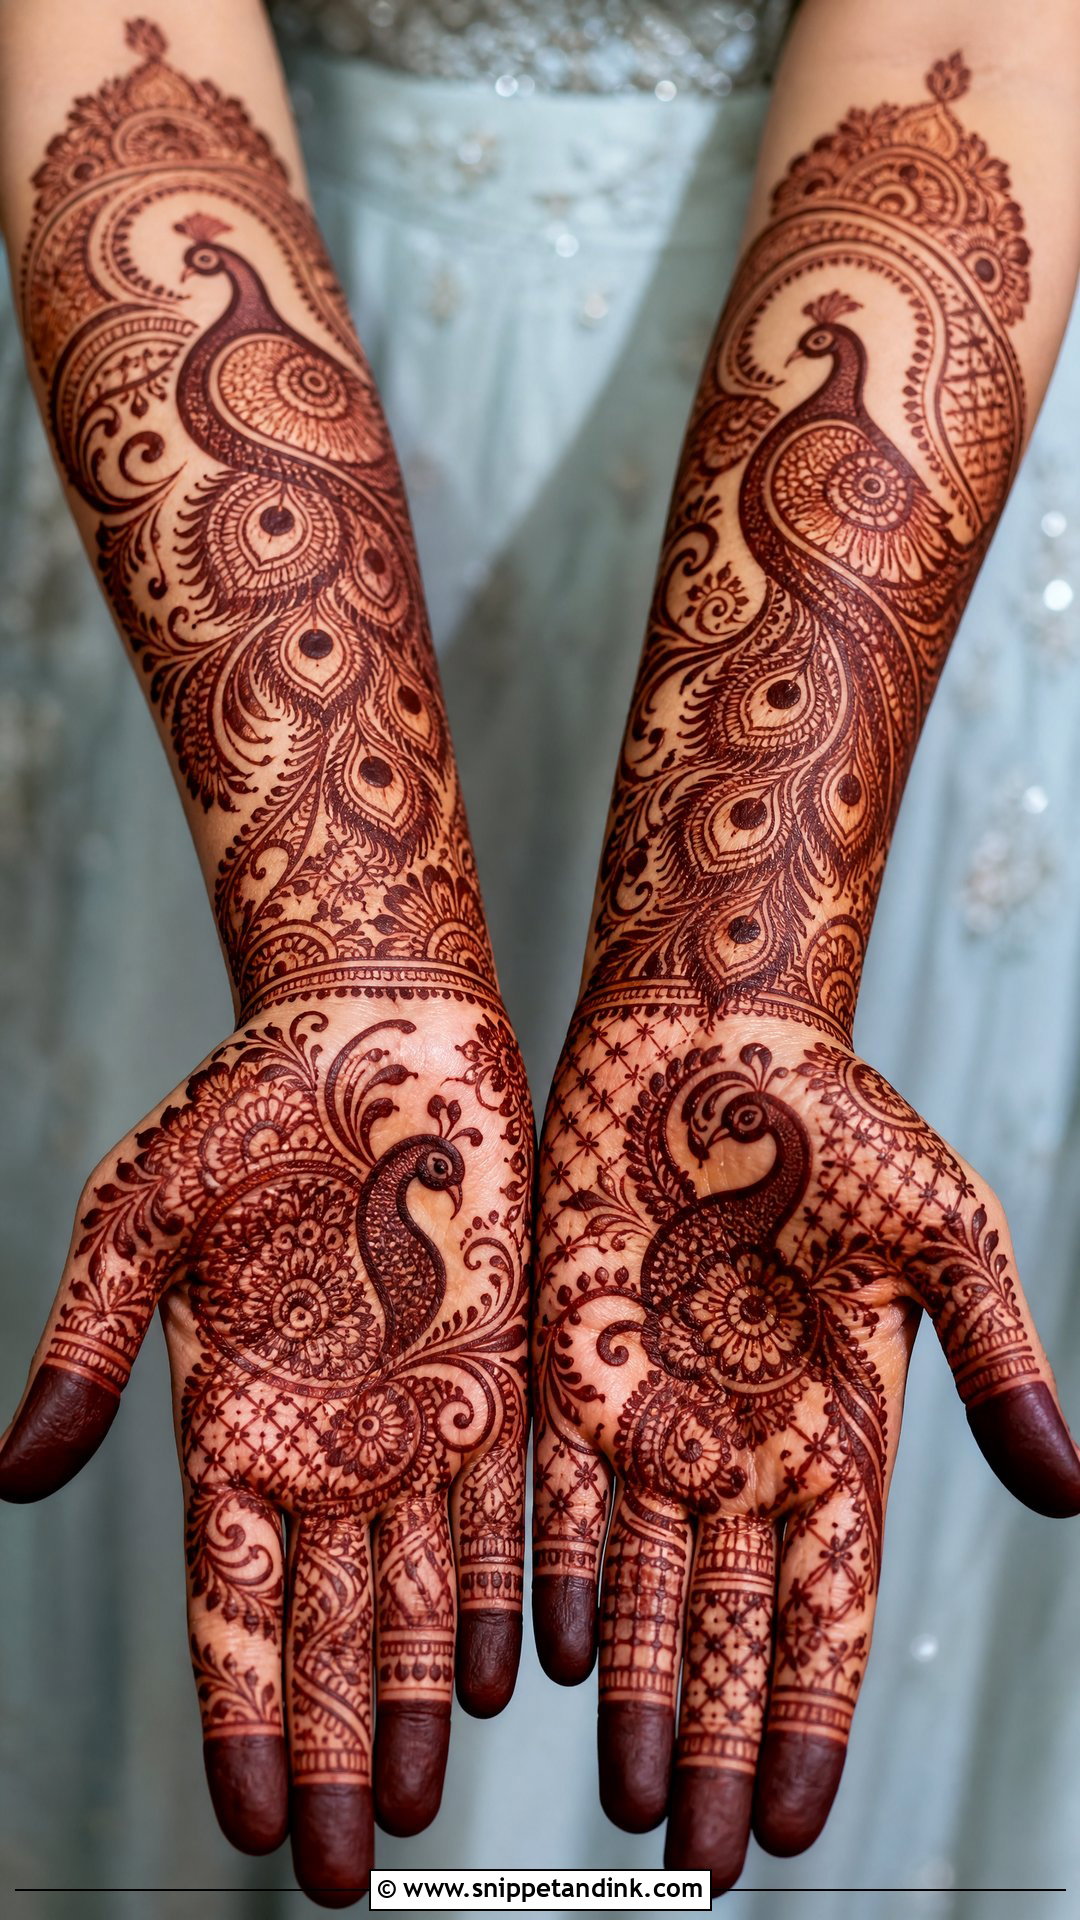
The peacock only works if the bird is big enough to recognise after the stain develops. Too small, and the neck and crest blur into the feathers. I usually place it across the palm or forearm and let the tail flow into paisleys, flowers and fine mesh, which gives the hand movement without needing portraits. Pair it with full fingertips, wrist cuffs and layered borders. Against a classic red or maroon outfit, it looks properly regal.
12. Bridal Paisley Mehndi
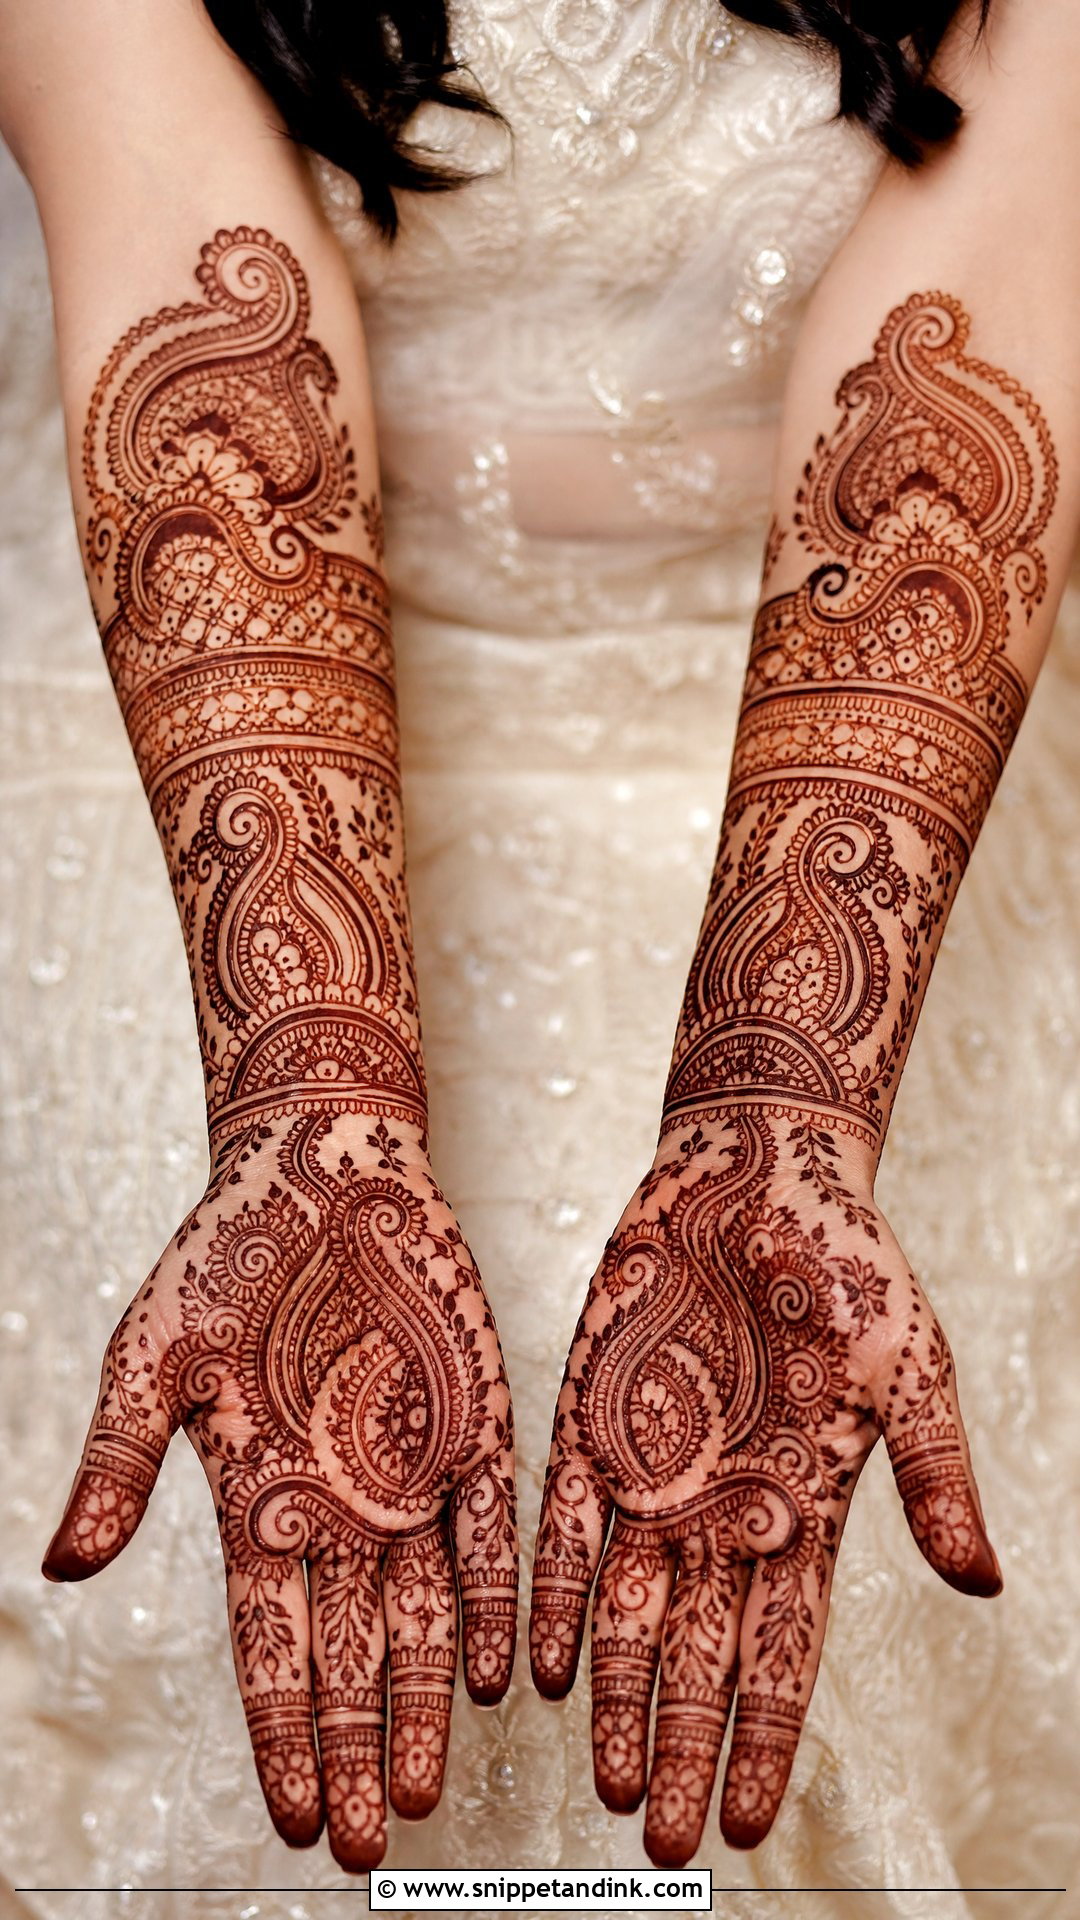
If I had to keep one motif and give up the rest, it would be the paisley. It works as a flowing vine, a centerpiece, a wrist band or a forearm panel, and its curve visually lengthens the hand. The mistake I see most often is drawing every paisley the same size, which makes the pattern flat and repetitive. I mix large ones for structure with small ones to fill gaps, then thread leafy trails between them. It can go dense and traditional or open and Indo-Arabic, and it suits practically any outfit color and jewelry.
13. Bridal Floral Mehndi
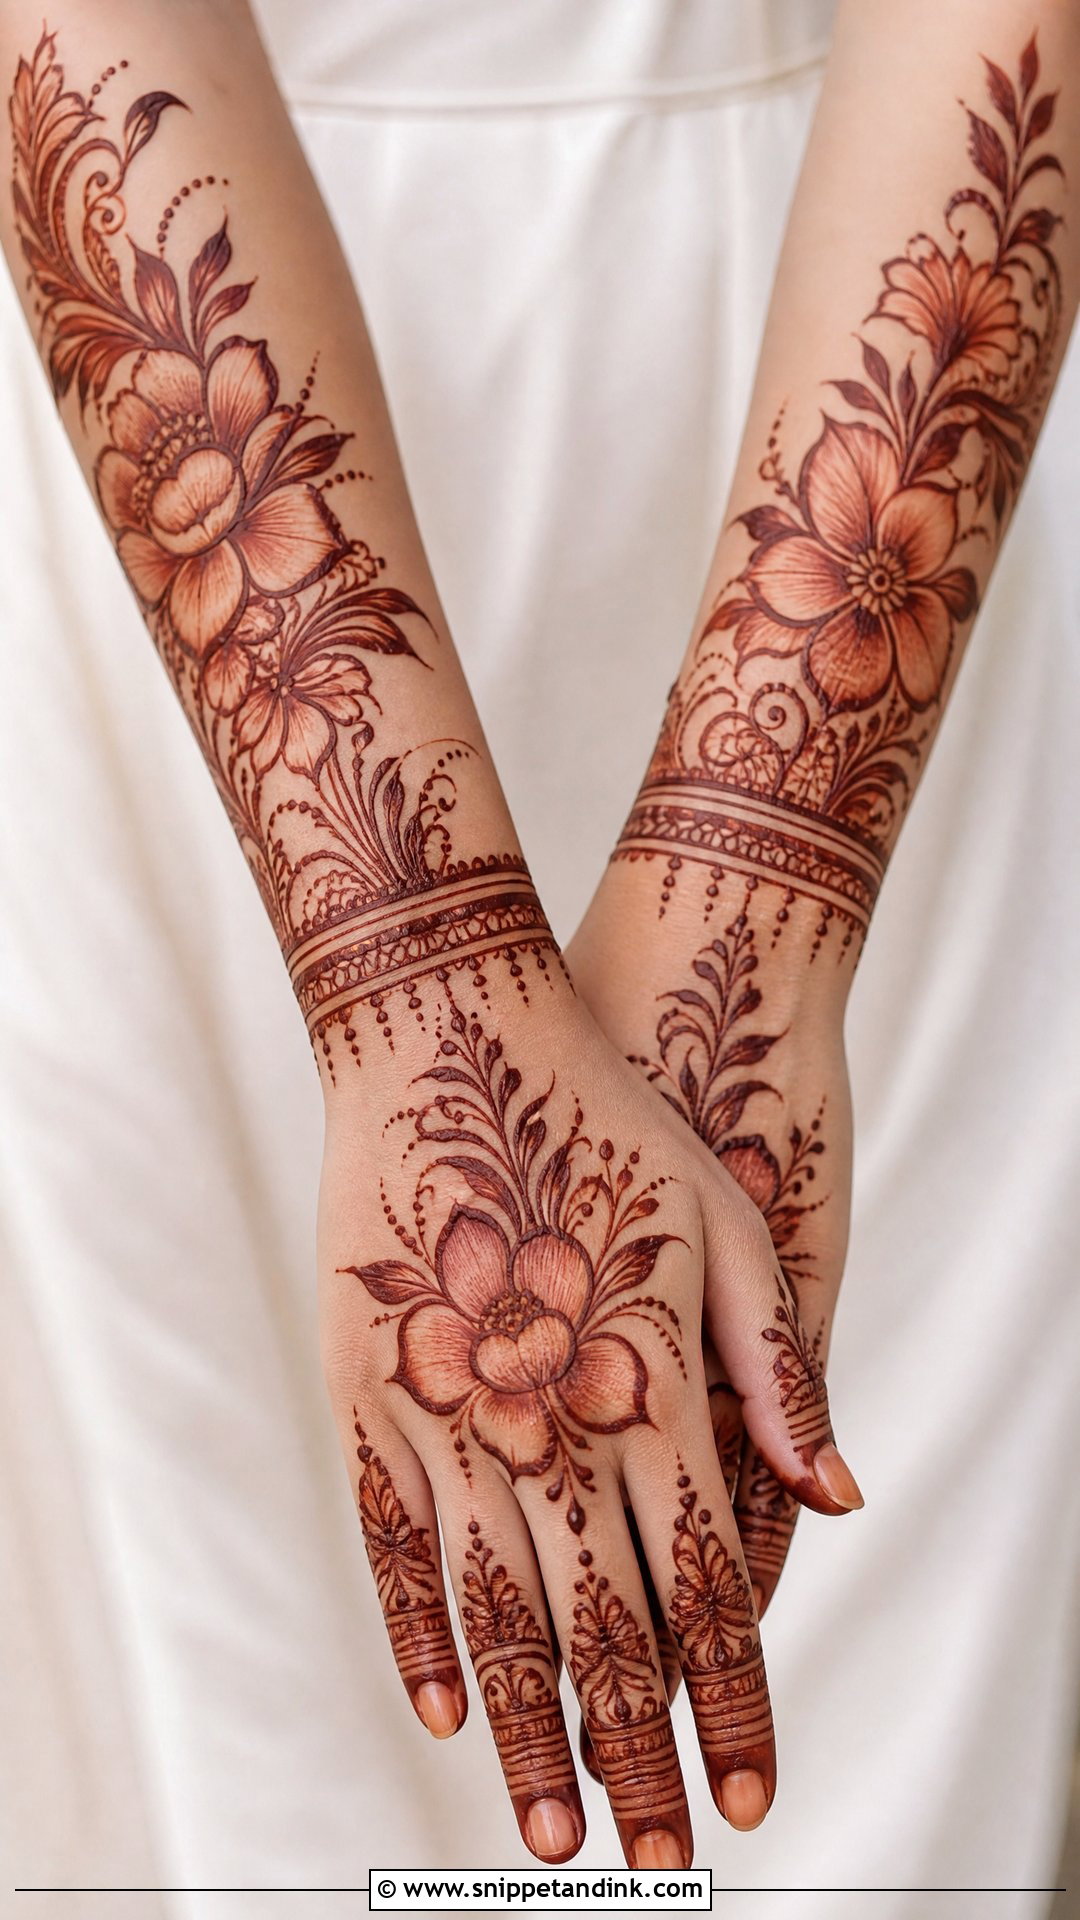
Soft petals and leafy vines keep floral bridal mehndi romantic without weighing the hand down. Roses, lotus flowers, simple five-petal blooms and shaded leaves can cover the full hand or travel as a trail from fingertip to forearm. Shading is what separates bridal florals from basic ones. I fill the base of each petal and let it fade outward, so the flower has depth once the stain darkens. Mix large and small blooms, add detailed fingers and a bracelet-style wrist, and it sits easily beside pastel outfits, garden venues and soft glam makeup.
14. Bridal Jaali Mehndi
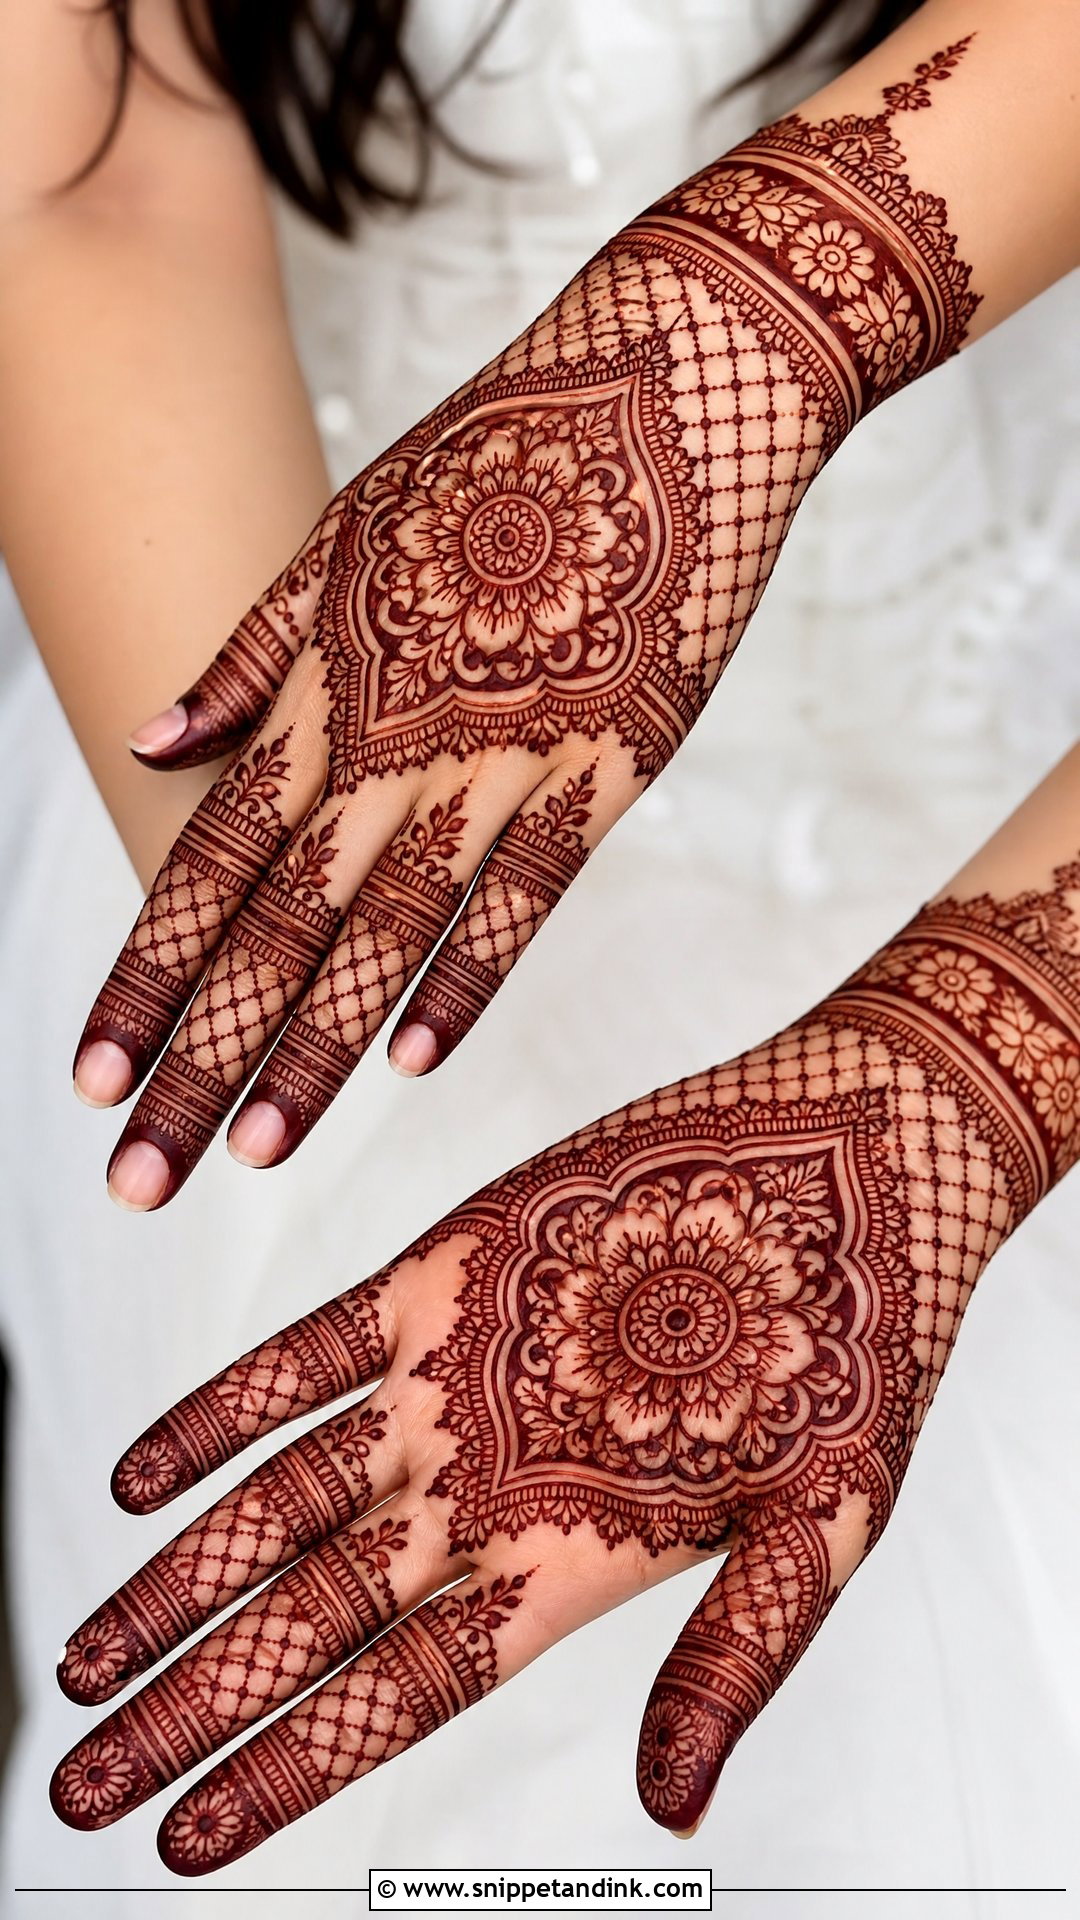
Jaali is the crisscross mesh that gives henna a lace-like texture, framed into panels with tiny dots and borders on the palm, back hand, fingers or forearm. Mesh is unforgiving work. If the paste is too thick or the cone pressure changes, the squares come out uneven, and one bad patch makes the whole hand look messy. I keep my jaali paste slightly smoother than my outline paste. Then I break the mesh up with open motifs or bold outlines so the eye gets a rest.
15. Bridal Portrait Mehndi
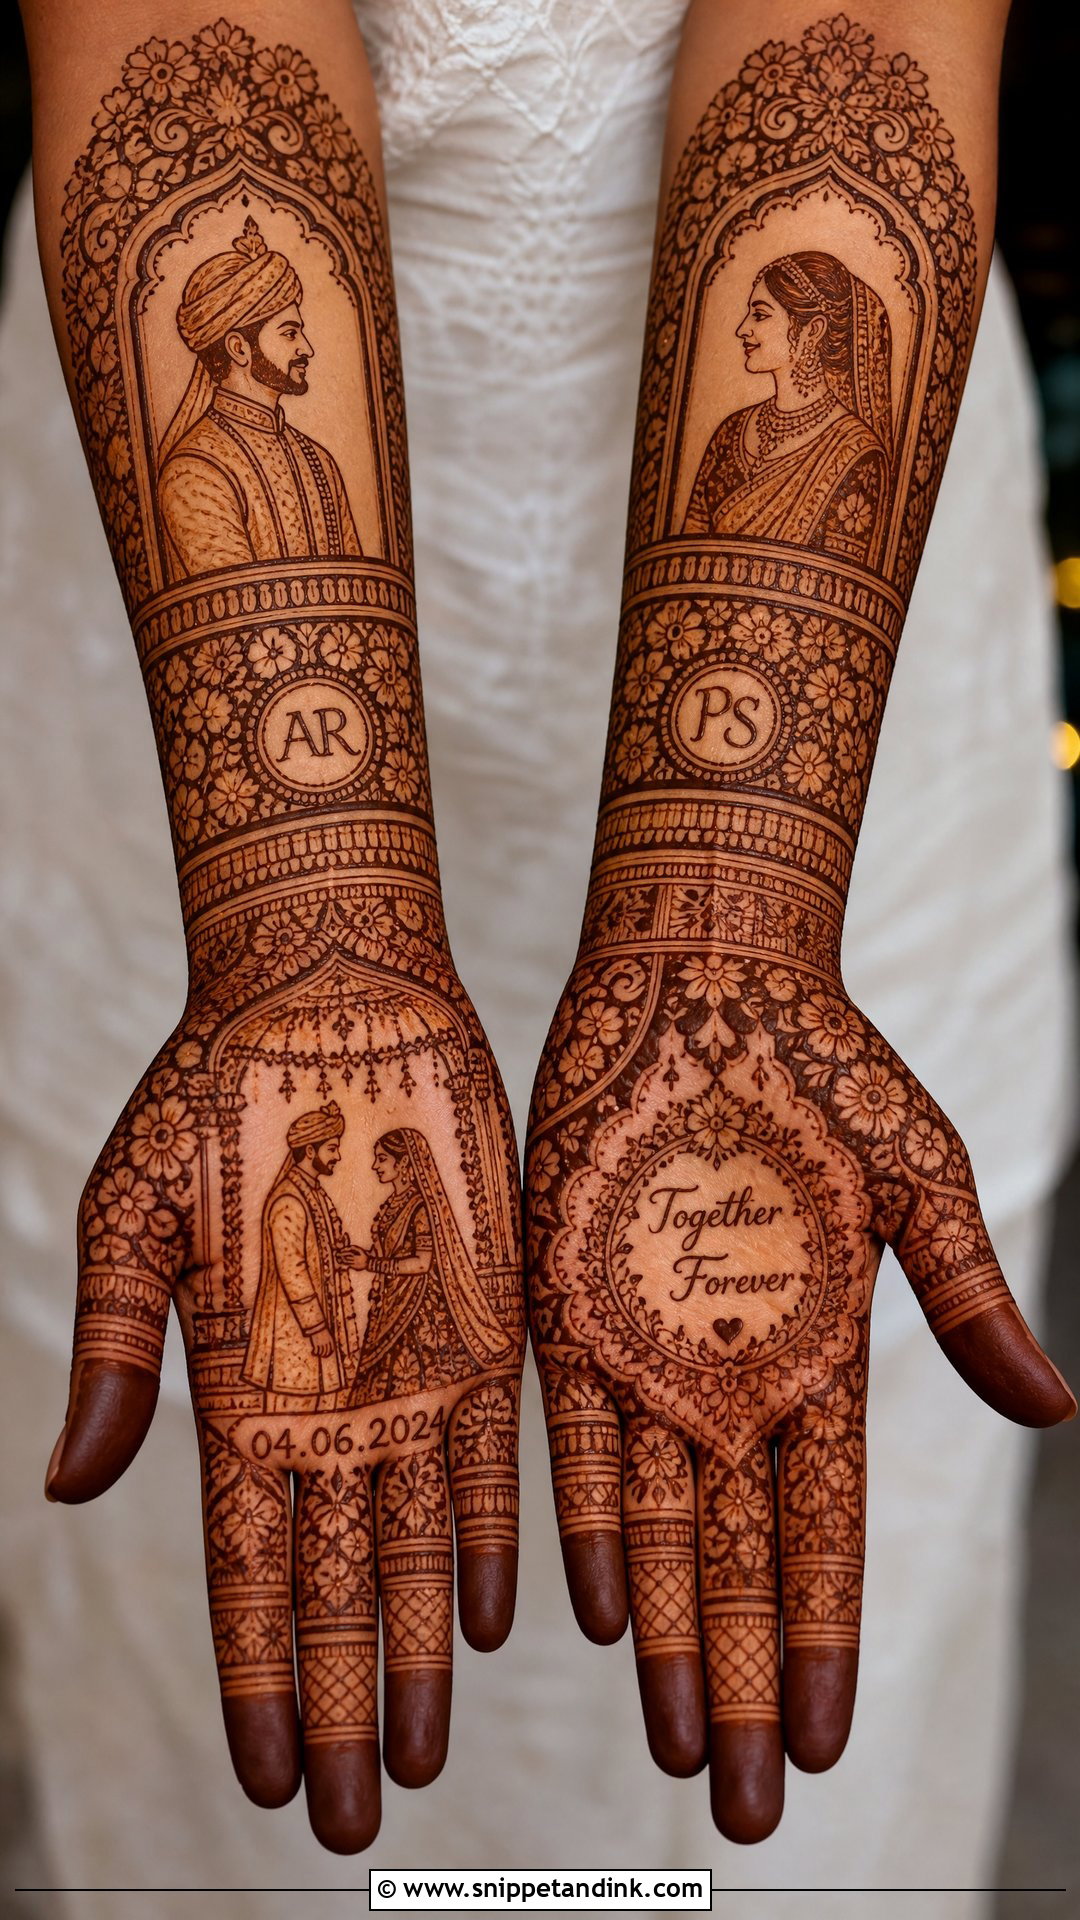
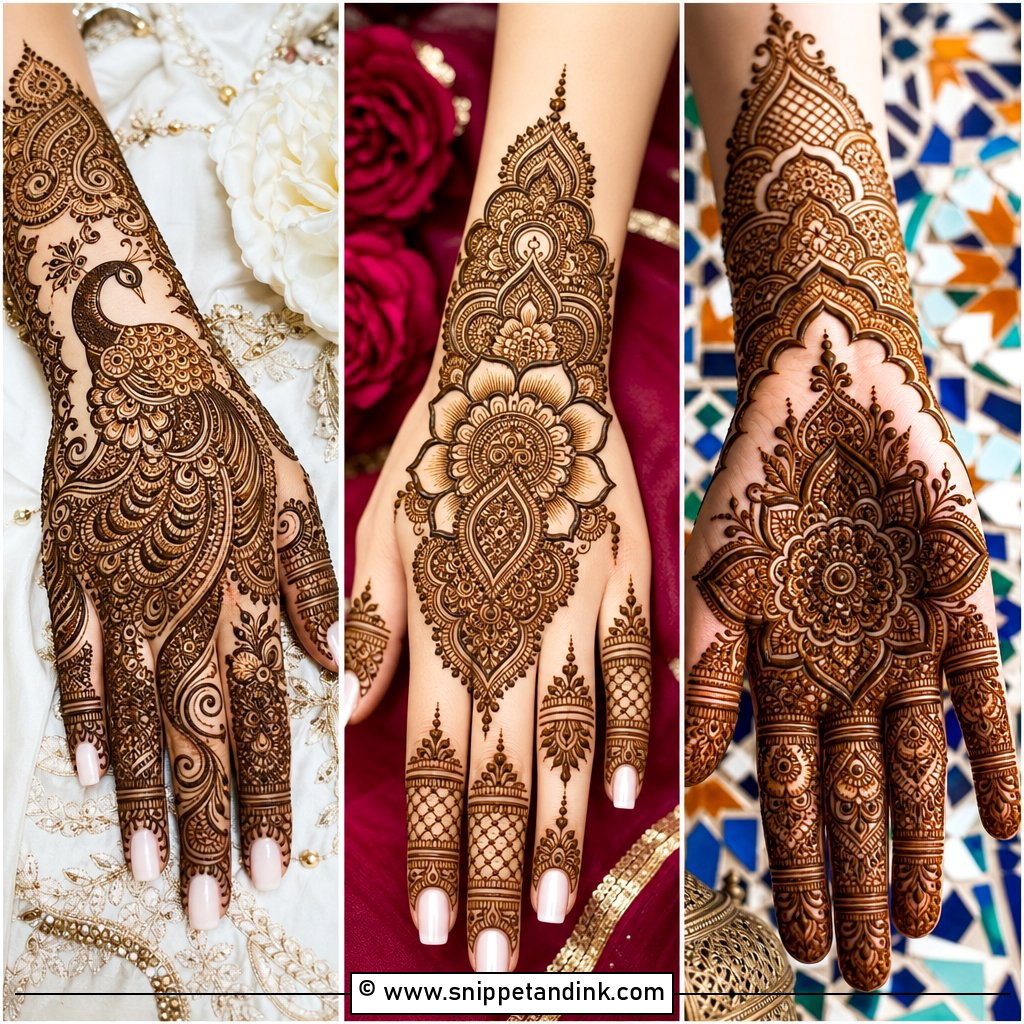
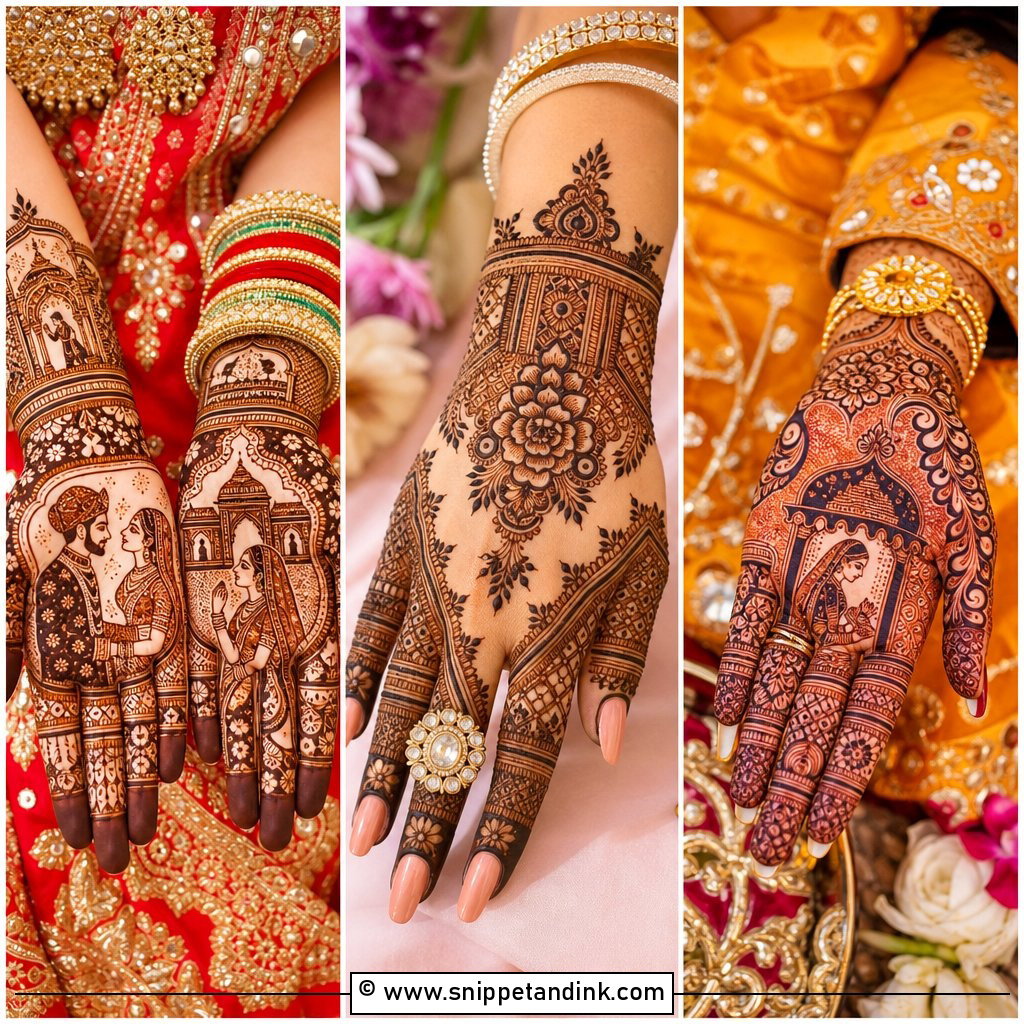
Portrait mehndi tells the wedding story through detailed figures of the bride and groom, usually on the palms or forearms, surrounded by a mandap, flowers, paisleys and decorative frames. This is specialist work. Faces, clothing and proportions are drawn at a tiny scale, and henna lines spread a little as they stain, so an artist without portrait practice can end up with blurred features. Ask to see her day-two stain photos, not just fresh paste. Keep the surrounding fillers neat so the figures stay readable, and add initials, a date or a small symbol from your own story if you want it personal.
16. Bridal Dulha Dulhan Mehndi
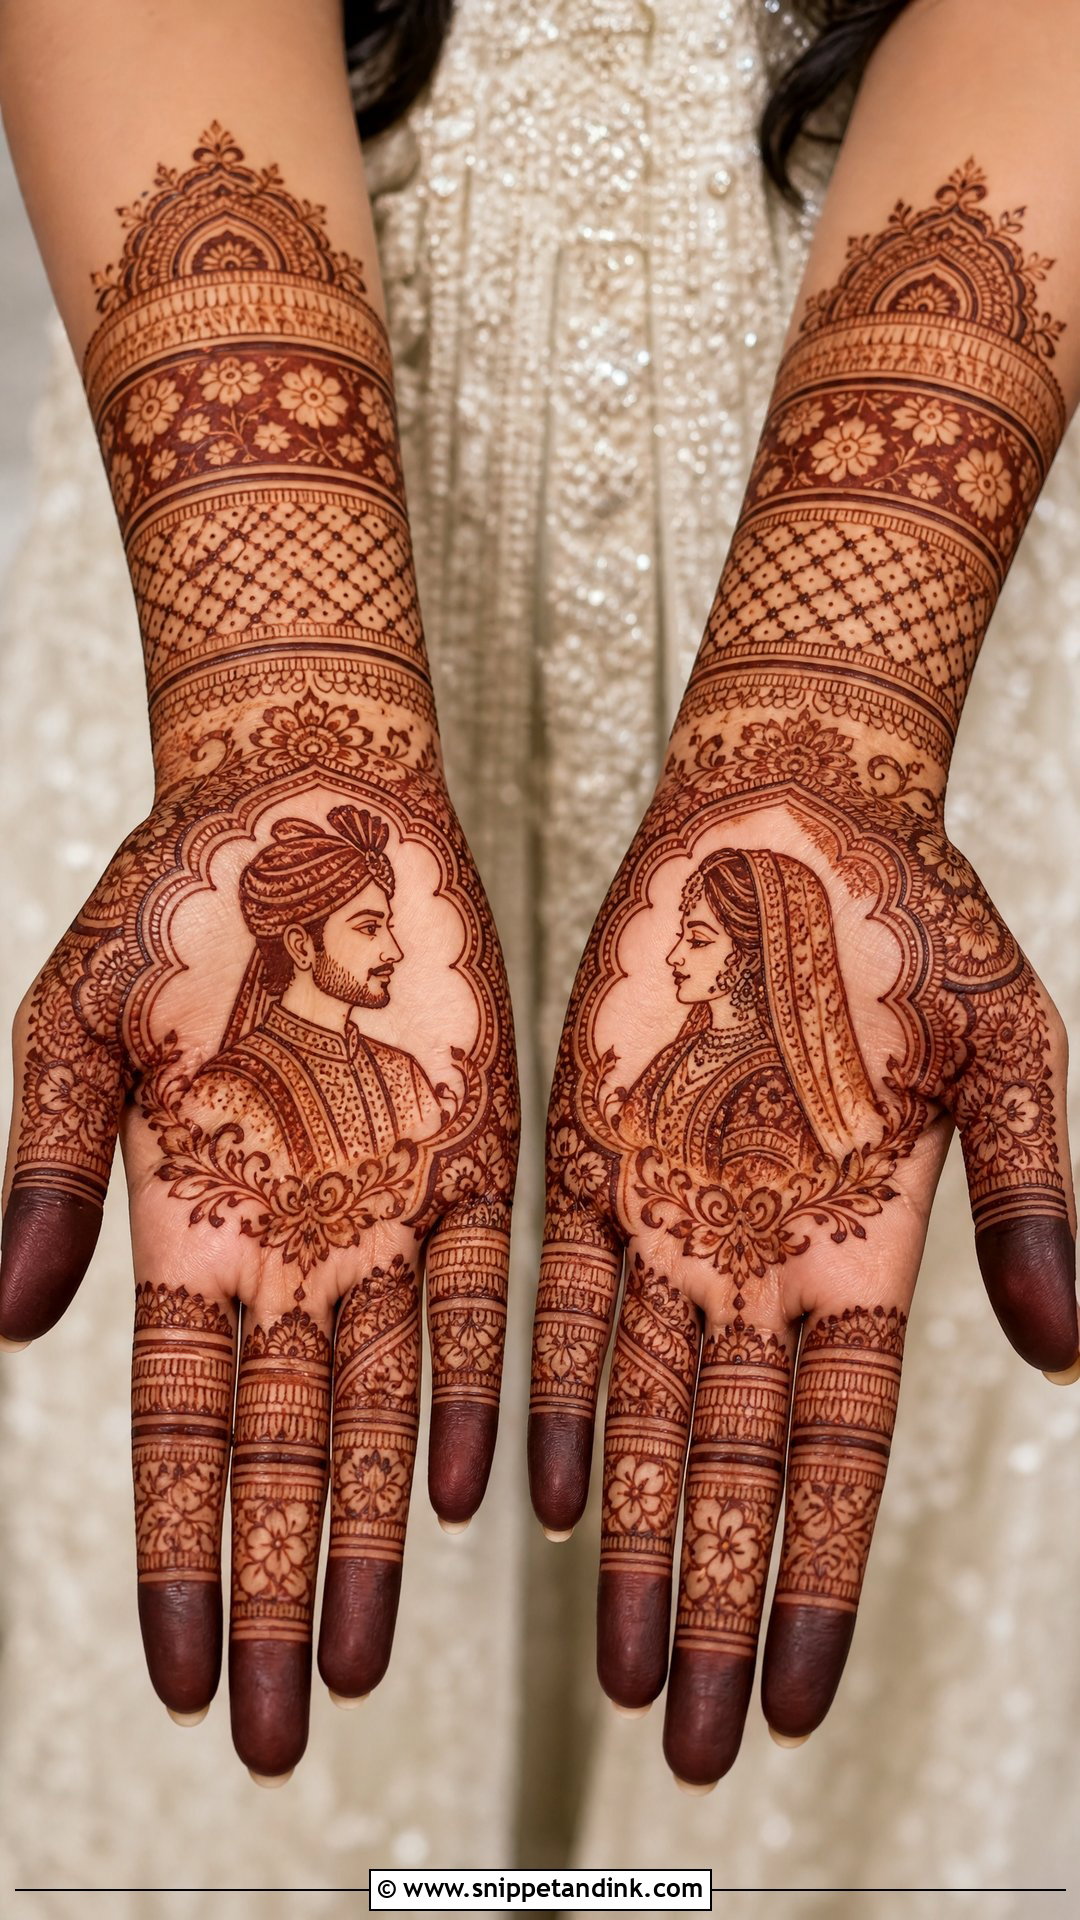
Bridal dulha dulhan mehndi puts the couple at the center: the bride on one palm, the groom on the other, or both together inside decorative frames. Paisleys, florals, mandala borders and filled fingers complete the rest. I keep the faces simple on purpose, with clear outlines for the clothing, because a clean expression reads better than tiny detail once the stain settles. Both hands are drawn with the final pose in mind, so the couple faces each other when your palms are held side by side for the photographer.
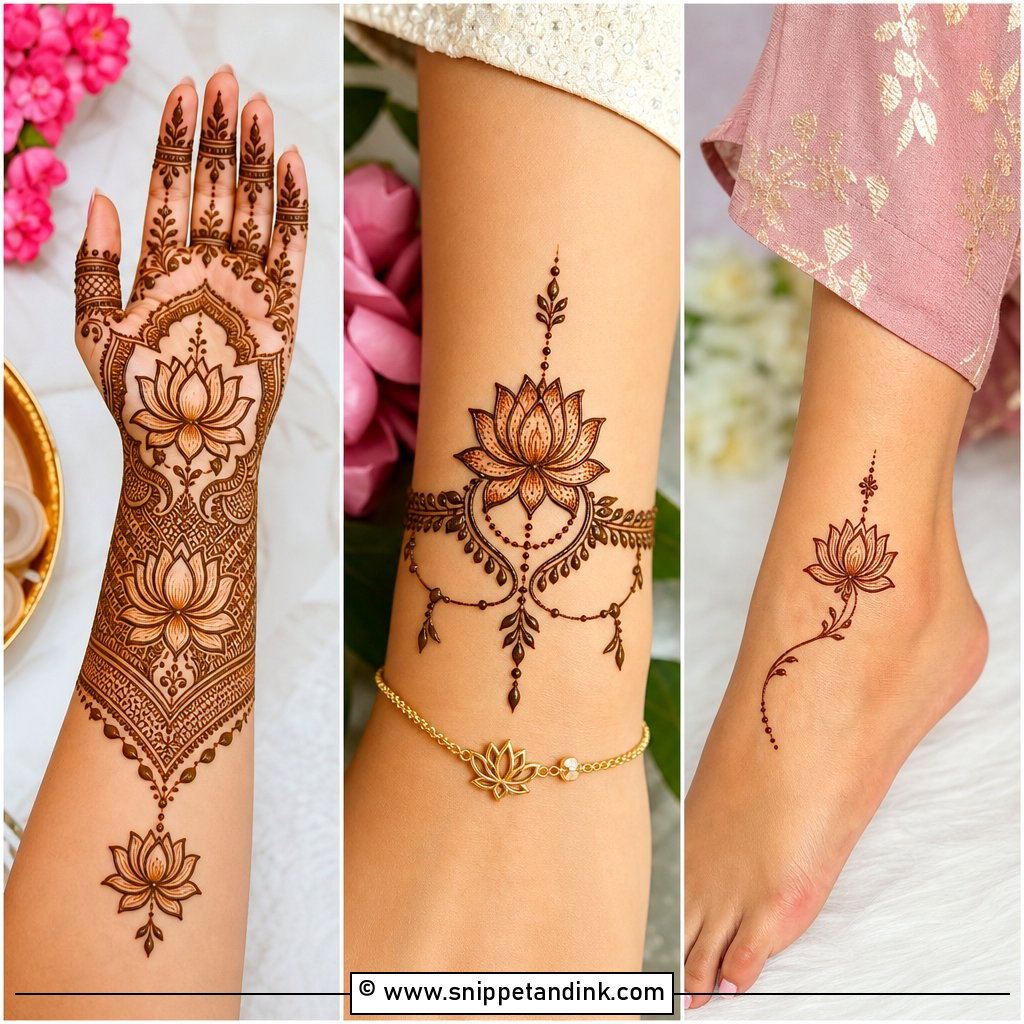
17. Bridal Lotus Mehndi
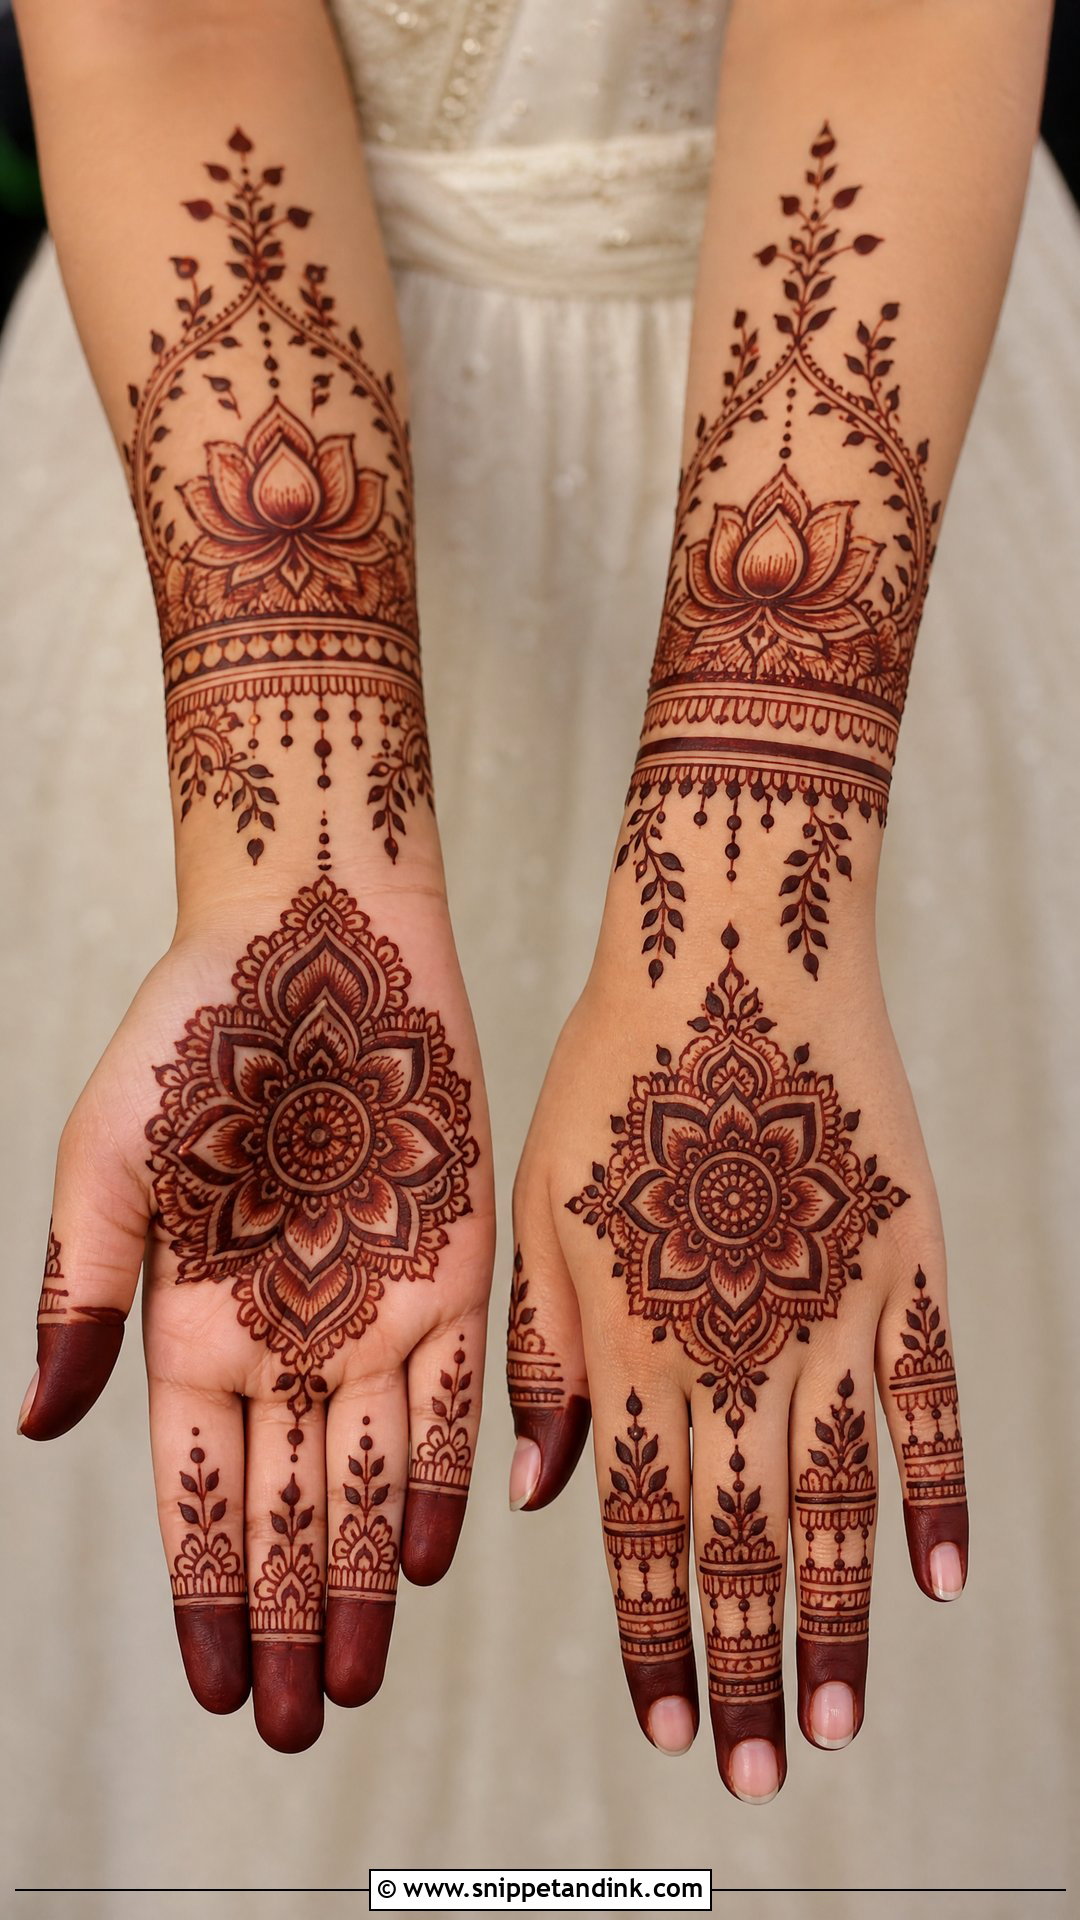
The lotus is the most versatile flower in my kit. It works as a palm centerpiece, a back-hand medallion, a wrist border or a repeated forearm band, and its layered petals hold up in both dense Indian work and open modern layouts. Fine dots, leafy vines and light shading make each petal stand out. Temple jewelry, silk sarees and red lehengas pair naturally with it, and so do pastels. When a bride wants something softer than peacocks or portraits but still traditional, this is usually where I suggest we begin.
18. Bridal Rajasthani Mehndi
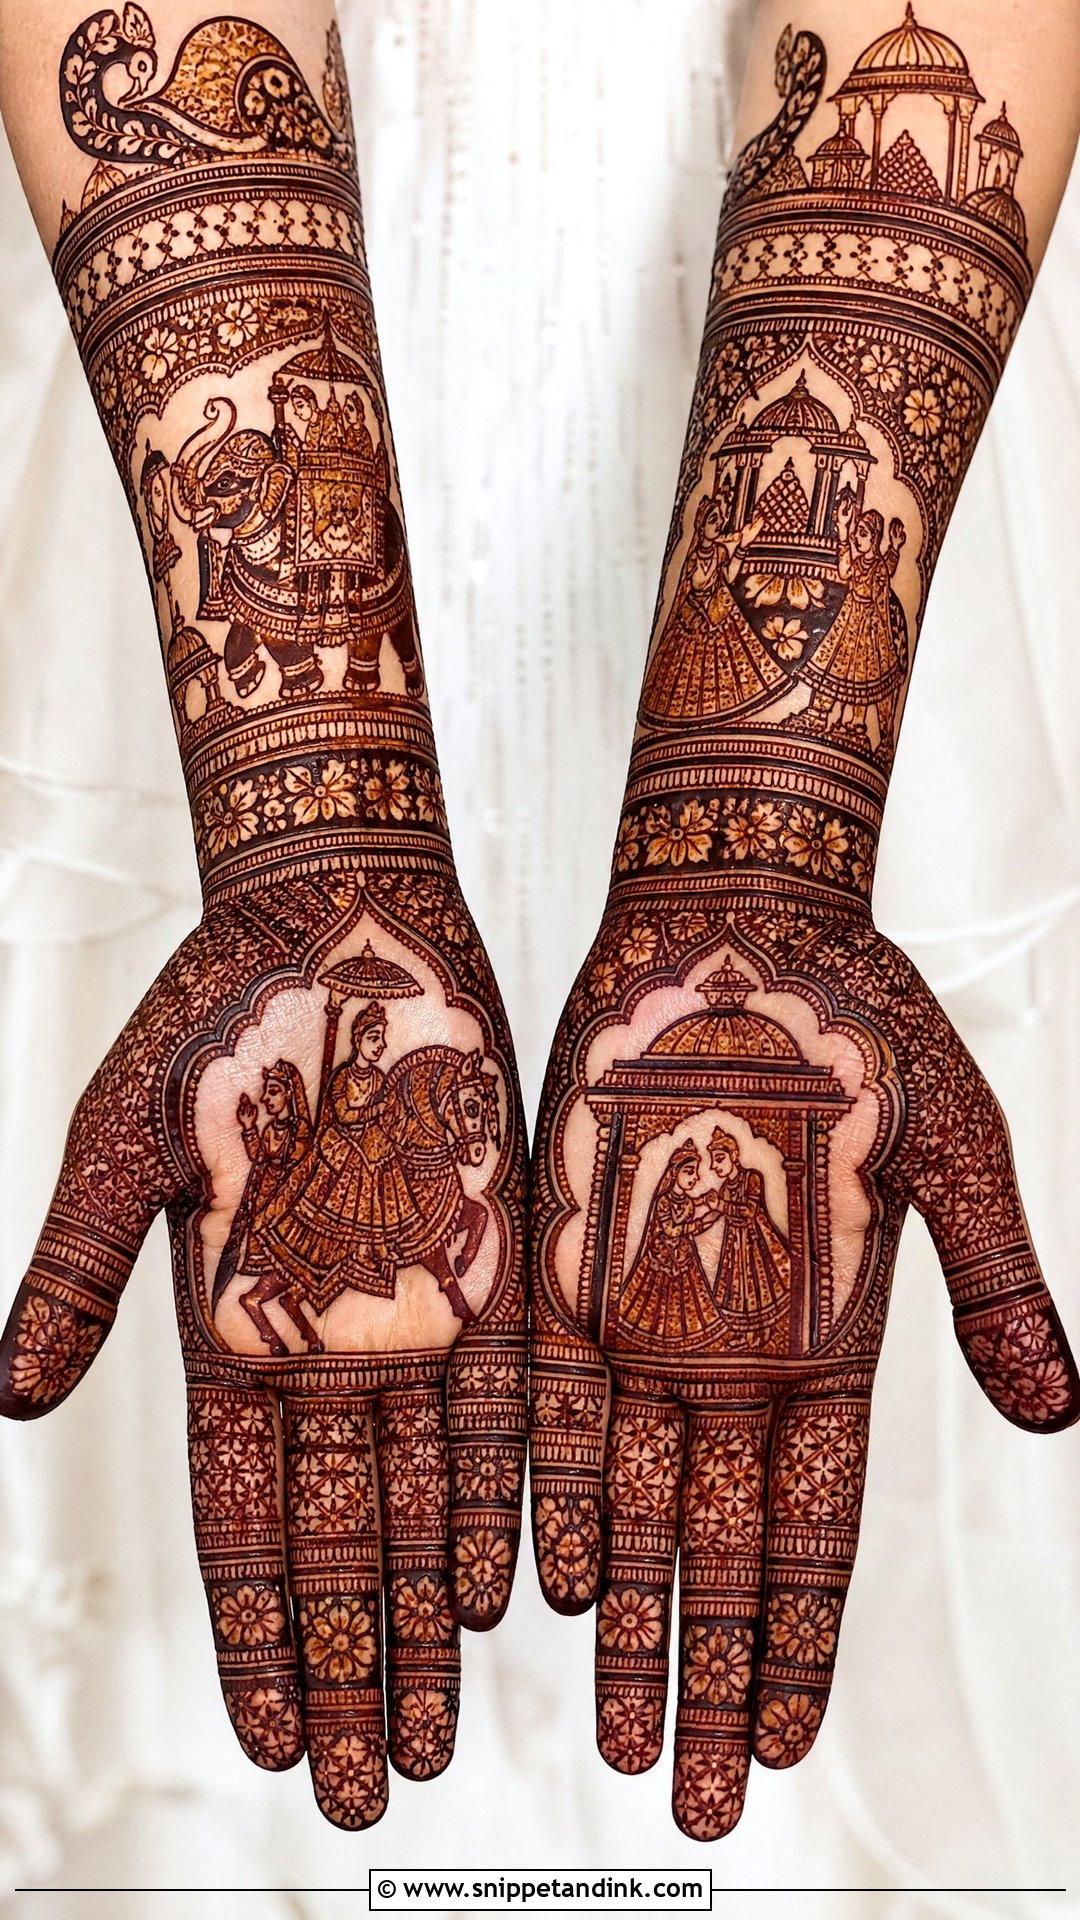
Rajasthani bridal mehndi runs well up the arms with bride-groom figures, royal motifs, elephants, peacocks, palanquins, paisleys and dense filler. It’s a long application, often split into stretches with breaks, so plan the whole day around it. Because it relies on miniature scenes, choose an artist whose fine work you’ve seen in stained photos, not only on paper. I put clear borders around each major scene so the story stays readable from a distance. Heavy jewelry, bright outfits and classic posed portraits are where it shines.
19. Bridal Moroccan Mehndi
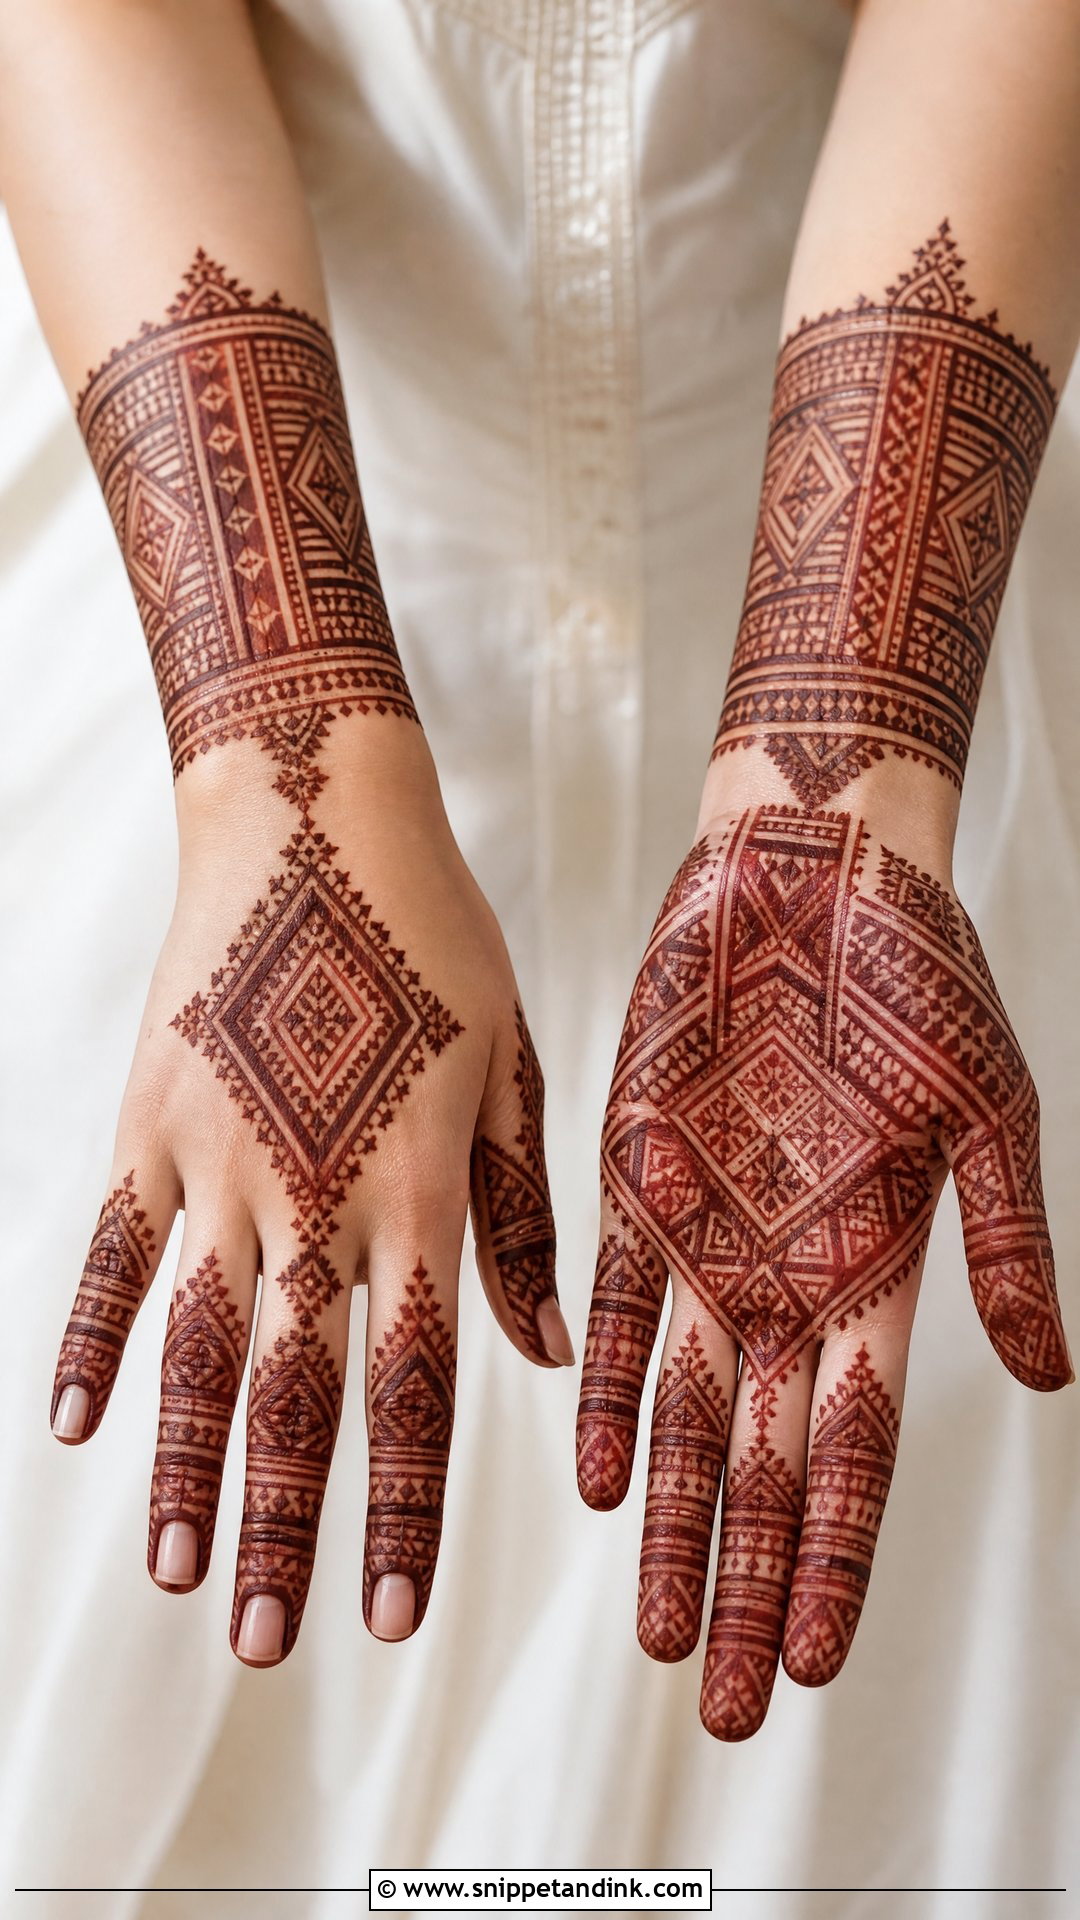
Moroccan-style henna swaps florals and paisleys for geometry: diamonds, triangles, straight lines, chevrons, grids and symmetrical bands. For a bride I cover the palms, backs of the hands, fingers and wrists in coordinated panels, with fine detail inside each shape. Straight lines are harder on skin than curves because knuckles and tendons shift underneath, so I draw them with the hand resting completely flat. Choose it if you want something unlike Indian or Arabic work and you’re planning simple jewelry. Cuff-like wrist bands keep it bridal.
20. Bridal Gulf Mehndi
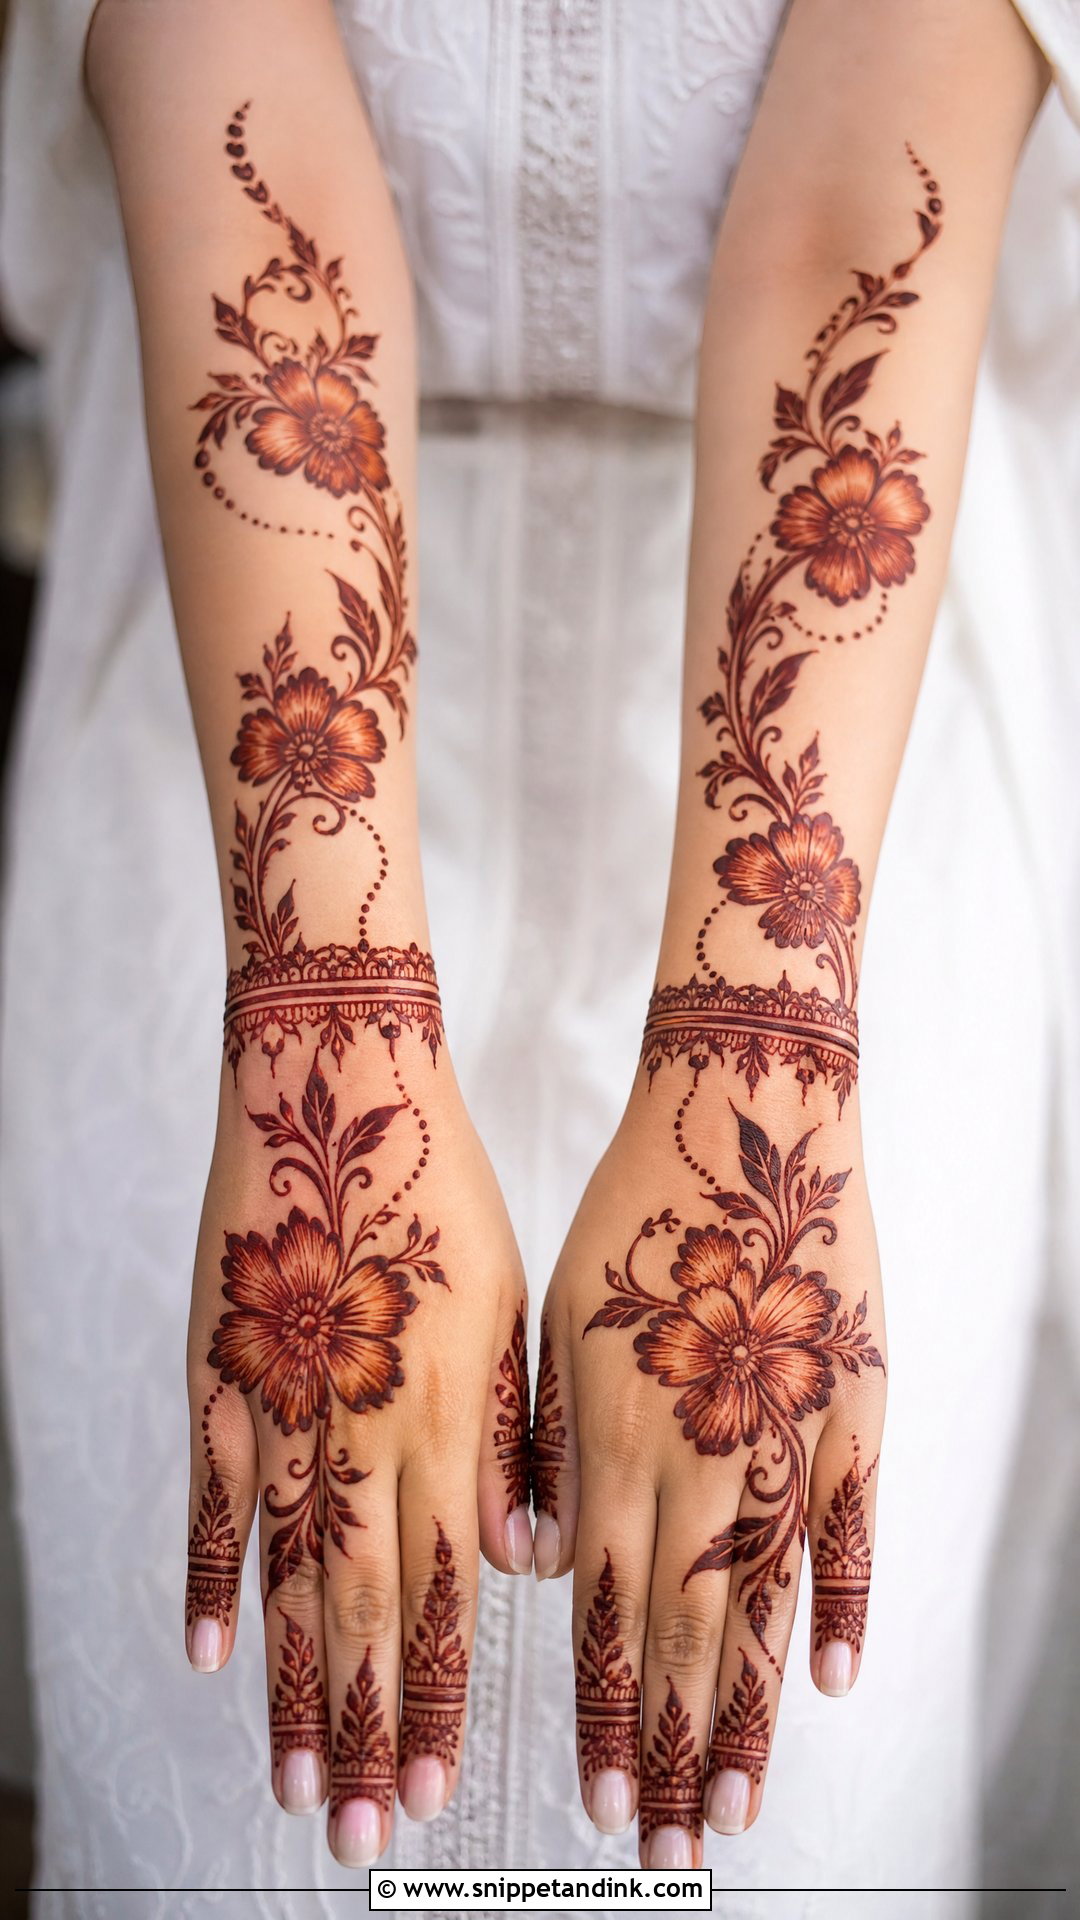
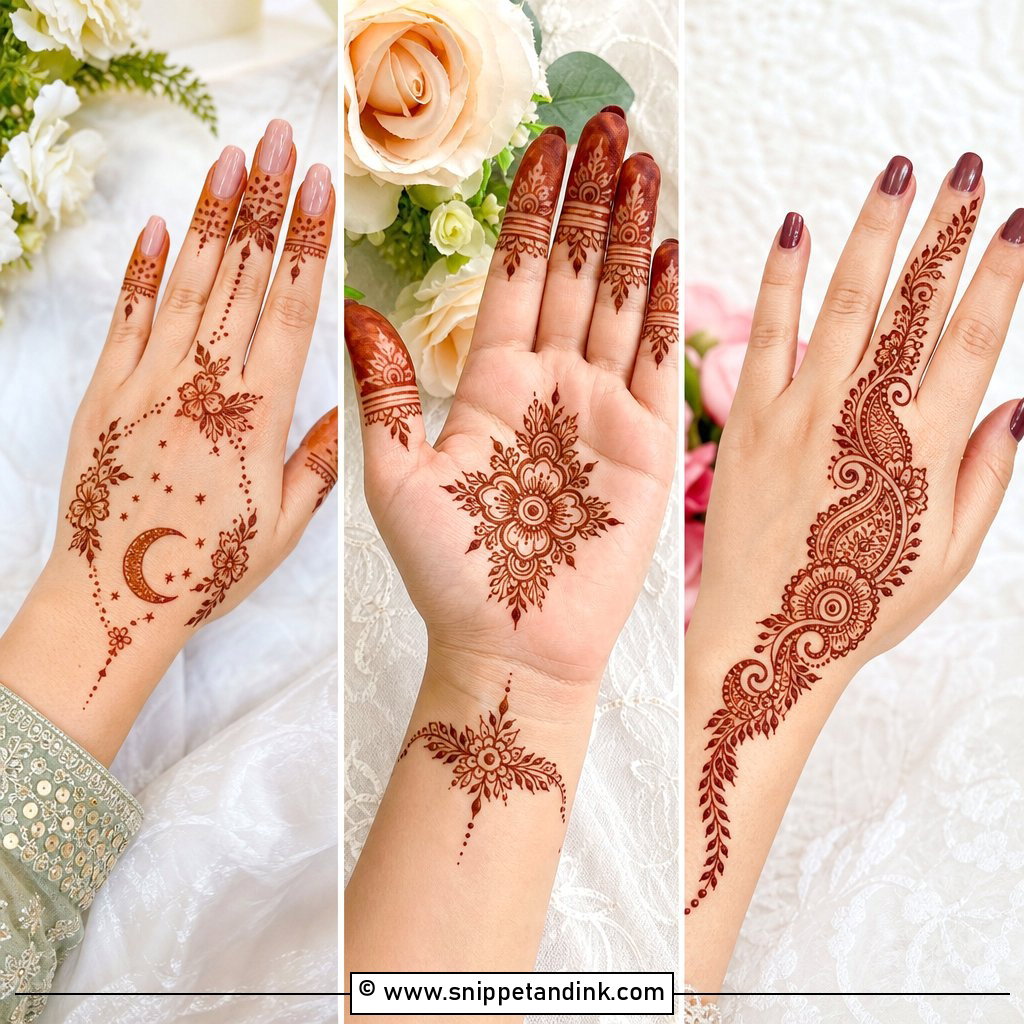
Gulf or Khaleeji-inspired work is built on big shaded flowers, leafy vines and wide open skin between them. For a bride, I extend it from the fingers to the forearm while keeping that generous spacing. The large motifs show clearly on the back hand, which helps, given that the back stains lighter than the palm. I draw the outlines bolder than usual so the flowers still read from across a room. Finish with strong finger designs and a soft wrist cuff.
21. Bridal Finger Mehndi
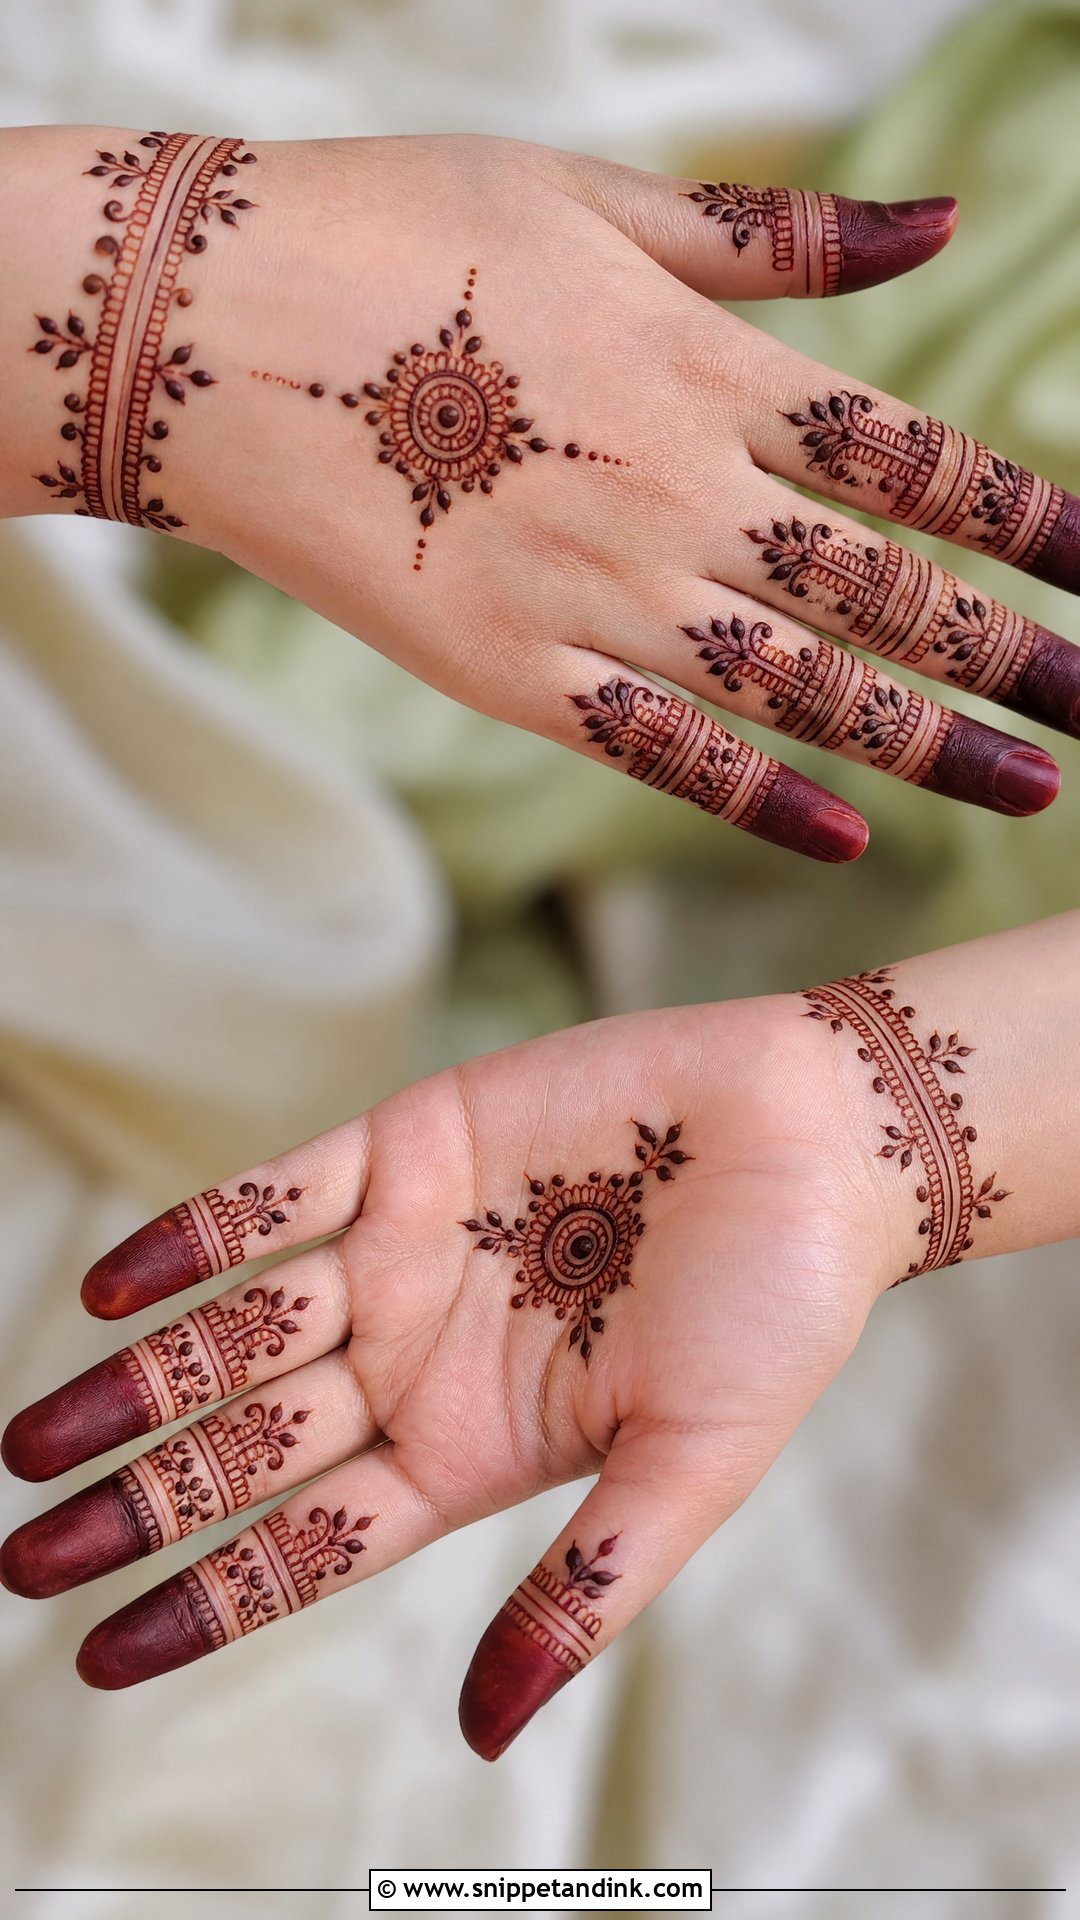
Fingers end up in more wedding photos than people expect, because they sit right next to the rings. Fine bands, leaves, dots, net patterns and filled fingertips make them look jewelry-like while linking to a palm mandala, back-hand trail or wrist cuff. Fingertips take henna very darkly, so filled tips become the deepest part of the stain. Don’t leave the rest of the hand bare, though. A small central motif or a wrist detail stops the fingers from looking disconnected in close-up ring shots.
22. Bridal Wrist Cuff Mehndi
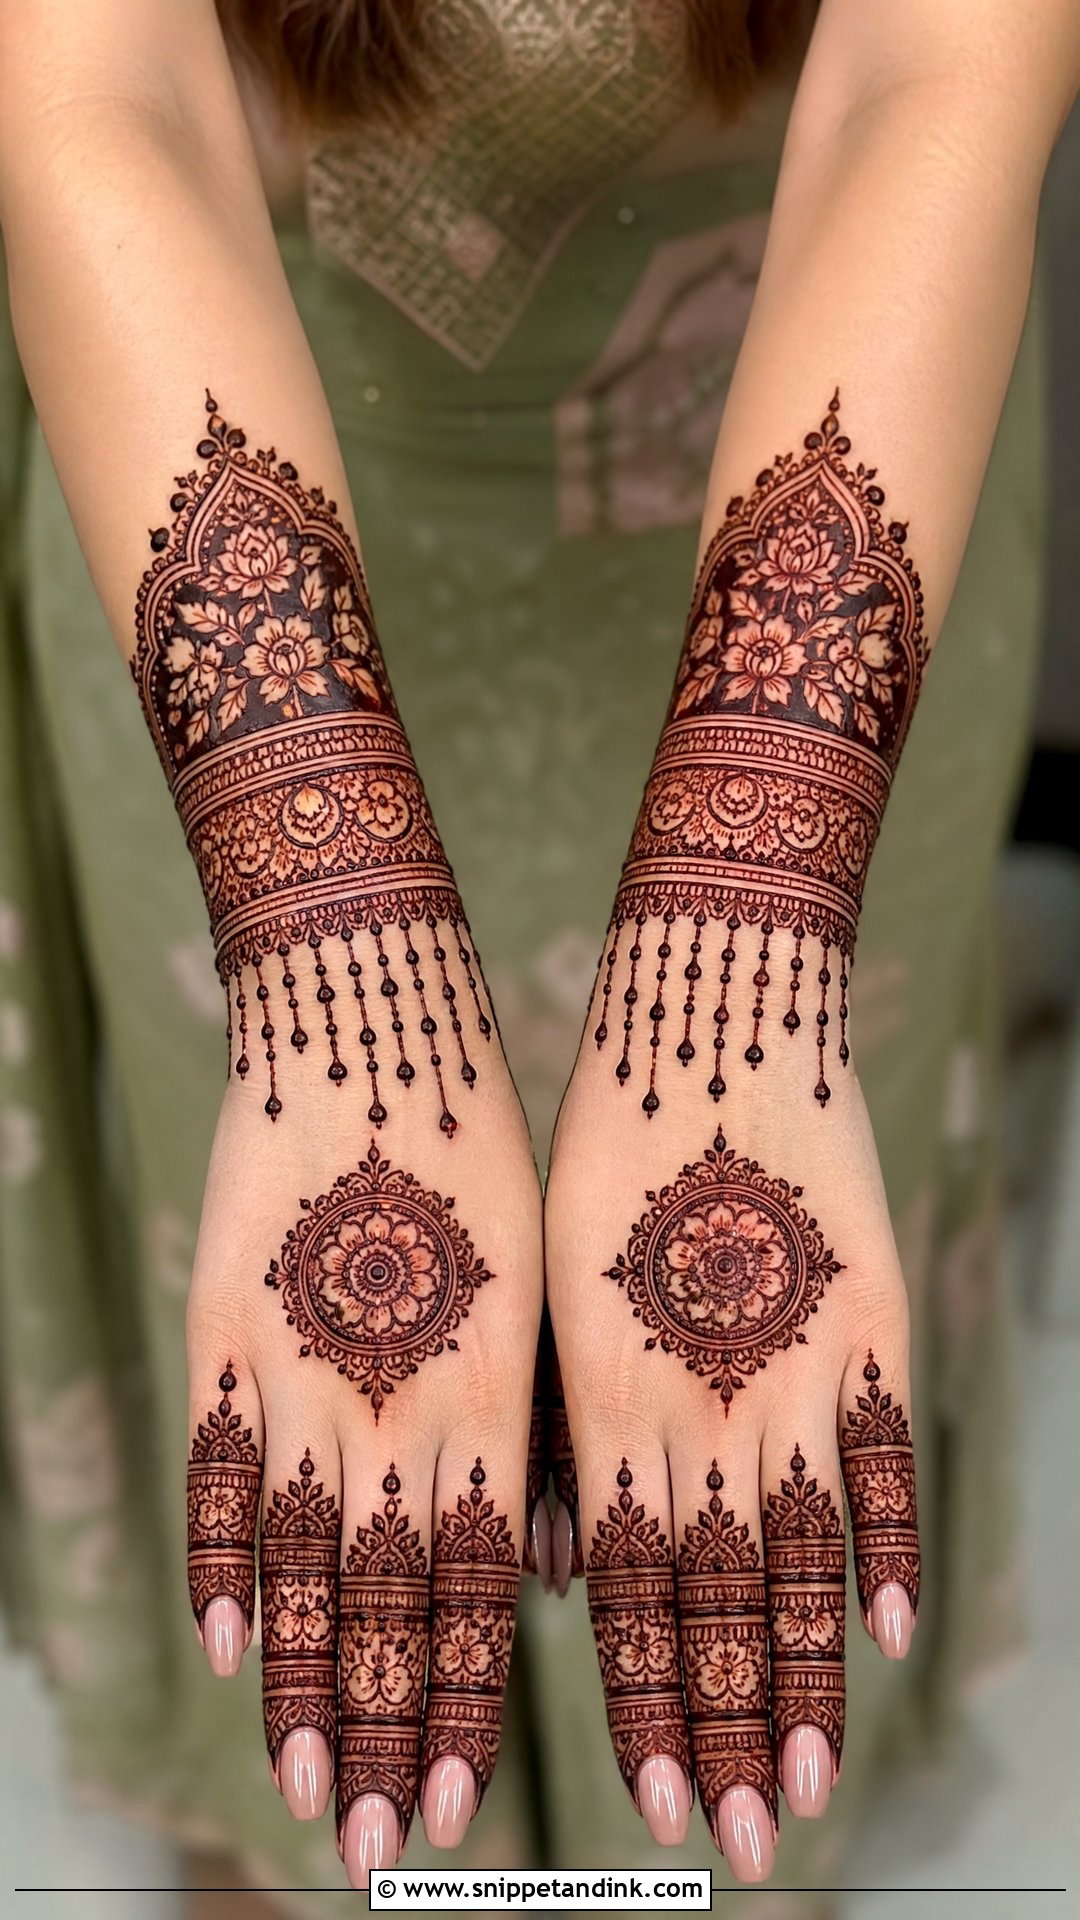
Think of a wrist cuff as henna jewelry: bracelet bands, chains, hanging dots and floral cuffs connecting to finger details like a hathphool. The first thing I ask is what you will wear on your wrists. A chooda or a stack of bangles can hide most of a cuff, so I place the band just below where they sit, or design it to peek out between them. Keep it detailed but not so heavy that it hides the shape of the wrist. A small mandala on the back hand balances it.
23. Bridal Negative Space Mehndi
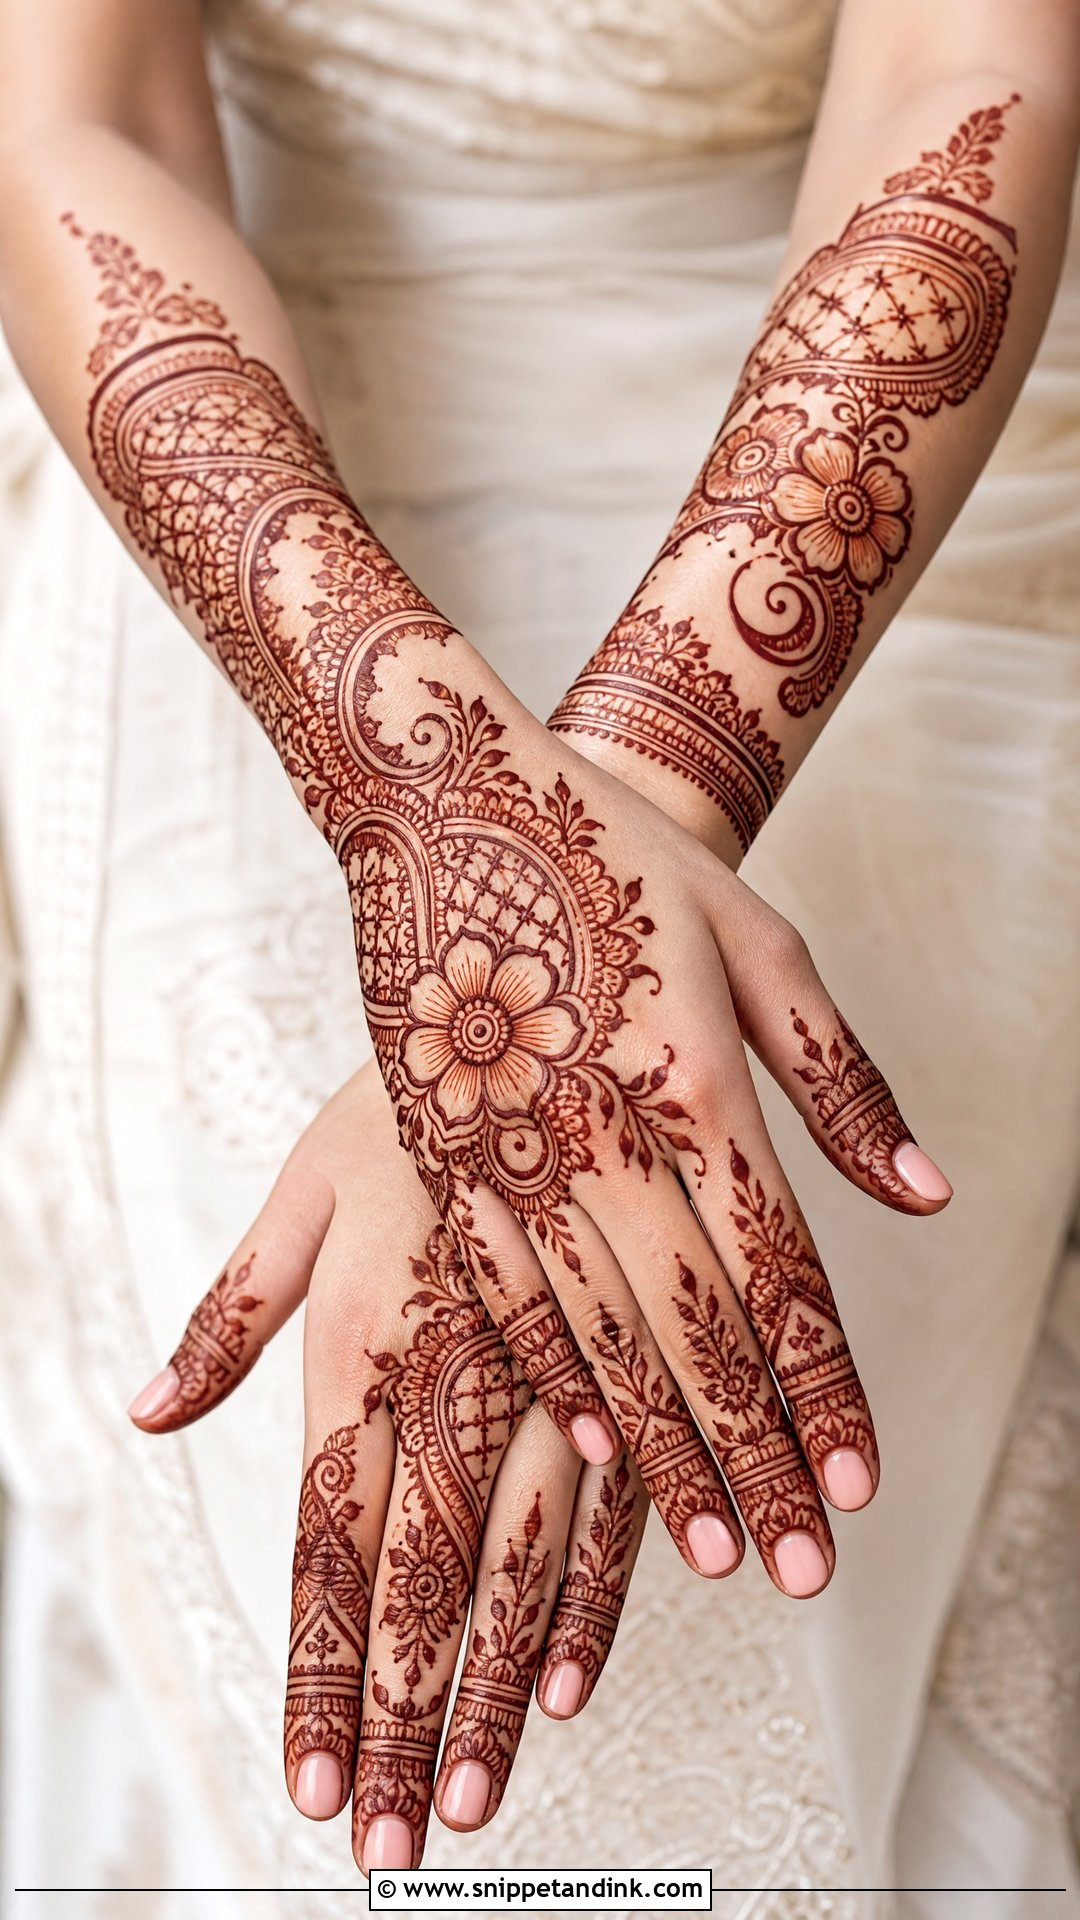
Here the open skin is part of the drawing. Bold florals, curved paisleys, mandala sections or geometric panels are separated by clean empty areas, which keeps the motifs easy to see in pictures. Those gaps must look planned, not accidental, so I decide where they fall before filling anything. To keep it bridal, the fingers, wrist and forearm still need proper detail. It pairs well with contemporary outfits and statement jewelry, and it’s one of the quicker bridal designs to sit through.
24. Bridal Half Hand Mehndi
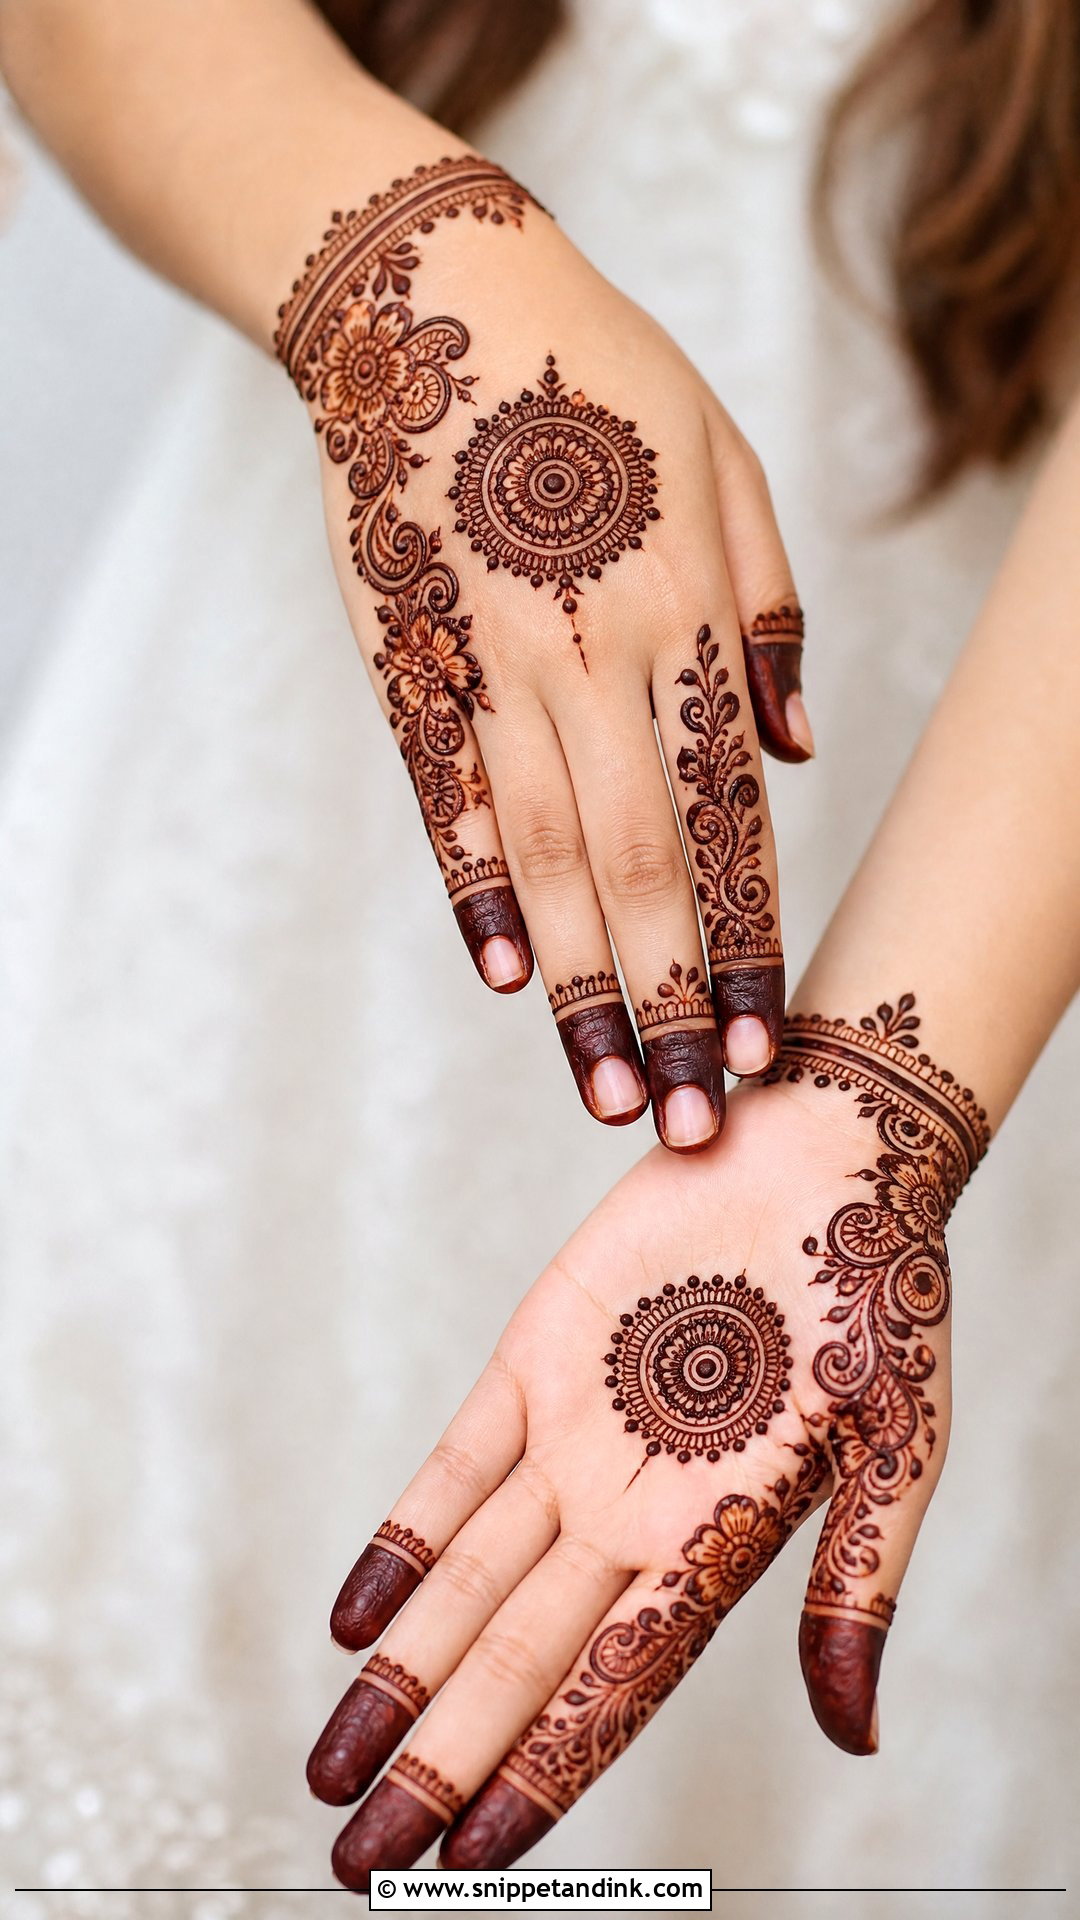
Half hand mehndi covers the fingers, palm or back hand and wrist, then stops before the forearm. It’s lighter to sit through and easier to live with, which makes sense for simple ceremonies, engagement functions, pre-wedding shoots or brides who value comfort. The design can be Arabic, mandala, floral, or Indo-Arabic, depending on your outfit and jewelry. Where I stop the pattern matters. I end it on a finished border just above the wrist crease, because a design that trails off mid-wrist looks as though the artist ran out of time.
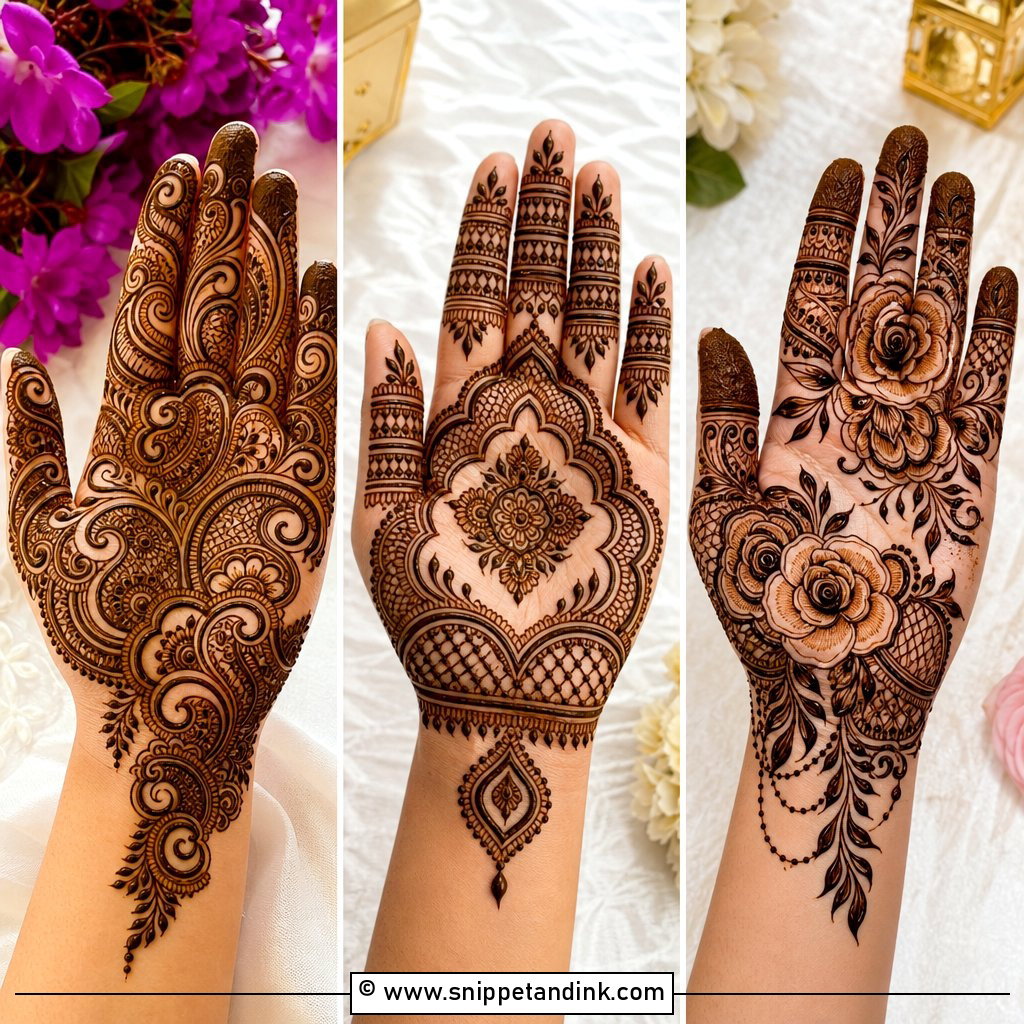
25. Bridal Feet Mehndi
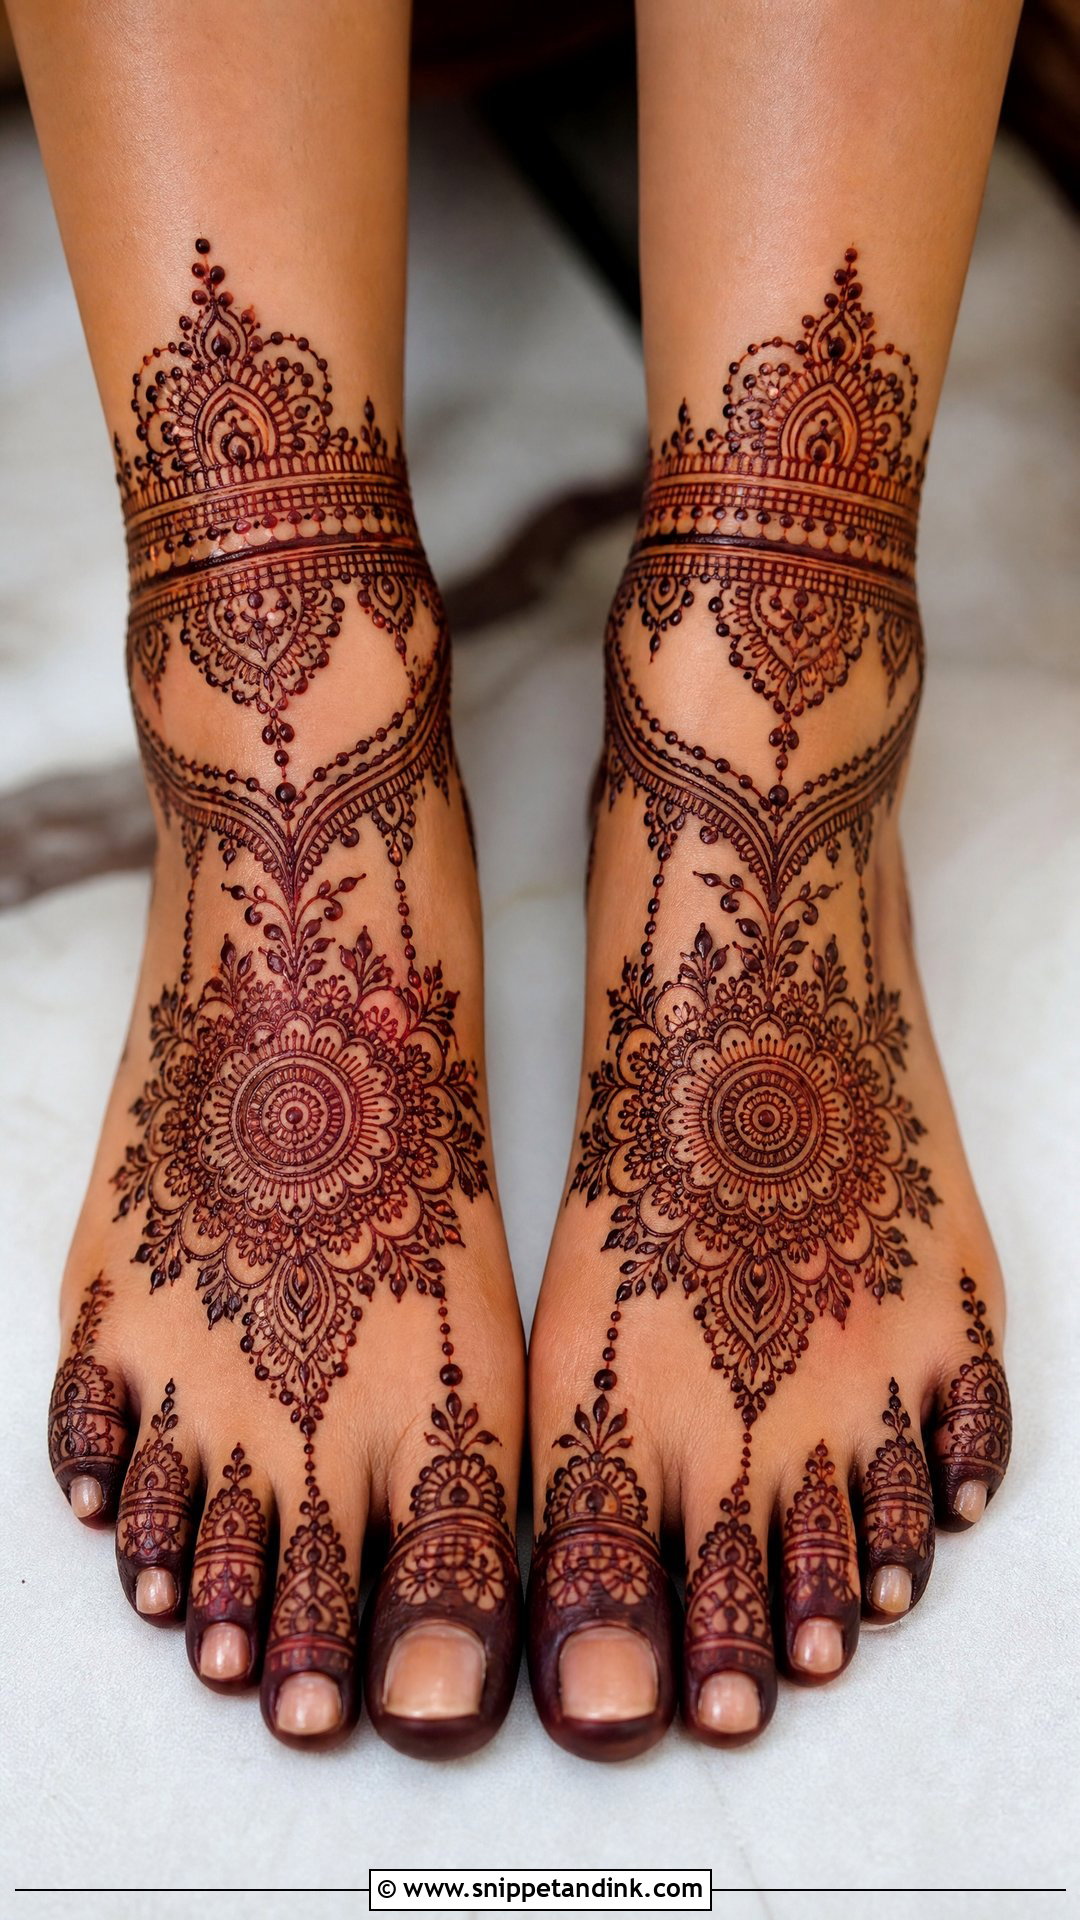
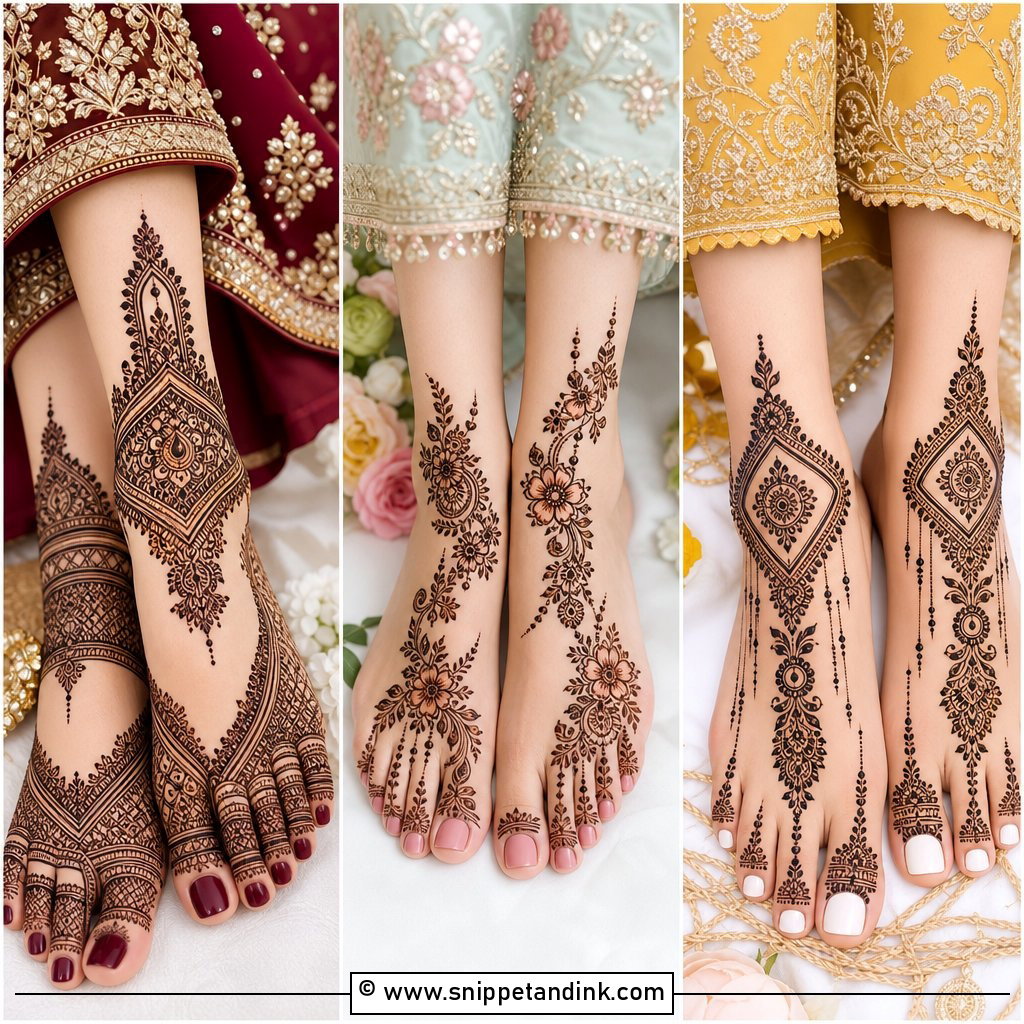
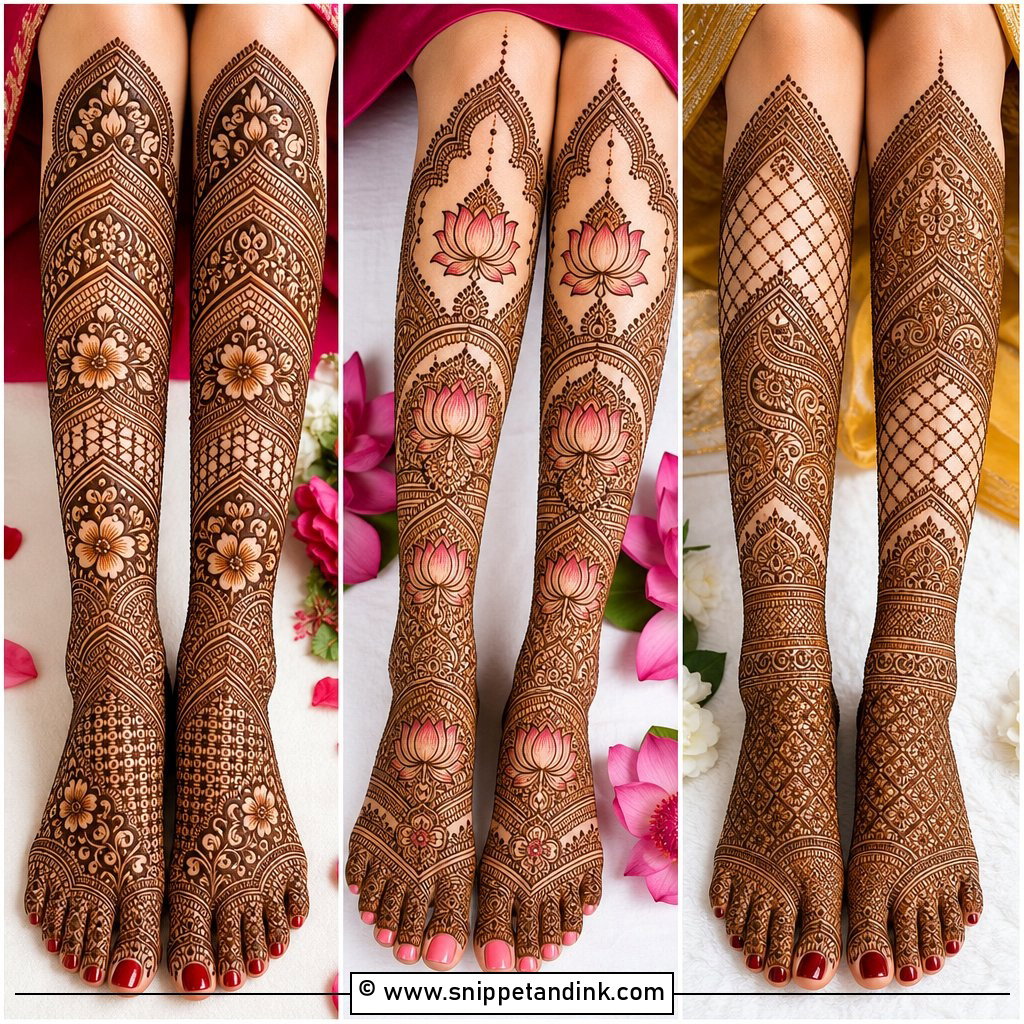
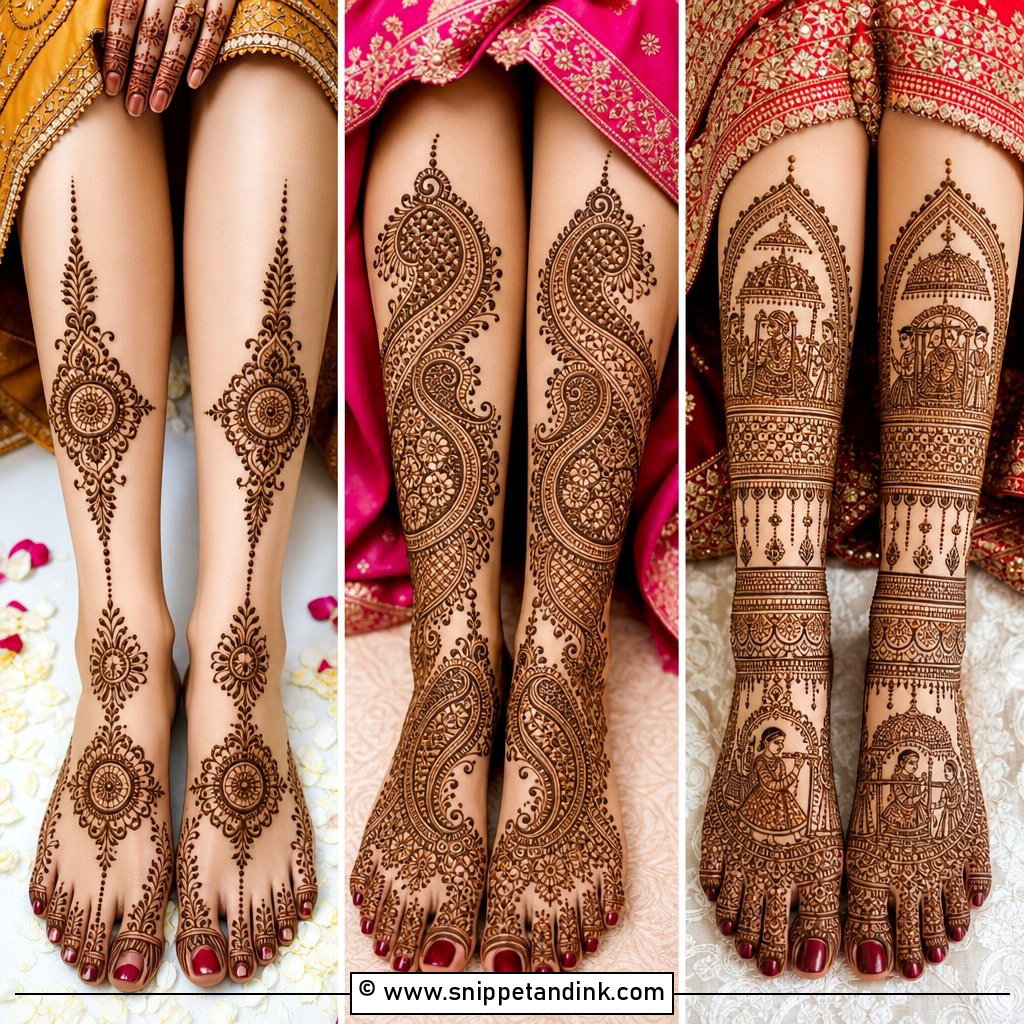
Feet complete the look for ceremonies where anklets, sandals or barefoot rituals are on show. A bridal feet design usually carries mandalas on the tops of the feet, floral vines, anklet-style borders, toe details and matching patterns on both sides. Feet stain very dark, but wet paste smudges the moment you stand up, so I plan foot work around when you’ll next need to walk. Crowded lines blur on the foot; ask for designs that frame the toes and ankles cleanly. With payal and open footwear, it’s often the detail guests notice when you sit for the rituals.
From Orange Paste to Deep Maroon in Two Days
Fresh stain is bright orange when the paste comes off. That surprises brides every time, and it is exactly how natural henna should look. The color darkens over the next 24 to 48 hours as it oxidises, which is why I schedule bridal application one or two days before the ceremony, never the morning of.
While the paste is on
- Leave it on as long as you can bear; overnight gives the deepest result.
- Once it dries, dab on a little lemon and sugar mix so the paste stays stuck to the skin.
- Keep your hands warm. A cold, air-conditioned room slows the stain.
- Wrap loosely in tissue and medical tape to sleep, rather than plastic gloves that make your hands sweat.
Taking it off
Scrape the dry paste away with a blunt edge or rub it off with a little oil. Keep your hands out of water for as long as you can afterwards, ideally the rest of the day, and skip soap, sanitiser and chlorinated pools until the wedding is over. Palms and fingertips go darkest, while the back of the hand stays lighter. That difference is normal, not a sign that something went wrong.
Why I Refuse Black Henna and Ask for a Patch Test
Natural henna never stains black. A paste that promises jet black color within an hour usually contains PPD, a hair-dye chemical that can blister skin and leave marks long after the wedding. I won’t use it, and I’d walk away from any artist who does.
Good bridal paste is henna powder mixed with lemon juice or water, sugar and an essential oil to help release the dye. Some skin reacts to the oil even when the henna itself is pure, so if yours is sensitive, ask for a small patch on the inner arm a week or two ahead. Finish waxing, scrubs and your manicure before the mehndi as well. Exfoliating afterwards takes the stain off with the skin.
Sleeve Length Decides More Than You Think
Coverage, detail and personal meaning are the decisions behind every bridal design I draw, and they get much easier once you know your sleeves, jewelry and schedule. Full Indian work feels grand; Arabic and Gulf styles feel open and light. Mandala, lotus, paisley, jaali and floral layouts are the dependable building blocks, while modern negative space designs give a fresher take. If you want the hands to carry your story, portrait or dulha dulhan work does that best. Bring outfit photos and your ceremony timeline to the consultation, and the right direction usually becomes obvious within minutes.
You'll Like These Ideas:


Leave a Reply