
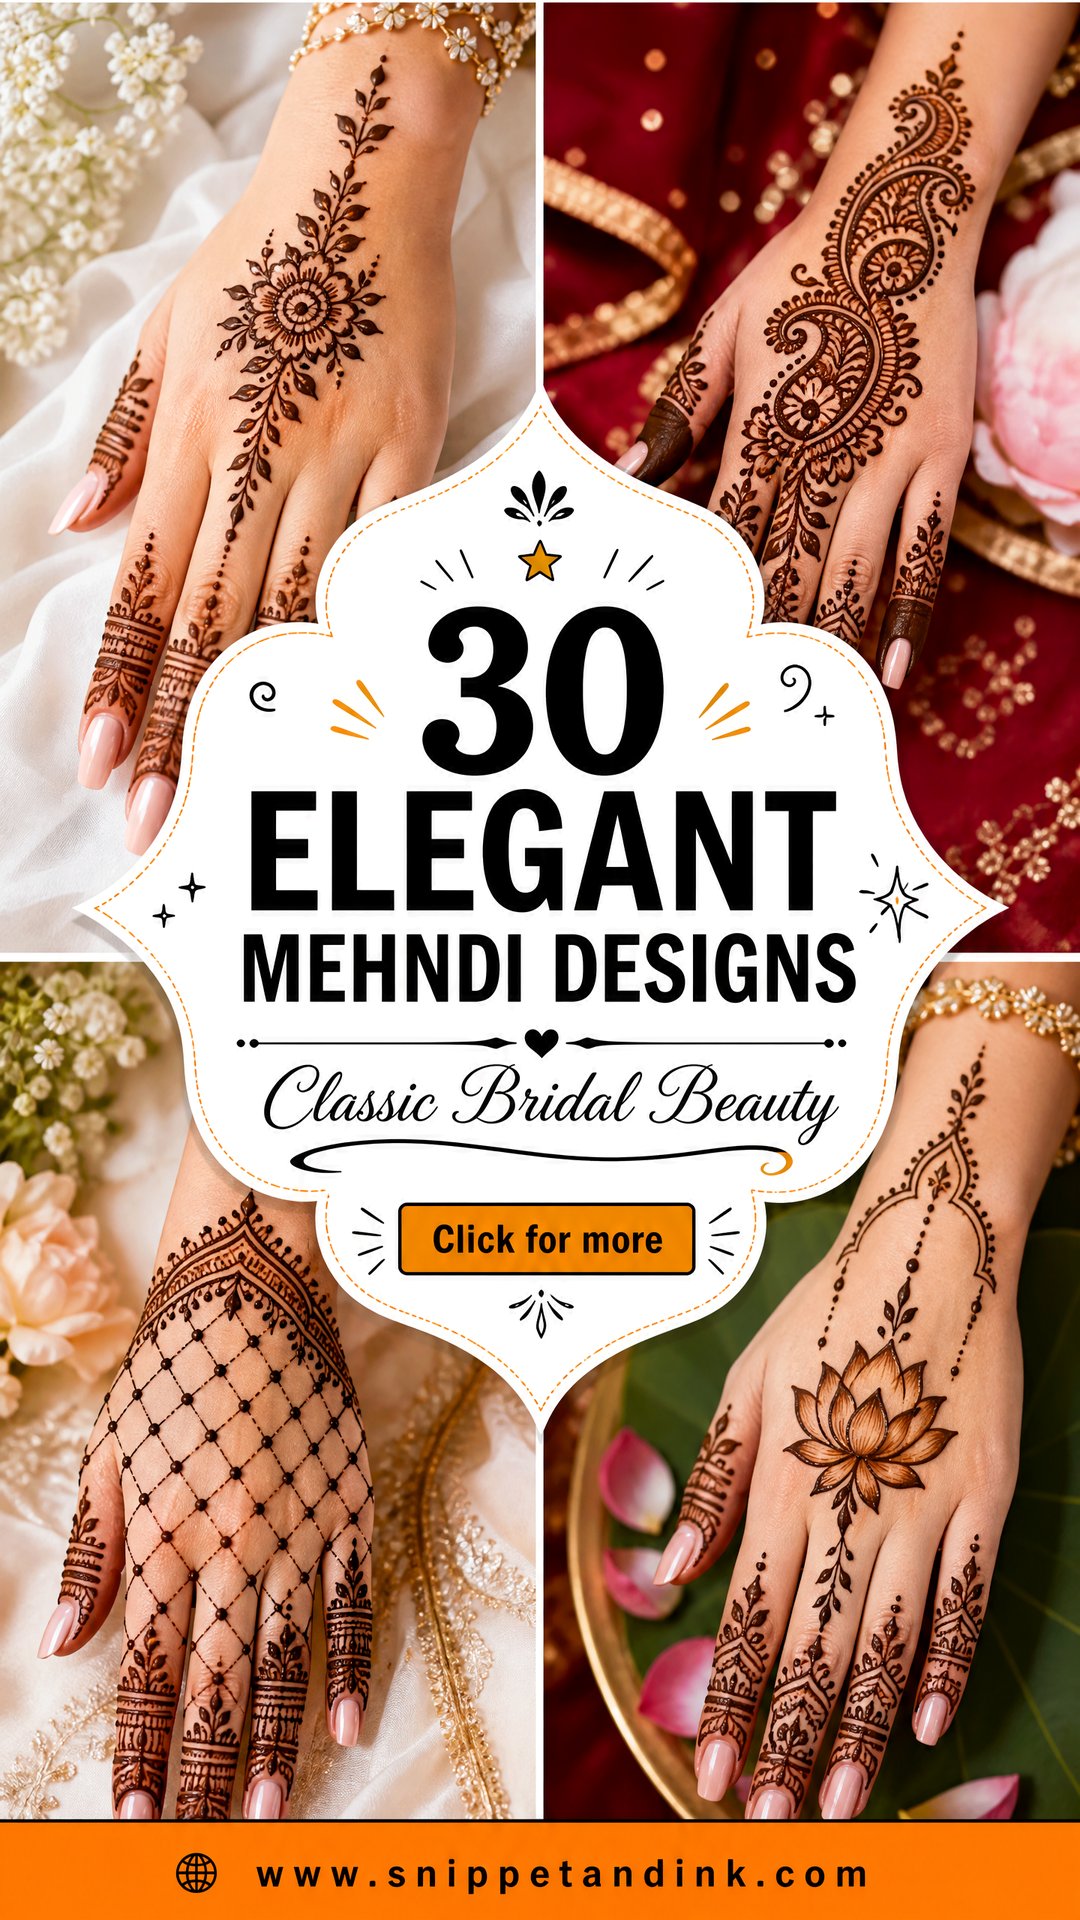
The henna I’m proudest of is rarely the densest. What makes a design read as elegant is planning: where the eye lands first, how much bare skin is left between motifs, and where the pattern stops. That applies to a bride’s full arms and to a sister who wants twenty minutes of work before the sangeet. Below are thirty layouts I apply again and again, from full Indian bridal coverage to Arabic trails, jaali, mandalas and quick party designs, with notes on how each one is built and who it suits.
Timing the Application So the Stain Peaks on the Day
Natural henna doesn’t come off the skin dark. When the paste flakes away, the stain underneath is bright orange, and it oxidizes to its deepest red-brown over the next 24 to 48 hours. That’s why I apply bridal mehndi one or two days before the wedding, never the morning of. A bride who has her henna done the same day will be photographed with orange hands.
Helping the stain develop
- Keep the paste on for as long as possible, ideally six to eight hours or overnight for bridal work.
- Once it’s dry to the touch, I dab on a lemon and sugar mix to keep it stuck to the skin.
- Scrape the dried paste off with a blunt edge or your fingers; don’t wash it off.
- Avoid water on the design for the next 12 to 24 hours, and keep your hands warm.
- Palms and fingers stain darkest; the back of the hand and the forearm will always be a shade or two lighter.
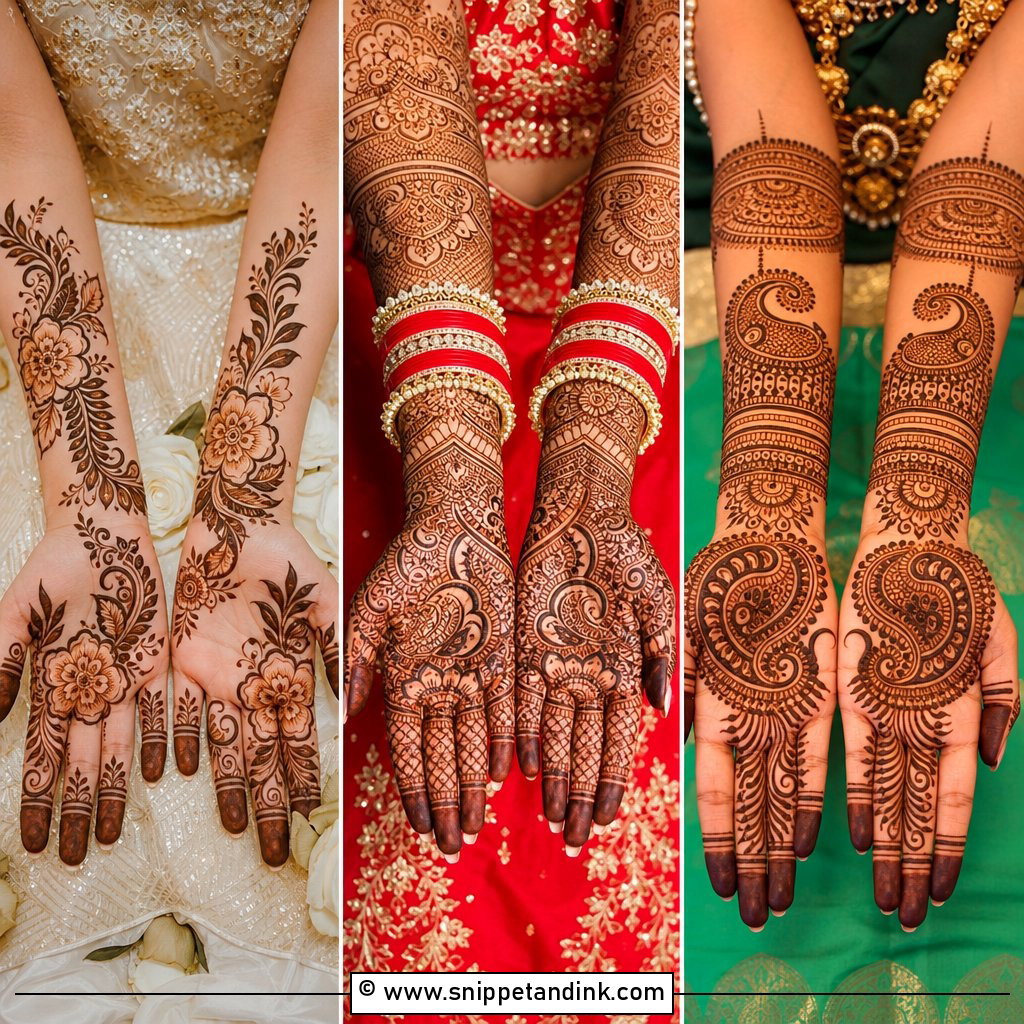
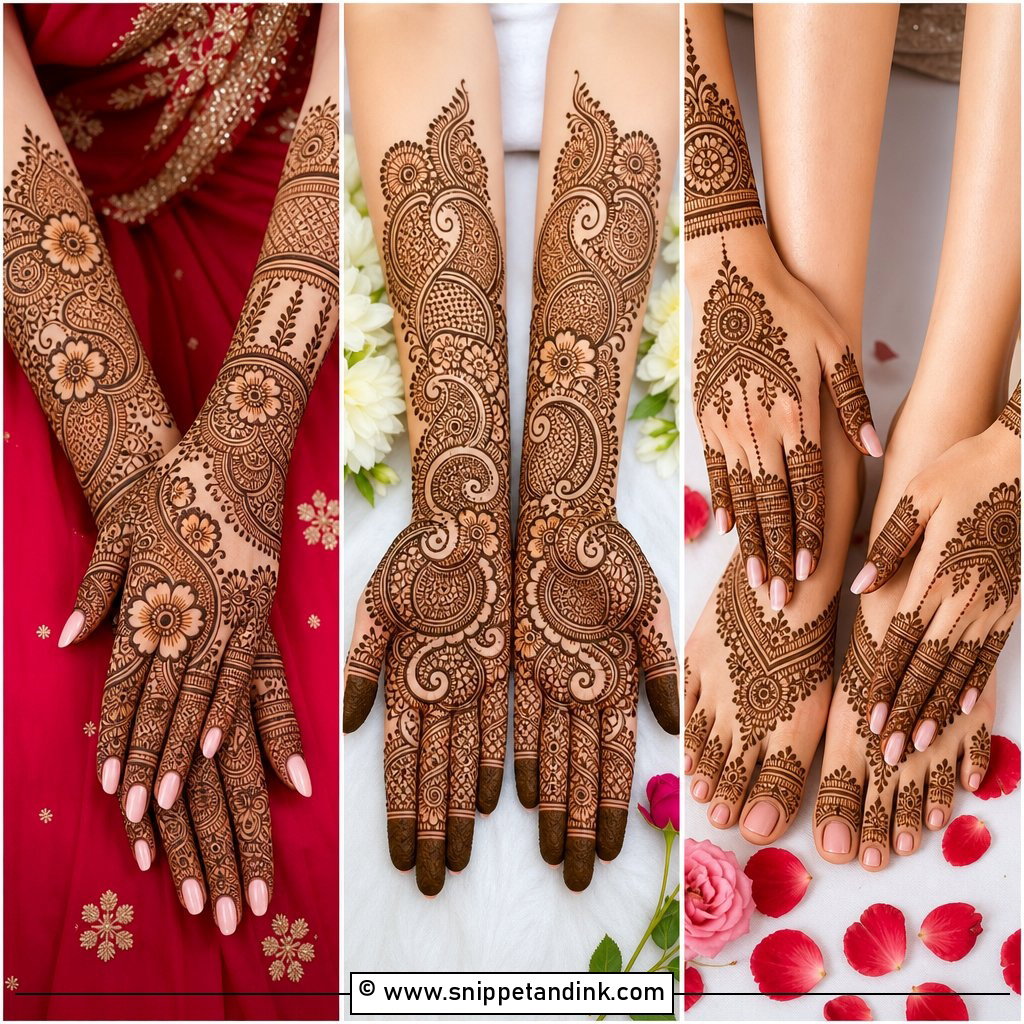
1. Full Hand Indian Mehndi Design
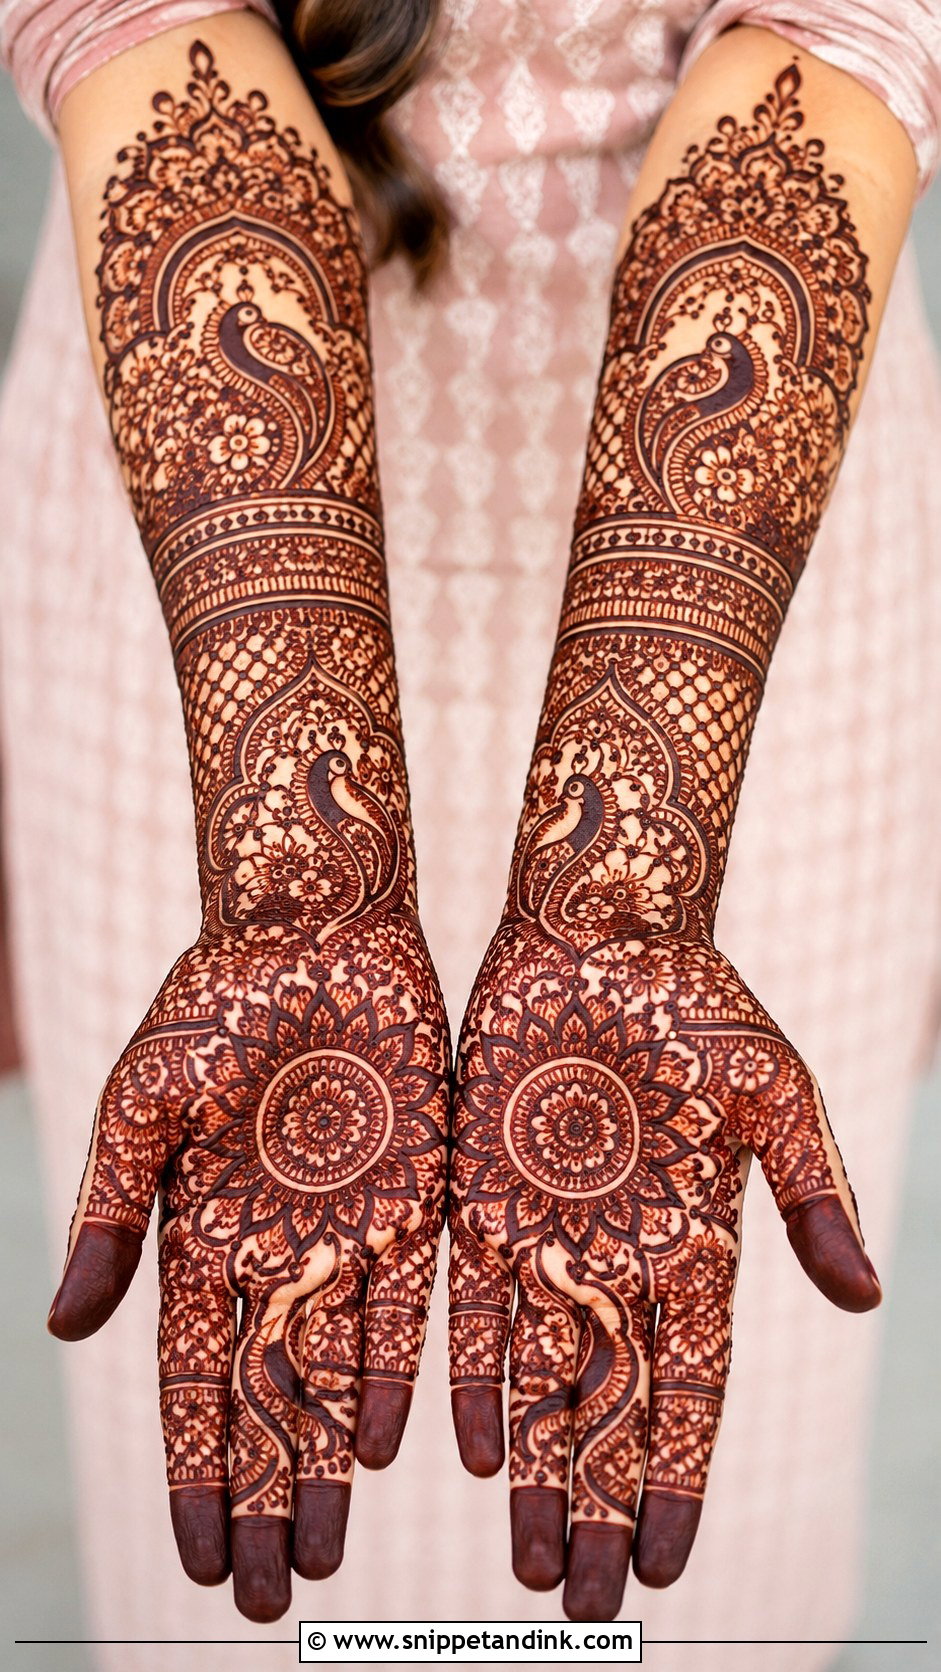
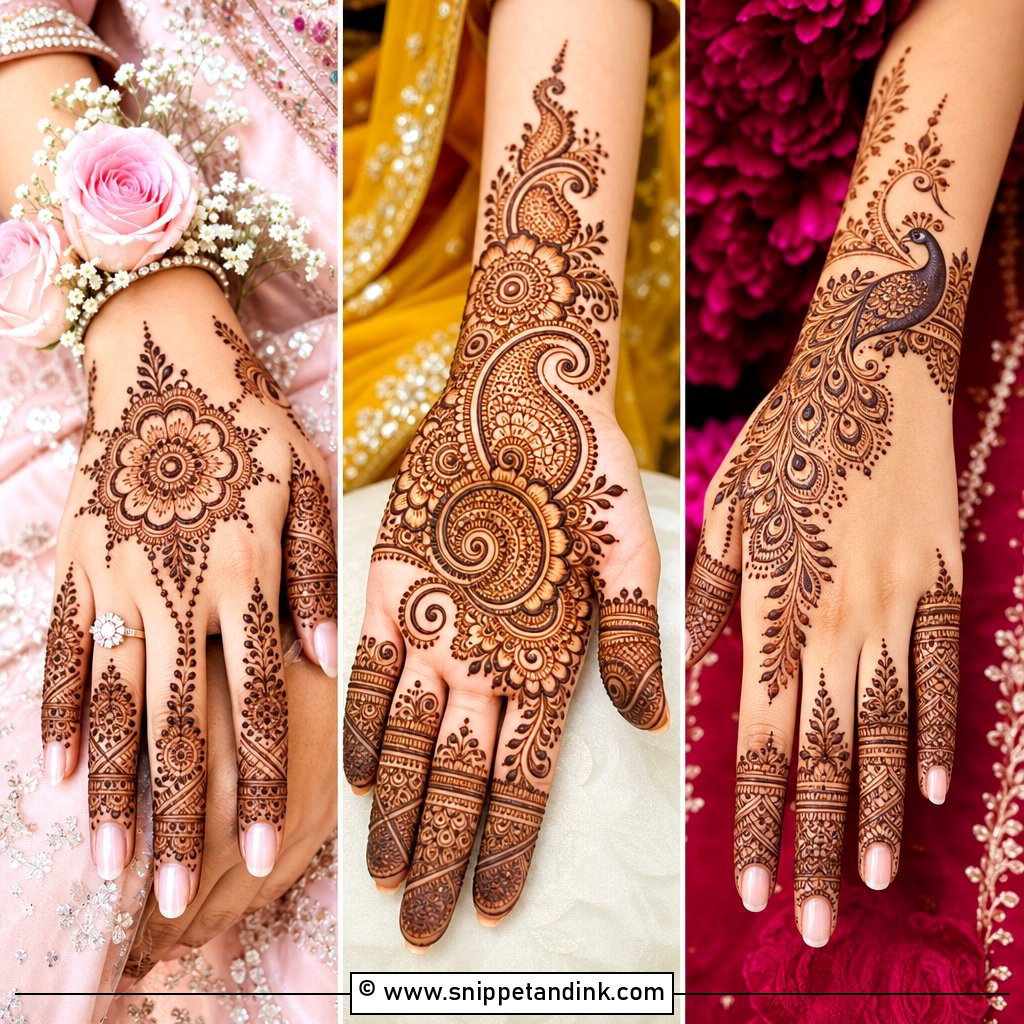
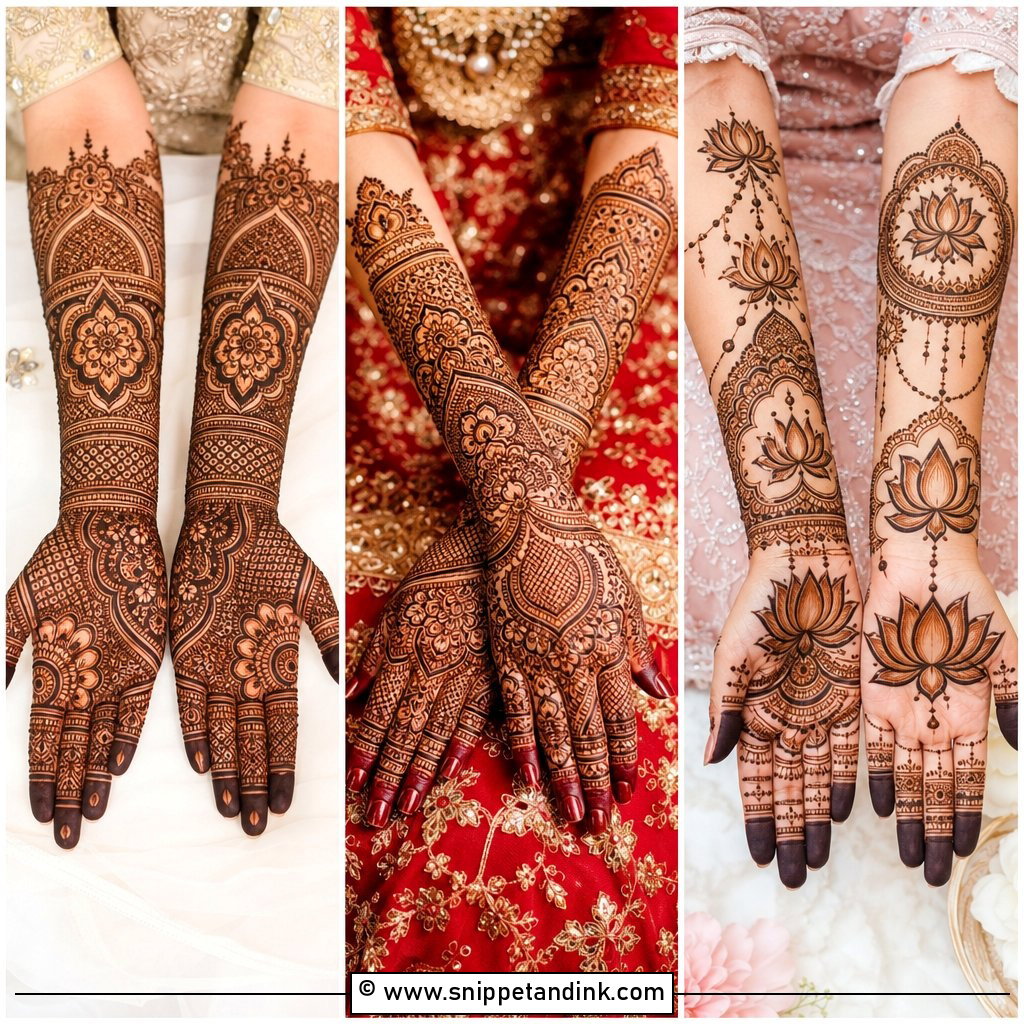
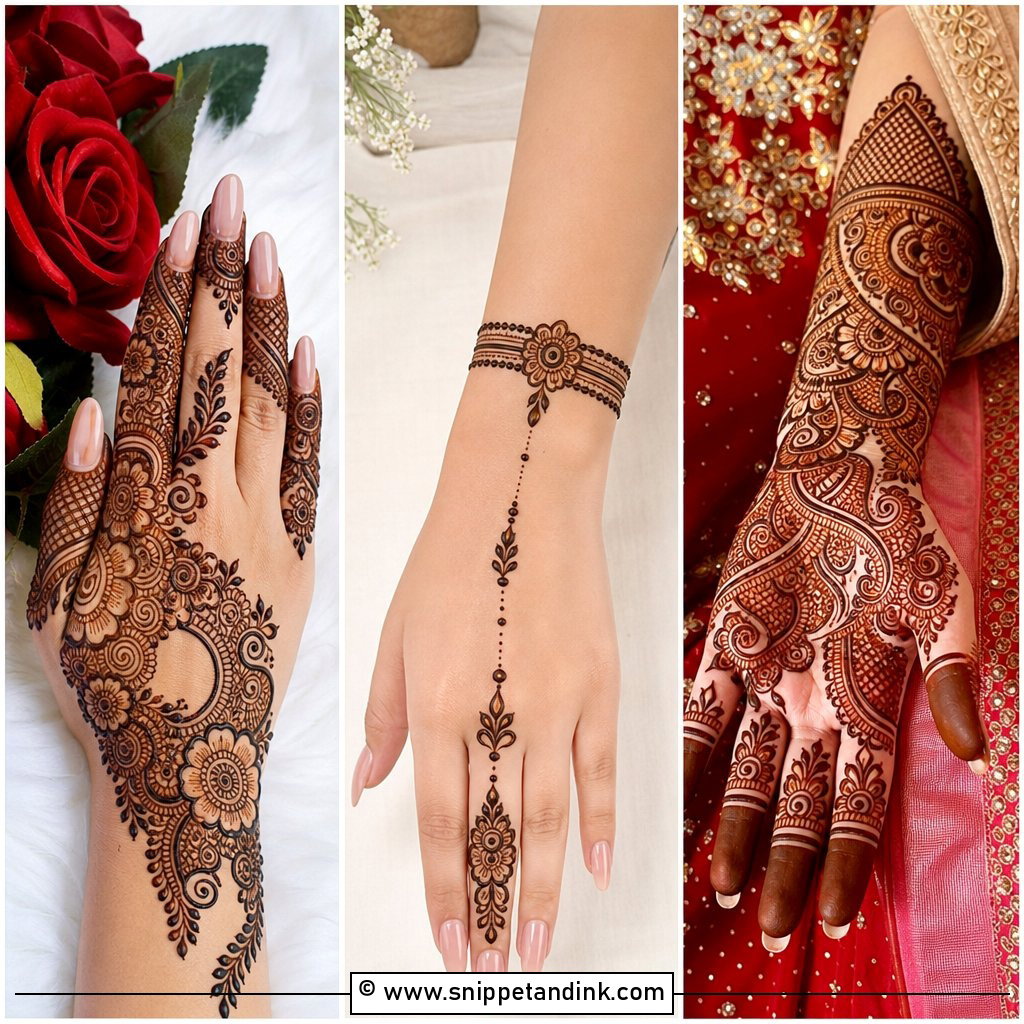
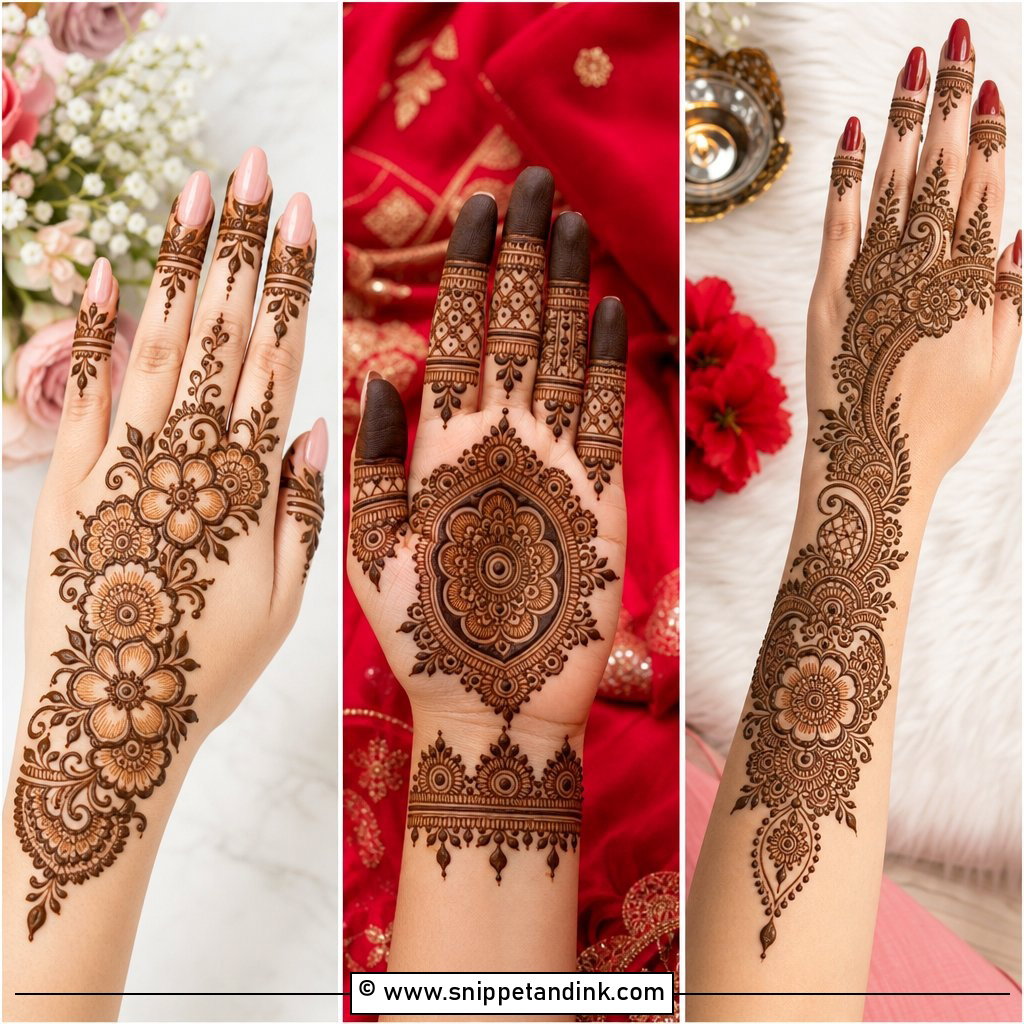
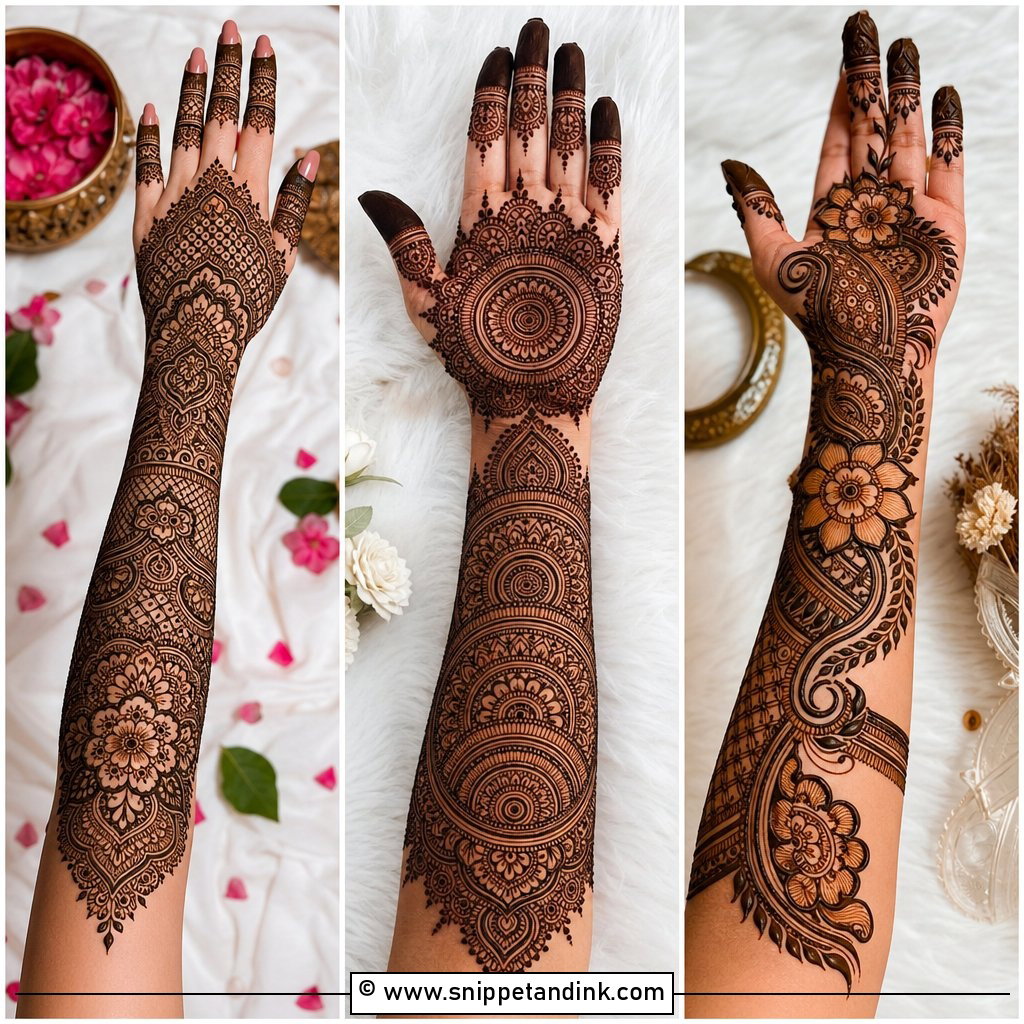
A full hand Indian design covers the palm, fingers, wrist and usually the forearm with closely placed motifs: paisleys, flowers, peacocks and curved borders. When I map one, I decide the anchor motif for the palm first and build outward, because filling every inch with tiny lines turns into a brown blur once the stain darkens. Shaded fingertips give a bold finish, and I usually end the wrist in a bracelet band so the stopping point looks deliberate. The palm takes the deepest color, which is why this layout is the classic for a bride’s main hands.
2. Arabic Mehndi Design For Hands
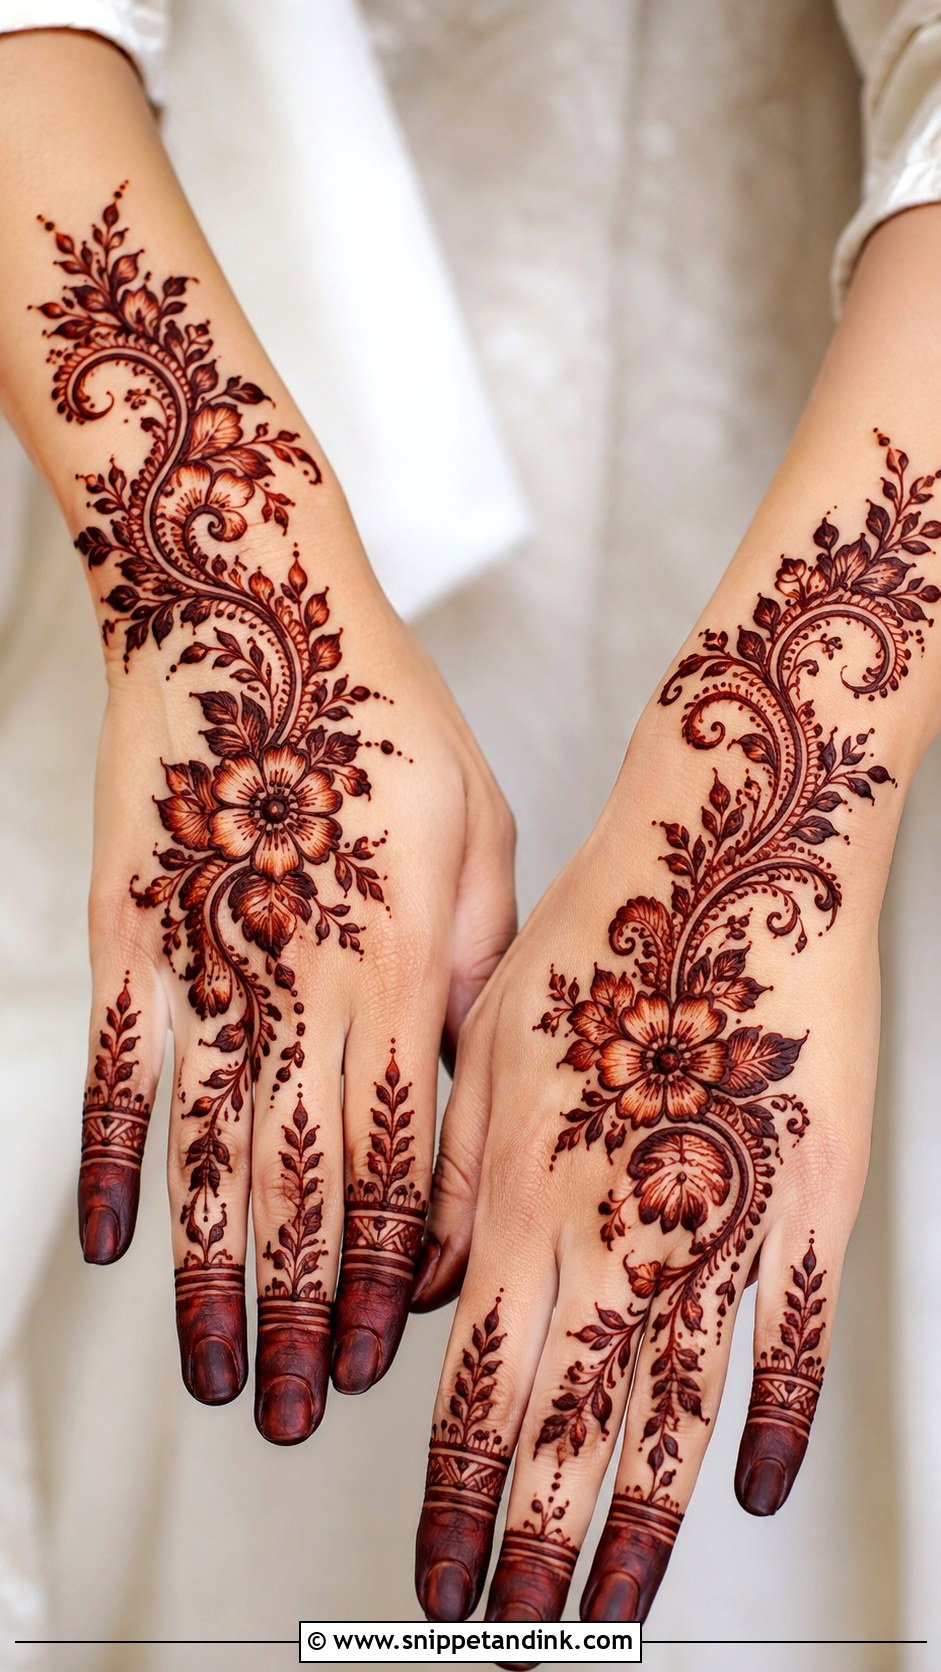
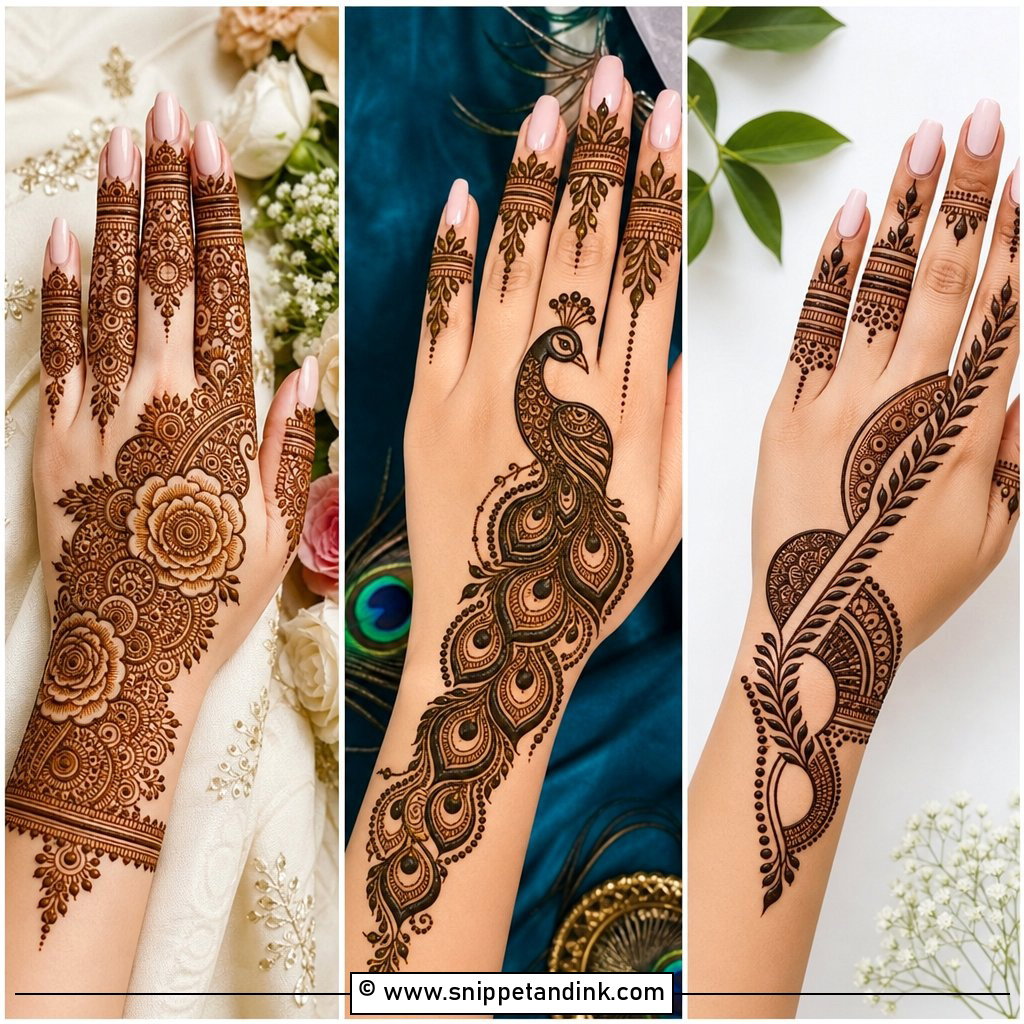
Arabic designs run diagonally from the wrist toward the index finger with bold flowers, leafy vines and shaded petals, and leave plenty of skin open. That empty space is part of the design, not a gap to fill. I keep the motifs medium-sized so they read from a distance, and I connect the finger work to the main trail so it doesn’t look like two separate drawings. It’s a quick application, often under half an hour a hand, which is why guests love it for Eid and wedding functions.
3. Back Hand Mehndi Design
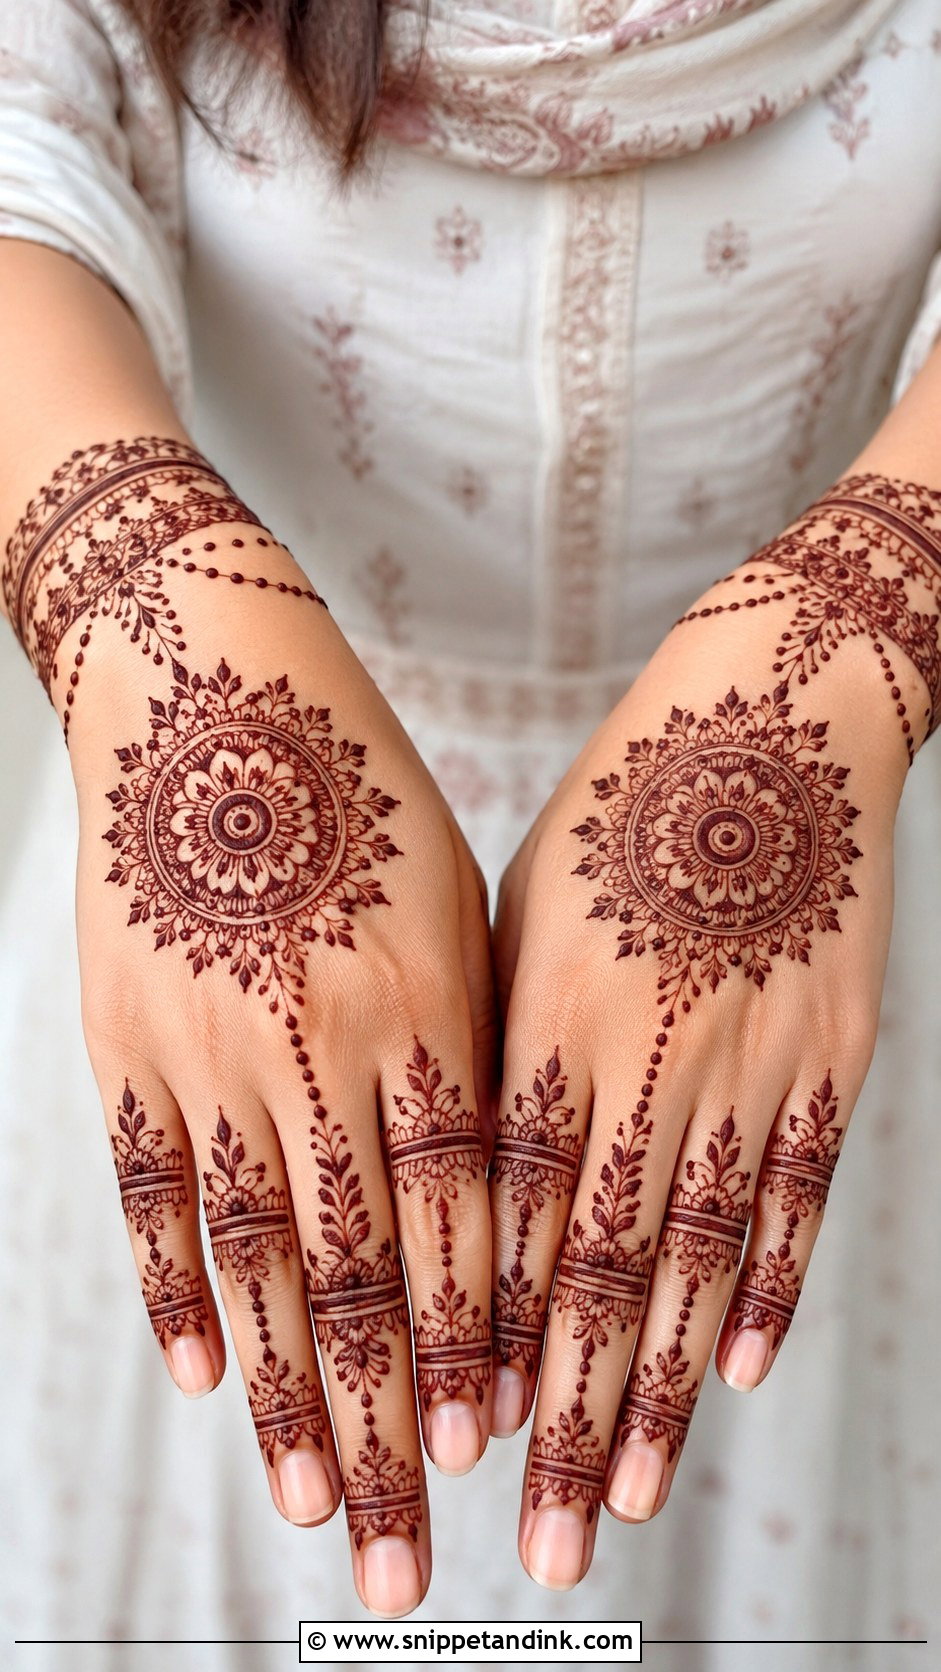
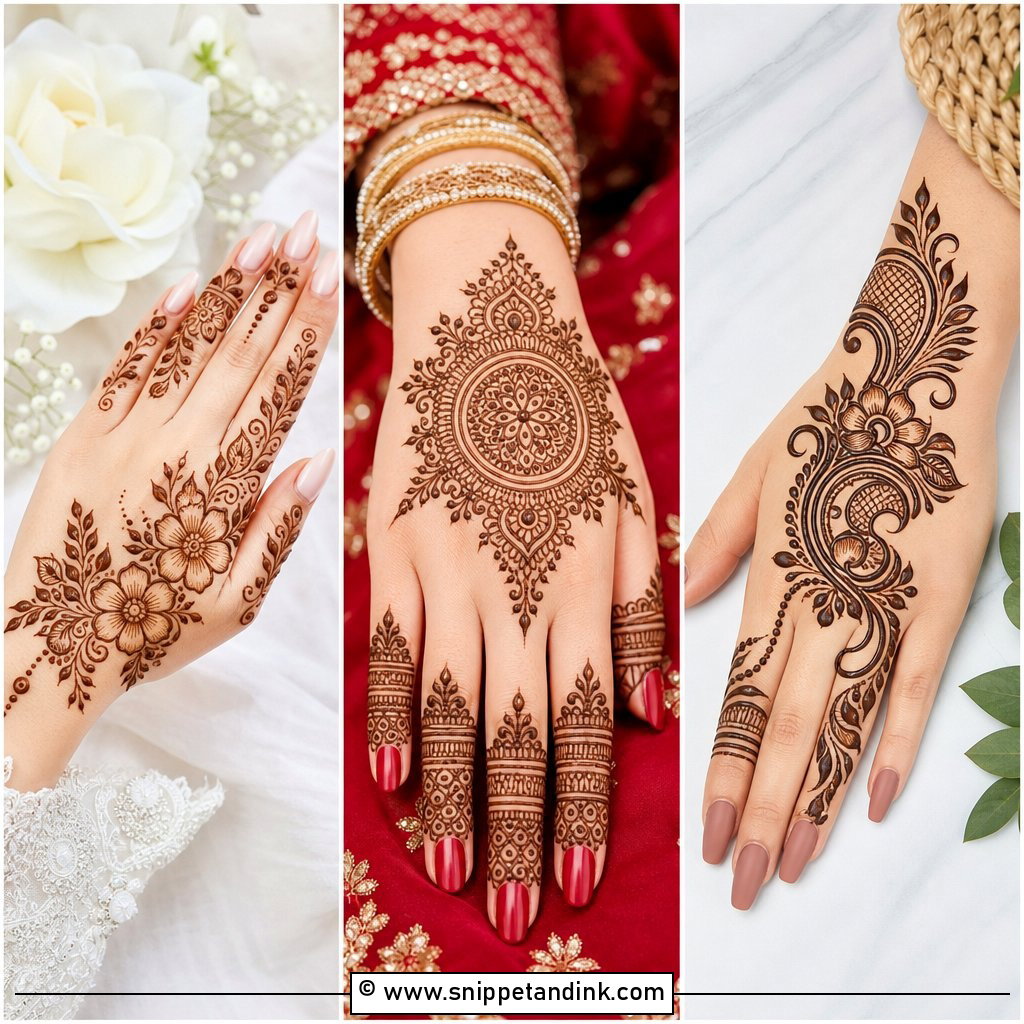
The back of the hand is what everyone sees during greetings and in jewelry shots, so I give it a clear centerpiece: usually a mandala over the middle of the hand, florals around the knuckles and slim finger patterns. Leave a little open skin between the mandala and the finger sections, or the whole hand reads as one dark patch. Be aware that the back of the hand stains lighter than the palm because the skin is thicker and drier there. Bridesmaids and engagement guests usually find it decorative enough without the long sitting time.
4. Front Hand Mehndi Design
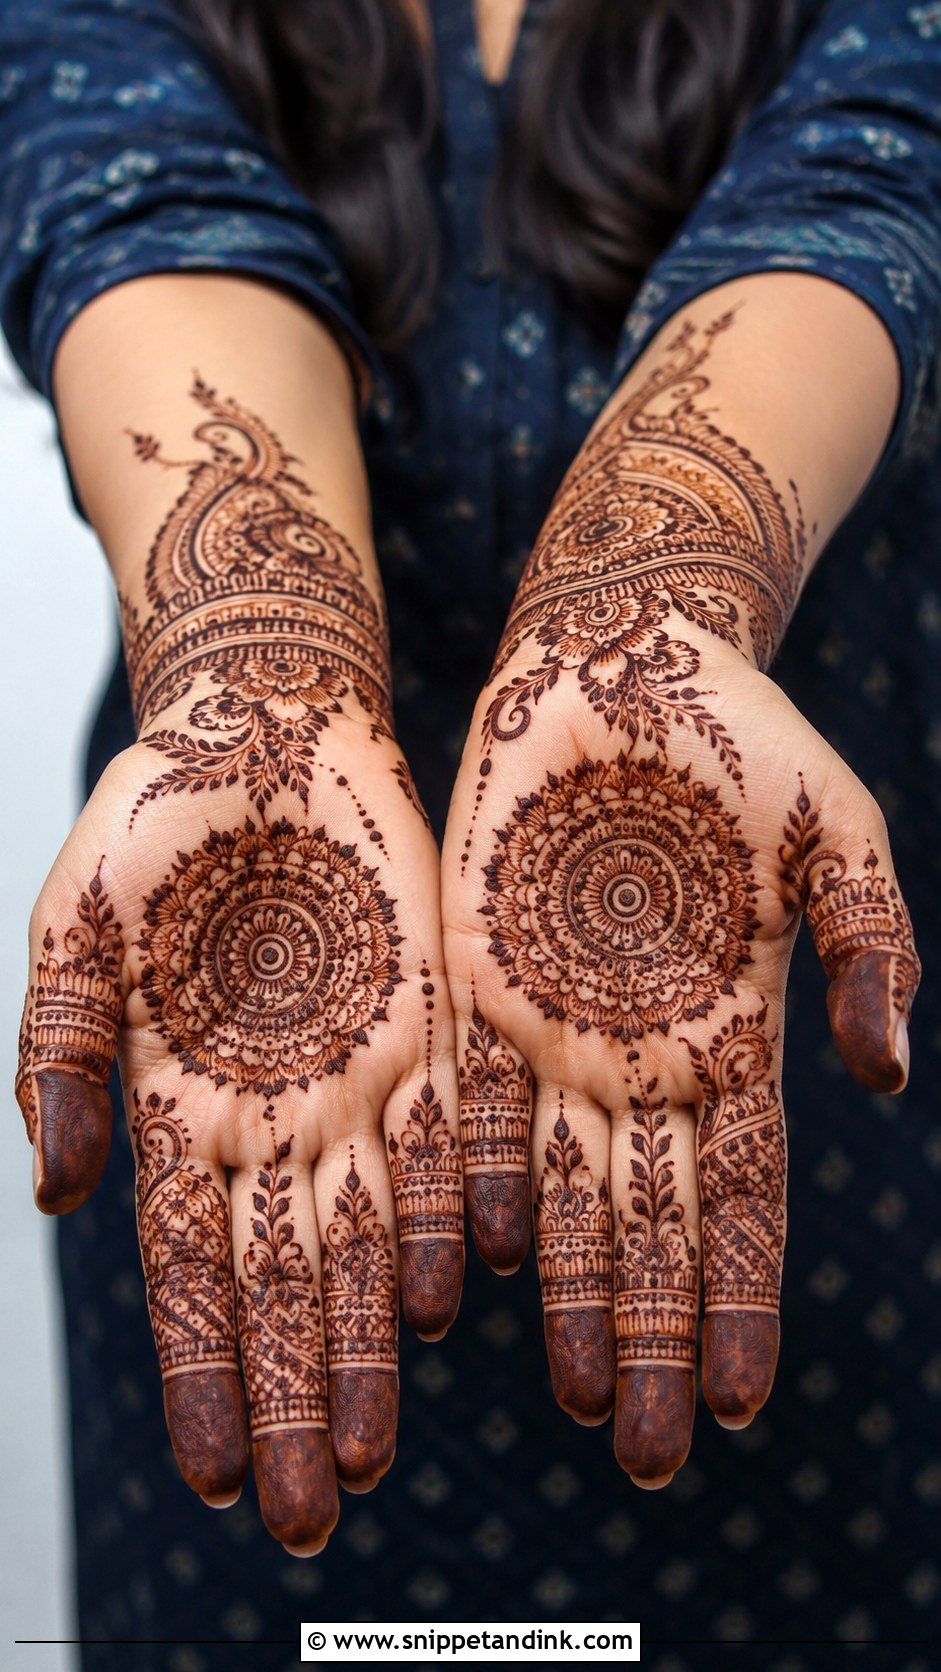
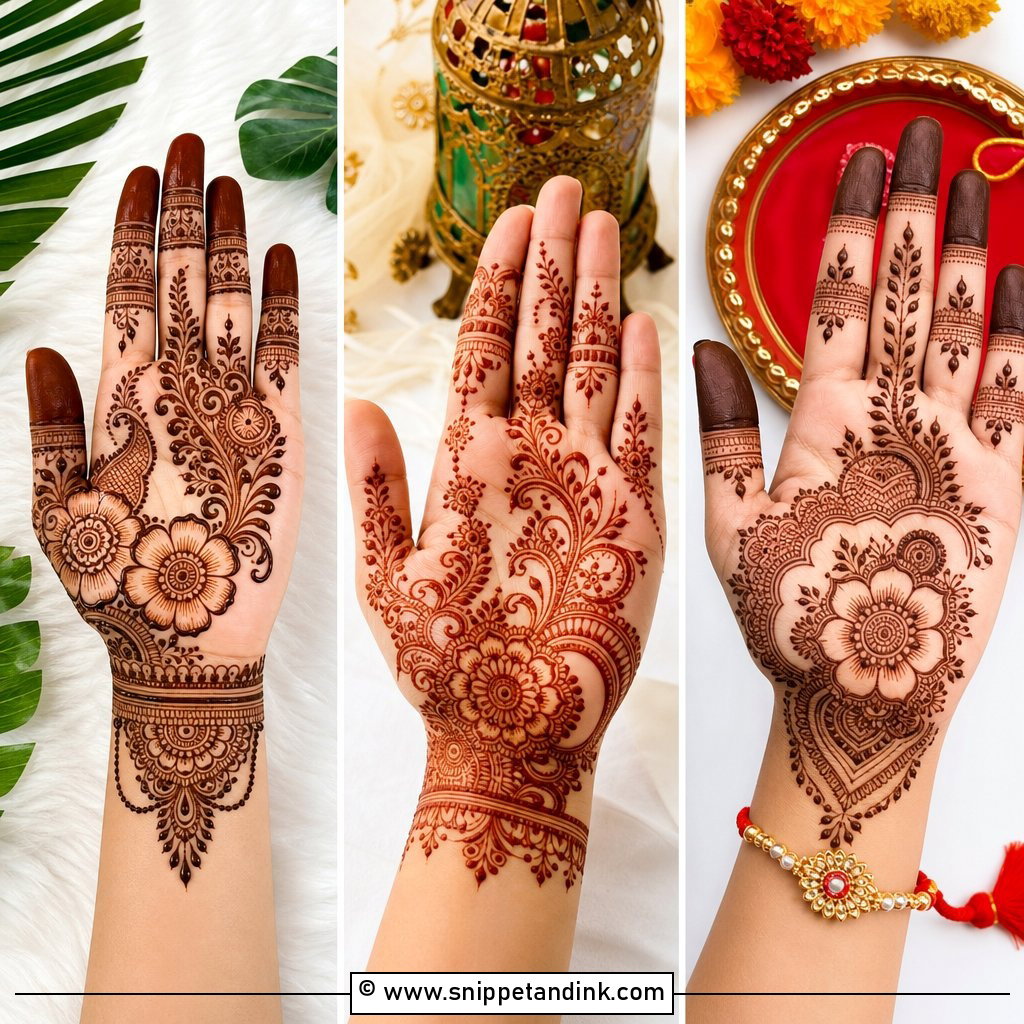
A front hand layout often starts with a mandala or floral circle in the center of the palm, followed by paisley corners, leafy borders and detailed fingertips. The palm holds henna color better than almost anywhere else, so this is where a design shows its best stain. My rule is one main shape repeated in smaller versions, rather than five unrelated motifs competing. Finger patterns can stay simple with petals, dots and fine mesh.
5. Simple Elegant Mehndi Design
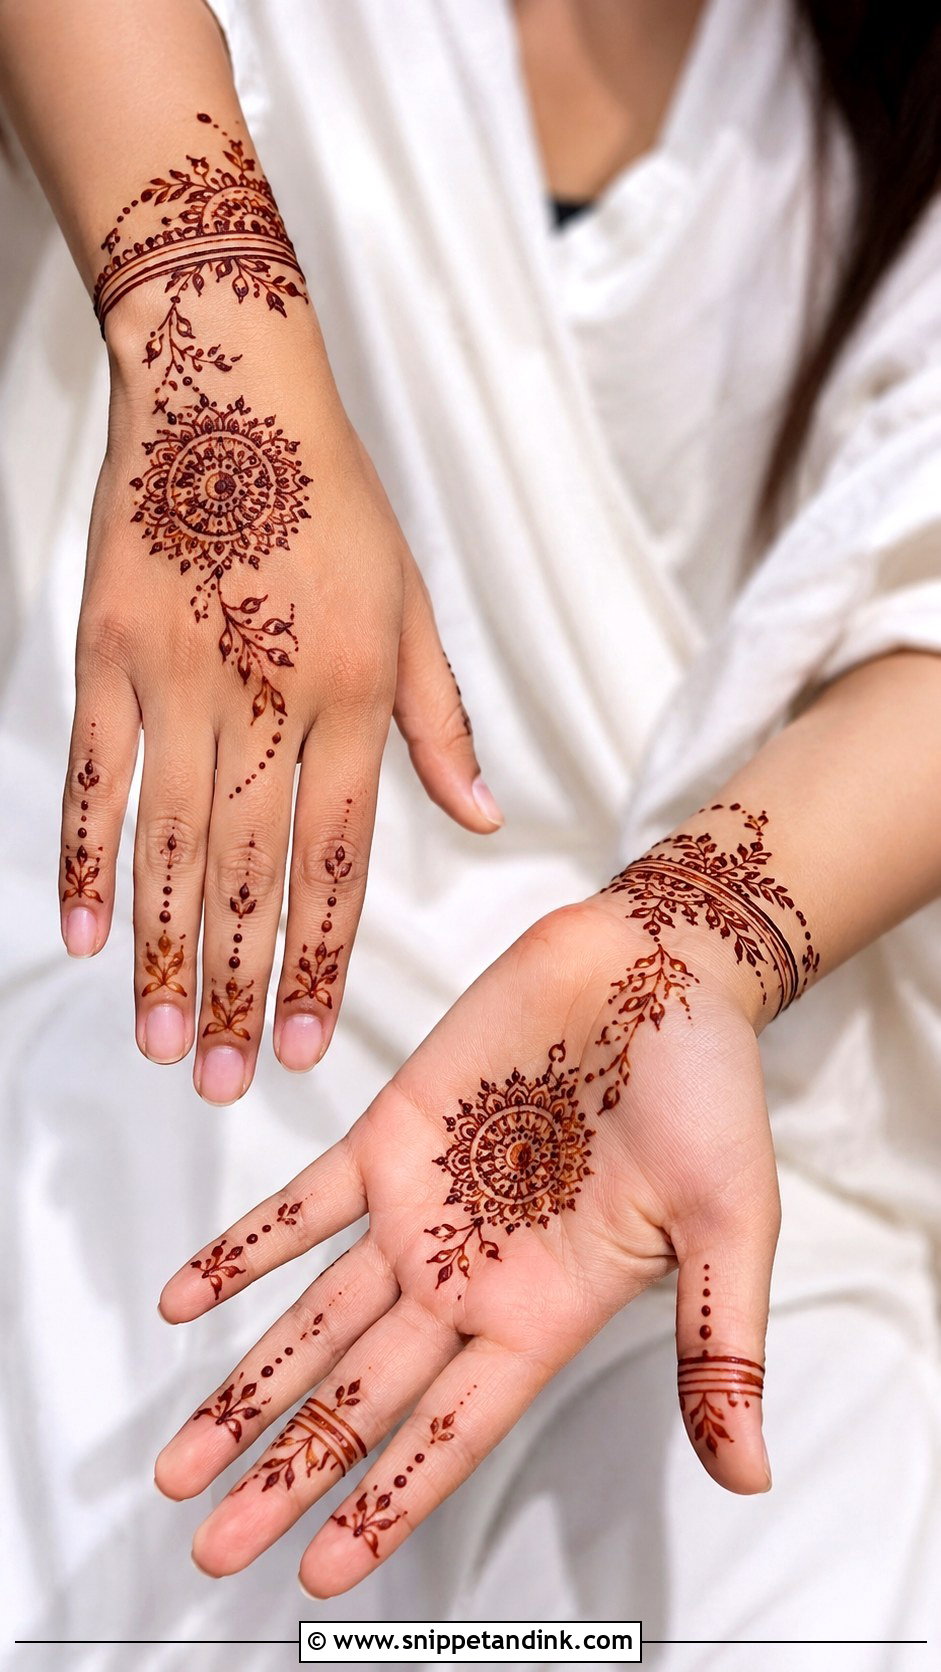
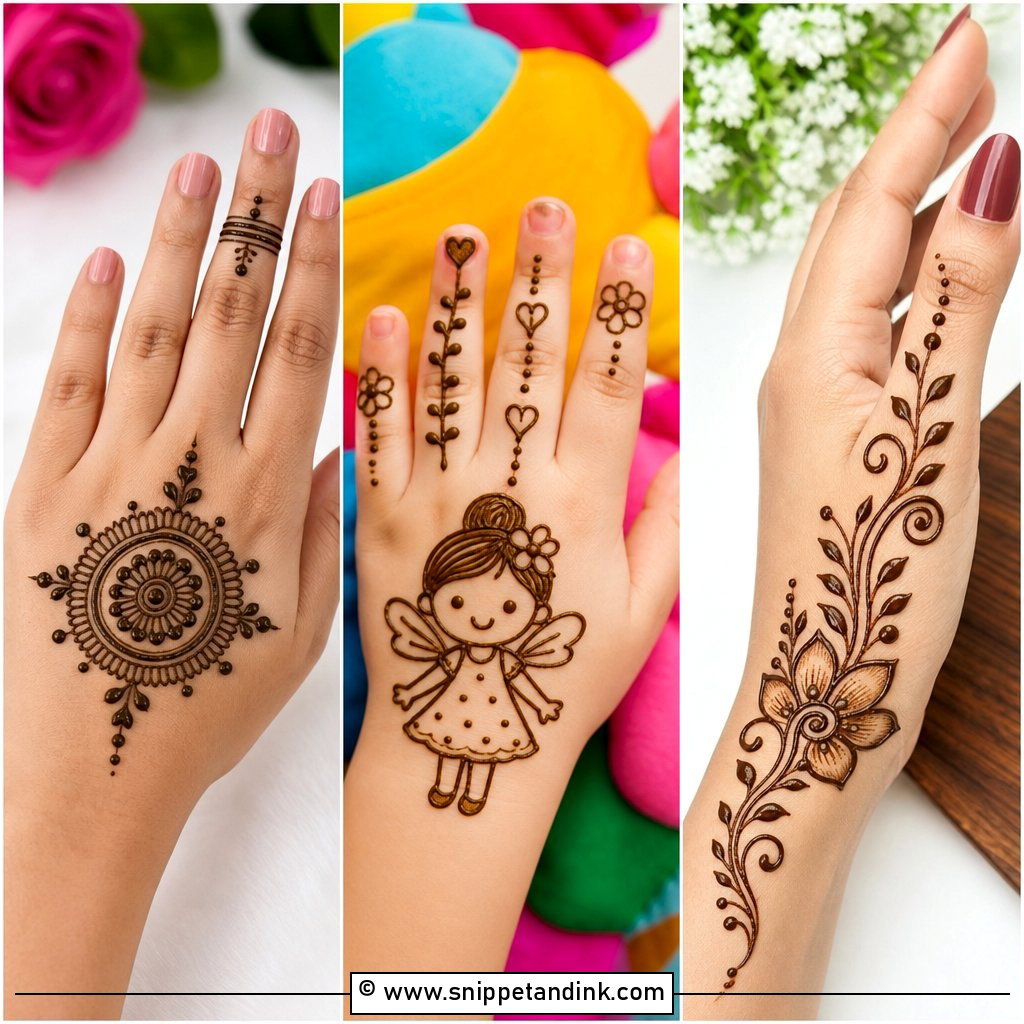
Simple designs depend entirely on neat line work. One main motif, light finger work and a soft wrist border is enough: a small mandala with leafy extensions, or a floral trail across the hand without heavy shading. It’s quick to apply and comfortable for first-time wearers or small gatherings. Thin lines, even spacing and smooth curves are what separate a simple design from an unfinished one, so I’d rather do less, cleanly.
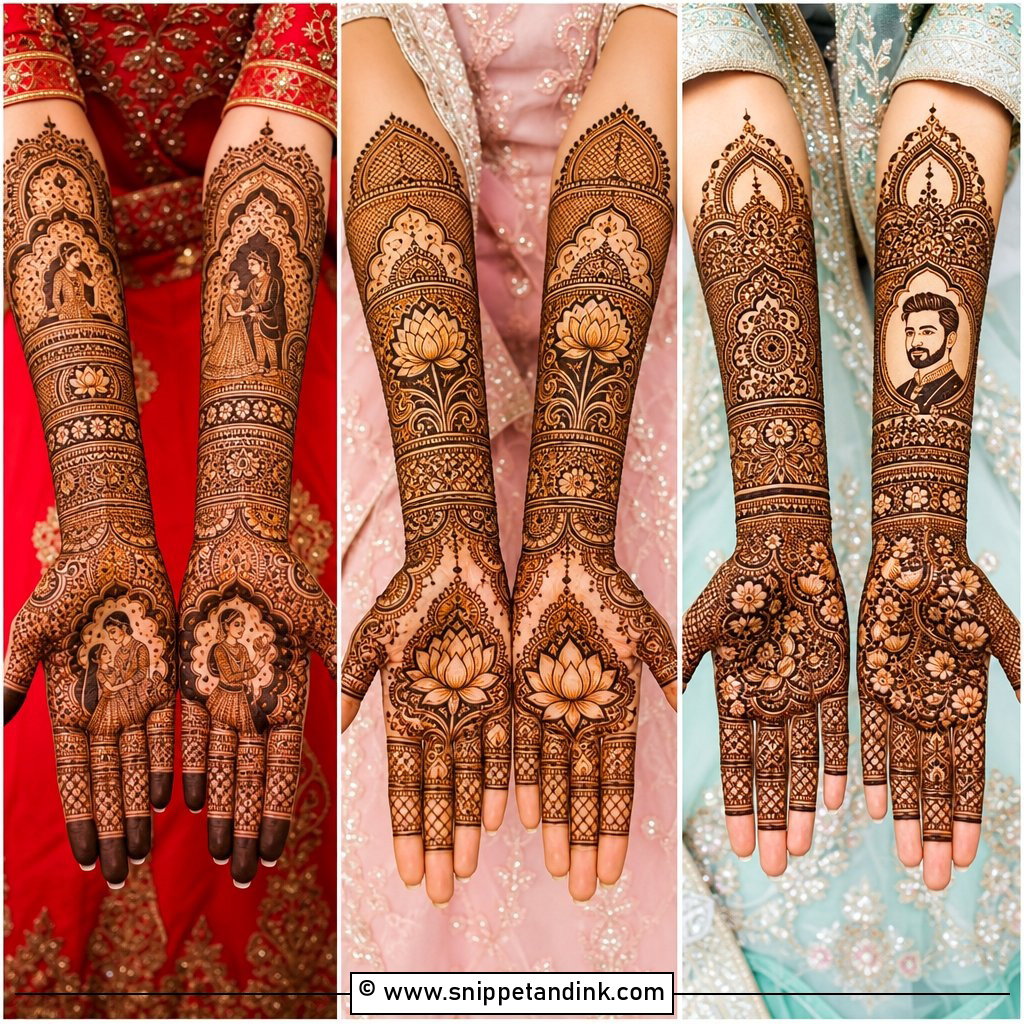
6. Bridal Mehndi Design Full Hand
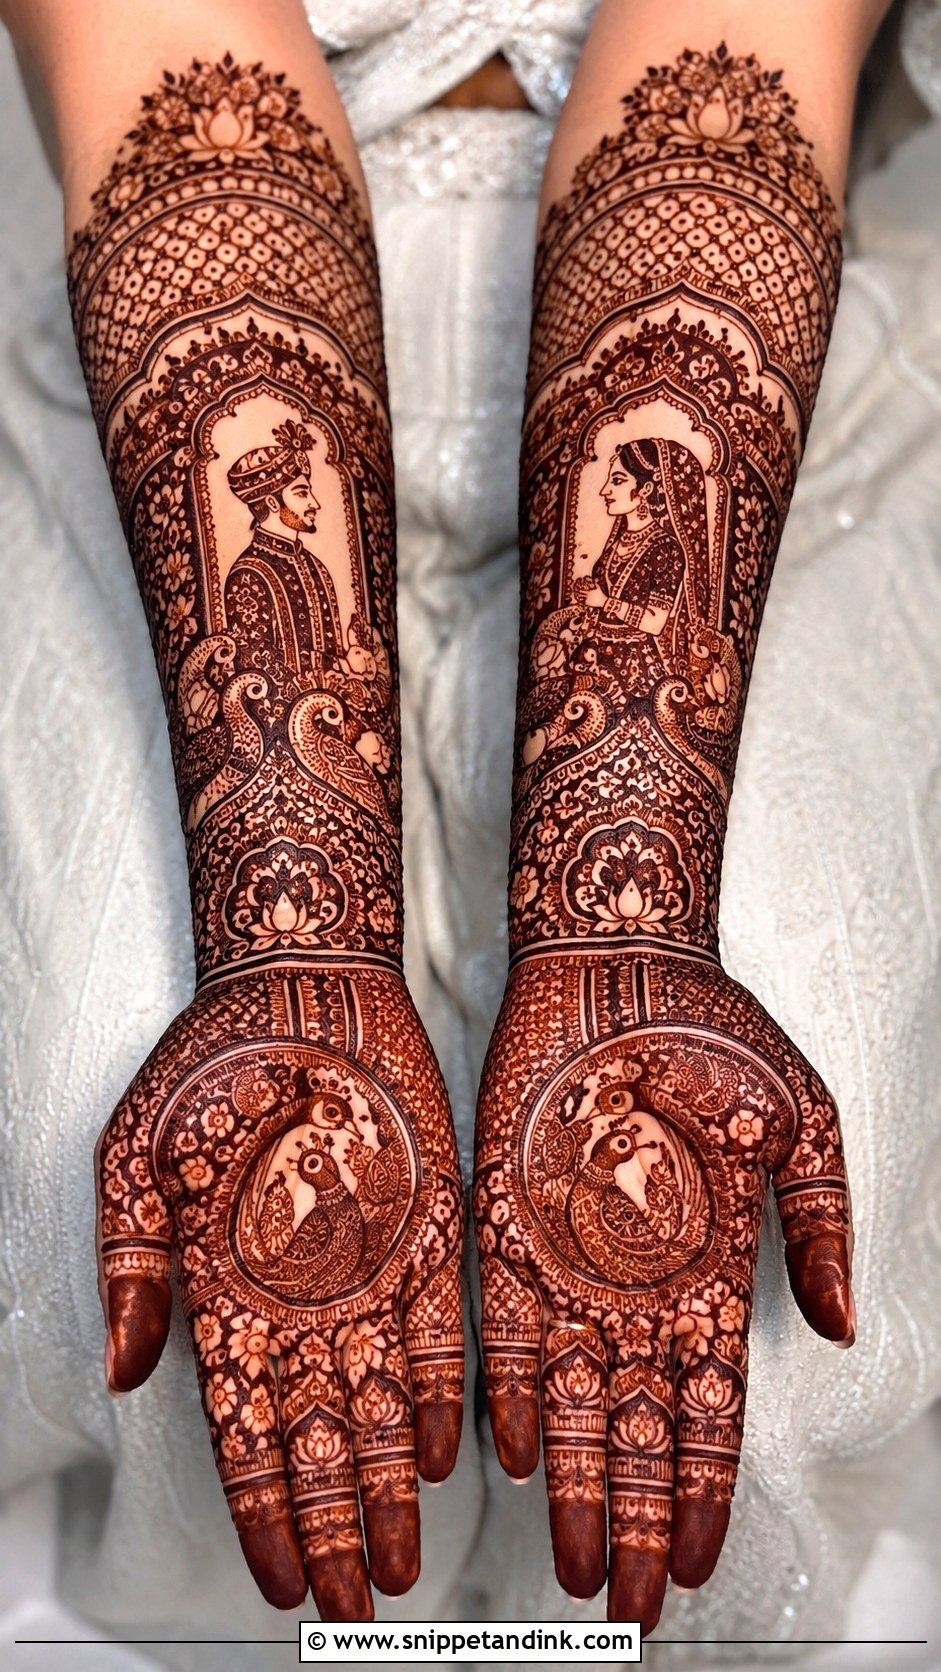
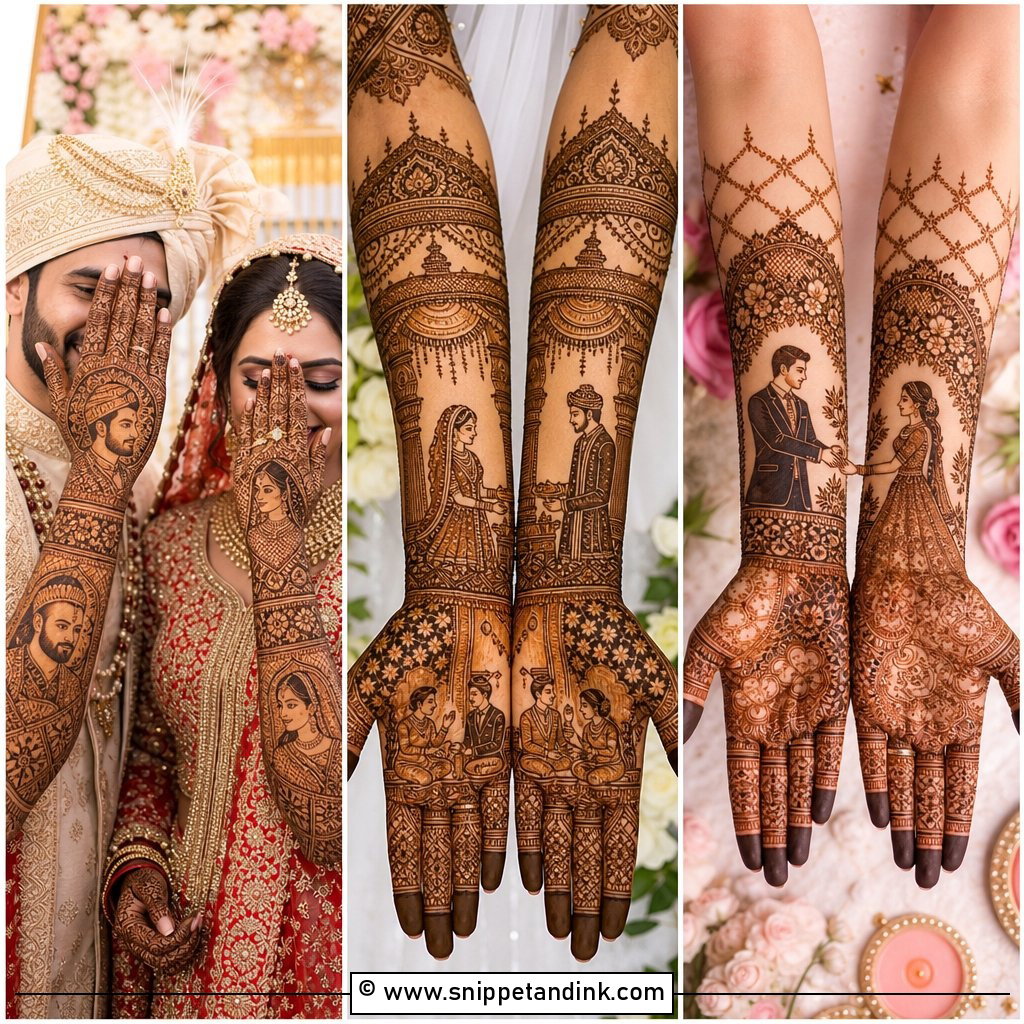
Full hand bridal mehndi extends from fingertips to the elbow or beyond, with dense motifs, personal details and mirrored patterns on both hands. Peacocks, lotus flowers, jaali mesh, bride and groom figures, paisley chains and hidden initials all appear. I divide the arm into clear sections: the palm carries the story motifs, the forearm carries layered bands and floral panels. That separation is what keeps it readable in close-ups. Expect four to six hours or more of application for both hands and arms, so plan the day around it.
7. Minimal Mehndi Design For Hands
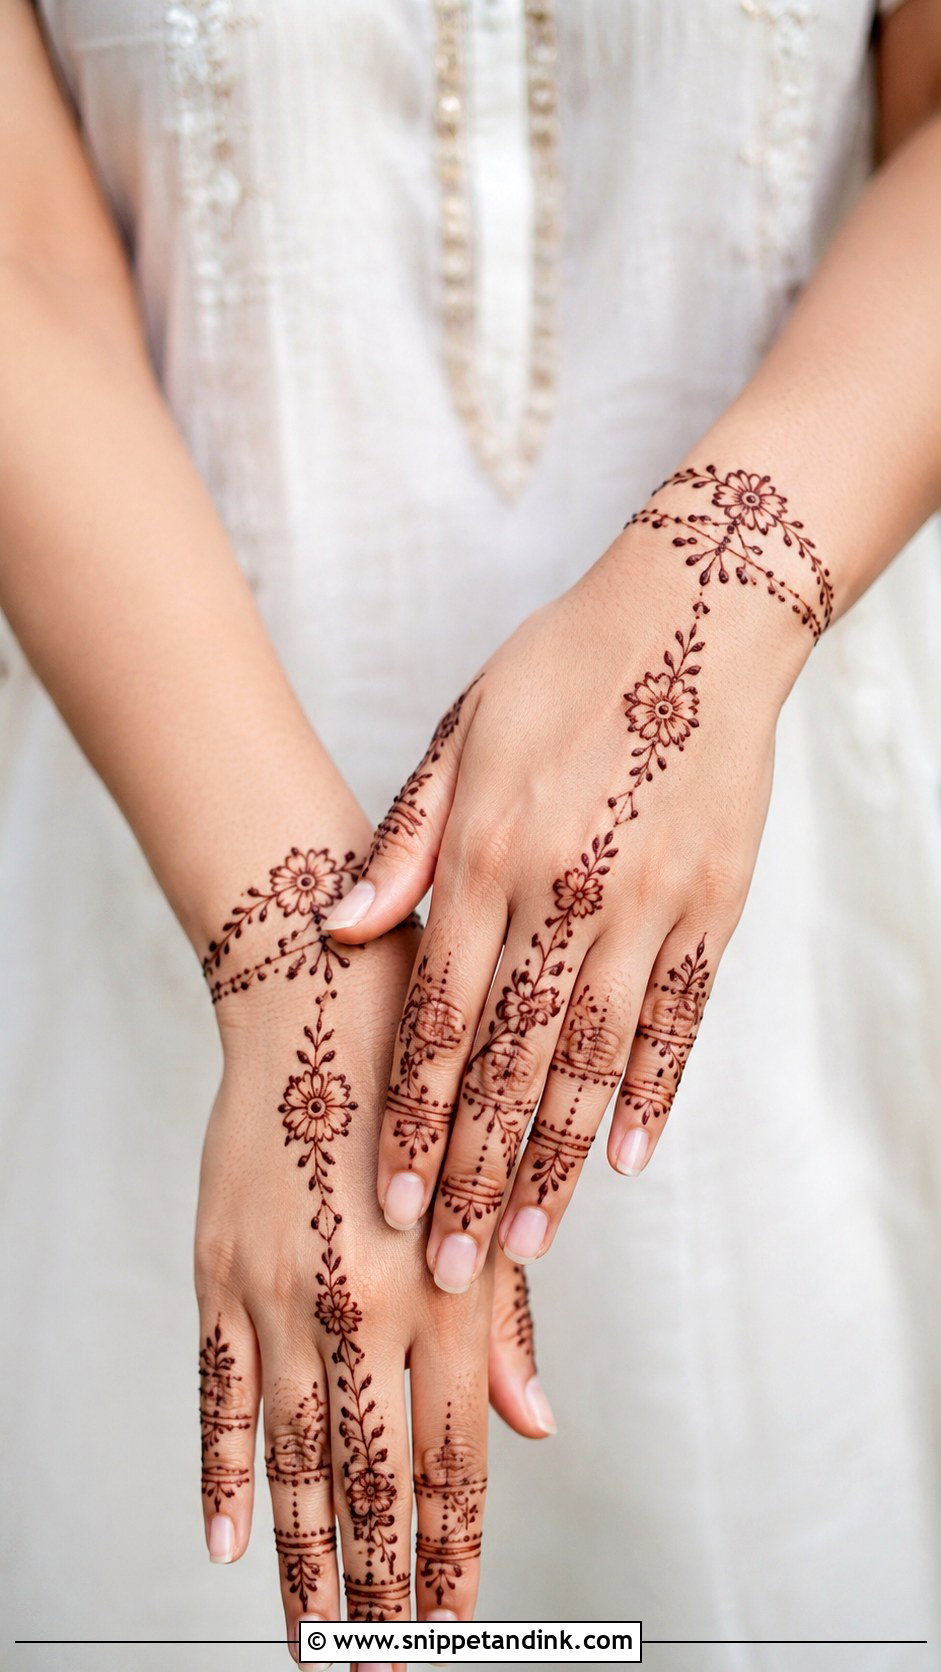
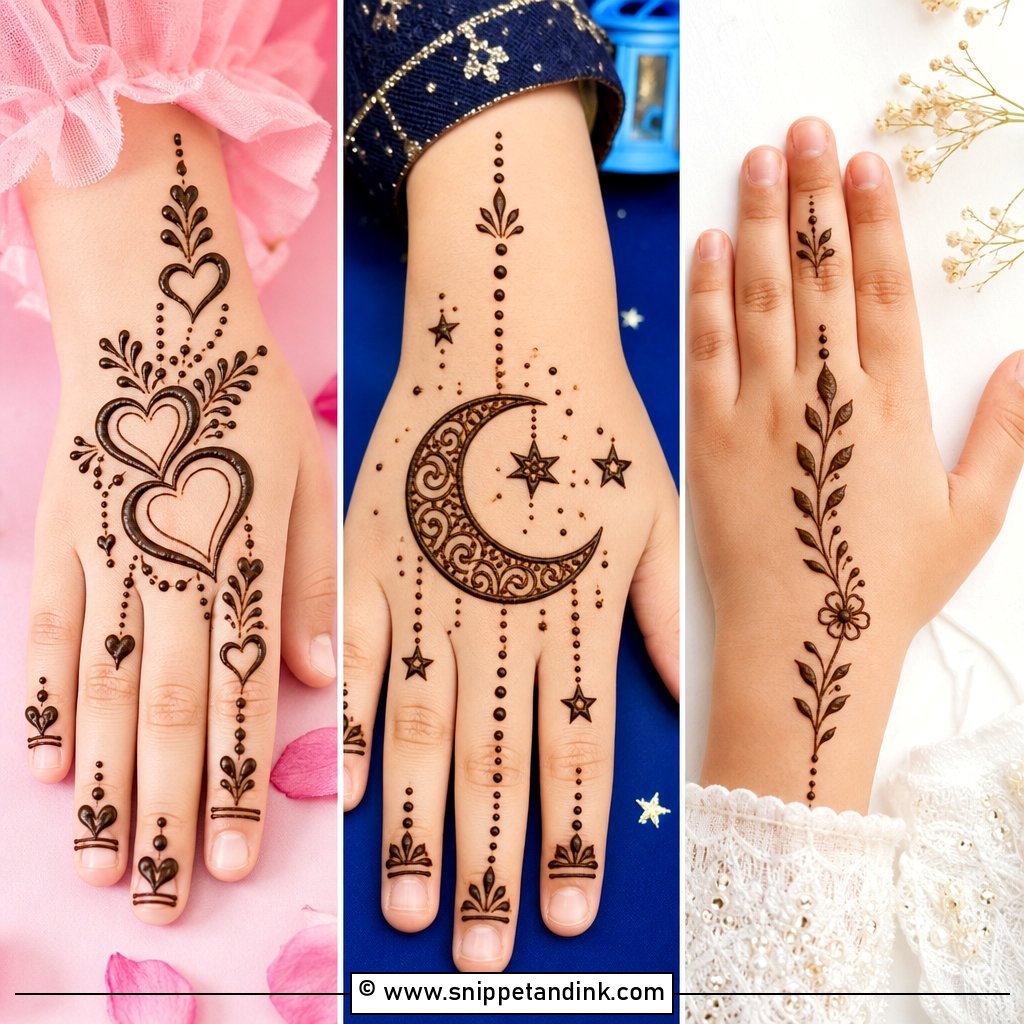
Minimal mehndi design for hands means fine finger lines, a small wrist bracelet, a tiny palm mandala or a slim vine across the back of the hand. The key is leaving enough empty space so each detail stands out. I repeat small motifs like dots and tiny leaves rather than adding new ones. It’s a good fit for engagements, roka ceremonies, Eid and smaller hands, which bold motifs can overwhelm.
8. Indo Arabic Mehndi Design
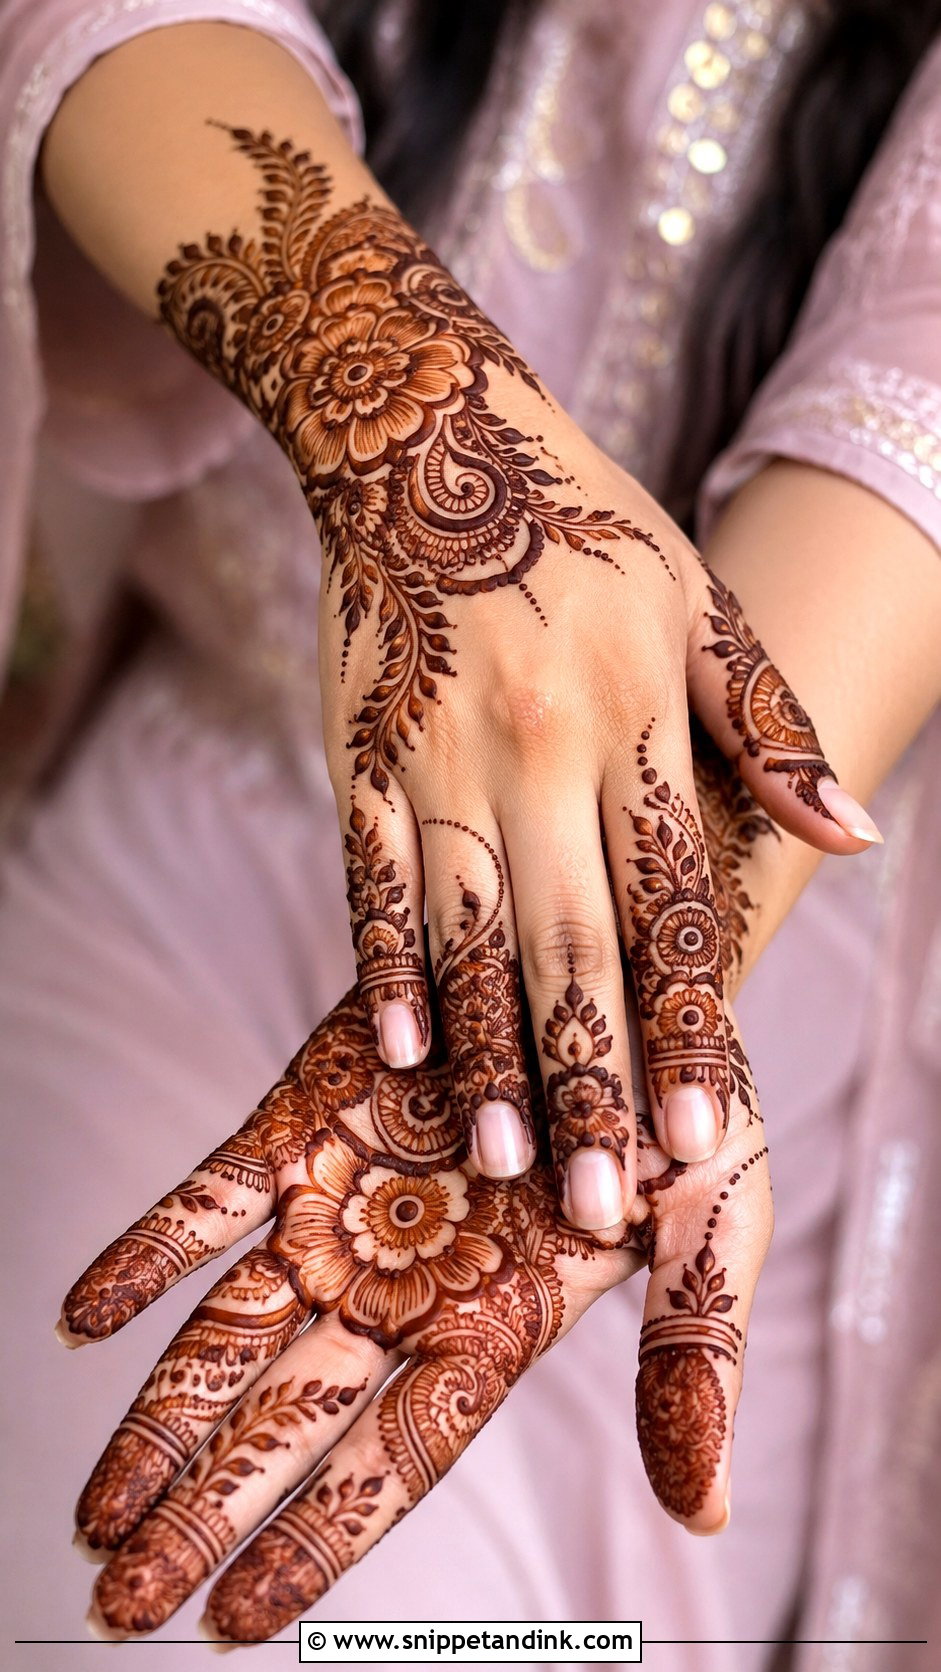
Indo-Arabic blends the bold flow of an Arabic trail with Indian fillers inside it: large shaded flowers and paisleys, filled with fine lines and mesh. It’s festive without being as dense as bridal work. I usually start at the wrist, curve across the palm and finish with decorated fingers. Motif size matters: on a small hand, scale the flowers down or the trail looks cramped.
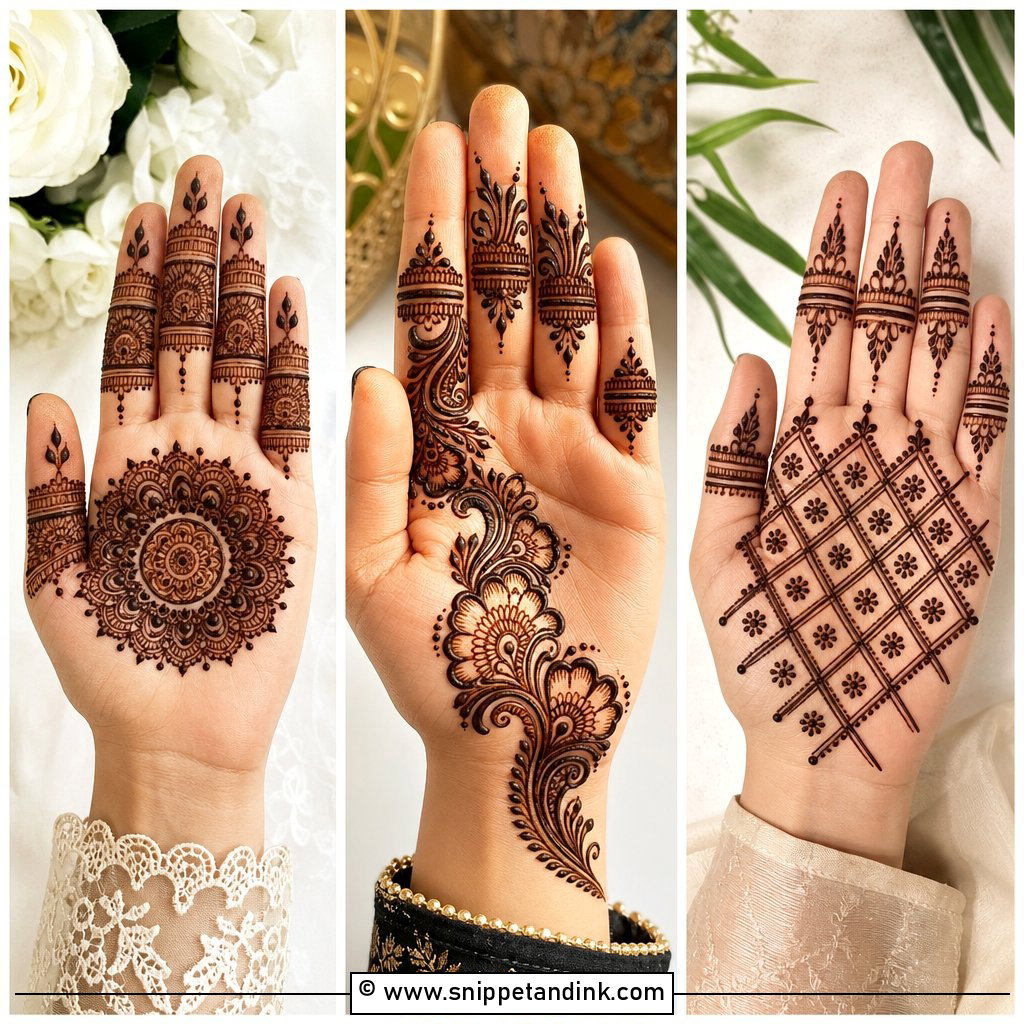
9. Mandala Mehndi Design
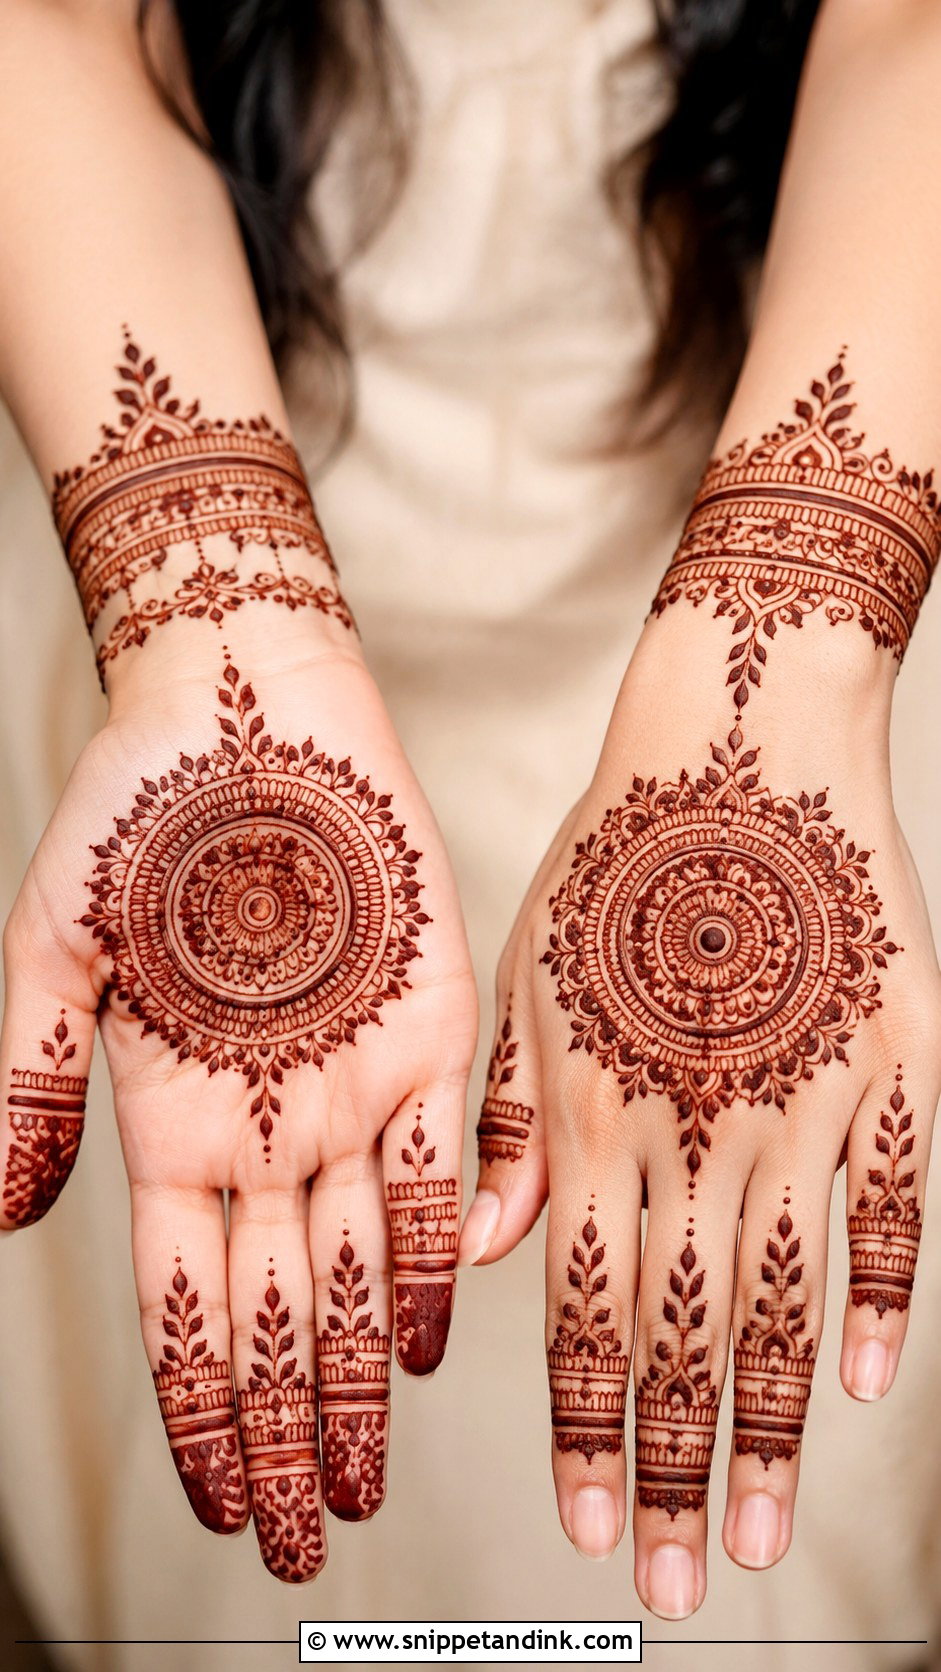
A mandala is the most forgiving design for beginners and guests because symmetry does the work. I place the center circle first, then build rings outward, checking that each ring is evenly spaced before adding the next. Small leaves or scalloped edges around the outer ring soften it. A matching wrist border finishes the hand without adding much weight, and it sits comfortably with both traditional and modern outfits.
10. Floral Mehndi Design
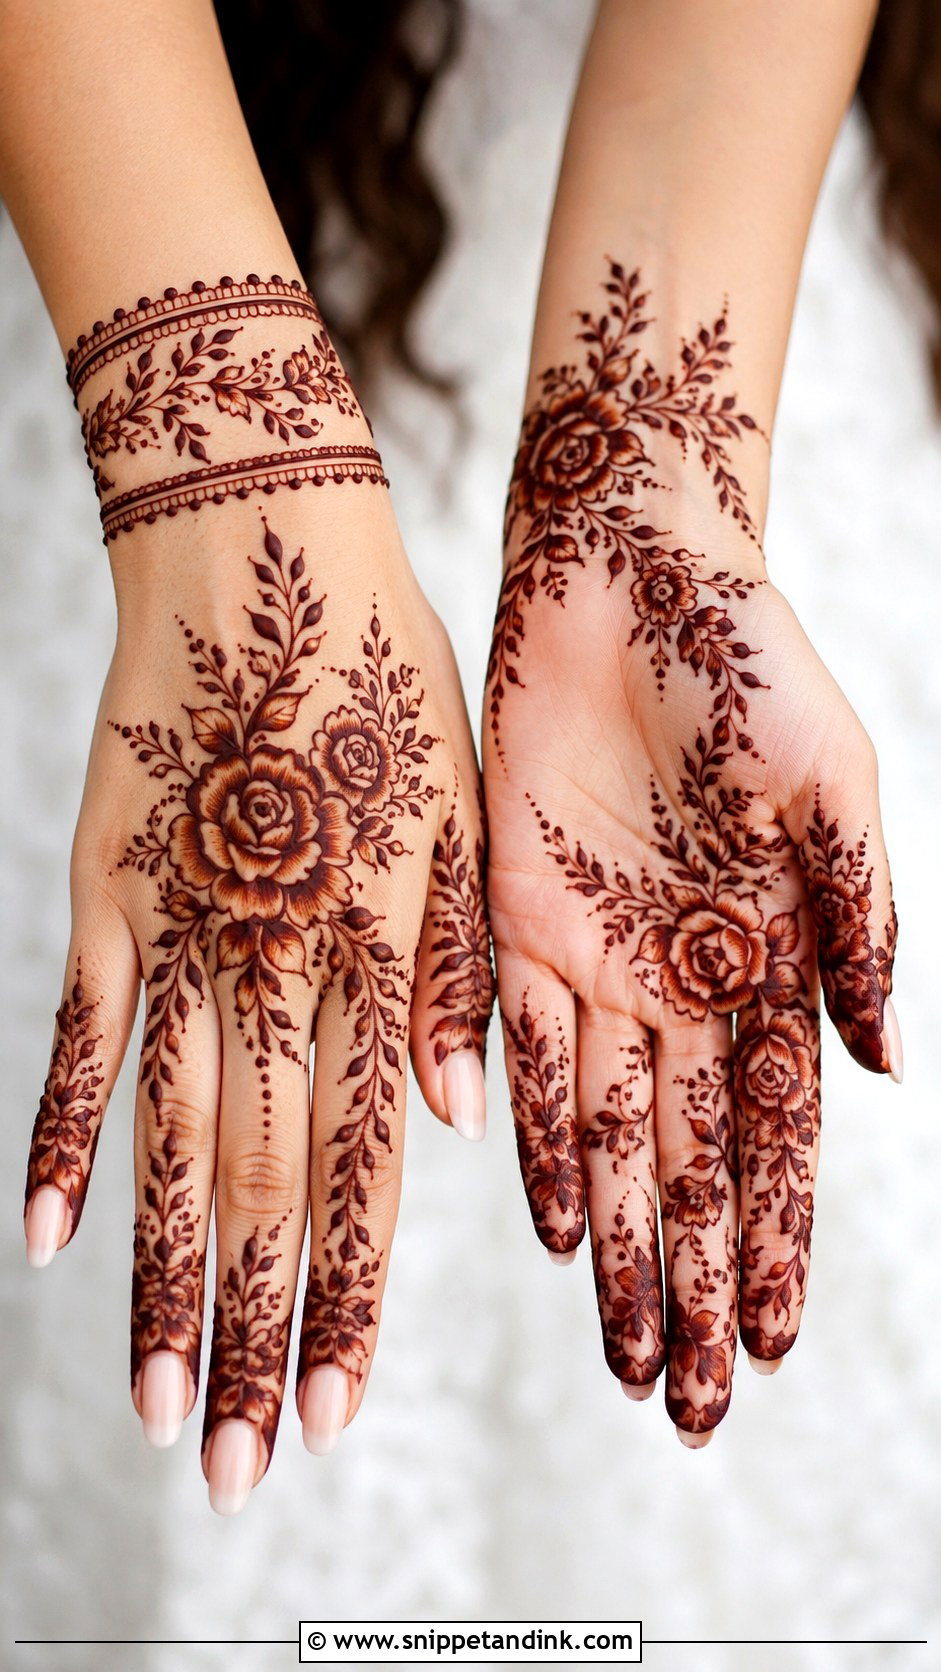
Floral designs can be light, bold, modern or bridal depending on how many flowers you use and how much you shade them. I place the largest flower near the center and let smaller buds travel toward the fingertips. A few well-drawn flowers beat many tiny crowded ones, which merge once the stain develops. Shaded petals add depth; open space around each flower lets it breathe.
11. Paisley Mehndi Design
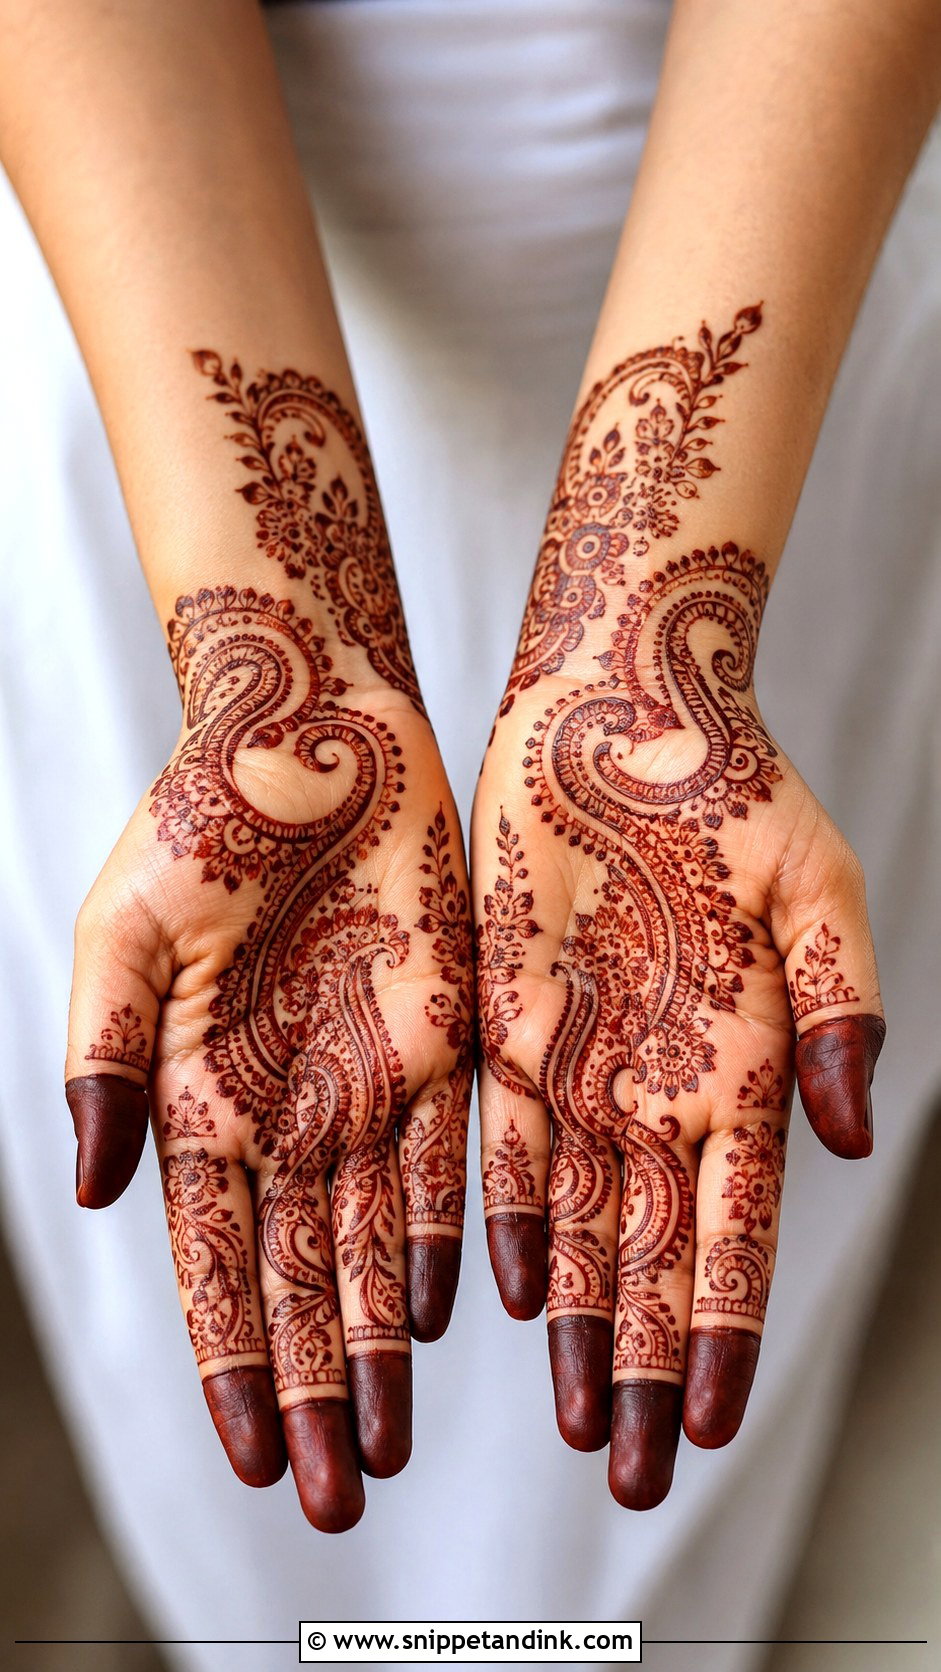
The paisley, or keri, is the backbone of traditional mehndi. A full layout can feature large paisleys on the palm, smaller paisley chains along the wrist and detailed finger panels. I fill each paisley with a different texture, dots in one, fine lines or tiny flowers in the next, so they don’t look stamped. Angled correctly along the palm, paisleys make the hand look longer. They’re a natural choice for weddings, Karwa Chauth and Diwali.
12. Jaali Mehndi Design
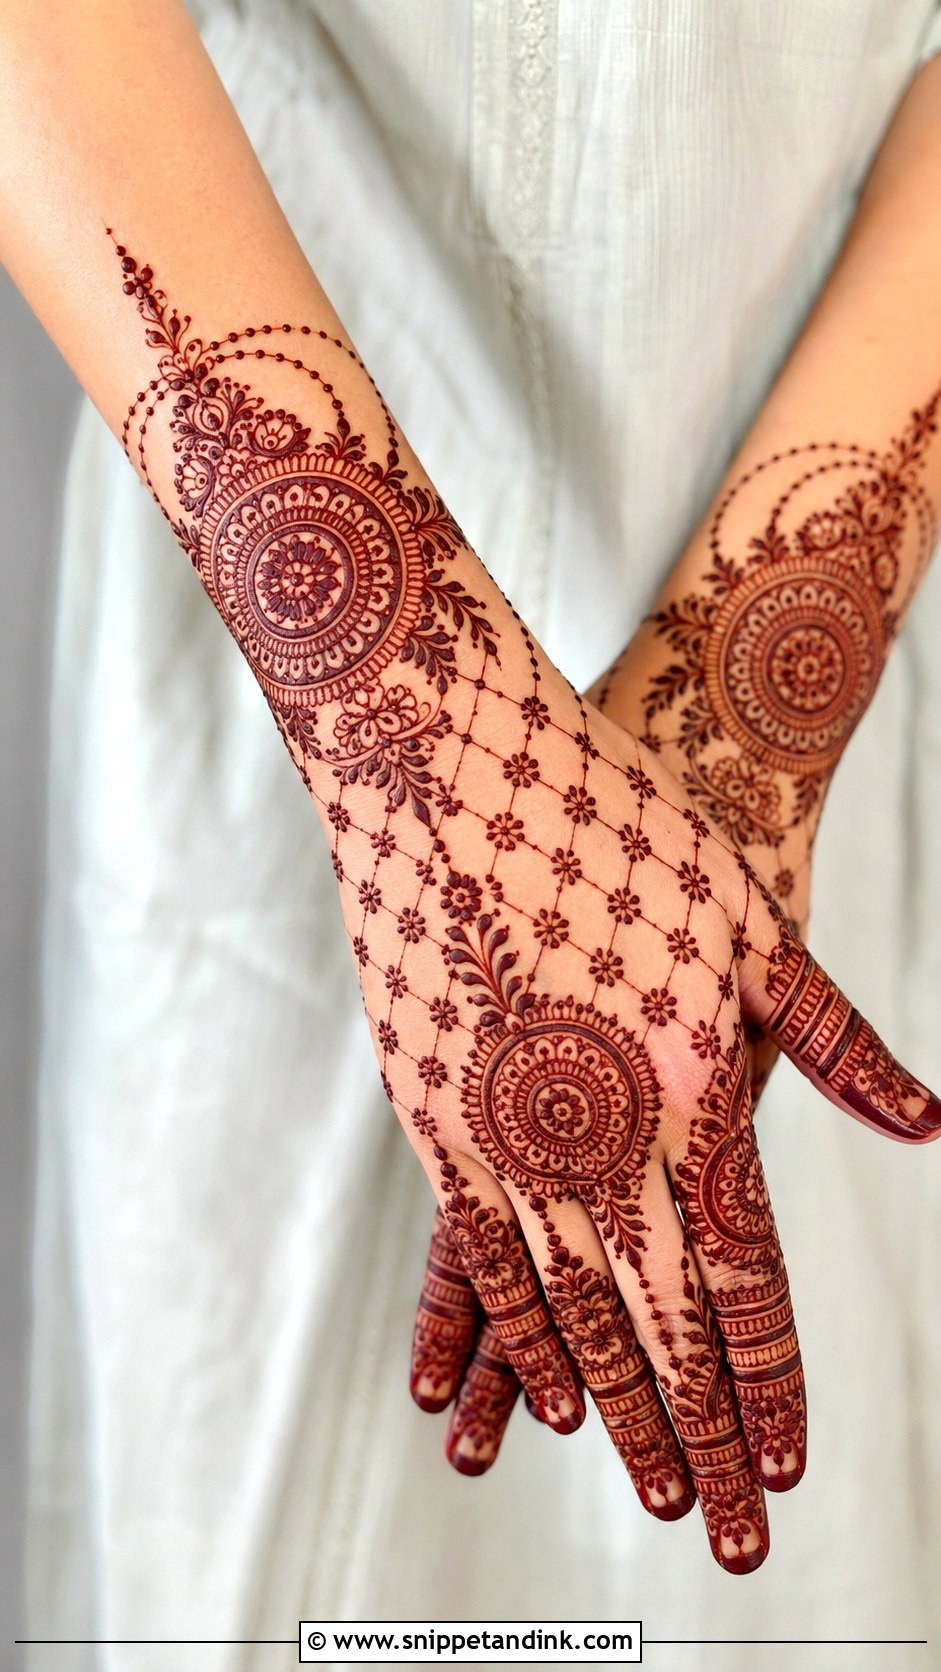
Jaali is a net pattern of diamonds or squares, and it’s the design that shows an artist’s hand the fastest. If the mesh lines are uneven, the whole section looks messy. I pair jaali with one bold motif, a mandala or a large flower, so the hand has a focal point. It covers the back of the hand or the forearm beautifully and gives a lace-like effect under bangles.
13. Peacock Mehndi Design
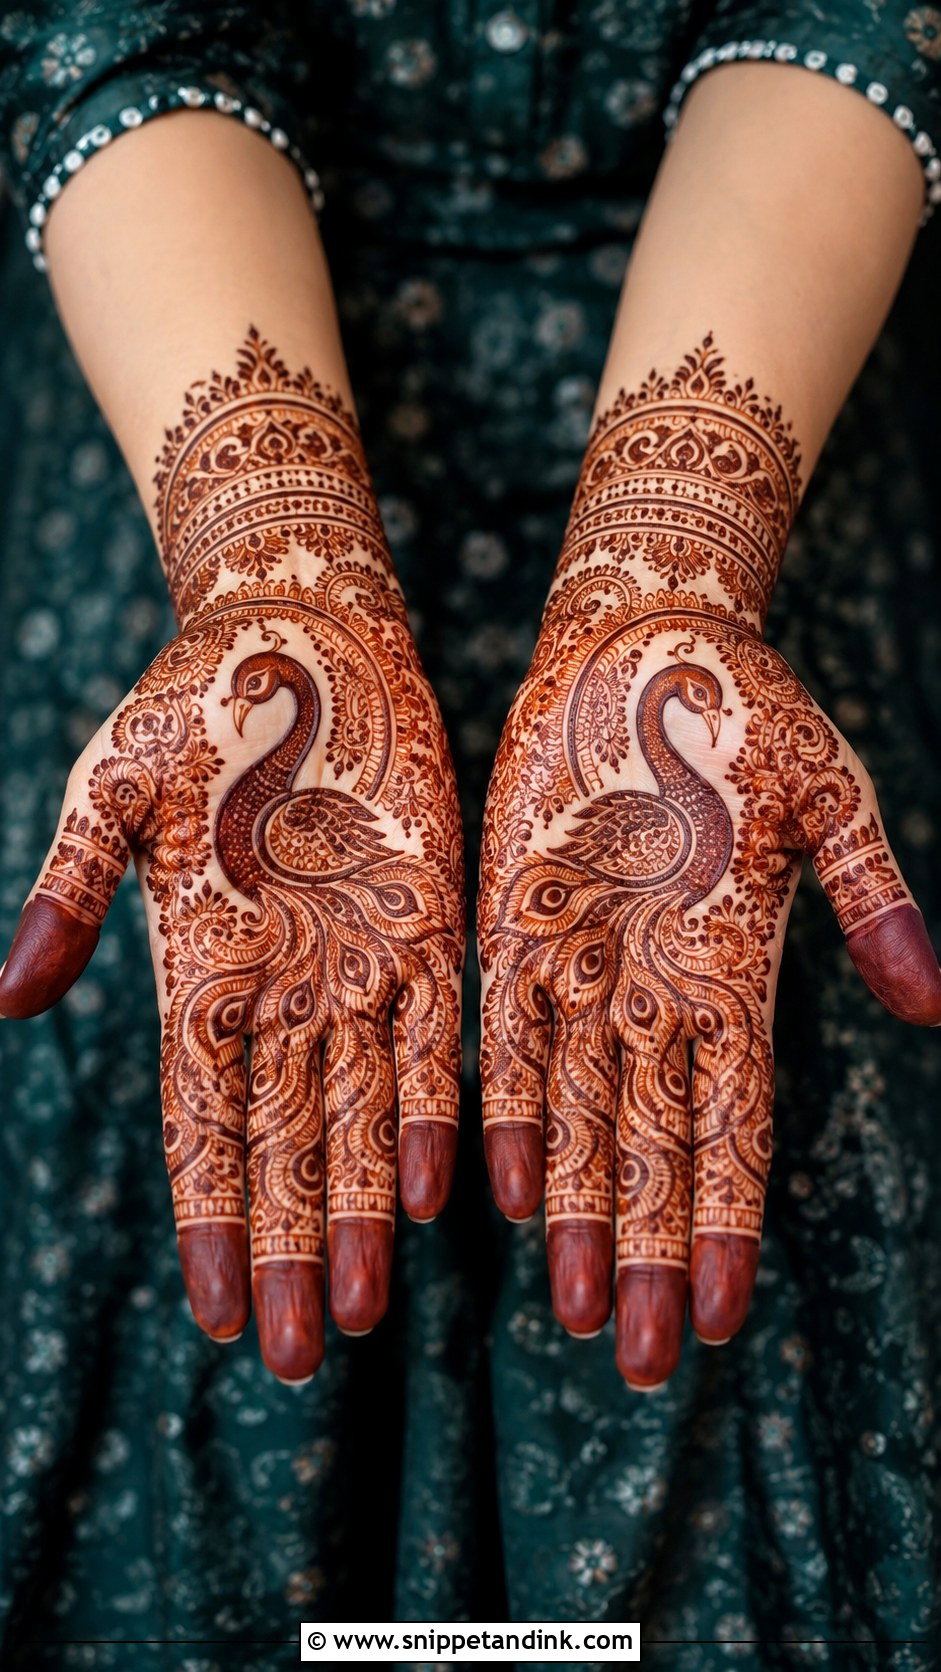
A peacock is the motif brides ask for most when they want something royal. I draw the body and neck first so the shape stays clear, then let the feathers flow into the surrounding paisleys and fillers. Overfilling the body is the common mistake; it turns into a solid blob once stained. Pair it with shaded fingertips and a bracelet border for sangeet or bridal hands.
14. Lotus Mehndi Design
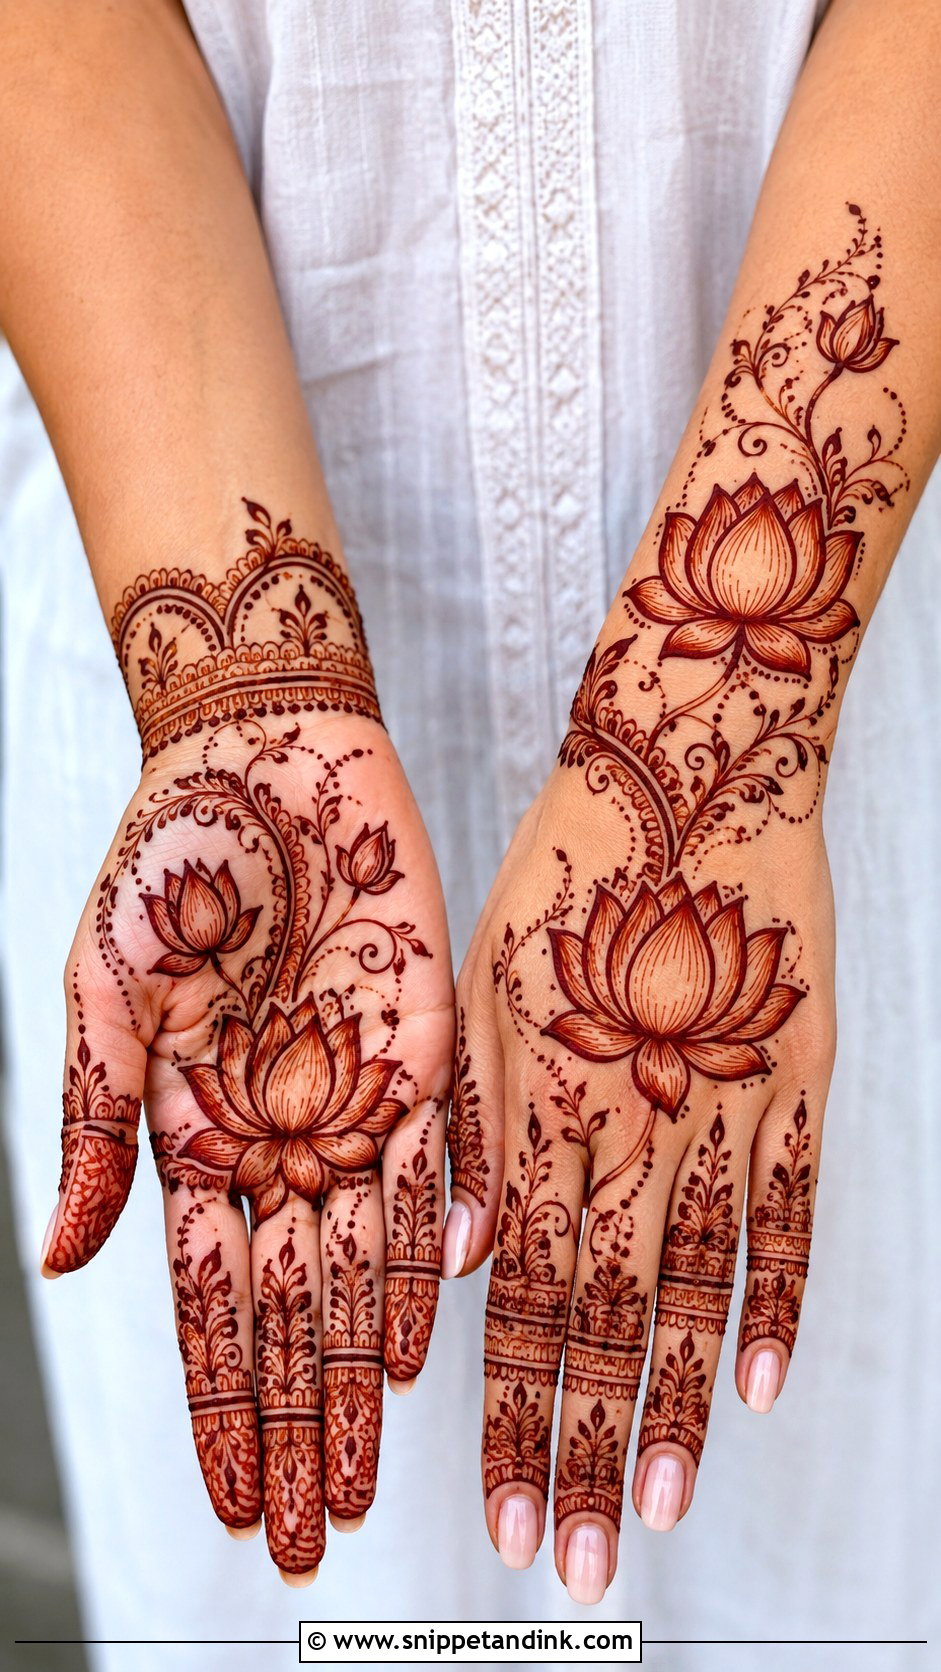
Lotus layouts can put a large lotus on the palm, a half-lotus at the wrist and buds along the fingers. The petals can be lightly shaded or left open for a cleaner effect. I surround the lotus with fine vines and scalloped borders rather than unrelated motifs, which keeps it calm. It also suits the back of the hand when paired with a mandala.
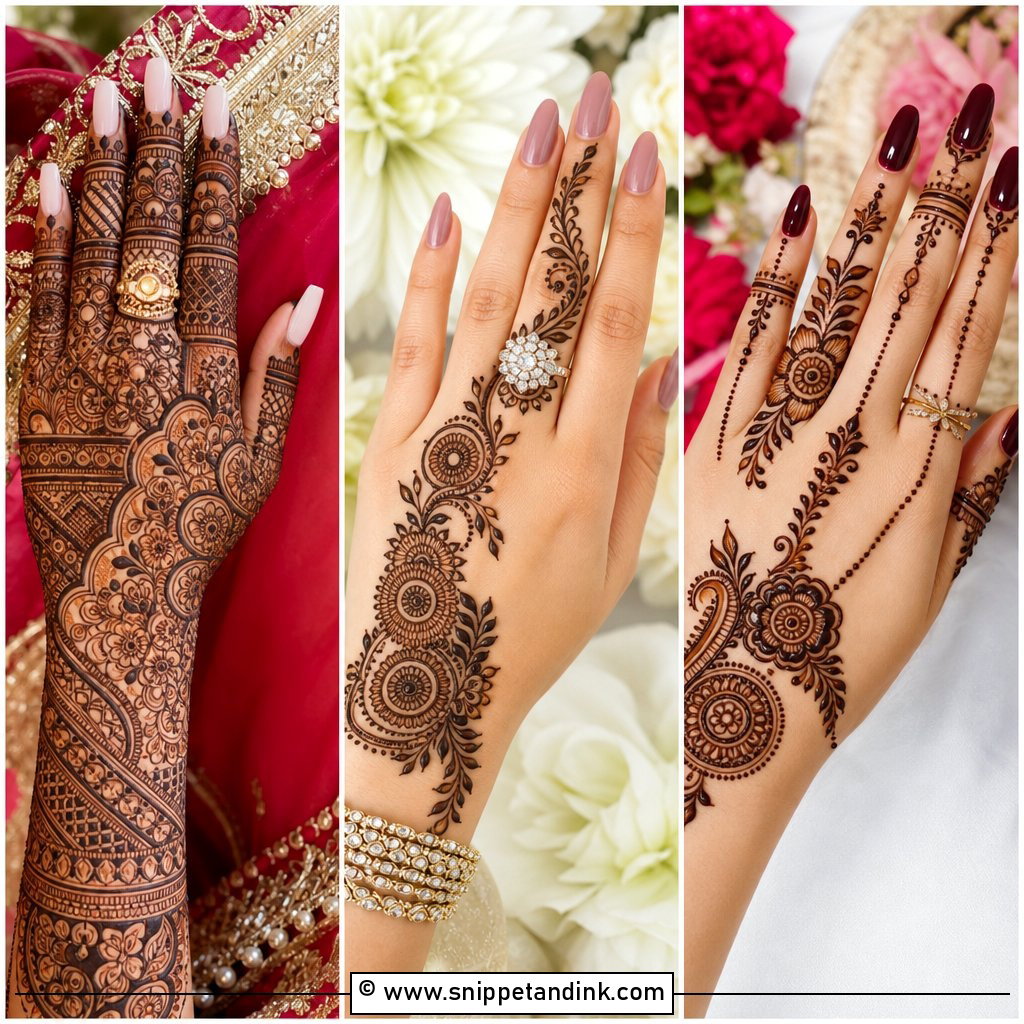
15. Khafif Mehndi Design
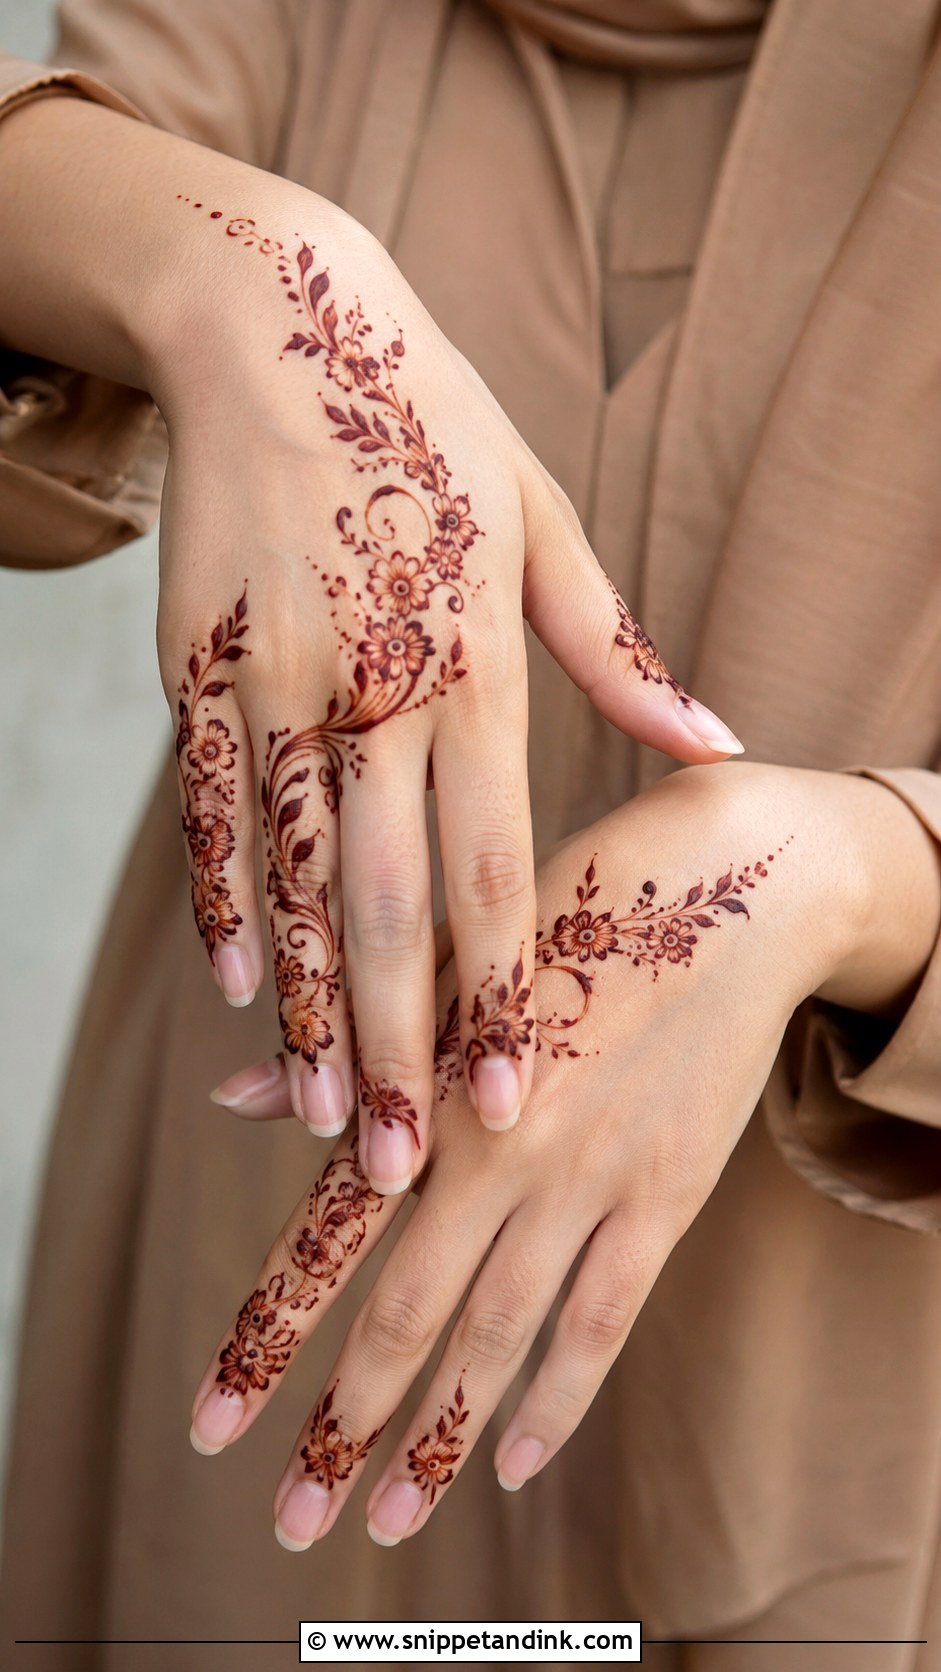
Khafif is fine-line work: small flowers, thin swirls and lots of negative space. It’s detailed without being heavy, and it needs a cone with a very fine tip and smooth paste, because any clump shows. I keep the outline thin throughout; thick outlines ruin the airy look. It’s a good choice for Eid, engagements and guests.
16. Gulf Mehndi Design
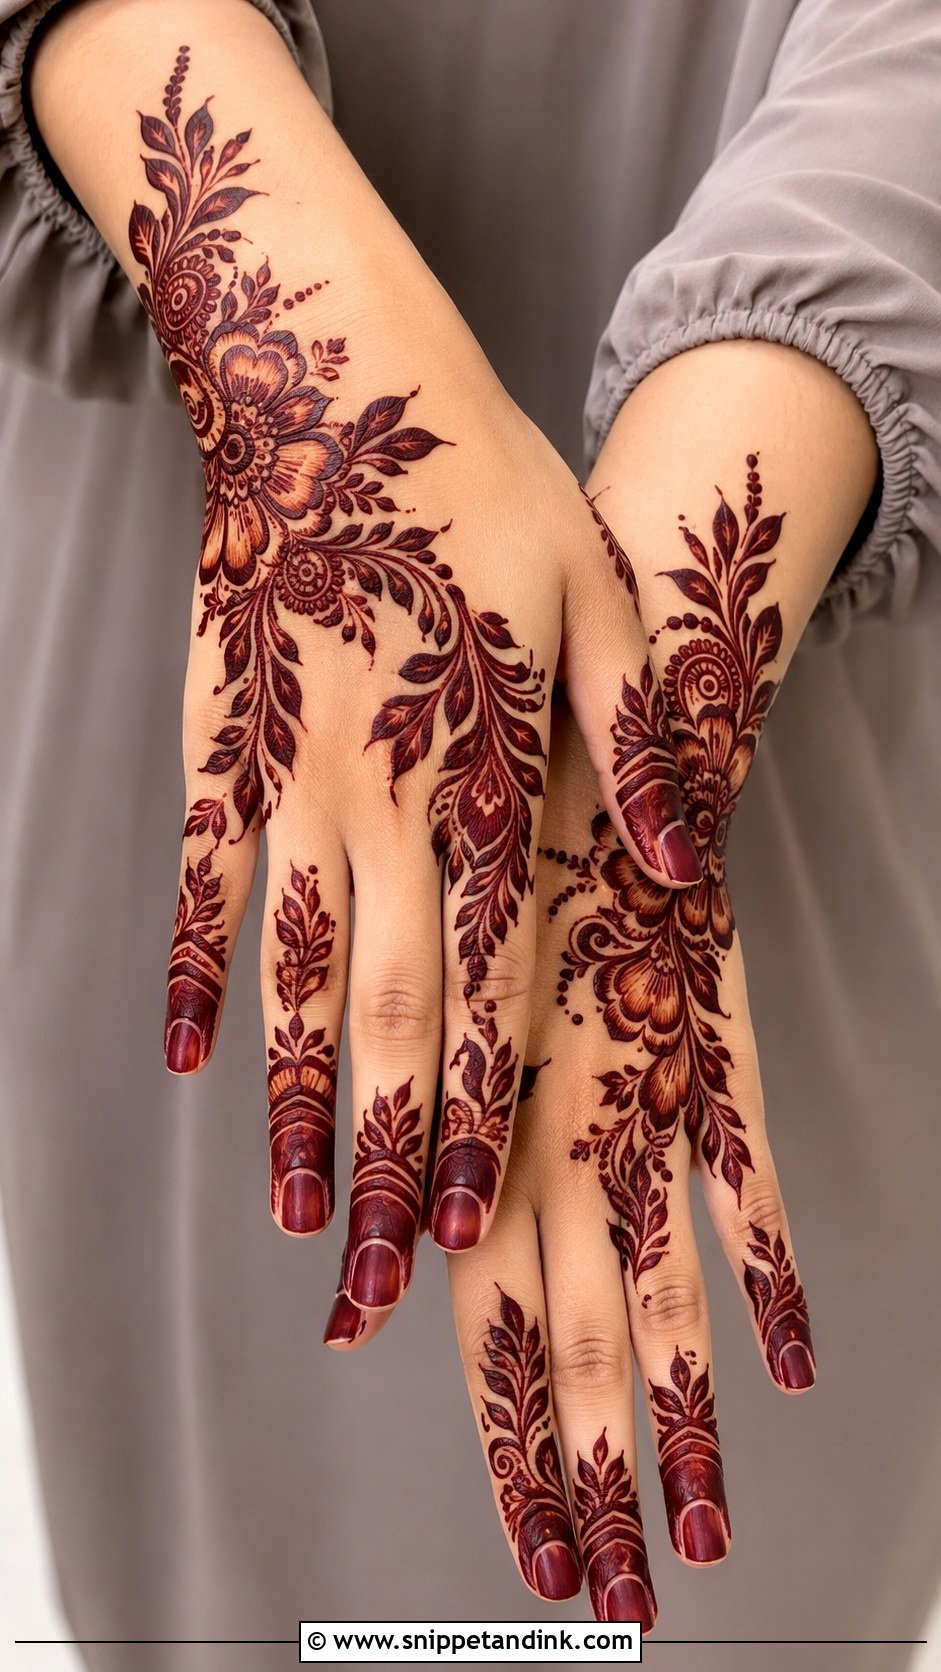
Gulf or Khaleeji-inspired henna uses bold florals, leafy curves and open gaps, often starting with a broad cluster at the wrist and moving diagonally to the index finger. Strong outlines and soft inner shading give it contrast. Clean fingertips matter; I either fully cap them or leave them bare, never half-done. It suits evening functions and Eid.
17. Moroccan Mehndi Design
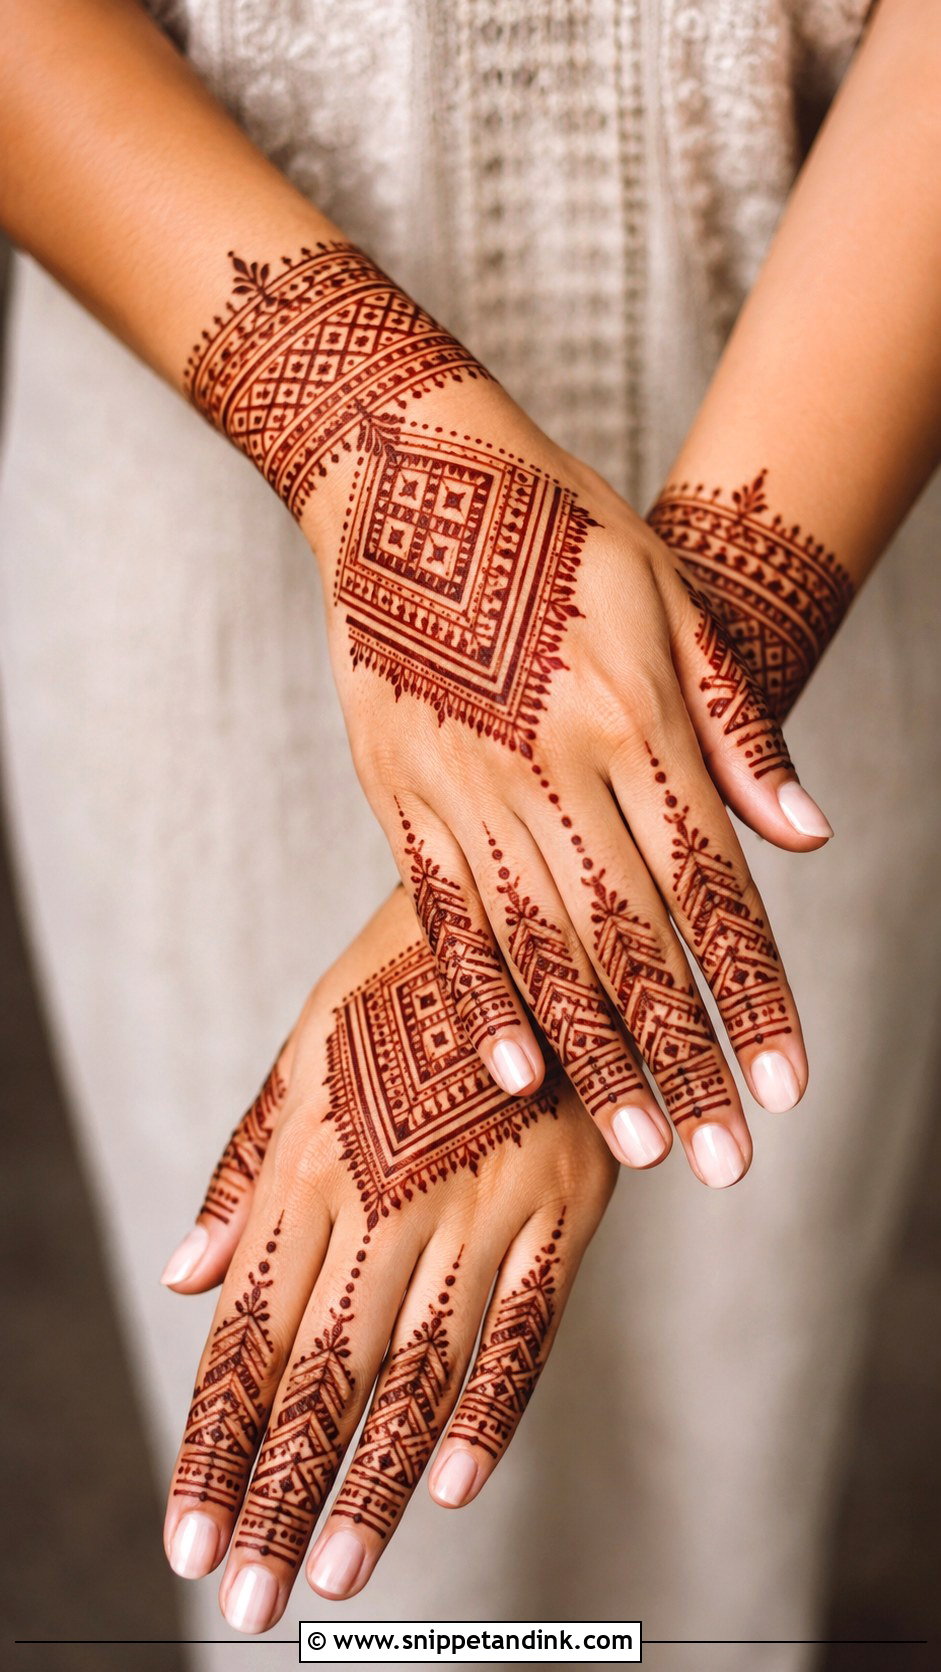
Moroccan henna relies on geometry: diamonds, triangles, straight lines, chevrons and bracelet-like bands. It reads modern and structured, and it’s a refreshing choice for brides who aren’t drawn to soft vines. The difficulty is straightness. I follow the natural length of the hand so the lines look intentional, and I keep florals to a minimum or skip them entirely.
18. Bracelet Mehndi Design
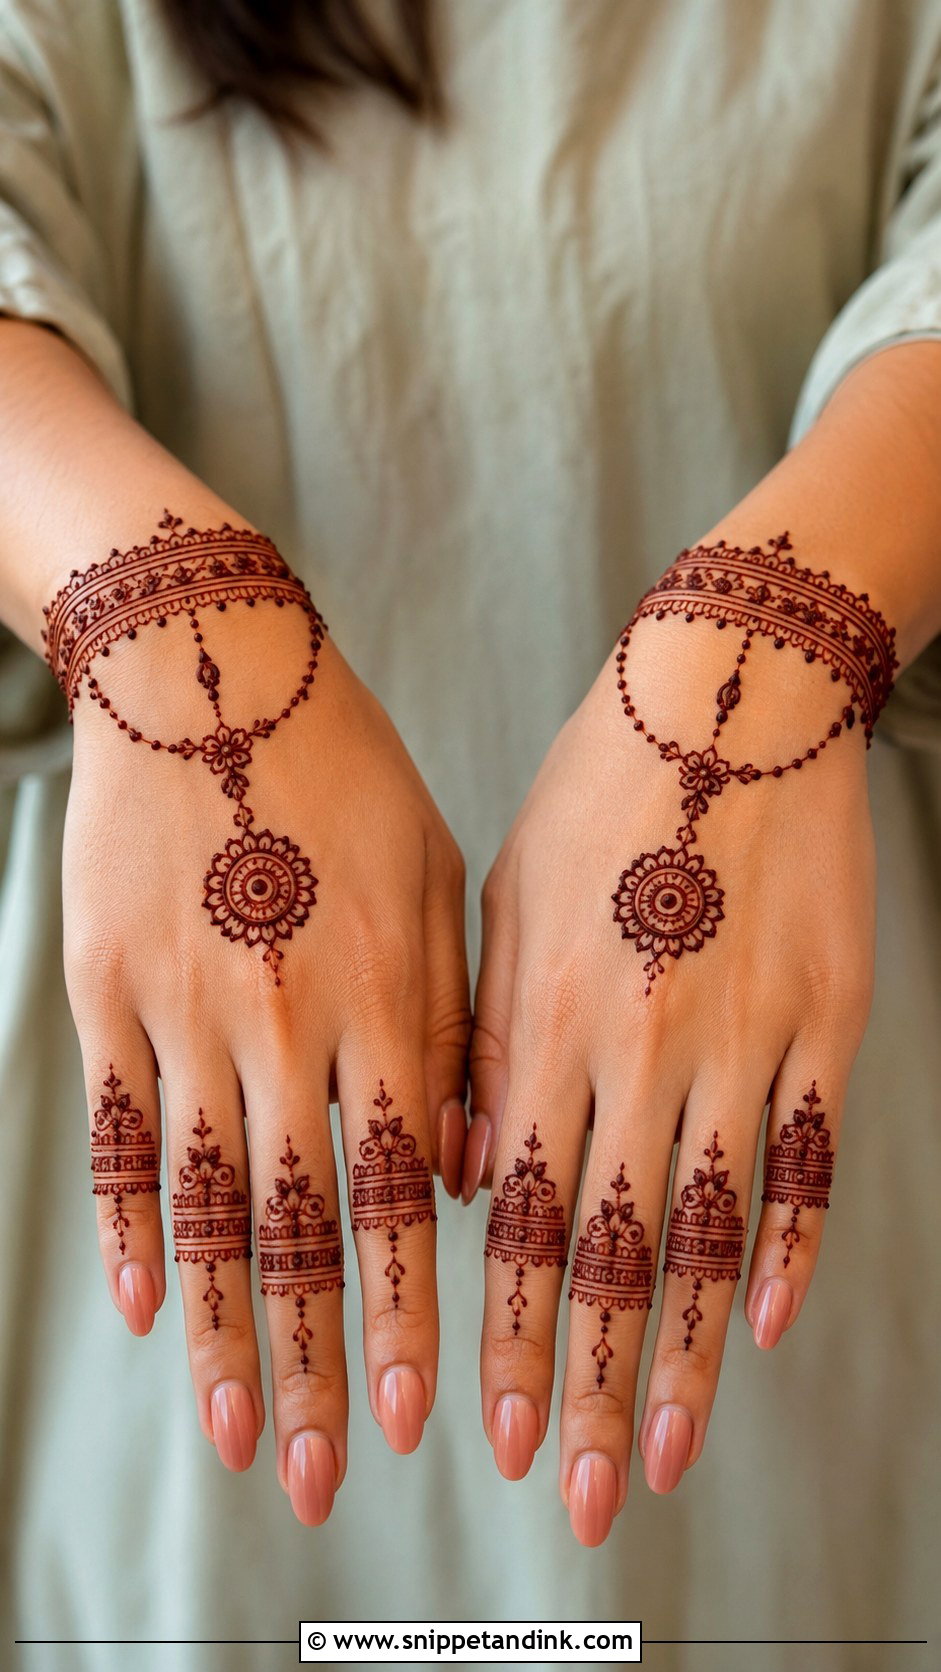
Bracelet designs mimic henna jewelry: a decorated wrist band, chains across the back of the hand and ring motifs on the fingers. I connect the chains to one or more fingers with thin lines and keep them light, because thick chains look heavy and stain unevenly. It’s a lighter dressed-up option for engagements and bridesmaids, and it sits nicely with real bangles.
19. Finger Mehndi Design
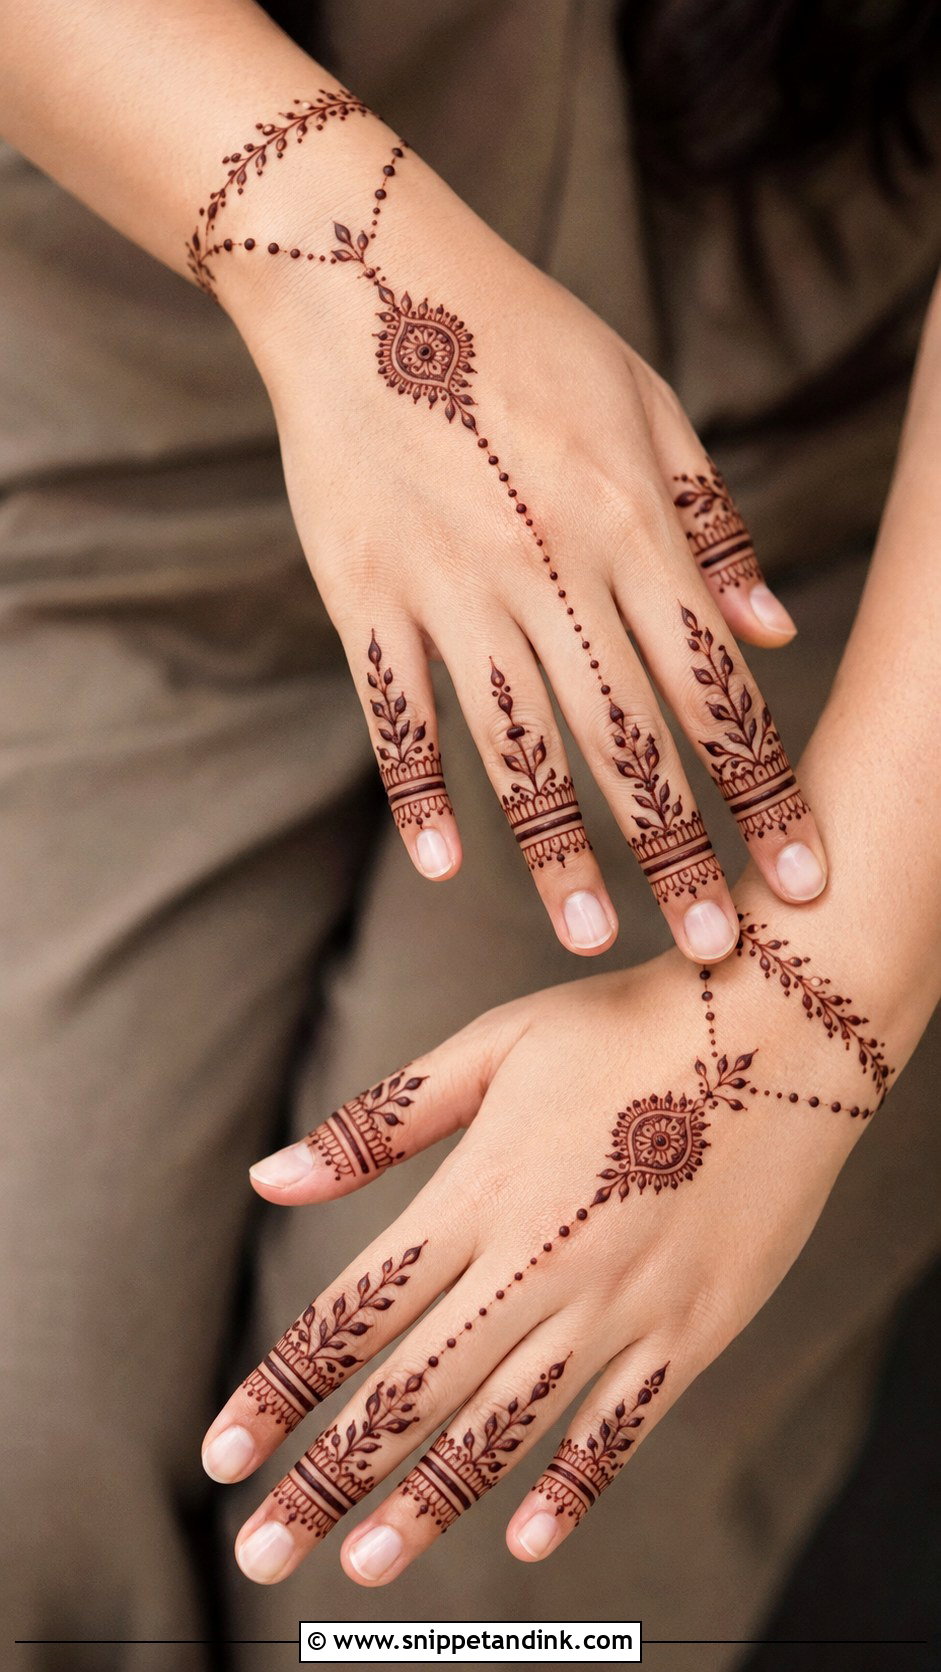
Finger-focused designs feel complete when they’re planned as a whole: decorated fingers, a small wrist band and a soft central motif or vine. I make the finger patterns related but not identical, varying the bands on each so it looks hand-drawn. It leaves the palm or back of the hand mostly open, which suits minimal brides, office events and Eid mornings.
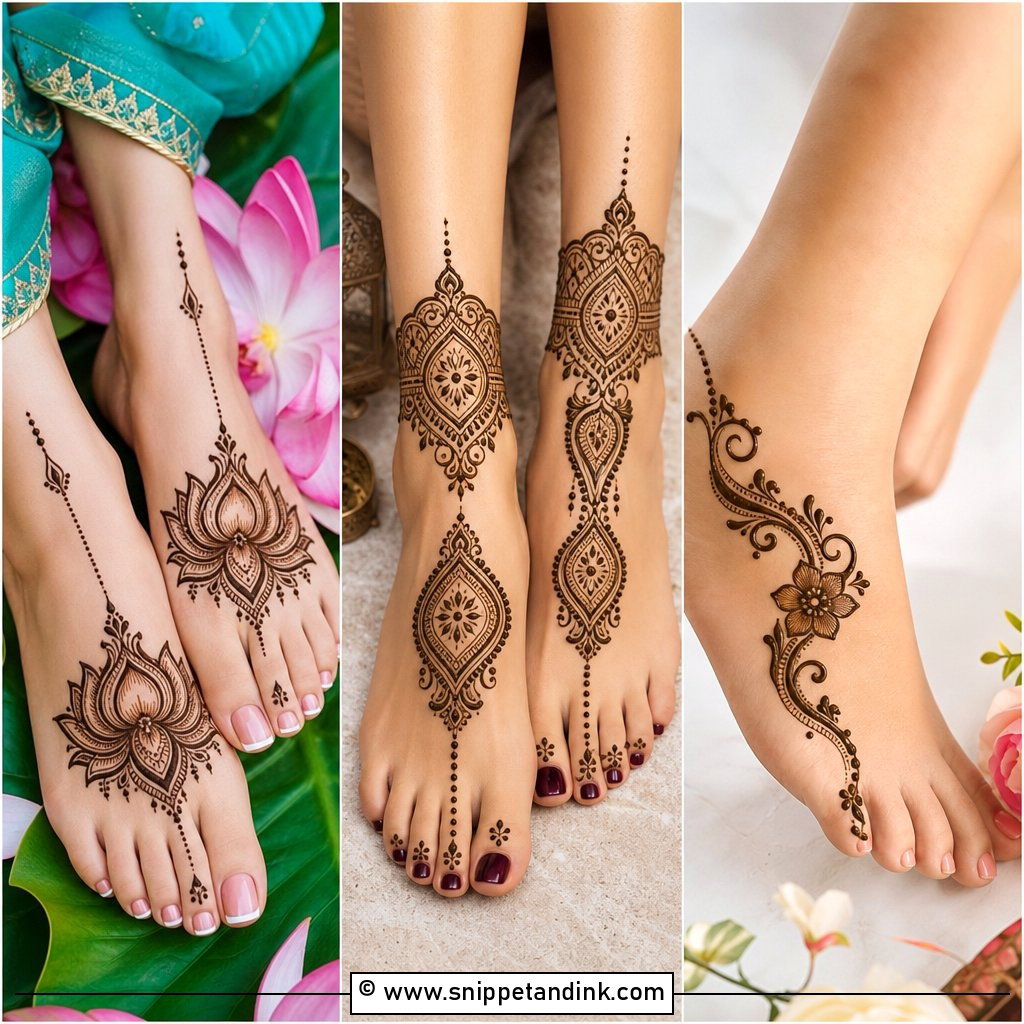
20. Rose Mehndi Design
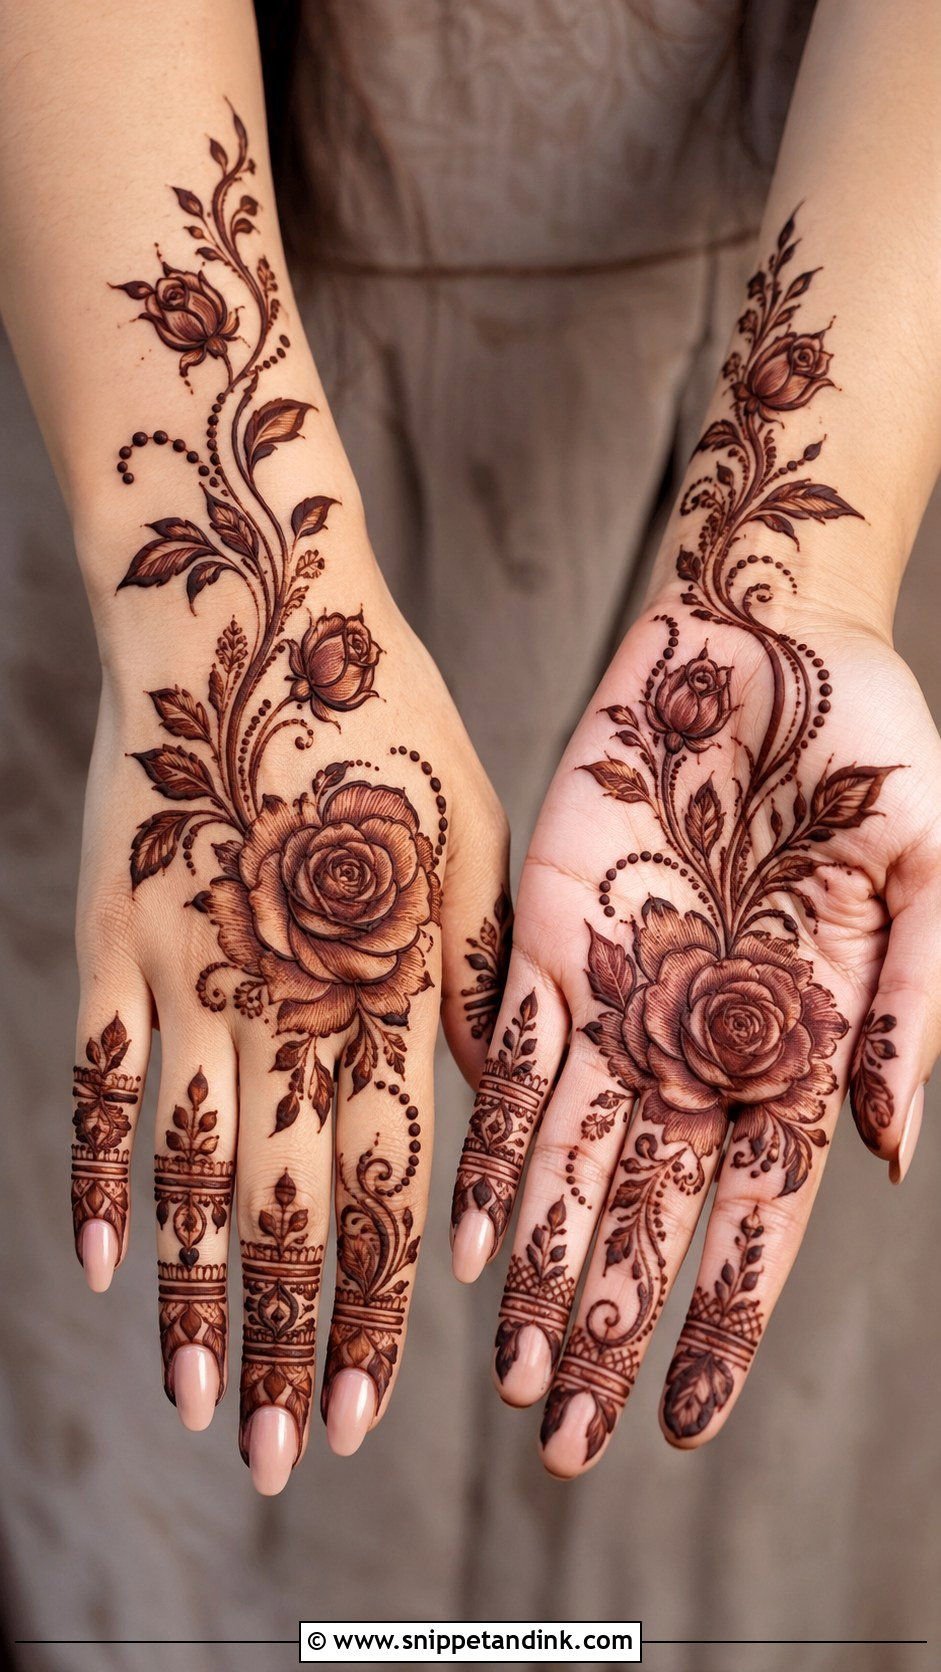
A rose design usually places one large rose at the center of the palm or back of the hand, with smaller buds flowing toward the wrist and fingers. Petal shading has to be soft and the outline clean, since roses lose their shape fast if petals merge after staining. Pair them with simple leaves and stems rather than extra fillers. A rose trail across the back of the hand follows the hand’s natural shape well.
21. Rajasthani Mehndi Design
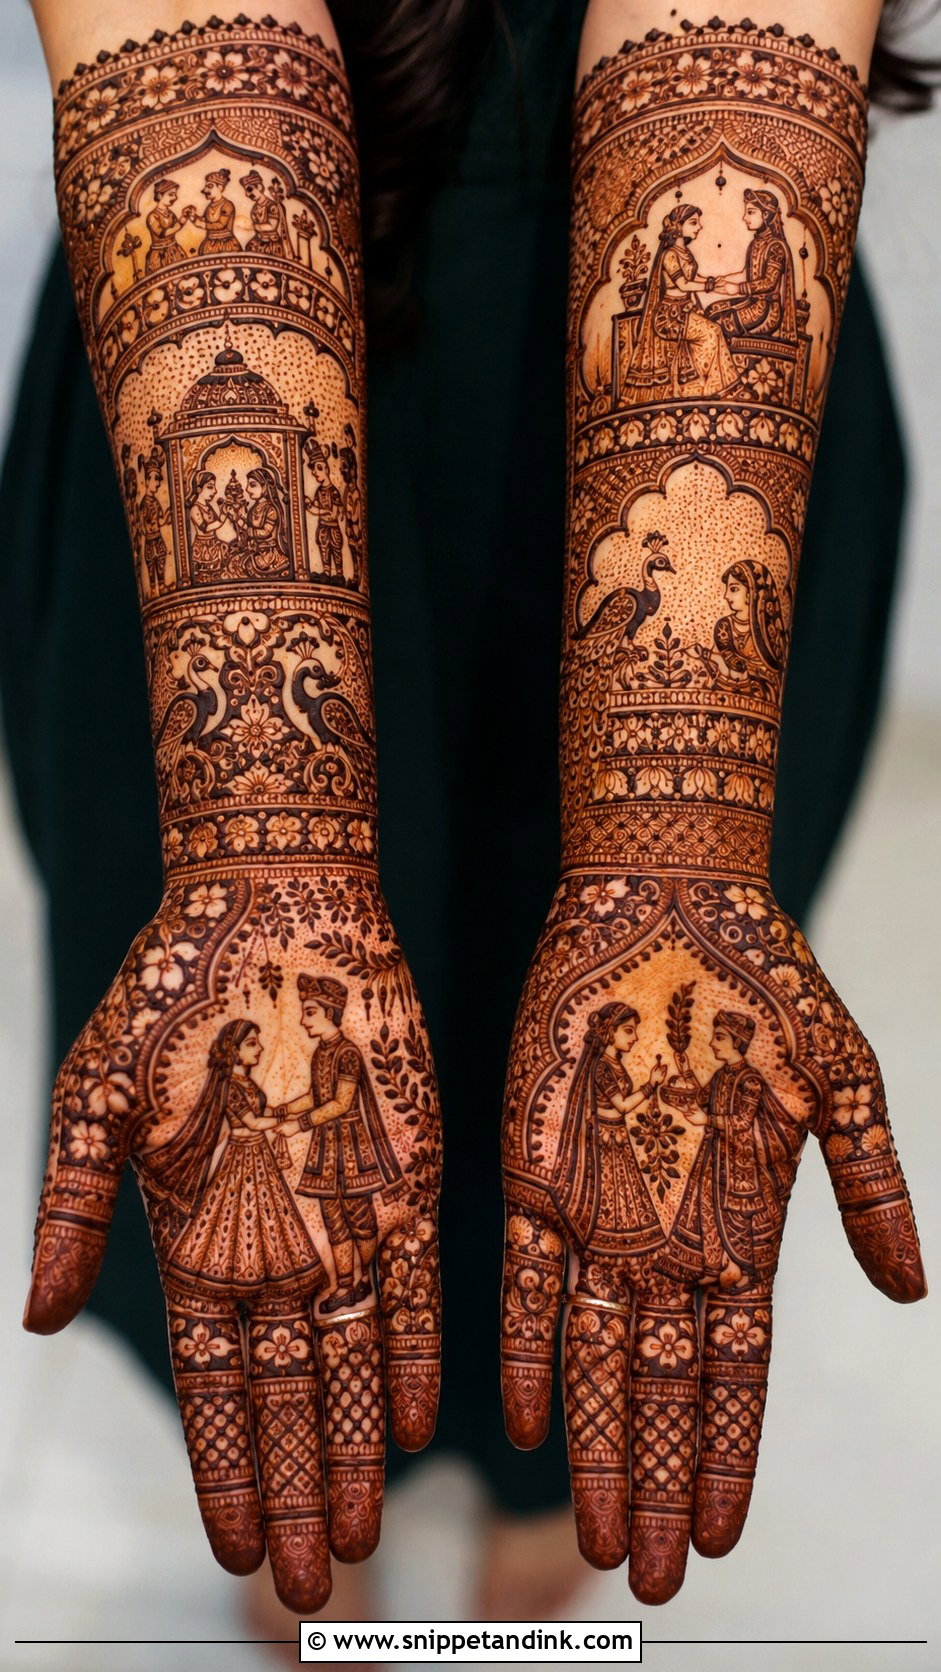
Rajasthani mehndi is storytelling: bride and groom figures, palanquins, peacocks and fine filler work. I divide the hand and arm into panels so each scene can be read: the palm holds the main figures, and fingers and forearms carry borders, florals and jaali. It takes time, often a full afternoon, and needs a patient bride who can sit still. The payoff is a design guests stop to look at.
22. Modern Mehndi Design
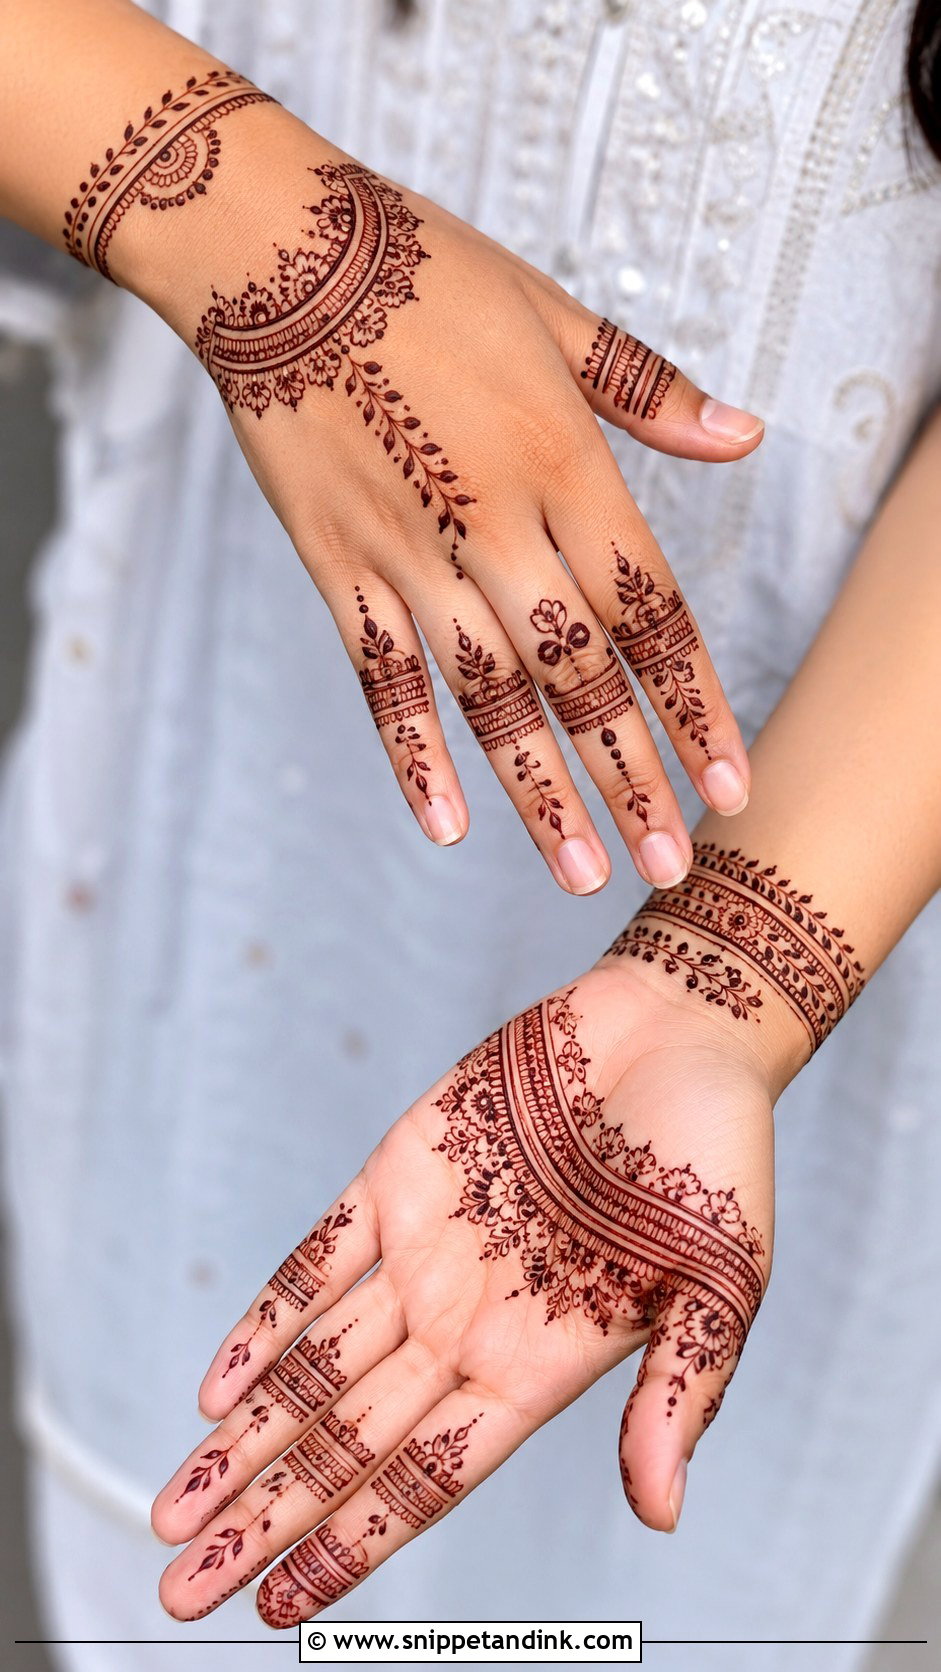
Modern mehndi uses negative space, slim vines, half-mandalas and geometric borders, with minimal finger detail. I pick one layout direction, a diagonal trail or a centered back-hand pattern, and stick to it. Too many motif types in one design is the usual problem. Every line needs some space around it, and that’s what makes the result feel fresh.
23. Shaded Mehndi Design
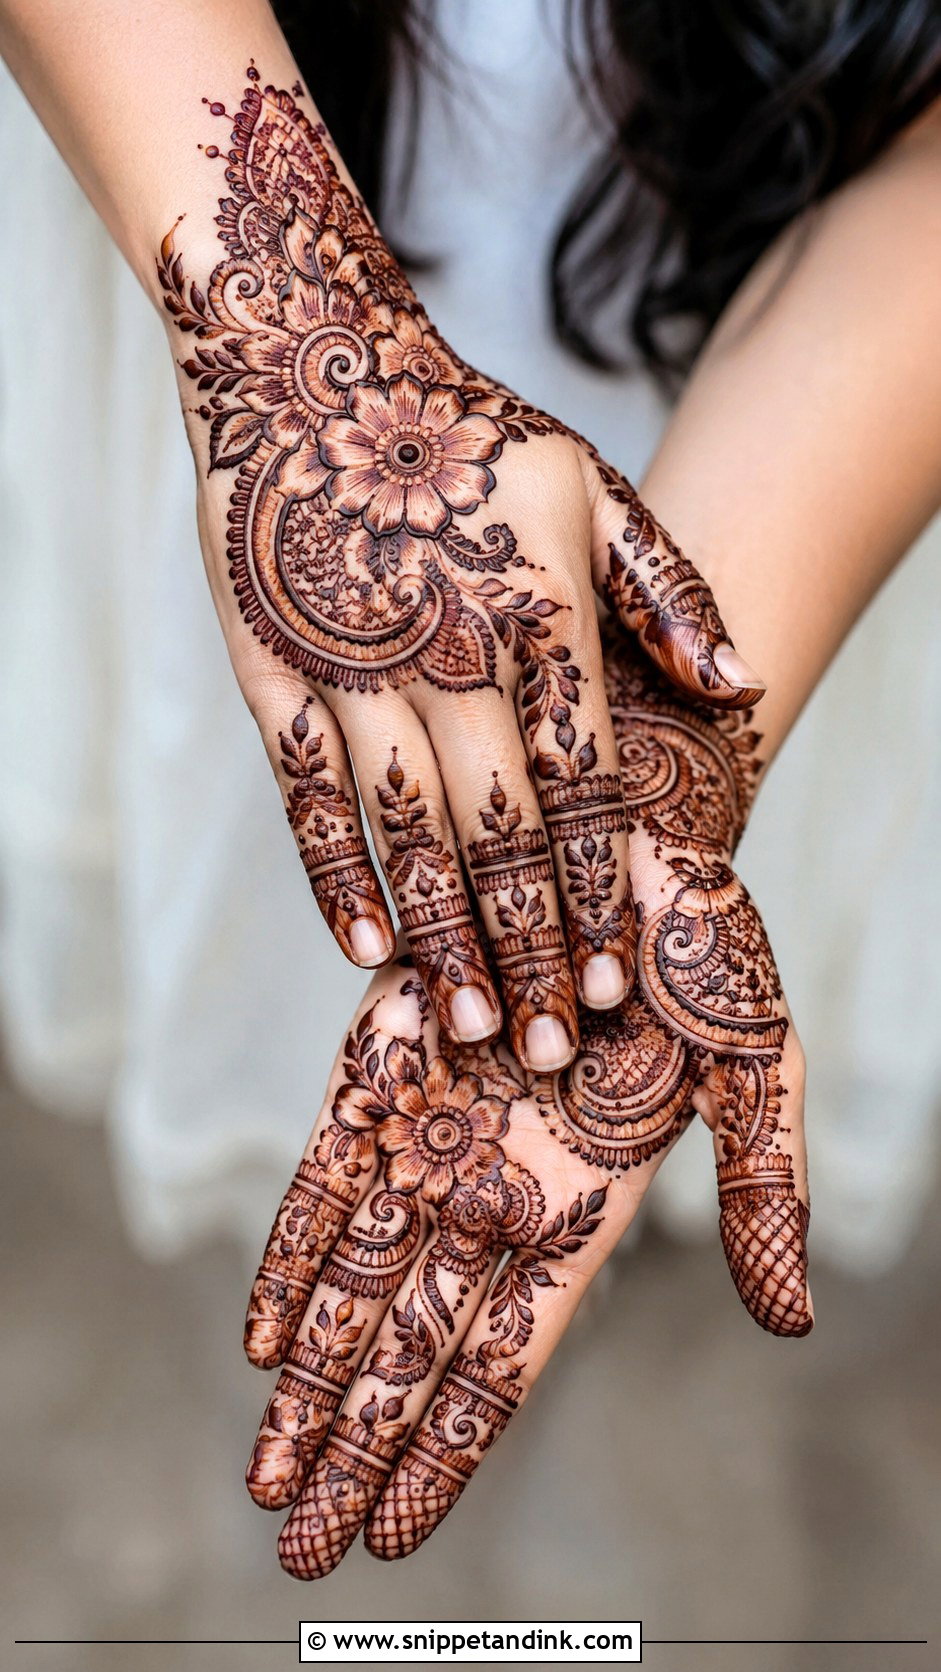
Shading gives depth: a dark outline with a lighter fill inside petals and paisleys. I shade by drawing very fine lines close together or by thinning the paste trail, not by smearing it. Consistency is everything, and heavy shading on every motif removes the softness. A shaded floral trail from wrist to fingers is one of my favorite quick designs for guests and sisters.
24. Vine Mehndi Design
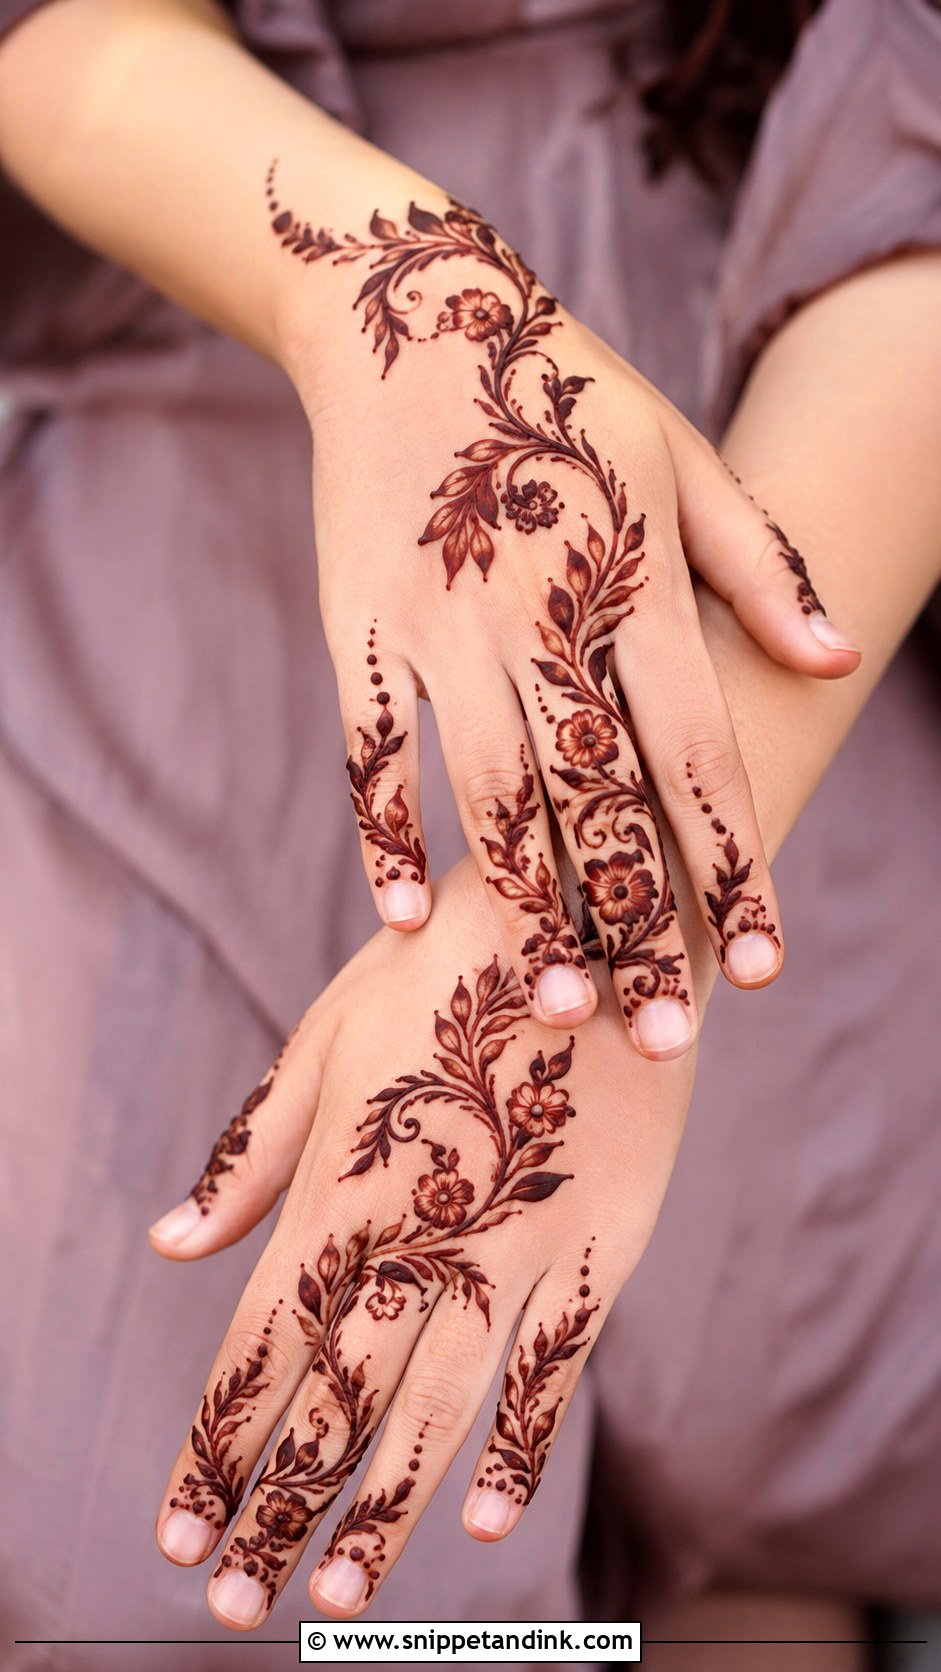
A vine follows the natural curve of the hand, from the wrist across the back and along one or two fingers, with leaves, small flowers and swirls. The curve has to be smooth and unbroken, so I draw it in one confident stroke before adding leaves. Filler goes only where the vine needs it. It’s light coverage that suits Eid, mehndi parties and casual celebrations.
25. Jewelry Mehndi Design
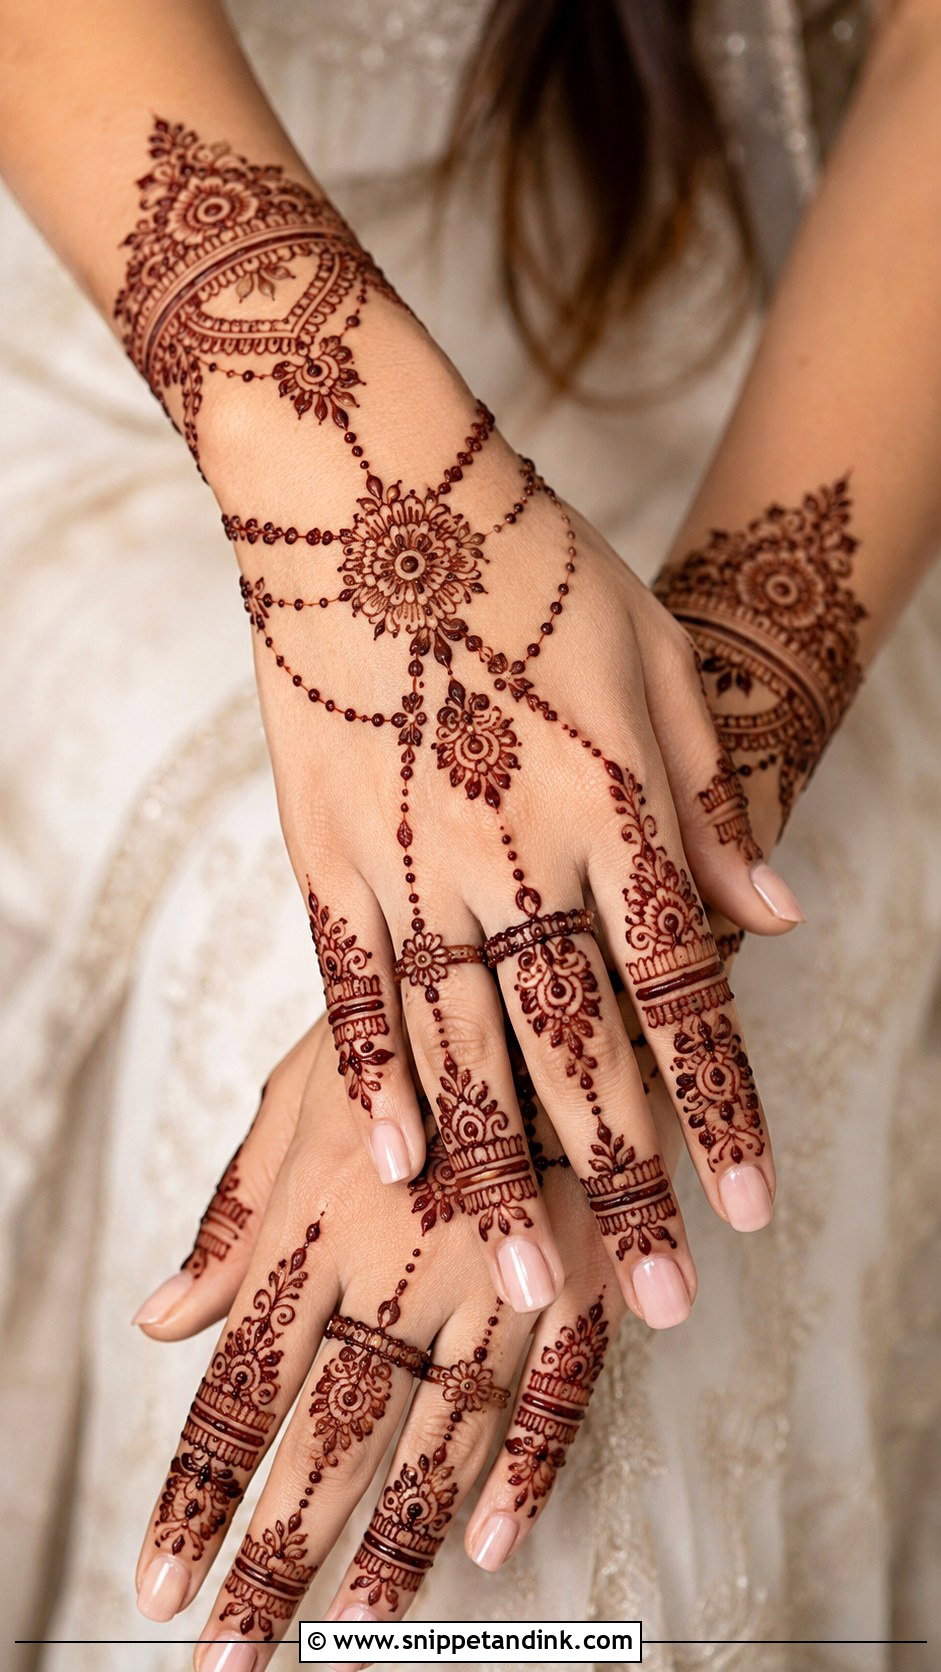
Jewelry designs draw rings, chain links, wrist cuffs and a small pendant motif on the back of the hand. A central floral pendant connected to the wrist and fingers creates a hand-harness effect. Thin chains and tiny dots keep it balanced. It pairs with real jewelry but stands on its own, which makes it a modern pick for engagements and bridesmaids.
26. Half Hand Mehndi Design
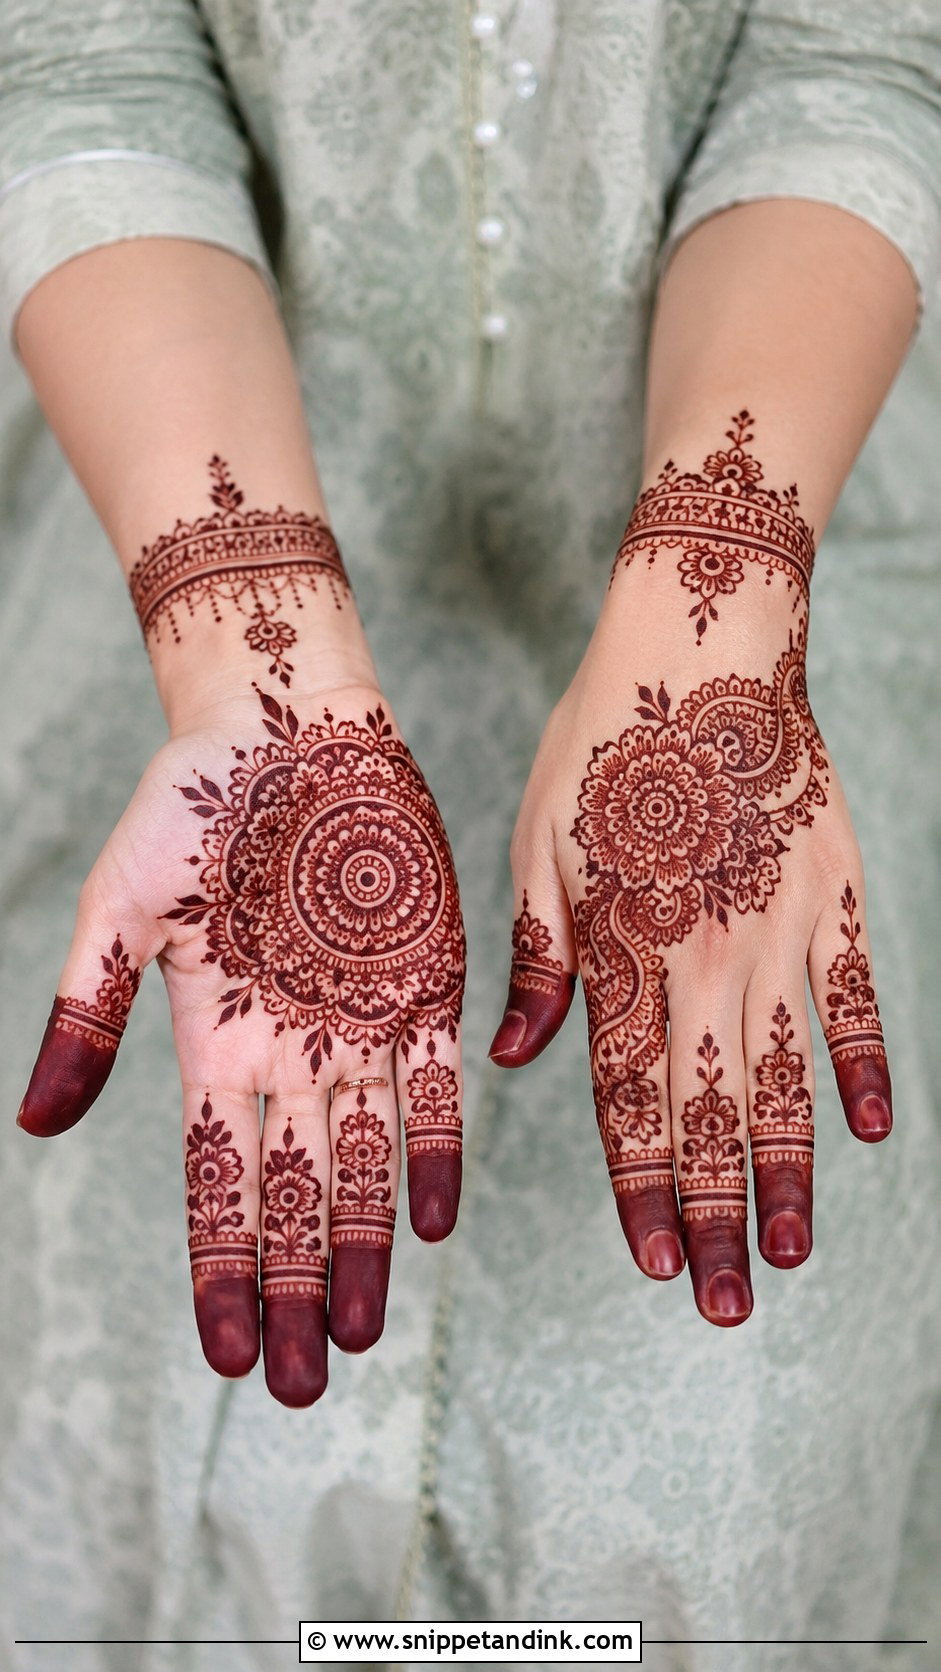
Half hand designs cover the palm, the back of the hand or the area from wrist to mid-palm, and stop there. The stopping point is what people notice, so I always finish it with a border or bracelet band rather than letting the pattern trail off. A mandala, floral cluster or jaali panel can carry the design. It’s quicker to apply and easier to live with for guests who don’t want henna up the forearm.
27. Engagement Mehndi Design
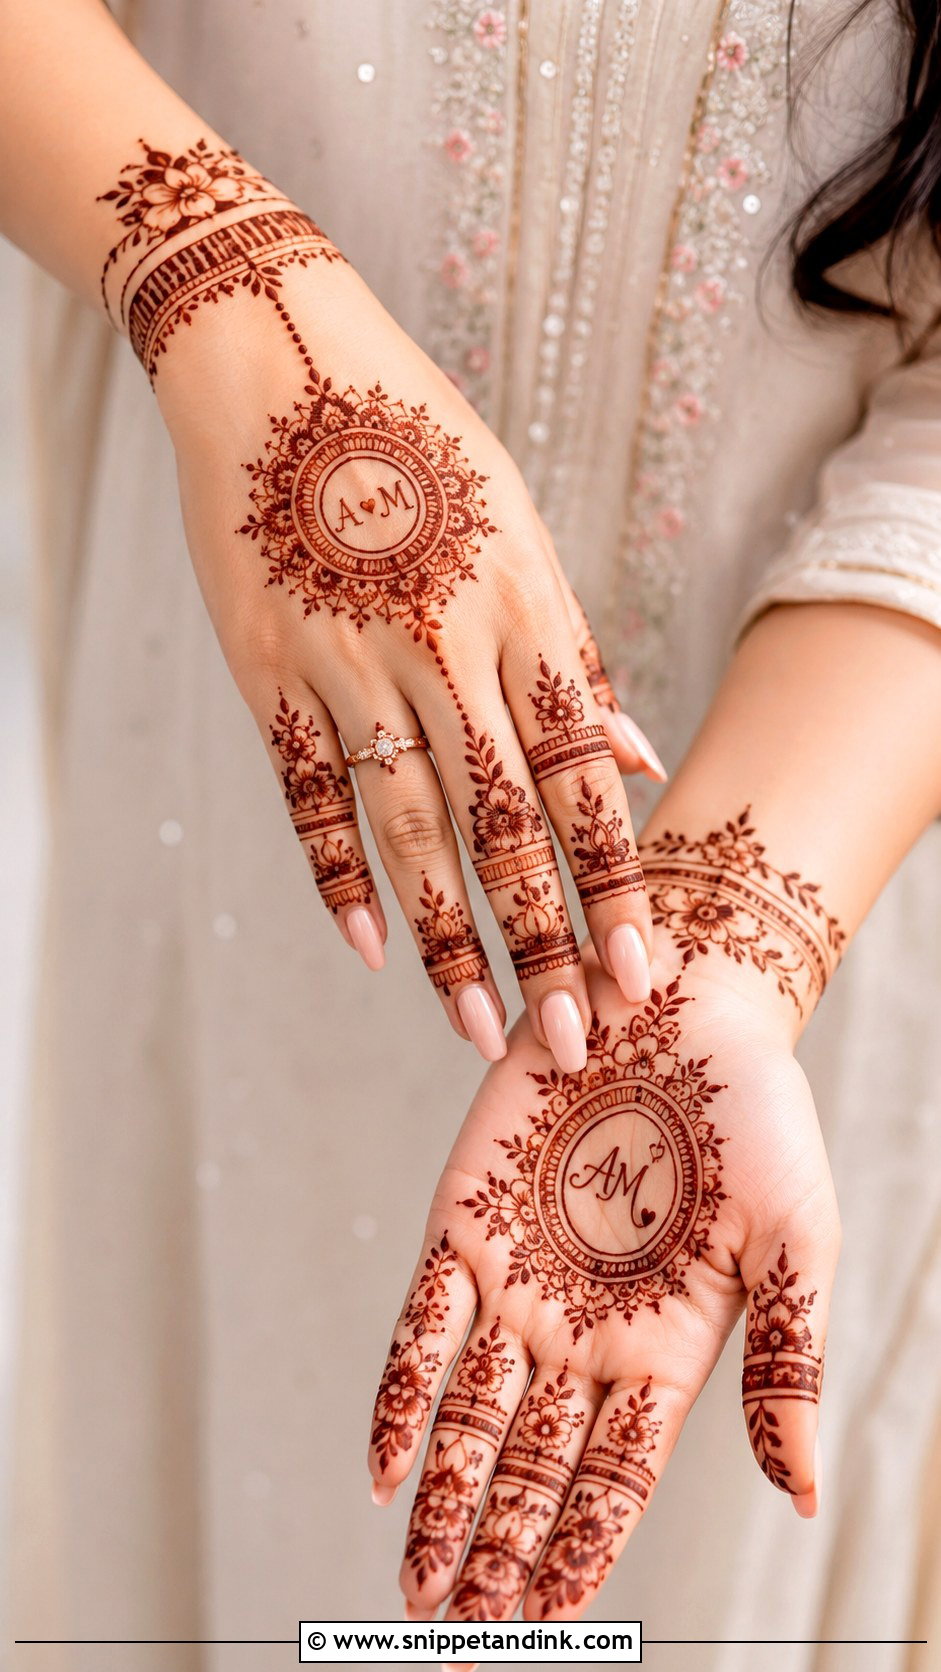
Engagement mehndi design has one priority: the ring. Engagement photos focus on hands, so I keep the ring finger open or lightly decorated and avoid dense patterns that hide jewelry. A back-hand mandala, bracelet details, floral fingers and a neat wrist extension work well, and a small heart or initials on the palm adds a personal touch. A deep reddish-brown stain photographs best with both pastel and bold outfits.
28. Eid Mehndi Design
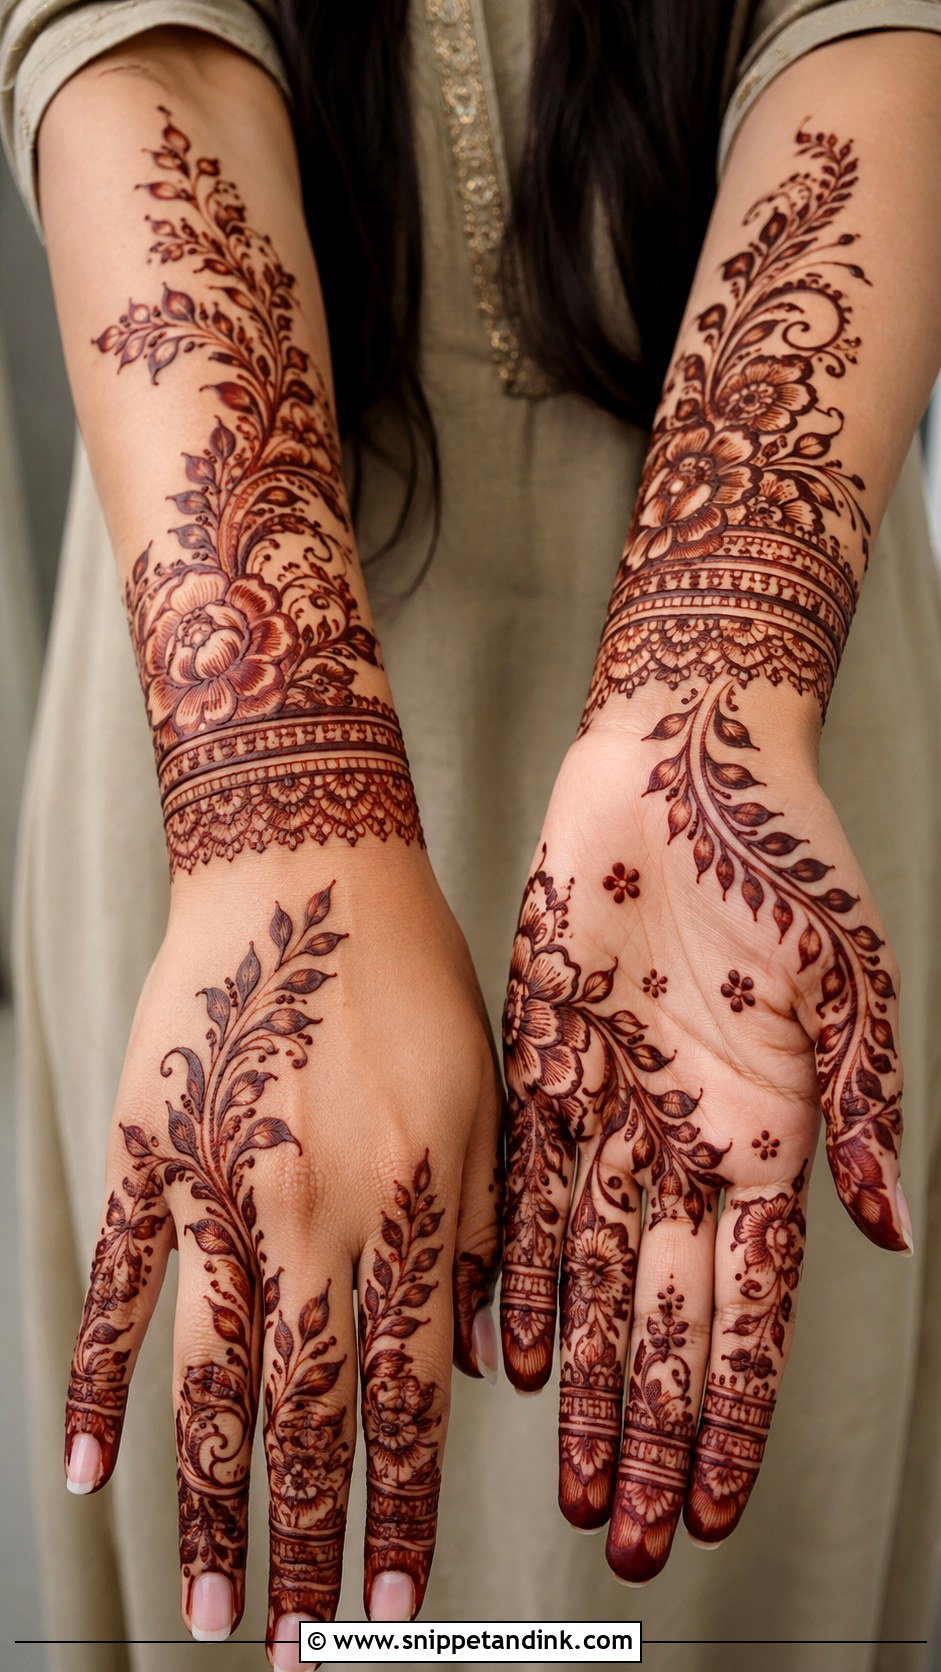
Eid henna is usually applied the night before, so it should dry quickly and let you sleep comfortably. Arabic florals, finger patterns, leafy vines and wrist bands are the core. Back-hand designs show well with bangles. If you want a traditional touch, add a small mandala on the palm, but keep the layout flowing with clean gaps so you can move freely during greetings.
29. Diwali Mehndi Design
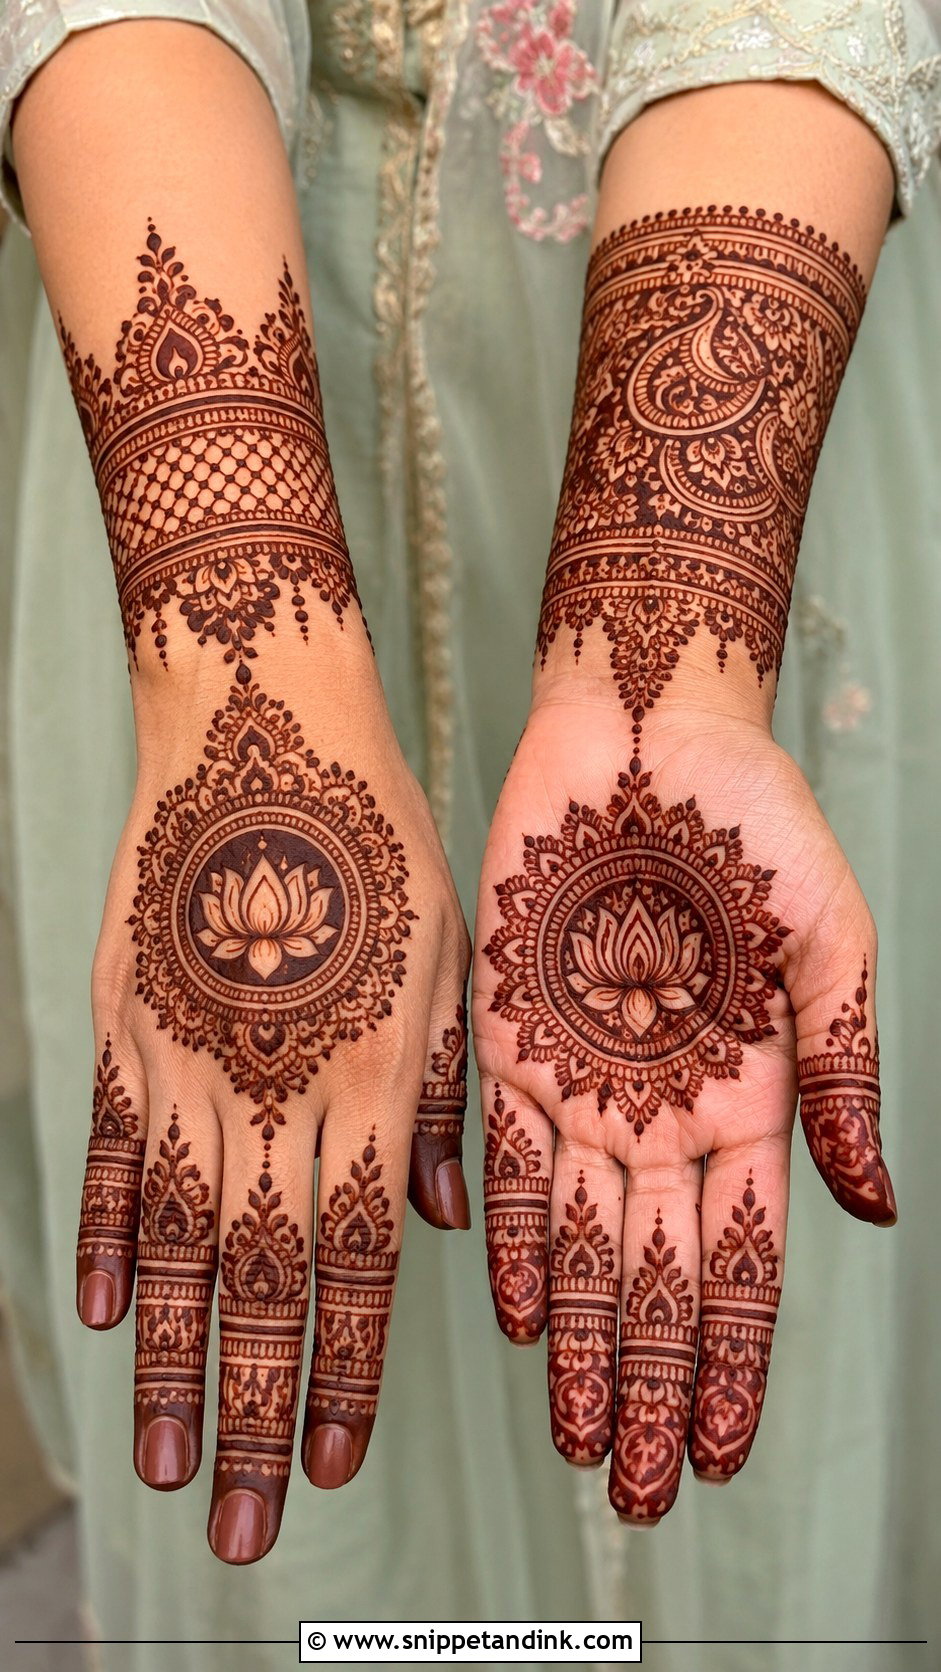
Diwali designs lean on lotus flowers, mandalas, paisleys, dotted borders and fine finger details, with the main motif on the palm and a neat bracelet border at the wrist. Diwali outfits are rich in color and jewelry, so the mehndi should be detailed but balanced, not heavy. A lotus mandala with leafy fingers is one I come back to often. Apply it a day or two before, so the stain has darkened by the evening puja.
30. Party Mehndi Design
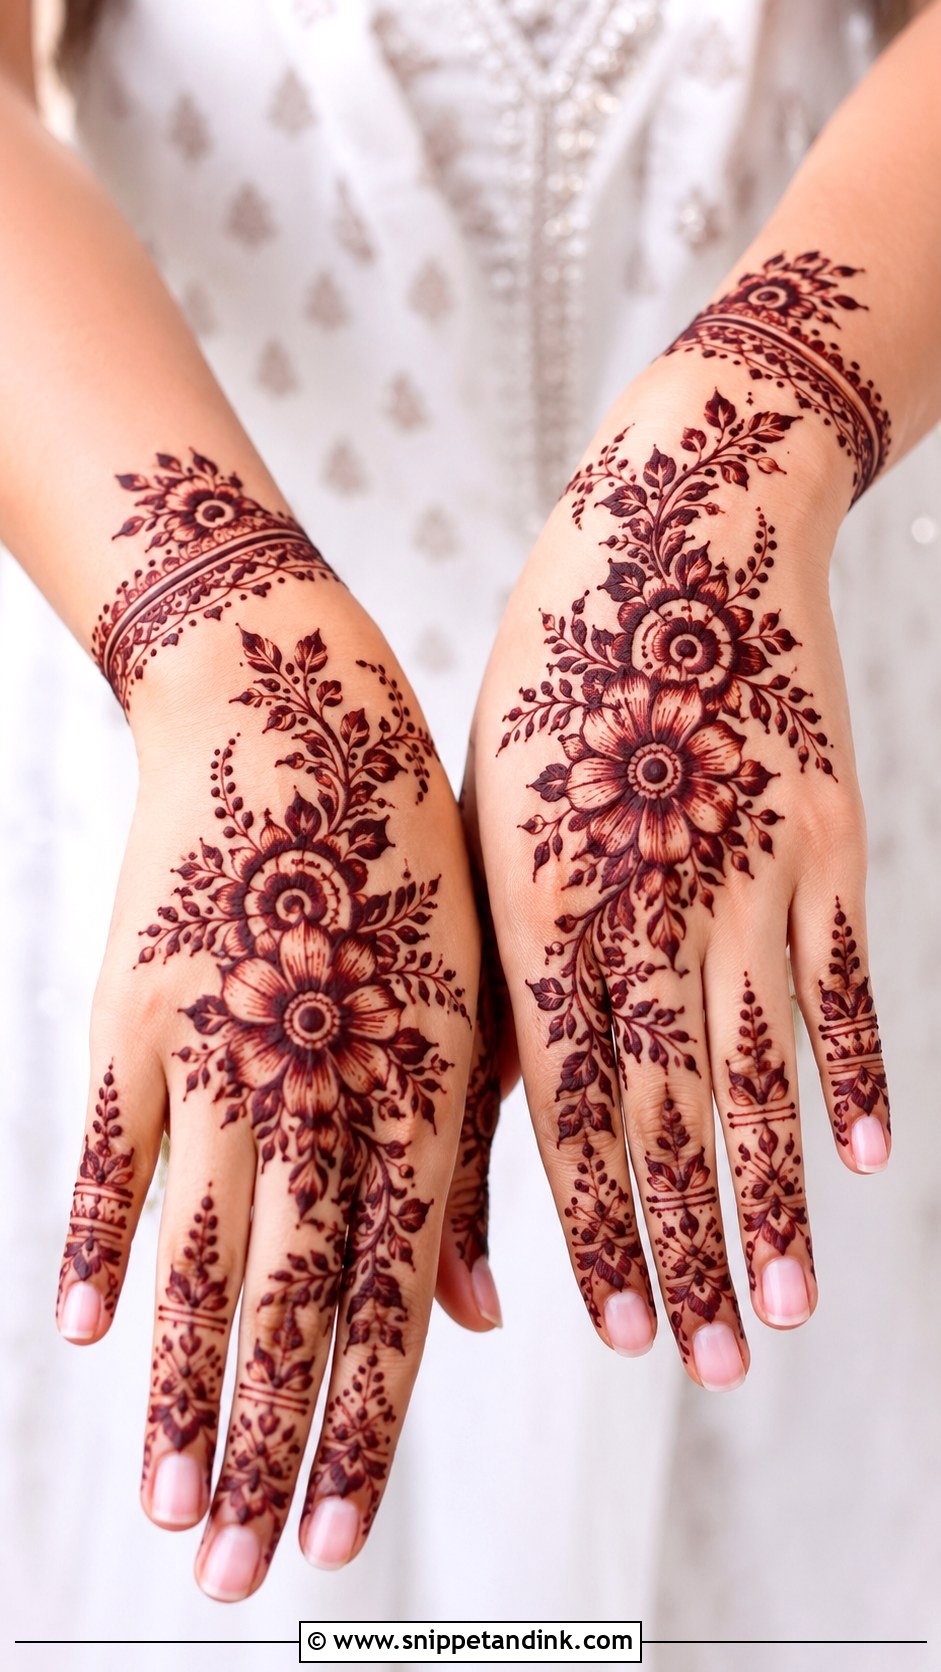
Party designs need to be stylish and fast: a bold back-hand flower, a diagonal Arabic trail, decorated fingers and a slim wrist band. I choose one main feature and connect it with thin vines and dots. Dense palm coverage is rarely worth it for a party unless the event is traditional. Most of these take fifteen to twenty minutes a hand.
Spotting a Chemical Cone Before It Touches Your Skin
Real henna stains orange first and never black. A paste that leaves an instant dark brown or black stain within an hour, or smells strongly of chemicals or kerosene, may contain PPD or other dyes, which can cause serious skin reactions and scarring. I’d always ask your artist what’s in the cone. Natural paste is henna powder mixed with water or lemon juice, a little sugar and an essential oil such as eucalyptus, cajeput or lavender.
If you have sensitive skin or allergies, ask for a small dot behind your elbow a few days before your appointment and watch for redness or itching. That patch test also shows you how dark the paste stains on your skin.
Making the Color Last Through the Wedding Week
Henna stays on the skin for one to three weeks, fading as the top layer of skin renews. The stain goes fastest on the palms of anyone who washes their hands constantly. A few habits keep it richer for longer.
- Apply a little coconut or mustard oil before showering to protect the design from soap and hot water.
- Skip scrubs, exfoliants, swimming pools and wax treatments until after the wedding.
- Wear gloves for washing dishes or cleaning, since detergent strips the stain quickly.
- Book any manicure before your henna appointment, not after.
Why Spacing Matters More Than Detail
Start with the occasion and how much coverage you can sit for, then pick the layout. Full hand Indian and bridal mehndi are rich and traditional, while Arabic, minimal, vine and jewelry designs are lighter and more modern. Mandalas, florals, paisleys, jaali and peacocks can be scaled up or down for any event. Whatever you choose, ask your artist to plan the spacing and where the design ends, because that’s what makes henna look elegant once it stains.
You'll Like These Ideas:


Leave a Reply