
Bows are one of the few modern motifs that sit comfortably inside traditional henna. A ribbon loop has the same curves as a paisley or a petal, so it blends into florals, jaali and mandalas instead of looking stuck on. I reach for bows when a bride wants a younger, lighter feel, and for bridesmaids and for guests who’d like something pretty that dries quickly. The 30 layouts below run from a single bow on the back of the hand to full bridal work, with notes on placement, line weight and how each one stains.
Drawing a Bow That Still Reads as a Bow Once It Stains
A bow has three parts: two loops, a knot and two tails. If any of them is off, it looks like a butterfly or a smudge from across the room. I always draw the knot first, then both loops, and I check that the loops match before adding the tails.
- Make the knot the darkest point. A small filled oval or a few shaded lines gives the eye an anchor.
- Keep the loops open. Henna spreads slightly into the skin as it stains, so loops drawn too narrow close up.
- Angle the tails. Tails that fall slightly outward look like real ribbon; straight-down tails look stiff.
- Size the bow to its spot. On a finger it should fit between two knuckles; on the palm it can be as wide as two fingers.
Line weight finishes the job. A bold outline on the bow with fine filling around it keeps the bow as the focal point once the whole design darkens.
1. Simple Bow Mehndi Design
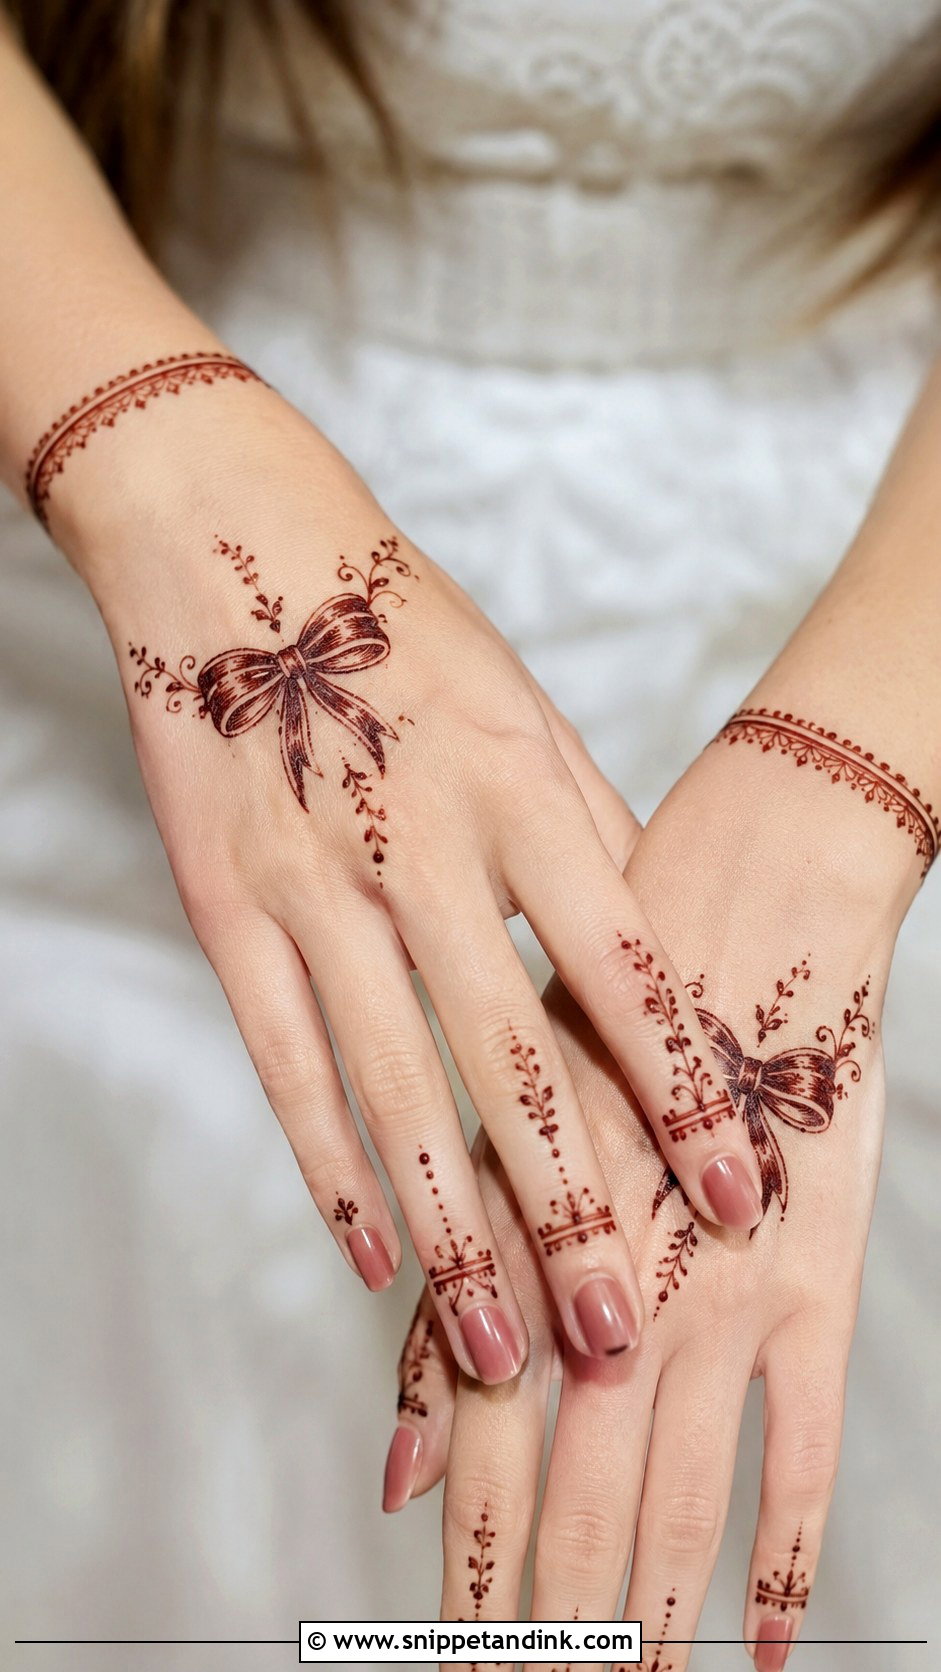
One clean bow in the center of the back hand, with light finger detailing, is the quickest design on this list. On its own, a single bow can look like a sticker, so I settle it into the hand with thin vines, dots and a few curved lines. Even pressure on the cone matters more than complexity here; a wobbly loop is obvious on so much bare skin. A narrow bracelet band or a dotted chain at the wrist keeps it light. Good for Eid mornings, casual gatherings and anyone who prefers minimal henna.
2. Bow Back Hand Mehndi Design
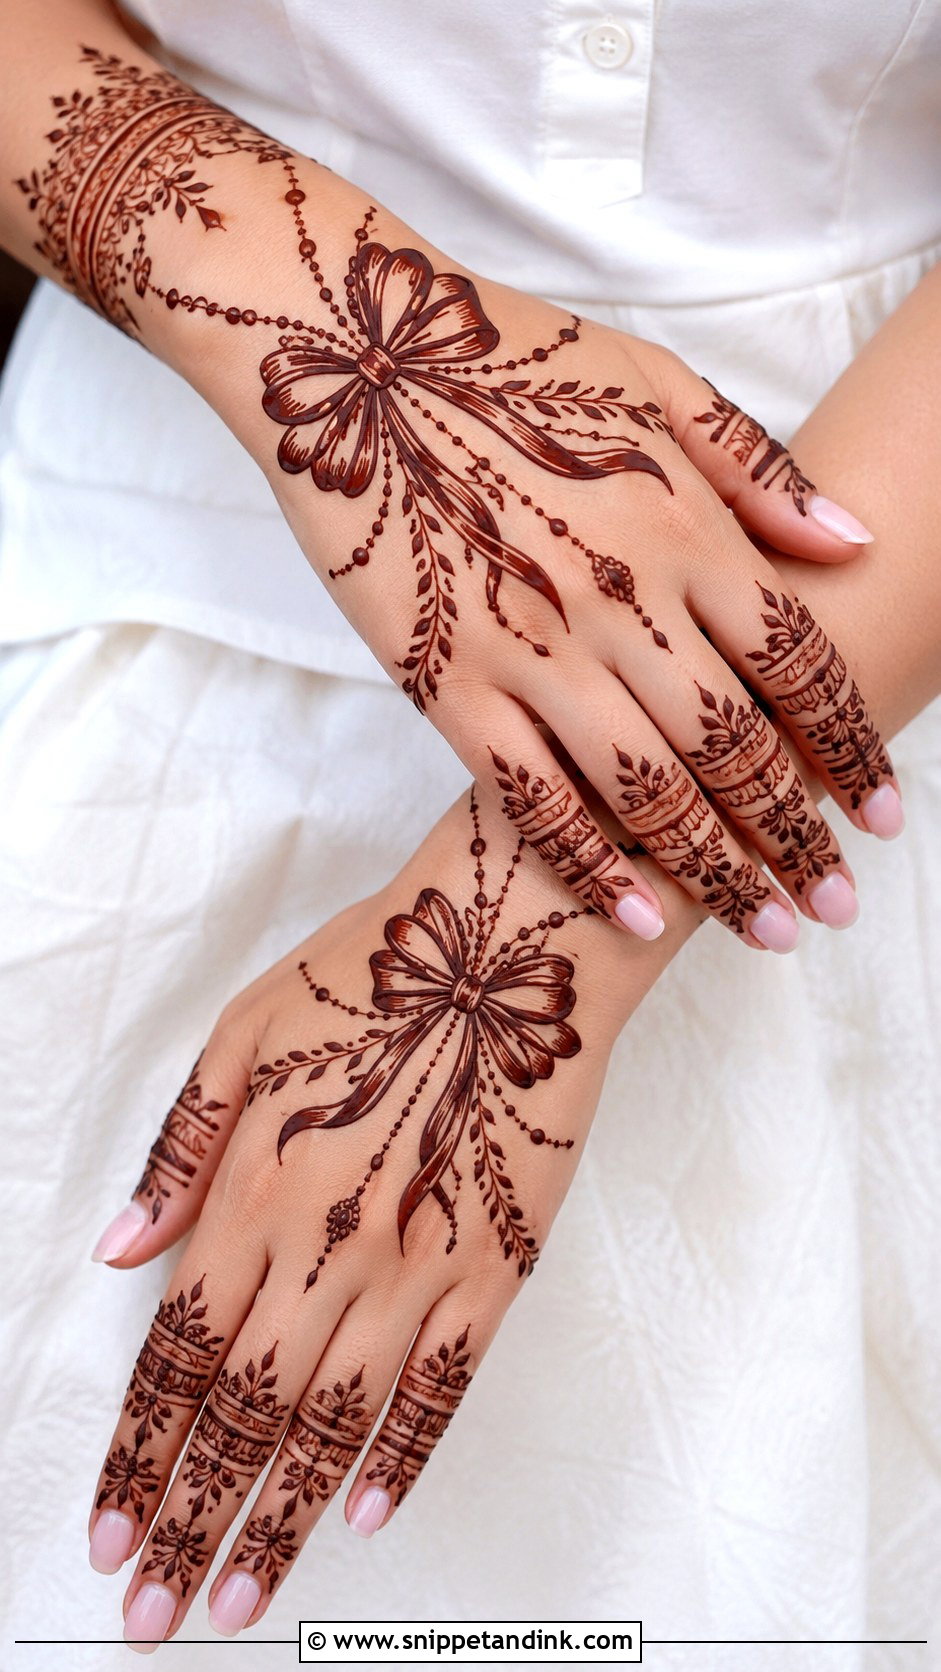
On a bow back hand mehndi design, placement decides the whole look. Just below the knuckles it reads like a ring; in the center of the hand it reads like a brooch. I balance a bold bow with fine finger work, then either run leafy trails toward the wrist or connect it to each finger with fine chains for a hand-harness effect, which flatters slim hands especially. The back of the hand stains lighter than the palm, so I draw the bow edges a little thicker there and fill the loops with soft shading or small mesh.
3. Bow Front Hand Mehndi Design
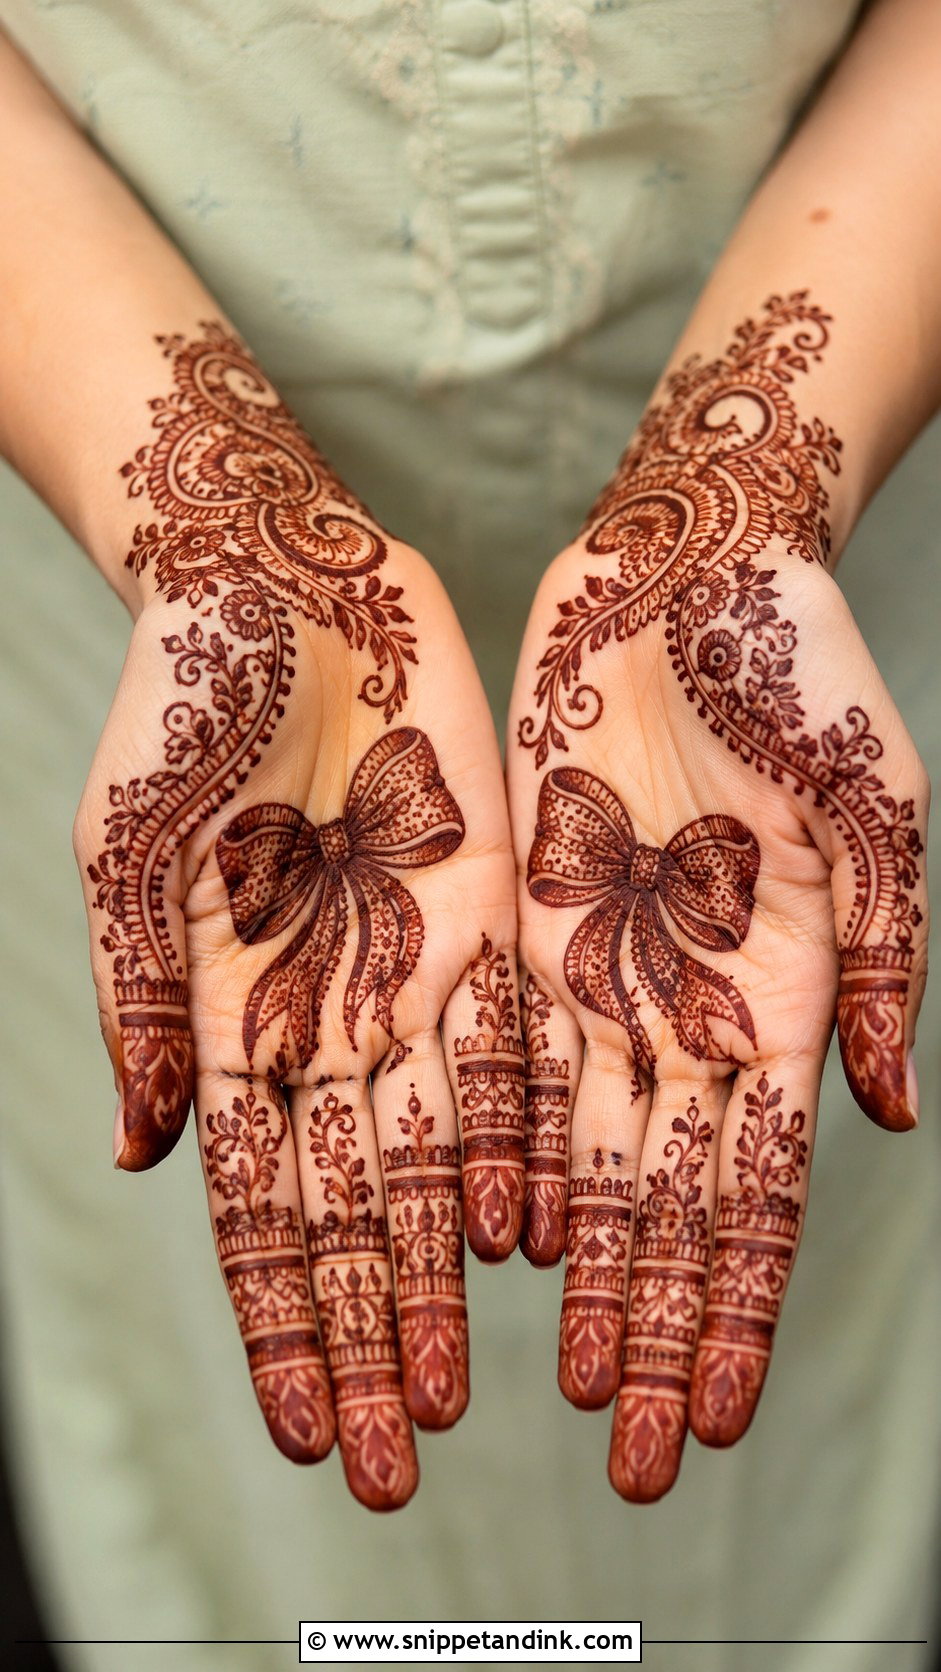
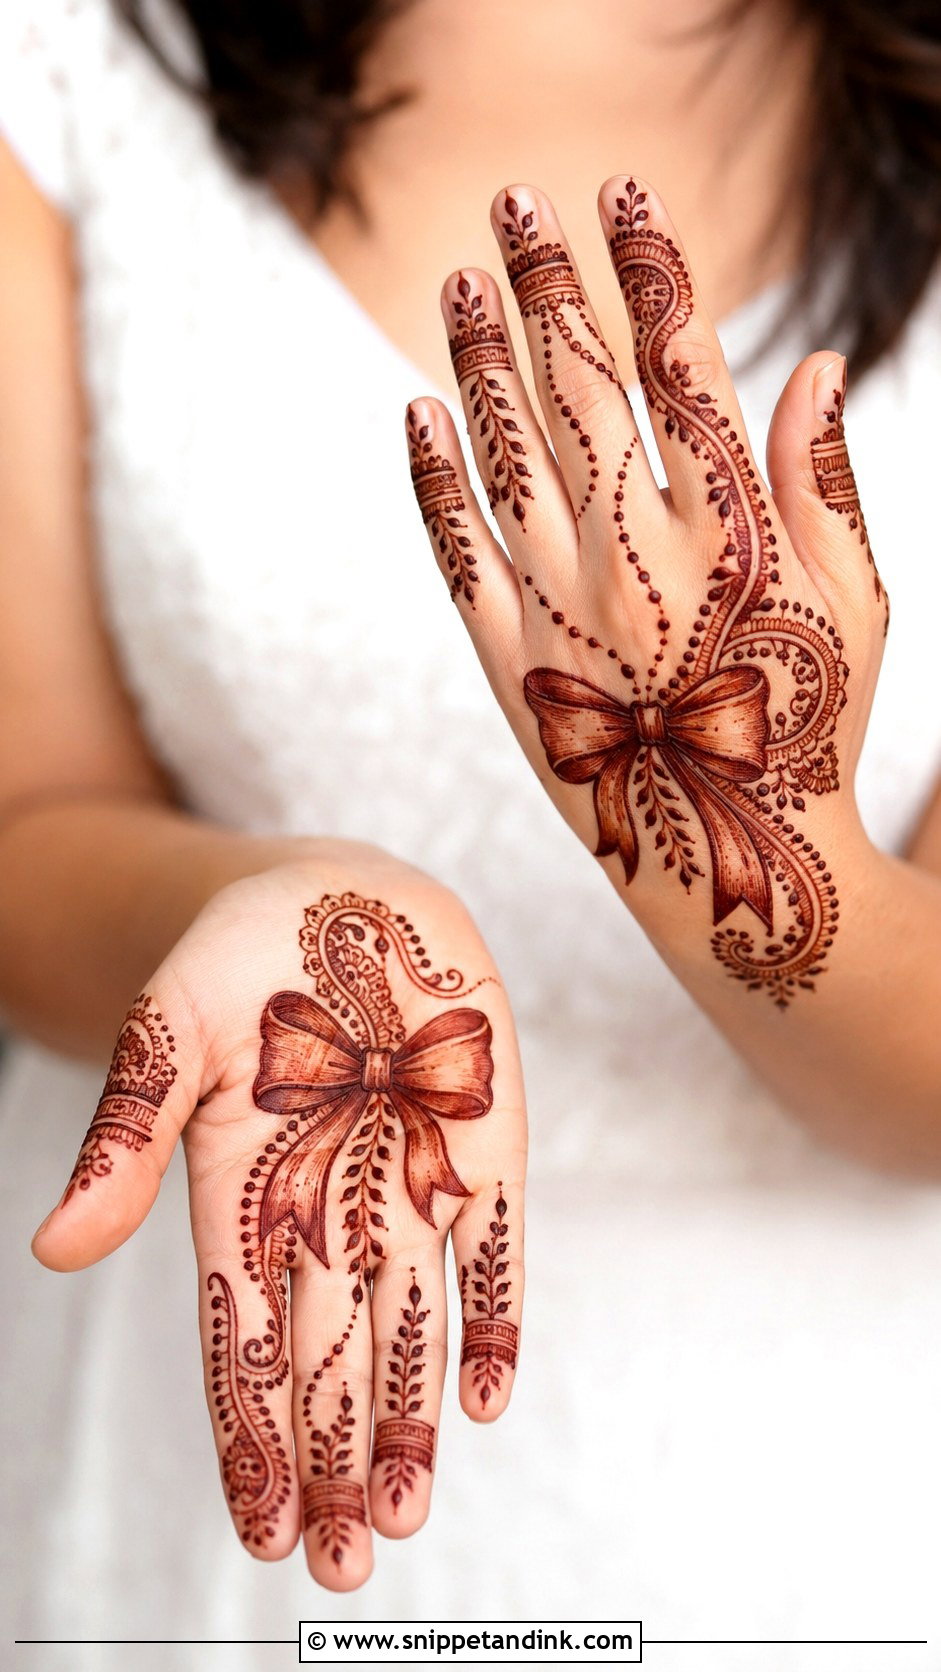
The palm is where henna stains darkest, so a large bow there reads very clearly. I start with the bow in the center, where its rounded shape fits the hollow of the palm, then build curved florals, small paisleys and dotted borders around it. The fingers get simple bands, leafy strips or small ribbon curves to carry the theme. It gives a clear focal point without heavy bridal coverage, which is why I suggest it for wedding guests and family events. Keep your palms open and still while it dries; this is where smudges happen.
4. Bow Bracelet Mehndi Design
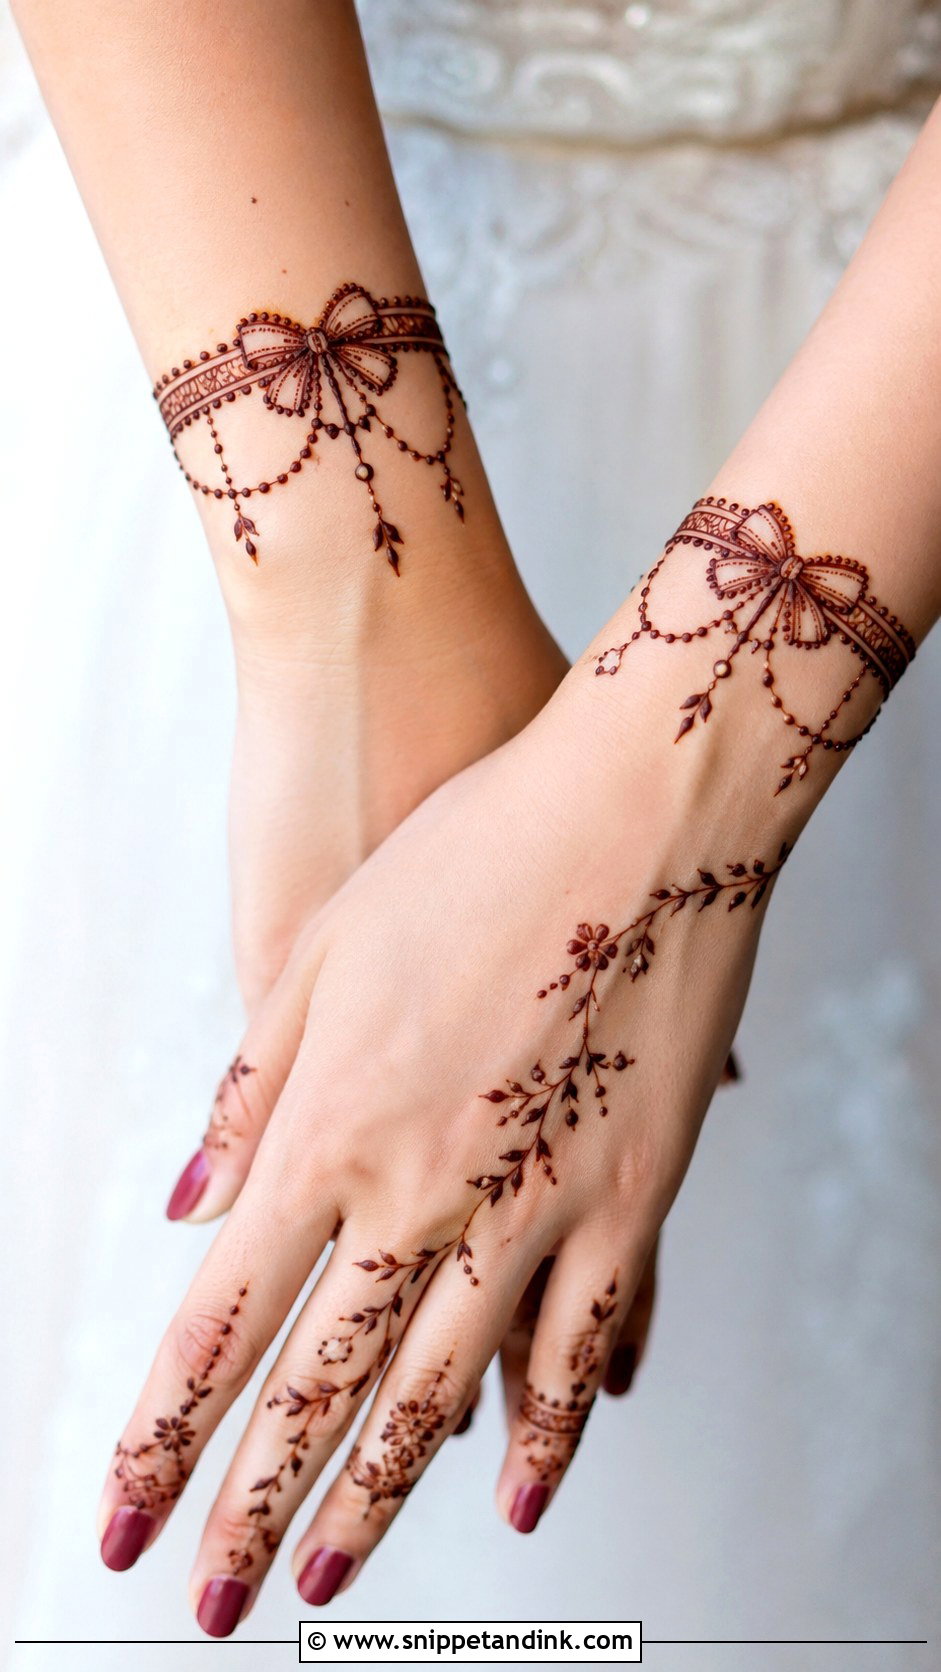
The bracelet layout is how most people wear this trend, since it looks like a fine piece of wrist jewelry. The bow sits at the center of the wrist and fine bands wrap around it. Two thin lines with dotted edges keep it minimal; florals, bead chains and lace details make it richer. I usually pair it with a finger vine on the back of the hand or a single ring motif on the middle finger. It can stand in for a real bracelet at an engagement, a bridesmaid lunch or a festive dinner.
5. Bow Finger Mehndi Design
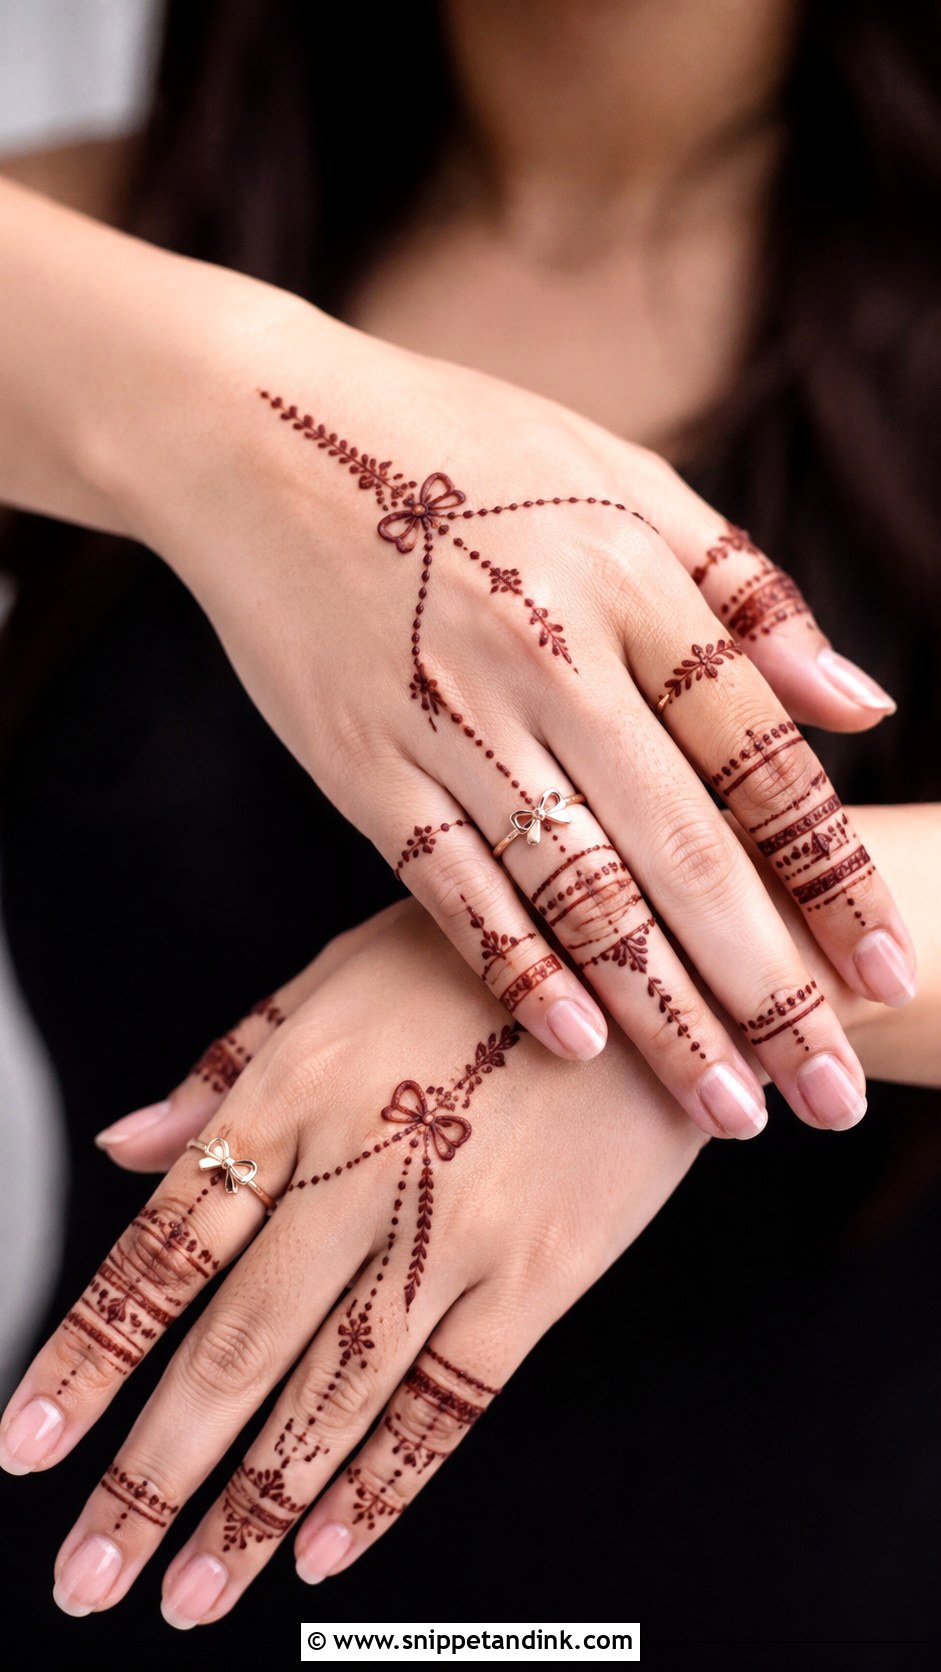
Here the fingers carry the design: tiny bows across two or three fingers with matching bands, dots and chain lines, while the back of the hand stays mostly bare. A fine wrist bracelet finishes it. With less paste on the skin, it dries quickly and never feels heavy, and because fingers stain dark, even very small bows show well. I keep a bow finger mehndi design to small, evenly spaced bows between the knuckles, where bending your fingers won’t crack the paste.
6. Bow Chain Mehndi Design
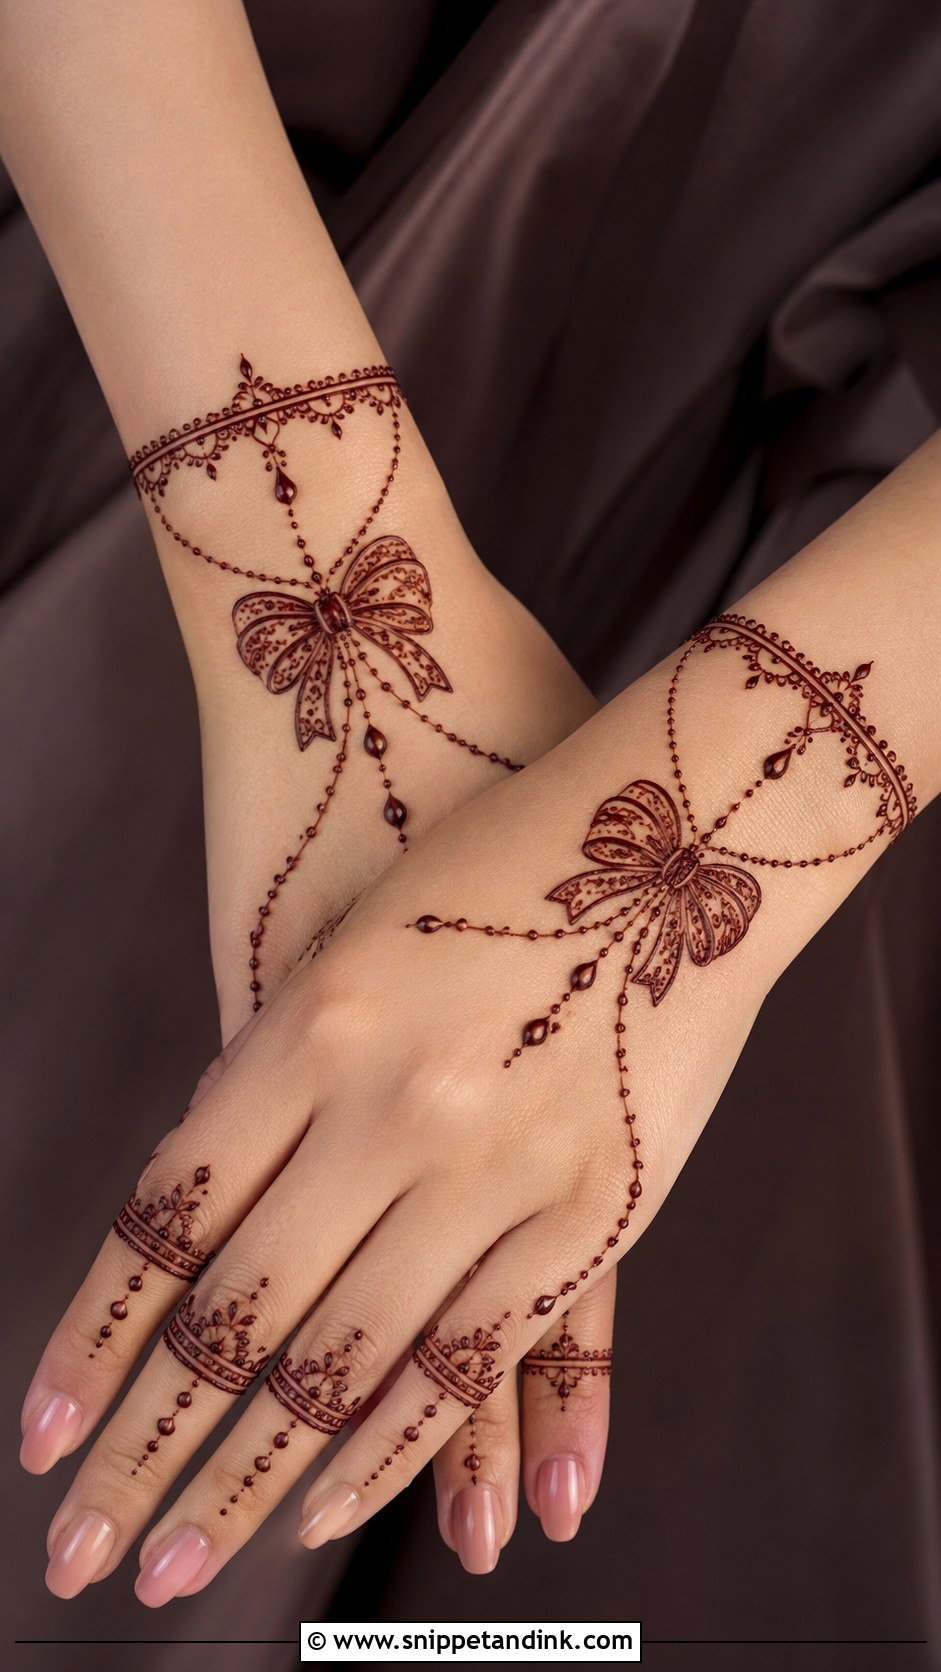
Chains drawn in henna turn a bow into hand jewelry. I start the bow near the wrist or on the back of the hand and connect it to the fingers with thin chain lines, dots and tiny hanging beads. A small floral ring on one finger makes the chain look more like the real thing. Spacing is everything: leave enough bare skin between the chains for the bow to stand out. It decorates without covering every inch, so it suits bridesmaids and guests, and it looks best in a deep reddish-brown stain.
7. Bow Ring Mehndi Design
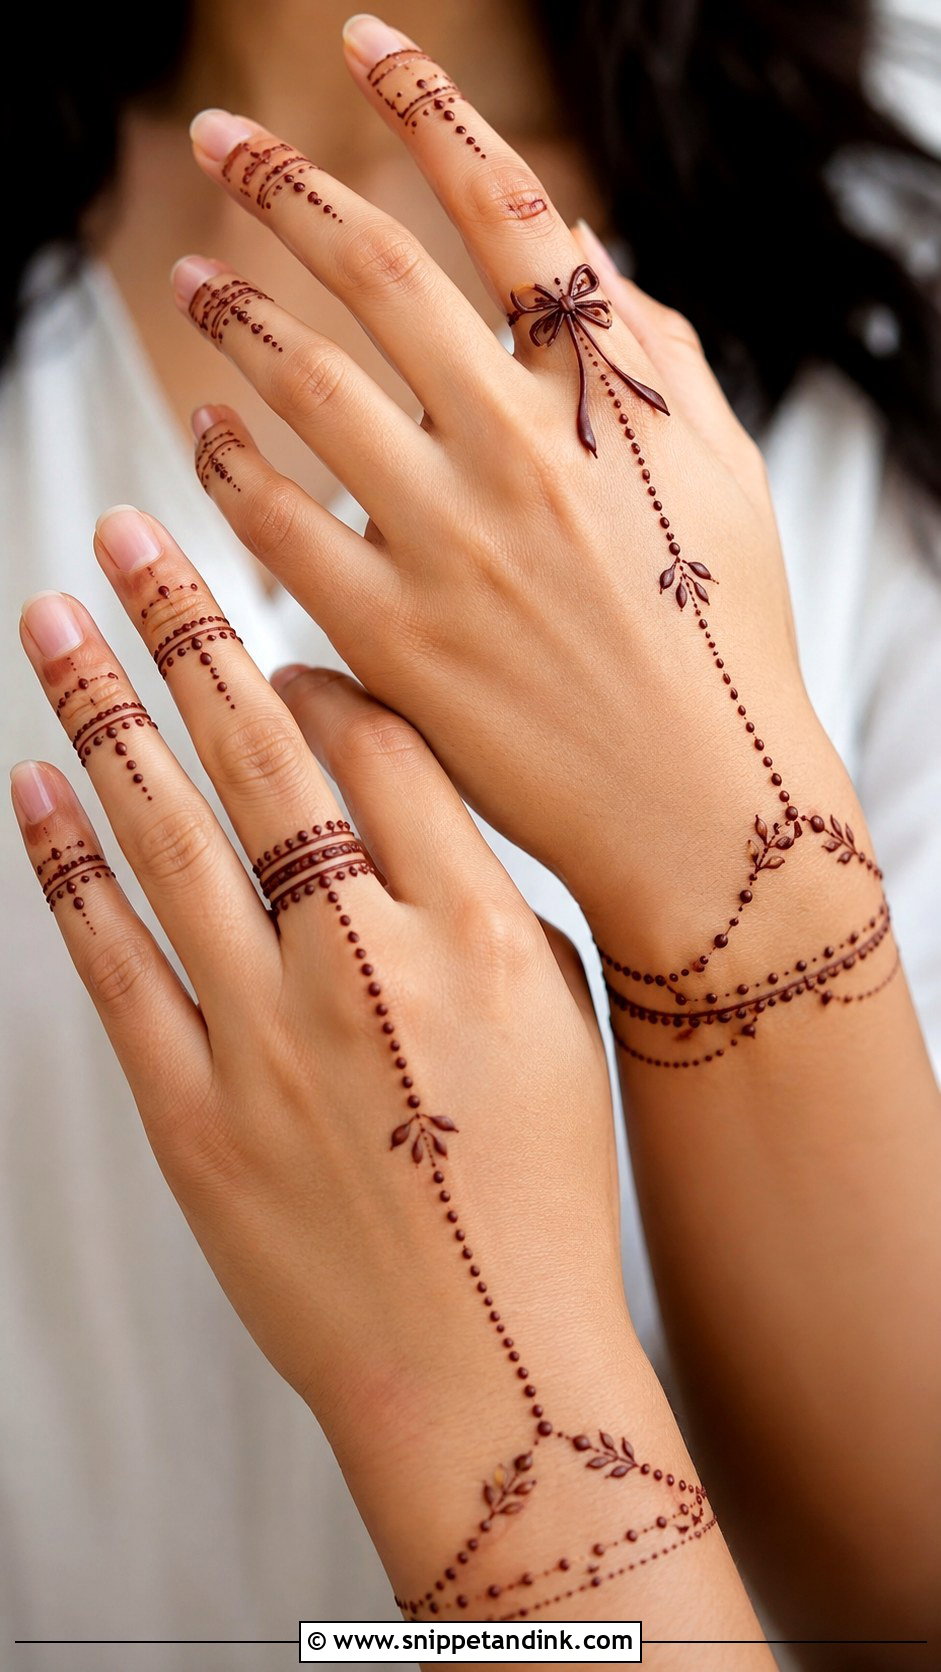
A ring design wraps a bow around one finger and extends fine lines toward the back of the hand or wrist. To balance it, I add dotted bands on the neighboring fingers and a slim bracelet at the wrist, so the ring stays the main focus. Finger skin bends constantly, so I place the bow between knuckles, never across one, or it cracks before it has a chance to stain. Crisp outlines and tiny dots keep it sharp for an engagement, a birthday or a small family function.
8. Bow Mandala Mehndi Design
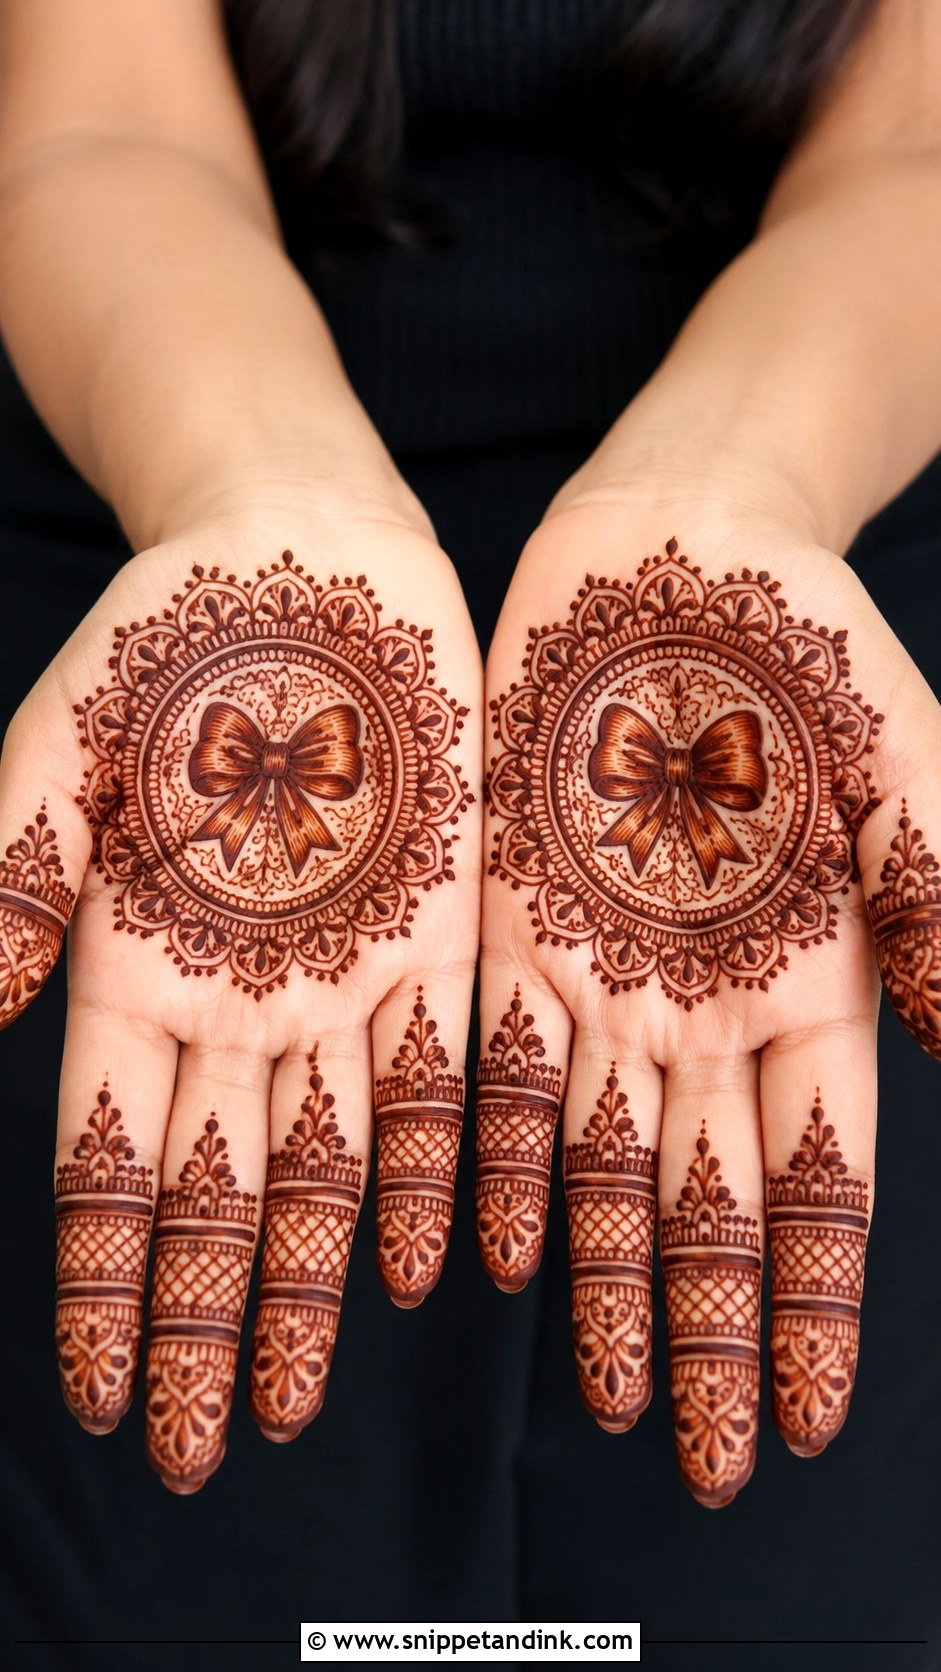
Putting a bow inside a mandala combines a trend with one of the oldest circular forms in henna. The bow sits at the center of a round mandala on the palm or back of the hand, ringed by petals, dotted circles and fine lace borders, and the fingers carry small mandala bands, leaf strips or net filling. The risk is that a delicate bow disappears into all that symmetry once the stain darkens. I draw it slightly bolder than the petals around it so it still holds the center.
9. Bow Floral Mehndi Design
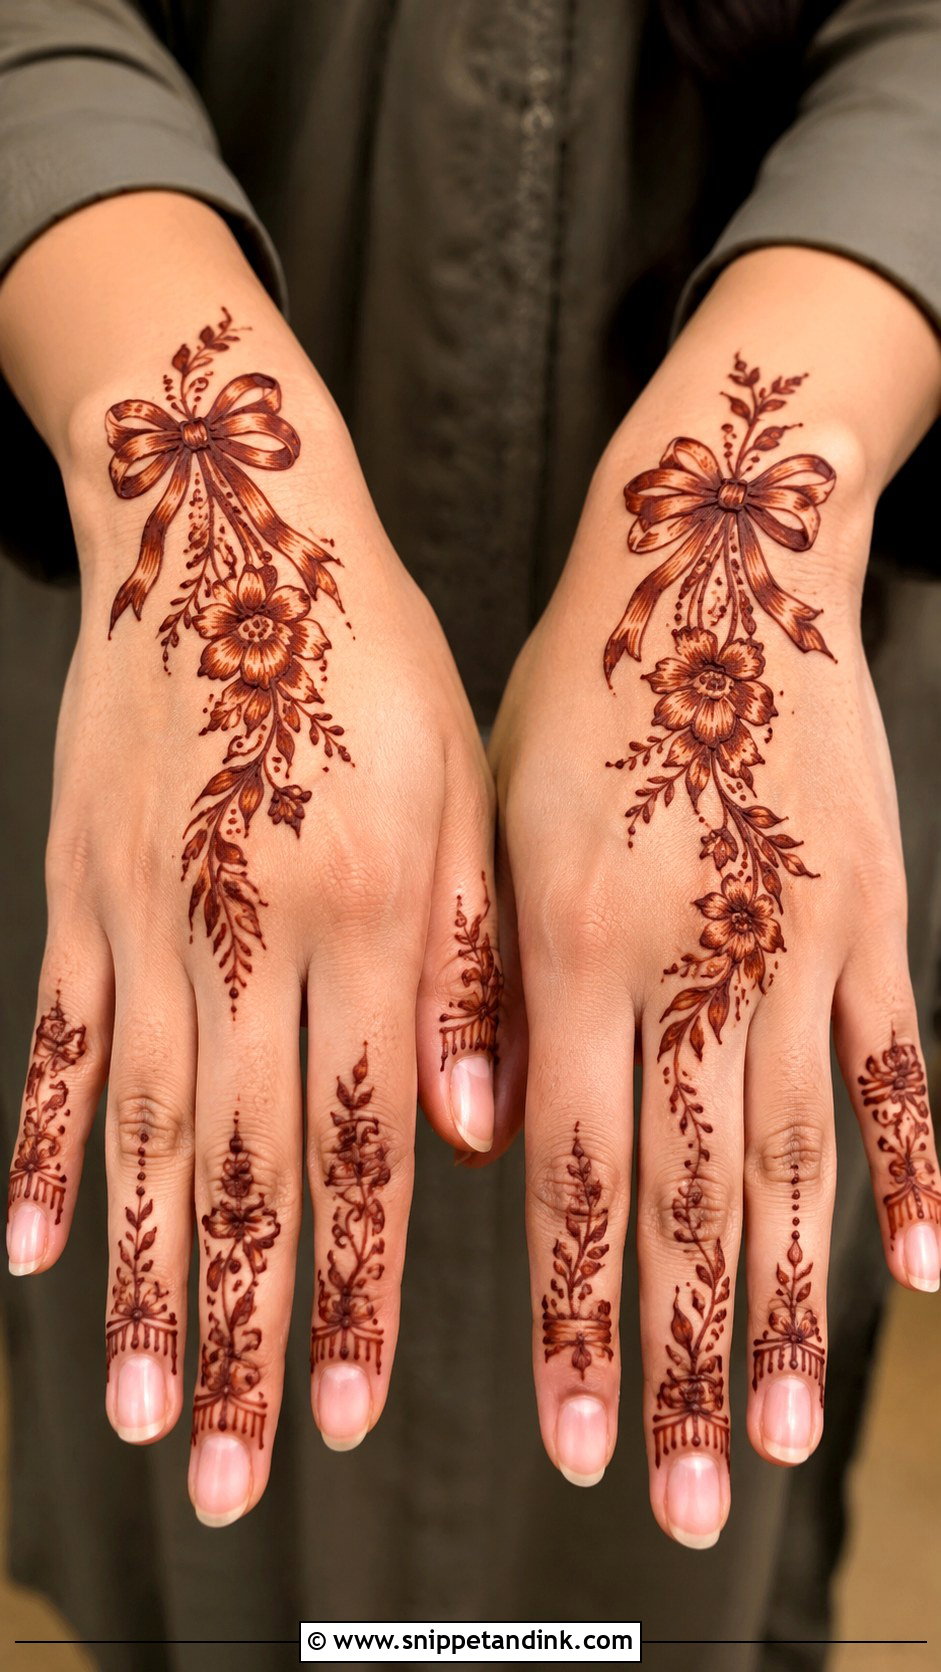
Flowers curving around a bow look like a ribbon-tied bouquet, which is why this pairing feels so natural. The bow can sit at the wrist, mid-palm or on the back of the hand, with petals, leaves and dotted vines flowing out from it. Arabic and Indo-Arabic layouts suit it best, since the floral trail can run diagonally from the fingers to the wrist. Flowers are forgiving, too: a petal can hide a small slip of the cone. For a fuller look, I lightly shade the bow loops and dot the flower centers.
10. Bow Arabic Mehndi Design
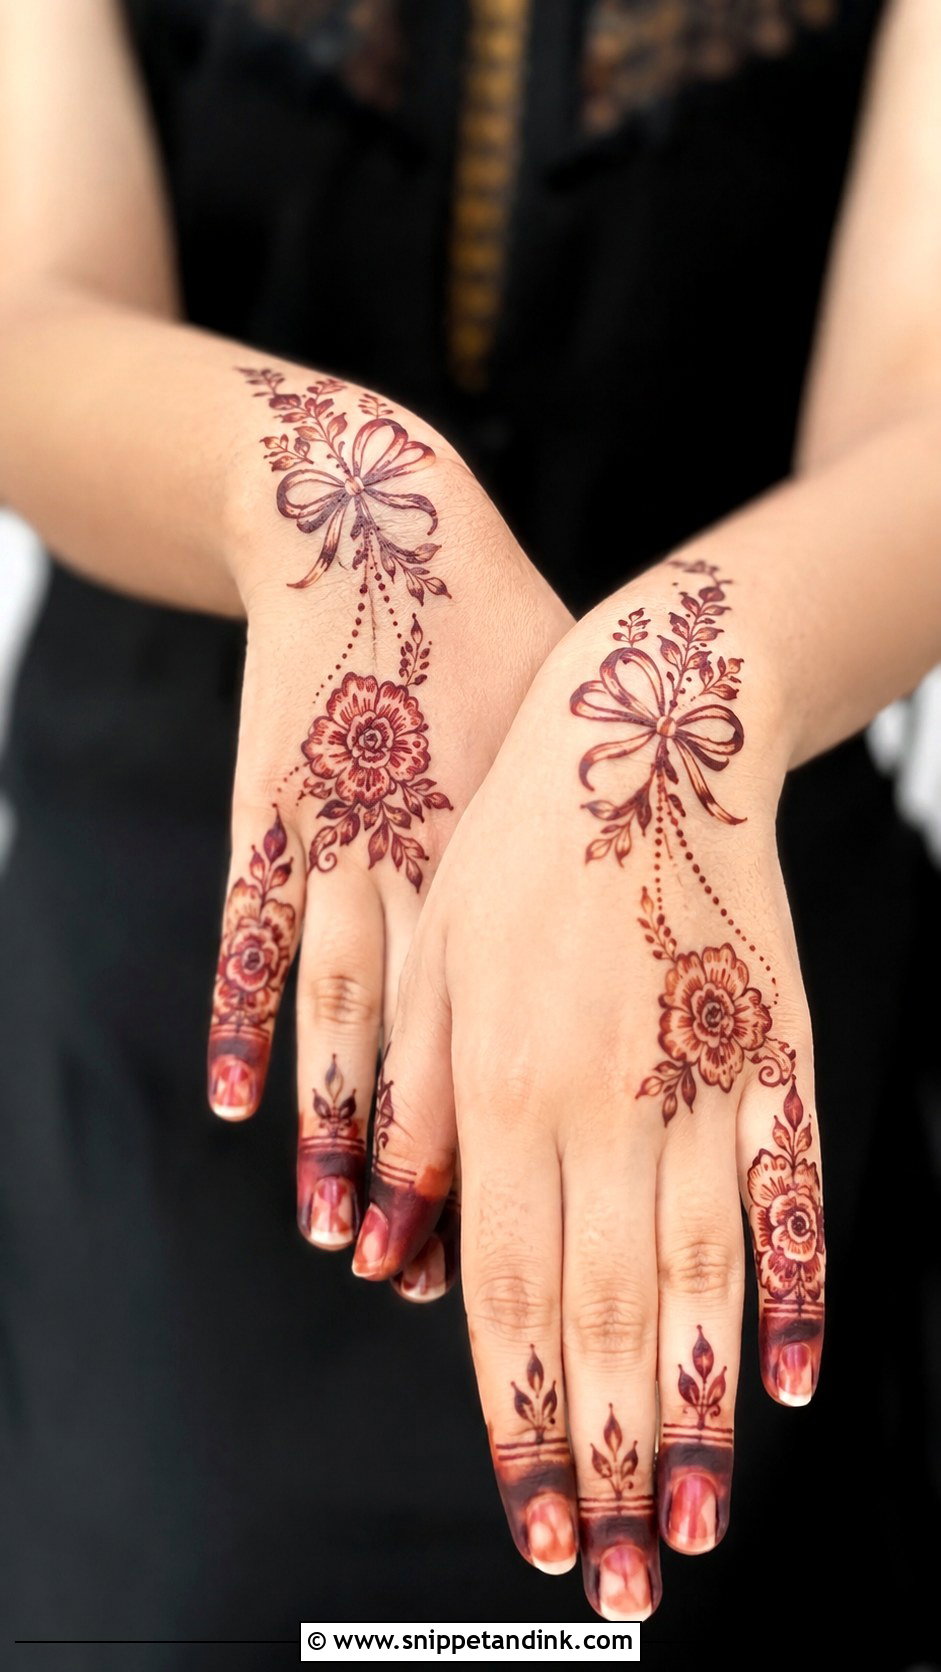
Arabic mehndi relies on bold outlines, open spacing and a diagonal trail, usually from one side of the wrist across the back of the hand toward the index or middle finger. The bow becomes the accent inside that trail, with flowers, leaves, swirls and dots supporting it. Bold strokes hold more paste, so they tend to stain deeper than fine work. I keep the fingers light, with matching curves or leafy tips. With little filling, it’s quick to apply, which makes it a sensible last-minute choice before Eid or a party.
11. Bow Indo Arabic Mehndi Design
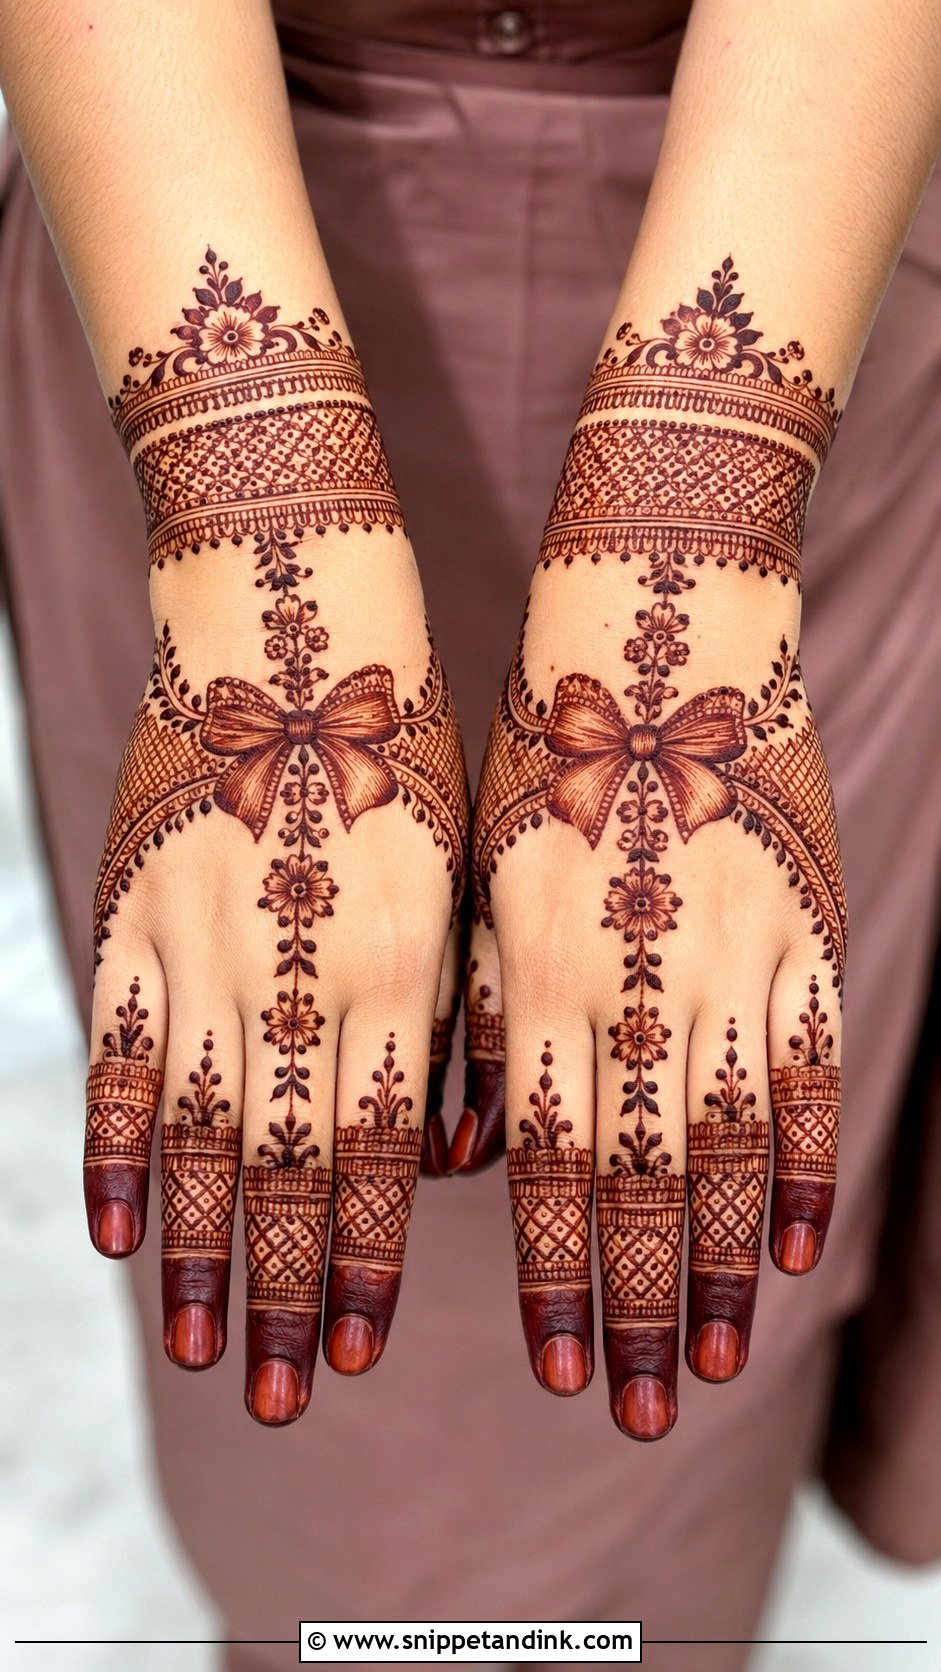
Indo-Arabic work mixes the dense structure of Indian mehndi with the open flow of Arabic patterns. On the back of the hand, I place the bow with a floral trail on one side and finer Indian filling on the other: small jaali squares, shaded petals, dots and clean wrist bands. The diagonal trail visually lengthens the hand, which flatters most hand shapes. The contrast between a bold bow outline and fine inner detail is what makes the result look professional rather than busy.
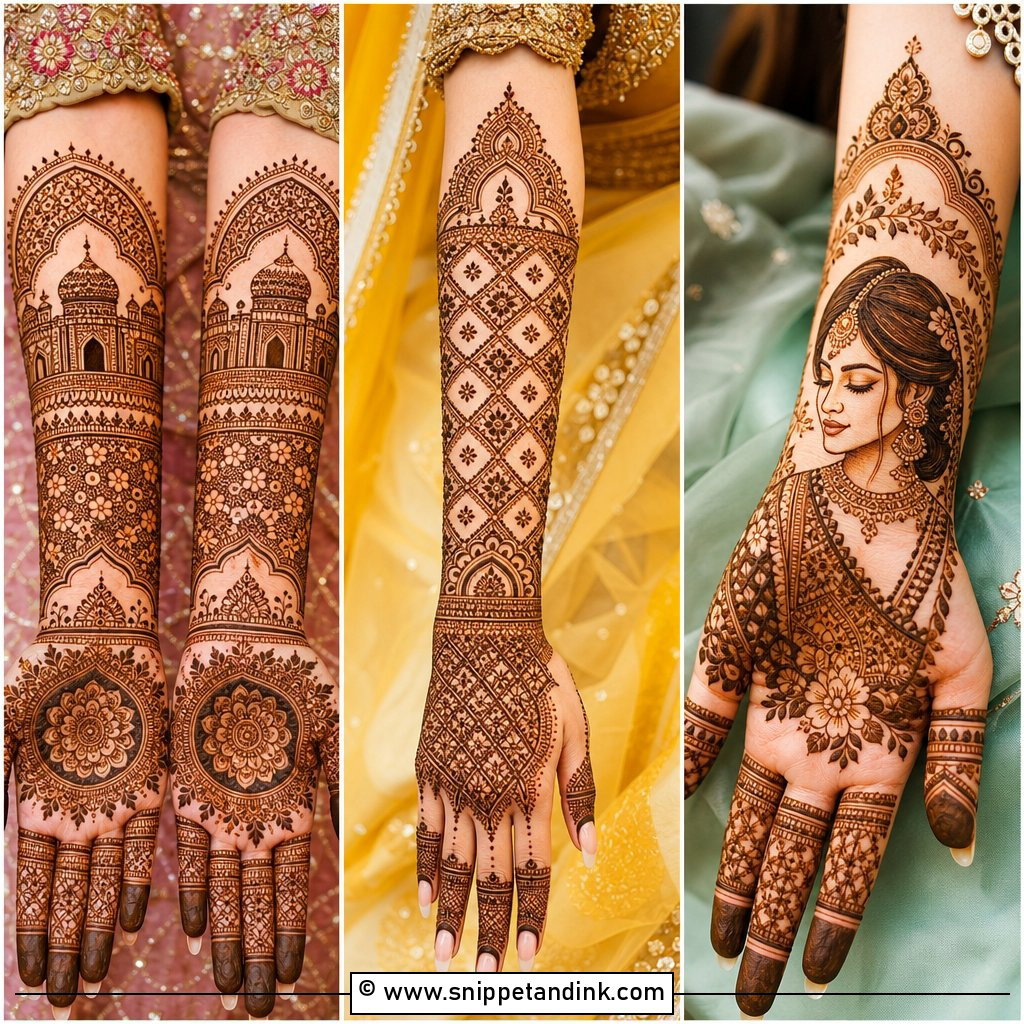
12. Bow Bridal Mehndi Design
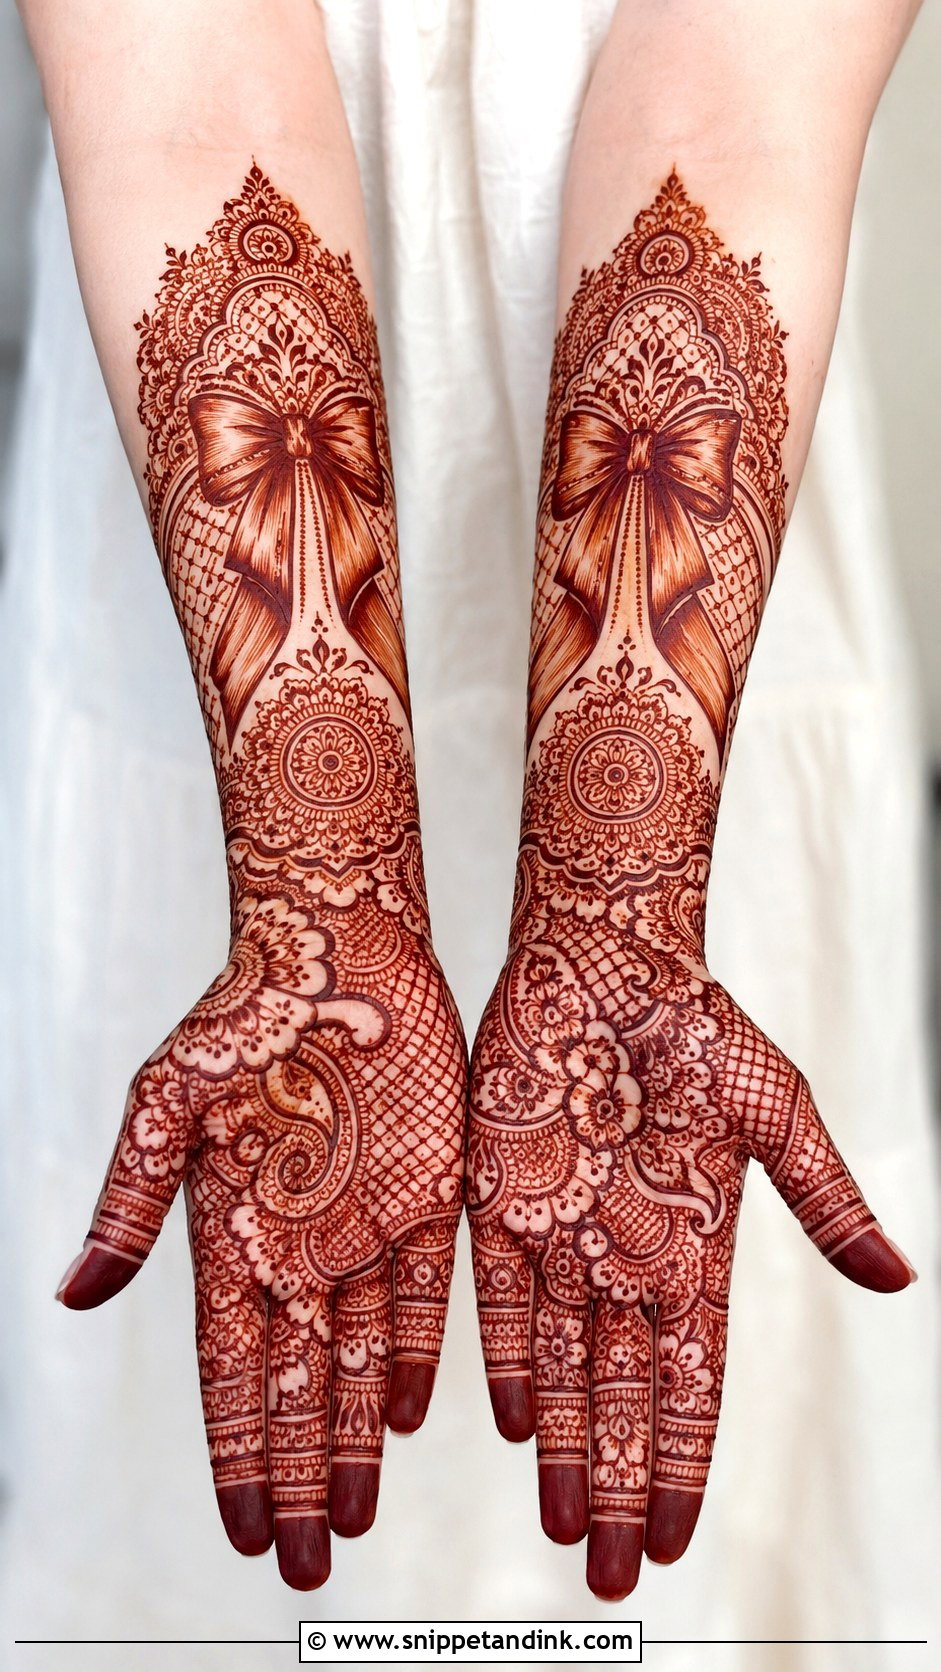
A bow bridal mehndi design works best when the bow lives inside a full traditional layout rather than replacing it. I place it on the wrist like a tied ribbon, on the back of the hand as a focal motif, or tucked into a palm mandala, then surround it with dense florals, paisleys, jaali and any personal details the bride wants, such as the couple’s initials. Fingers are fully covered so the hands look complete in close-ups. The bow should be shaded and blended in, never cartoonish, and matching bows on both hands give symmetry when the hands are photographed together.
13. Bow Bridesmaid Mehndi Design
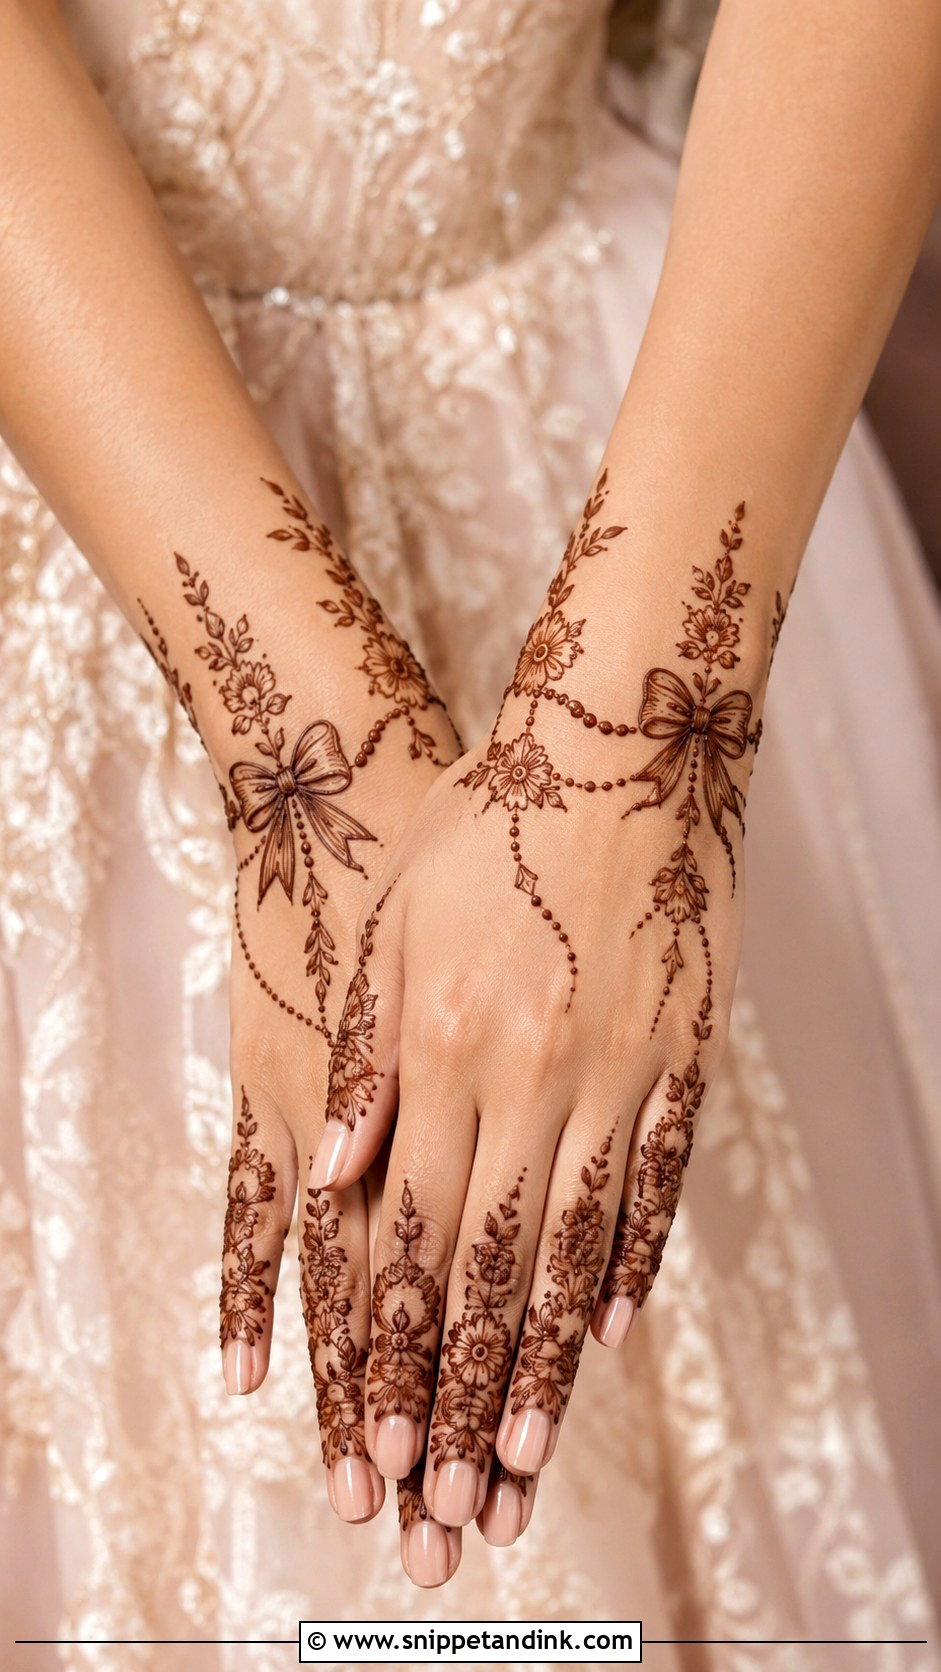
Bridesmaids usually get less time in the chair than the bride, and they need designs that suit both traditional and fusion outfits. A back-hand bow bracelet connected to floral finger trails and a light wrist cuff gives enough detail for photos while keeping the hand open and comfortable. Tiny beads, stars or leaves around the bow add a celebratory finish. I keep the palm light if they’ll be up and helping soon after, because a heavily covered palm takes longest to dry.
14. Bow Engagement Mehndi Design
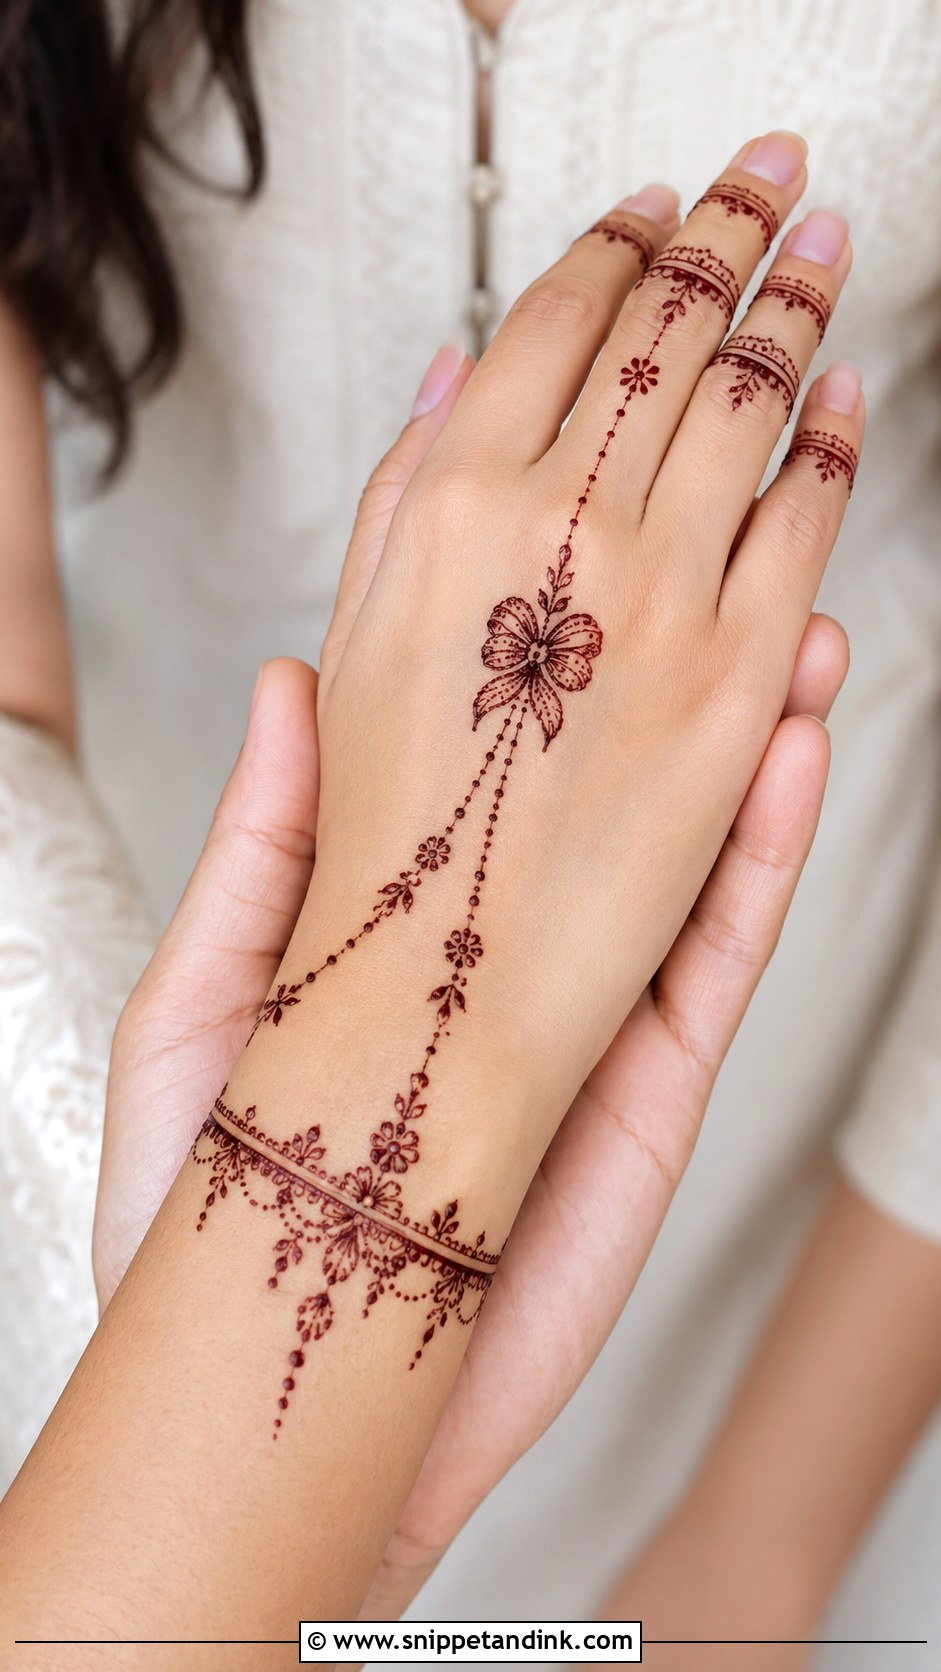
For an engagement, I treat the bow as a frame for the ring. A neat bow near the ring finger, linked by a fine chain to a wrist bracelet, draws the eye to the ring without competing with it. Small flowers or dotted lace make it feel ceremonial. The palm can stay simple, with a small mandala or a matching bow if you want both sides decorated. Keep the ring finger itself fairly clear if the ring goes on that day, because sliding a ring over damp paste smudges it.
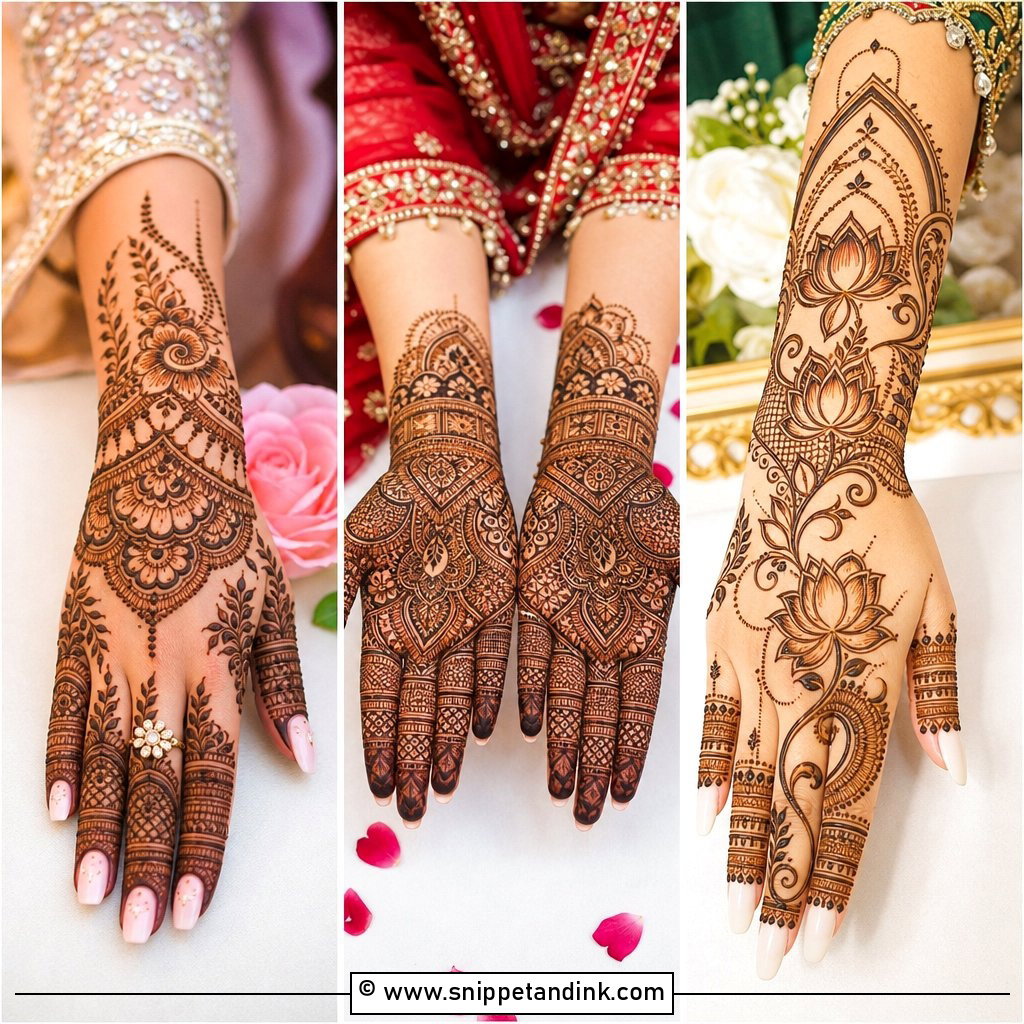
15. Bow Eid Mehndi Design
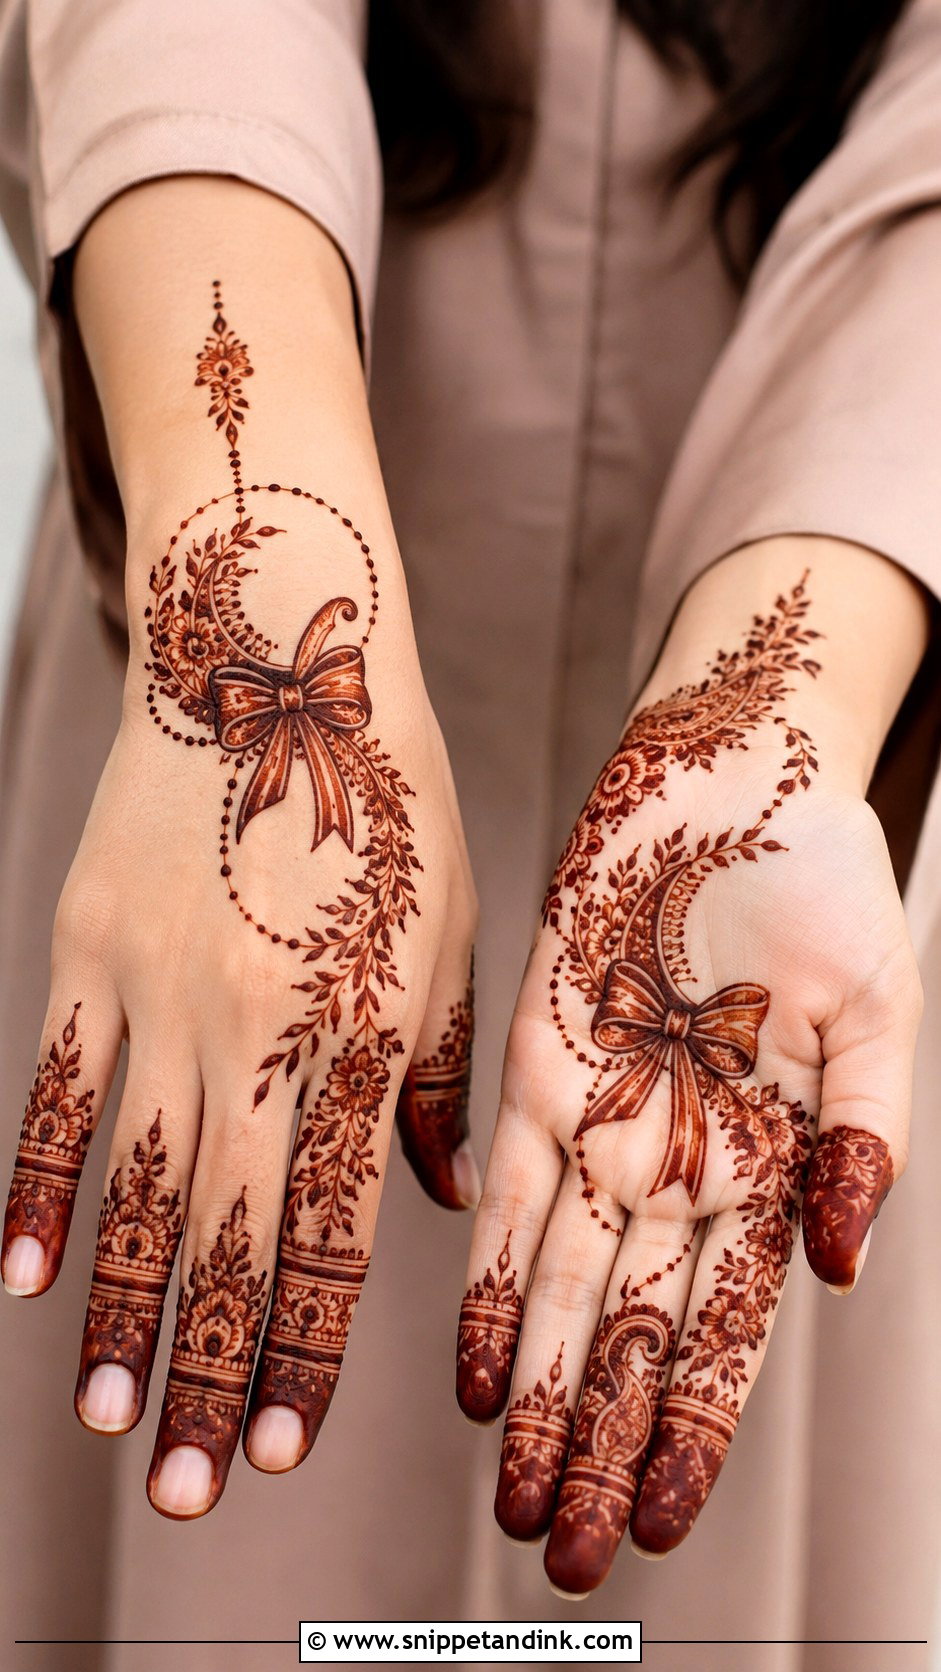
Eid mehndi is often applied the night before, in a busy house, so the design needs to be quick and tidy. A back-hand layout with one central bow, crescent-inspired curves, dotted chains and light finger bands fits that well. Small floral vines at the wrist make the hand look fuller without adding much time. For a more traditional touch, add paisley borders or a small palm tikka. It sits nicely with bangles and rings, and looks complete without them too.
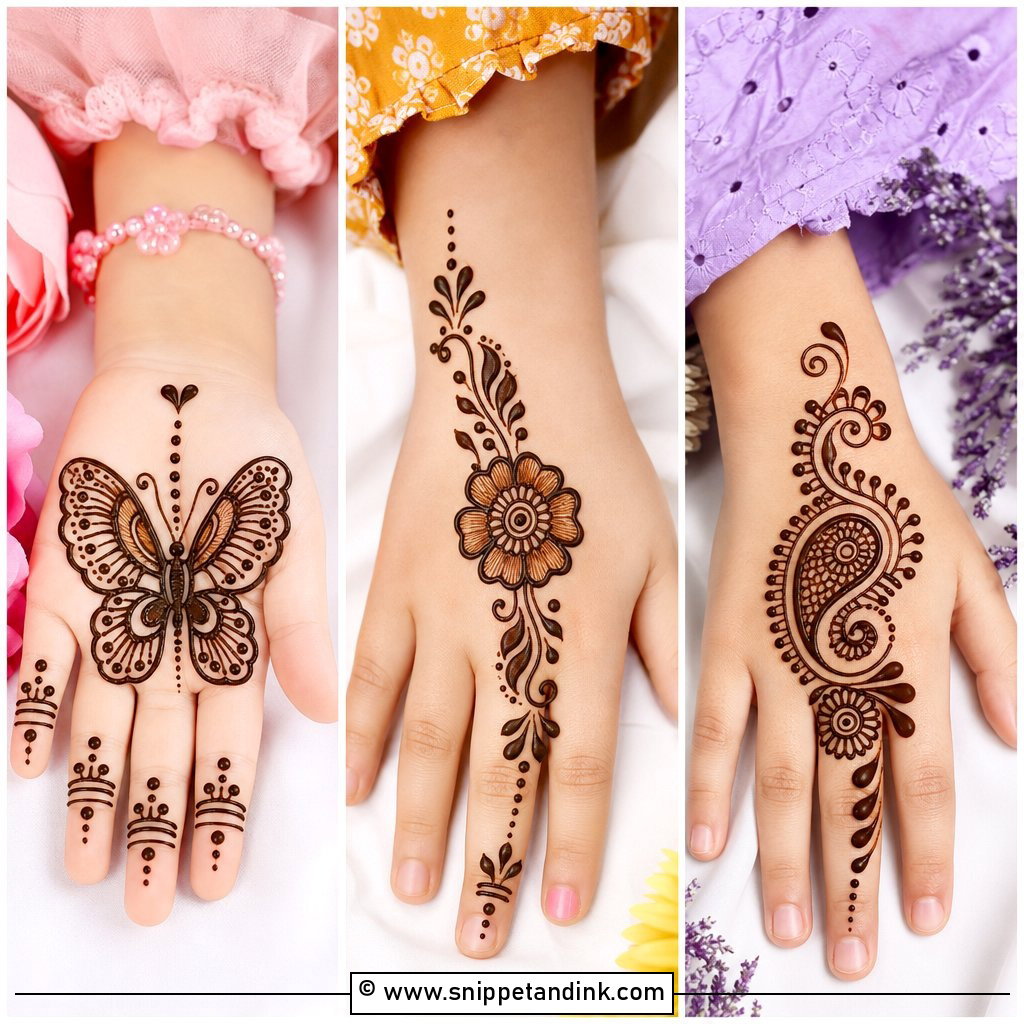
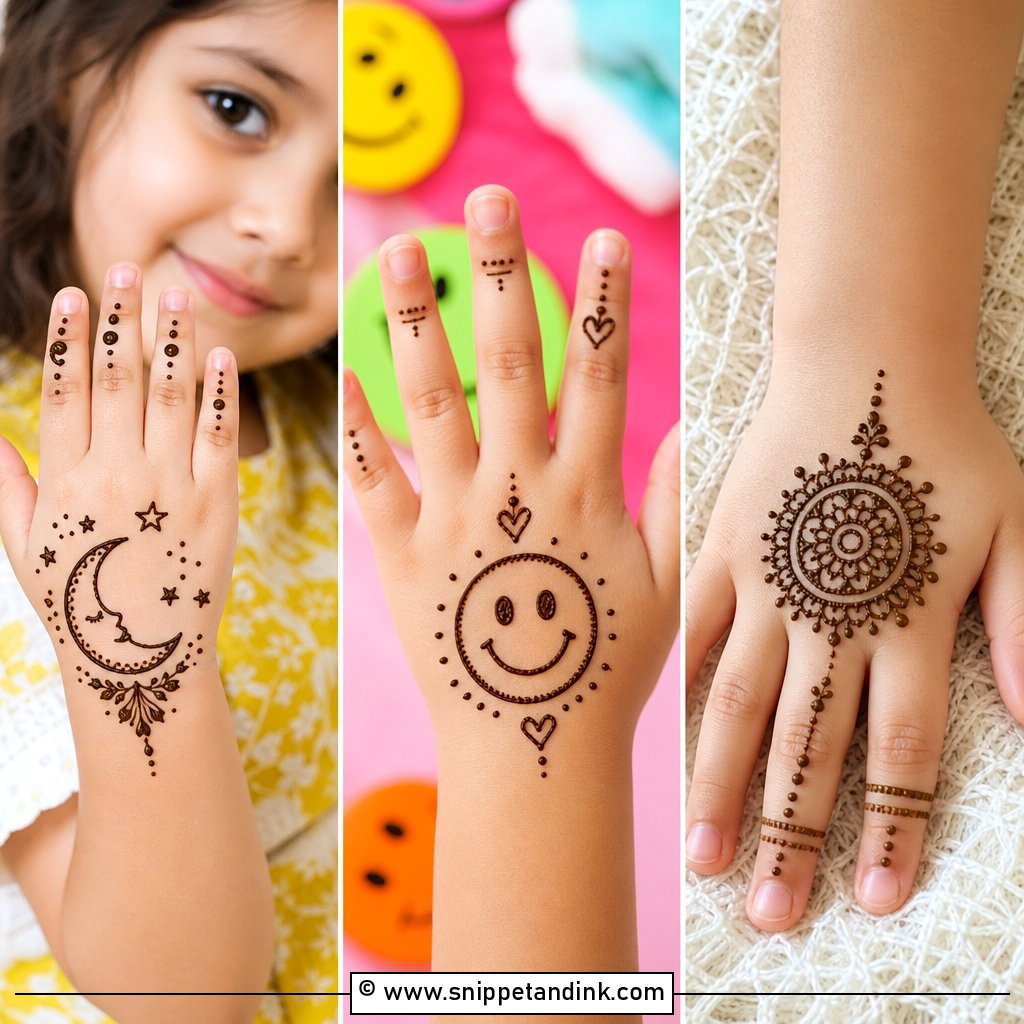
16. Bow Kids Mehndi Design
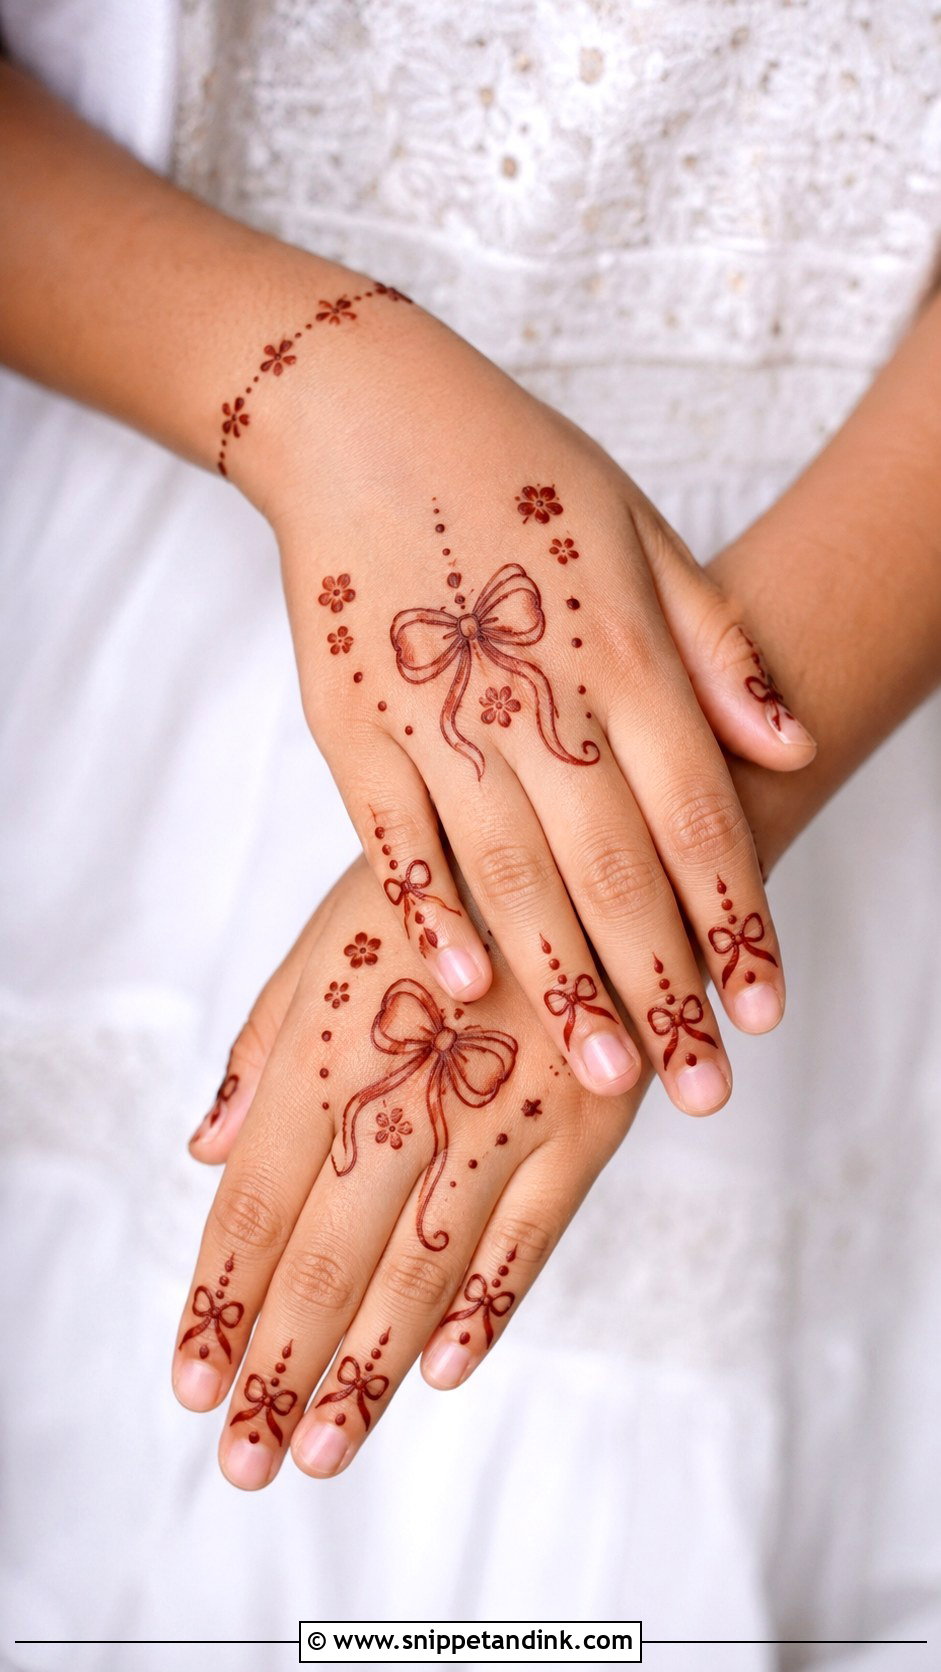
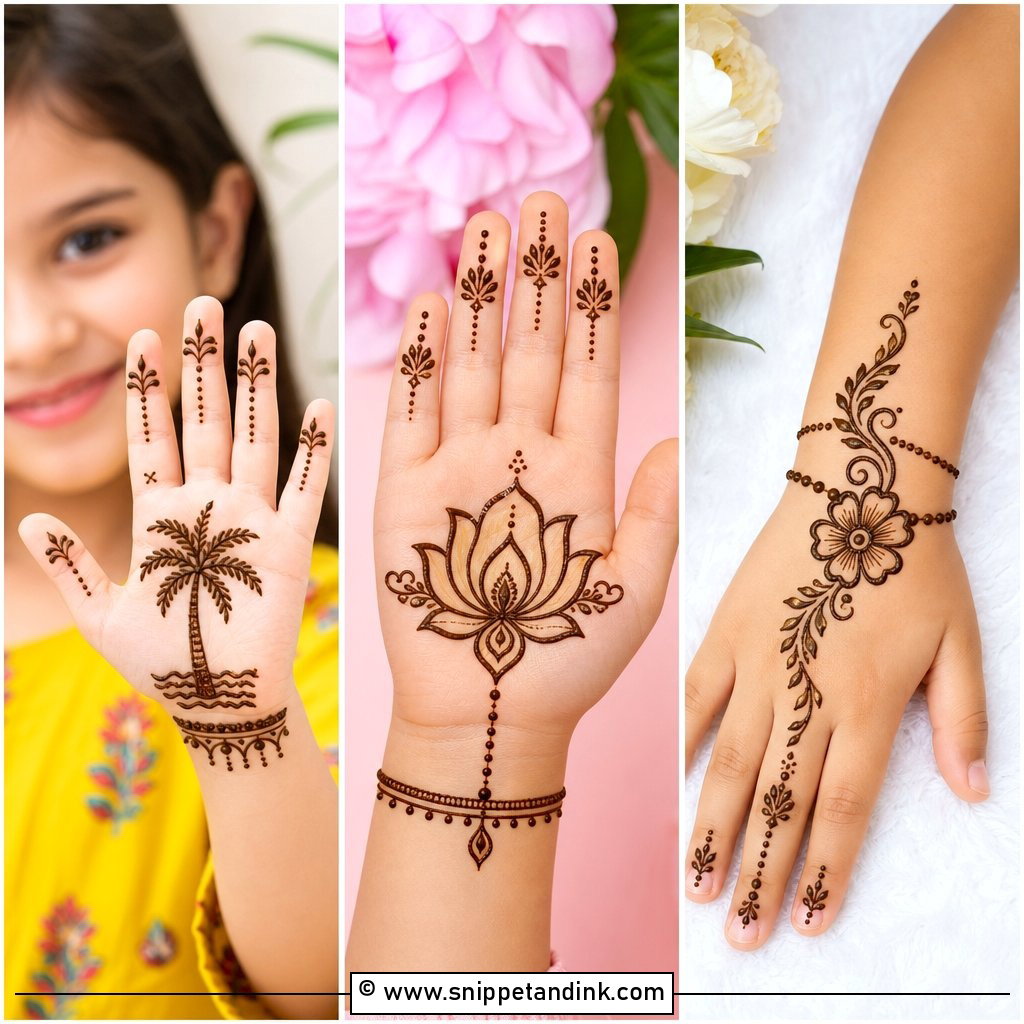
A bow kids mehndi design should be simple, clear and quick, because children rarely sit still for long. I draw a back-hand bow with rounded loops, tiny flowers, dots and a light bracelet band, and keep the fingers to small bands or mini bows. Fine, dense work smudges on small, busy hands. Use natural henna only on children, never so-called black henna, which can contain chemical dyes that cause serious skin reactions. A small palm bow inside a dotted circle completes it.
17. Bow Minimal Mehndi Design
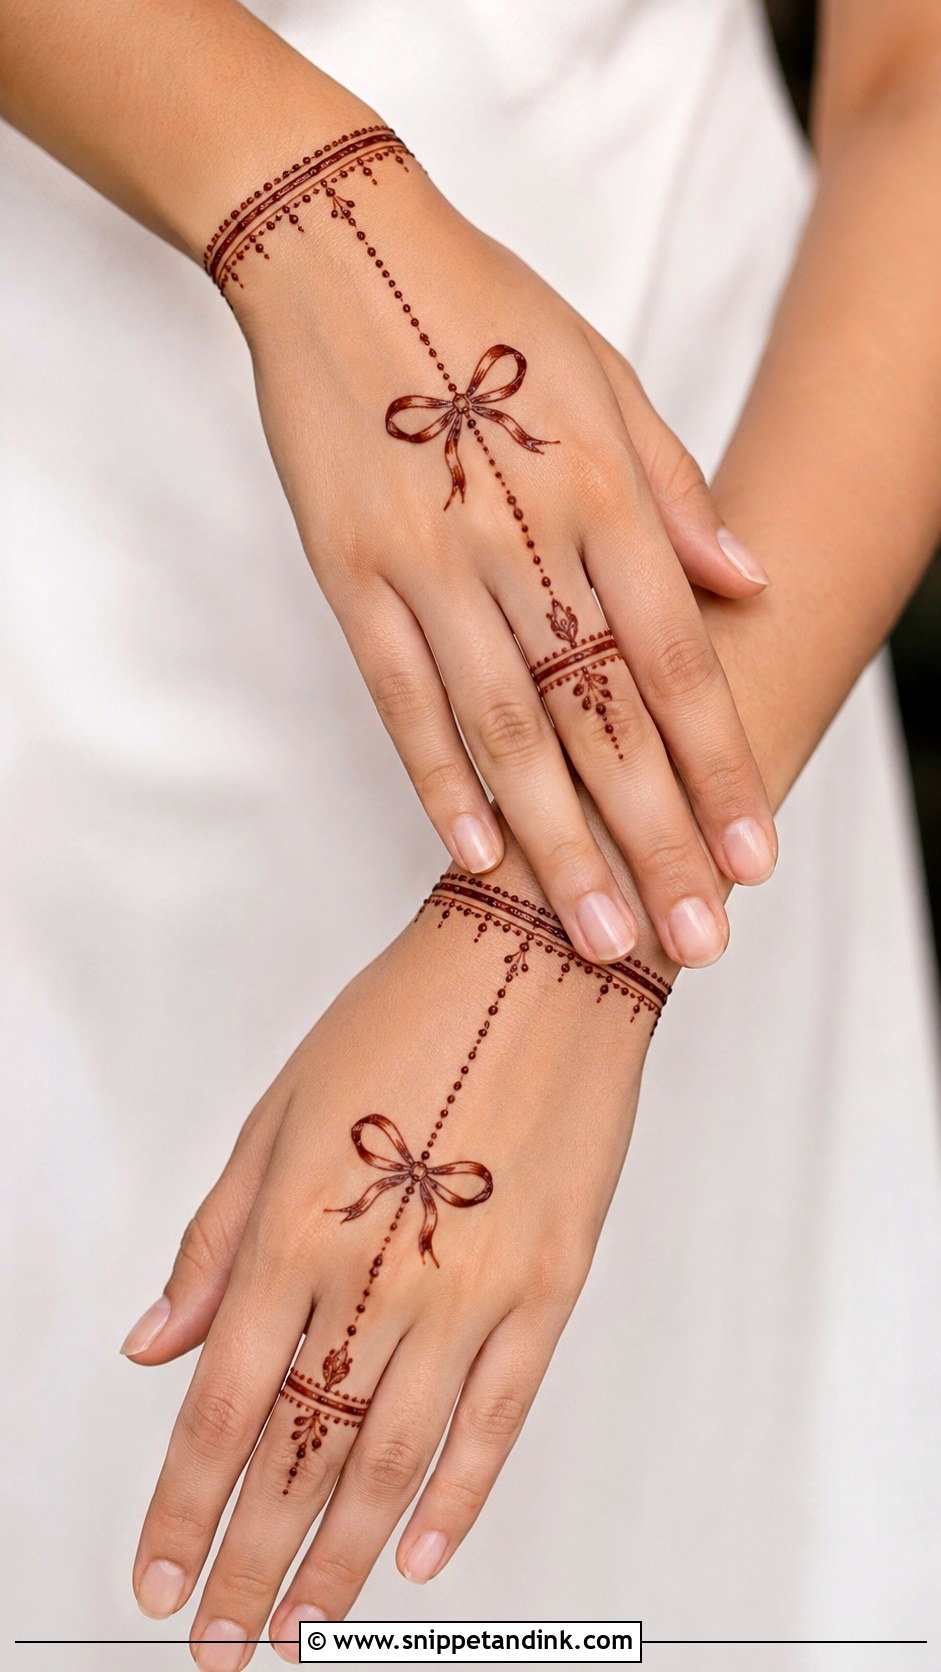
Minimal designs live or die on neatness. A small bow on the back of the hand, a slim chain to one finger and a very light wrist cuff, and nothing else. With so much bare skin, an uneven loop is the first thing anyone notices, so I check that both loops match before I add a single extra line. Resist the urge to scatter dots. It suits small events, office-friendly celebrations and anyone practicing their first bows.
18. Bow Full Hand Mehndi Design
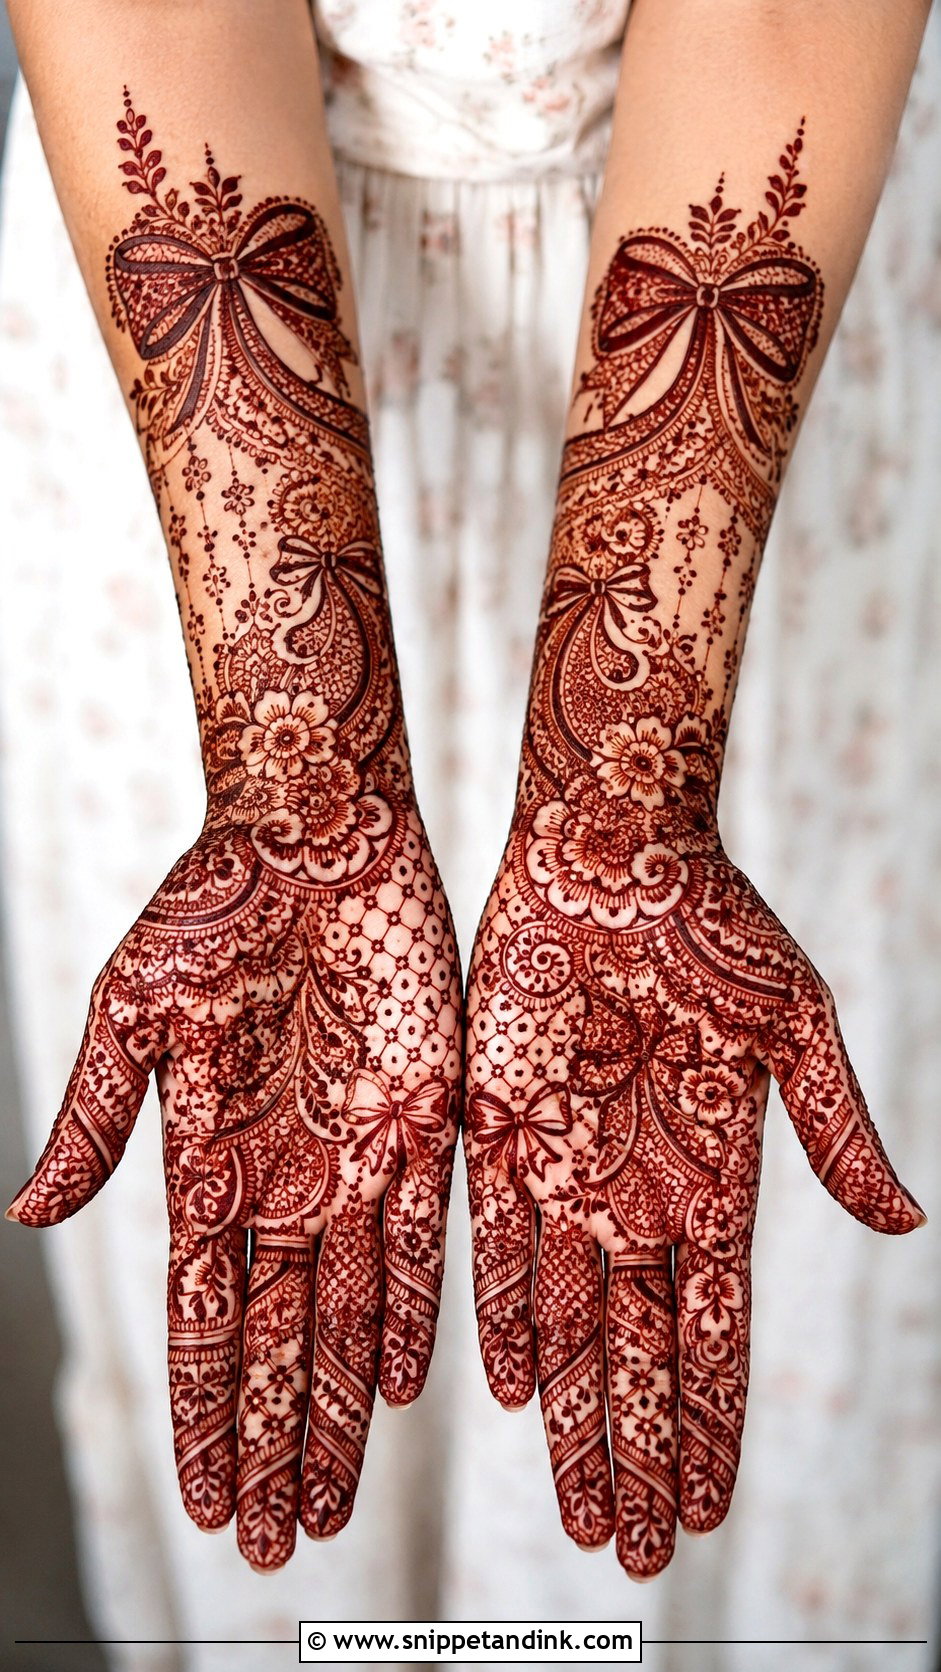
Full coverage turns a cute motif into a detailed piece of work. The bow sits at the wrist like a ribbon tie, while the palm and back of the hand carry florals, paisleys, jaali and finger patterns. Repeating small bows in the borders keeps the theme going, but too many look busy, so my rule is one large bow as the feature and smaller ones in two or three chosen spots. A full design takes a few hours, so plan to sit through it and keep your hands still while the palms dry.
19. Bow Half Hand Mehndi Design
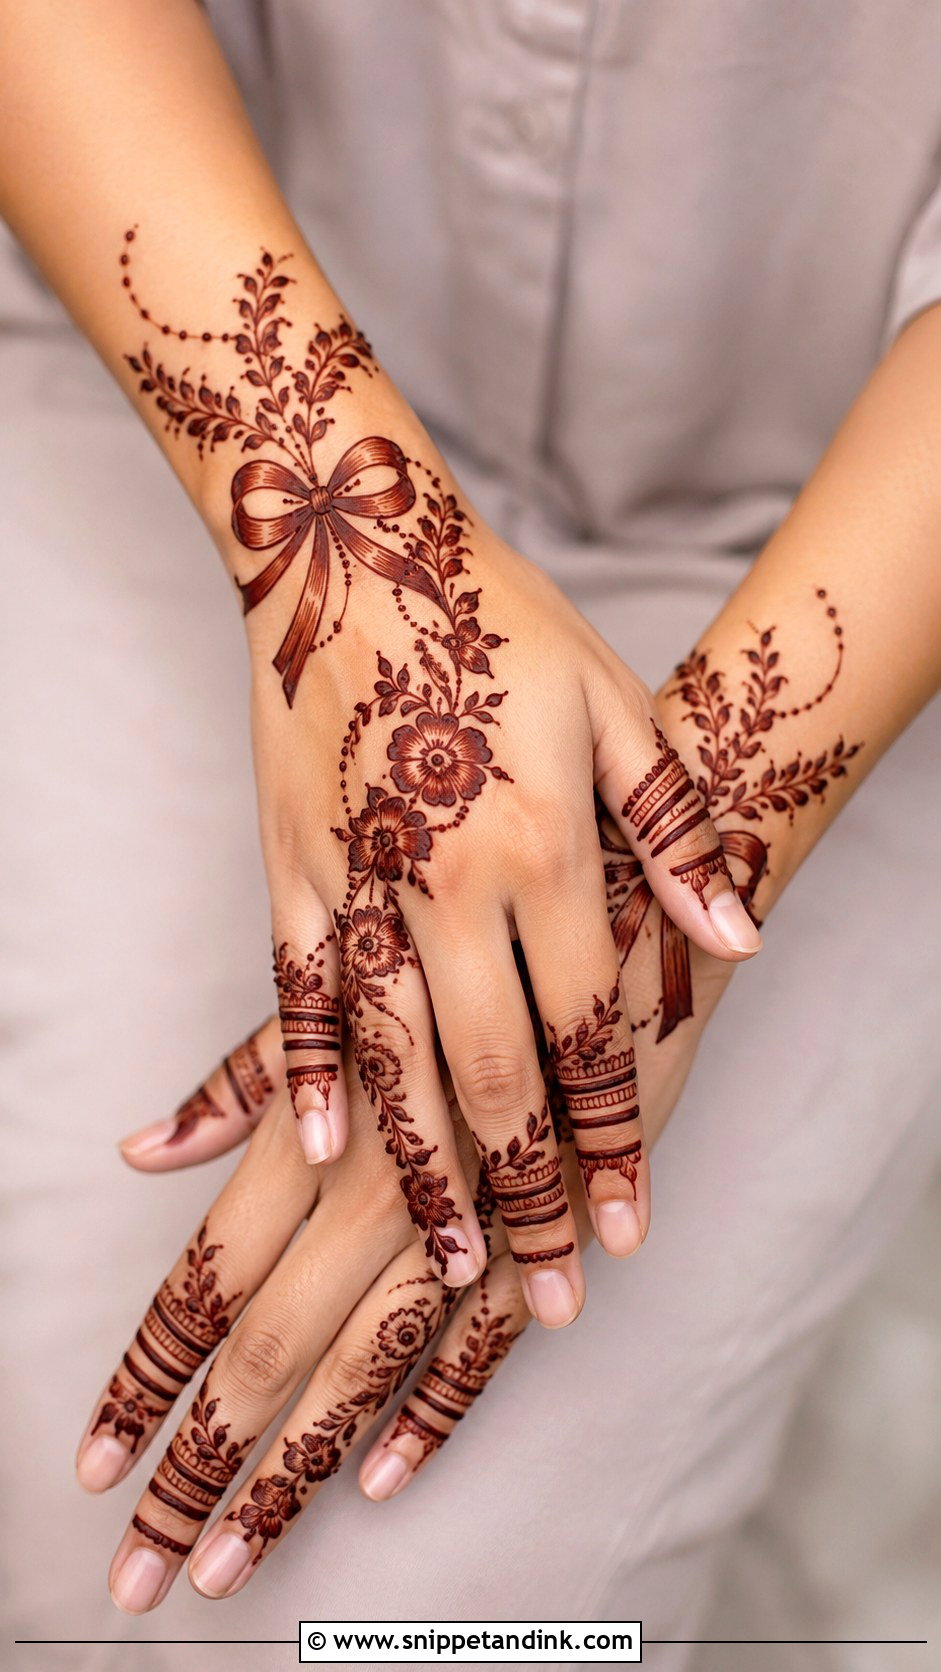
A half hand design starts at the wrist with a ribbon-style bow and climbs halfway up the back of the hand or the palm through a floral trail. Fingers get simple bands, leaves or small bow accents. It applies quickly and lets more of your skin tone show between the lines. I run the trail either diagonally or straight up the center; scattered motifs look unplanned. A practical option for guests and bridesmaids.
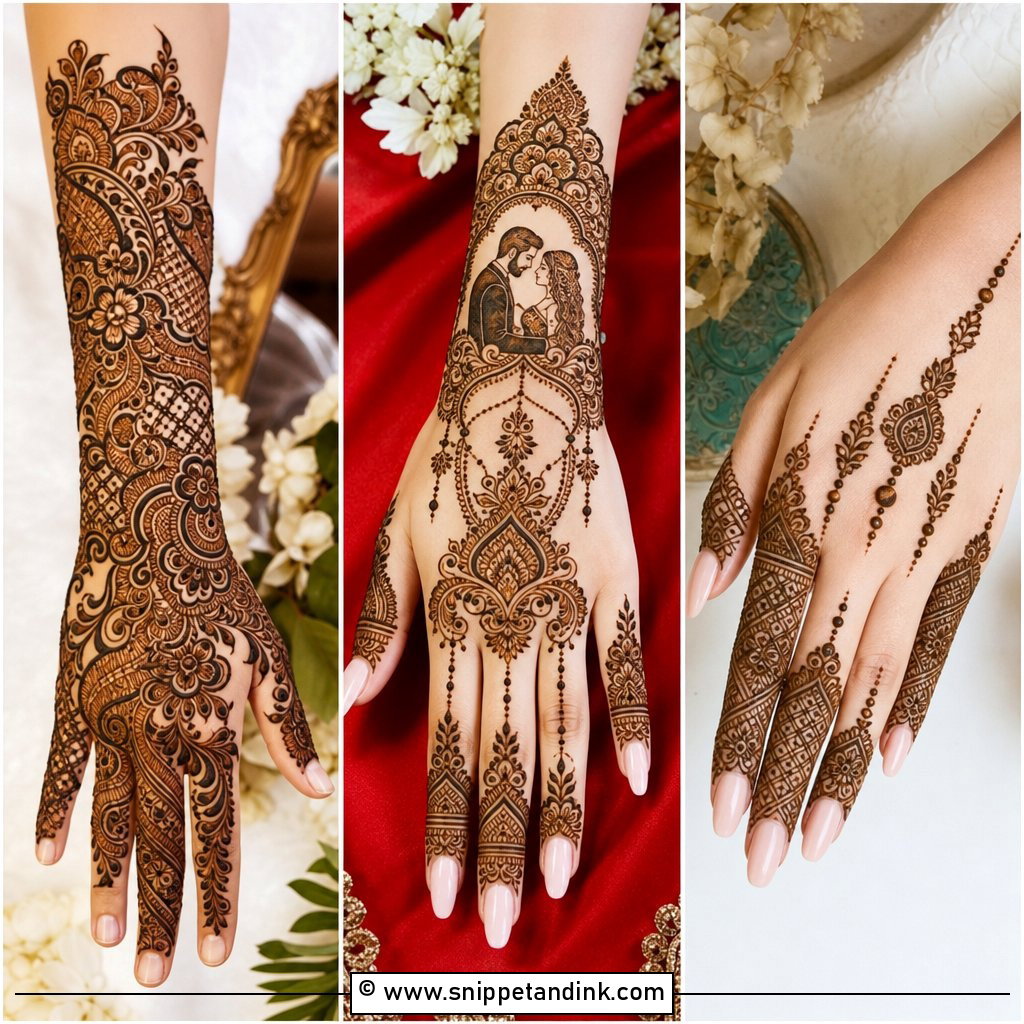
20. Bow Palm Mehndi Design
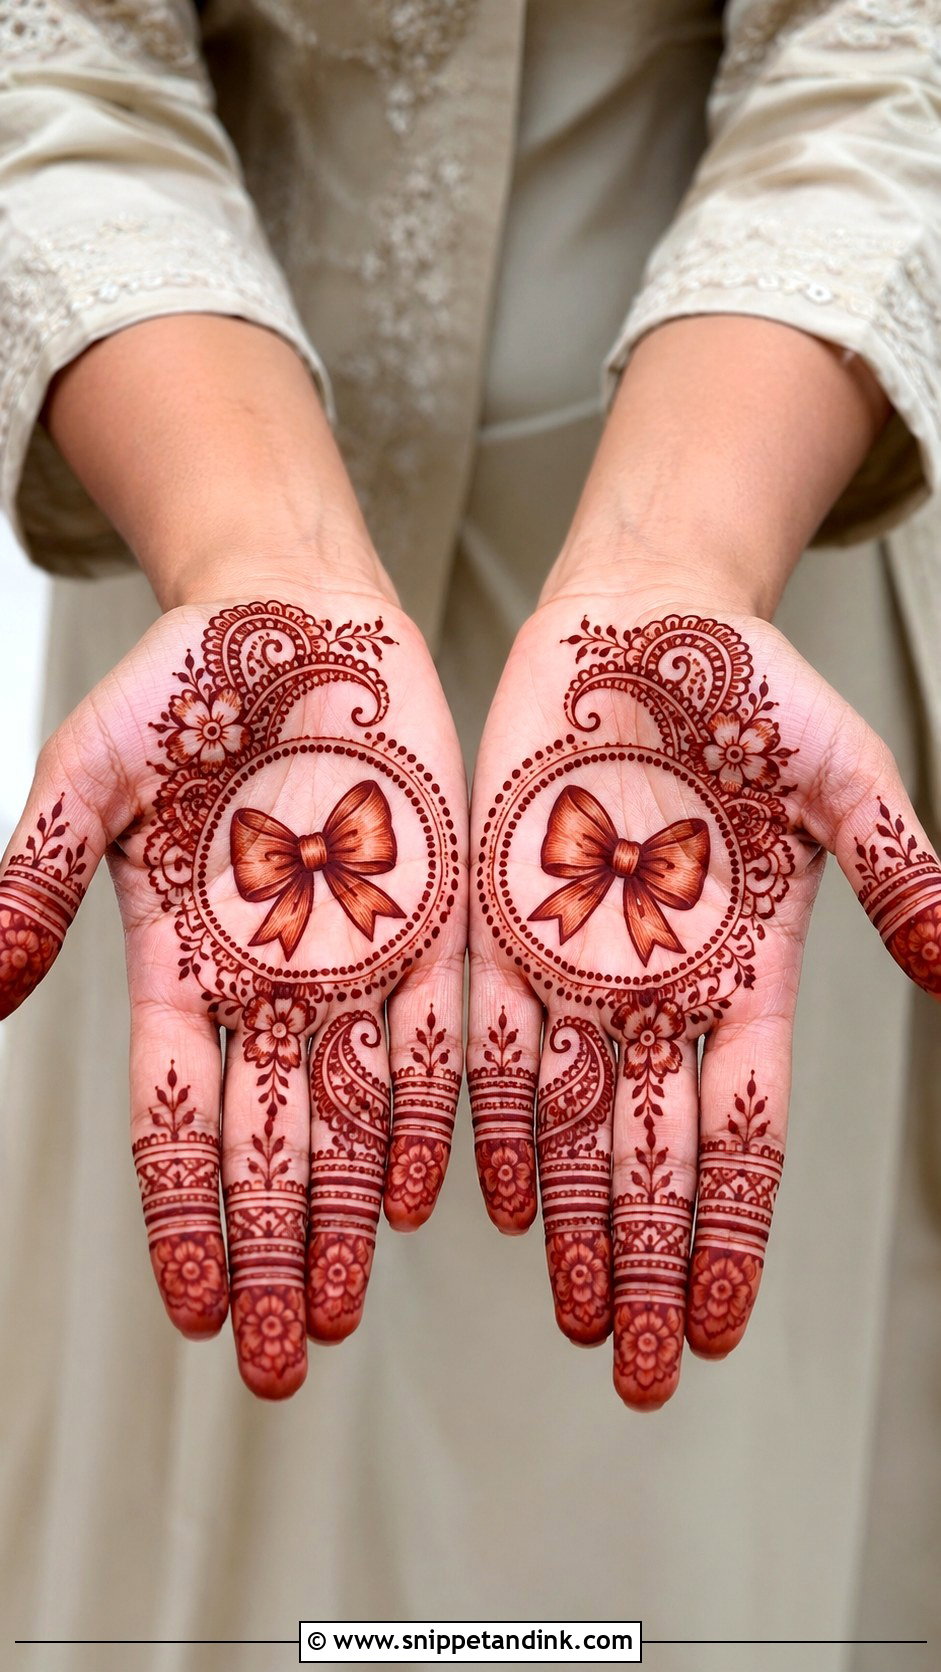
Palms take the deepest stain, so a bow placed in the center reads strongly every time the hand opens. I frame a rounded bow with circular dots, petals and small paisley curves, and carry matching ribbon bands or leafy panels down the fingers. Palm mehndi has a traditional feel for festive rituals, and the bow brings a modern note into it. If you’d like a softer look, I shade only one side of each loop. The outline needs to be bold enough to keep its shape as the color deepens.
21. Bow Wrist Mehndi Design
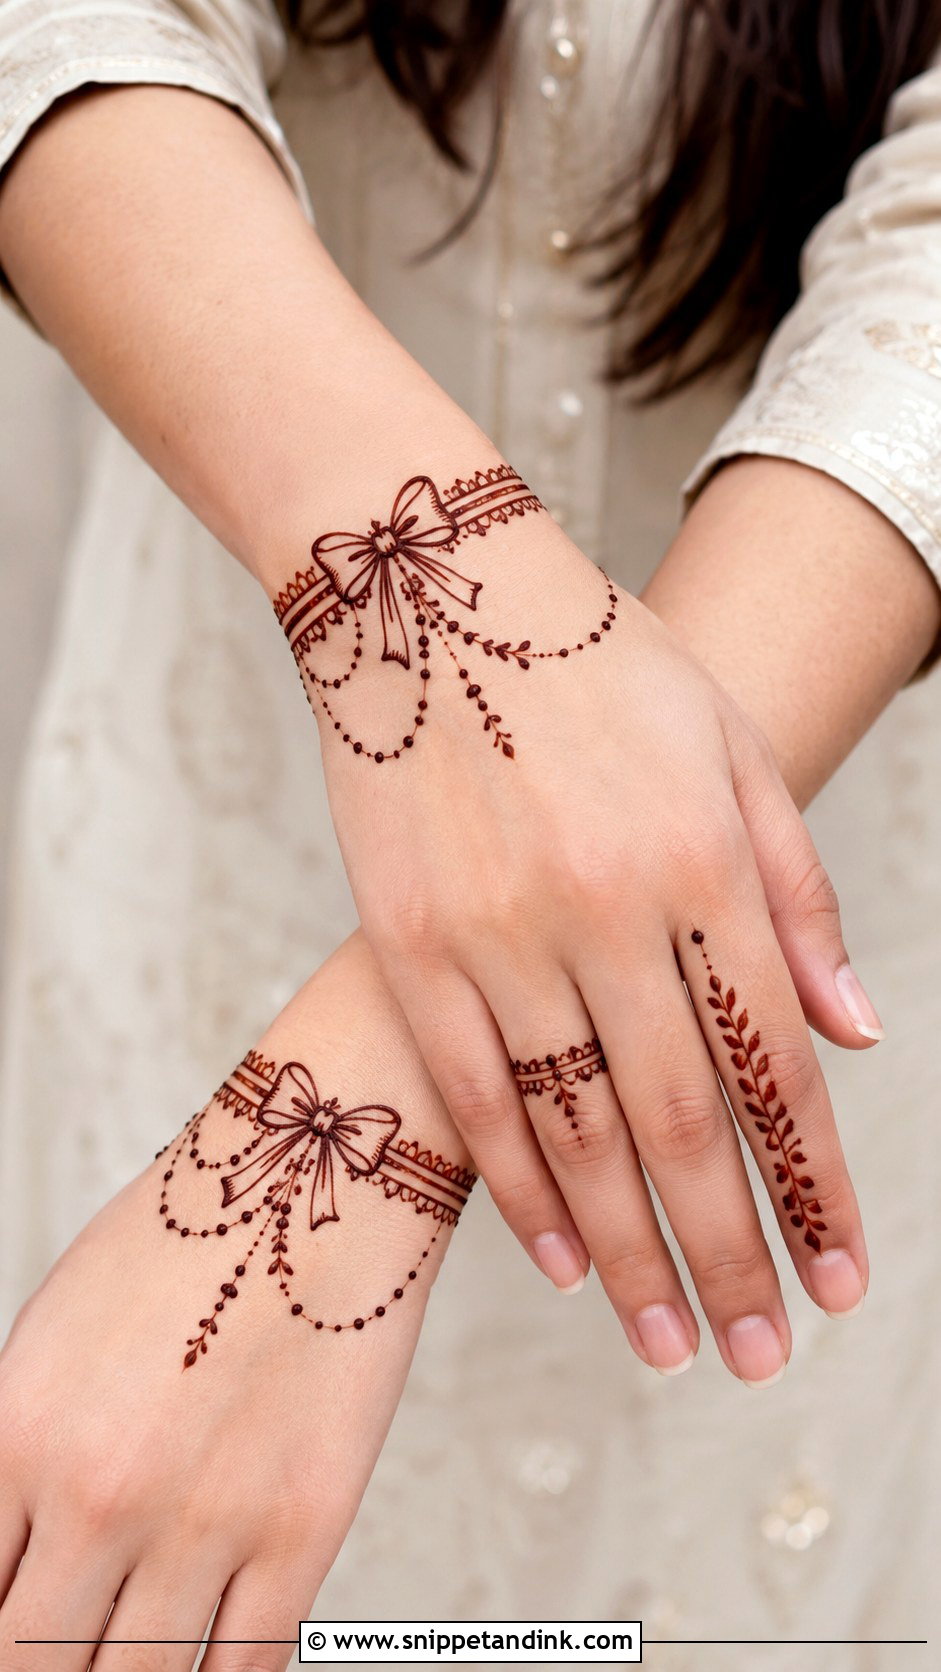
A wrist design works like a drawn bracelet and sits well with ethnic and casual outfits alike. The bow is centered on the wrist and extended with double-line bands, dotted chains and lace borders. A small finger vine or a ring chain on the back of the hand completes it. It keeps detail off the palm, which smudges easily, so you get your hands back sooner. The wrist stains lighter than the fingers, so I ask clients to leave the paste on there as long as they can.
22. Bow Jaali Mehndi Design
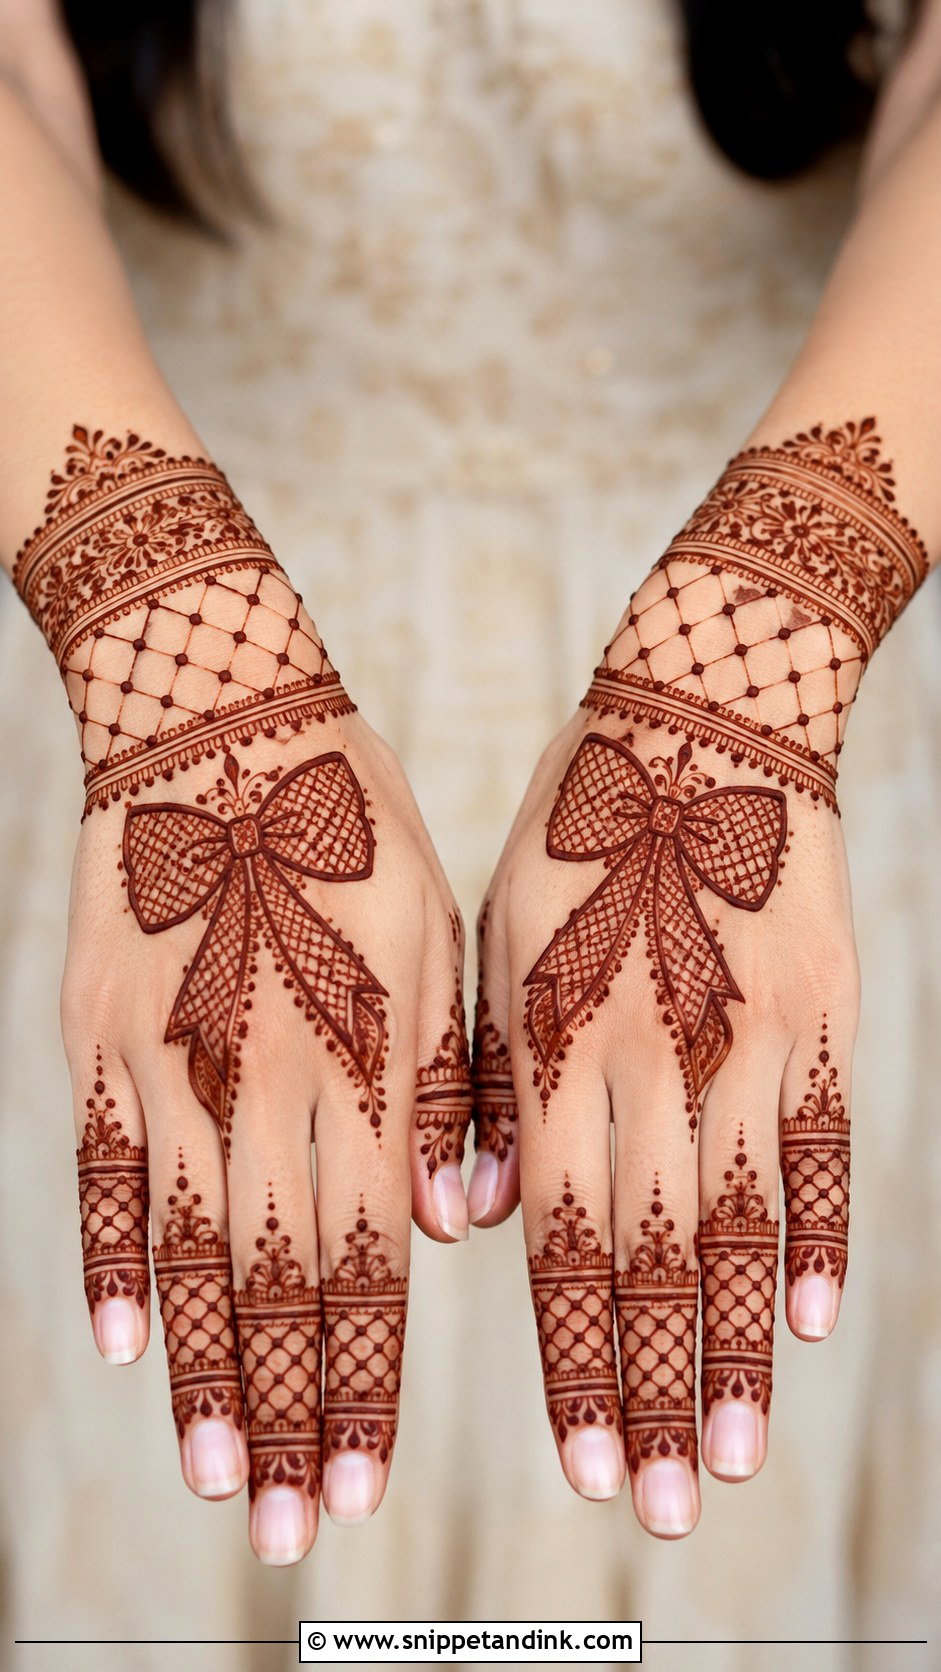
Jaali is crisscross mesh, and I fill one loop of the bow or a panel beside it, adding a tiny dot at each crossing. The fingers repeat the same net in narrow bands. It brings texture without needing many motifs, a middle ground between minimal and bridal. The squares must be big enough to stay open; if the lines sit too close, the stain bleeds and the mesh fills in solid. Keep the bow outline smooth and strong so the net doesn’t swallow it.
23. Bow Paisley Mehndi Design
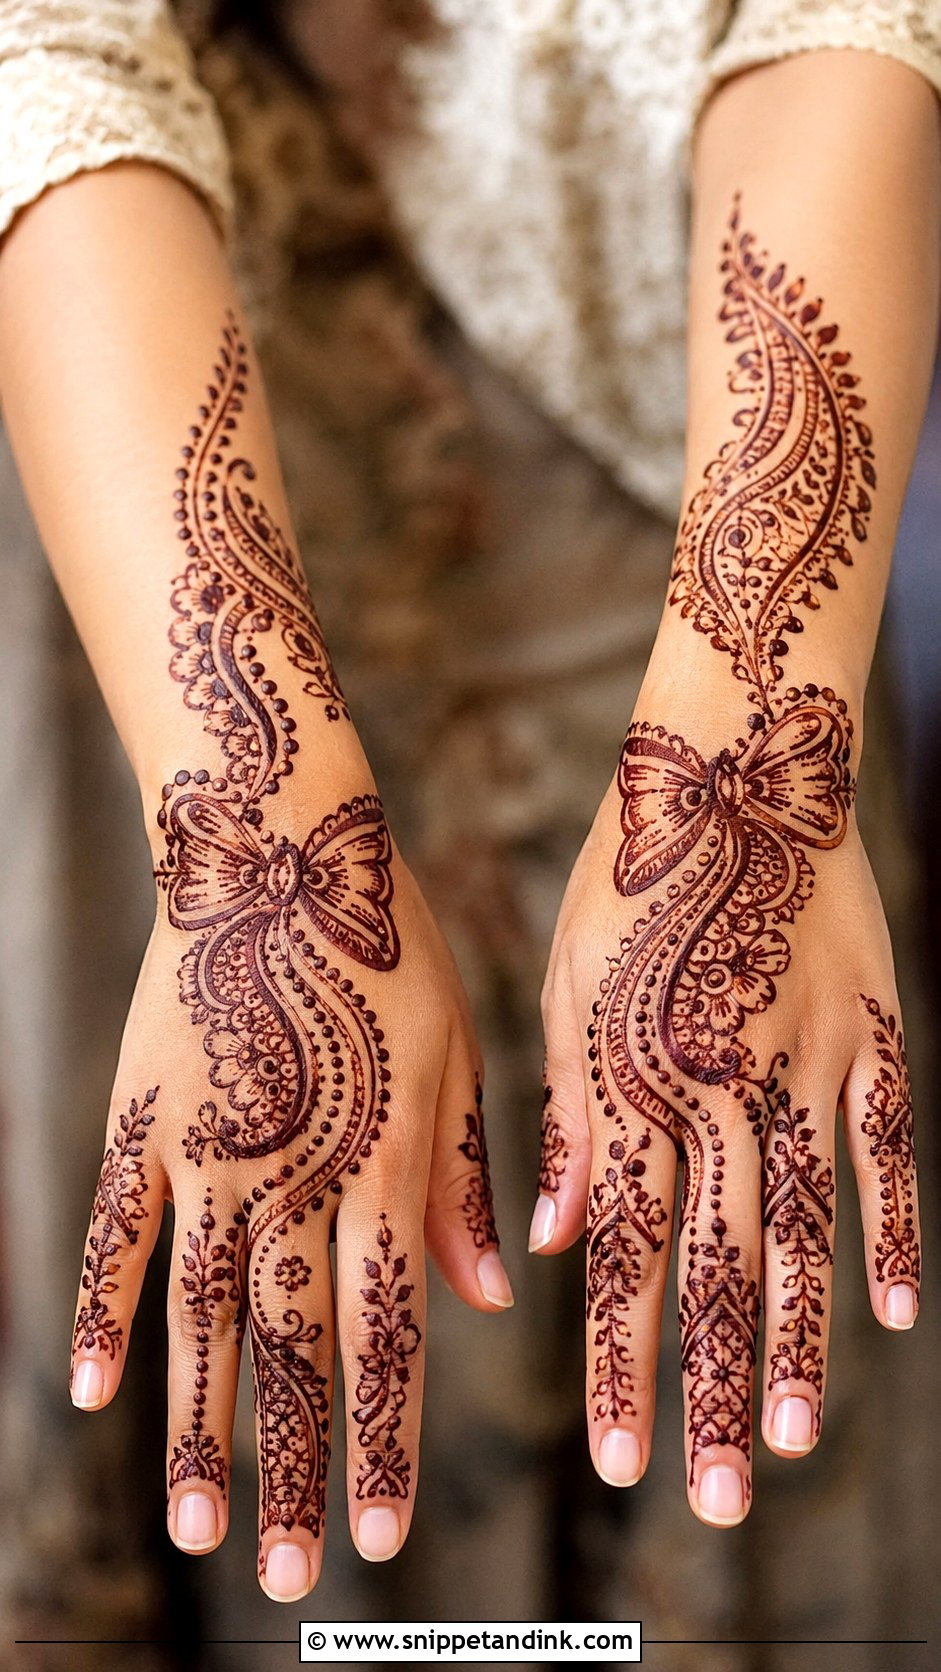
Paisleys already curve like flowing ribbon, so they pair with a bow more naturally than you might expect. I place the bow near the wrist or mid-palm and curve paisleys around it, linked by small leaves, dots and petal borders. It stays close to classic Indian henna, which suits family weddings, Karwa Chauth and Teej. Larger paisleys on one side with smaller details on the other keep it balanced. The bow must stay visible, not buried under paisley filling.
24. Bow Peacock Mehndi Design
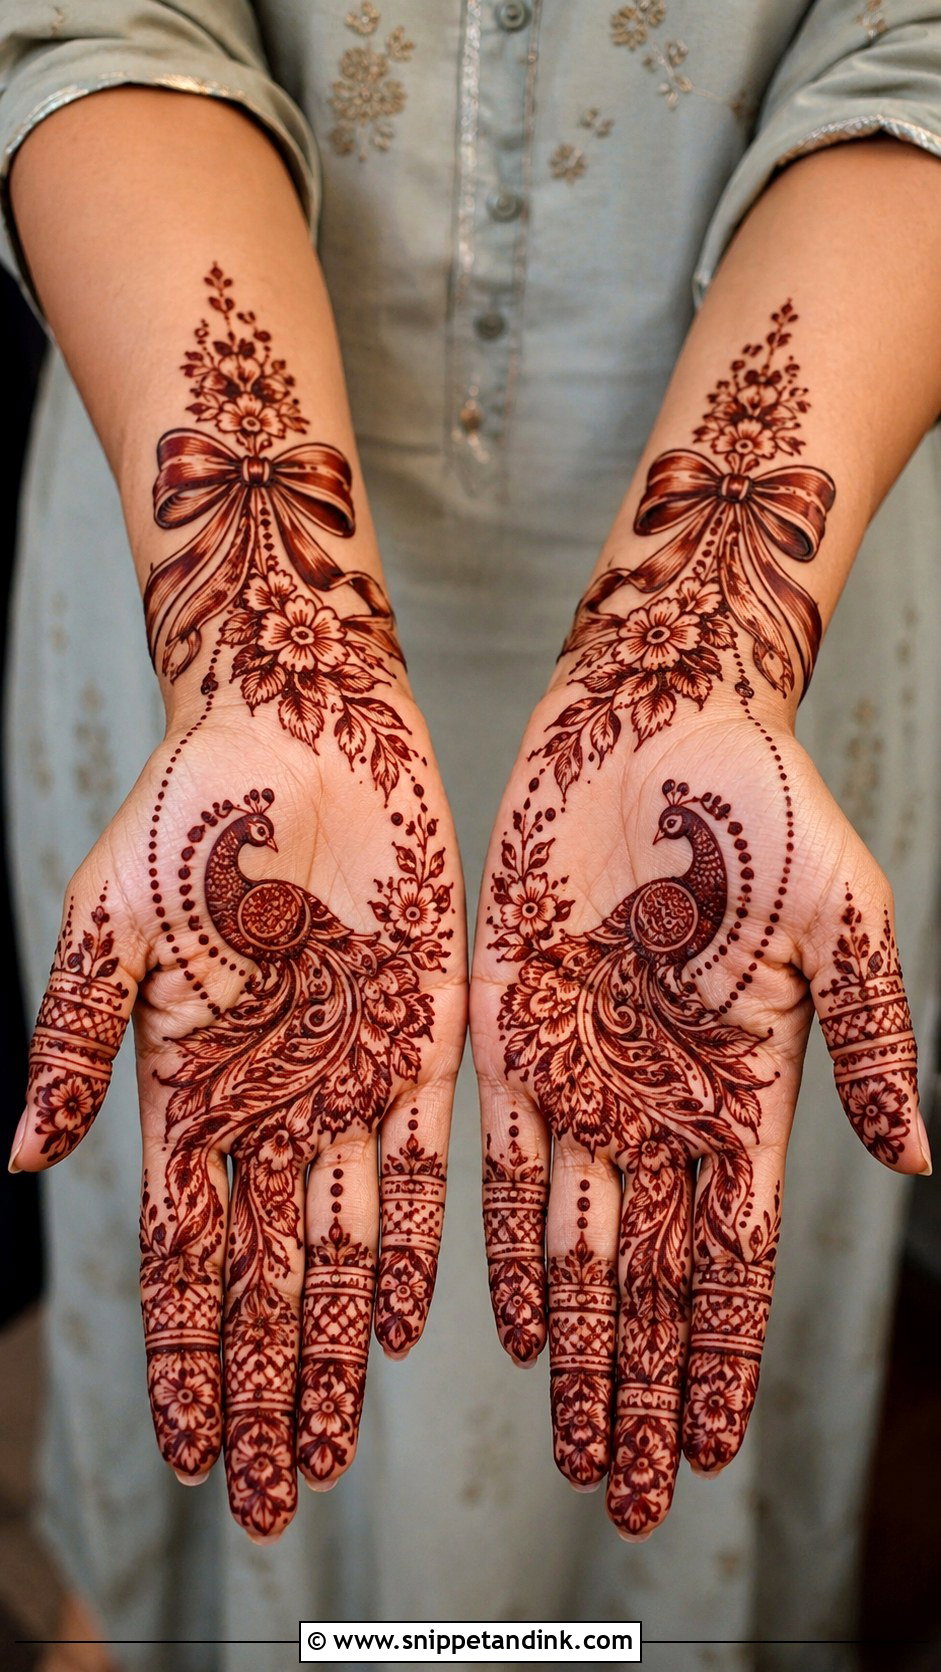
A peacock is already intricate, so pairing one with a bow takes careful spacing. I put the bow at the wrist and let the peacock’s body curve across the back of the hand or palm, its feathers flowing into ribbon-like trails, florals and dots. The bow stays clean and slightly bold; if both motifs are fussy, the hand looks crowded. You get a full, festive look without a traditional bridal scene, which works for a sangeet or as a wedding guest.
25. Bow Heart Mehndi Design
A bow tied around a heart on the back of the hand is easy to personalize, with initials inside the heart if you like. Thin chains run to the fingers and wrist, with tiny flowers, dots and soft lace edges to fill it out. I keep the heart smaller than most people ask for, because an oversized heart takes over the hand. A smaller matching heart on the palm makes a front-and-back pair. Engagements, anniversaries and bridesmaids suit it.
26. Bow Butterfly Mehndi Design
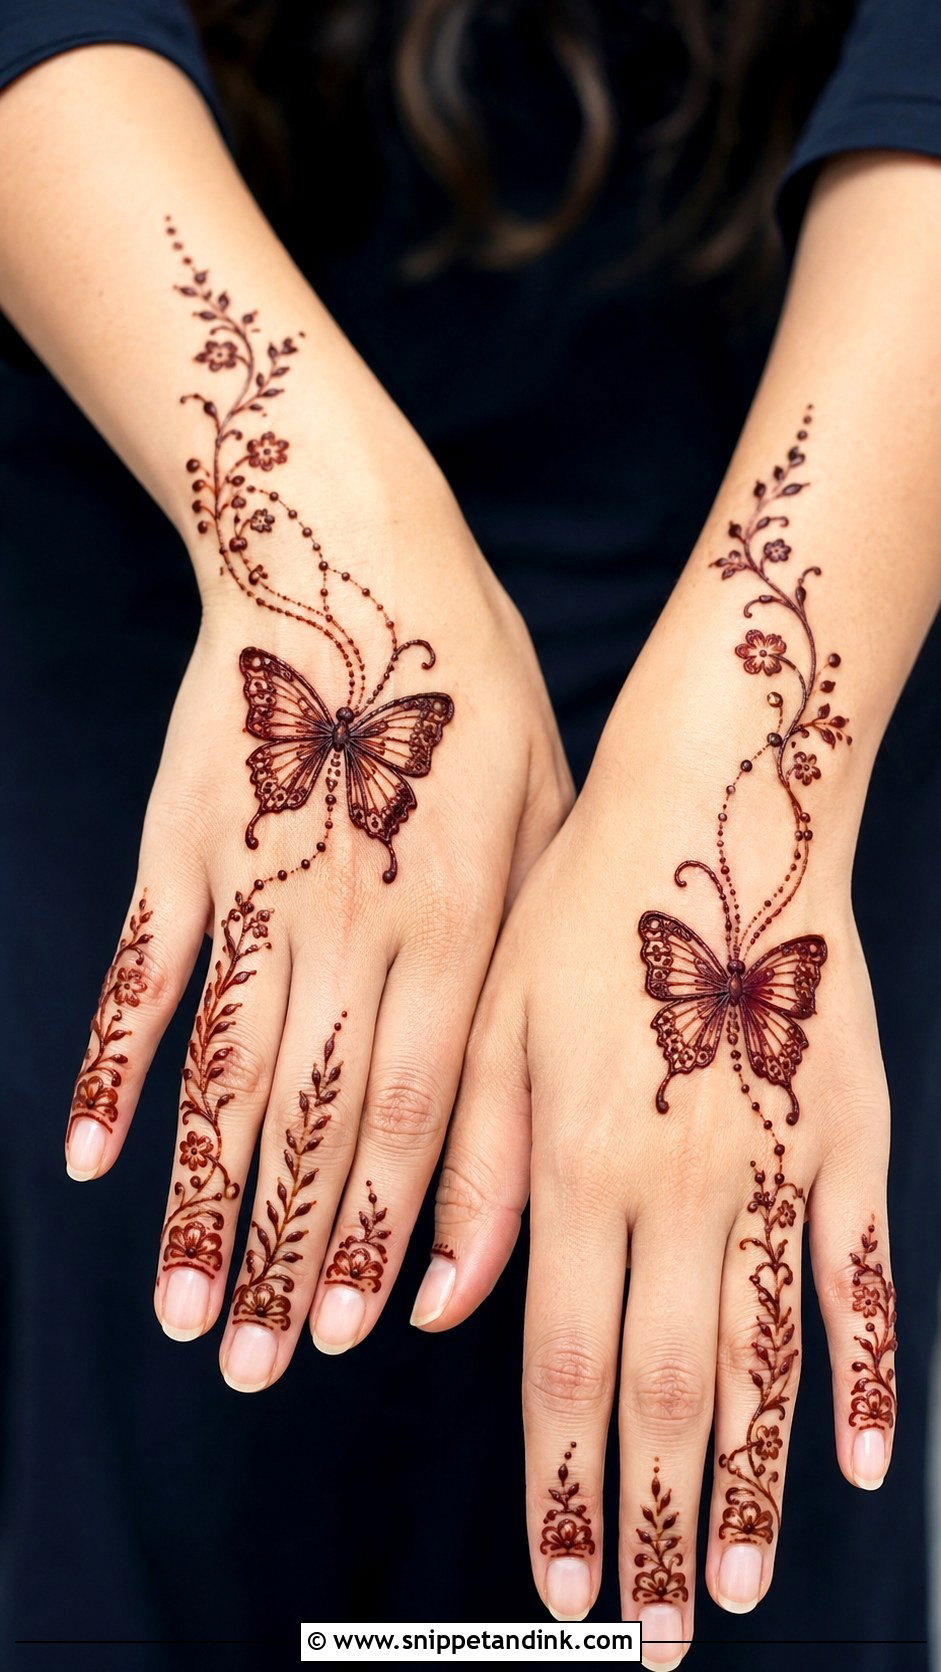
Butterflies give a bow design movement. I draw the bow near the wrist and let wings open across the back of the hand with small floral and dotted details, or I turn the bow loops themselves into wings. The fingers stay simple with tiny vines or dotted bands. Contrast in line weight is what keeps it readable: thin lines for the wings, a slightly thicker outline for the bow. It suits parties, Eid and casual celebrations.
27. Bow Net Mehndi Design
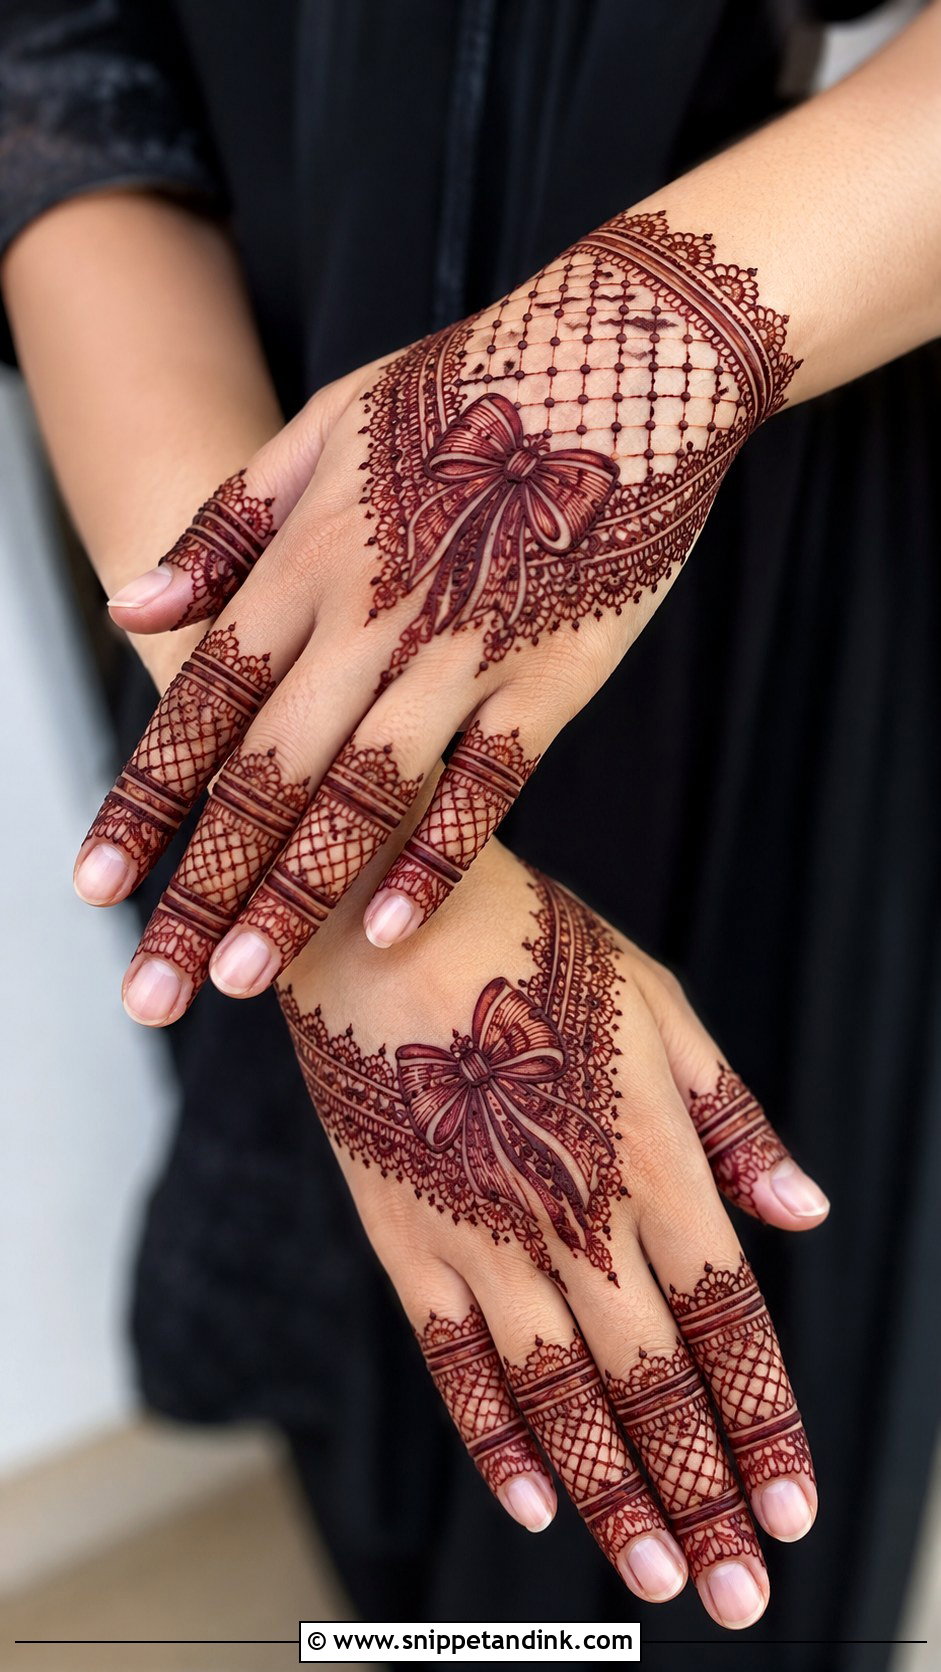
A net design gives the hand a lace-glove effect around a central bow. I start the bow on the back of the hand or wrist, then surround it with soft net panels, dotted borders and mesh bands on the fingers. It feels dressy for a wedding guest without being heavy. The net needs even spacing, with gaps wide enough to stay clean once the stain develops. Leaving one side of the hand open stops it feeling crowded, and a narrow wrist cuff makes the bow look like part of a lace accessory.
28. Bow Lace Mehndi Design
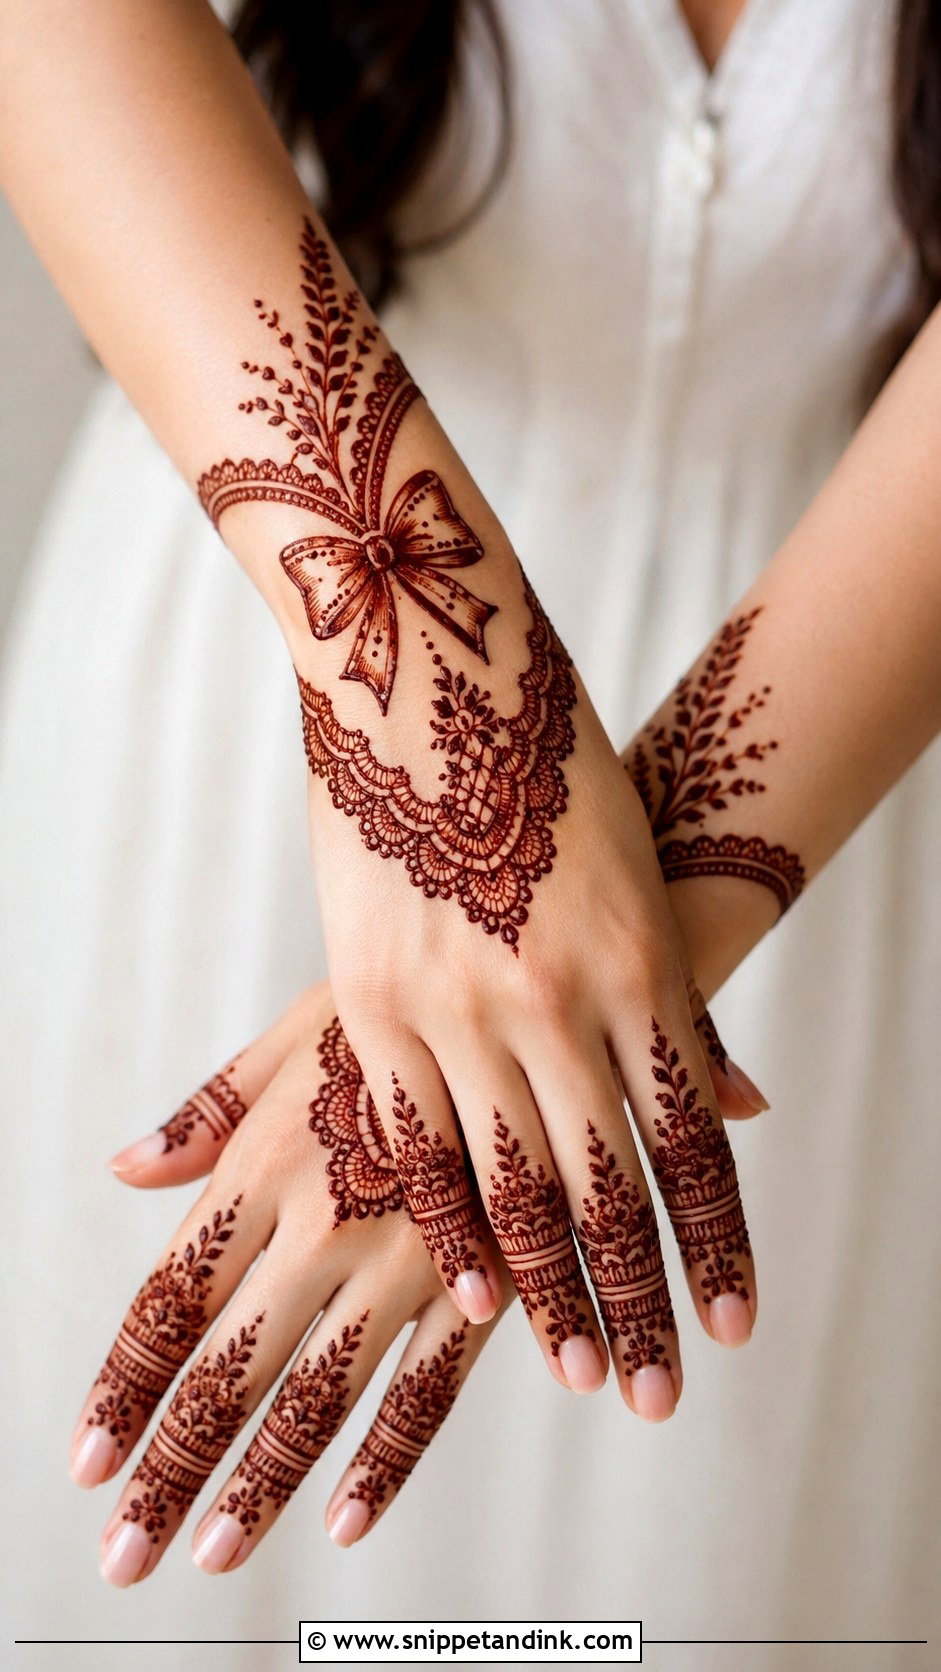
Lace work is fine and photo-friendly: a tied ribbon bow surrounded by scalloped borders, tiny dots, floral lace and leafy curves spreading gently from the fingers to the wrist. It suits bridesmaids, engagement guests and anyone in a delicate outfit. The trick is fine lines that aren’t packed together, because henna spreads slightly into the skin as it stains and tight lace blurs. A clean bow outline gives the whole pattern its structure.
29. Bow Cuff Mehndi Design
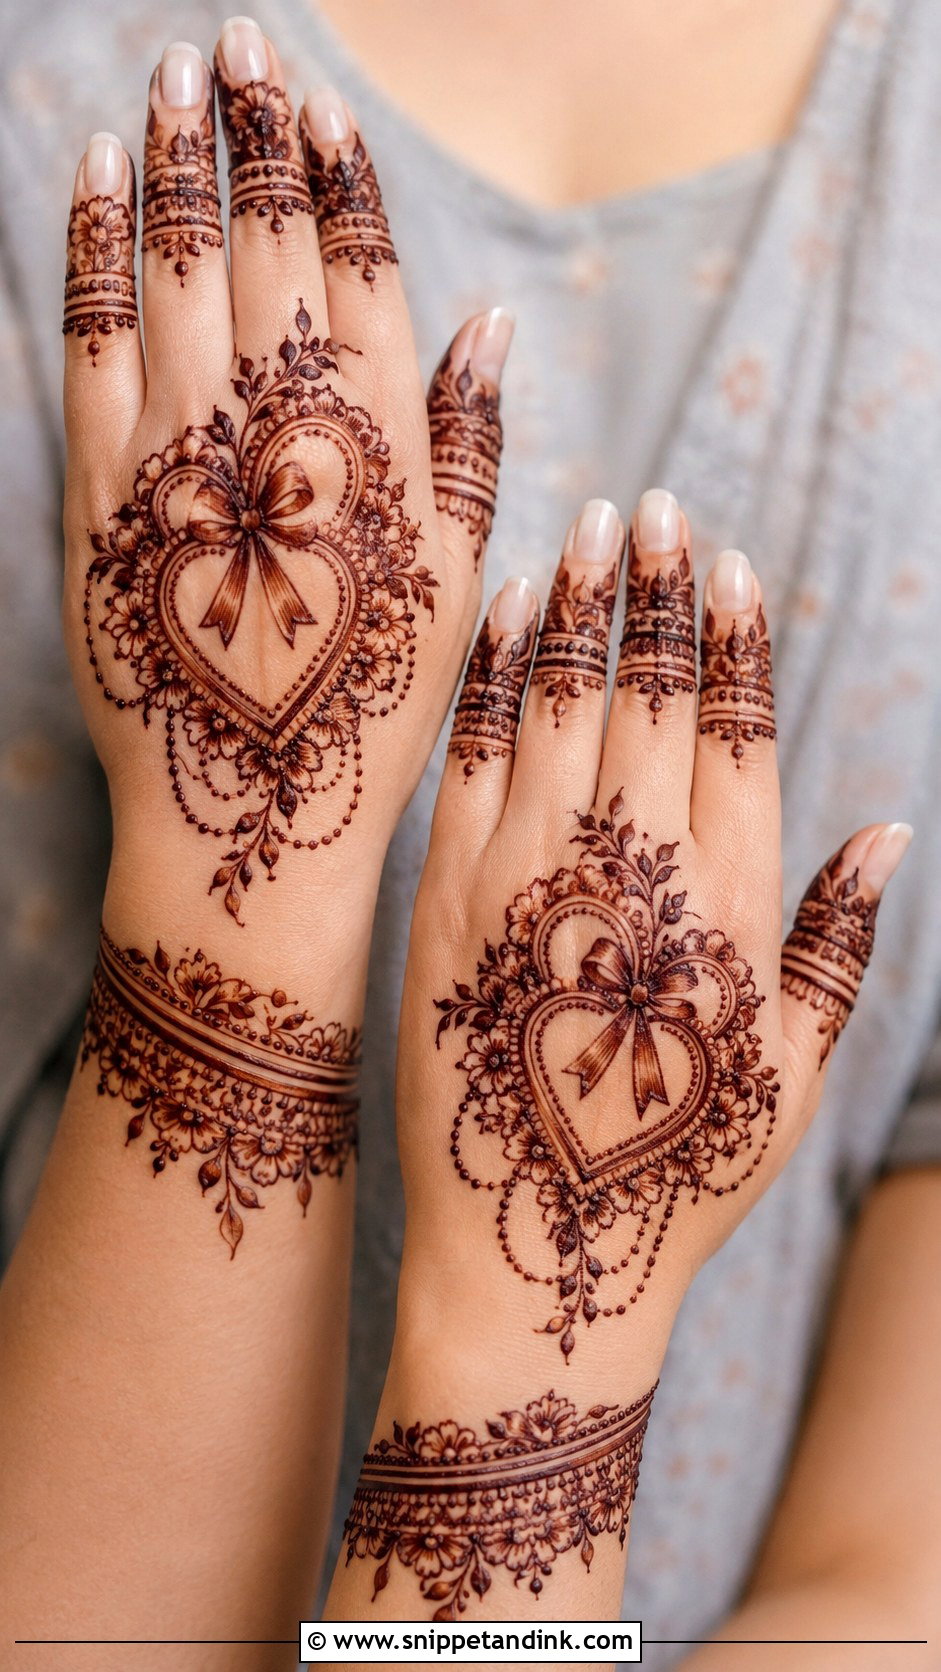
A cuff is the wider, bolder sister of the bracelet. It wraps the wrist with a bold bow at the center, filled with florals, mesh or small paisleys, while the back of the hand carries just one or two finger chains so the design stays wrist-led. It reads like statement jewelry, especially with sleeveless or short-sleeved outfits. Clean, parallel cuff edges are what make it look professional, and the bow has to sit dead center for balance.
30. Bow Ribbon Mehndi Design
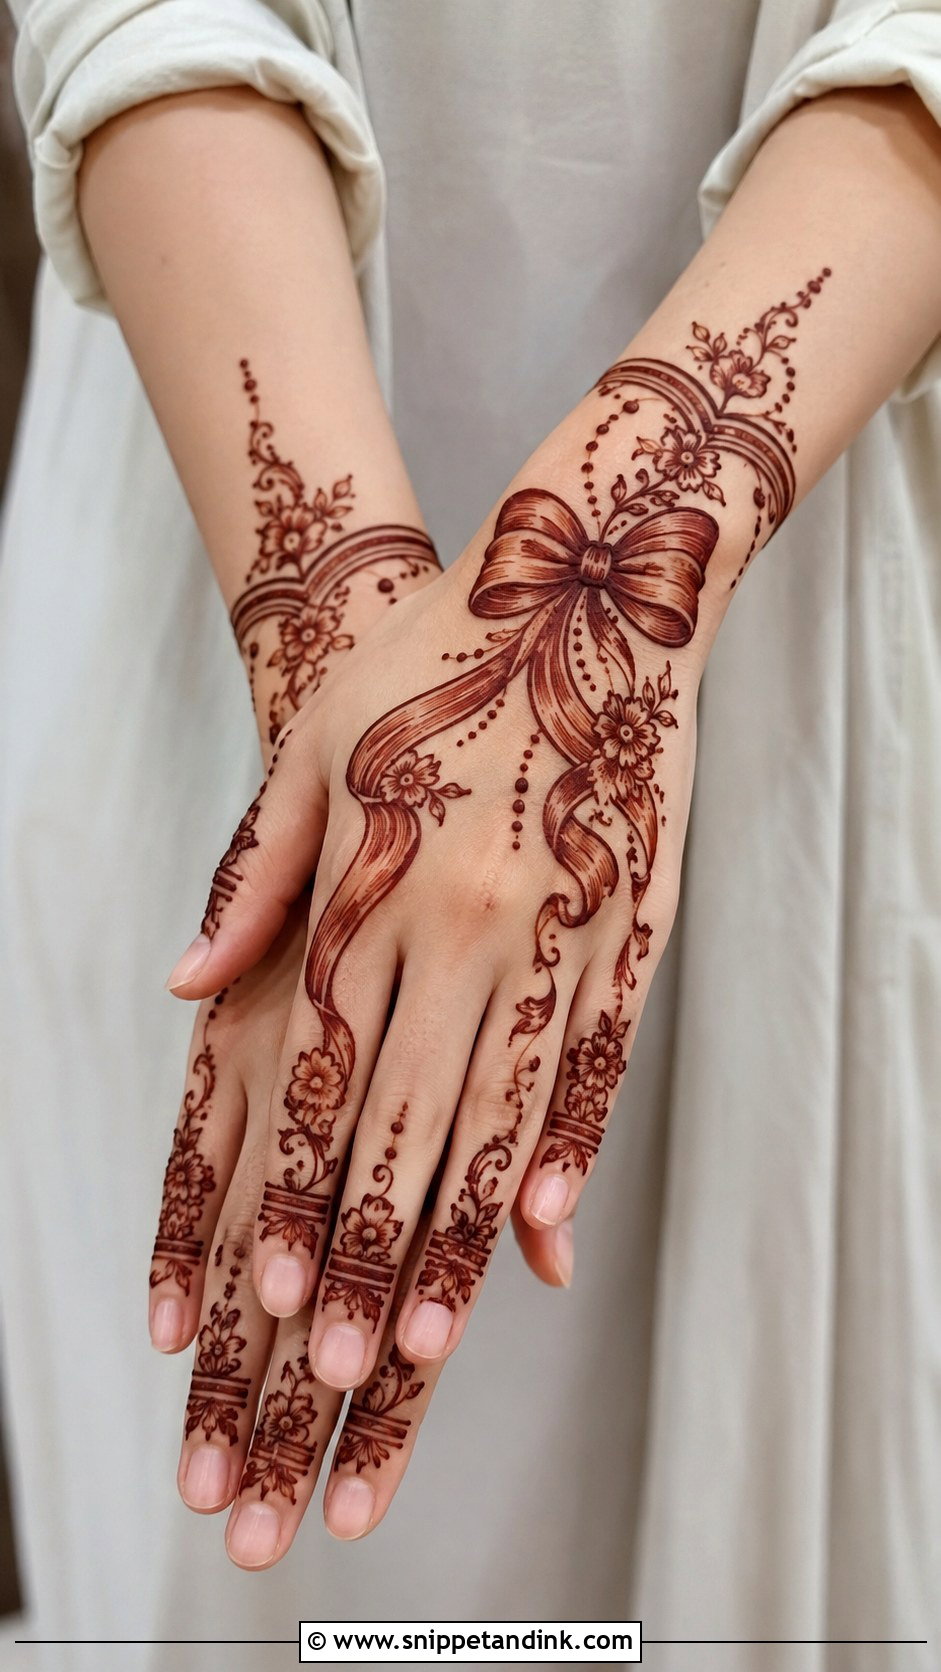
Ribbon trails give the hand a flowing, wrapped look. I start with a tied bow at the wrist and let the ribbon curve across the back of the hand toward the fingers, dotted with small flowers. Shading the folds stops the ribbon looking flat. Thin ribbon suits a minimal design and wider ribbon a fuller festive one. Keep the curves smooth and connected so the eye follows them. It’s especially suited to Indo-Western outfits, where a cute detail meets traditional henna texture.
How Long the Paste Stays On, and What Comes After
Natural henna looks orange when the paste first comes off, then deepens to reddish-brown over the next day or two. Fine bow work depends on that full development more than bold designs do, because thin lines carry less dye.
- Leave the paste on for at least six hours, overnight if you can. Dabbing a little lemon and sugar mix over it once it’s dry helps it stay in contact with the skin.
- Scrape the dried paste off with a blunt edge or rub it away with your fingers. Don’t wash it off.
- Keep water away for the first 12 to 24 hours, and keep your hands warm, which helps the color darken.
- For the next few days, rub a little balm or oil over the design before washing, and skip scrubs, chlorine and harsh soaps.
For a bride, I book the application one or two days before the wedding so the stain is at its deepest on the day itself. If you’ve never worn henna, or the cone is mixed with essential oils, ask for a small patch test a couple of days ahead.
Give the Bow Room to Breathe
Bows work in mehndi because their curves belong to the same family as petals and paisleys. What separates a good bow from a crowded one is a clean outline, balanced spacing and supporting motifs that frame it instead of hiding it. Go minimal for quick events and fuller for weddings and festivals, and pick Arabic flow, Indian detail or an Indo-Western mix to suit your outfit. Above all, give the paste time on your skin; a well-drawn bow only looks as good as the stain behind it.
You'll Like These Ideas:


Leave a Reply