
The palm is where henna does its best work. Skin on the inner hand and fingers is thicker and takes the dye deeper than the back of the hand, so a palm design ends up the darkest and most detailed part of any mehndi. That’s why the inside hand gets so much attention at weddings, Eid, Diwali, Karva Chauth, engagements and family functions. Mandalas, florals, paisleys, jaali and bold Arabic trails all fit there, and the same palm can carry one neat motif or a fully packed bridal layout. Below are the palm designs I’m asked for most, from a five-minute circle to full bridal coverage.
Palm Creases, Sweat and Where a Design Should Sit
The inside of the hand is the best surface for henna and also the busiest. It folds, it sweats and it touches everything, and a good palm design plans around all three.
- Creases. The main palm lines bend every time you hold something. I keep faces, initials and fine grids off them, and use bands, borders or open skin across them instead.
- Warmth. Warm hands stain darker. If your hands run cold, keep them warm while the paste sits; they’ll stain deeper for it.
- Scale. A small palm can’t hold the same motif count as a large one. Ask your artist to resize the design to your hand rather than copy a photo exactly.
- Dominant hand. It gets rubbed and washed more over the following days, so its stain usually fades a little sooner.
For a bride, I’d book bridal mehndi one to two days before the wedding. Fresh henna comes off the skin bright orange and deepens to its richest color over the next day or two, so timing it right means the darkest stain lands on the wedding day itself.
1. Simple Mandala Inside Mehndi Design
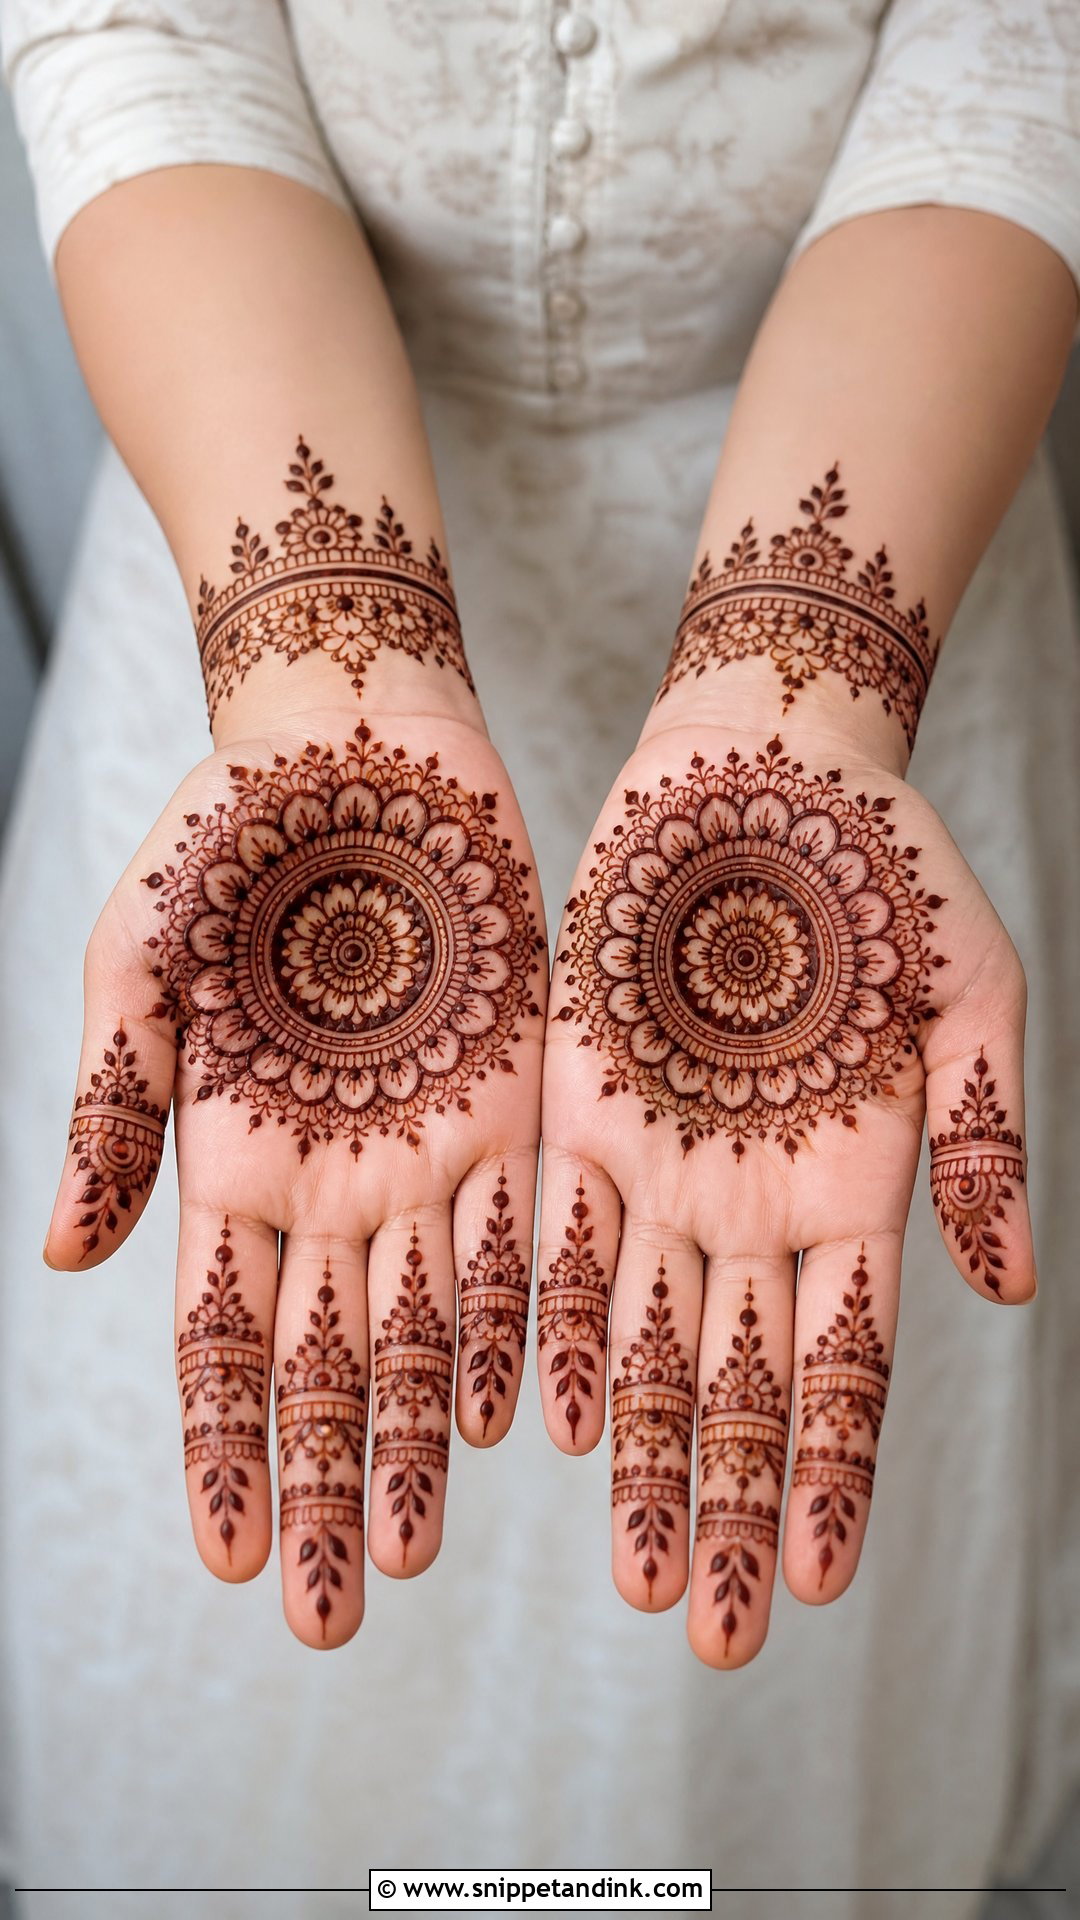
A simple mandala inside mehndi design is the first palm pattern I teach, because the round center sits naturally in the hollow of the hand. I start with a small circle, build petal layers outward, then finish with a dotted border. Fingers stay light: leafy tips, a band or two, a few dots. The one thing to watch is the center point. If it sits too close to the wrist, the whole circle looks like it’s sliding off the hand, so I place it slightly above the middle of the palm.
2. Arabic Inside Mehndi Design
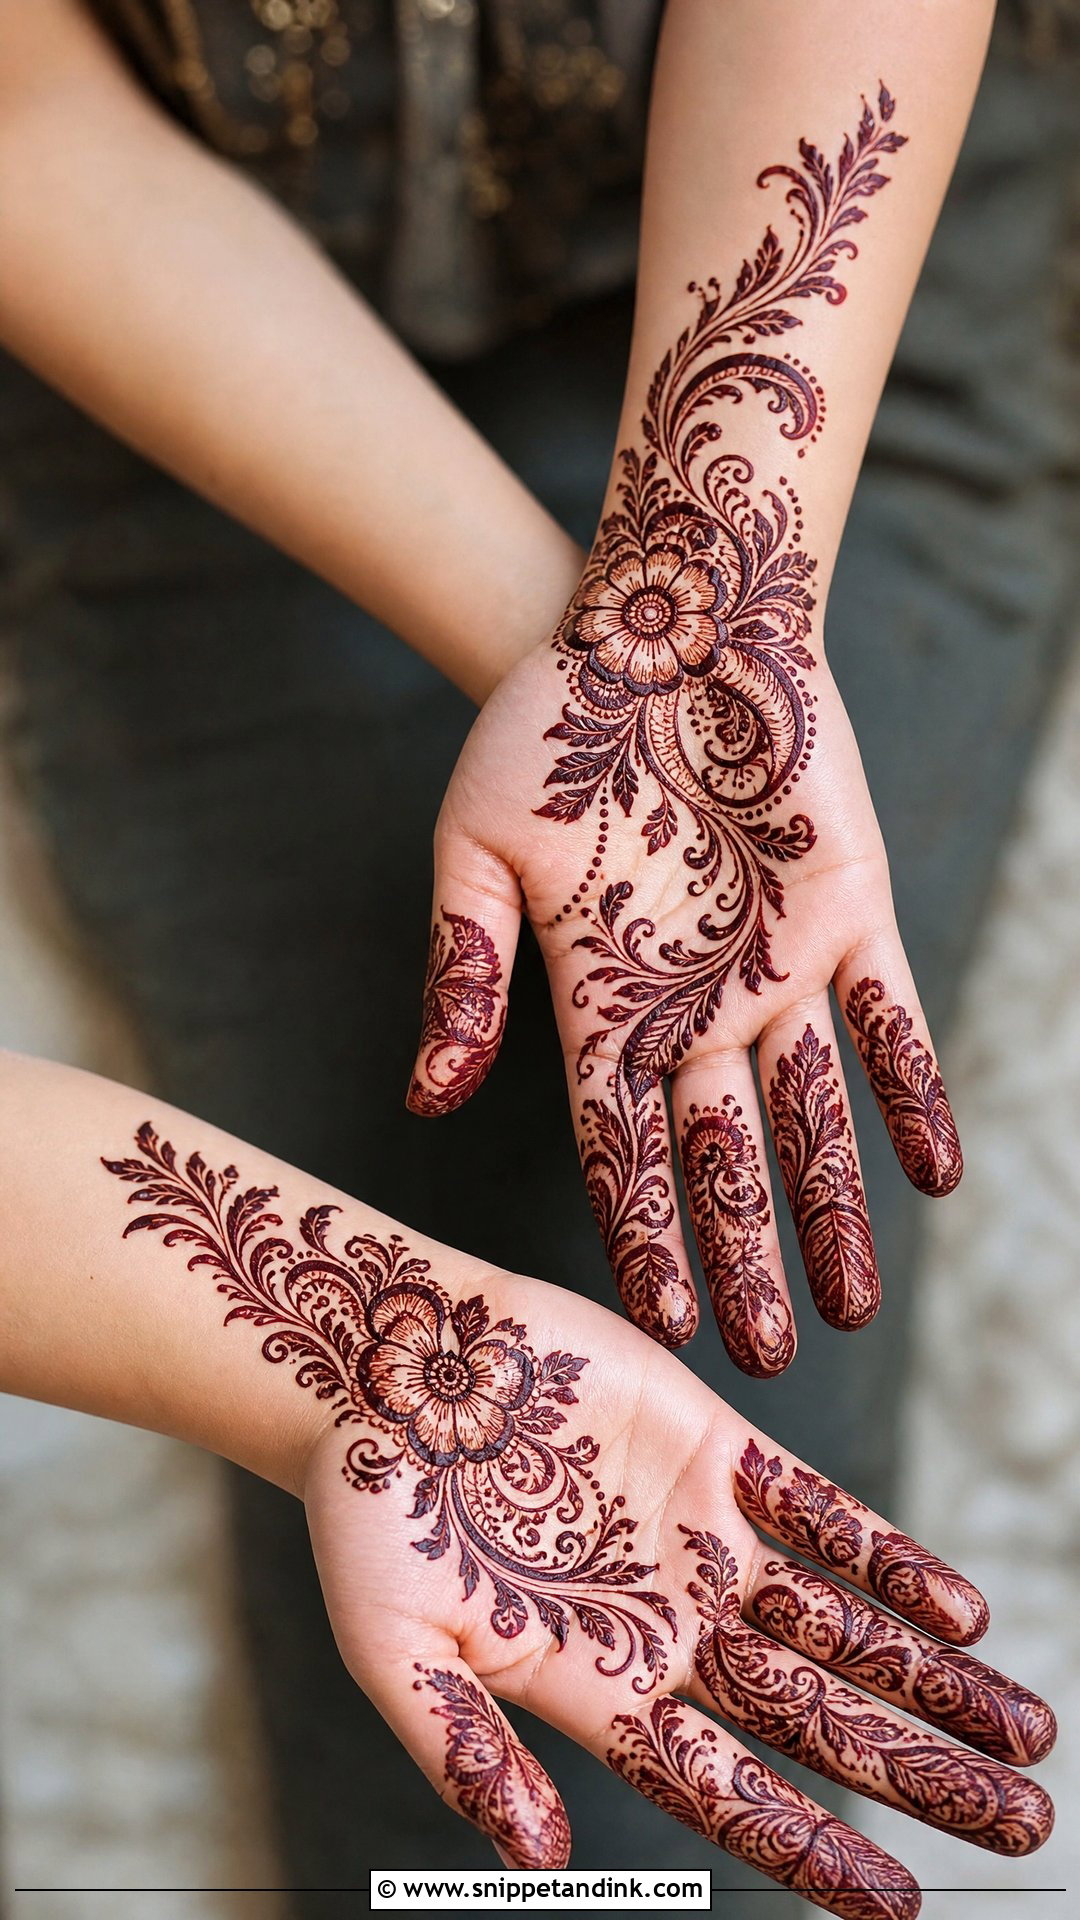
Arabic palm work trades tiny detail for large flowers, curved leaves and open skin. The trail usually starts at the wrist, crosses the palm on a diagonal and runs up one or two fingers, which makes the hand look longer. I use a slightly wider cone tip for the outlines here and keep the fillings simple. The empty spaces aren’t unfinished, they’re the design. Guests at Eid or a wedding like it because it’s quick to sit for and still reads from across a room.
3. Full Palm Inside Mehndi Design
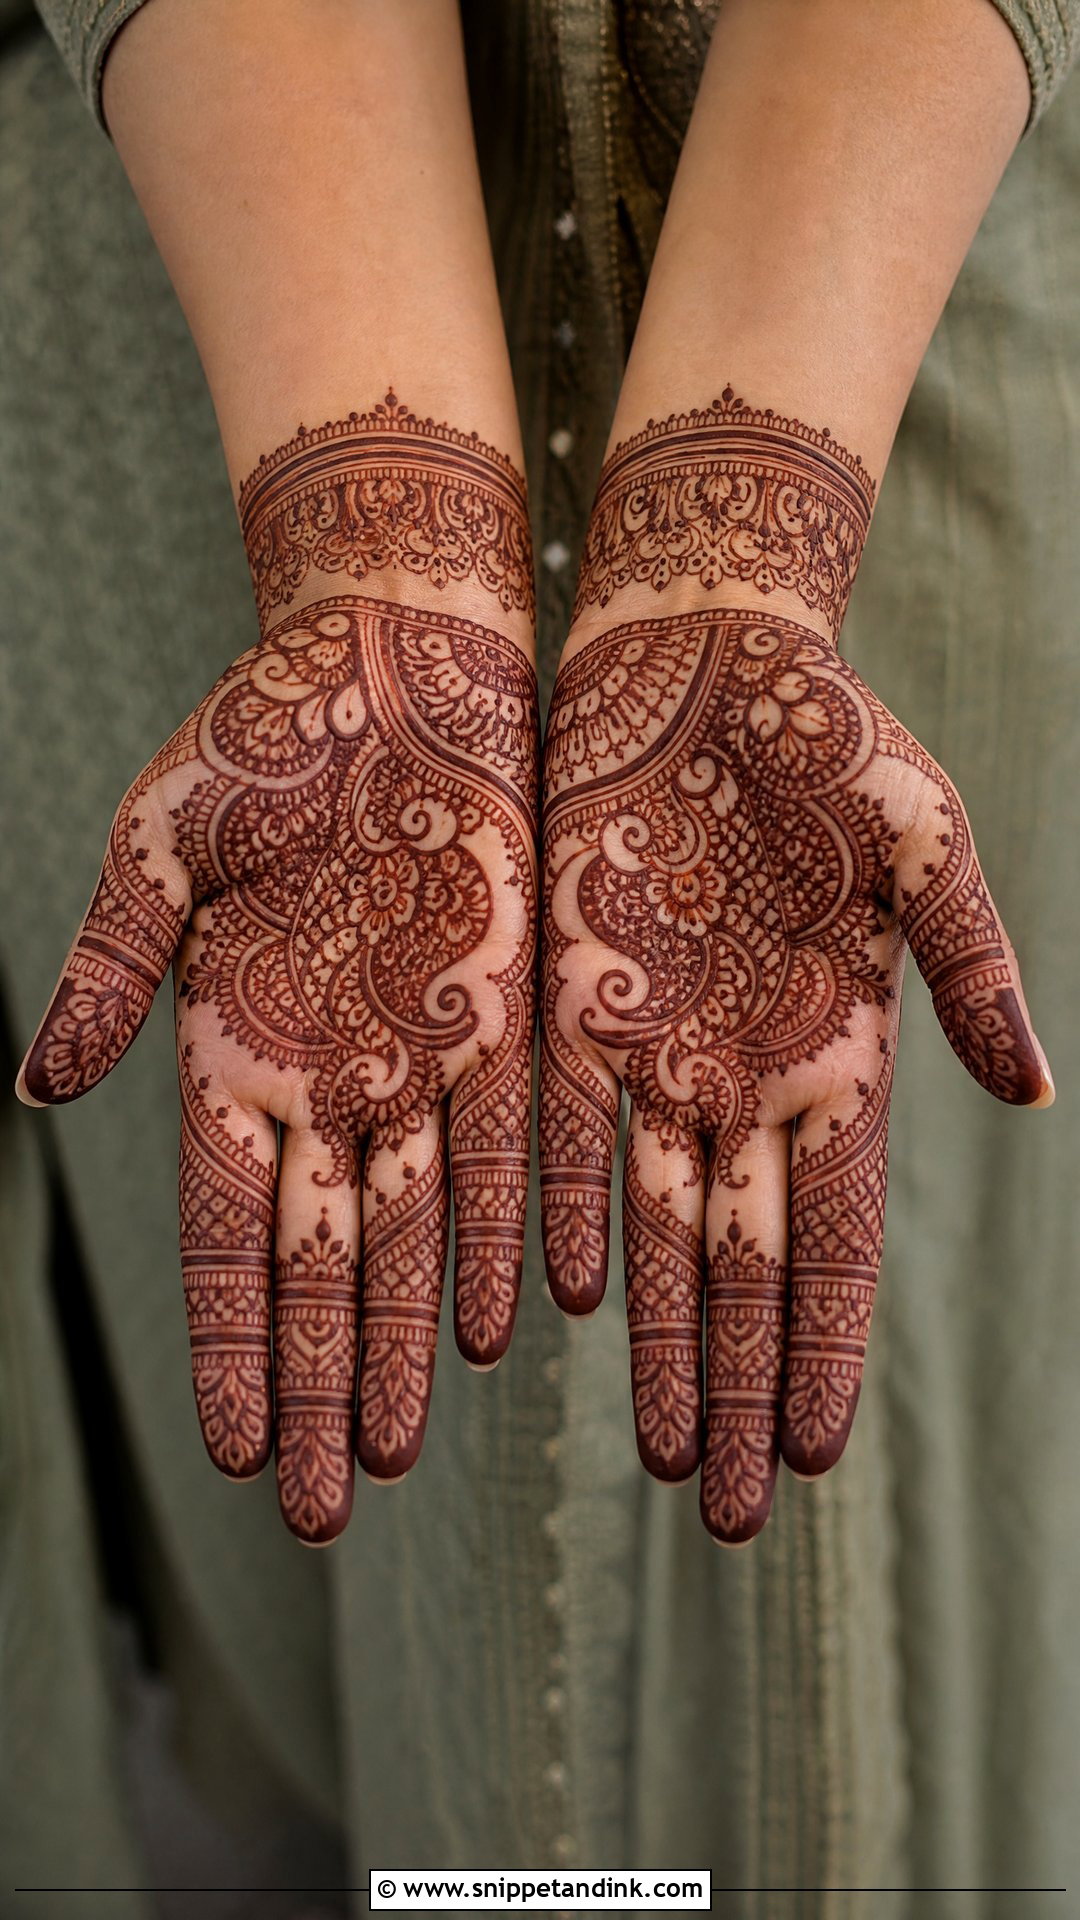
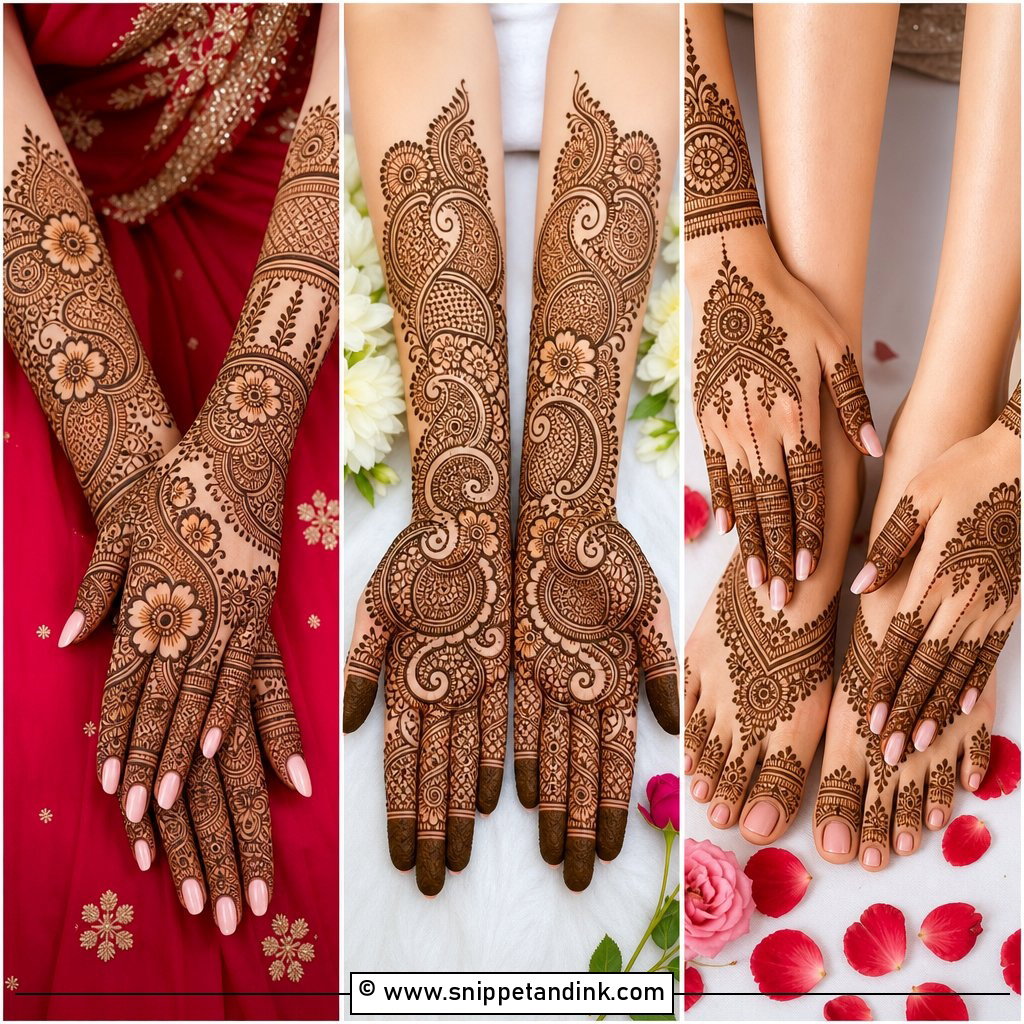
Full palm coverage gives you the richness of bridal mehndi without going up the arm. The palm fills with connected paisleys, florals, dots and vines, the fingers are decorated base to tip, and the wrist gets a bracelet border. Where these go wrong is even density. If every area is equally packed, the stain reads as one dark patch, so I alternate bold outlines with fine fill and leave thin channels of skin between sections. It suits festivals, engagements and family events, and it’s comfortable enough to sleep in.
4. Bridal Inside Mehndi Design
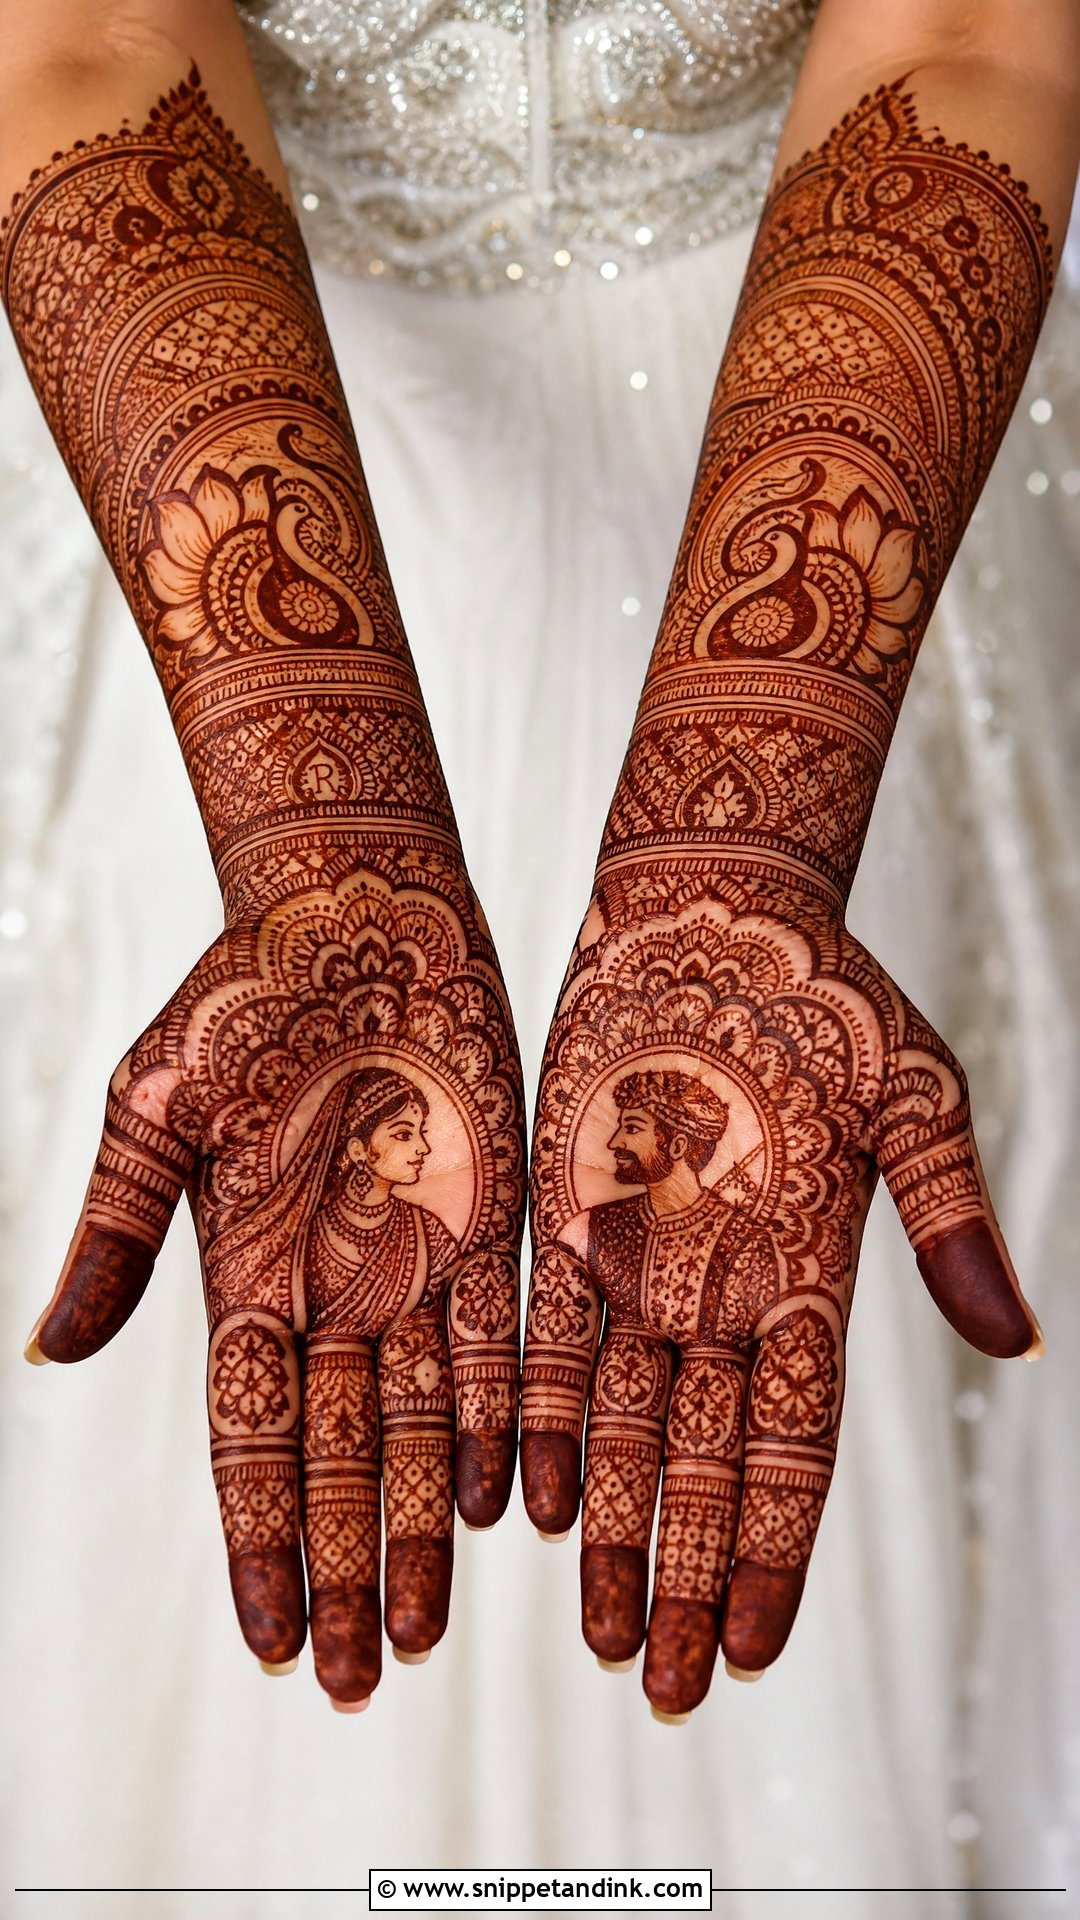
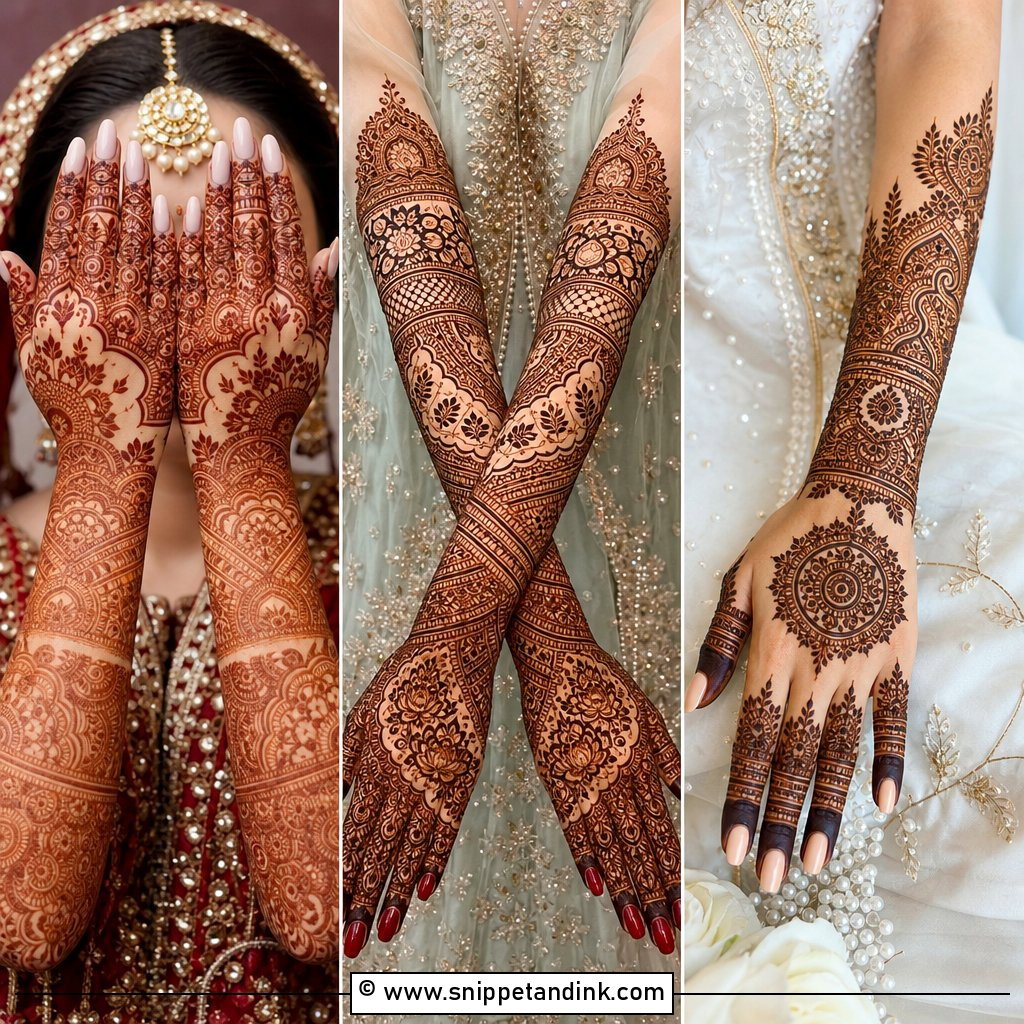
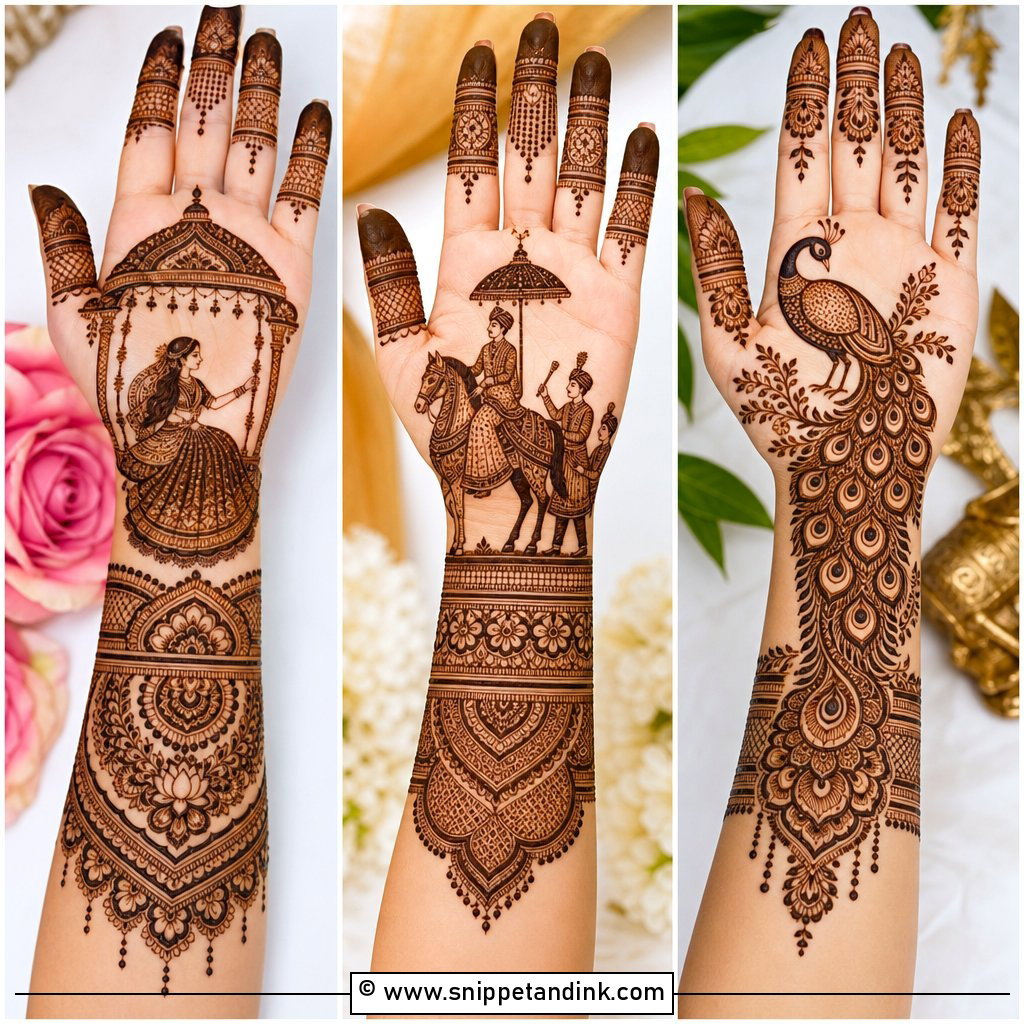
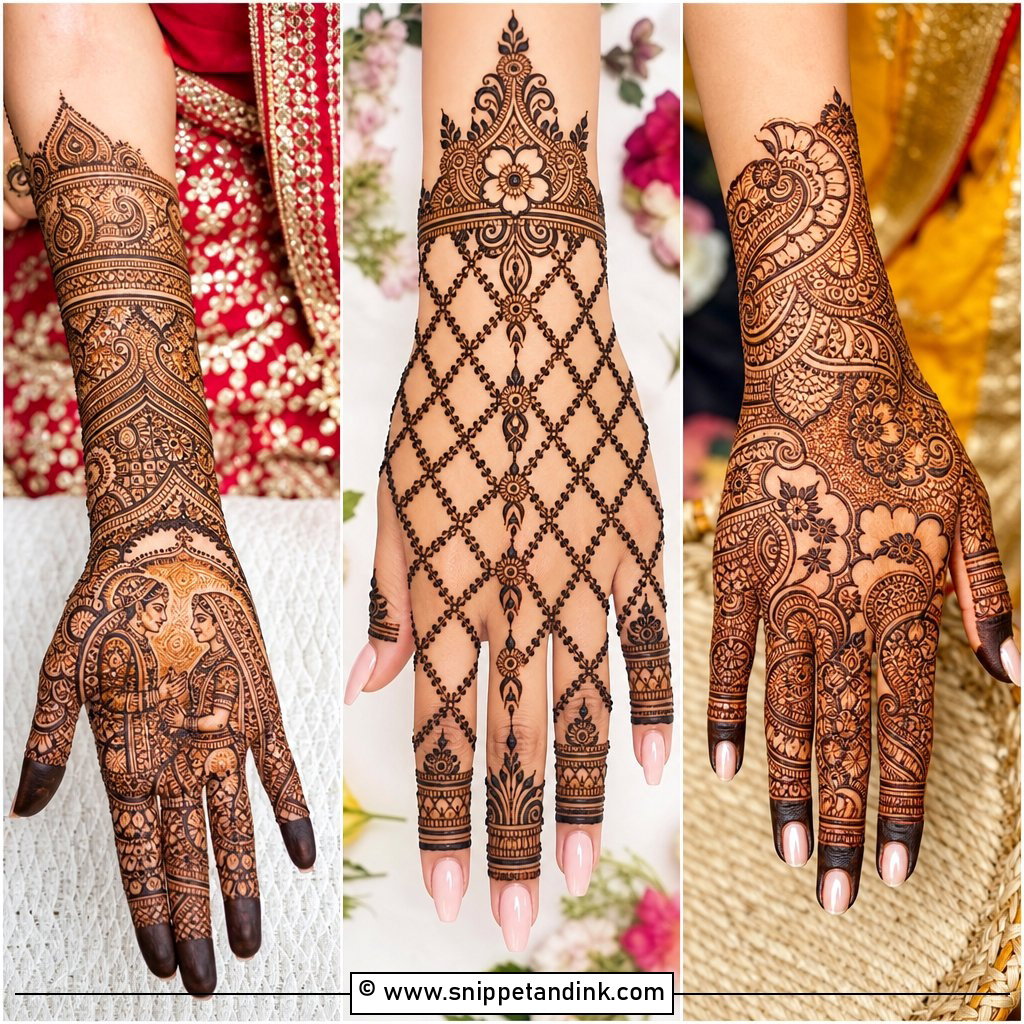
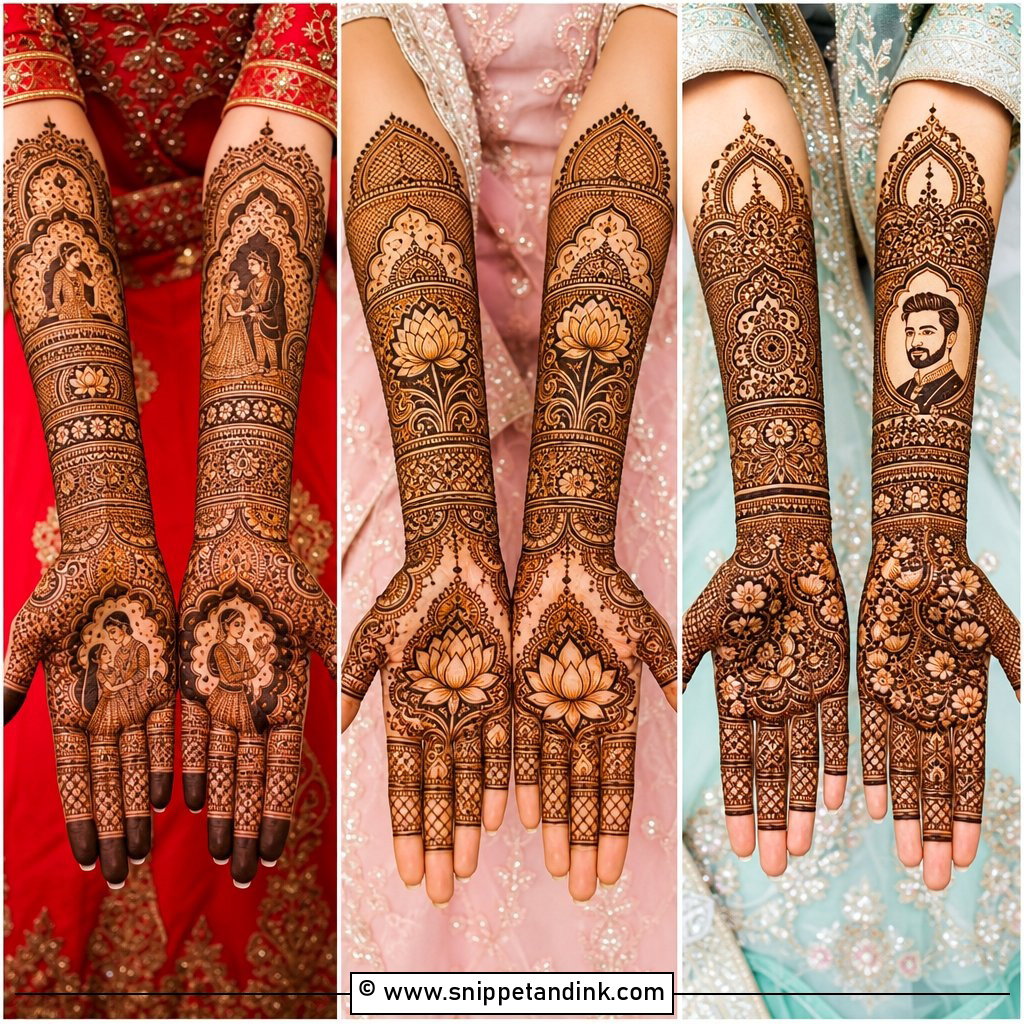
Bridal palms are where a design can tell a story: large mandalas, a bride and groom pair, peacocks, lotus, paisleys, and often the groom’s initials hidden somewhere for him to find. Fingers get fine lines, leafy grids and ornamental bands, and the cuffs carry on up the wrist and forearm. I keep the two hands symmetrical for a traditional bride, then plan the faces and figures so they sit flat on the palm instead of across a crease, where features distort when the hand bends. A deep maroon stain is what makes all this detail visible in close-up ritual photos.
5. Floral Inside Mehndi Design
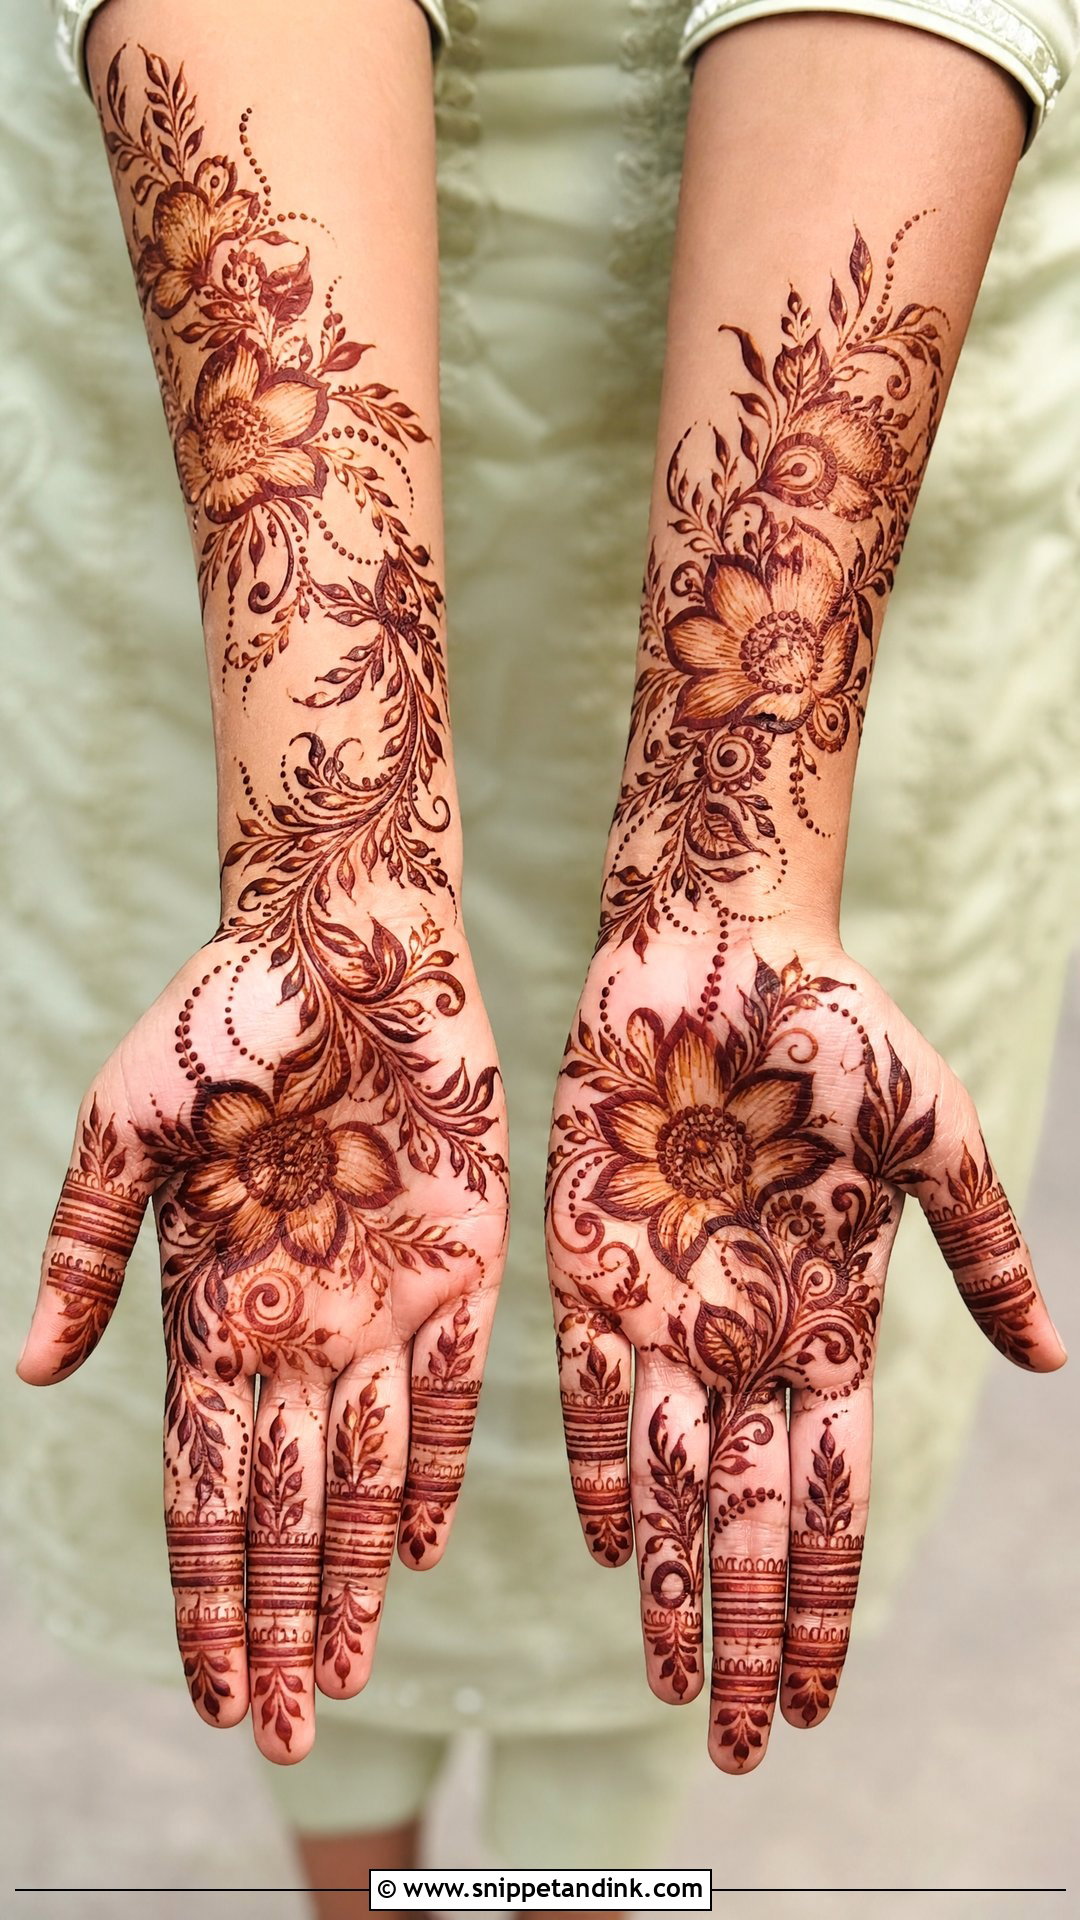
Flowers across the palm look fresh as long as they aren’t crowded. You can use one large flower in the center or several medium ones joined by vines, with leafy curves leading toward the fingers and wrist. I keep the petal fill to a few light strokes, because heavy shading inside petals tends to blur together as the stain darkens. Bridesmaids and teenagers who want something pretty without traditional density often pick this, and flowers are easy to recognize in photos, even from a few feet back.
6. Paisley Inside Mehndi Design
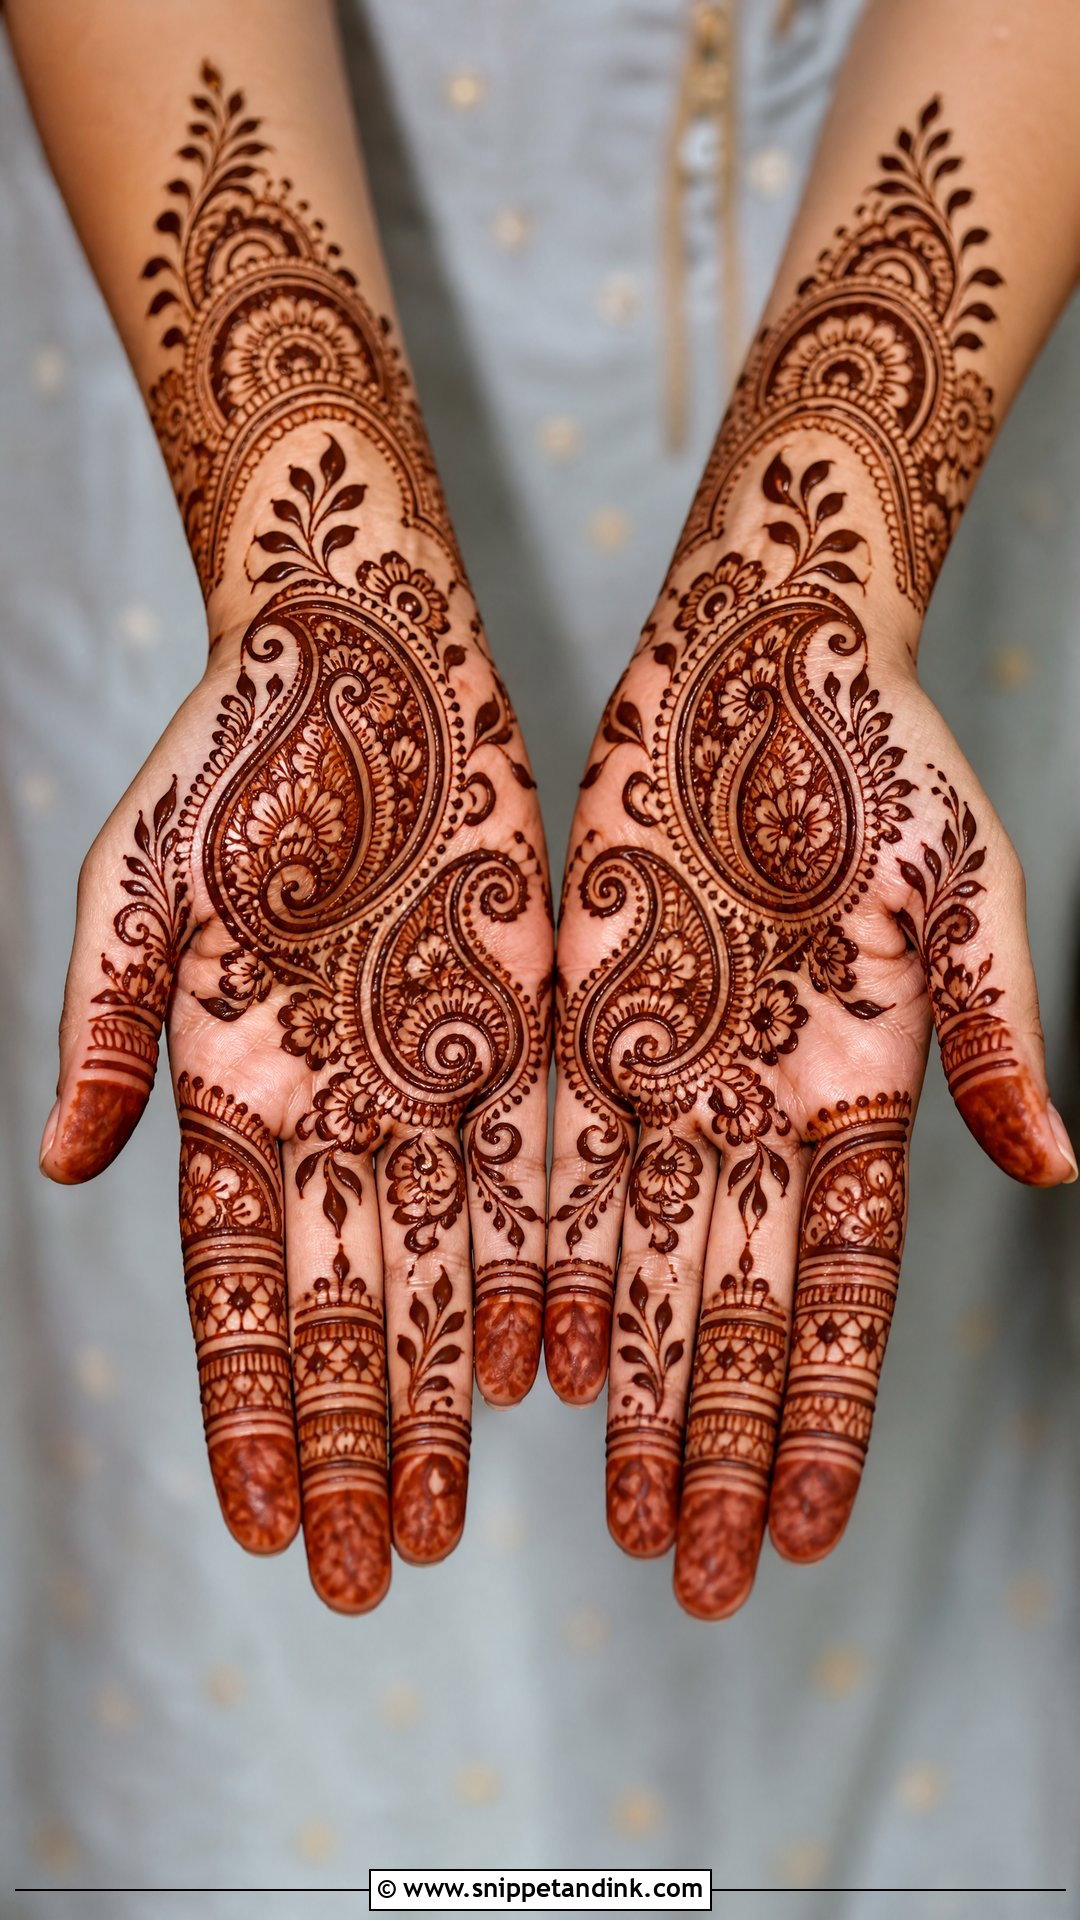
The paisley, or keri, is the shape that makes a palm look unmistakably Indian. Its curve fits the hand, so it can sit in the center, hug one side or repeat in a flowing chain. I fill each one with small petals, dots and curved veins, then add finger bands and a wrist border. On a narrow palm, two medium paisleys look better than one large one, which tends to run into the thumb. It’s traditional without being heavy, which is why it shows up at pujas and festive days as often as at weddings.
7. Tikki Inside Mehndi Design
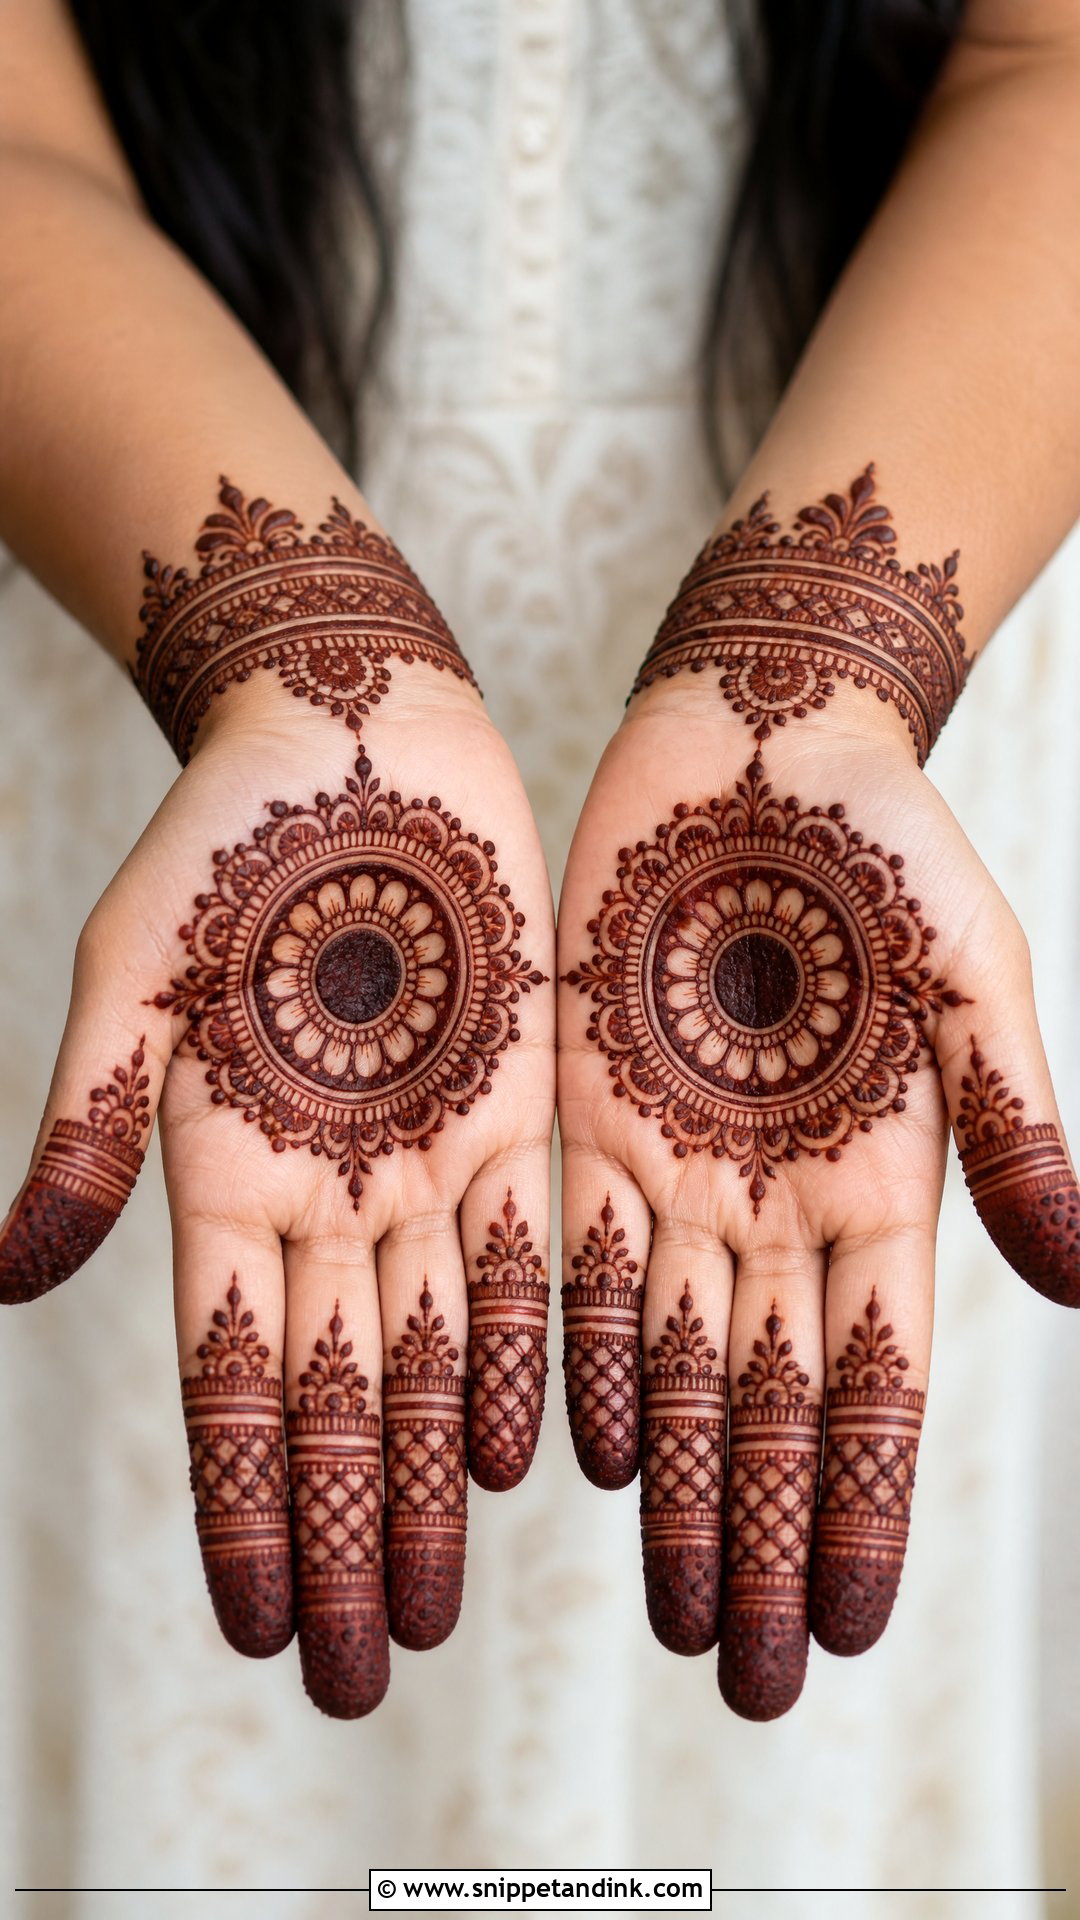
The tikki is the oldest palm design I know and still one of the quickest: a filled or semi-filled circle in the center of the palm, ringed with petals, dots and tiny leaves. Matching fingertips or ring-like bands finish it. A solid tikki needs a smooth, even layer of paste, because thin patches stain lighter and show up as a blotchy circle. For a more current version, I leave a ring of bare skin around it so the edge looks sharp. It’s a favorite for Eid, Teej and Karva Chauth when there’s little time.
8. Lotus Inside Mehndi Design
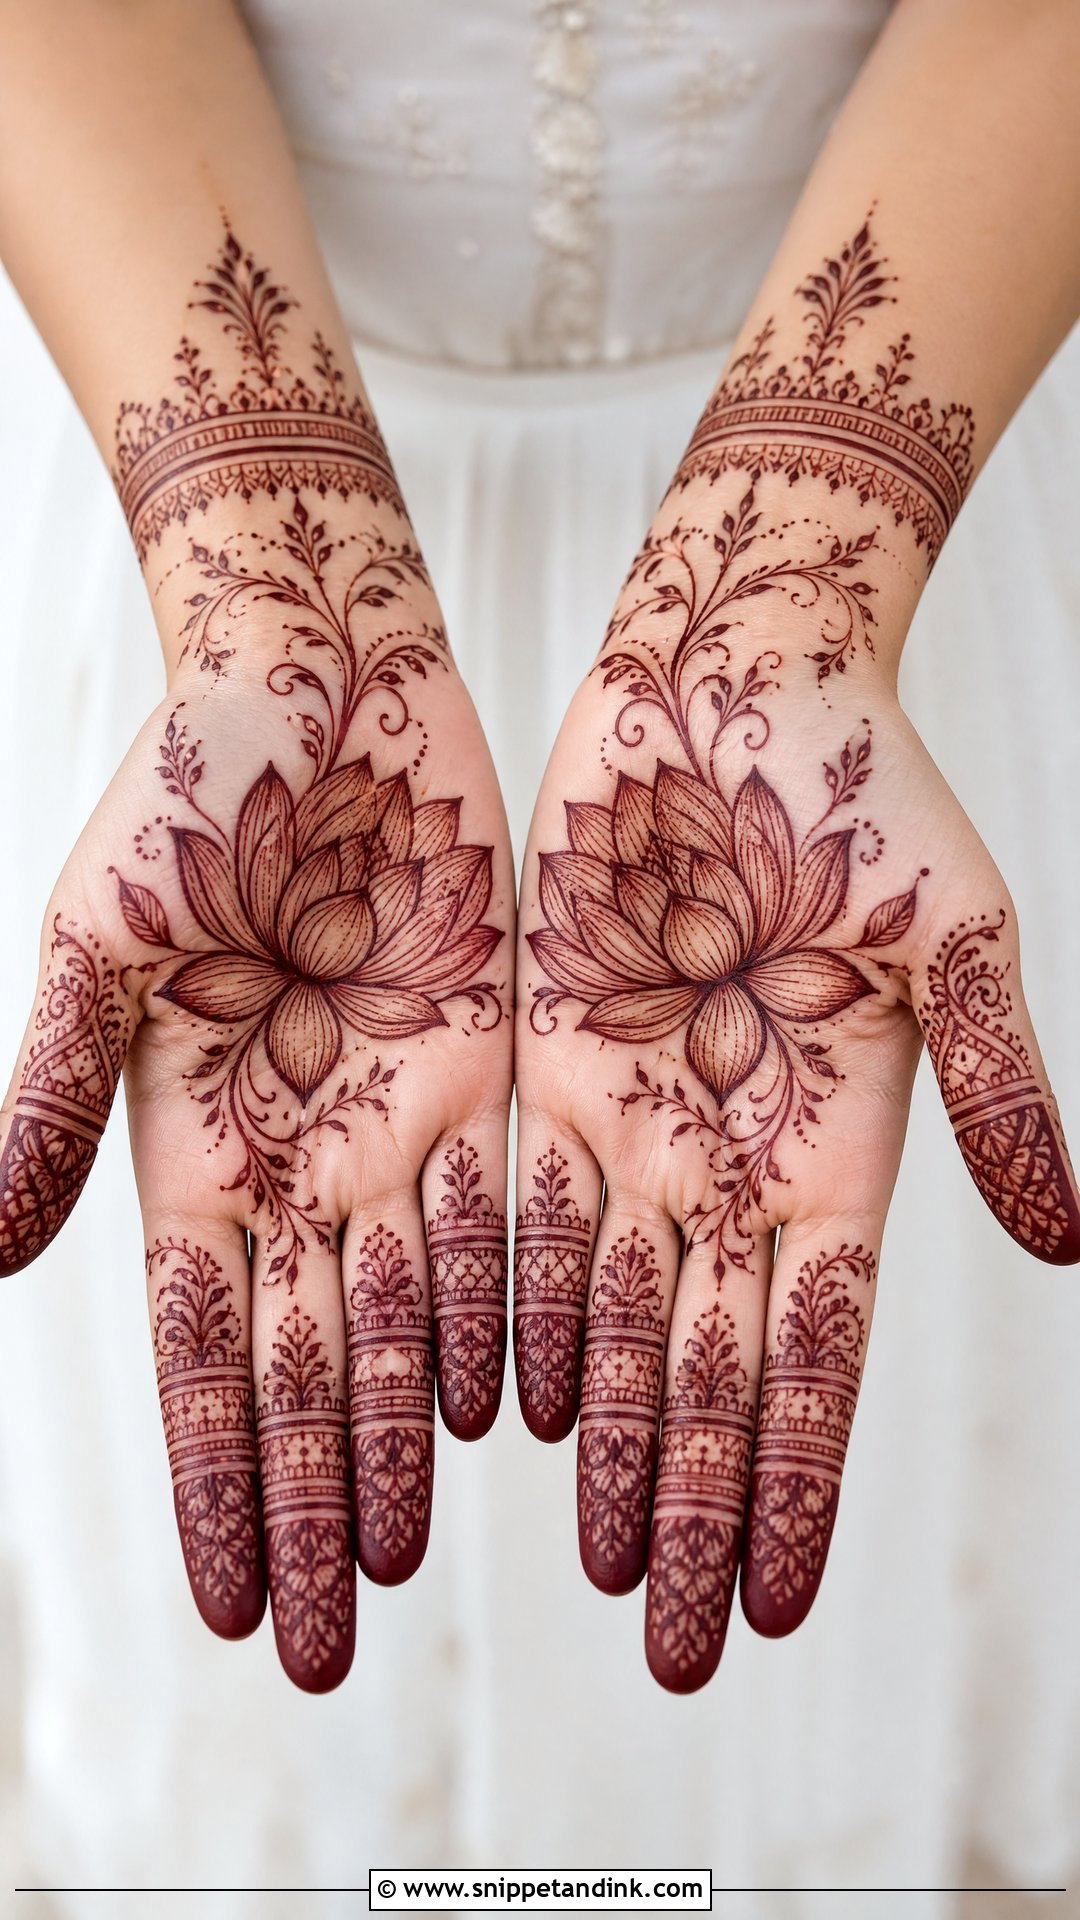
A lotus in the center of the palm, petals opening toward the fingers and wrist, has a calm feel that suits engagement ceremonies and festive prayers. The petals are easy to stretch or shorten, so the motif adapts to wide and narrow palms better than almost any other. Keep it to clean outlines, or add shading, dots and small vines for a richer version. Thin finger detailing and a slim wrist band turn the single motif into a complete hand.
9. Peacock Inside Mehndi Design
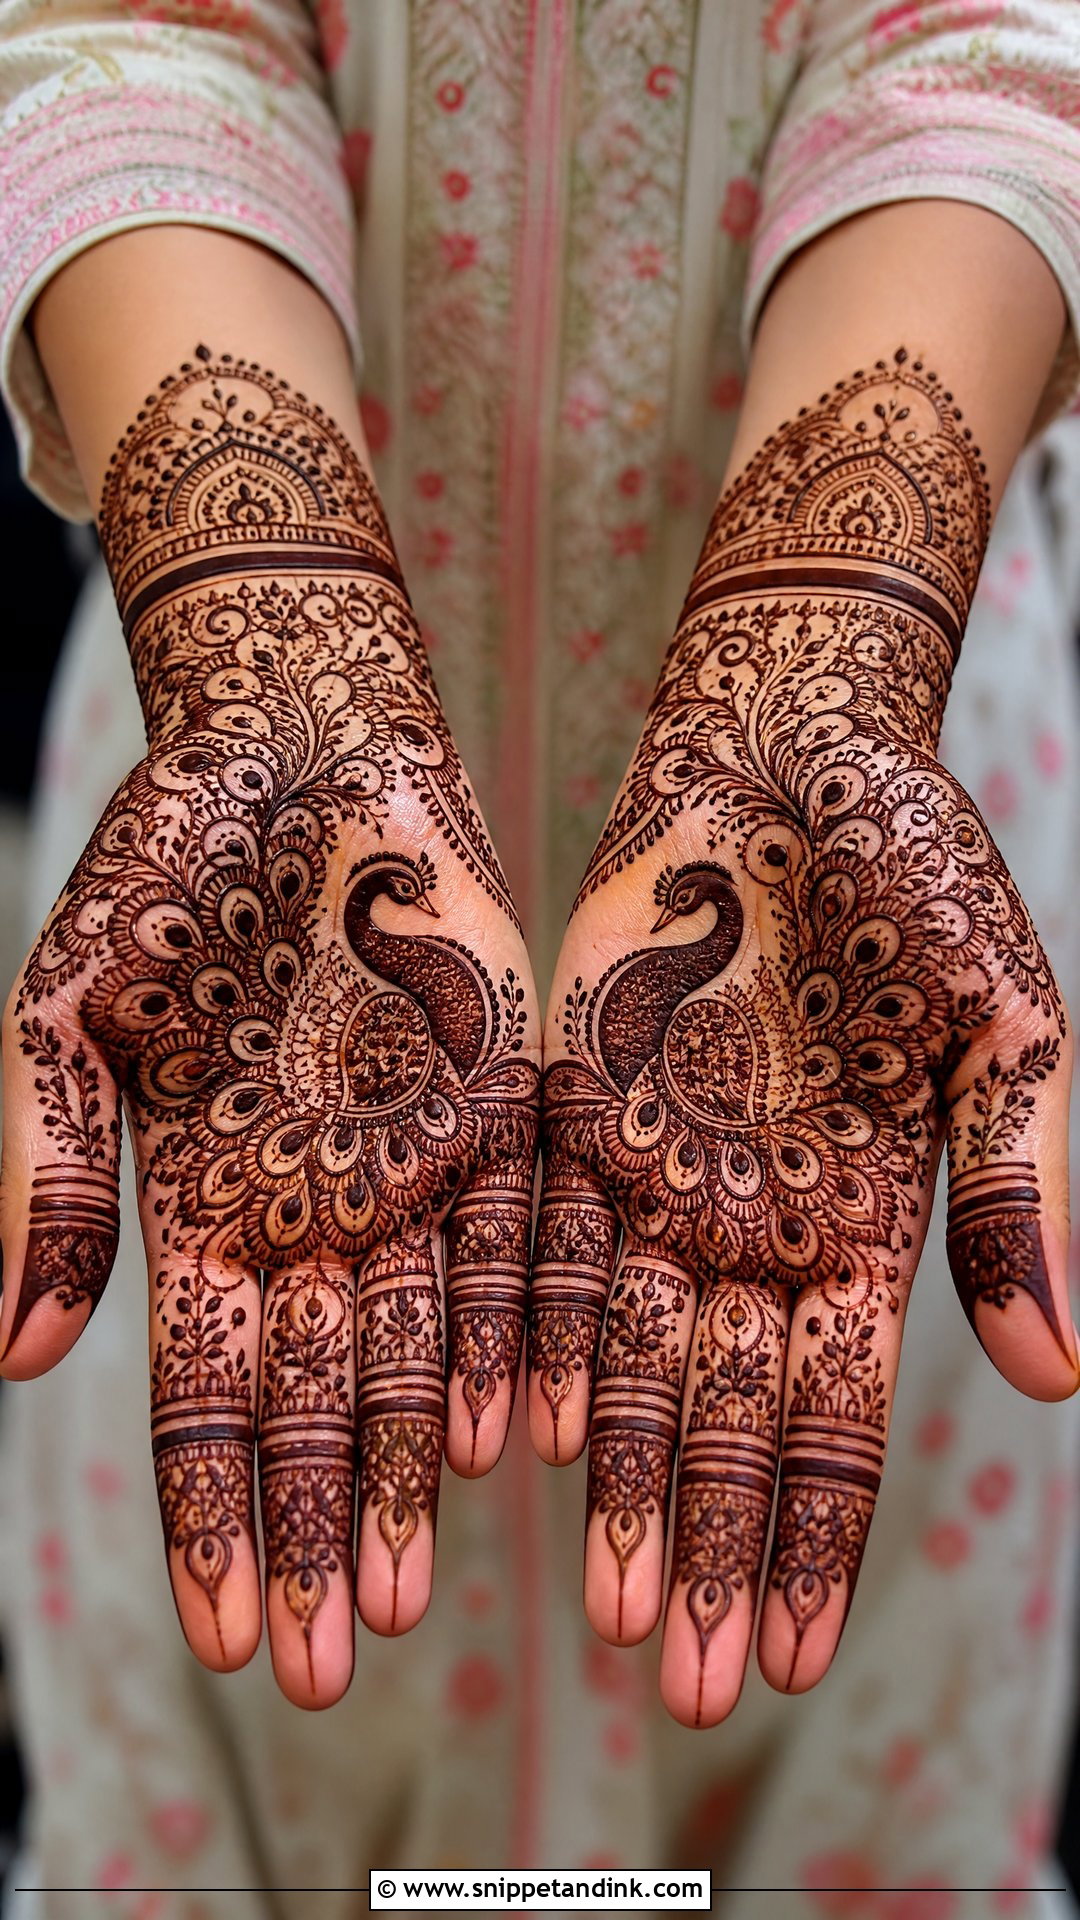
Peacocks look royal, but they’re the motif I see go wrong most. The body needs a clear outline on one side of the palm, with feathers spreading toward the center or up the fingers, filled with small curves, teardrops and fine lines. If the surroundings get busy, the bird disappears, so I leave a margin of plain skin around the neck and head. It’s a strong choice for bridal functions, sangeet and Diwali, finished with decorated fingers and a curved wrist border.
10. Jaali Inside Mehndi Design
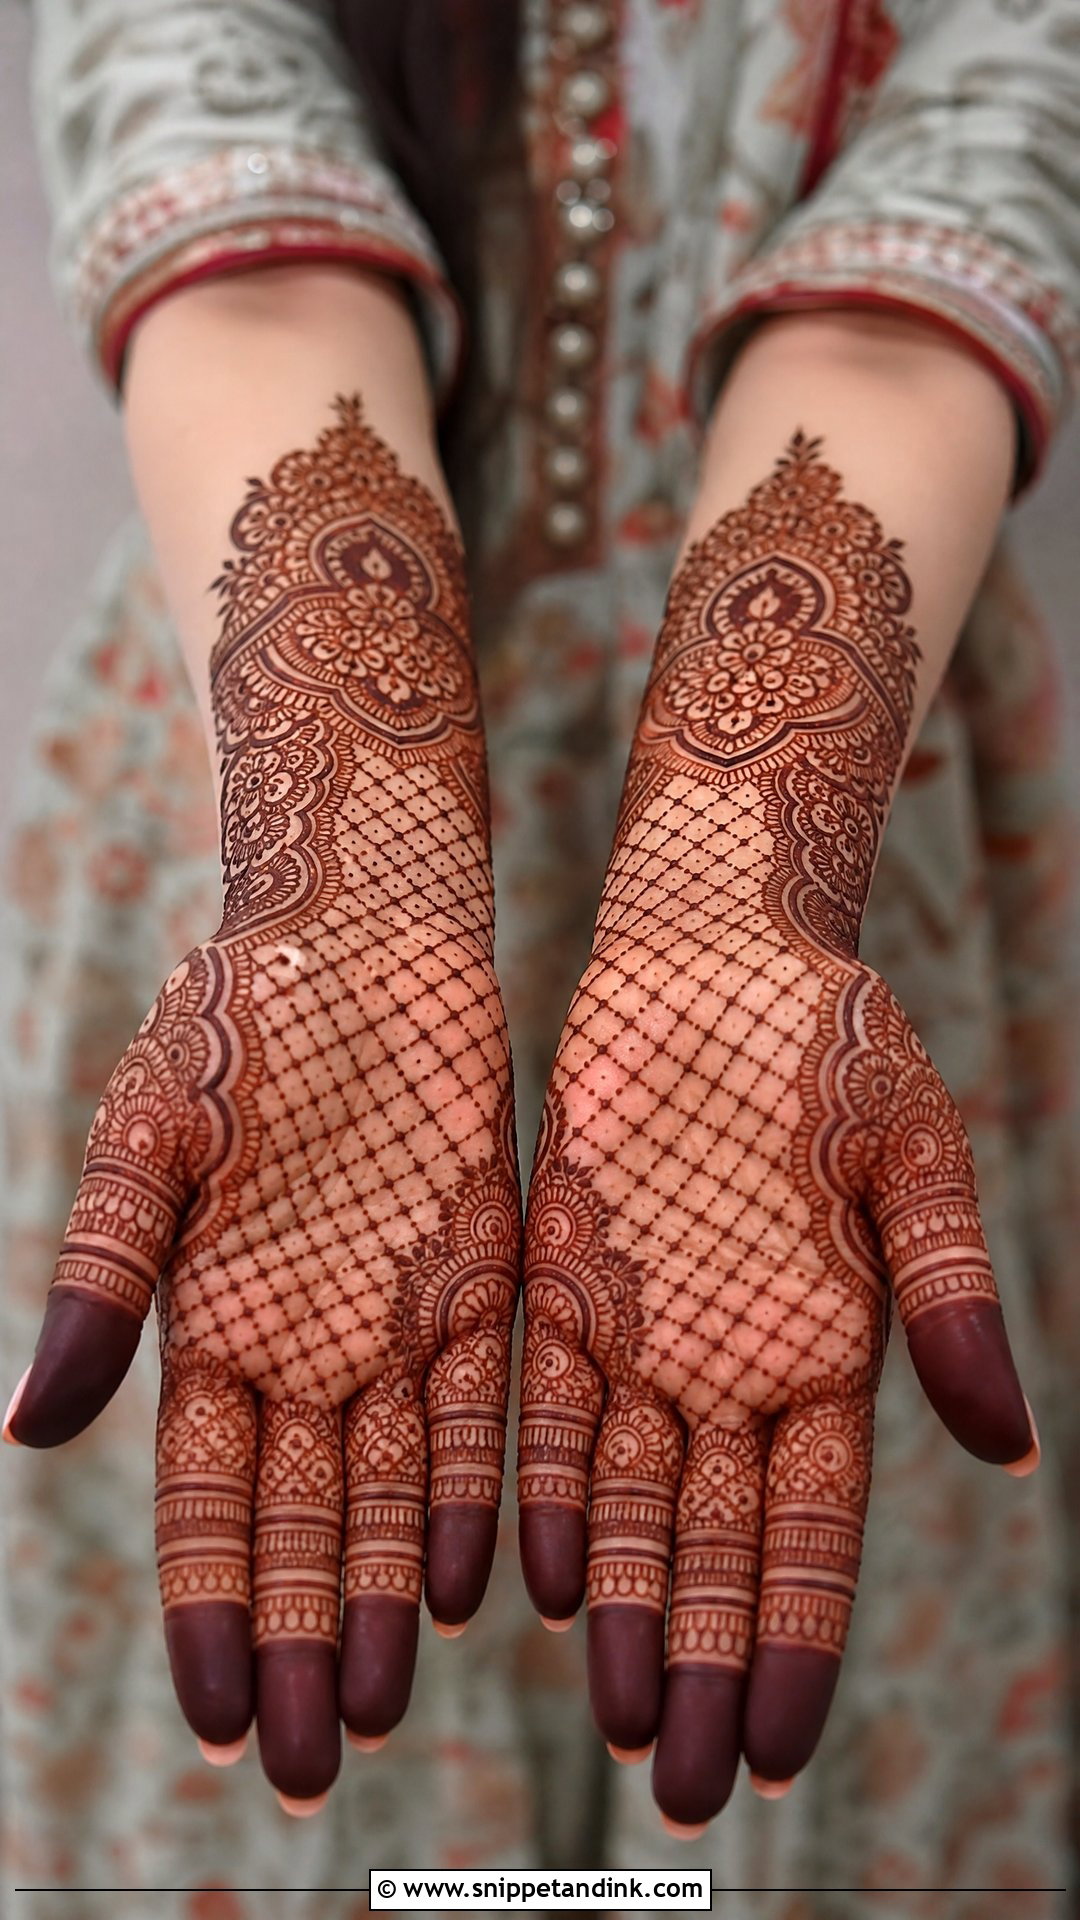
Jaali is the mesh pattern I reach for when someone wants a full-hand effect without a dark palm. It can cover part of the palm, sit inside a mandala or form a side panel beside flowers and paisleys. Diamond grids, tiny dots and fine borders keep it polished. The lines have to be thin and evenly spaced, so I use a fine cone tip and fresh, smooth paste; lumpy paste breaks a grid line and the gap shows up clearly in the stain. It pairs as easily with a lehenga as with a modern outfit.
11. Indo Arabic Inside Mehndi Design
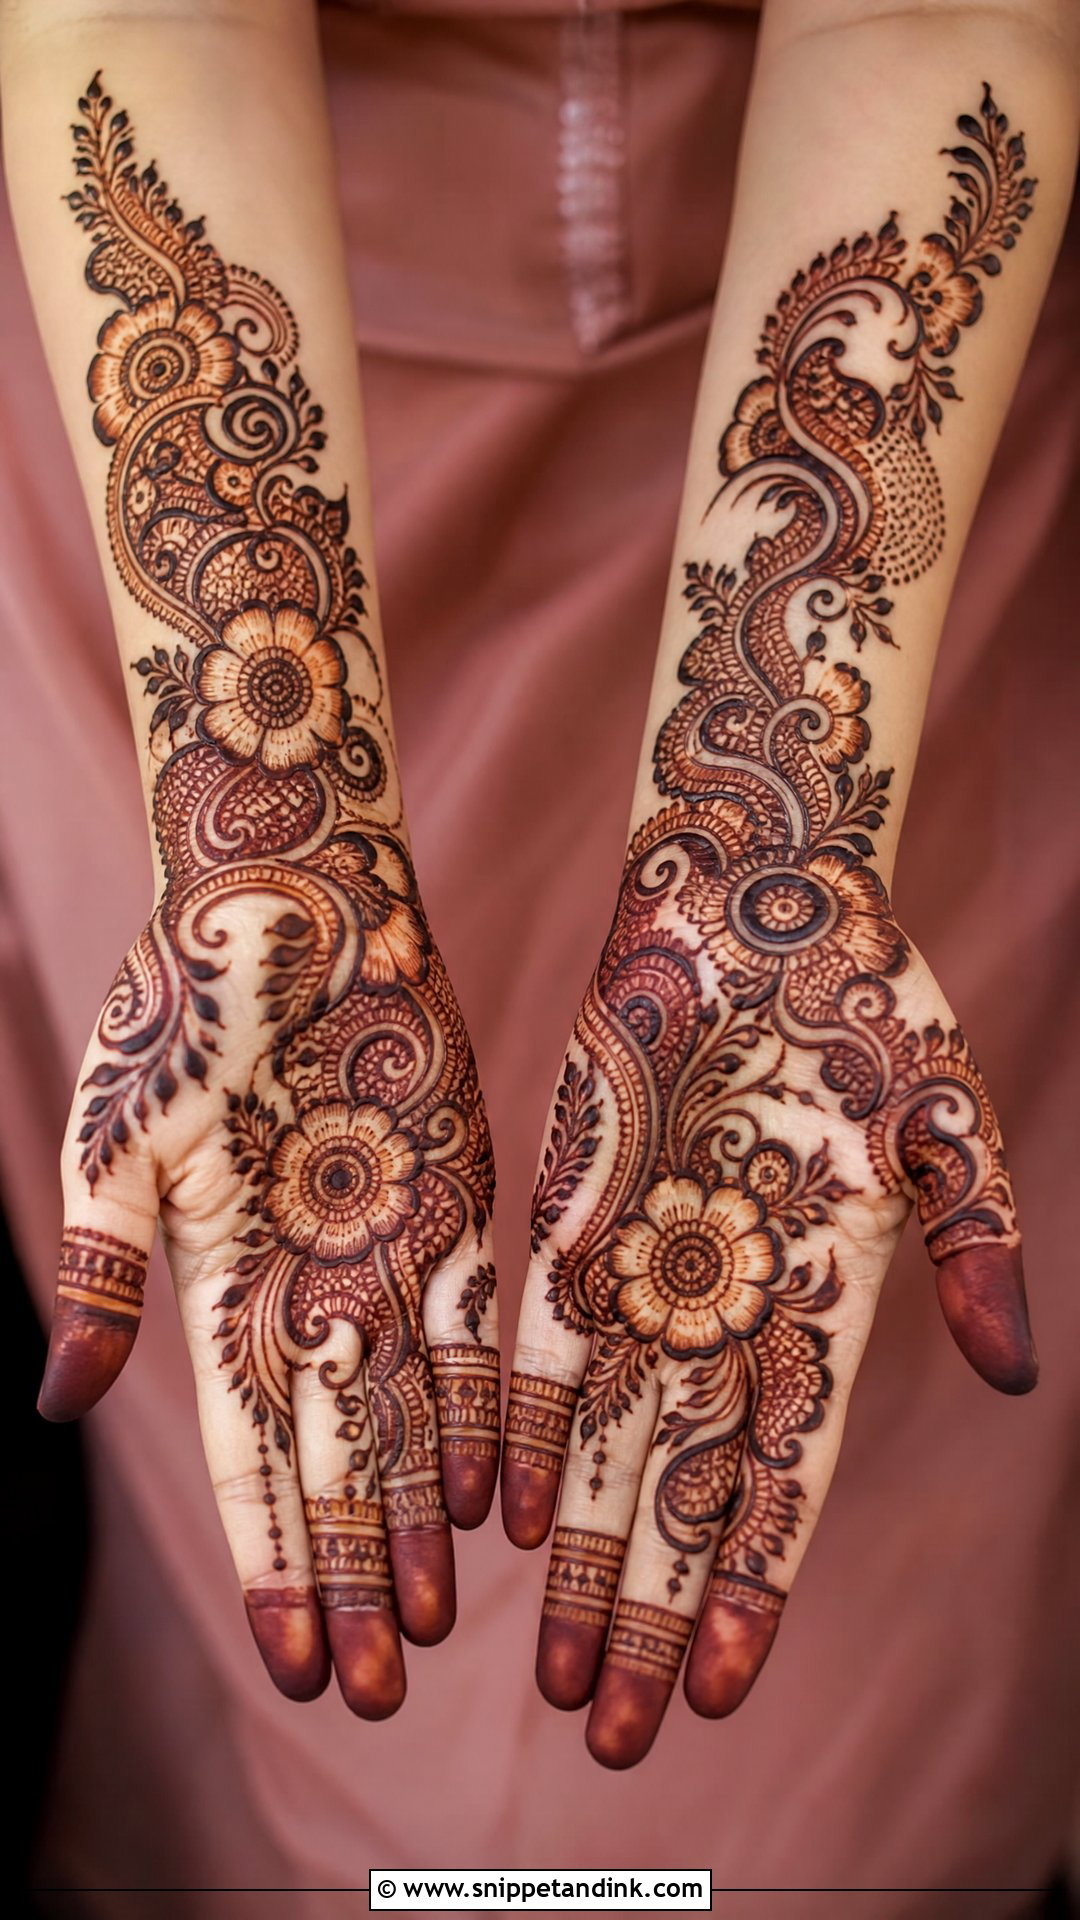
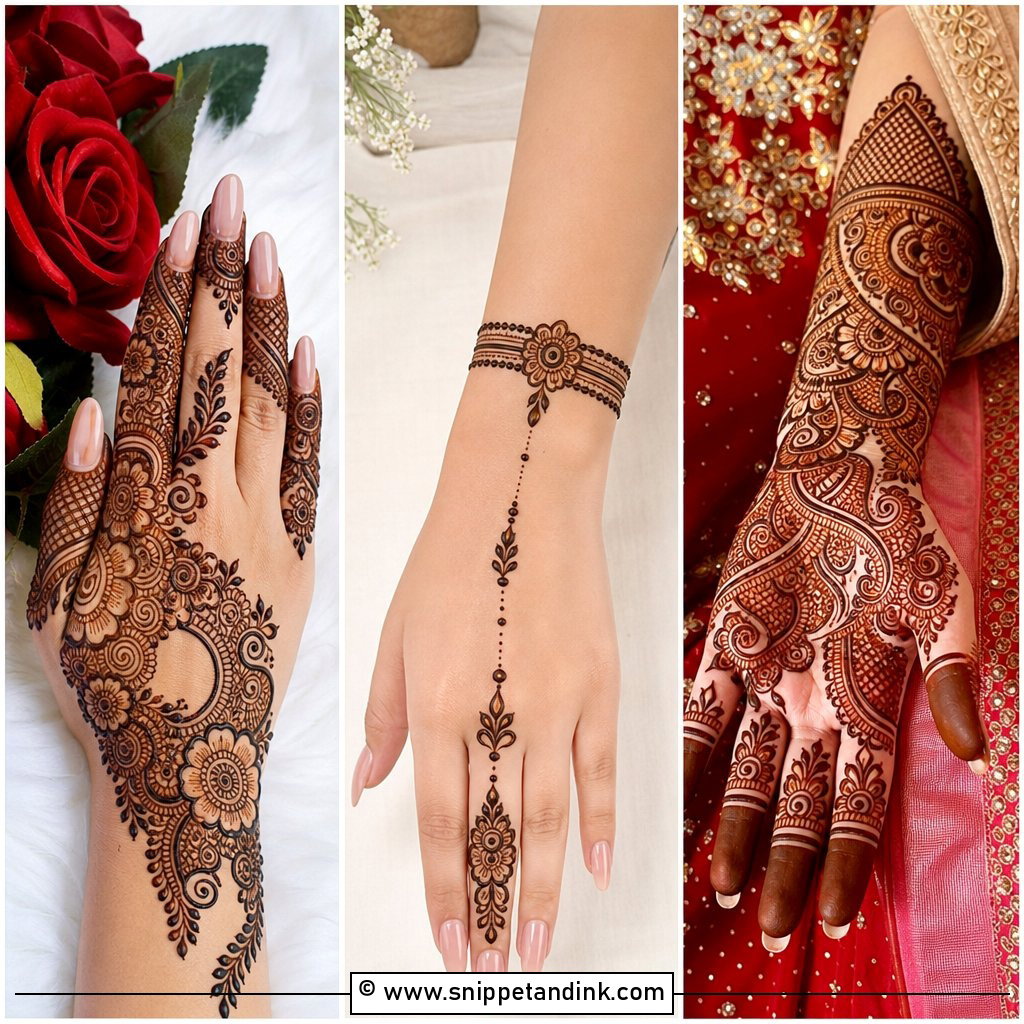
Indo Arabic takes the bold diagonal flow of Arabic mehndi and fills it with Indian detail: paisley filling, mini mandalas, dots and finger bands along a floral trail. The result looks full in photos while still showing skin between motifs. I keep the main flowers bold and the inner details fine, because that contrast is what makes it work. It suits almost any occasion, which is why it’s the design I suggest when someone can’t decide.
12. Minimal Inside Mehndi Design
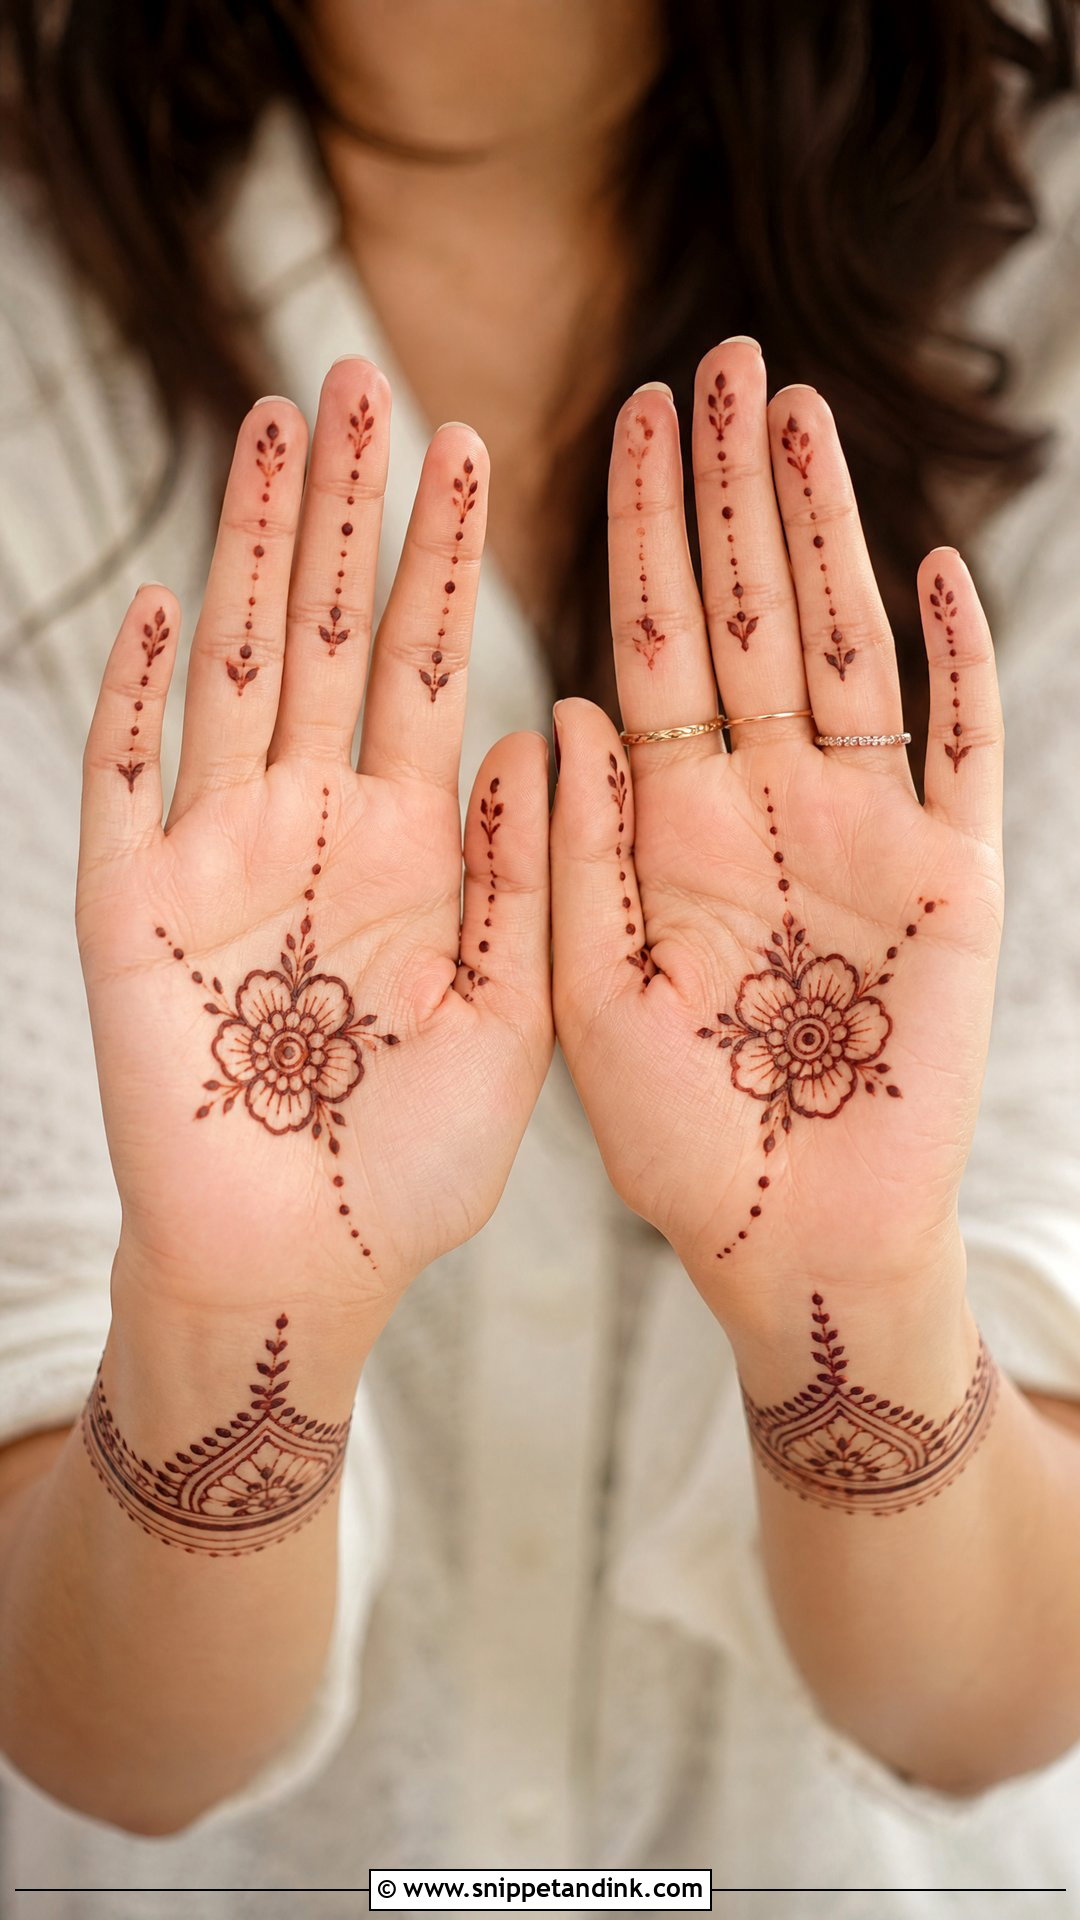
Very little paste, a clean palm and lots of open space. A small flower, a tiny mandala, a delicate vine or a simple geometric center is enough, with light rings, dots and leafy tips on the fingers. It’s what I suggest for office-friendly festive looks, school events and first-timers. People who dislike the tight, cracking feel of dried paste over a whole palm usually prefer this too.
13. Finger Focus Inside Mehndi Design
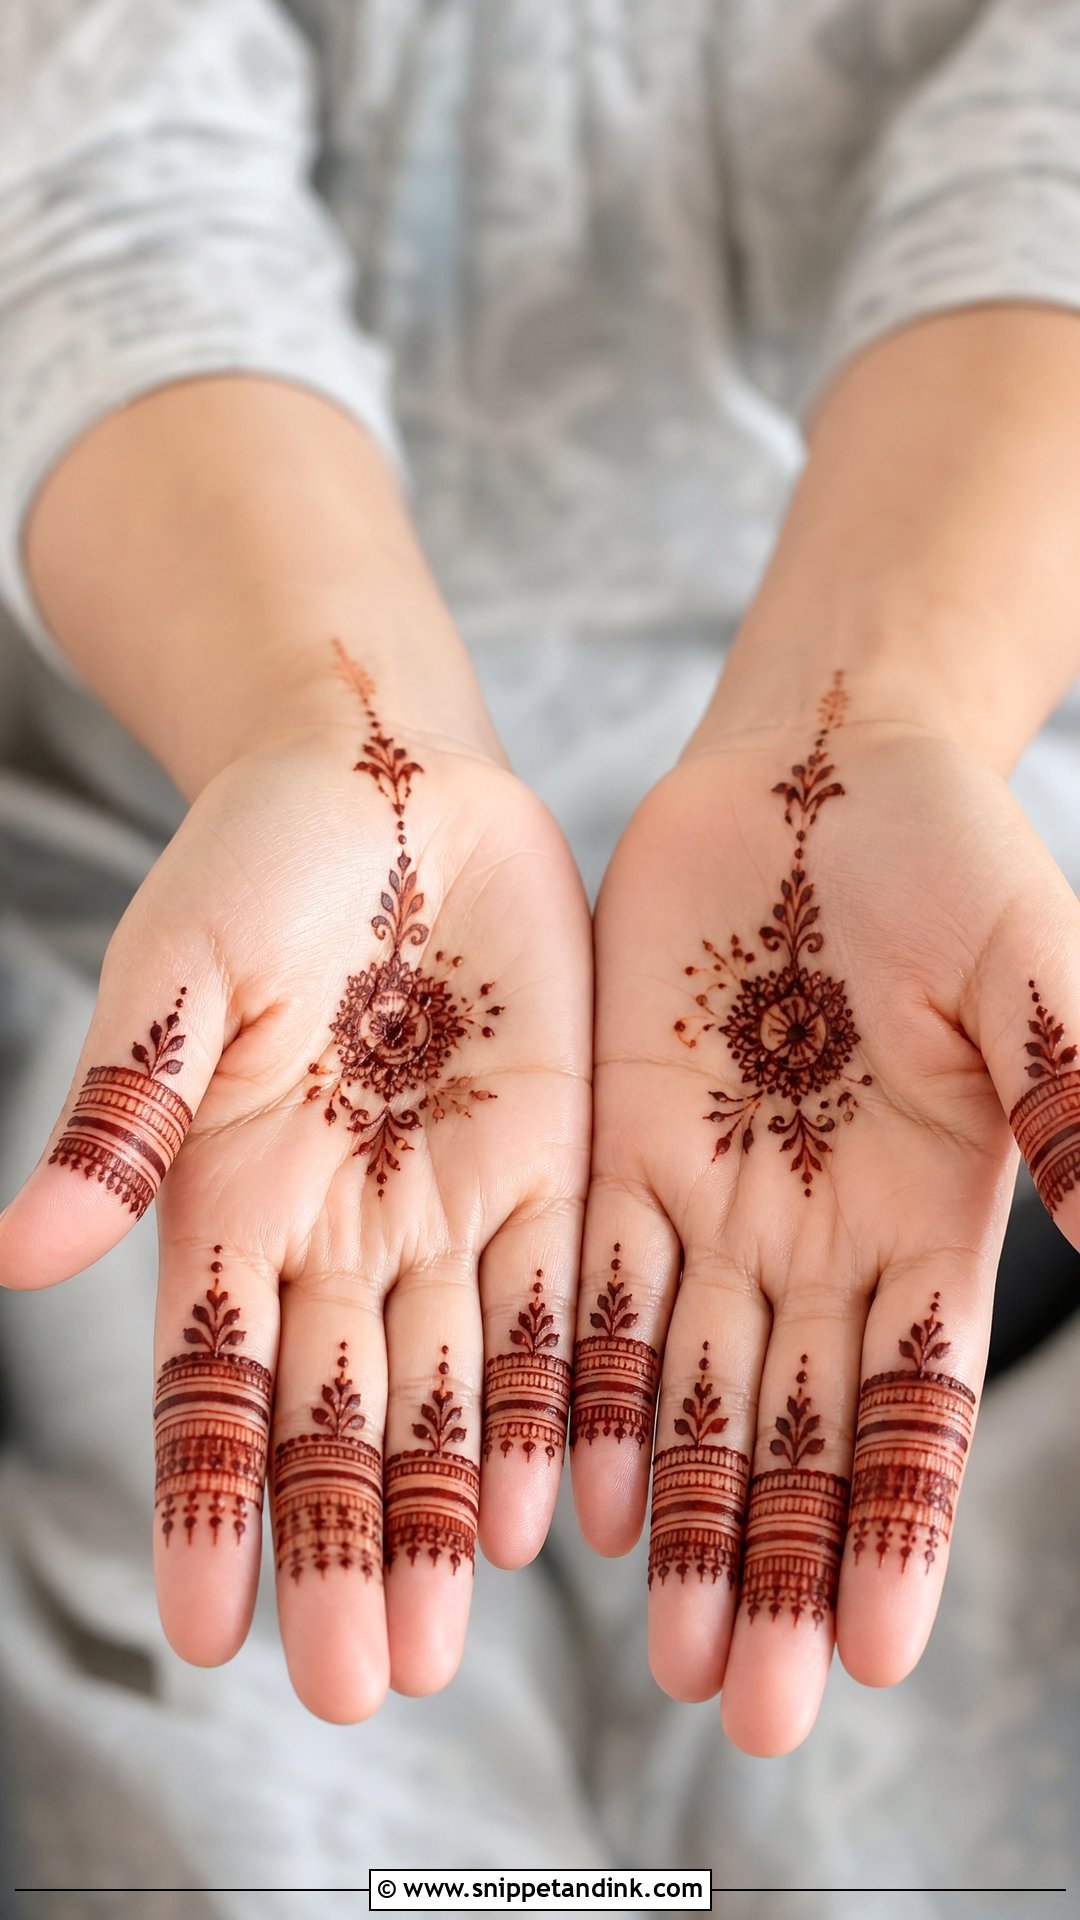
Putting the detail on the inner fingers keeps the palm light while the hand still looks decorated. The palm may hold only a small center motif or a curved line, and each finger gets bands, leaves, dots, mesh and tiny florals. It dries faster than dense palm work and suits anyone who wears rings. Fingertips stain the darkest of anything on the hand, so even fine finger work reads well. I make the fingers similar rather than identical, which keeps the handmade feel.
14. Half Hand Inside Mehndi Design
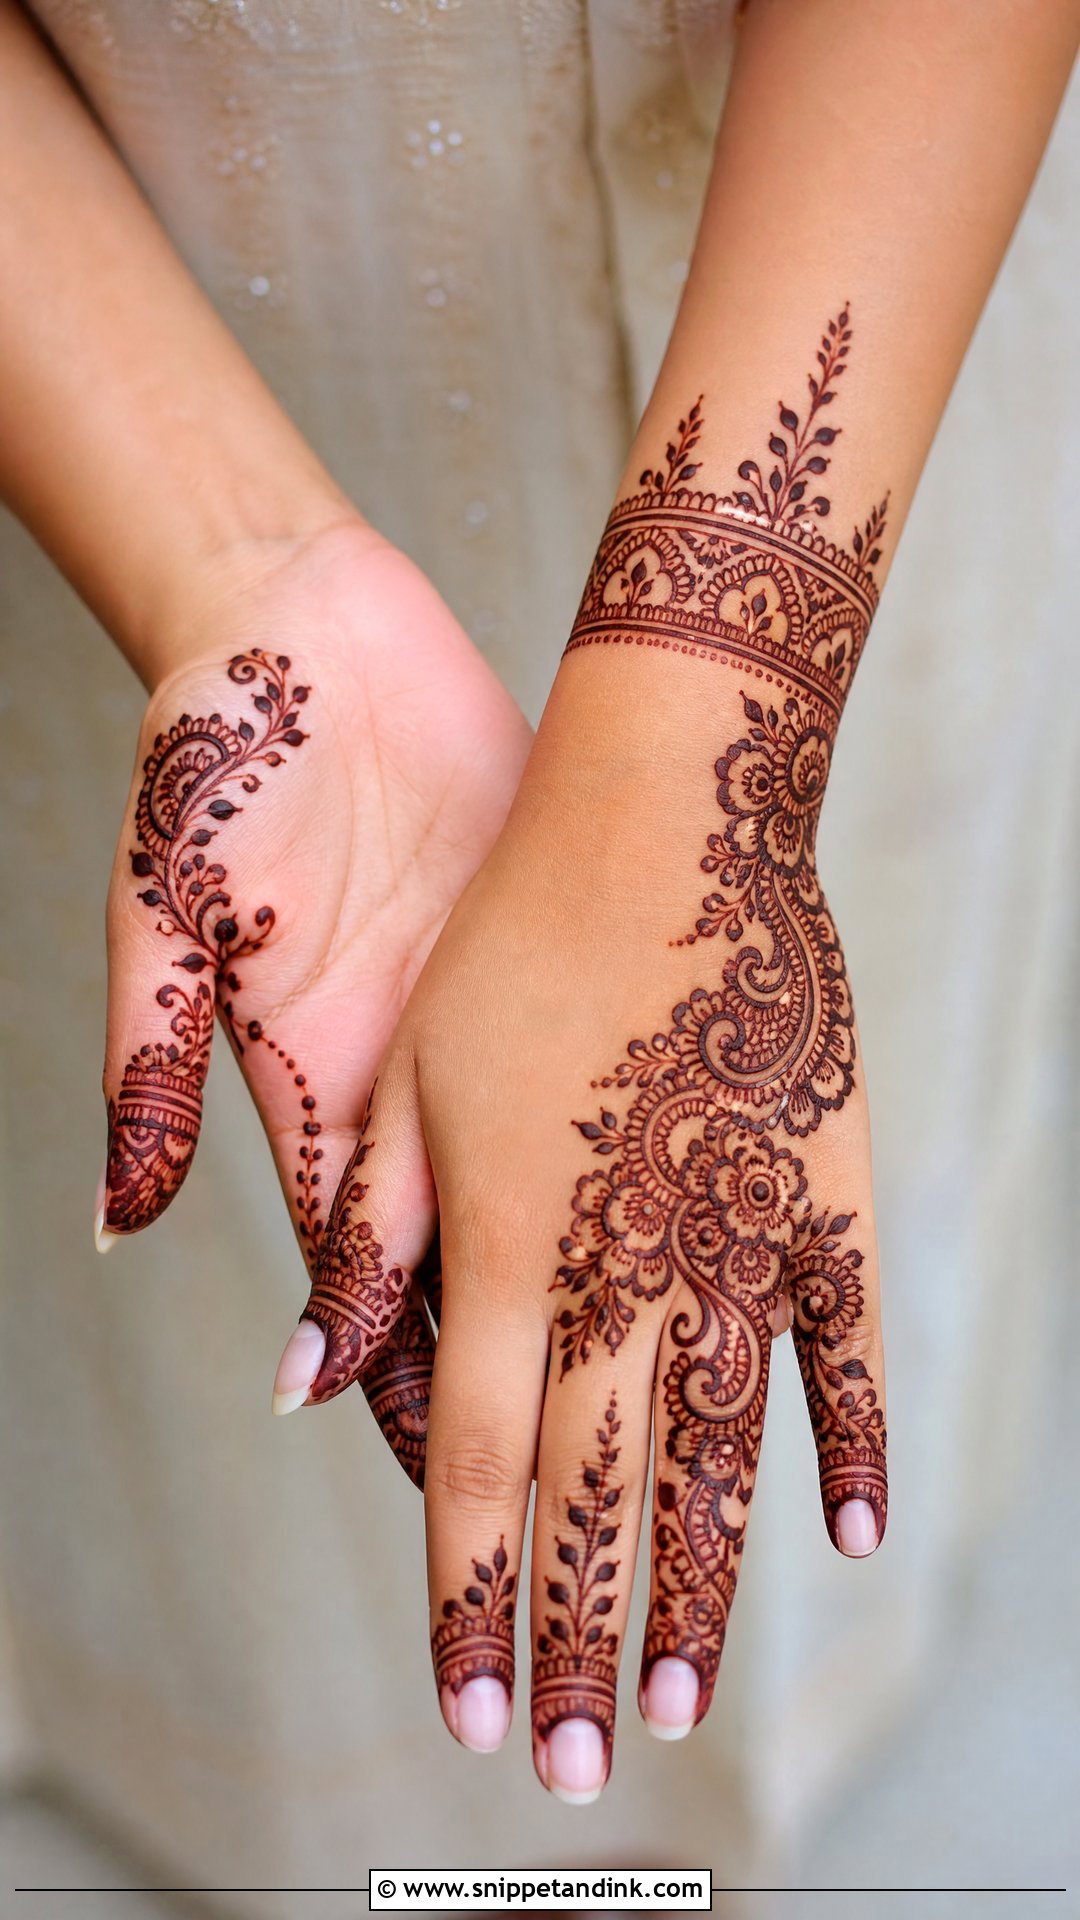
Half-hand designs cover either the lower palm near the wrist or one side of the palm, leaving the rest open for contrast. One common layout starts with a wrist cuff and grows upward with florals, paisleys and vines; another fills only the thumb side on a diagonal. When I plan a half hand, I stop the pattern along a natural line such as the lifeline crease, so the edge looks intended rather than abandoned. It’s also easy to extend later if you decide on a fuller look.
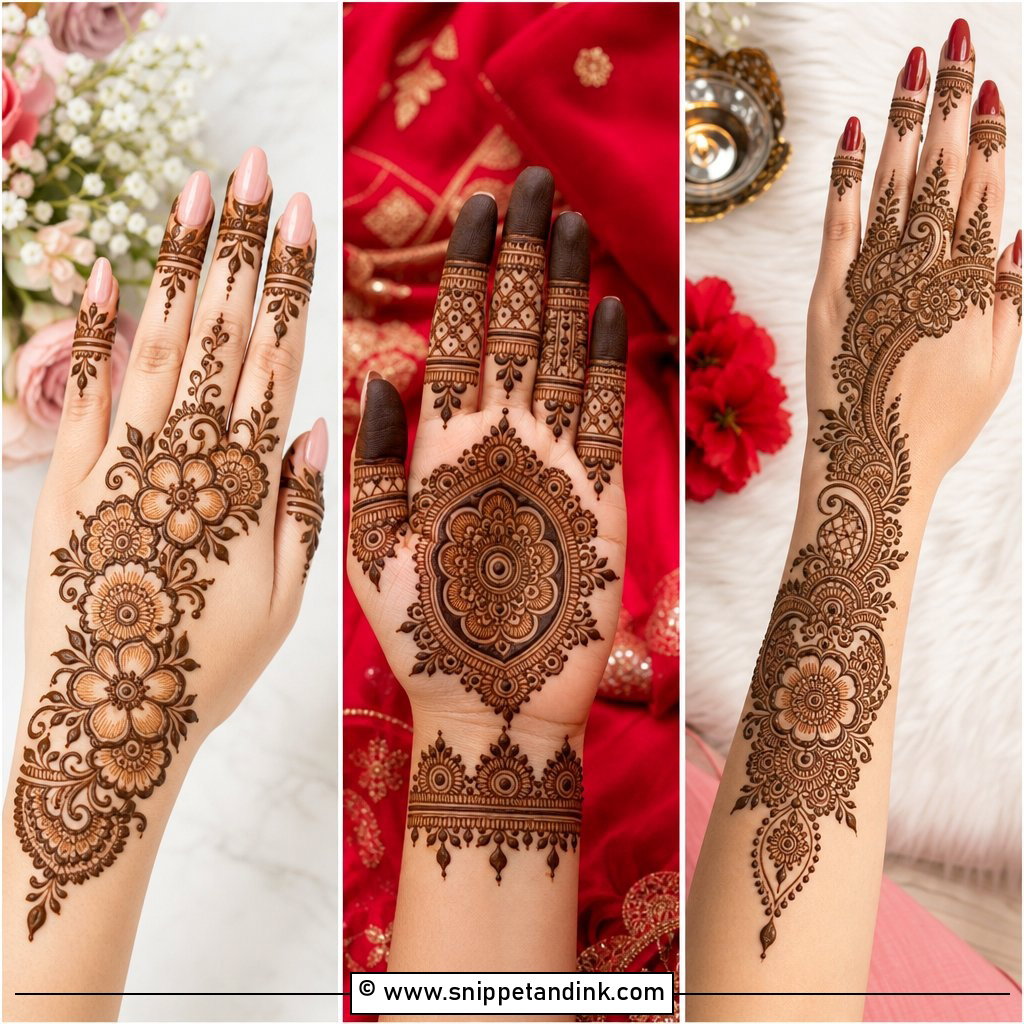
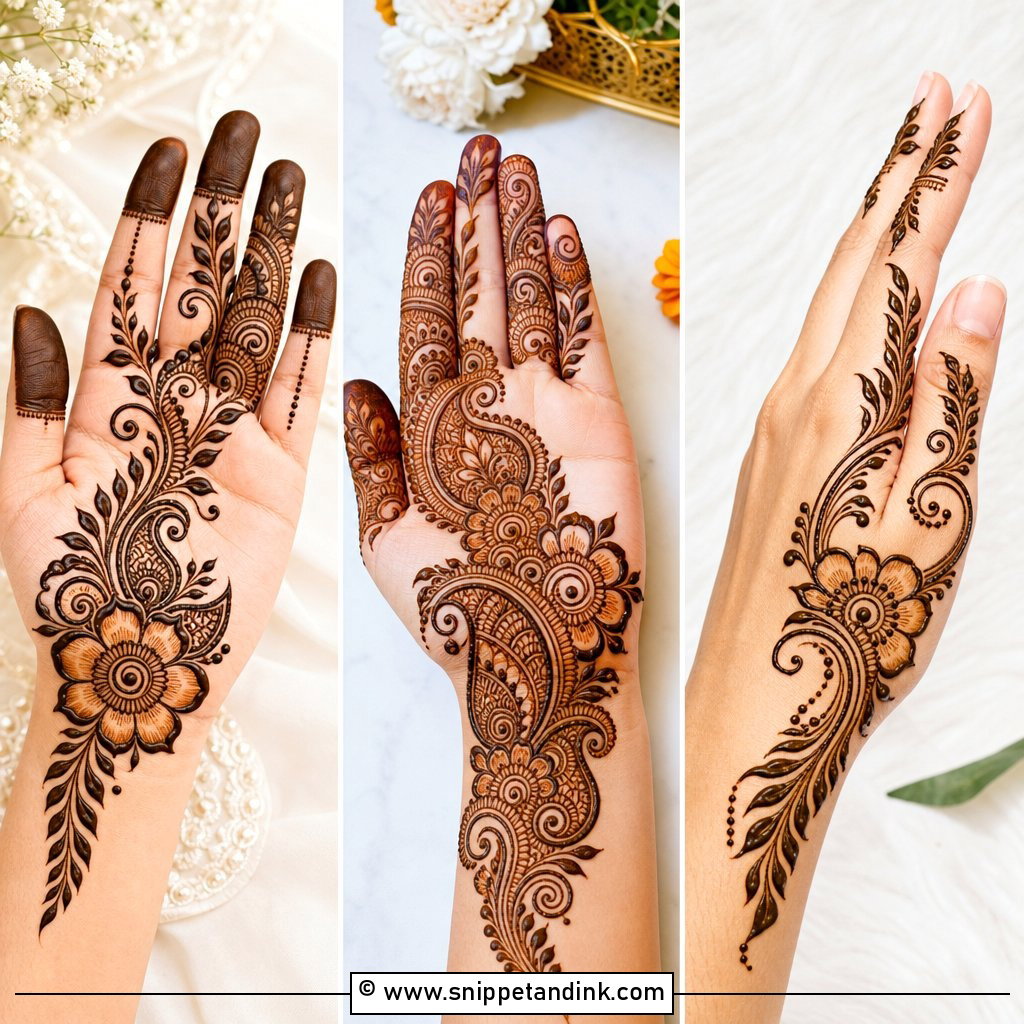
15. Moroccan Inside Mehndi Design
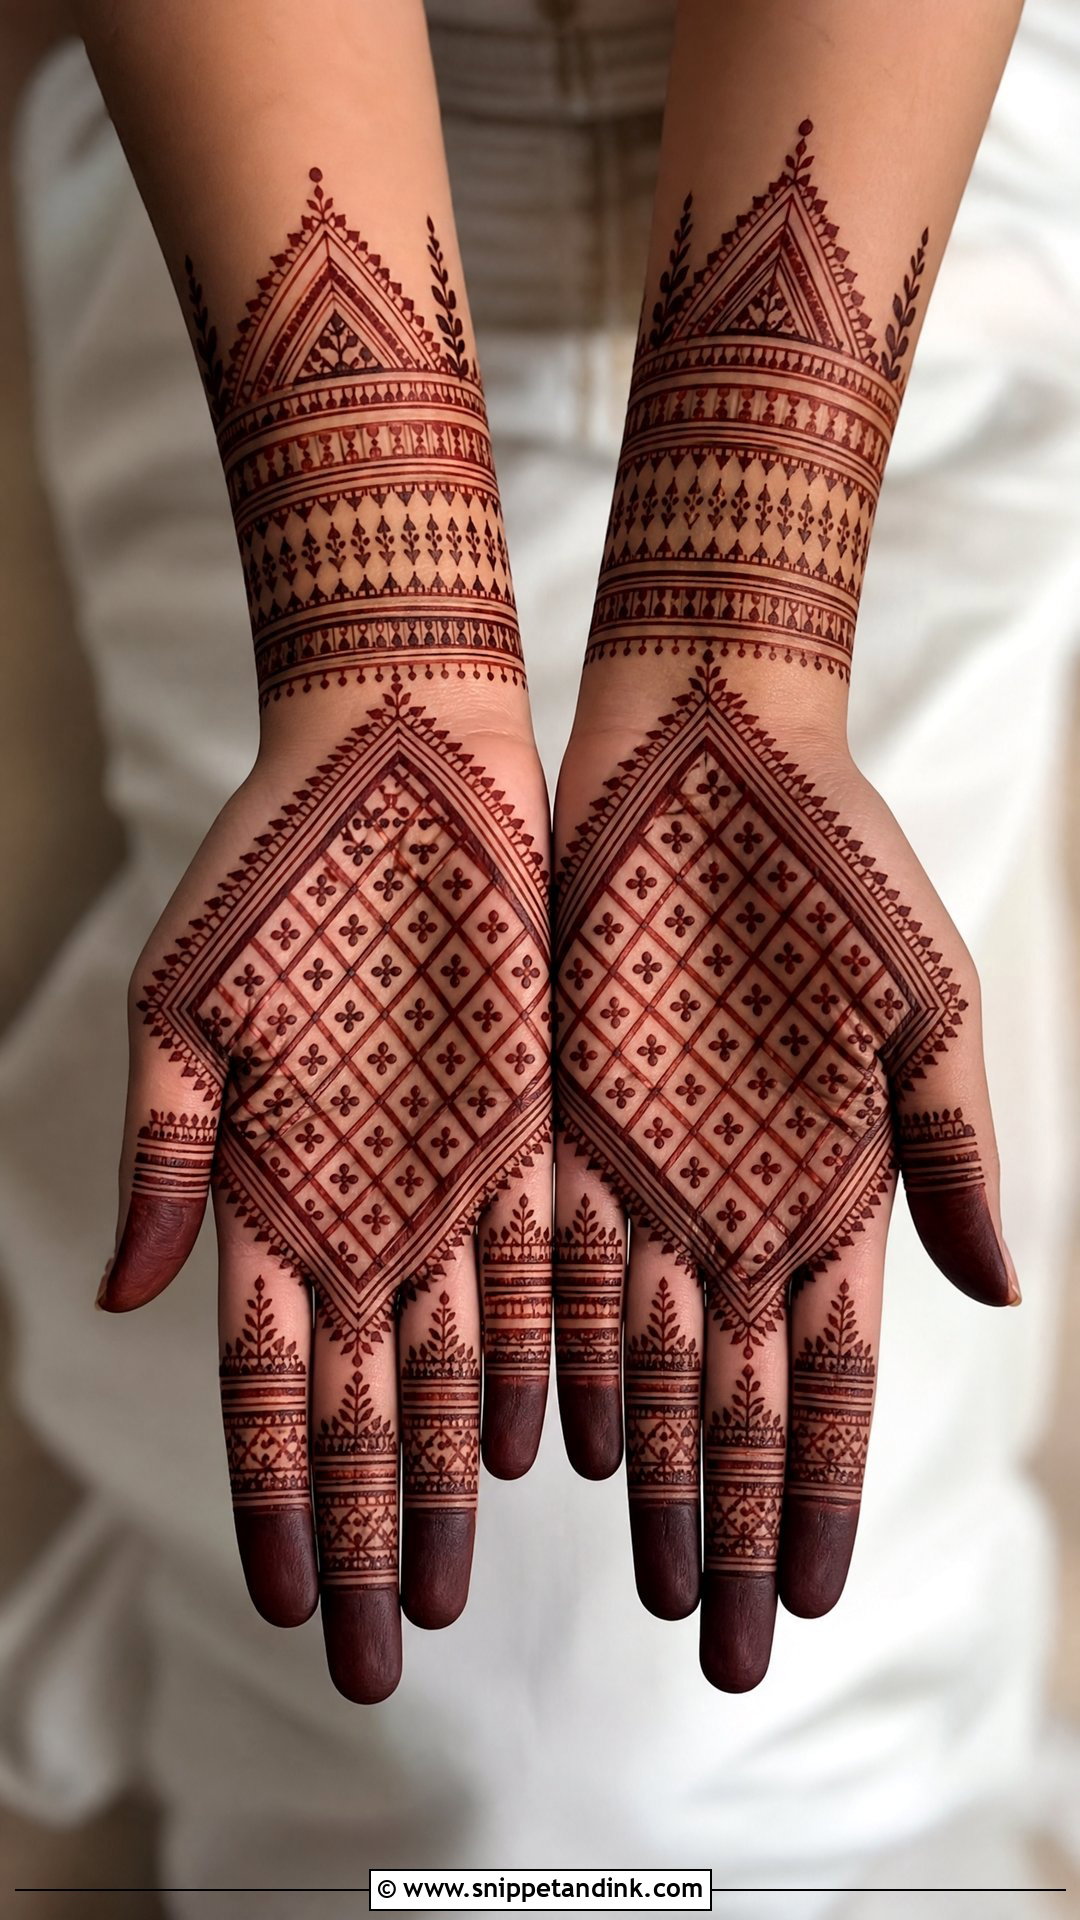
A Moroccan inside mehndi design swaps florals for diamonds, triangles, straight lines and structured borders. The palm usually carries a central diamond grid, with finger lines and wrist bands in clean symmetry. Straight lines are harder to pipe than curves, and any wobble shows, so I mark key points with tiny dots first and join them. It suits people who prefer sharp patterns over soft florals, and a deep stain makes the geometry stand out on the inner hand.
16. Gulf Inside Mehndi Design
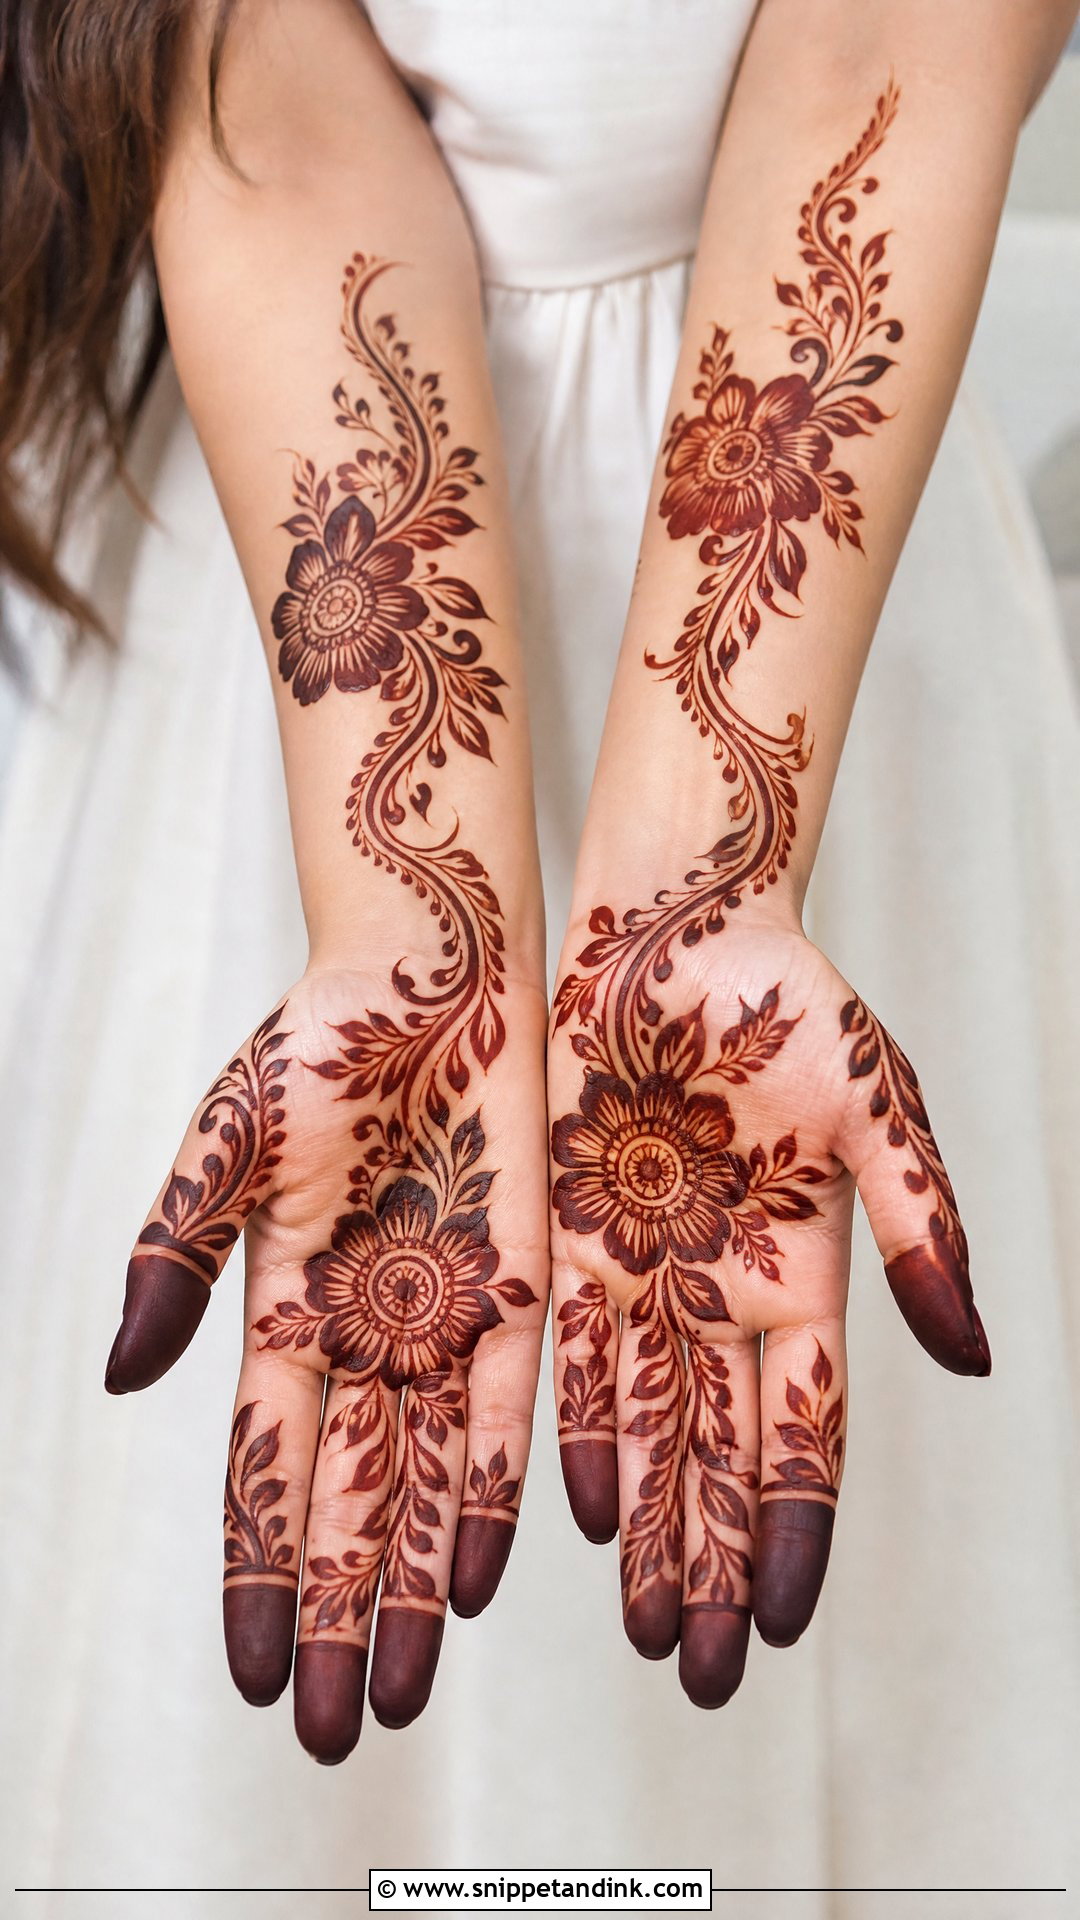
A Gulf inside mehndi design, also called Khaleeji-inspired mehndi, uses bold florals, leafy trails, solid dark fingertips and wide open spaces. The pattern may flow from the wrist to the index finger or curve around the thumb side. I outline the flowers thickly and add only light dots or shading inside. The fully coated fingertips are a signature, and they need a generous layer of paste left on for hours to come out properly dark. It’s especially flattering on long fingers, at Eid, weddings and evening events.
17. Modern Inside Mehndi Design
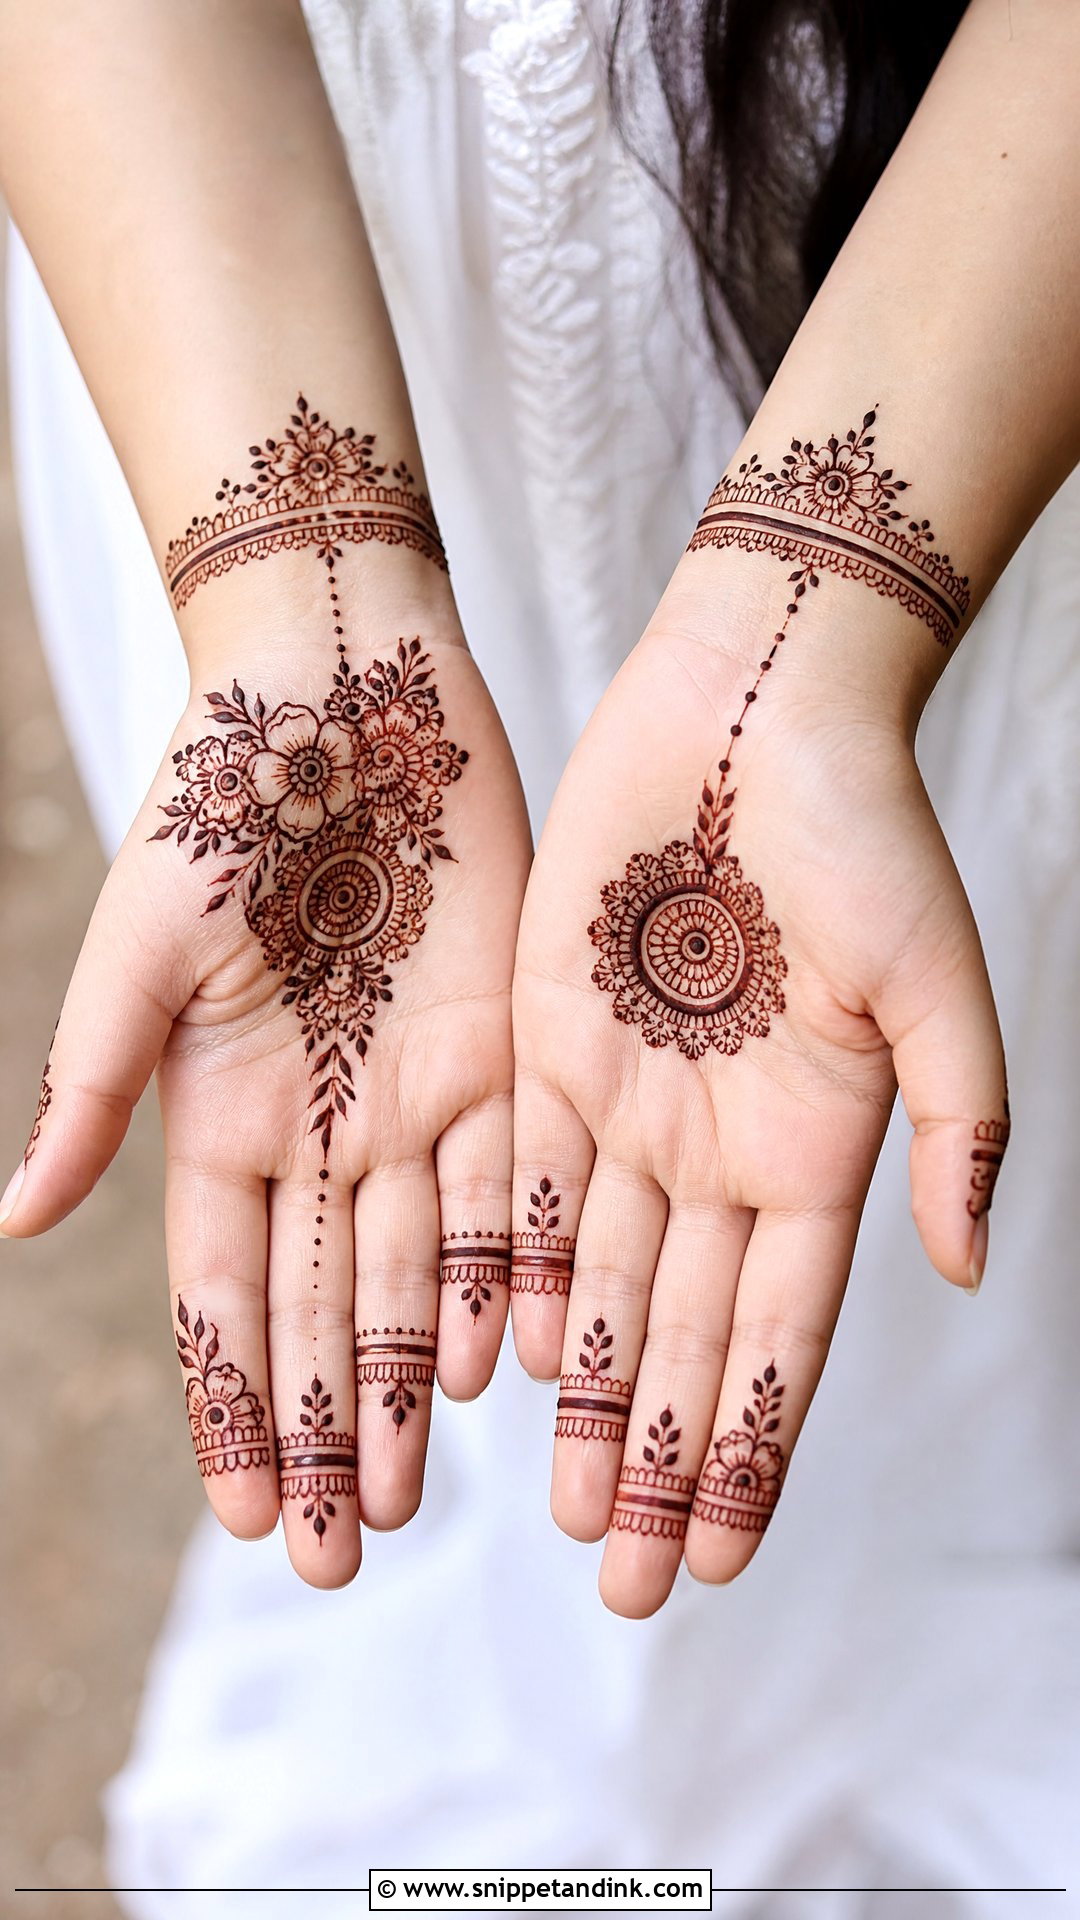
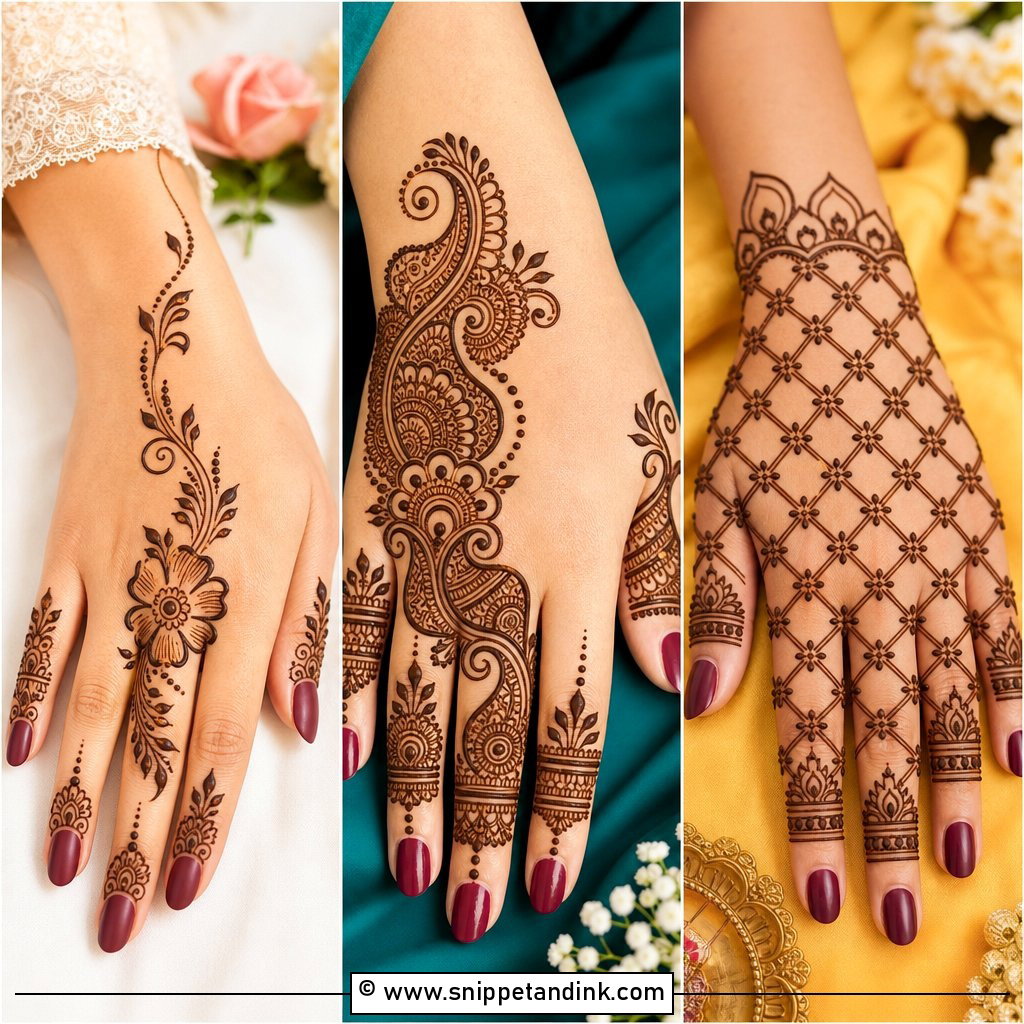
Modern palm mehndi is about placement more than coverage: open spacing, thin line art, a small mandala, a wrist bracelet and finger rings. I often put one bold floral cluster on the palm and connect it to the fingers with fine lines. It goes with almost any outfit, which is why college students and bridesmaids ask for it. The catch is that thin line art leaves nowhere to hide, so a shaky line stays visible for the full two weeks.
18. Bracelet Inside Mehndi Design
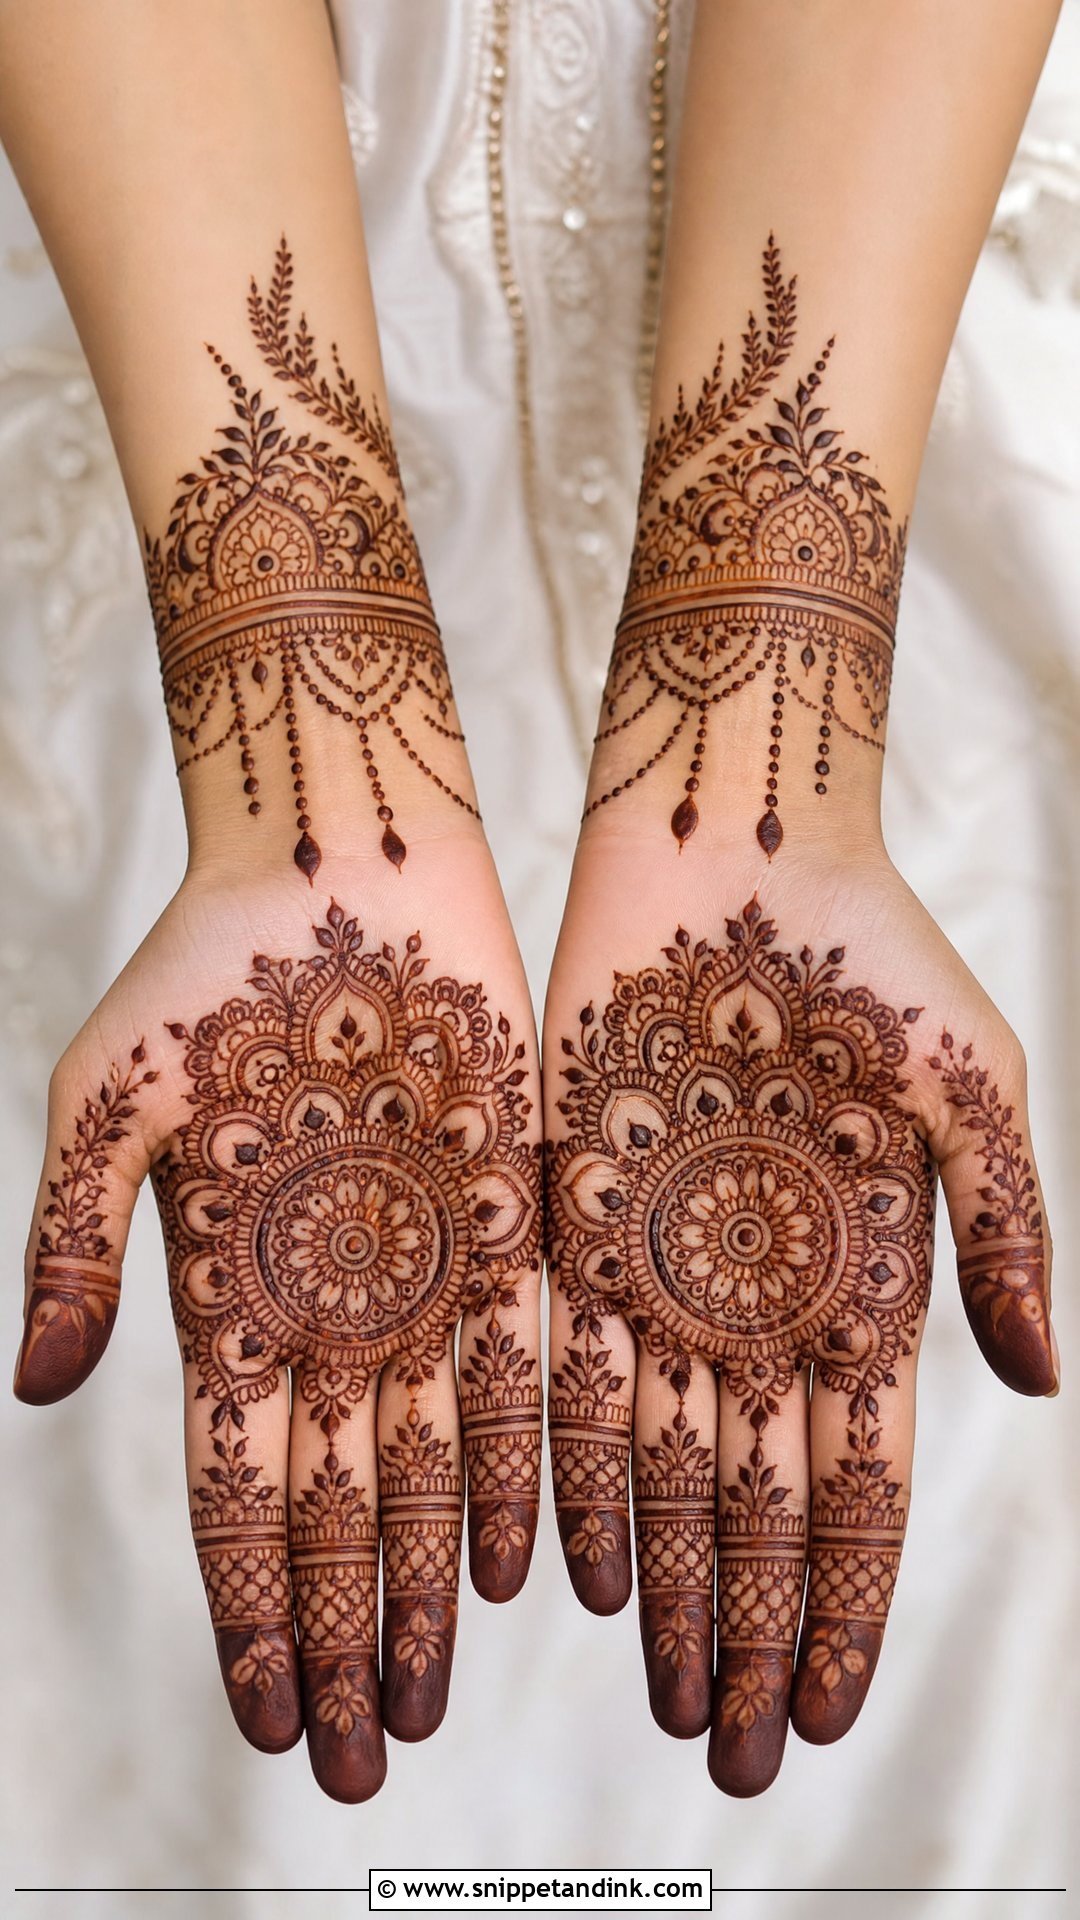
A bracelet inside mehndi design links the palm pattern to a decorative cuff at the wrist. The palm carries a mandala, flower, paisley or small jaali panel, and chains, dots or hanging motifs join it to the cuff like jewelry. I draw the wrist band where the bangles will sit, slightly above the wrist crease, because a band right on the crease cracks while drying and gets hidden under bangles anyway. Keep it neat and evenly spaced, since it frames the whole hand.
19. Rose Inside Mehndi Design
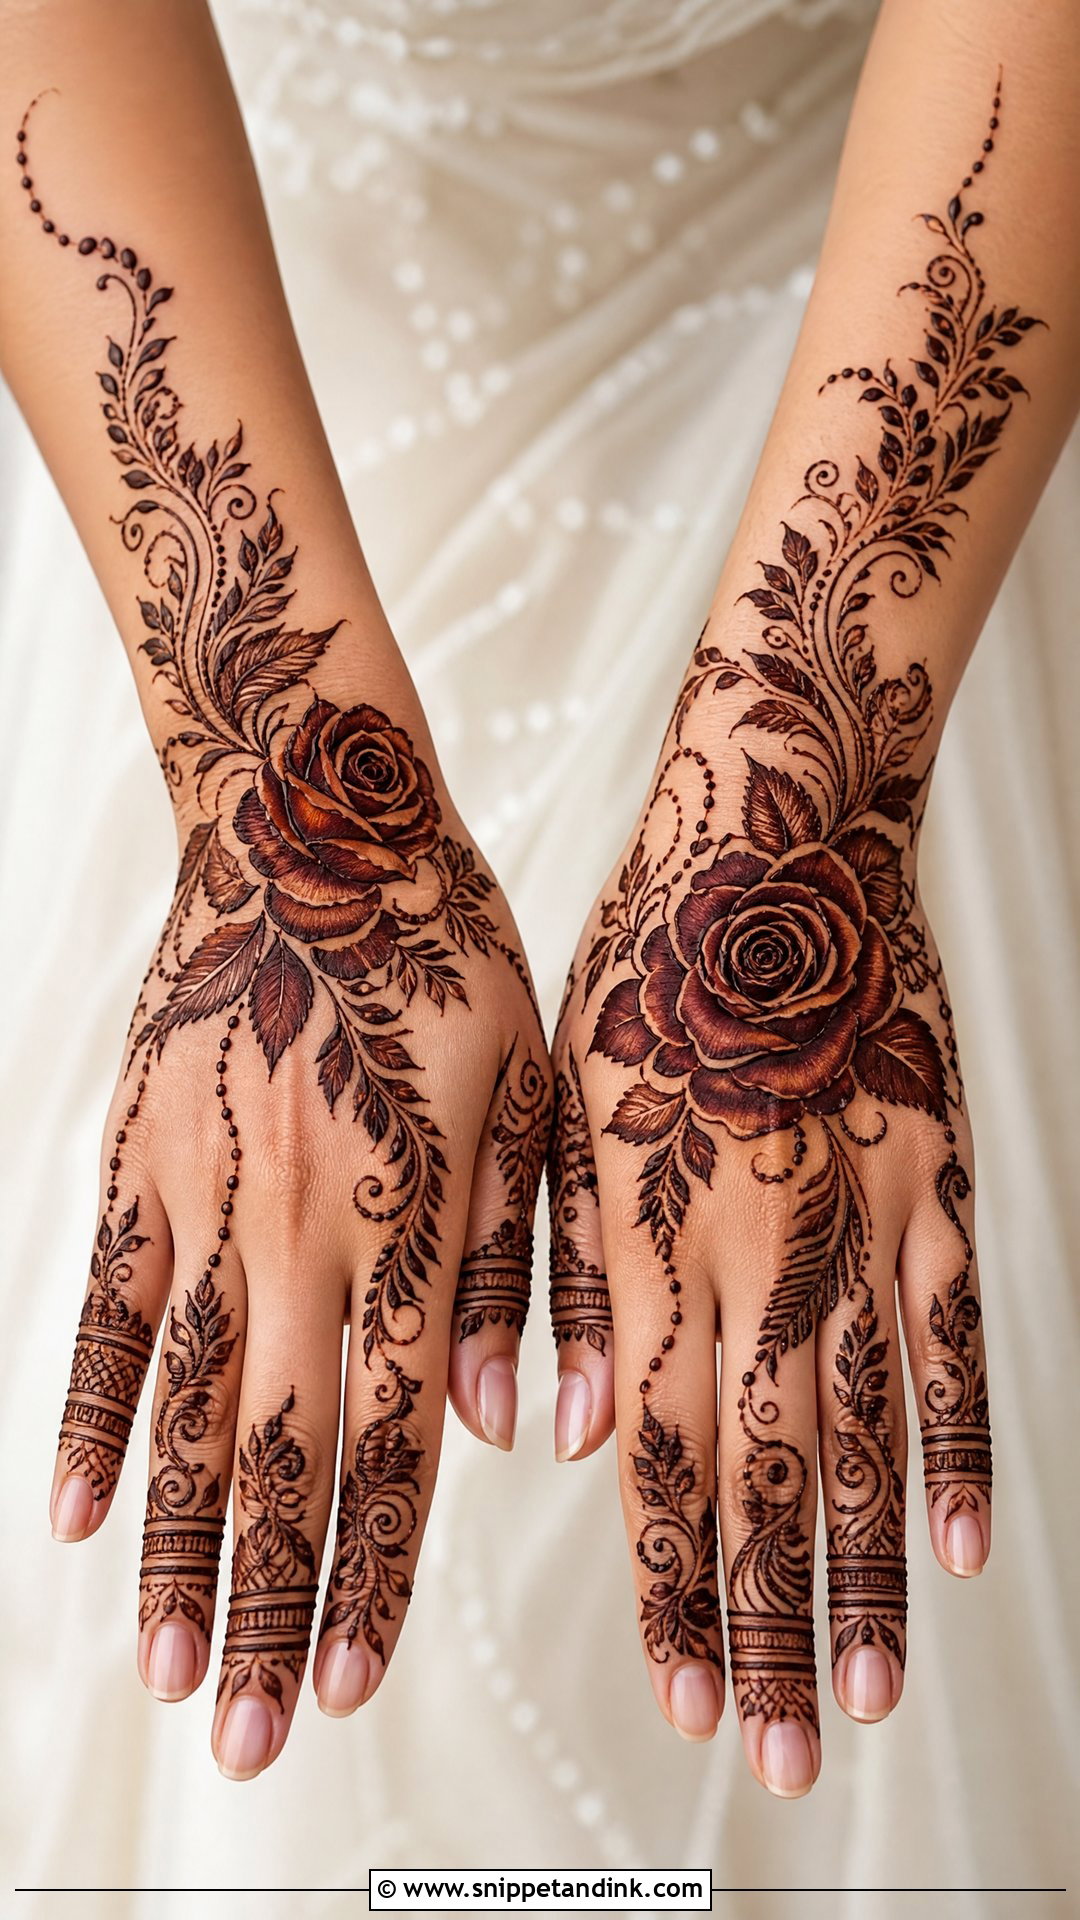
Roses read as romantic without heavy decoration. The rose can sit in the center of the palm or appear along a flowing Arabic trail, built from layered curved petals with leaves, dots and small vines around it. Petal spacing matters more than people expect: if the curves touch, the stain fills the gap and the rose turns into a dark blob. Thin floral bands or leafy tips finish the fingers. It’s a natural pick for engagements and bridesmaids.
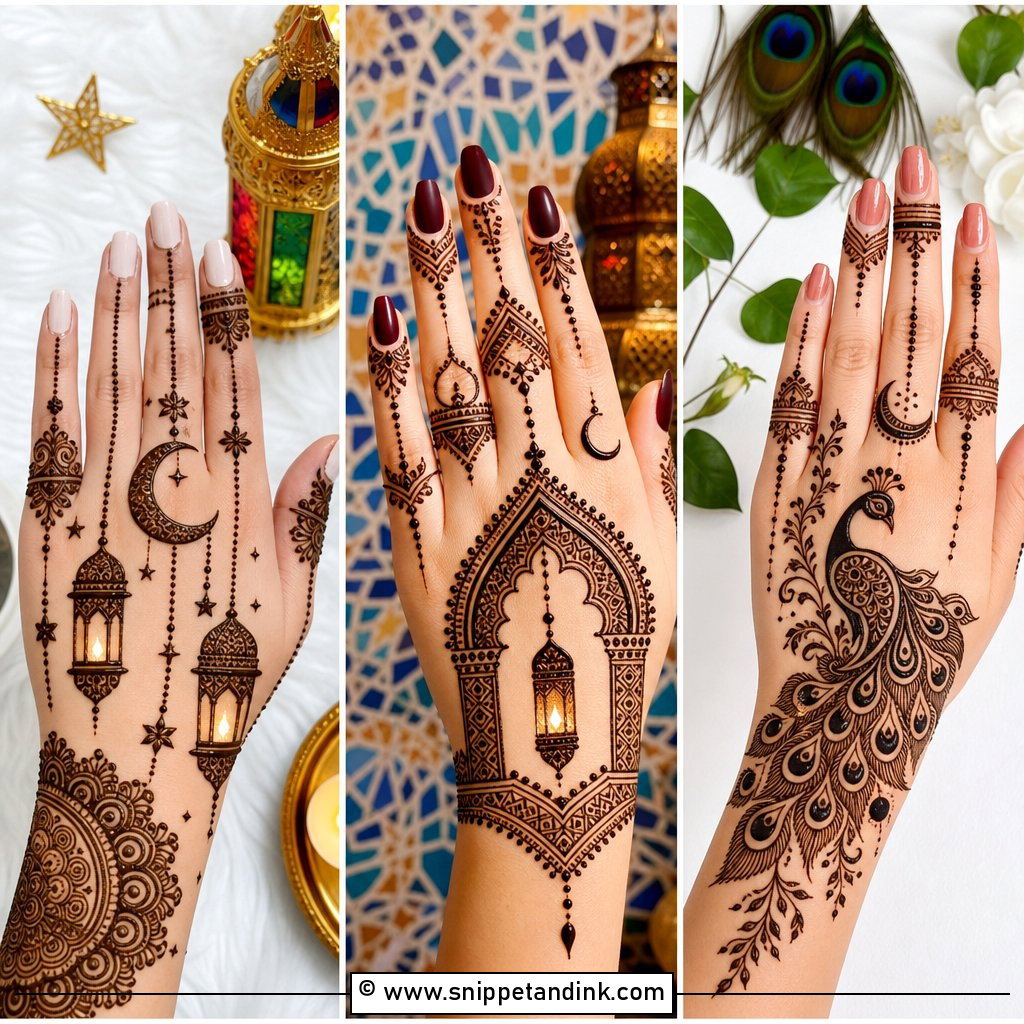
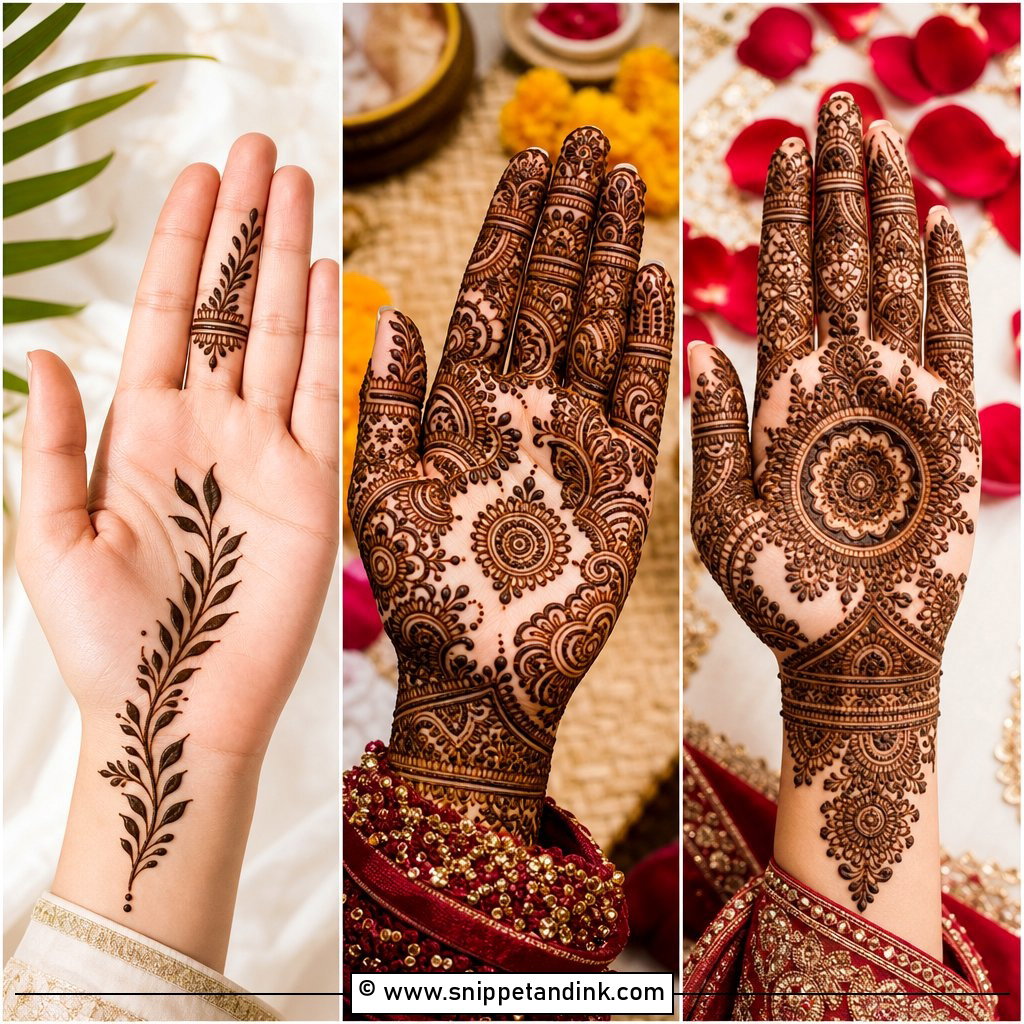
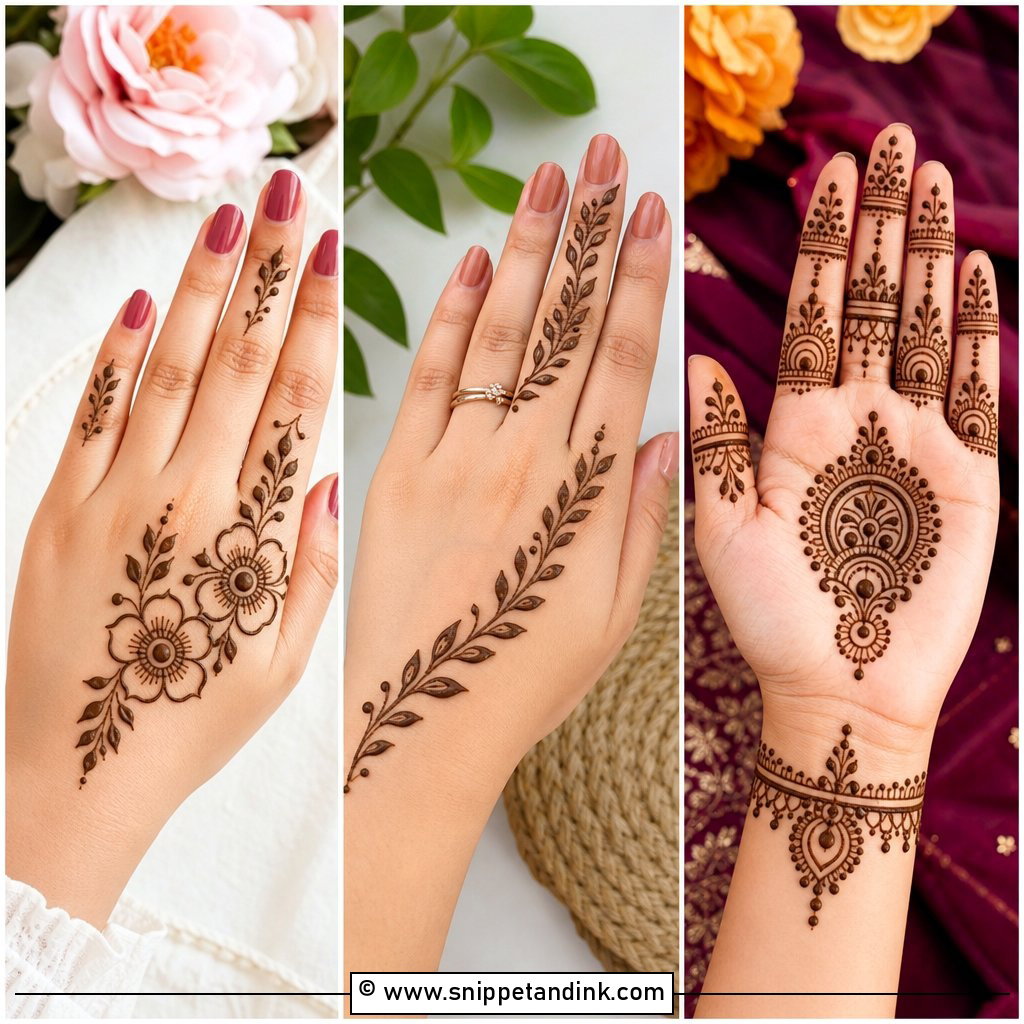
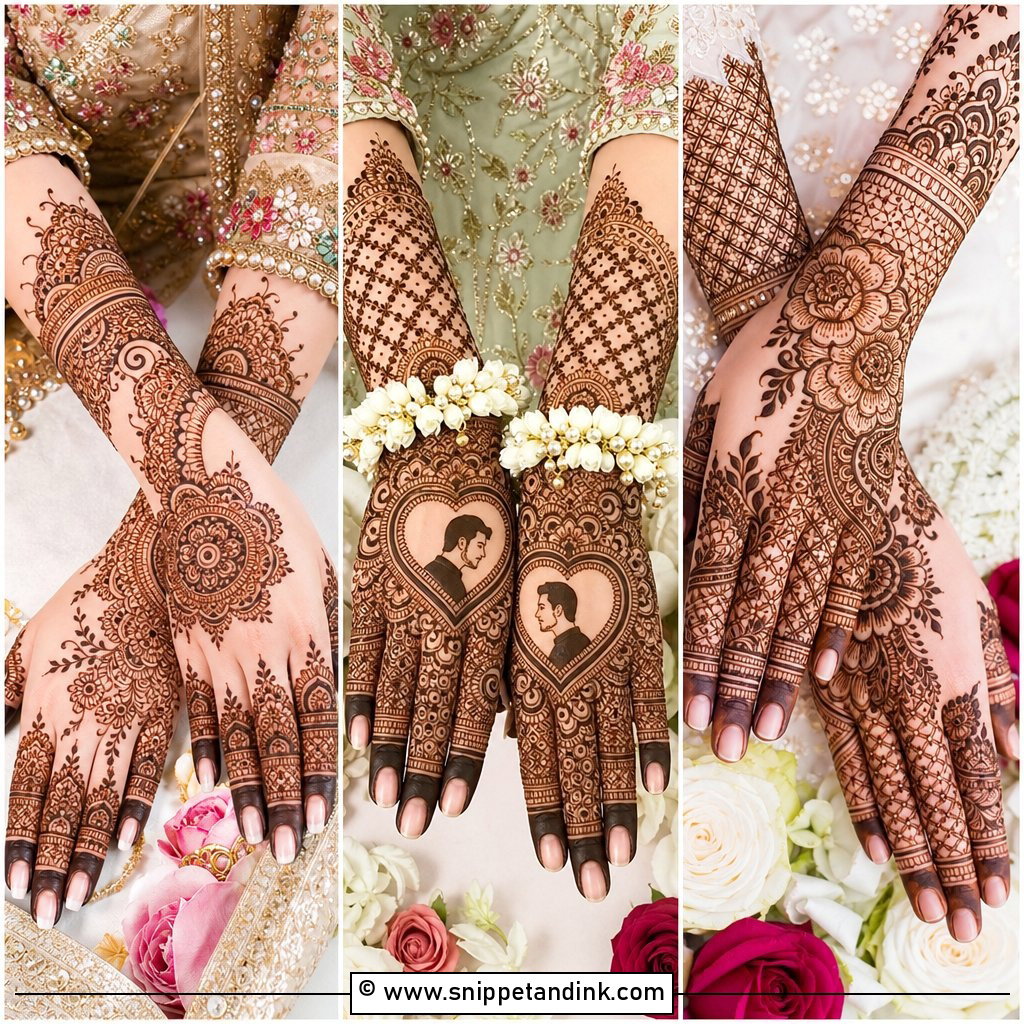
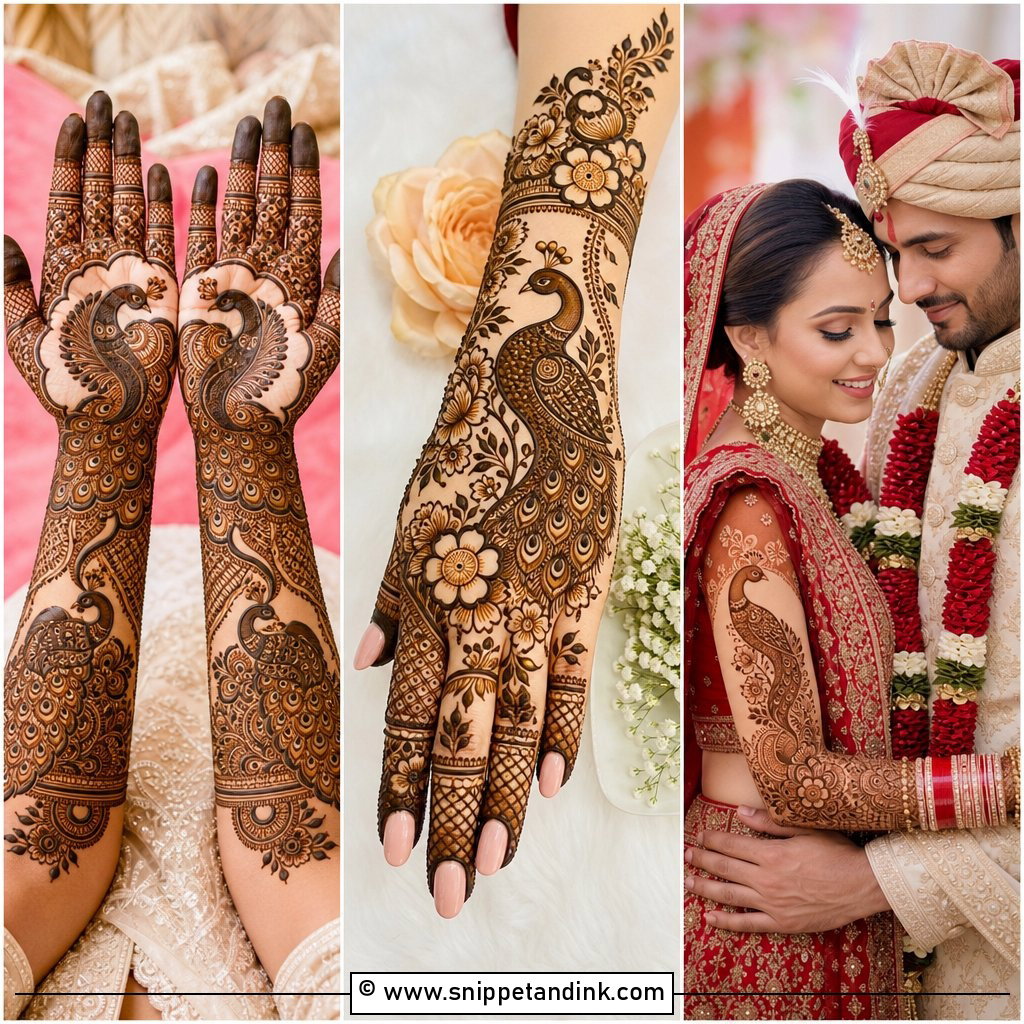
20. Grid Inside Mehndi Design
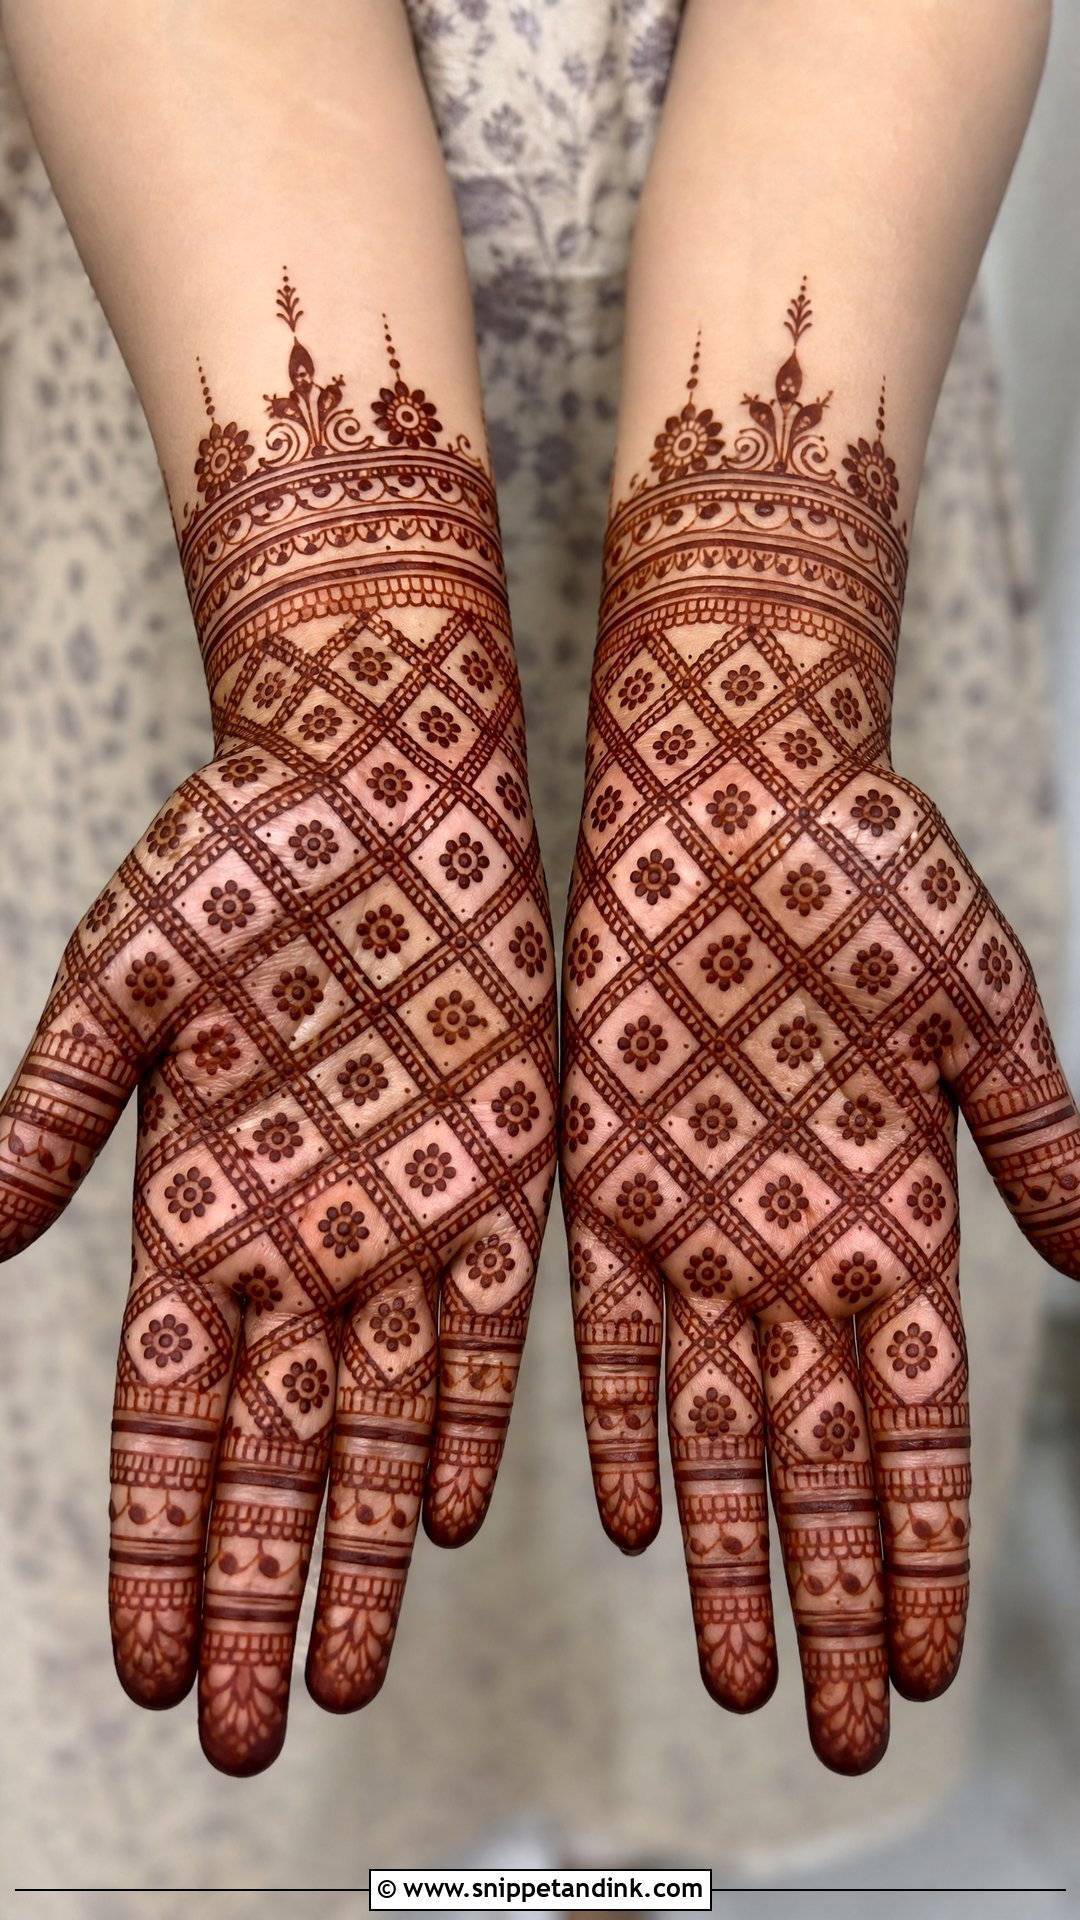
Grids give the palm texture without big motifs. Diamonds, squares or curved lattice lines form the base, with tiny dots, leaves or mini flowers in some of the spaces so it doesn’t look plain. It can fill the whole palm or form one panel beside a mandala or paisley. Keep the fingers simpler with bands and dots, or the hand starts to look like graph paper.
21. Front Hand Bridal Inside Mehndi Design
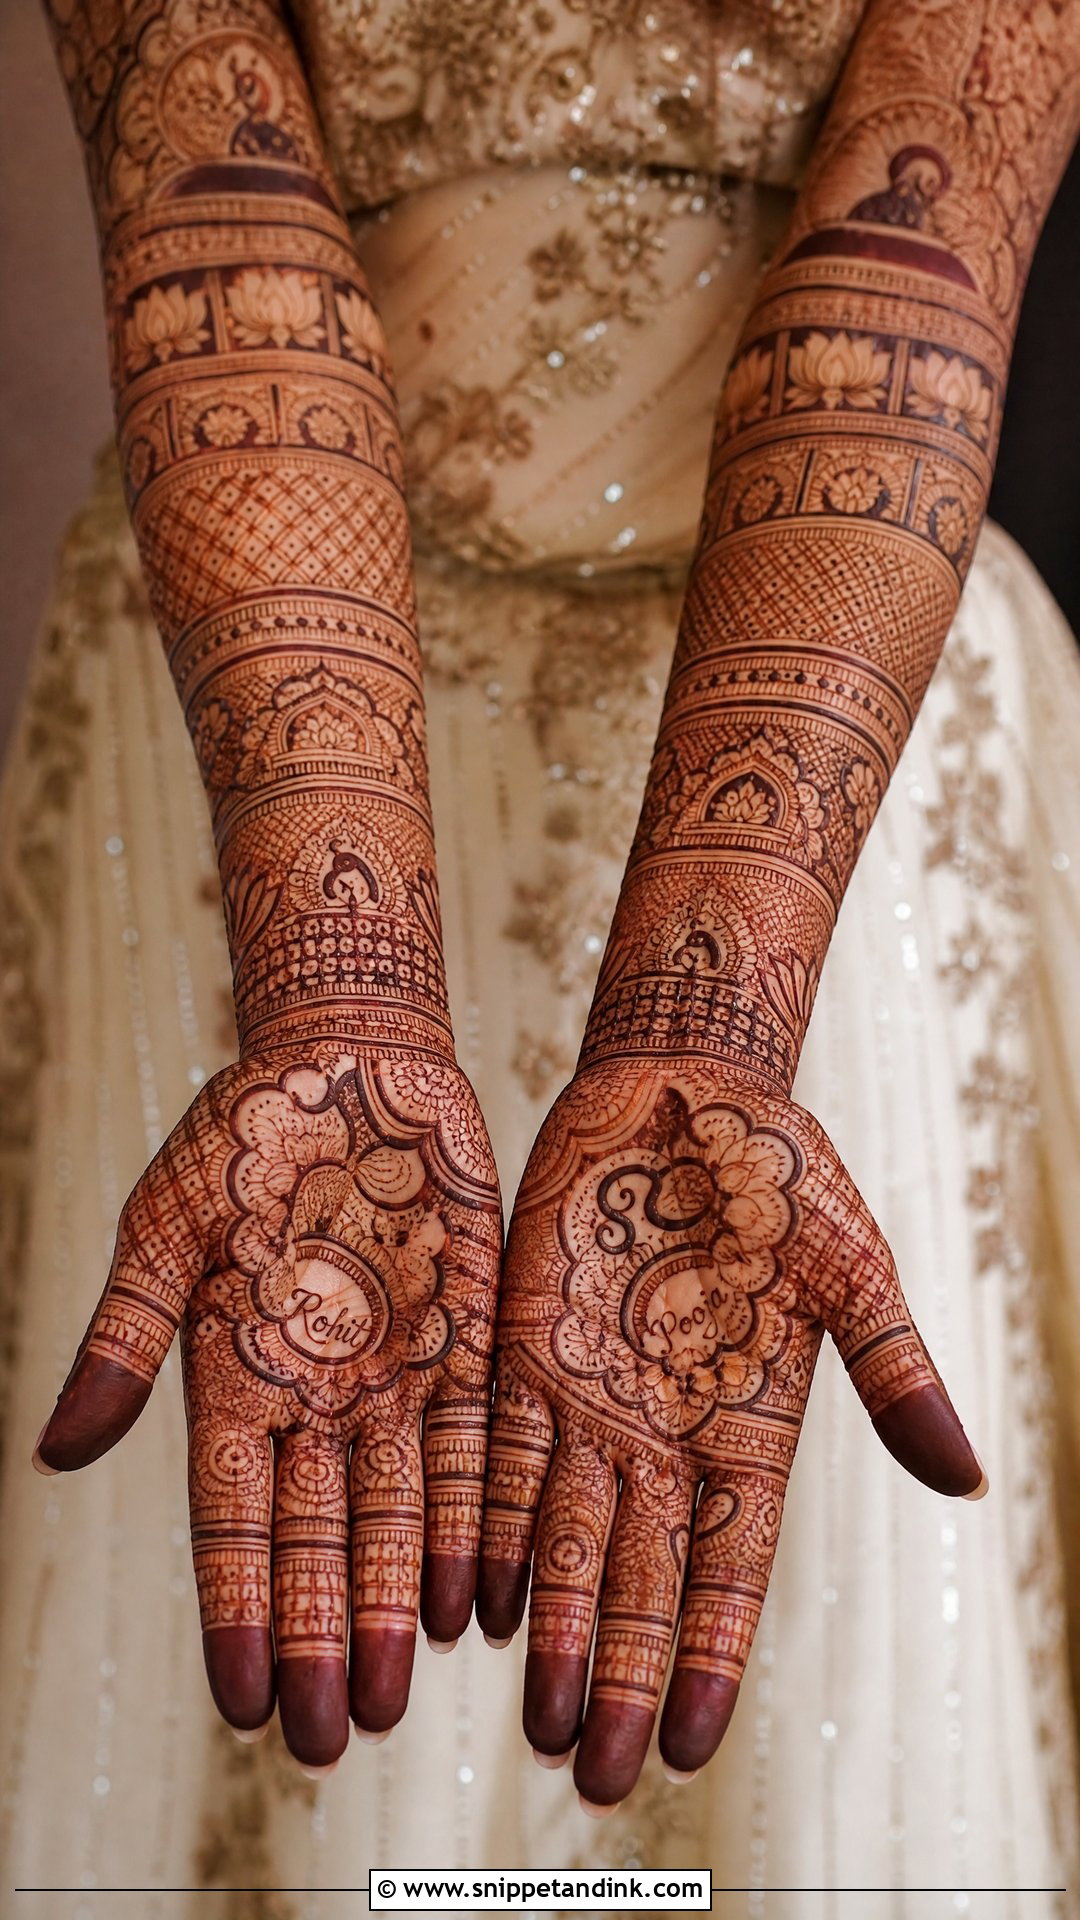
Bridal front-hand work is made for close-ups. It covers the palm, fingers, wrist and often the lower forearm with dense, organized patterns: mandalas, peacocks, lotus, kalash motifs or hidden names, with fingers in fine lines, checks, leaves and shaded bands. It should look rich from a distance and detailed up close. That takes time, often several hours for both hands, so I ask brides to eat beforehand and have someone ready to help with their phone and water. The two hands should feel connected, through matching symmetry or a story that continues across the palms.
22. Easy Inside Mehndi Design
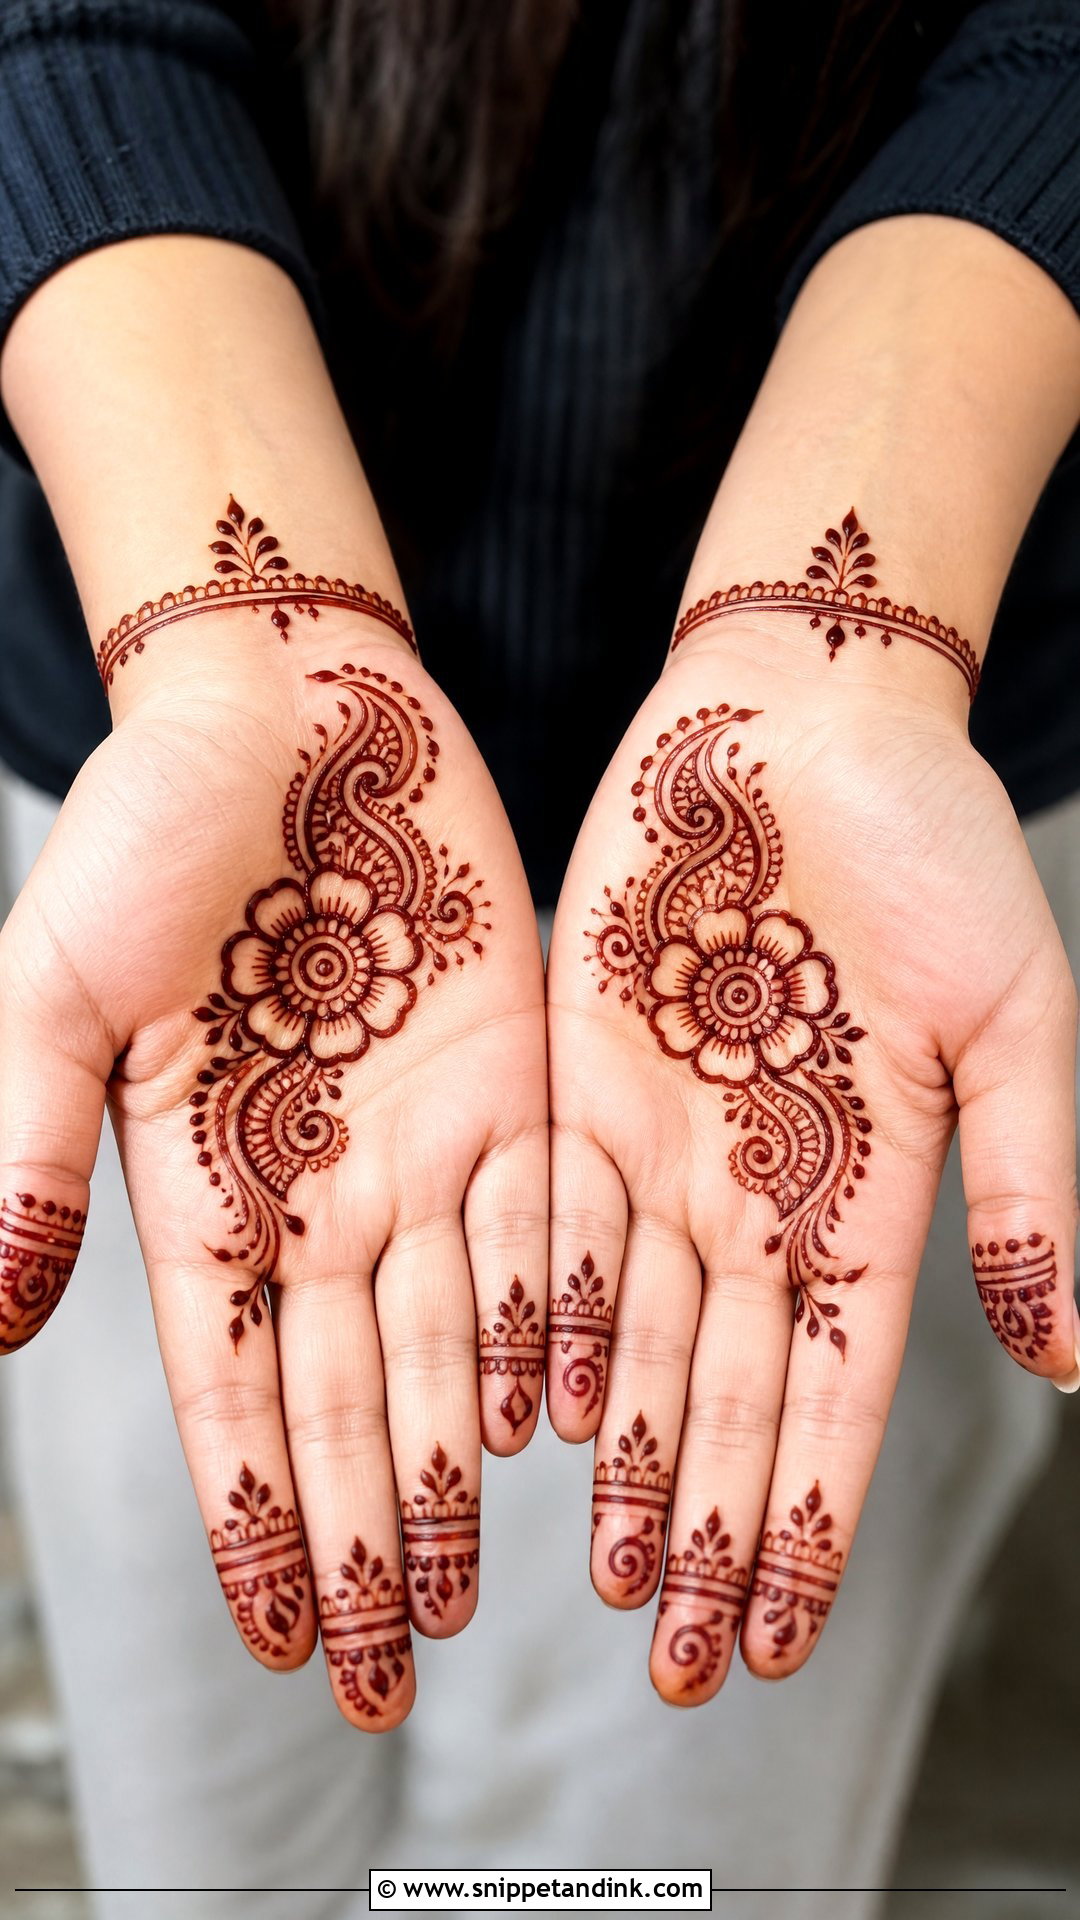
Easy palm designs should still look finished. Choose one main palm motif, such as a flower, circle, paisley or small vine, then add finger bands, dots and a wrist line. If you’re applying it yourself, skip very tiny fillings because they smudge easily, and use slightly thicker strokes. Doing the non-dominant hand first helps, since your steadier hand then does the second side. It’s quick enough for kids, teens and last-minute events.
23. Heavy Inside Mehndi Design
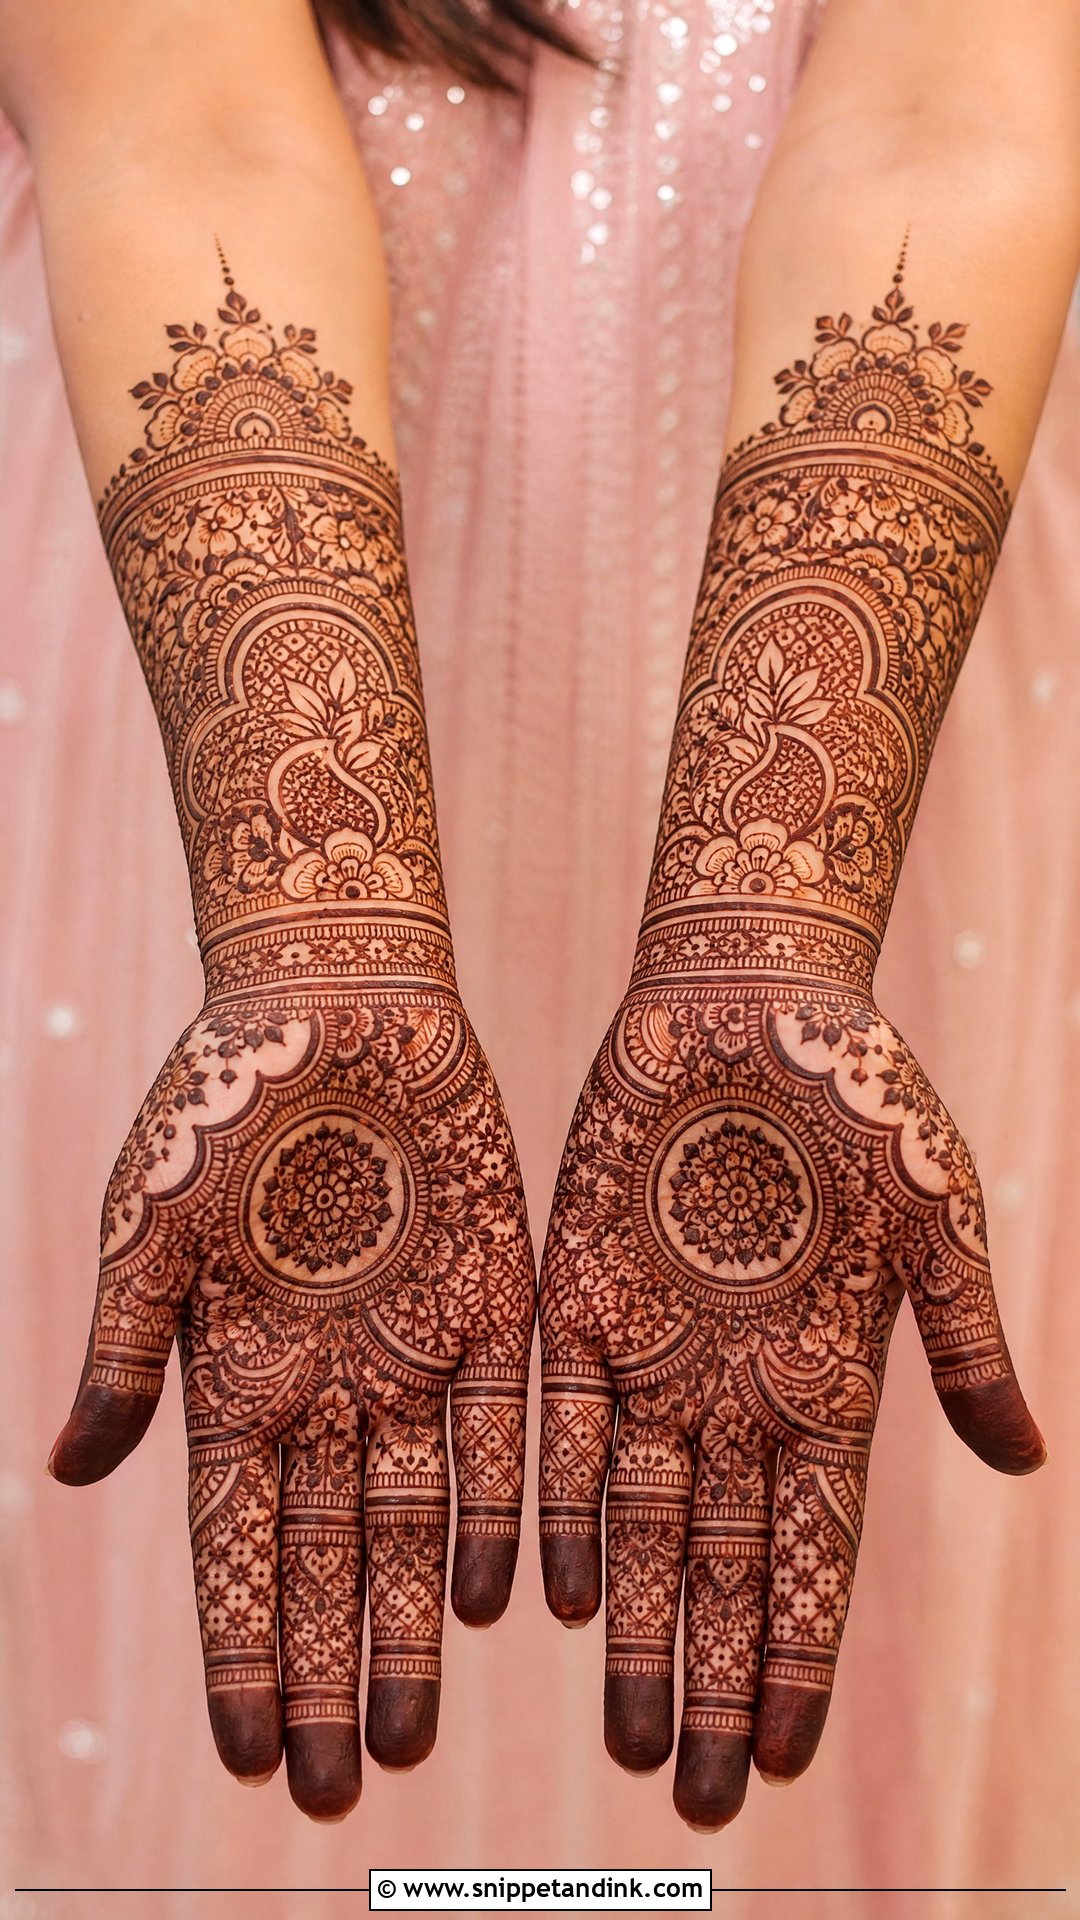
Heavy palms are about rich coverage: mandalas, paisleys, florals, jaali, leafy borders and fine dots, with fully decorated fingers and a thick cuff or layered bracelet at the wrist. Random filling is the danger. I divide the palm into sections first, separate them with bold outlines, then fill each one, so even a dense design stays readable in photos. It suits weddings, big festivals and family ceremonies, but it needs you to sit still for a long time and keep the paste on for hours afterward.
24. Kids Inside Mehndi Design
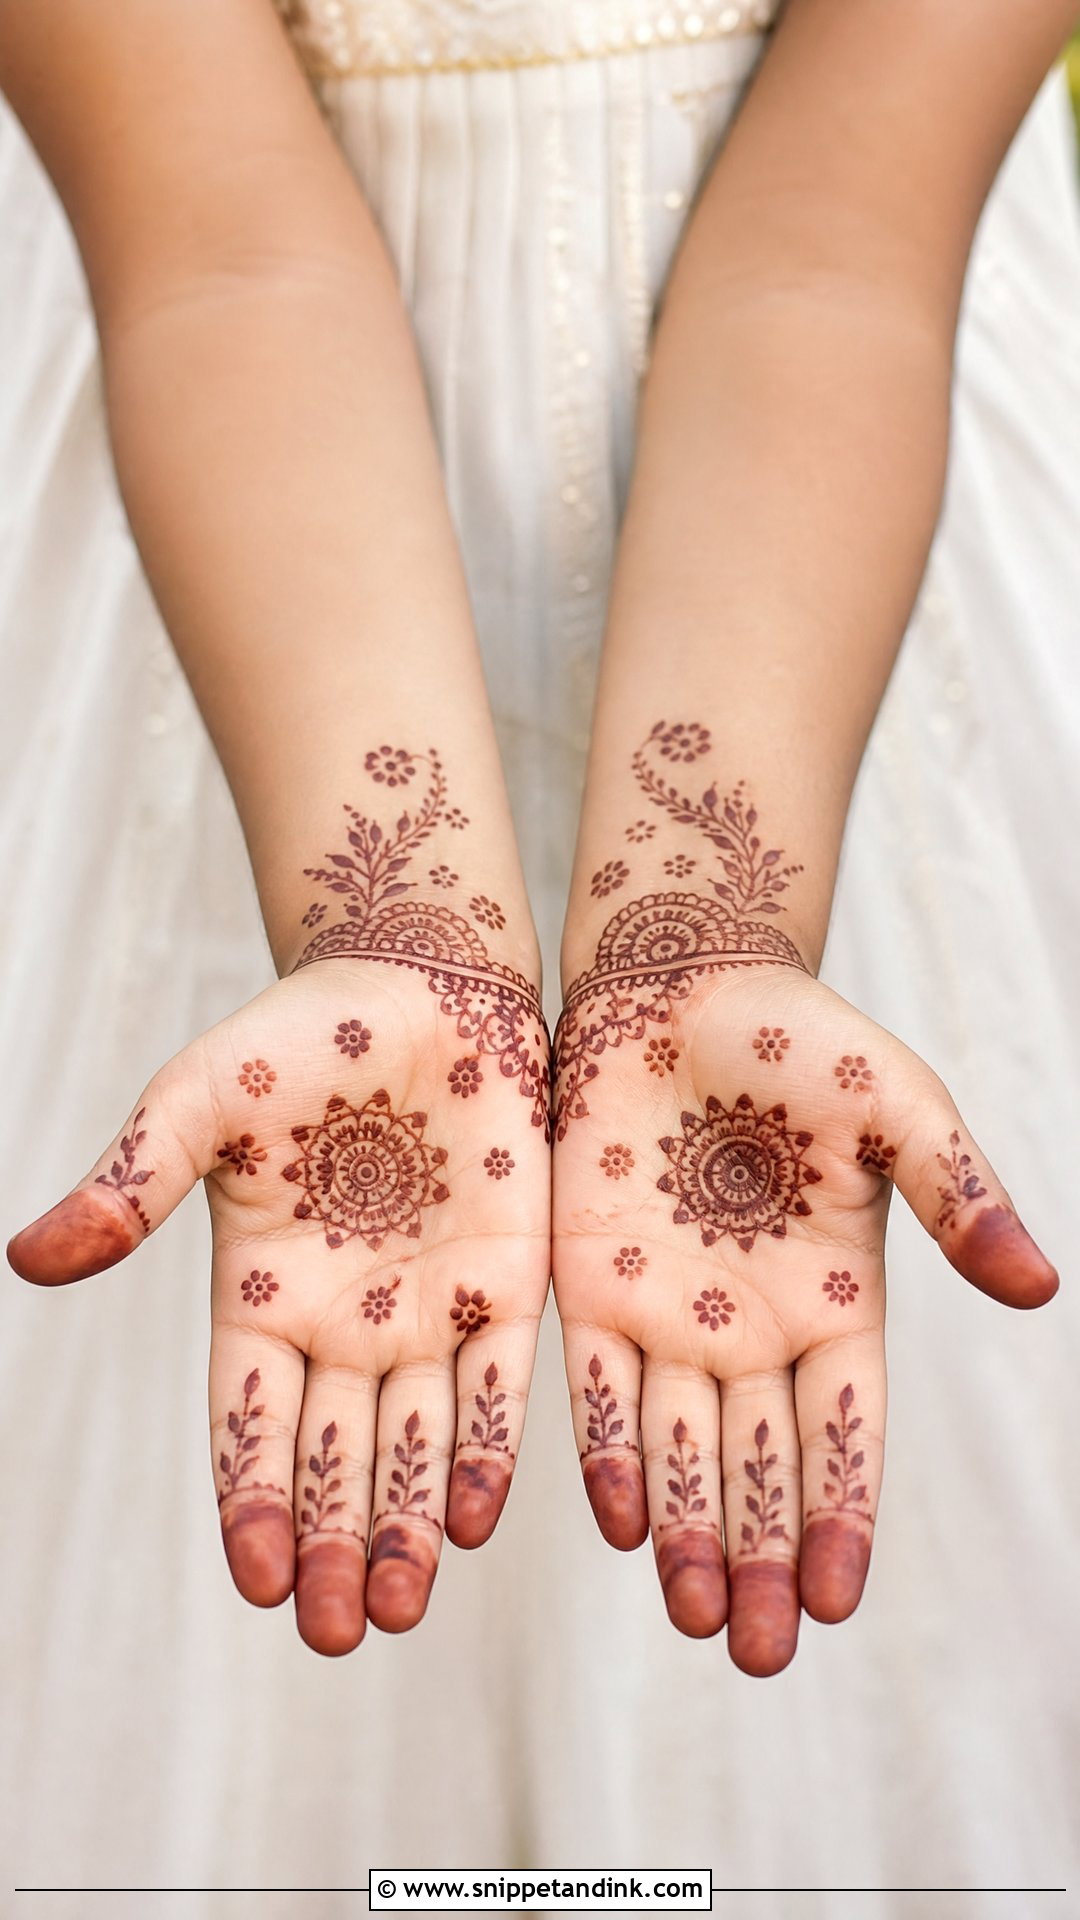
For children, comfort comes before detail. Small flowers, hearts, dots, tiny mandalas, butterflies or simple vines suit little palms, and a small center motif with decorated fingertips is often enough. Keep coverage light so they don’t have to sit still long. Only use natural henna on children; anything sold as instant black henna can contain PPD, which can cause serious skin reactions. It’s a sweet addition for Eid, Diwali, family weddings and school cultural days.
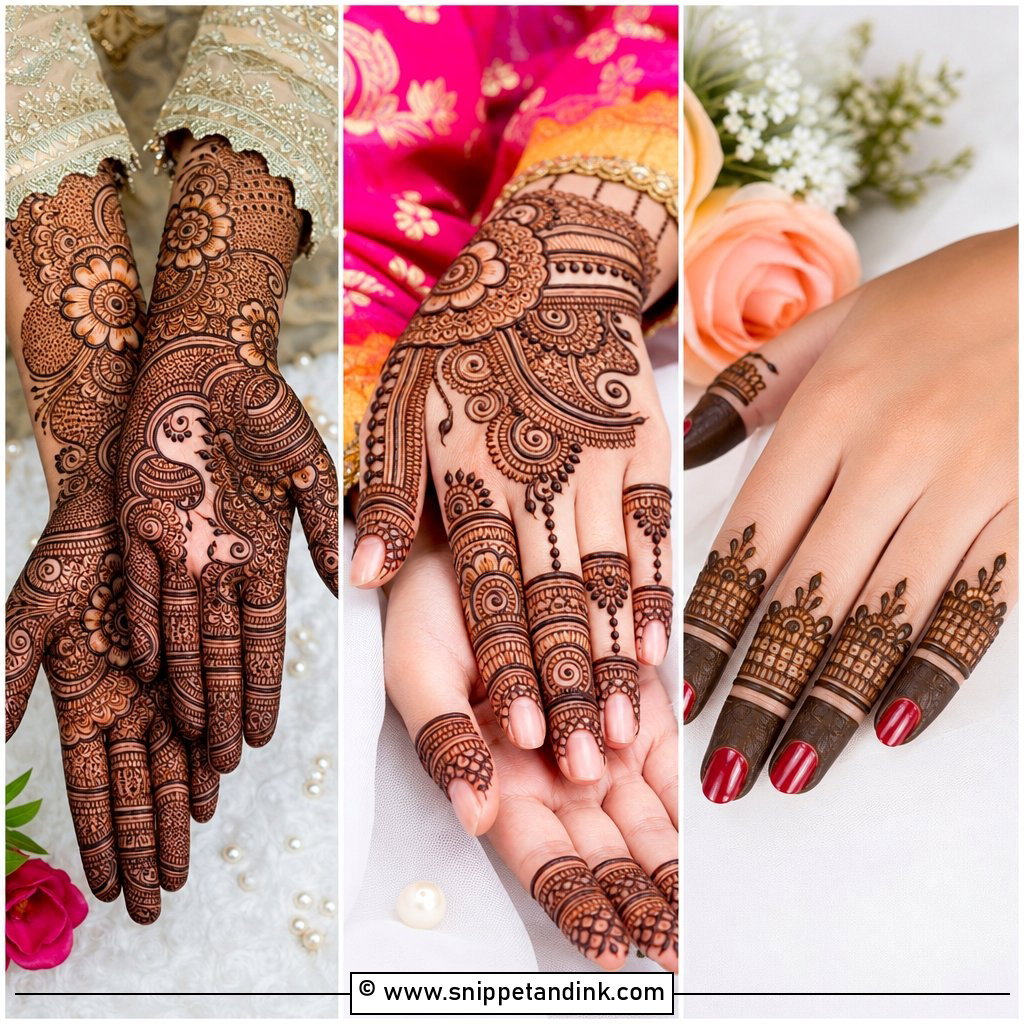
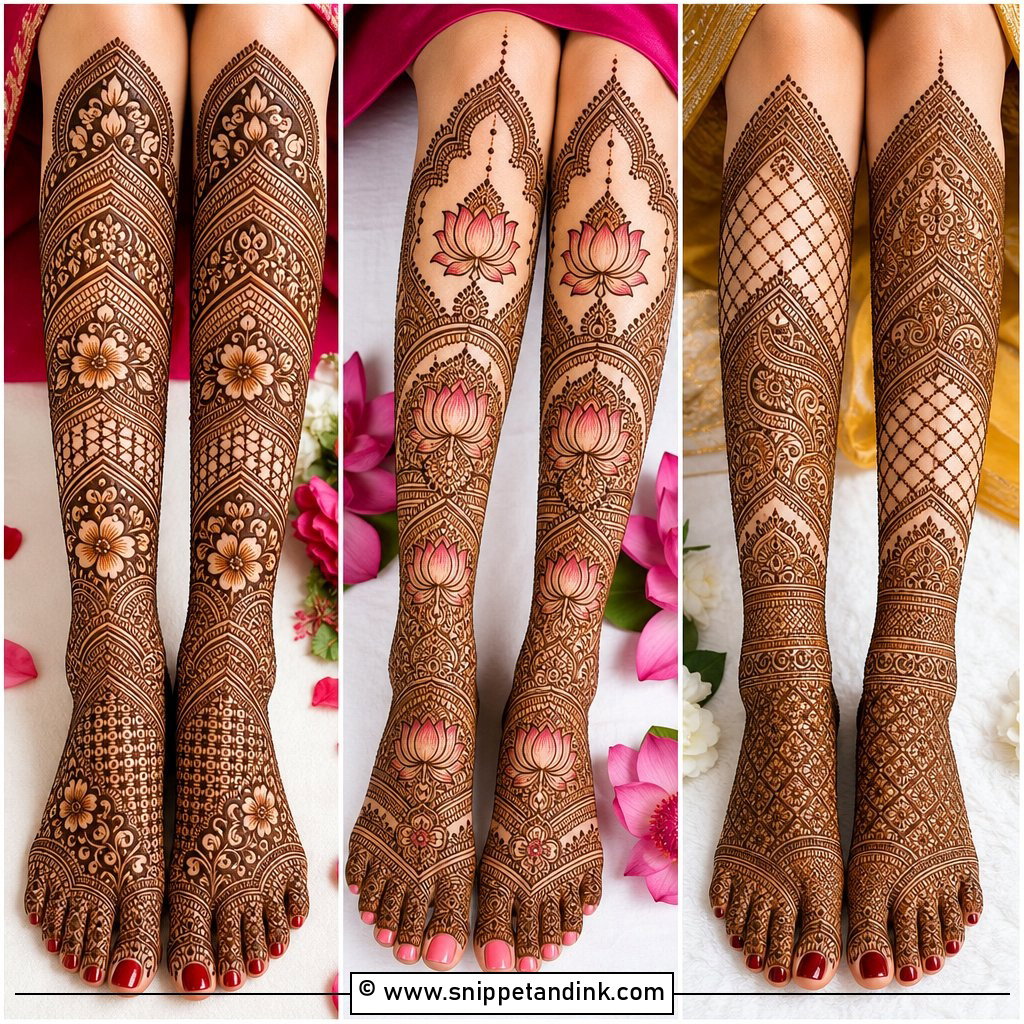
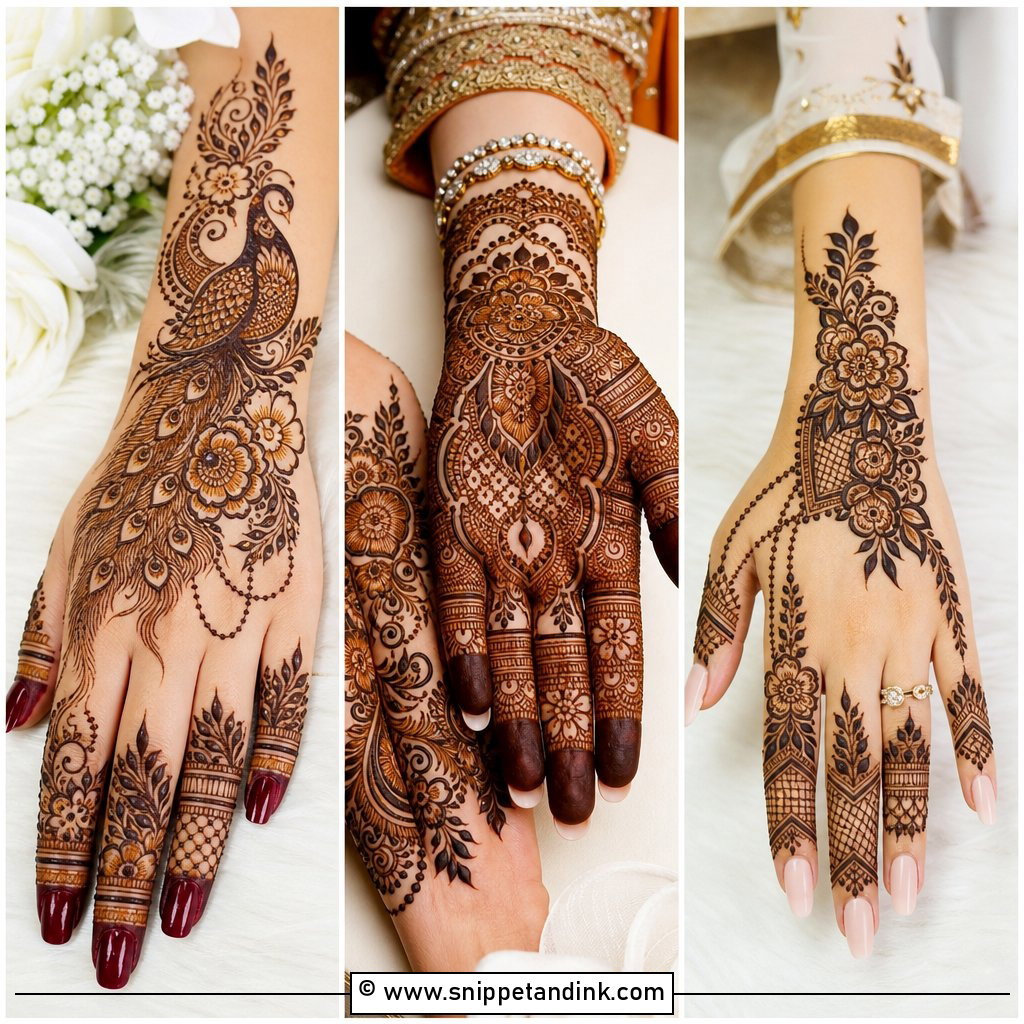
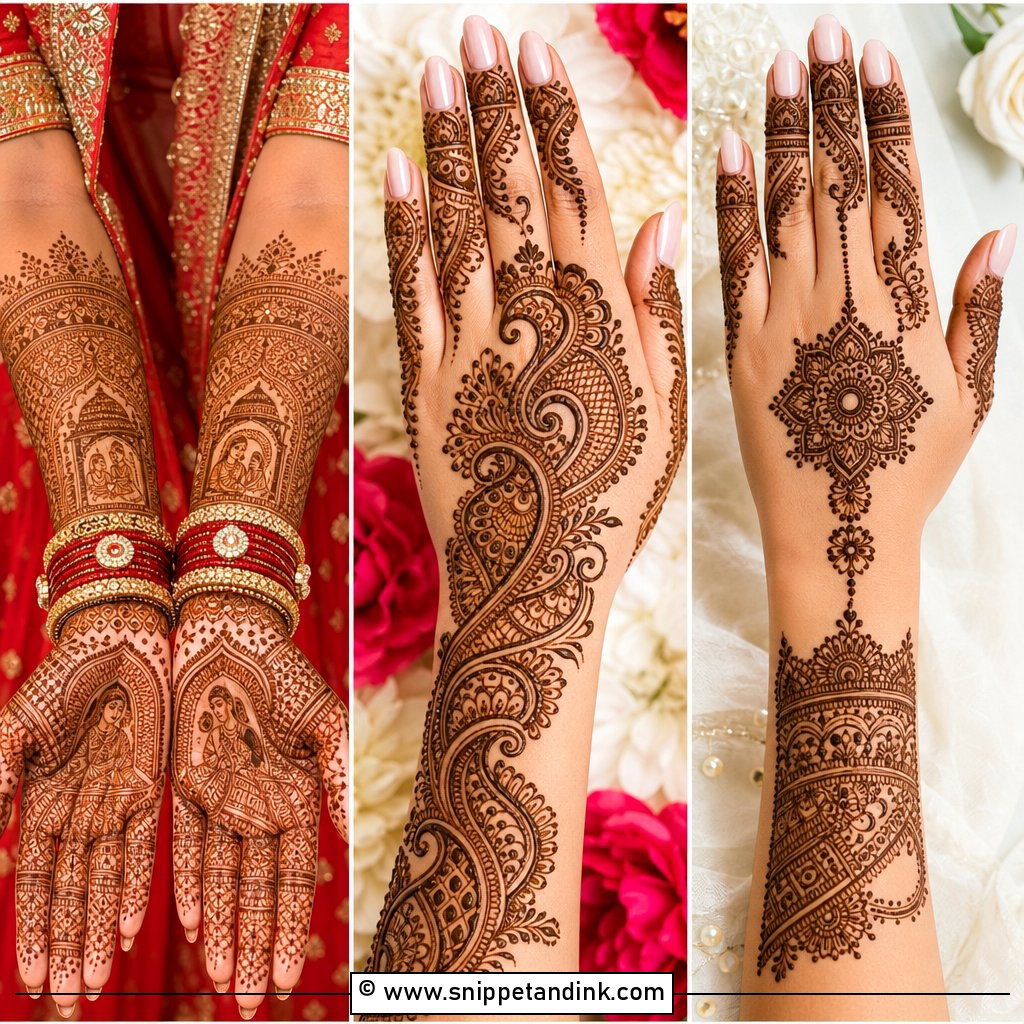
25. Festival Inside Mehndi Design
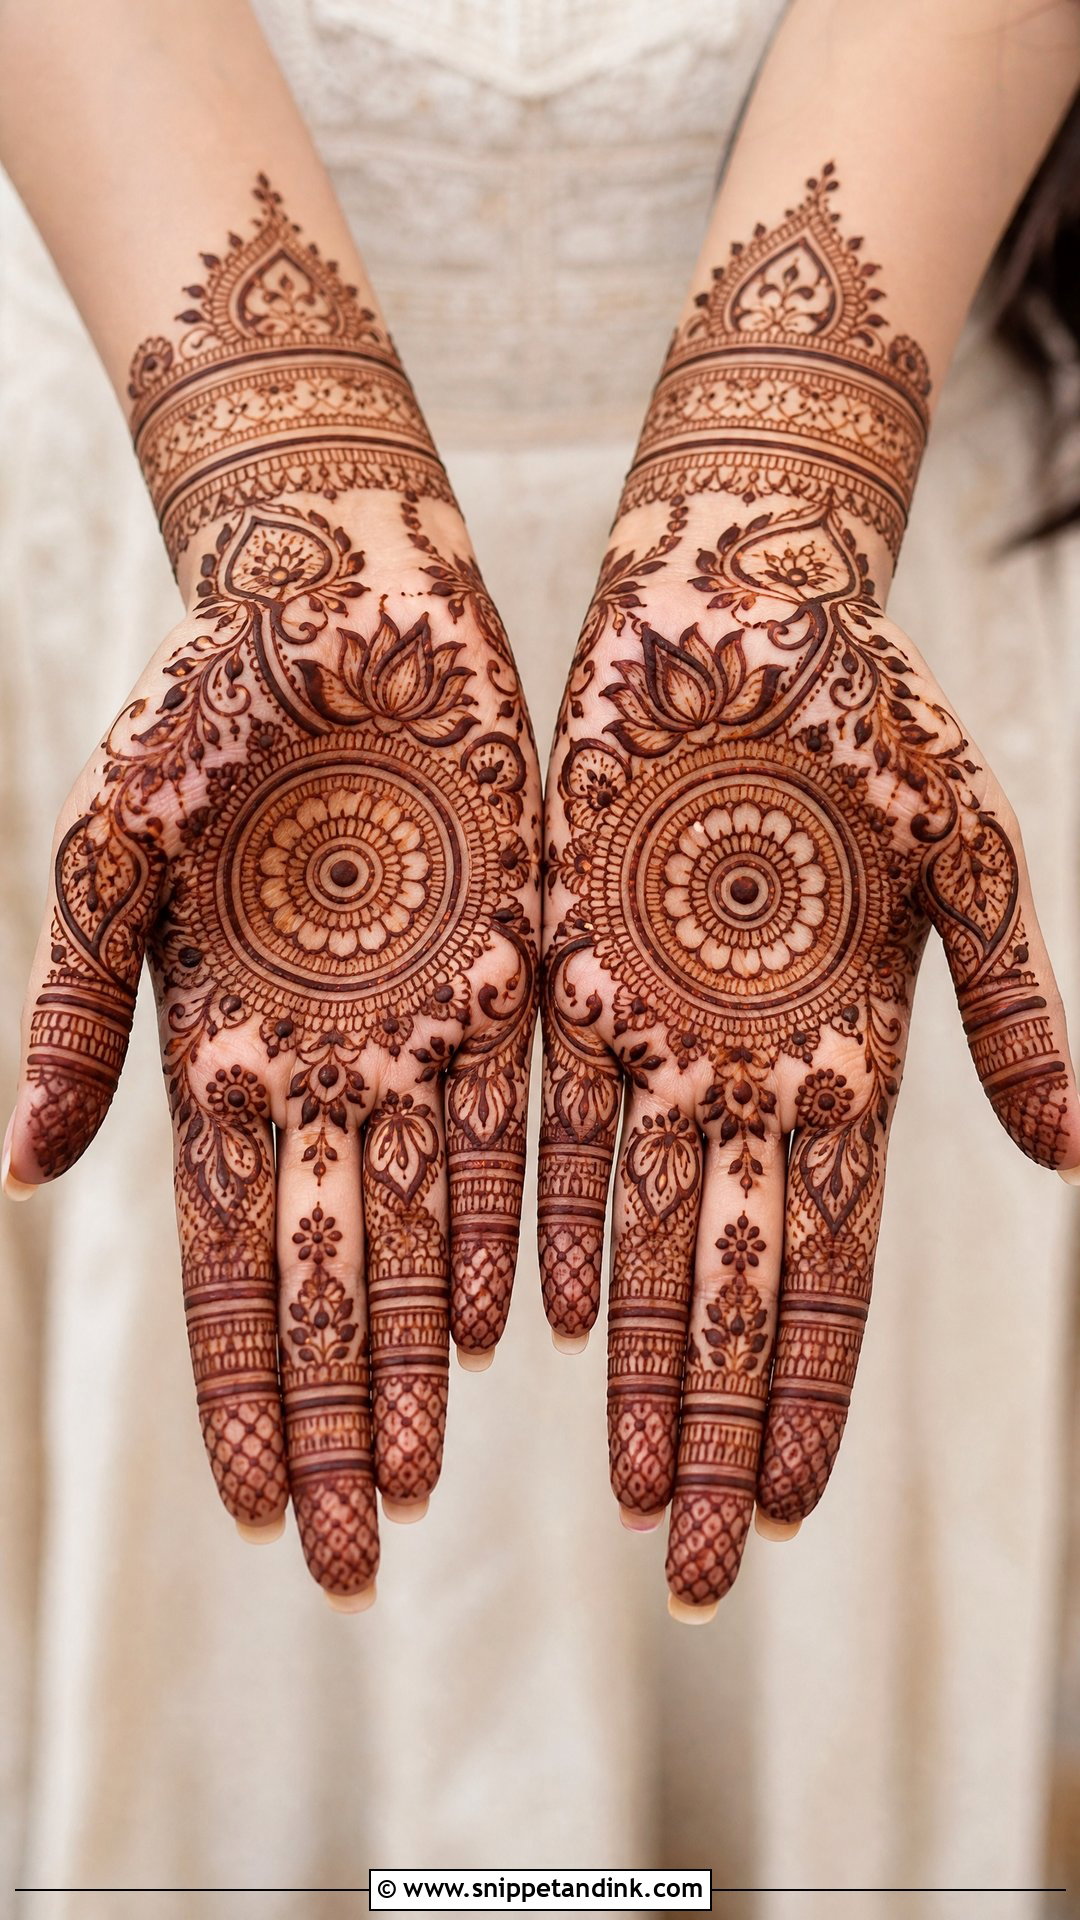
A festival inside mehndi design combines a palm mandala, floral vines, finger bands and a small wrist bracelet, scaled up or down for the event. For Eid, I lean toward open Arabic flow. For Diwali, mandalas, lotus details and dots. For Karva Chauth or Teej, slightly fuller with paisleys and wrist cuffs. Applying it a day or two ahead is smart, since the stain keeps darkening and looks best on the second day.
What You Do After the Cone Decides the Color
Two people can get the same design from the same paste and end up with very different stains. Most of the difference comes from aftercare.
The first night
Leave the paste on as long as you can, ideally six to eight hours or overnight. Dabbing on a little lemon and sugar mixture once it’s dry helps it stick and stops it flaking early. Wrap the hands loosely in tissue or cotton gloves to sleep, not plastic, which makes them sweat and smudge the design.
Removing the paste
Scrape it off with the back of a butter knife or rub it off with your fingers. Don’t wash it off. Then keep water away from your hands for as long as you can, ideally the rest of the day, and rub on a little balm or coconut oil before showering or washing dishes.
Checking the paste is real henna
Natural henna paste is greenish-brown and stains orange first, then darkens. A paste that leaves a jet-black mark within an hour is not natural henna, and black dyes like PPD can cause blistering and lasting skin sensitivity. If you’re unsure, ask your artist what’s in her cones, and do a small patch test a few days before the event.
Which Palm Pattern Fits the Hours You Have?
The palm holds detail and color better than any other part of the hand, which is why it carries so much meaning at a wedding. Simple mandalas, Arabic trails, bridal coverage, finger patterns or a classic tikki all work there; what changes is the time you can sit and the occasion. For a quick event, minimal florals or finger-focused patterns are plenty. For weddings and major festivals, full palm, heavy or bridal layouts are worth the hours. Get the spacing, motif size and finger detail balanced, and any of these palm designs will stain well and look complete.
You'll Like These Ideas:


Leave a Reply