
Most of the henna I put on during festival season is not elaborate at all. A few clean lines, a flower and some dots, done in minutes, and people go home happy. Simple designs suit beginners, kids, teens, bridesmaids, Eid and Diwali mornings, Karwa Chauth, Rakhi and the many small gatherings in between. They rely on open space, small florals, vines, little mandalas and finger accents, which also makes them forgiving on small hands, short palms and long fingers alike. If you are picking up a cone for the first time or just want something quick, these are the simple designs I would point you to, with the small details that make each one look tidy.
Practise Five Strokes on Paper First
Every simple design below is built from a handful of strokes. When I teach beginners, we spend the first session on paper or a plastic sheet, not on skin, because that is where you learn how much pressure the cone needs.
- The dot: touch, squeeze lightly, lift straight up. Practise a row of evenly sized dots.
- The line: hold the cone like a pen and let the paste fall onto the surface just ahead of the tip, rather than scraping the tip along.
- The petal or teardrop: start with pressure, then ease off as you pull, so it tapers to a point.
- The C-curve: the base of every vine and mandala ring. Keep your wrist still and move from the elbow.
- The leaf: two curves meeting at a point, with a line down the middle.
If your lines keep breaking, the cone tip is usually cut too small or the paste is too thick. If they spread into fat blobs, the tip is too wide or you’re squeezing too hard. Snip a tiny bit at a time and test on paper after each cut.
Once those five feel steady, you can draw nearly everything on this list. If a line goes wrong on skin, wipe it straight away with a damp cotton bud. Wet paste lifts cleanly within a minute or so; leave it longer and it will have already started to stain.
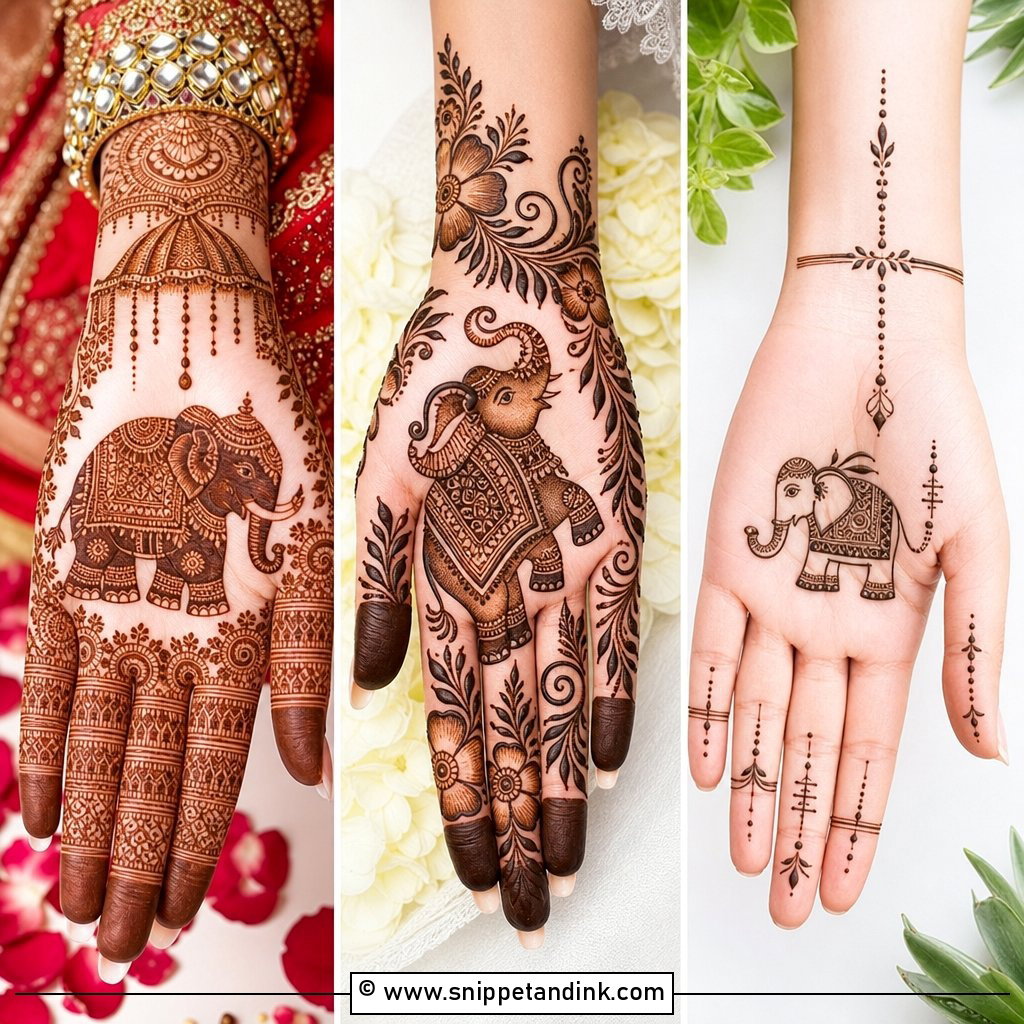
1. Simple Front Hand Mehndi Design
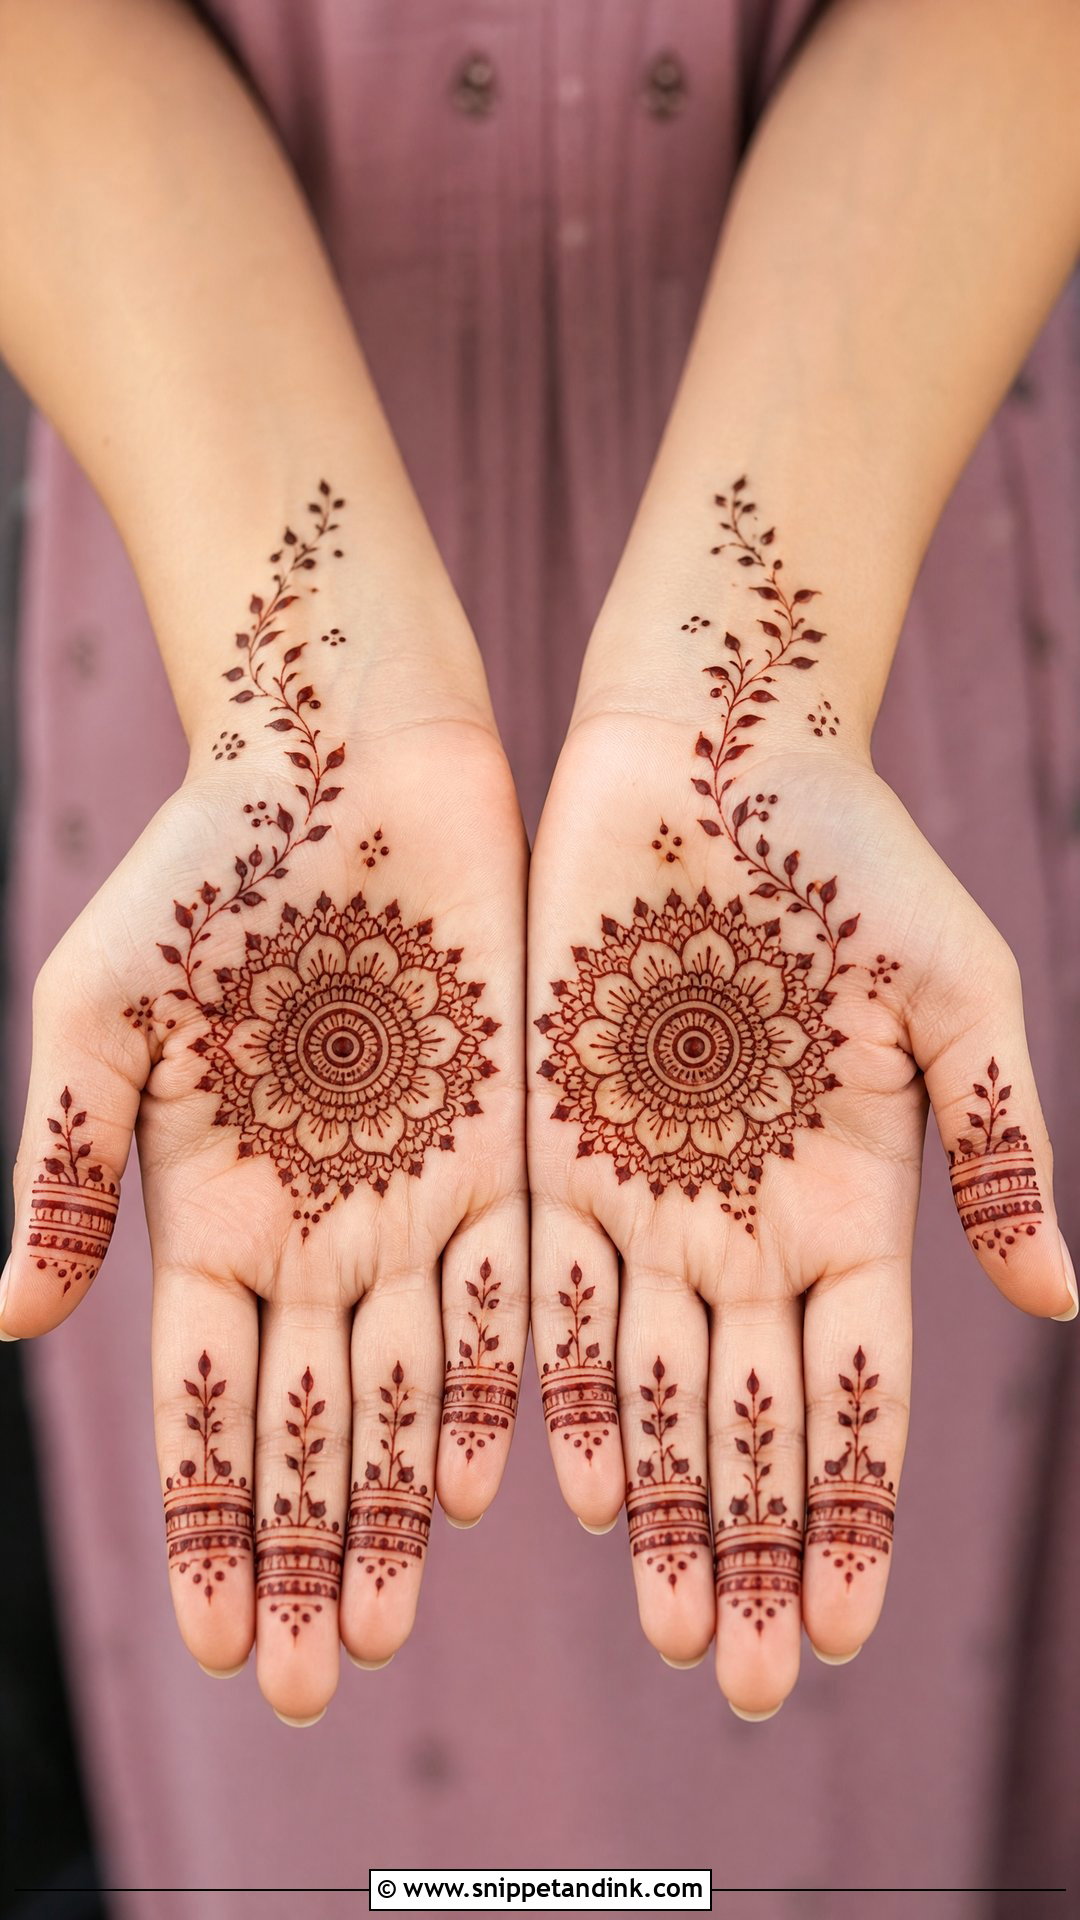
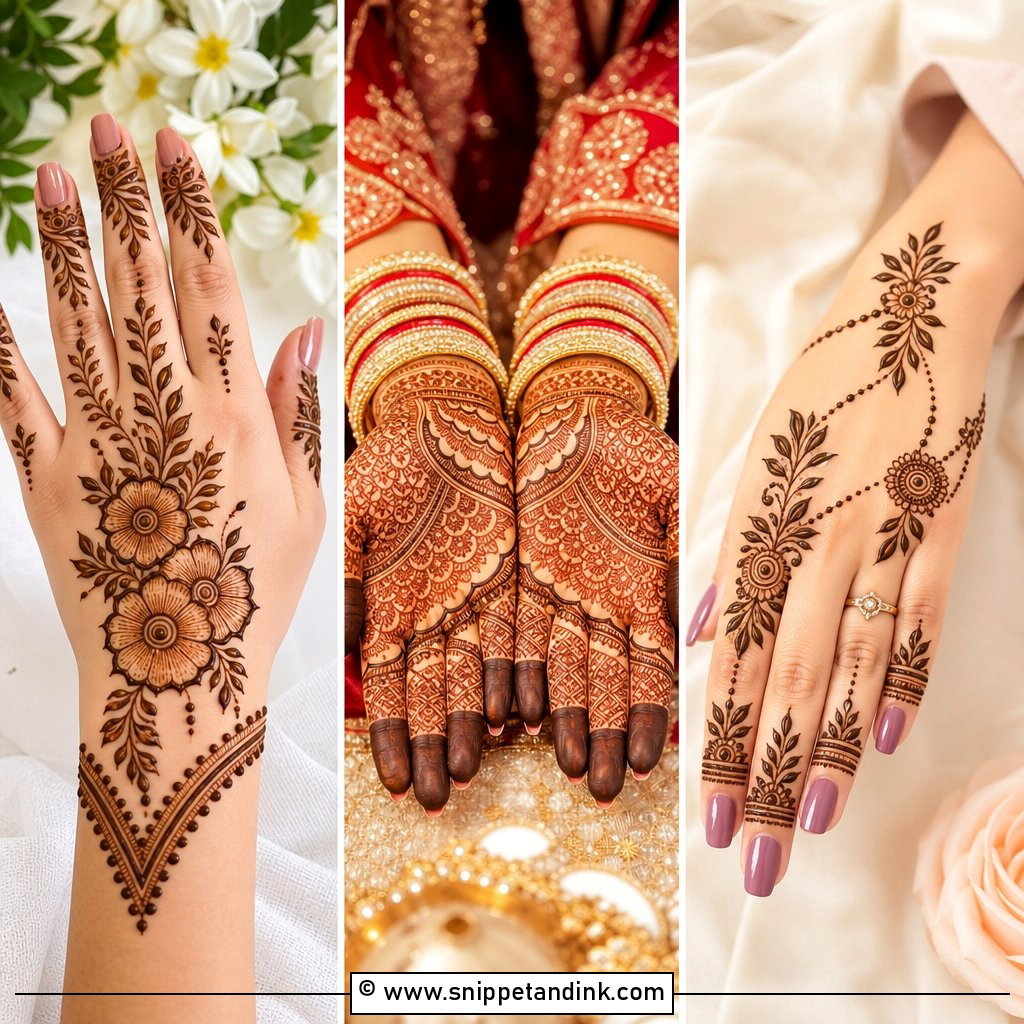
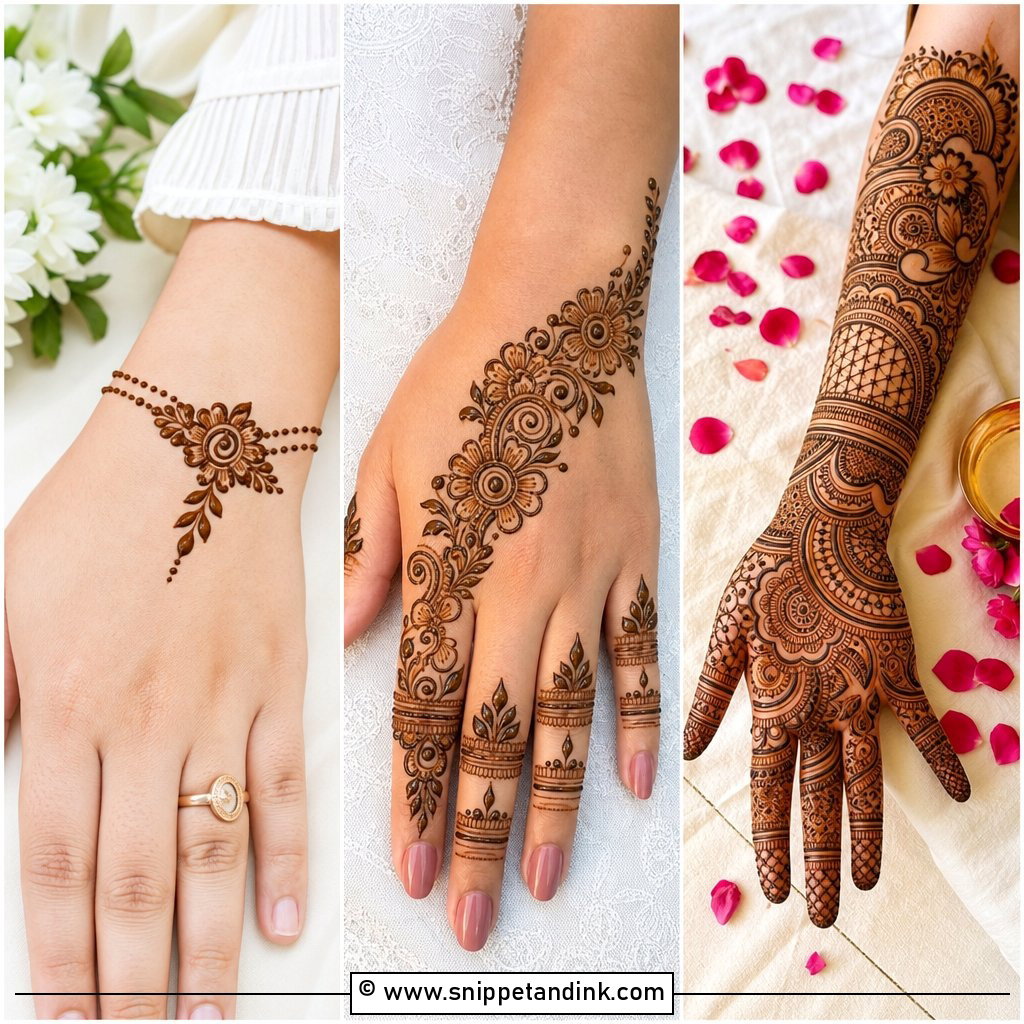
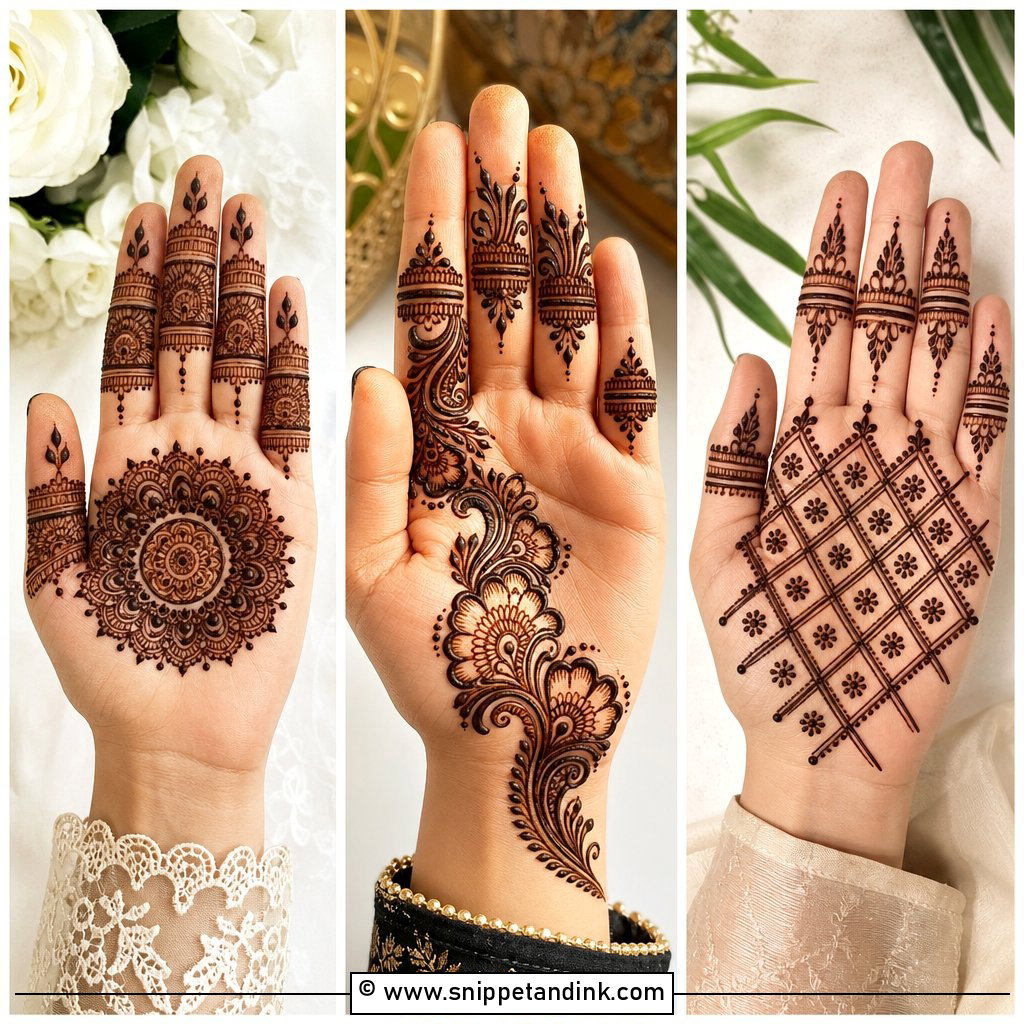
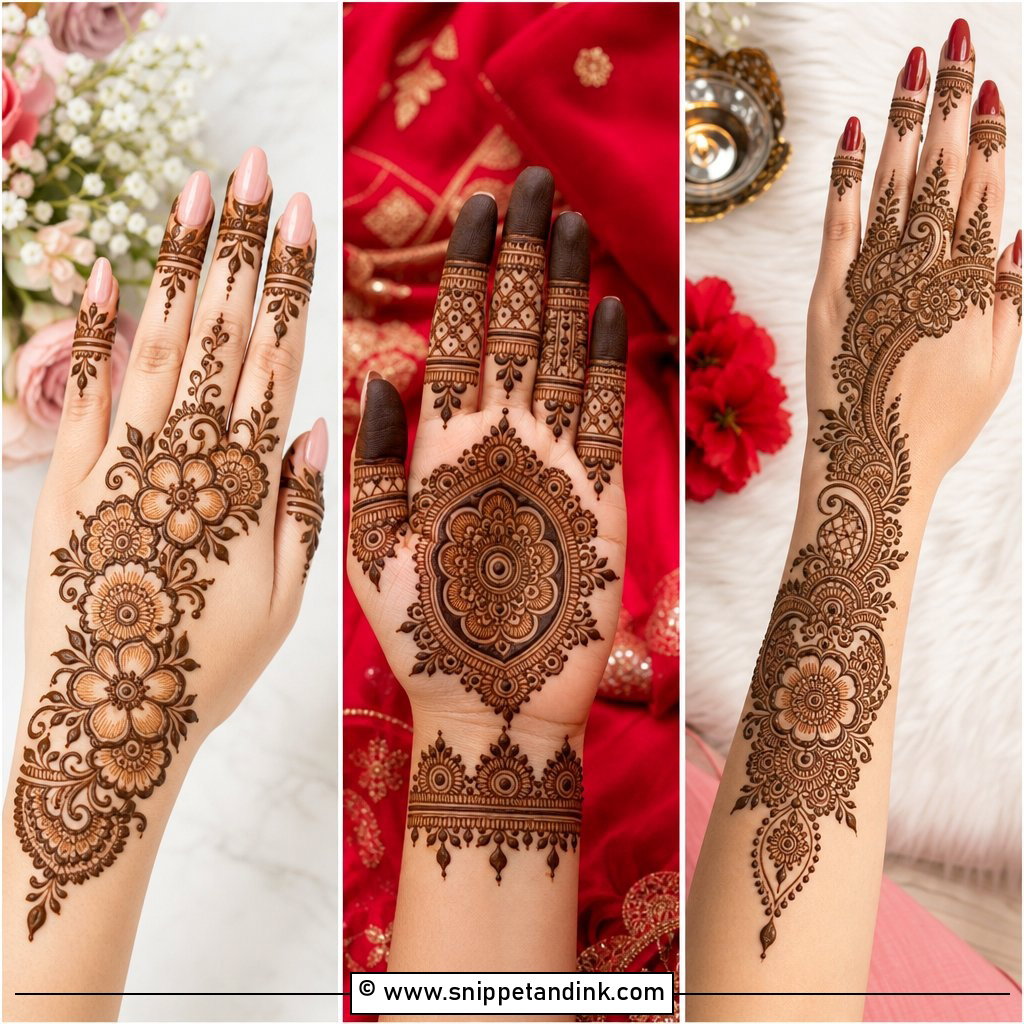
The palm is flat, which makes a simple front hand mehndi design the easiest place to begin. Put a small flower or round mandala in the centre, ring it with dots, then run thin vines or leaf trails to the fingers. Partly filled tips or small bands finish it. No shading is needed, so a beginner can draw it confidently. The open skin also lets the reddish-brown stain stand out clearly.
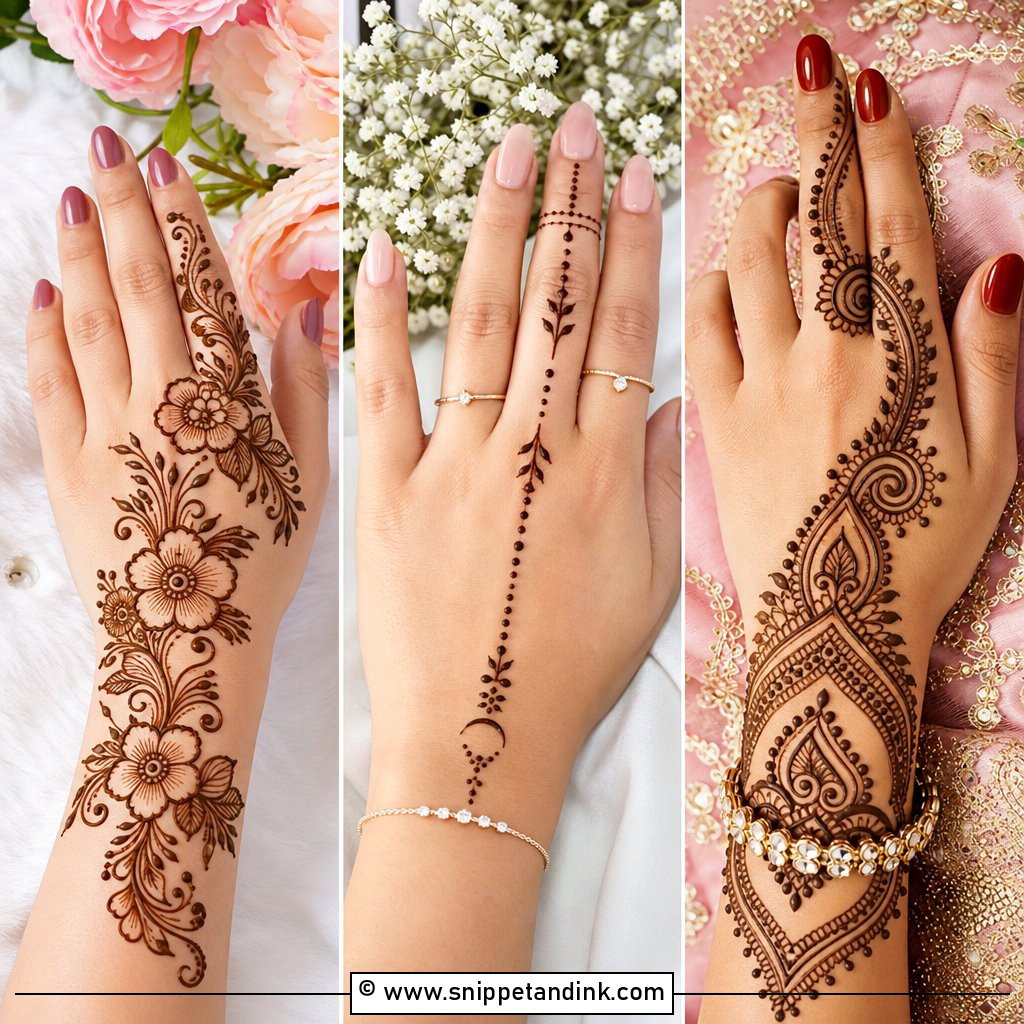
2. Simple Back Hand Mehndi Design
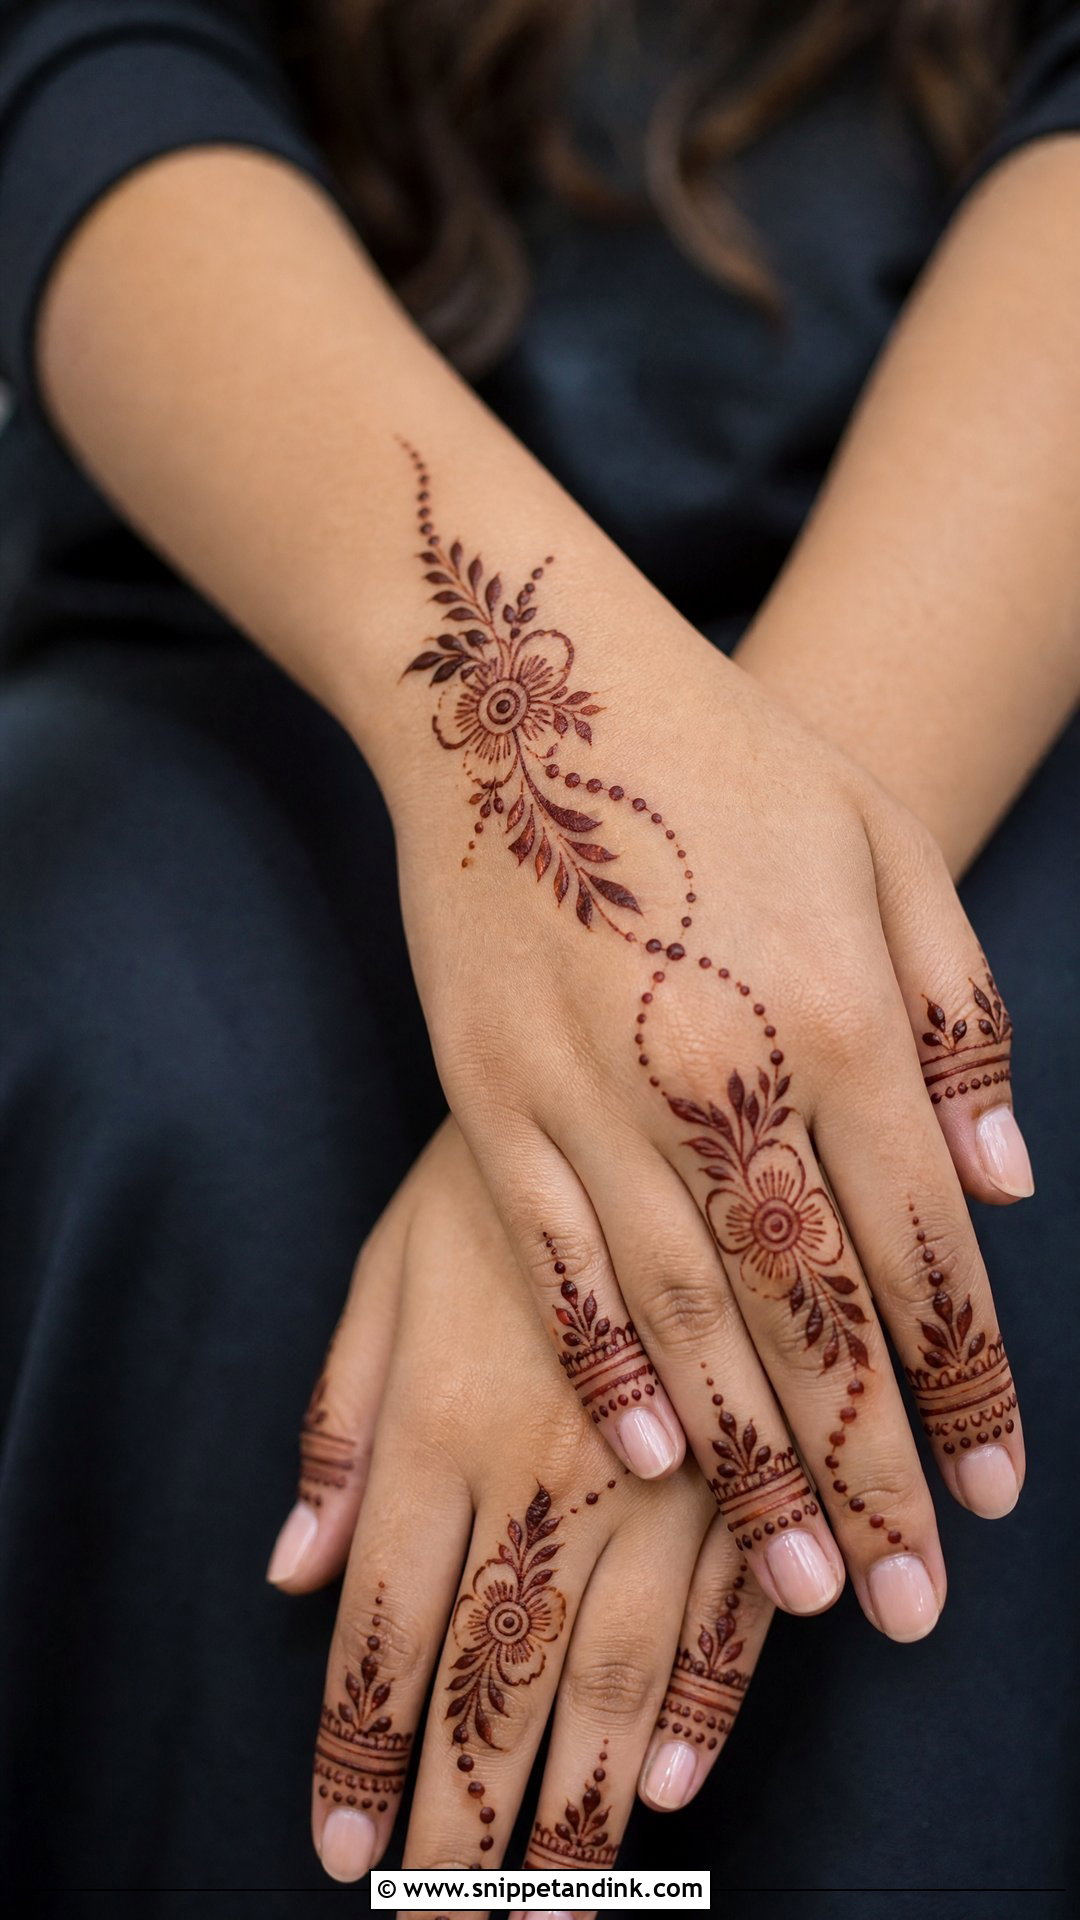
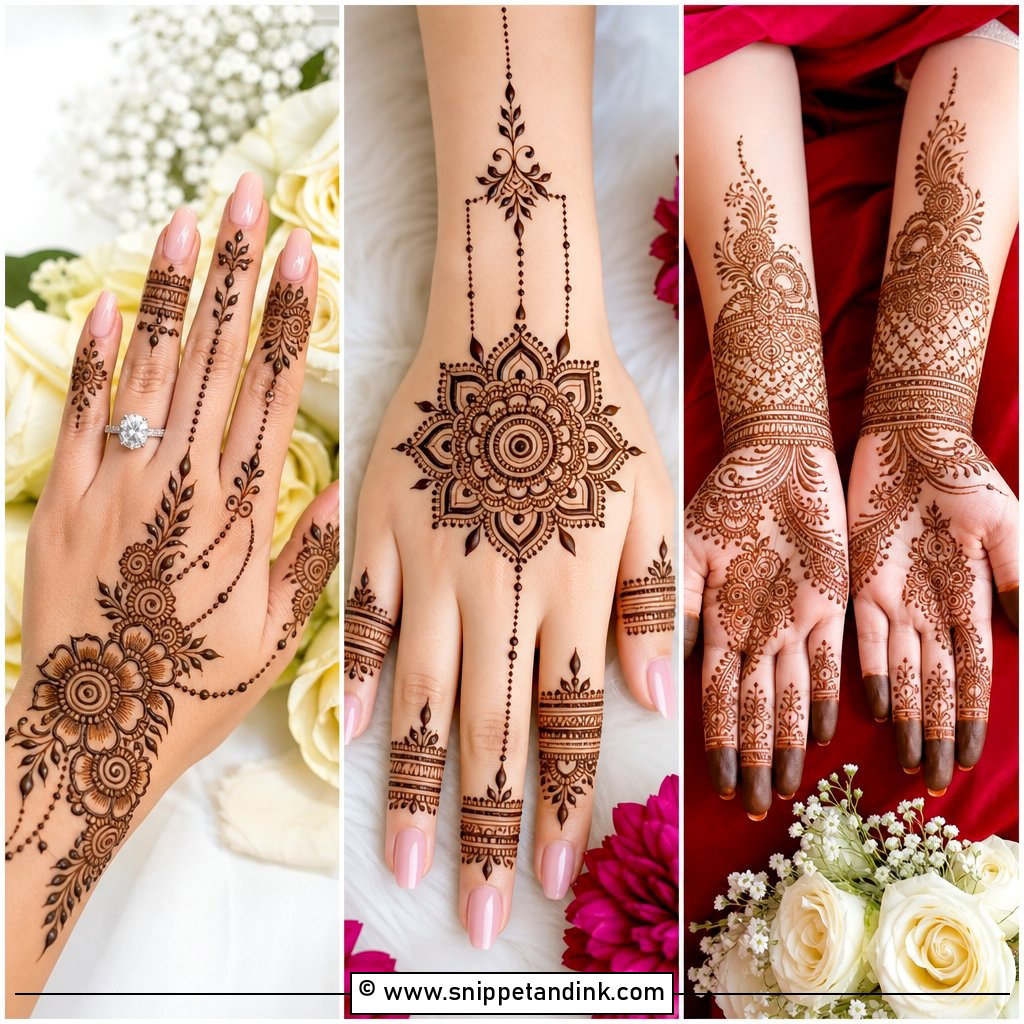
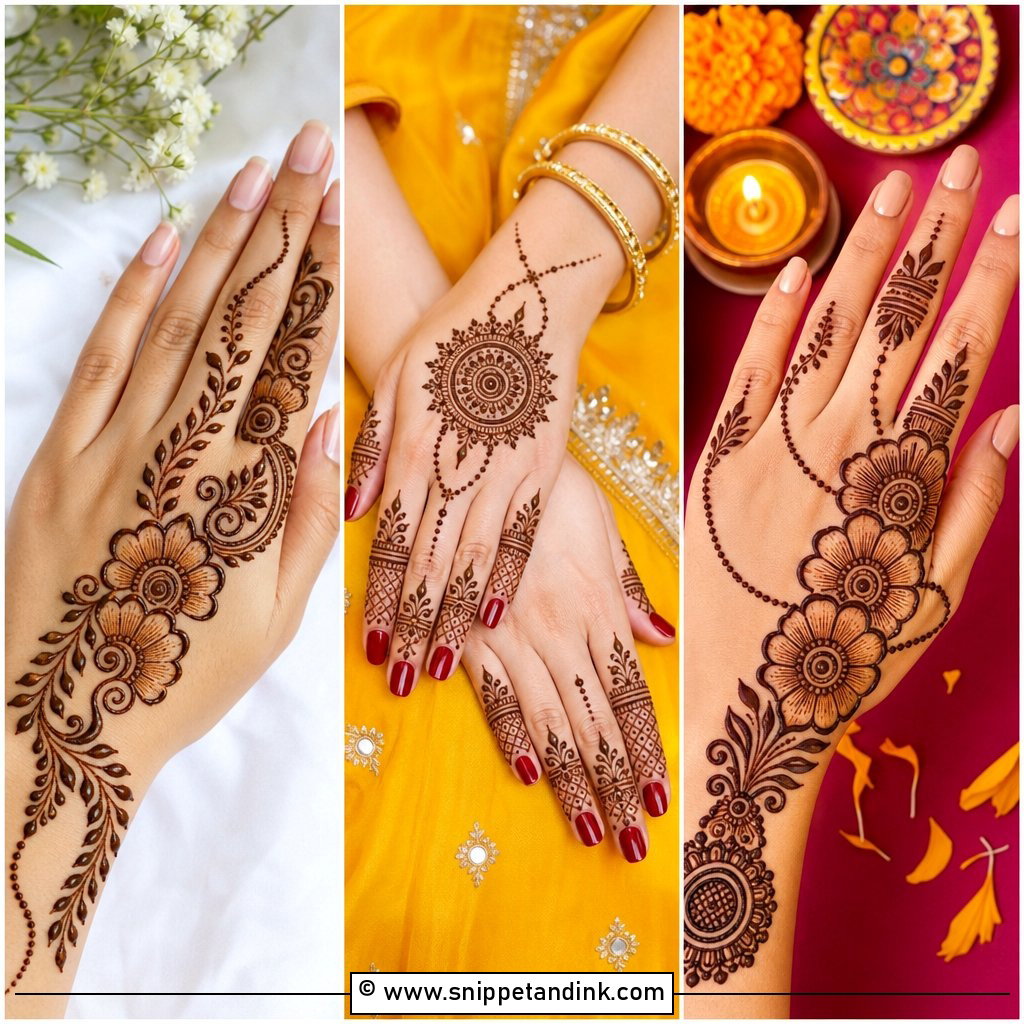
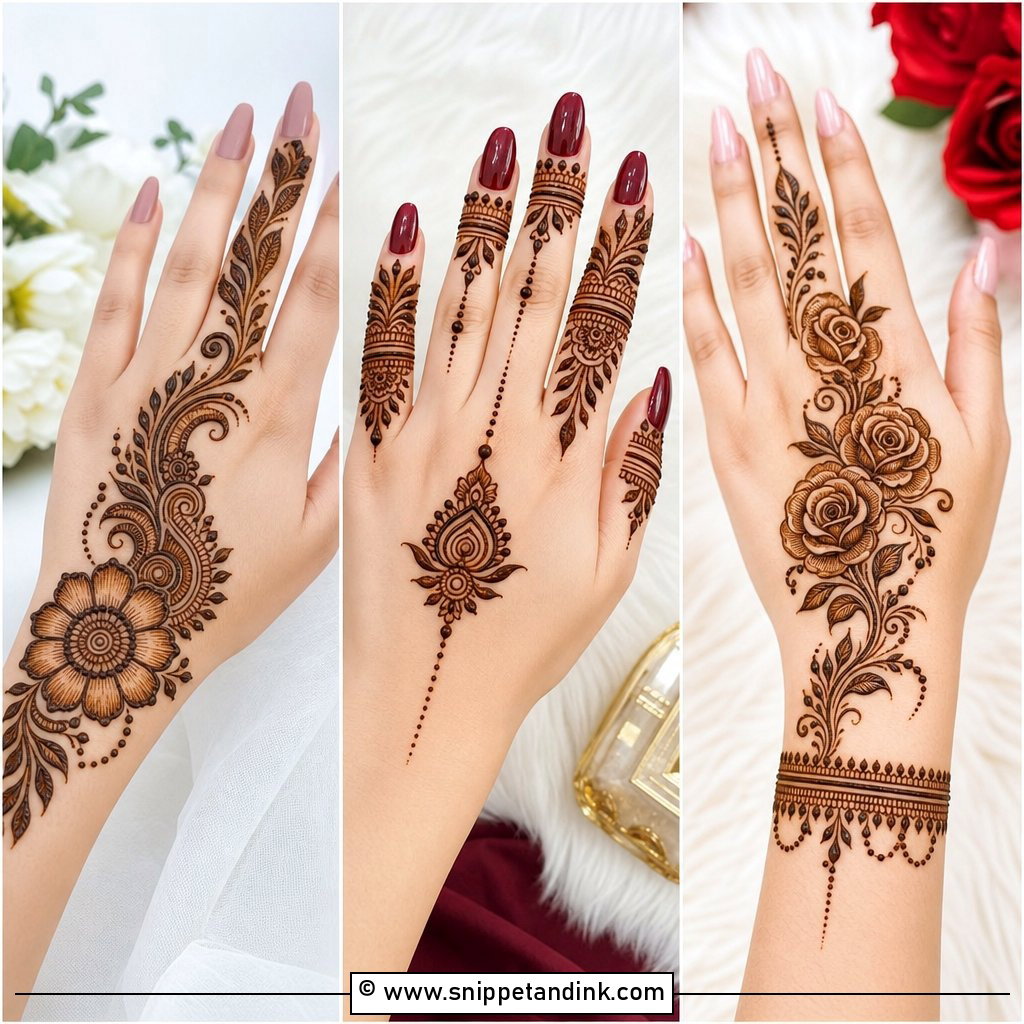
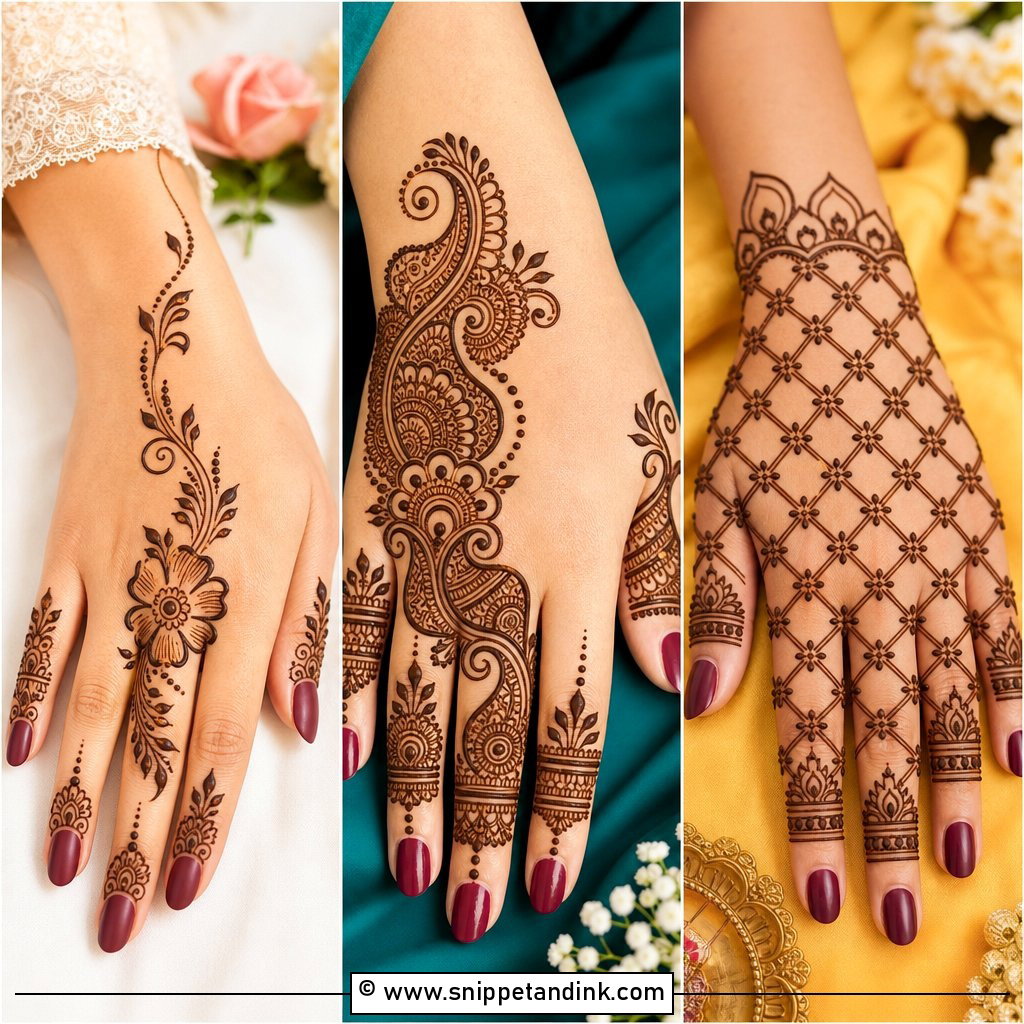
Start near the wrist and travel toward one or two fingers with a small floral cluster, a curved vine and a dotted chain. Leave plenty of empty skin around it. That restraint is what keeps it modern and light enough for everyday wear, while still showing up in photos. A couple of tiny bands on the index or middle finger tie the wrist to the fingertip.
3. Simple Arabic Mehndi Design
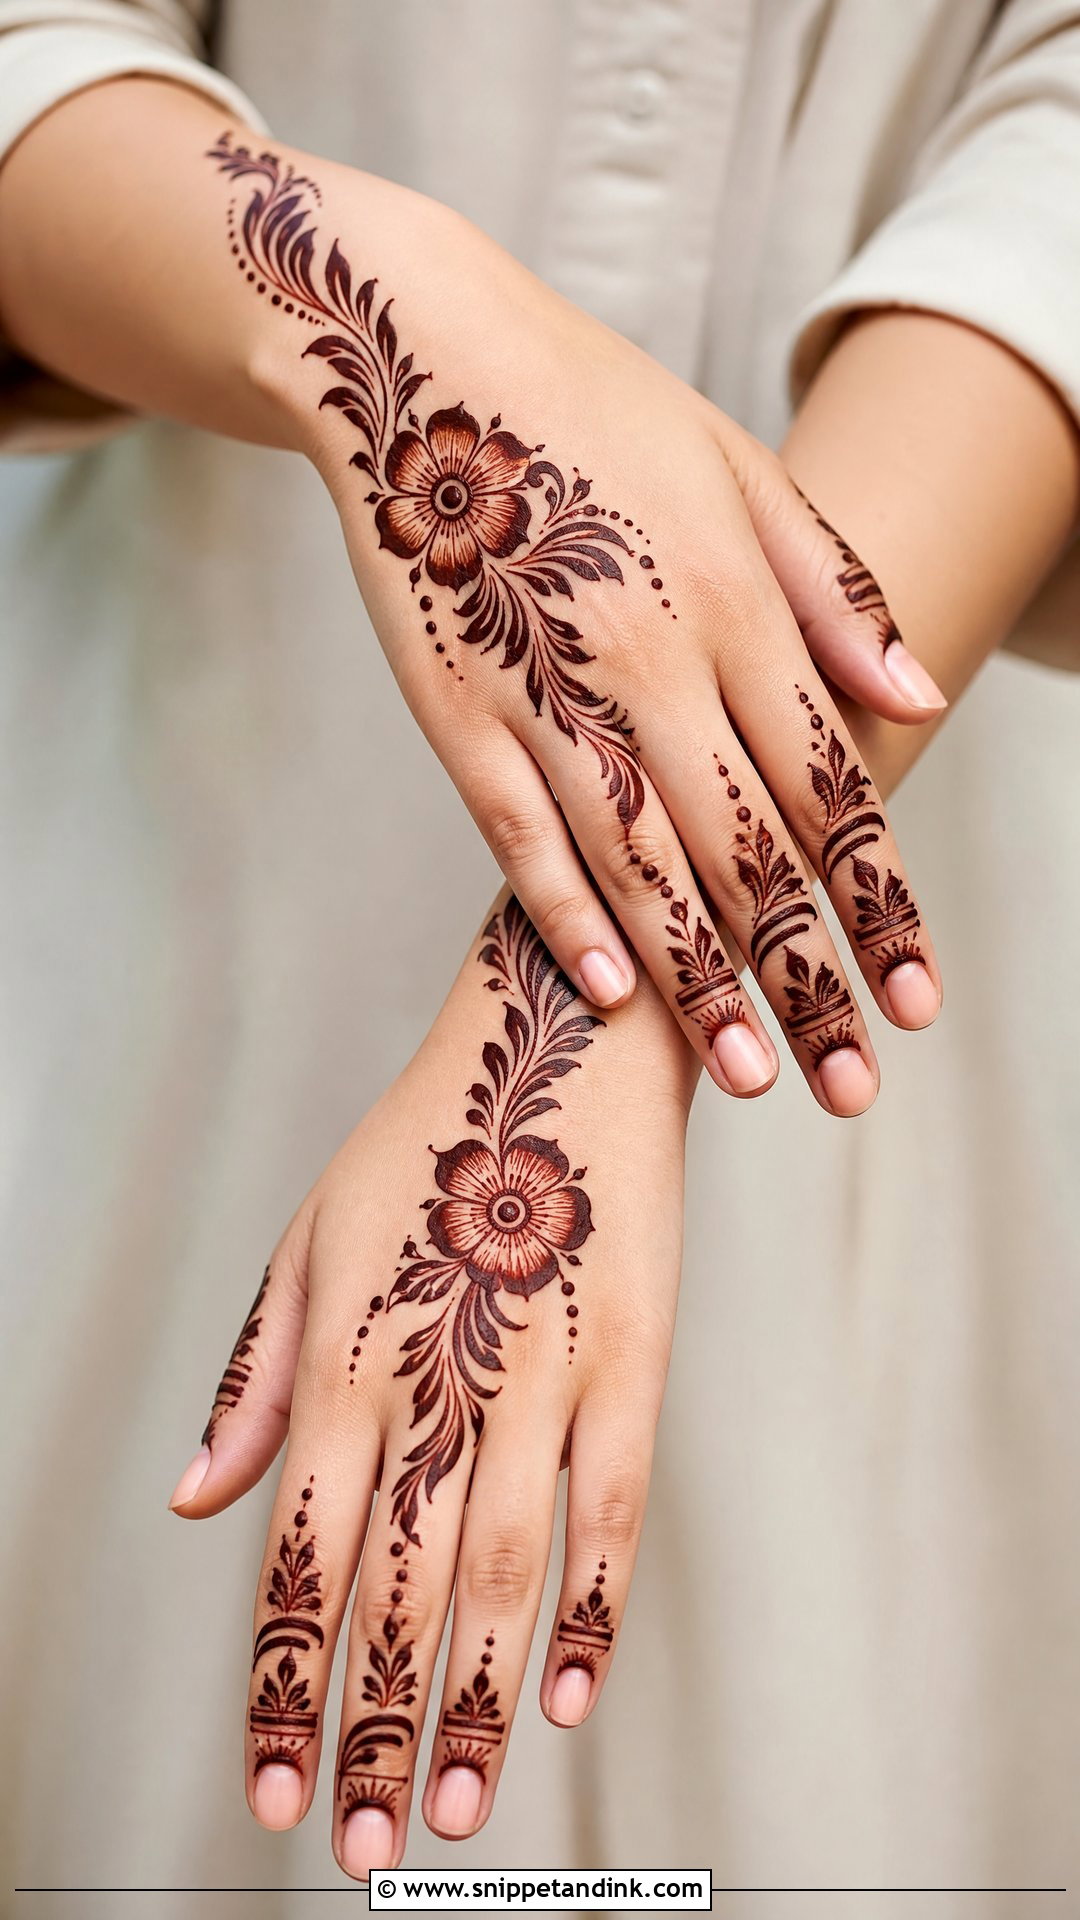
Bold flowers, curved leaves and open spaces, laid diagonally from wrist to index finger. Keep the flowers slightly large and add small dots and vines around them. Beginners do well with Arabic layouts because they do not need strict symmetry, so a slightly uneven petal just looks hand-drawn. It suits Eid, weddings and last-minute plans, on the palm or the back hand.
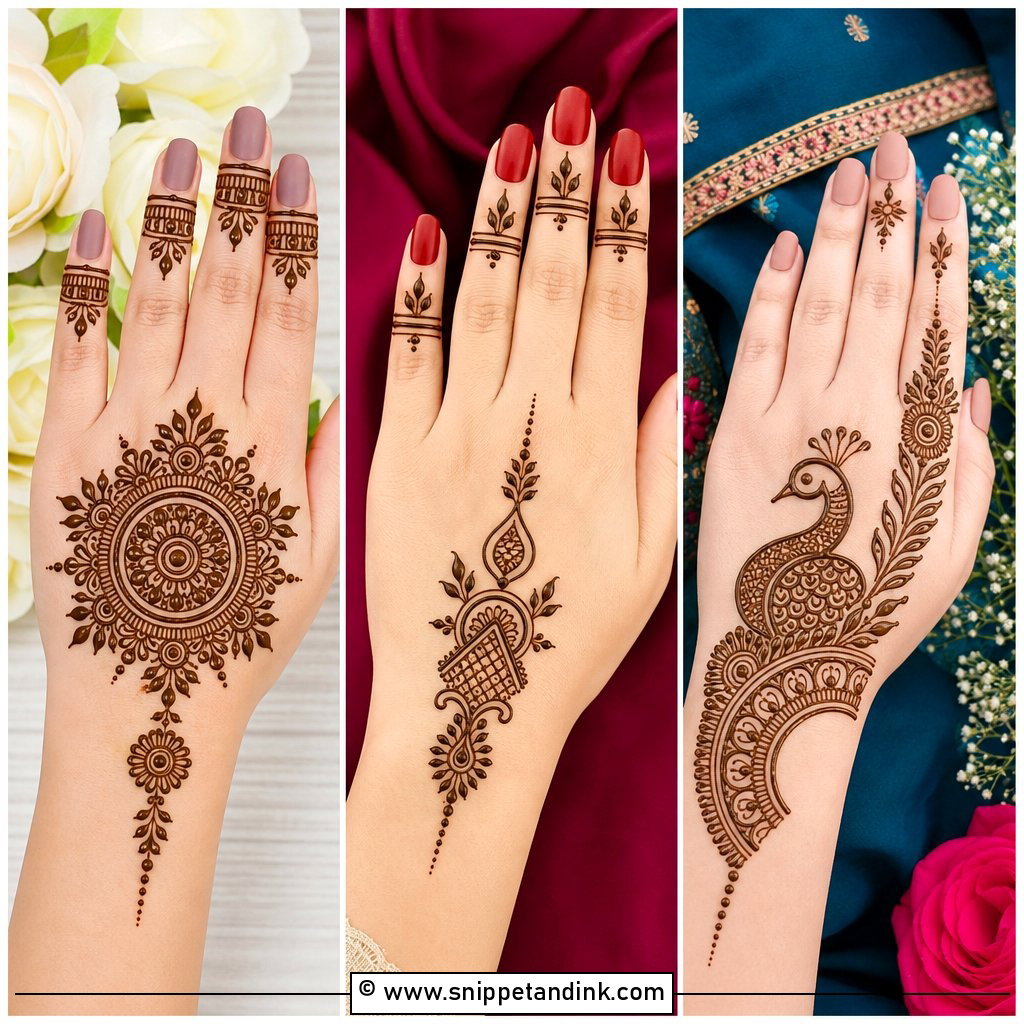
4. Simple Mandala Mehndi Design
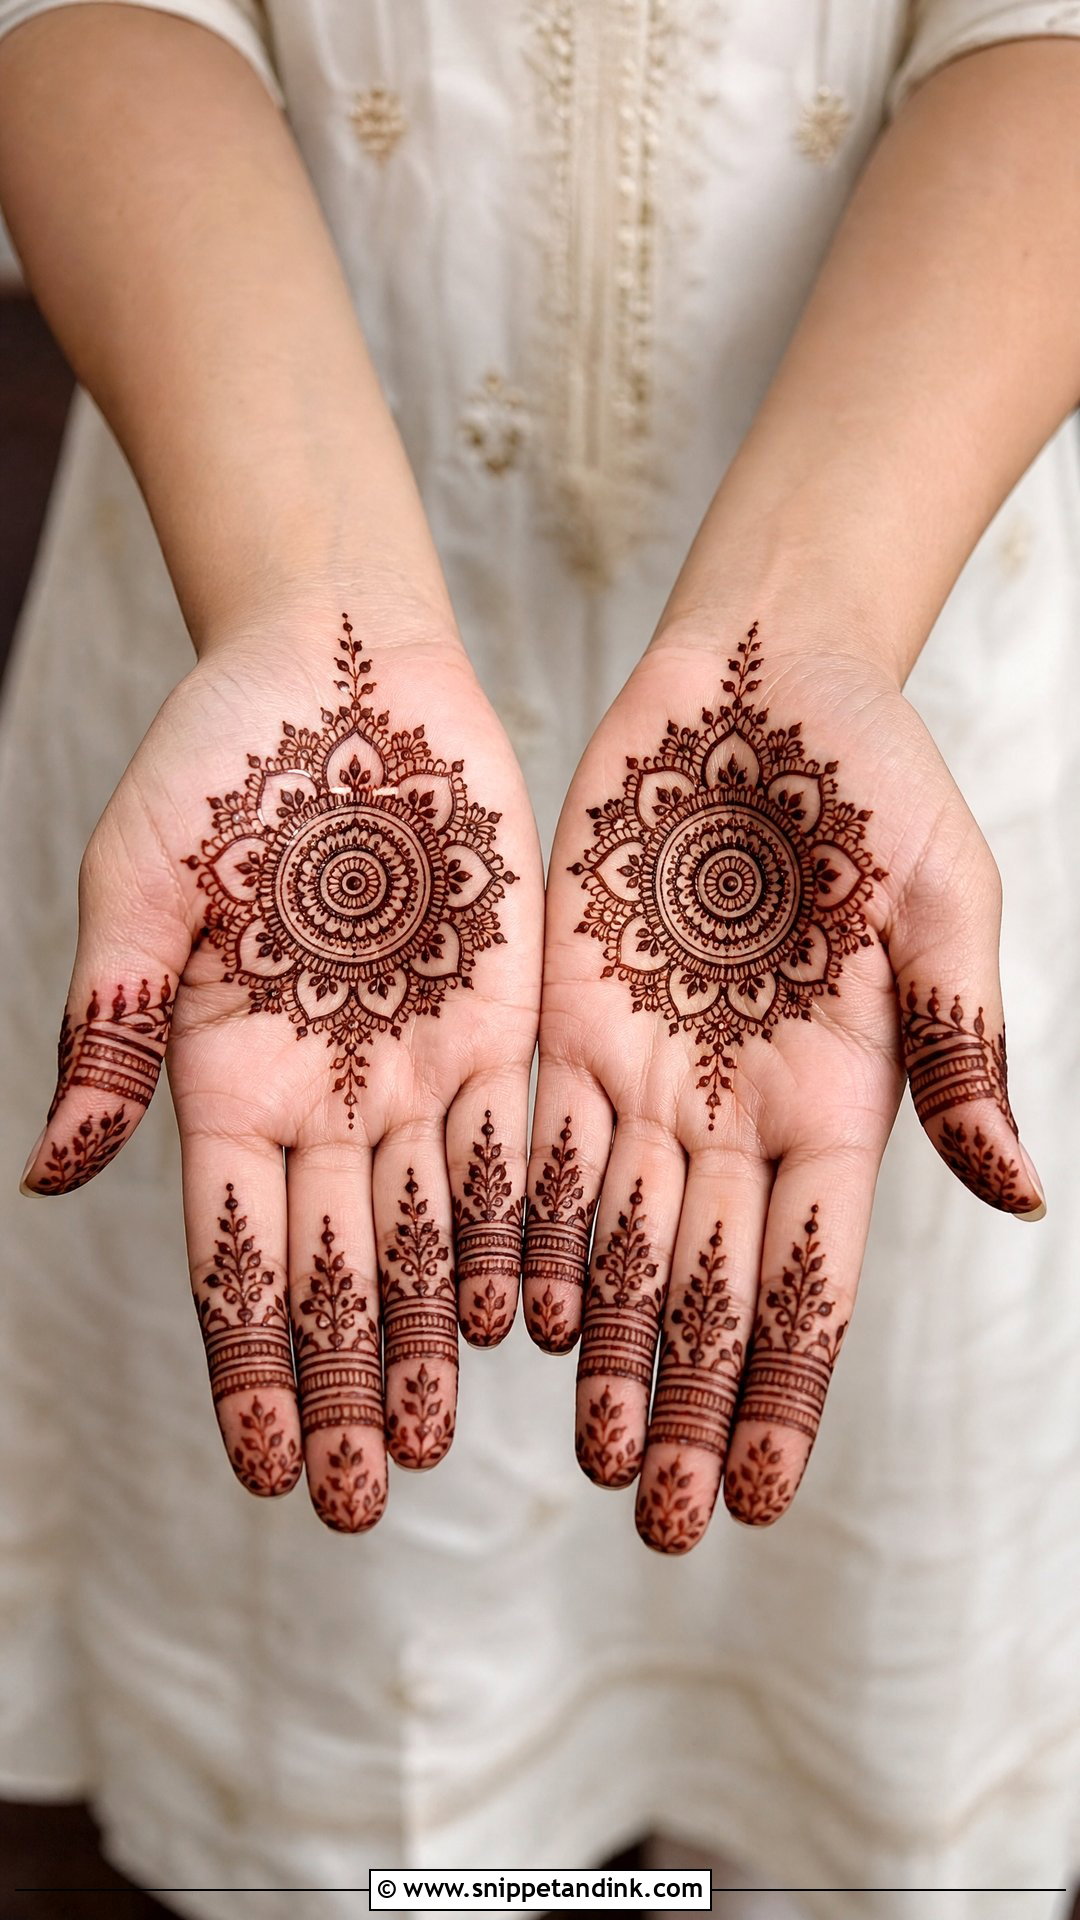
A round mandala is easy to control: a small circle, petals around it, then one or two rings of dots, curves and tiny leaves. Keep the fingers to dots or thin lines. I tell beginners to turn the hand, not their wrist, as they go round; it keeps the circle even. Centre it, and resist adding extra motifs around it.
5. Simple Finger Mehndi Design
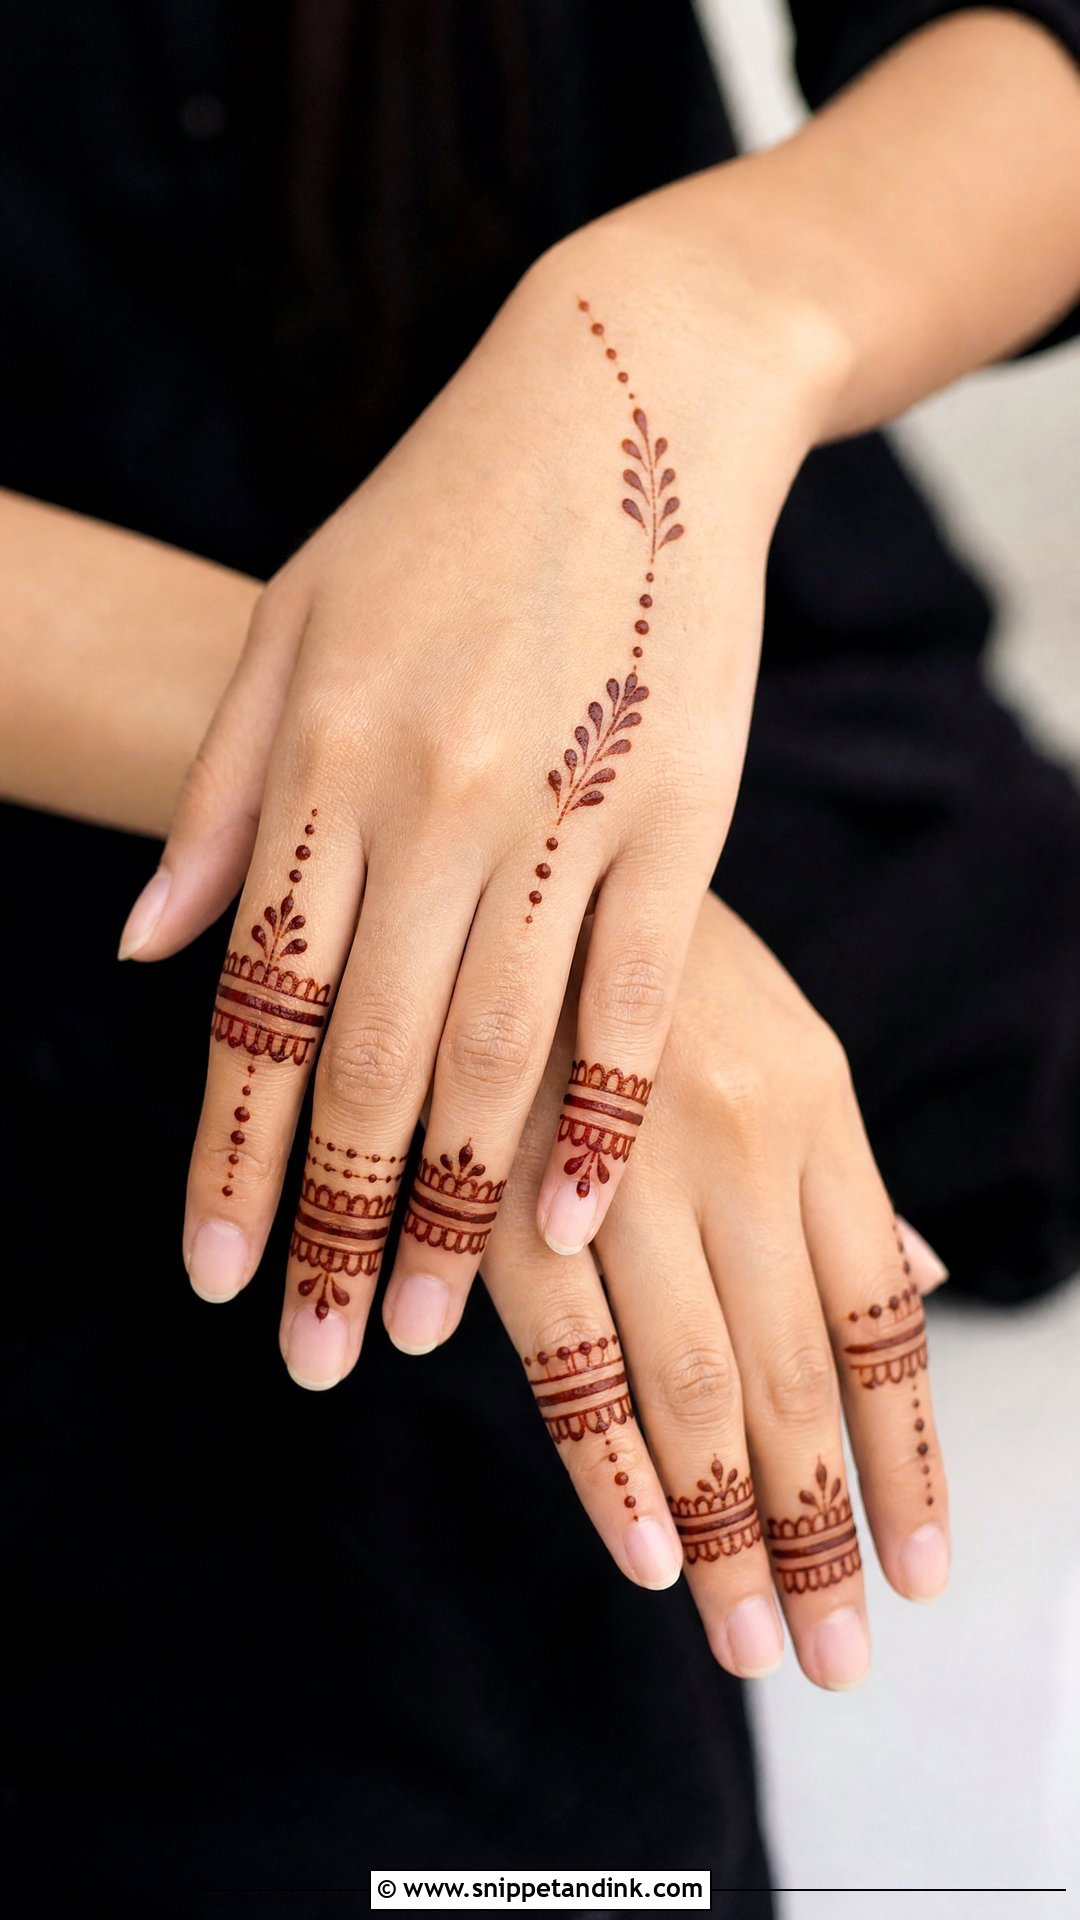
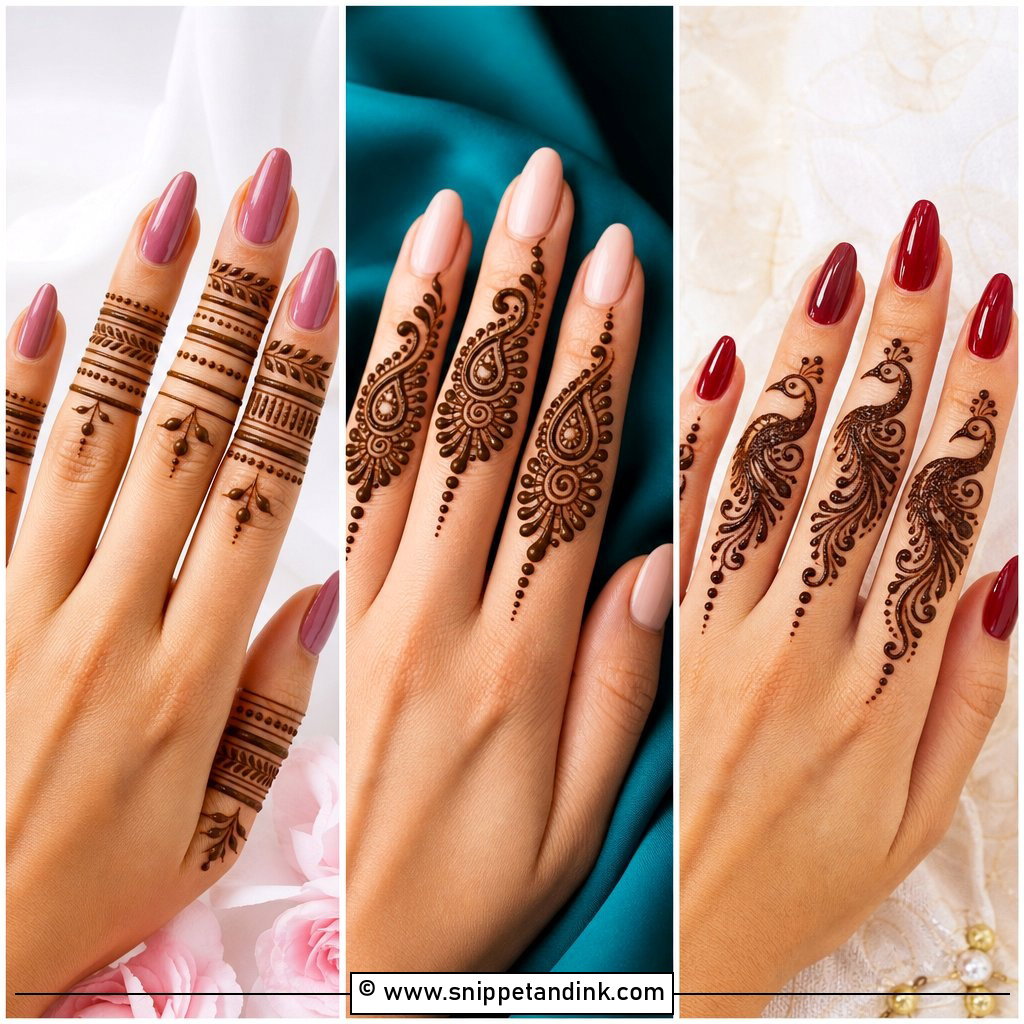
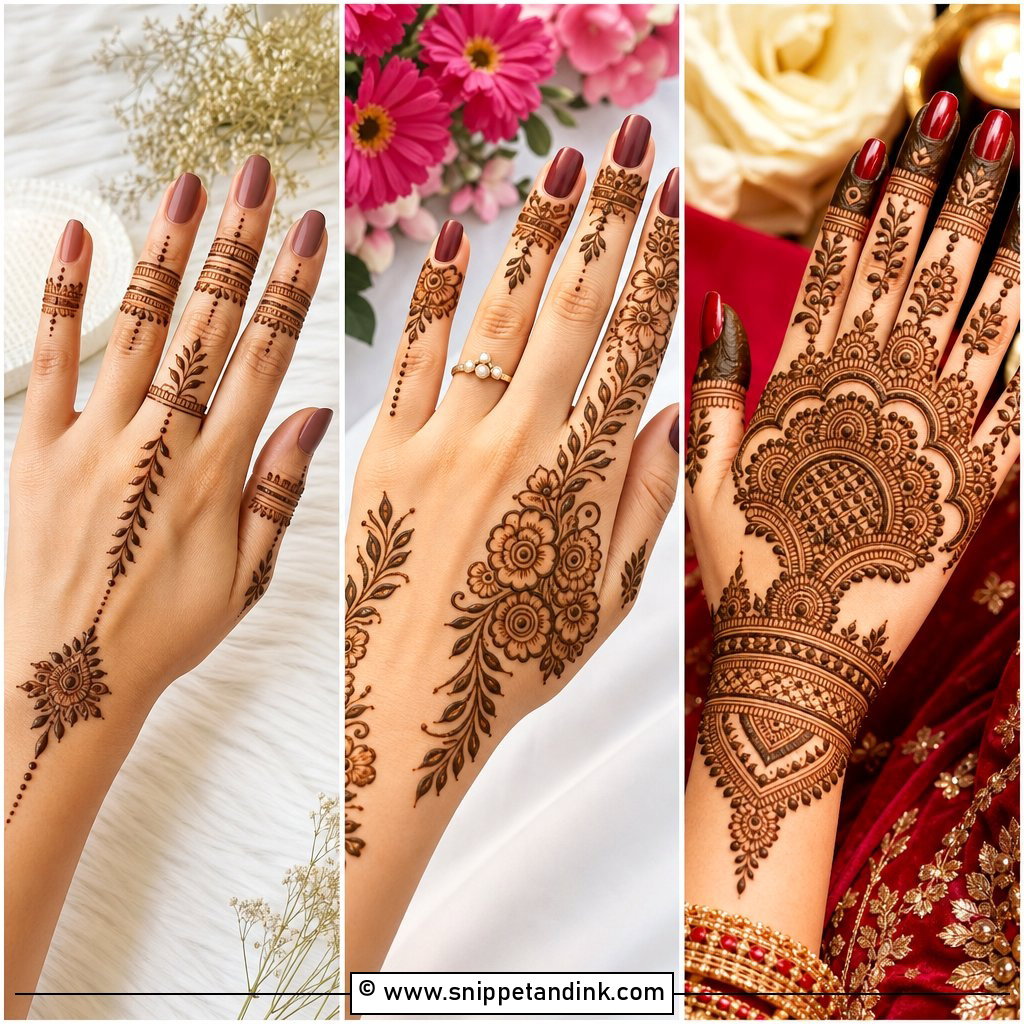
Decorating only the fingers, with small bands, dots, leaves and thin lines, leaves the palm open and dries fast. Match all fingers or make one the focus. It looks neat beside rings and bangles. On its own it can feel slightly unfinished, so I add a short line at the wrist or a few dots near the knuckles to round it off.
6. Simple Flower Mehndi Design
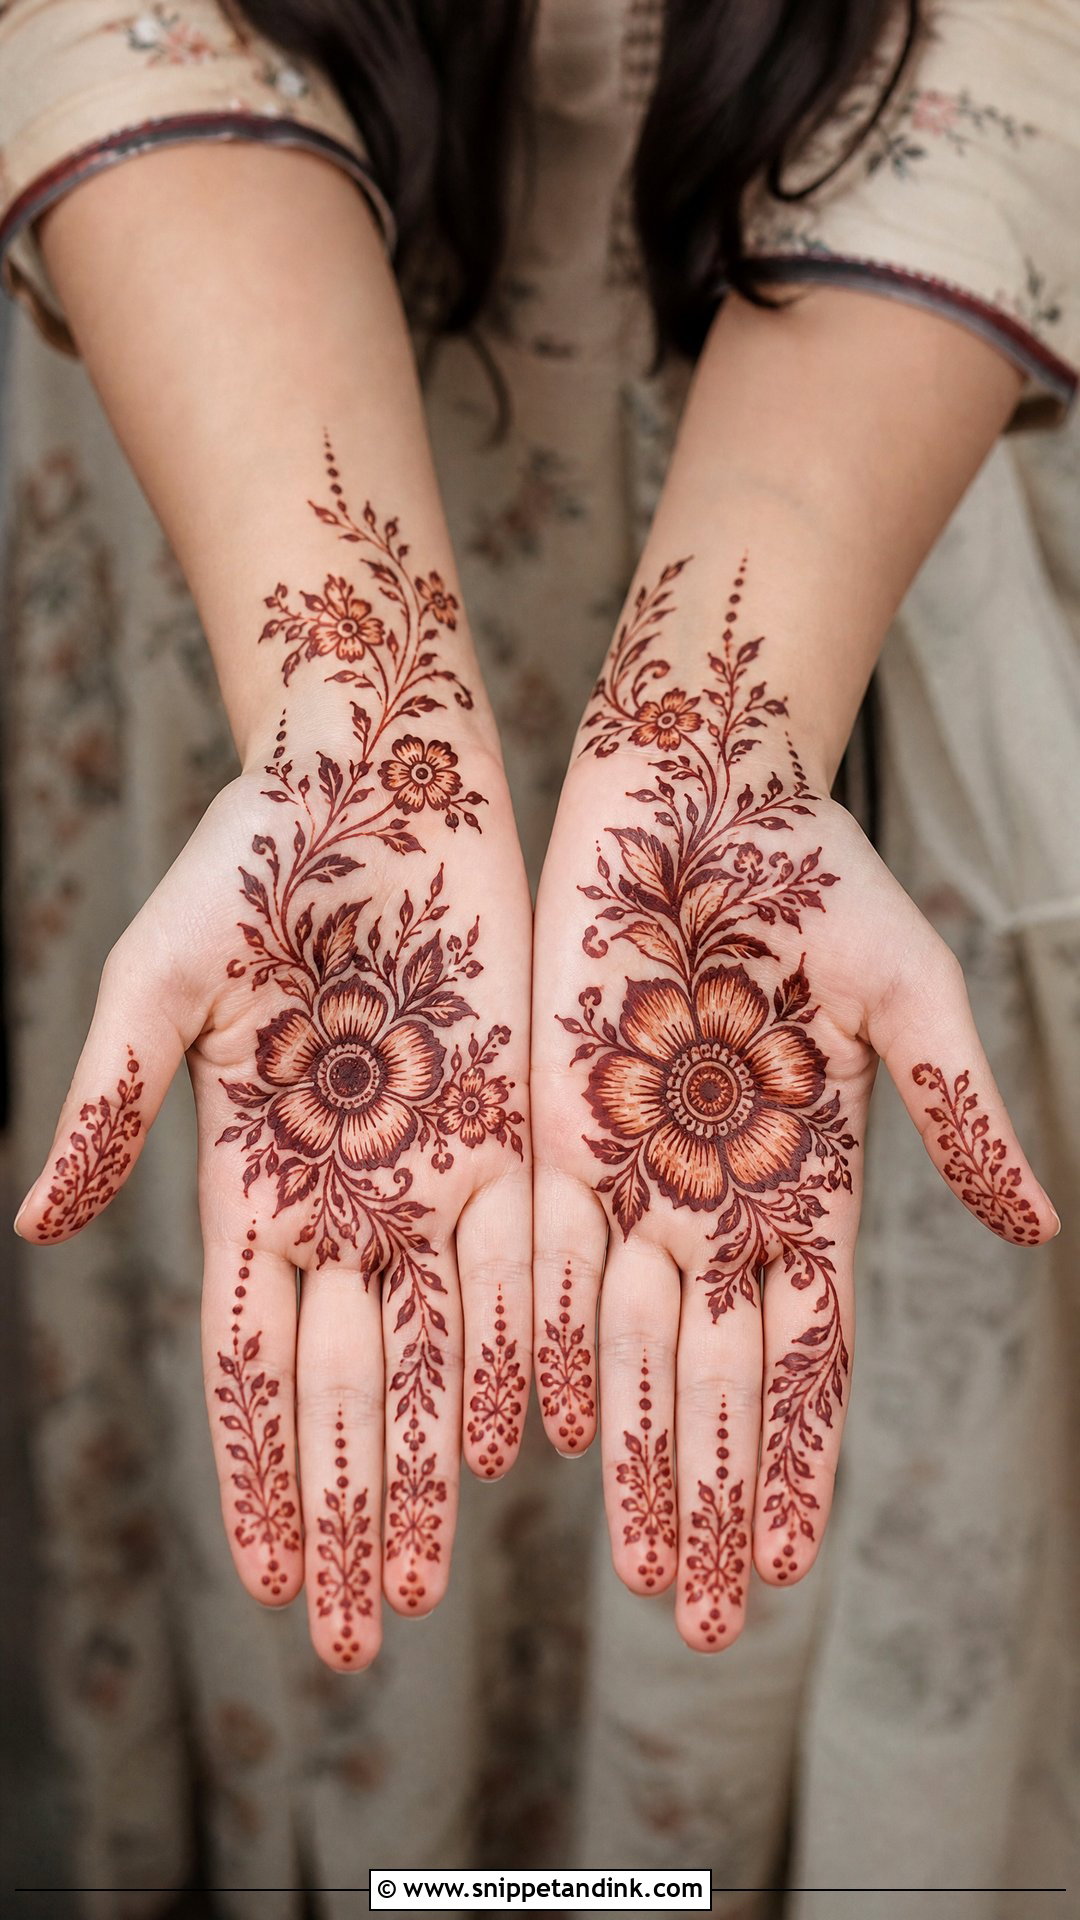
One larger flower on the palm or back hand, two or three smaller ones around it, joined by curved stems and tiny leaves. Keep the petals open and rounded. Flowers are forgiving: if a petal goes wrong, the next one can be shaped to balance it. Kids, teens and adults all suit it. Fingertip dots or thin bands complete the hand without crowding it.
7. Simple Vine Mehndi Design
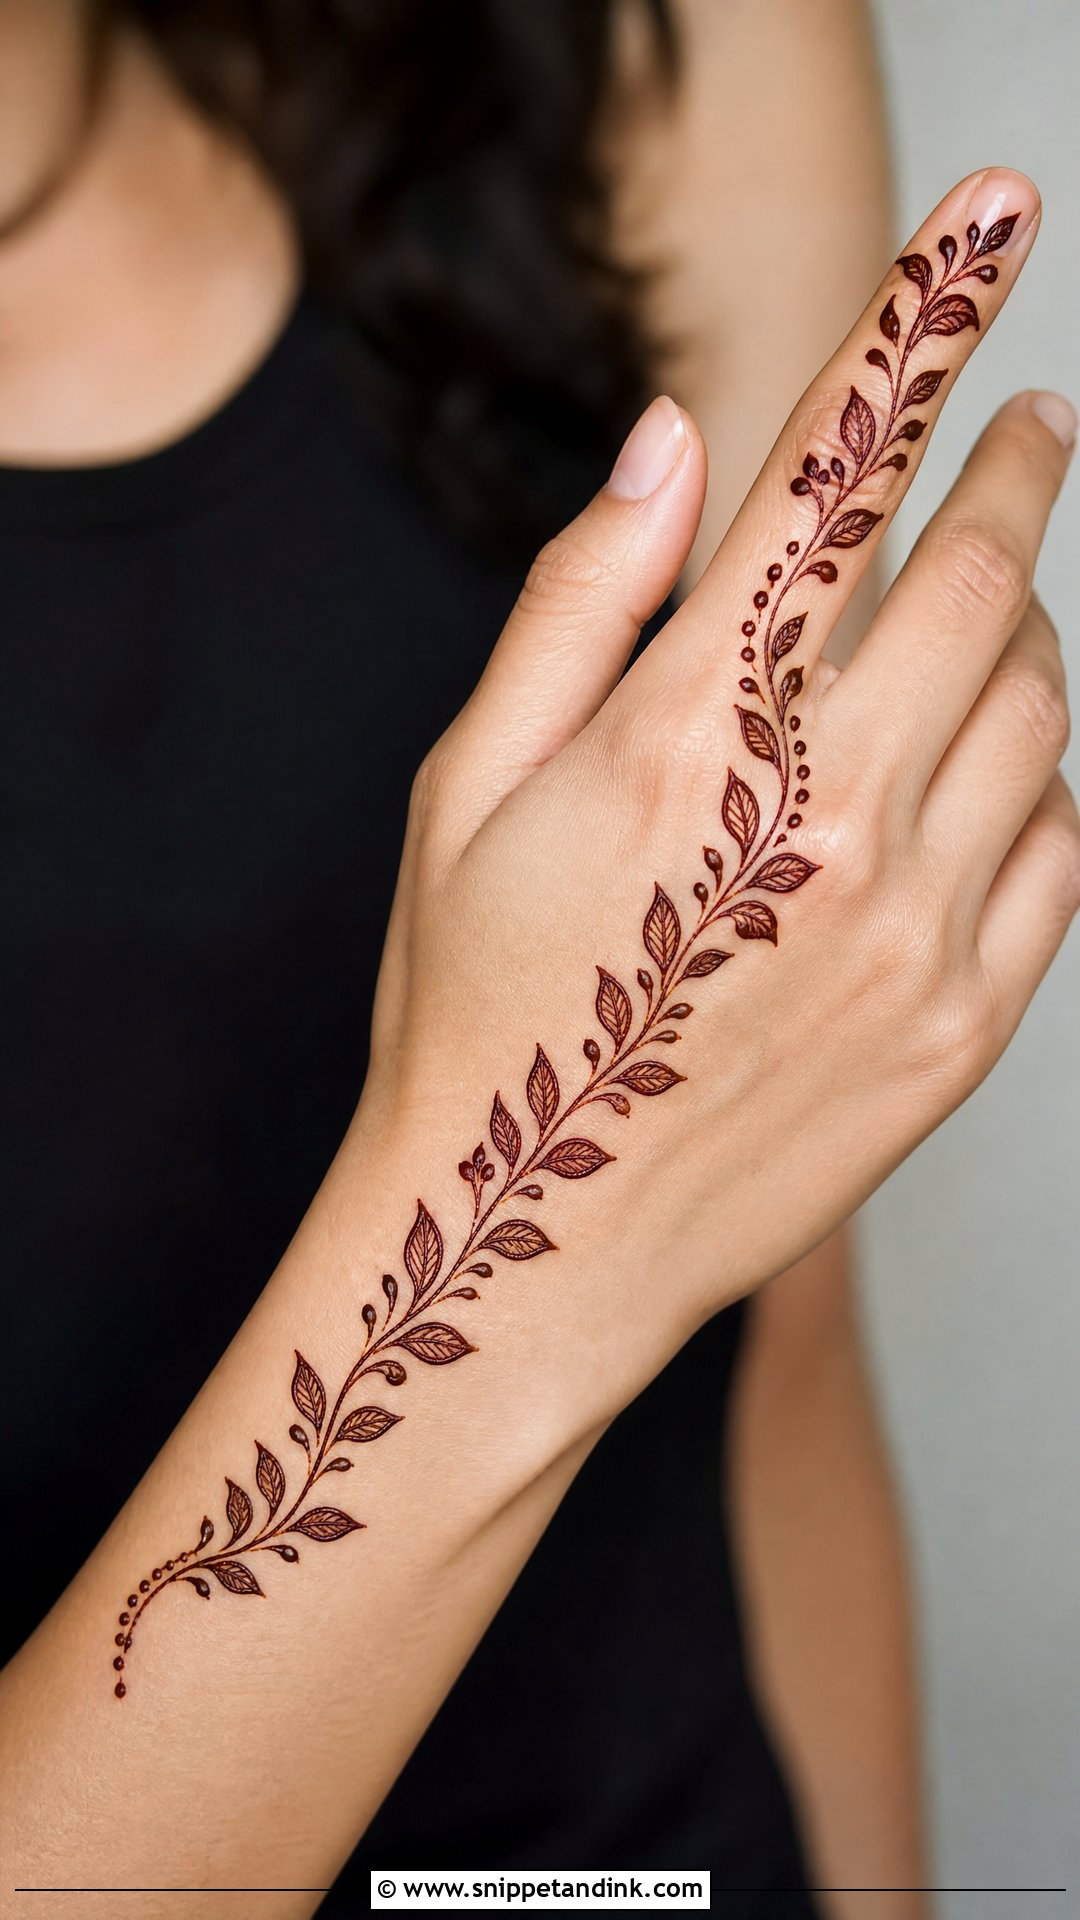
One flowing line from the wrist to the middle or index finger, small leaves on both sides, dots in the gaps. That is the whole design, and it lengthens narrow hands and short palms because of the diagonal. Leave the leaves outlined for a minimal look or fill them for stronger contrast. Draw the stem first in one smooth stroke; adding leaves to a shaky stem never hides the shake.
8. Simple Bracelet Mehndi Design
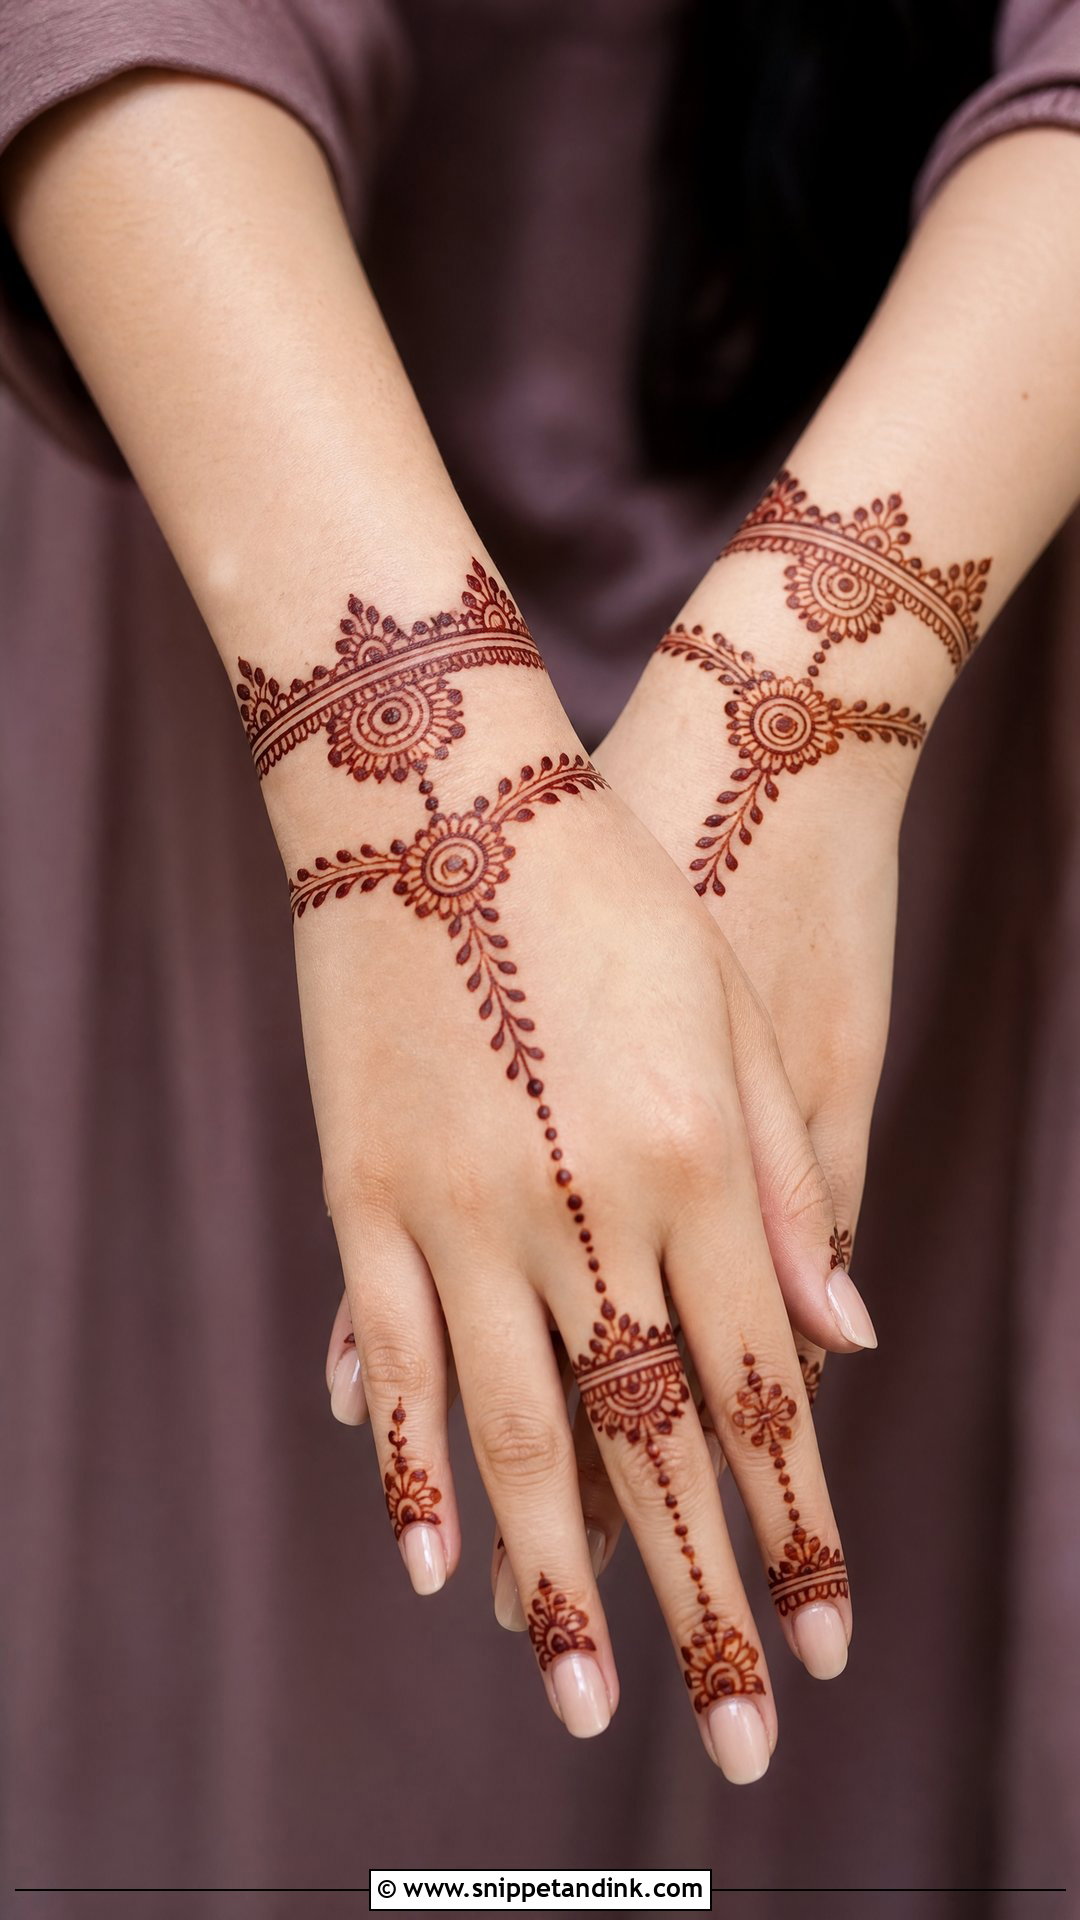
Two or three thin bands around the wrist, decorated with dots, tiny flowers and small leaves, and a short chain toward the middle finger. Keep the back hand open so the bracelet stays the focus. It suits office events and casual parties and sits like a soft accessory beside bangles. Draw the bands with your palm facing down so they line up where bangles actually rest.
9. Simple Half Hand Mehndi Design
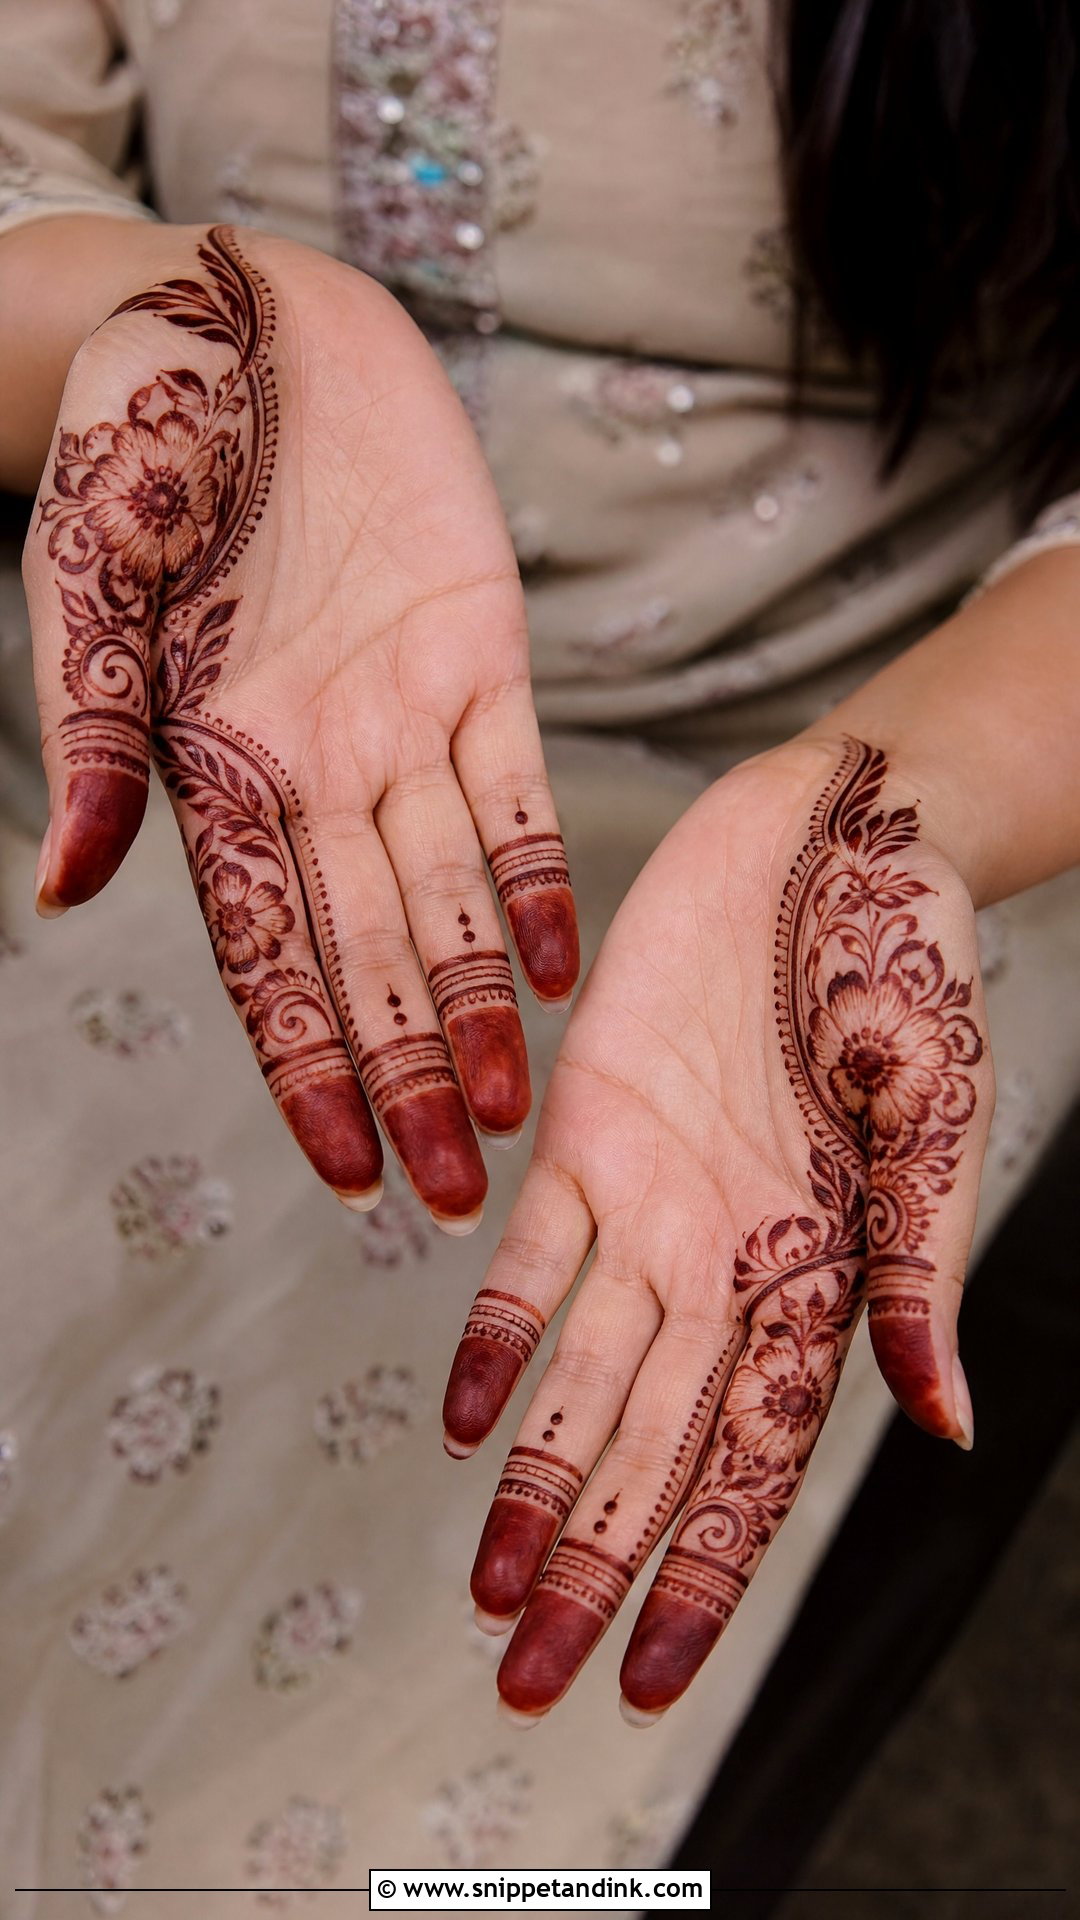
Cover one side of the palm or back hand with flowers, vines, dots and light curves and leave the other side mostly bare. A diagonal from wrist to fingers looks best. It is quicker than a full hand because nothing needs filling, yet it still feels festive. Repeat a couple of simple shapes, petals and leaves, so it stays calm rather than busy.
10. Simple Palm Mehndi Design
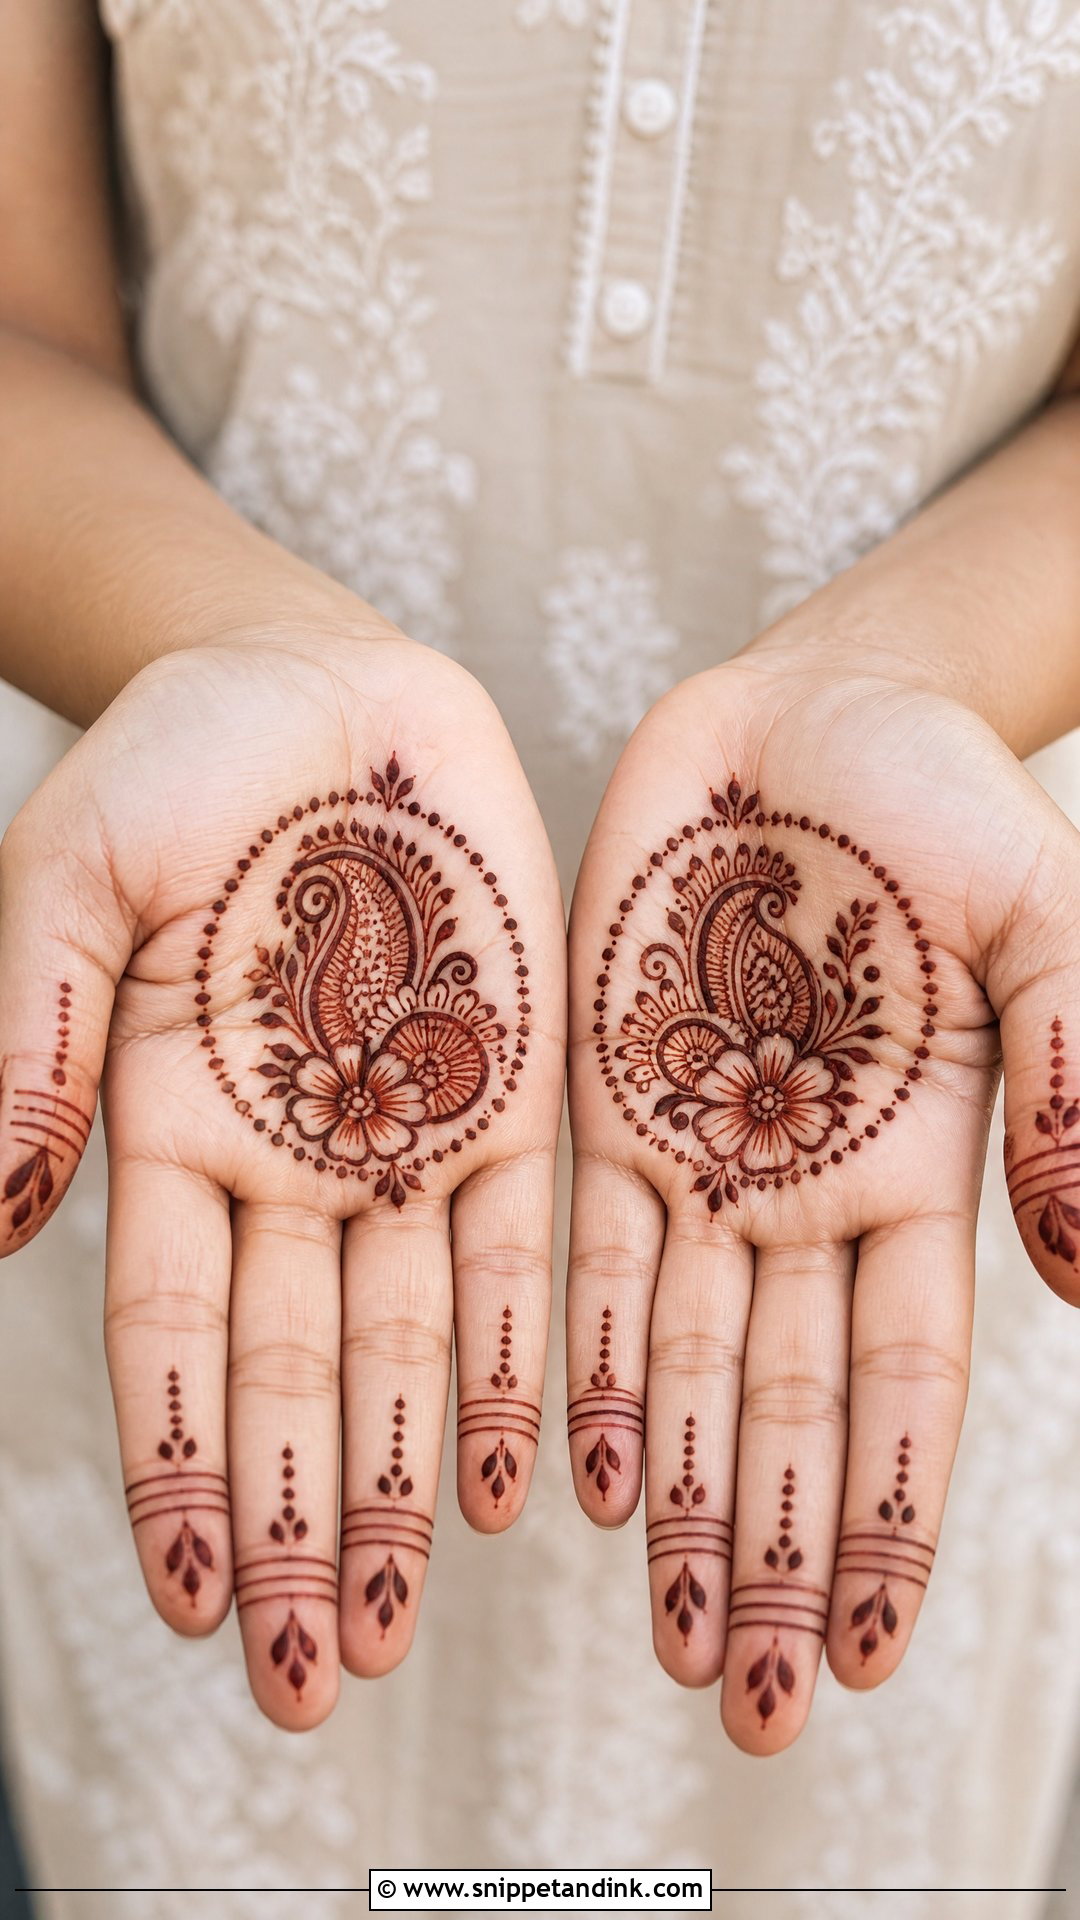
Pick one motif, a mandala, flower, paisley or small sun, place it in the centre and add dots or tiny leaves around it, with light lines and rounded tips on the fingers. The palm usually stains darker than the back of the hand, so even a small design comes up rich. It suits family rituals well. Neat spacing is the whole trick.
11. Simple Wrist Mehndi Design
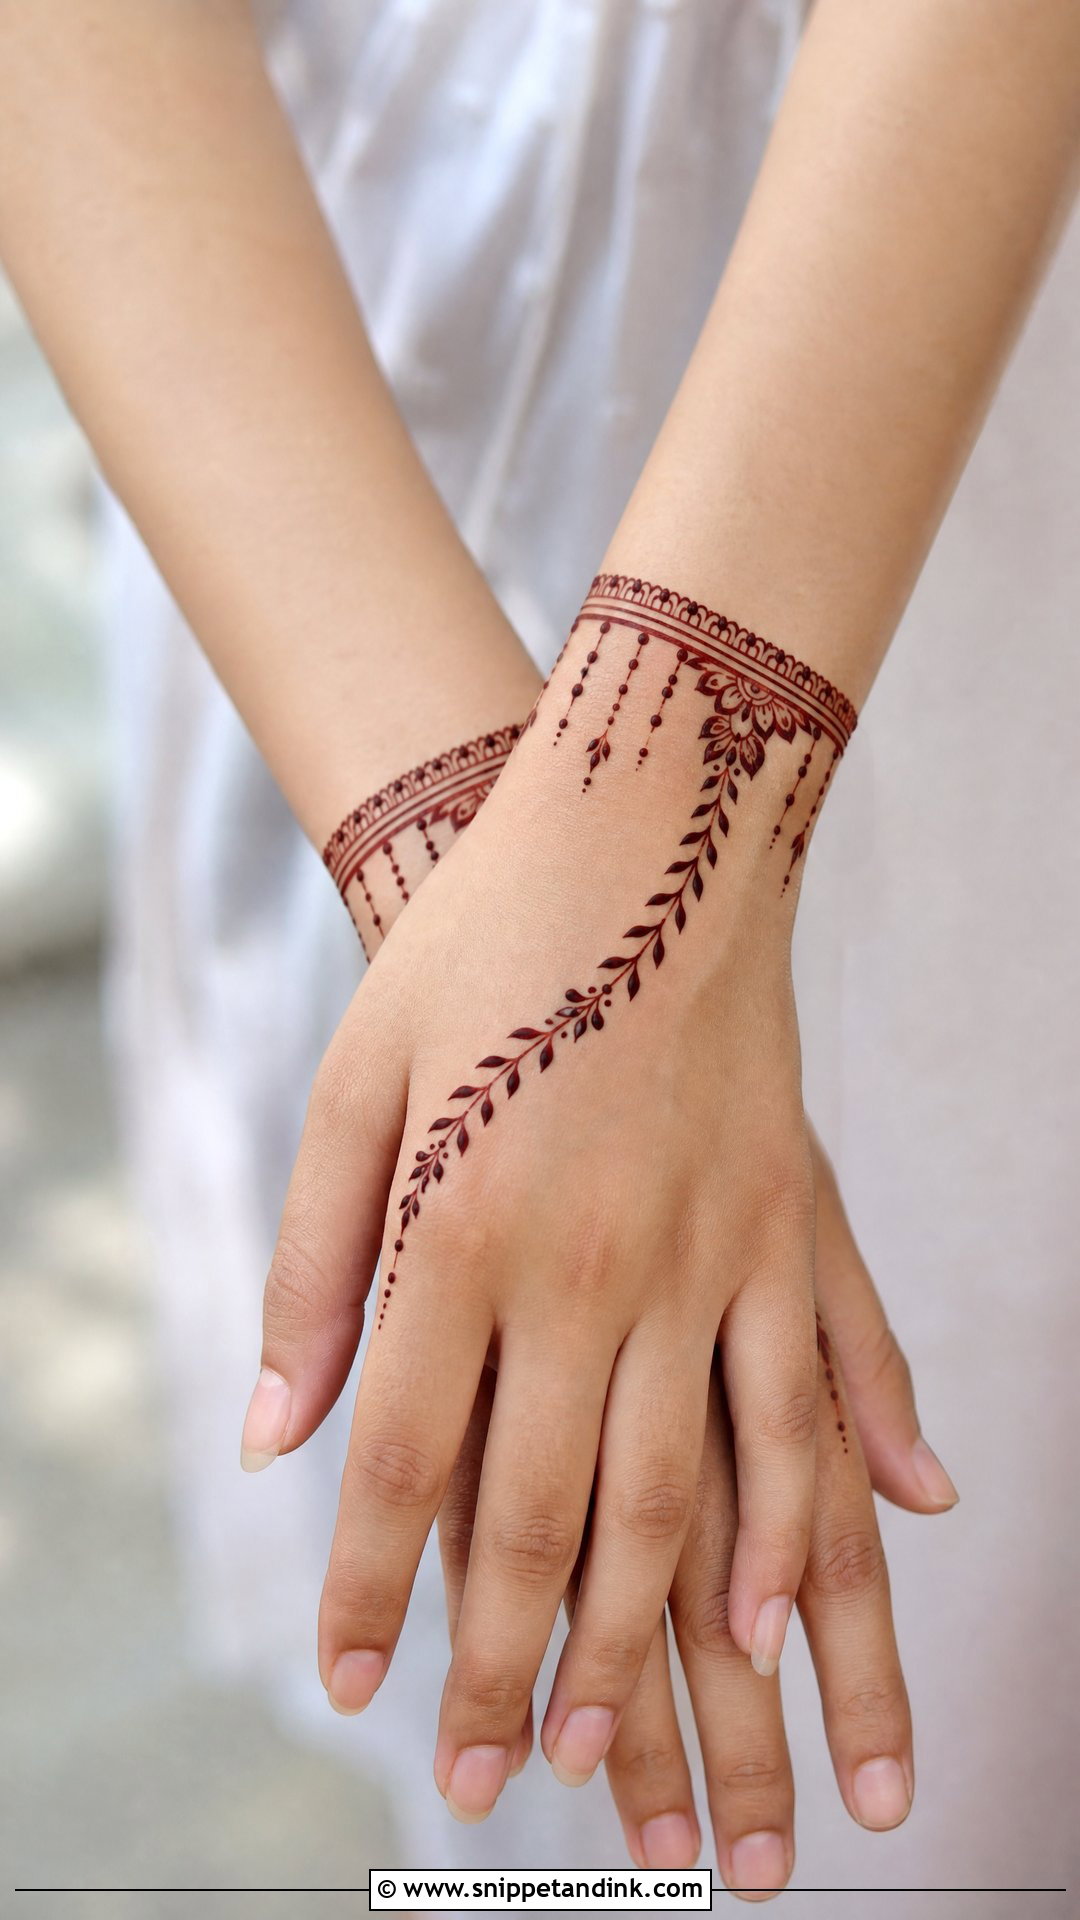
Shape it like a cuff or a small floral band: one main line around the wrist, tiny petals, dots and a few hanging chains, with a short vine reaching toward the hand. It is subtle and quick, and suits anyone who does not want the whole hand covered. Keep the lines fine. A thick wrist band tends to look heavy and smudges on sleeves.
12. Simple Round Mehndi Design
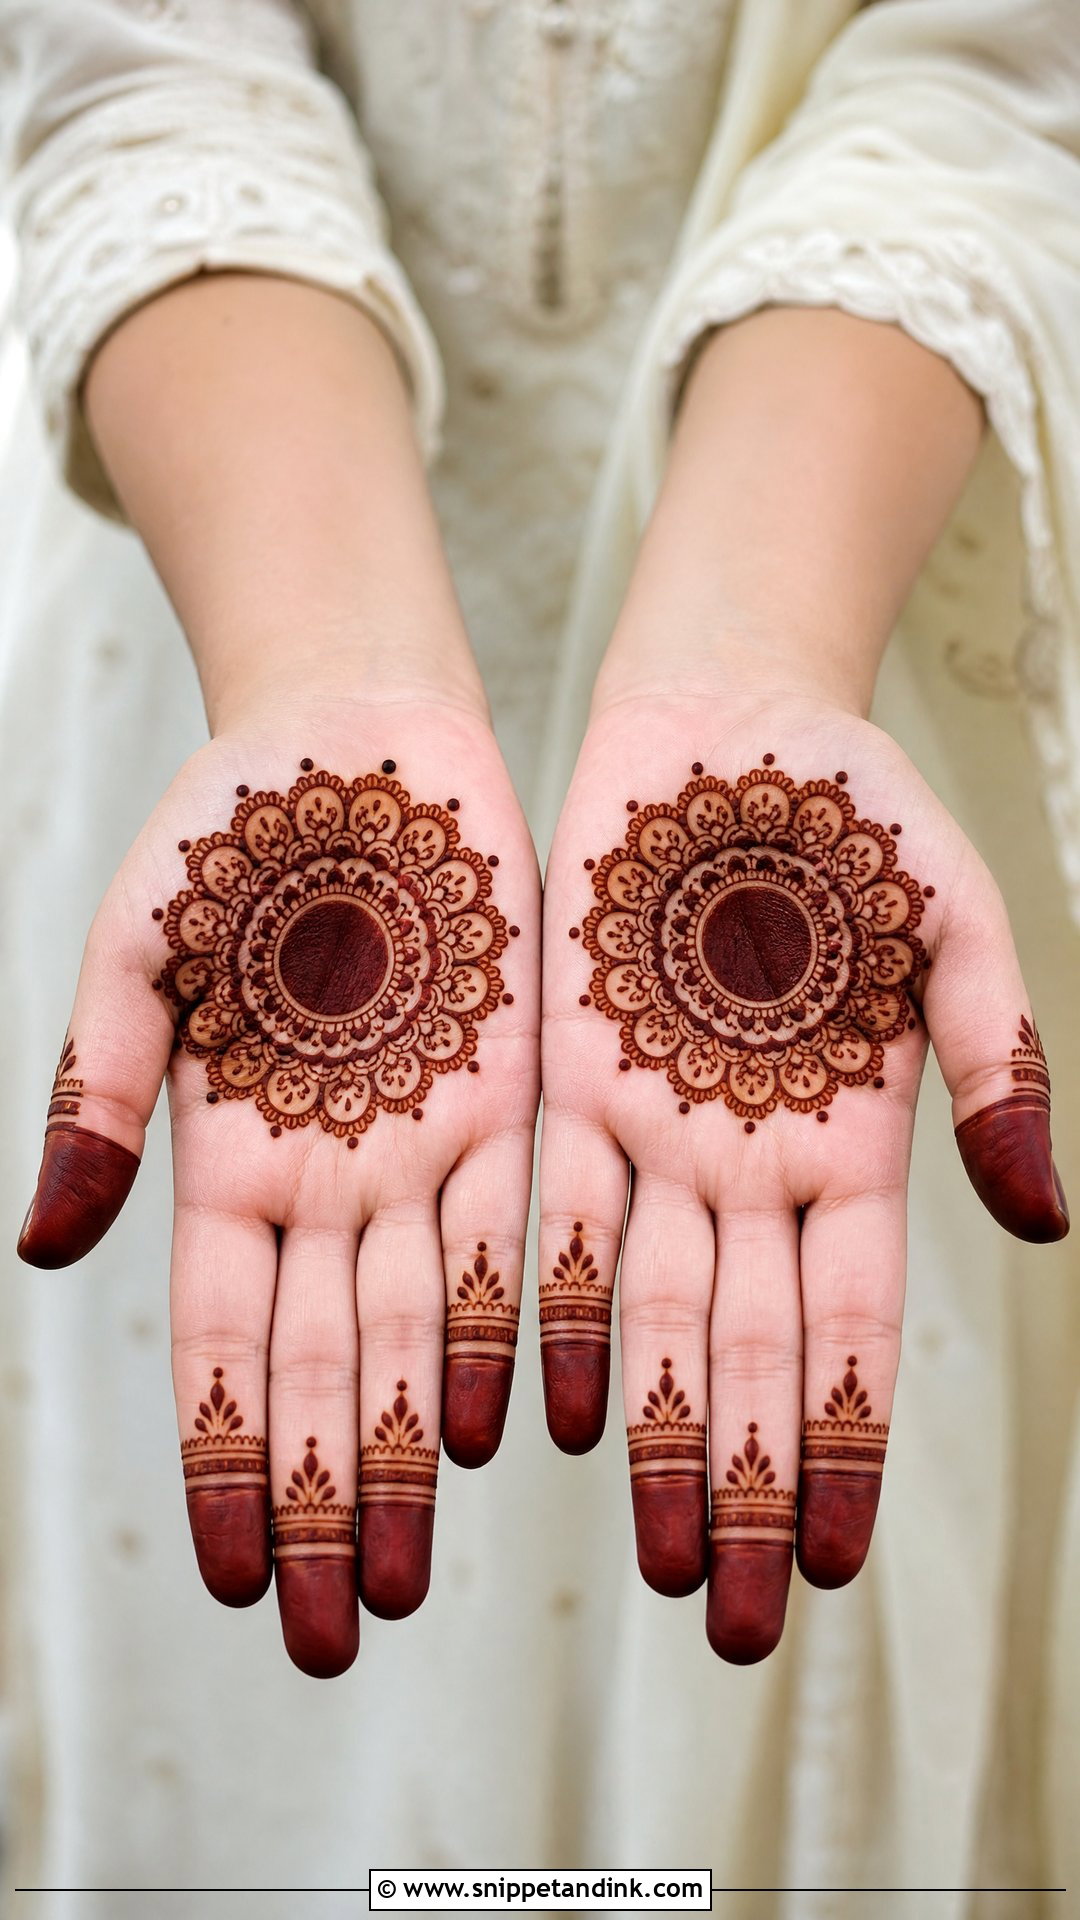
Many South Asian homes call this the gol tikki: a bold circle in the palm, built outward with petals, dots, scallops and small rings. Symmetry does the work, so even with light fingers the hand looks complete. Circles are easier to repeat than bridal motifs, which makes it a good first design. Rotate the hand slowly while you draw and keep the cone at a steady angle.
13. Simple Paisley Mehndi Design
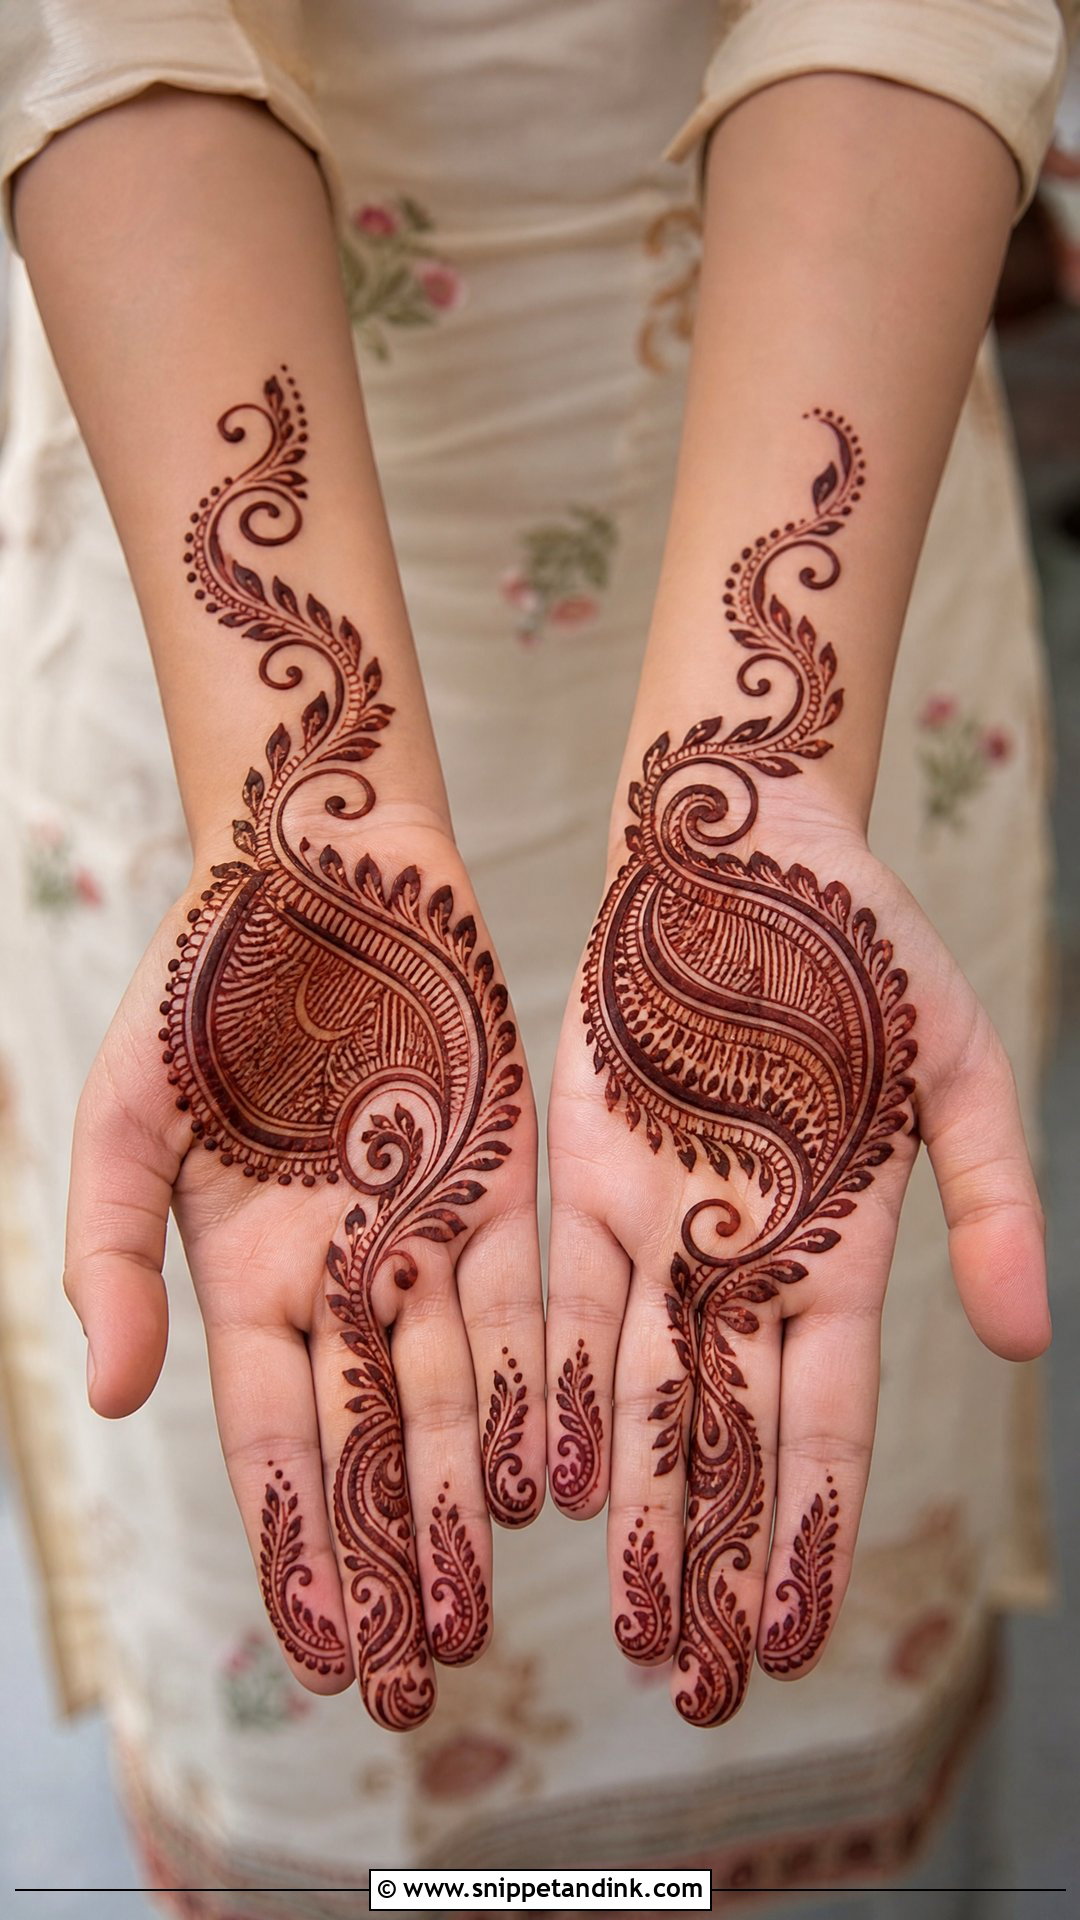
One large paisley on the palm or back hand, with dots, leaves and curved lines around it and a short vine toward the fingers. Fill it with small strokes or leave it open. The paisley stretches or shrinks to fit any hand. It is a step more traditional than a plain flower, which suits festive outfits and wedding guests.
14. Simple Leaf Mehndi Design
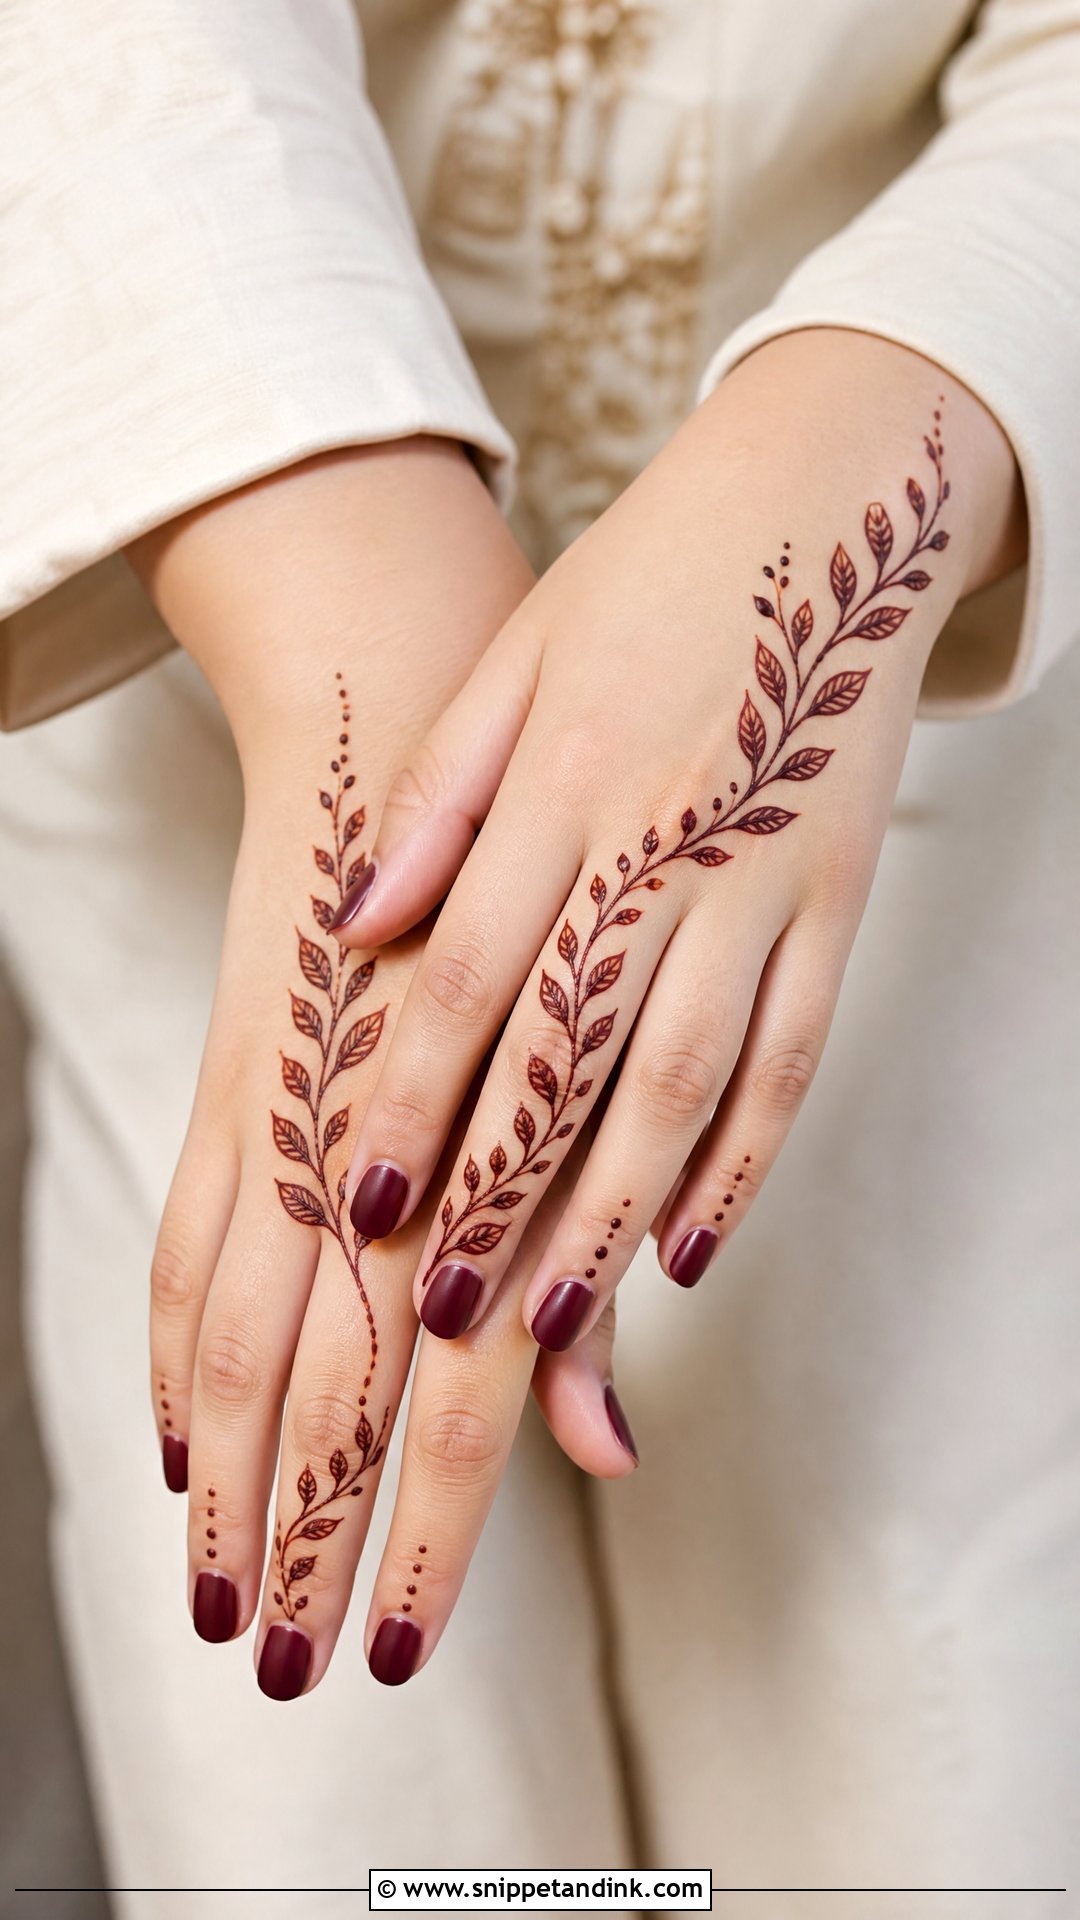
A thin curved stem across the palm or back hand, leaves on alternating sides, dots around the vine. Run it diagonally for a modern look or straight from wrist to finger for a cleaner one. Leaves repeat well, so it is hard to get wrong, and the result is light enough for daytime events. Keeping the leaves roughly the same size is what makes it look finished.
15. Simple Kids Mehndi Design
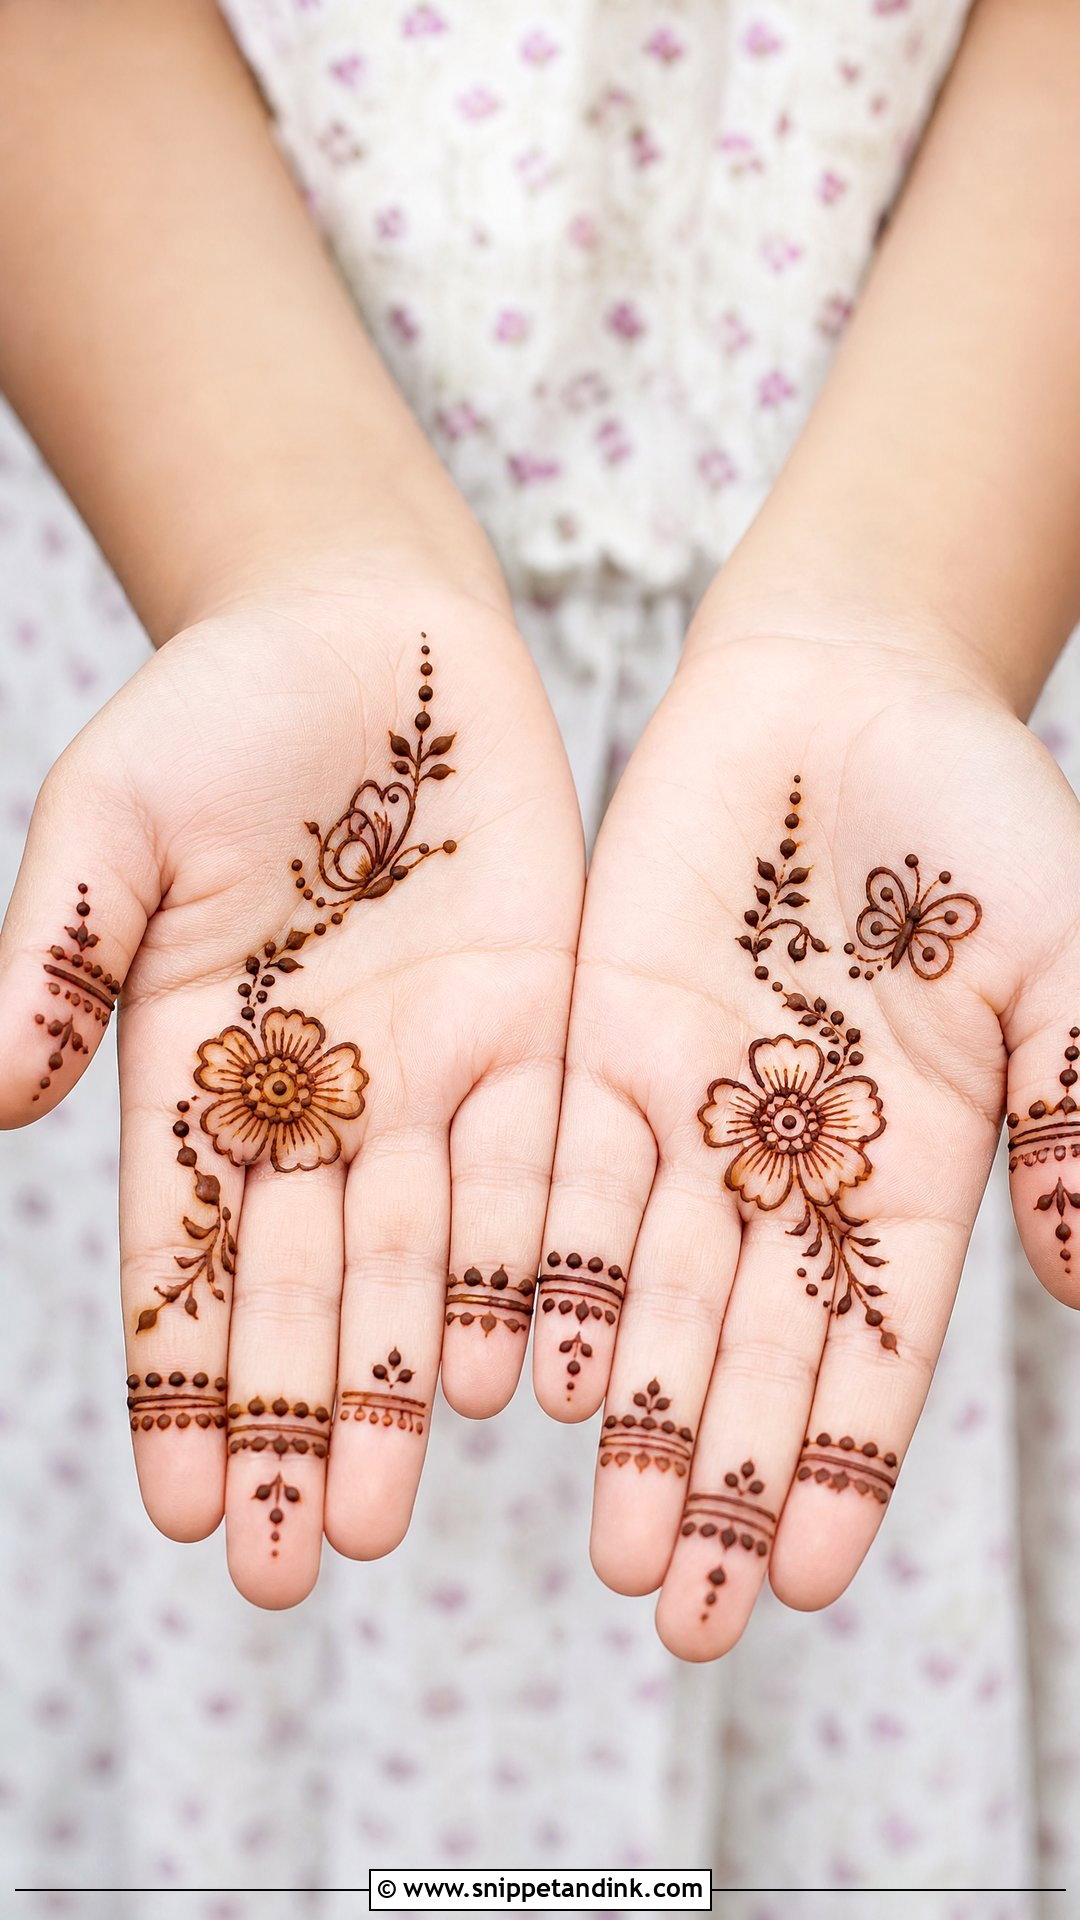
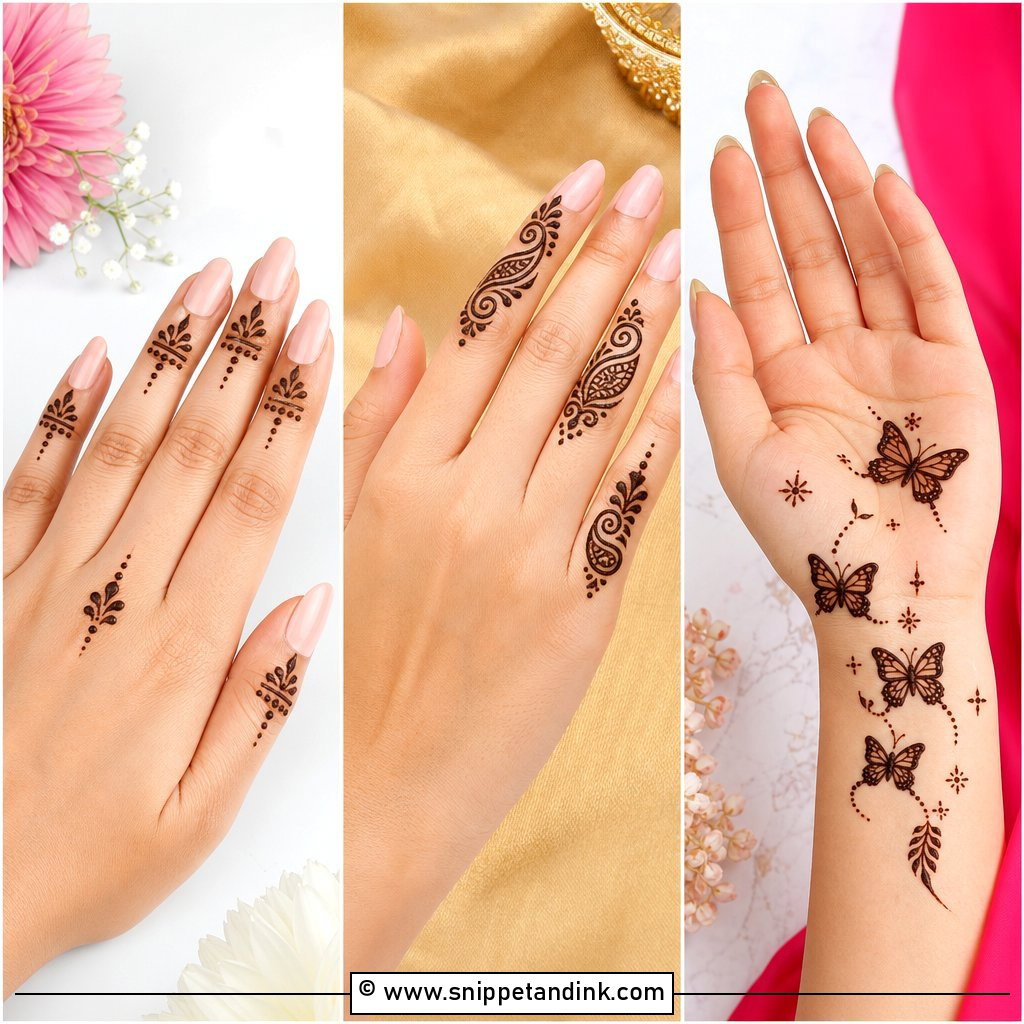
A simple kids mehndi design needs to be finished before the child loses interest: a small flower, butterfly, heart-shaped floral or tiny mandala on the palm, with dots or mini bands on the fingers. Skip dense filling, since it smudges before it sets. Rounded shapes and open space look clear even after a smudge. Use natural henna only on children.
16. Simple Eid Mehndi Design
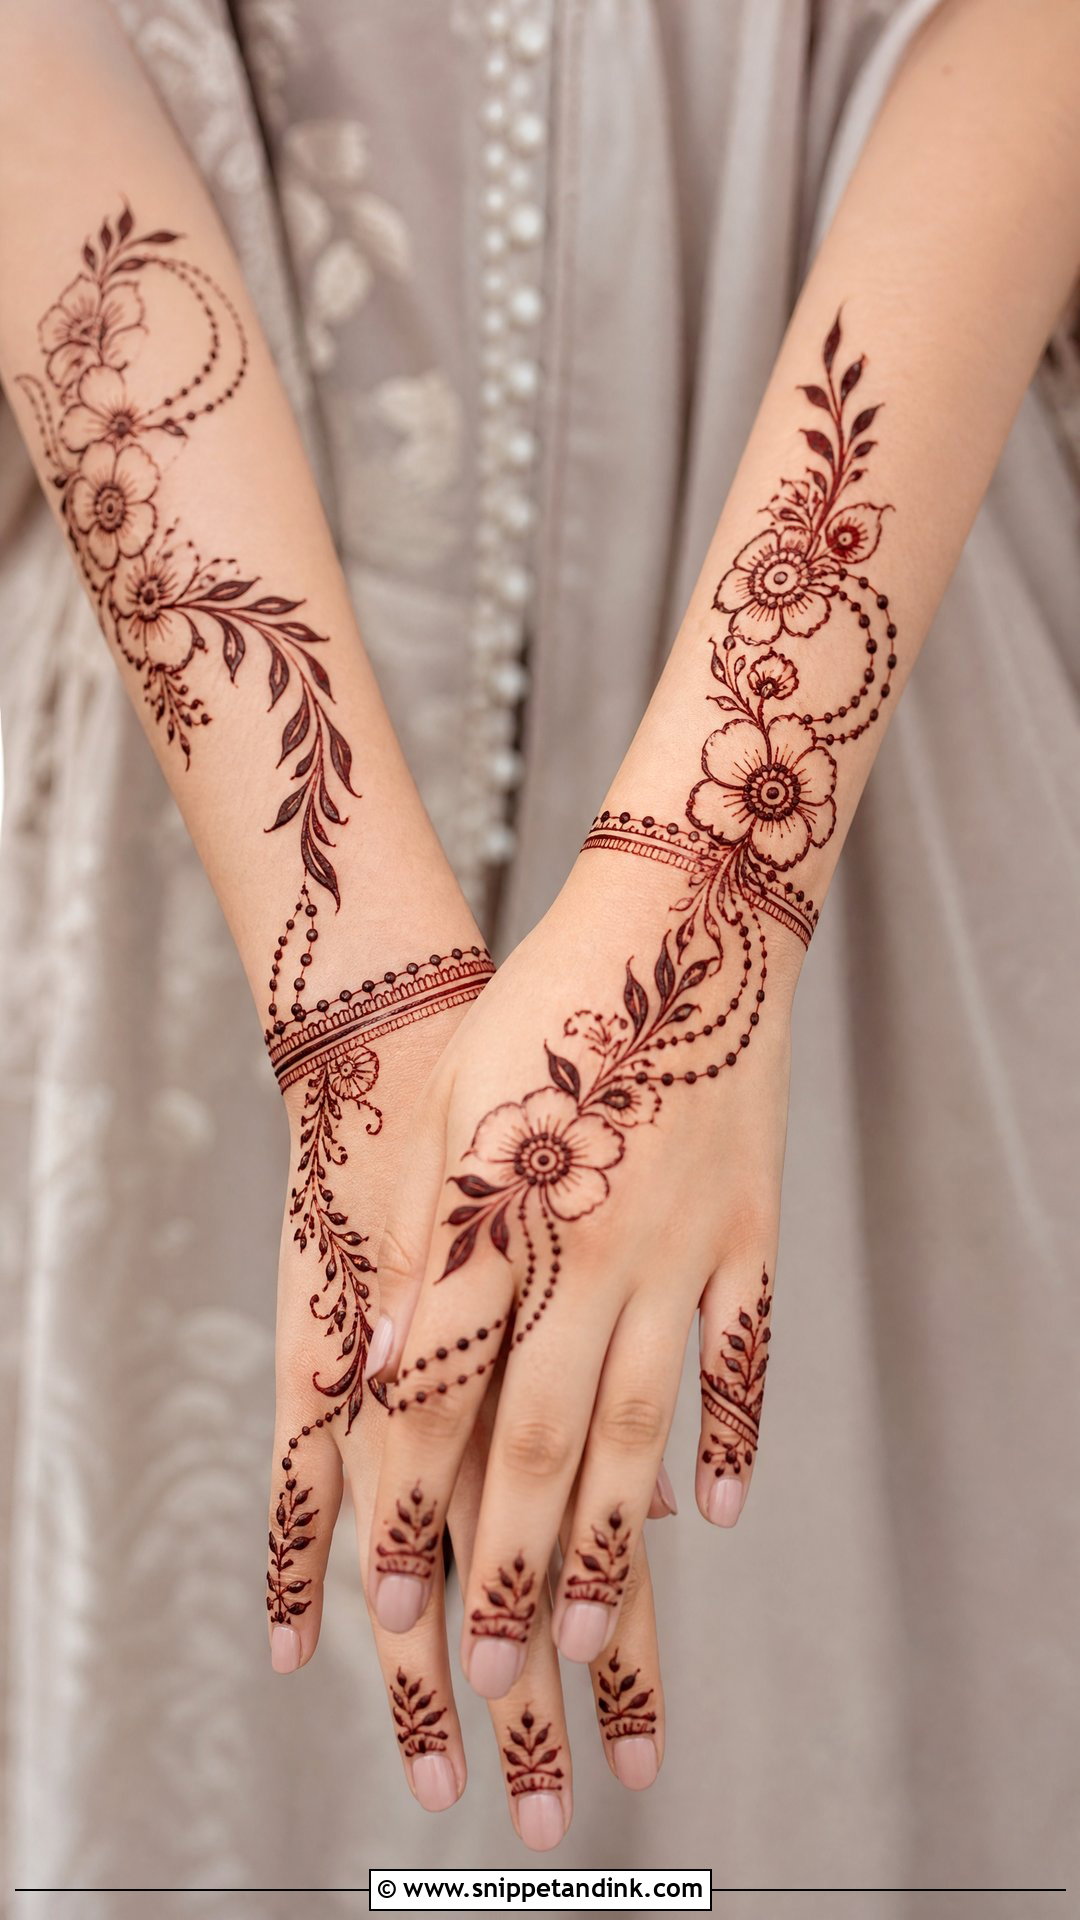
A light Arabic-style trail across the back hand with flowers, dots and leafy curves, plus small finger details and a thin wrist band. It looks festive without covering the hand, and goes on quickly before prayers and visits. Slightly bold outlines stain better than thin ones. Put it on the night before and sleep with it on; the colour deepens by morning.
17. Simple Diwali Mehndi Design
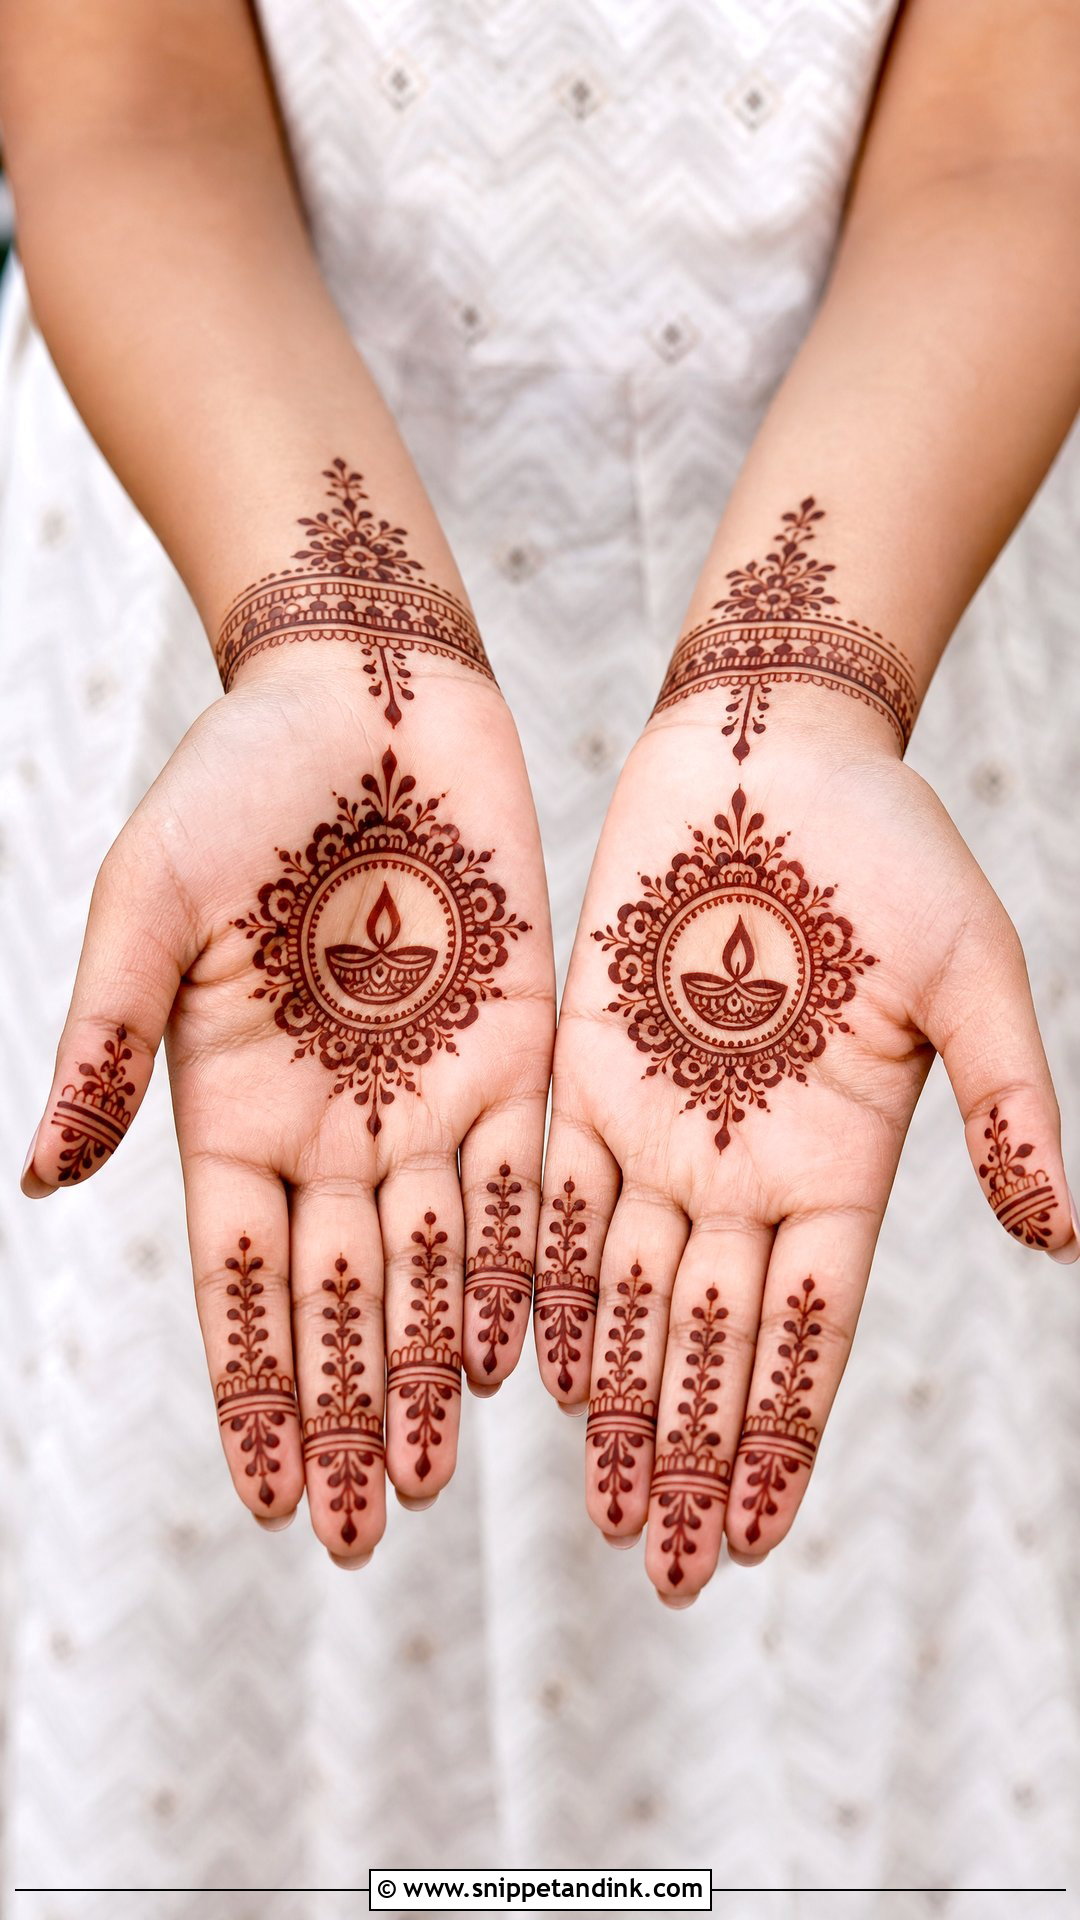
A small mandala, diya-shaped curves, dots and floral lines on the palm or back hand, with small finger details. Heavy filling is unnecessary; open space dries faster, which matters when you are cooking, decorating and visiting all day. A neat wrist band finishes it. Apply it a day ahead if you can, so you are not guarding wet paste while lighting lamps.
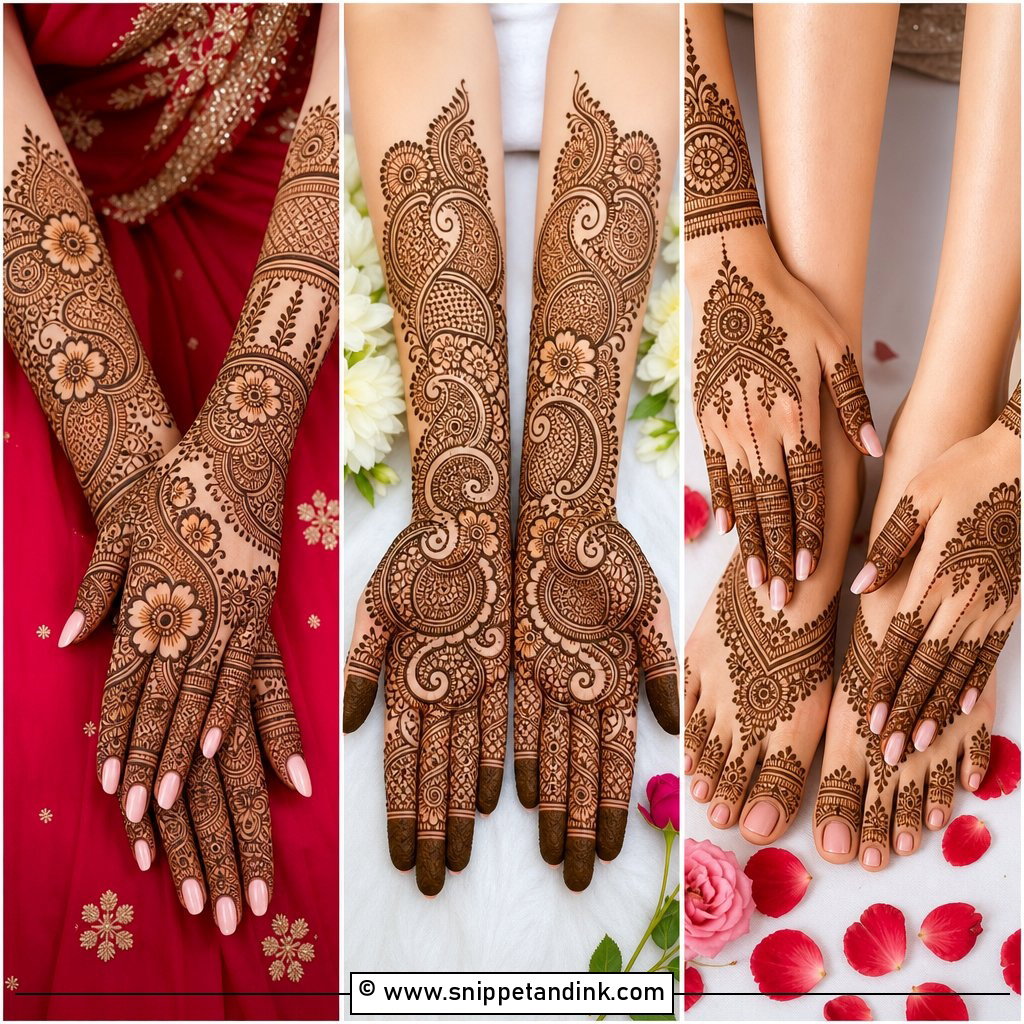
18. Simple Bridal Mehndi Design
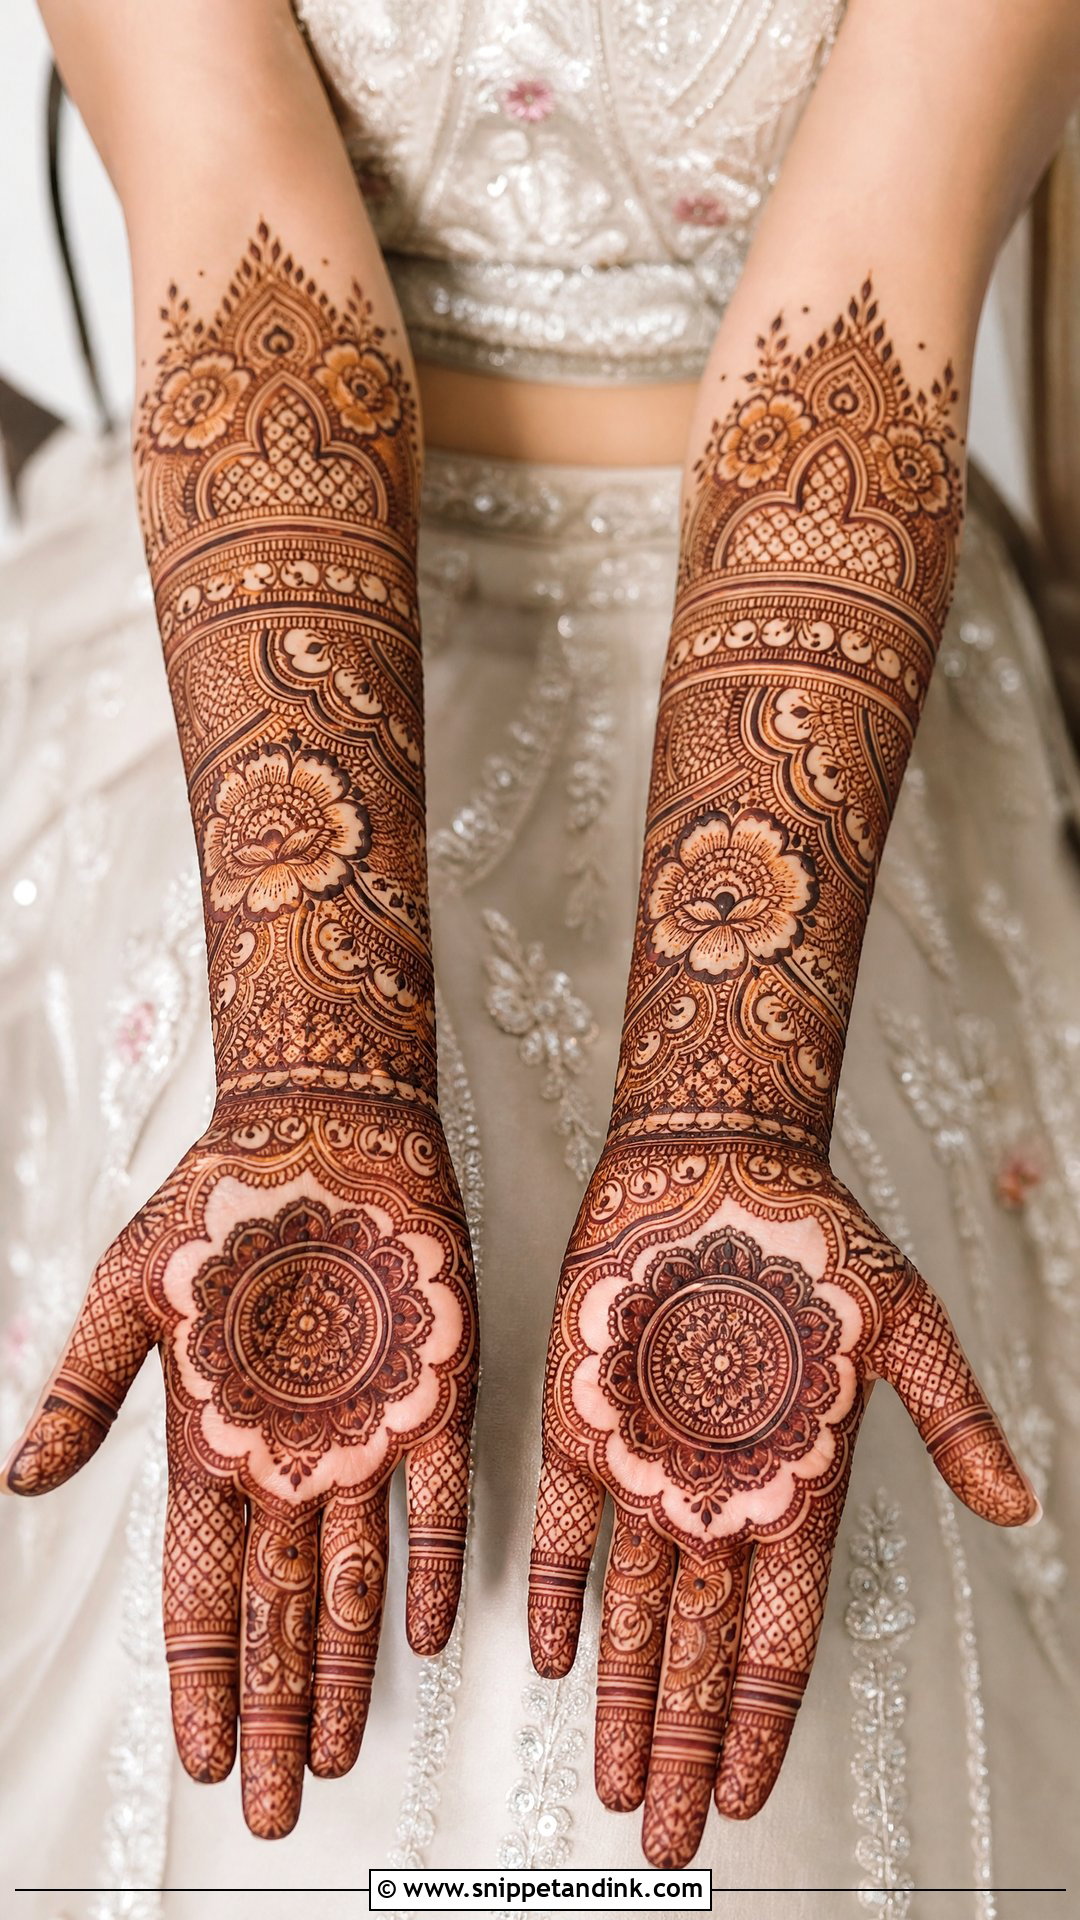
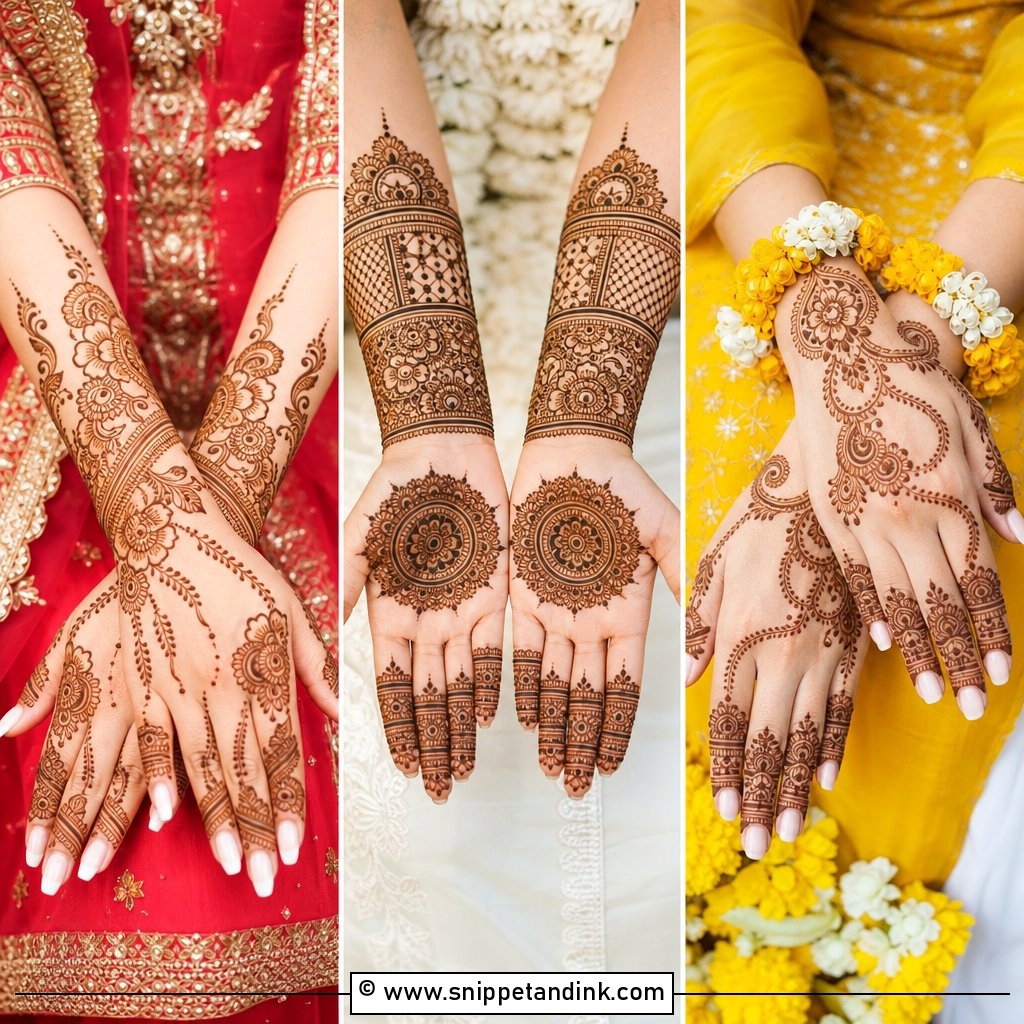
Simple and bridal are not opposites. A light full-hand layout of flowers, paisleys, mandalas and clean finger bands, spaced generously and kept symmetrical, suits minimal brides, small ceremonies, nikah, haldi or a civil wedding. A slightly fuller wrist-to-forearm border gives it bridal weight. It is far easier to sit through than dense traditional work, which is a real advantage on a busy wedding week.
19. Simple Engagement Mehndi Design
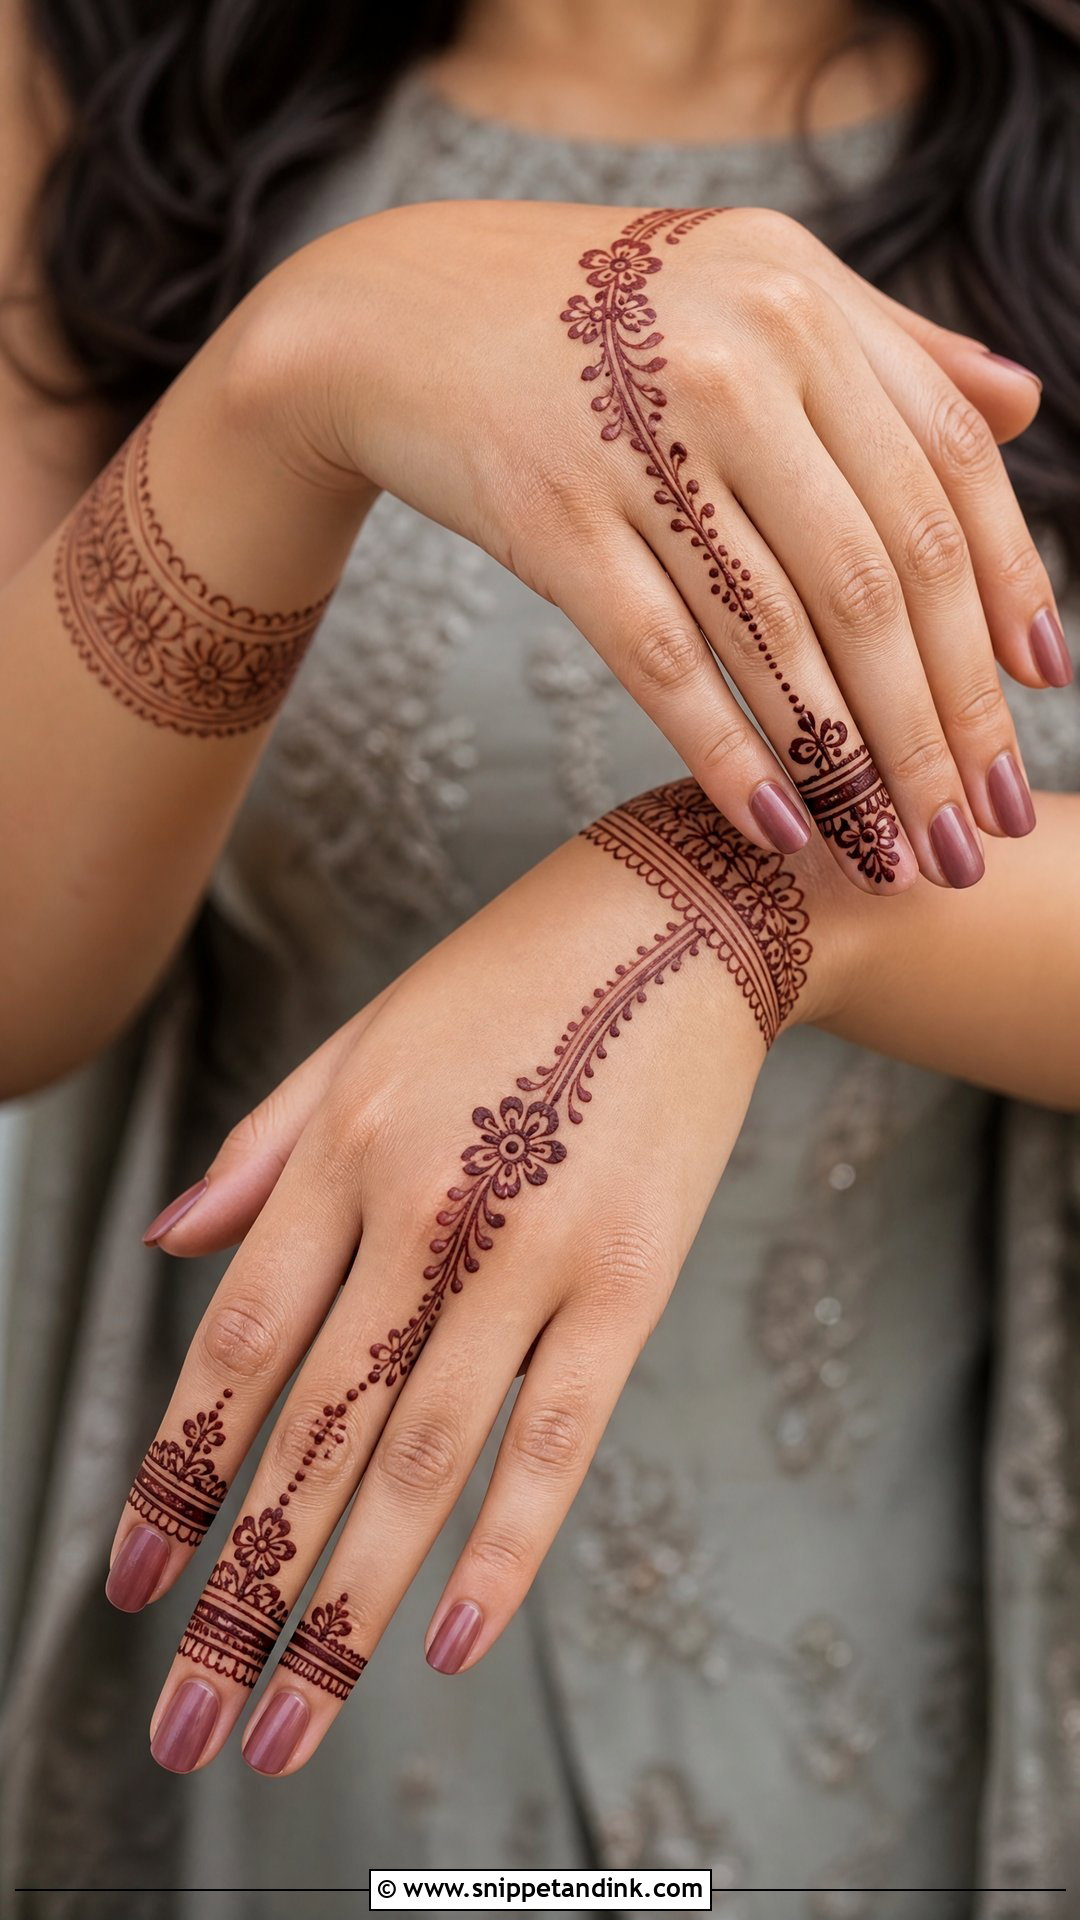
A back-hand bracelet band, a detailed ring finger and a small floral chain joining them create a jewelry look that frames the ring. Keep the palm plain or add one matching motif. Thin lines, dots and small petals keep it refined. I leave a little bare skin exactly where the engagement ring will sit, so the ring is not lost against the stain.
20. Simple Bridesmaid Mehndi Design
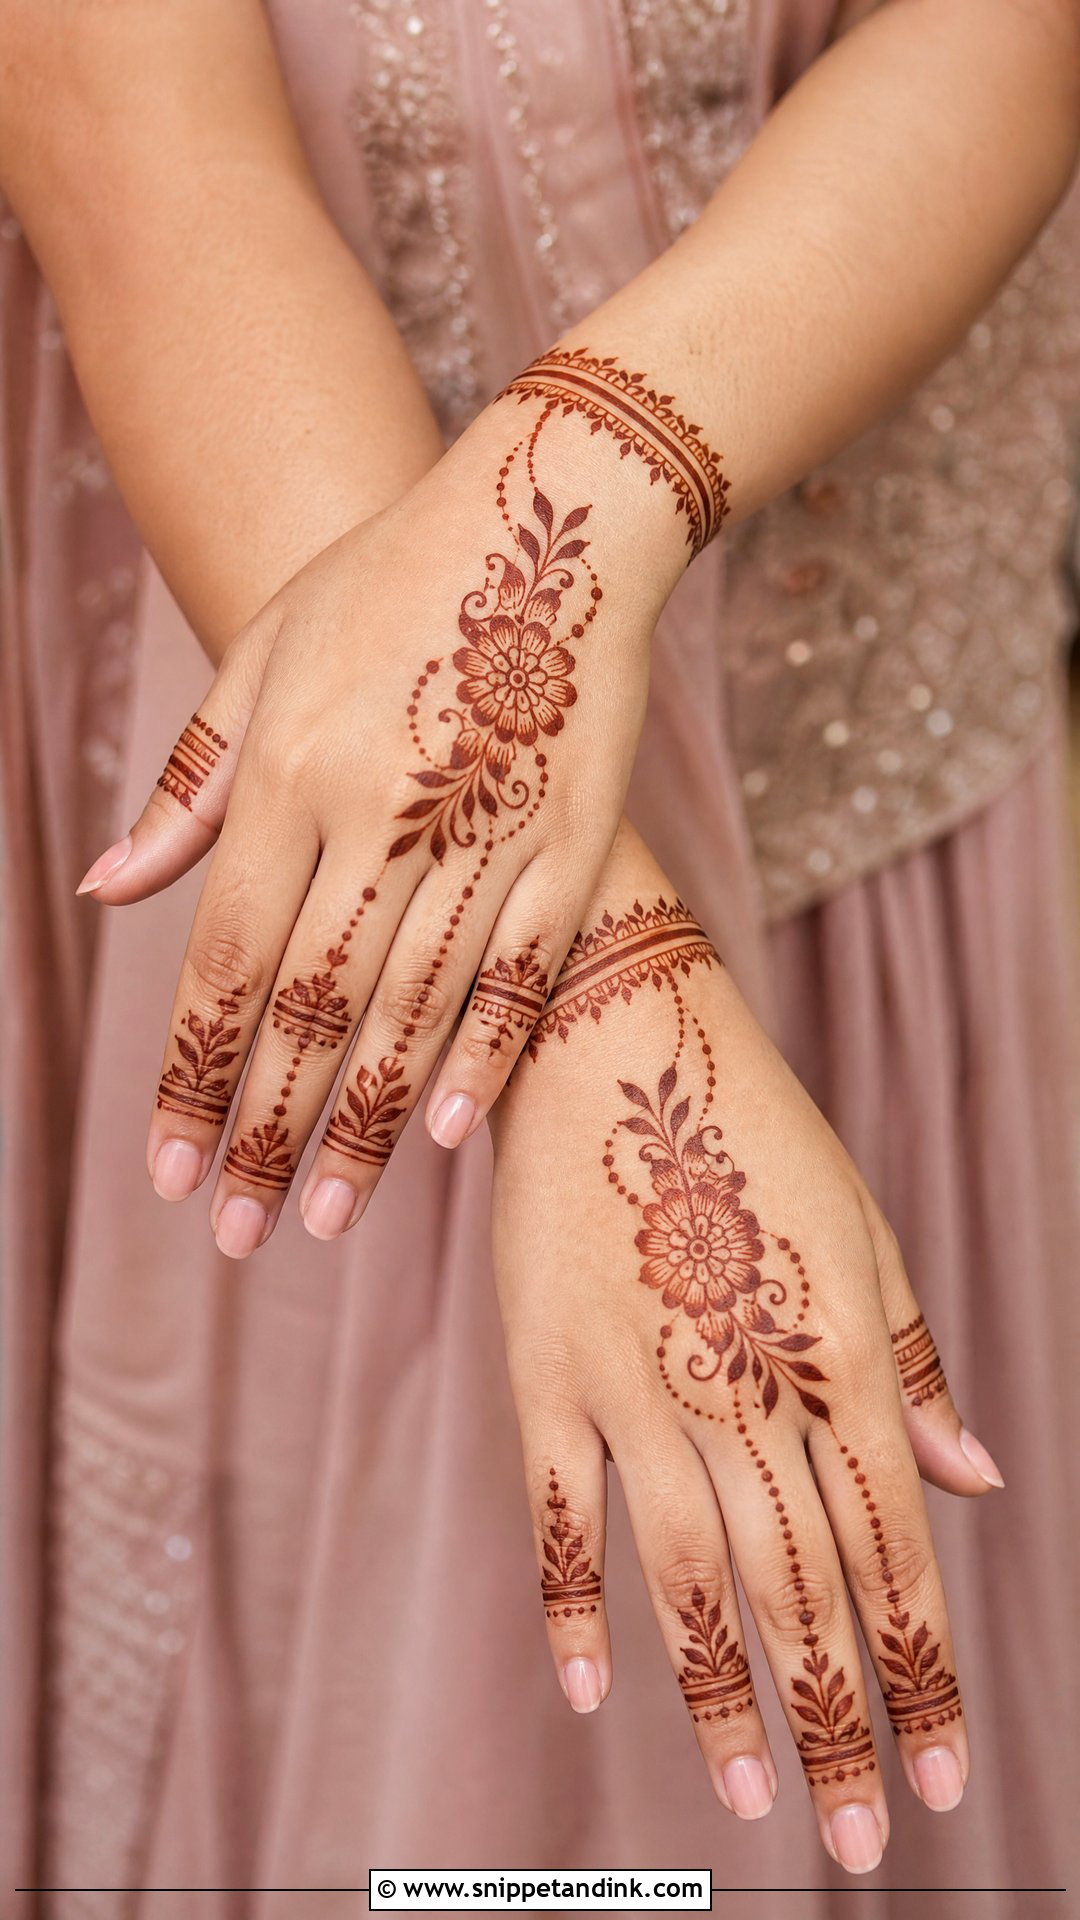
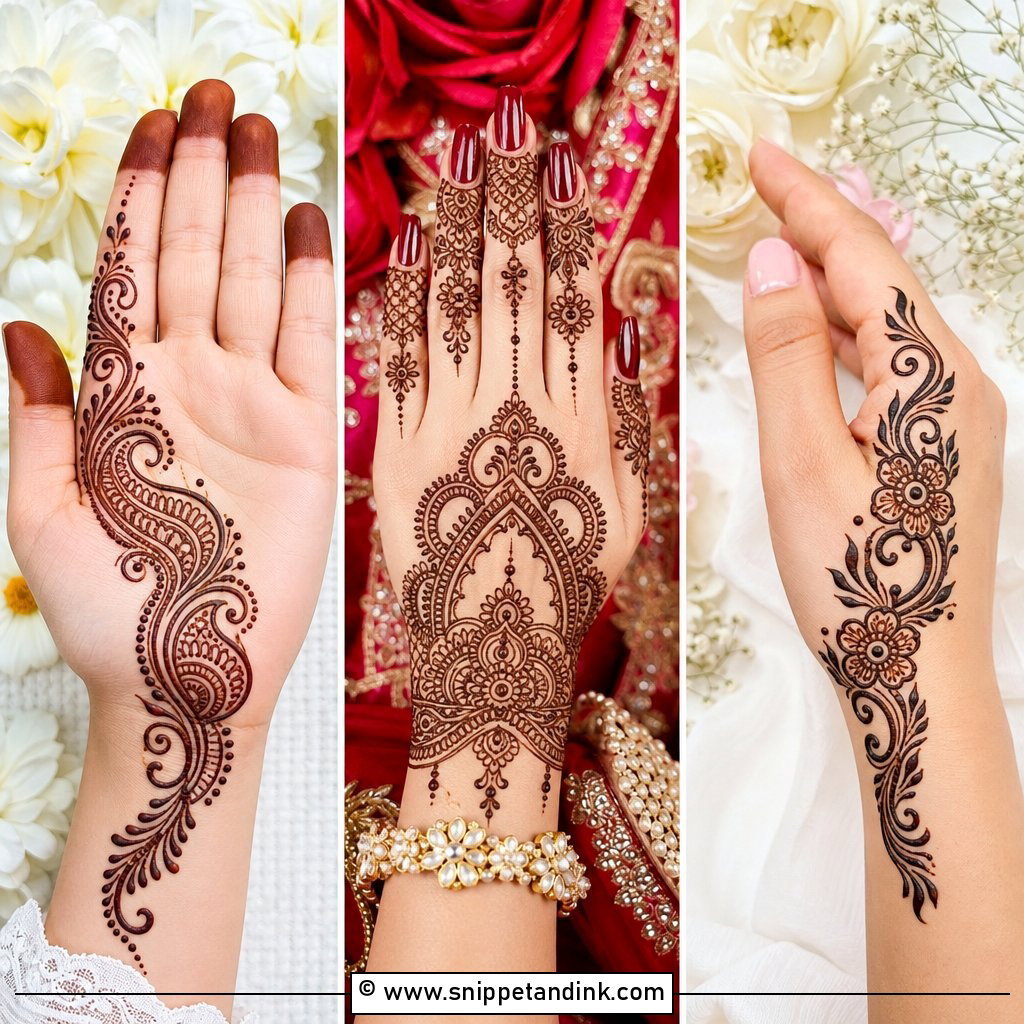
Bridesmaid henna should be festive and clearly lighter than the bride’s. A diagonal floral trail on the back hand, light finger bands and a small wrist border do the job. It is quick enough for one artist to get through several people before an event, and it looks consistent in group hand photos. Flowers, leaves and dotted chains keep it soft.
21. Simple Back Finger Mehndi Design
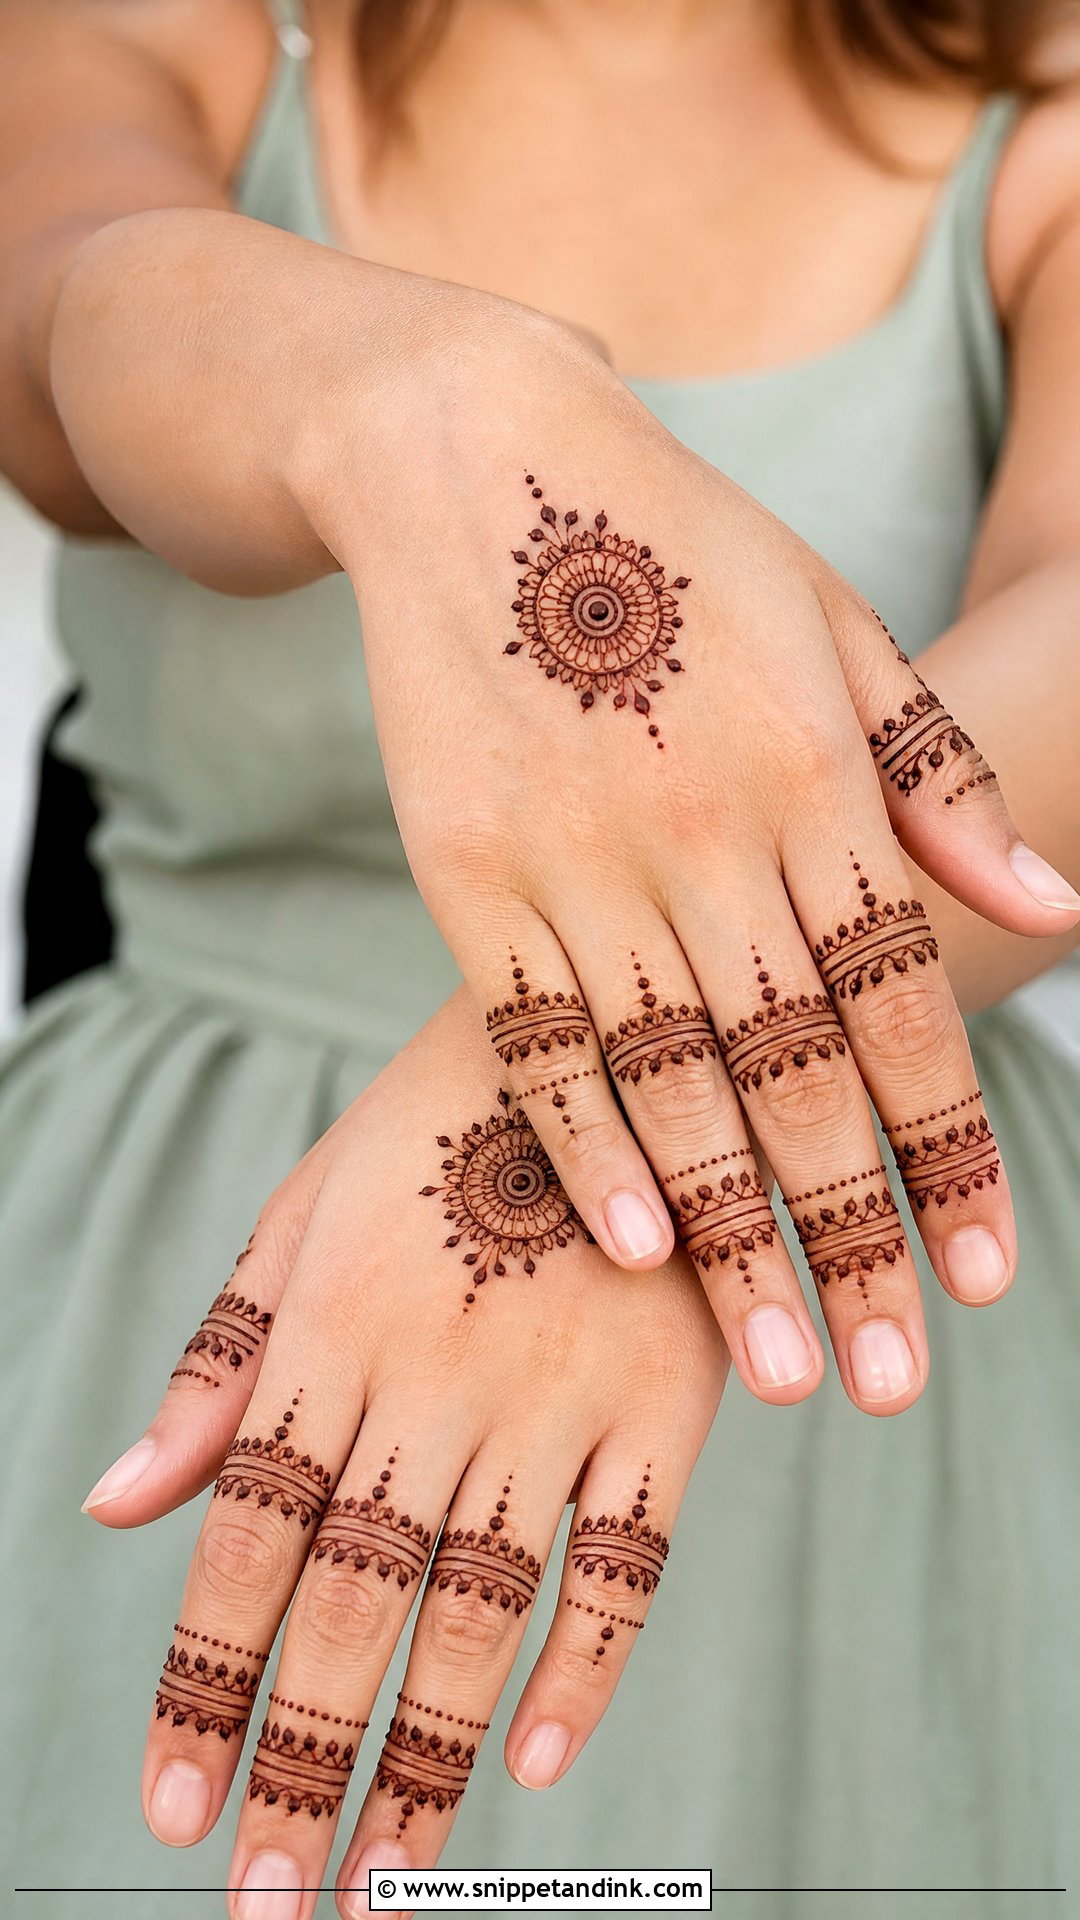
Thin bands, leaf rows, dots and small curves on the backs of the fingers, with the centre of the back hand mostly empty and maybe a tiny mandala near the knuckles. It is one of the fastest designs here. Teens and office-goers like it. Keep the finger patterns alike, because one finger that differs looks like a mistake in a design this sparse.
22. Simple Full Hand Mehndi Design
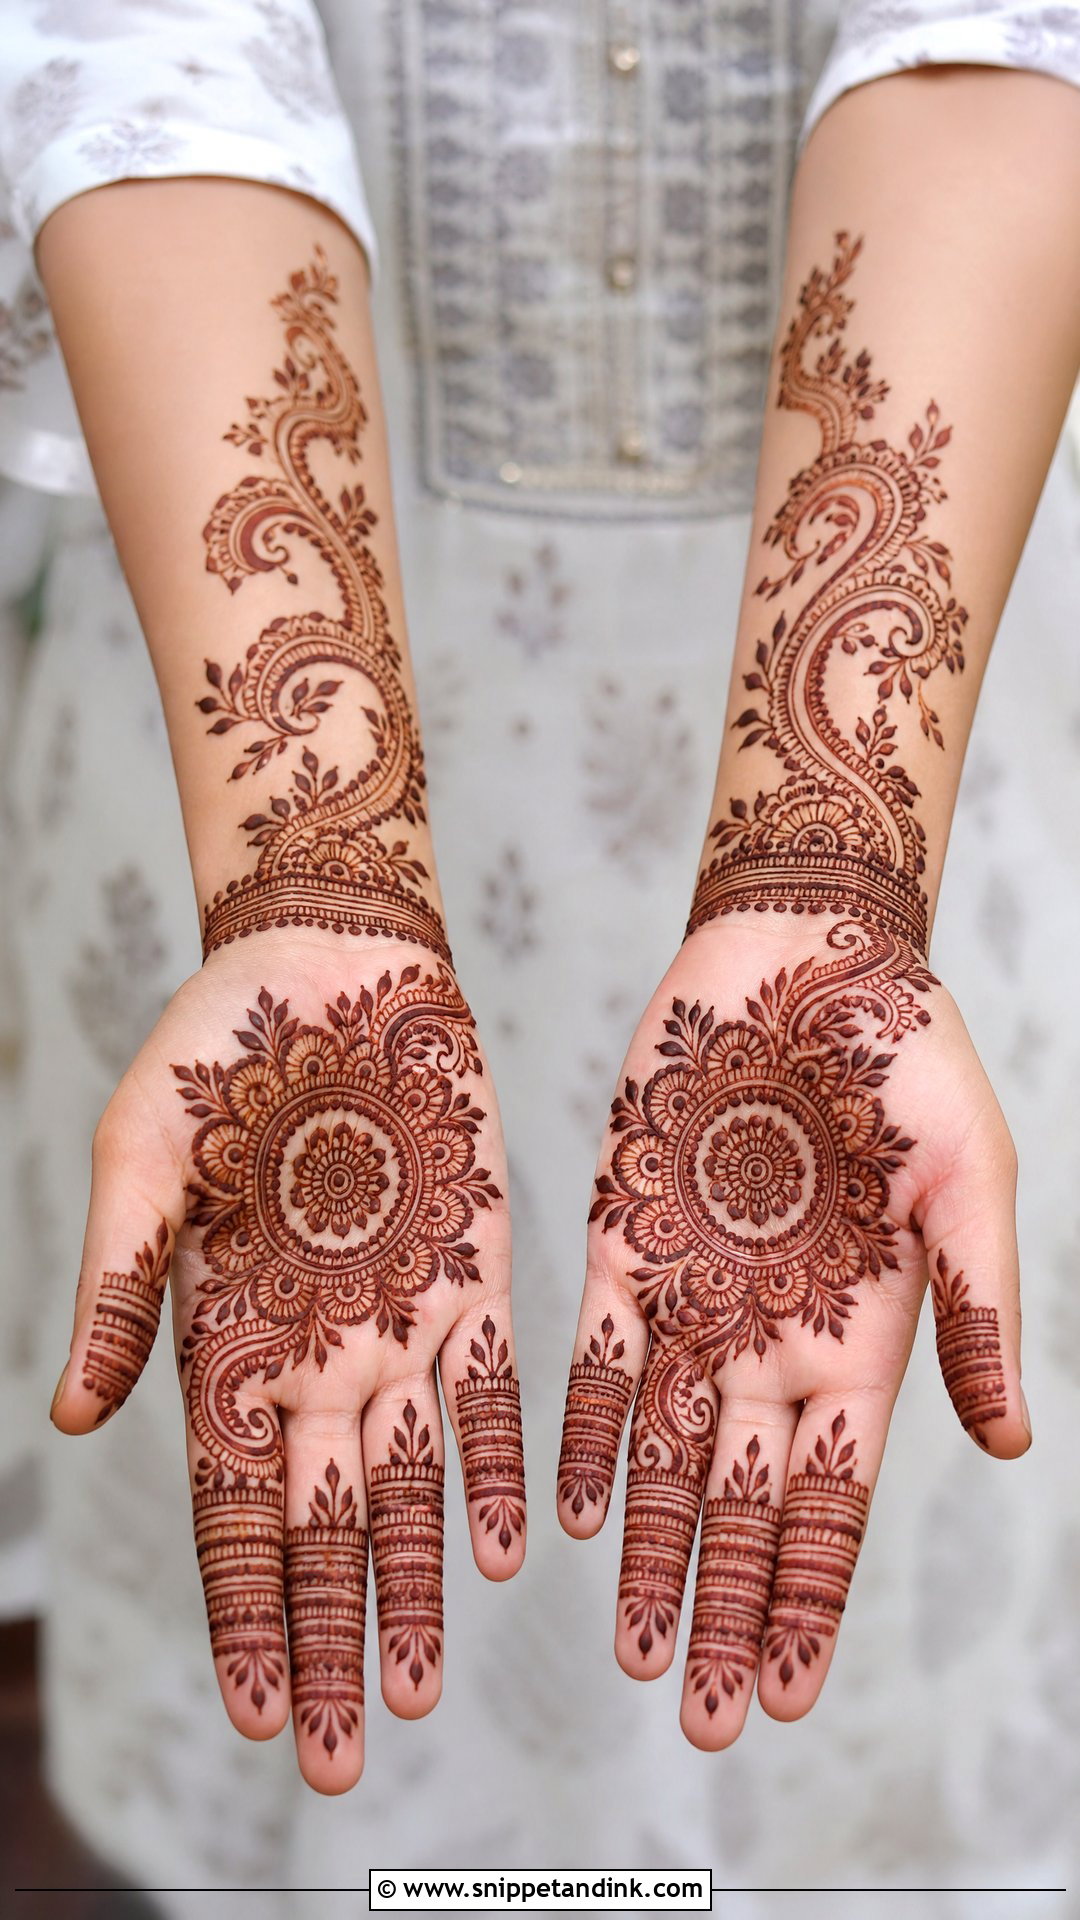
A simple full hand mehndi design covers palm, fingers and wrist with large motifs spaced apart rather than dense bridal fill. A mandala or flower in the palm, paisley or leaf trails along the sides, finger bands and a single bracelet line. It feels like full-hand henna but goes on quickly. The rule I follow: if a gap looks empty, make the nearest motif slightly bigger instead of adding a new one.
23. Simple Side Hand Mehndi Design
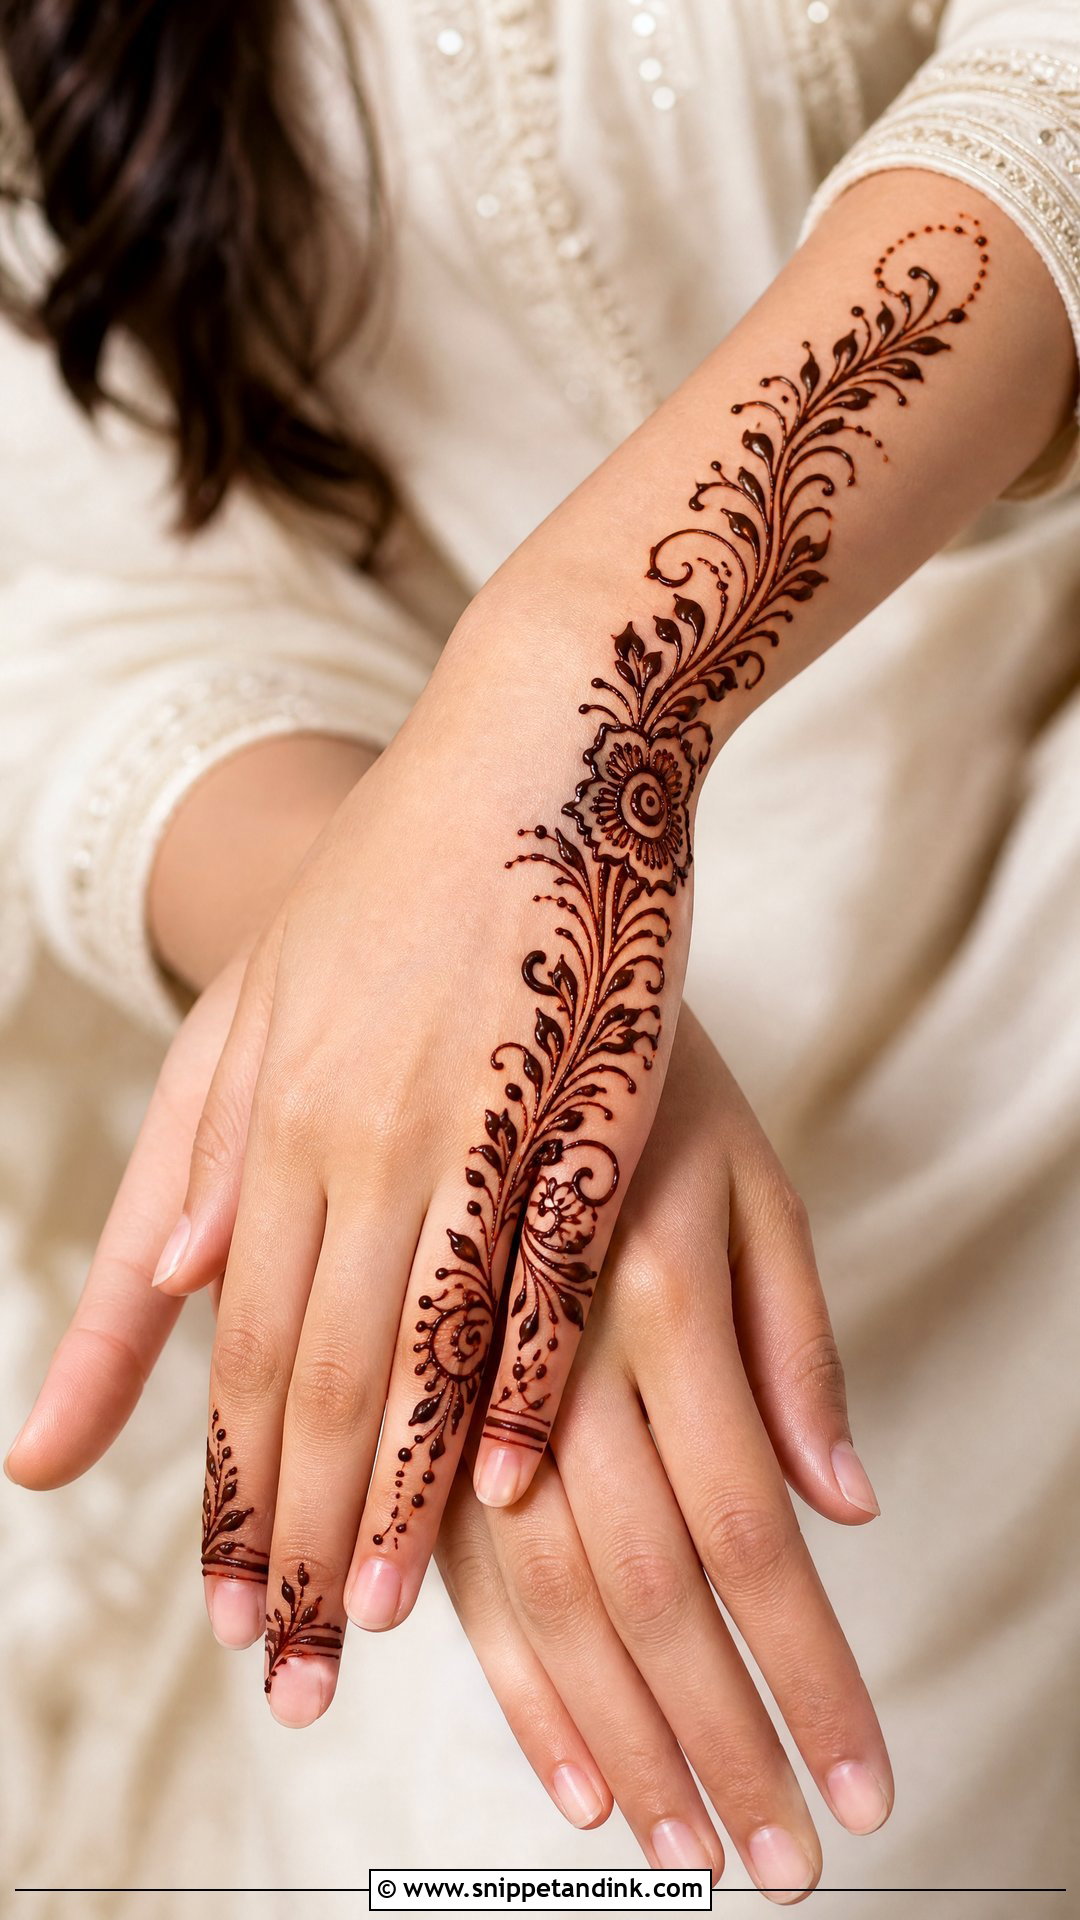
Starting at the wrist, the design runs along the outer edge of the palm or back hand to the little finger, a slim border of flowers, leaves, dots and curves. Most of the hand stays open. Side layouts are forgiving because there is no centre to misjudge. Tiny fingertip details stop it looking lopsided.
24. Simple Jaali Mehndi Design
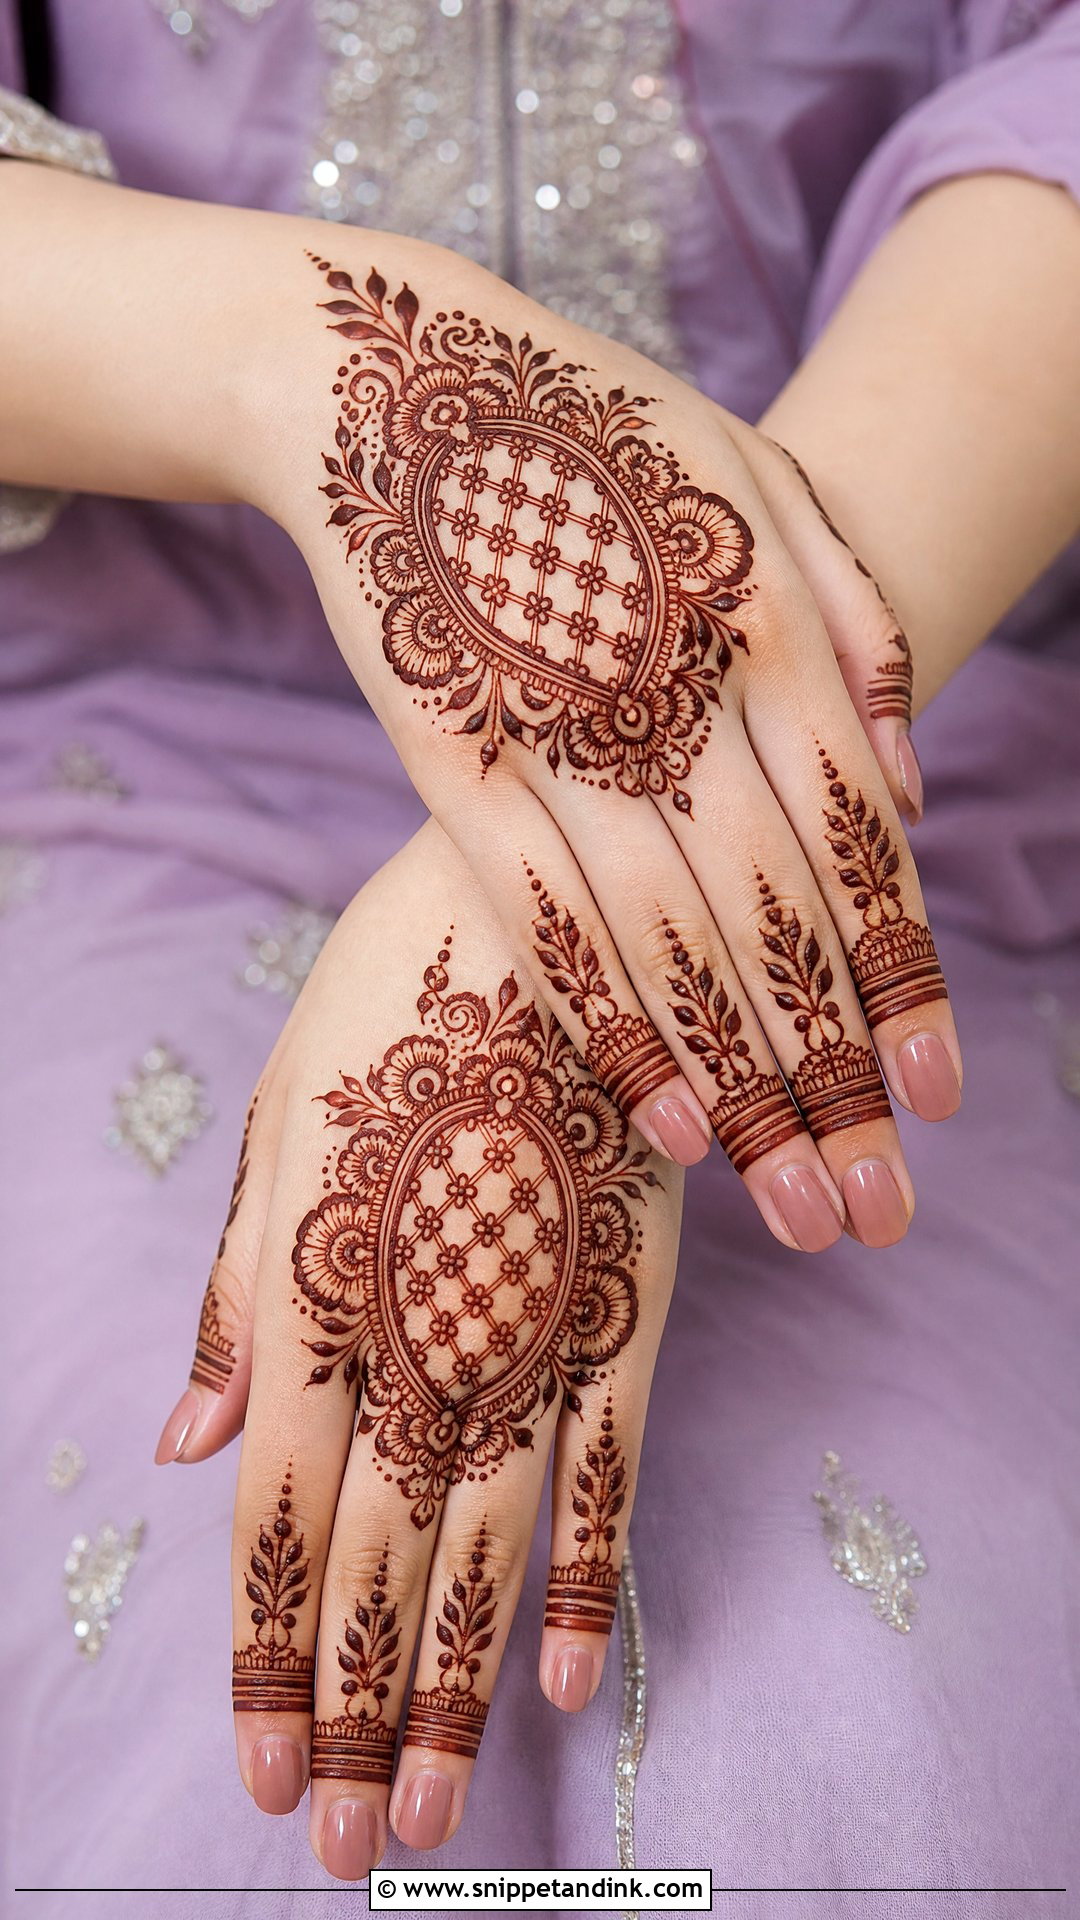
Mesh looks detailed but stays simple when it is small and contained. Put a light net on one section of the back hand or palm and frame it with flowers or leaves. Covering the whole hand with jaali is hard for beginners, as the lines drift. A small patch adds texture. I draw all parallel lines in one direction first, then the crossing set.
25. Simple Moroccan Mehndi Design
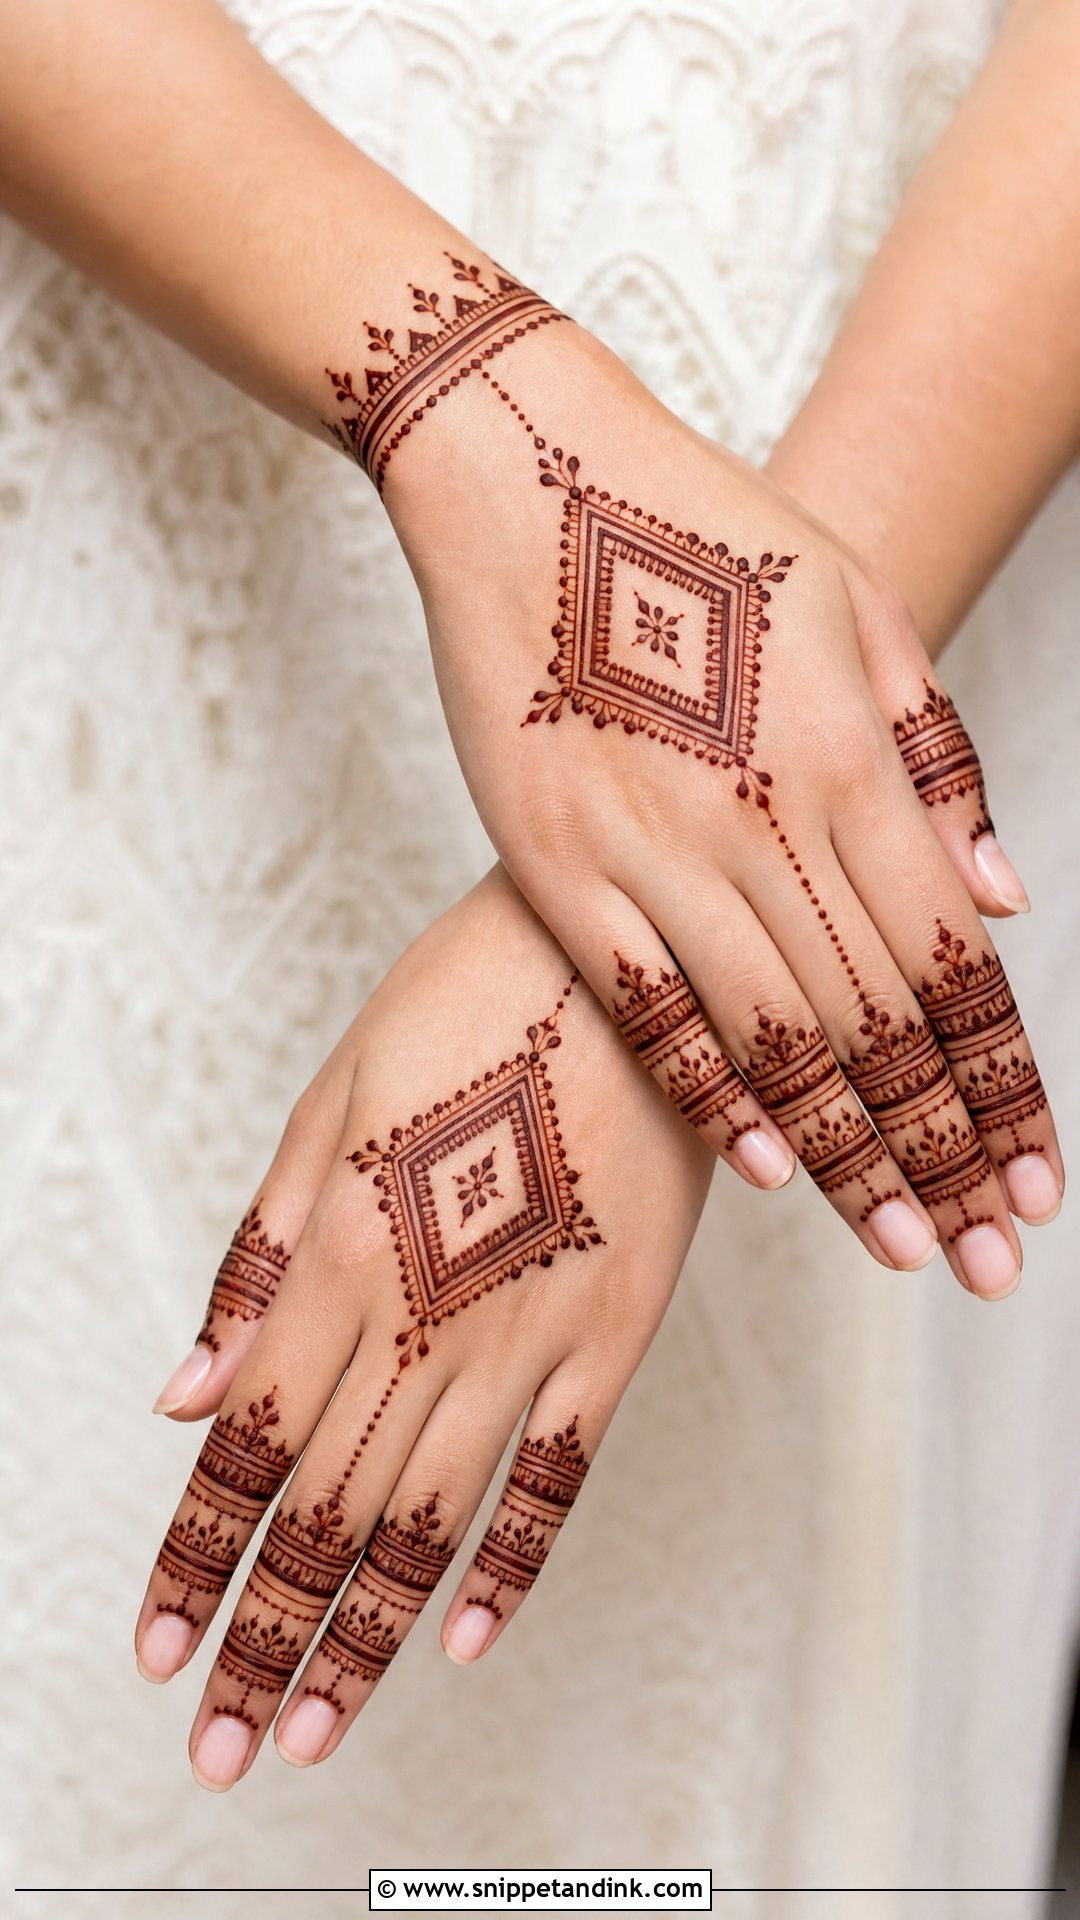
A central diamond on the back of the hand, matching finger bands and a wrist border of triangles or dots. Lines should be straight, bold and evenly spaced. It is a welcome change from florals and easy for beginners because it repeats one shape. Use short strokes and lift the cone between them; long lines are where wobbles appear.
26. Simple Indo Arabic Mehndi Design
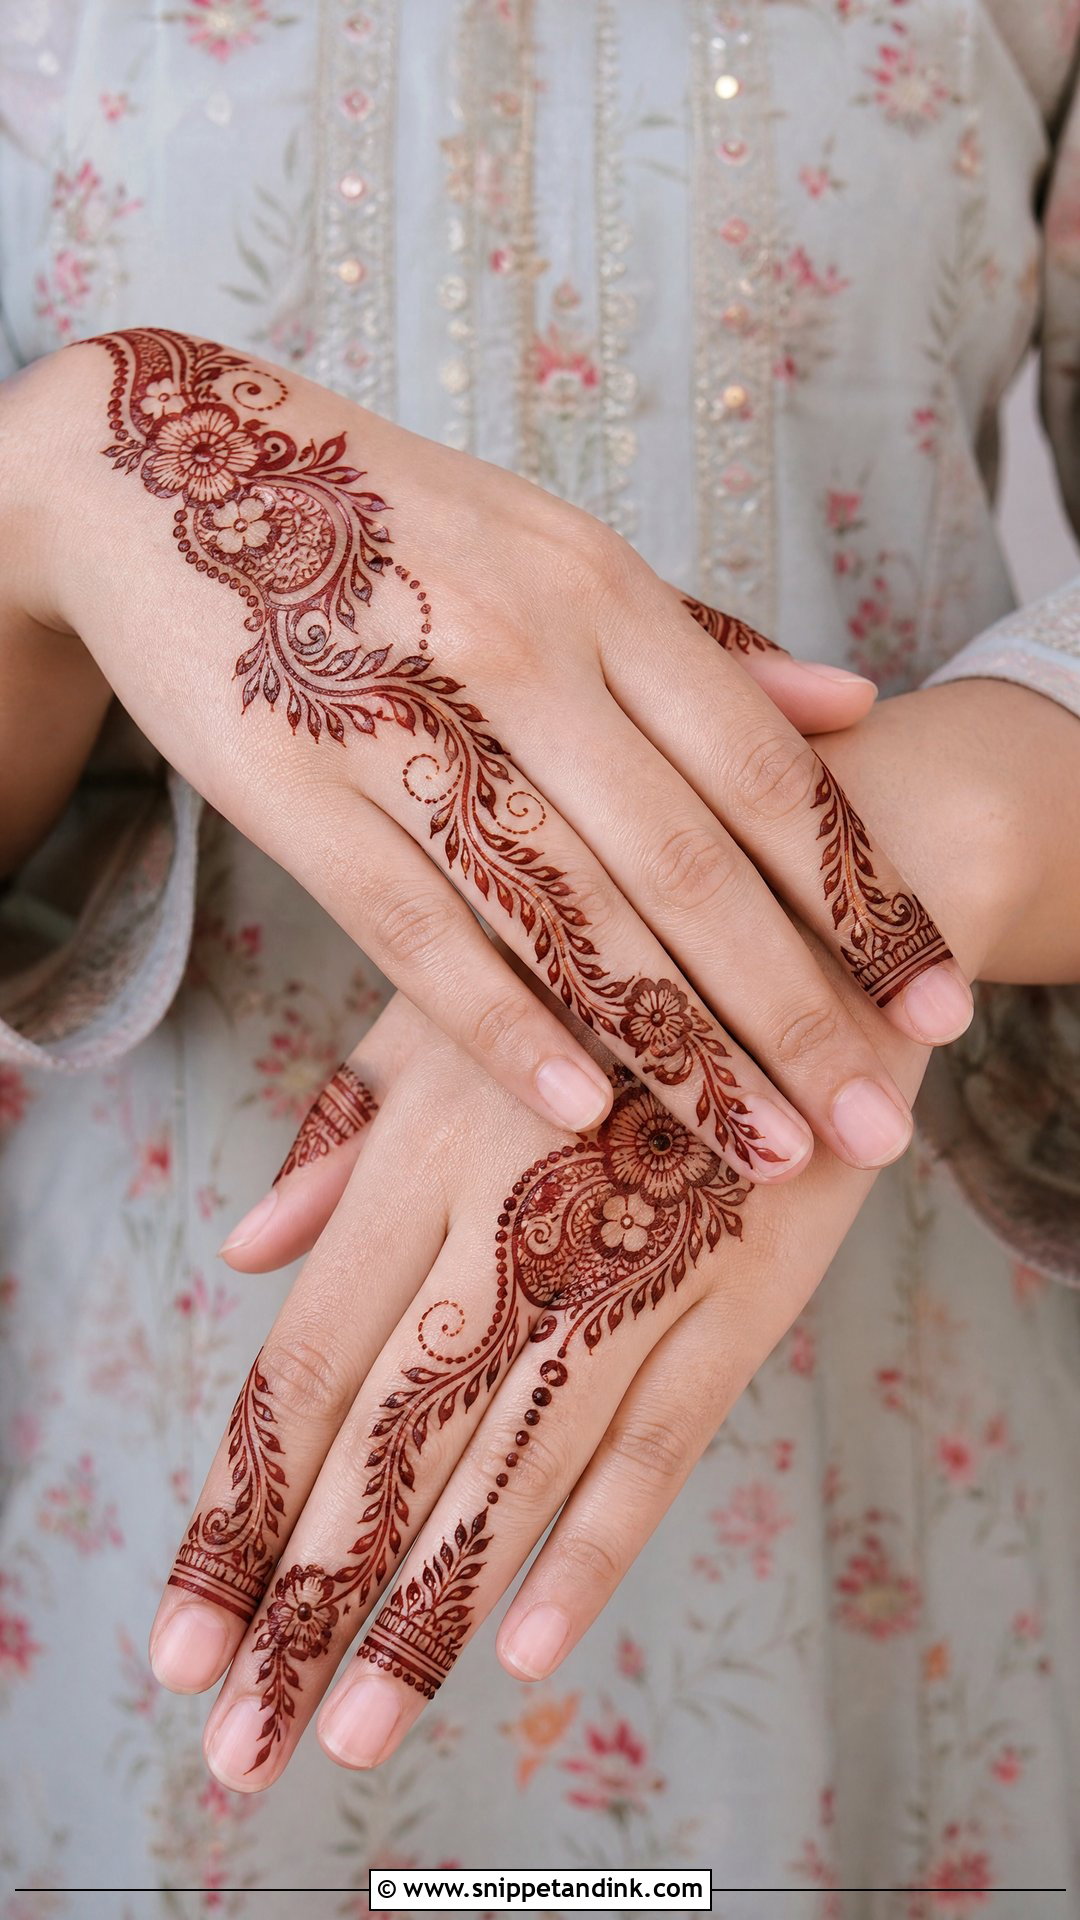
Arabic flow plus a little Indian detail is what Indo-Arabic mehndi means. For a simple version, a diagonal floral trail from wrist to index finger, a few paisleys, dots and small line fillings inside the flowers, with open skin left visible. It suits Eid, Diwali and weddings. Beginners can make it look full with larger flowers and simple leaves instead of tiny detail.
27. Simple Gulf Mehndi Design
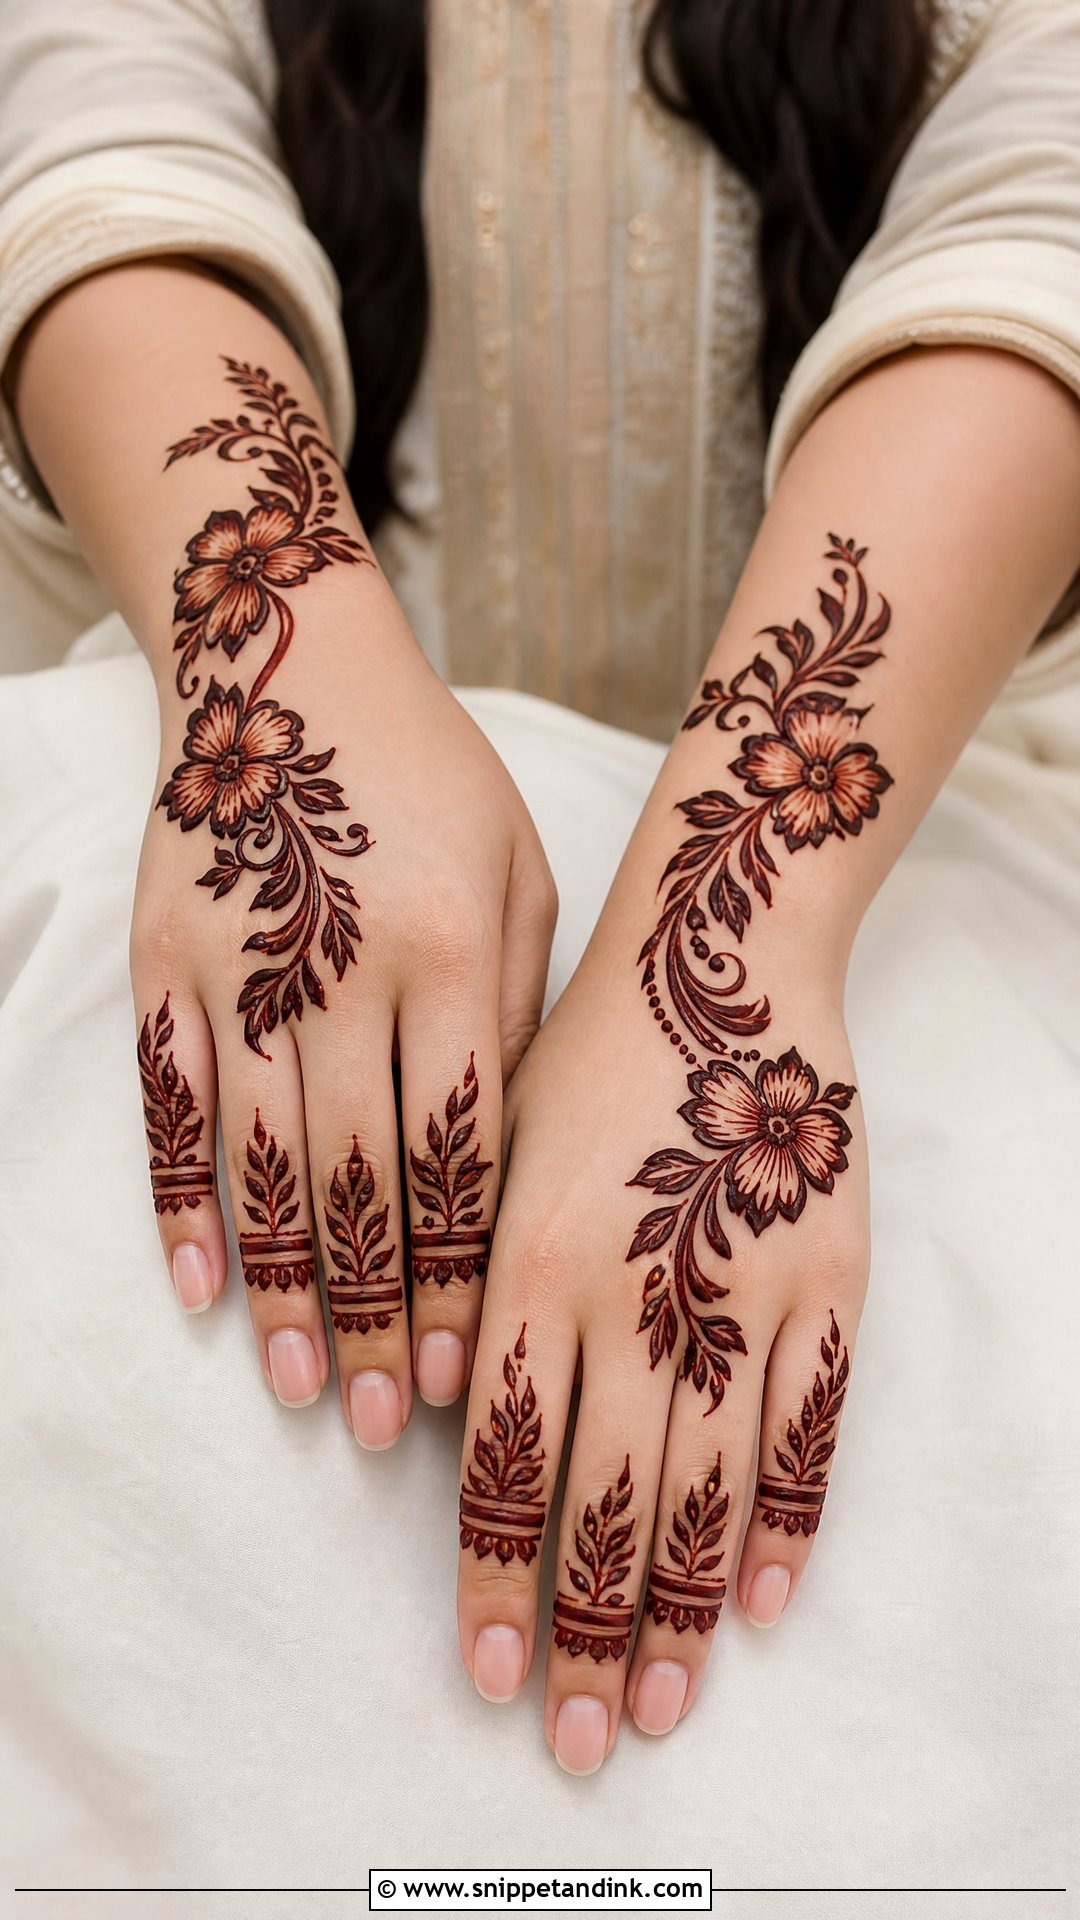
Bold flowers, flowing leaves and open spacing from the wrist toward the fingers on the back hand, with soft bands or leaf rows at the tips. Large shapes and smooth curves read from a distance, which suits celebrations and photos. Slightly bold, clean outlines hold the most paste, and they are what deepen to that rich maroon.
28. Simple Minimal Mehndi Design
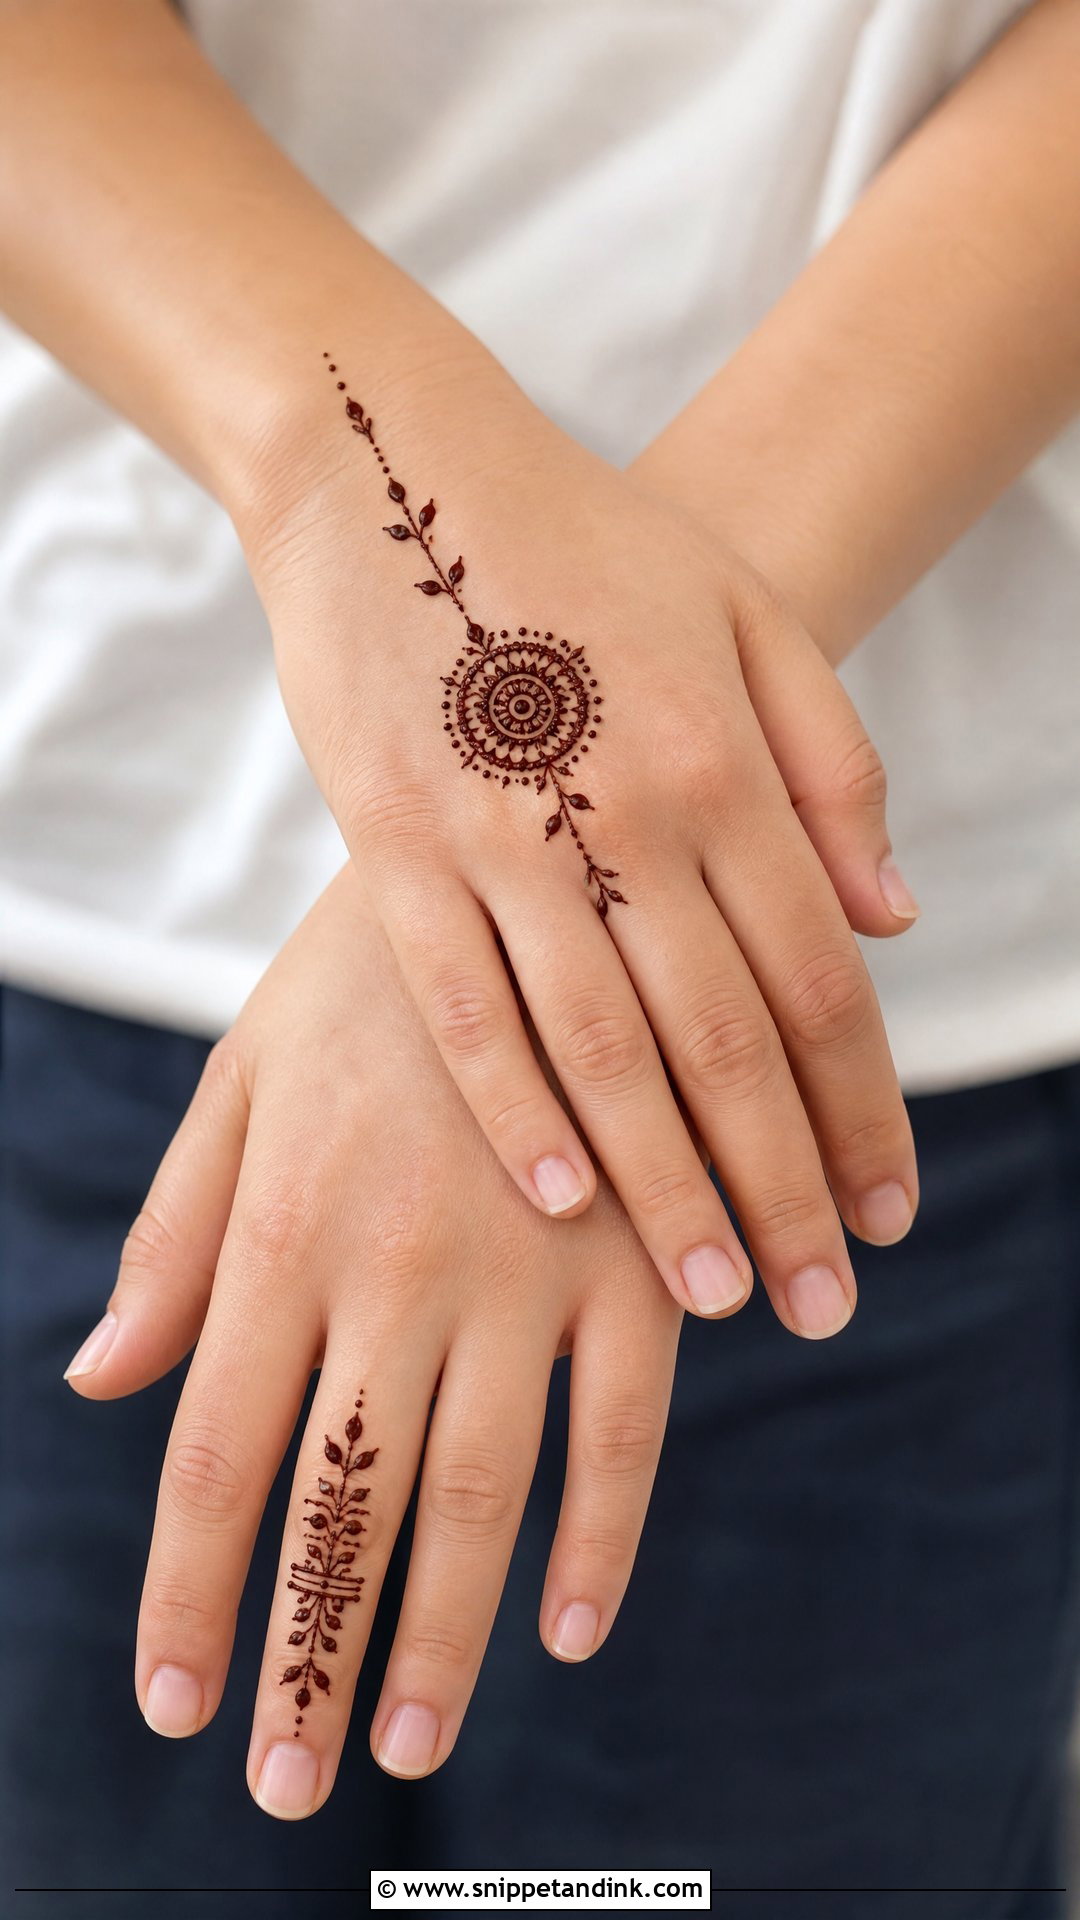
One small motif, a tiny mandala, slim vine or delicate flower, on the back hand or palm, plus a few dots or finger accents. Nothing else. The bare skin is part of the design, so do not fill it. Thin, even lines matter more here than anywhere. It suits daily wear and college events for people who want henna without a festive weight.
29. Simple Ring Mehndi Design
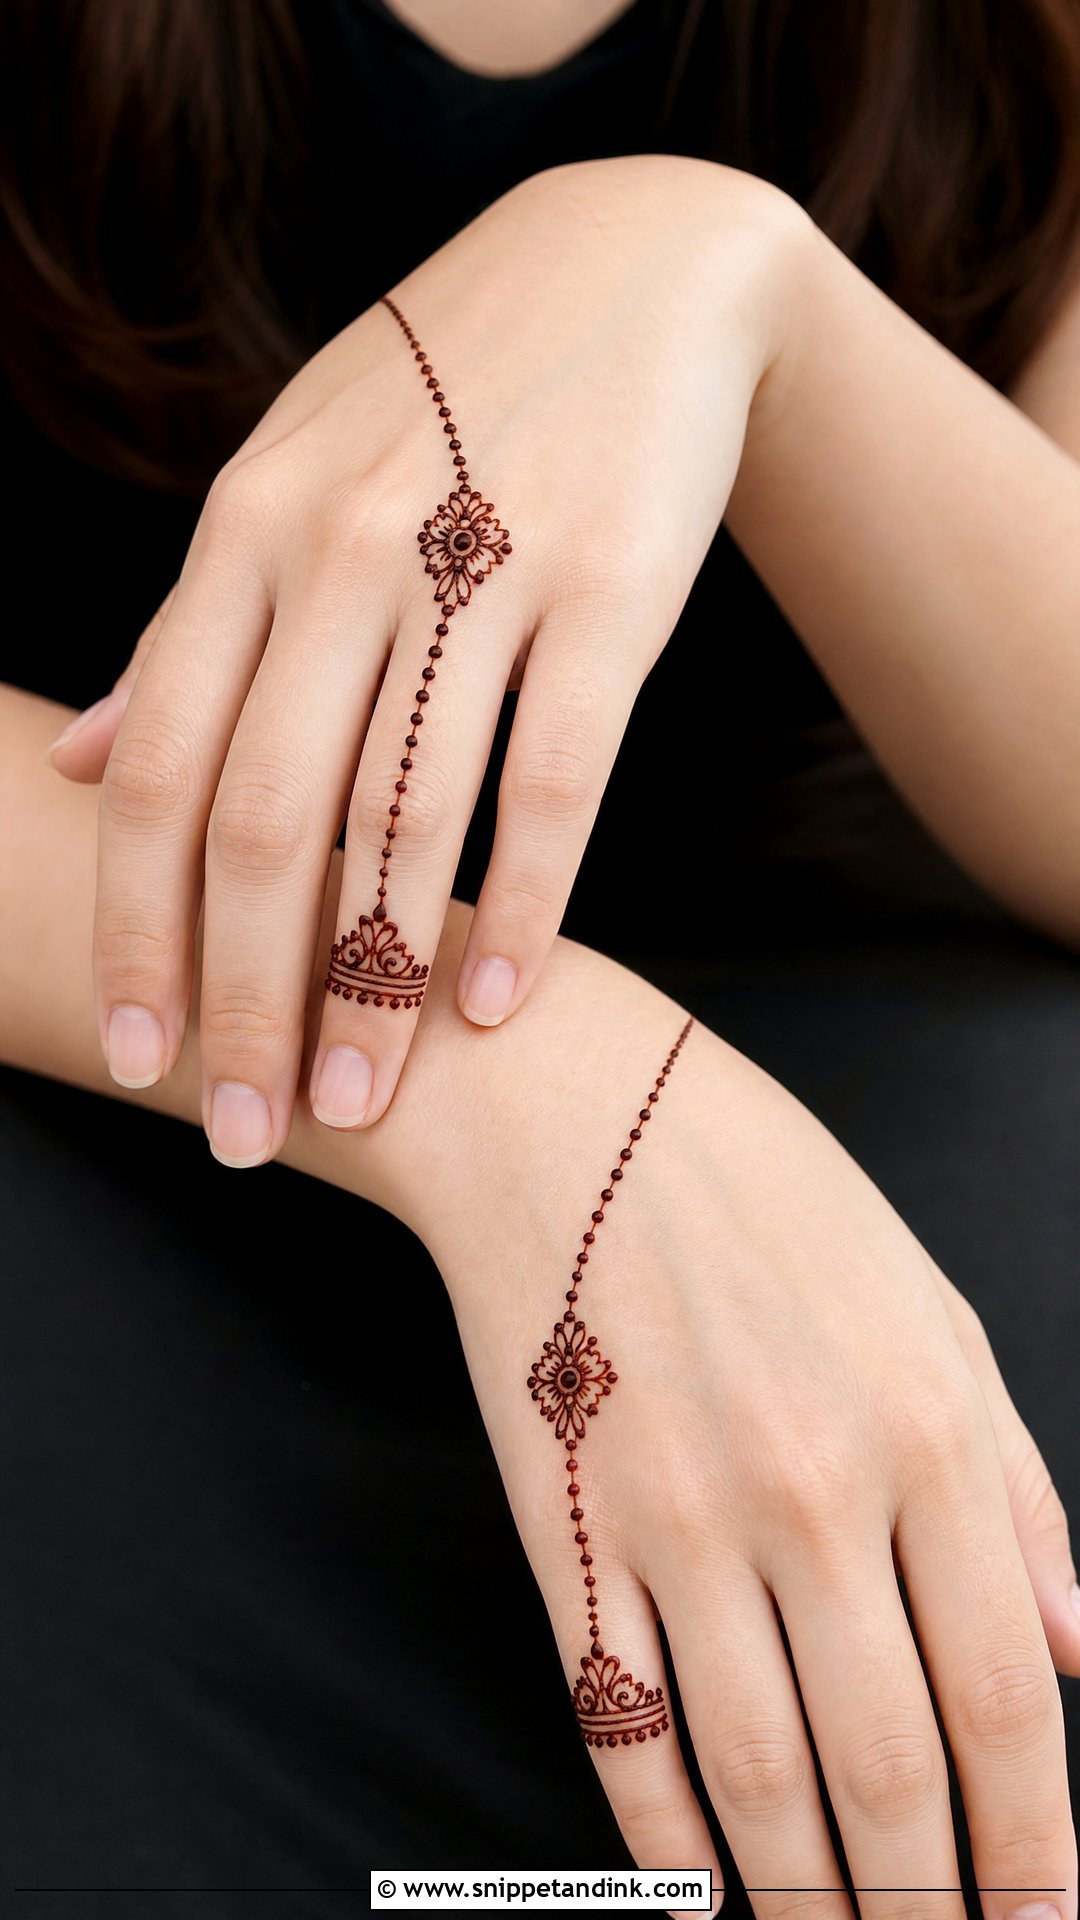
Decorate one finger like a ring with small bands, dots and a tiny floral top, then draw a thin chain to the wrist or to a bracelet band. Leave the rest open. It is quick and sits well with real rings and bangles. Keep the chain straight or gently curved; a wiggly chain looks drawn rather than worn.
30. Simple Peacock Mehndi Design
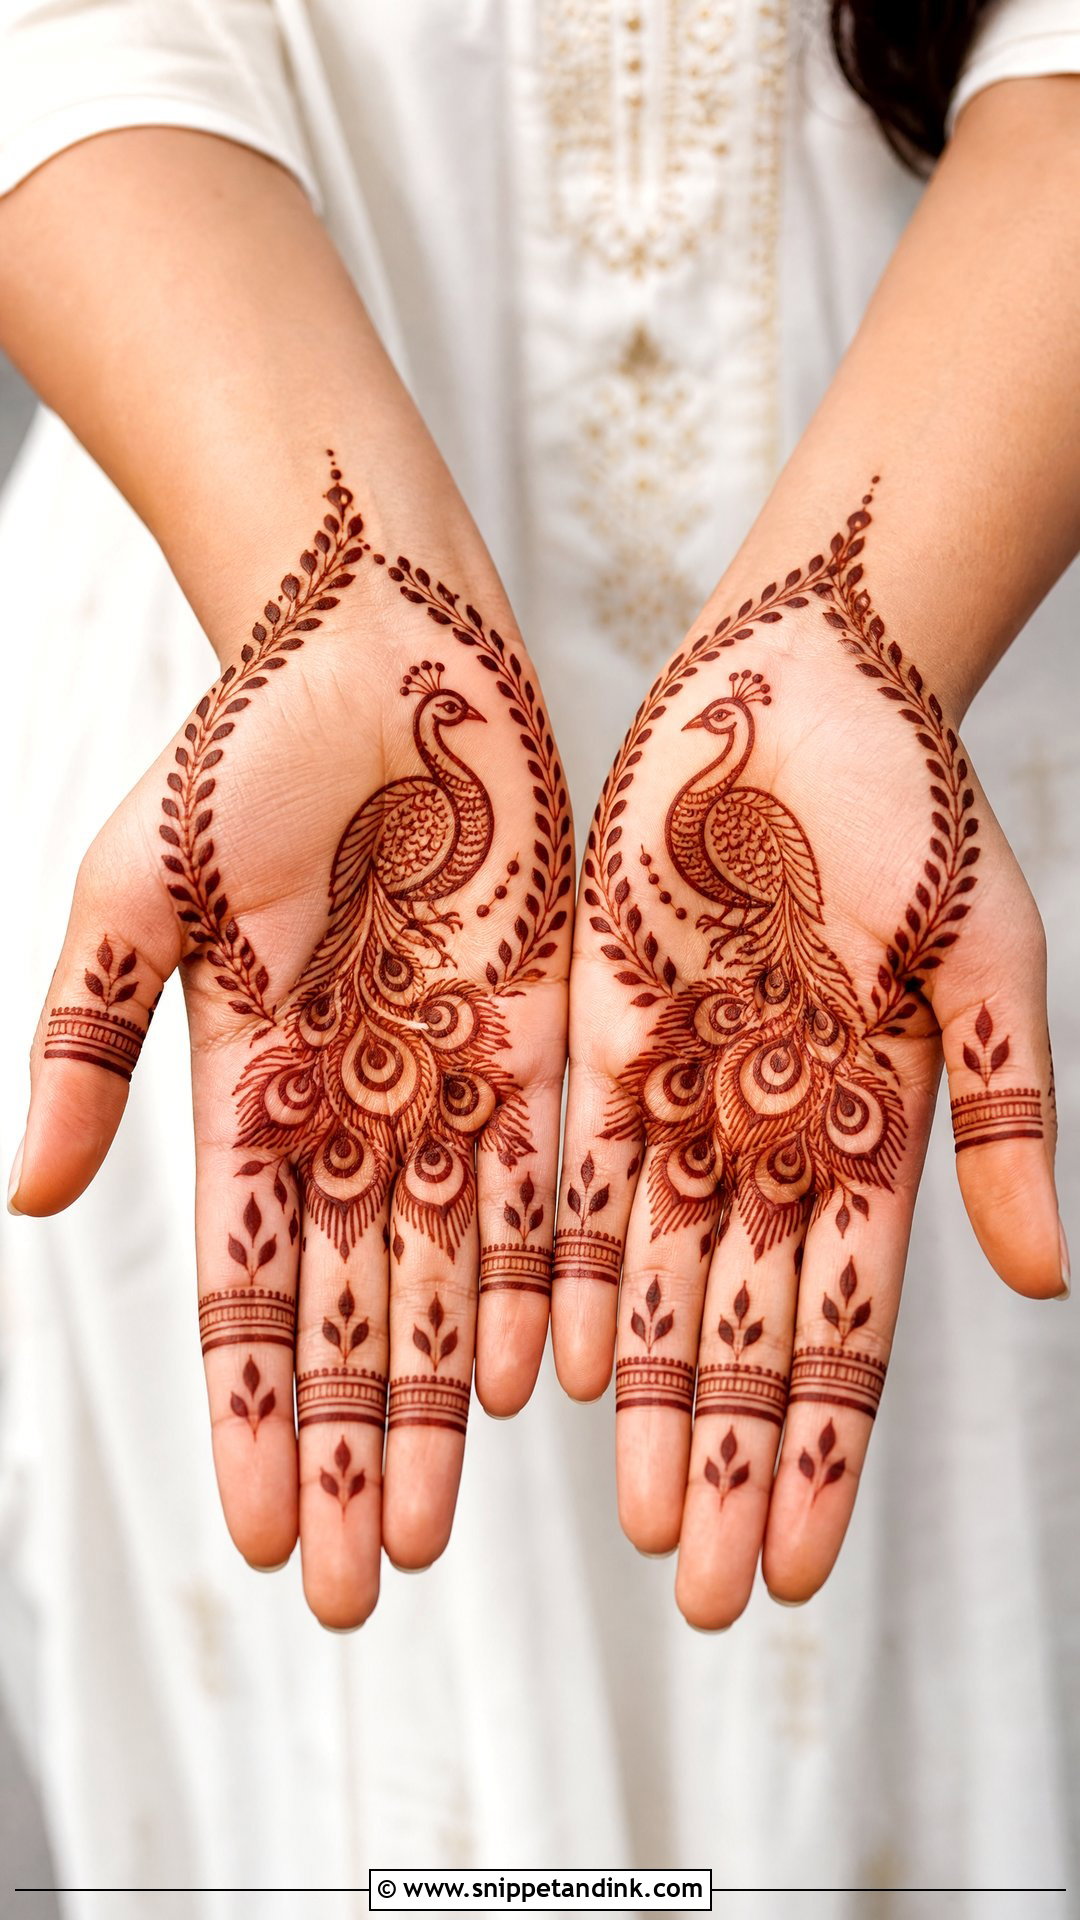
A peacock can stay simple if you draw only its outline and a few feather curves, with dots and leaves around it. Skip filling the body; clean strokes suggest the shape. Keep the fingers to bands or dots so the bird stays the focus. Get the neck curve right first, since that single line is what makes it read as a peacock.
31. Simple Rose Mehndi Design
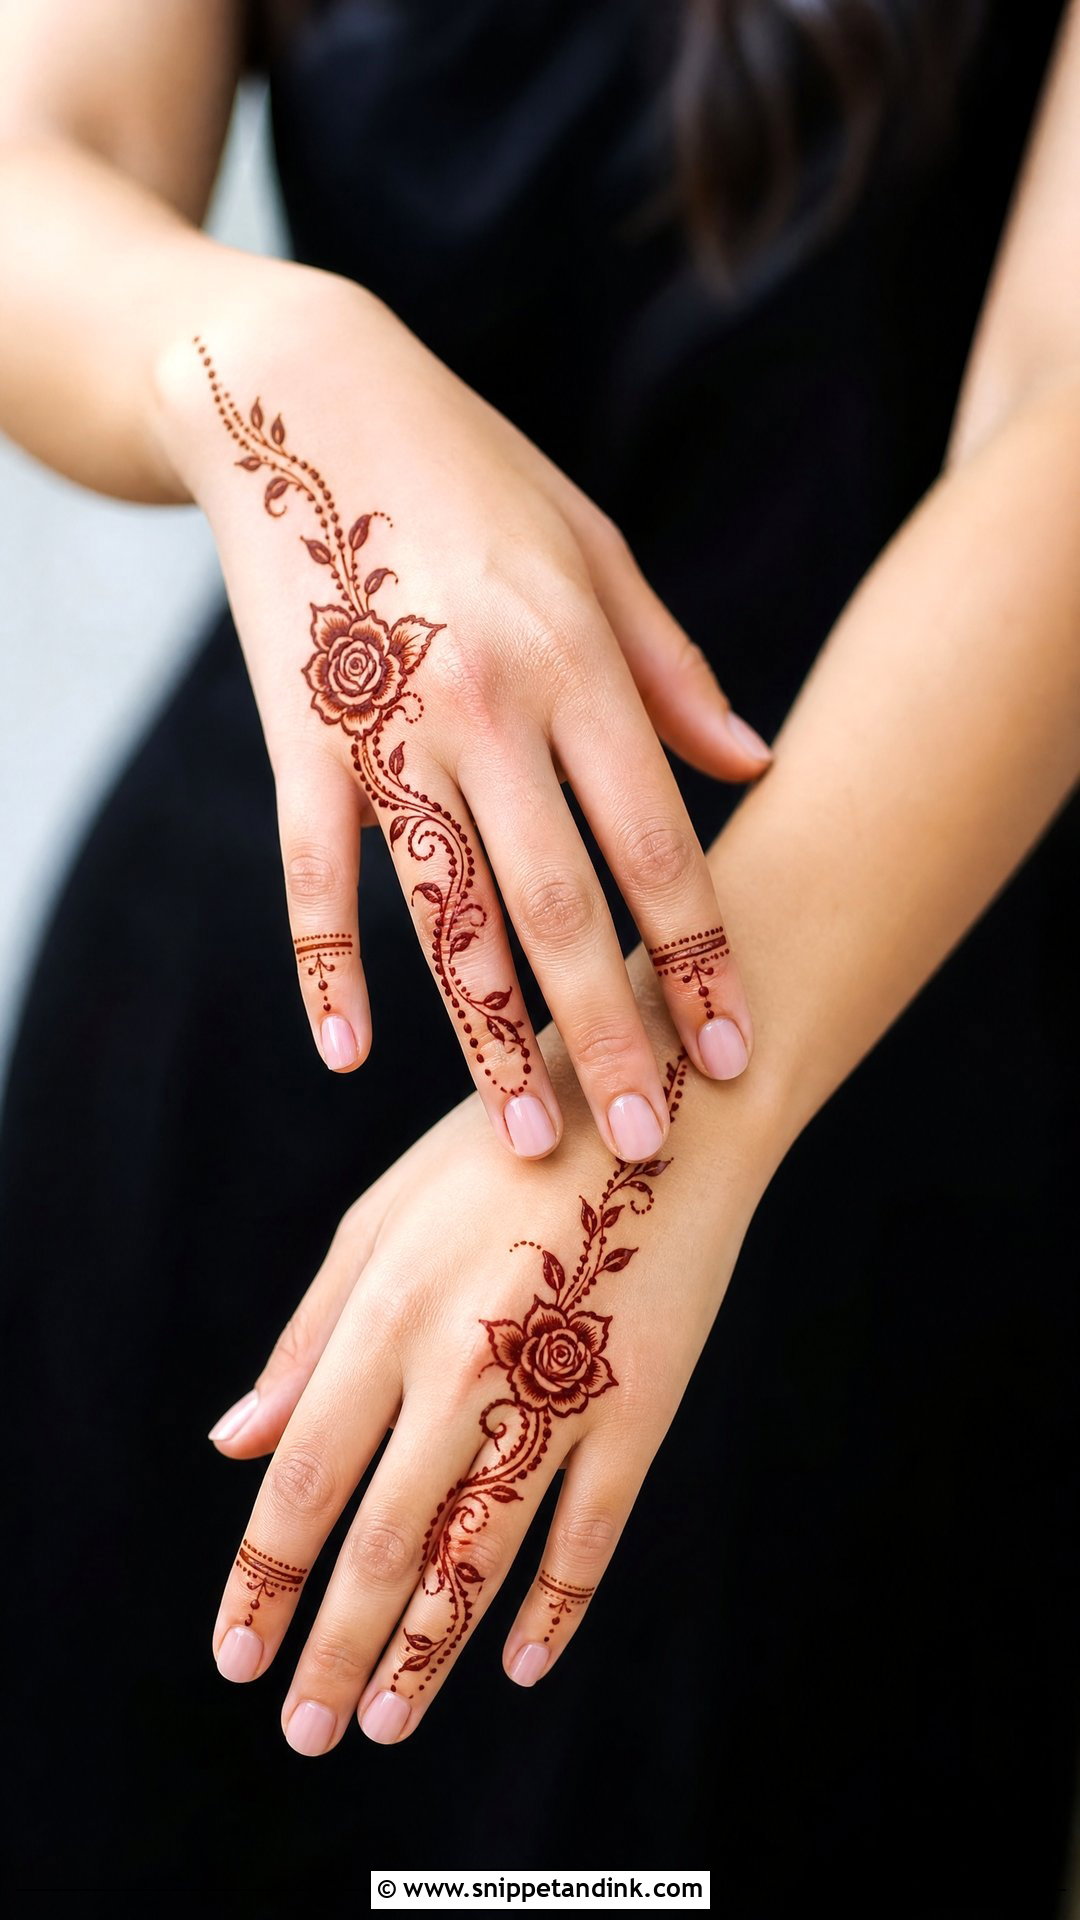
Start with a small spiral, add rounded petals around it, place it on the back hand or palm and connect it to a light vine with tiny leaves and dots. Thin bands or petal shapes on the fingers finish it. Draw the rose slightly bold. Thin rose petals tend to merge into a brown smudge once the stain darkens.
32. Simple Tikki Mehndi Design
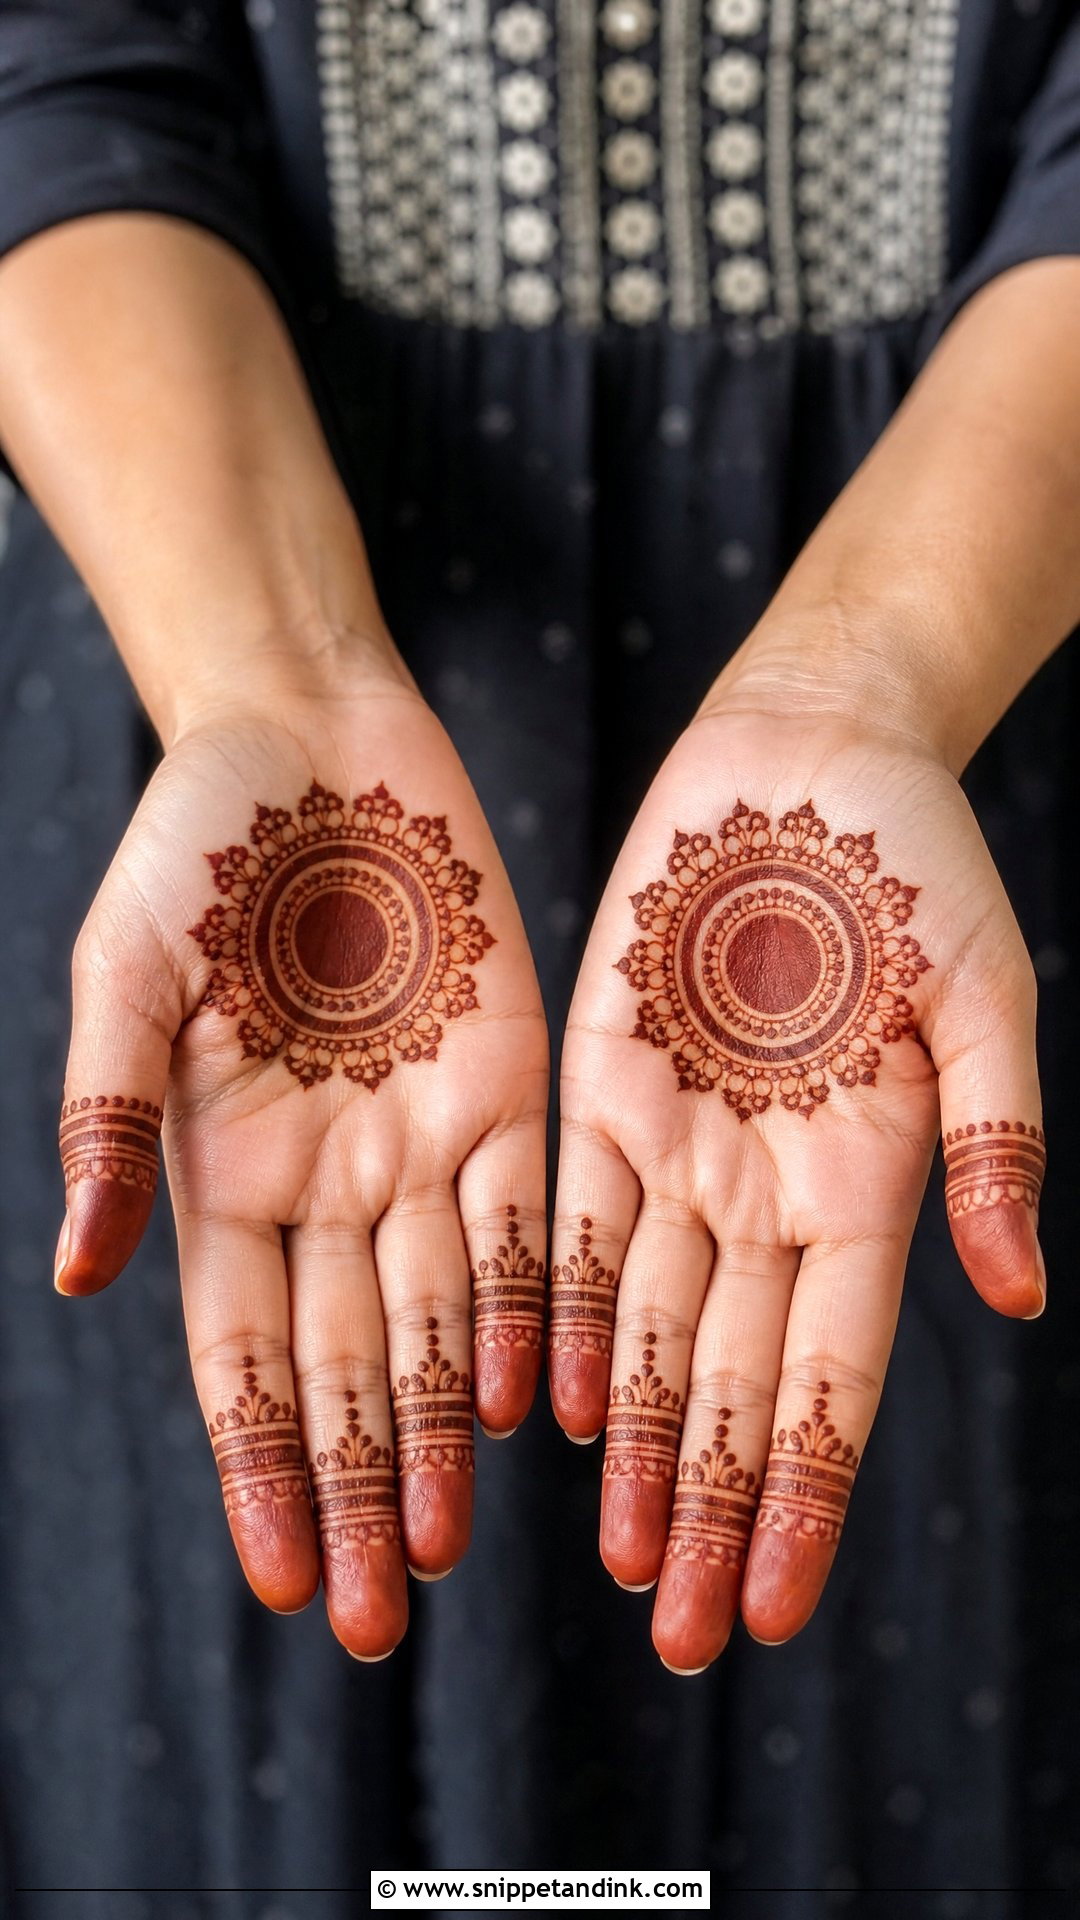
A filled or outlined circle in the palm surrounded by petals, dots or small scallops; the fingers can stay plain or get fingertip bands. It is fast, traditional and good for kids and beginners. Keep the circle clean and repeat the same small pattern evenly round it. A filled tikki stains darker than an outlined one, so fill it if you want depth.
33. Simple Dotted Mehndi Design
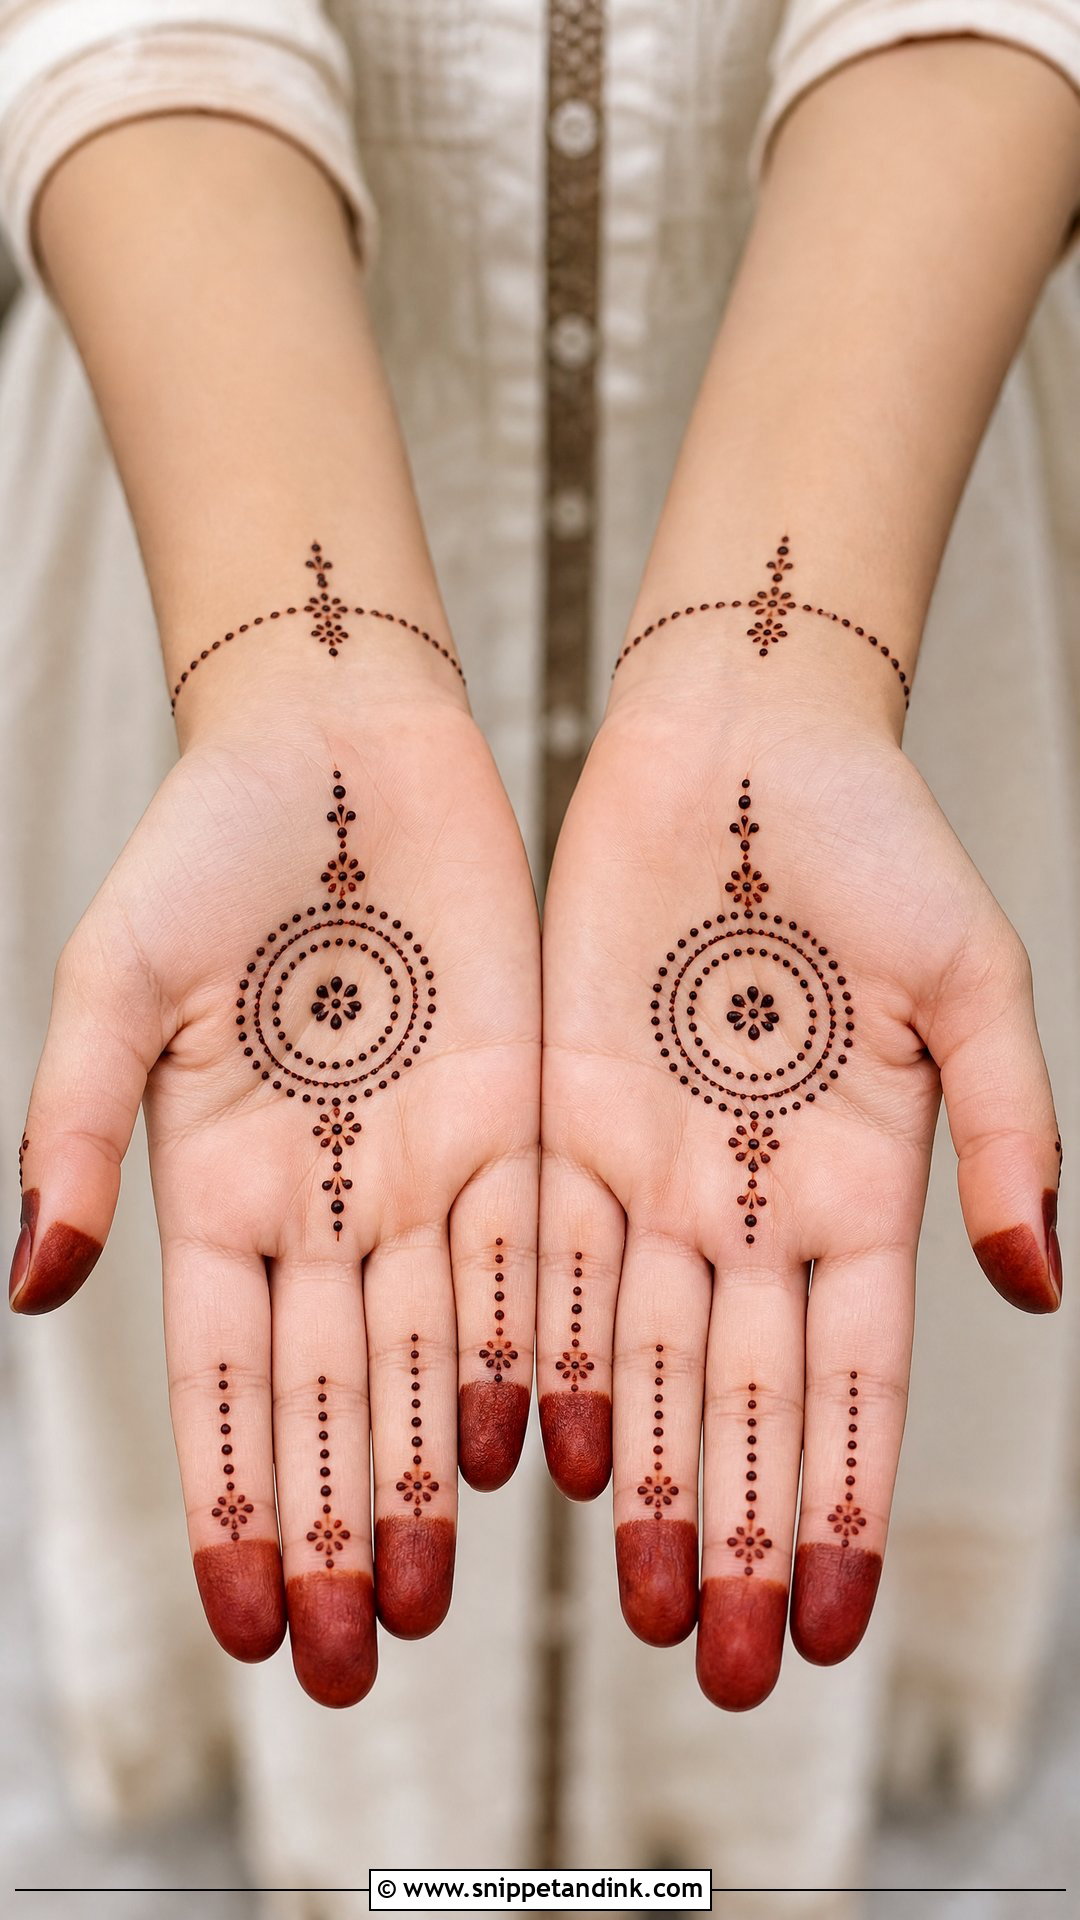
Dot chains, circles and light finger patterns can build a whole layout. A simple dotted mehndi design starts with a tiny mandala or flower and runs dotted trails toward the fingers and wrist. Dots are easier than long lines for a new hand and dry quickly. Squeeze, touch and lift straight up; dragging the cone turns dots into commas. Even spacing makes it look deliberate.
34. Simple Heart Mehndi Design
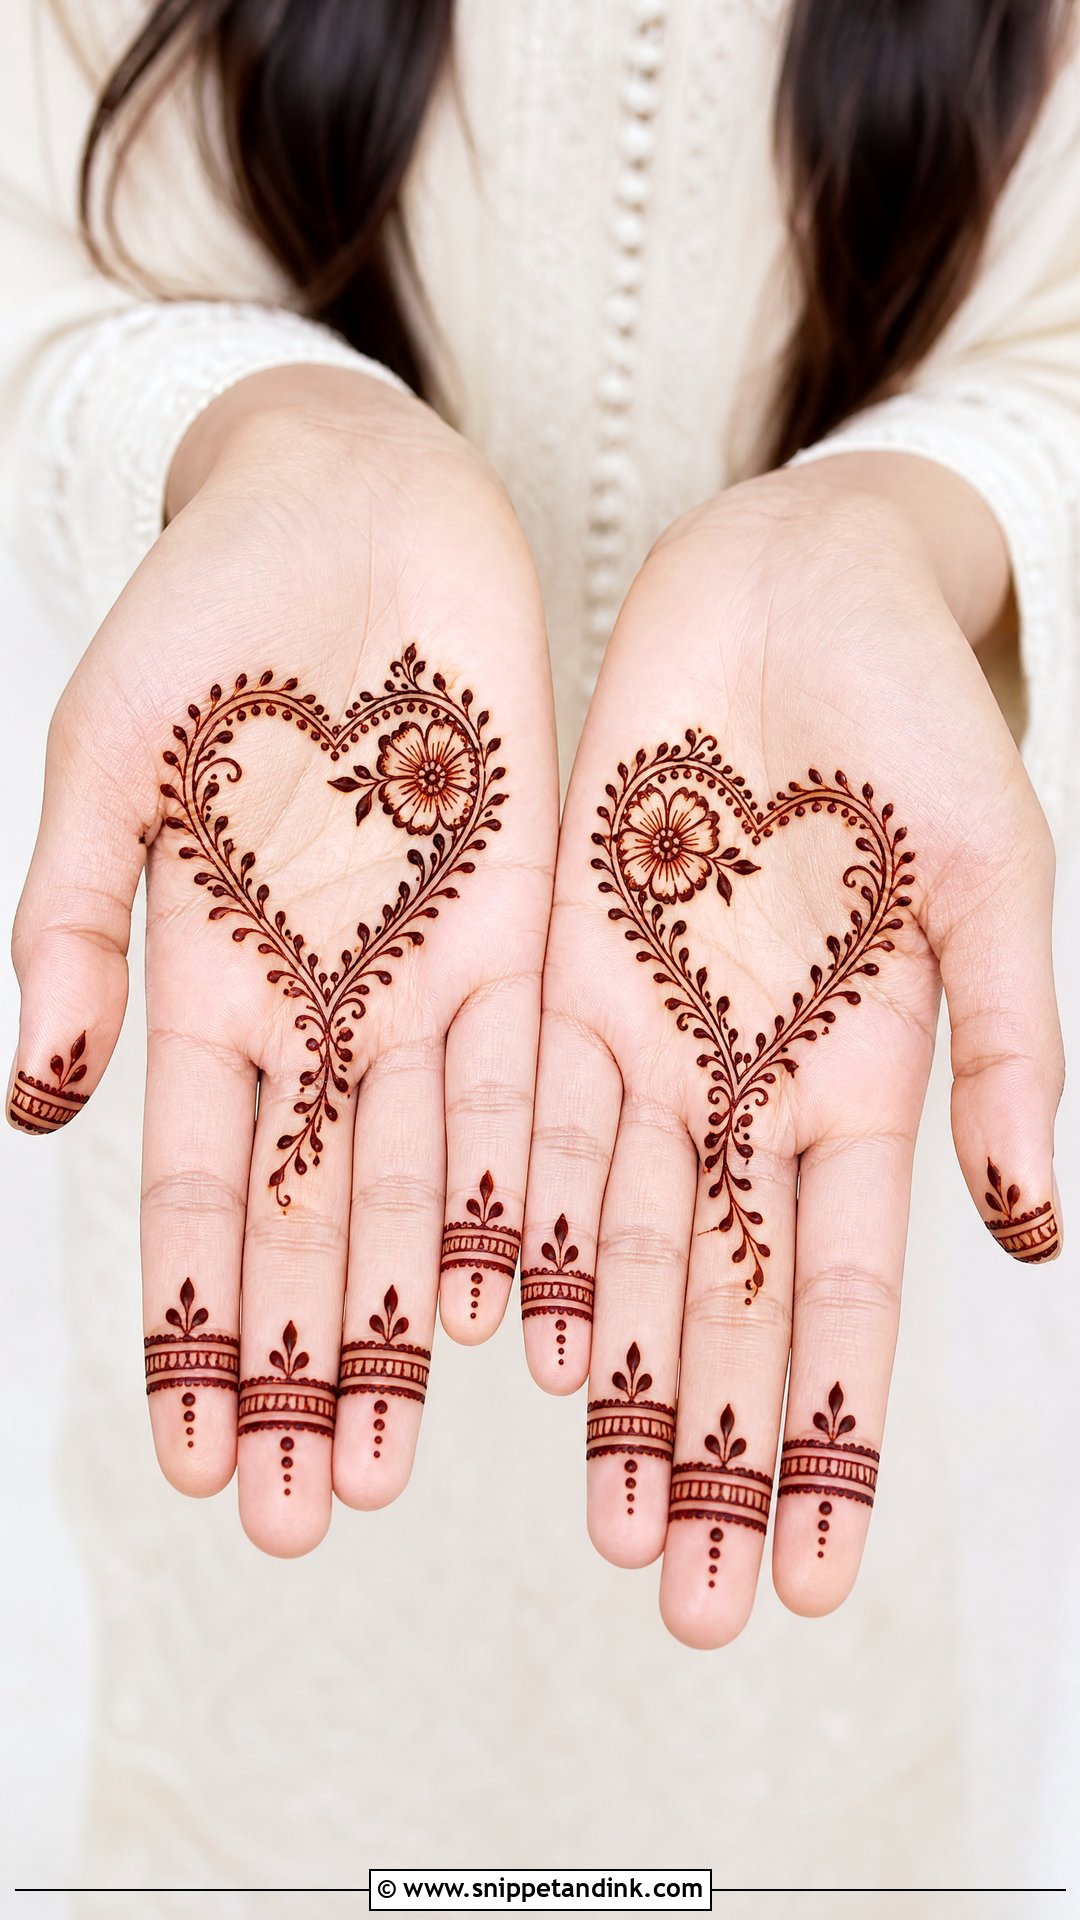
A small heart-shaped floral frame on the palm or back hand, with dots, leaves and a short vine around it, reads as sweet rather than childish. Keep the shape soft and not too large. Sisters, best friends and teens like it, and it works for a light engagement or anniversary look too. Match one or two finger bands to finish the hand.
35. Simple Forearm Mehndi Design
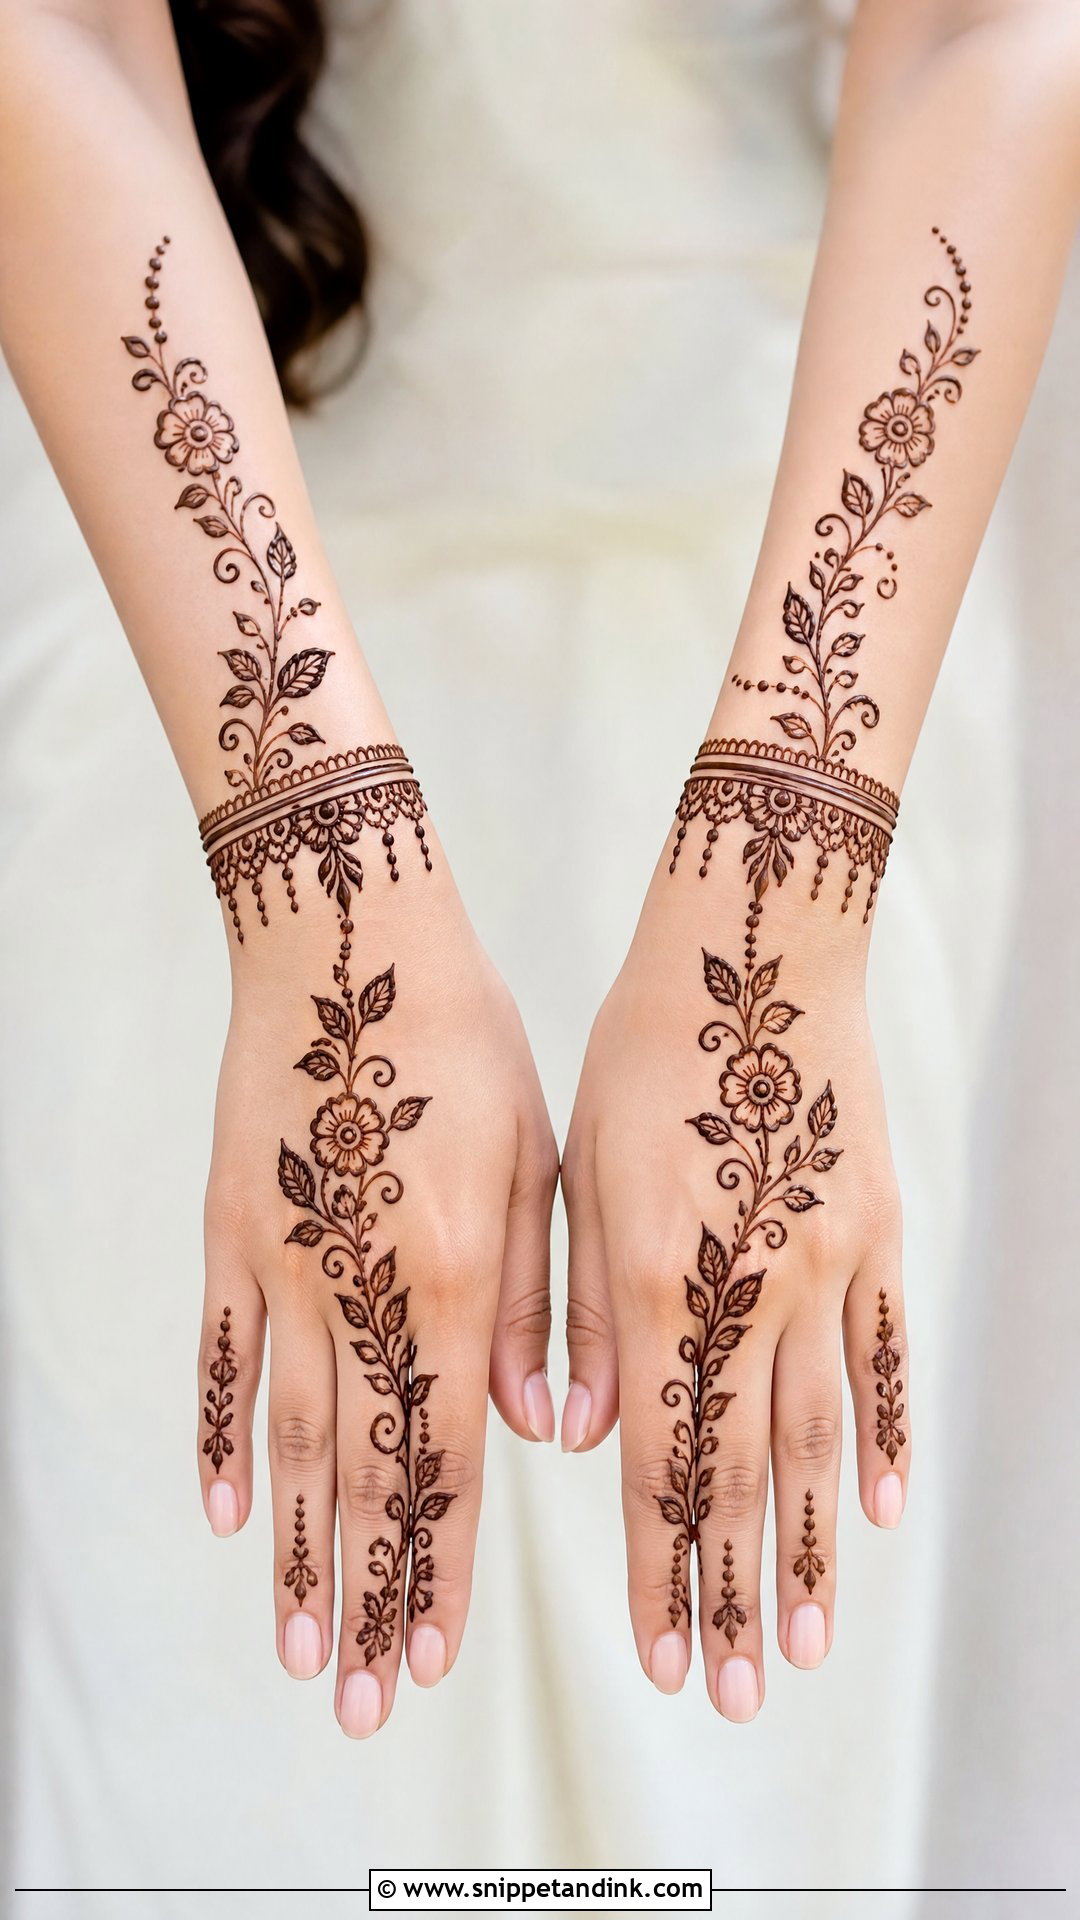
A wrist bracelet with a slim vine running a few inches up the forearm, using small flowers, leaves, dots and curves. Connect it to the back hand or leave it as a separate cuff. It shows well with short sleeves and bangles and suits bridesmaids and guests. Keep it narrow; a forearm design that widens quickly looks heavy, and the forearm stains lighter than the hand anyway.
Is That Shop-Bought Cone Real Henna?
Beginners usually buy ready-made cones, and this is where I’d be careful. Natural henna paste is perishable: it is normally sold fresh or frozen, has a short shelf life at room temperature, and stains orange first, darkening over a day or two.
Signs a cone may not be safe
- It promises a dark stain within minutes or a black colour.
- It has no ingredient list, or lists dyes or chemical names beyond henna, lemon, sugar and essential oils.
- It sits on a shop shelf for months unrefrigerated and still claims to be natural.
- It smells strongly of chemicals rather than earthy and herbal.
Some quick-stain cones contain dyes that can cause allergic reactions and blistering. Do a small patch test on the inner arm a day before your celebration, especially with a new brand, and use only plain natural henna on children.
Dots, Leaves, Circles and Petals Carry Every Design Here
None of these designs need complicated skills. A clean mandala, a soft vine, a tiny flower, a dotted trail or a bracelet can make hands look festive in minutes. Your comfort, hand shape, occasion and taste decide the rest. If you are new, start with open layouts and repeat easy shapes: dots, leaves, circles, petals. When you want more polish, add finger bands or a wrist border. A steady cone and simple spacing will carry you a long way.
You'll Like These Ideas:


Leave a Reply