
Most of the henna I apply in a year isn’t bridal at all. It’s the everyday kind: a palm mandala for a cousin’s dholki, a quick trail for Eid gatherings, Diwali celebrations, a back-hand bracelet before a school function. These designs sit between bare hands and full coverage, and they have to live through cooking, typing and washing up afterwards. The ideas below cover that middle ground, from a single vine to a fuller festive palm, with notes on how long each takes and who it suits. Pick by the time you have and what your hands will be doing for the next week.
Practise on Paper Before the Cone Touches Your Palm
Many of these designs are drawn at home, and the difference between a neat hand and a smudged one is usually ten minutes of practice. I still warm up on paper before a long session.
- Hold the cone like a pen, but let your other hand guide its tip. Squeeze from the top with the rolled end, never from the middle, or paste bursts out unevenly.
- Lift the line slightly off the surface. Henna is laid on the skin like icing on a cake, not dragged like ink. Dragging gives thin, broken lines.
- Drill four shapes until they’re steady: dots, straight lines, a leaf from two curves, and a teardrop that becomes a paisley.
- Snip the tip a hair at a time. A hole that’s too wide gives thick ropes you can’t control; you can always cut more, never less.
- Wash your hands with plain soap and skip lotion first. Oils on the skin stop the dye from taking.
Mistakes come off if you’re quick. Wipe a wrong line with a damp cotton bud within the first minute or two, before it stains, and redraw.
1. Simple Front Hand Mehndi Design
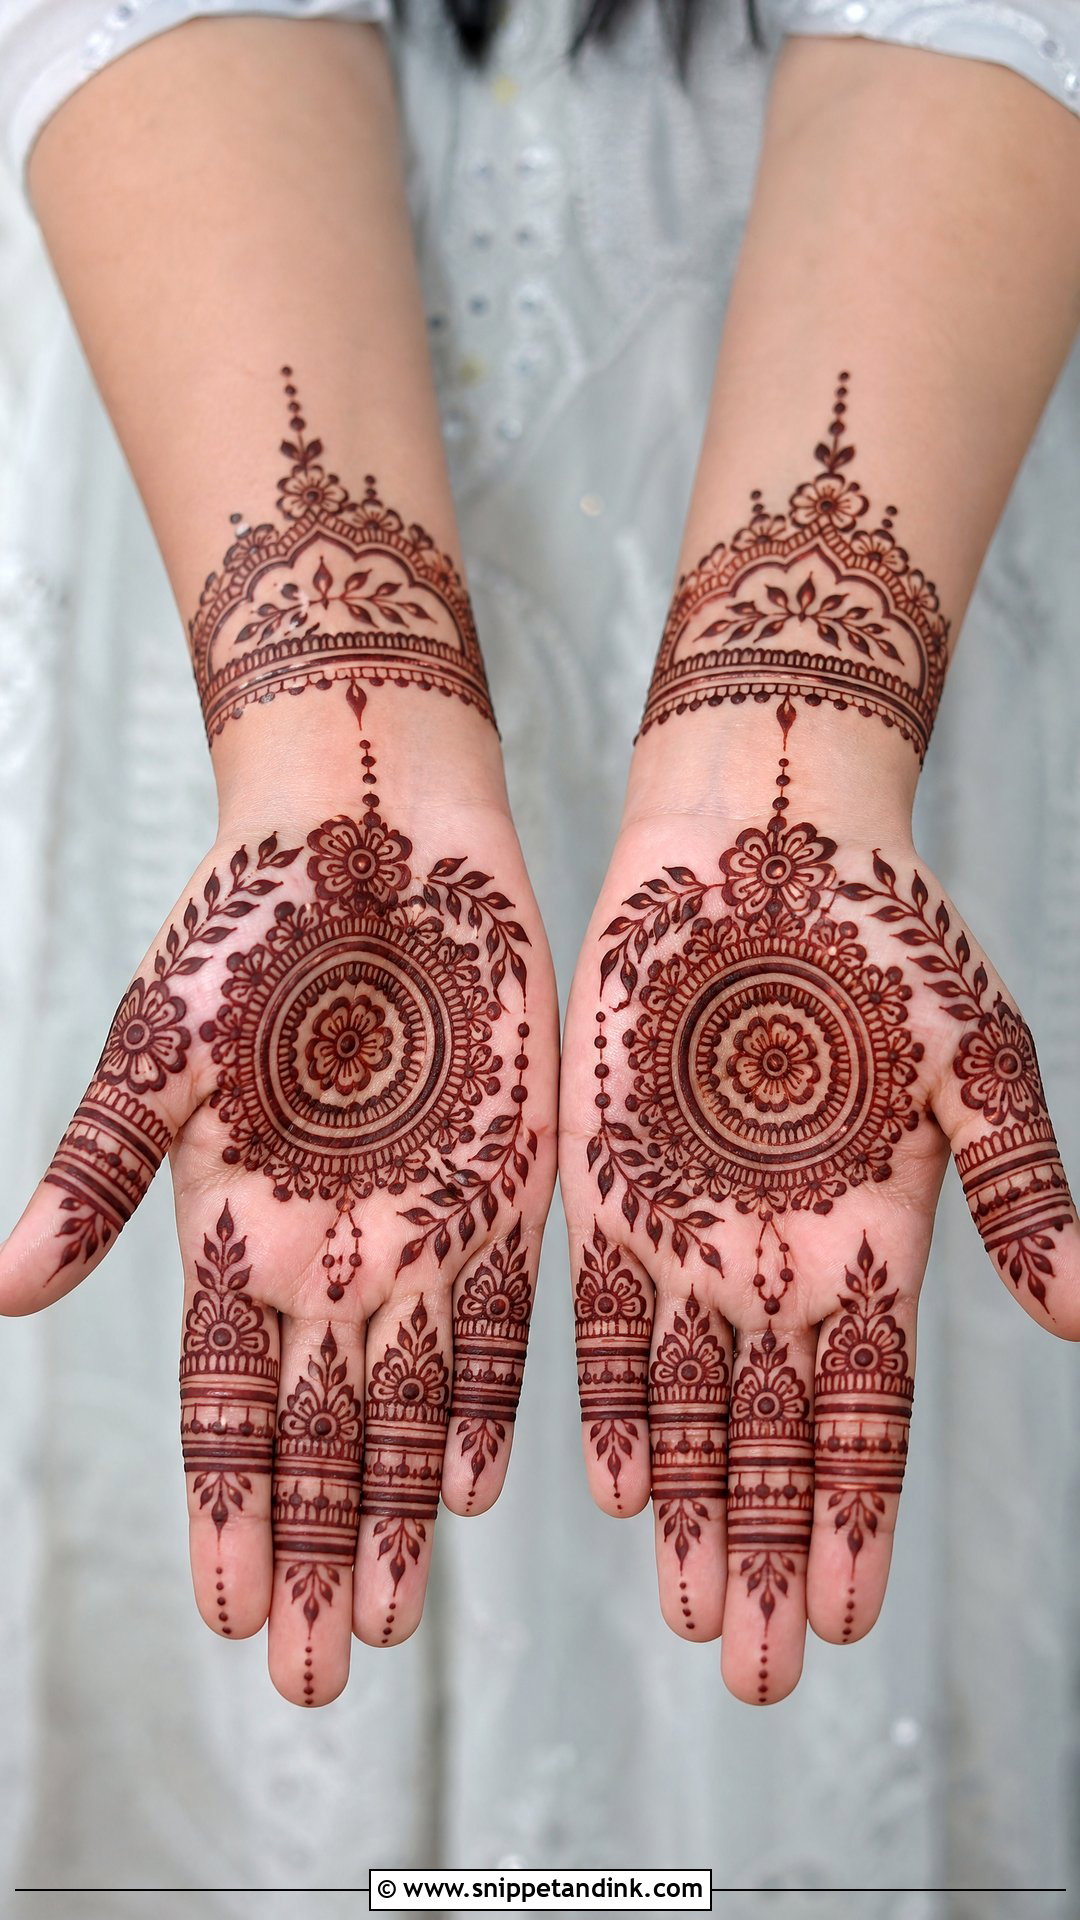
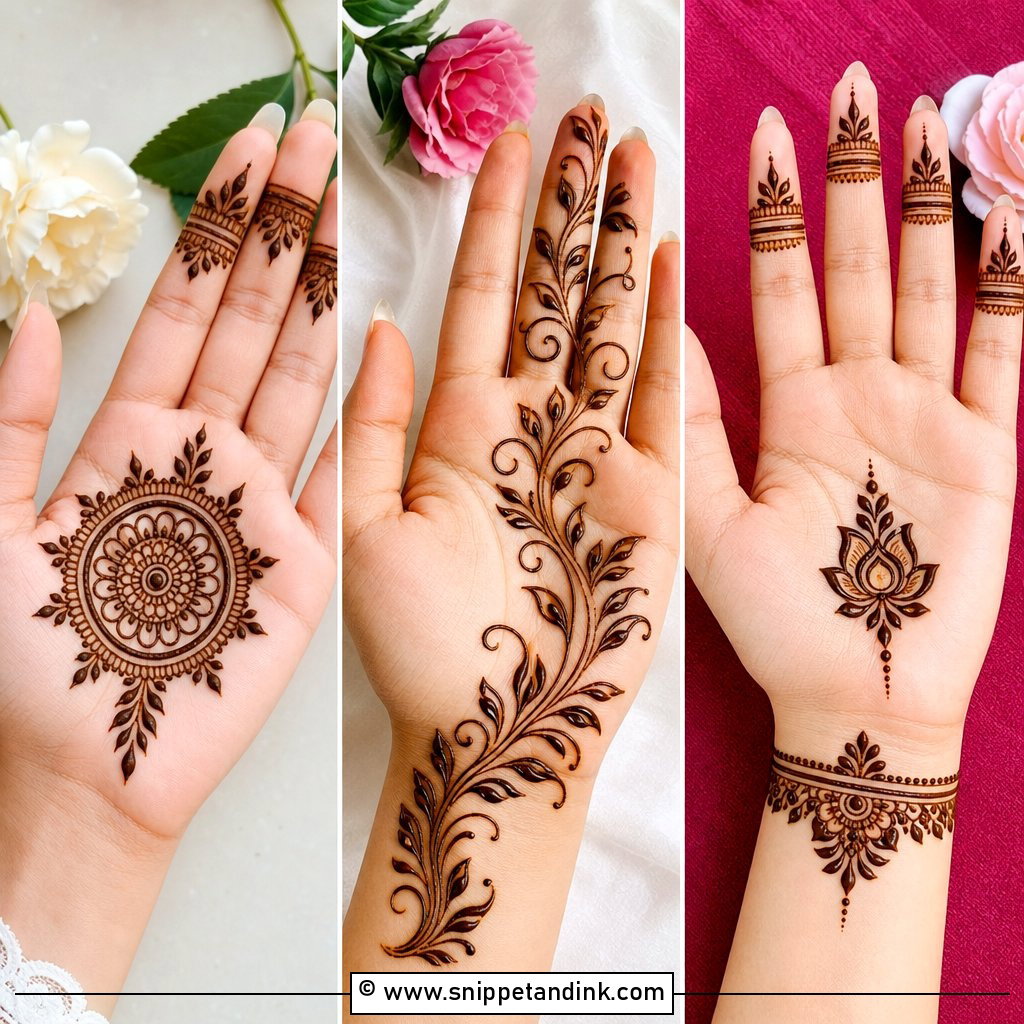
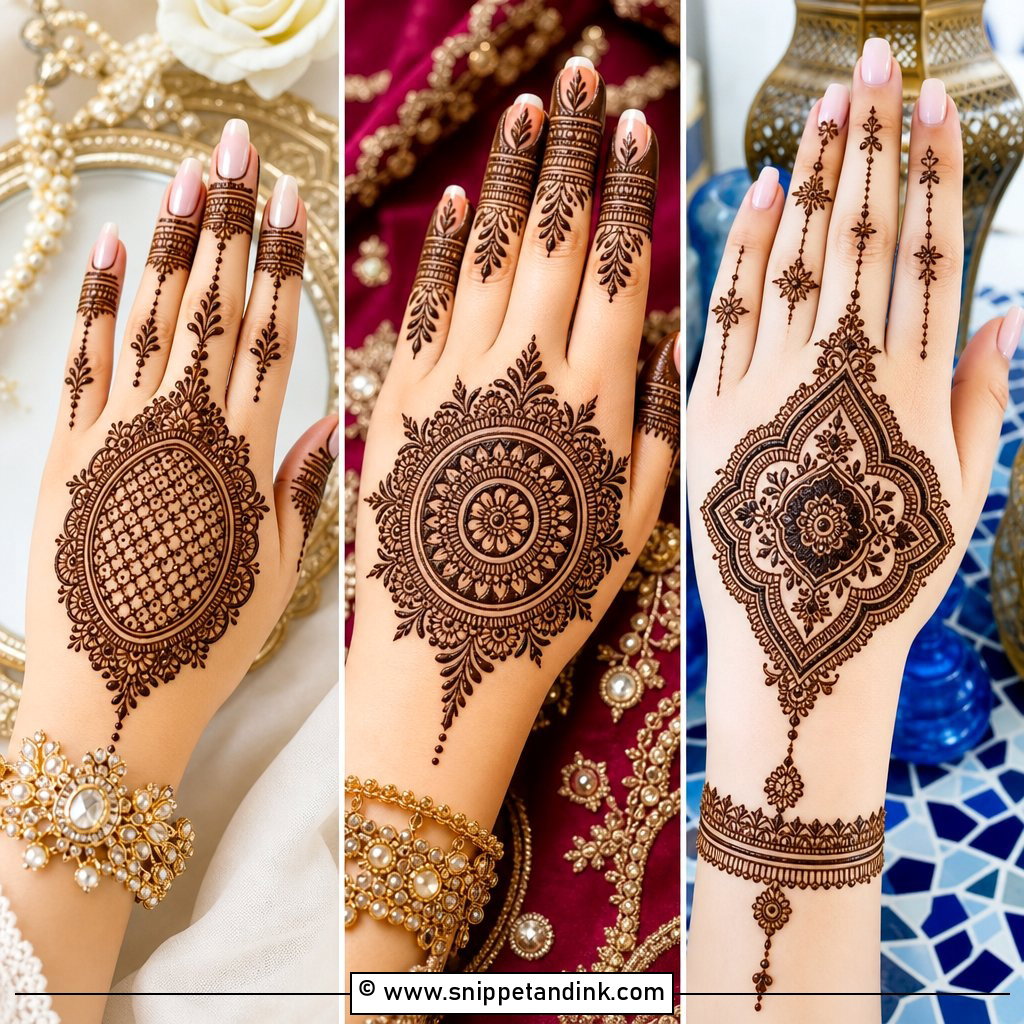
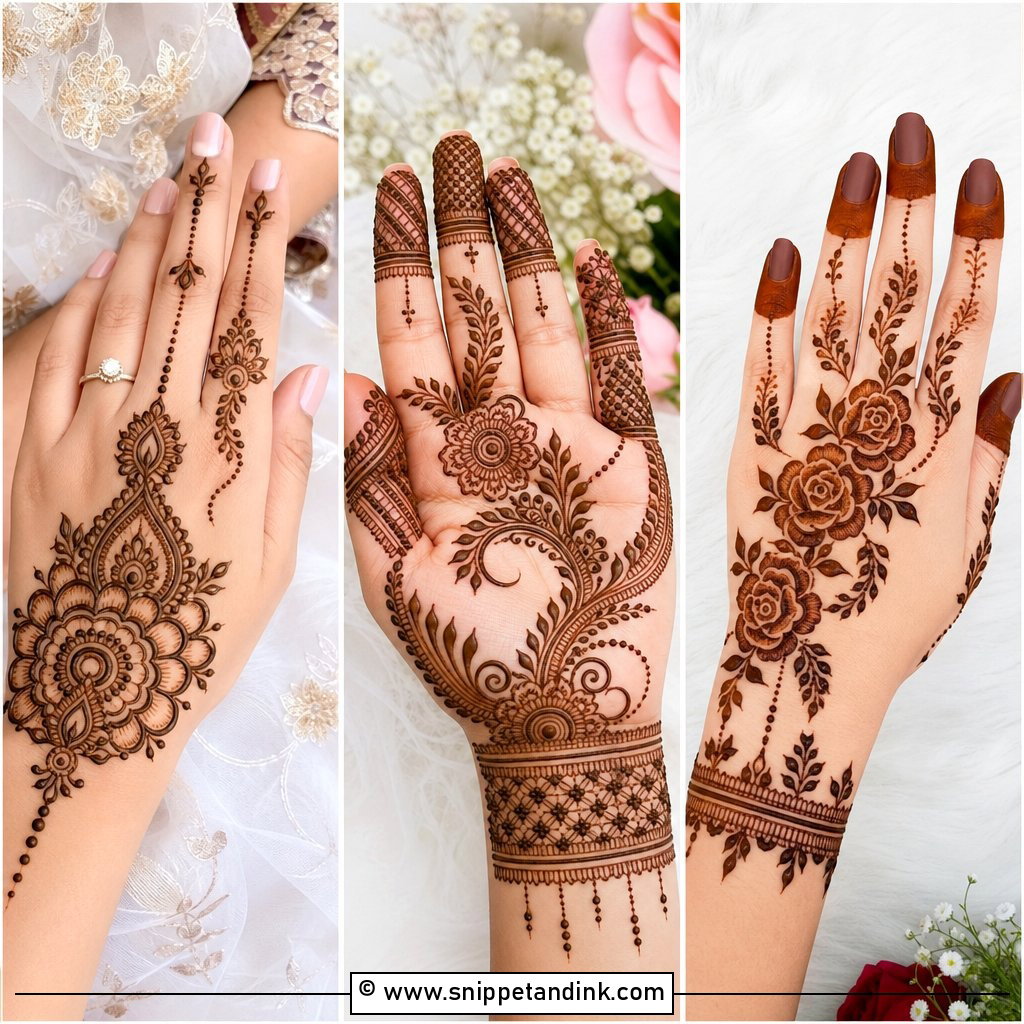
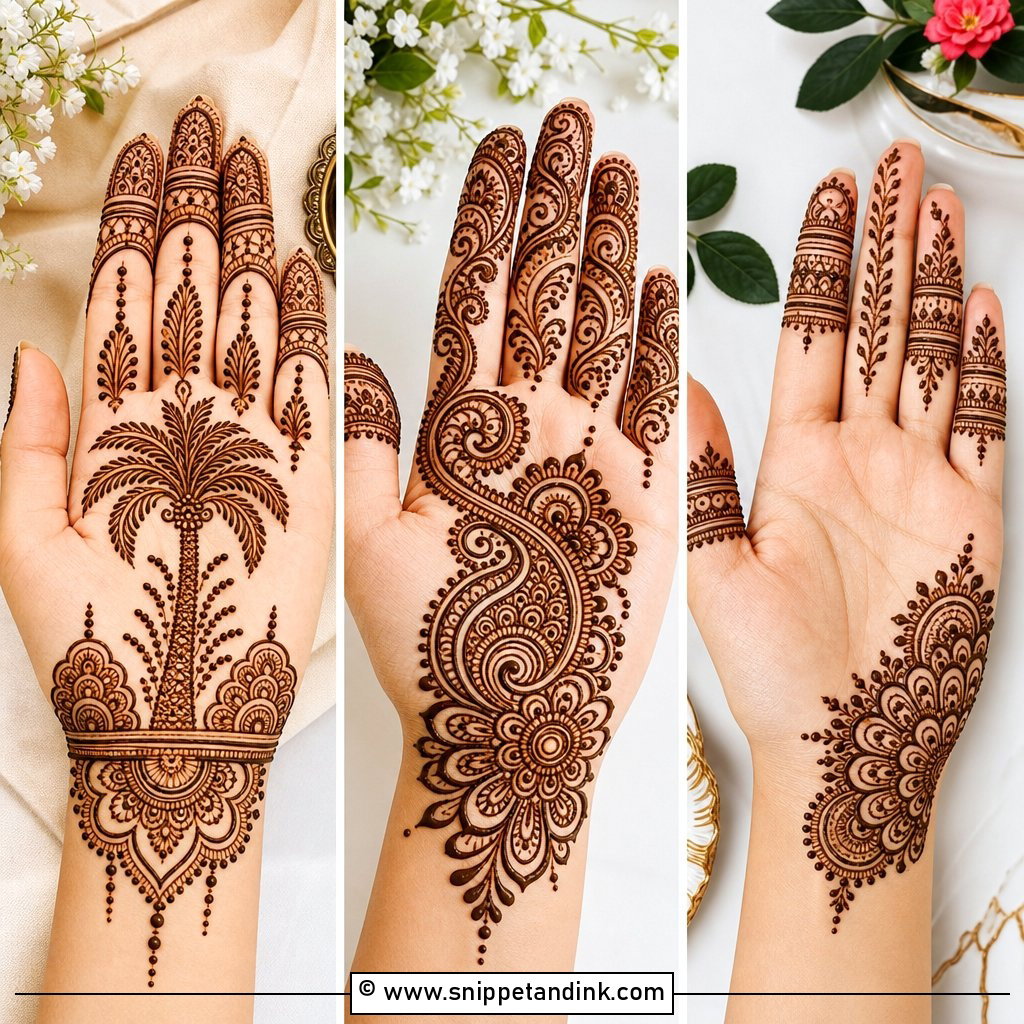
Start with a small mandala or flower in the middle of the palm, then grow leafy lines, dots and curves outward, and finish the fingers with thin bands or simple tips. That order matters: centre first, edges last, so the spacing never runs out at the fingertips. I keep a clear gap between the centre motif and everything around it, because the palm stains deepest and lines drawn too close will read as one blob by day two. It’s a calm design to draw slowly, which makes it a good first project at home.
2. Simple Back Hand Mehndi Design
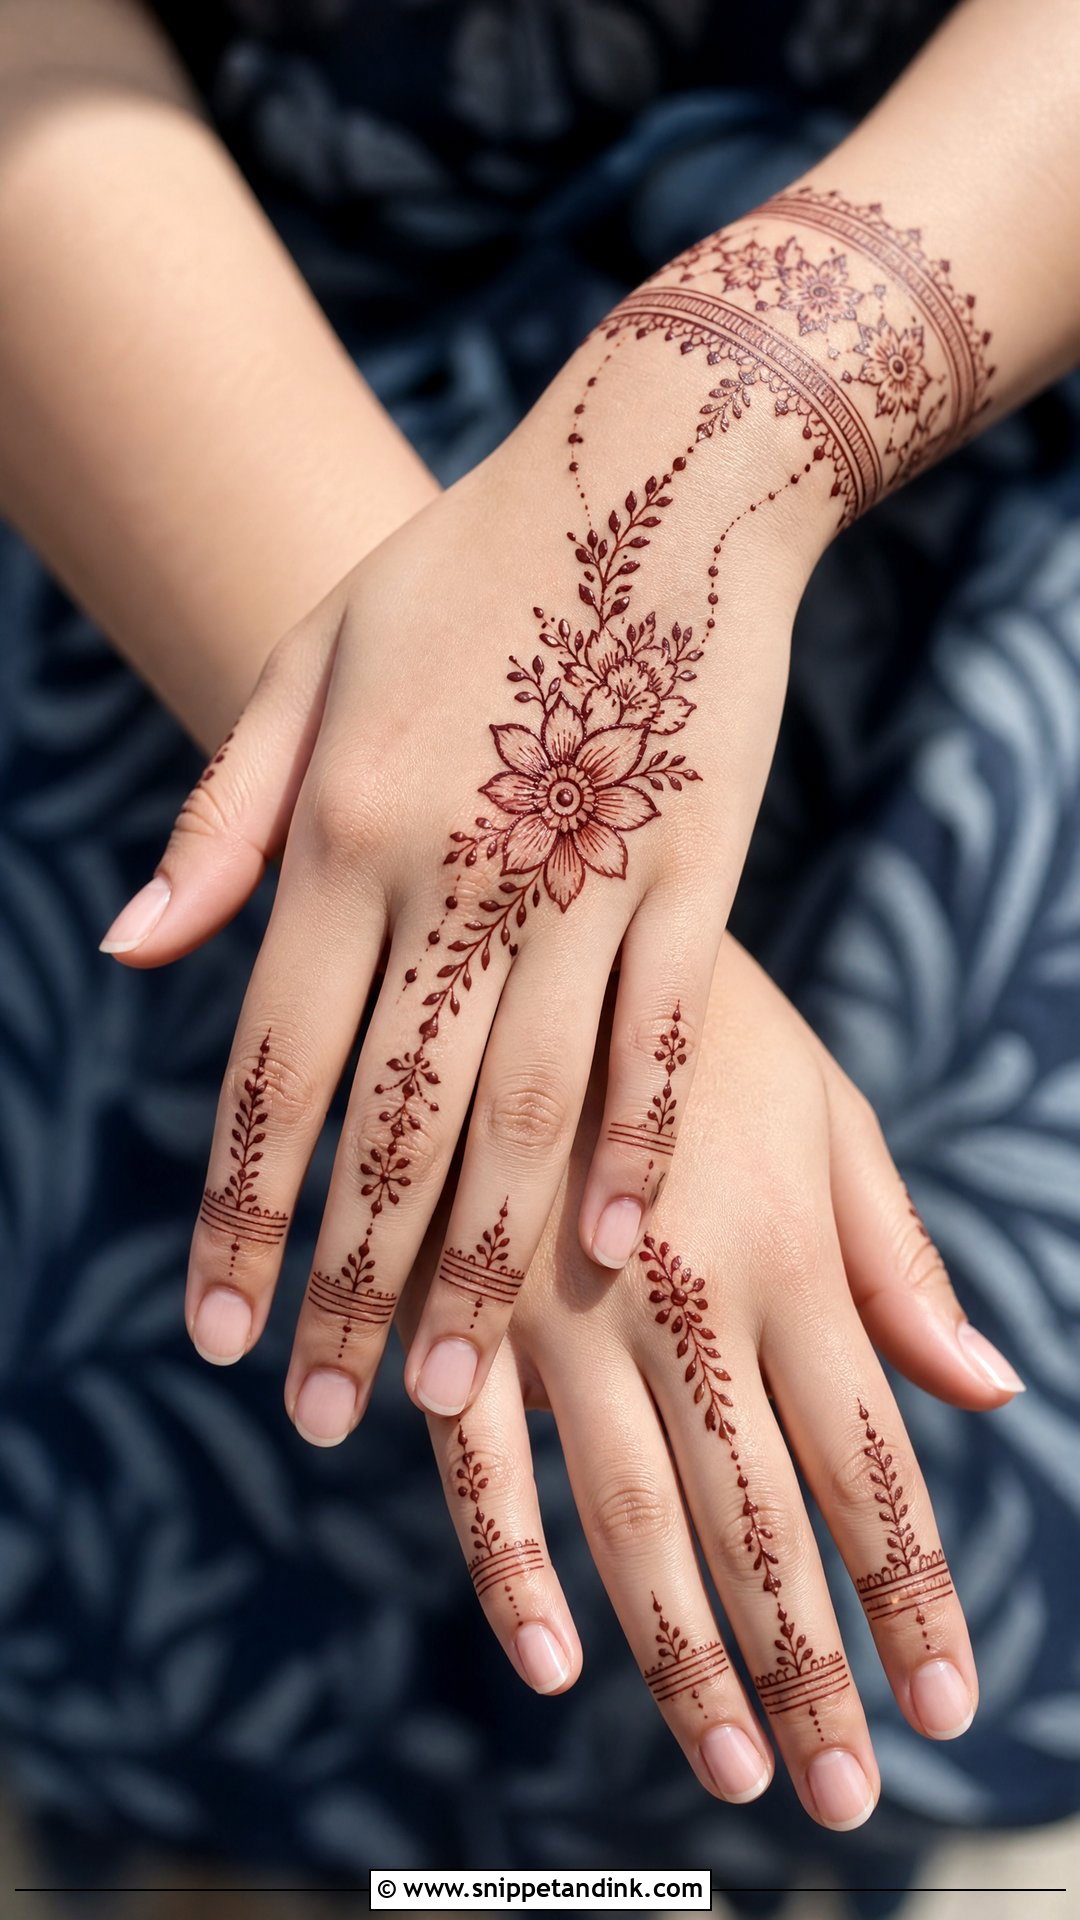
Back-hand patterns usually anchor on one flower, a small mandala or a bracelet line at the wrist, connected to finger details in thin lines, dots and leaves. I leave the knuckles partly bare. Skin there folds every time you make a fist, and henna drawn across the crease cracks off early and stains in broken lines. The back of the hand also stains lighter than the palm, so this is the place for slightly bolder outlines rather than hairline work.
3. Arabic Normal Mehndi Design
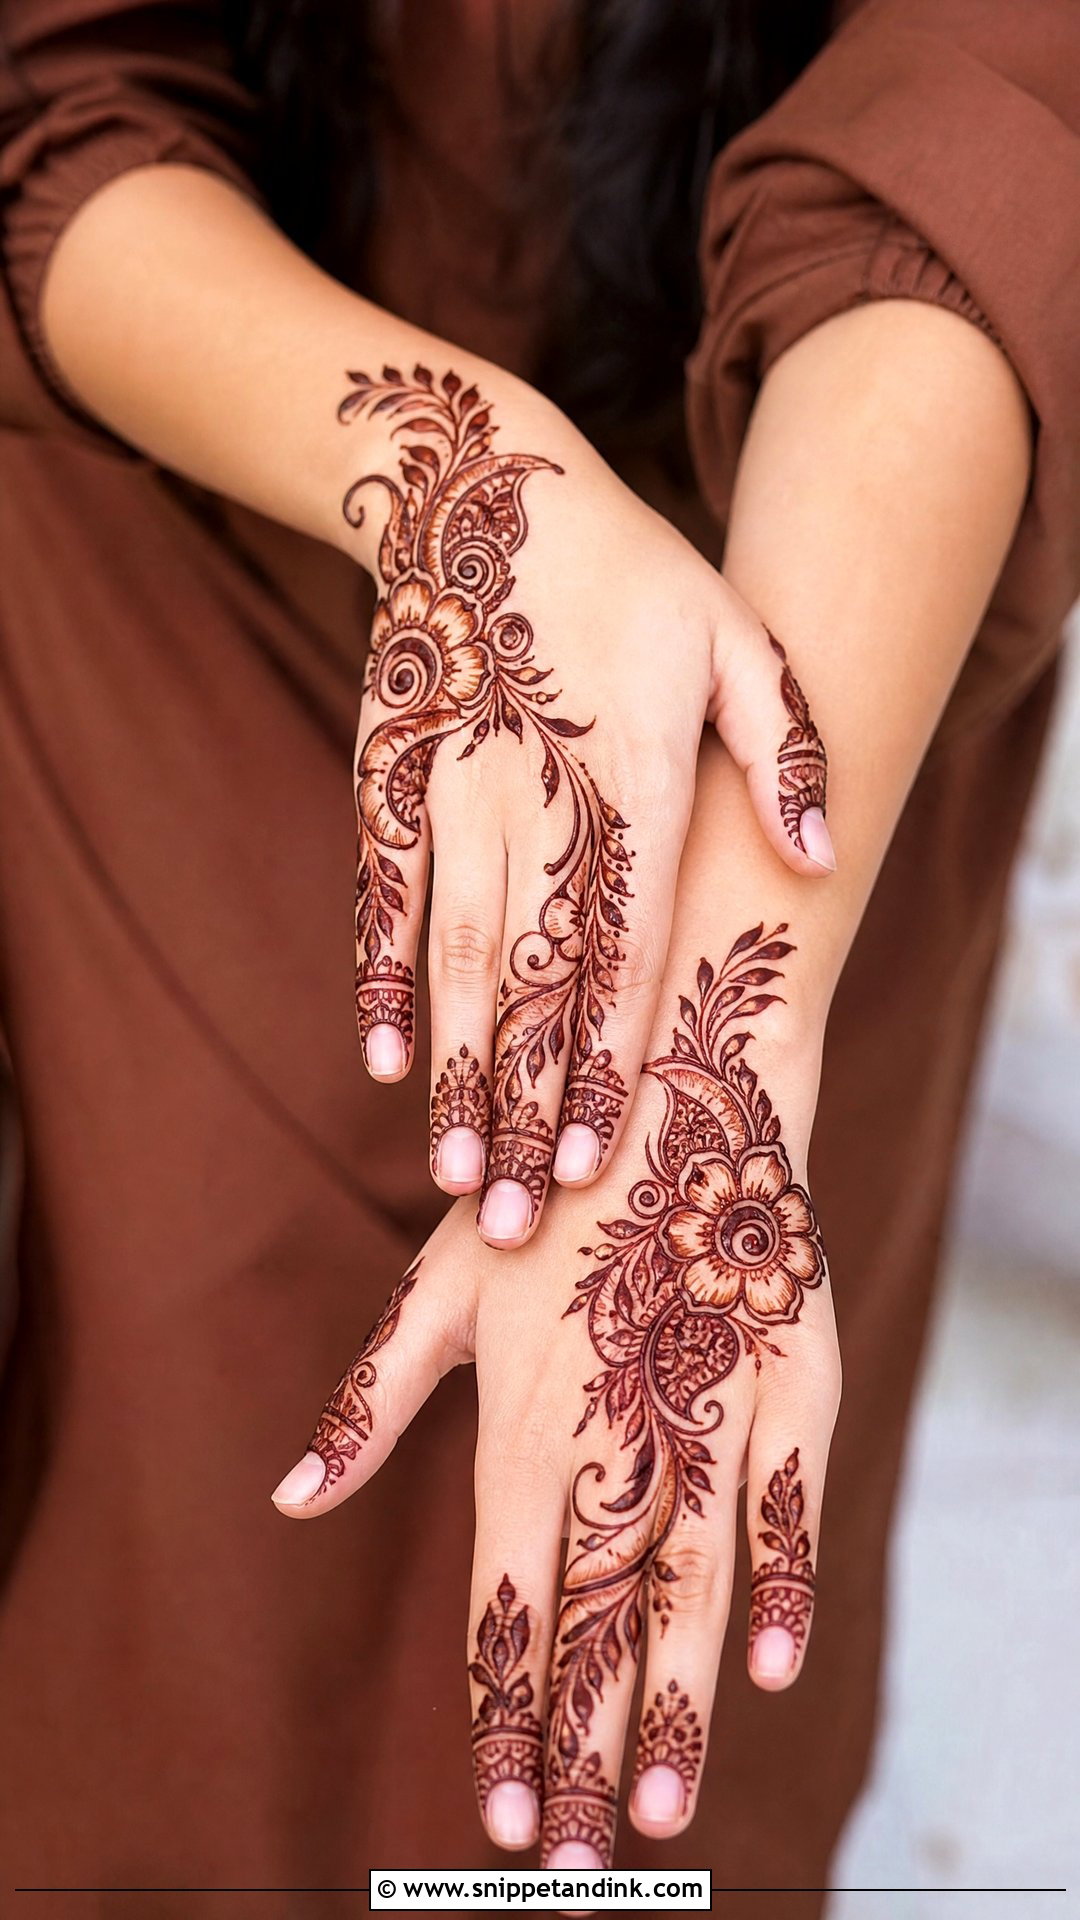
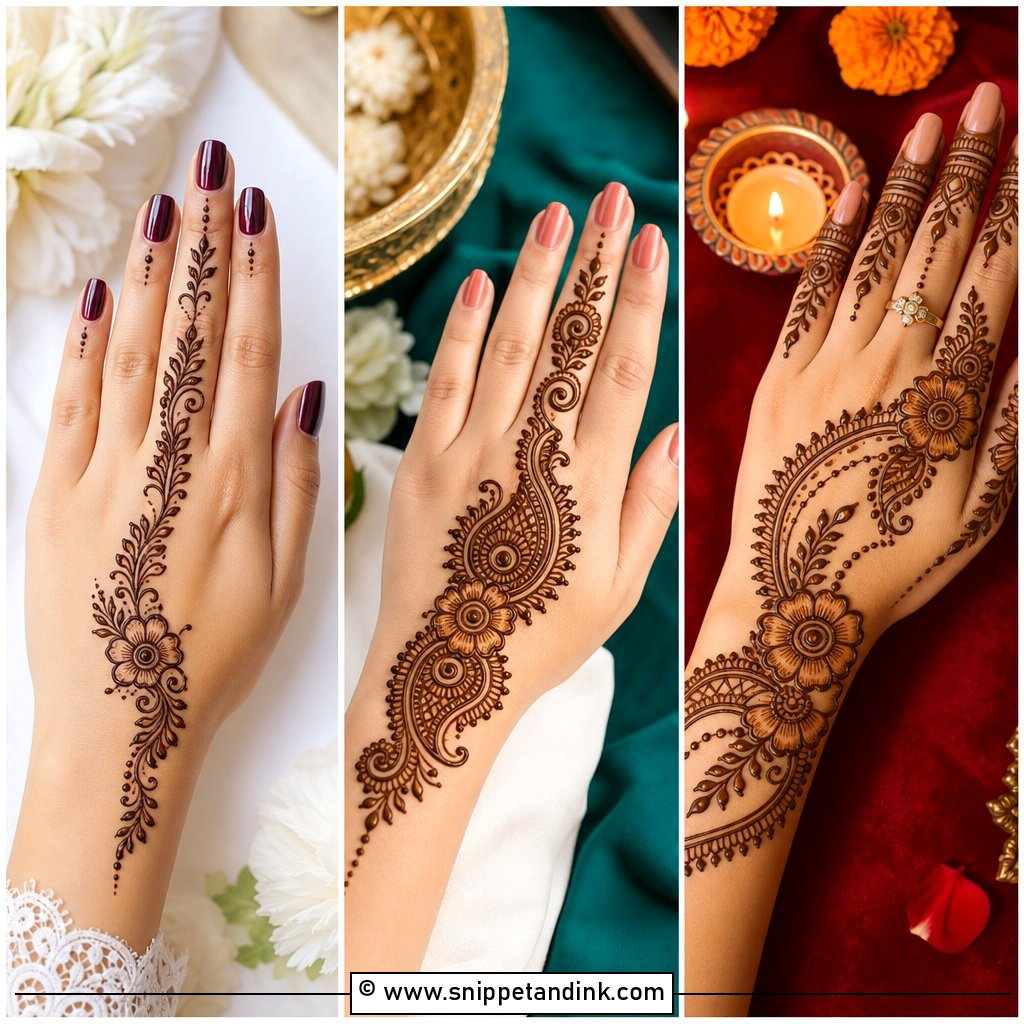
The Arabic layout runs diagonally from the wrist toward the index finger, with large flowers, curving vines and paisleys set apart by open skin. Less coverage means it dries faster and costs you less sitting time than a dense Indian palm. I draw the main stem in one unbroken pull before adding a single flower, since stopping halfway leaves a visible joint. Bold outlines with a little shading inside the petals is the classic finish, and it works on the palm or the back.
4. Indian Normal Mehndi Design
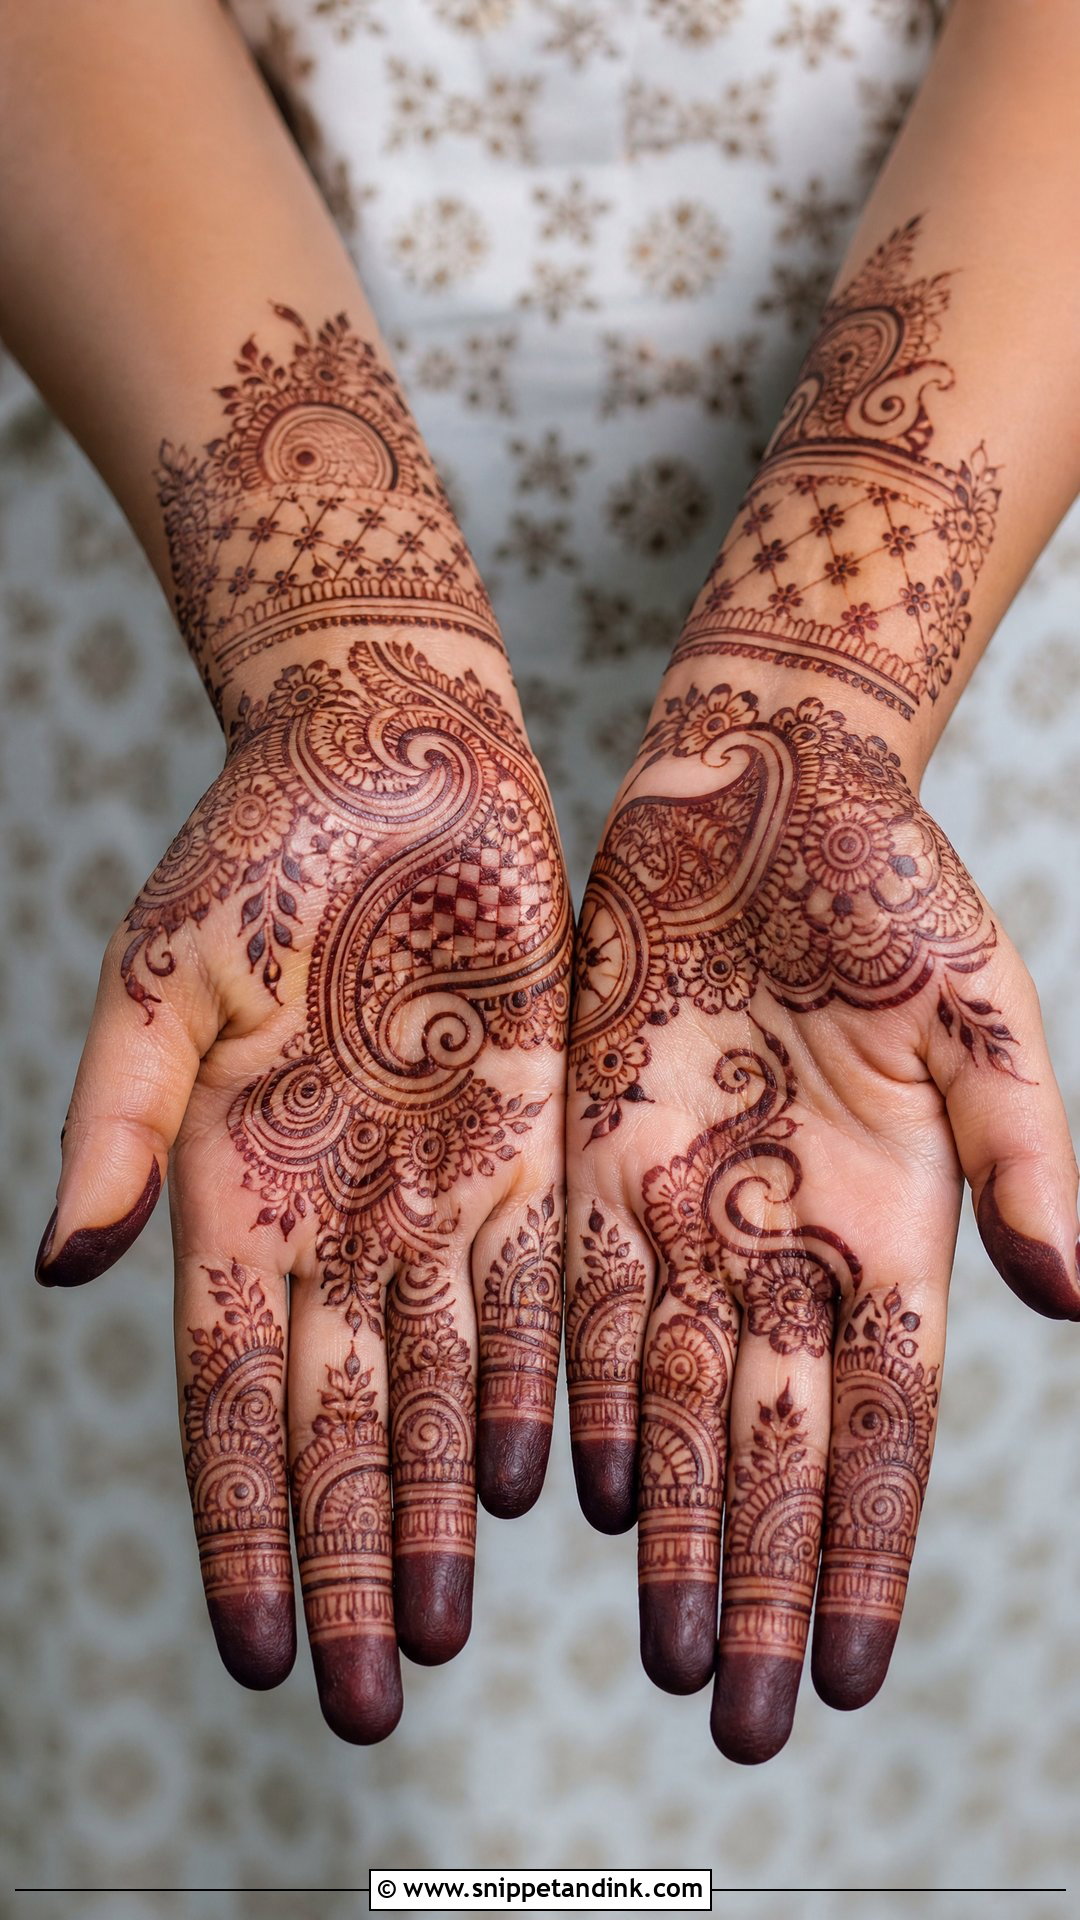
Indian-style everyday mehndi borrows the bridal vocabulary, paisleys, small flowers, checks and fine curved lines, and spaces it out so the hand doesn’t look like it’s going to the mandap. A round centrepiece with small borders around it is my usual starting point, with lightly filled or banded fingertips. It takes longer than Arabic work, though nowhere near bridal hours. Festivals, pujas and family weddings are where I see it most.
5. Mandala Normal Mehndi Design
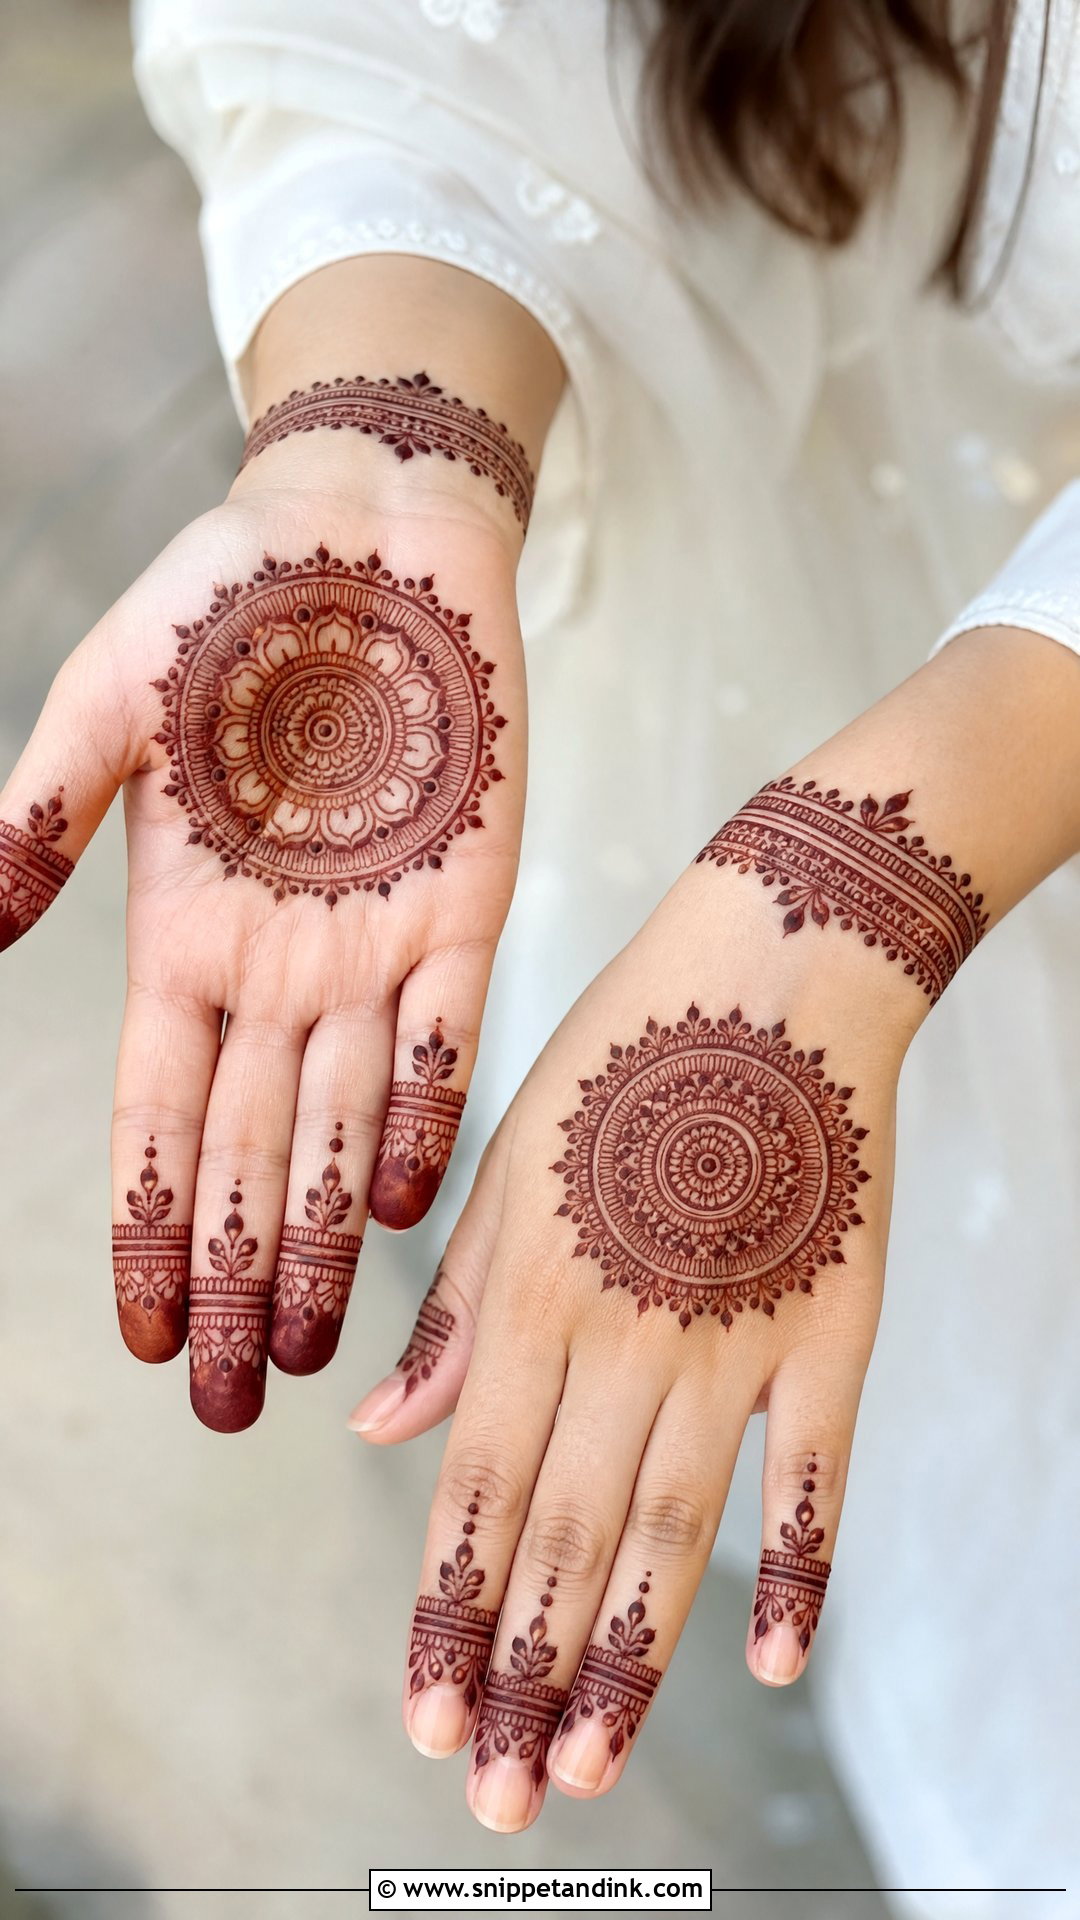
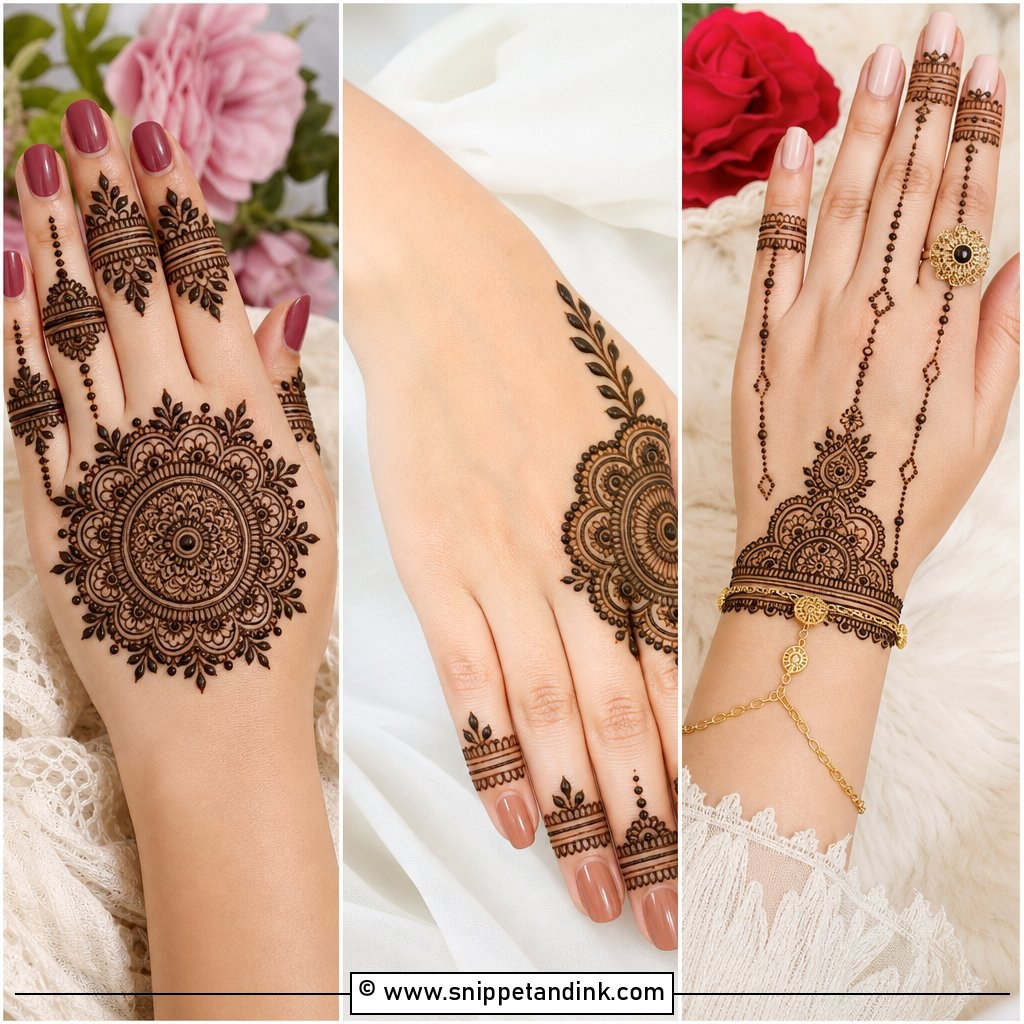
A mandala is a circle with layers: a centre dot, rings of petals, small curves and dots on the outside edge. On the back hand or the palm, it gives instant symmetry. I keep the fingers simple when the mandala is the star. Getting a true circle on a curved palm is the hard bit, so I have the client flatten the hand on a cushion and I draw the outer ring in short arcs, turning my wrist around the centre point, instead of one long freehand sweep. A slim wrist band finishes it neatly on small or large hands.
6. Floral Normal Mehndi Design
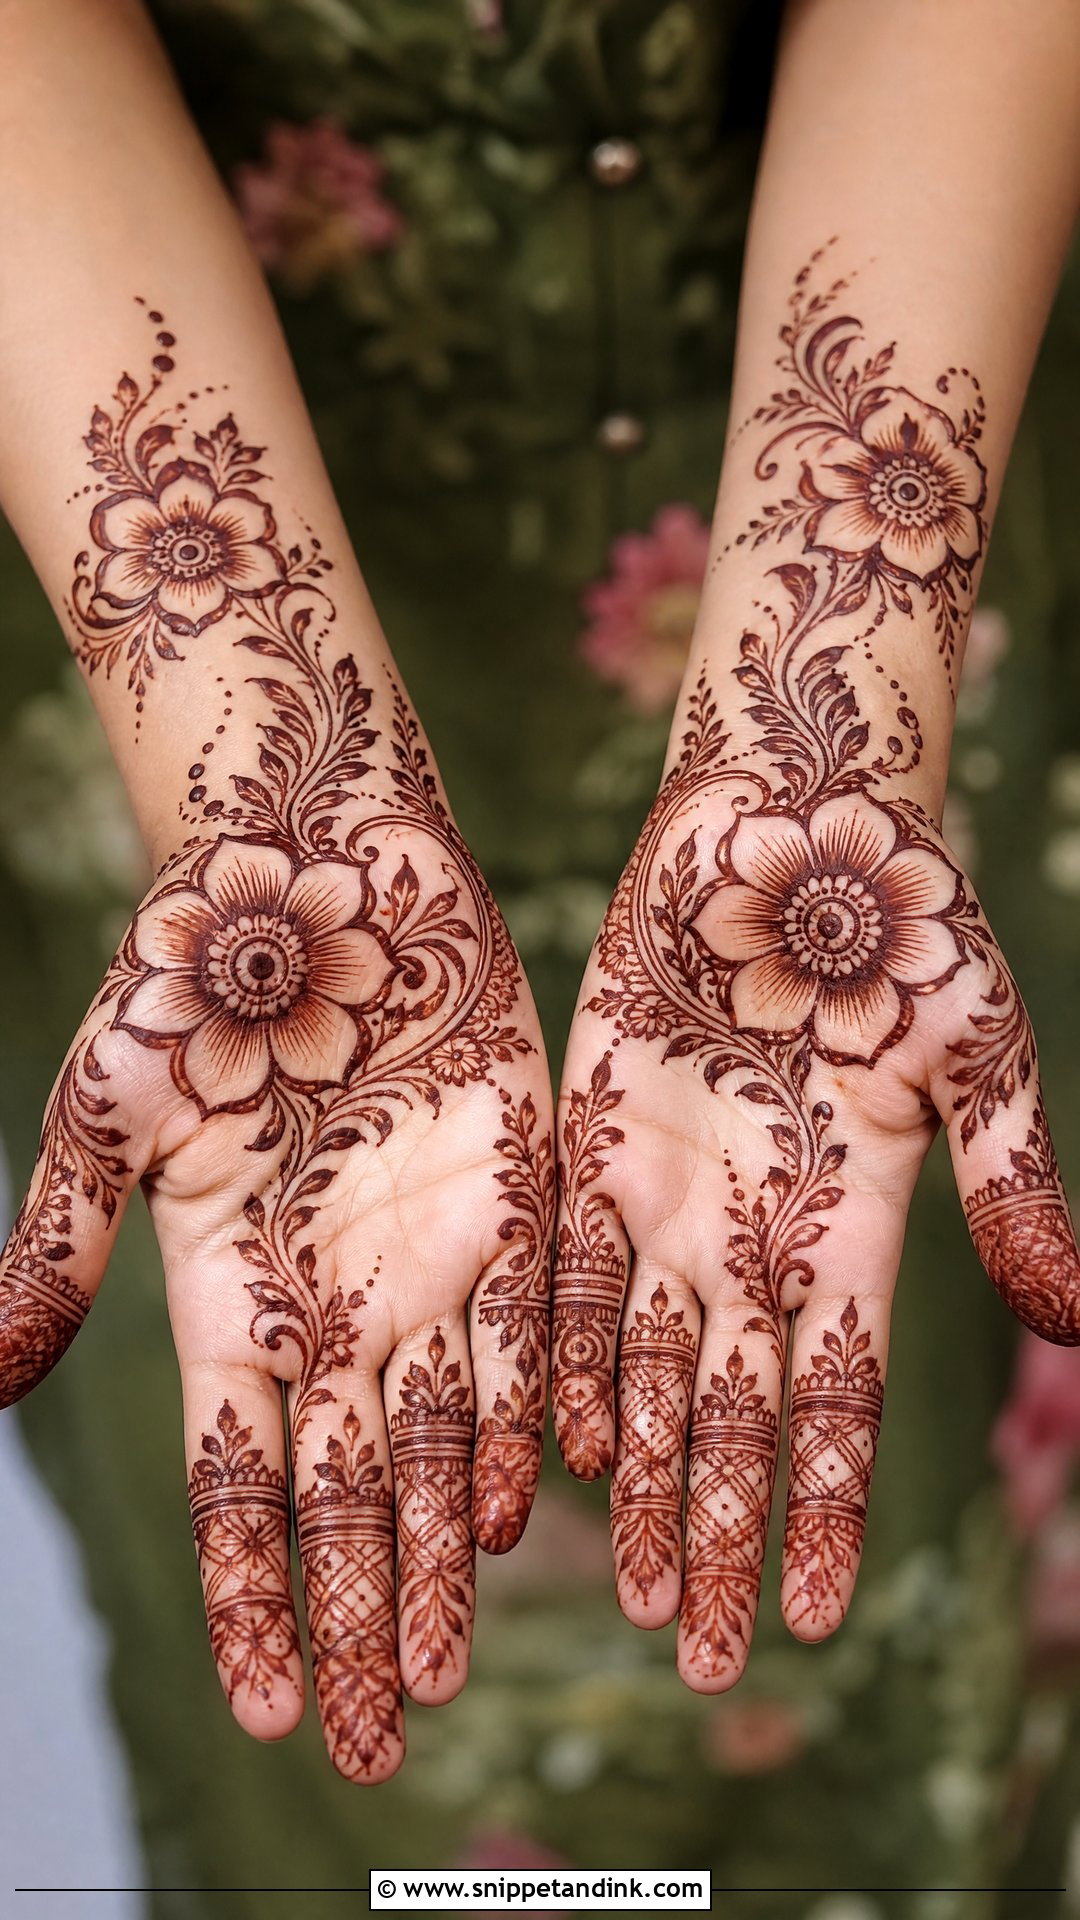
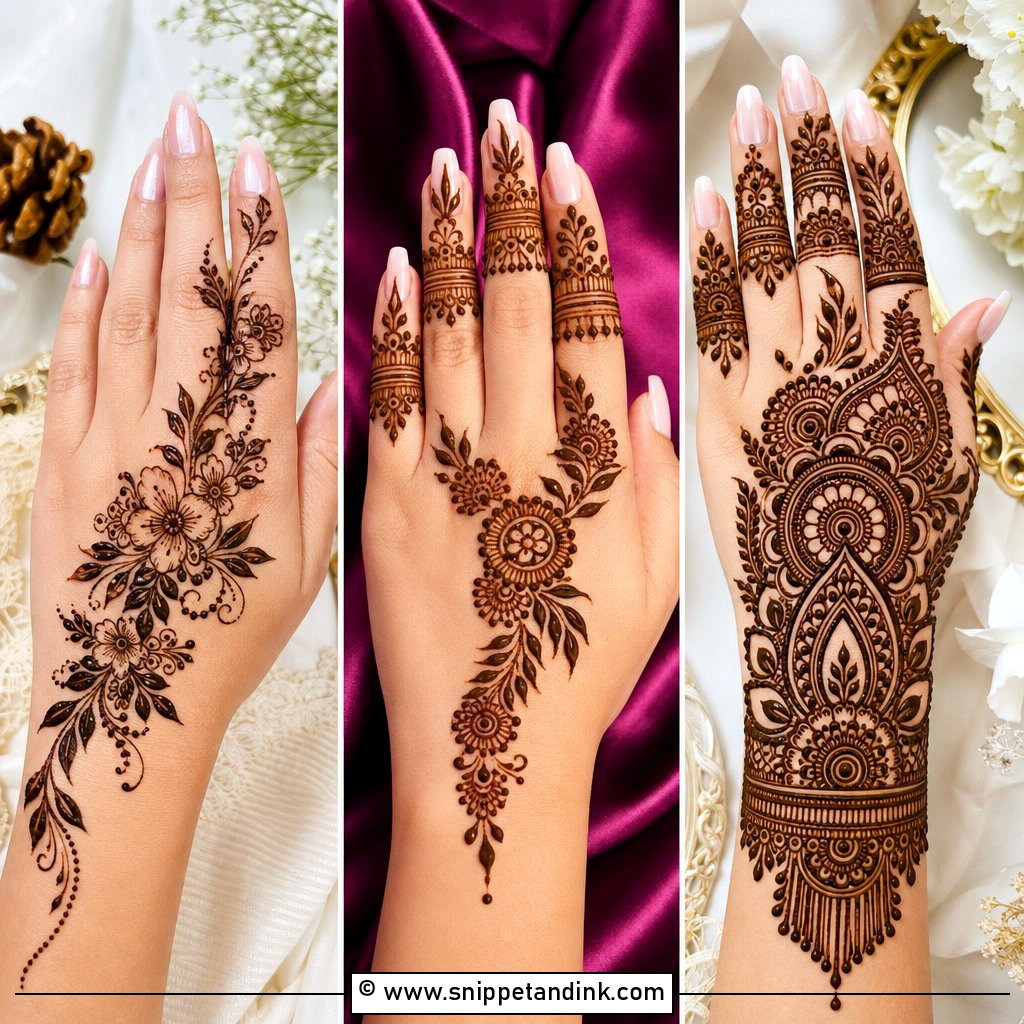
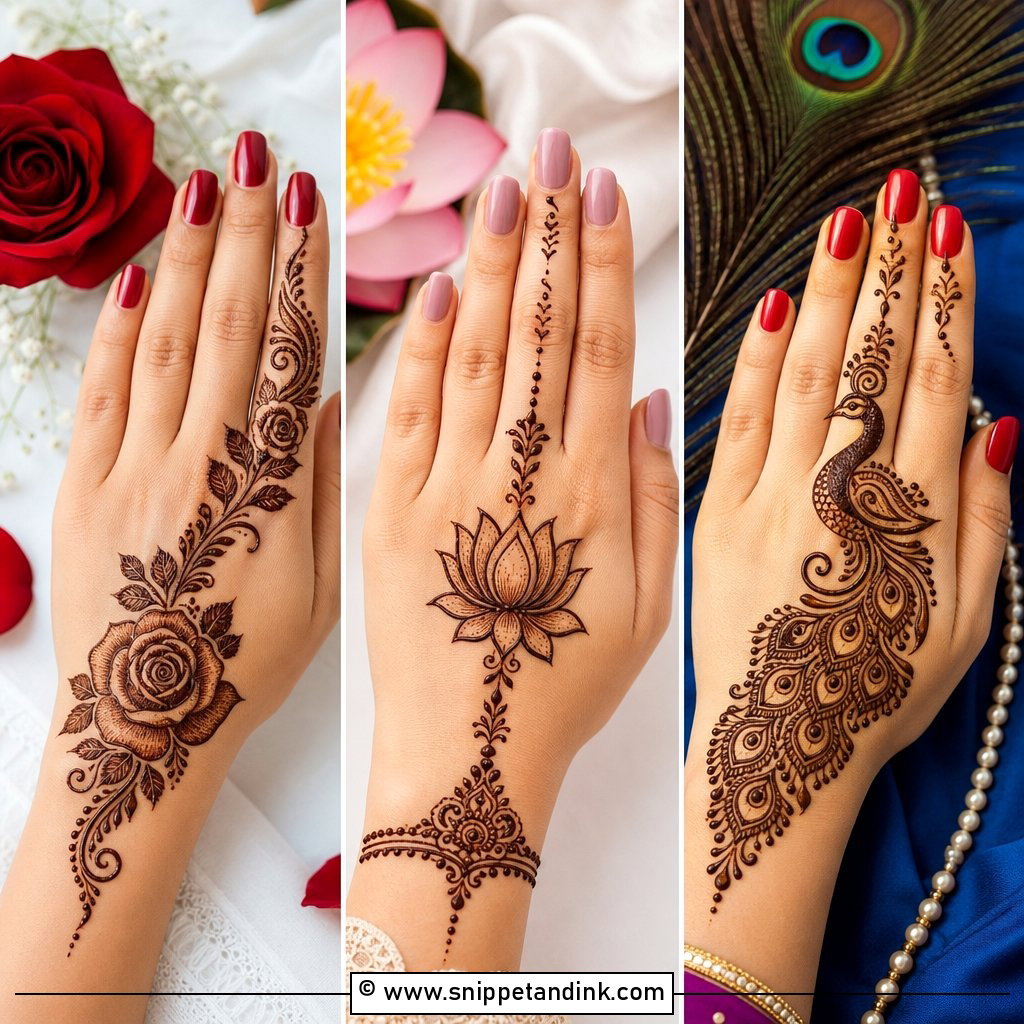
A floral design can sit on the palm, the back of the hand or along one side. One big bloom anchors it, and smaller flowers, leaves and curling stems keep it connected. Scattered flowers with no stems joining them look like stamps, so I always link them. For everyday wear, I leave the petals mostly open inside; for a festive version, I add shaded petals and a small jaali patch. It sits happily with a kurta or jeans.
7. Paisley Normal Mehndi Design
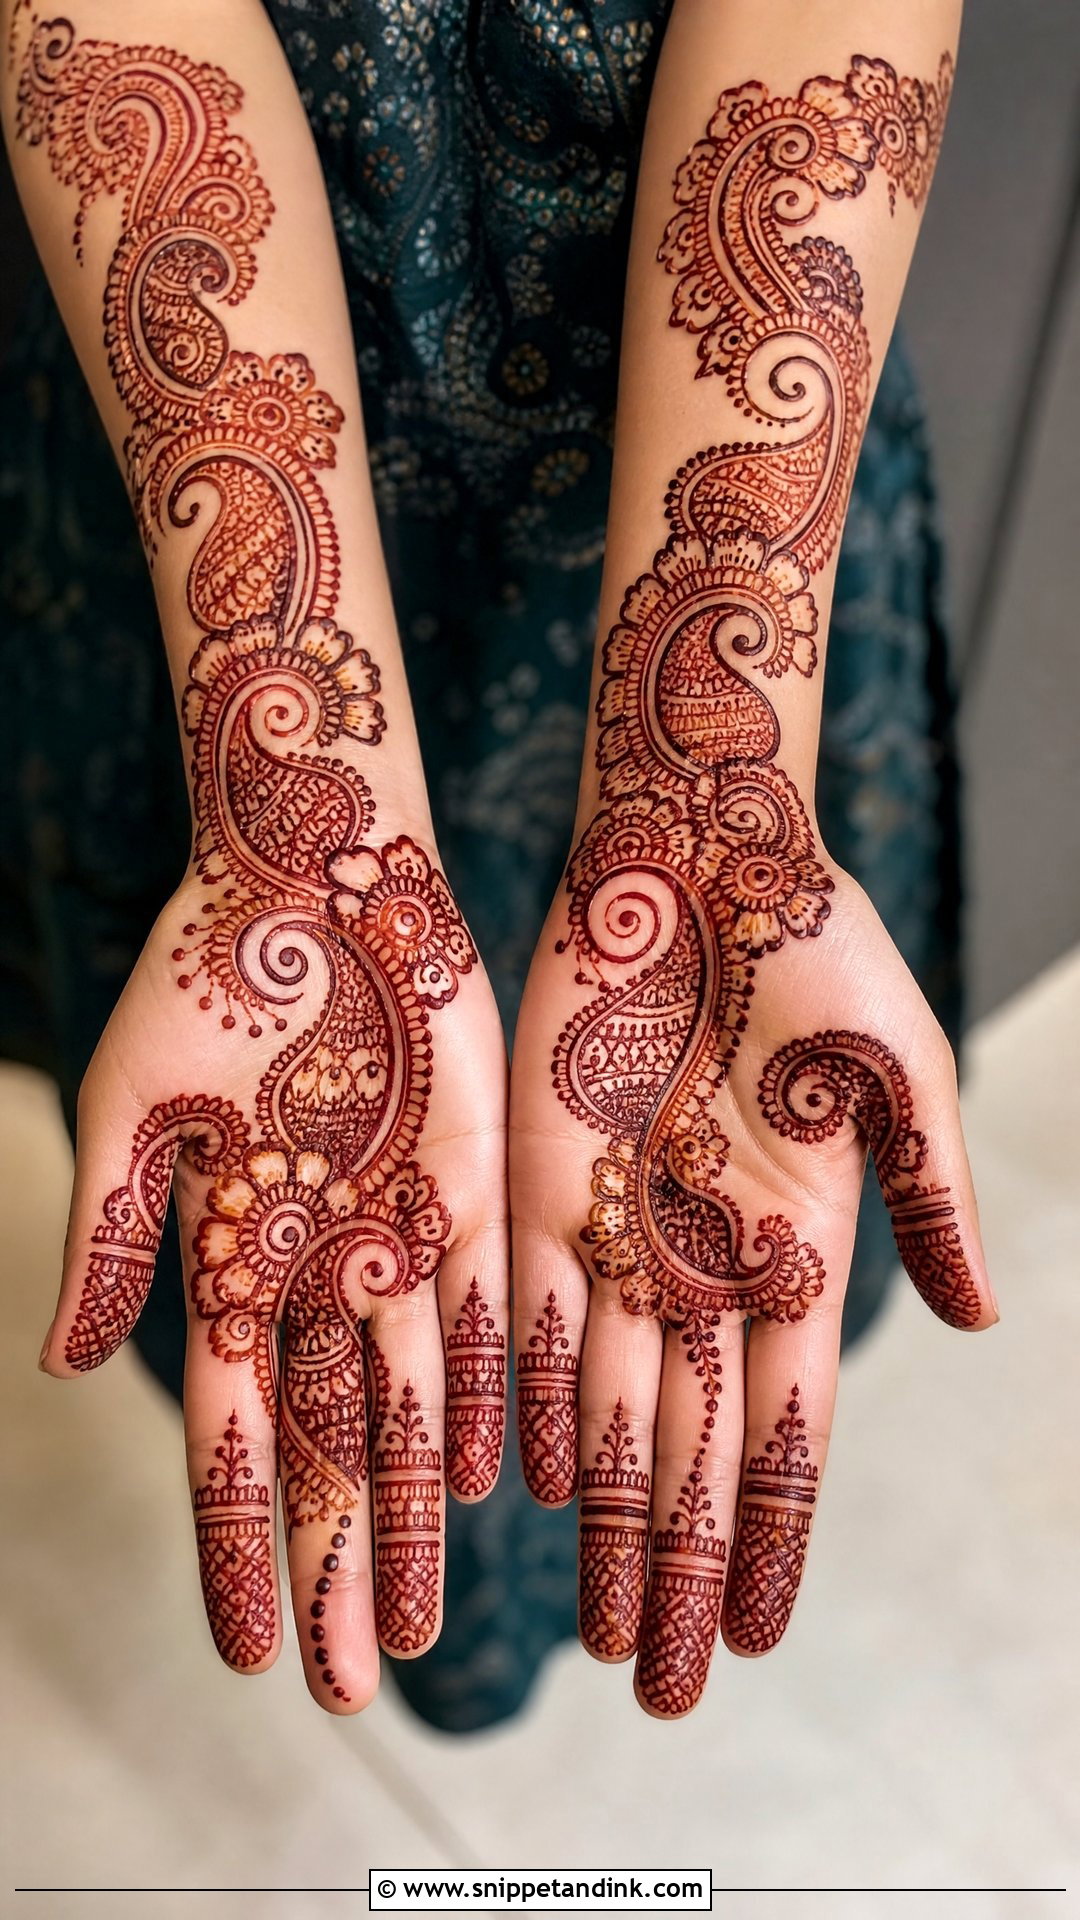
Paisley, the curved mango shape, gives a hand traditional character with very little effort. Two or three paisleys across the palm or along the side, each filled with tiny leaves, dots or mini flowers, is plenty for normal wear. I point the curl of each paisley toward the fingers so the flow reads upward from the wrist. Crowd in a fourth and the design loses its breathing room; soft gaps between them are what keep it everyday rather than bridal.
8. Indo-Arabic Normal Mehndi Design
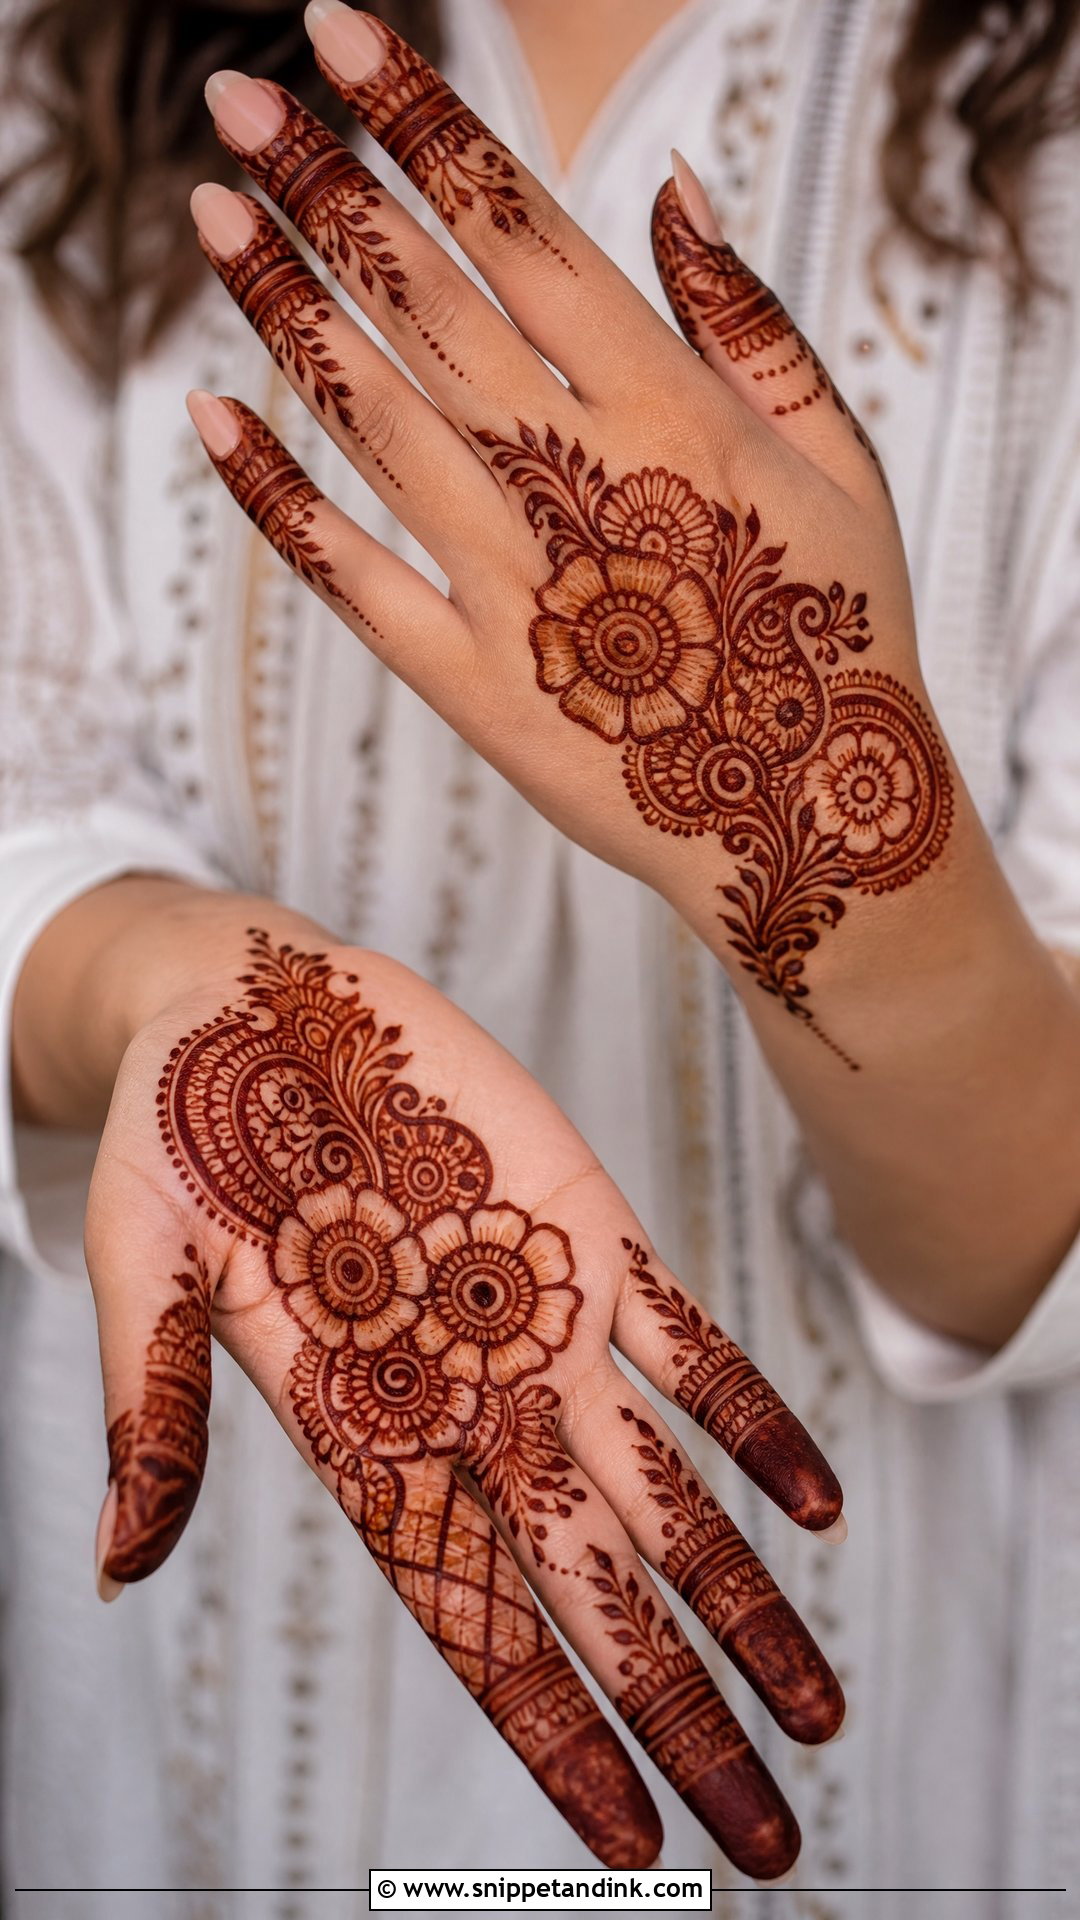
Indo-Arabic takes Arabic’s open trail and adds Indian detail: small mandalas, paisleys and fine fillers inside a floral path that starts at the wrist and finishes near the fingers. The empty space is doing structural work here. When I’m short on time, I trim fillers first and never the gaps, because a full Indo-Arabic hand without open skin just turns into a heavy Indian design. It sits nicely across Eid, Diwali, engagements and family weddings.
9. Full Hand Normal Mehndi Design
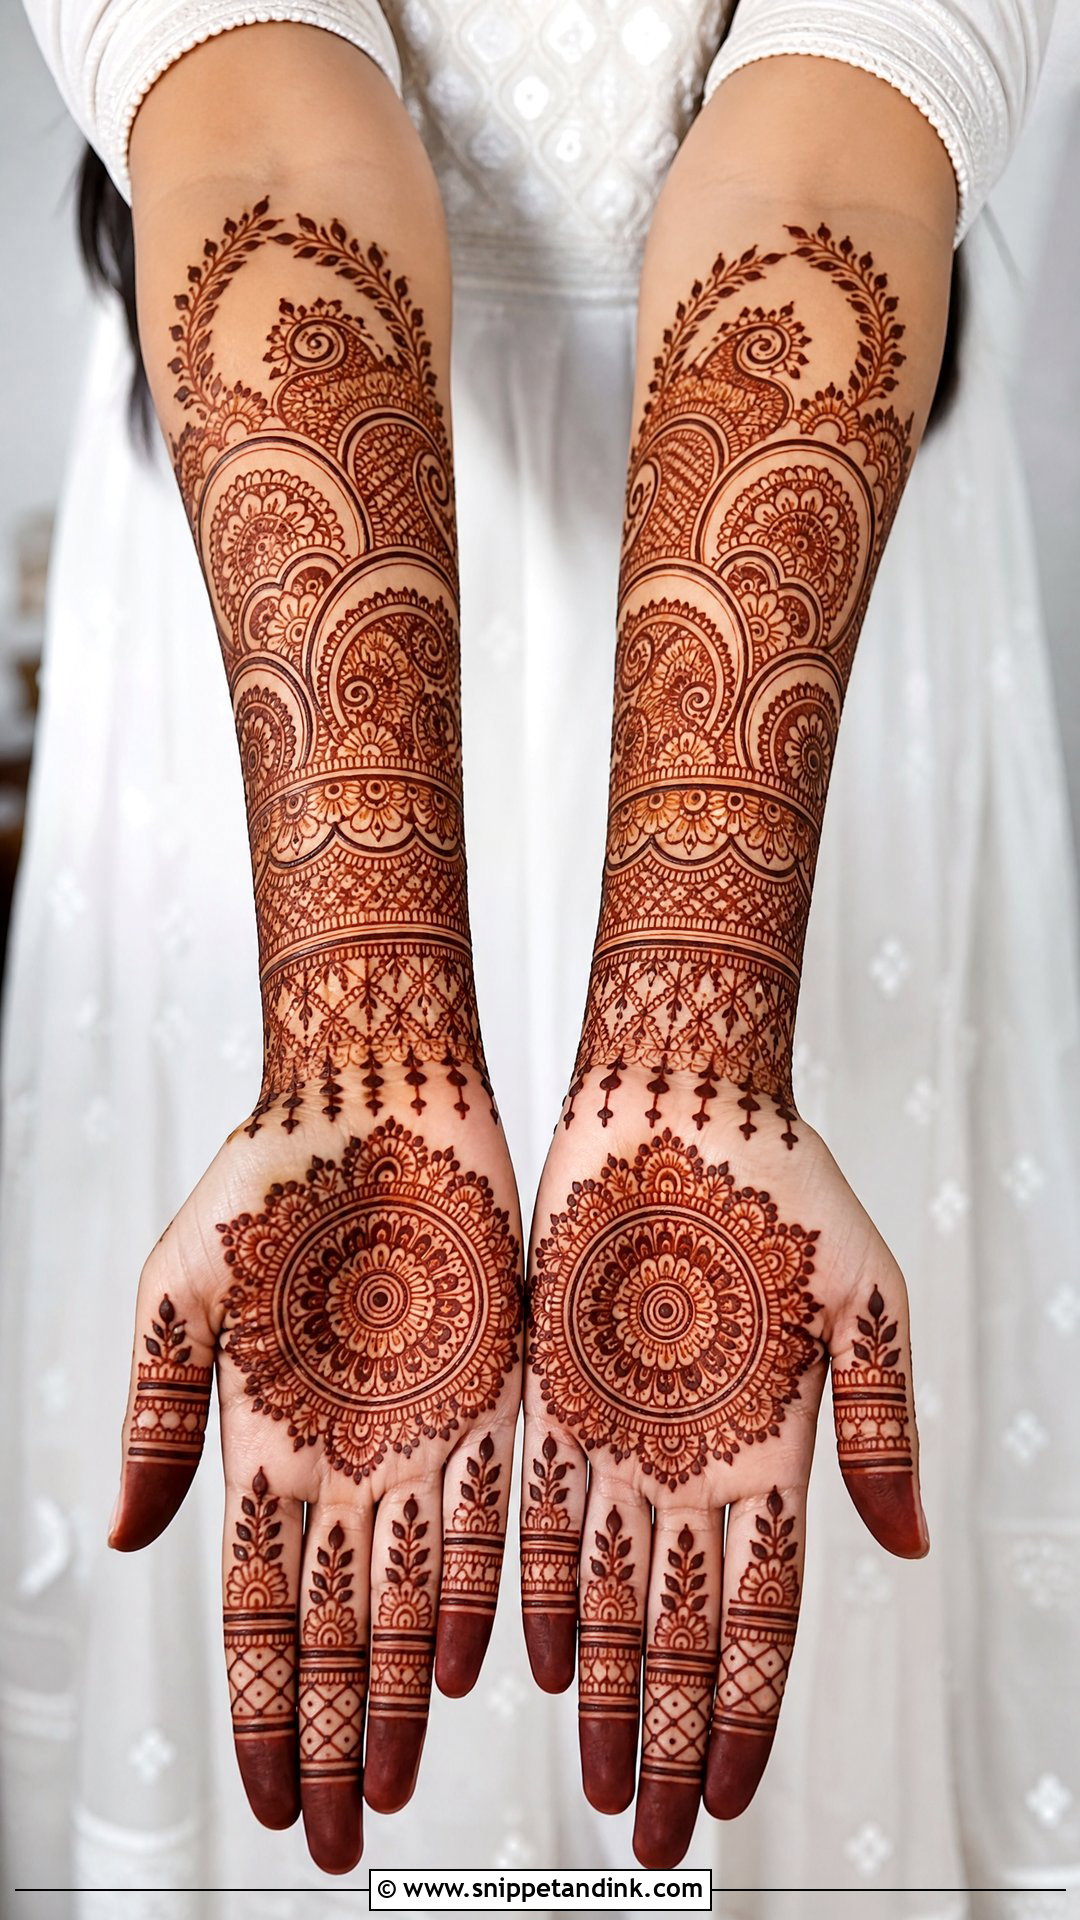
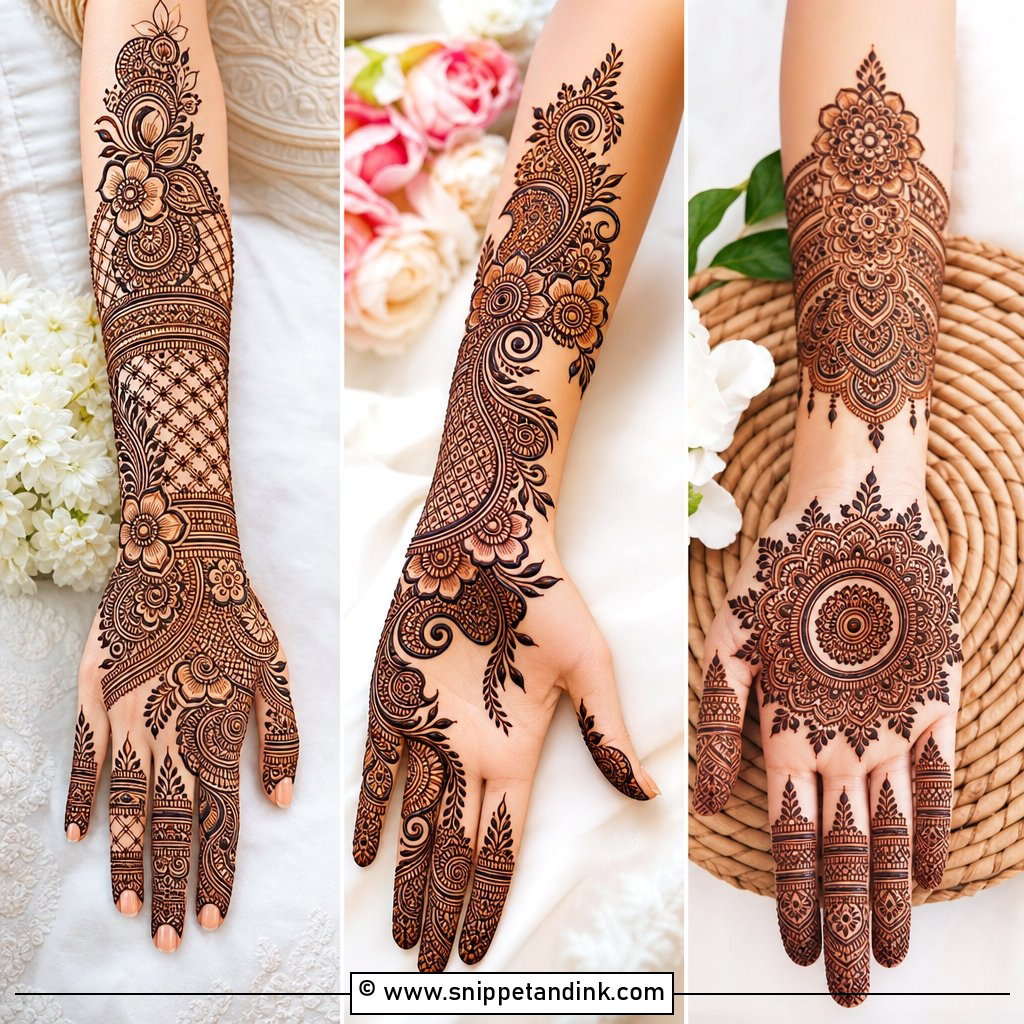
Full coverage without the bridal density is a matter of spacing. I divide the hand into zones: a central motif on the palm, bands on the fingers, a bracelet-style border at the wrist. Mandalas, flowers, paisleys and vines can all appear, but each zone gets a single job. Medium gaps between zones stop it looking overfilled. Allow roughly an hour or more a hand, and expect it to feel snug on the skin as the paste dries.
10. Half Hand Normal Mehndi Design
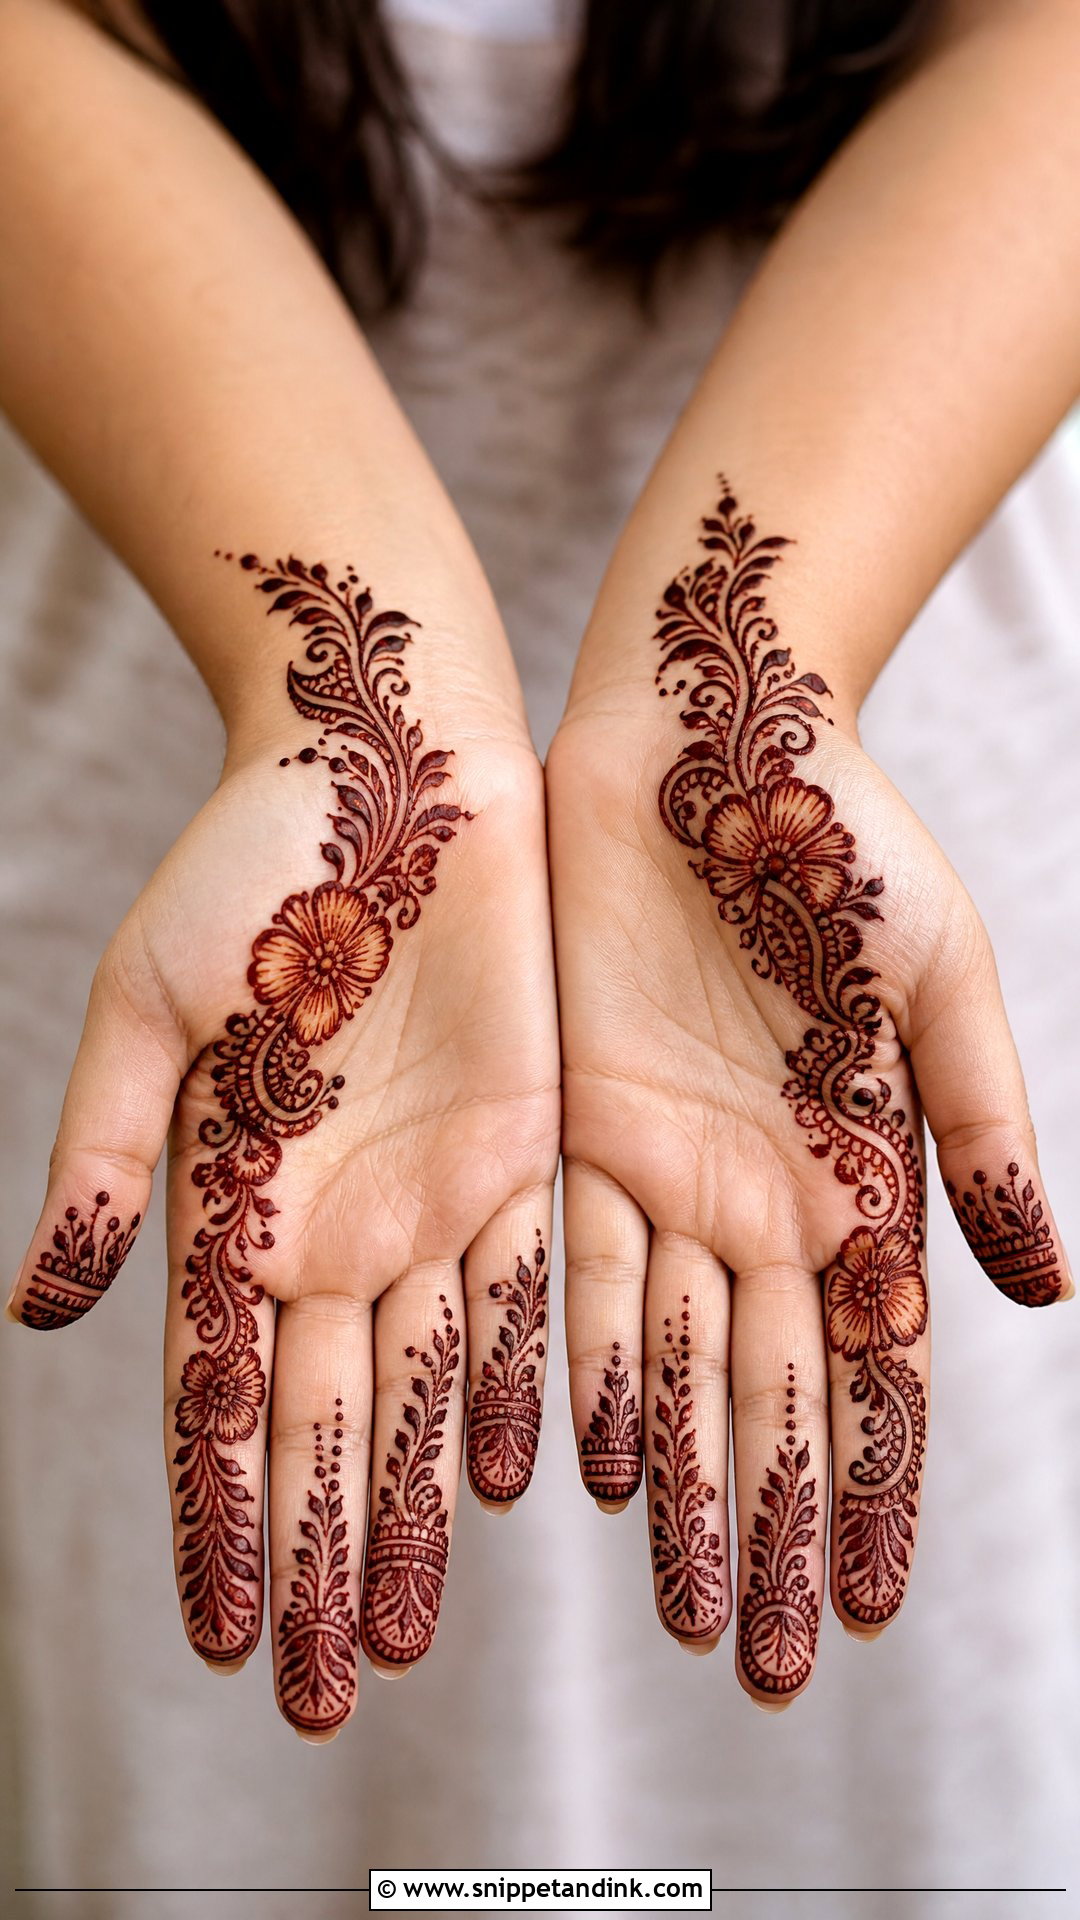
Half-hand designs cover either the palm and fingers or the wrist and one side of the hand. Quick to apply and easy on a busy day. With limited space, every element has to be clear, so I’d pick one Arabic trail or one small mandala, not both. Light fingers and an open area around the palm keep it neat. This is also the design I suggest for anyone nervous about how henna will look at work the next day.
11. Finger Normal Mehndi Design
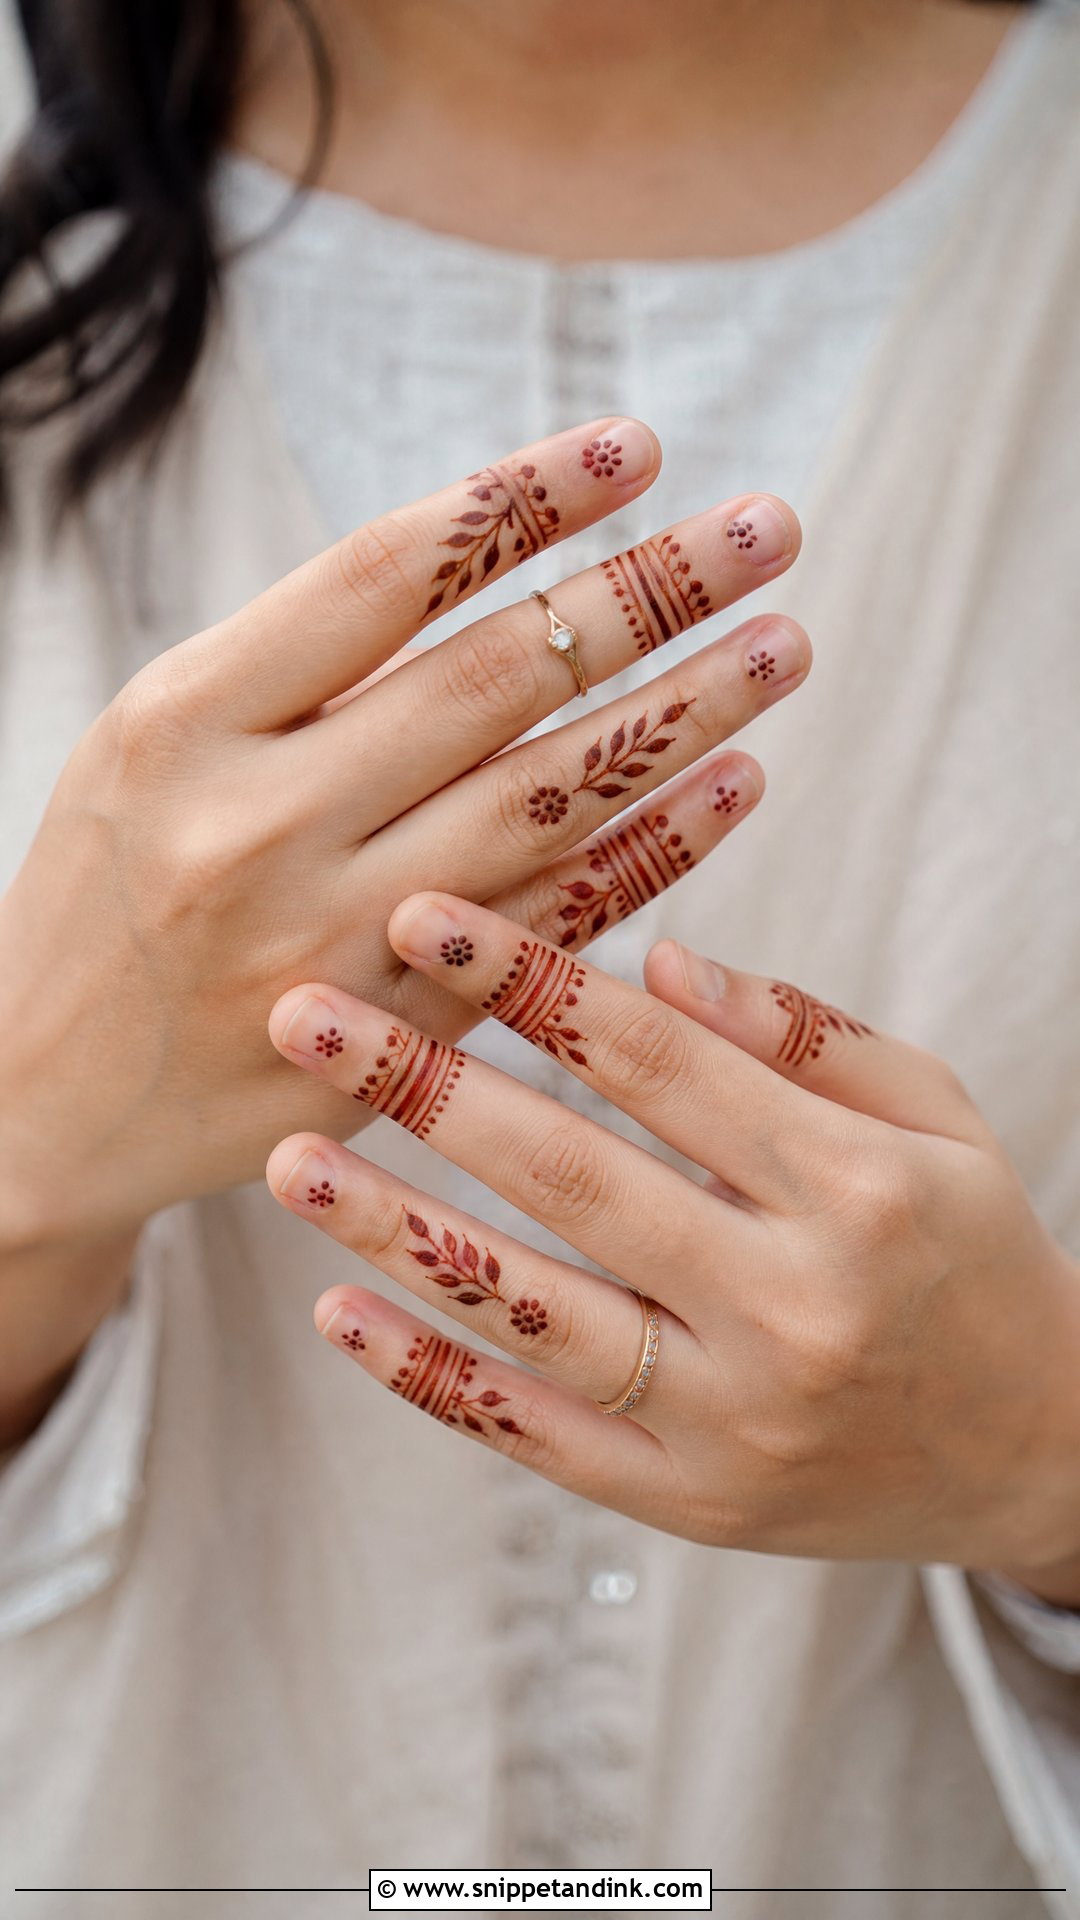
Finger mehndi keeps the palm empty or nearly so and puts small bands, leafy tips, dots, tiny flowers and ring shapes on each finger. A thin wrist bracelet or one small palm motif finishes it. It’s the quickest design here, often fifteen minutes a hand. One honest caution: fingertips stain darkest of anywhere on the body, and filled tips can look almost black for a few days. If that’s not wanted for the office, choose outlined tips instead of solid ones.
12. Wrist Normal Mehndi Design
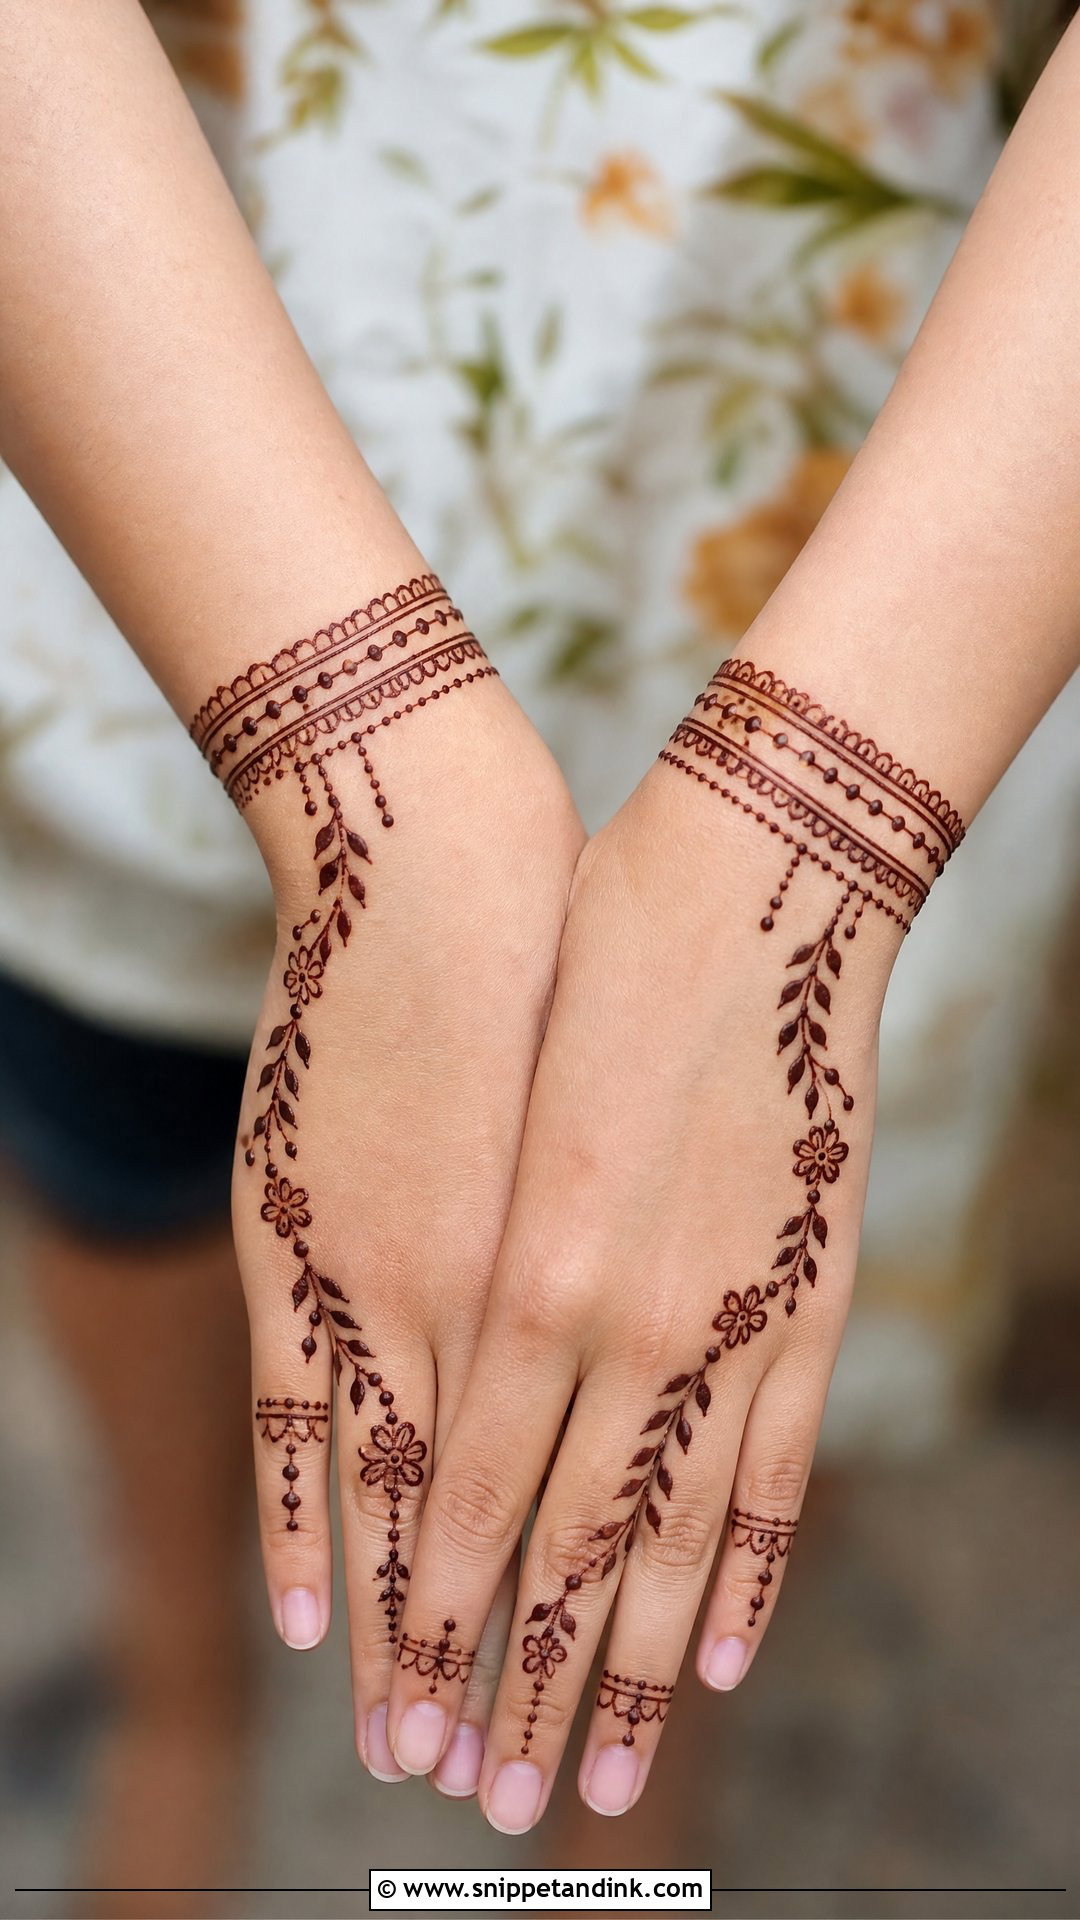
Think of this one as a henna bracelet. Thin bands, flowers, leafy chains and little hanging drops wrap the wrist, sometimes connected by a fine trail to one finger. It frames the back of the hand and stays well clear of the palm, so you can cook, wash and type with almost no smudging risk while it dries. Even borders are the whole craft. I mark the upper and lower edges of the band first so the width never wanders as I go round the wrist.
13. Ring Normal Mehndi Design
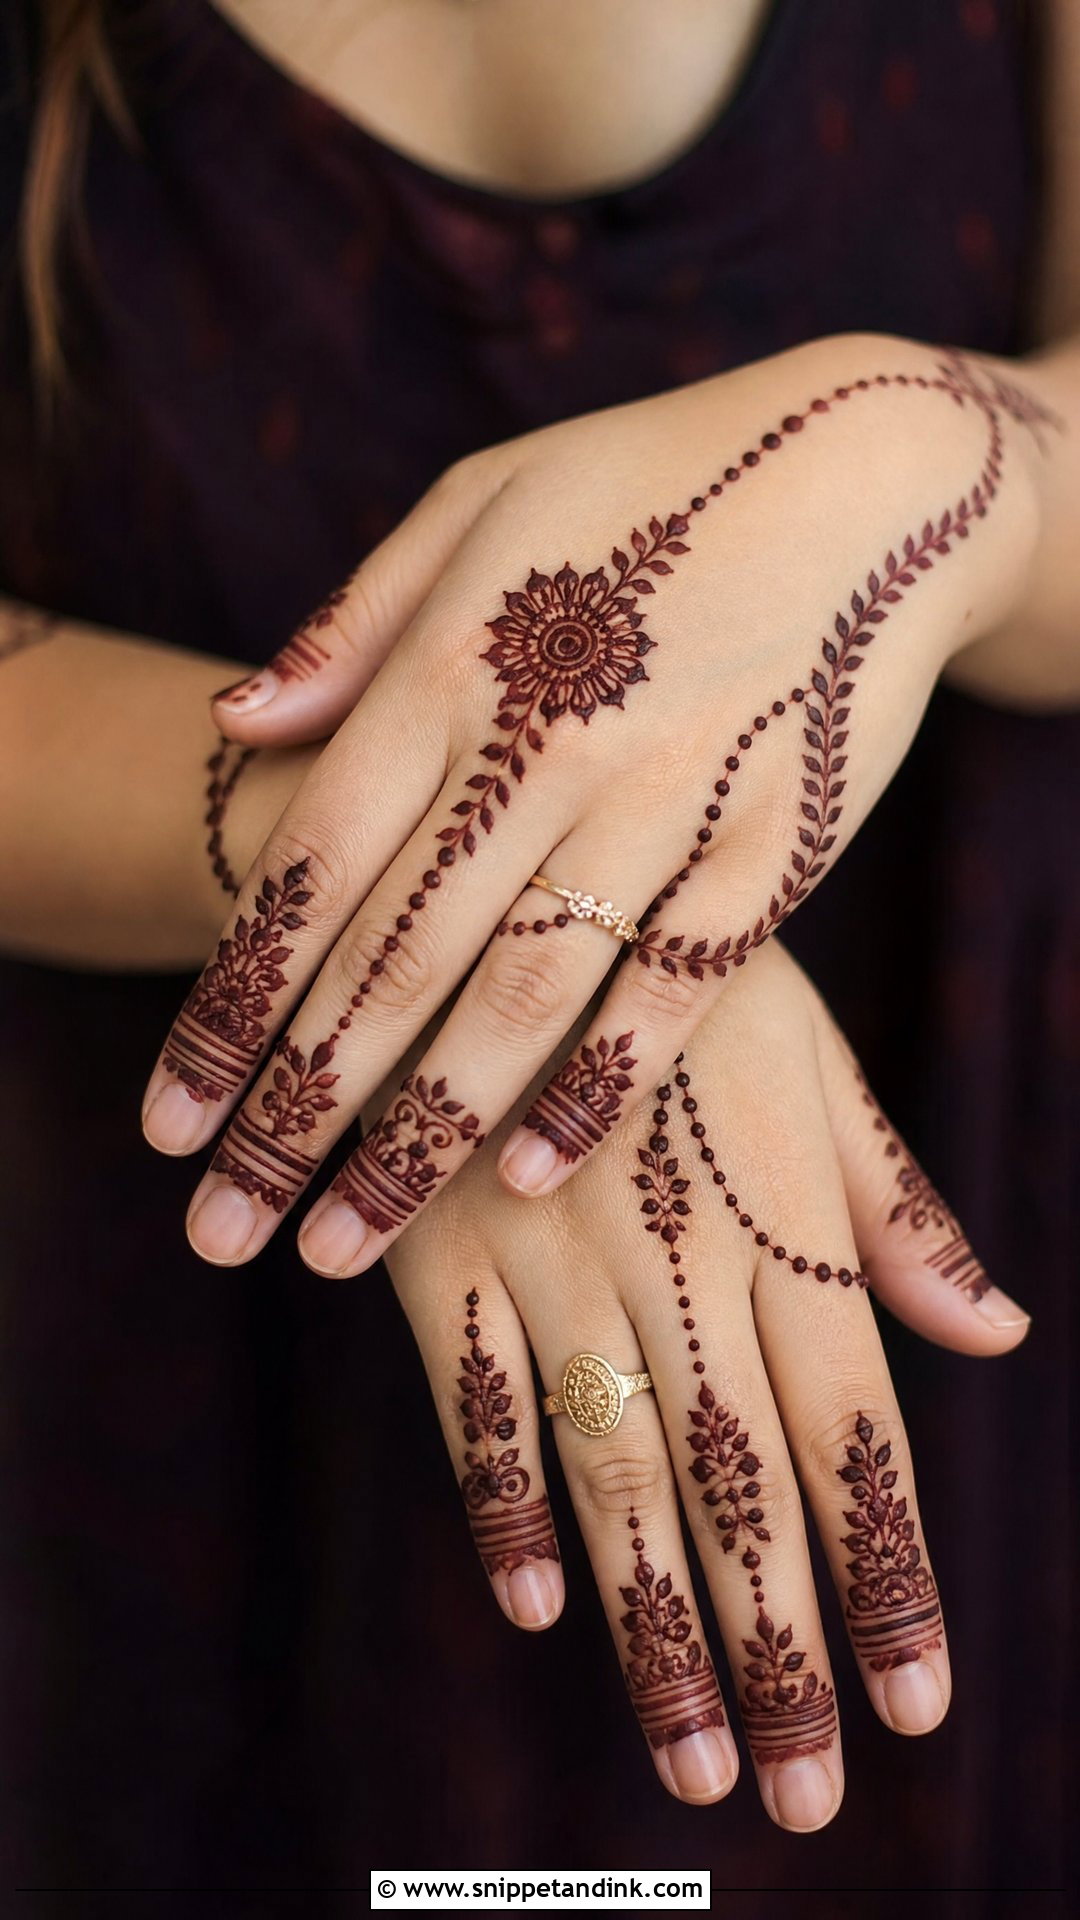
A ring design links one or more fingers to a small motif on the back of the hand with a chain, dots or a leafy line. A tiny mandala or flower usually sits near the centre. It’s one of the most requested simple back hand looks for engagement guests and festive outfits. My advice is one clean connection, not three. Multiple chains crossing the back of the hand tend to look tangled once the stain is in.
14. Jaali Normal Mehndi Design
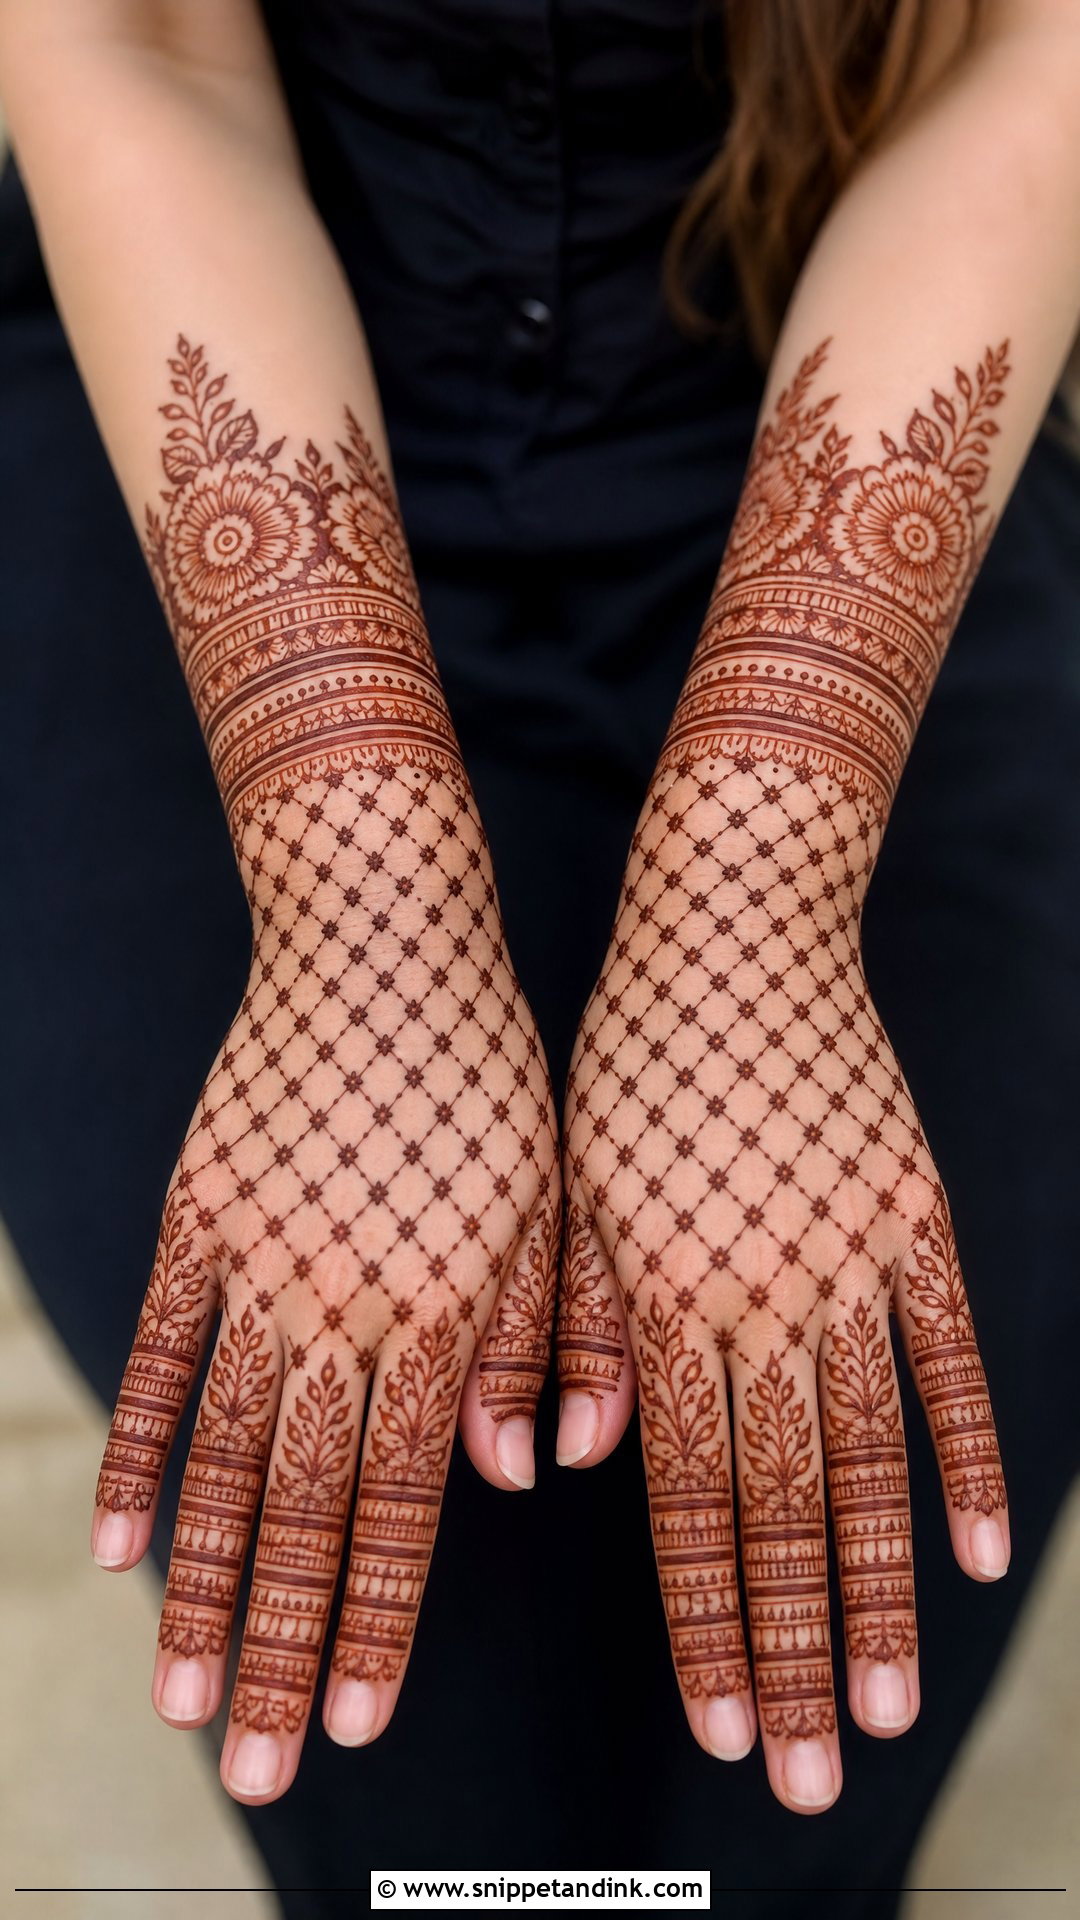
Jaali is a net of crossing lines, sometimes dotted or flowered inside each square, placed on the back hand, a palm corner, the wrist or the fingers. It dresses a hand up without full coverage. Because mesh reads as heavy, I restrict it to one area and surround it with open flowers or plain borders. Even line spacing is the whole trick; I draw all the lines in one direction first, then cross them, which keeps the squares regular.
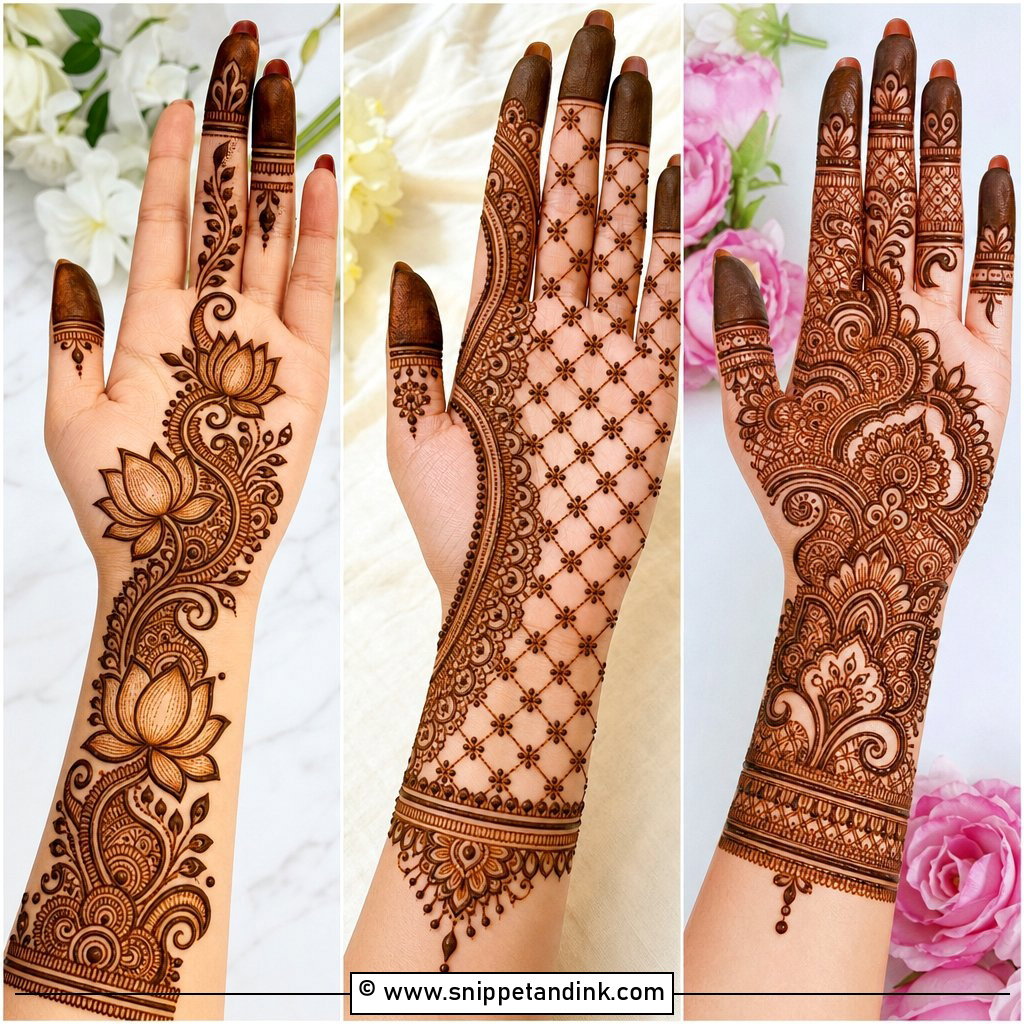
15. Bel Normal Mehndi Design
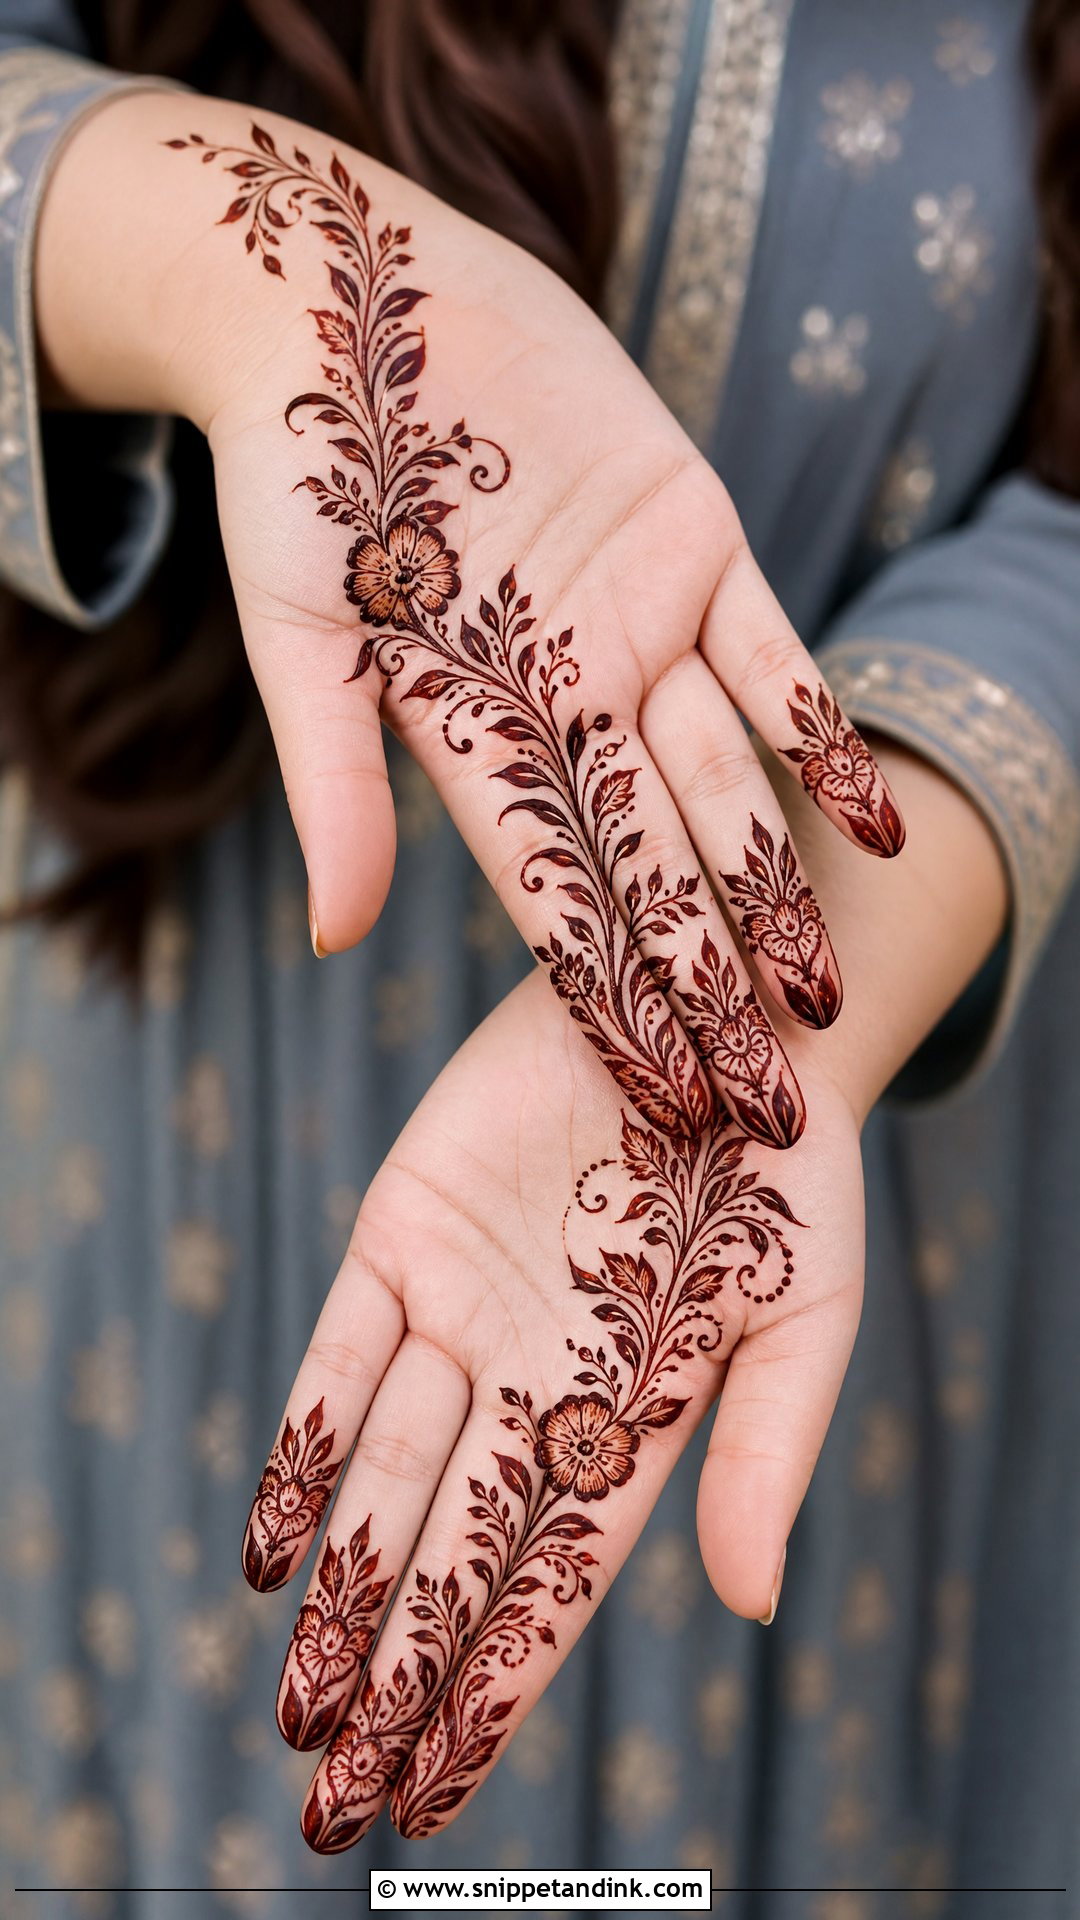
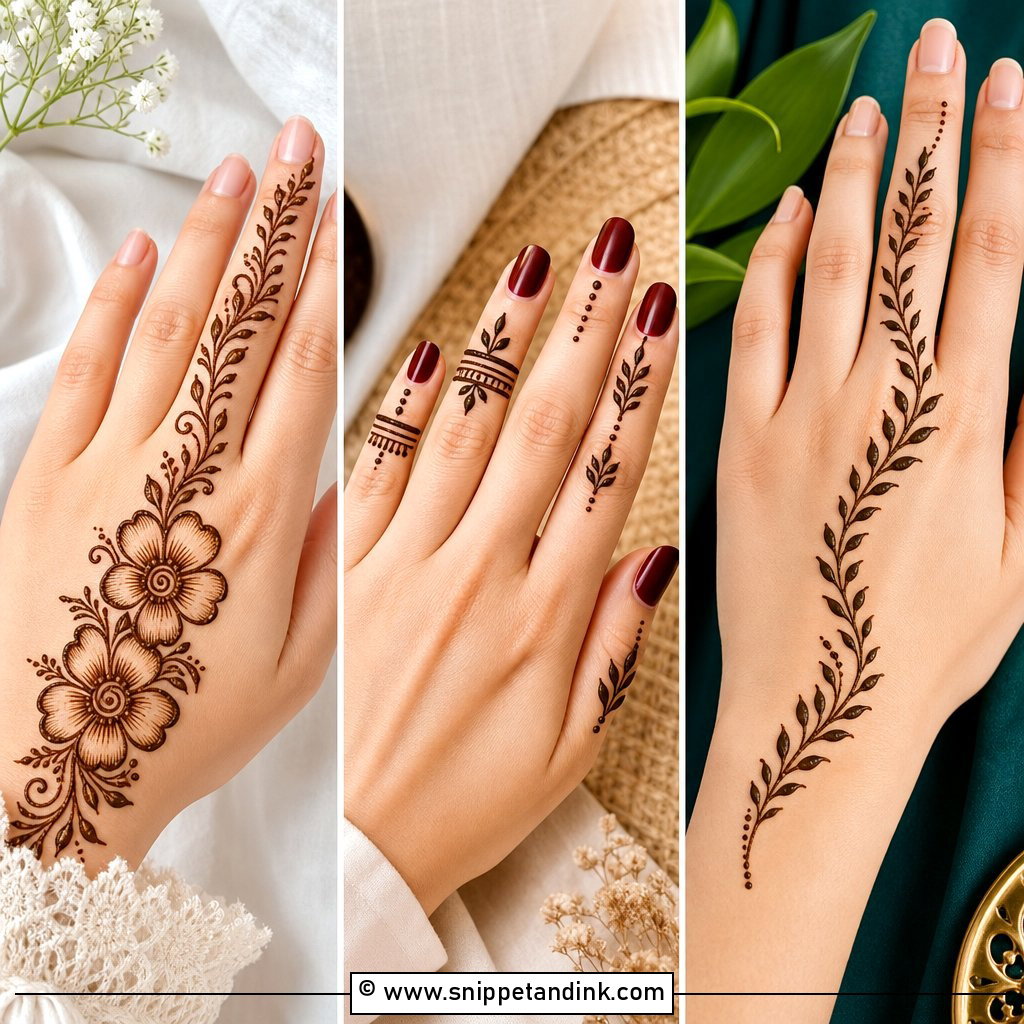
A bel is a single flowing vine with leaves, small flowers and maybe a paisley or two, travelling from the wrist toward the index or middle finger. It’s quick, Arabic in feeling and kind to beginners because one continuous line is easier to control than a symmetric shape. The wrist end and the finger end need equal weight. When one side is bare and the other is busy, the vine looks like it’s sliding off the hand.
16. Round Tikki Normal Mehndi Design
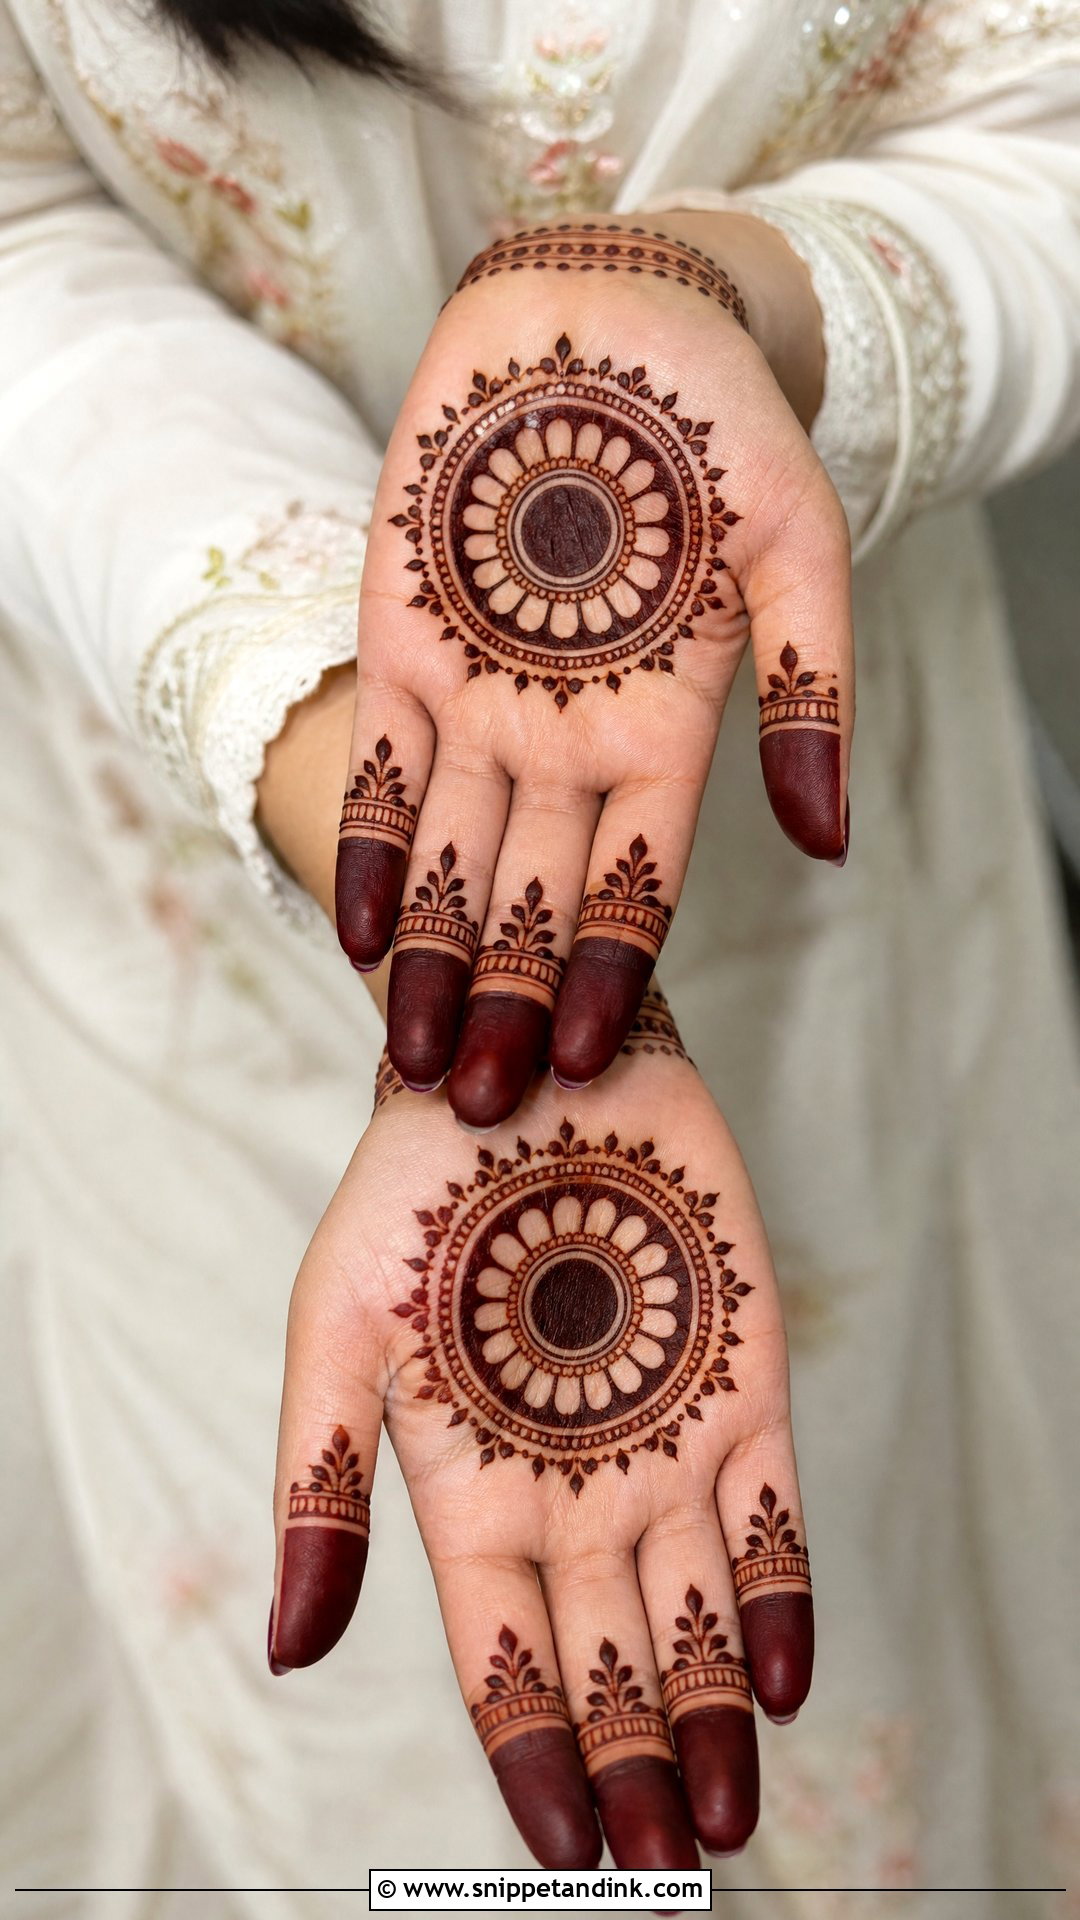
The round tikki is the oldest everyday design I know: a filled or patterned circle in the centre of the palm, dots and small petals around it, fingertips filled or banded. Families have been putting it on children and grandmothers alike for generations because it takes minutes and looks festive instantly. A solid tikki stains very deep on the palm. Add a little wrist detail and it becomes a fuller design without much more time.
17. Minimal Normal Mehndi Design
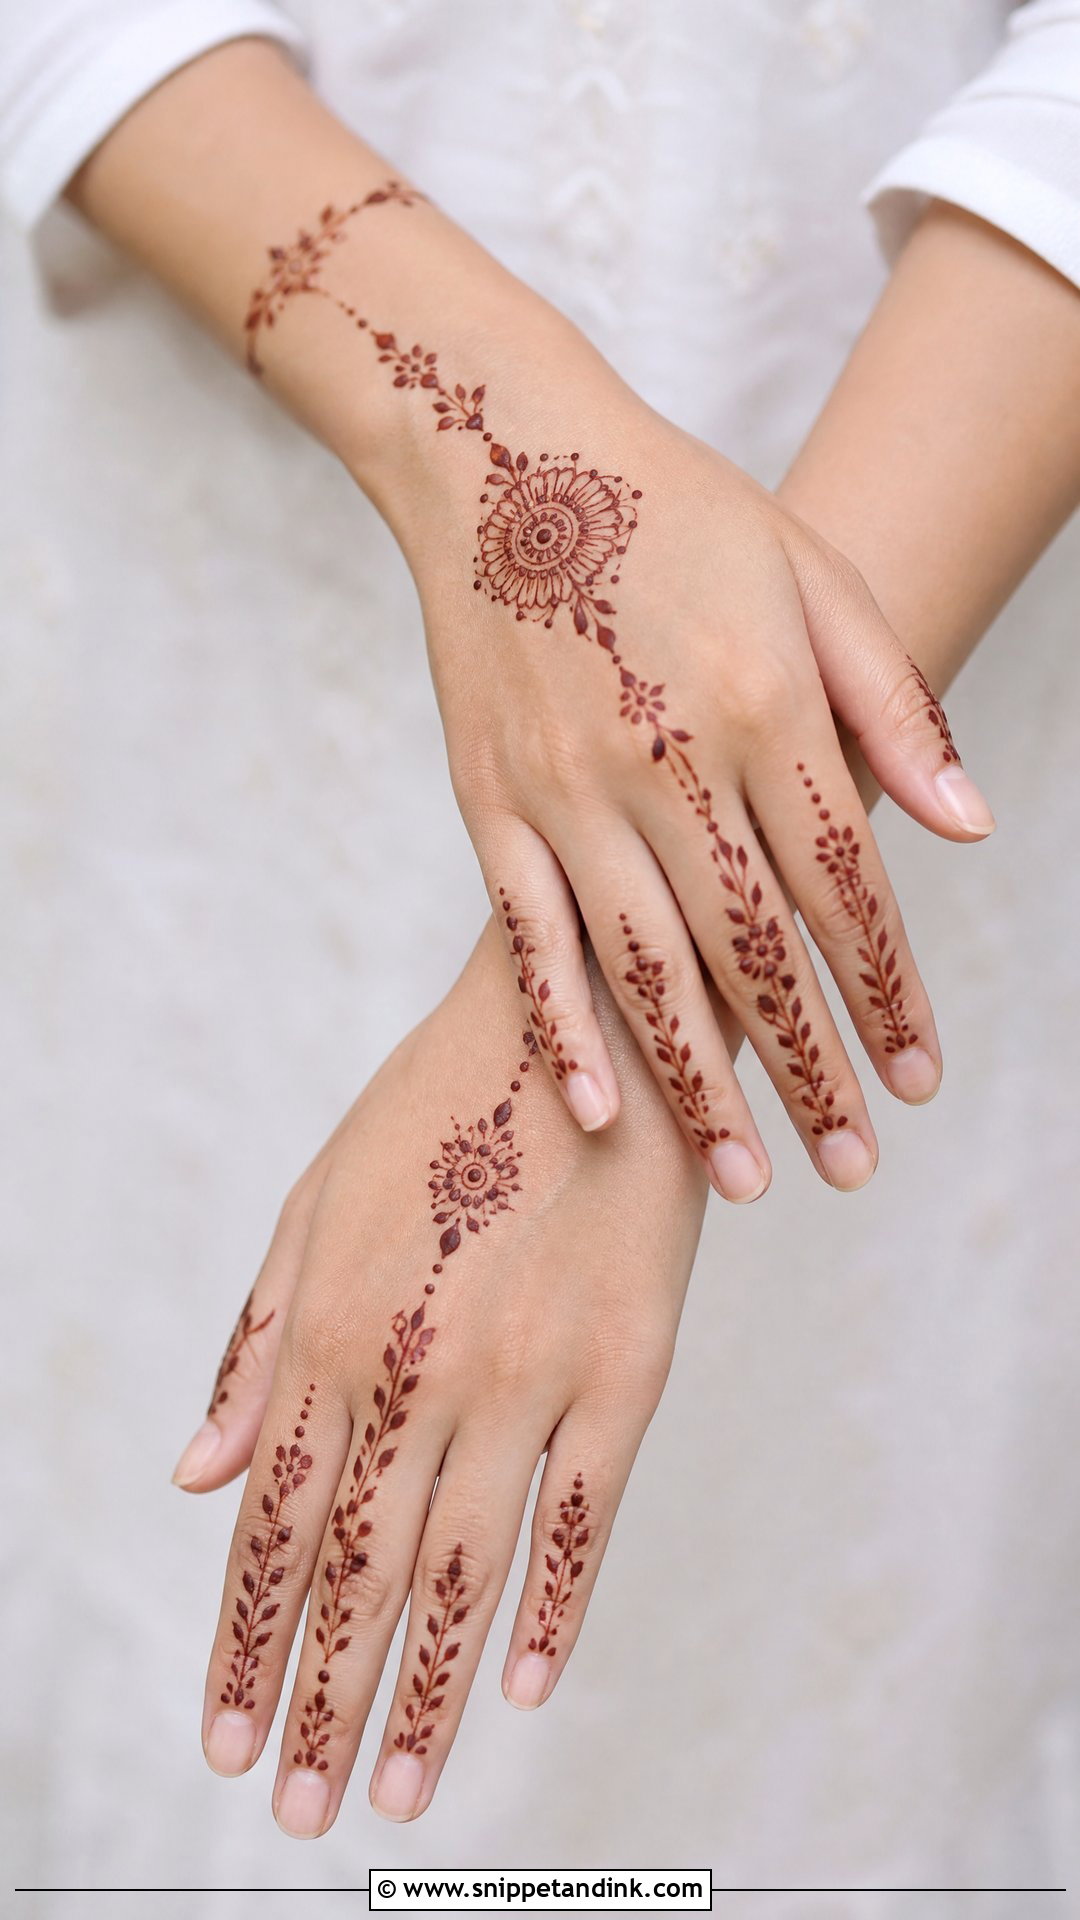
Minimal means a small flower on the back hand, a thin vine on one finger or a tiny mandala near the wrist, with most of the skin left bare. Placement carries the whole design. I’d put the motif slightly off-centre on the back of the hand, toward the index finger, because a dead-centre dot often looks accidental. It dries in minutes and suits first-timers who aren’t sure they’ll like the colour.
18. Easy Normal Mehndi Design For Beginners
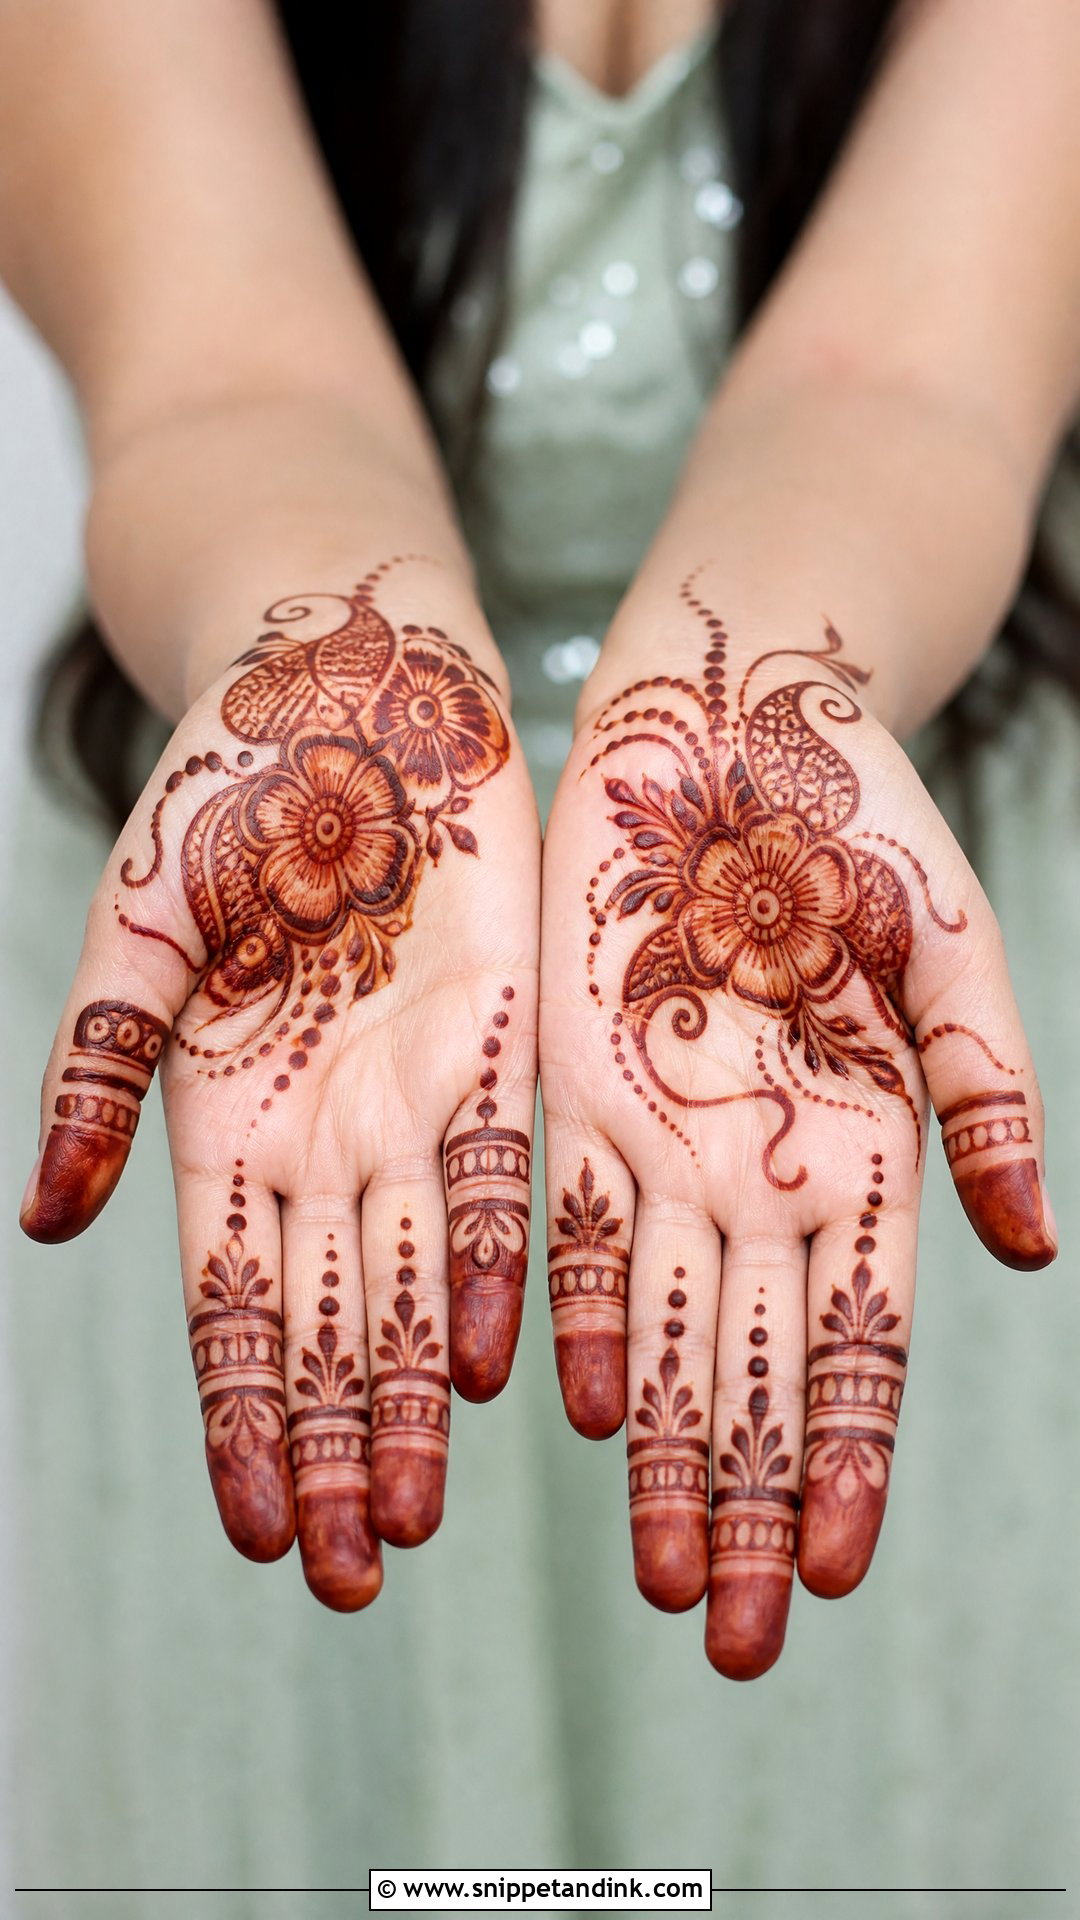
For a first attempt, choose forgiving shapes you can repeat: a flower, circle or paisley in the center of the palm, then leaves, dots, curves and finger bands. Leave hair-fine detail for later. A diagonal Arabic layout is easier than a mandala because it doesn’t demand perfect symmetry. What separates a neat beginner hand from a messy one is steady pressure on the cone, so practise lines and dots before attempting a pattern.
19. Front And Back Normal Mehndi Design
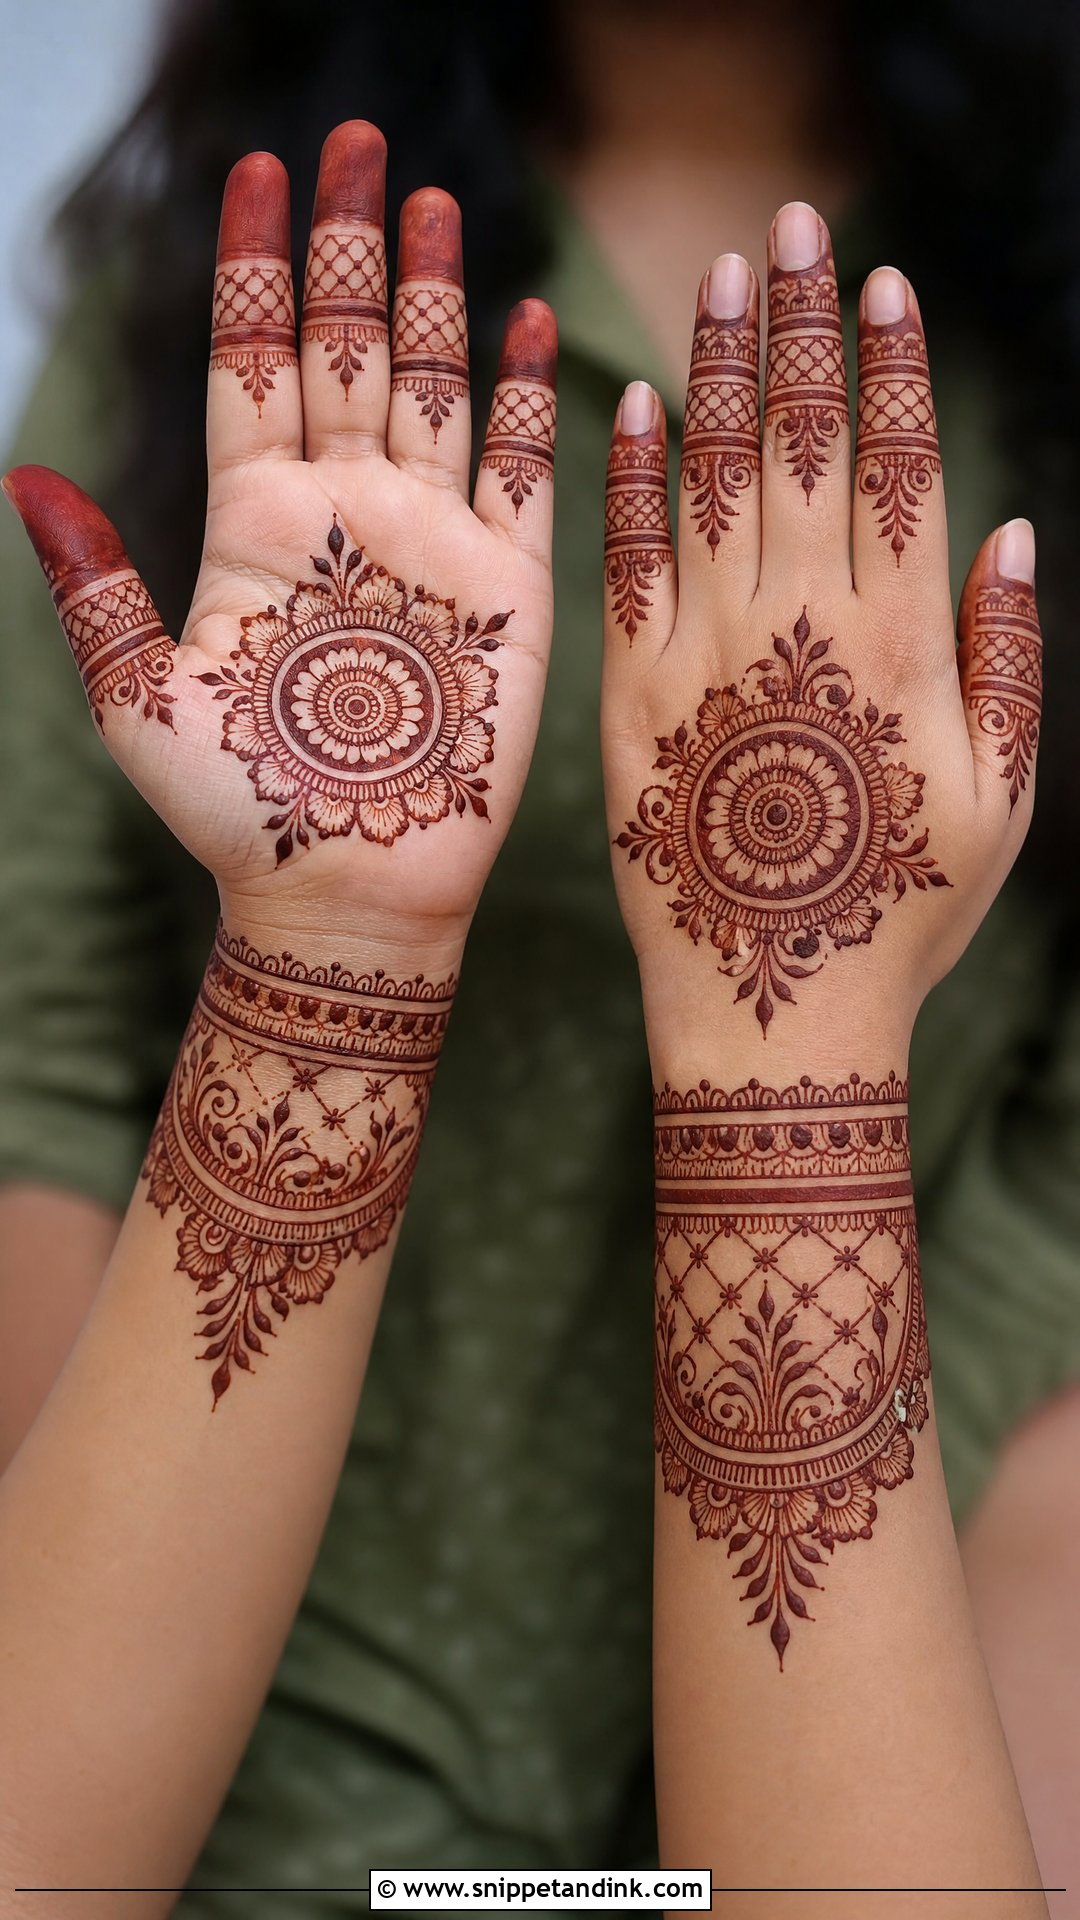
Palm and back can match without being identical. A mandala or floral centre on the palm and a bracelet or Arabic trail on the back will look like a set if they share one element, the same leaf shape or the same dot border. I keep the palm slightly fuller and the back lighter, since the palm will stain darker anyway and the back would otherwise look crowded by comparison. Festivals and wedding guests are the usual reason people ask for both sides.
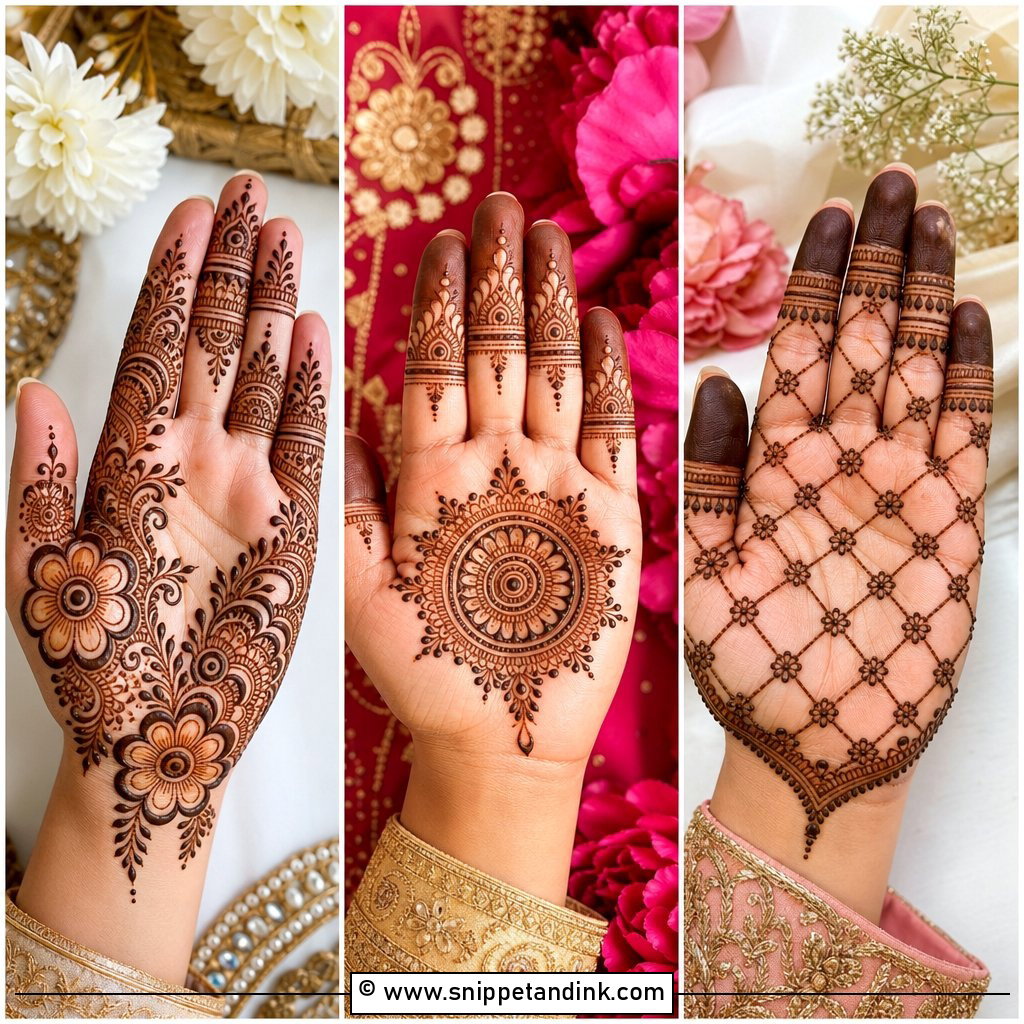
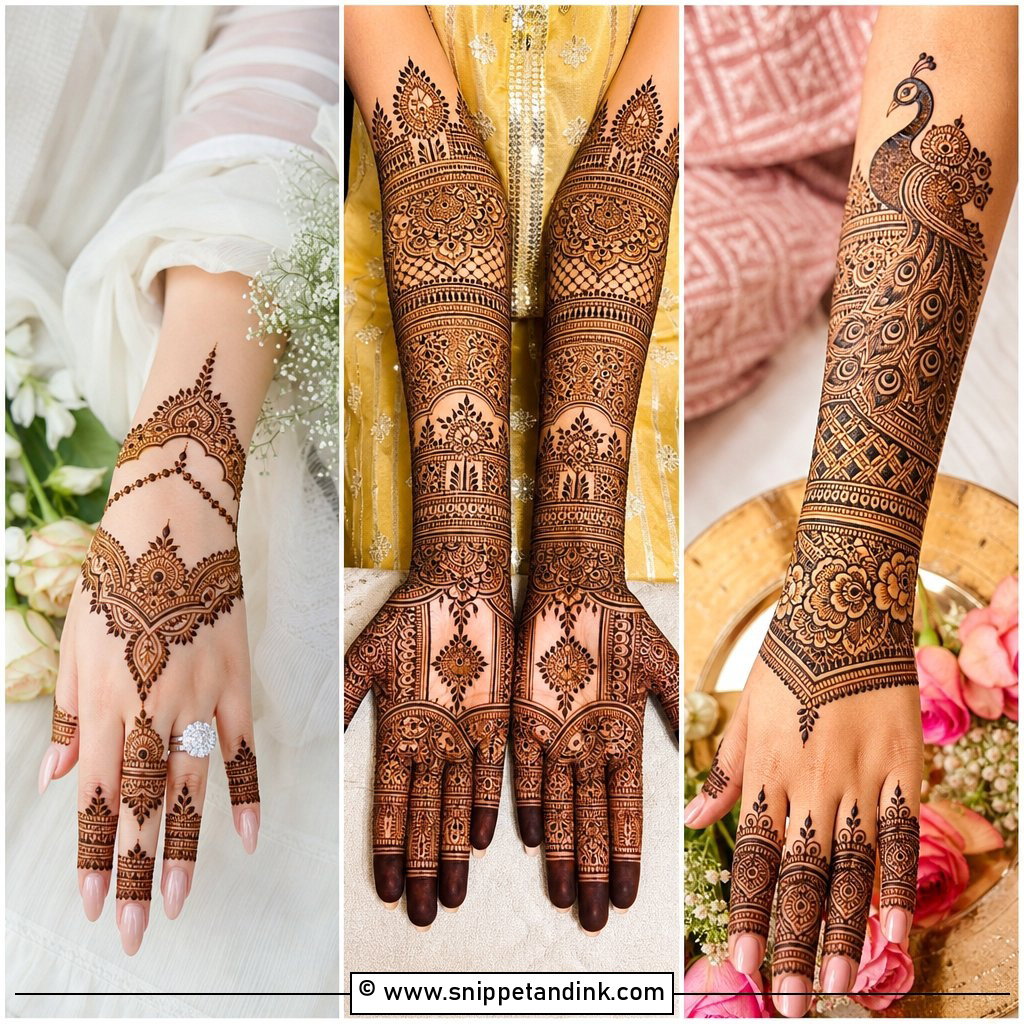
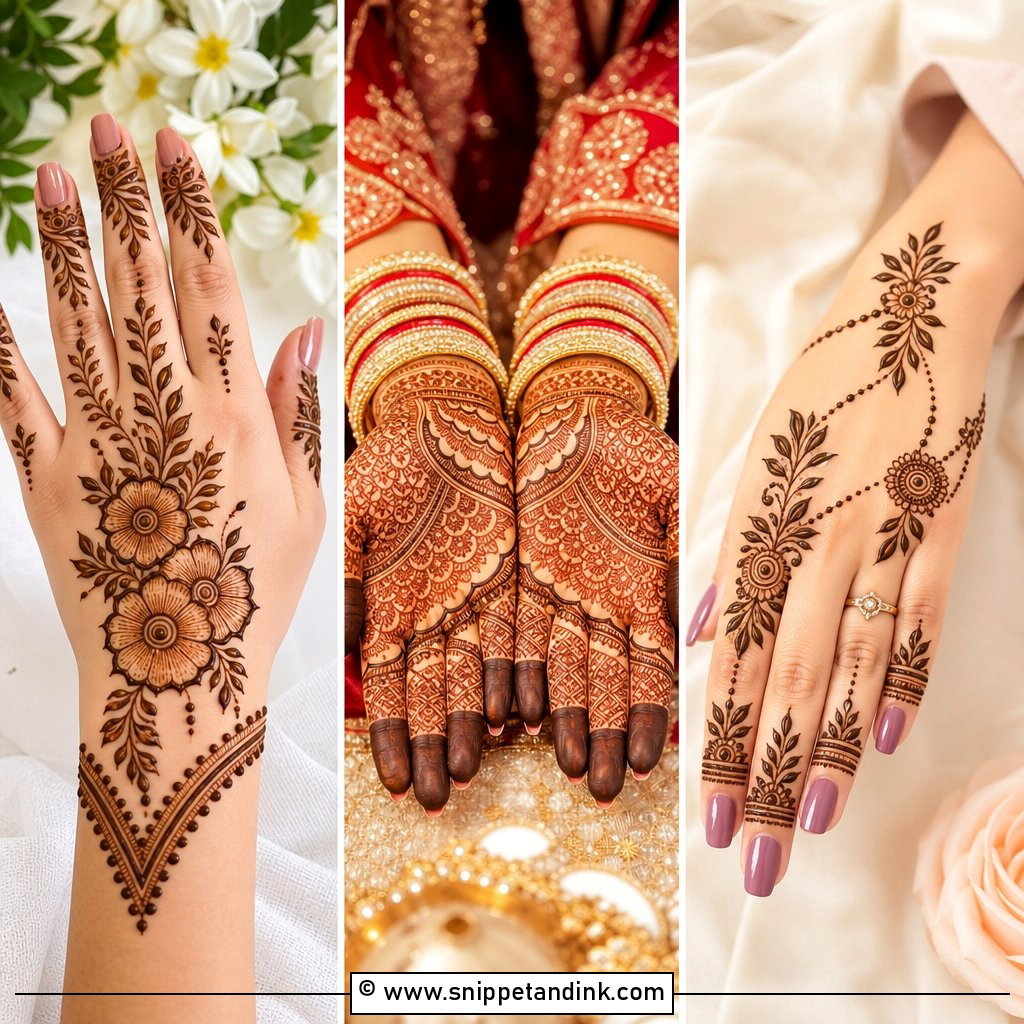
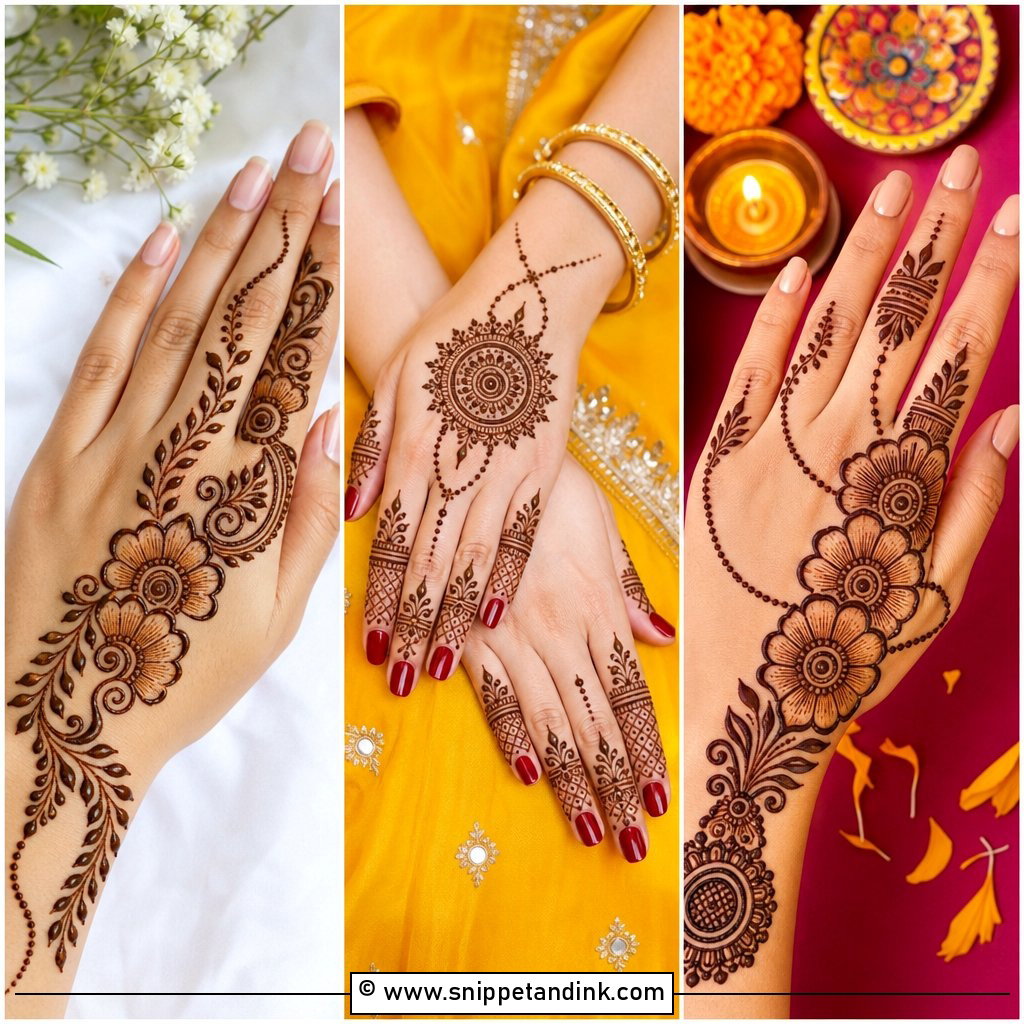
20. Modern Normal Mehndi Design
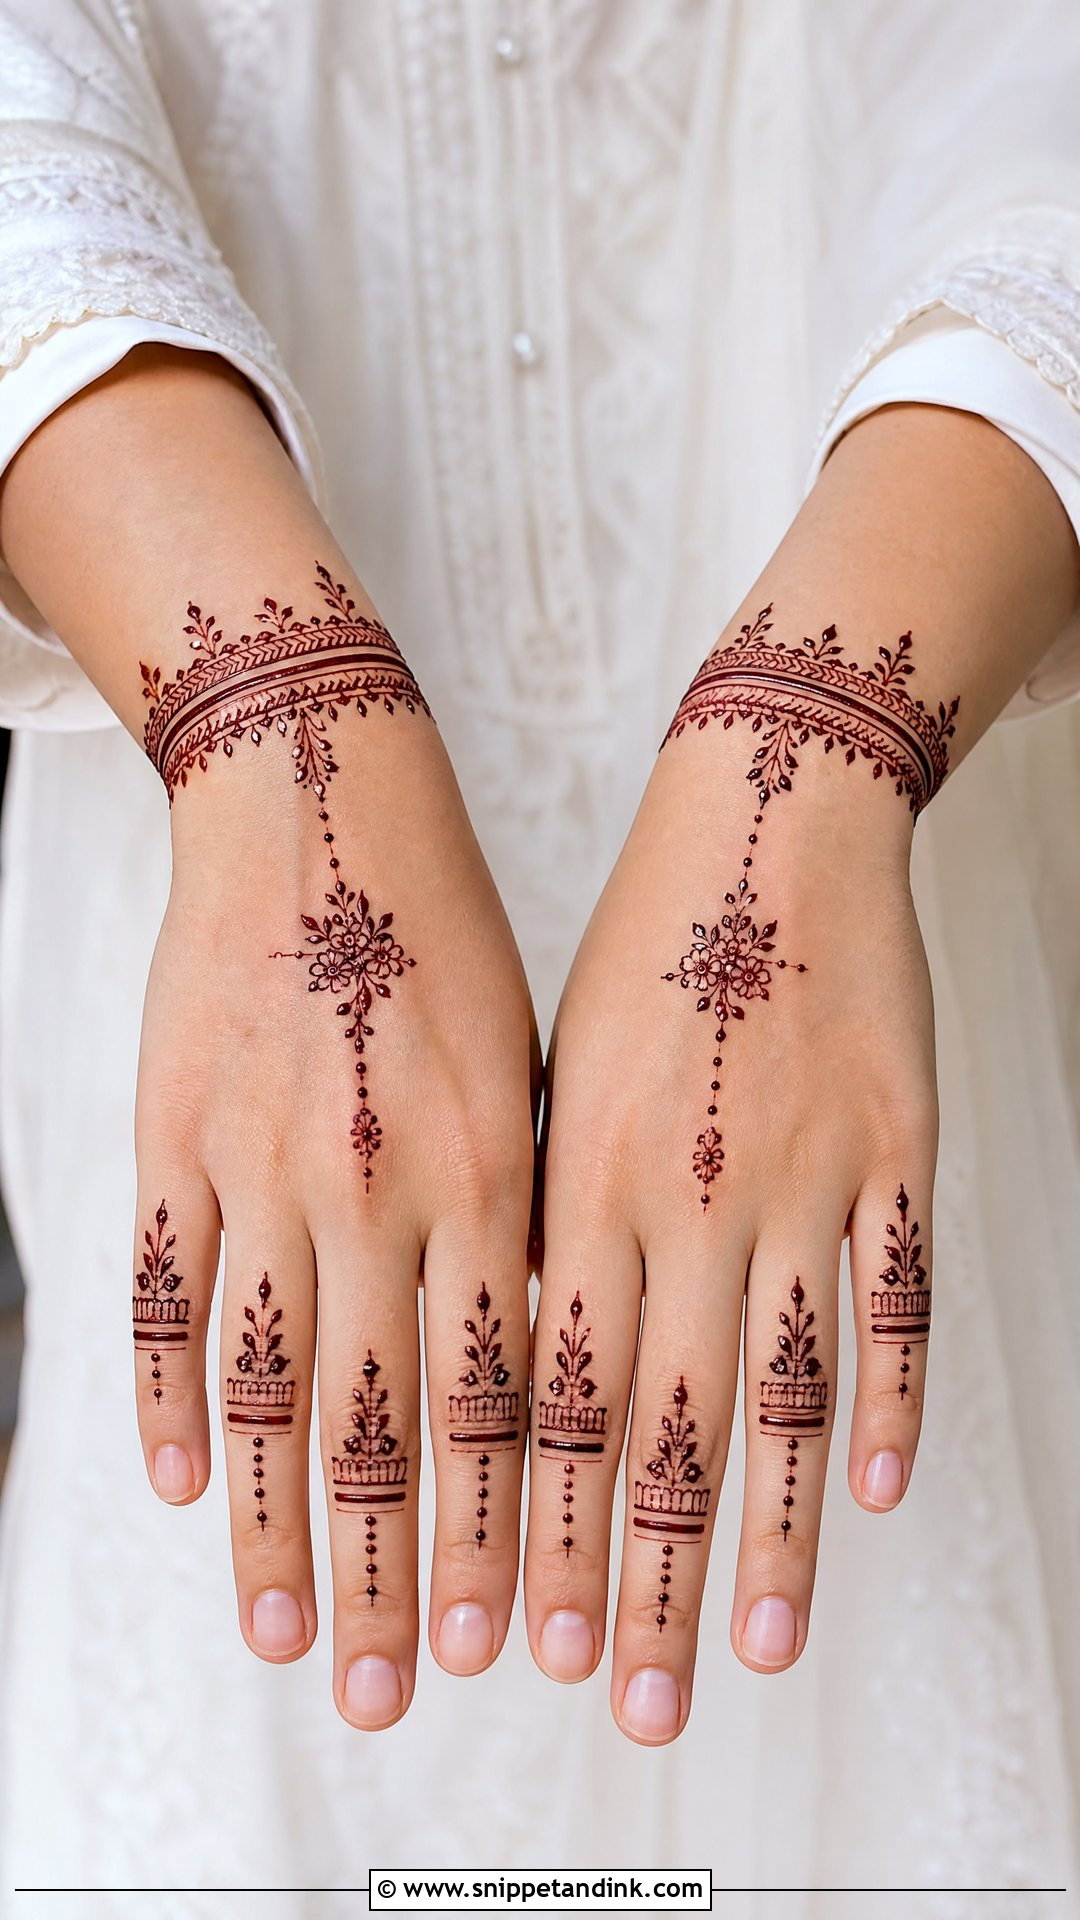
Modern everyday henna uses the old elements in a cleaner layout: negative space, slim finger lines, a geometric panel, a small flower and a bracelet at the wrist. It highlights selected areas instead of covering the whole hand, which sits well with fusion wear and plain outfits. The mistake I see most is mixing five motifs on one hand. Pick two and repeat them.
21. Shaded Normal Mehndi Design
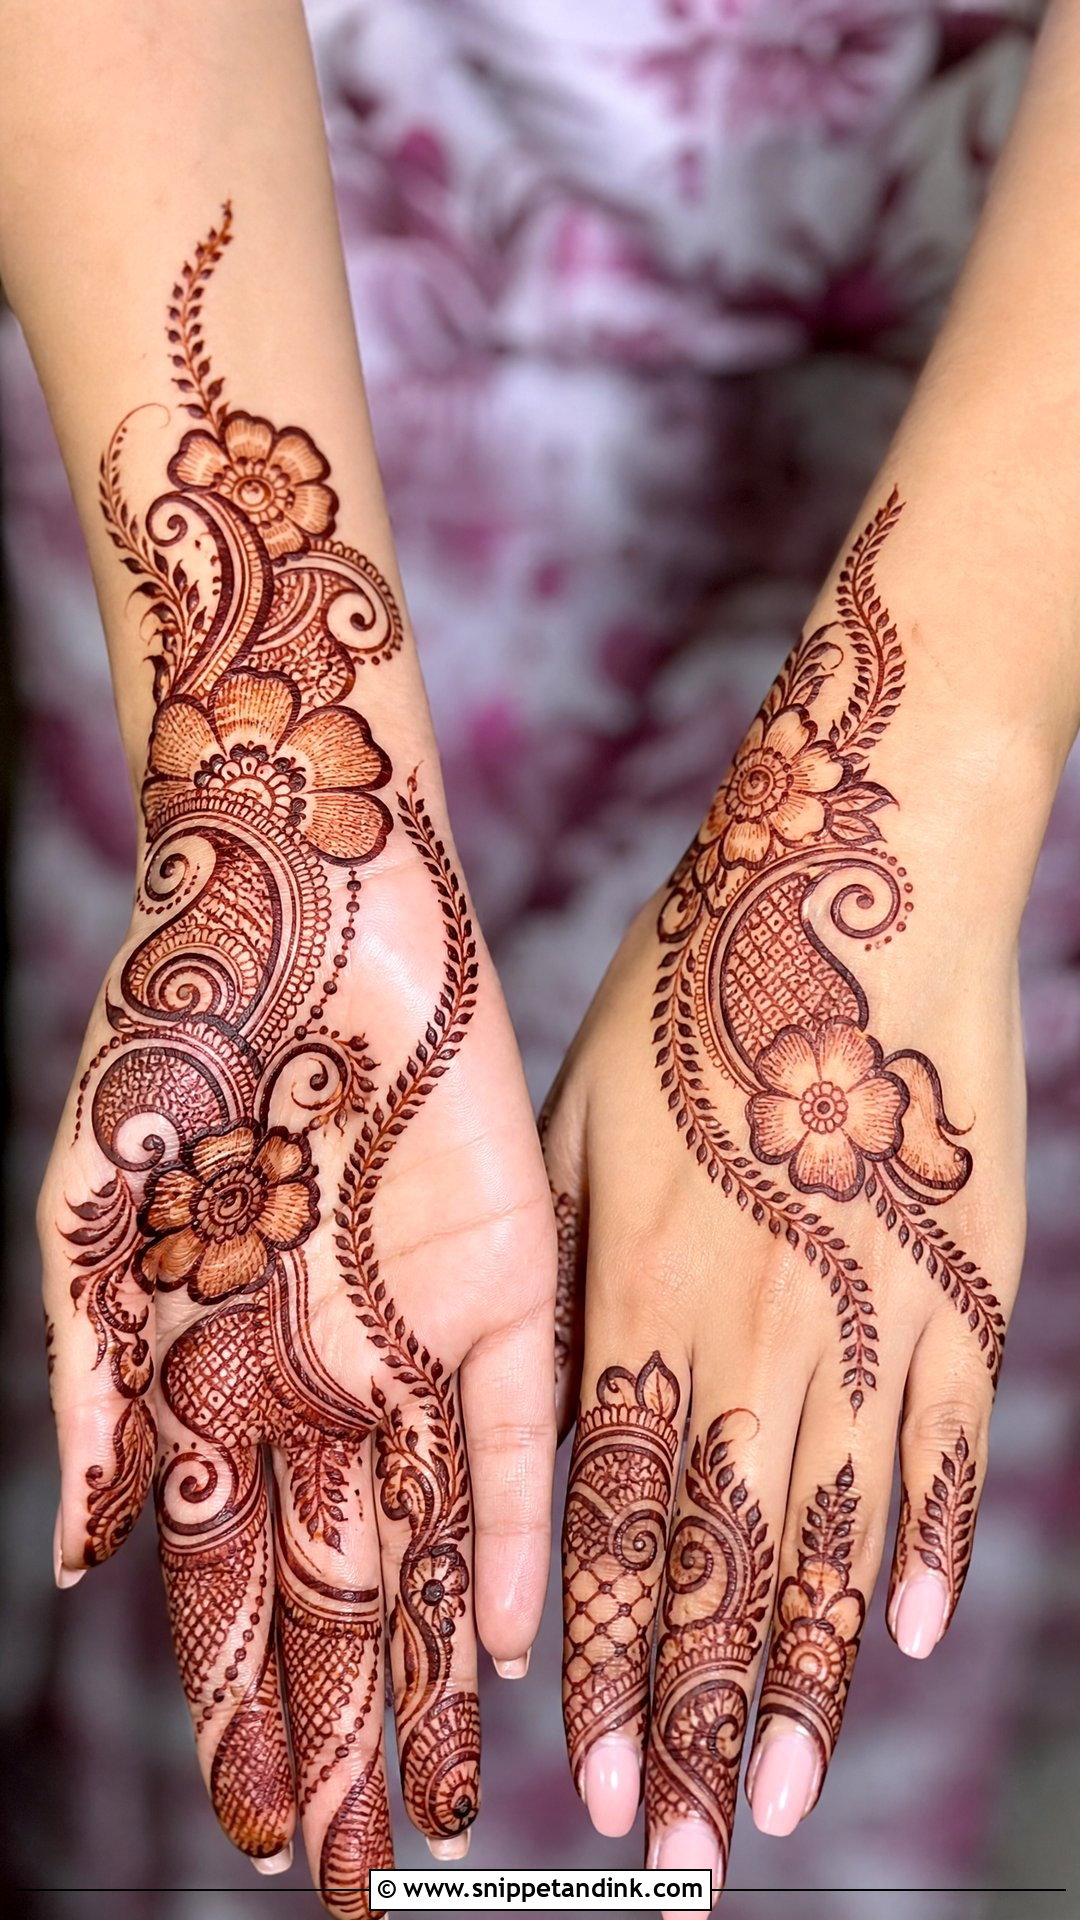
Shading fills petals, leaves or paisleys with fine strokes so a plain motif gains depth. It only works with bold outlines around it, otherwise the shading leaks visually into the background. I use slightly thinner paste and lighter pressure for shading than for outlines. Leave most of the design unshaded; a diagonal floral trail with shading on just the main petals gives far more effect than shading everything.
22. Peacock Normal Mehndi Design
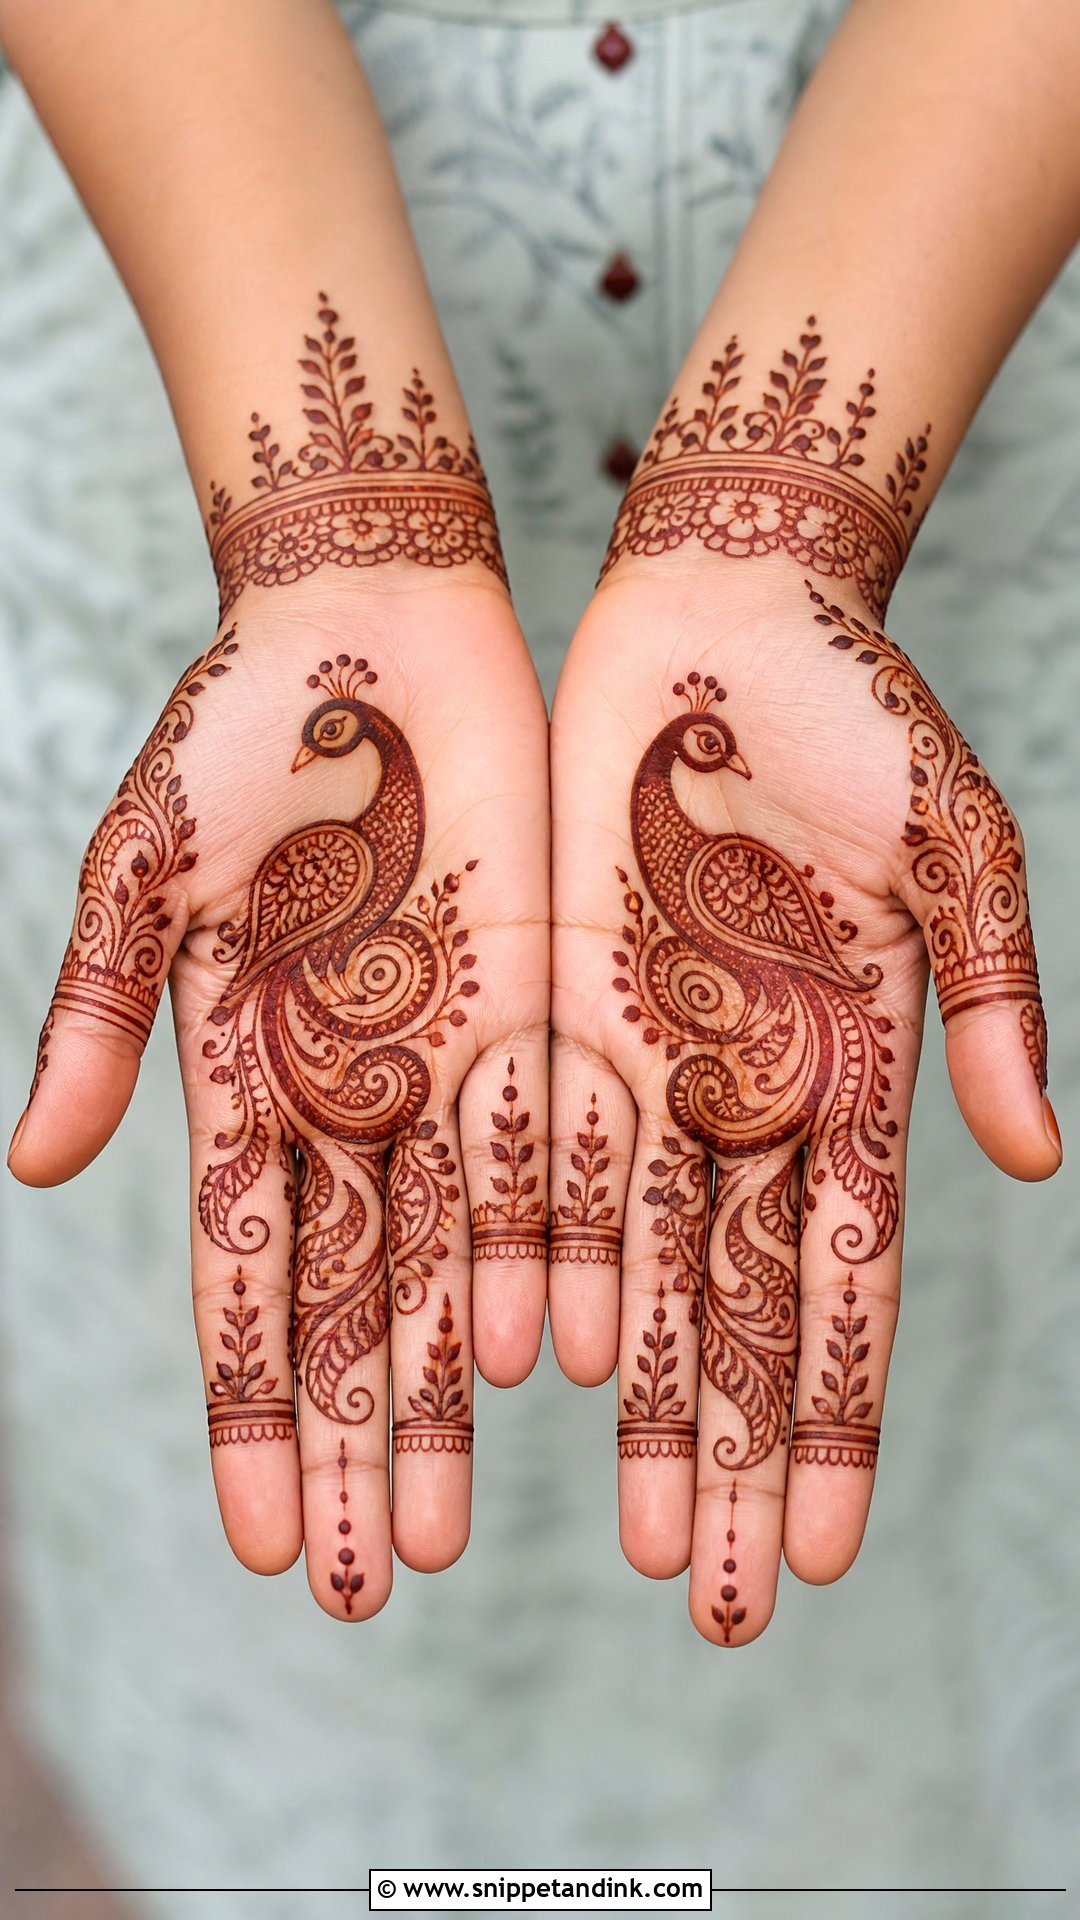
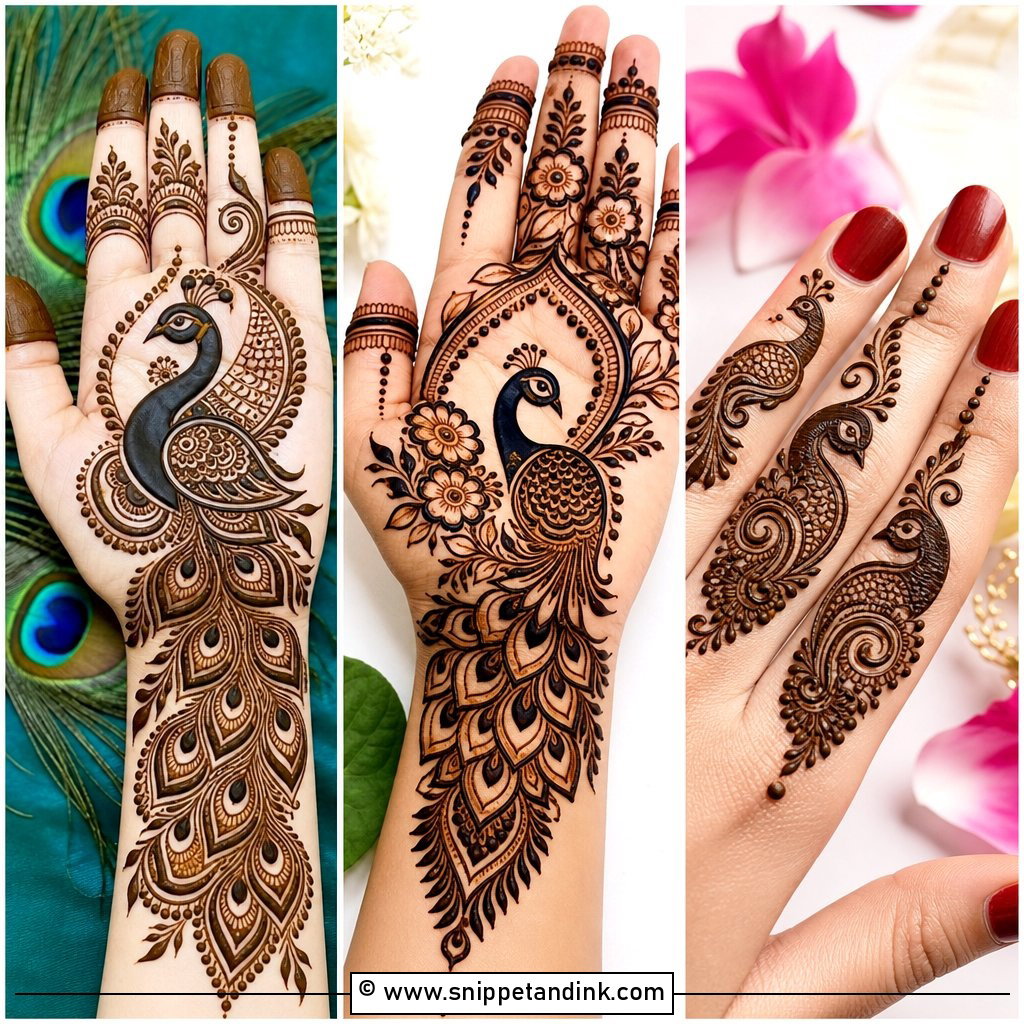
Peacocks belong to Indian henna, and a small one keeps a design traditional without heading into bridal territory. Place it in the palm, near the wrist or within a side trail. Its body can stay simple while the feathers get the curves, dots, leaves and little paisleys. A peacock pulls the eye, so I clear space around it and keep the rest of the hand quiet, often just a floral wrist border and banded fingers.
23. Leafy Normal Mehndi Design
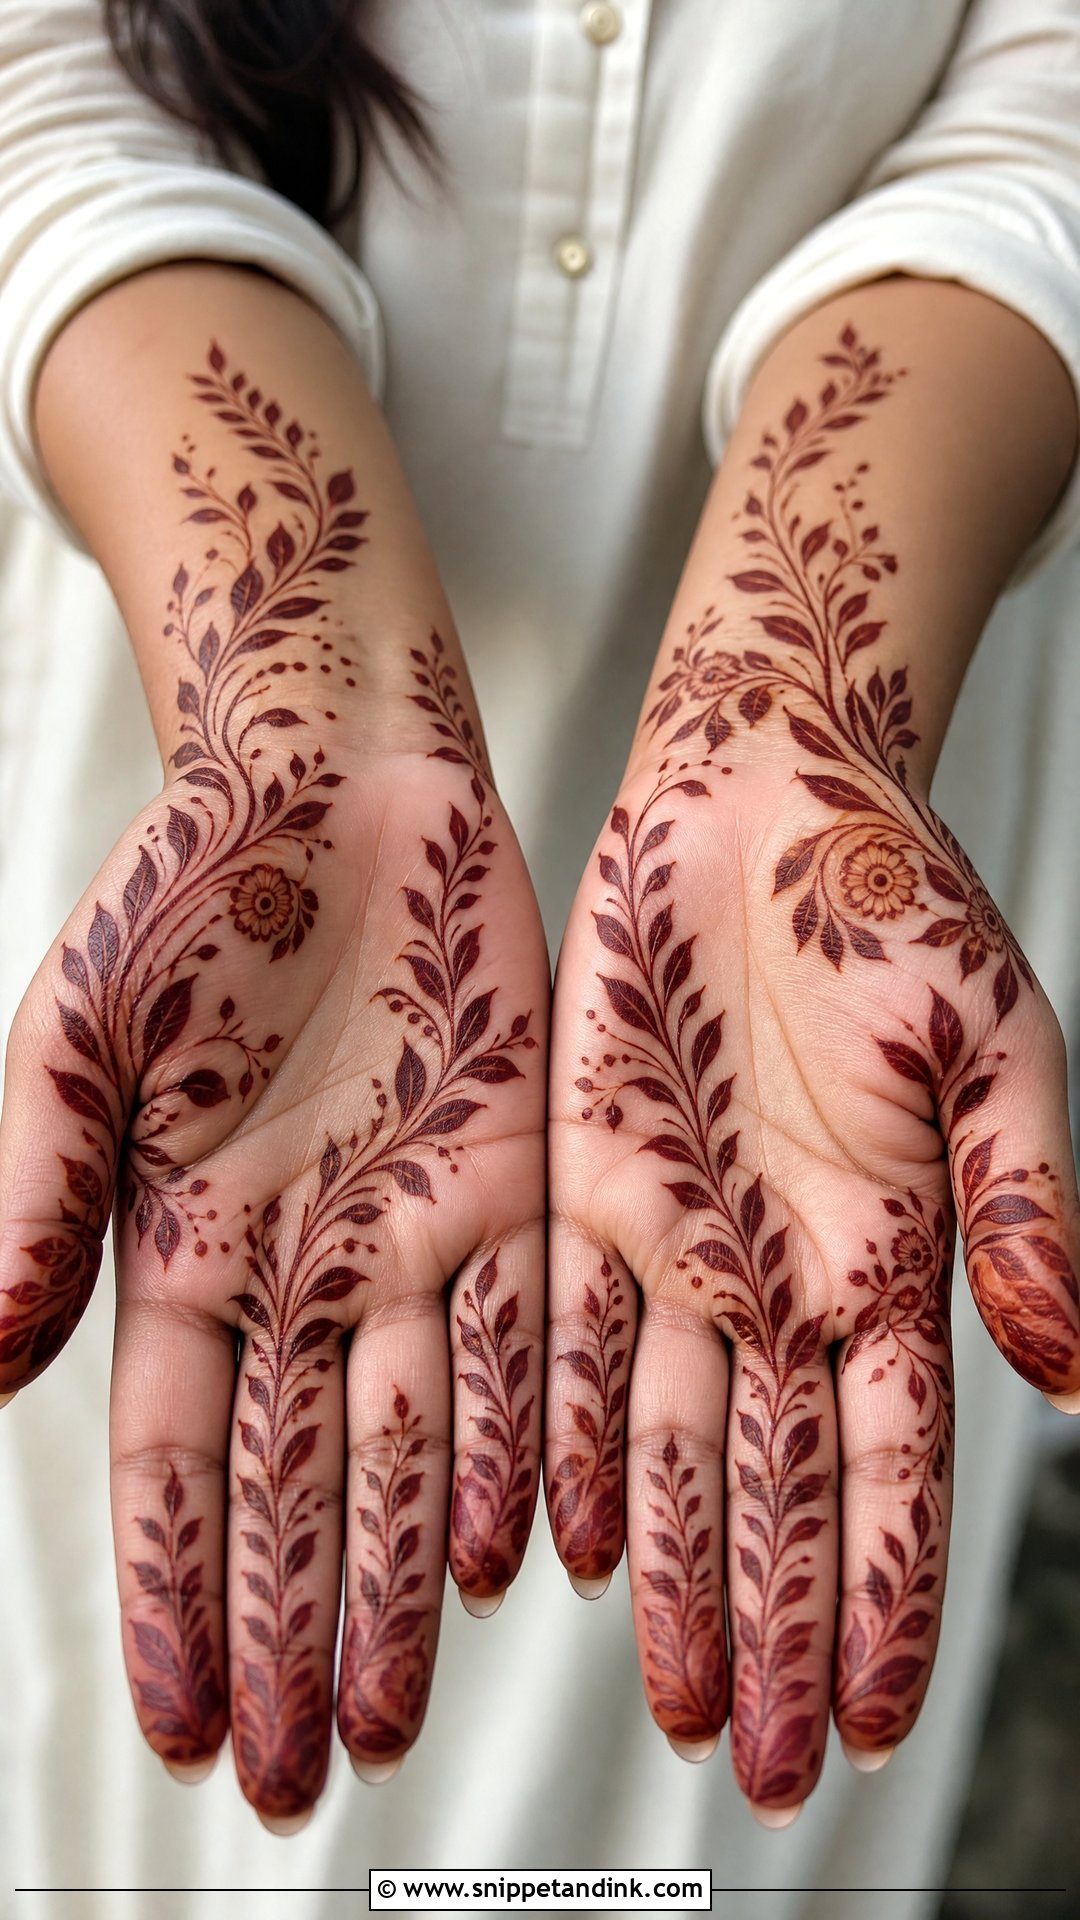
Leaves are the most adaptable motif in henna. A vine along the fingers, a trail across the palm or a wrist-to-finger line on the back hand can all be built from one leaf shape repeated. I teach beginners leaves first: two curved strokes meeting at a point, then a centre vein. Dots and thin curves link them. It’s light, quick and much fresher than a palm full of dense flowers.
24. Chain Normal Mehndi Design
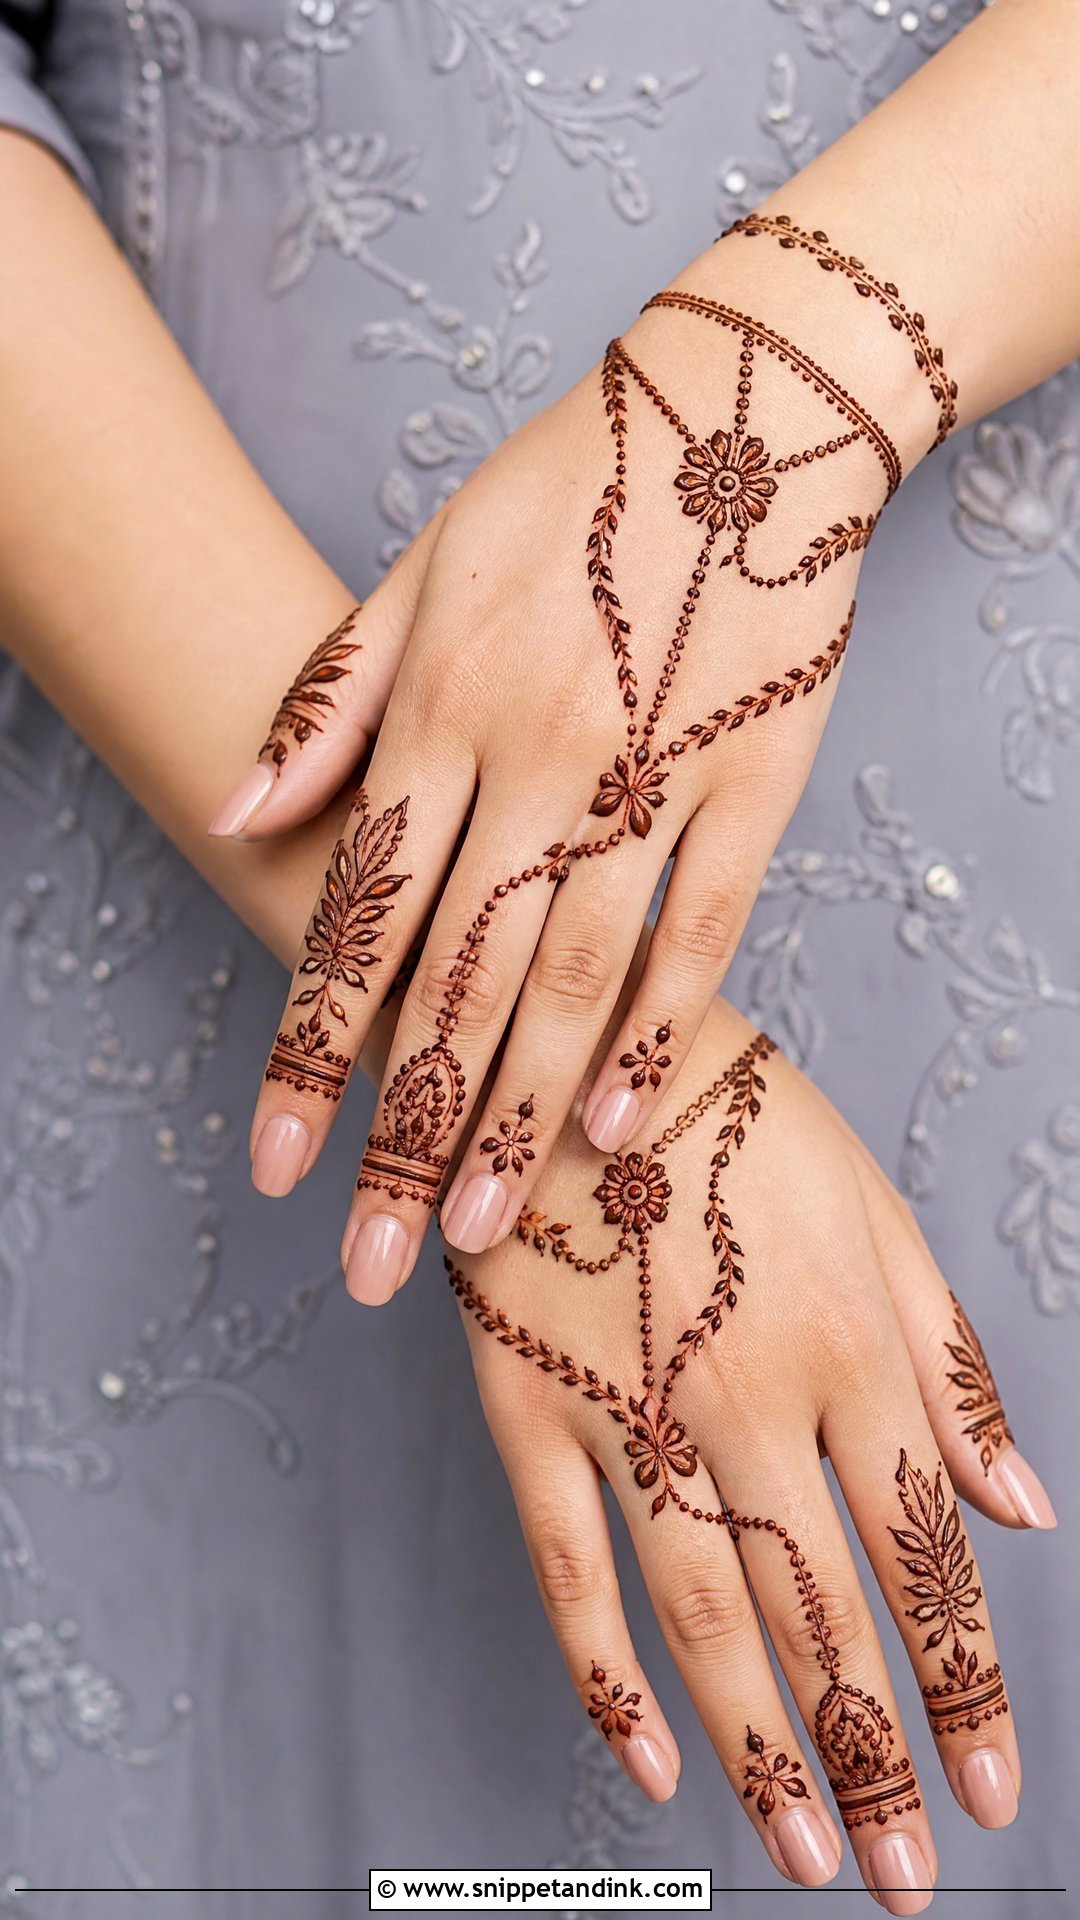
Chain designs imitate fine jewelry with dots, loops, small leaves and thin lines running from the wrist to the fingers, often around a tiny flower or mandala on the back hand. The lines must stay thin and evenly spaced. If the paste is too thick or the cone tip cut too wide, chains lose their delicacy and look like ropes. It dries quickly and suits celebrations where you’ll be wearing rings.
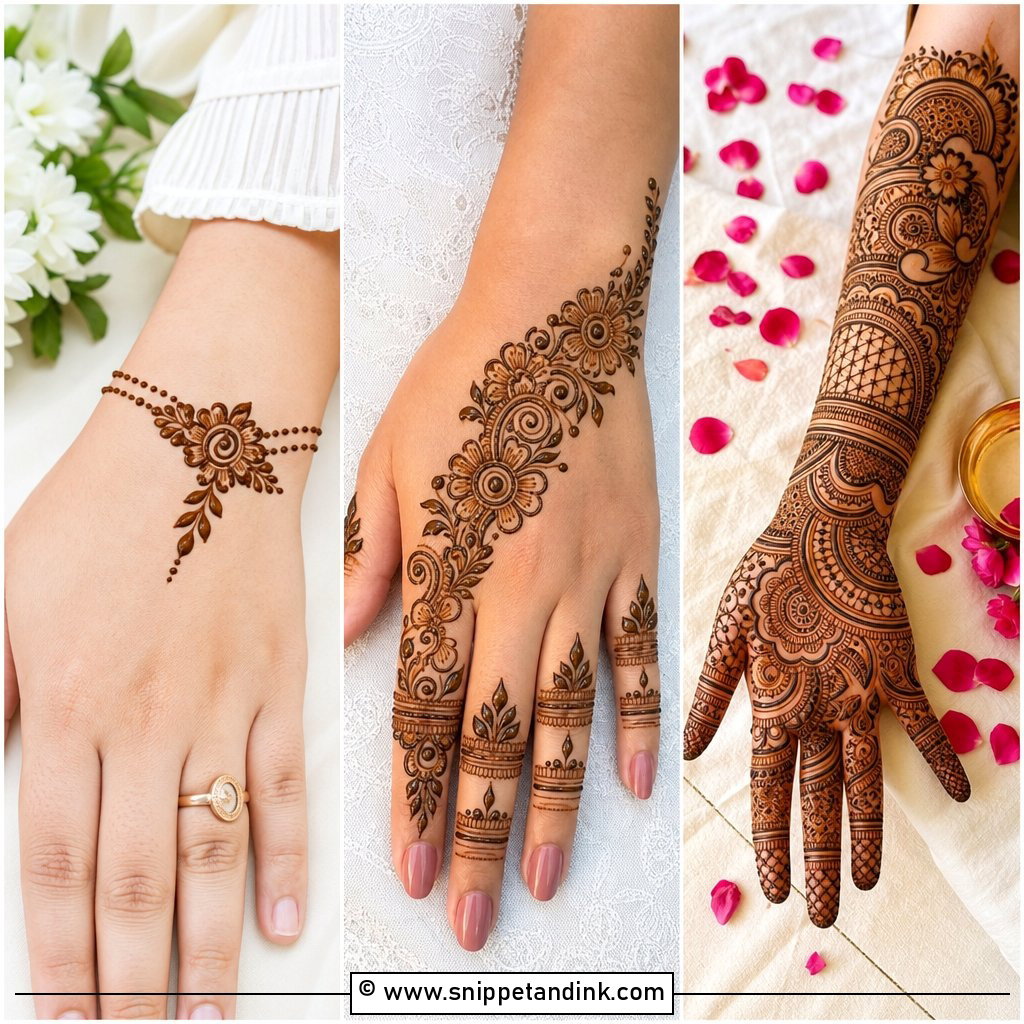
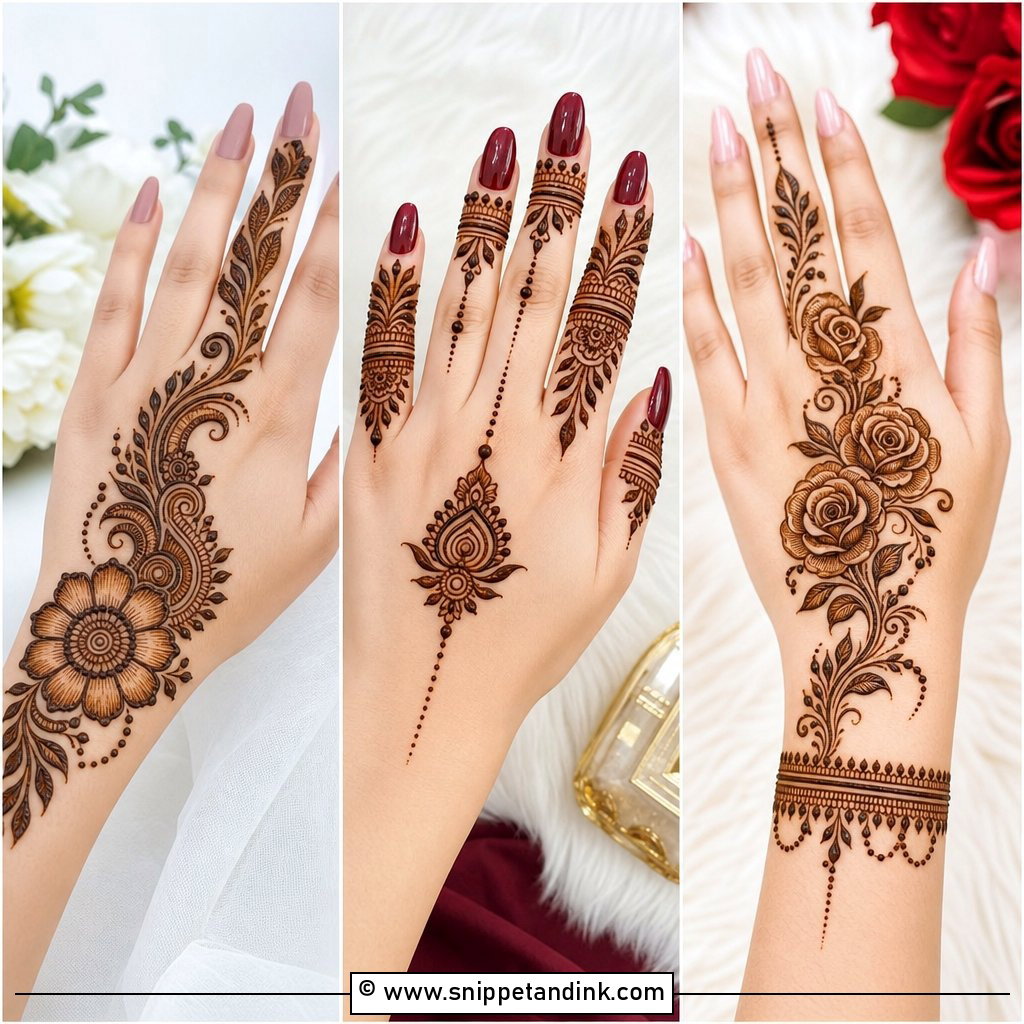
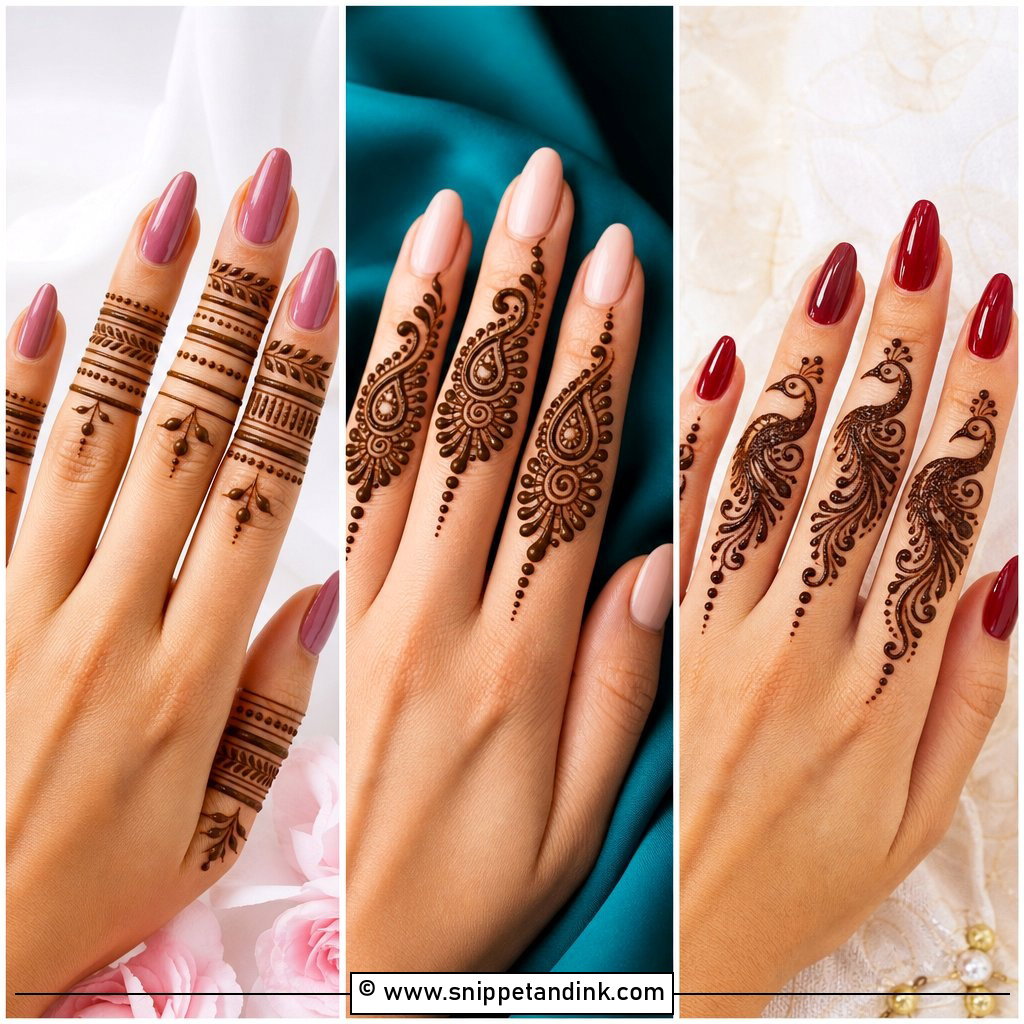
25. Side Hand Normal Mehndi Design
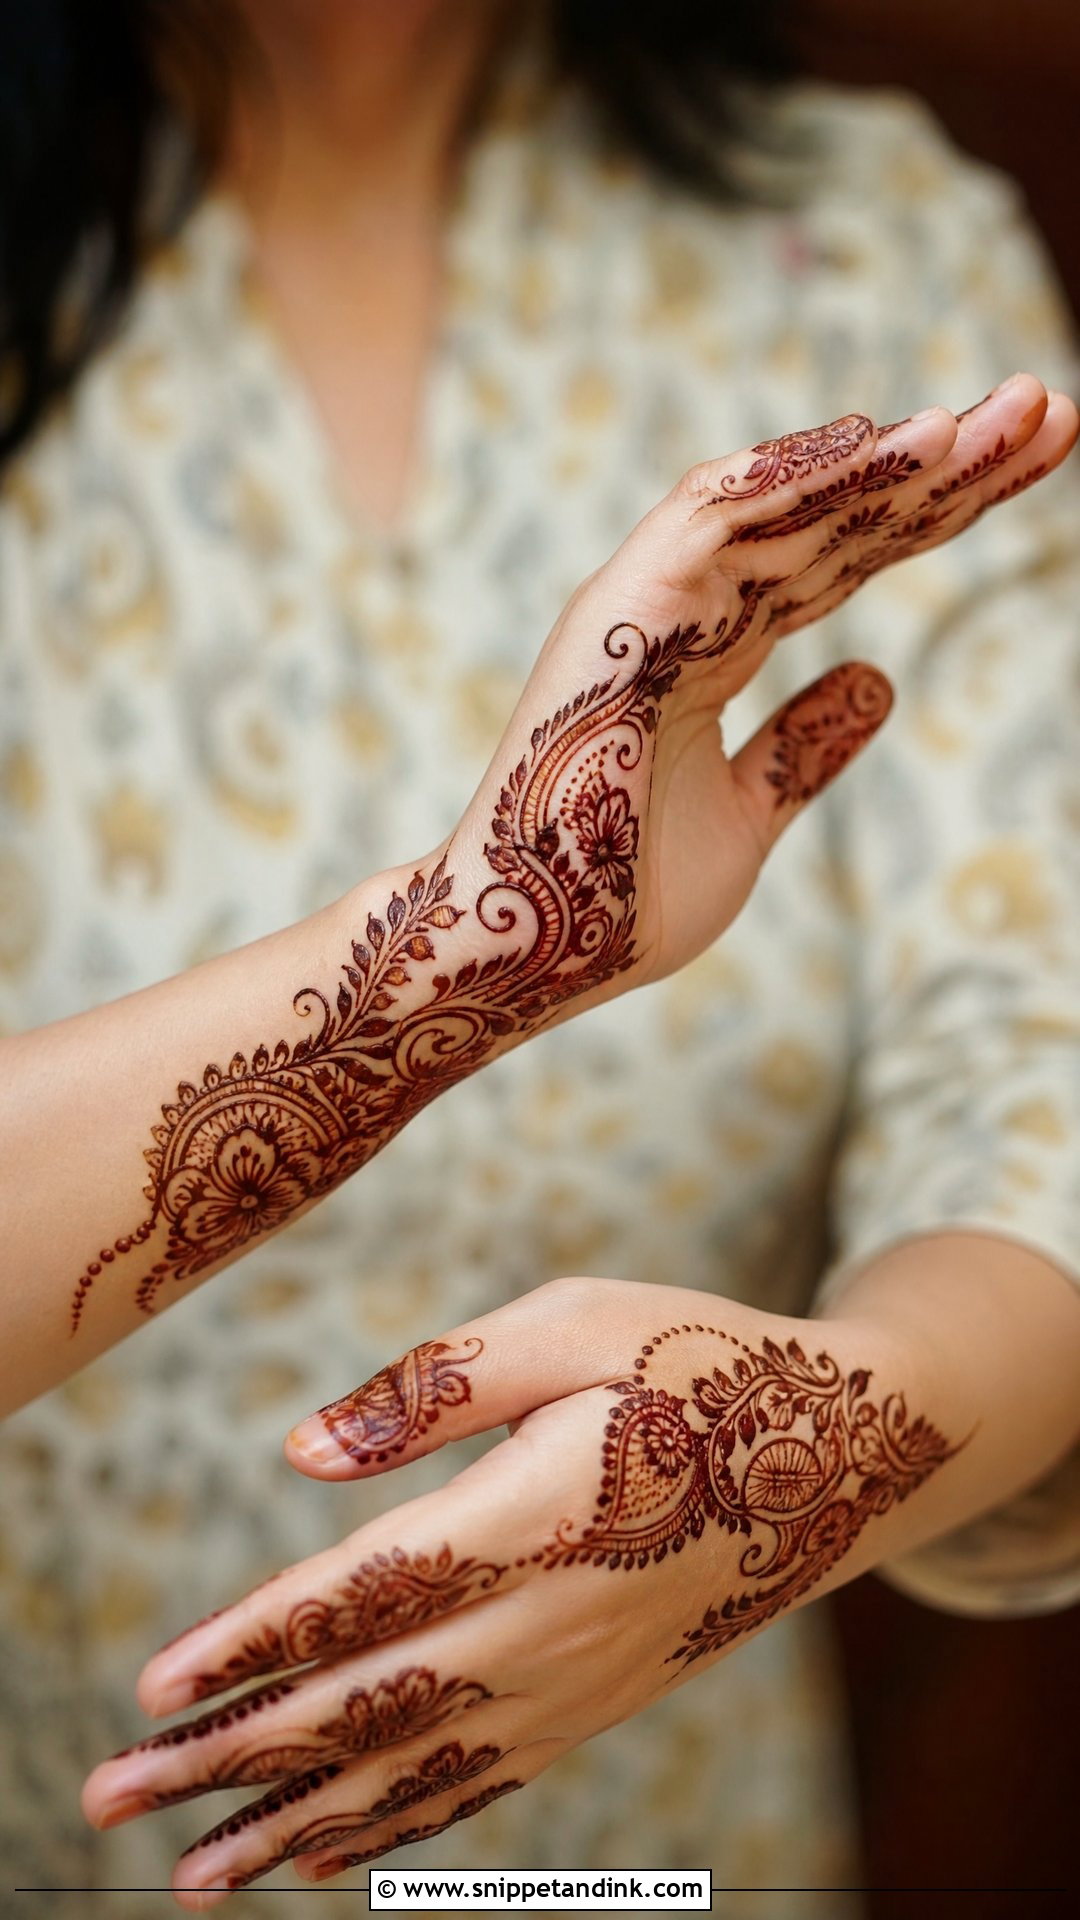
Side-hand mehndi runs flowers, leaves, paisleys or Arabic curves along one edge of the palm or back, from wrist to fingers, and leaves the other side open. That asymmetry is the appeal. It flatters long fingers and narrow hands because the diagonal adds movement. I draw it on the outer edge, the little-finger side, when the client is right-handed and writes a lot, since the inner edge rubs on paper and desks.
26. Kids Normal Mehndi Design
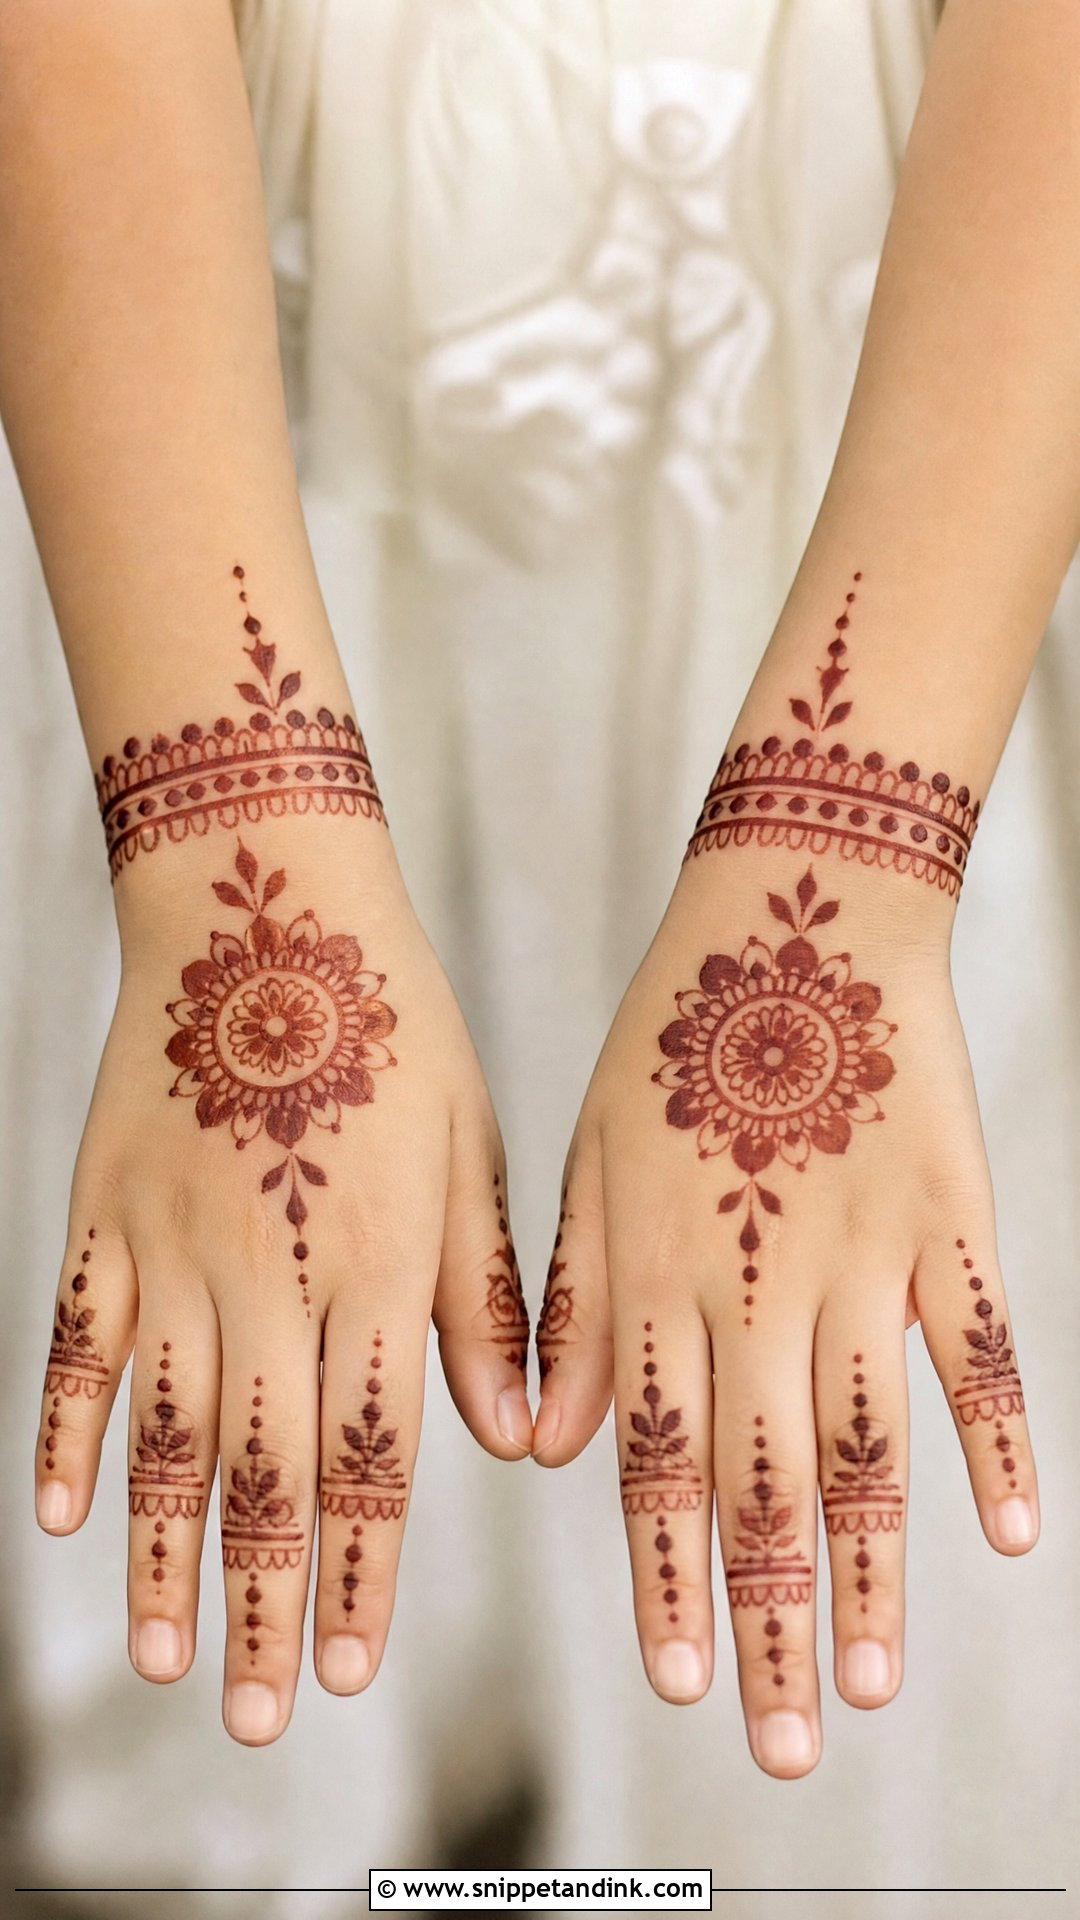
With children, speed beats detail. Small flowers, hearts, a round tikki, stars, leaves or a simple vine are enough, and nothing should go far up the arm. A small palm flower with dotted fingers can be done before they lose patience. I only use natural henna on kids, and I’d ask any artist what’s in her cone before letting her touch a child’s hand; dark instant cones can contain chemicals that cause serious skin reactions. Let them hold their hands still for a few minutes, then let them play.
27. Festival Normal Mehndi Design
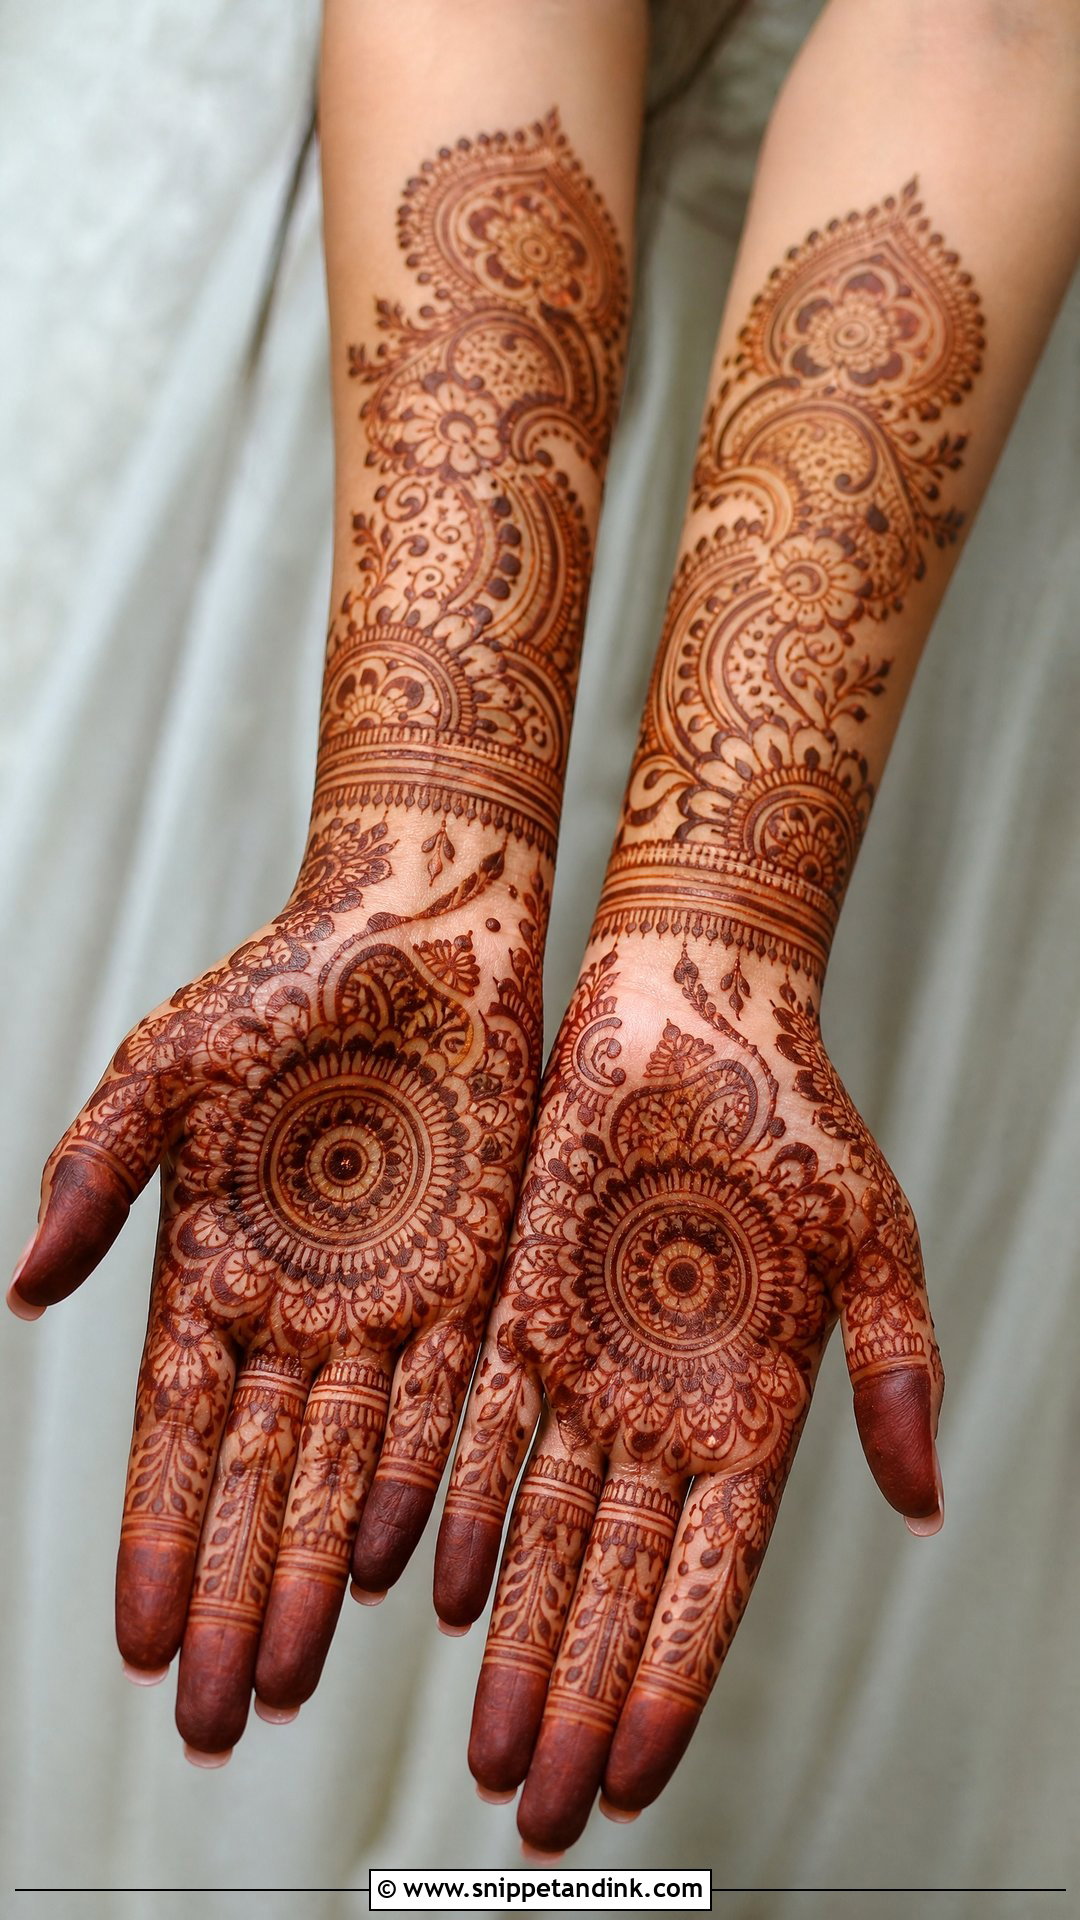
For Eid, Diwali, Karva Chauth, Teej or a family celebration, a fuller palm centre with simple fingers and a light wrist is the balance I aim for. It looks festive without hours in the chair. Front and back together give more impact if you have the time. Clean lines matter even more here because a crowded festive palm muddies as it darkens. Festival mehndi also has to sit with your outfit and jewelry, so I ask what bangles you’ll wear before I decide where the wrist border ends.
28. Wedding Guest Normal Mehndi Design
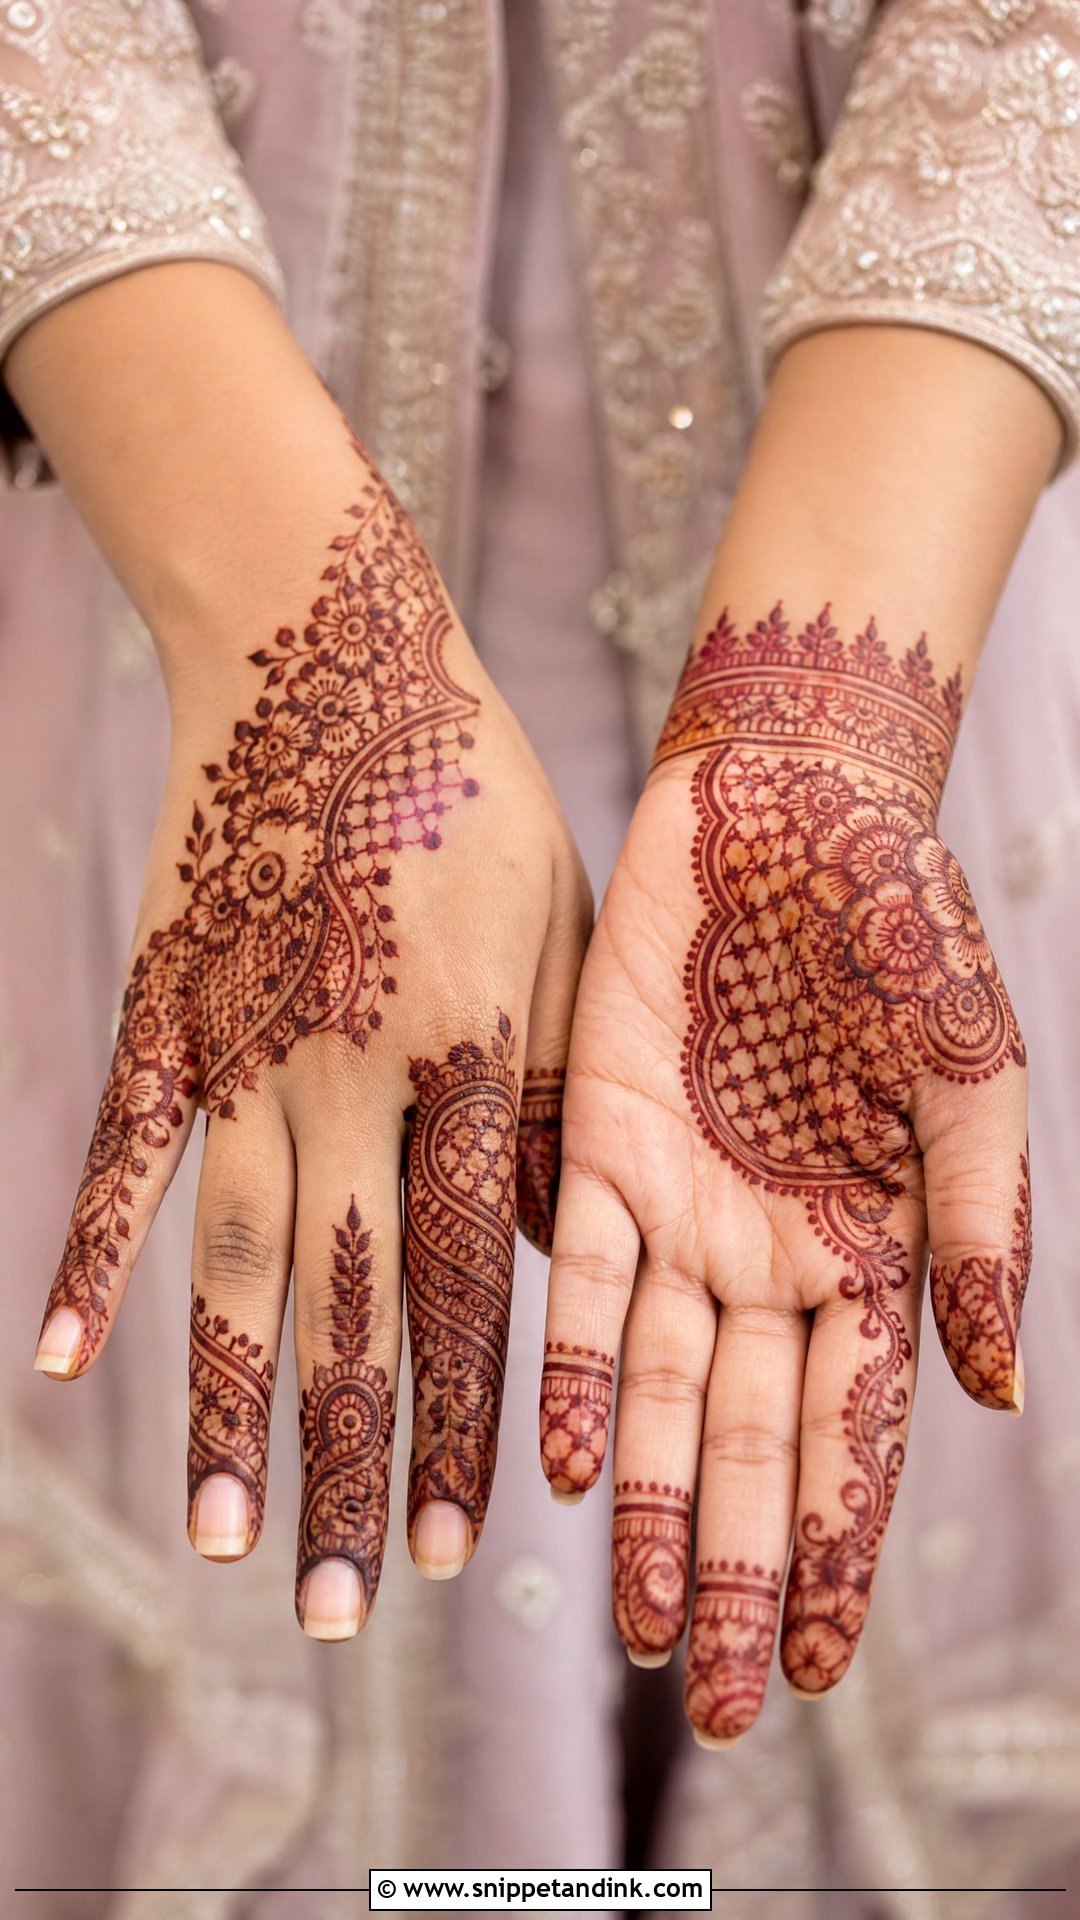
As a wedding guest, your henna should look dressed up but clearly lighter than the bride’s. A floral Arabic trail, an Indo-Arabic back hand or a neat half-hand pattern are my usual suggestions, with a paisley or a jaali patch for a dressier version. Leave plenty of open skin. If you’re attending several functions over a week, apply for the main event and expect a slow fade across the rest; that’s normal, and nobody will notice except you.
29. Small Hand Normal Mehndi Design
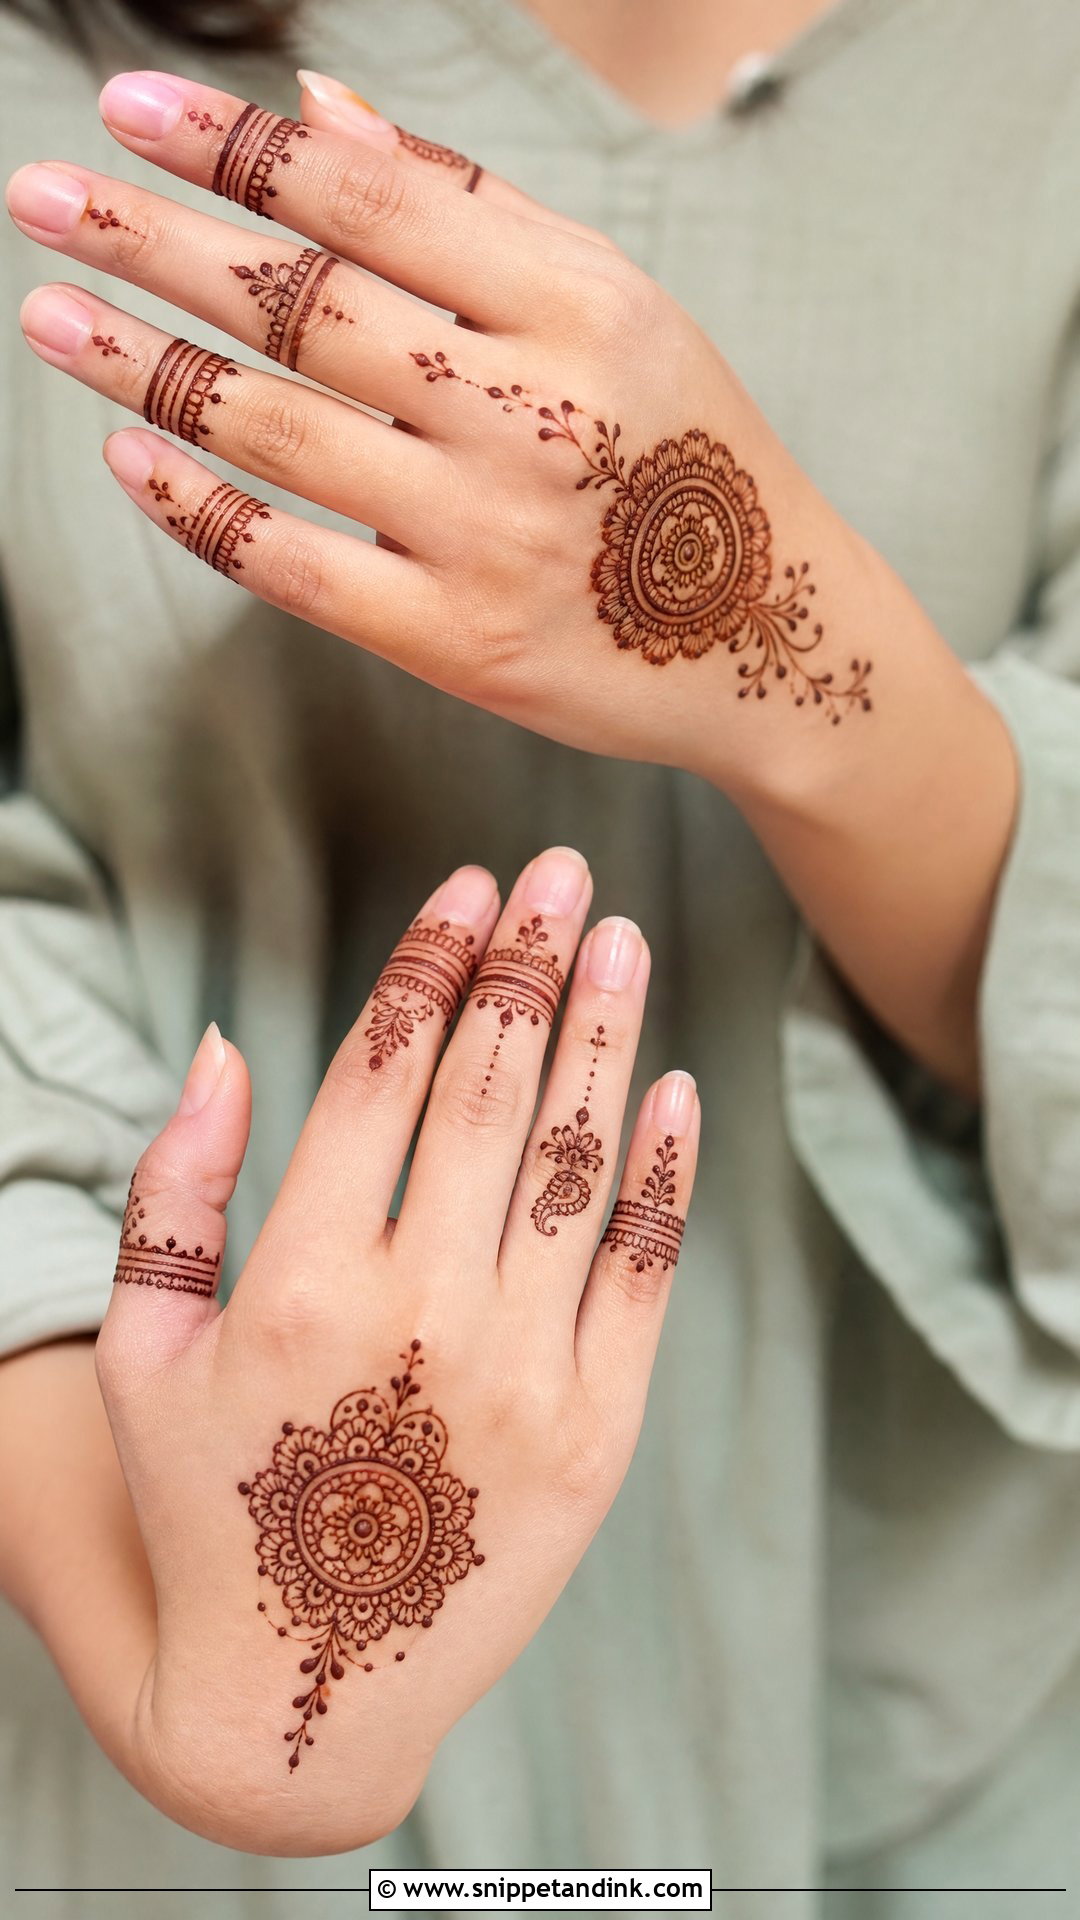
On small hands, proportion is everything. One main motif, a mandala, flower, paisley or a short Arabic trail, with thin finger bands and small dots. A huge palm motif swallows a petite hand, while slim vines and side patterns make it look longer. When I work on young girls or very petite adults, I shrink the motifs rather than the gaps, because the open spaces are what stop it looking crowded.
30. Normal Mehndi Design For Dark Stain
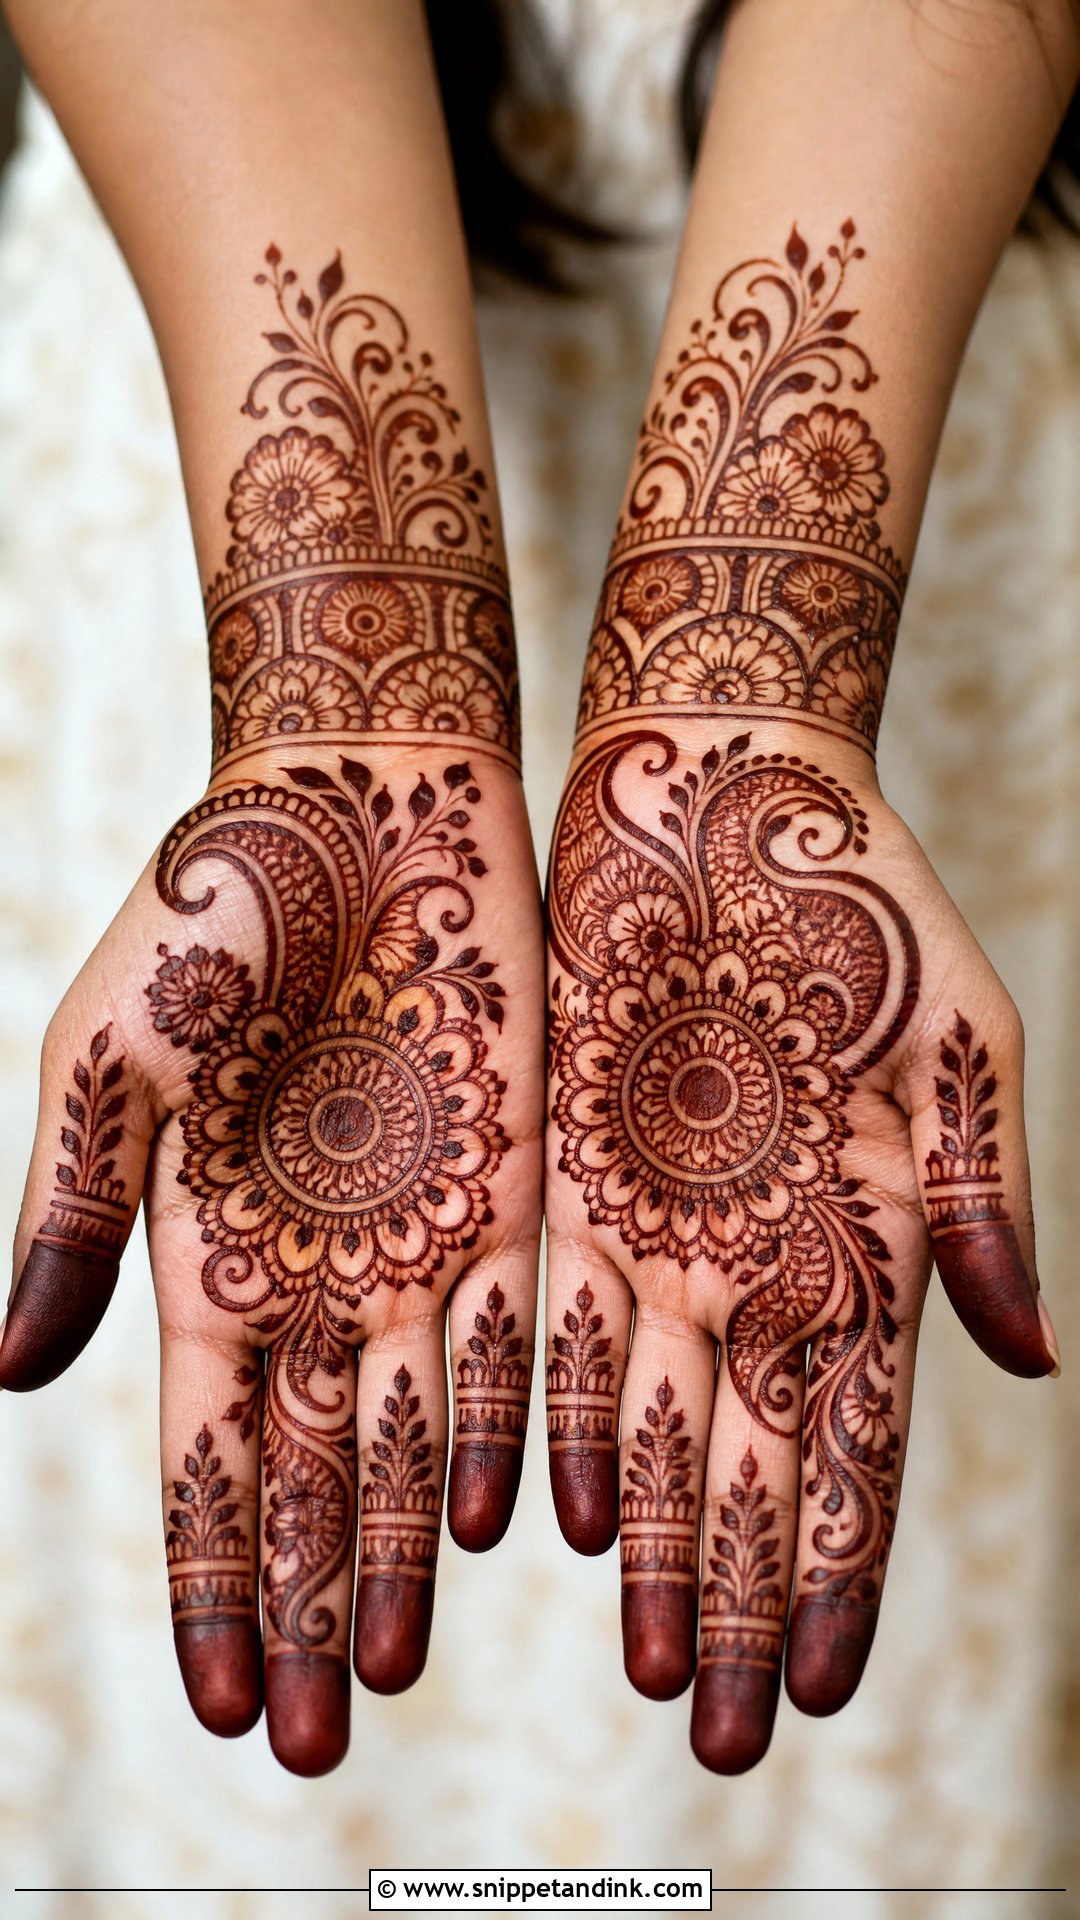
Natural henna stains reddish-brown to deep maroon depending on skin, paste quality and aftercare. Bold lines and open shapes show colour best; thick outlines, open flowers, bold paisleys and clean mandalas outperform tiny crowded detail. After you scrape off the dried paste, keep water away for as long as you reasonably can and let the colour develop over the next day or two. Palms come up darker than the back of the hand because the skin there is thicker and warmer. If you want rich colour from a simple design, this is the layout to choose.
Your Hands Still Have Dishes and Keyboards Tomorrow
Everyday henna has a harder life than bridal henna. Nobody is carrying your plate for you, so the stain meets soap, sanitiser and hot water on day one. Here’s how I tell clients to protect it without changing their routine too much.
- Wear rubber gloves for washing up and cleaning. Detergent and hot water strip colour faster than anything else.
- Go easy on alcohol hand sanitiser for the first few days. It dries the skin and speeds up fading.
- Rub a little balm or coconut oil over the design before a shower or a swim. Chlorine is especially harsh.
- Don’t scrub or exfoliate the area. The stain lives in the top layer of skin and leaves as that layer sheds.
When it starts fading unevenly
A normal design lasts about one to three weeks, and the palms hold out longest. Fingers and the back of the hand go patchy first. If you need it gone faster before work, gentle exfoliation and a warm soak help it fade evenly. I wouldn’t redraw over a half-faded stain, as the old and new colours rarely match and the overlap looks muddy.
Leftover paste
Natural henna paste loses its dye within a day or two at room temperature. Wrap leftover cones and freeze them, then thaw one at a time. A paste that stays usable on a shelf for months is a warning sign, not a convenience.
Simple Henna That Fits Into a Working Week
Everyday mehndi works when it’s balanced: enough pattern to feel festive, little enough that you can still cook and work in it. A palm mandala, a back-hand bracelet, an Arabic trail, a leafy vine or a fuller festival palm can all get you there. Match the design to your hand shape, your time and your outfit. Clean lines and some bare skin will do more for the finished stain than any extra motif.
You'll Like These Ideas:


Leave a Reply