
Most people who sit down in my chair before Eid or a cousin’s sangeet ask for the same thing: something that looks current but still reads as real mehndi. That usually means borrowing from several traditions at once, an Arabic trail here, an Indian filler there, a band of jaali on the wrist. The designs below run from ten-minute finger patterns to full forearm work, and for each one I’ve added what I watch for when I apply it and who I’d steer elsewhere. Hand shape matters less than you’d think; spacing and placement do most of the flattering.
Work Backwards From the Day You Want the Darkest Colour
Natural henna comes off the skin bright orange. Over the next 24 to 48 hours it oxidises and deepens to reddish brown or maroon. So the colour you see at the party depends on when you had it applied, not just on the design. I tell people to book their mehndi one to two days before the event whenever they can.
The design you pick also decides how long you sit. Here’s roughly how I’d plan it:
- Finger bands, a bracelet or a single Arabic trail: fifteen to thirty minutes per hand, and you can do this the evening before.
- Half-hand or Indo-Arabic coverage: closer to an hour for both hands, plus drying time before you can use them.
- Full Indian or bridal hands and forearms: several hours, so book it two days out and clear your evening.
Where the design sits matters too. Palms and fingertips stain darkest, the back of the hand comes up lighter, and the forearm lighter still. If you want a dark result but only have time for a small design, put it on the palm.
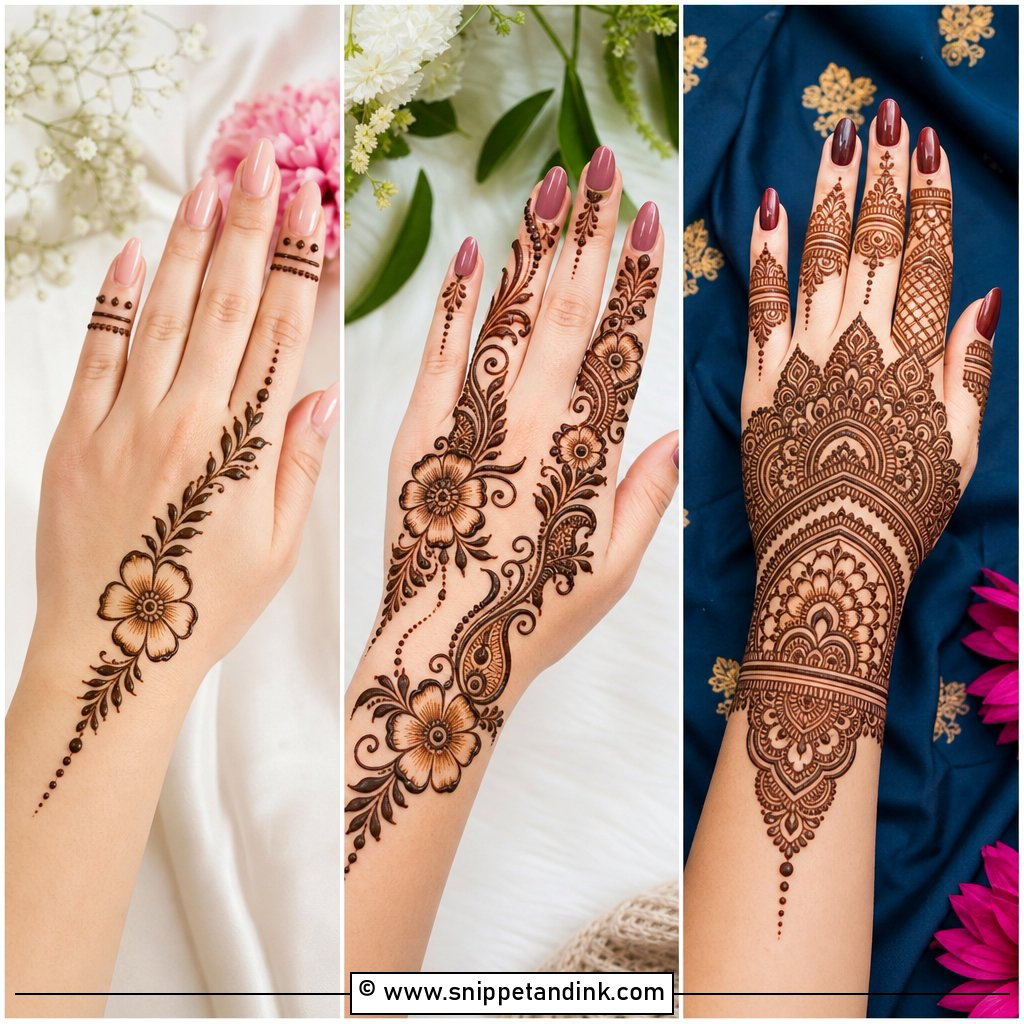
1. Simple Arabic Mehndi Design
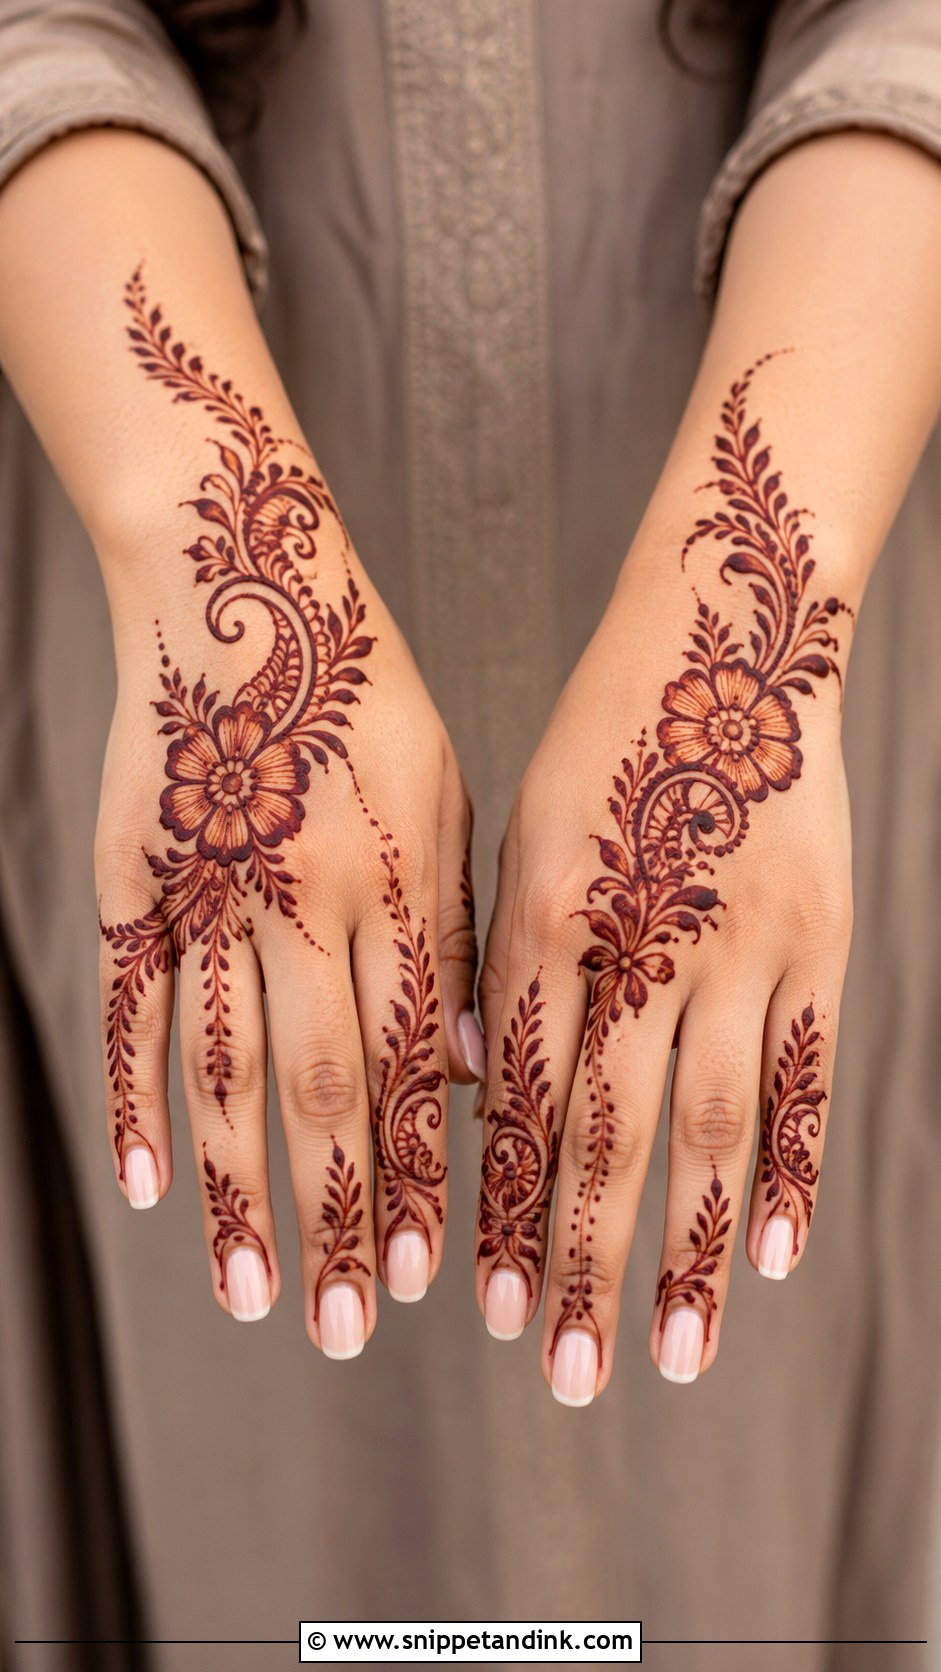
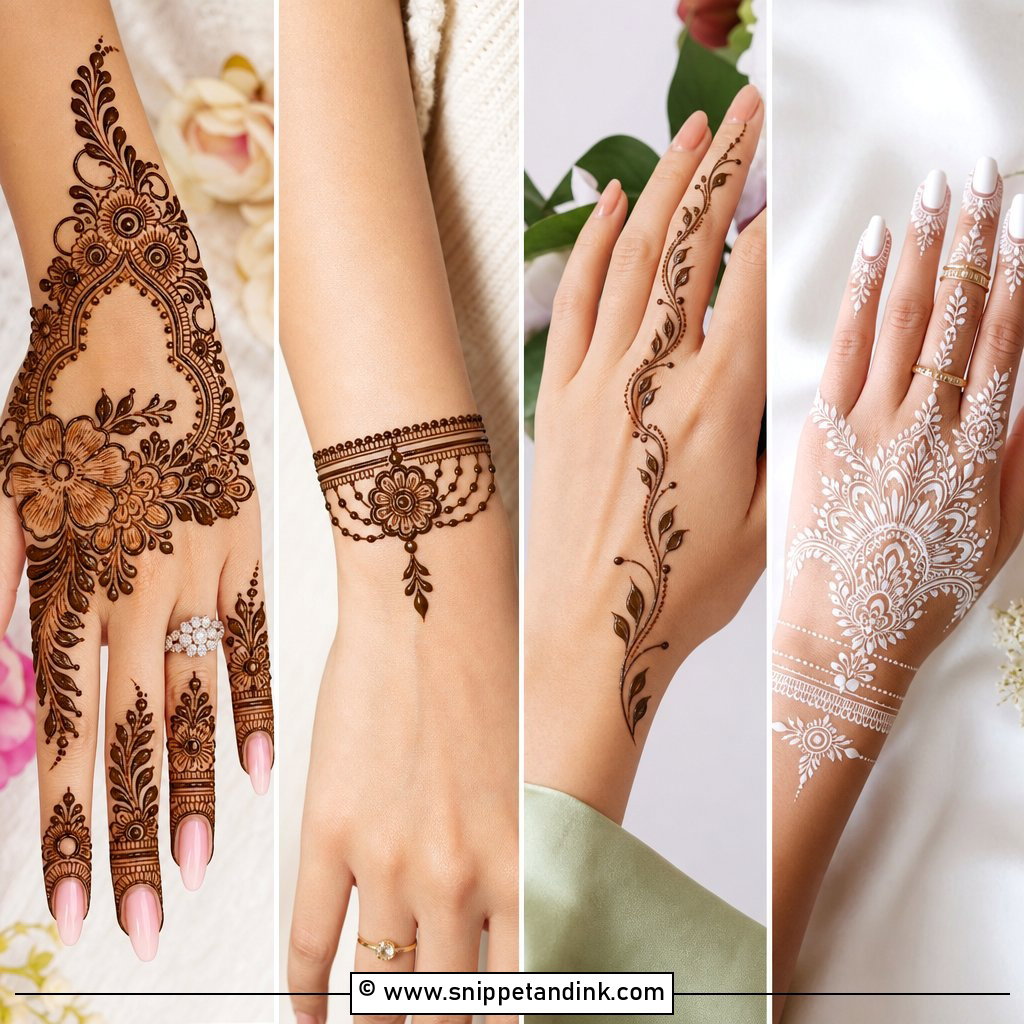
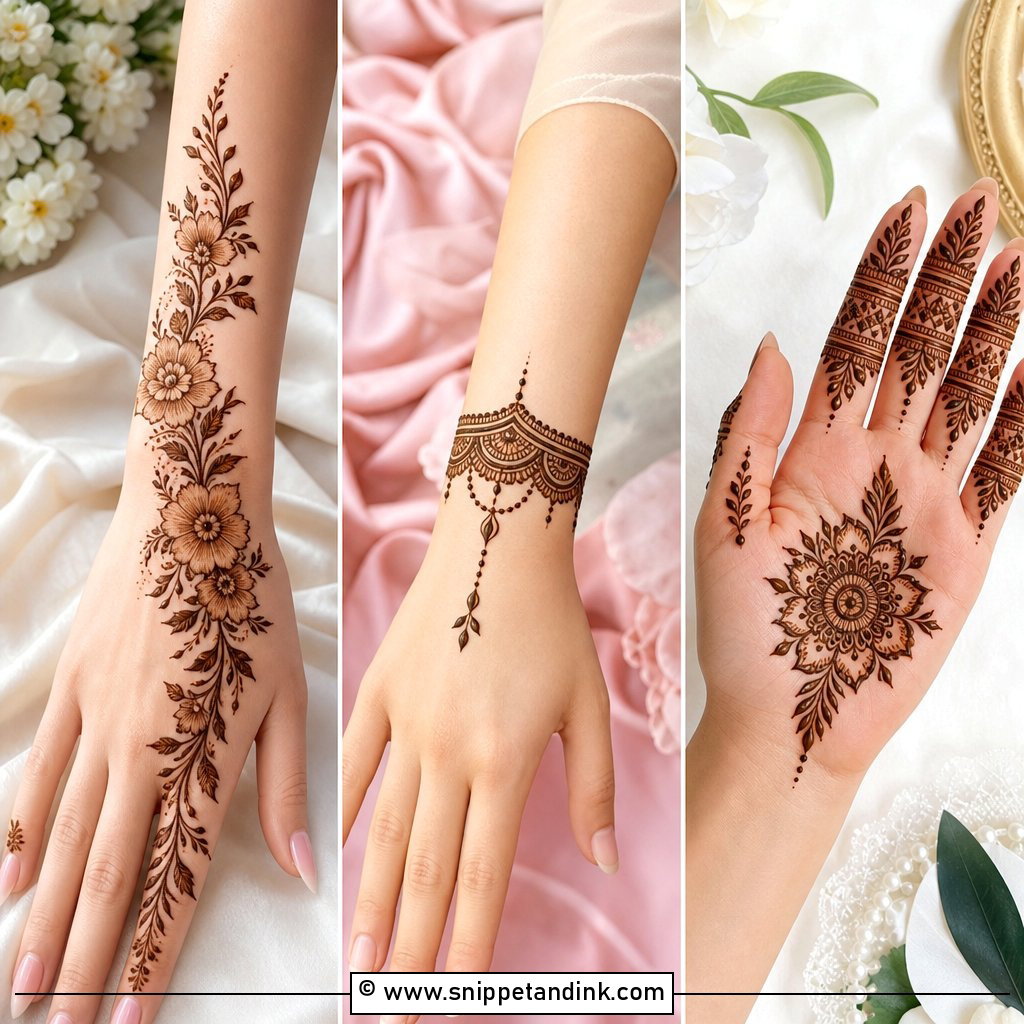
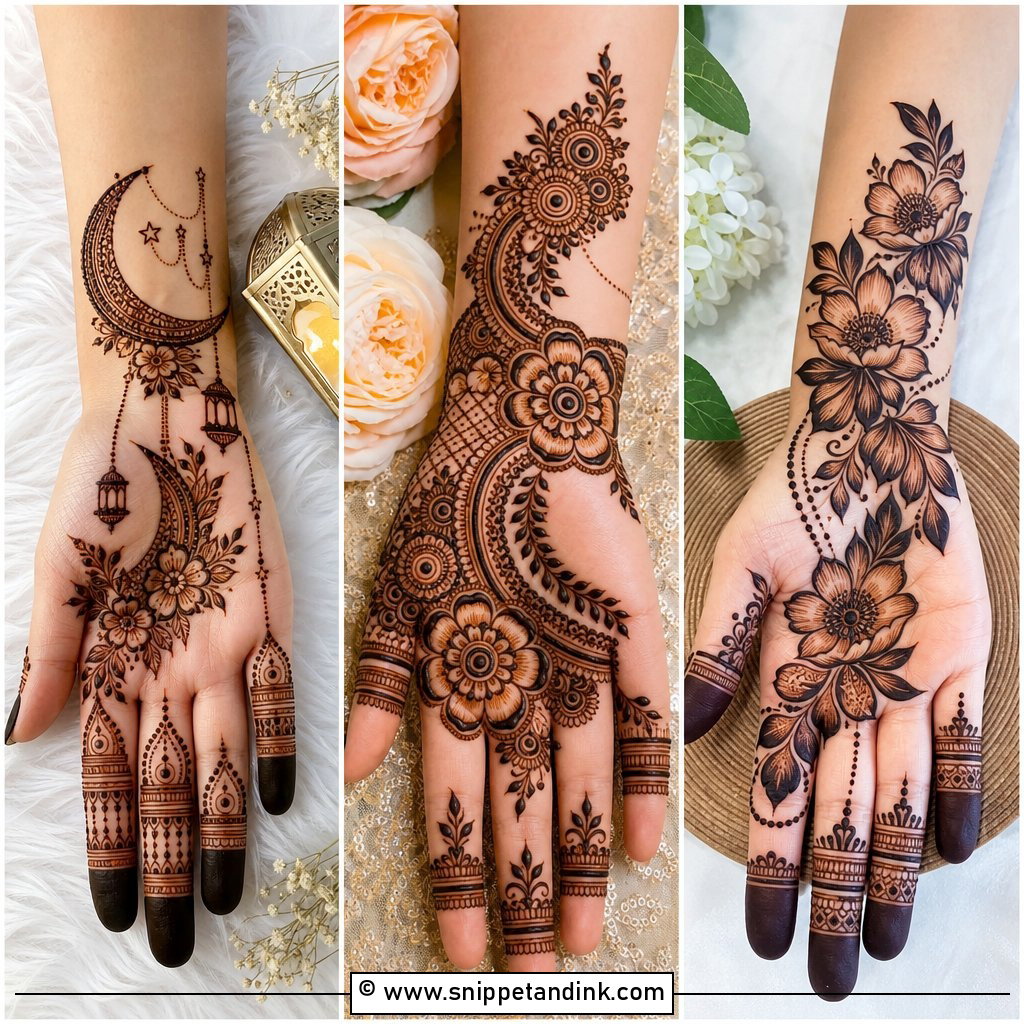
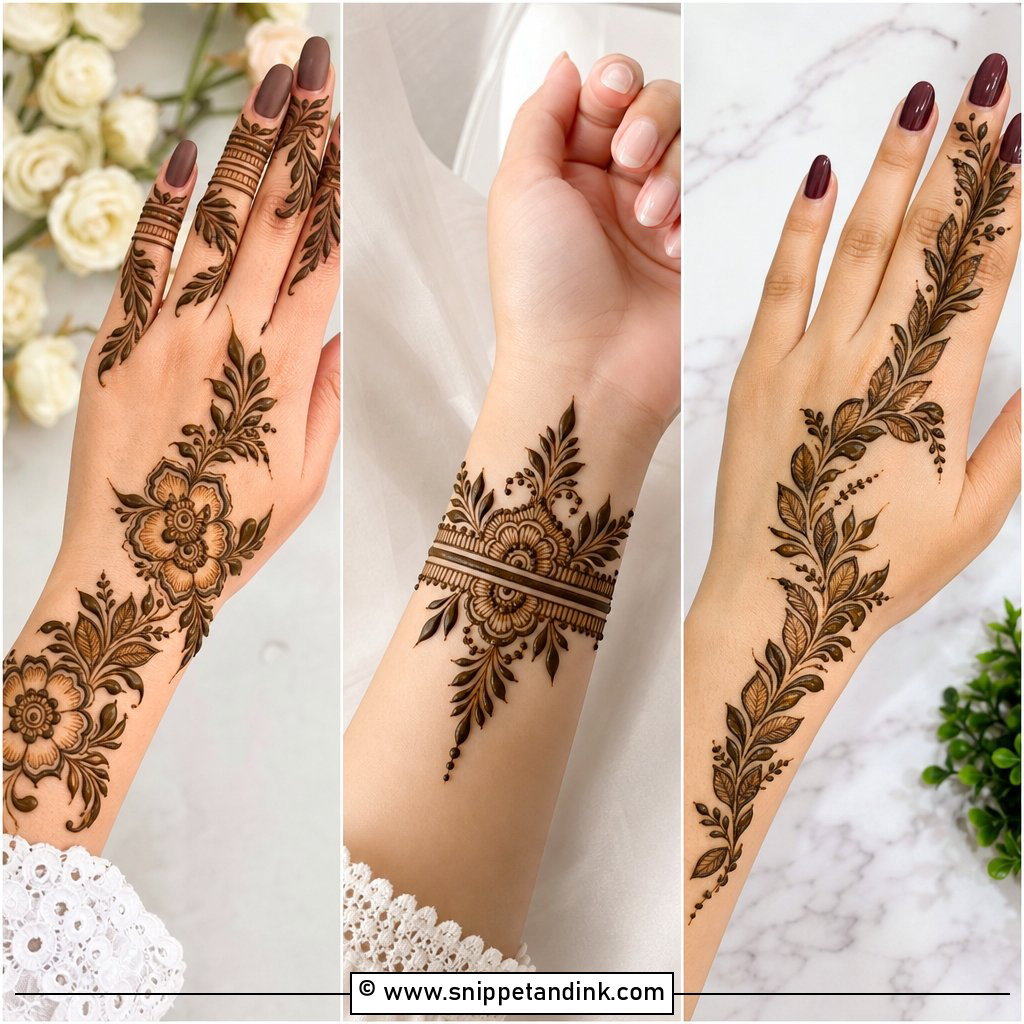
This is the design I reach for when someone has twenty minutes and a party that evening. I start a large flower near the wrist bone and let the trail run diagonally toward the index or middle finger, which follows the natural line of the hand when it’s relaxed. Bold outlines with very light inner detail are the trick, because thin fillers on the back of the hand stain paler than the palm and can almost vanish. Beginners can attempt this one at home with a decent cone.
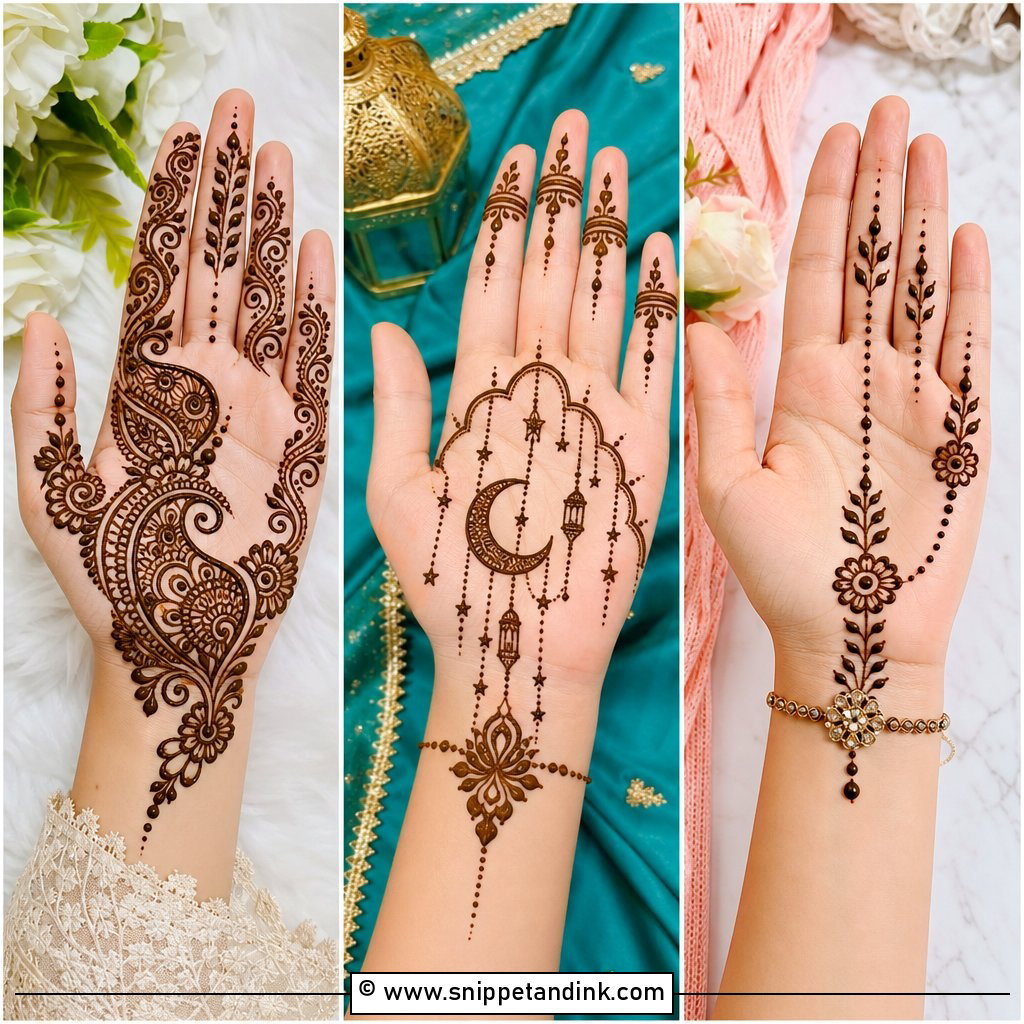
2. Front Hand Mandala Mehndi Design
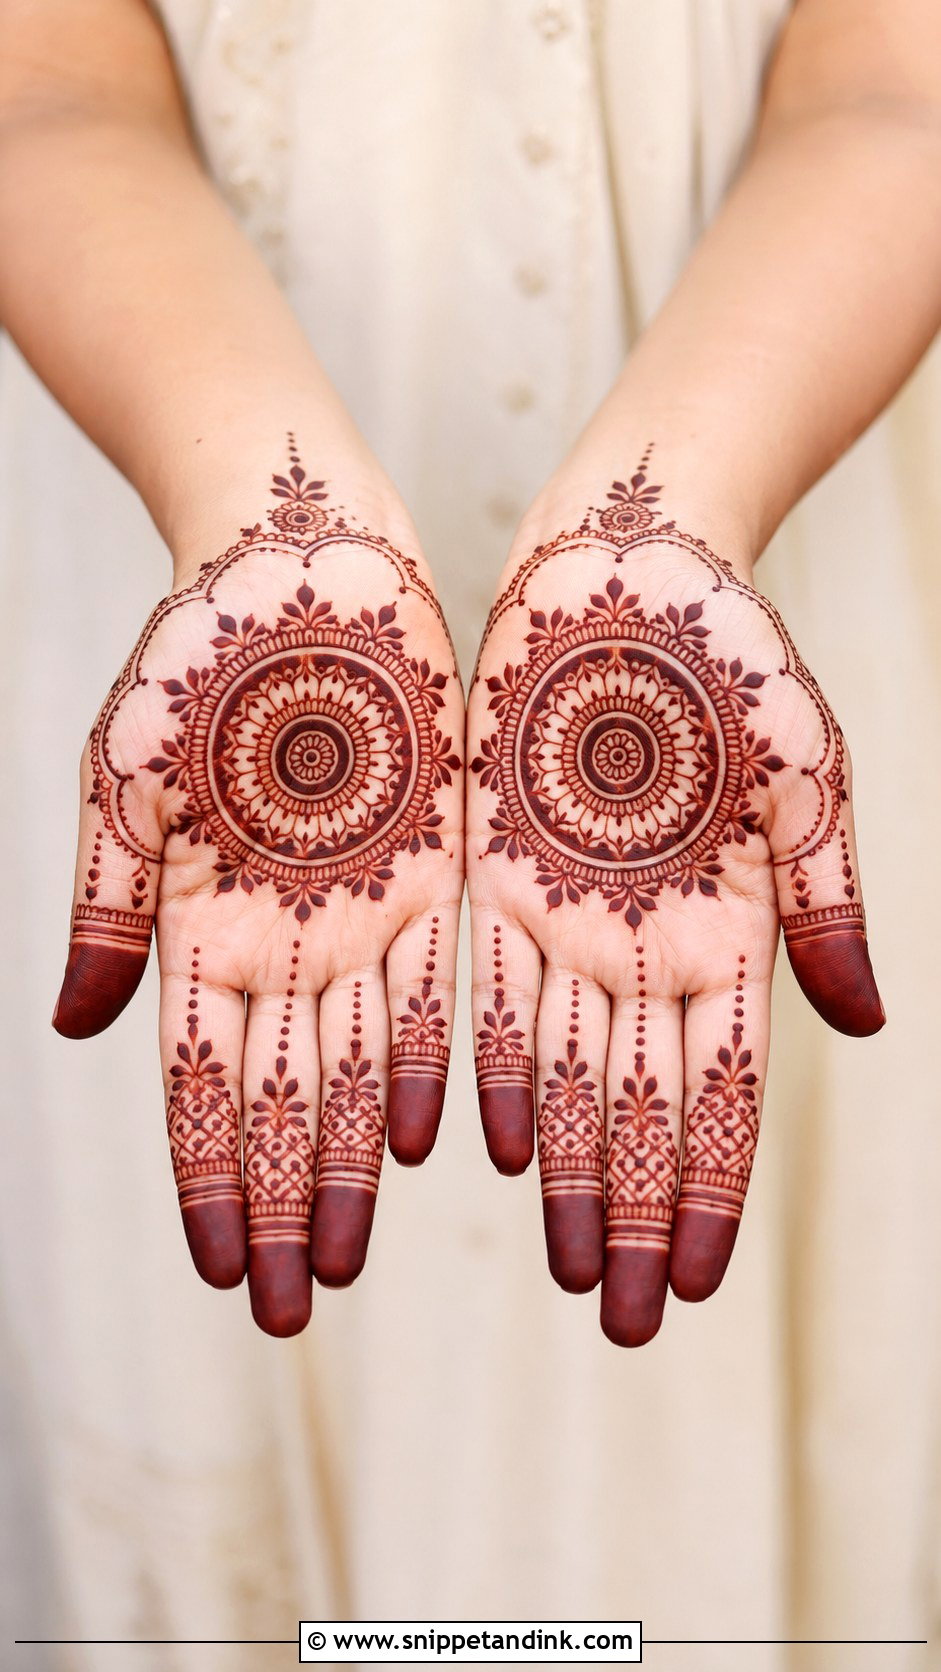
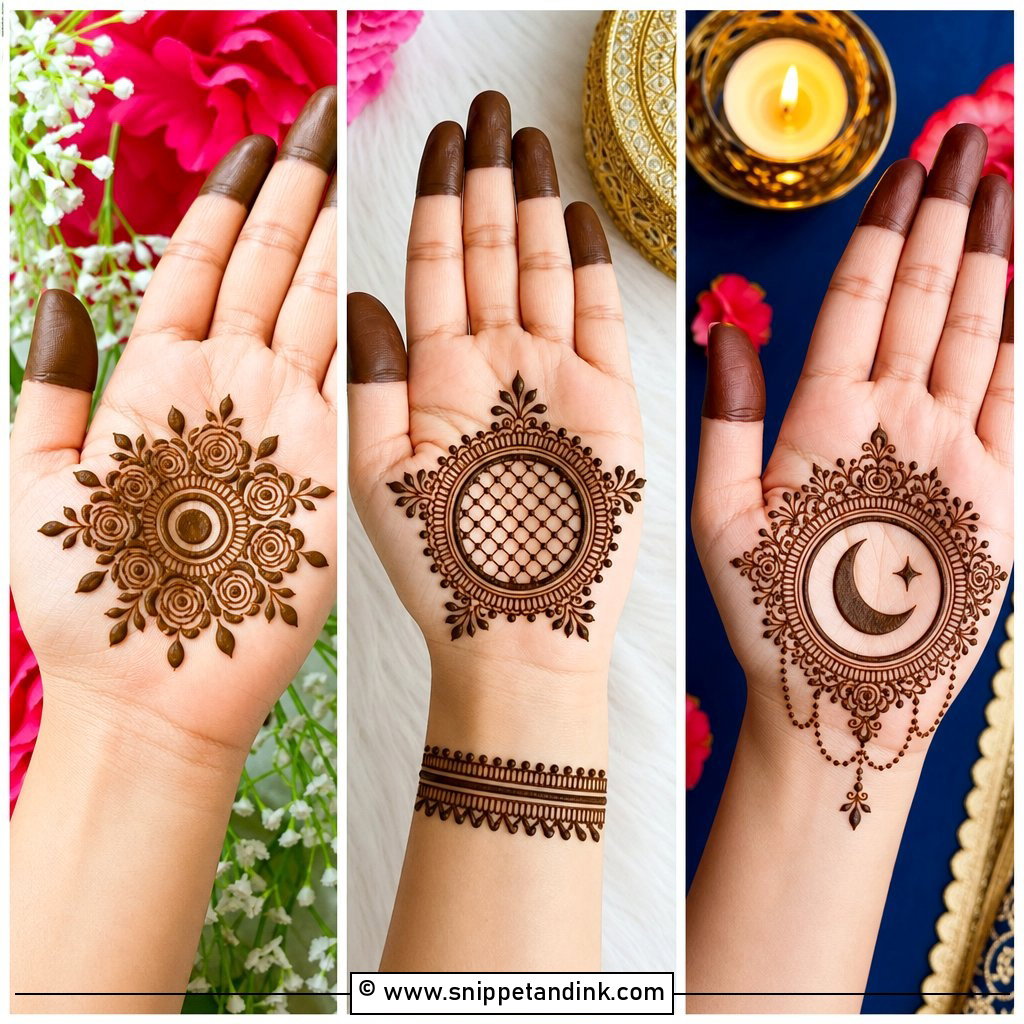
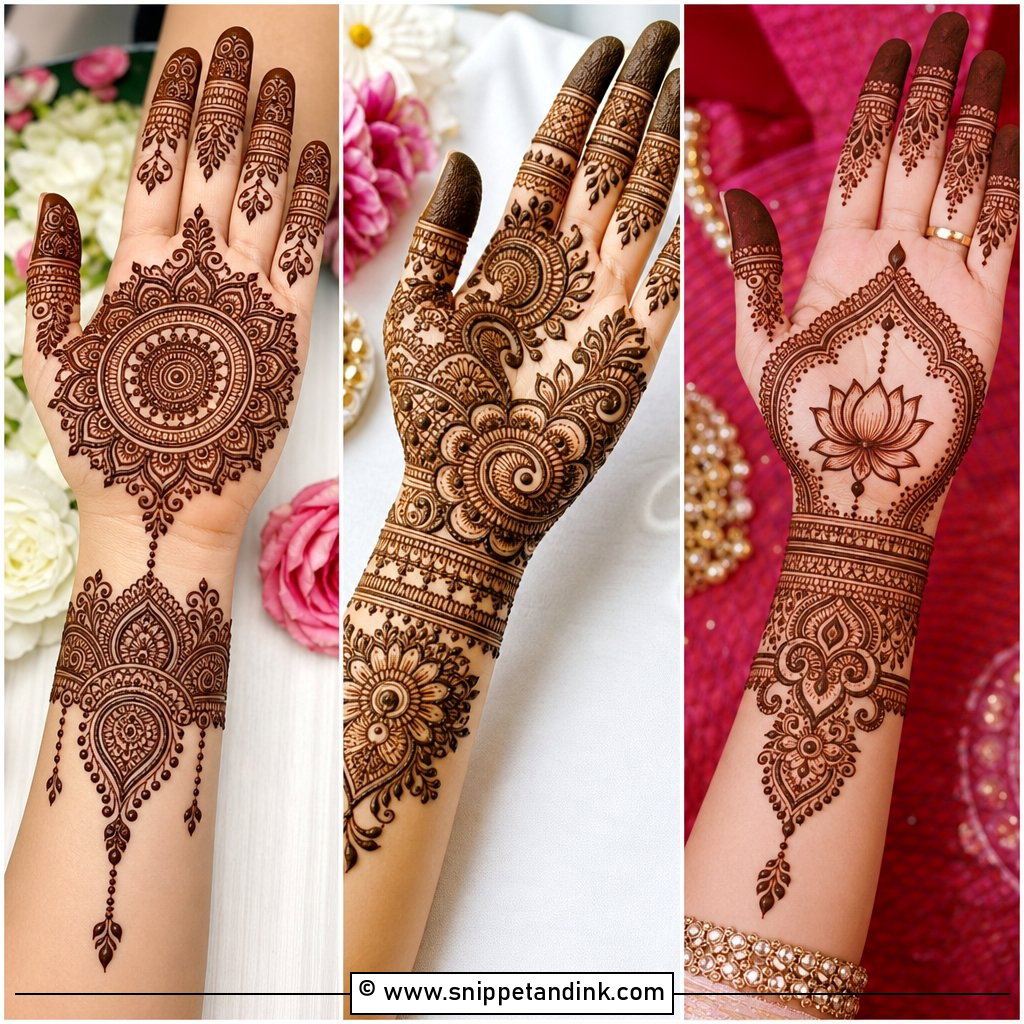
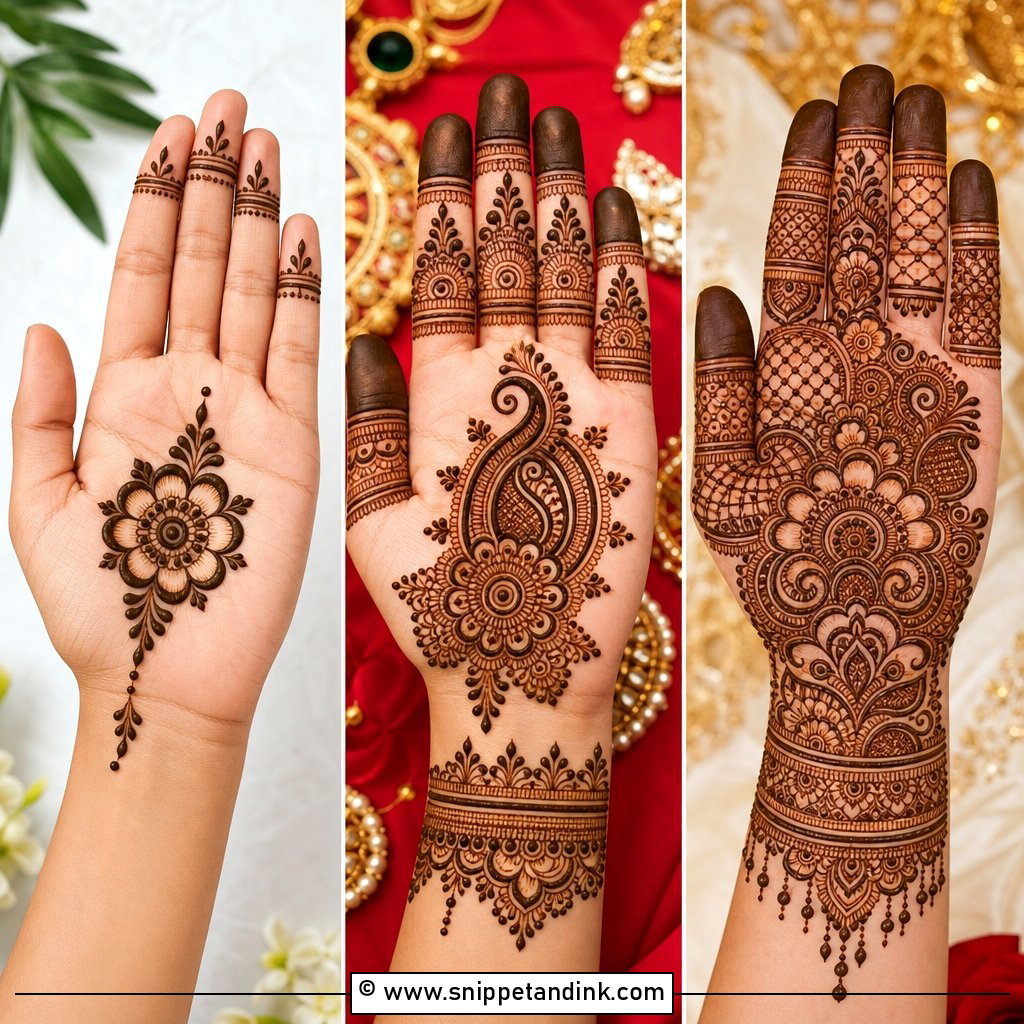
A palm mandala lives or dies on its centre point. I find the middle by having the client cup her hand slightly, since the flat-hand centre sits a little too close to the fingers once the hand is at rest. Then I build outward in rings of petals and dots, leaving a hairline of bare skin between each ring so they don’t bleed together as the paste dries. Fingers get light bands only. Small hands take a smaller mandala, not a squeezed one.
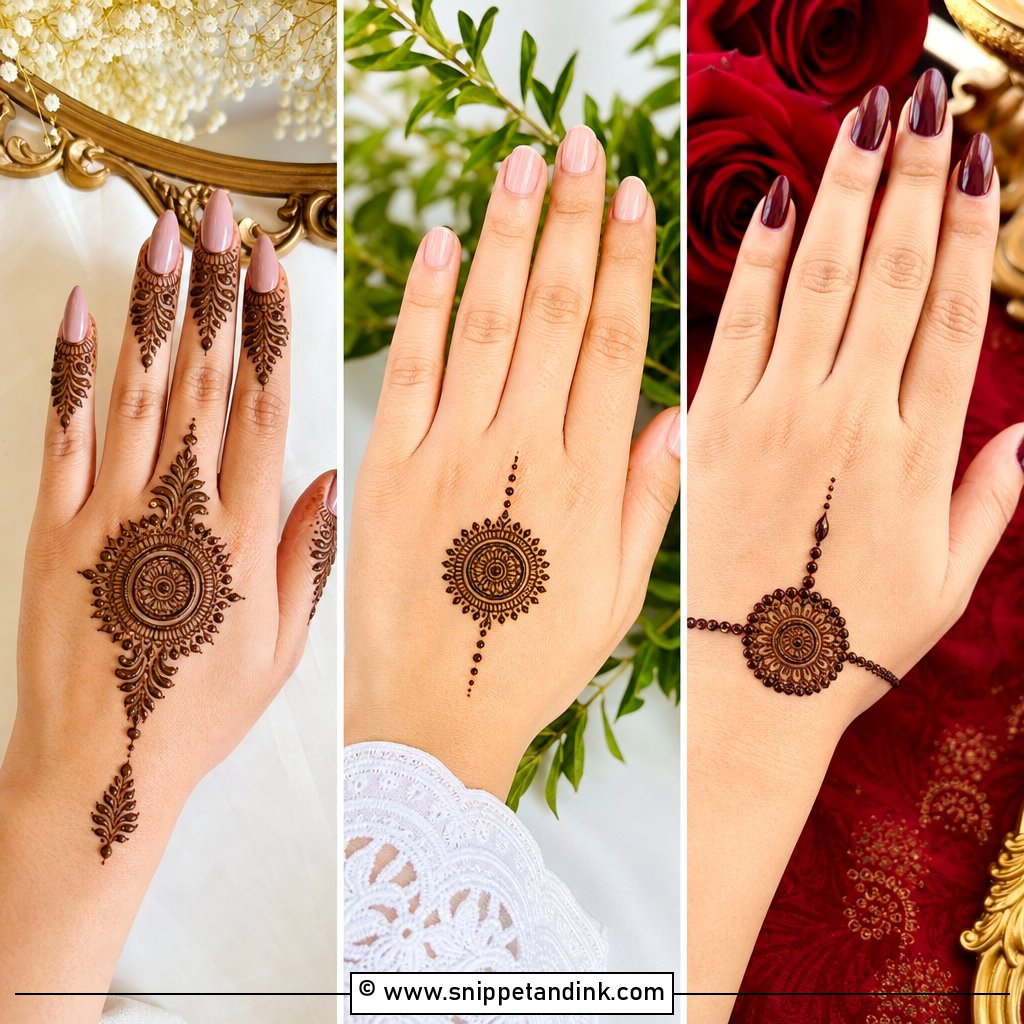
3. Back Hand Bracelet Mehndi Design
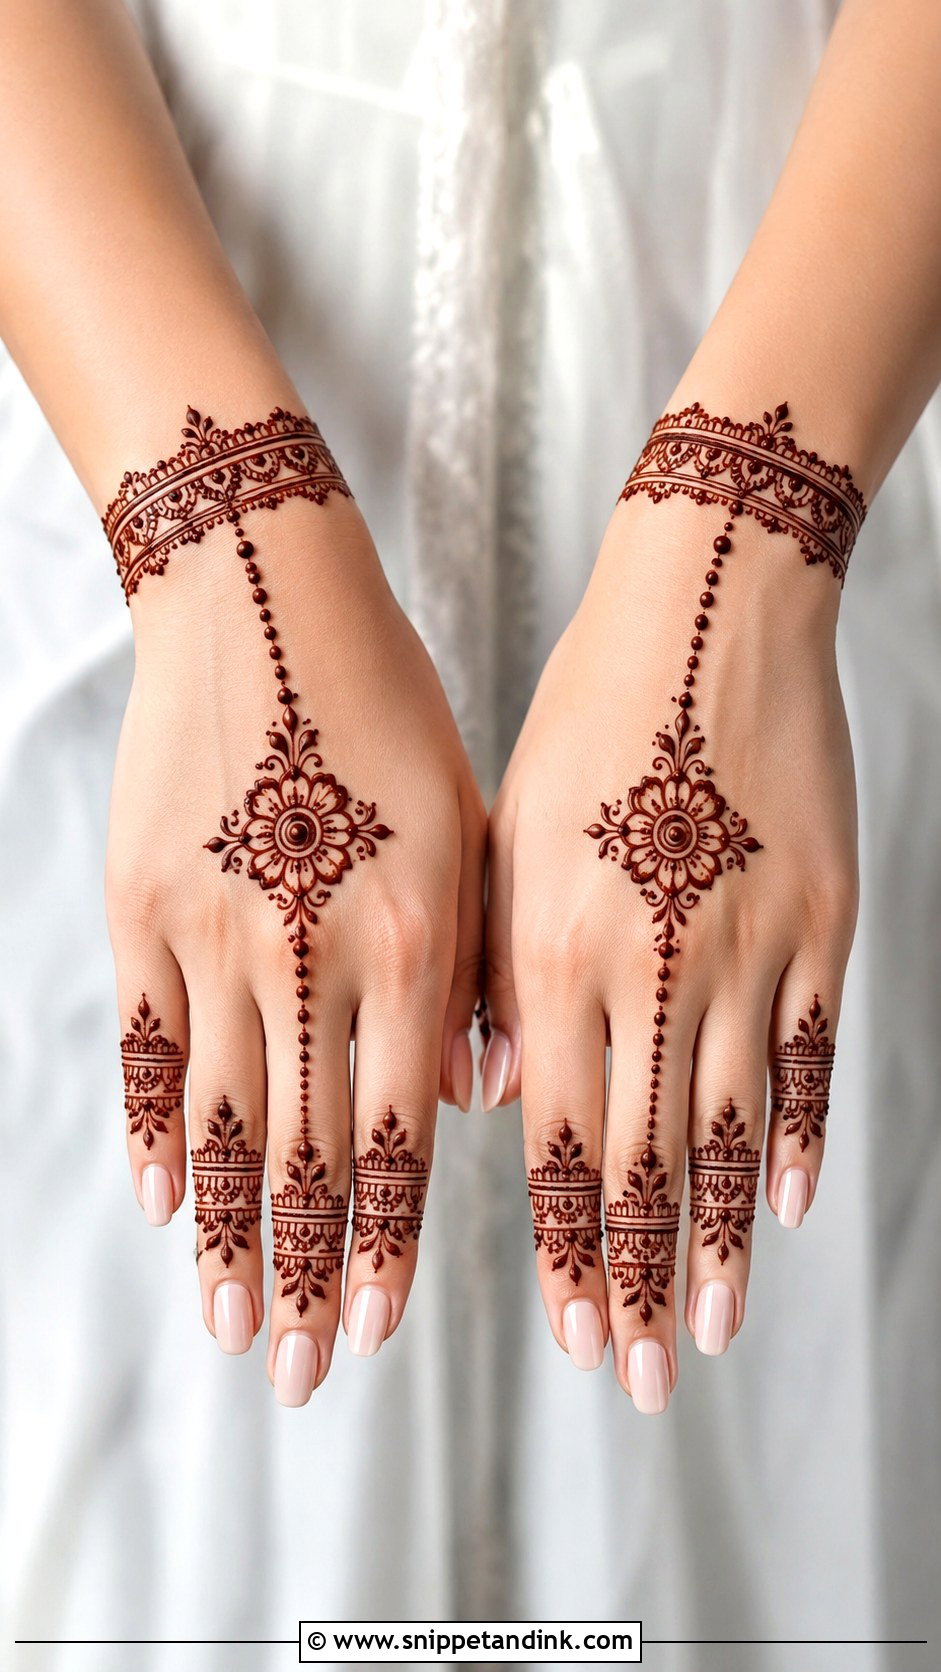
Clients love the bracelet look because it reads as jewelry from across a room. The cuff has to sit on the narrow part of the wrist, above the bone, or it distorts every time the hand bends. From there I run one chain to the middle or ring finger. My one warning: a cuff drawn with shaky, uneven thickness looks worse than no cuff at all, so I pull that line slowly in one pass and keep it slightly bolder than the trail.
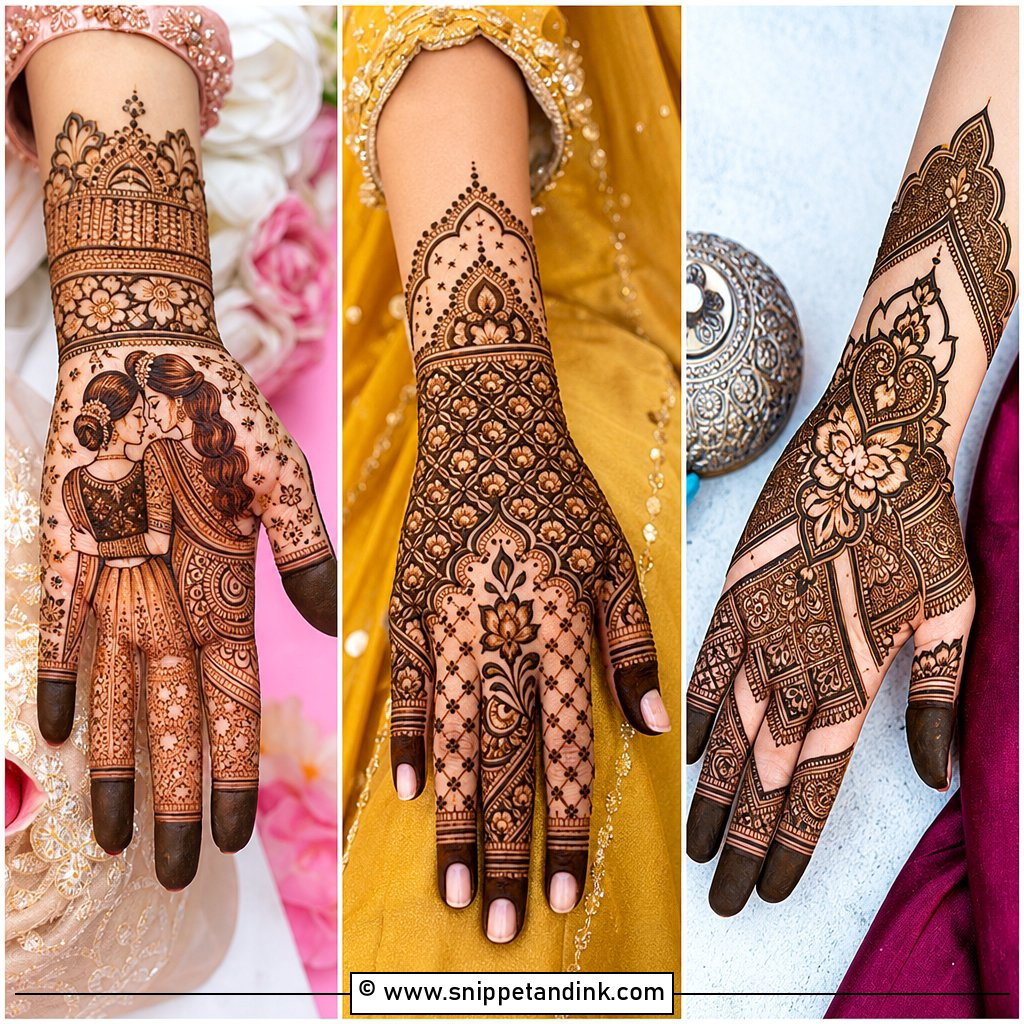
4. Full Hand Indian Mehndi Design
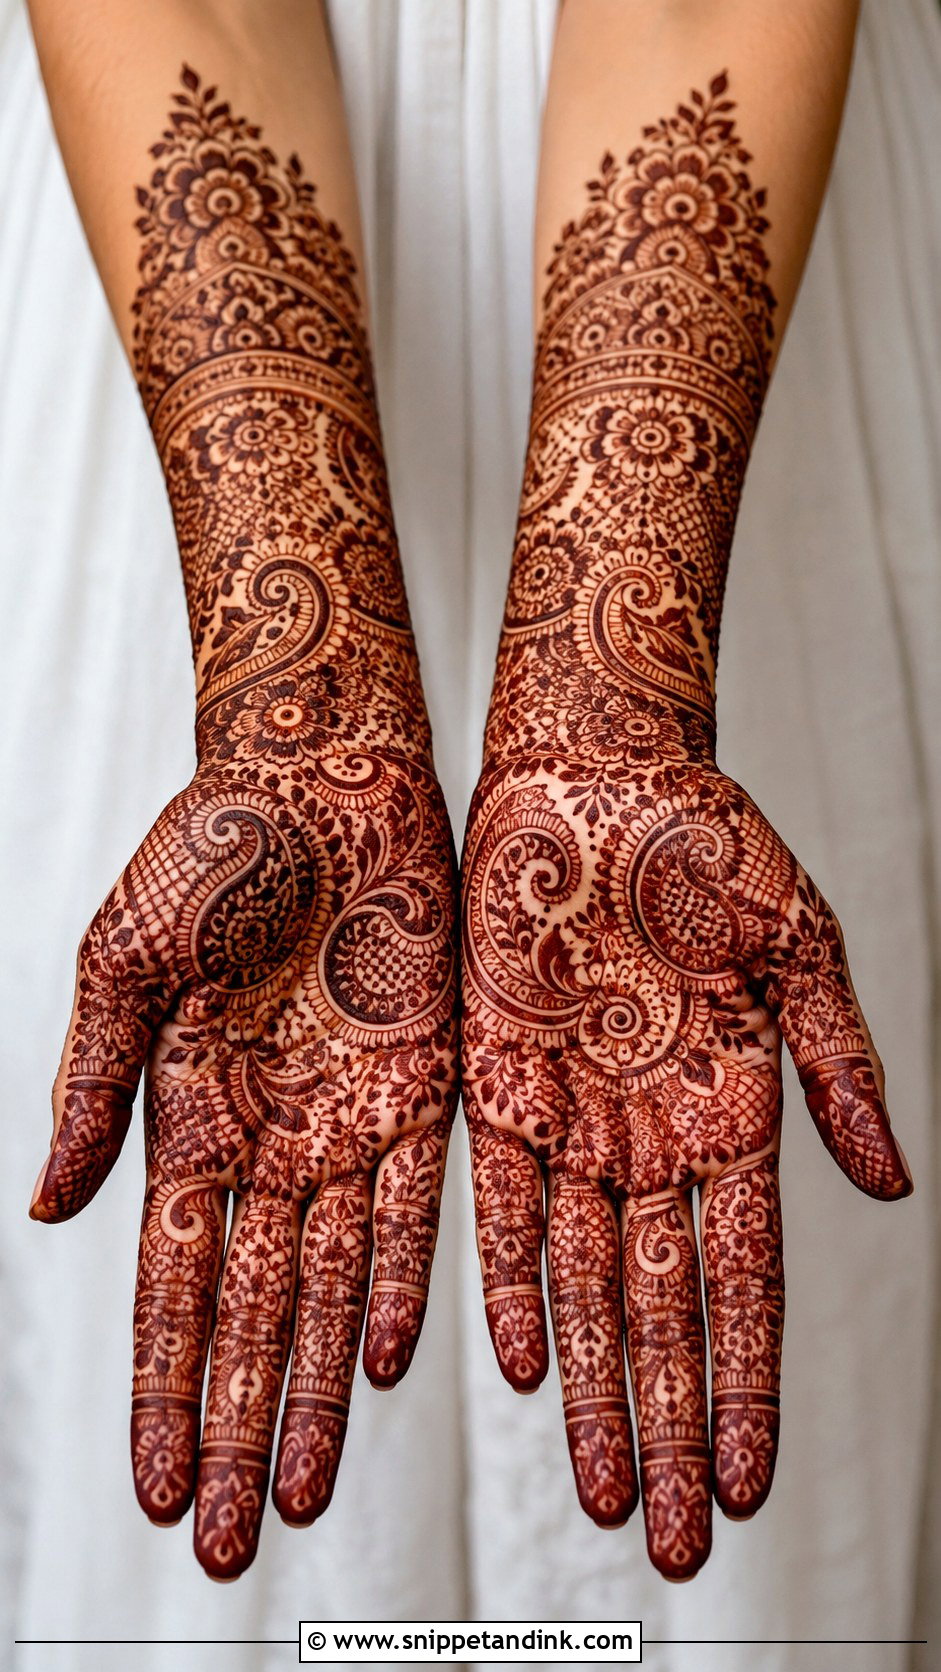
Full Indian coverage takes me well over an hour per side, and the client has to sit still for every minute of it. Paisleys, peacocks and grid fillers run from fingertips to forearm. What separates a neat full hand from a muddy one is blocking: I divide the hand into zones and give each zone a different filler, rather than repeating the same dots everywhere. Fine strokes need a steady, fresh cone, so I swap cones halfway if the paste starts to stiffen.
5. Modern Finger Mehndi Design
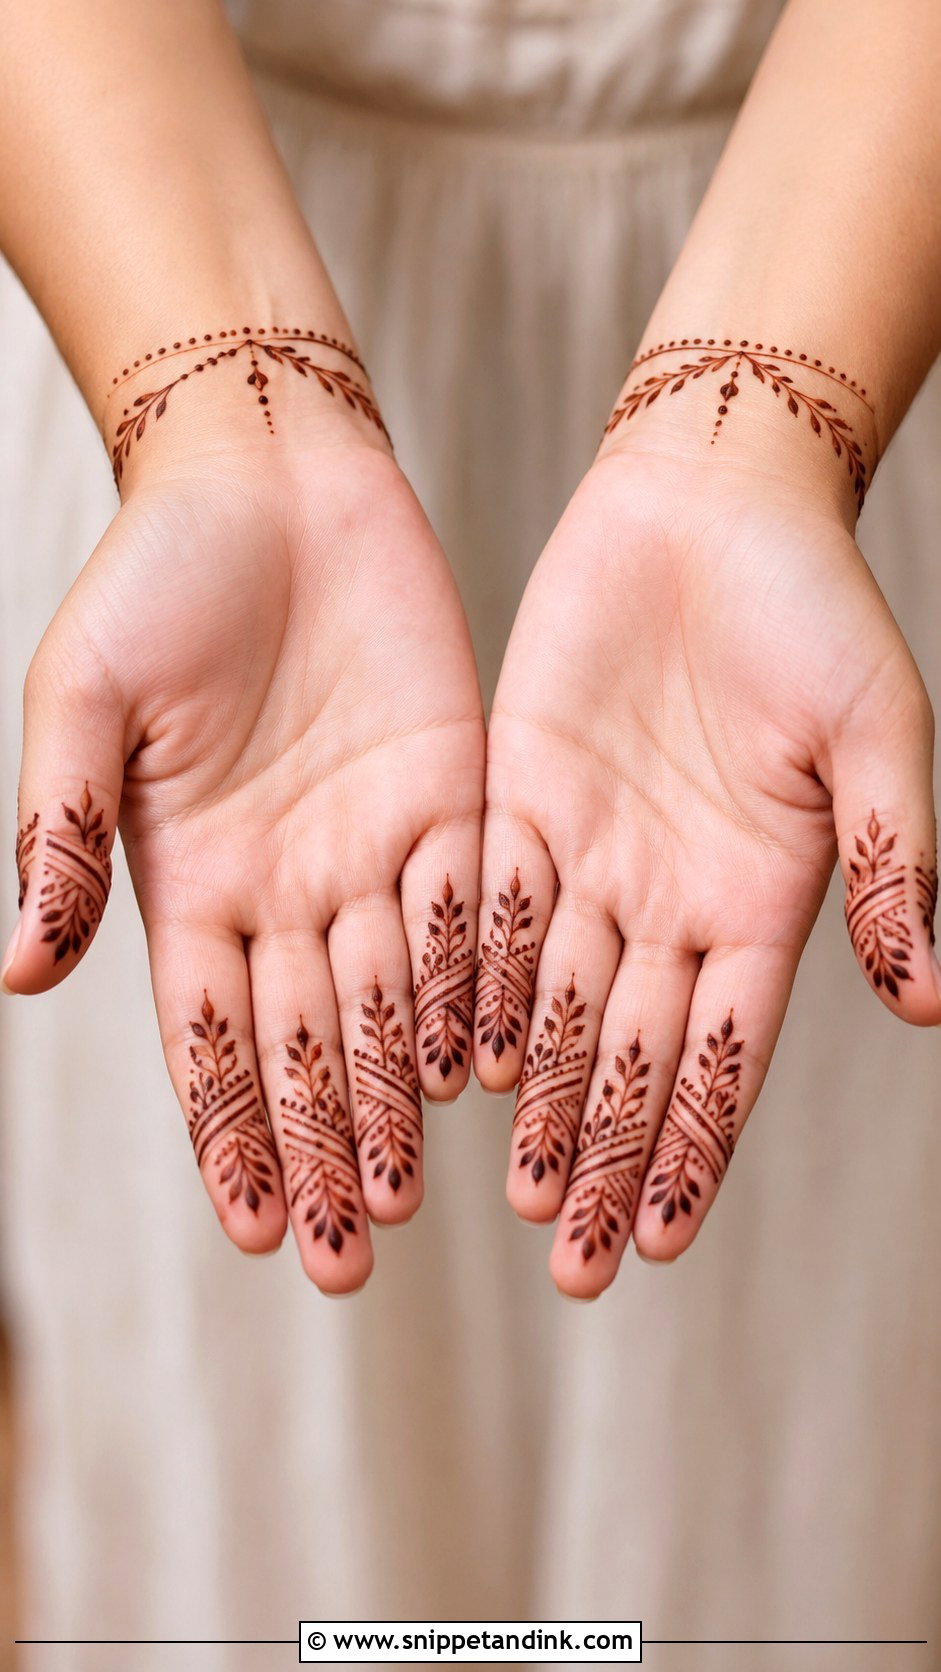
Finger-only mehndi is quick, and it’s honest about where henna stains darkest: fingertips and the inner finger pads take colour faster than almost anywhere else on the body. I’ll often give each finger a different band, leaves on one, half-moon tips on another, and leave the palm bare or add a tiny accent by the thumb. Keep the gaps between bands equal. Uneven spacing is the first thing people notice once the stain comes up.
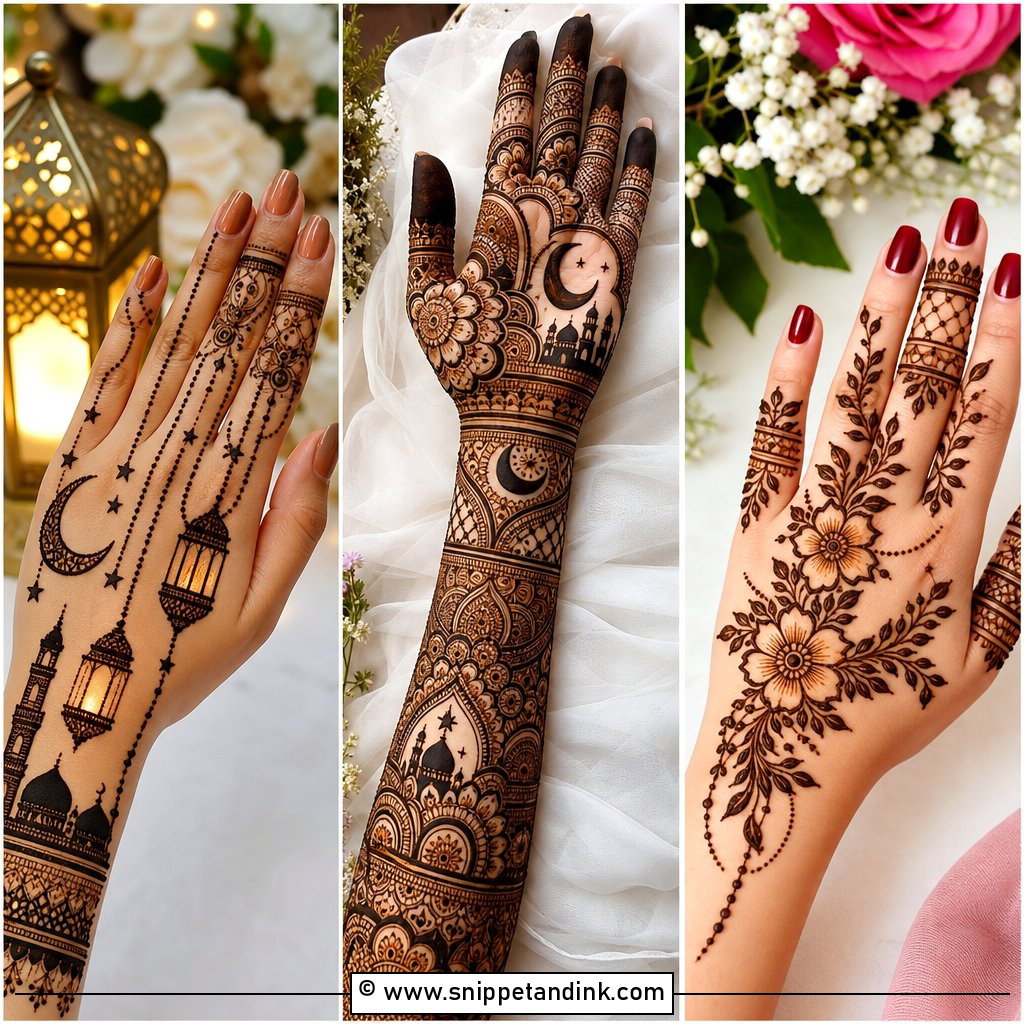
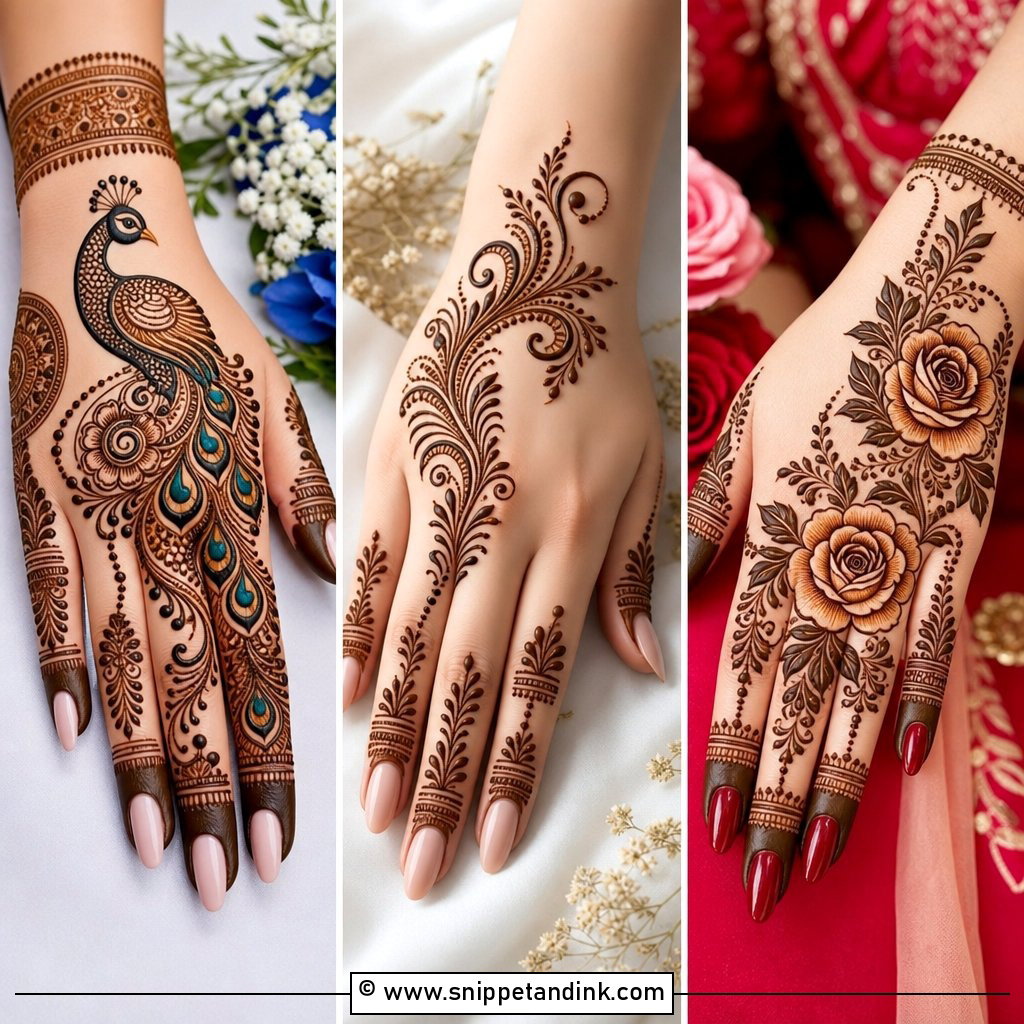
6. Floral Back Hand Mehndi Design
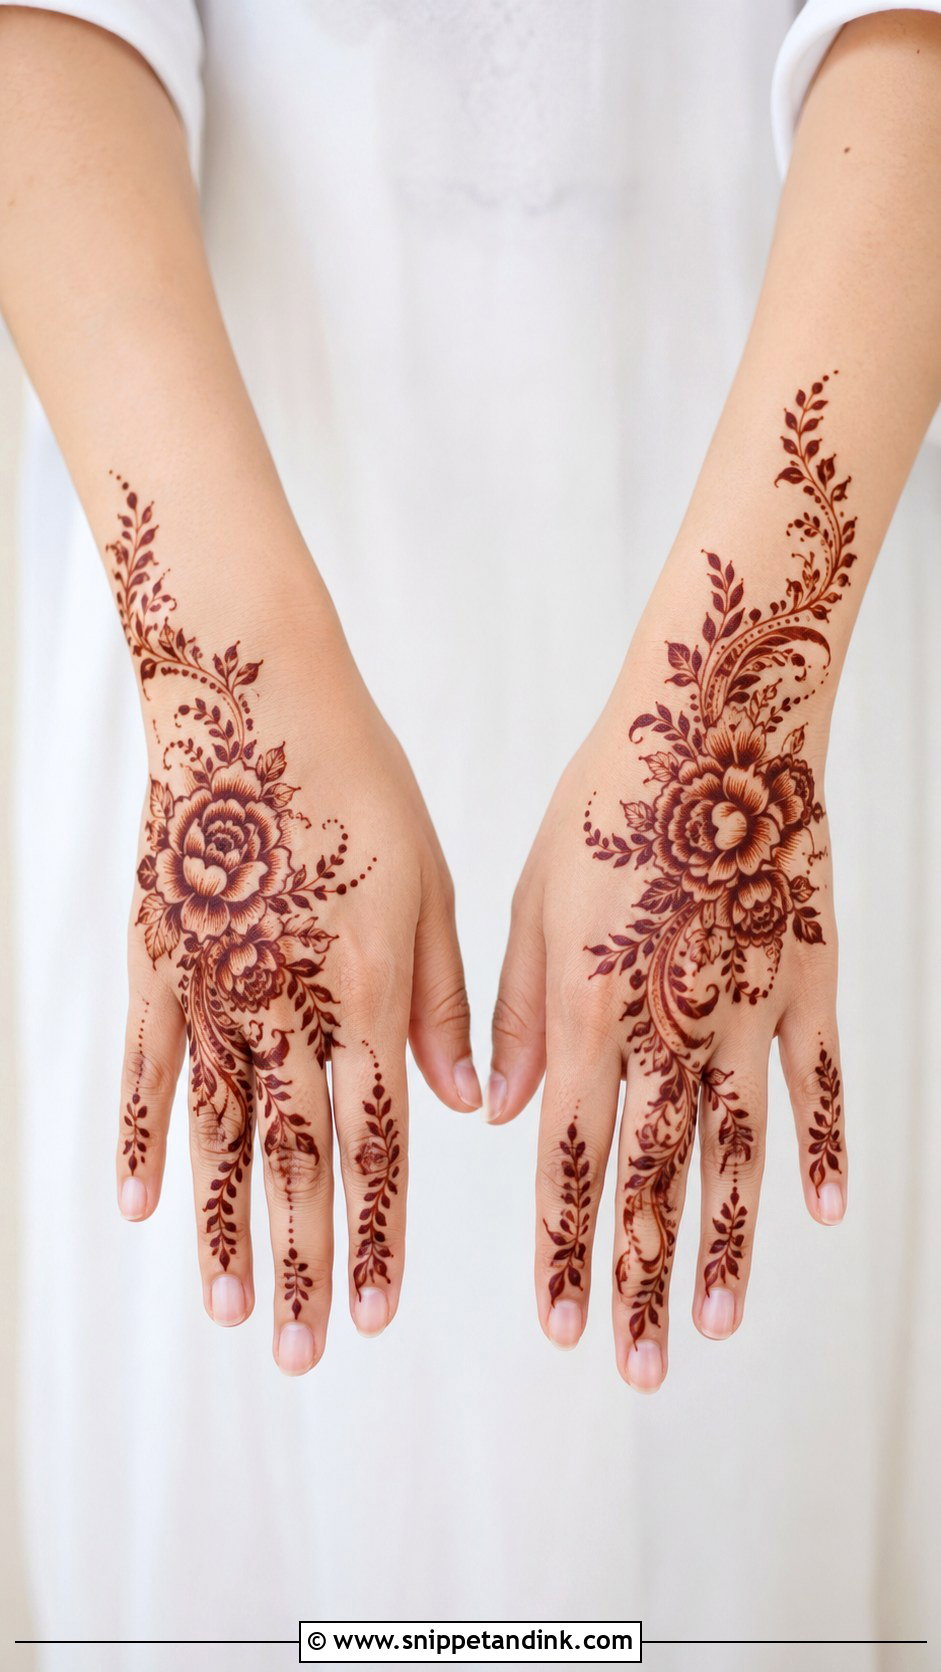
Flowers on the back of the hand suit almost everyone, because the hand already curves gently from wrist to knuckles and a diagonal vine follows that curve. I mix one or two large blooms with smaller buds so the design doesn’t look heavy. The back of the hand stains lighter than the palm, so this is a design where I’d ask you to leave the paste on longer than you think you need, ideally overnight.
7. Indo Arabic Mehndi Design
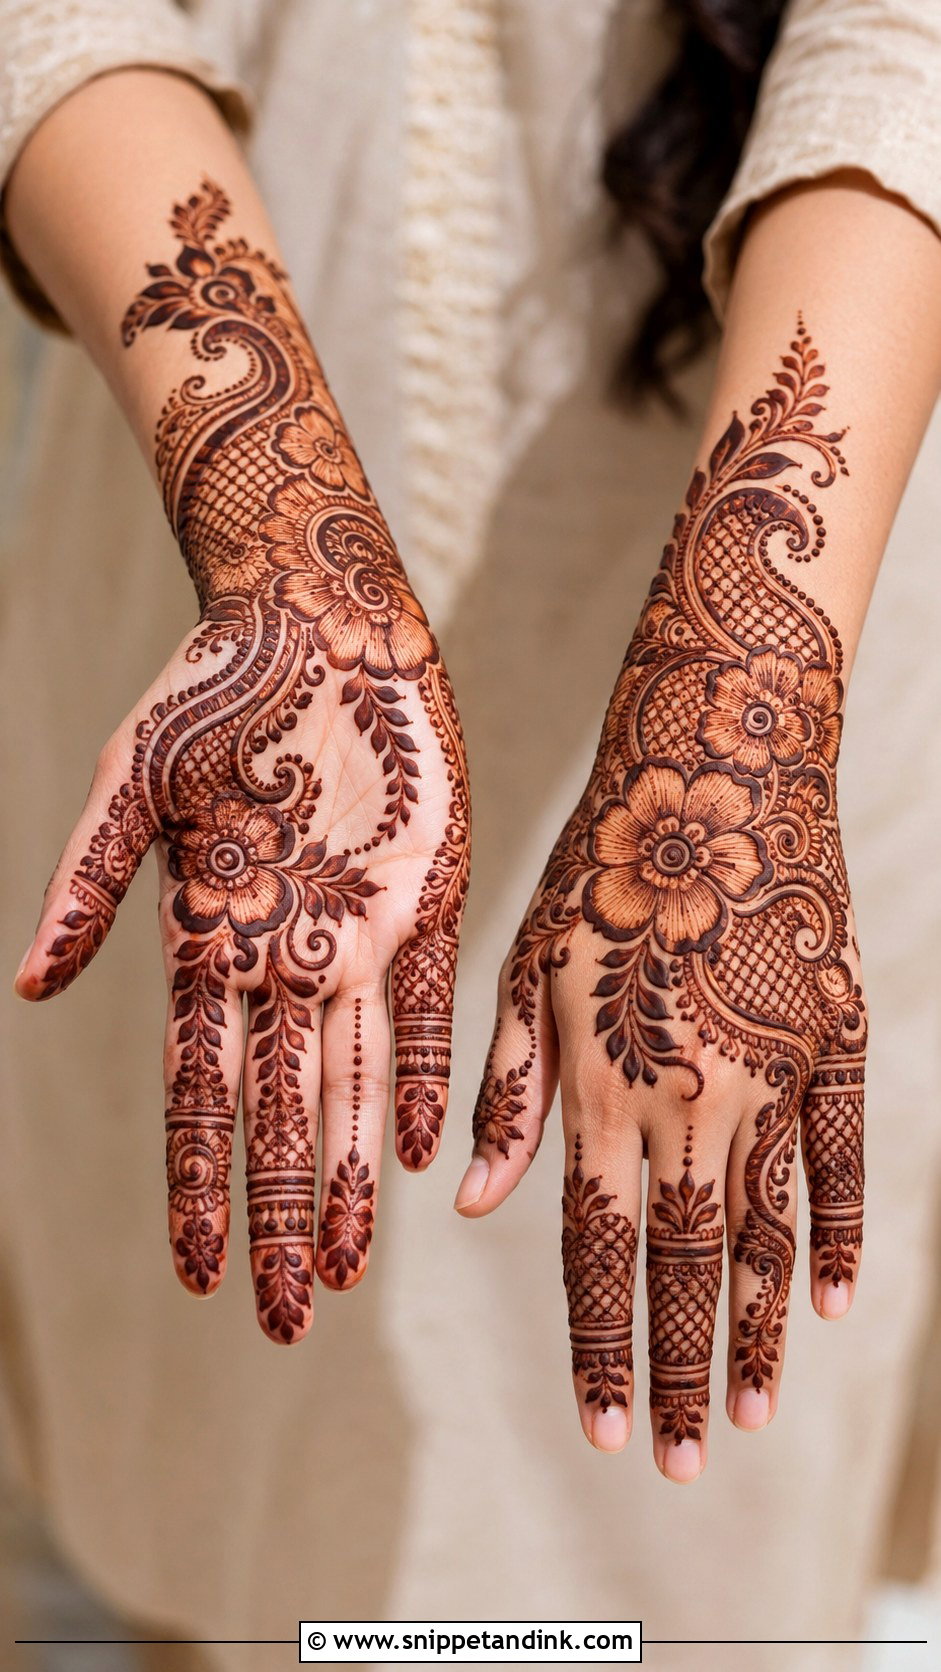
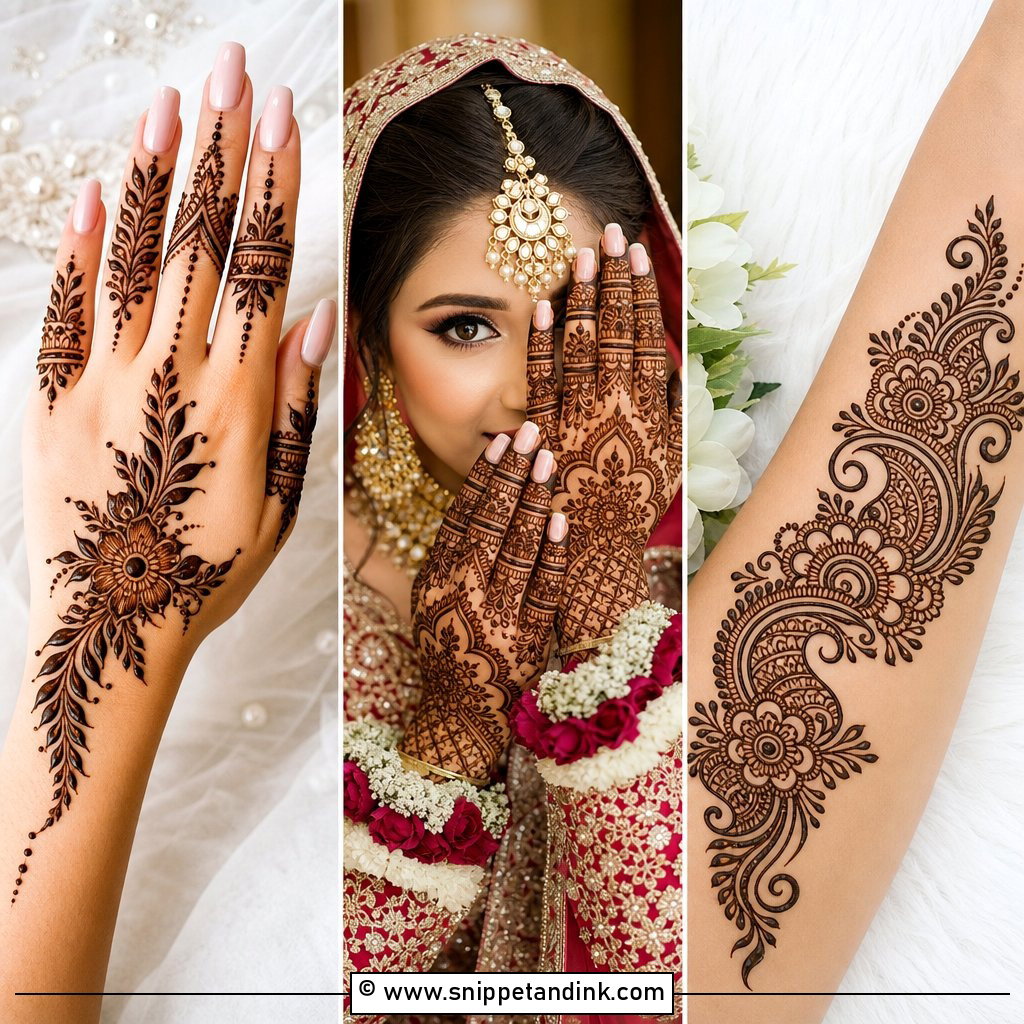
Indo-Arabic is what I recommend most to people who can’t decide. You get the open, diagonal flow of Arabic work with pockets of Indian detail like jaali, tiny leaves and fine lines tucked into chosen sections. It’s busier than plain Arabic but nowhere near a full bridal hand. The bit that needs care is the border around each detailed pocket: if the outline is weak, the filler spills visually and the whole layout loses its shape.
8. Peacock Mehndi Design
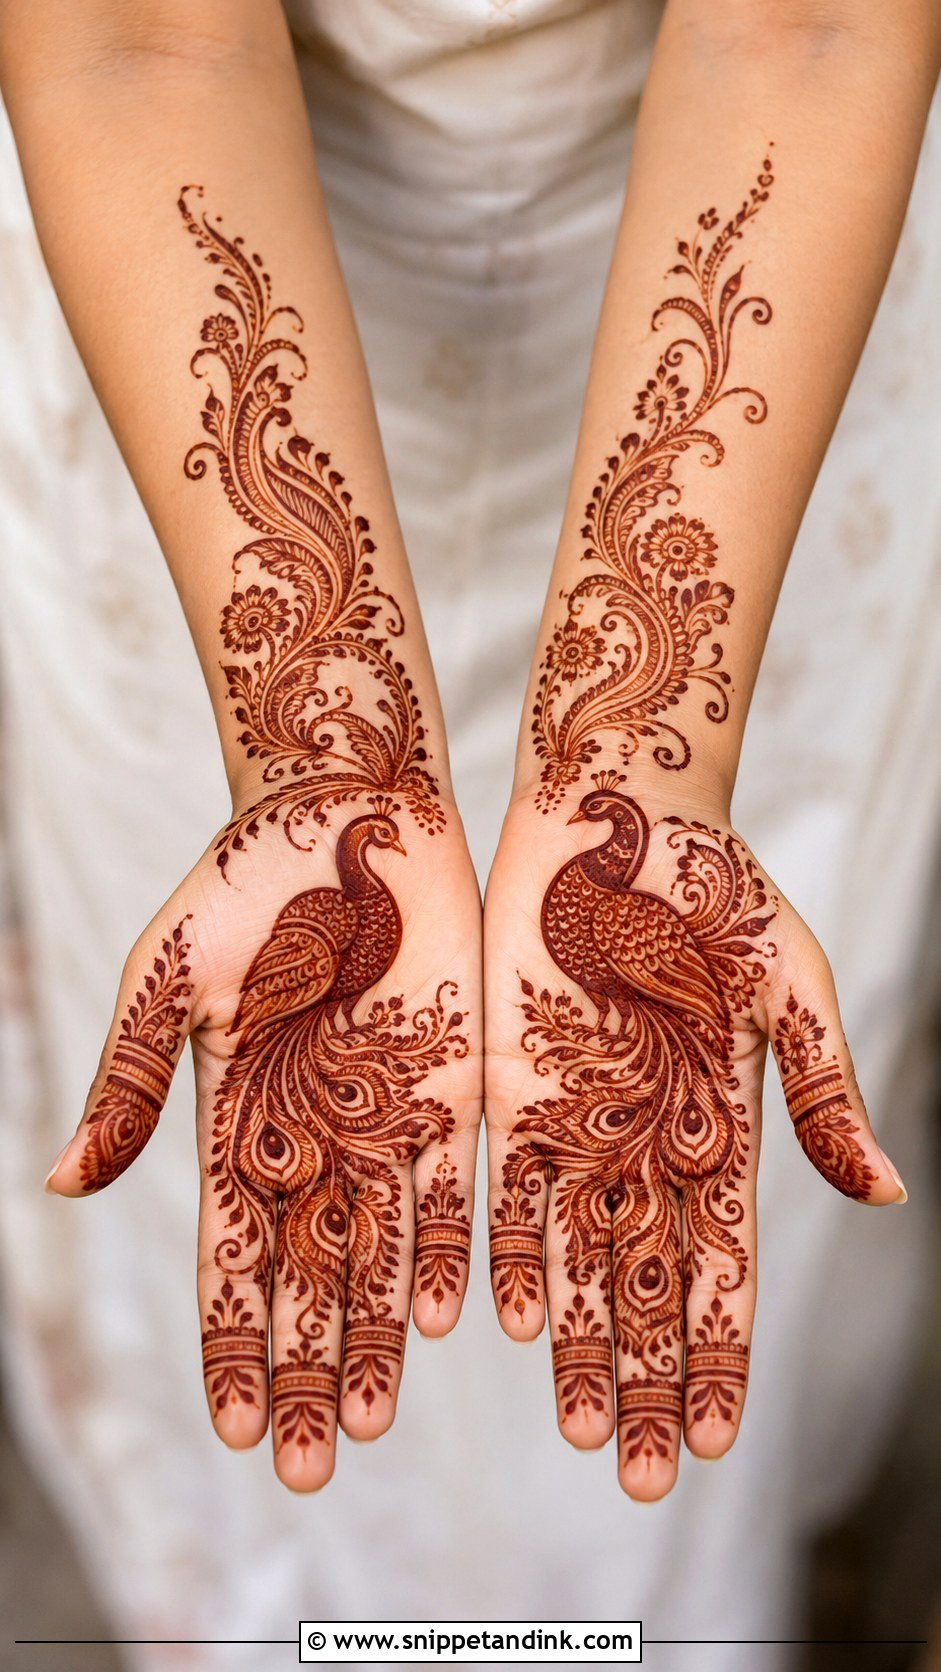
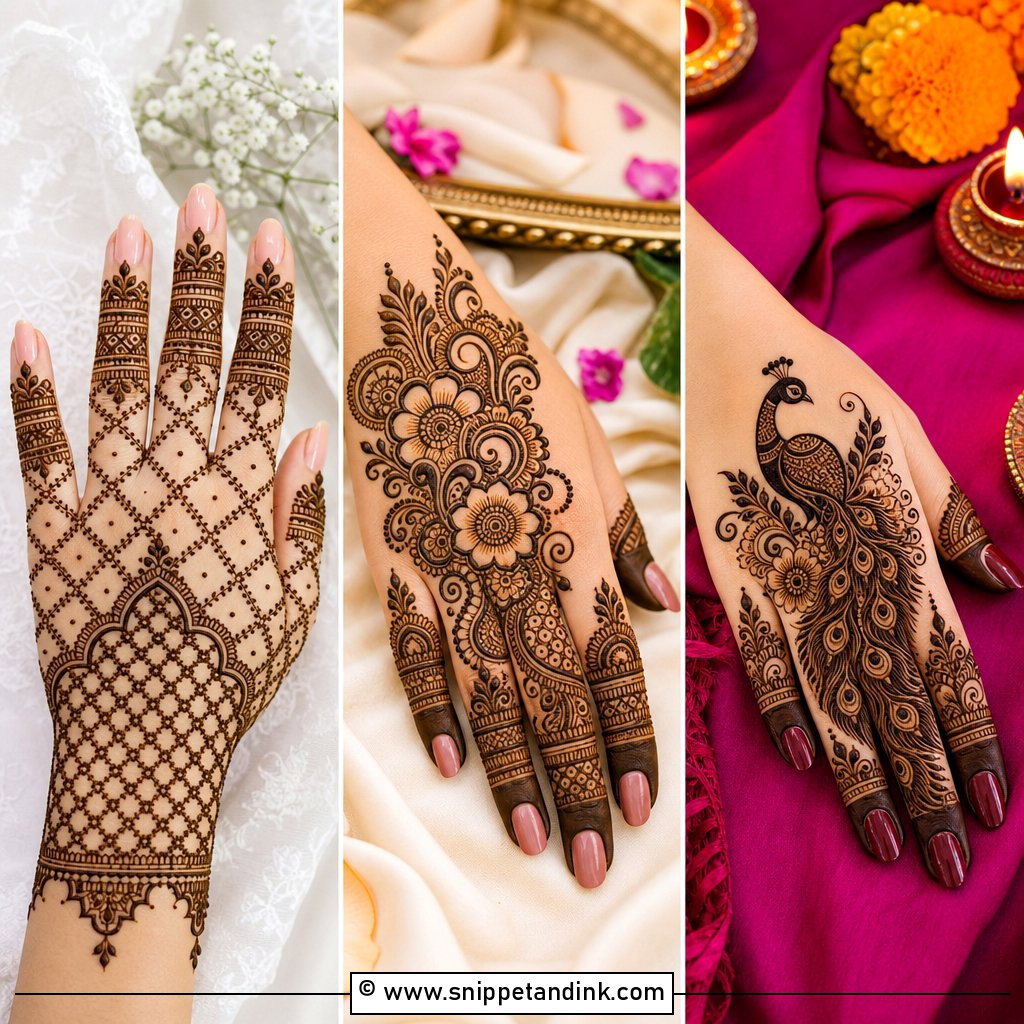
The peacock is a centrepiece, so I place it first and draw everything else around it. On a palm it faces inward toward the thumb; on the back of the hand I usually angle it up toward the fingers. The neck curve is where I slow down, because a wobbly neck makes the bird look clumsy no matter how detailed the feathers are. For a lighter version, I leave the feather lines open instead of filling them, which stains cleaner too.
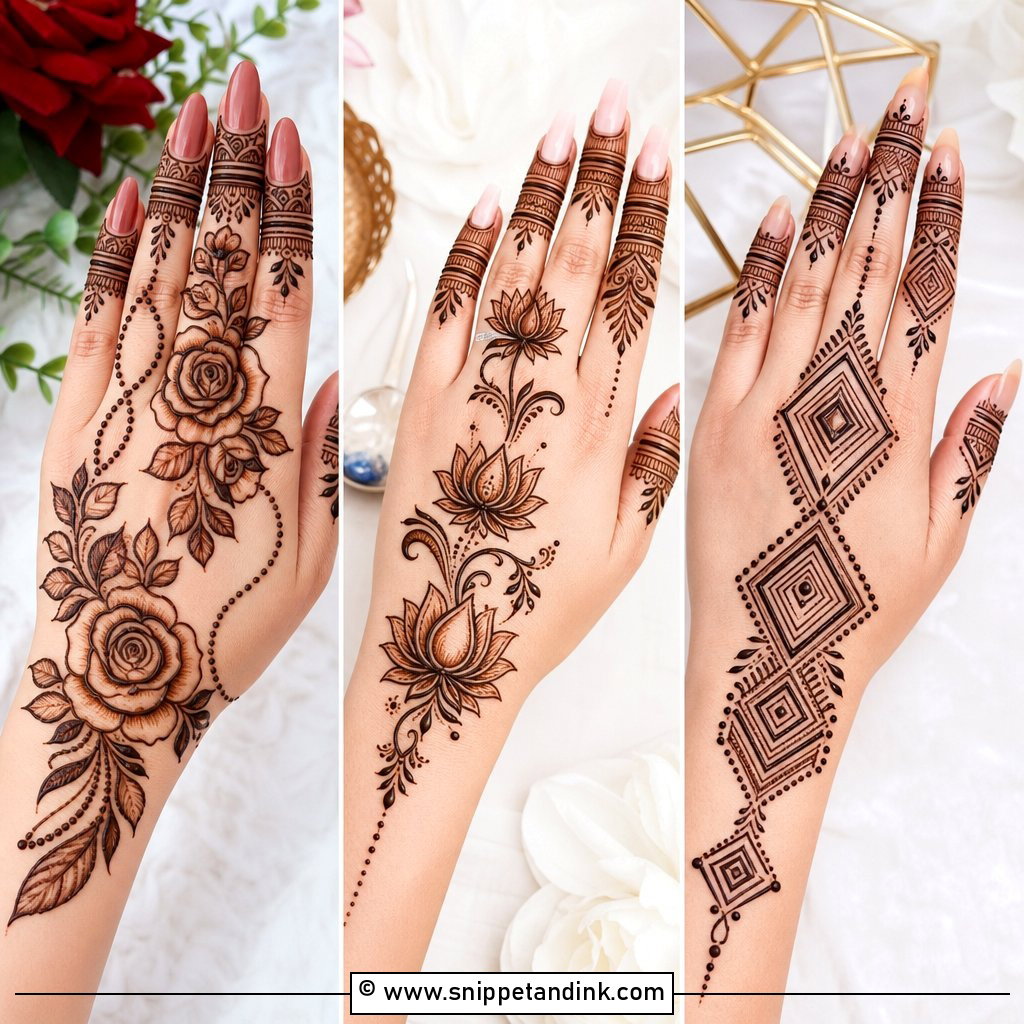
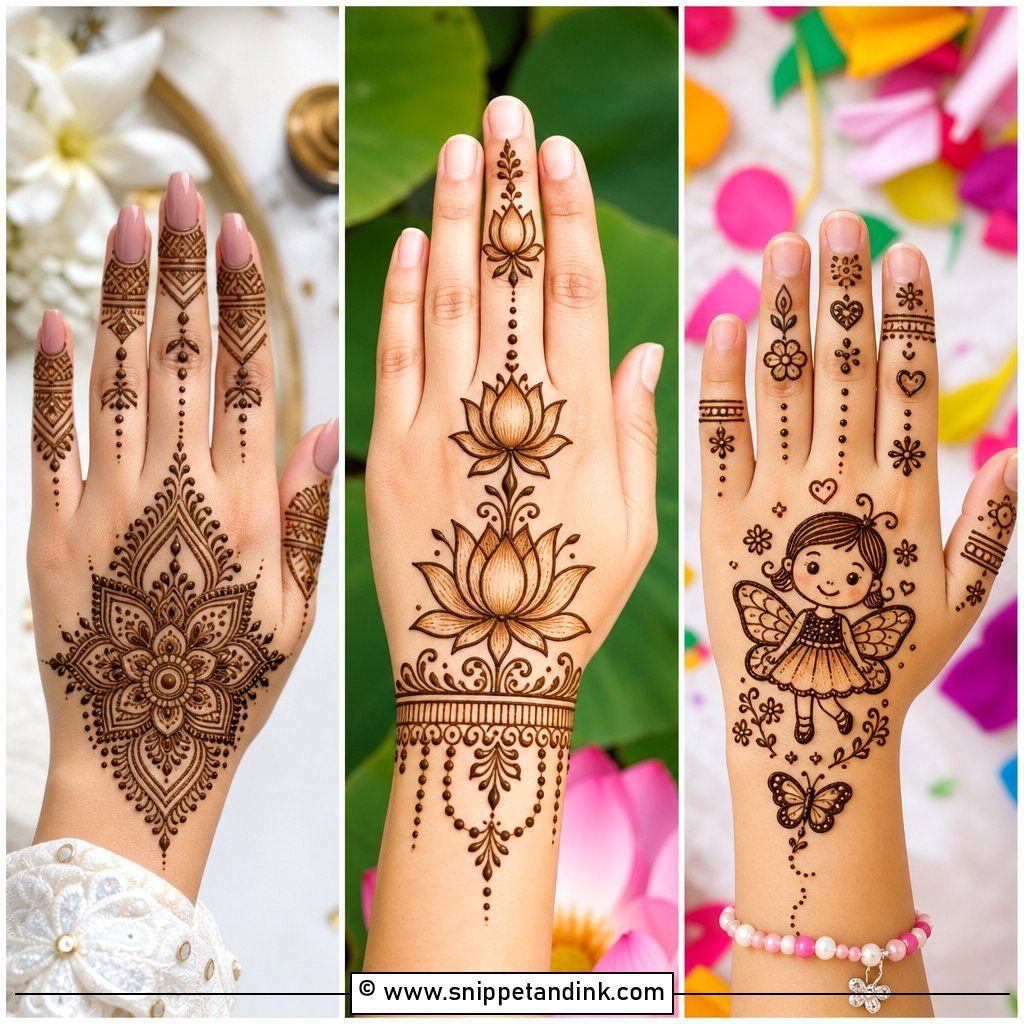
9. Lotus Mehndi Design
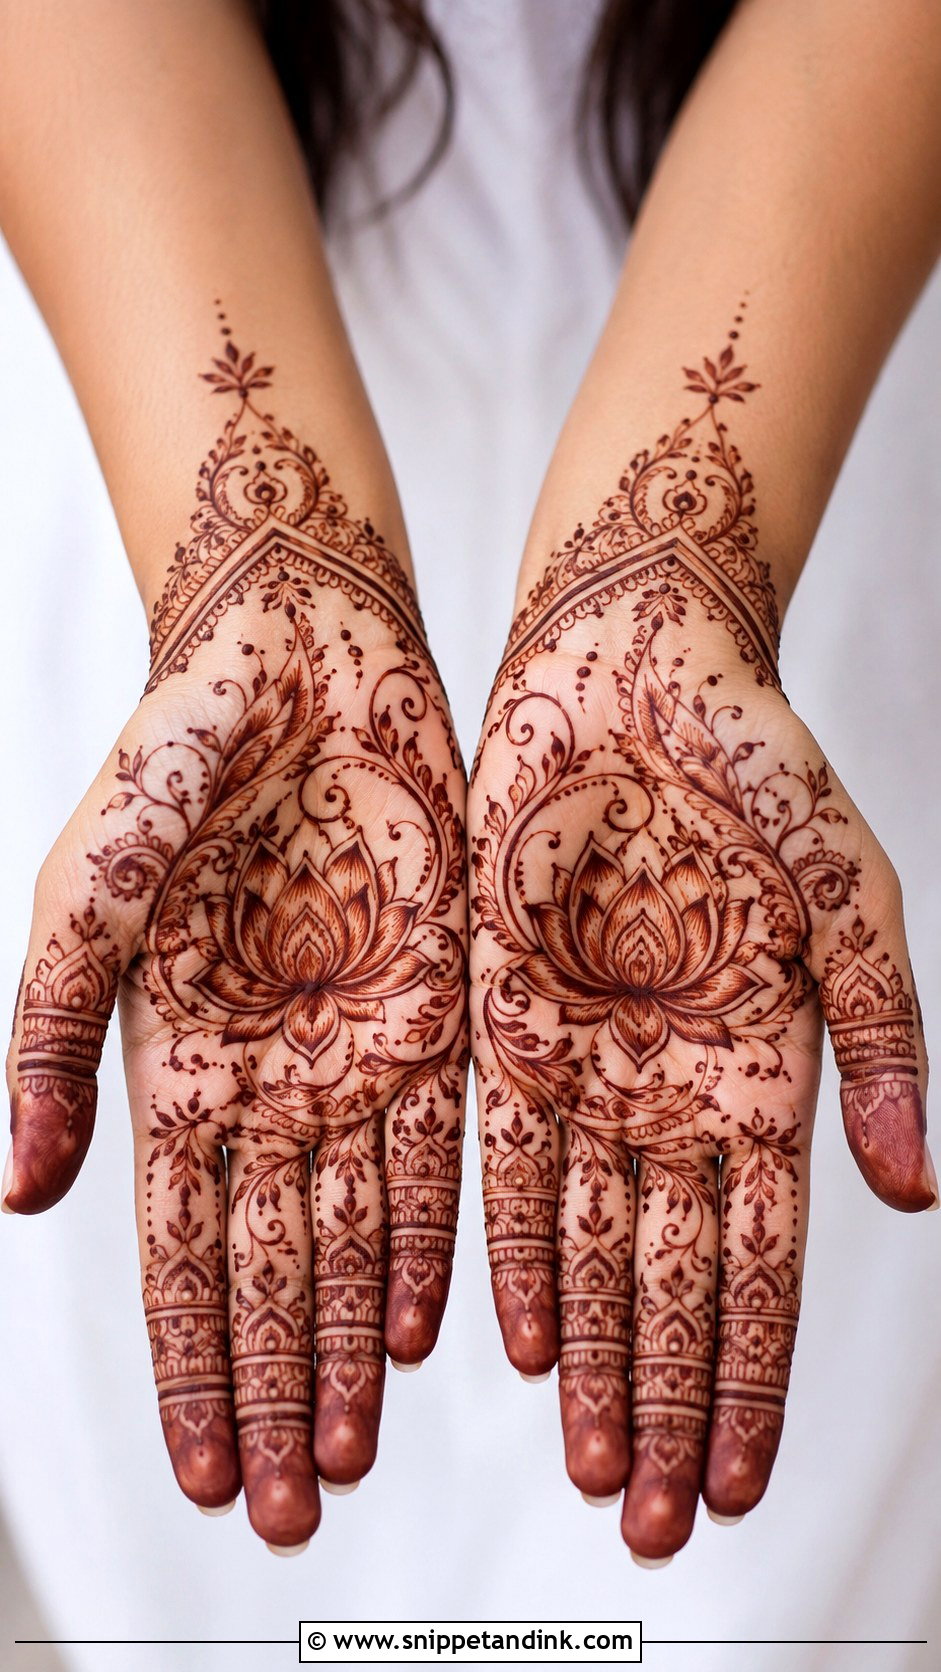
A lotus gives you a lot of visual detail for very little work. Its layered petals look intricate even when each petal is a simple pointed shape. I place it in the centre of the palm or at the wrist as the start of a trail. The petals need equal spacing and a clear point, otherwise the flower reads as a blob once the stain darkens and the fine gaps close up slightly.
10. Jaali Mehndi Design
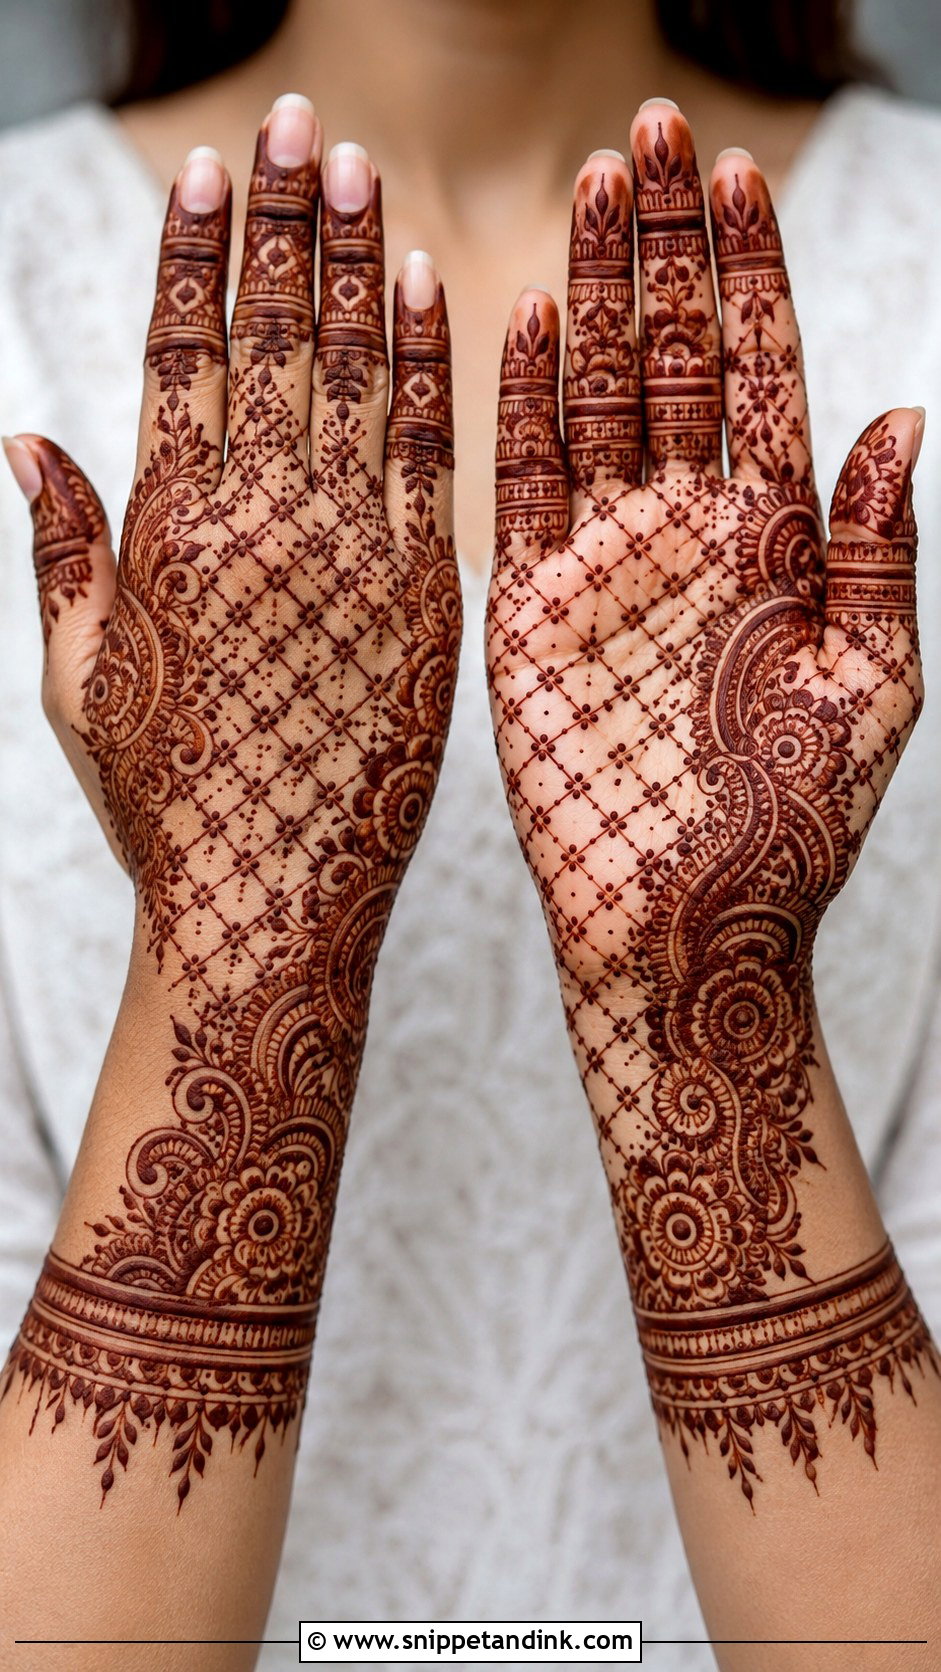
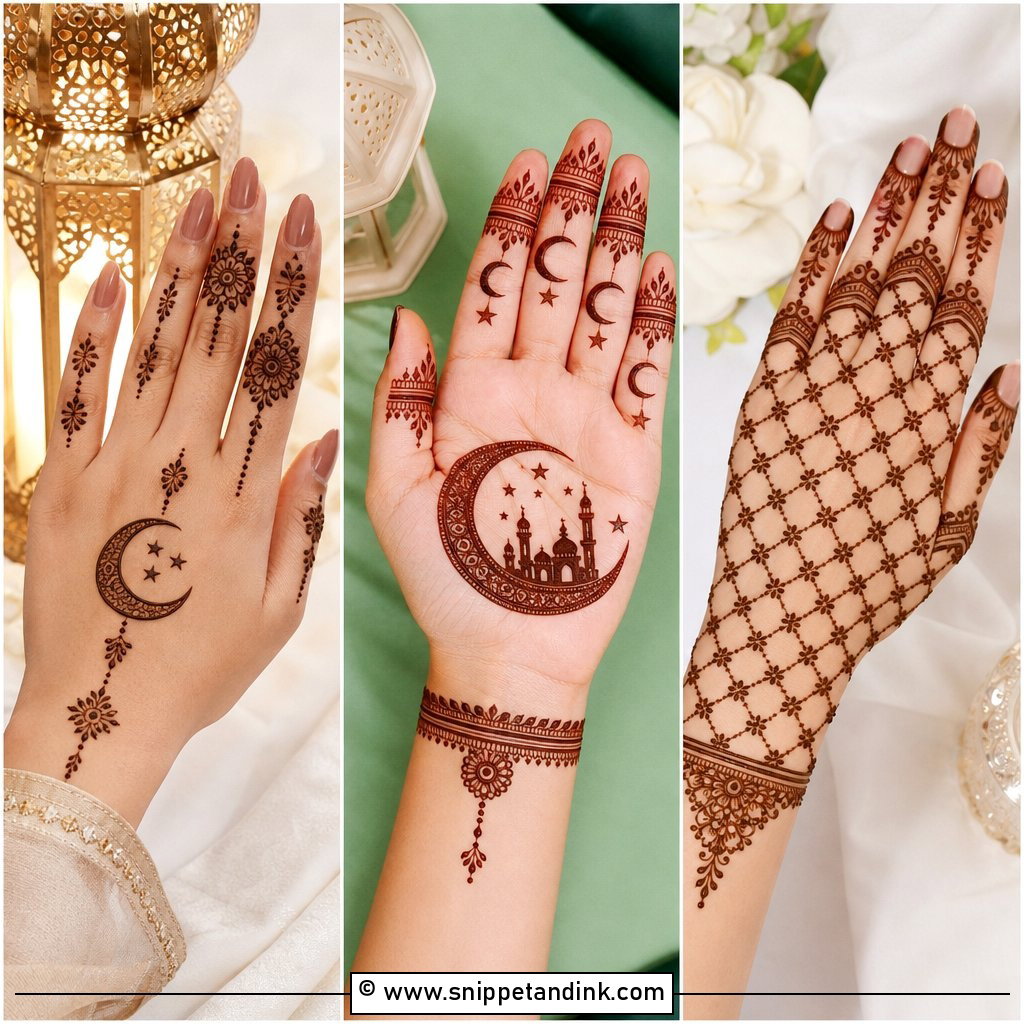
A jaali mehndi design is just crossed lines, yet it’s one of the hardest fillers to do well. The lines have to be thin and the spacing even, because henna spreads a fraction as it dries and tight netting closes into a solid patch. I always pair jaali with a bolder motif, like a flower or paisley, so the eye has somewhere to rest. Dots in the diamond gaps are optional; on small hands I leave them out.
11. Minimal Mehndi Design
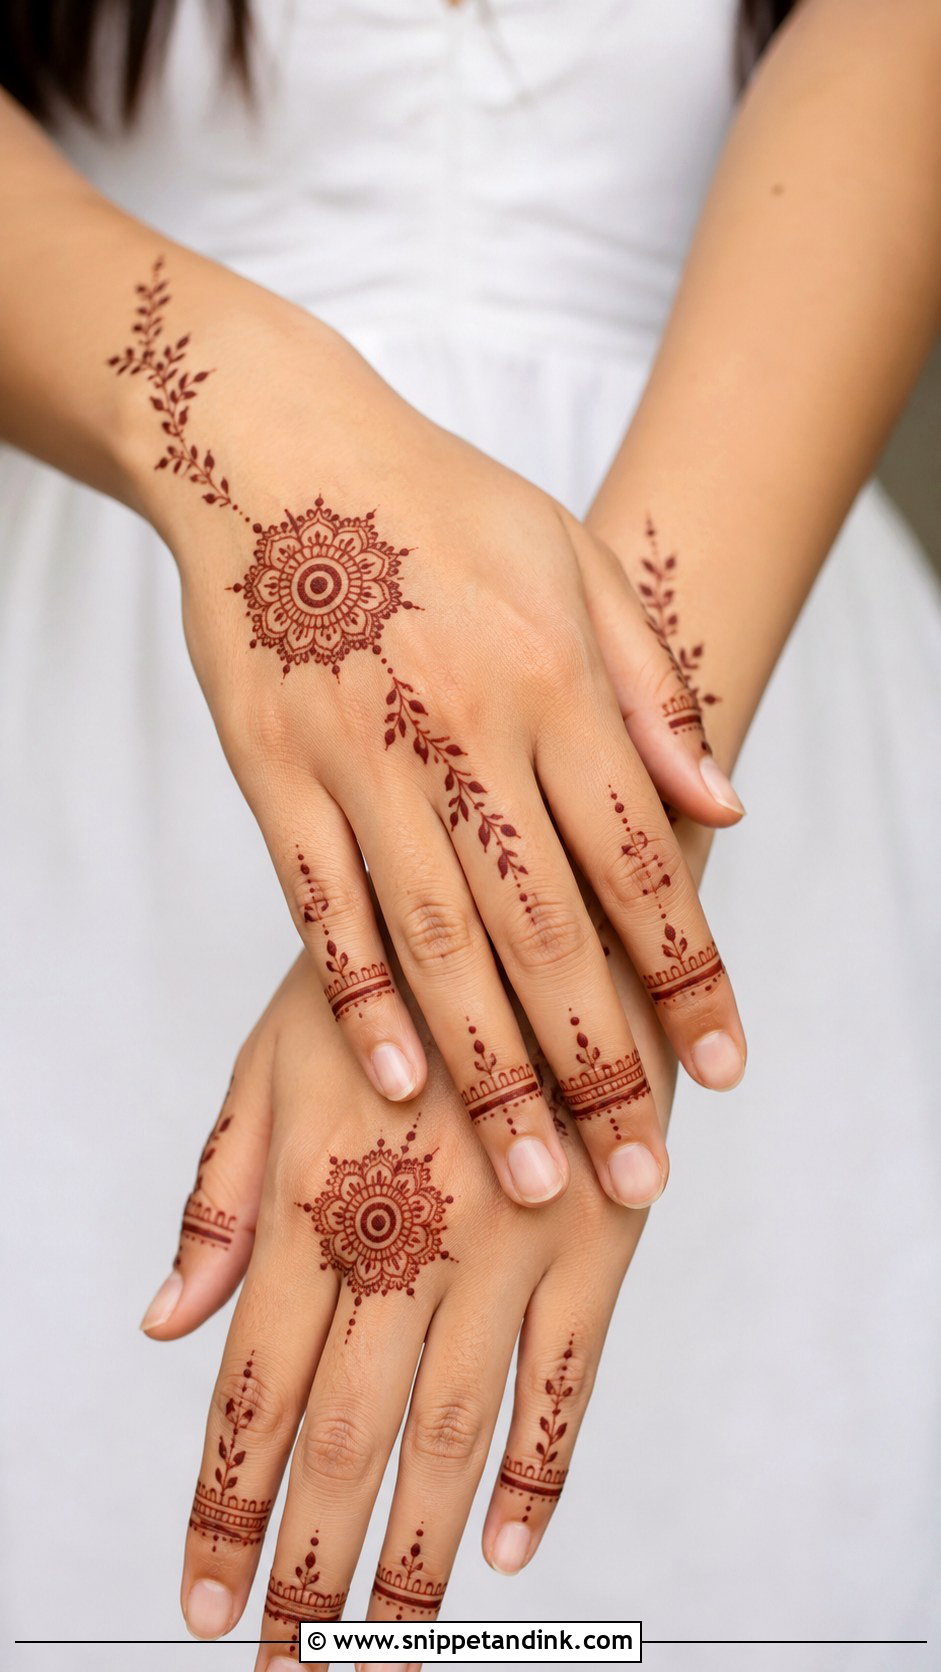
Minimal doesn’t mean careless. With so few elements on the hand, every line is visible, and a single wobble stands out more than it would in a full design. I pick one focus, a small mandala or a leafy wrist trail, and leave the rest bare. It’s my usual suggestion for people who want henna they can wear to work the following week without explaining it.
12. Bridal Mehndi Design
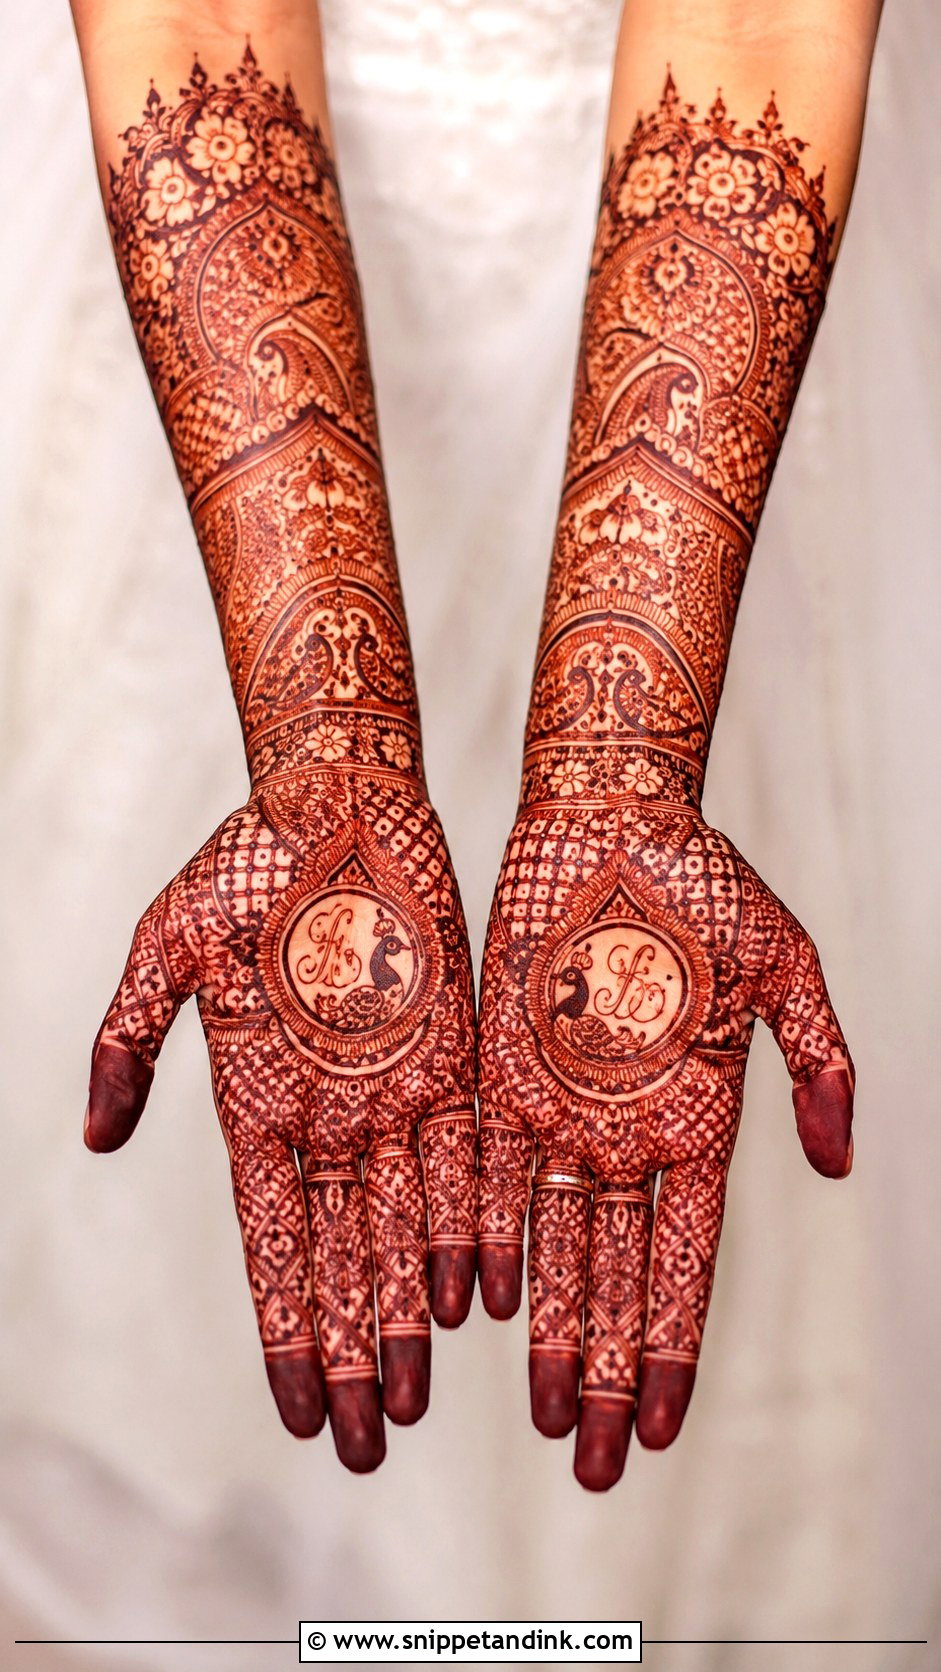
Bridal work is the one design here I never rush. A traditional bridal hand covers palms and forearms with paisleys, florals, mandalas, jaali and often a portrait or symbolic scene, and it can take several hours for both hands. Many brides now ask me to hide initials or the wedding date somewhere in the pattern. If you want a lighter bridal look, a detailed palm with a softer forearm still reads as bridal. Whatever the coverage, I make sure there are enough solid areas, because thin lines alone never give that deep bridal stain.
13. Eid Mehndi Design
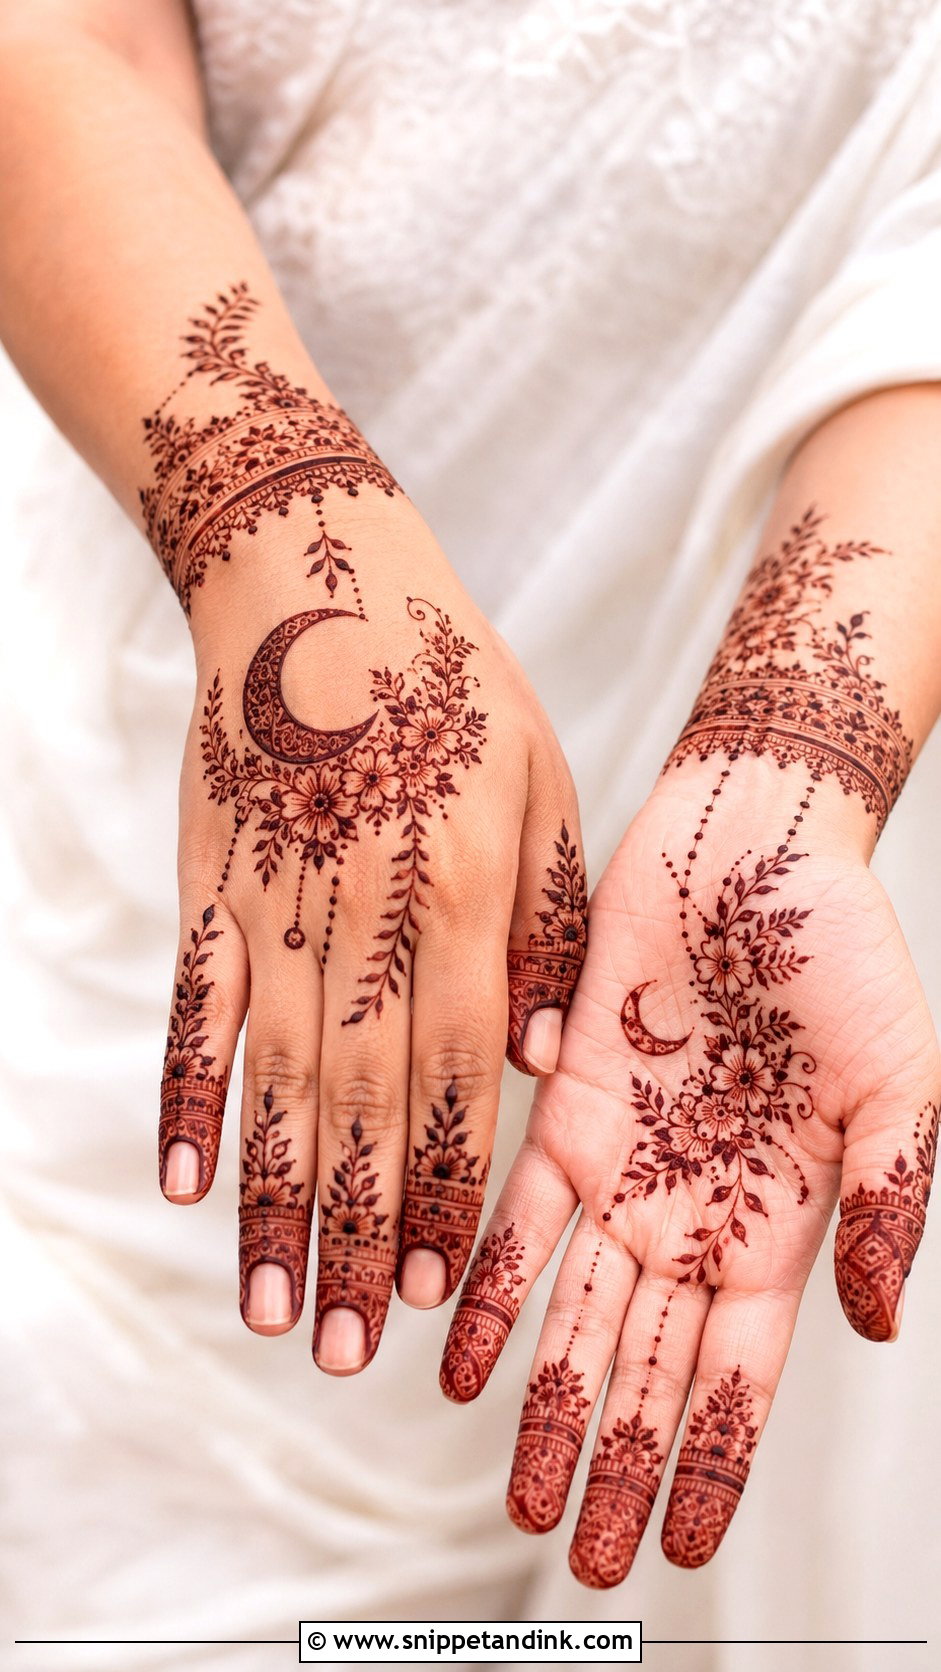
An Eid mehndi design has to fit around a very busy night before Eid, so I keep it achievable. Arabic floral trails, crescent accents, finger bands and bracelet chains are the usual requests. I leave clear open skin around the main motifs so the design still looks crisp in daylight photos the next morning. Apply it the evening before at the latest; henna applied that morning will still be orange at lunch.
14. Engagement Mehndi Design
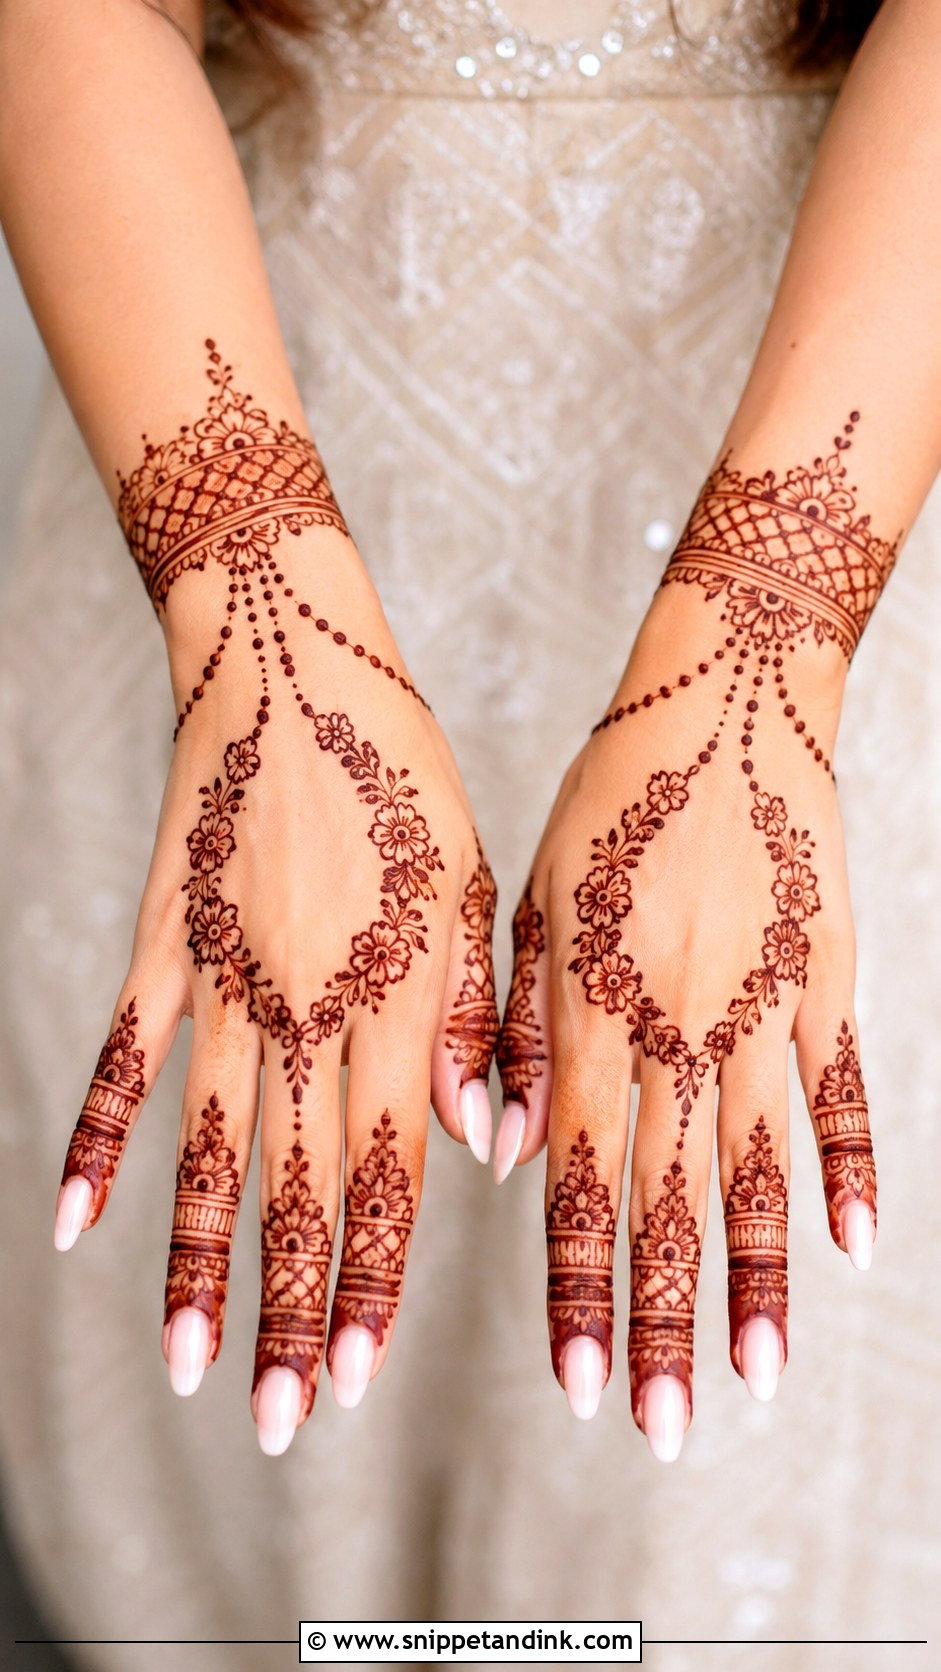
For an engagement mehndi design, the ring finger is the star, so I design around it rather than over it. I keep the area just below the knuckle on that finger fairly open so the ring sits against clean skin in photos. A bracelet wrist, a floral trail and lightly decorated fingers complete the hand without crowding it. On the palm, a small mandala is plenty.
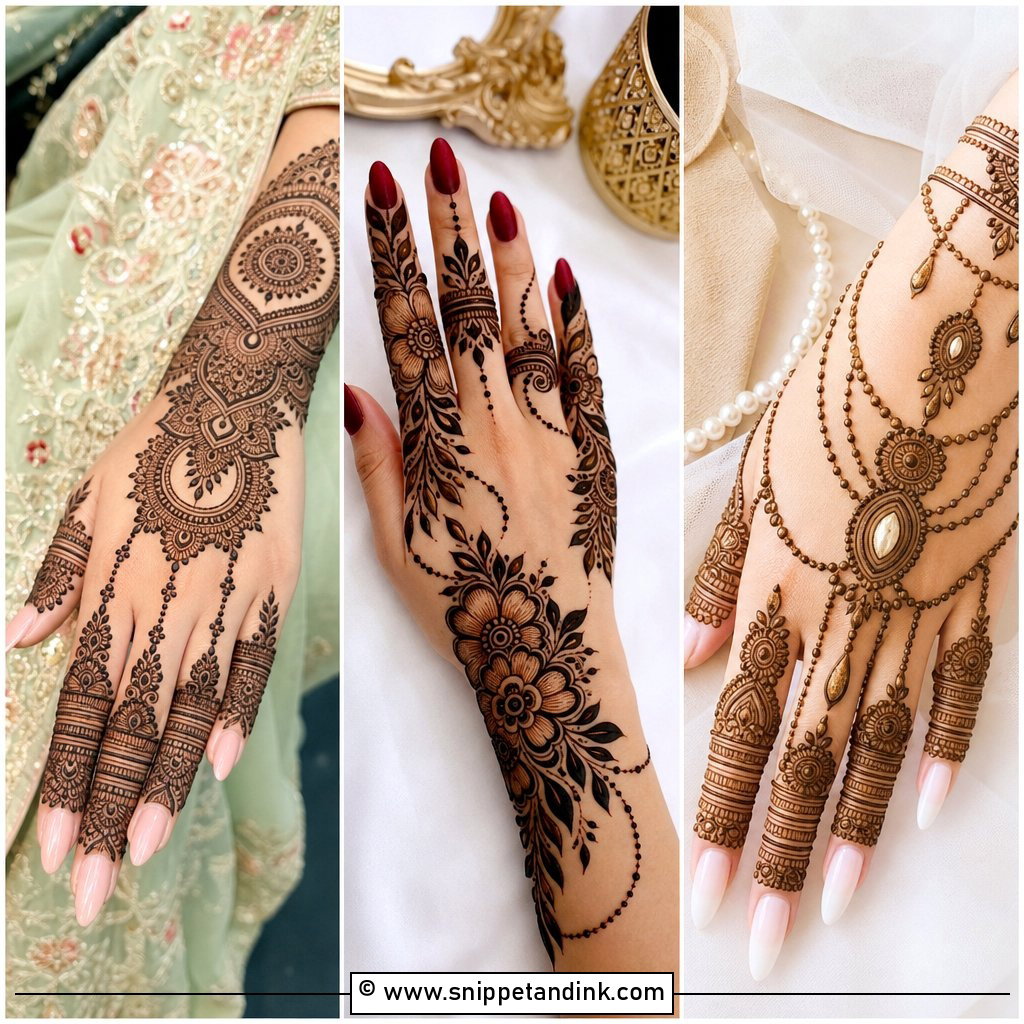
15. Kids Mehndi Design
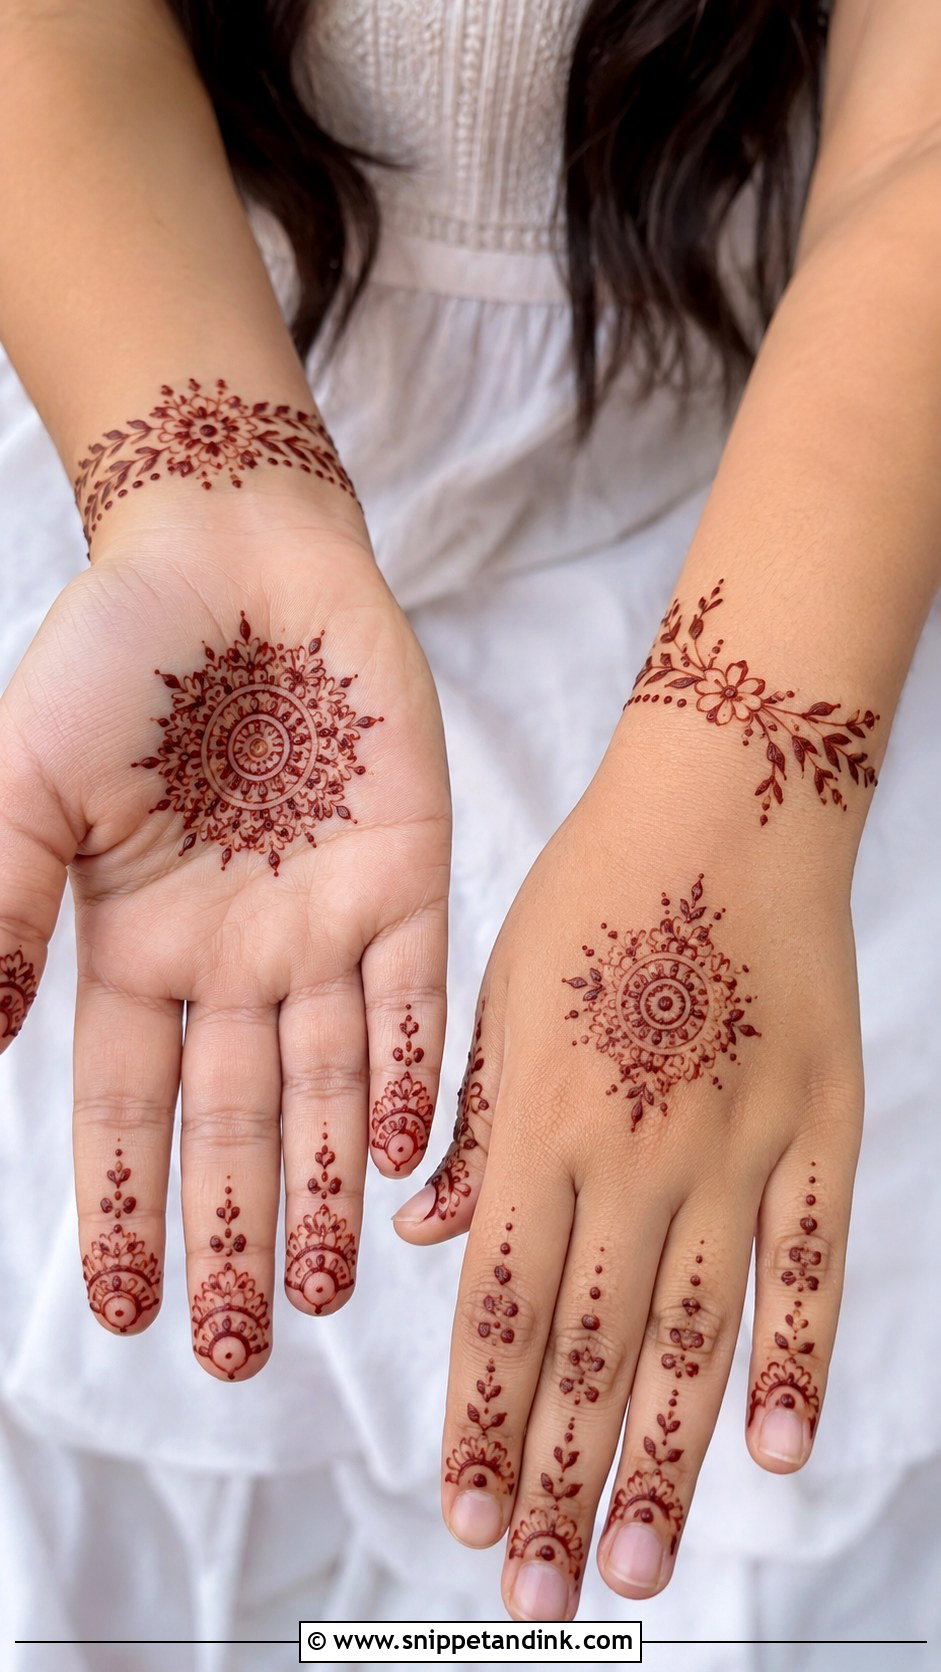
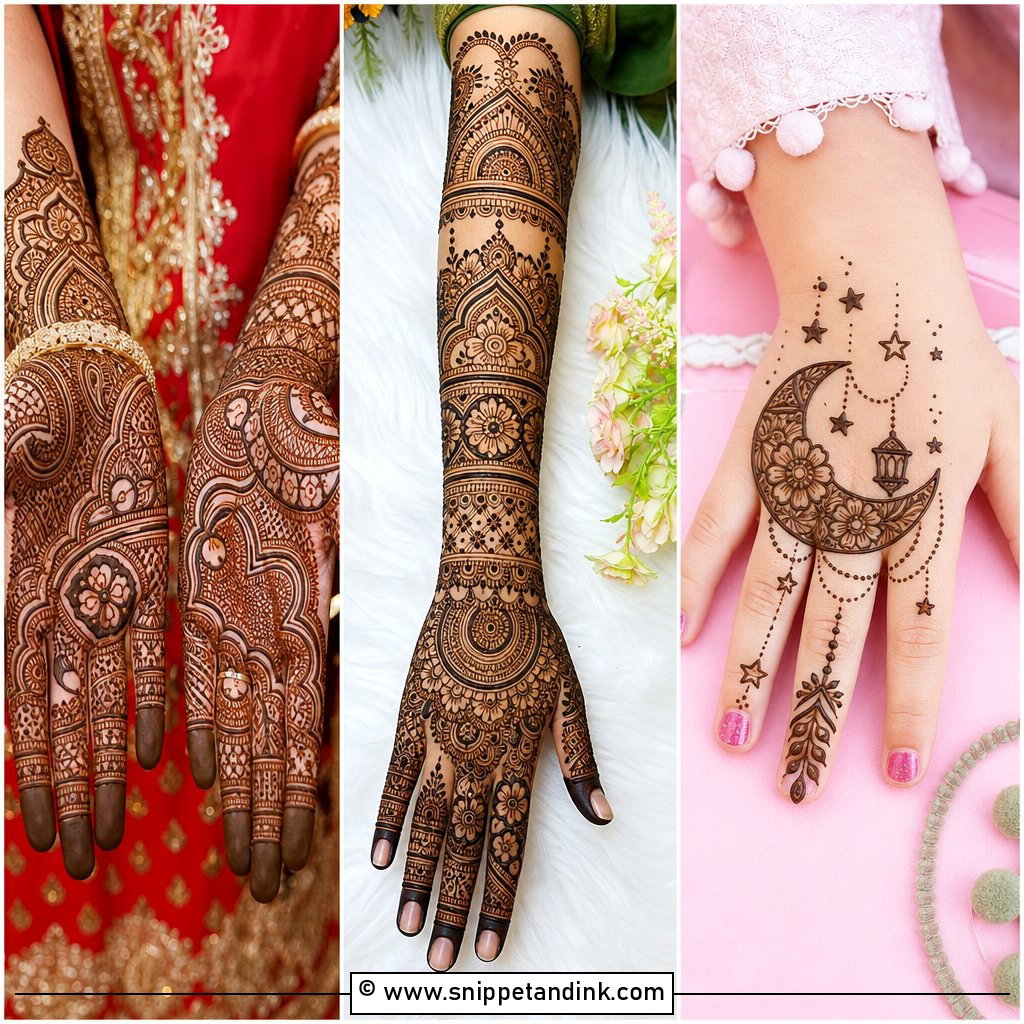
Children rarely sit still for more than ten or fifteen minutes, so I plan a kids design that I can finish in that time. Small flowers, a leafy bracelet, stars or simple finger tips all work. I avoid tiny fillers completely; they smudge the moment a child grabs something. And I only ever use natural henna on children, never a dark ready-made cone that promises an instant black colour.
16. Moroccan Mehndi Design
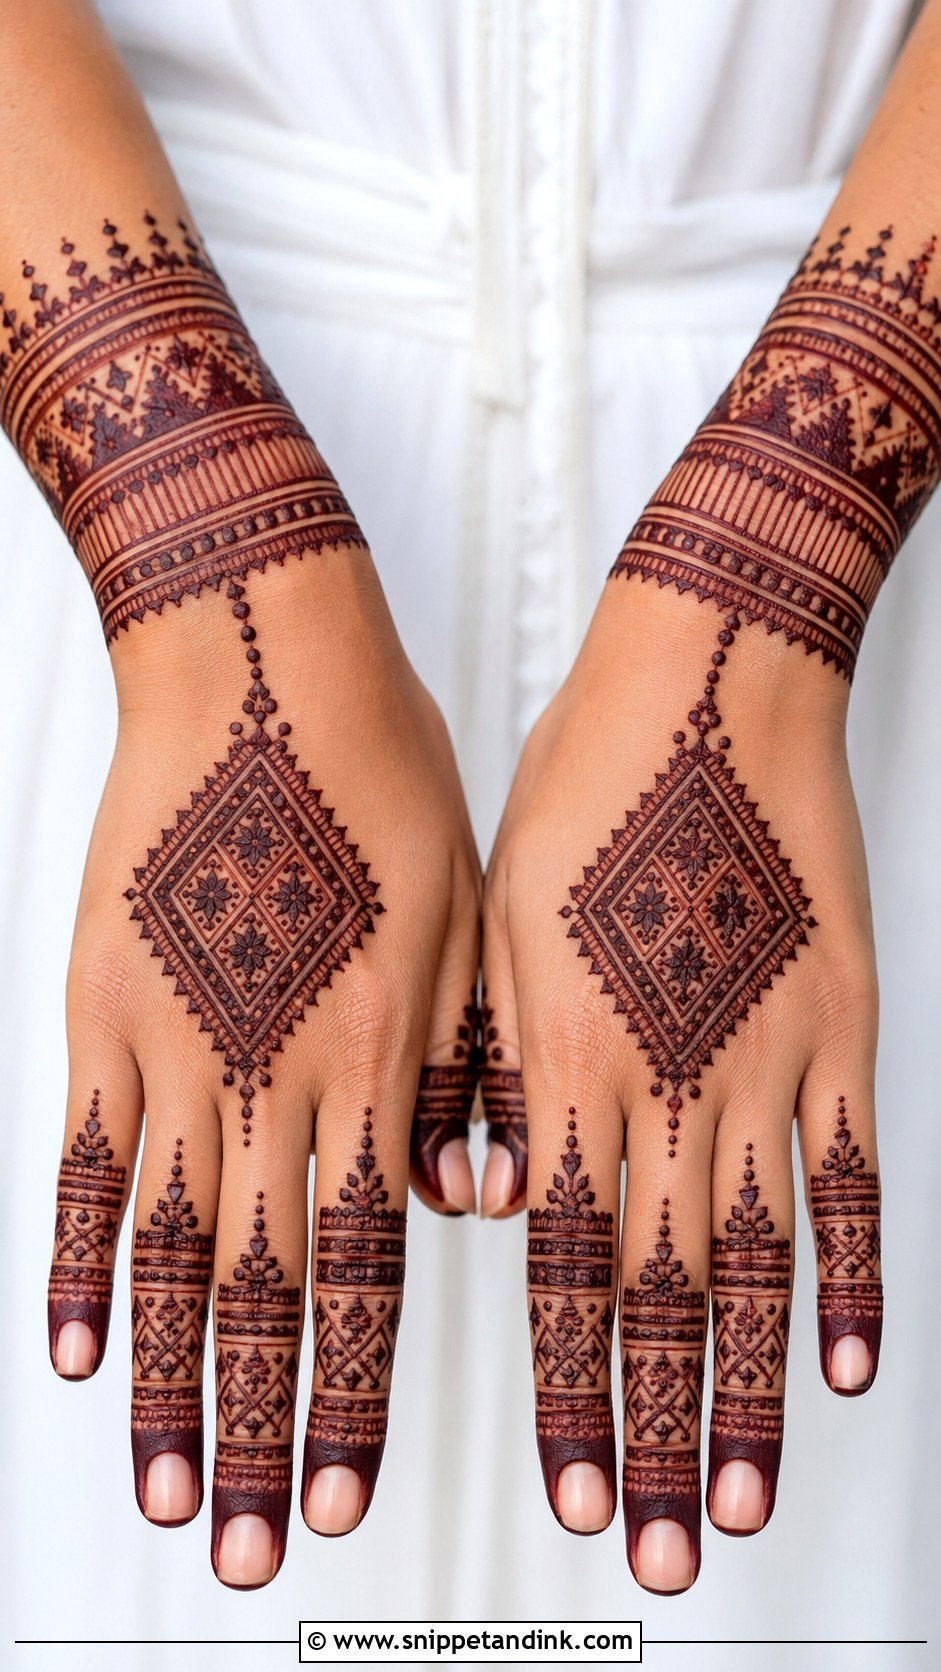
Moroccan work trades flowers for geometry: diamonds, triangles, straight bands and dots. It’s harder than it looks, because henna doesn’t forgive a crooked straight line the way it forgives a curved petal. I apply with steady, even pressure and turn the hand rather than my wrist so each line stays true. It suits people who find florals too sweet.
17. Gulf Arabic Mehndi Design
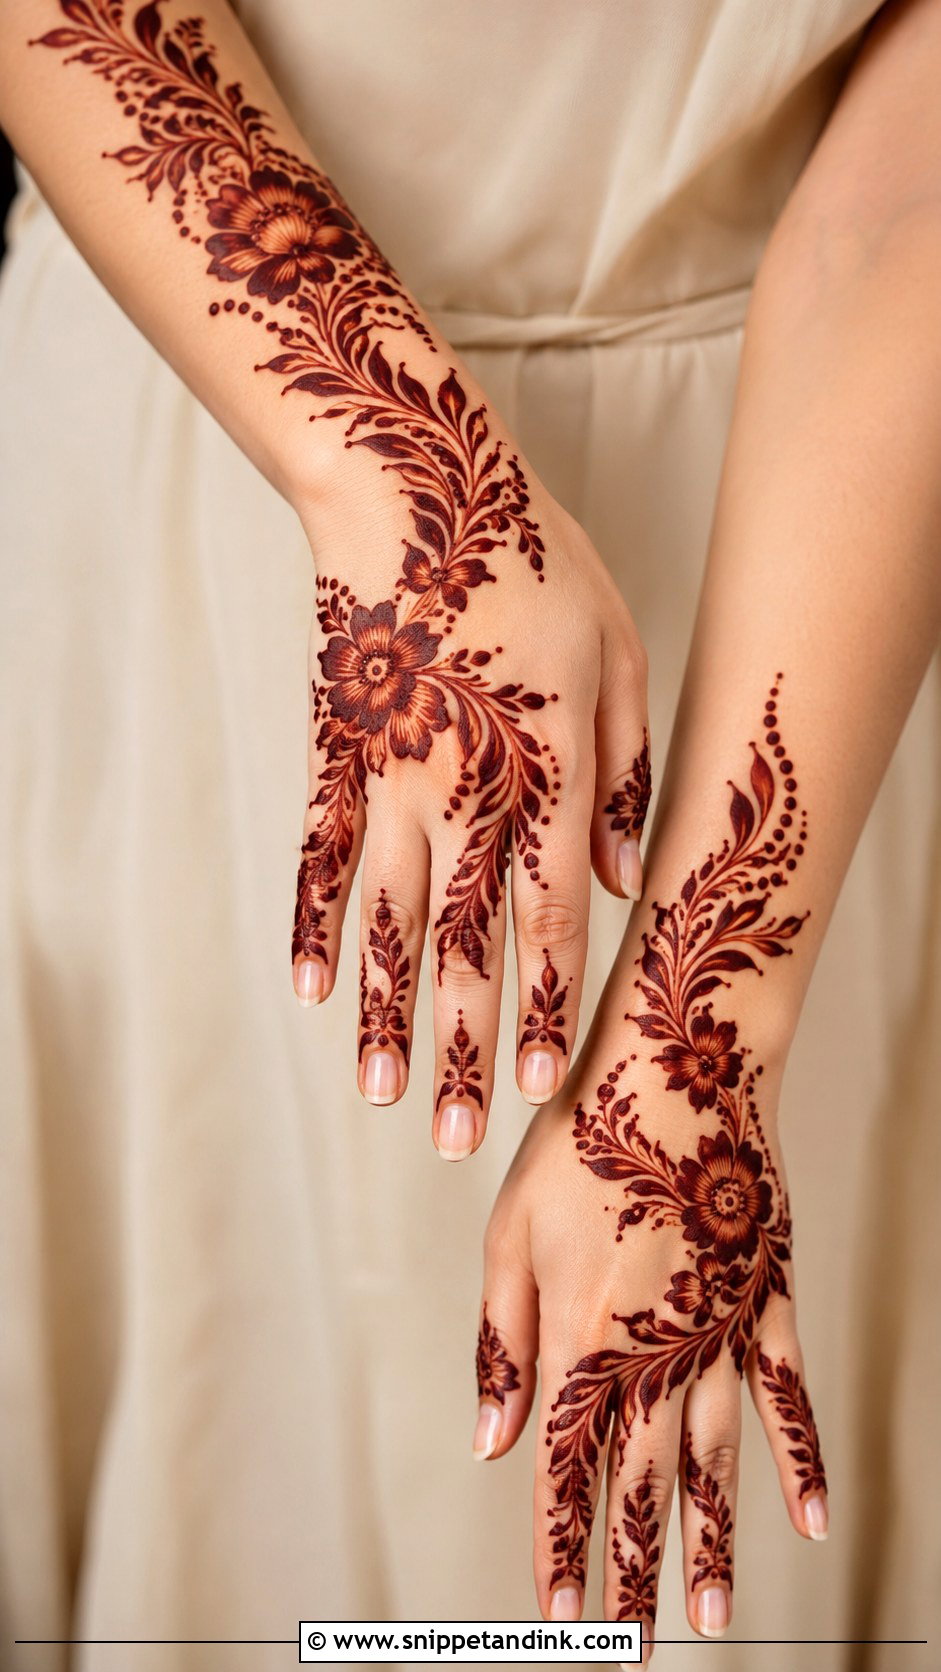
Gulf or Khaleeji style is all about scale. Big shaded flowers and sweeping leaves cross the hand on a wide diagonal, with plenty of bare skin left on purpose. I weight one side of the hand and leave the other side open, which is what gives this style its dramatic feel. The shading inside the petals needs a slightly thinner paste flow so it builds a gradient rather than a solid fill.
18. Half Hand Mehndi Design
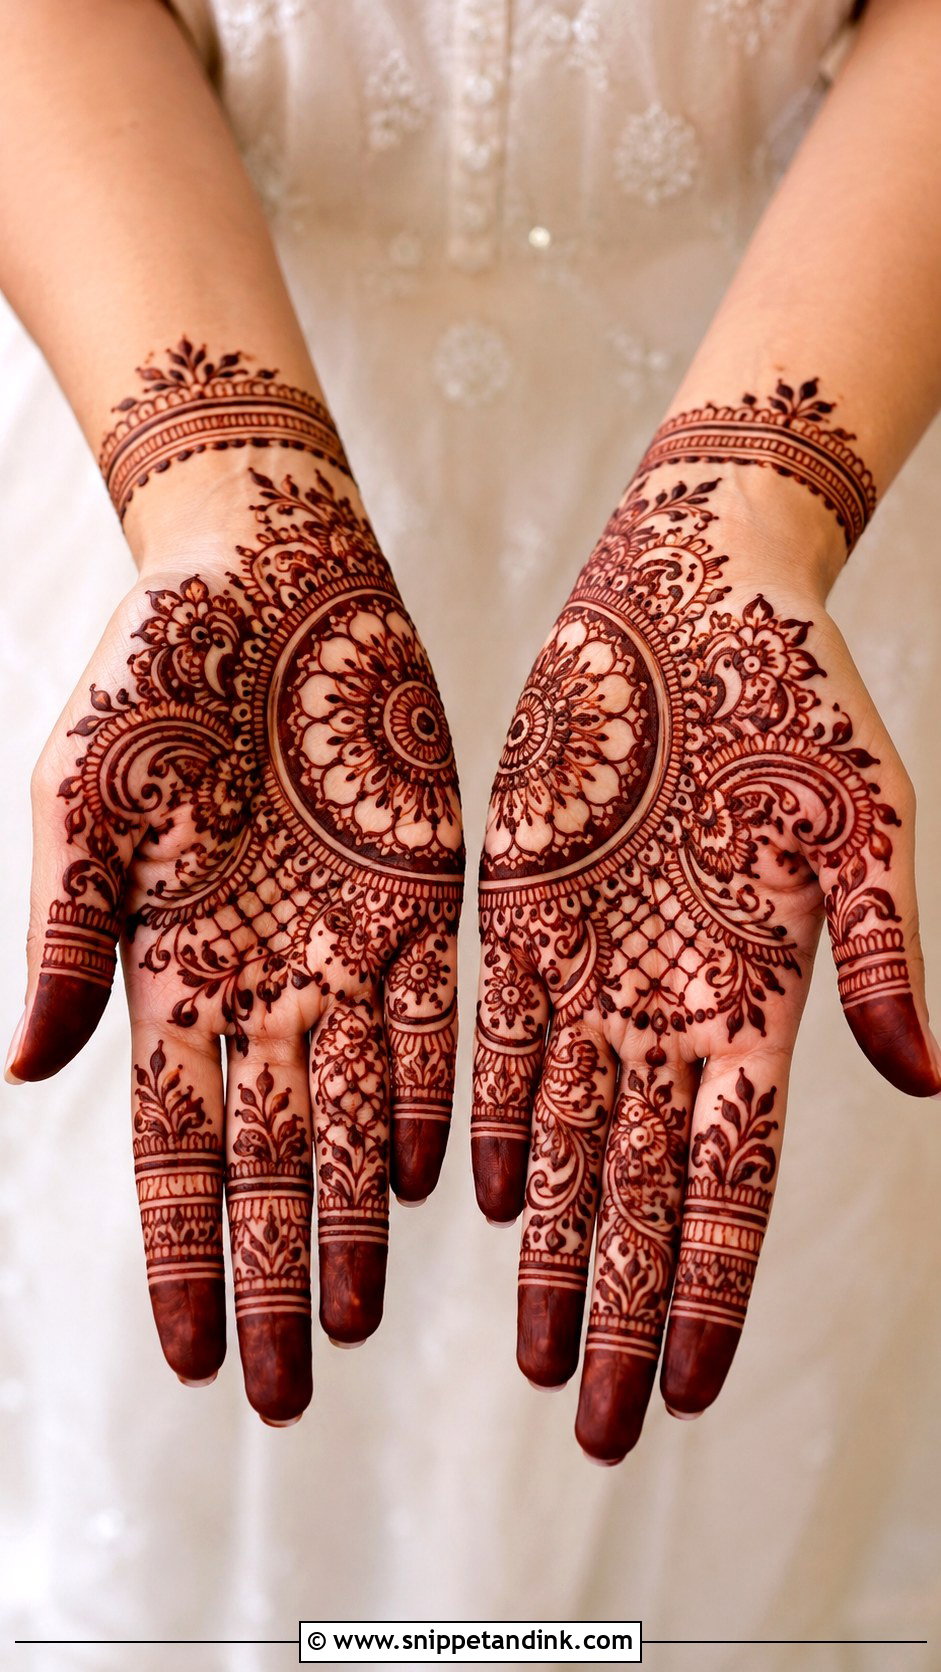
Half-hand coverage sits between minimal and bridal, and it’s the most practical option for most festive events. It covers the palm and fingers and stops at the wrist, or runs a back-hand trail that ends before the forearm. The design has to look finished where it stops, so I close it with a clear border at the wrist or the base of the palm. Without that line it looks like I ran out of time.
19. Palm Mehndi Design
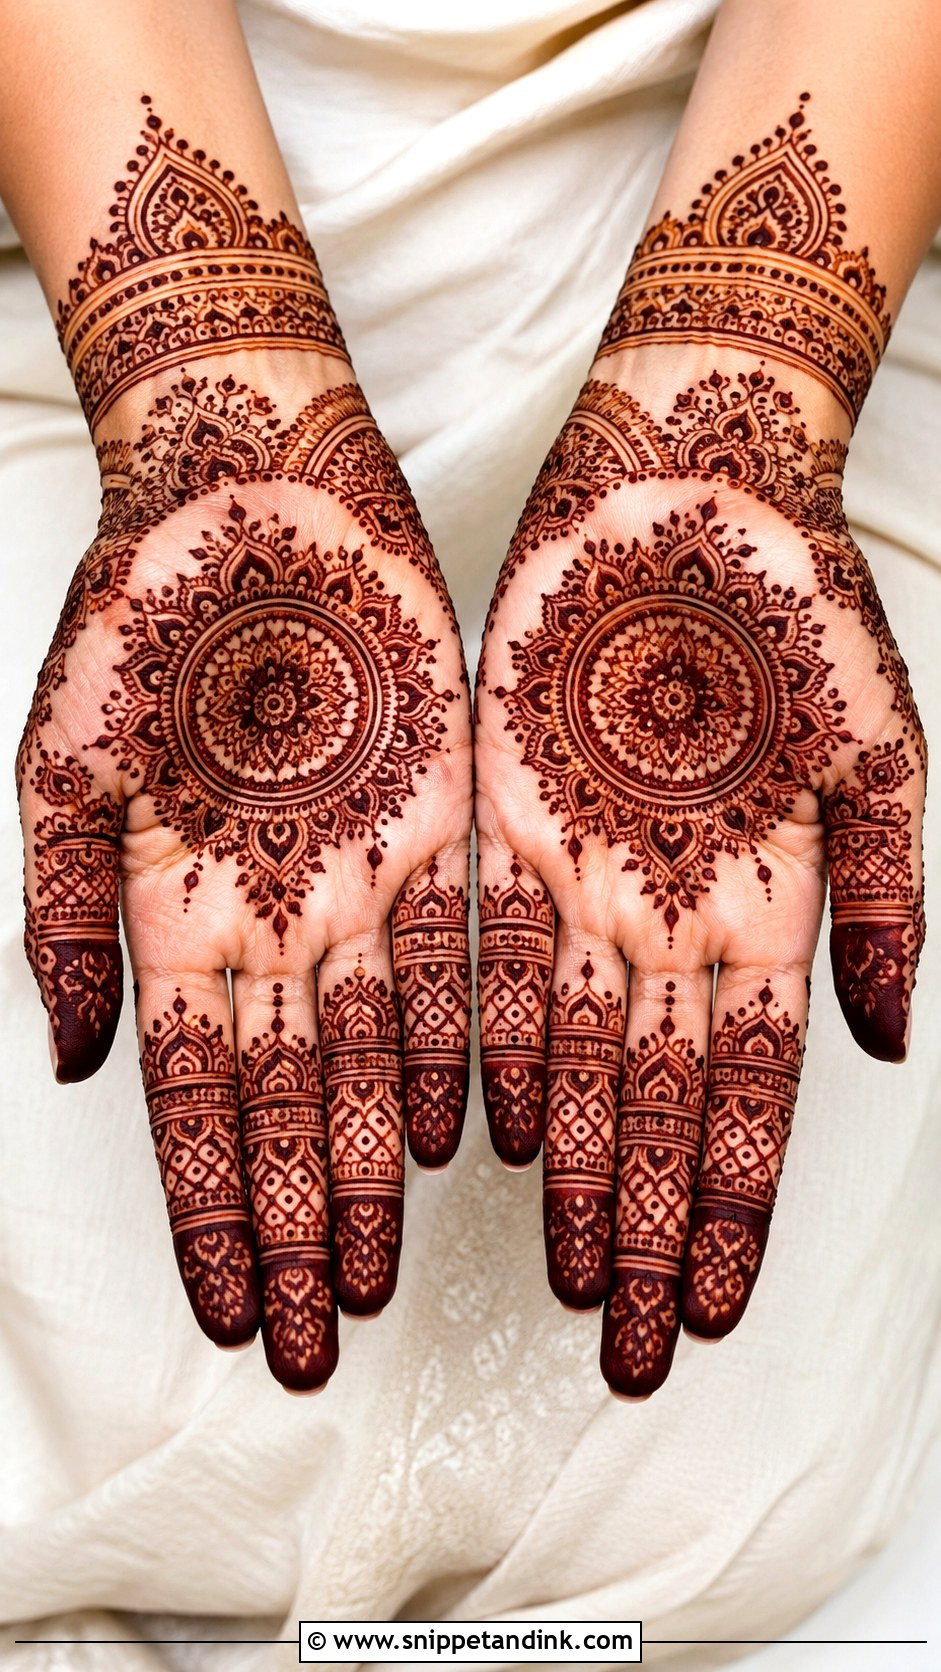
A palm mehndi design gets the best stain on the hand, because palm skin is thick and takes henna deeply. That’s why I put the most detailed motif there: a mandala, lotus or peacock. I resist the urge to fill every gap with tiny lines, since a crowded centre loses its focus once the colour darkens. Fingers can stay simple.
20. Back Hand Mehndi Design
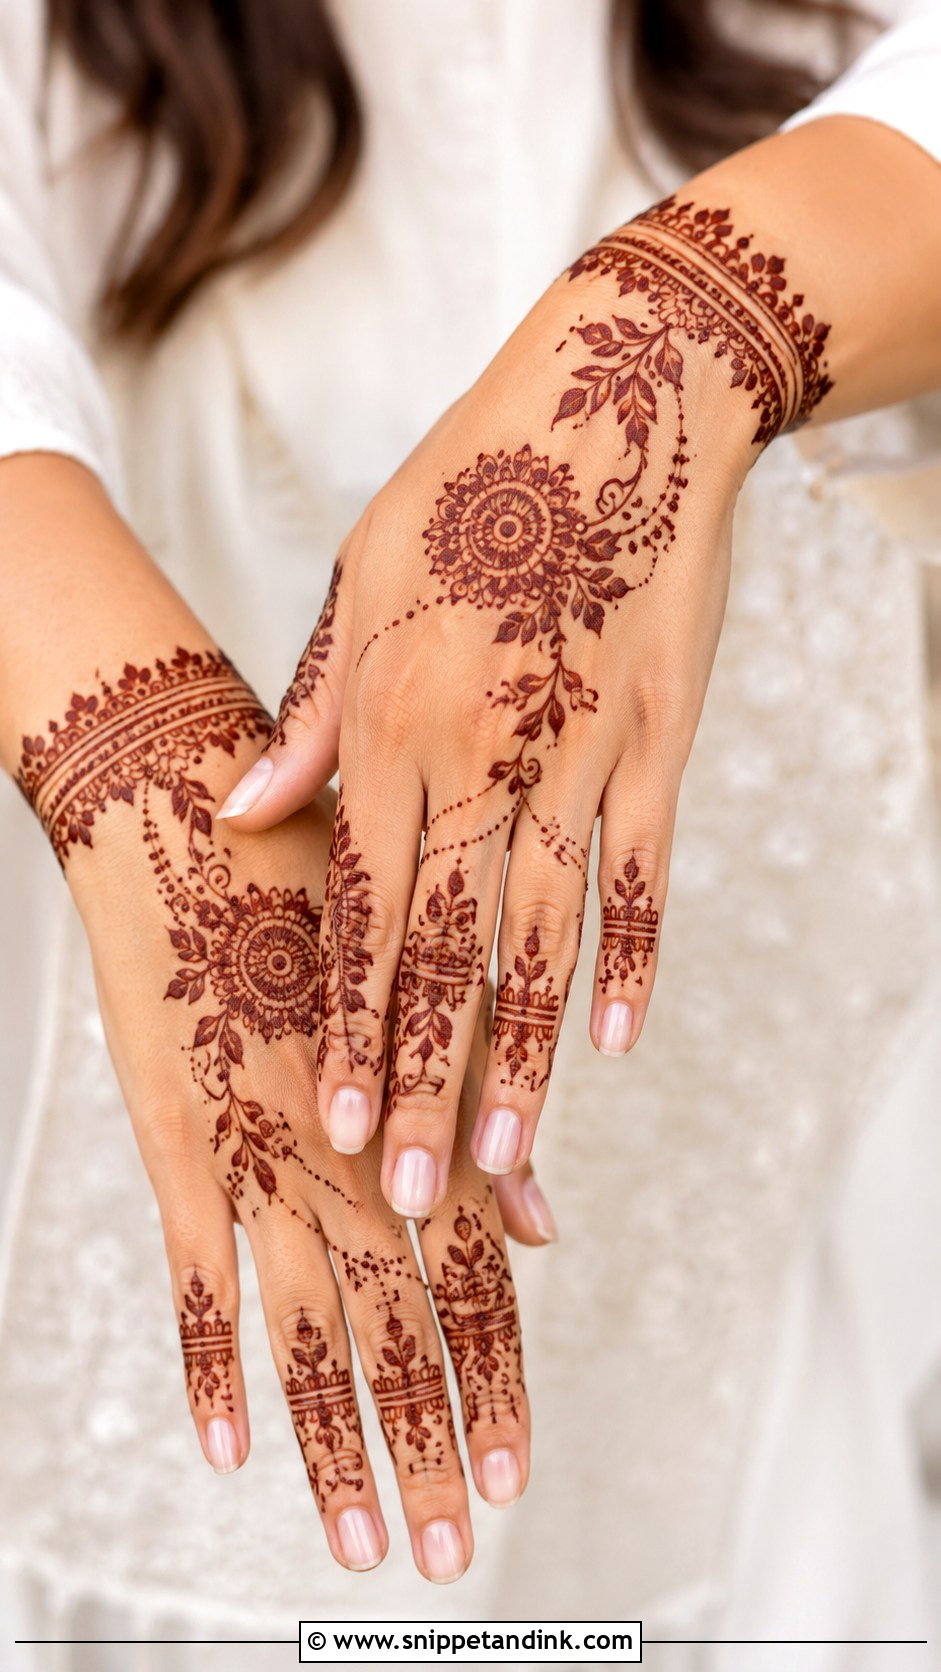
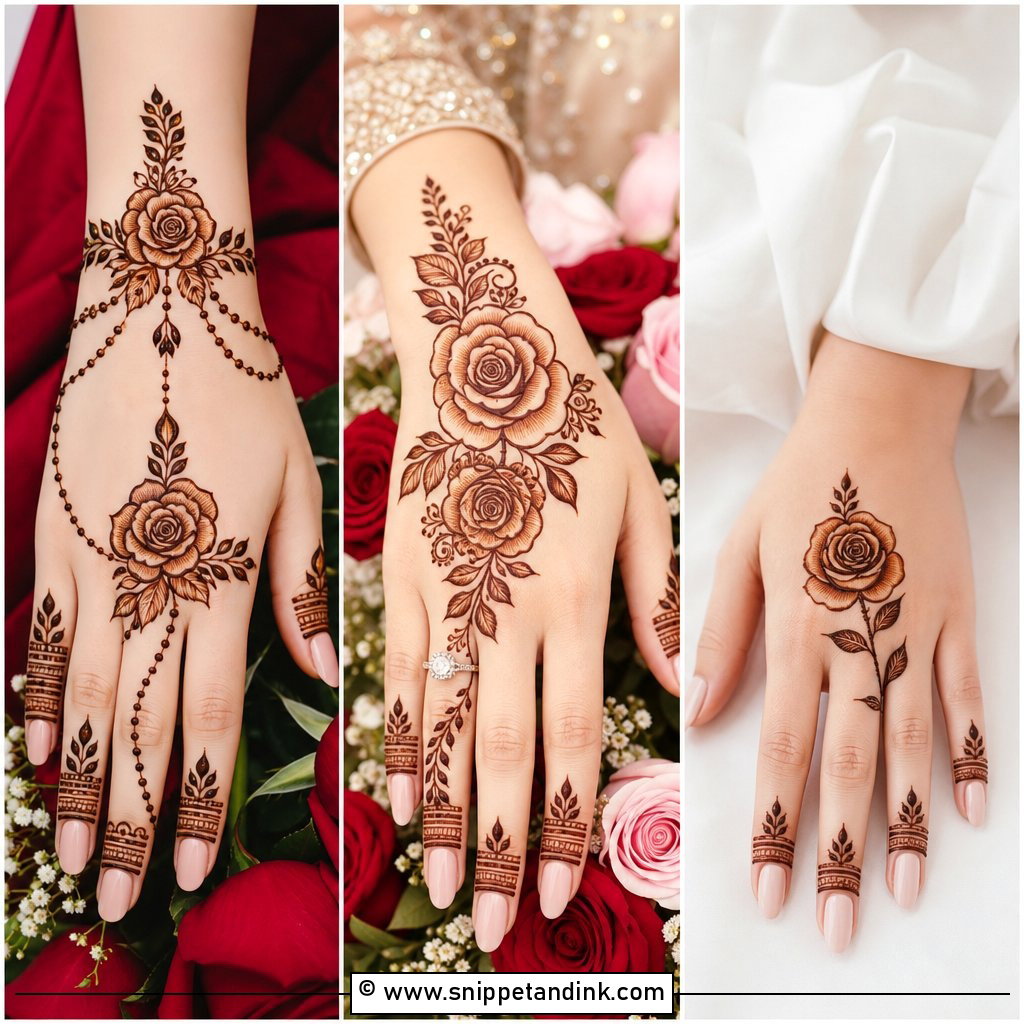
The back of the hand is what everyone actually sees, when you’re holding a plate, greeting relatives or posing with a cup of chai. It’s a flat surface, so spacing mistakes show clearly. I build around one structure, a central flower, a diagonal vine or a ring chain, and keep the knuckles lightly decorated. Heavy lines across the knuckles crack as you bend your fingers while the paste dries.
21. Full Finger Mehndi Design
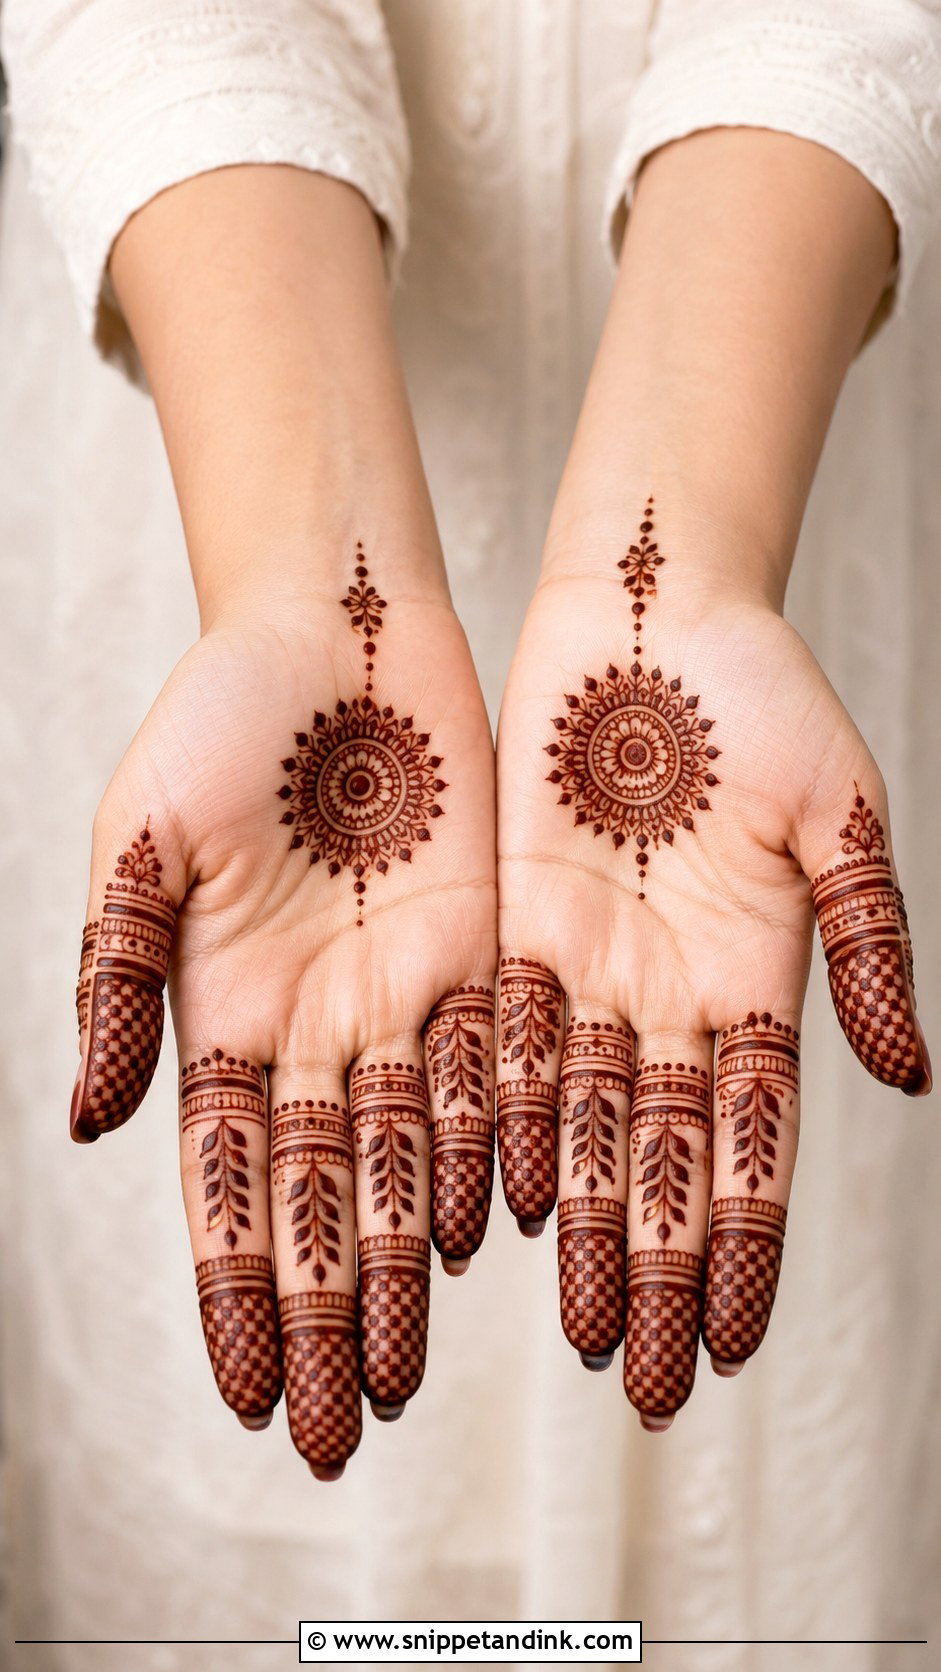
A full finger mehndi design makes fingers look longer, especially when the bands taper toward the tips. I usually mix two or three pattern types across the five fingers rather than making them identical, which looks repetitive up close. Filled fingertips stain very dark, so if you want a softer finish, ask for outlined tips instead of solid ones.
22. Paisley Mehndi Design
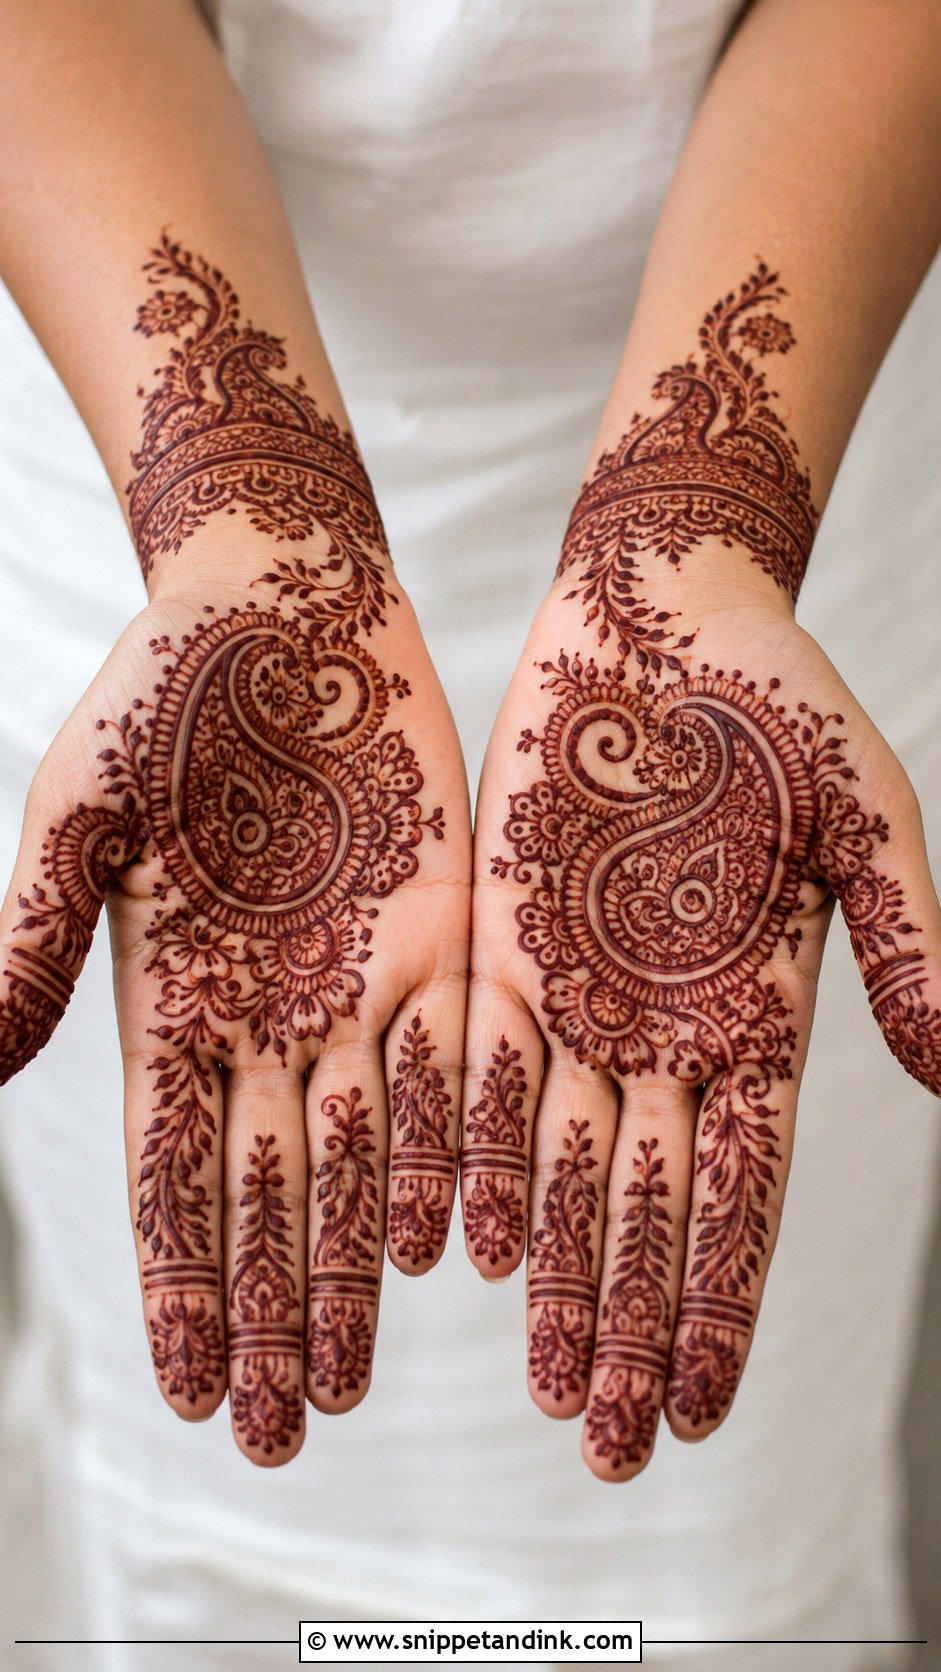
Paisley has been part of mehndi for generations, and it adapts to almost any layout. My favourite arrangement is one large paisley on the palm with smaller ones trailing toward the fingers. The outline should be smooth and fairly thick, then the inner detail lighter, so the shape stays readable from a distance. A thin, wavering paisley outline is the most common thing I correct when students practise.
23. Rose Mehndi Design
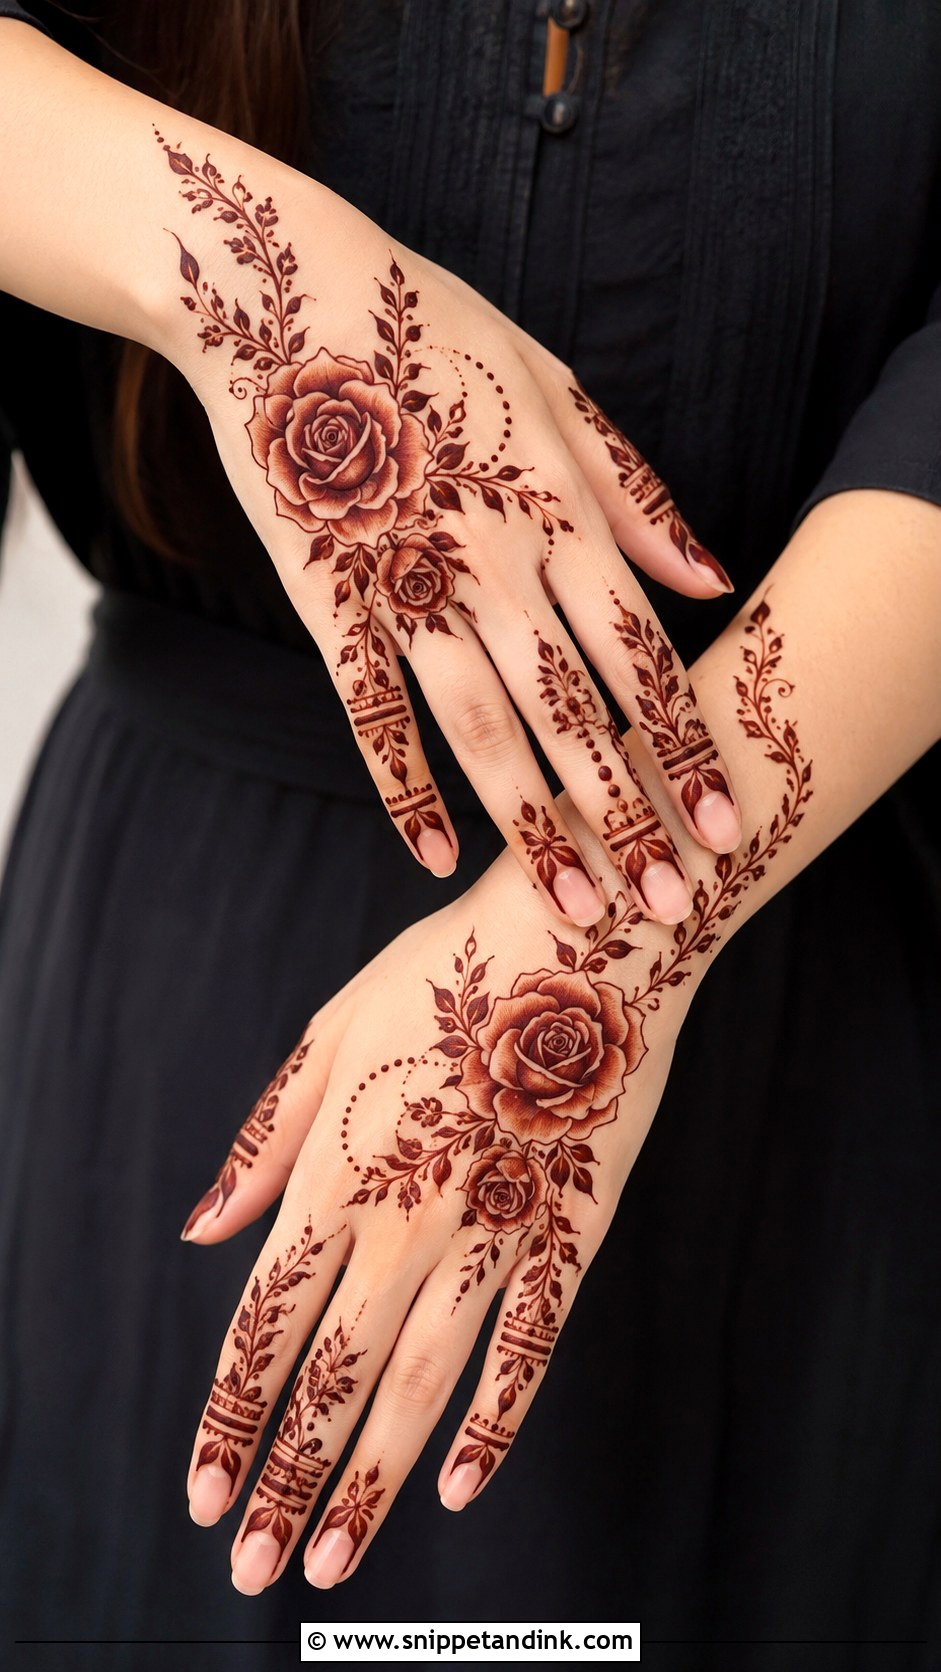
Roses are trickier than round flowers because the petals spiral and overlap. I draw the centre swirl small and tight, then add petals outward with smooth curves, no sharp corners. One large rose with open space around it suits Arabic and Indo-Arabic layouts. Keep the fingers to leaf bands so the rose stays the main event.
24. Negative Space Mehndi Design
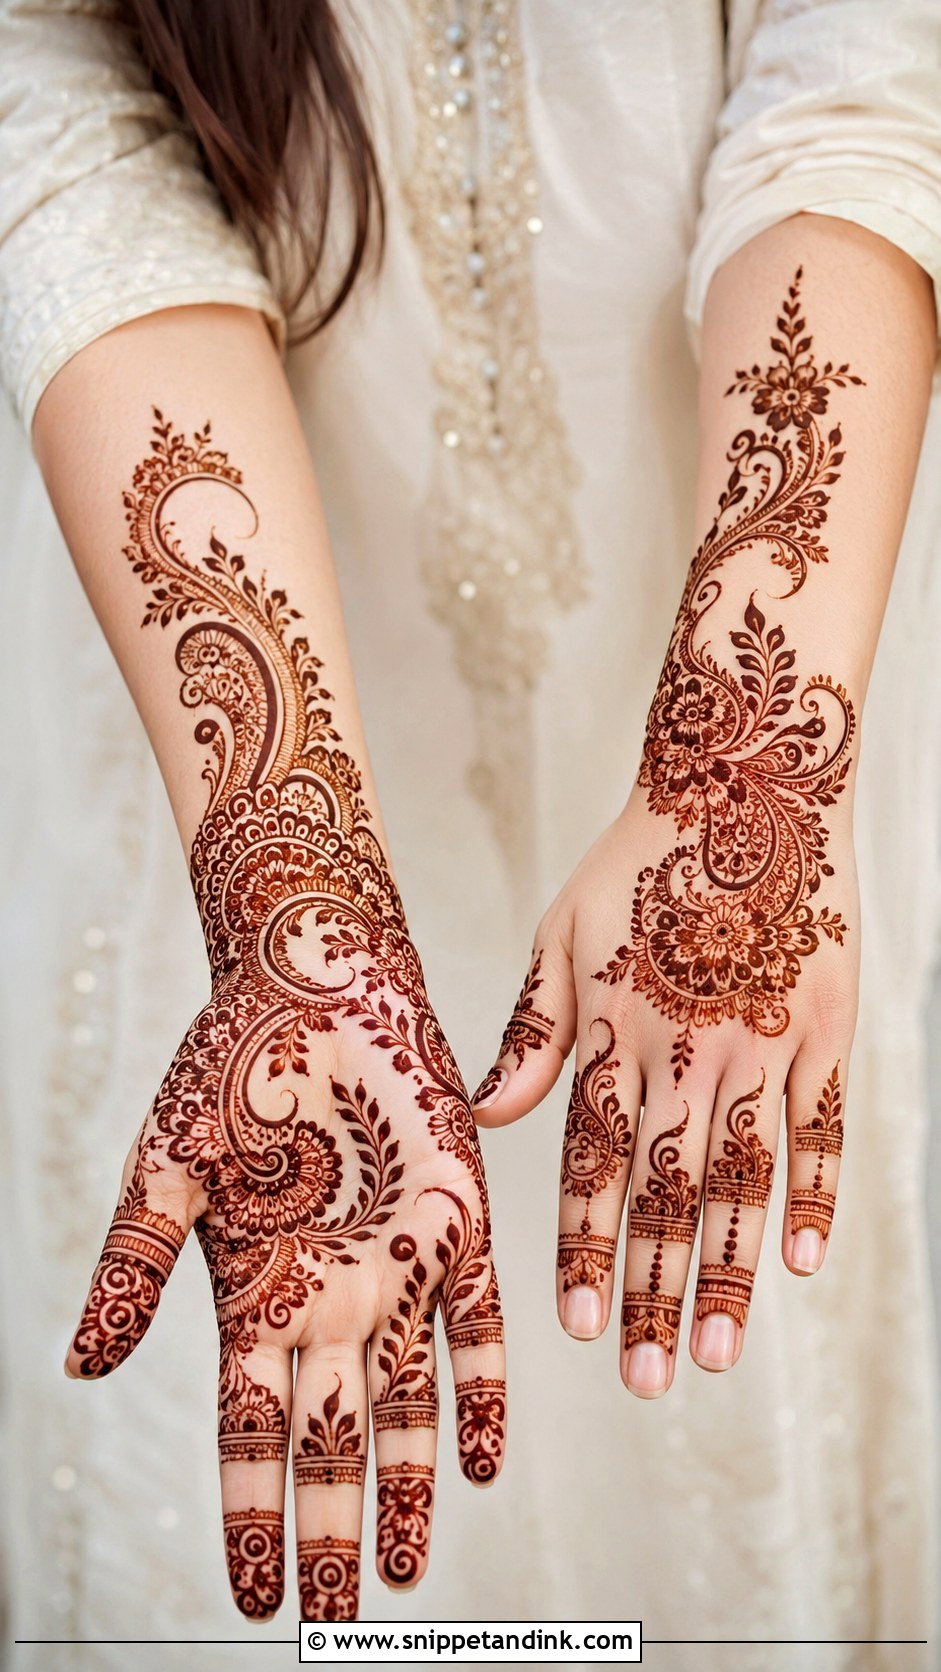
In a negative space design, the bare skin is part of the pattern, not leftover space. That means I plan the empty areas before I put any paste on the hand, sometimes marking them with a few faint dots. Random gaps look unfinished, while planned gaps look deliberate. It’s my answer for anyone who says full mehndi feels heavy.
25. Jewelry Mehndi Design
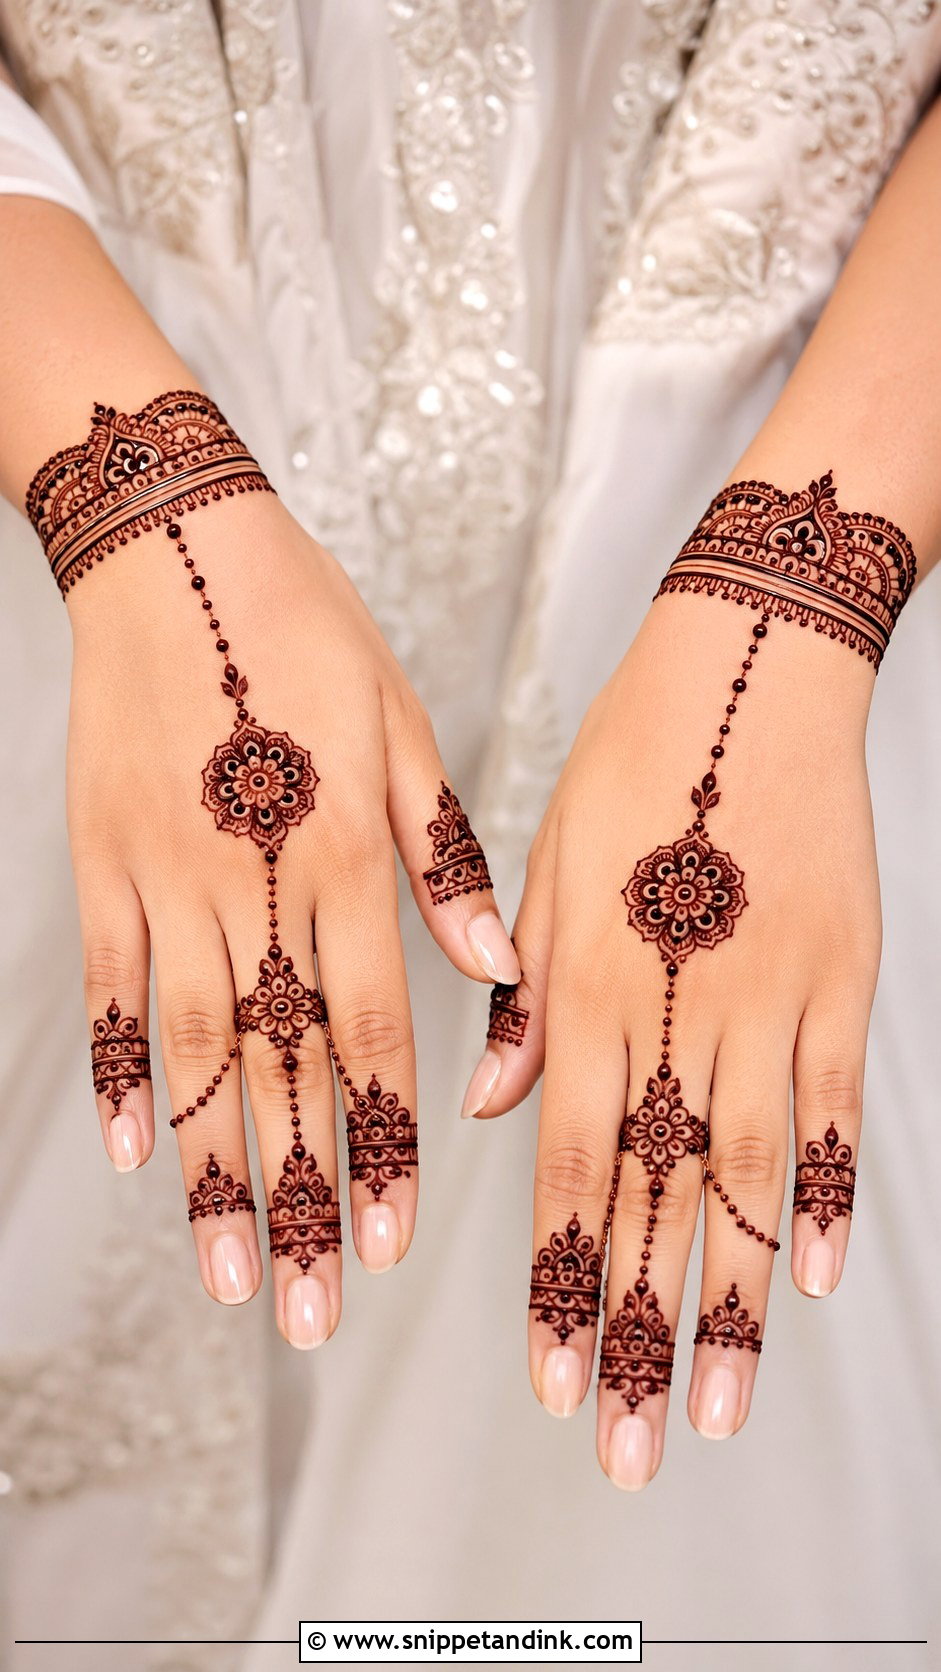
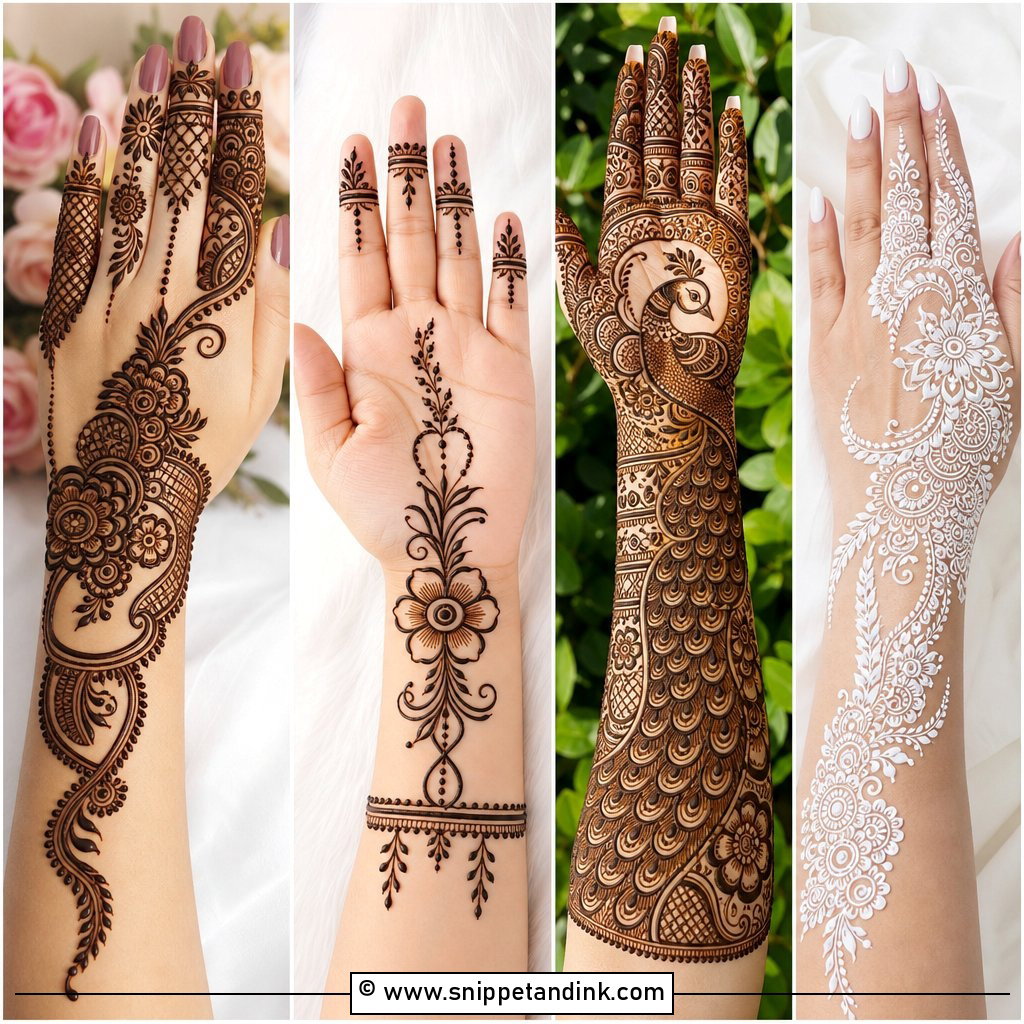
Jewelry mehndi copies rings, chains and a hand harness, so it belongs mostly on the back of the hand. I draw the wrist band slightly bolder and the chains thinner, which mimics how real jewelry looks. A central flower connects the bracelet to one or more fingers with dotted chains. If you’ll wear real rings too, tell your artist which fingers, so the henna frames the metal instead of disappearing under it.
26. Shaded Mehndi Design
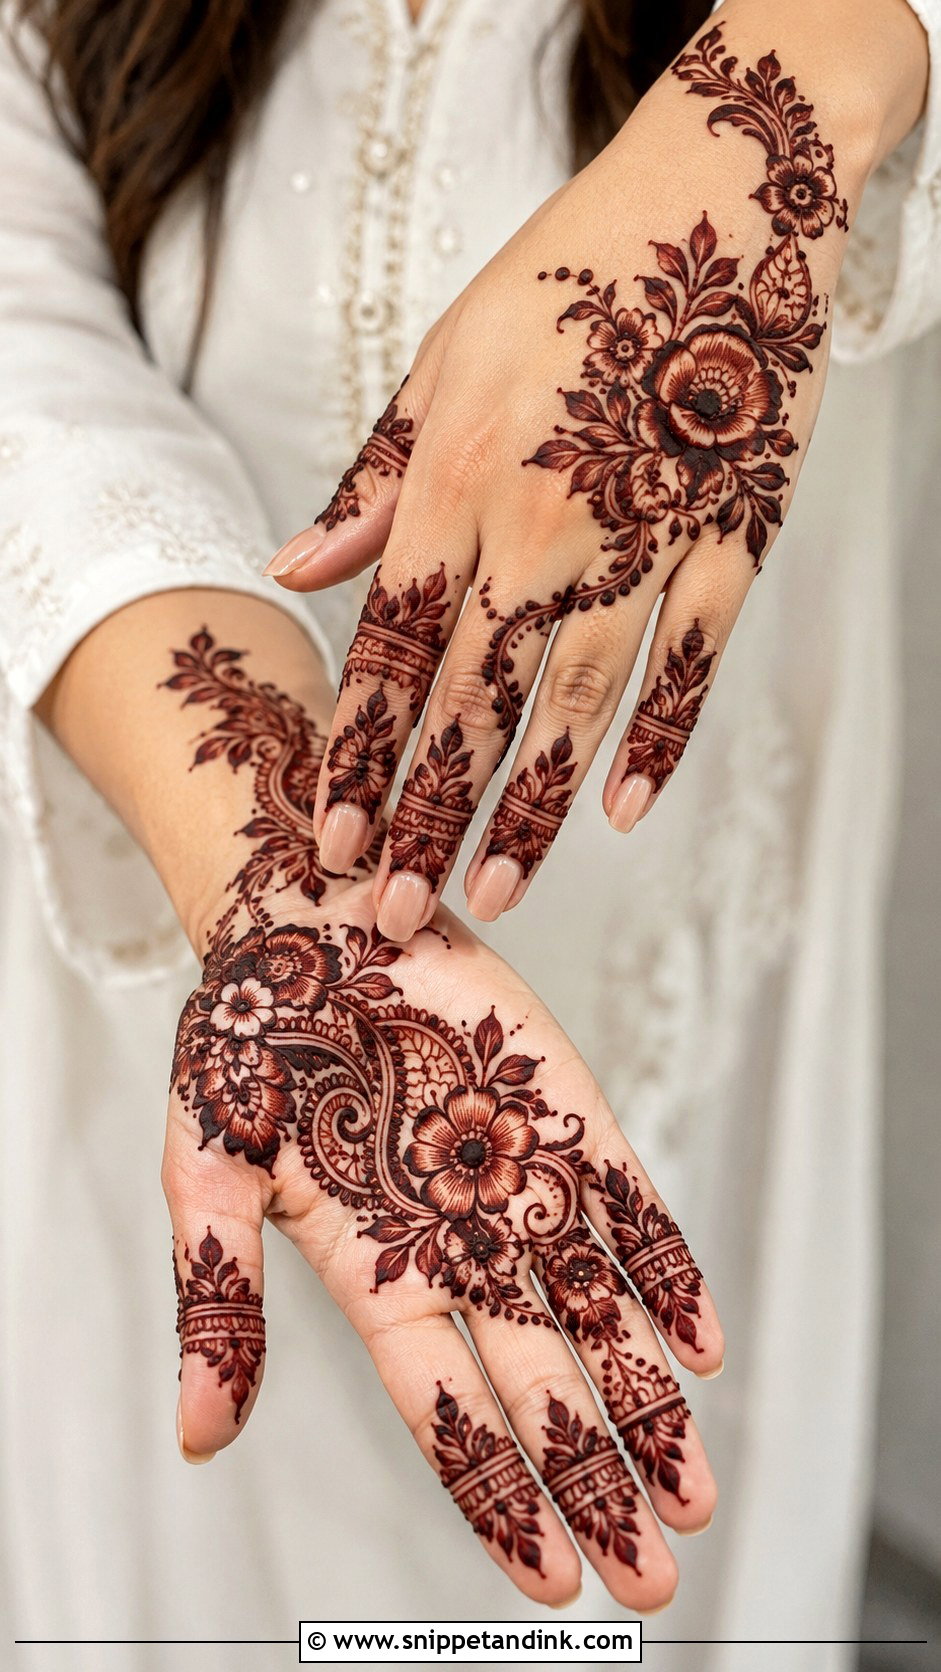
Shading means filling petals or leaves with a gradient instead of a solid block, and it needs a confident hand. I let a little more paste flow at the base of a petal and thin it toward the tip. On small hands I use shading sparingly; too much and the whole hand turns dark and flat once it stains. It shows best on large Arabic or Gulf-style motifs with open space around them.
27. Geometric Mehndi Design
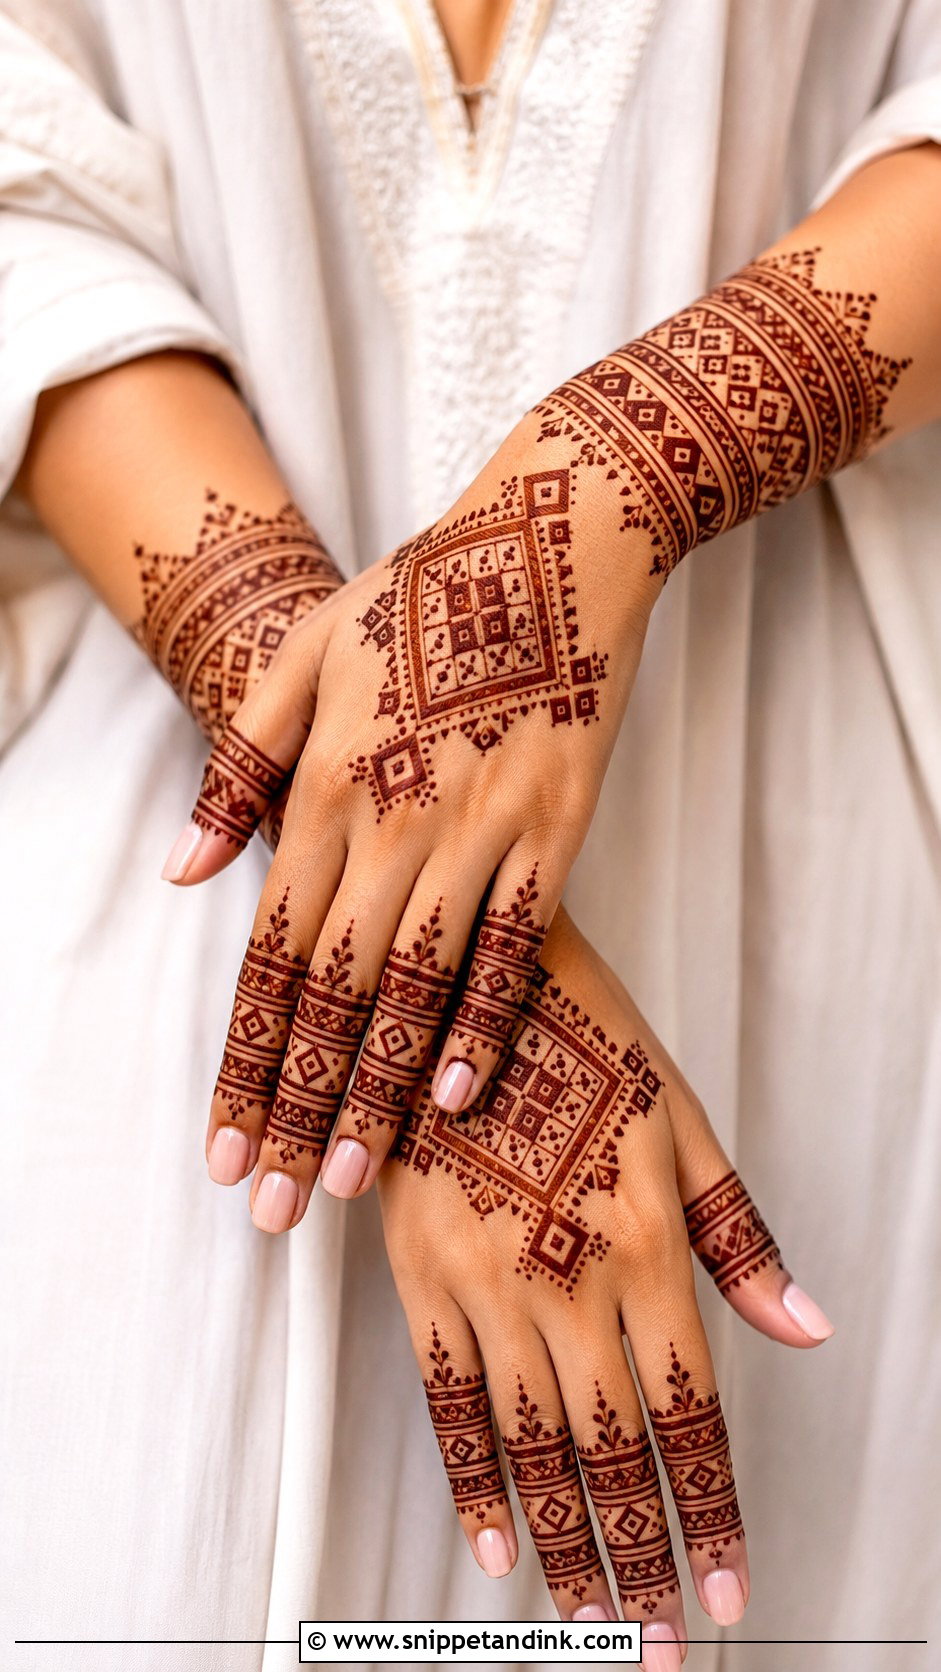
Geometric mehndi suits fusion outfits and people who find florals fussy. Lines, grids, triangles and diamonds do all the work, so precision is everything. I usually soften a geometric hand with one small mandala or a leafy border, otherwise it can look like a circuit board. Ask your artist to show you a straight line on paper first; it tells you a lot about their control.
28. Forearm Mehndi Design
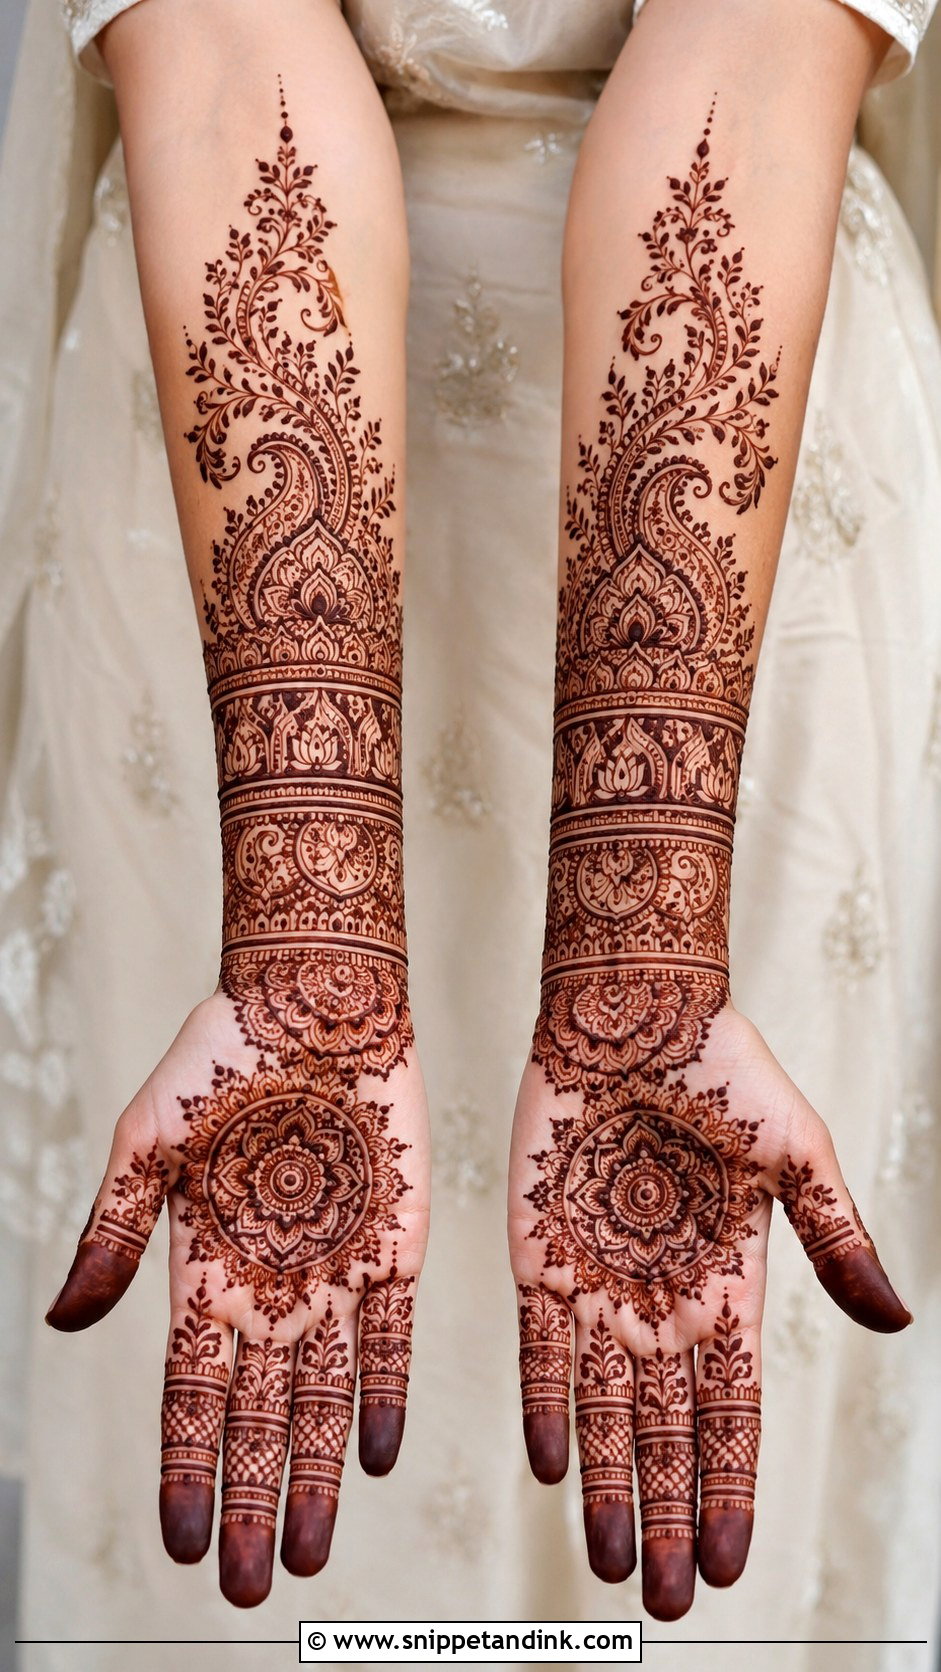
A forearm mehndi design extends the pattern past the wrist and changes the whole proportion of the arm. I start with a strong wrist section and let the design taper as it climbs, which follows the shape of the forearm. Forearm skin stains lighter than the hands, so dense filler up there often looks faded next to the palm. It’s worth it with sleeveless or short-sleeved outfits; under full sleeves nobody sees it.
29. White Mehndi Design
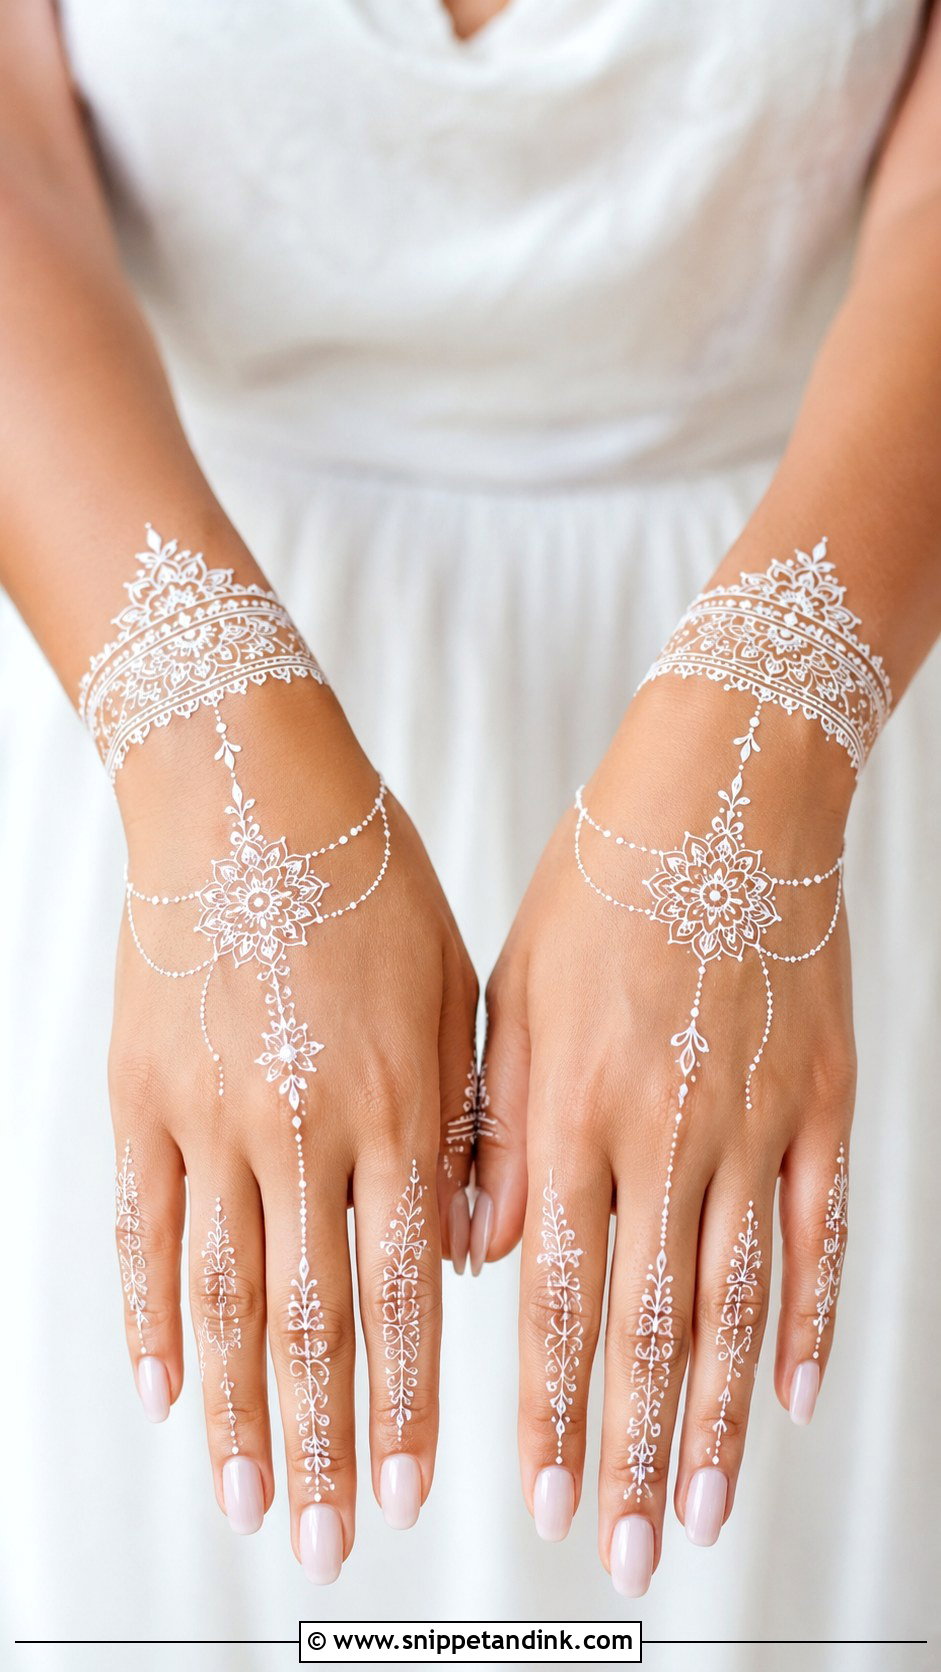
White mehndi isn’t henna at all. It’s a body-safe adhesive or skin paint, sometimes mixed with fine glitter, and it sits on top of the skin instead of staining it. That means it lasts a day or so, rubs off on fabric, and smudges if you wash your hands carelessly. I keep white designs simple, usually a bracelet or lace trail on the back of the hand, because fine detail blurs.
30. Glitter Mehndi Design
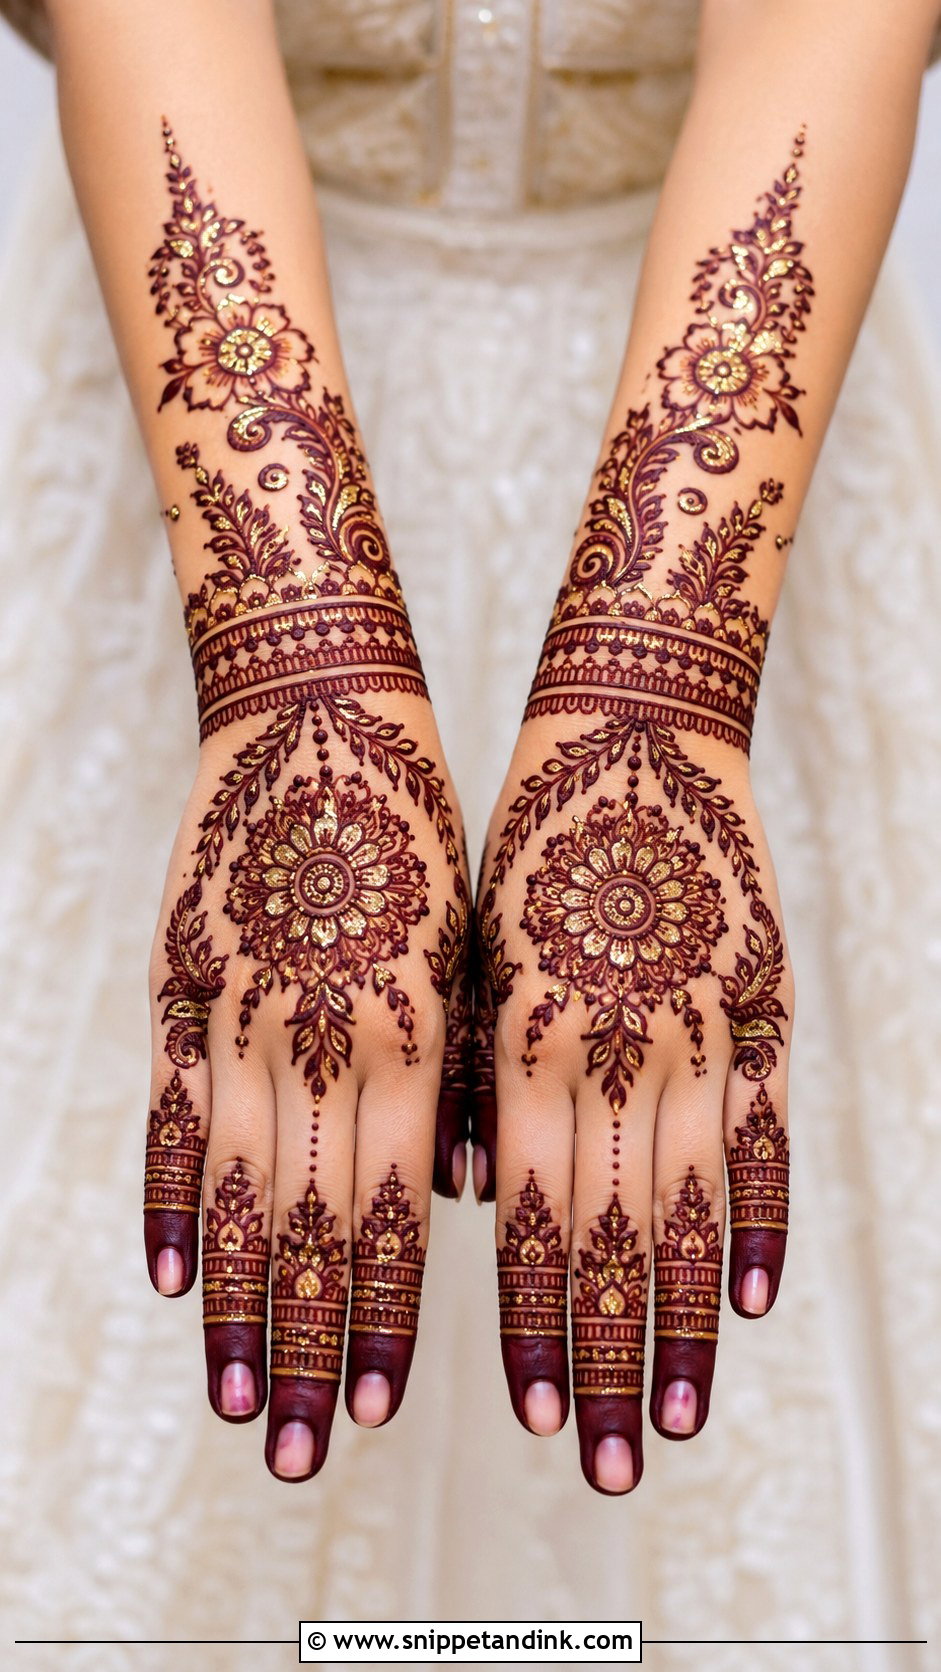
Glitter mehndi is decoration, not stain. I apply a cosmetic-grade adhesive in selected petals or borders and press glitter onto it, either over dried henna or on its own. Gold, copper and maroon look richest against skin. I use glitter only in a few spots; covering the whole design makes it look like craft glue. It flakes off within a day, so time it for the event itself.
The First Twelve Hours Decide How Dark It Gets
Most disappointing stains come from paste that was washed off too early. Once the design is dry to the touch, I dab on a little lemon and sugar mixture so the paste stays stuck to the skin and keeps releasing dye. Then the aim is to leave it on as long as you can, at least six hours and ideally overnight.
- Scrape the dried paste off with a blunt edge or your fingers. Don’t wash it off.
- Keep water off the design for the next twelve to twenty-four hours if you can.
- Warmth helps the stain develop, so keep your hands warm rather than in air conditioning.
- A little natural oil or balm before showering protects the design for the first few days.
Expect the colour to peak around day two and then fade slowly over one to three weeks as the skin renews. Palms fade faster because you use them constantly.
Why I Won’t Use Black Henna, Even for a Quick Party Design
Real henna never stains black. A cone that promises jet black colour in an hour usually contains PPD, the dye used in hair colour, and it can cause blistering, scarring and a lifelong allergy to hair dyes. If your artist’s paste is black, smells of chemicals or stains in minutes, say no. Good natural paste smells earthy, often of essential oils like eucalyptus or tea tree, and goes on green to brown.
White and glitter designs are a separate case. They’re adhesive and cosmetic glitter, not henna, so the usual skin-sensitivity rule applies: if you react easily to cosmetics, ask for a small patch on the inner wrist first.
One Hand, One Event: Matching the Pattern to Your Plans
Every design above can be scaled up or down, from a quick Arabic trail or finger bands to full Indian coverage, peacocks and forearm work. Start with how much time you have, both in the chair and before the event, then pick the coverage. If you’re short on either, a back-hand trail or bracelet design will look finished. If you have a full evening and a day of drying time, go for the detailed palm. Whatever you choose, the stain is what people see, so give the paste time to do its work.
You'll Like These Ideas:


Leave a Reply