
A bride’s mehndi is the one part of her look that is drawn by hand, on her own skin, the day or two before the wedding, and it only reaches its full colour after she has stopped thinking about it. That makes the design choice as much about time, coverage and how the stain develops as about the pattern itself. Below are the bridal styles I’m asked for most, from dense Indian and Rajasthani storytelling to open Arabic and Gulf trails, Moroccan geometry and small details like initials and wrist cuffs. For each one I’ve added what I look at before the cone touches the hand.
Two Days Out: Timing the Sitting Around the Stain
Natural henna doesn’t show its true colour when the paste comes off. It starts out bright orange and darkens to a deep red-brown over the following 24 to 48 hours. That is why I book bridal sittings one to two days before the wedding, so the stain peaks on the day itself rather than the day after.
How long you’ll sit depends on the style. A minimal or Arabic design on both hands can be finished in an hour or two, while full Indian, Rajasthani or royal coverage on hands and feet can take most of a day. Plan for that properly:
- Eat and use the bathroom before I start; once both hands are covered, you’re dependent on others.
- Book any manicure, waxing or exfoliation before the sitting, not after. Scrubbing or polish removers fade a stain fast.
- Wear something loose with short or rolled sleeves, so nothing brushes the wet paste.
- Ask for a patch test if you have sensitive skin, and only accept natural henna. A paste that stains black within an hour is not natural henna and can cause serious skin reactions.
1. Full Hand Bridal Mehndi Design
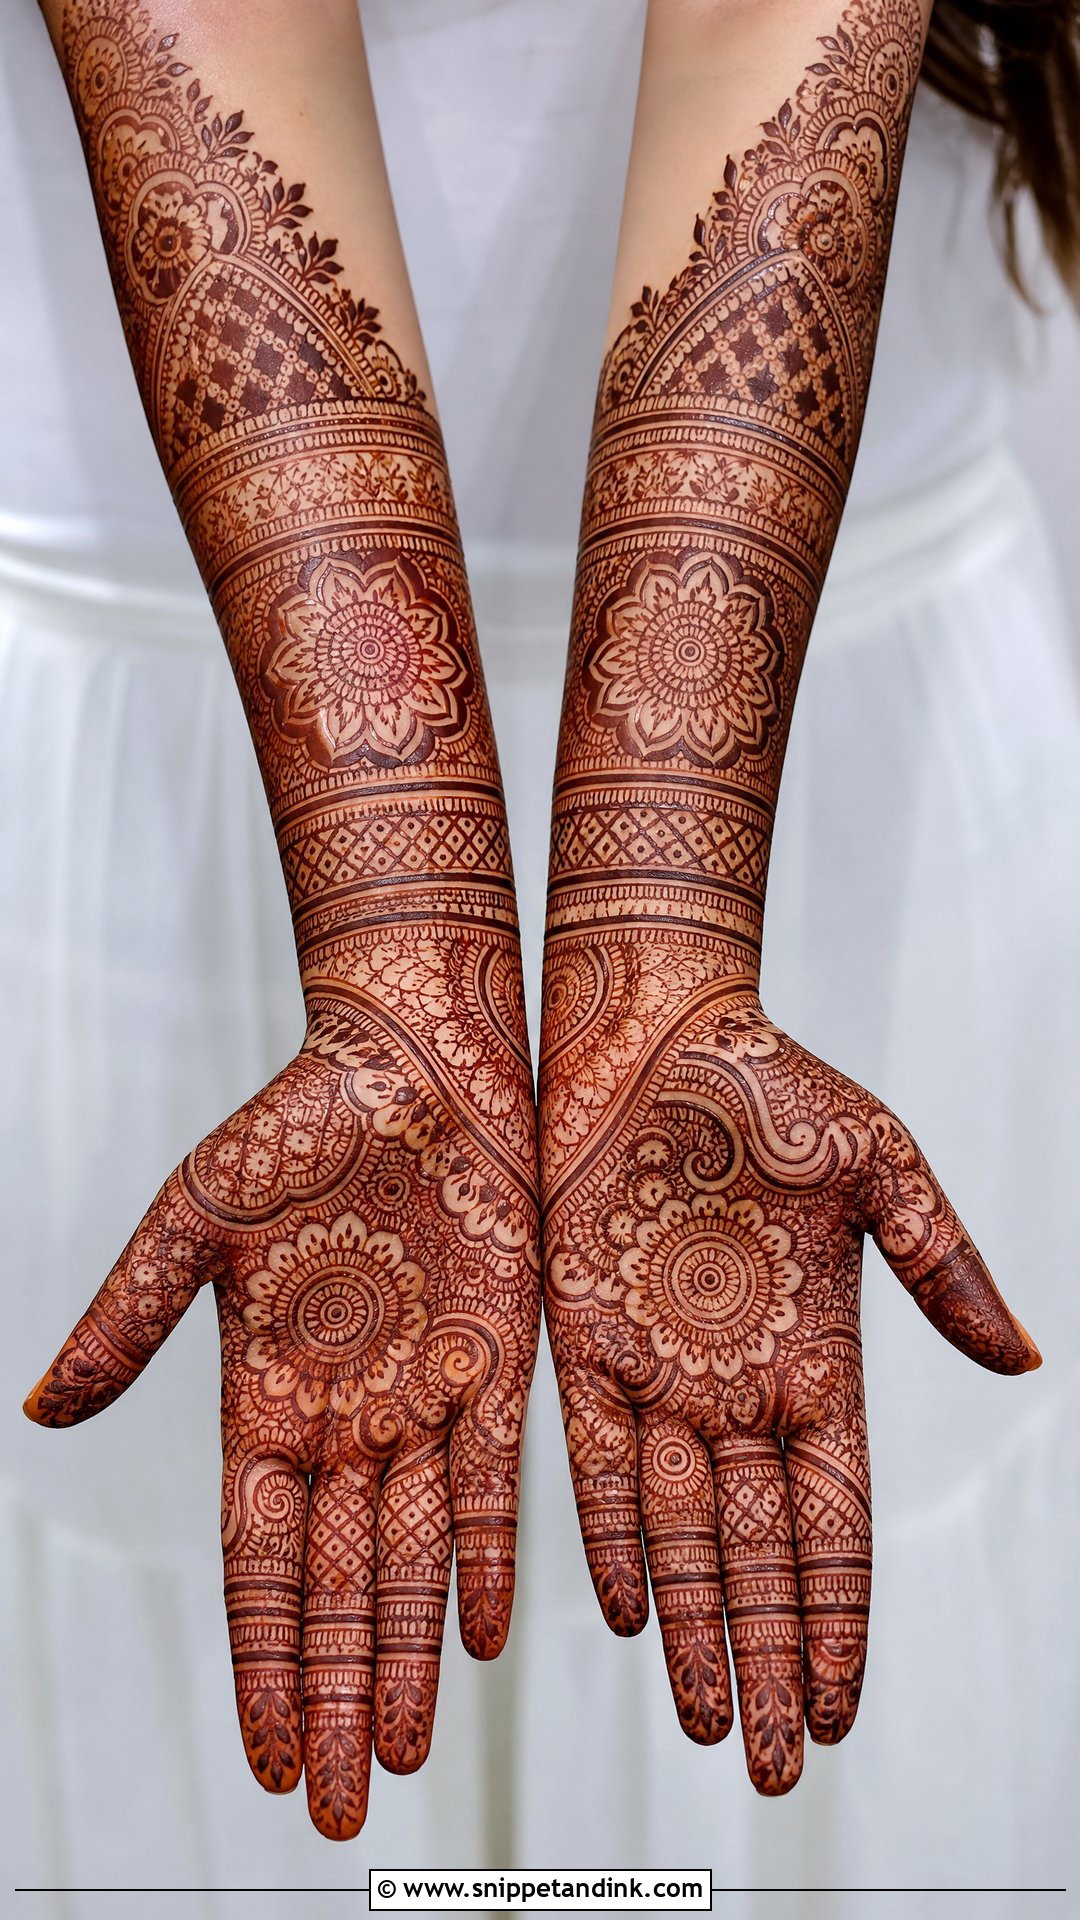
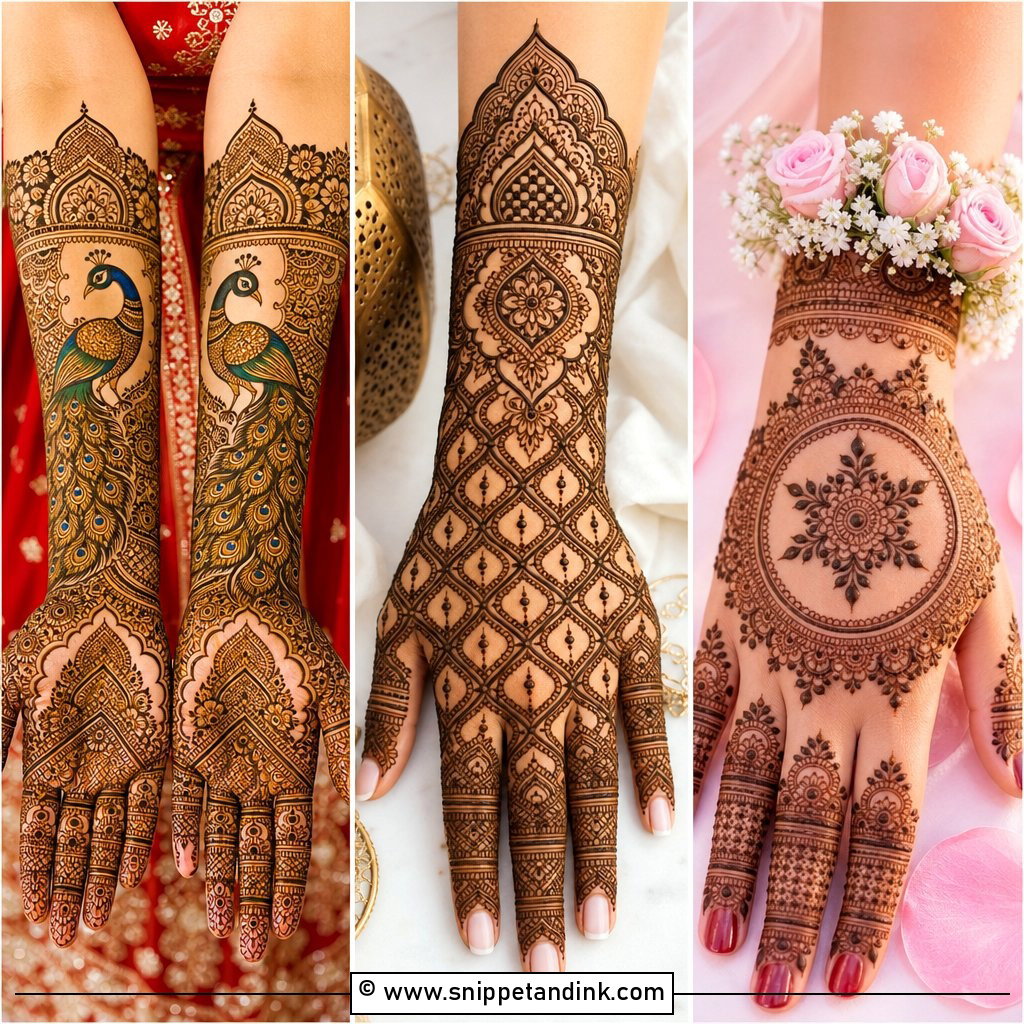
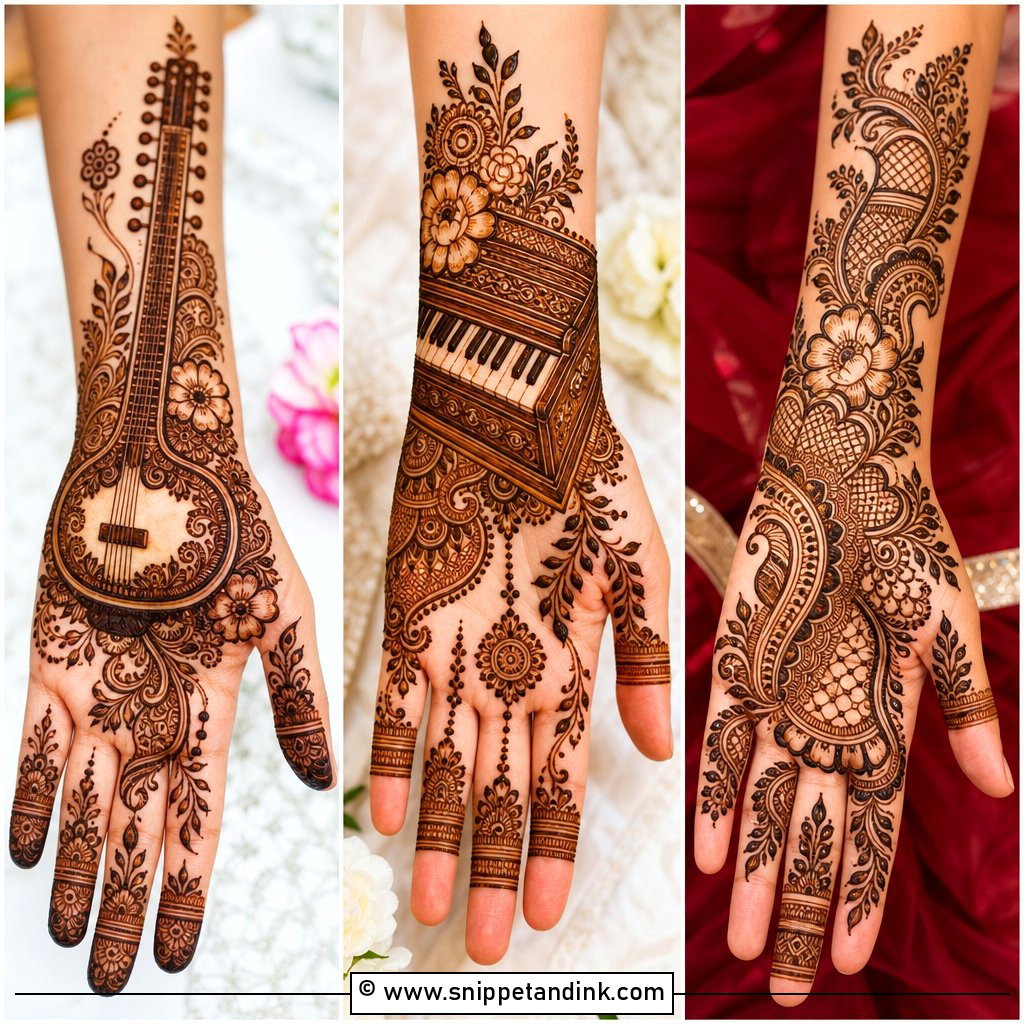
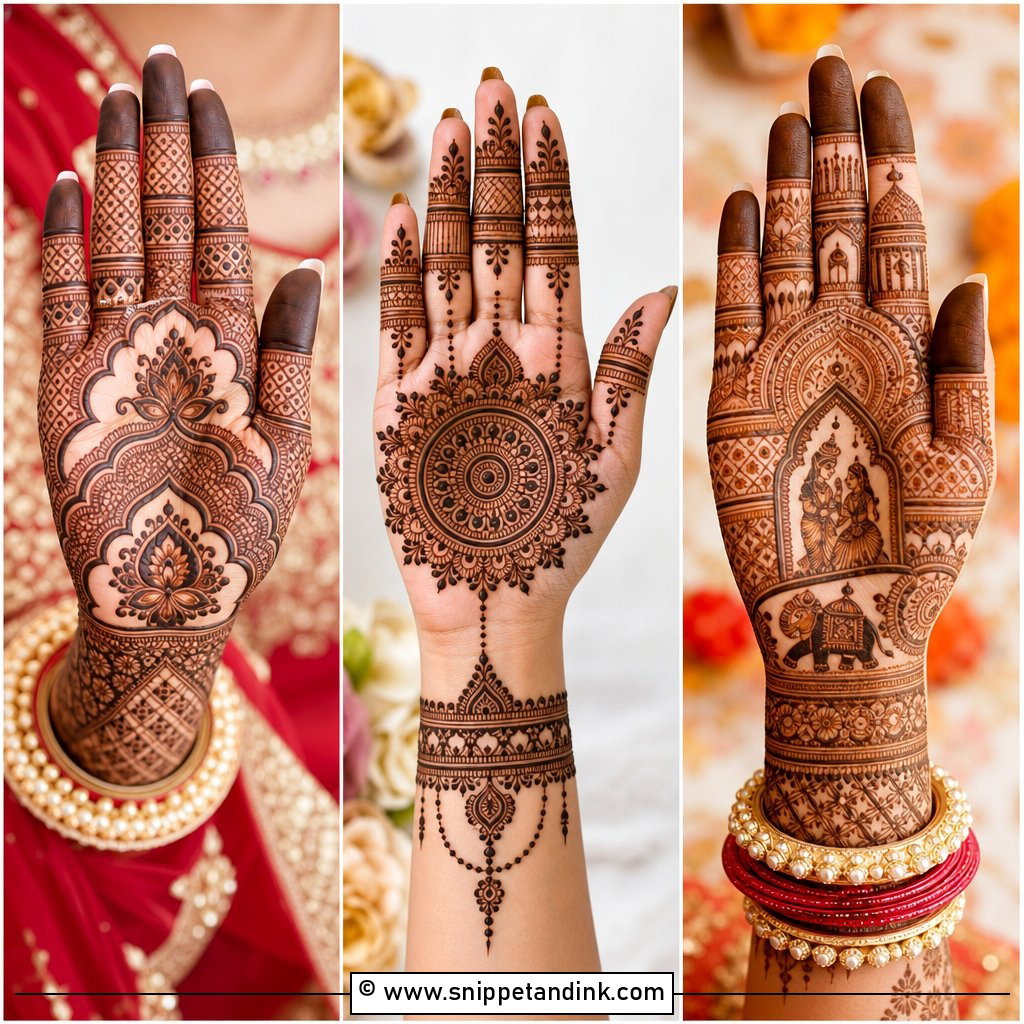
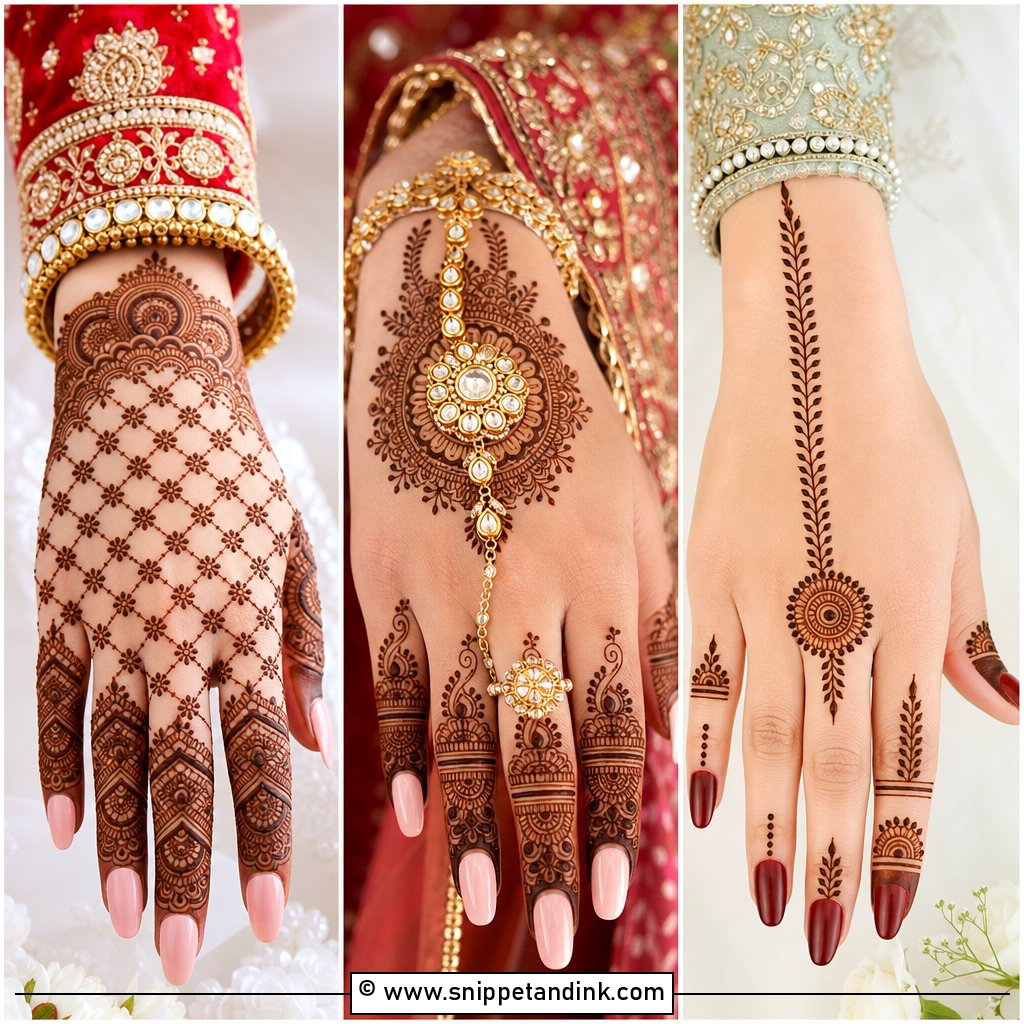
Fingertips to forearm is the coverage most families picture when they hear “bridal mehndi”. A layout like this combines paisleys, florals, vines, mandala circles and fine filler, usually with a bold central motif on the palm and bands that wrap the wrist like bracelets. Before I start, I mark where the sleeve of the outfit will end, so the design finishes at a point that is actually seen. The thing I watch most closely is spacing: even gaps between motifs stain evenly, while crowded filler can blur into a dark patch once the colour deepens. Filled fingertips matter too, because a pale tip next to a deep palm looks unfinished.
2. Indian Bridal Mehndi Design
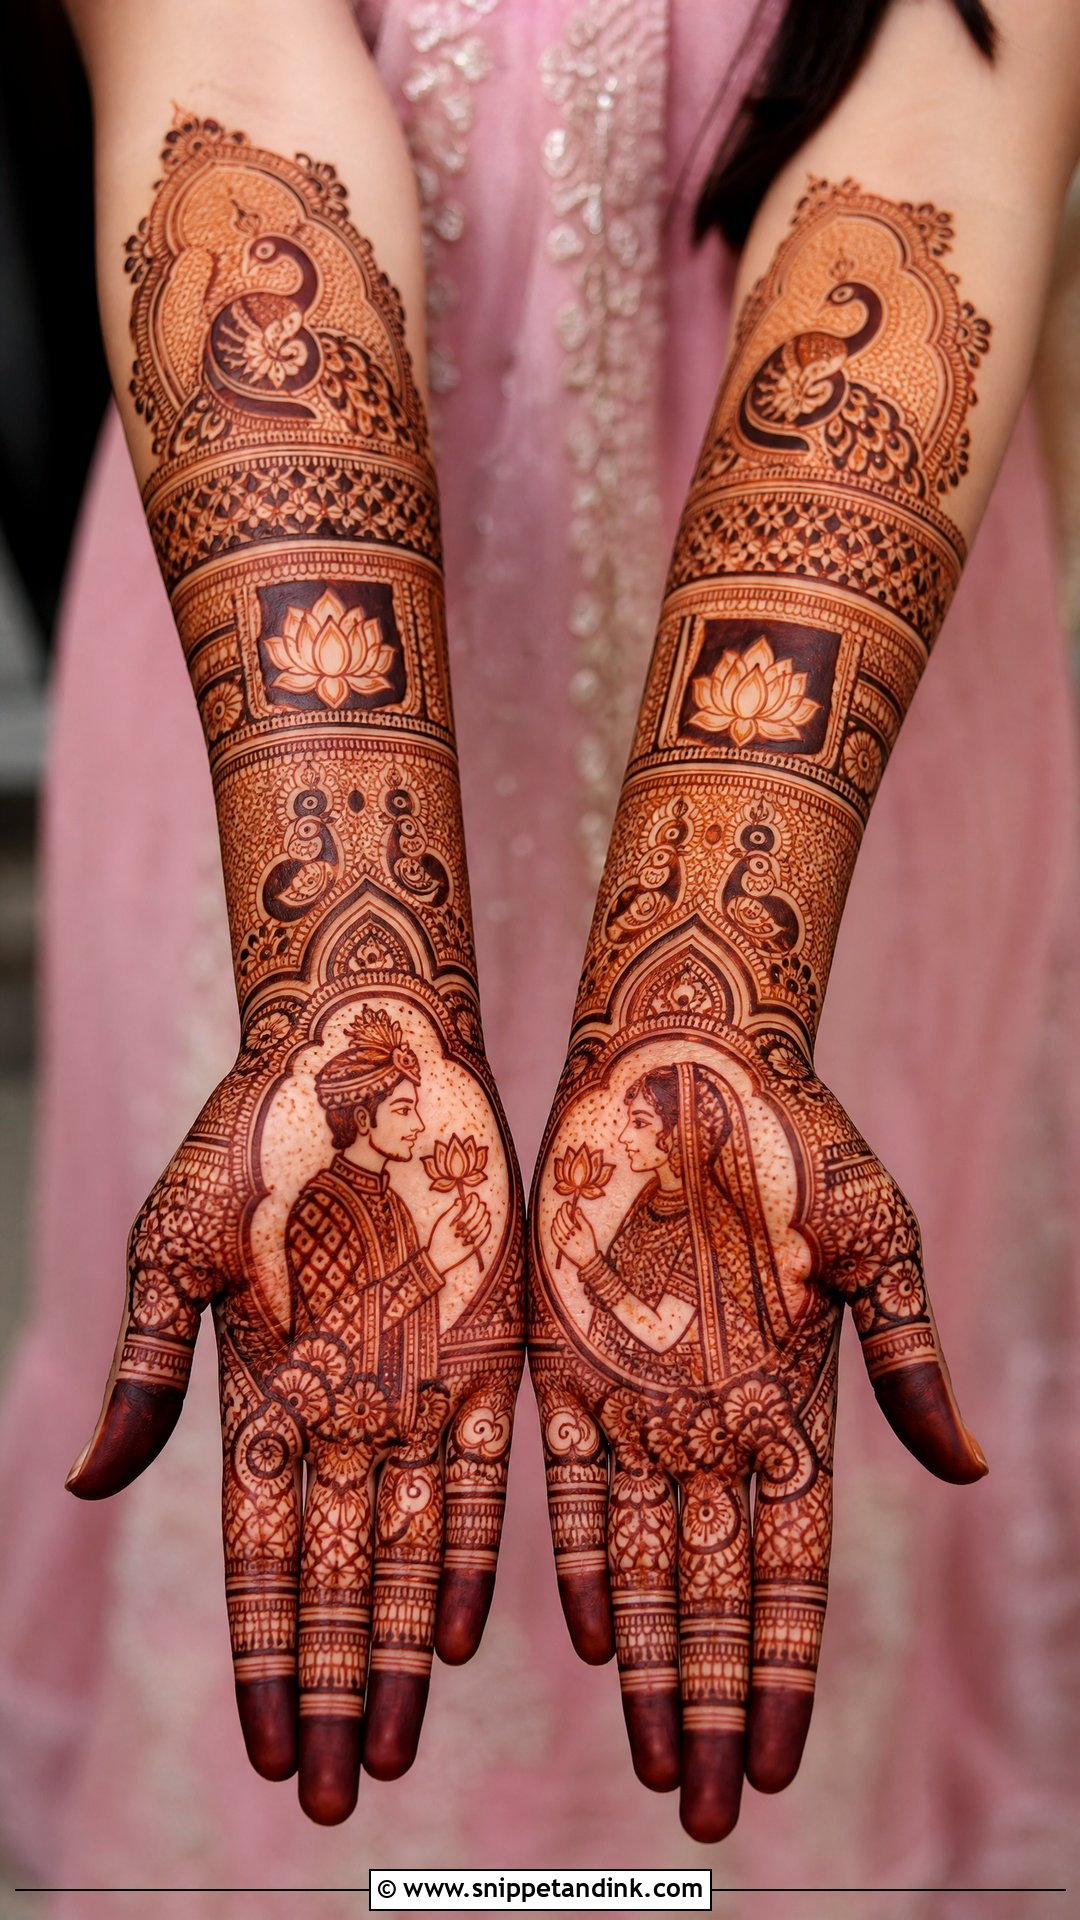
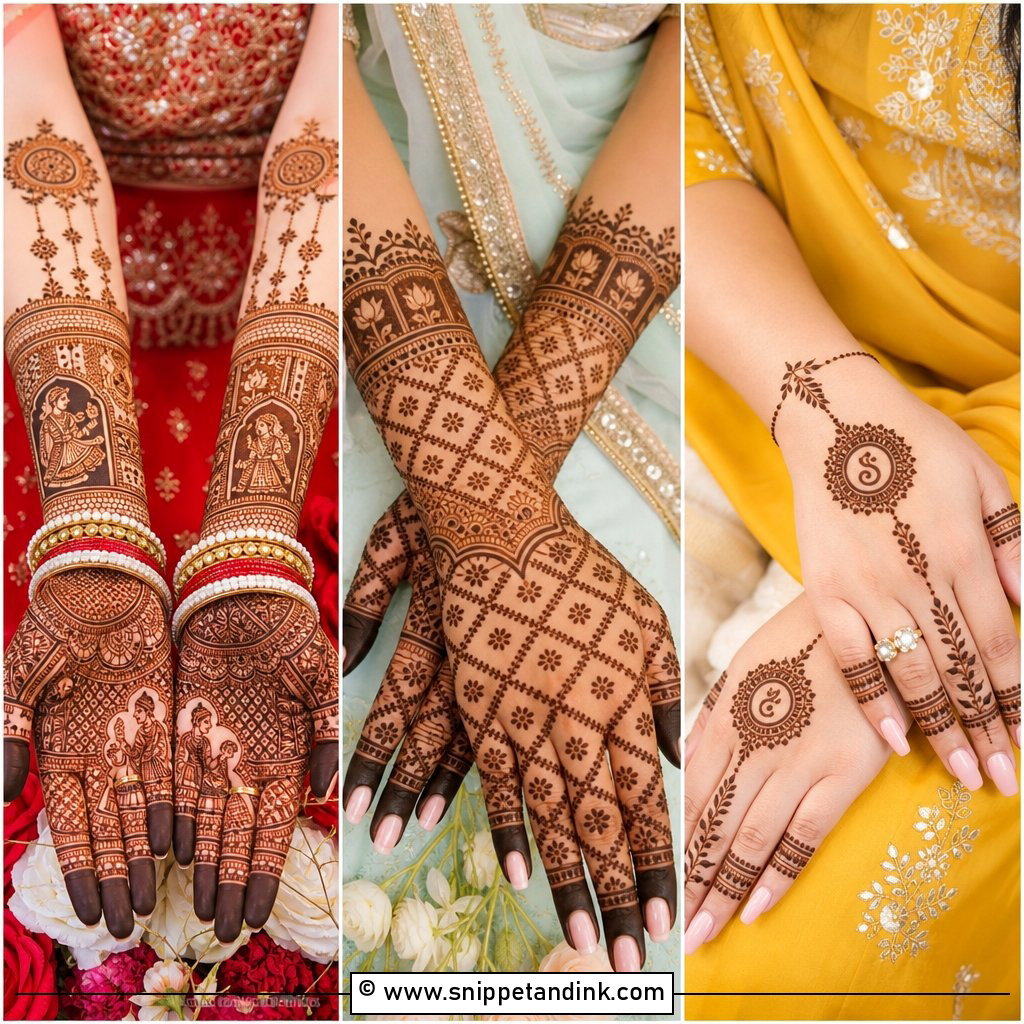
Traditional North Indian work tells a story across both hands. Indian bridal mehndi design typically draws on peacocks, lotus, paisleys, kalash and bride-groom figures, all linked by lace-like filling. I usually put the main scene on the palms and continue the story on the back hands and forearms with jaali and floral borders. Symmetry between the two hands matters more here than in any other style, since the palms are photographed side by side. Be ready to sit still for several hours; this is the slowest design on the list.
3. Arabic Bridal Mehndi Design
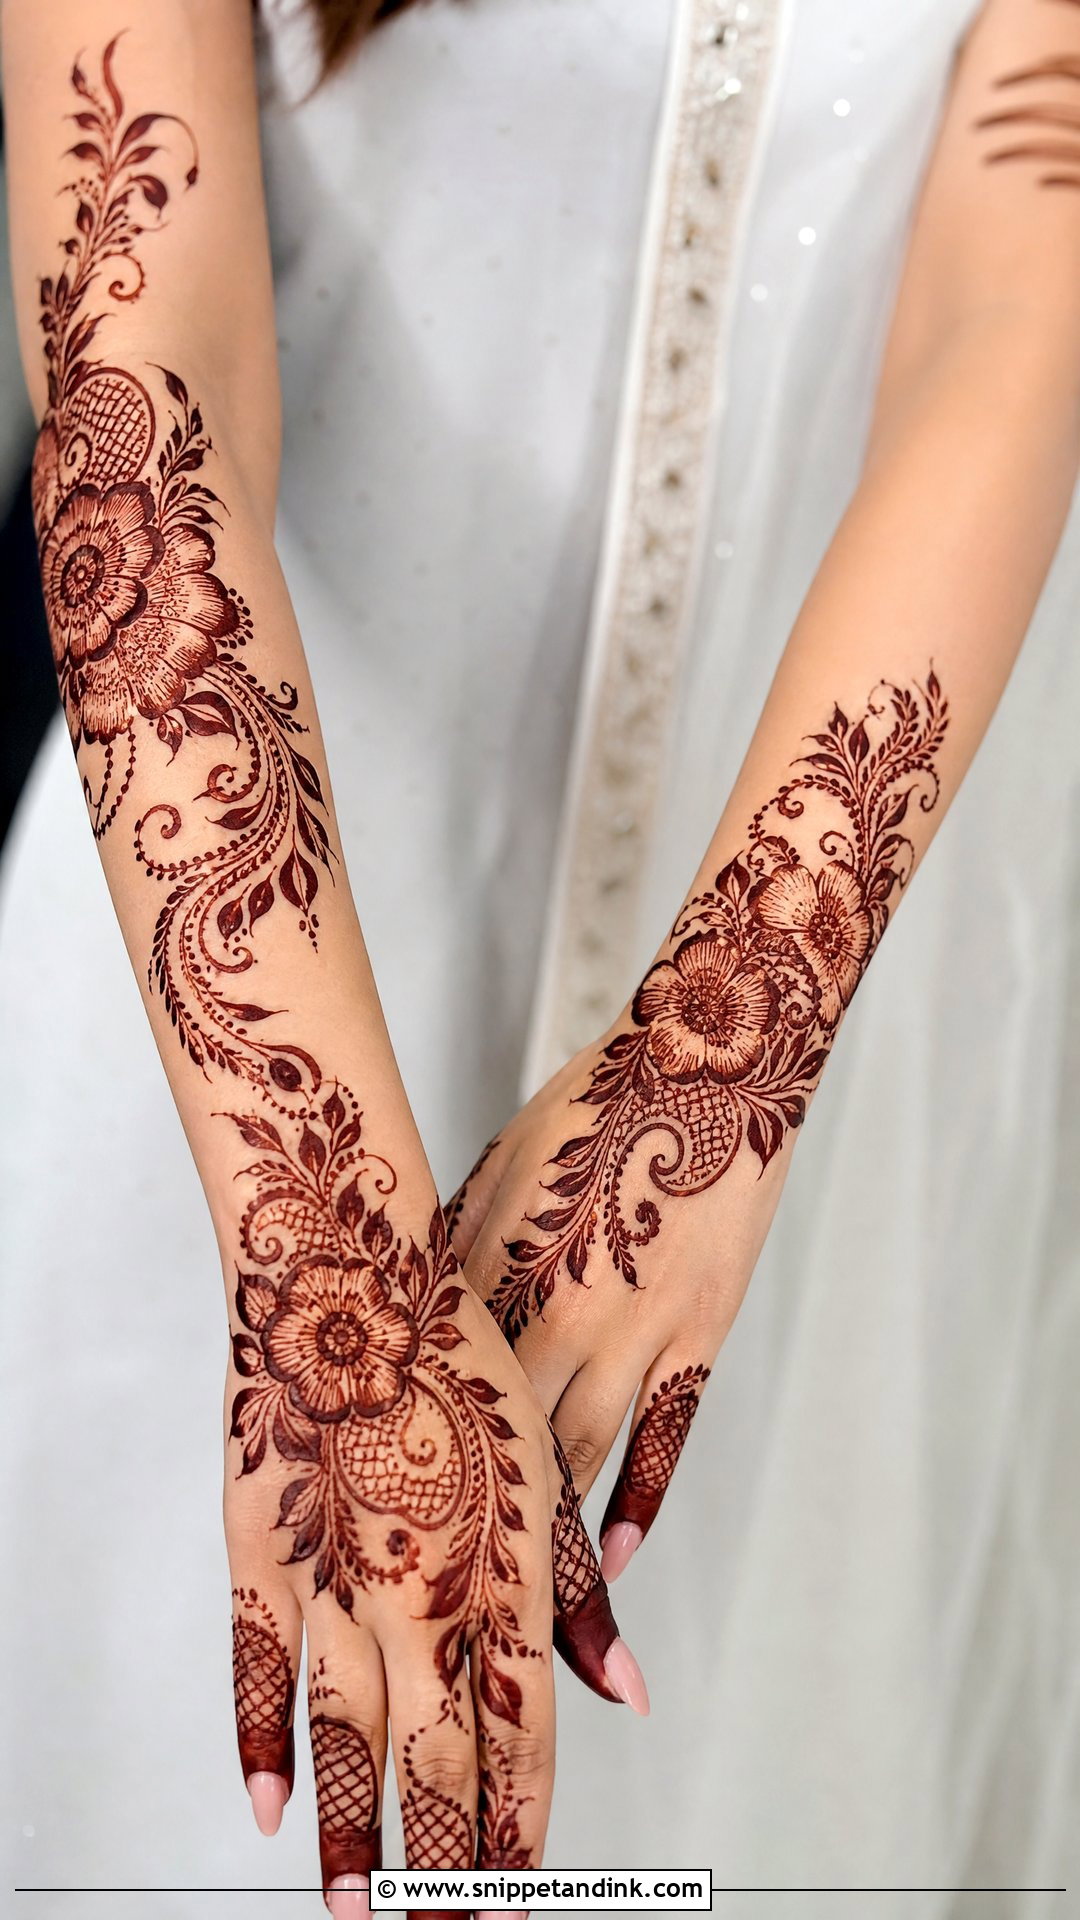
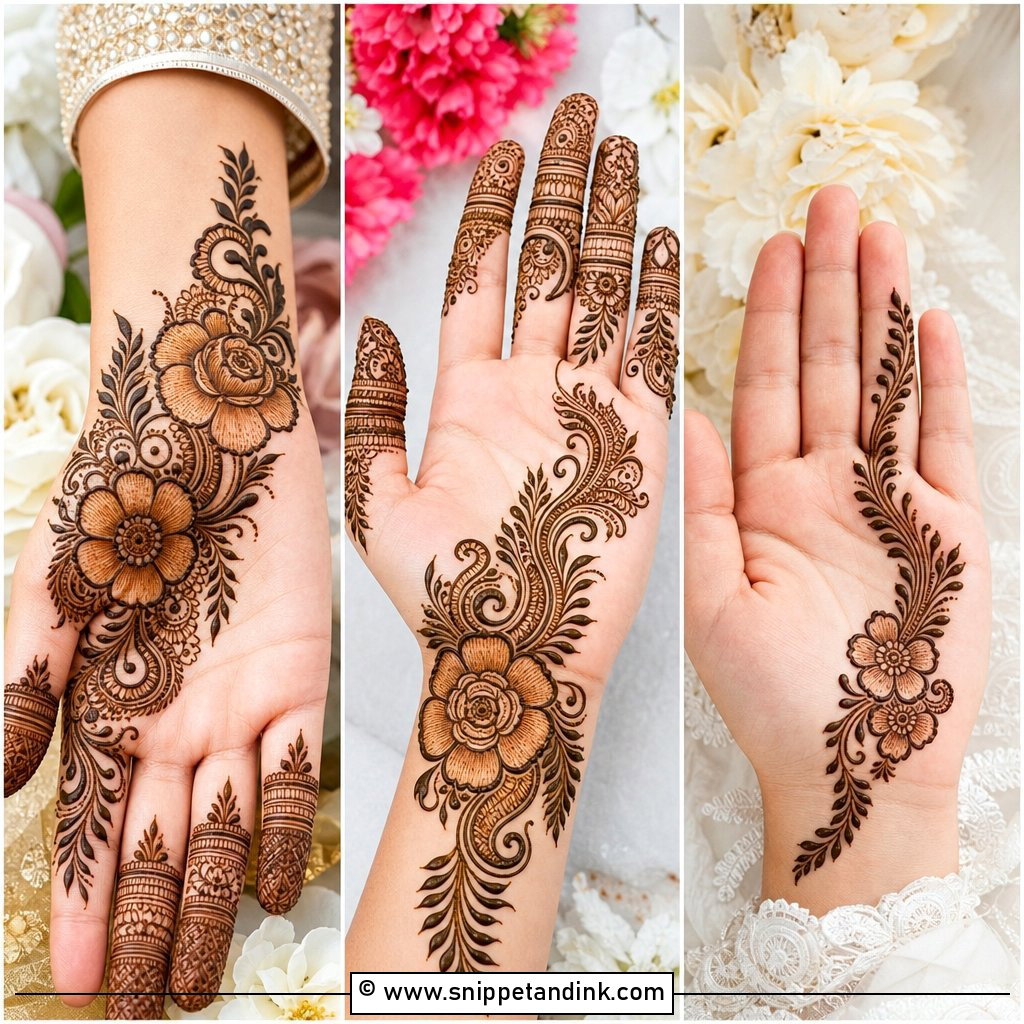
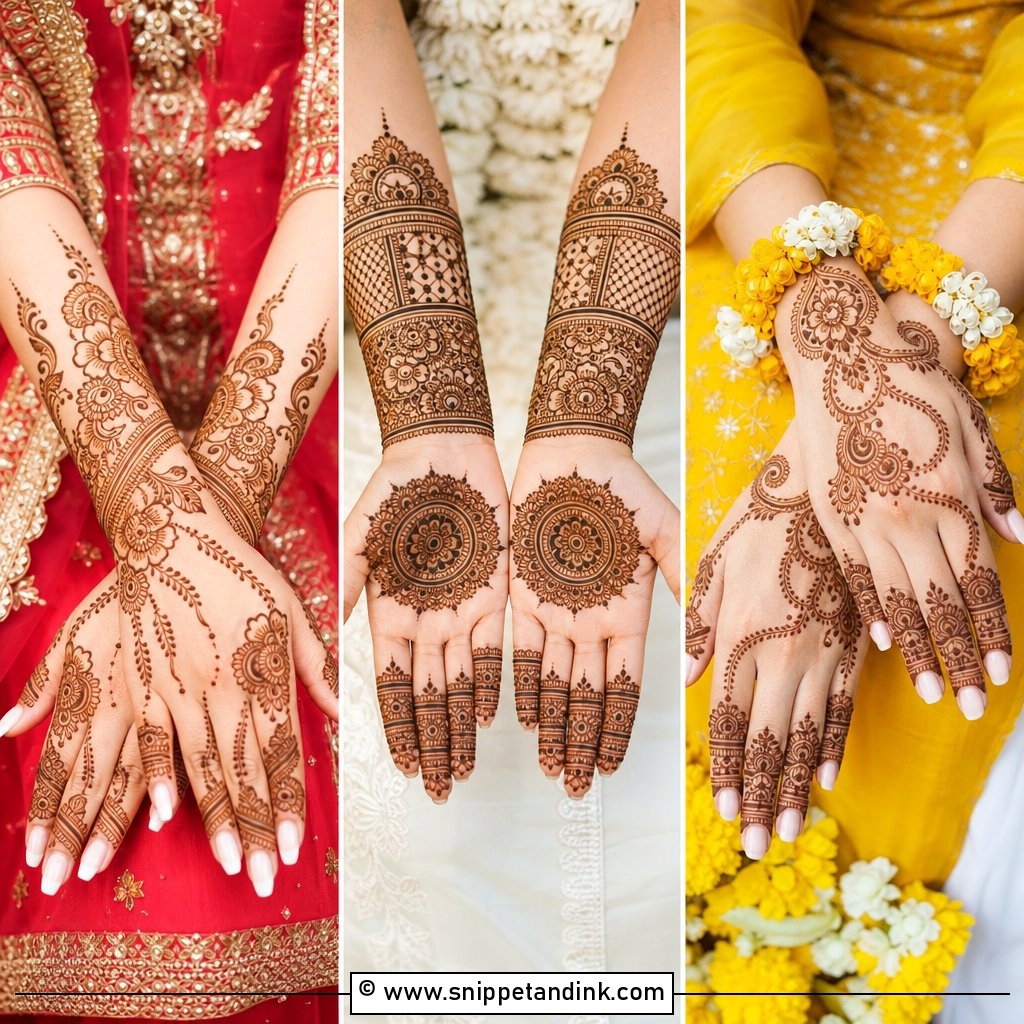
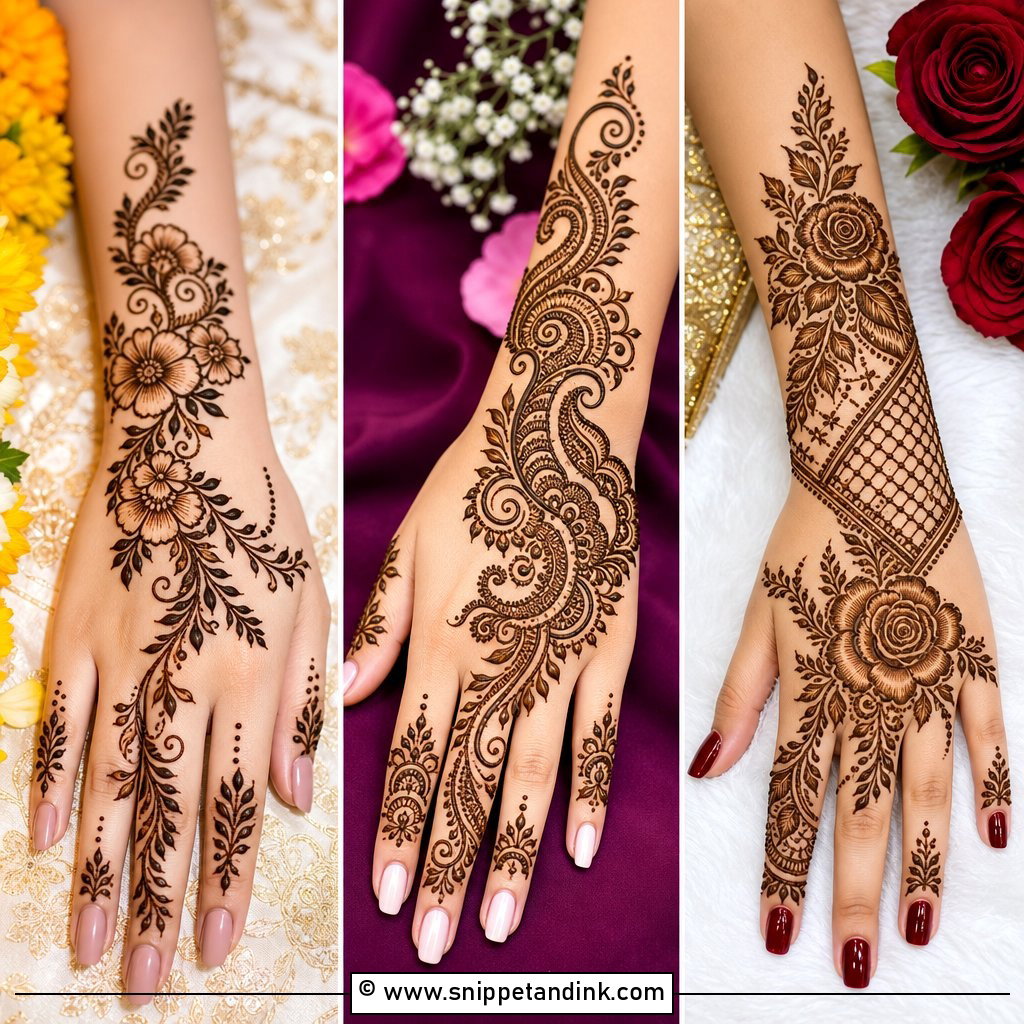
Arabic work is about bold strokes and the skin left between them. The pattern runs diagonally across the palm or back of the hand, from fingers to wrist, with large flowers, shaded leaves and curved vines. I use a slightly thicker line here than in Indian work, because the open space makes any wobble obvious. It is quicker to apply and dries faster than dense filling, which helps on a crowded mehndi day. For a bride, I extend the trail up toward the forearm and add finer finger detail so it looks finished rather than casual.
4. Indo Arabic Bridal Mehndi Design
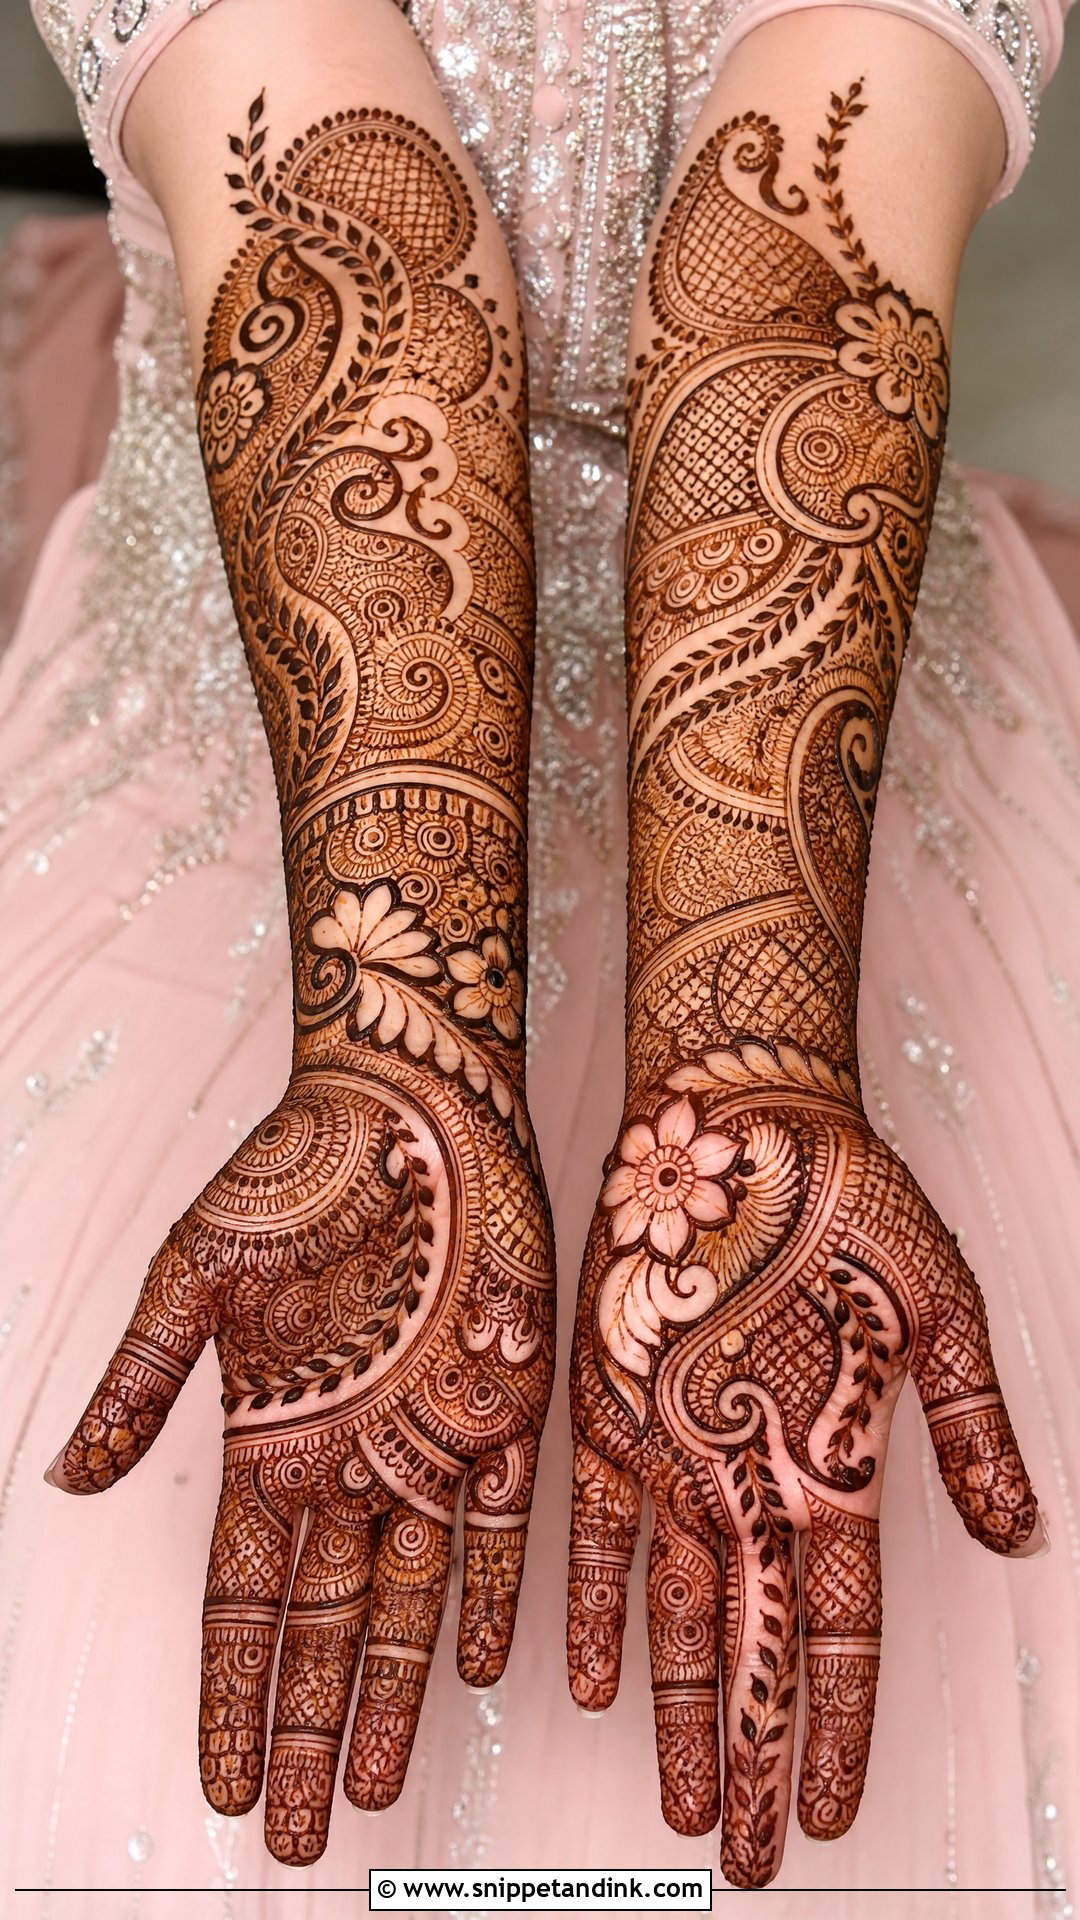
Indo-Arabic gives you Arabic flow with Indian filling tucked into it. Big florals and paisley trails create the movement, and jaali or mandala sections fill selected areas instead of every inch. I usually keep the palm a little fuller and let the back hand run diagonally, which reads well in ring photos. It suits brides who want visible motifs rather than very tiny all-over detail, and it sits comfortably beside a lehenga, saree or a fusion outfit.
5. Bridal Portrait Mehndi Design
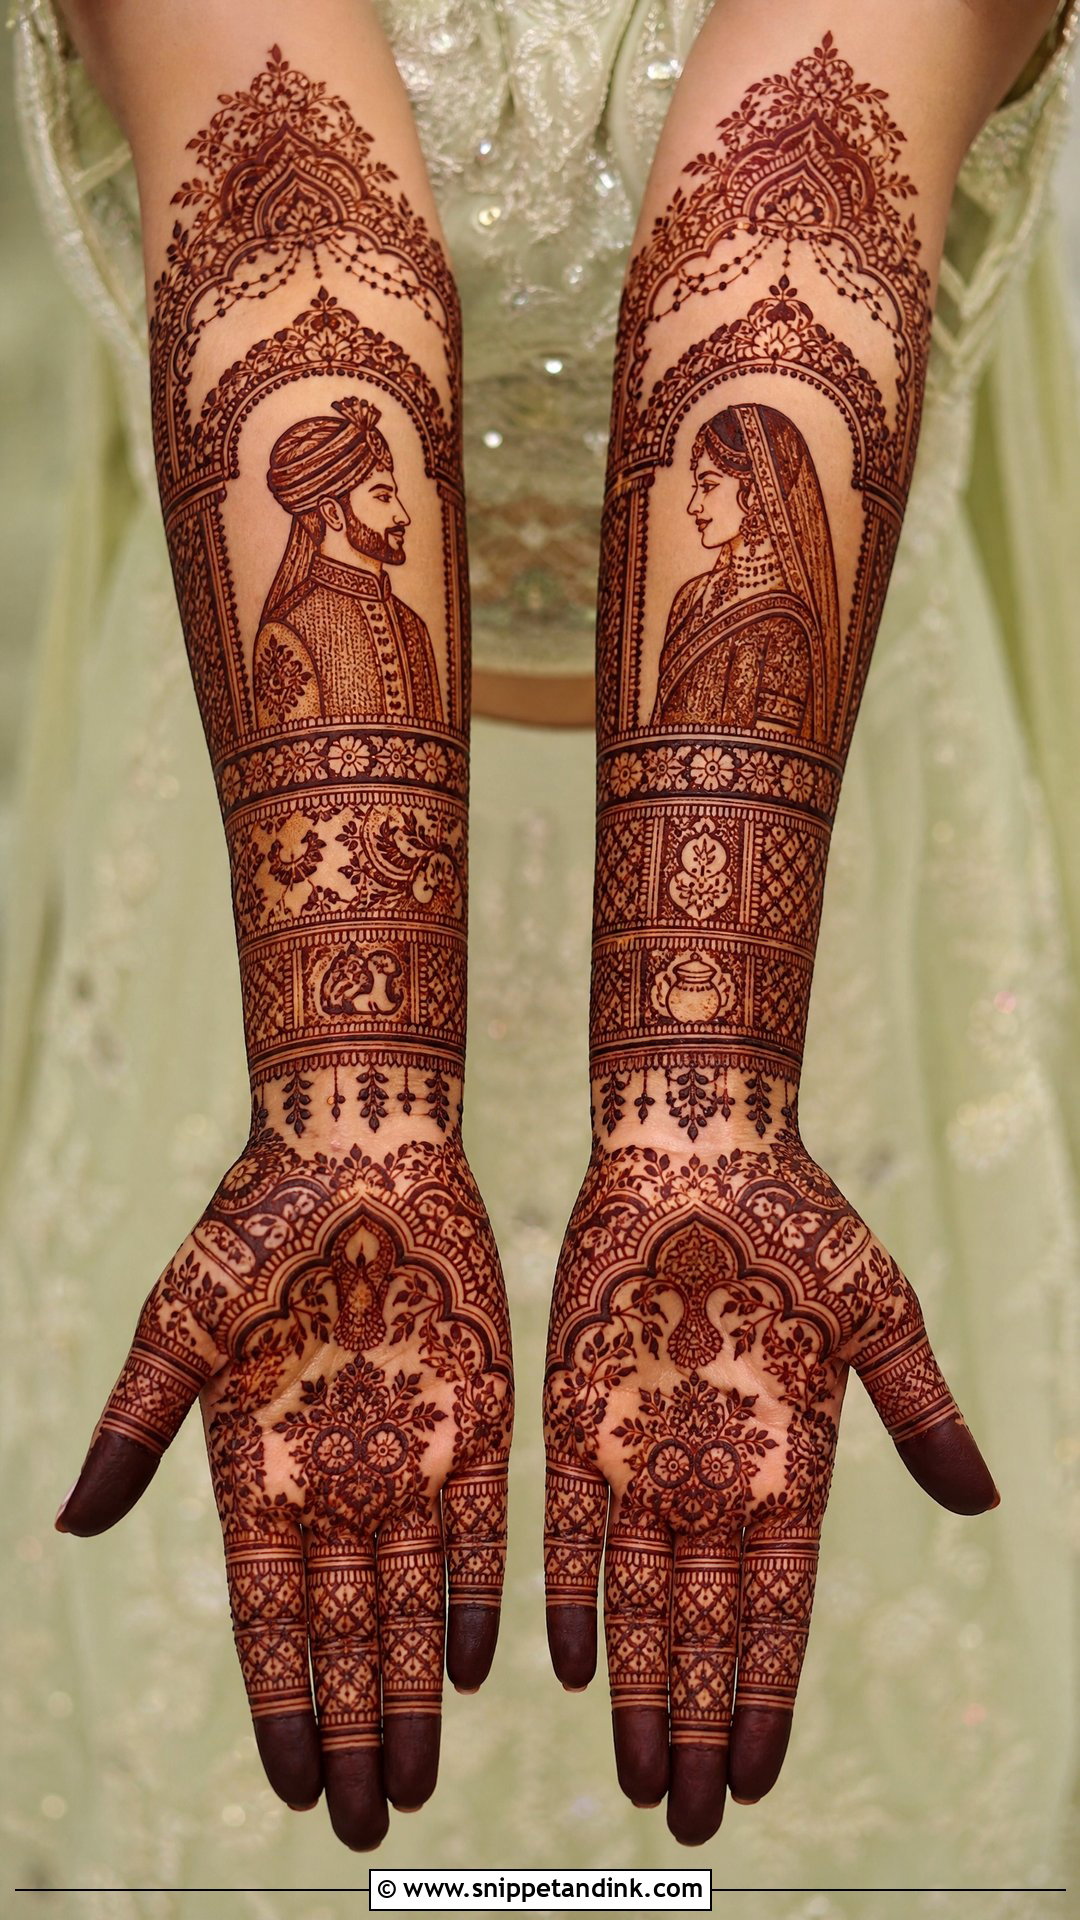
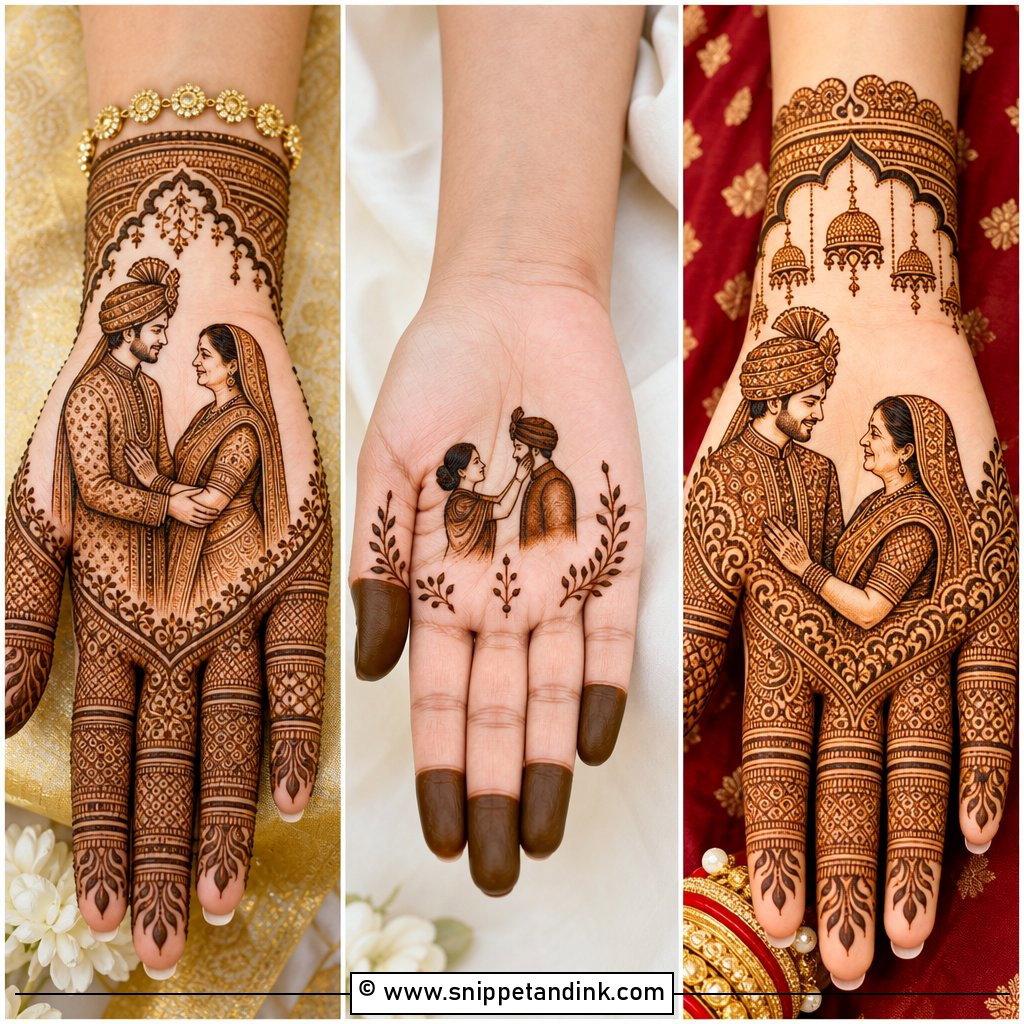
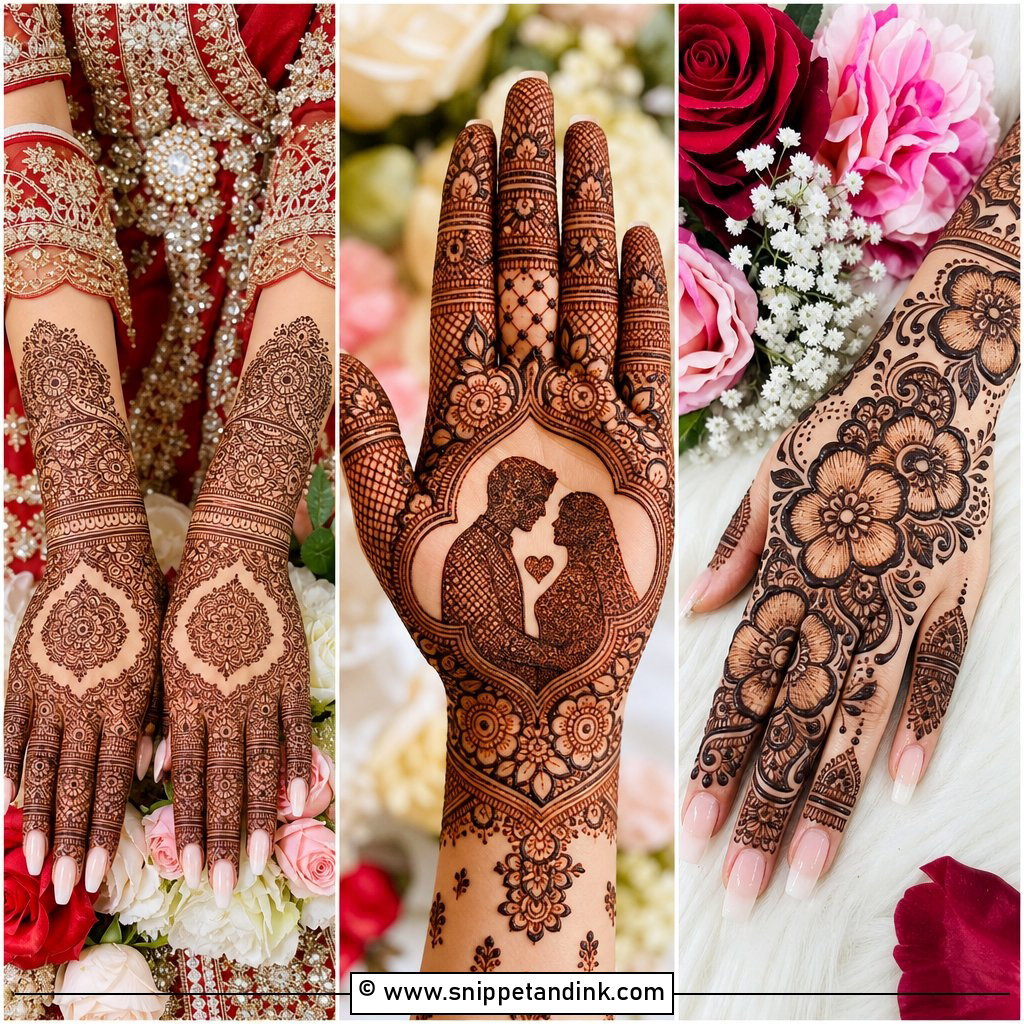
Portrait work is the one style where I’d tell you to look at the artist’s past faces before booking. Drawing a recognisable face with a cone is a separate skill from drawing florals, and a lopsided eye or heavy outline is what people notice. The bride usually goes on one palm and the groom on the other, framed by domes, florals and fine borders; some couples add a varmala or doli scene. I keep the surrounding detail quieter so the portraits read clearly once the stain darkens and fine lines thicken slightly.
6. Bride And Groom Mehndi Design
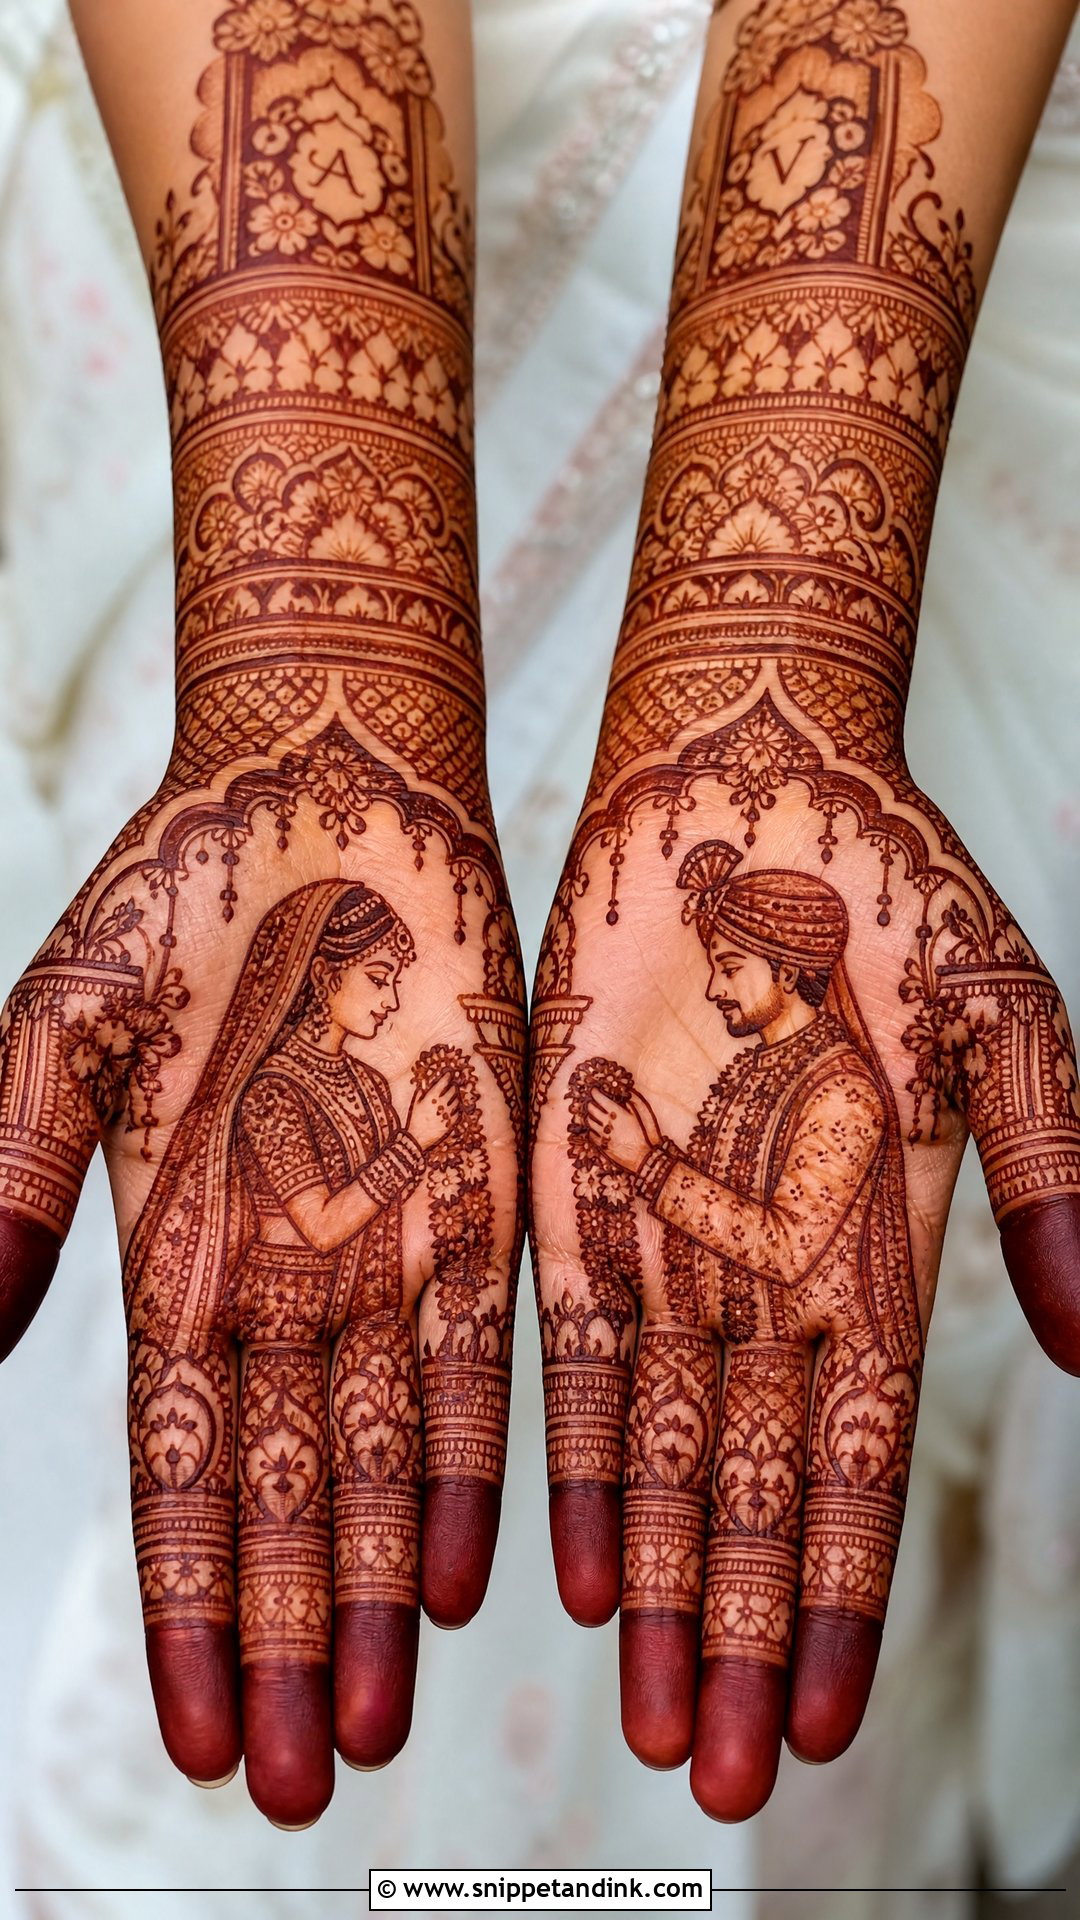
Splitting a couple across two palms is one of the oldest ways to personalise the hands. In a bride and groom mehndi design, the groom sits on one palm and the bride on the other, each in a matching frame. Garlands, a mandap, initials or a hidden date can be added between them. I fill the rest of the hand with paisleys, peacocks and lattice so the figures don’t look stranded. Medium to full coverage suits it best; on a sparse hand the portraits feel isolated.
7. Back Hand Bridal Mehndi Design
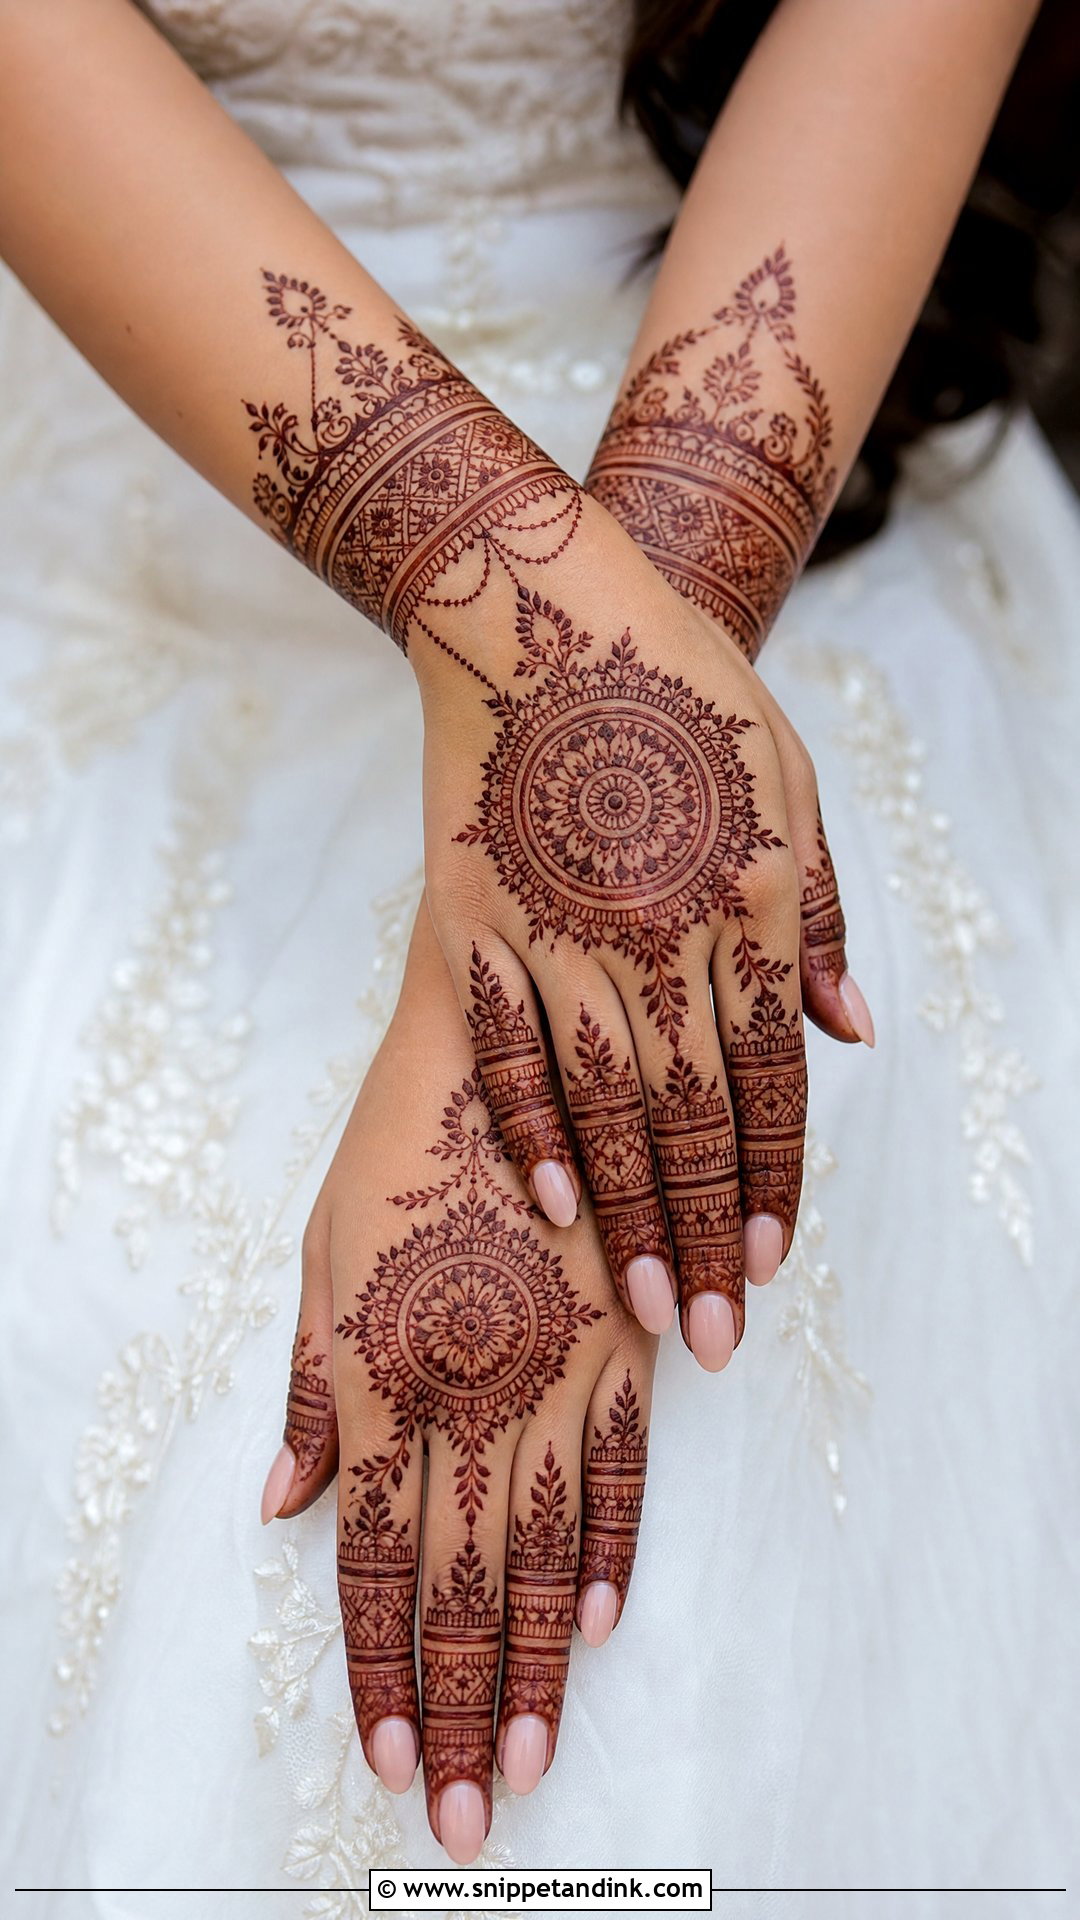
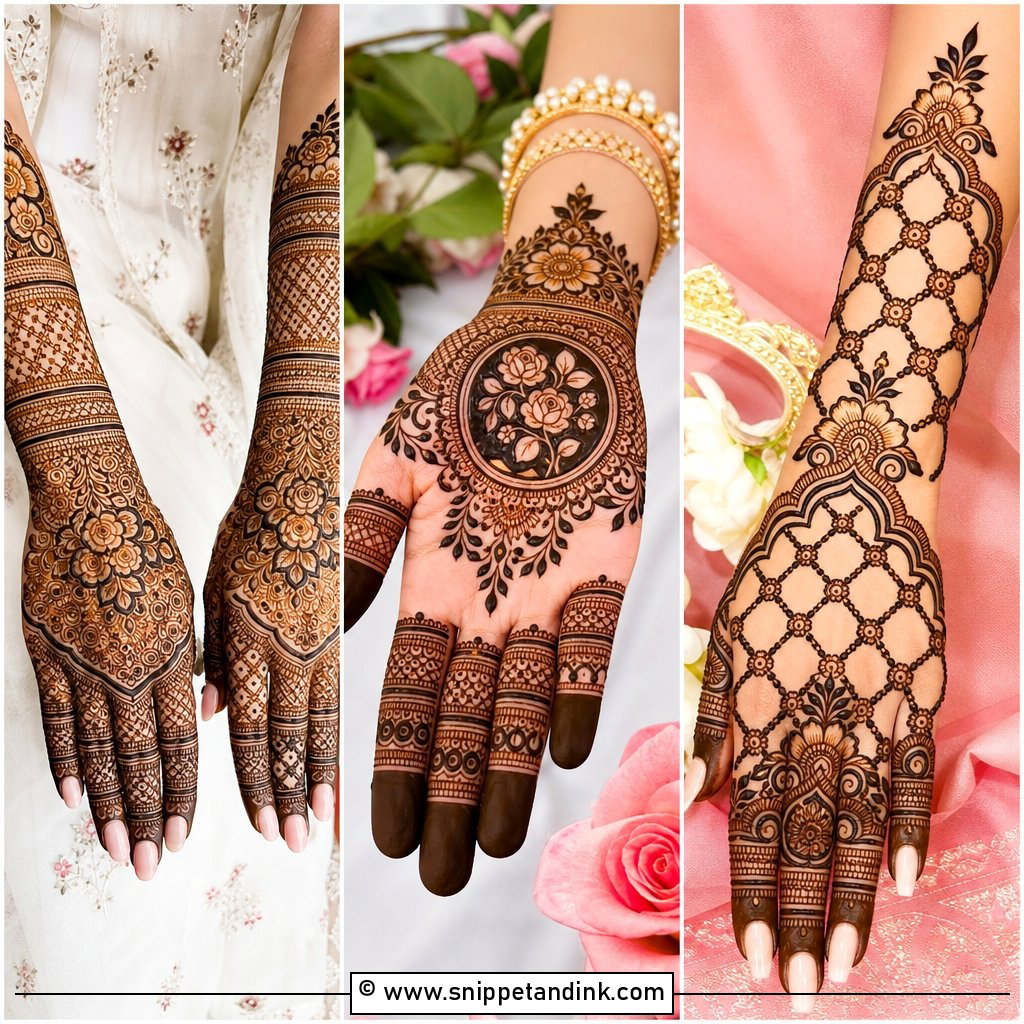
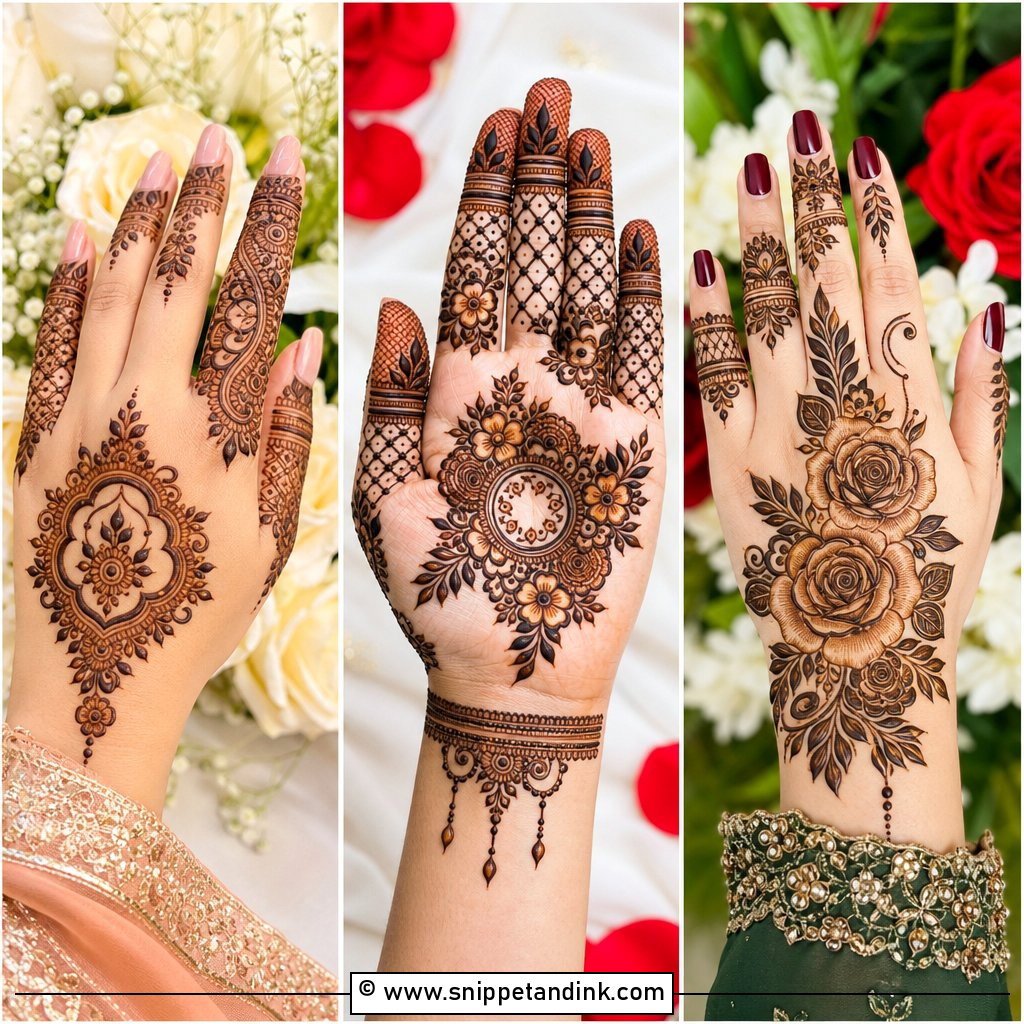
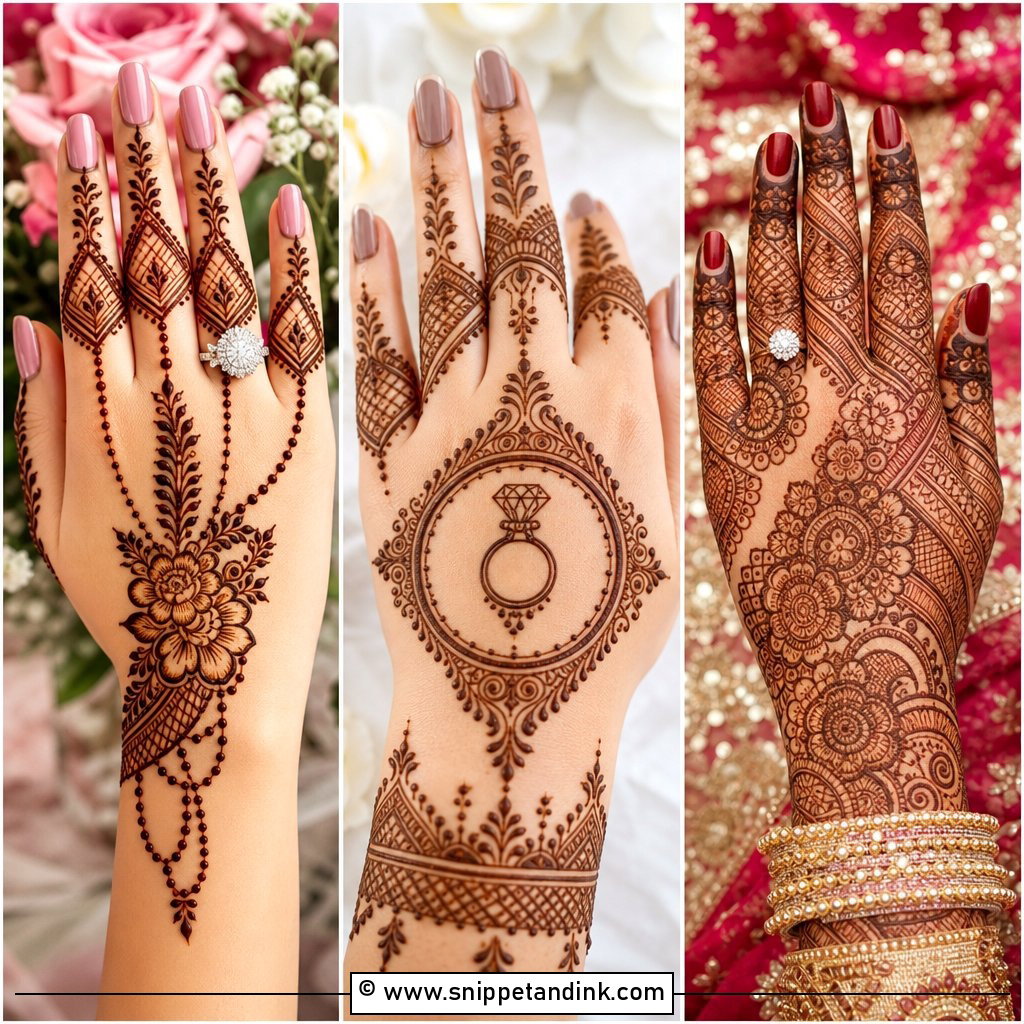
The back of the hand is in more photos than the palm: ring shots, bangle shots, the hand on the groom’s arm. Back hand bridal mehndi design usually centres on a mandala, then runs floral chains to finger caps and a wrist cuff. I plan the layout around the knuckles, because skin creases there and lines drawn straight across them can look broken when the hand is relaxed. Extending it from nails to just past the wrist gives a full bridal effect. Check that it leaves room for your rings and kaleeras.
8. Front Hand Bridal Mehndi Design
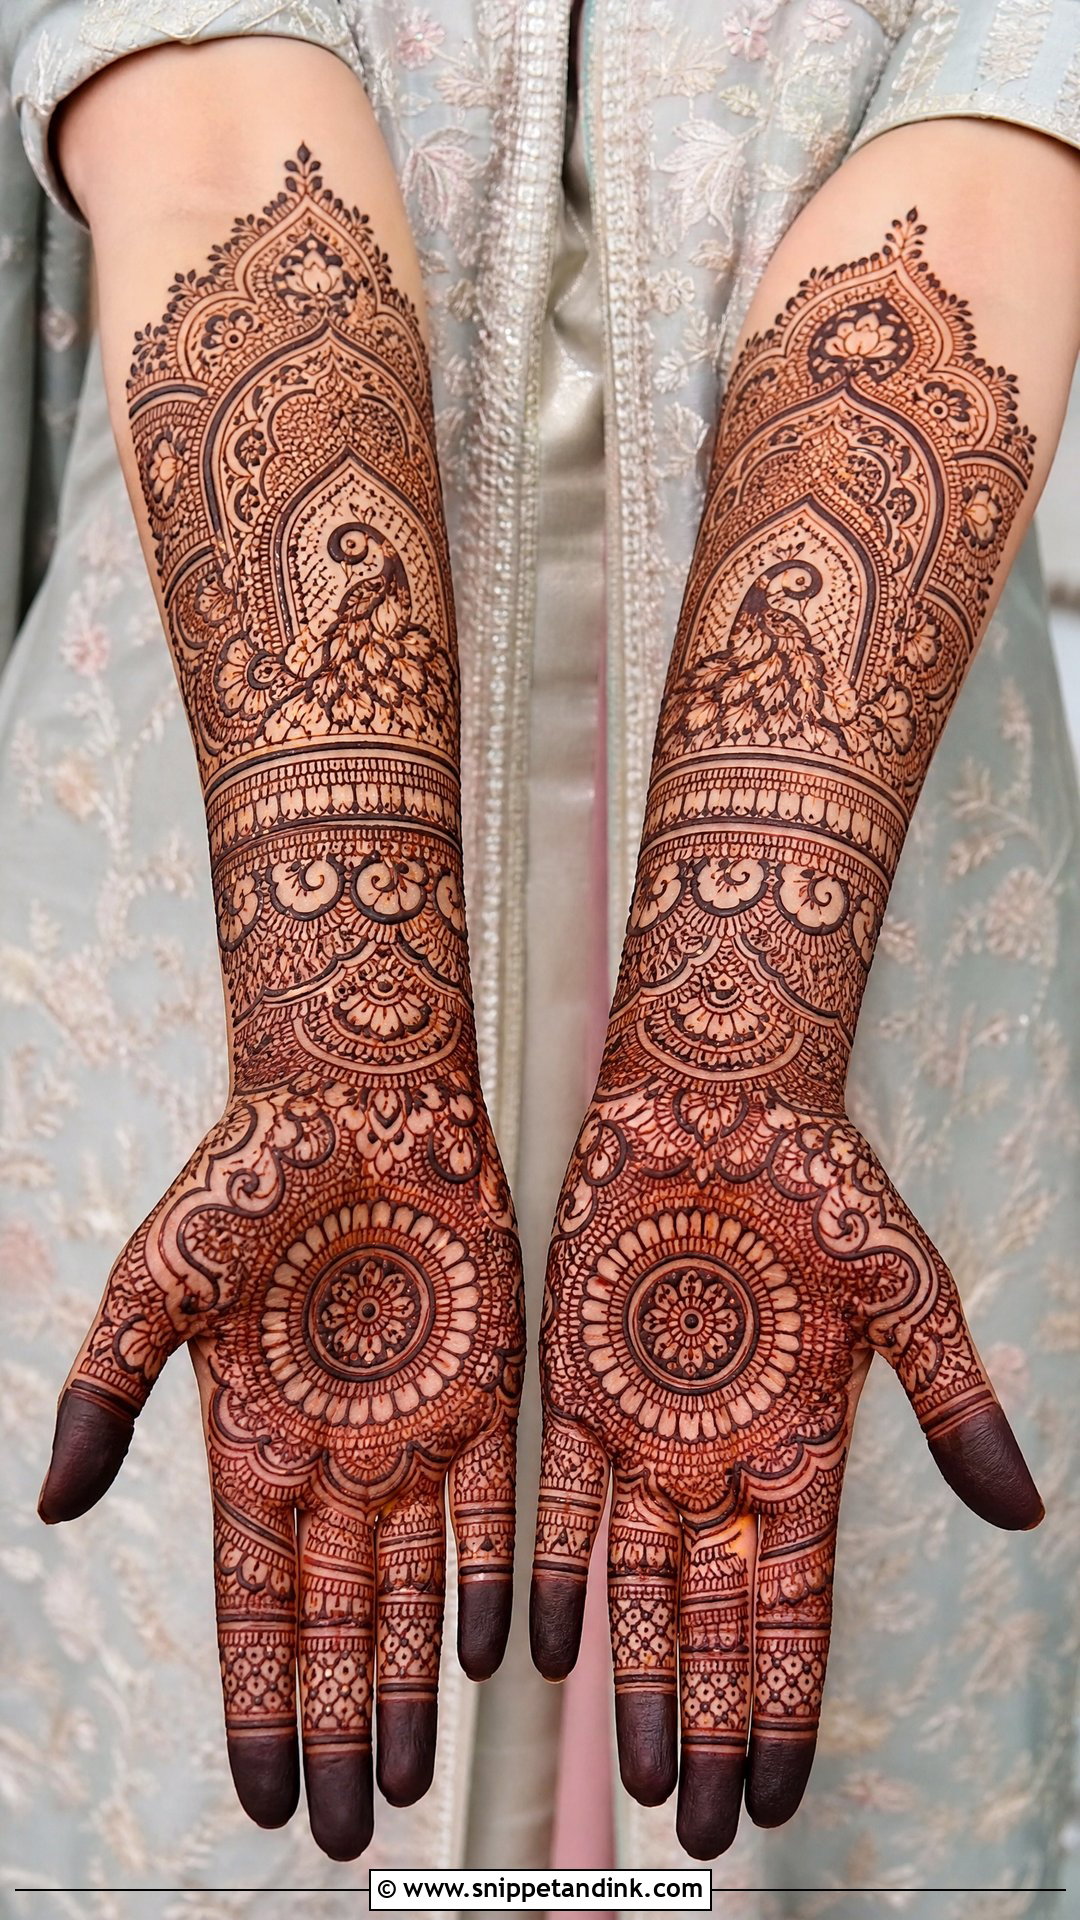
Palms carry most of the traditional symbols, and they also take the deepest stain because the skin there is thicker. That’s why I put the densest detail here: a central mandala, paisleys around the sides and fine florals running into the fingers, with a cuff at the wrist and peacocks or vines on the lower forearm. Clear borders around the main motifs stop it reading as one dark mass. This is the side guests see when you hold flowers or present your hands in rituals.
9. Bridal Mandala Mehndi Design
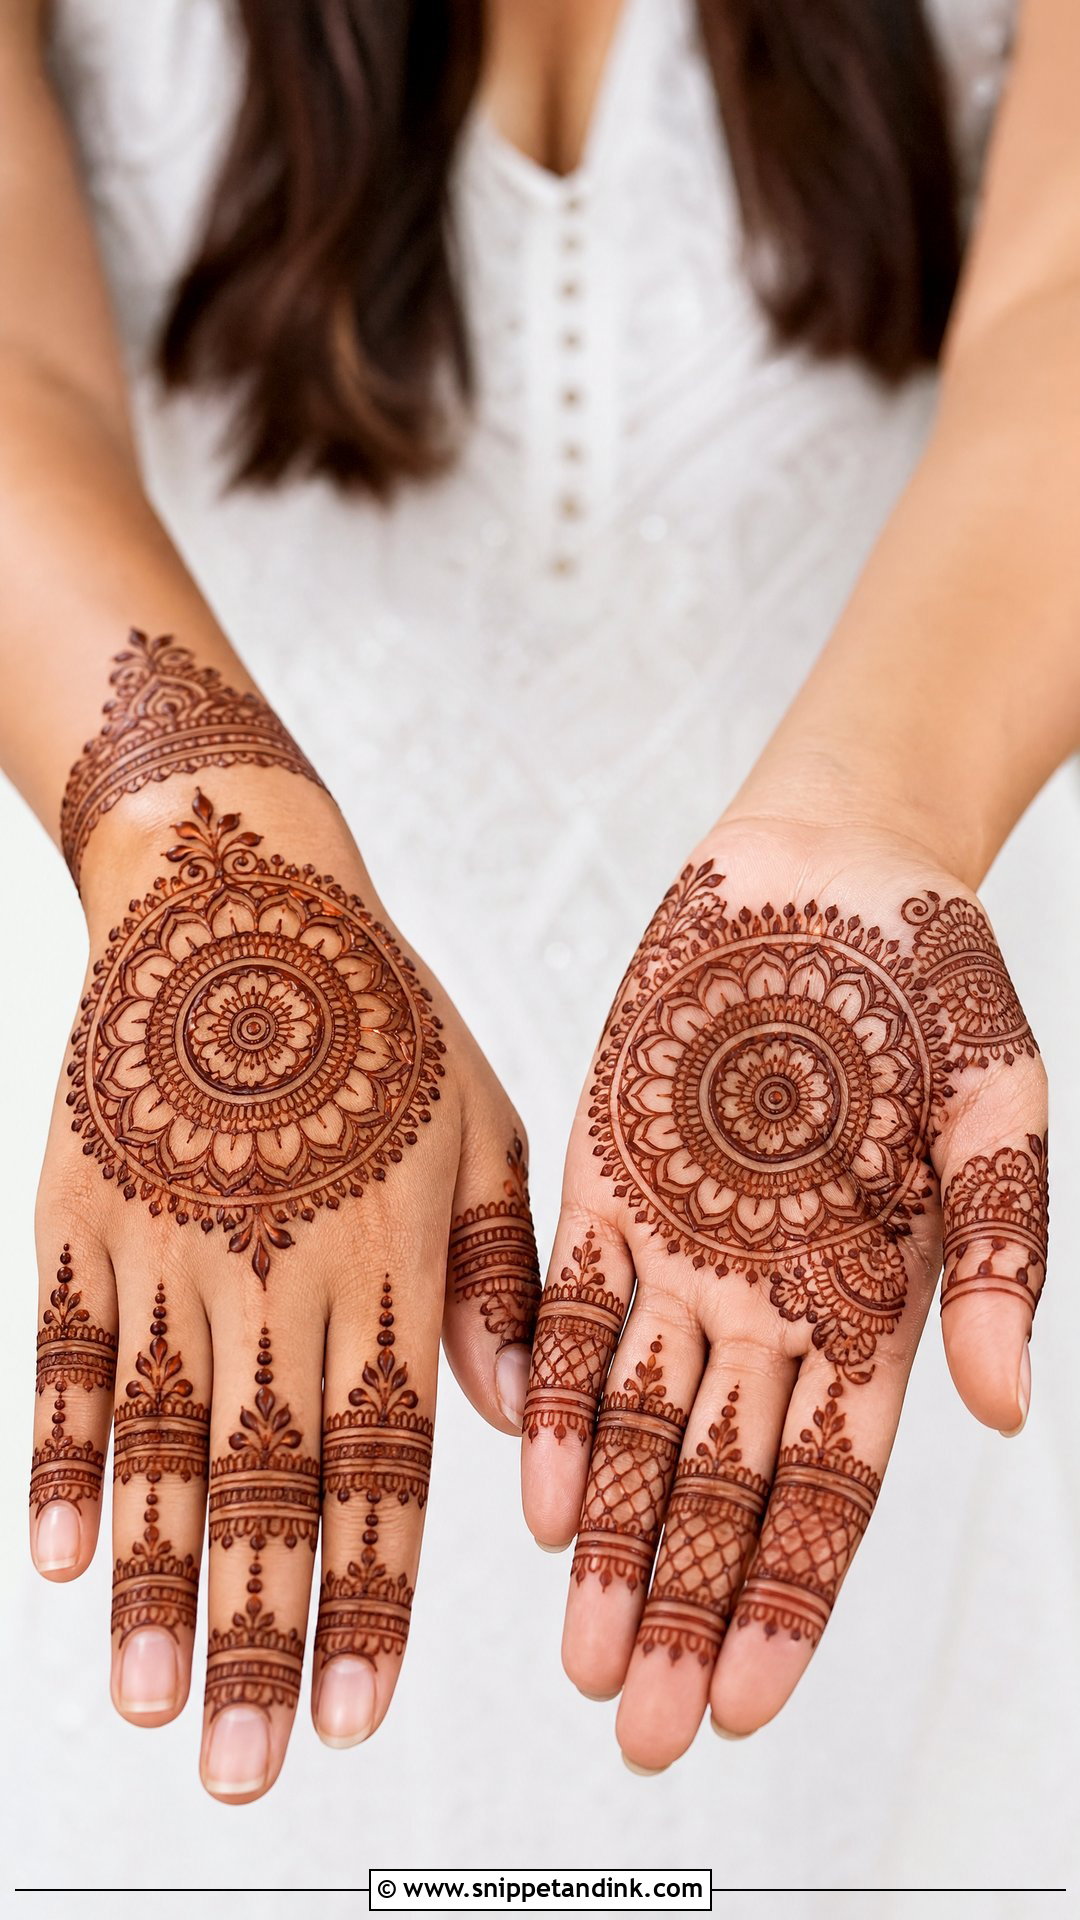
A mandala organises the whole hand around a single centre point, which is why it suits small hands so well. I place it in the middle of the palm or back hand and expand outward in rings of petals, dots and paisleys. On its own it can look plain for a bride, so I add decorated fingers, a wrist cuff and a short forearm extension. Getting it truly round is harder than it looks; I mark the centre first and build the rings outward evenly instead of drawing the outer circle freehand.
10. Peacock Bridal Mehndi Design
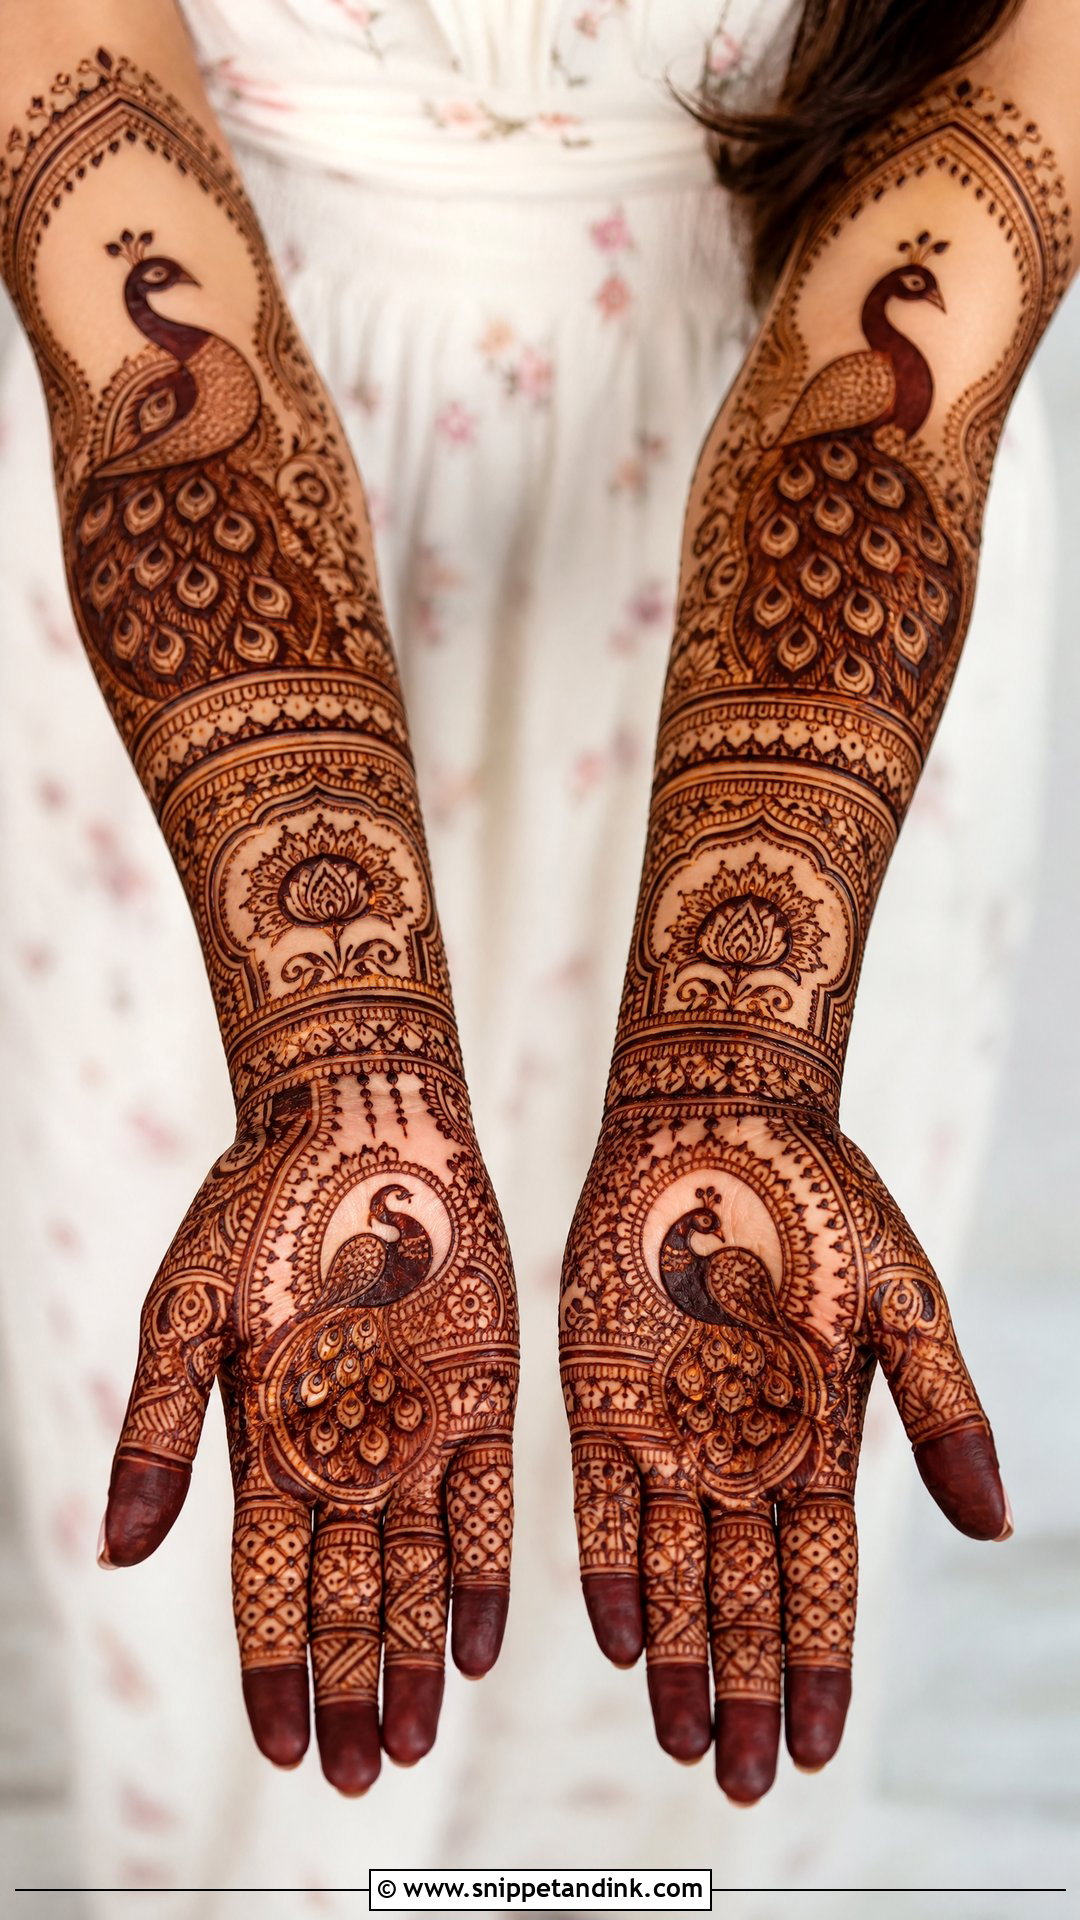
Peacocks bring a festive, regal feel, and the feathers give the design movement as they flow into paisleys and florals. I place the bird on the palm, wrist or forearm and shade the feathers in layers. The common mistake is burying the bird in filler; once the stain darkens, an overcrowded peacock becomes hard to pick out, so I leave a little clear skin around the head and neck. Paired on both hands with mandala centres, it sits well with heavy lehengas and temple jewellery.
11. Floral Bridal Mehndi Design
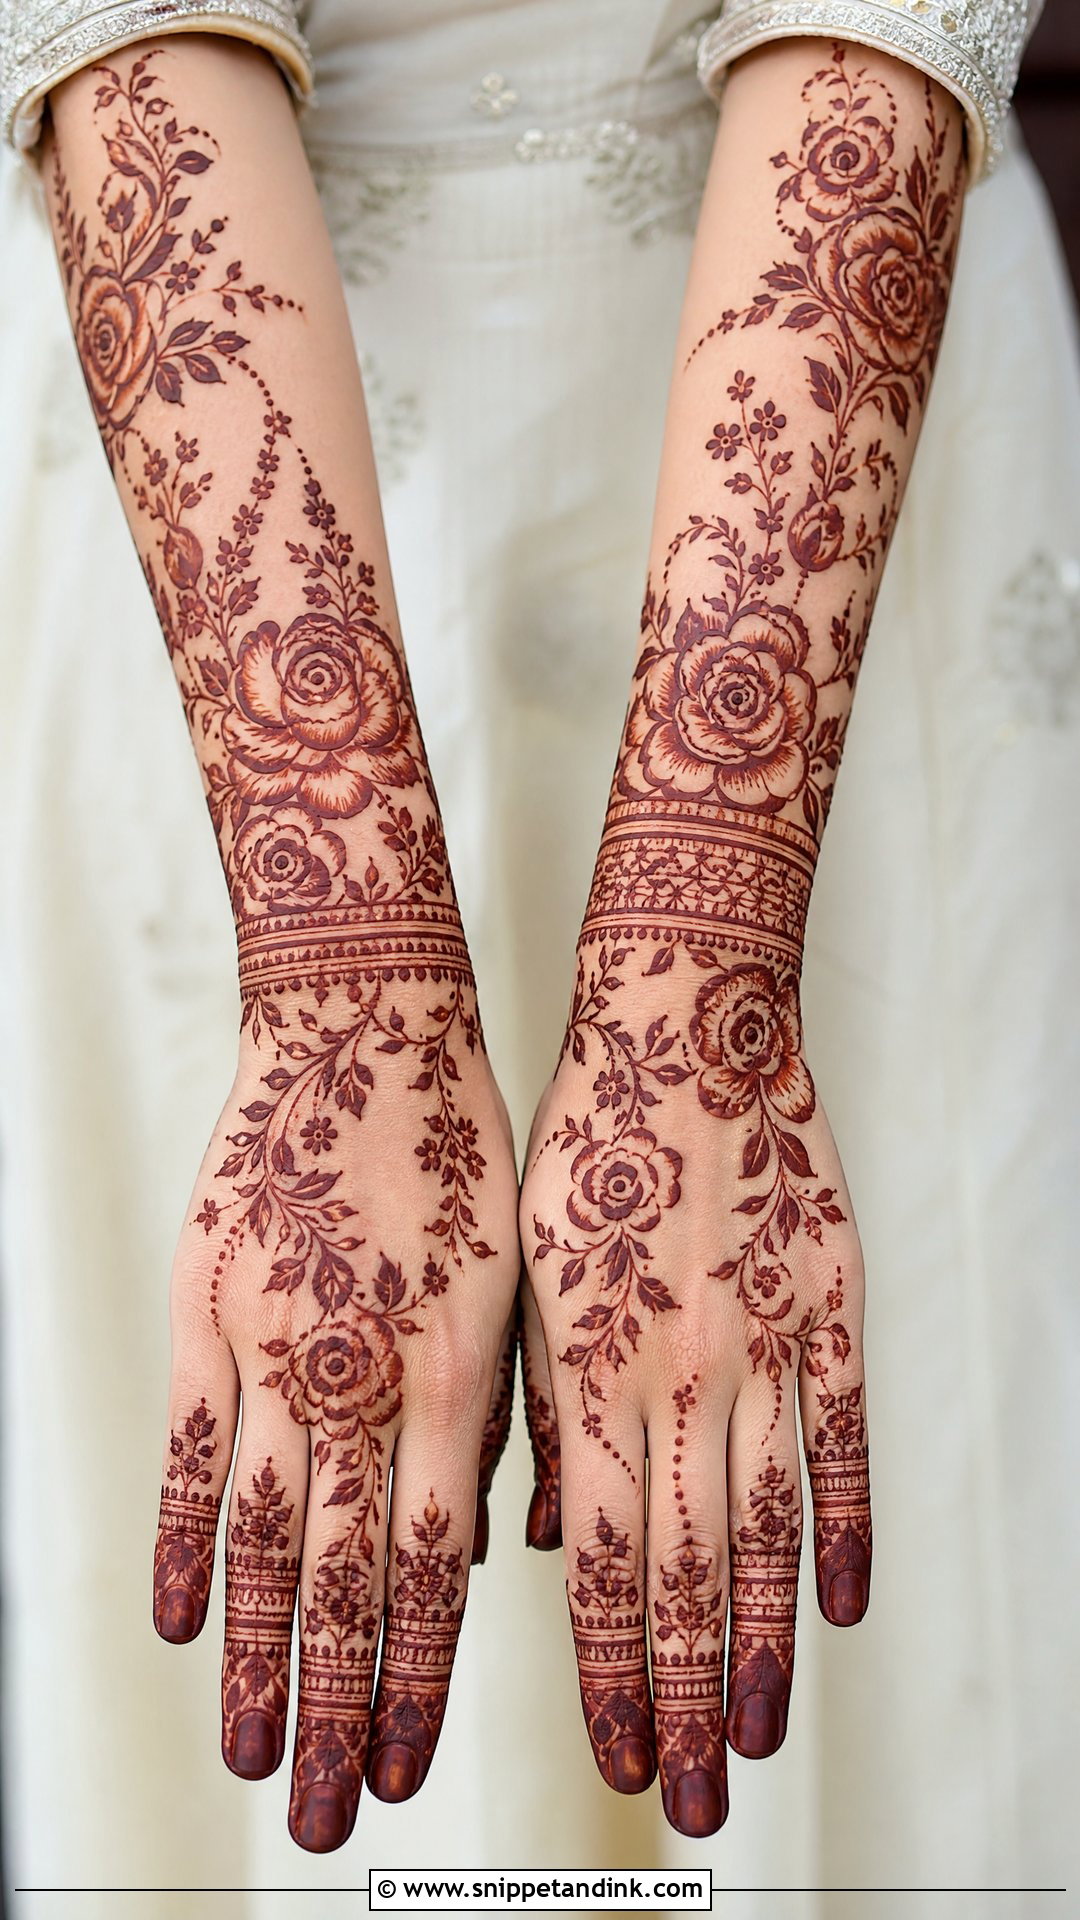
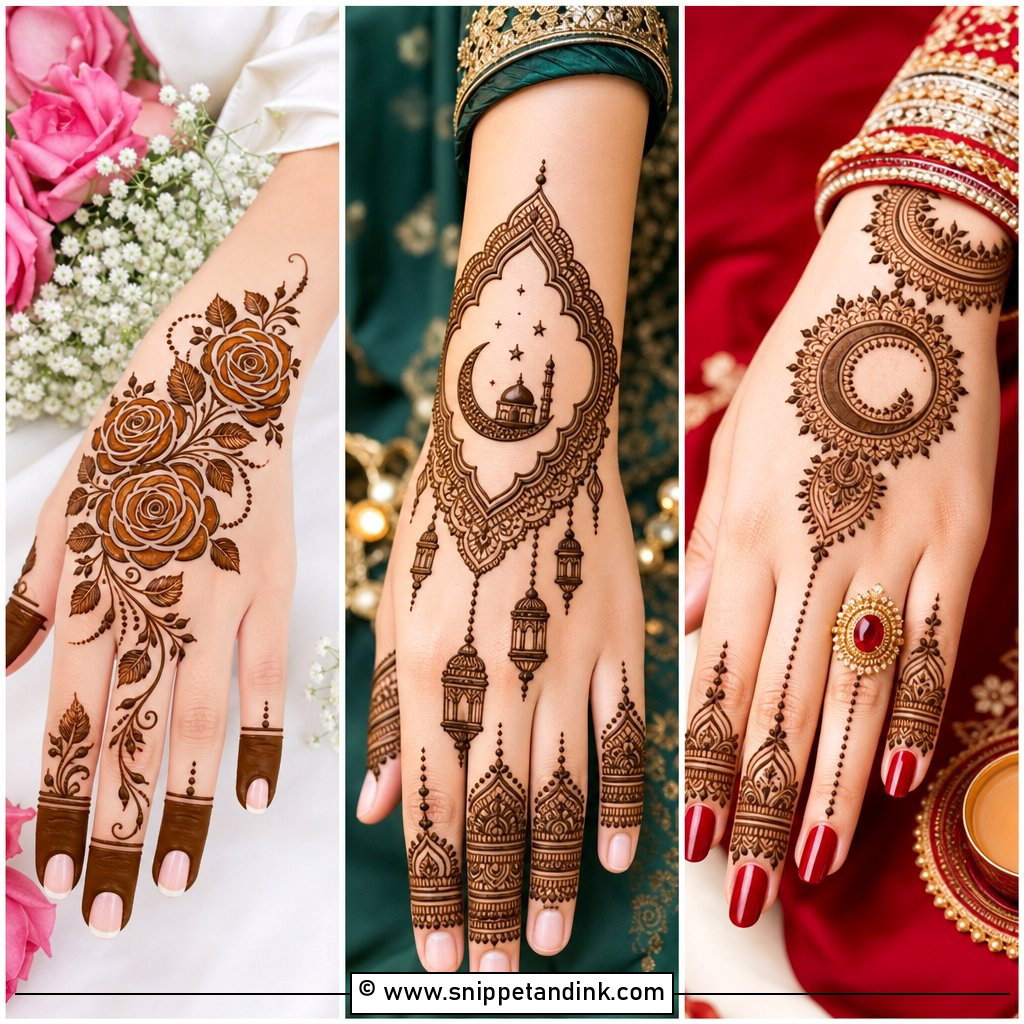
Florals are the most flexible motif in mehndi. They can be full-hand or semi-filled, bold or delicate. Large flowers create focus points and small blossoms and vines fill the fingers and wrist. For a modern bridal version I combine shaded roses with clean spaces and dots; for a traditional one, flowers mix with paisleys and ornamental bands. Initials or a date are easy to hide between petals. Almost every outfit and hand shape suits it, which is why so many brides end up here.
12. Paisley Bridal Mehndi Design
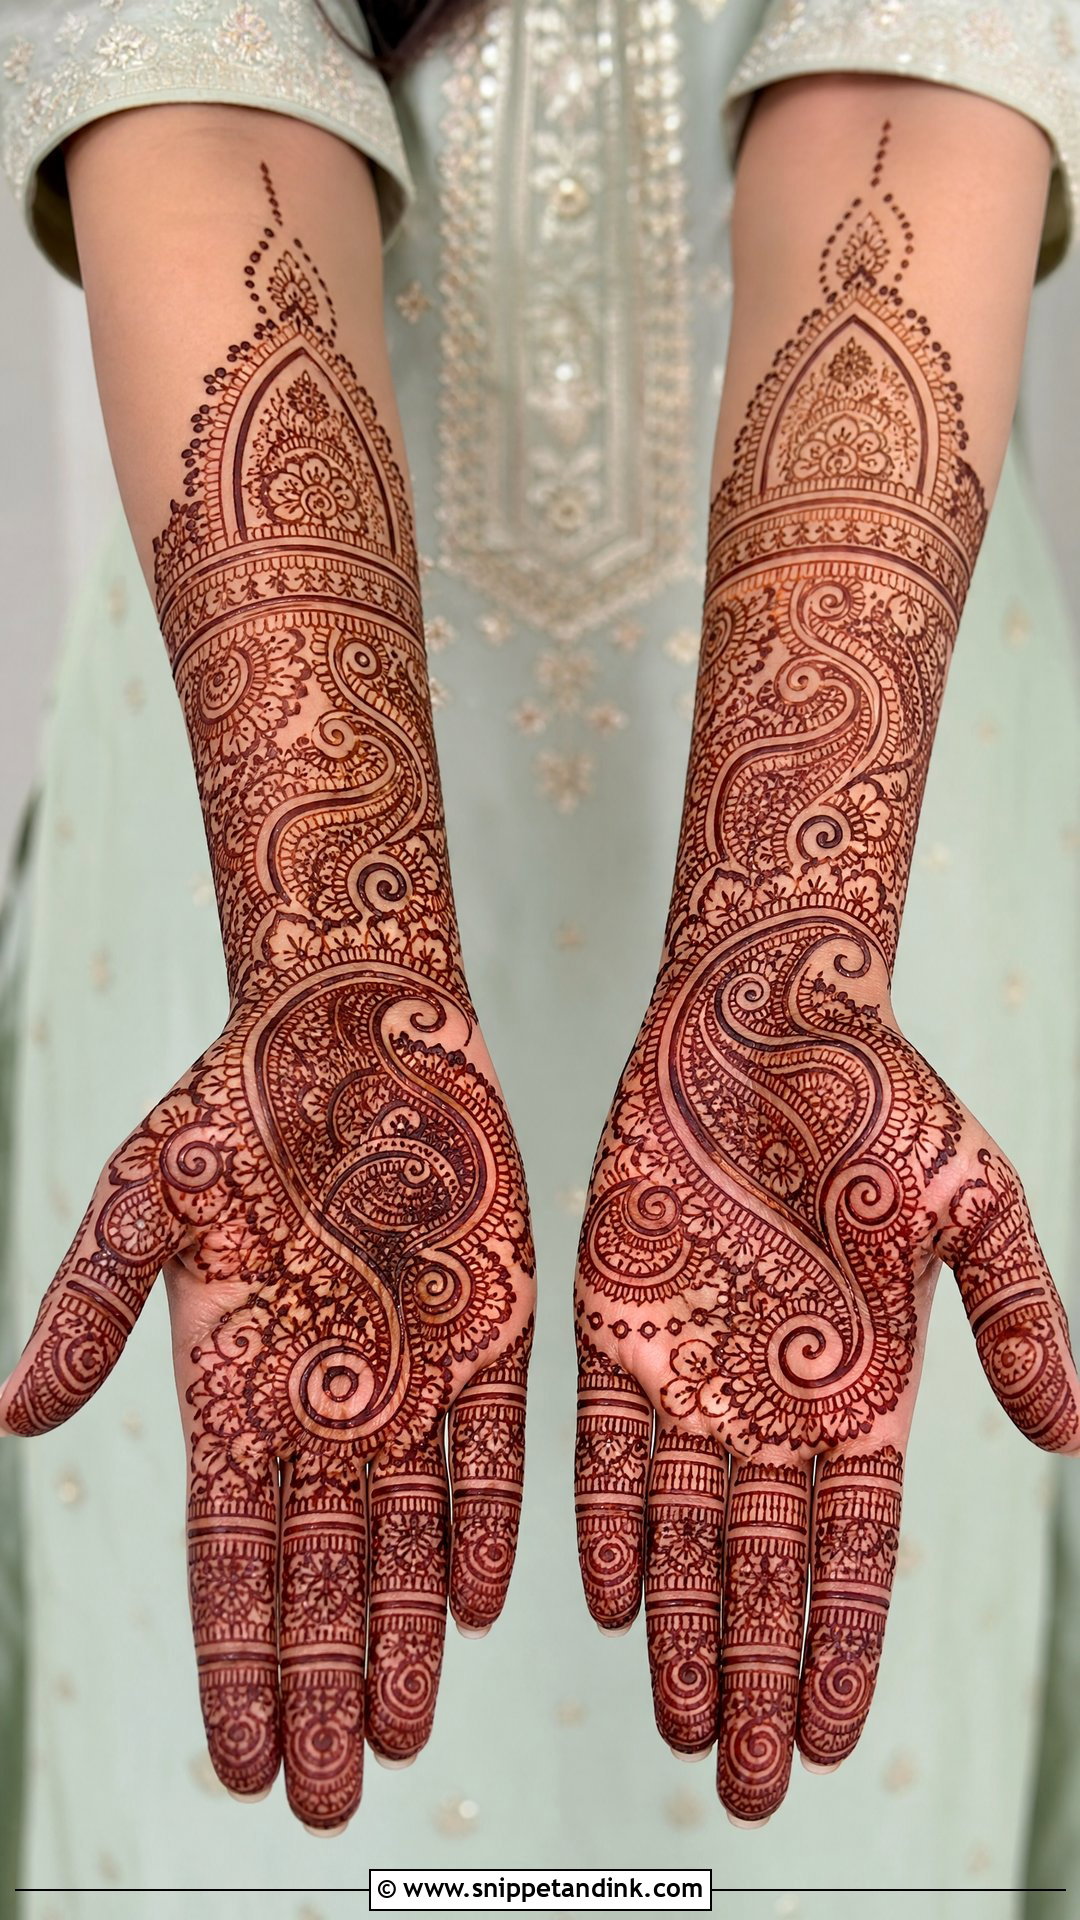
Paisley, the curved mango shape, is the backbone of most traditional bridal work. On its own it flows well across palms, wrists, fingers and forearms, and in a bridal layout I layer large paisleys with smaller inner patterns, floral borders, spirals and fine net filling. Placement is what I spend time on: the largest paisleys go where they’ll be seen clearly, at the centre of the palm and the back of the hand, with tiny fillers around them. It suits brides who want tradition without portraits or theme scenes.
13. Jaali Bridal Mehndi Design
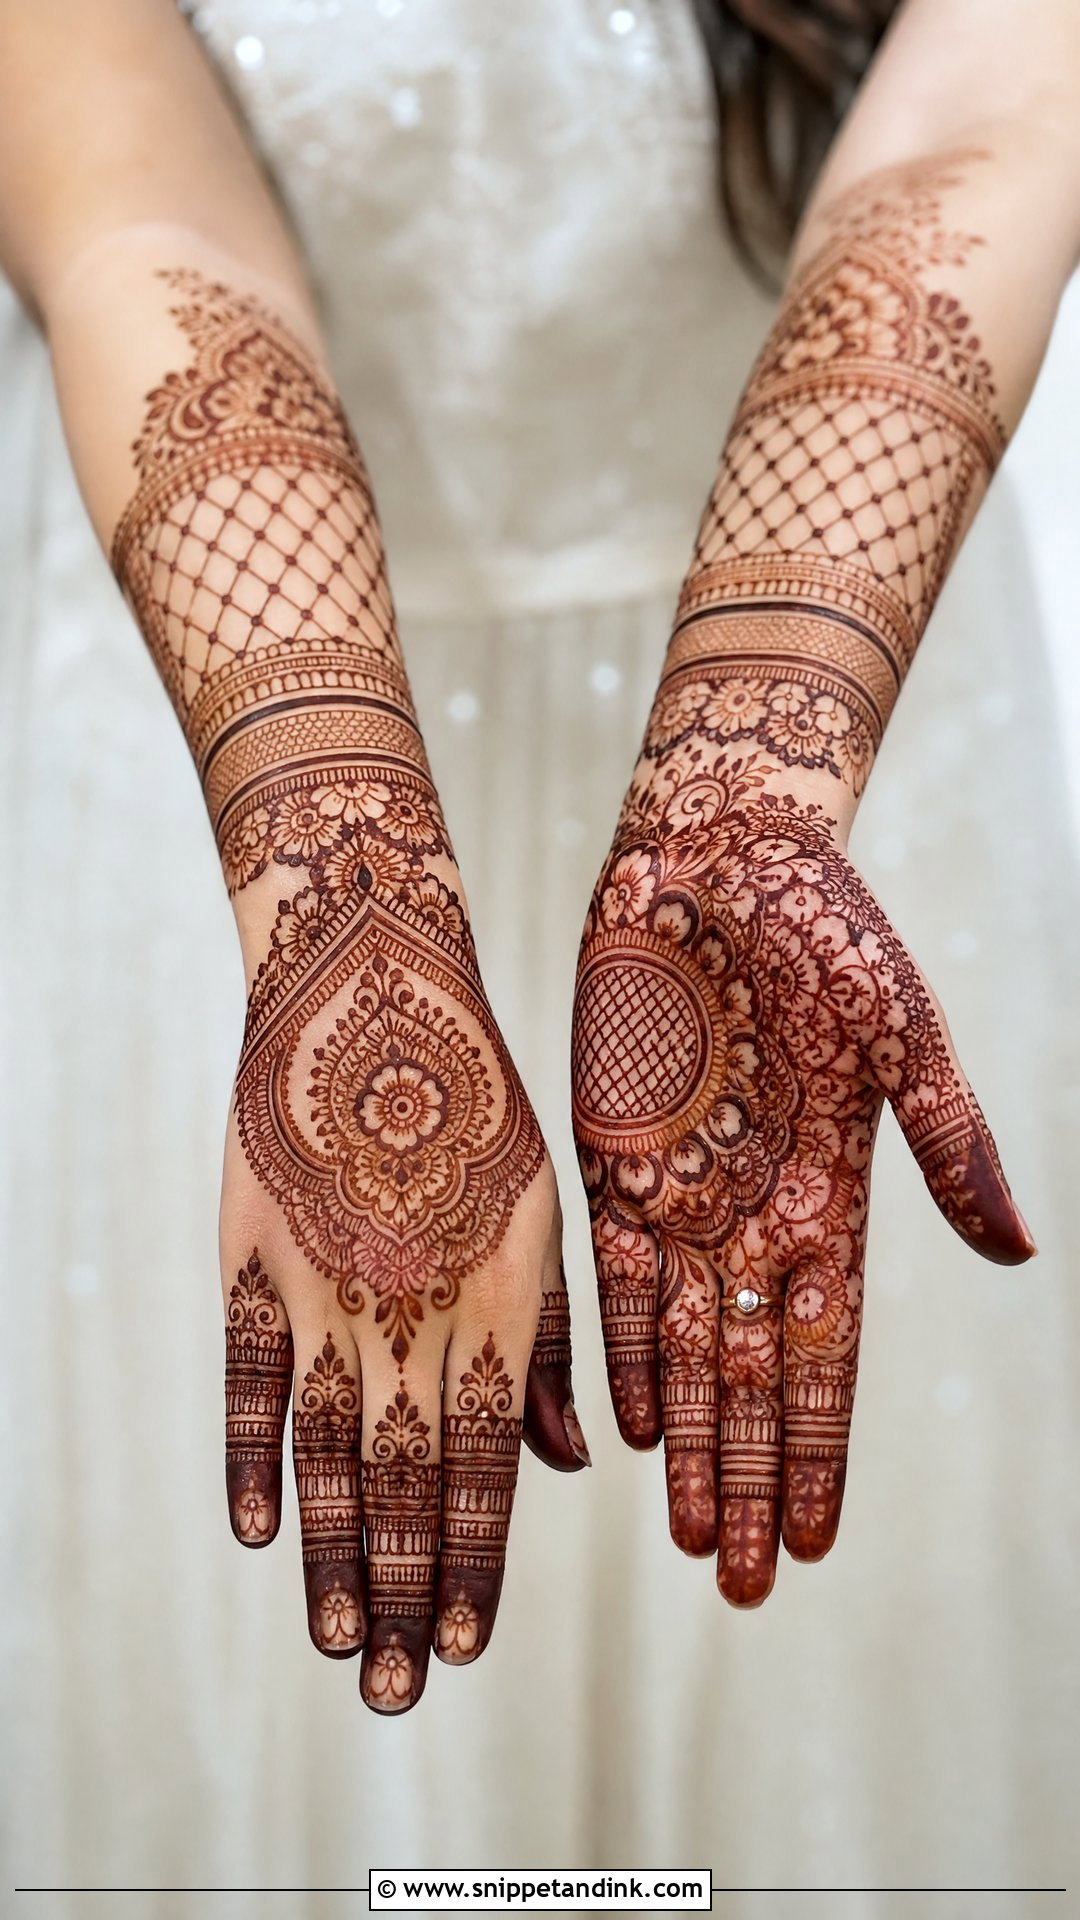
Lace is what people usually say when they first see fine jaali on skin. A Jaali bridal mehndi design is built from crisscross mesh, tiny dots, floral corners and bordered sections. It looks best on the back hand alongside a mandala or cuff. On the palm I mix it with paisleys and florals so the hand doesn’t look repetitive. The skill is in even spacing: the mesh lines must be thin and evenly gapped, because as the stain darkens over the next two days, tight lines can merge and the lace effect is lost.
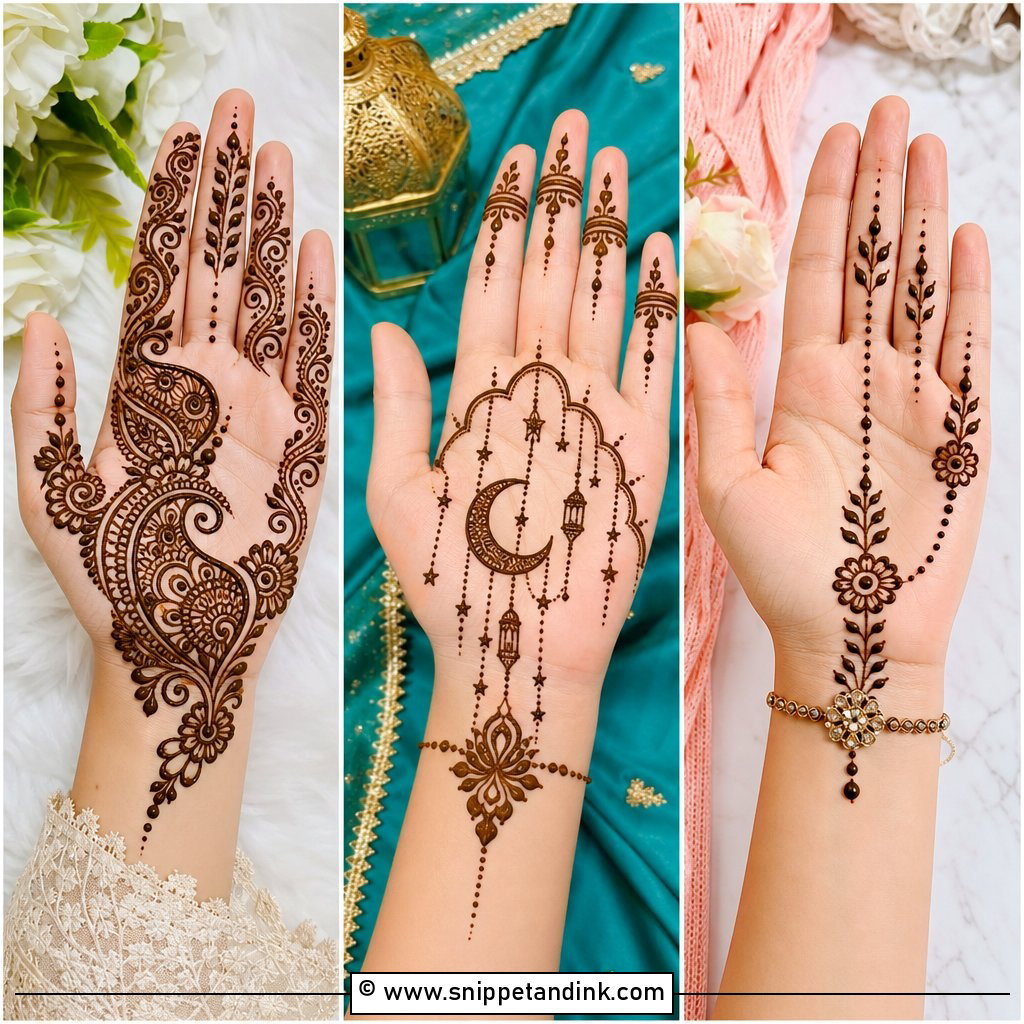
14. Minimal Bridal Mehndi Design
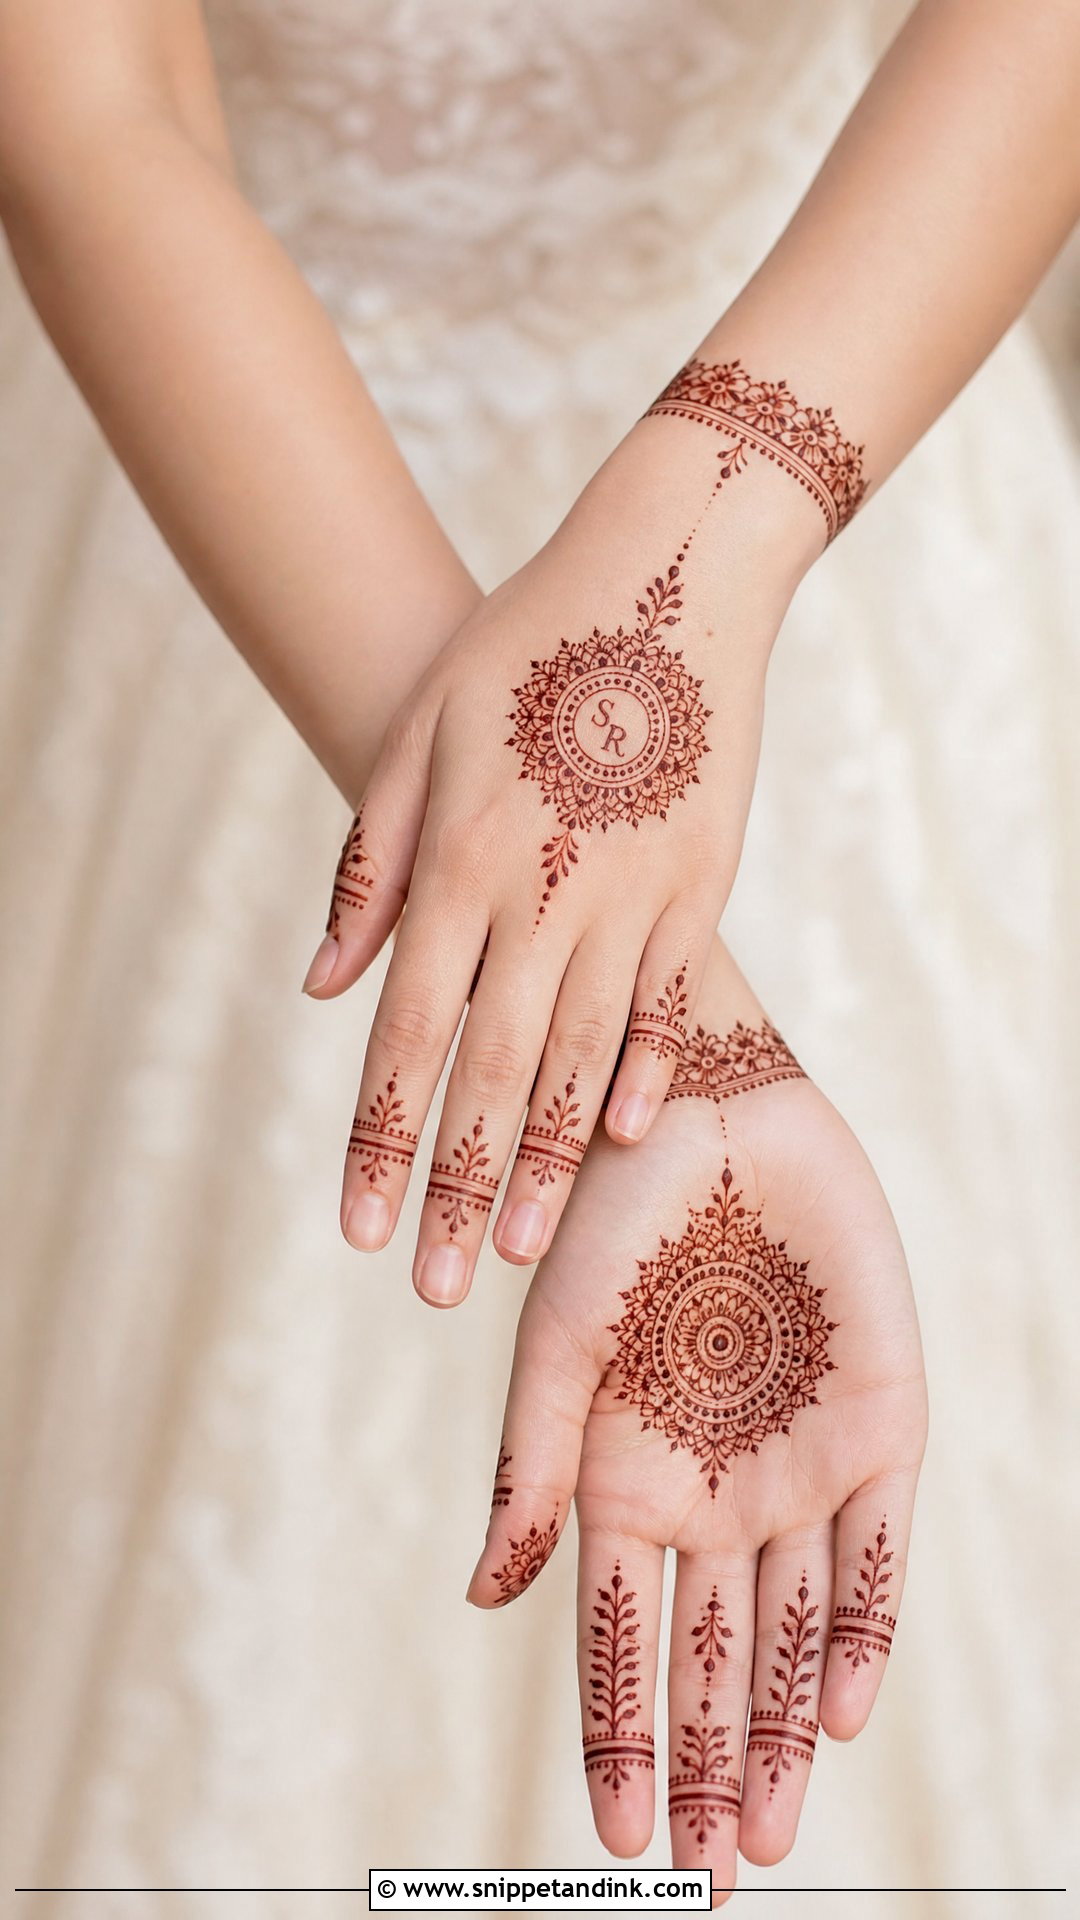
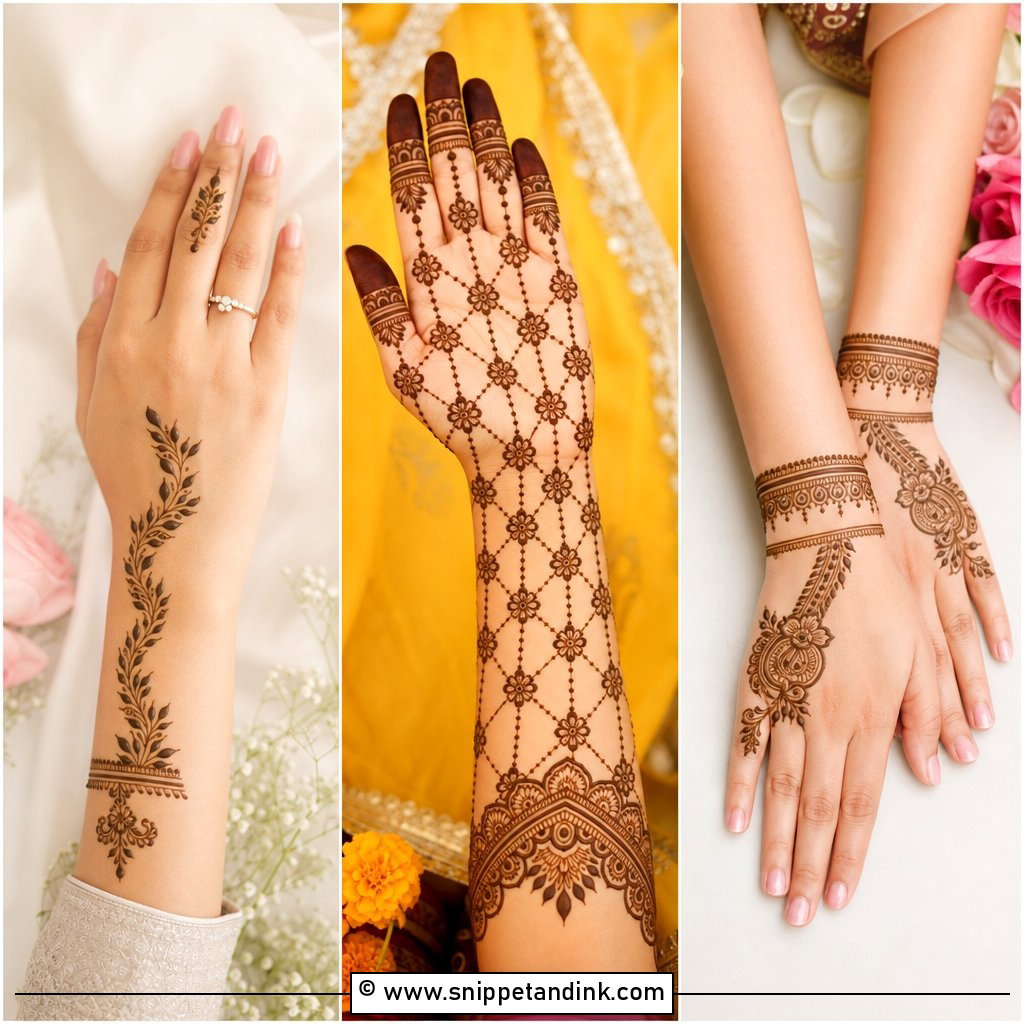
Minimal mehndi works best when every element looks placed on purpose. A small mandala, fine finger lines, a floral wrist band and plenty of open skin keep it light. It suits brides who can’t sit for hours or don’t want coverage up the arms. To keep it bridal rather than casual, I add refined details: initials, tiny florals, pearl-like dots or a slim bracelet pattern. It sits naturally beside modern sarees and understated jewellery.
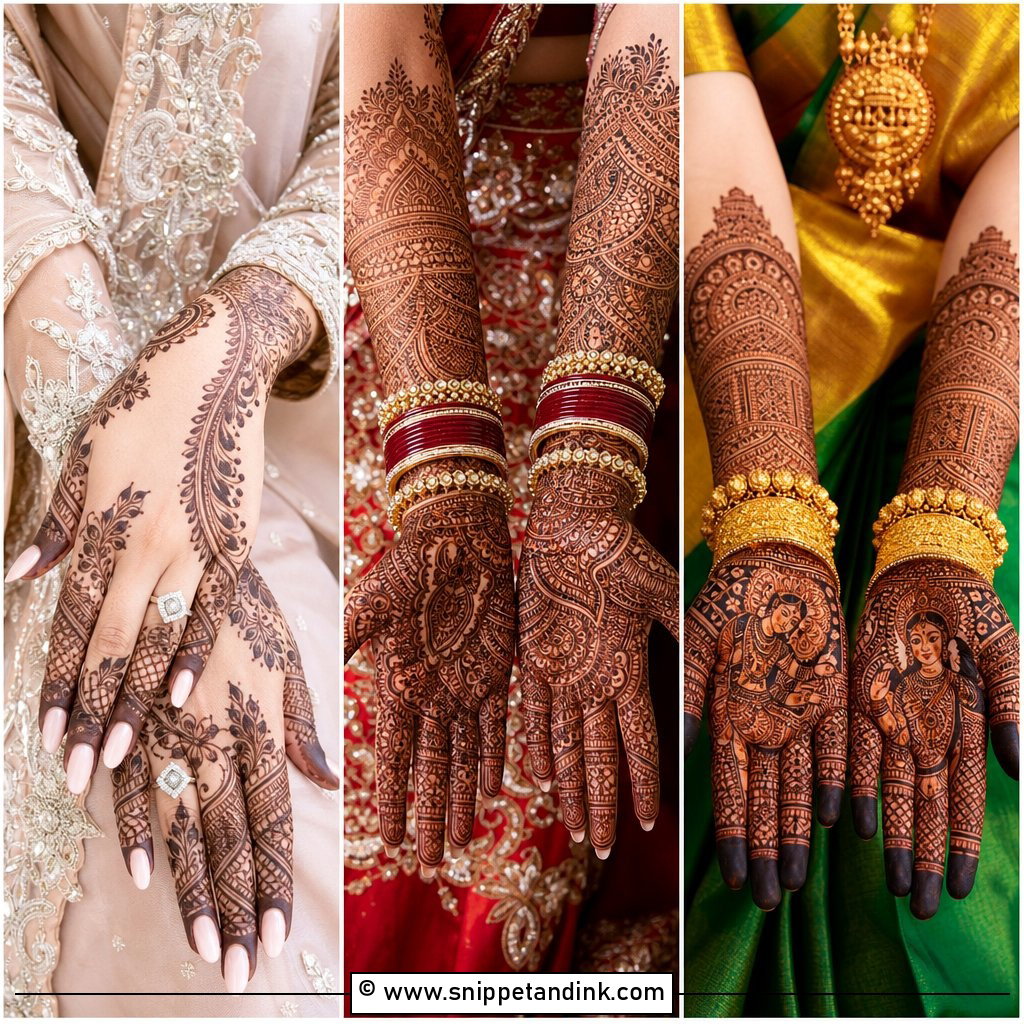
15. Modern Bridal Mehndi Design
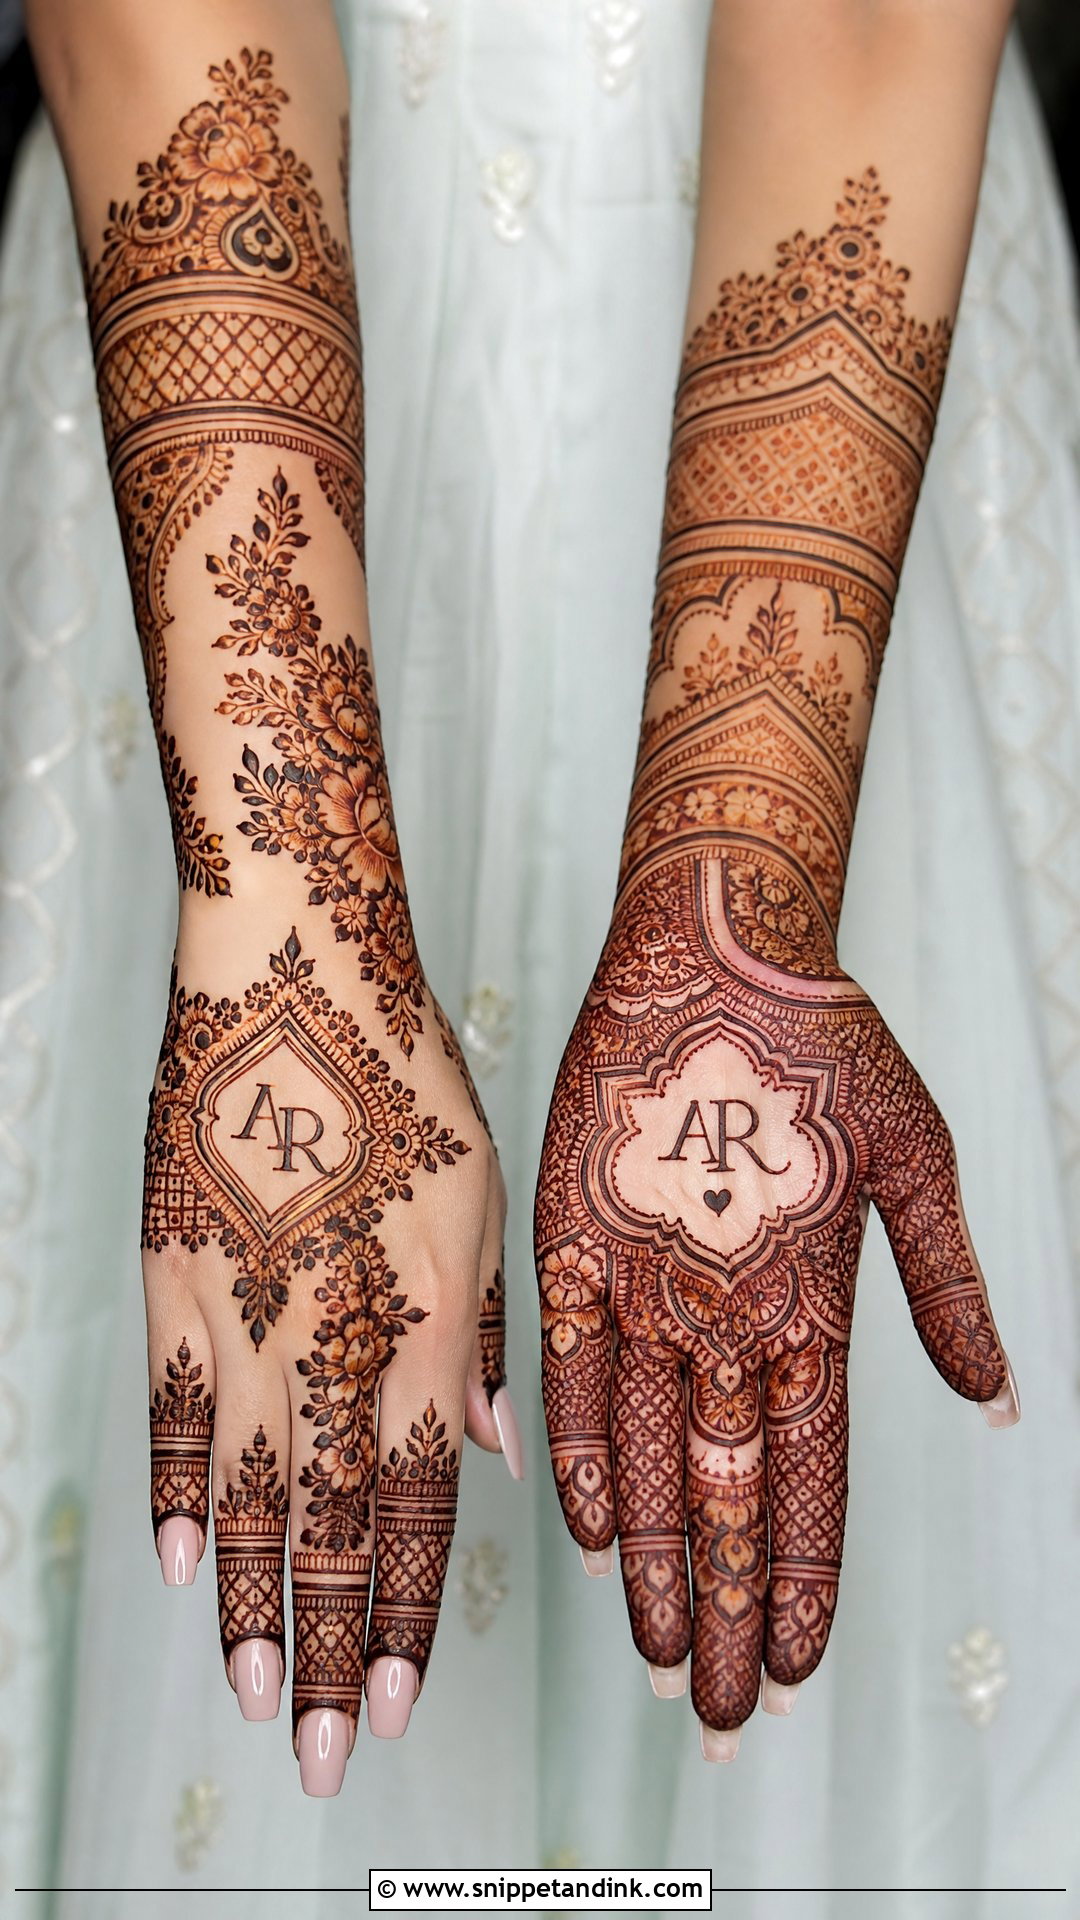
Modern bridal mehndi borrows from tradition but cleans up the layout. Geometric grids, bracelet bands, neat florals and initials are arranged with deliberate negative space, so some areas of the palm and wrist stay open for contrast. I usually build it around one strong focal point, a mandala or floral trail, with structured finger patterns. It is lighter than classic full-hand work and suits pastel outfits, sleek jewellery and minimal makeup.
16. Simple Bridal Mehndi Design
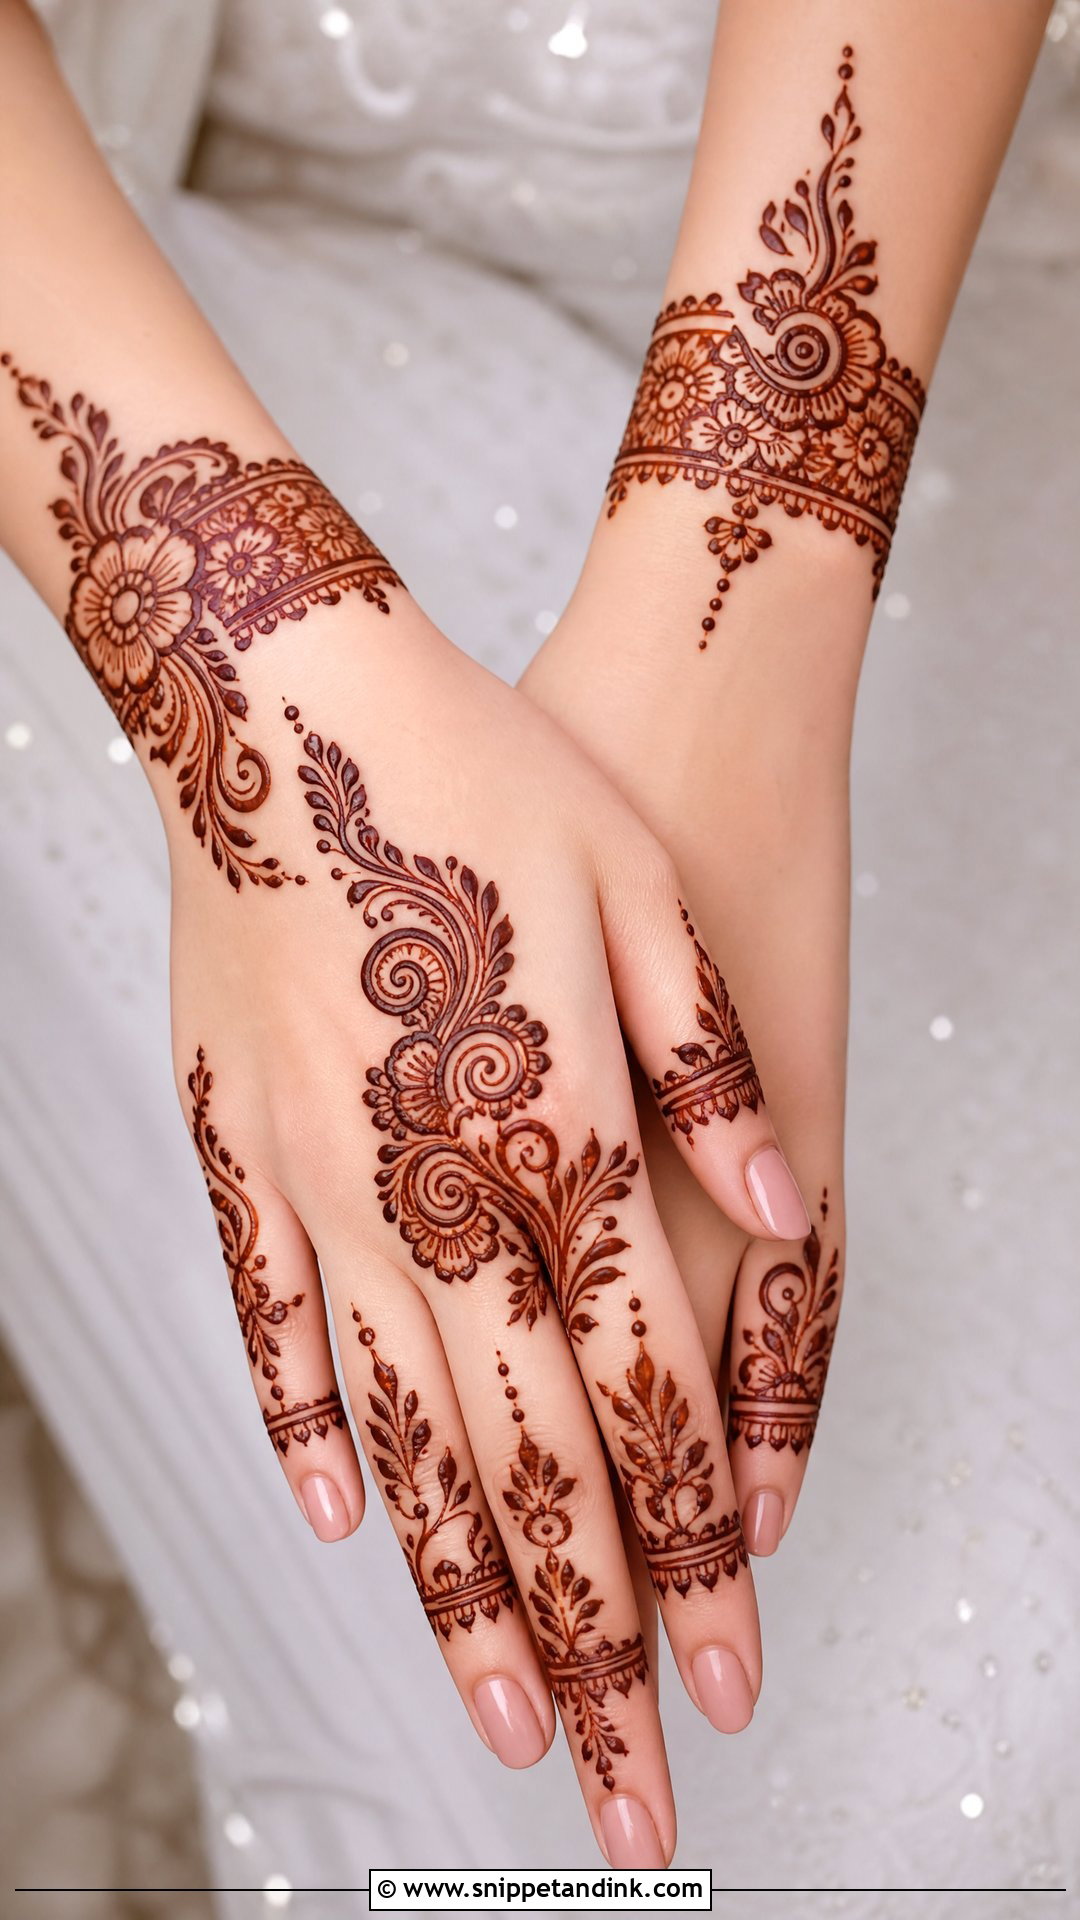
Simple doesn’t have to mean unfinished. This style swaps tiny filler for clear florals, paisleys, vines, dots and finger detail laid out in an easy-to-read pattern. A simple palm design can connect to a wrist cuff, and the back hand can carry a central flower with slim trails to the fingers. Smooth, confident lines matter more here than in dense work, because there’s nothing to hide a shaky stroke. It is also the style I’d suggest for a bride wearing mehndi to several pre-wedding events who wants the bridal set to look a little different.
17. Royal Bridal Mehndi Design
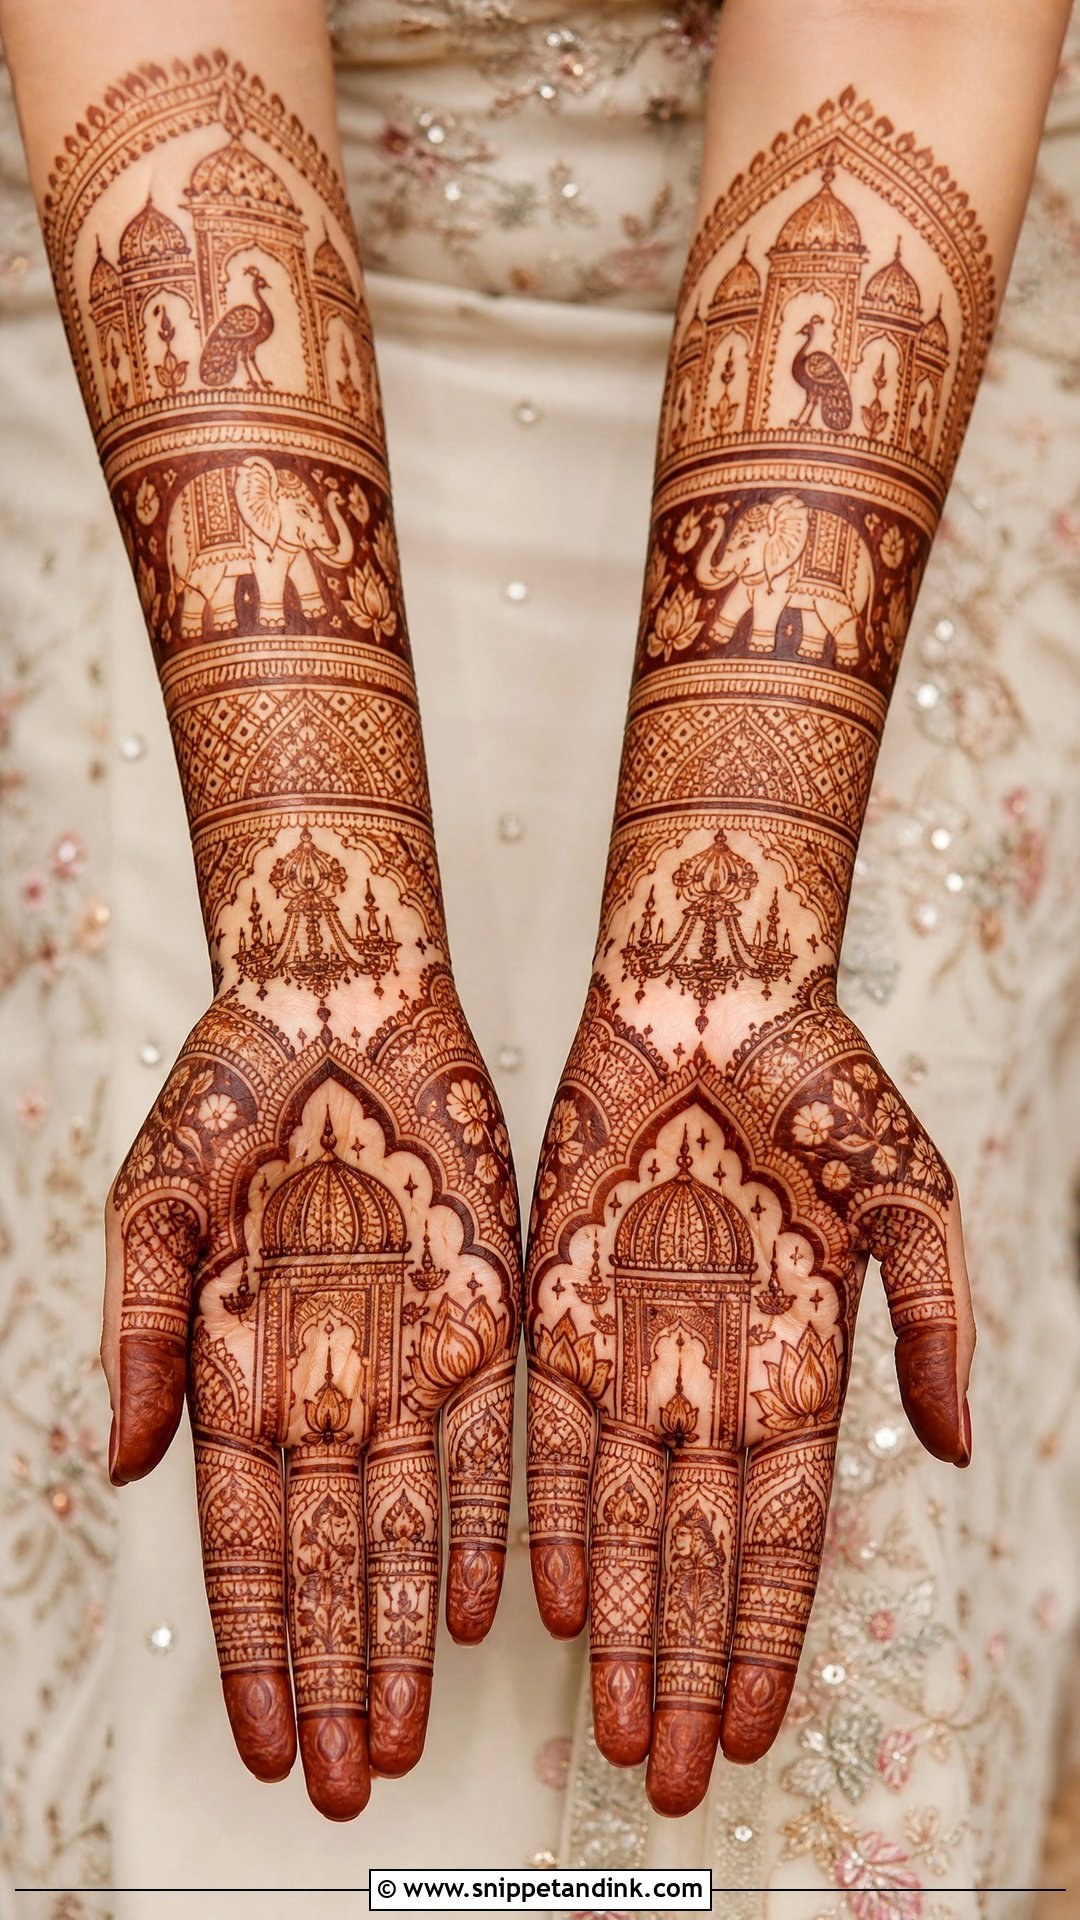
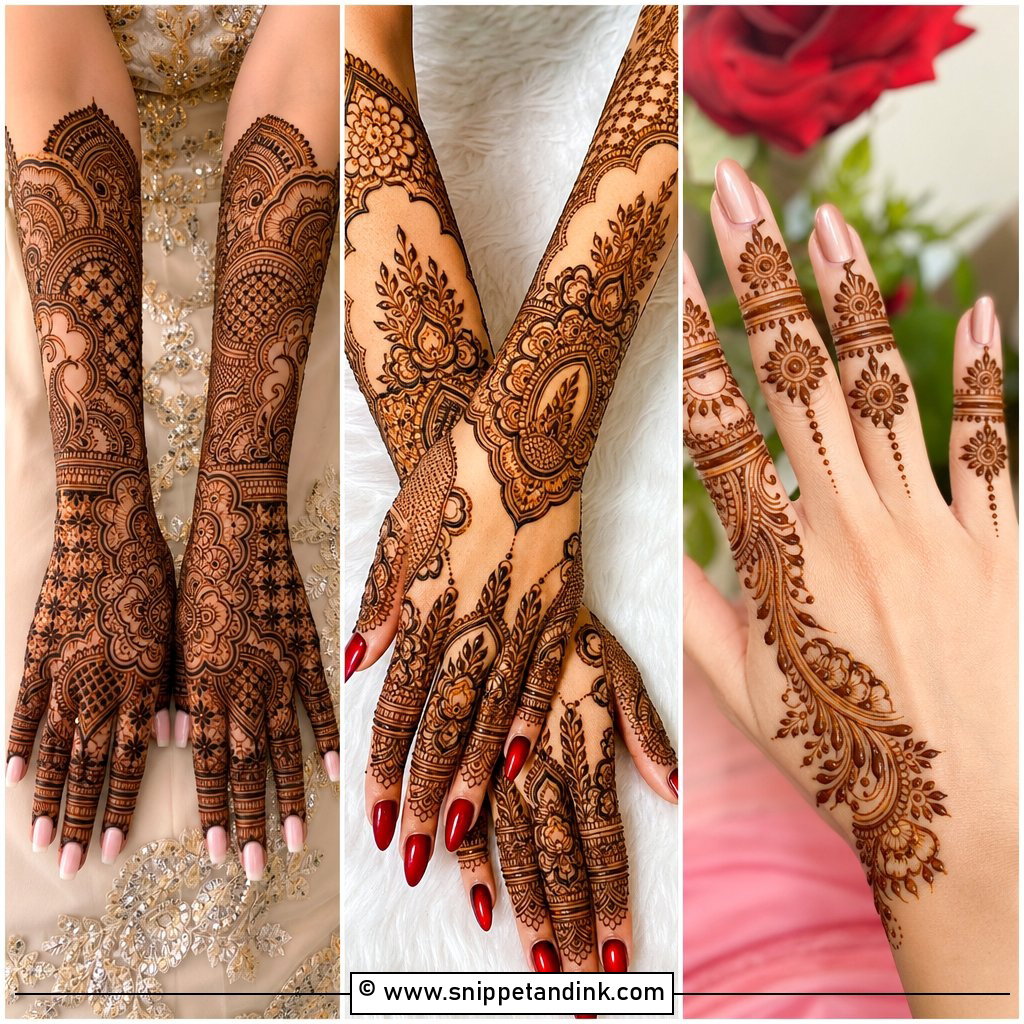
Palace motifs give this style its name: domes, elephants, peacocks, lotus, chandeliers and ornate borders, often with cuffs that read like jewellery. Coverage usually runs from fingertips to forearms or even elbows. What separates a polished royal design from a crowded one is panelling; I divide the hand into sections and give each motif its own frame, so every detail stays visible. It pairs naturally with heavy lehengas and kundan jewellery. Plan for a long sitting.
18. Rajasthani Bridal Mehndi Design
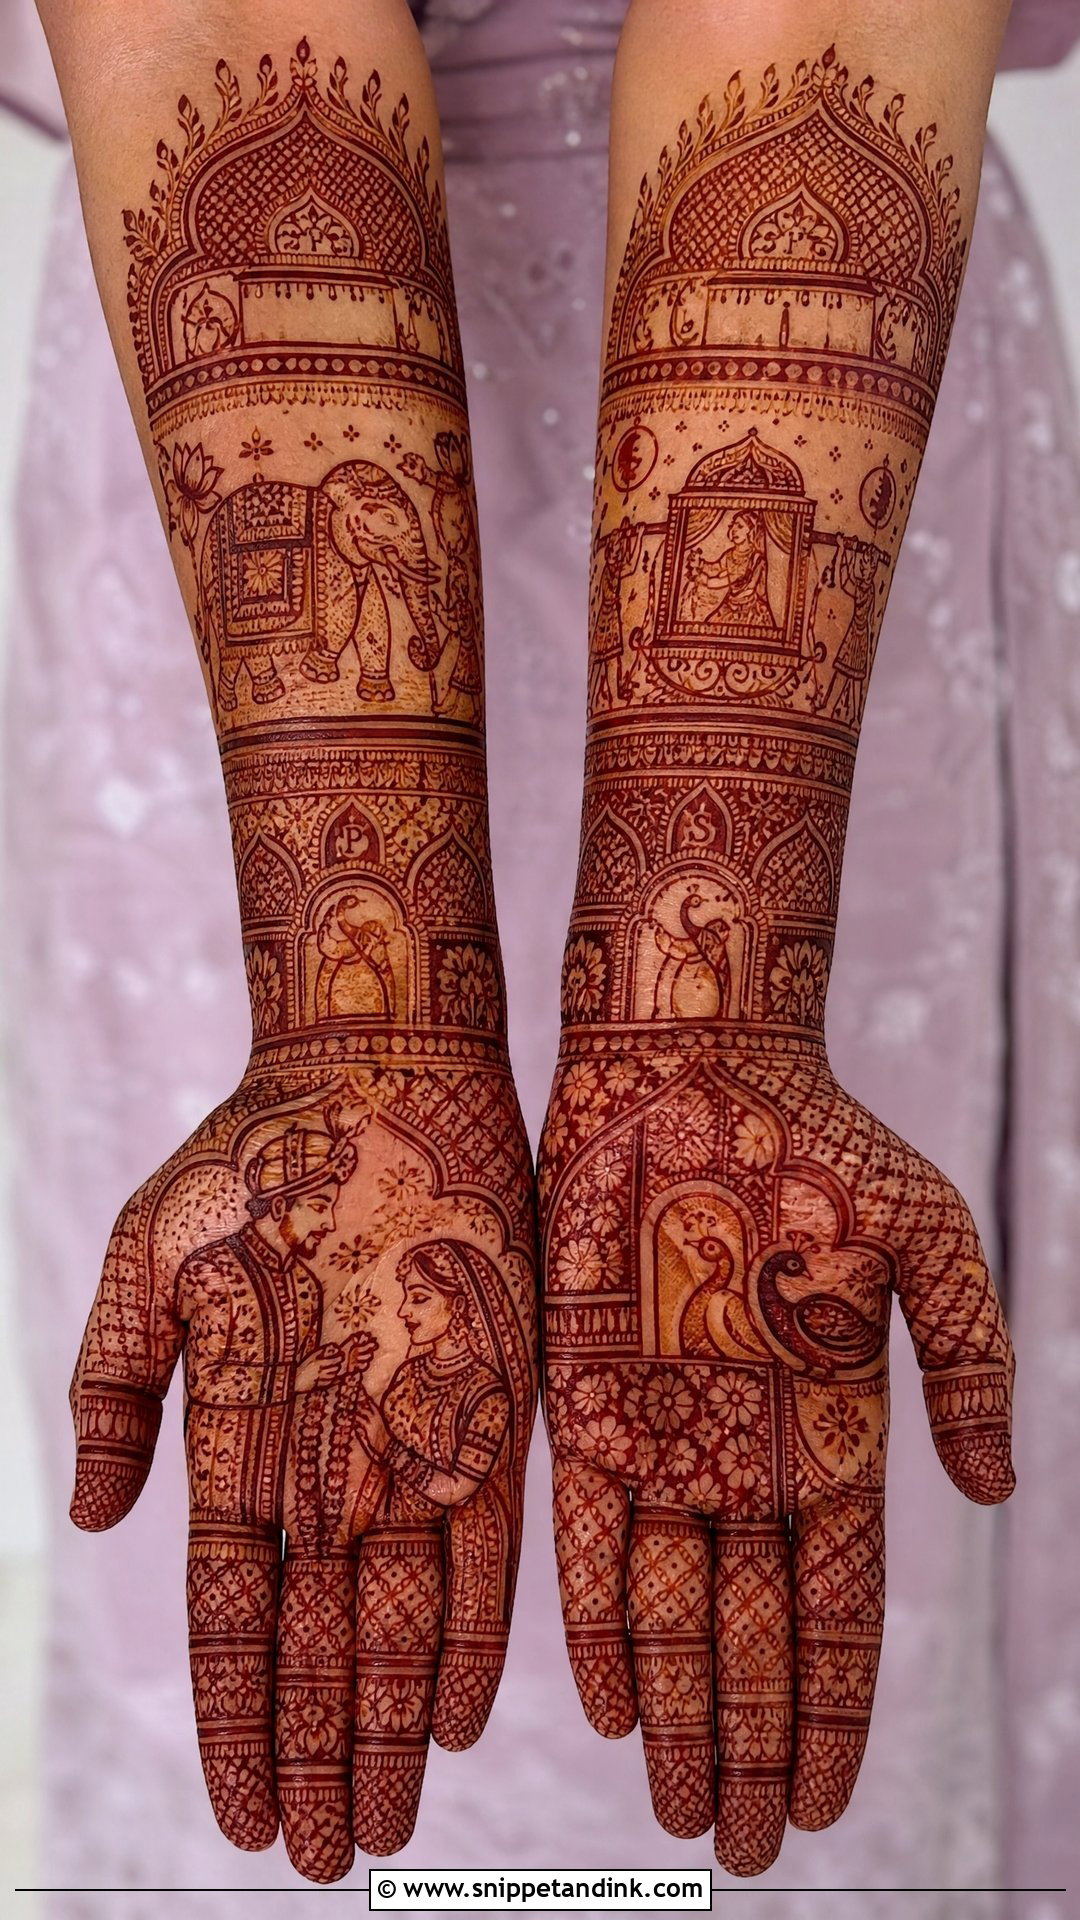
Rajasthani work is dense, detailed and narrative. Bride and groom figures, jharokha windows, elephants, peacocks and doli scenes cover the front and back of the hands with very little empty skin. The craftsmanship is in the fine filler, so it needs patience from both the artist and the bride. Hiding the groom’s initials somewhere in the pattern is a long tradition, and with filling this dense it can take him a while to find them. Book enough time for this one; rushing it shows.
19. Pakistani Bridal Mehndi Design
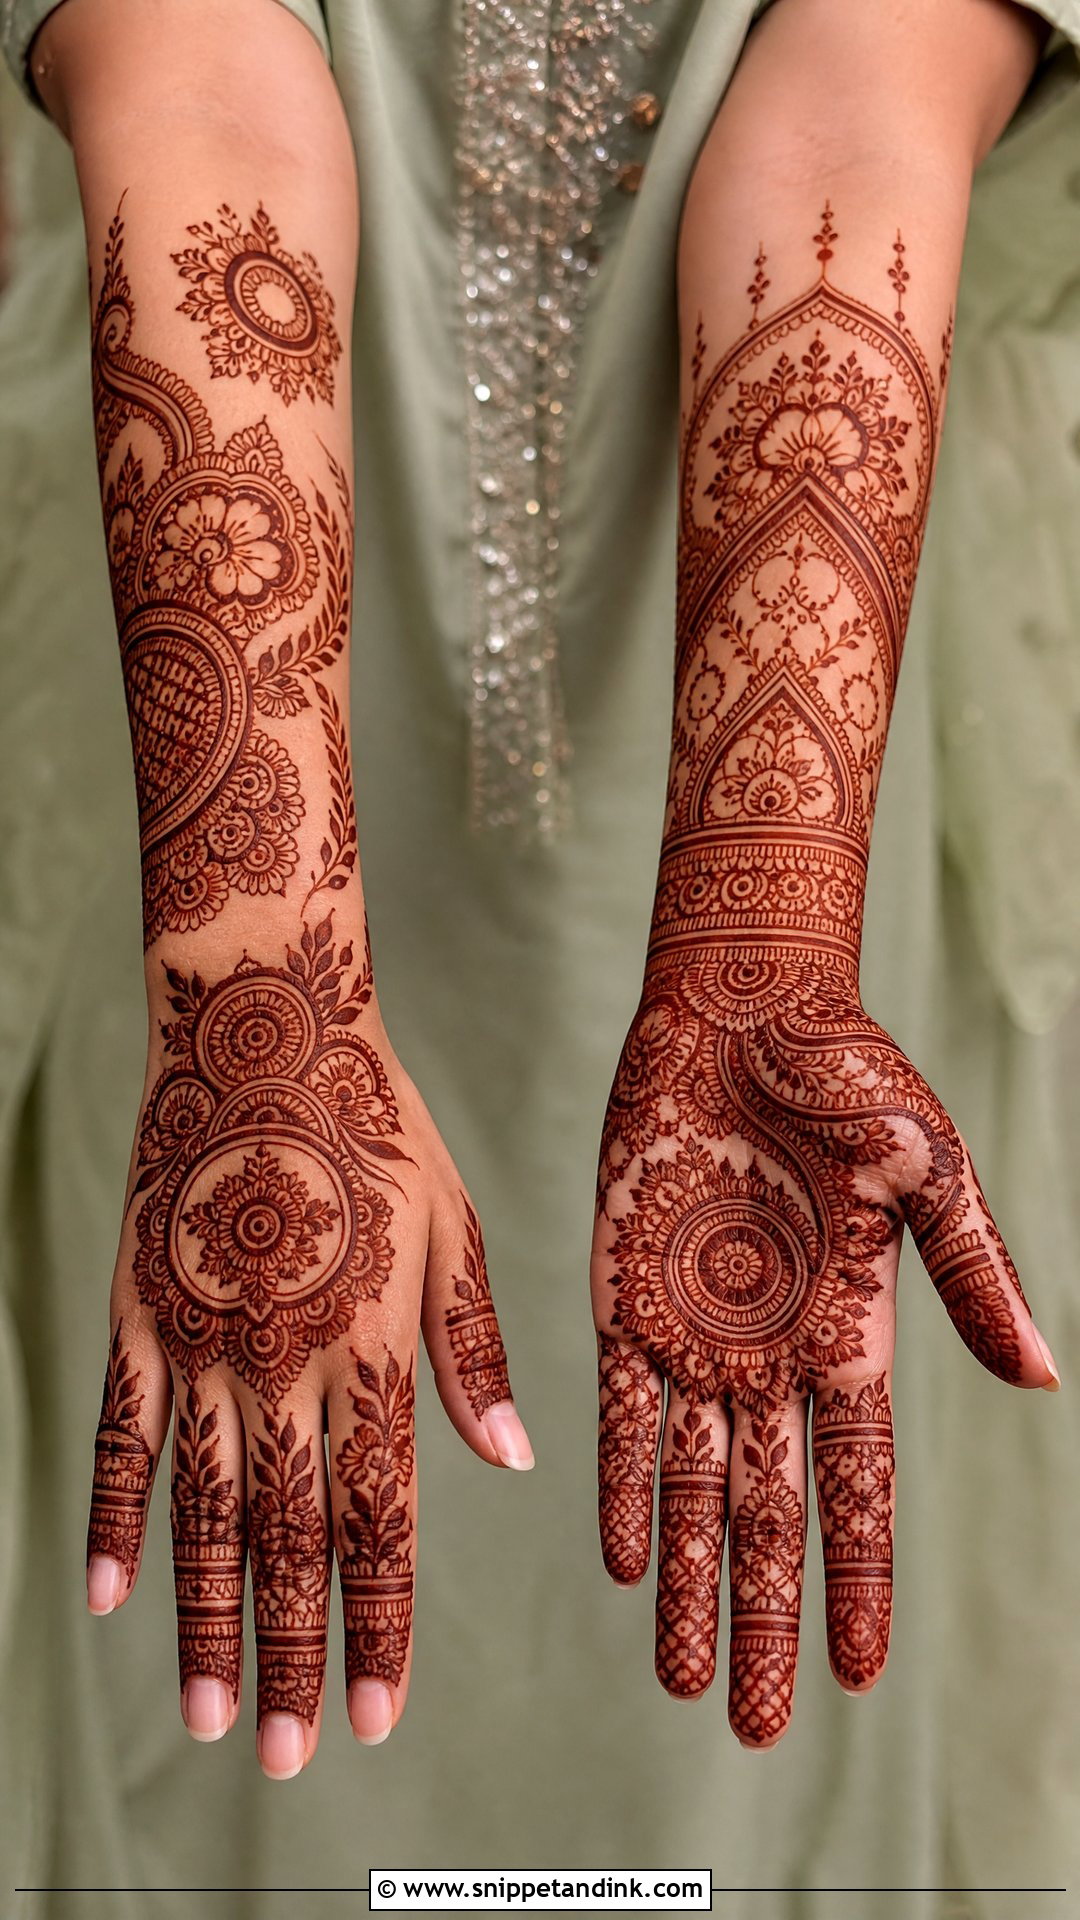
Pakistani bridal work usually blends Indian-style filling with Arabic-inspired flow. The result is full and decorative, with florals, domes, vines, paisleys and mandalas running from the wrist up the forearm. Both hands look connected but not identical. I outline the main motifs with stronger borders and keep the inside detail finer, which gives depth and helps the stain read richly. It suits ghararas, shararas and embroidered bridal dresses, and brides who want density with a little breathing space.
20. Moroccan Bridal Mehndi Design
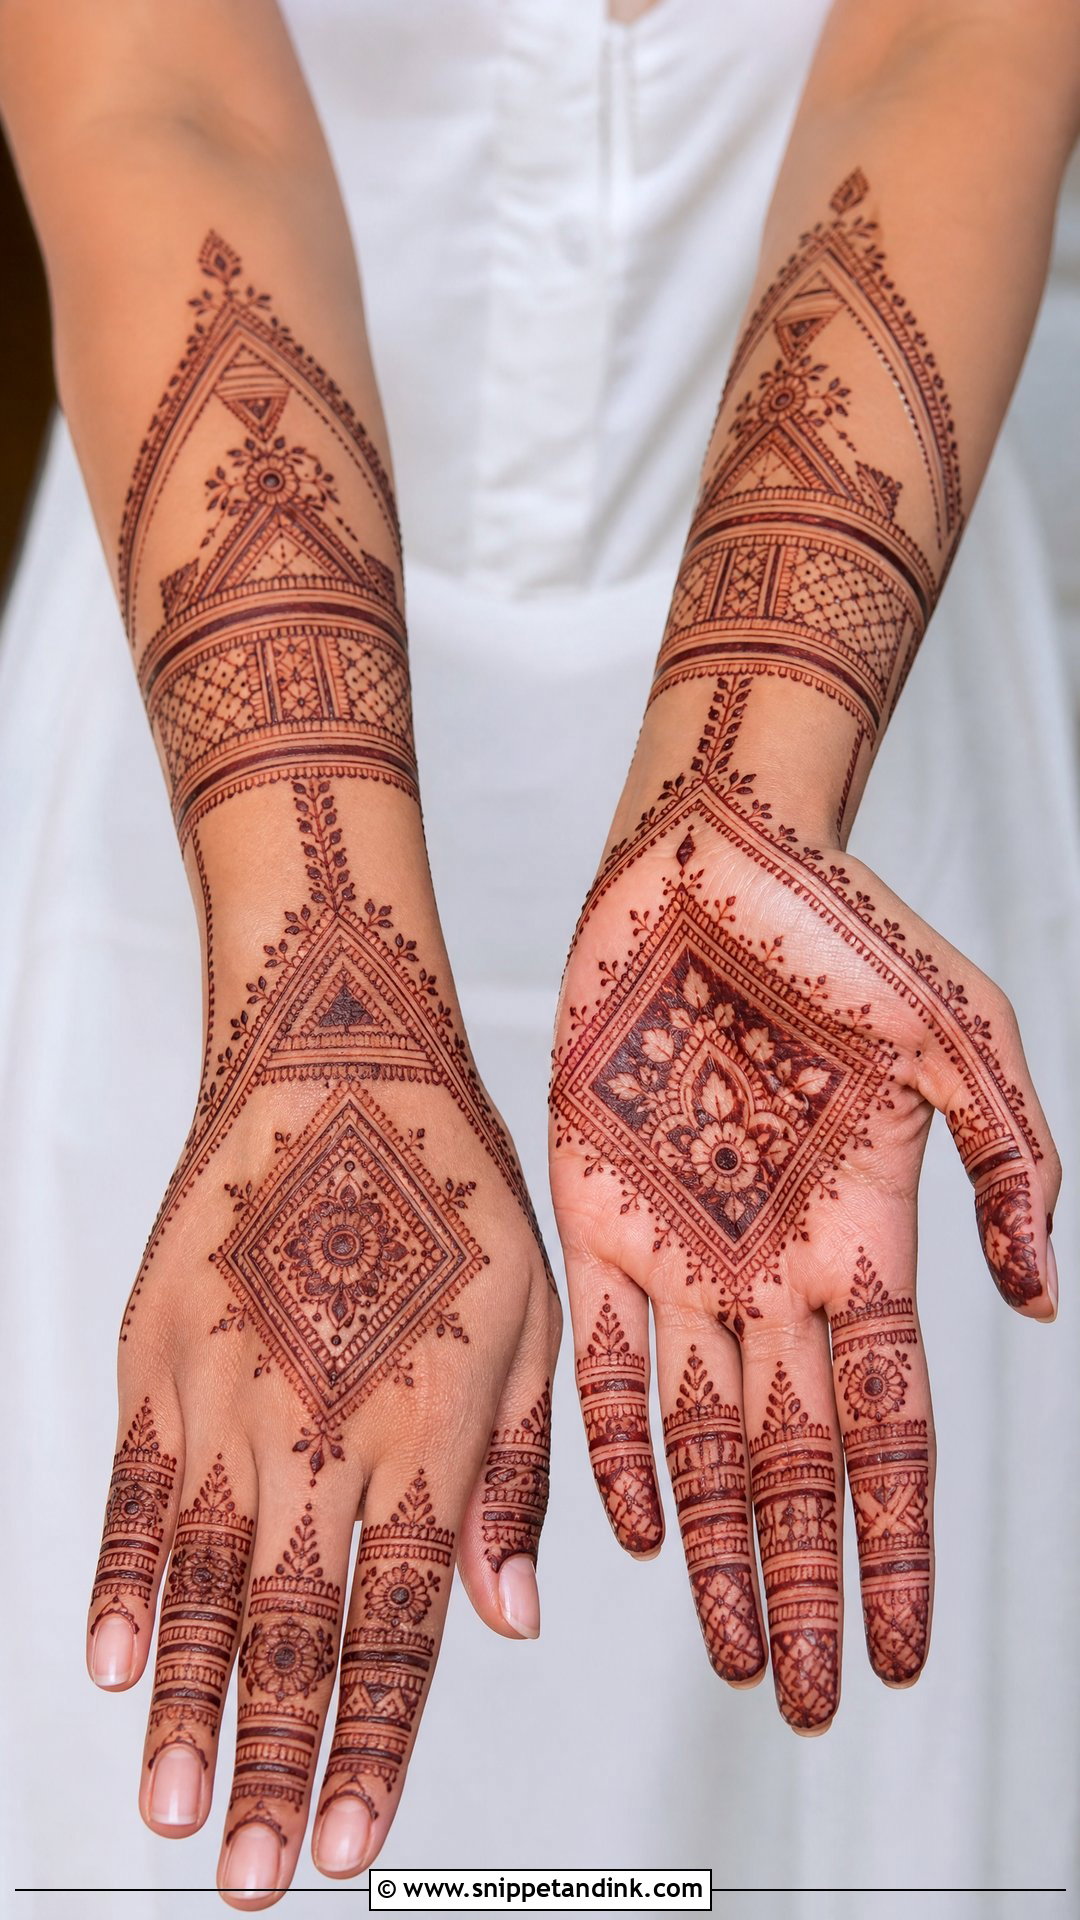
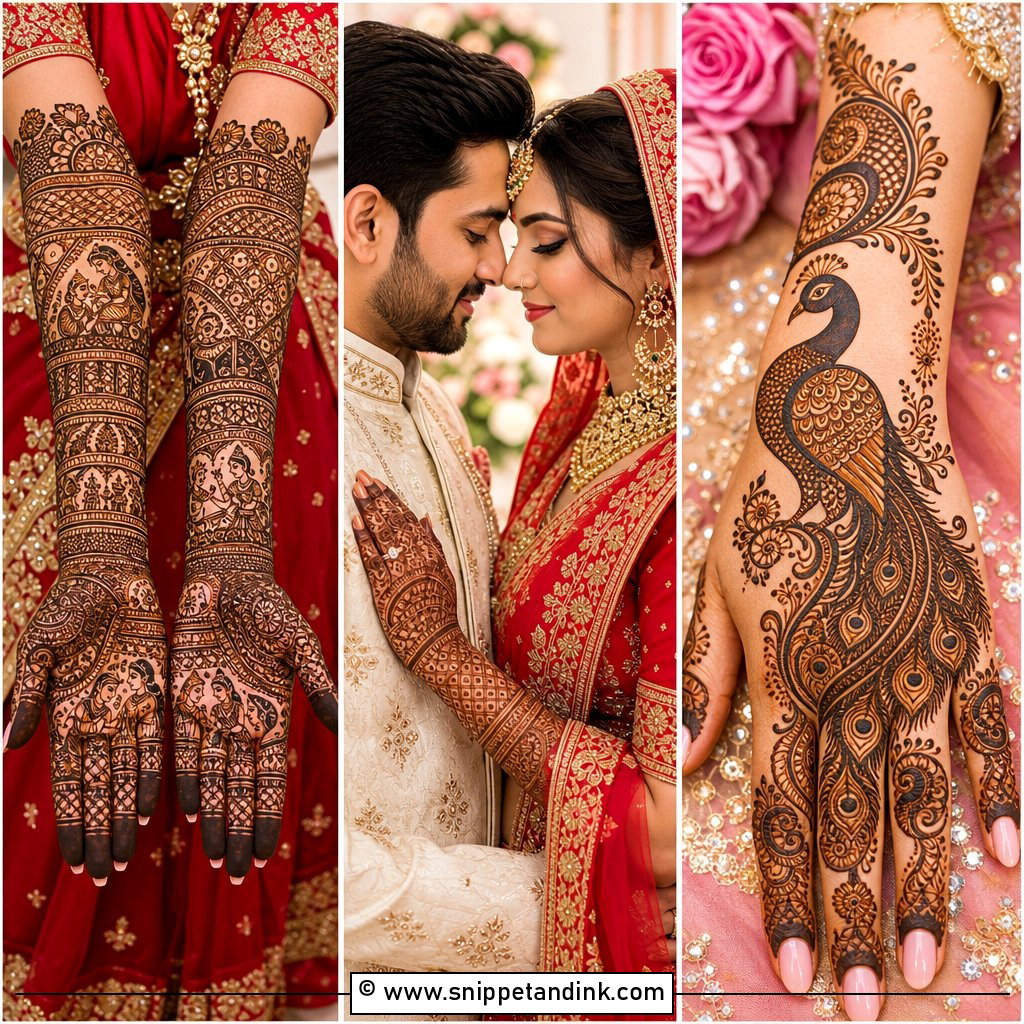
Geometry replaces floral flow here. Moroccan bridal mehndi design is built from diamonds, triangles, lines, grids and structured bands that follow the fingers and wrist. A bridal version covers the hands and wrists in repeating patterns, then softens them with small dots or floral accents. It suits the back hand best. Clean, sharp linework is everything; I keep the cone pressure steady and plan the grid before drawing, because an uneven grid is the first thing people notice.
21. Gulf Bridal Mehndi Design
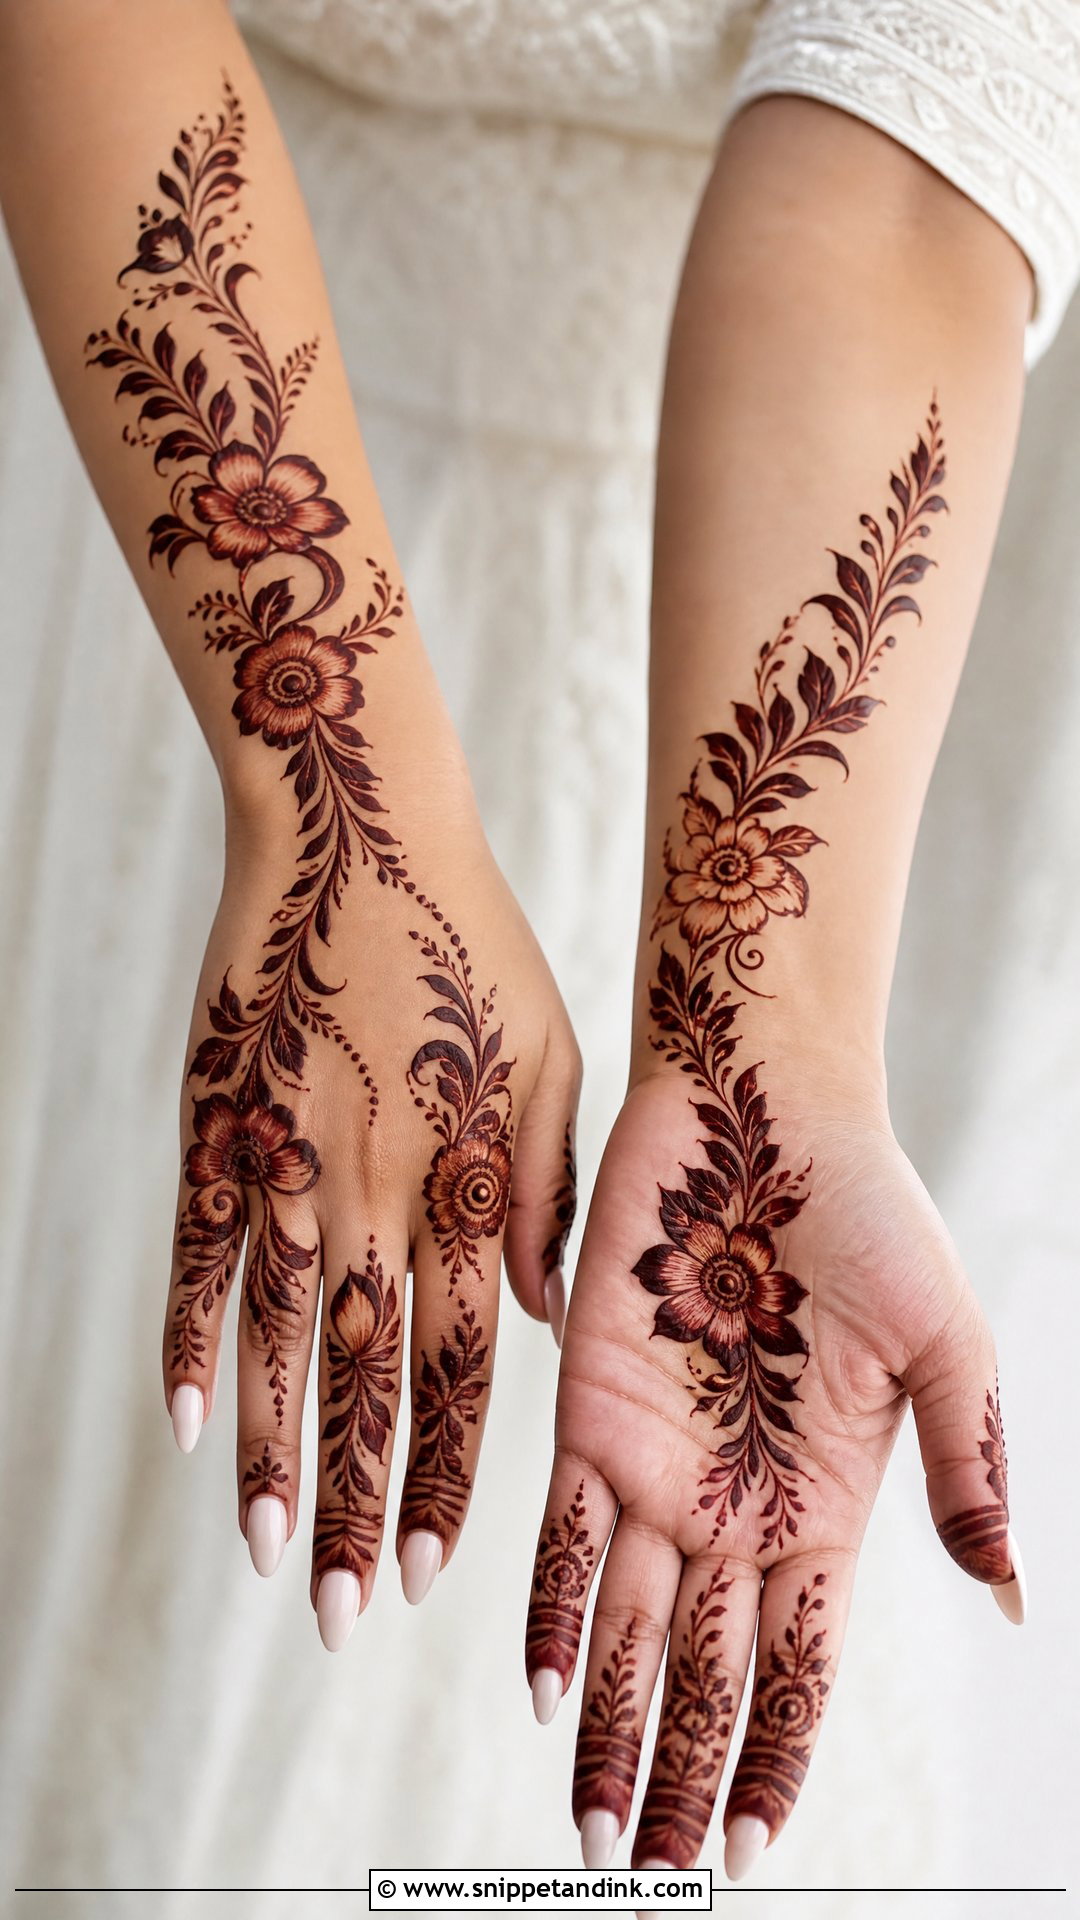
Gulf or Khaleeji mehndi is known for bold florals, leafy vines and plenty of open skin. The pattern flows from fingers to wrist on a soft diagonal. For a bride I make the motifs larger and extend them toward the forearm. Because there’s less filler, the lines need to be thick and dark, and that makes the paste quality important; a well-mixed natural paste gives a deep, even stain on bold strokes. It pairs well with embellished sleeves and gold jewellery.
22. Bridal Finger Mehndi Design
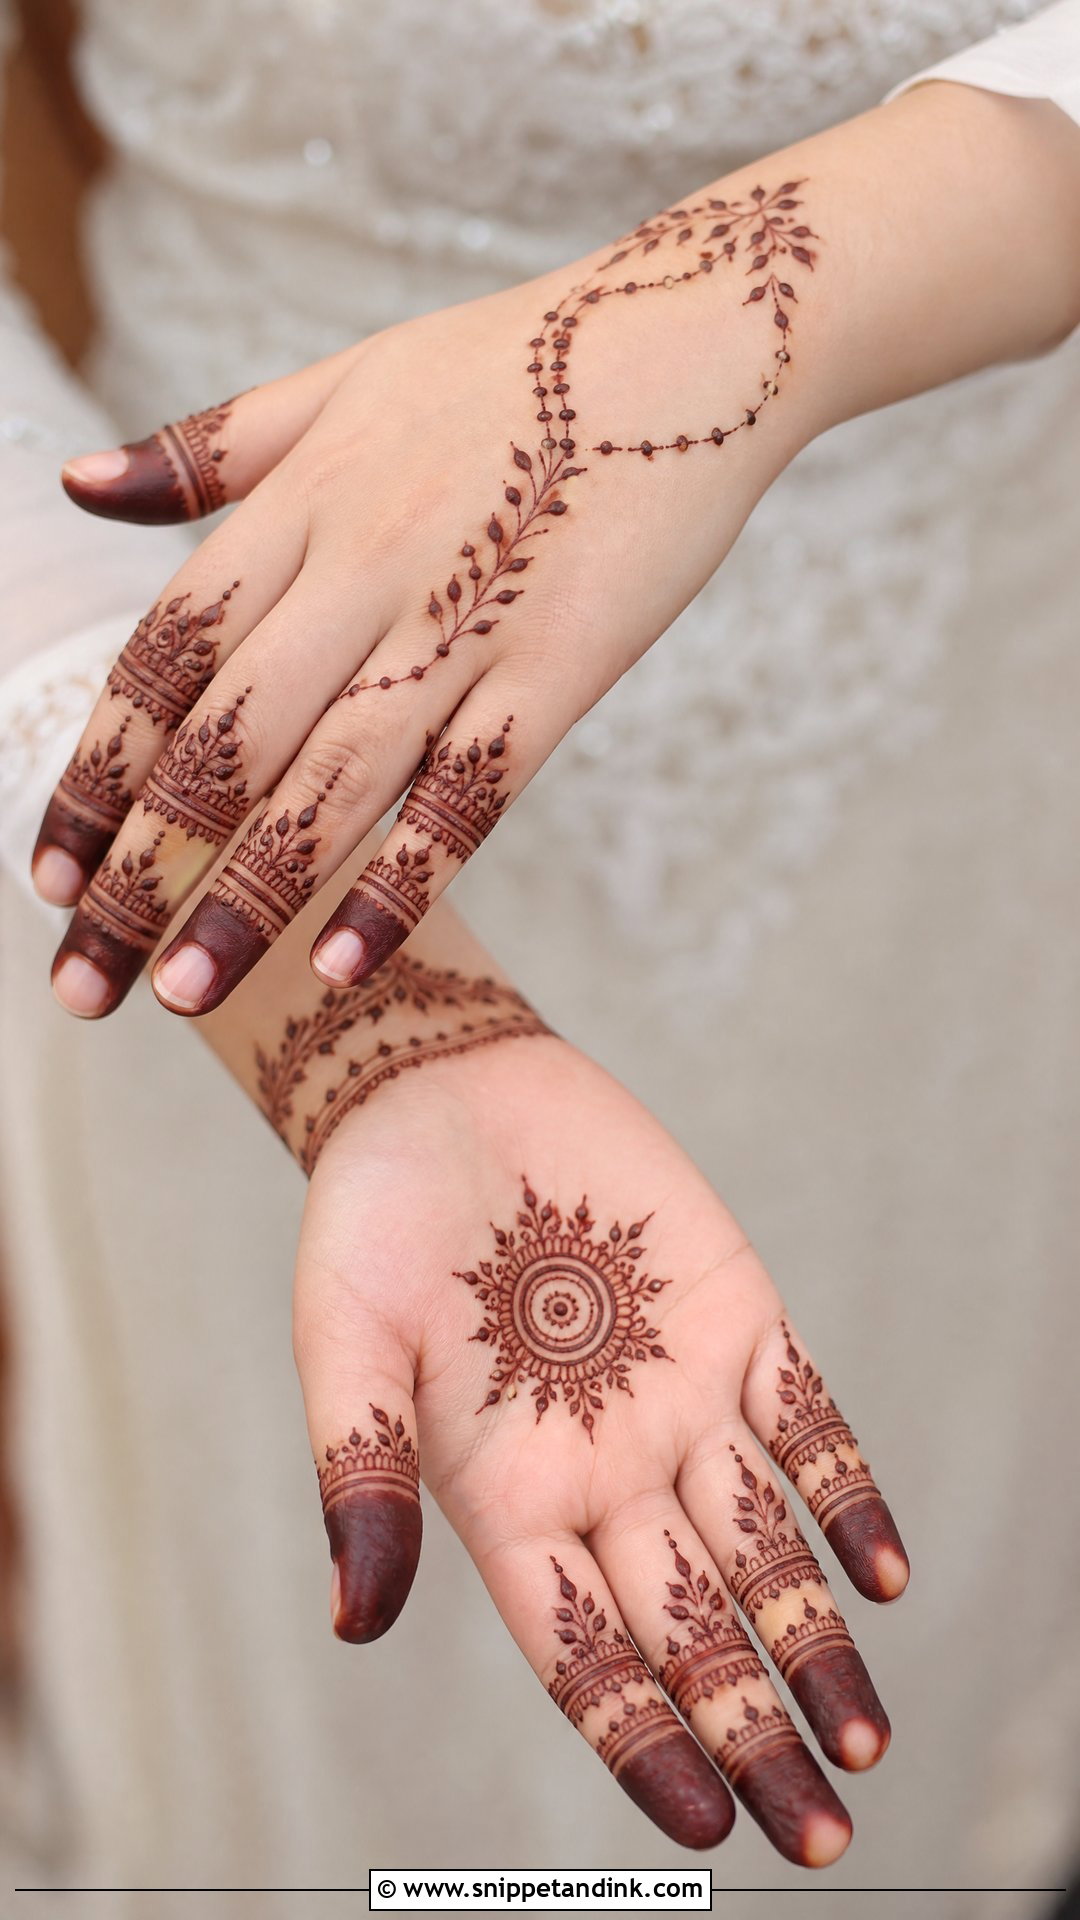
Detailed fingers with a quieter hand put the attention on rings and nails. Fingers carry capped tips, leafy bands, ring-like motifs and fine vertical lines, while the palm has a small mandala or floral centre and the wrist a slim cuff. I connect the fingers to the rest of the hand with delicate chains or dotted trails so the design doesn’t look half done. Fingertips stain the darkest of anywhere on the hand, so I keep finger detail a little more open than elsewhere.
23. Bridal Wrist Cuff Mehndi Design
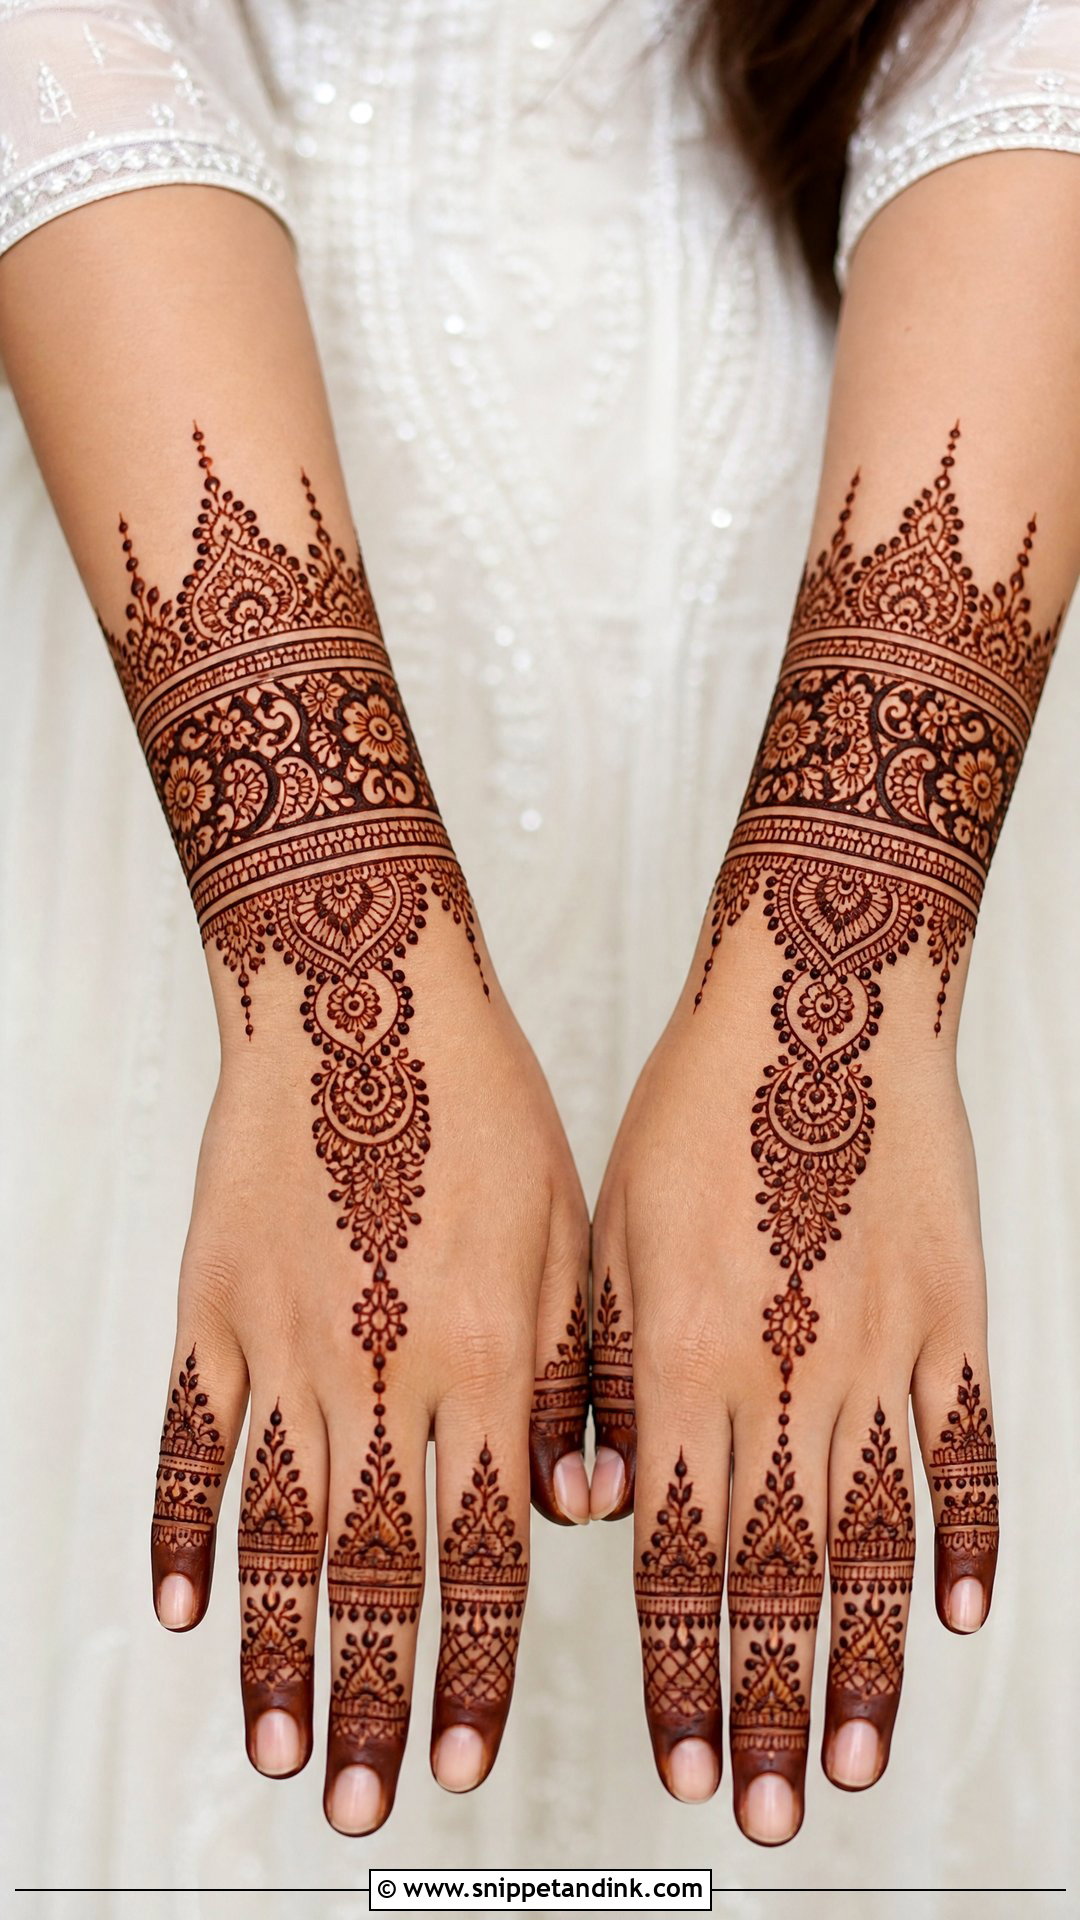
A wrist cuff turns mehndi into jewellery. The main band wraps the wrist and connects to finger motifs with chains, dots or floral trails. For a bride the cuff can be wider and layered with paisleys, jaali or a mandala. It pairs naturally with bangles, which look like an extension of the design. One practical note: skin at the wrist and forearm stains lighter than palms and fingers, so I keep the cuff lines bolder there to balance the colour.
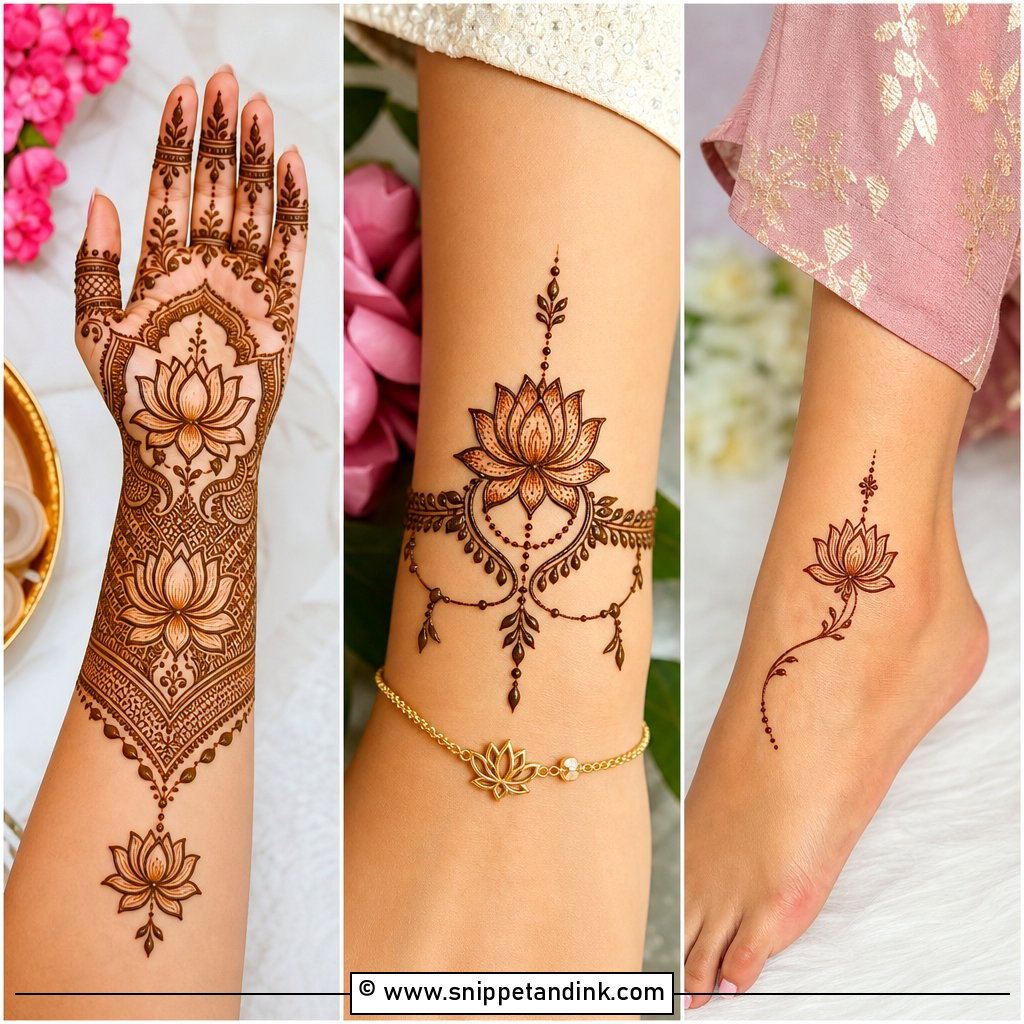
24. Bridal Foot Mehndi Design
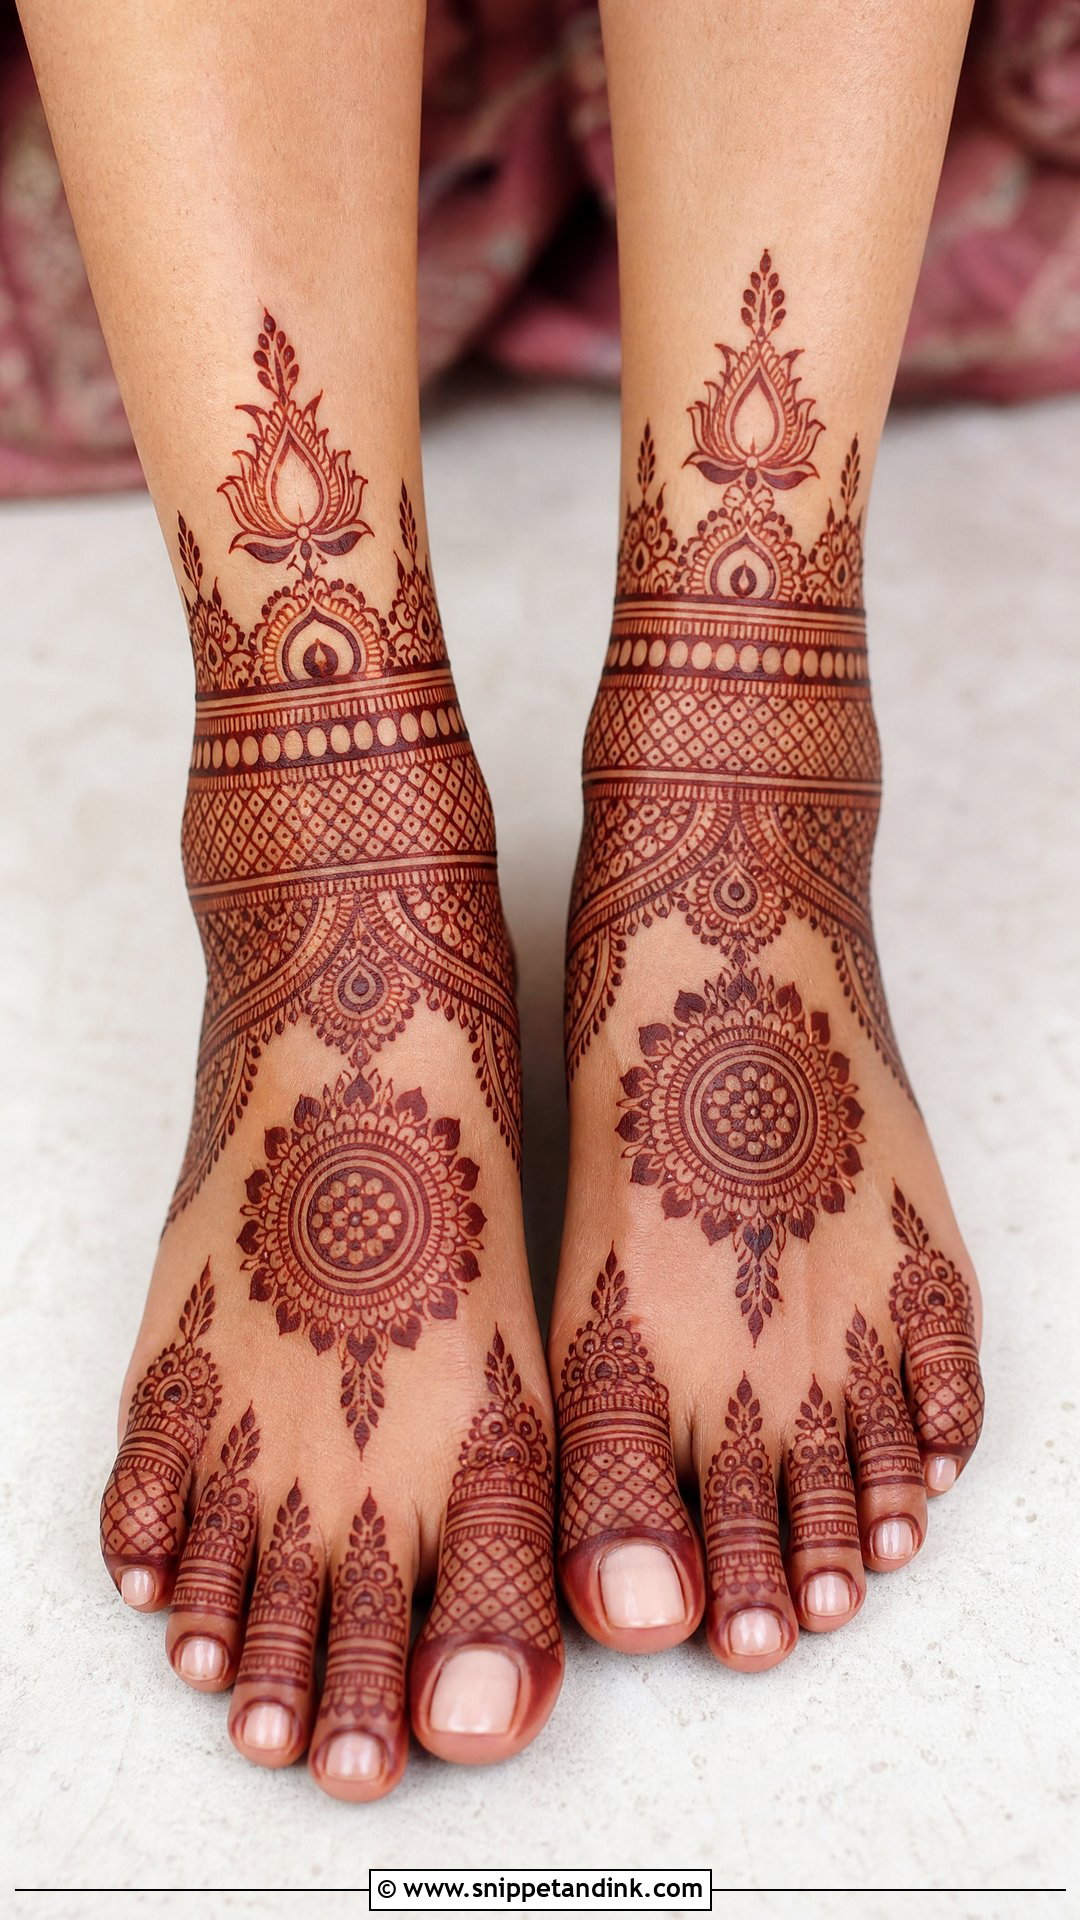
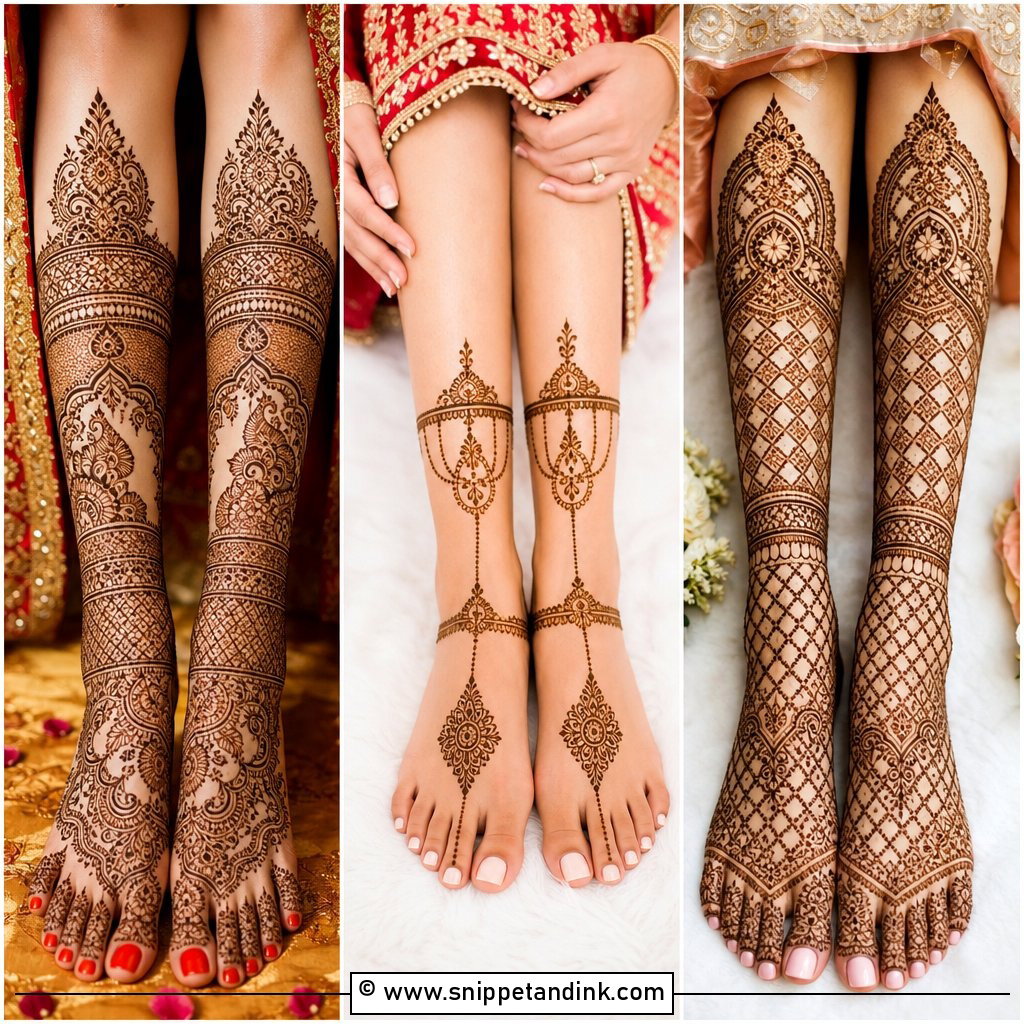
Feet show during many ceremonies, especially when the bride is seated or barefoot. Bridal foot mehndi design can cover the toes, tops of the feet, ankles and sometimes the lower legs, with mandalas, anklet bands, paisleys and lotus flowers. Symmetry between both feet matters. I ask to see the bridal sandals first and plan the design around the straps, so the best details aren’t hidden. Feet usually stain deeply, but they also rub against shoes and floors, so keep them covered as little as possible for the first day.
25. Bridal Initials Mehndi Design
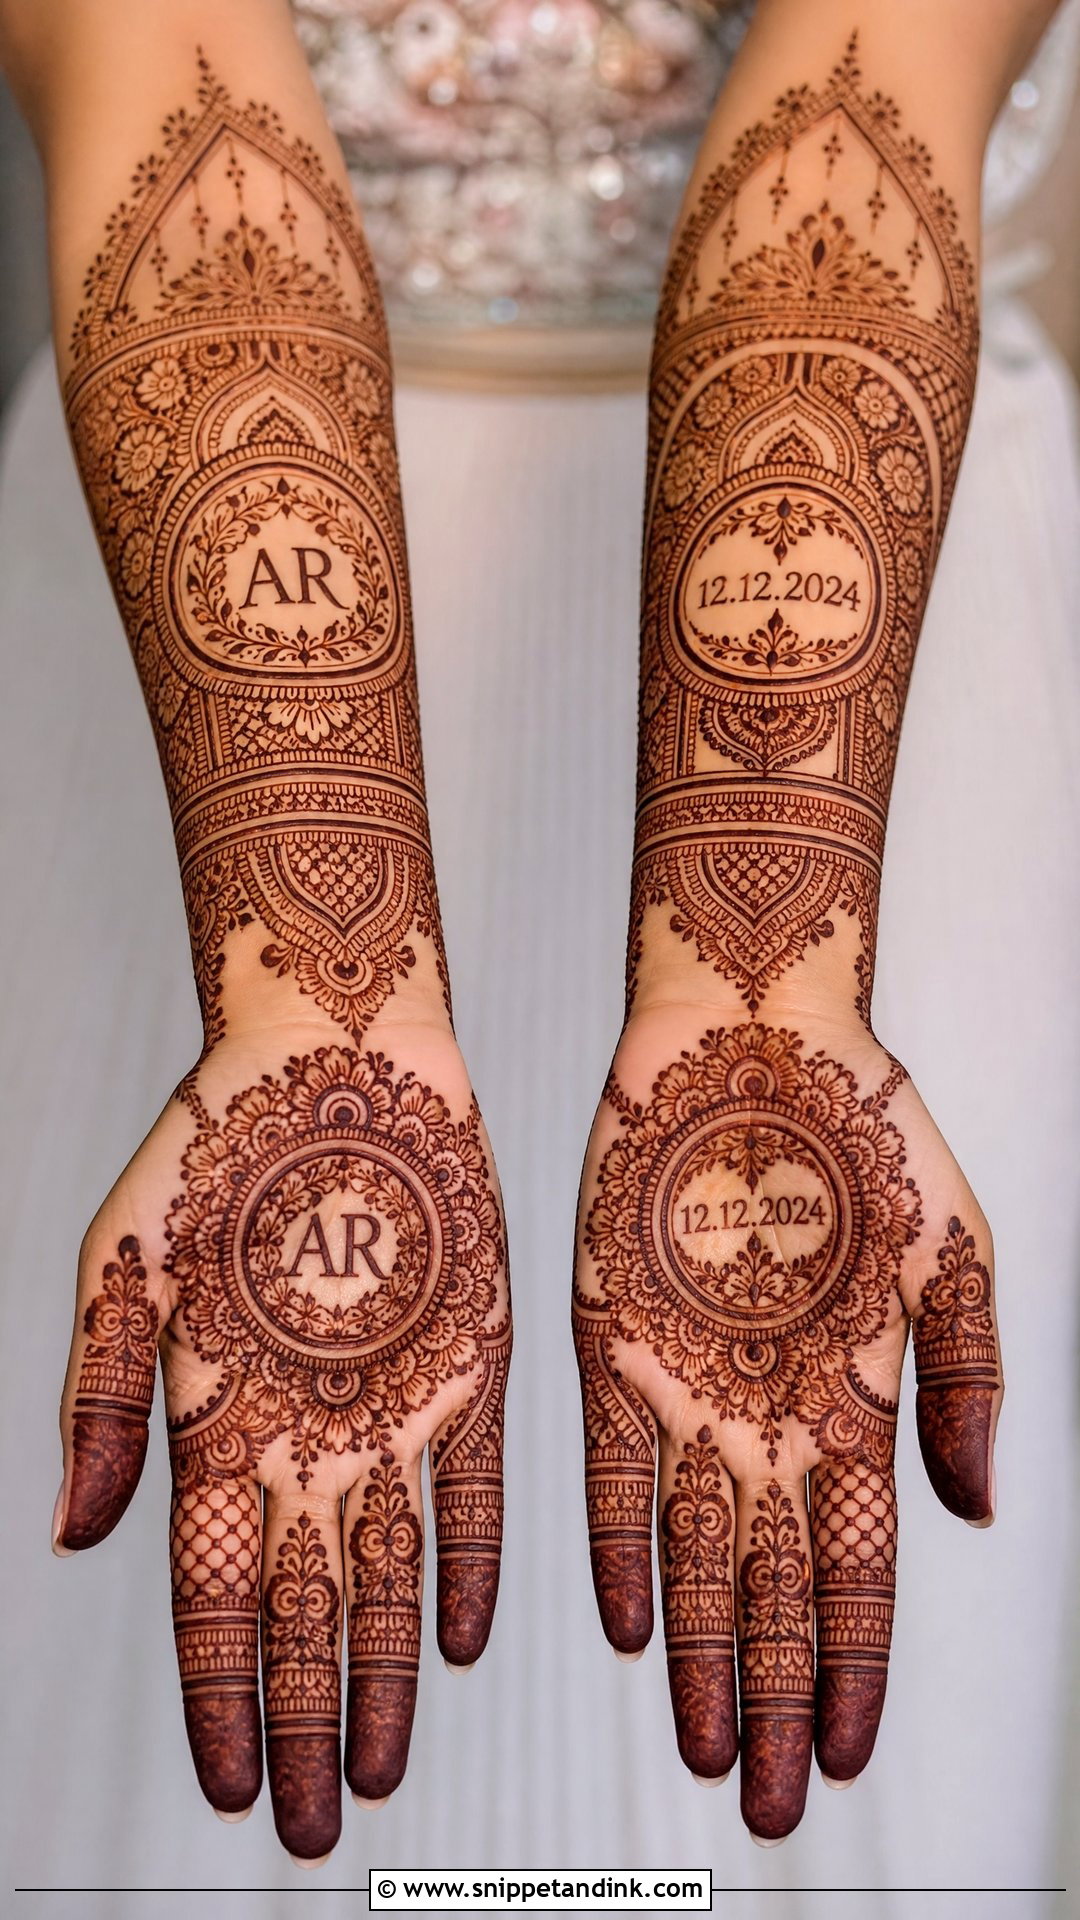
Initials are the easiest personal detail to add to any style. Bridal initials mehndi design hides letters inside a paisley, within a mandala, among jaali, or near the wrist in delicate script. Some brides add both names, the wedding date or a small symbol. I blend the letters into the line work rather than writing them separately, so they look like part of the pattern. Hide them well; the search is part of the fun for the groom.
Leave the Paste On, Then Keep Water Away
The deepest stains I see come from brides who leave the paste on longest. I’d aim for at least six to eight hours, and overnight if you can sleep with your hands wrapped in tissue or cotton. While the paste is drying, I dab on a little lemon and sugar mixture, which helps it stay stuck to the skin instead of cracking off early.
- Scrape the dried paste off with a blunt edge or your fingers. Don’t wash it off.
- Keep the hands away from water for as long as you can, ideally 12 to 24 hours.
- Keep your hands warm. Warmth helps the colour develop, and cold hands stain more slowly.
- Skip soap-heavy cleaning, chlorine and hand sanitiser in the first day; all of them dull the stain.
Once the colour has developed, a thin layer of balm or natural oil before bathing protects it. Expect the stain to fade gradually over one to three weeks, palms and fingertips lasting longest, while the backs of the hands and wrists fade first.
Sleeves, Bangles and the Stain You Wake Up To
The design you choose has to work with your sleeves, your bangles, your schedule and how long you can sit still. Dense Indian and Rajasthani designs carry tradition and story, while Arabic trails, minimal mandalas or modern negative-space layouts are faster and lighter. Portraits, initials, peacocks, jaali or a wrist cuff can personalise any of them. Look at the sleeve length of your outfit, plan where your bangles will sit, book the sitting at the right time and look after the paste afterwards. Do that and the colour on the wedding day will be as deep as the design deserves.
You'll Like These Ideas:


Leave a Reply