
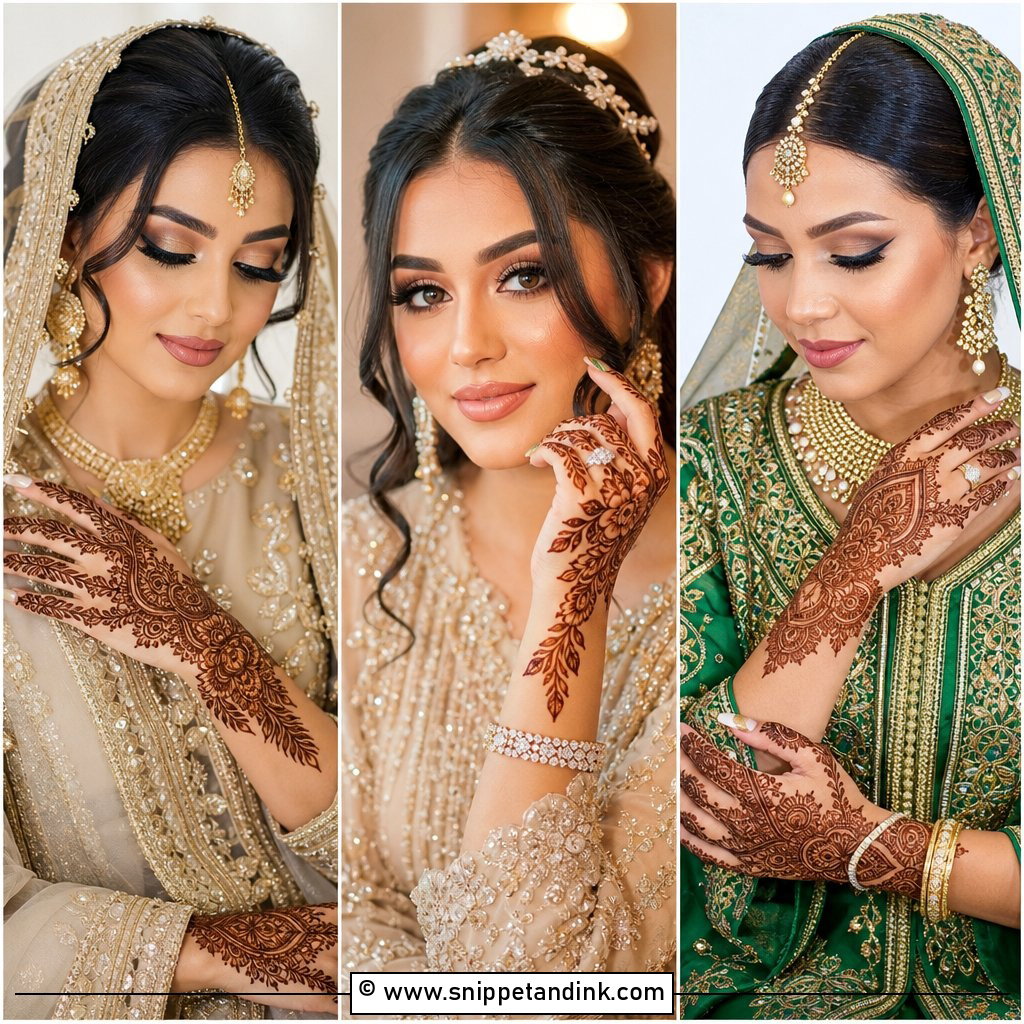
Palms get the attention while the paste is wet, but it’s the back of the hand that ends up in the photos. Every ring shot, every close-up of the chooda, the varmala and the moment hands are joined during the pheras shows the outer hand. That’s why I plan Dulhan back hand mehndi designs differently from palm work: the layout has to read from a distance and still hold detail up close. The styles below run from dense traditional filling to airy Arabic flow, jaali, jewellery patterns, portraits and a few personal touches, with my notes on how each one stains and wears.
Why the Outer Hand Stains Lighter Than Your Palm
The skin on the back of the hand is thinner and has less of the thick outer layer that henna dye binds to, so it never stains as dark as the palm. A design that comes up deep maroon on the palm might settle a shade or two lighter on the outer hand. That’s normal, and it’s why I adjust the design for this area rather than copying palm work.
- Bolder outlines and slightly thicker lines on the outer hand give the stain more paste to draw from.
- Very fine filler can look faint here, so I save the finest detail for the fingers and palms.
- The stain starts orange when the paste comes off and darkens over the next one to two days, so judge the colour on day two, not day one.
- Applying one to two days before the wedding puts the darkest stain on the day itself.
1. Full Back Hand Dulhan Mehndi Design
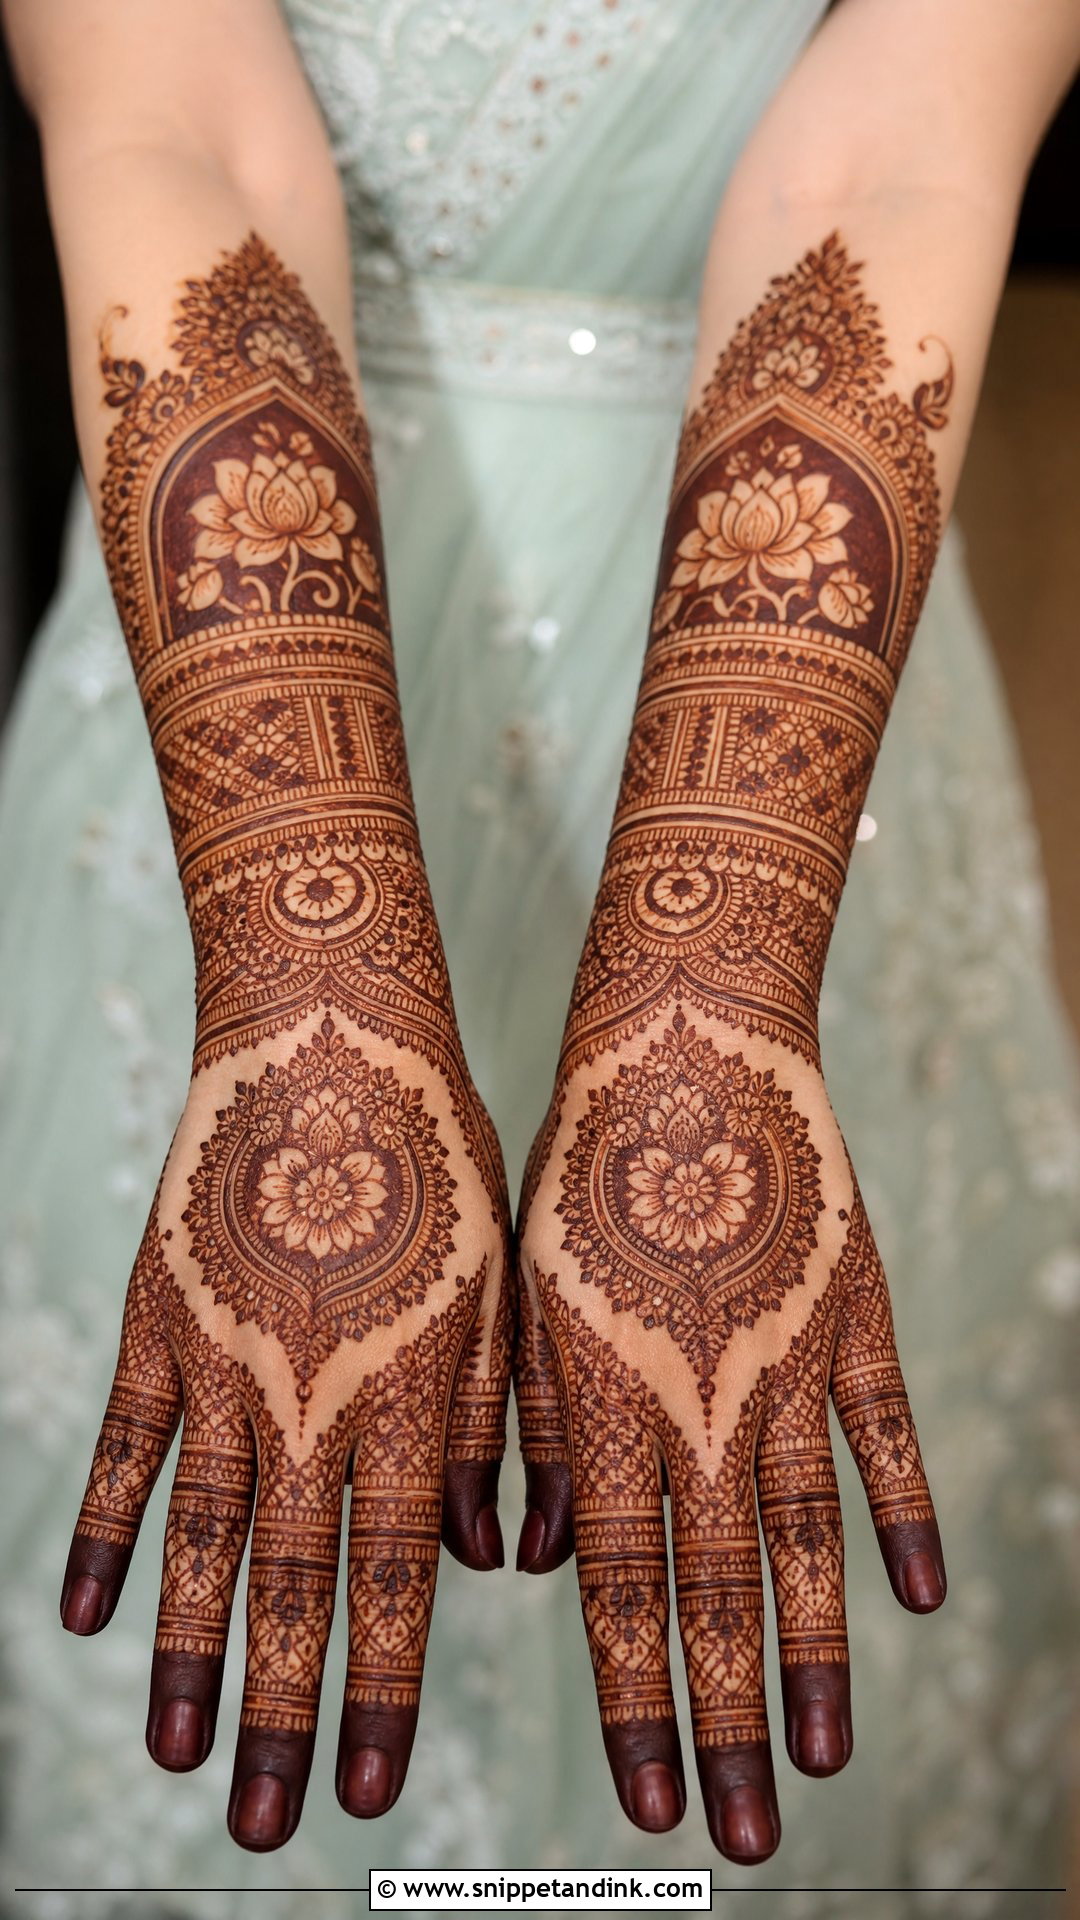
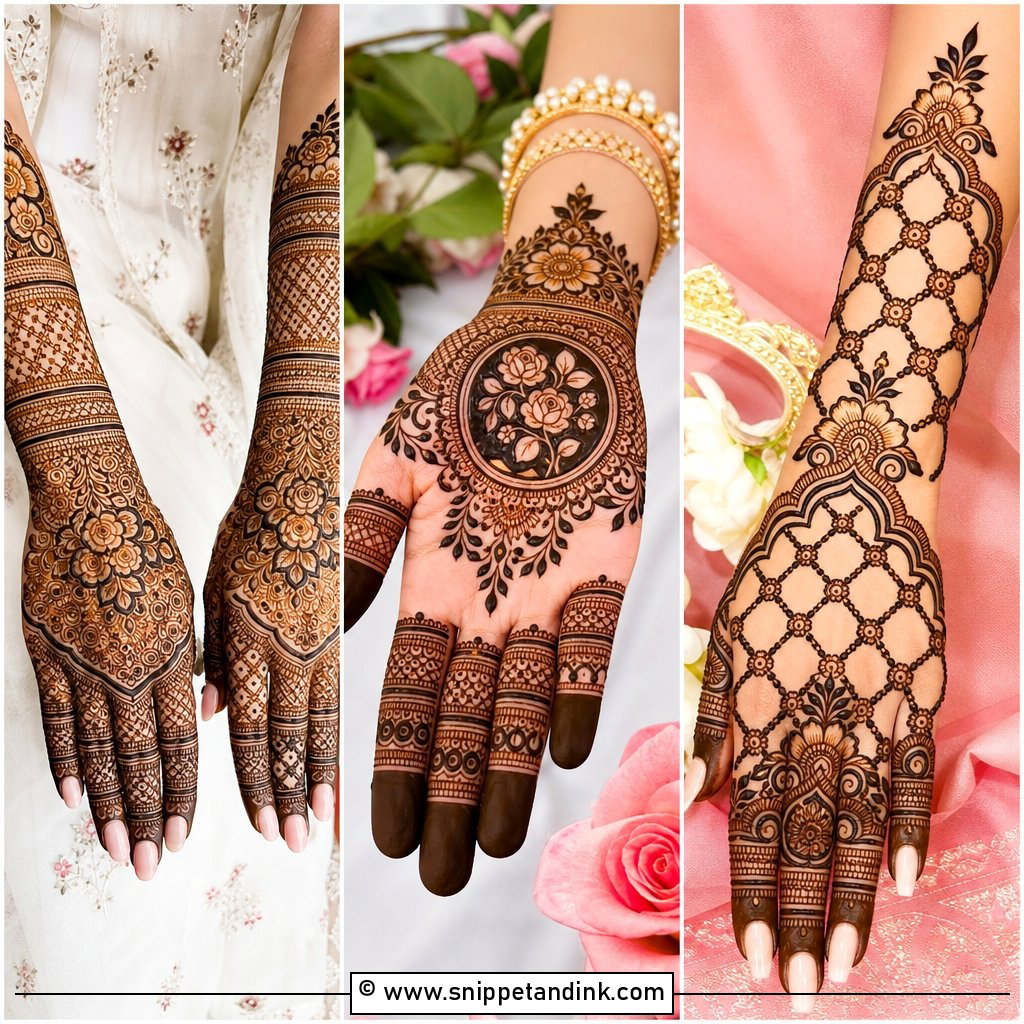
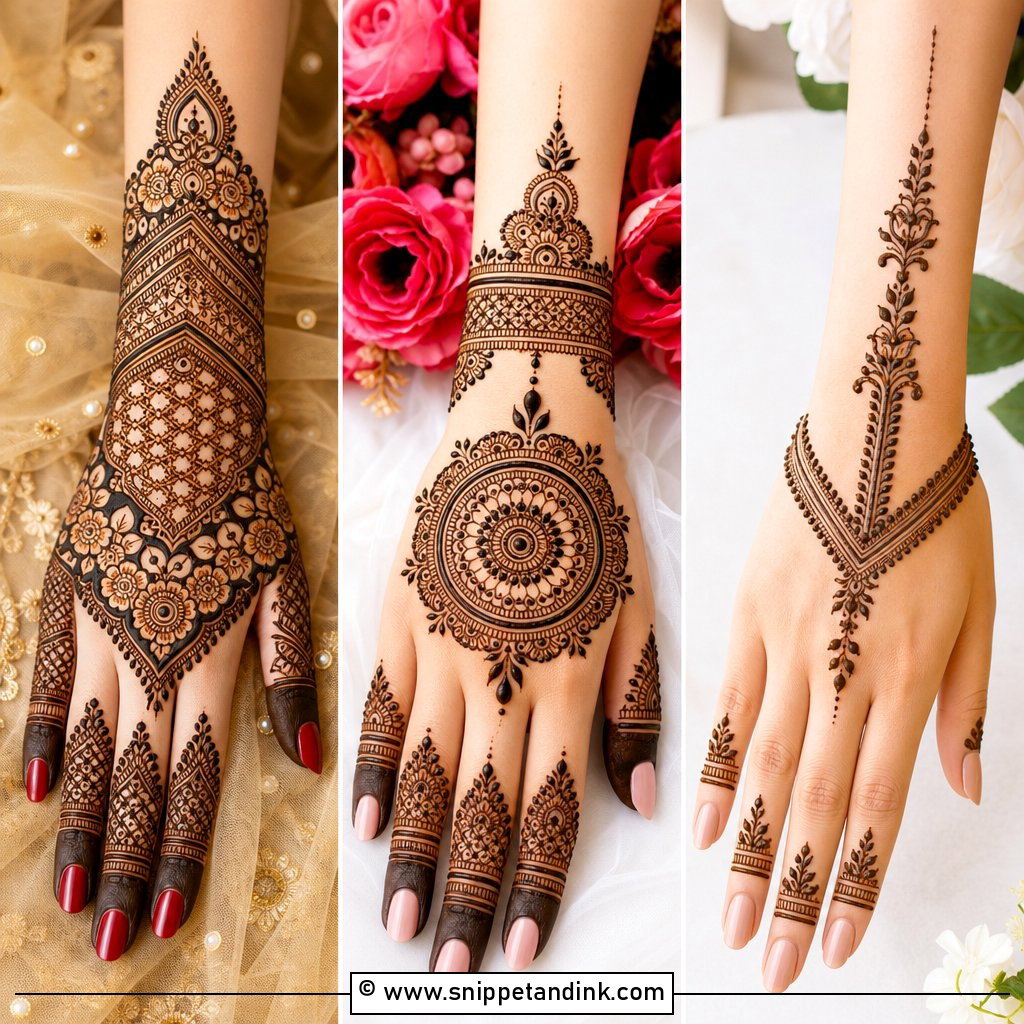
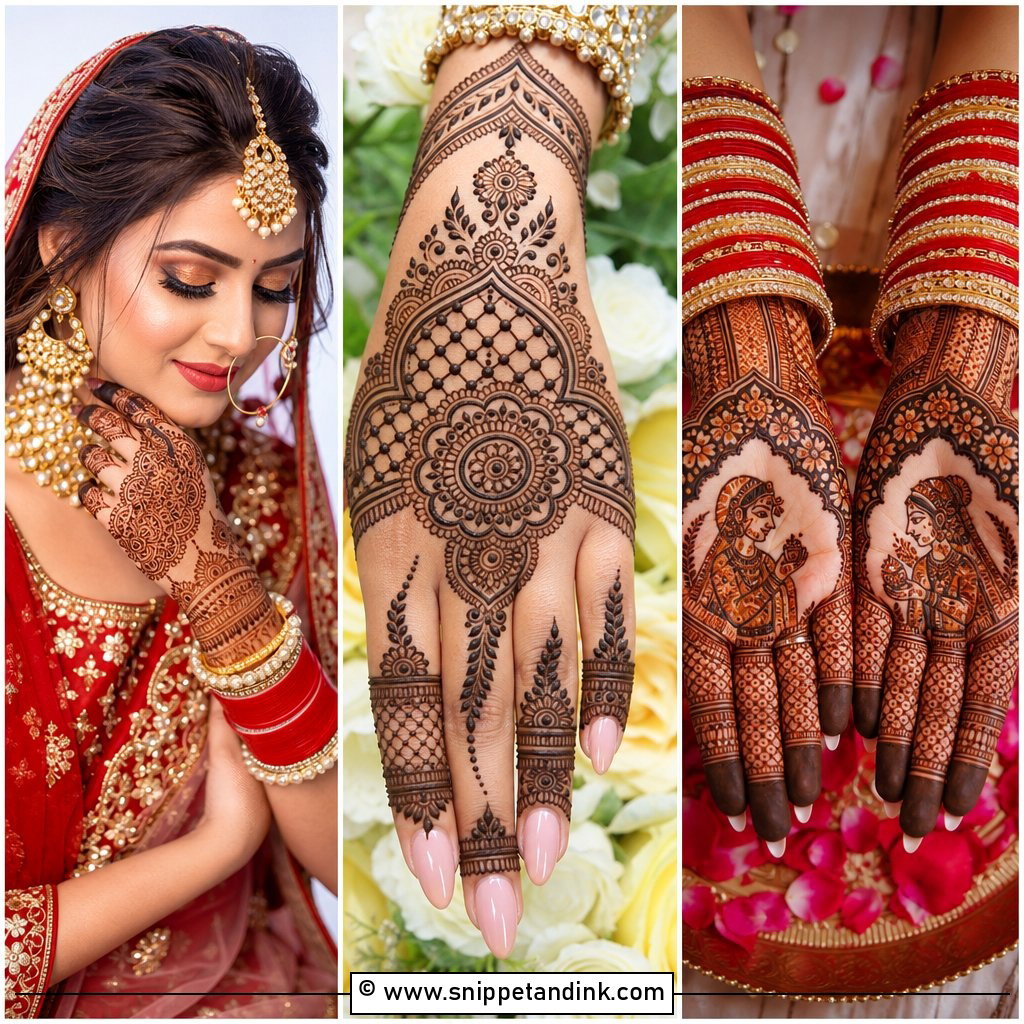
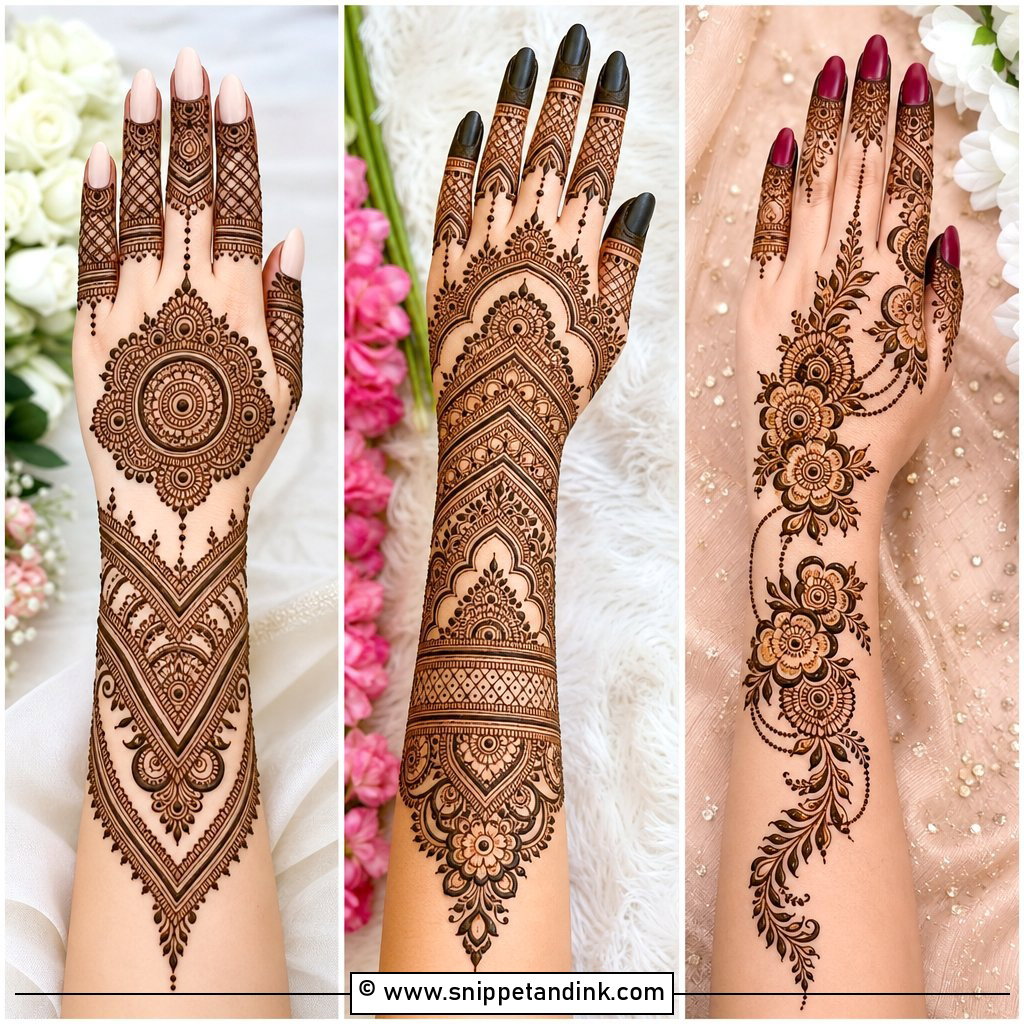
Full coverage on the back of the hand starts at the fingertips and works inward, and the order matters. I outline the large centre motif first so the fingers and wrist bands can be scaled around it, otherwise the middle ends up cramped. Detailed tips, floral or paisley bands across the fingers and a scalloped or lotus border at the wrist complete it. Heavy chooda covers the lower part of this design, so I keep the boldest work above the wrist where it stays visible. Leave the centre motif slightly larger than you think; fine work there tends to merge into one dark patch once it stains.
2. Indian Dulhan Back Hand Mehndi Design
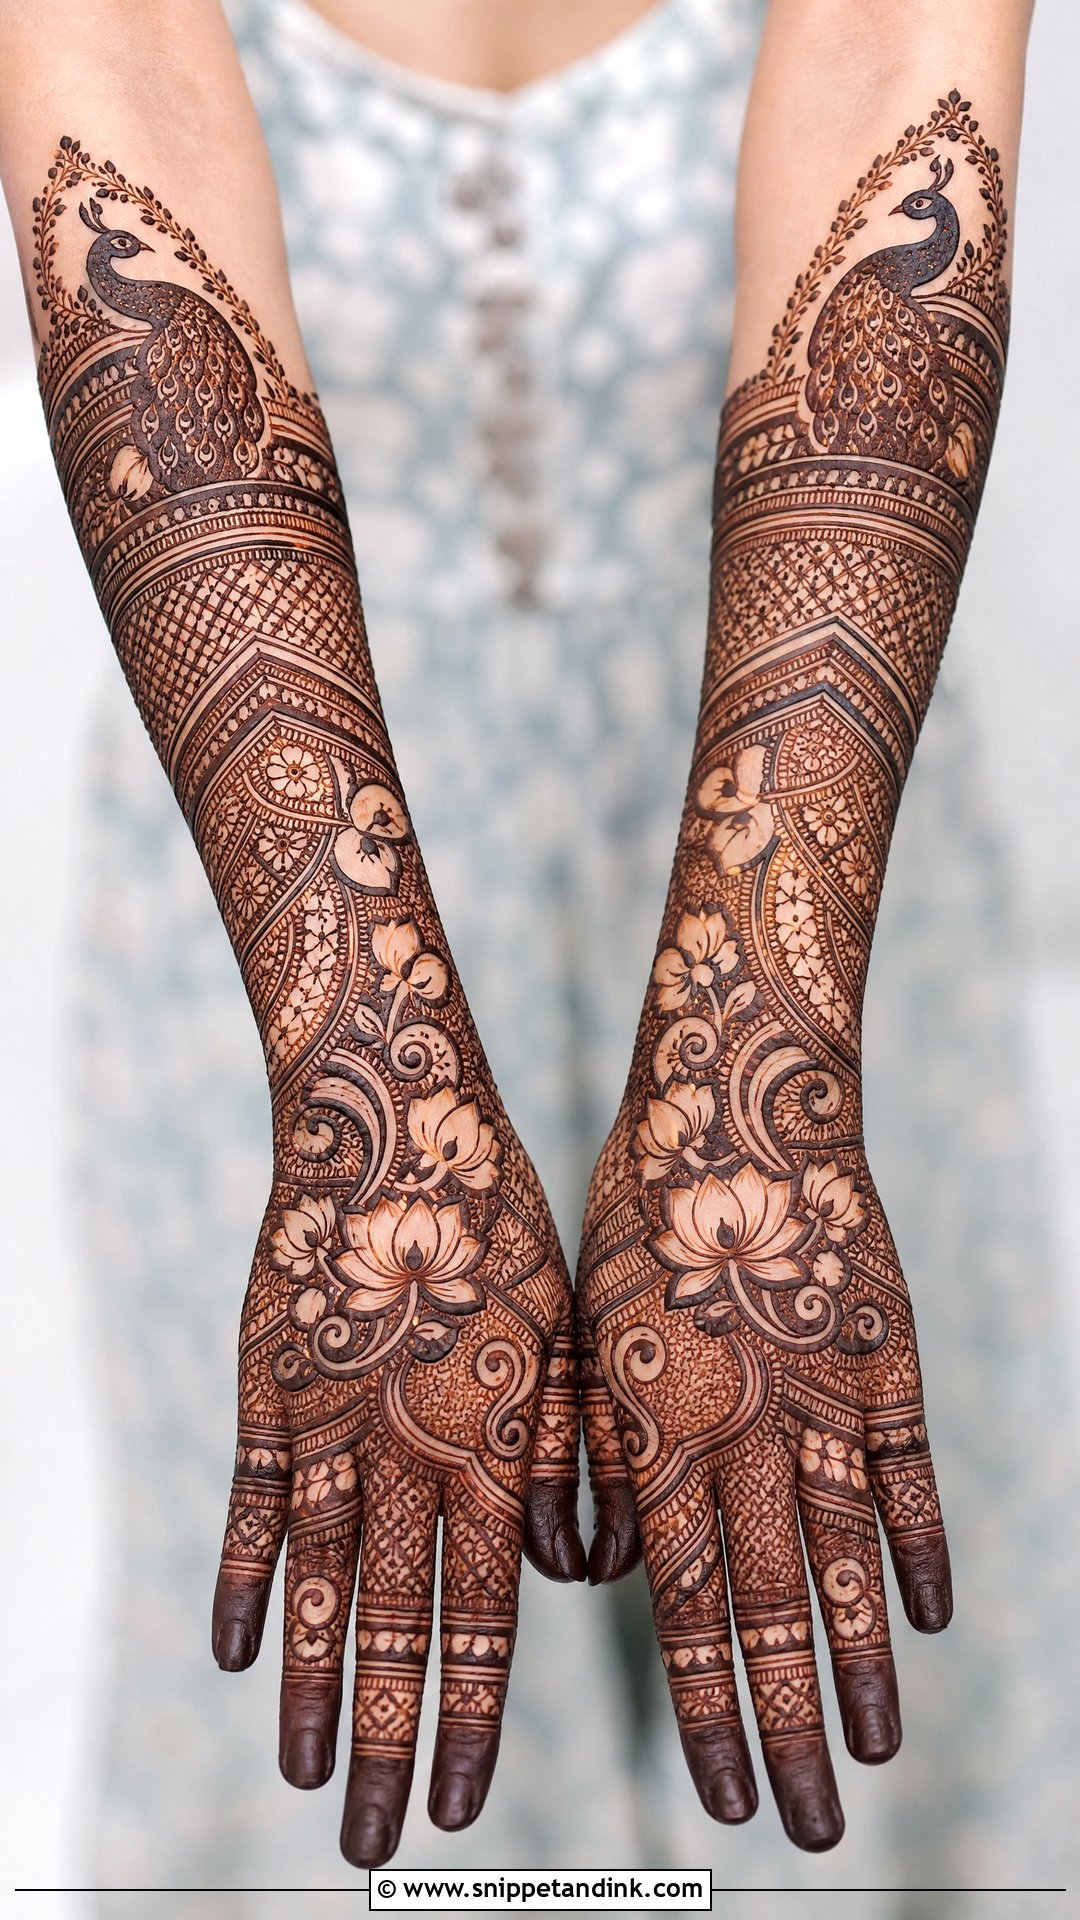
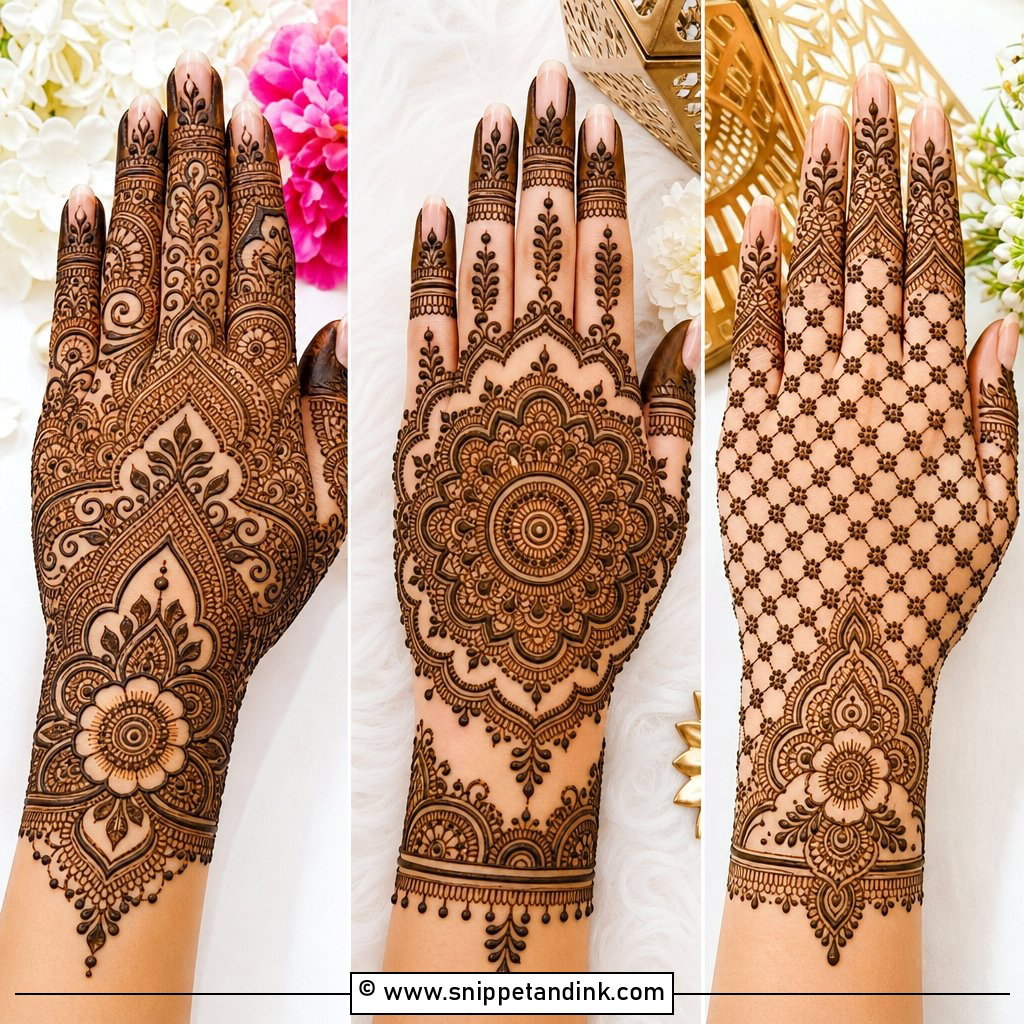
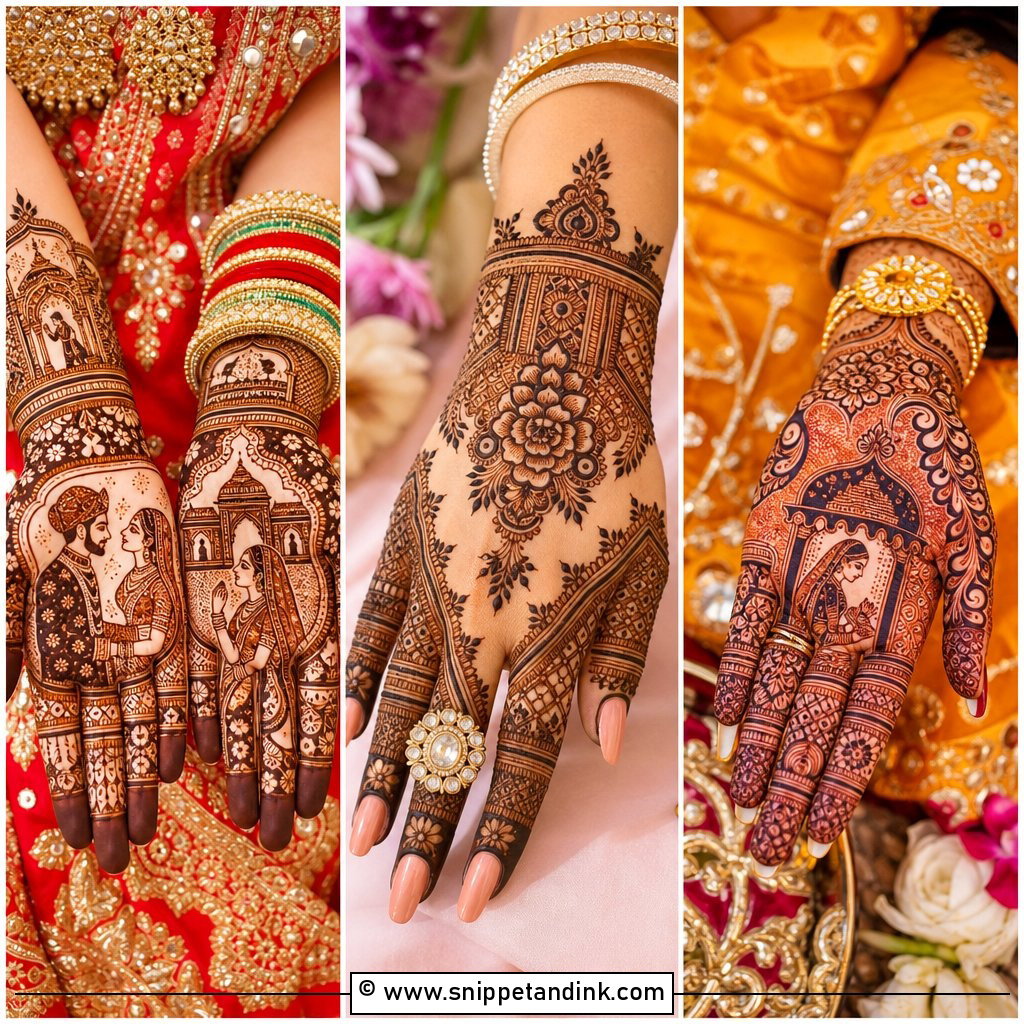
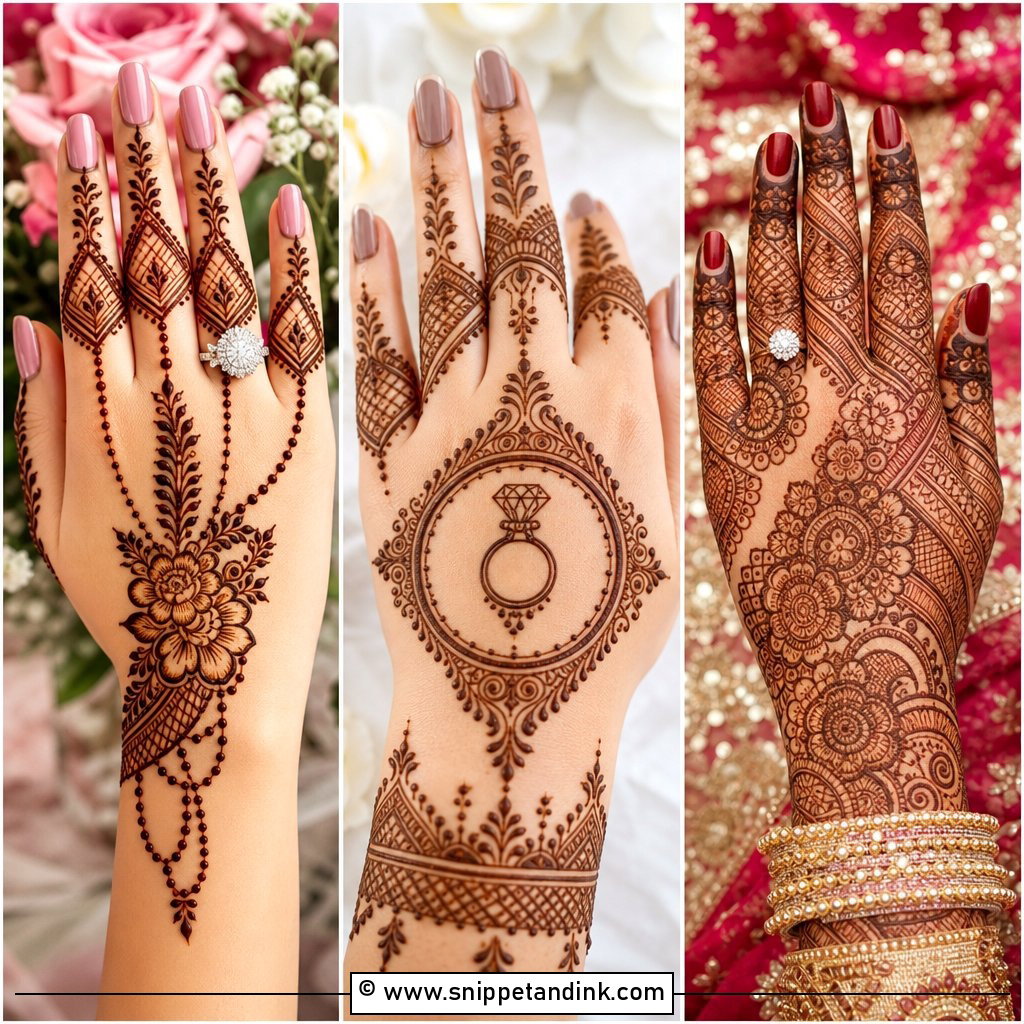
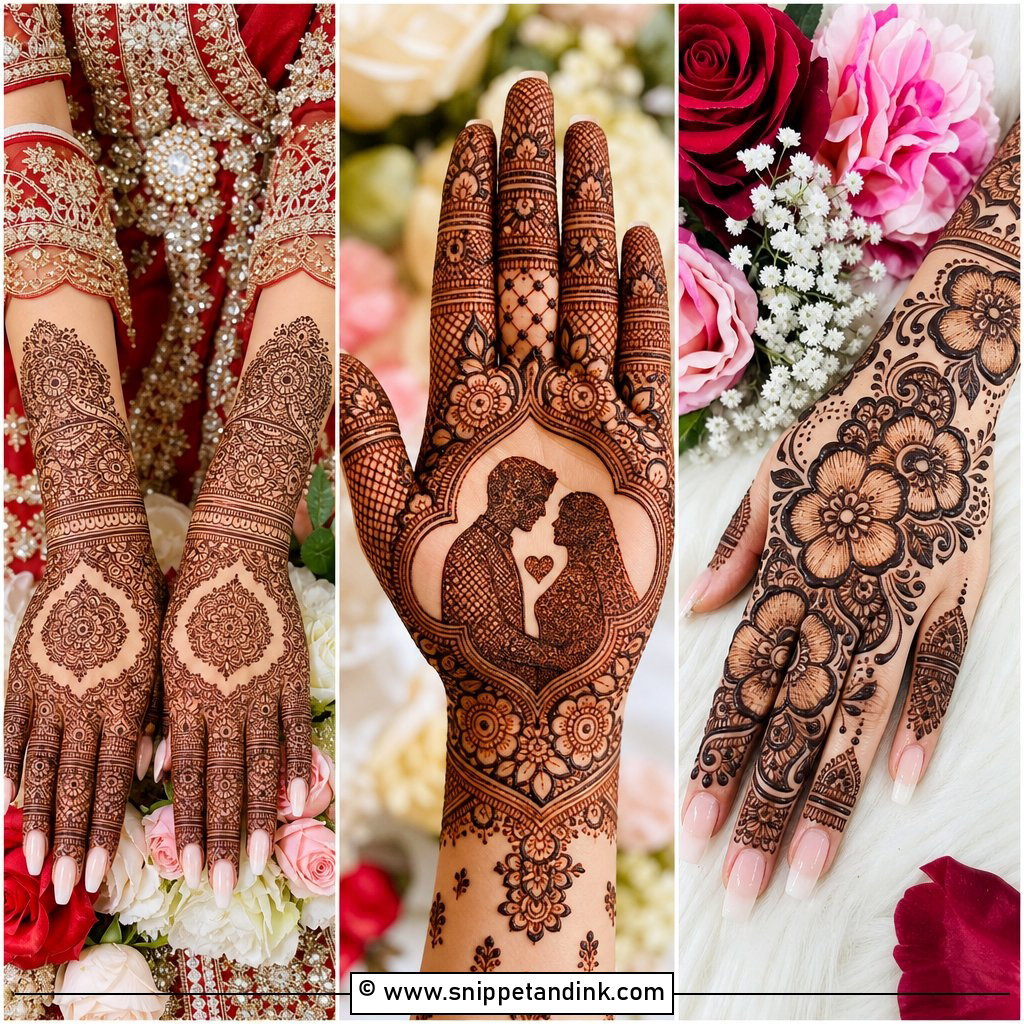
Traditional Indian filling is the most detailed work I do and the most time I’ll spend on one hand. Paisleys, lotus flowers, peacocks, vines and tiny fillers all fit together, yet a good layout still flows clearly from fingertips to wrist. I use a fine cone tip for the filler and a slightly thicker line for major outlines, because thin filler stains lighter on the back of the hand than on the palm. Keeping both hands symmetrical takes discipline when the design is this dense, so I sketch the first few anchor shapes on both hands before filling either one.
3. Arabic Dulhan Back Hand Mehndi Design
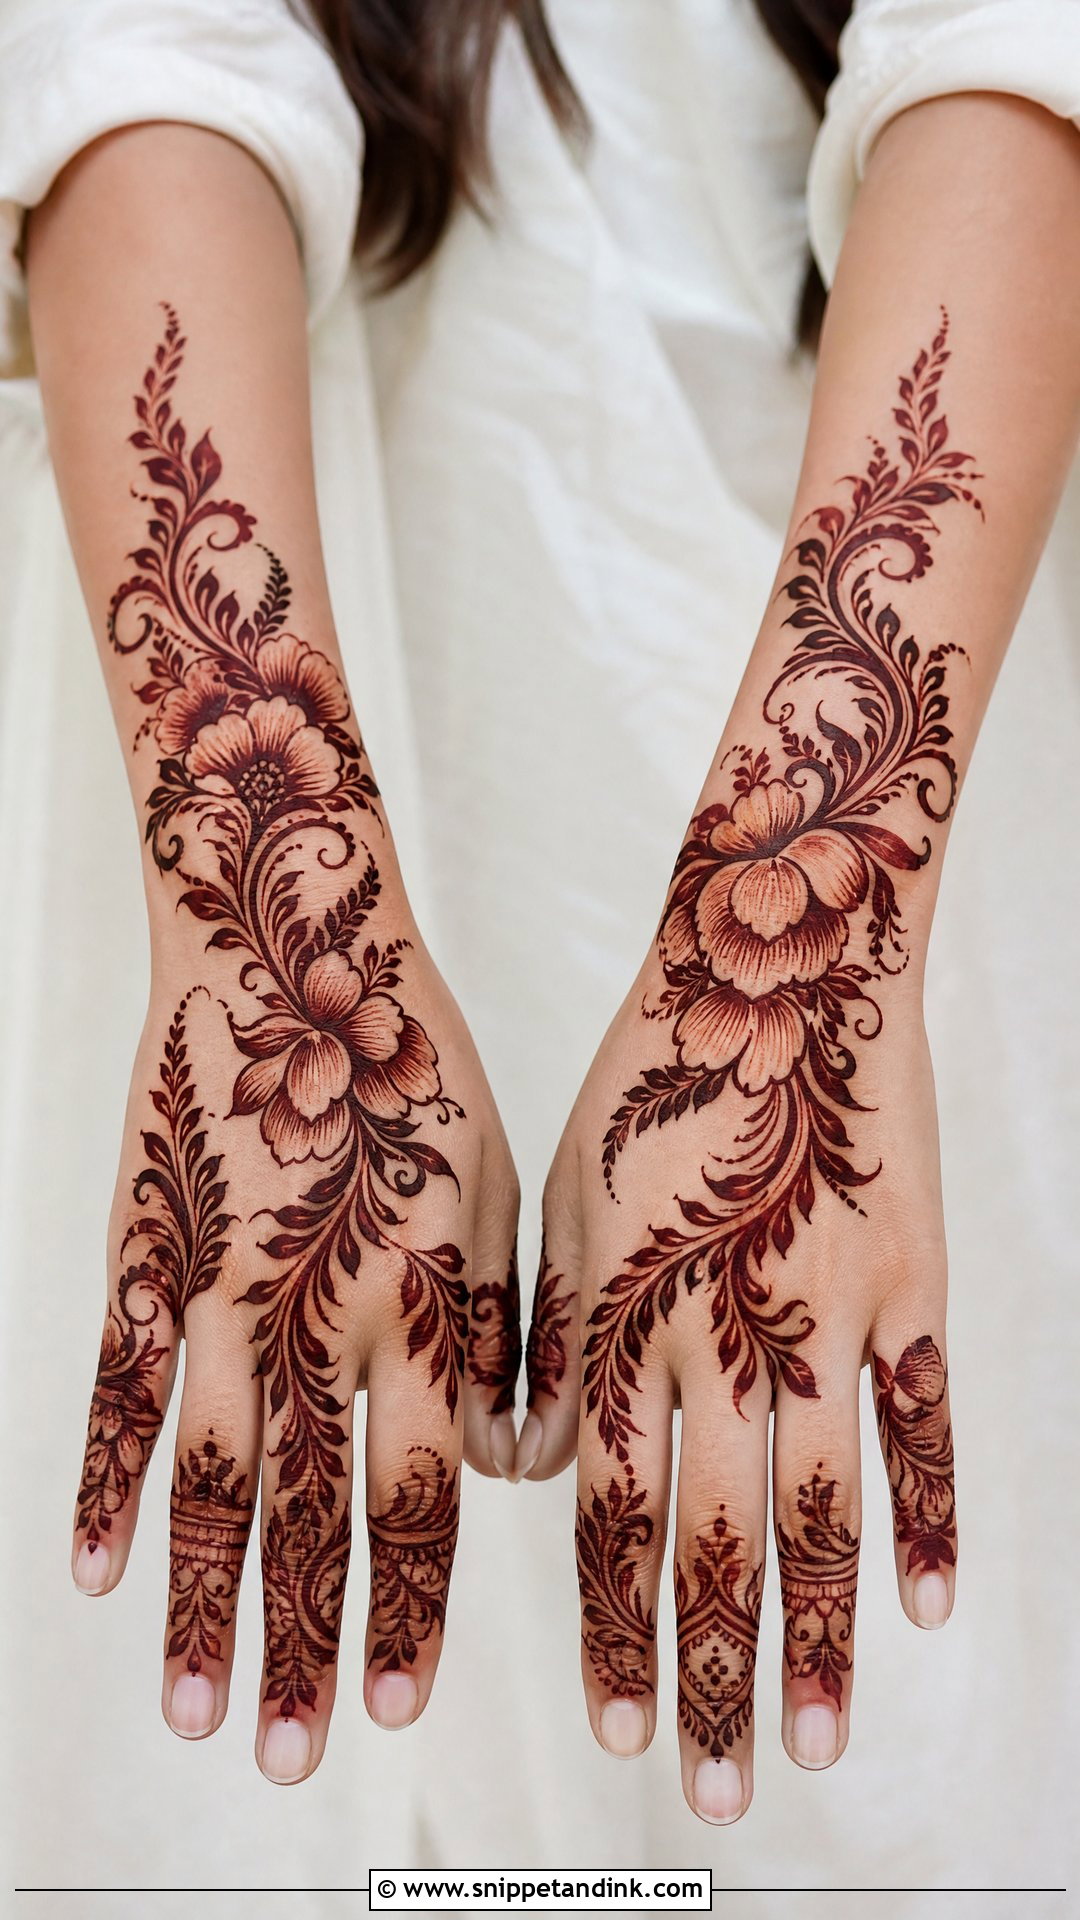
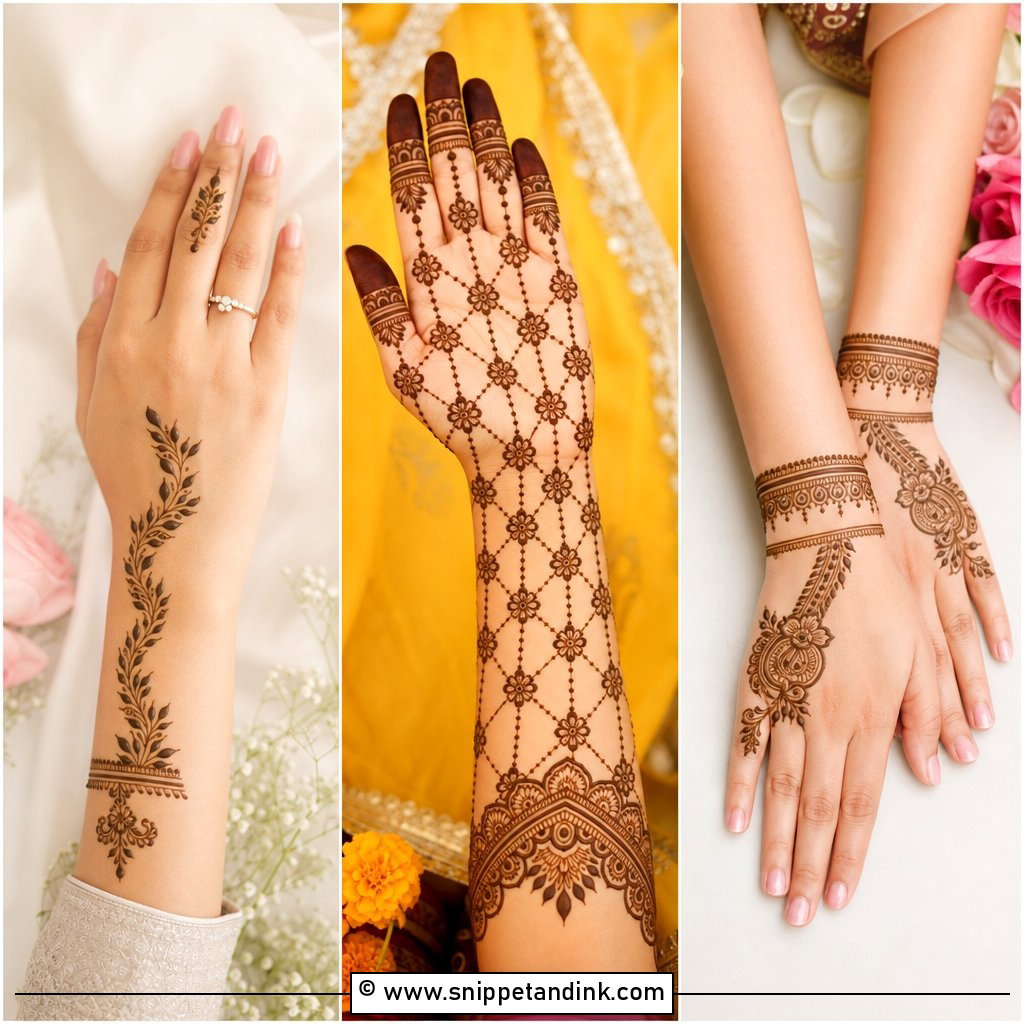
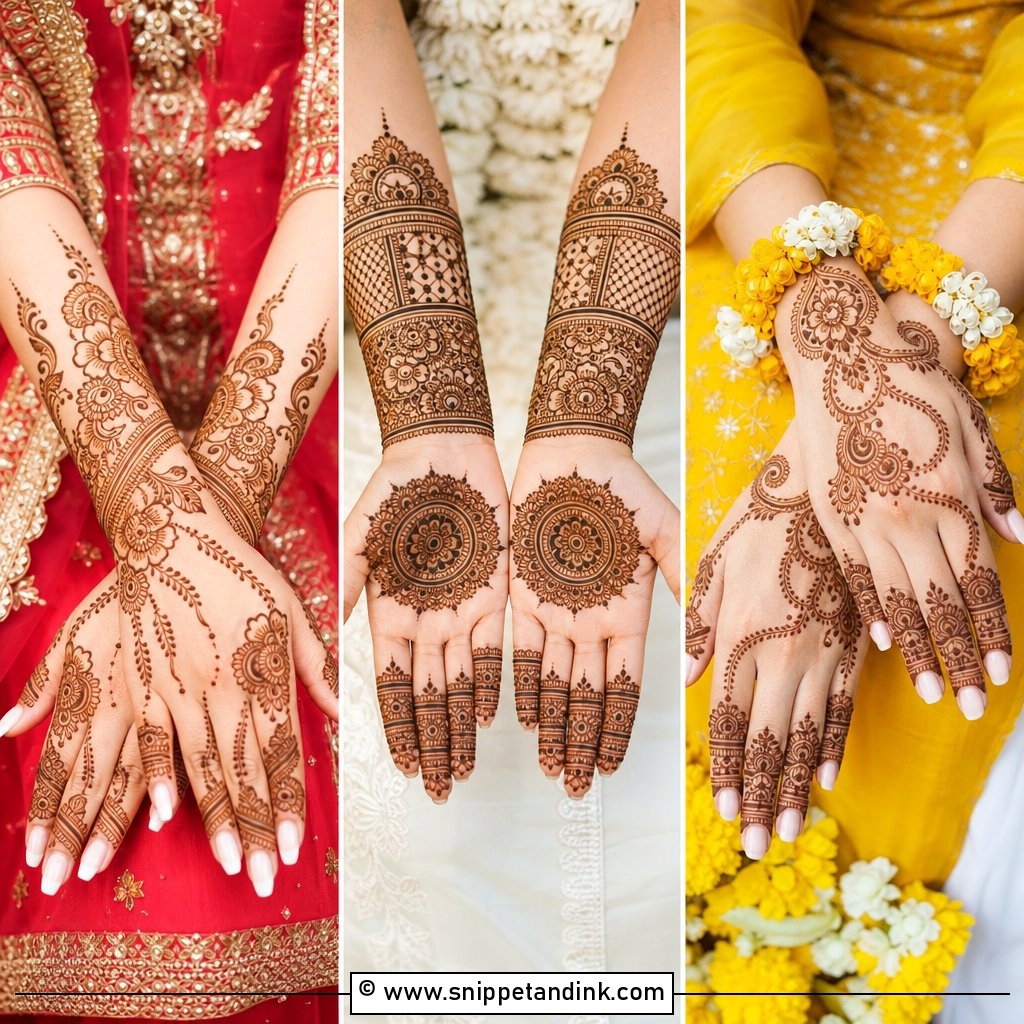
Arabic layouts suit brides who want the mehndi to look festive without covering every inch. Bold flowers, shaded petals and a leafy trail usually travel diagonally from the index finger toward the wrist, leaving open skin around them. That open skin is part of the design, so I’m strict about where the trail starts and stops. The shading is done by dragging the paste thinner inside each petal, which gives a lighter and darker tone within one flower once it develops. It’s one of the faster bridal styles to apply, which matters if you have a long list of guests waiting.
4. Indo Arabic Dulhan Back Hand Mehndi Design
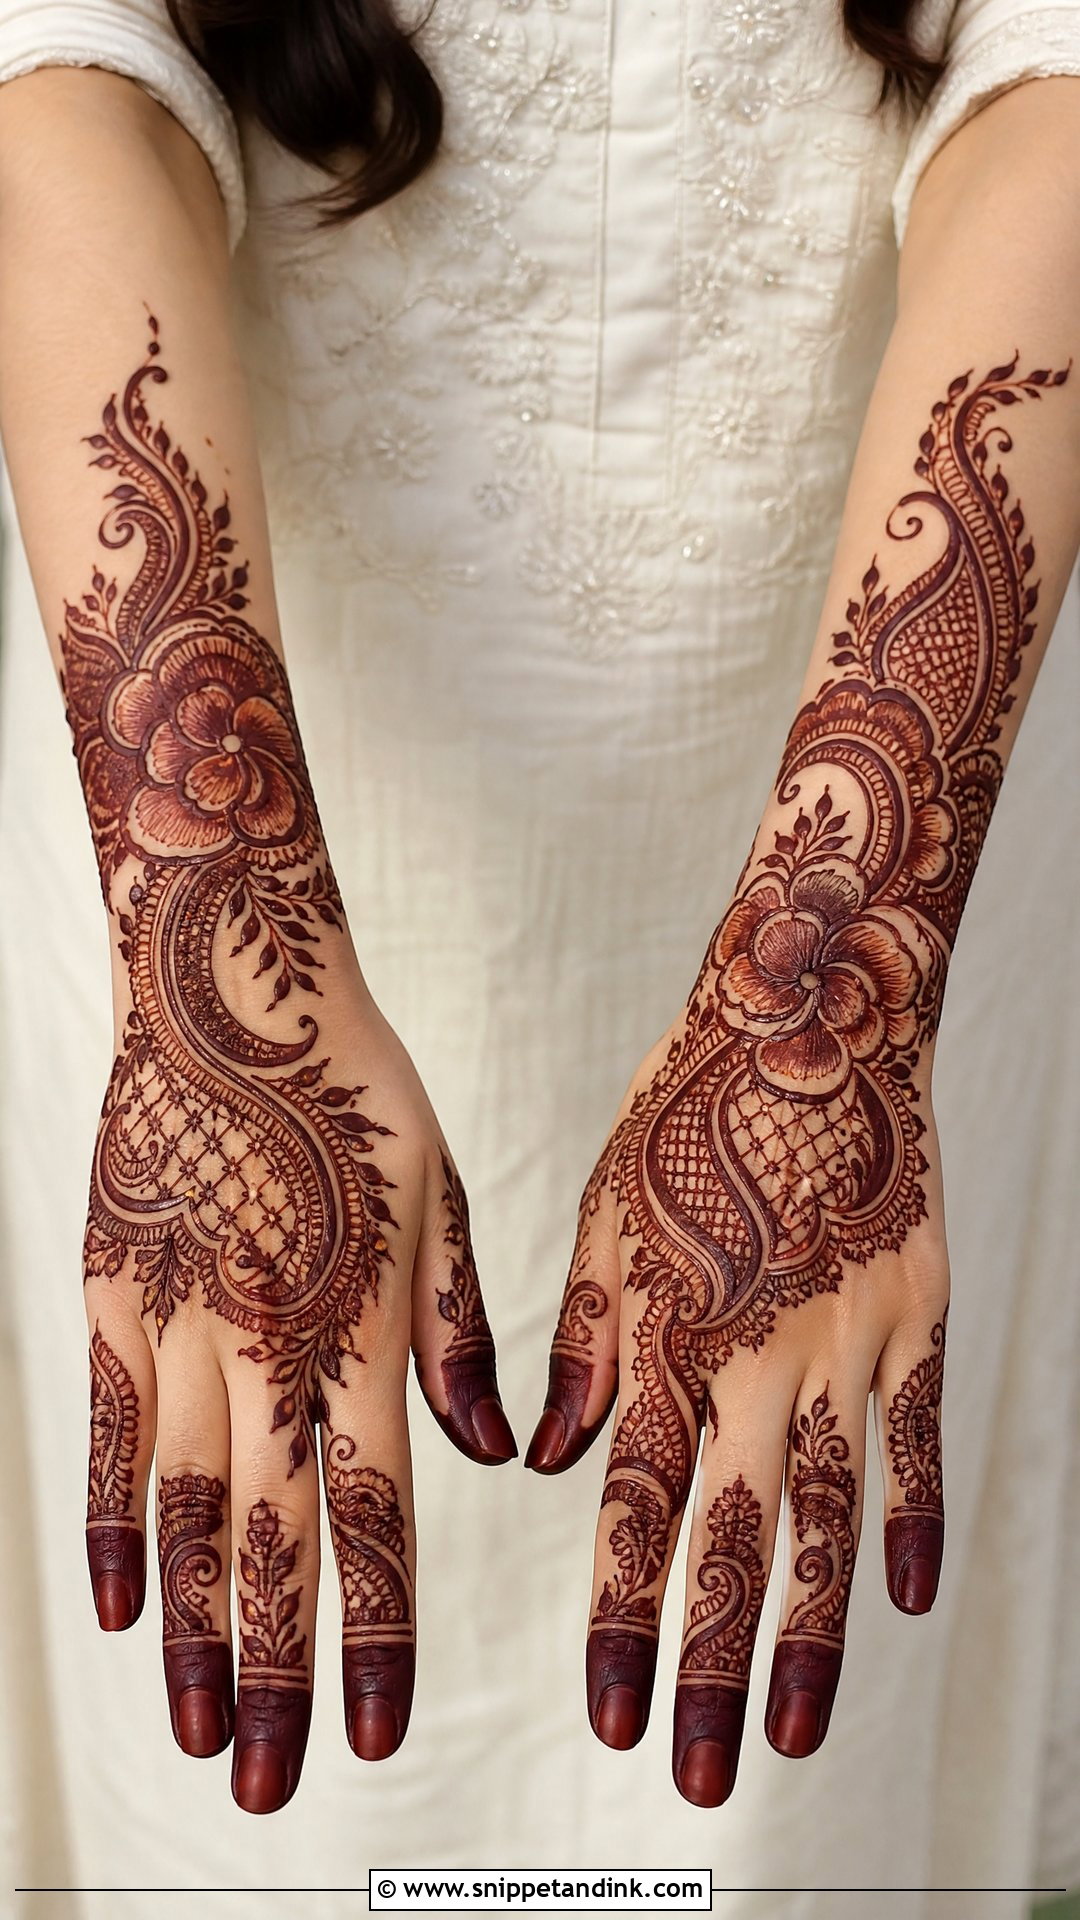
Indo Arabic takes Arabic’s flowing spacing and fills parts of it with Indian detail: jaali panels inside the trail, paisley curves, filled fingertips. It ends up less dense than classic Indian bridal mehndi but busier than pure Arabic. I suggest it when a bride wants the drama of a full bridal hand but can’t sit for six hours. A clear wrist cuff and matching finger patterns pull it together. The balance of filled and open areas gives the stain contrast, which helps it show from across a room.
5. Mandala Dulhan Back Hand Mehndi Design
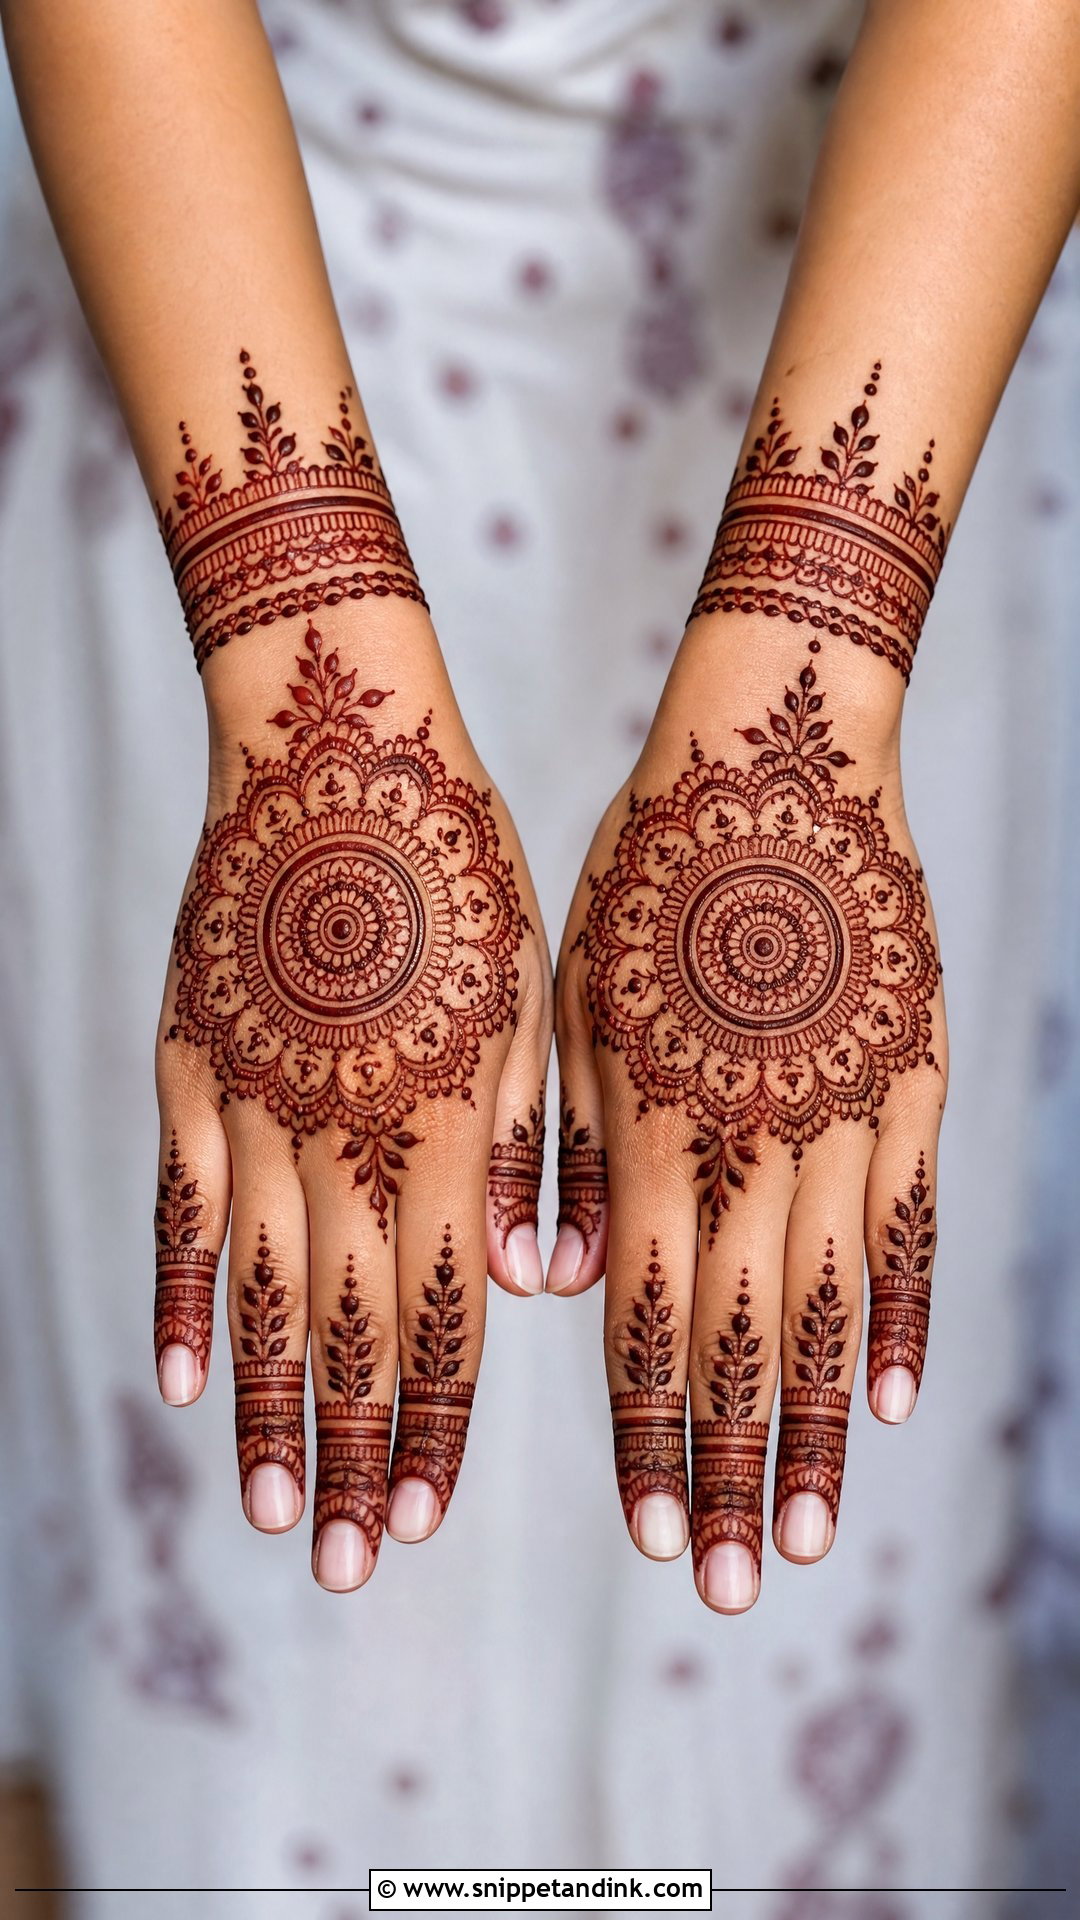
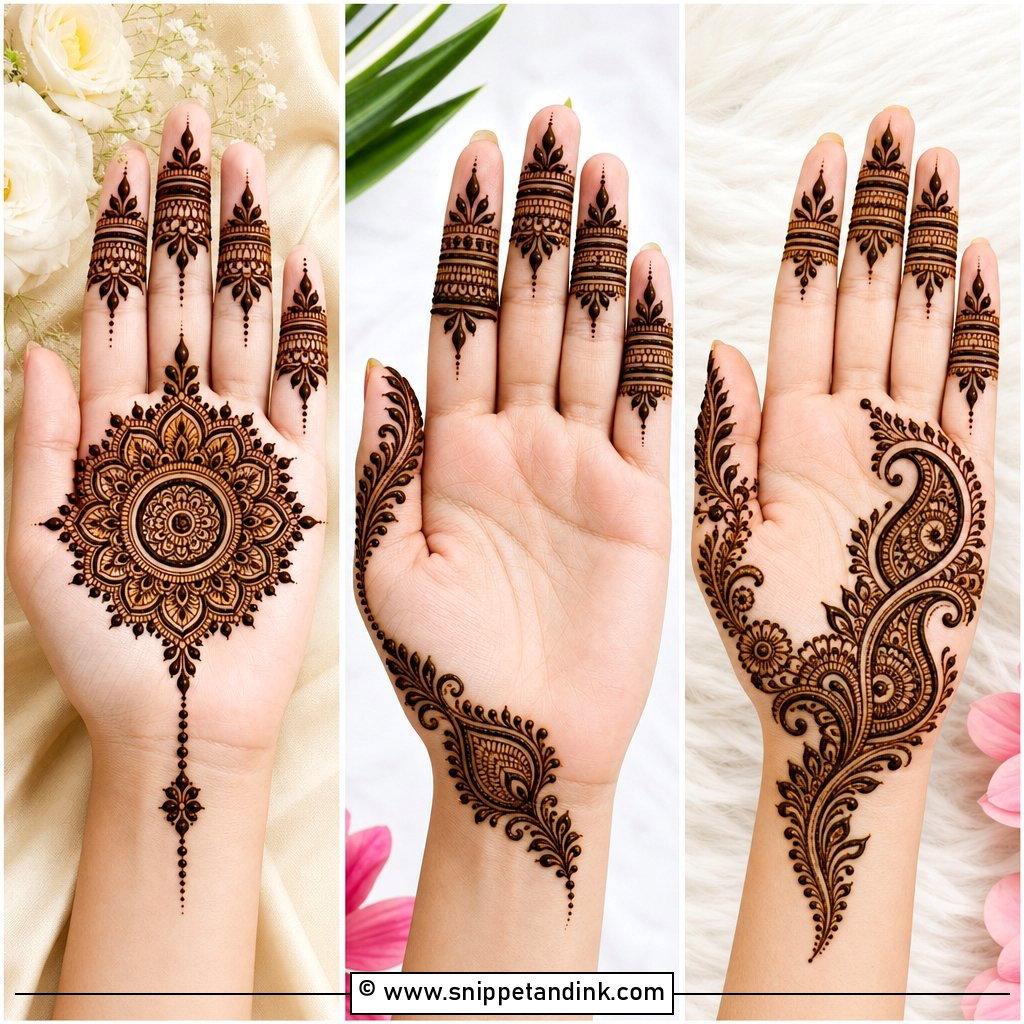
A mandala gives the back of the hand a calm centre, but on its own it can look like an everyday design. To make it bridal I surround it with paisleys, petal rings and lace-like borders, then link it to the fingers with dotted lines or leafy bands. The circle has to sit in the exact middle of the hand, and hands aren’t symmetrical, so I place it with the fingers slightly spread. It pairs well with hathphool jewellery, since the chain lines can echo the mandala’s spokes.
6. Floral Dulhan Back Hand Mehndi Design
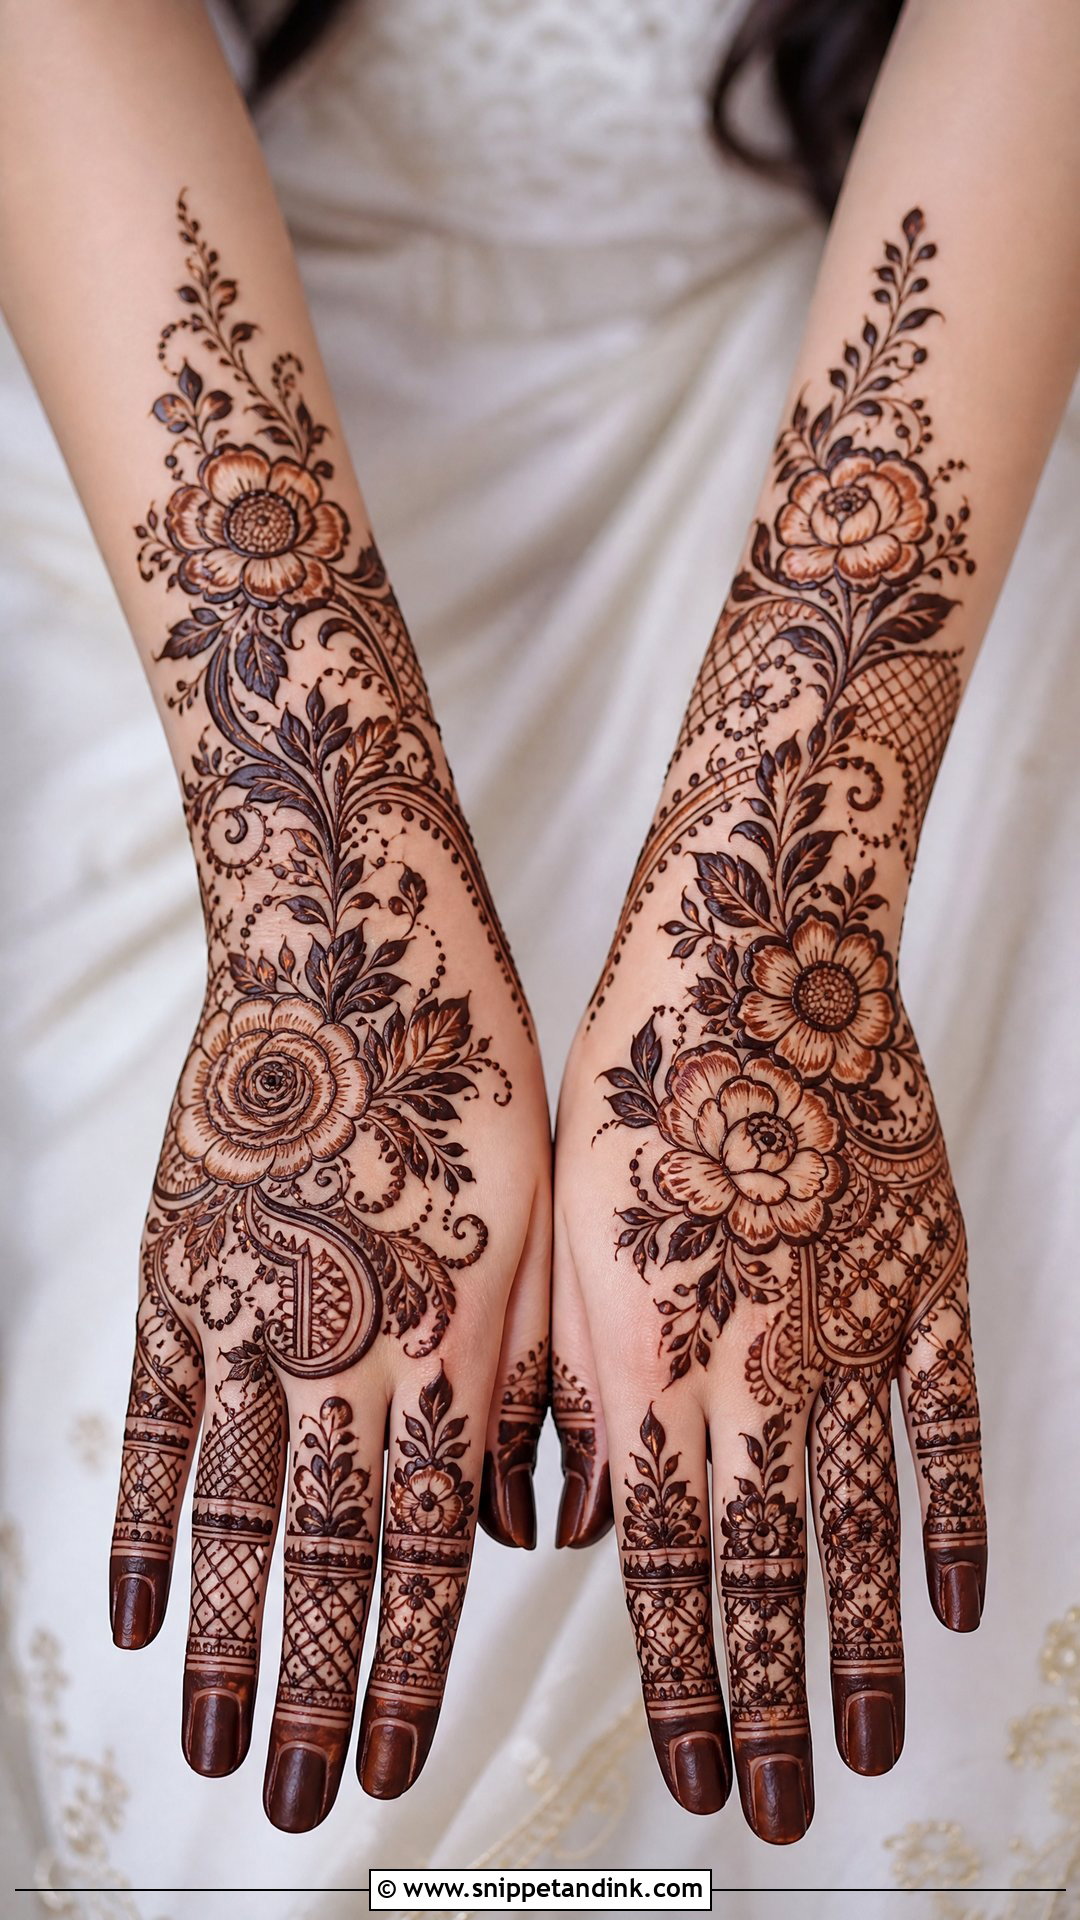
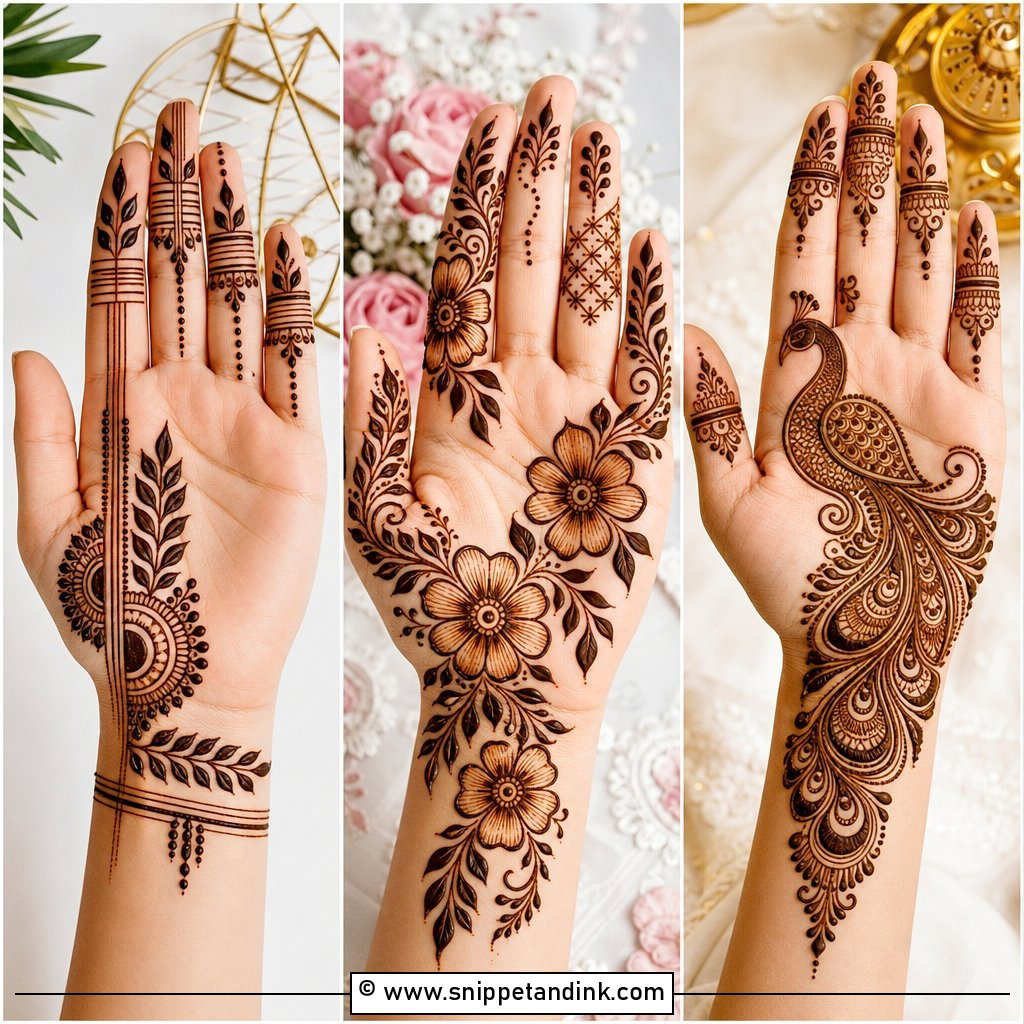
Floral work is the most adaptable style there is, and flower size is what sets the mood. Large layered blooms with shaded leaves feel bridal; small scattered flowers look casual. I connect every flower with vines or a paisley so nothing floats on its own, which is the most common reason floral mehndi looks unfinished. A floral bracelet or lotus band at the wrist closes the design. It works with almost any outfit colour, from red lehengas to pastel shararas.
7. Paisley Dulhan Back Hand Mehndi Design
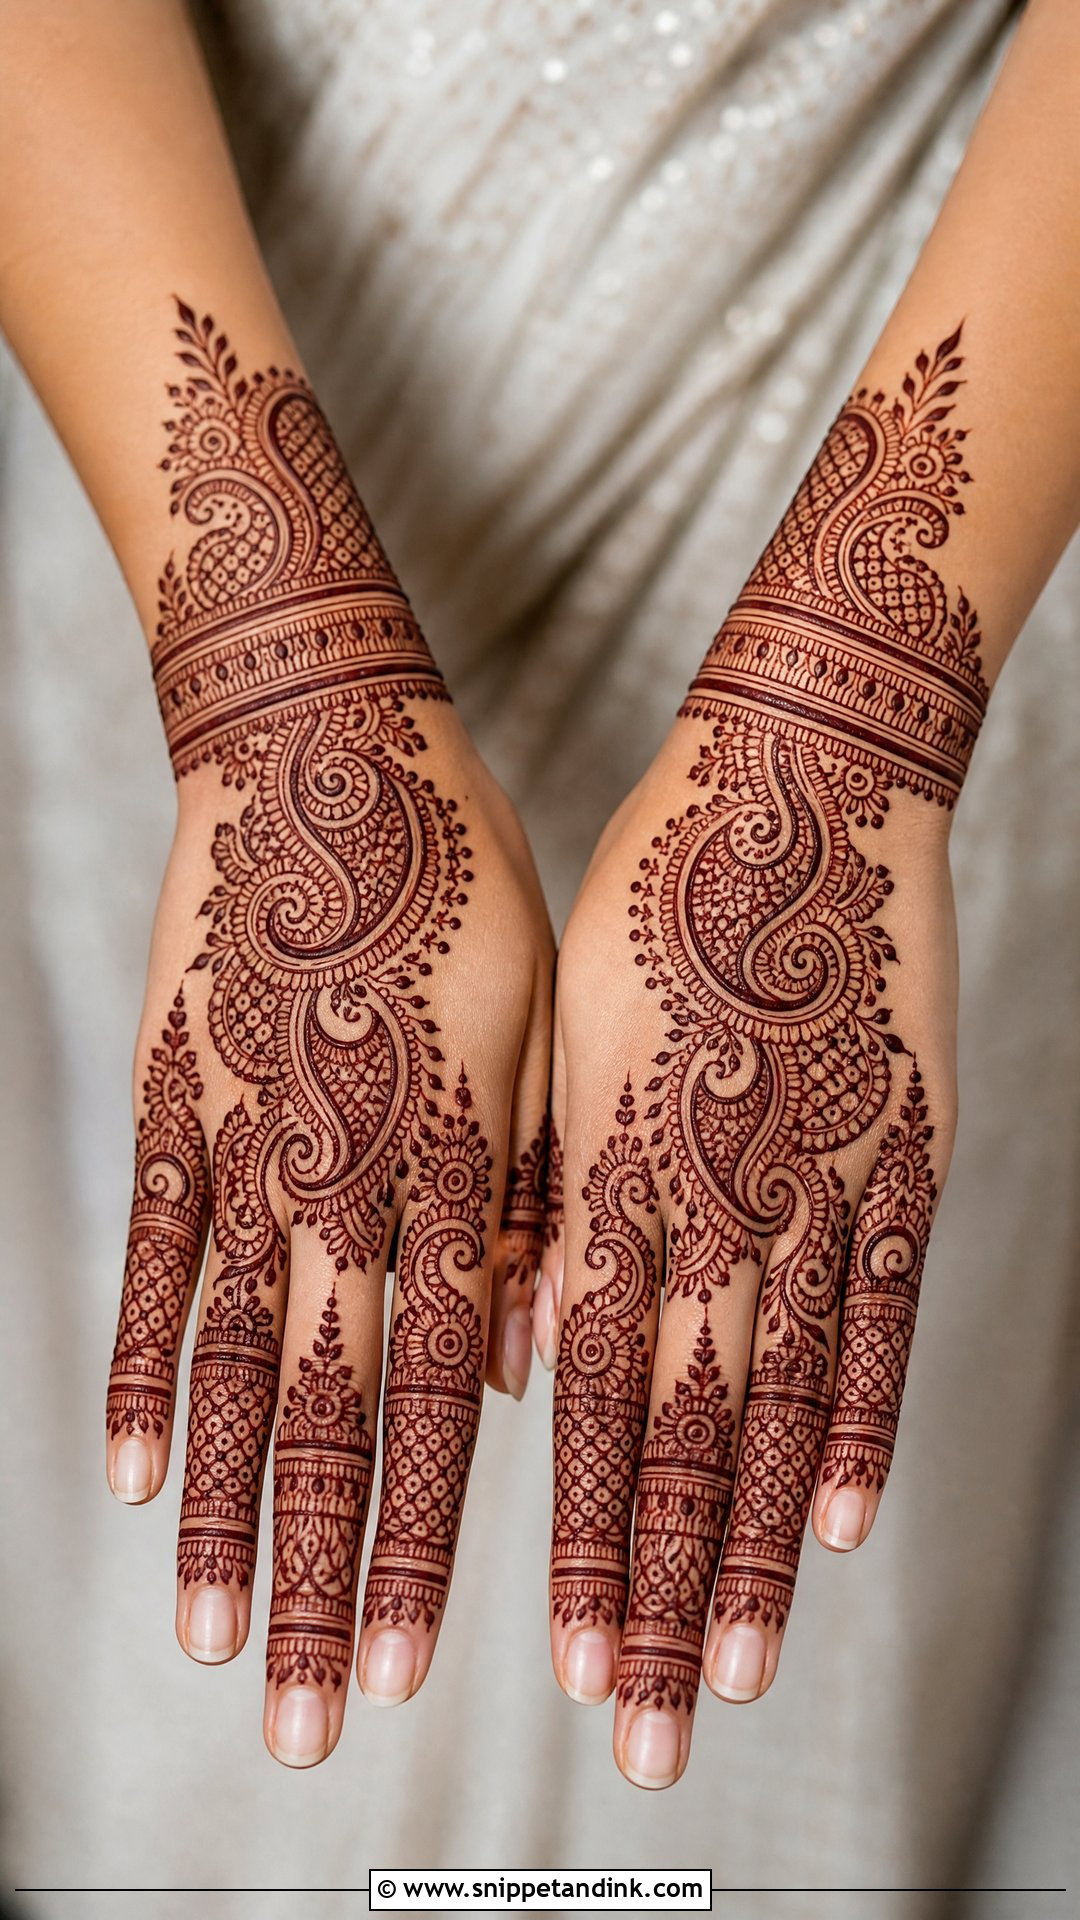
Paisleys give a hand movement, and I graduate their size: large near the wrist, medium across the back of the hand, small on the fingers. Inside each one I vary the filler, using checks in one, tiny leaves in the next, spirals in the third, so the hand has texture when the stain develops. Paisley outlines are bold by nature, which means they come up dark and clear even on the back of the hand. This is the heavy design I’d suggest to a bride who wants tradition without figures or names taking over.
8. Peacock Dulhan Back Hand Mehndi Design
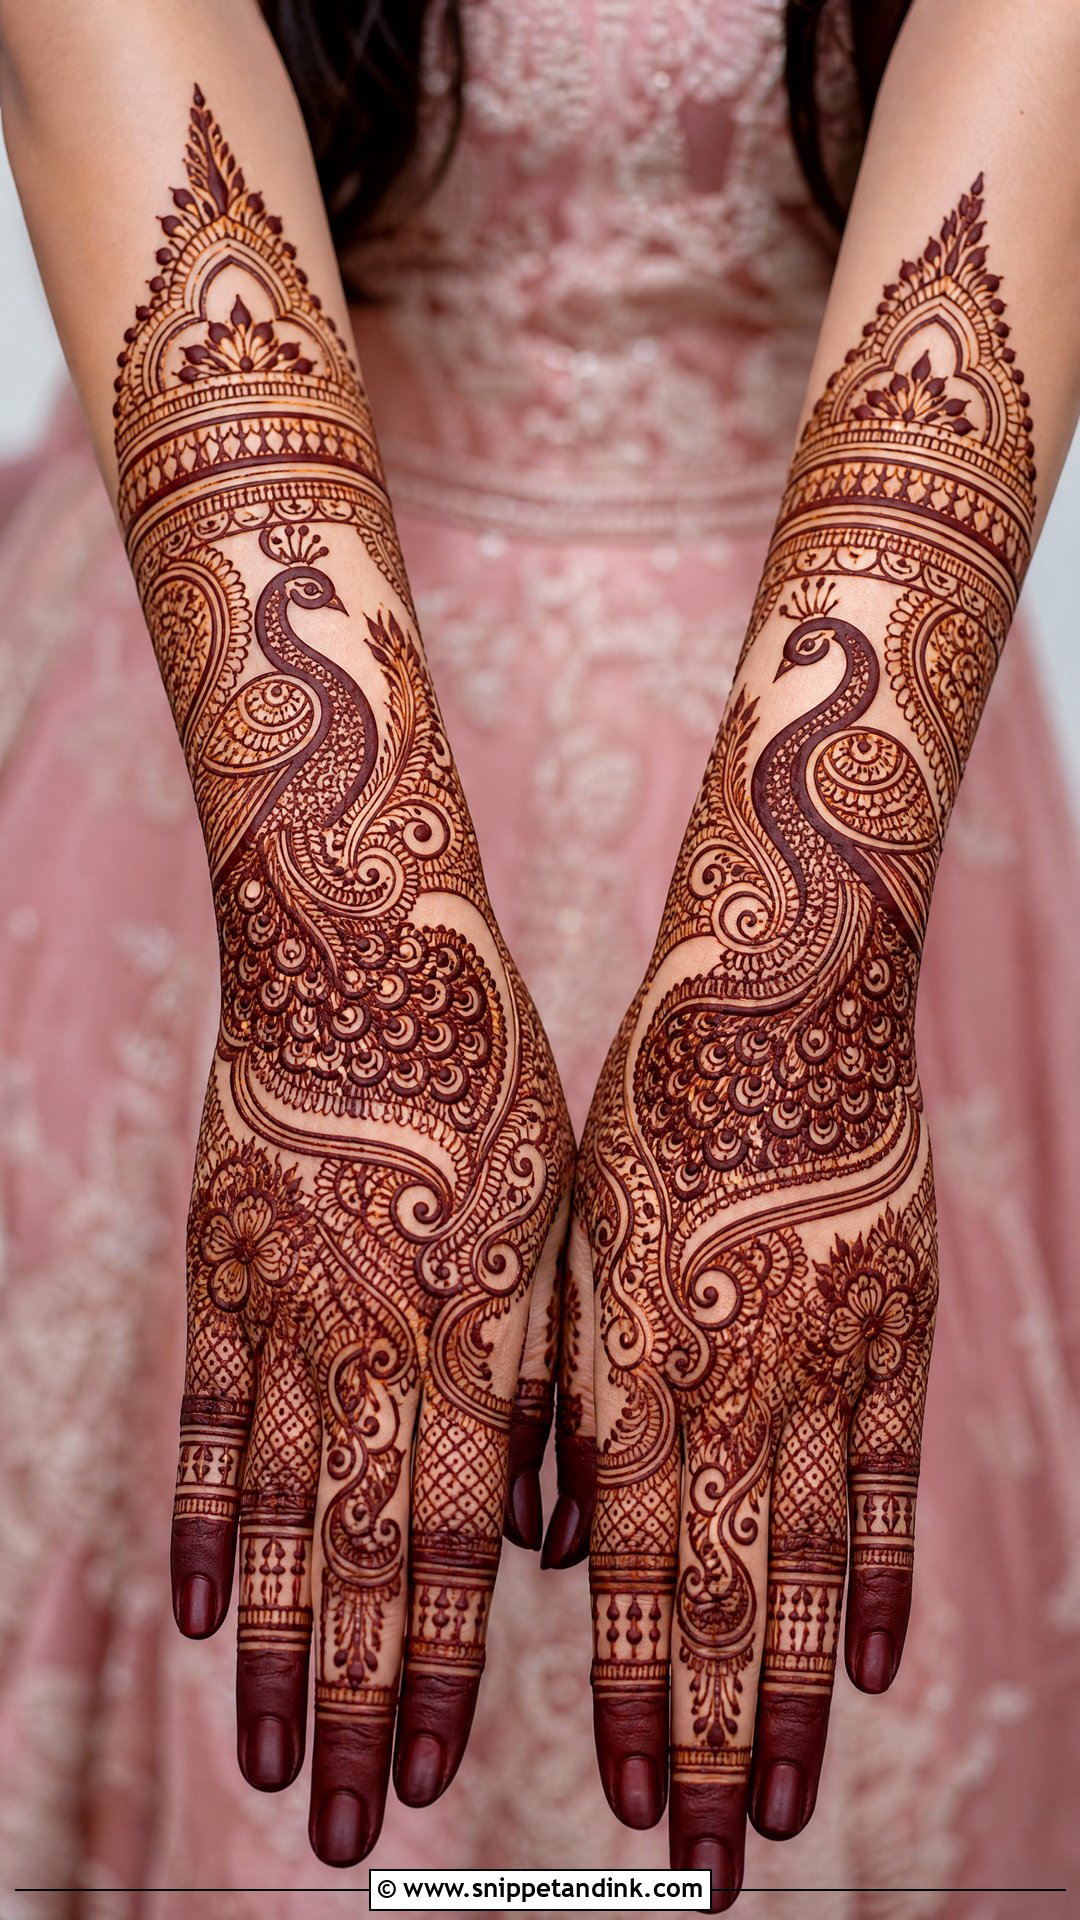
Peacocks look festive, but they’re easy to get wrong. The neck needs a smooth S-curve and the feathers have to fan in proportion, or the bird looks stiff. I place it near the wrist or along the side of the hand, sometimes as a mirrored pair across both hands, and let the feathers flow into paisleys and jaali. peacock motifs carry a lot of celebration in traditional weddings. Keep the neck and feather outlines bold so the shape survives the stain. A peacock on one hand with matching floral-paisley work on the other also looks good.
9. Jaali Dulhan Back Hand Mehndi Design
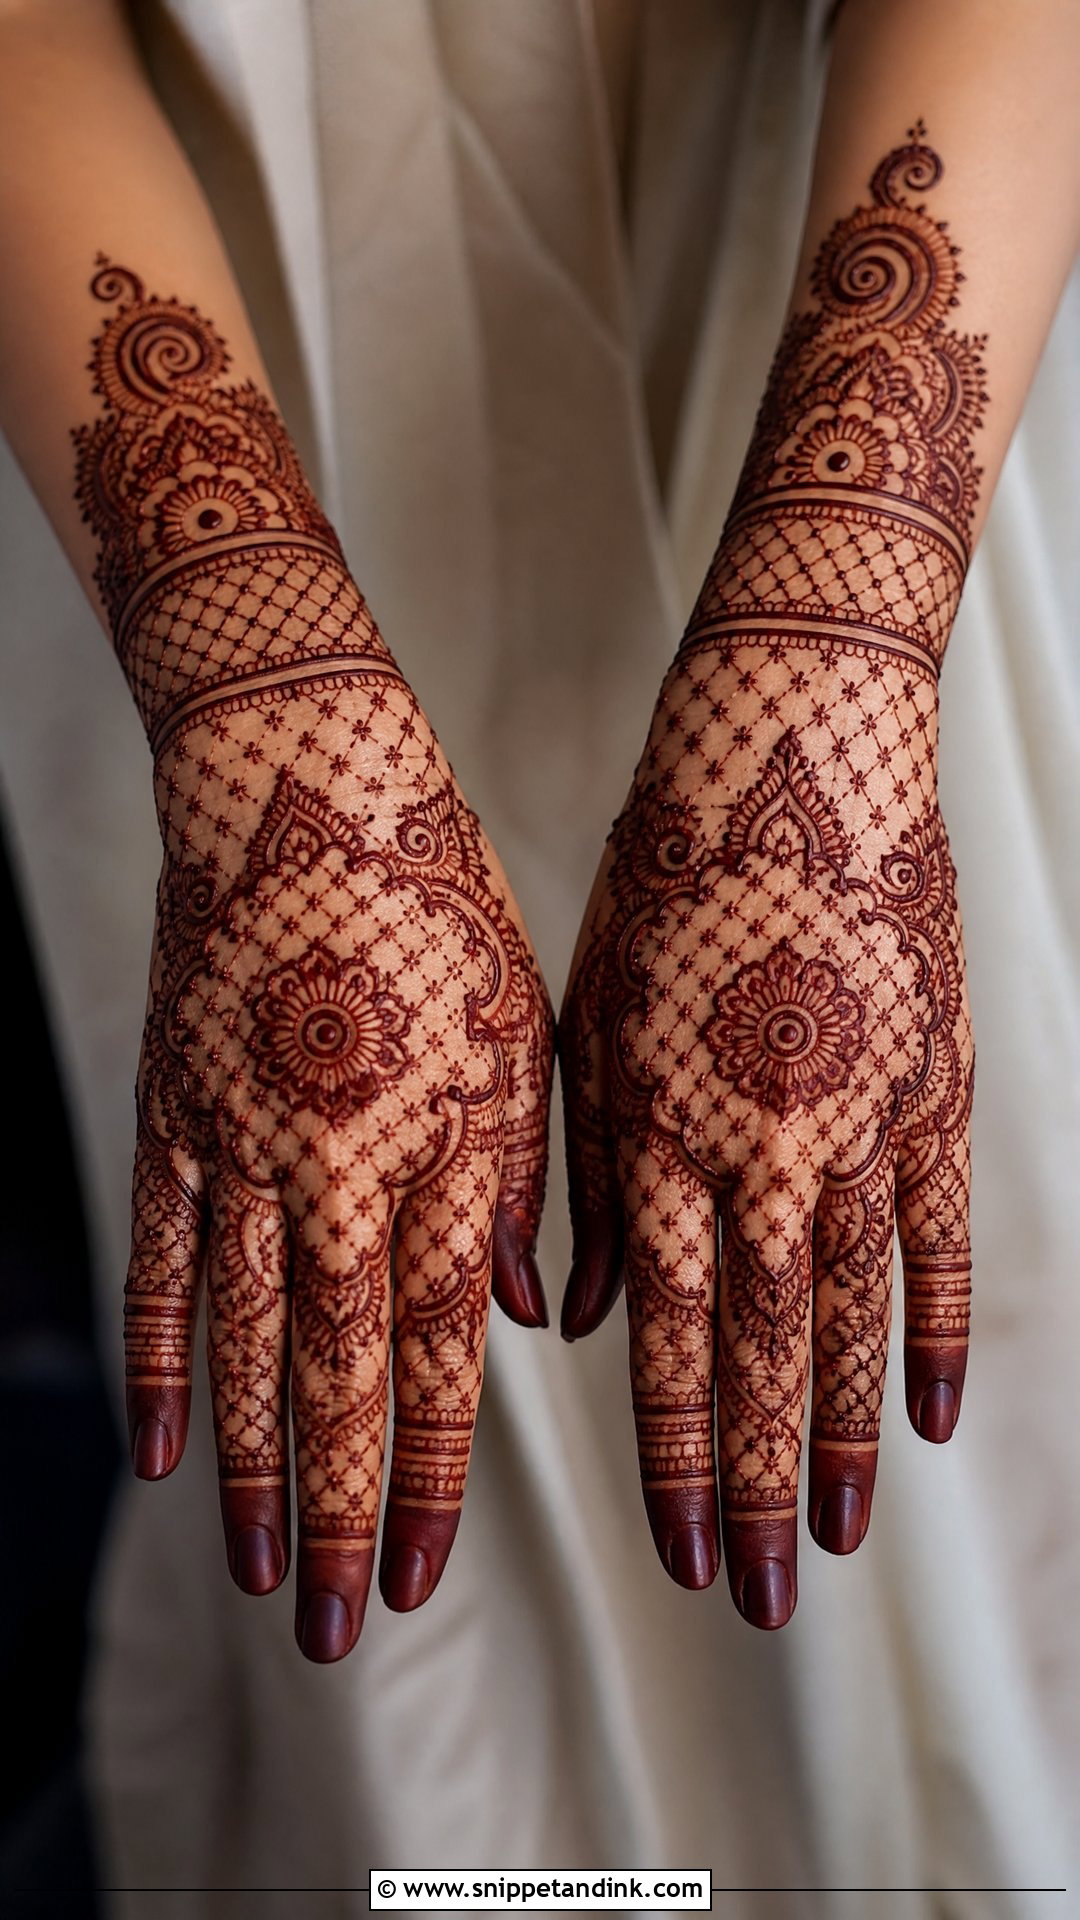
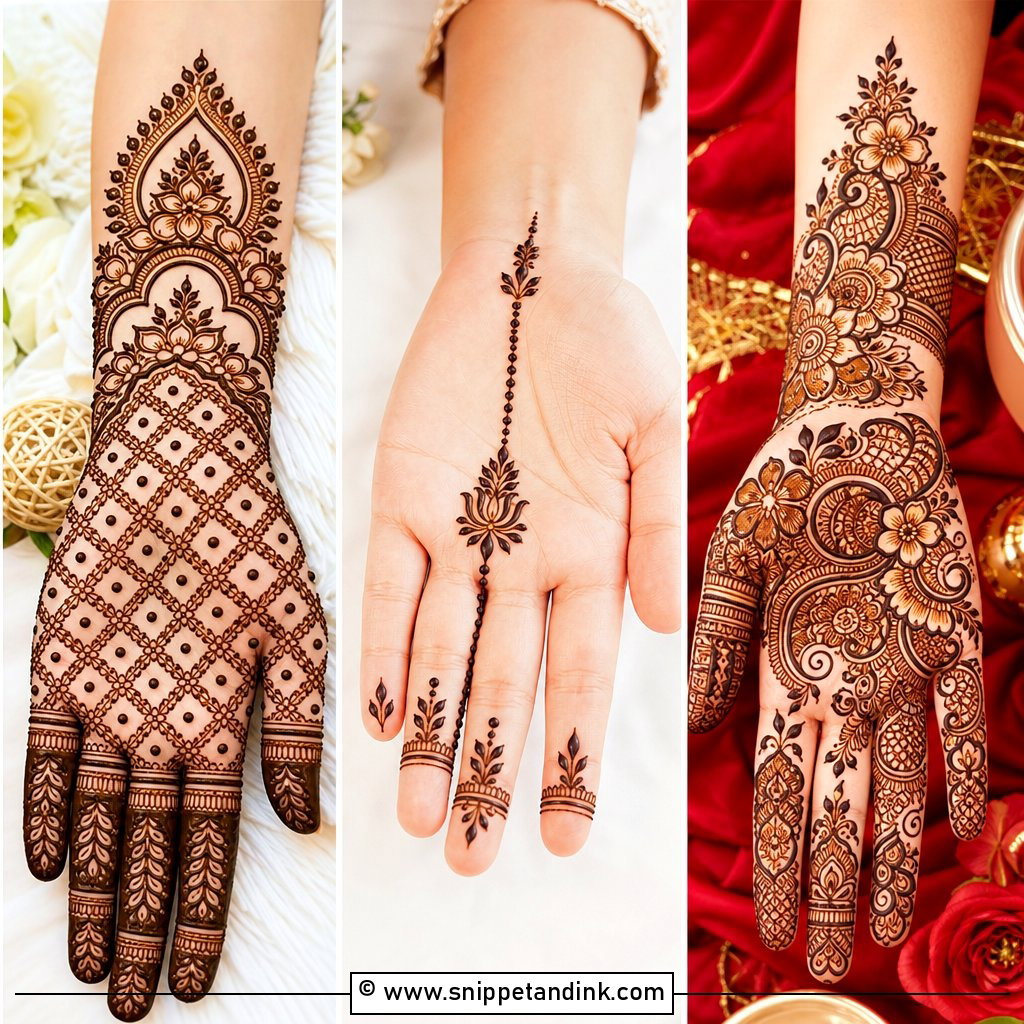
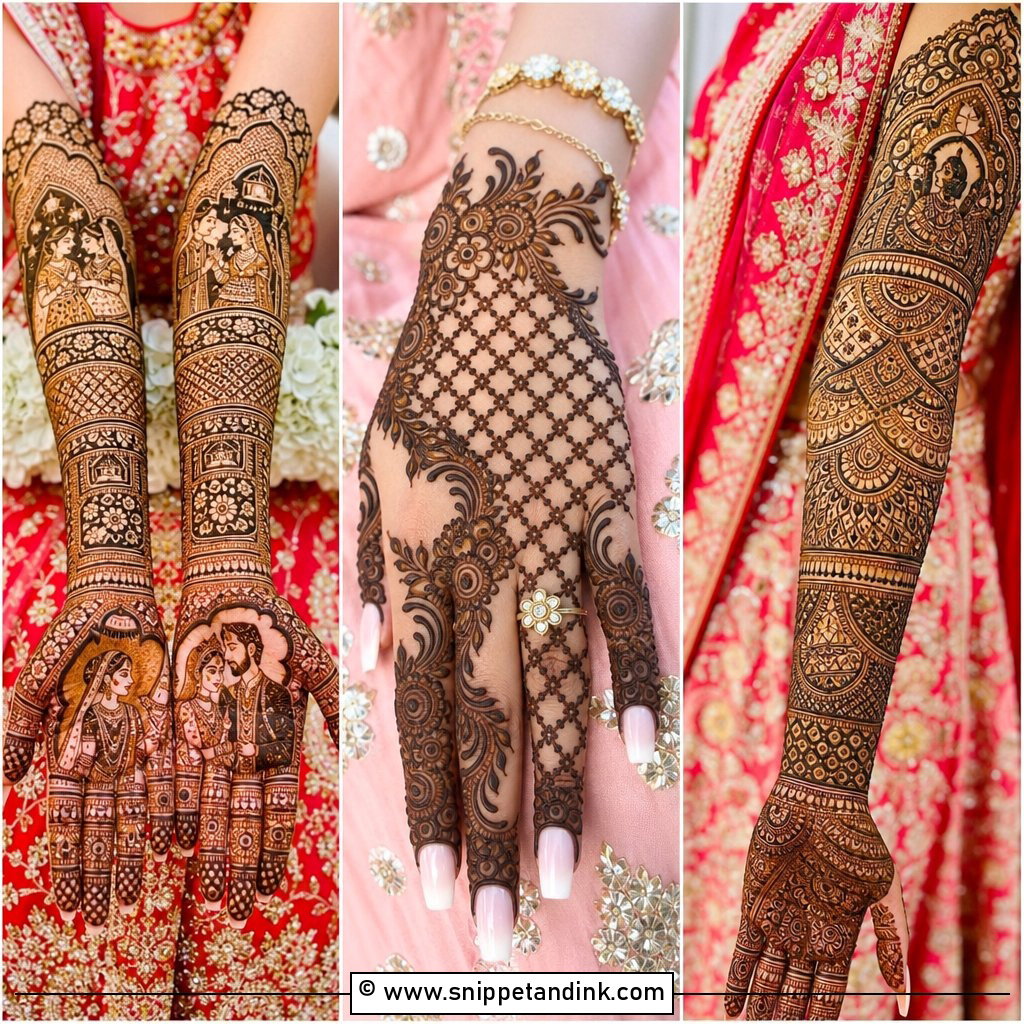
Jaali is the net pattern that gives mehndi a lace effect, and it demands the steadiest hand of any filler. Uneven lines show immediately because the eye reads the grid as a whole. I never fill a whole hand with jaali; it needs a mandala, floral centre or paisley cuff to break it up, otherwise it looks like a glove. The contrast between net sections and solid motifs is what makes it refined. It looks especially right alongside net dupattas and lace-sleeved blouses.
10. Jewelry Dulhan Back Hand Mehndi Design
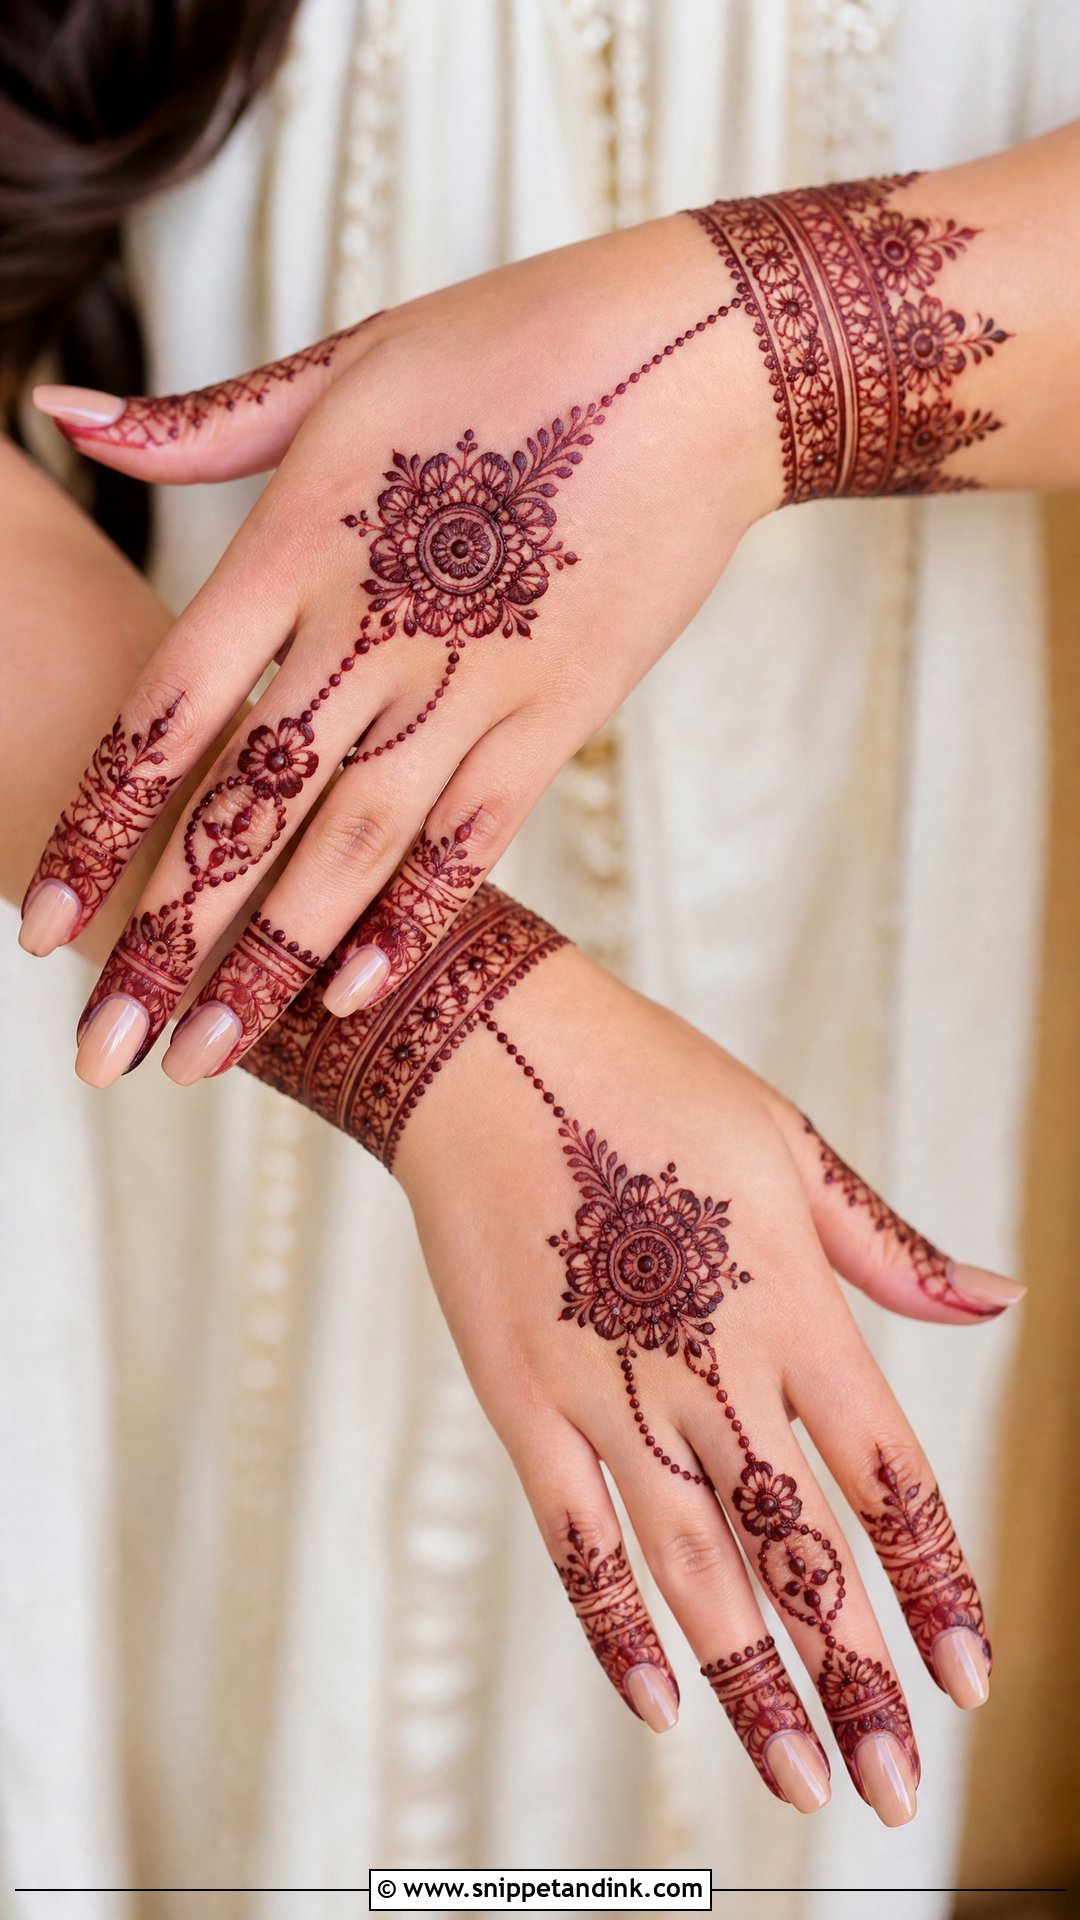
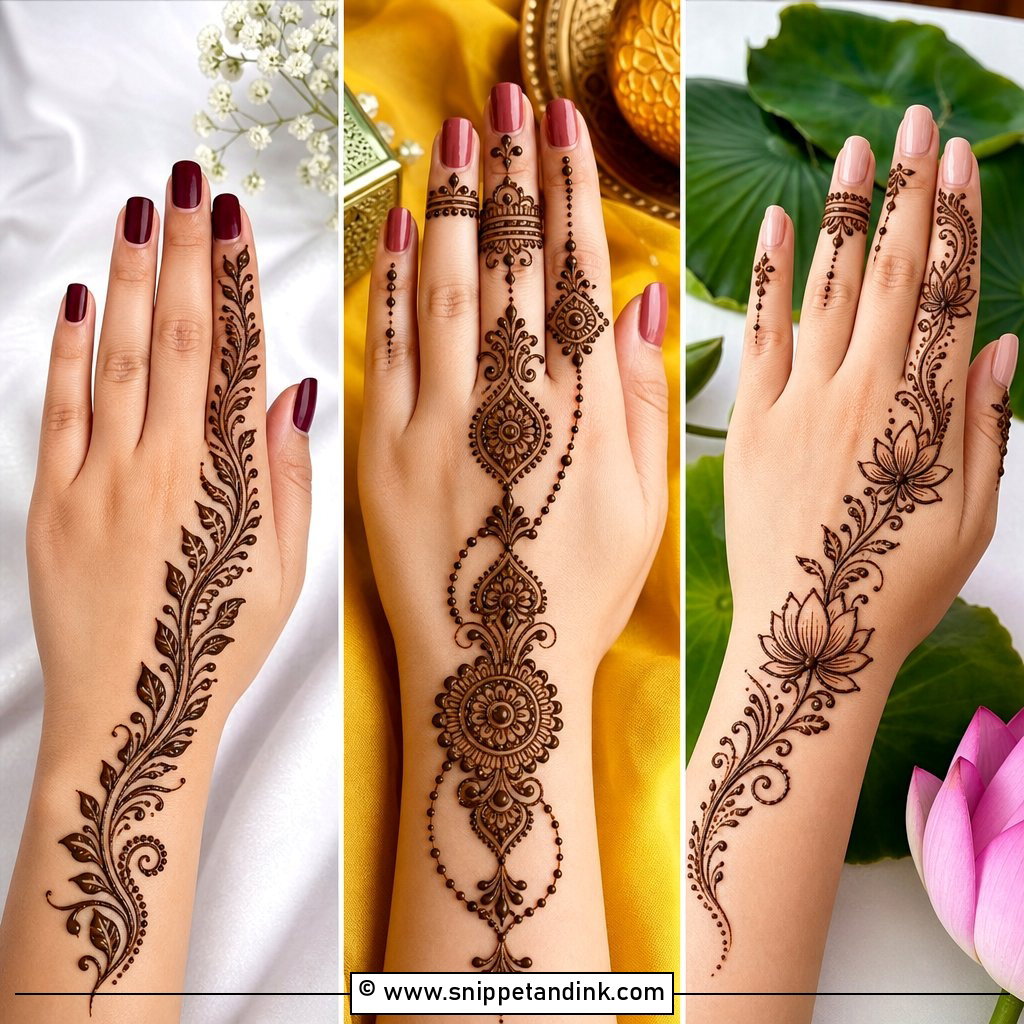
Jewellery-style mehndi draws henna versions of a ring chain, a bracelet cuff and a hathphool, all linked by fine dotted lines. I keep the chains very thin and the cuffs bold, because thin lines stain lighter and that contrast is what makes the jewellery read. A floral or mandala motif usually sits where the hathphool’s centre would be. If you’ll wear real hathphool on the day, tell me first, so I can draw the henna version to frame the piece rather than disappear under it.
11. Bracelet Dulhan Back Hand Mehndi Design
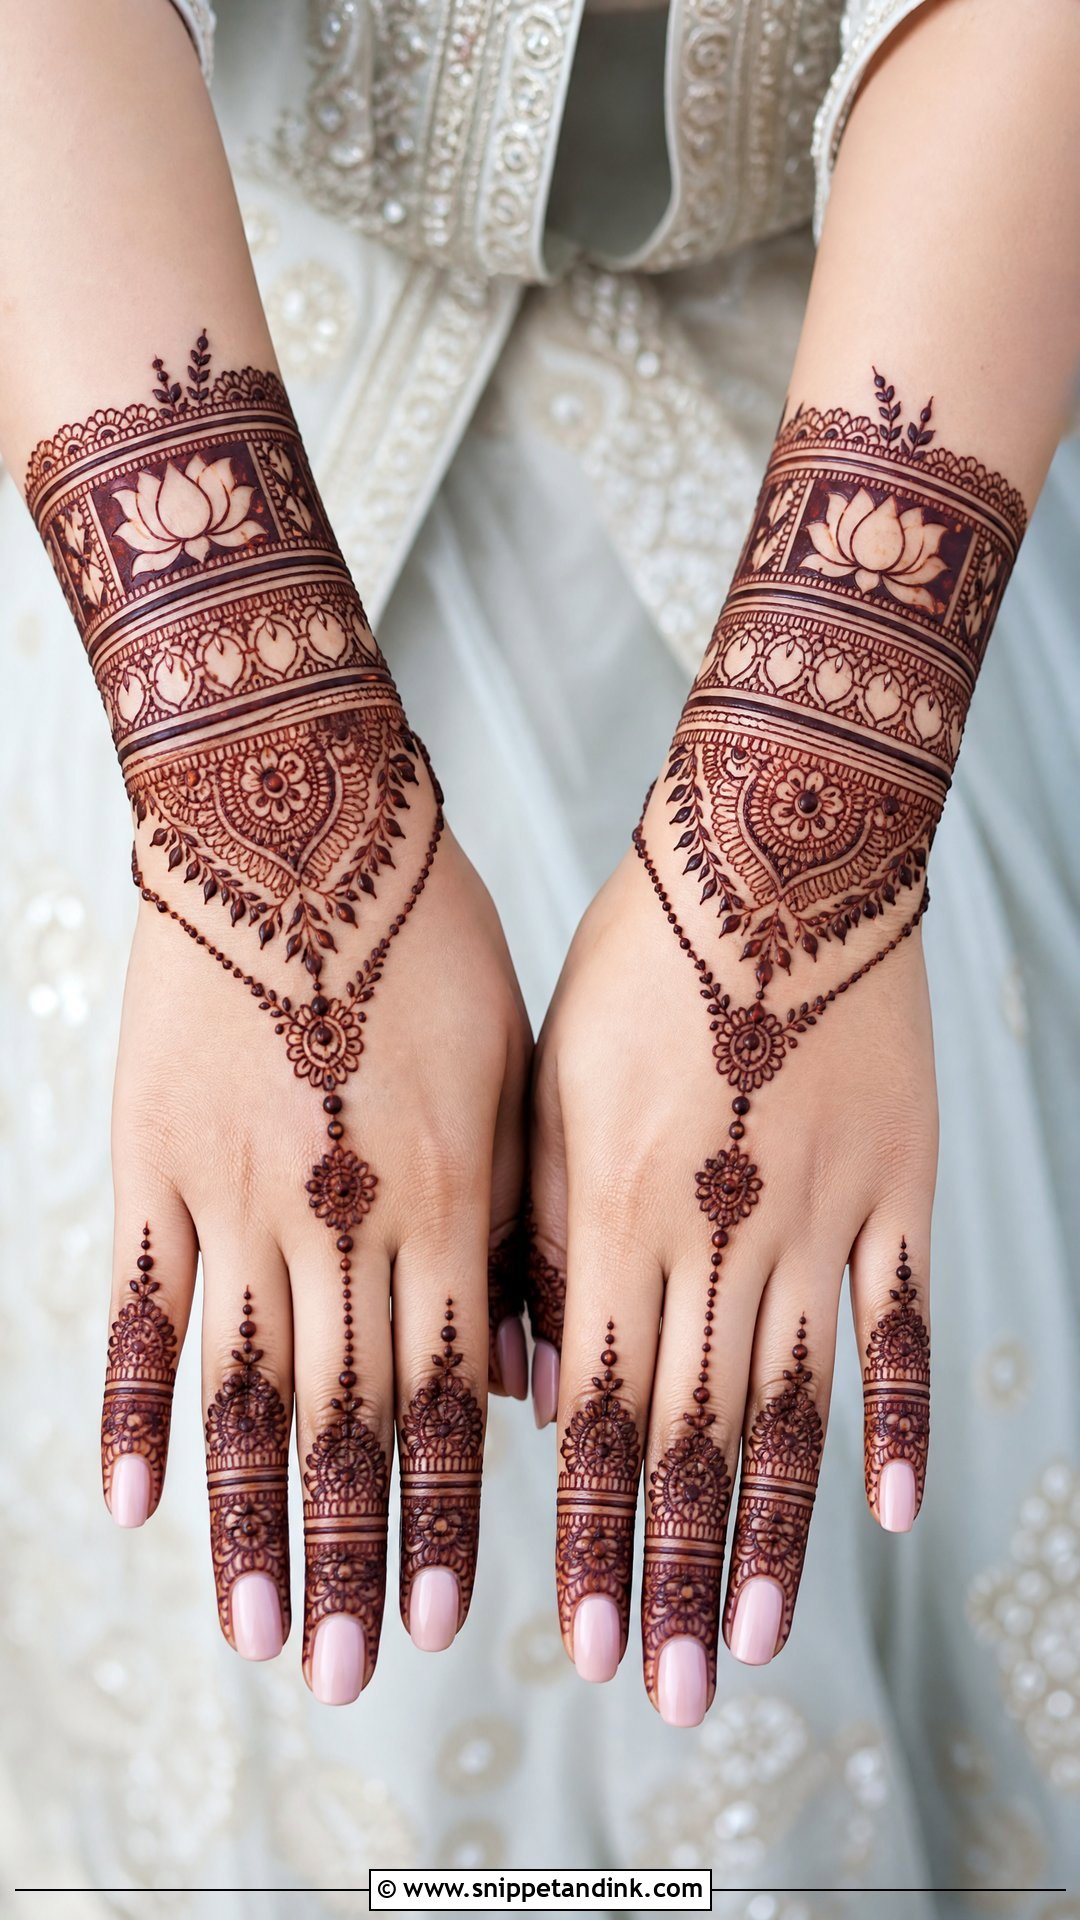
Bracelet work concentrates the detail at the wrist and lower hand. I stack several bands, each with a different filler: scallops, lotus strips, bead-like dots. From the top band, vines or chains run toward the fingers. This layout is my answer for brides wearing a lot of bangles or chooda, since the bands sit between the bangles and the knuckles rather than under them. It also stays visible with long sleeves. Slightly thicker outlines on each band keep them crisp in photos.
12. Minimal Dulhan Back Hand Mehndi Design
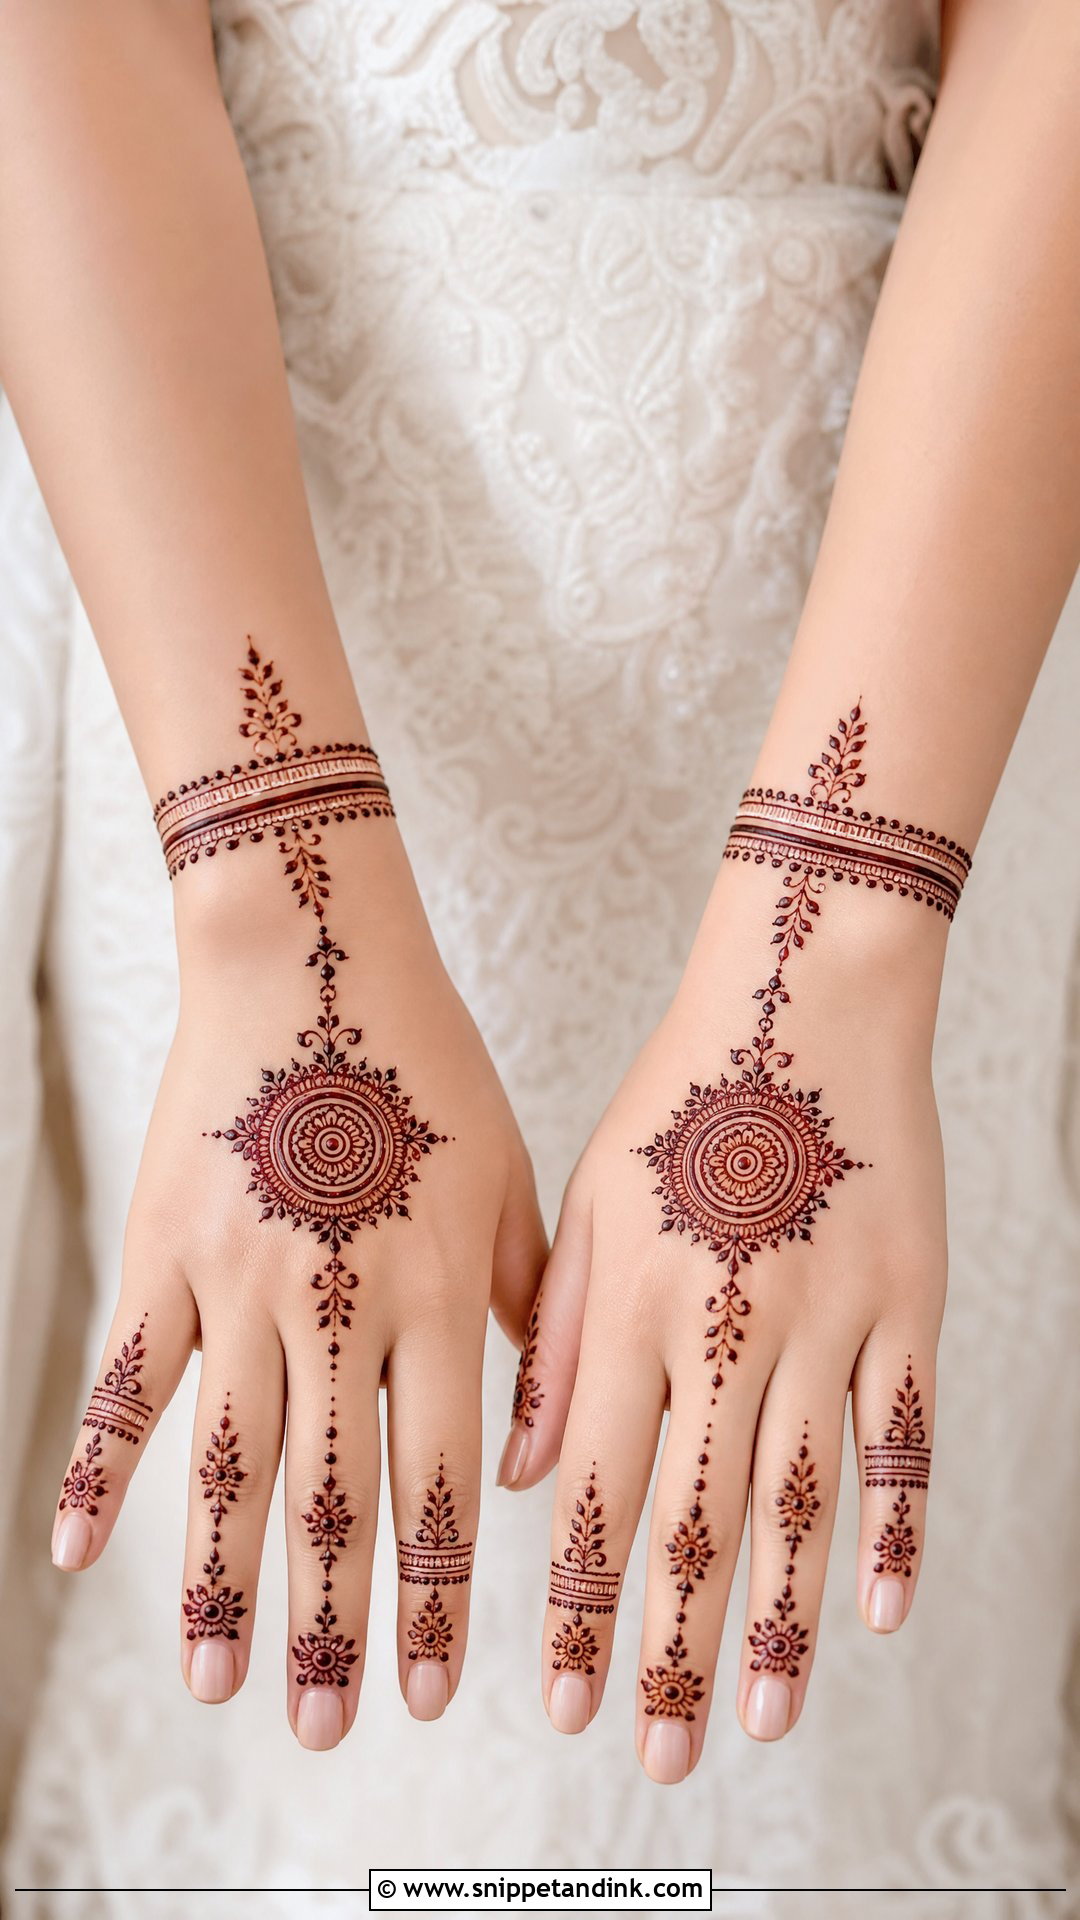
Minimal bridal mehndi still needs to look bridal, and that comes from precision rather than quantity. With so much open skin, a wobbly line or uneven dot is obvious, so I work slower on minimal designs than people expect. A centred mandala, fine finger details, a leafy trail and a slim wrist border are usually enough. It suits intimate and destination weddings and pastel outfits. One strong focal motif per hand stops it from looking unfinished.
13. Heavy Dulhan Back Hand Mehndi Design
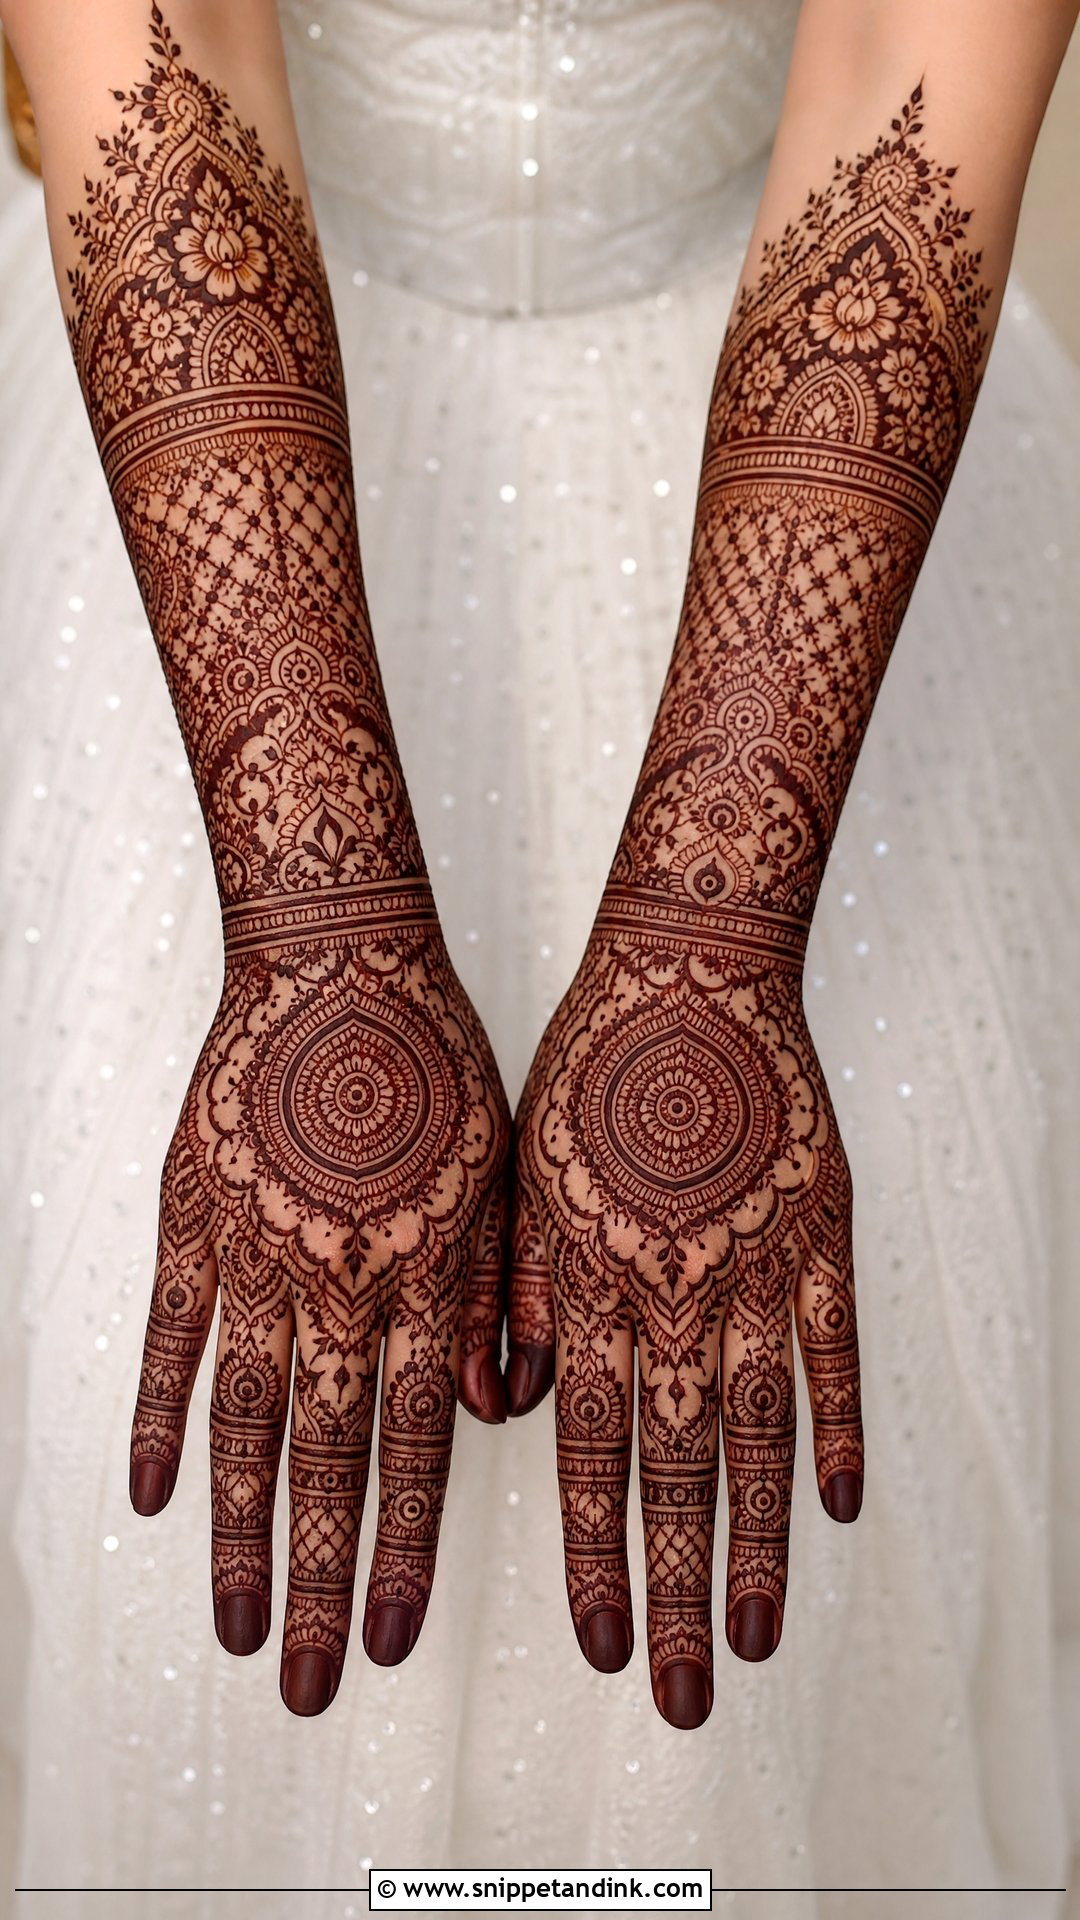
Heavy coverage runs from fingertips past the wrist into the forearm, and it’s the design that needs the most structure. When every area is equally dense, the stain turns into one flat maroon block and the motifs vanish. I solve that with bold outlines around the major shapes and different filler textures in each section, so the eye can still separate them. It looks rich against red, maroon, gold or deep green outfits. Plan for a long sitting and eat before we start.
14. Simple Dulhan Back Hand Mehndi Design
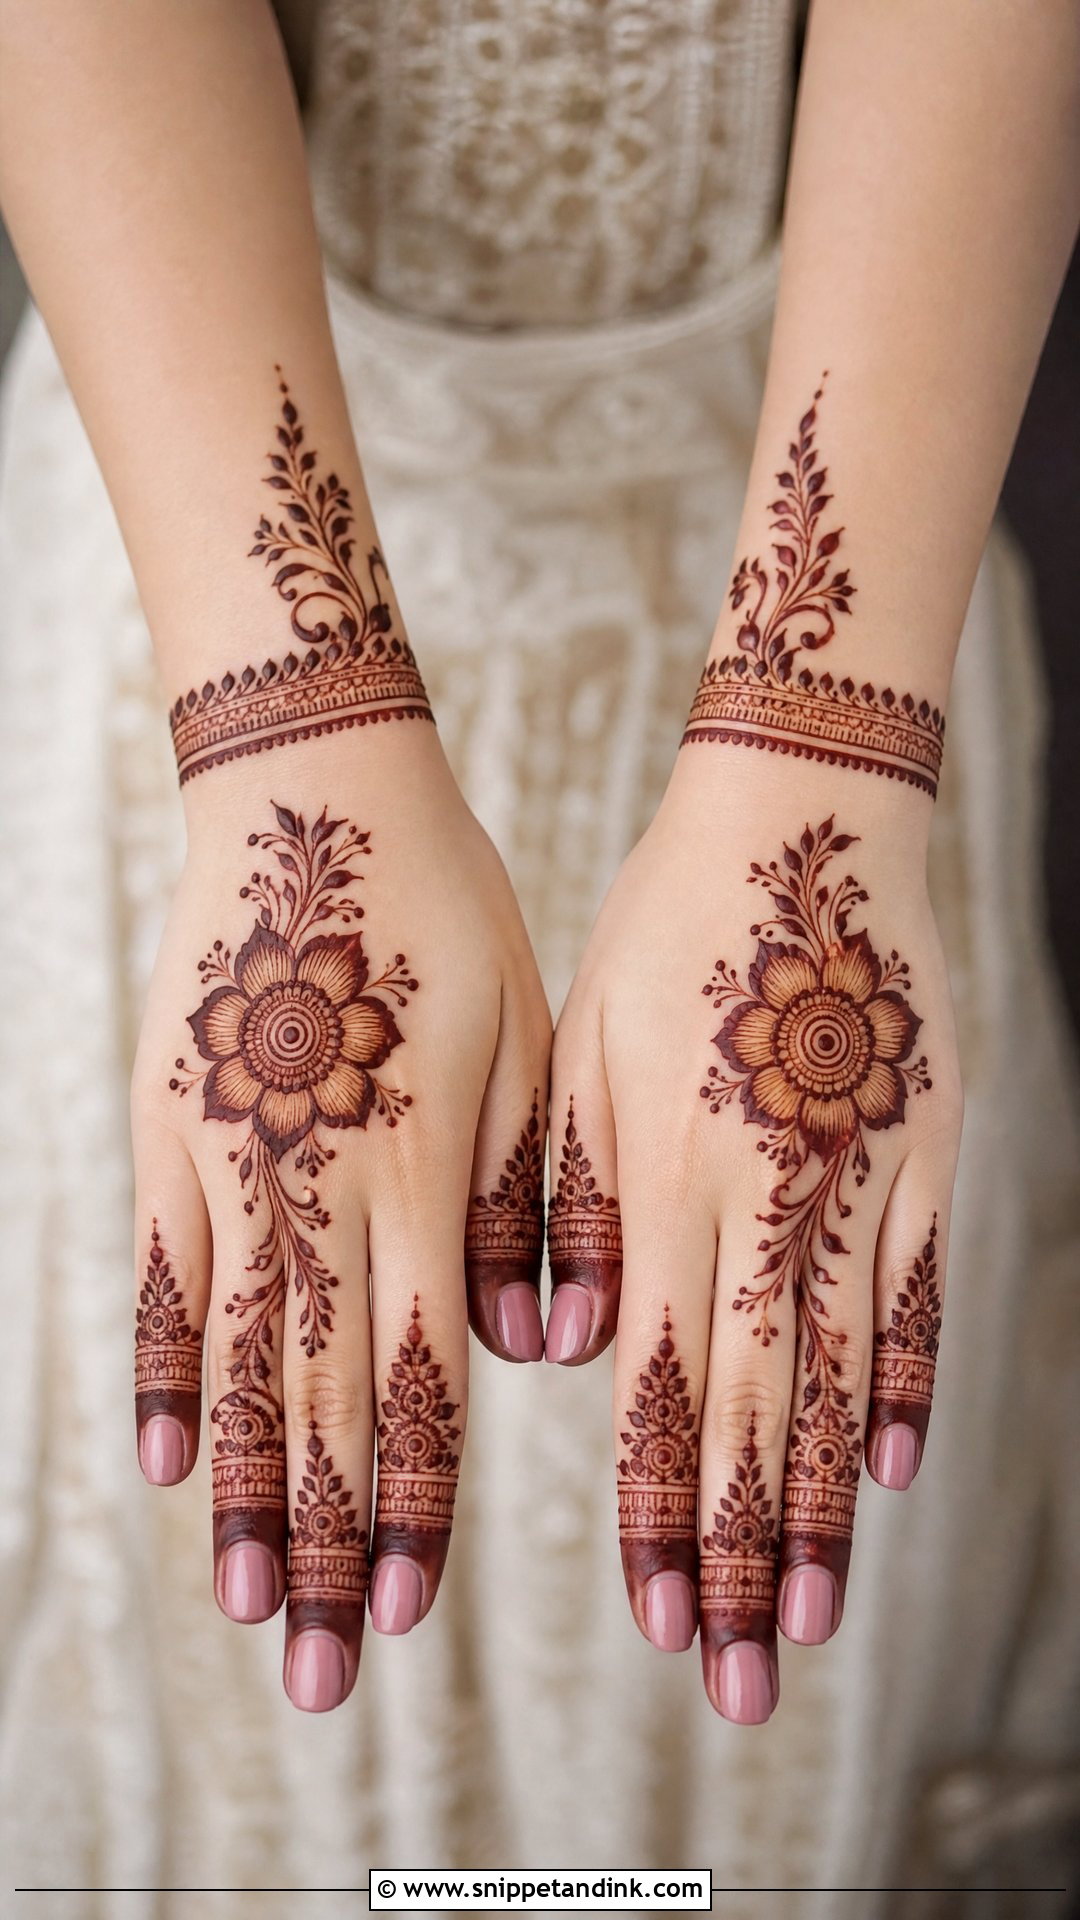
A simpler bridal hand is quicker to apply but shouldn’t look basic. I build it around one bold flower near the centre, decorated fingers, a leafy side trail and a small wrist cuff. The trick is giving the bride’s version more detail at the fingertips and a richer wrist border than a bridesmaid’s version of the same design, so the two don’t look identical in group photos. It’s a practical choice for brides with sensitive skin who don’t want paste sitting on a large area for hours.
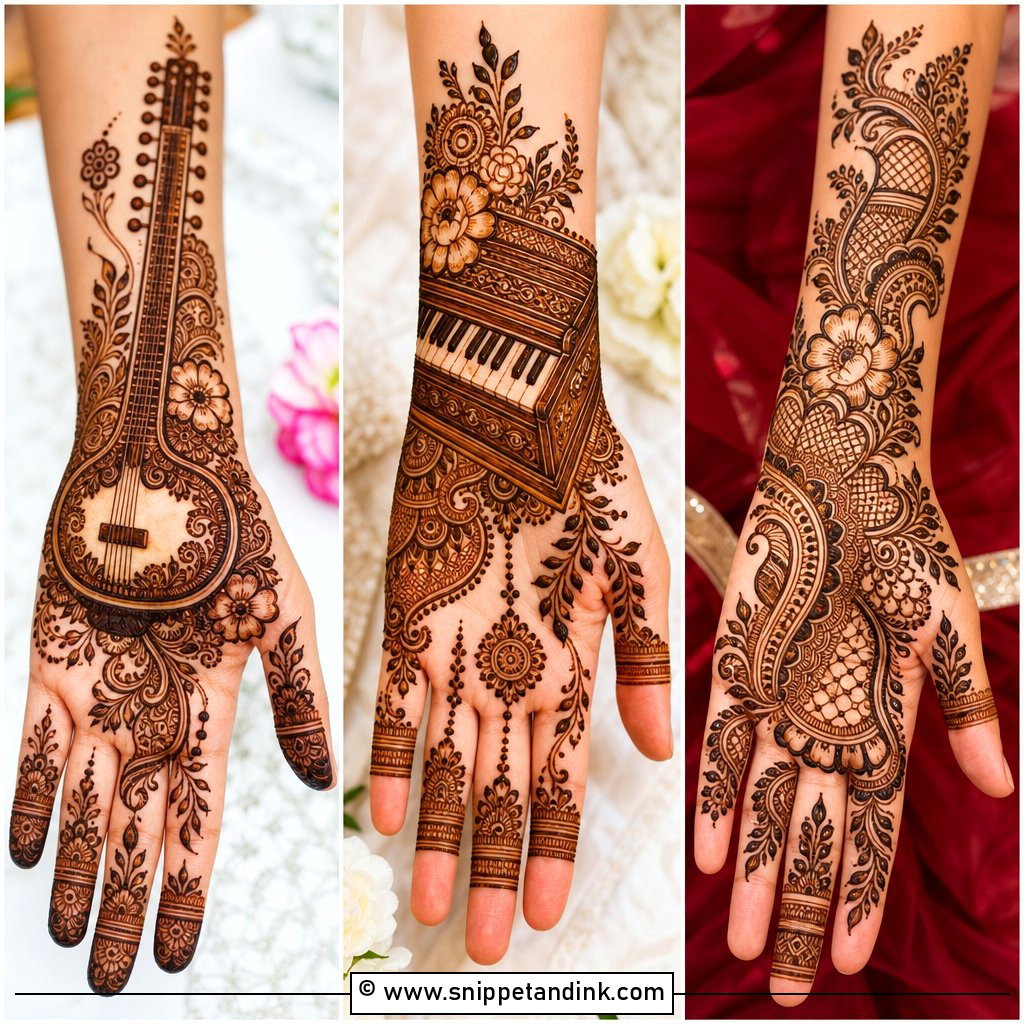
15. Modern Dulhan Back Hand Mehndi Design
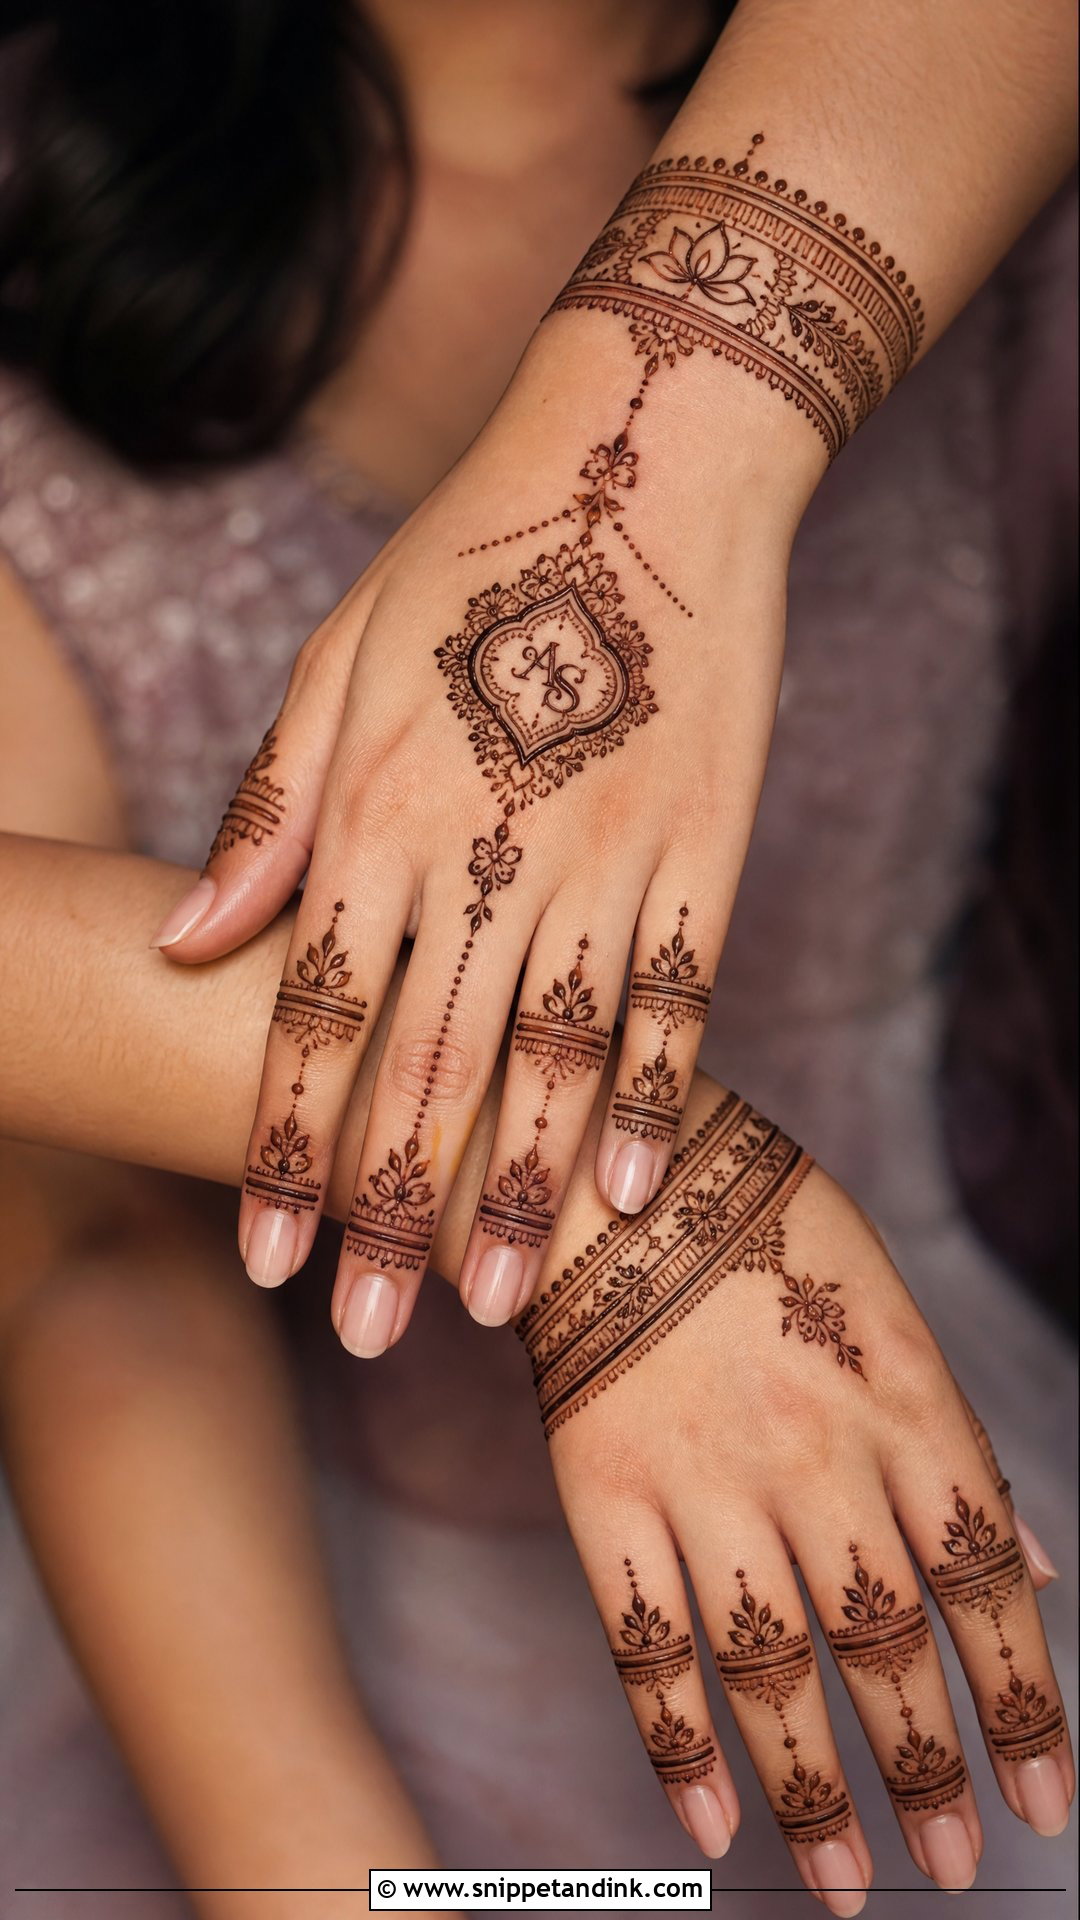
Modern bridal mehndi uses spacing and symmetry as much as motifs. Spaced florals, geometric bands, fine-line fingers and one bold centrepiece keep the hand clean. This is the style where initials, a wedding date or a small personal symbol fit most naturally. I think about the ring shot when planning it, keeping the ring finger clear enough for the band to show. It suits contemporary lehengas, fusion outfits and minimal jewellery.
16. Royal Dulhan Back Hand Mehndi Design
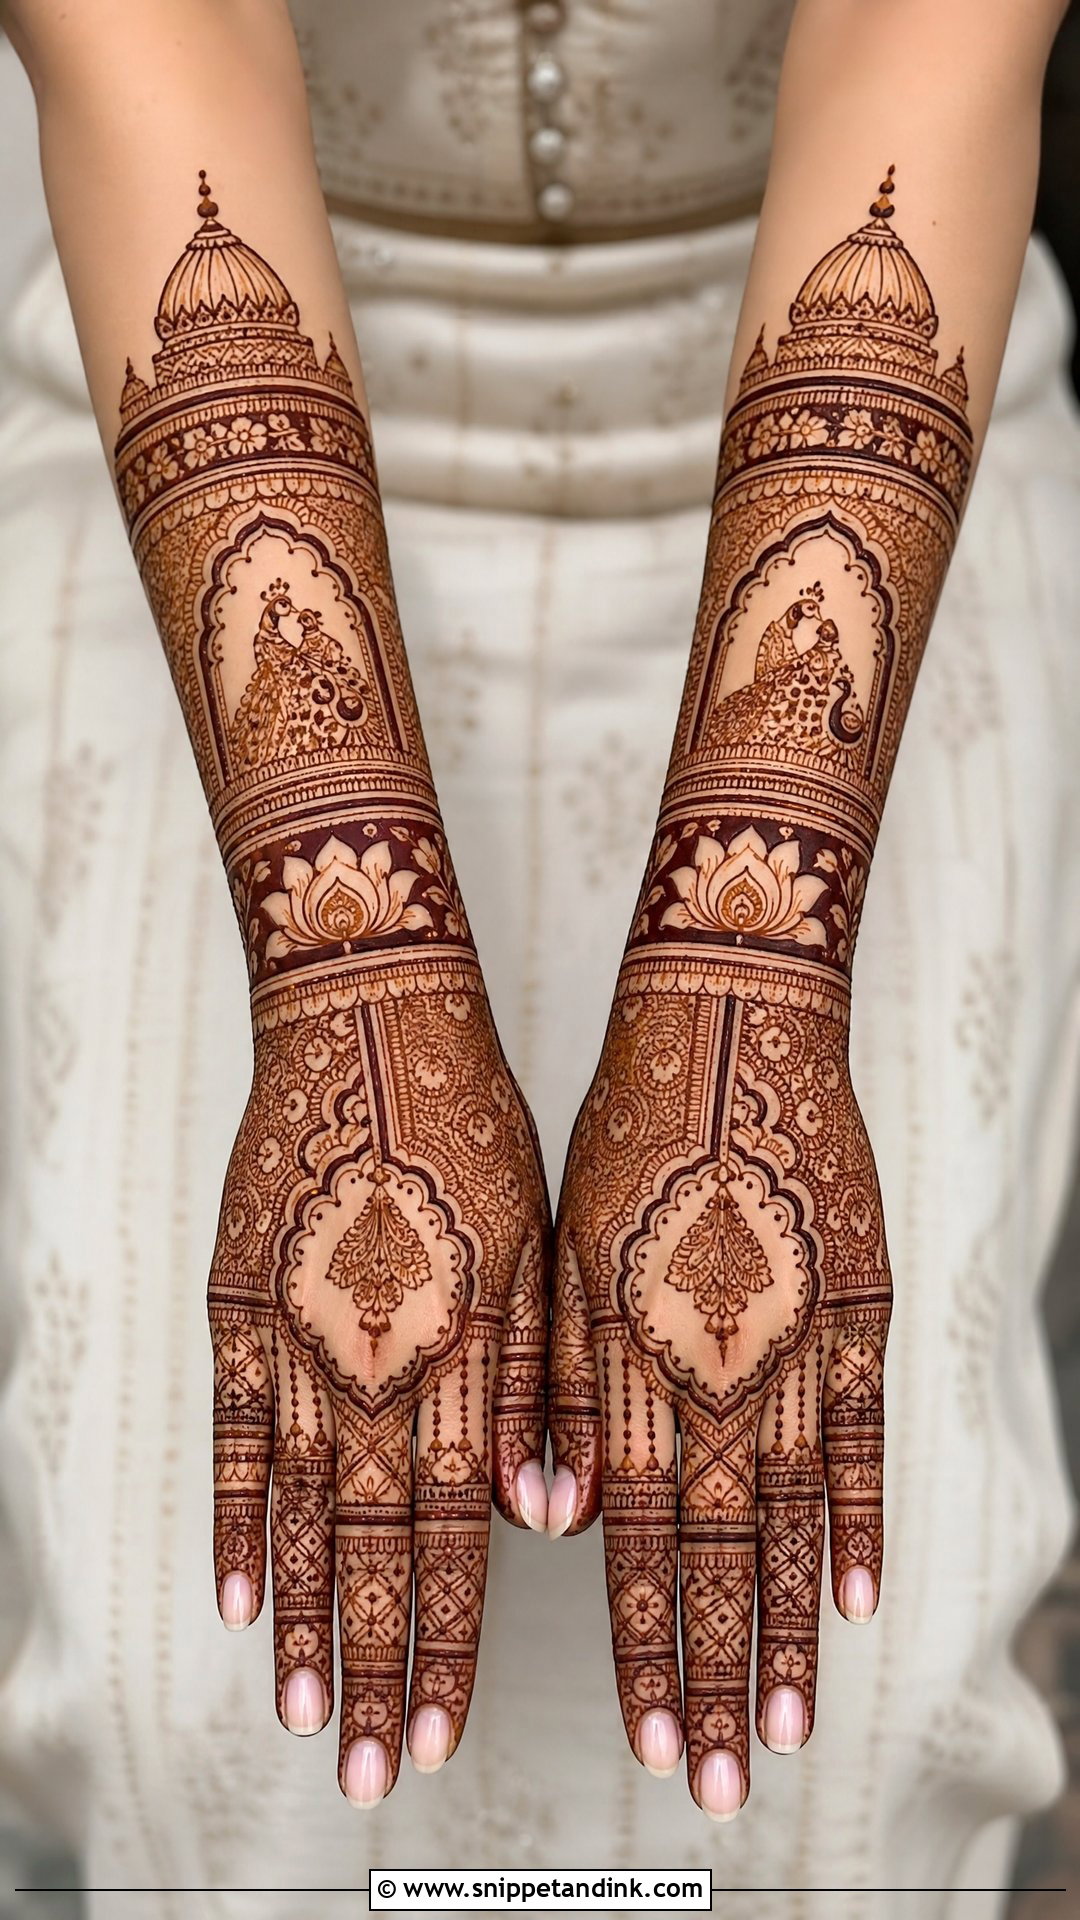
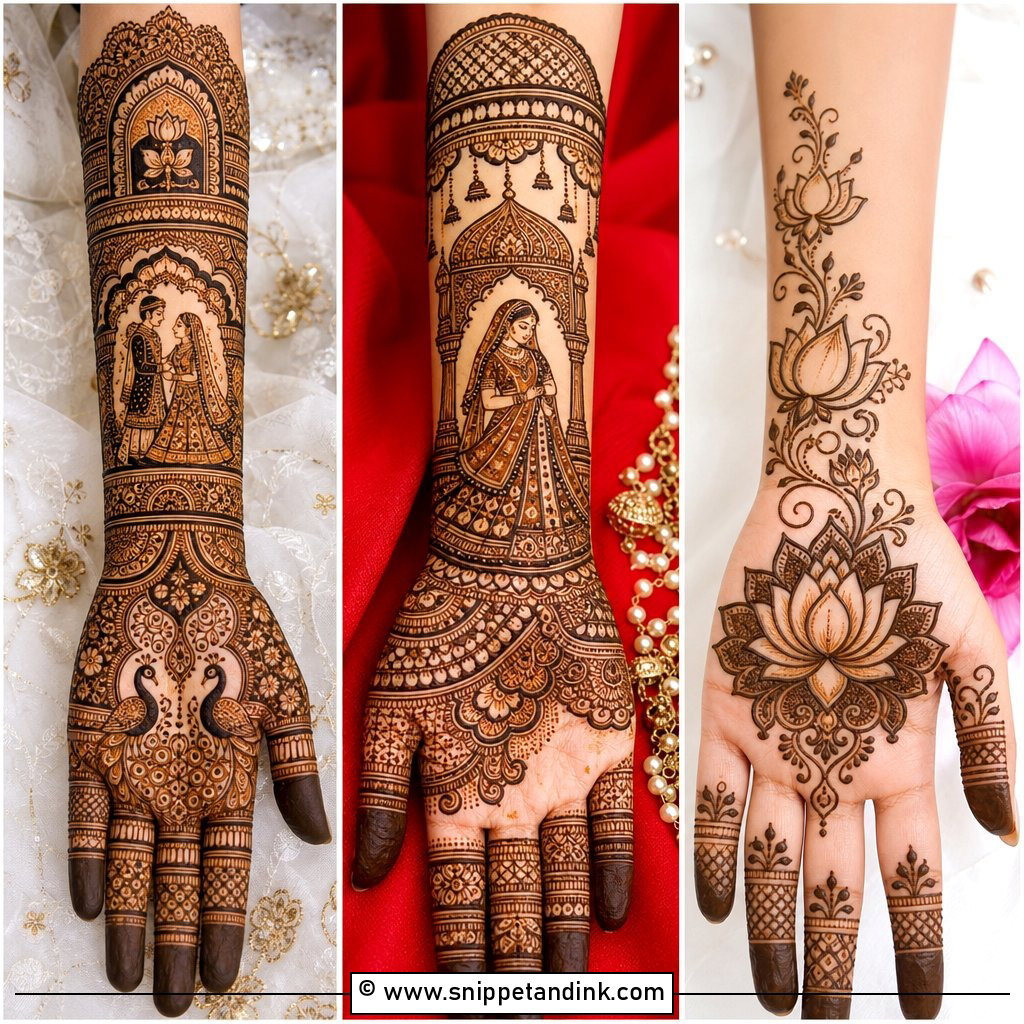
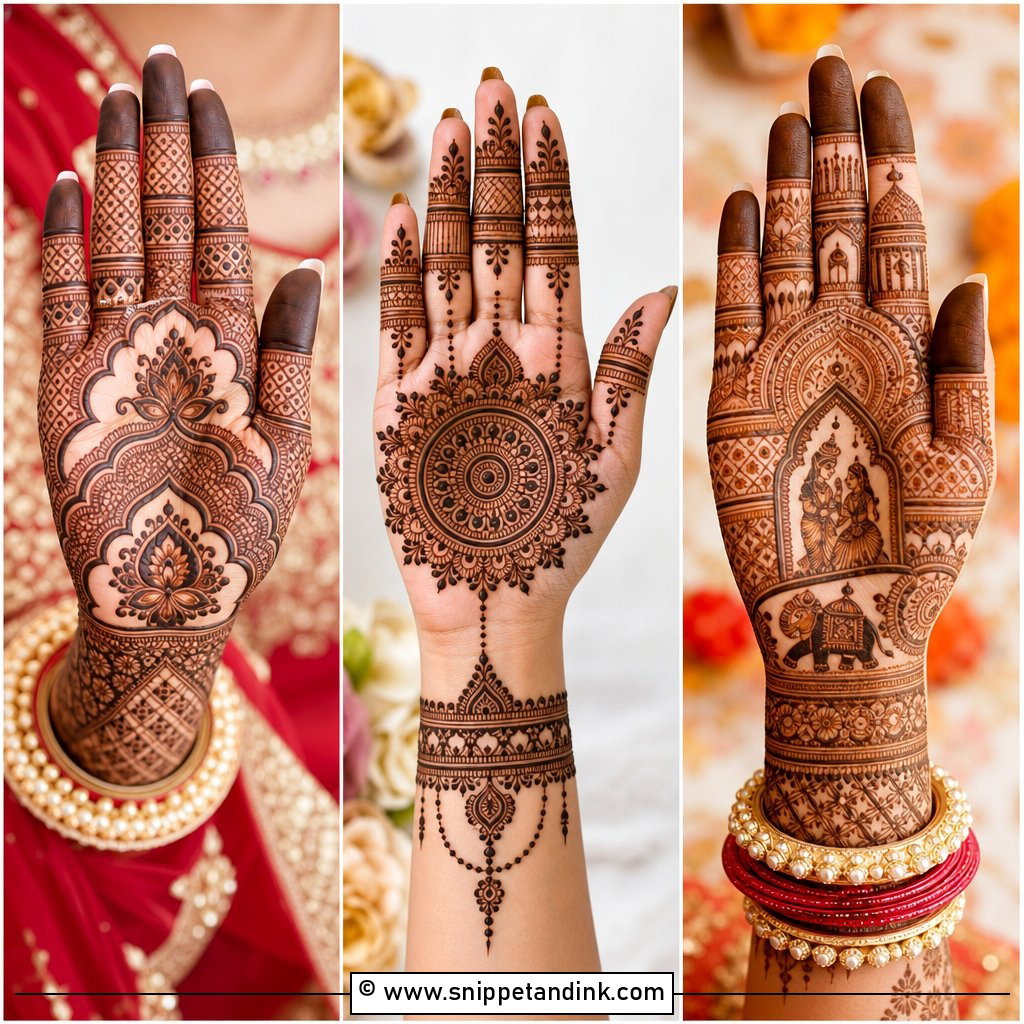
Royal designs borrow architecture: palace arches, domes, ornamental cuffs, with lotus borders and peacocks woven between them. I treat the back of the hand like a facade, building the arch structure first and filling it afterwards, which keeps the symmetry true. Dense leafy patterns and mesh fill the fingers. It suits Rajasthani-inspired weddings and traditional jewellery. This is a slow design, and I’d budget extra sitting time for it.
17. Portrait Dulhan Back Hand Mehndi Design
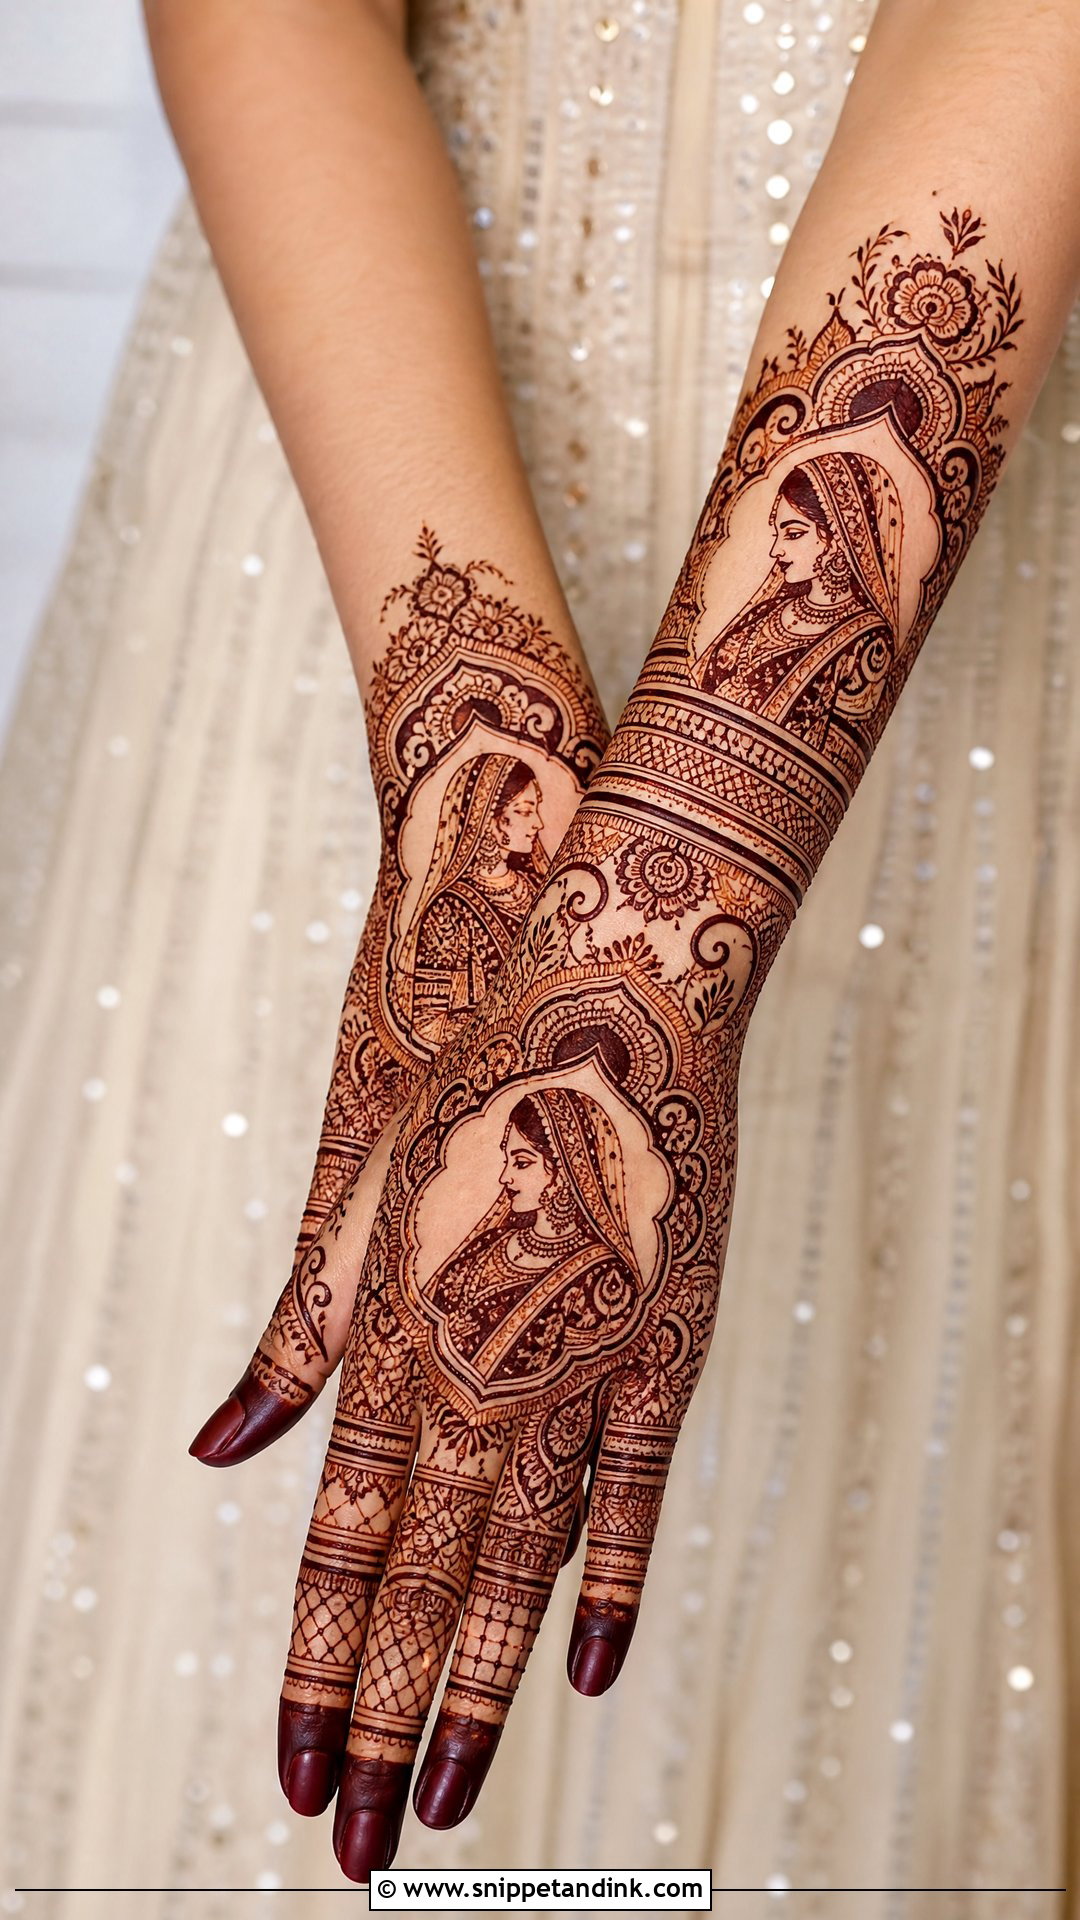
Portraits are usually drawn on palms, where there’s more flat space, so putting them on the back of the hand takes planning. I keep the faces small and simple, often near the wrist, with florals and jaali surrounding them. Portrait mehndi needs an artist who has drawn faces many times, because one wrong line in the eyes changes the expression and henna can’t be erased. Ask to see photos of their portrait work after staining, not just fresh paste.
18. Dulha Dulhan Back Hand Mehndi Design
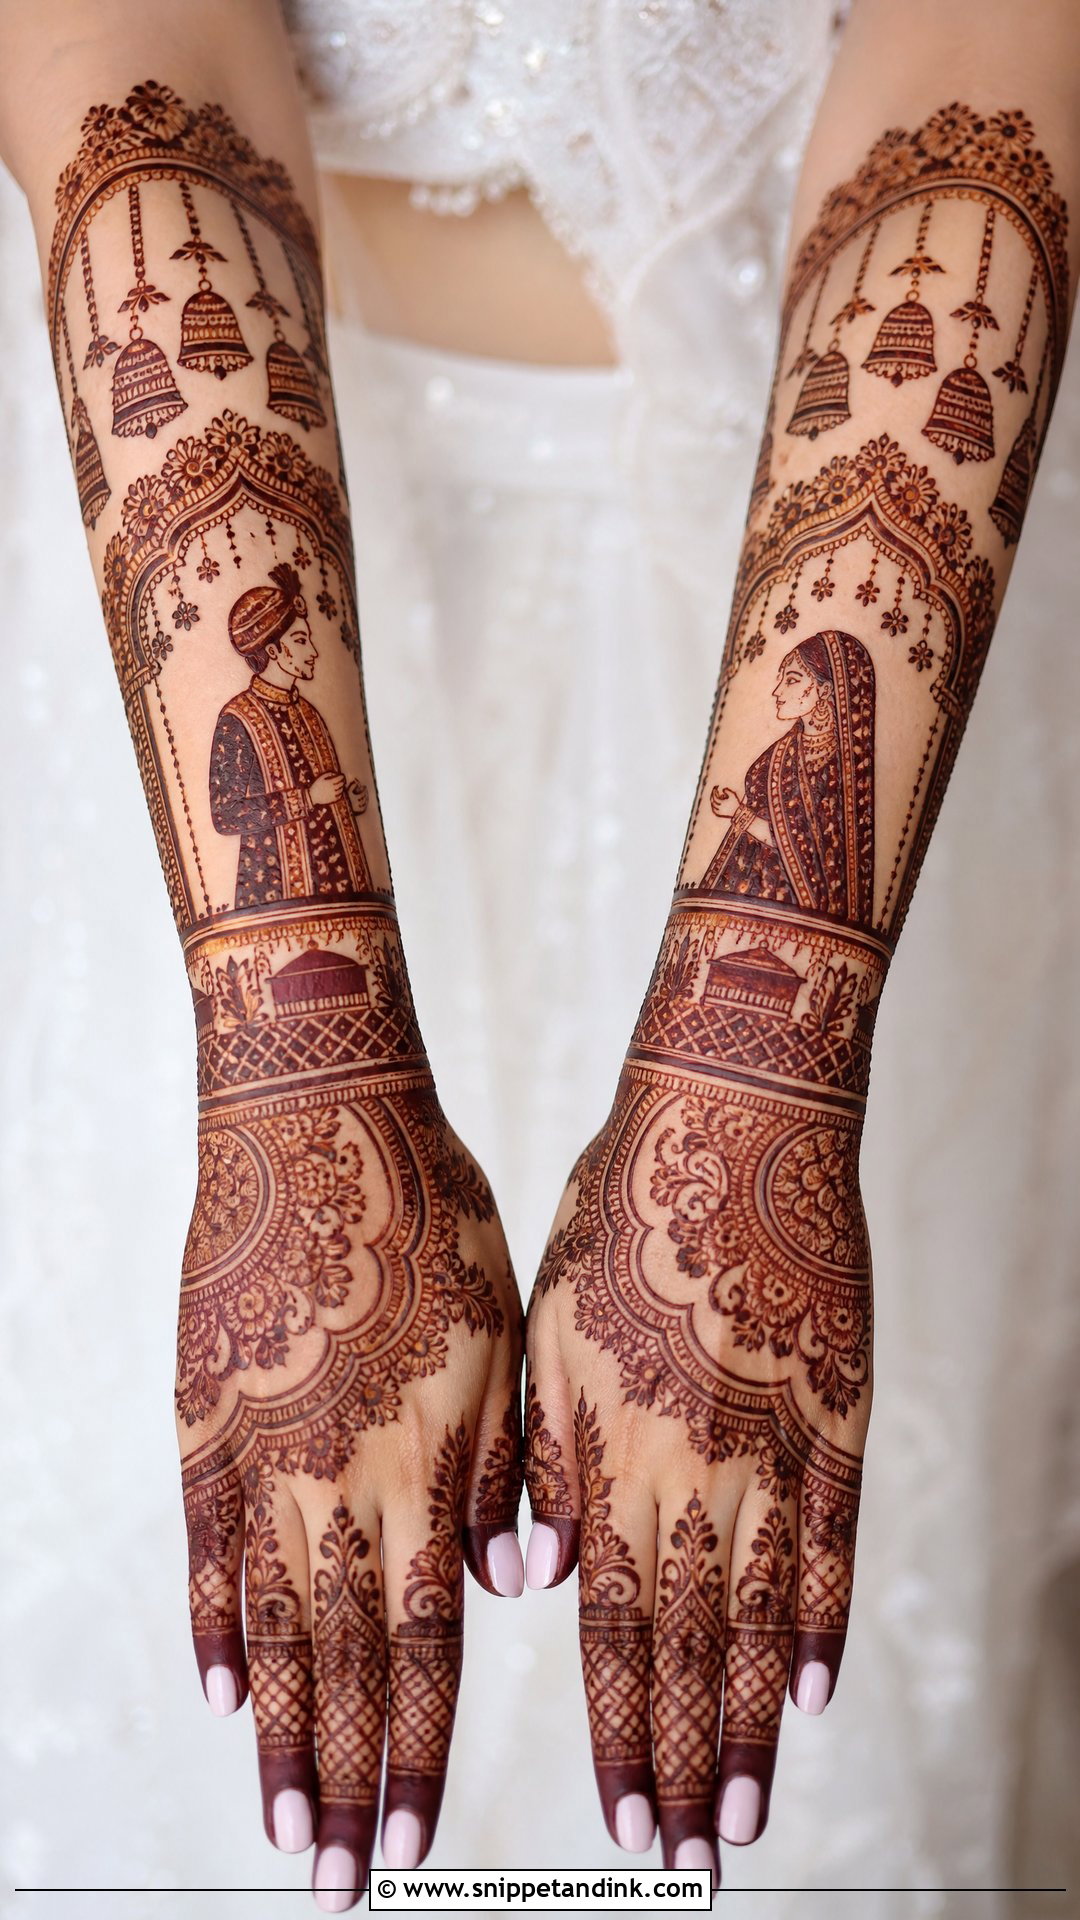
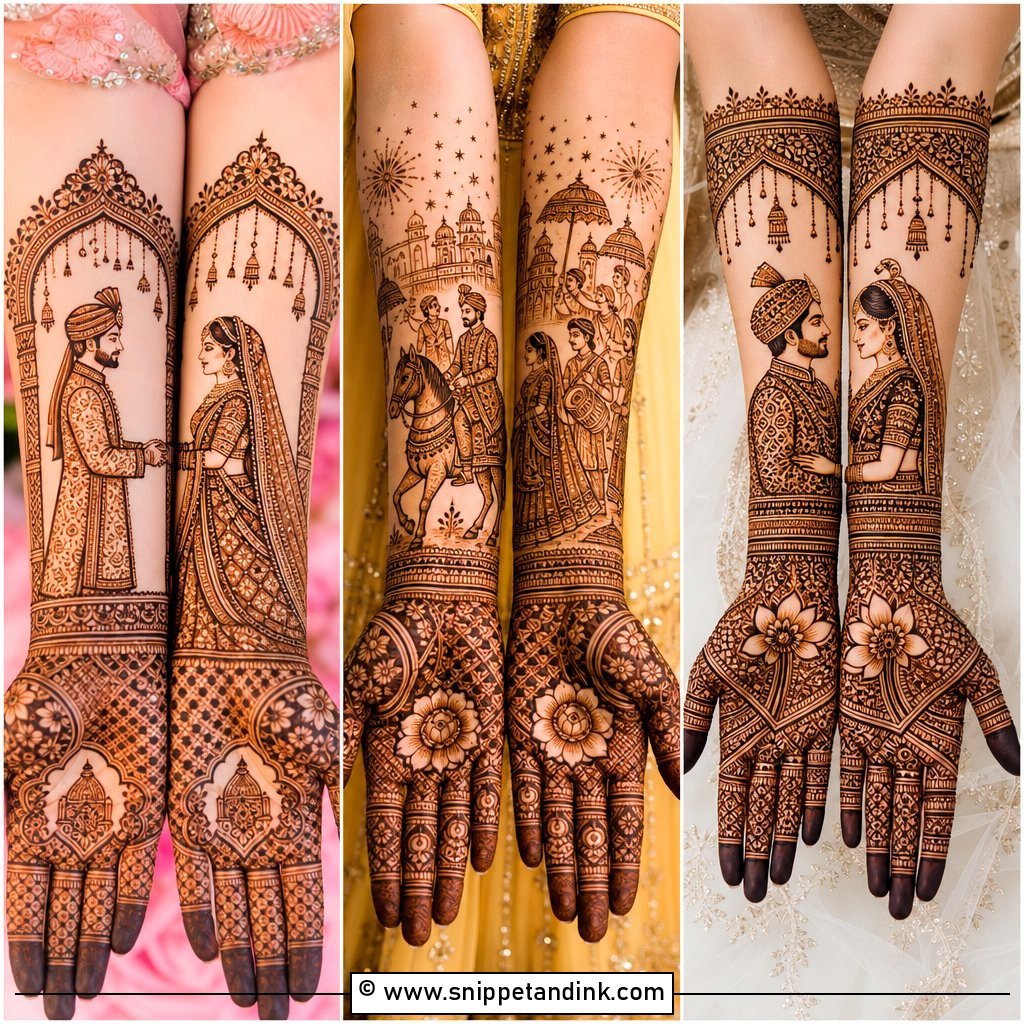
A dulha on one hand and a dulhan on the other makes the most of the moment when hands are placed together for photos. I draw both figures at the same scale and angle so they face each other when the hands meet. Mandap details, bells, flowers and paisleys fill the rest. Larger figures with simple faces stain more clearly than tiny detailed ones. Keep dense filler around the figures, not over them, so the dulha-dulhan theme stays readable.
19. Name Dulhan Back Hand Mehndi Design
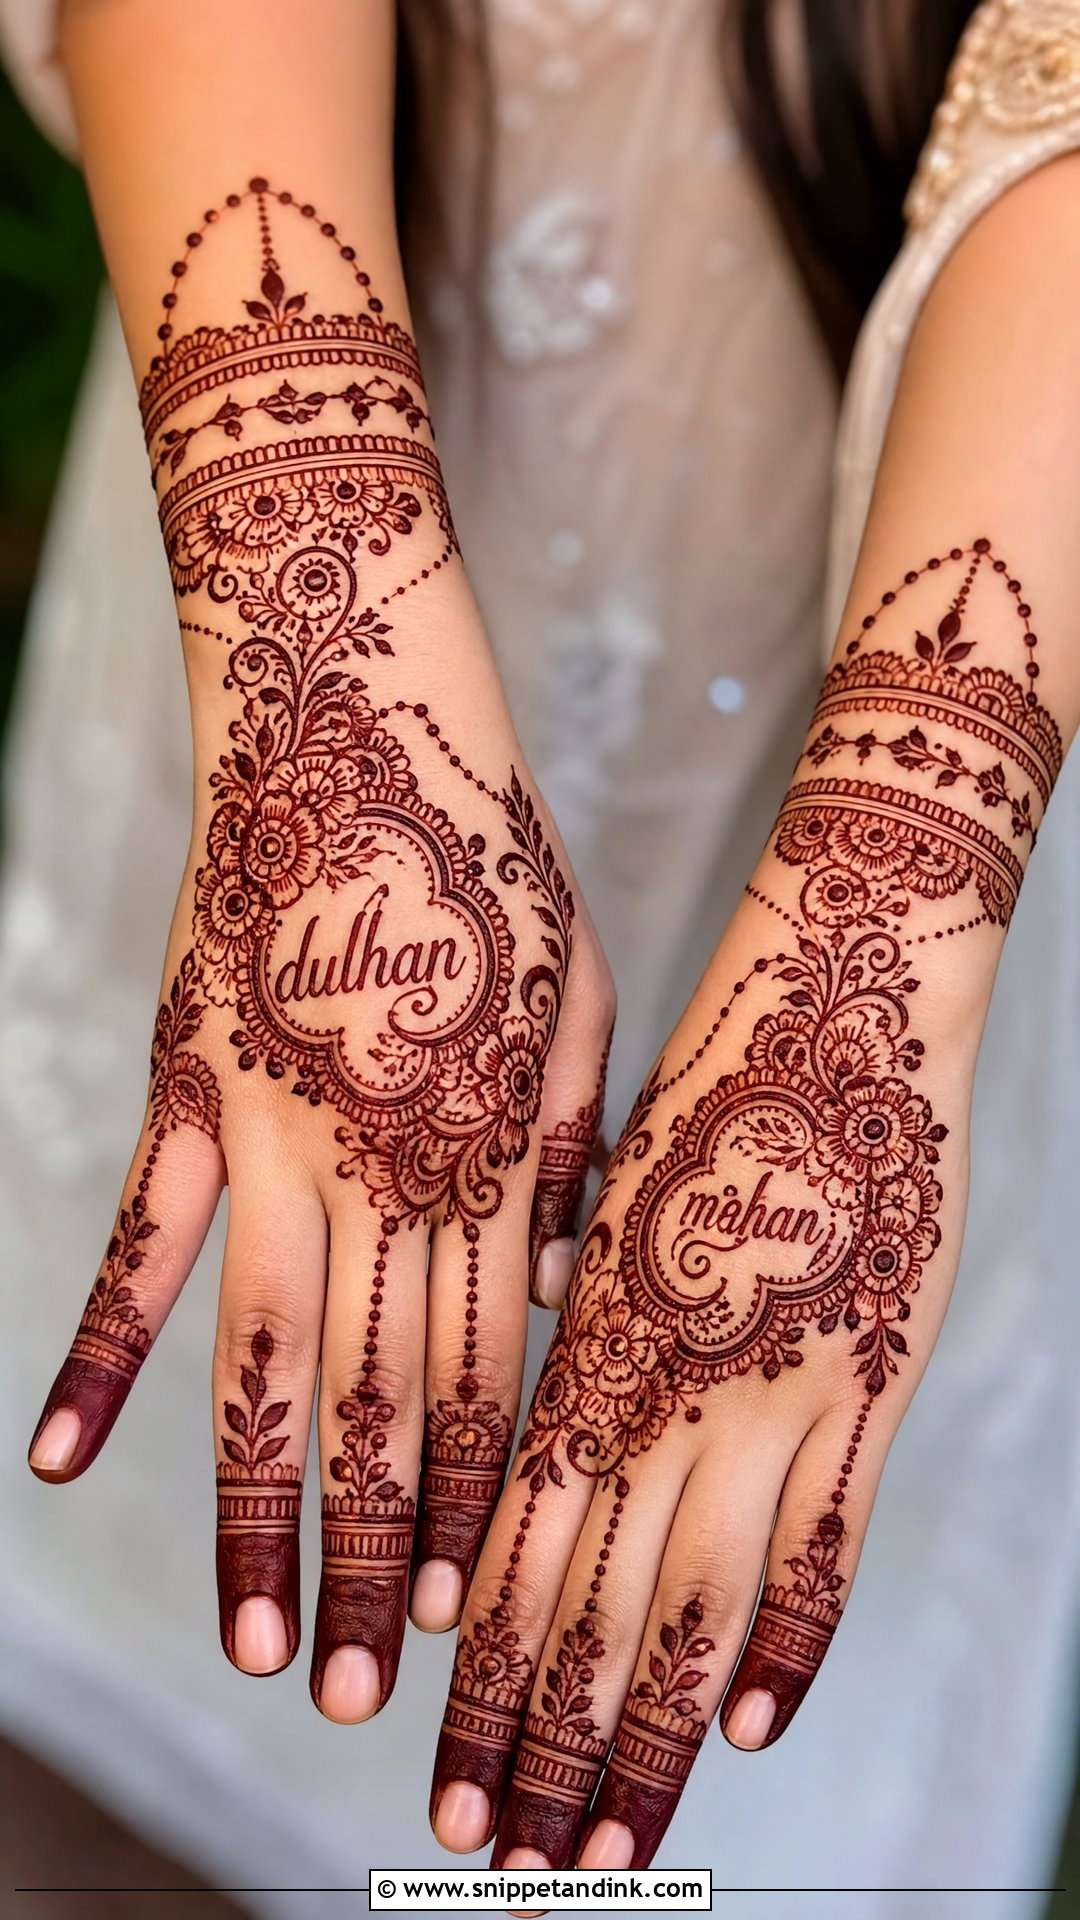
Hiding the groom’s name in the mehndi is a playful custom, and I enjoy placing it. The name, initials or wedding date can sit inside a paisley, along a bracelet band or within a floral vine. I tuck it where it blends in but can still be found, because a search that goes on too long stops being fun. Fine lettering needs a thin cone tip and good paste consistency. The rest of the hand still needs full finger work and a finished wrist so the design doesn’t depend on the name alone.
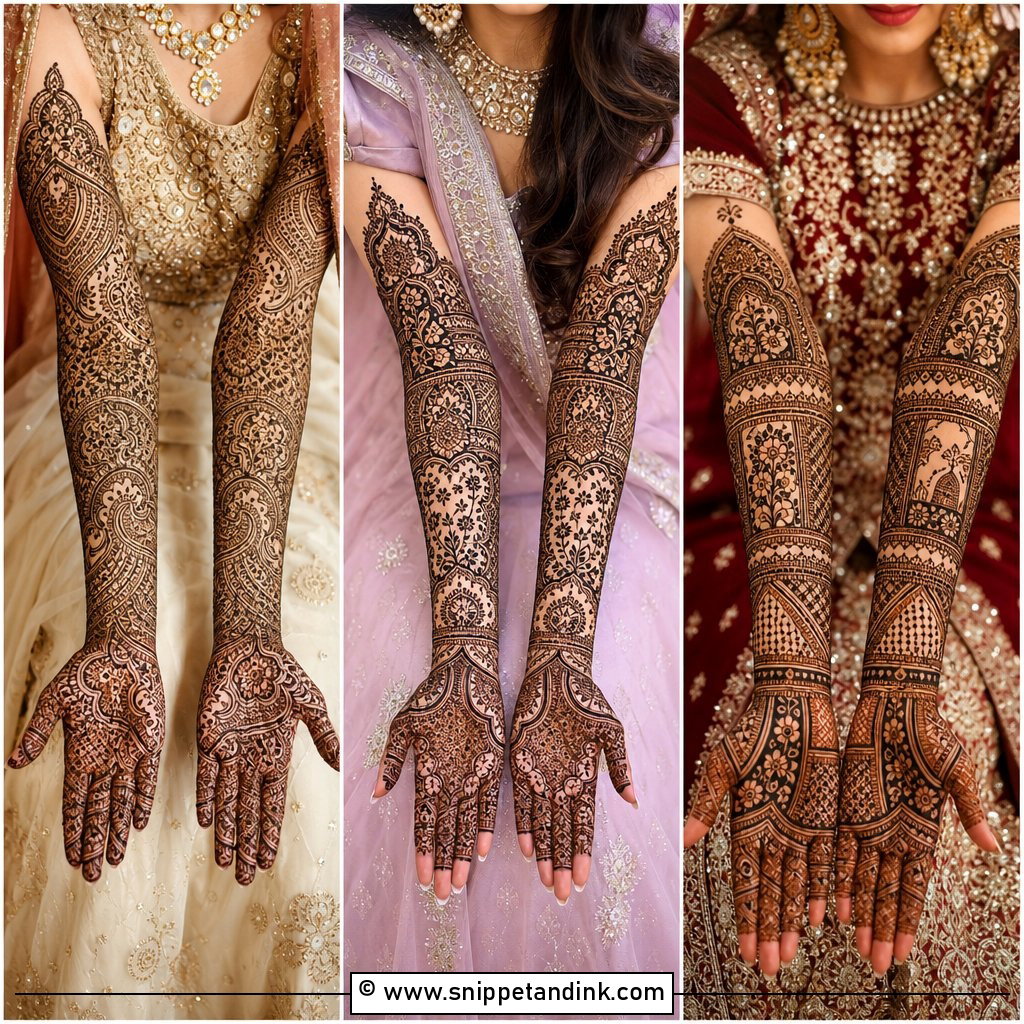
20. Lotus Dulhan Back Hand Mehndi Design
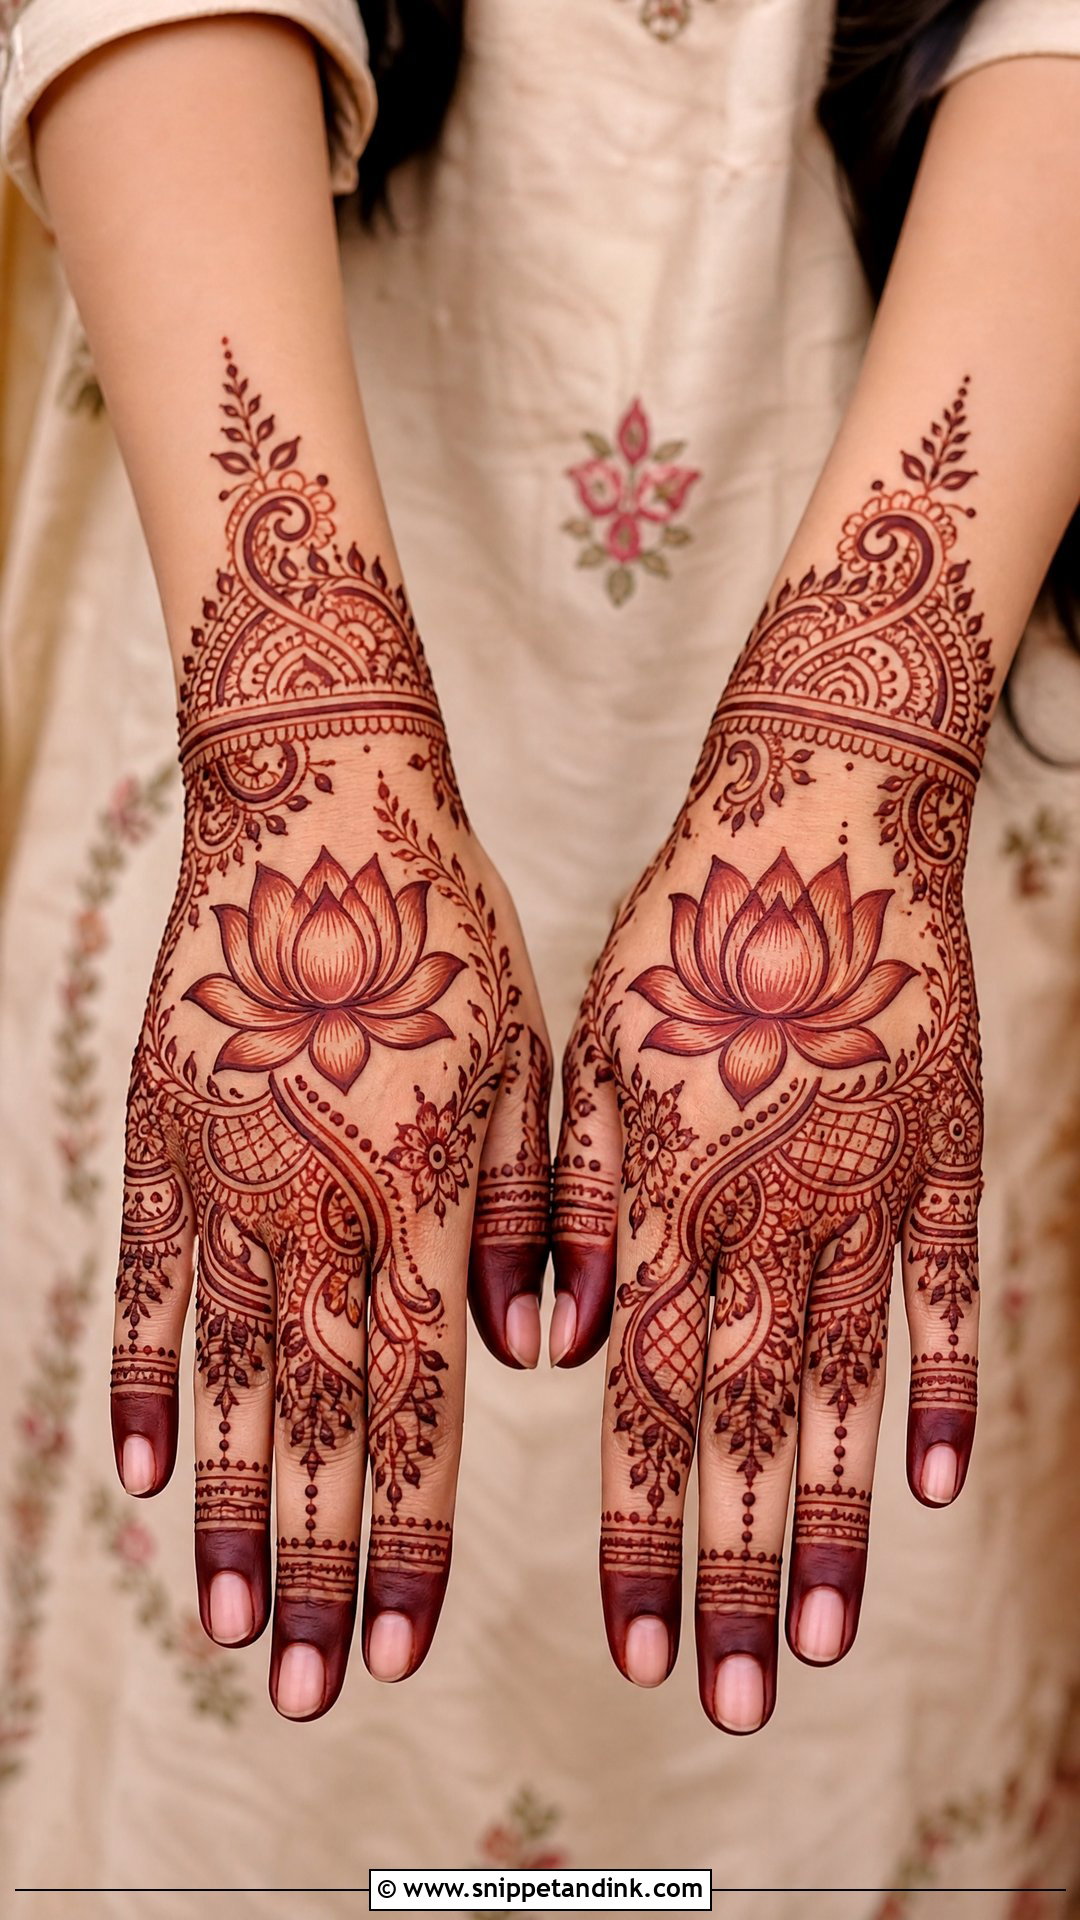
Lotus motifs are easy to draw bold, which is exactly why they stain well on the back of the hand. I place the lotus at the centre, near the wrist or along a diagonal trail, and add vines, dots and jaali around it. Open petals with shaded edges give a softer look; surrounding the petals with dense filler gives a heavier one. It works with temple jewellery and silk outfits. The petal outlines are the part I take most care over, as they define the whole motif.
21. Moroccan Dulhan Back Hand Mehndi Design
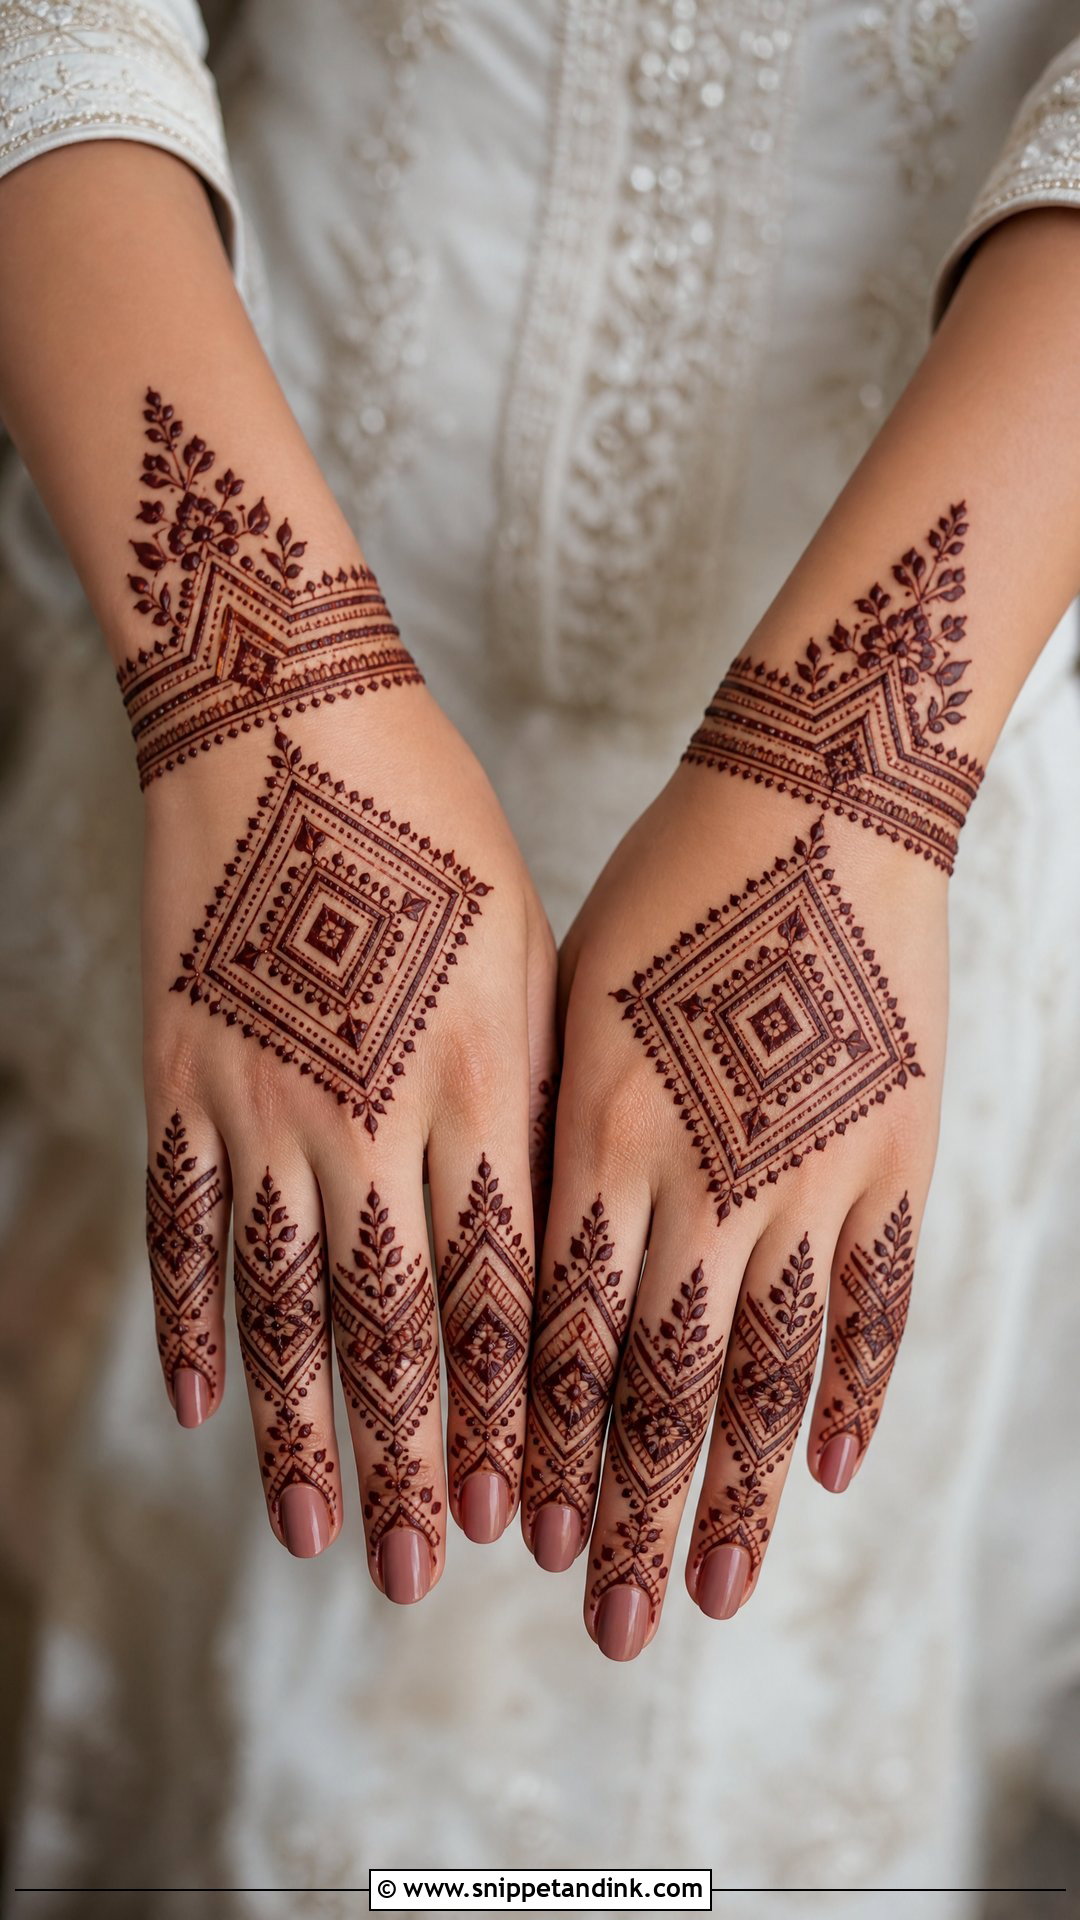
Moroccan dulhan back hand mehndi design is built from diamonds, grids, triangles and angular bands, and it relies entirely on straight, evenly spaced lines. Henna paste doesn’t naturally want to go straight, so this is a style where the artist’s control shows. I soften it with a few florals at the wrist or leafy finger details to keep it bridal. A geometric centre panel flowing into cuff-like bands is my preferred layout. It stands out among floral-heavy designs and looks sharp with statement rings.
22. Gulf Dulhan Back Hand Mehndi Design
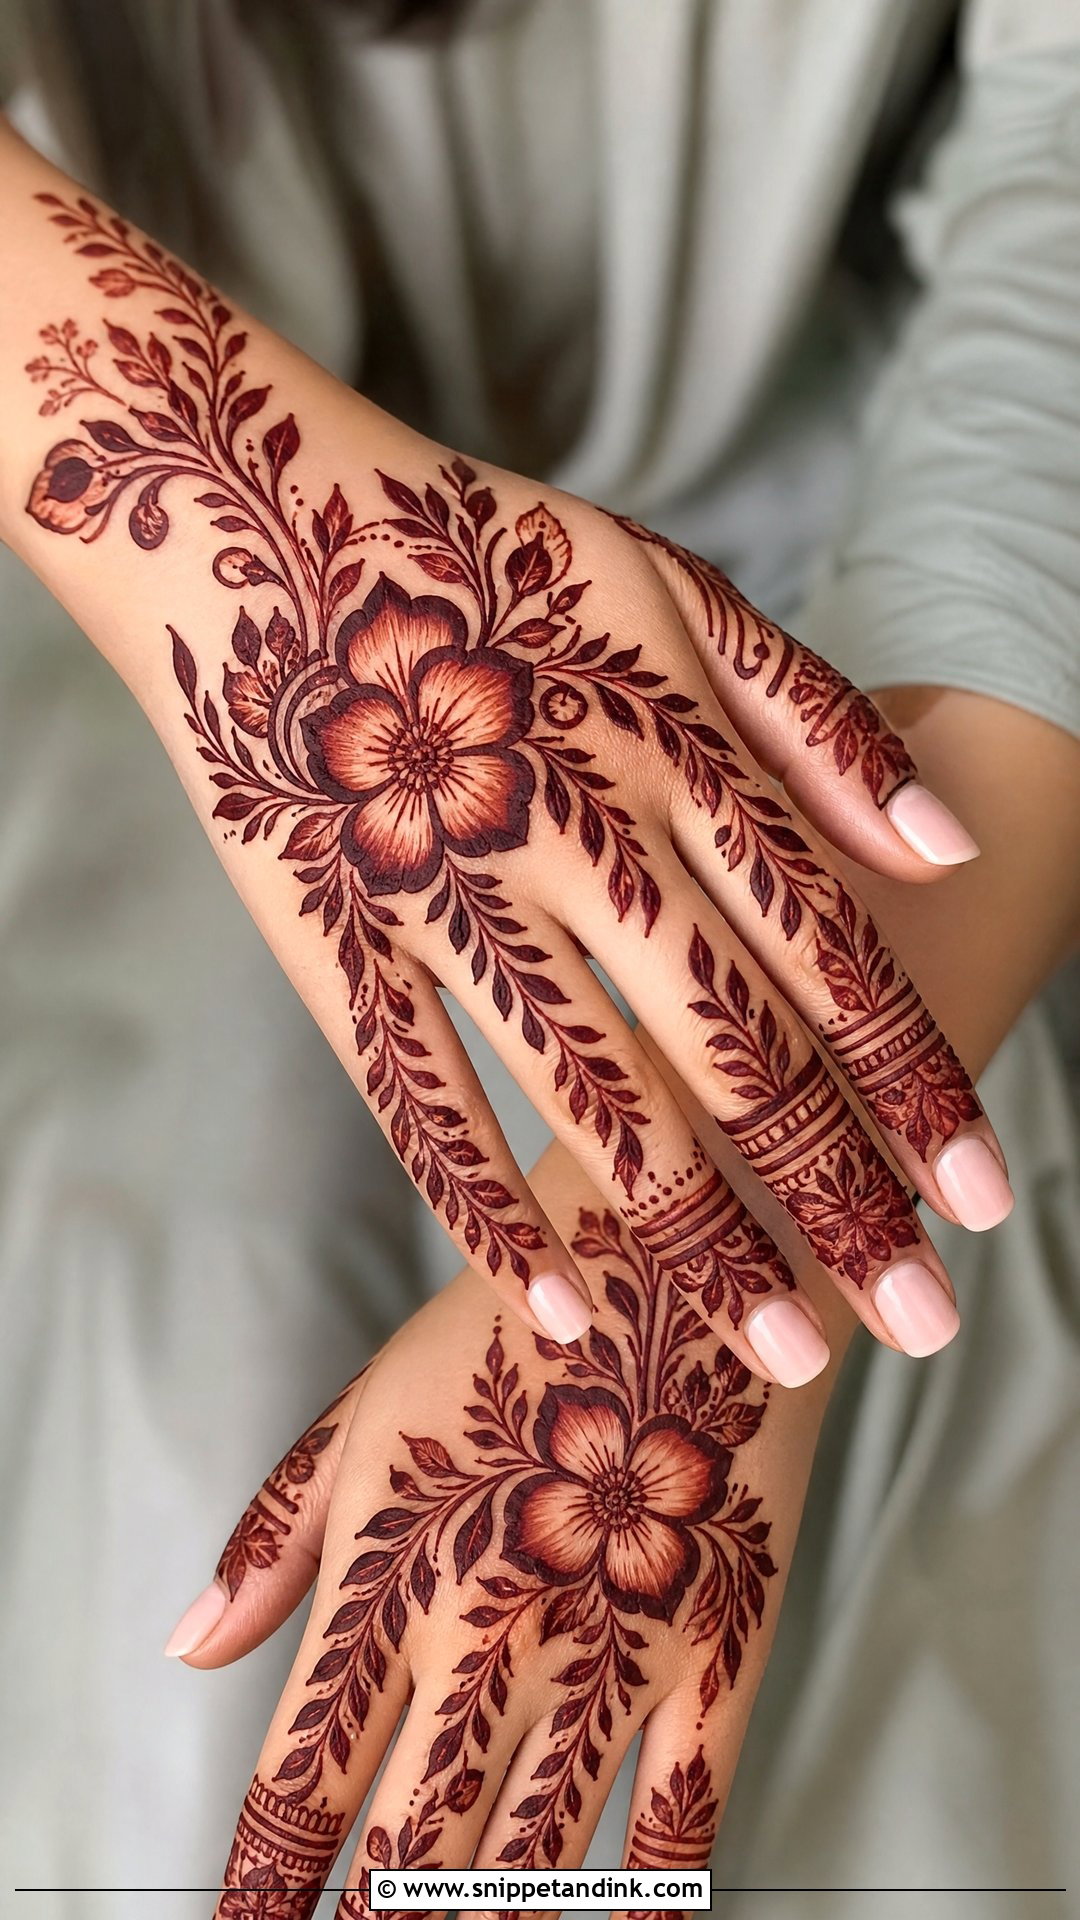
Khaleeji or Gulf-style mehndi uses big flowers, leafy sprays and thick outlines with plenty of open skin. Those thick lines carry more paste, so they stain darker and last longer than fine work. I usually place the large flowers along one side of the back of the hand with leaves curving toward the wrist and fingers. Fingertips can be fully filled or just lightly detailed. Small dots and shaded petals make it wedding-ready without losing its airy look.
23. Pakistani Dulhan Back Hand Mehndi Design
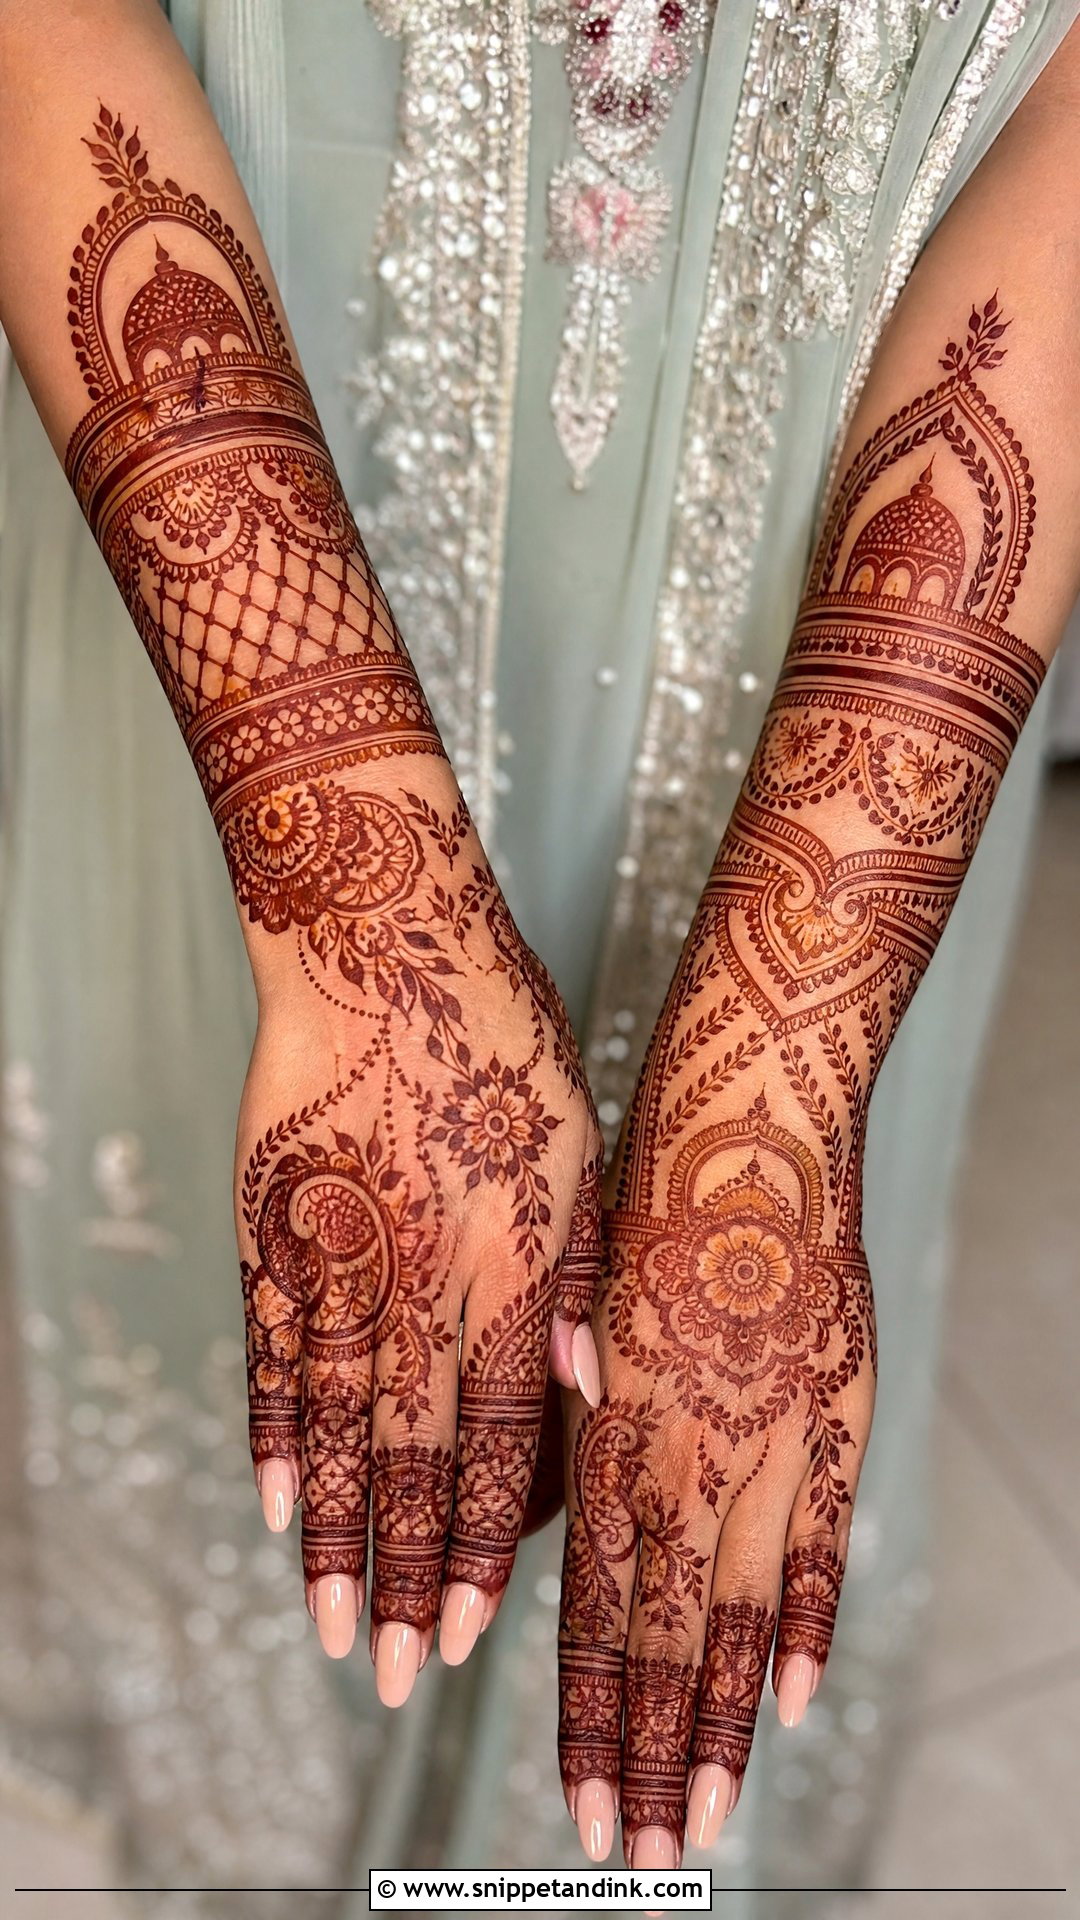
Pakistani bridal mehndi often blends Indian detail with Arabic flow and strong symmetry: domes, florals, paisleys, mesh panels and bracelet bands. It feels rich without being cramped. I like alternating patterns on the fingers with a large centrepiece on the back of the hand, then extending the design toward the forearm. Matching both hands with small variations in the centre motifs keeps them interesting side by side. It sits well with shararas, ghararas and heavily embroidered sleeves.
24. Rajasthani Dulhan Back Hand Mehndi Design
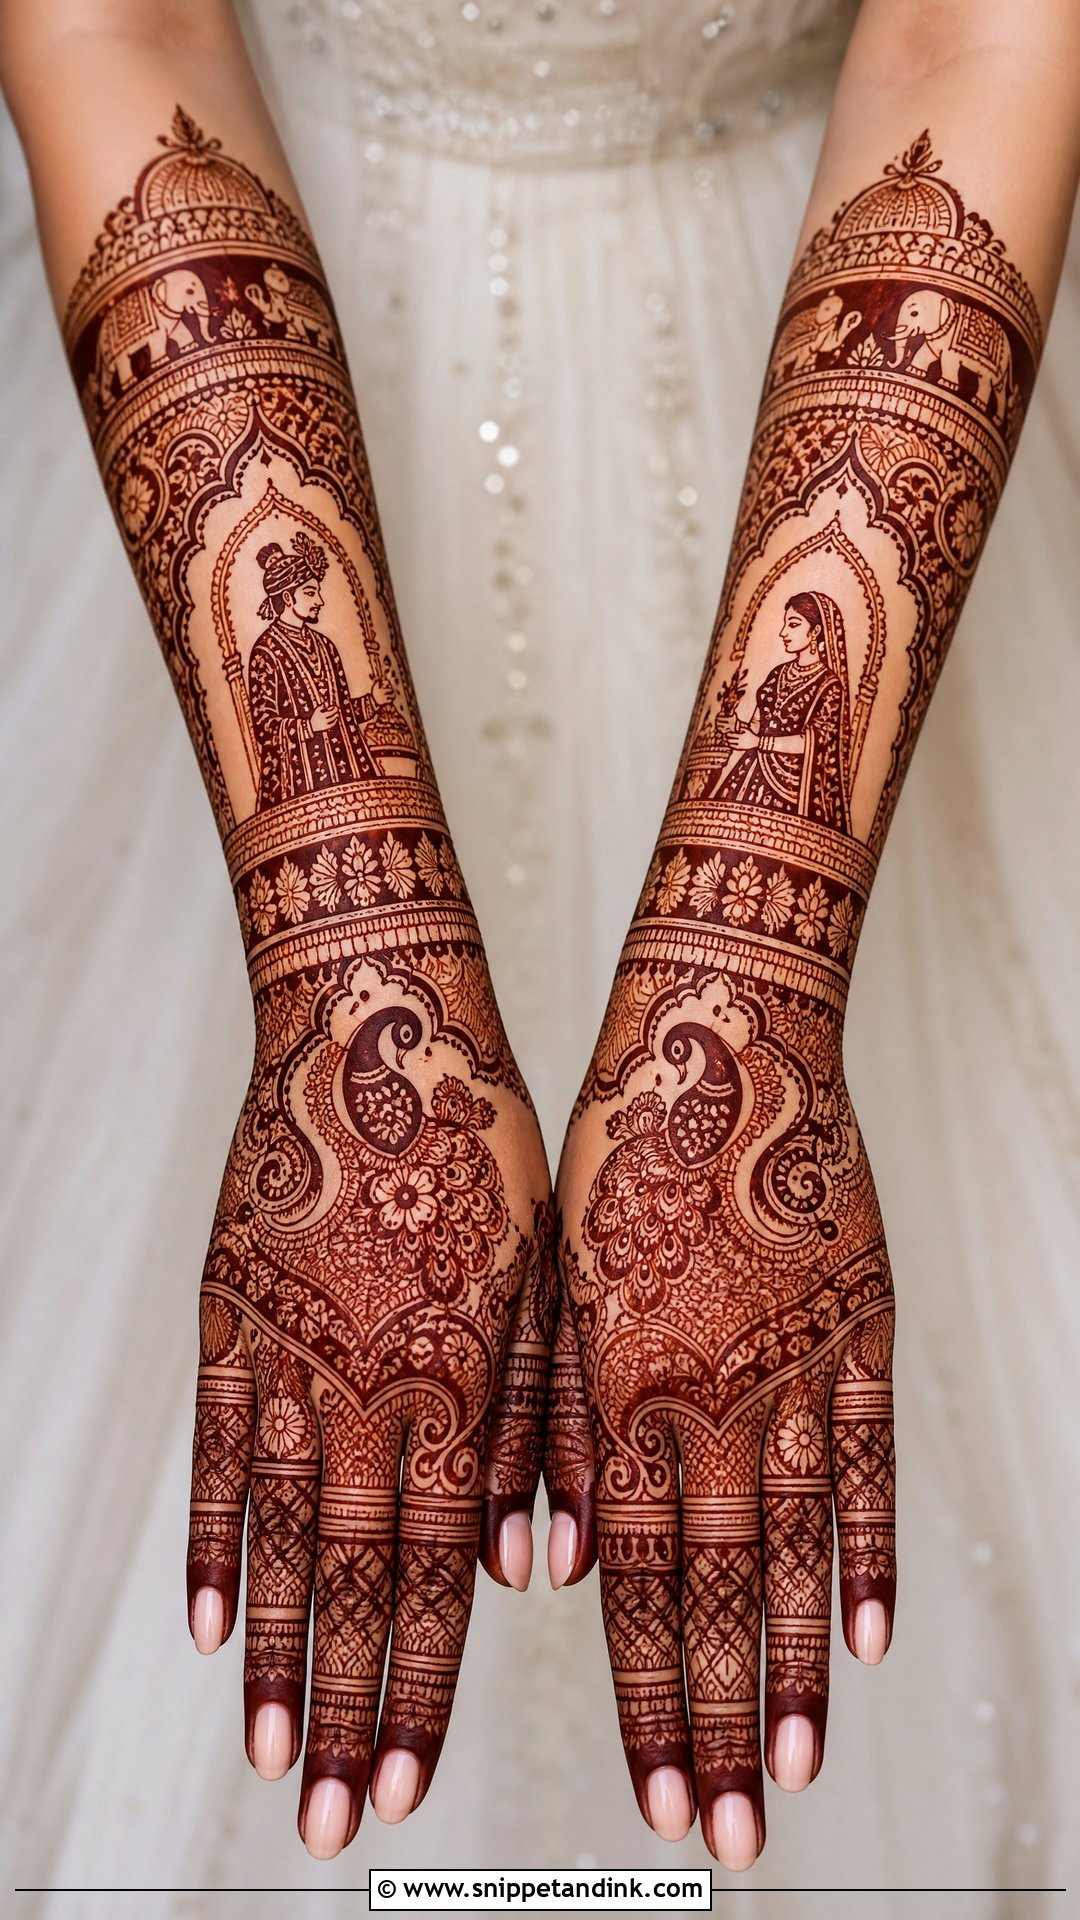
Rajasthani mehndi is full of story: peacocks, arches, dhol motifs, elephant borders and bride-groom figures, often divided into panels across the hand. Because so much is going on, clear outlines decide whether it reads or turns into noise. I plan the panels first so each one gets its own motif, then make the forearm section an extension of the back of the hand rather than a separate design. Done carefully, it holds up in full-length photos as well as close-ups.
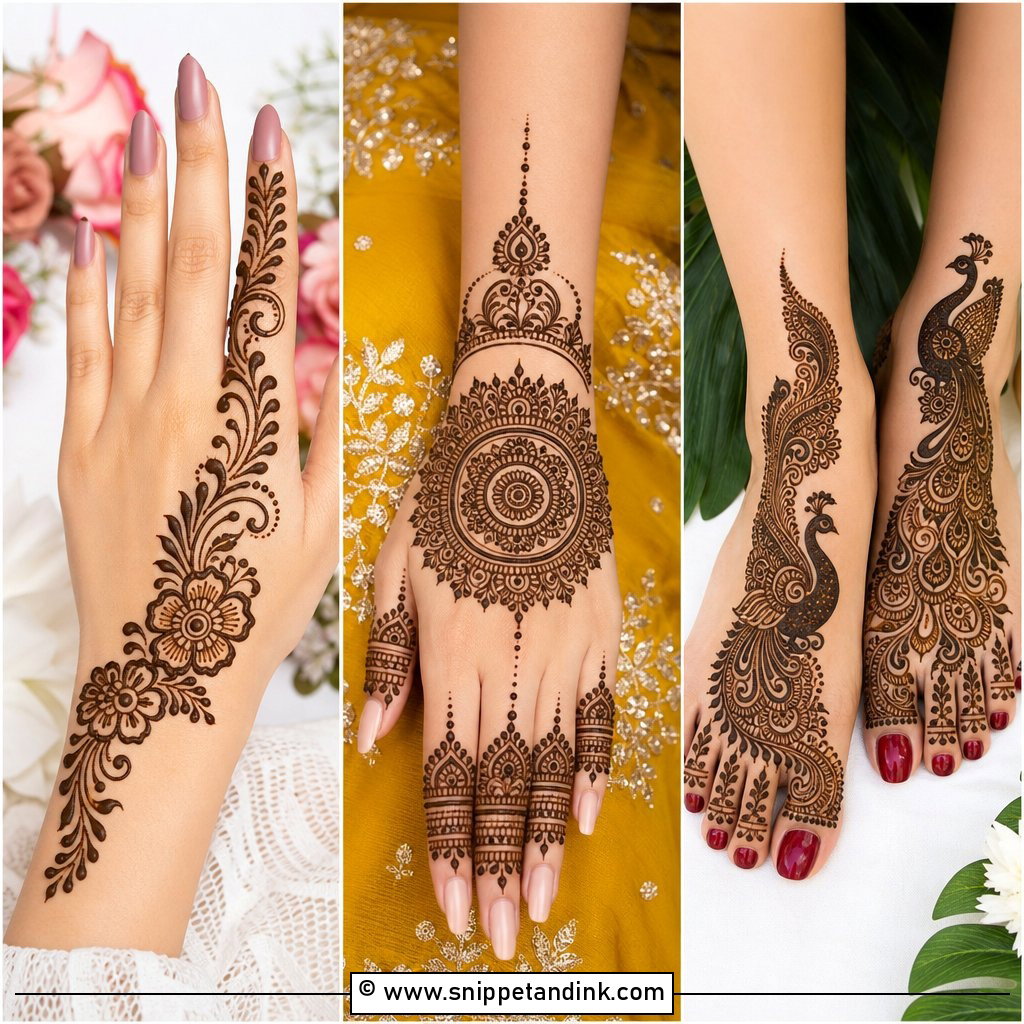
25. Back Hand Dulhan Mehndi Design For Engagement
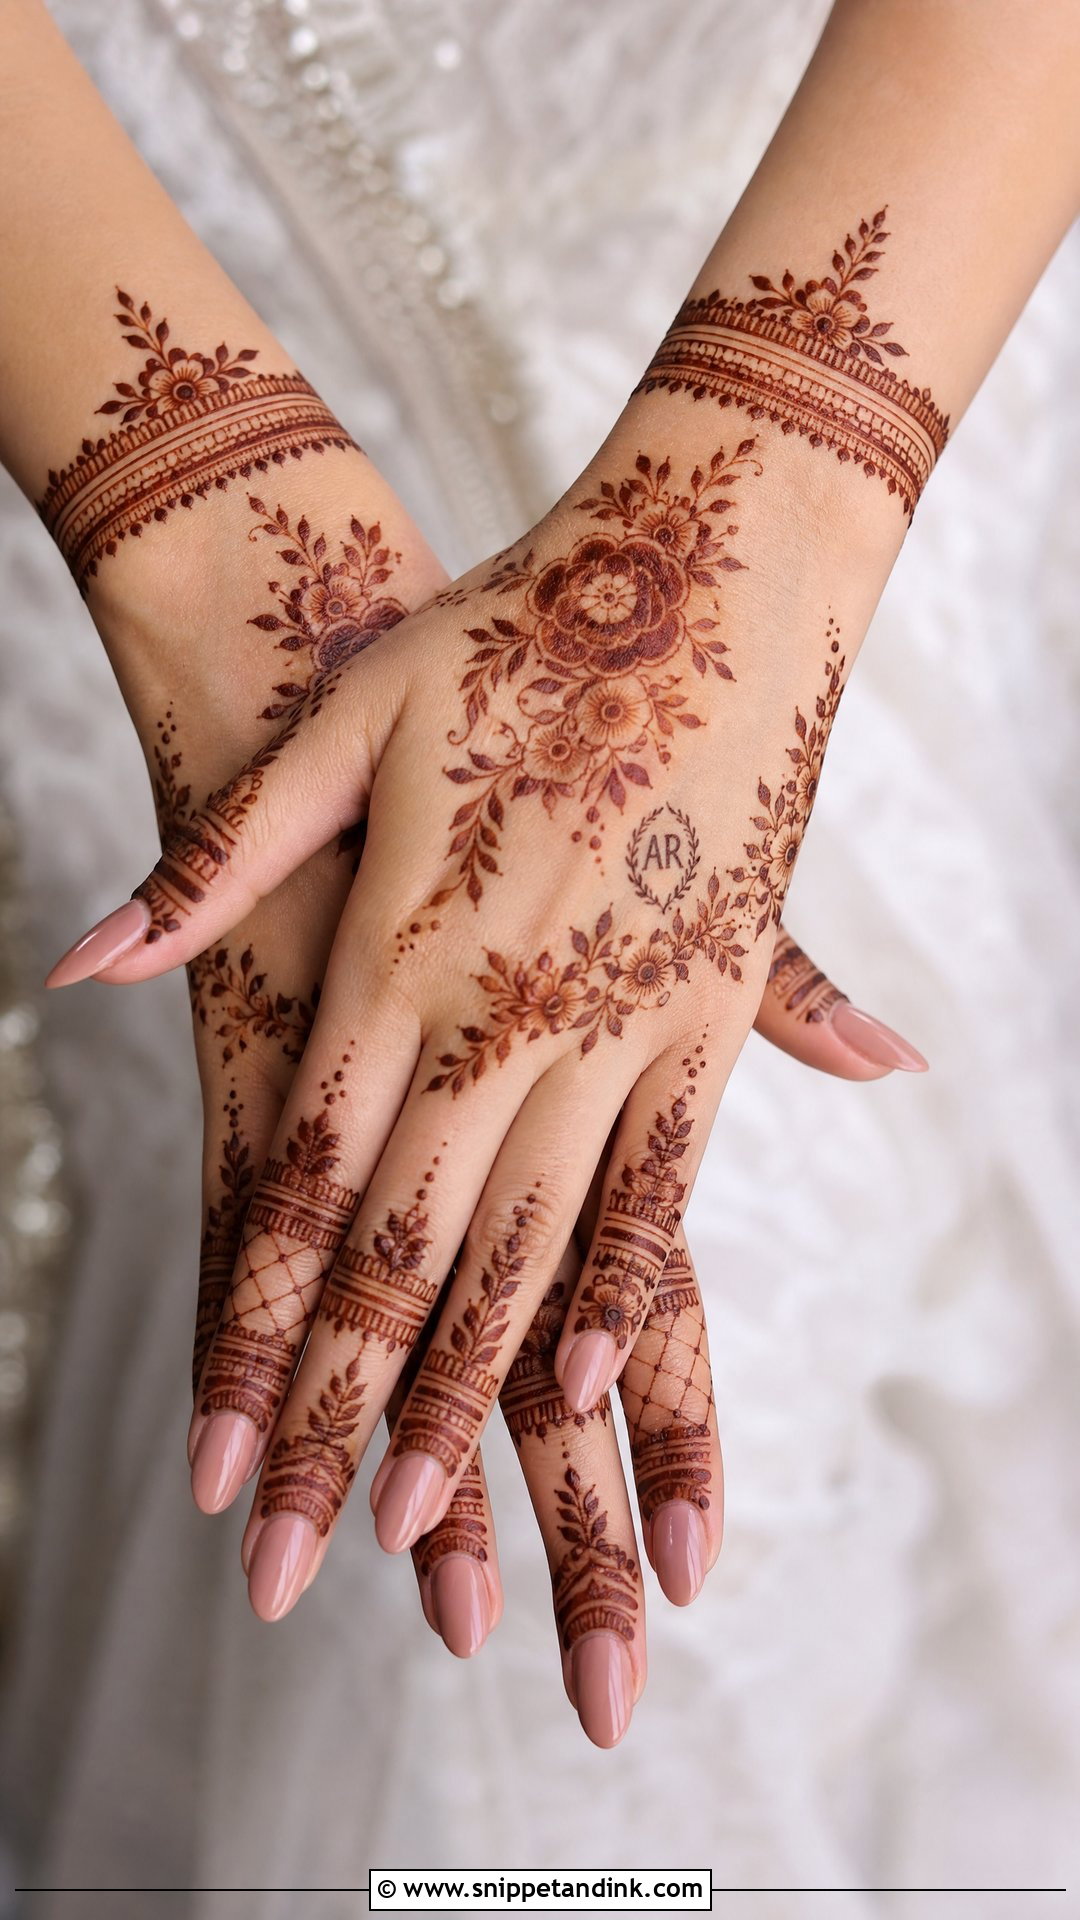
Engagement mehndi should feel bridal but lighter than the wedding design, and the back of the hand matters most because that’s where the ring sits in photos. A mehndi design for engagement can be a floral centre, fine fingers and a bracelet band with small initials. I keep the ring finger detailed but open around the base, so the ring isn’t lost against dark henna. Arabic or Indo-Arabic spacing keeps it quick, and I’d save the heaviest work for the wedding itself.
Hours in the Chair and the Two Days After
Full bridal hands with arms can take several hours to apply, and heavier designs take longer. Use the bathroom before we start, wear a loose top you can get out of without smudging, and have someone ready to feed you and hold your phone. I’ll ask you to keep your hands still and warm while the paste dries.
Aftercare that actually darkens the stain
- Leave the paste on for as long as you can, ideally overnight. The longer it sits, the deeper the stain.
- A light dab of lemon and sugar helps the dried paste stay on your skin. Don’t soak it.
- Scrape the paste off with a blunt edge or your fingers rather than washing it off.
- Keep the area away from water for as long as possible afterwards, and skip hand soap, sanitiser and chlorine.
- Warmth helps. Keeping your hands warm, without sweating heavily, encourages the stain to develop.
Ask what’s in the cone
Natural henna stains orange to brown to maroon and never jet black. A paste that promises an instant black colour may contain chemical dyes that can cause serious skin reactions, and a bride’s hands are the last place to risk that. I’d always ask your artist what’s in their paste, and if you have sensitive skin, try a small patch a few weeks before the wedding.
What Makes a Back Hand Design Look Finished
Whichever style you lean toward, the same few details separate a bridal hand from an ordinary one: clear outlines, deliberate spacing, neat fingertips and a wrist that’s been properly finished. Traditional brides tend to love Indian, Rajasthani or paisley-heavy work; those wanting more open skin usually settle on Arabic, Gulf or minimal layouts; and names, portraits or dulha-dulhan figures add a personal layer to either. Book a trial if you can, look at the stain two days later, and choose the design you’ll still be happy to see in every ring photo.
You'll Like These Ideas:


Leave a Reply